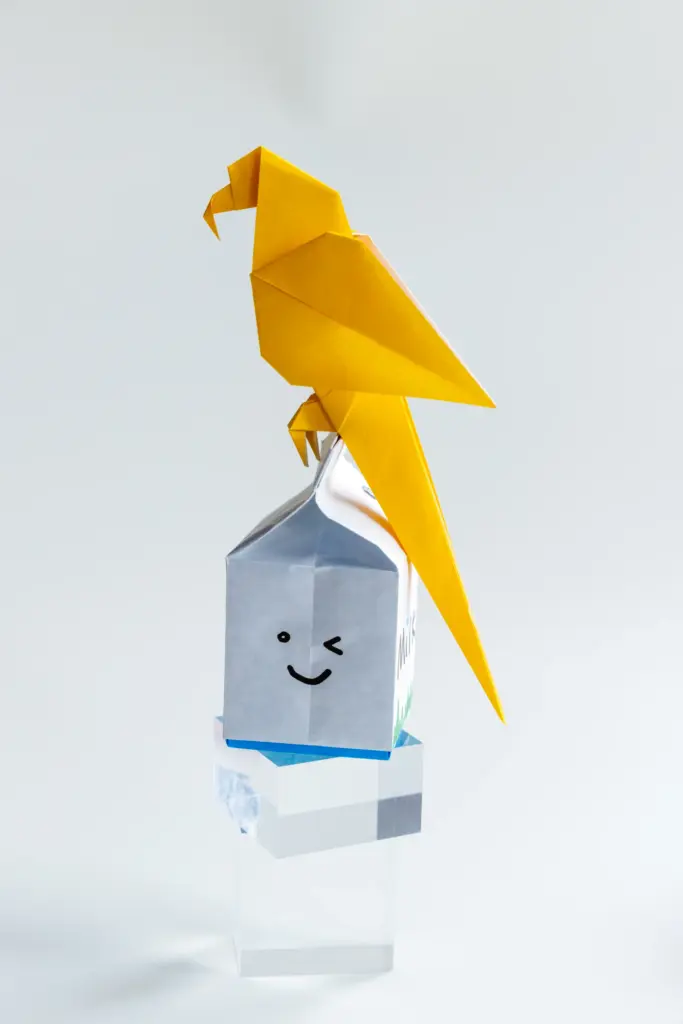
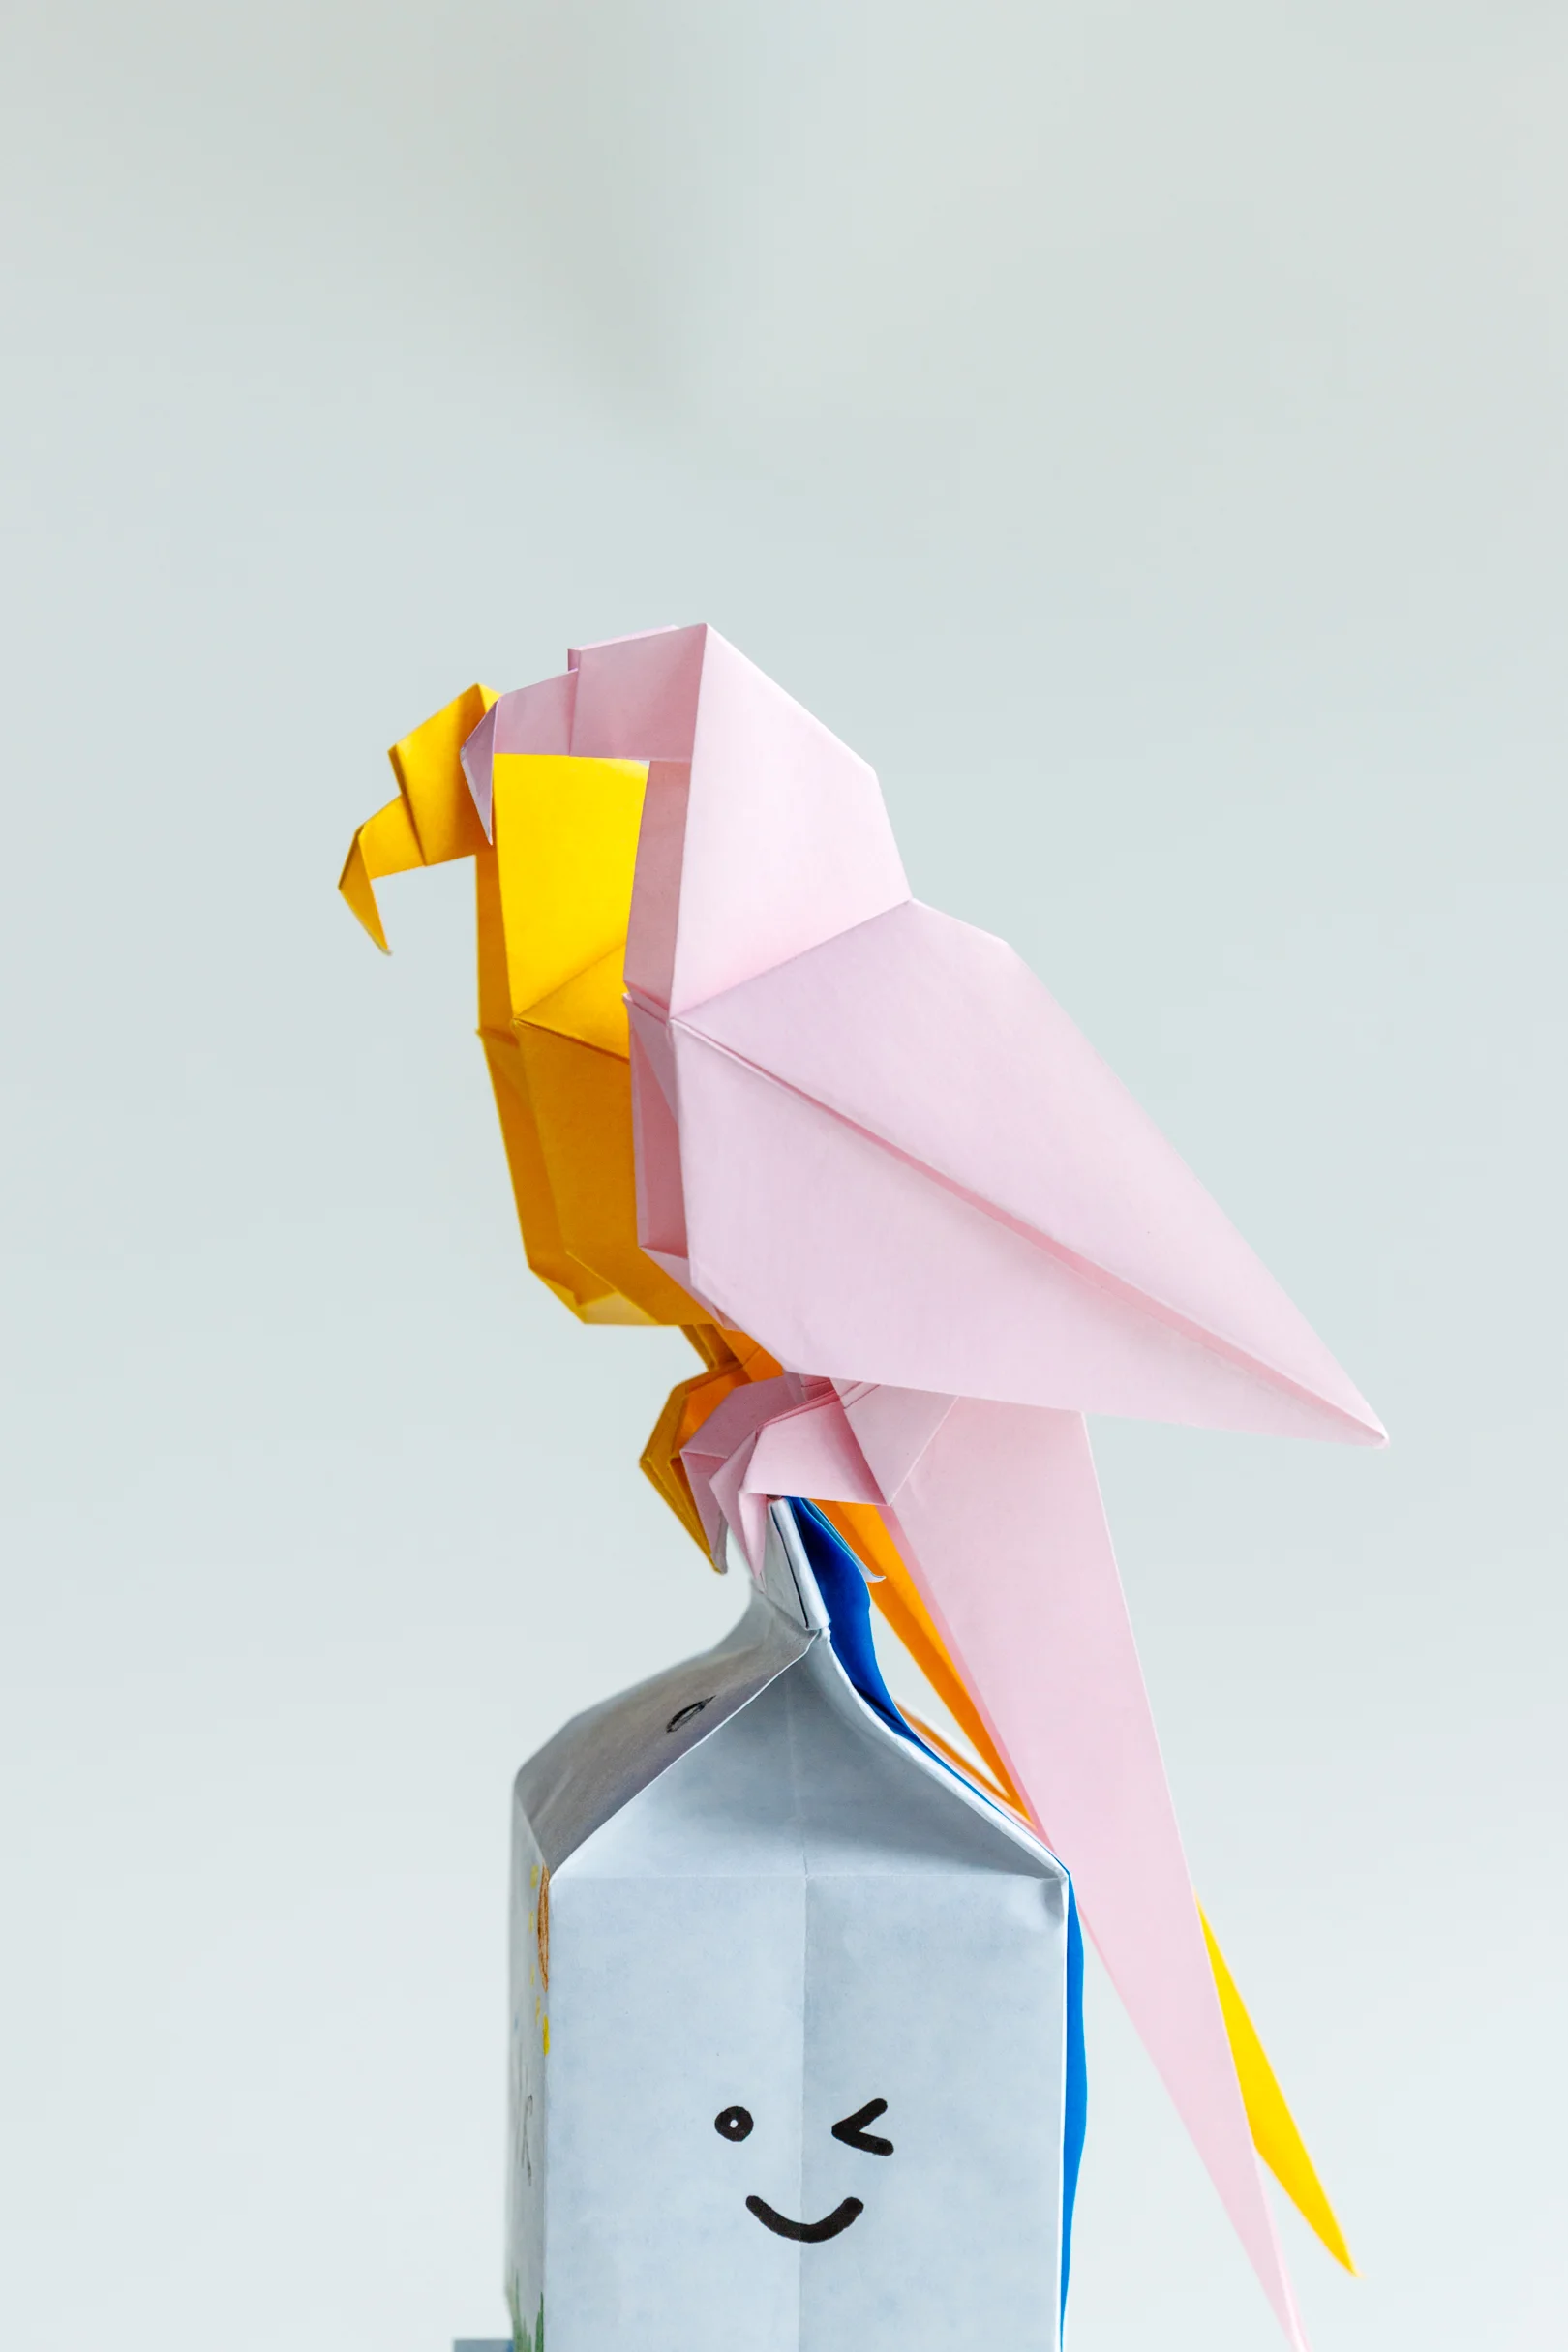
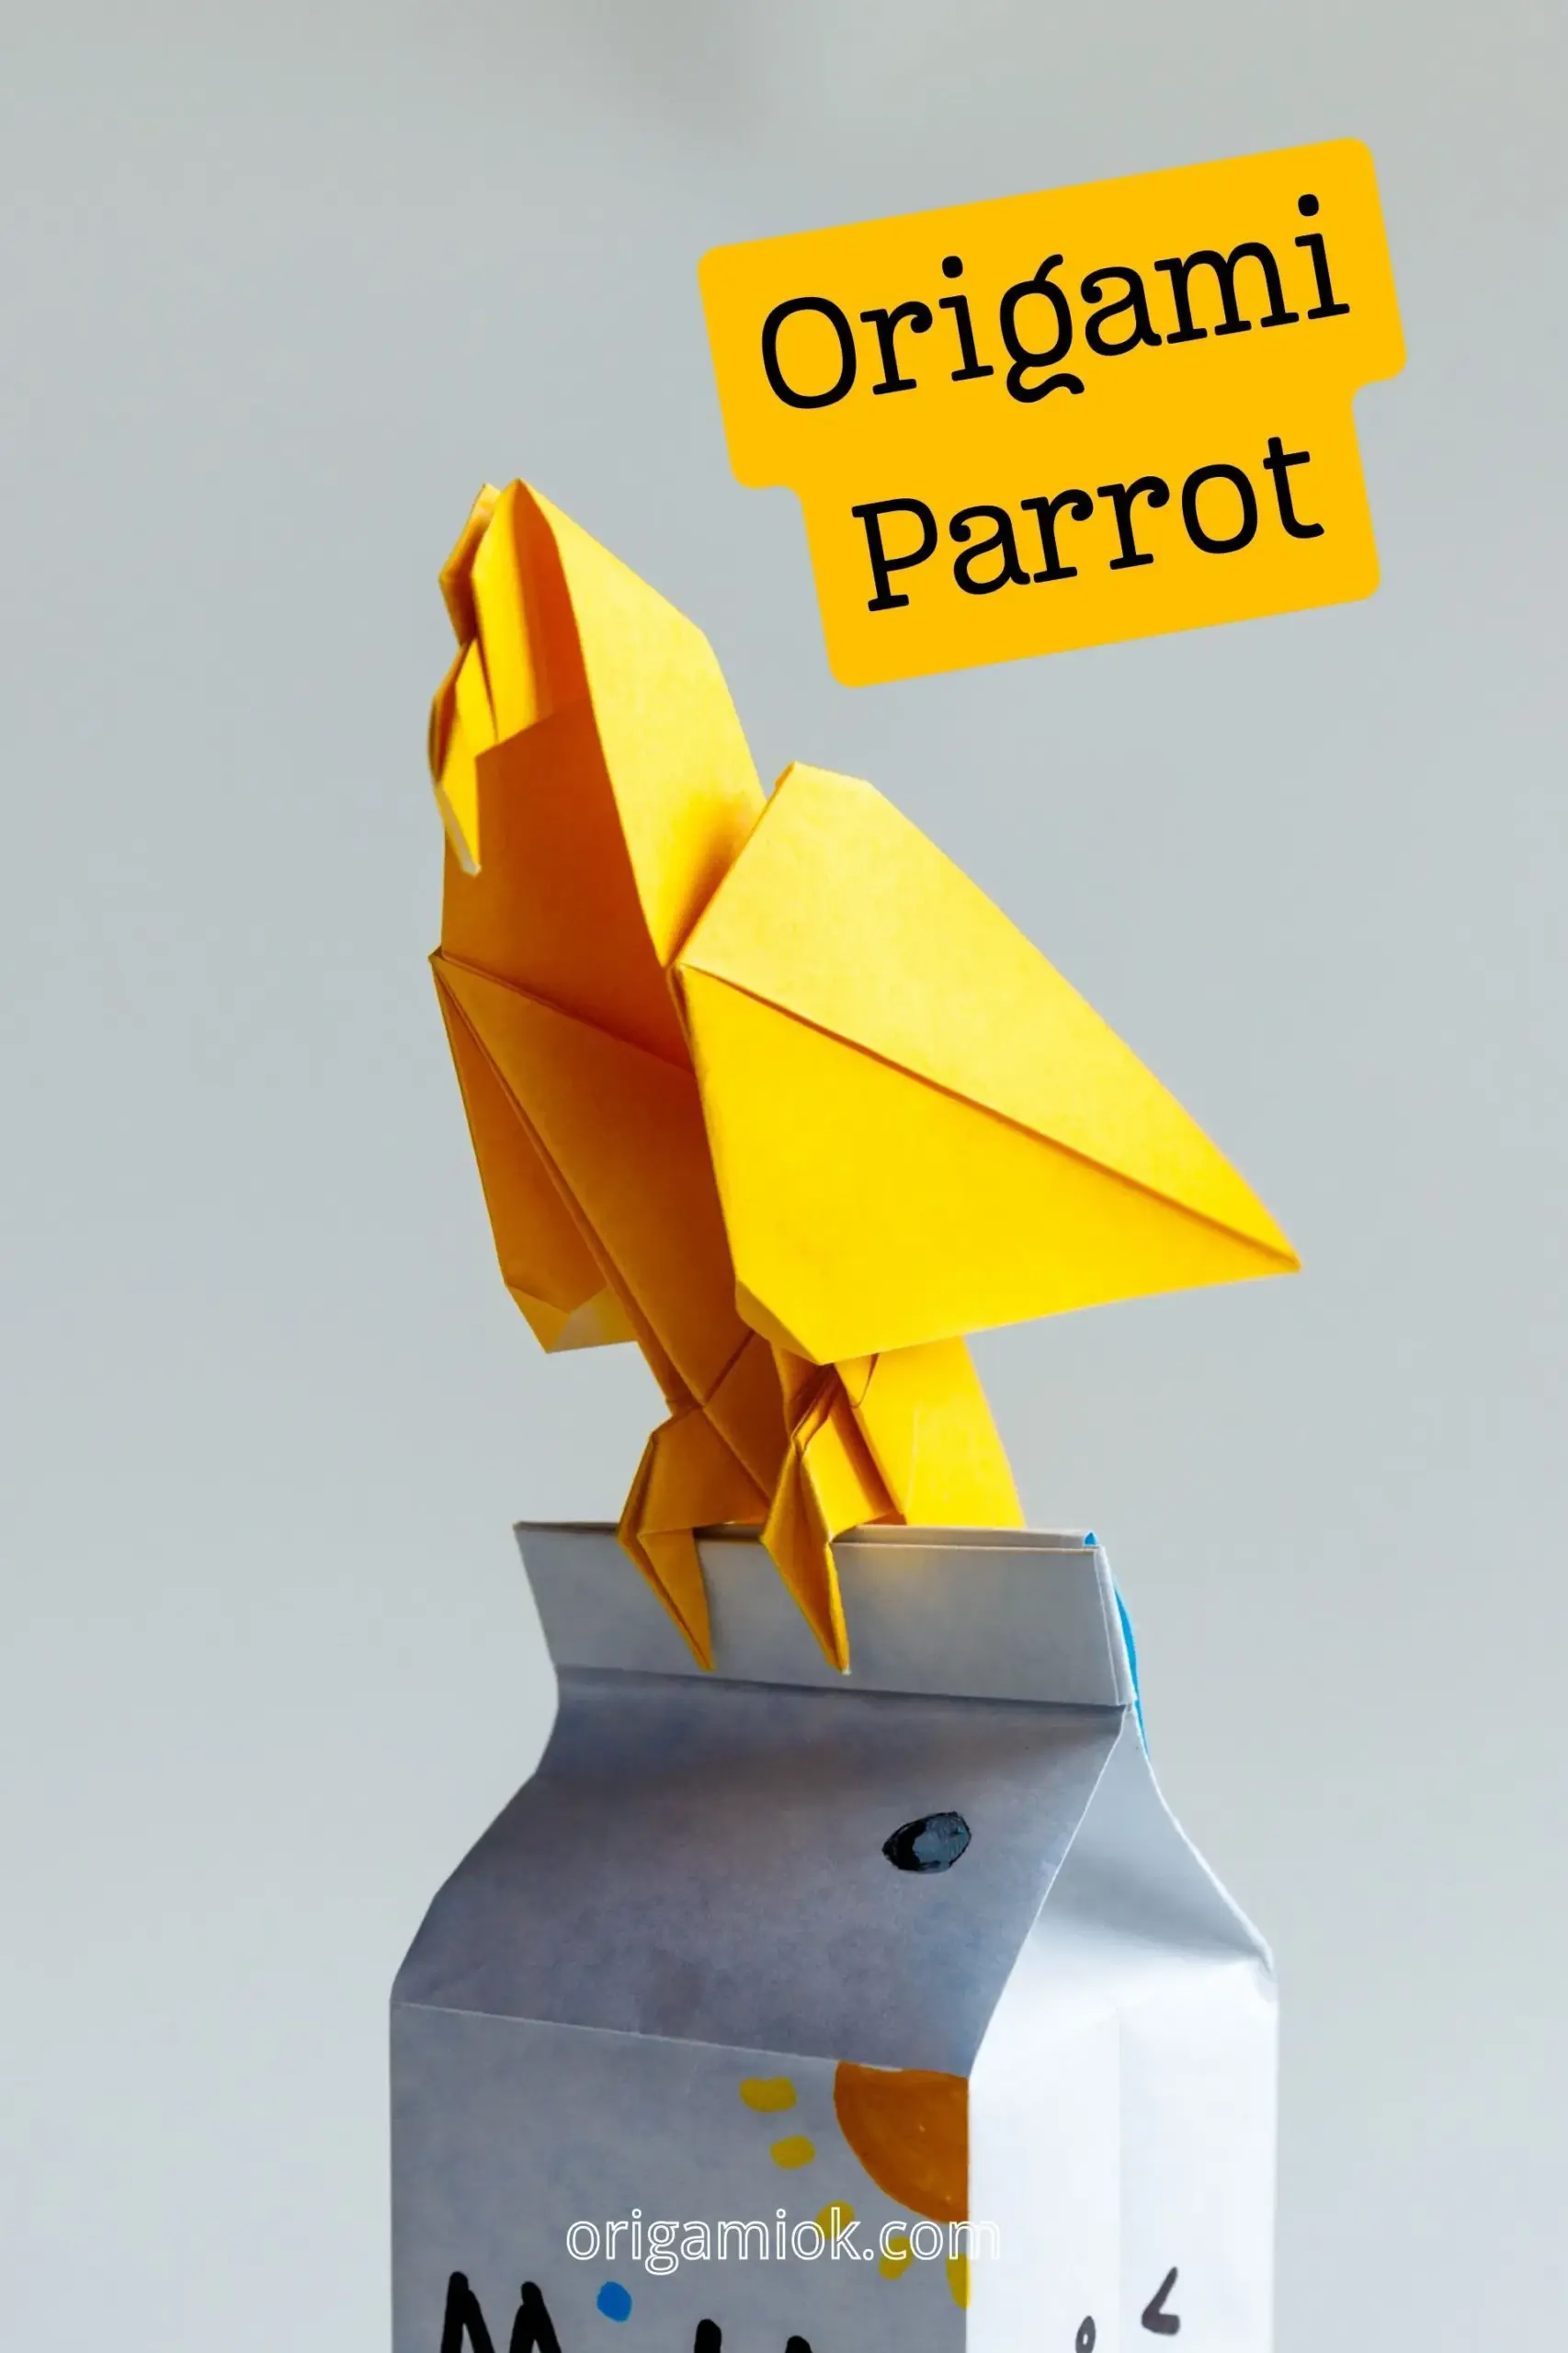
A lovely and lifelike origami parrot. With our easy-to-follow instructions, even a novice can successfully make this. The impressive long tail and the ability for the finished product to stand on your finger or desk make it worth a try!
In this instruction, we use the Bird Base as the base of the parrot, and we also use many Inside Reverse Fold and Outside Reverse Fold to form the head and feet.
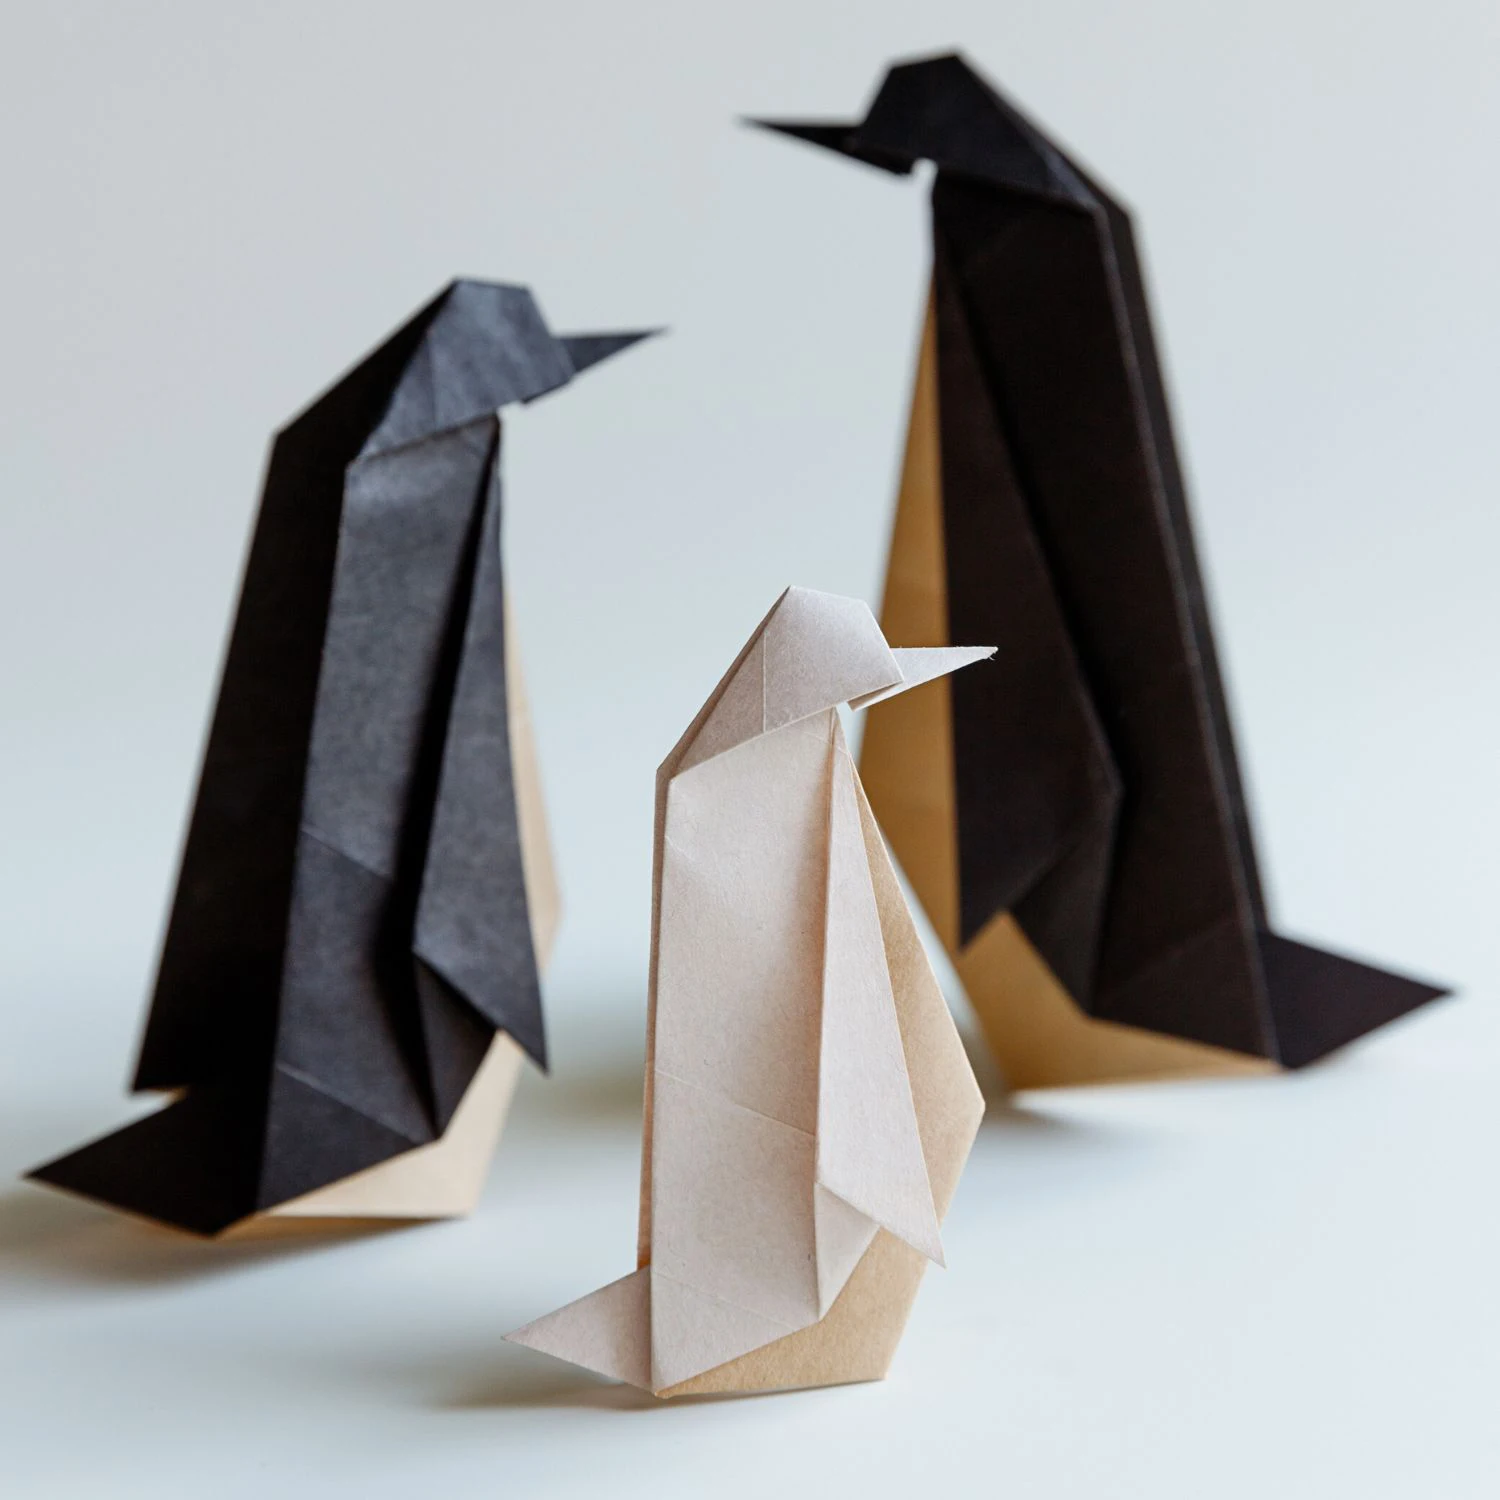
For beginners, we have some other easier origami bird for you to try for explore our origami easy penguin or duck. We also have a collection of origami birds.
If you are new to origami, start here from our beginner guide to know the basics and how to read the step-by-step instructions.
- Folding time: 20 minutes
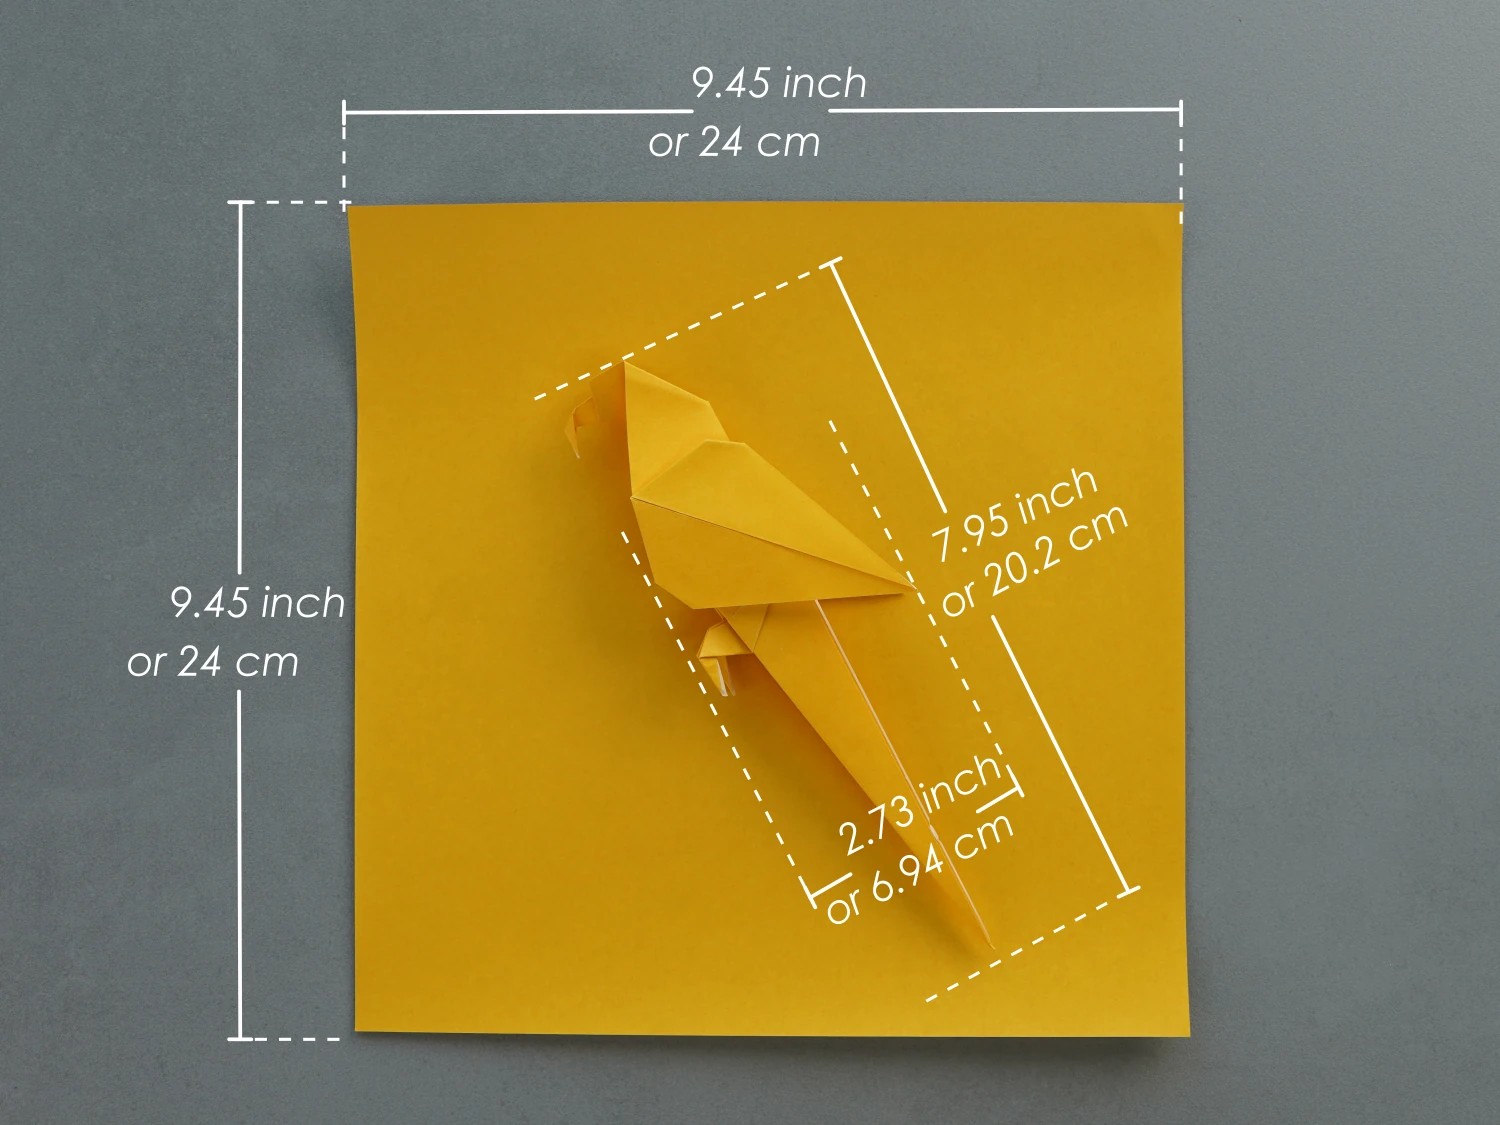
- Paper: 24×24 cm
- Difficulty: Advanced
Material
Prepare a piece of 24×24 cm origami square paper, and you will get a 20.2×6.9 cm origami parrot. Use textural and pattern paper to make your parrot more unique.
Origami Parrot Video
Step by Step Instructions
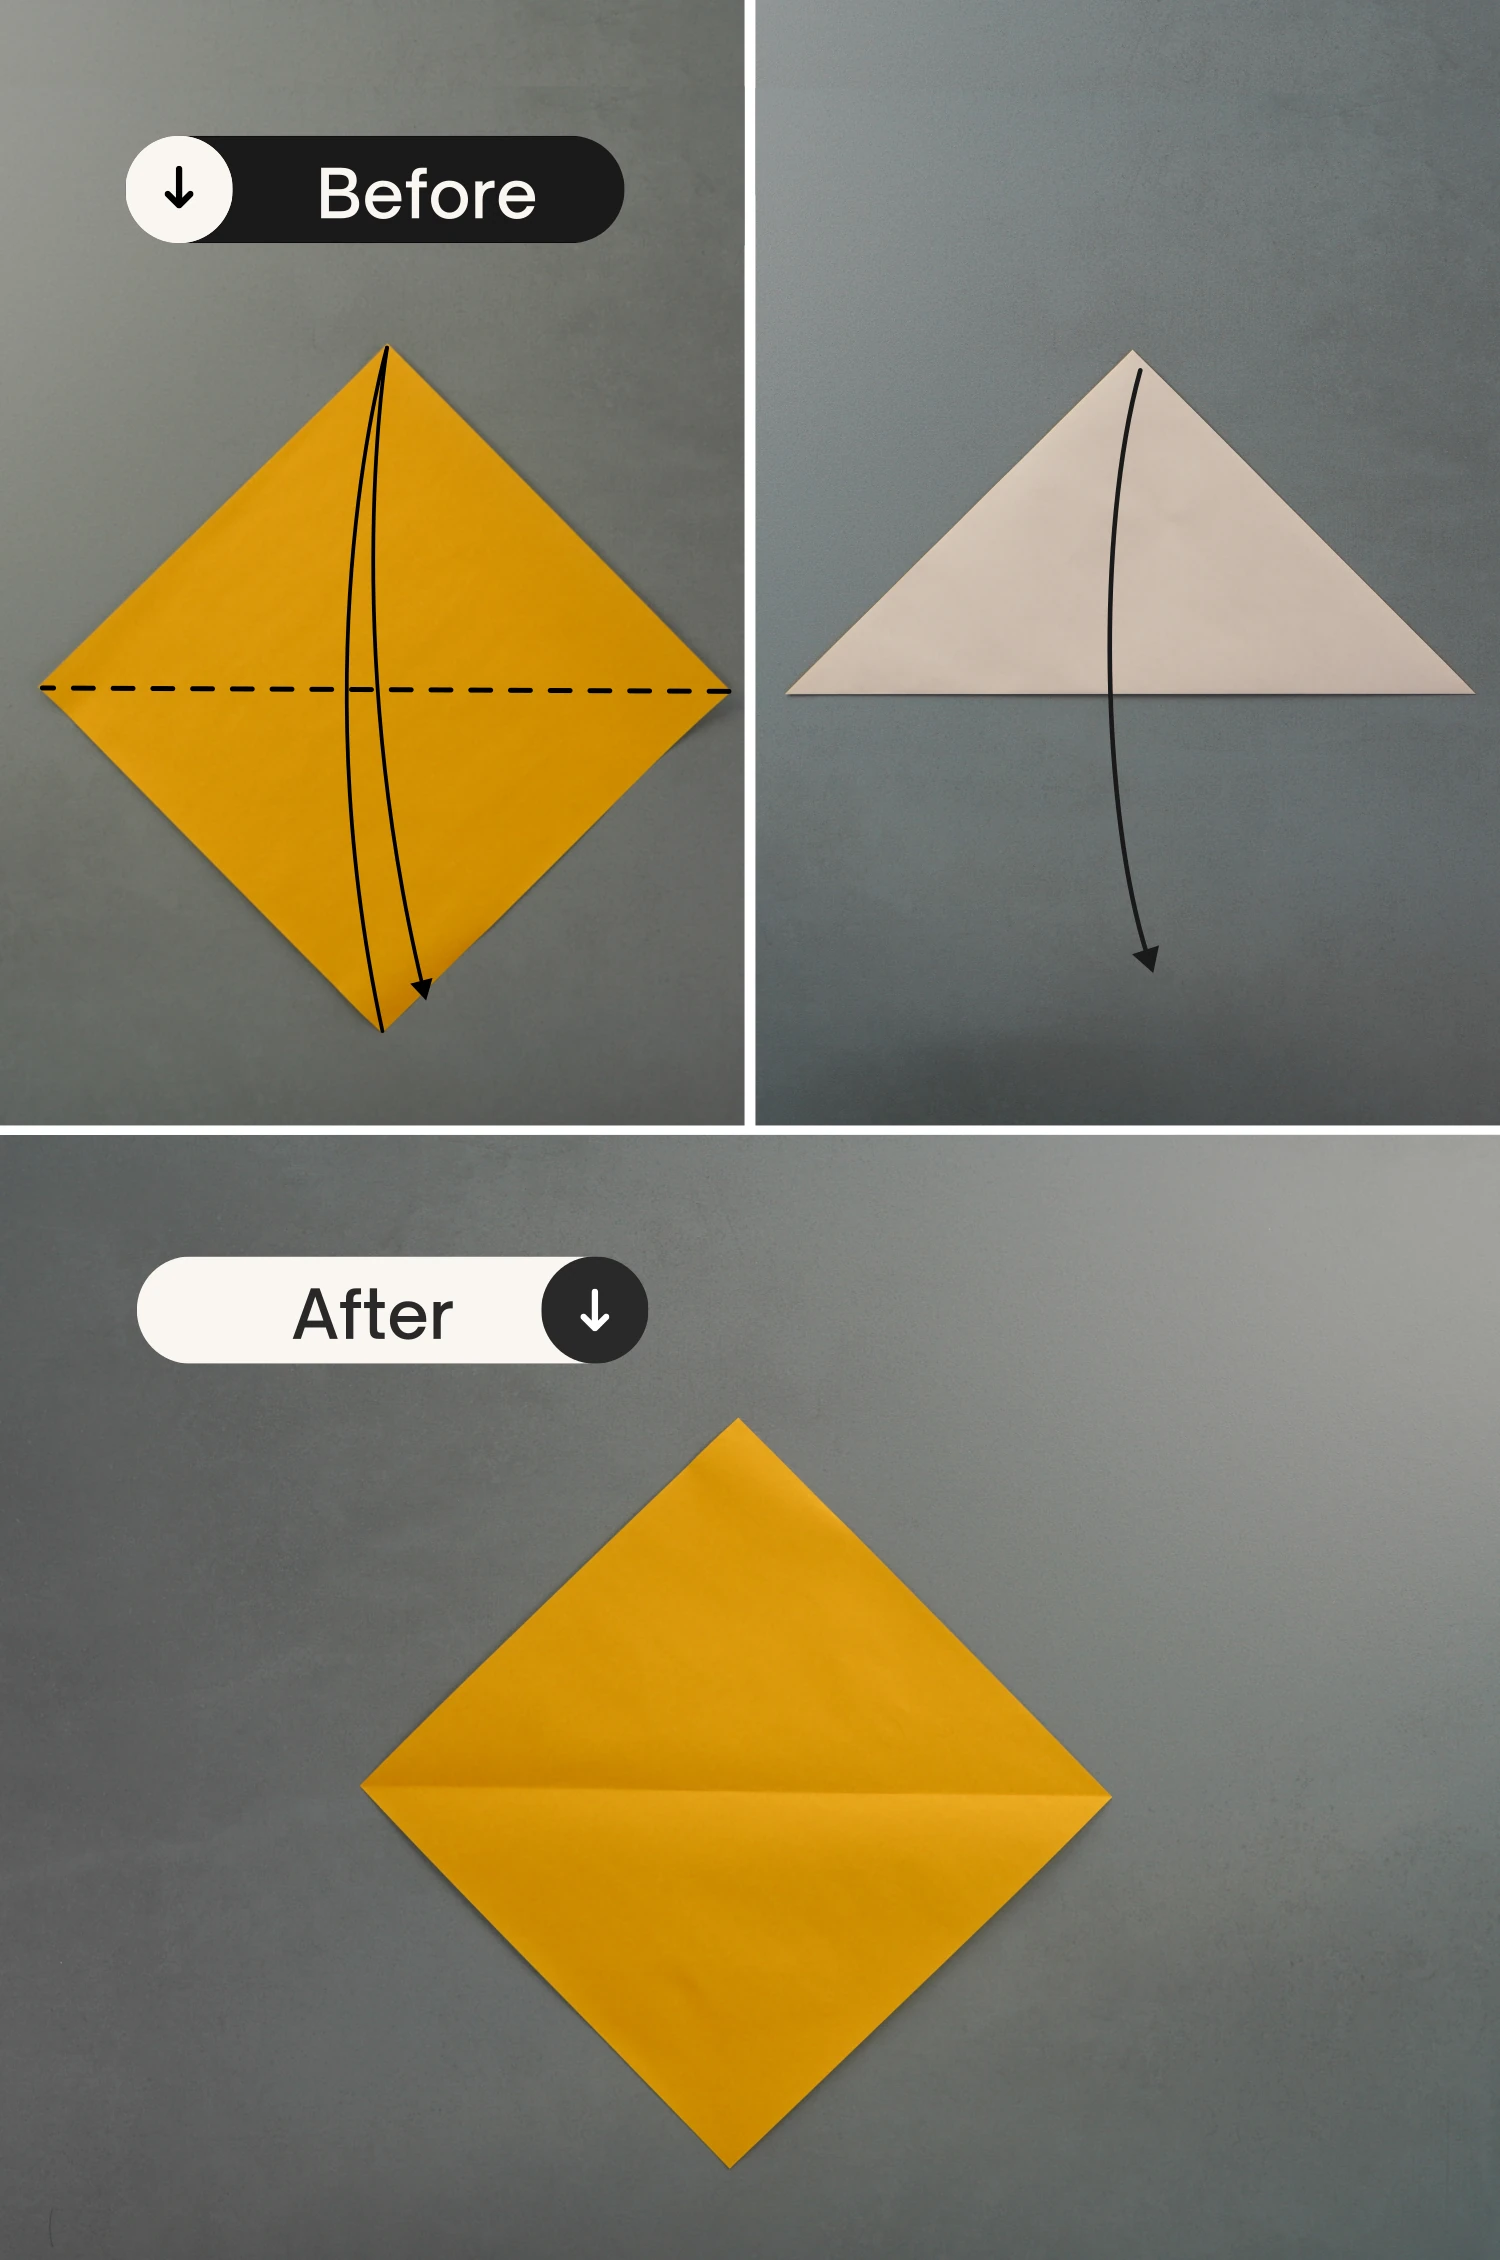
Step 1
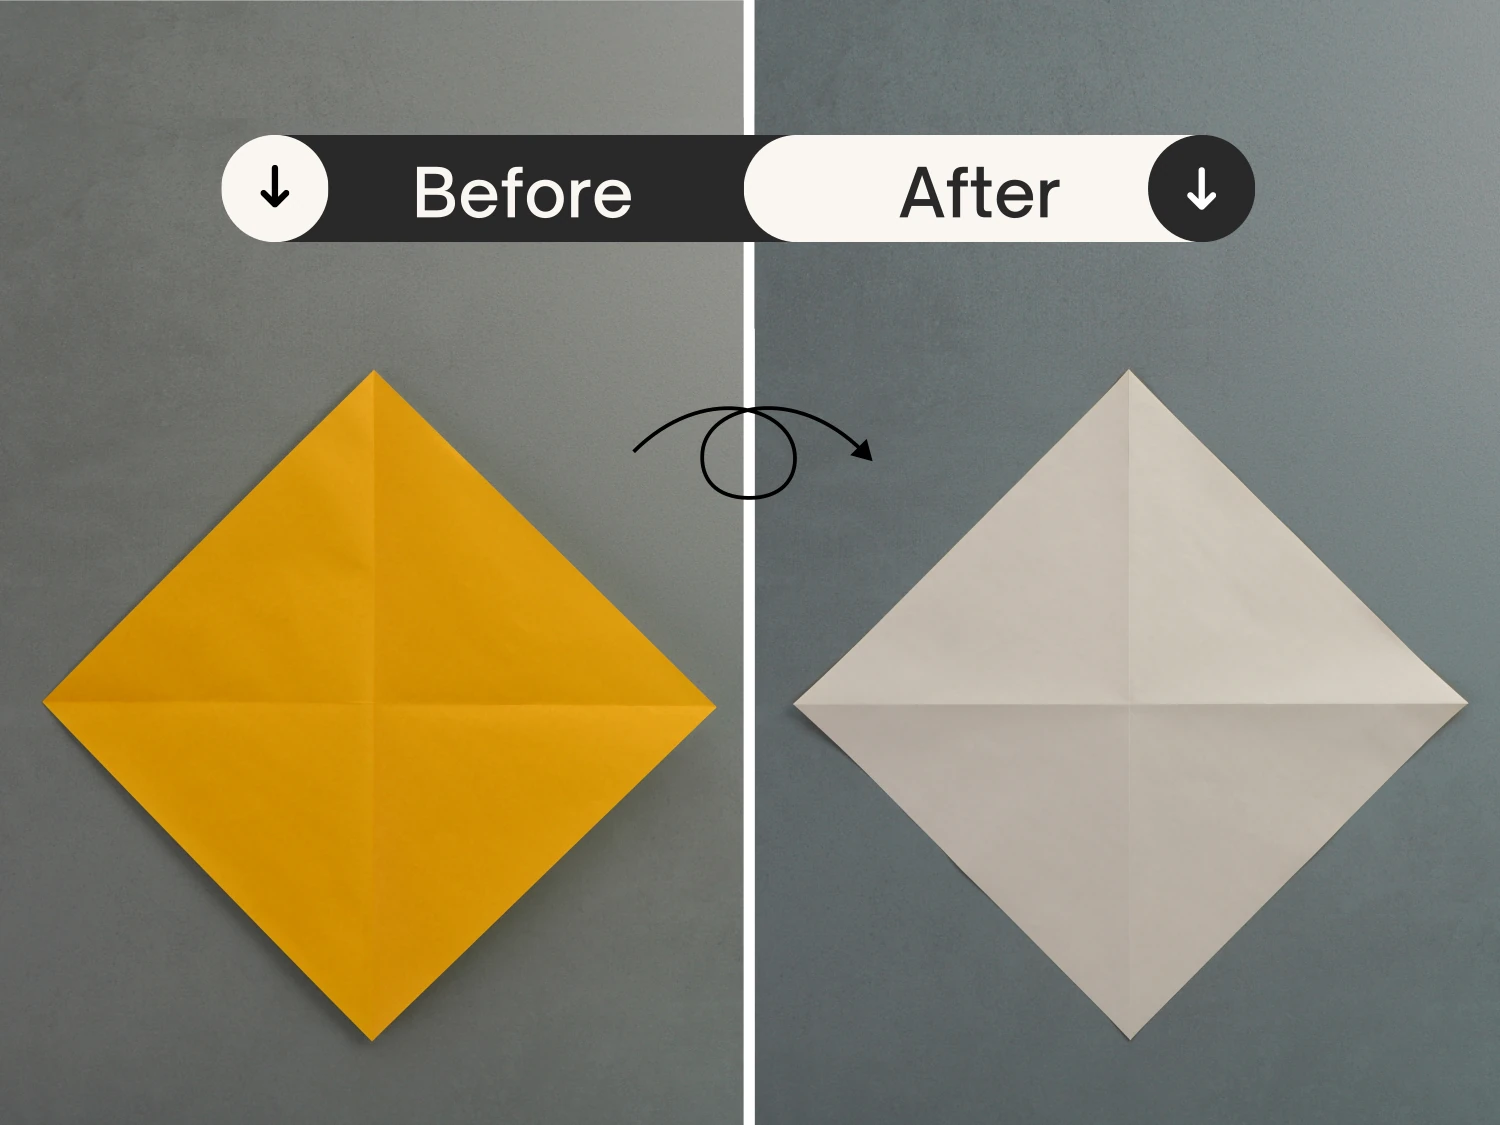
Start with the yellow side facing up, fold it in half horizontally, crease it well then unfold.
Step 2
Fold the right point to the left diagonally, crease it well then unfold.

Step 3
Flip it over.
Step 4
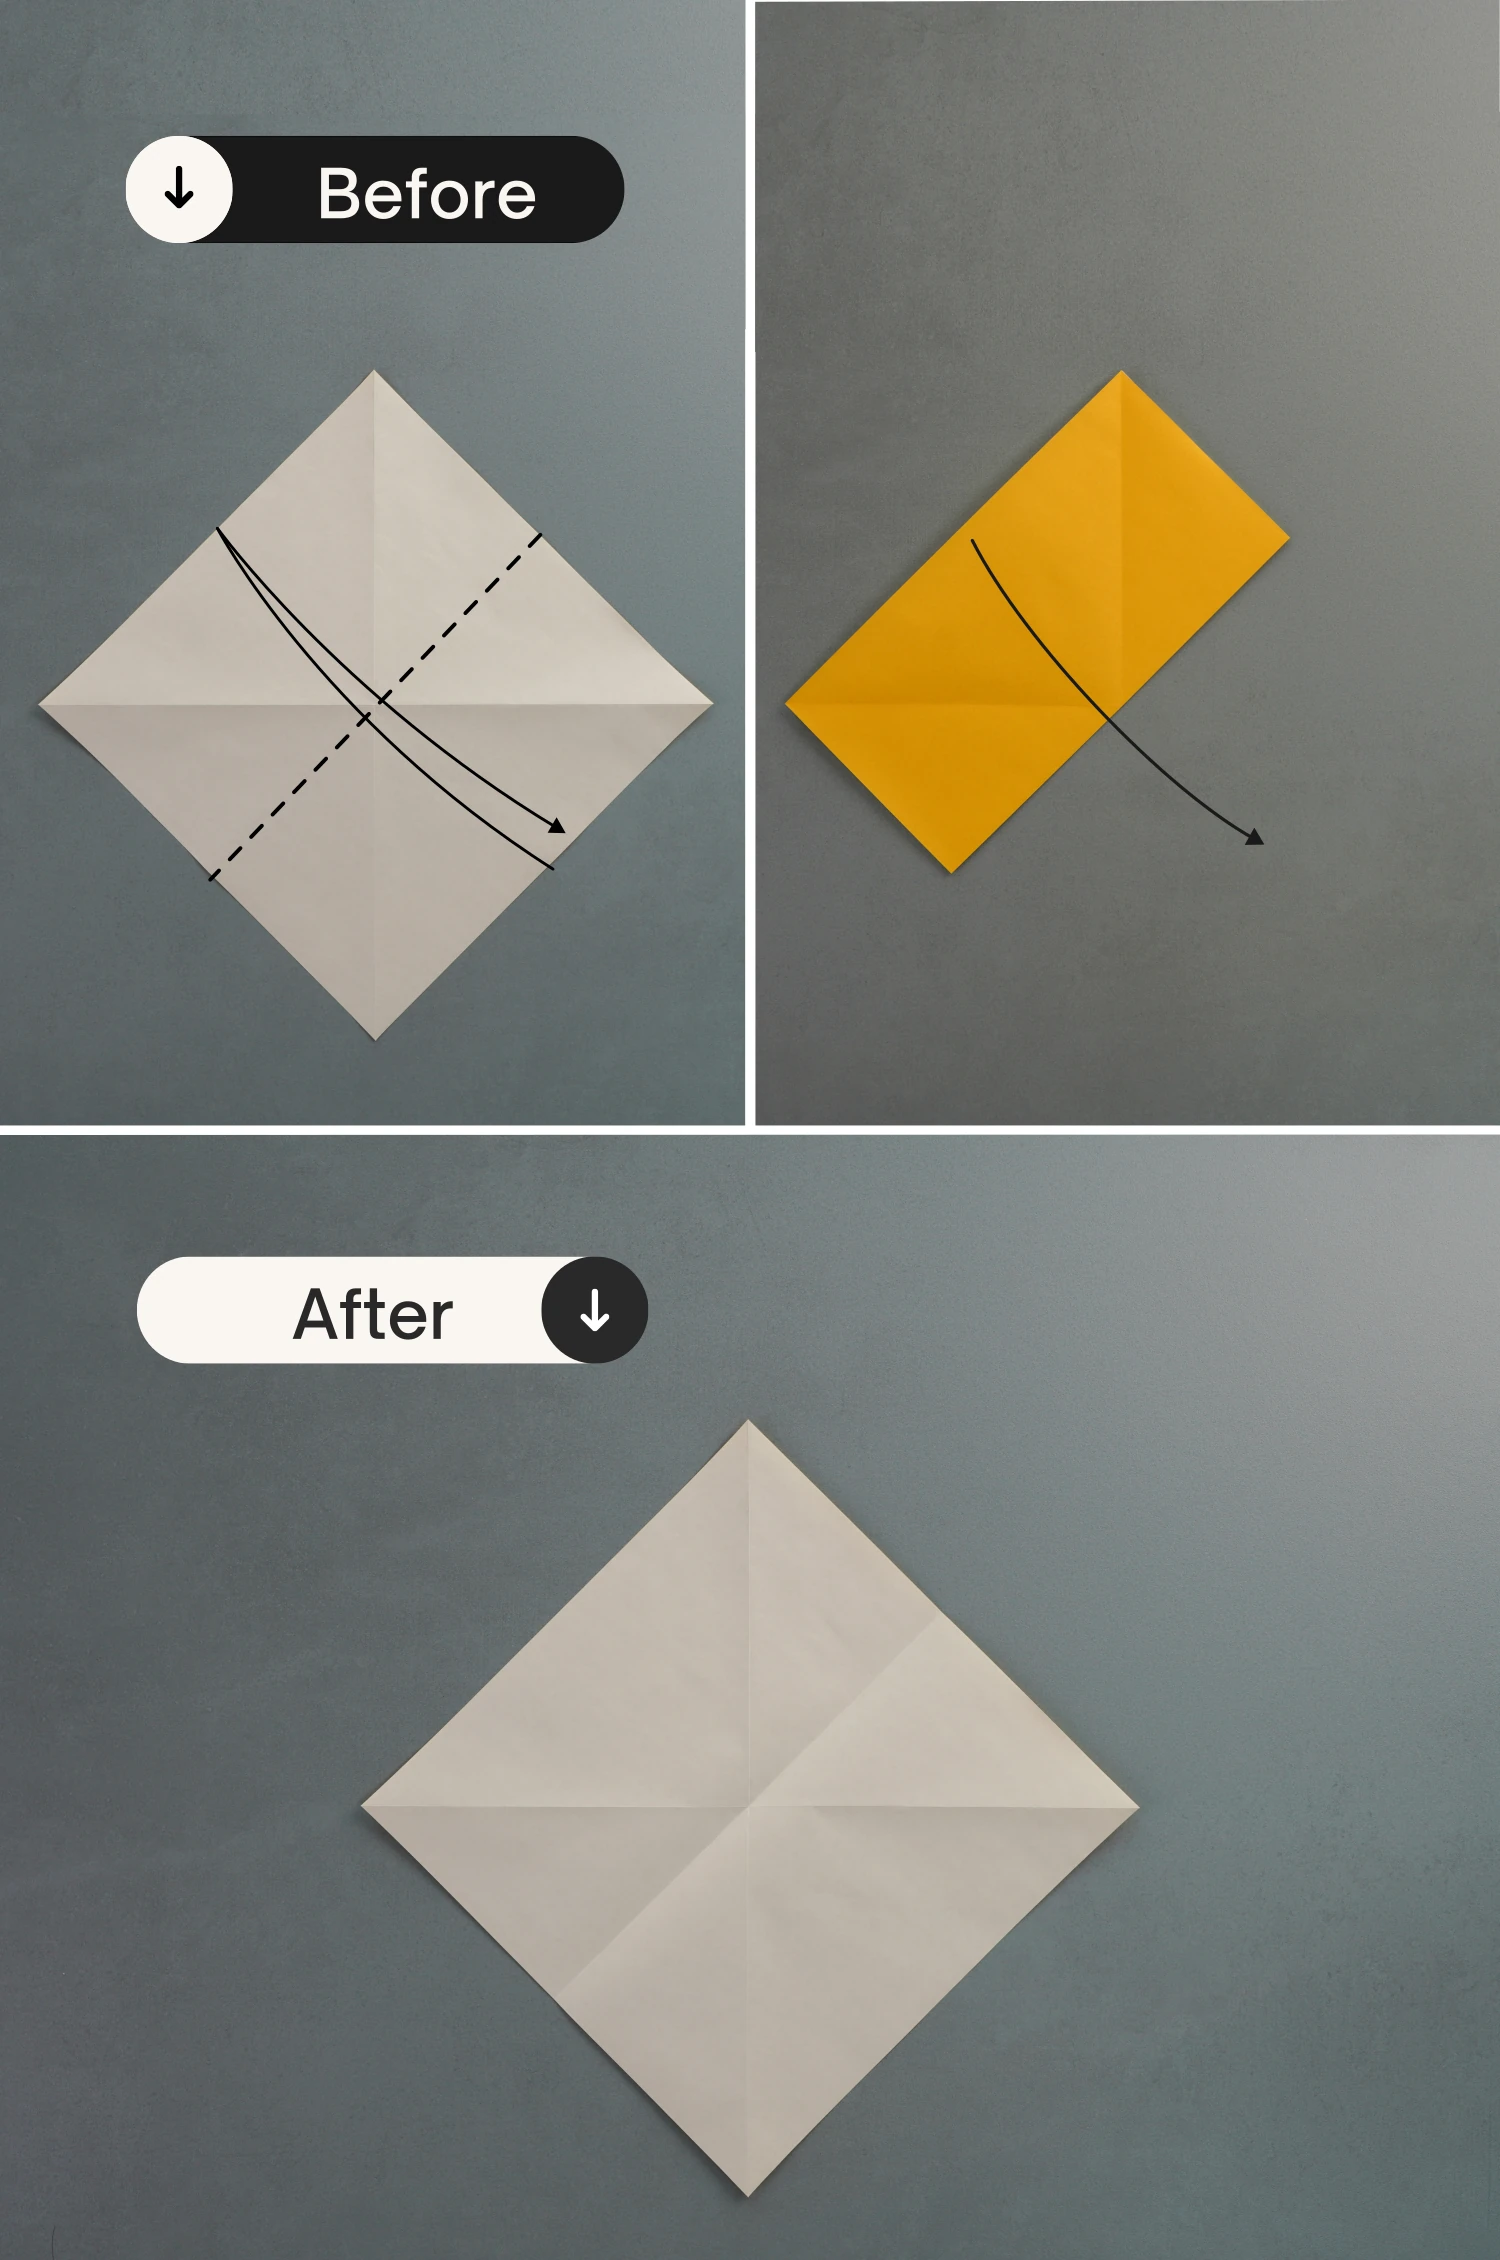
Fold the bottom right edge to align with the top left edge, crease it well then unfold.
Step 5
Fold the bottom left edge to align with the top right edge, leaving a crease, and unfold.

Step 6
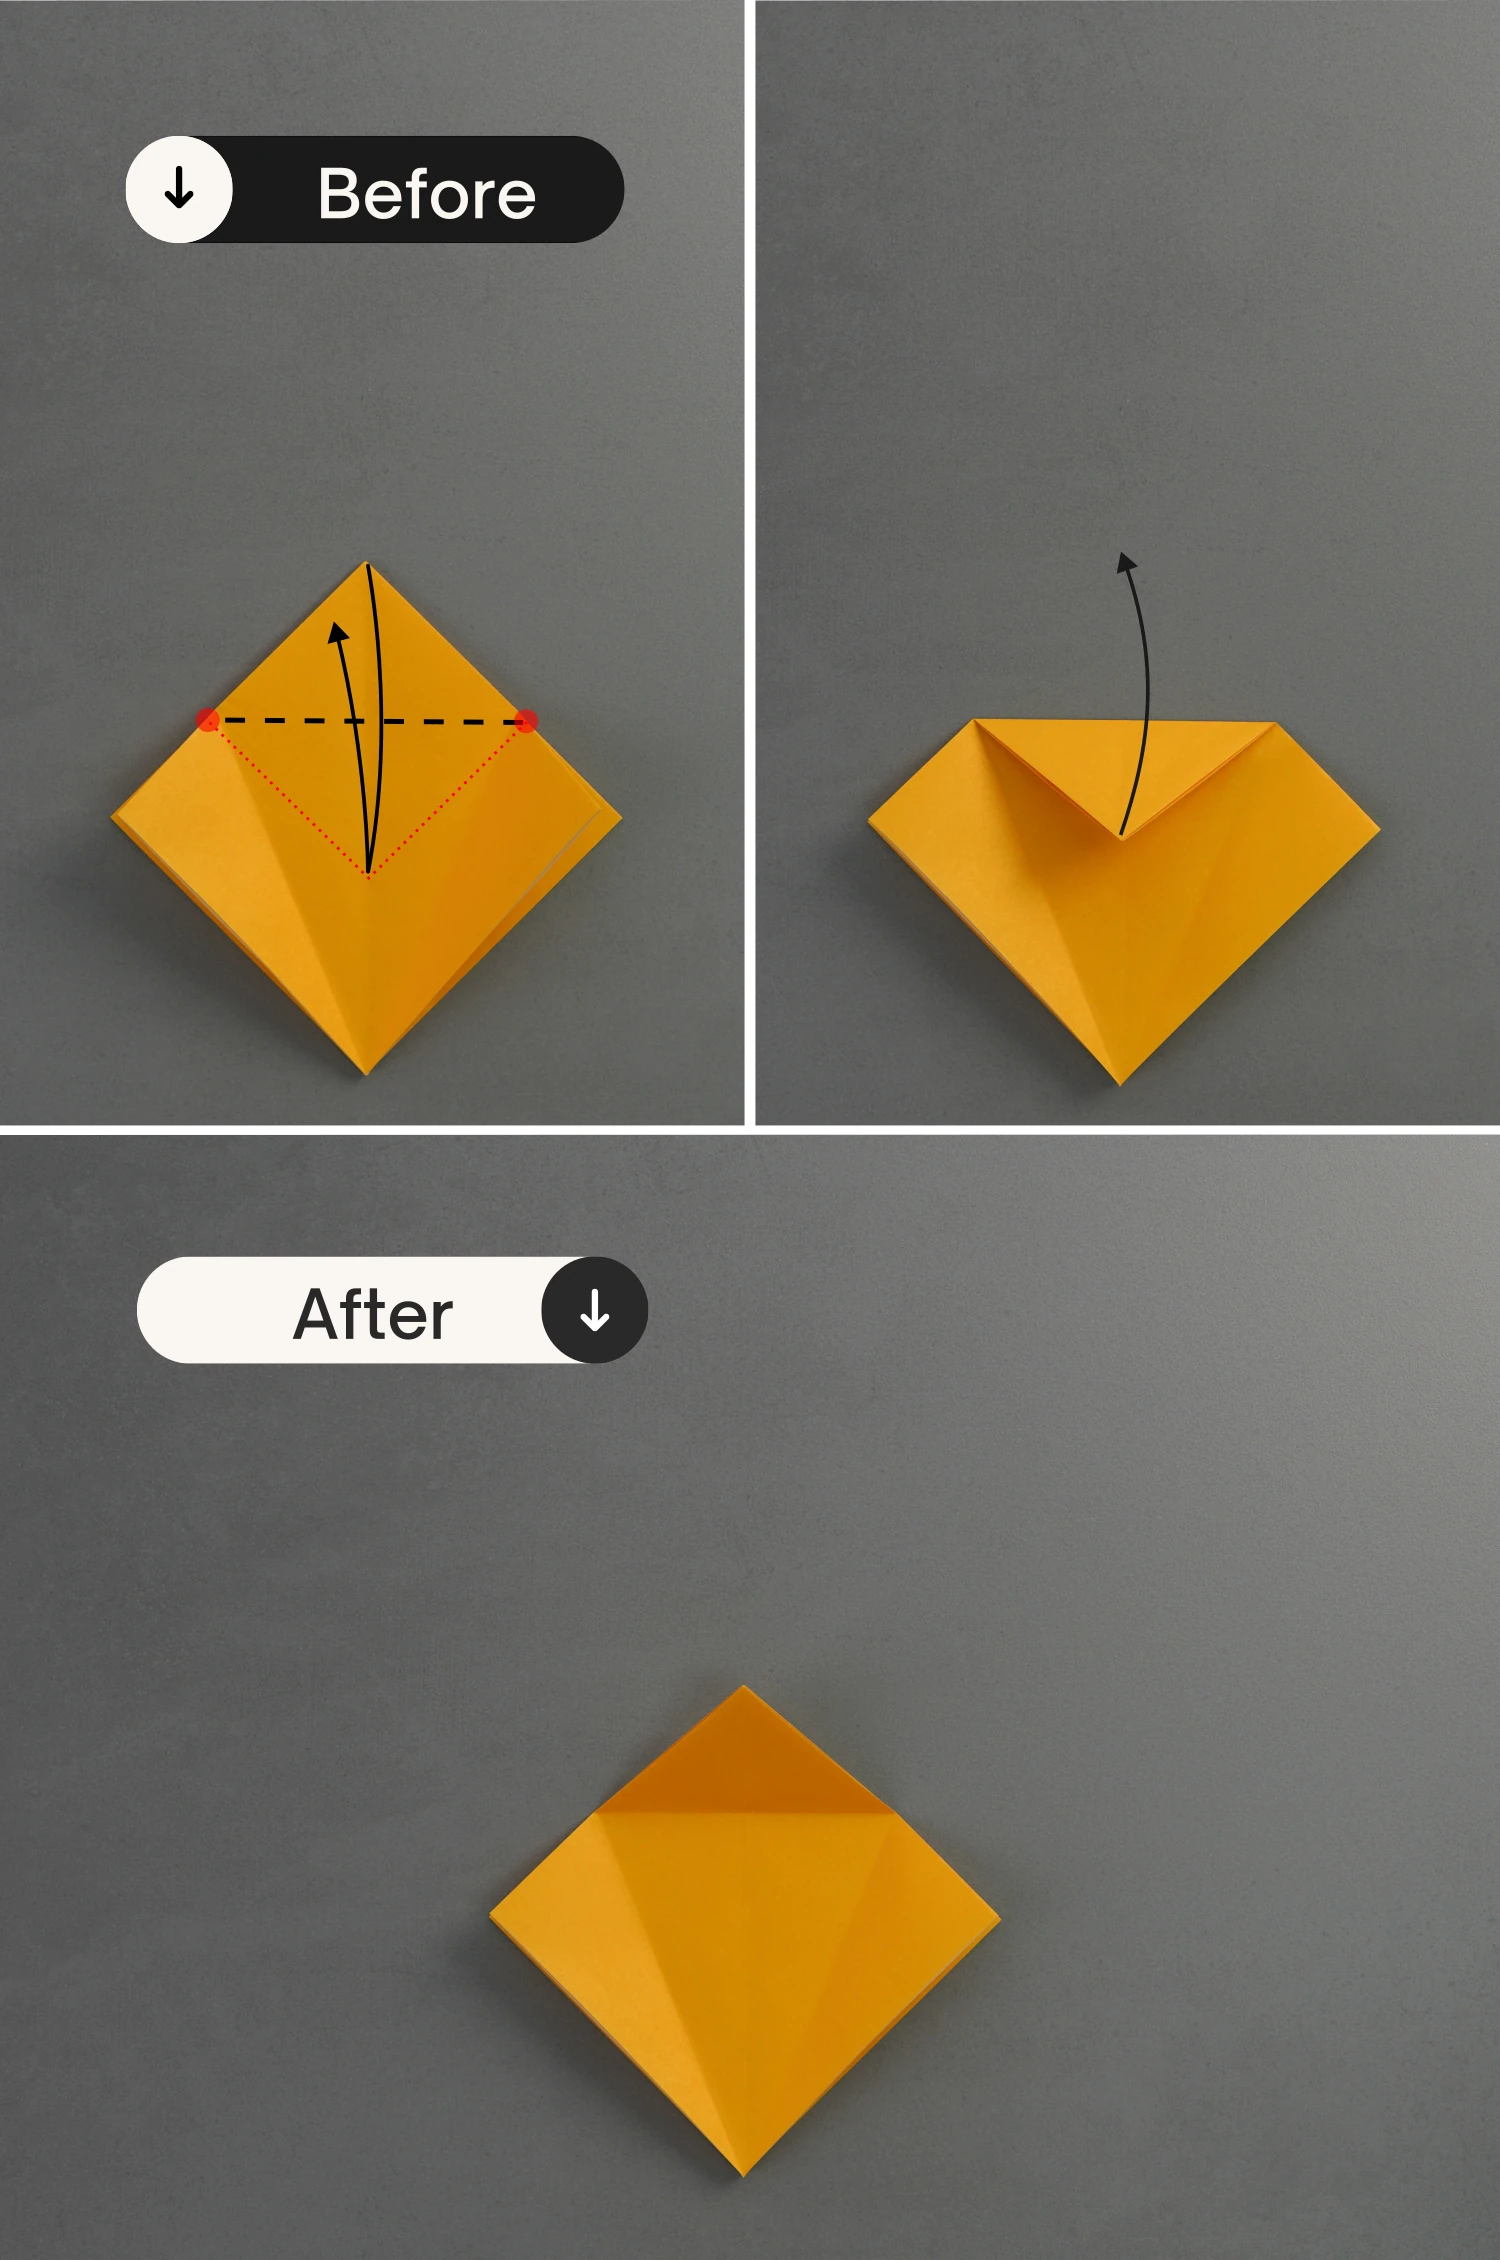
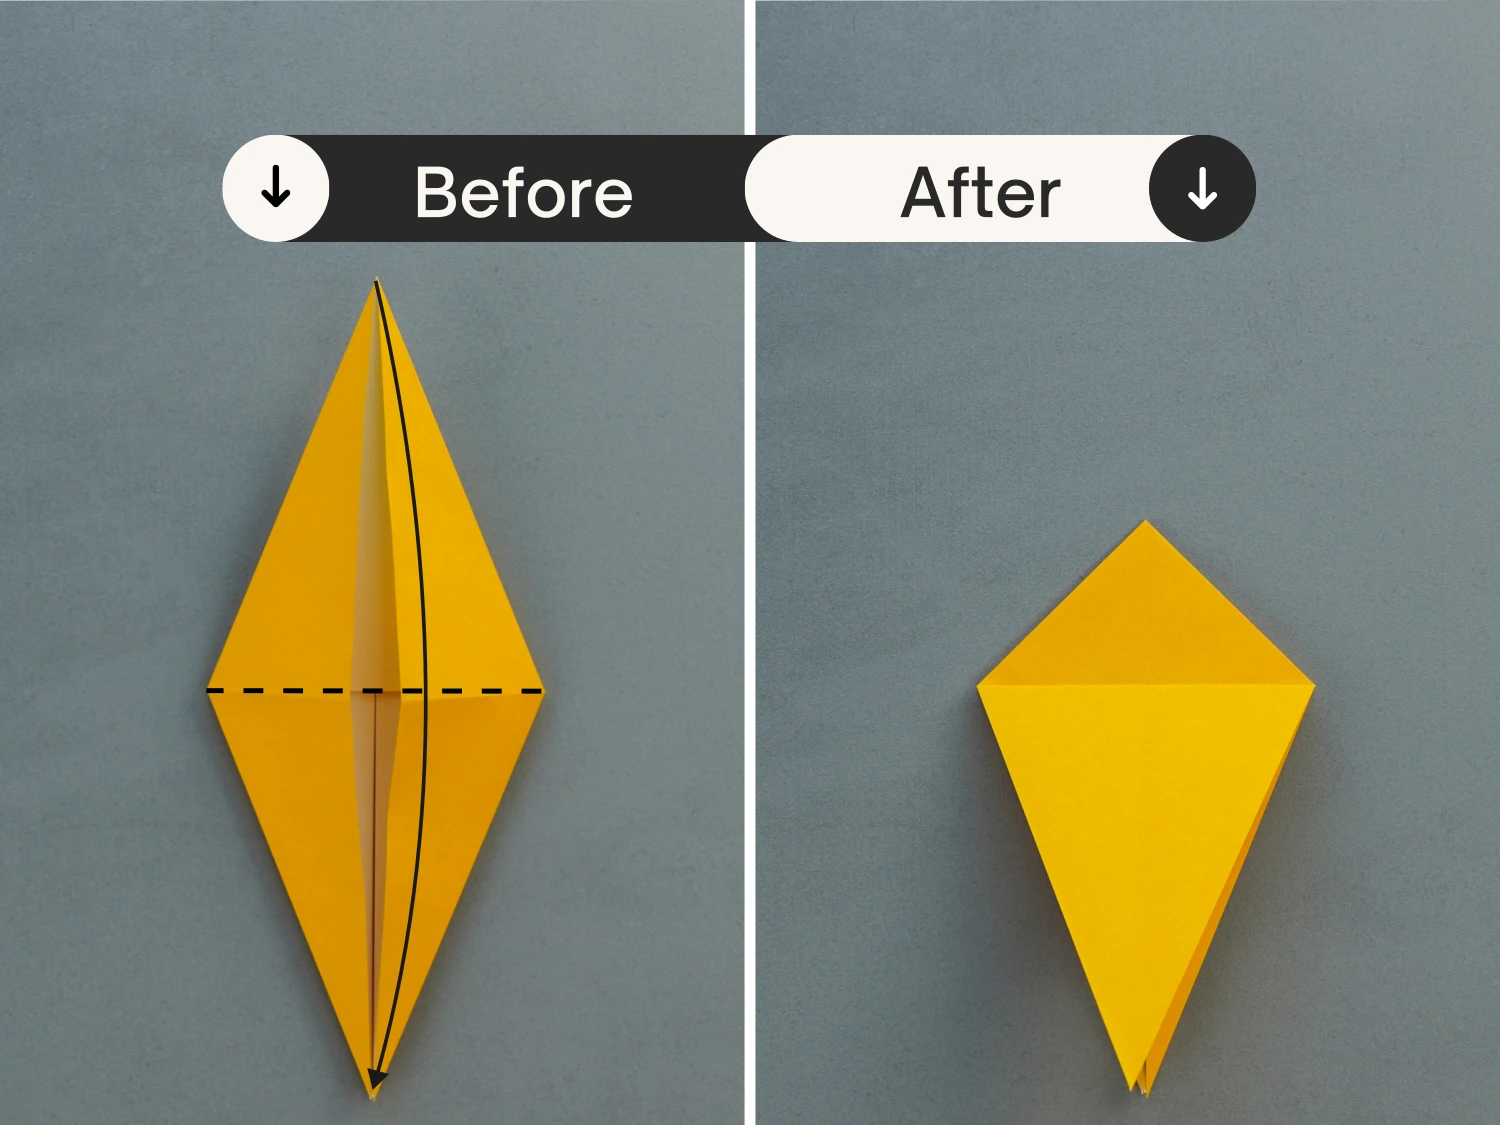
Now, shape the left and right creases, and use both hands to press the left and right points, then push them down to meet the bottom point.
Flatten the fold along the existing creases.
Step 7
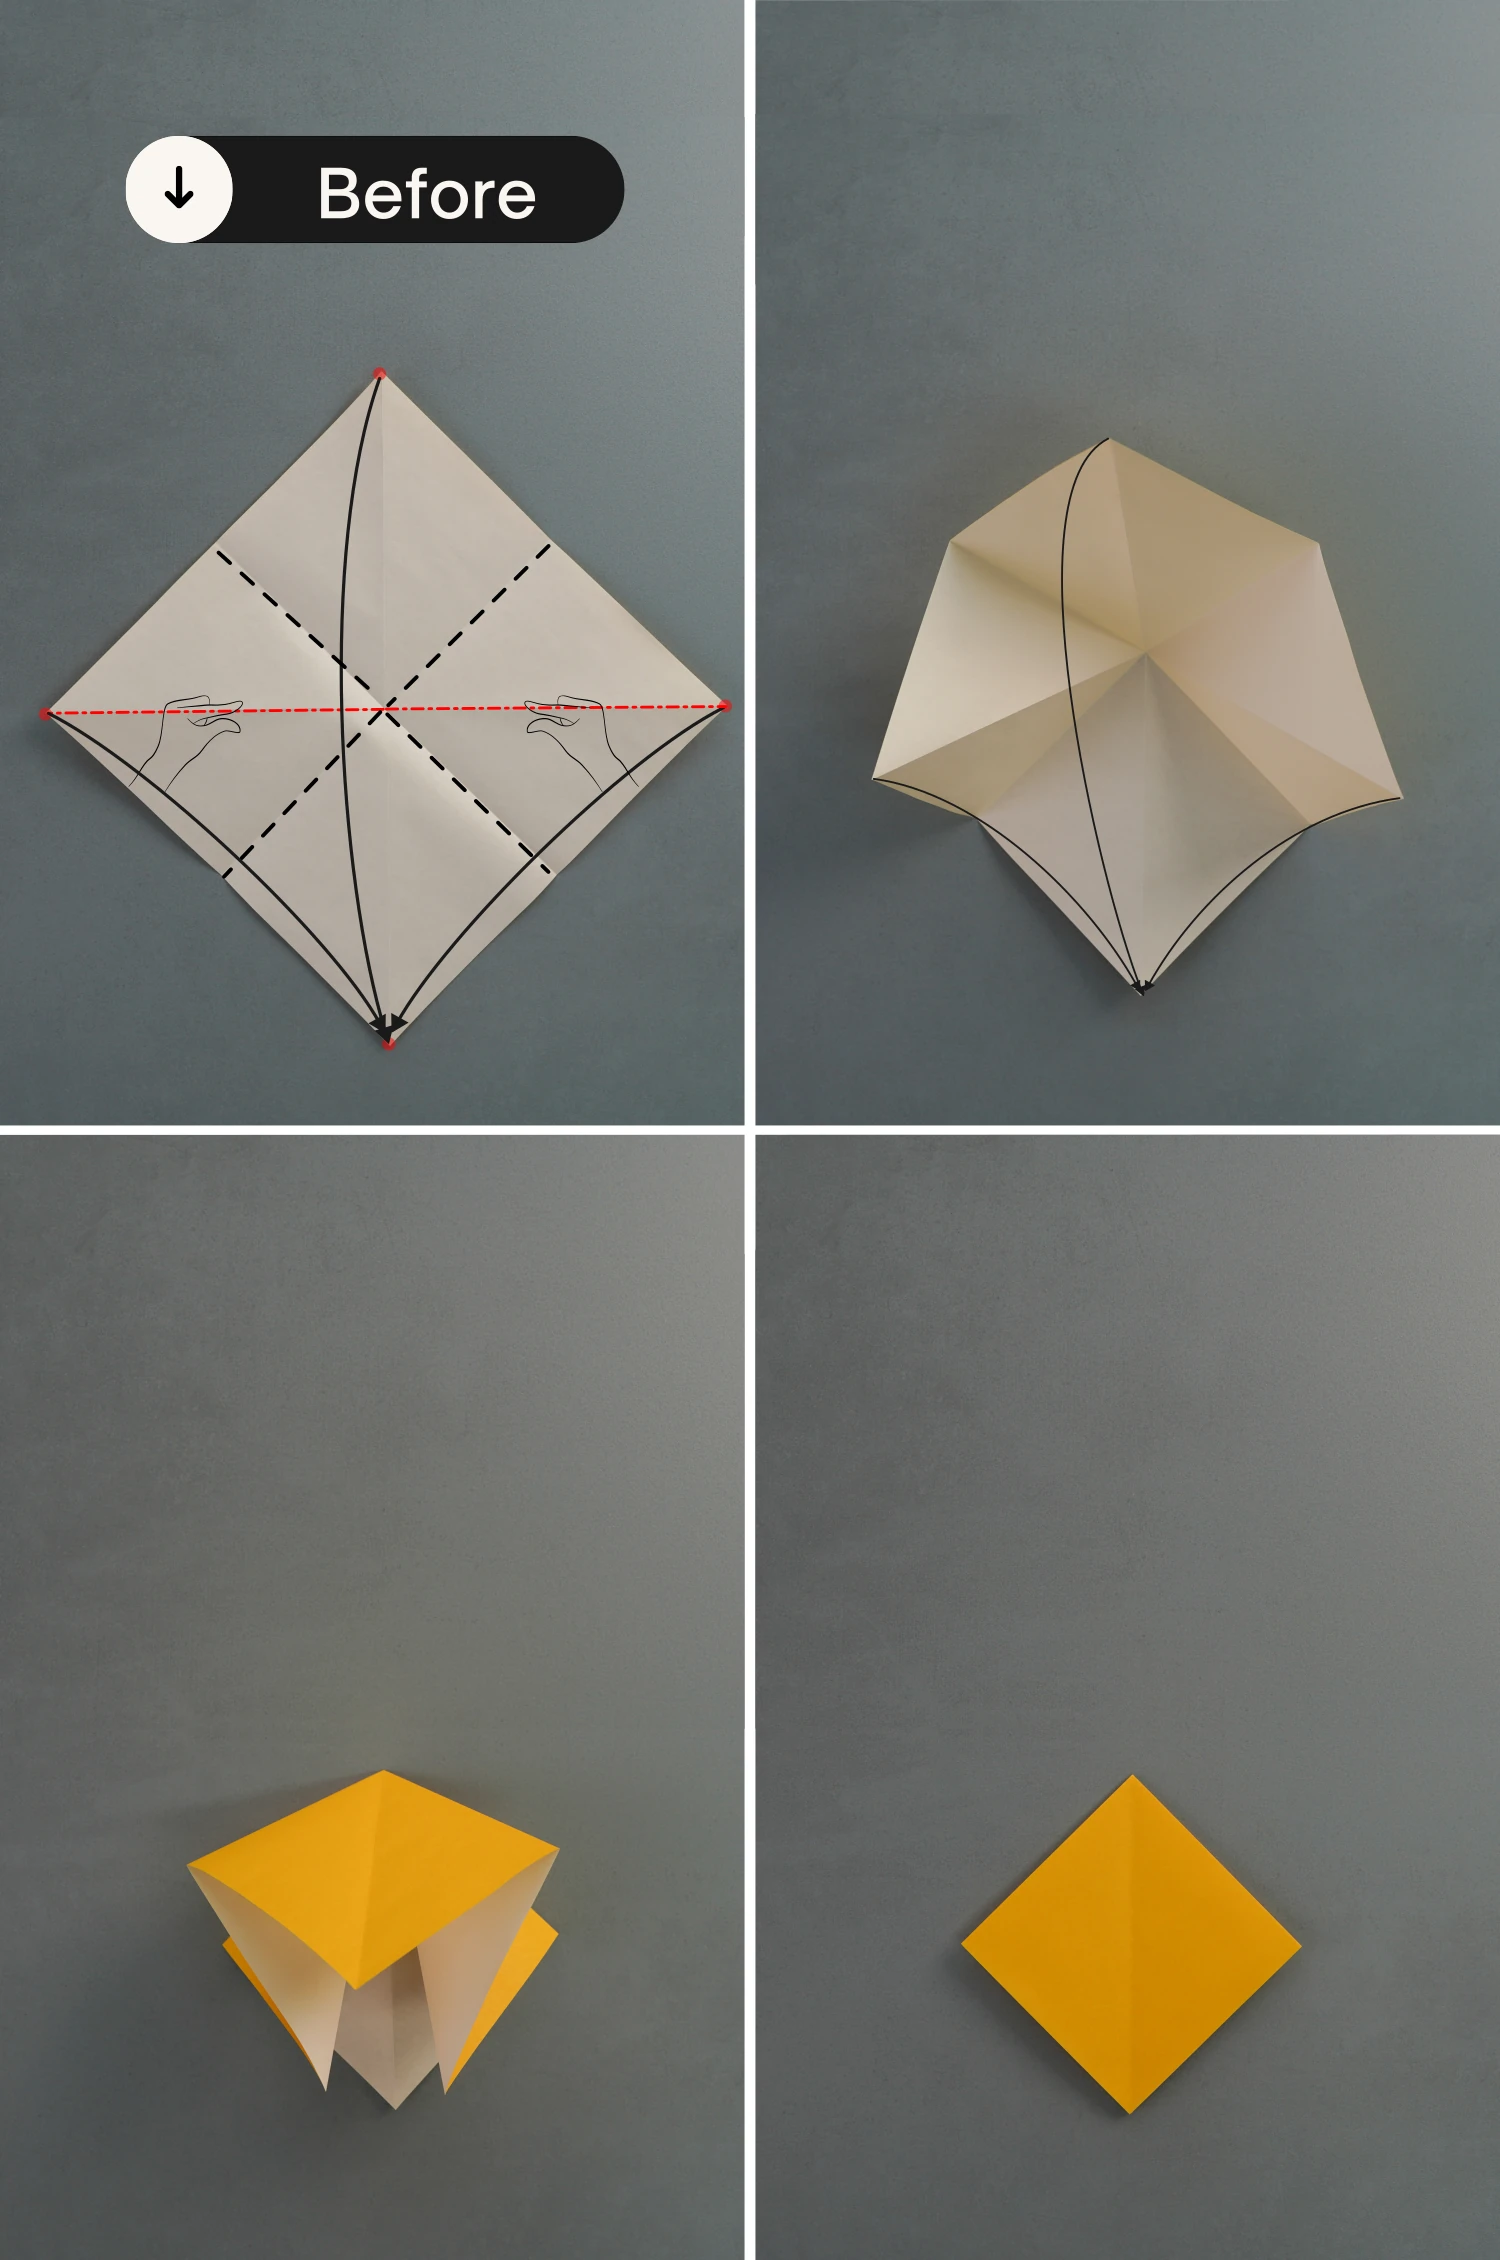
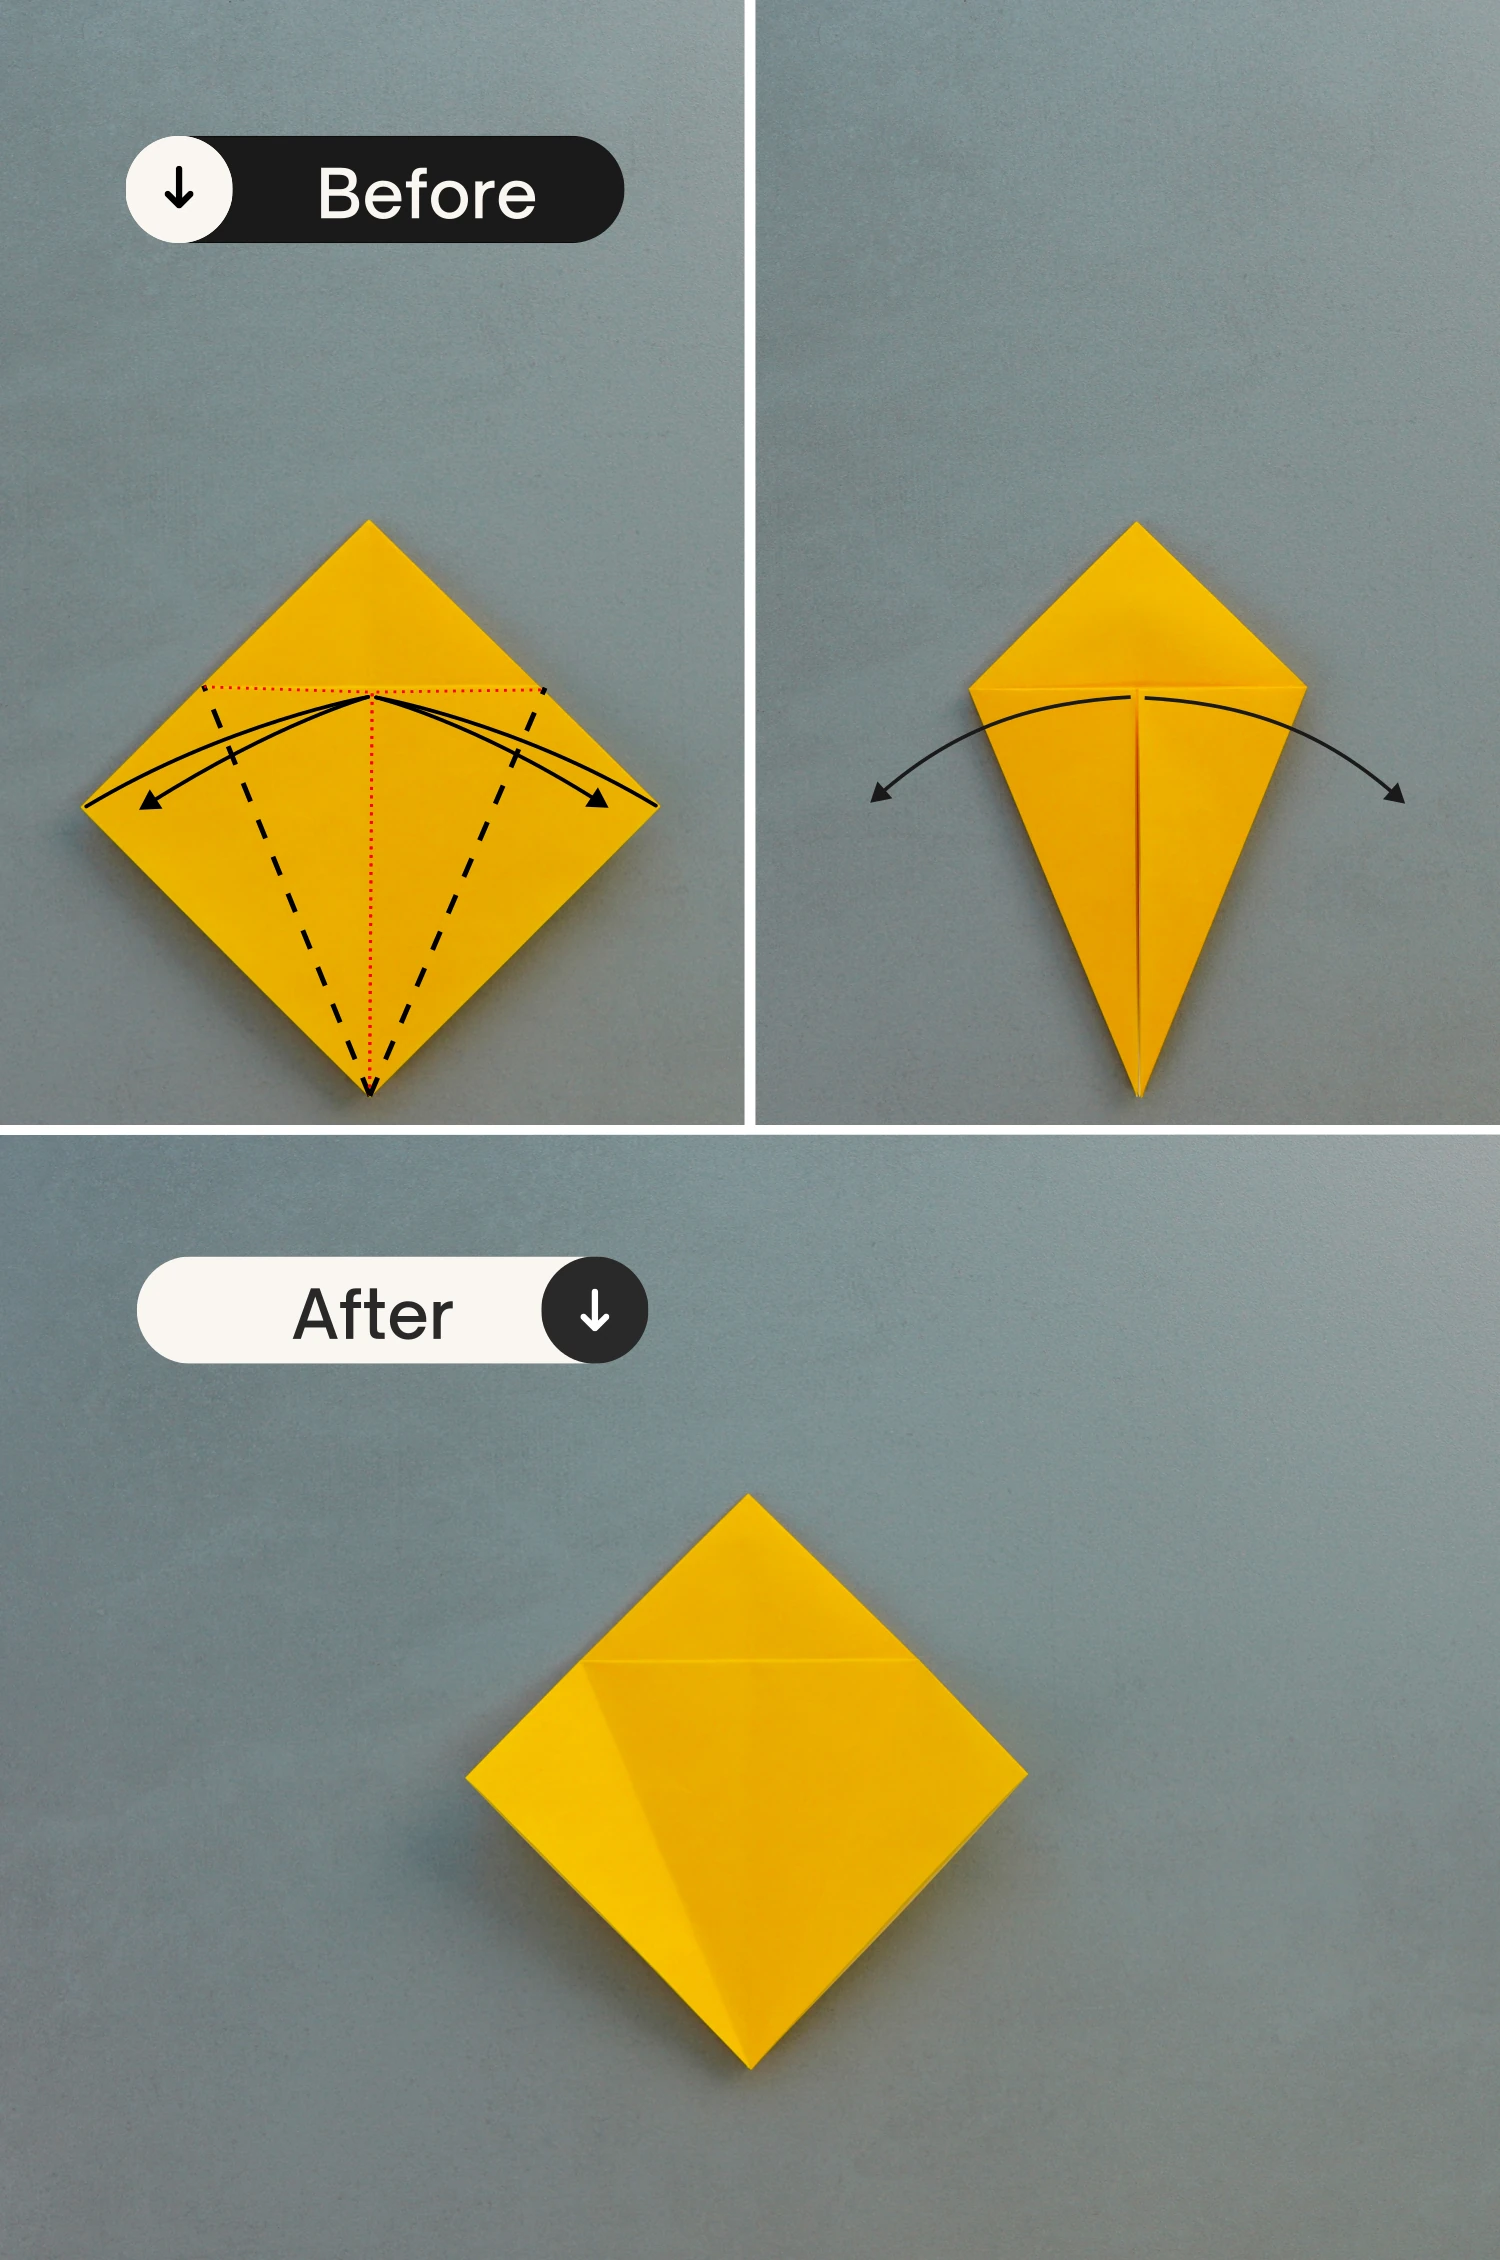
Fold the bottom left and right edges of the top layer to align with the middle vertical crease, crease them well then unfold.
Step 8
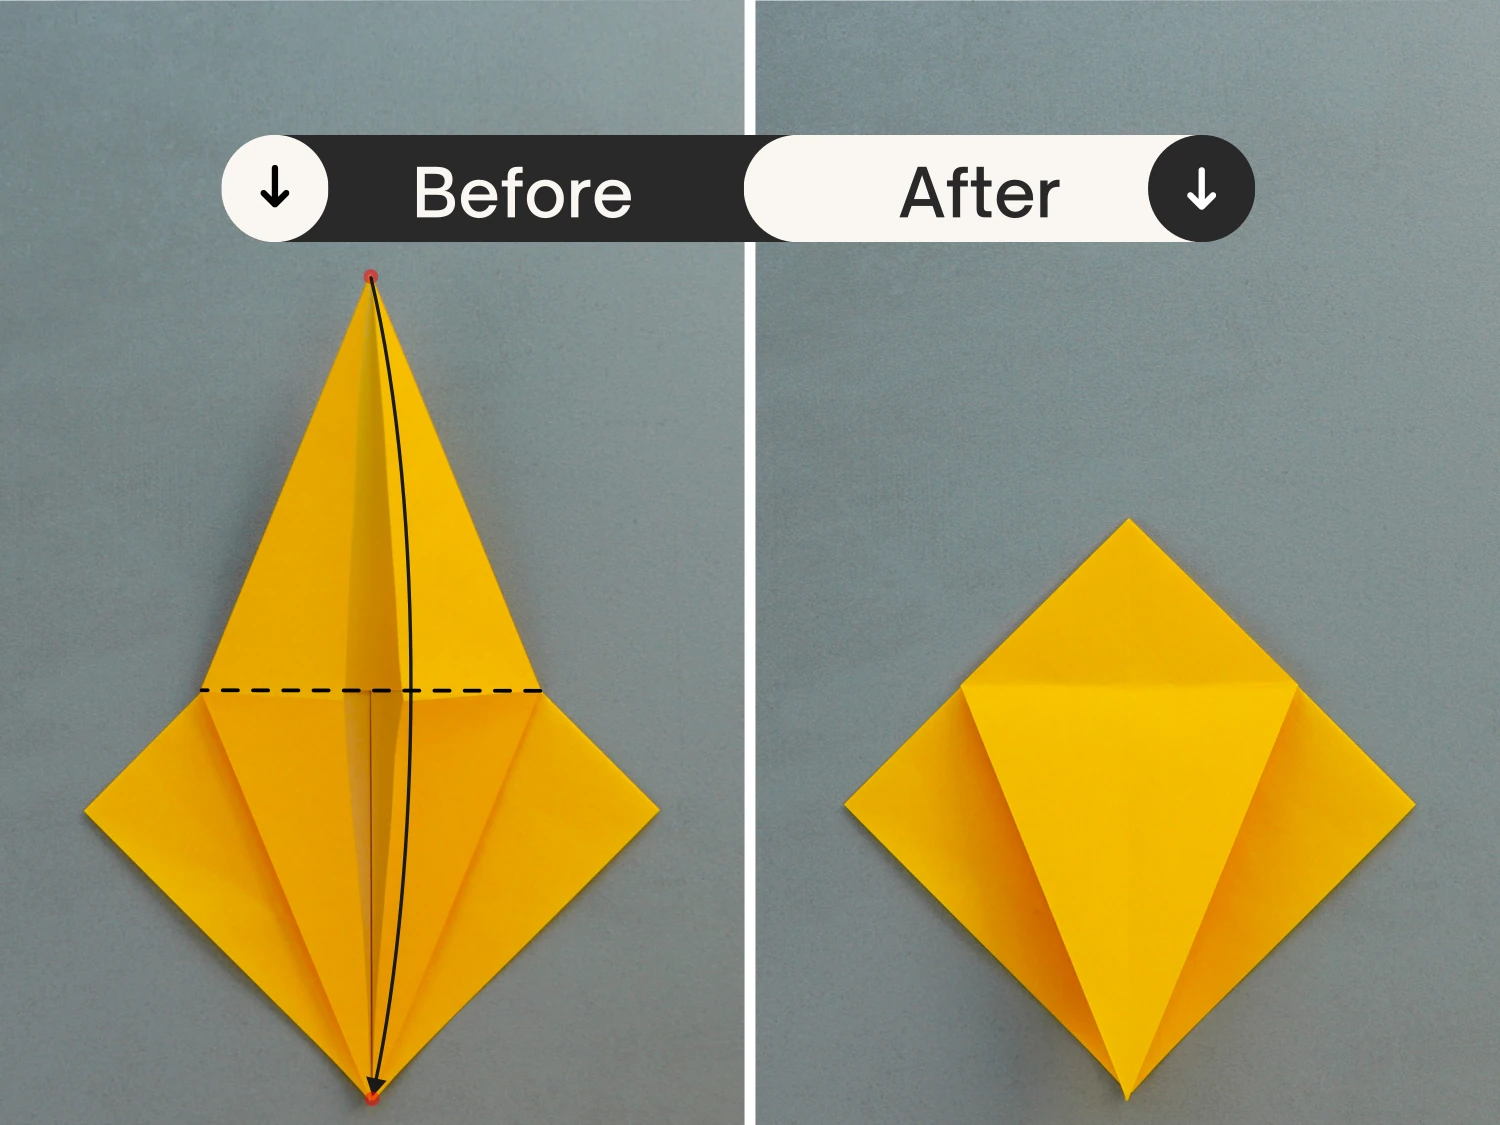
Fold the top corner down along the dotted line, and unfold it.
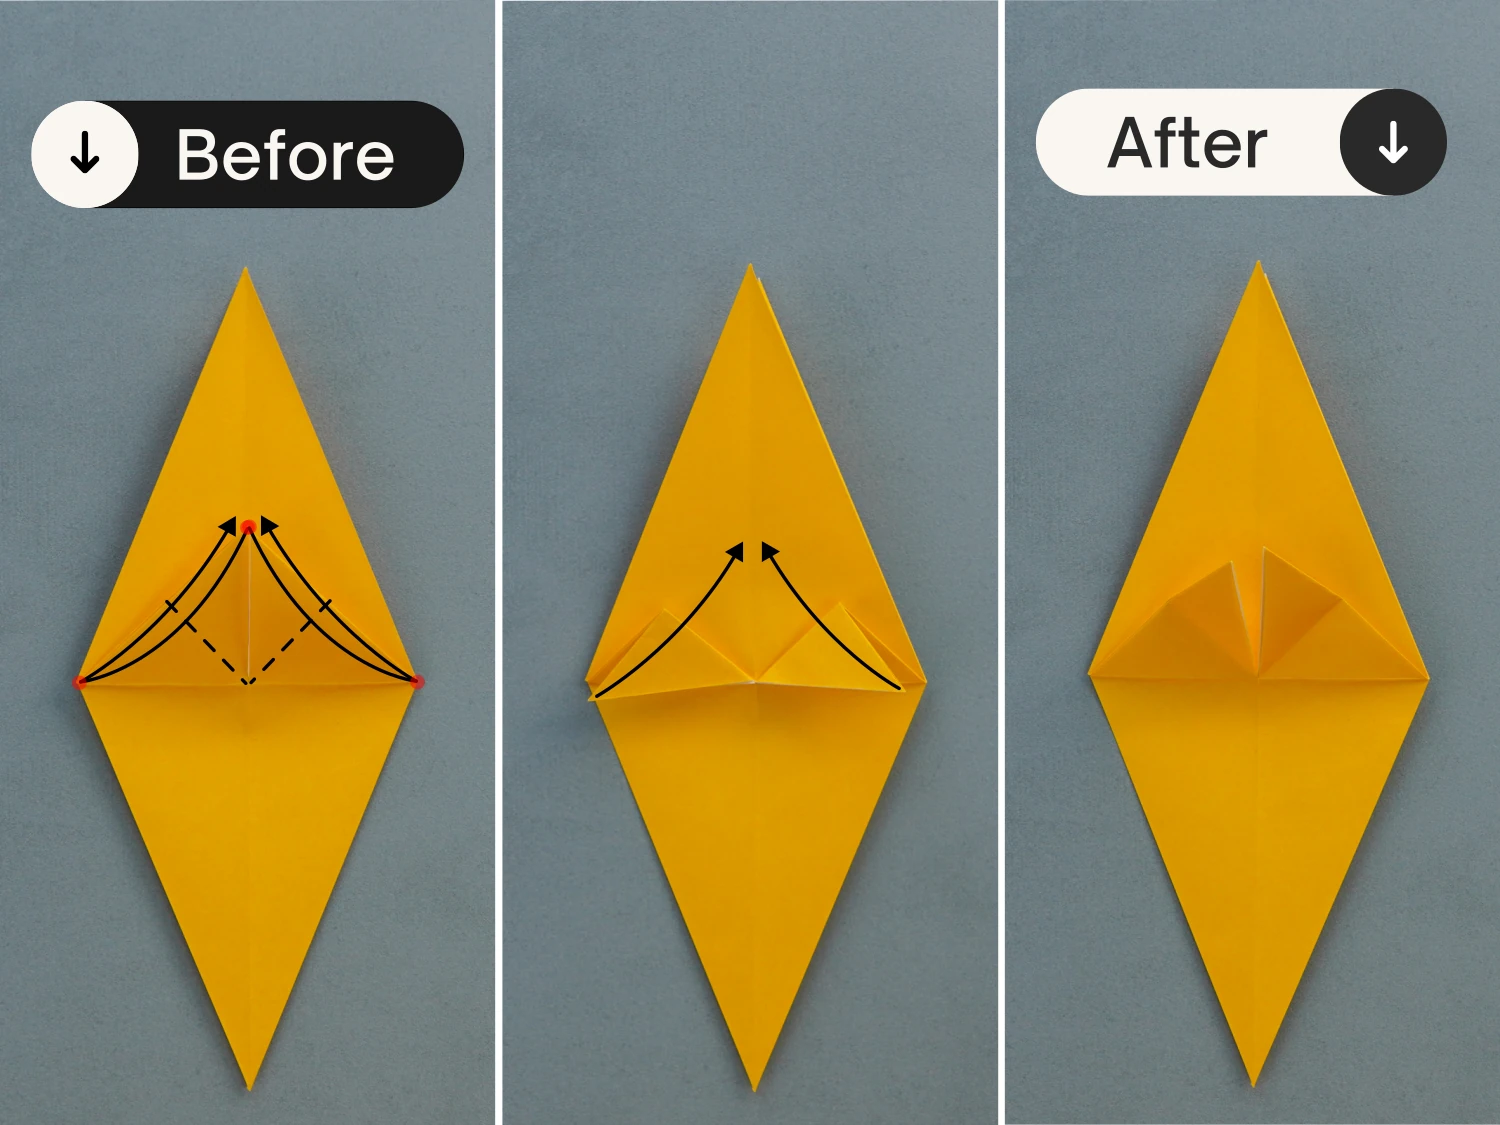
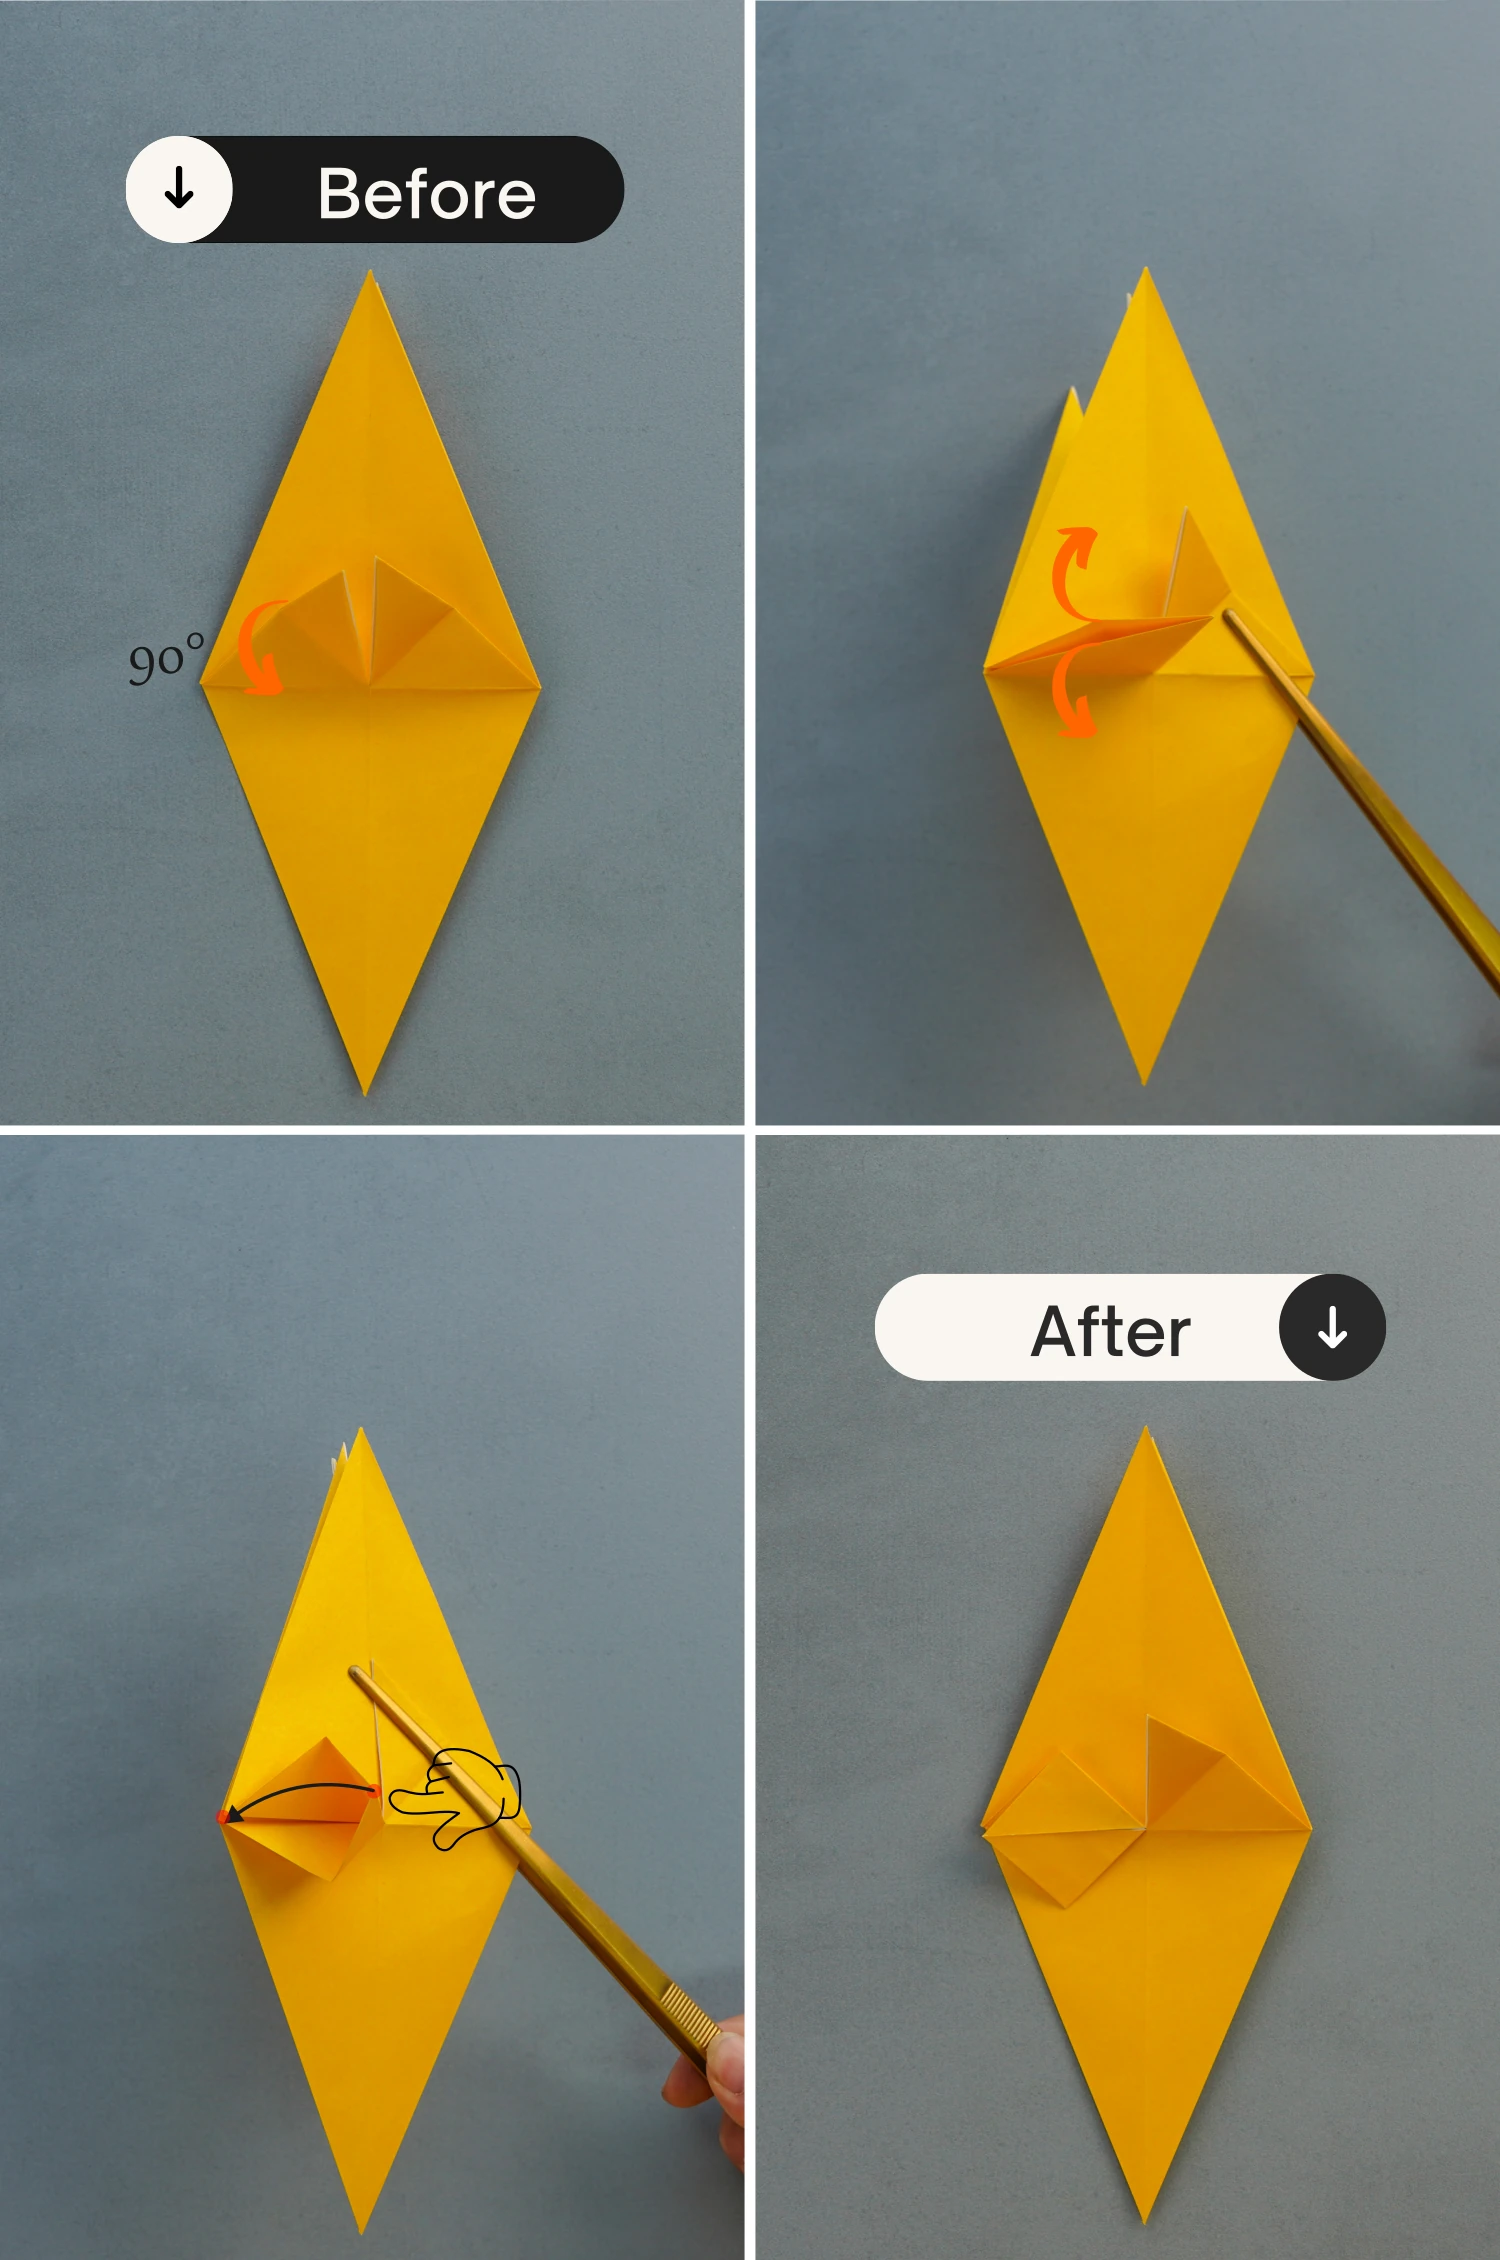
Step 9
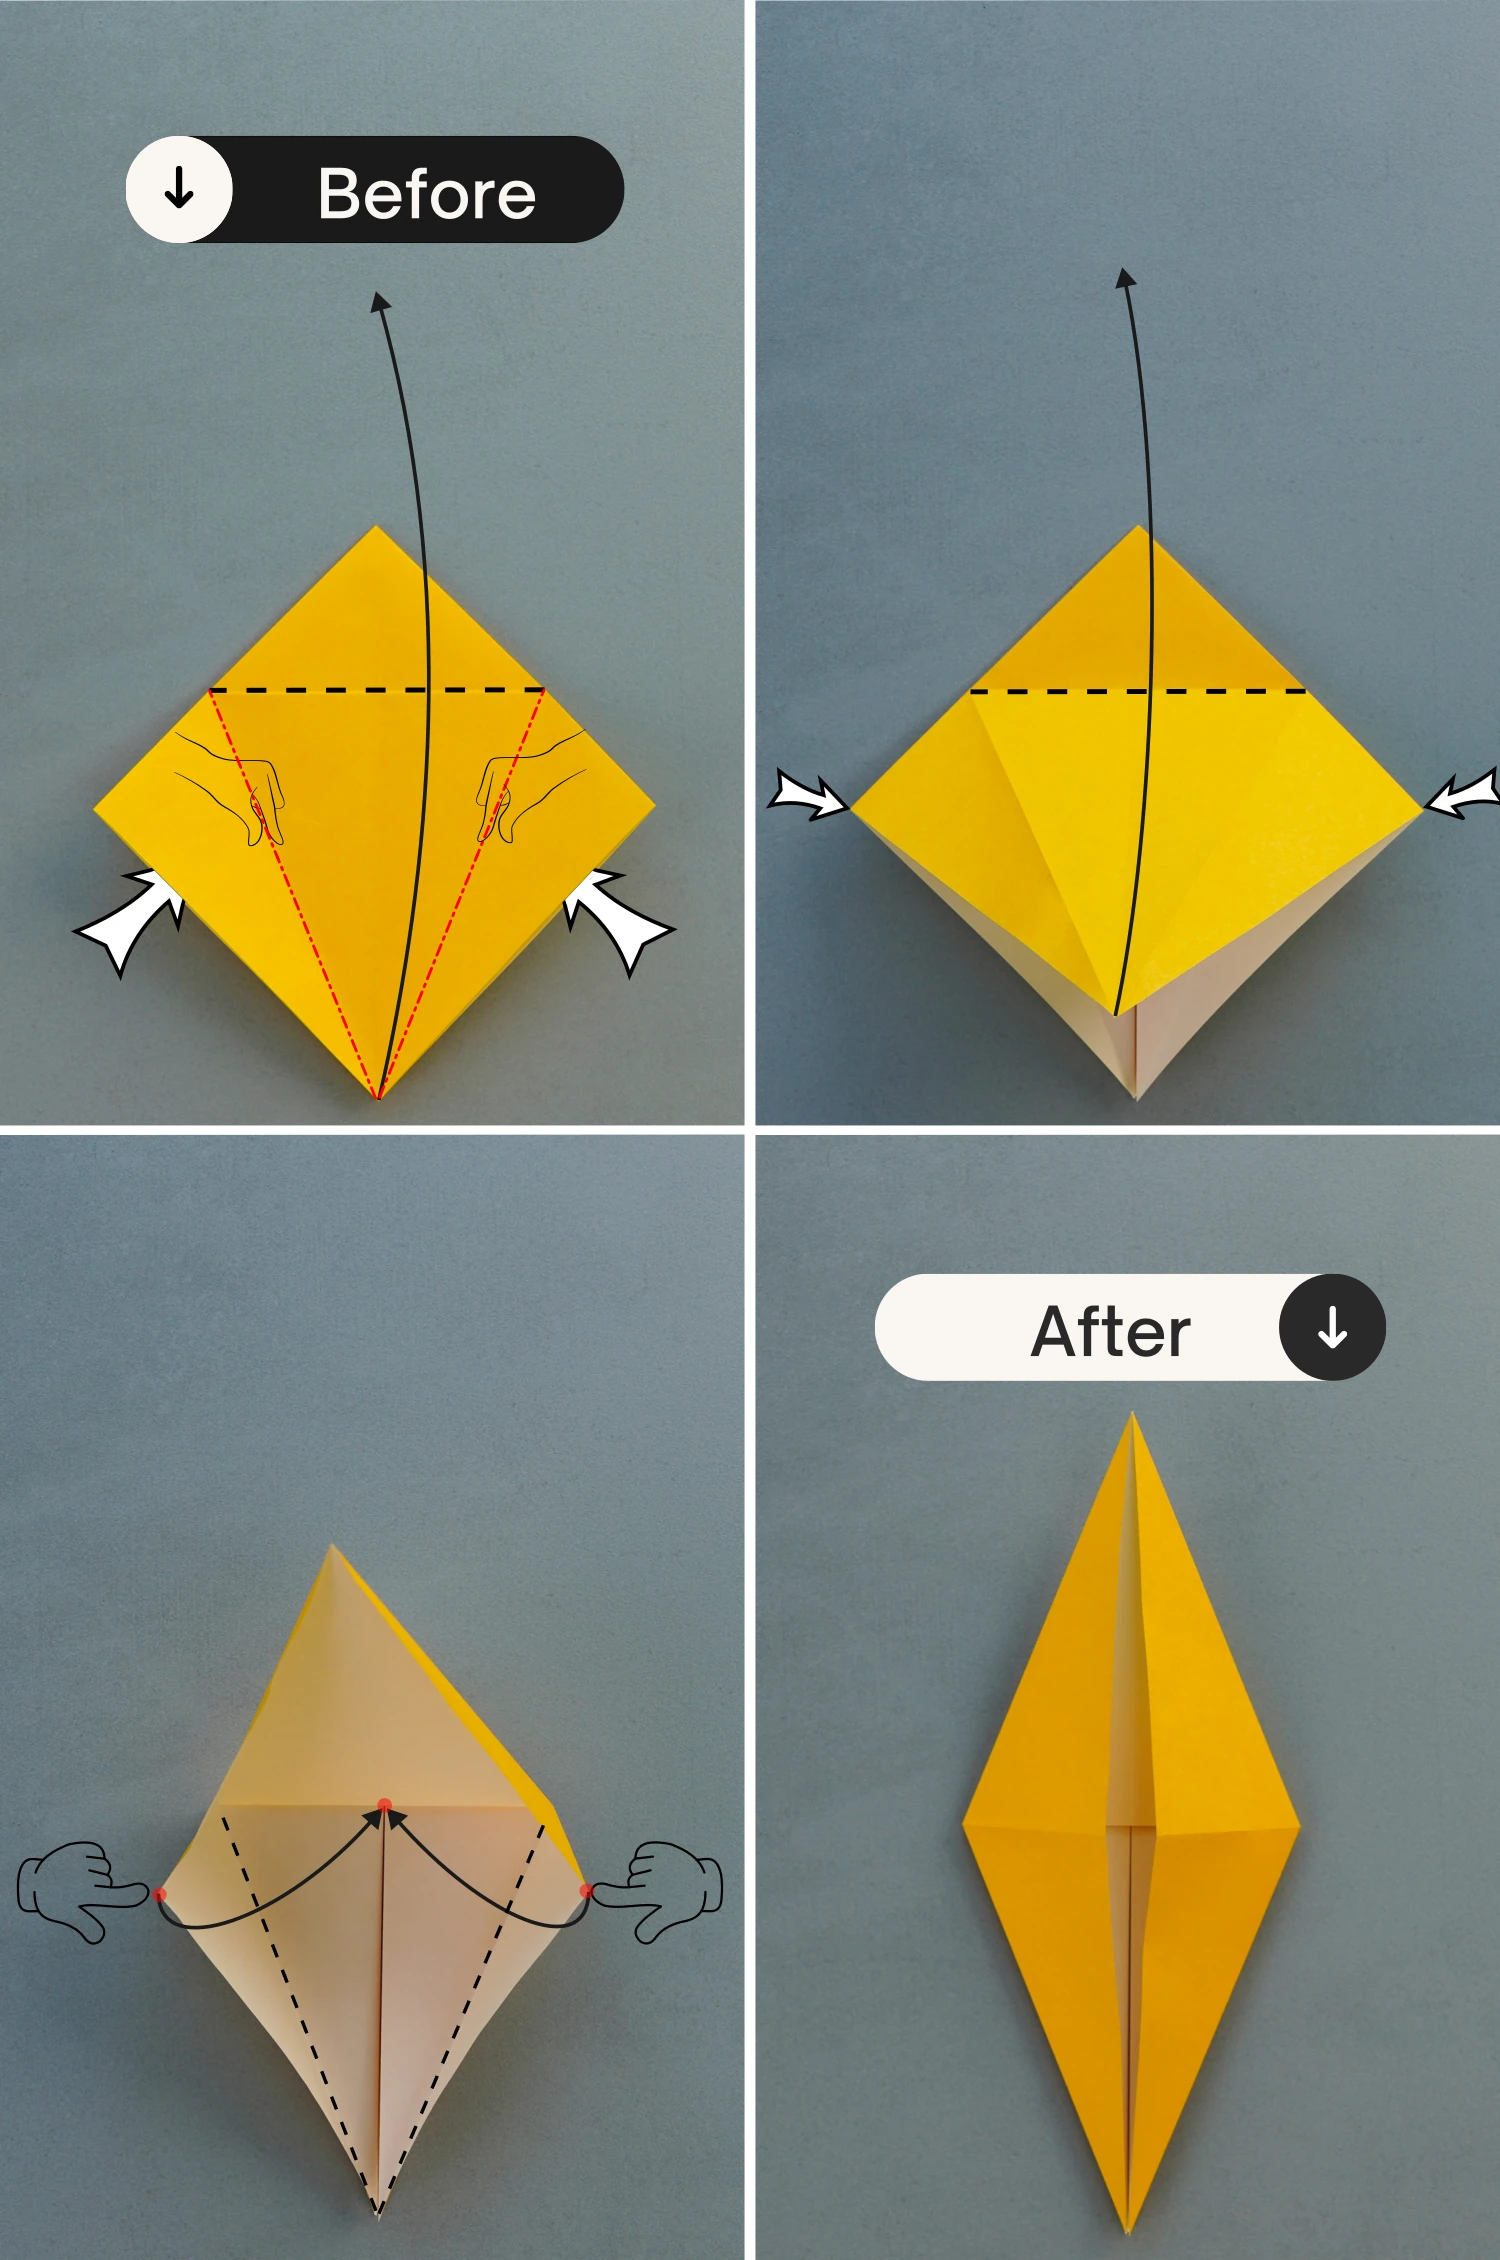
Open the pocket based on the crease created by the previous step. Then lift up the top layer, push the left and right points to the center, and flatten the pocket.

Step 10
Fold the top triangle down.
Step 11
Flip it over.

Step 12
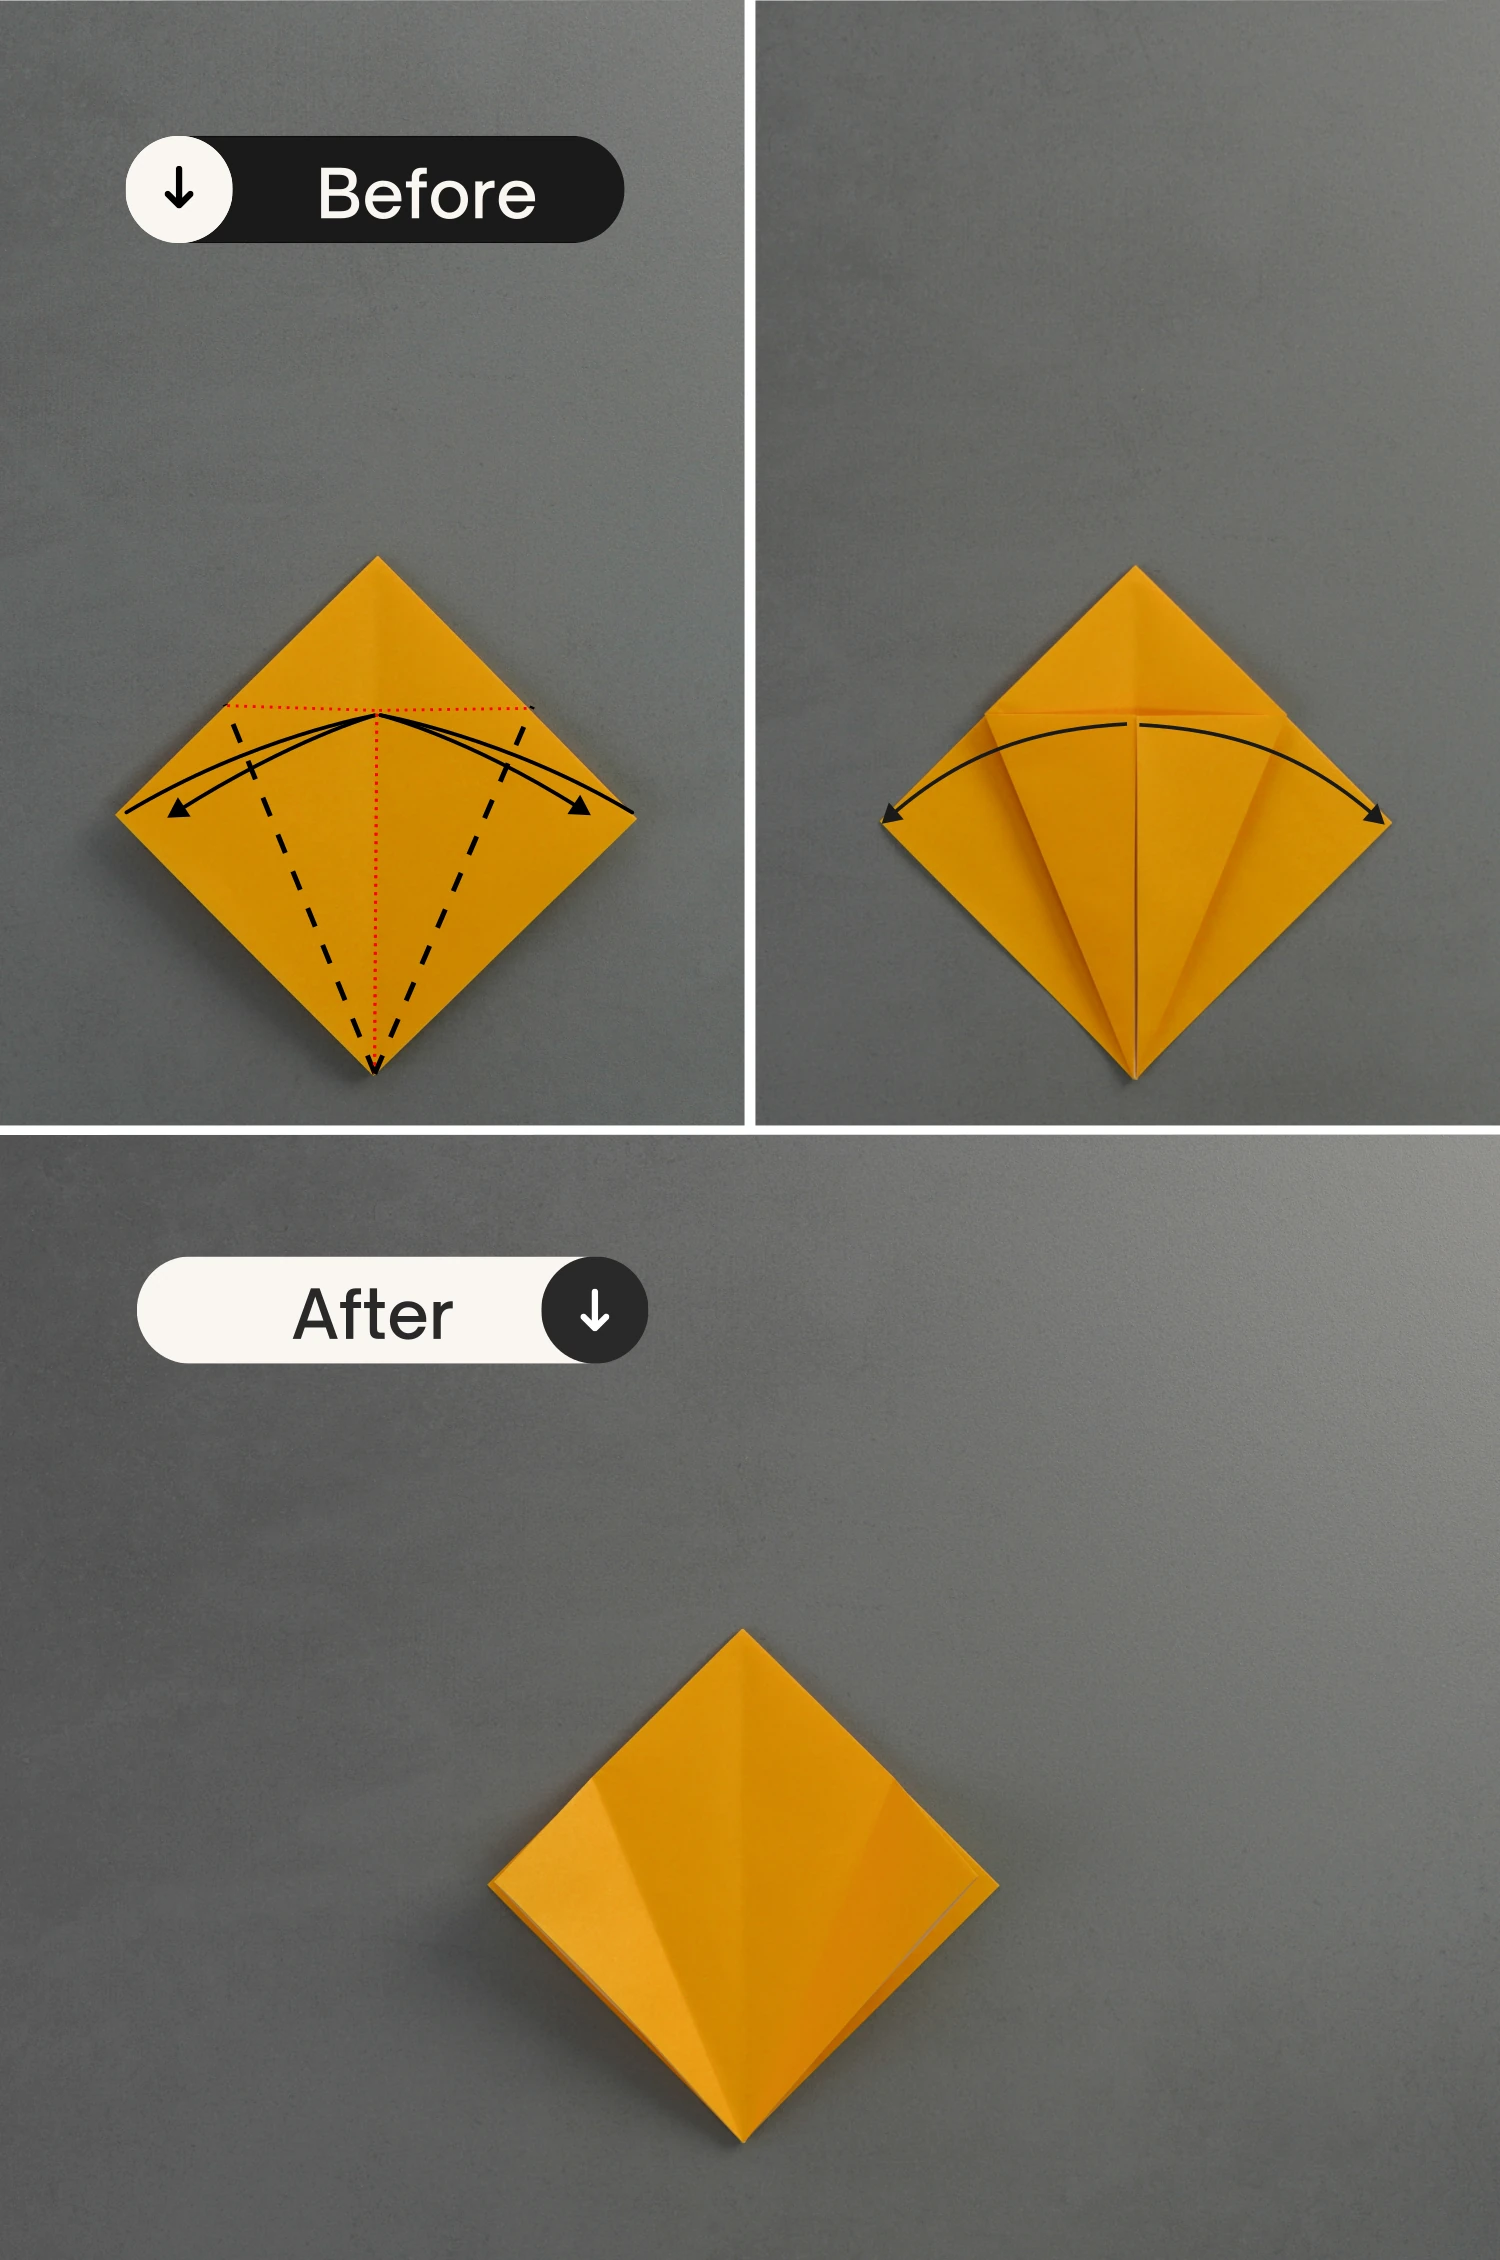
Like before, fold the bottom left and right edges to the center, and unfold.
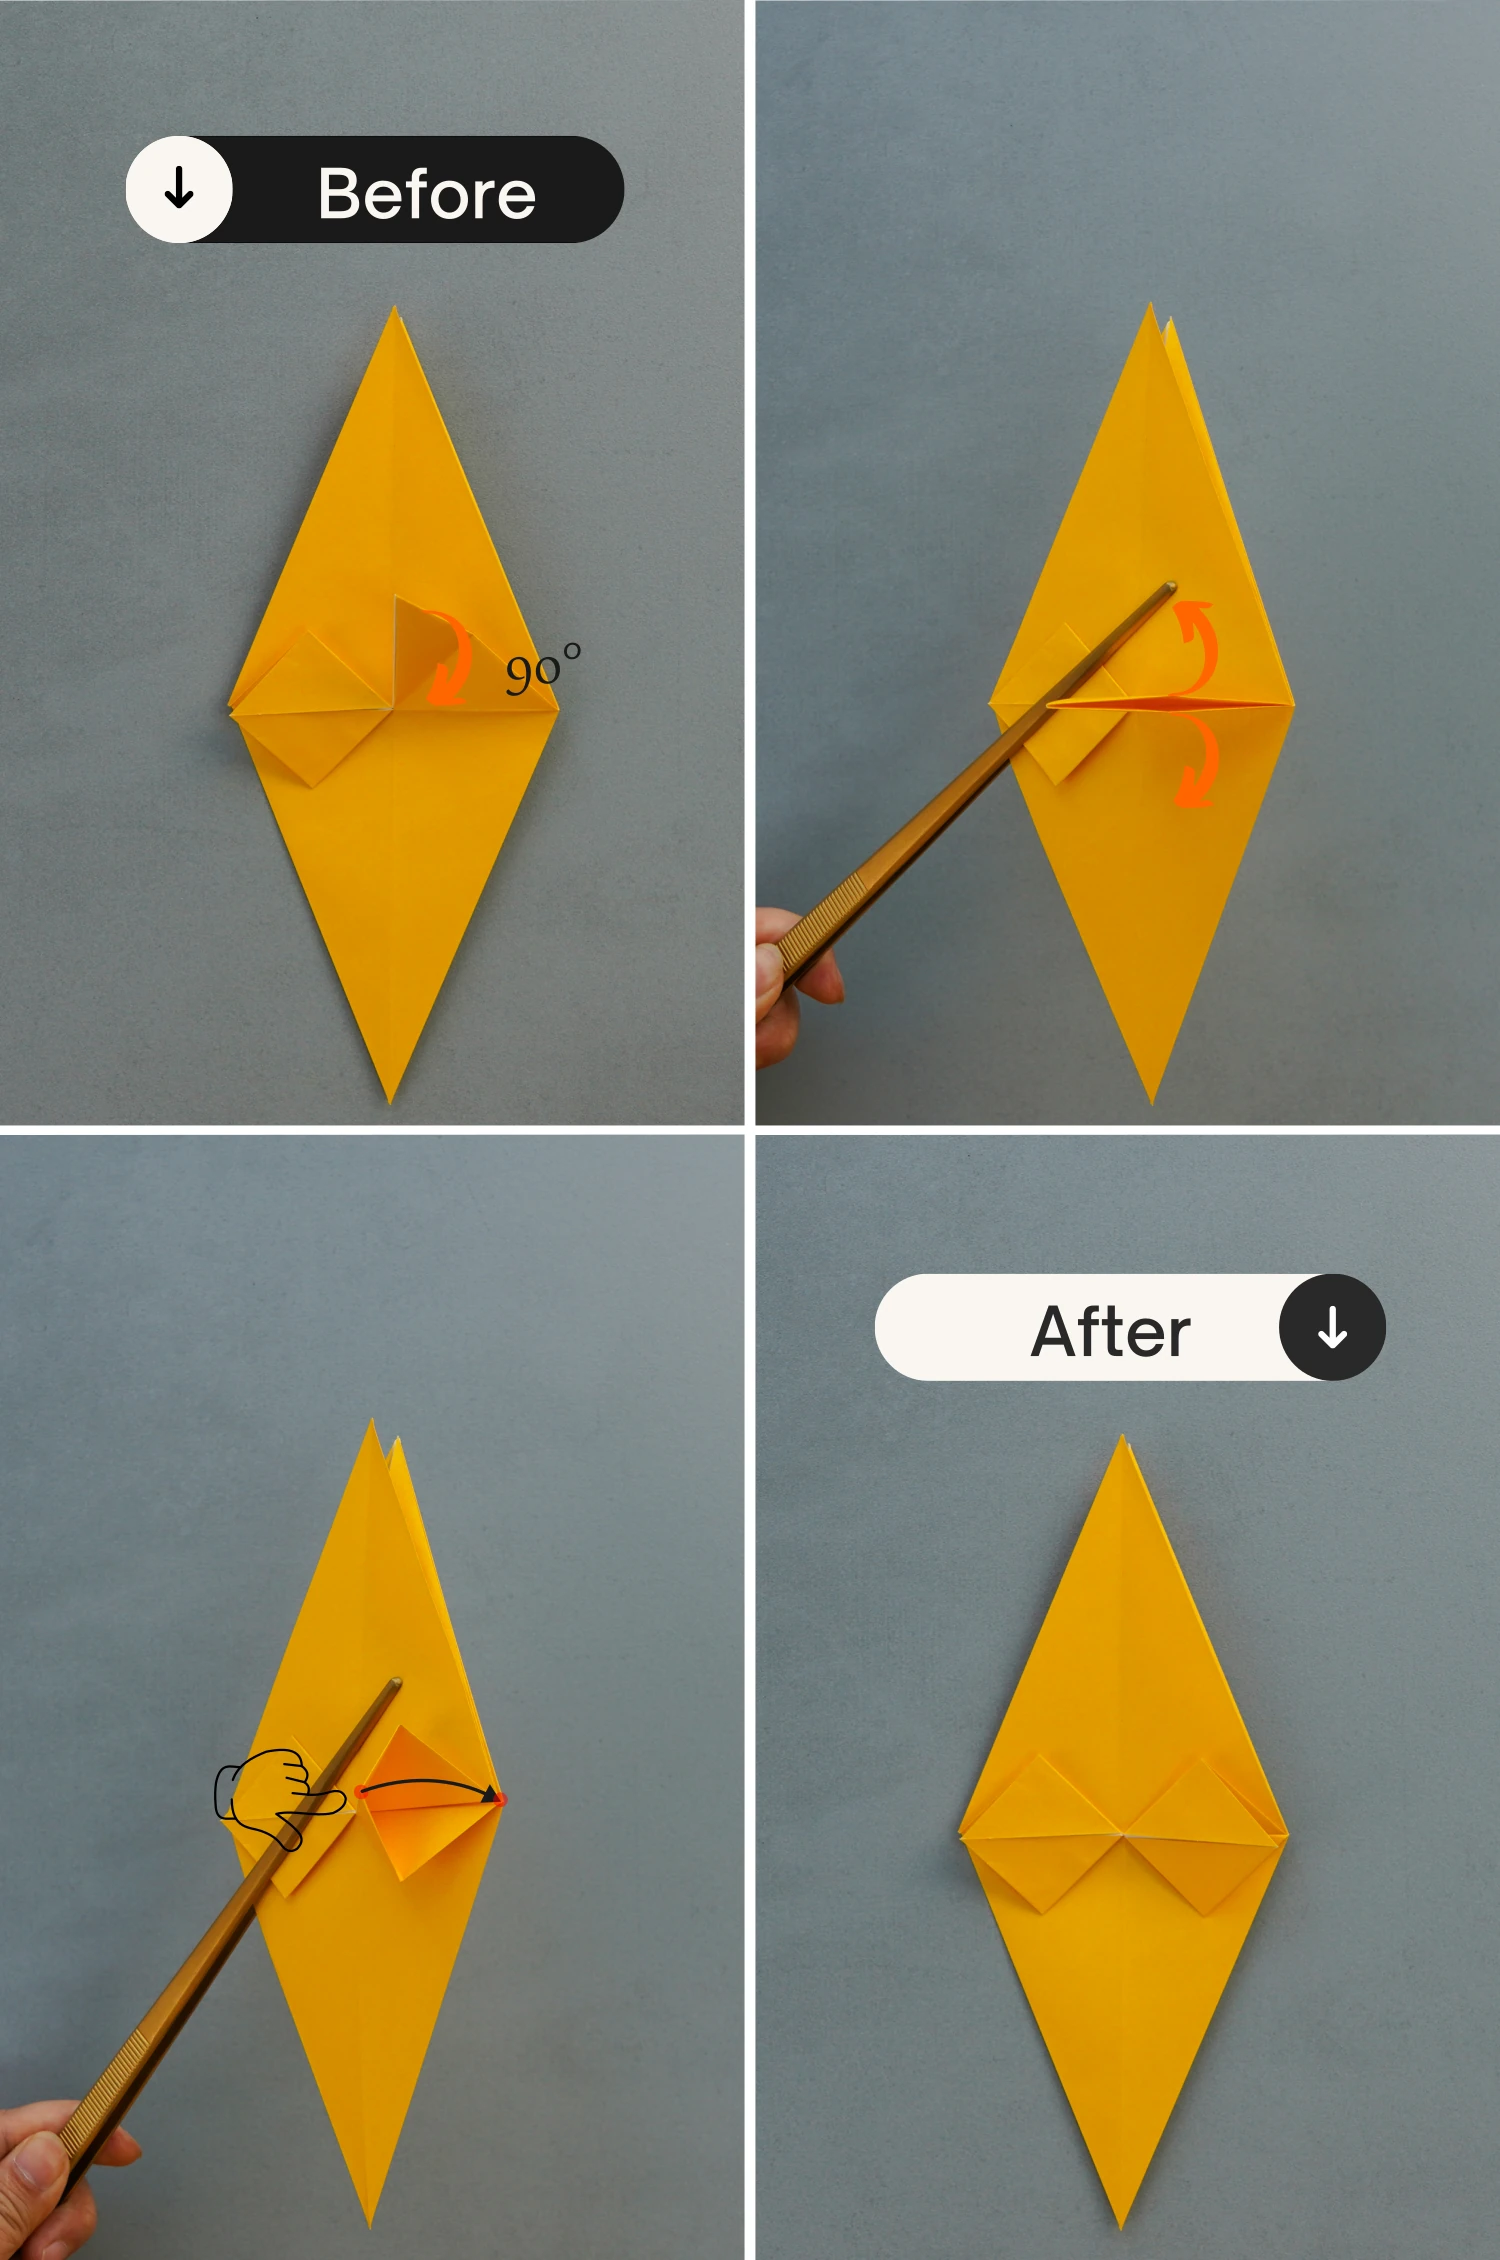
Step 13
As you did in step 9, open the pocket based on the crease created by the previous step. Then lift up the top layer, push the left and right points to the center, and flatten the pocket.
Step 14
Fold the top triangle down.
Step 15
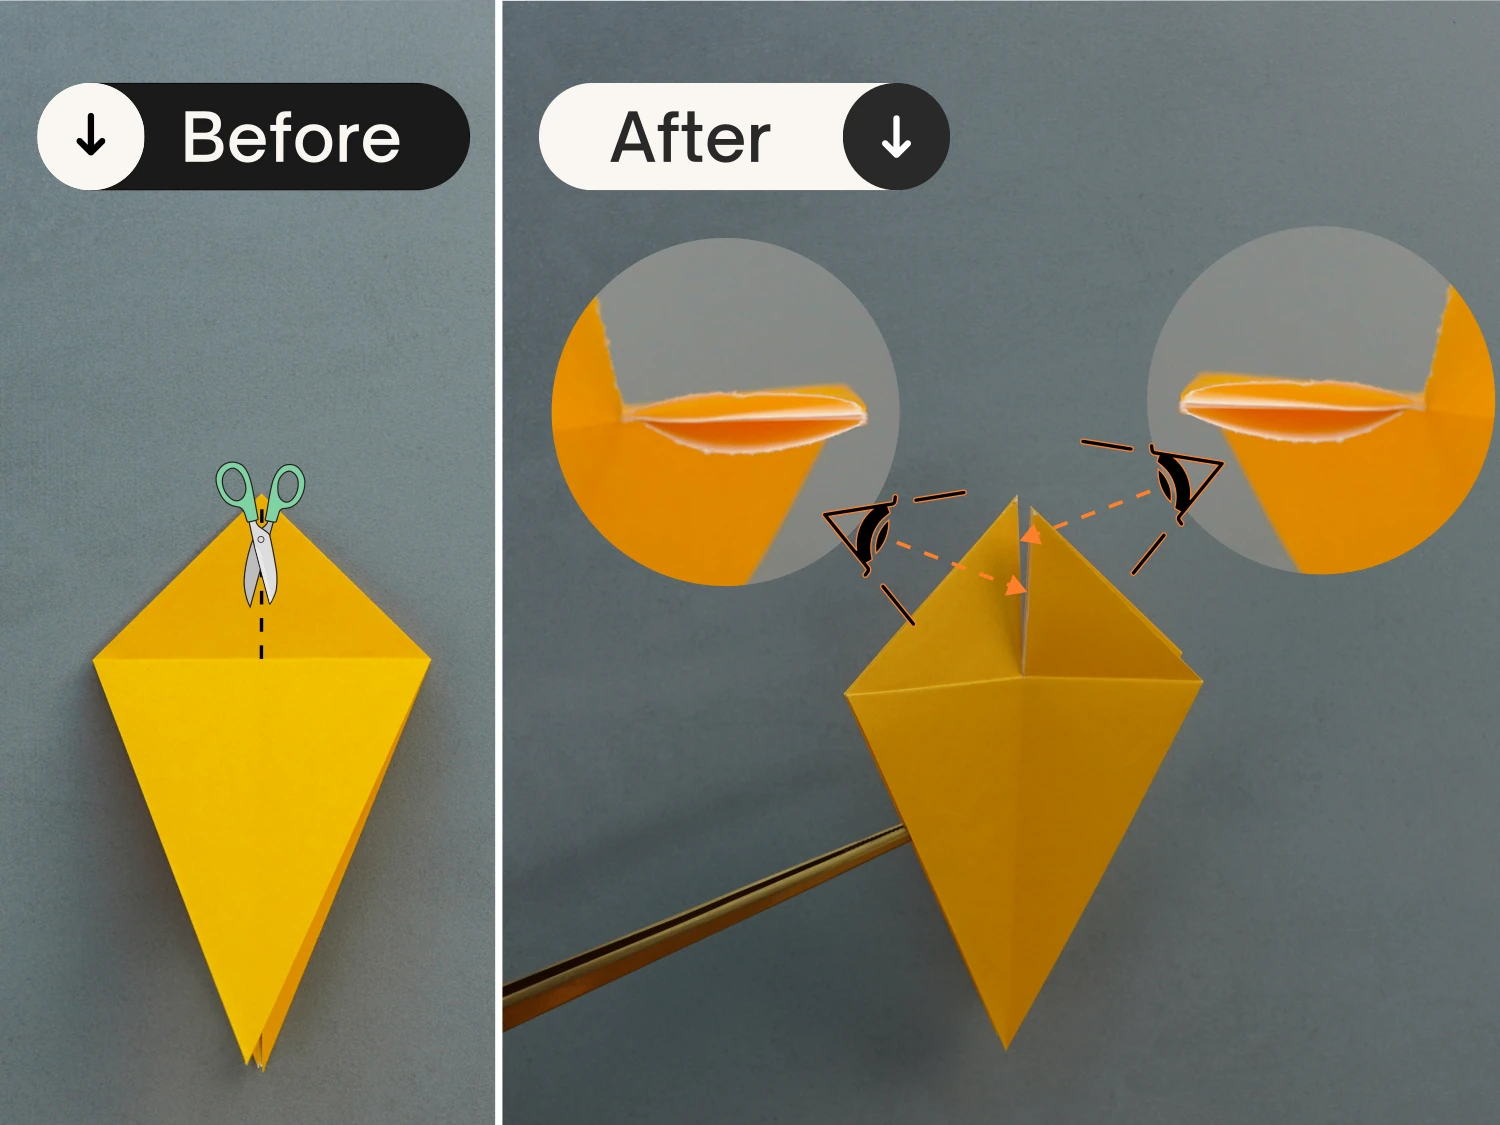
Cut the paper along the top vertical crease.
Step 16
Fold the bottom triangle of the top layer up along the horizontal crease, then flip the paper over.
Step 17
Focus on the two triangles in the center you just cut, fold their top corners down diagonally, crease them well then unfold them.
Step 18
Bring up the left triangle, open it from the left, then squash it to create a square.
Step 19
Similarly, lift the right triangle, open and squash it, creating another square.
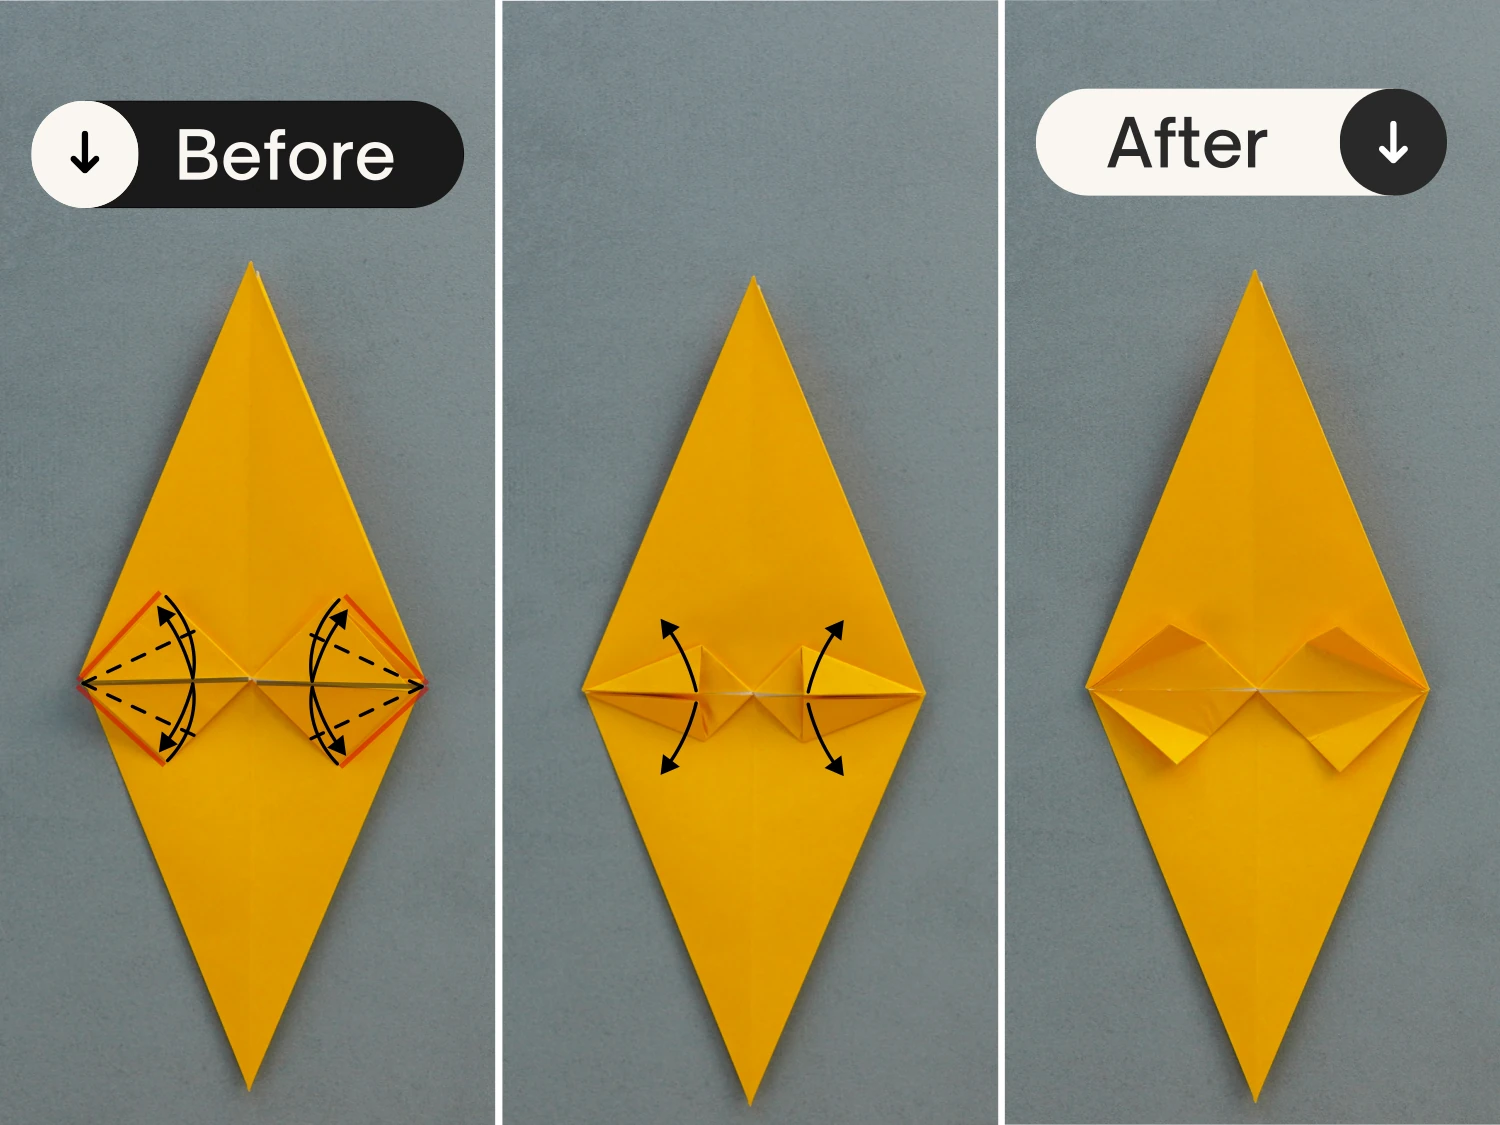
Step 20
Fold the top and bottom left edges of the left square to align with its middle line, crease them very well then unfold.
Repeat this for the right square, fold the top and bottom right edges to align with its middle line, and unfold them.
Step 21
Now focus on the left square, lift its top layer by taking its left point along the black dotted line, then fold it to the right and push the top and bottom points to the center. Next, flatten it along the creases you made in the previous step.
Finally, you should fold the right triangle back to the left, as the last two pictures show.
Step 22
In the same way, take the right corner of the top layer of the right square, fold it to the left along the dotted line, and push the top and bottom points to the center. Next, flatten it and finally fold the left triangle back to the right.

Step 23
Flip the paper over, and fold the bottom left and right edges to align with the vertical line, then flip the paper over again.
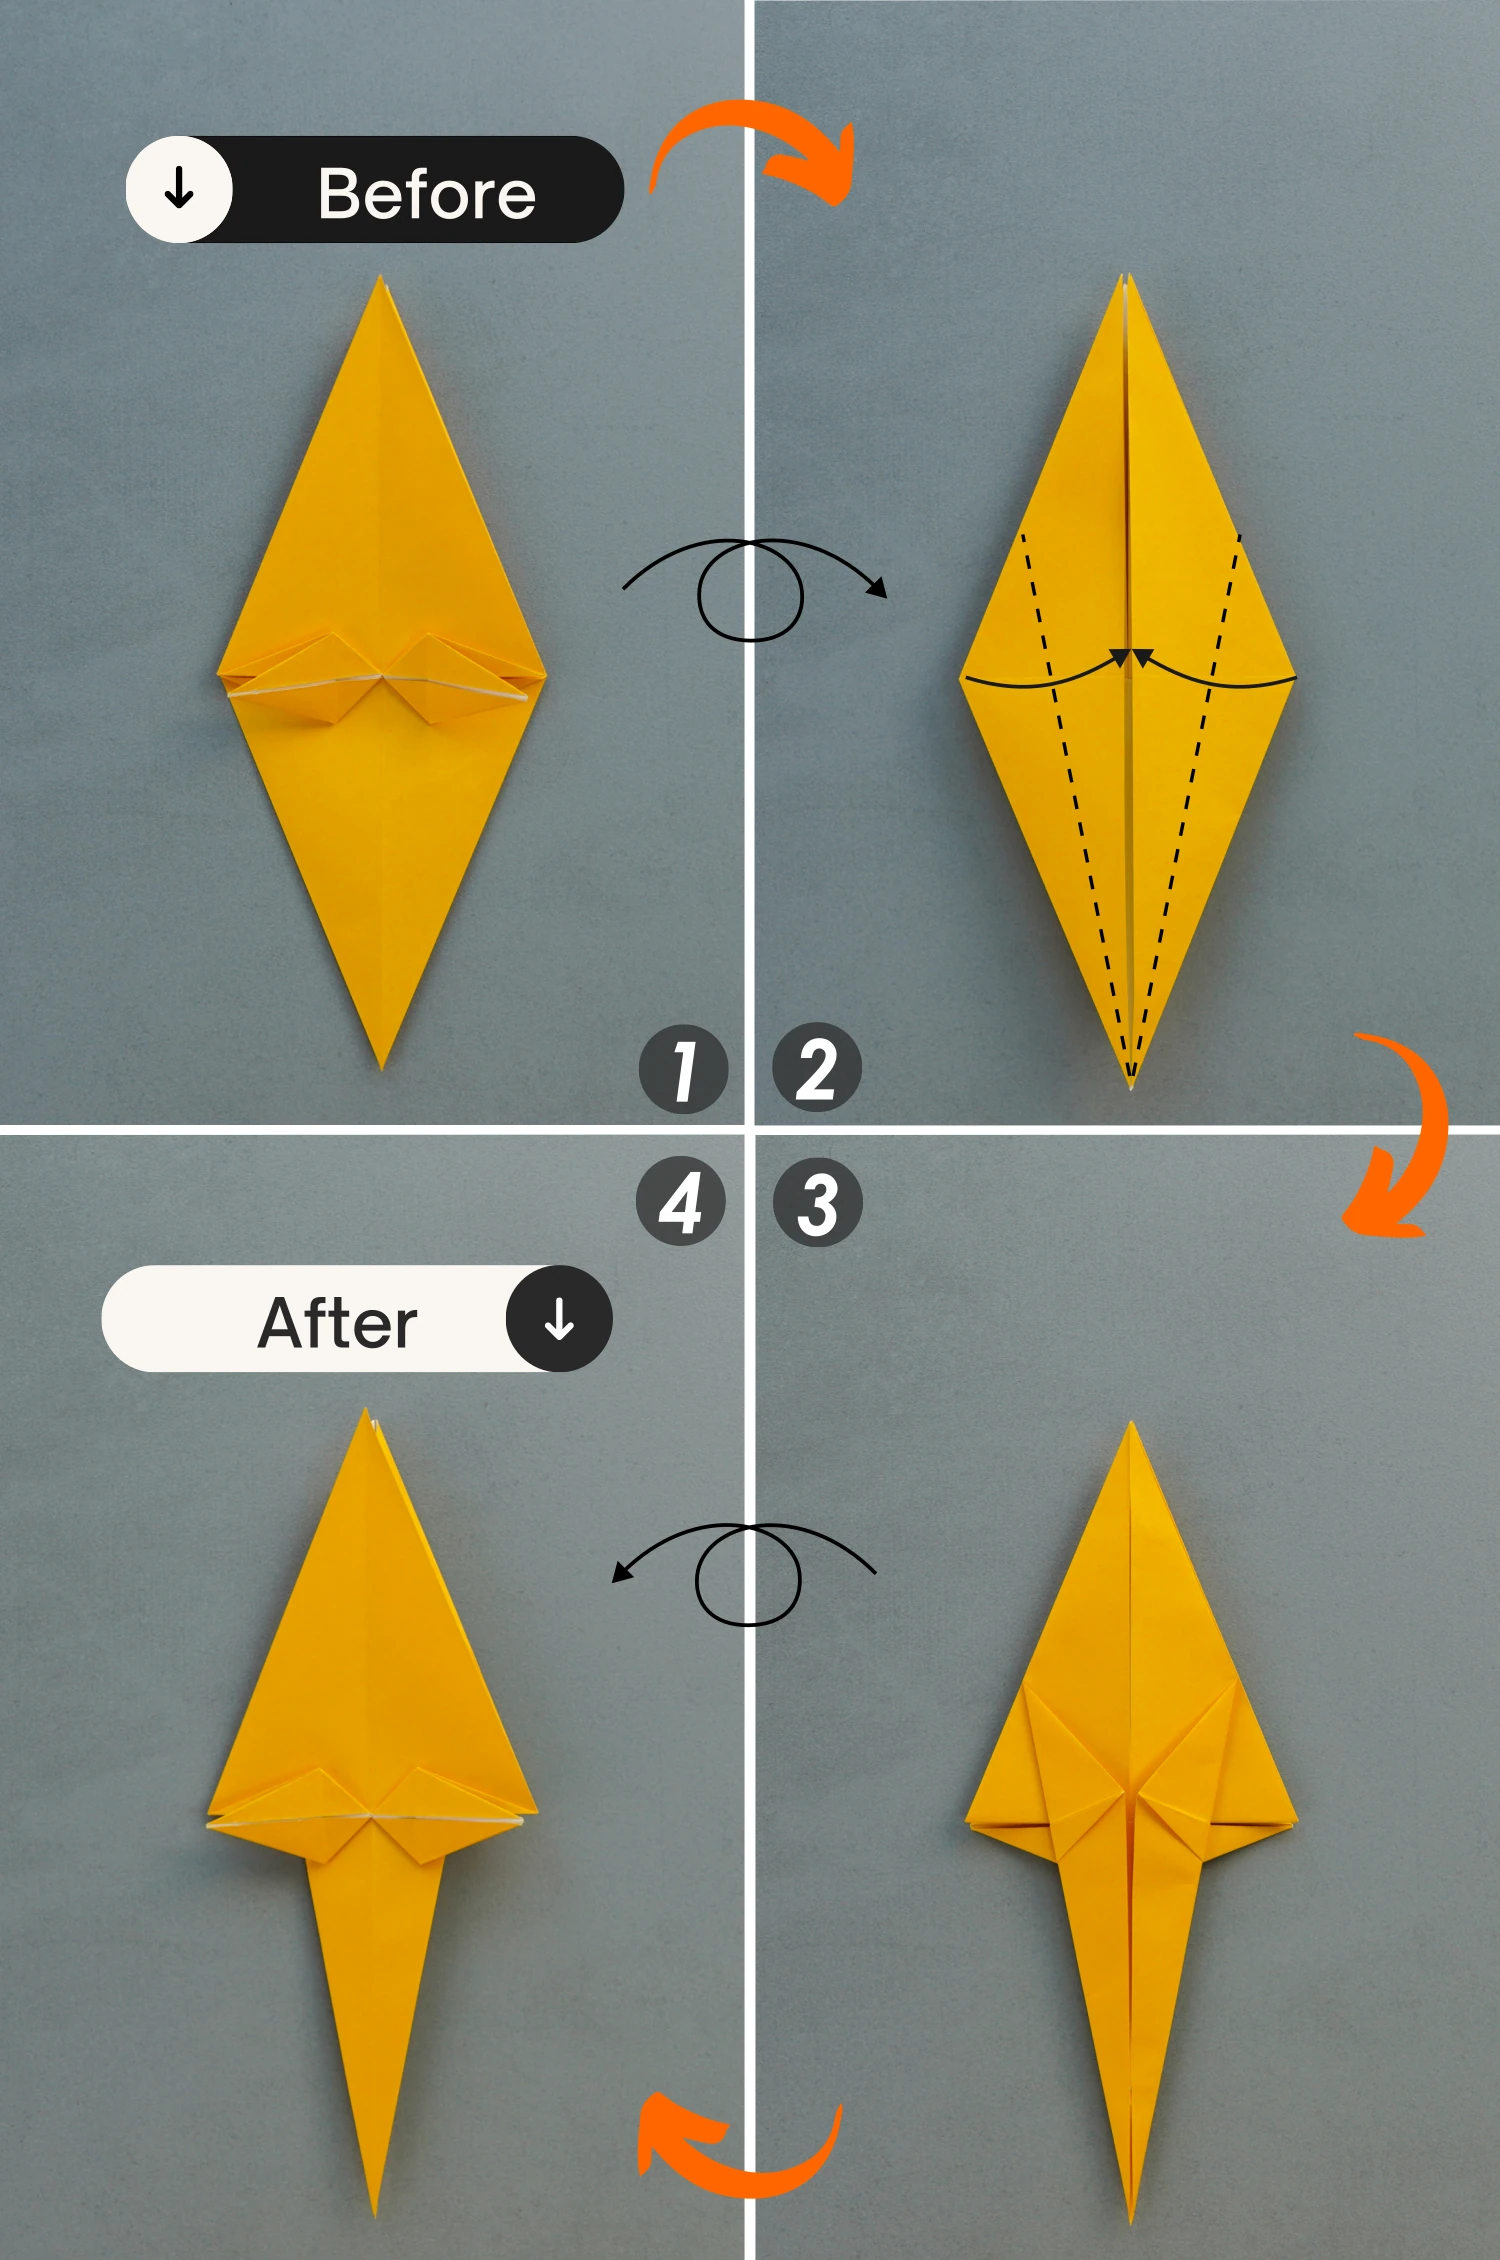
Step 24
Fold the two small triangles down diagonally.
Step 25
Fold the left and right corners of the top layer to the center, making it overlap with the bottom layer. [When folding the top layer, avoid folding the corners underneath]
Step 26
Fold the paper in half vertically from right to left.
Step 27
Fold the upper top layer down along the dotted line, then unfold it.
Step 28
Fold the upper layer down to the right, aligning the top left edge with the top right edge of the lower layer, crease it well then unfold.

Step 29
Lift the upper top layer along the existing crease, open this layer, then squash it based on the creases you made in the previous step. Next, fold the top and bottom left corners of this folded part slightly backward, as the last two pictures show.
Step 30
Rotate 180 degrees horizontally.
Step 31
Fold the top layer down along the dotted line, and unfold it.
Step 32
Then fold this layer down to the left, making its top right edge align with the top left edge of the lower layer, crease well then unfold.
Step 33
Lift the top layer and open it, then squash it along the creases you just made, and fold the top and bottom right corners of the folded part slightly backward, just as you did in step 29.

Step 34
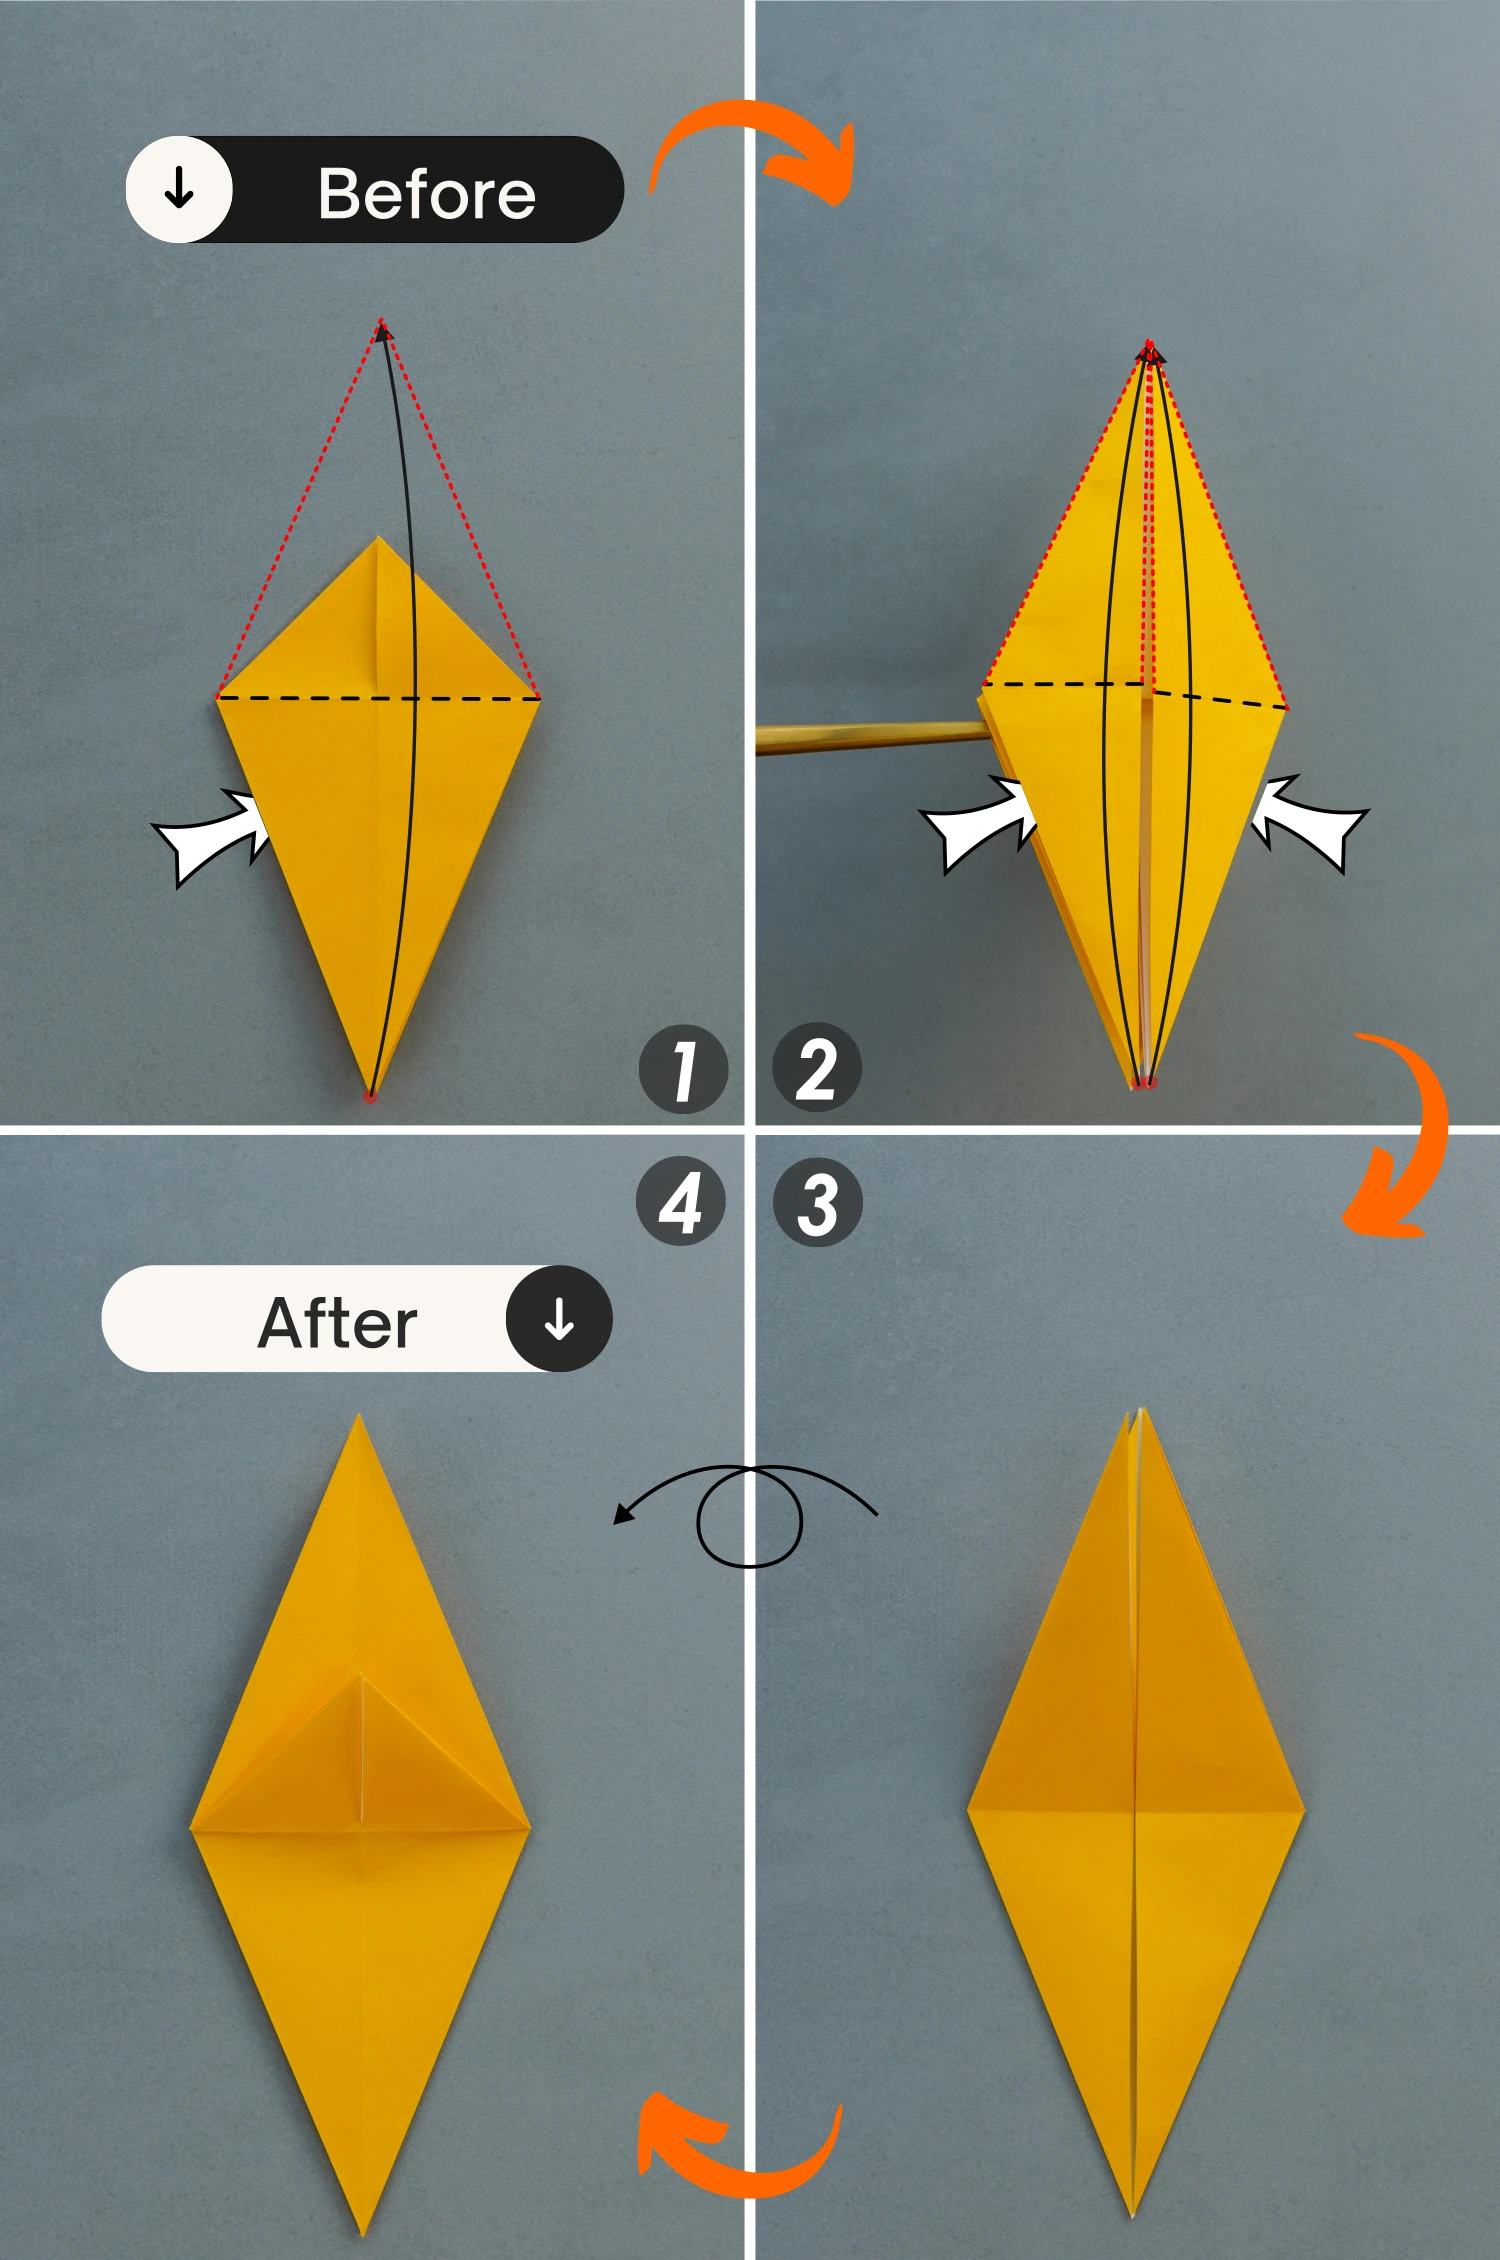
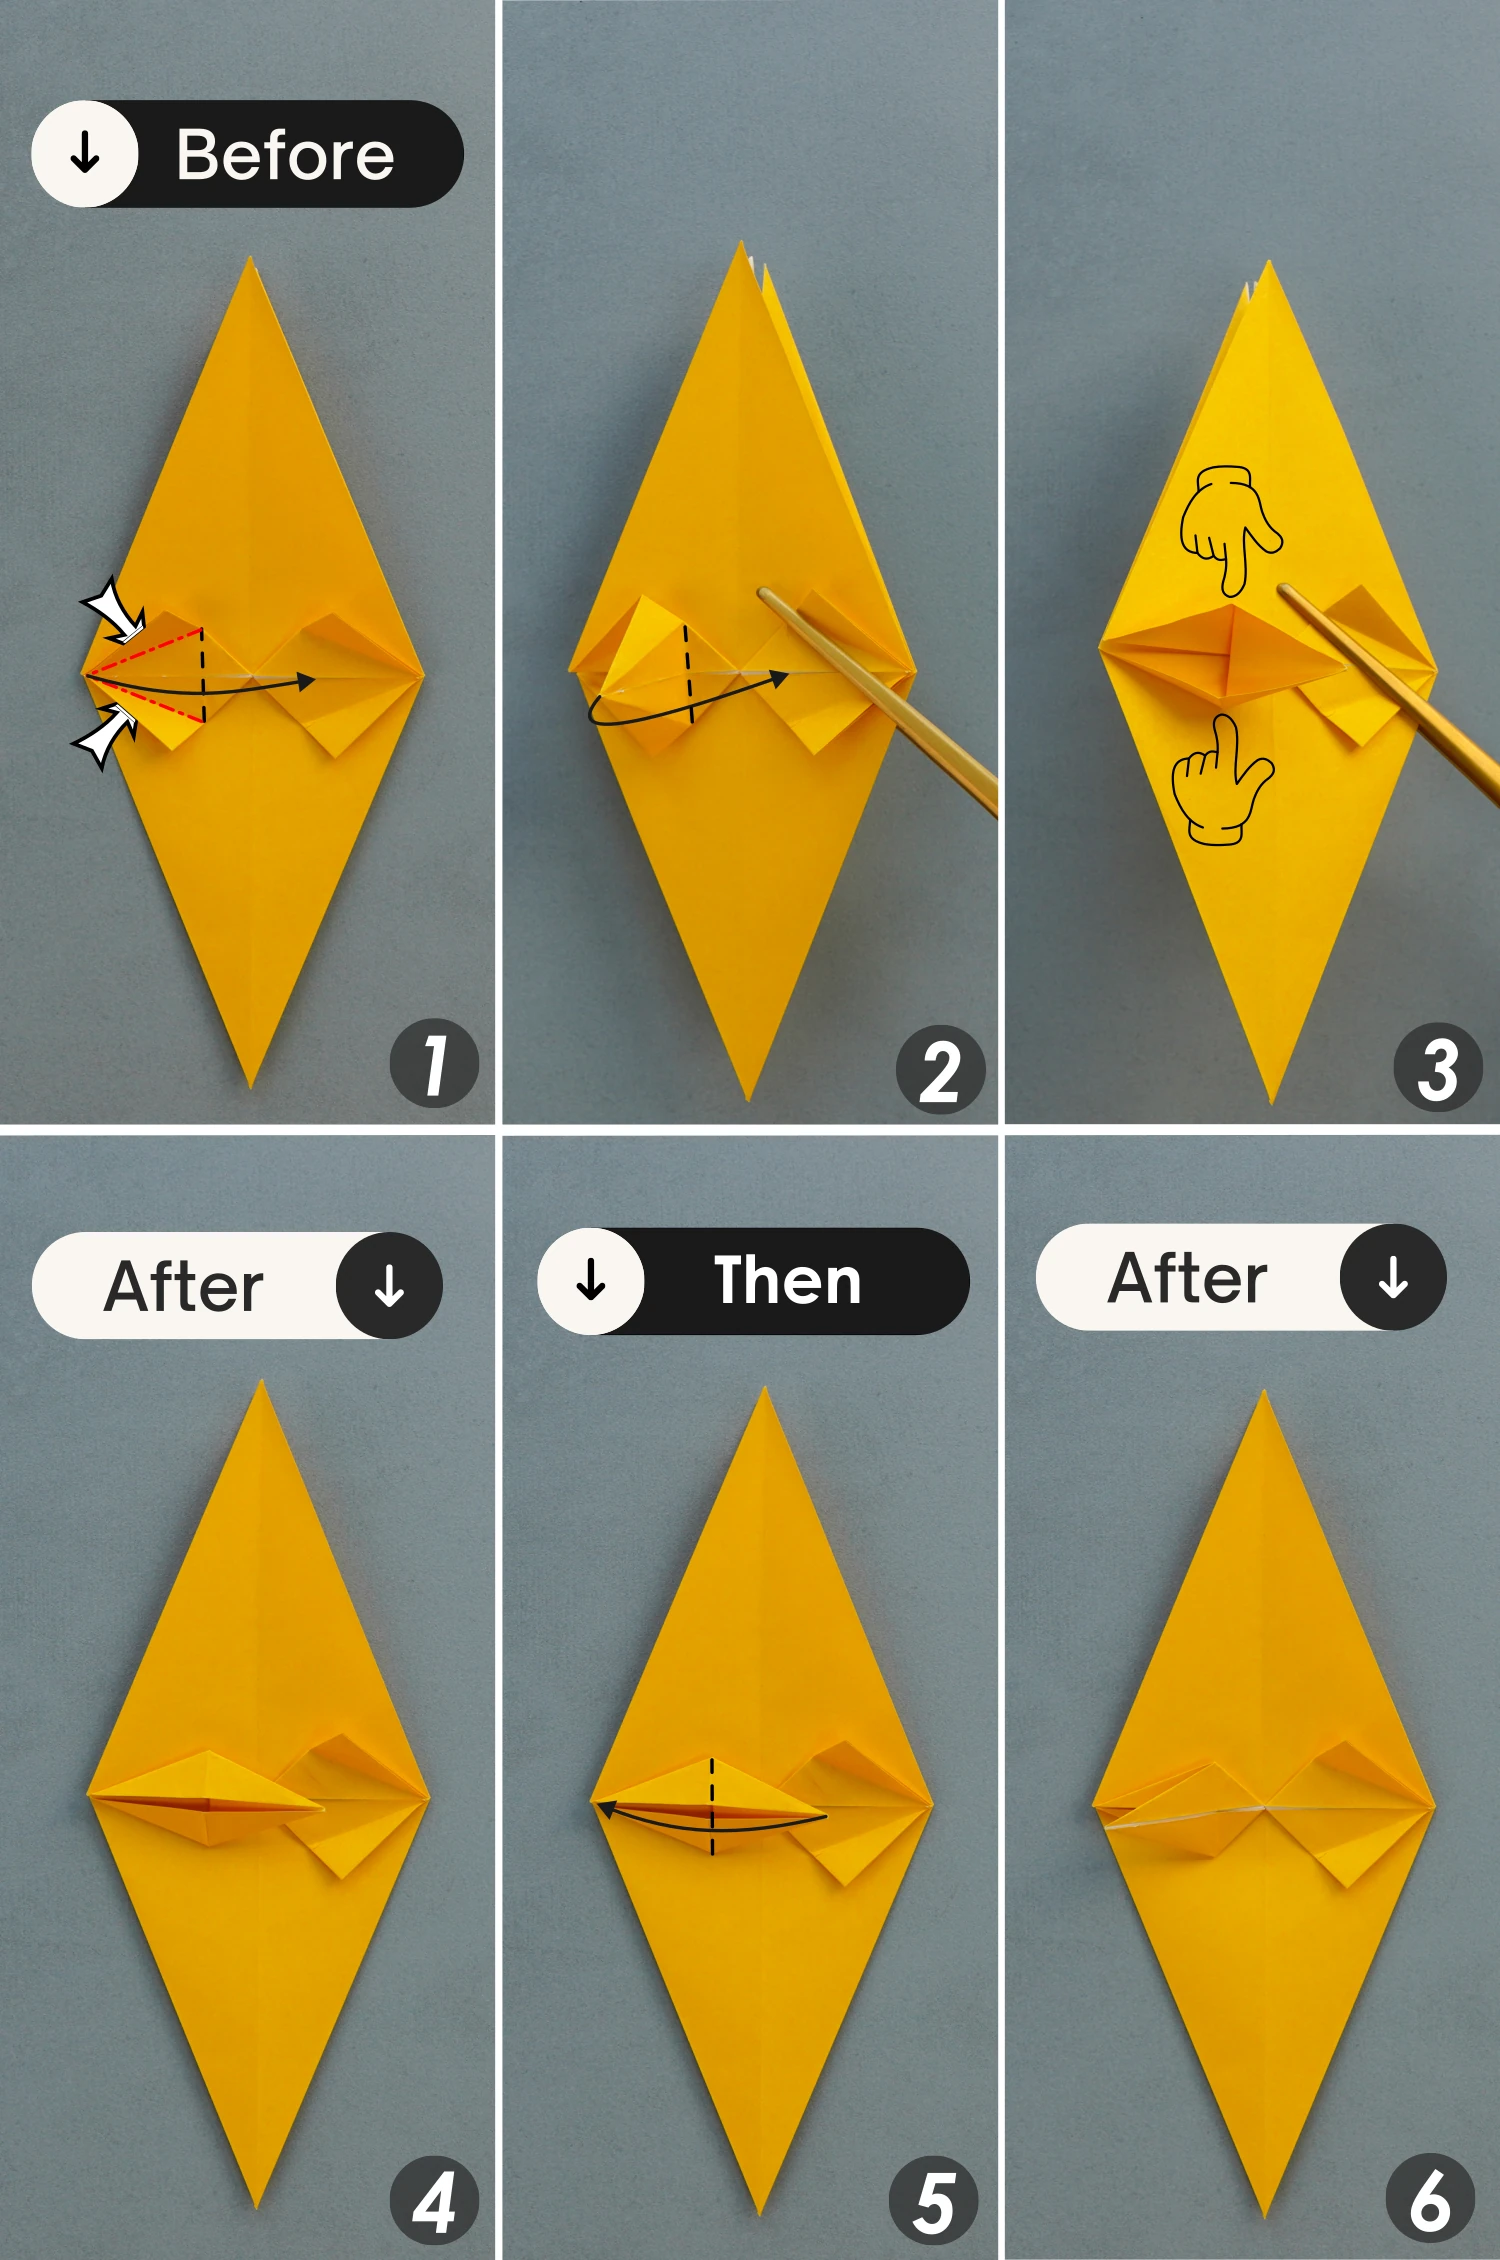
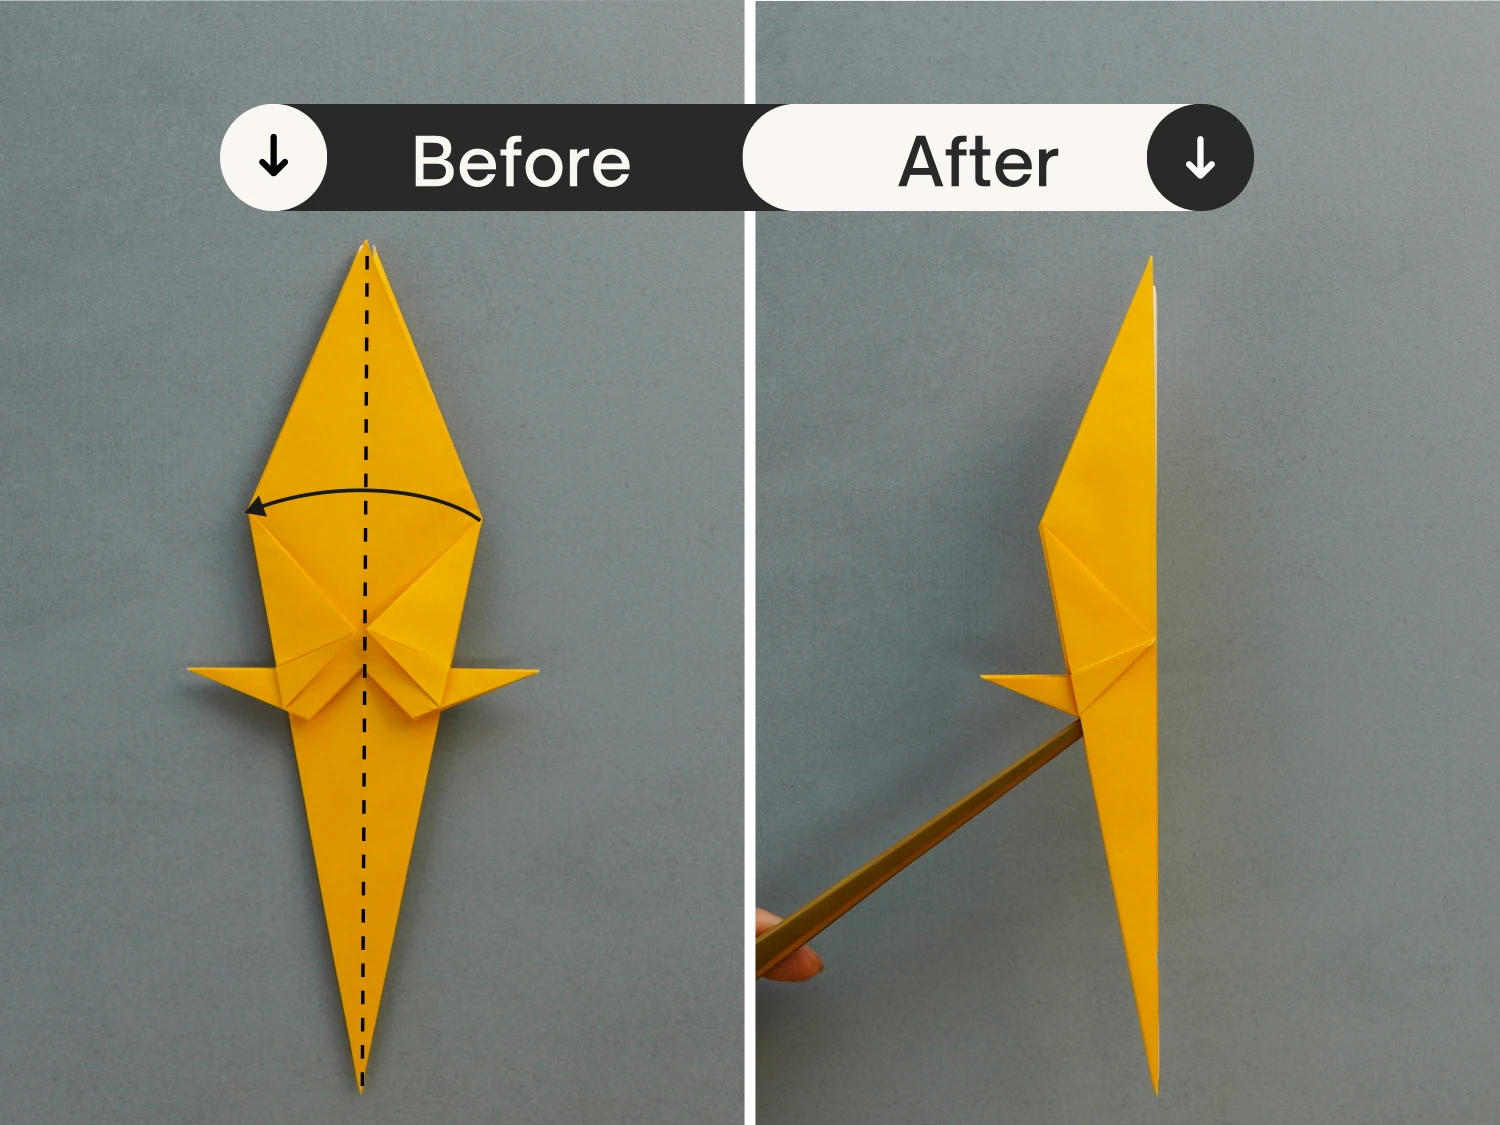
Fold the top point down, and unfold it.
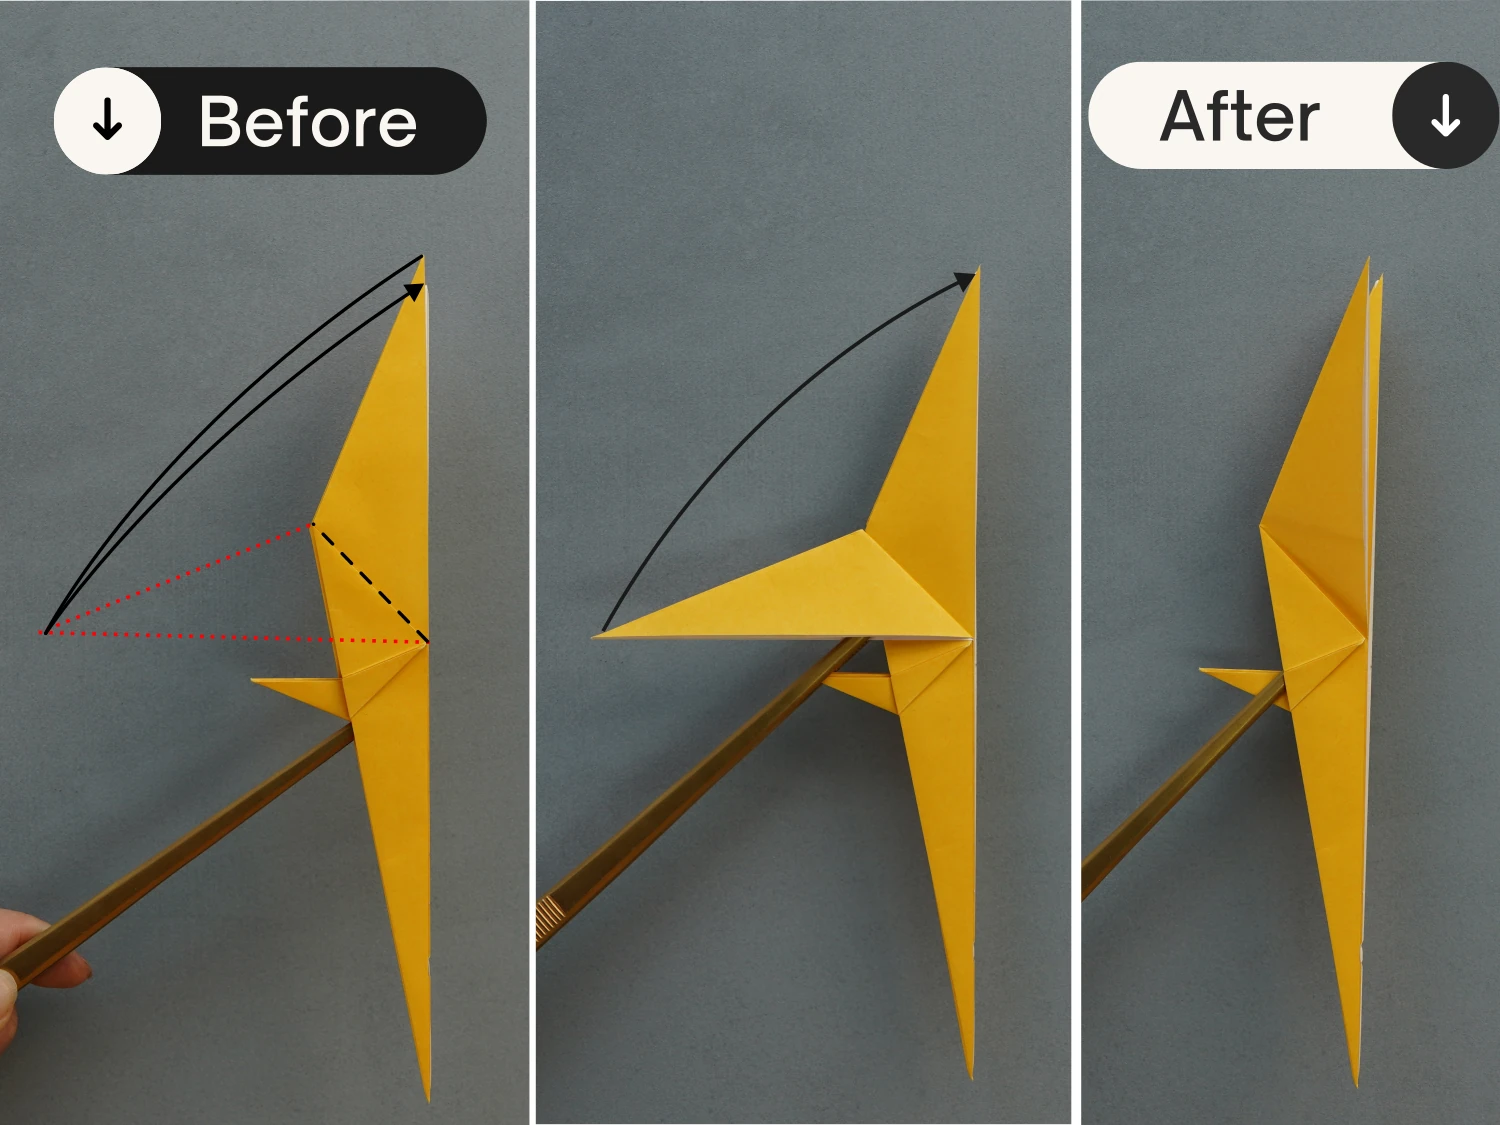
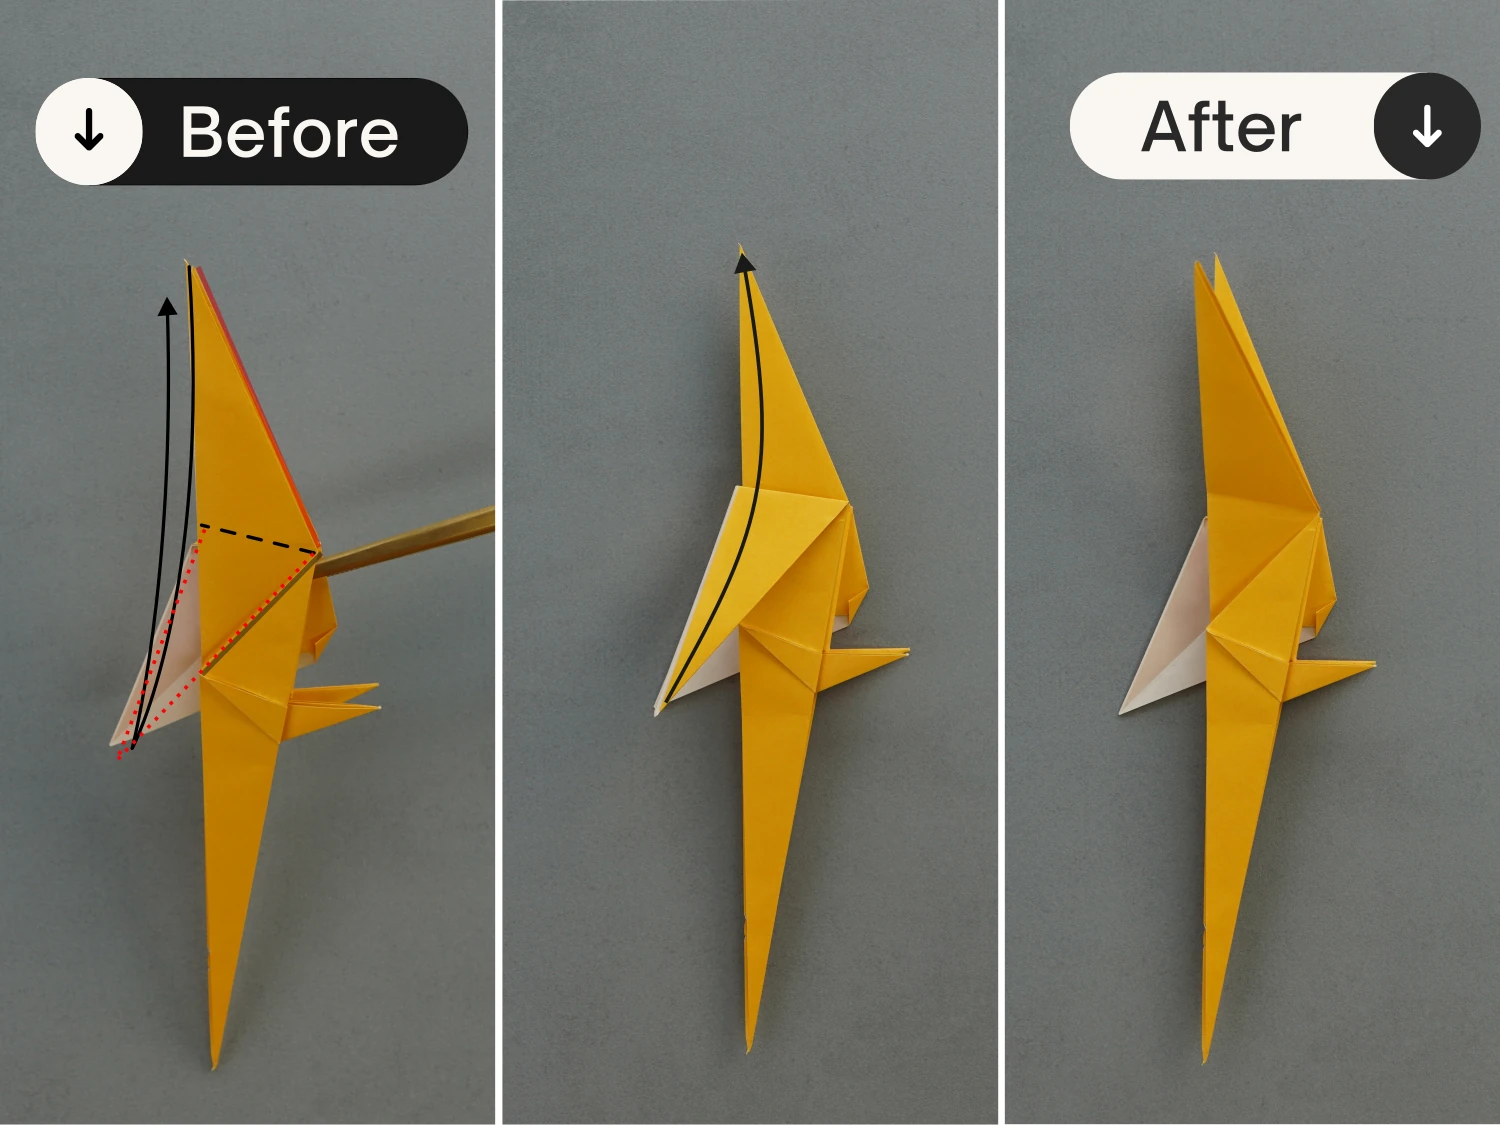
Step 35
Switch to the left side view, and fold the right point to the left diagonally along the dotted line, making it meet the intersection point of the middle line and the creases you made in the previous step.
Then fold it back to the right along the dotted line as the third picture shows.
Finally, press the right tip down, and close the corner along the existing creases, as we can see in the last three pictures. Now you created the parrot’s head.
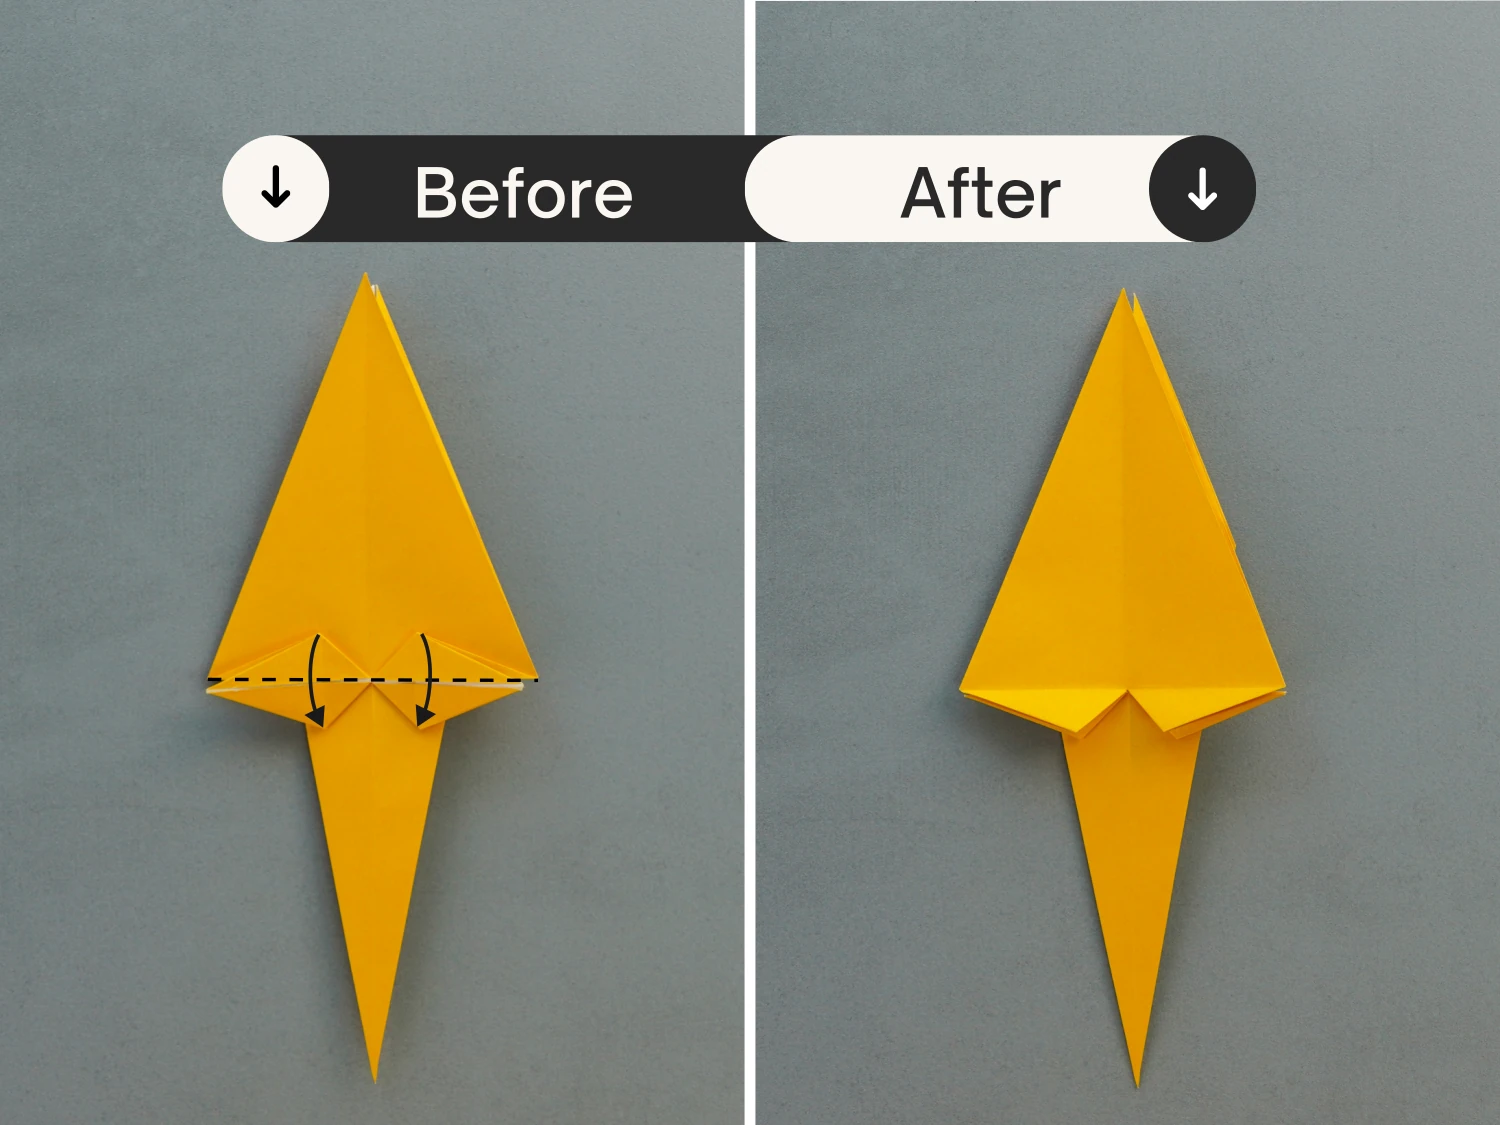
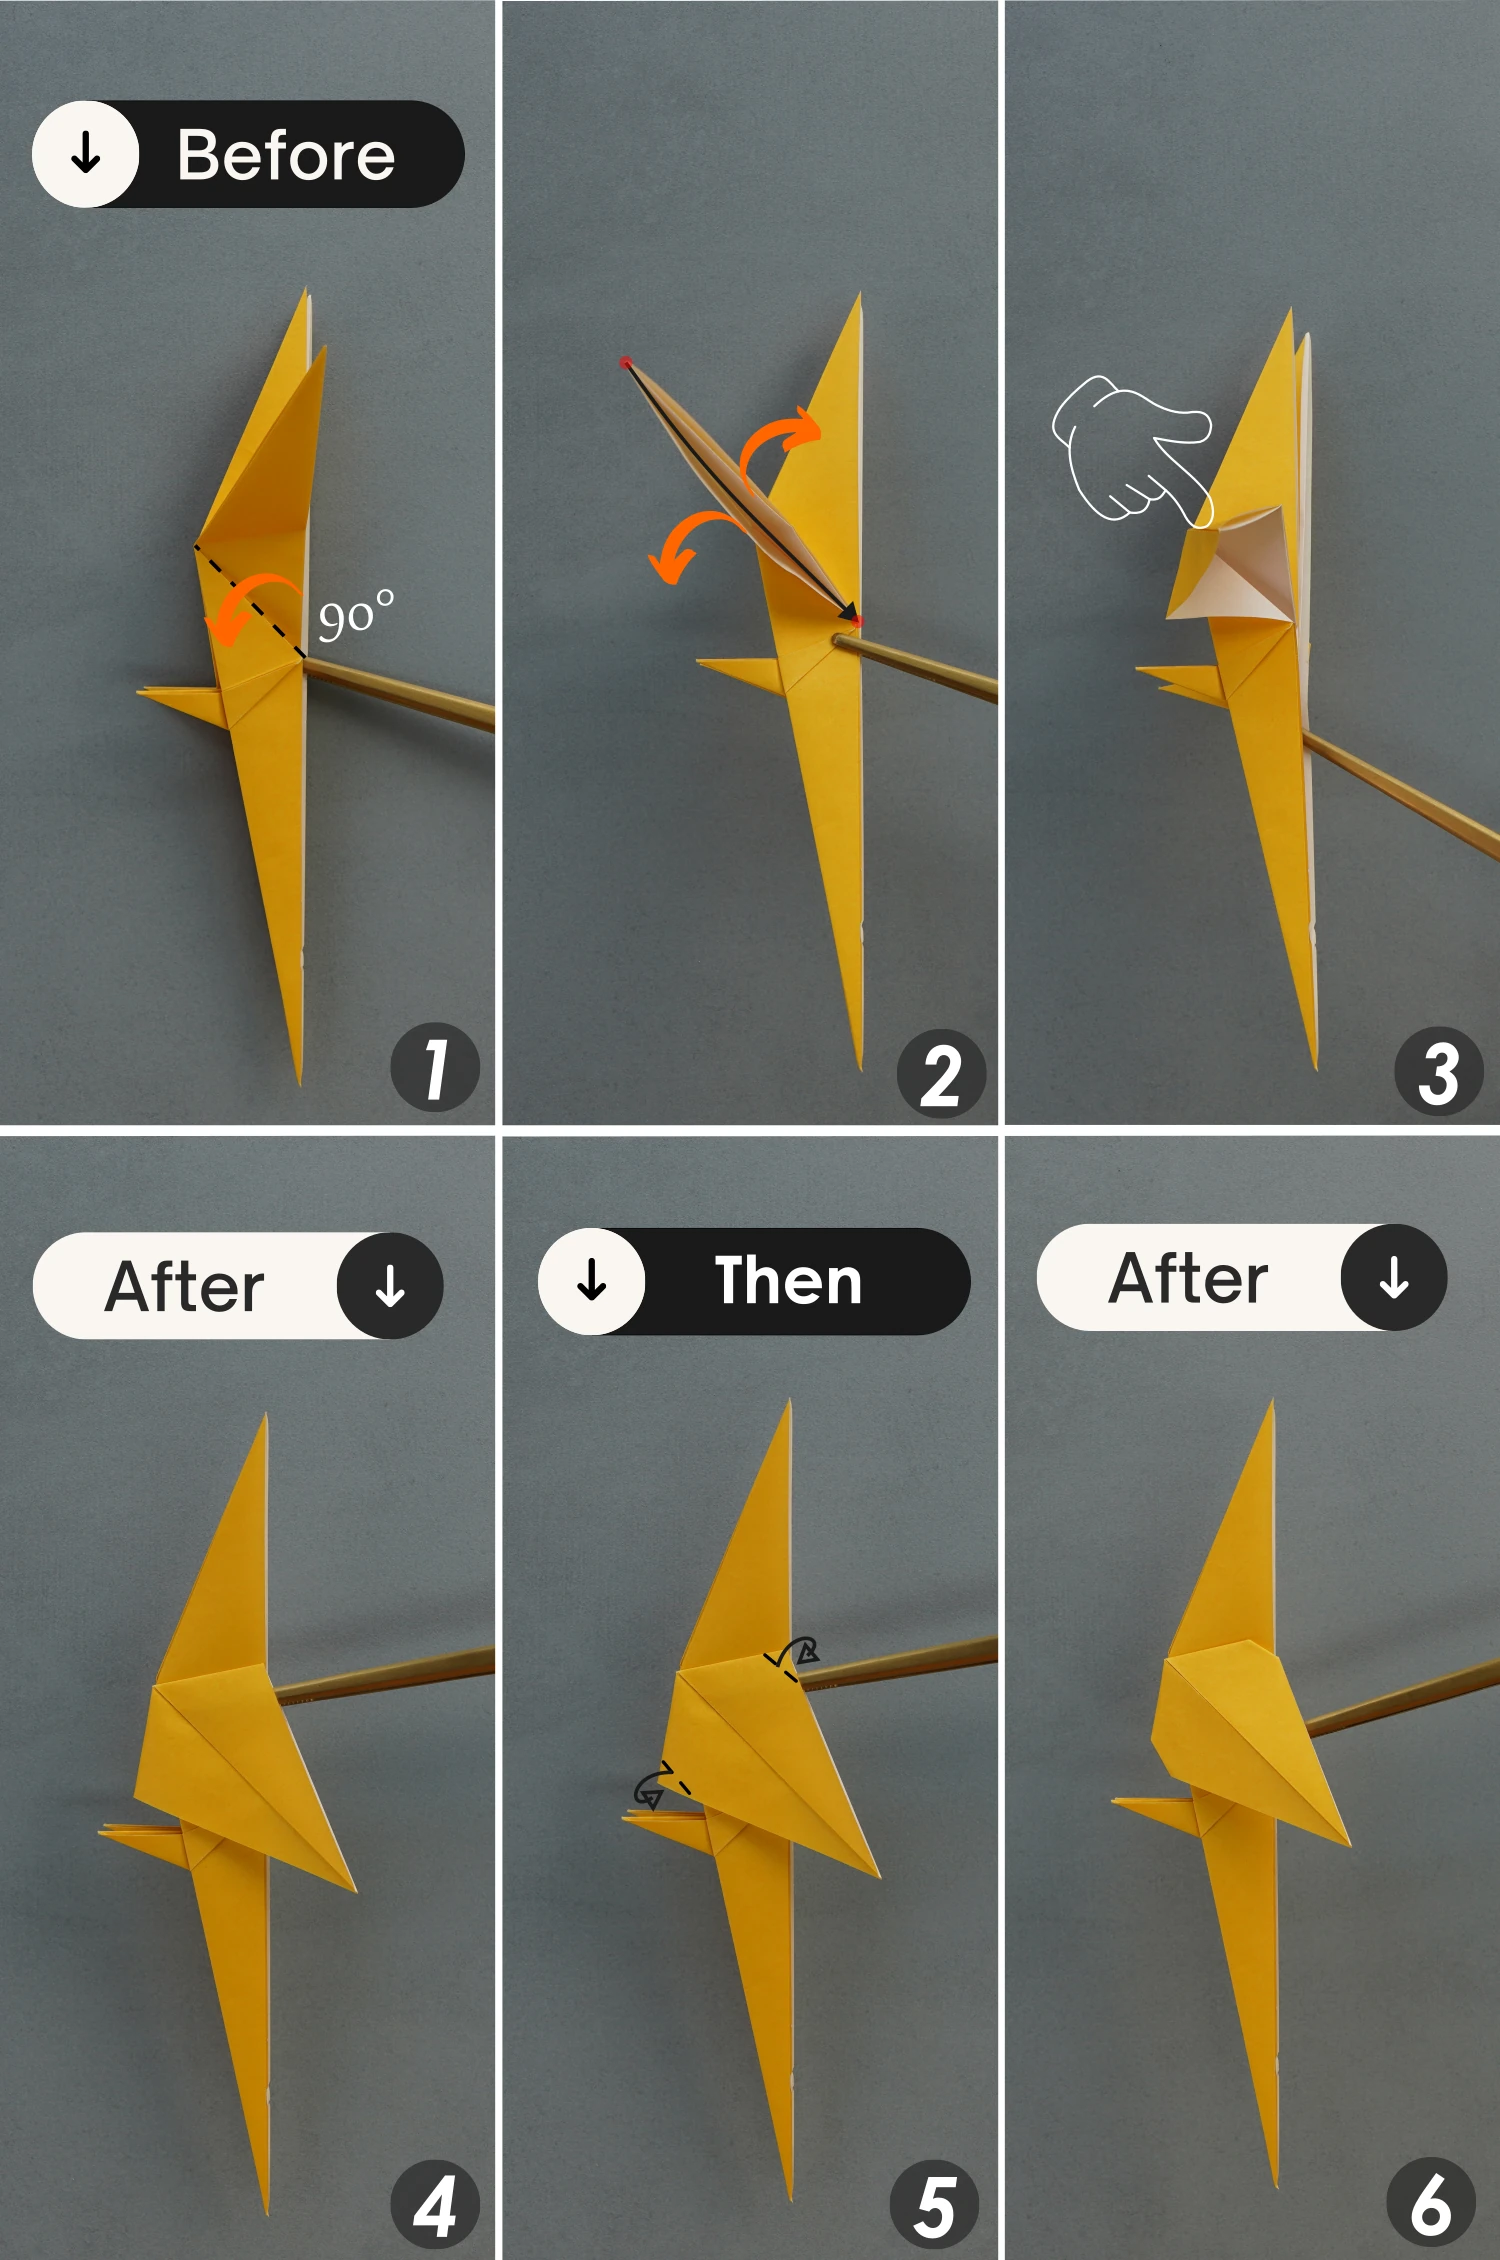
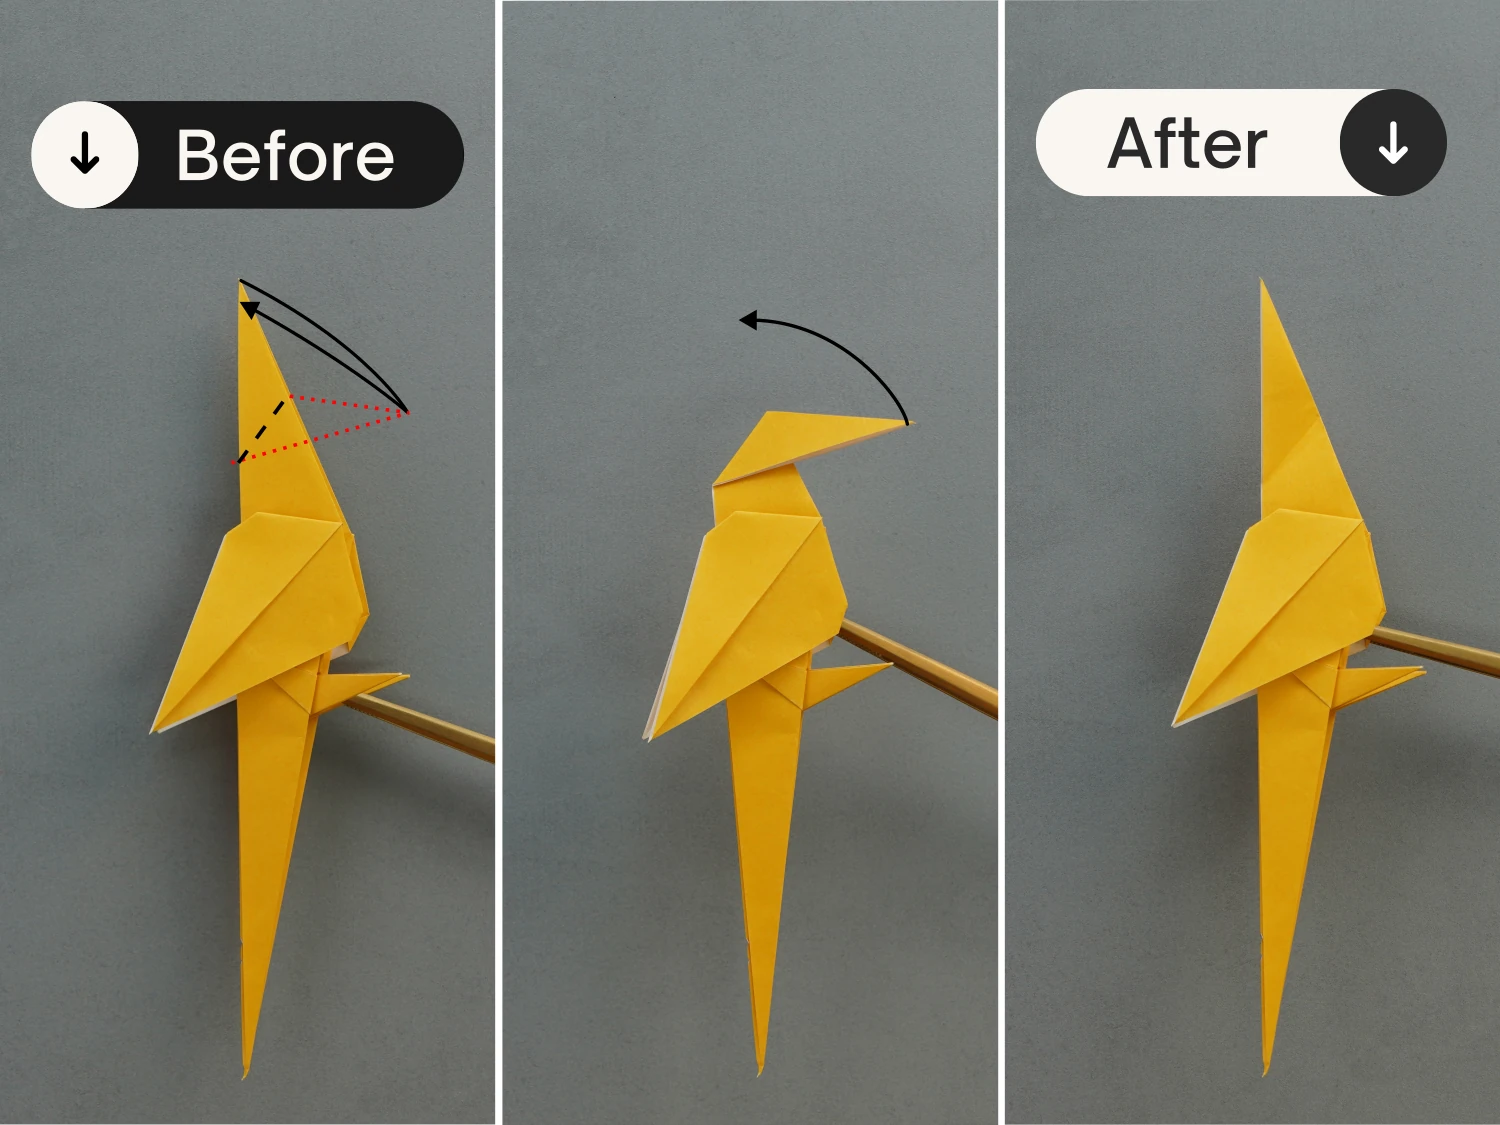
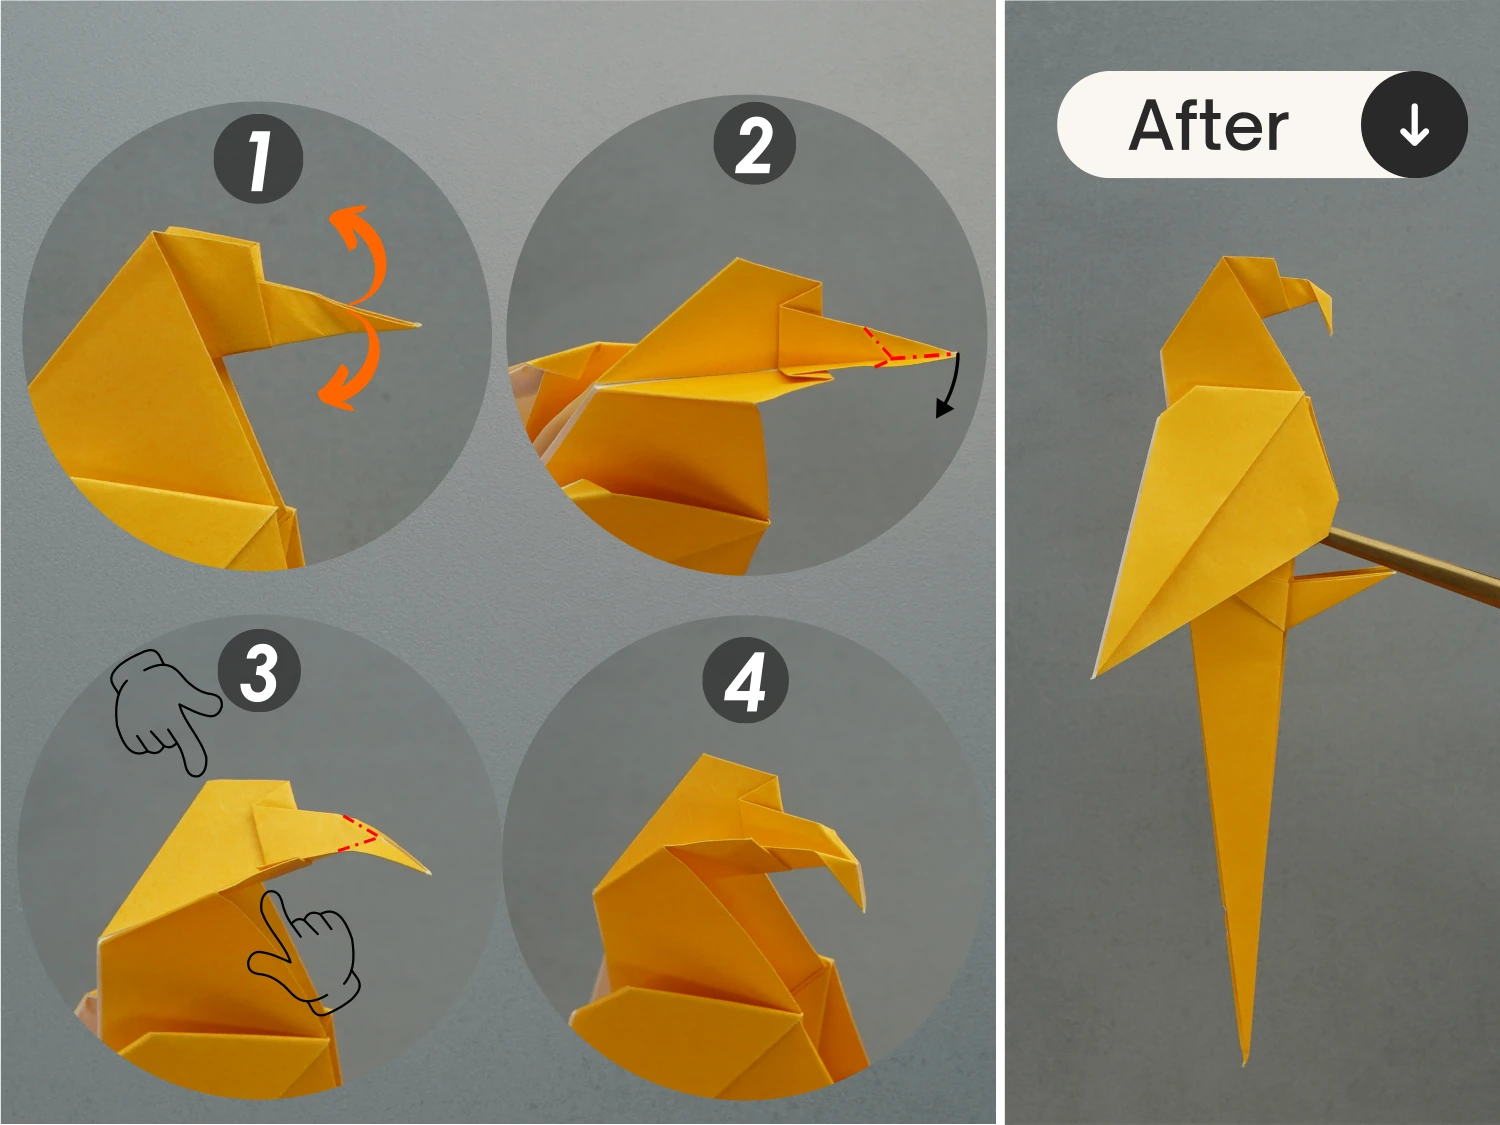
Step 36
Focus on the head part, and fold its beak down a little, then unfold it.
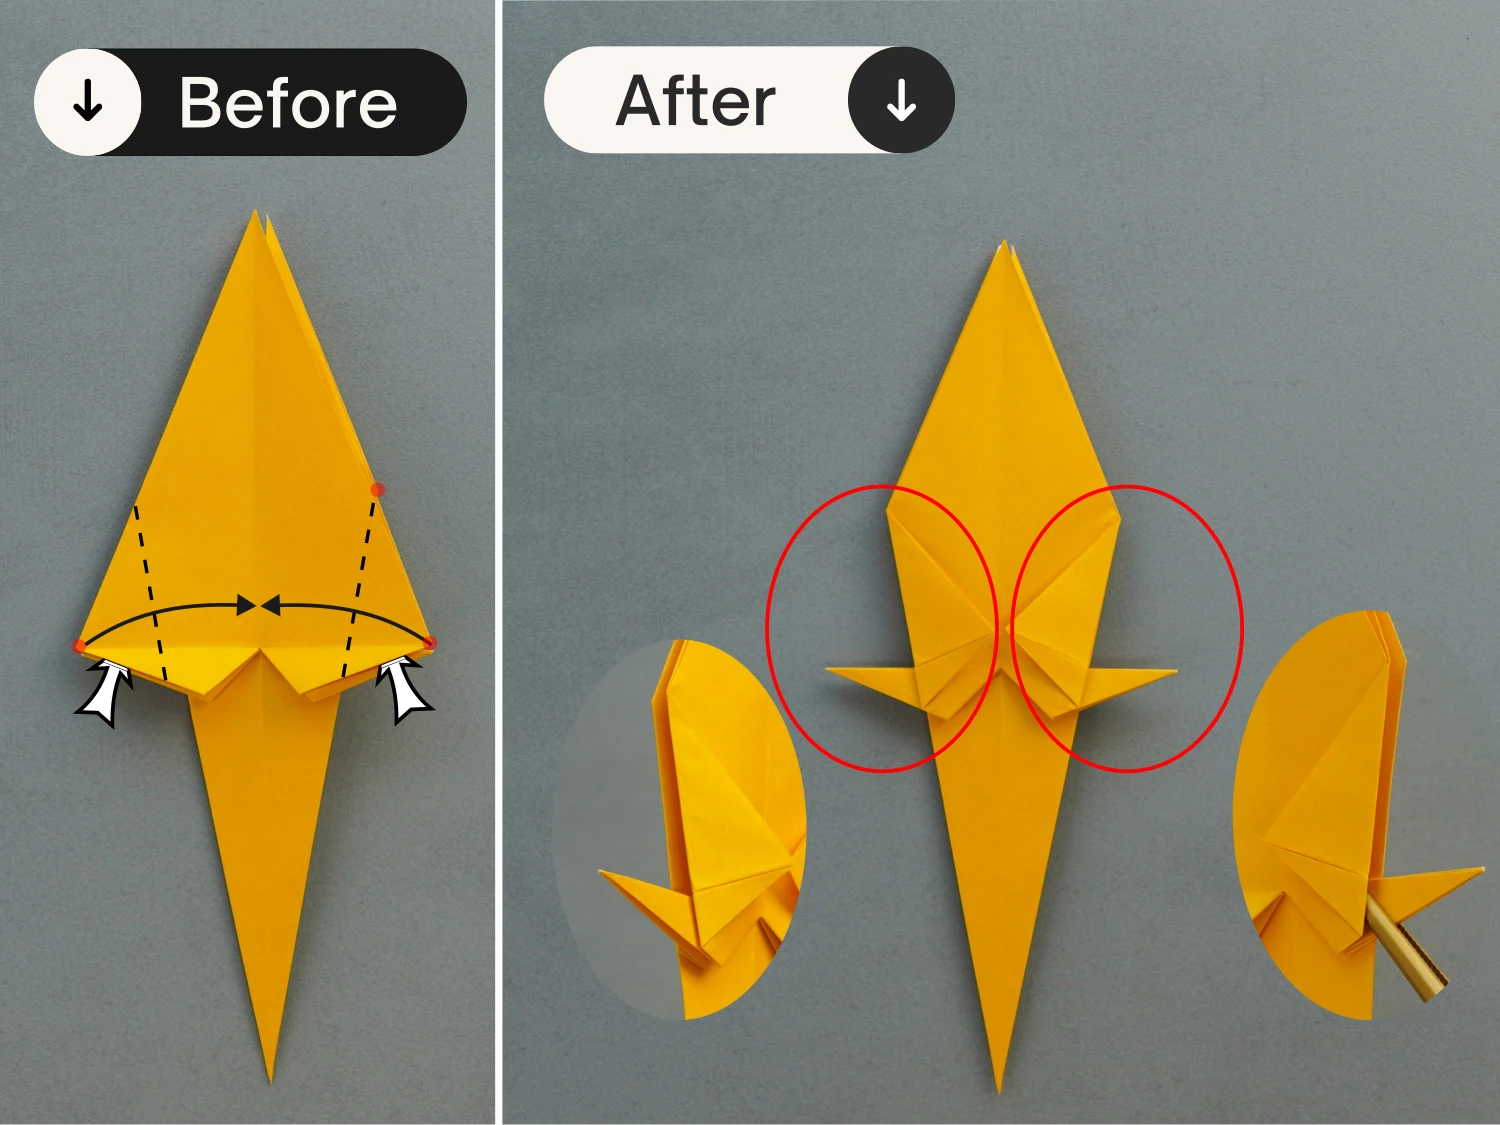
Step 37
Open the beak part from the top, press down the right tip, then close and flatten it along the creases you made in the previous step.
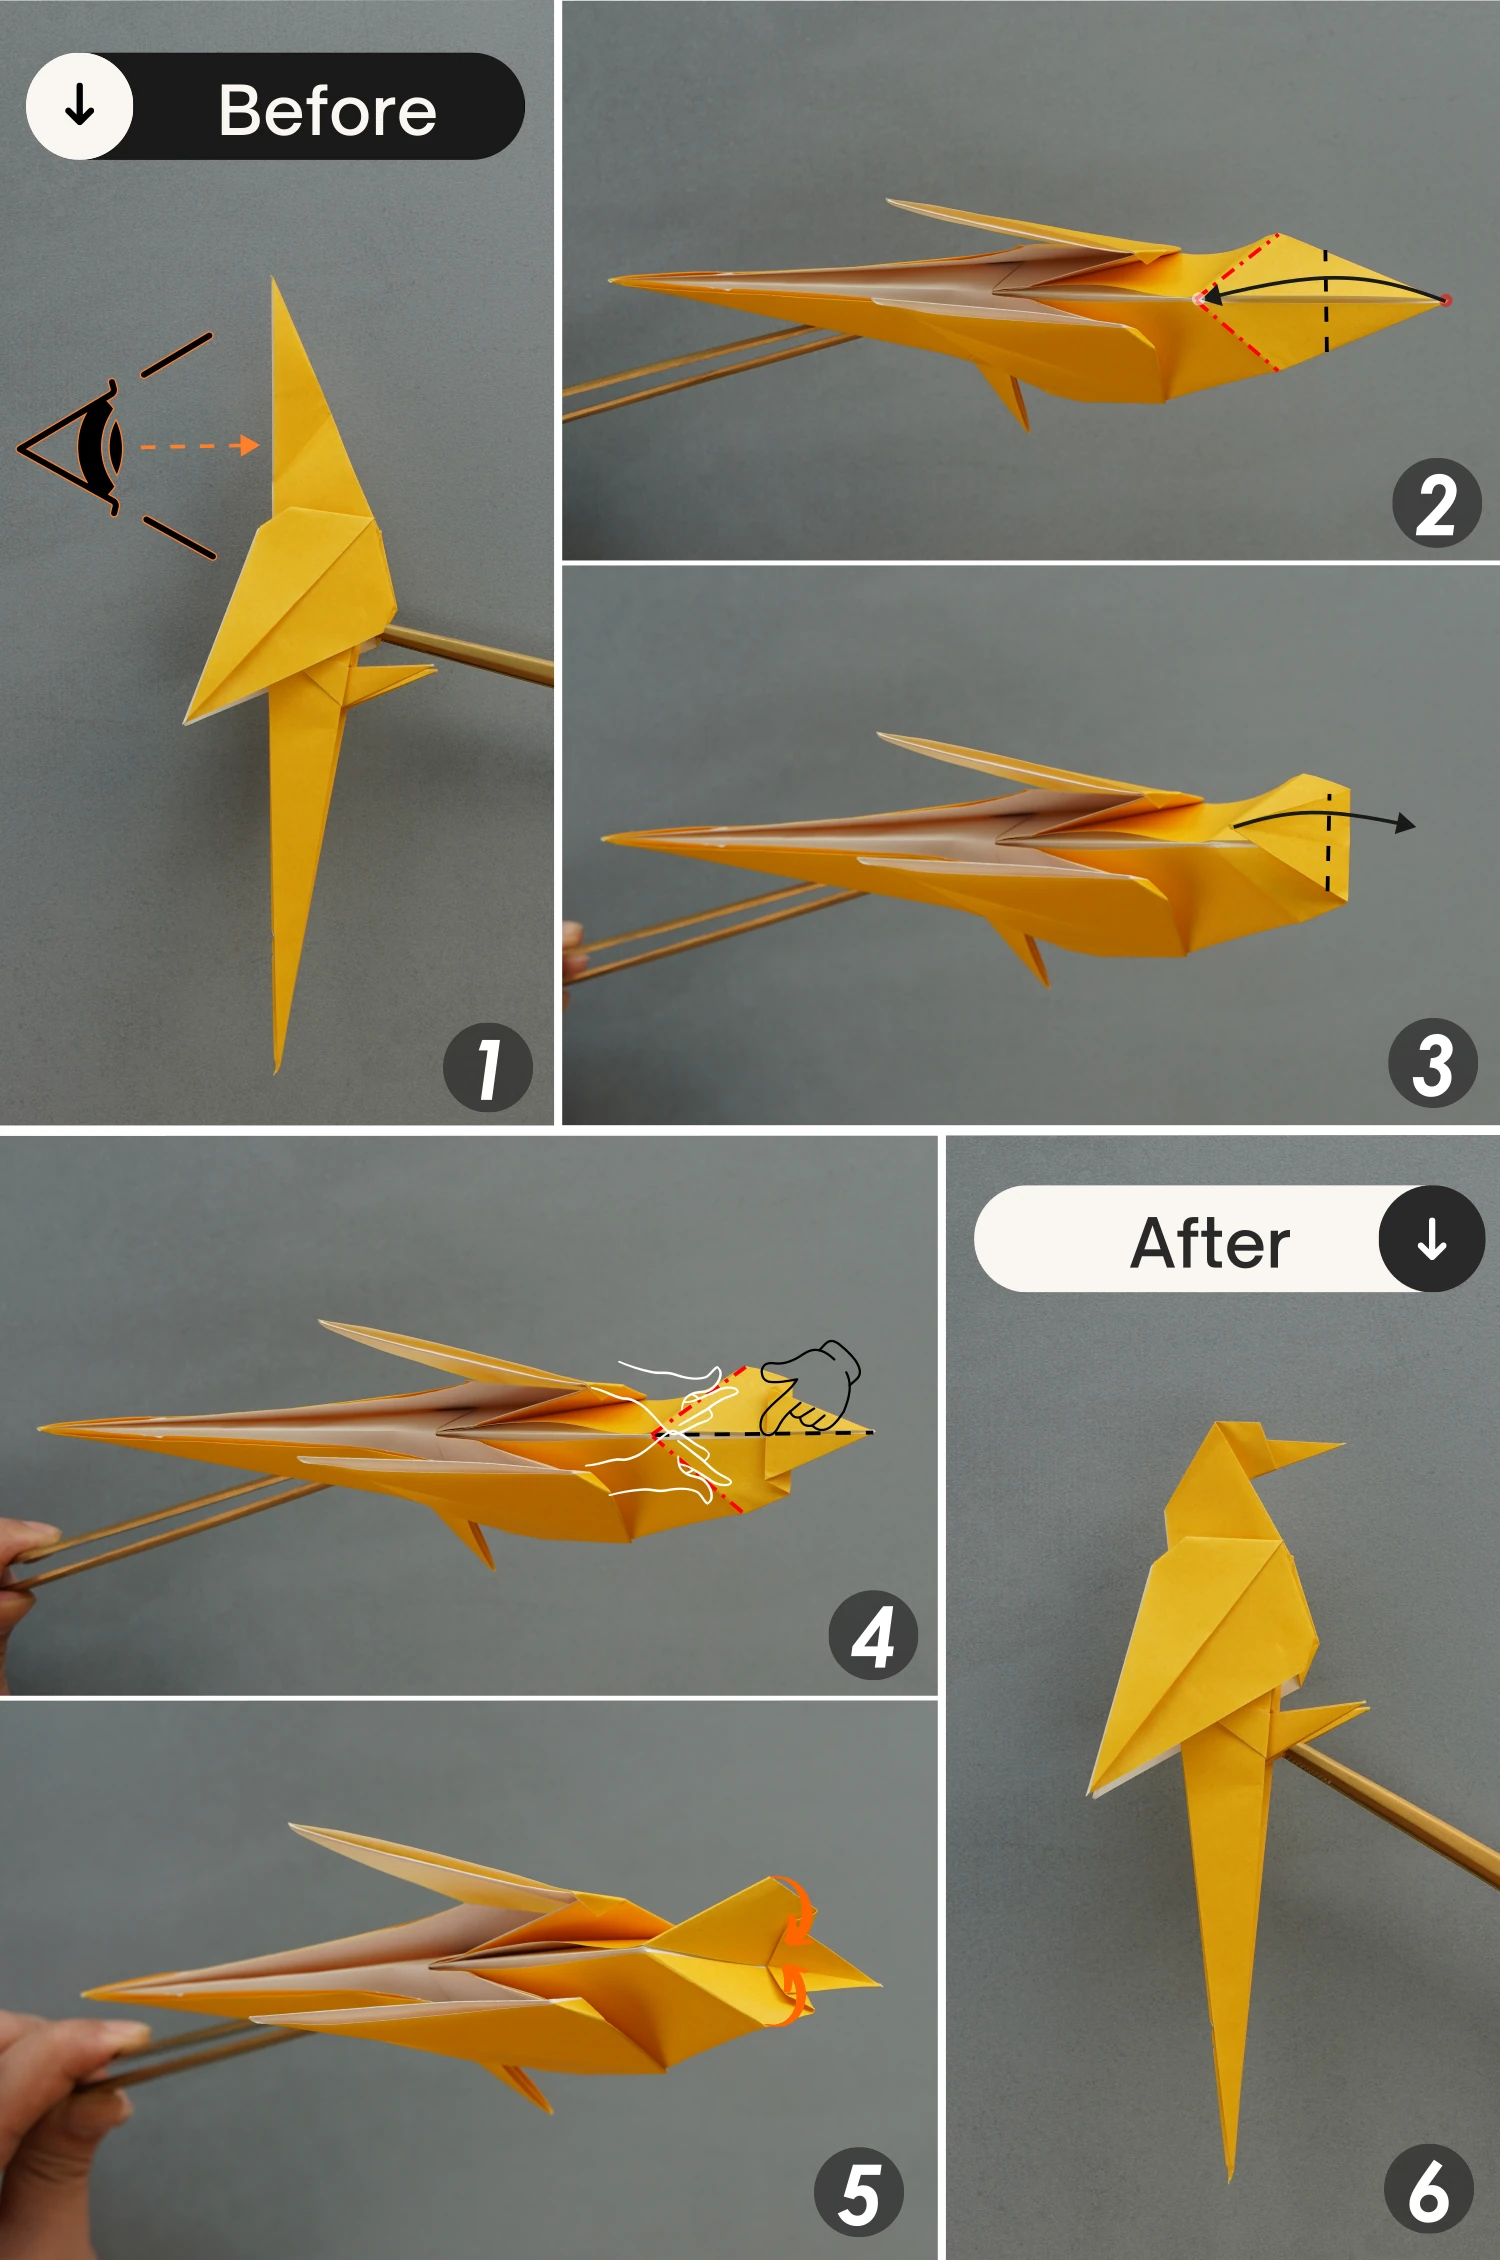
Step 38
Next, we are going to shape its feet.
Fold the front foot down a little, and unfold it.
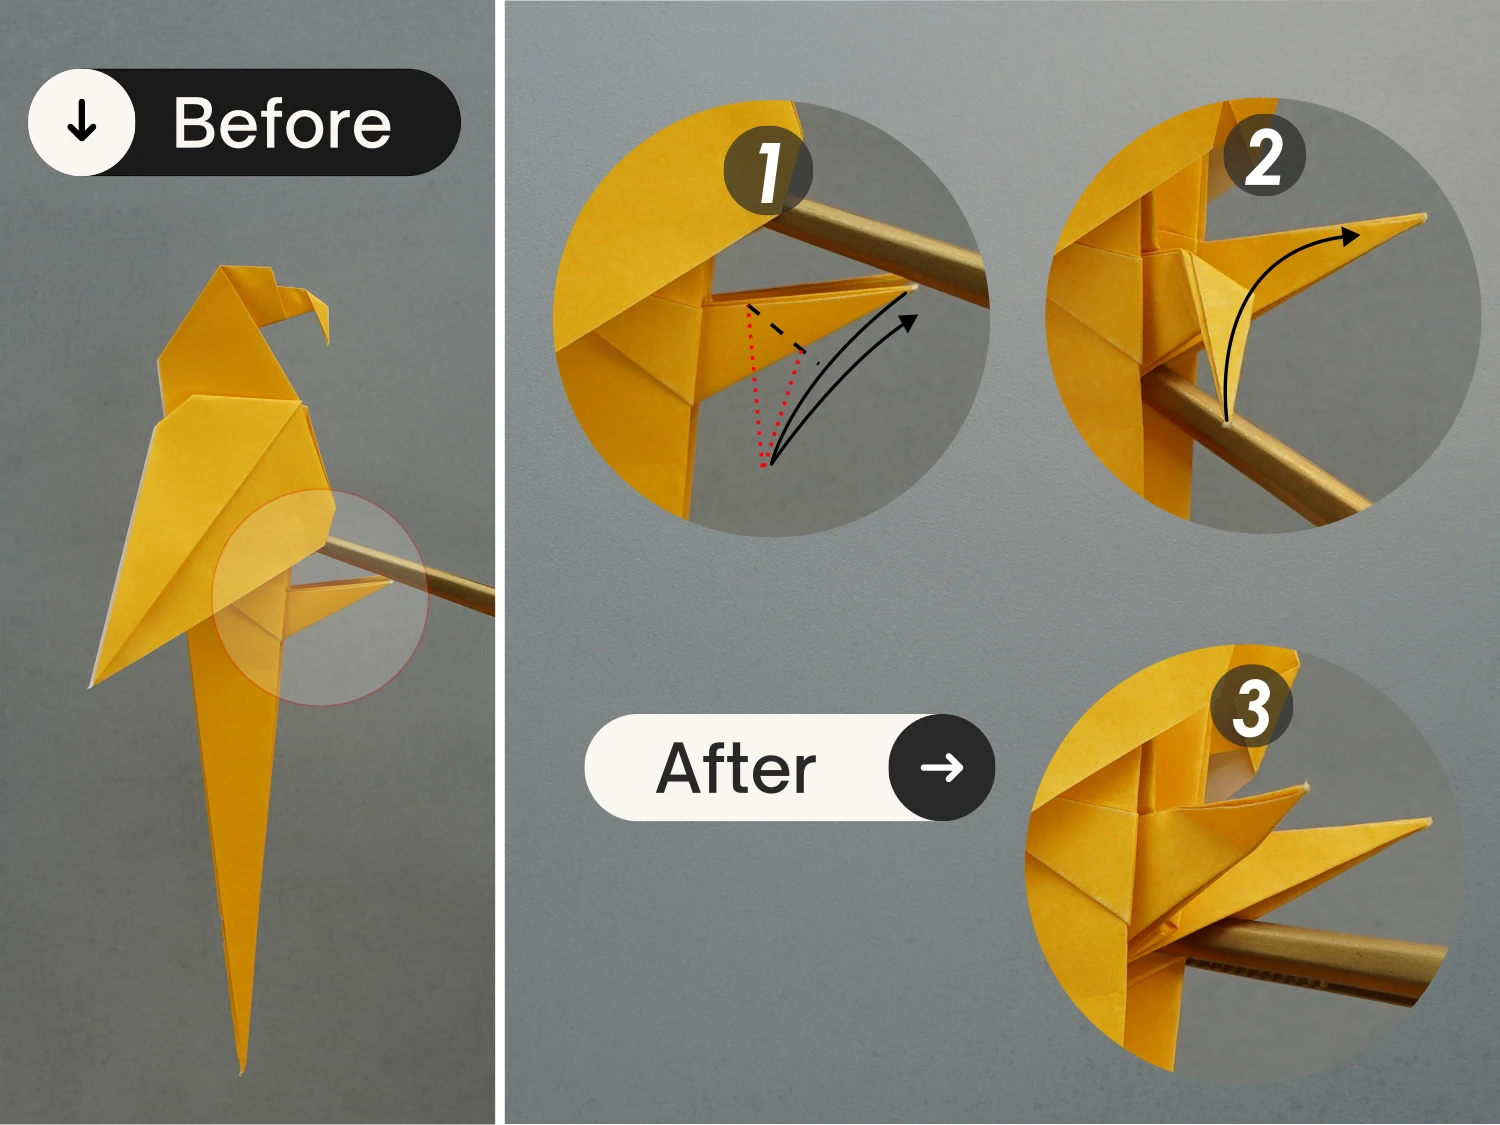
Step 39
Rotate it 90 degrees counterclockwise and view it from the left side
Open the foot flap, and press the tip down to tuck between the layers of the flap, then close and flatten it along the creases you made in the previous step.
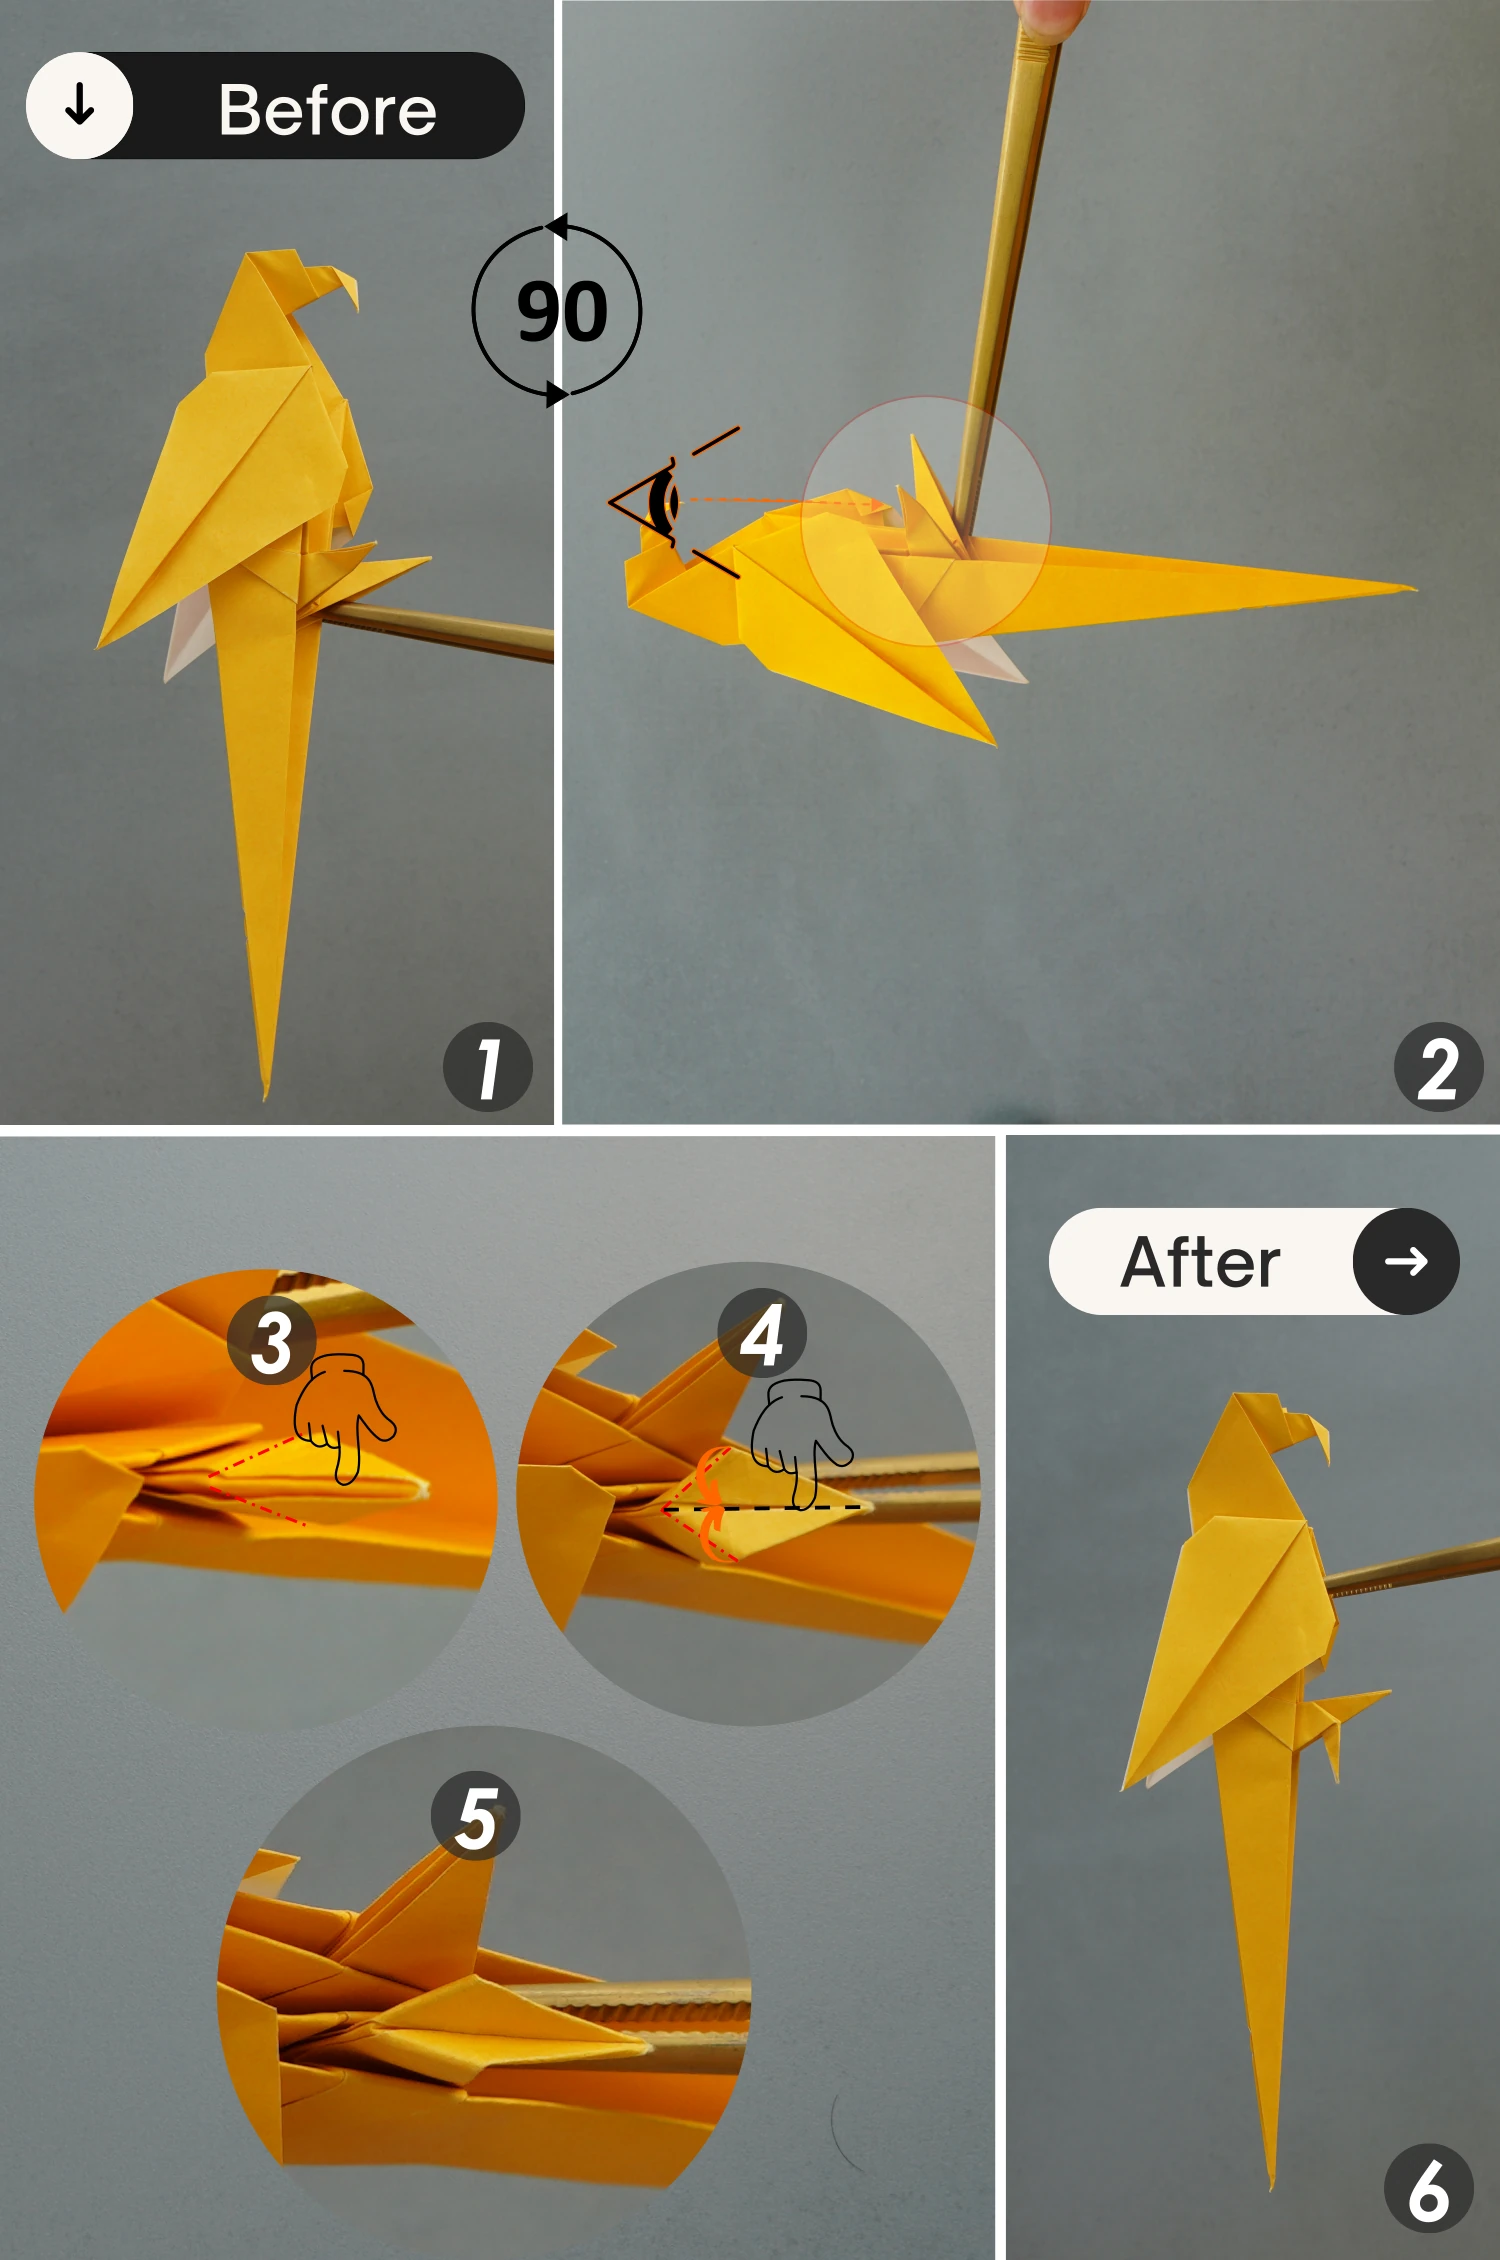
Step 40
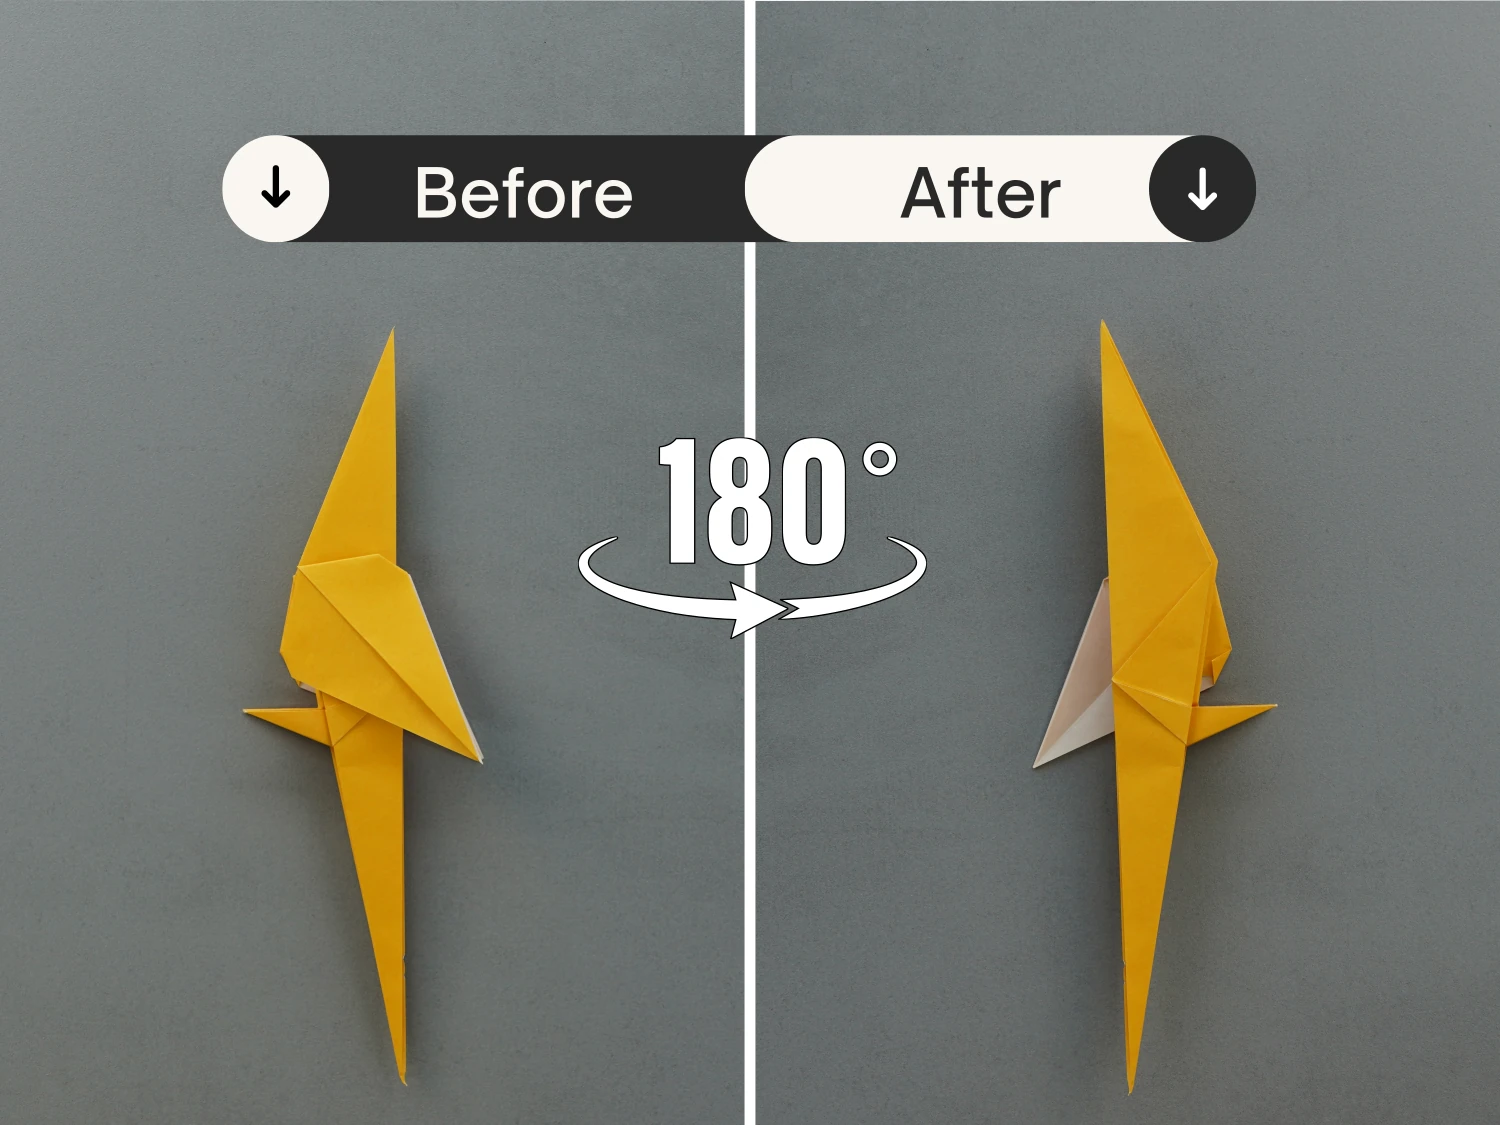
Rotate the paper 180 degrees horizontally.

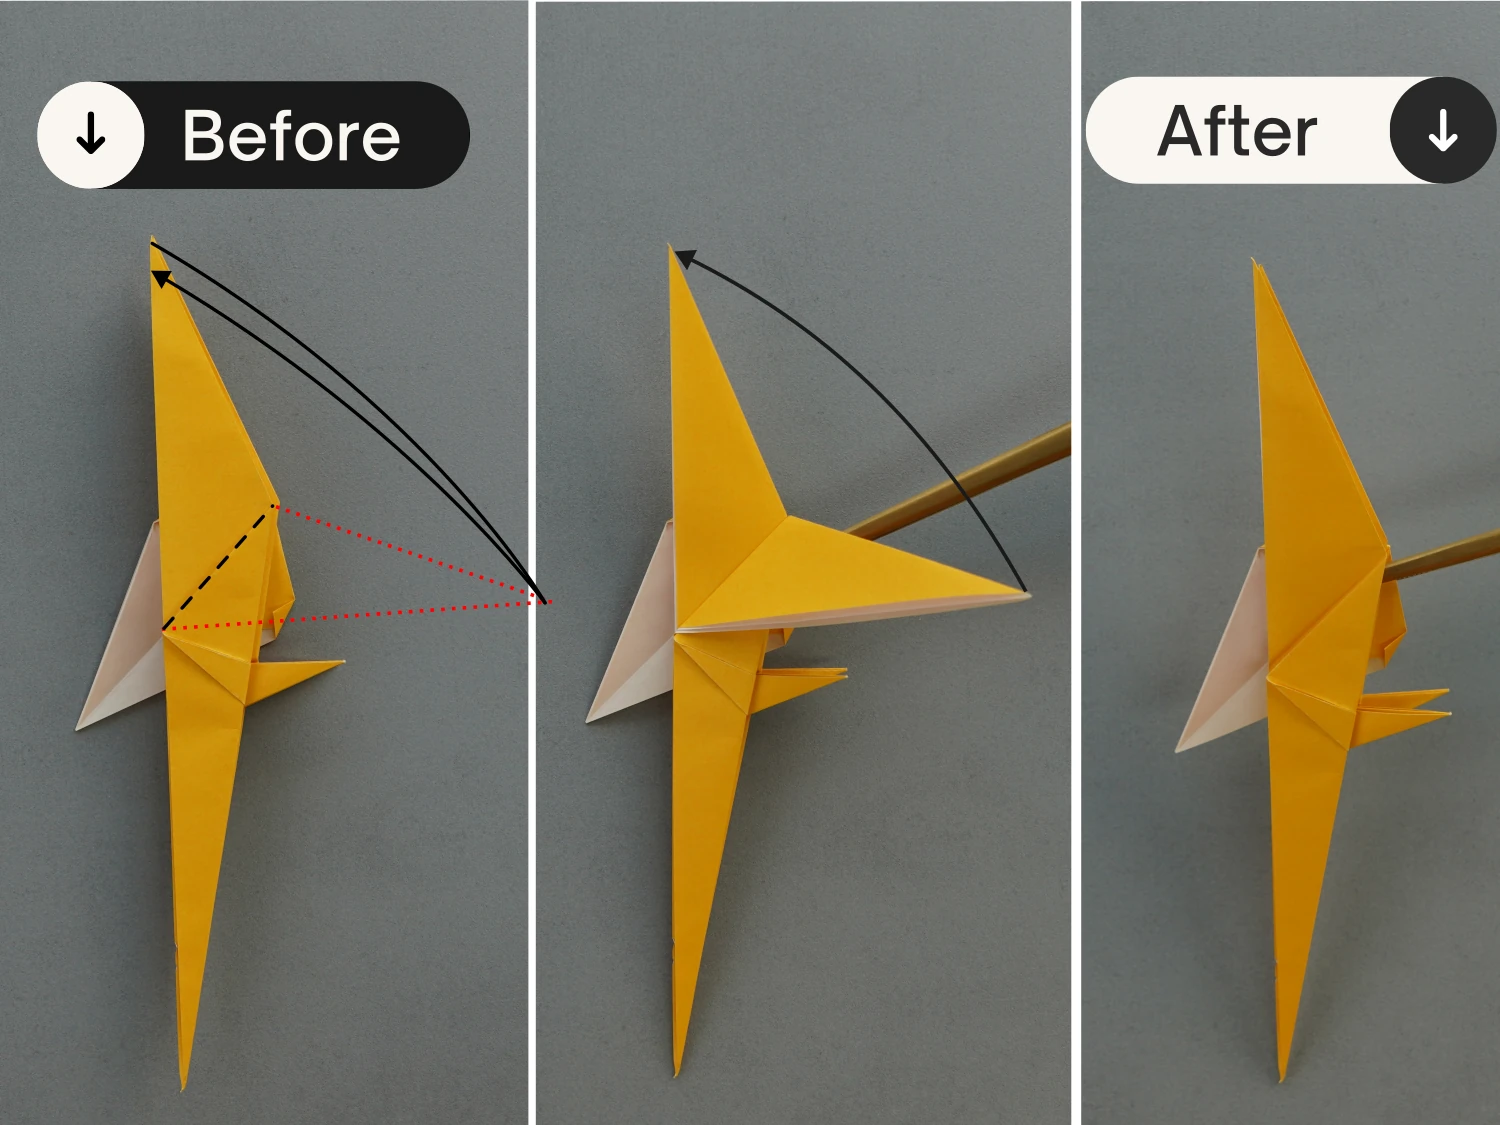
Step 41
Similarly, fold this foot down a little, crease it well then unfold.
Step 42
Then open this corner, and press the tip down to tuck between the layers, next, close and flatten the corner along the creases you just made.
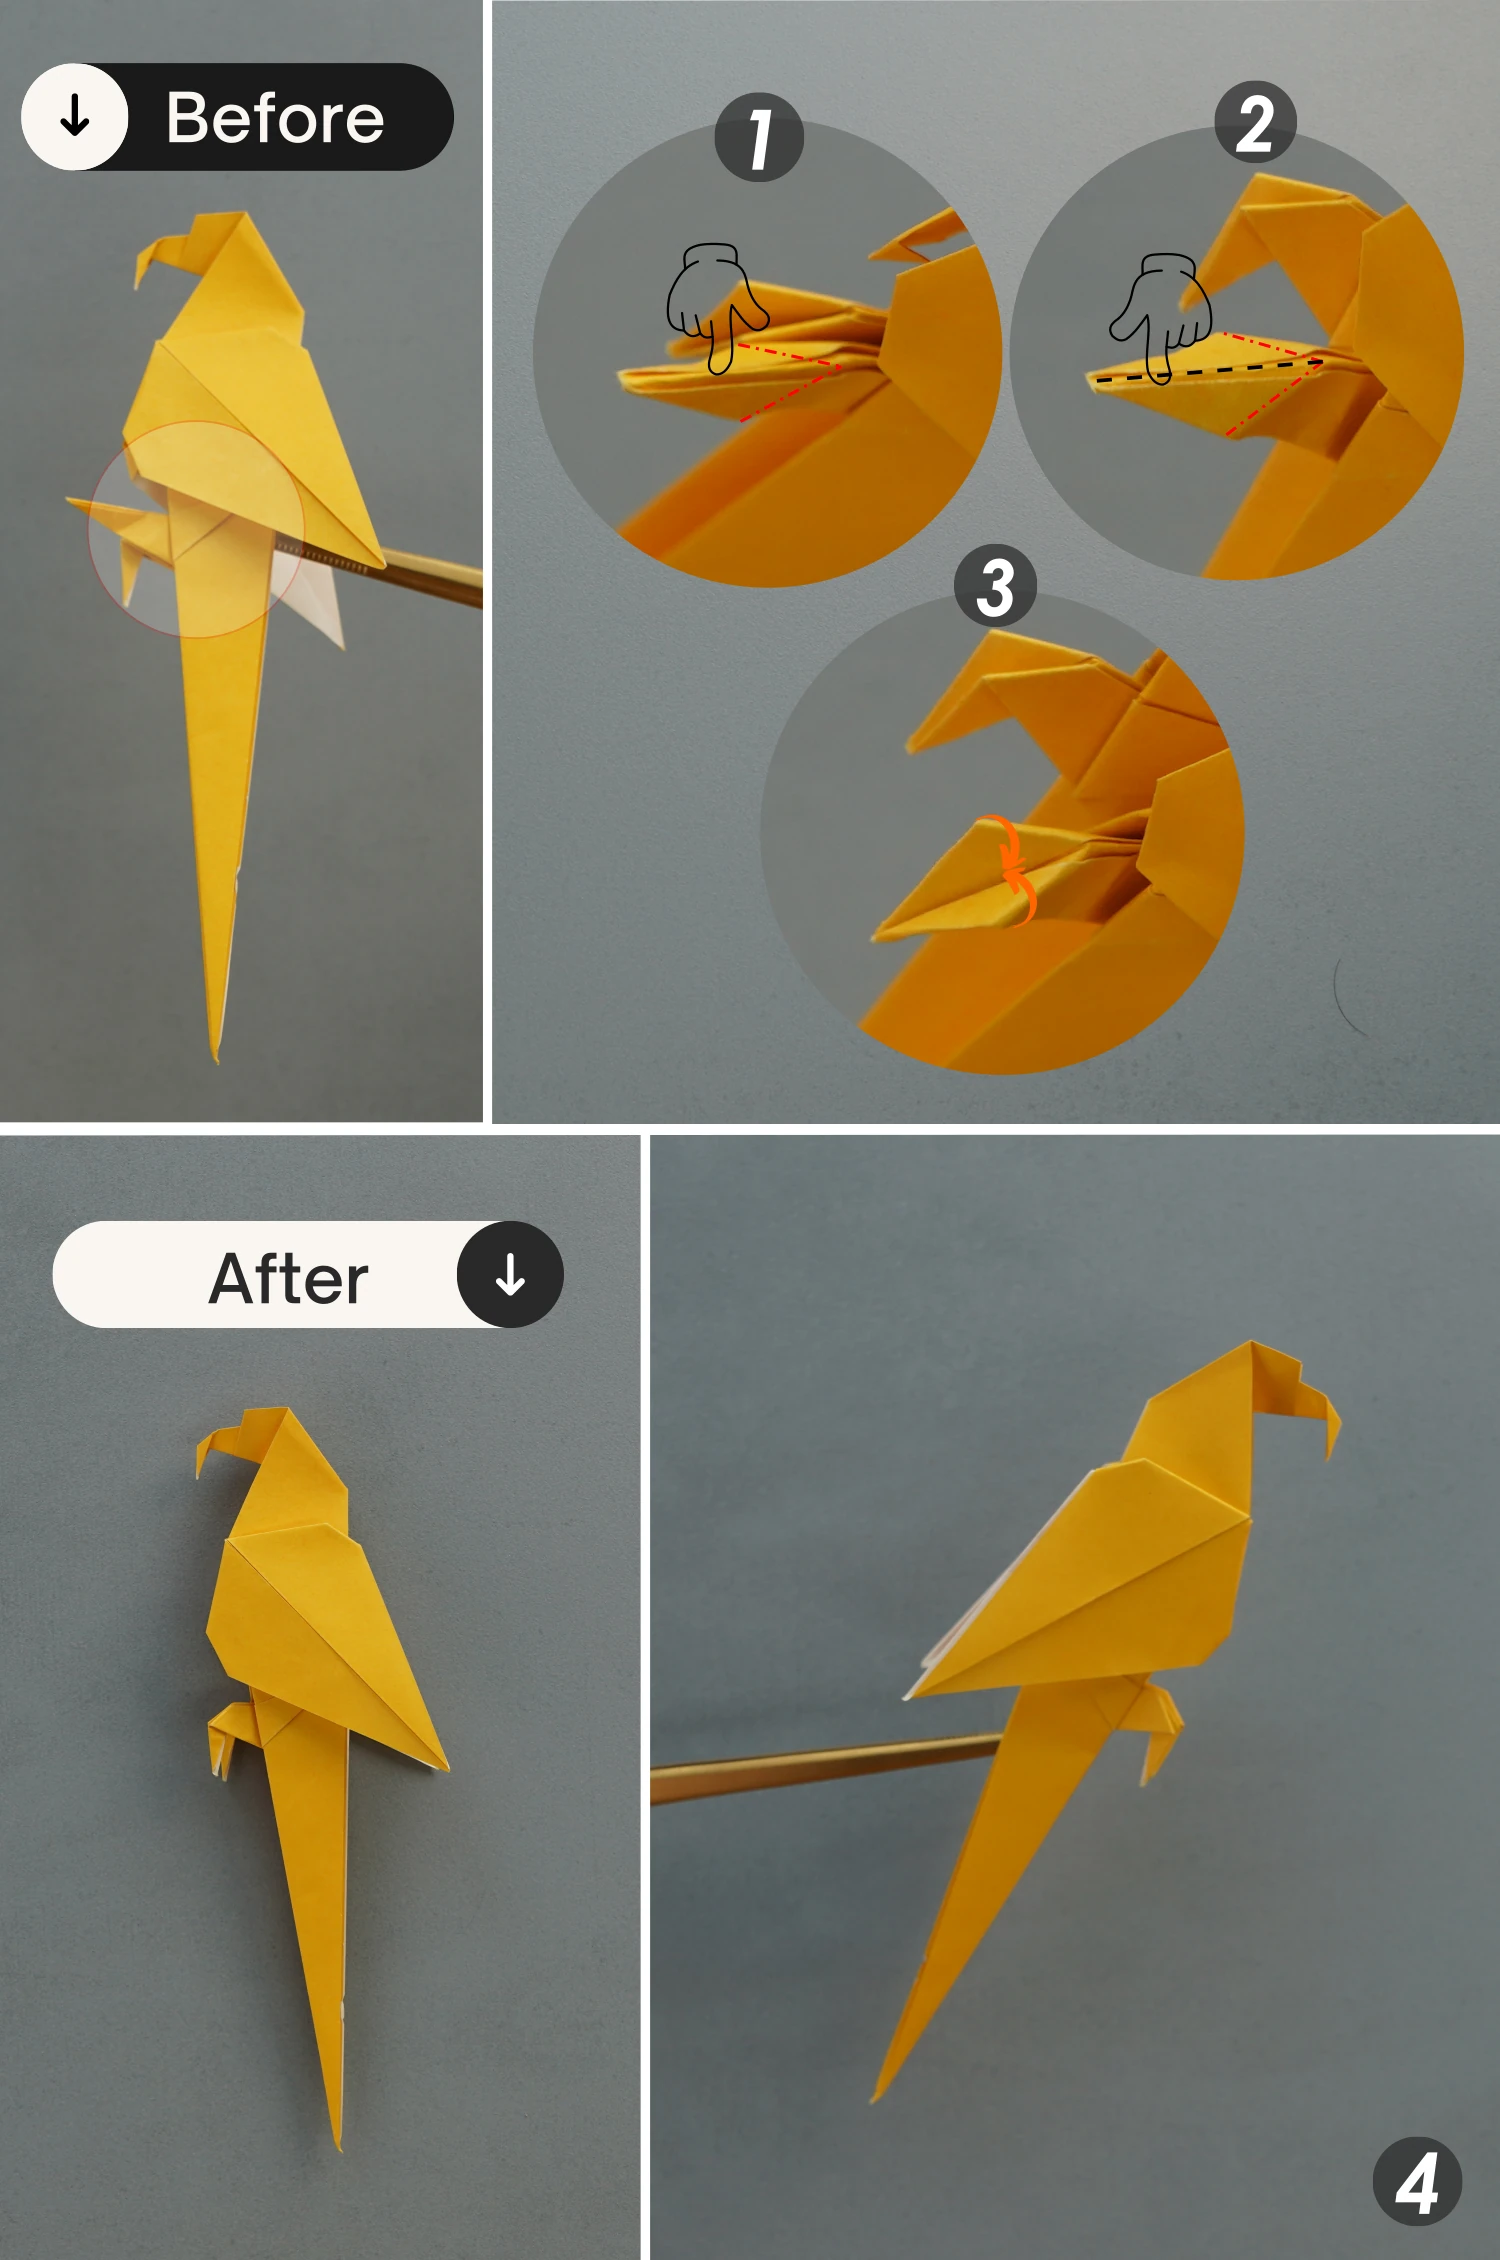
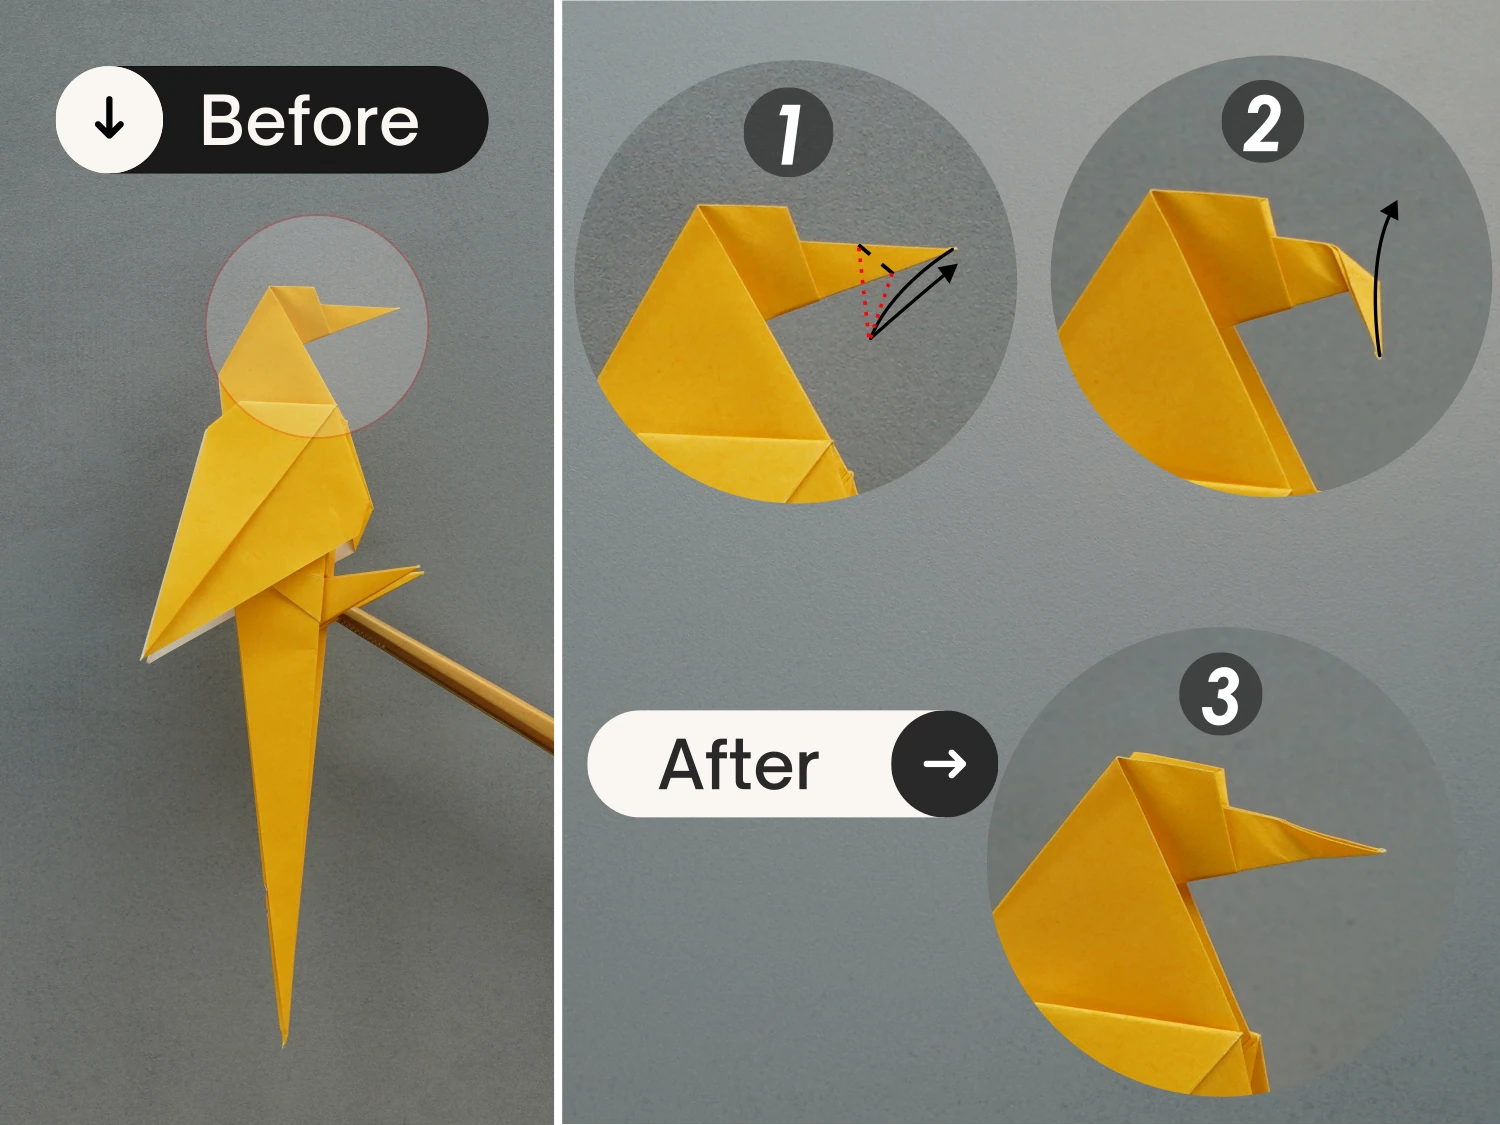
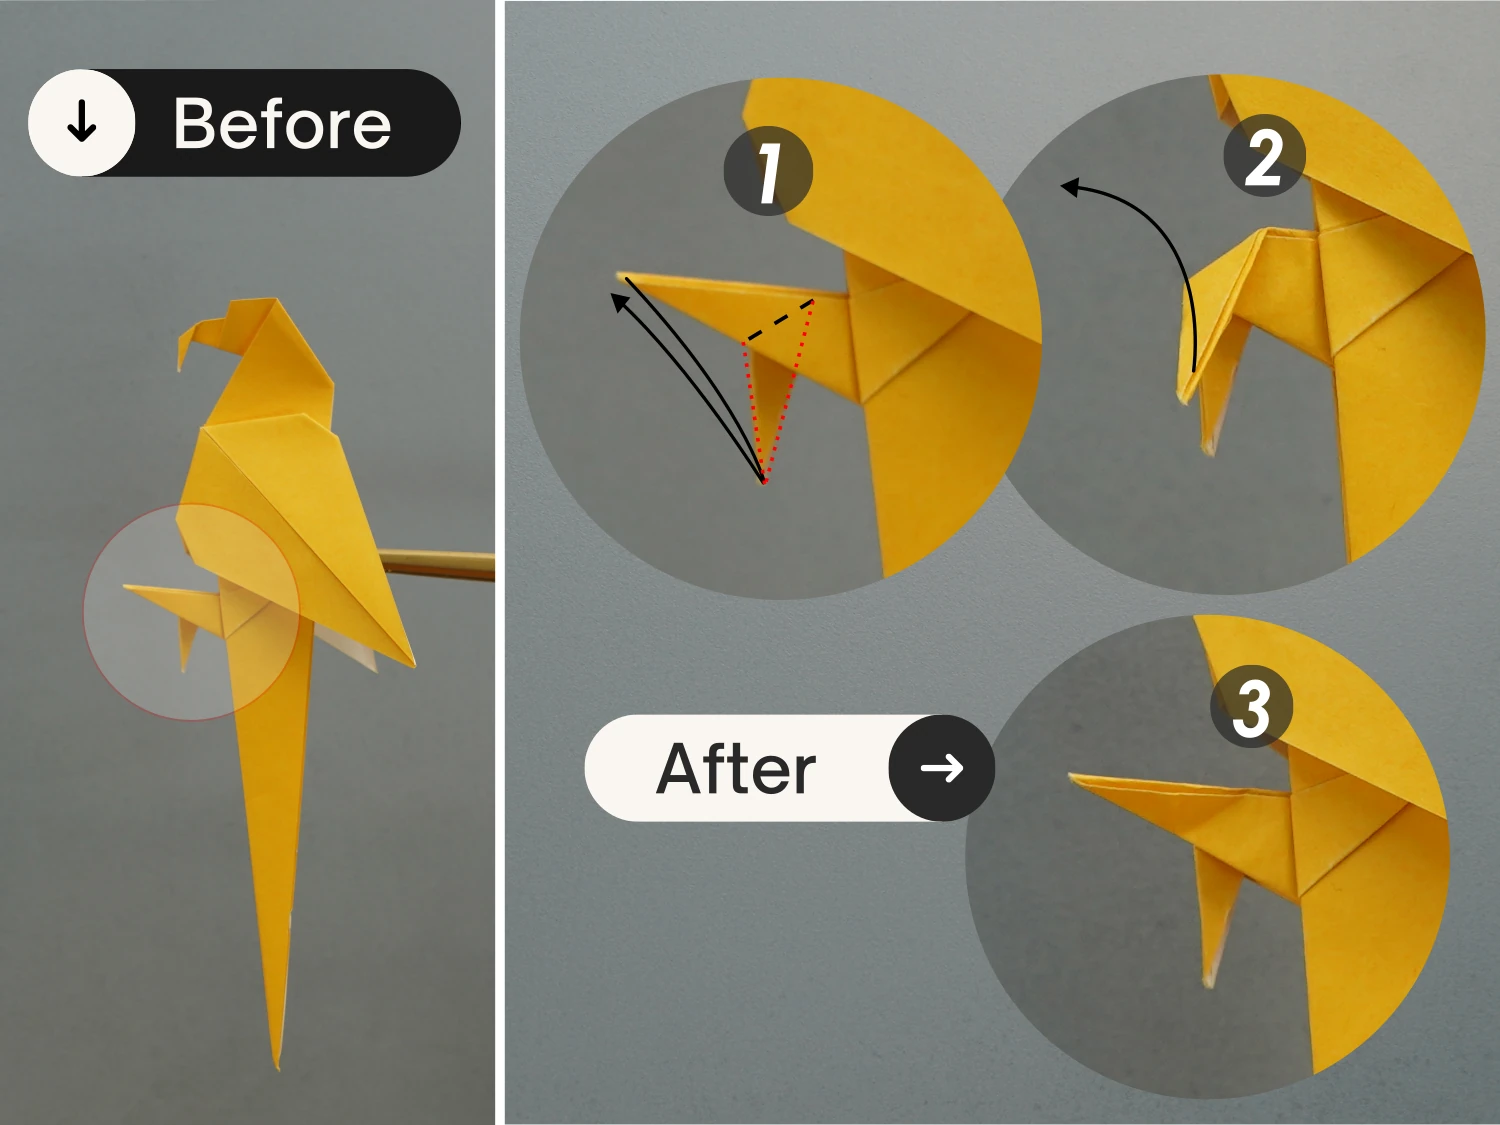
What’s Next
This is the final shape of an origami parrot, now you can check our other origami bird instructions, hope you will love them.