How to Make a Classic Origami Box
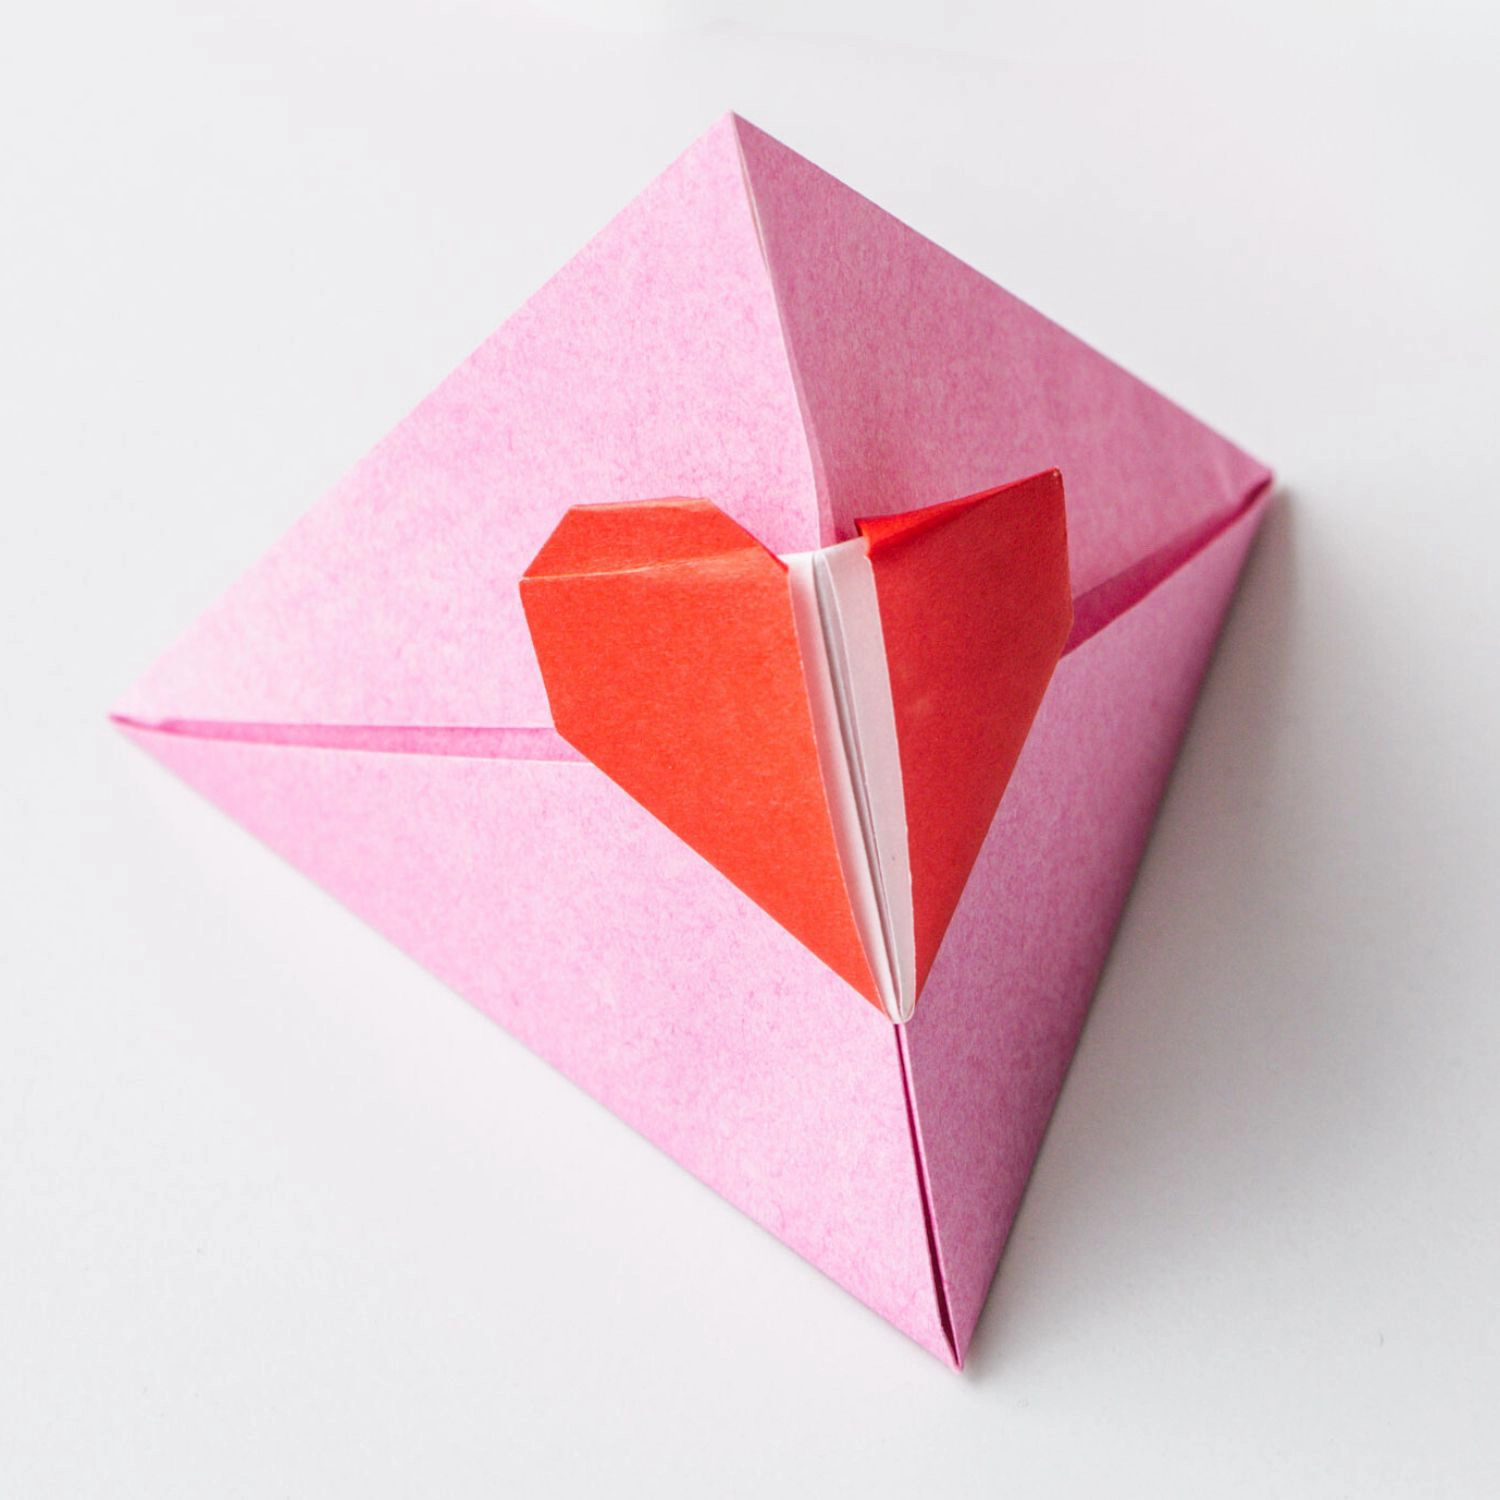
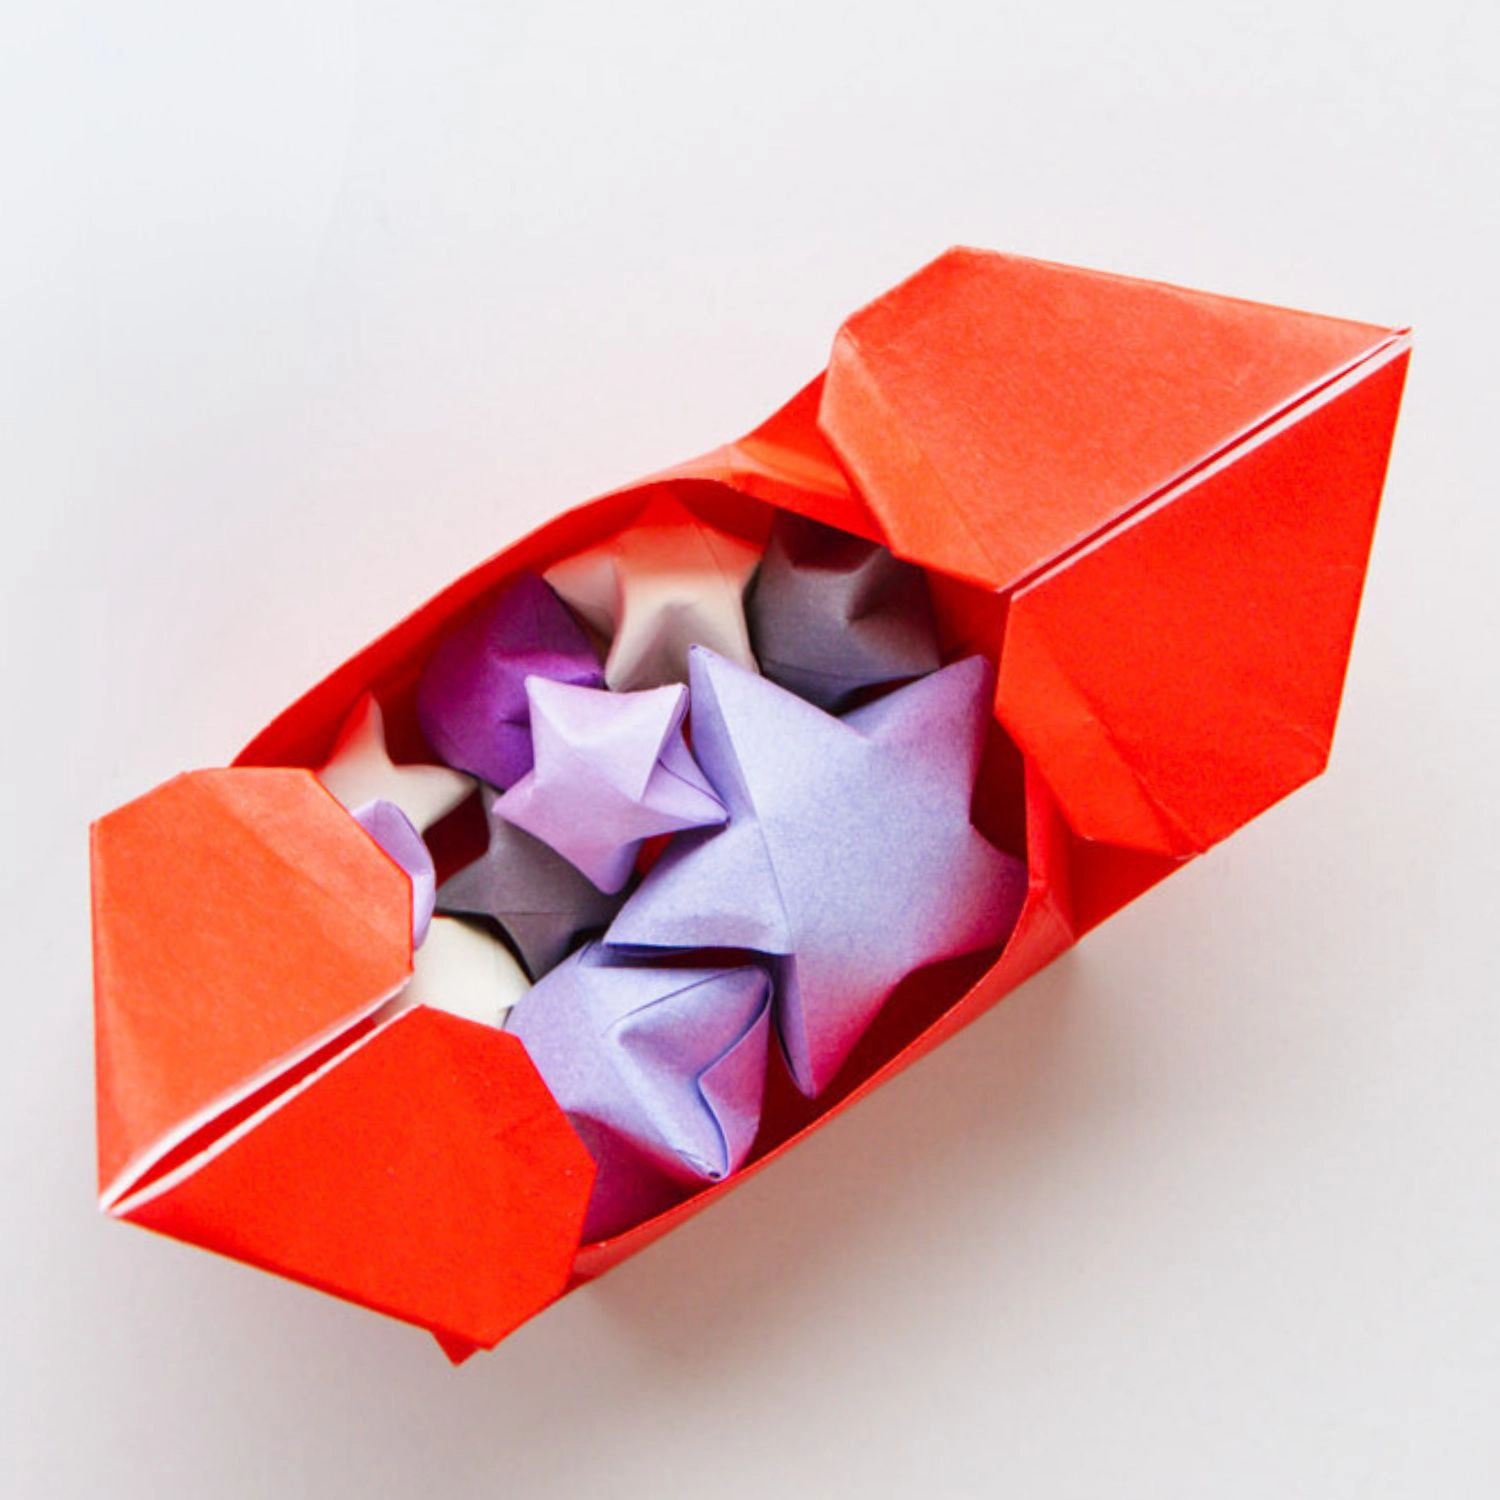
A cute mini origami box, very creative and simple to make. You can use it to pack some small gifts or store small stuff, like small sugar and hair accessories.

We provide step-by-step diagram instructions and beginner-friendly videos. Check both for quicker learning.
If you are new to origami, start here from our beginner guide to know the basics and how to read the step-by-step instructions.
- Folding time: 5 minutes
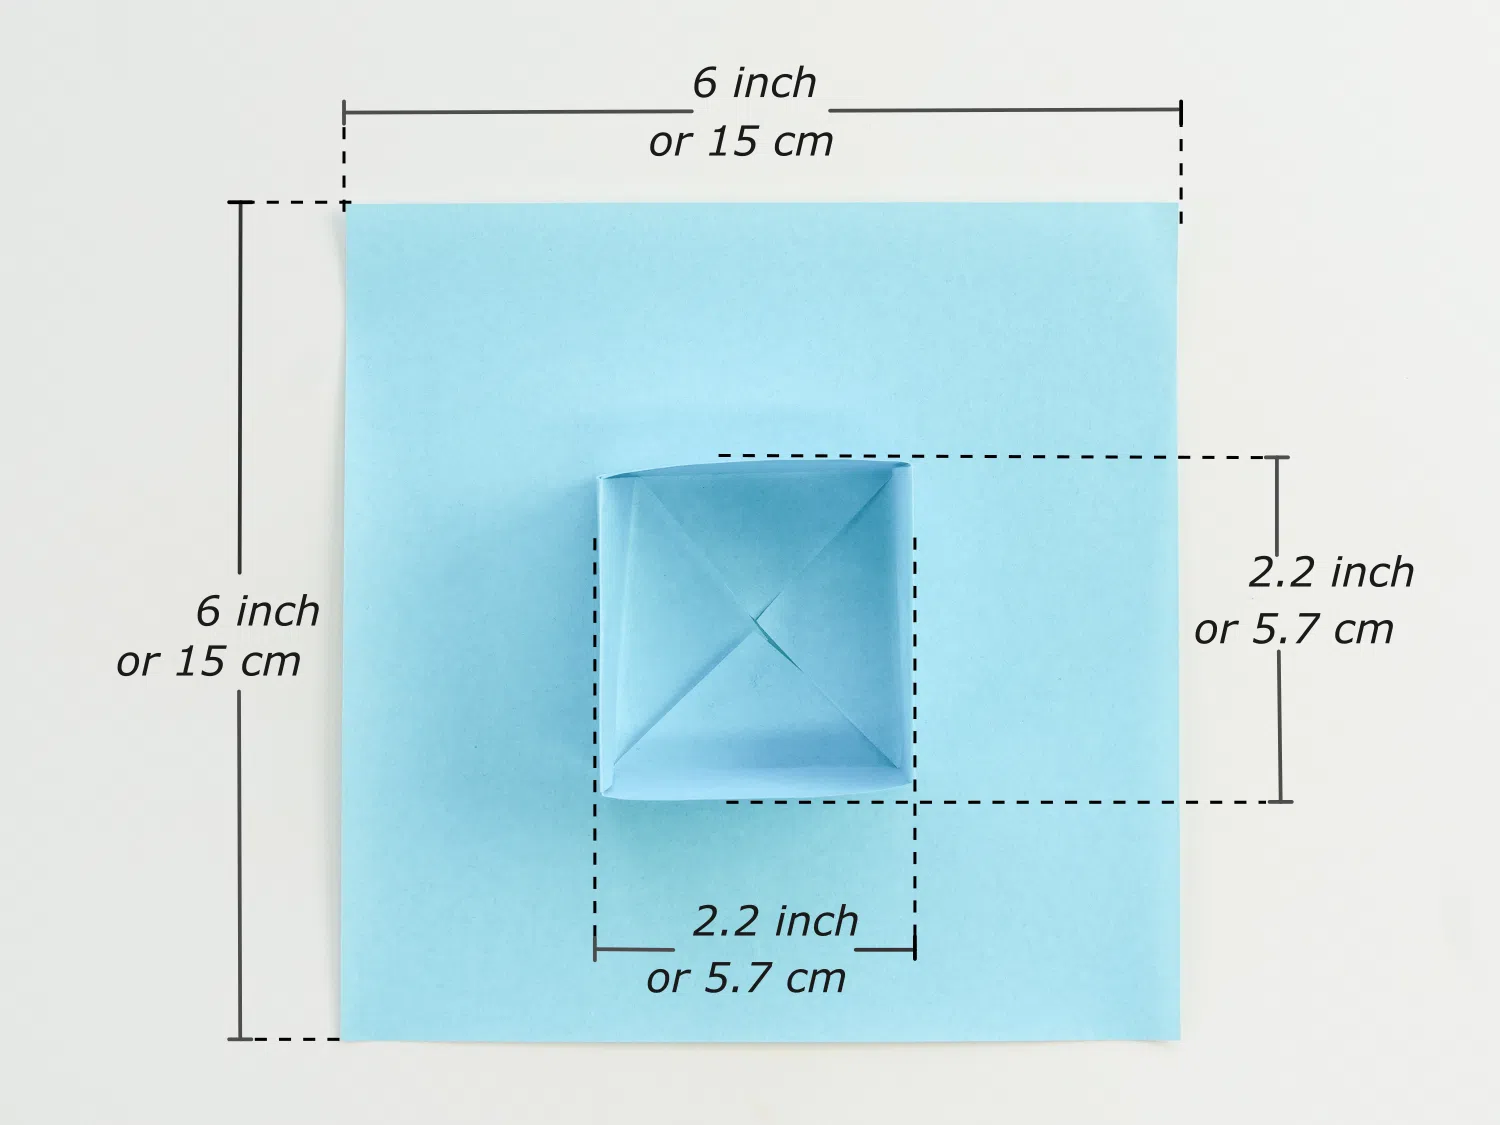
- Paper: 15×15 cm
- Difficulty: Easy, Beginner friendly
Material
Prepare a 15*15 cm square origami paper, with different colors on each side, and you will get a 5.7*5.7 cm lovely box. You can choose any color according to your preference, and other sizes of square paper are also available.
Easy Origami Box Video
Step by Step Tutorials
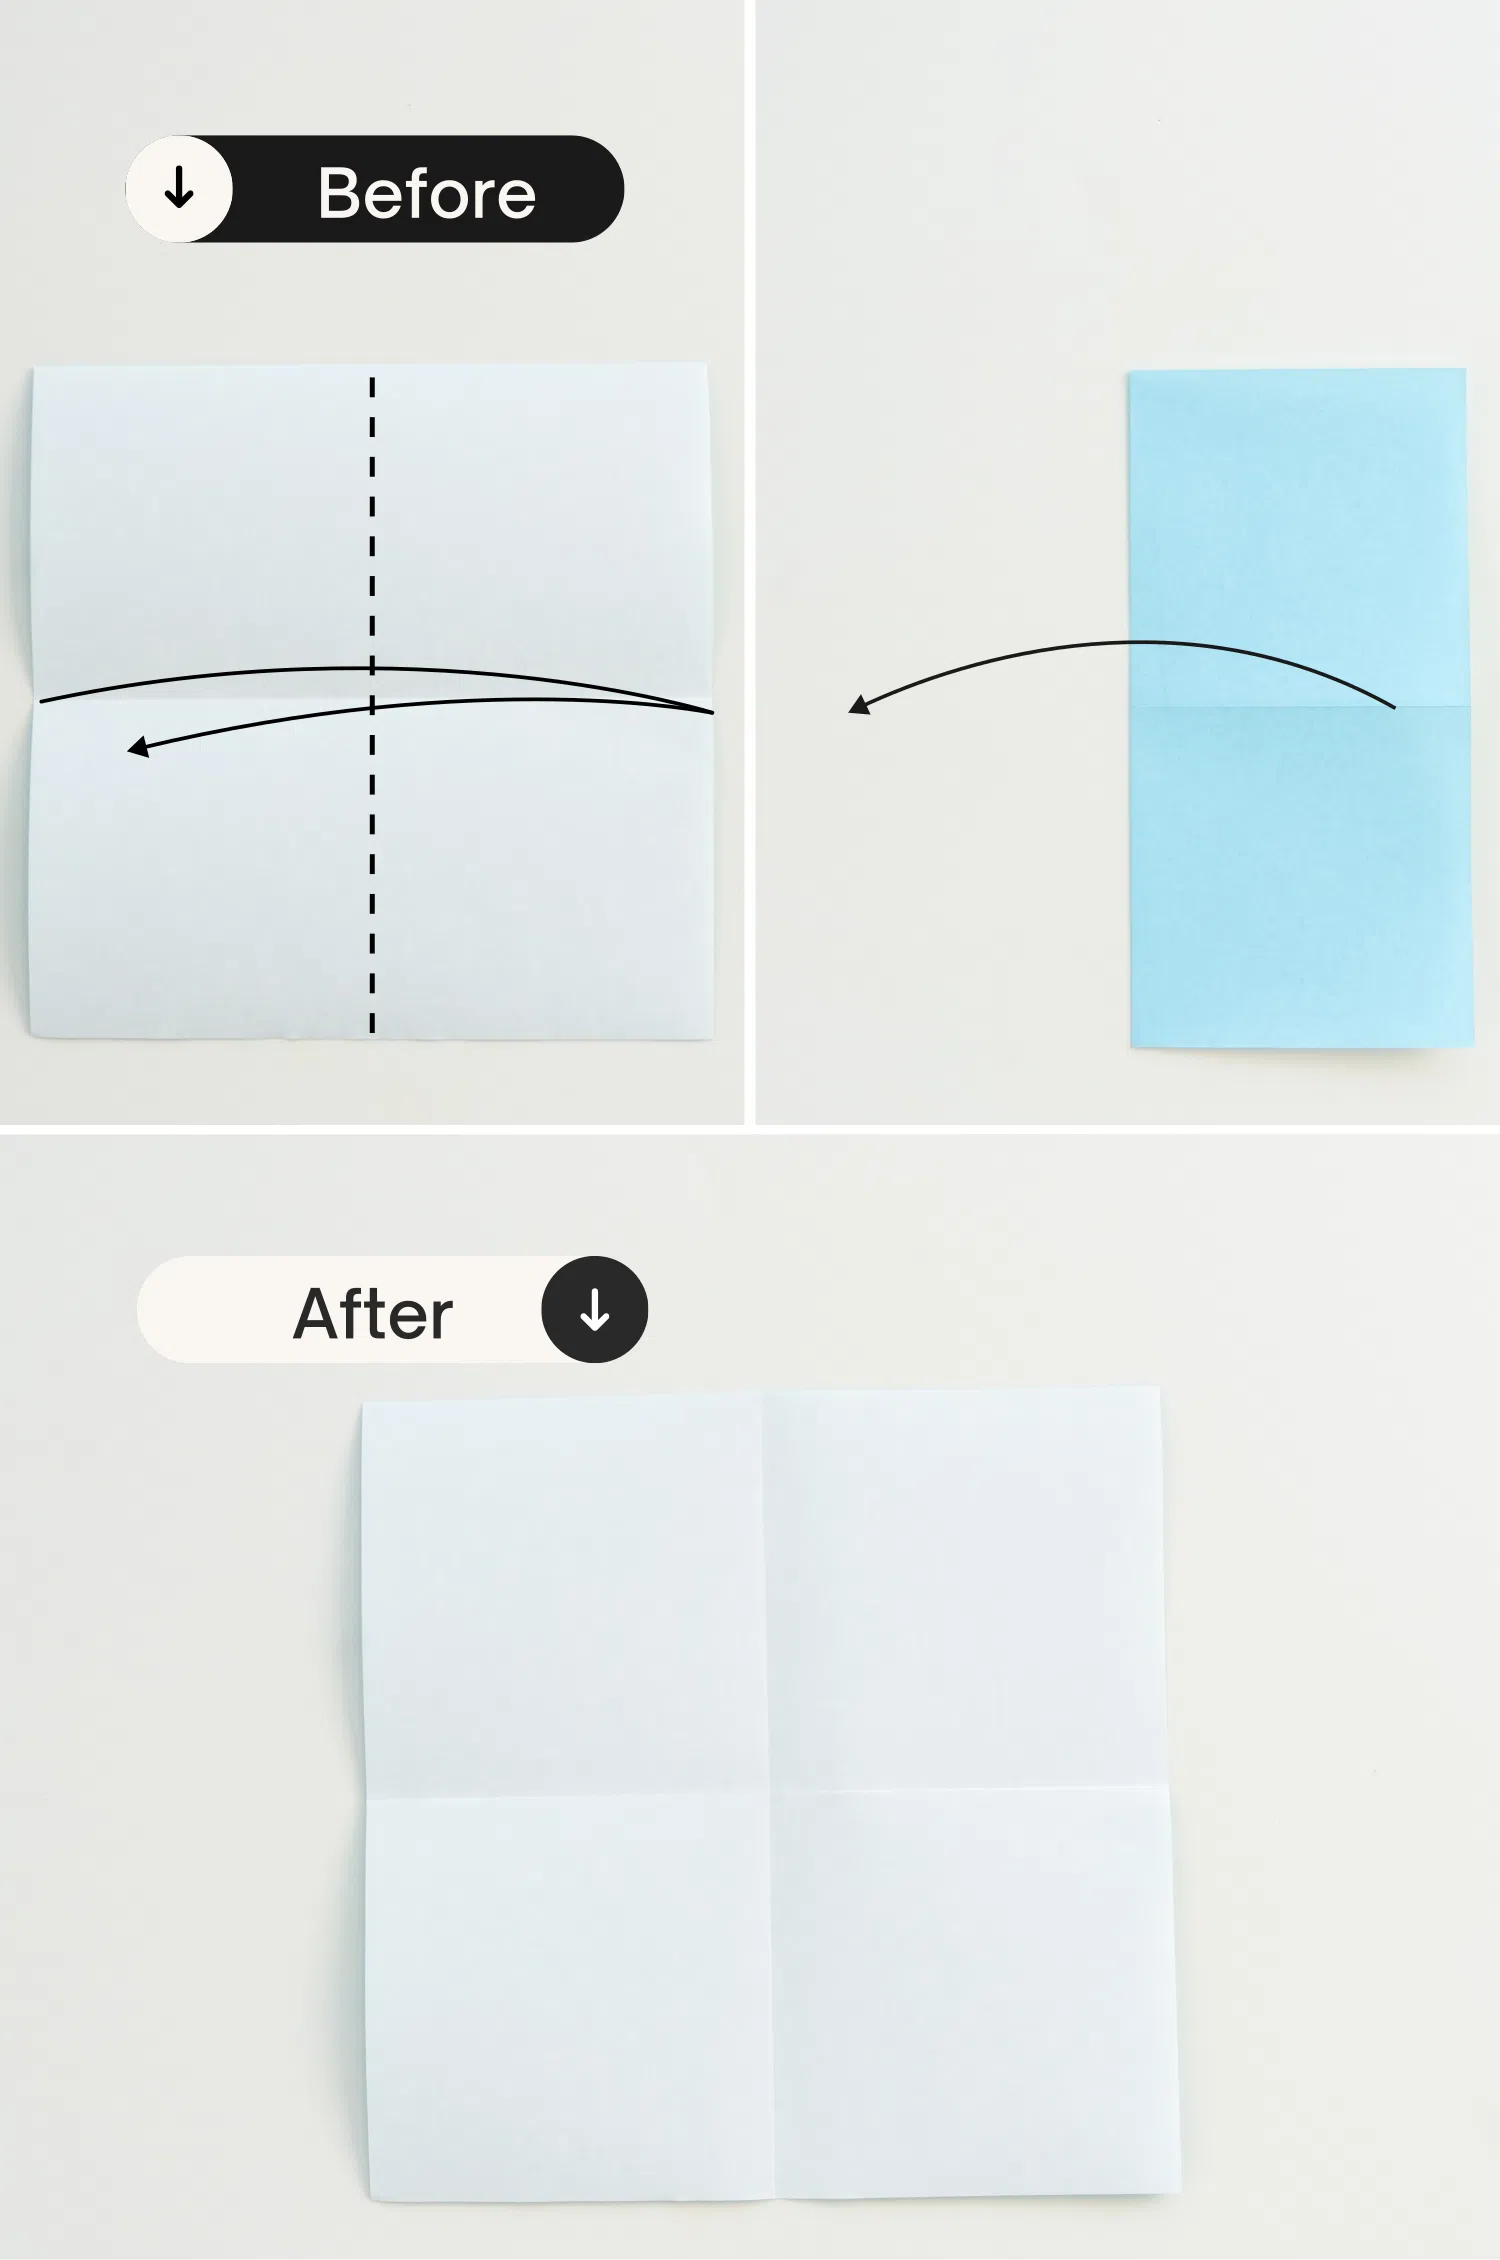
Step 1
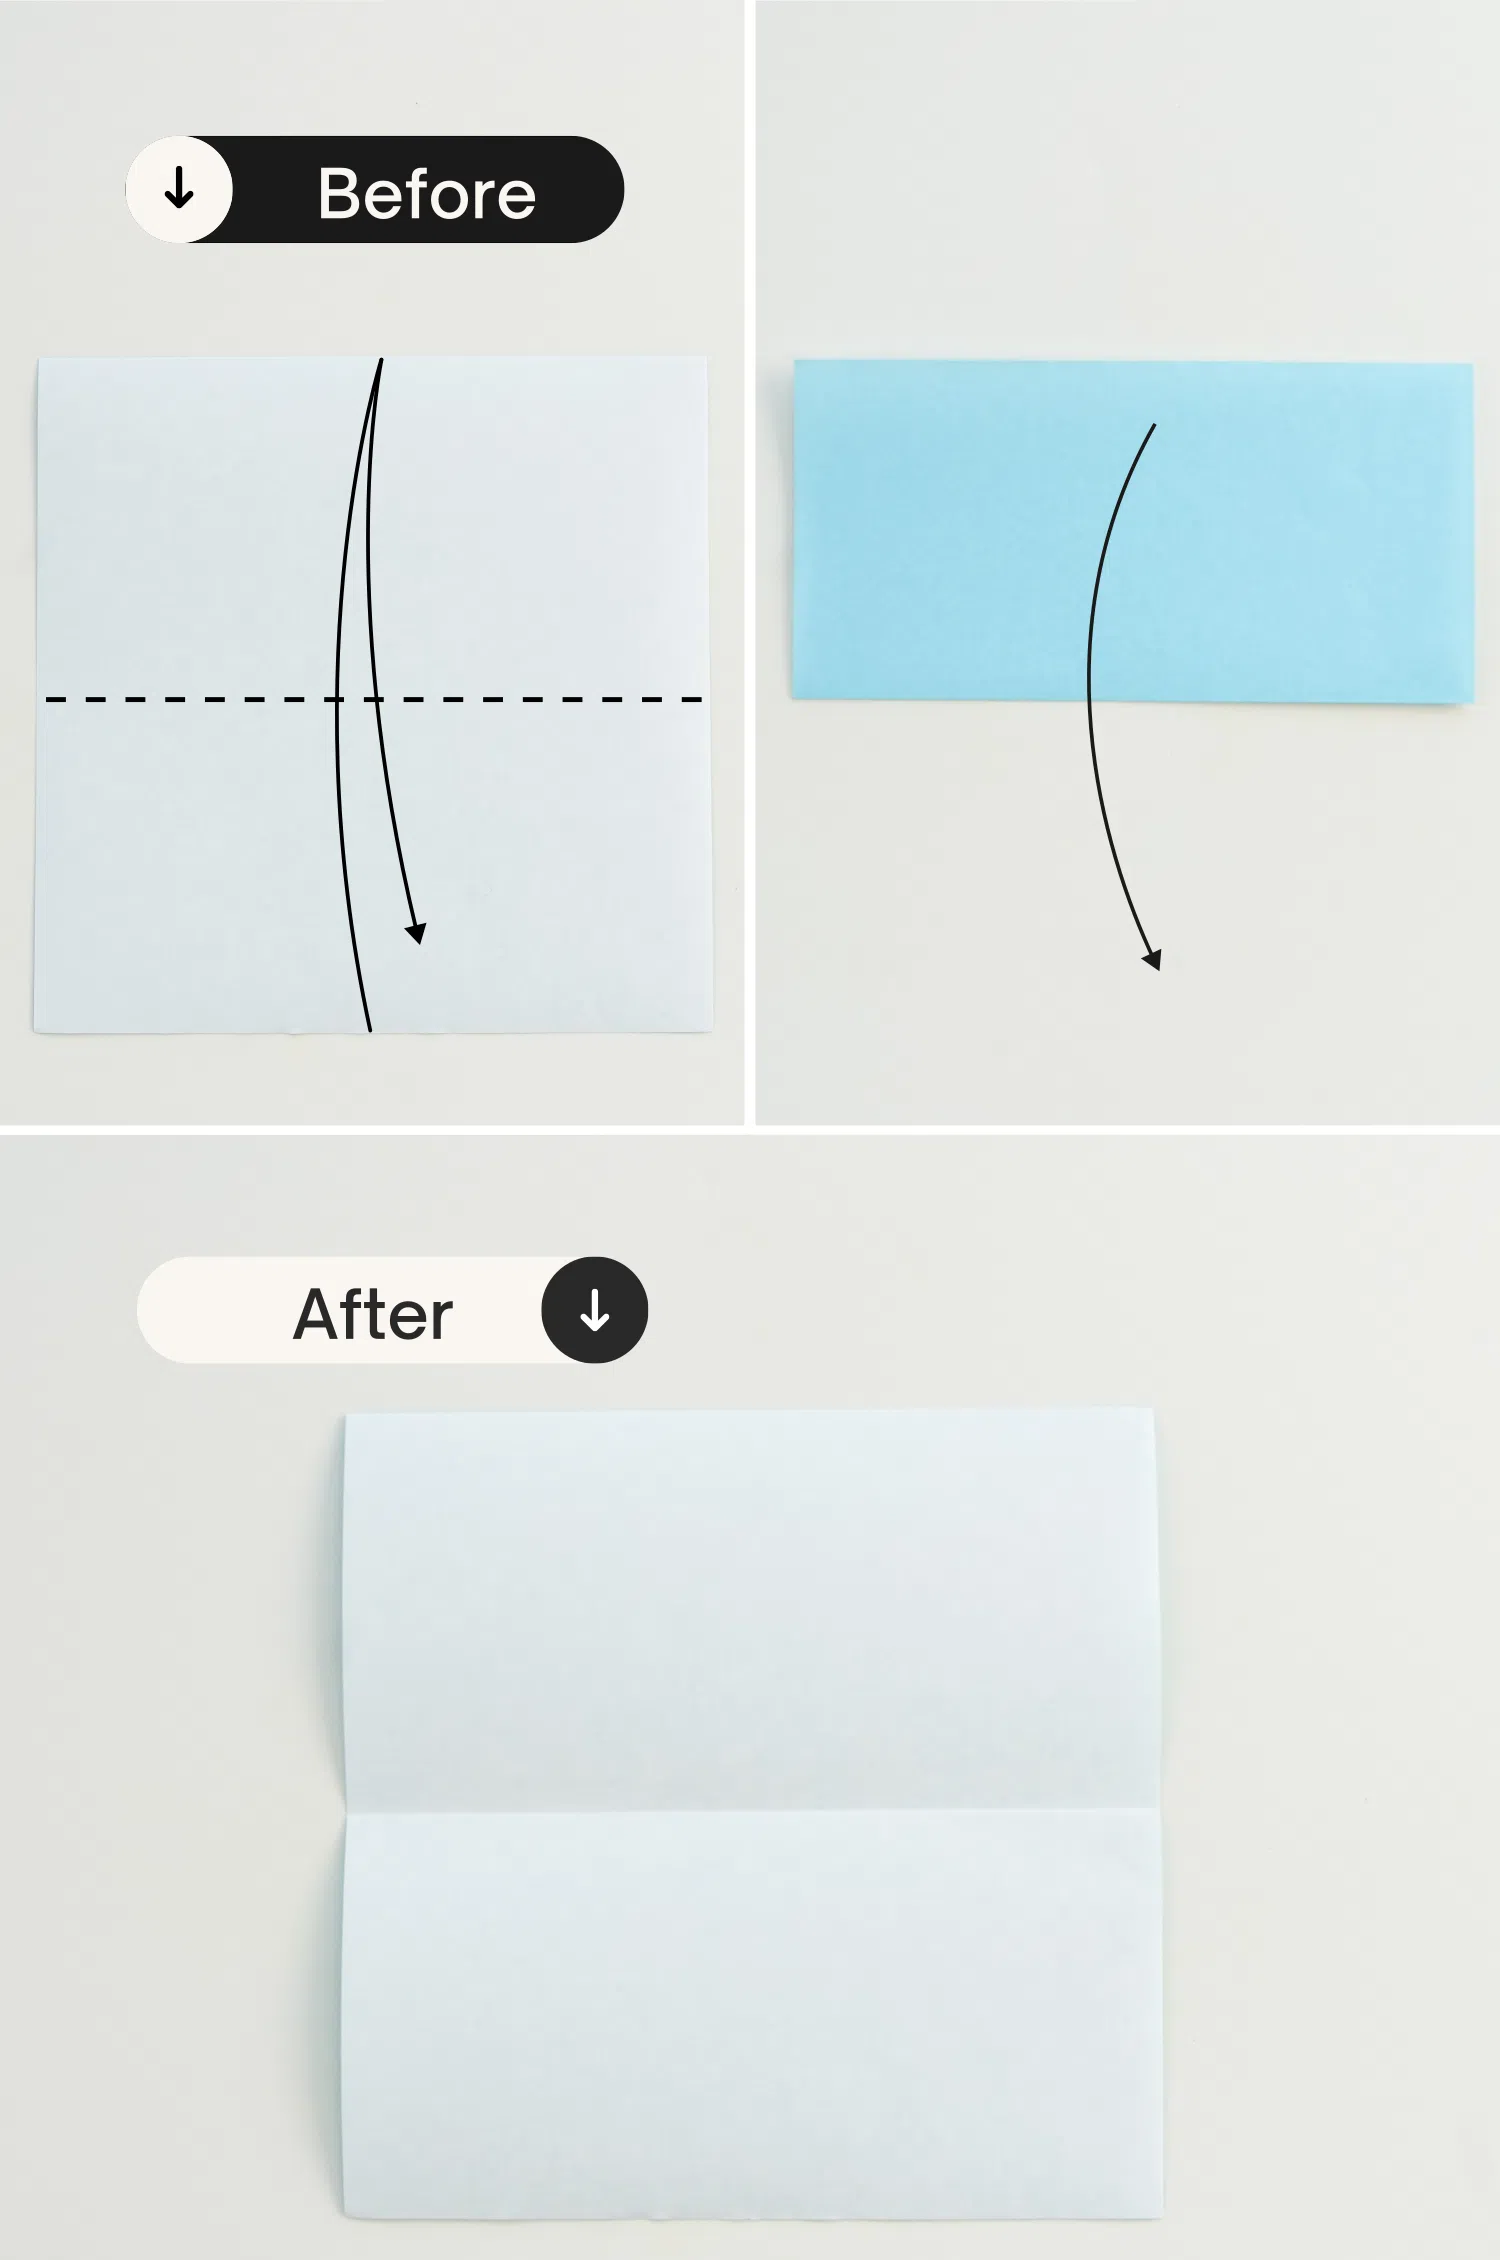
Start with the white side of the paper facing up. Fold it in half horizontally, crease it well and unfold.
Step 2
Fold it in half vertically, crease well and unfold.
Step 3
Fold the four corners of the paper to the center.
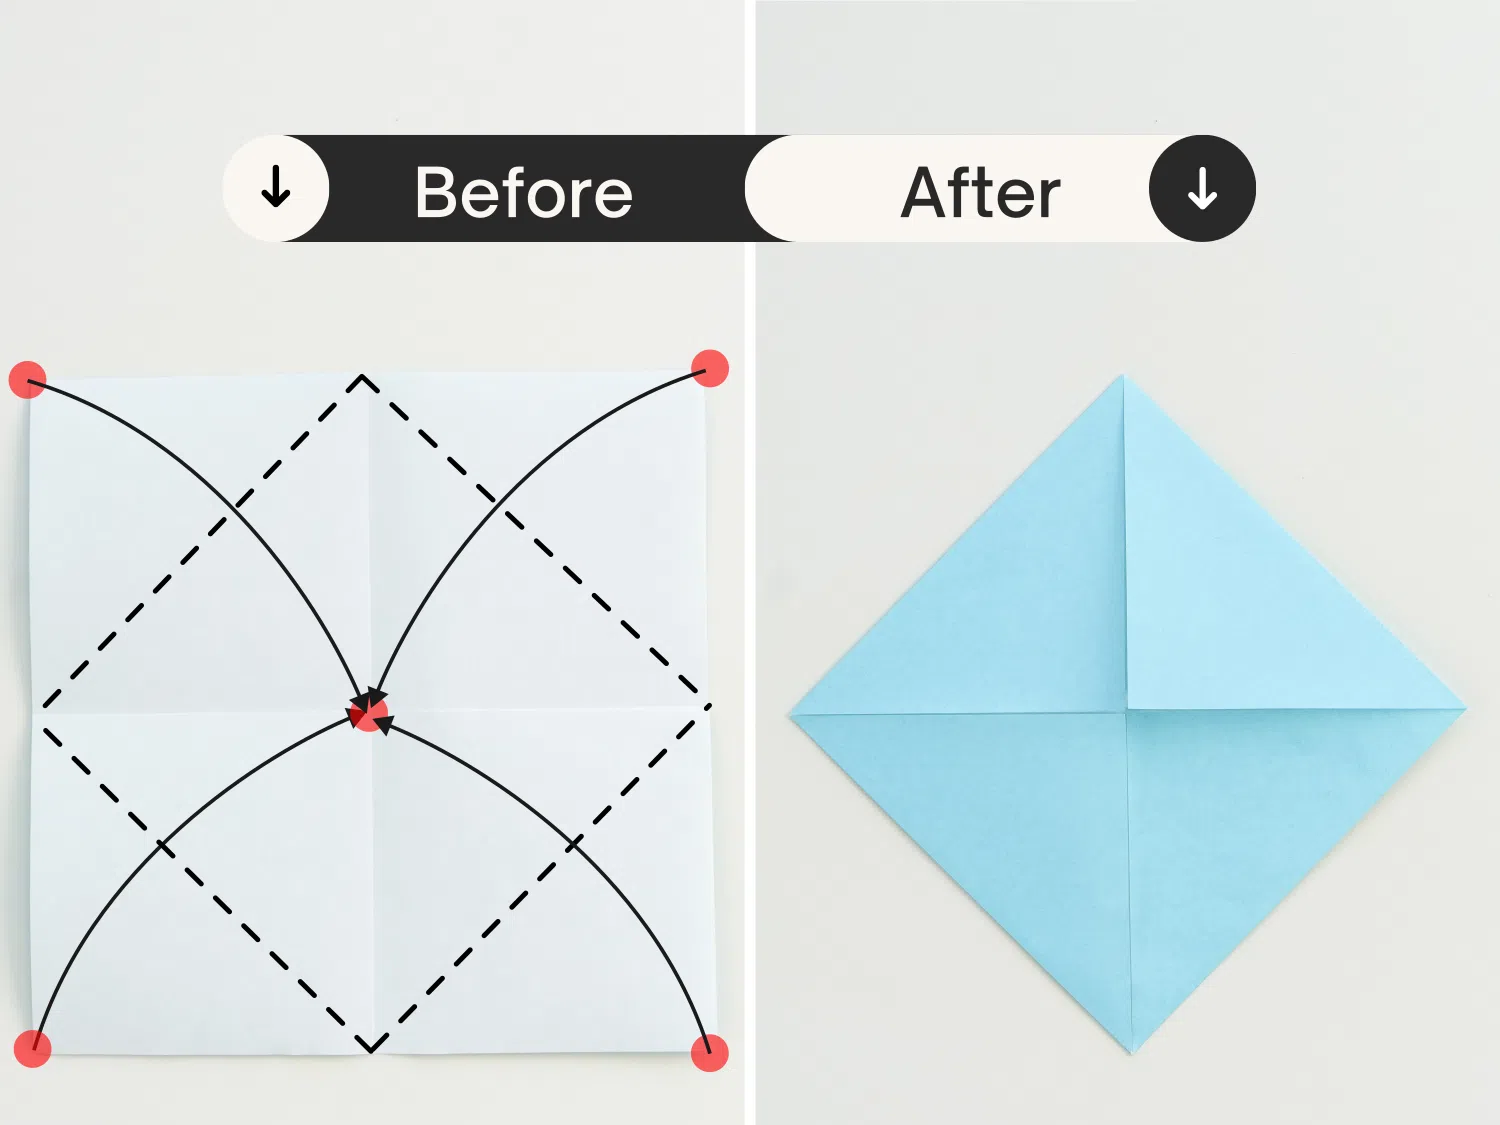
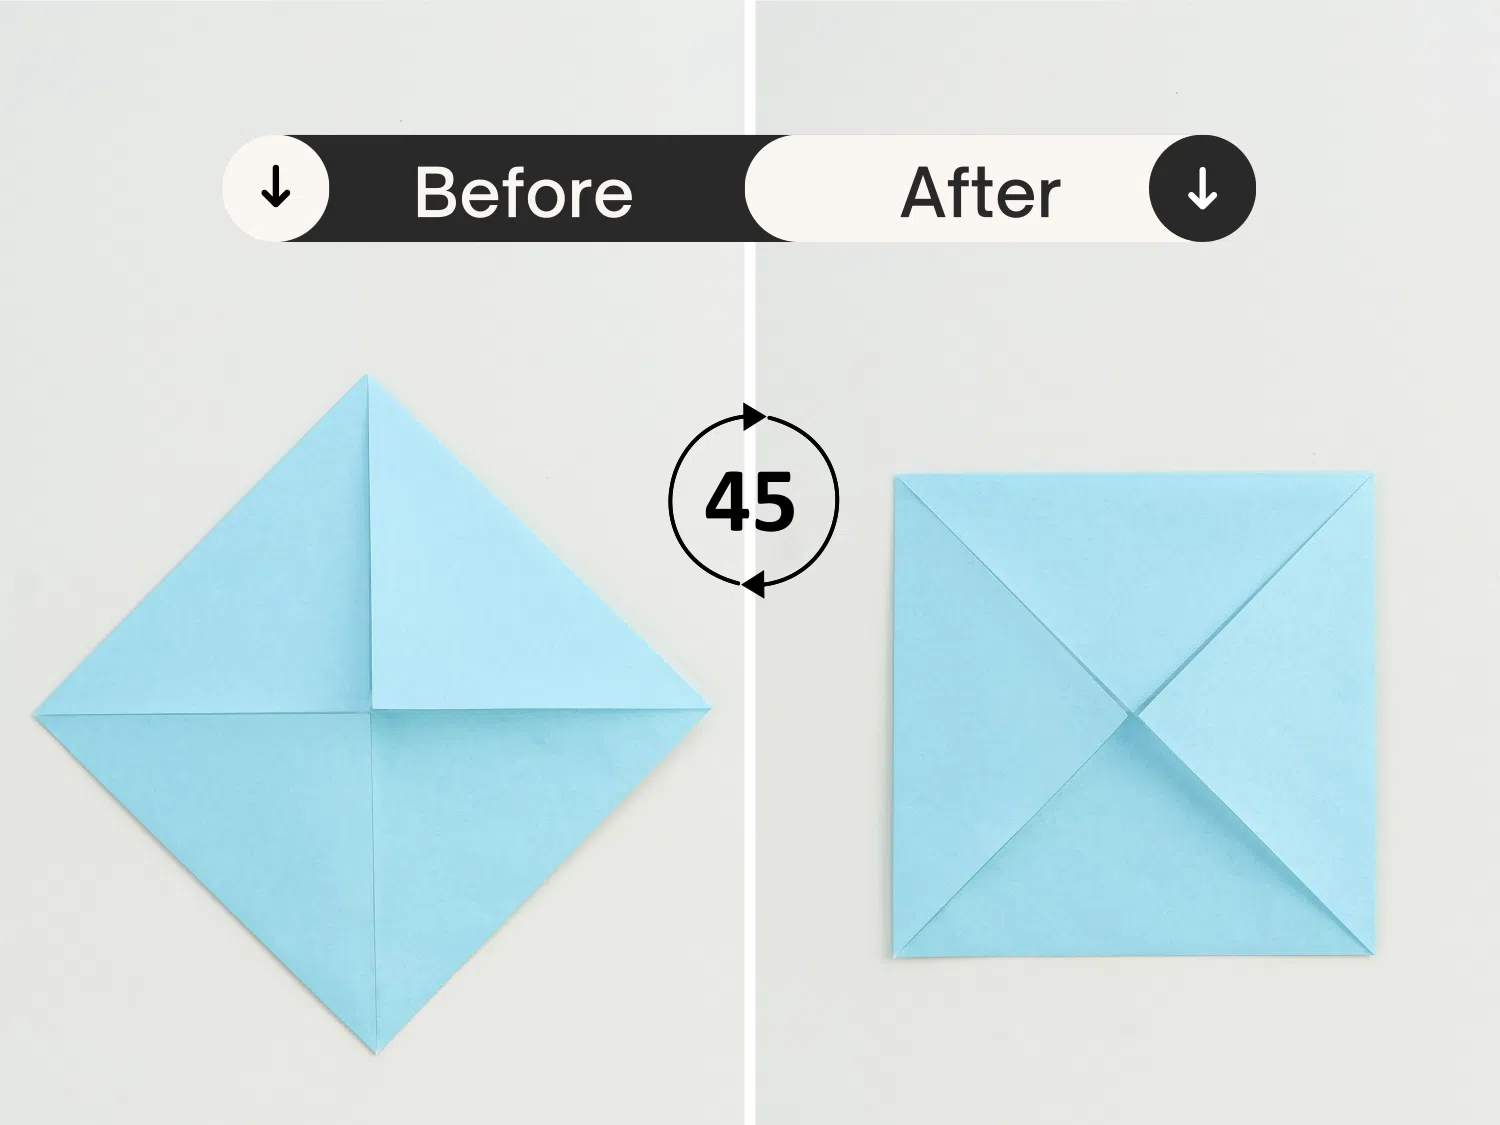
Step 4
Rotate it 45 degrees clockwise.
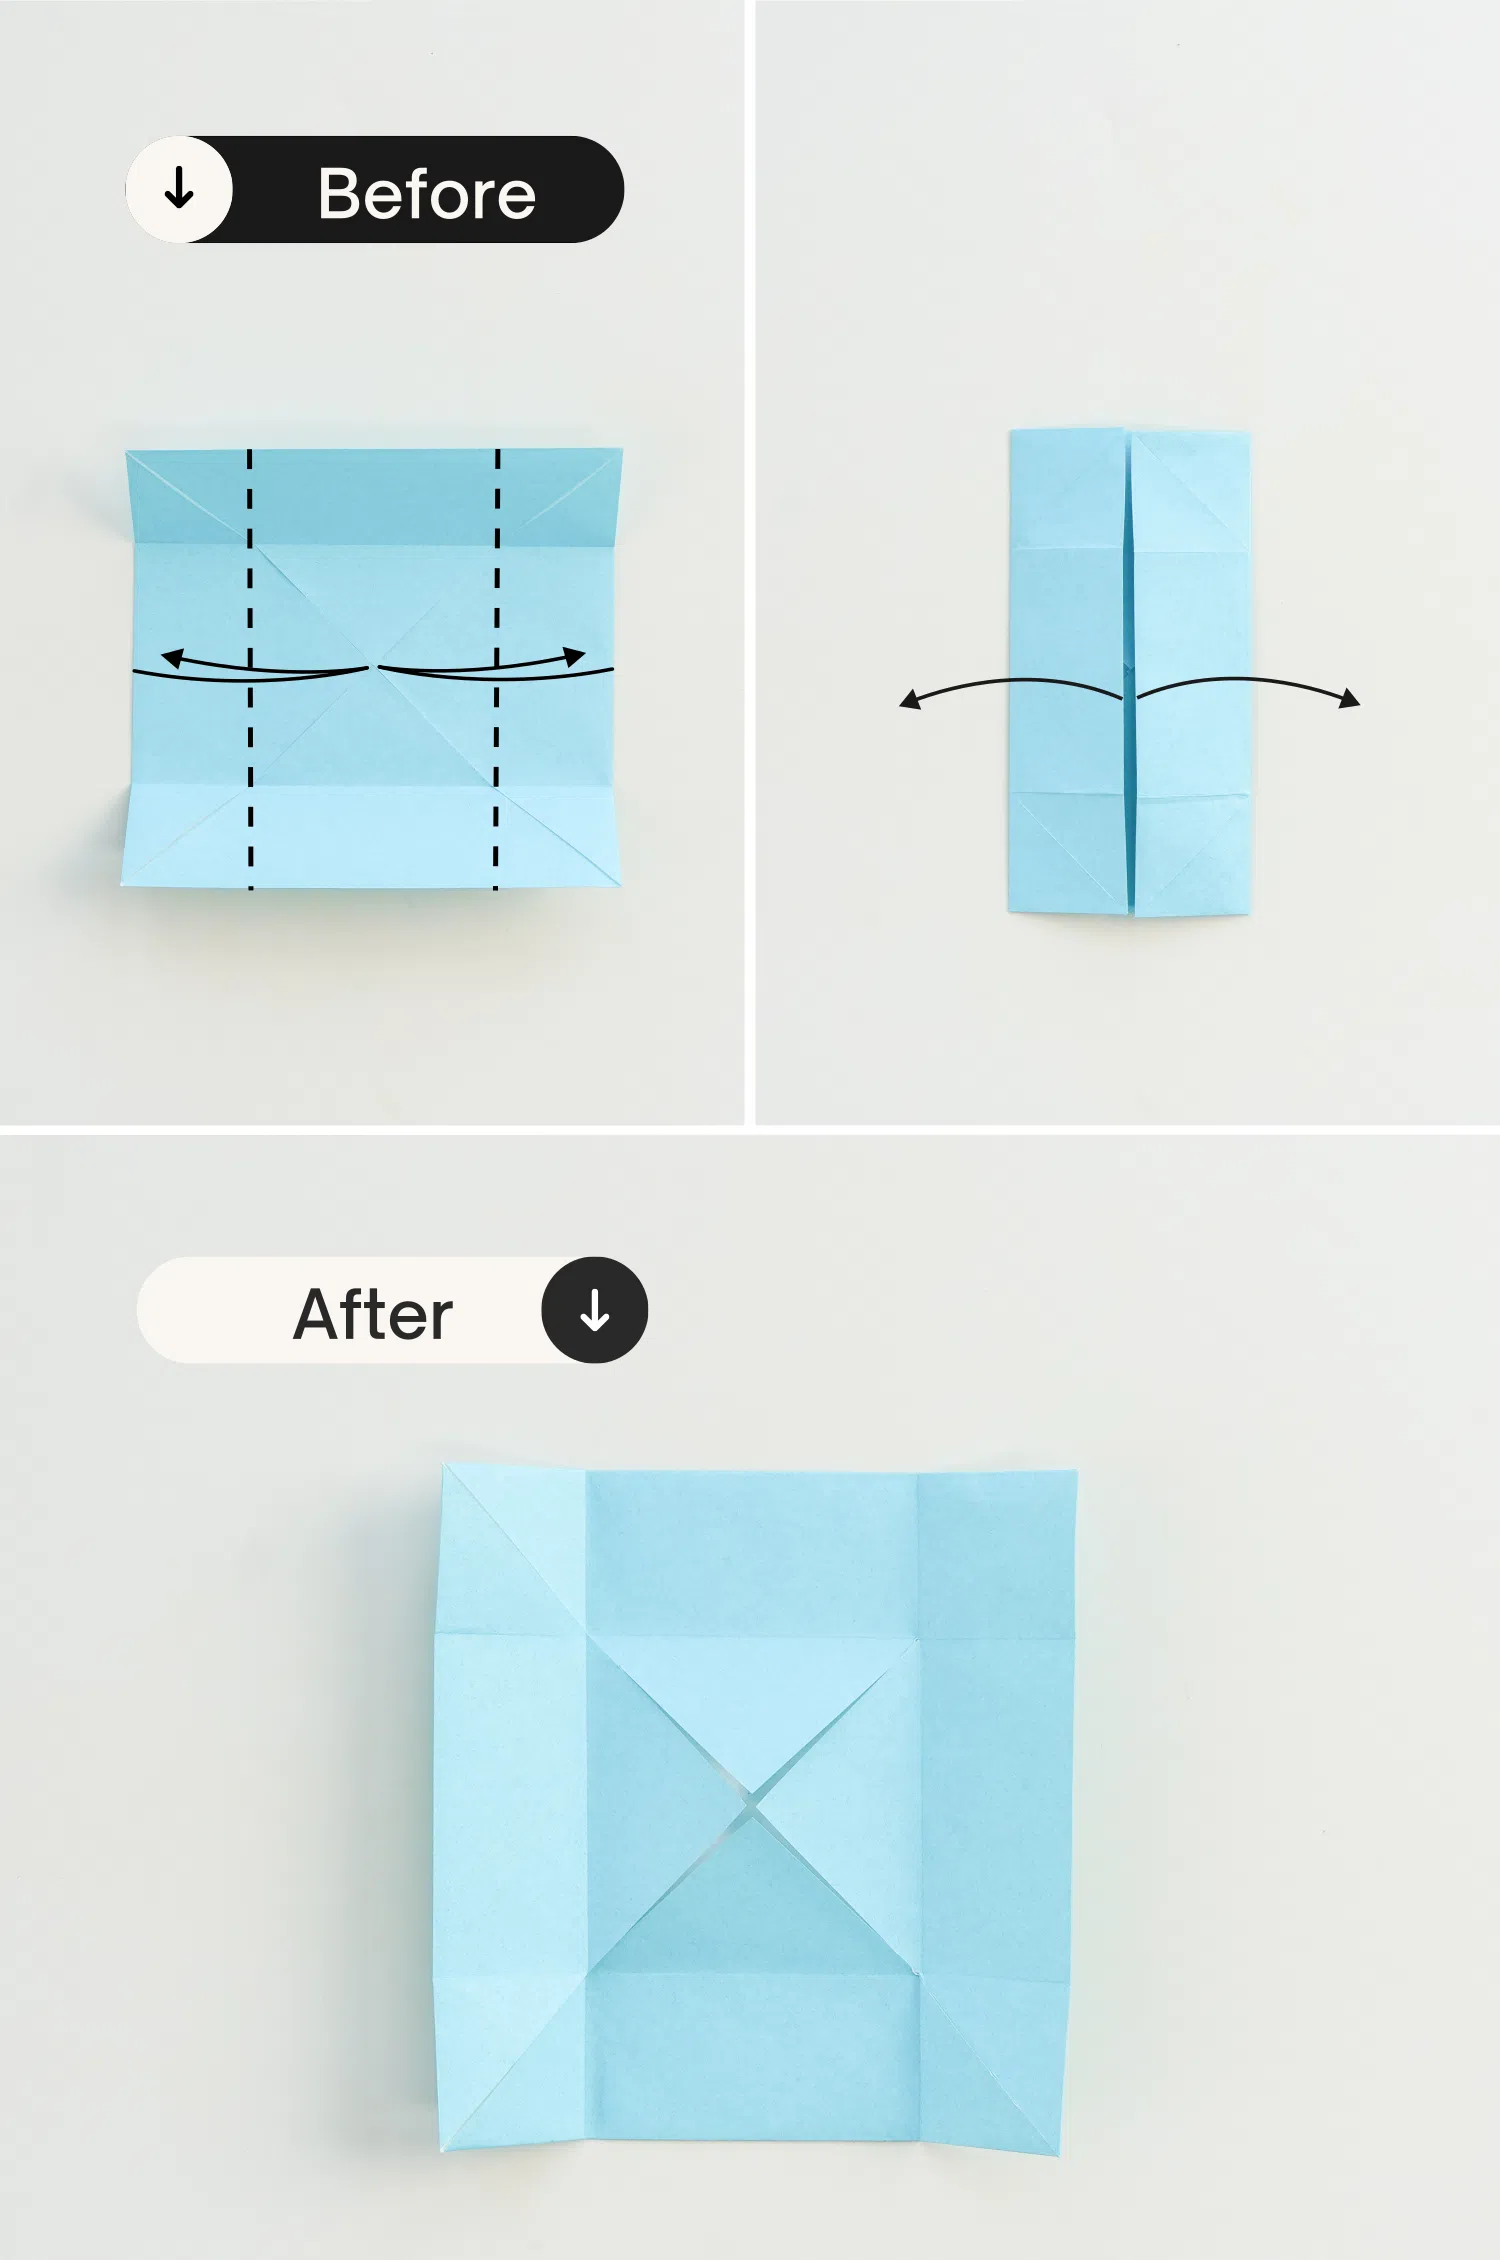
Step 5
Fold the top and bottom edges along the dotted line to the center, crease them well, and then unfold.
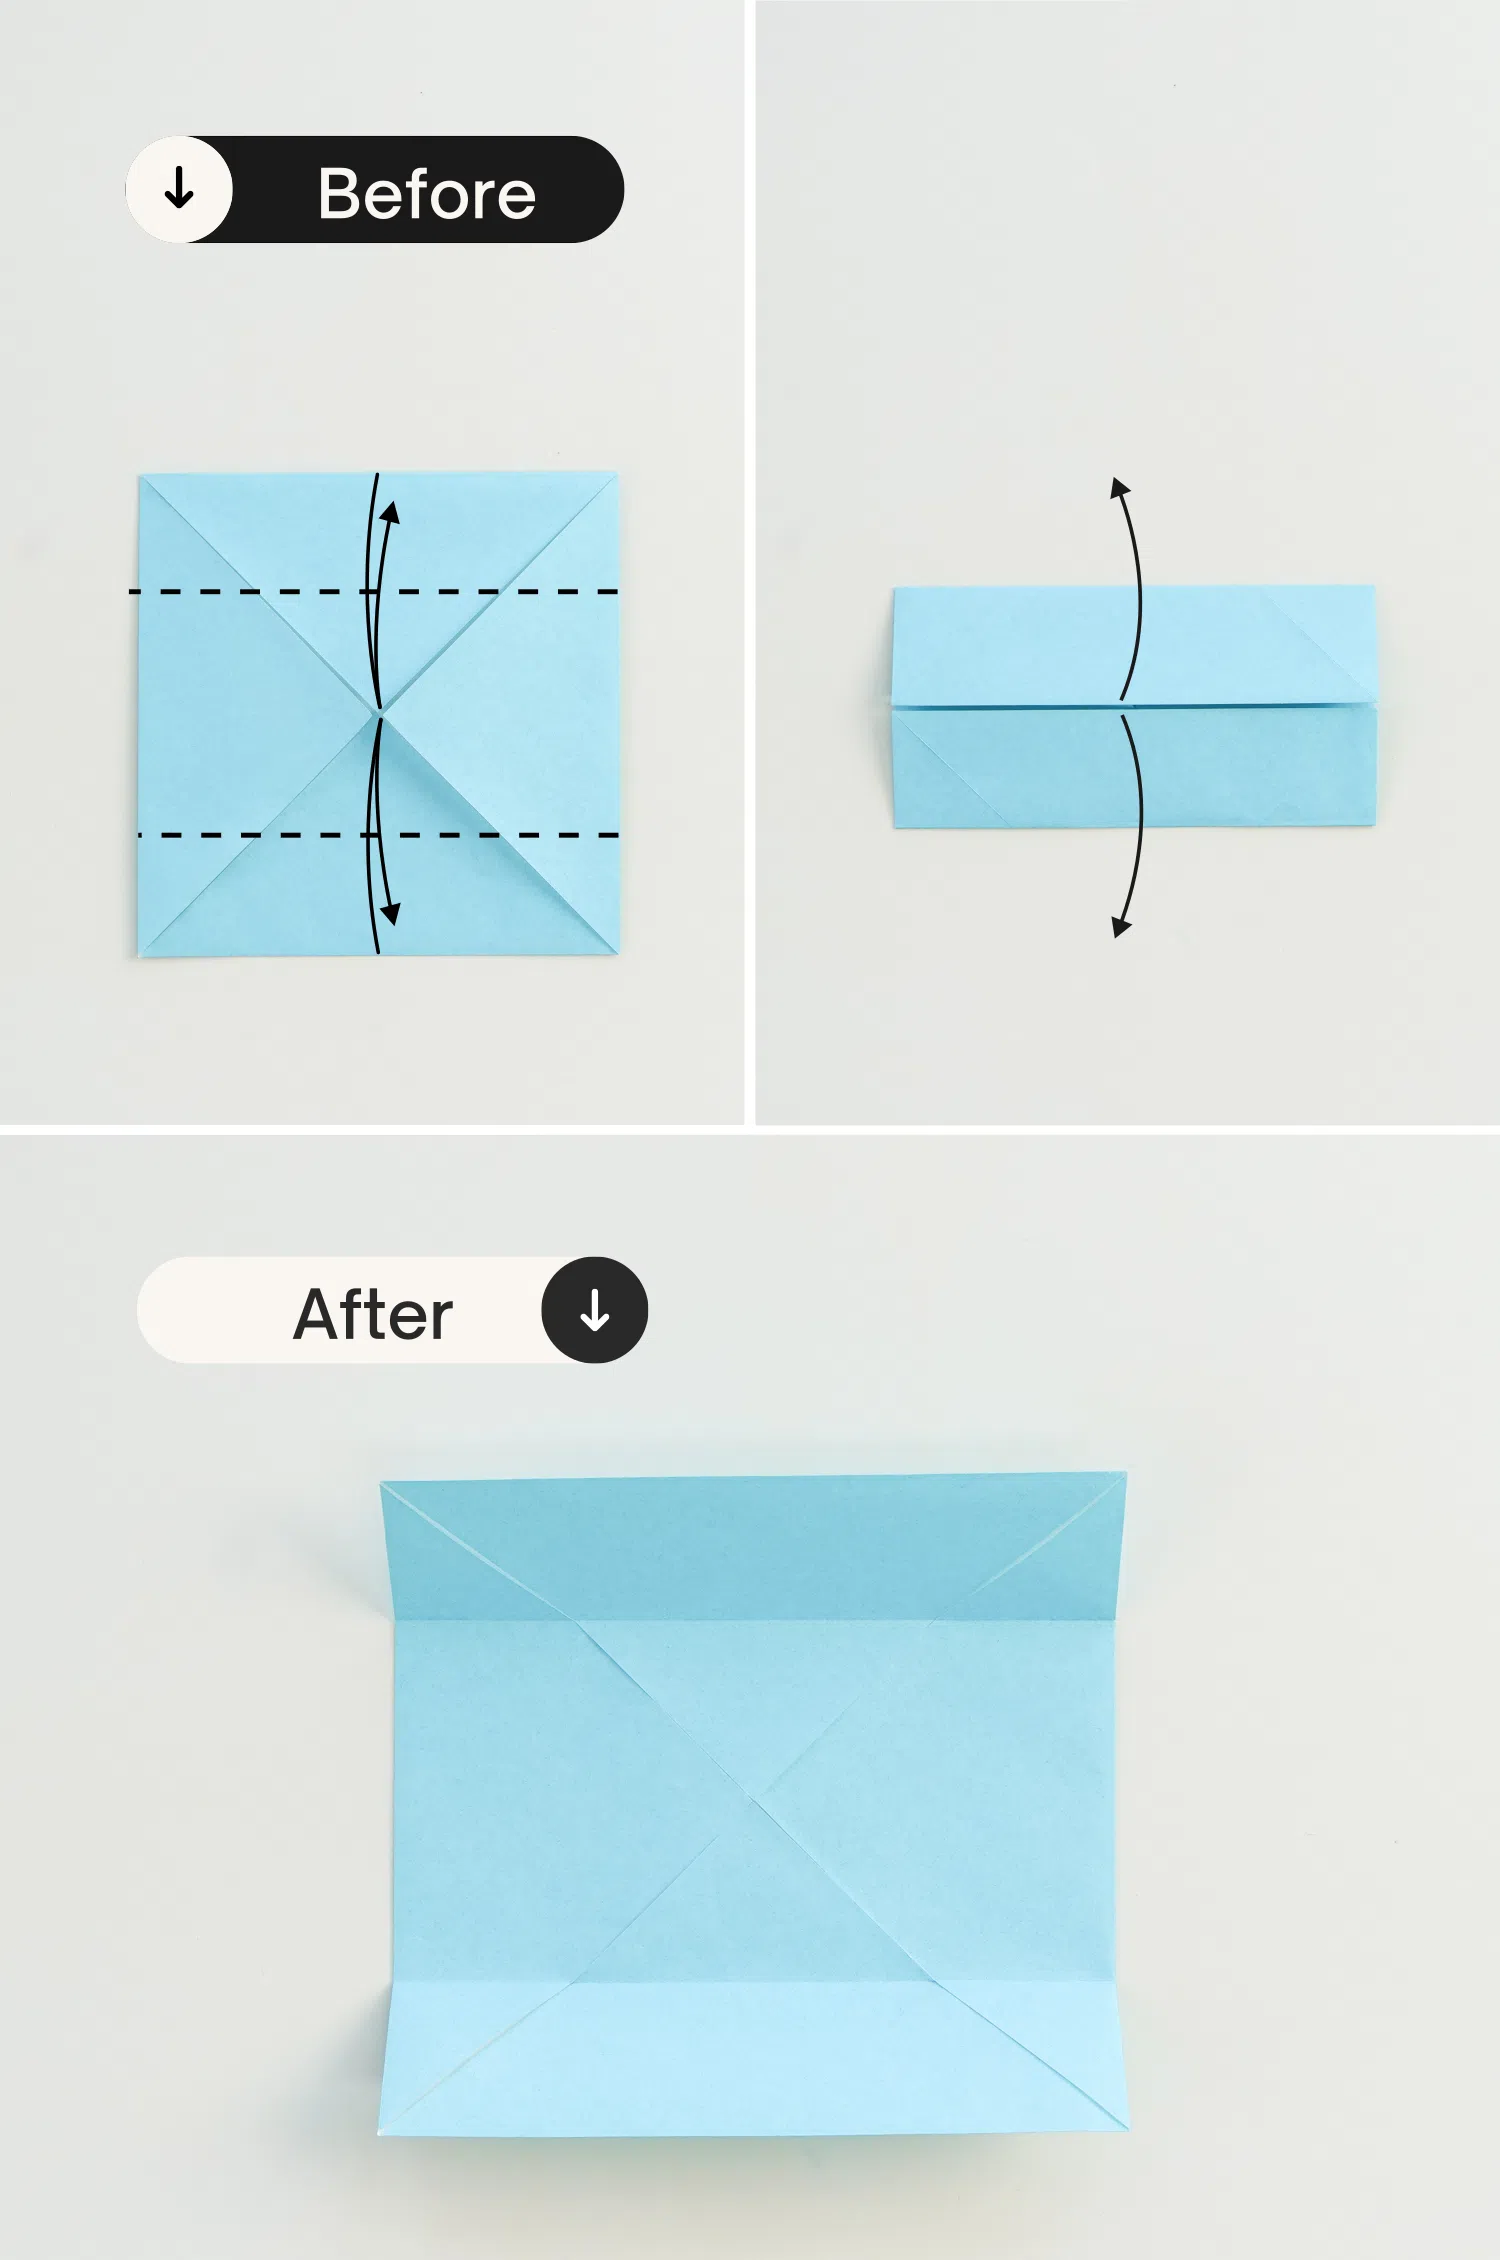
Step 6
Fold the left and right edges to the center along the dotted line, crease it well then unfold it.
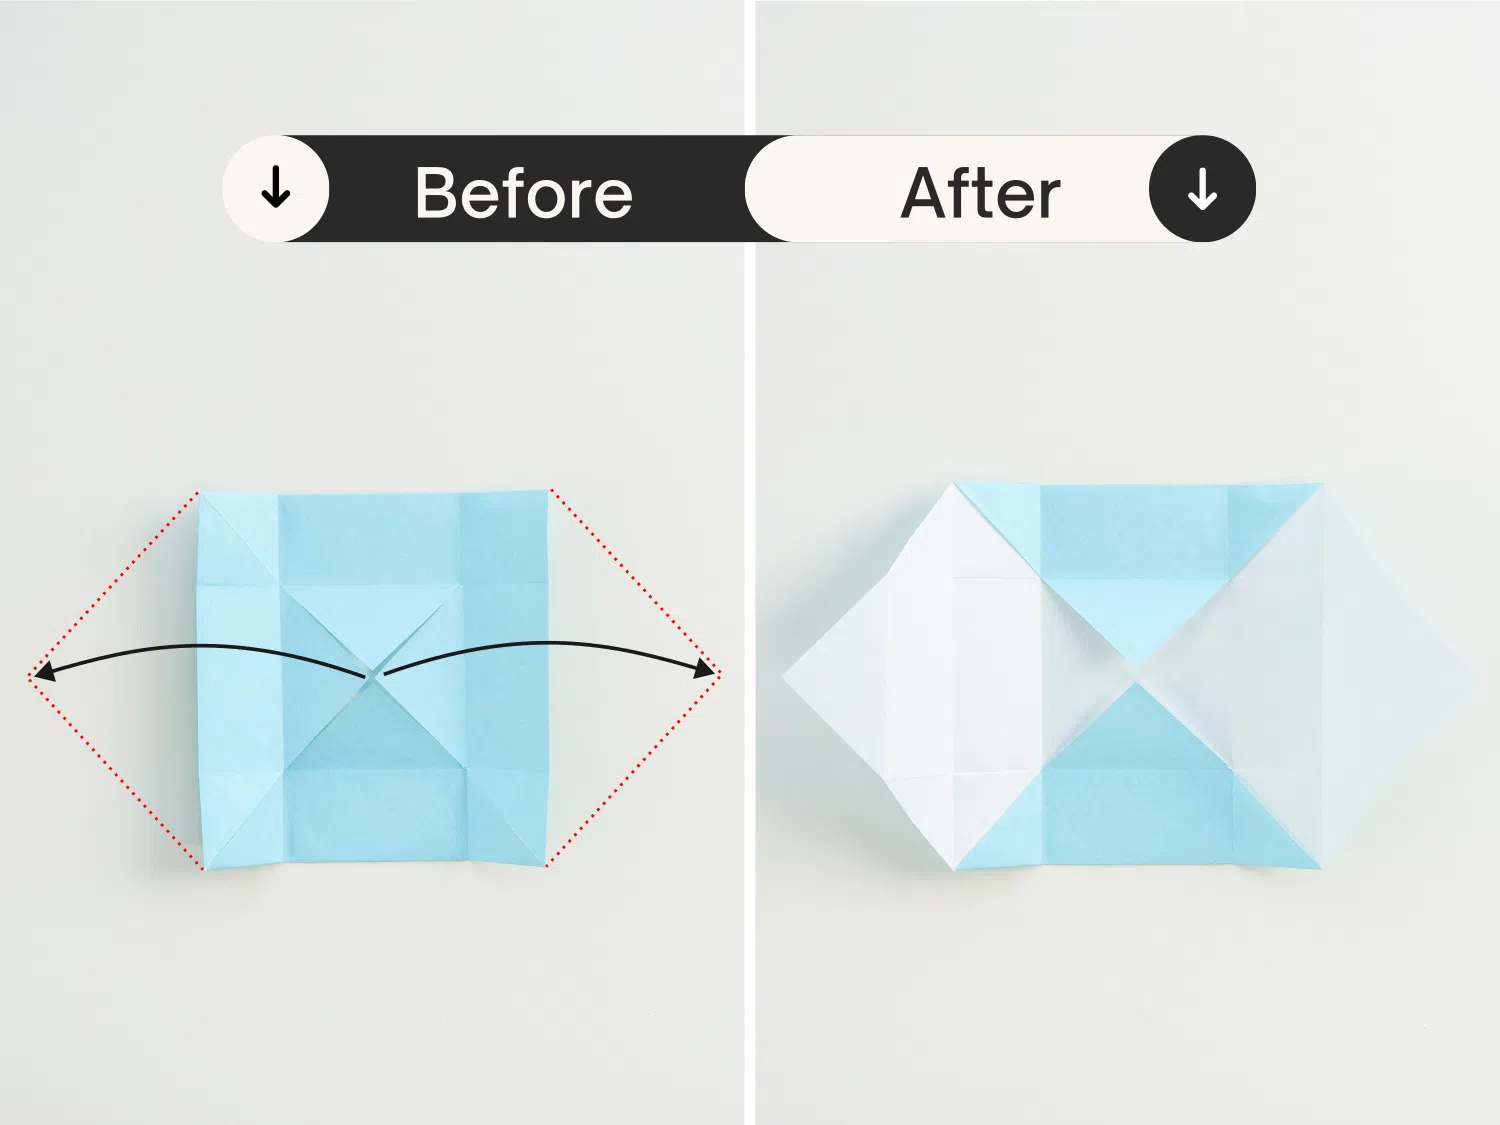
Step 7
Unfold the left and right triangles.
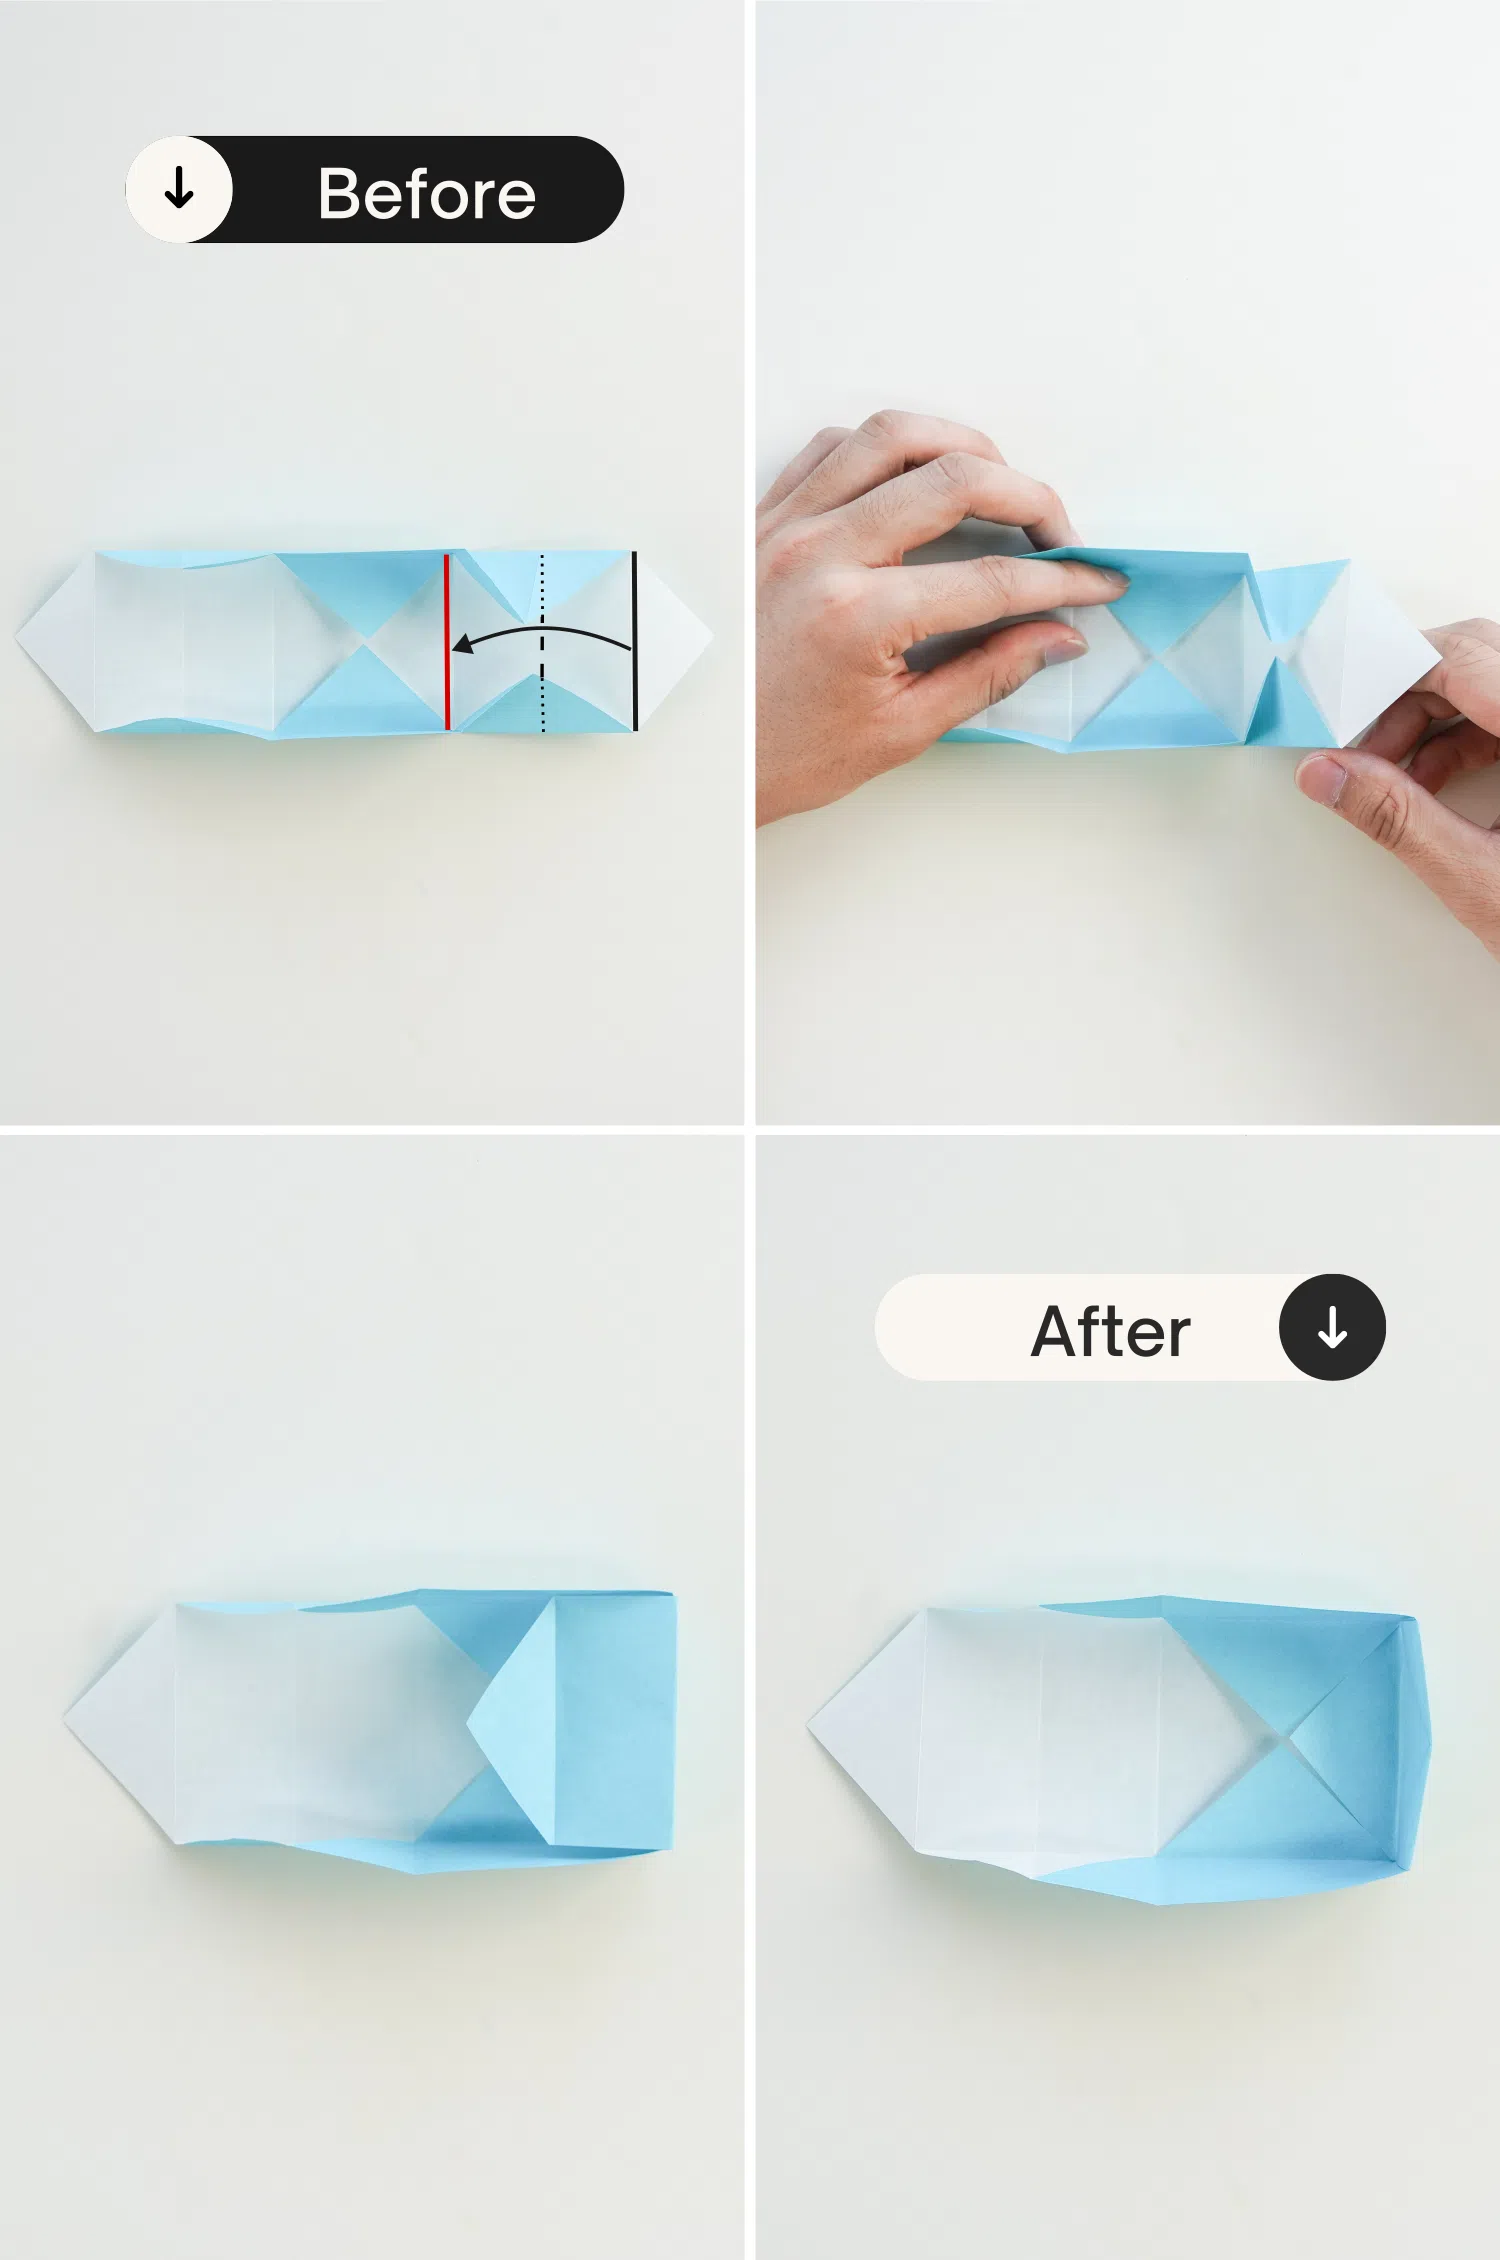
Step 8
Fold the top and bottom edges to the center along the dotted line.
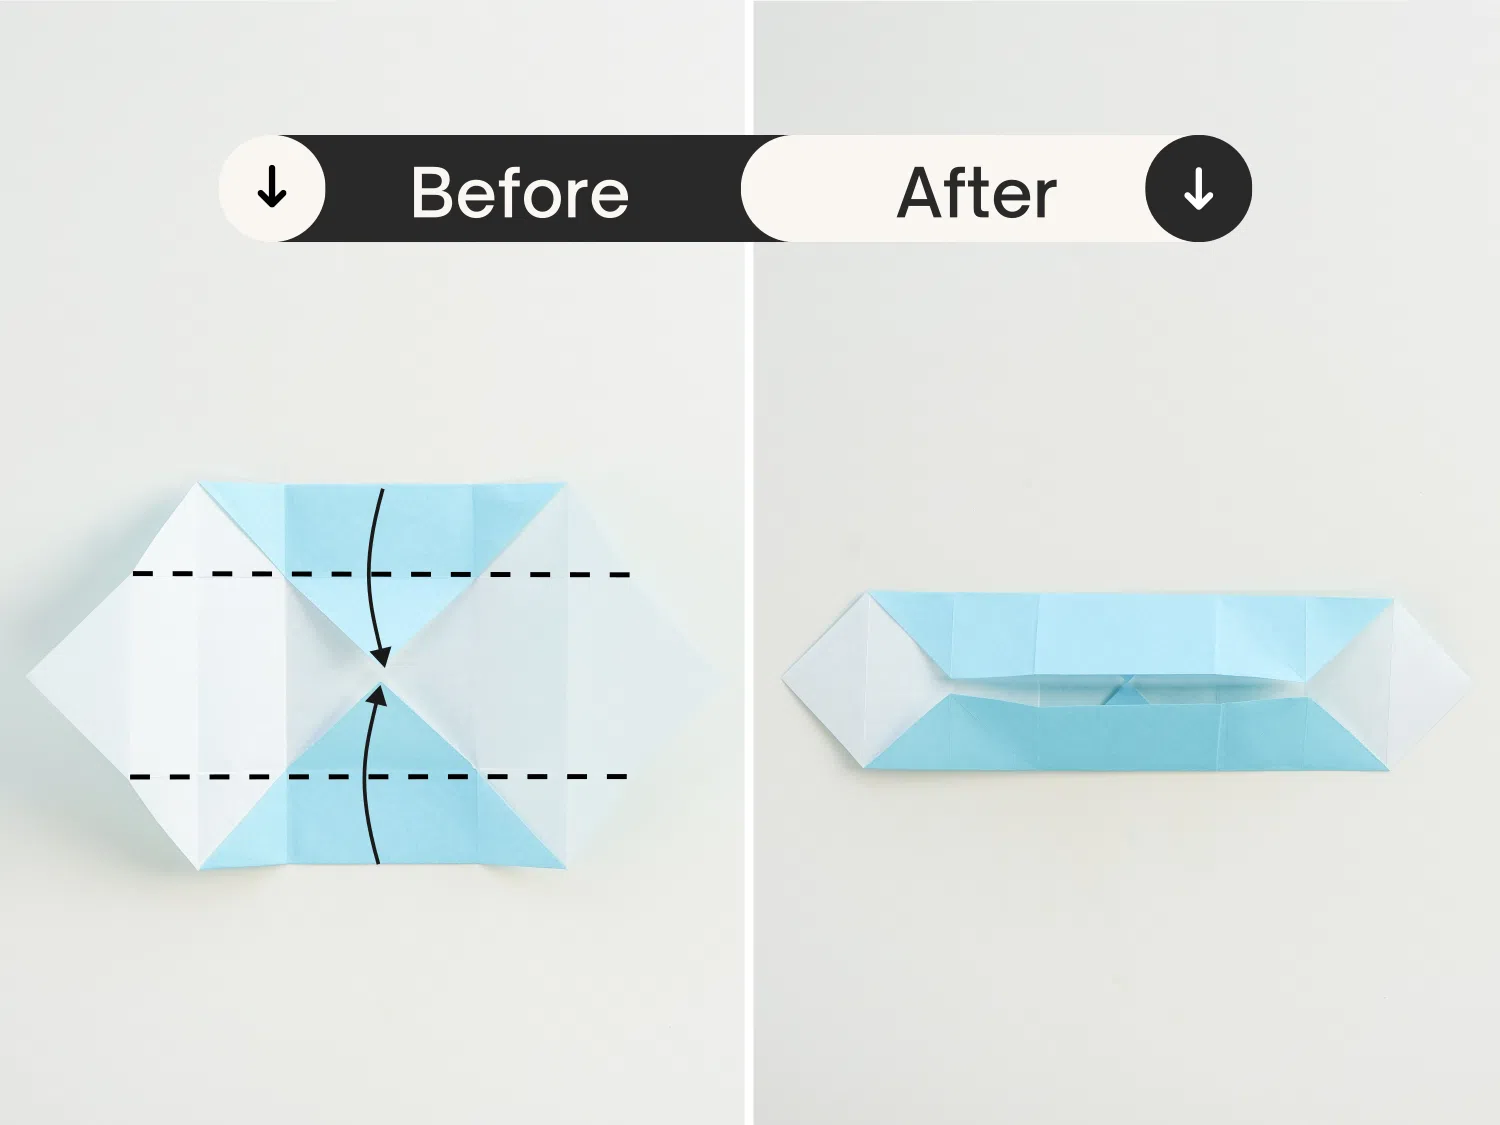
Step 9
Then unfold them for only 90 degrees, creating two standing edges.
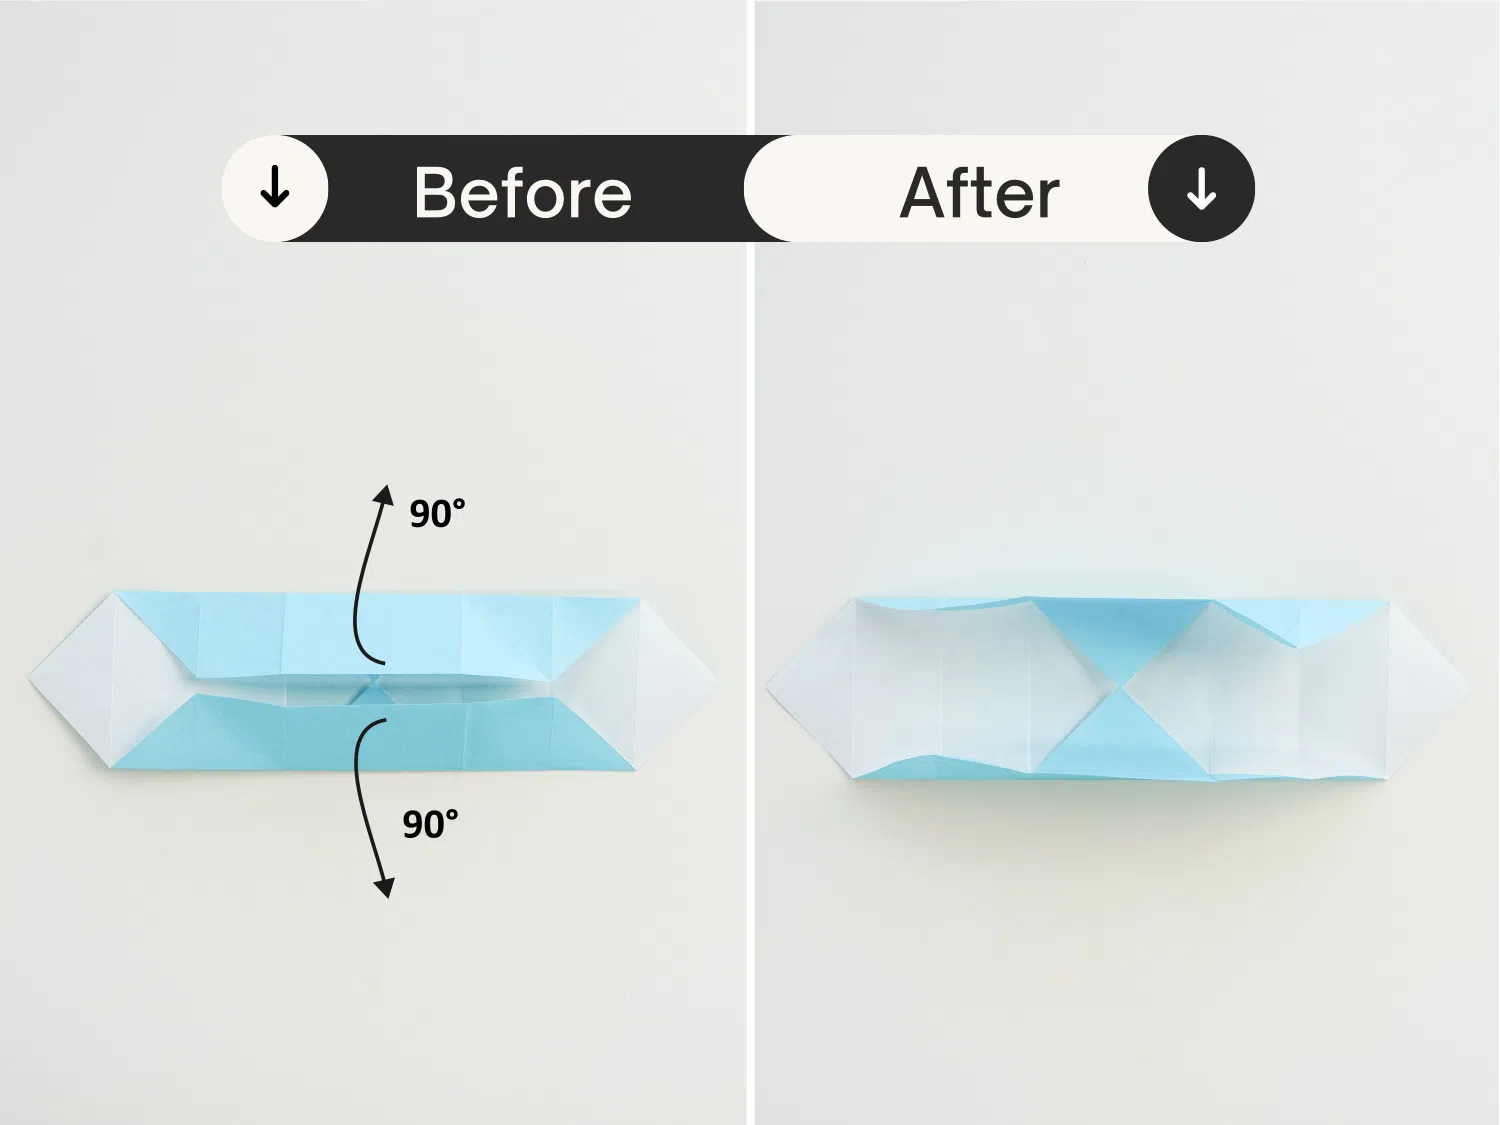
Step 10
Lift the right corner along the dotted line slightly.
Fold both the bottom and top sides along the dotted line, and bring the two red points together.
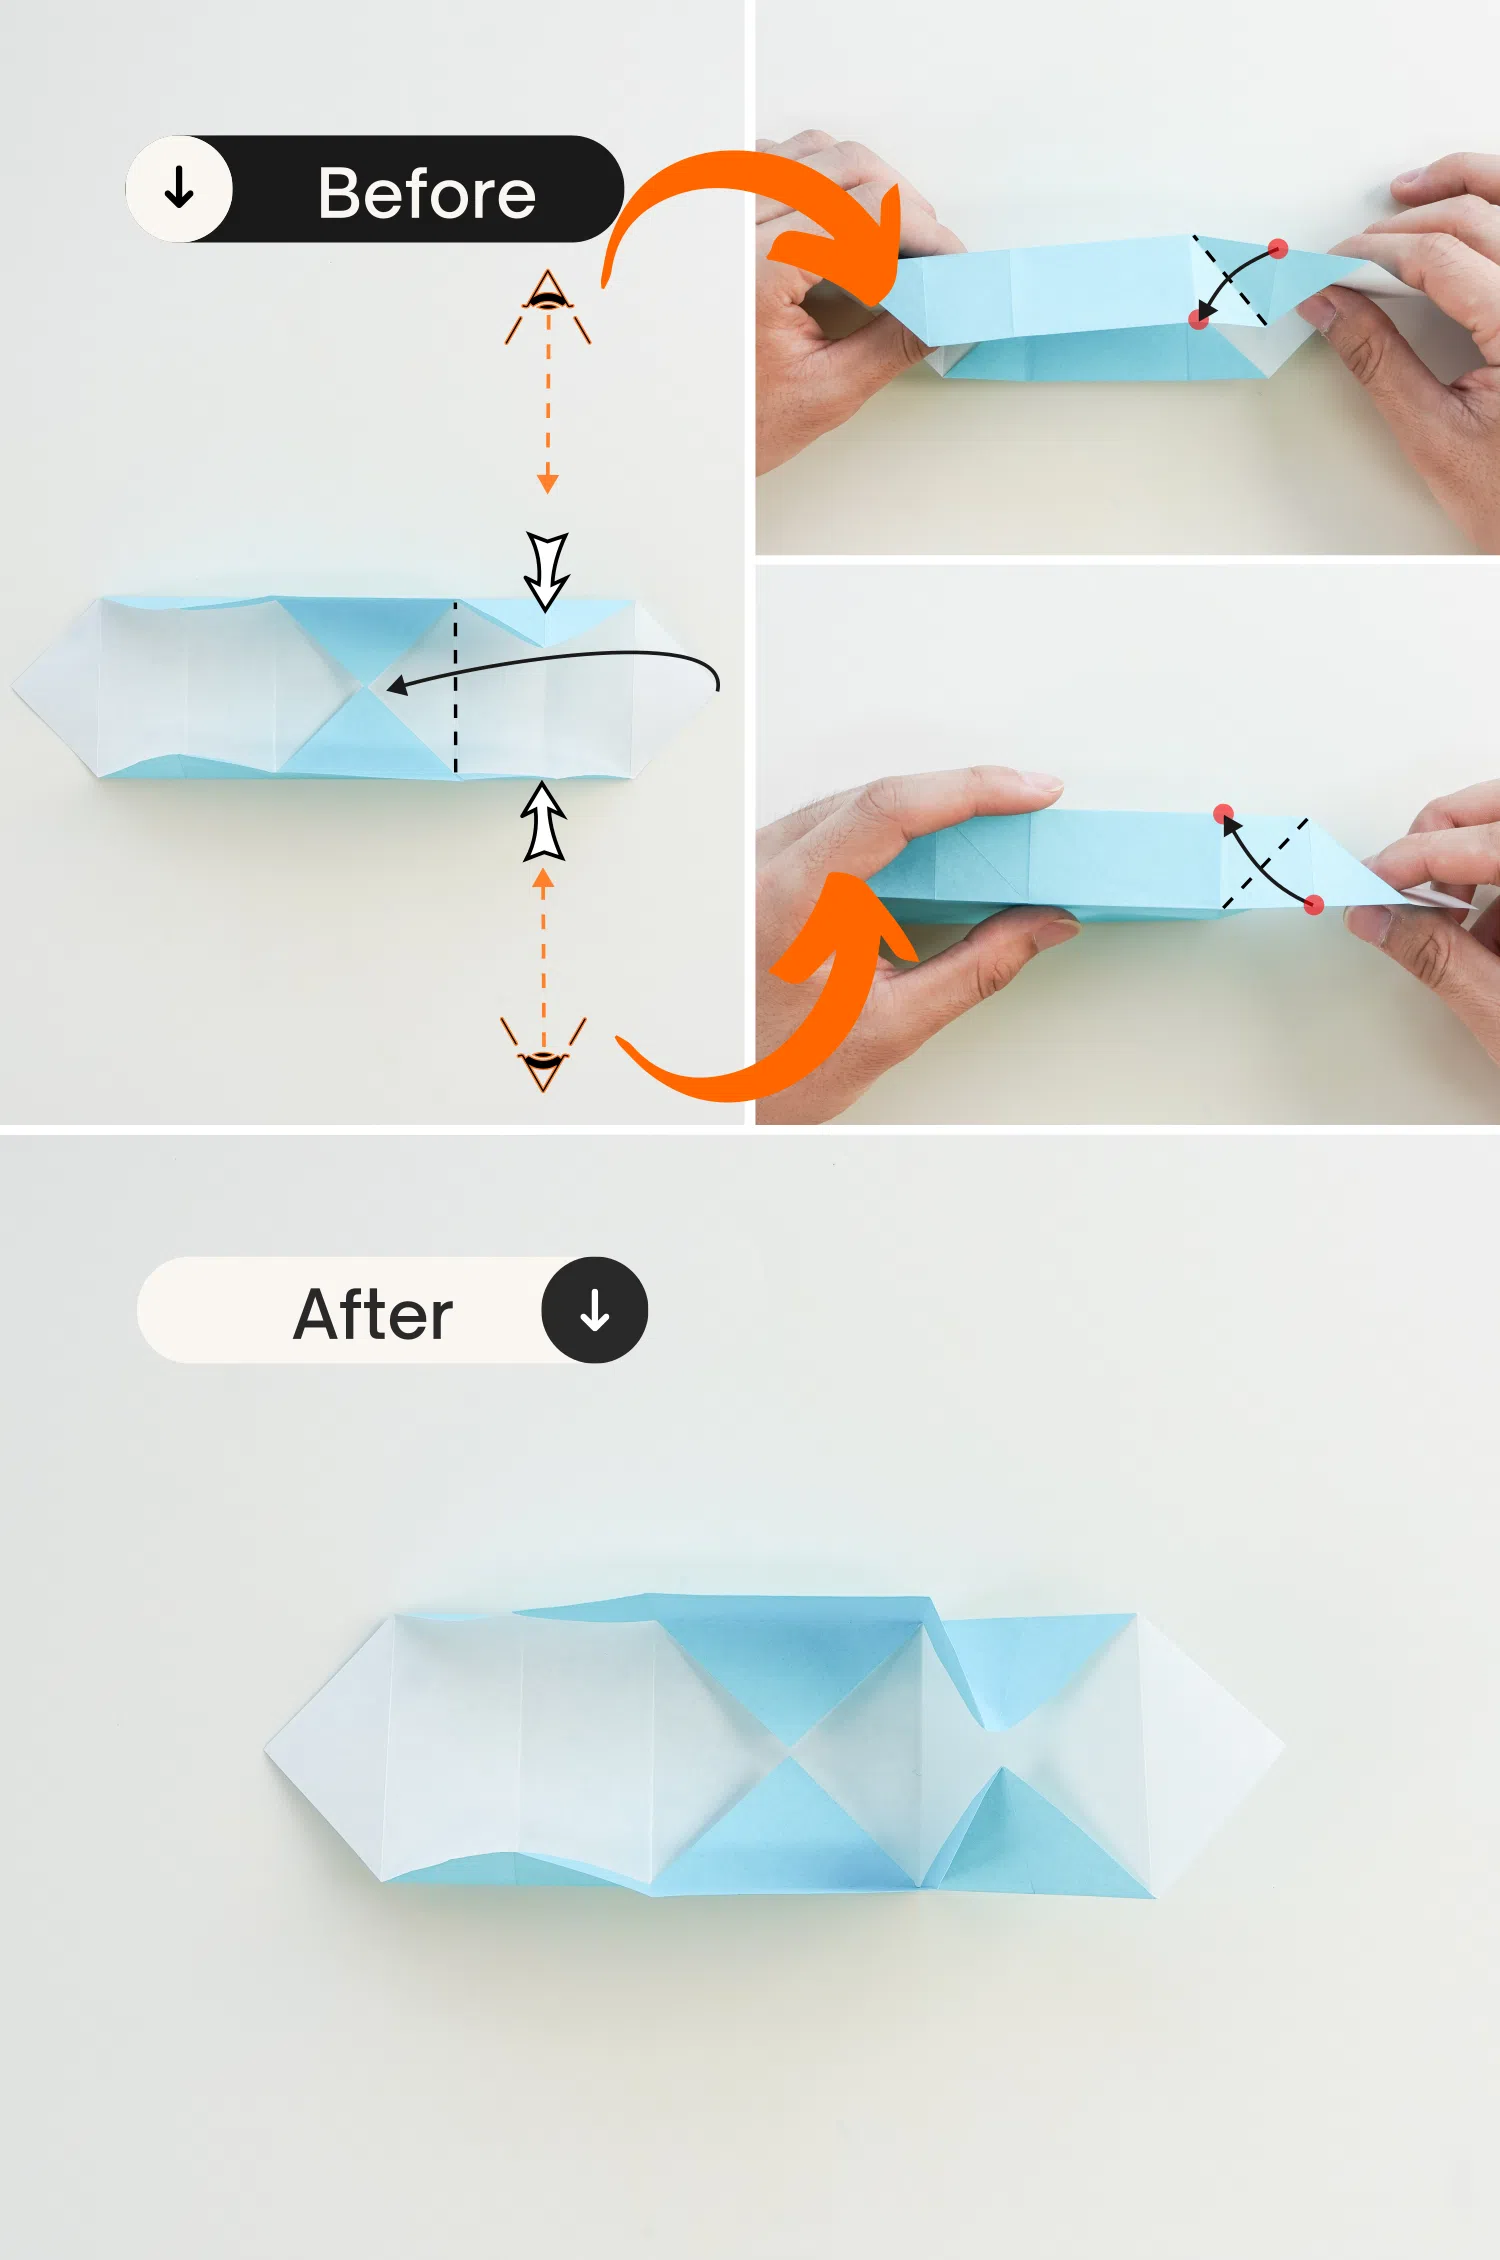
Step 11
Fold the black line to meet the red line along the dotted line. Now you have one of the sides of the box.
Step 12
Similarly, lift the left corner slightly along the dotted line, and make the two red points together on both sides.
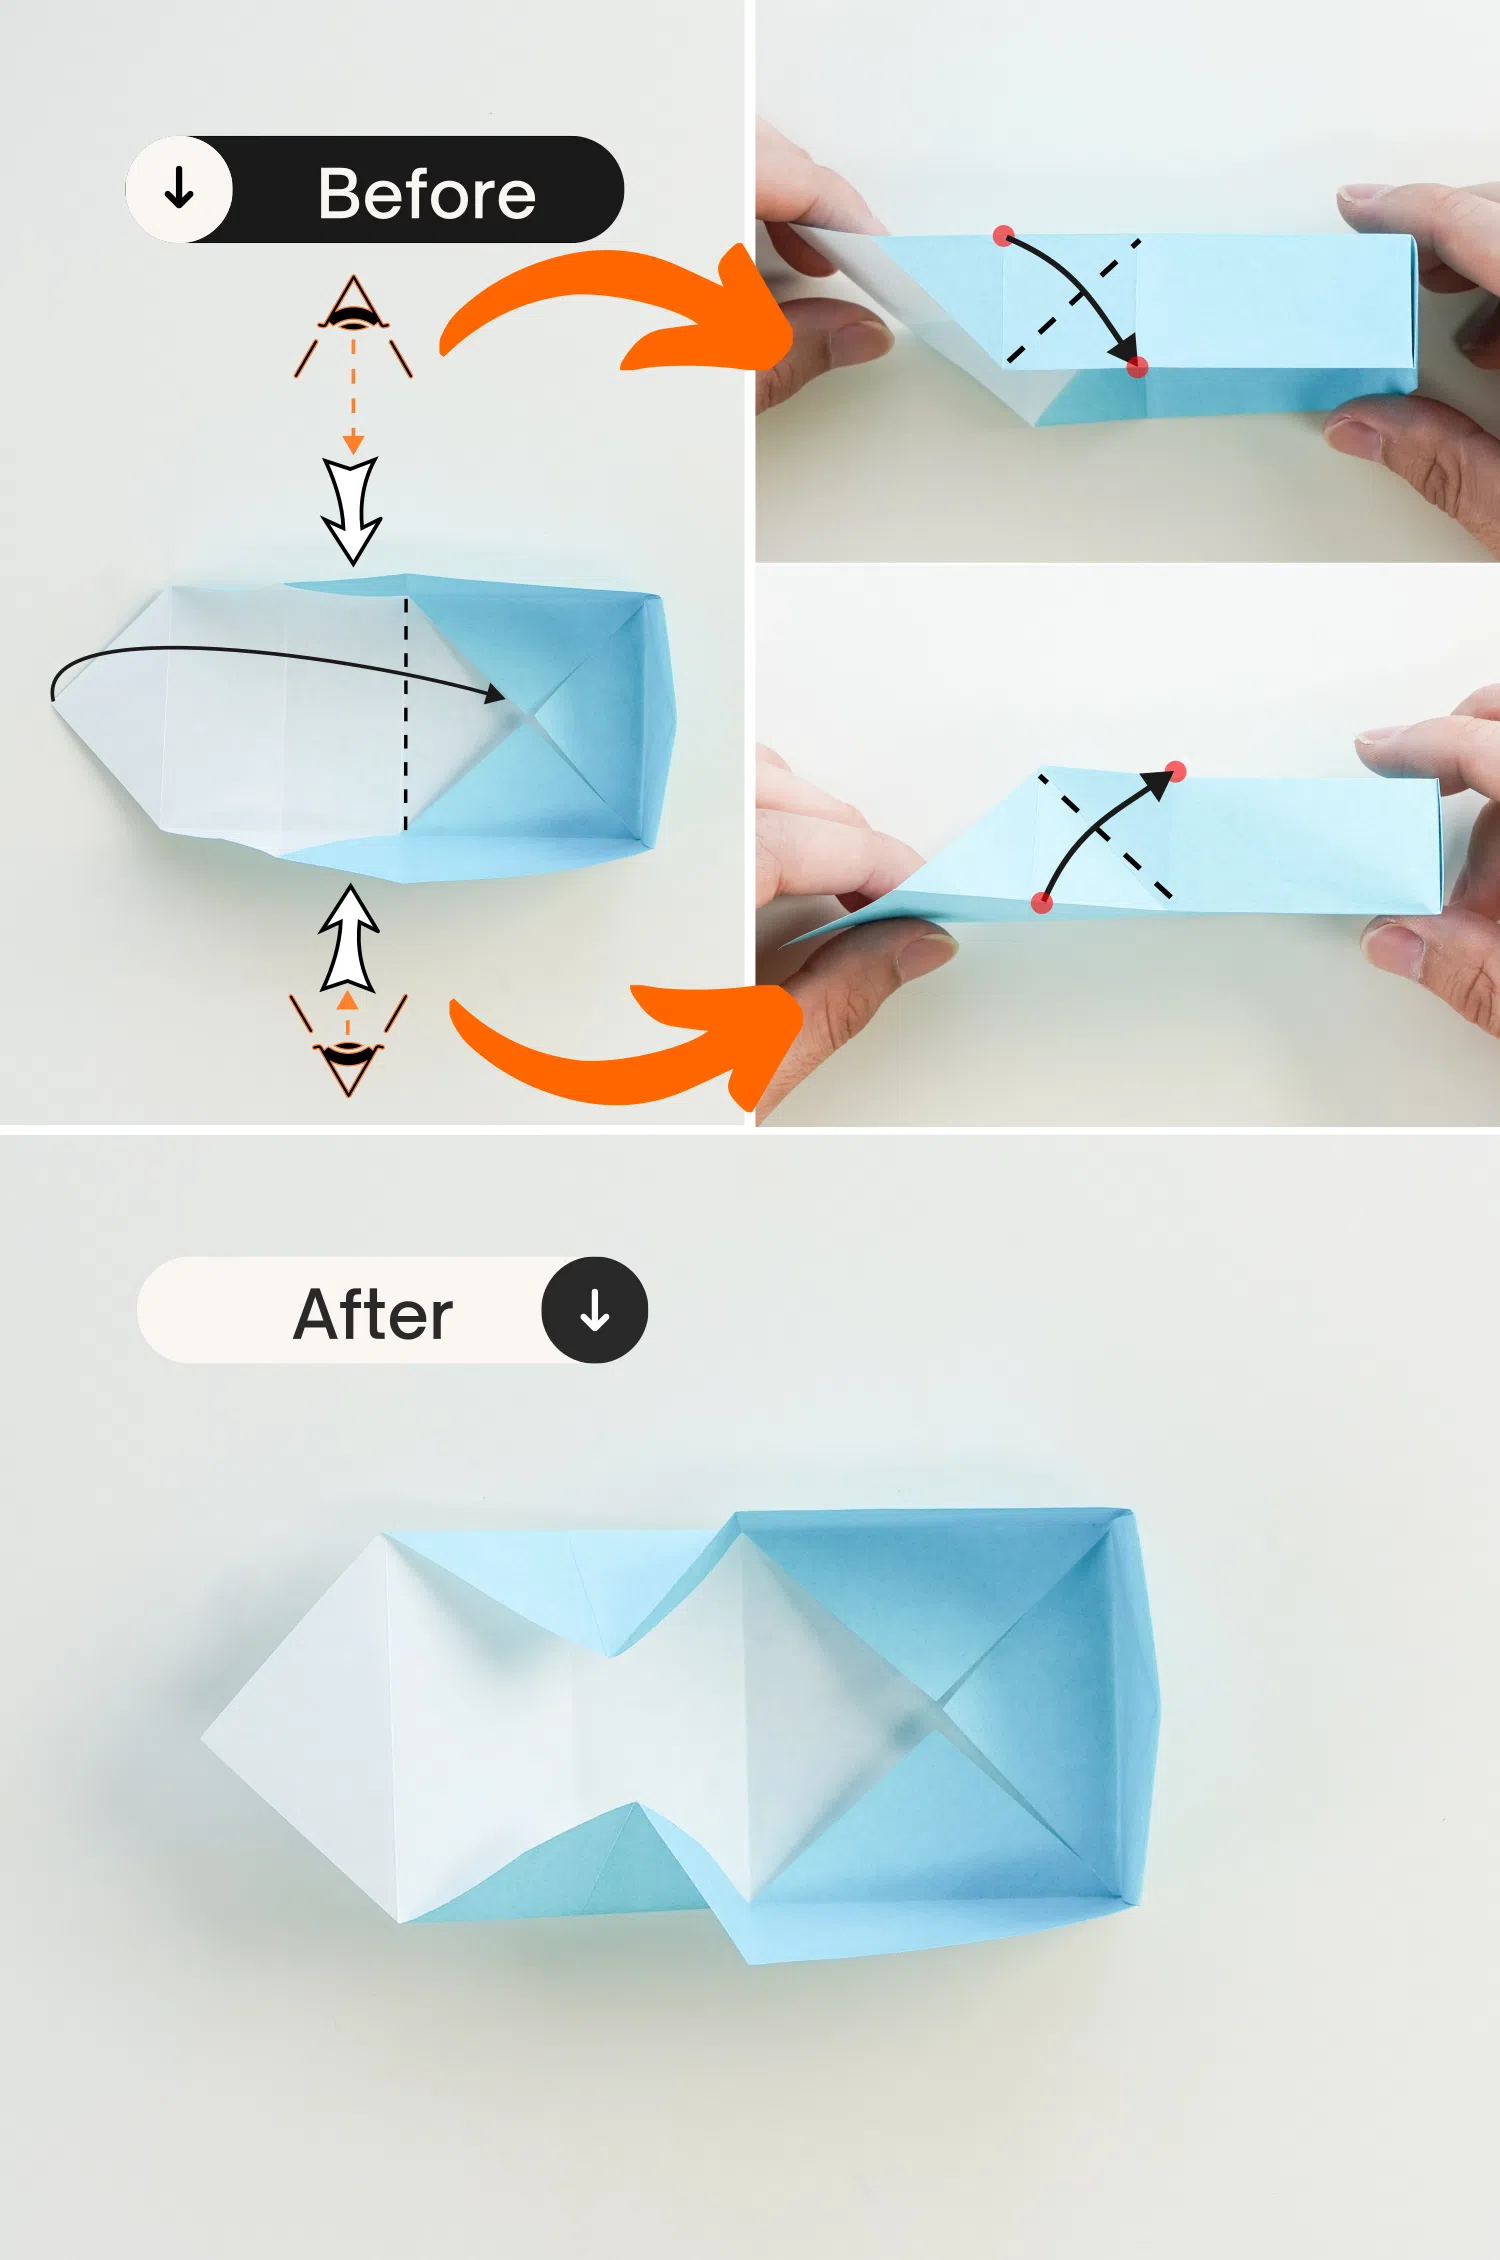
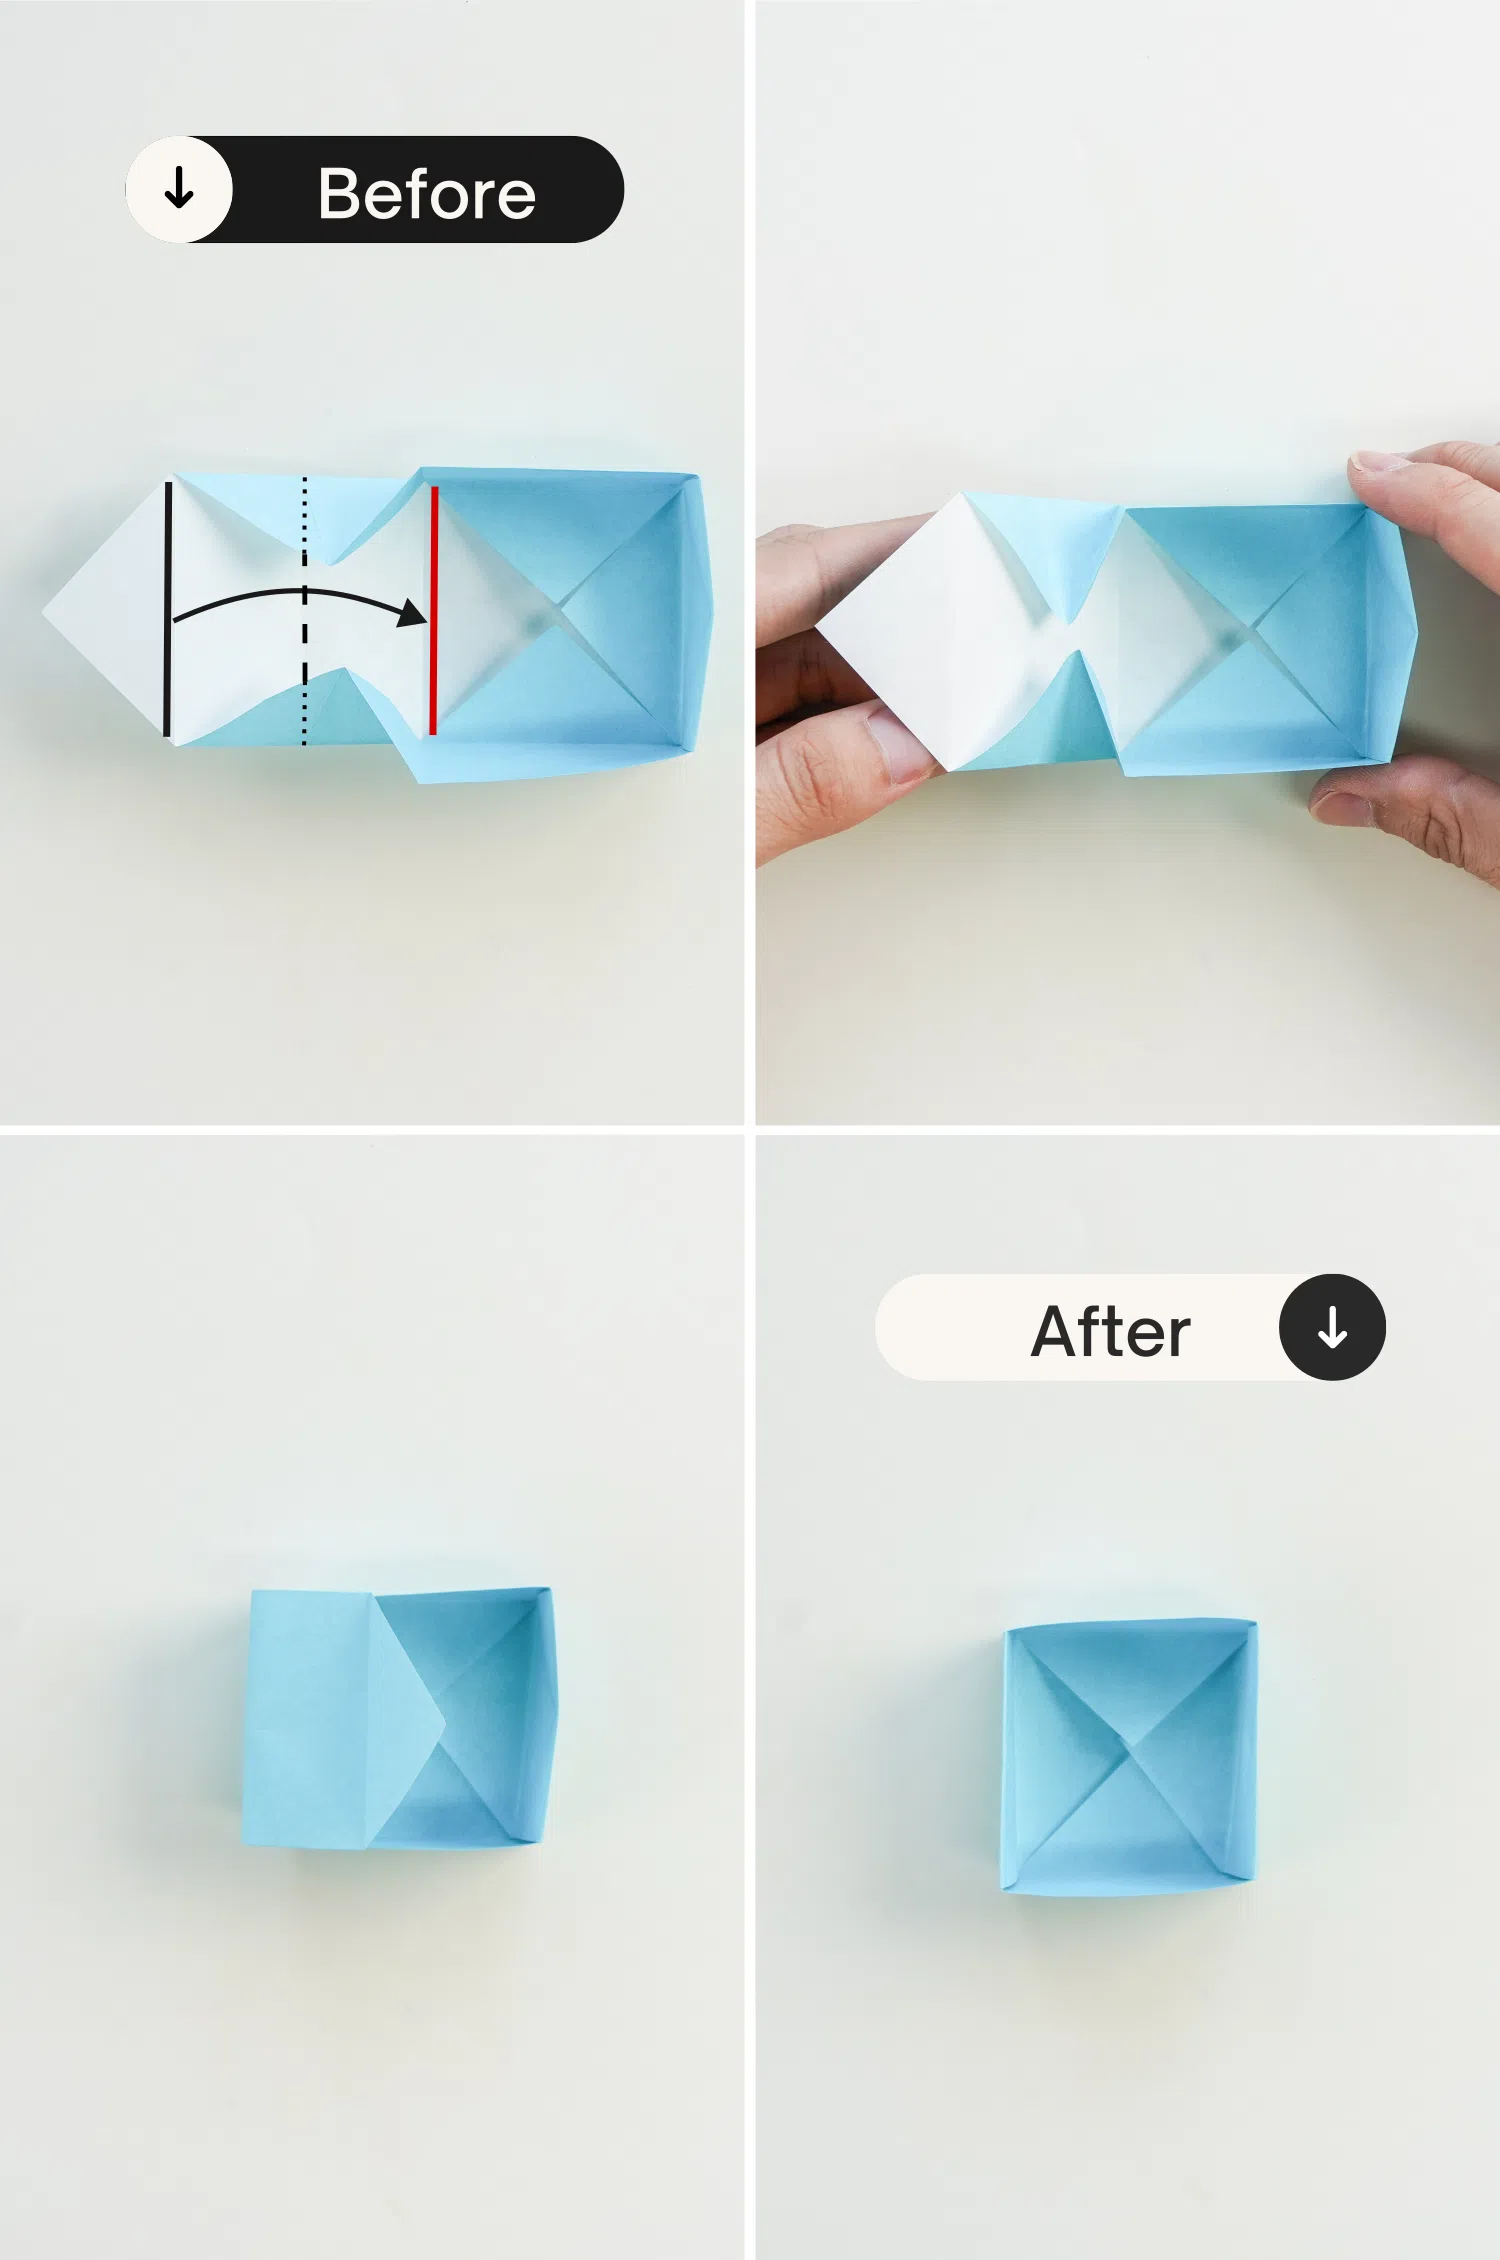
Step 13
Finally, fold the left part down making the crease shown by the black line to meet the red line, and place the left triangle to fit into the white part of the bottom of the box, now this cute box is done.
Other easy box ideas