A super fun and simple origami finger trap! It is not only easy and enjoyable to make but also brings endless fun and surprises. When you finish making it, press it with your finger and it will clamp onto your finger like a monster’s mouth! That’s truly interesting.
In this instruction, we use the Square Base as the basement, a scissor is required.

If you are new to origami, start here from our beginner guide to know the basics and how to read the step-by-step instructions.
Interested in origami toys, check our origami snapper too.

- Folding time: 10 minutes
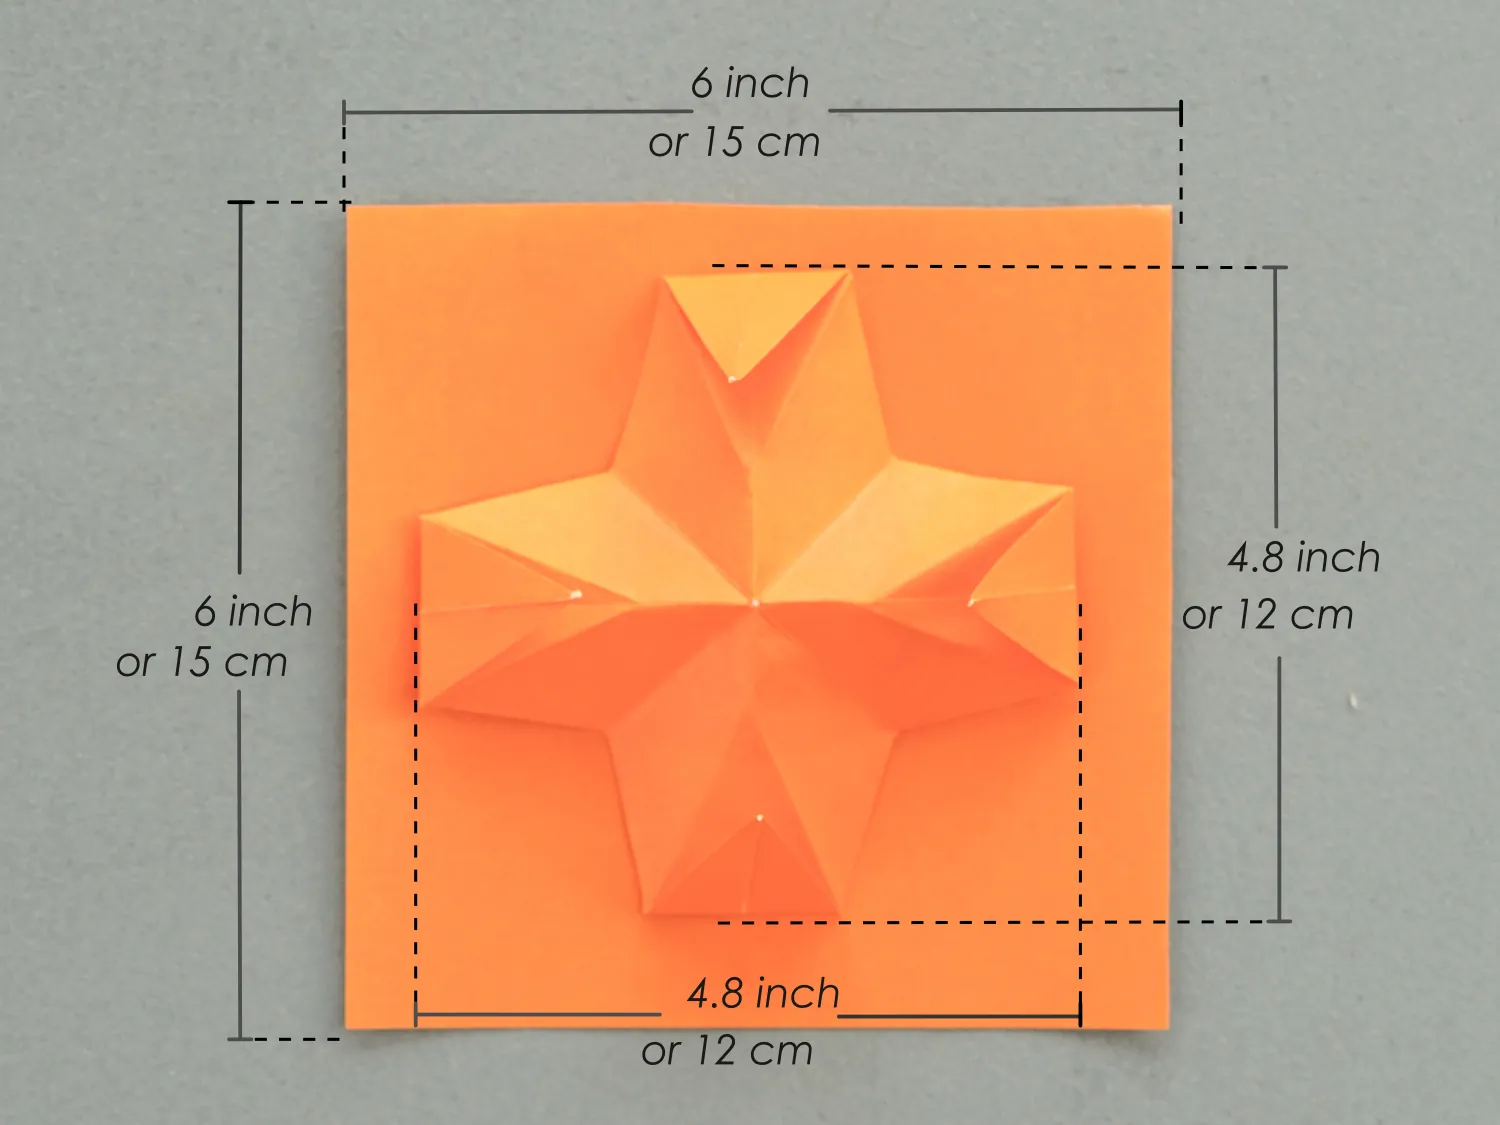
- Paper: 15×15 cm
- Difficulty: Easy
Material
Prepare a piece of 15×15 cm origami square paper, with different colors on each side, and you will get a 12×12 cm finger trap. Try to use various colors and patterned paper to enhance the fun of this finger trap.
Origami Finger Trap Video
Step by Step Instructions
Step 1
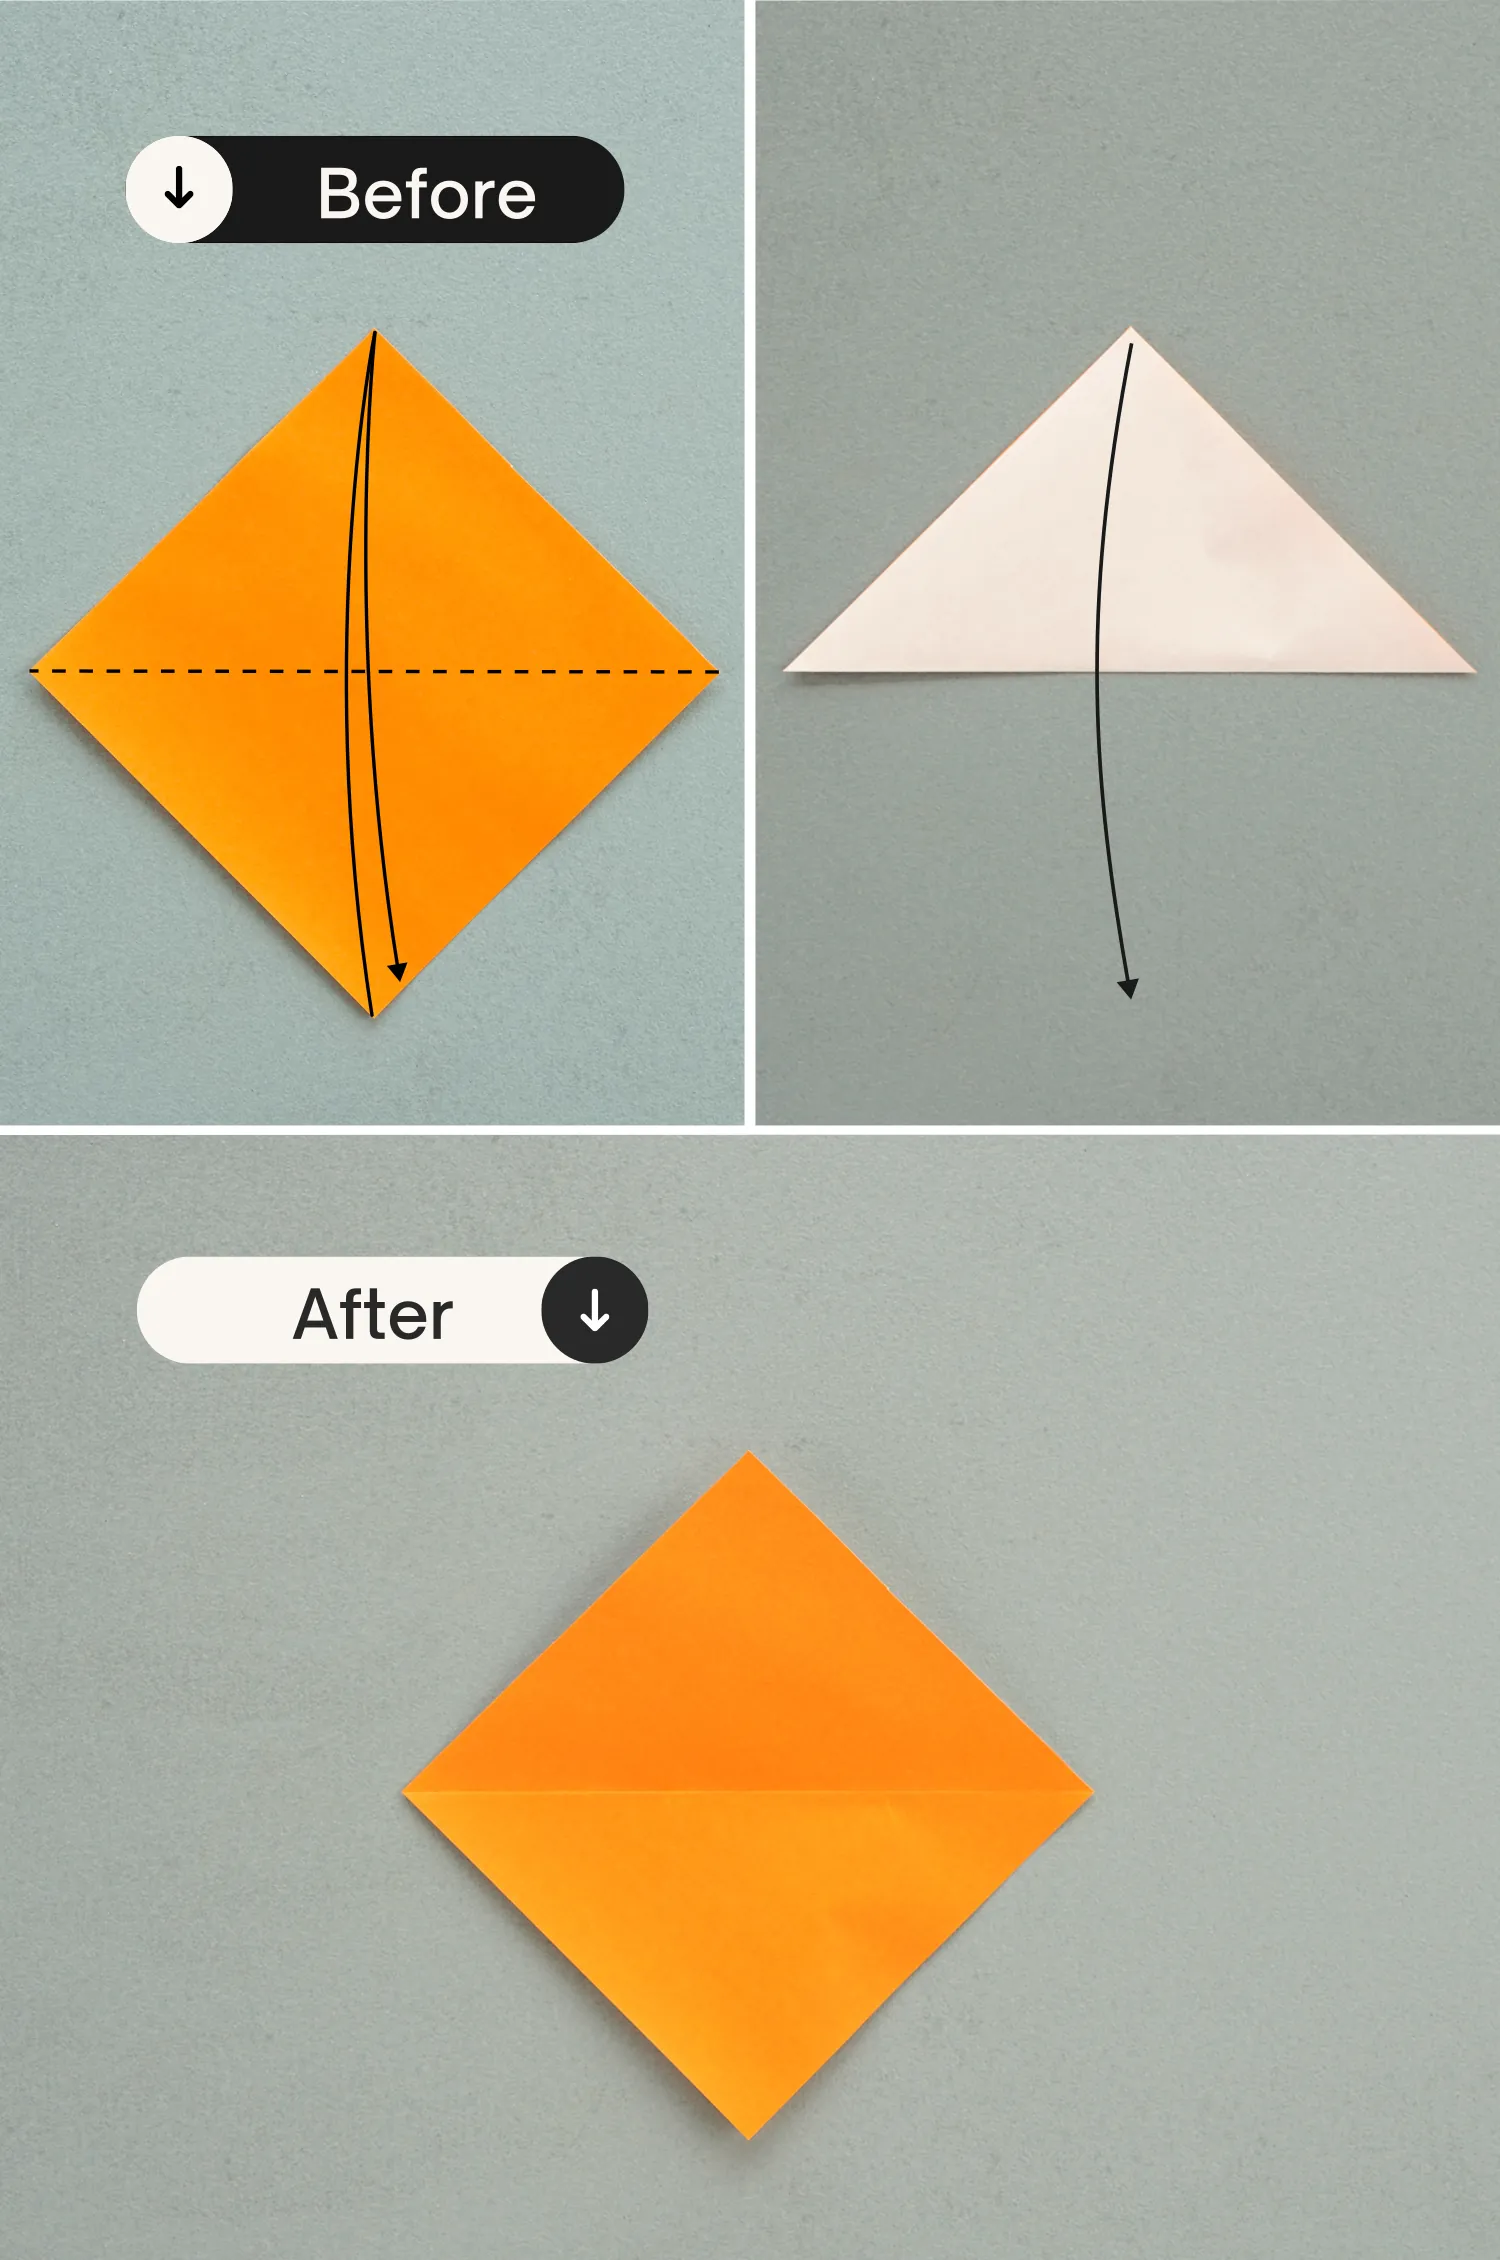
Start with the colored side of the paper facing up. Fold it in half horizontally, crease it well then unfold.
Step 2
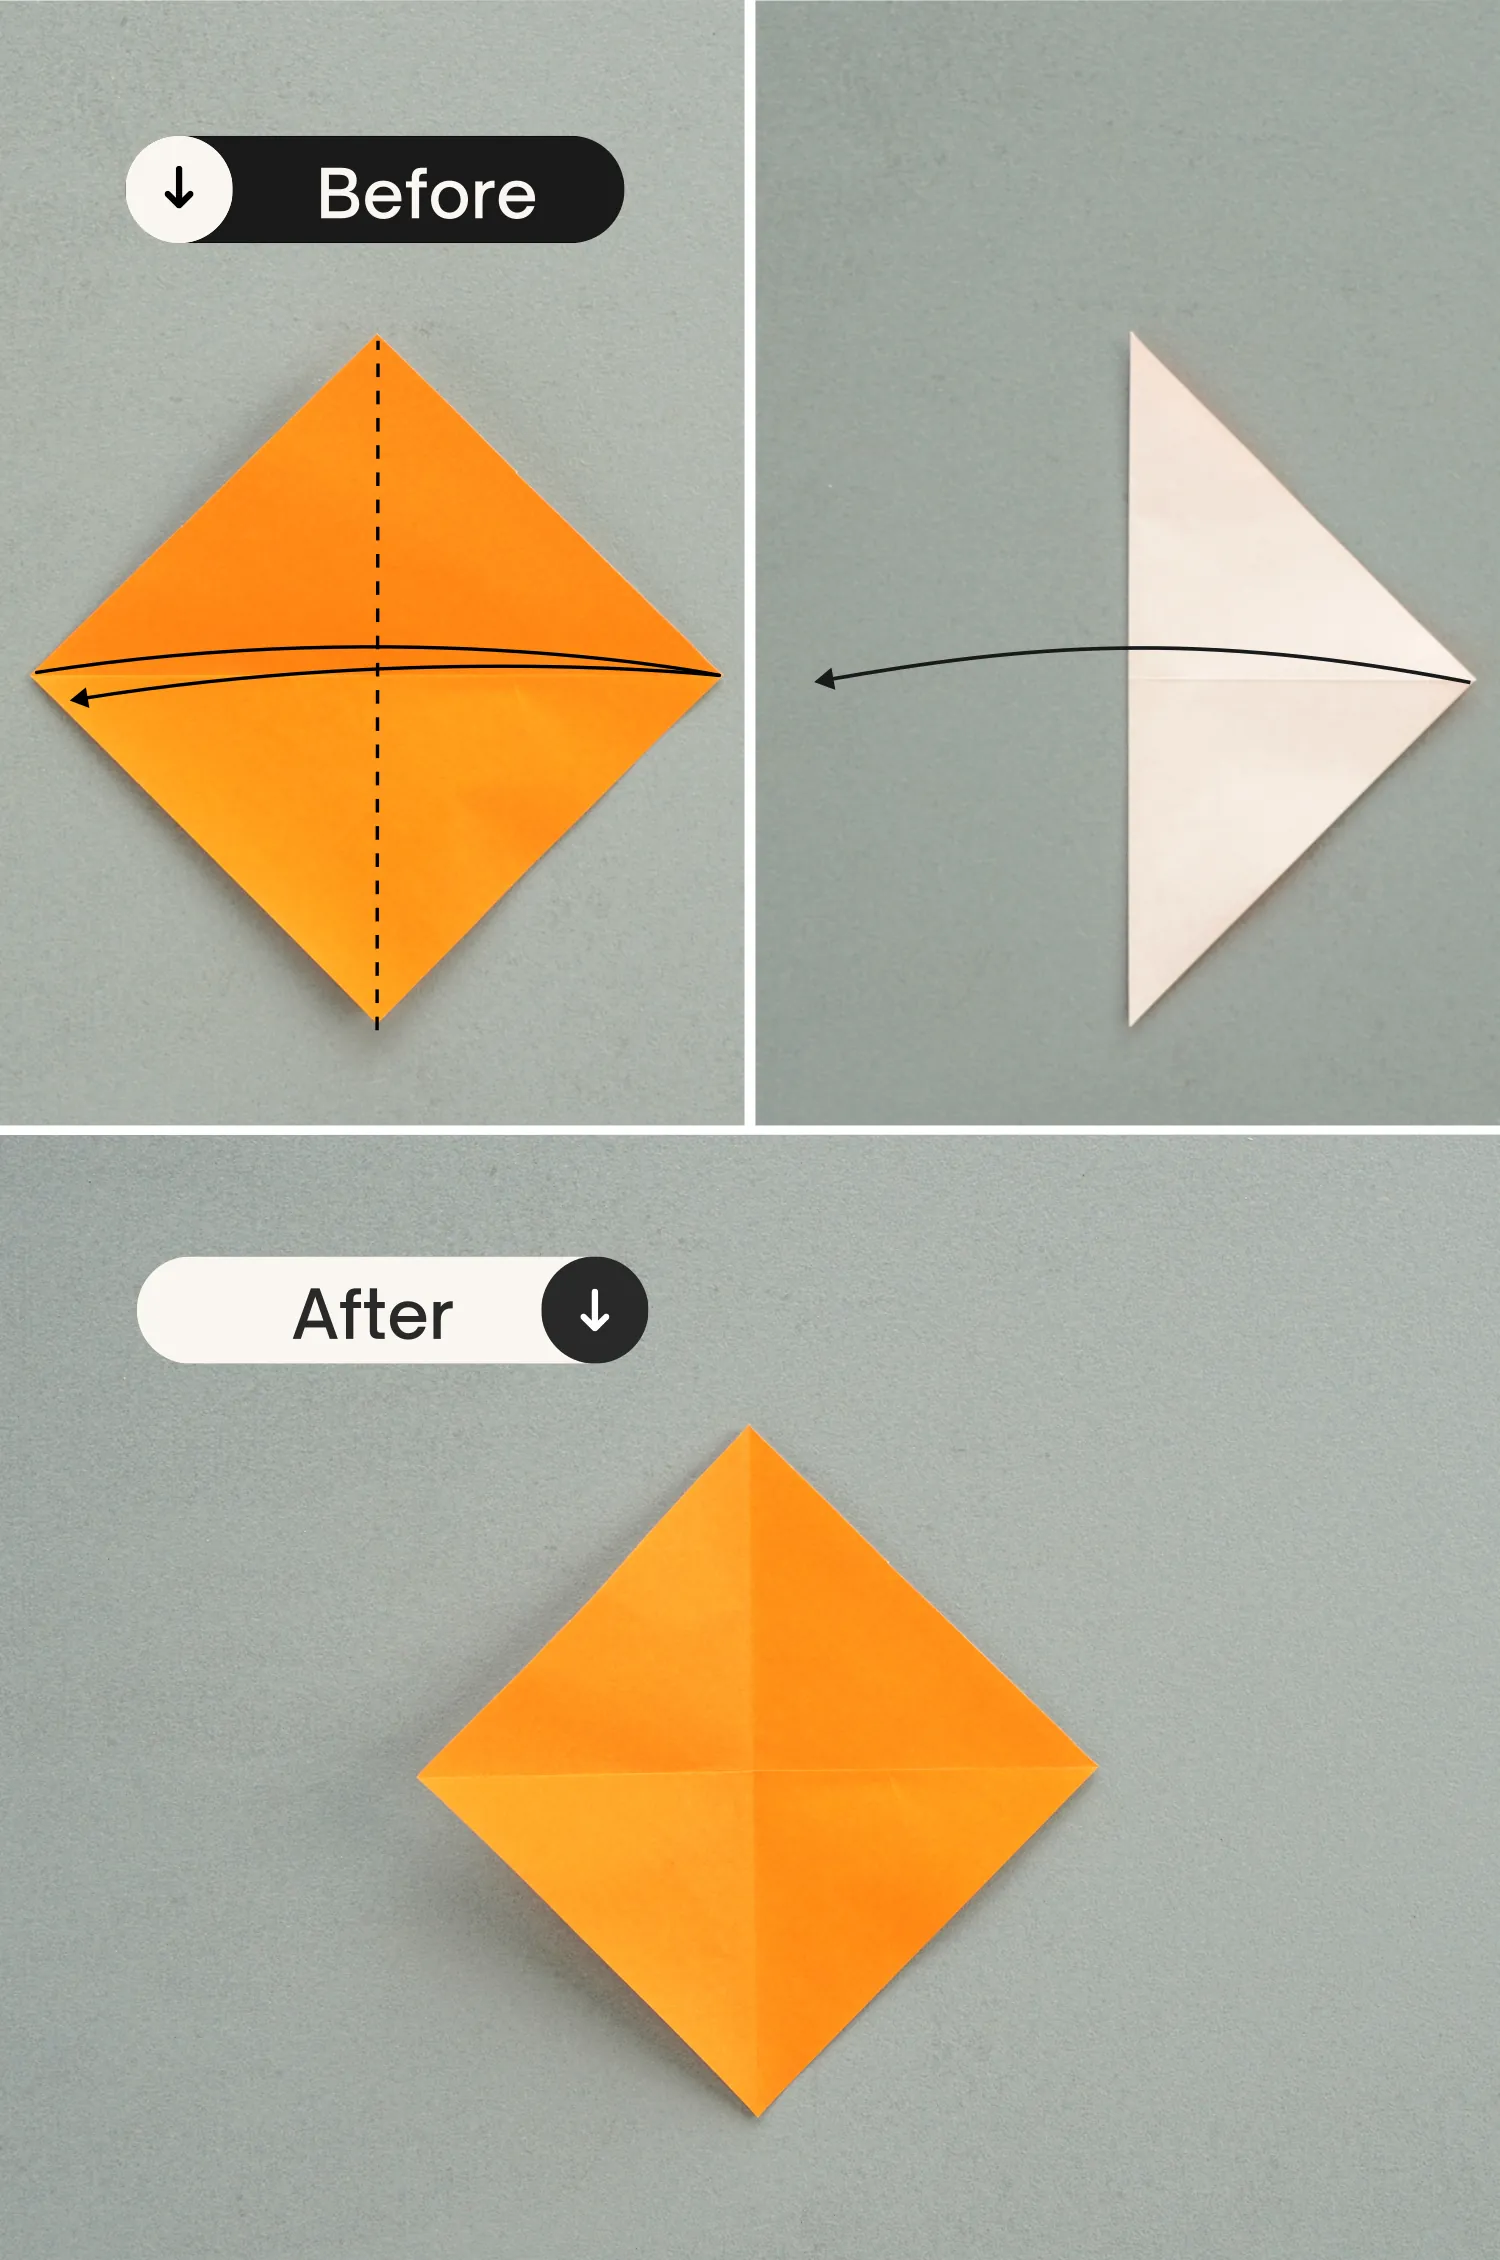
Fold it in half vertically, and unfold it.
Step 3
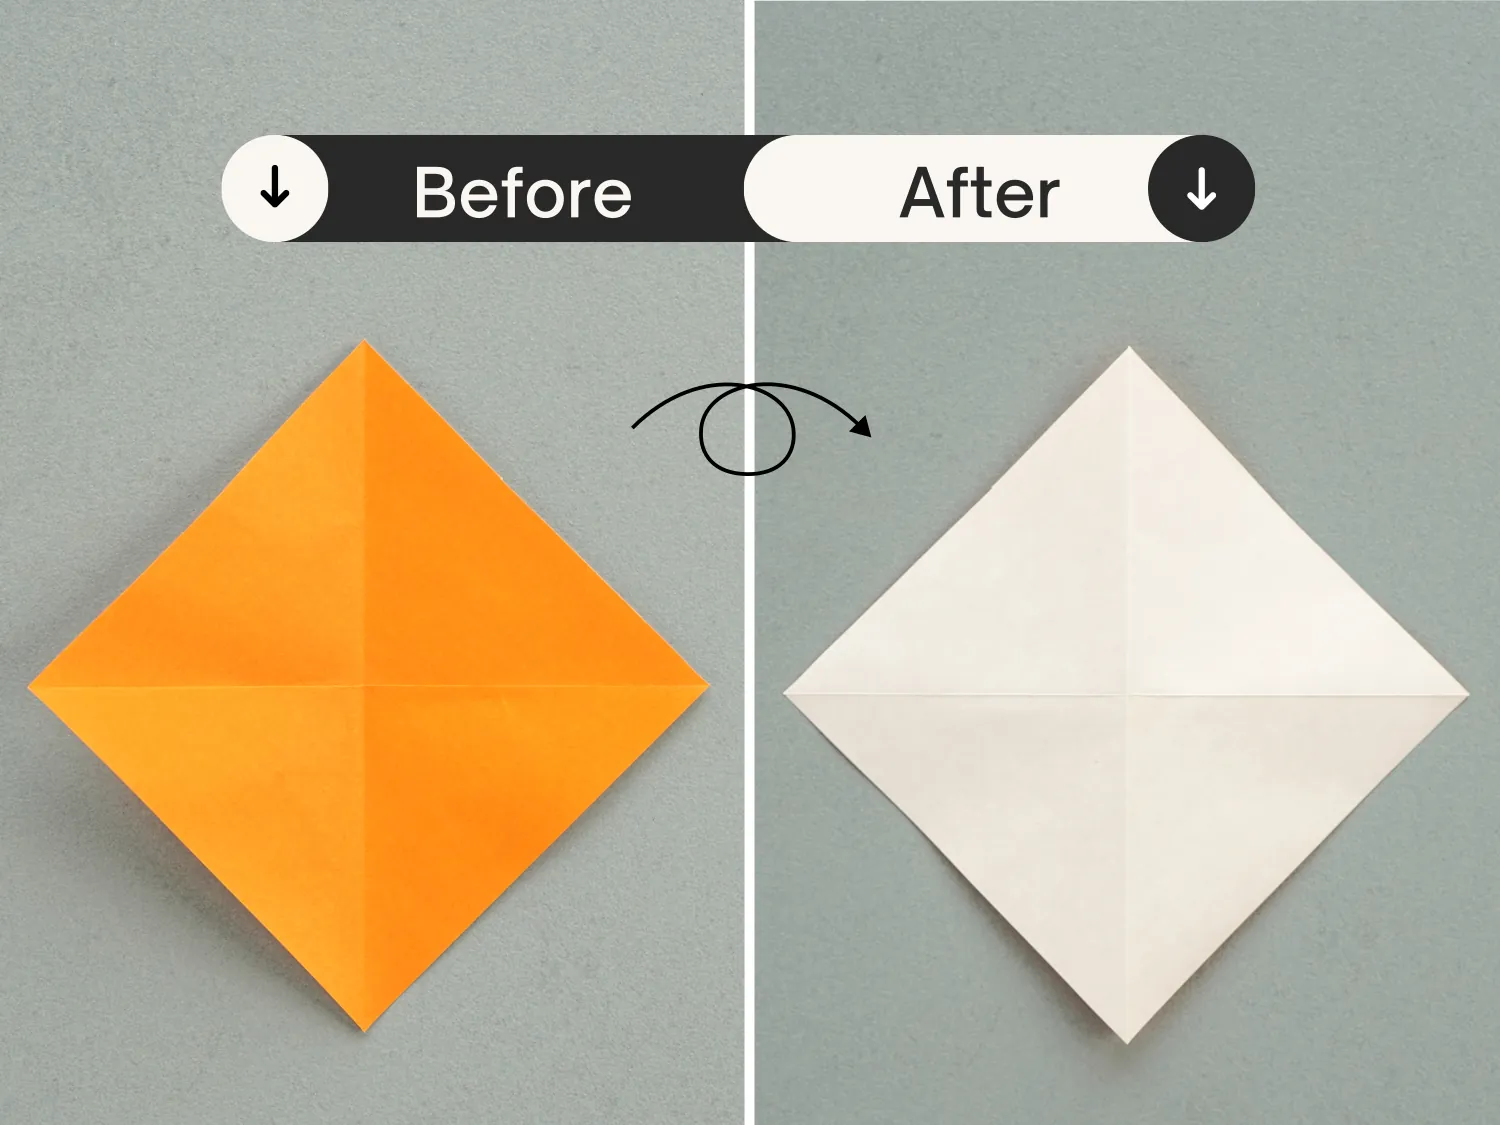
Flip the paper over.
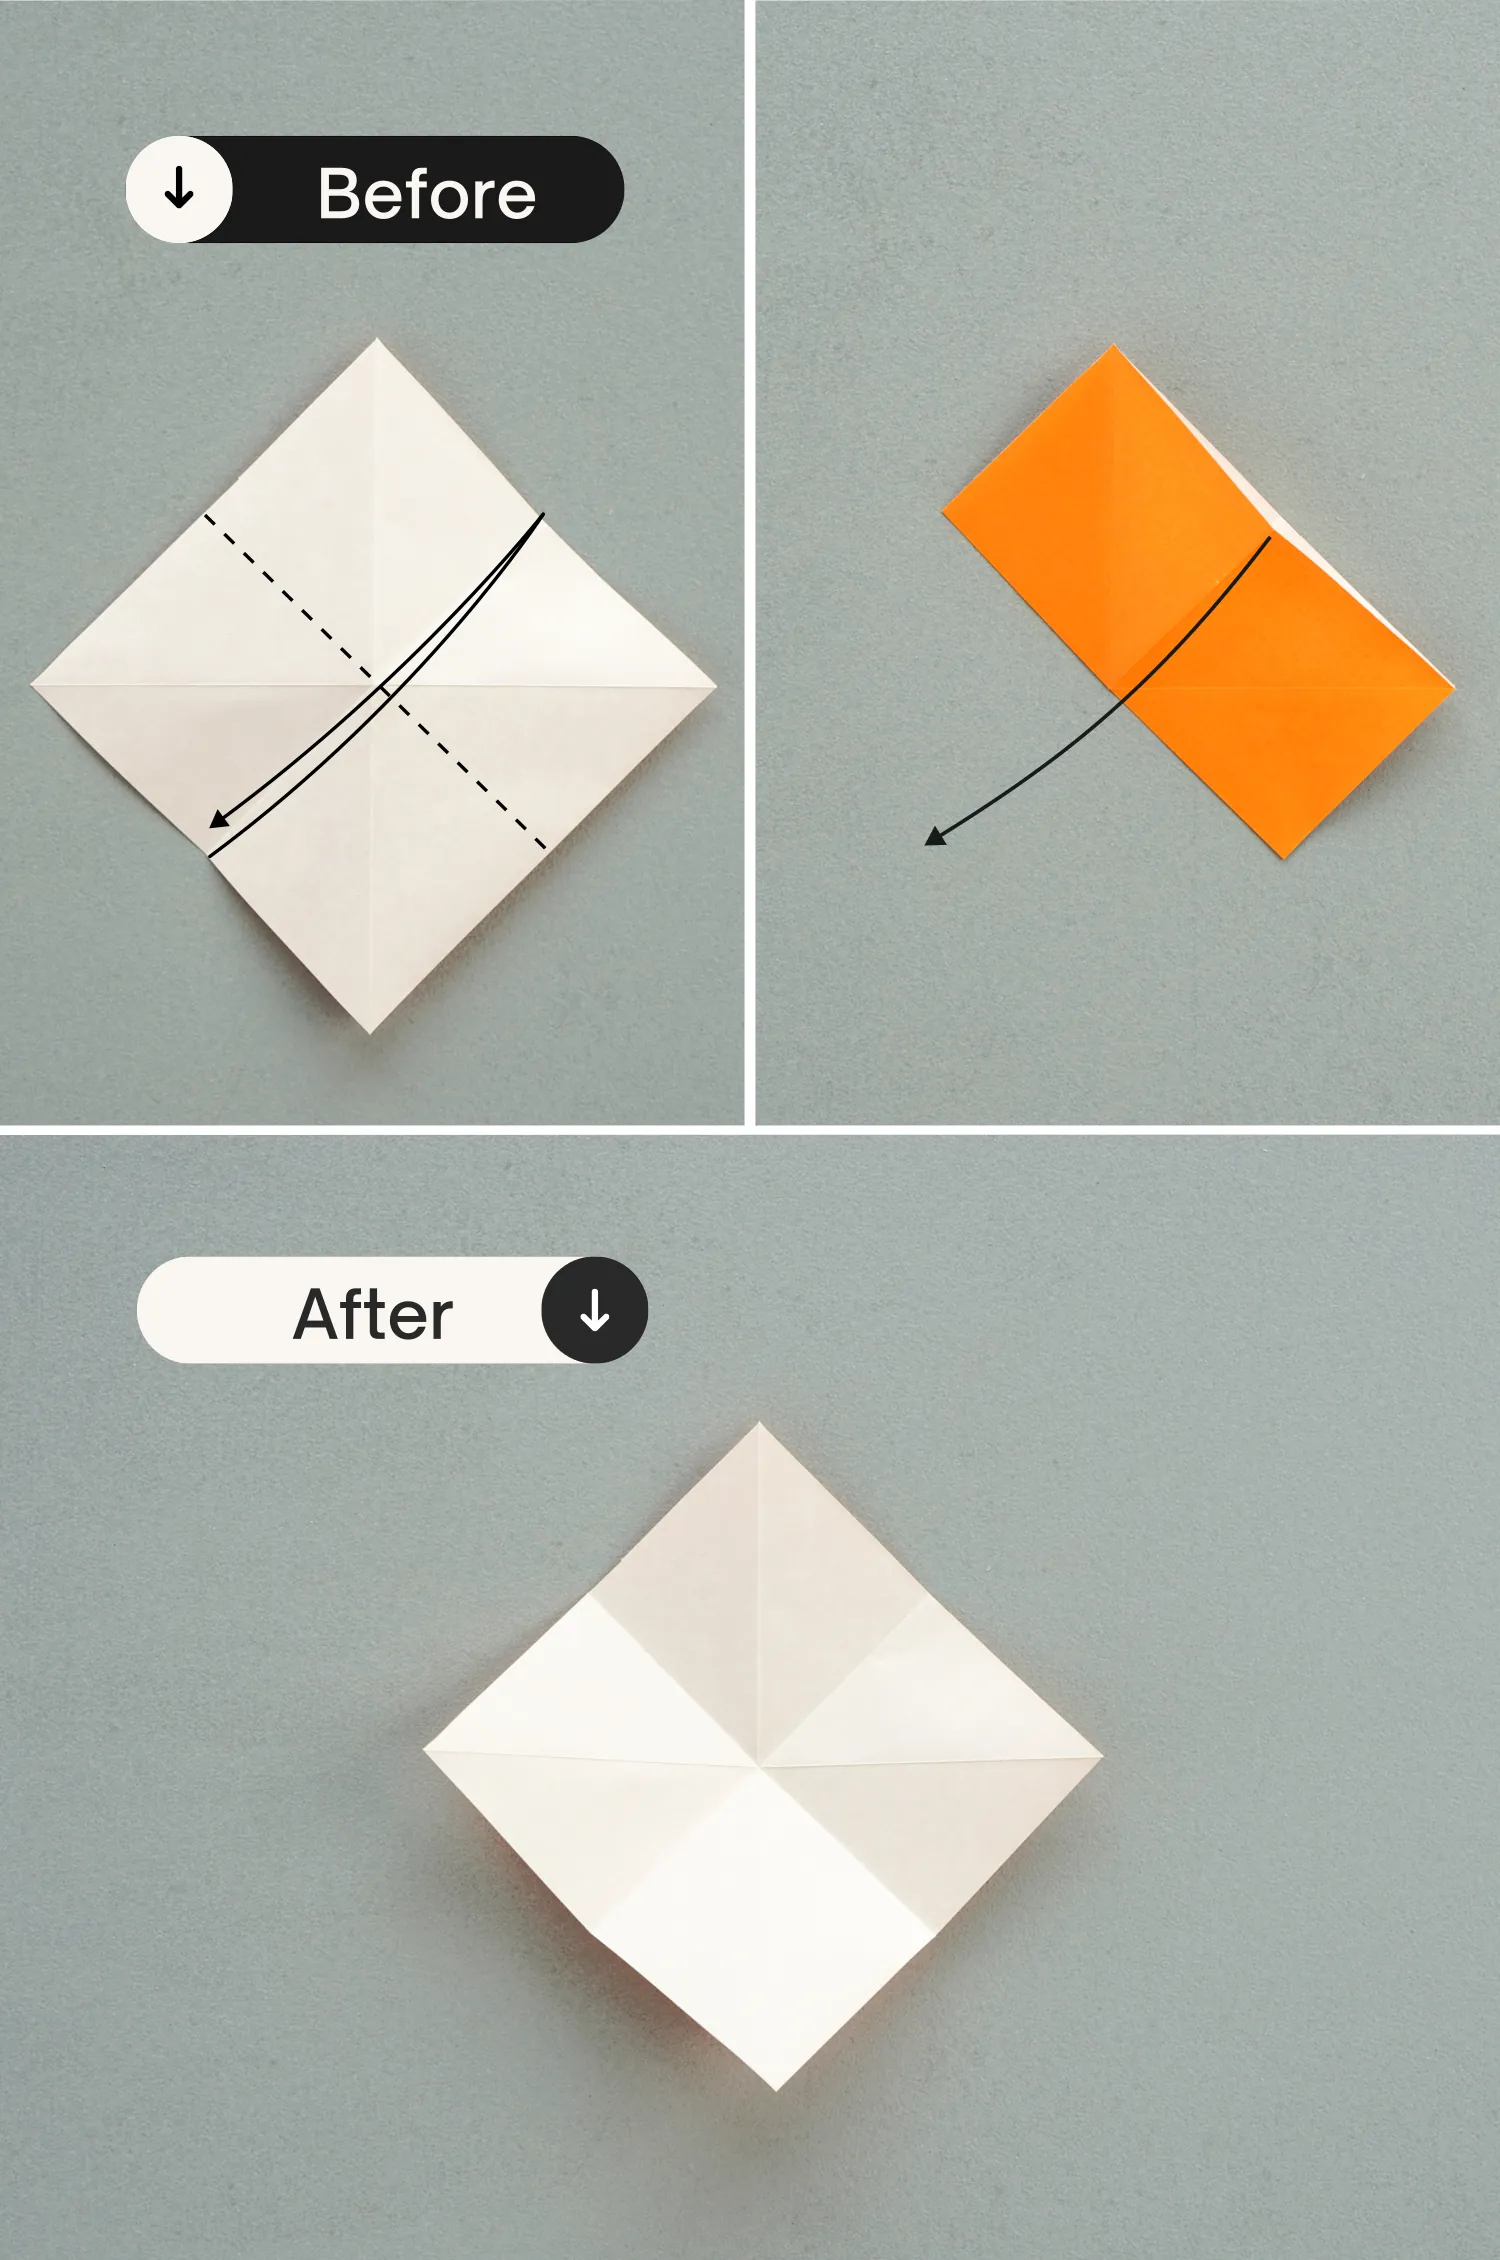
Step 4
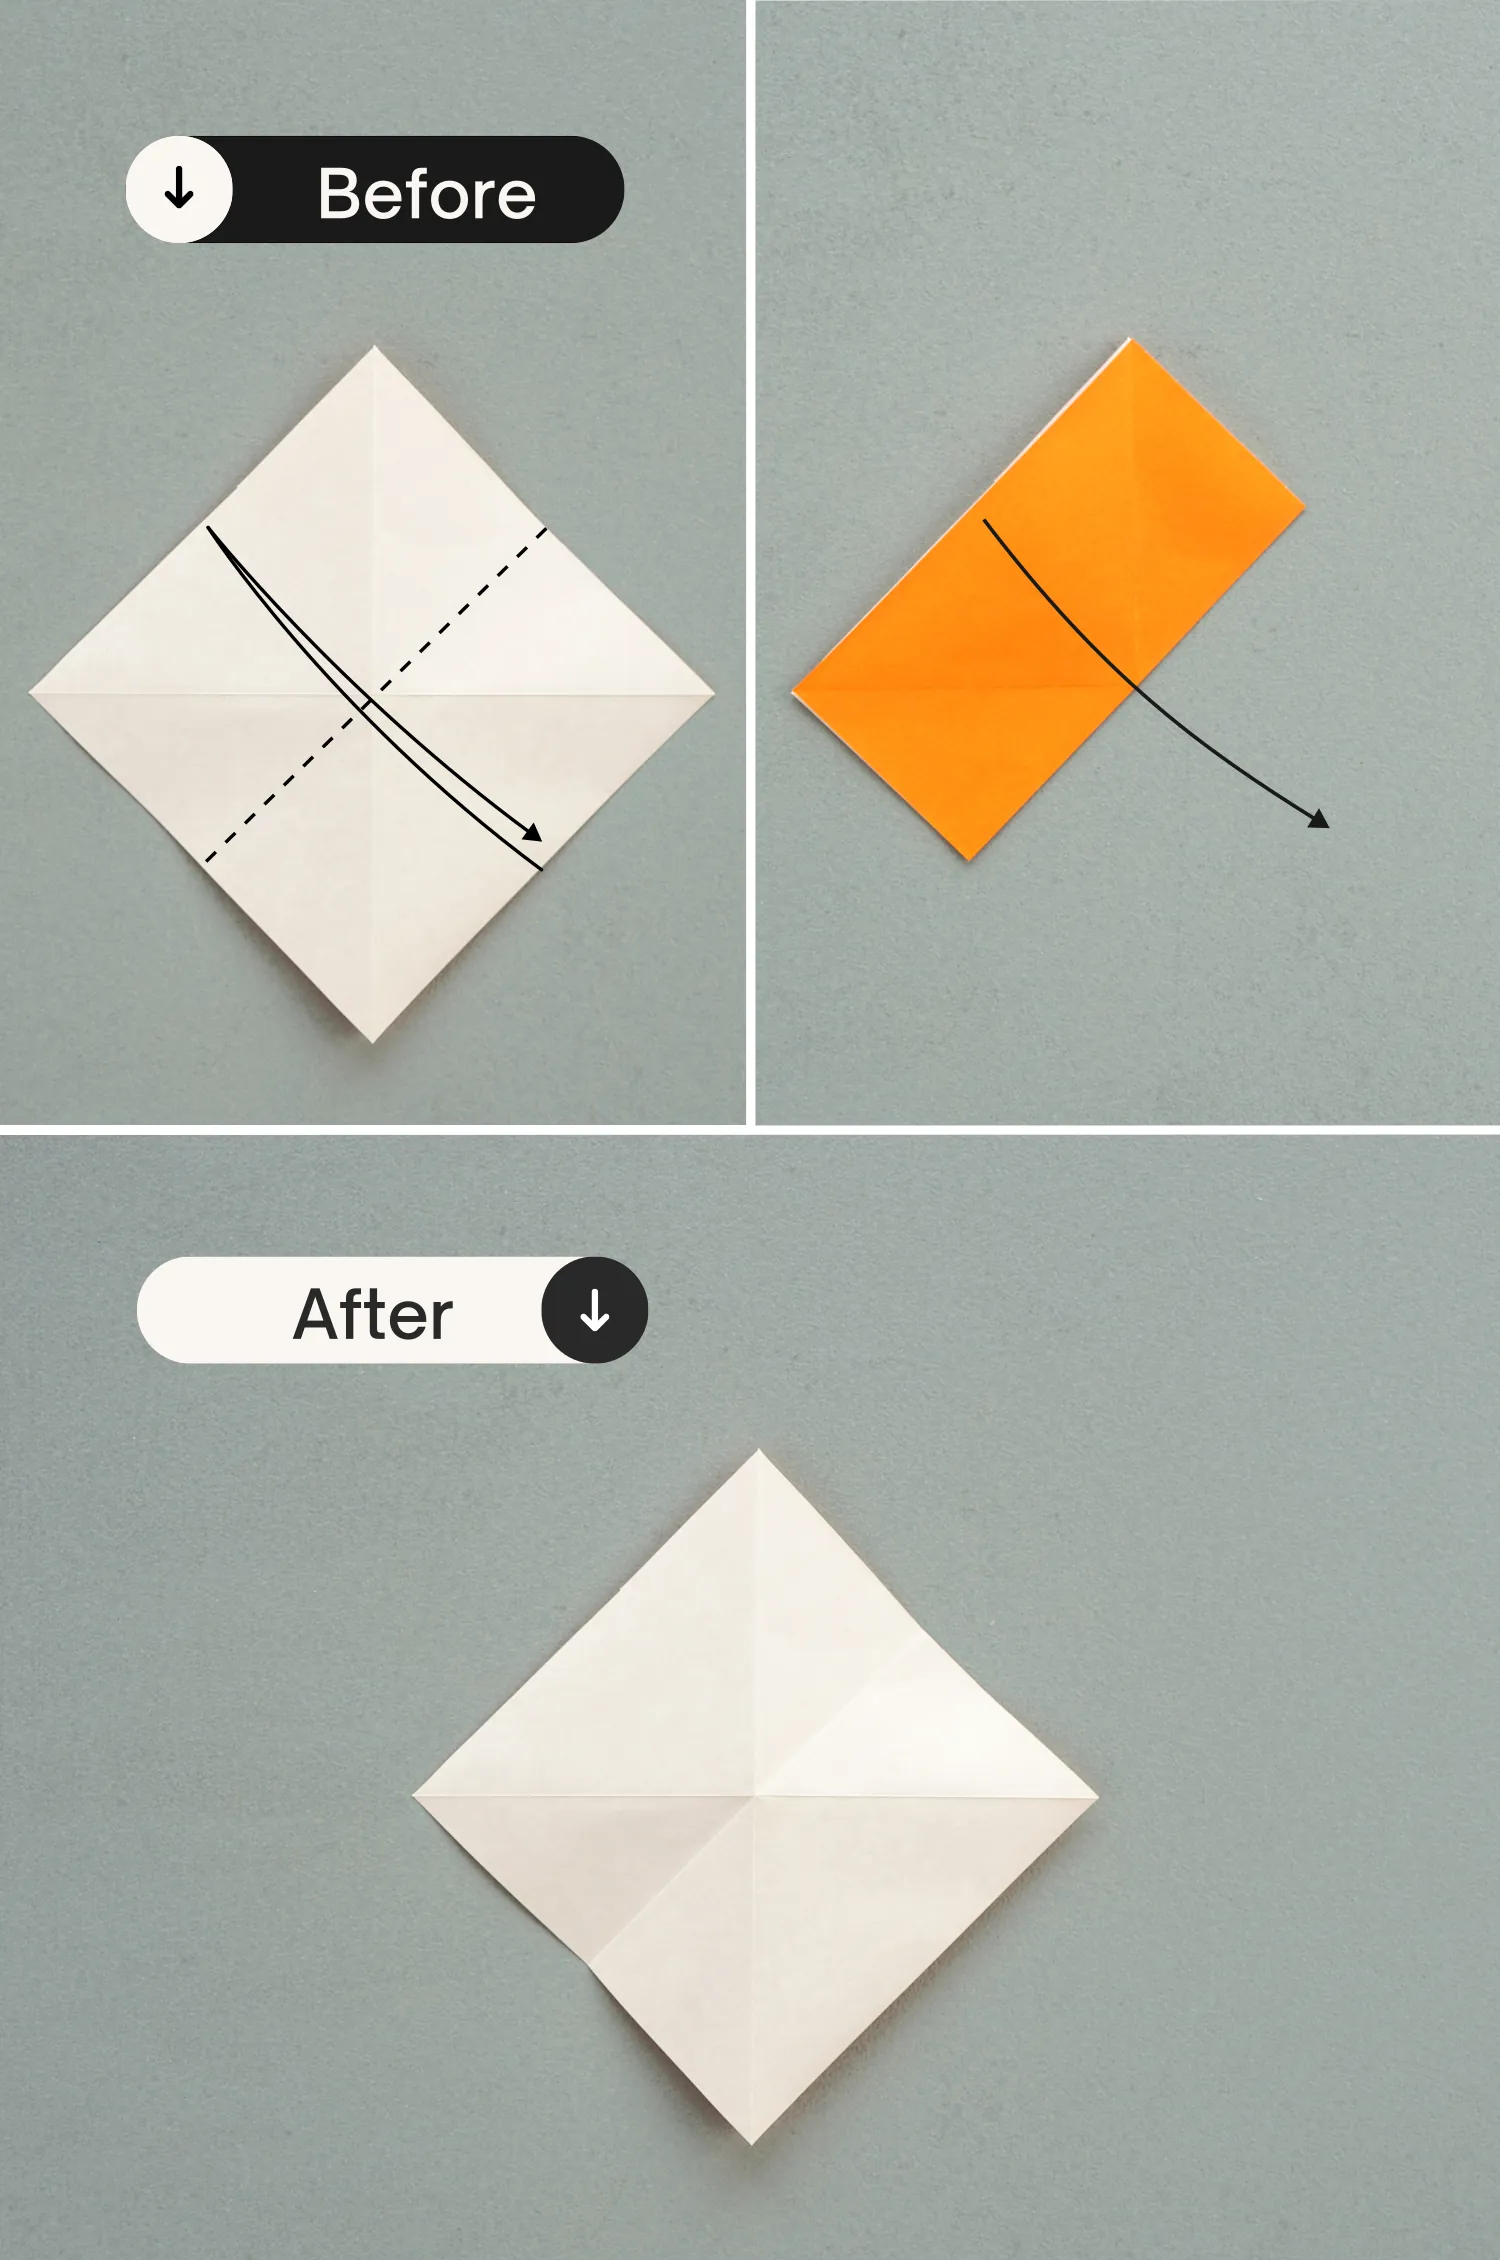
Fold the bottom right edge to align with the top left edge, and unfold it.
Step 5
Fold the top right edge to align with the bottom left edge, crease it well then unfold it.
Step 6
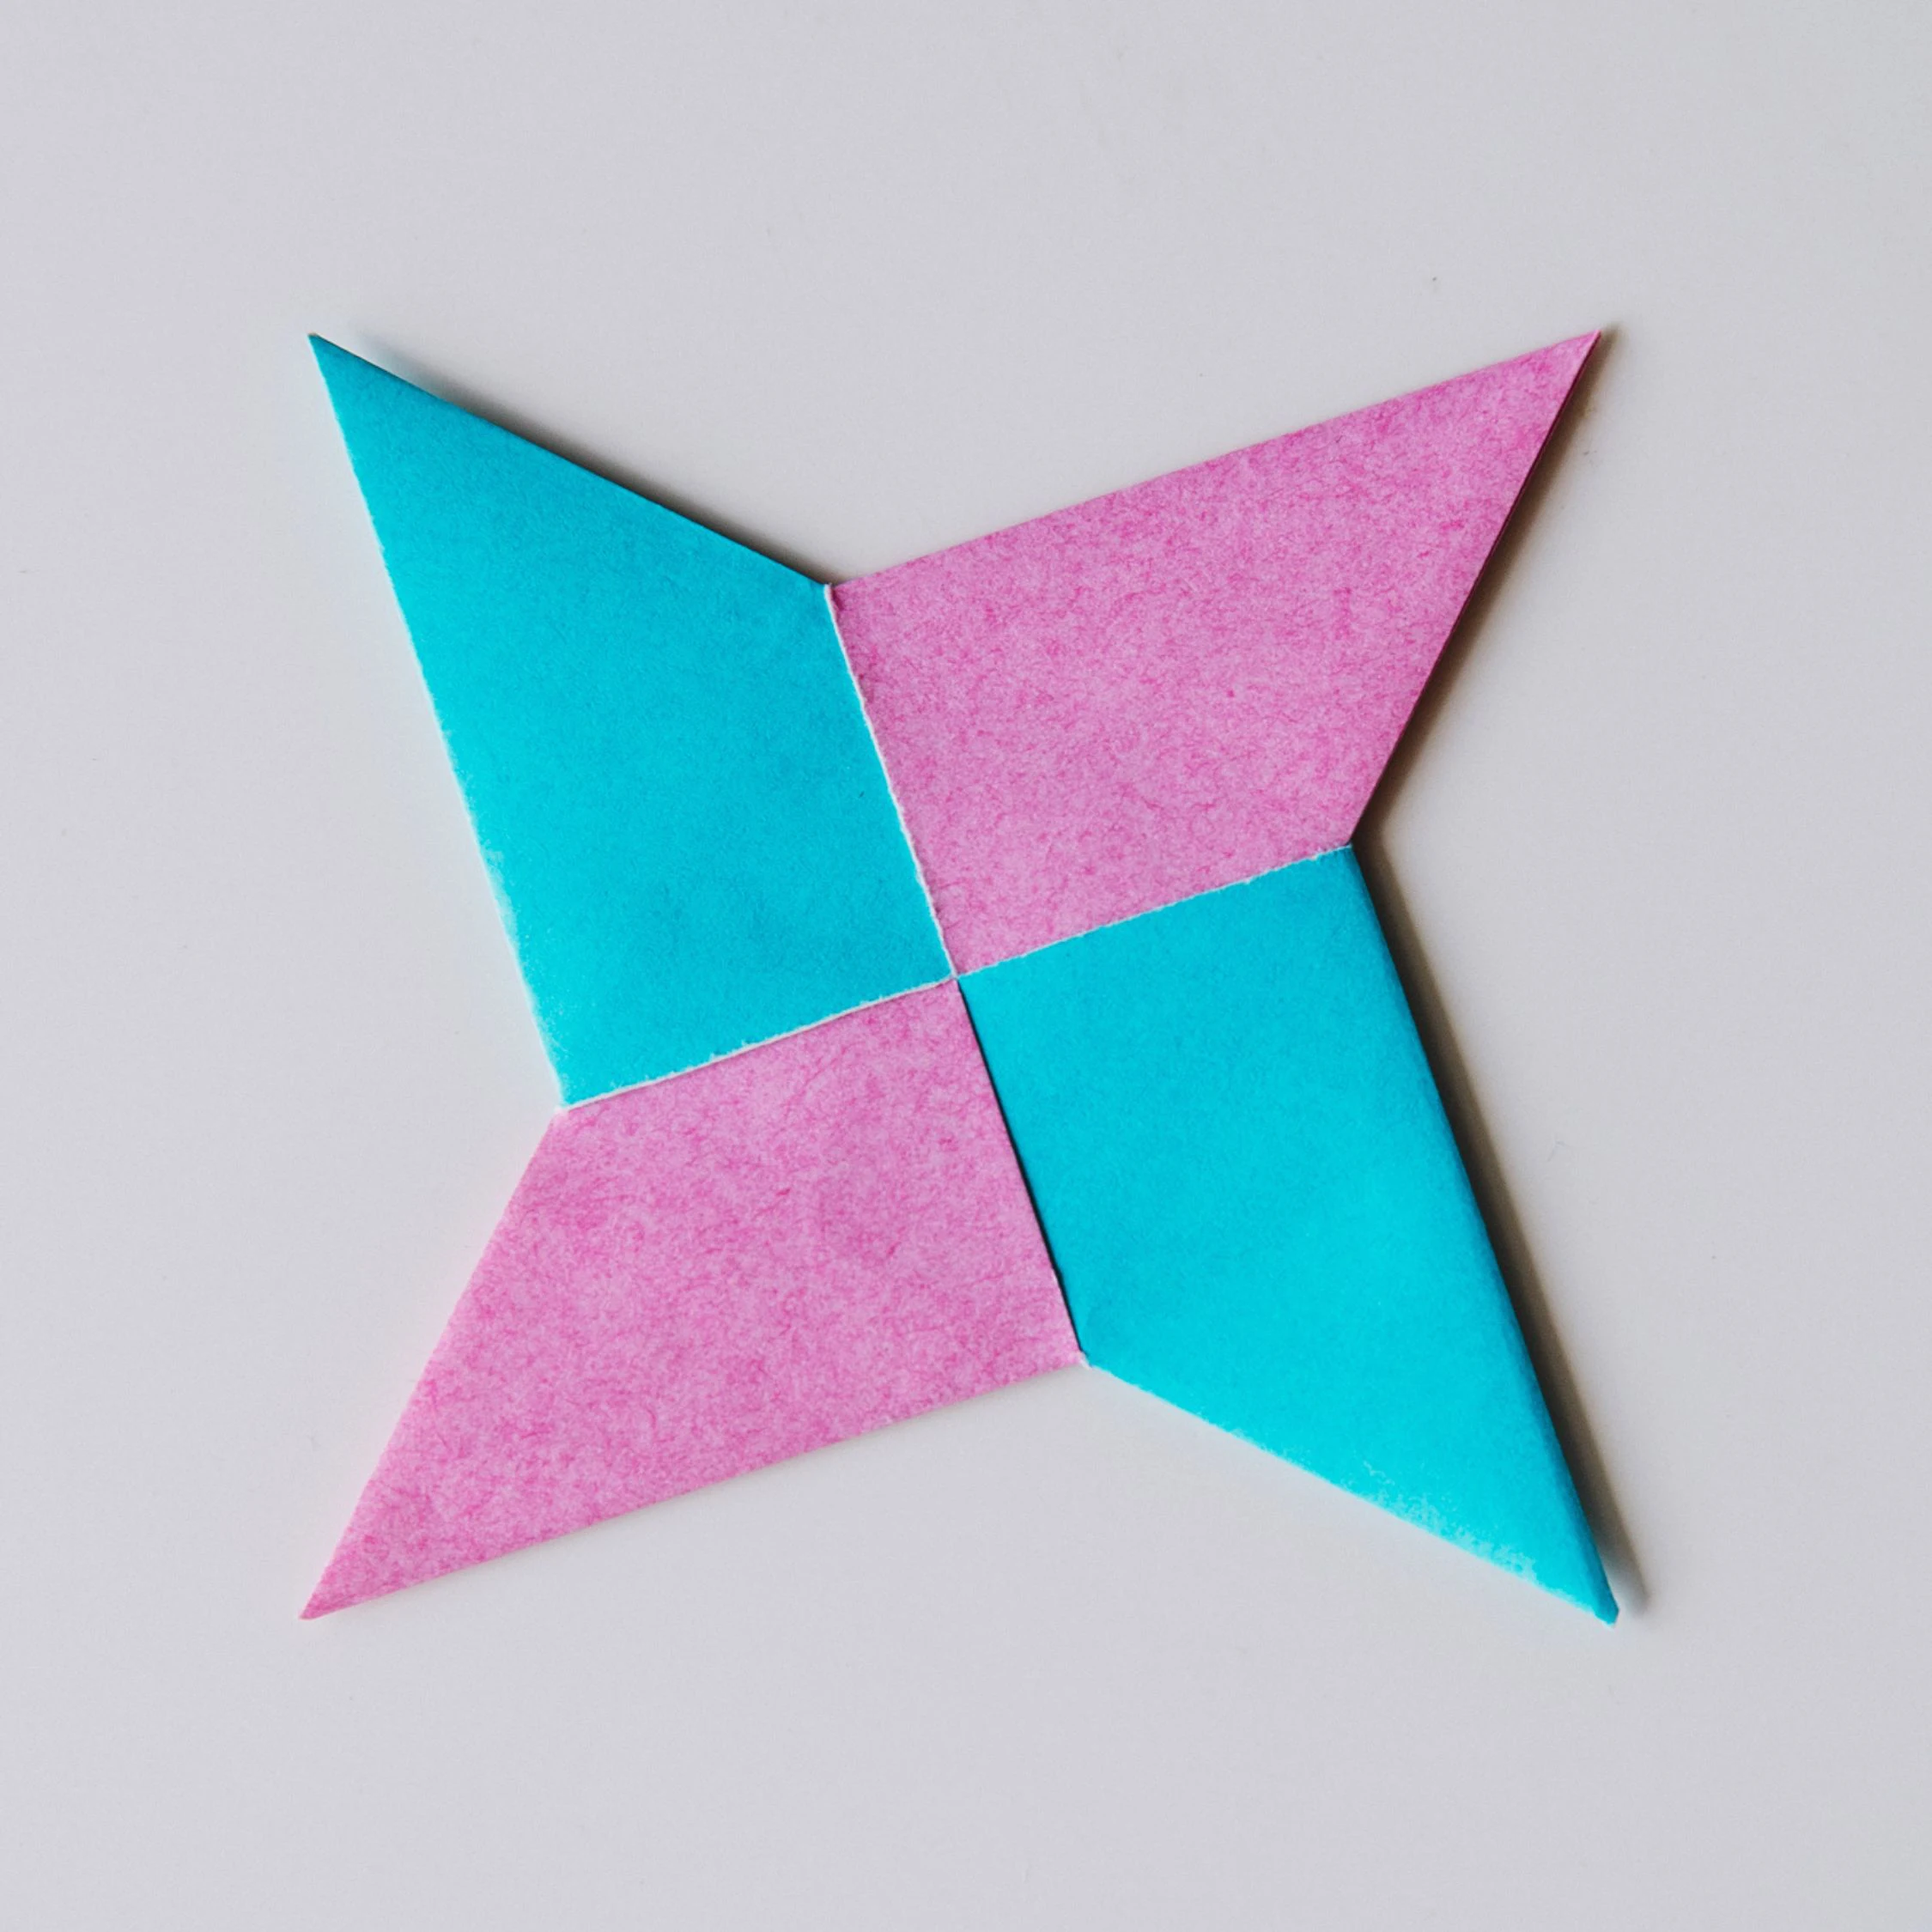
Shape the left and right creases, and push the left, right, and top points to meet the bottom point along the existing creases, creating a small square.
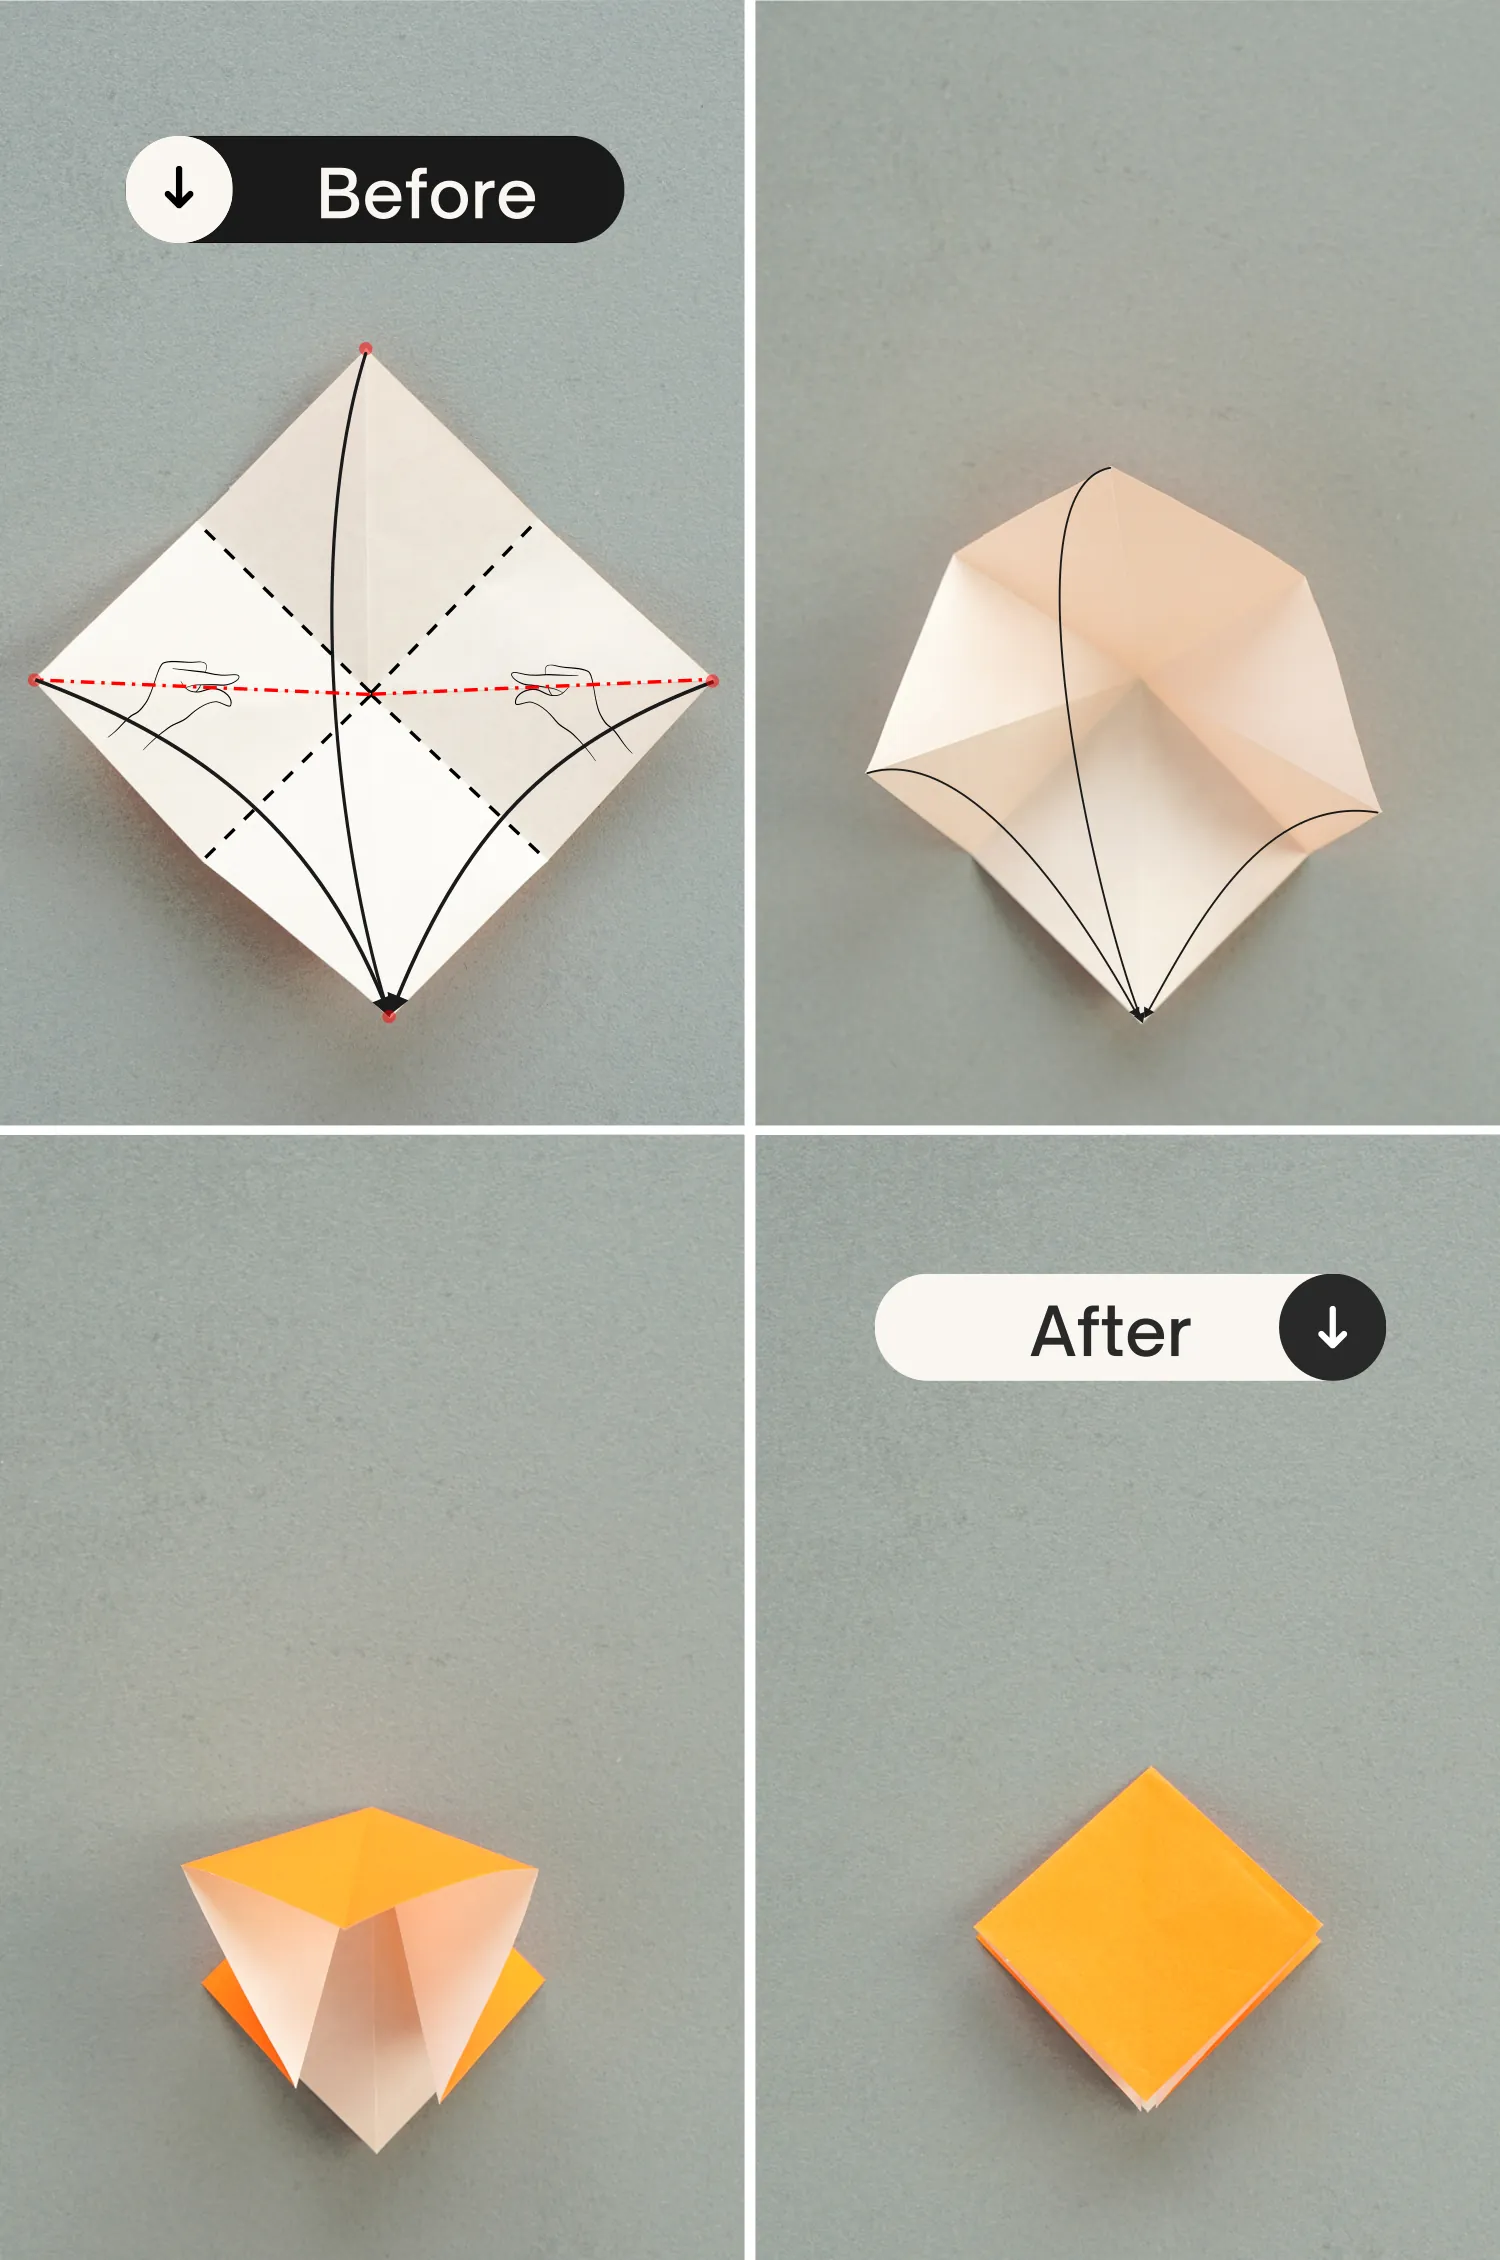
Step 7
Fold the bottom left and right edges to align with the middle vertical crease, then flip the paper over and repeat.
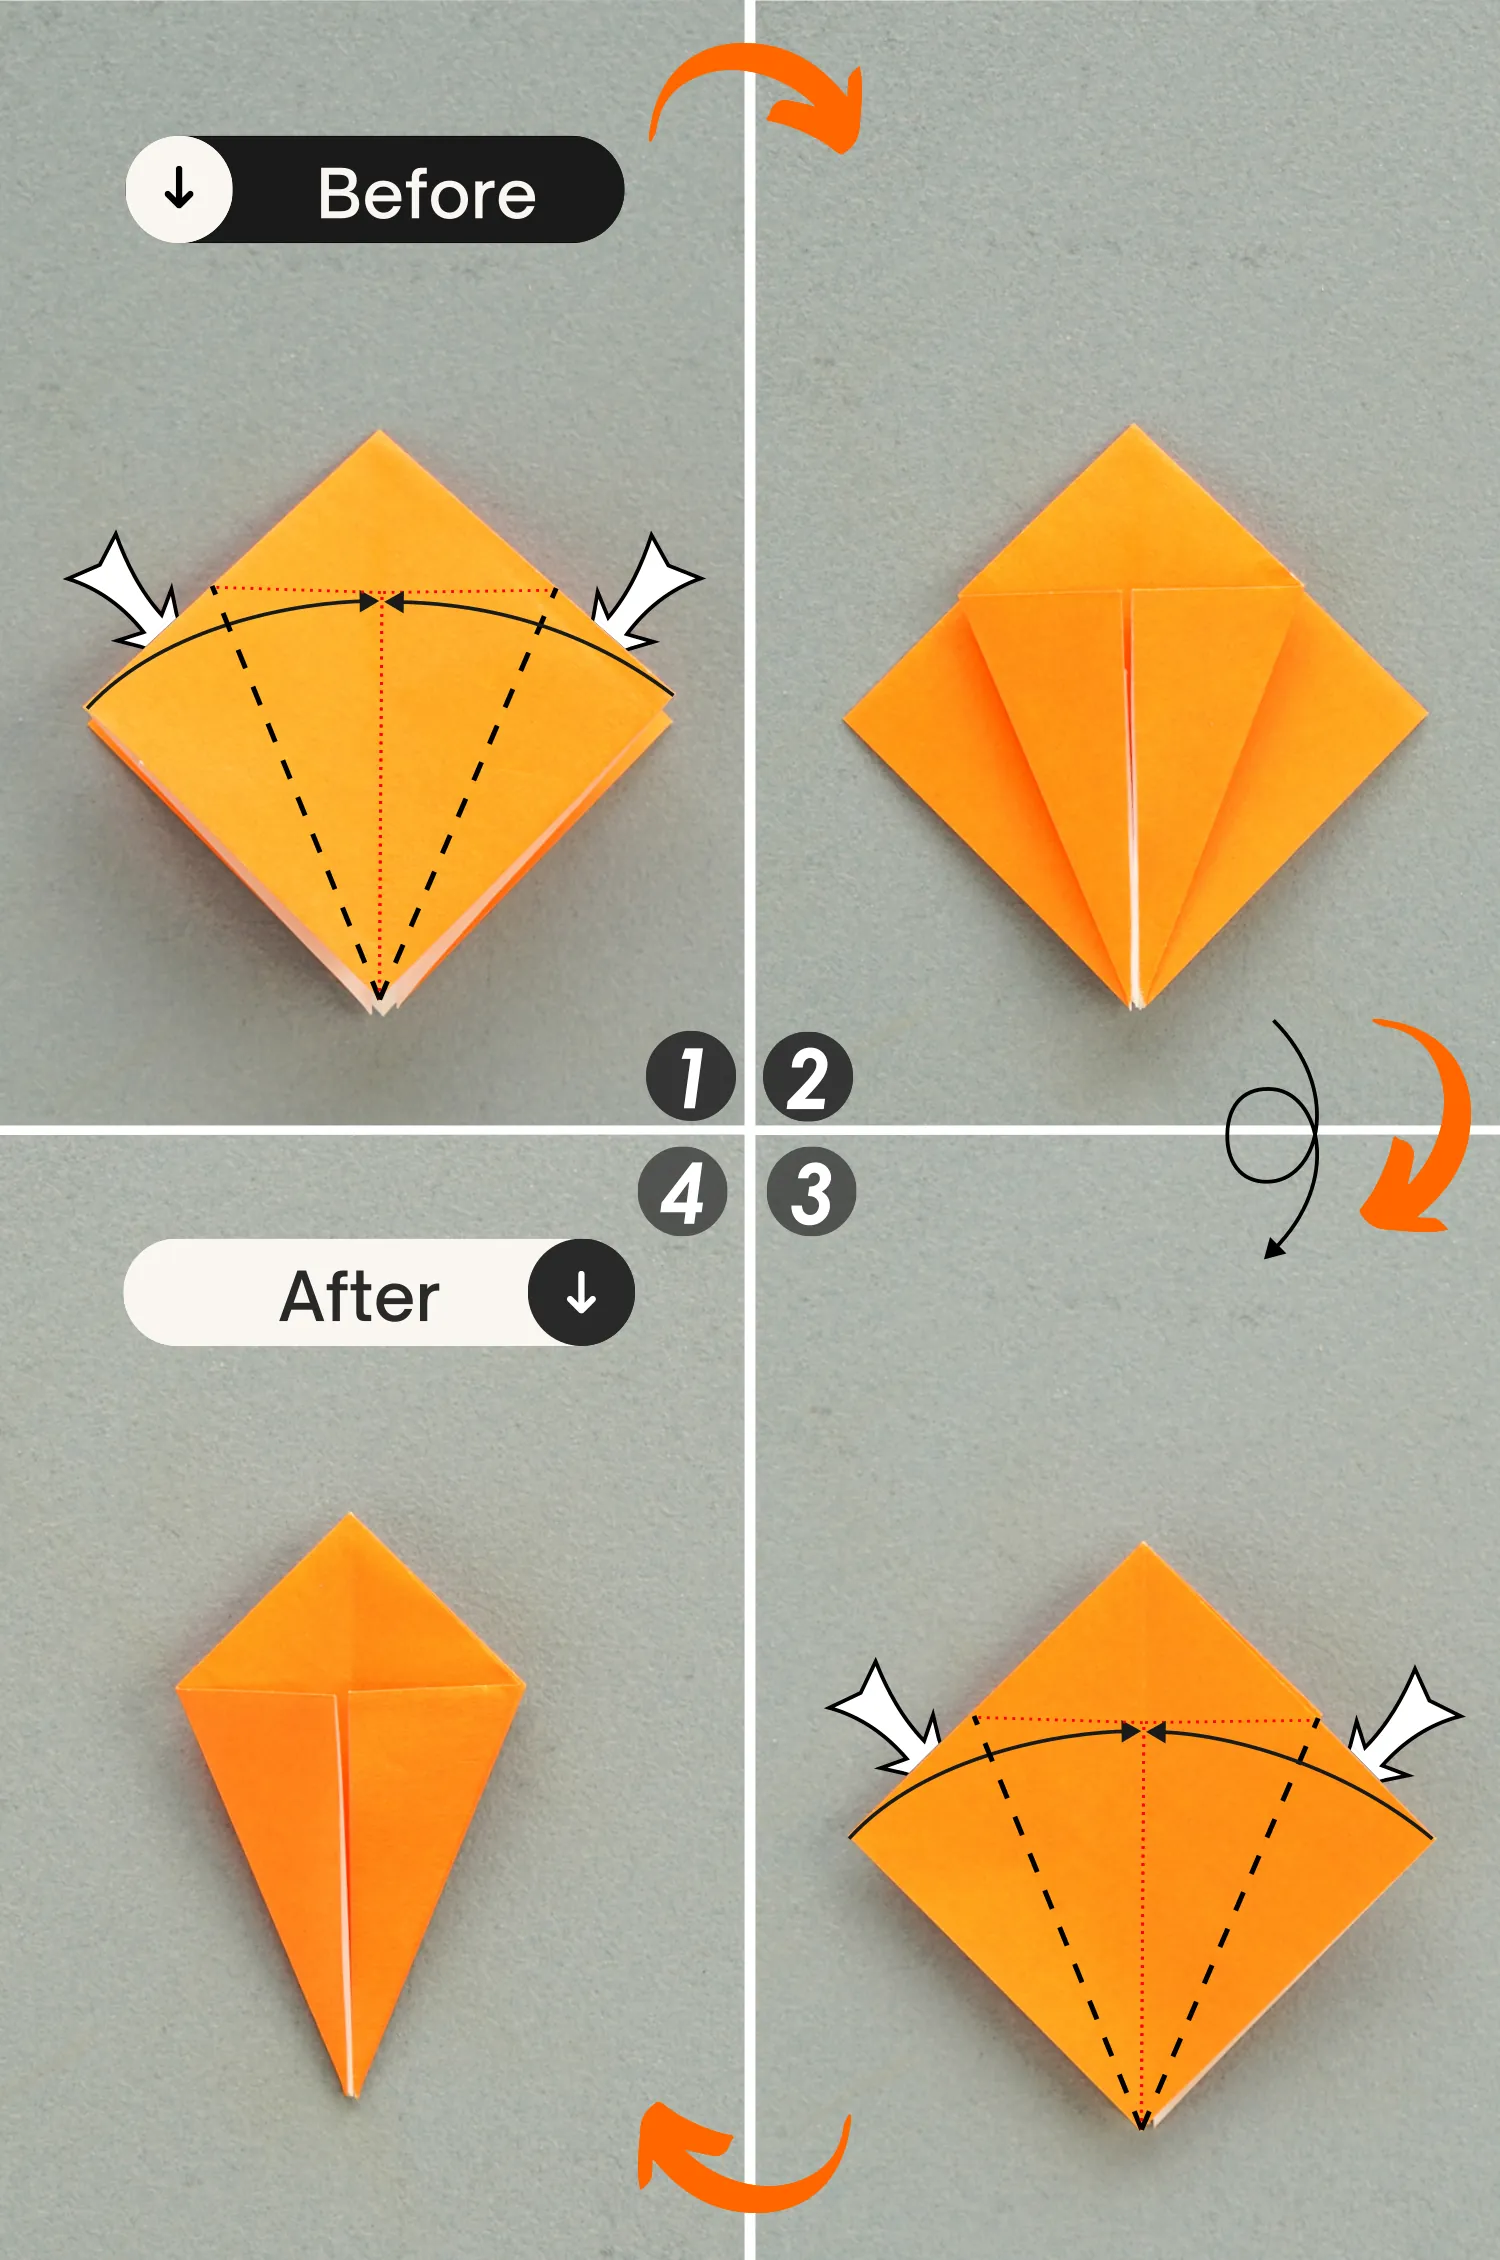
Step 8
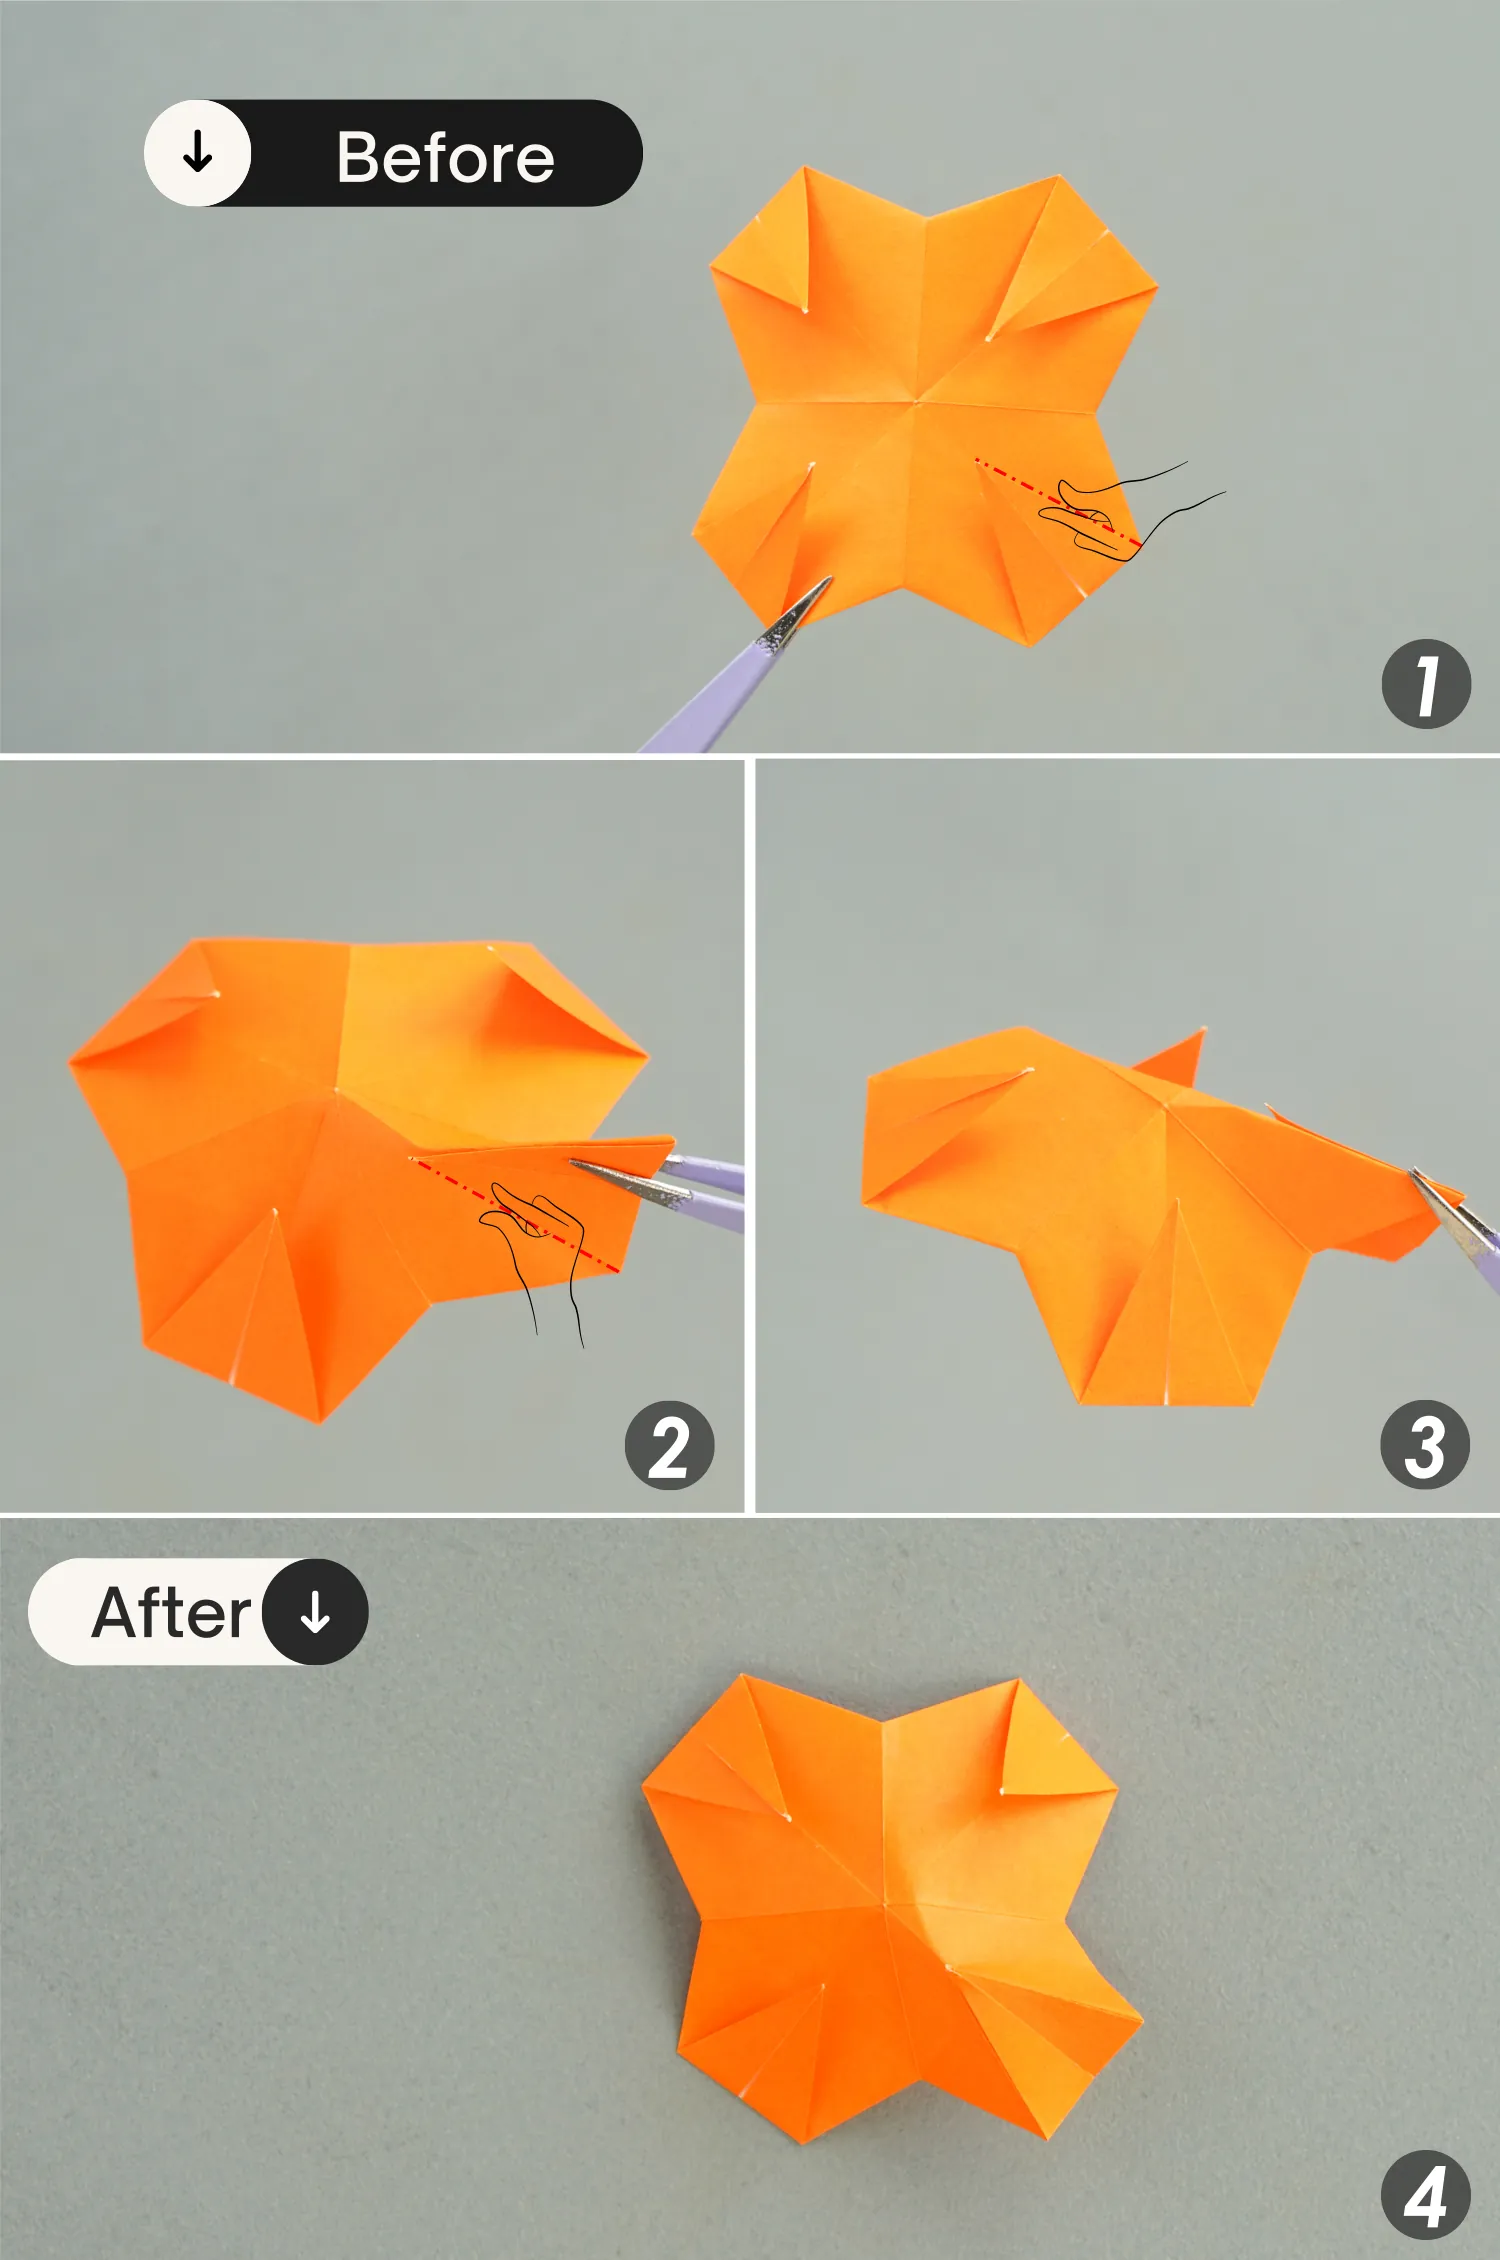
Step 9
Cut these four short creases shown by the dotted lines.
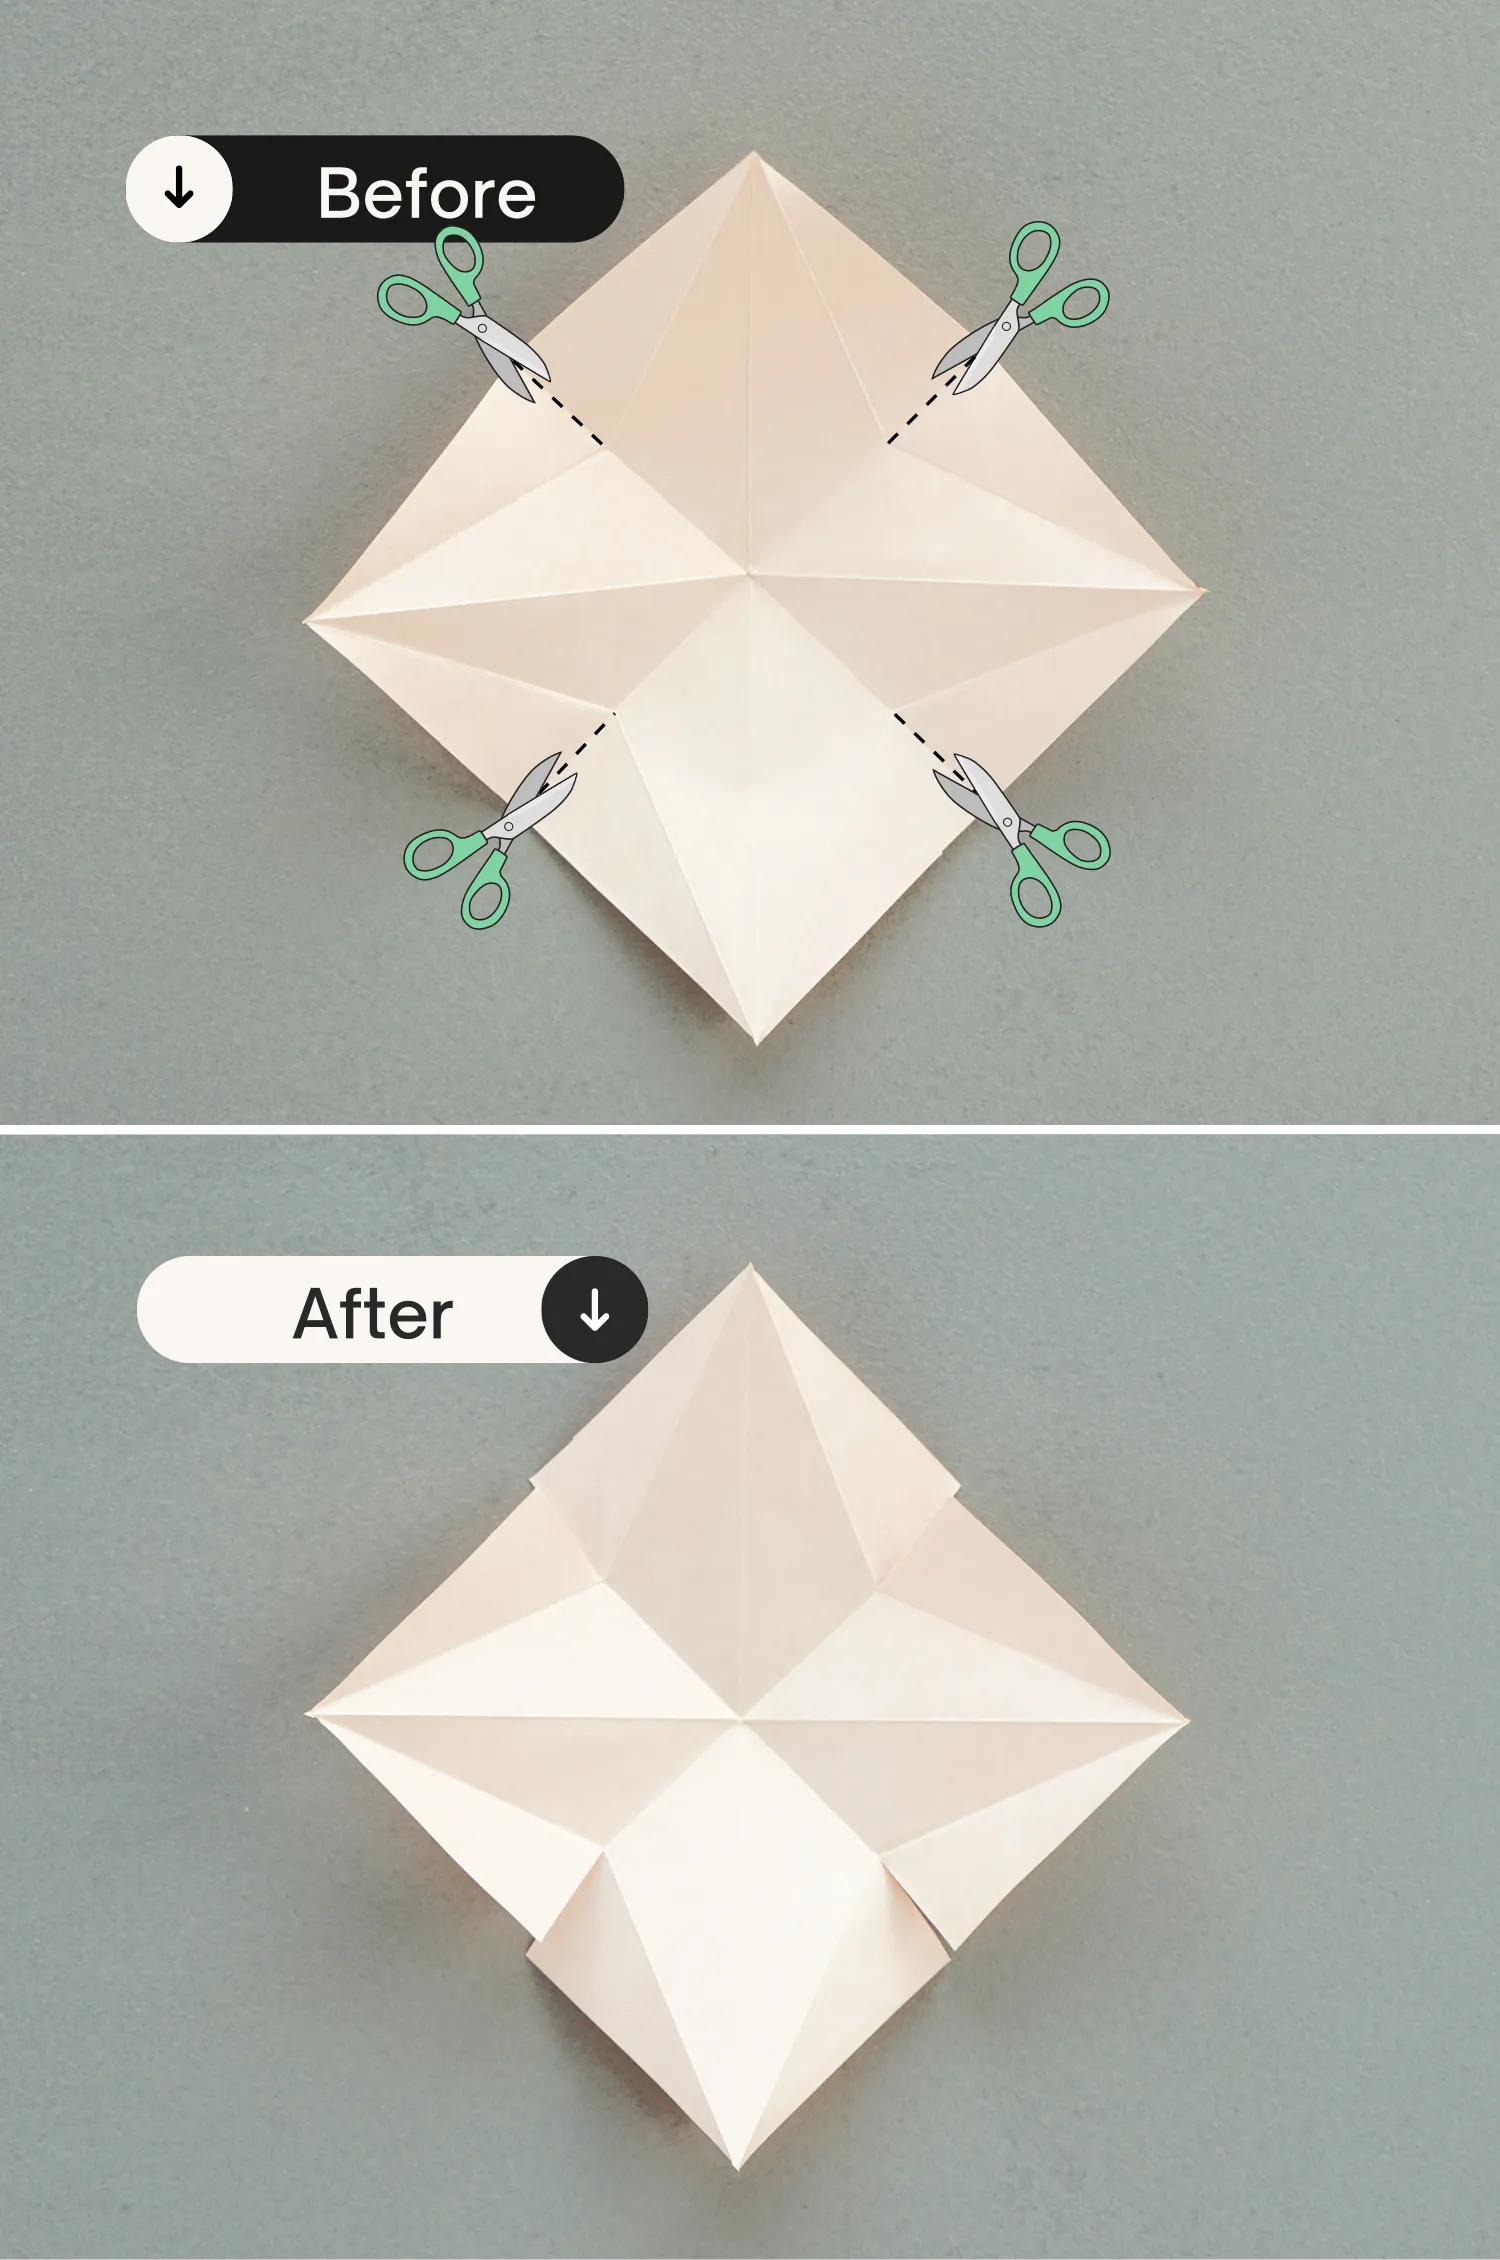
Step 10
Fold these edges along the creases shown by the dotted lines.
Step 11
Flip the paper over.
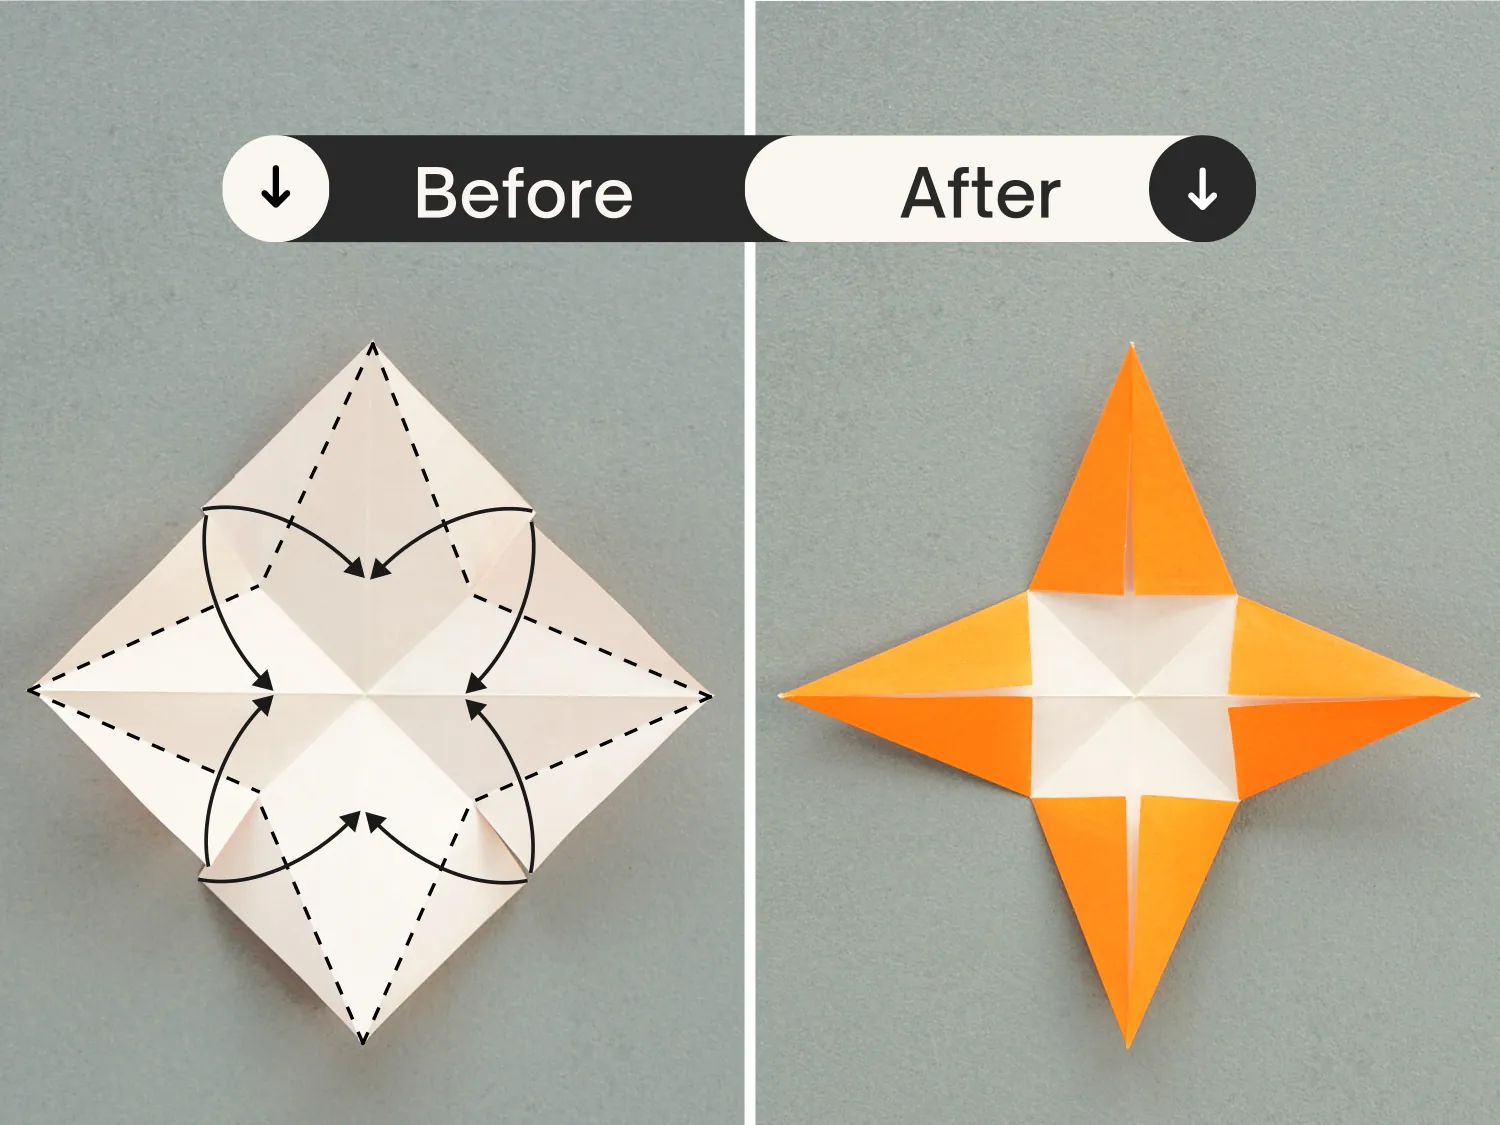
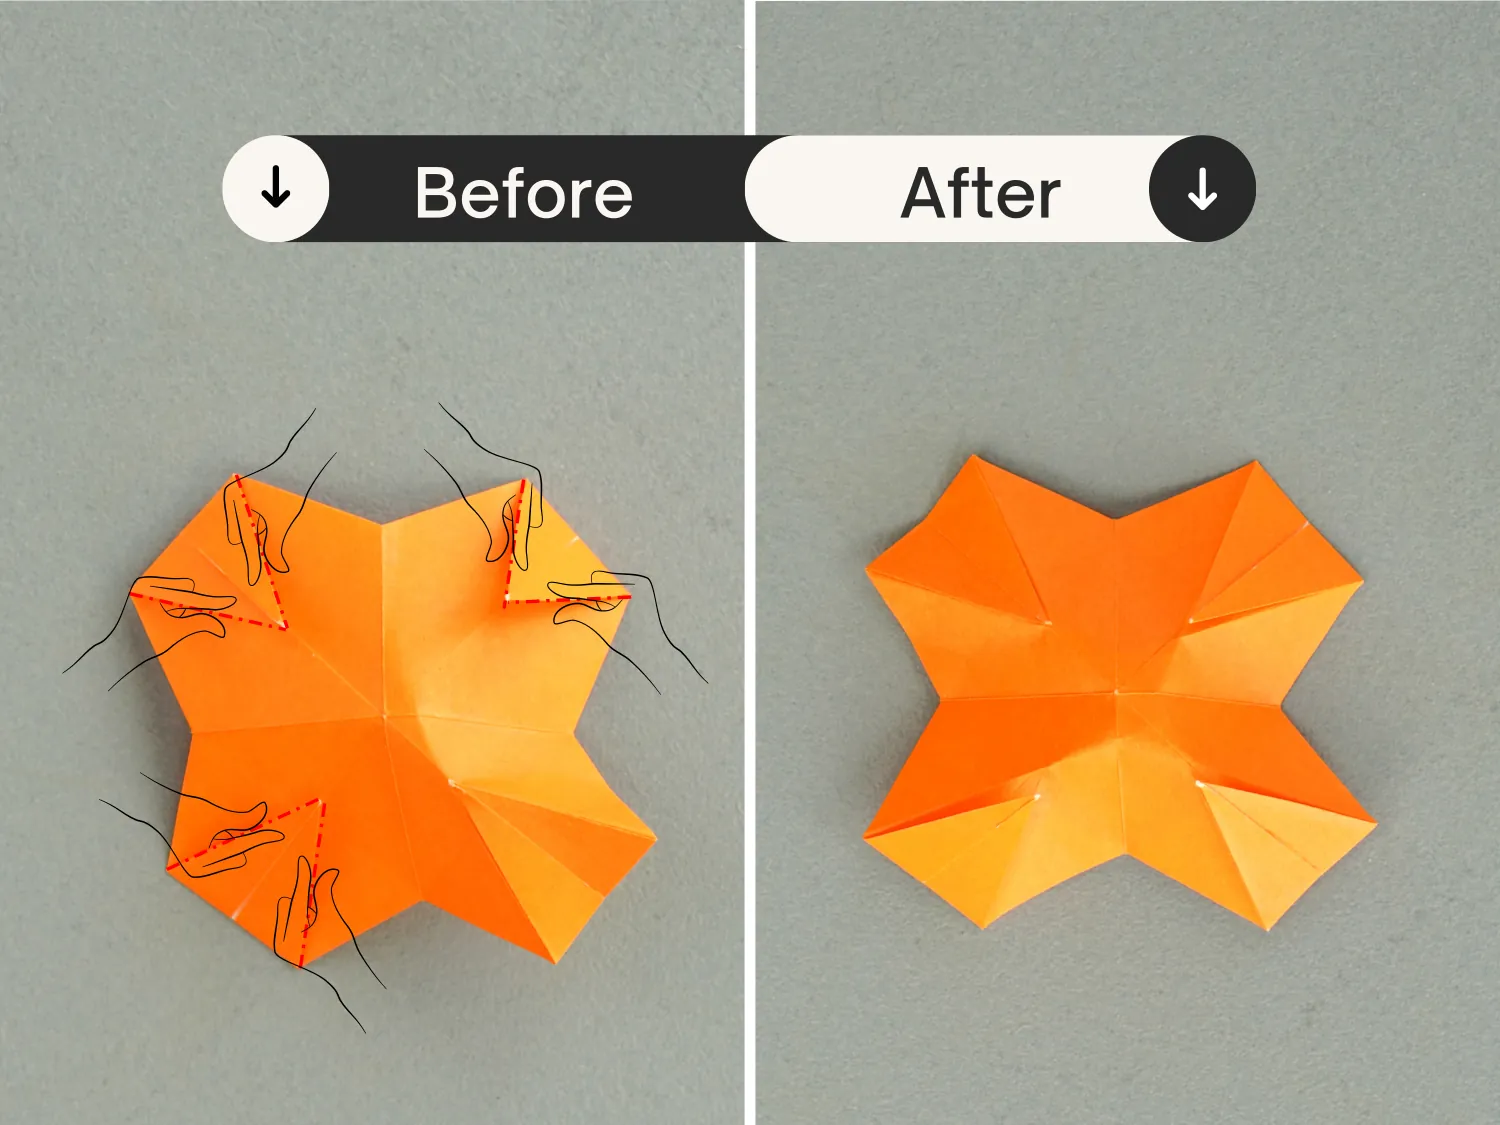
Step 12
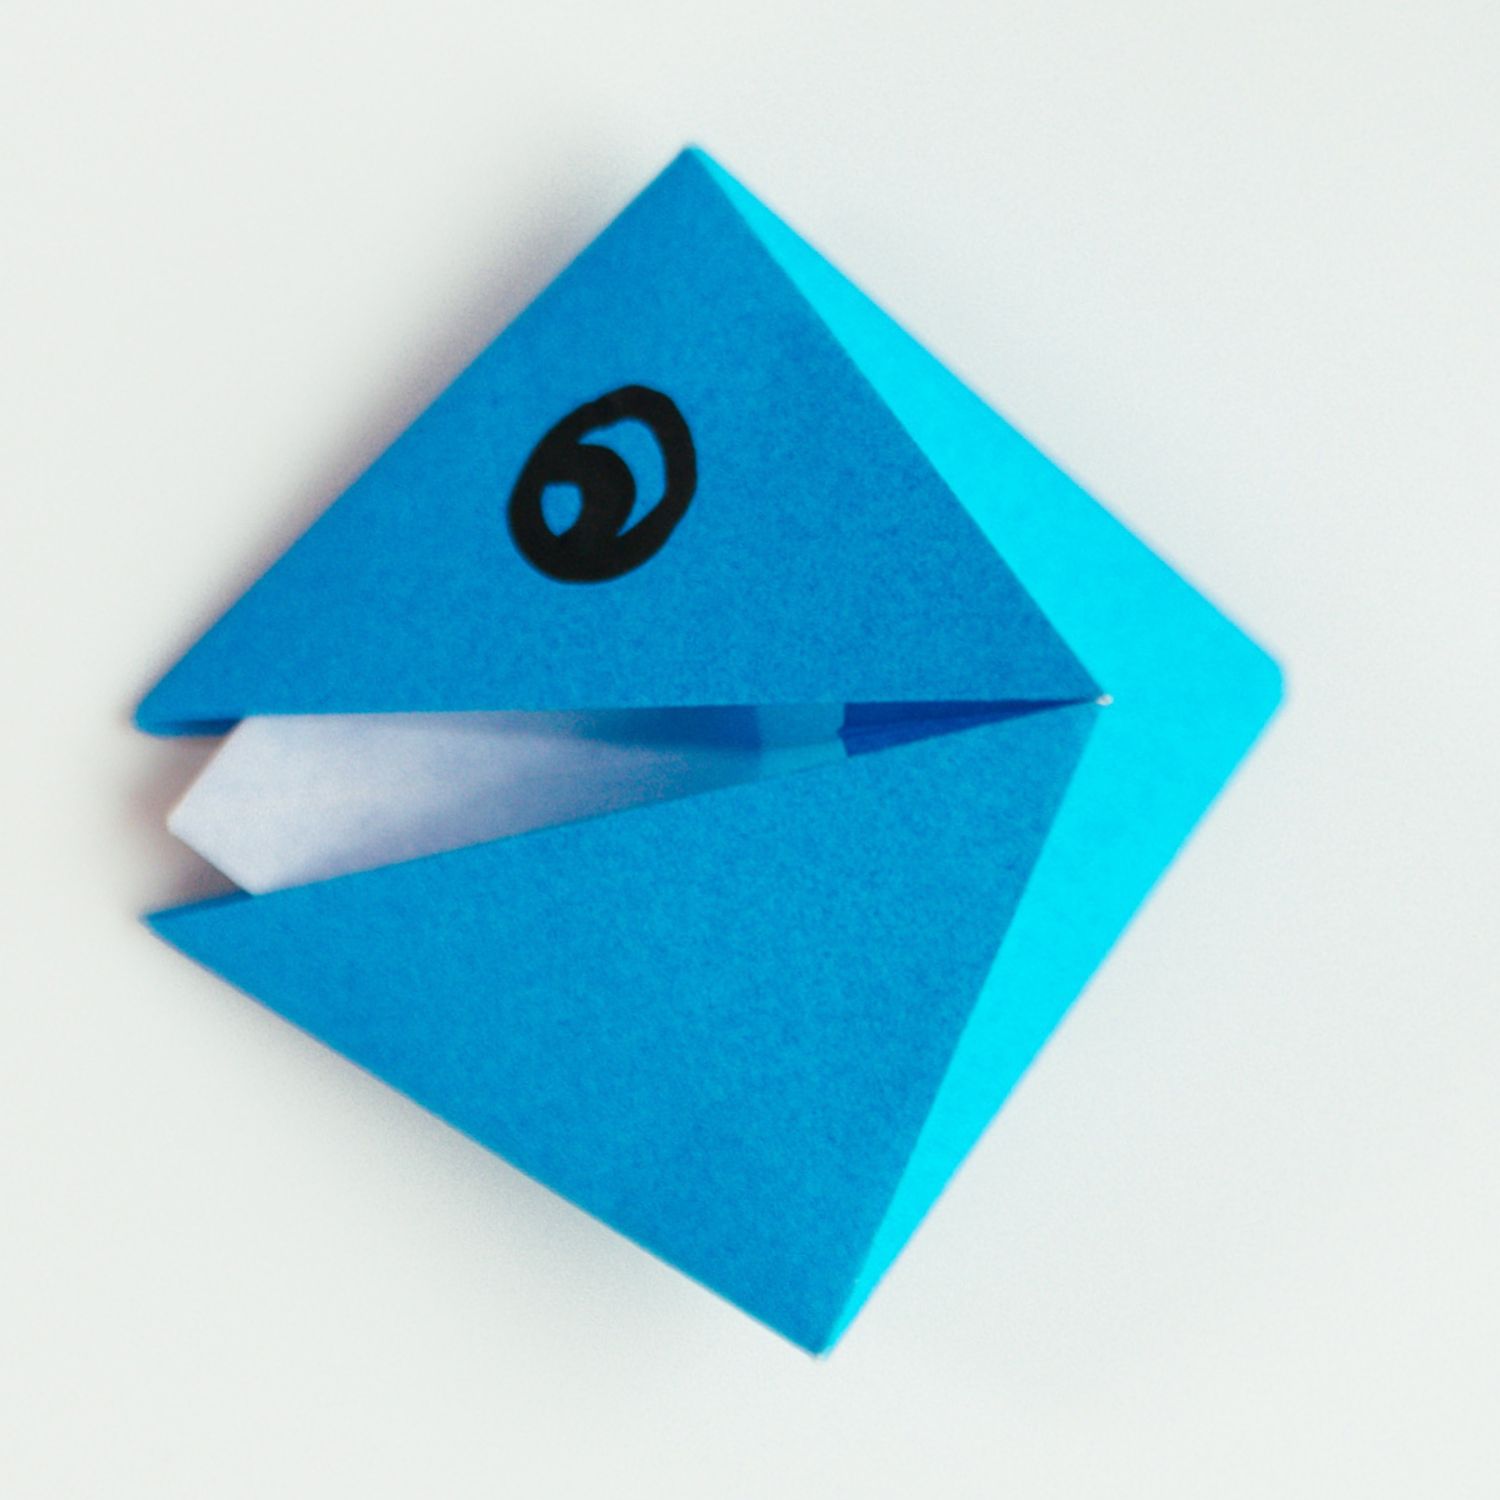
Fold the four corners toward the center along the dotted line. [for a better final effect, try folding these four triangles for a slightly larger section]
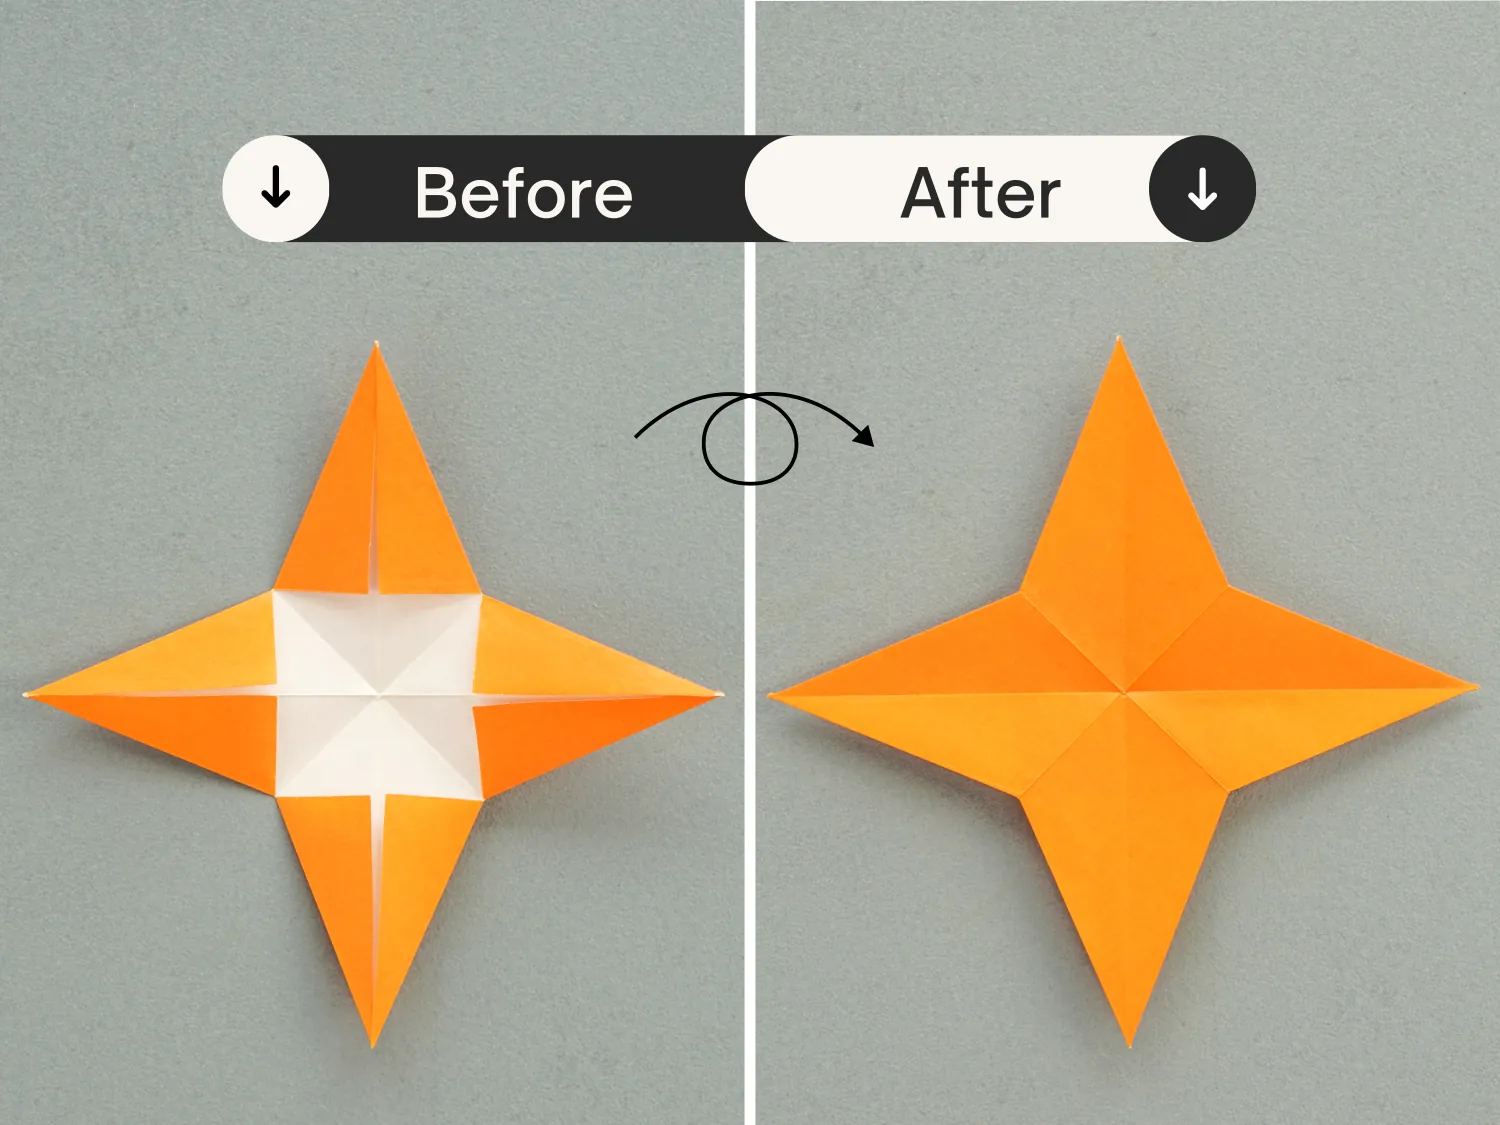
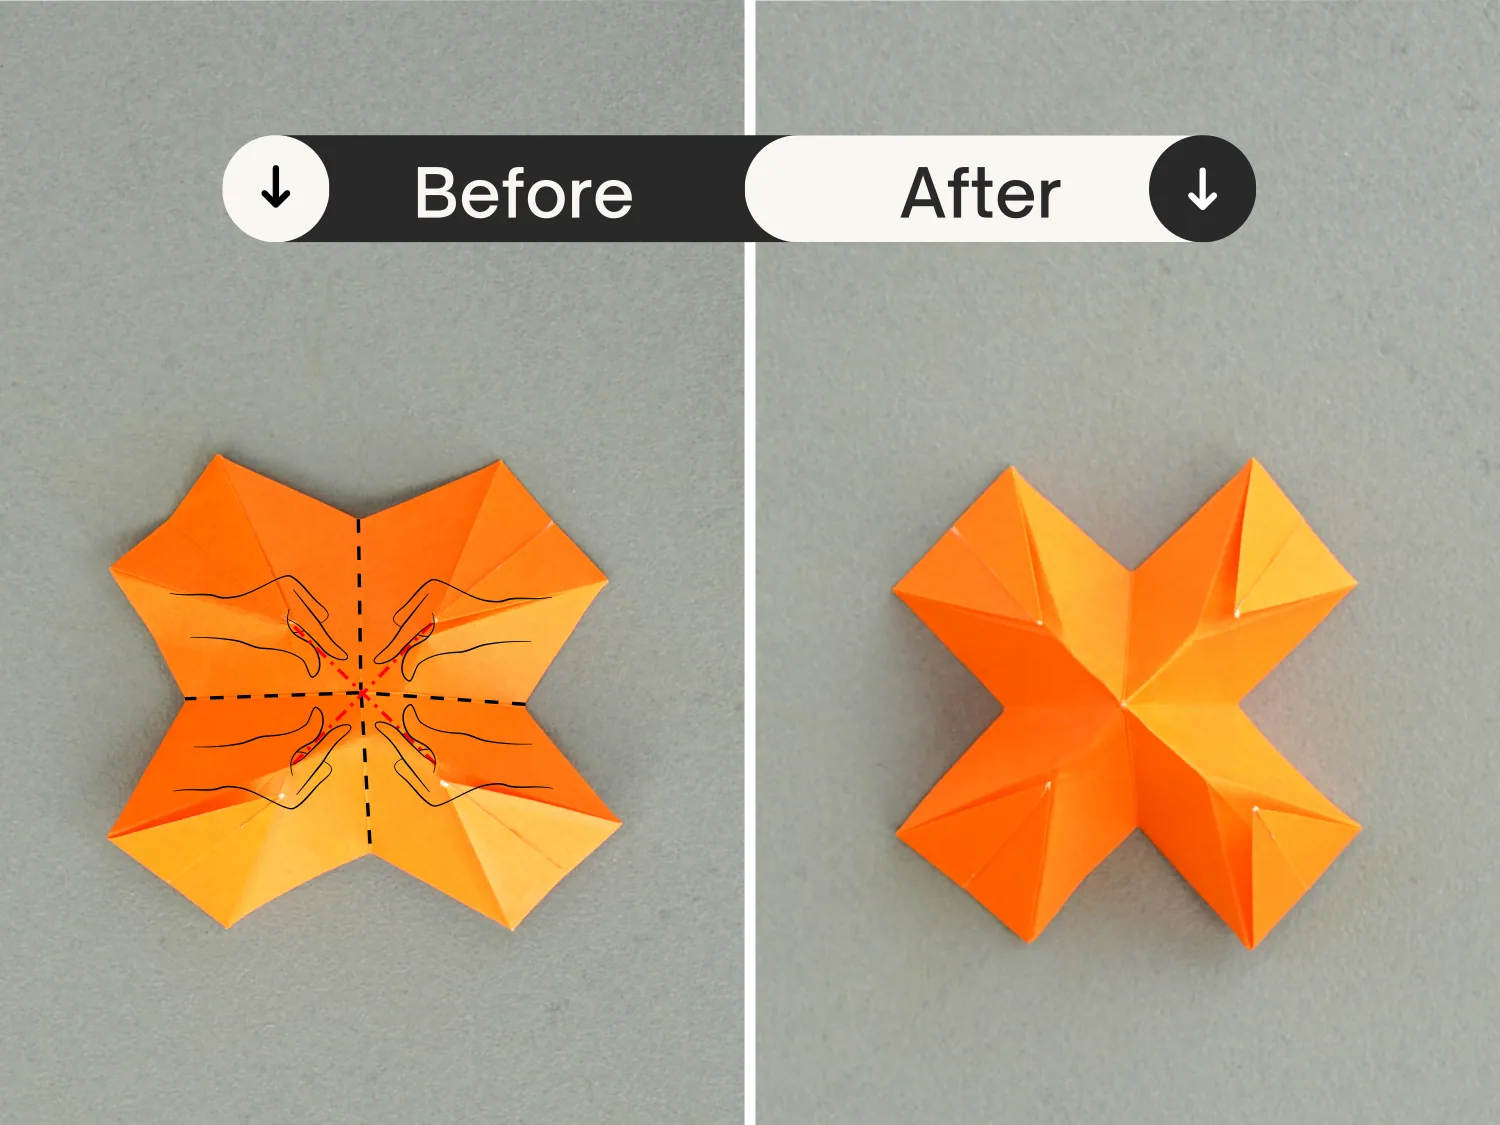
Step 13
Focus on the bottom right part, shape the left and right edges of this triangle and push down its middle vertical line.
Step 14
Repeat this for the remaining three triangles.
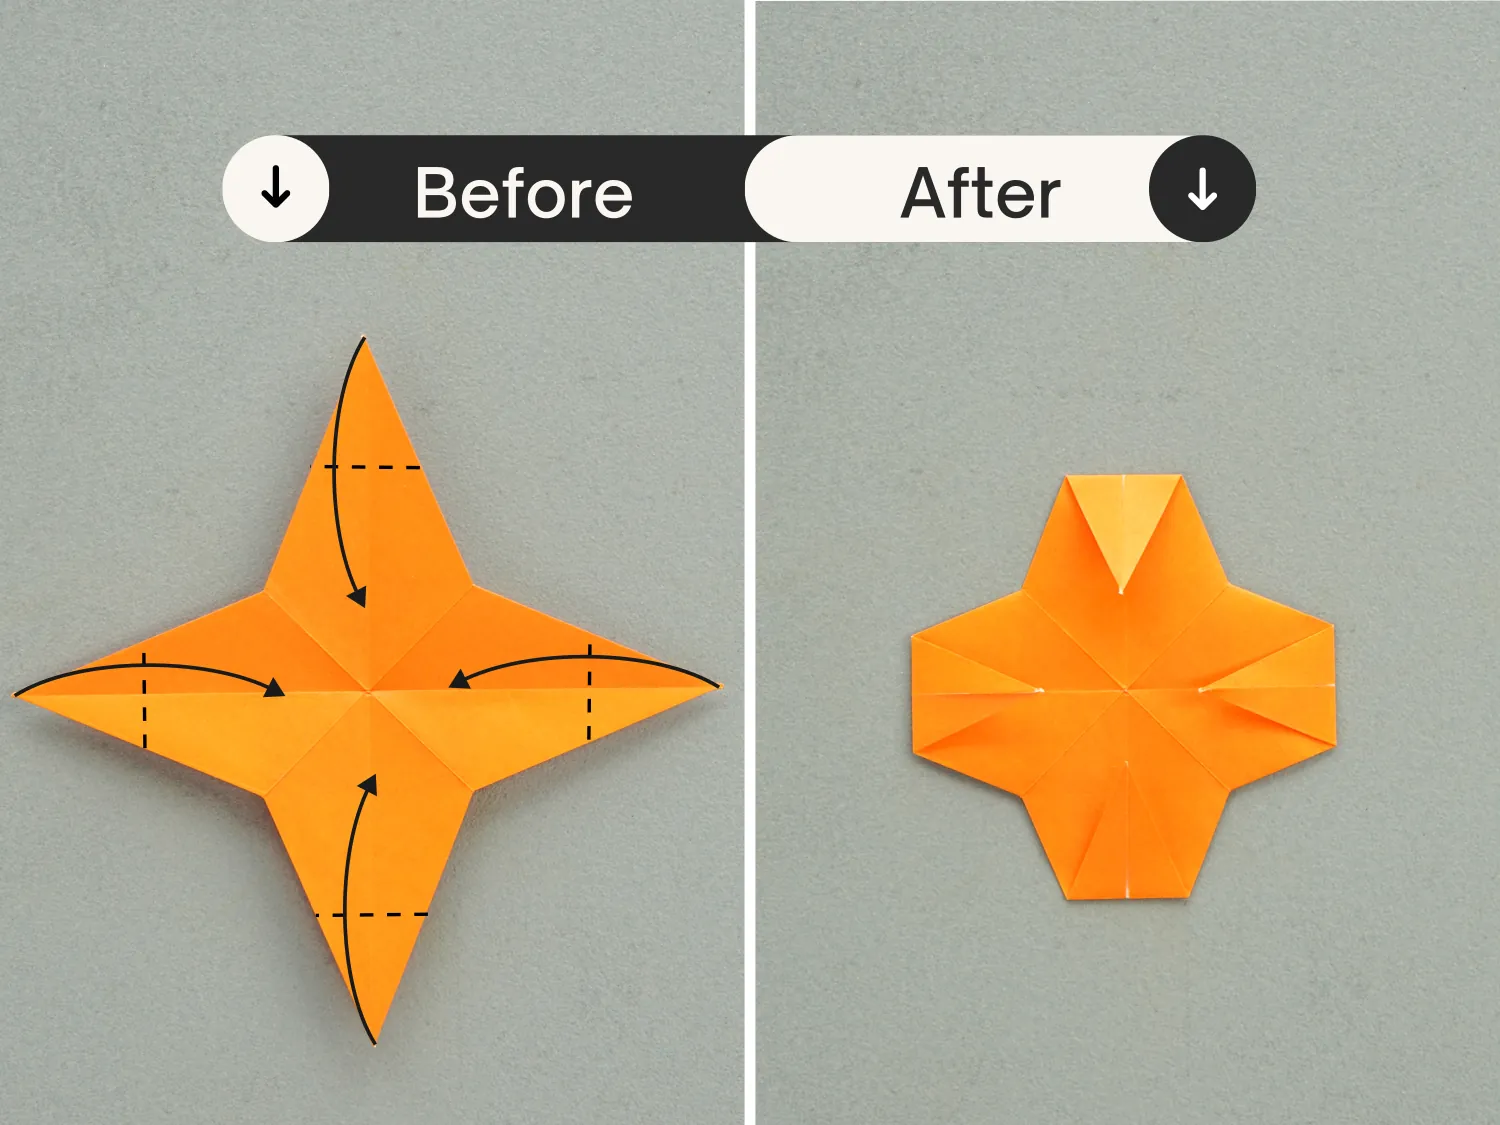
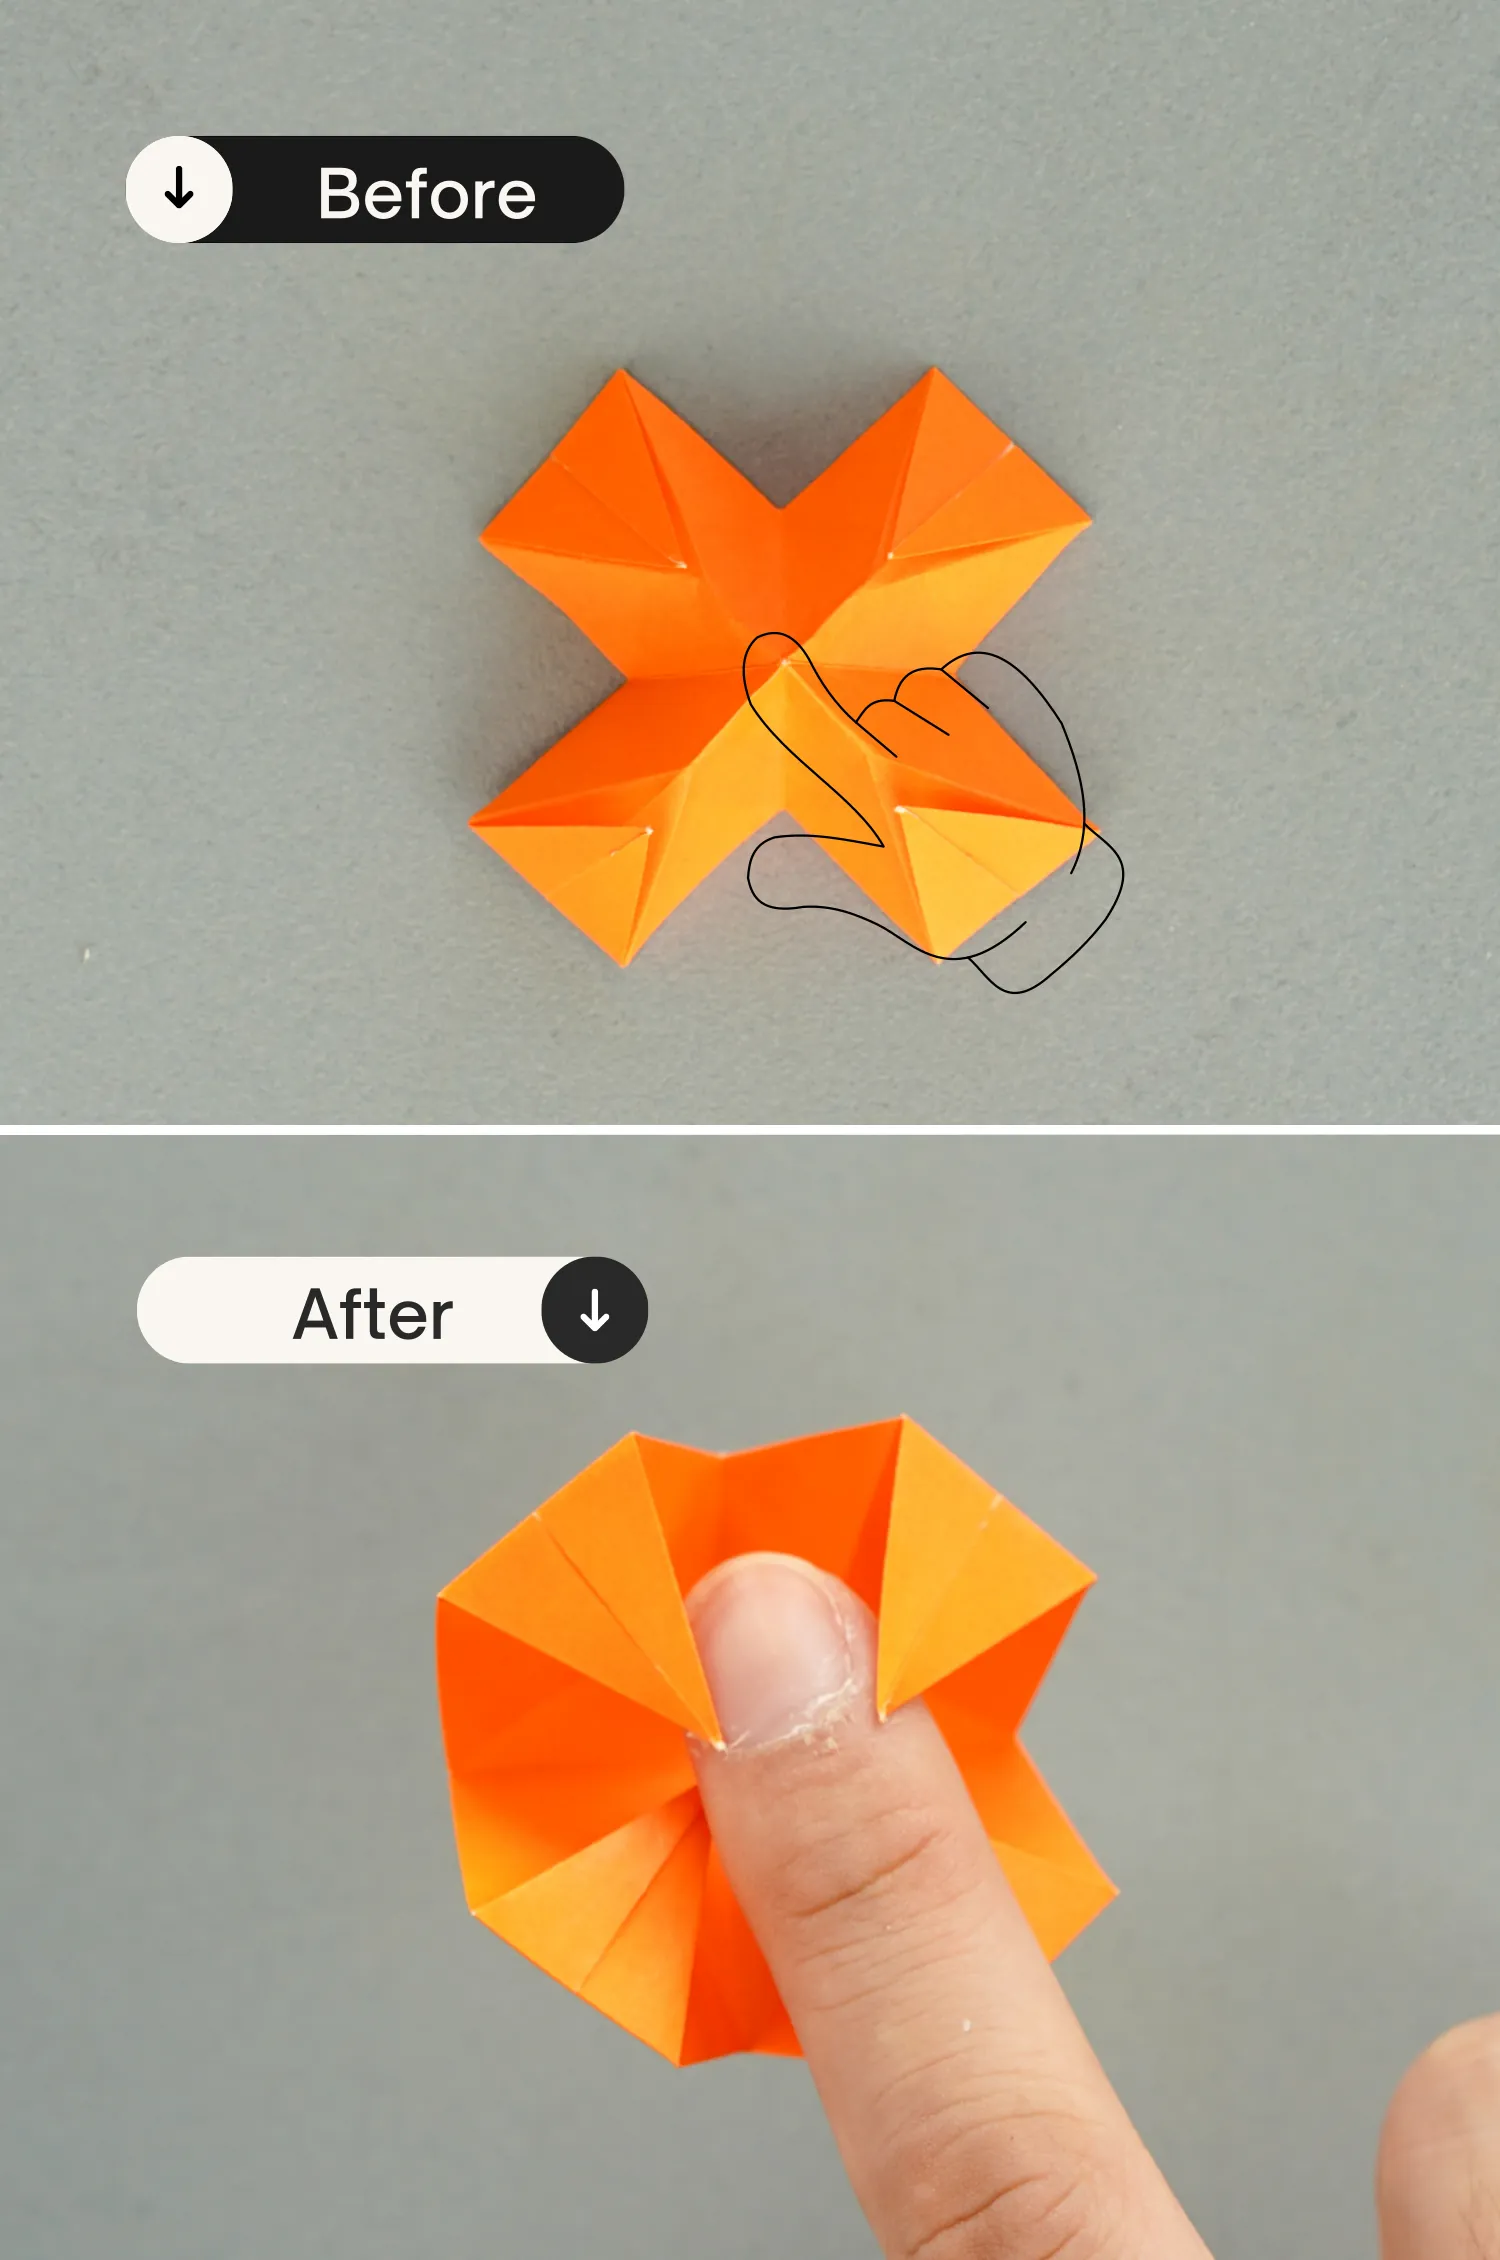
Step 15
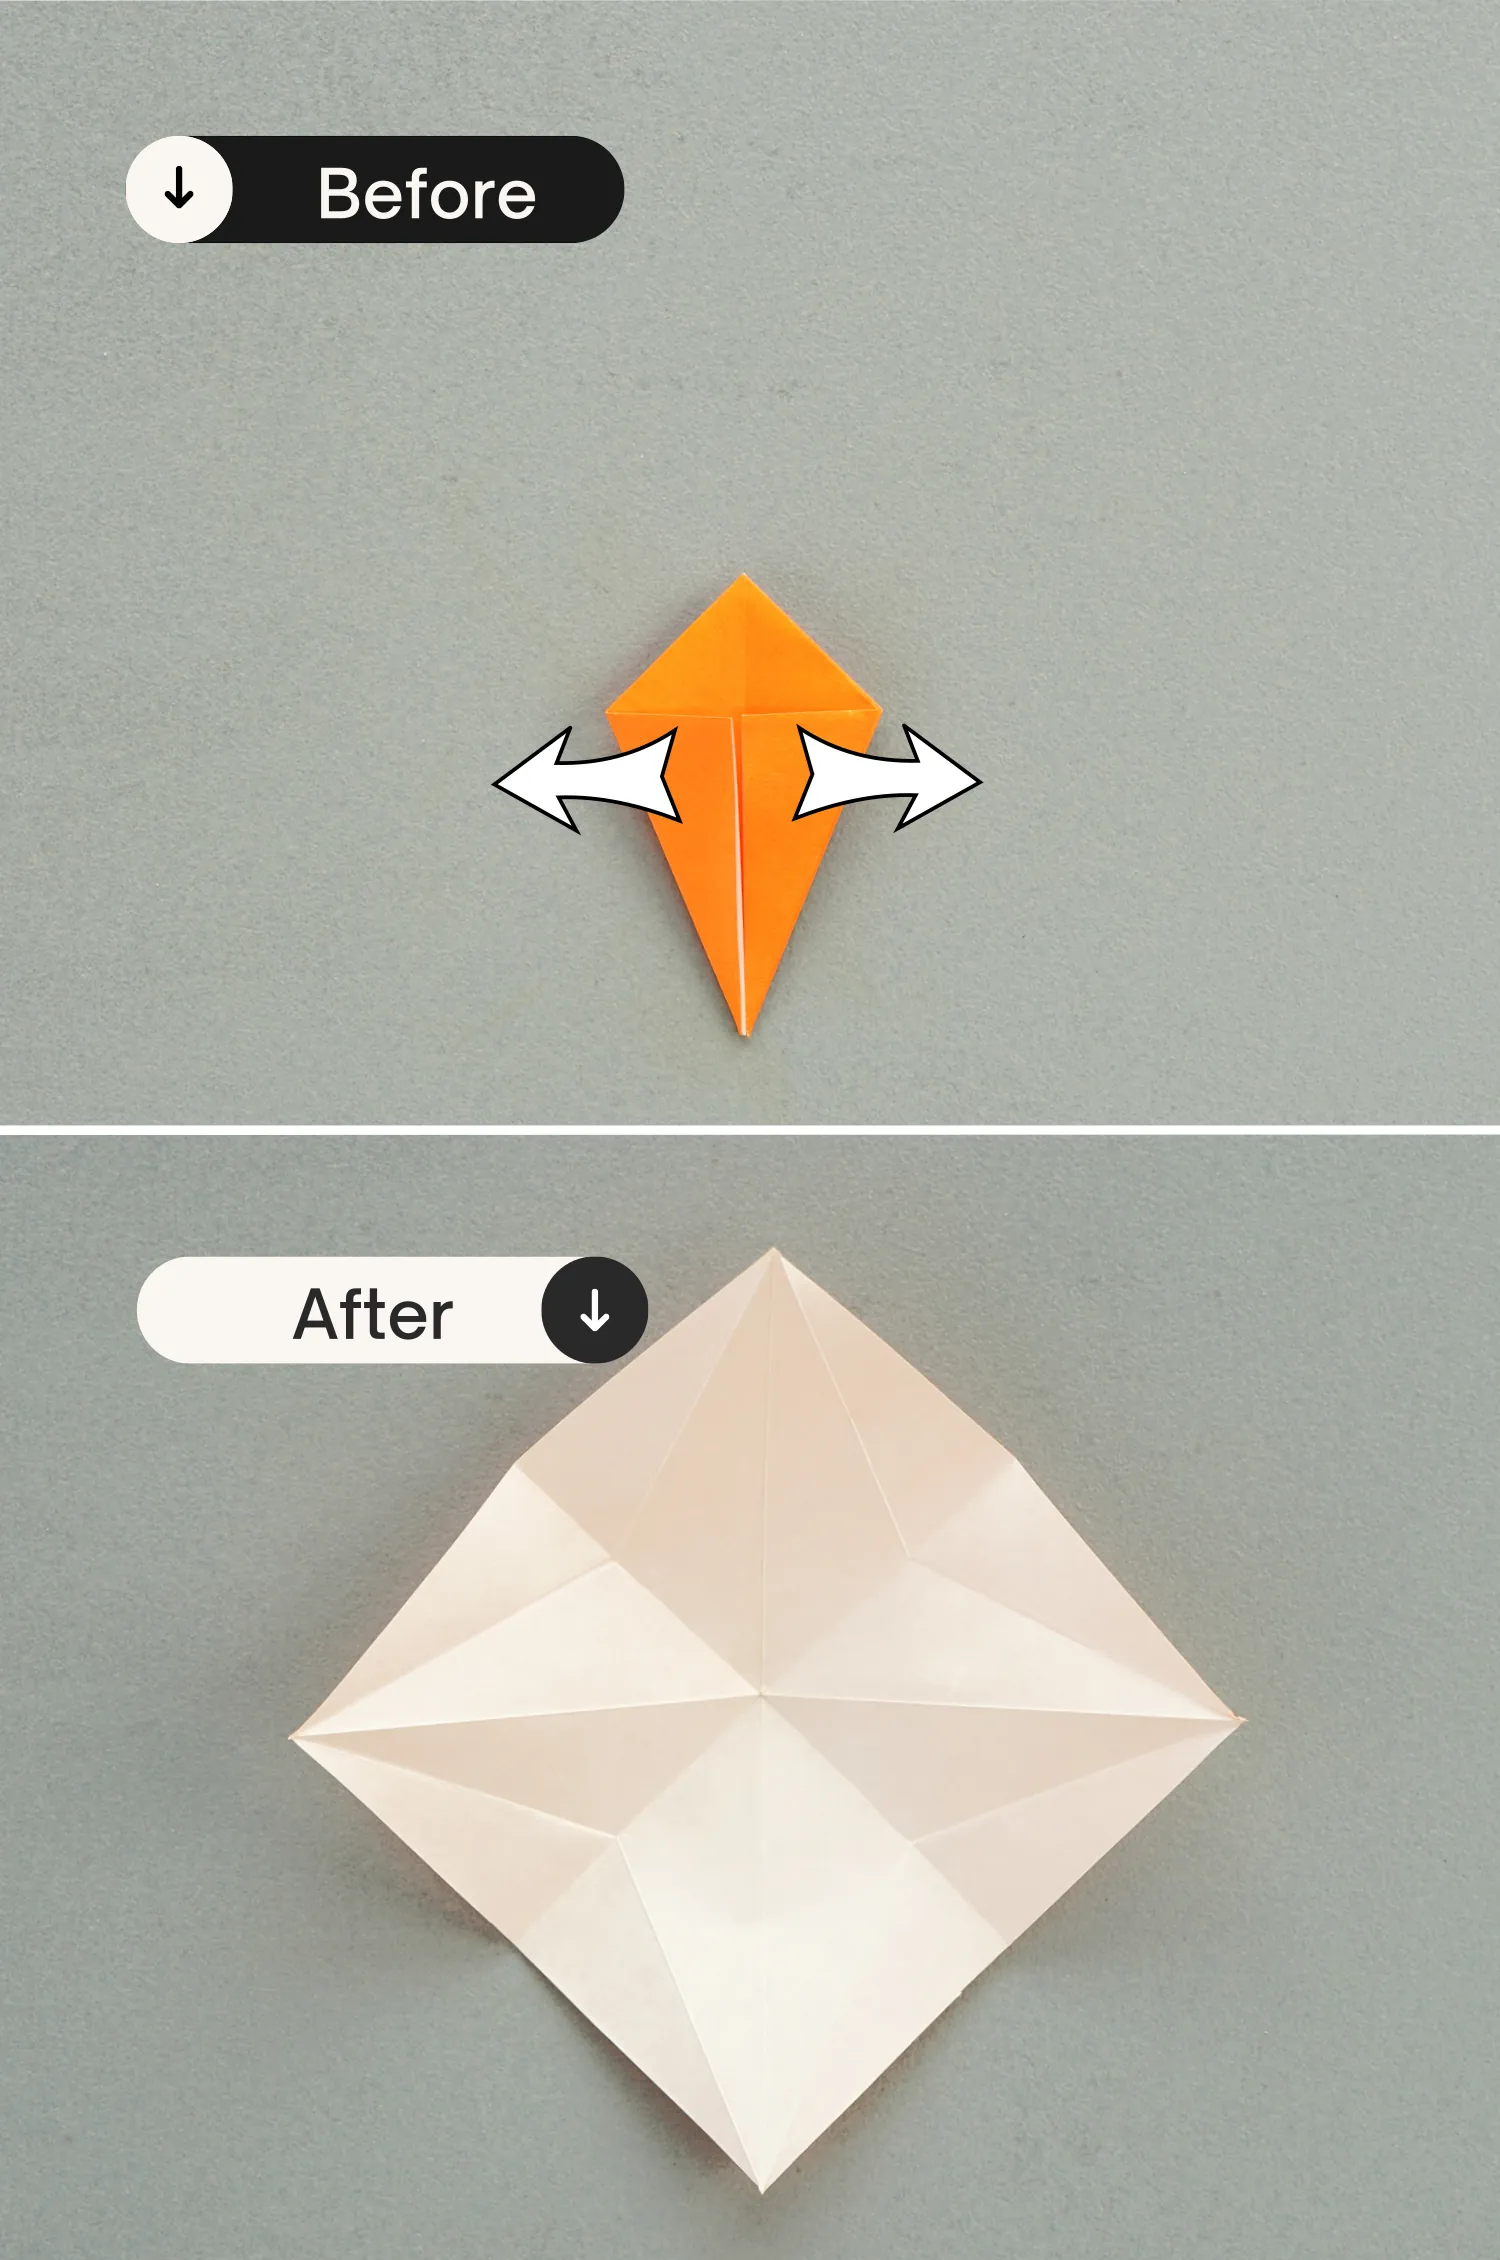
Shape the four creases shown by the red dotted line that extends from the top points of the four triangles.
Step 16
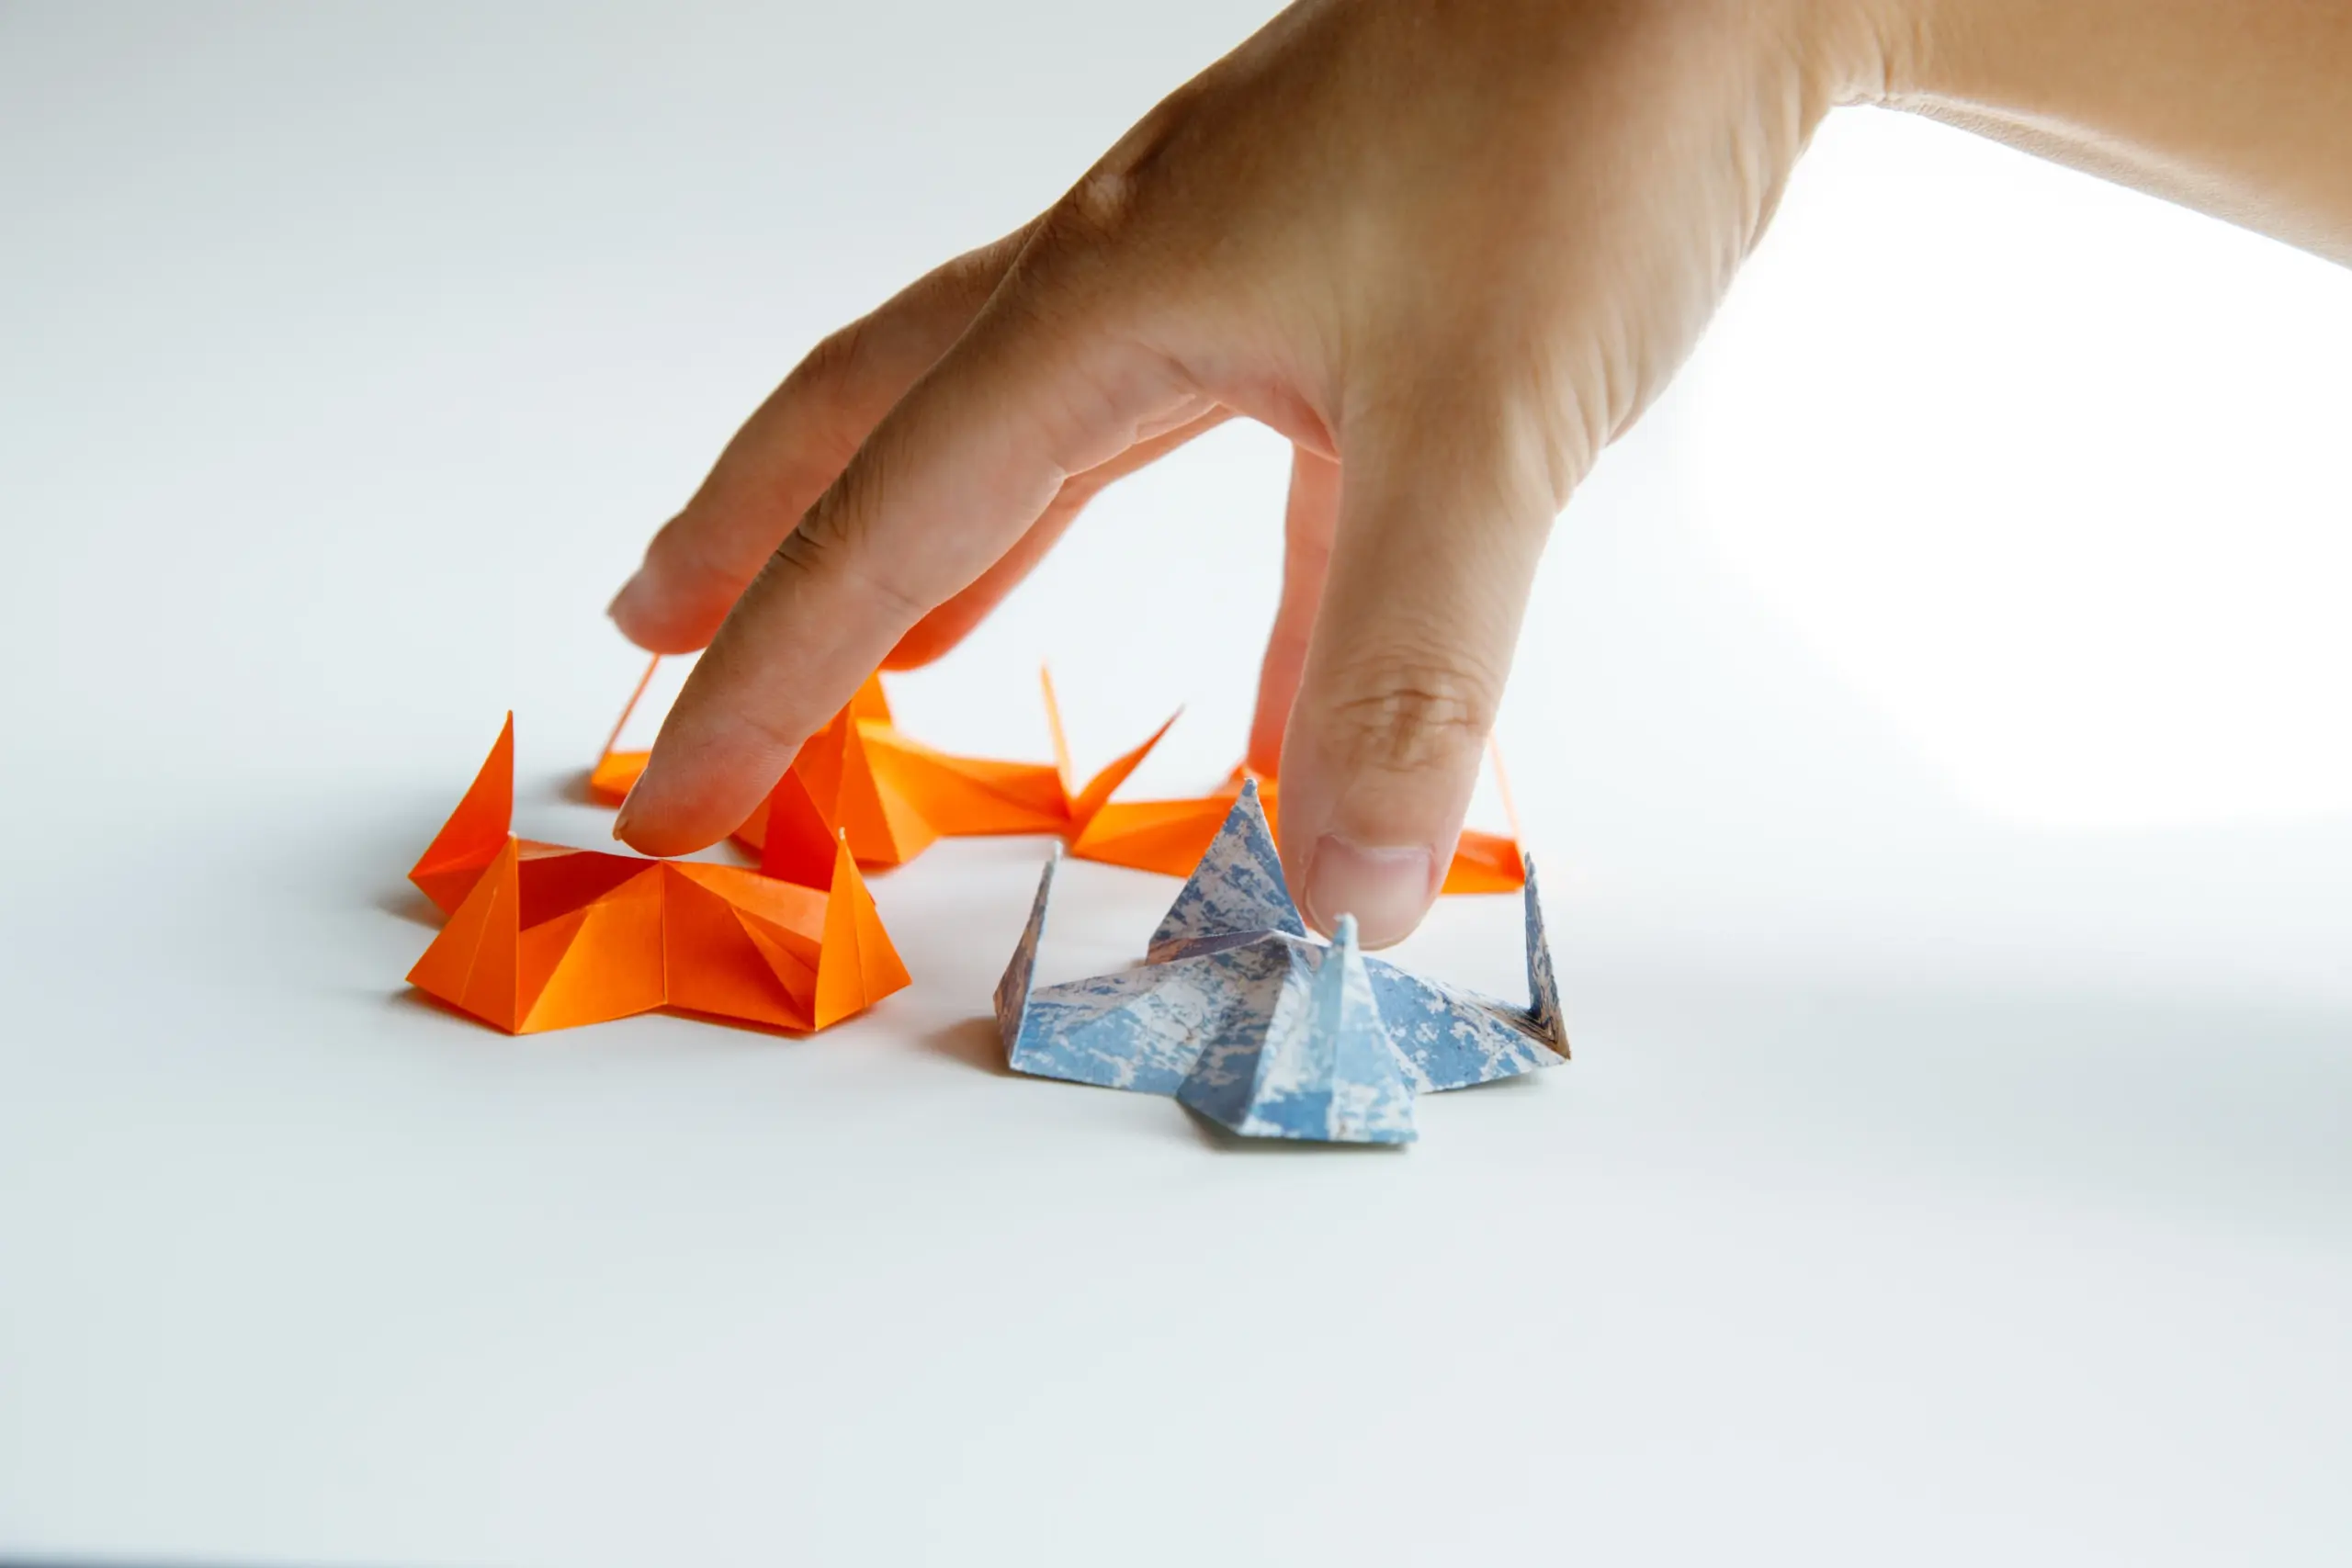
Use your finger to press down the top middle point, and these four triangles will clamp your finger.
What’s Next
You have successfully completed this cute adorable origami finger trap. We also offer a variety of other easy origami toy instructions. Feel free to explore them, and we hope you will enjoy them!
Other Easy Origami Toy Ideas