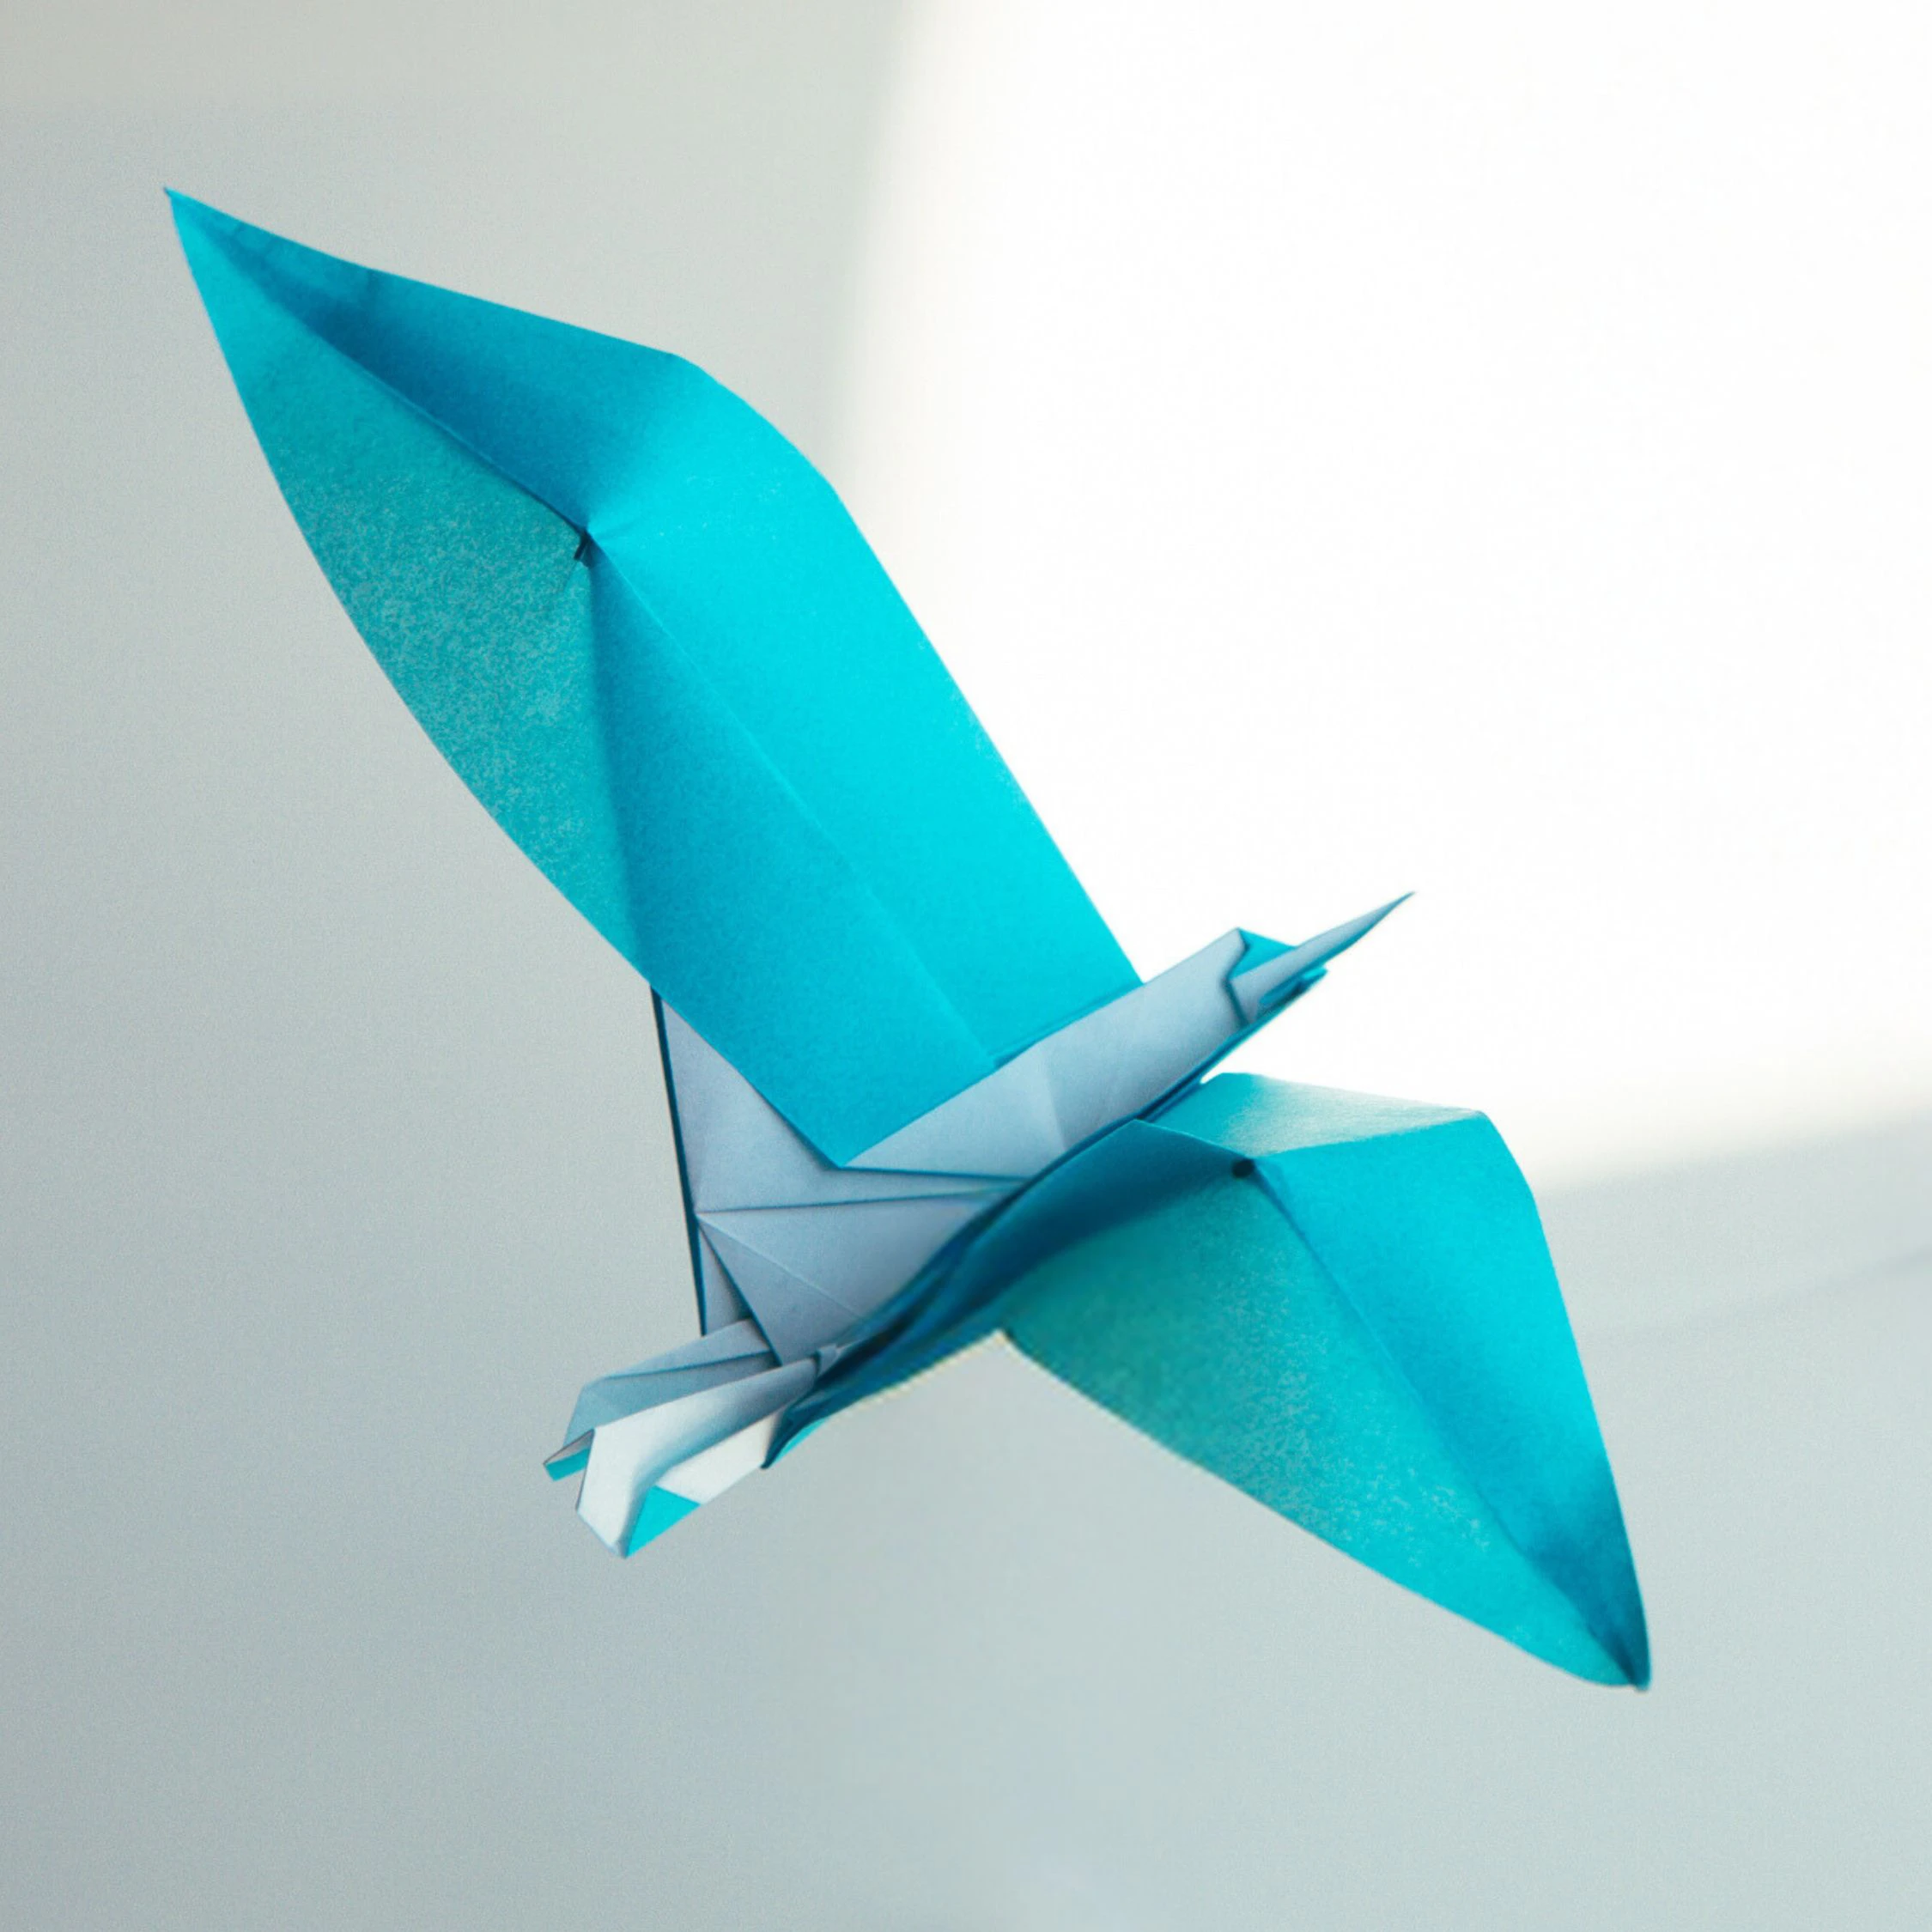
This origami flapping bird is a little similar to the origami crane, but what makes it different is it has two flapping wings, just like it is flying in the sky, full of vitality.
More specifically, if you make it correctly, once finished, pull the tail, and the wings will flap up and down as if it is alive!
We use the Inside Reverse Fold to shape the head and tail, and the base is made with the Square Base and the Bird Base.

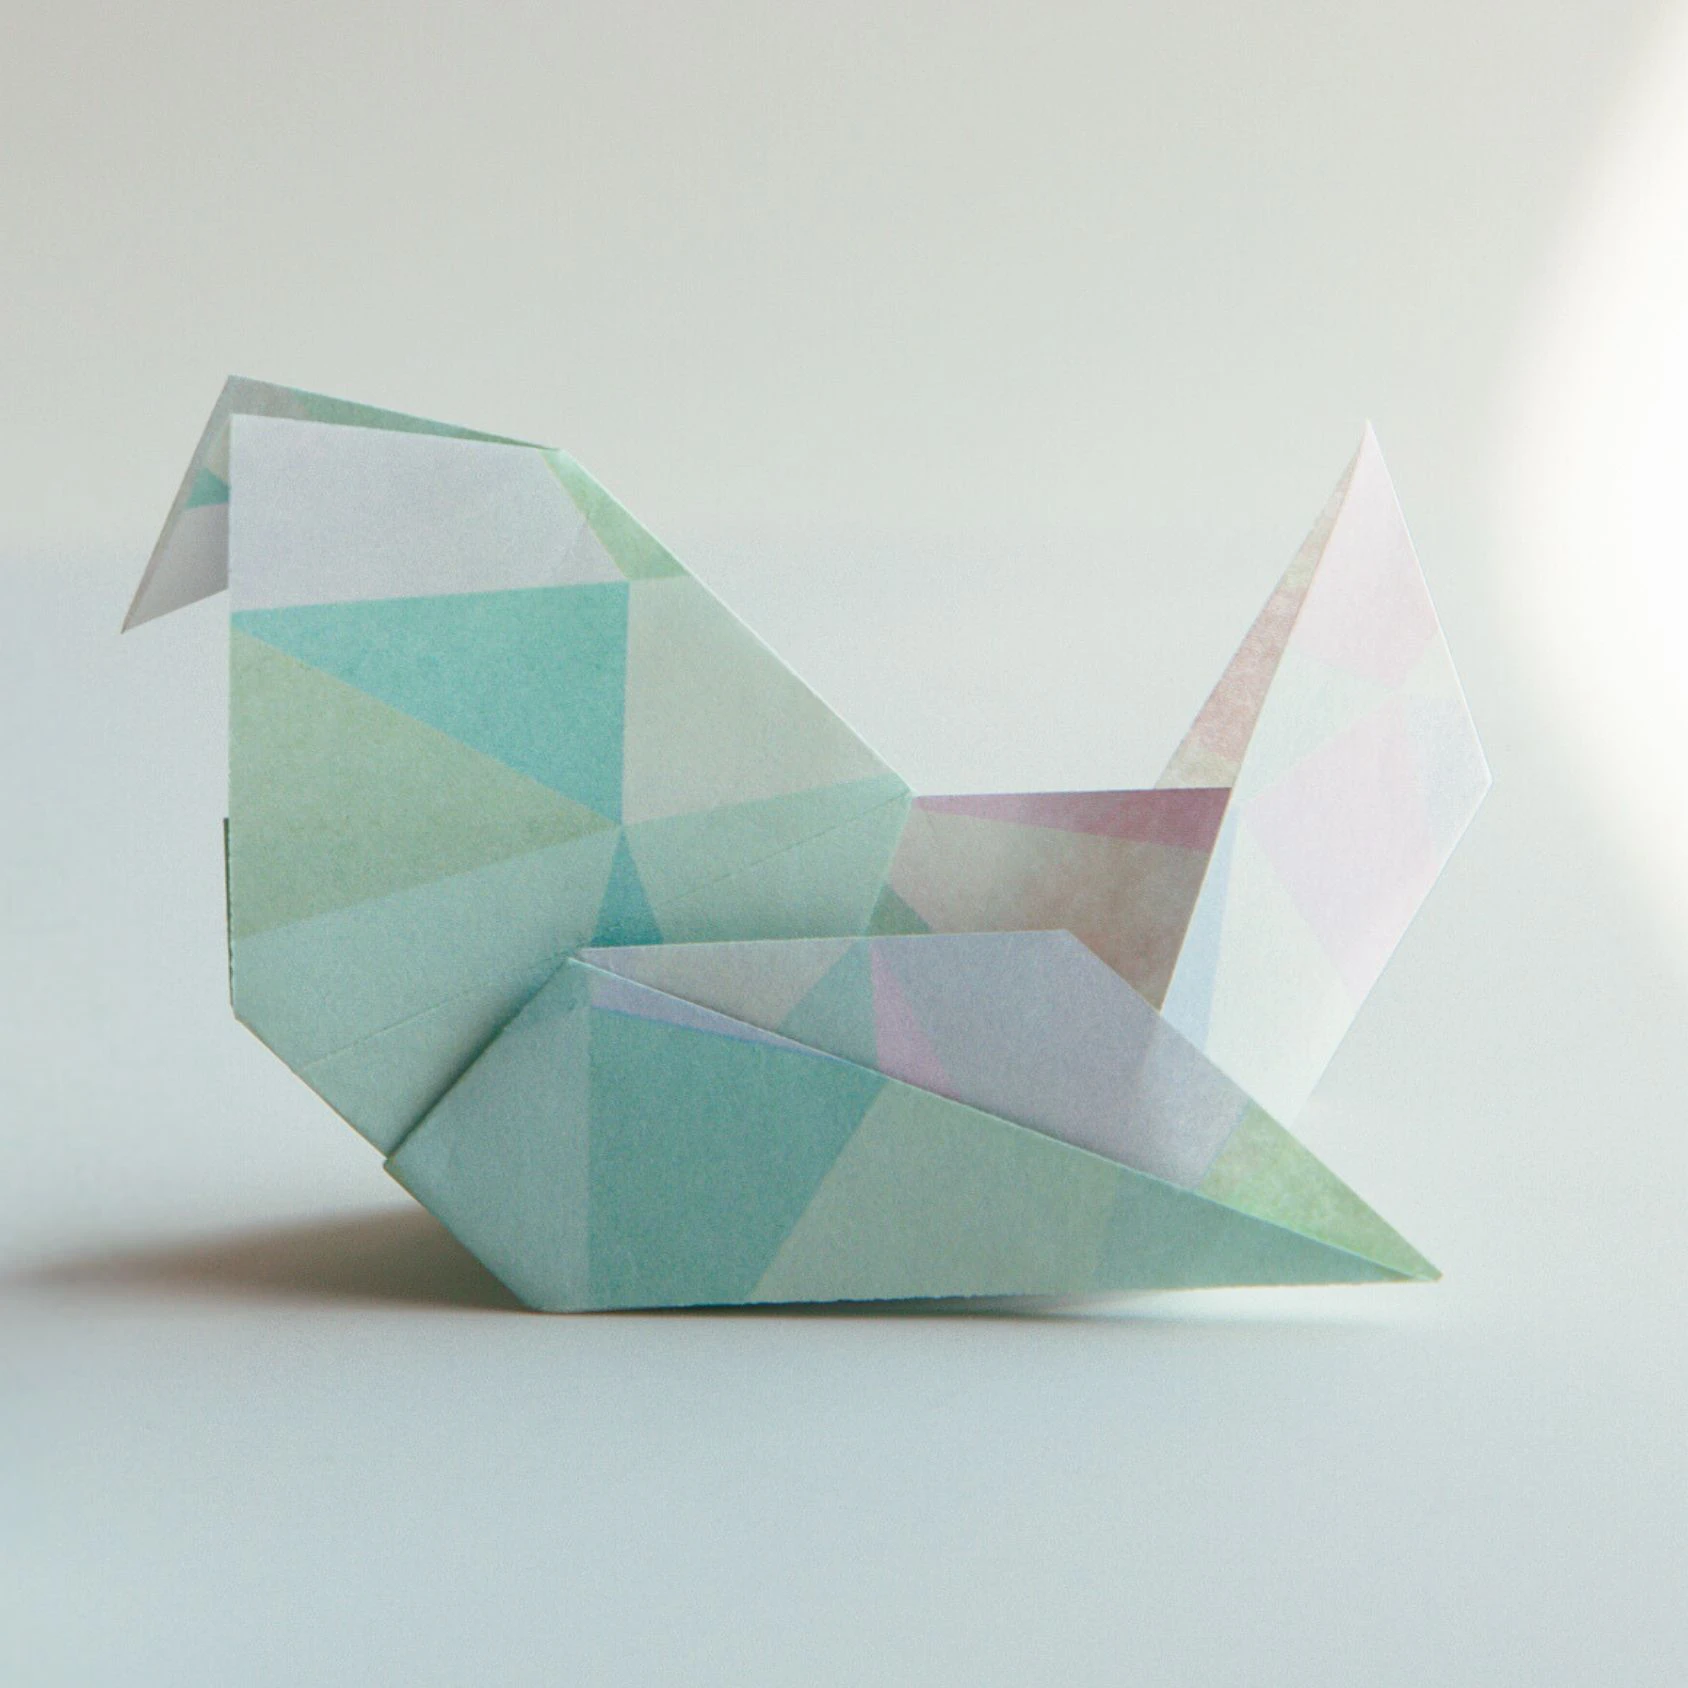
Birds are always the symbol of freedom and peach. Check our origami birds collection if you want more inspirations for either easy or complicated origami birds.
If you are new to origami, start here from our beginner guide to know the basics and how to read the step-by-step instructions.
- Folding time: 10 minutes
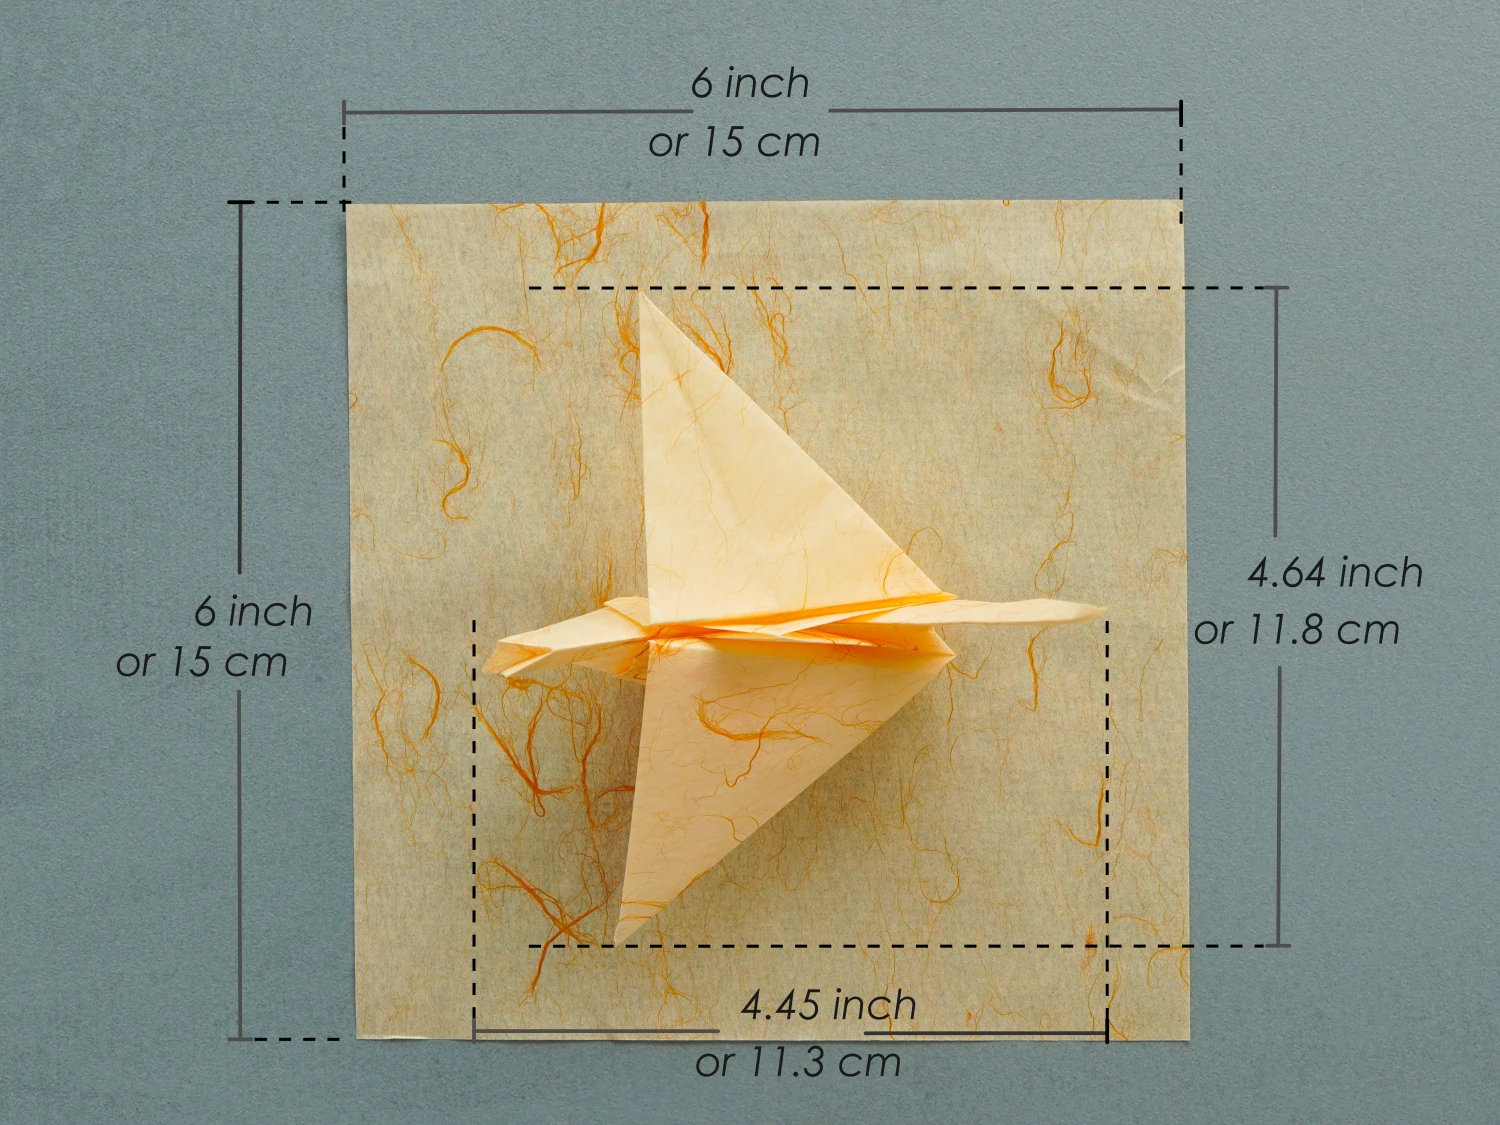
- Paper: 15×15 cm
- Difficulty: Easy
Material
Prepare a piece of 15×15 cm origami square paper to create an 11.8×11.3 cm flapping bird. Try to use patterned papers, making your flapping bird more unique and outstanding in appearance.
You can make a super large flapping bird with this instruction. We have tested with wrapping material and it works out super fine with thicker and larger paper.

Origami Flapping Bird Video
Step by Step Instructions
Step 1
Start with the patterned side of the paper facing up, fold it in half diagonally, and unfold it.
If you don’t have patterned paper, then use the paper with different colors on each side, and start with the side that has the color you want to show facing up.
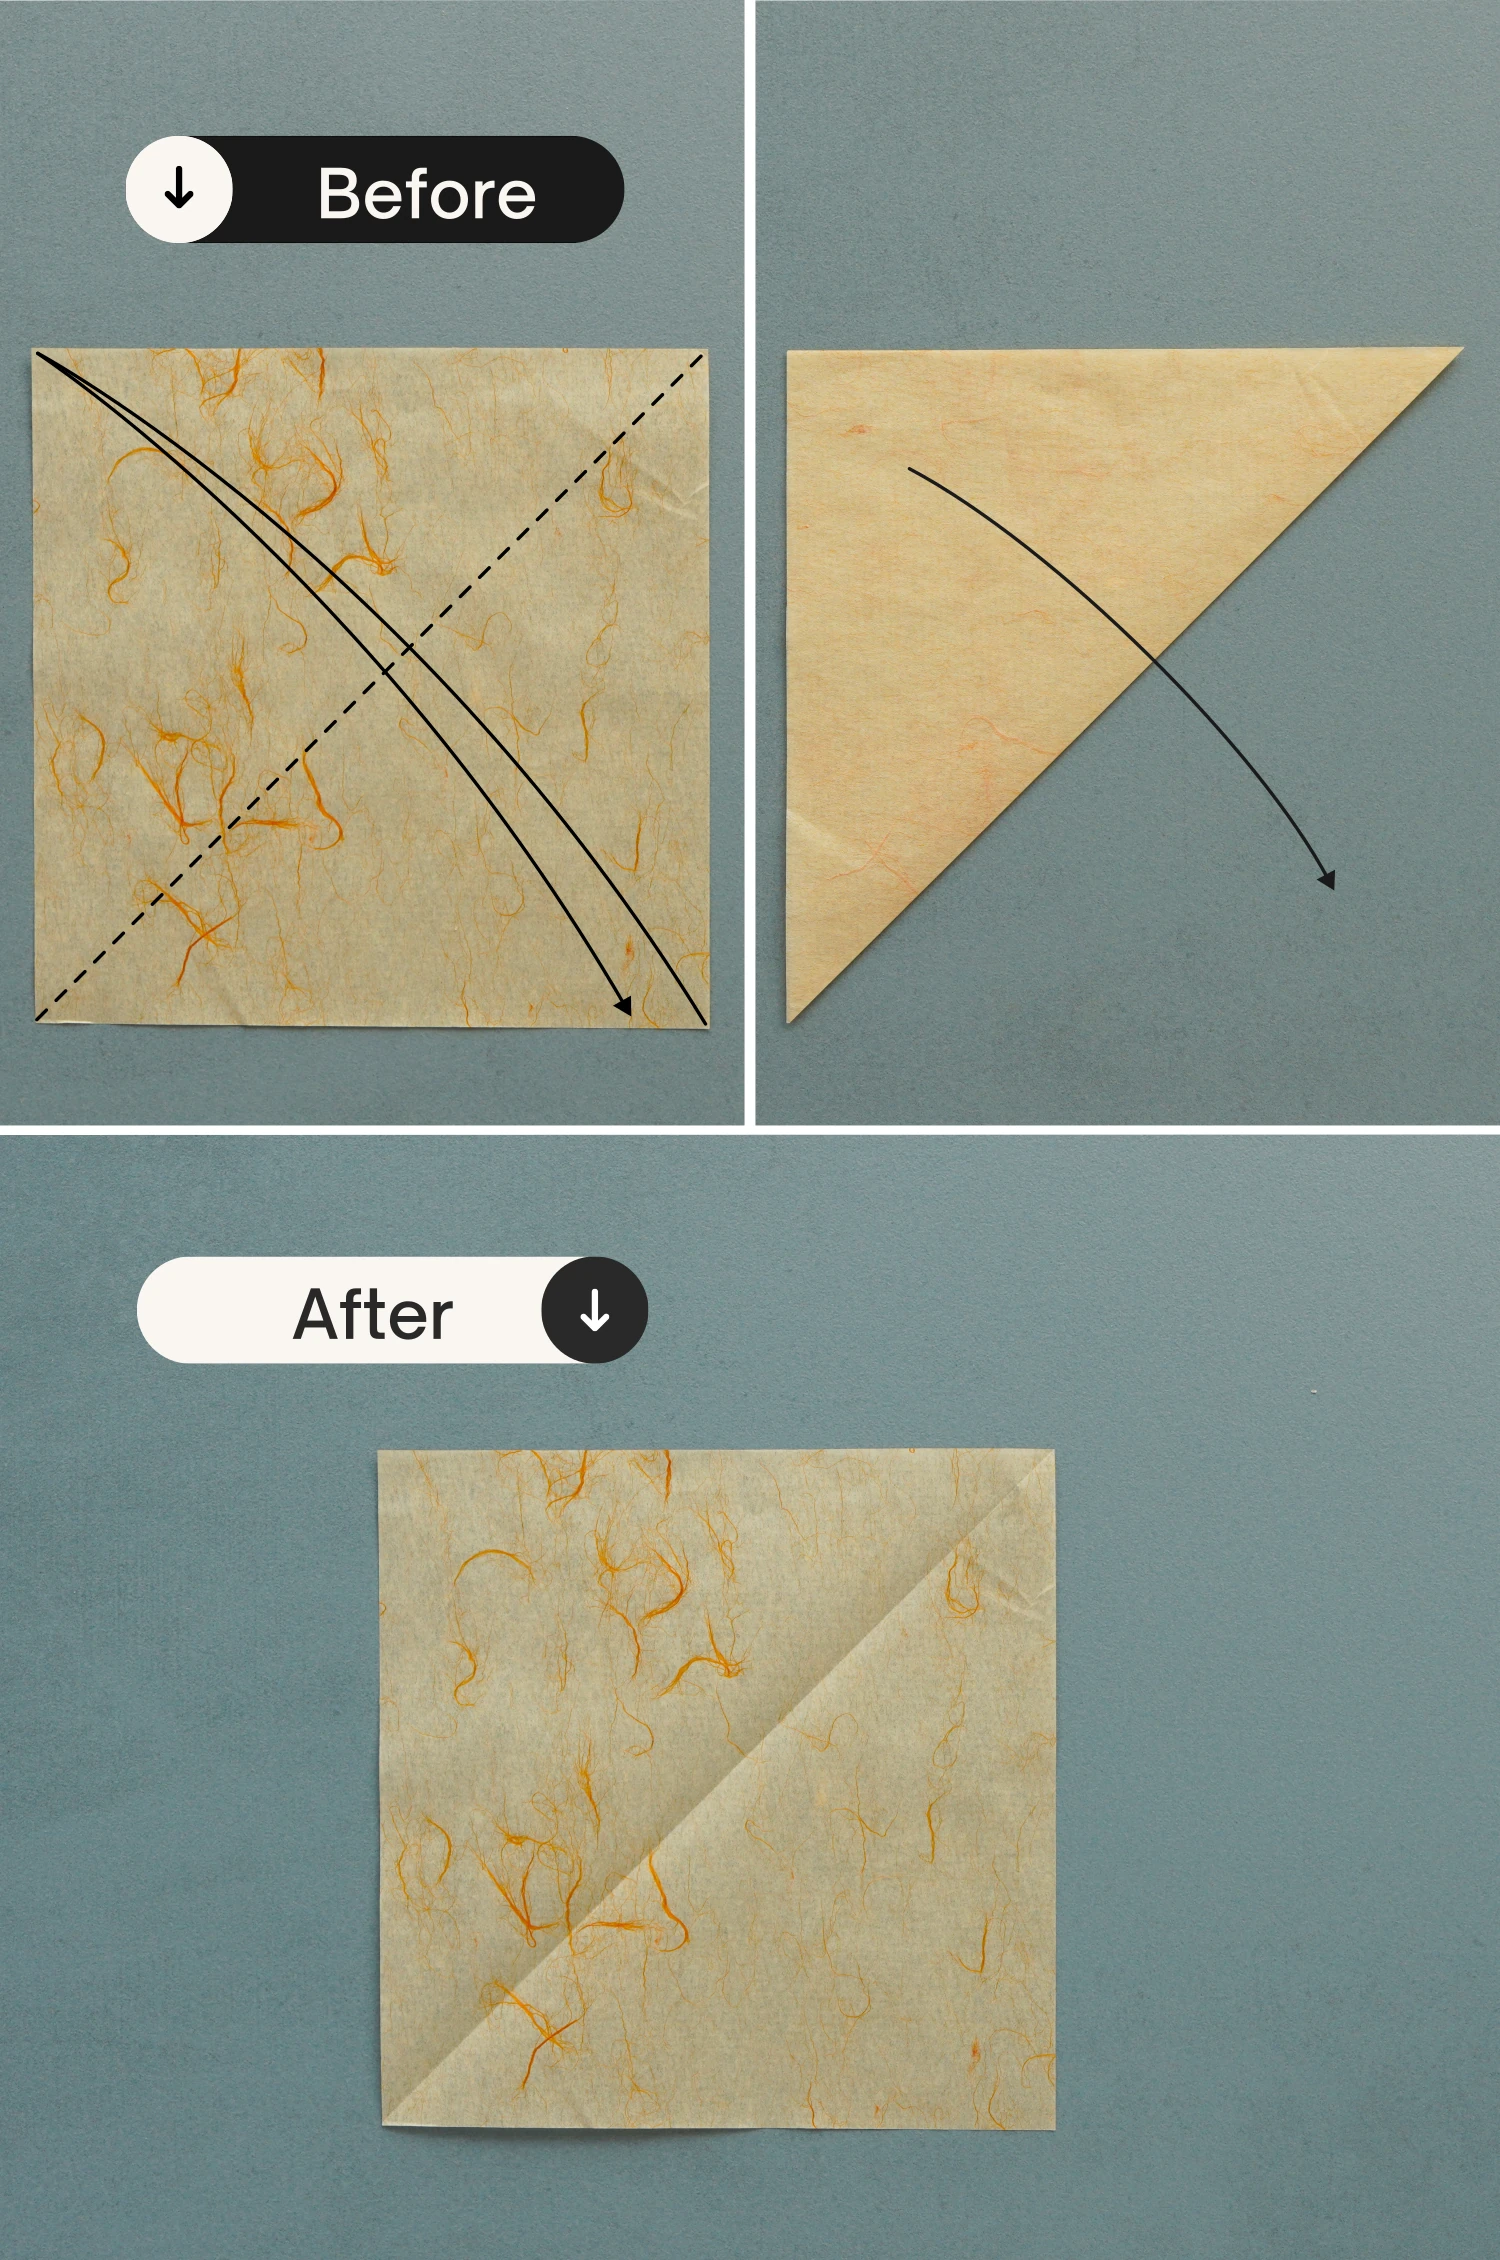
Step 2
Fold it in half diagonally from the other side, crease it well then unfold.
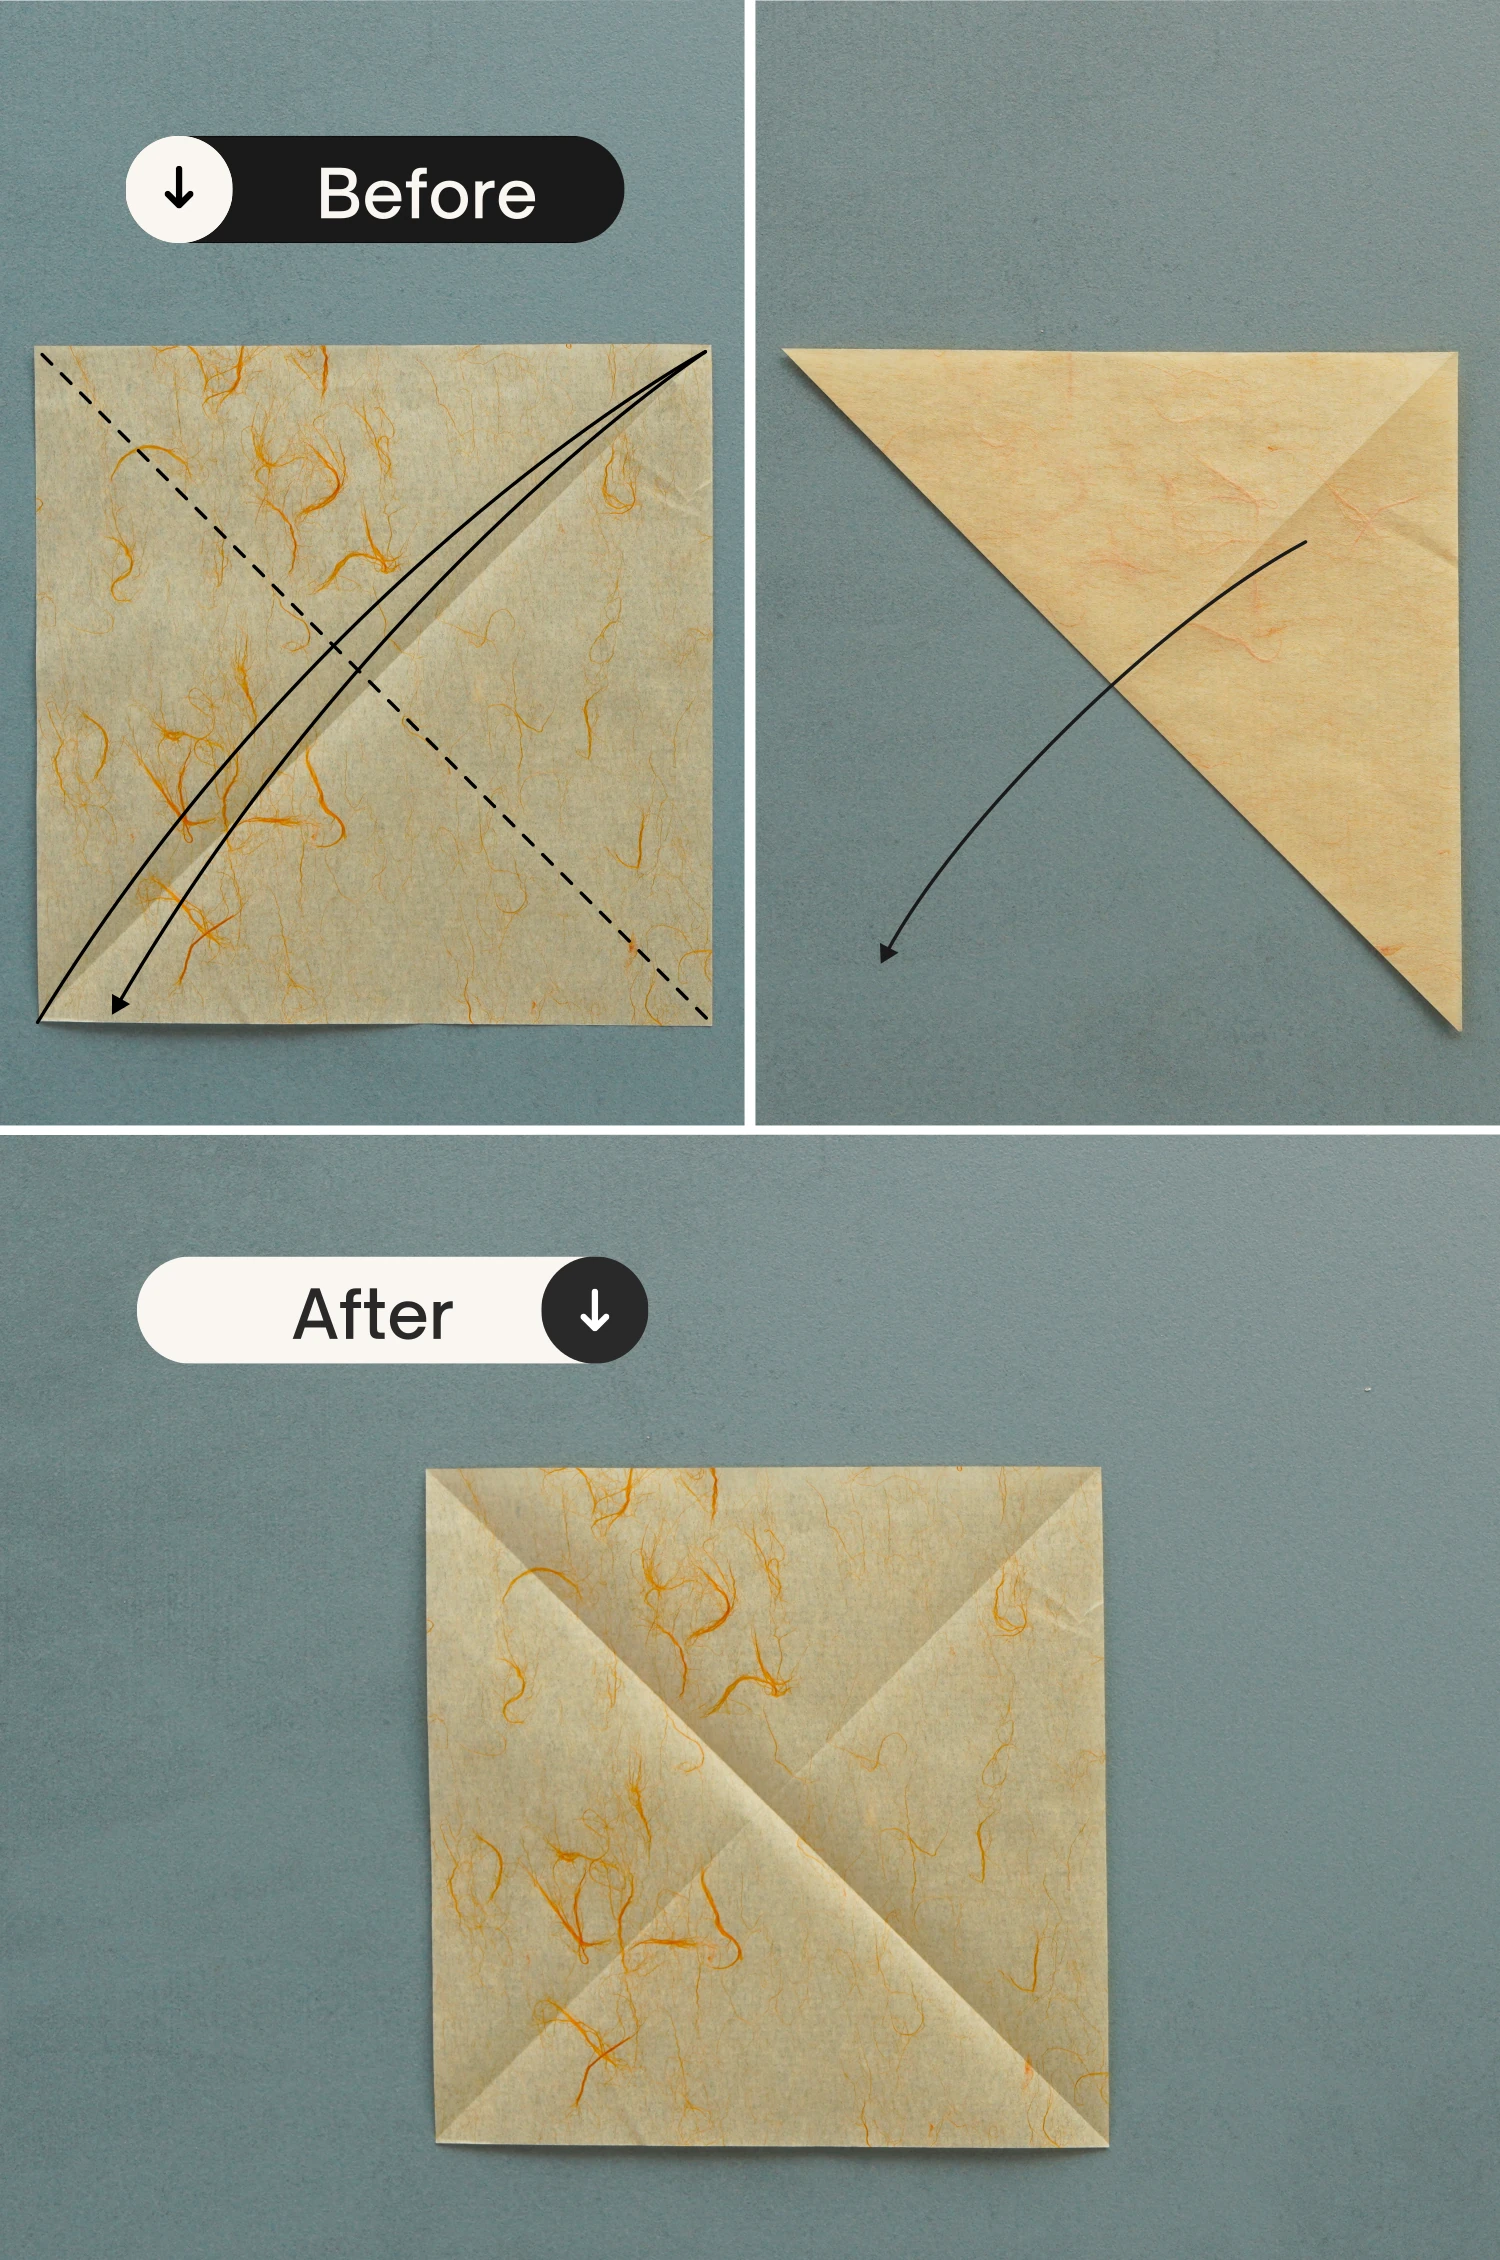
Step 3
Flip the paper over.
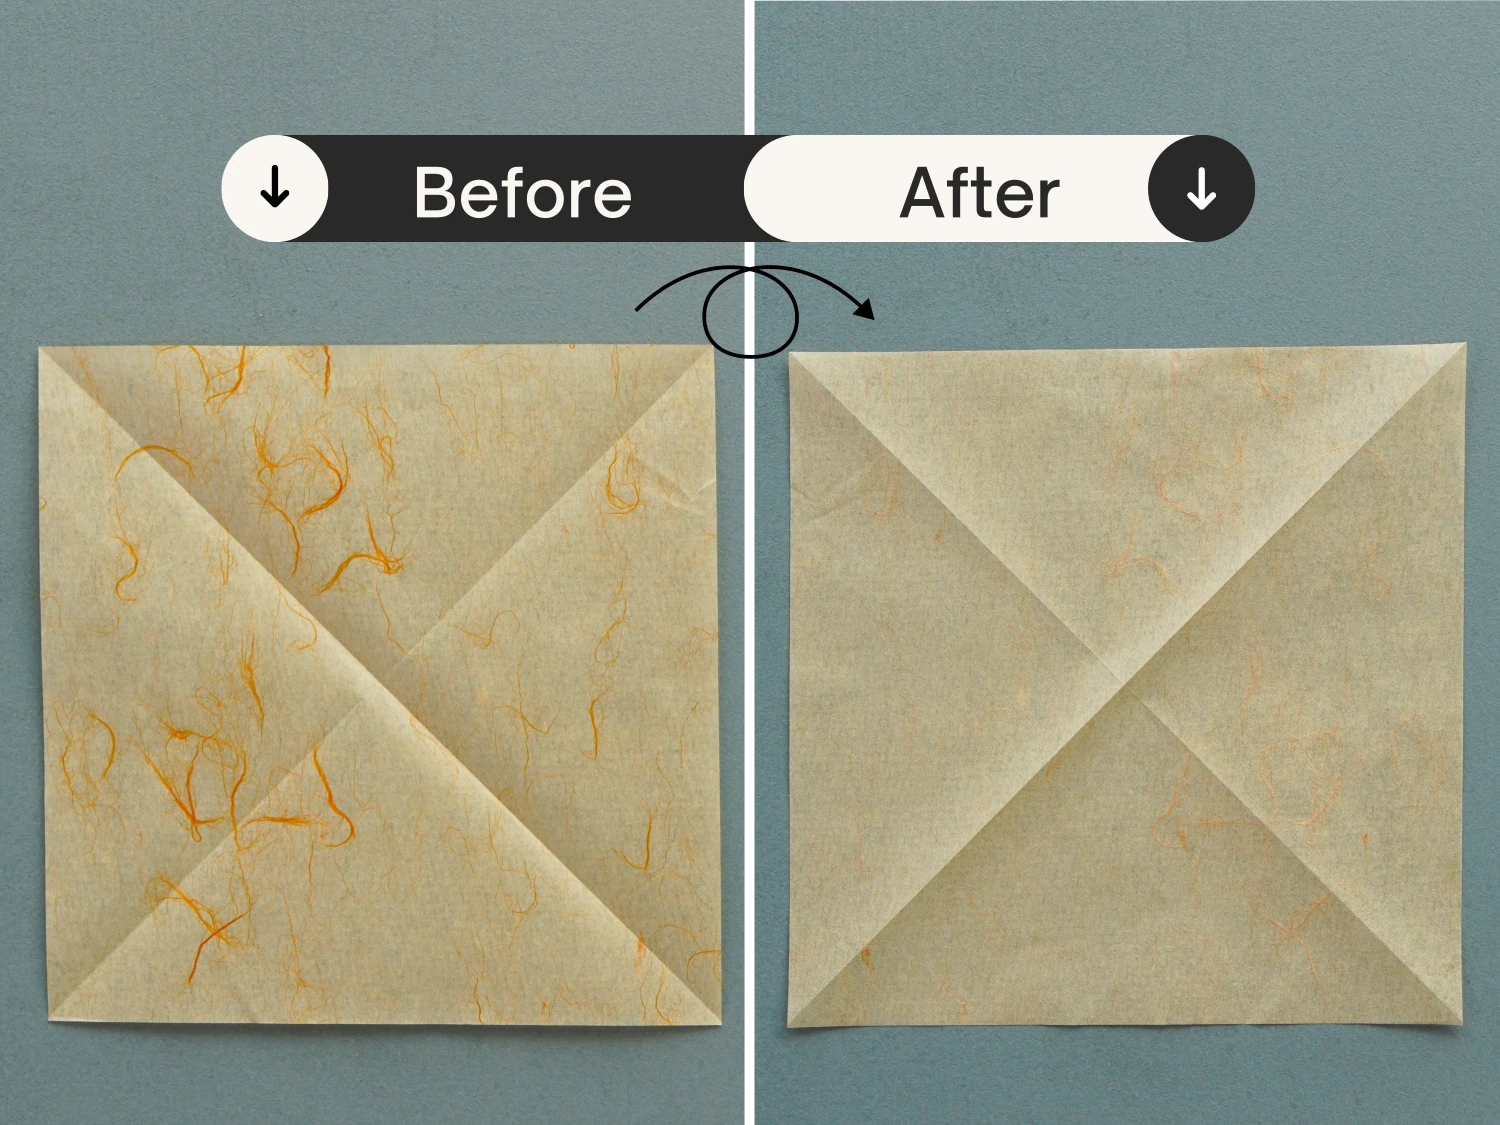
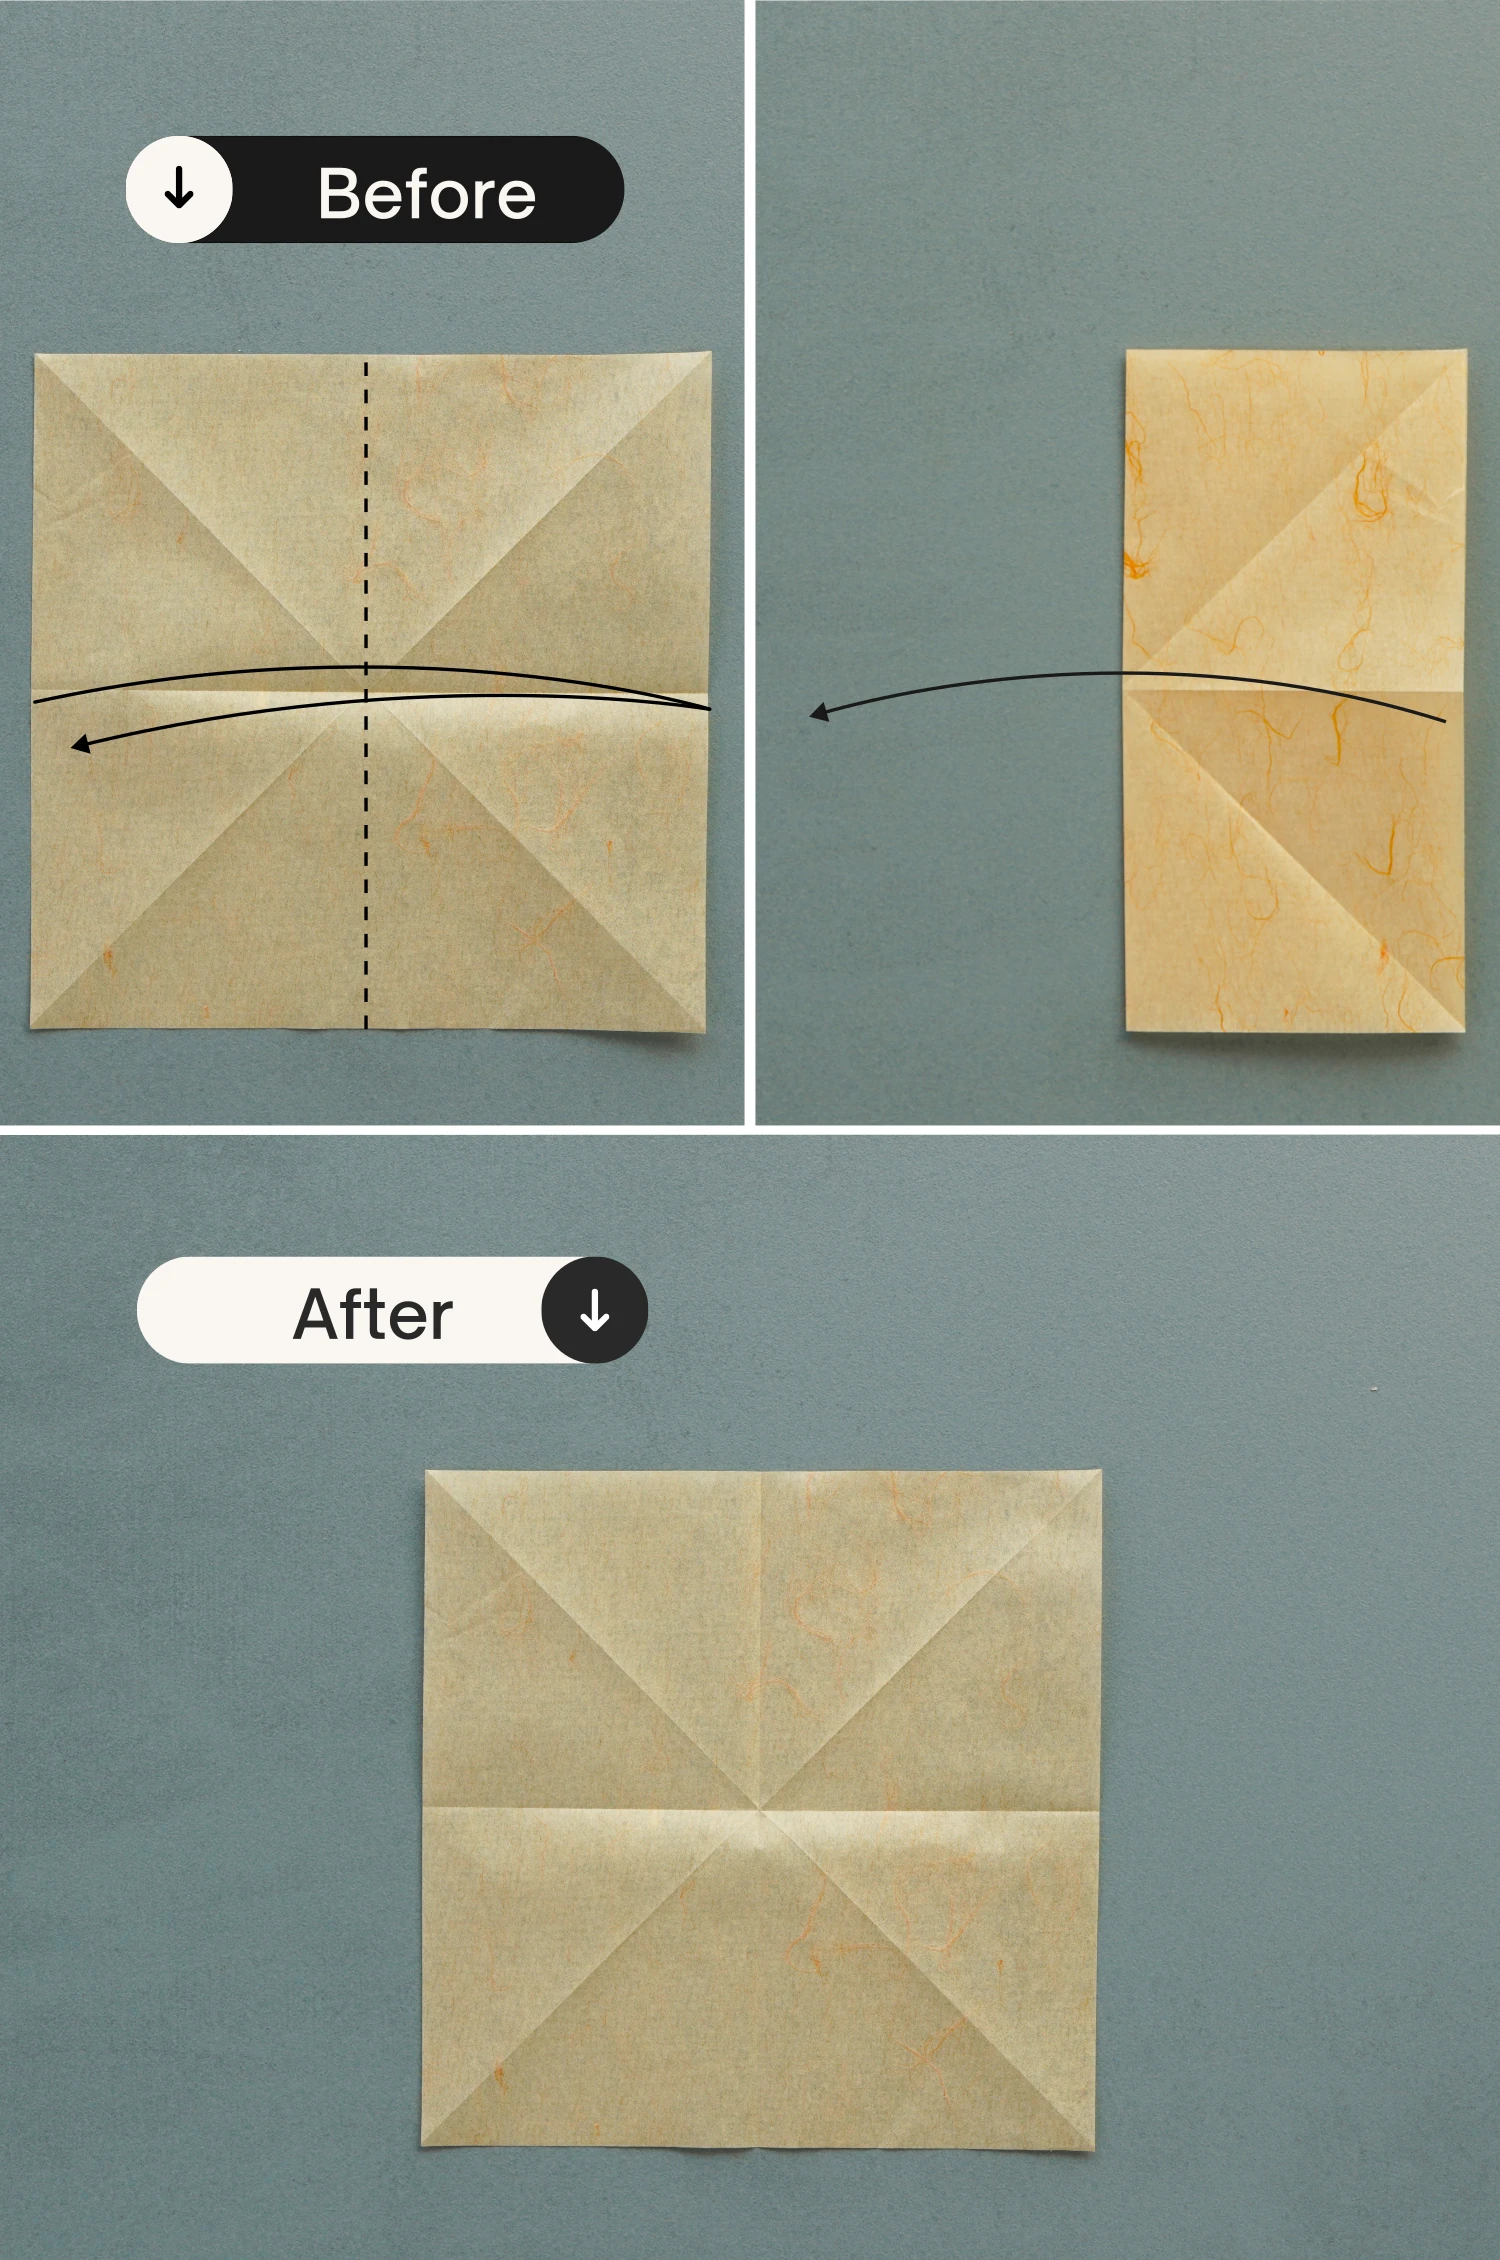
Step 4
Fold it in half horizontally, getting a crease then unfold it.
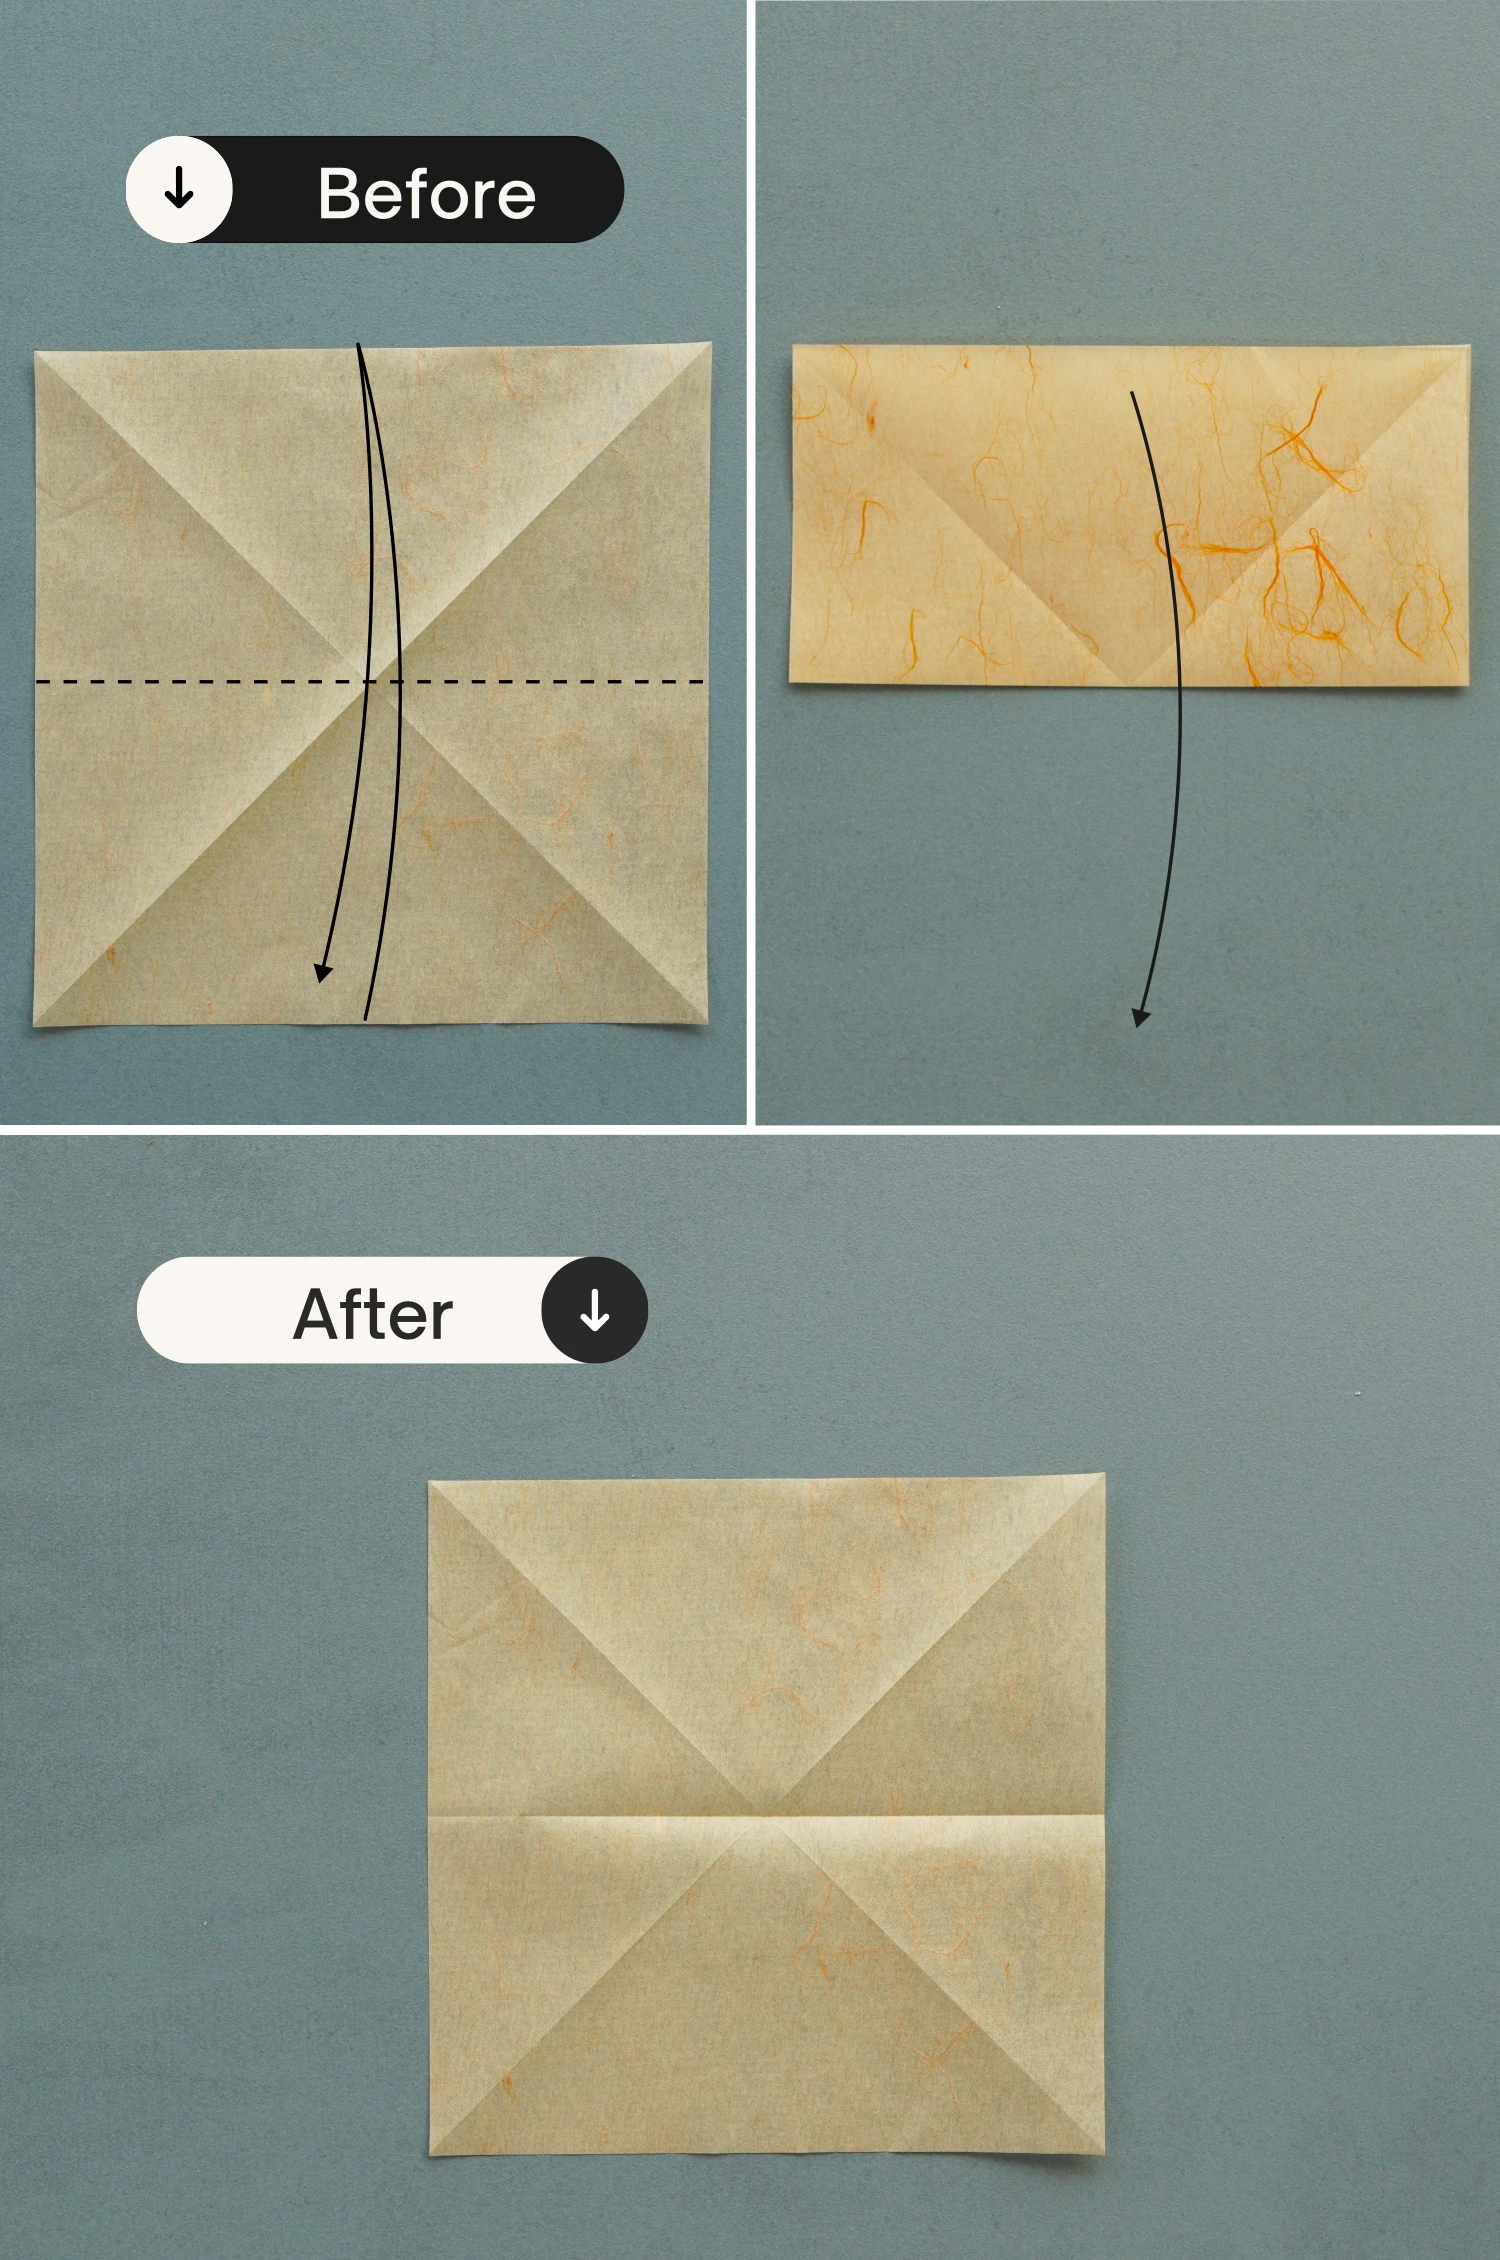
Step 5
Fold it in half vertically, crease it well, and unfold.
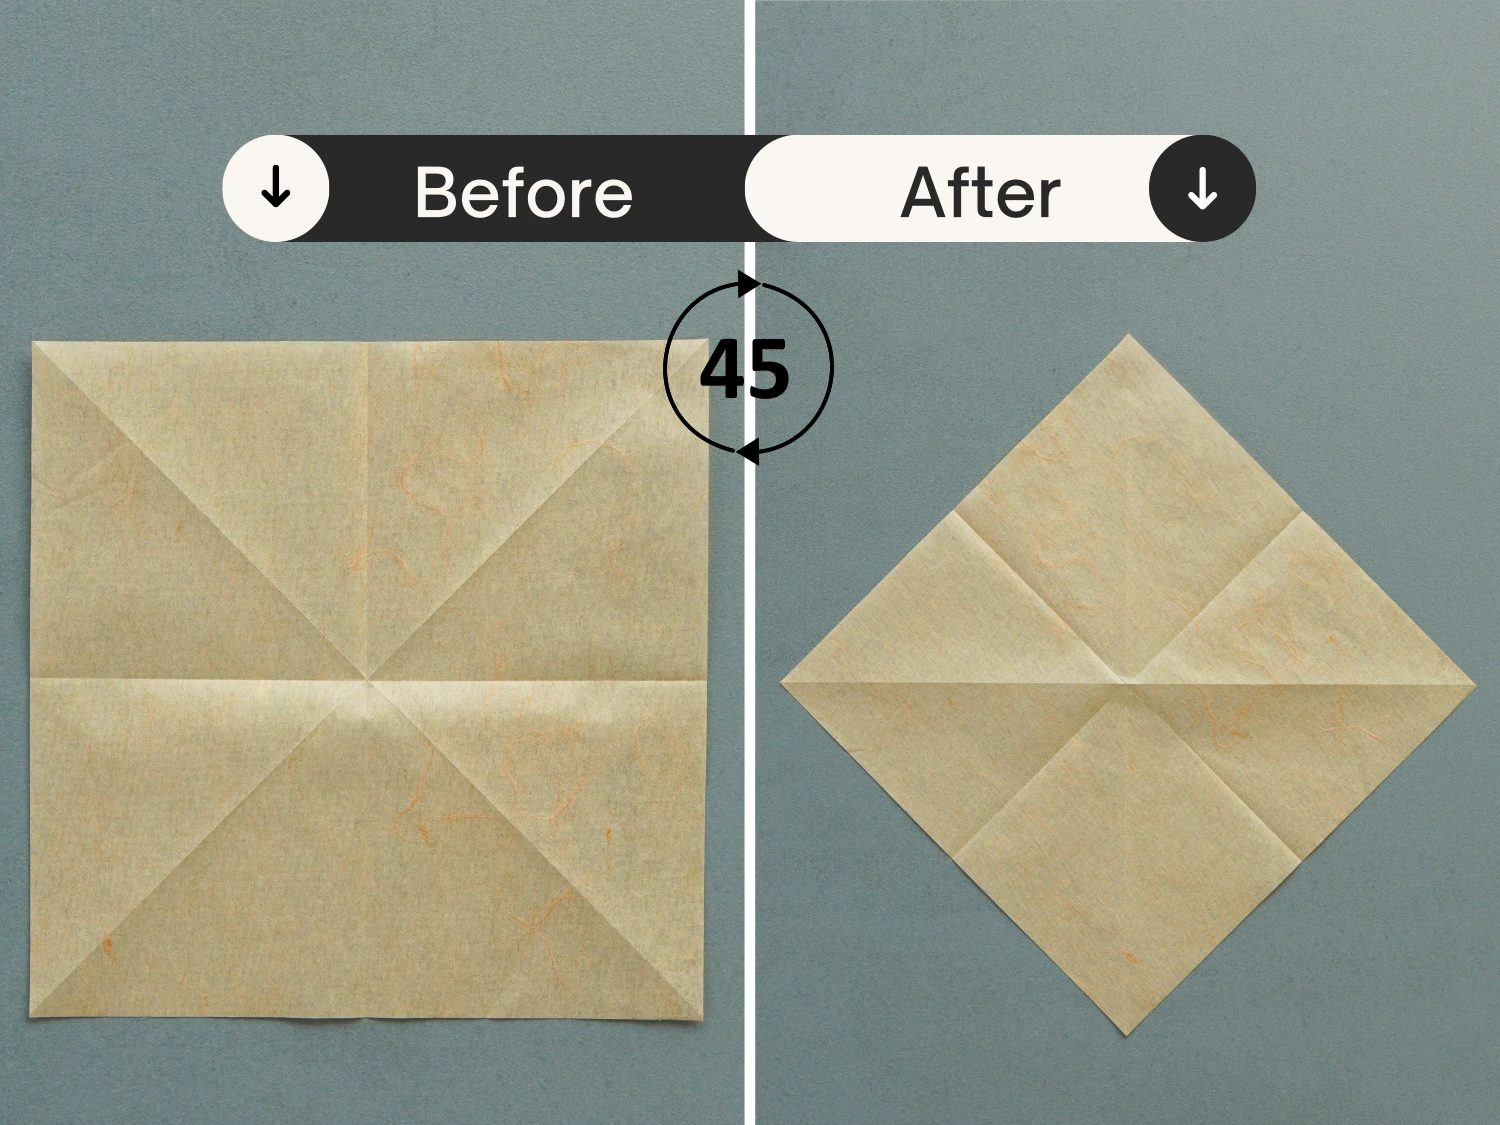
Step 6
Rotate 45 degrees clockwise.
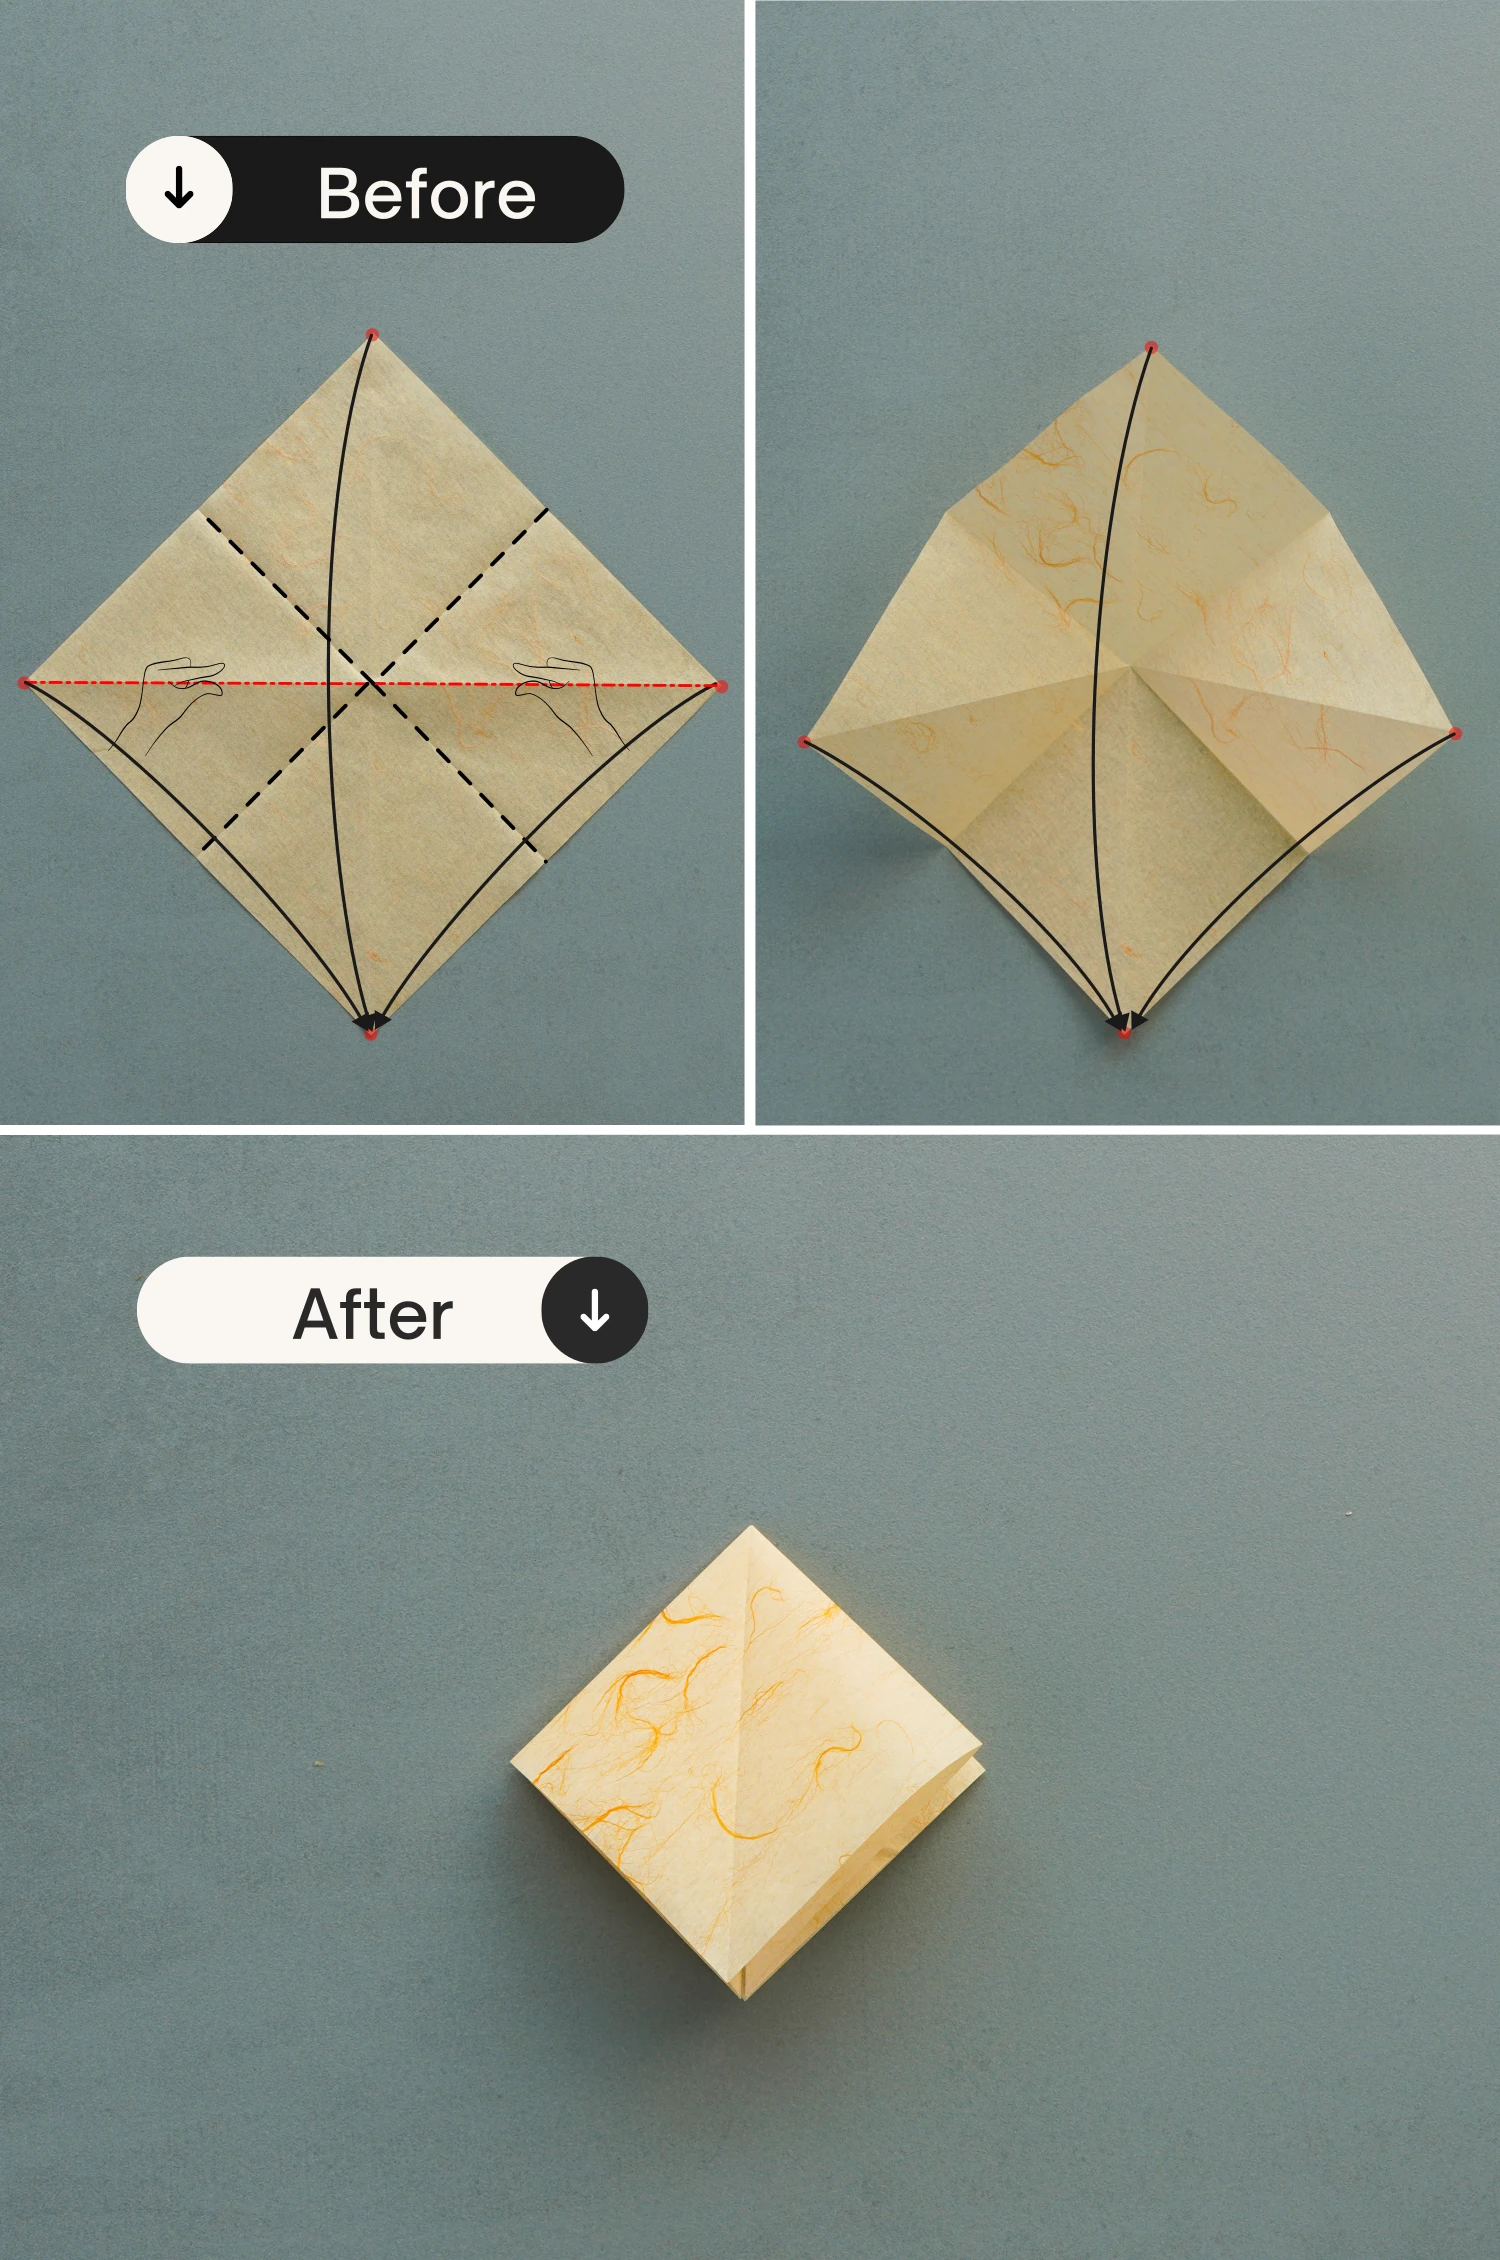
Step 7
Now we are going to make a square base.
Use both hands to press the left and right points. Then push them down to make them meet the bottom point.
Flatten the fold to finish.
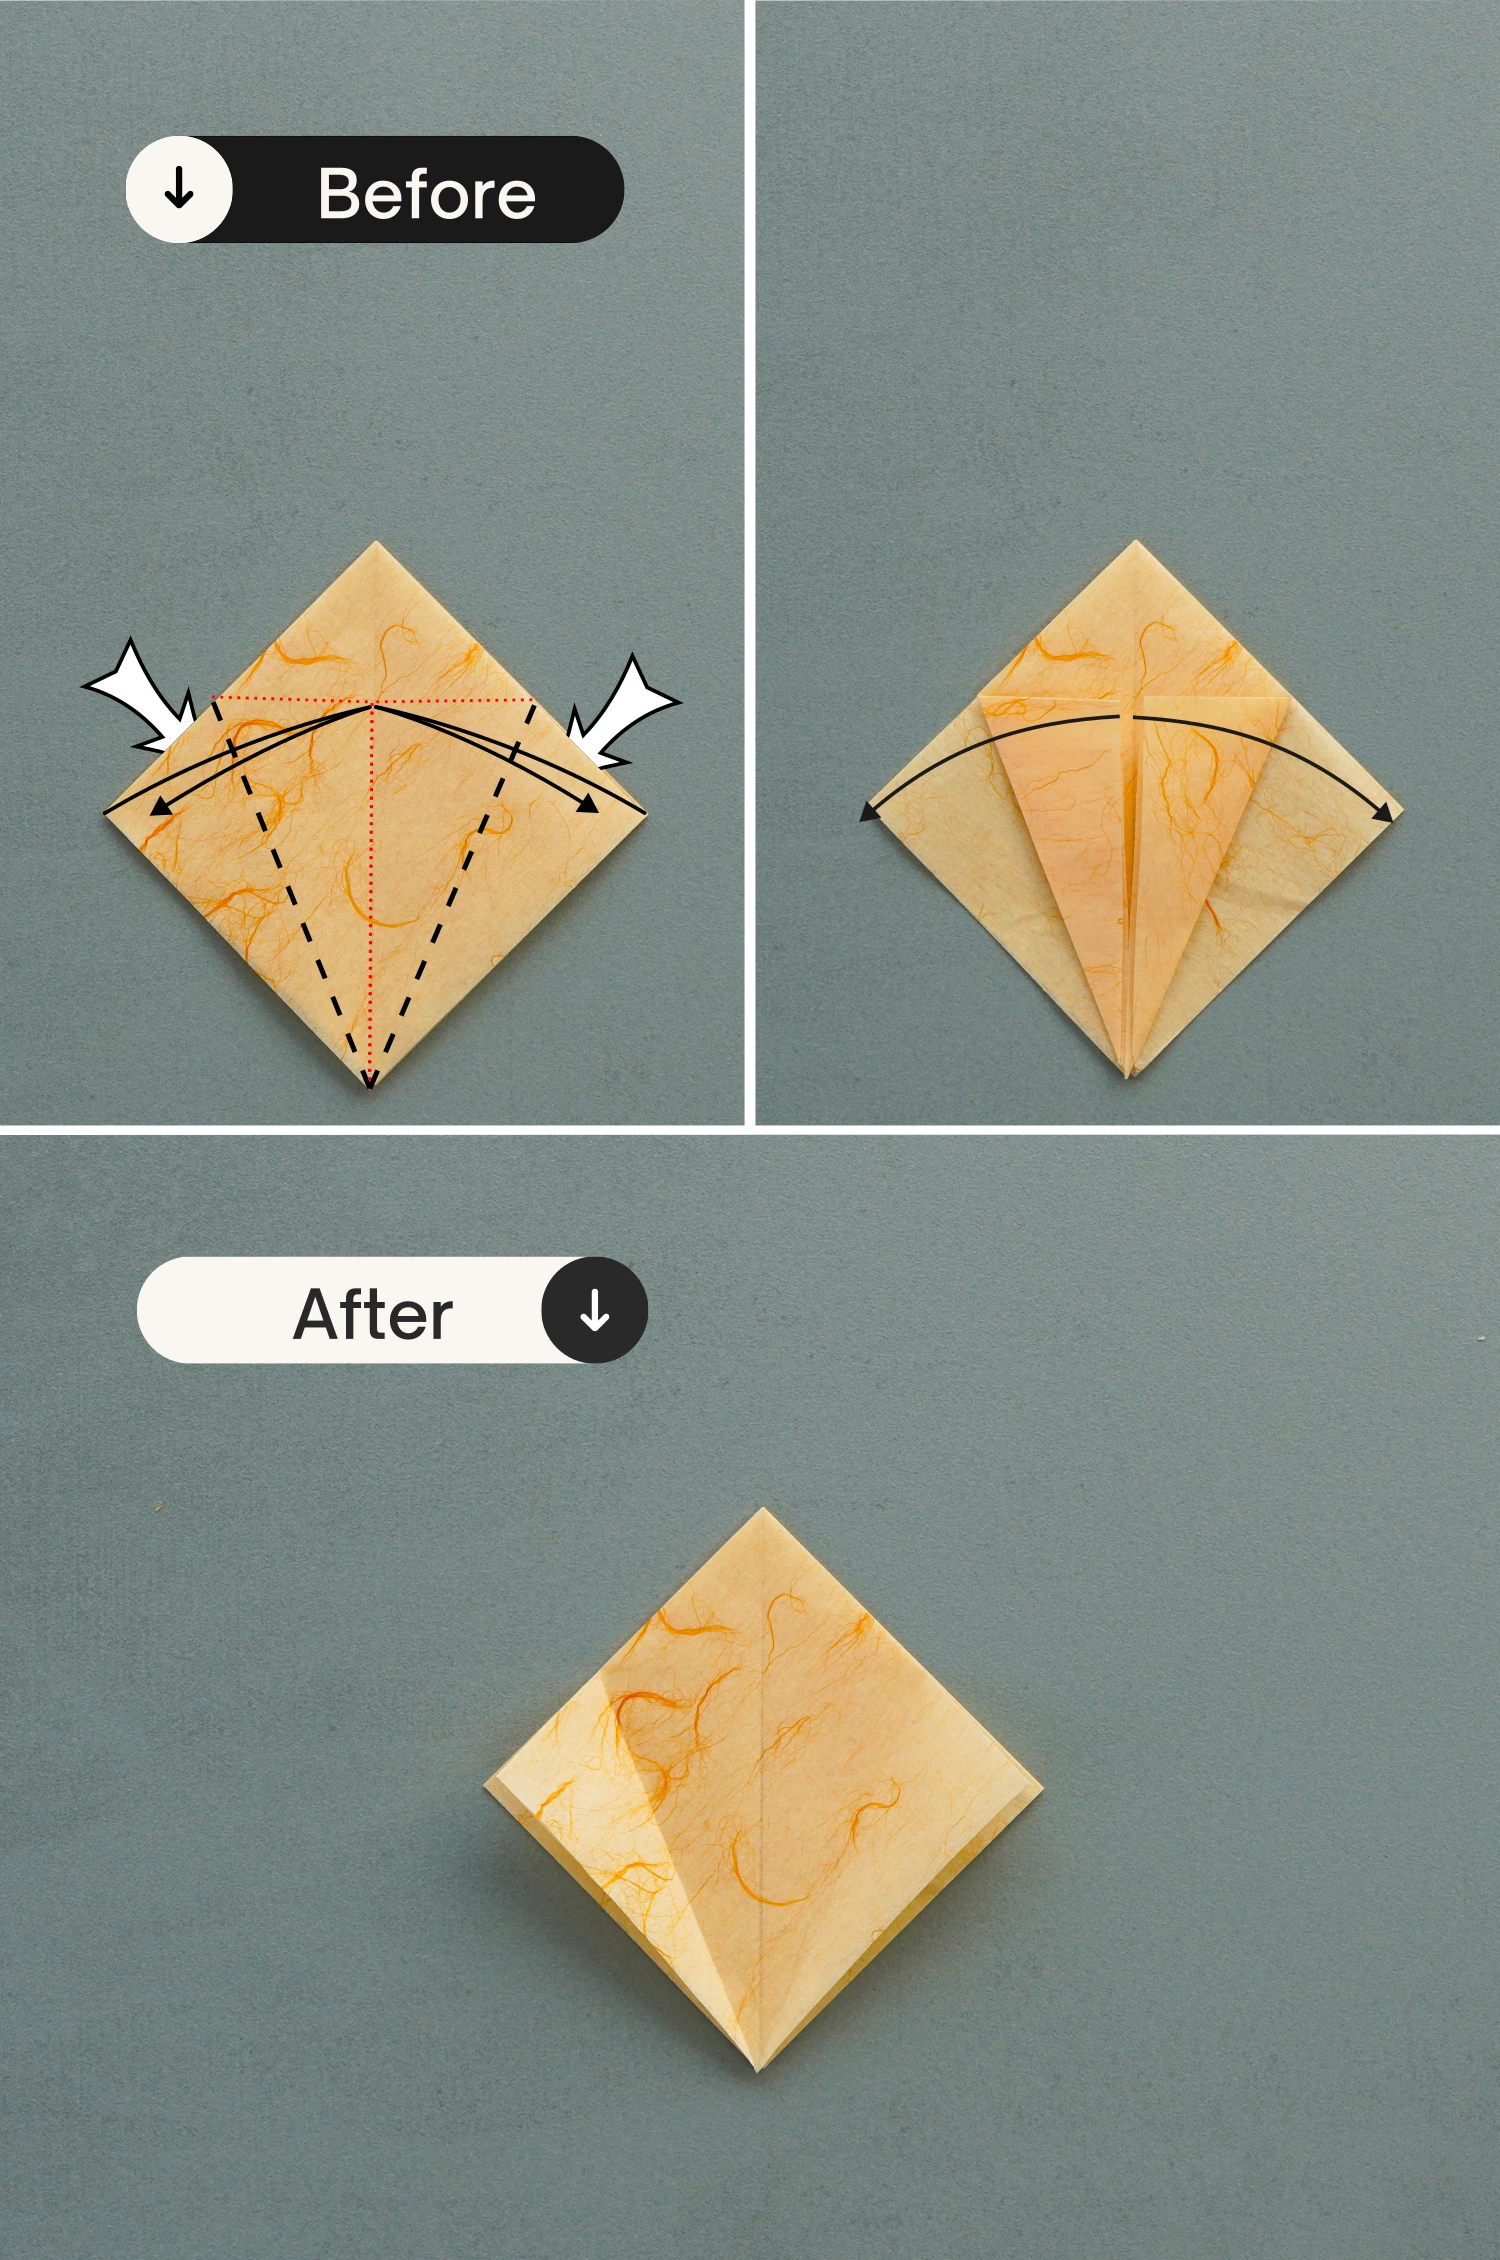
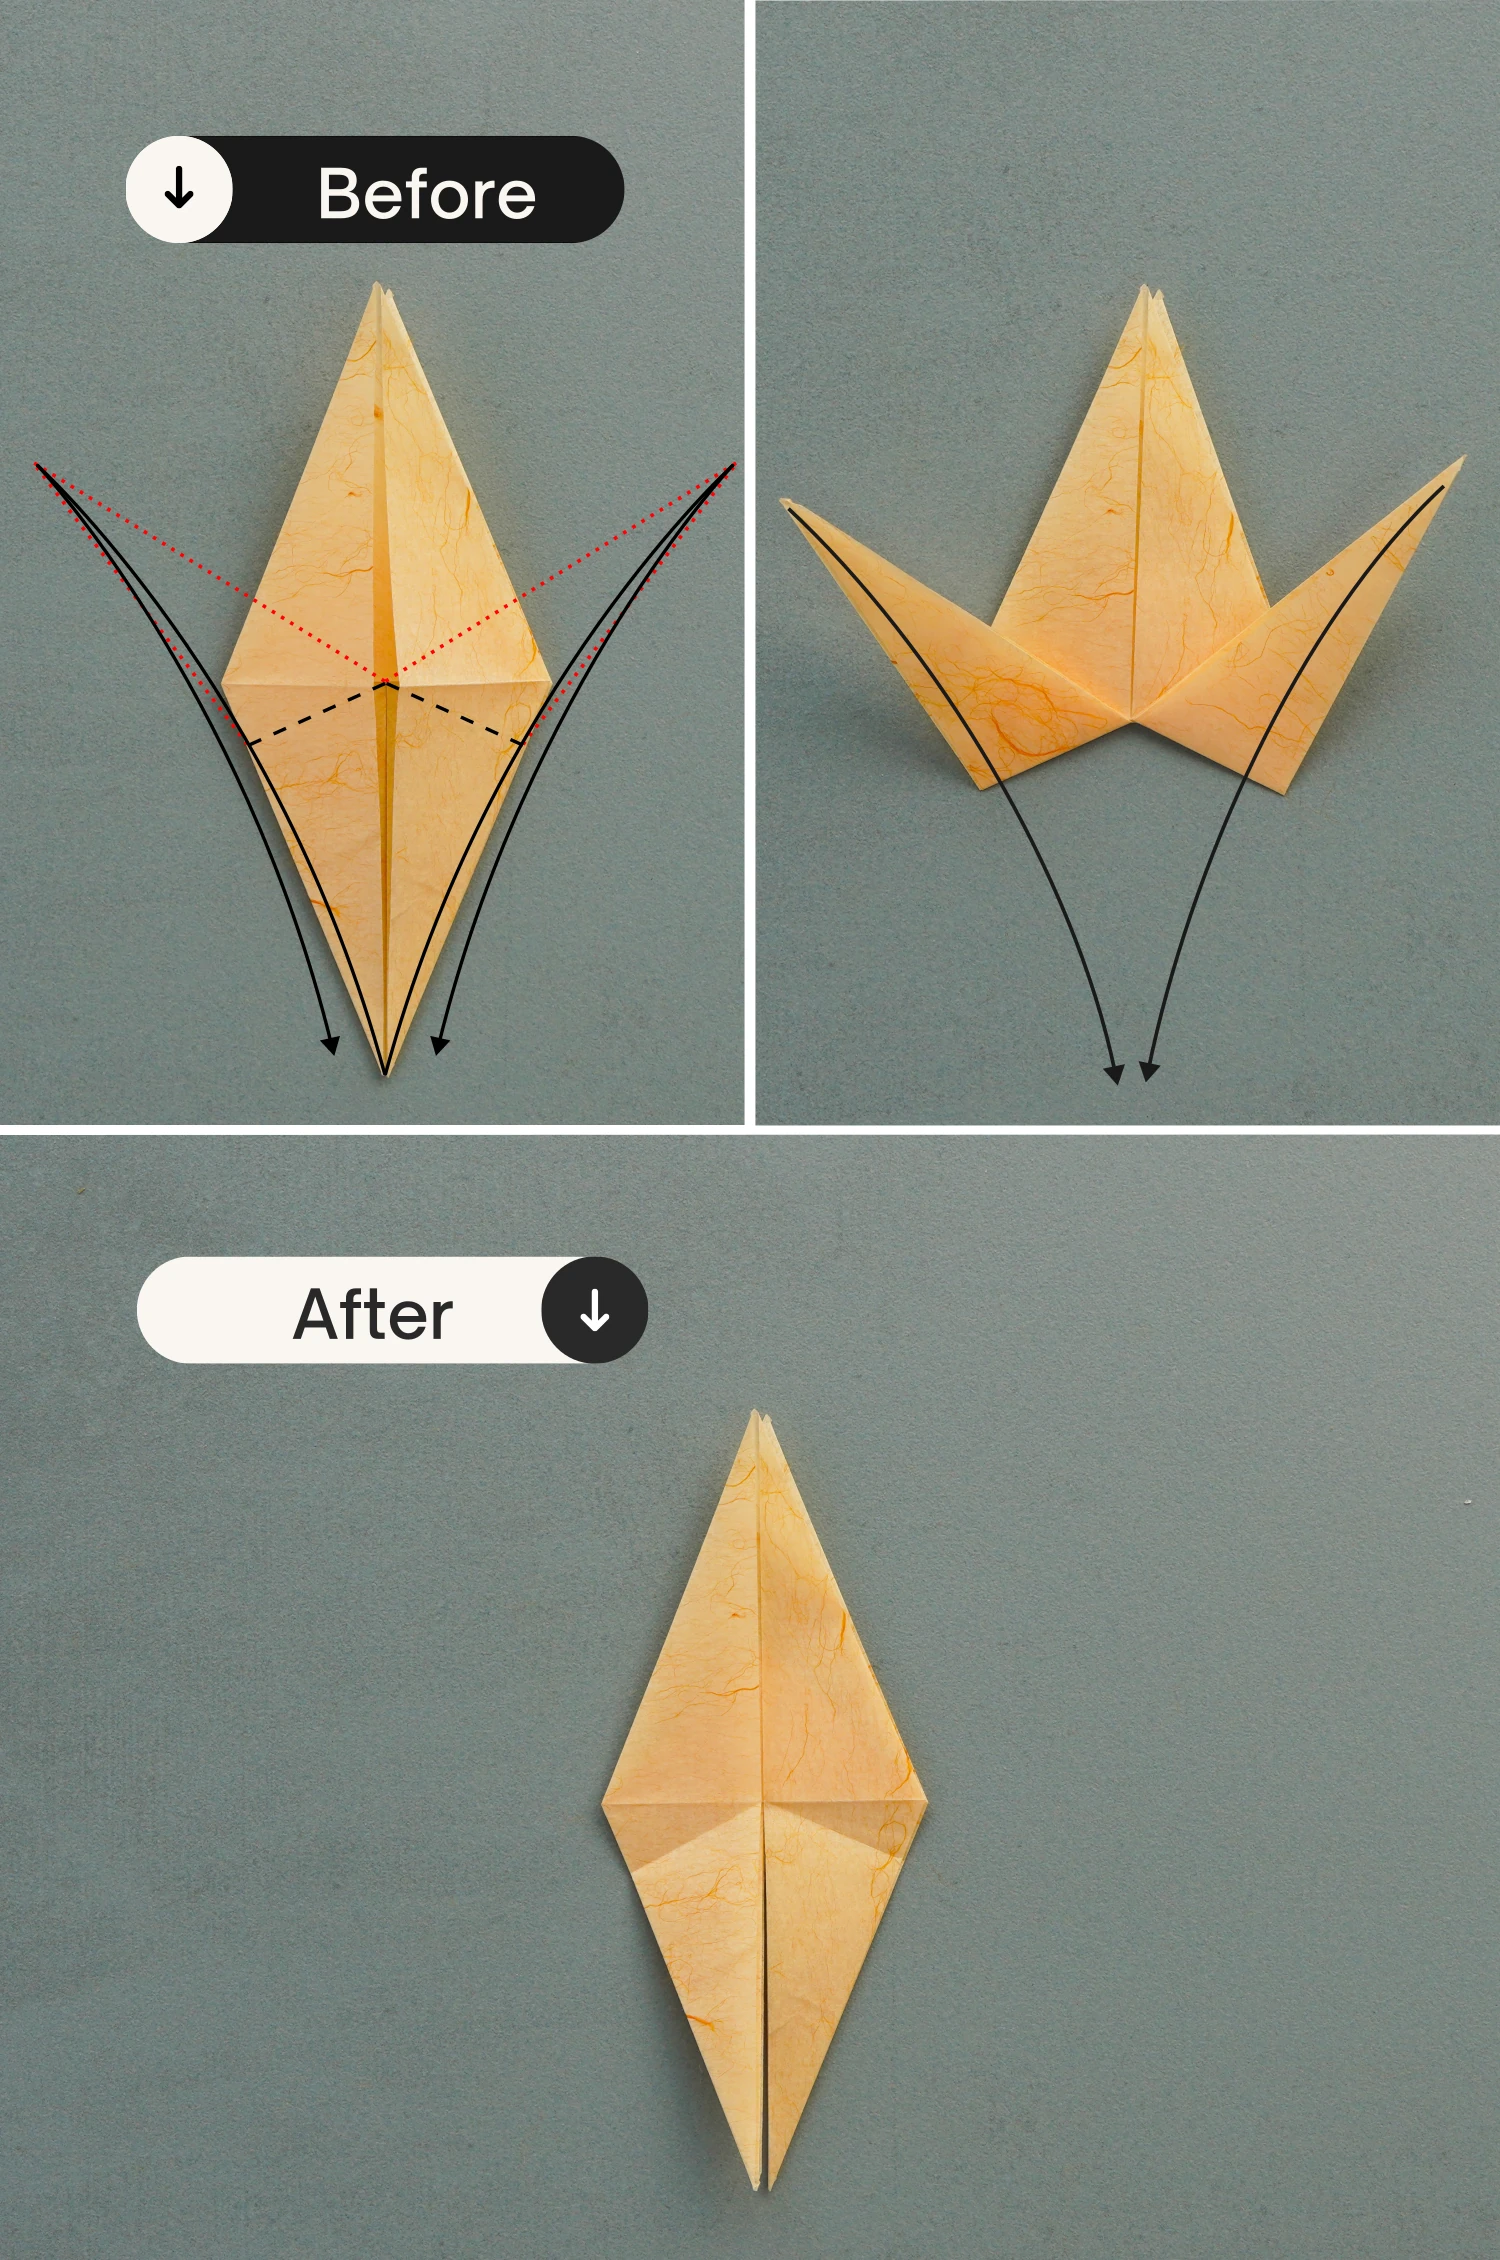
Step 8
Fold the bottom left and right edges to align with the vertical crease (the top layer only), crease them well then unfold.
Step 9
Fold the top corner down along the dotted line, leaving a crease, and unfold.
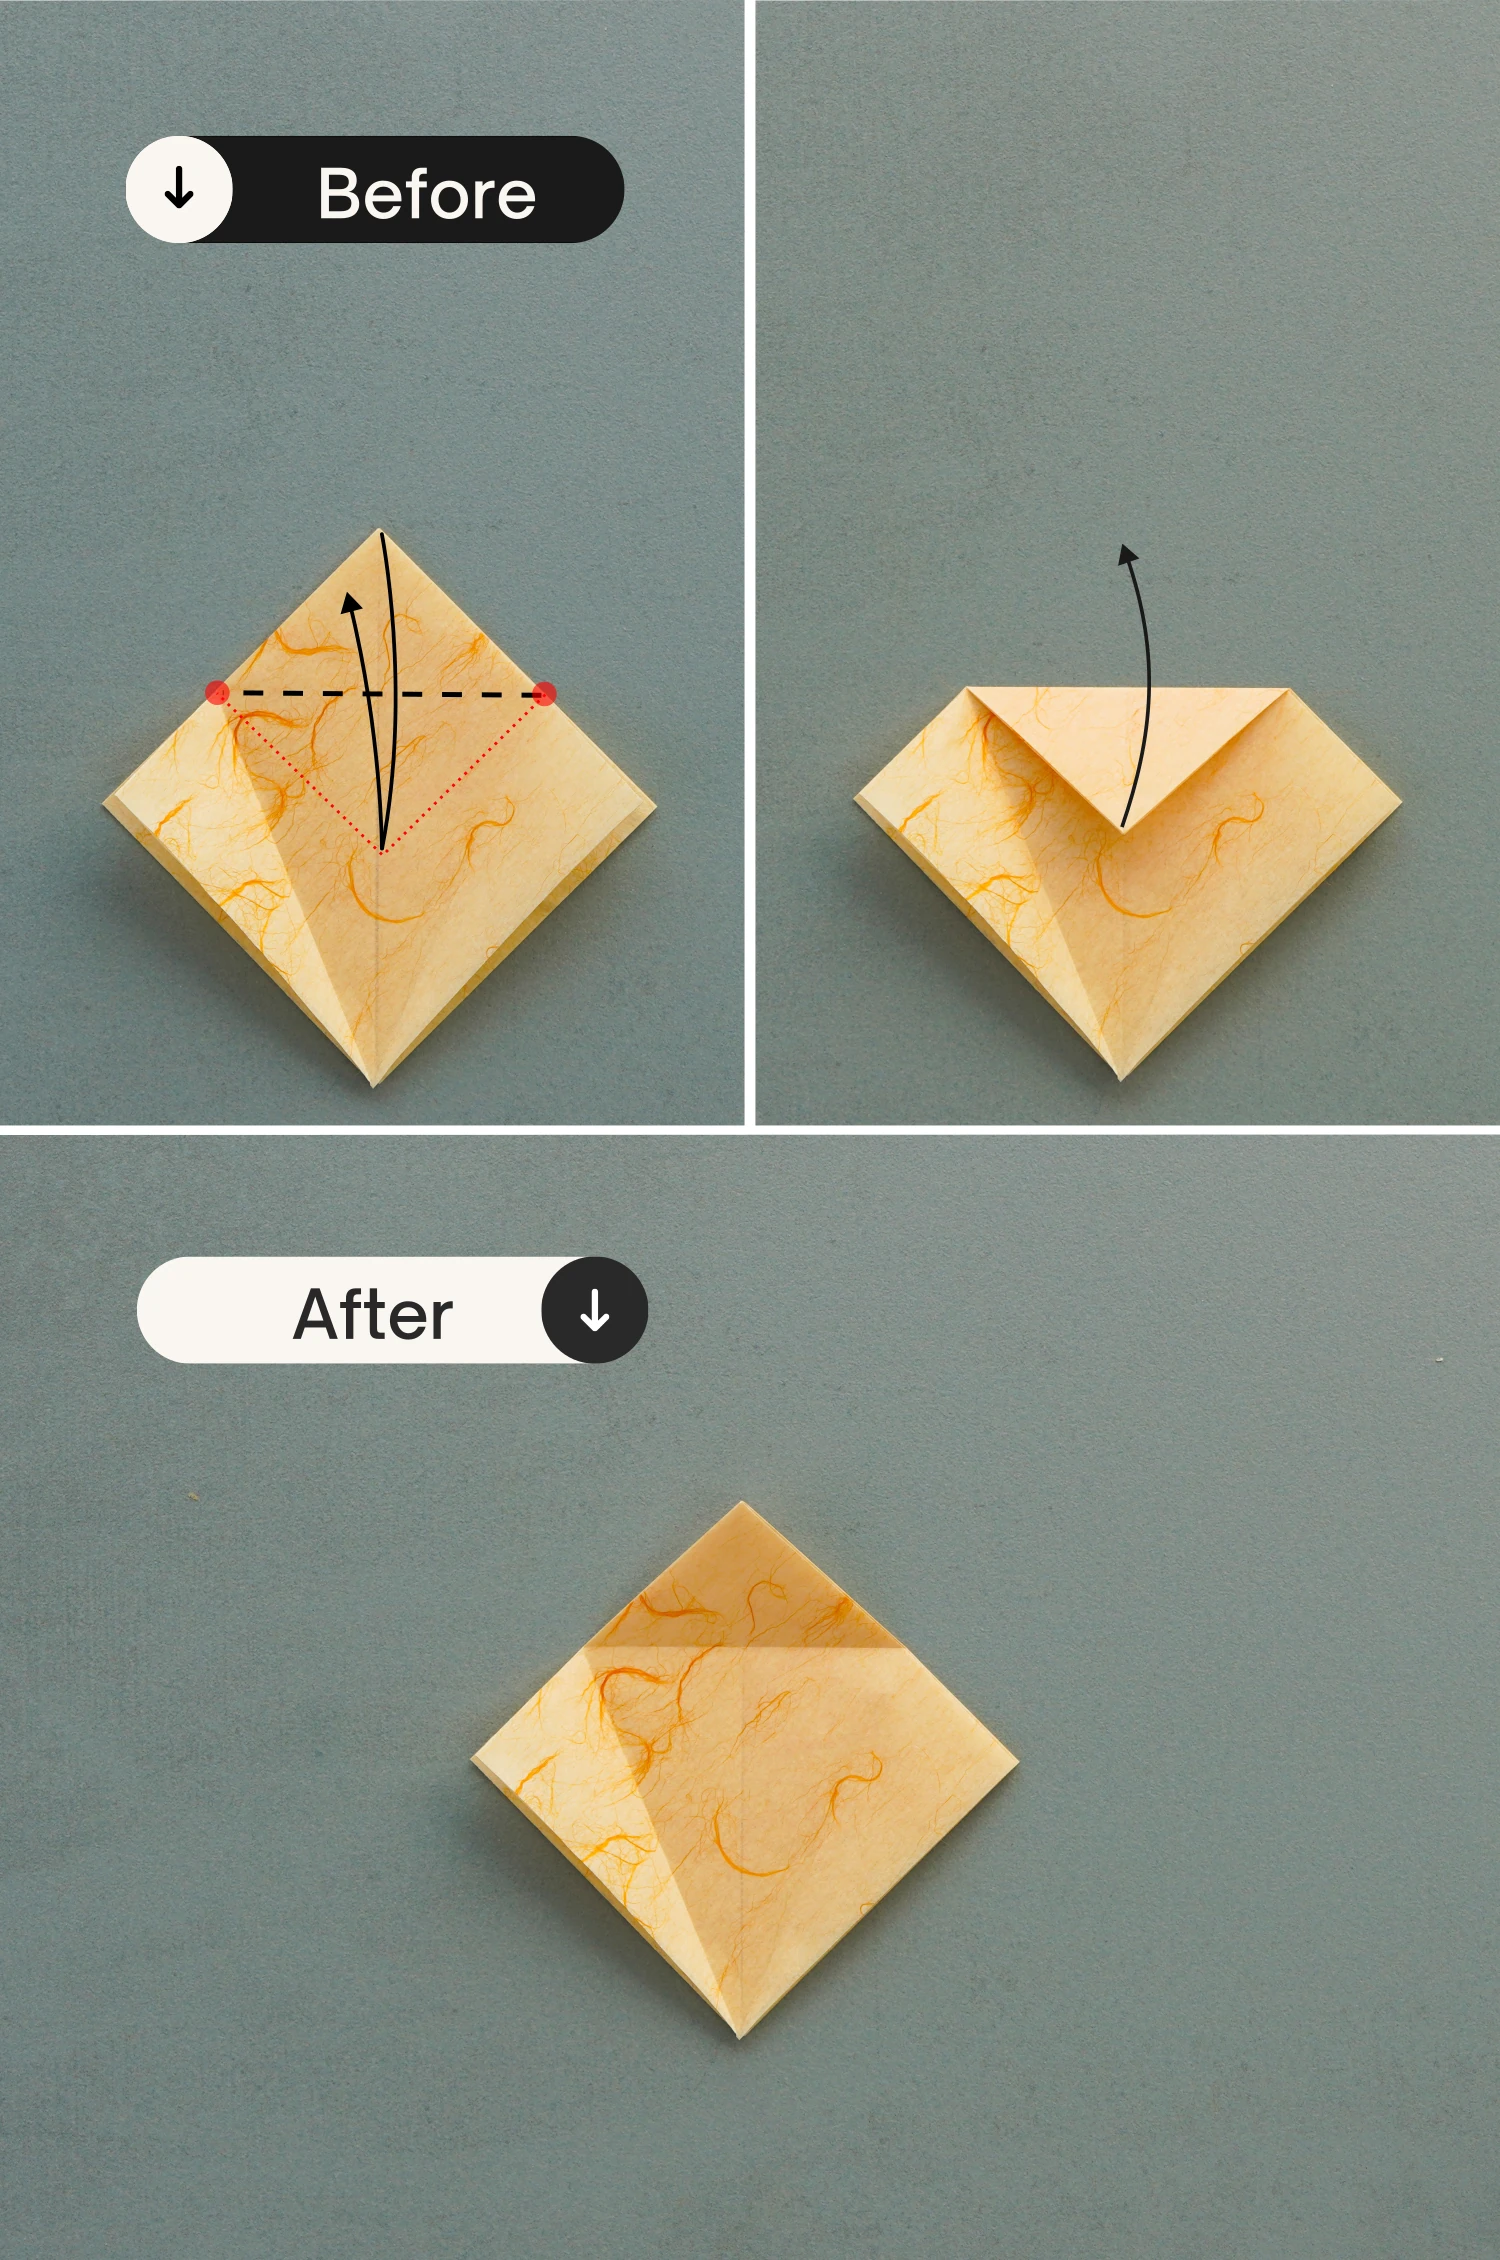
Step 10
Lift up the top layer of the paper. Then push the right and left points with your fingers to flatten the fold. All the creases you will need are existing.
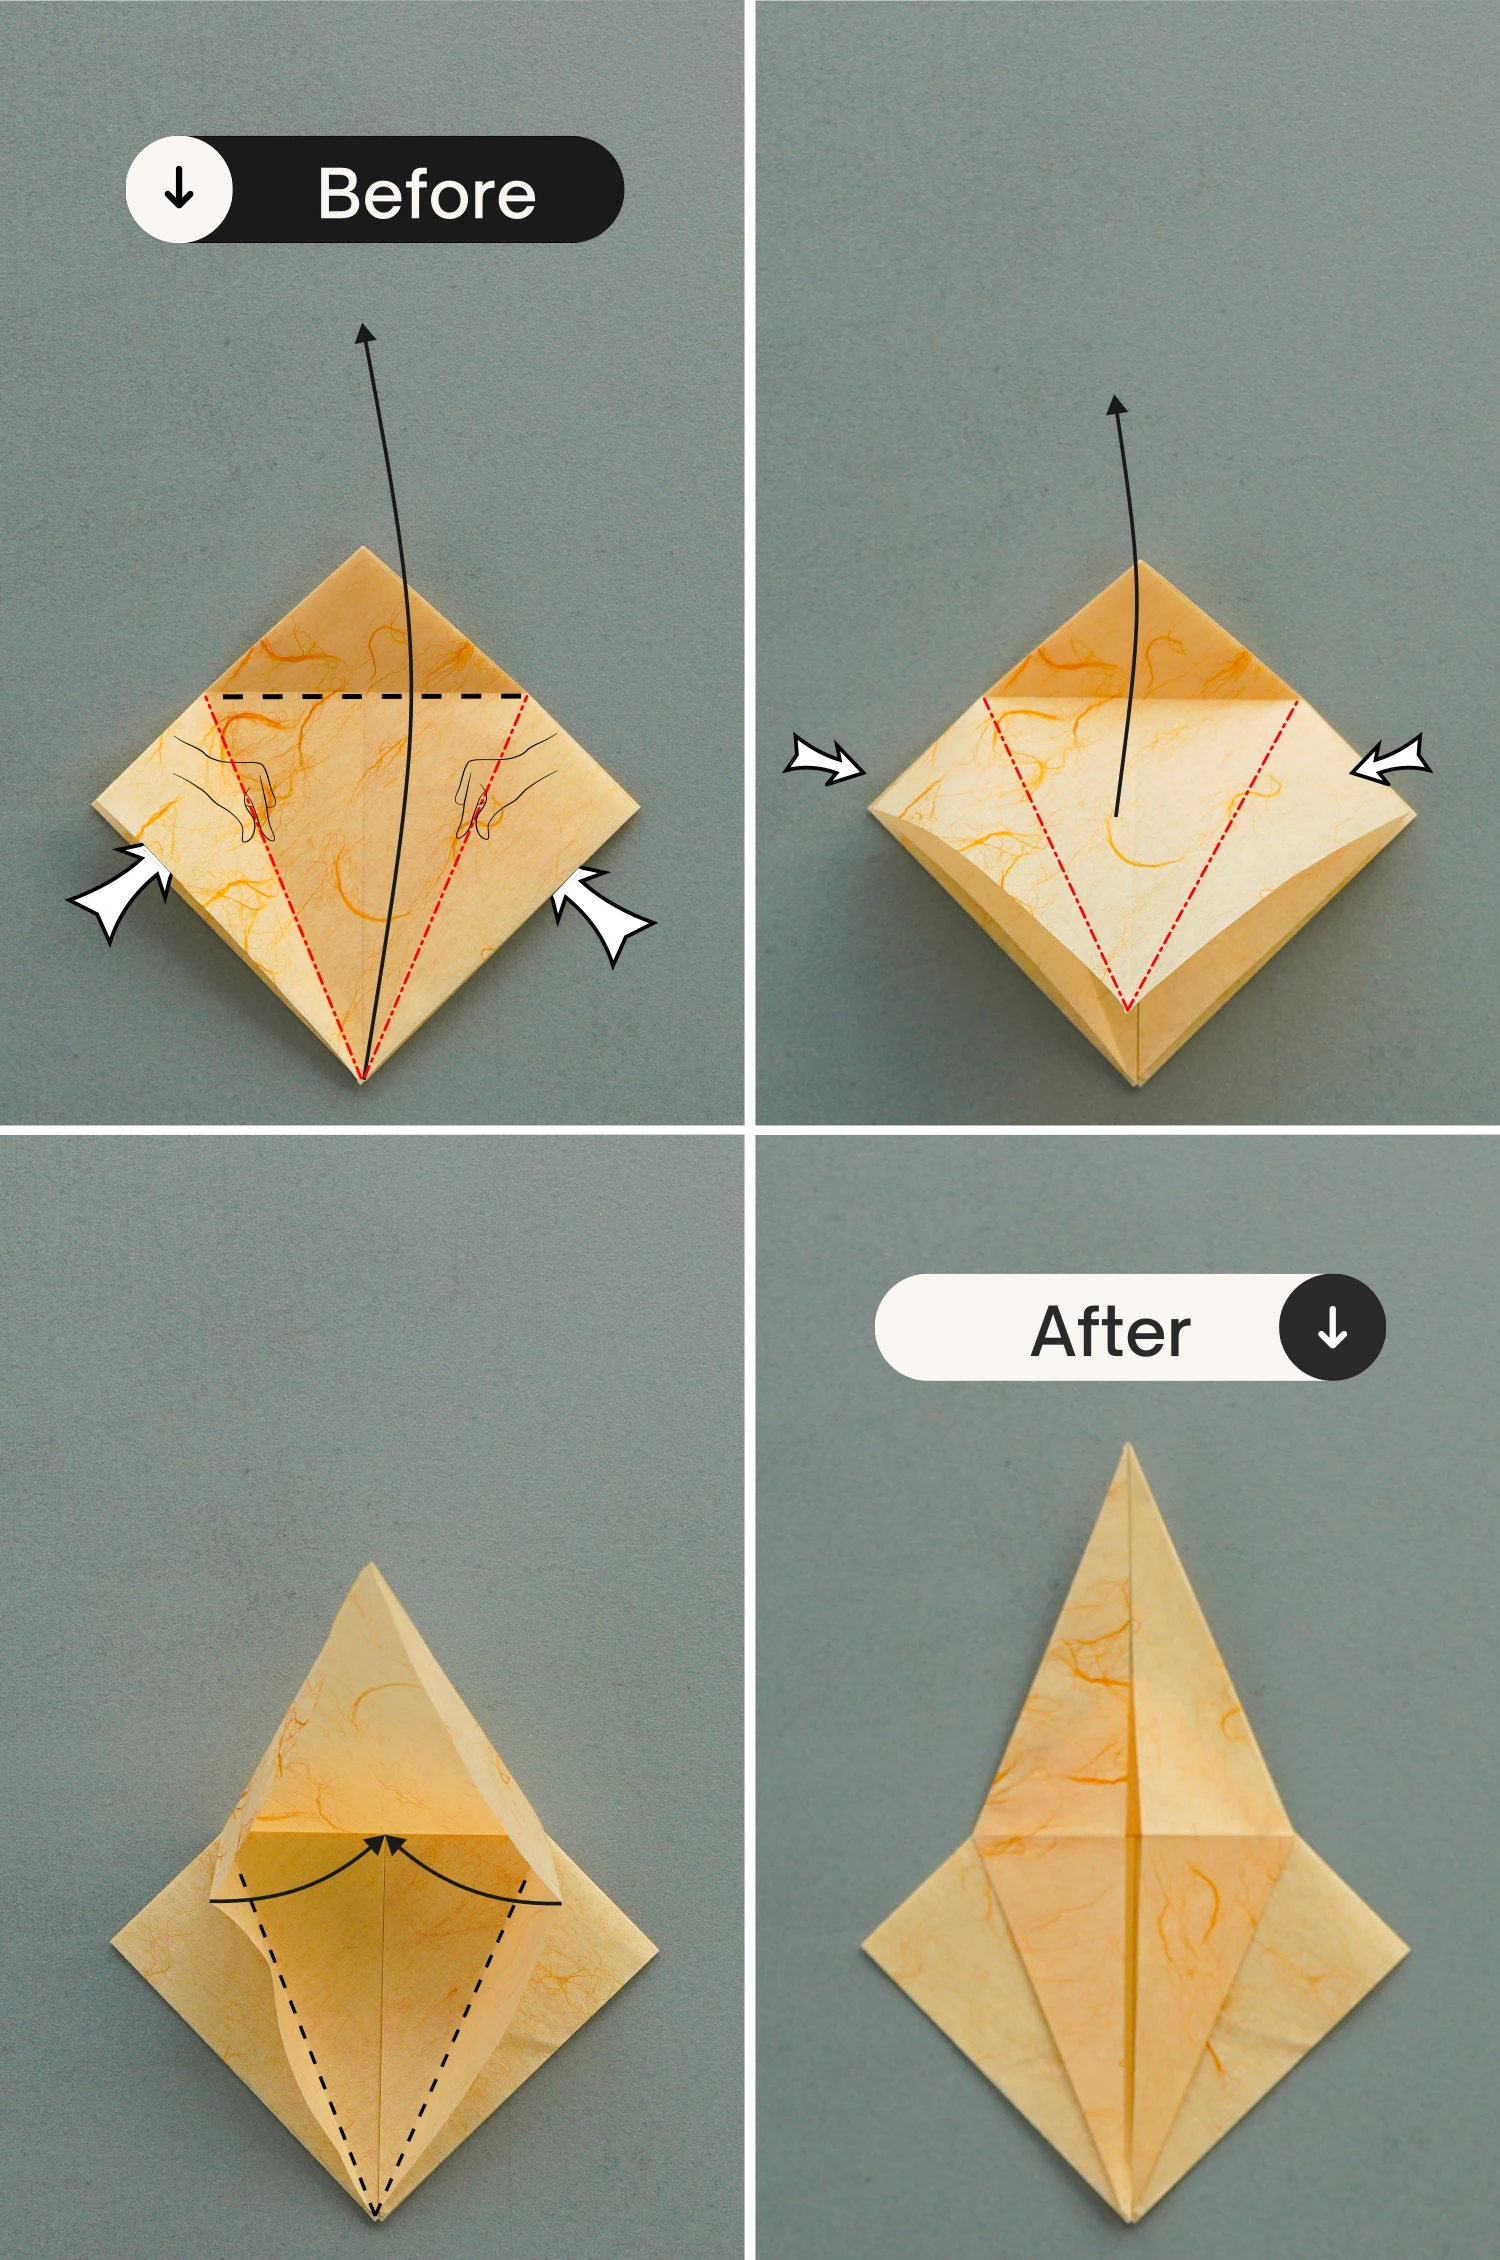
Step 11
Flip the paper over.
Step 12
Fold the bottom left and right edges to align with the middle vertical crease, crease them well then unfold.
Step 13
Repeat step 10, lift the top layer, and push the left and right points to flatten the fold.

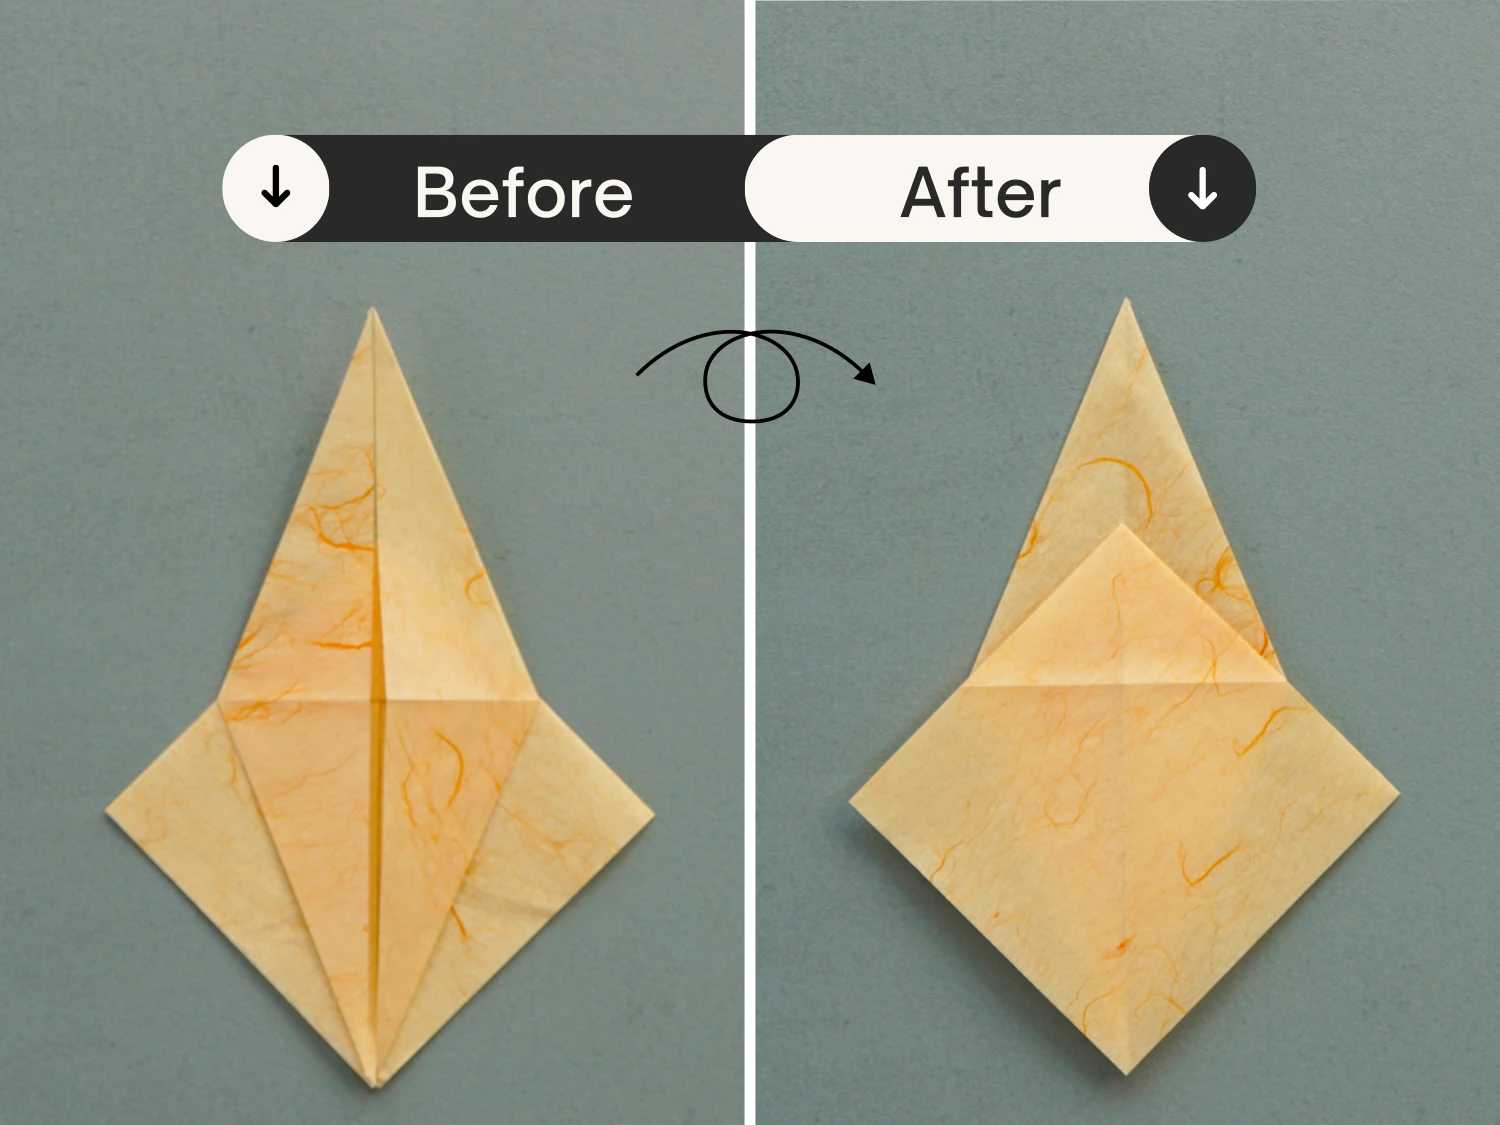
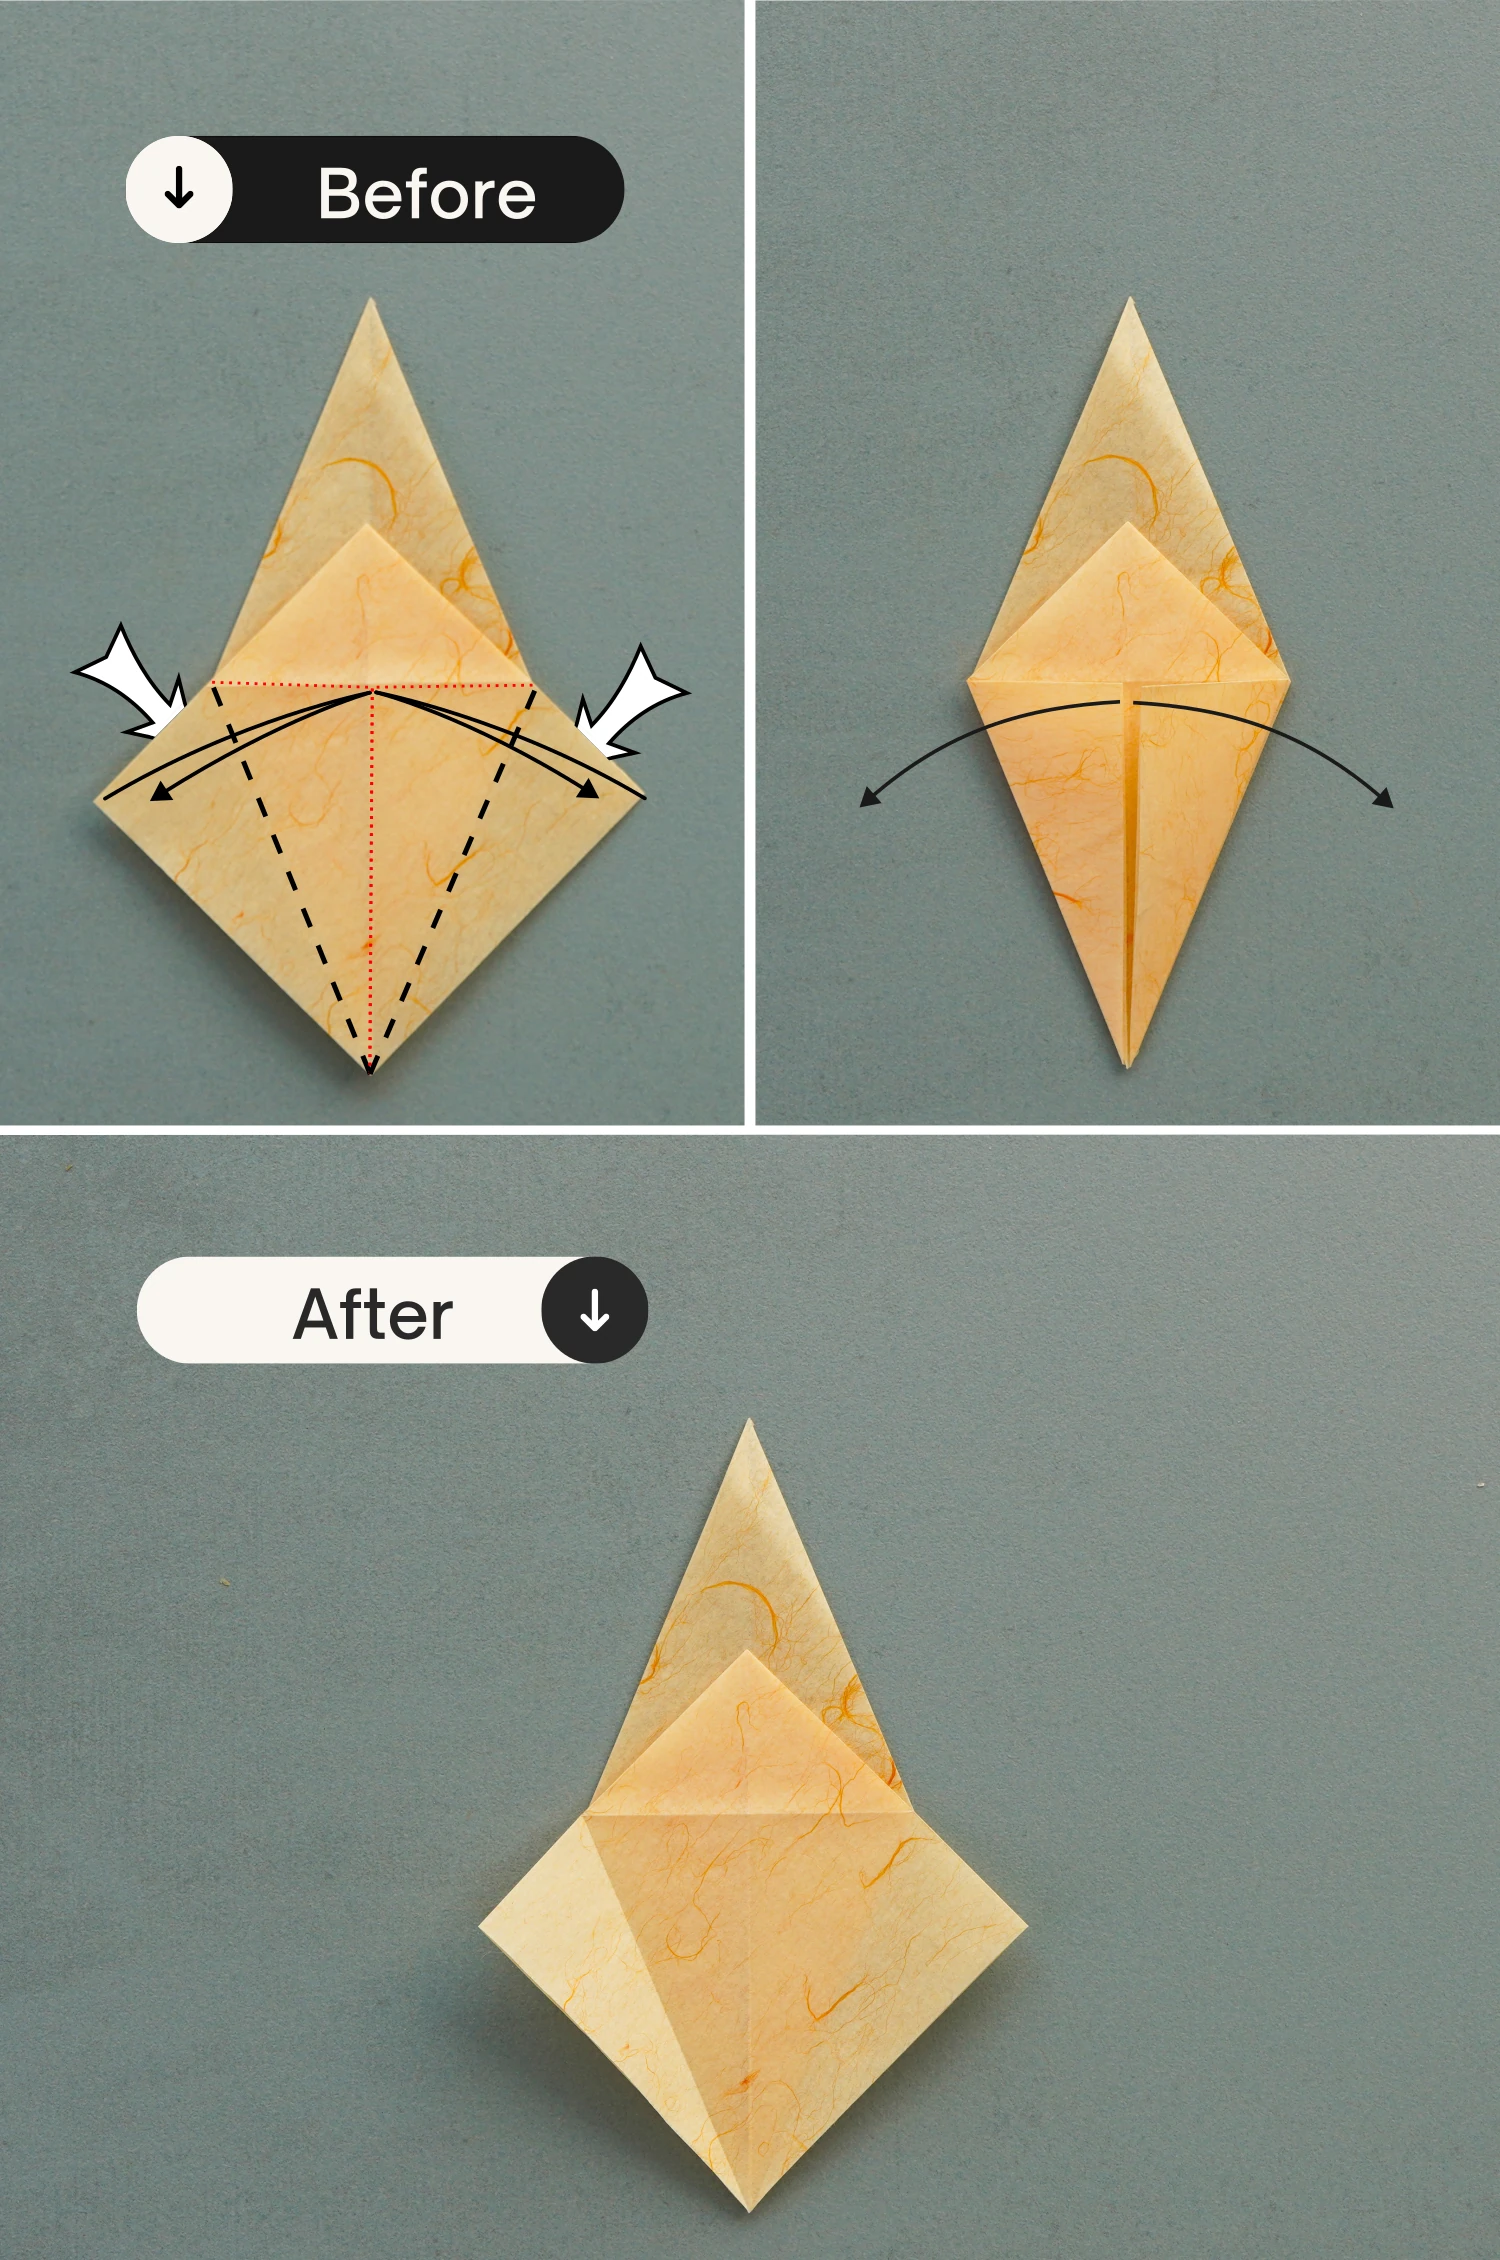
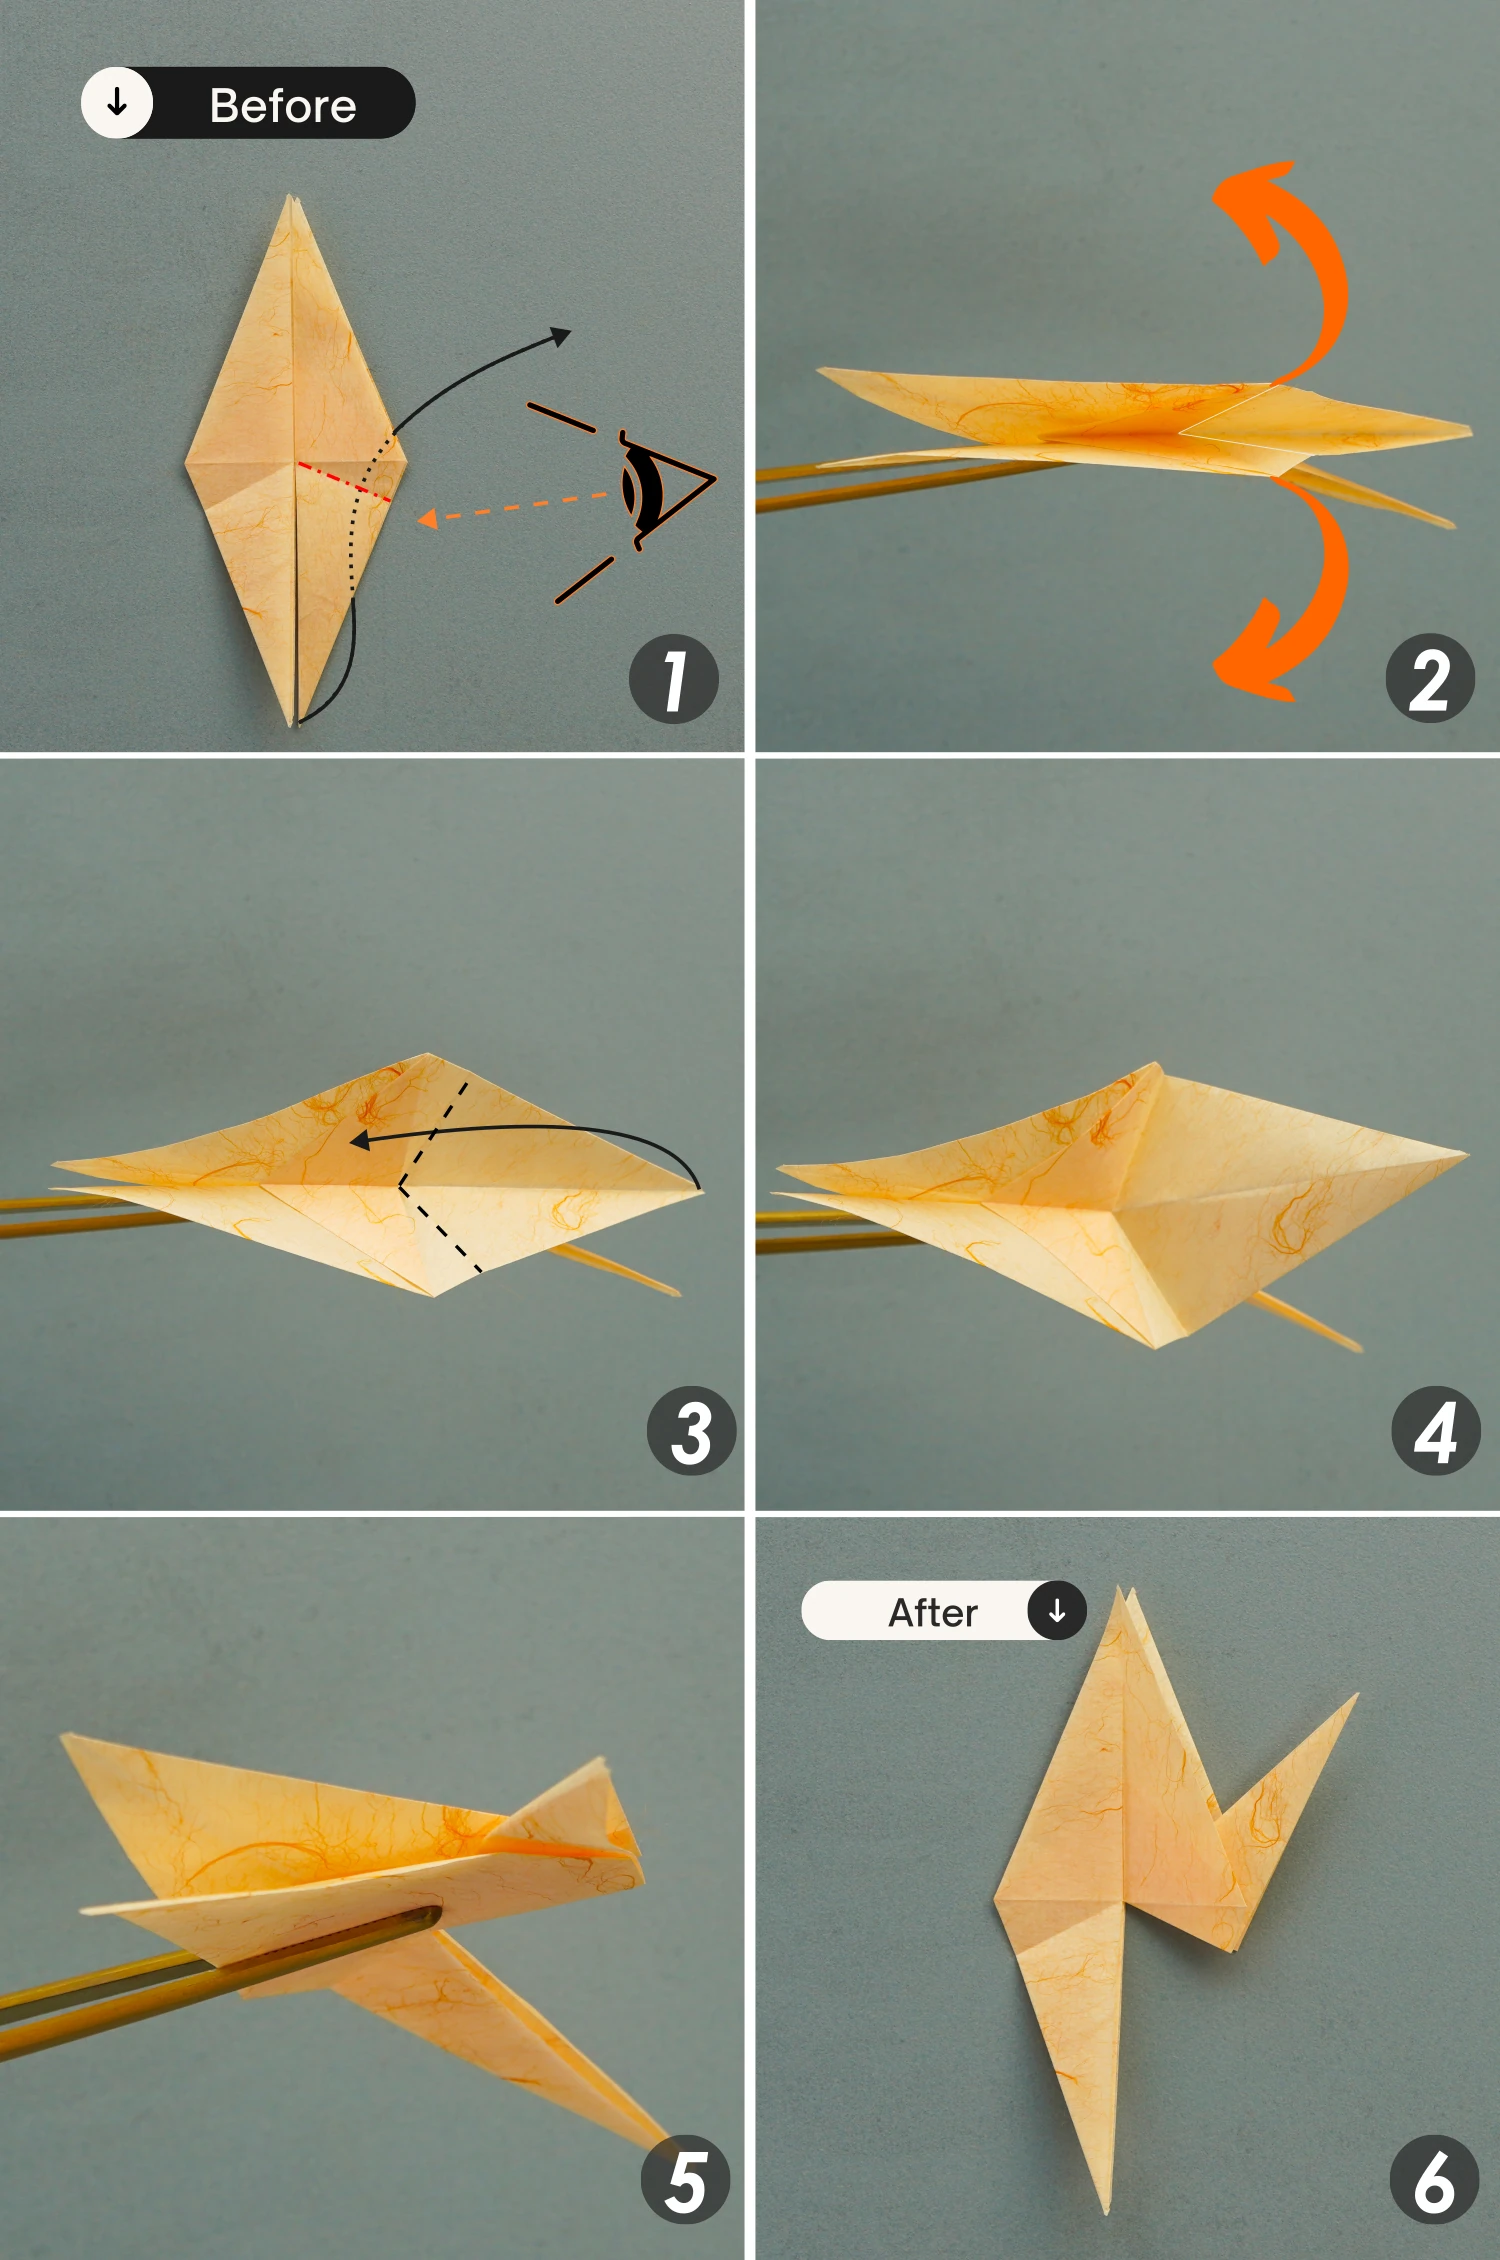
Step 14
Fold the bottom right flap to the top right, and unfold.
Repeat this for the bottom left flap, fold it to the top left then unfold it.
Step 15
Flip the paper over vertically, and view it from the right side. Slightly open the opening as the second picture shows. Fold the right corner to the left, and shape the creases on both sides you made in the previous step. Push this corner inwards, tucking it between the two layers of paper.
Step 16
Repeat this for the left side.
Flip it over vertically, open it, fold the left corner to the right, and shape the creases on both sides. Then tuck it between the two layers.
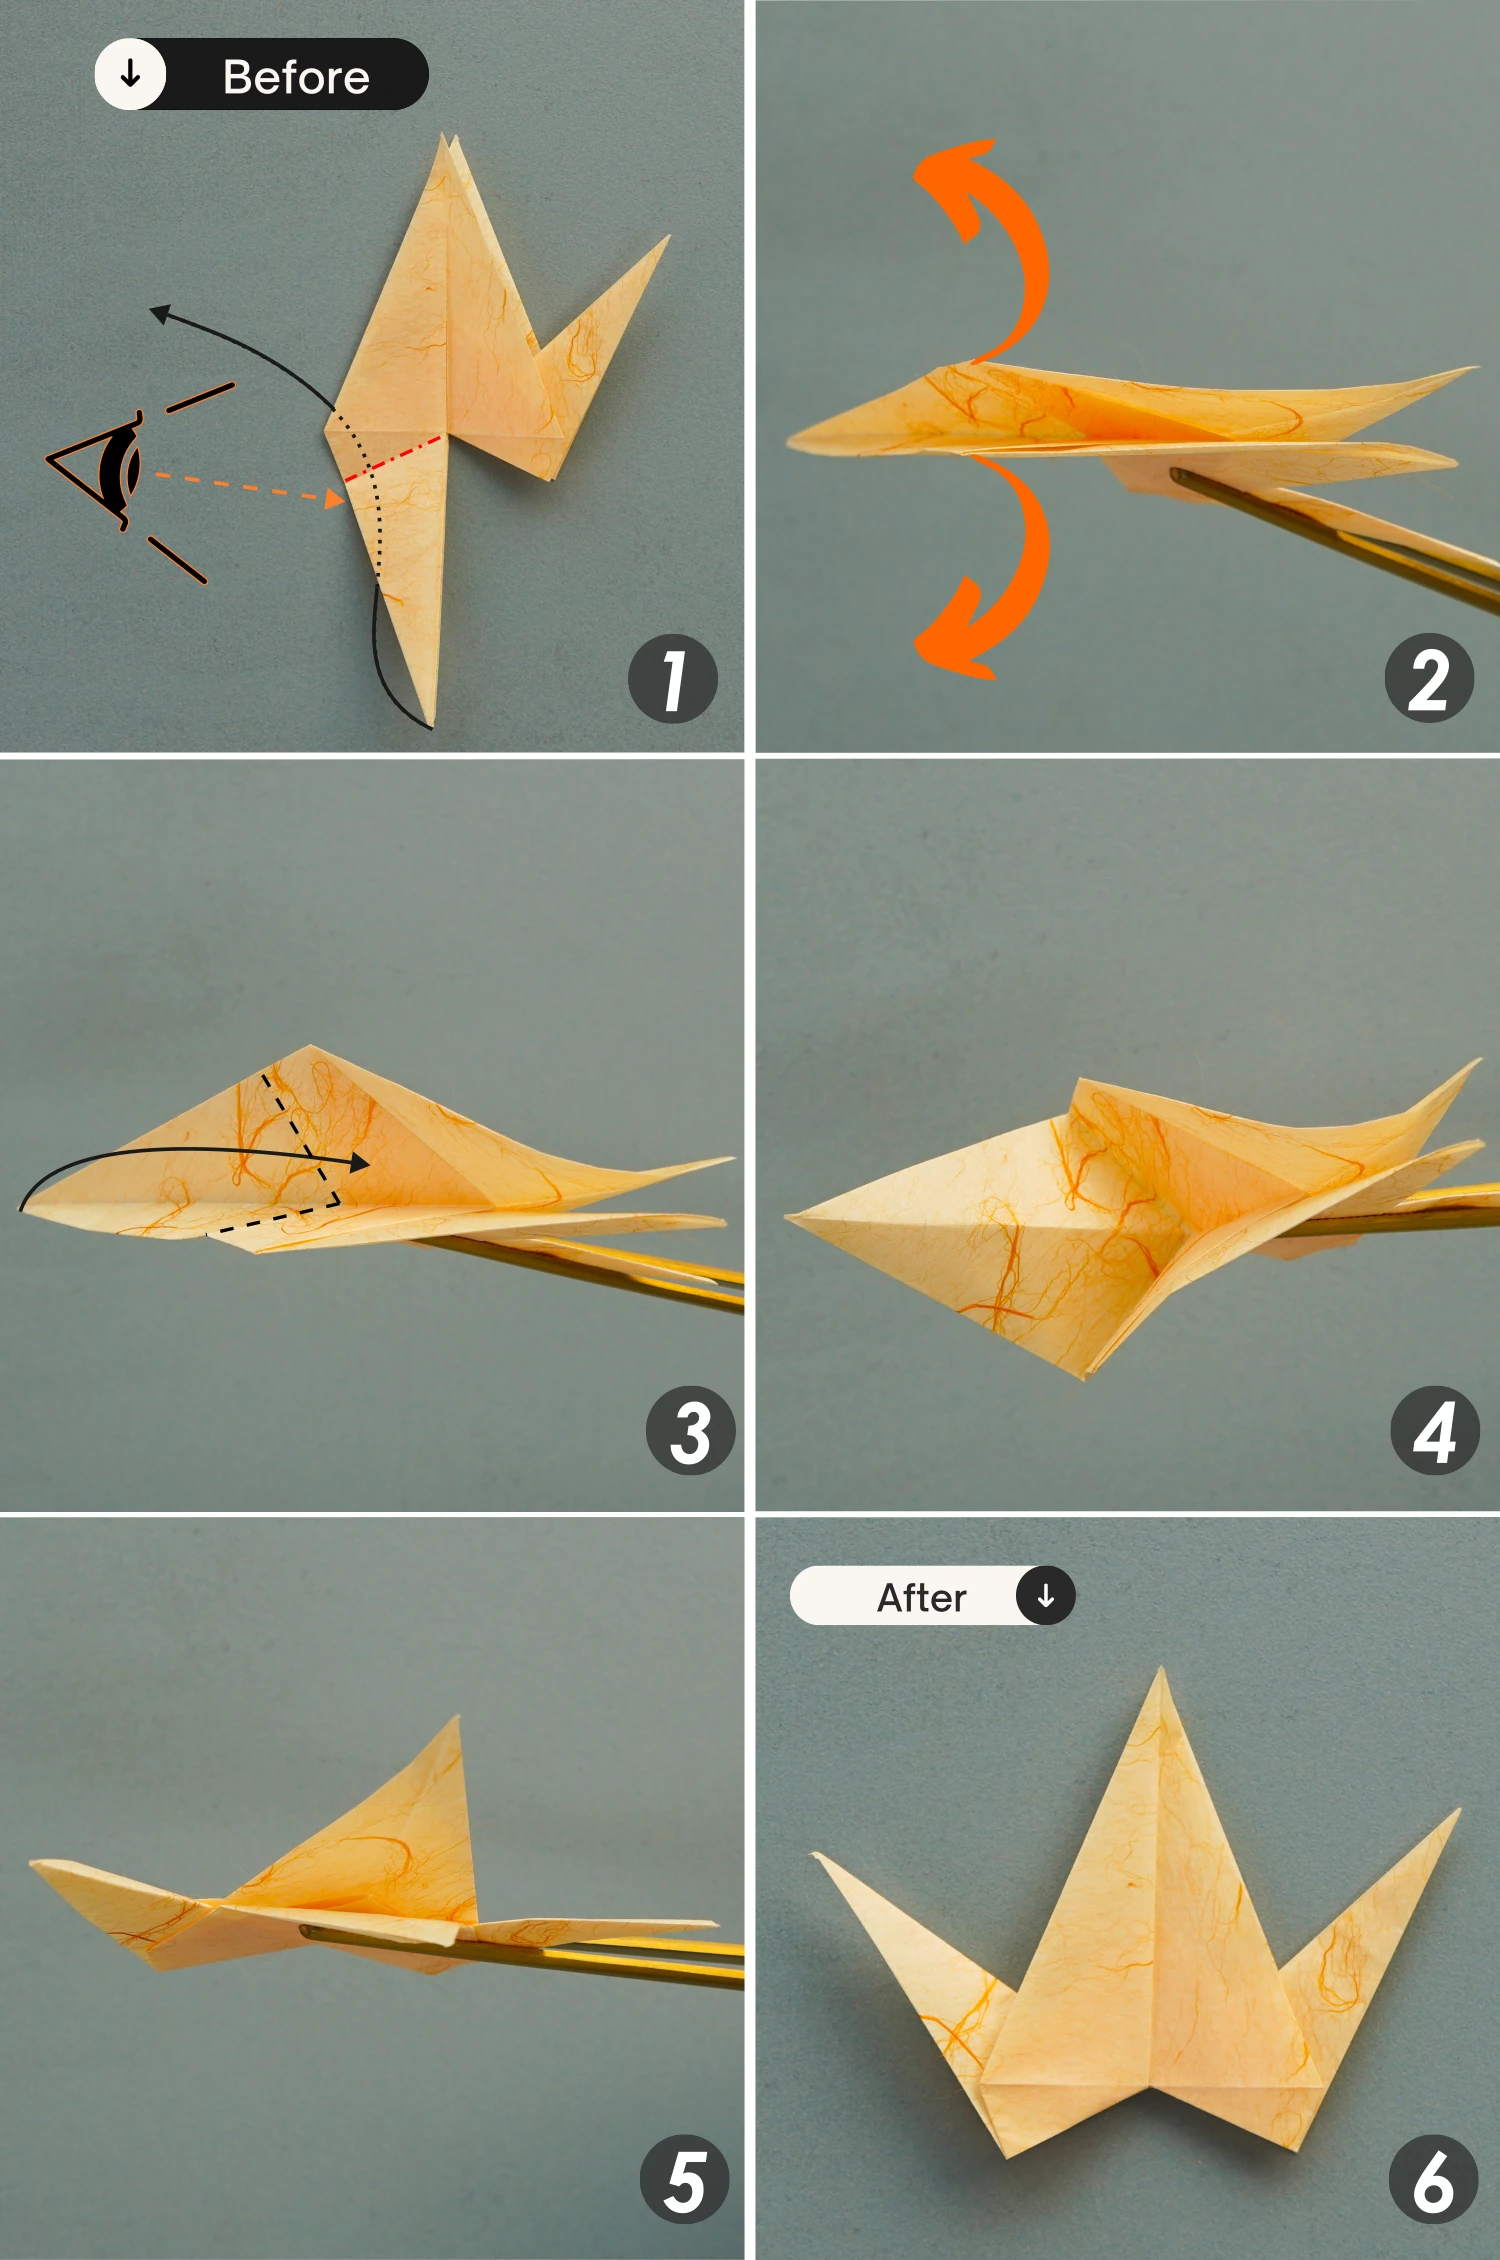
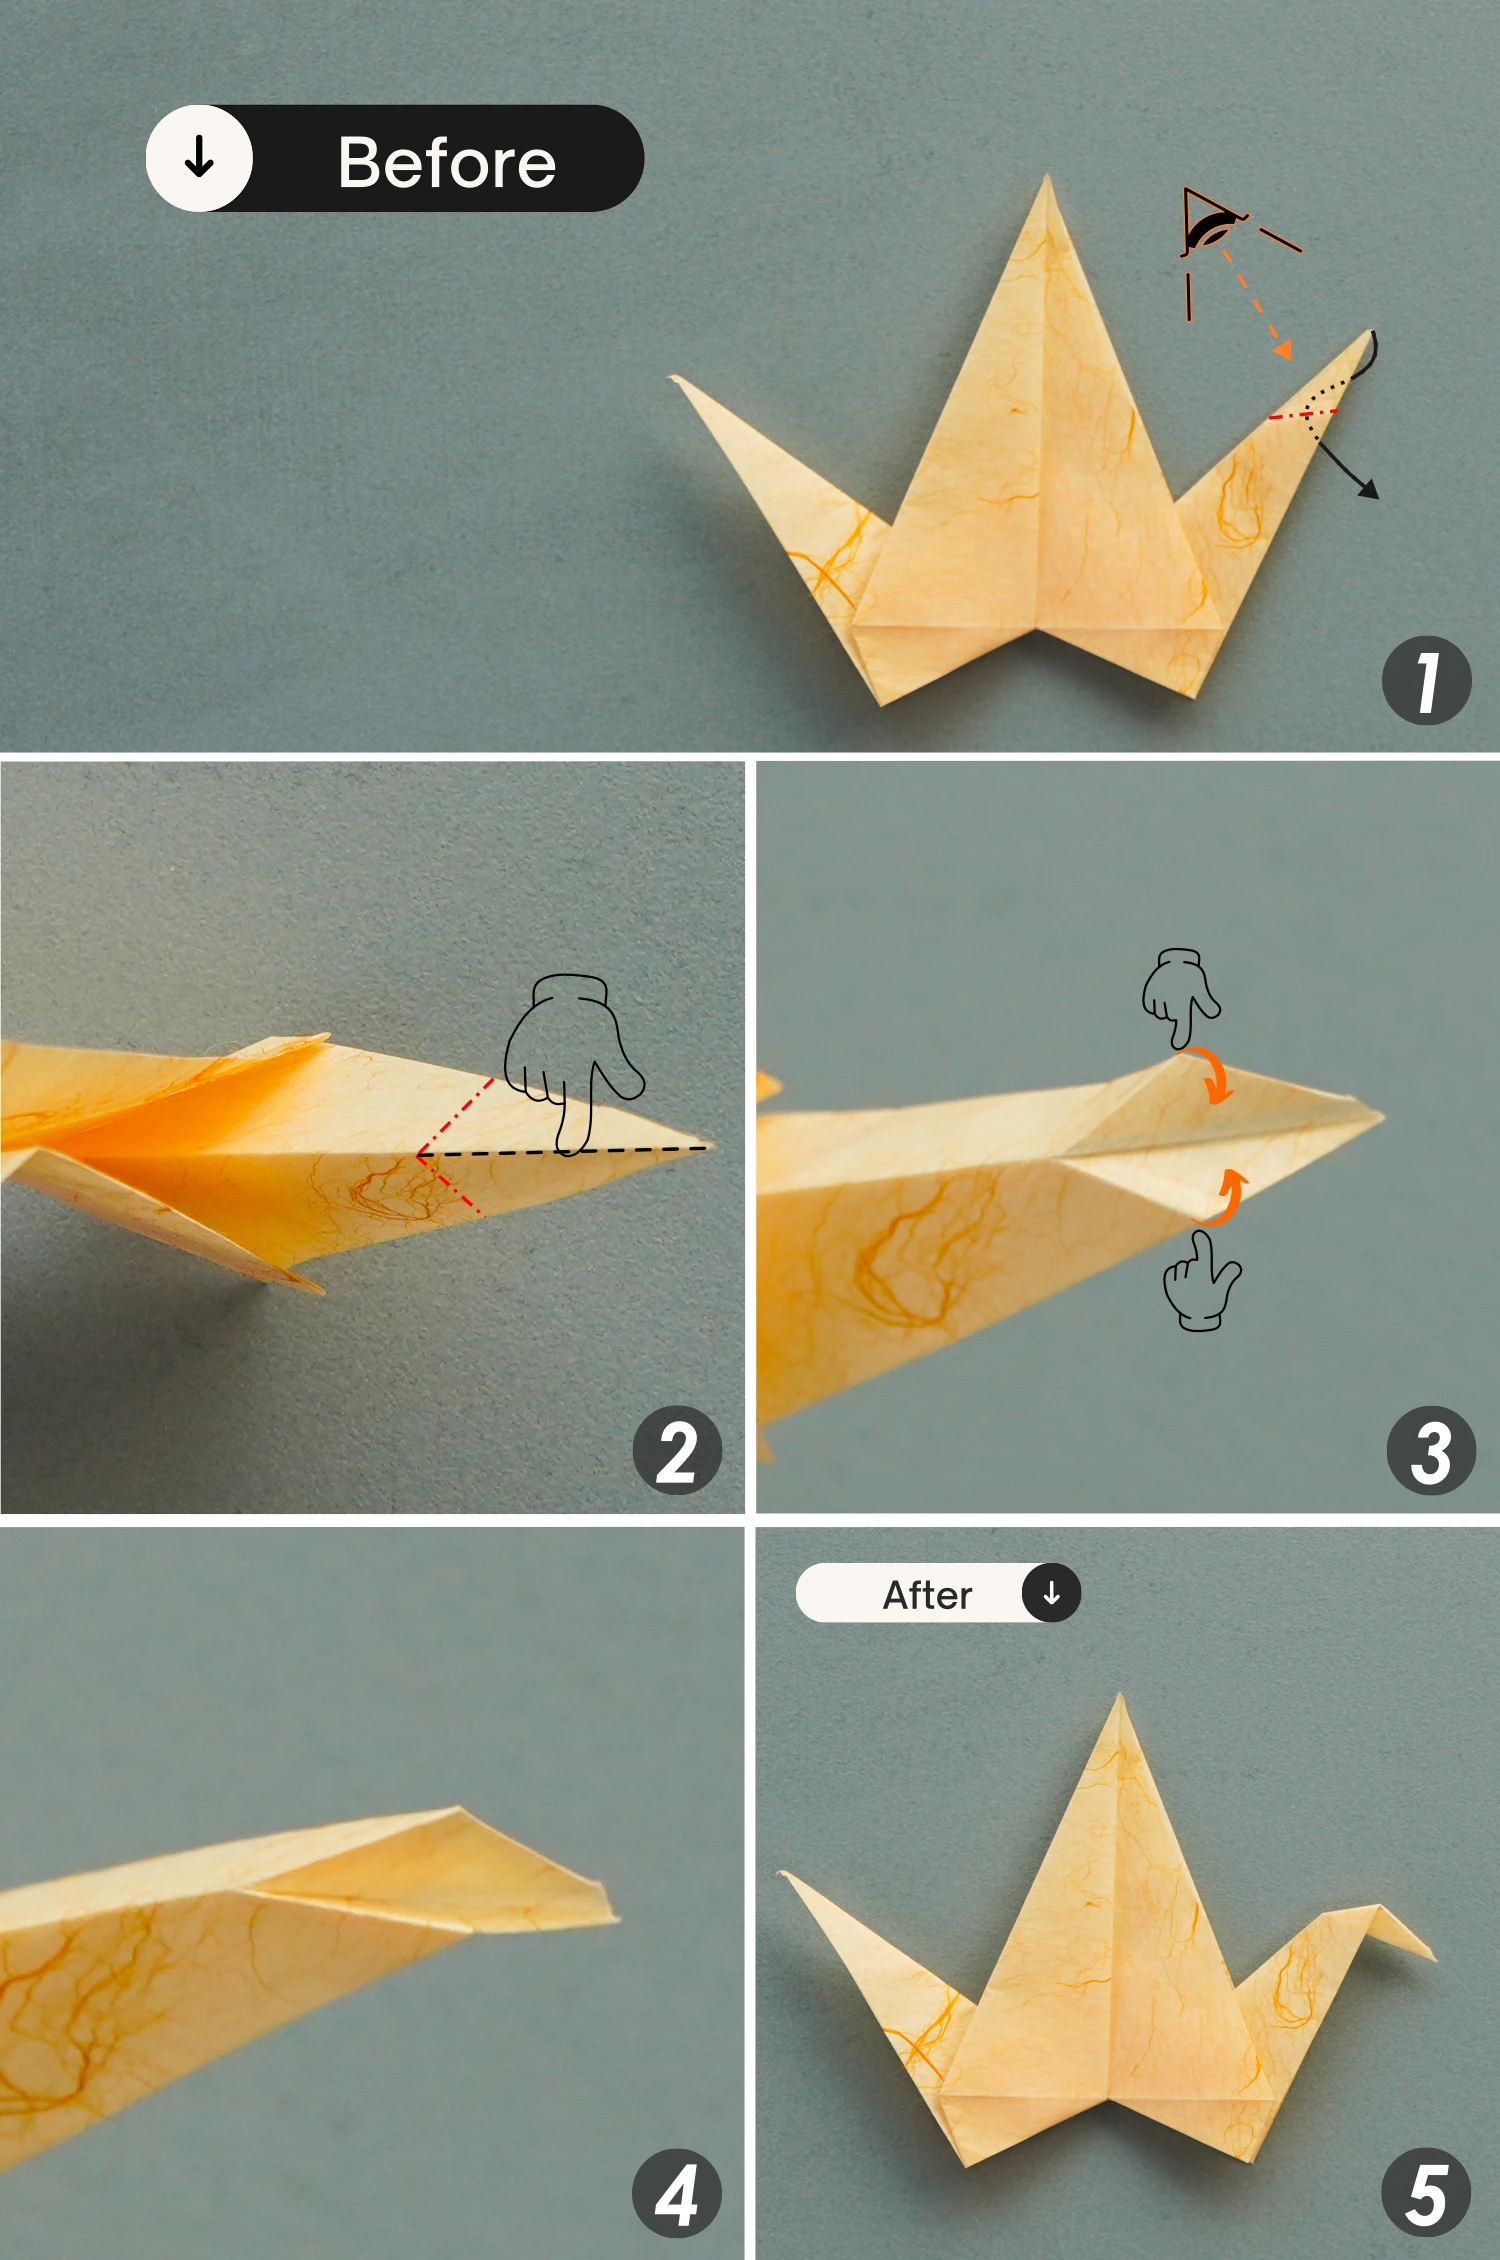
Step 17
Fold the right tip down a little, then unfold it.
Step 18
View it from the top, press down the tip, and shape the creases on both sides. Push this corner inward and tuck it between the two layers.
Finally, flatten the fold, getting the head of the bird.
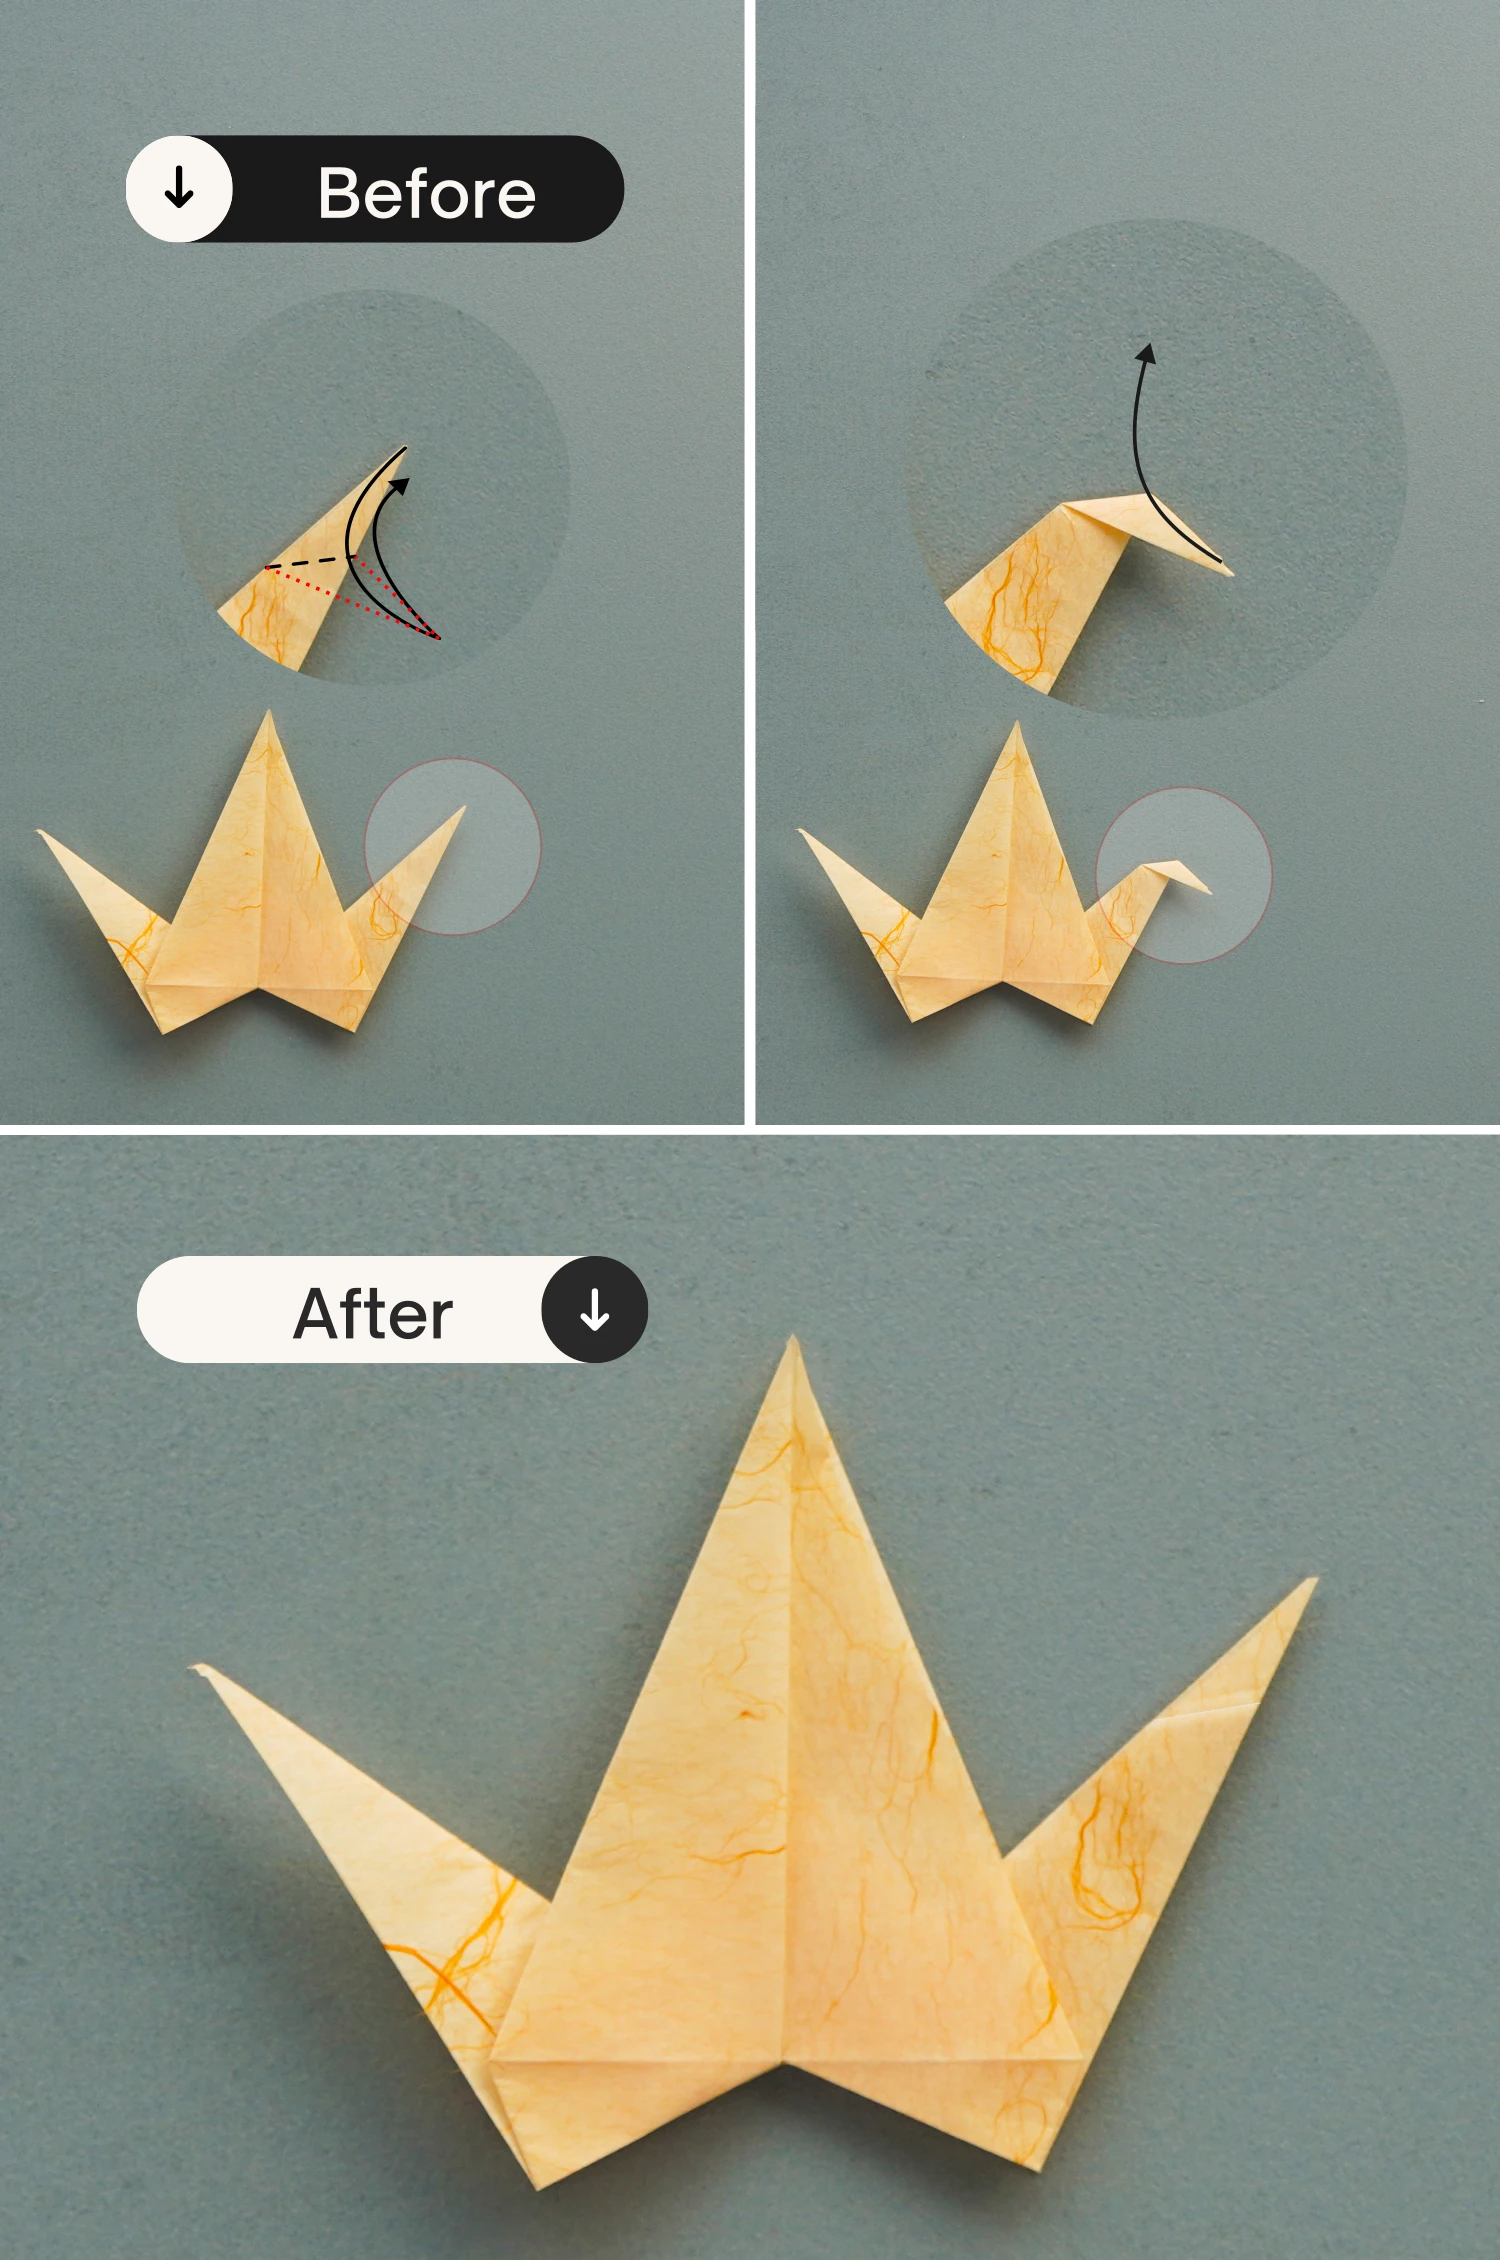
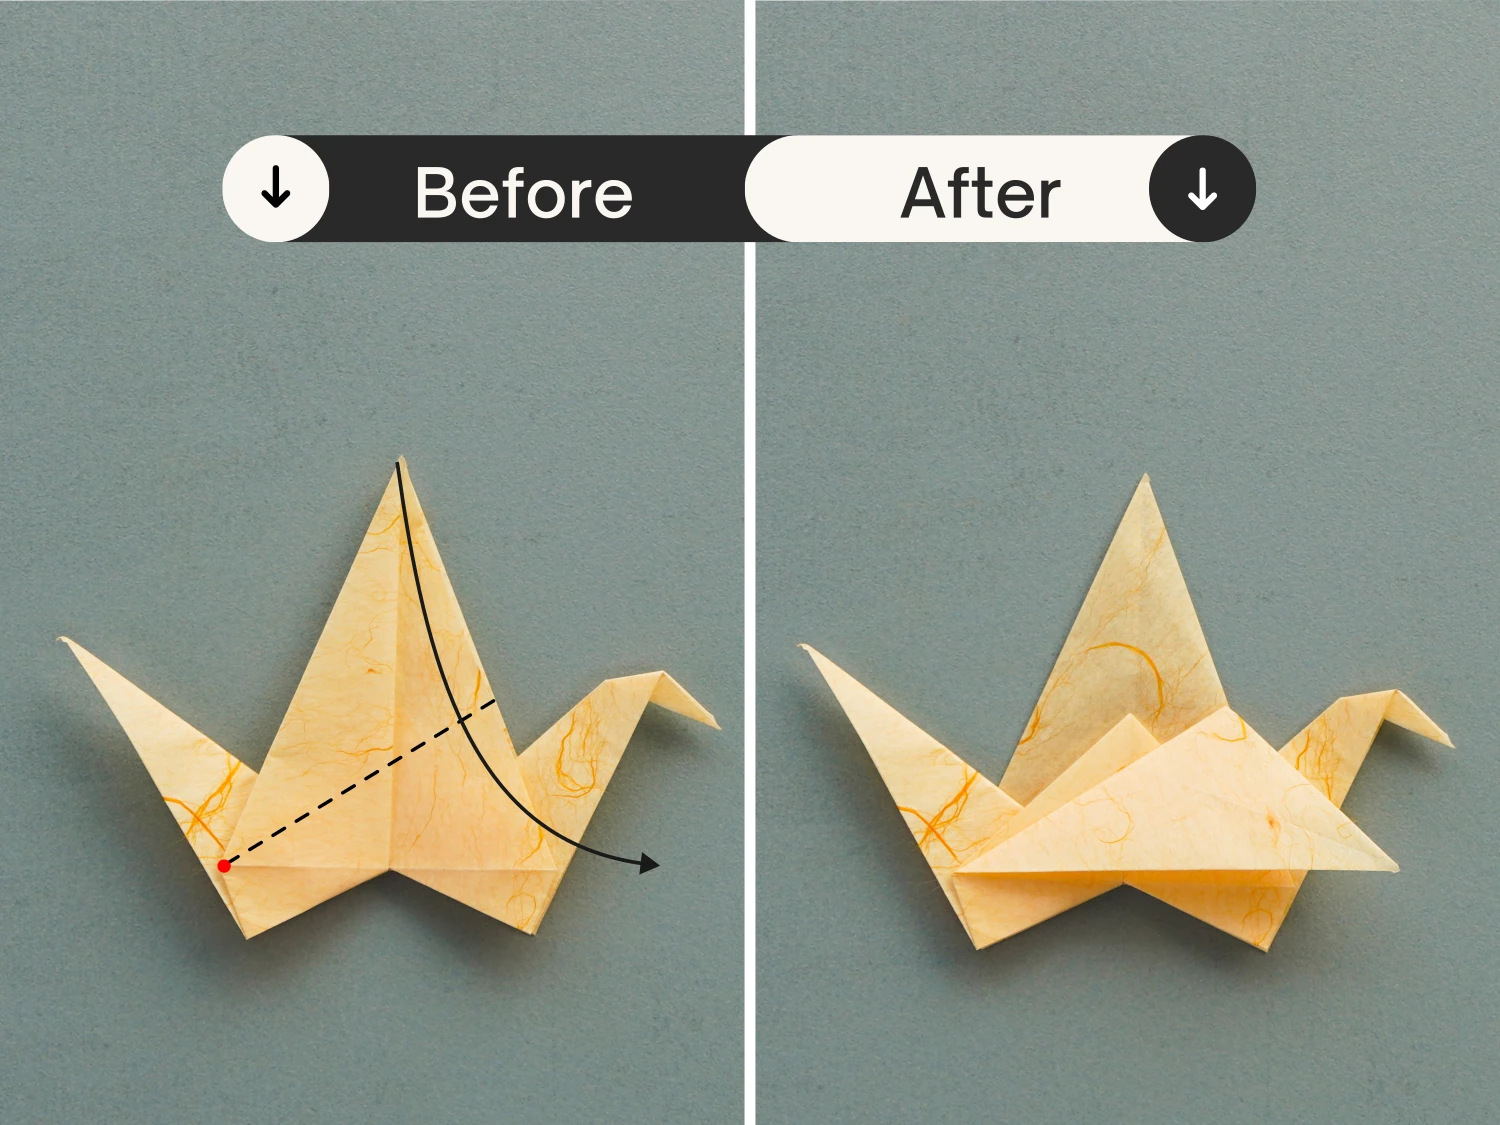
Step 19
Take the top corner of the top layer, and fold it down along the dotted line, creating one of the flapping wings.
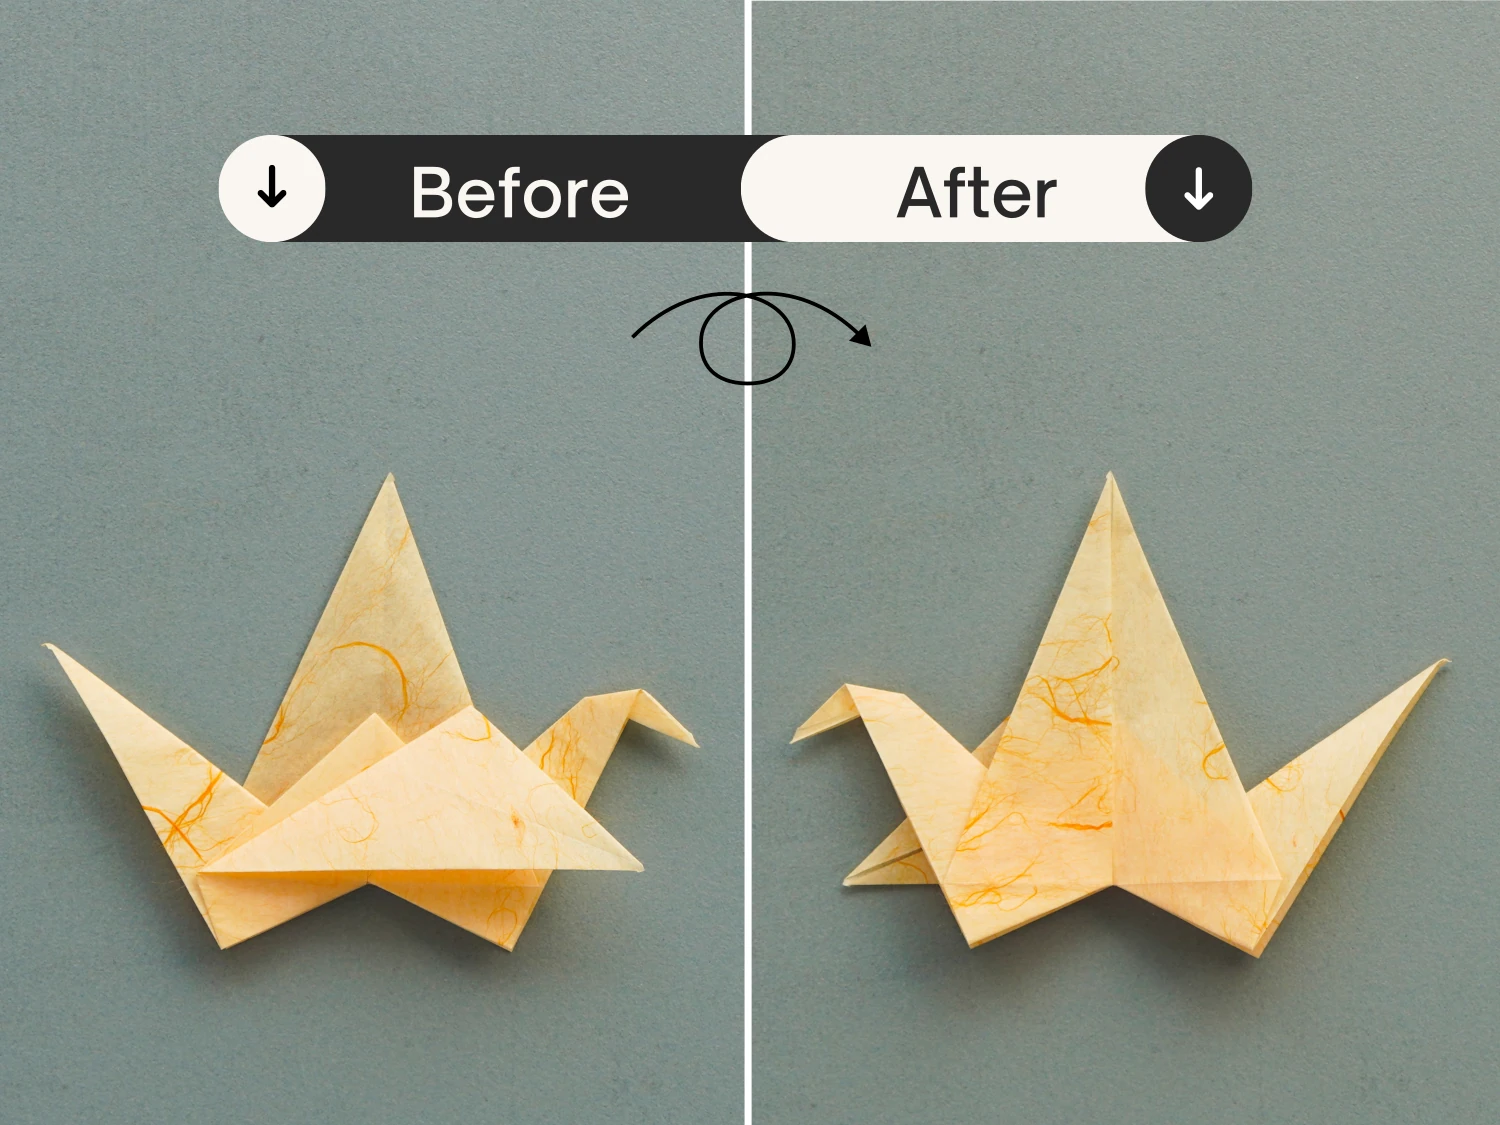
Step 20
Flip the paper over.
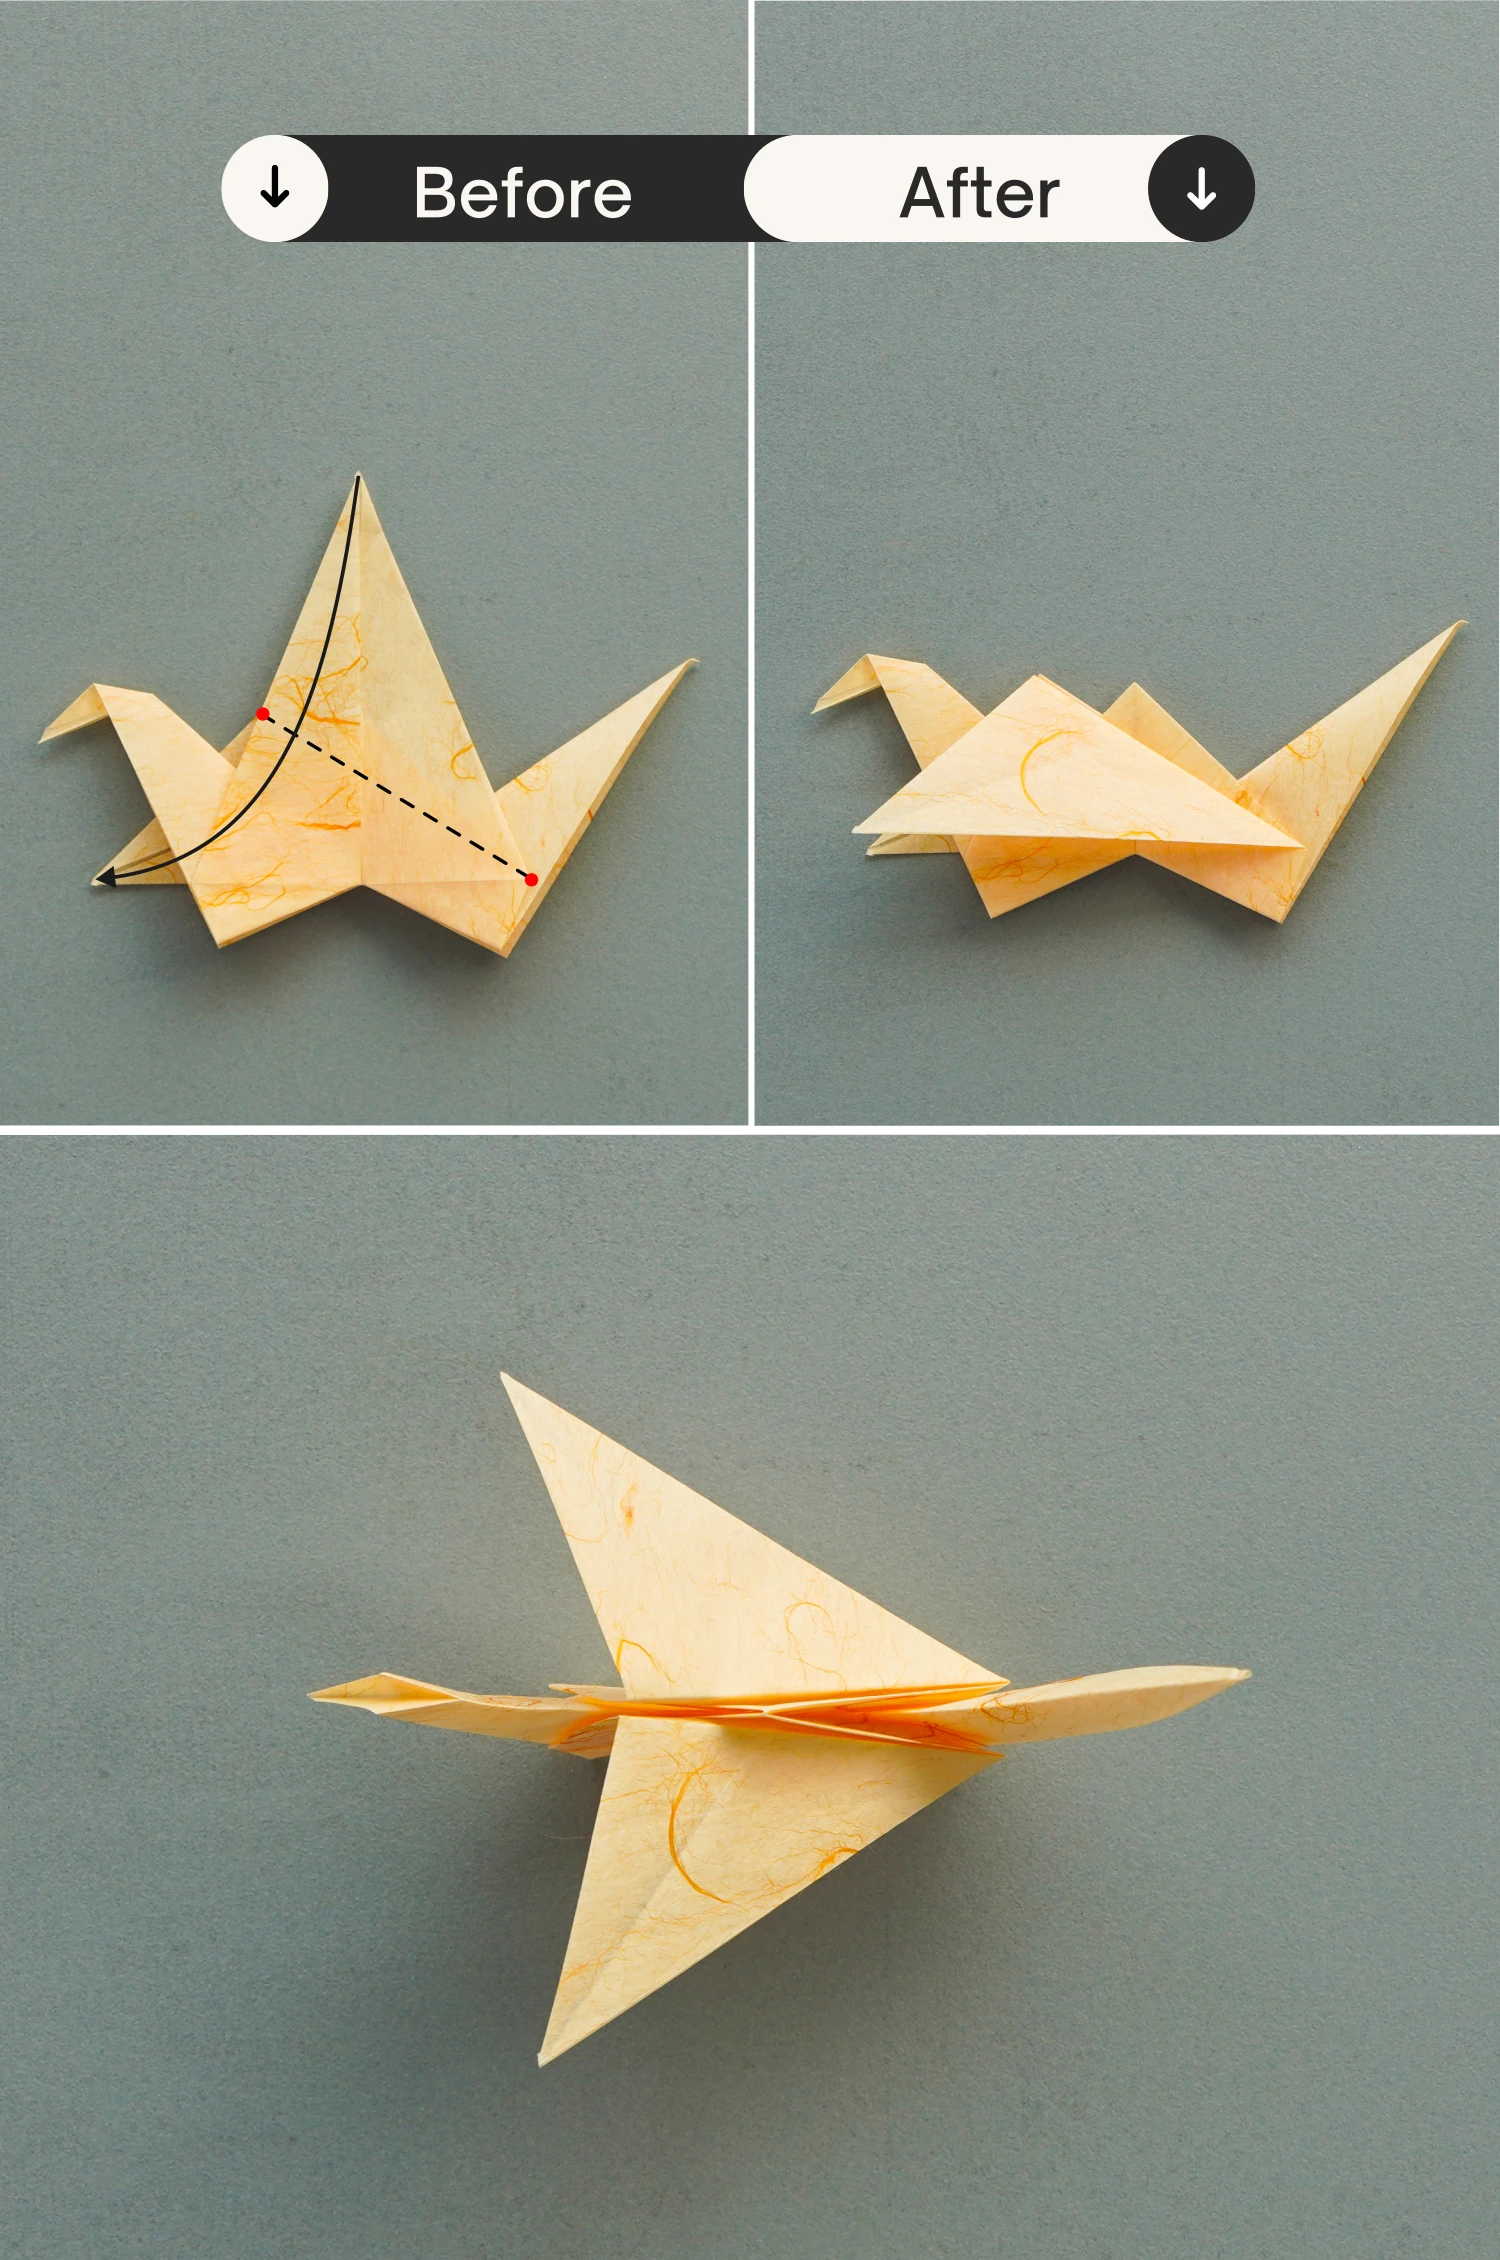
Step 21
Similarly, fold the top corner down along the dotted line, making sure to overlap with another flapping wing you made in step 19.
What’s Next
That’s your lovely flapping bird, if you are interested in origami birds, now you can check our other bird ideas, they are easy to make, and all are adorable. Enjoy folding!
Other Origami Bird Ideas