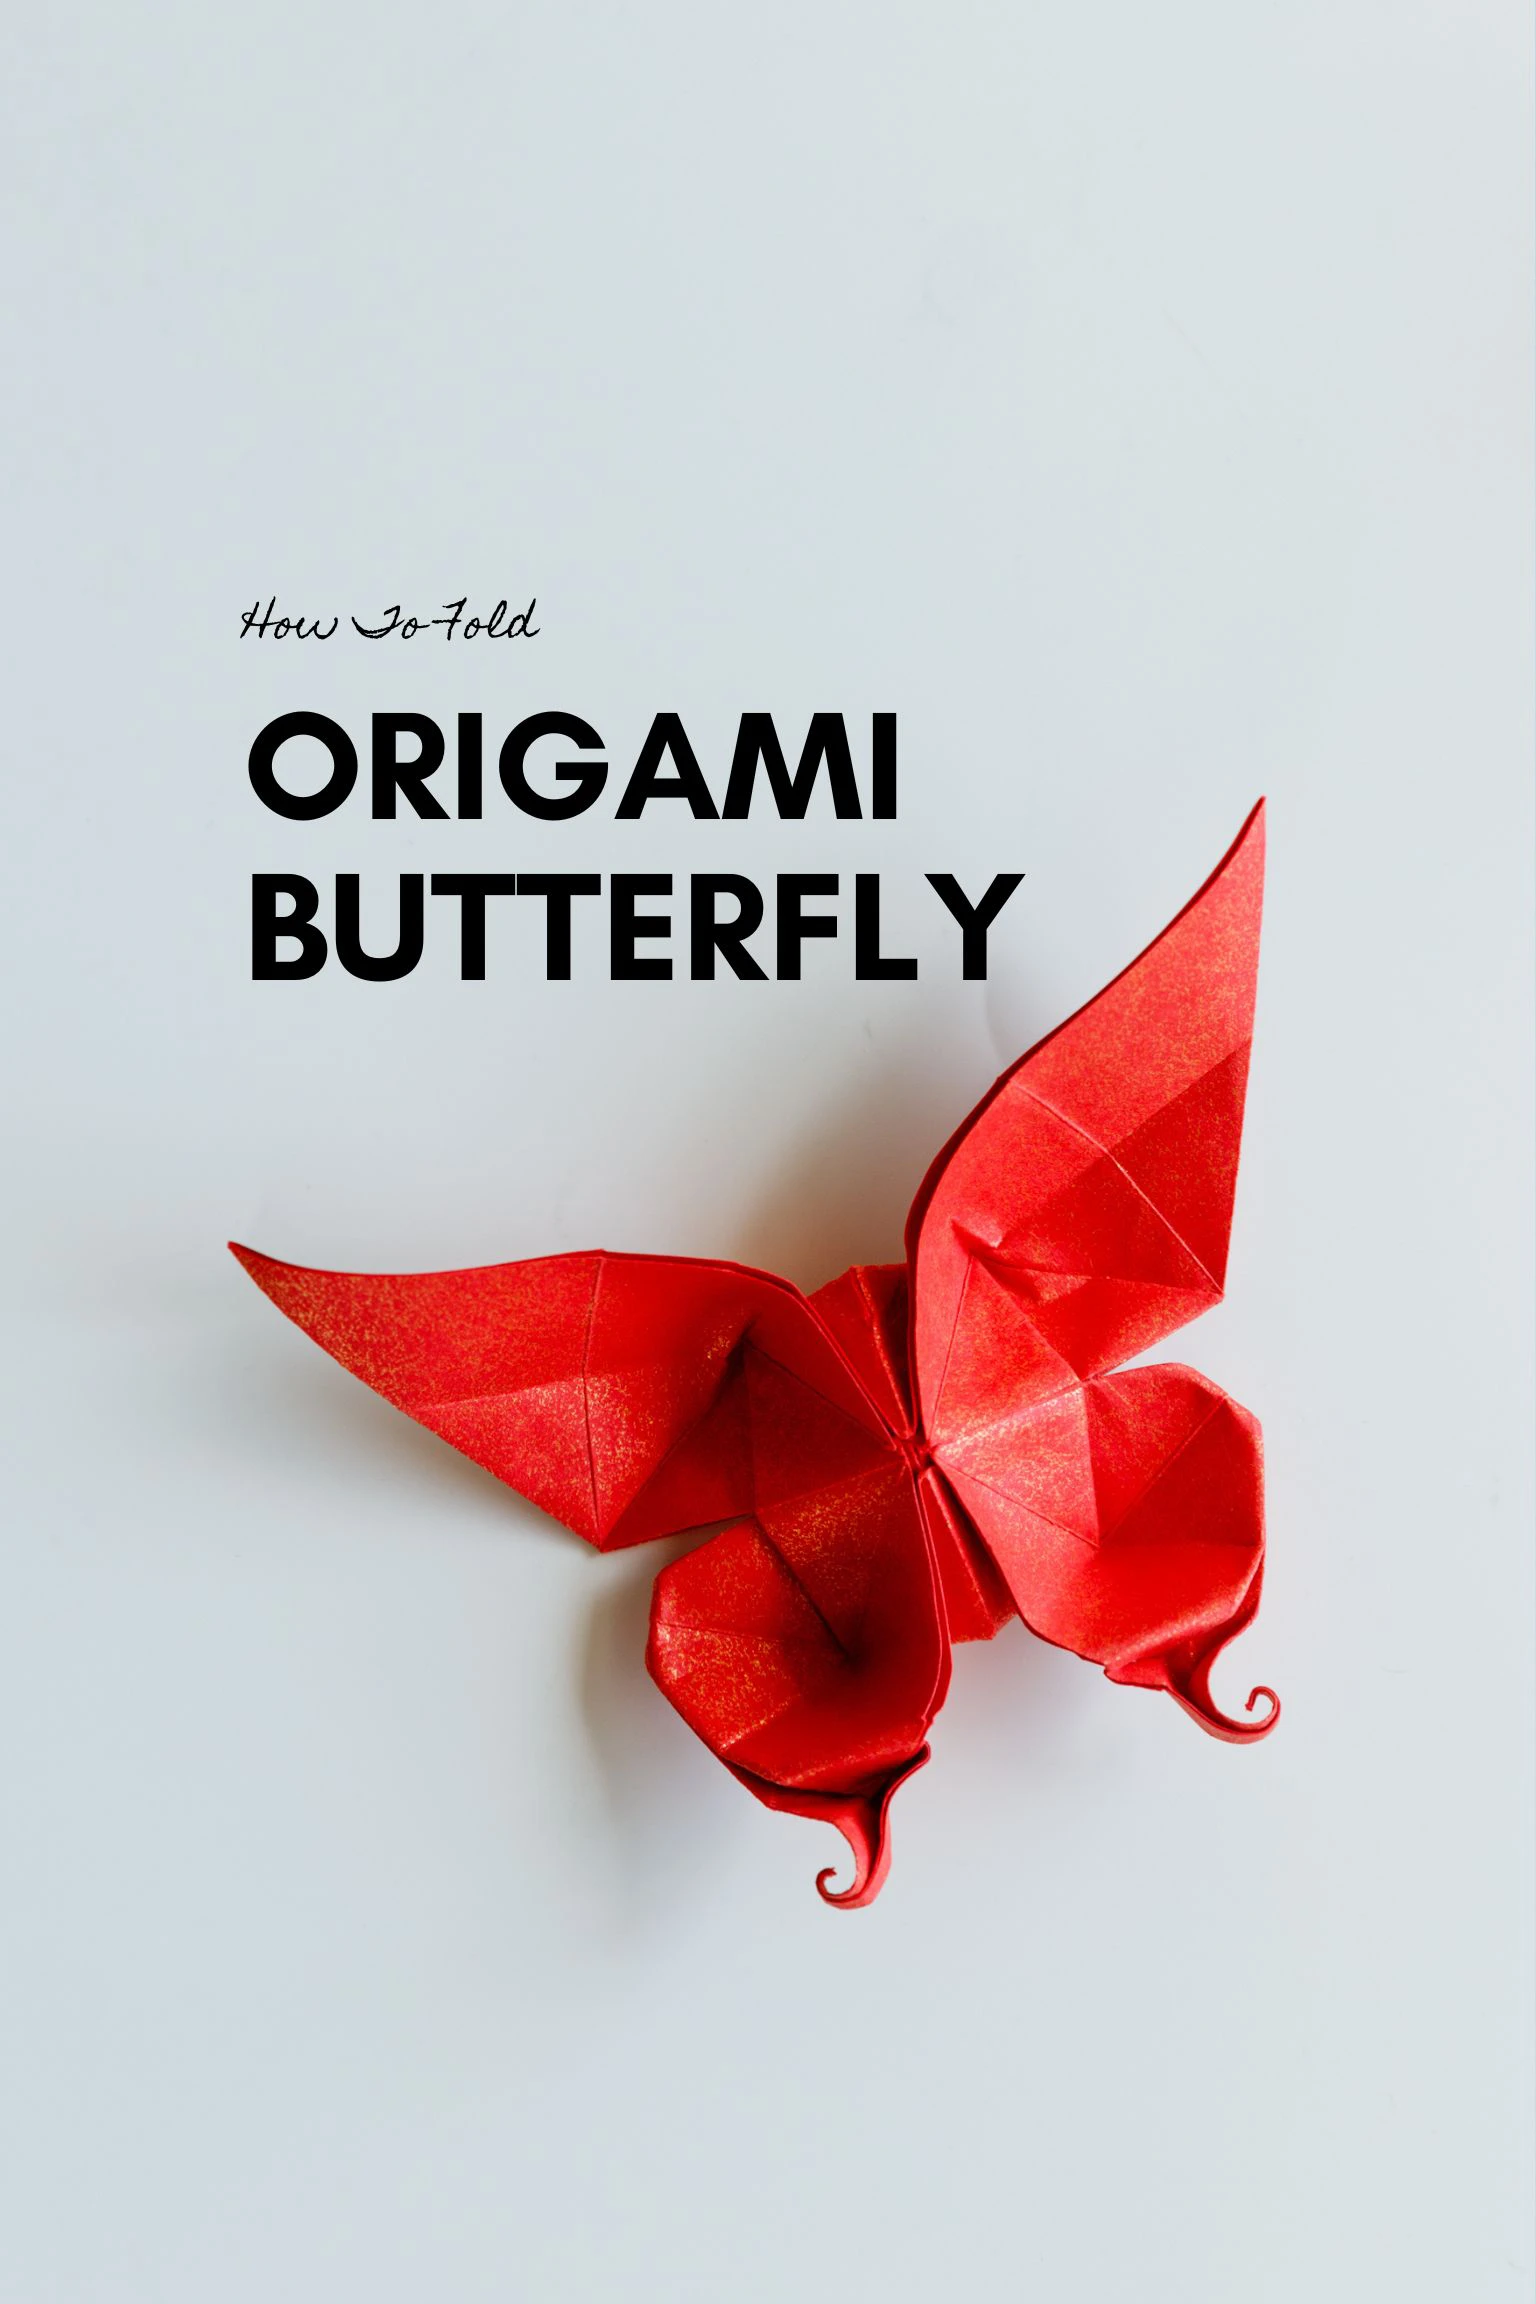
This super delicate and beautiful origami butterfly is highly recommended, using glitter paper will make it even more unique and charming, even just one look and you won’t forget it. When you finish it, you can adjust its wings to make its shape appear more light and graceful.
It would be a great idea to use it for a gift box decoration purpose or to create a mini origami insect world since we offer many other origami insect instructions, you can check them at the end of this post.
This is a middle version, and we also offer an easy origami butterfly, it is as lovely as this one and more suited for the beginner.

We provide step-by-step diagram instructions and beginner-friendly videos. Check both for quicker learning.
If you are new to origami, start here from our beginner guide to know the basics and how to read the step-by-step instructions.
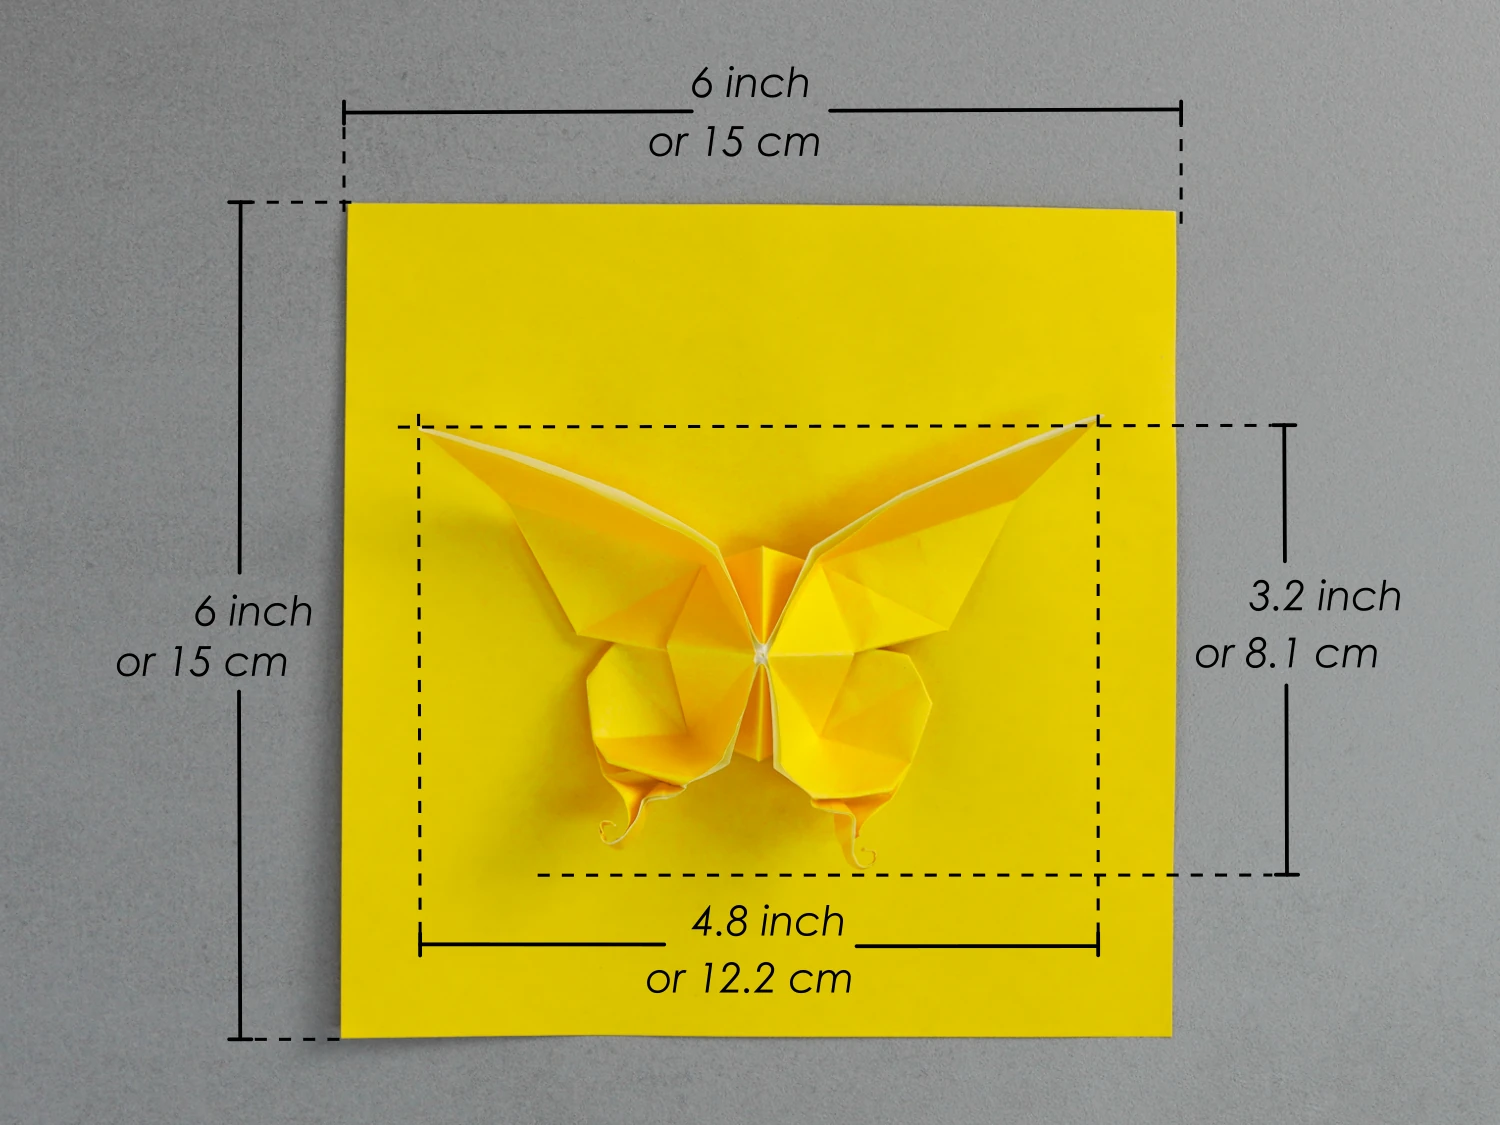
- Folding time: 20 minutes
- Paper: 15×15 cm
- Difficulty: Middle
Material
Get a piece of 15×15 cm origami square paper, with different colors on each side, to create an 8.1×12.2 cm origami butterfly. We strongly recommend that you use paper with fine glitter, which will make your butterfly look more eye-catching and luminous.
Origami Butterfly Video
Step by Step Instructions
Step 1
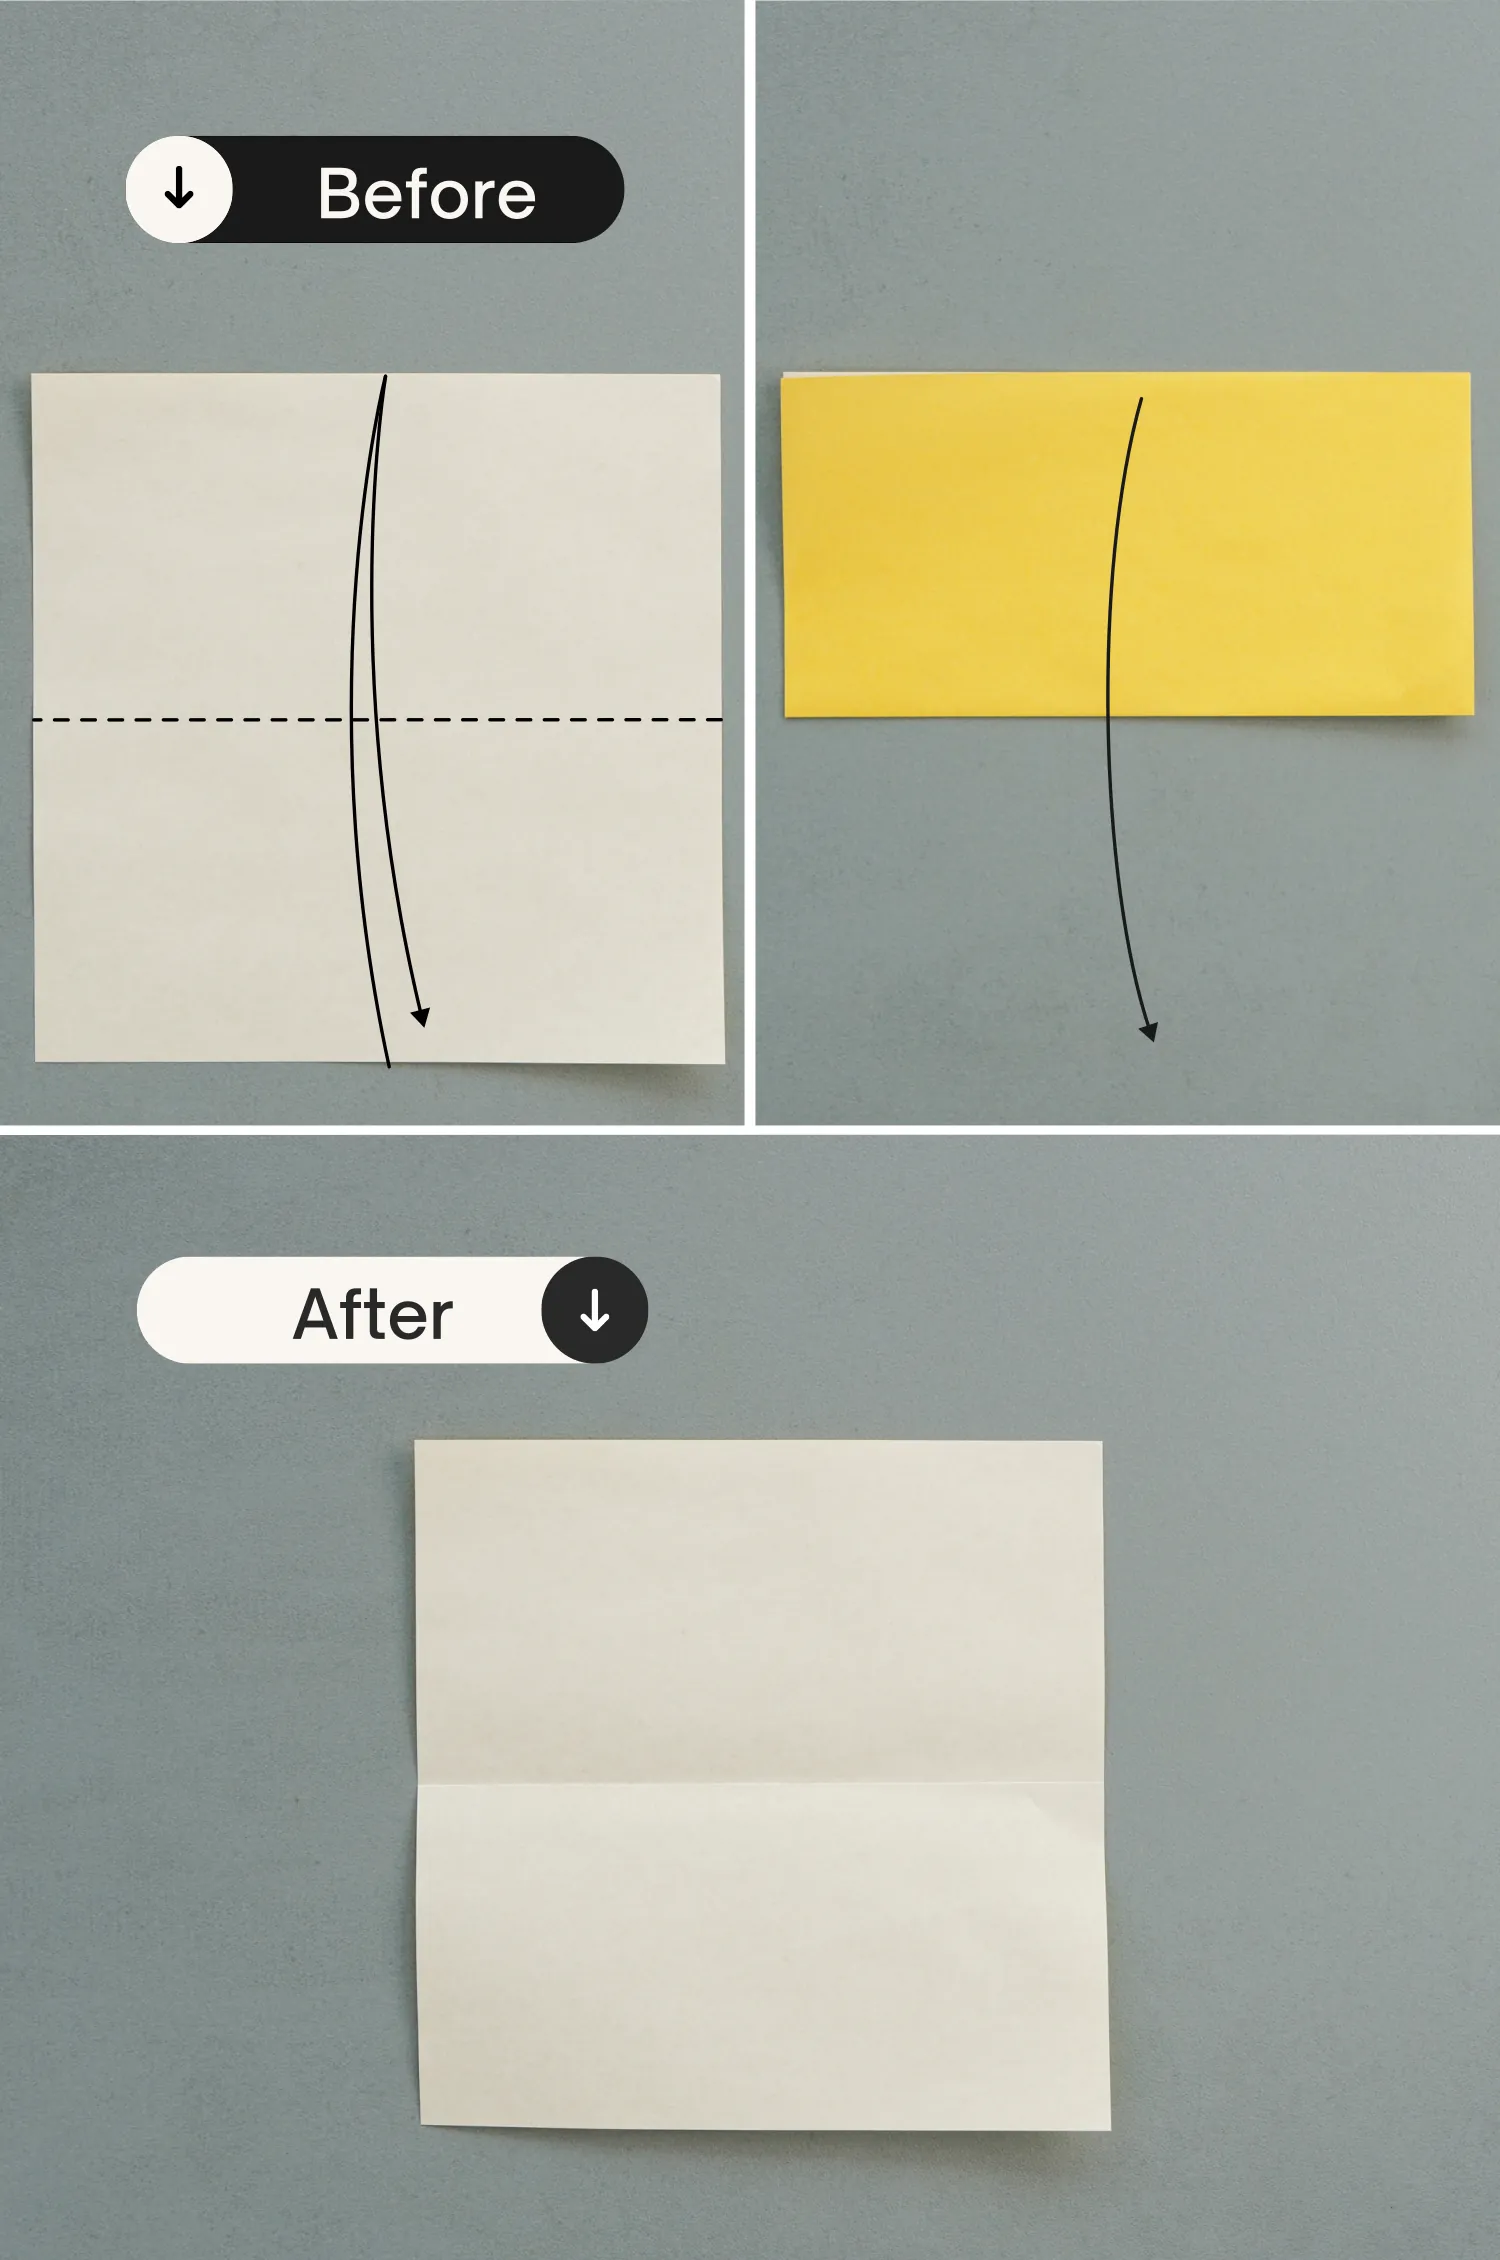
Start with the white side of the paper facing up, fold it in half horizontally, leaving a crease then unfold it.
Step 2
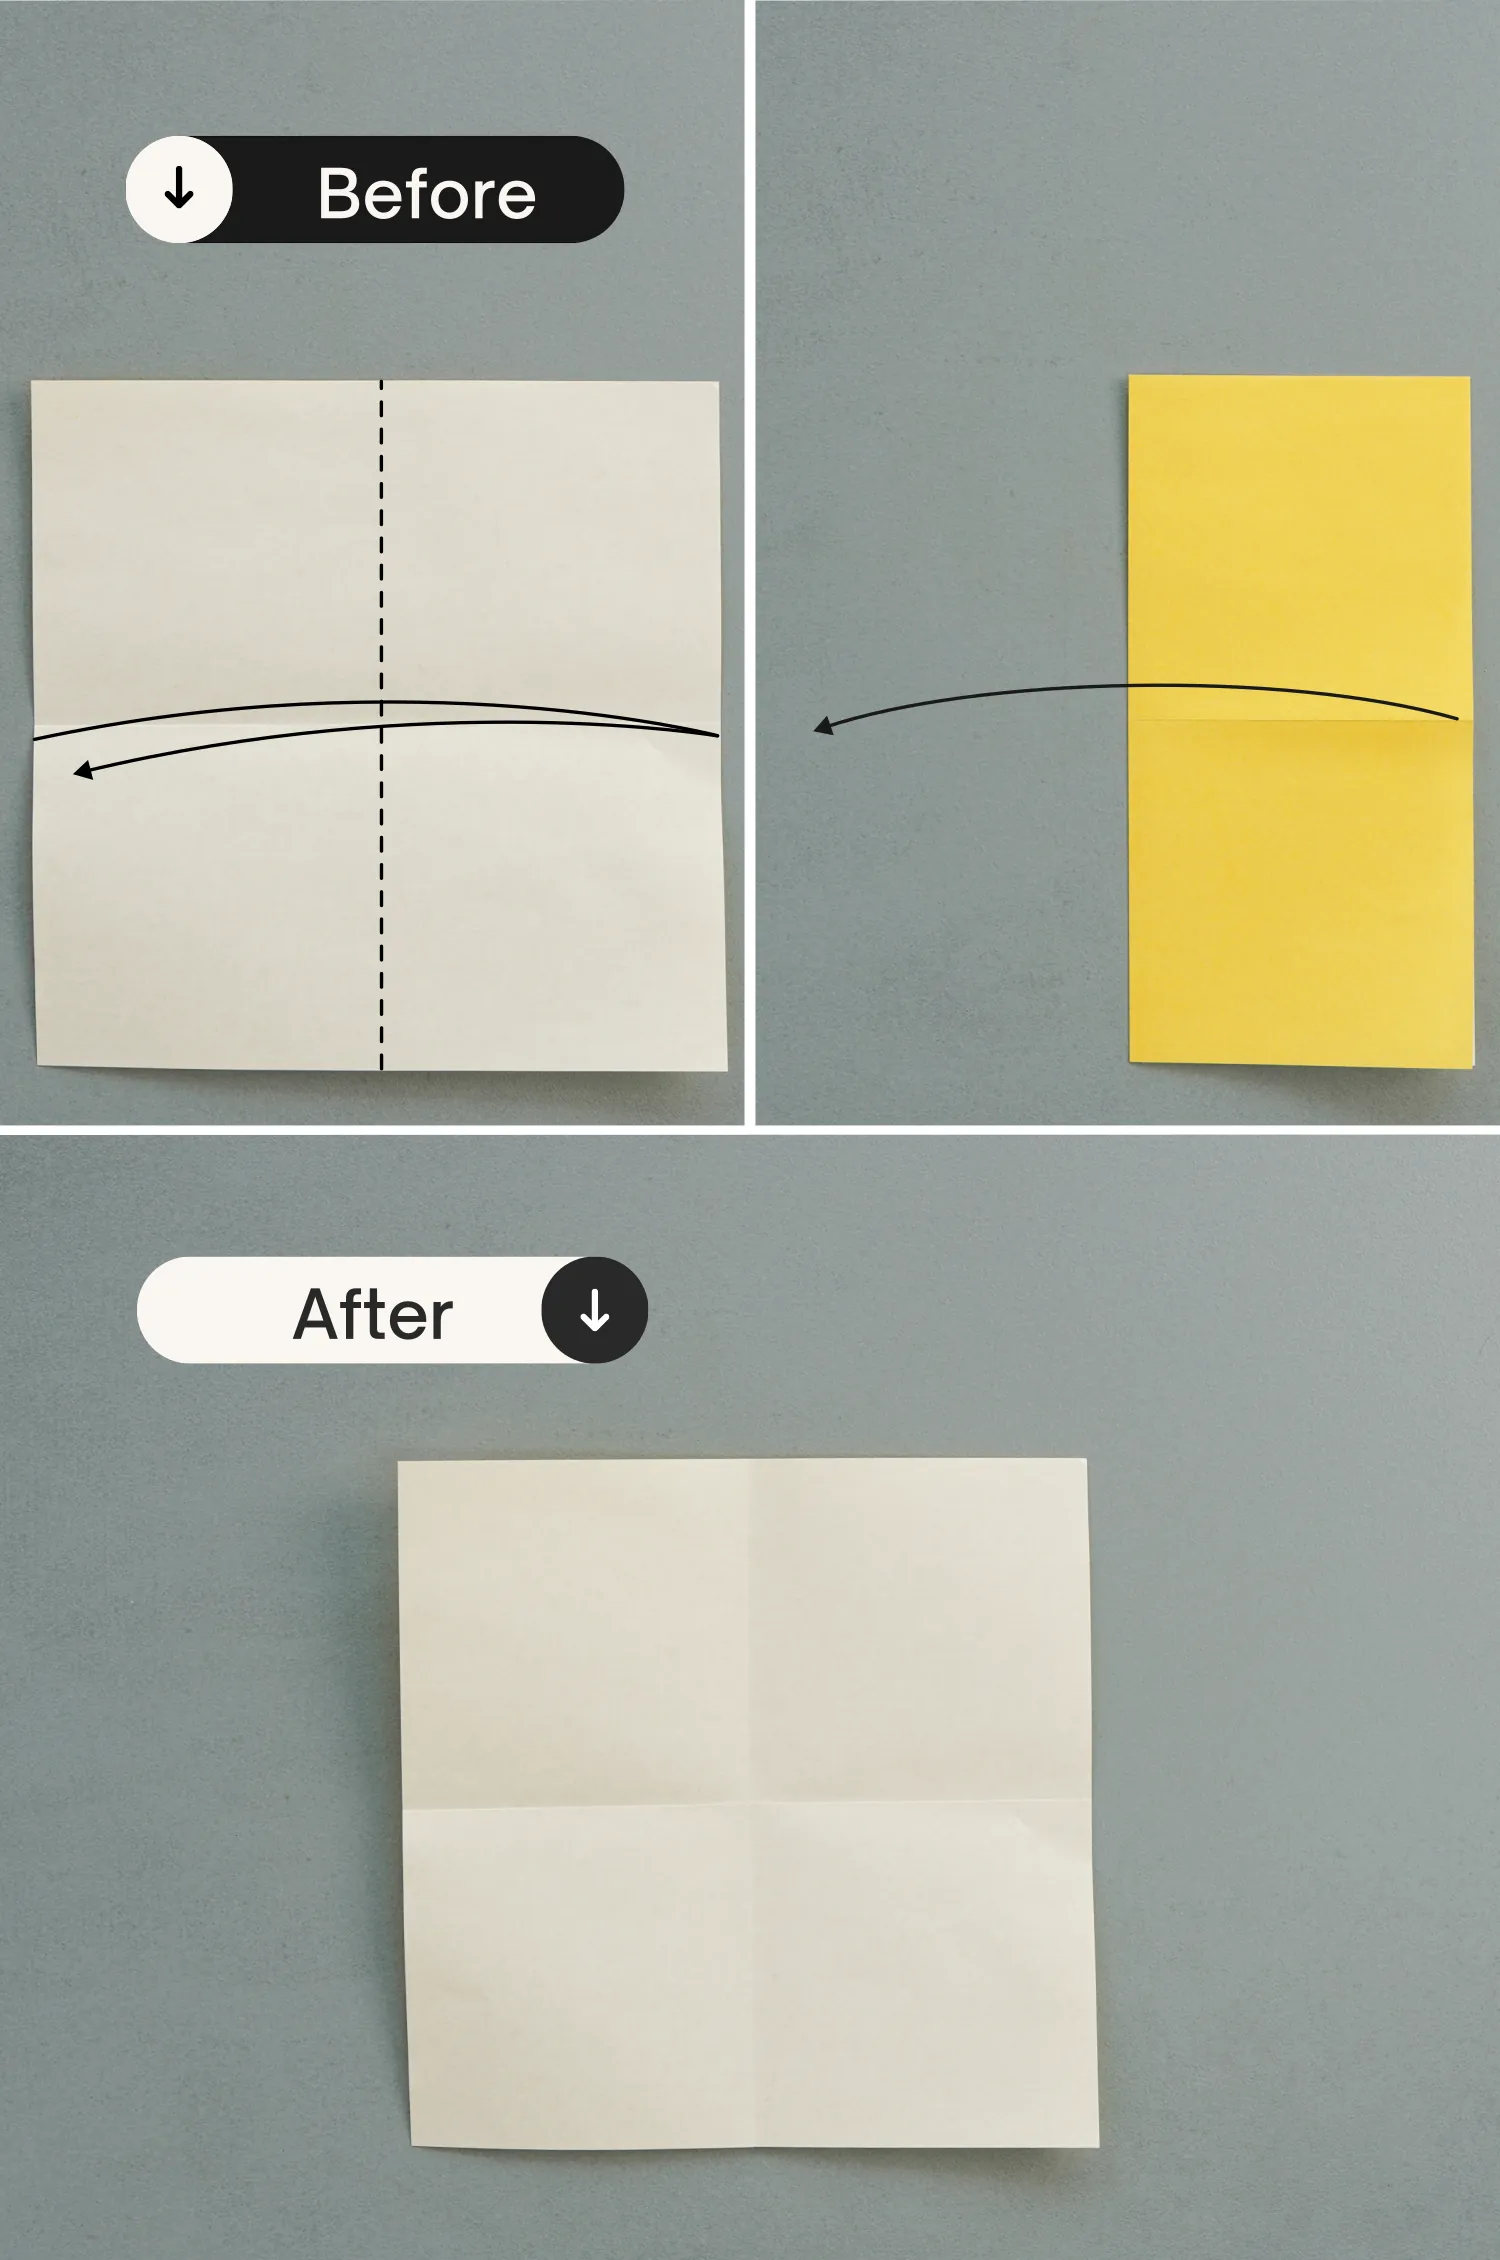
Fold it in half vertically, and unfold it.
Step 3
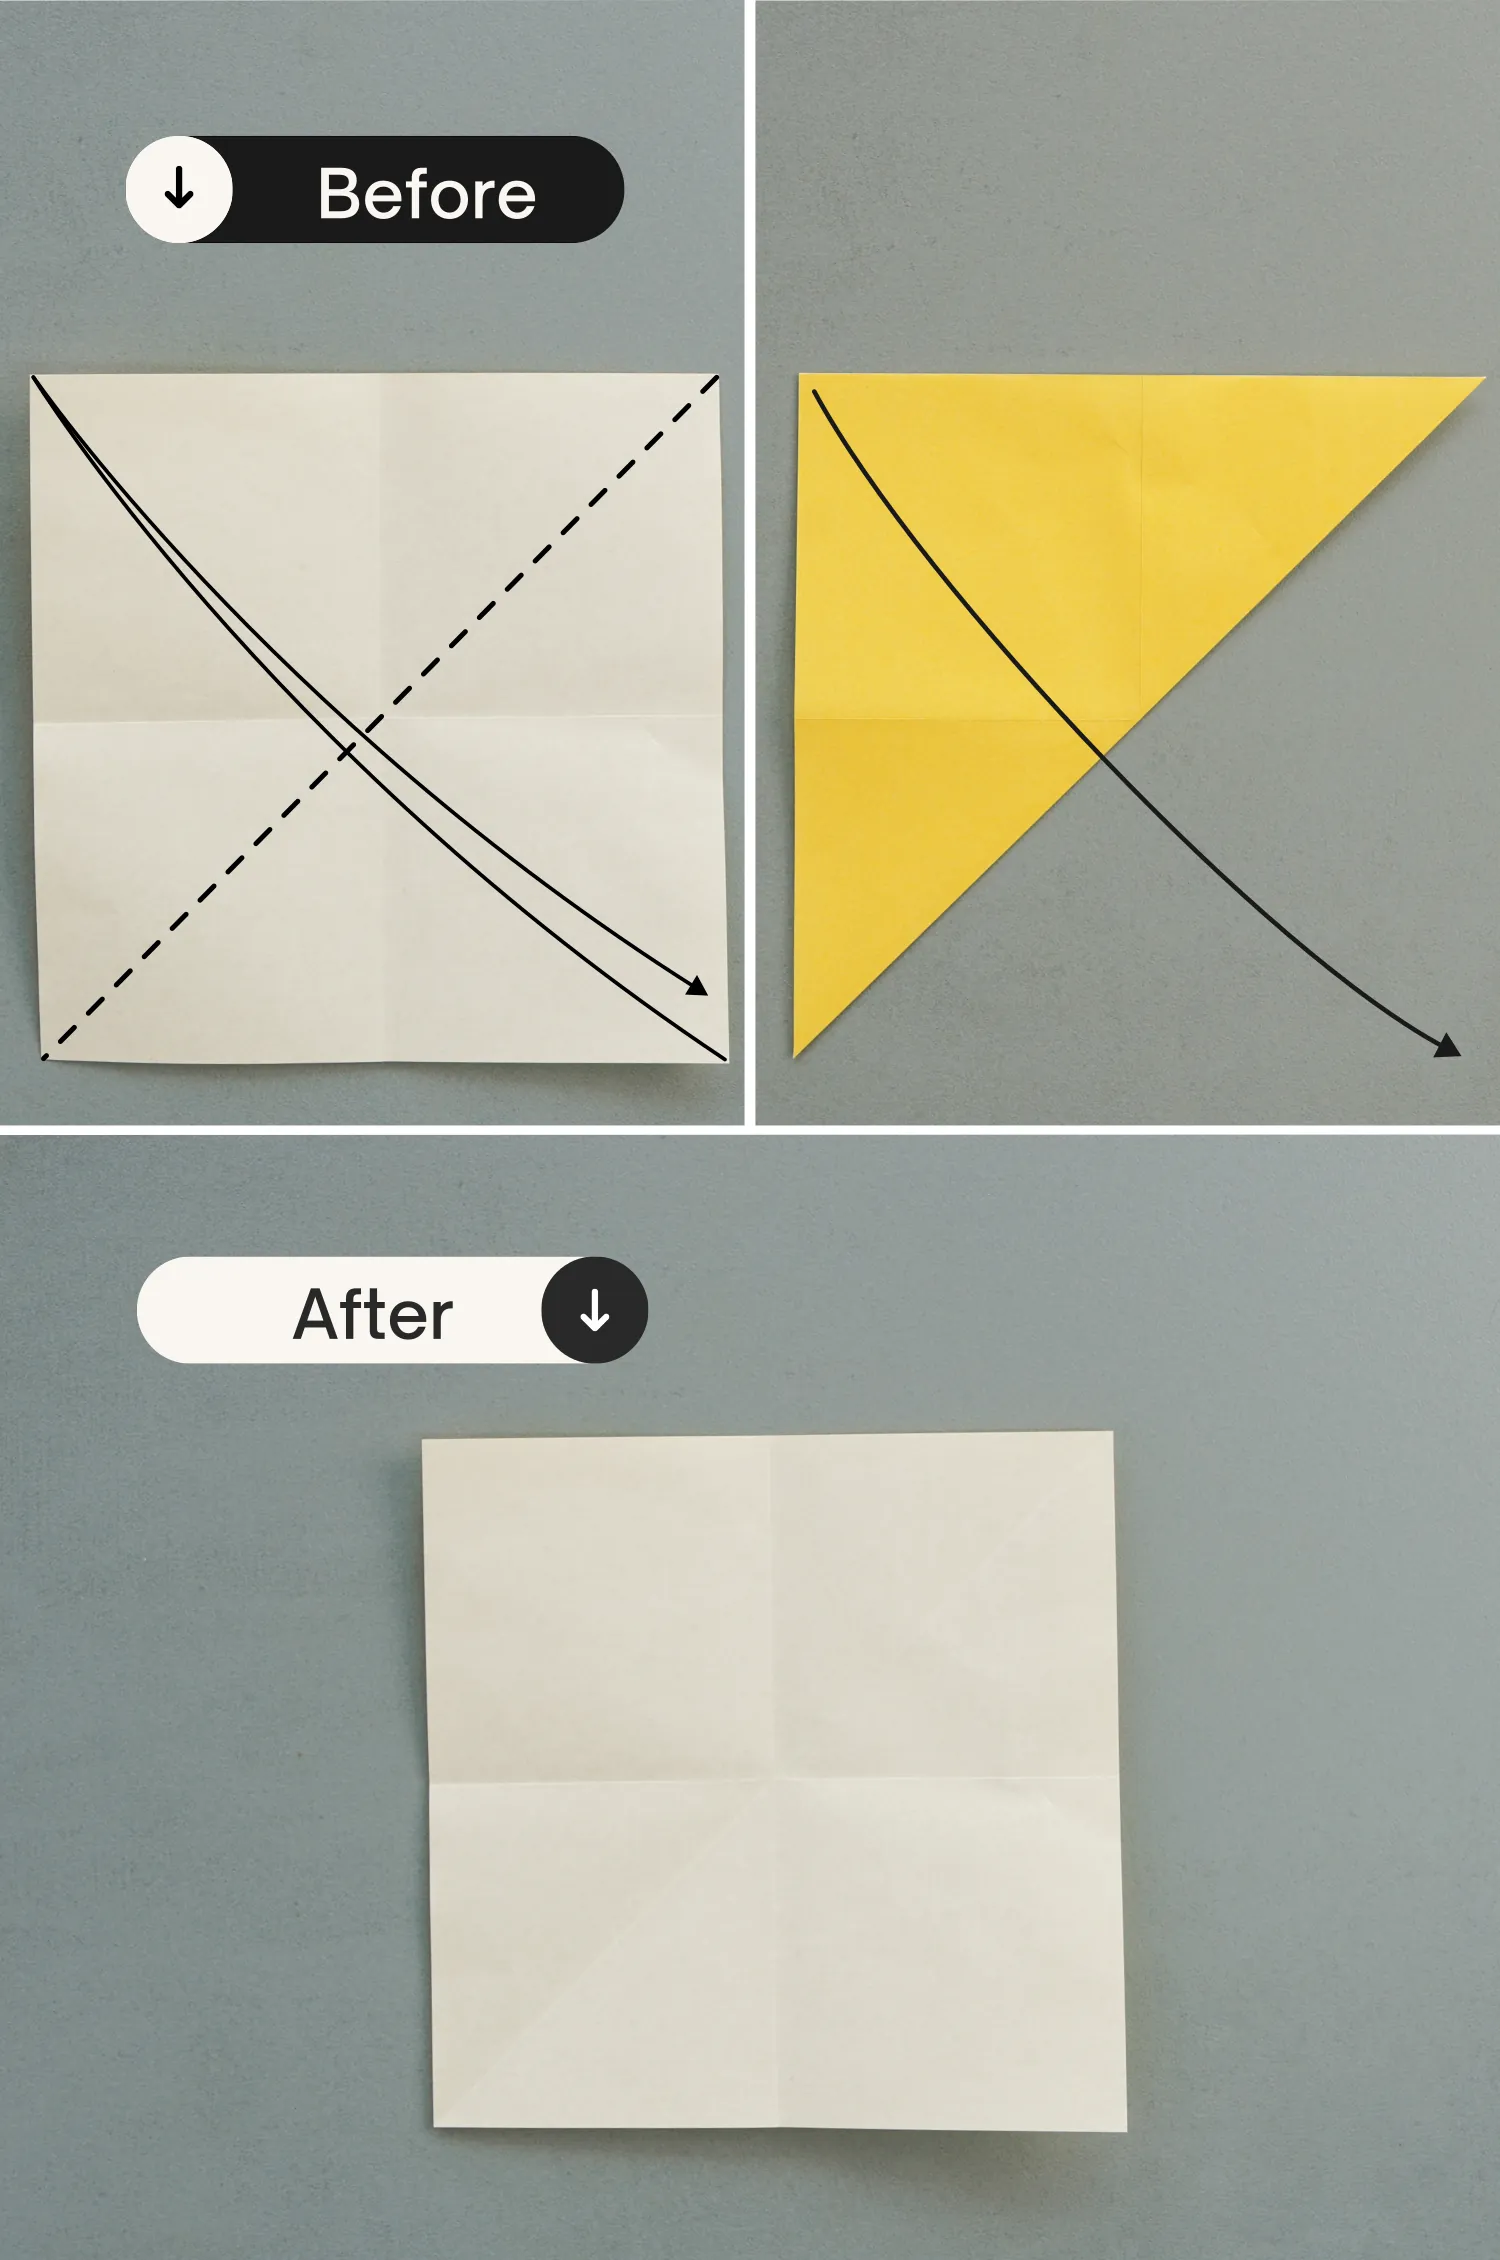
Fold the paper in half diagonally from the bottom right to the top left, and unfold it.
Step 4
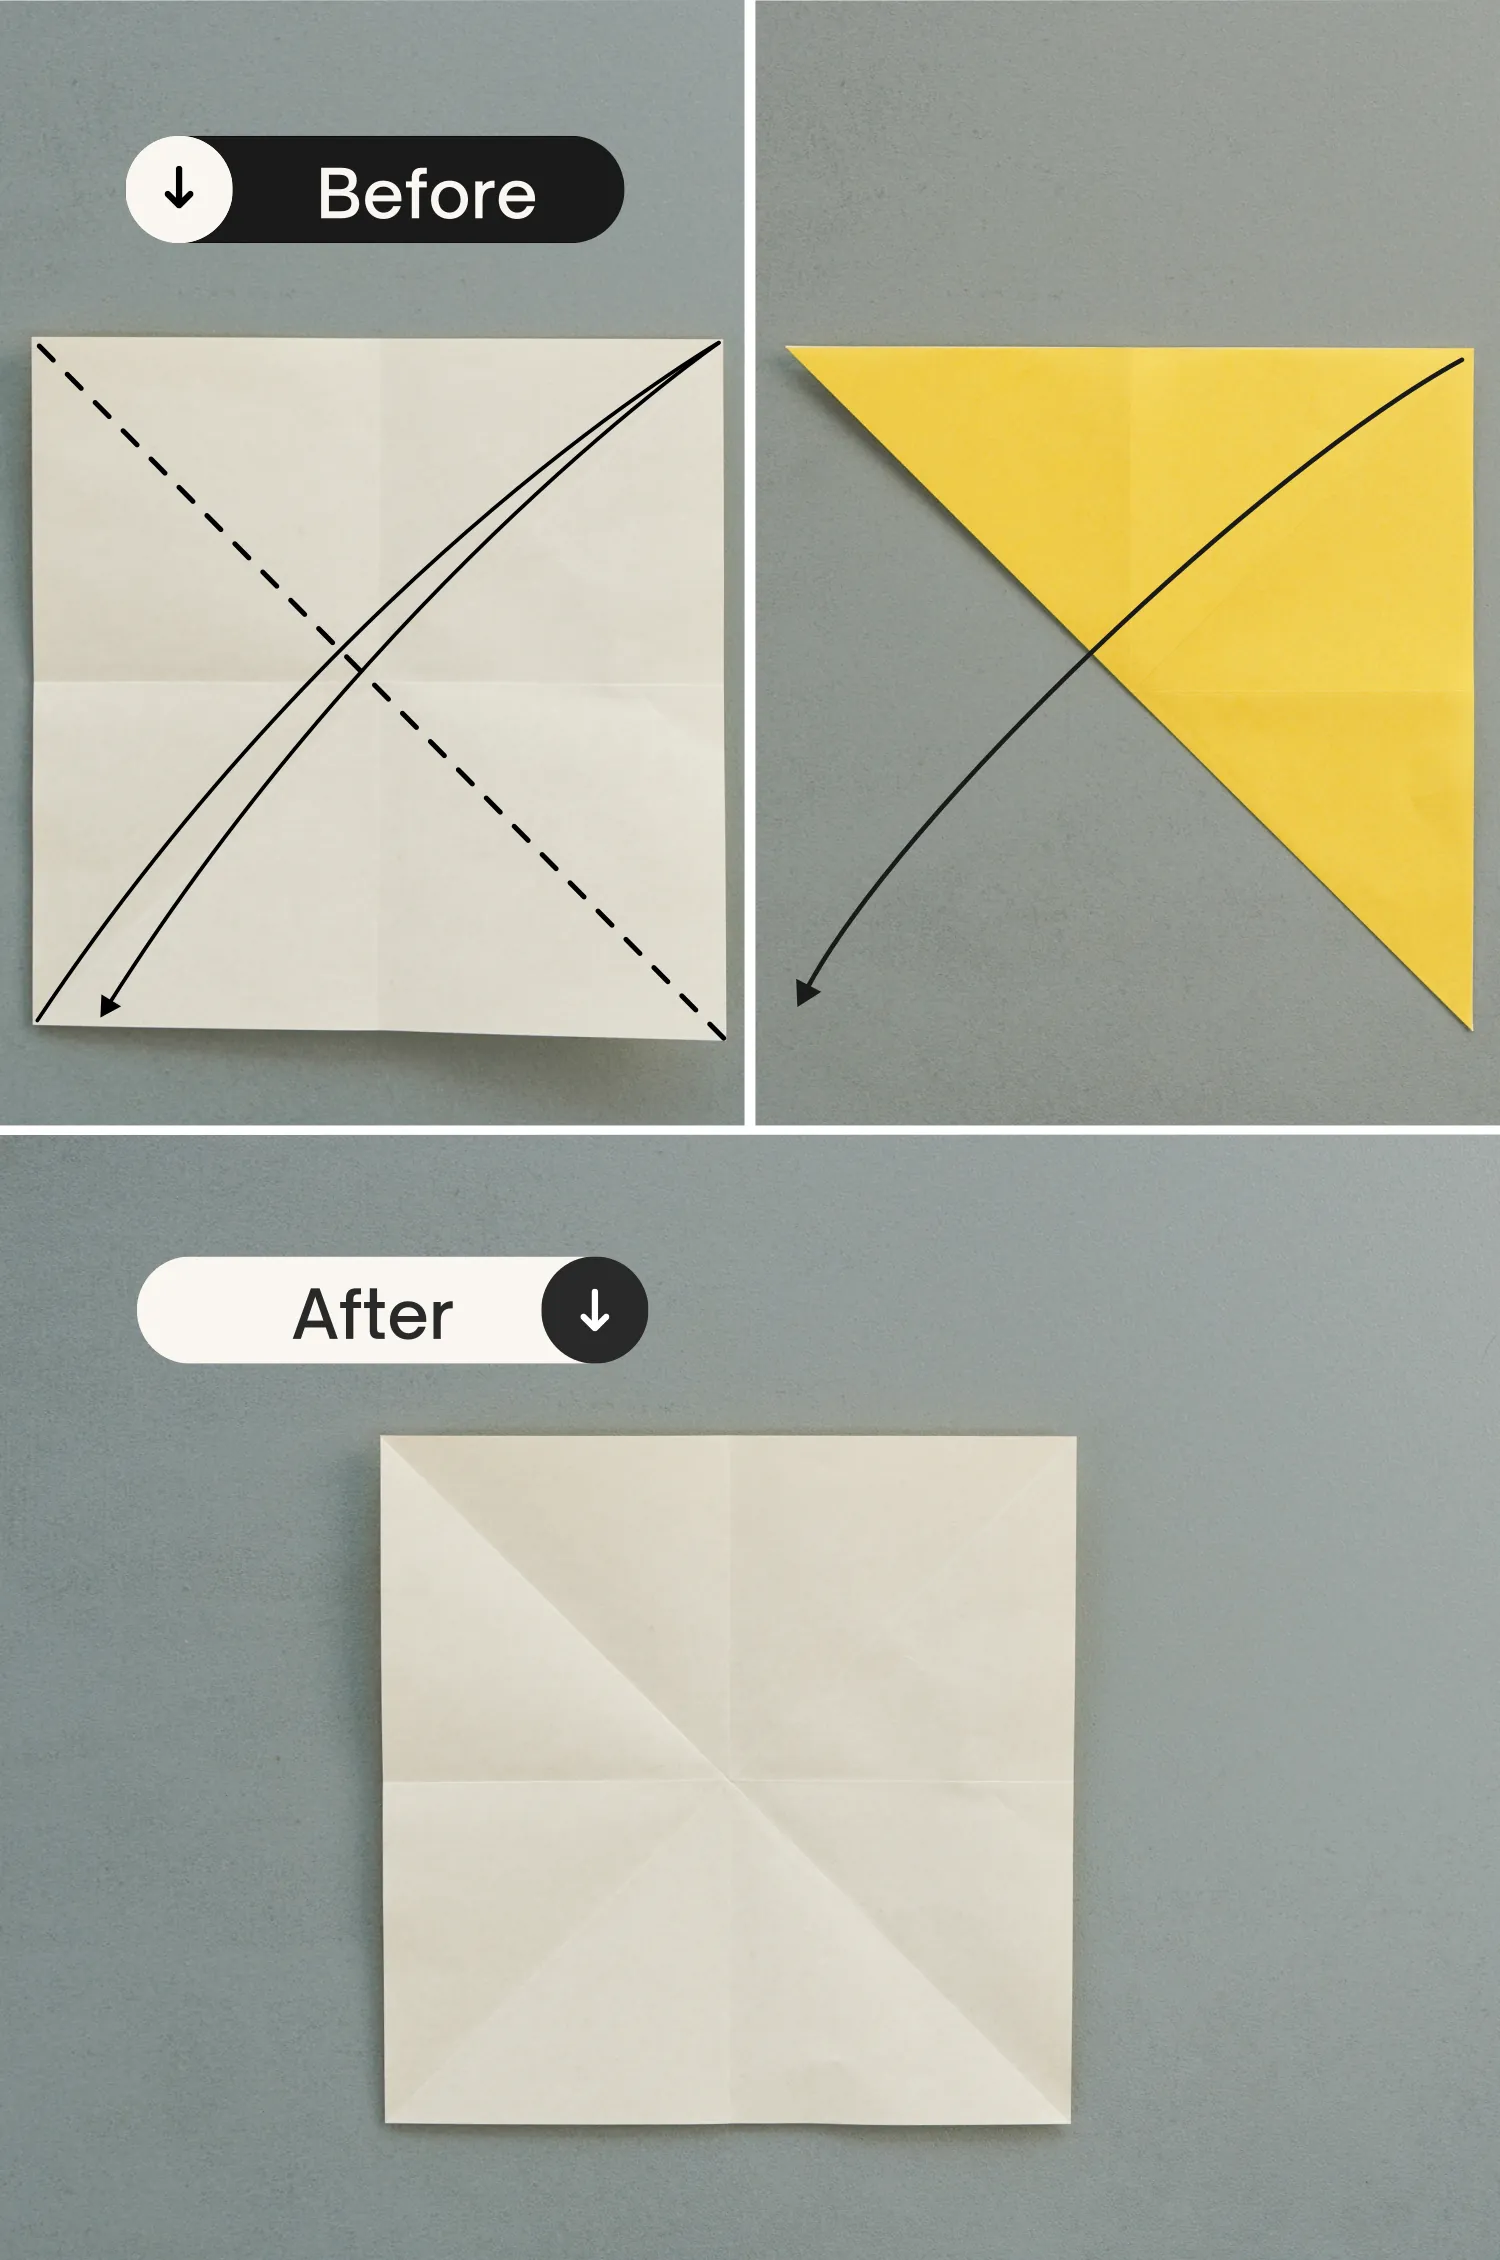
Fold in half diagonally from the opposite position, and unfold it.
Step 5
Fold the four points to meet the center intersection point formed by the creases you just made, crease them well then unfold.
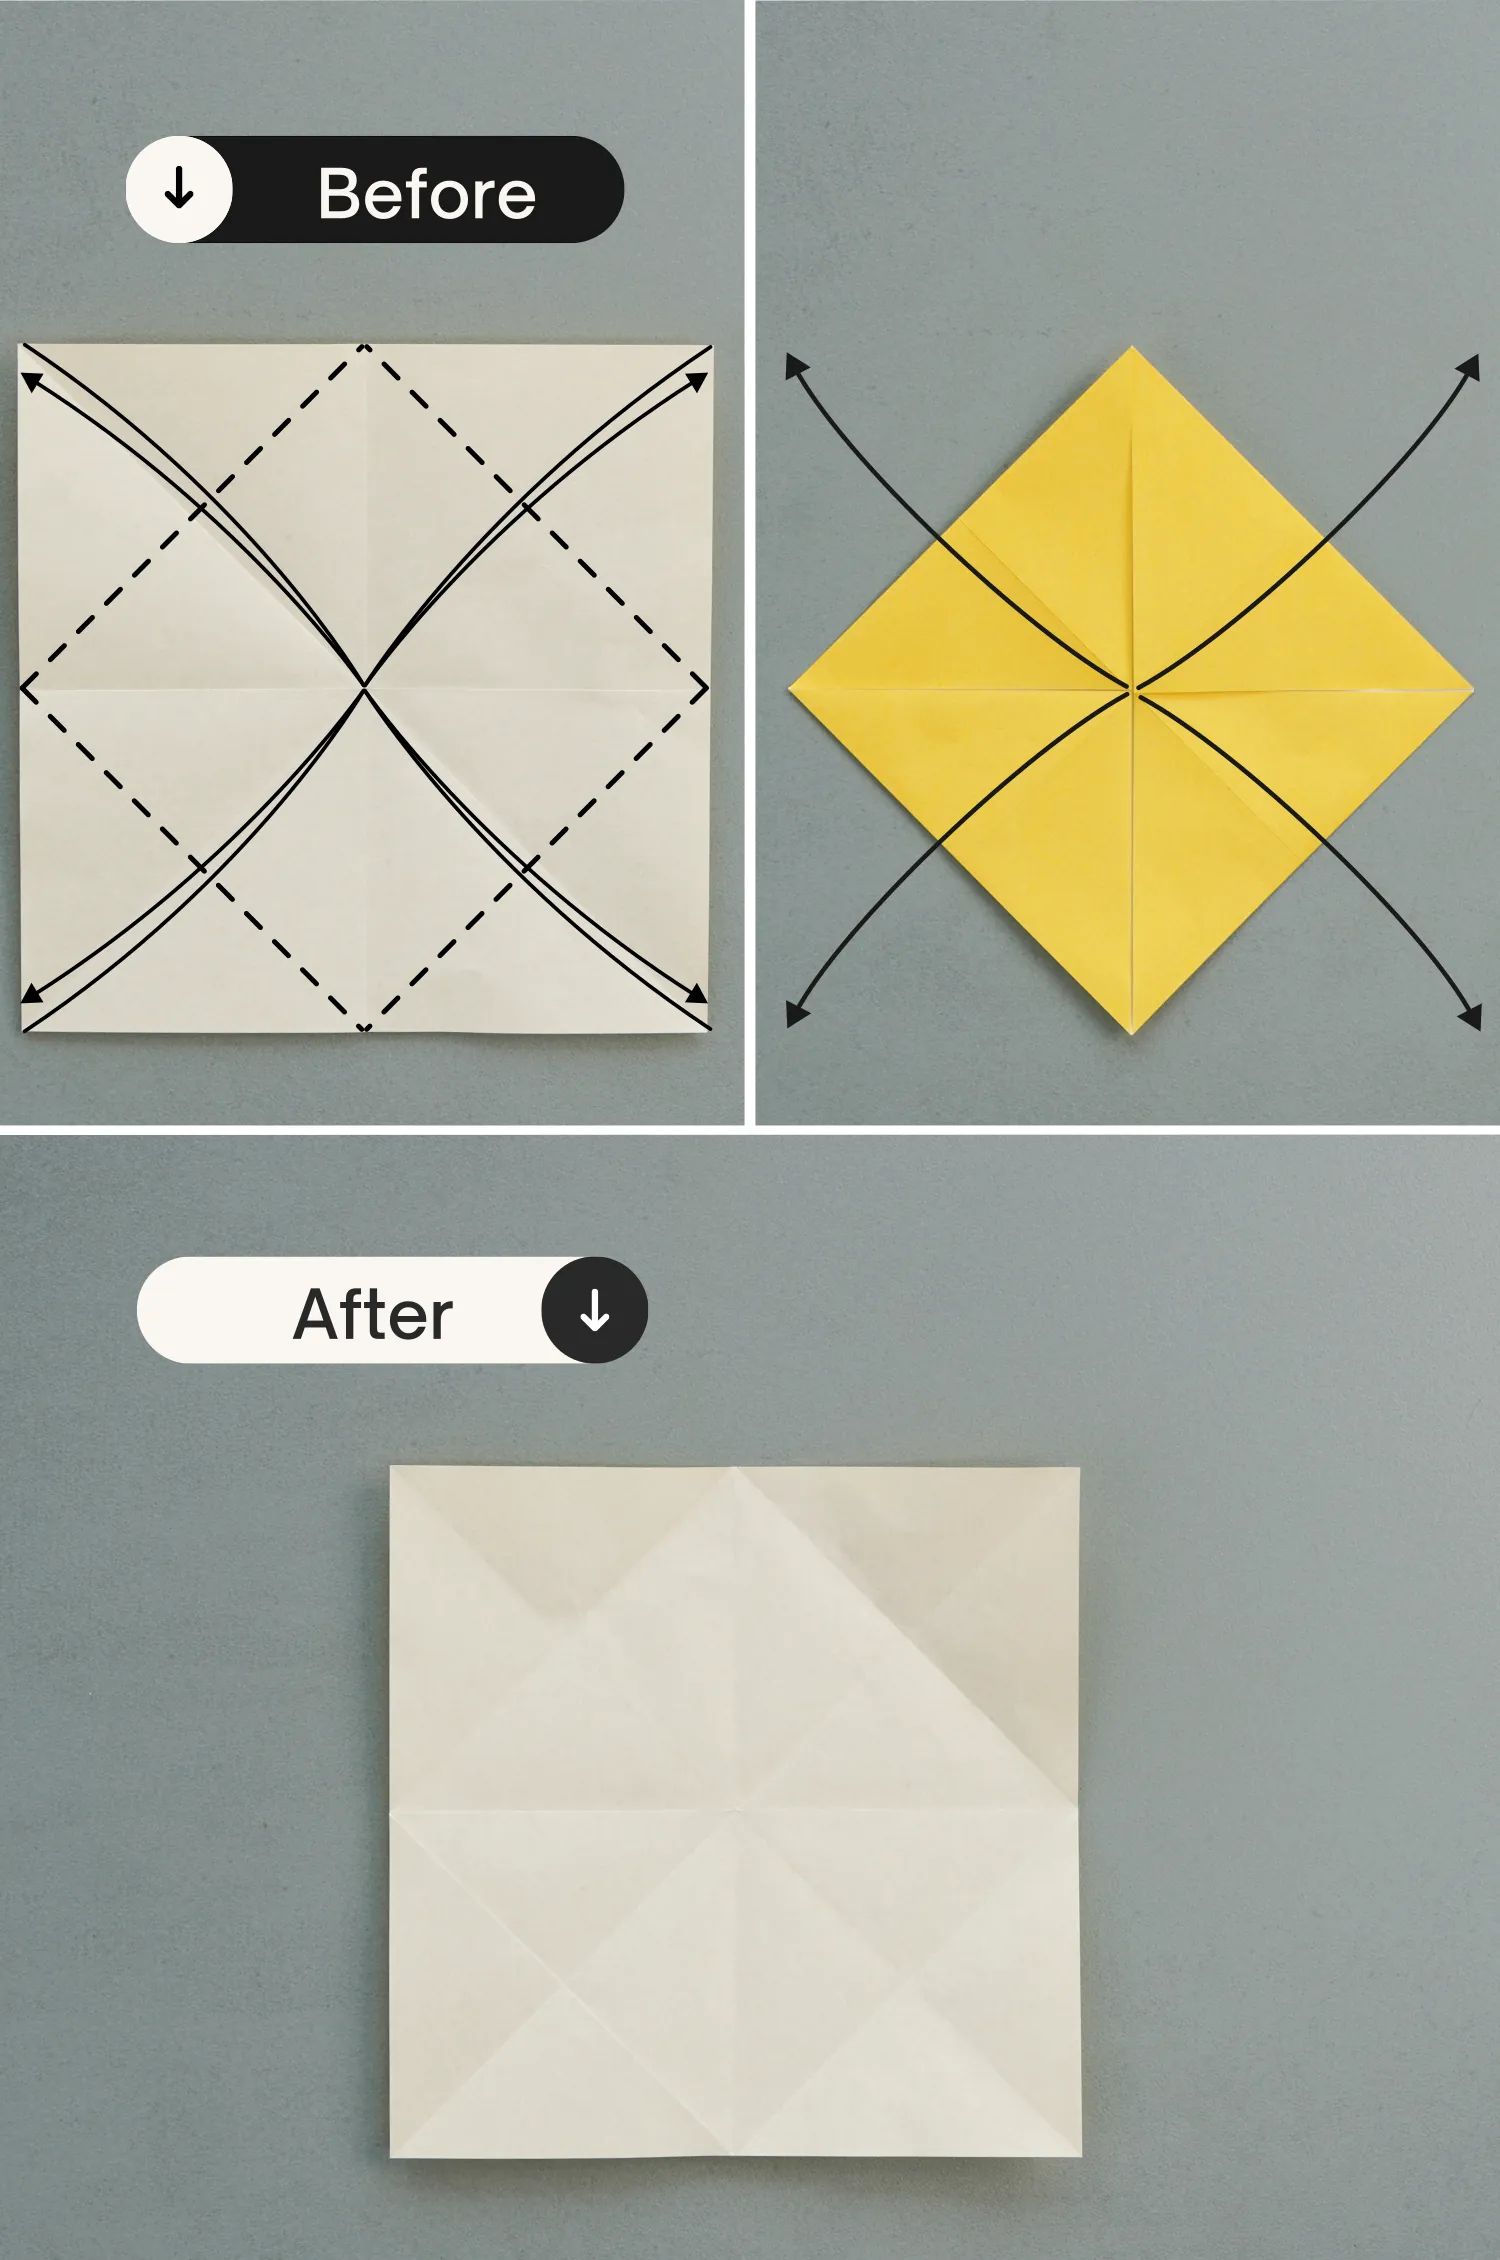
Step 6
Fold the left and right edges to align with the middle vertical crease, crease them well then unfold.
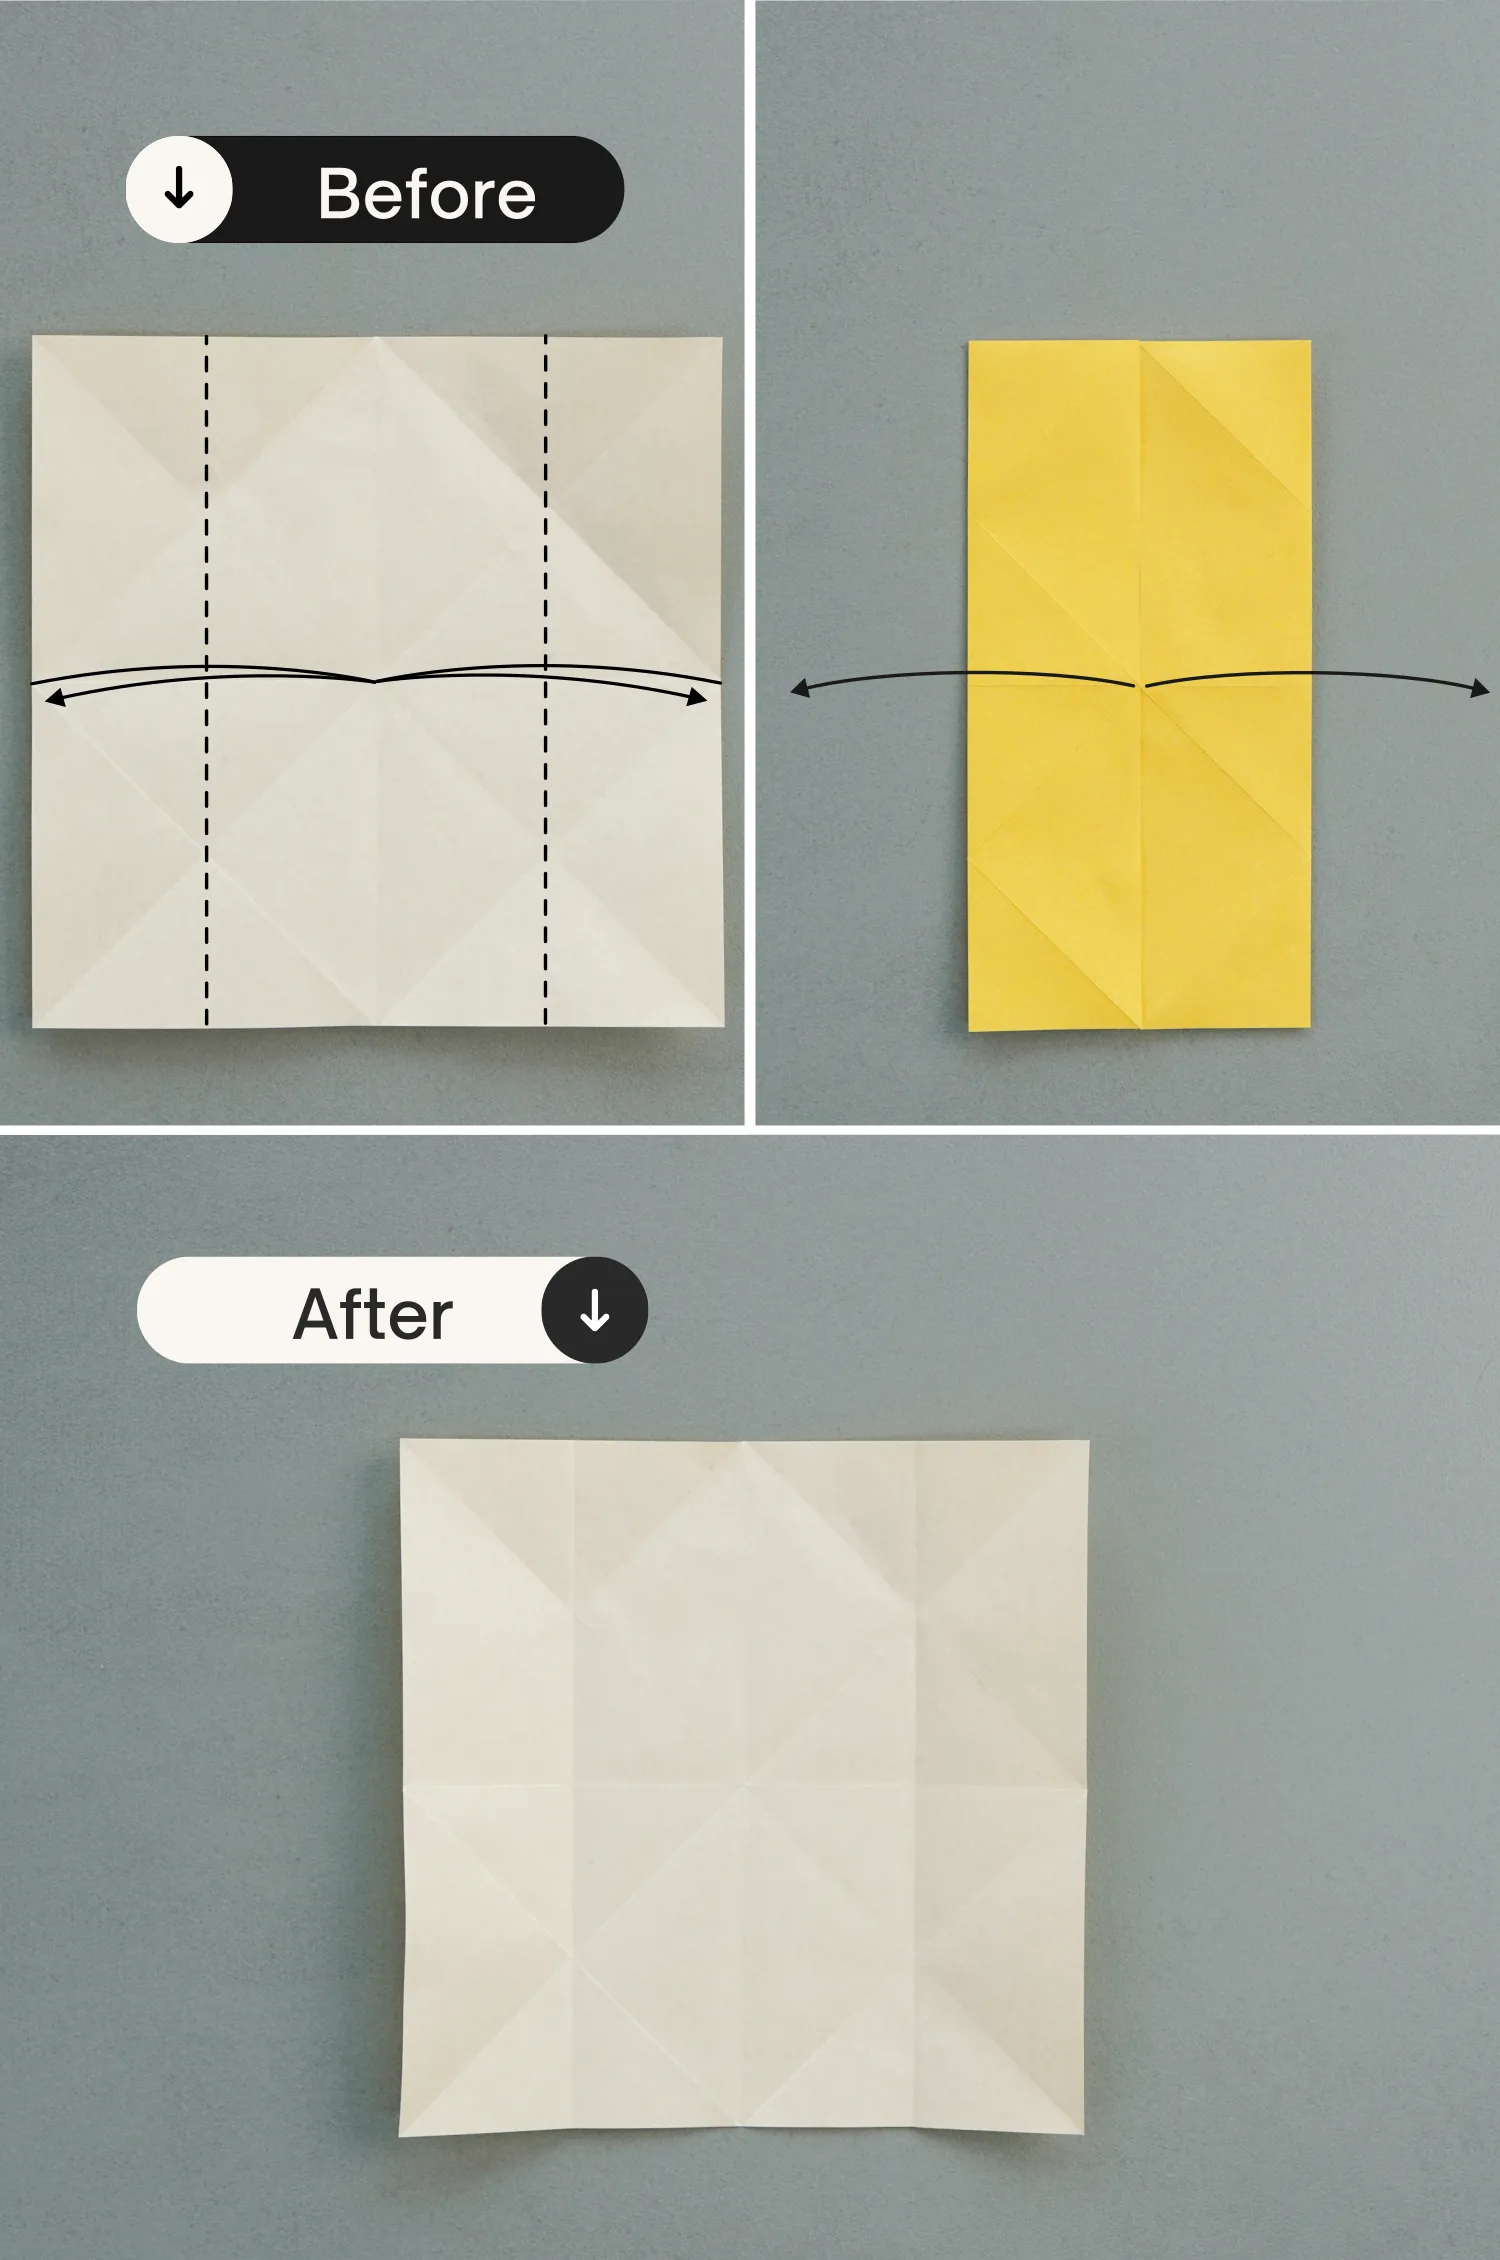
Step 7
Fold the top and bottom edges to align with the middle horizontal crease.
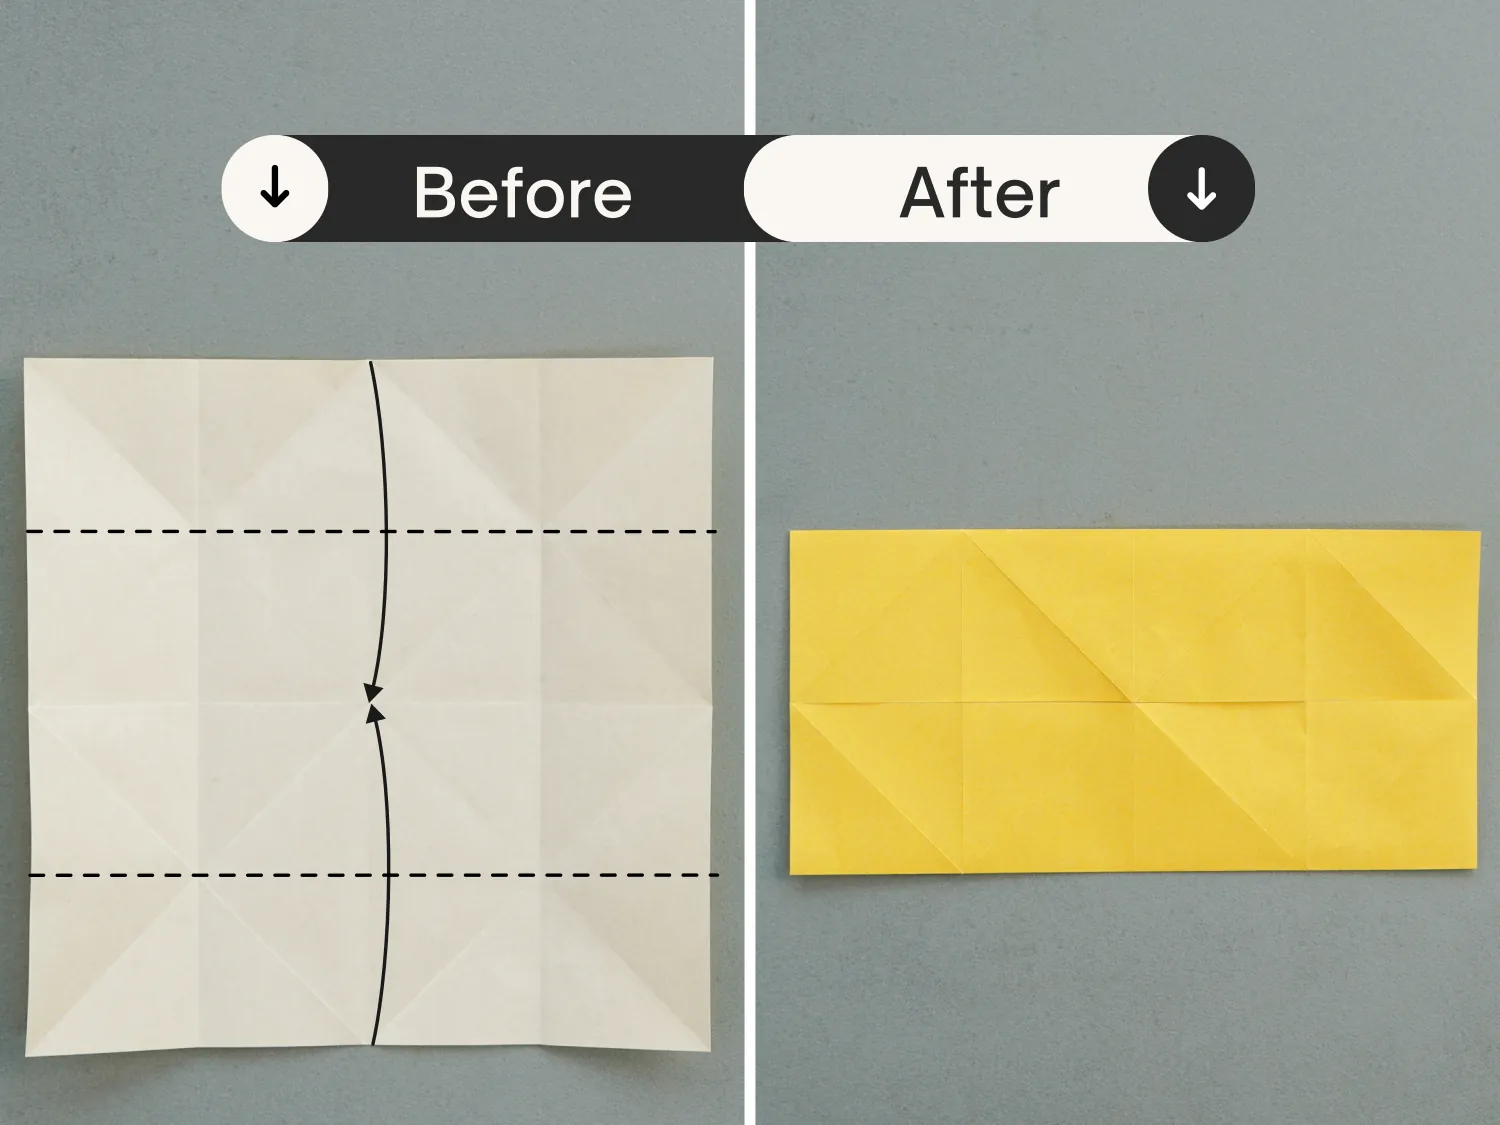
Step 8
Fold the right section of the bottom edge of the top rectangle to meet its middle vertical crease along the existing crease, and similarly, fold the right section of the top edge of the bottom rectangle to align with its middle vertical crease, then the right pocket will be opened. Next, fold the right edge to the left to align with the middle vertical crease, and finally flatten the pocket.
Repeat this for the left pocket.
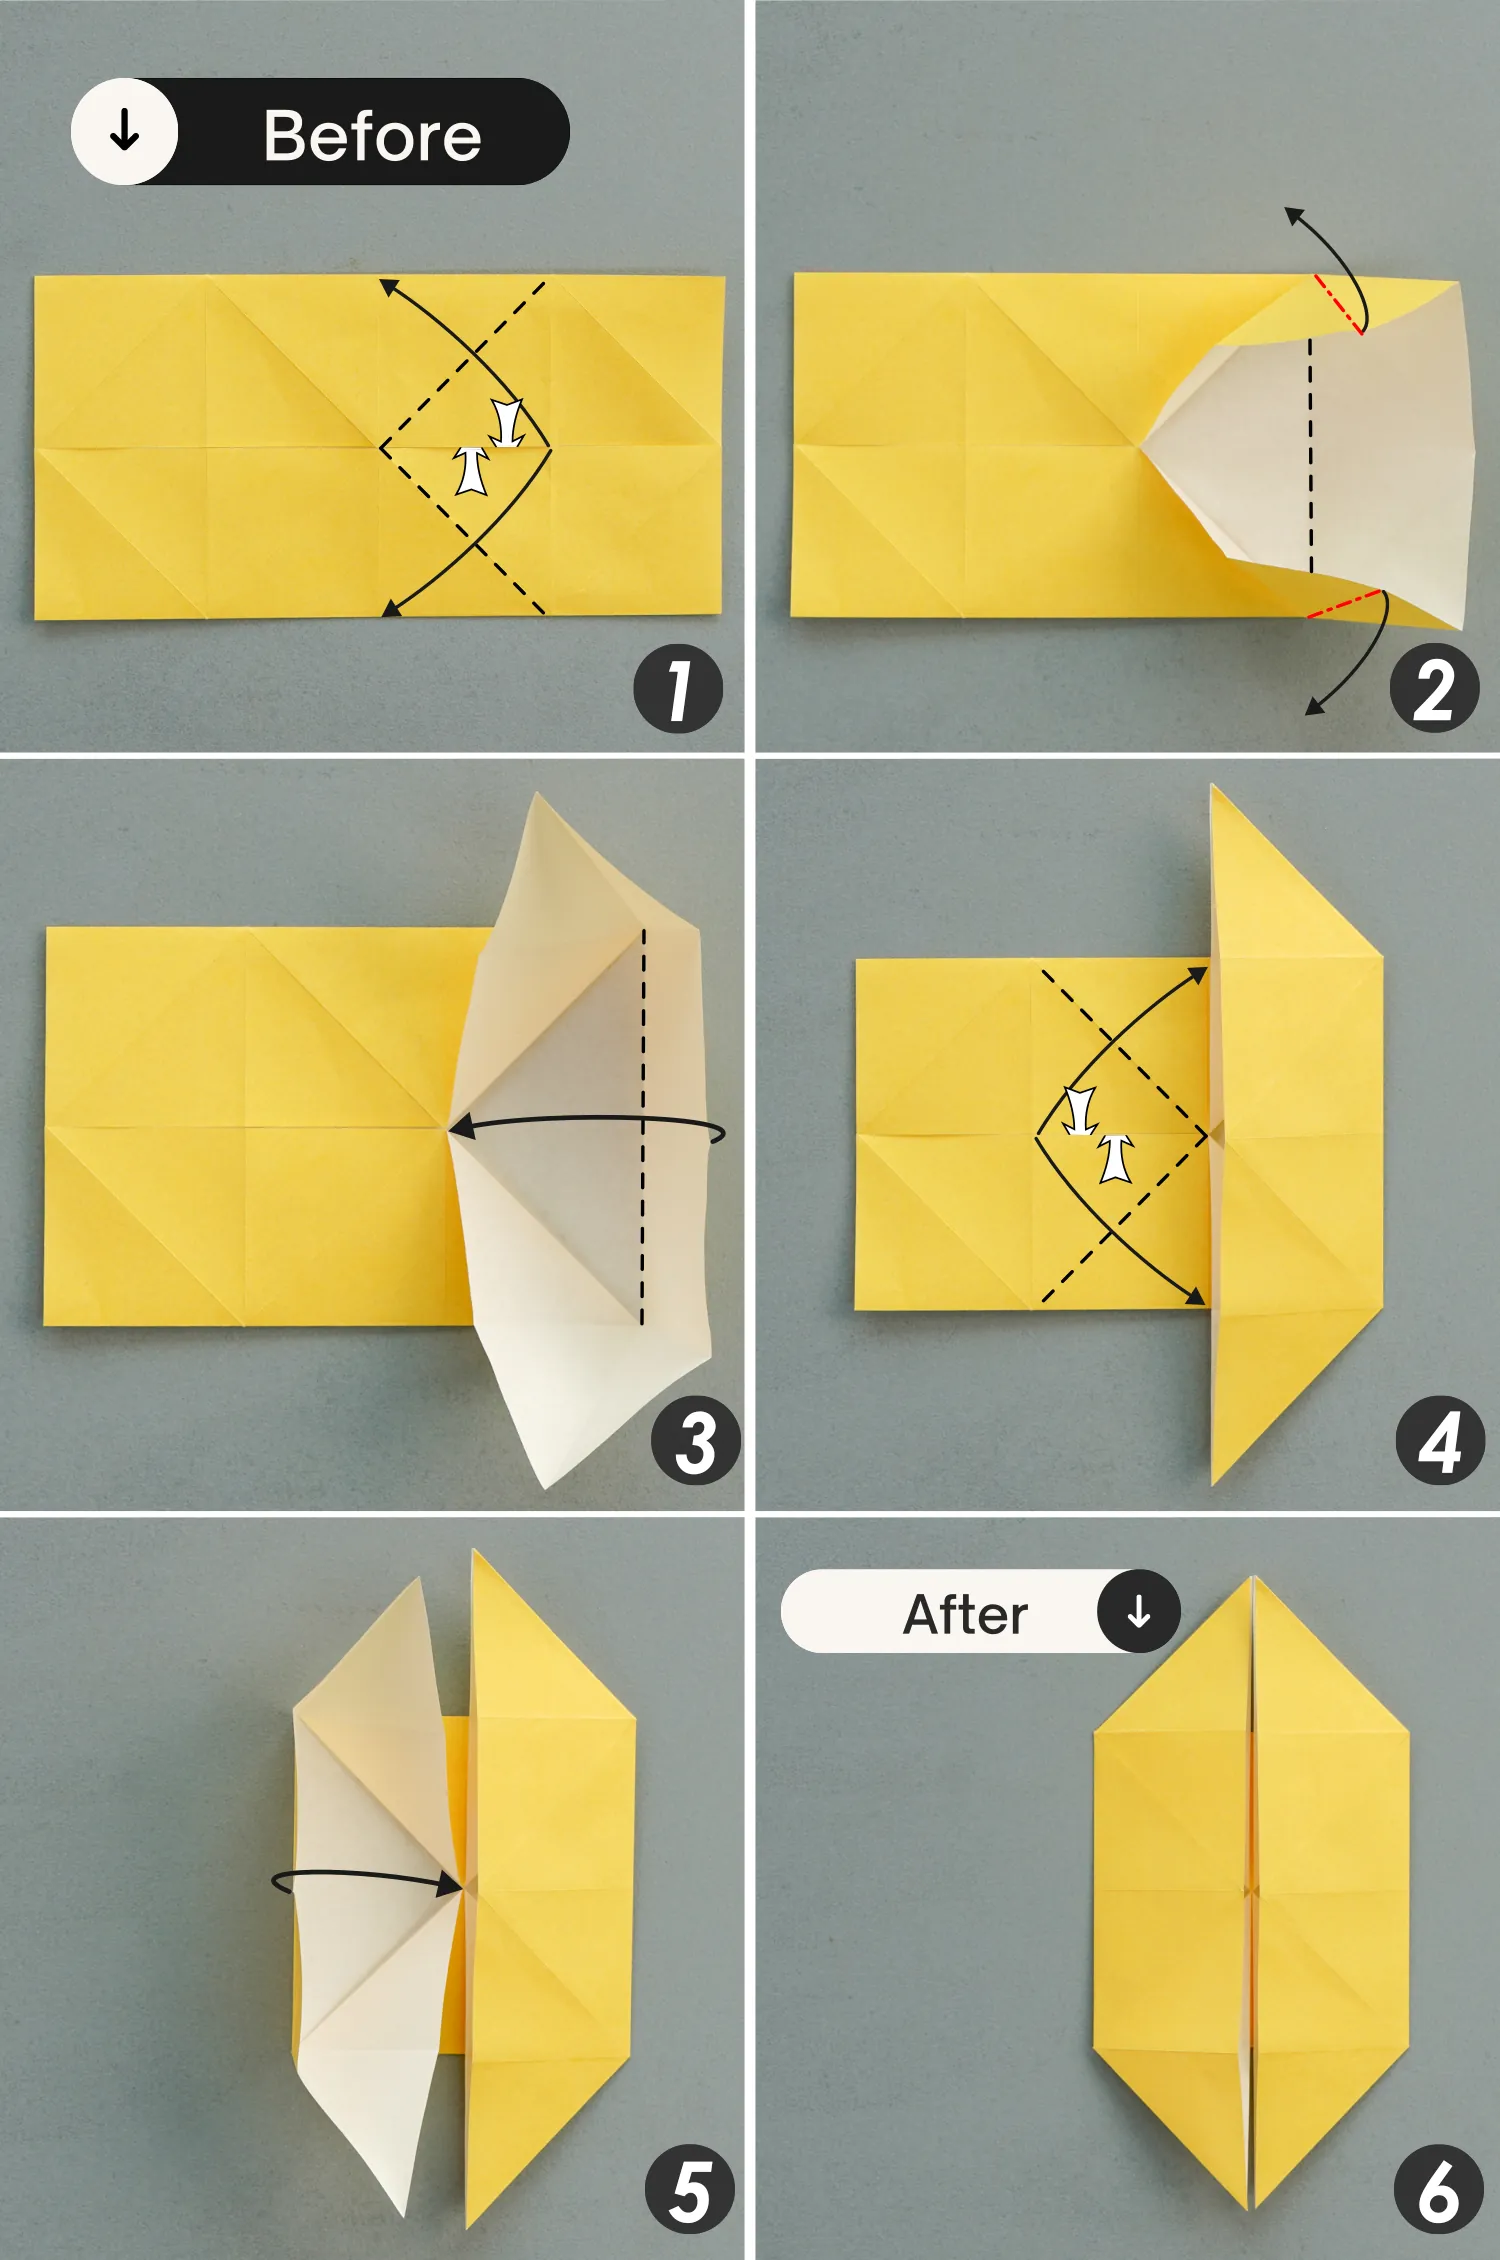
Step 9
Flip the paper over.
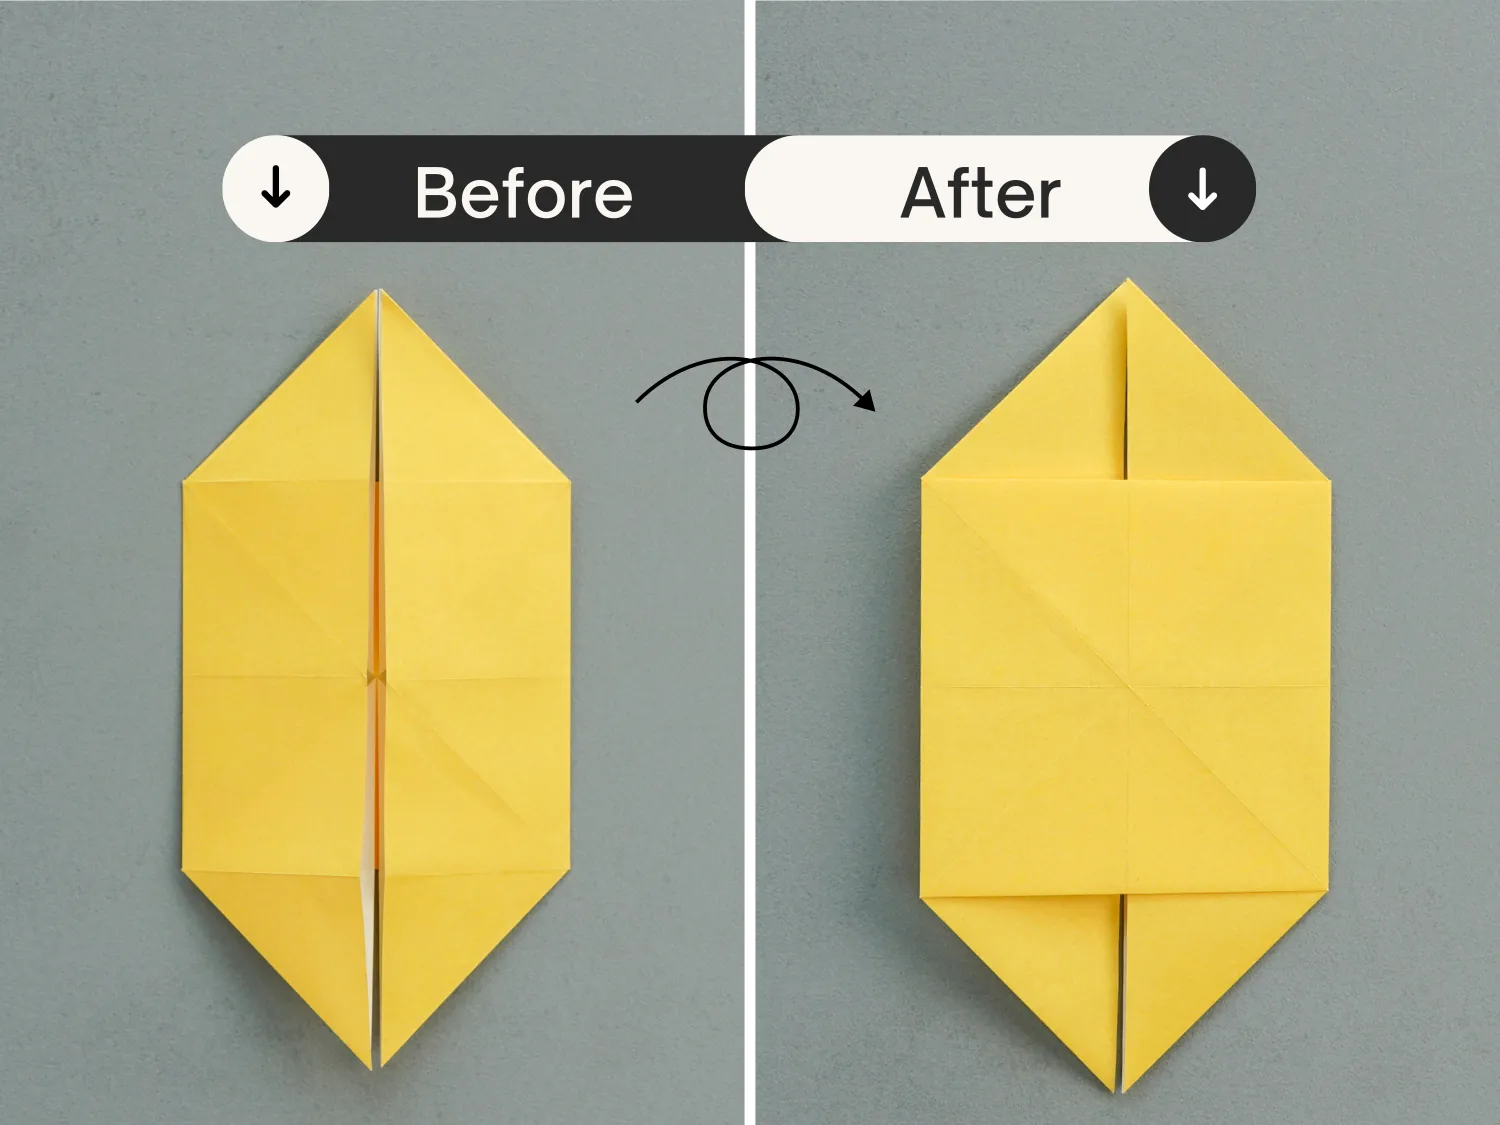
Step 10
Fold up the bottom corners horizontally to meet the top edge of the middle square, crease it well then unfold.
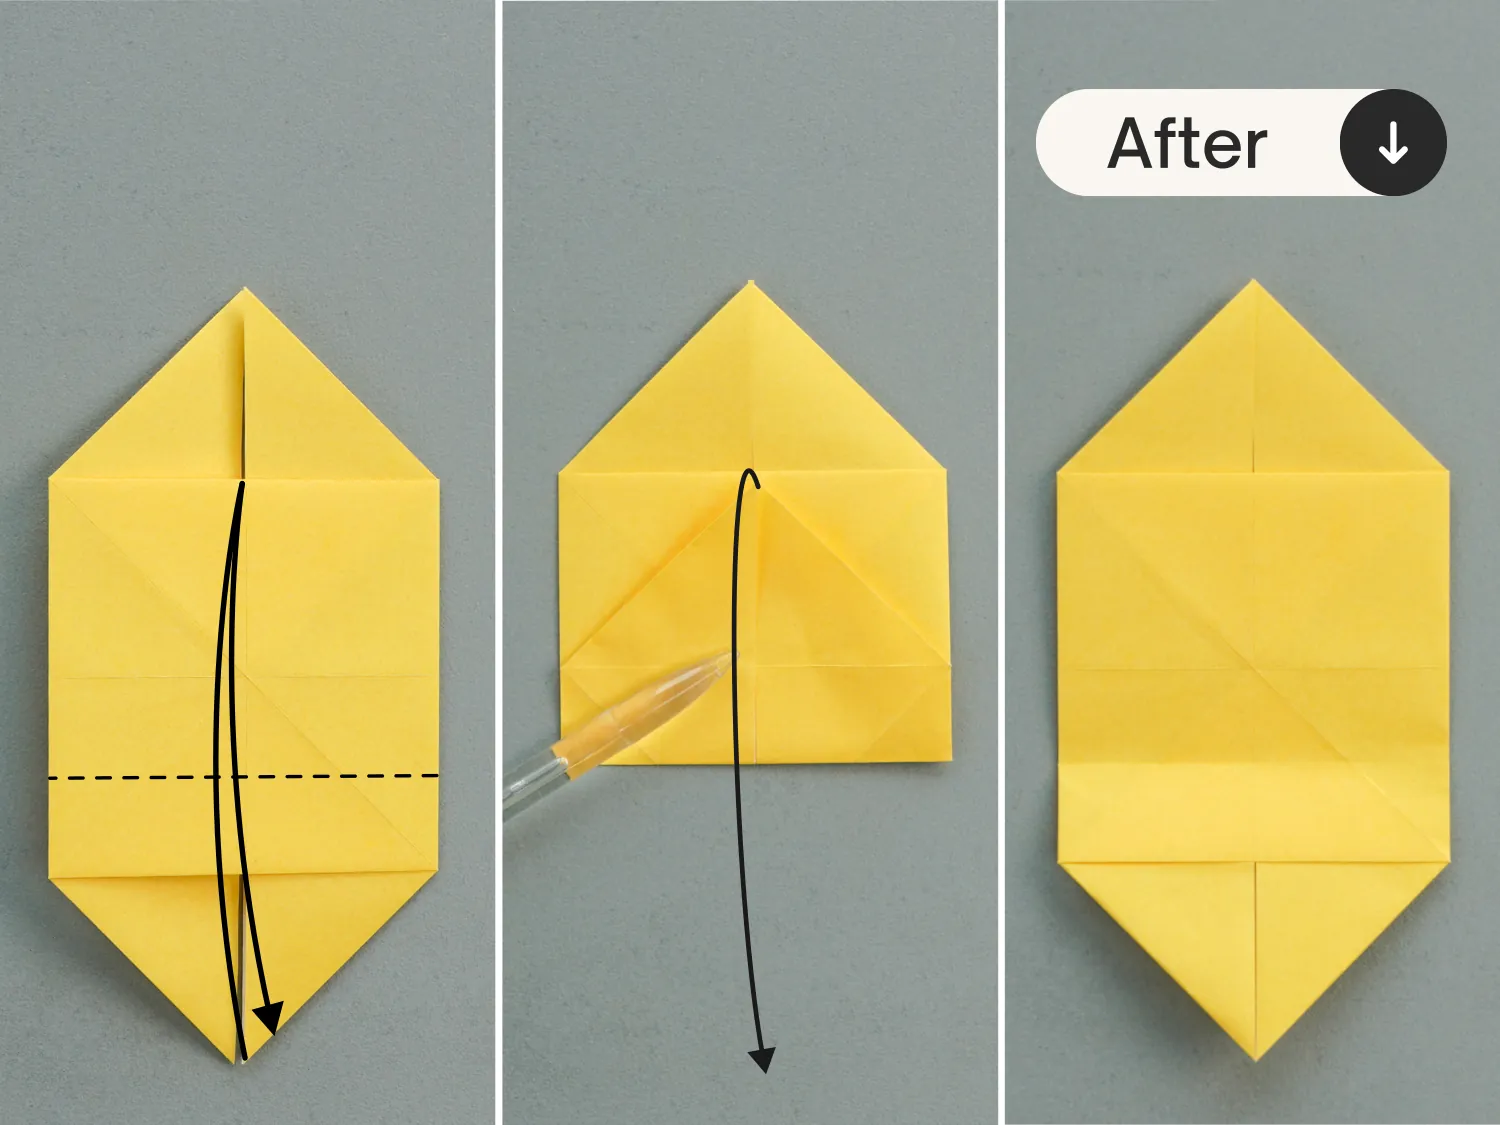
Step 11
Similarly, fold down the top corners to meet the bottom edge of the middle square, and unfold it.
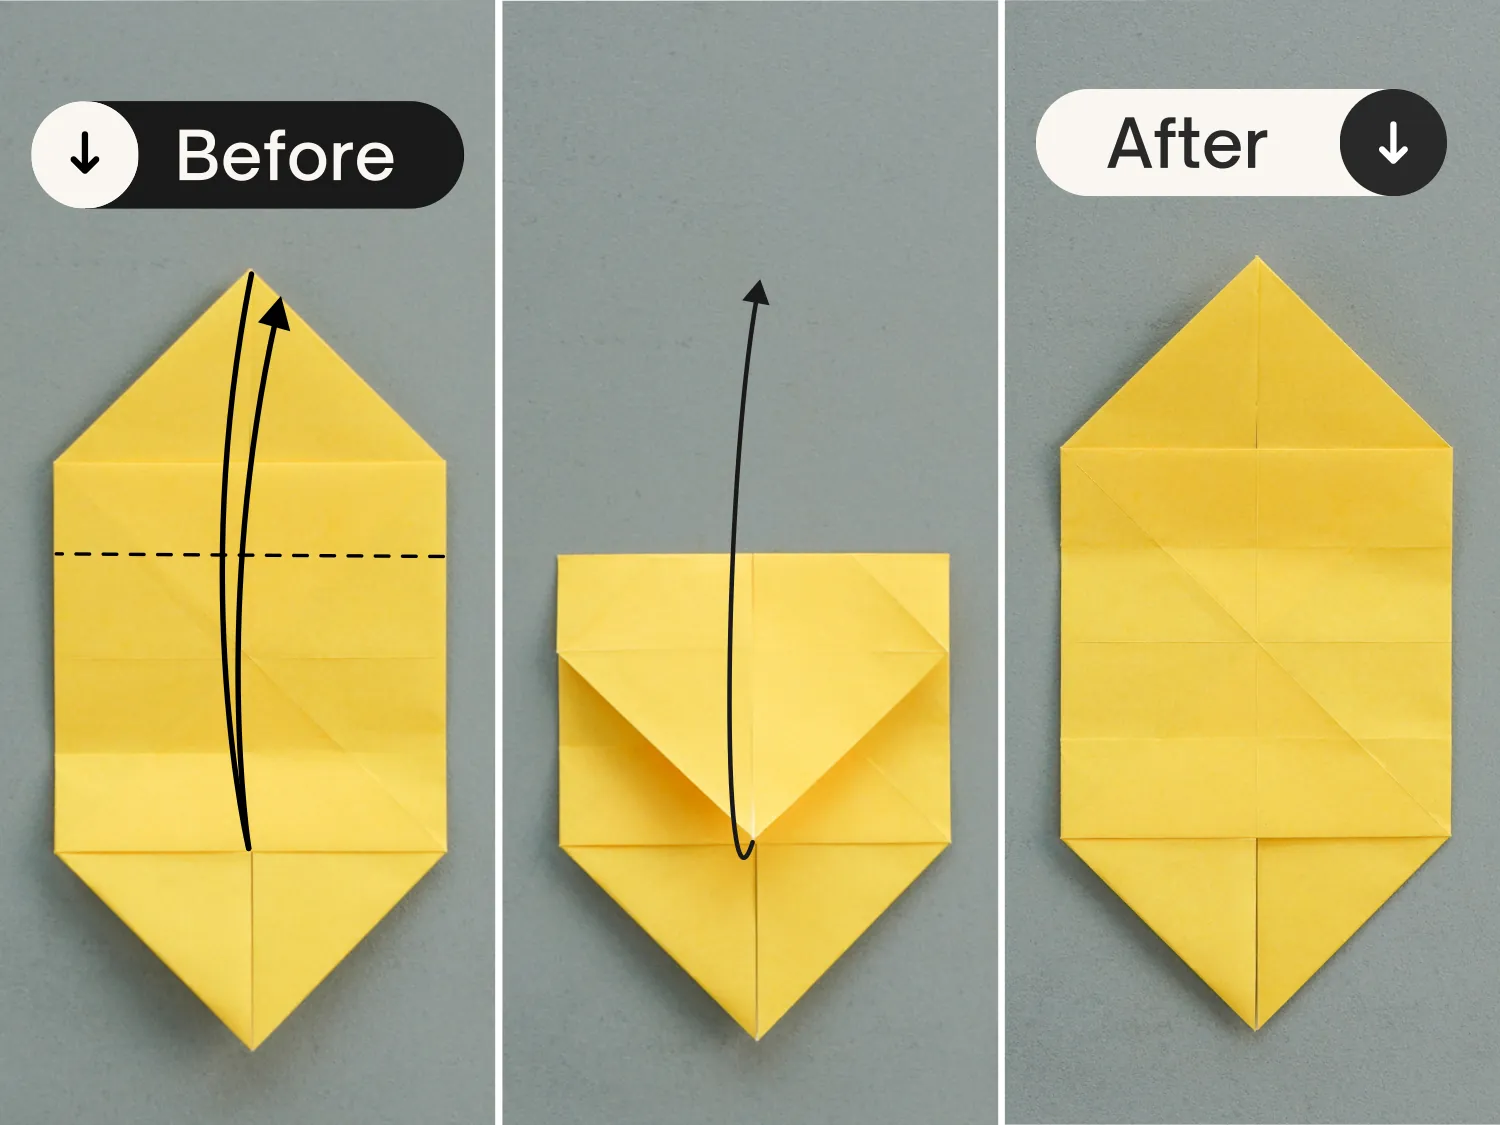
Step 12
Fold the left and right edges to align with the middle vertical crease, crease them well, and unfold them.
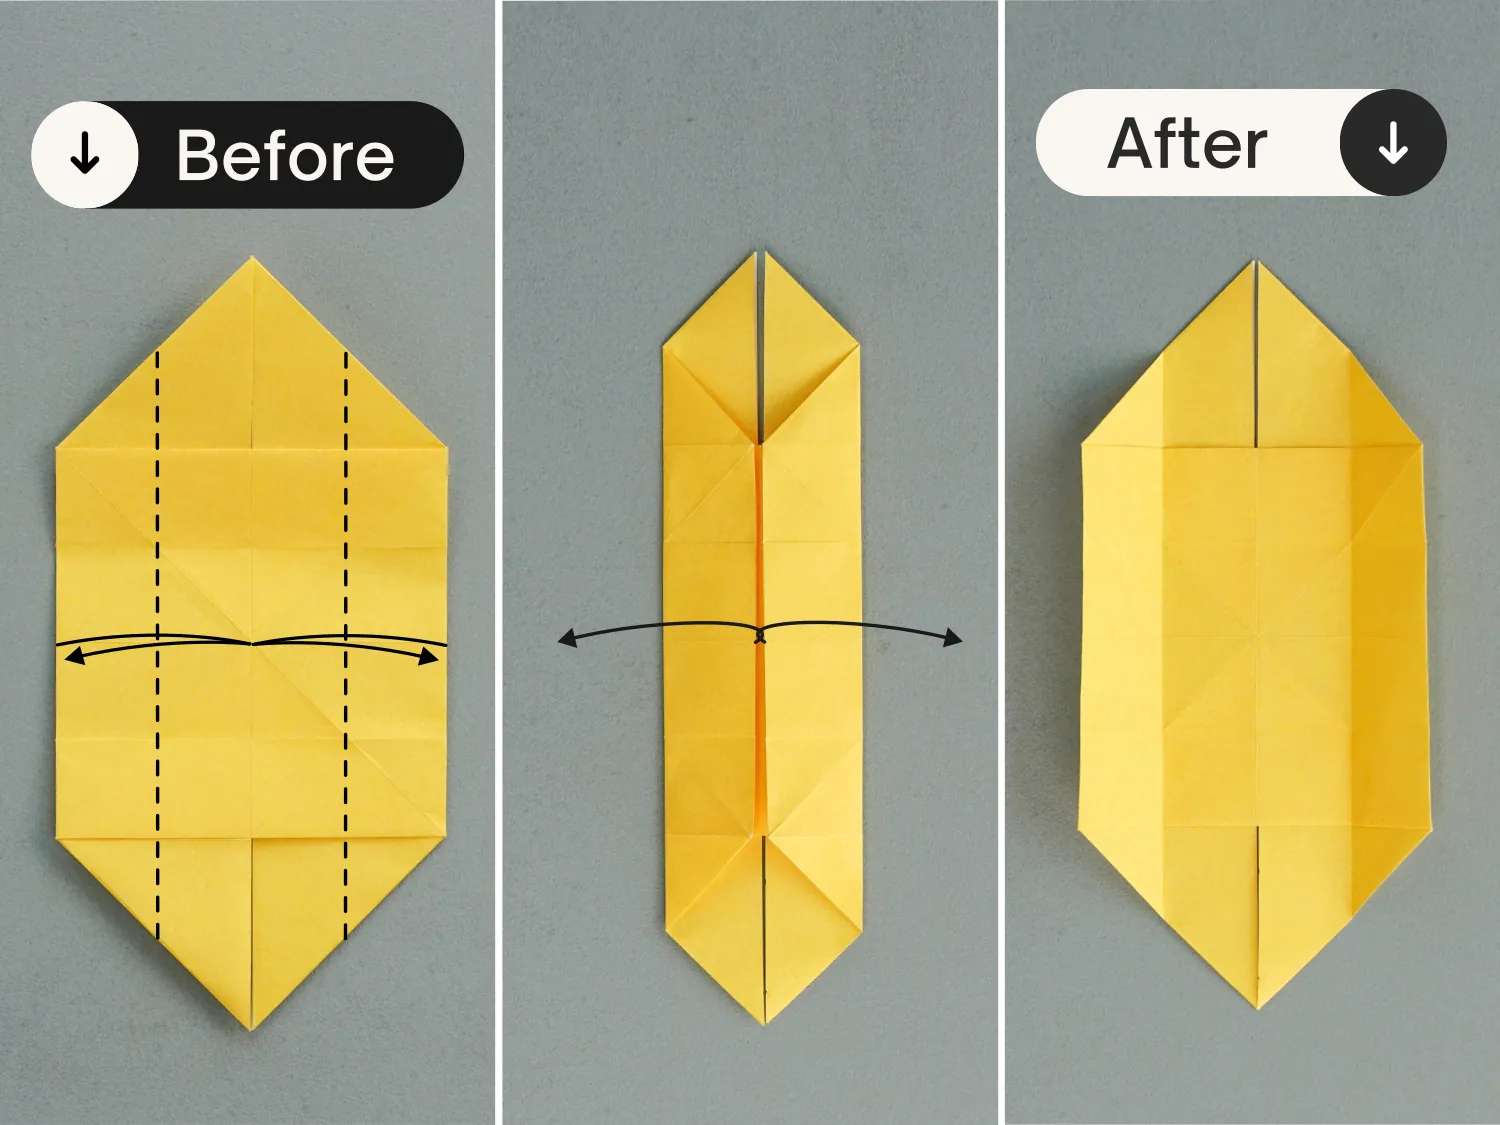
Step 13
Rotate the paper 90 degrees clockwise.
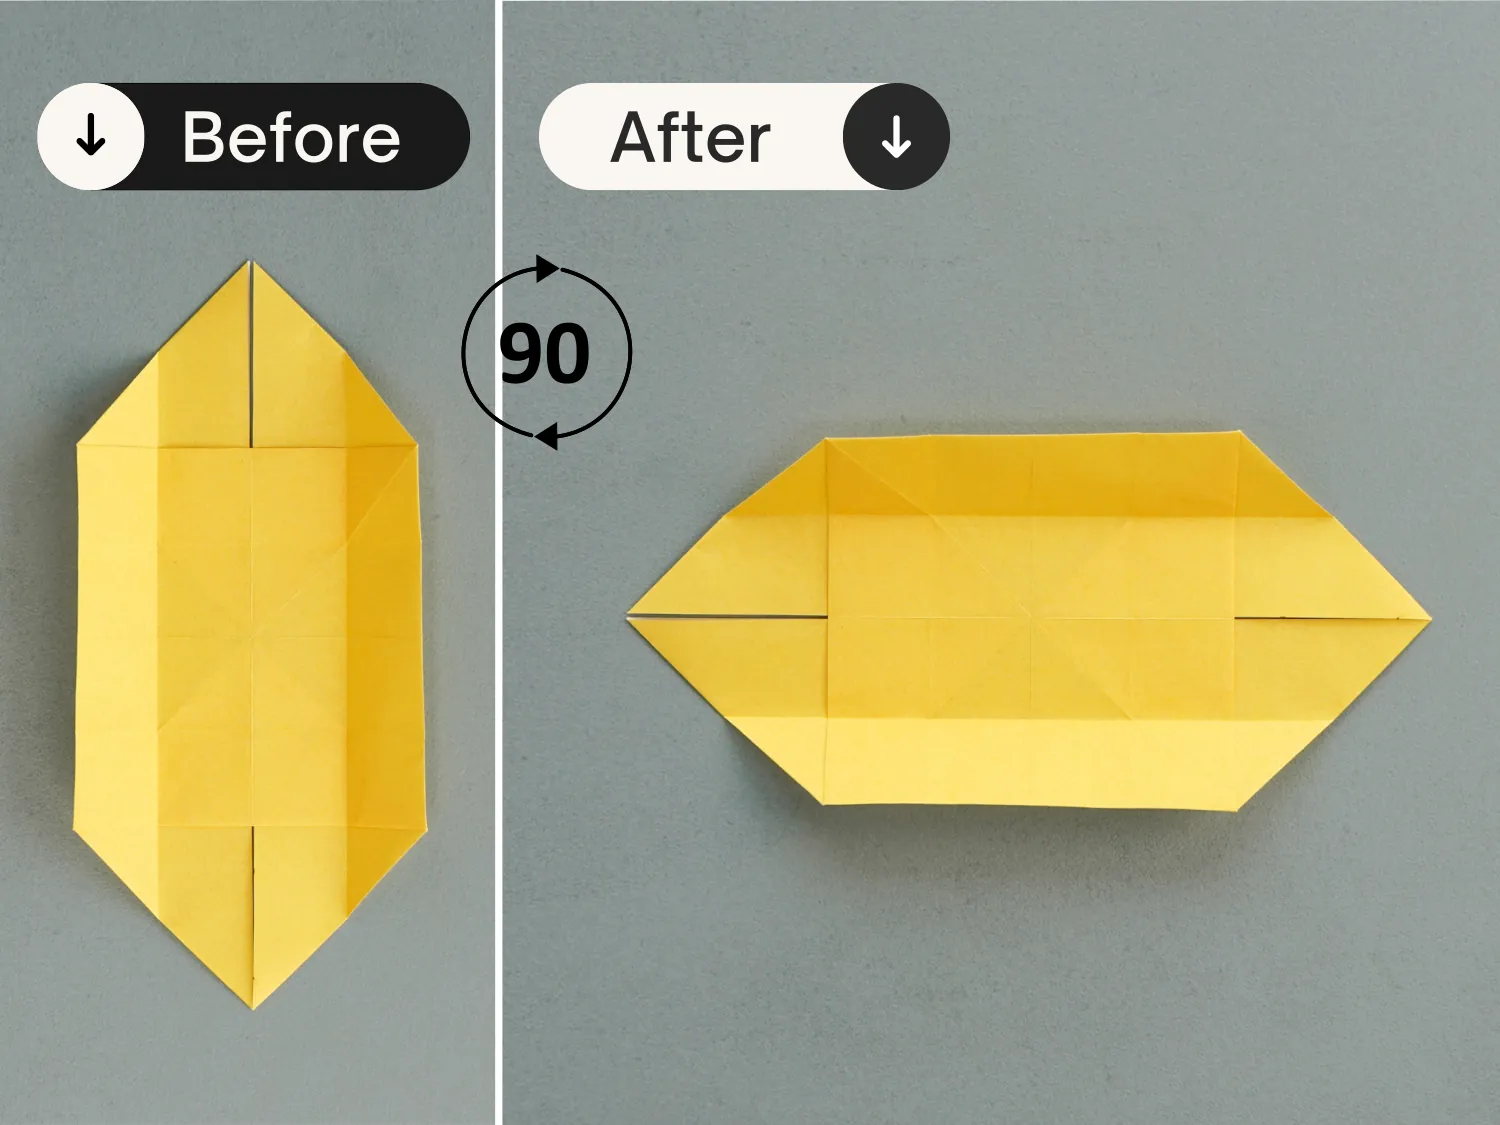
Step 14
Focus on the middle square, and fold its left and right edges toward the center, the top and bottom edges will be lifted as you do so, then press down the top and bottom edges toward the center as well, and finally flatten the fold. All the required creases are existing.
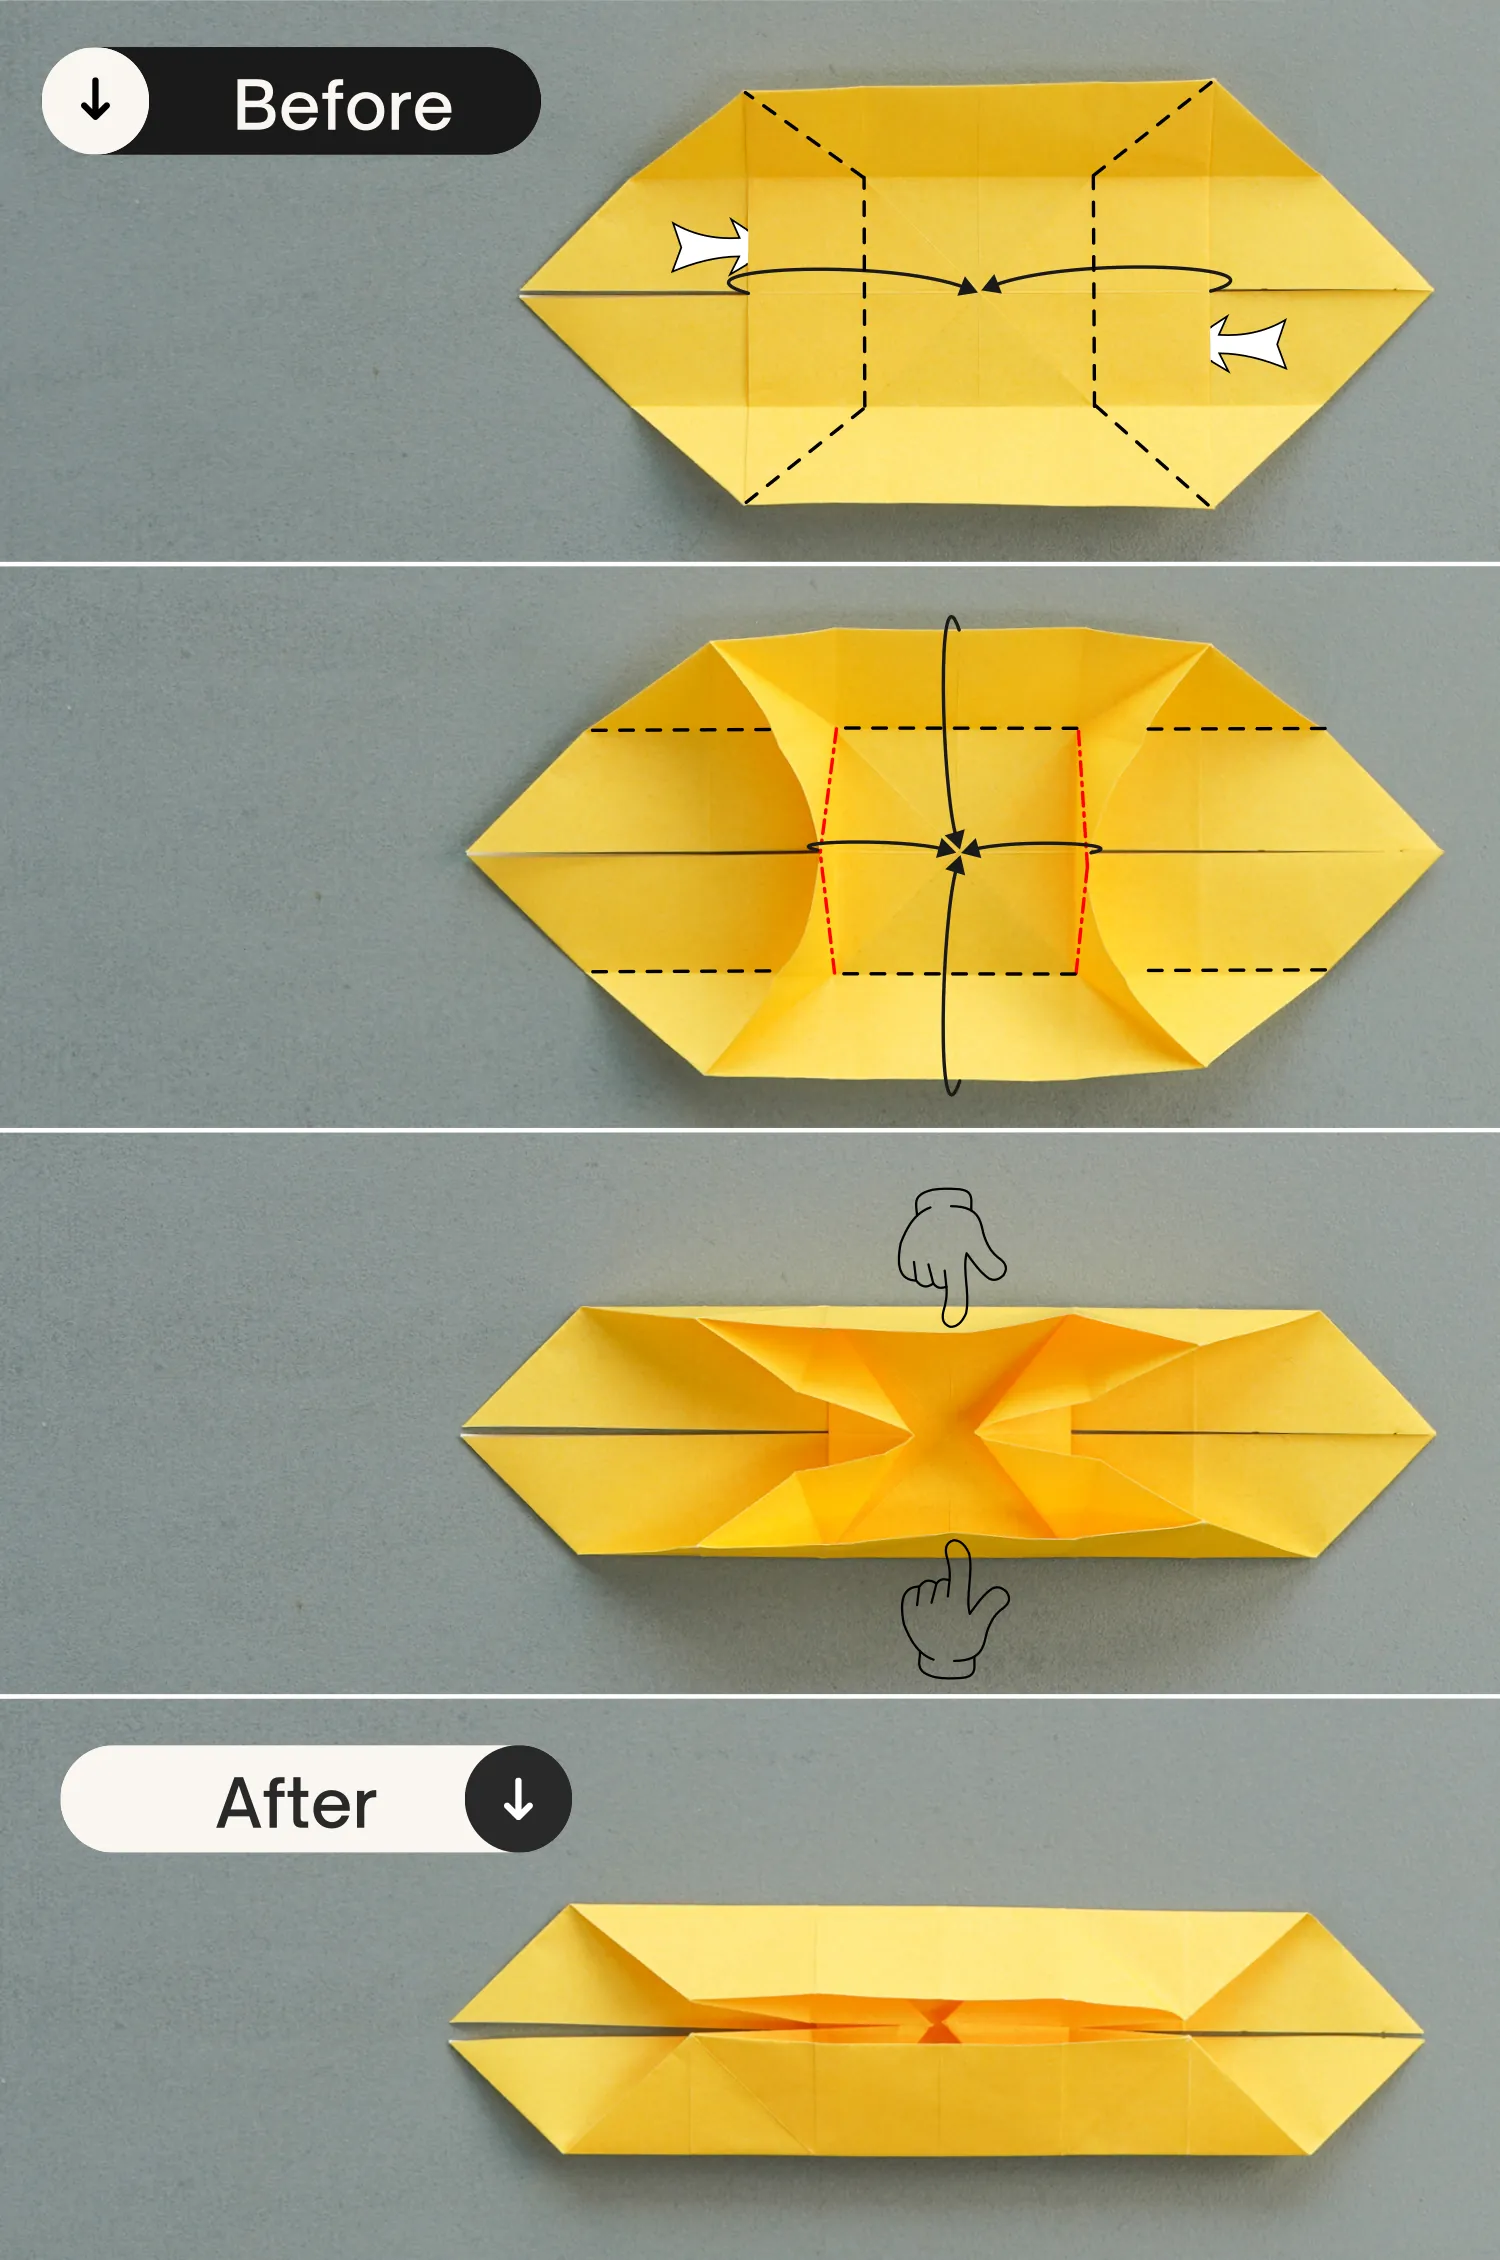
Step 15
Turn over the paper.
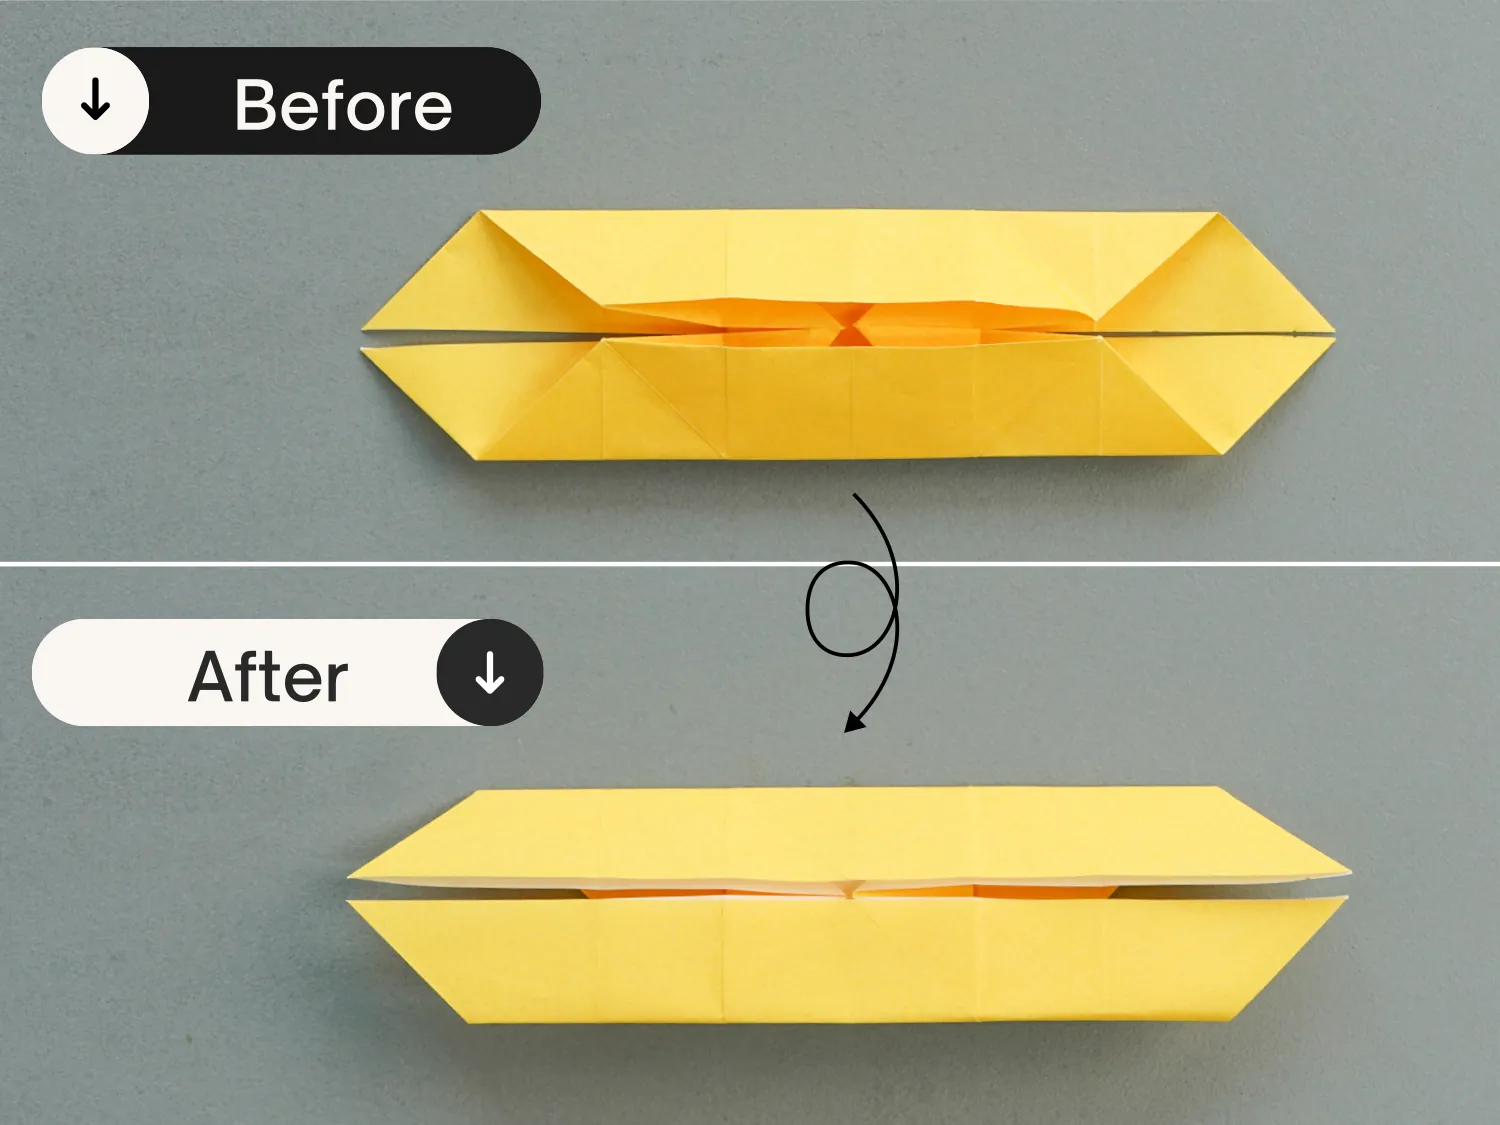
Step 16
Shape the middle vertical crease to form two arched corners on the top and bottom, then fold the left and right sections of both the two horizontal edges on the middle to align with the vertical crease you shaped. Next, shape the four horizontal and vertical creases separately in the center as the third picture shows, making the four parts of the butterfly spread out more naturally.
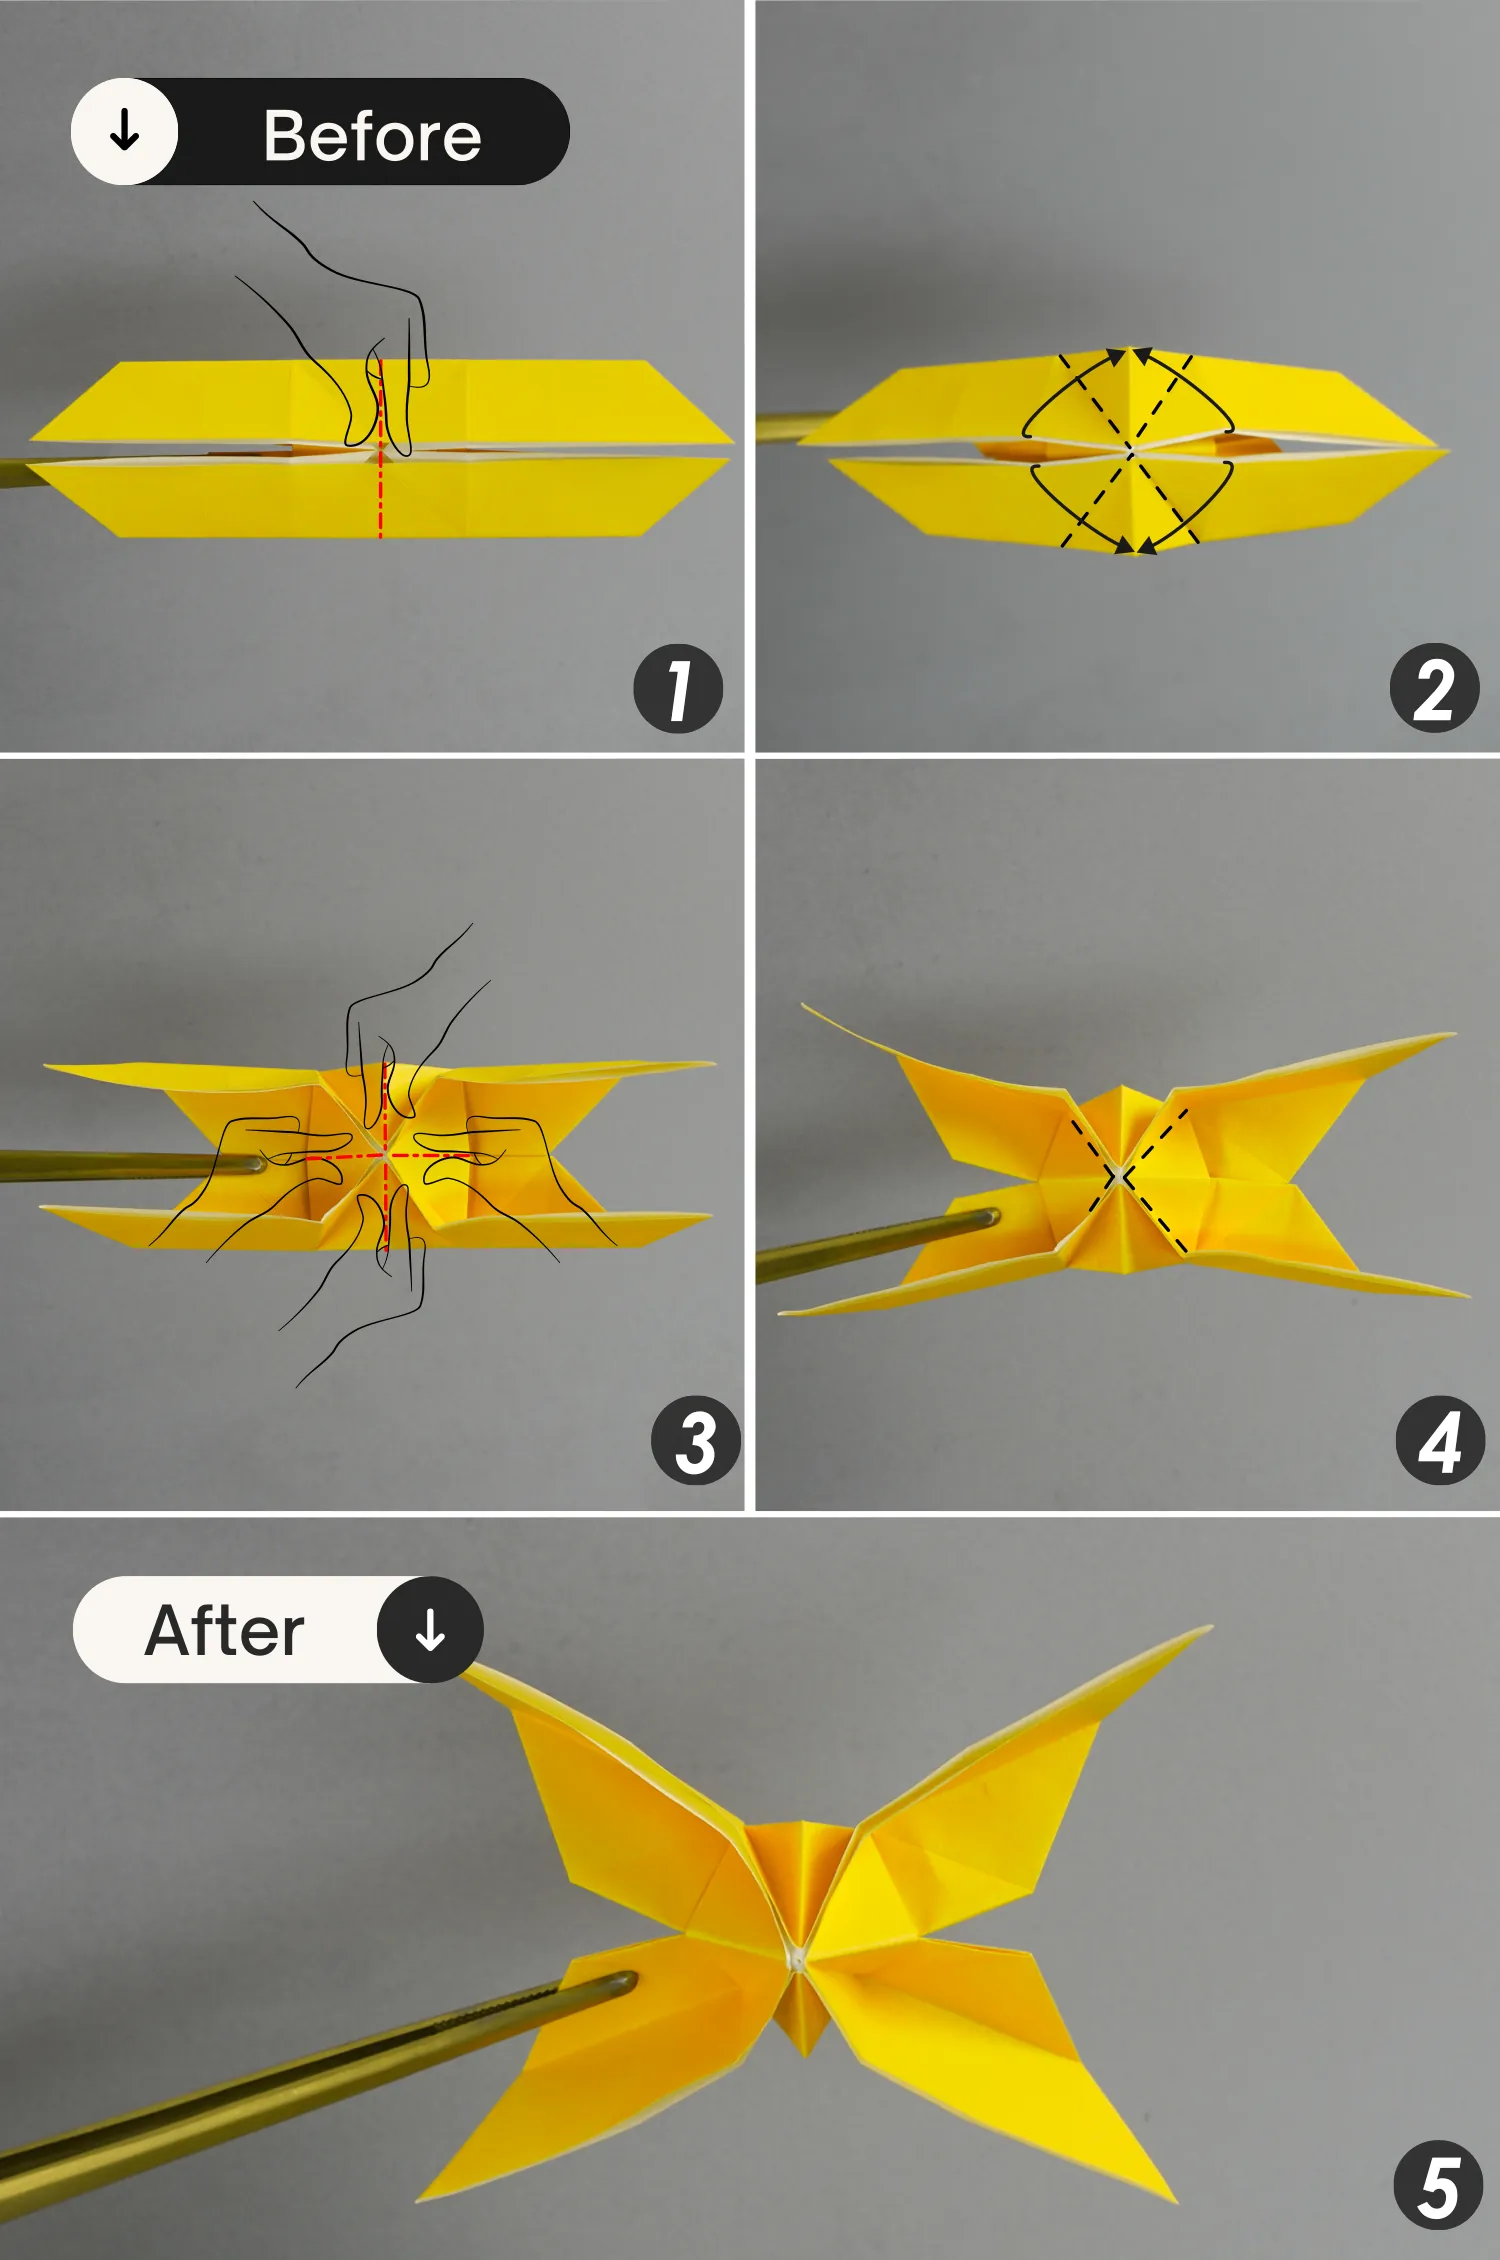
Step 17
Flip the paper over.
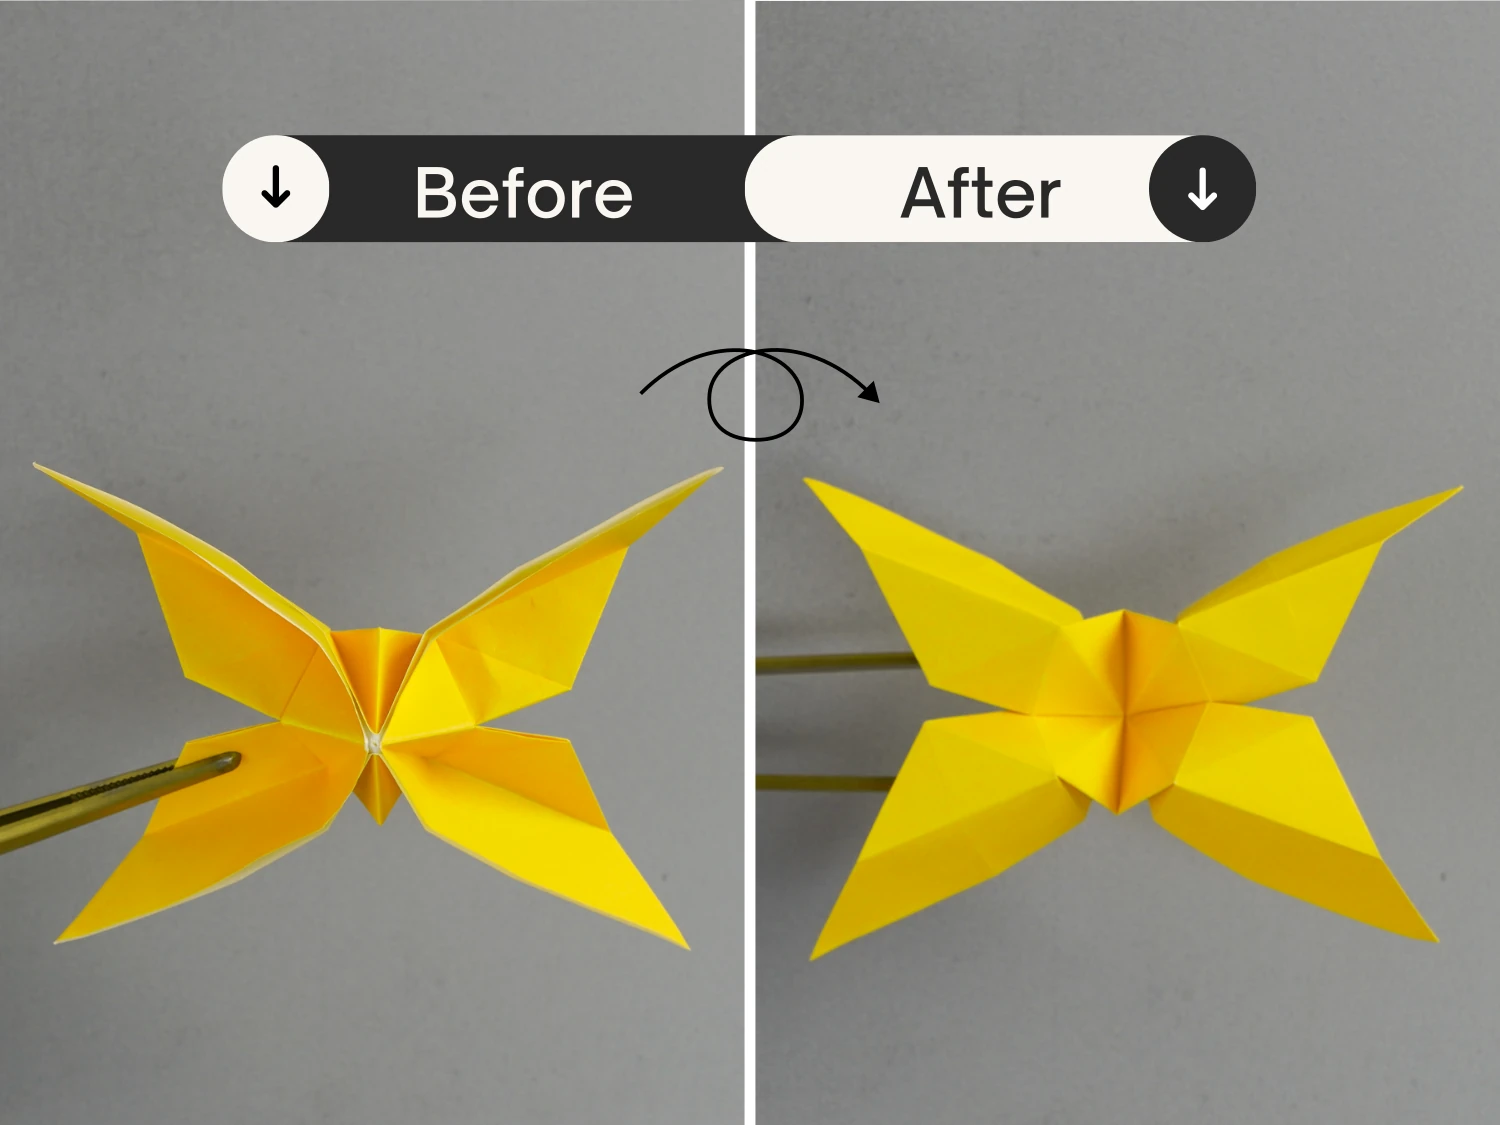
Step 18
Fold the bottom right point toward the top left along the crease shown by the dotted line.
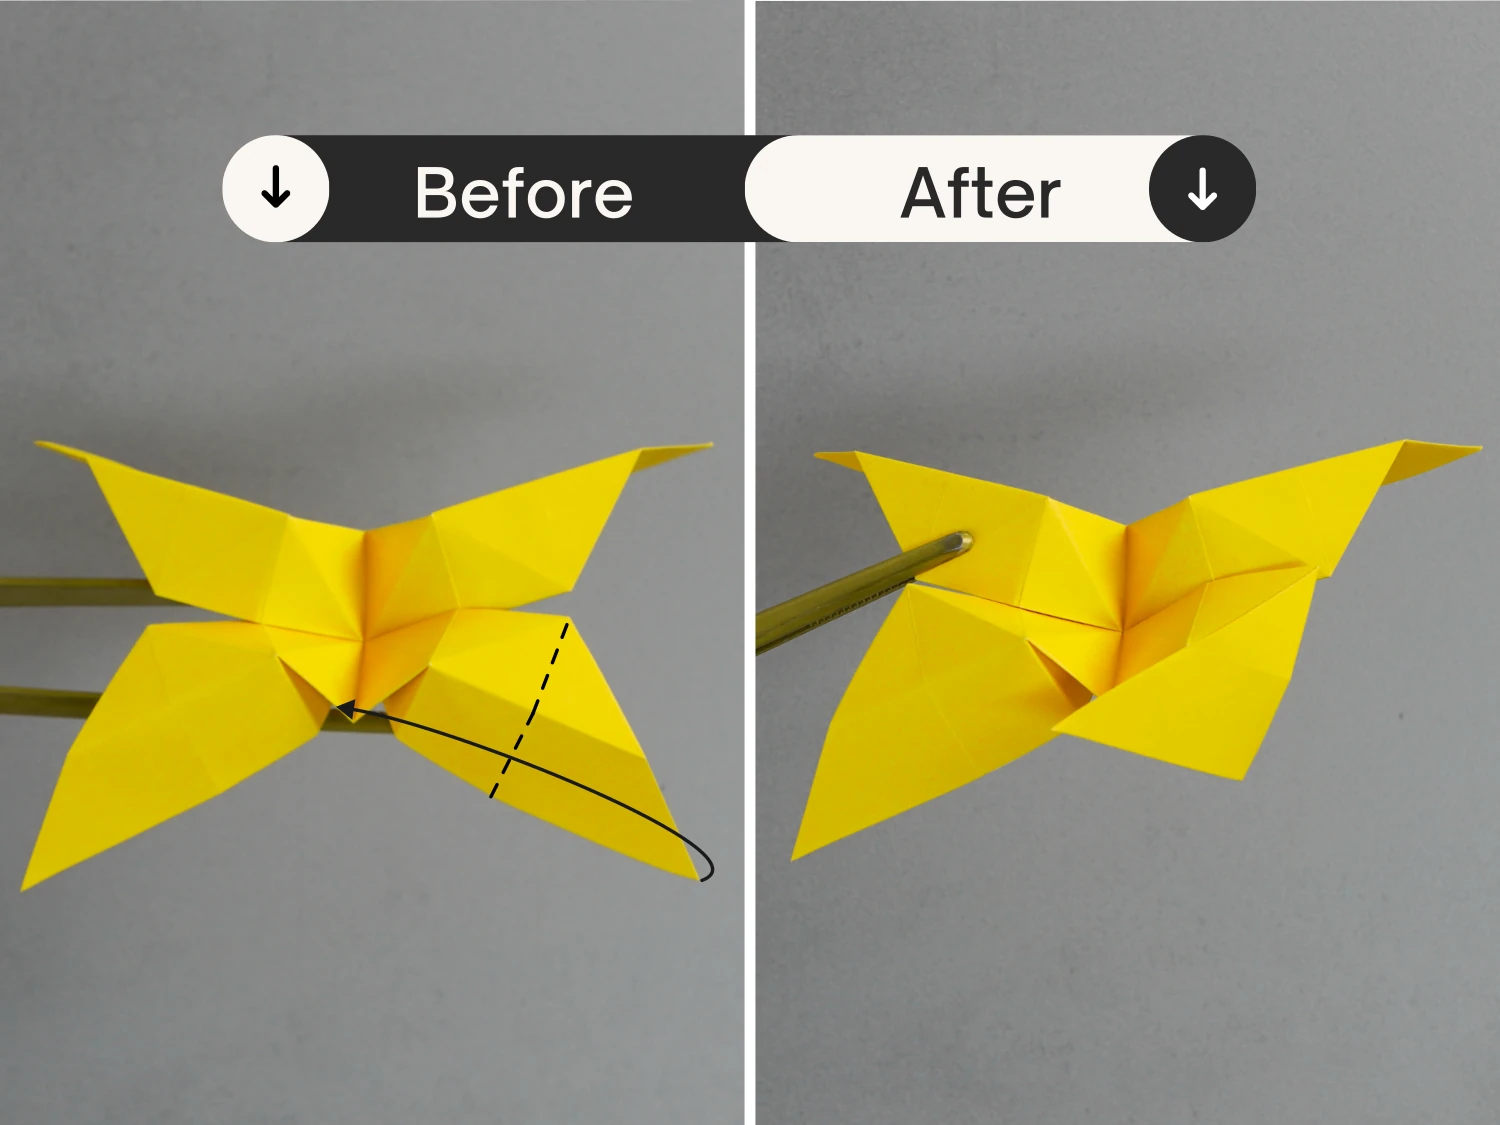
Step 19
Then fold it toward the top right along the dotted line, leaving a crease then unfold.
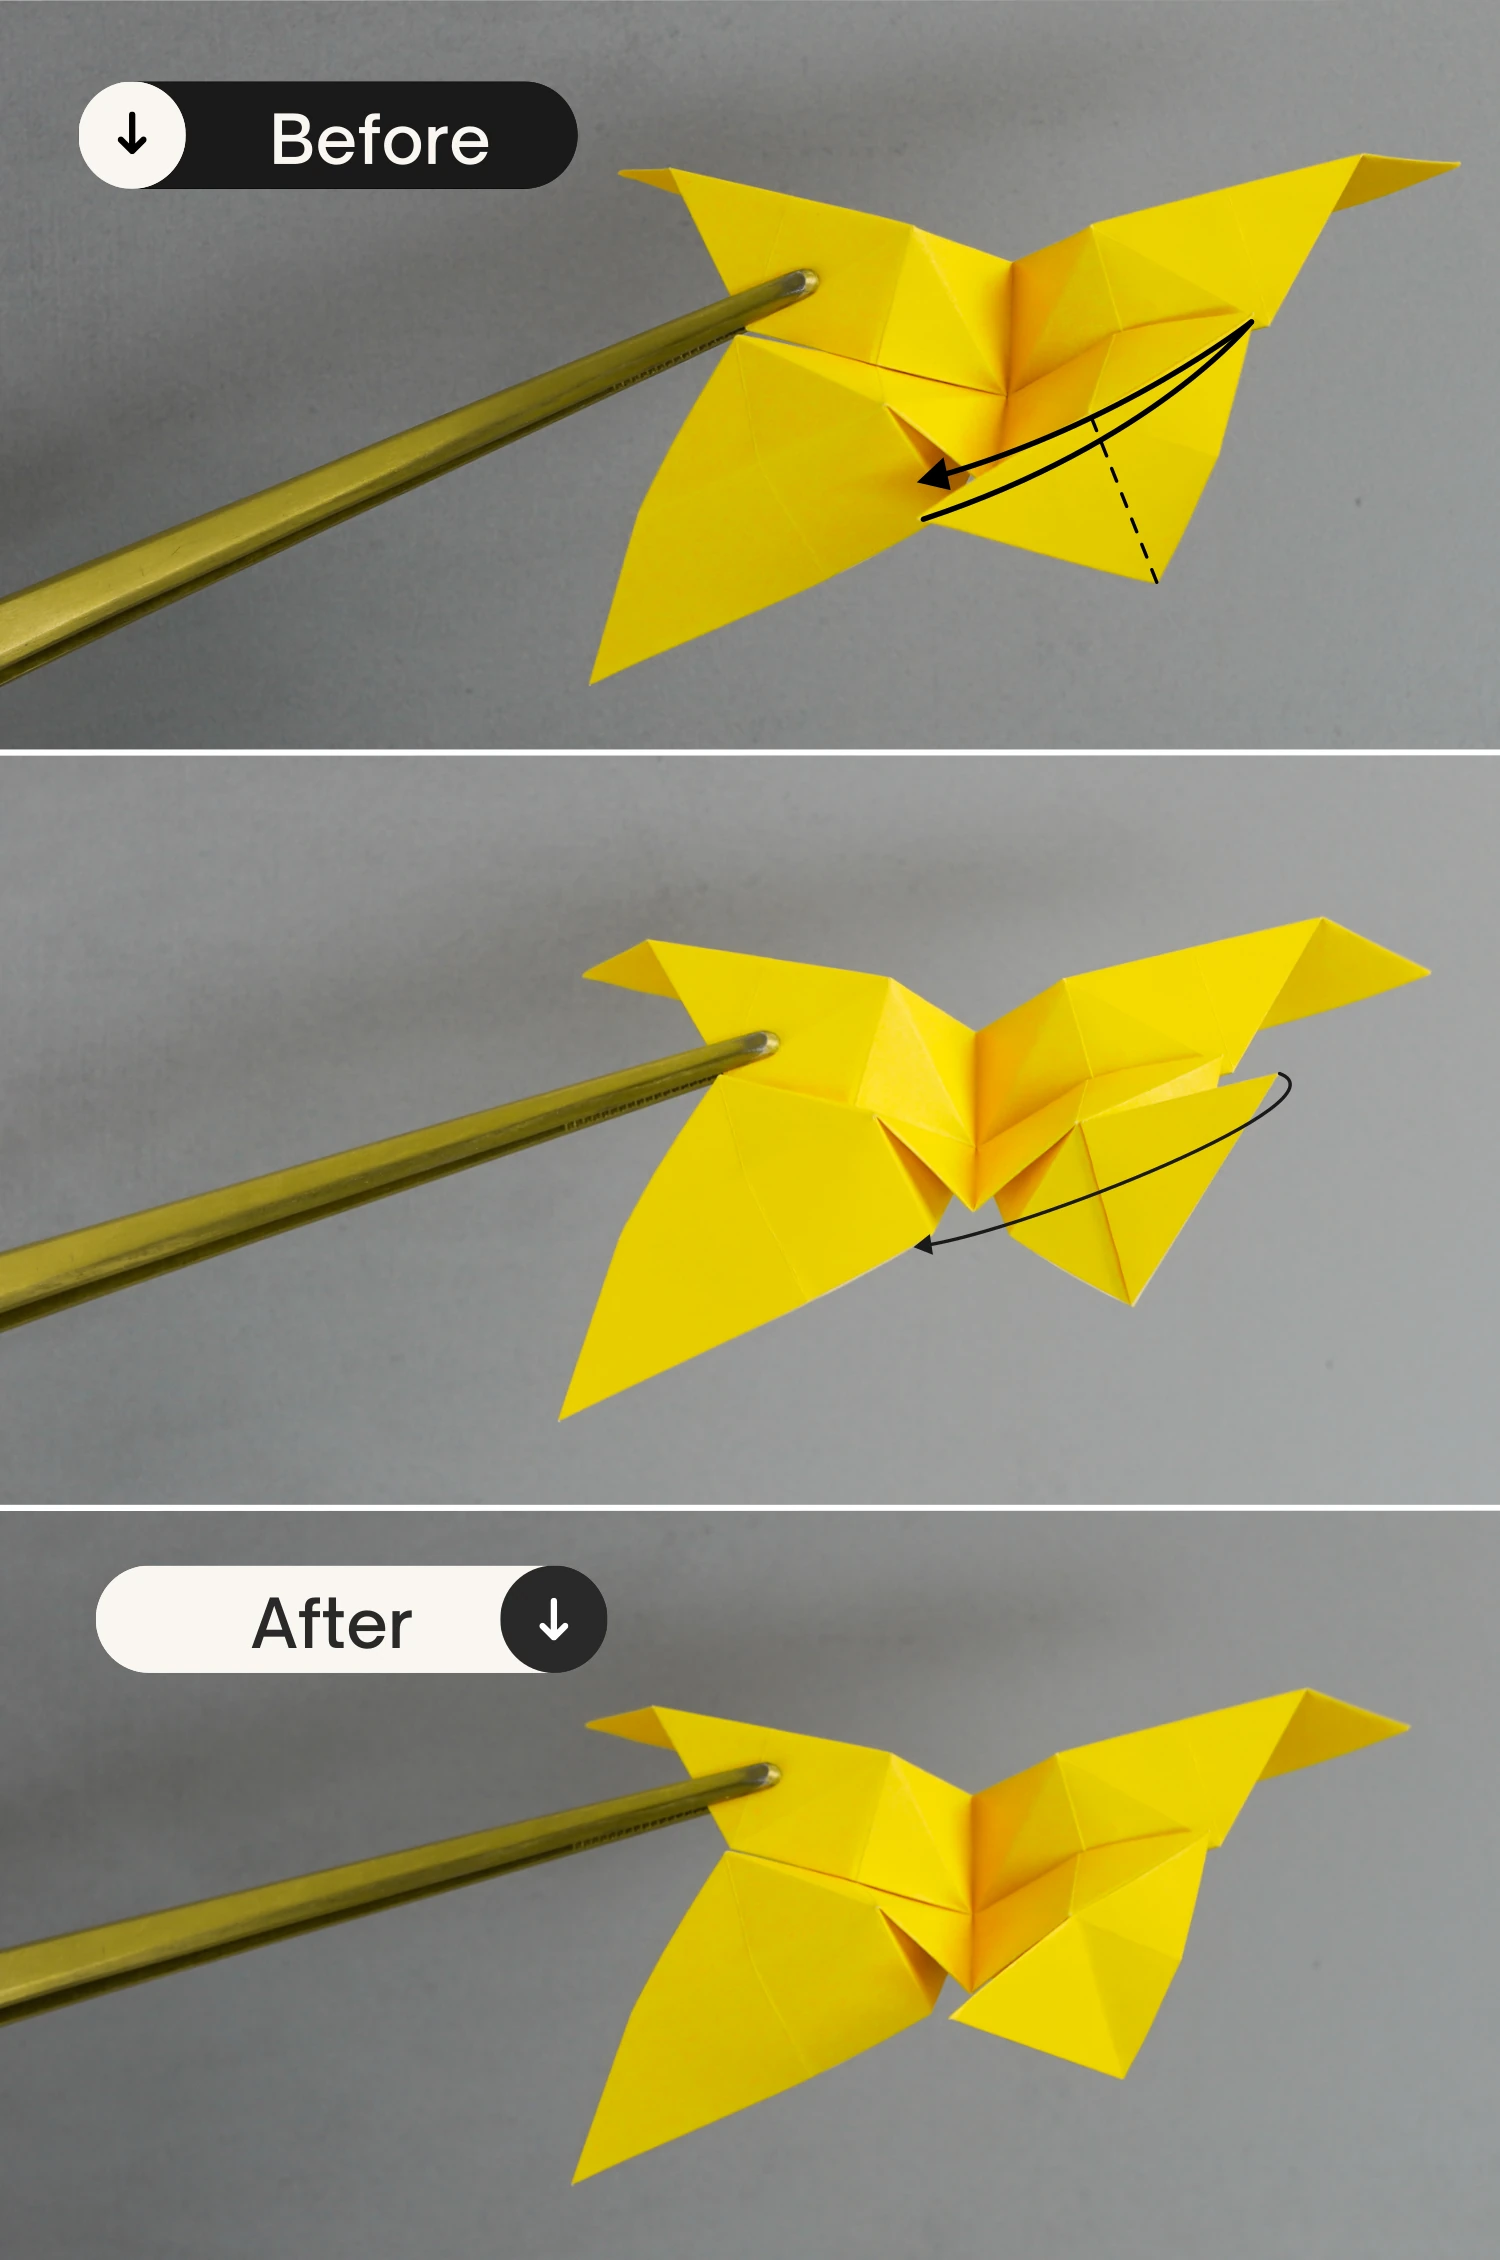
Step 20
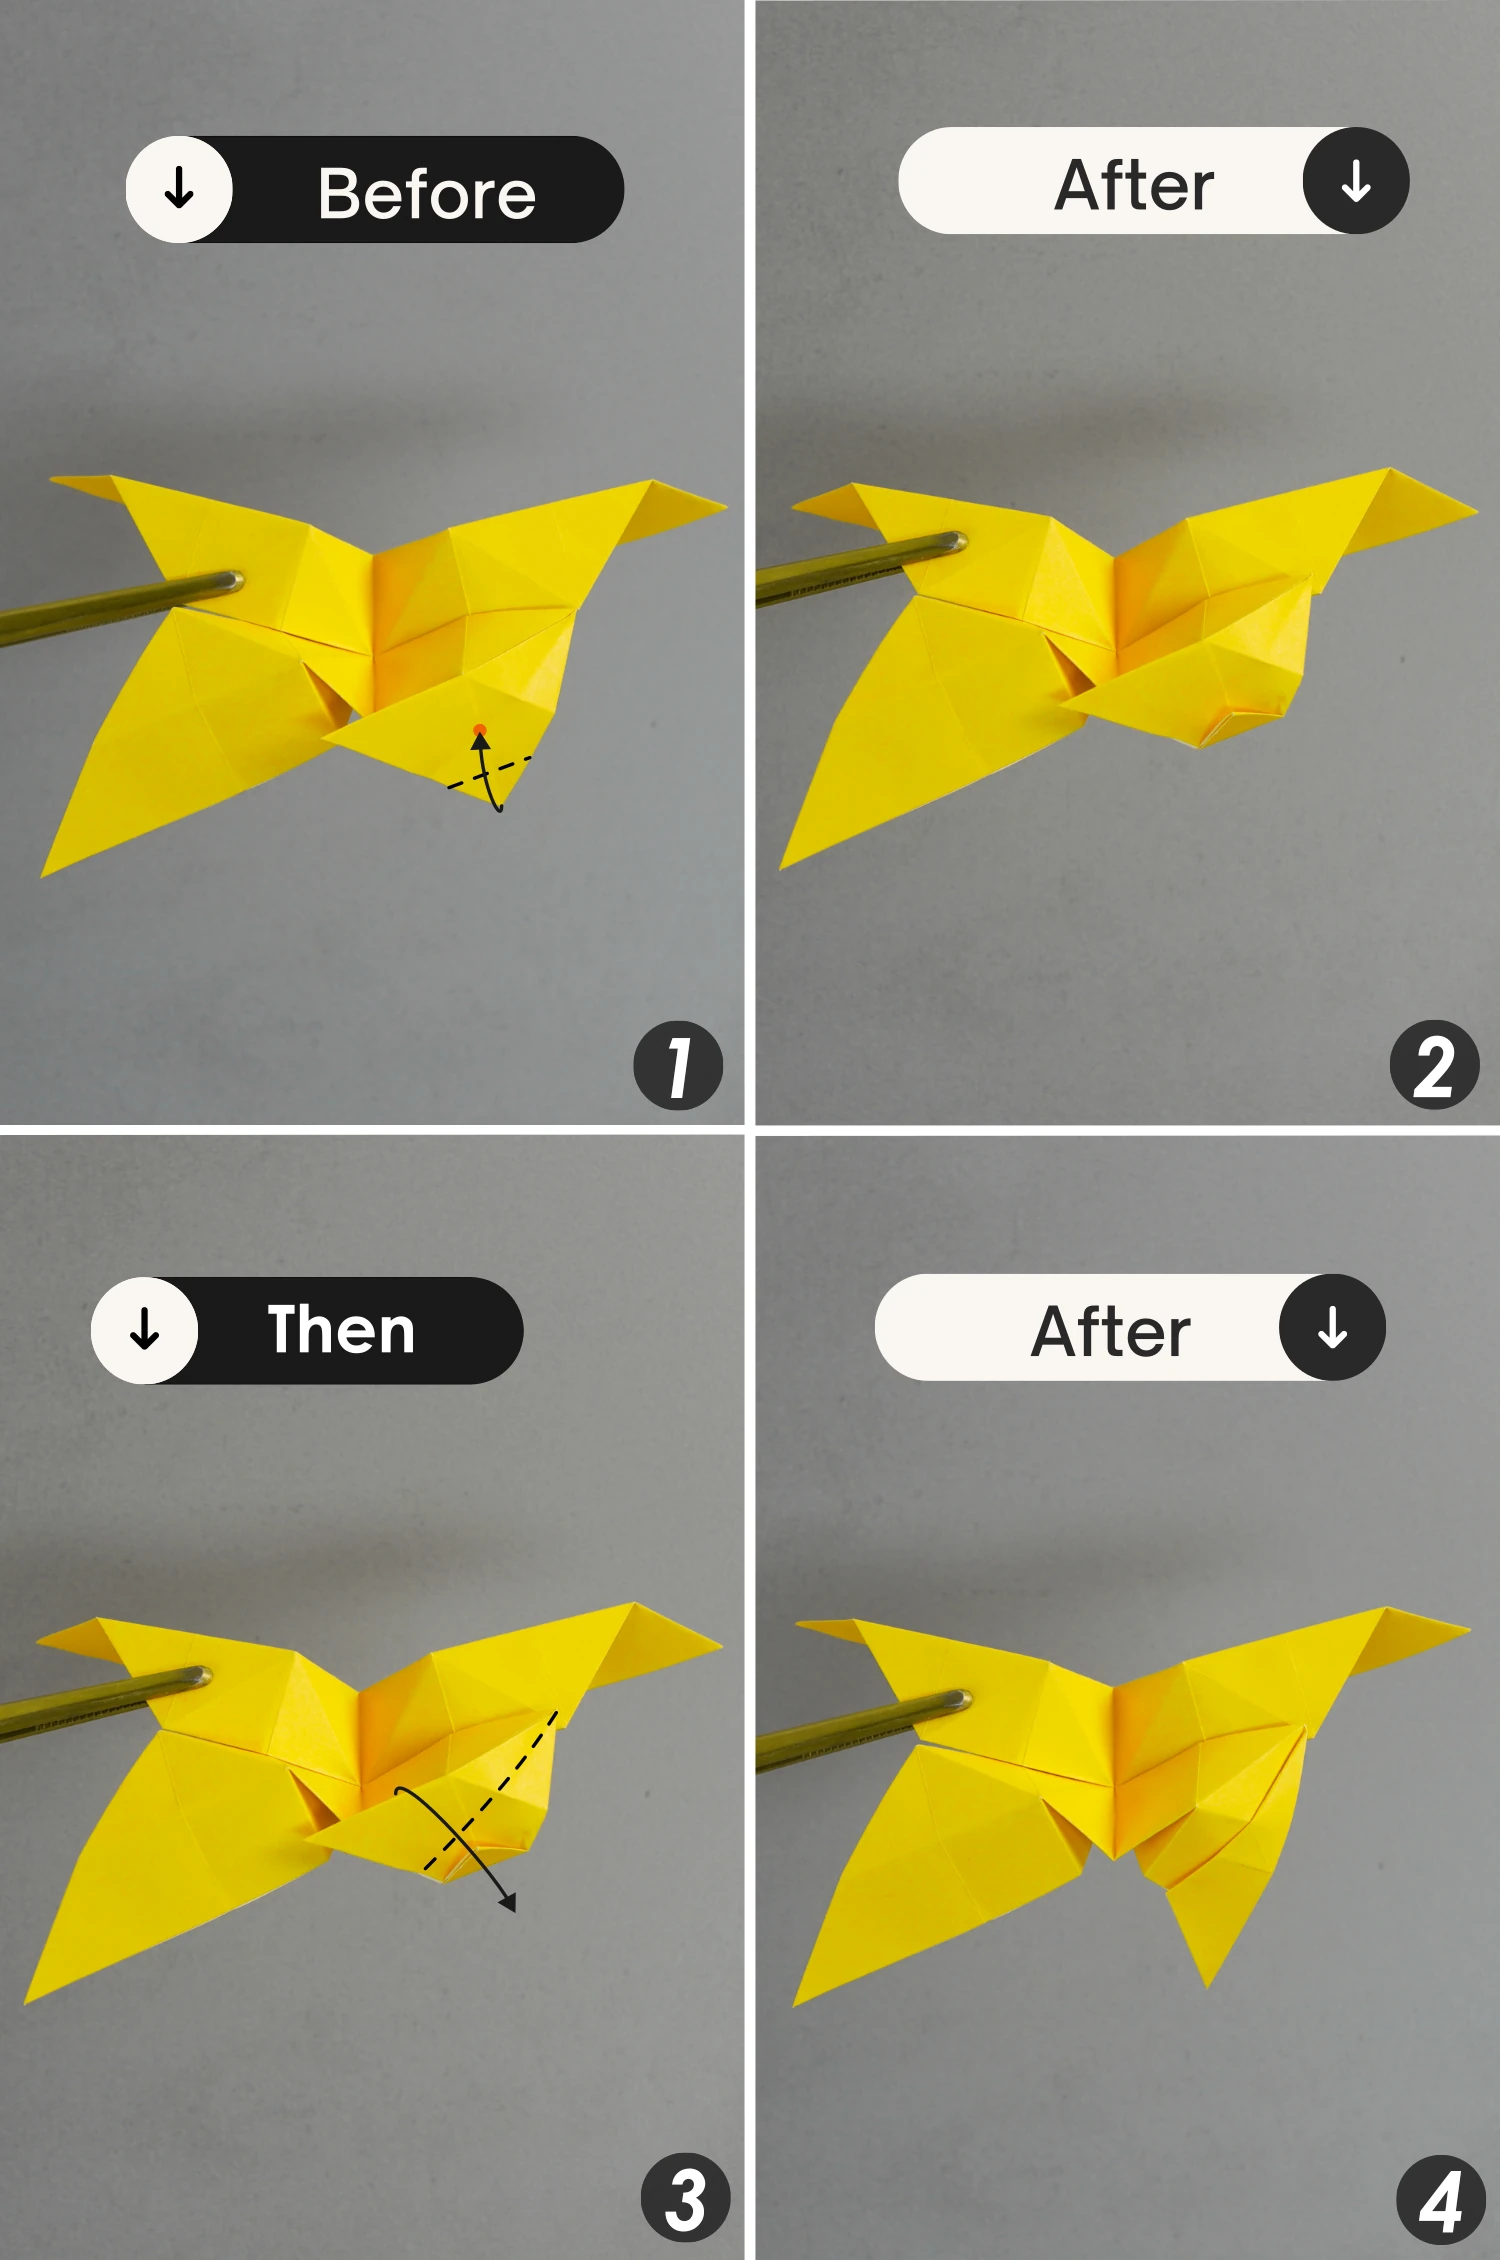
Fold the left edge of the folded layer on the bottom right to the right along the dotted line, to align with its right edge, leaving a crease then unfold.
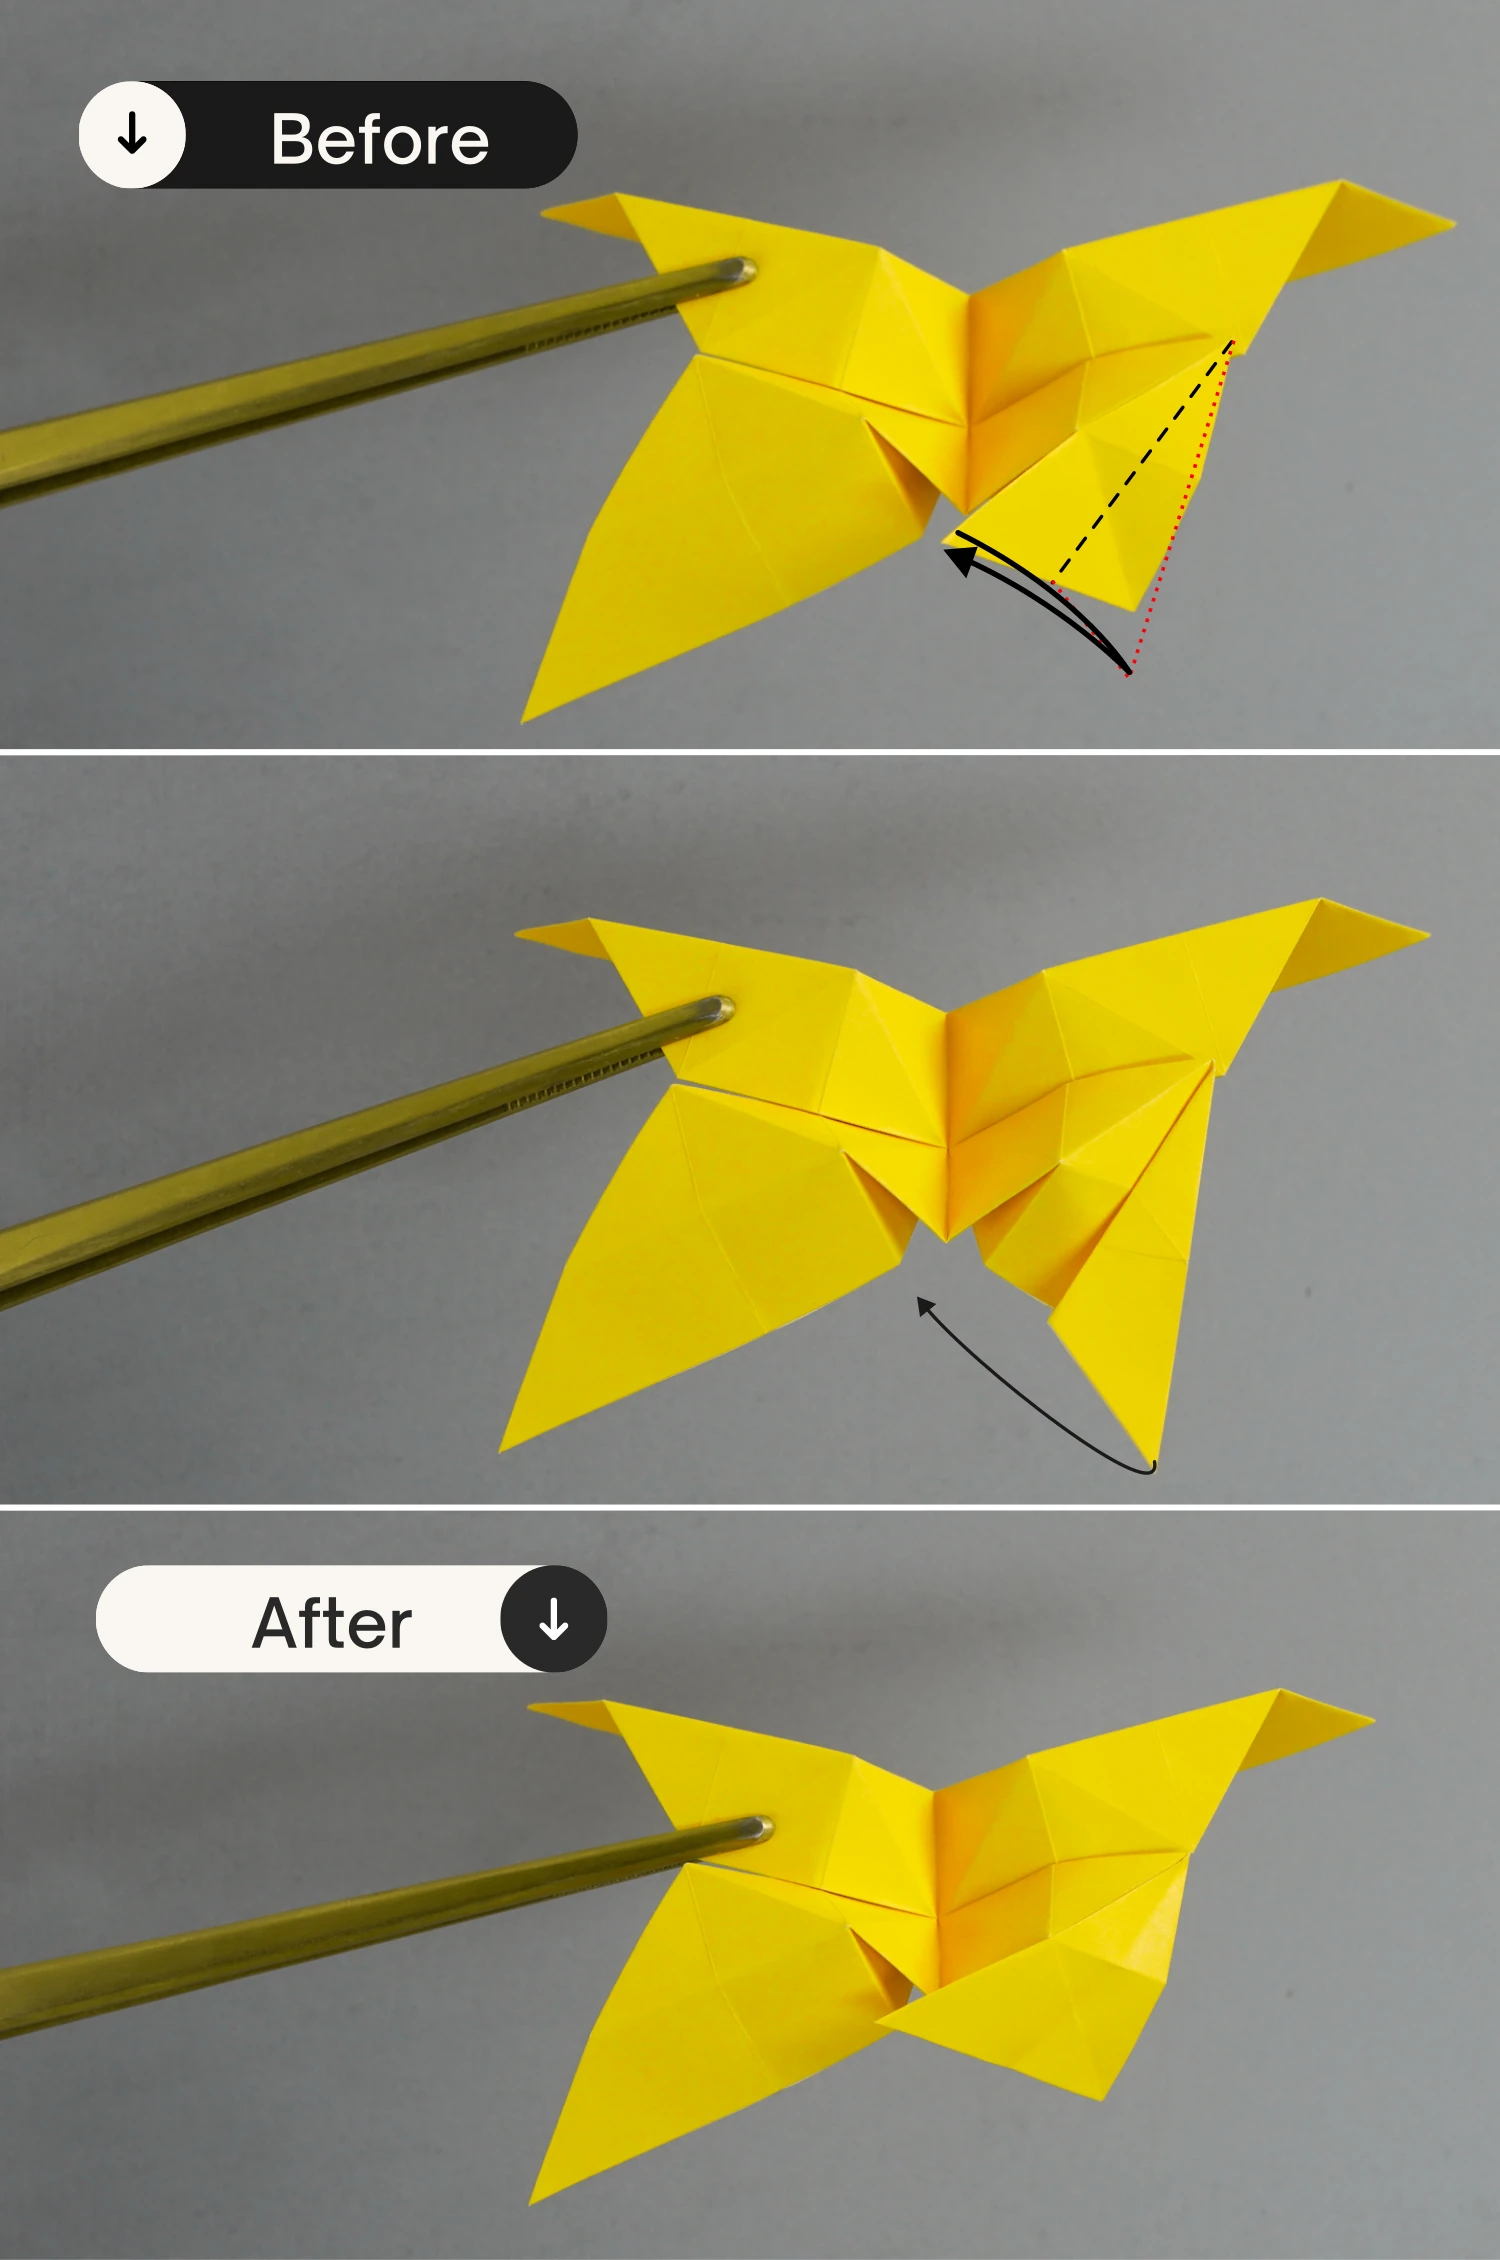
Step 21
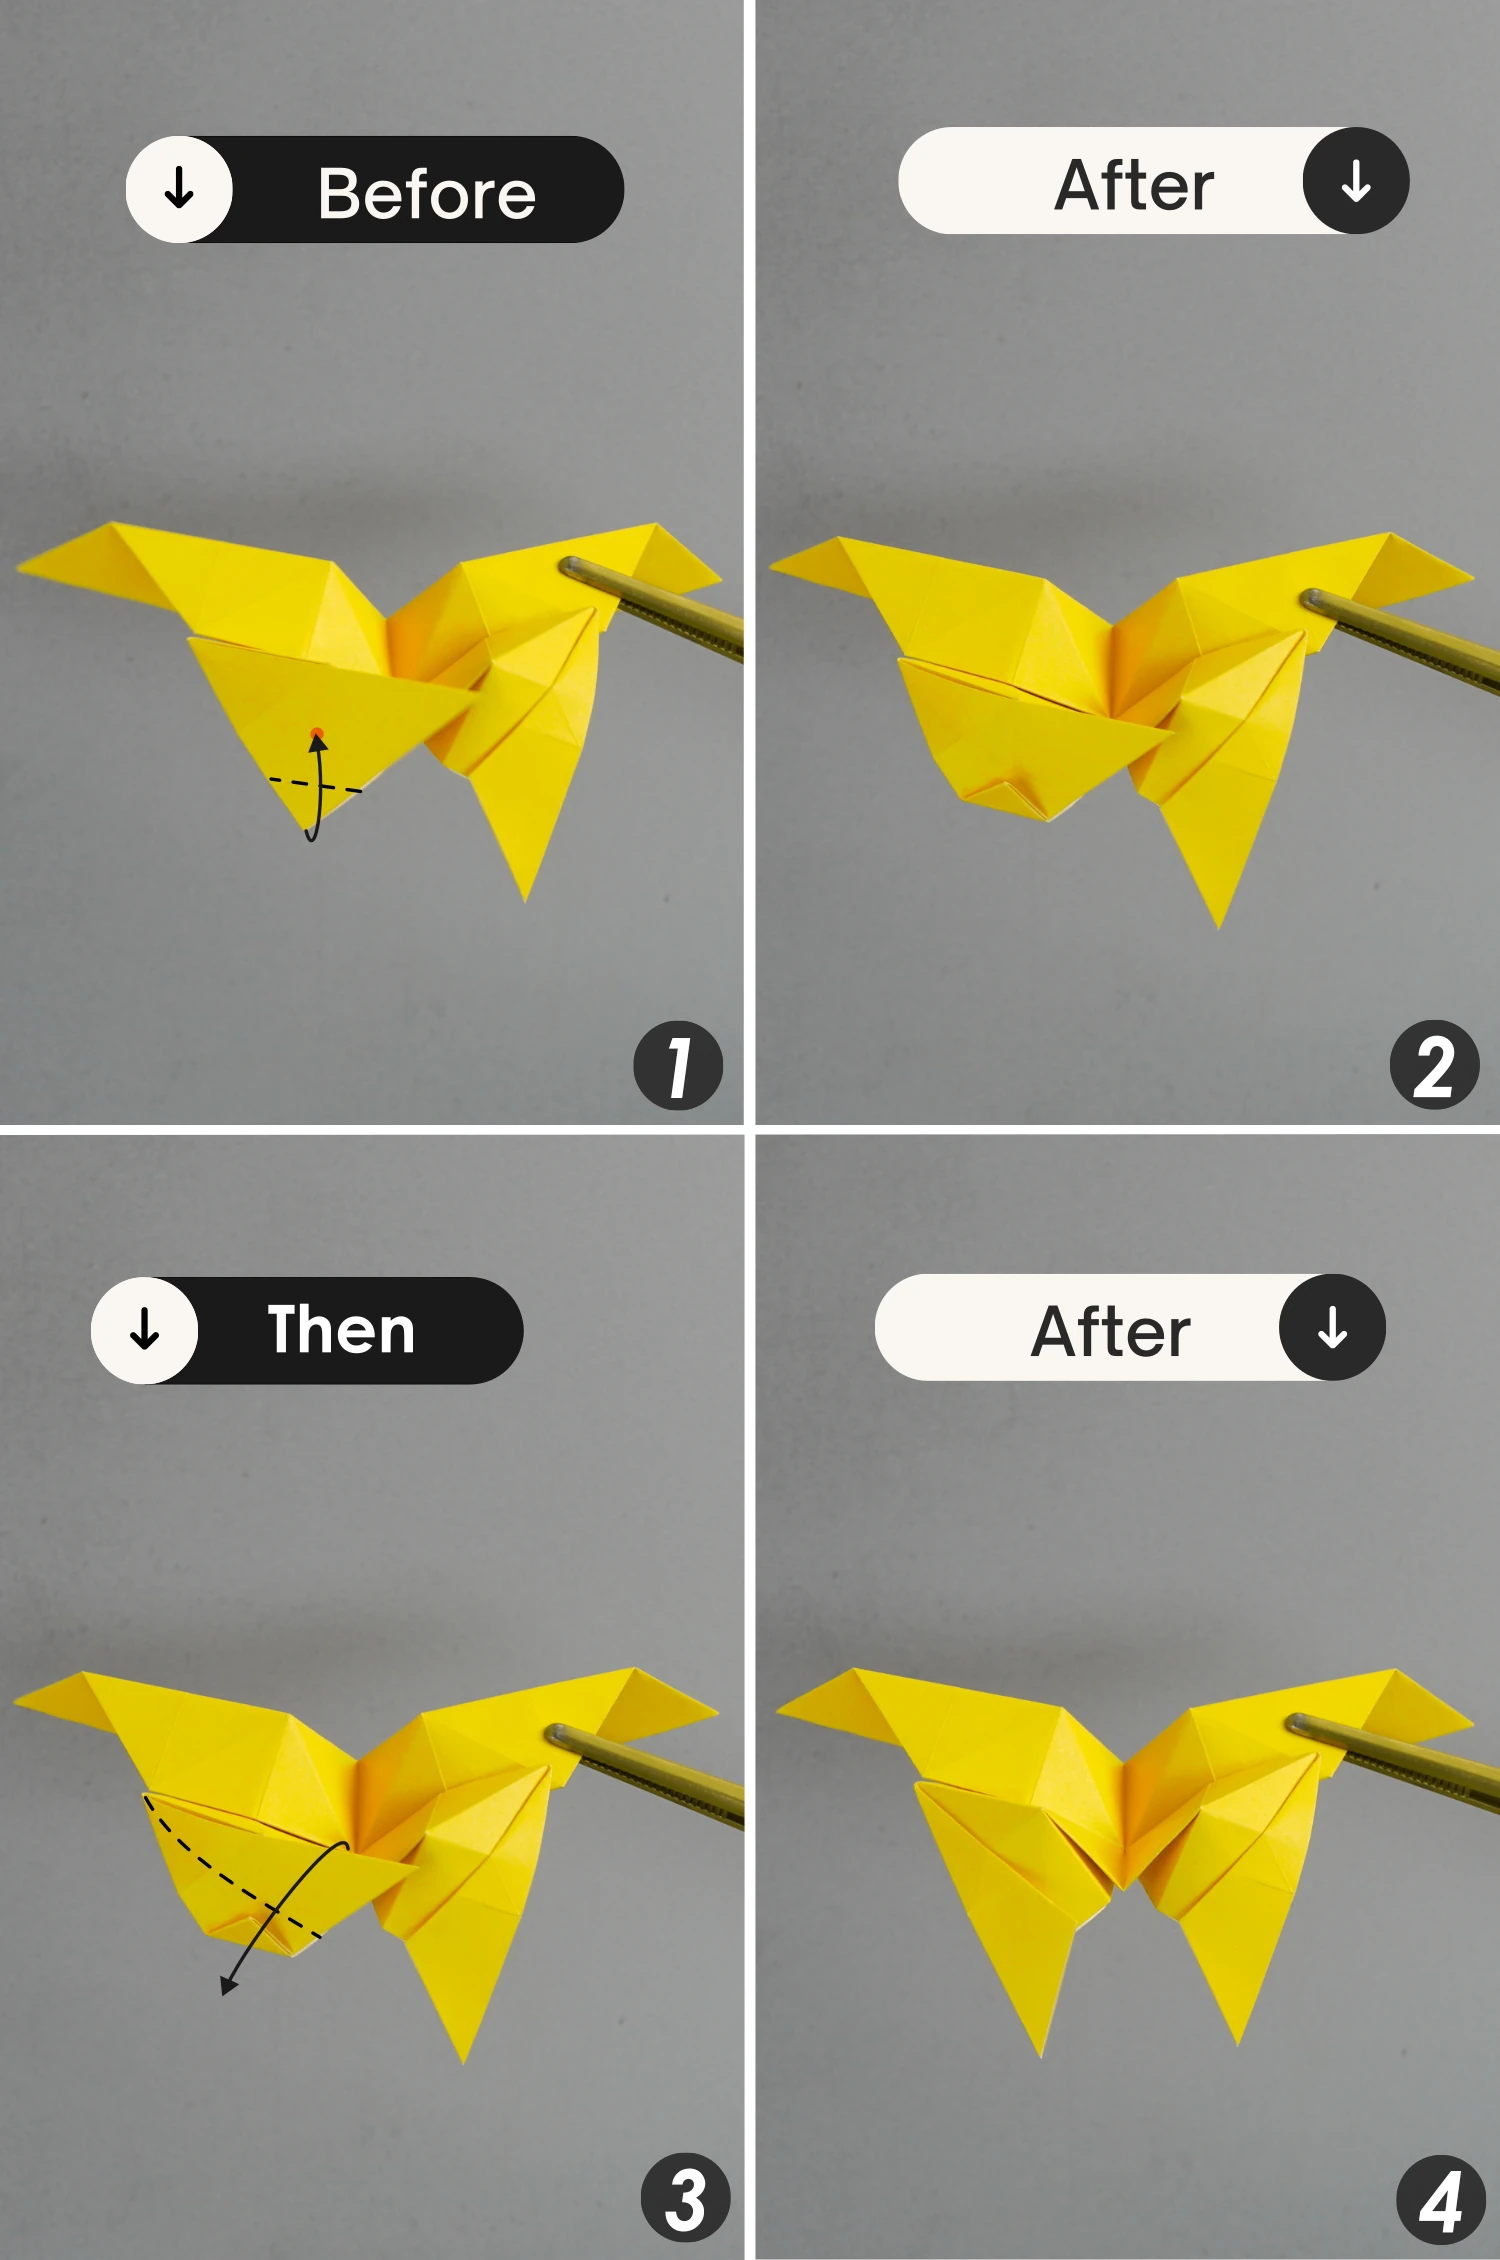
You can see here an intersection point formed by the two creases you made in the previous steps, shown by the red spot, next, you should fold the bottom right corner to meet this intersection point.
Then fold the left edge of this layer to the right again along the existing crease.
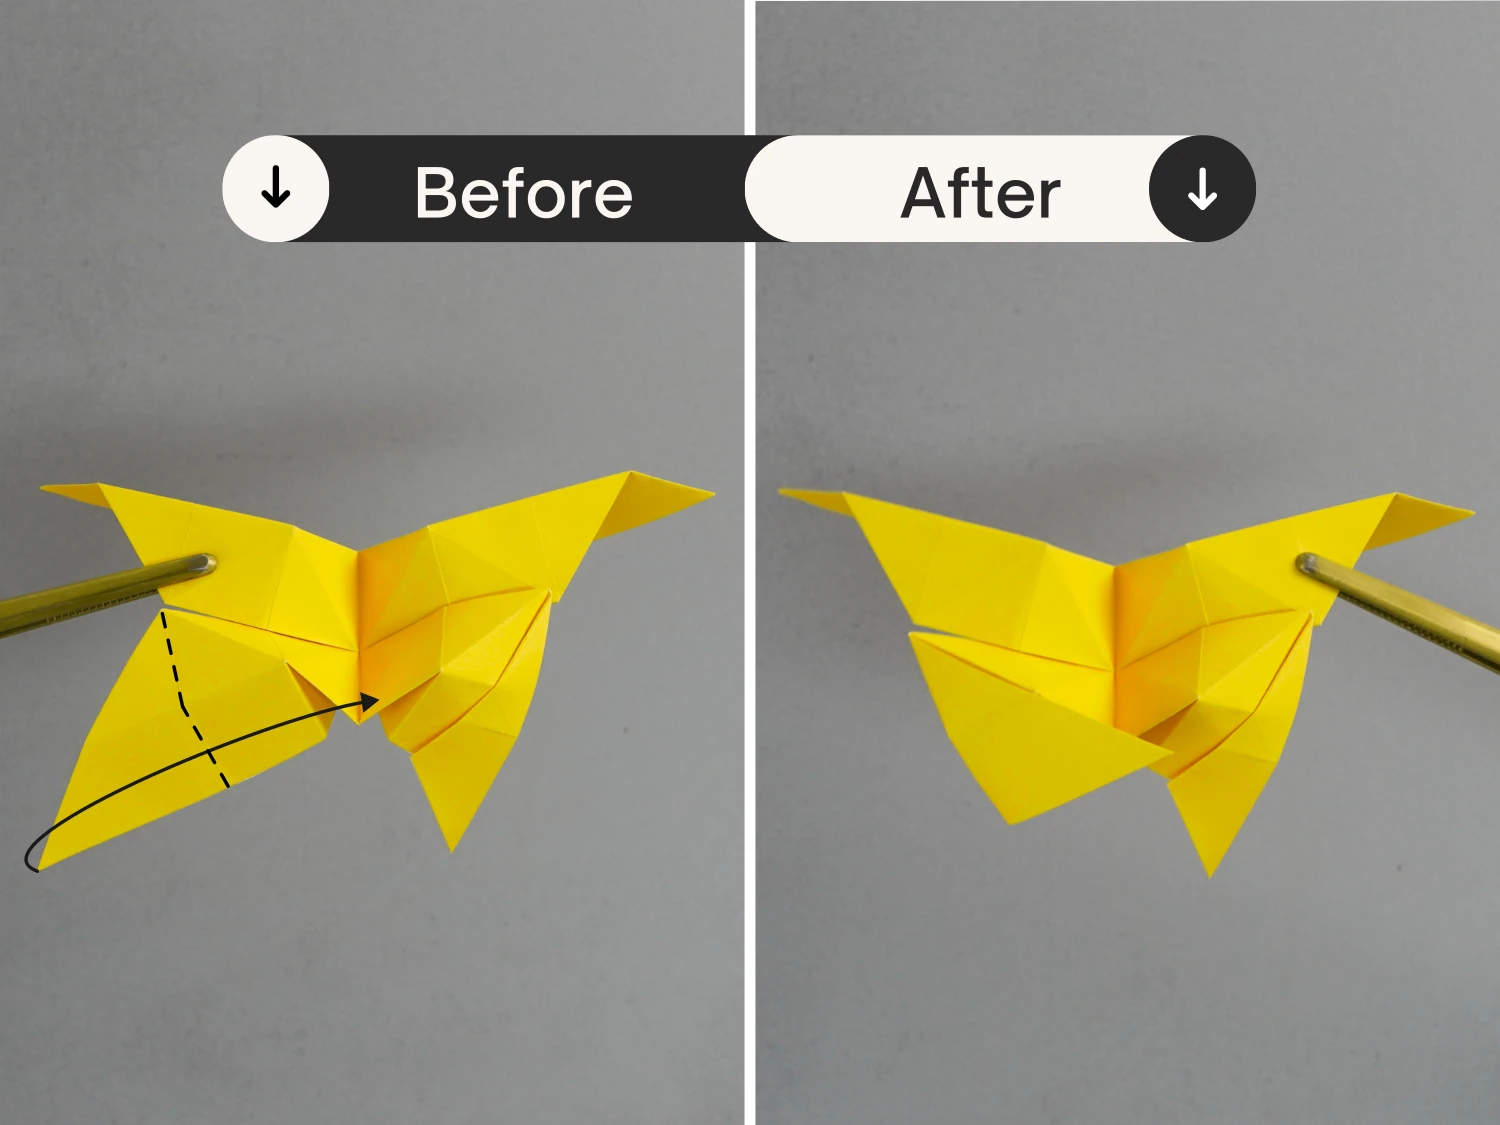
Step 22
Focus on the bottom left part, and fold the bottom left point toward the top right along the crease shown by the dotted line.
Step 23
Then fold it to its top left corner along the dotted line, leaving a crease then unfold.
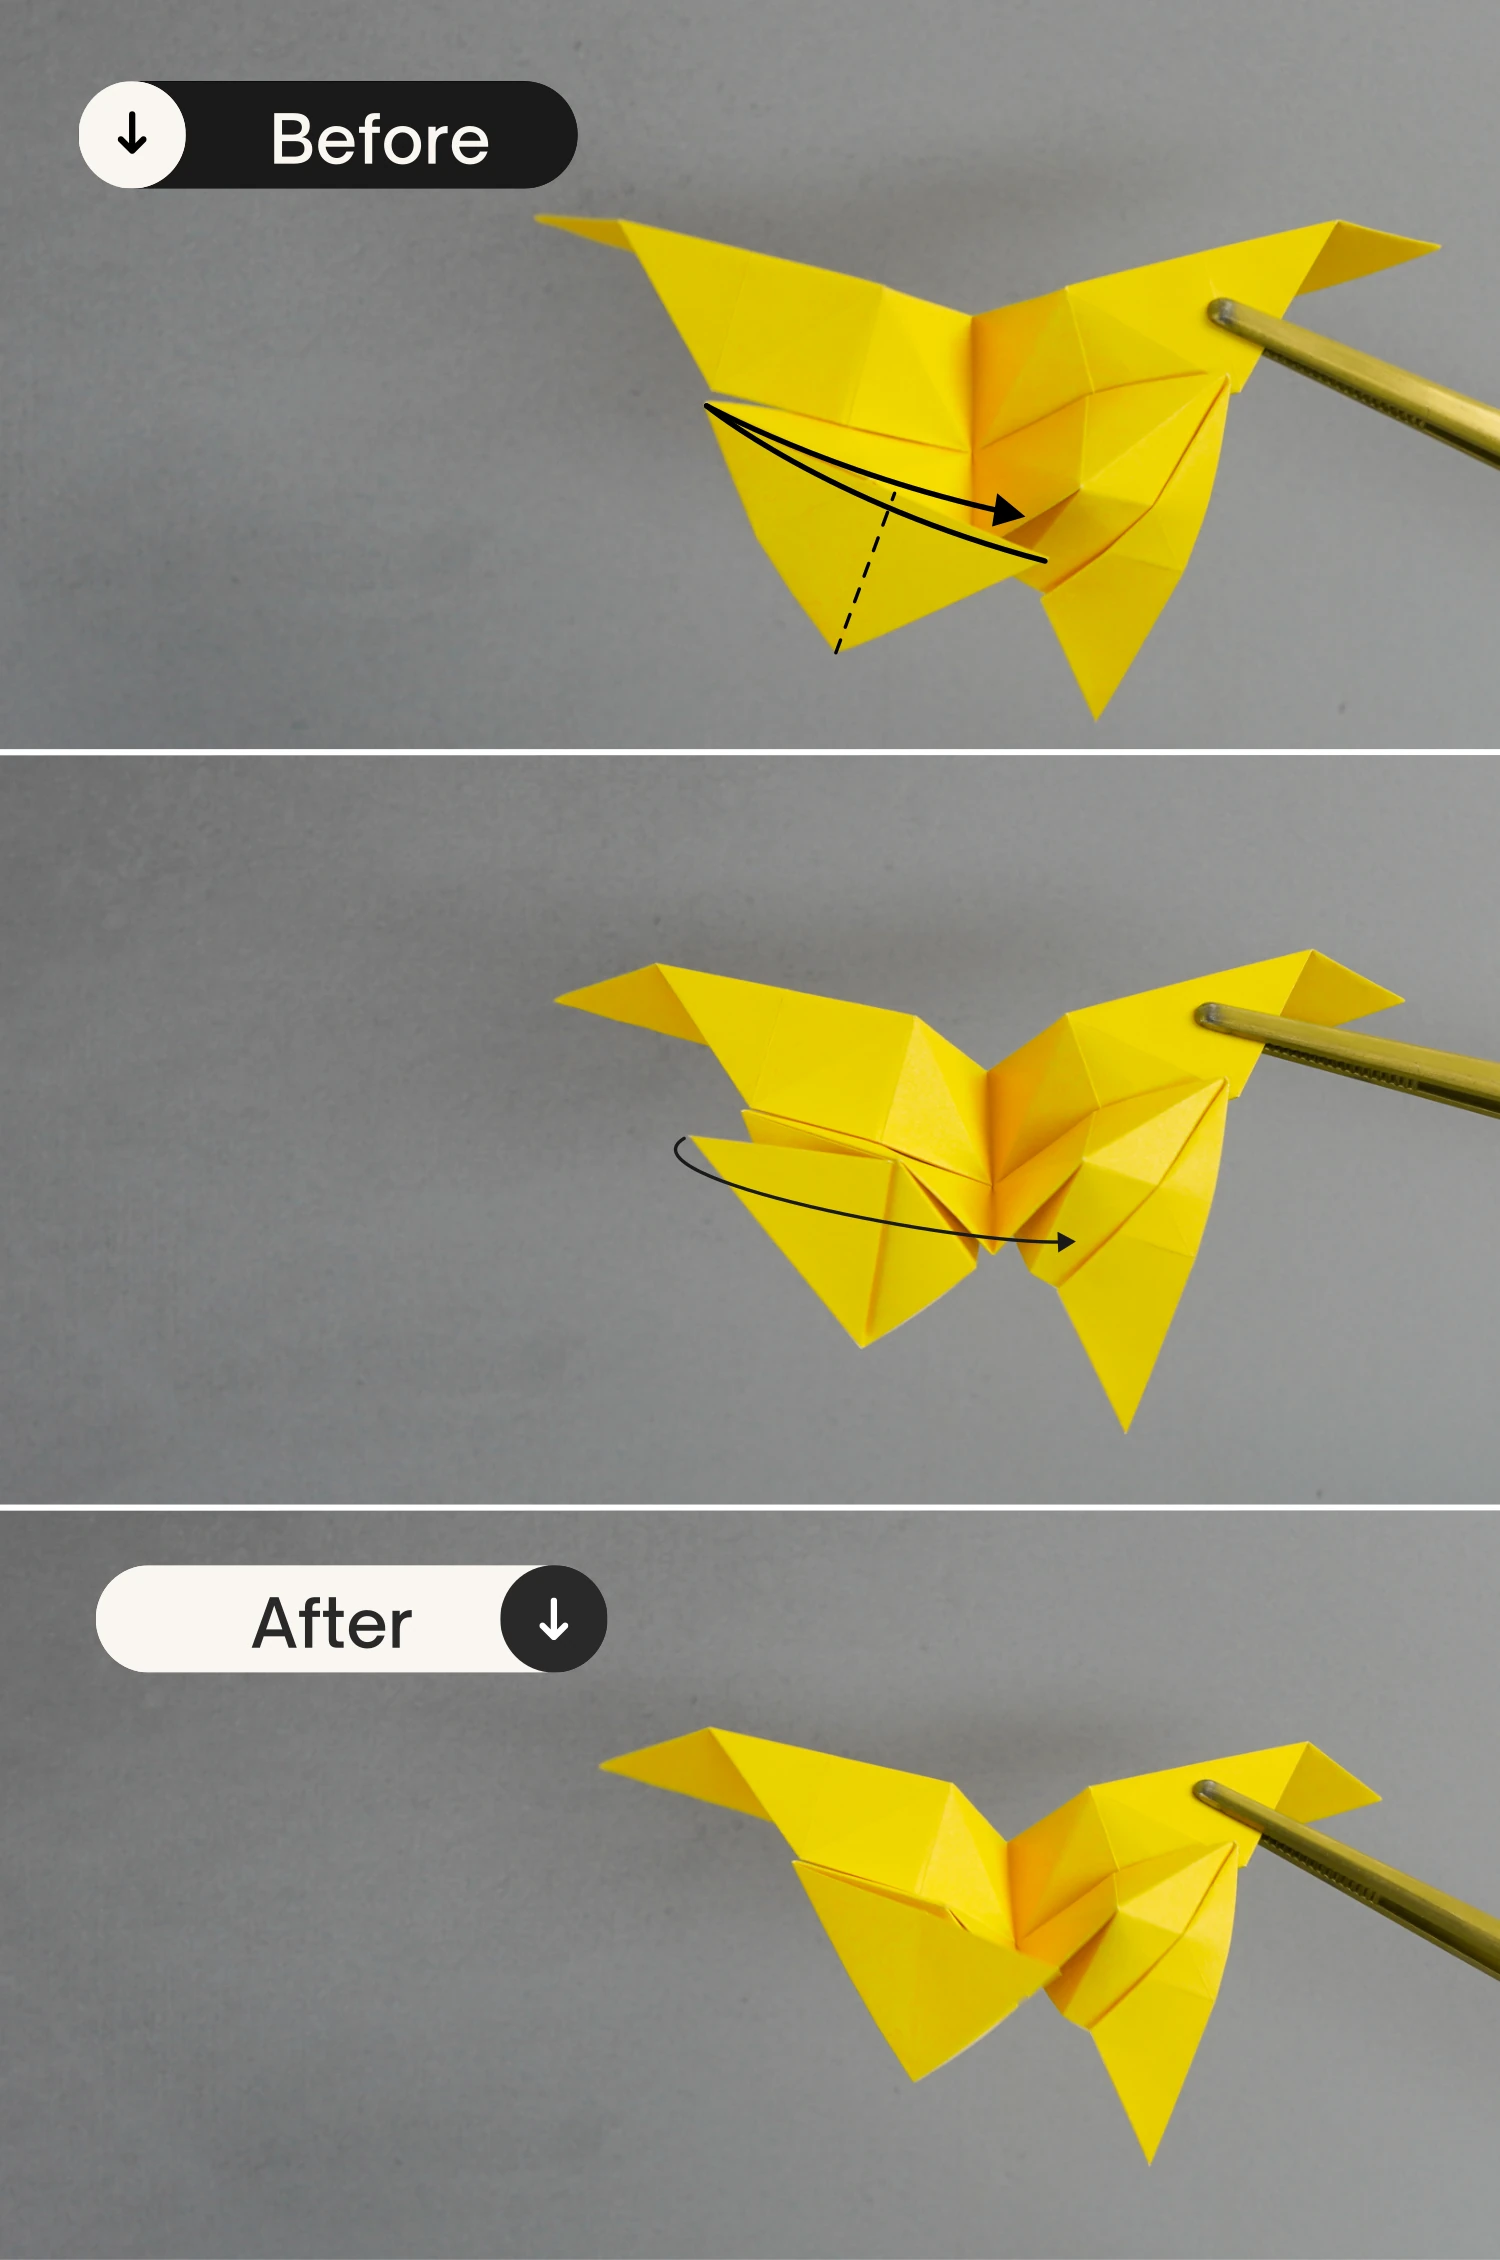
Step 24
Fold the top right edge of this folded layer to align with its left edge, leaving a crease then unfold.
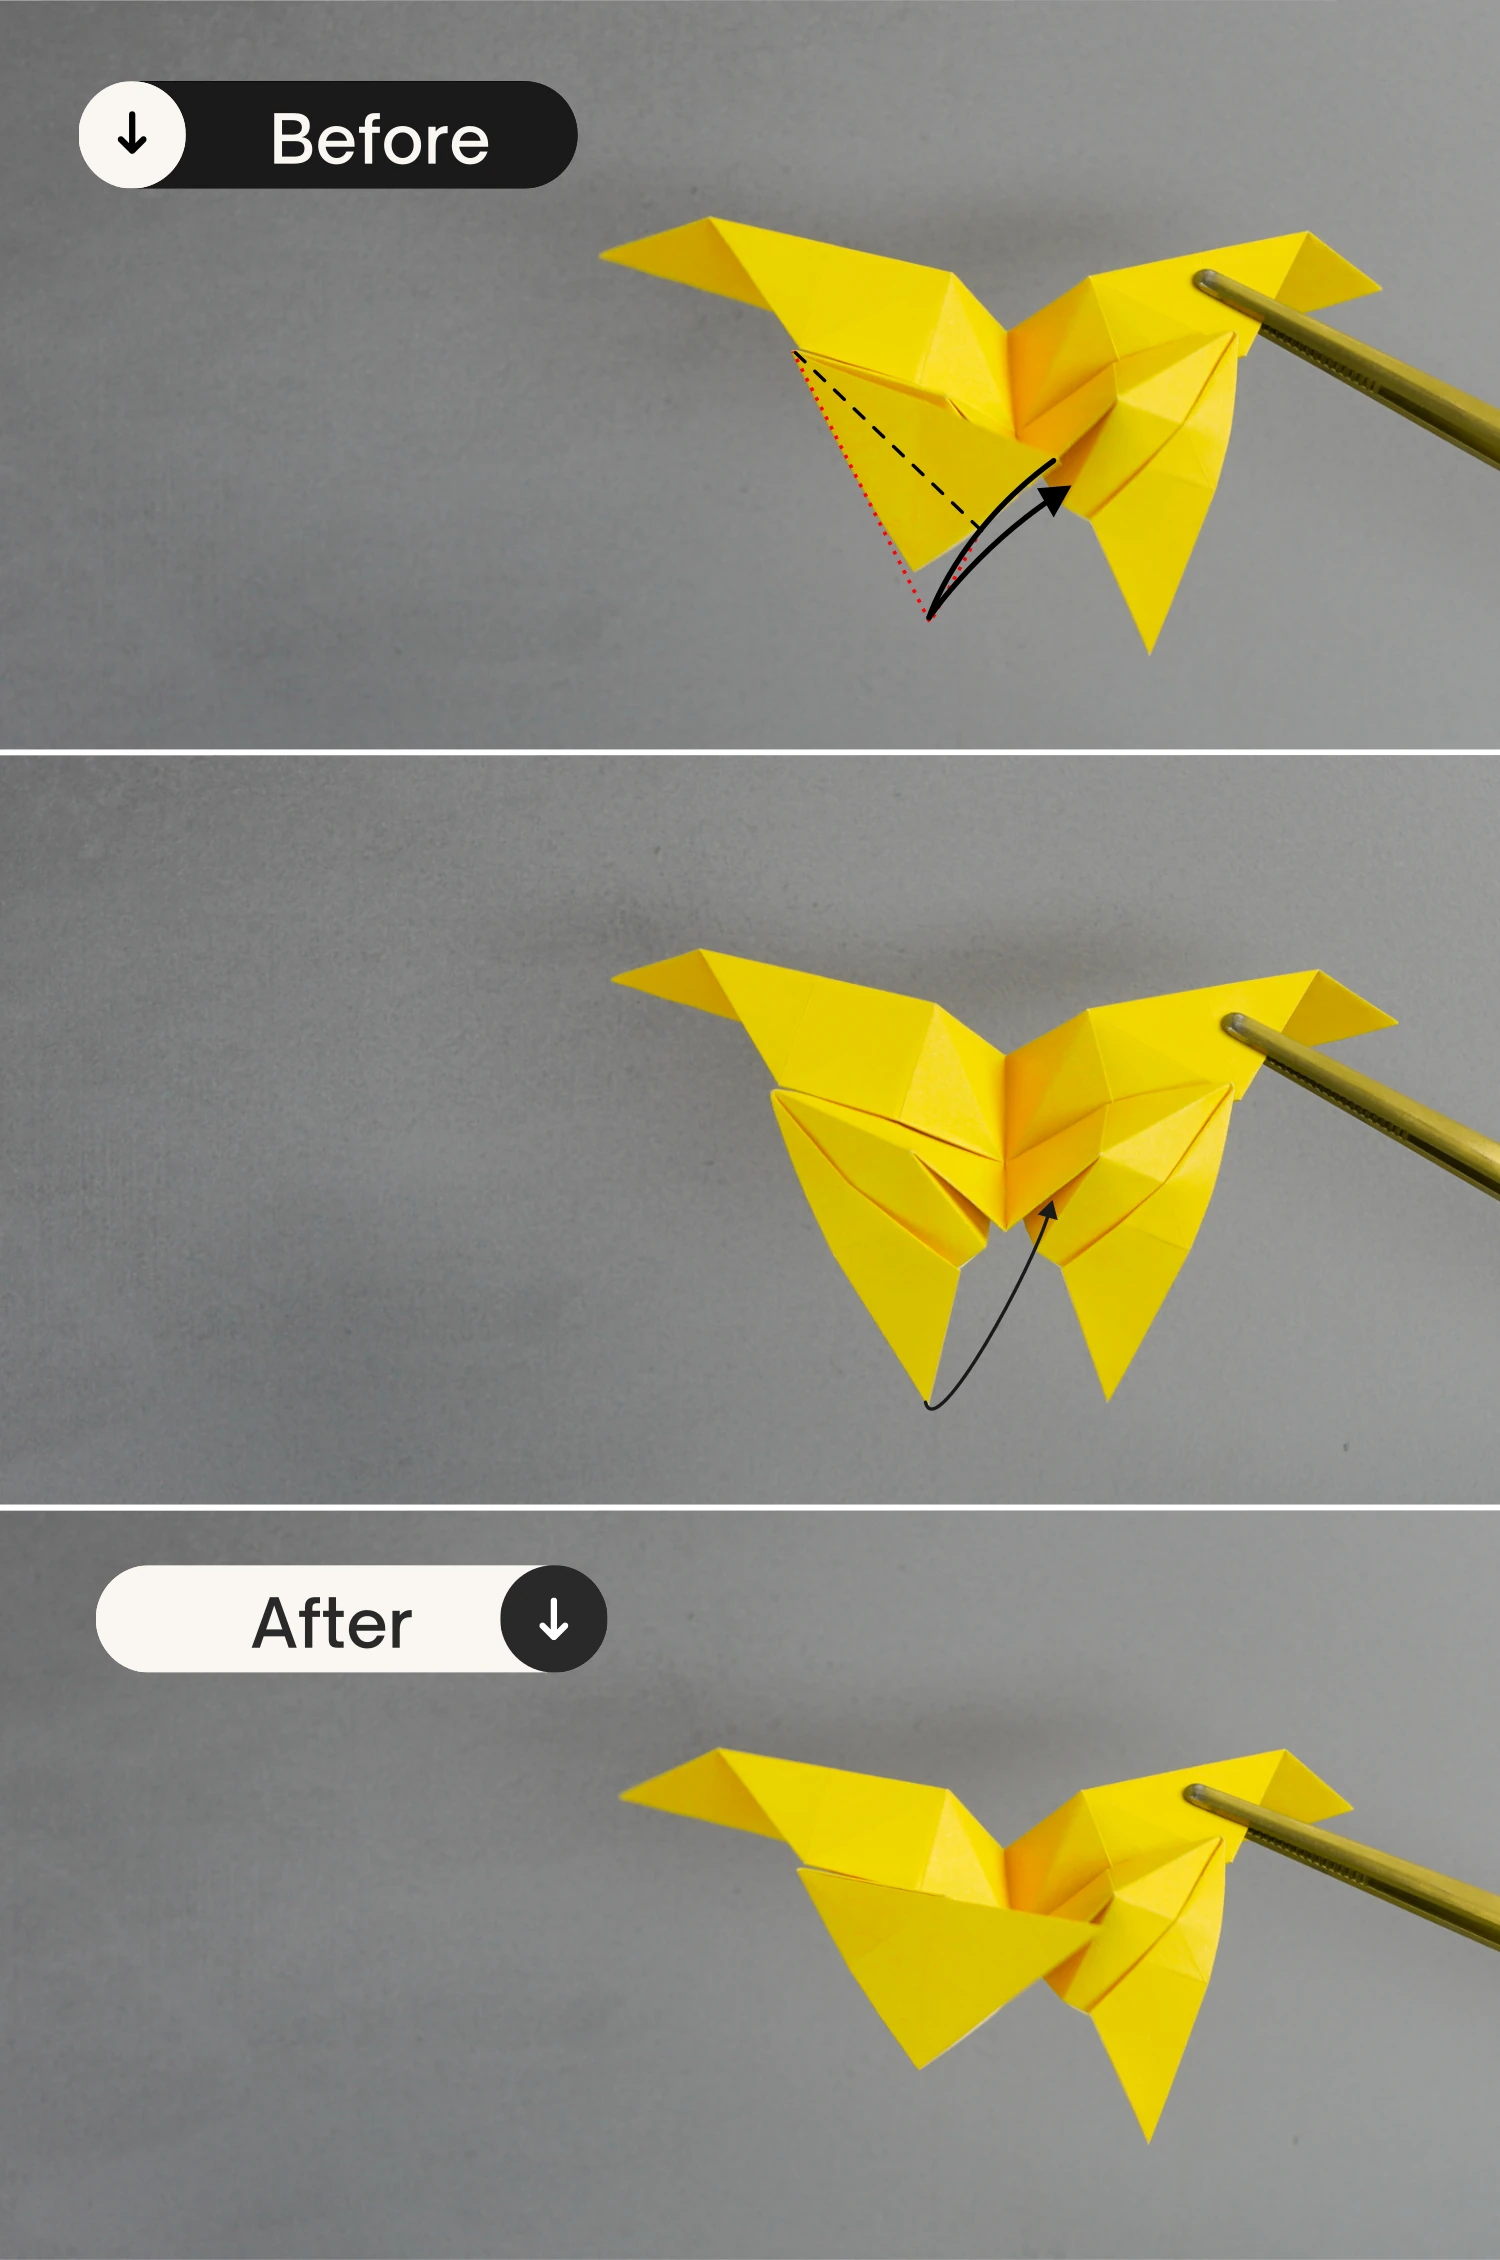
Step 25
Like before, fold the bottom left corner to meet the intersection point, and fold the top right edge of this layer to align with its left edge again.
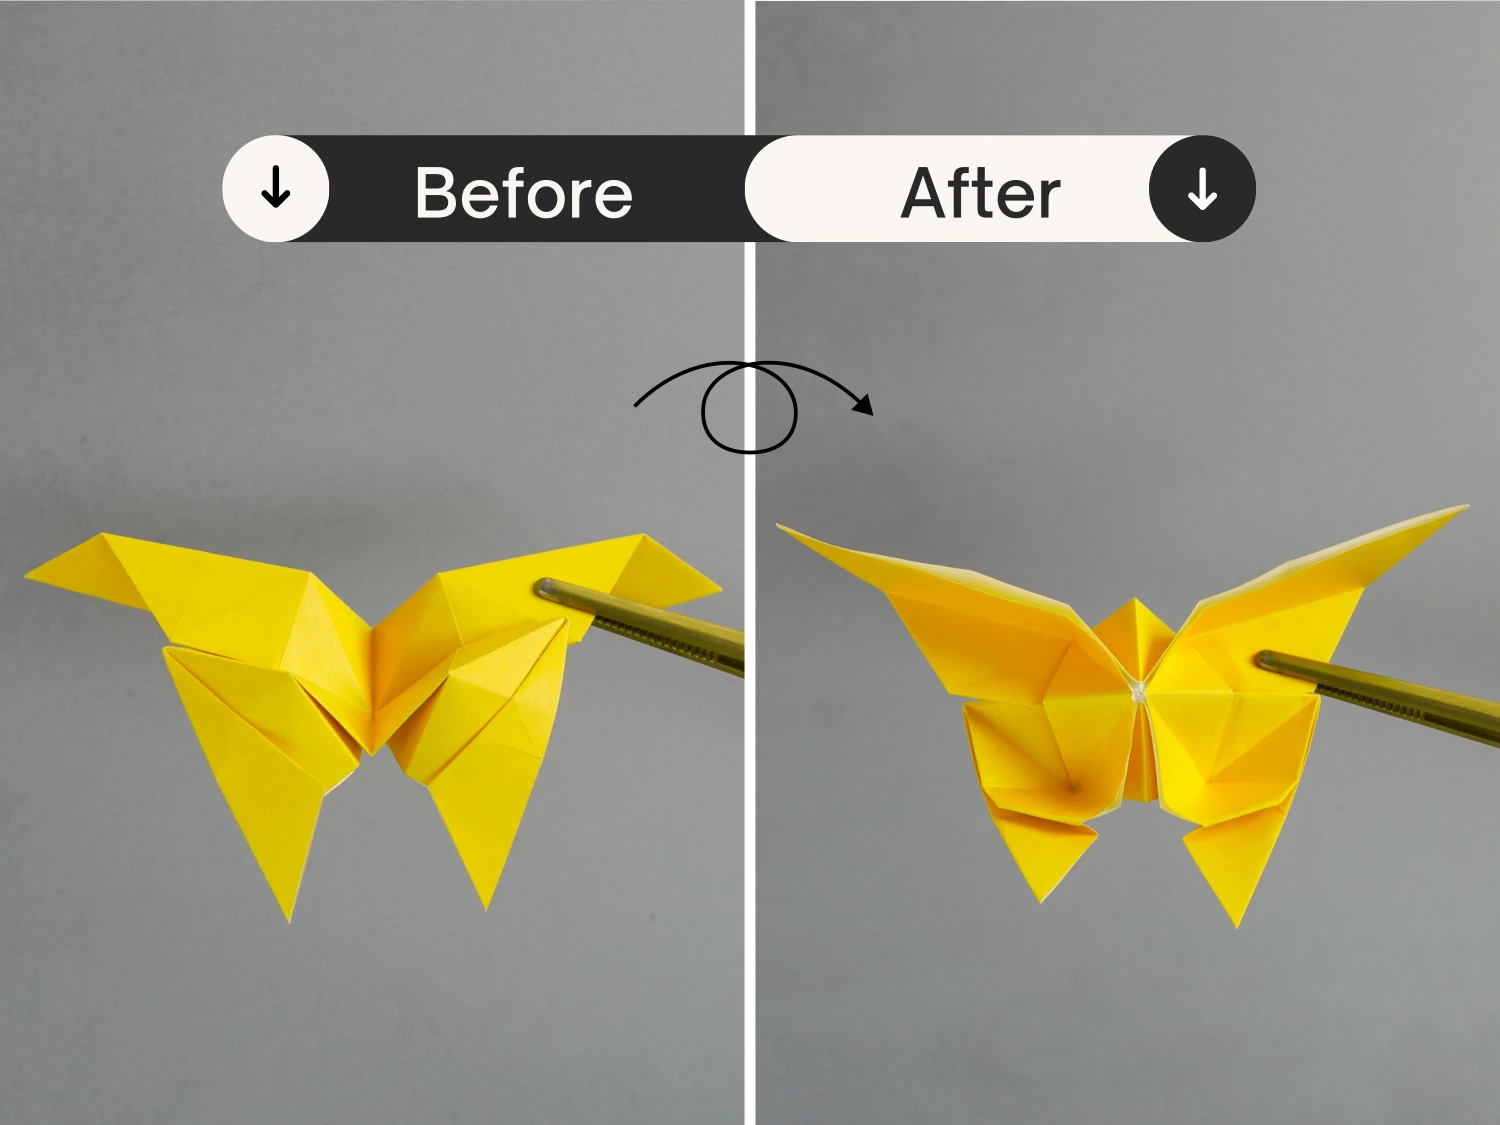
Step 26
Turn over the model.
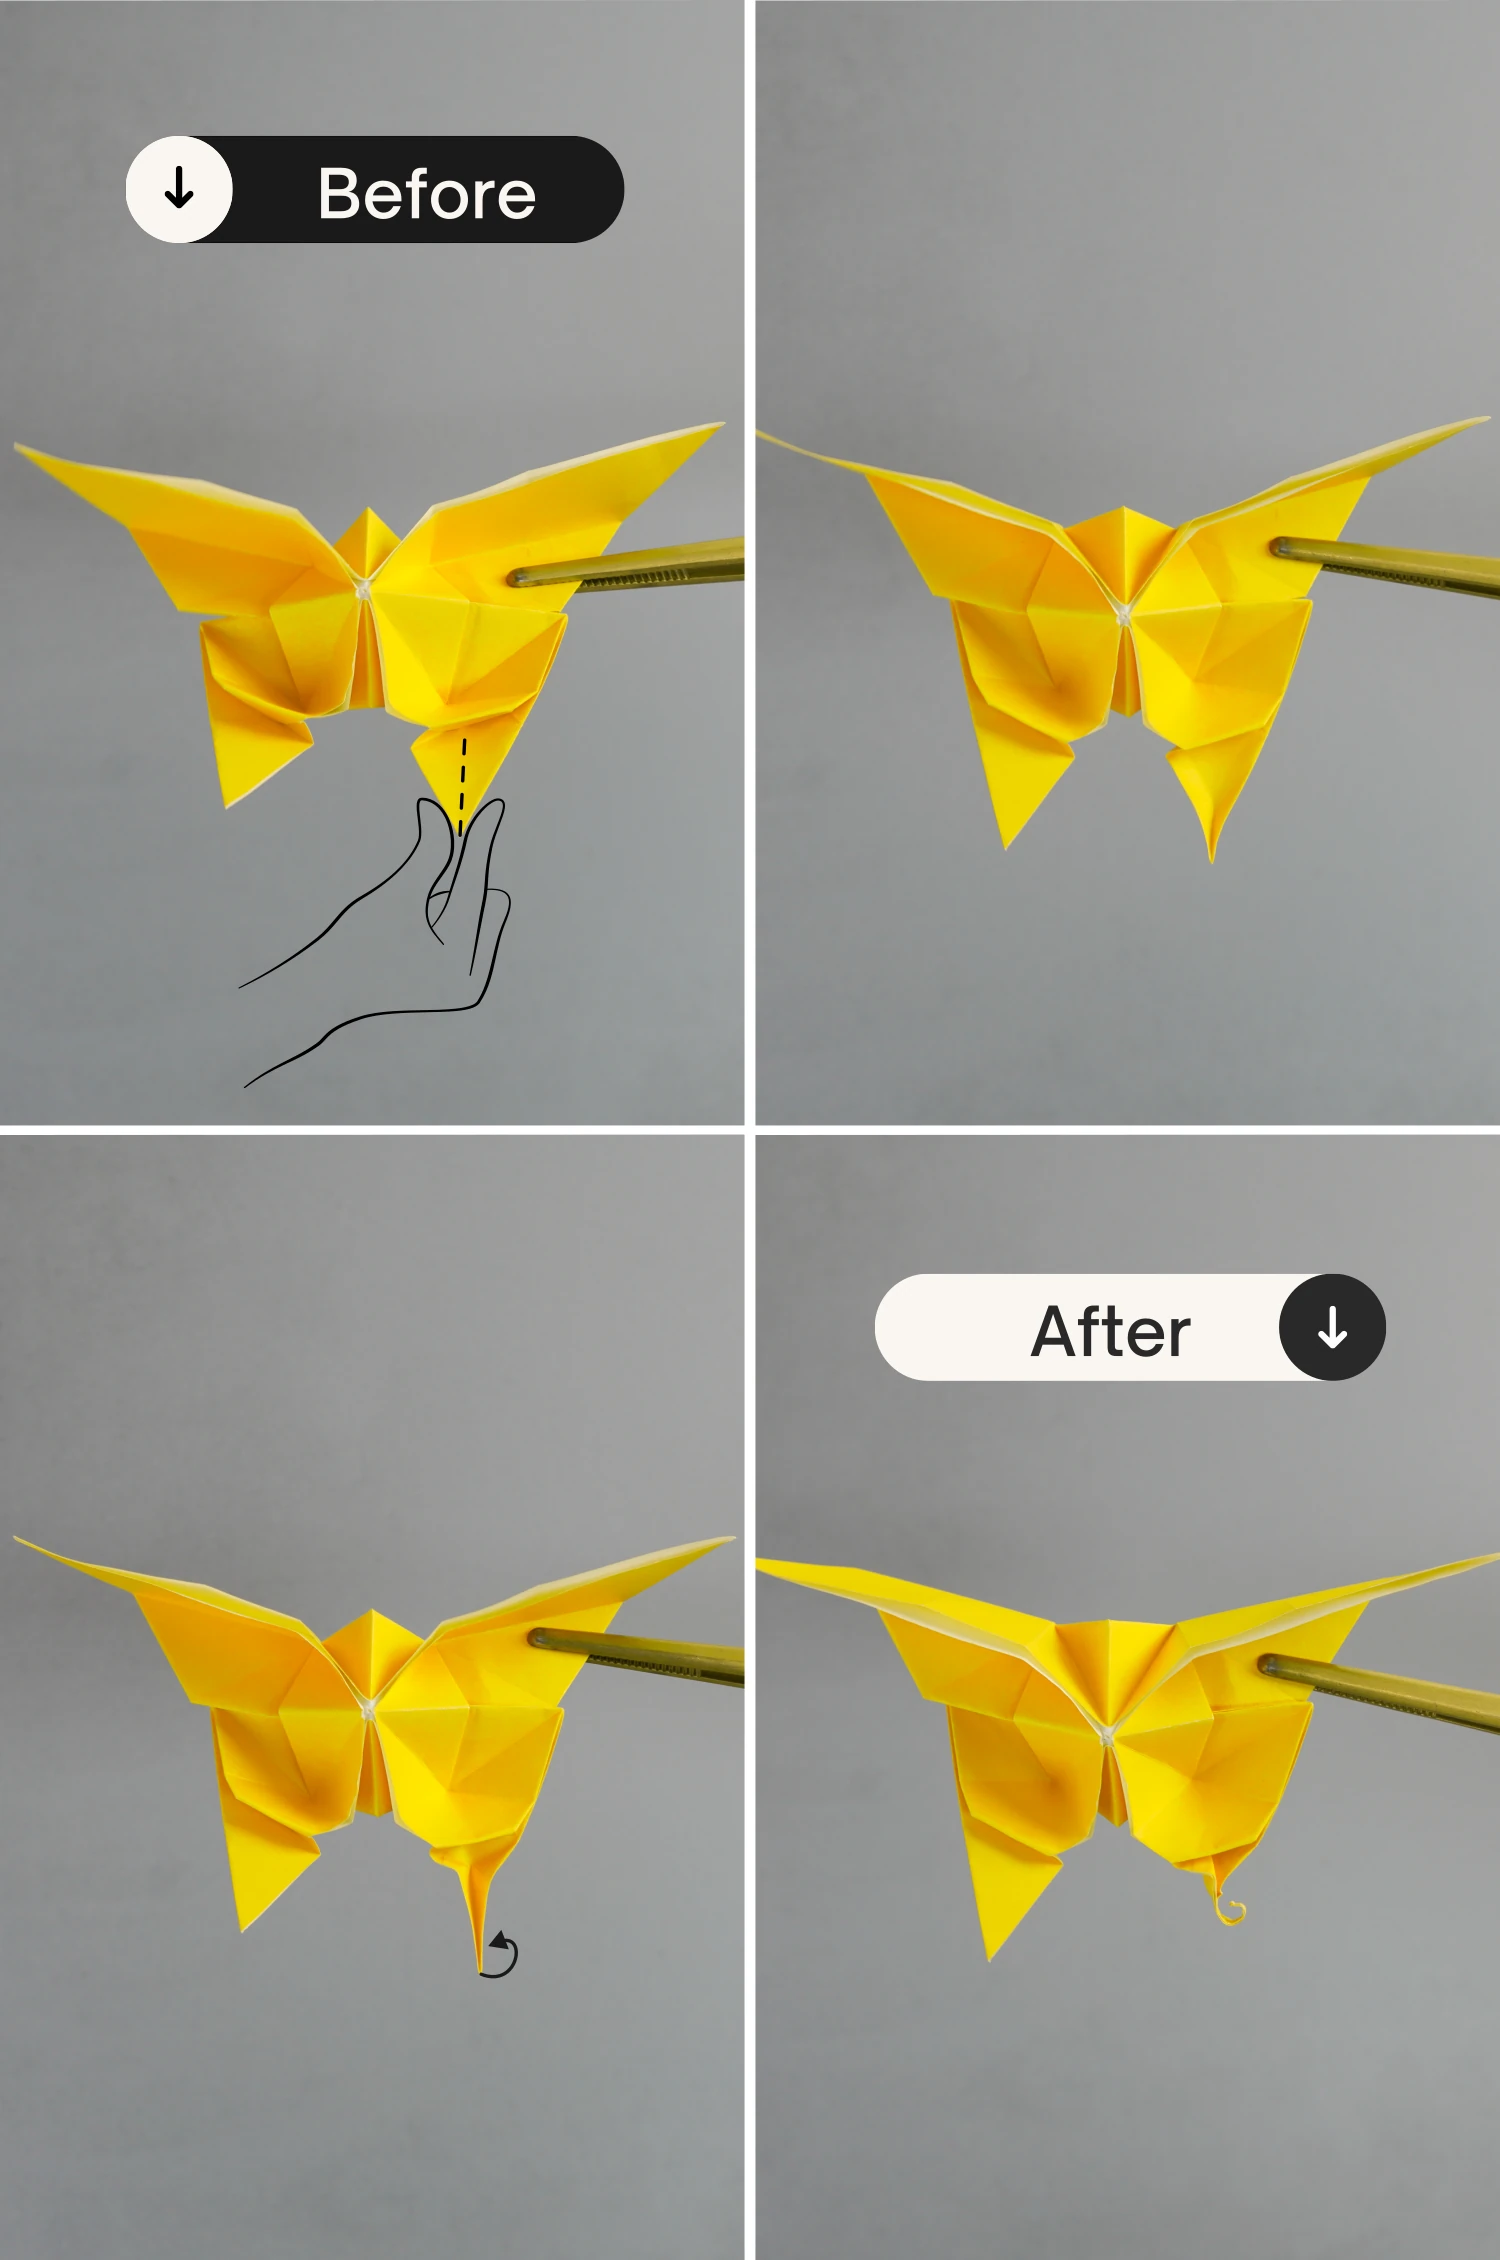
Step 27
Sharpen the bottom right corner, and bend it to the right side.
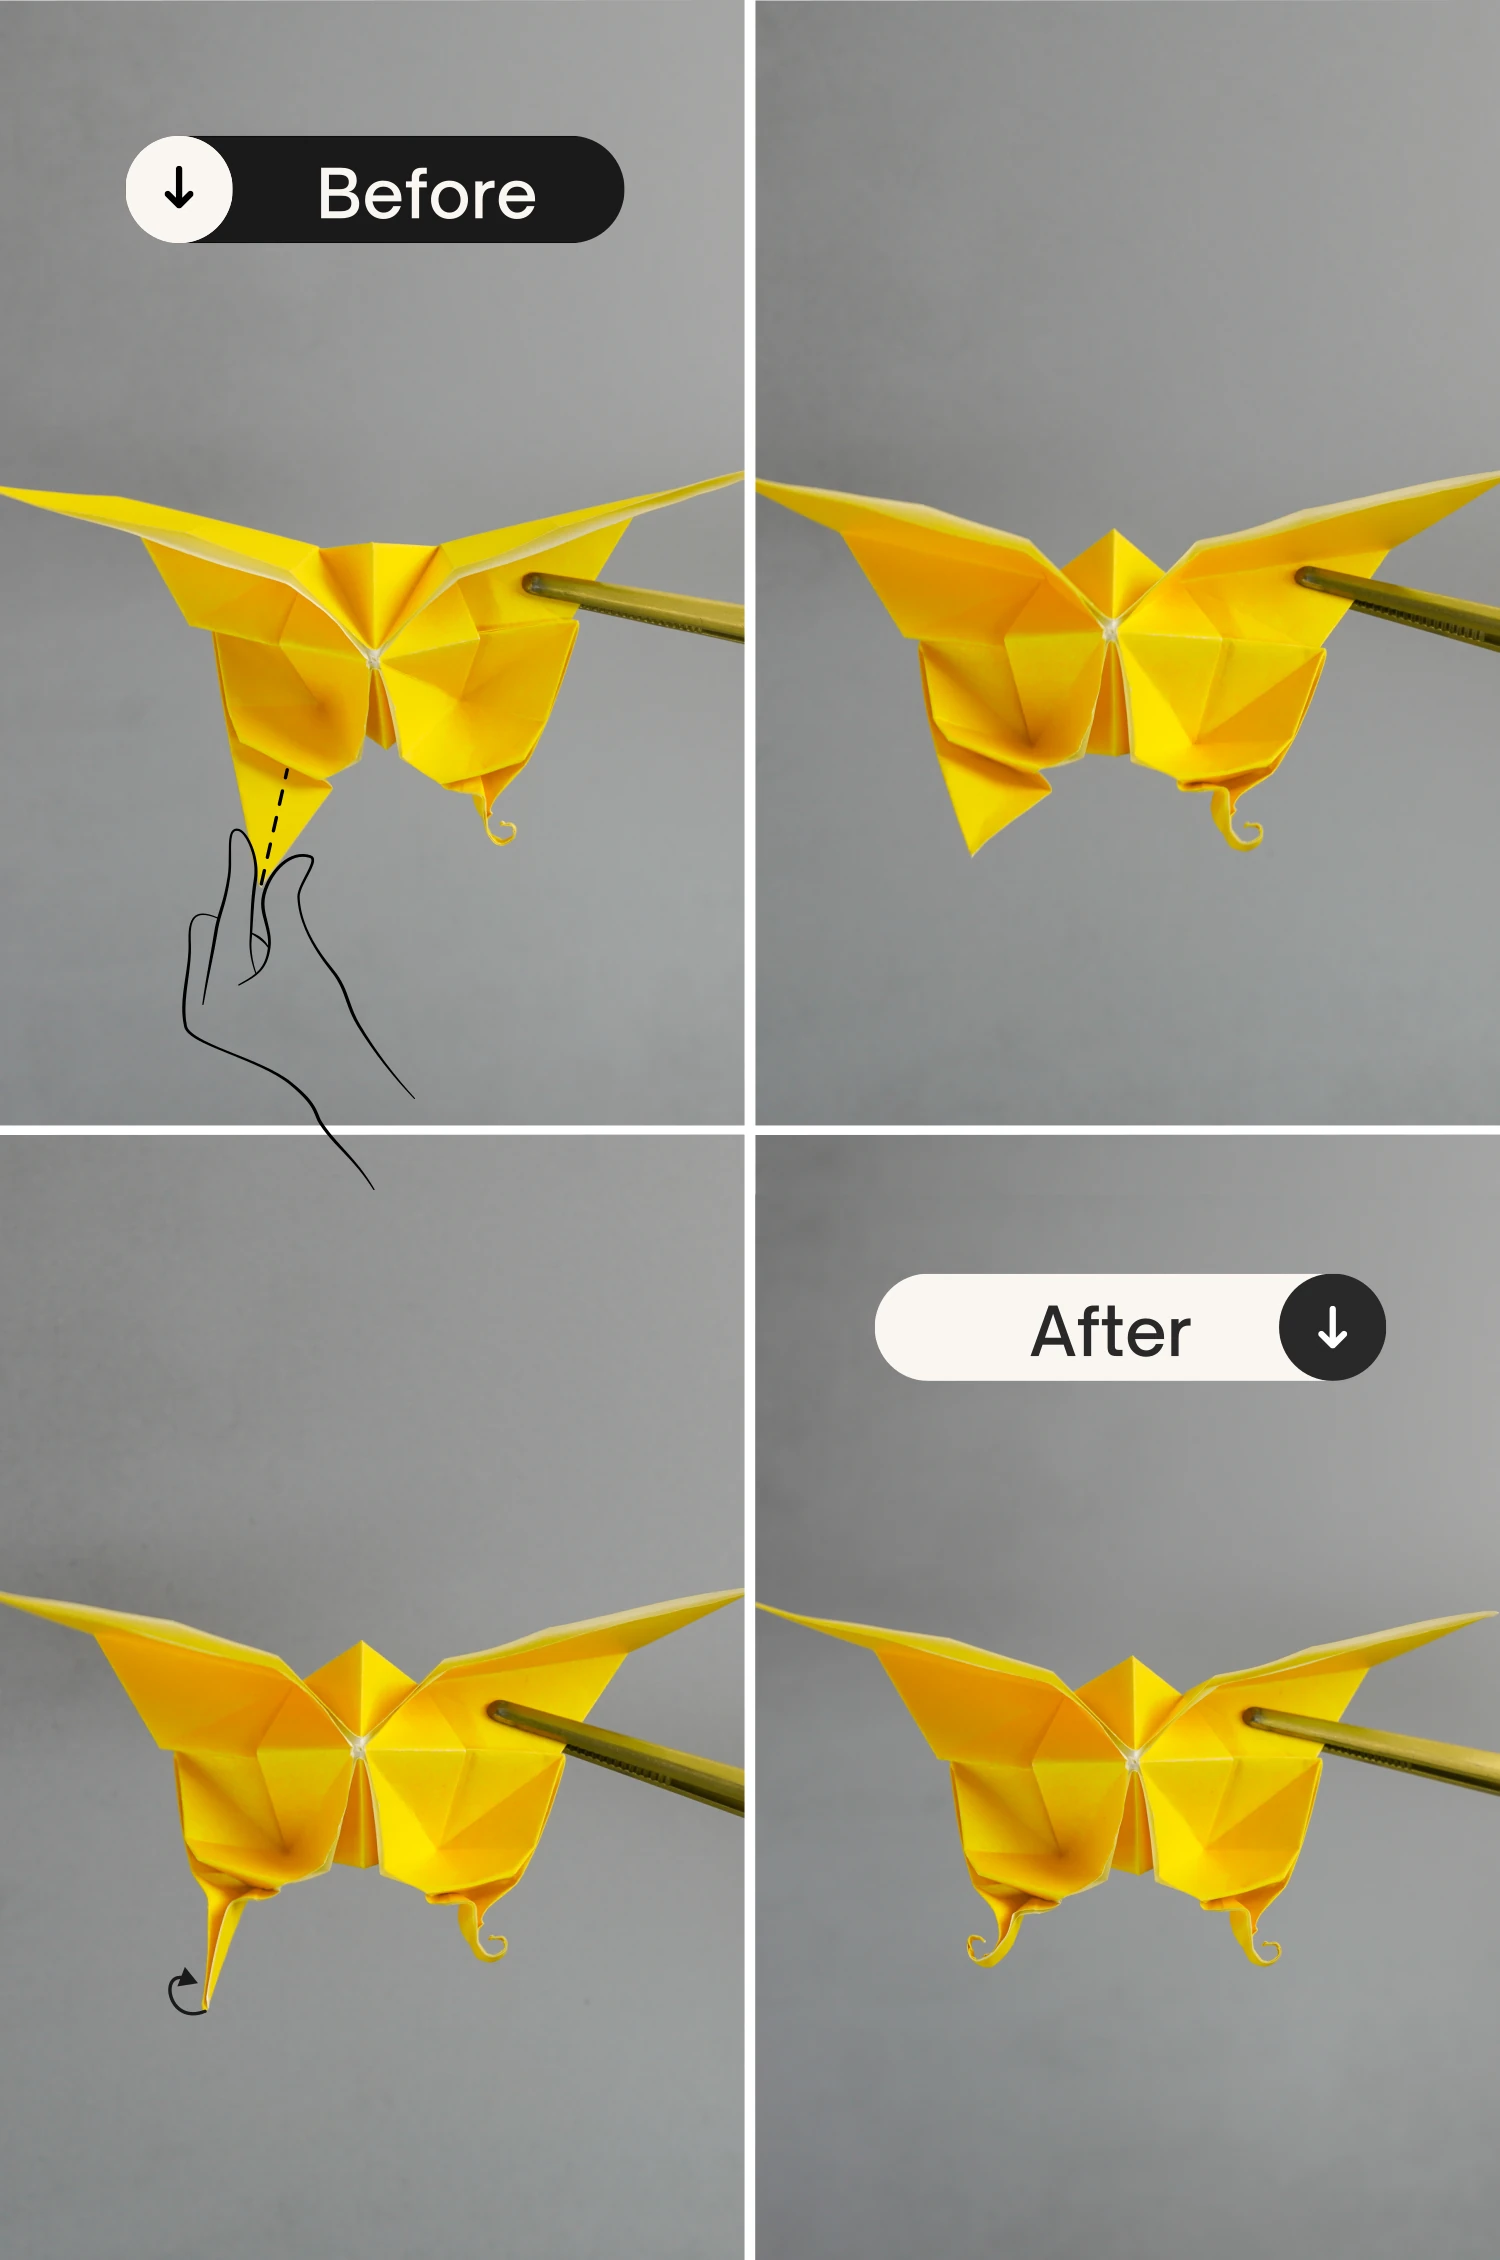
Step 28
Similarly, sharpen the bottom left corner and bend it to the left side.
Step 29
Flip the paper over.
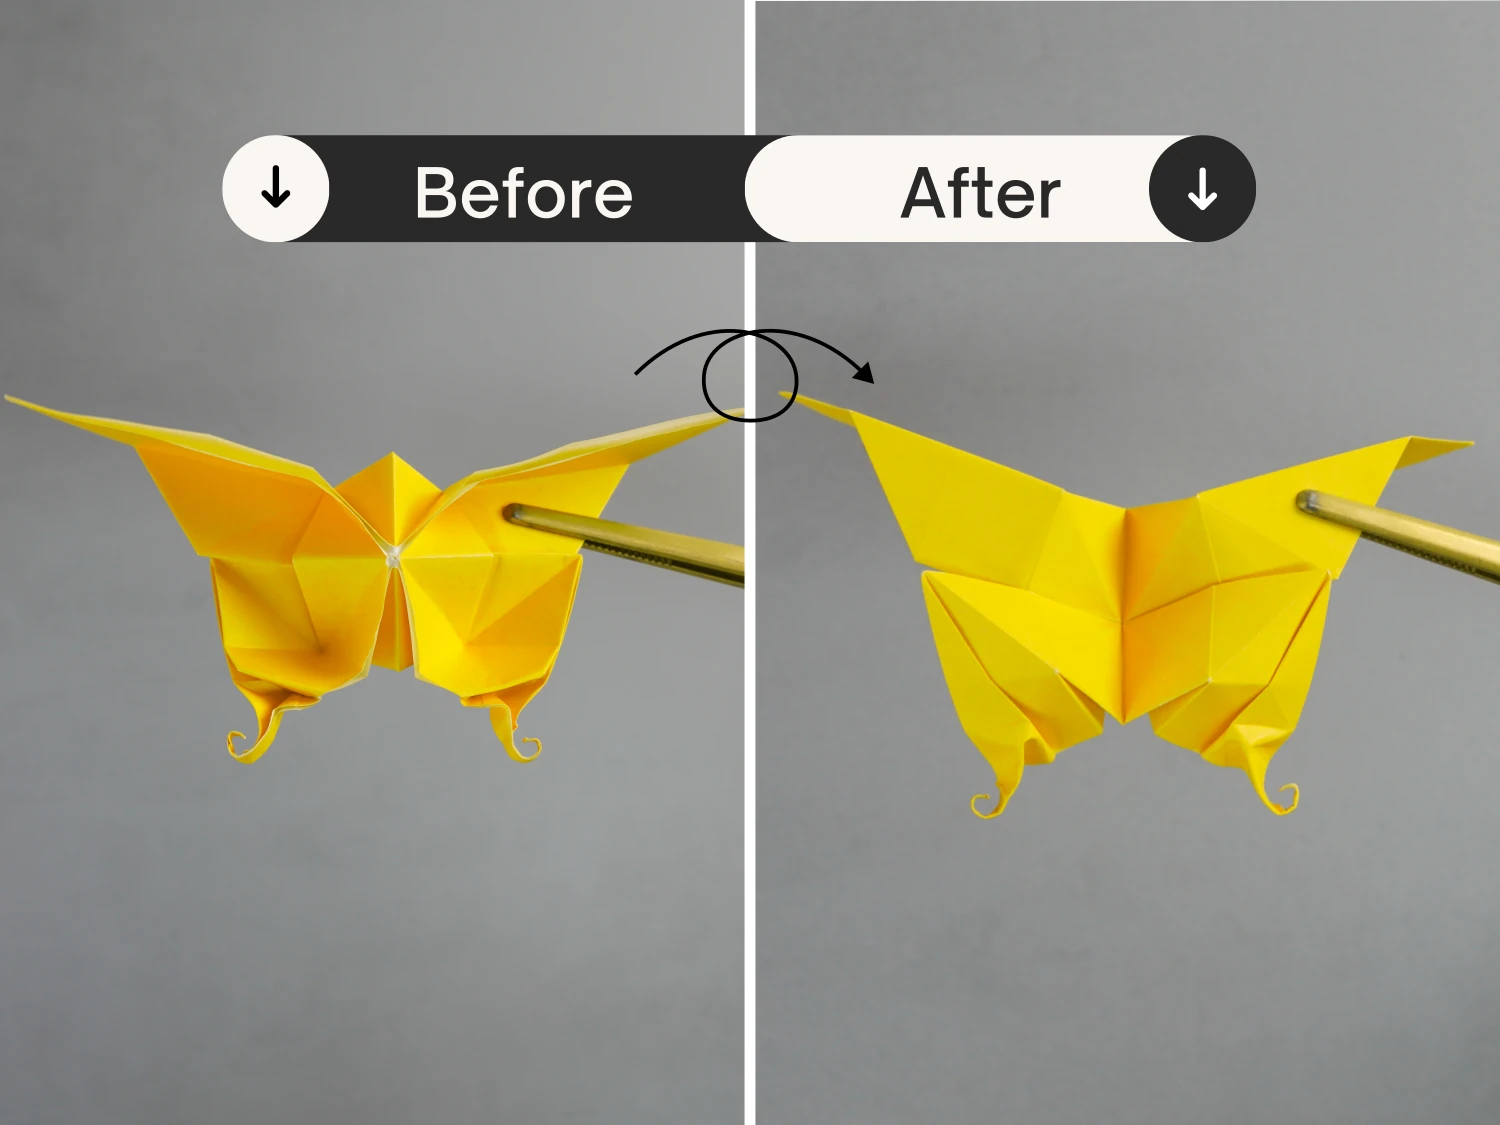
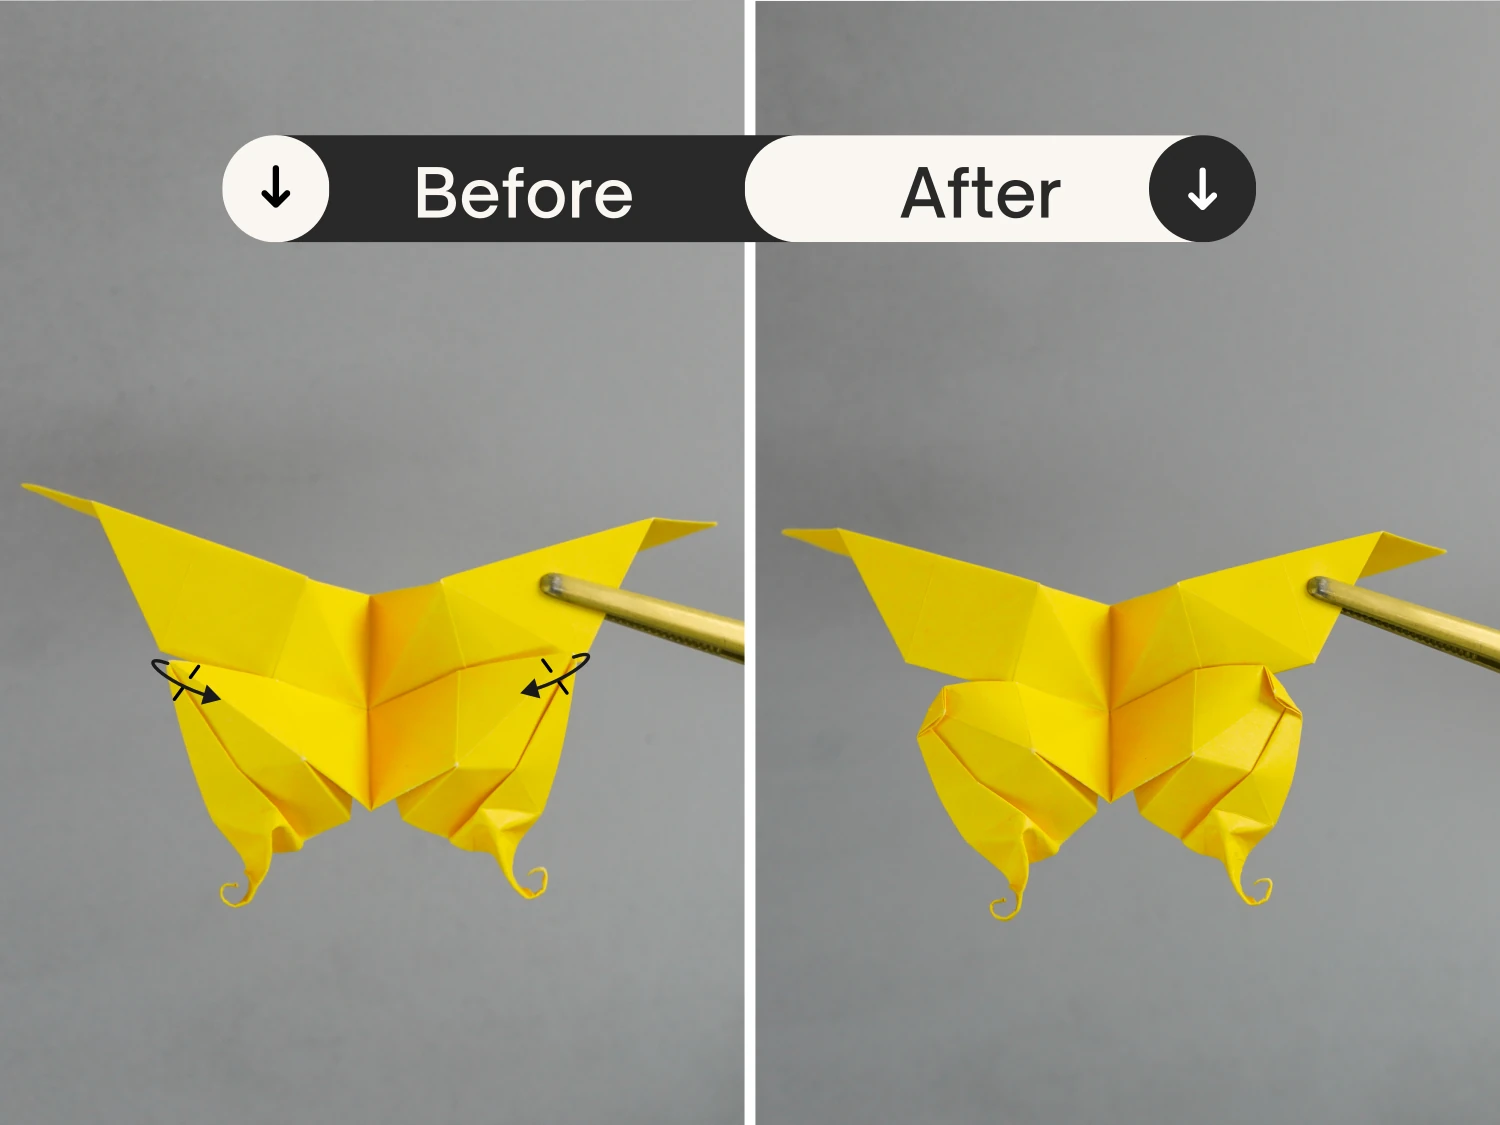
Step 30
Fold the top left corner of the bottom left part and the top right corner of the bottom right part a little.
Step 31
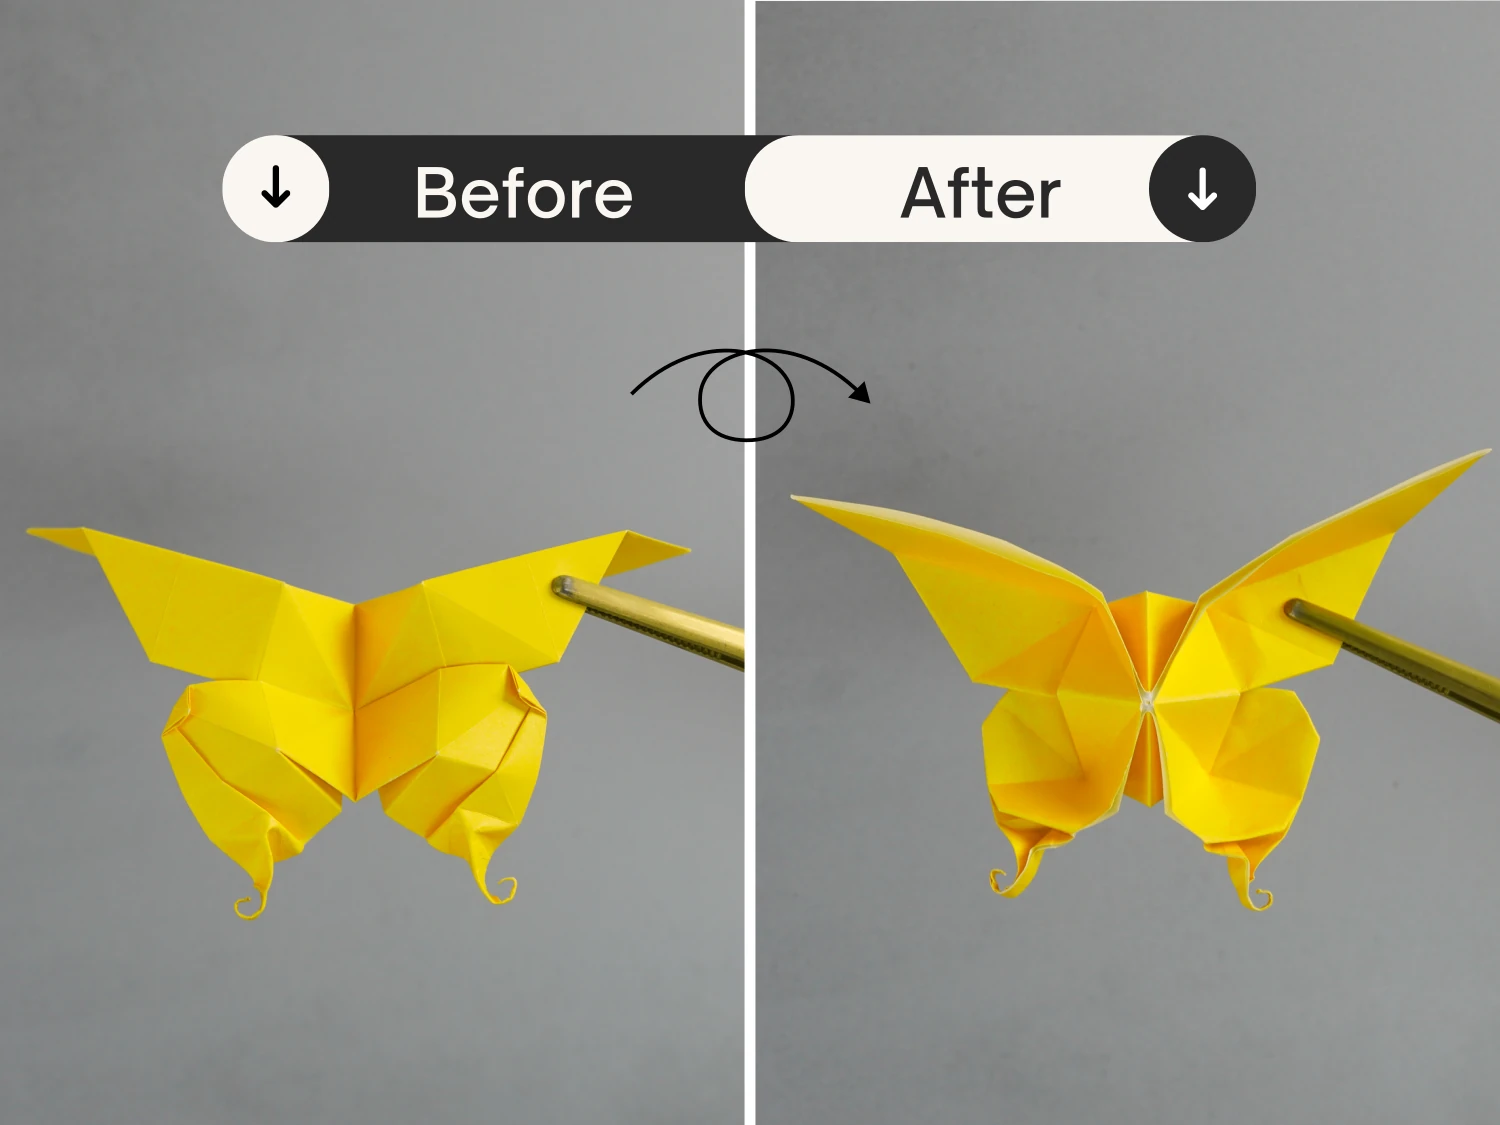
Flip the paper over, this is your lovely origami butterfly.
What’s Next
This is the final shape of an origami butterfly, now you can explore our other origami insects instructions. Happy folding!
Other Origami Insects Ideas
