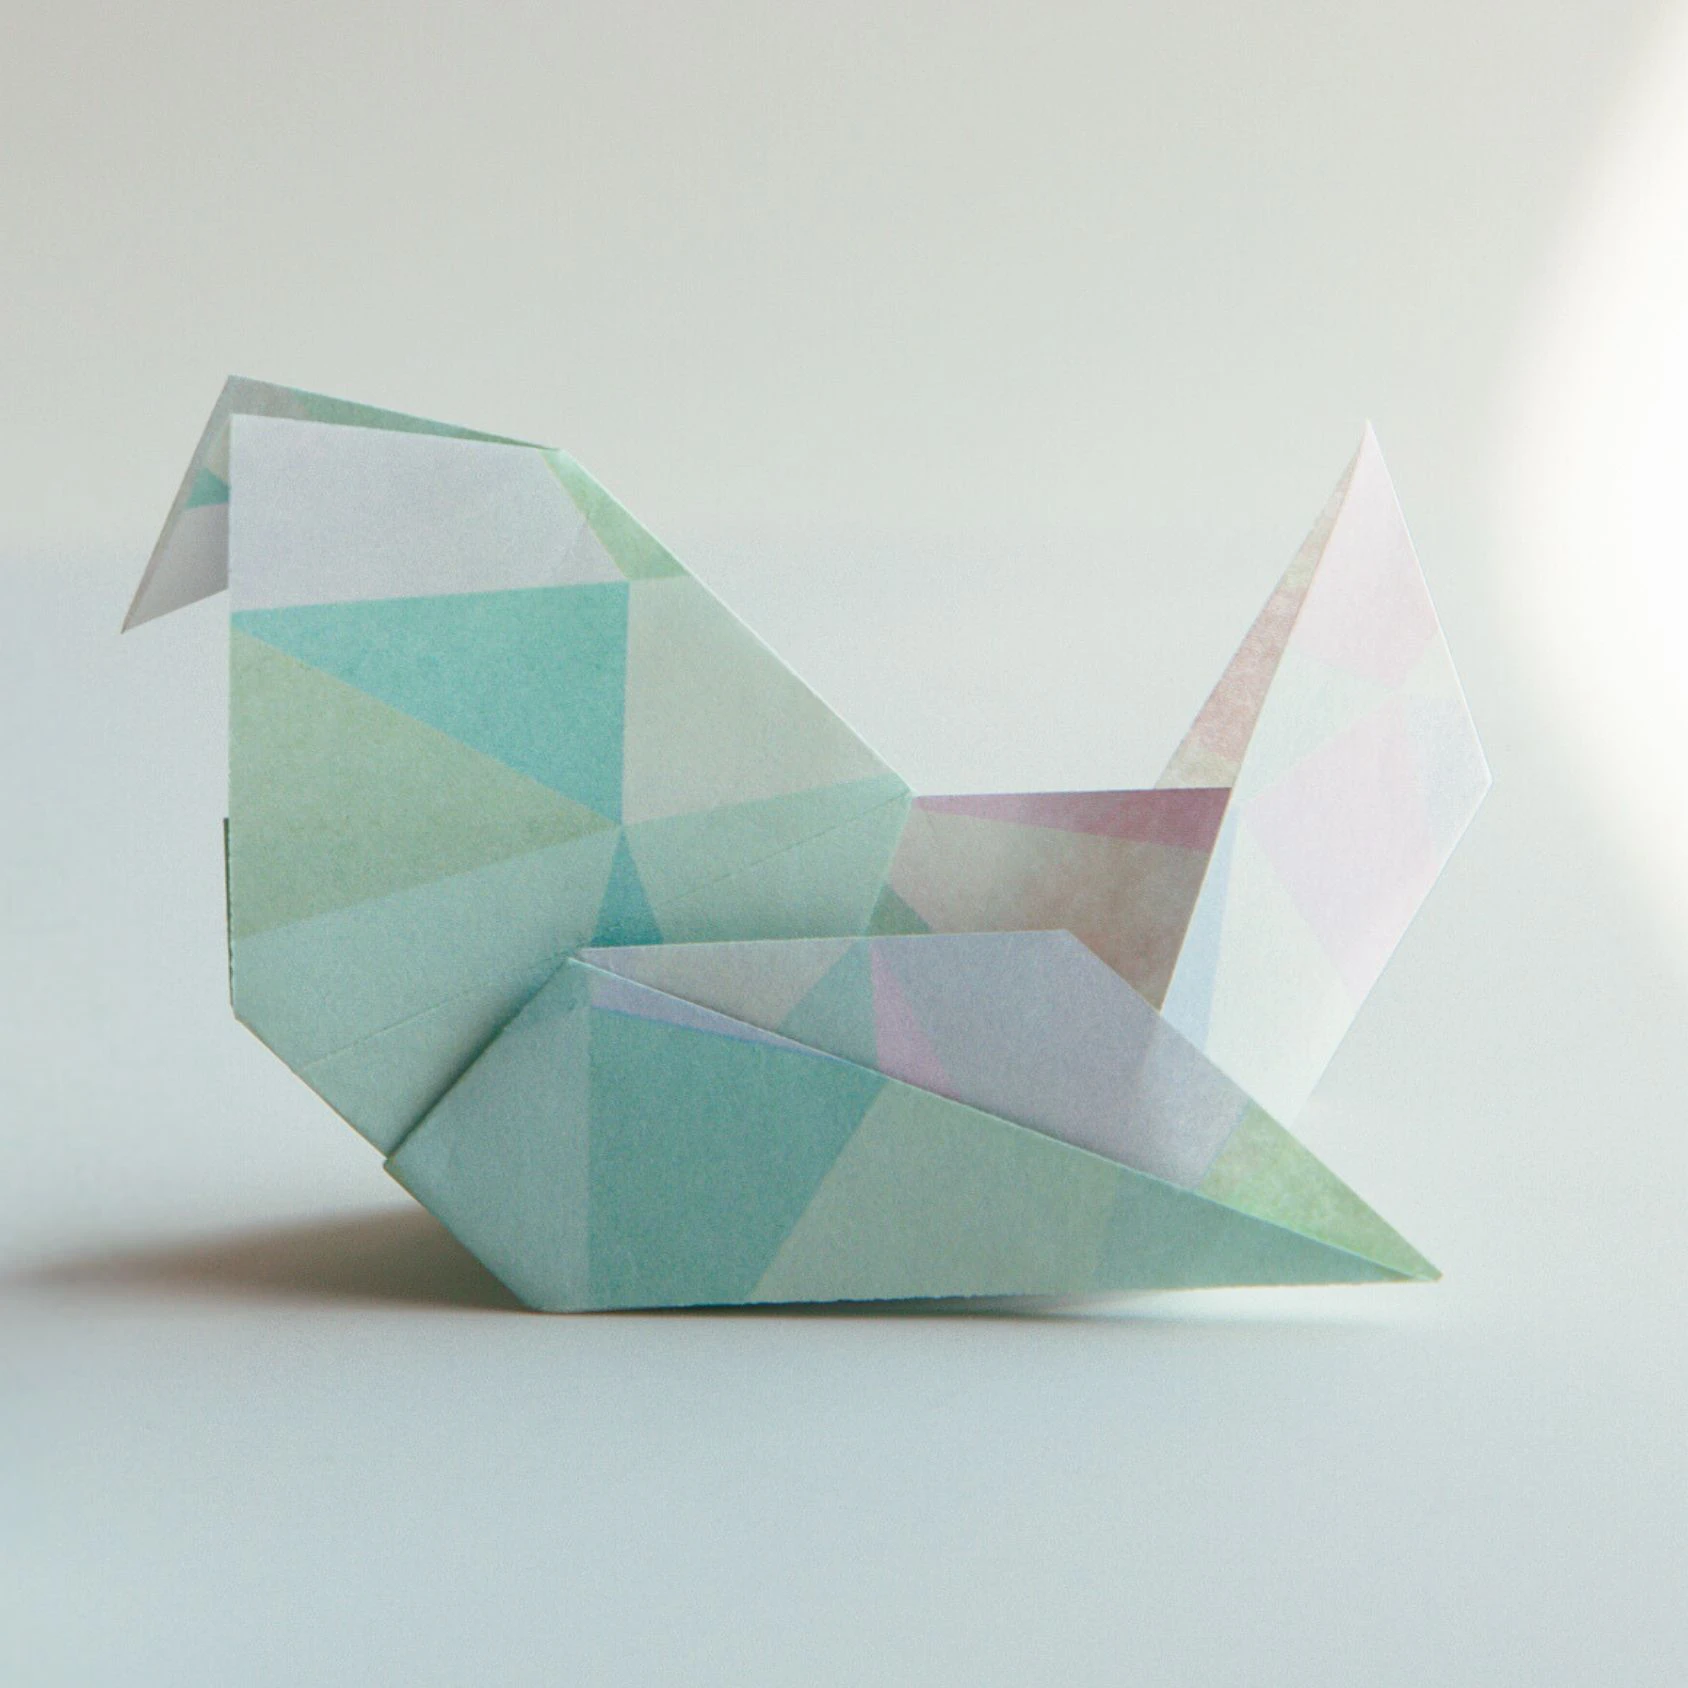
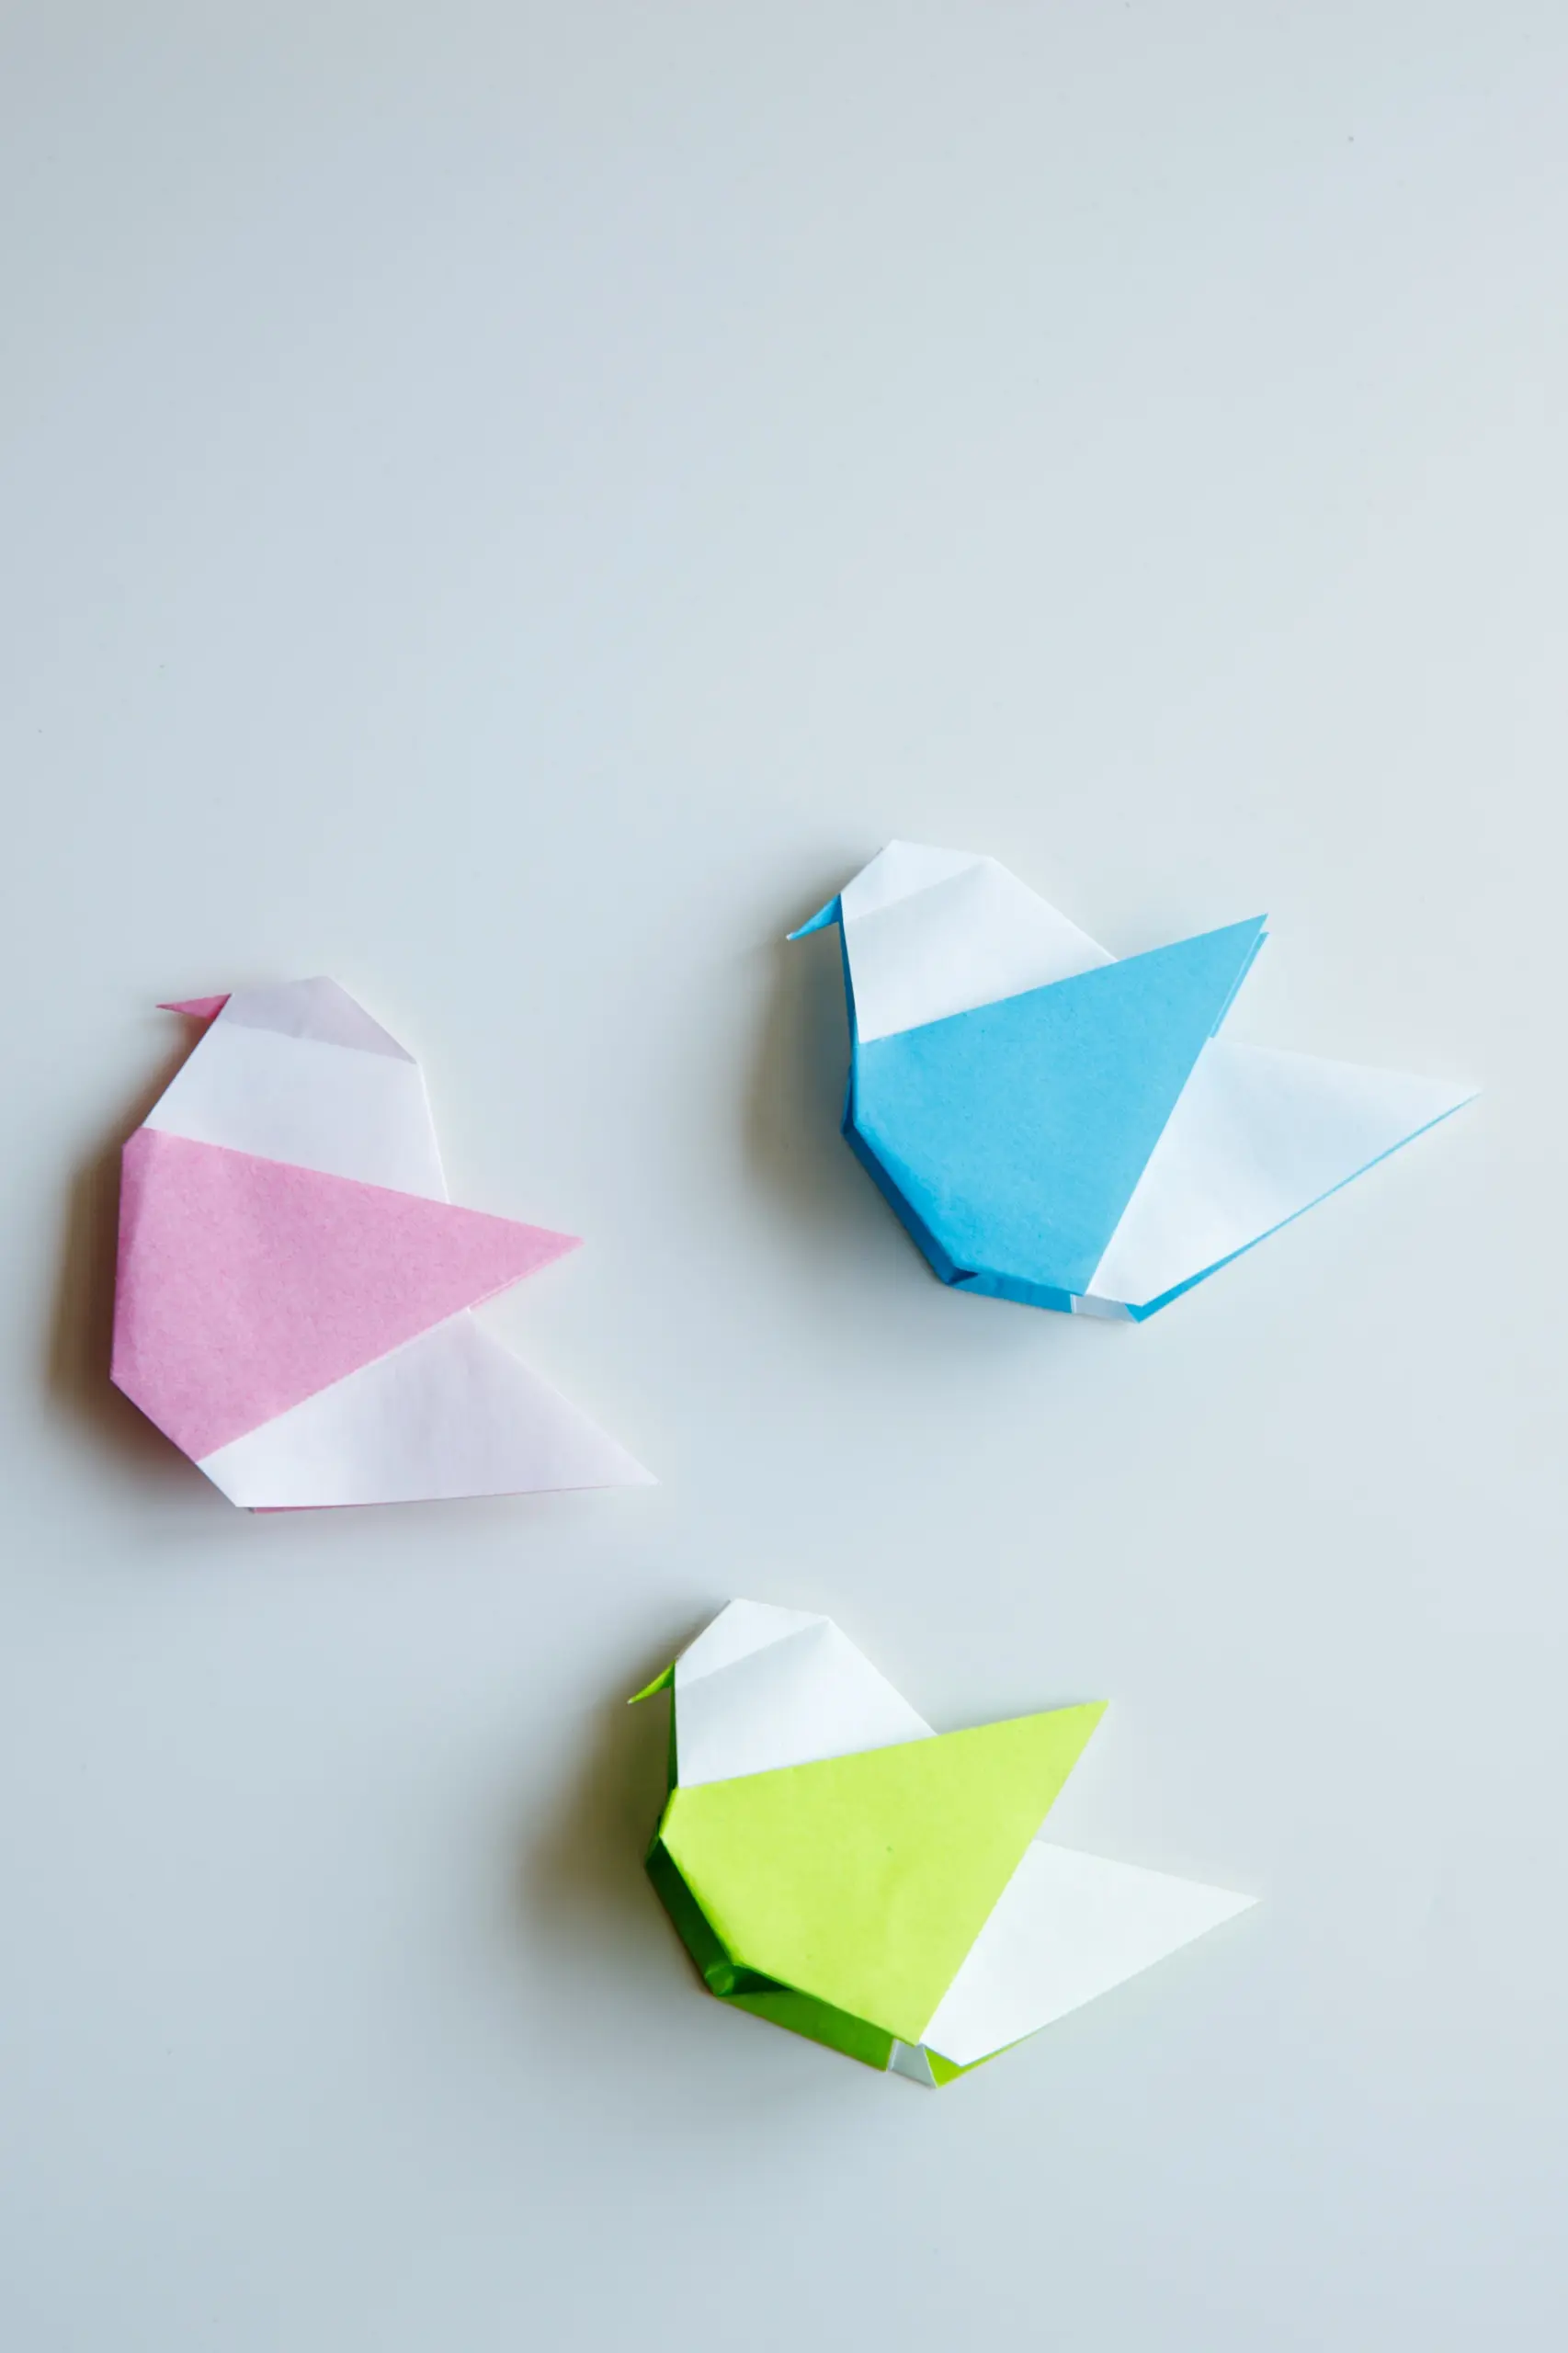
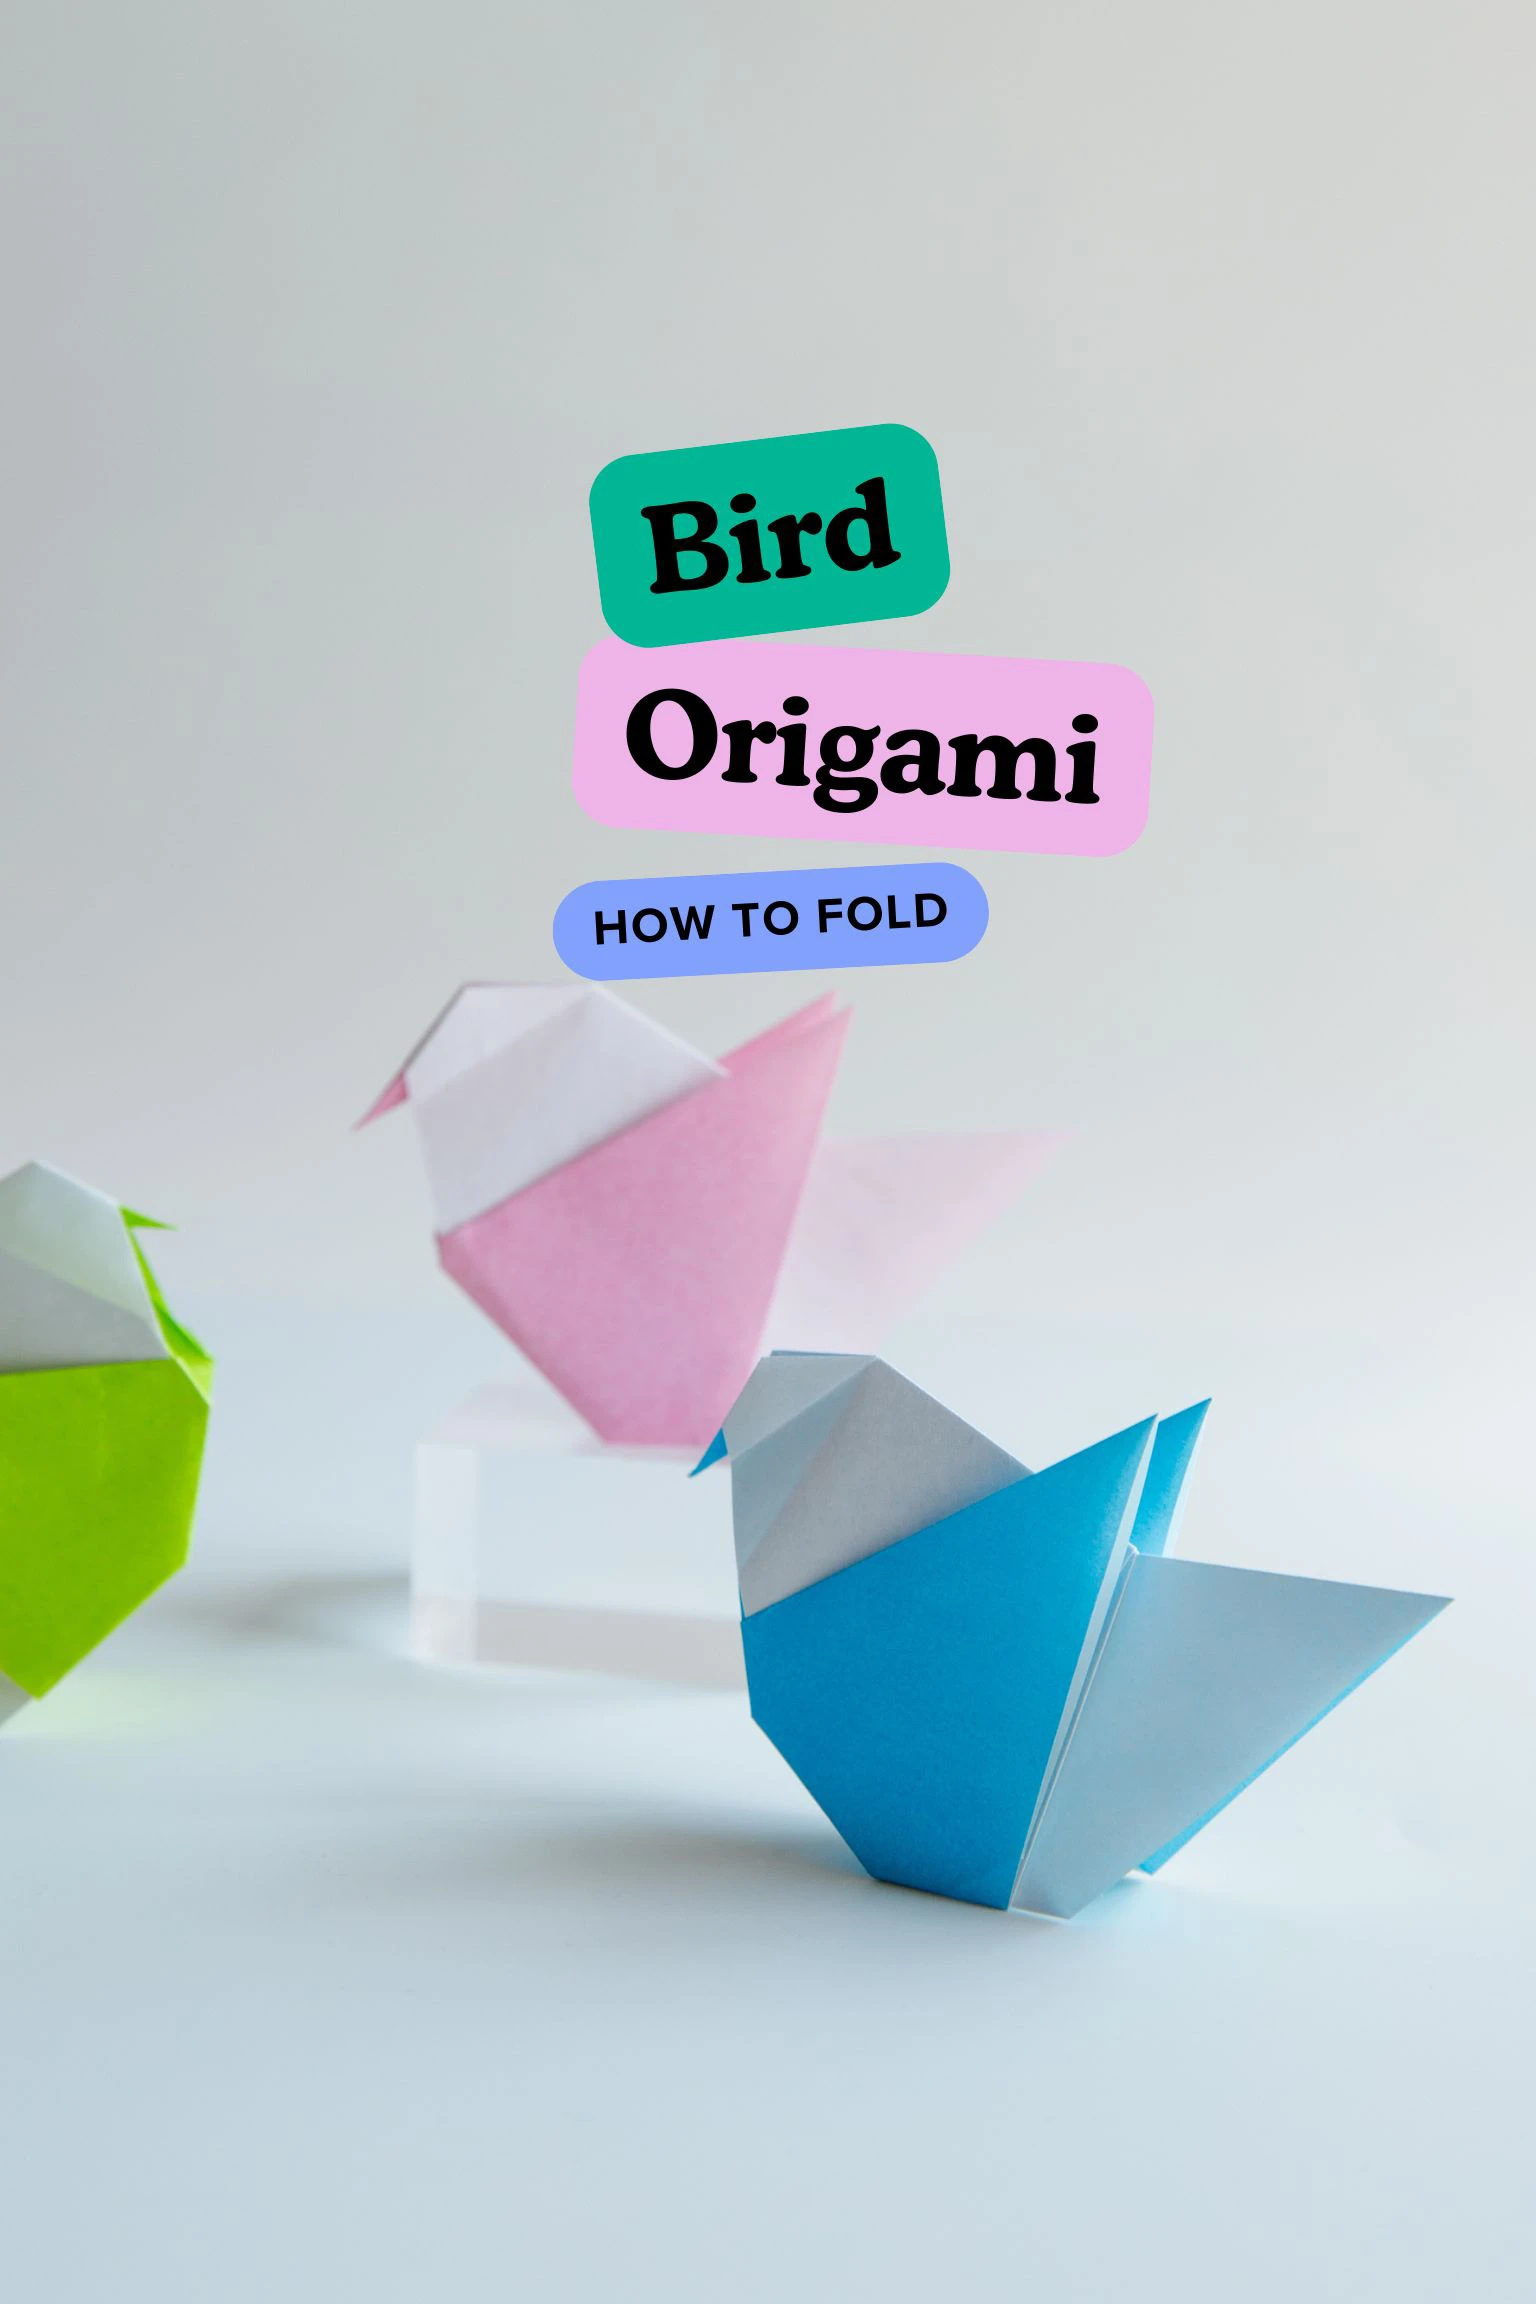
Here’s a super easy and cute origami bird. This is the simplest version, with a chubby body and the classic appearance of a bird that we often see in cartoons. Despite being so easy to make, it can also bring you a lot of enjoyment and a sense of accomplishment.
We use Crimp Fold to form the tail, while the Inside Reverse Fold to form the beak.

If you are new to origami, start here from our beginner guide to know the basics and how to read the step-by-step instructions.
- Folding time: 10 minutes
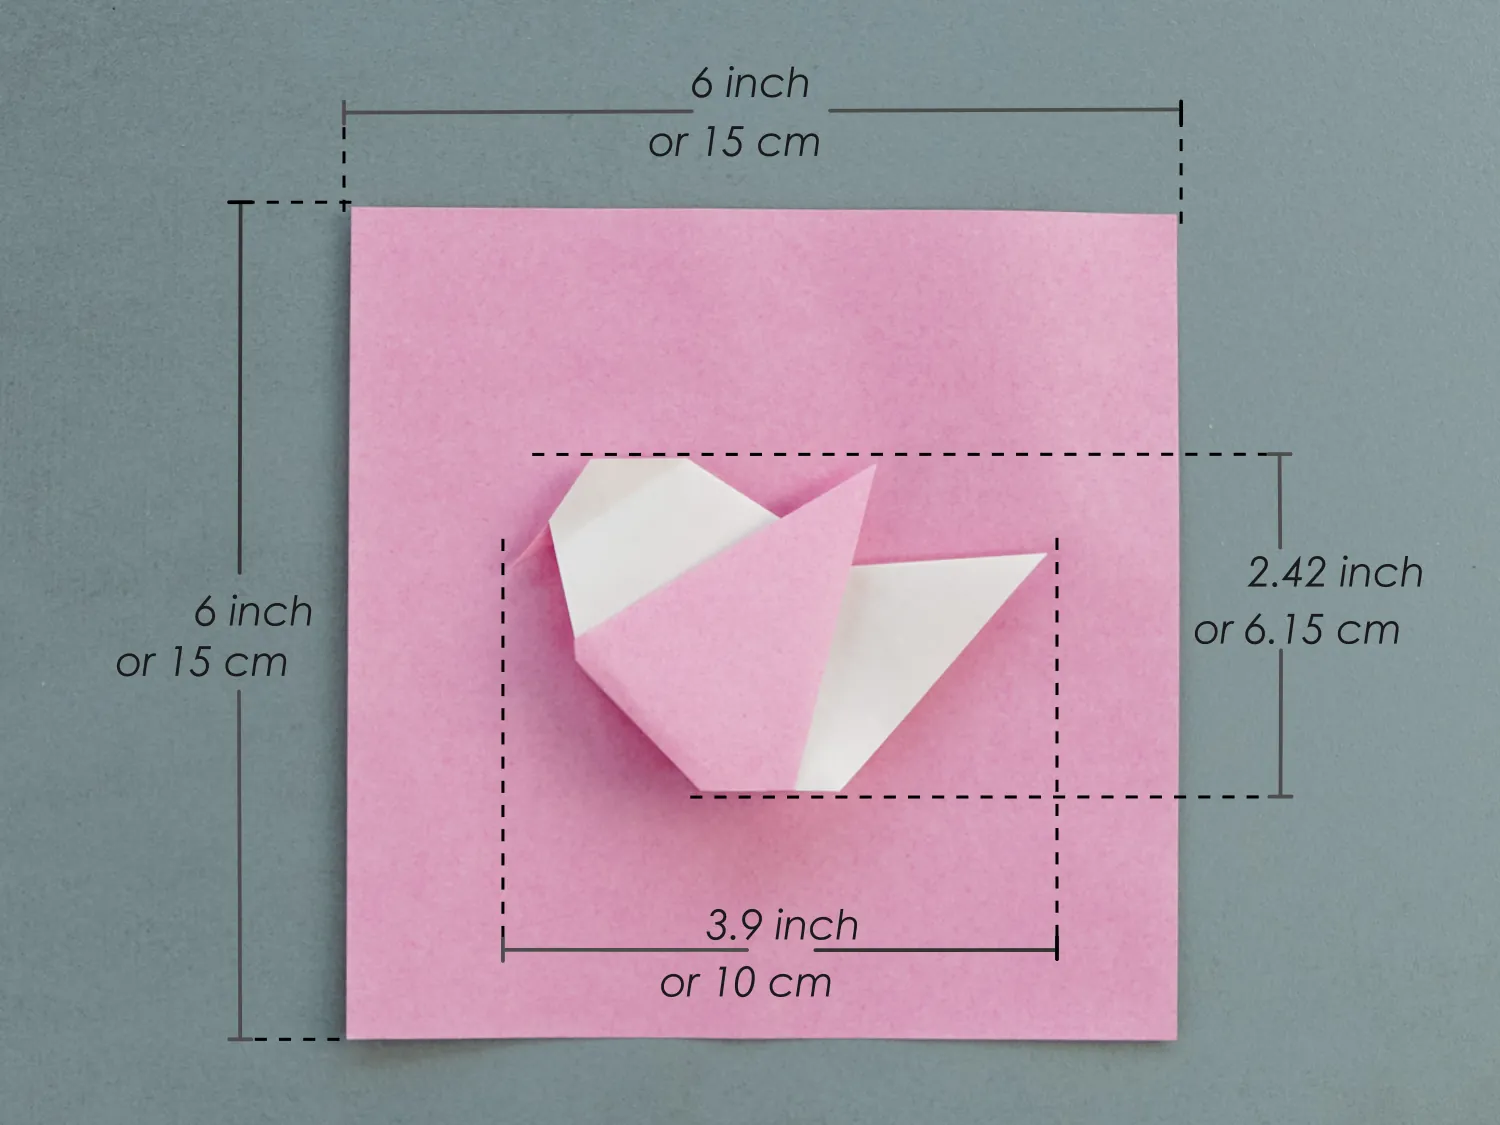
- Paper: 15×15 cm
- Difficulty: Easy
Material
Get a piece of 15×15 cm origami square paper, with different colors on each side, to create a 10×6.15 cm pigeon.
Origami Bird Video
Step by Step Instructions
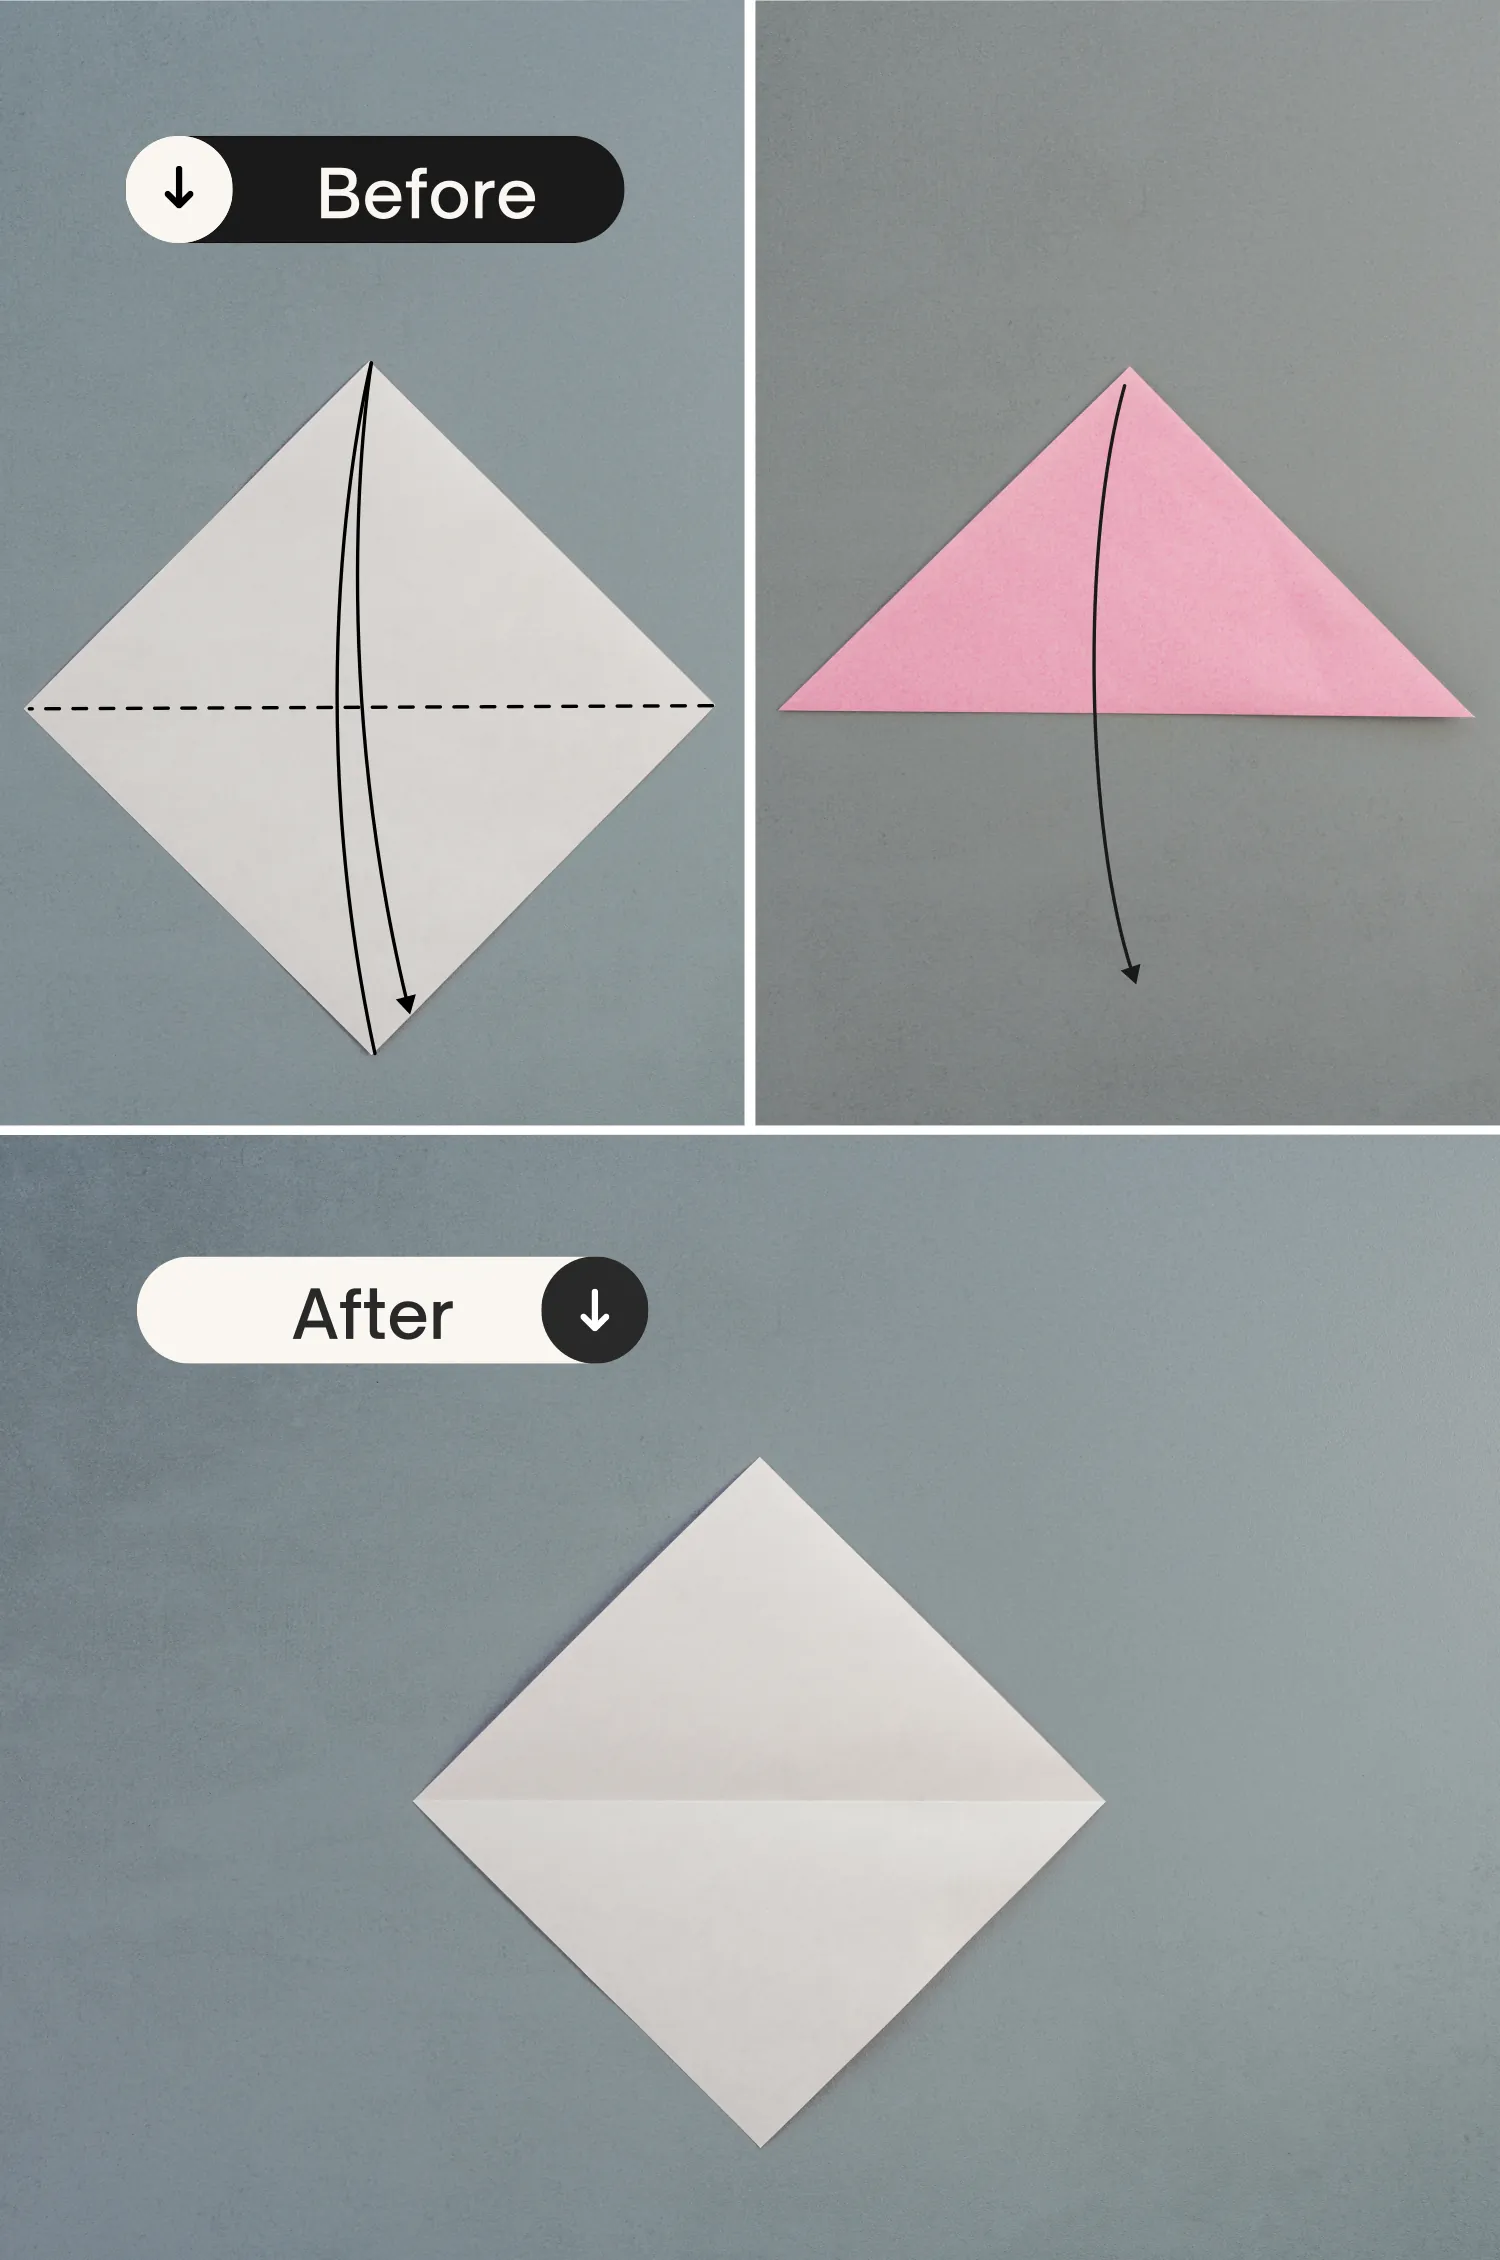
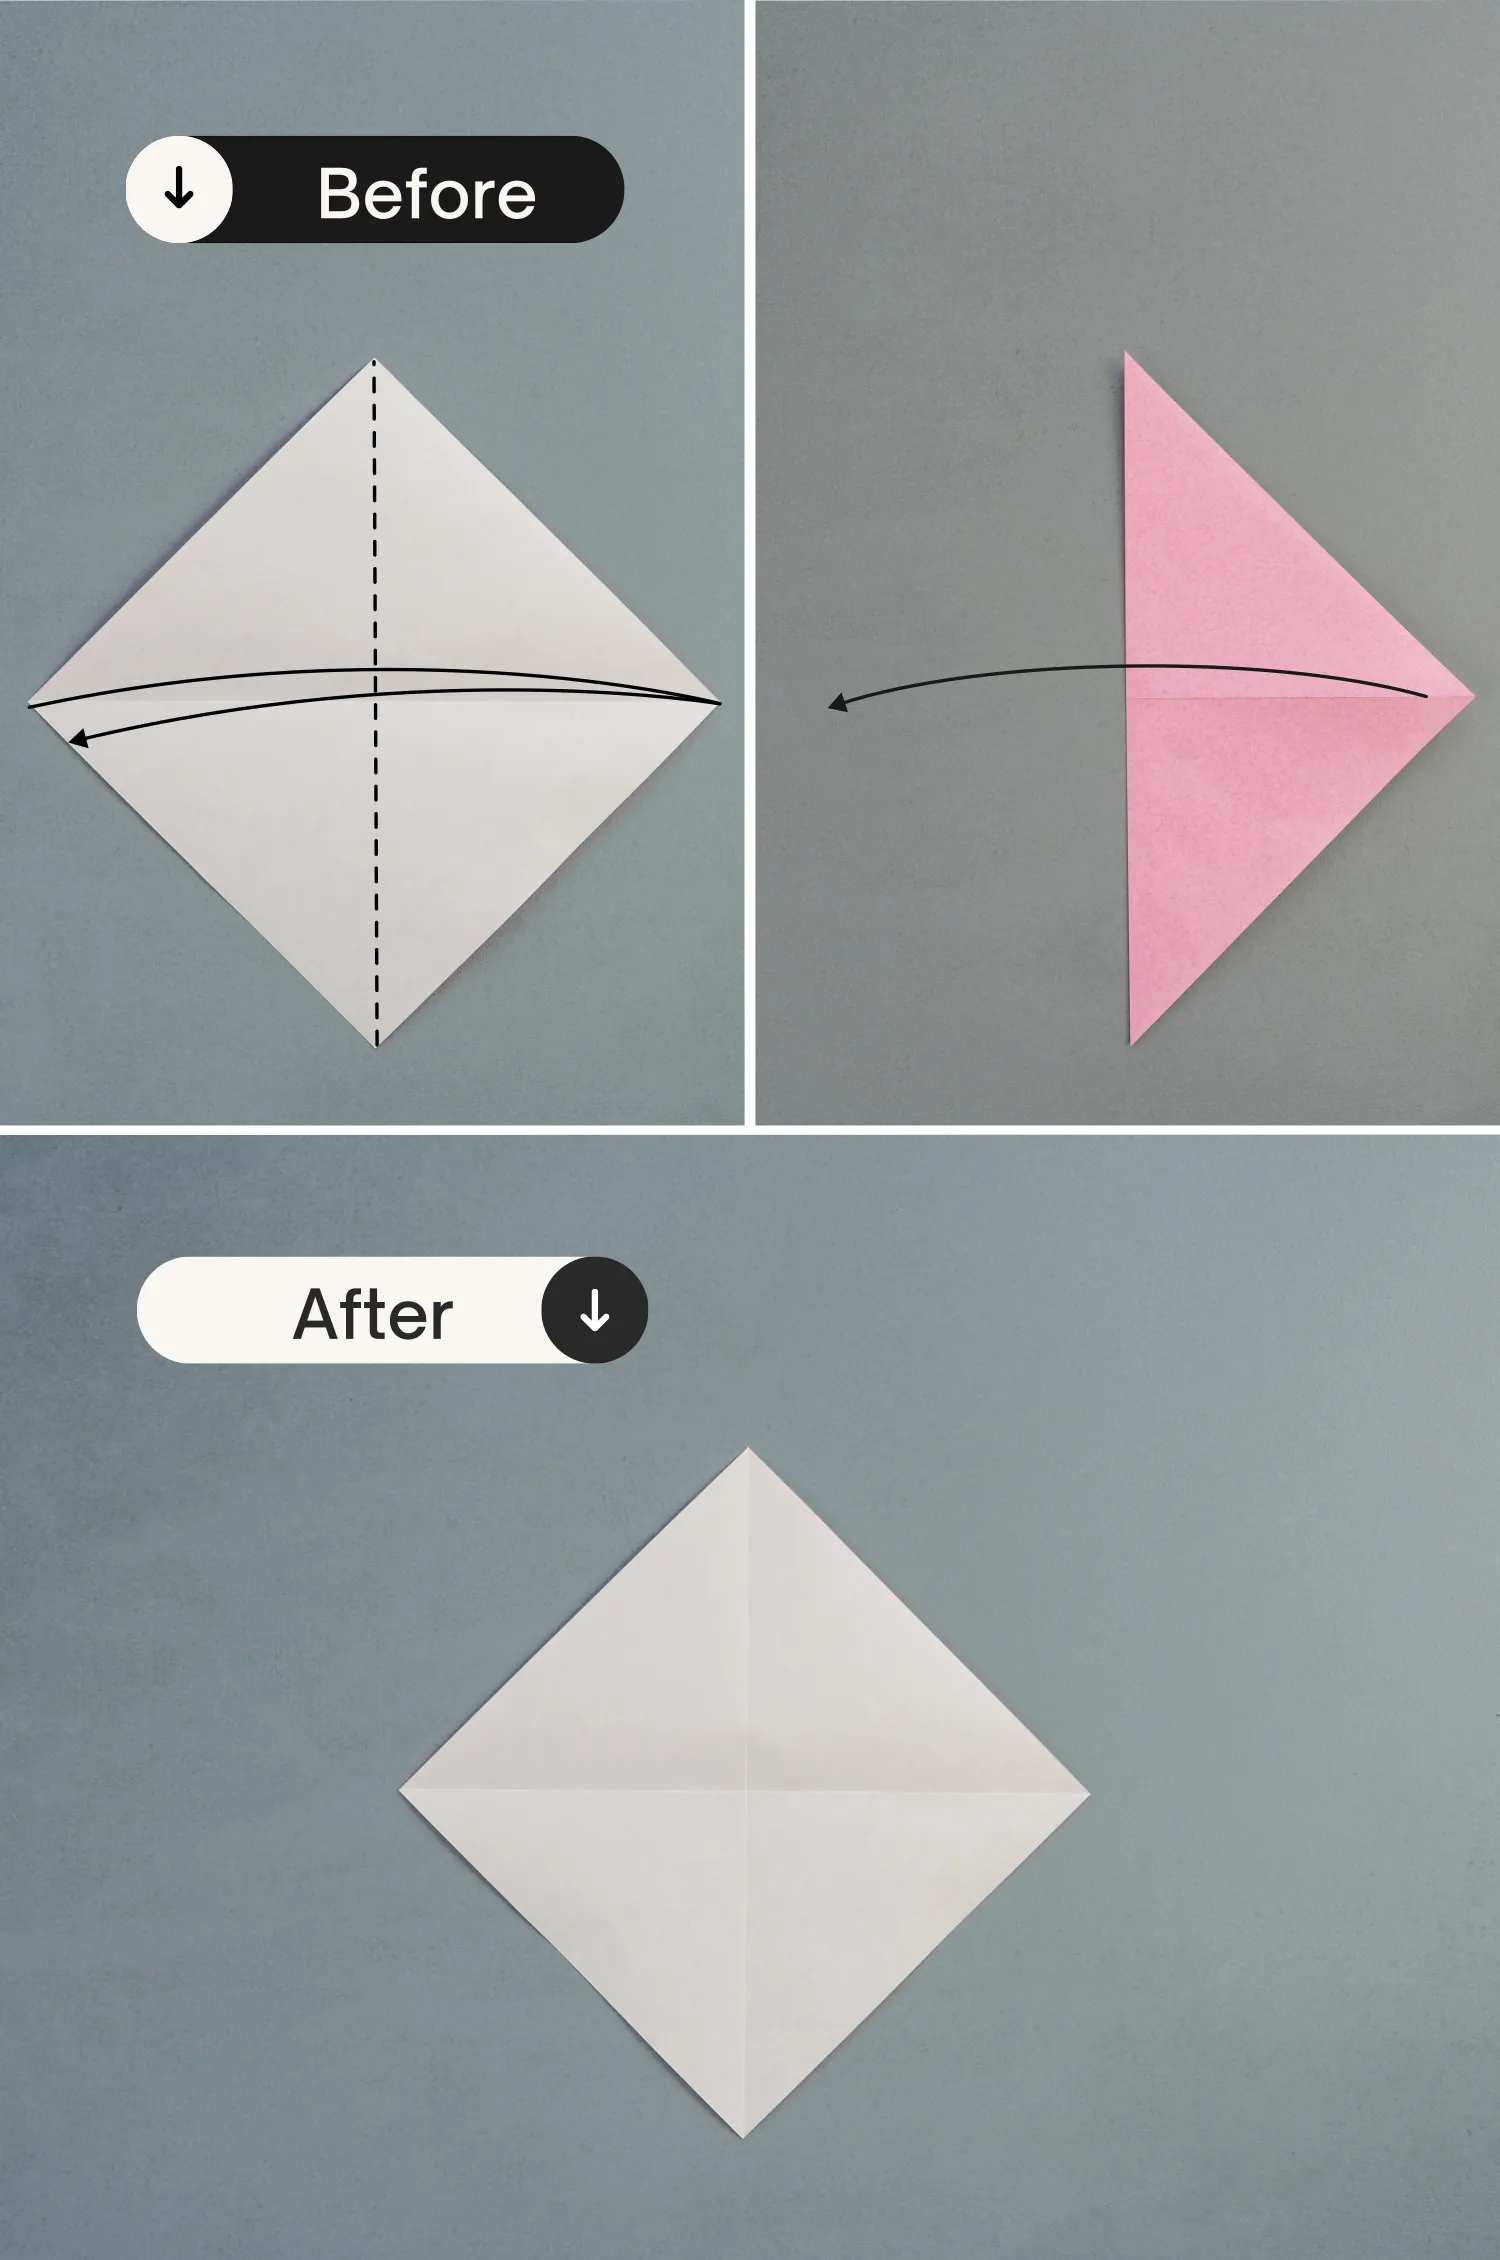
Step 1
Start with the white side of the paper facing up, and fold it in half horizontally, leaving a crease then unfold it.
Step 2
Fold it in half vertically, and unfold it.
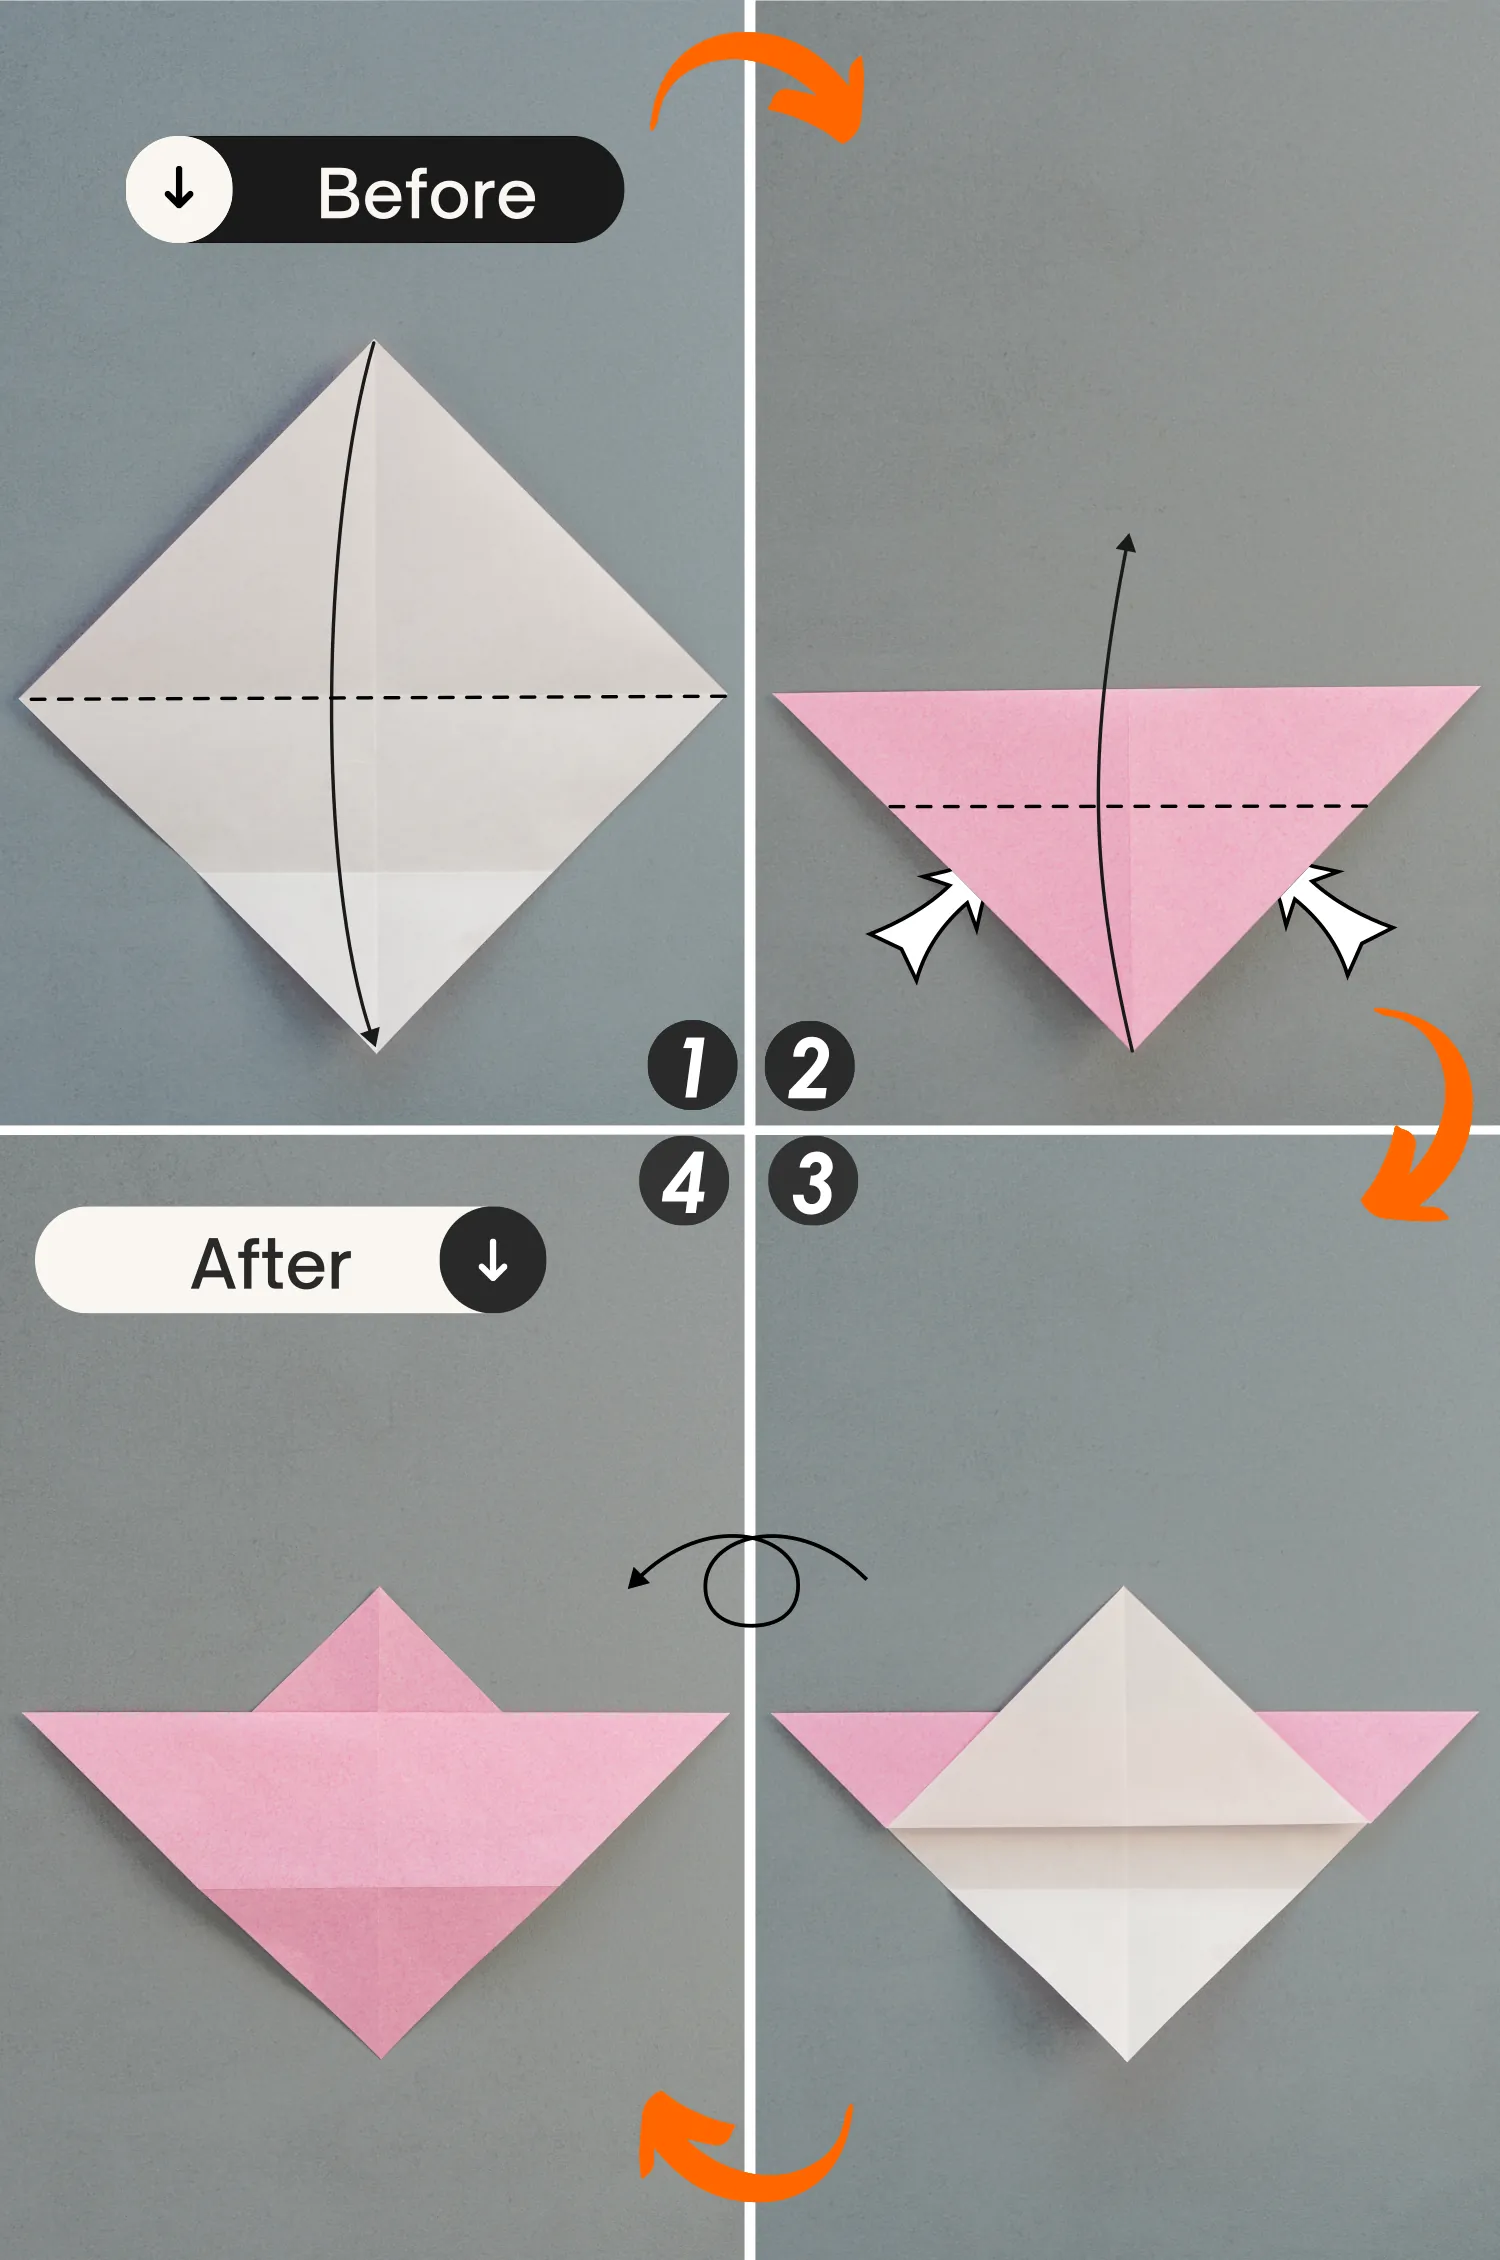
Step 3
Fold the bottom point up to meet the intersection point formed by the two creases you just made, crease it well then unfold it.

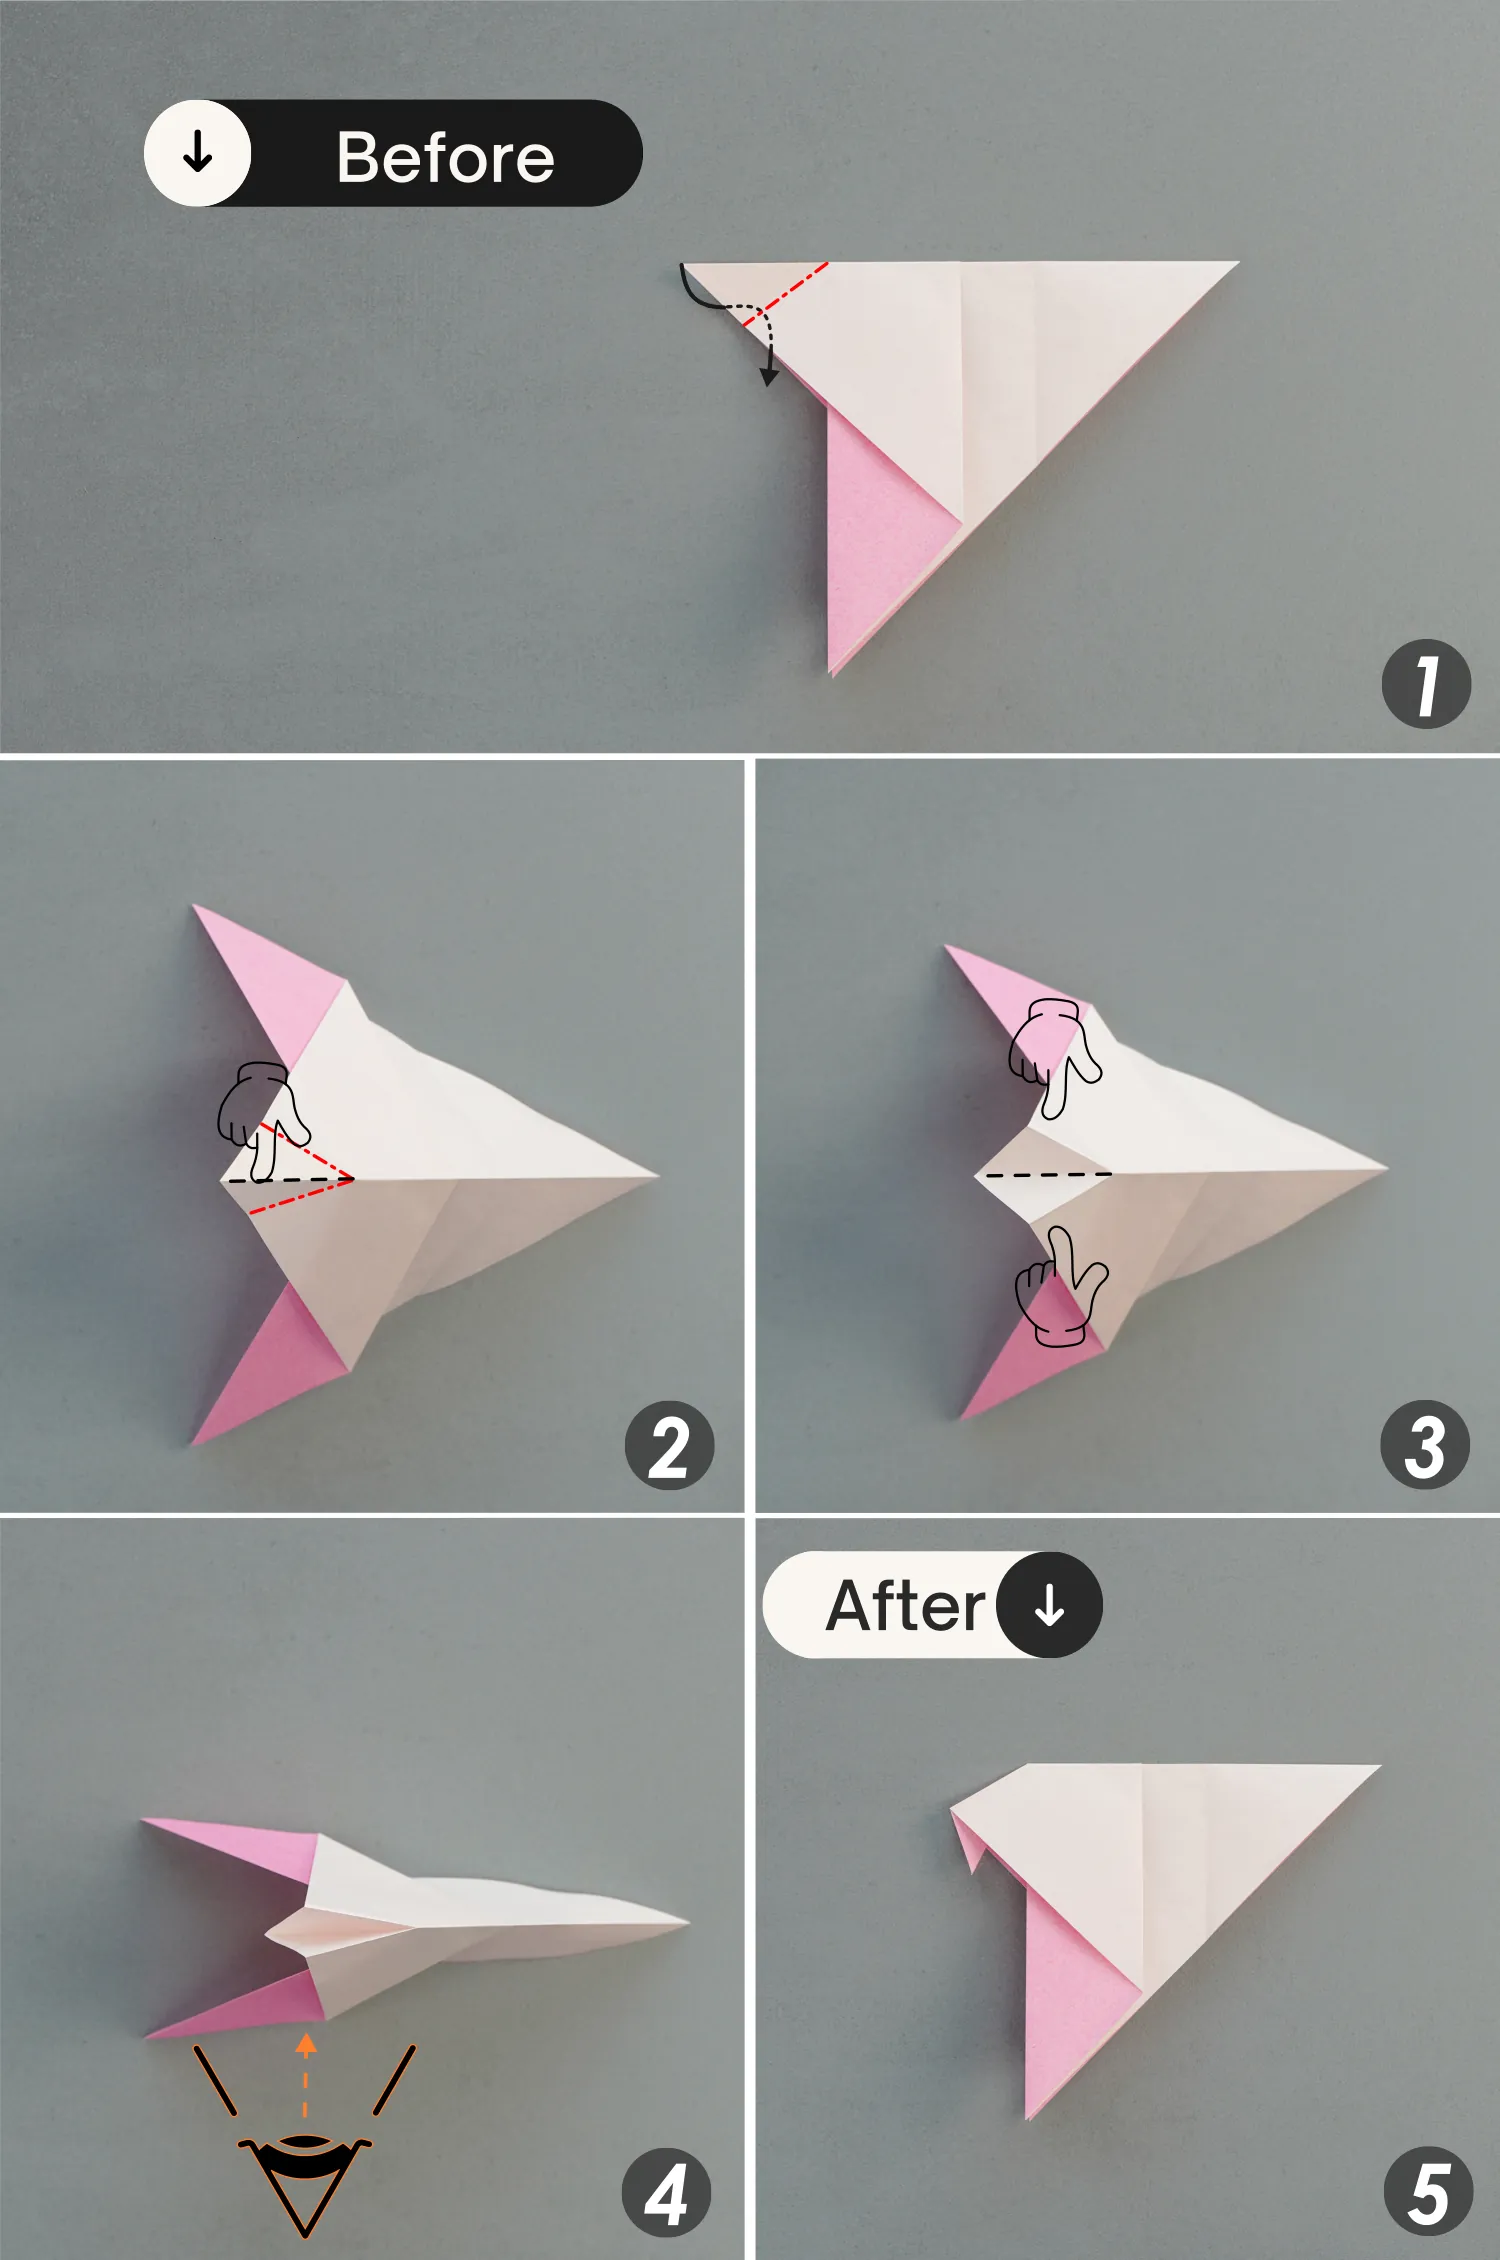
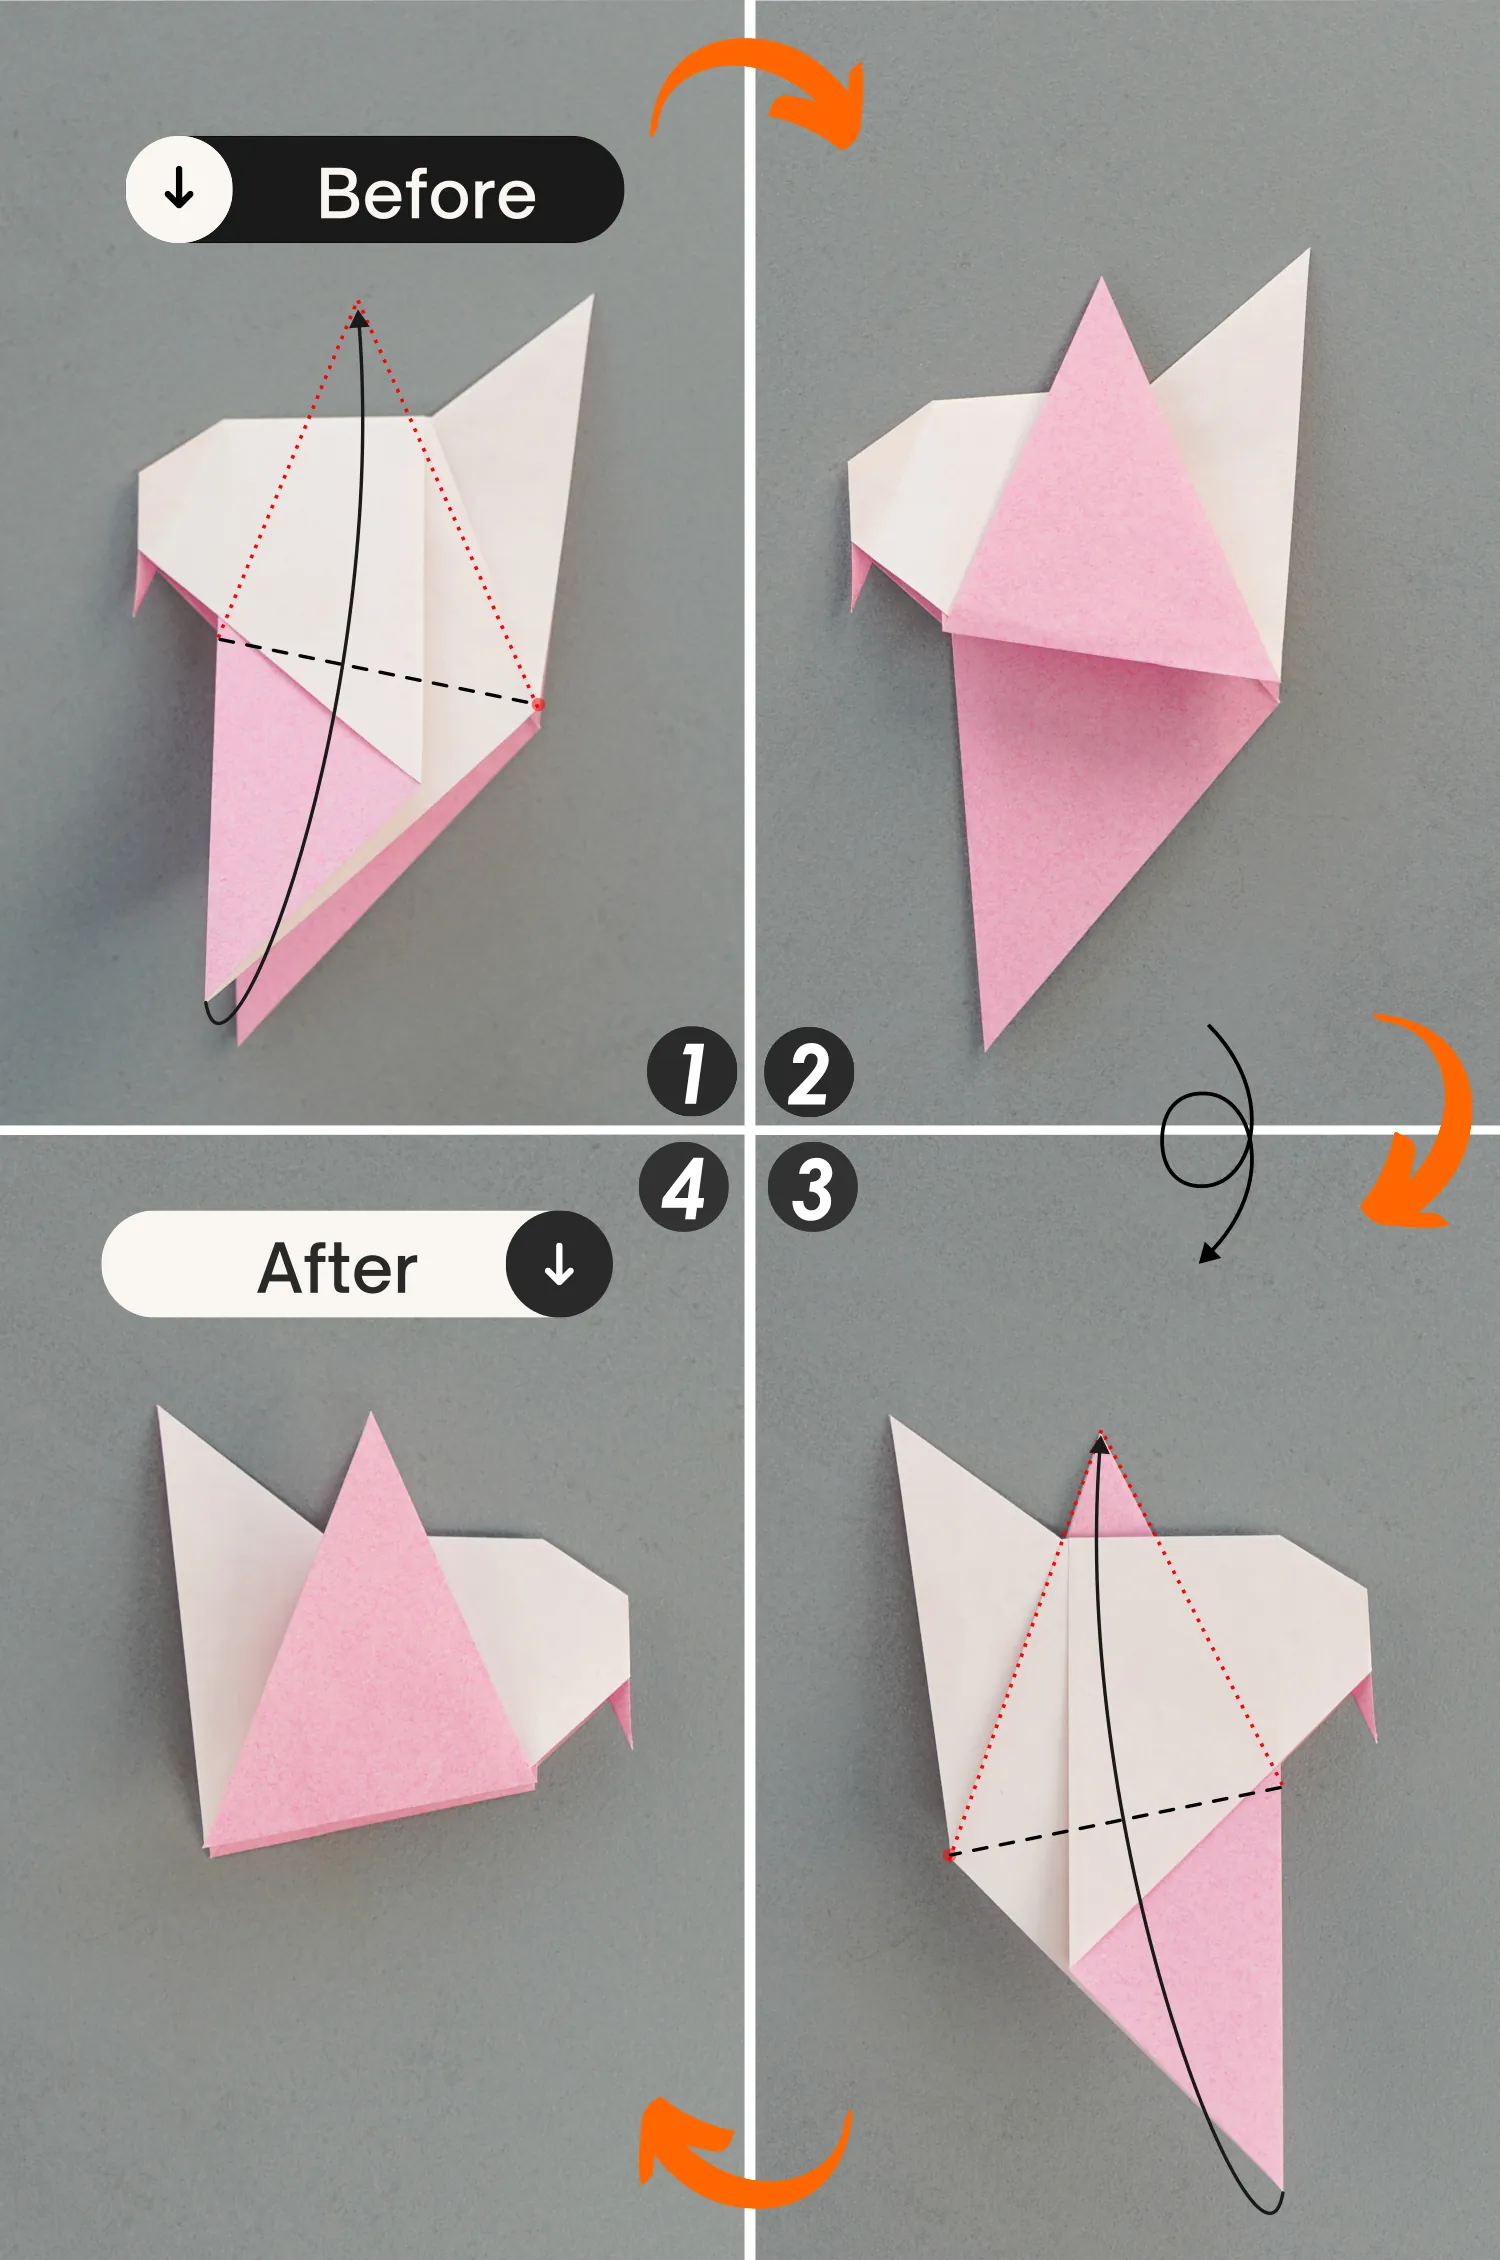
Step 4
Fold the top point to meet the bottom point along the horizontal crease, then fold it back to the top along the dotted line[picture 2], and finally, flip the paper over.
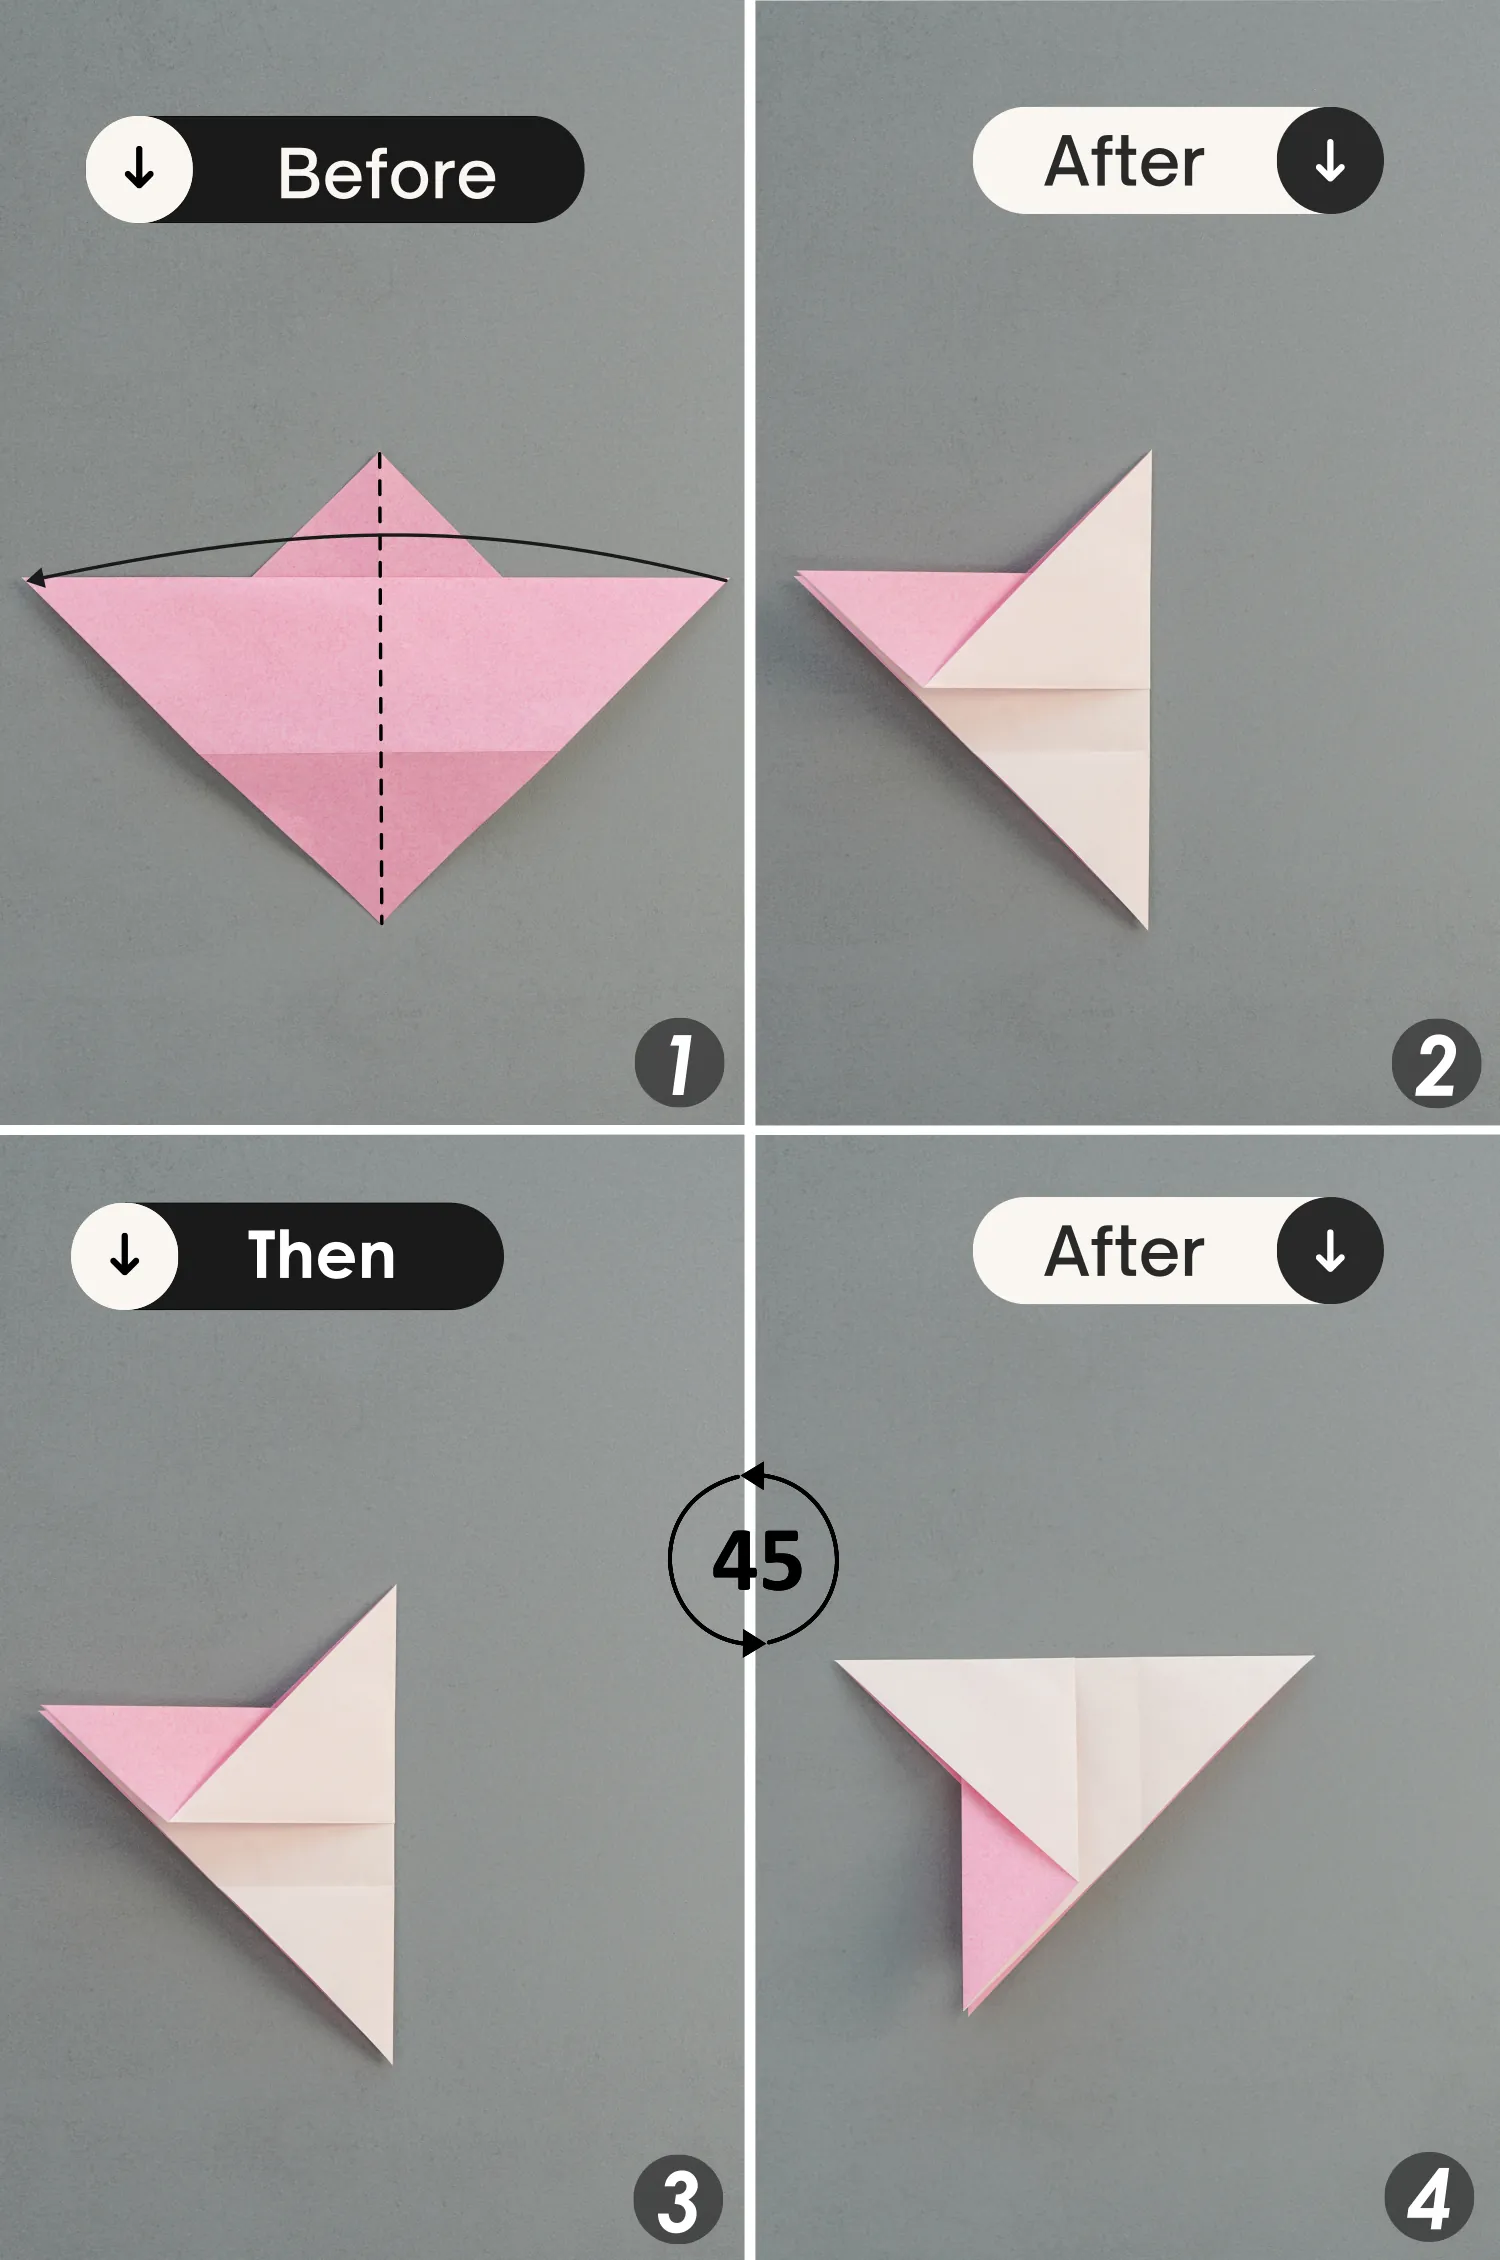
Step 5
Fold the paper in half vertically from the right to the left, then rotate it 90 degrees counterclockwise.
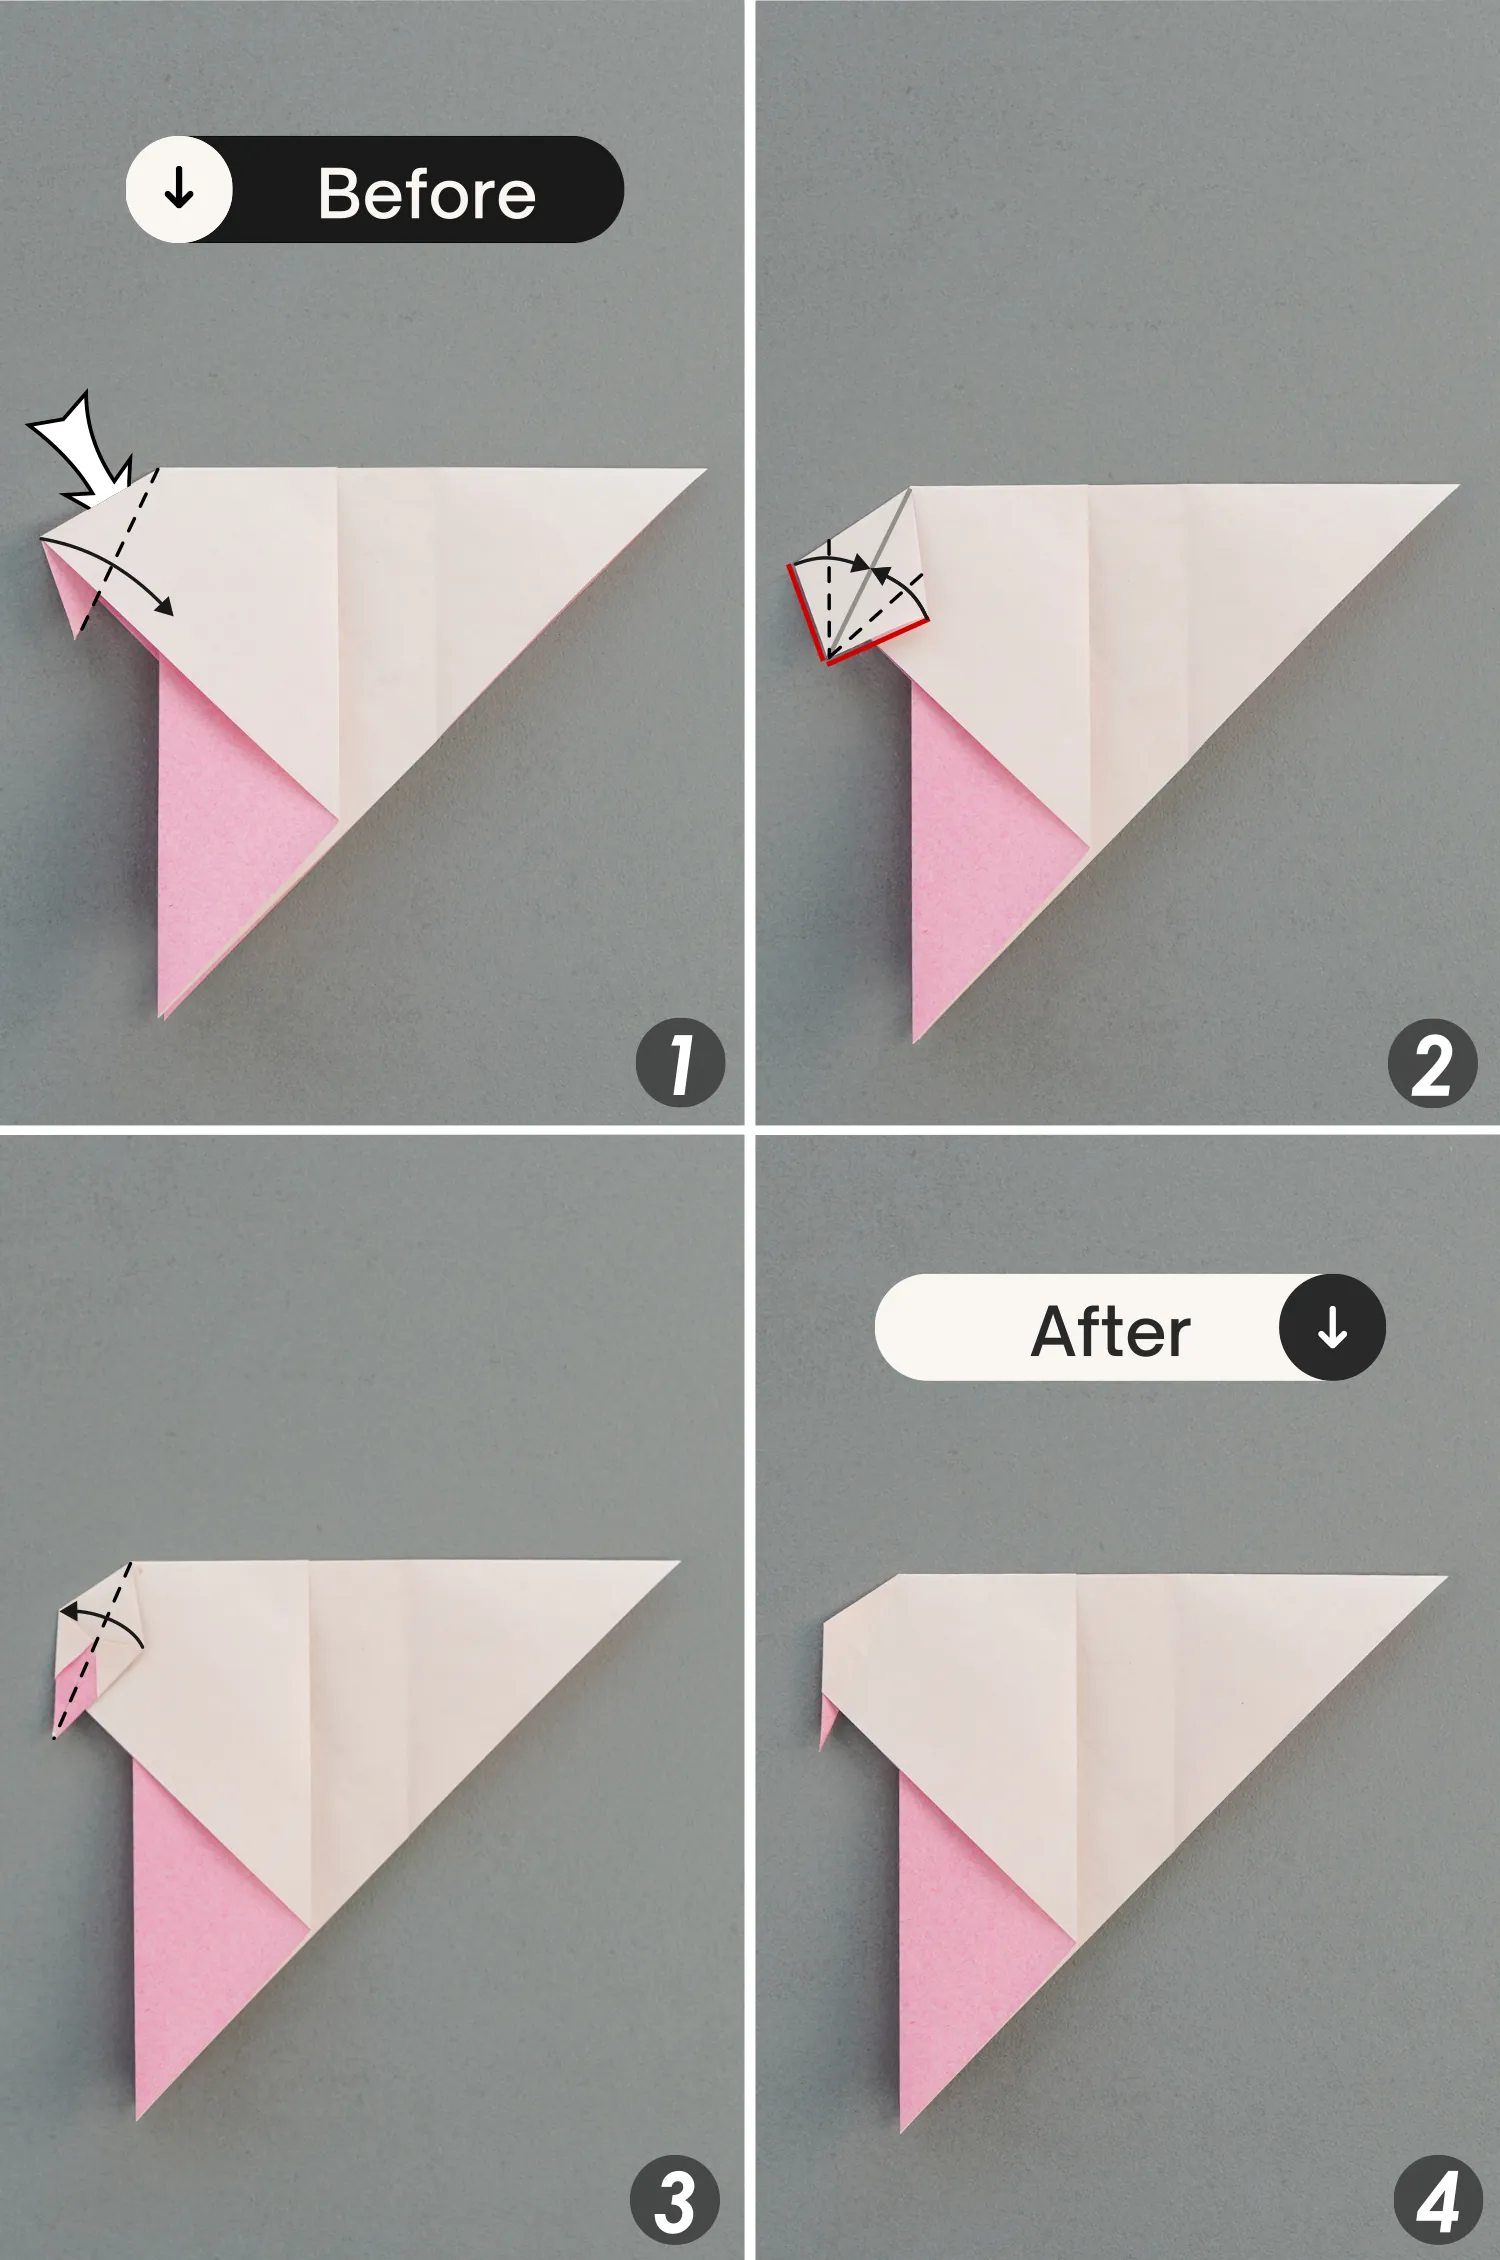
Step 6
Fold the left corner down, leaving a crease then unfold it.
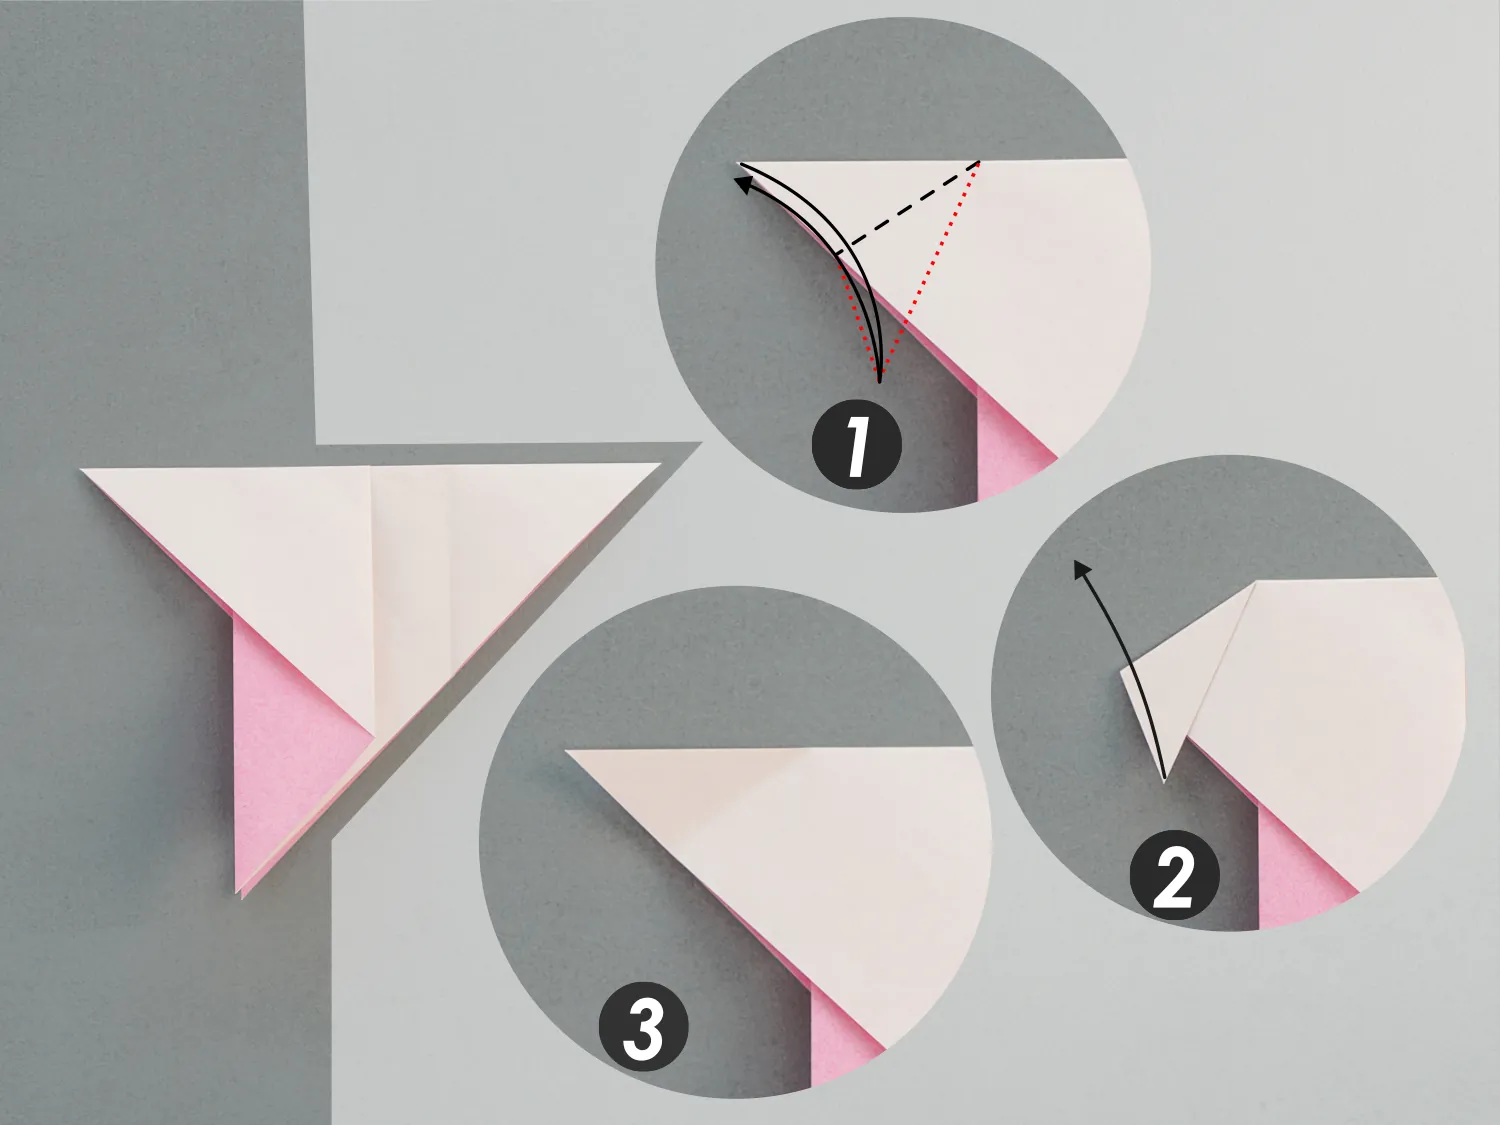
Step 7
View it from the top side, open the paper, and press down the middle crease of the left-folded corner, shape the creases you made in the previous step, then close the paper to make the corner tuck between the layers. Next, view it from the front side, you created the bird’s beak.
Step 8
Fold the left corner of the top layer to the right side, creating a small quadrilateral, then fold its two edges shown by the red lines to align with its middle crease shown by the grey line, next, fold its right part back to the left sight along its middle crease.
Step 9
Fold the right point to the left along the dotted line connecting the two red spots, leaving a crease and unfold it.
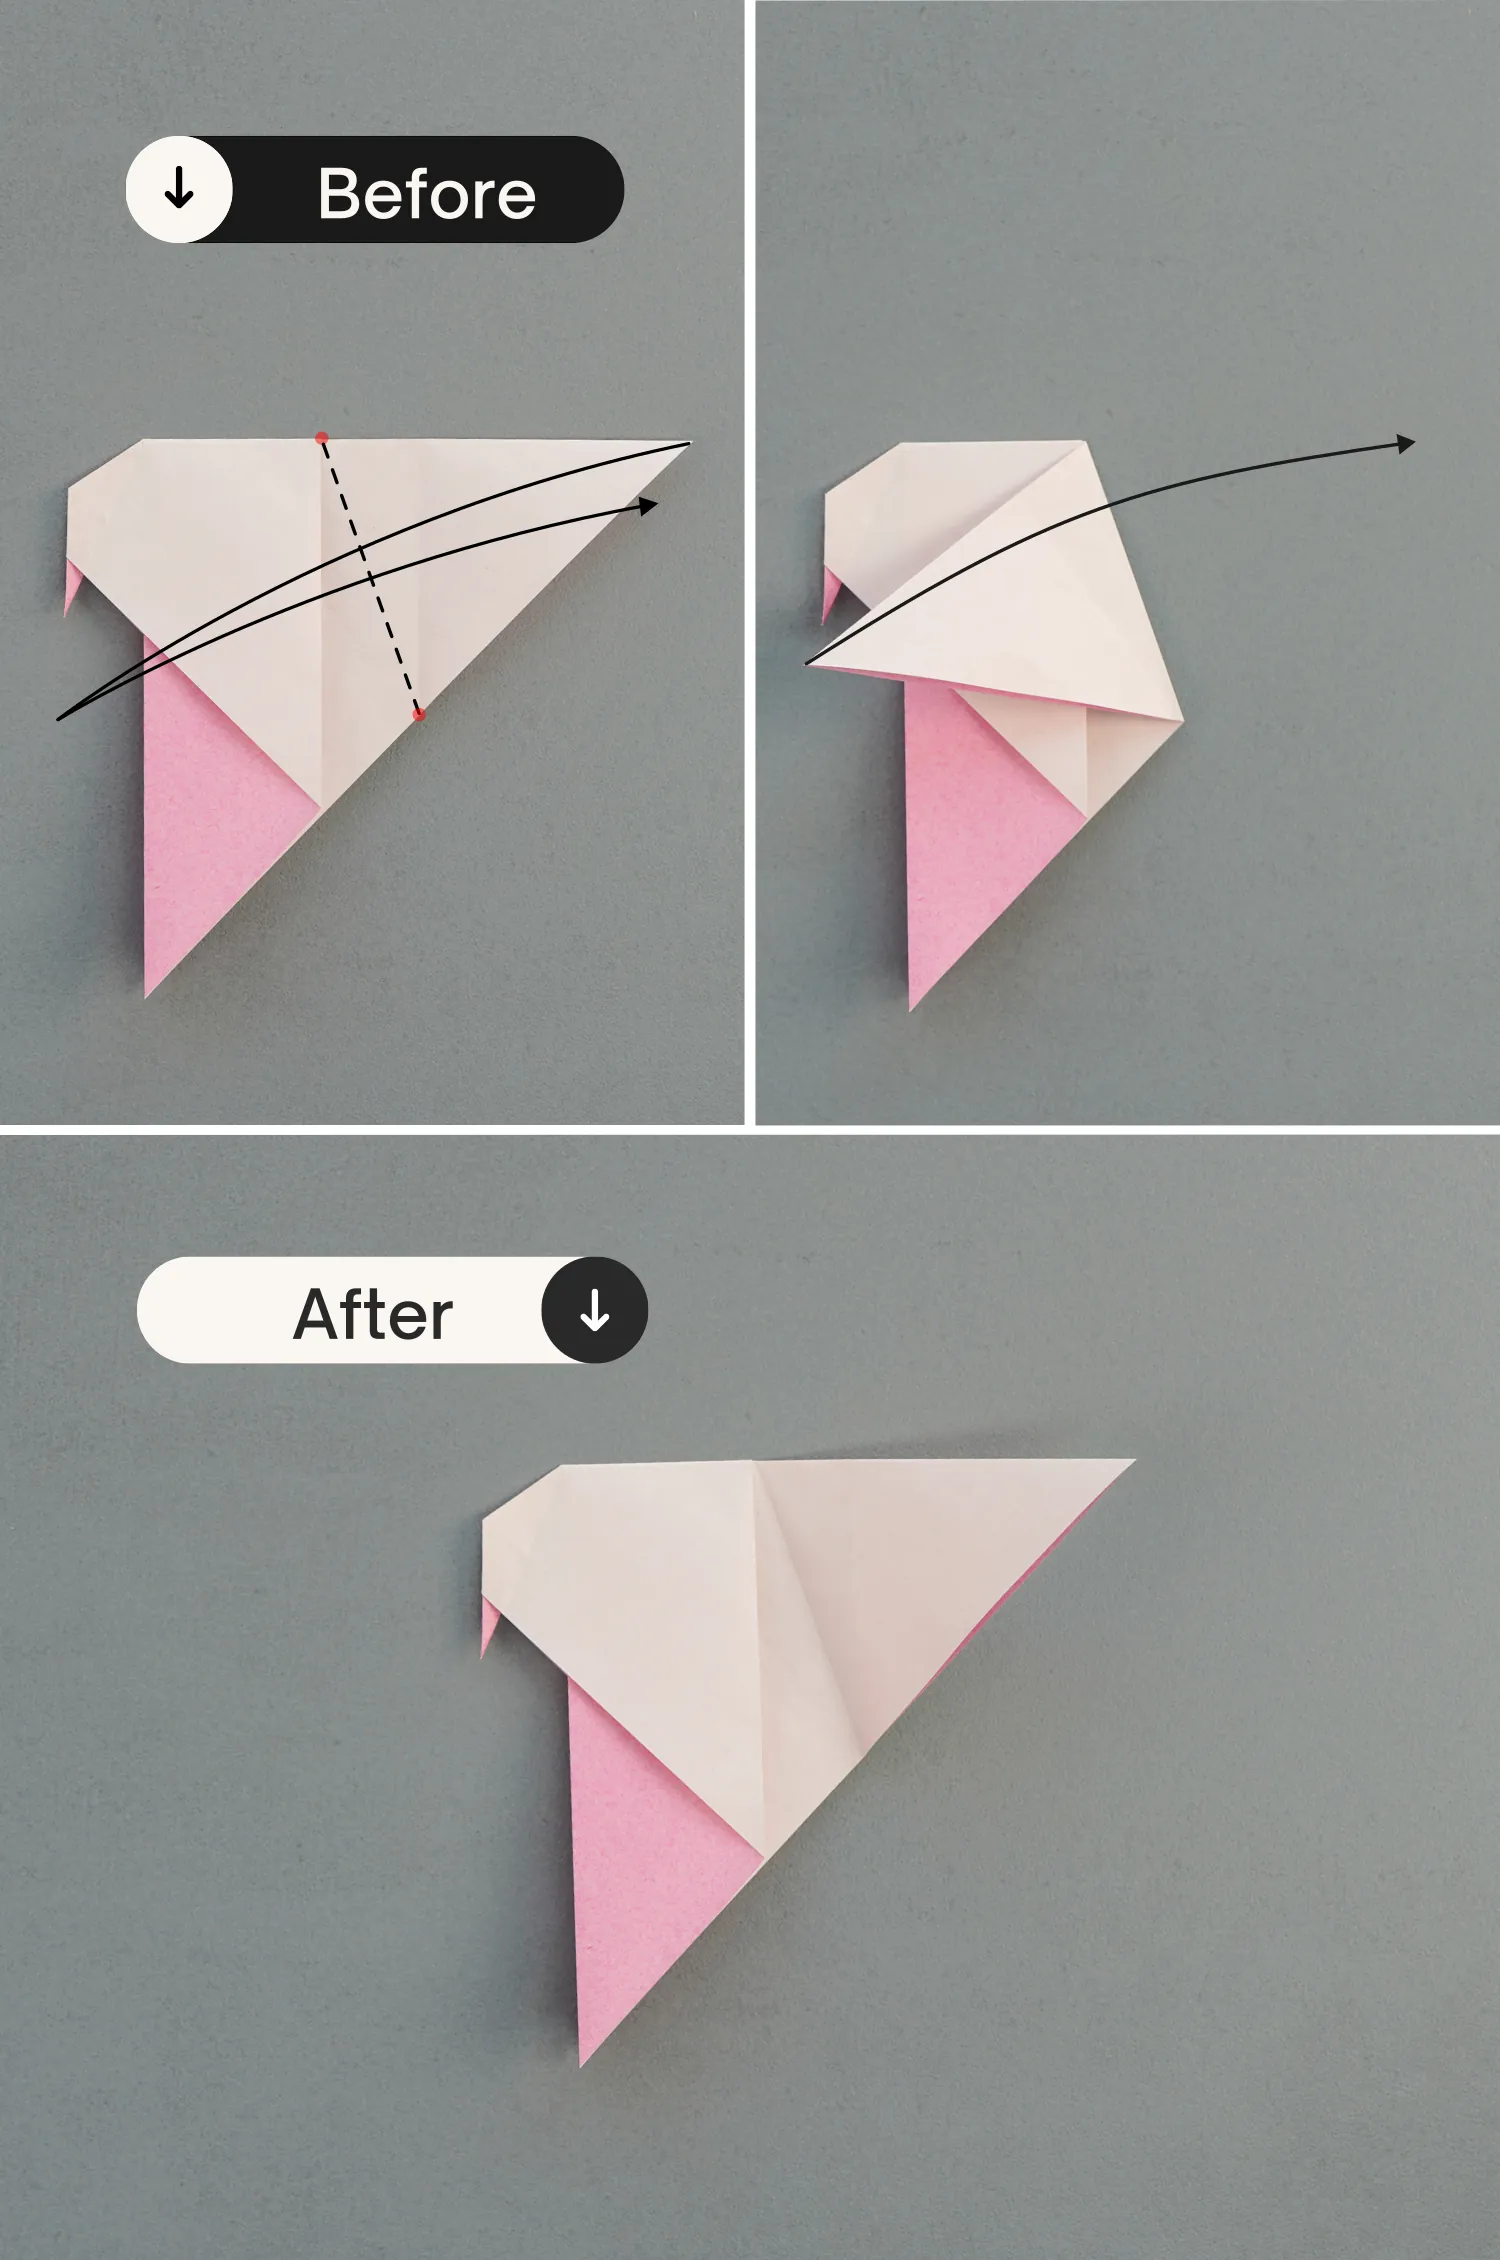
Step 10
View the paper from the bottom right side, open the pocket, and fold the right point to the left along the crease you made in the previous step[picture 2]. Then fold it back to the right along the crease shown by the dotted line[picture 3]. Finally, close this pocket, getting the bird’s tail.
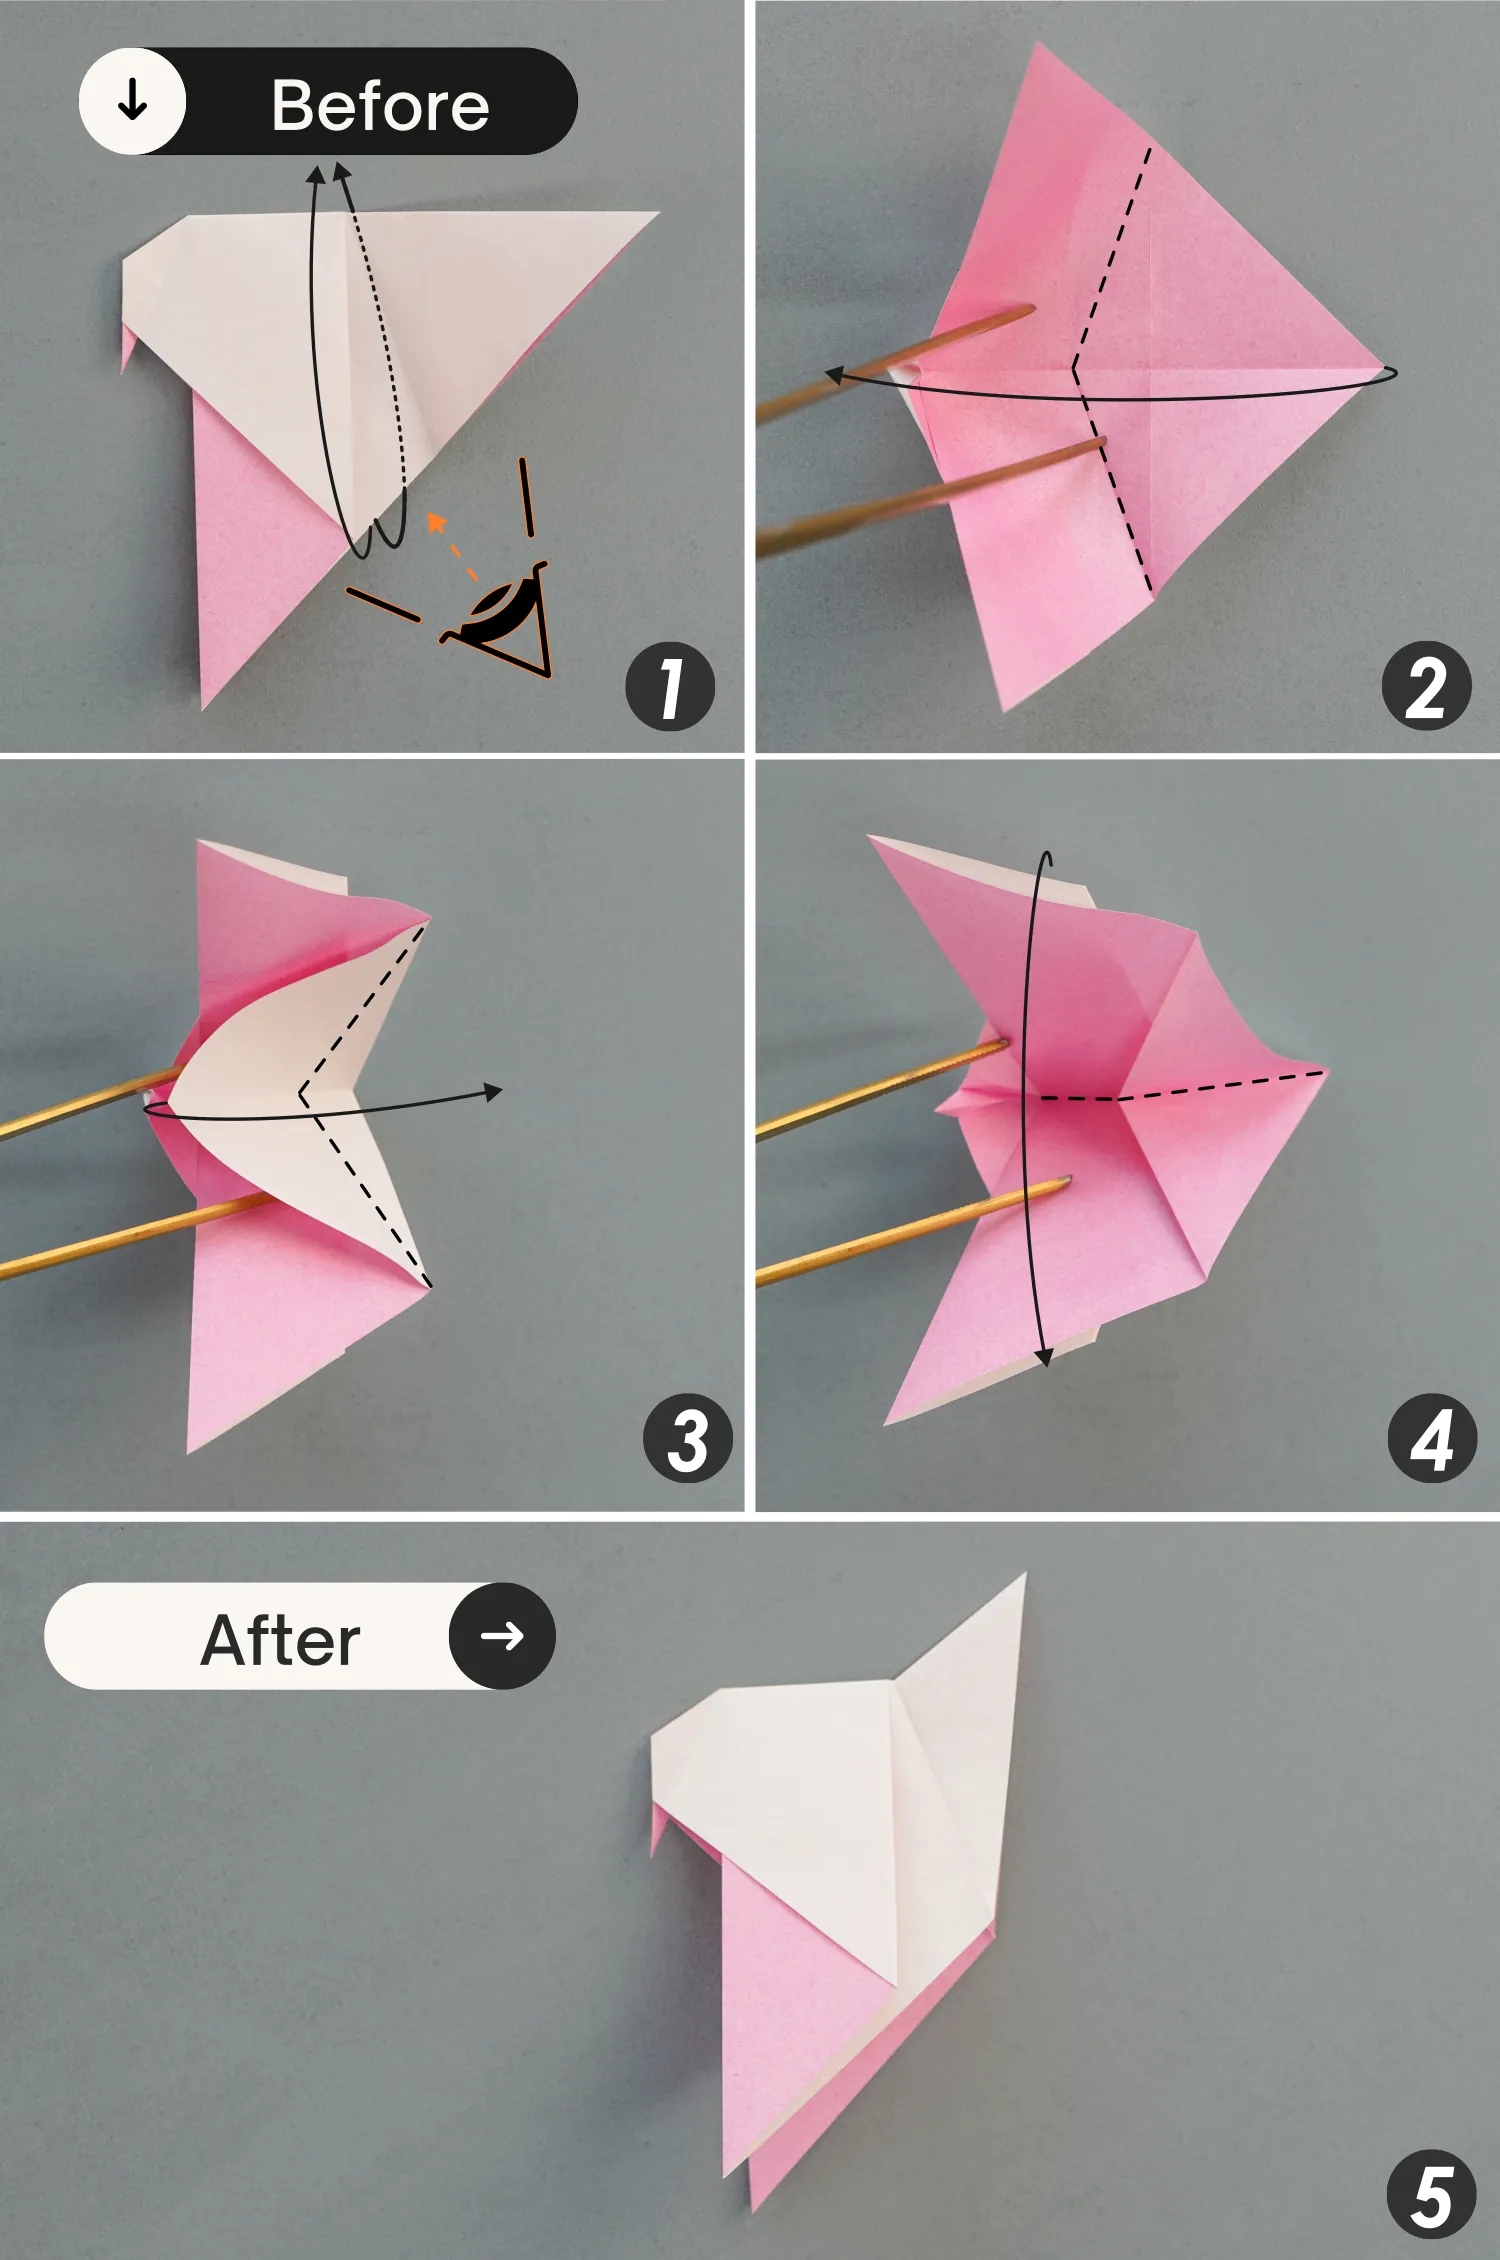
Step 11
Fold the bottom corner of the top layer up, then flip the paper over, and fold the bottom corner up in the same way, making these two edges flush. These are the wings of the bird.
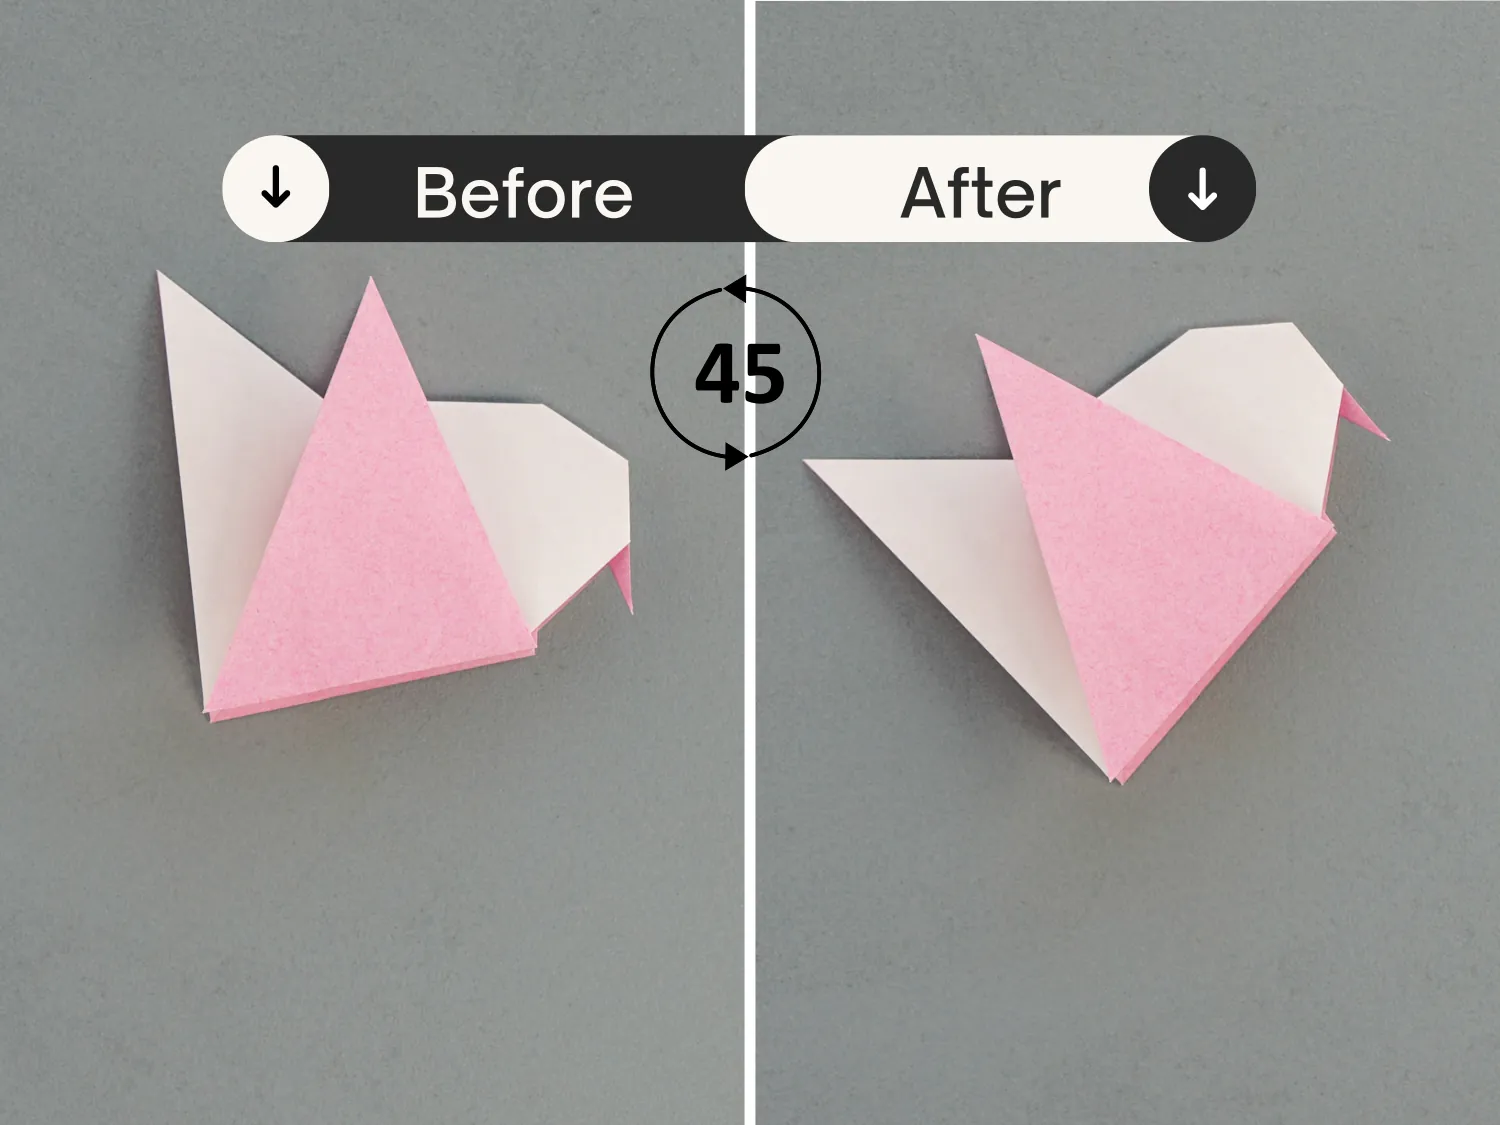
Step 12
Rotate it 45 degrees counterclockwise.
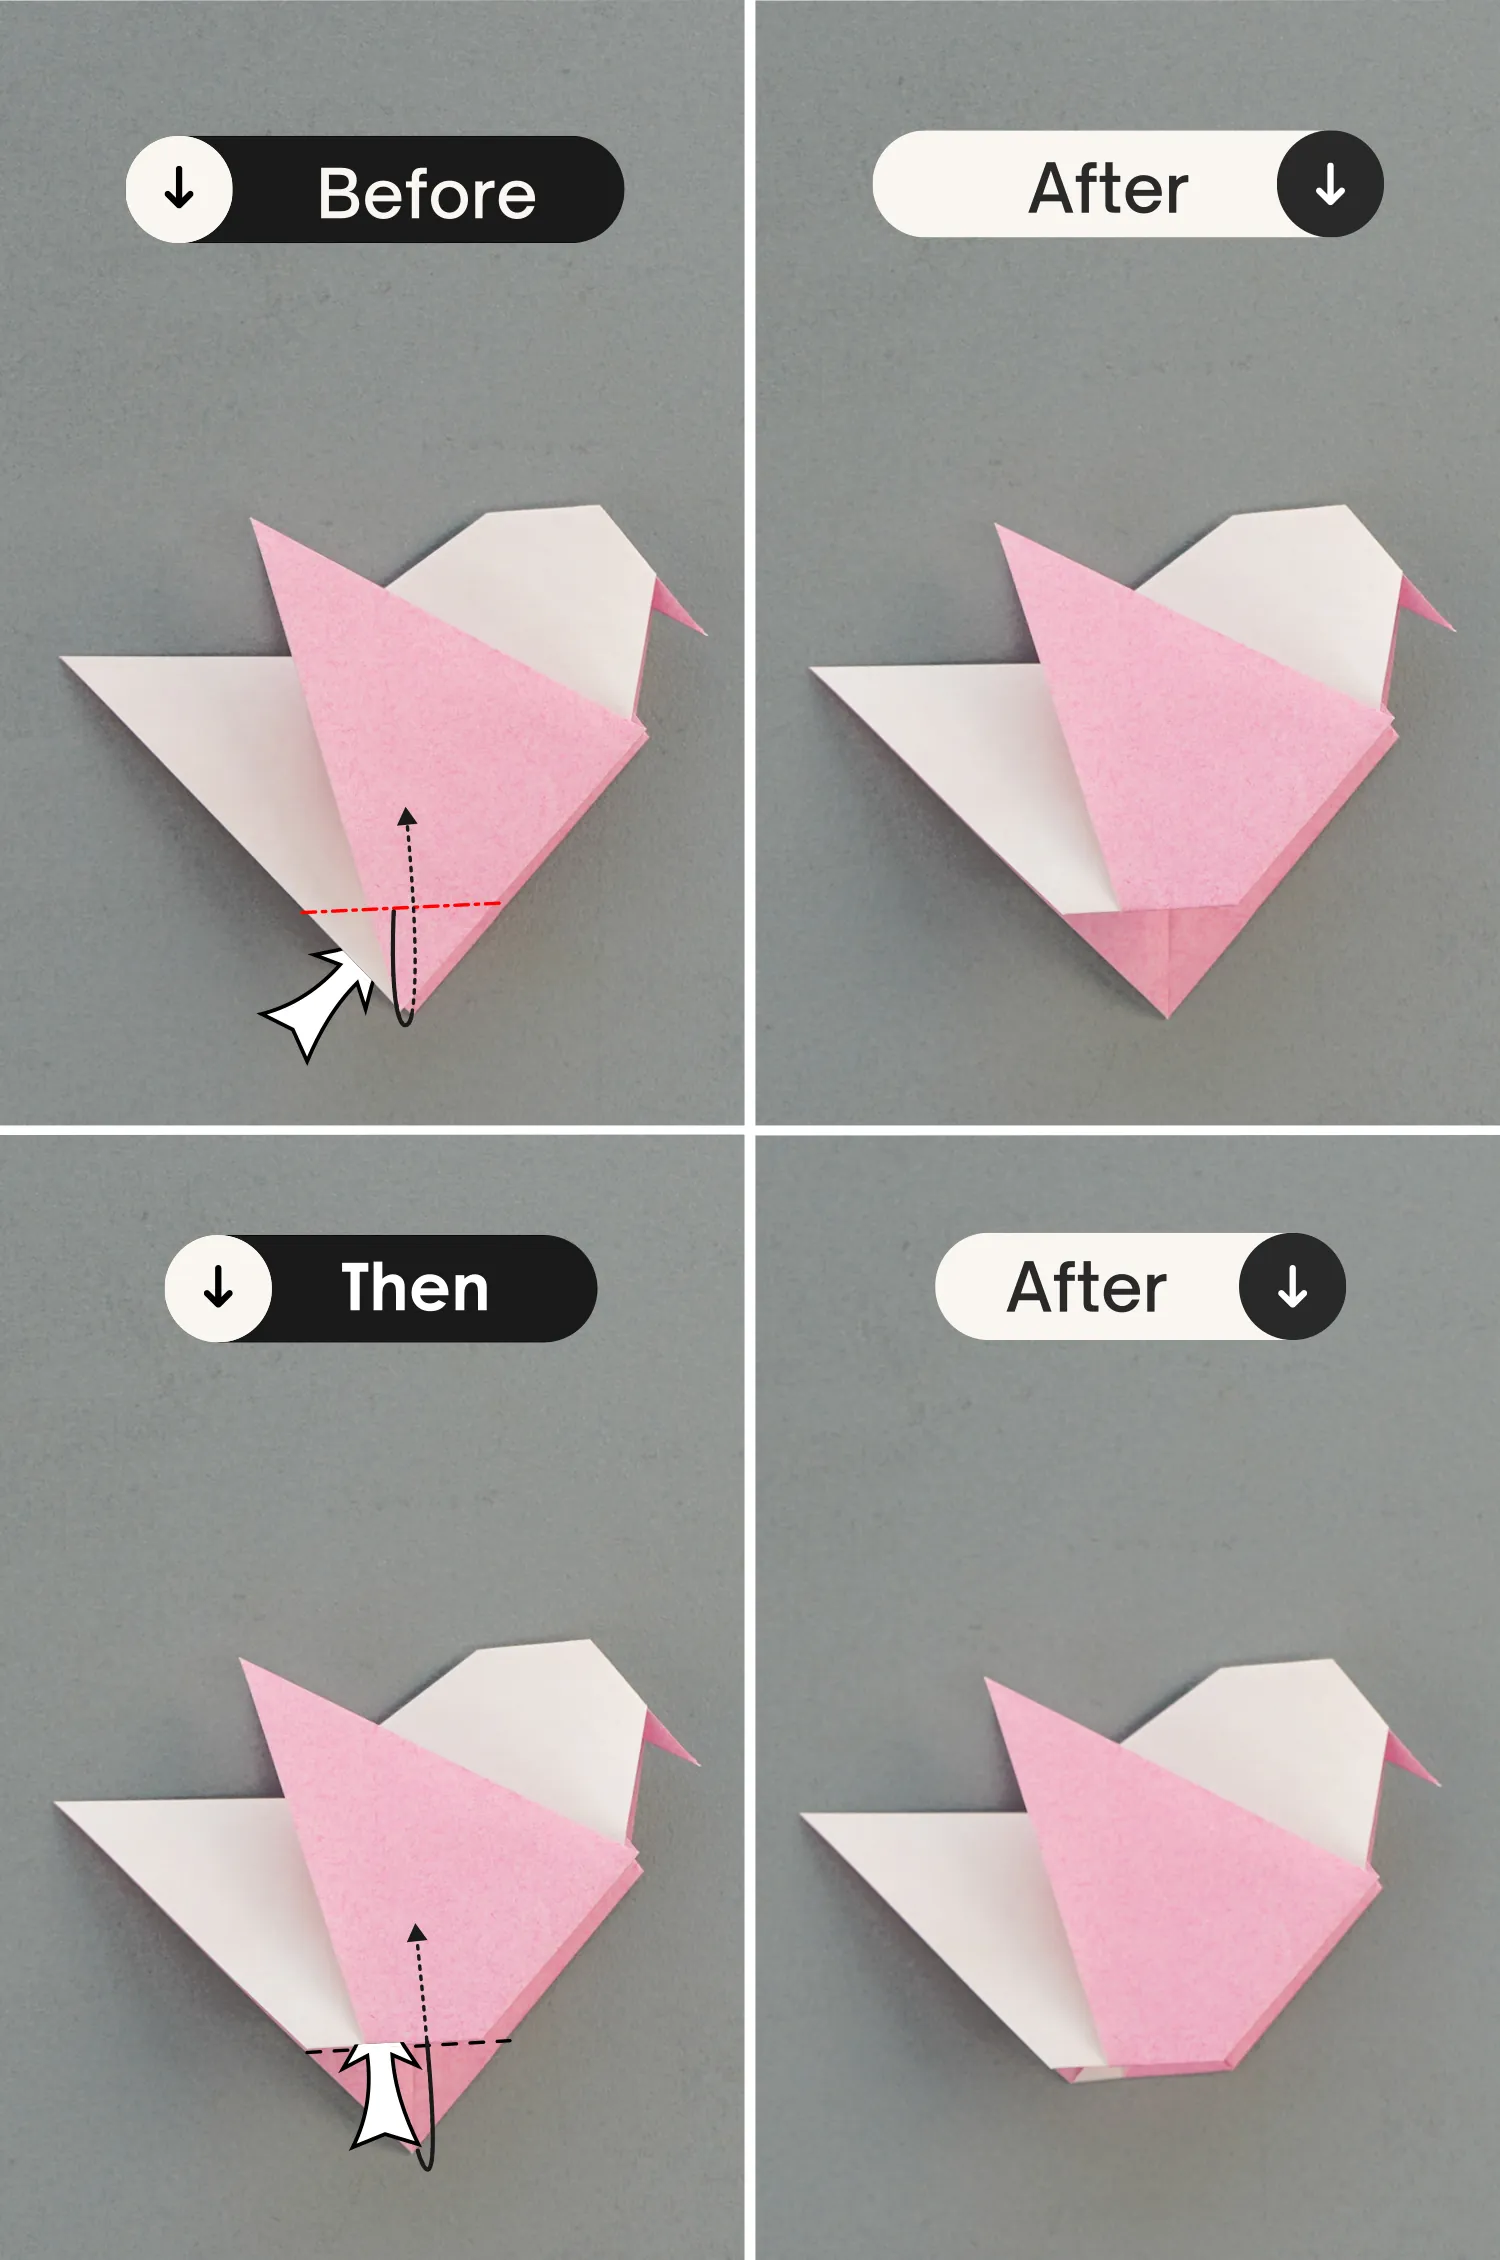
Step 13
Fold the bottom corner of the top layer backward, then fold the bottom corner of the bottom layer up, making sure these two edges slush.
What’s Next
This is the final shape of an easy and lovely origami bird. Now you can explore a variety of other easy origami bird instructions, to create a wonderful bird world. Hope you will enjoy them!
Other Easy Origami Bird Ideas