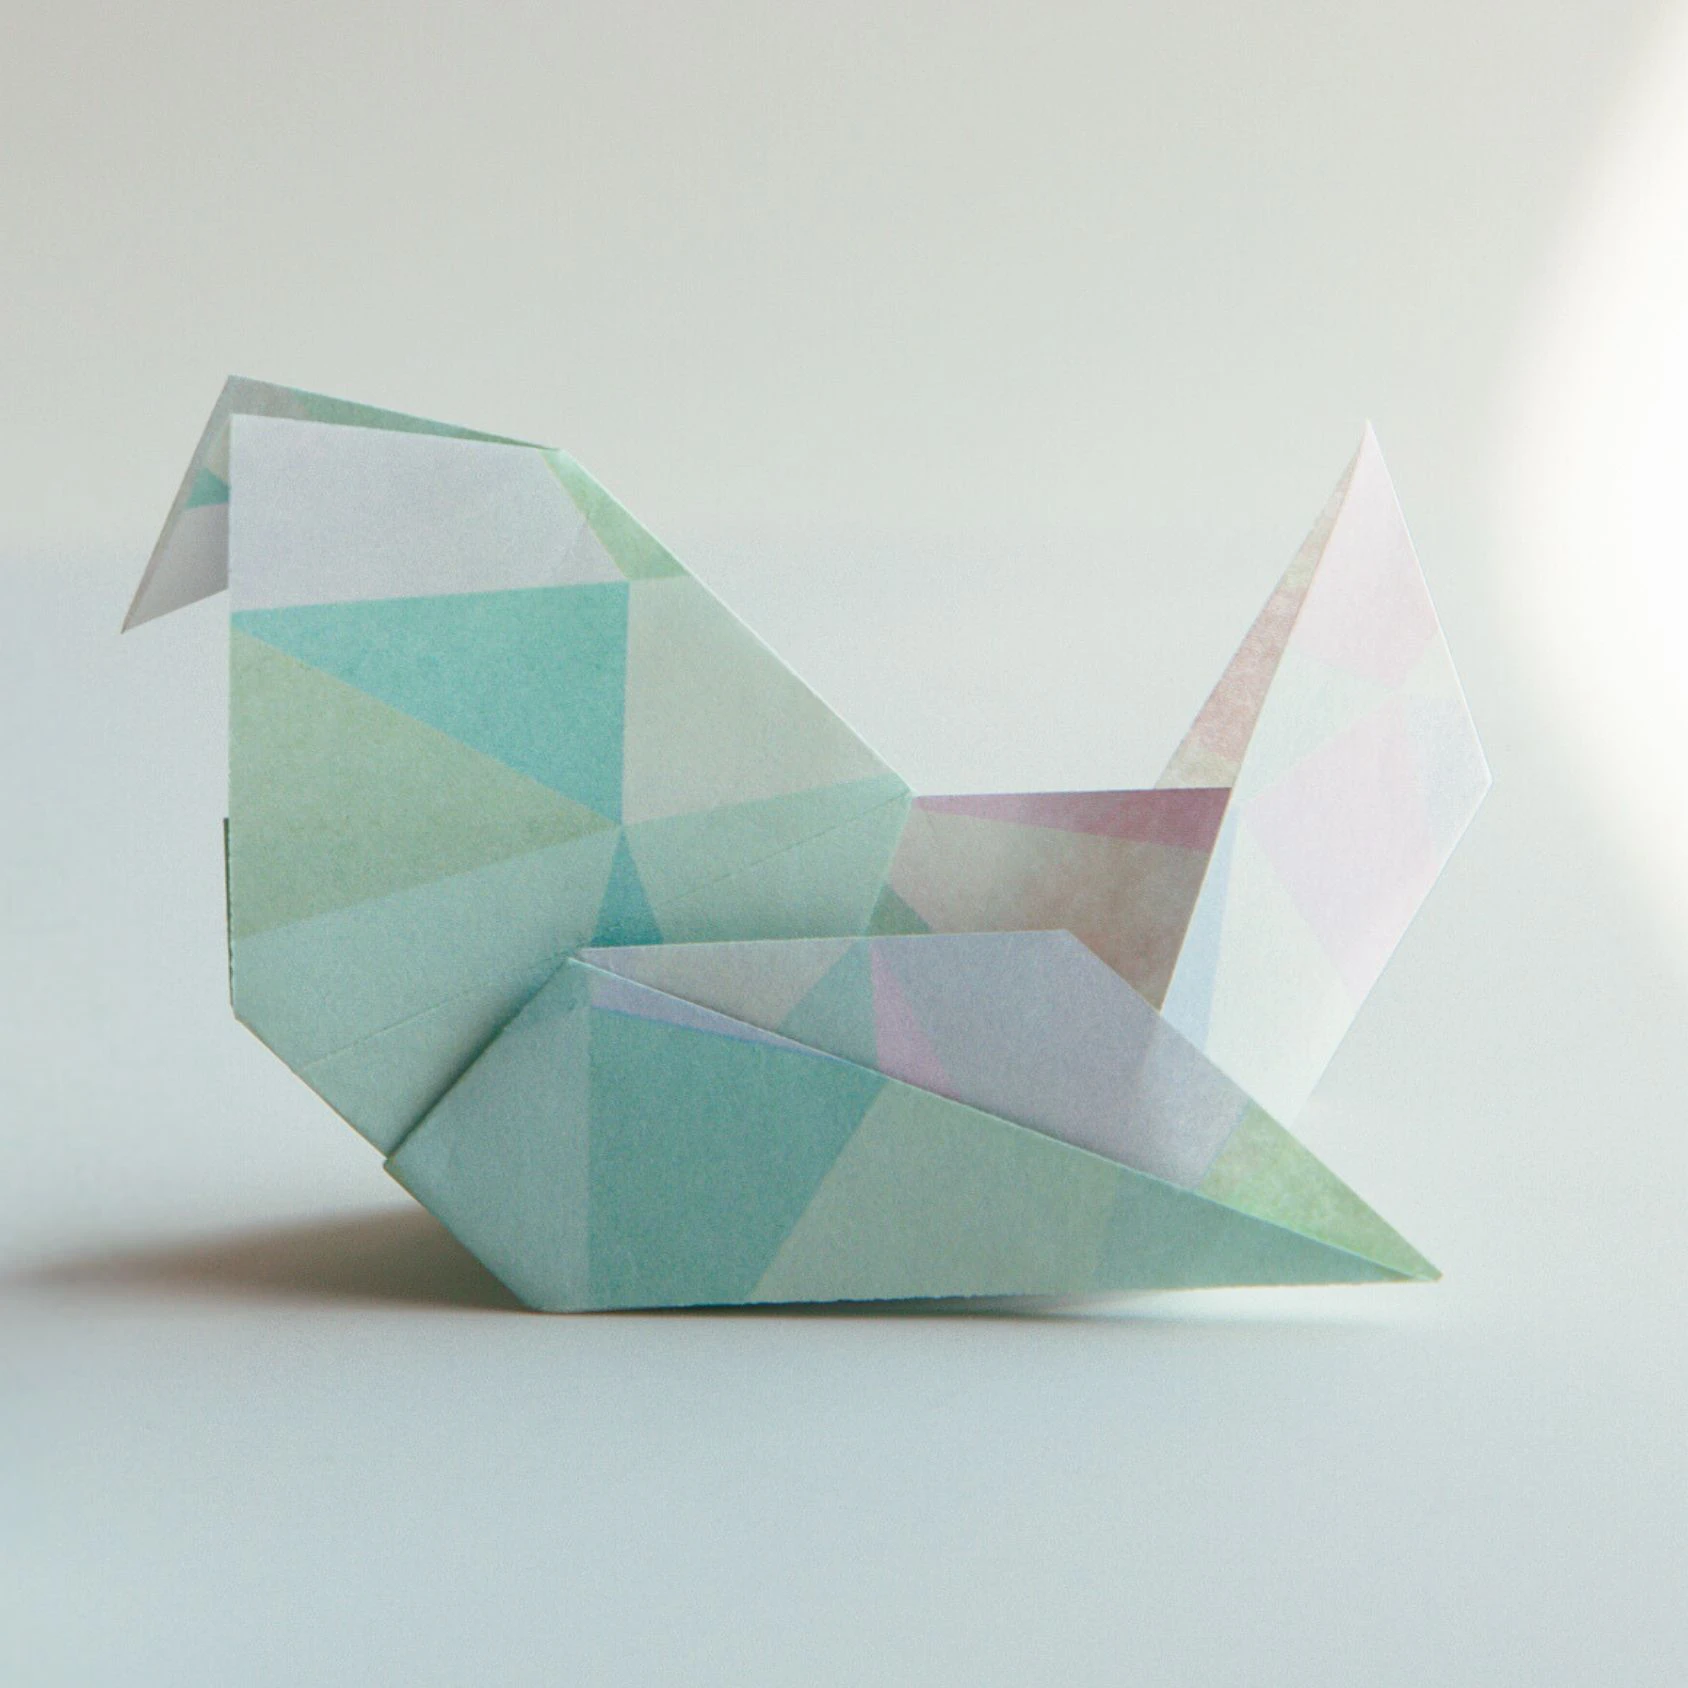
Learn to create a lovely origami seagull with our easy-to-follow instructions. This seagull spreads its wings and appears to be soaring freely in the sky. The overall posture looks light and evokes a sense of freedom, bringing back fond memories of the sea.
Since there is a lot of detailed folding, we suggest using a slightly large square paper.

We provide step-by-step diagram instructions and beginner-friendly videos. Check both for quicker learning.
If you are new to origami, start here from our beginner guide to know the basics and how to read the step-by-step instructions.

- Folding time: 20 minutes
- Paper: 20×20 cm
- Difficulty: Advanced
- Designer: Riccardo Foschi
Material
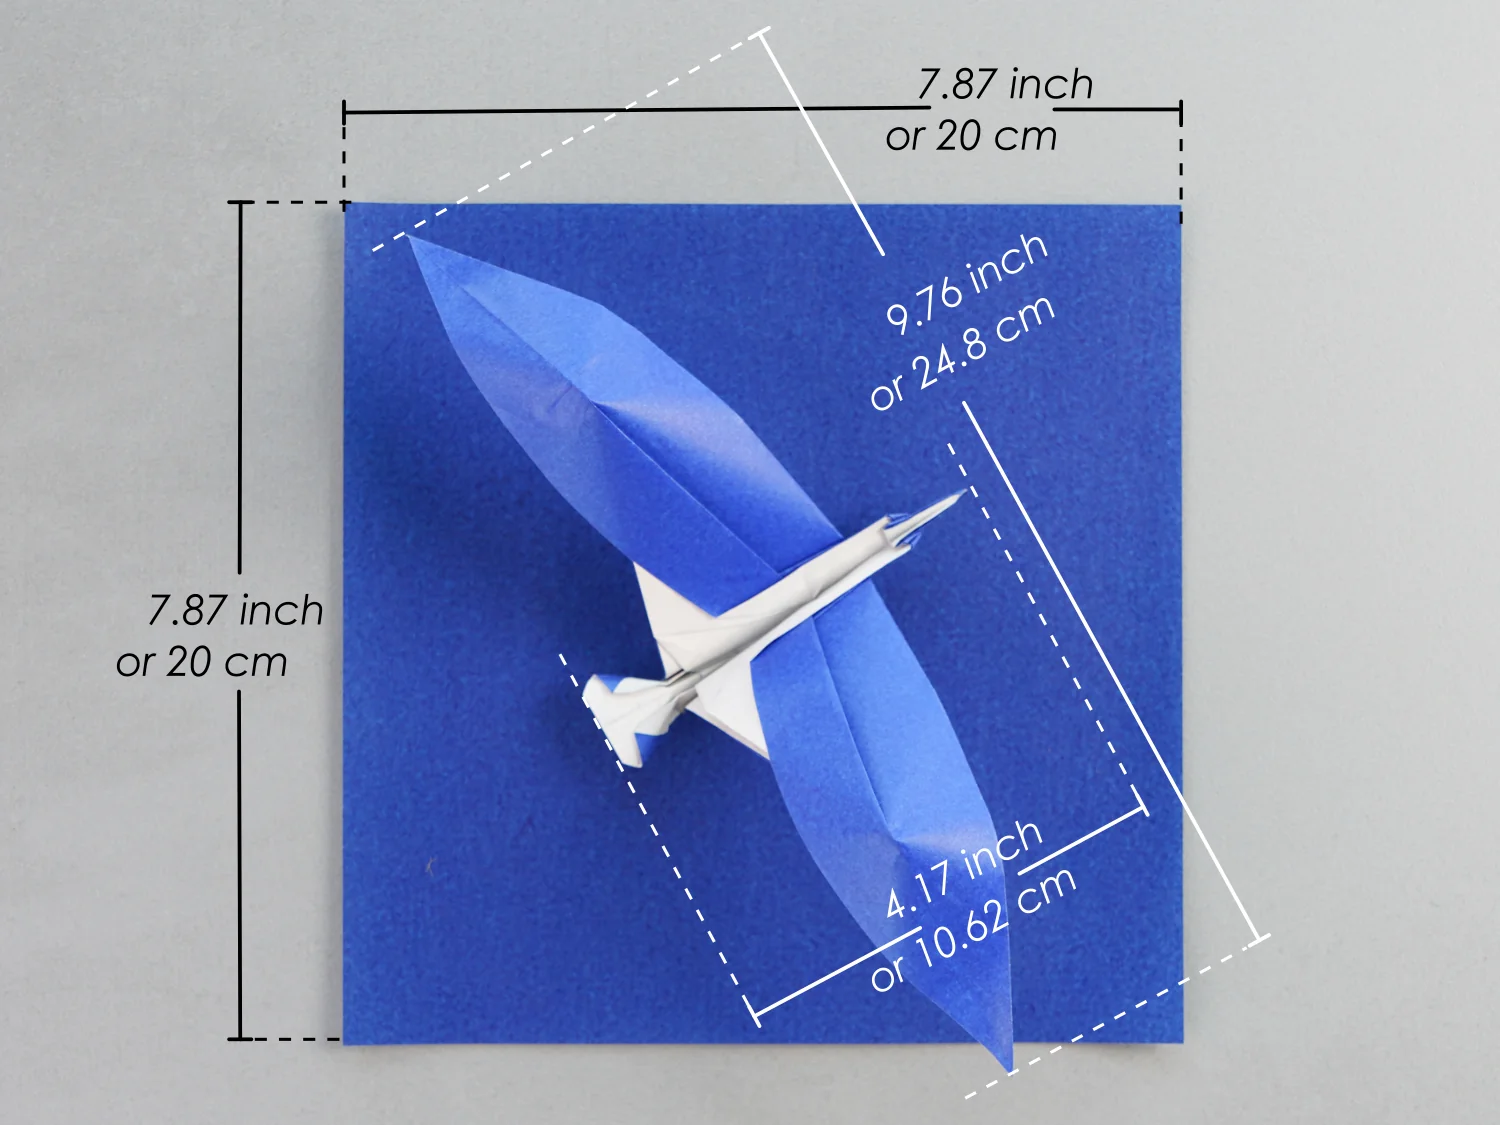
Prepare a piece of 20×20 cm origami square paper, with different colors on each side, to create a 24.8×10.62 cm origami seagull. Experiment with different colors and patterns, making your product more unique.
Origami Seagull Video
Step by Step Instructions
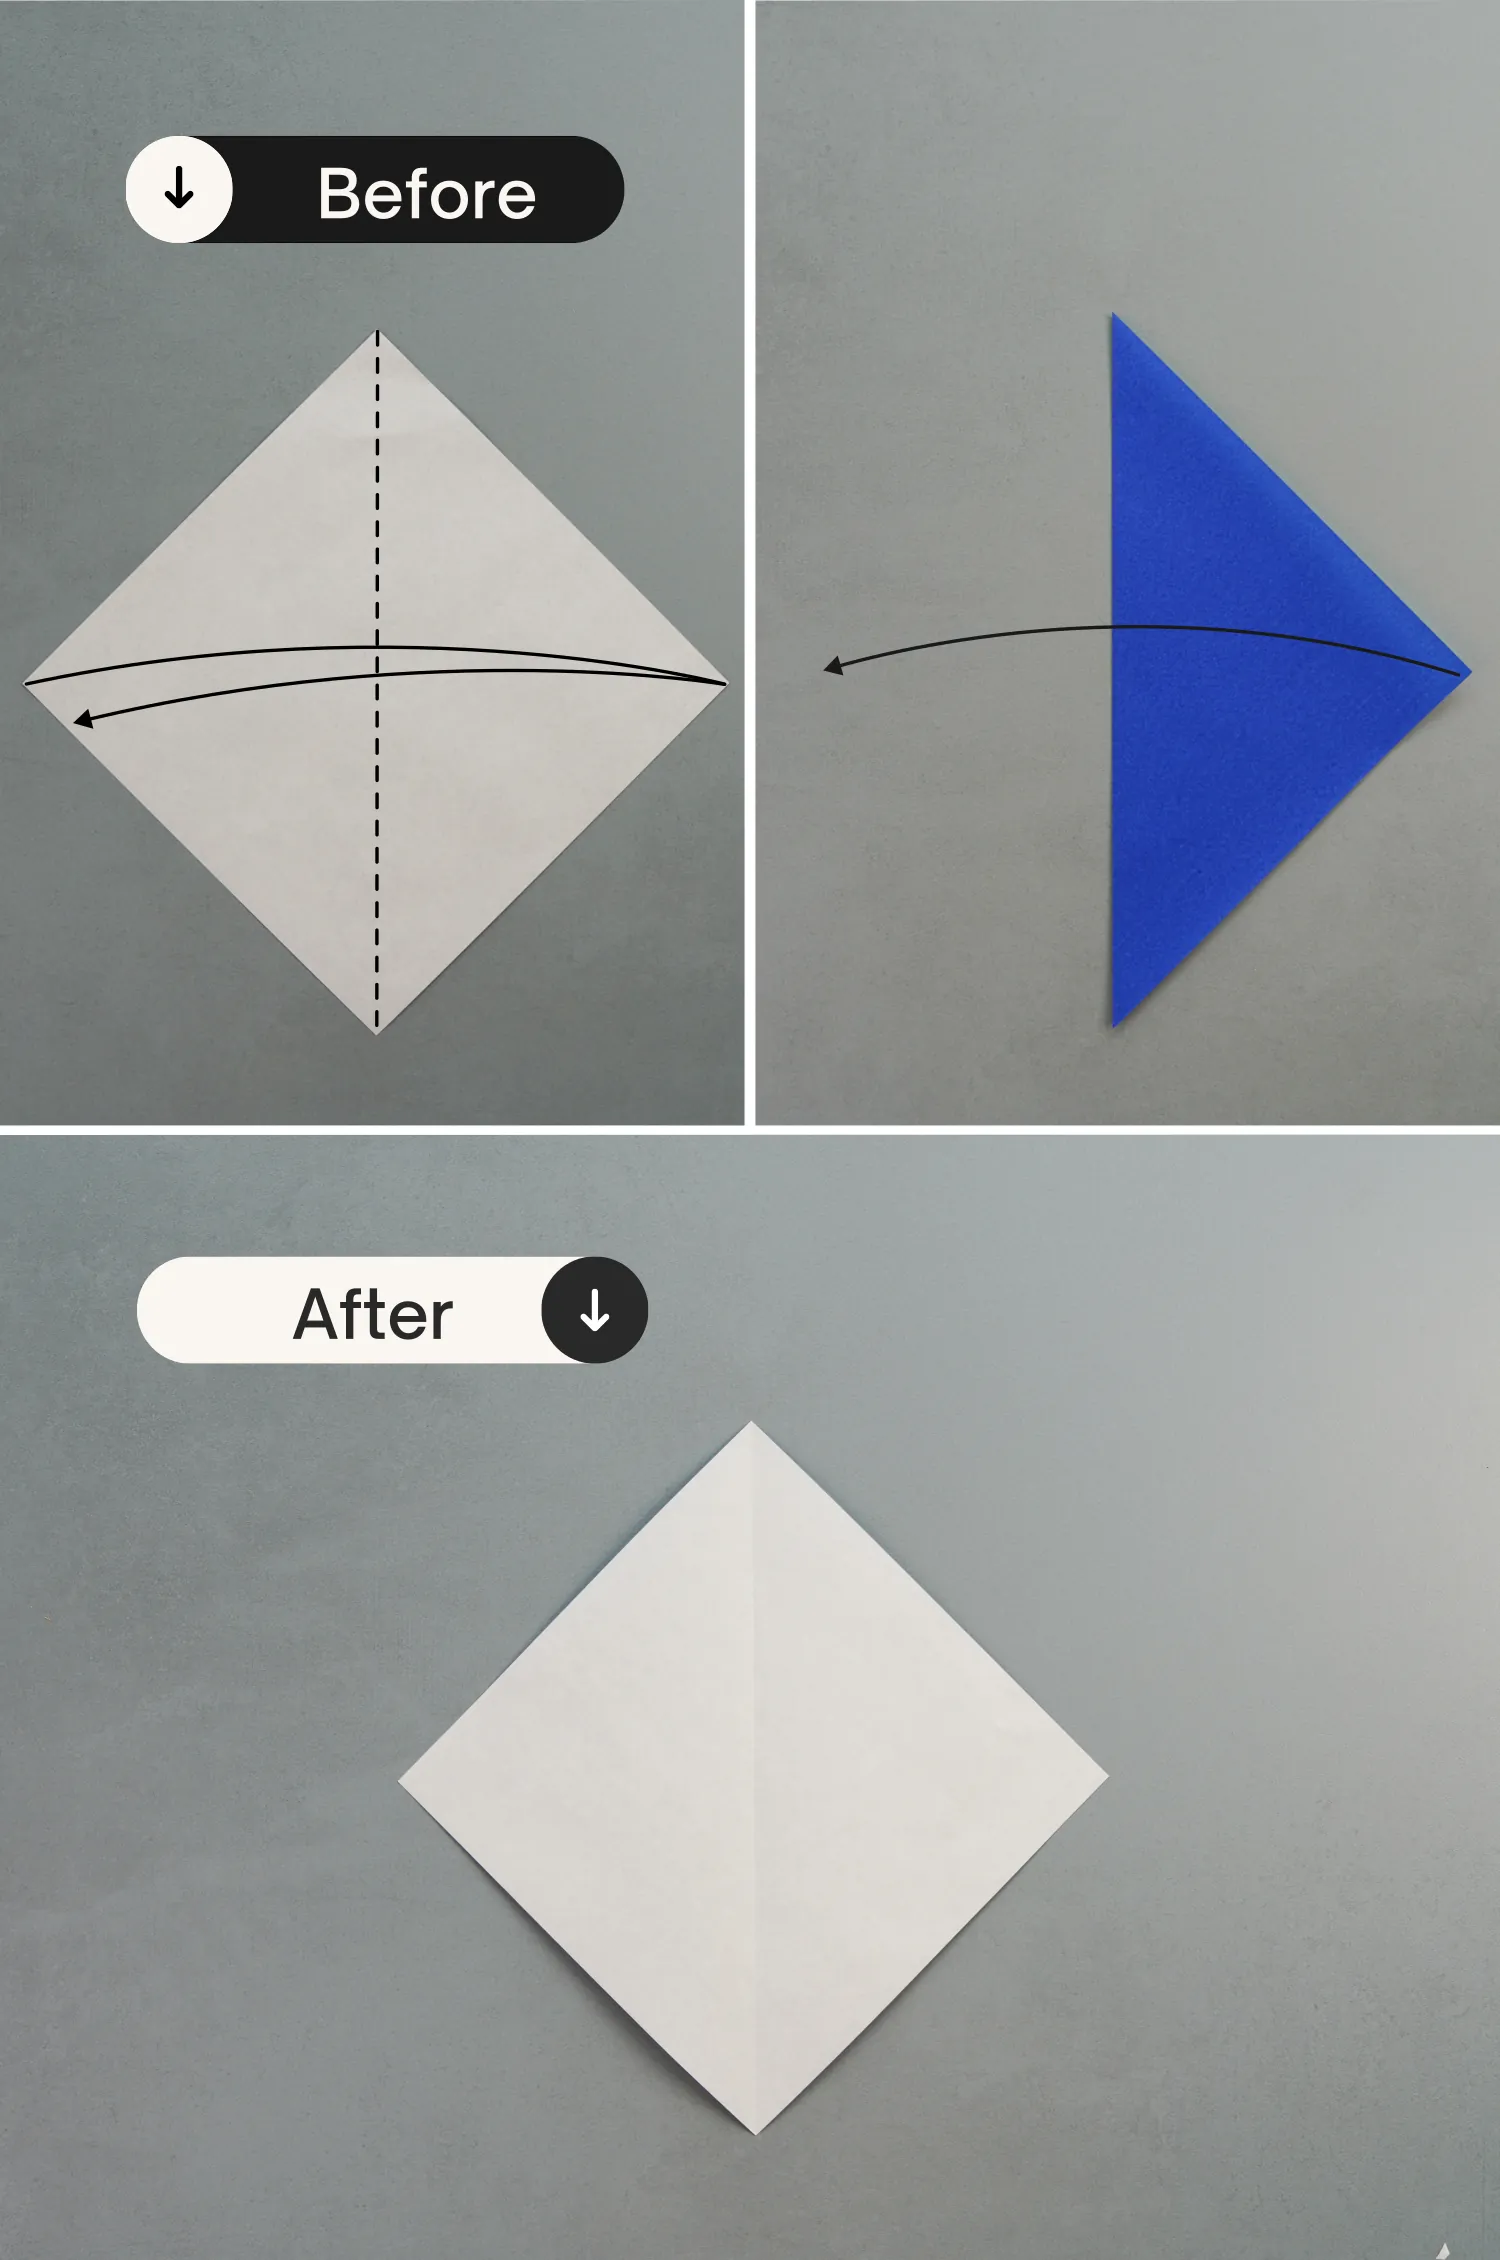
Step 1
Start with the white side of the paper facing up, and fold it in half vertically, leaving a crease then unfold it.
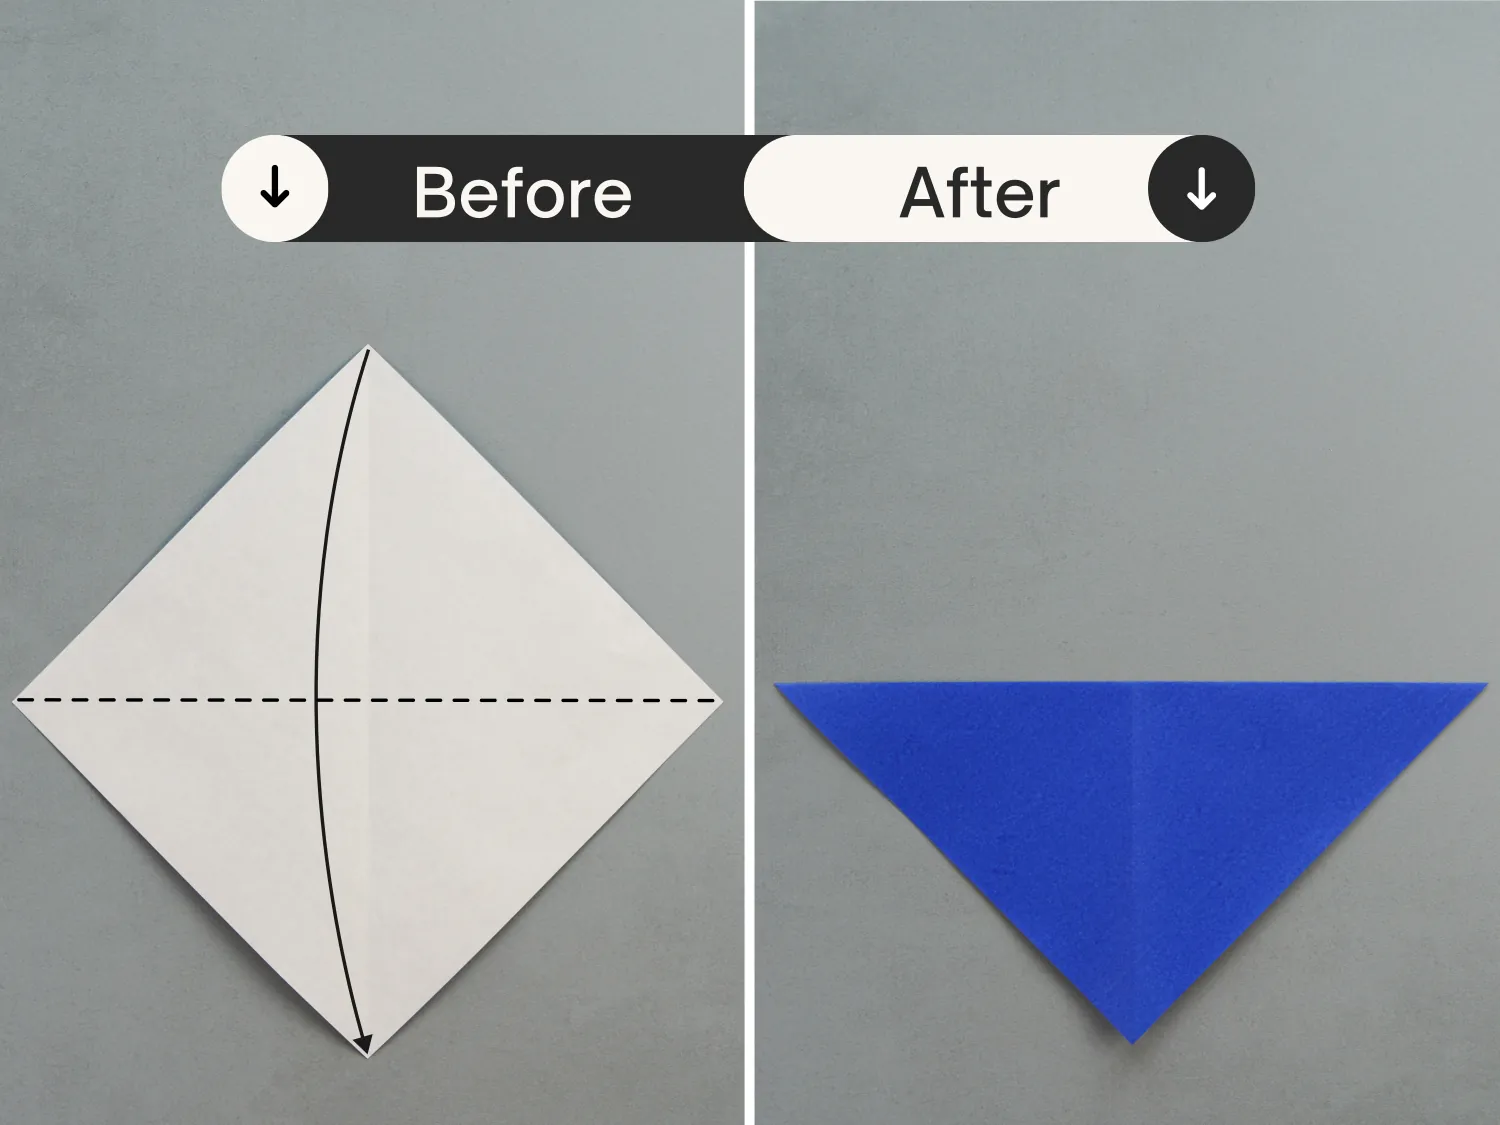
Step 2
Fold the top point to the bottom point diagonally.
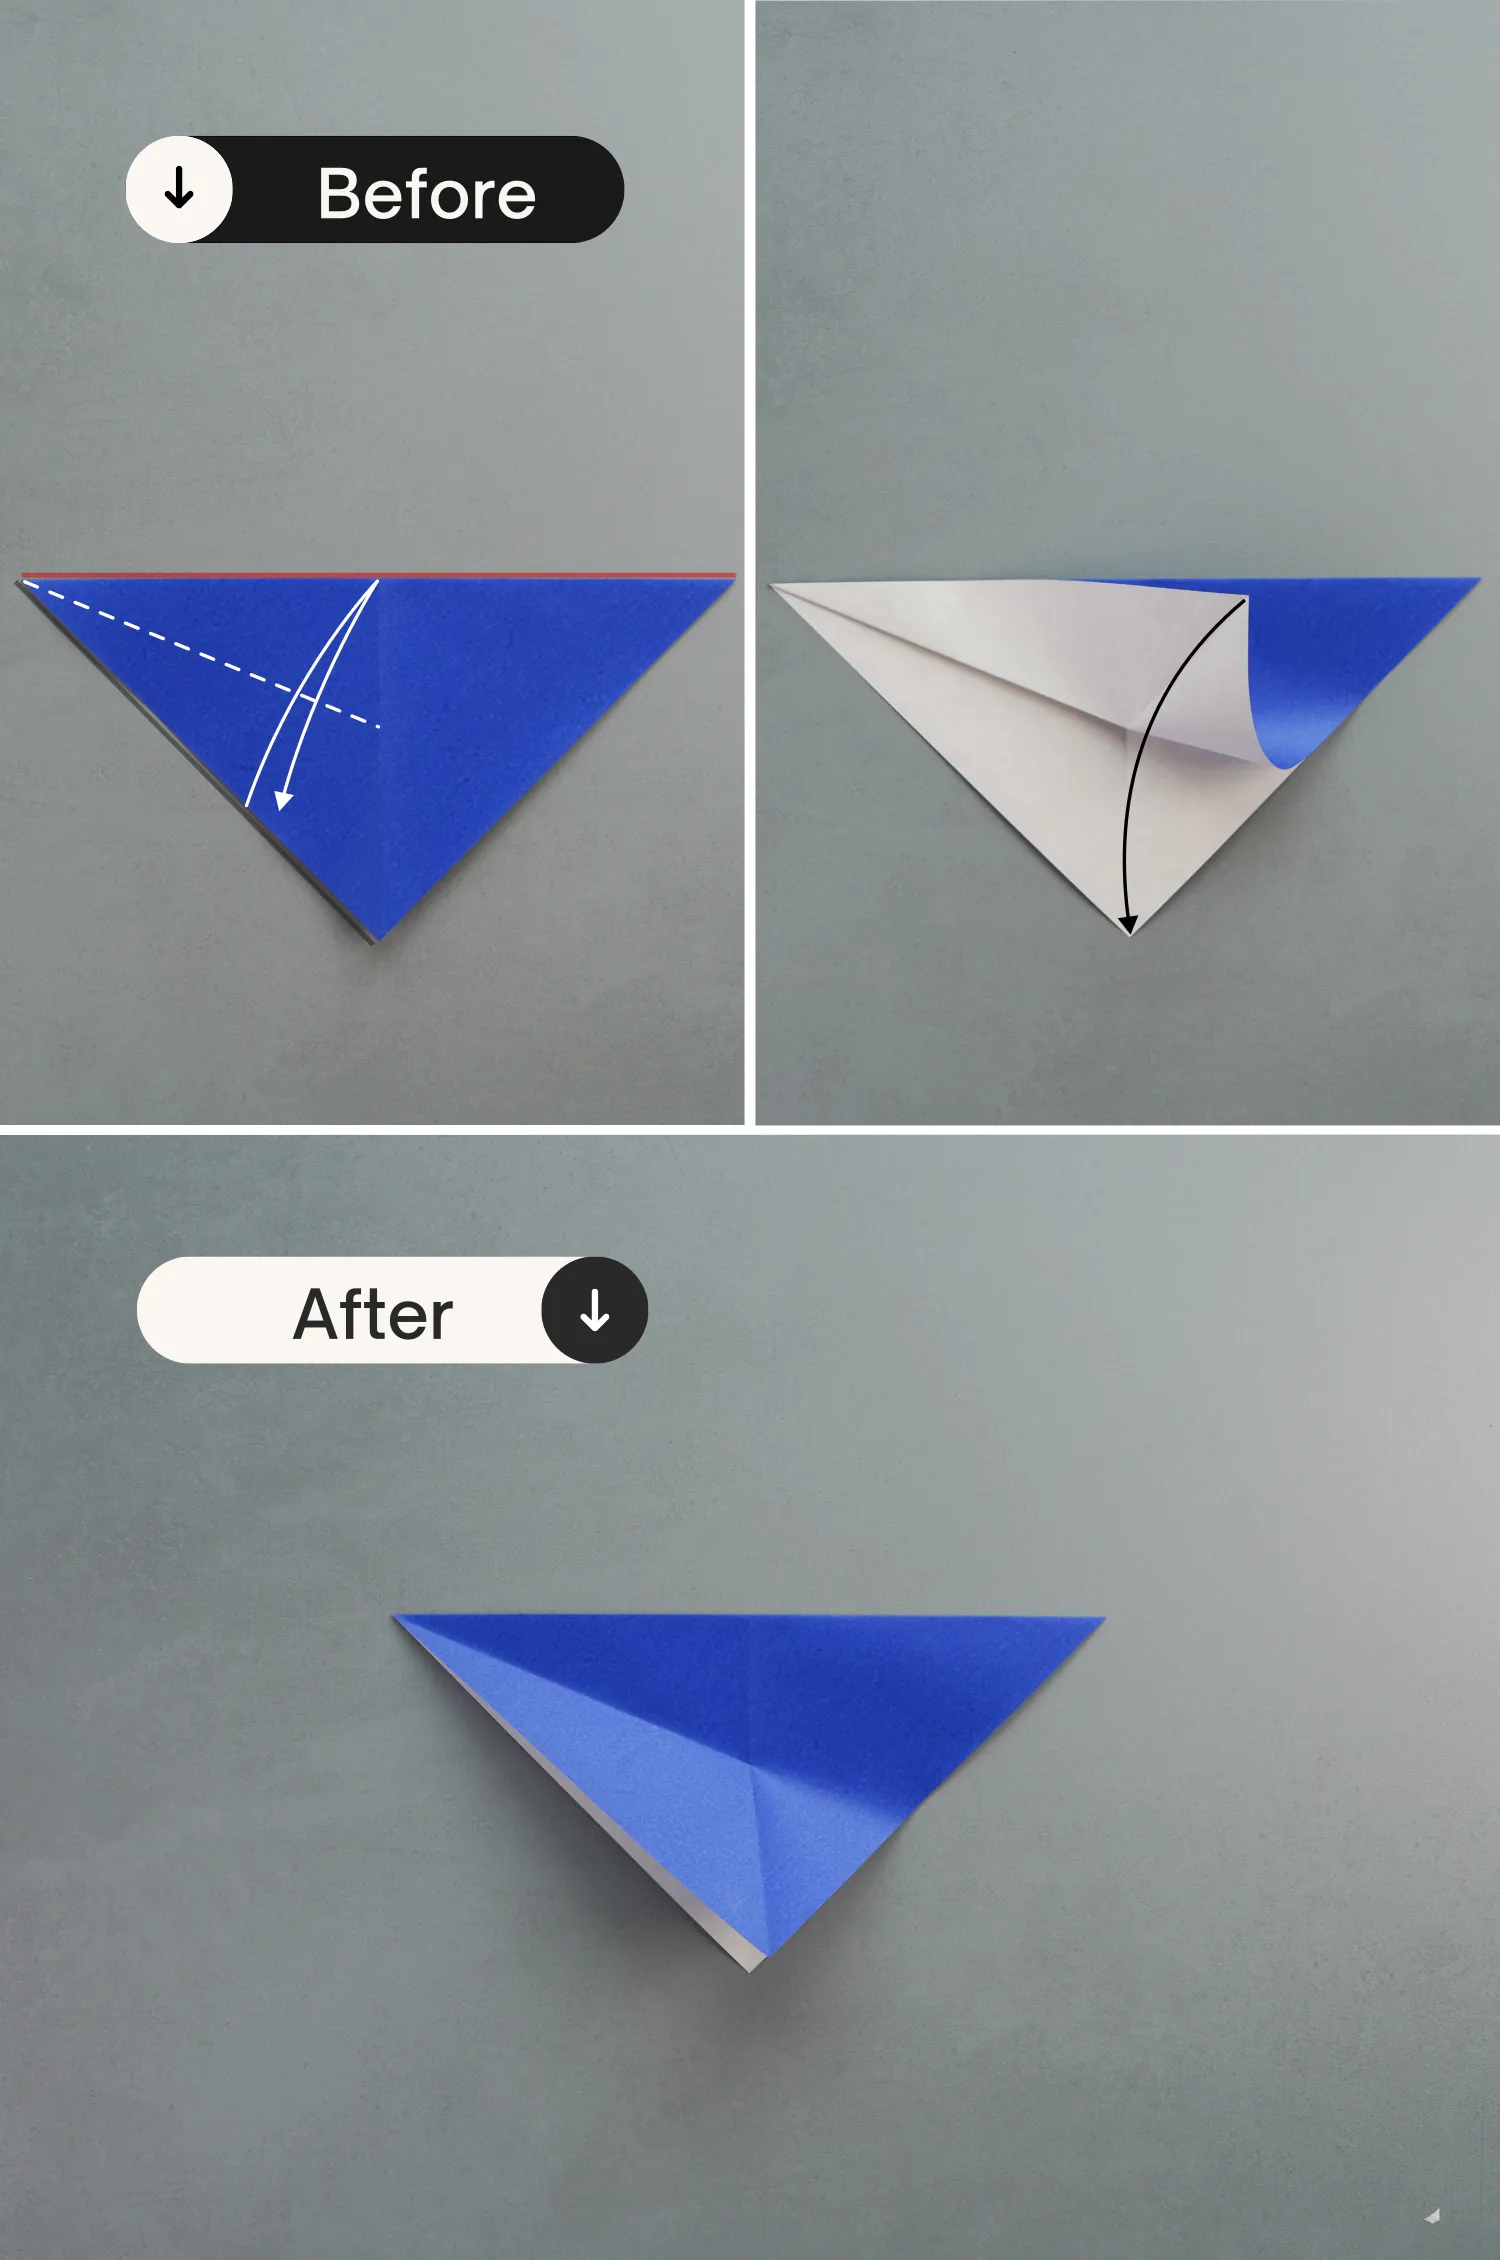
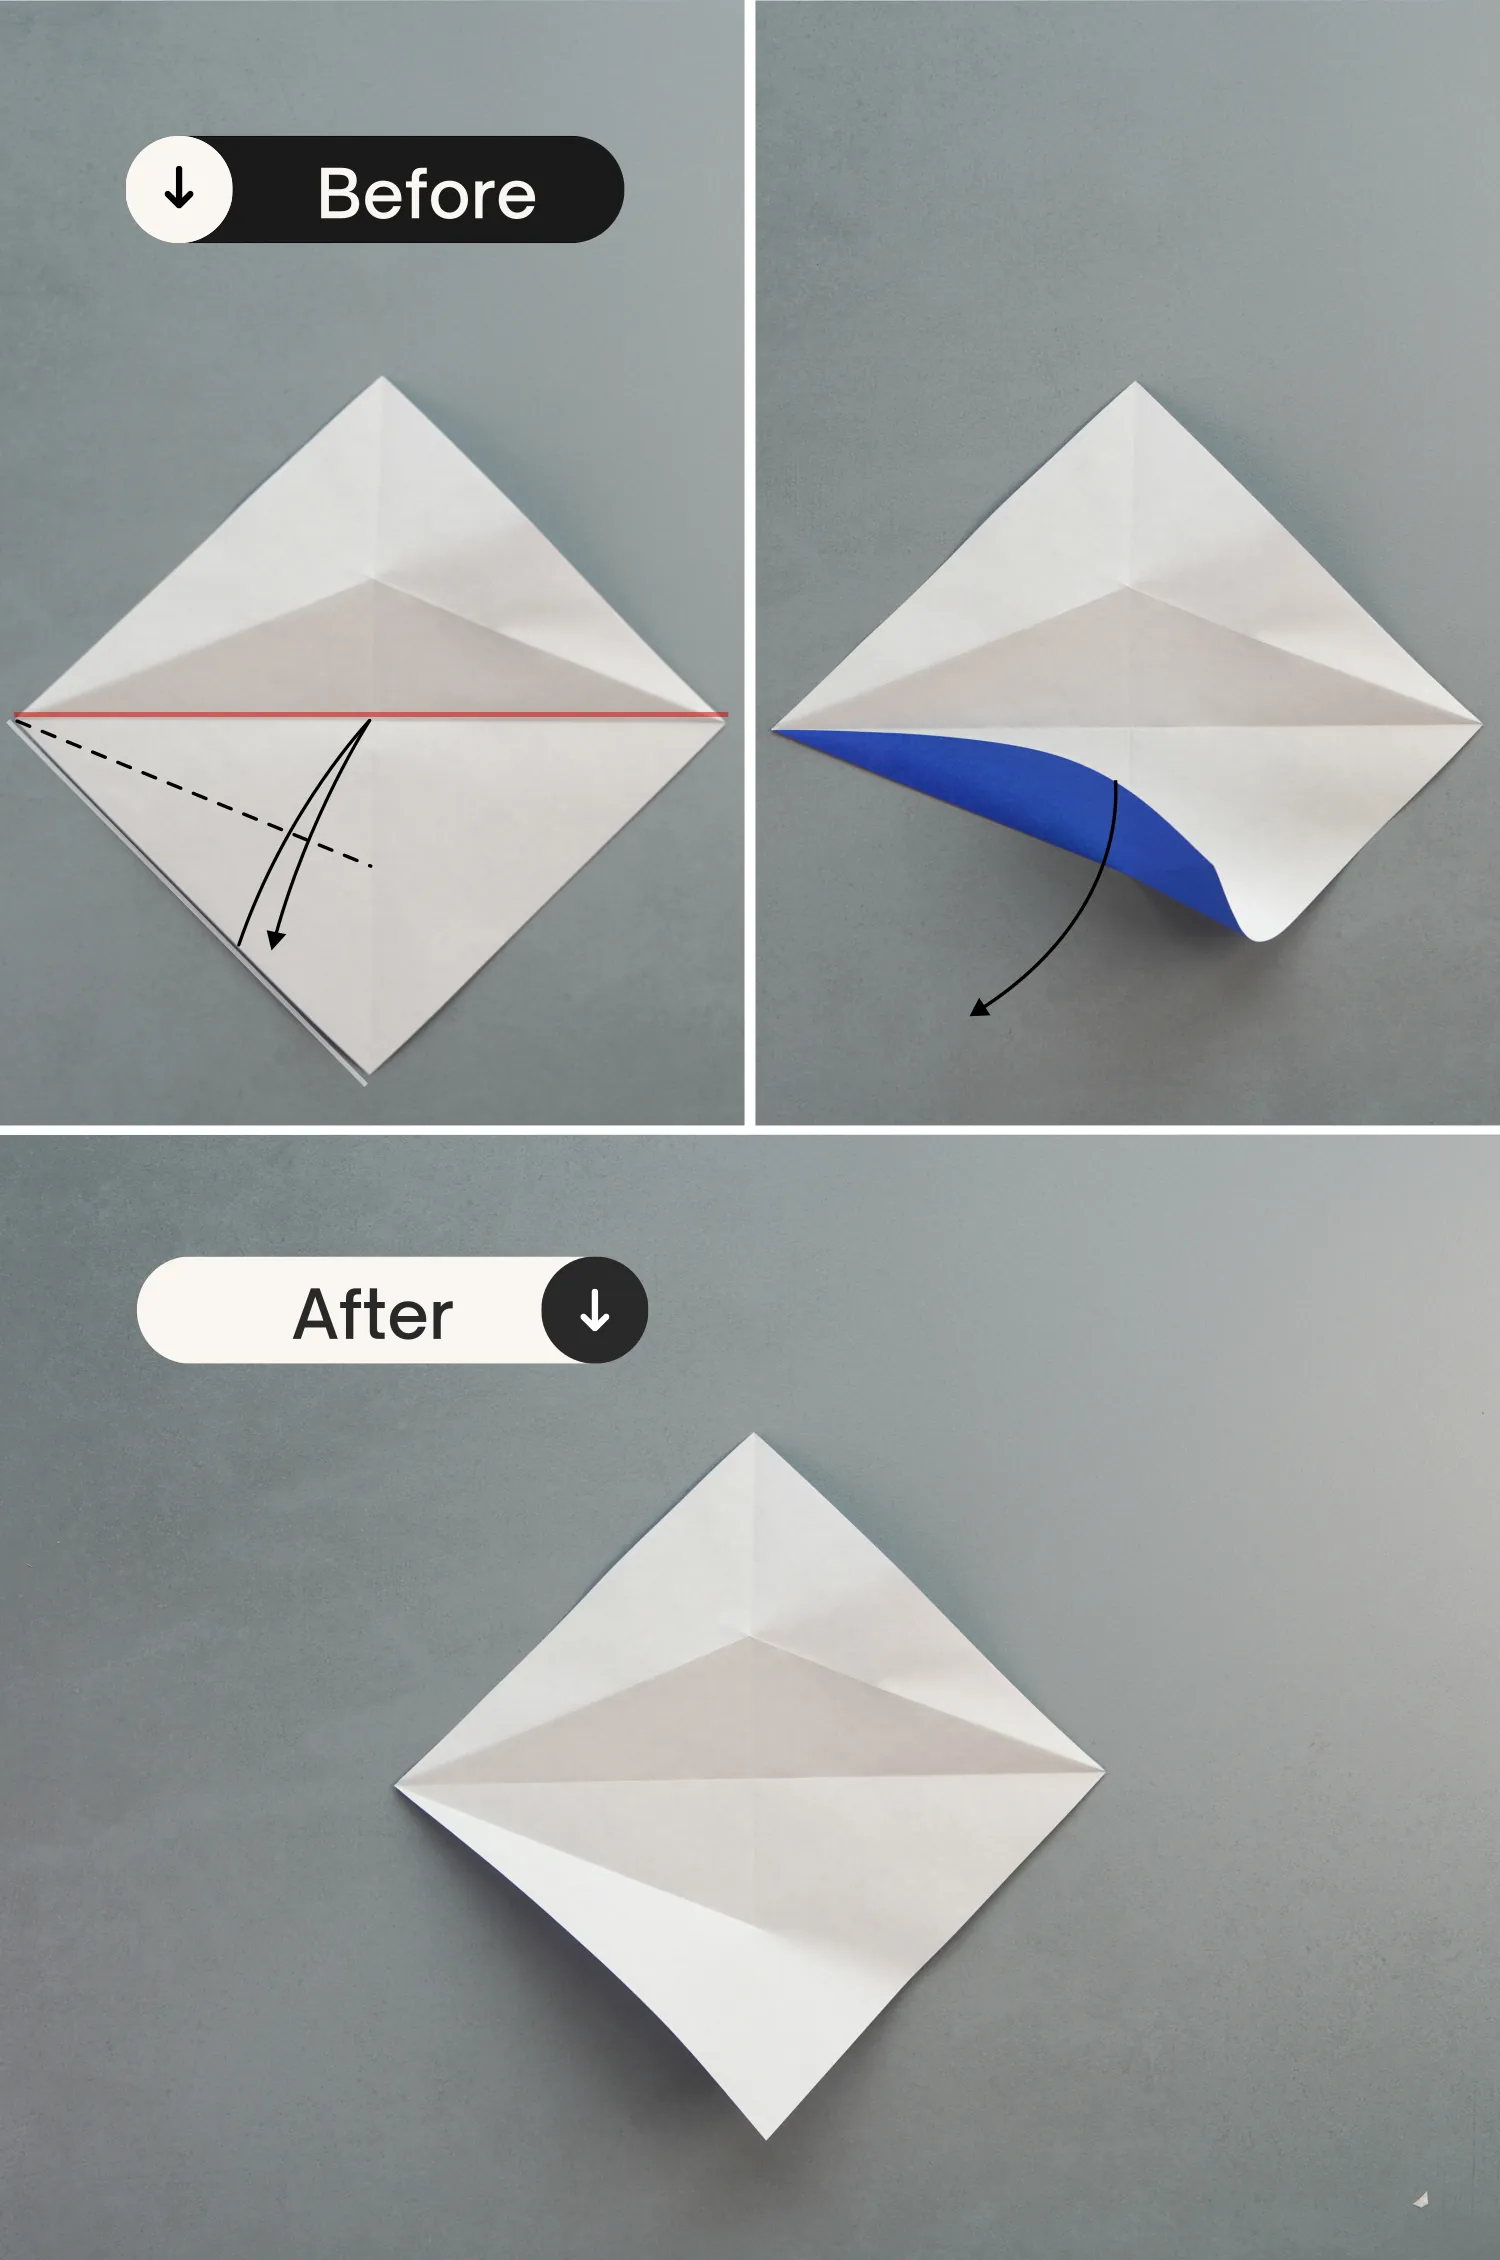
Step 3
Fold the bottom left edge of the upper layer to align with the top edge, and make a crease from the left point to the middle vertical crease of the paper, then unfold it.
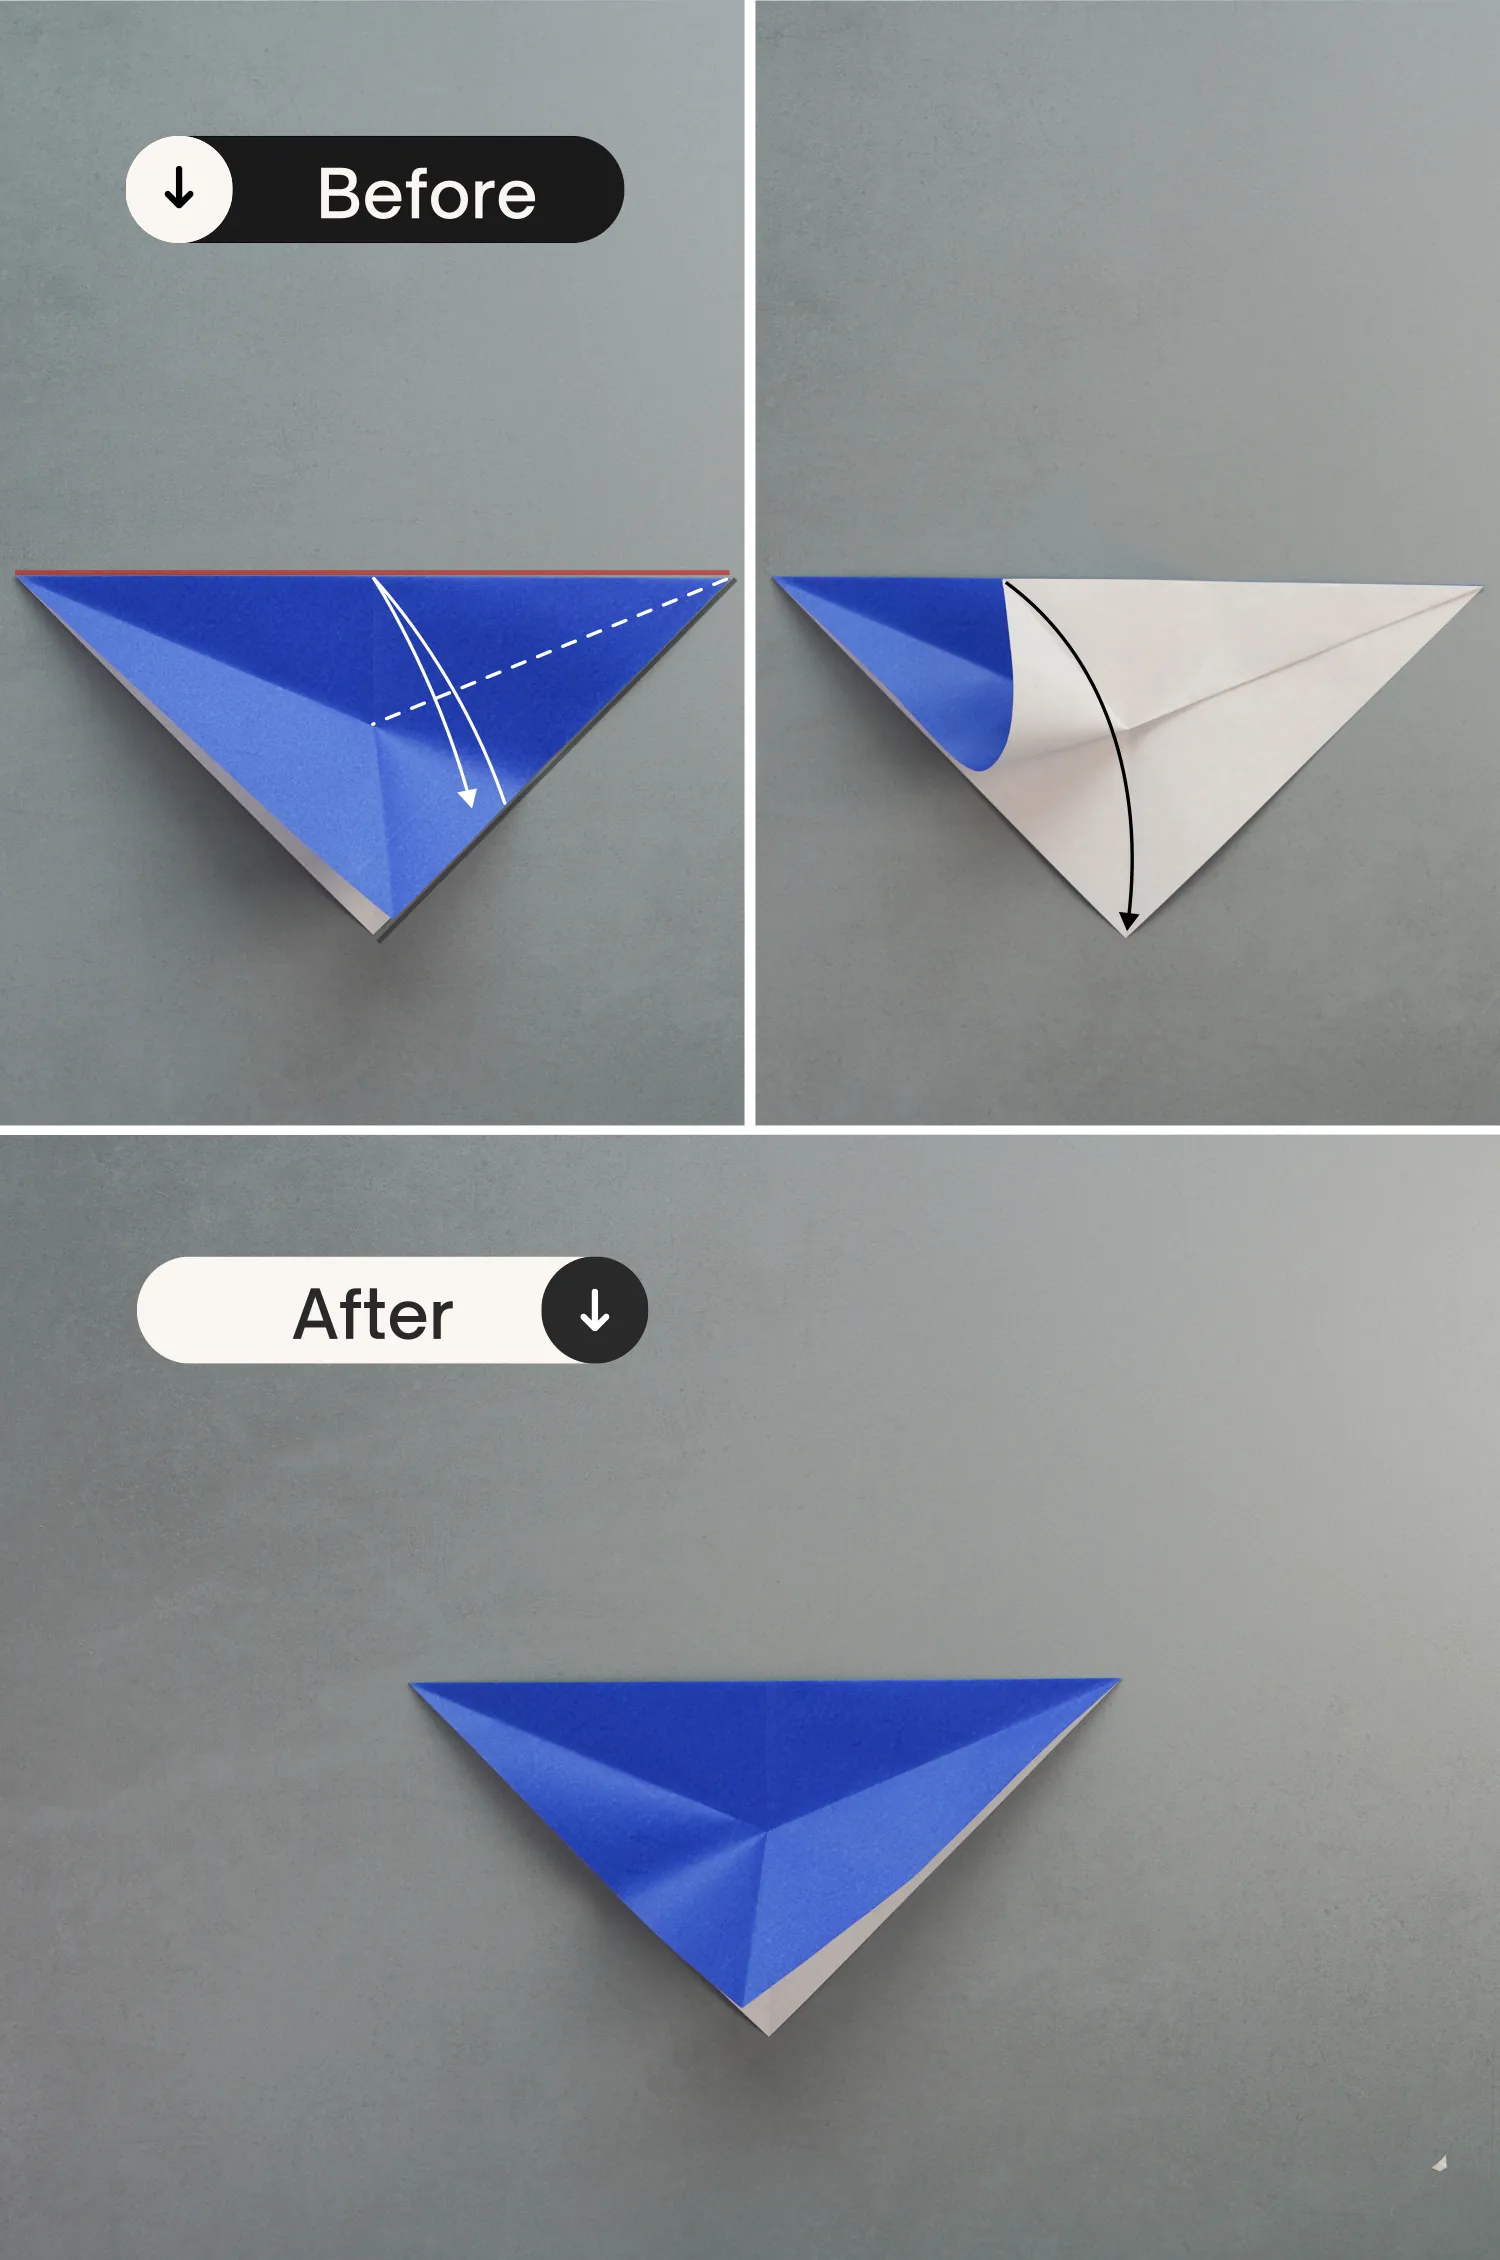
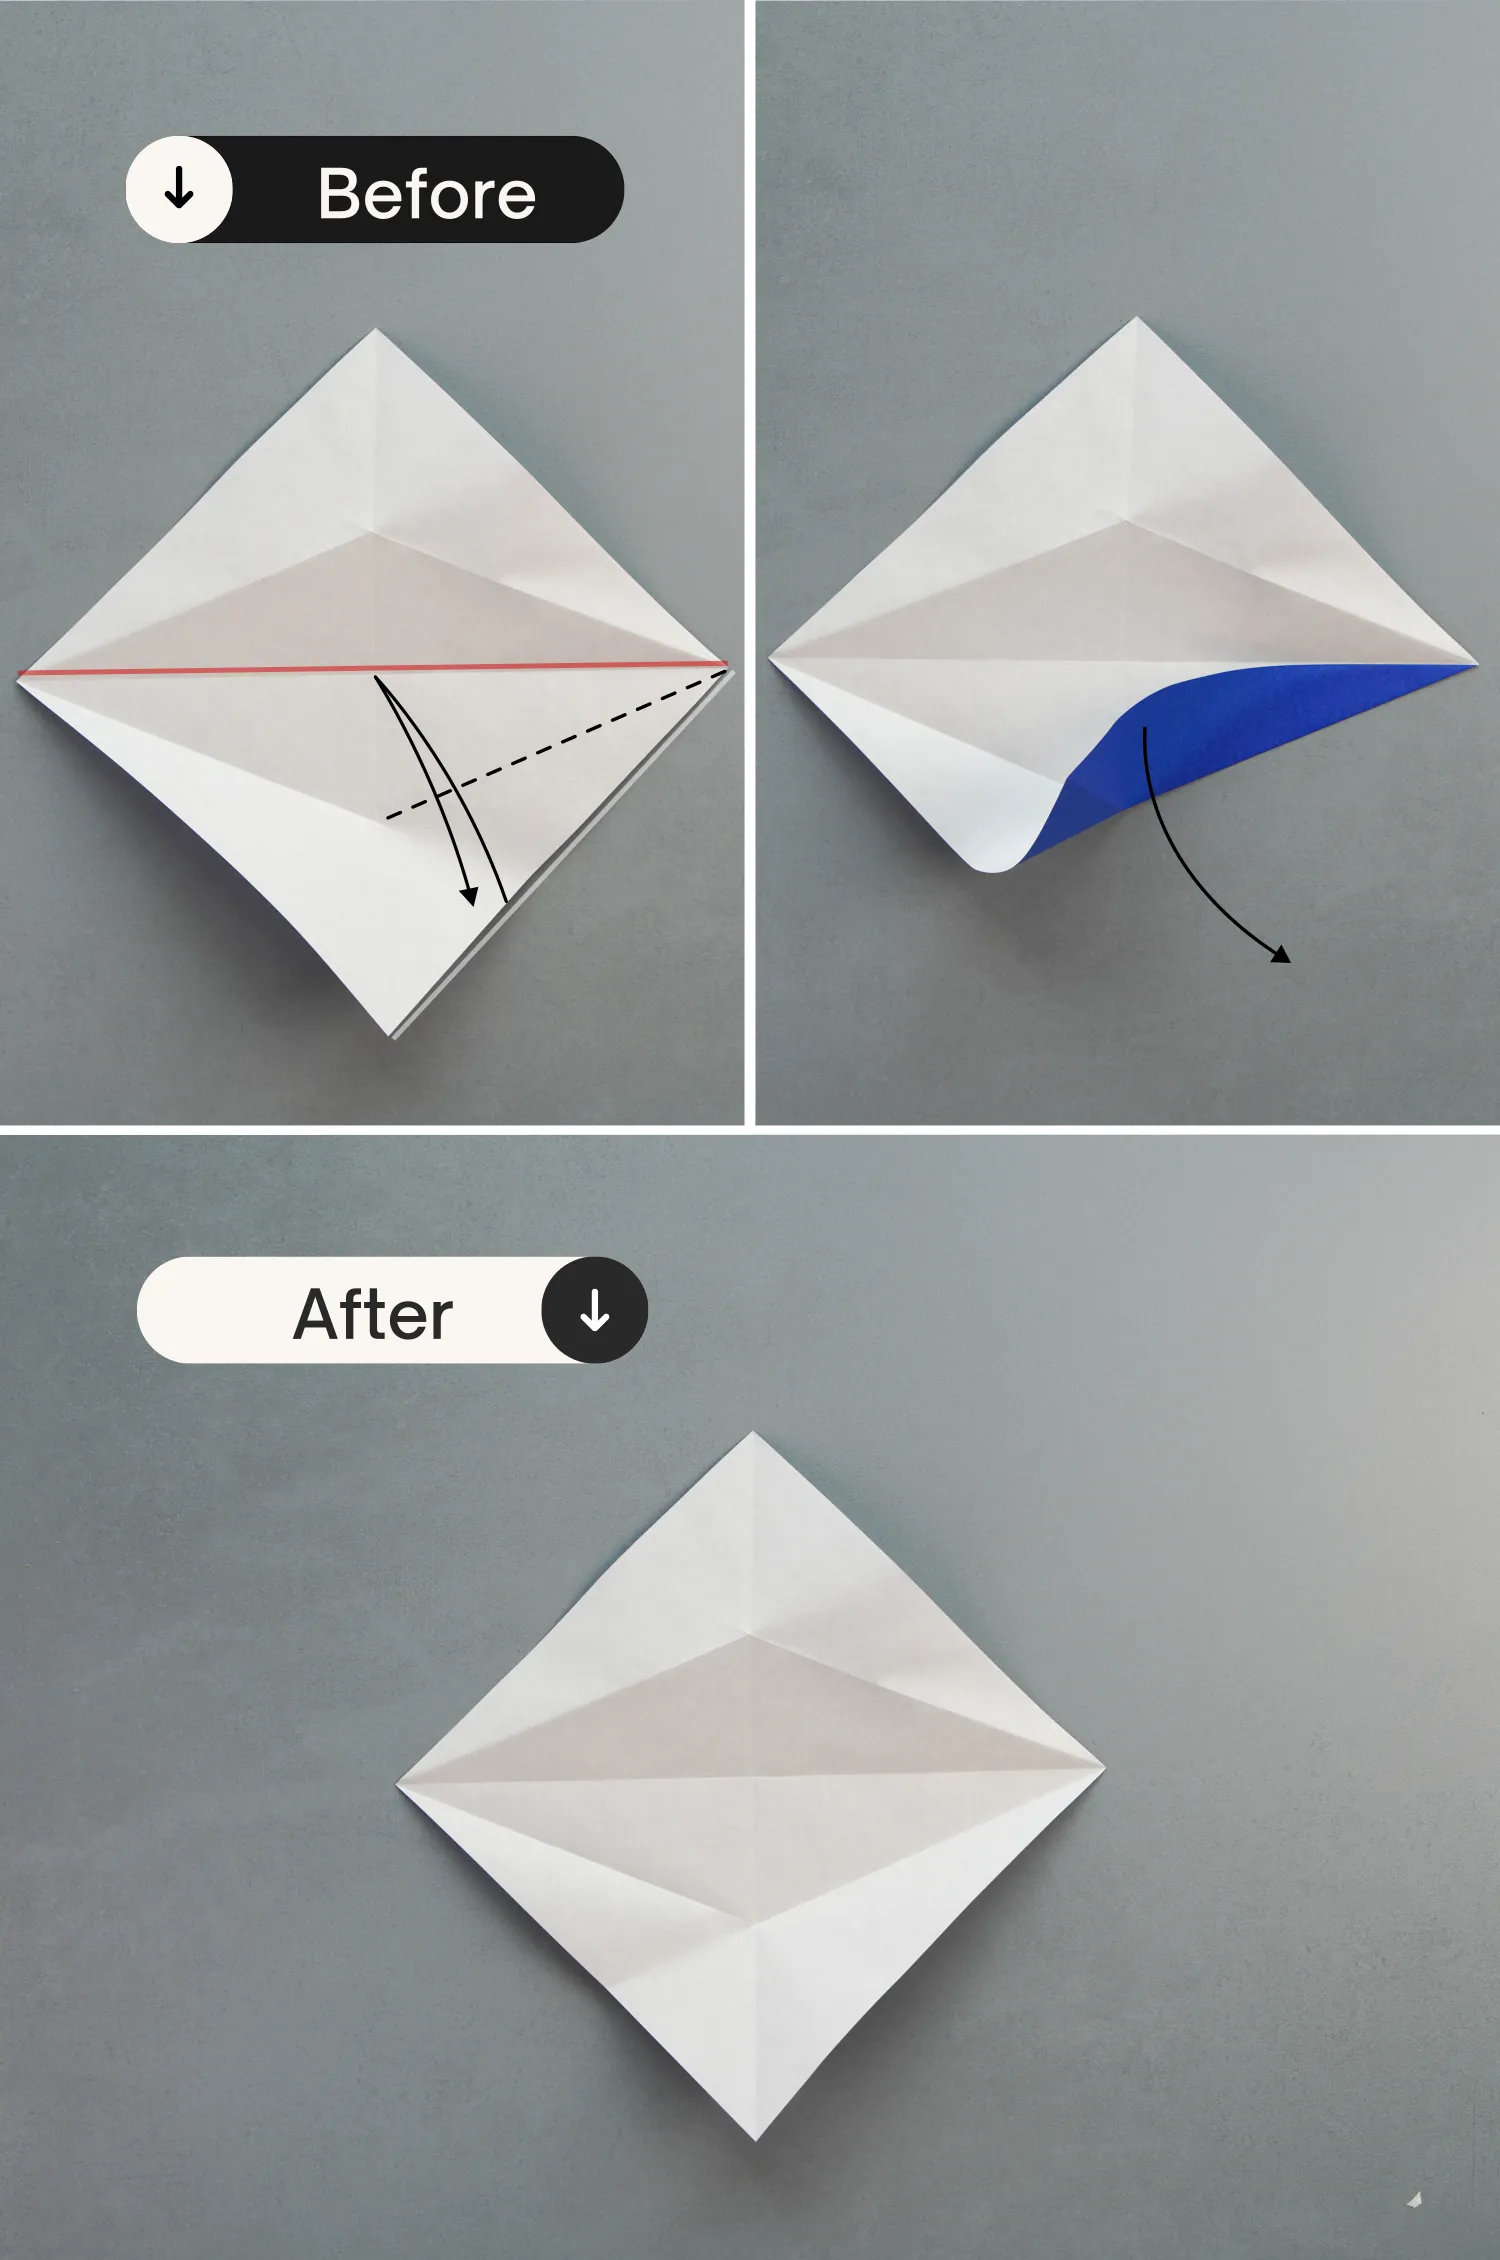
Step 4
Similarly, fold the right edge of the upper layer to align with the top edge, leaving a crease from the right point to the vertical crease, and unfold it.
Step 5
Unfold the paper.

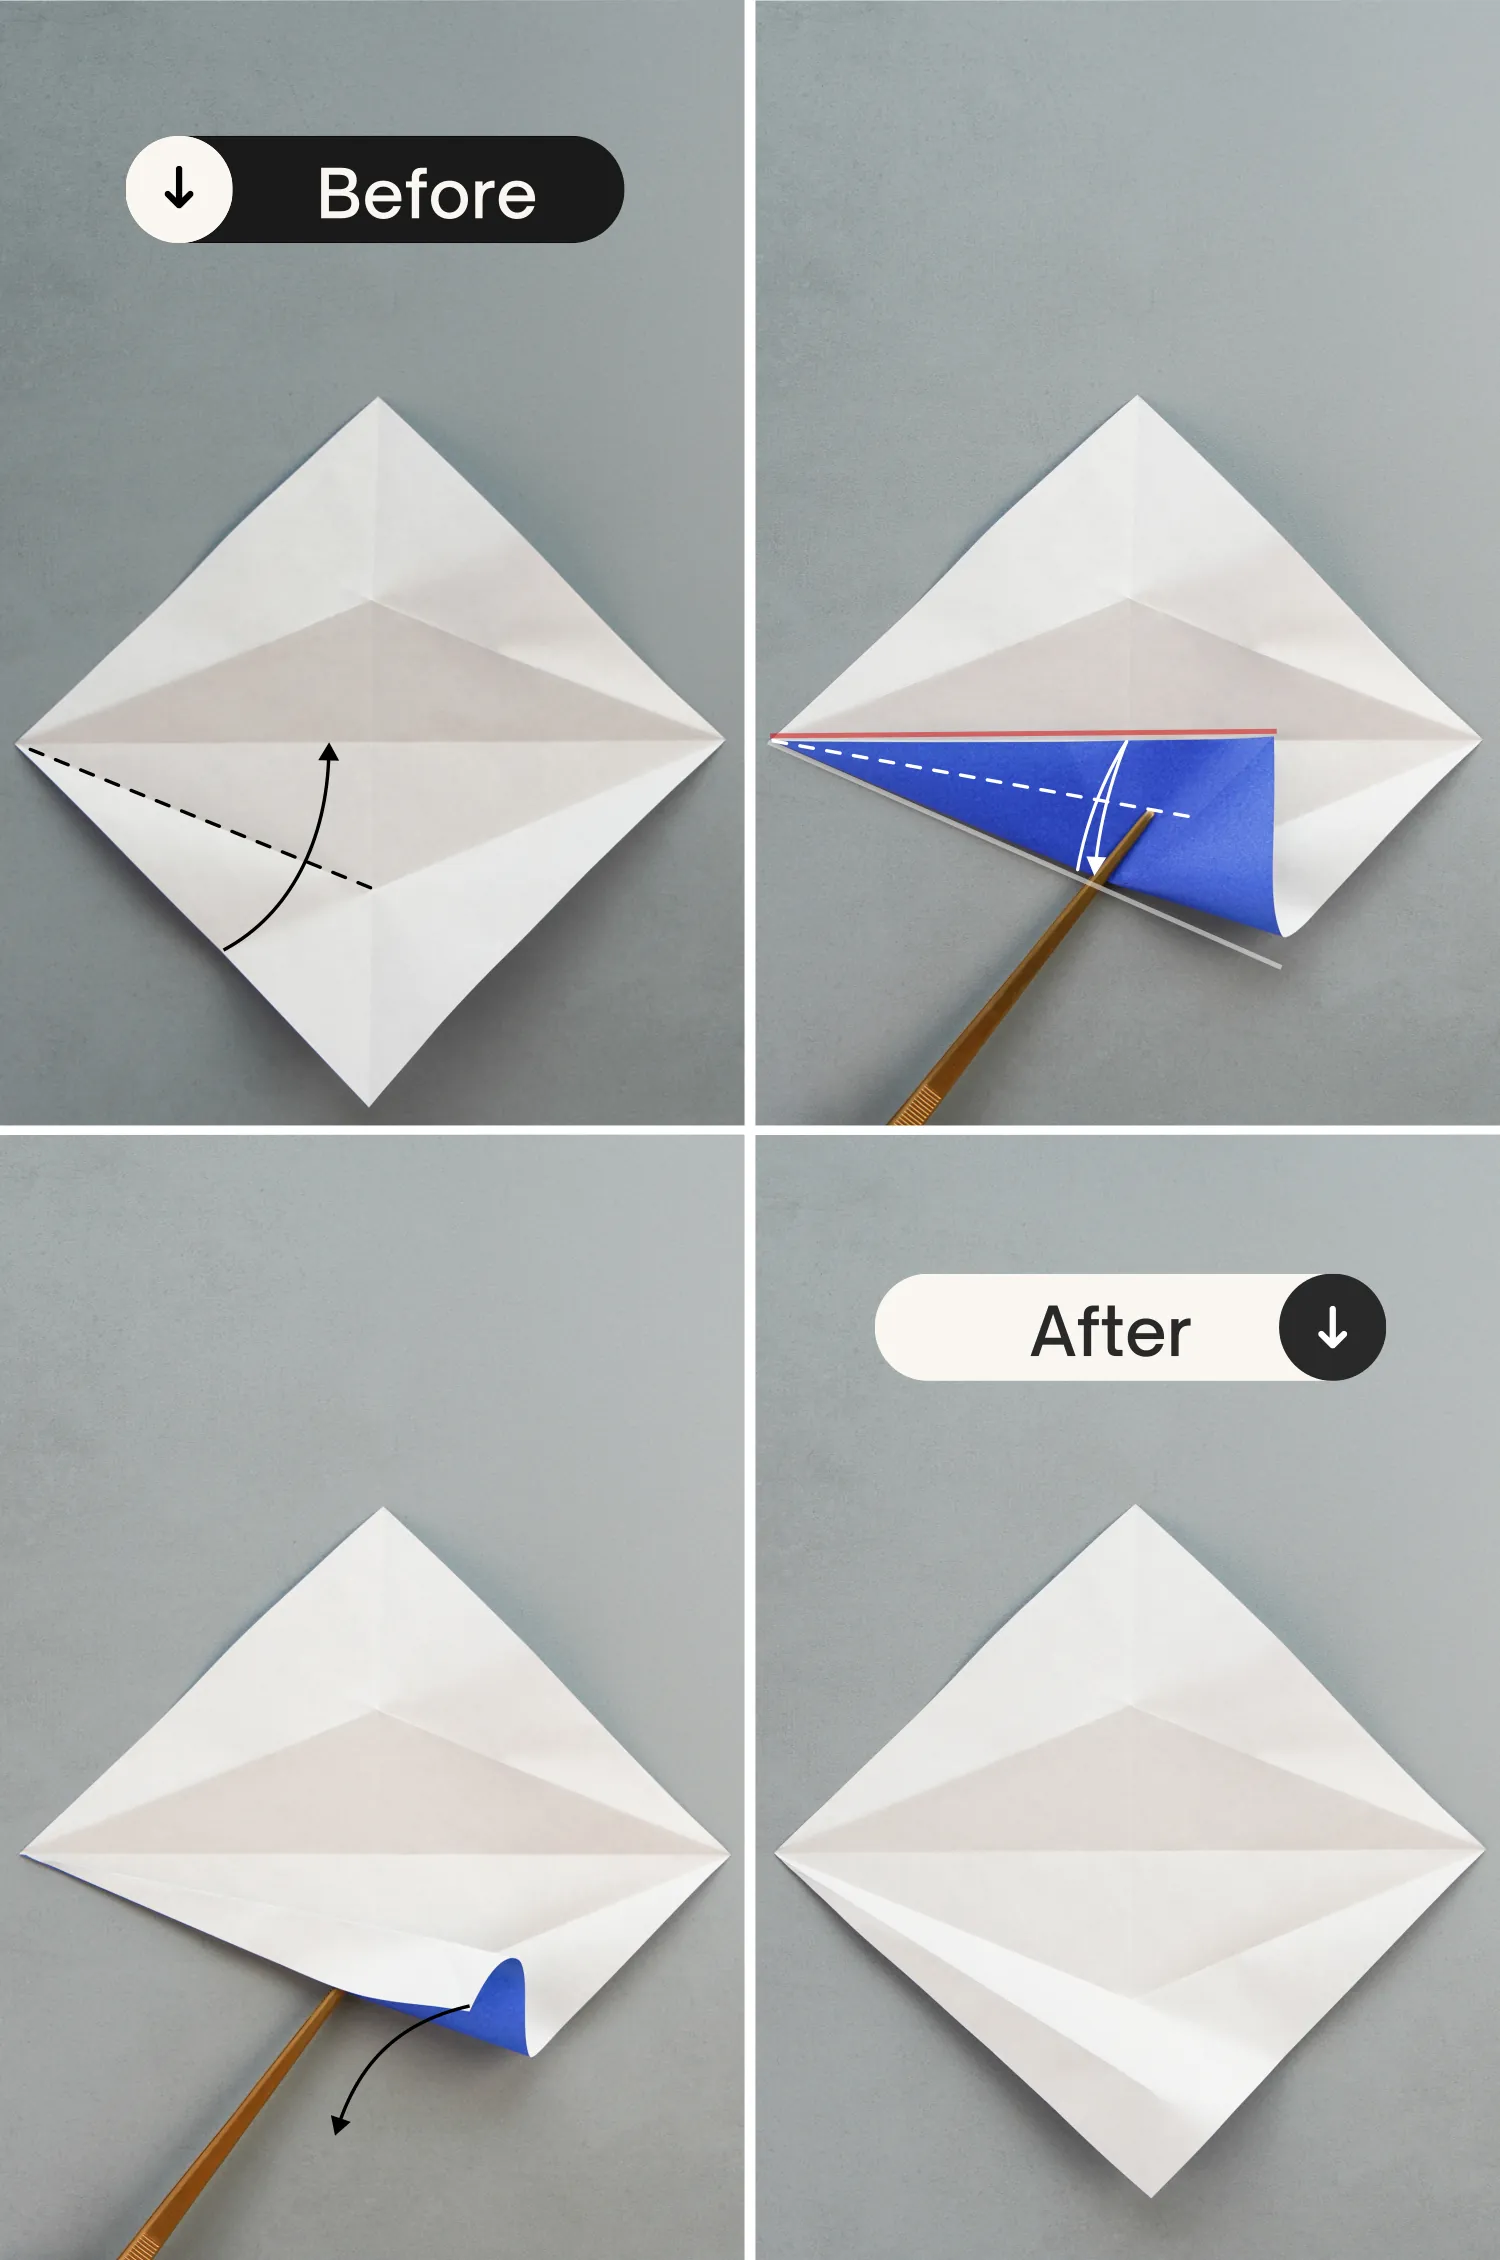
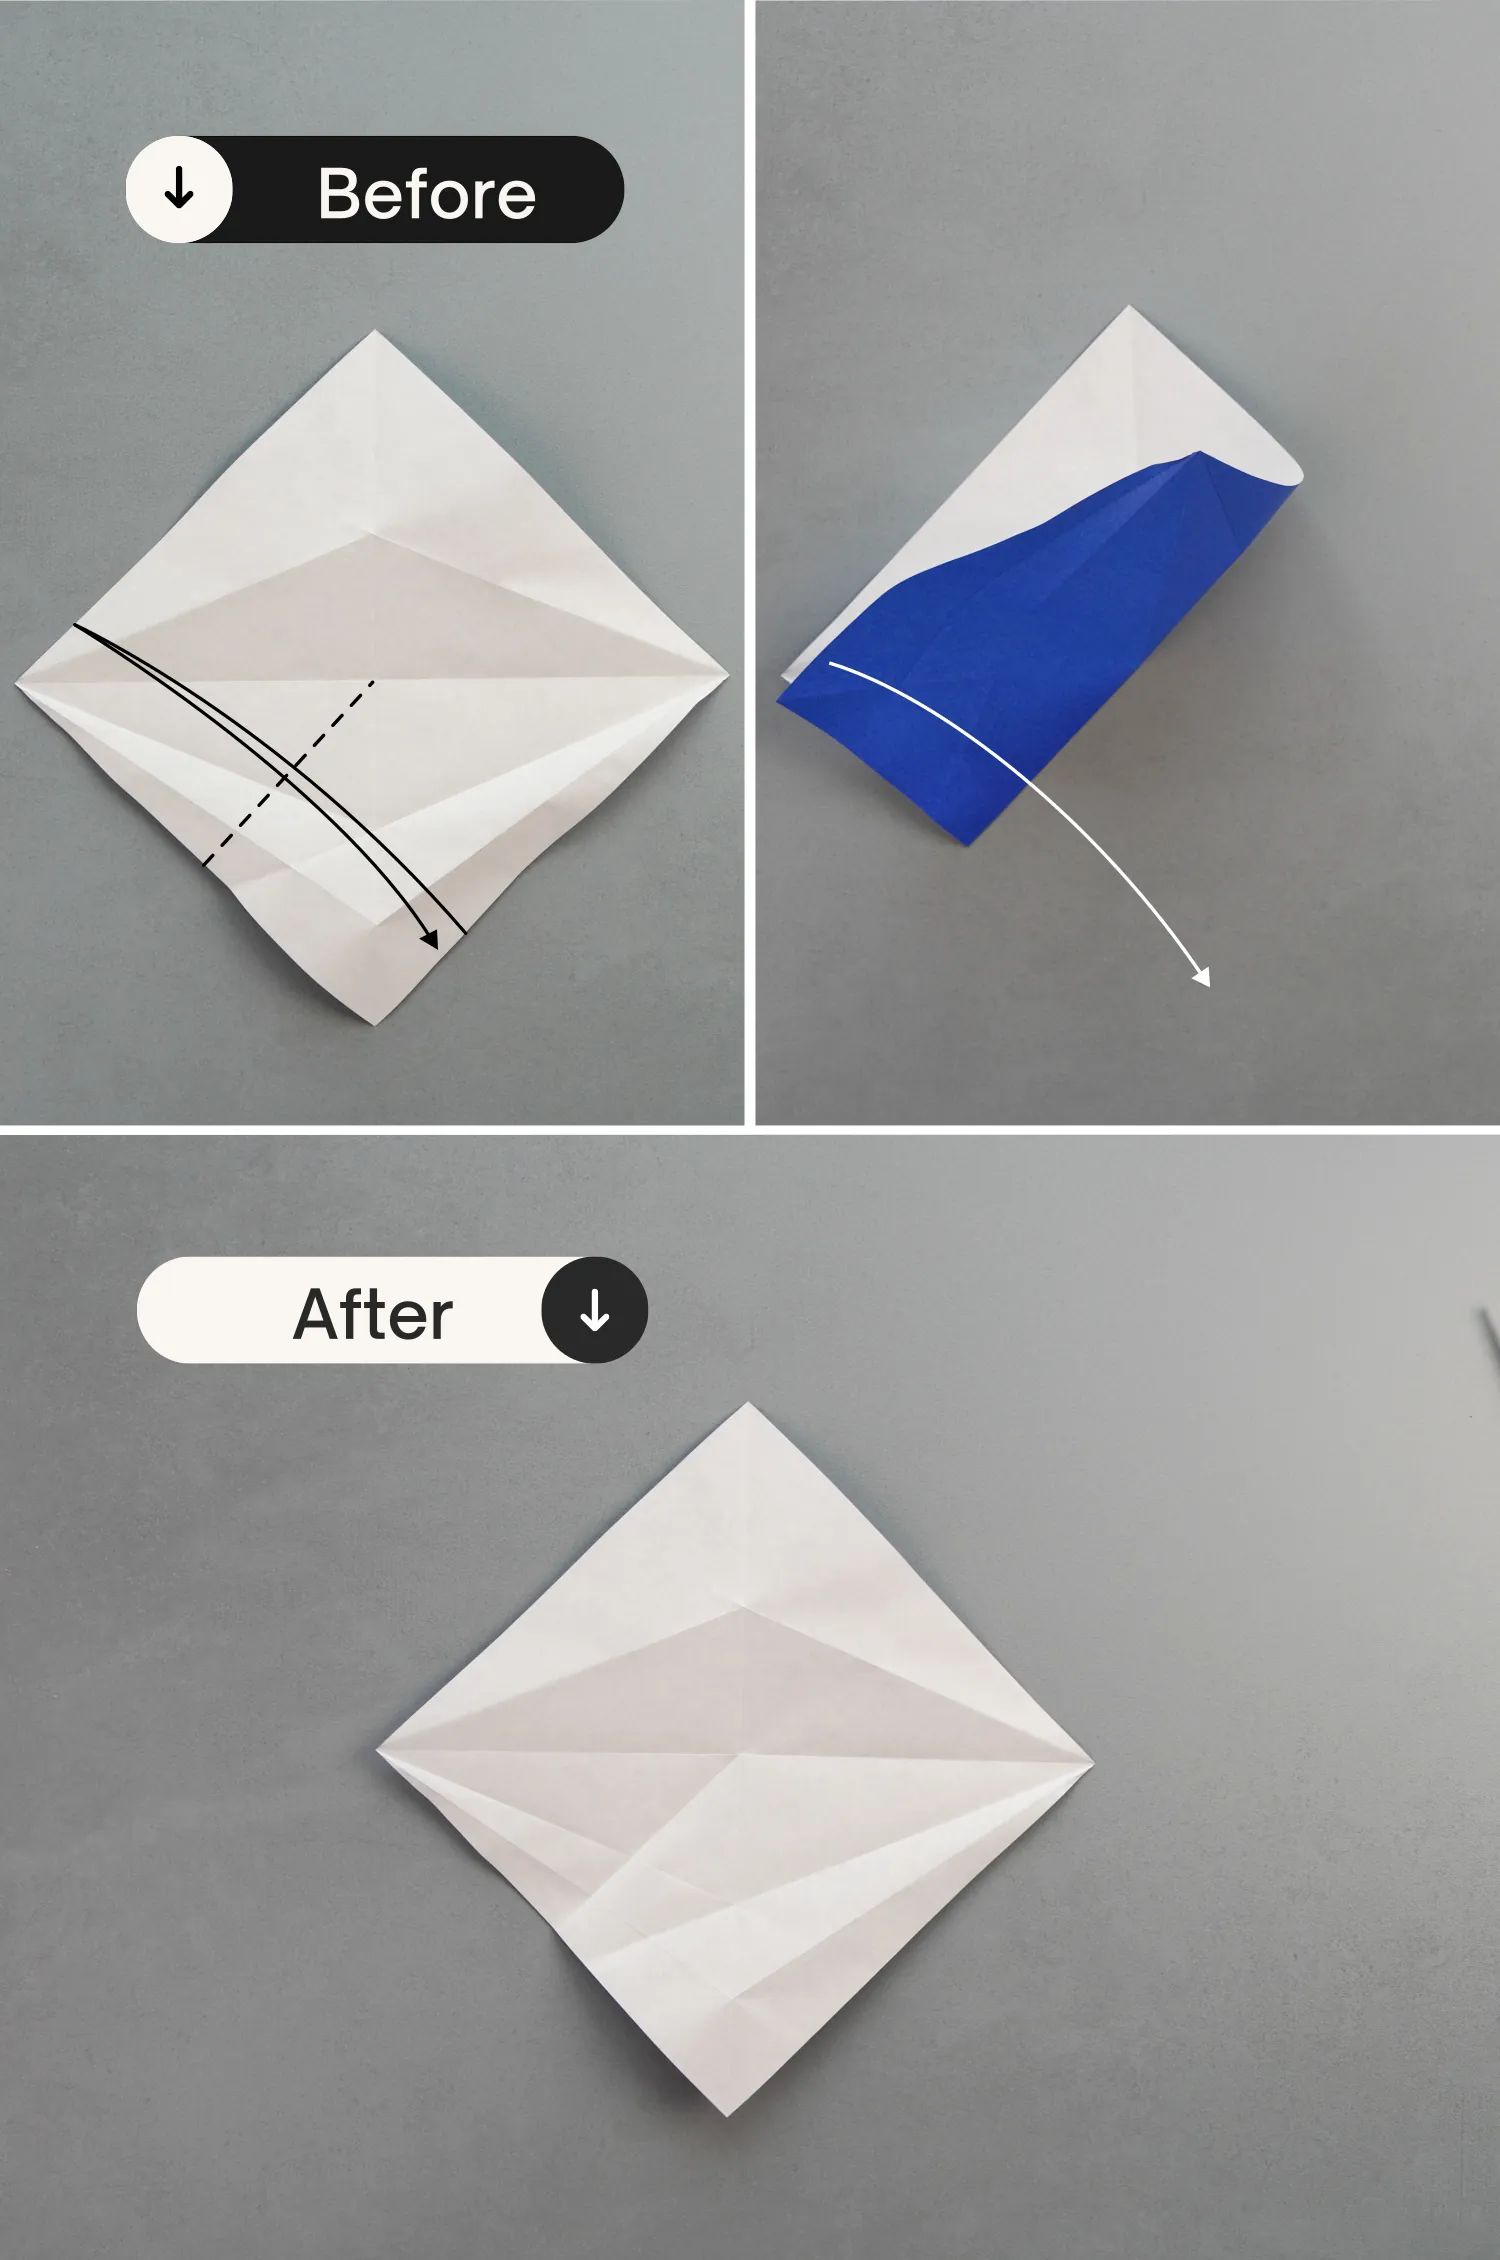
Step 6
Fold the bottom left edge to align with the middle horizontal crease, leaving a crease from the left point to the vertical crease, and unfold it.
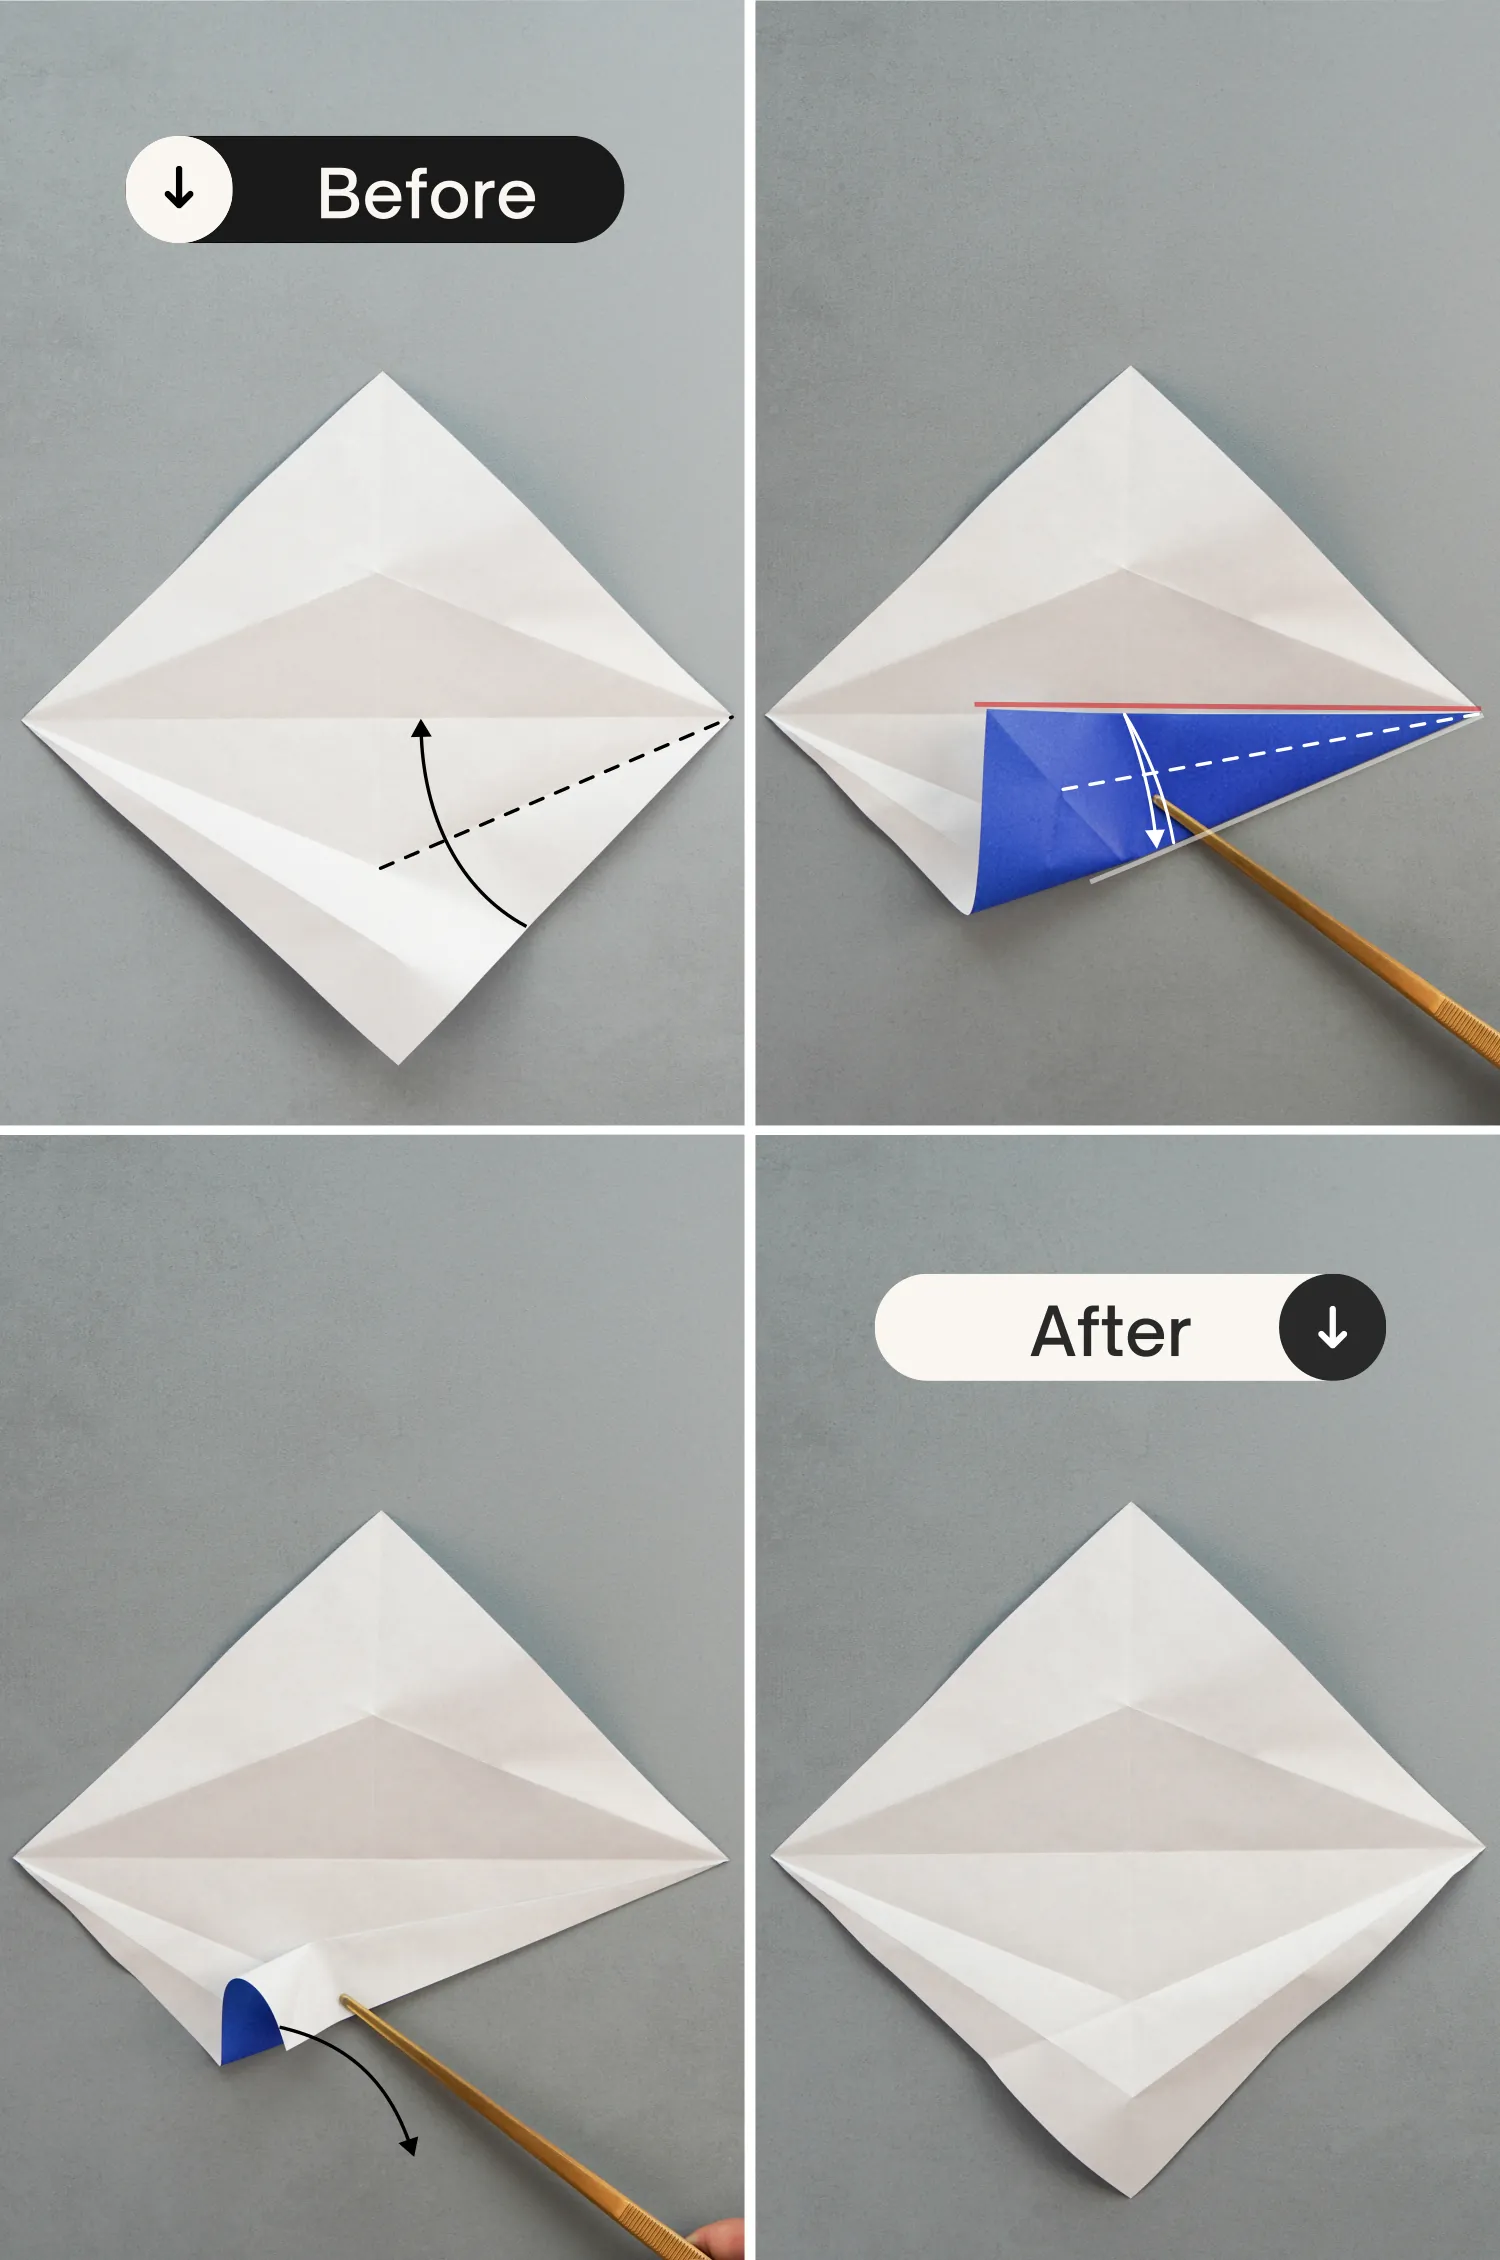
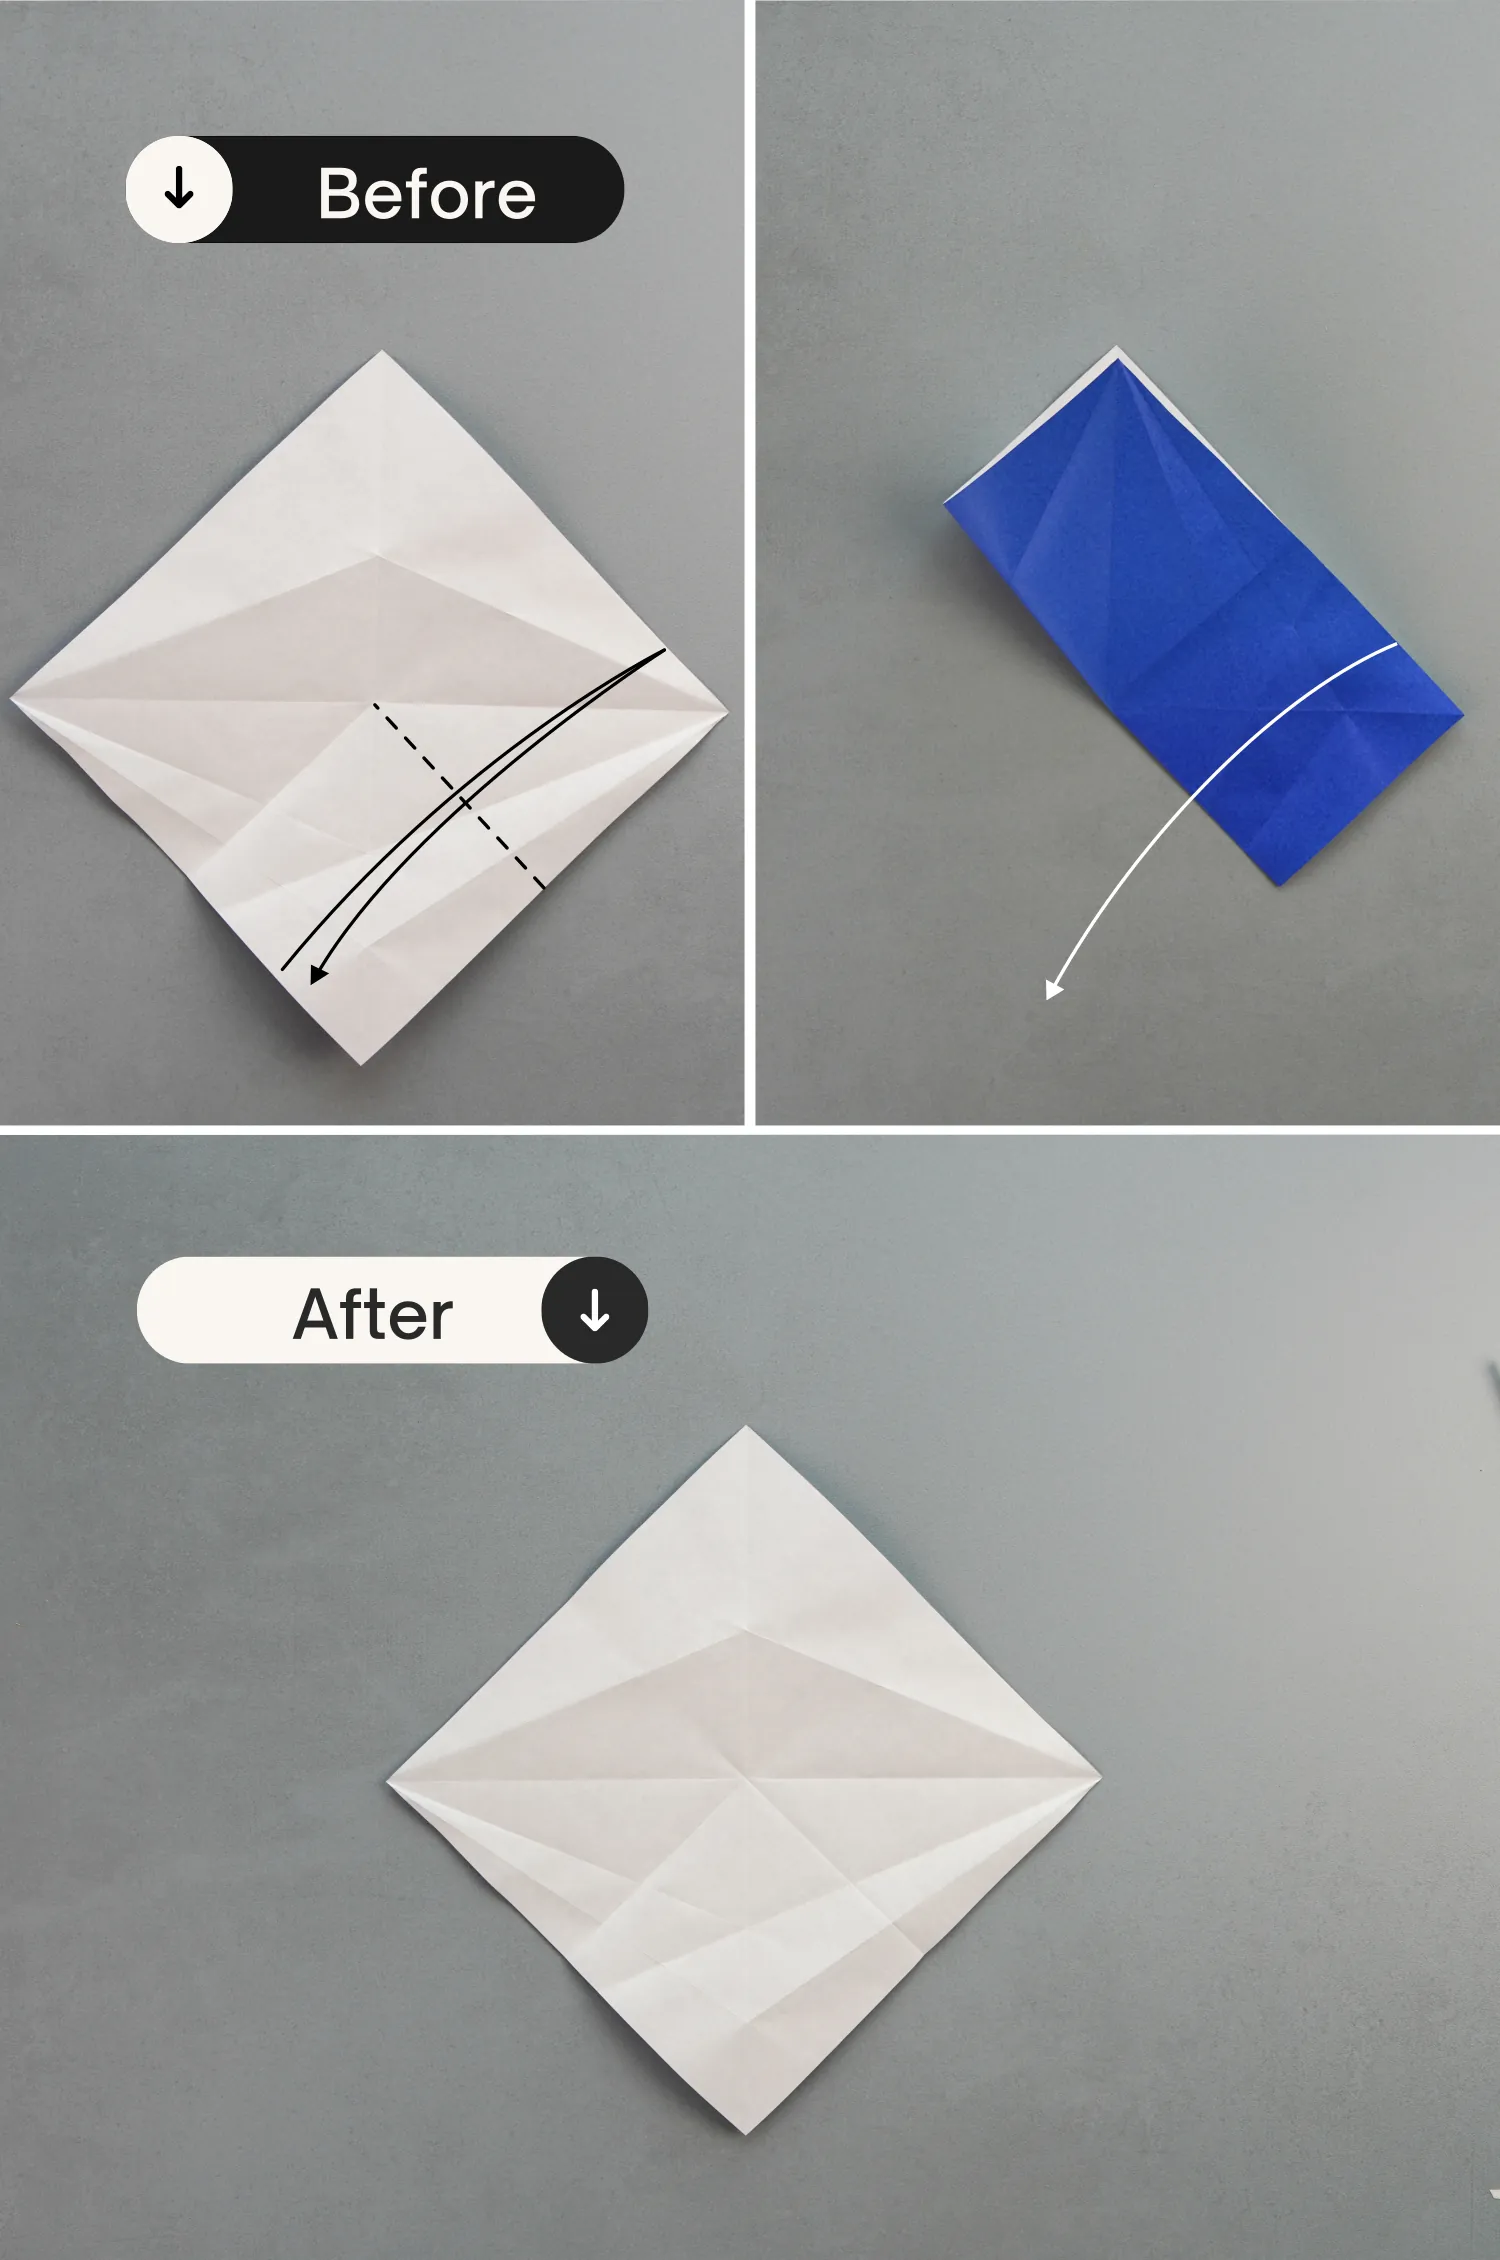
Step 7
Fold the bottom right edge to align with the horizontal crease, leaving a crease from the right point to the vertical crease, and unfold it.
Step 8
Fold the bottom left edge to align with the horizontal crease, and fold it back down until it aligns with the bottom left edge created by the crease, leaving a crease from the left point to the vertical crease then unfold them.
Step 9
Similarly, fold the bottom right edge to align with the horizontal crease, then fold it back down until it aligns with the bottom right edge created by the crease, leaving a crease from the right point to the vertical crease, and unfold them.
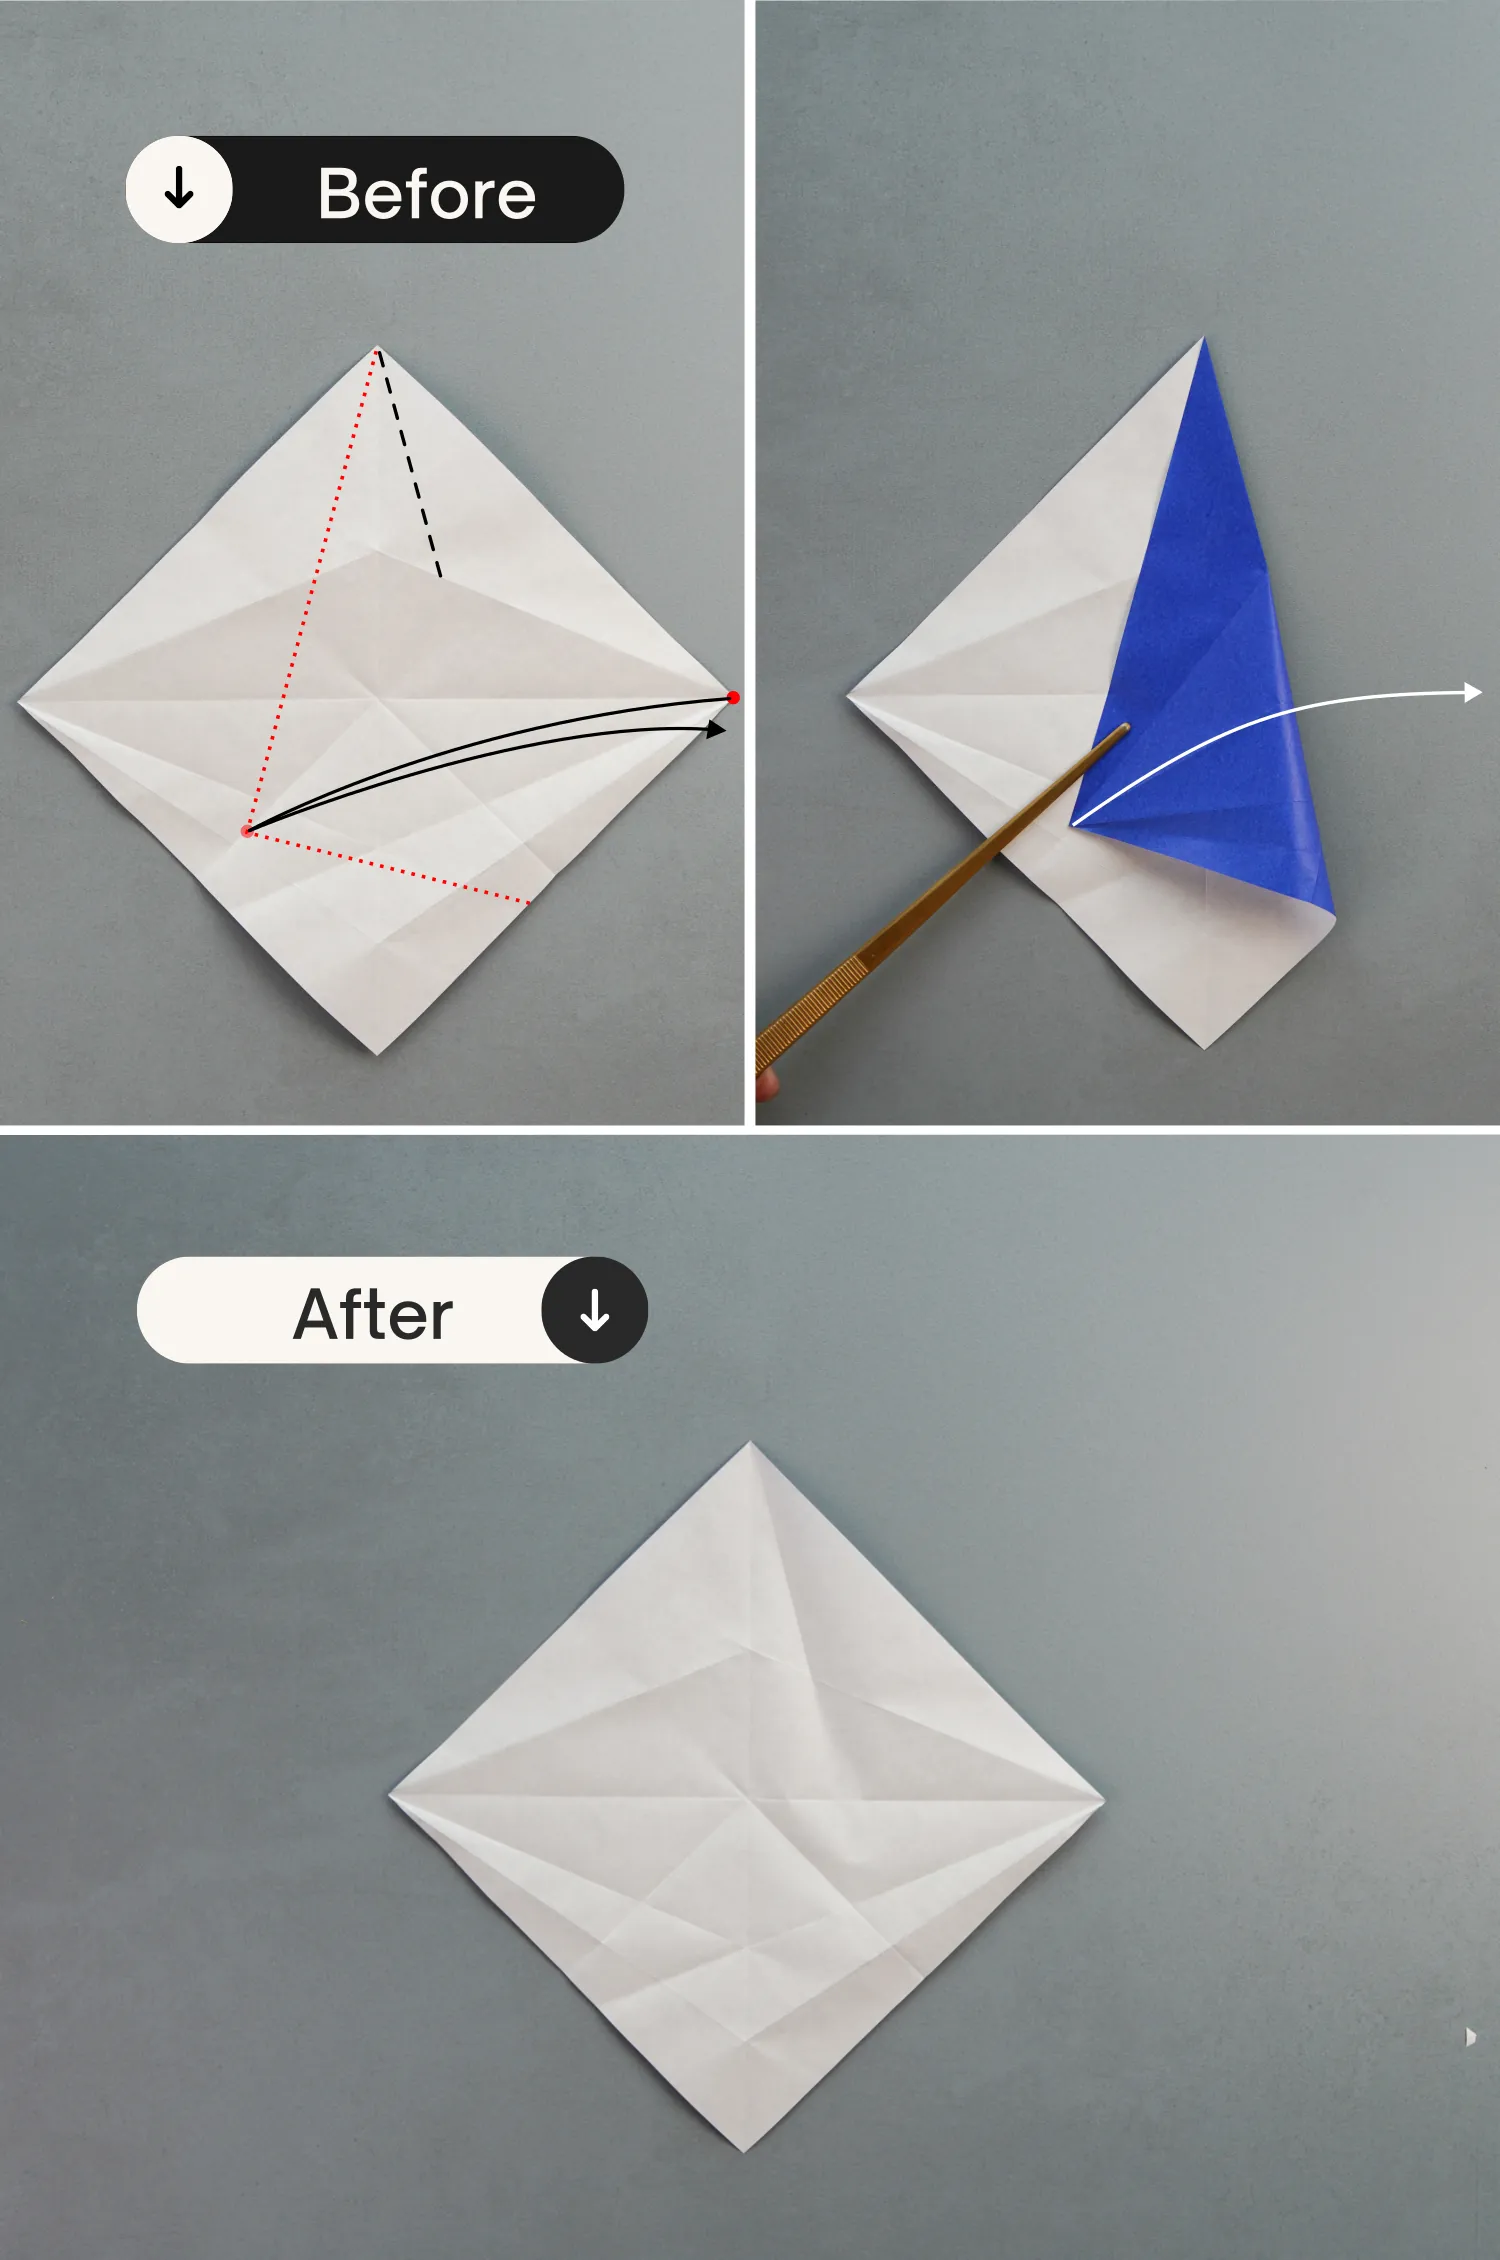
Step 10
Fold the bottom right edge to align with the top left edge, leaving a crease from the midpoint of the bottom left edge and the intersection point formed by the middle vertical and horizontal creases, then unfold it.
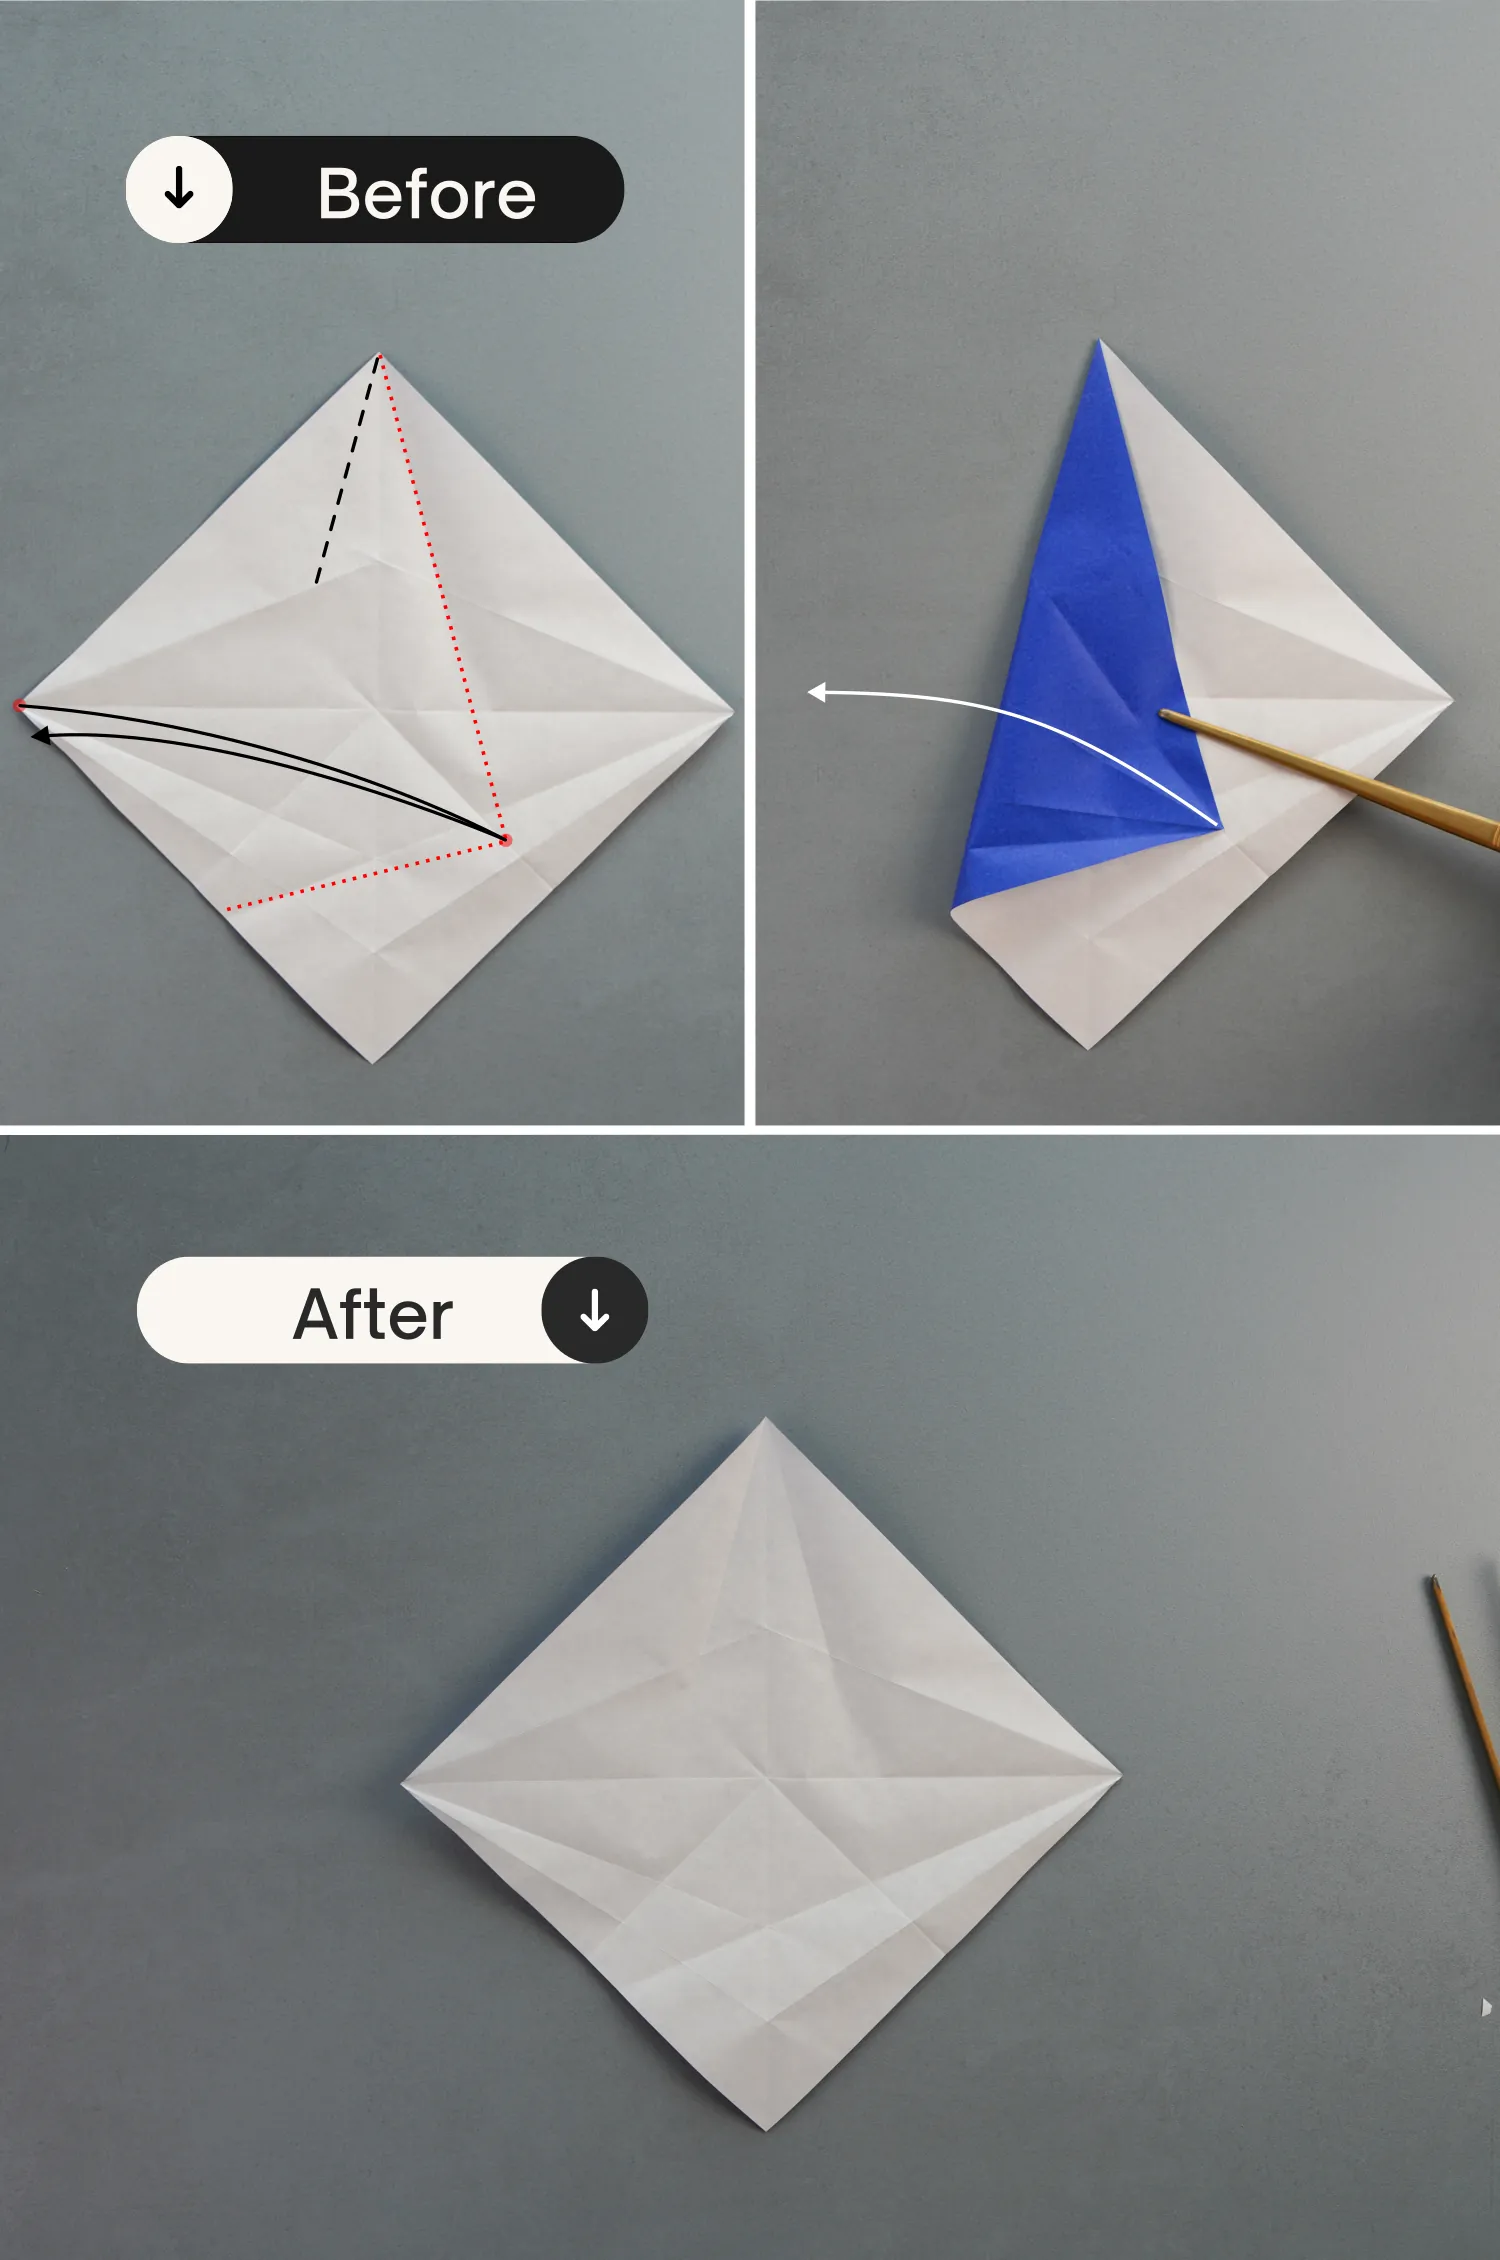
Step 11
Fold the bottom left edge to align with the top right edge, leaving a crease from the midpoint of the bottom right edge to the center intersection point, and unfold it.
Step 12
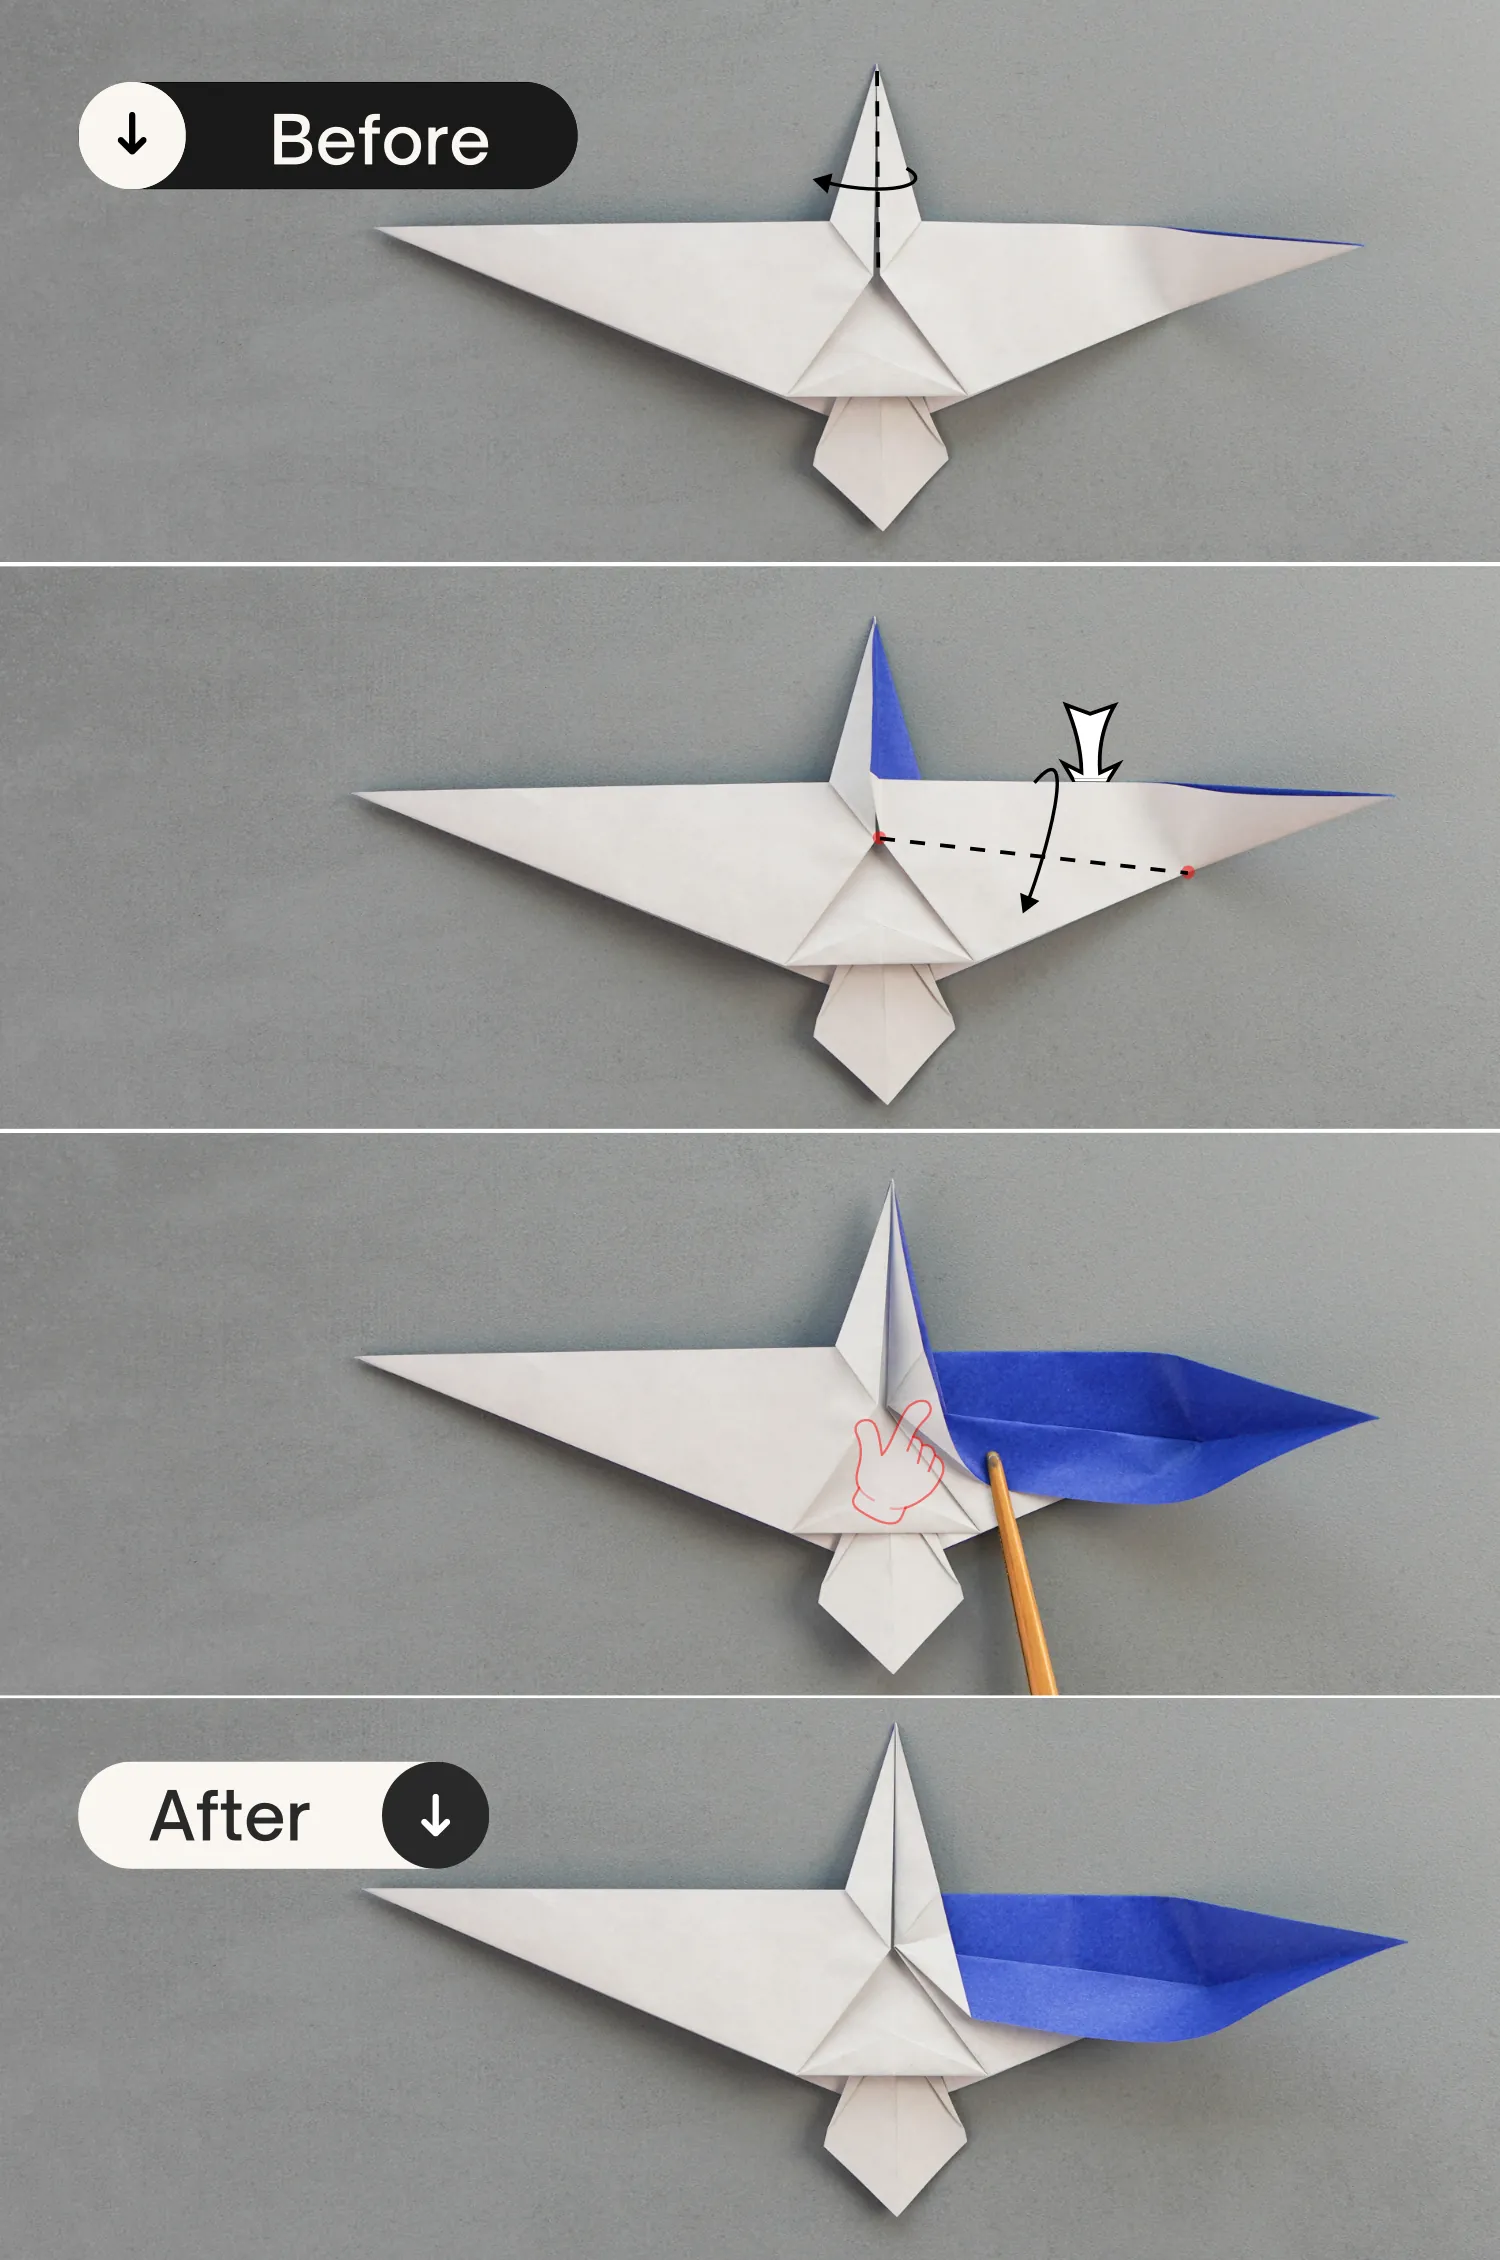
Fold the right point to the left to meet the red spot, leaving a crease from the top point to the right slanted crease on the top, and unfold it.
Step 13
Similarly, fold the left point to the right to meet the red spot, leaving a crease on the top, and unfold it.
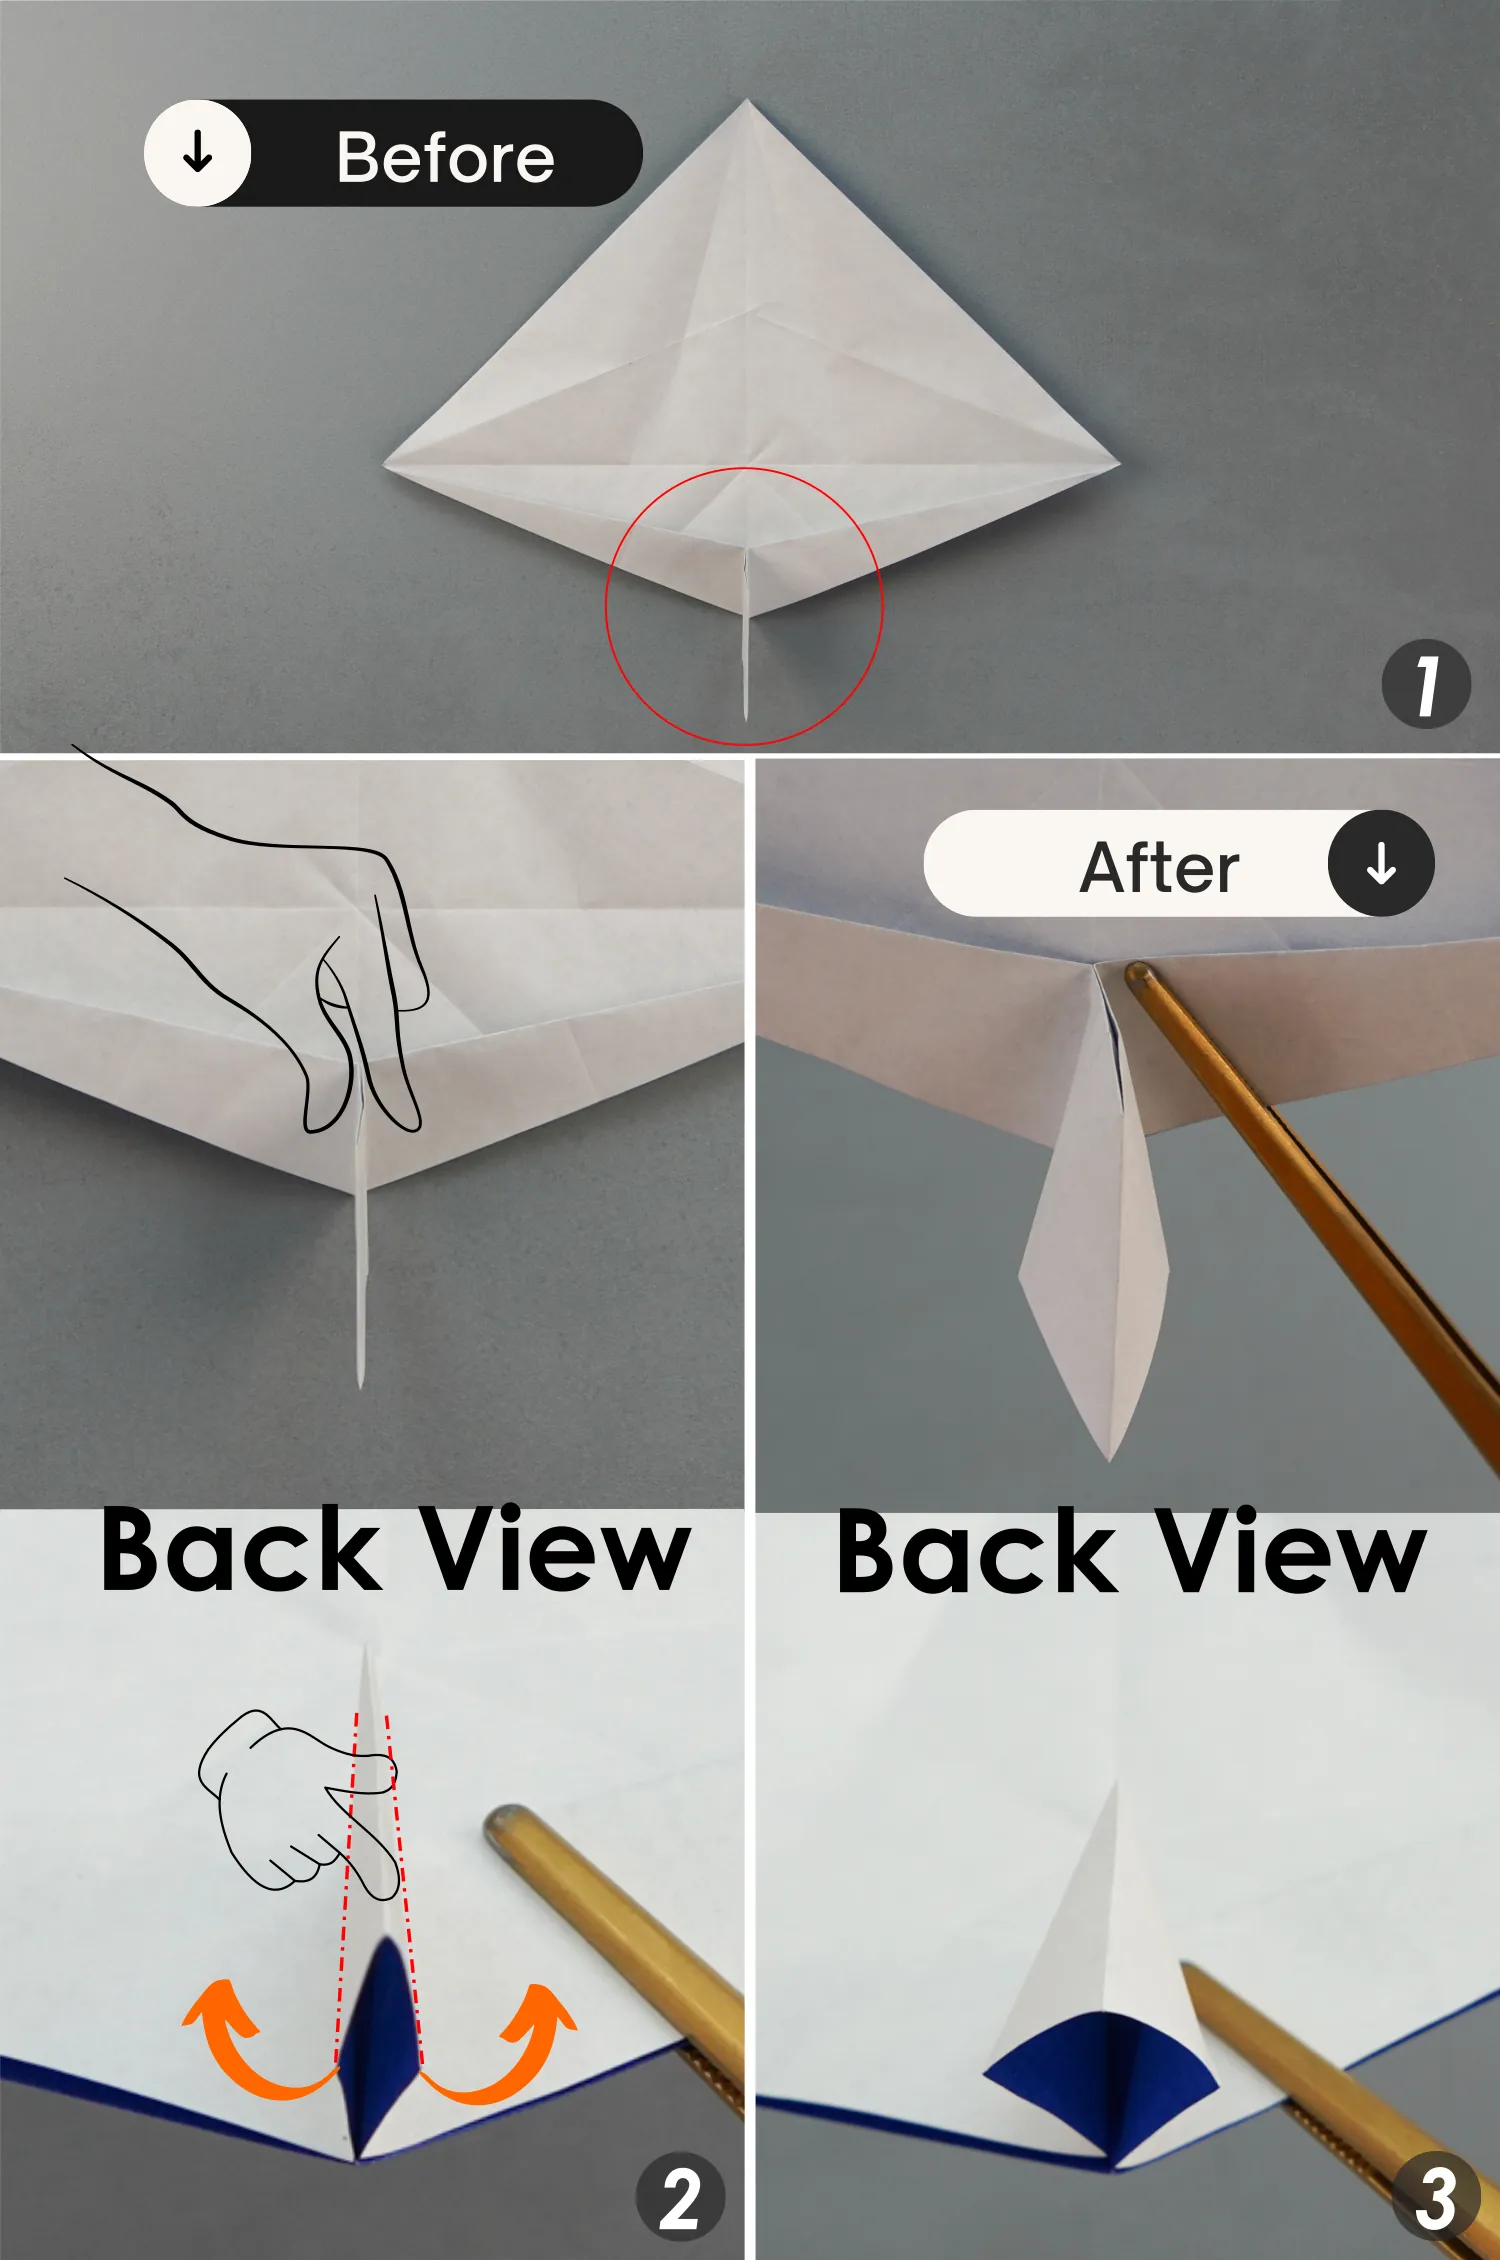
Step 14
Pinch and shape these three creases shown by the red dotted line, and bring up the bottom left and right edges along the creases shown by the black dotted lines, creating a small corner on the bottom.
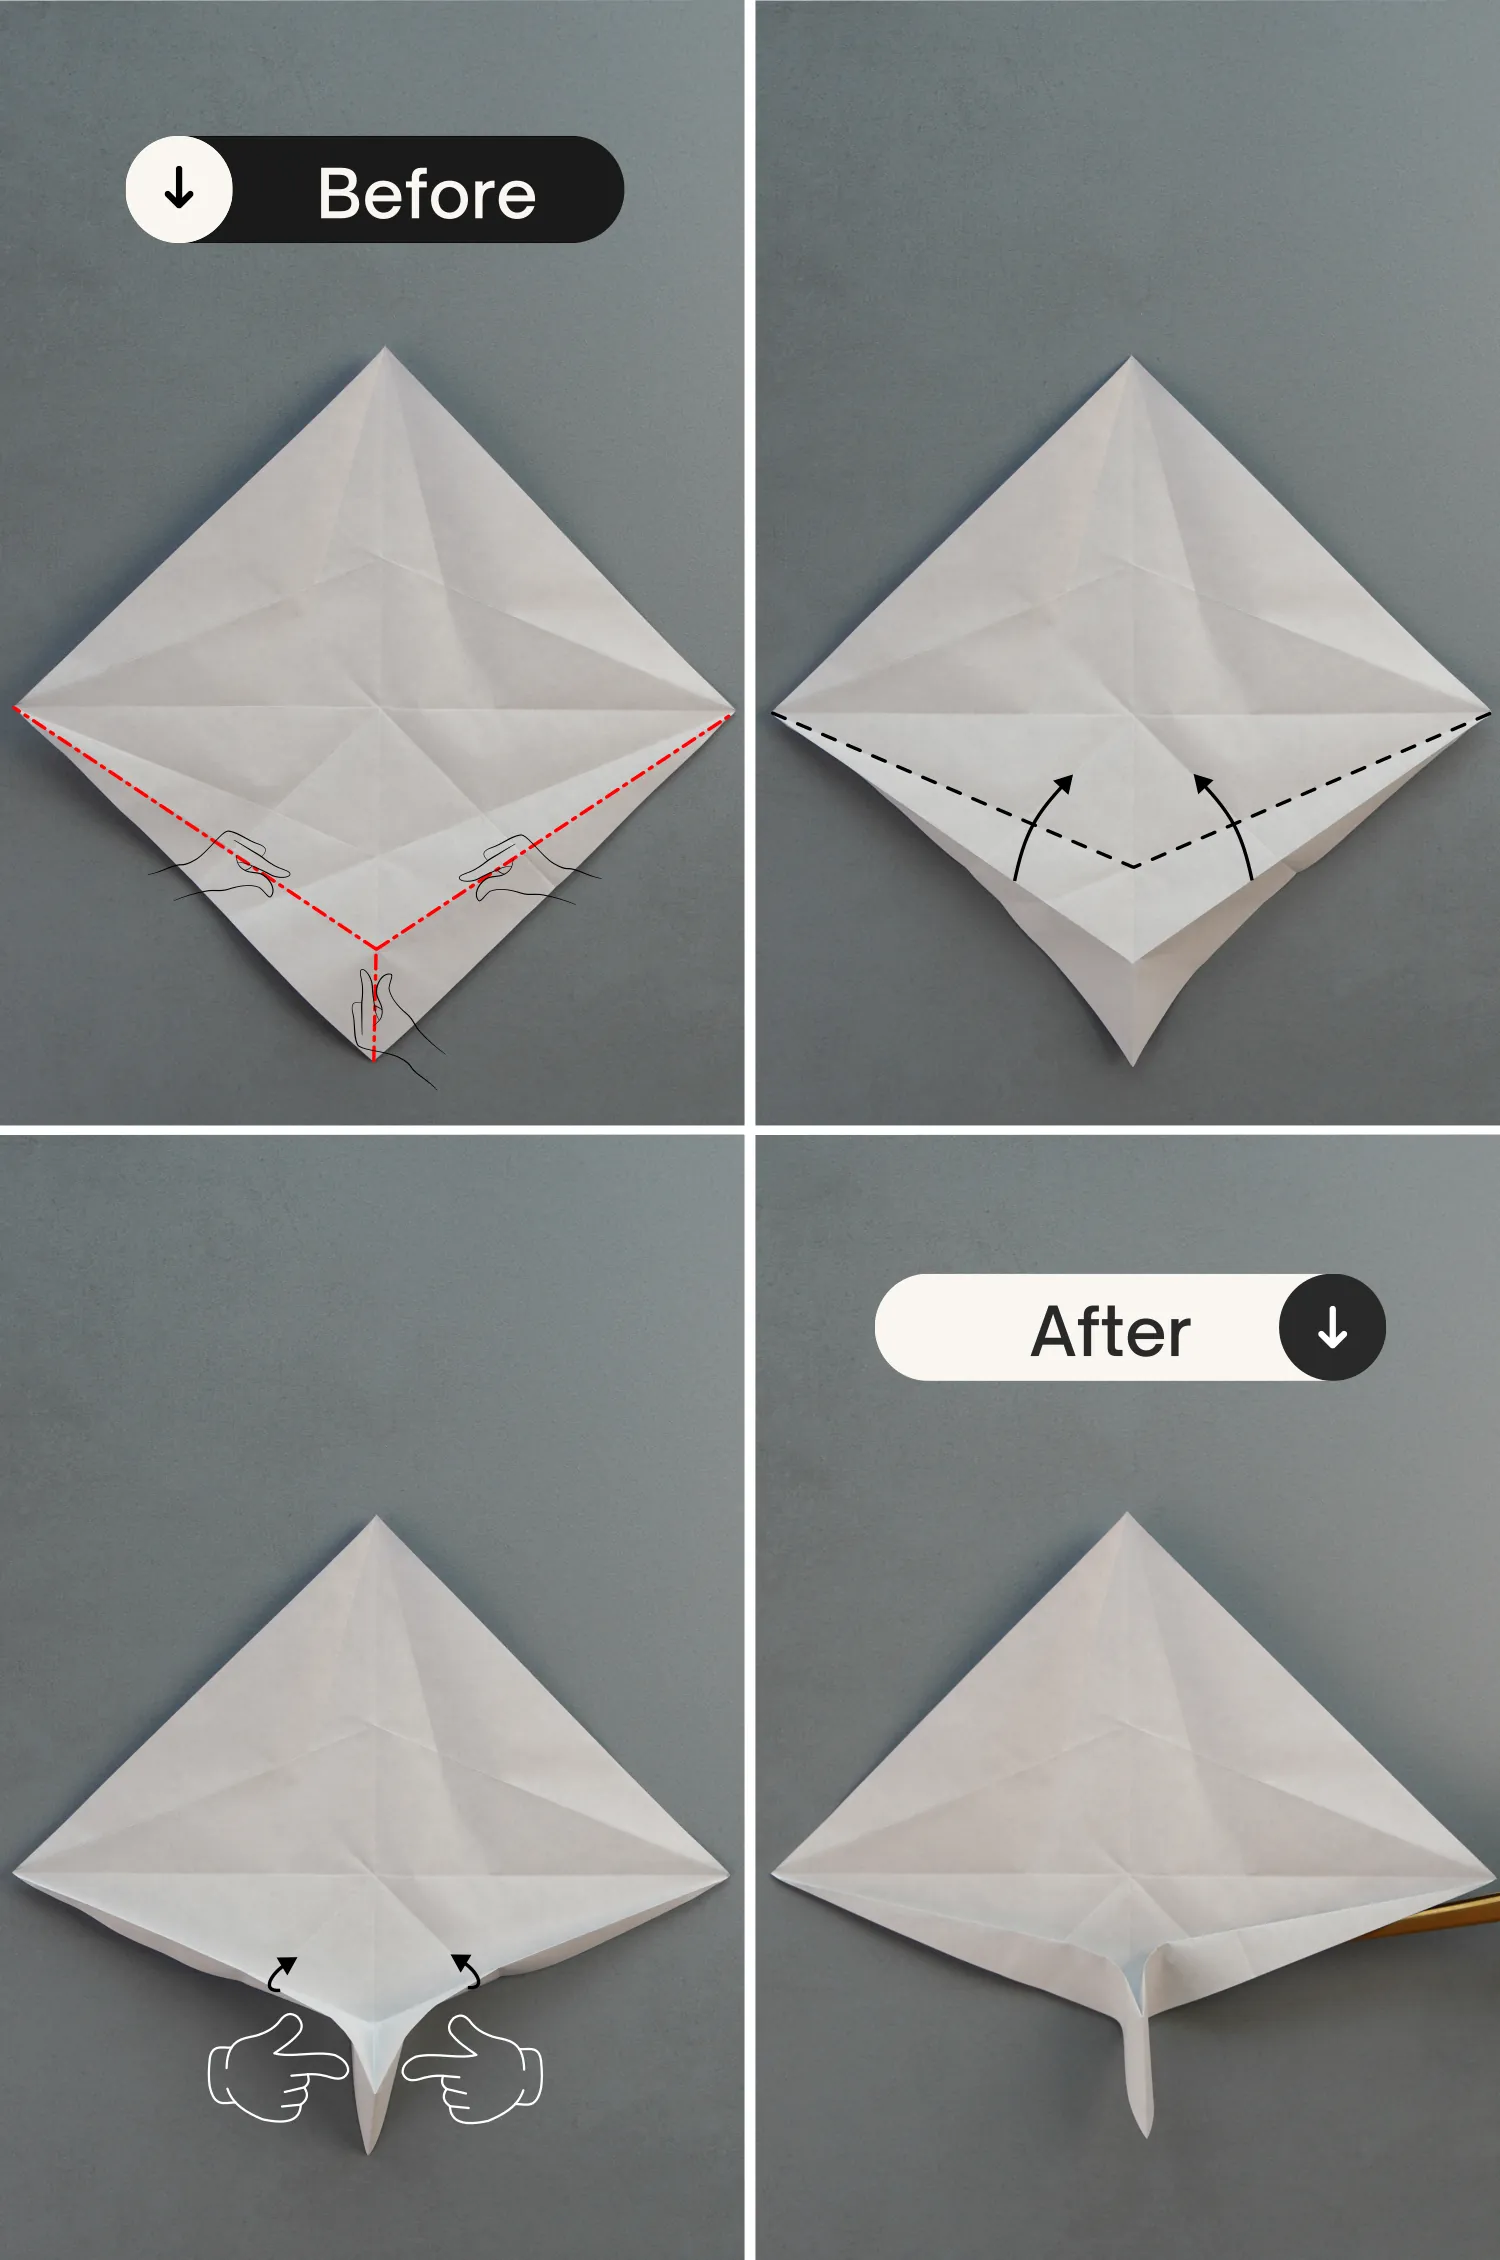
Step 15
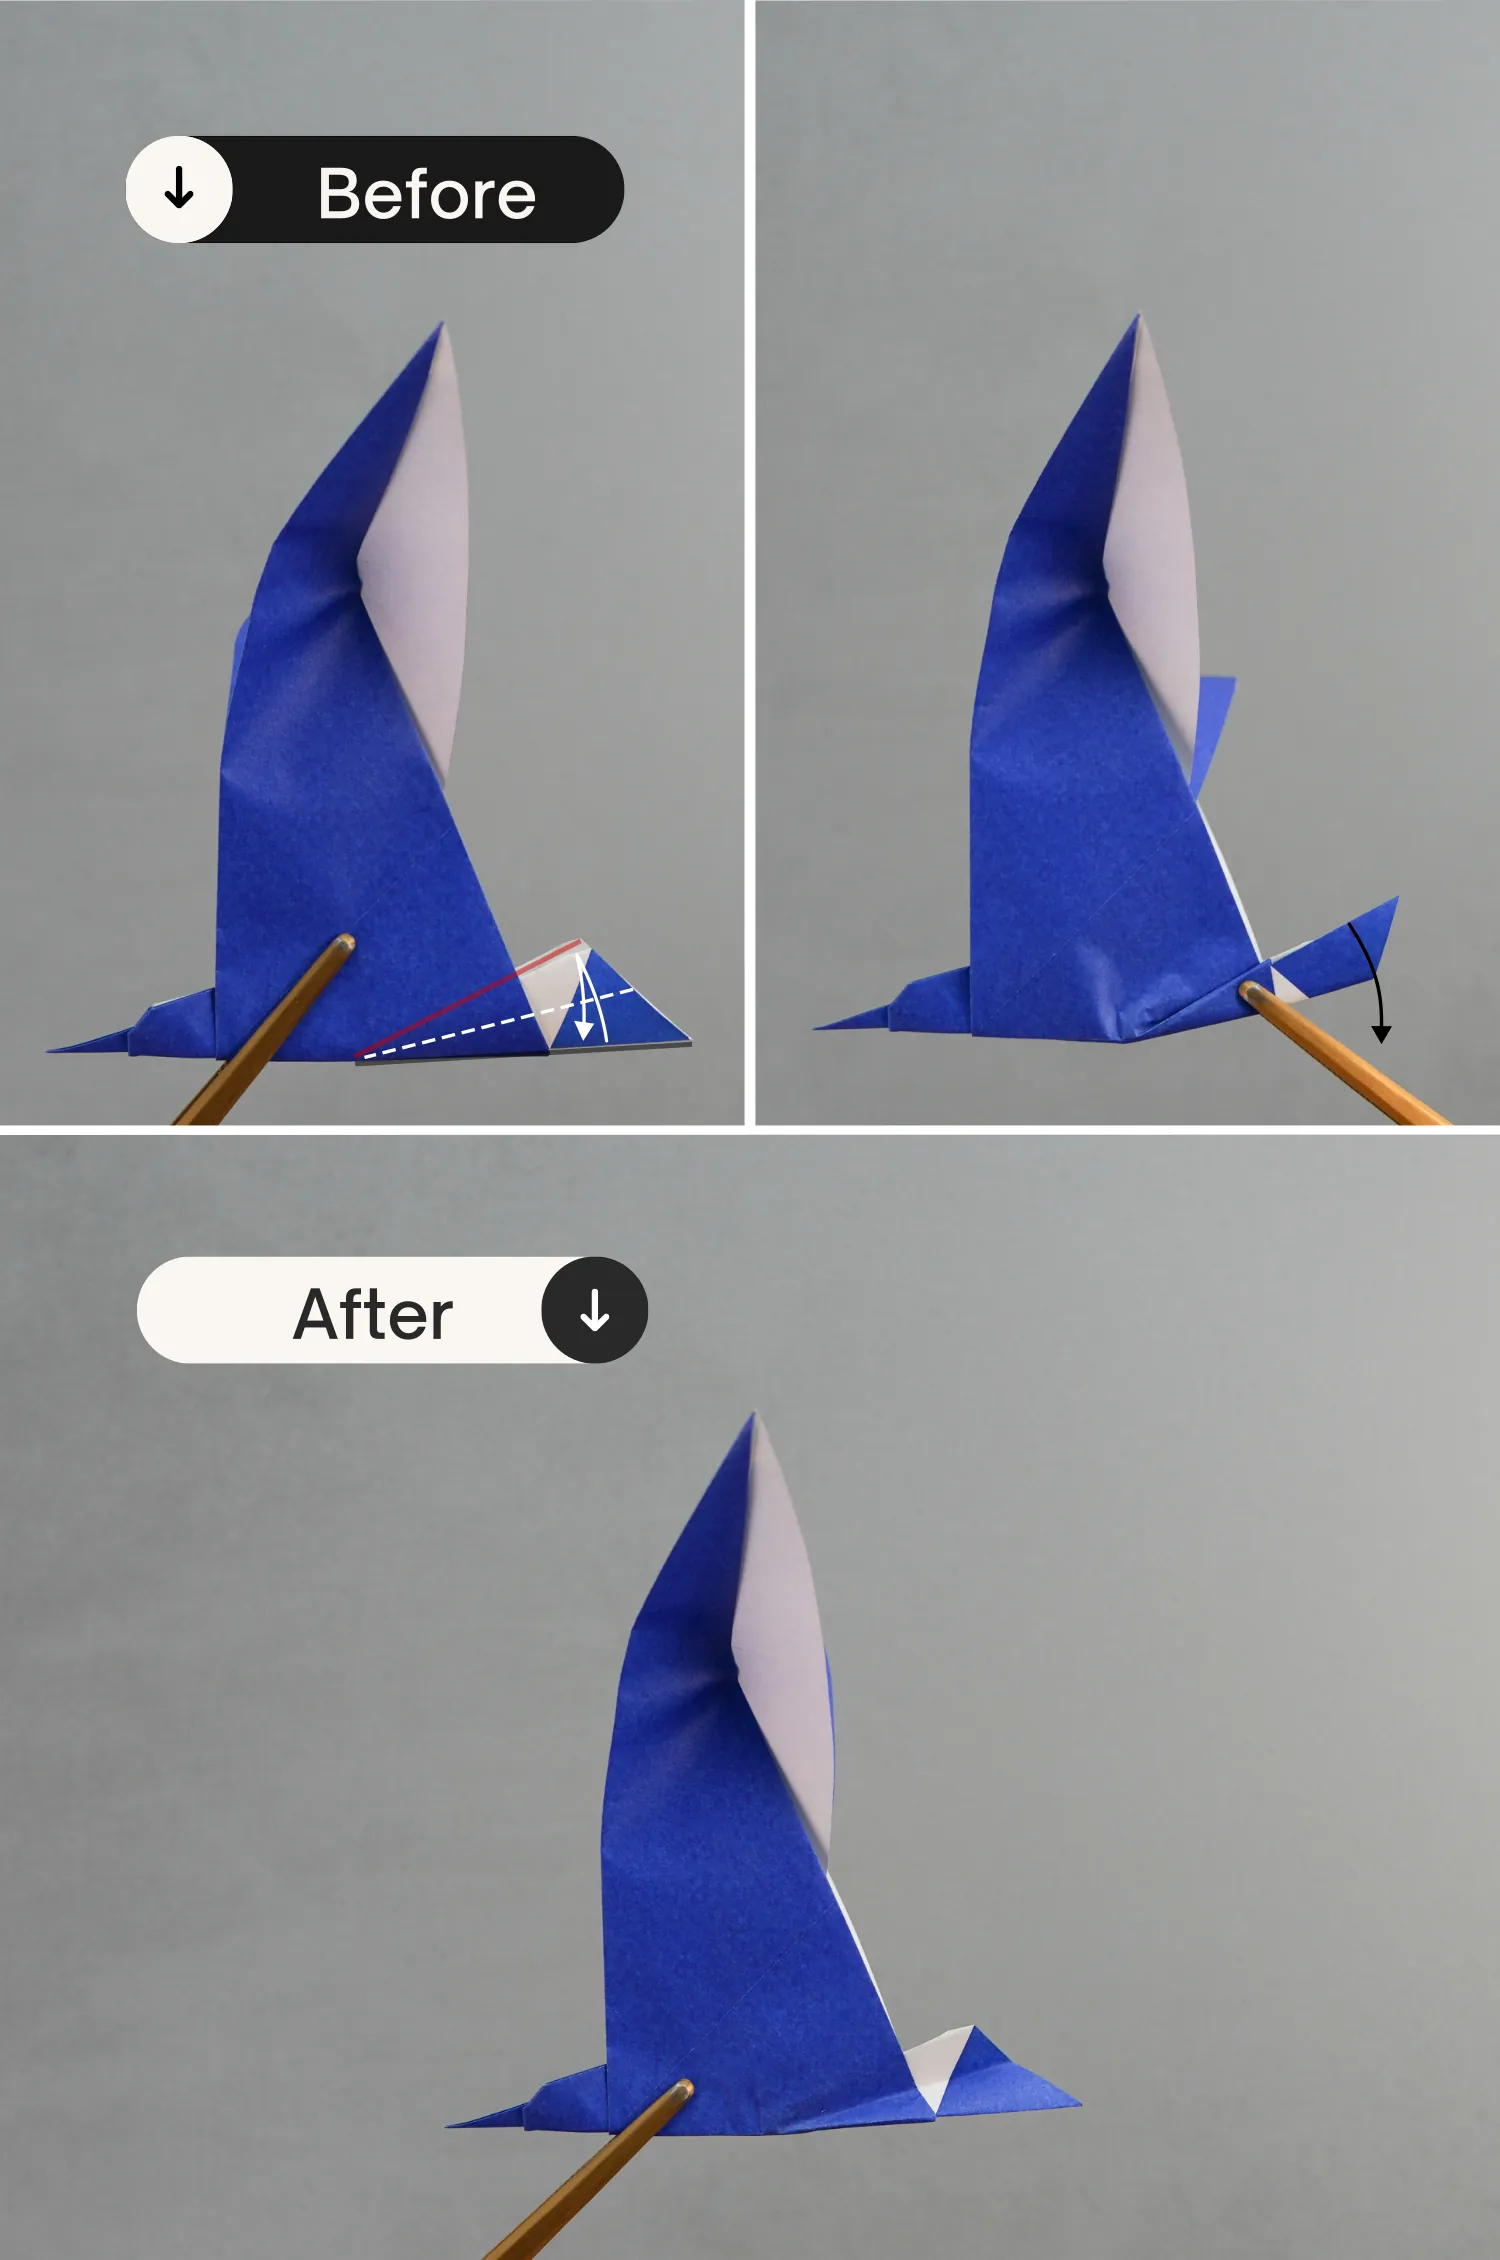
Flatten the raised corner on the bottom and fold it down to the right, then fold it to the left, creating two creases.
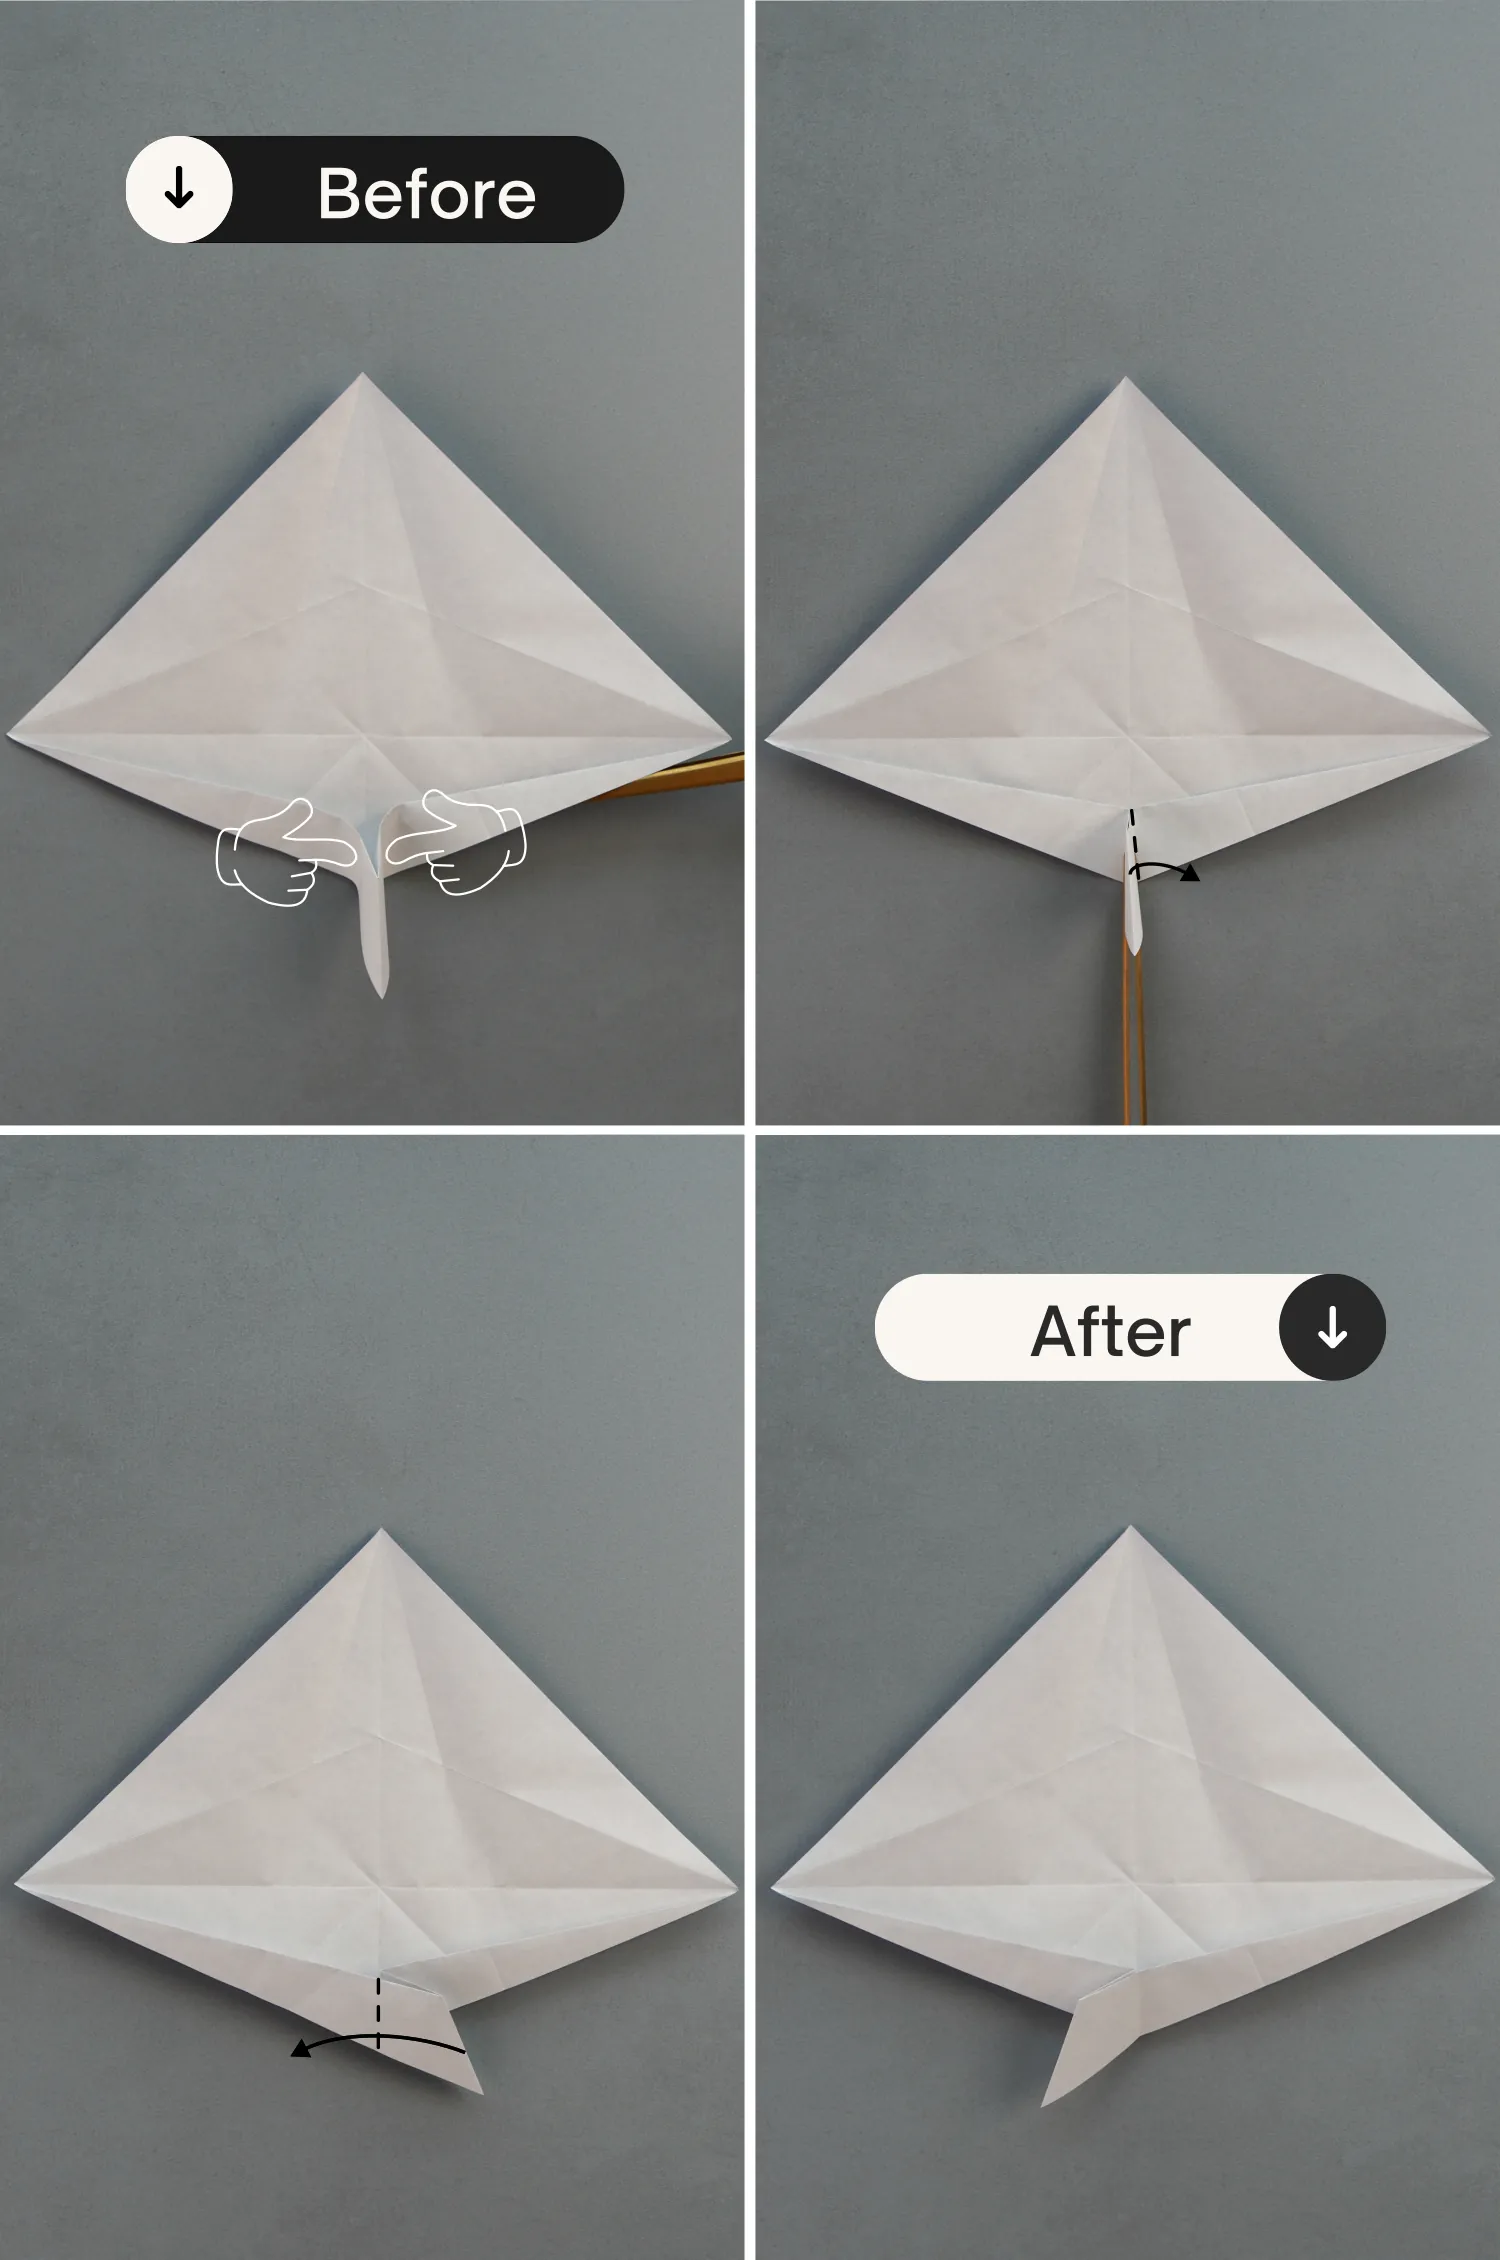
Step 16
Fold the left edge of this small corner to the right to align with the crease you made in the previous step, leaving a creases, and unfold it, then fold this corner to the right.
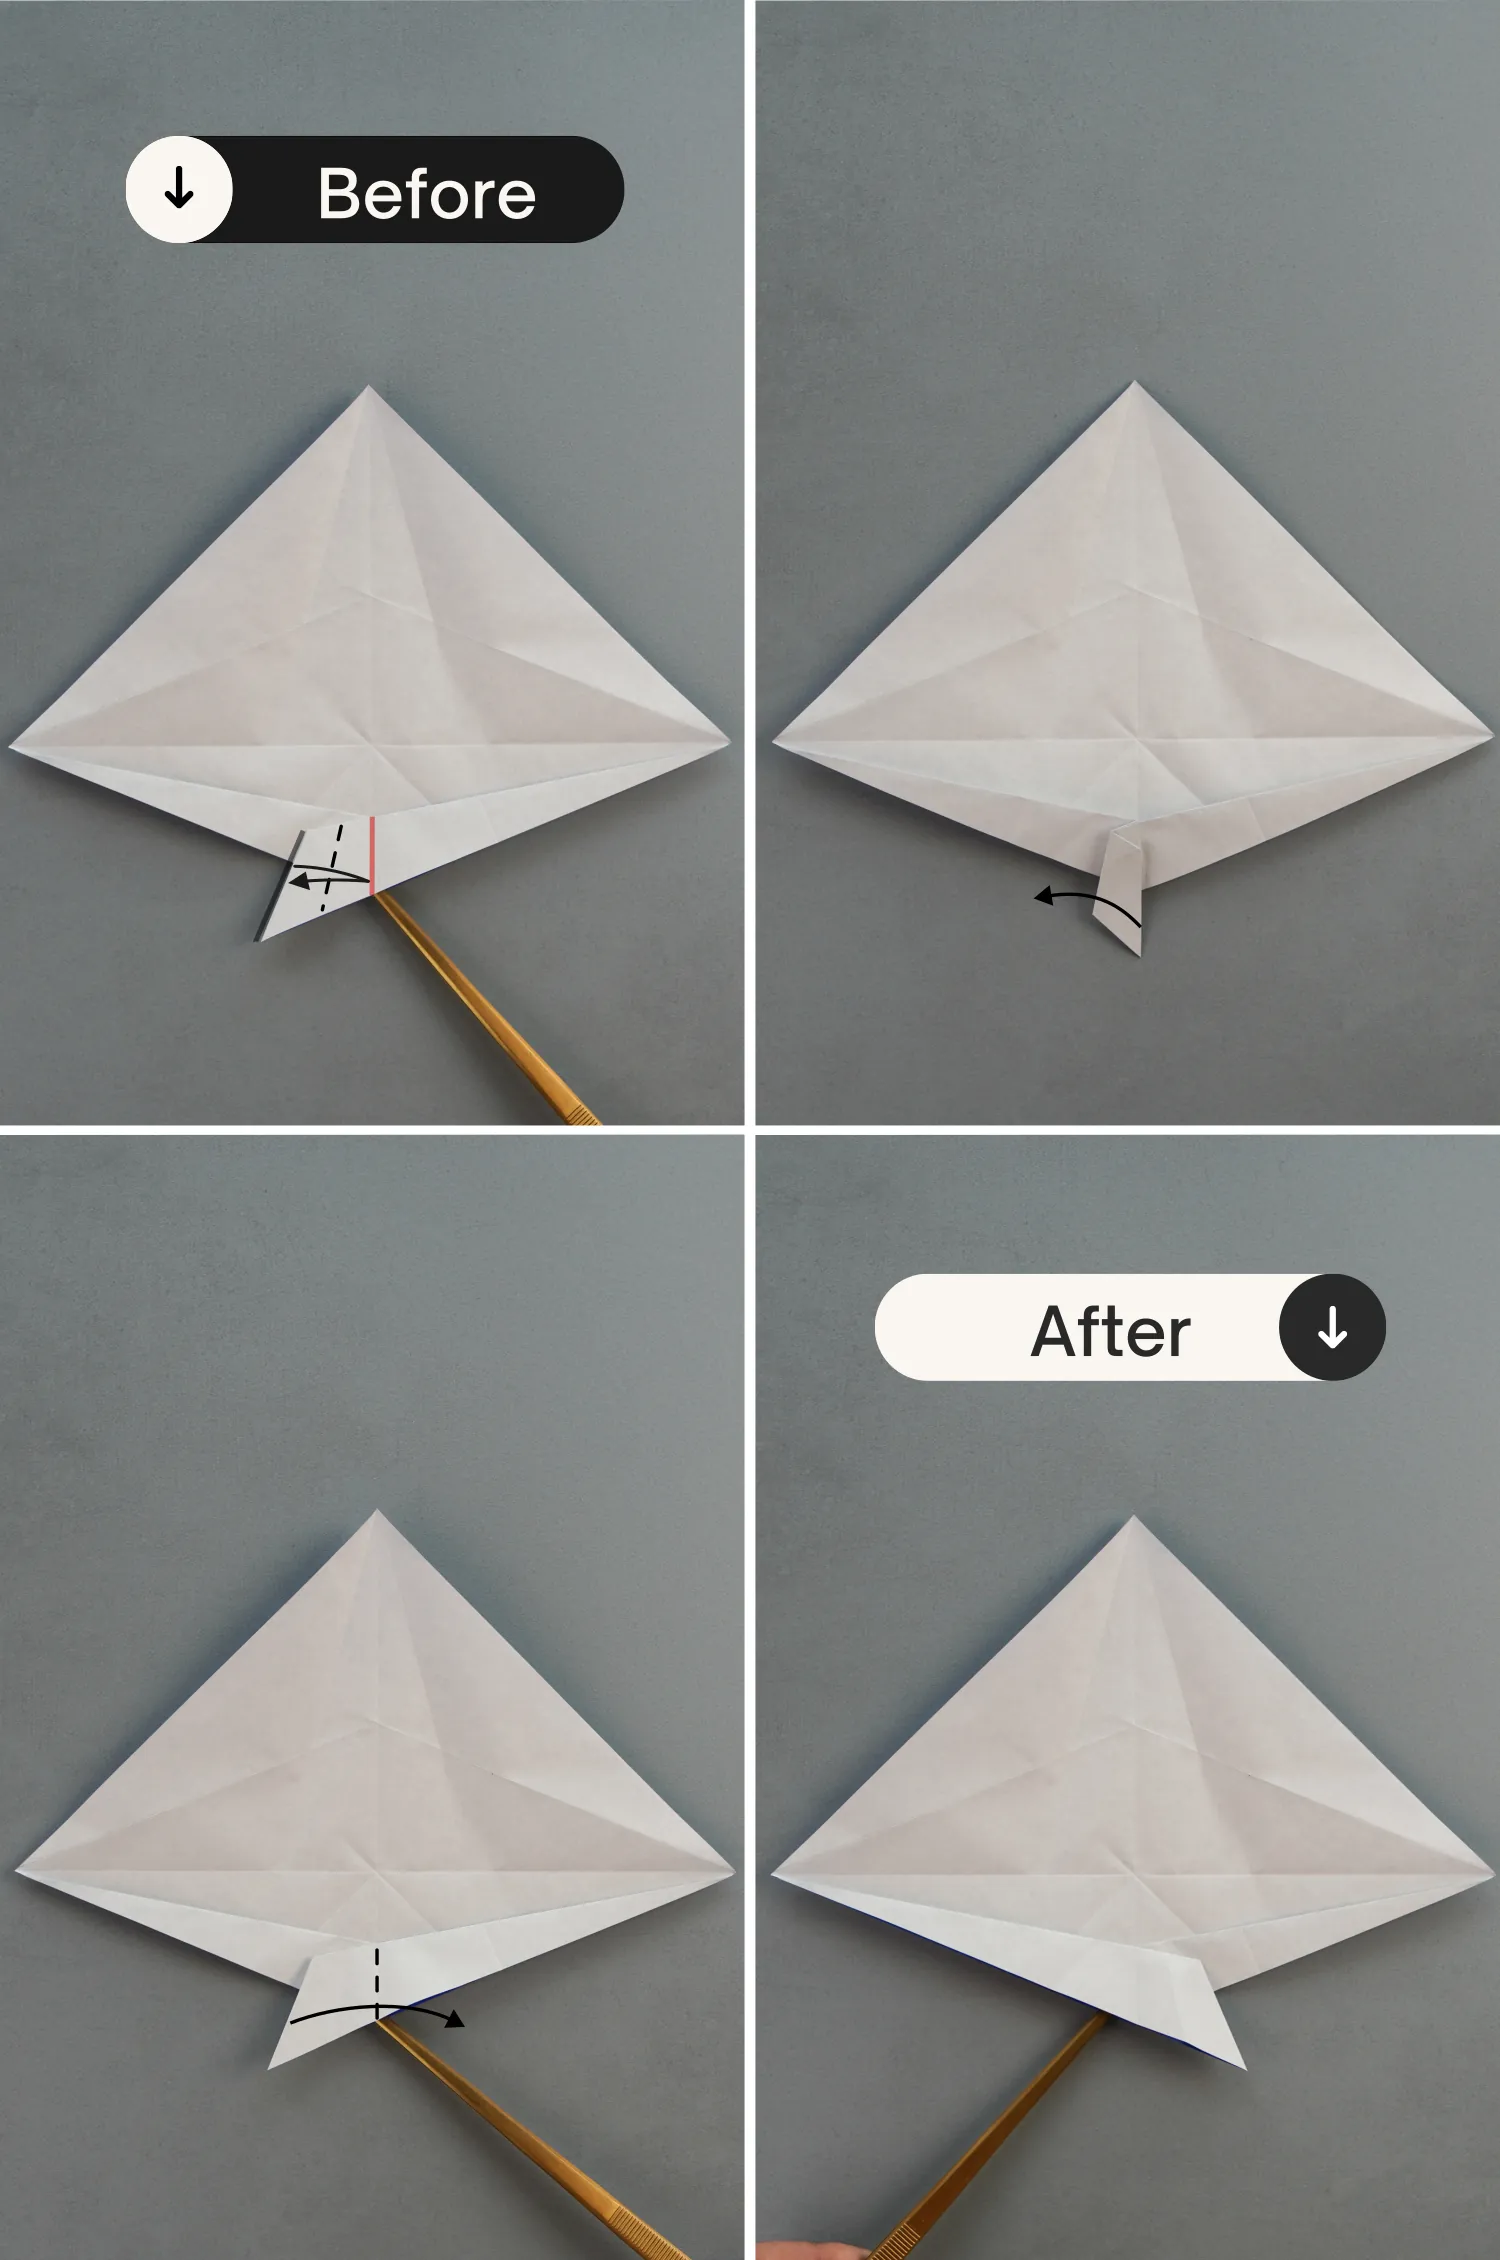
Step 17
Like before, fold the right edge of the corner to the left to align with the crease shown by the red line, leaving a crease then unfold it. Finally, making this corner stand again.
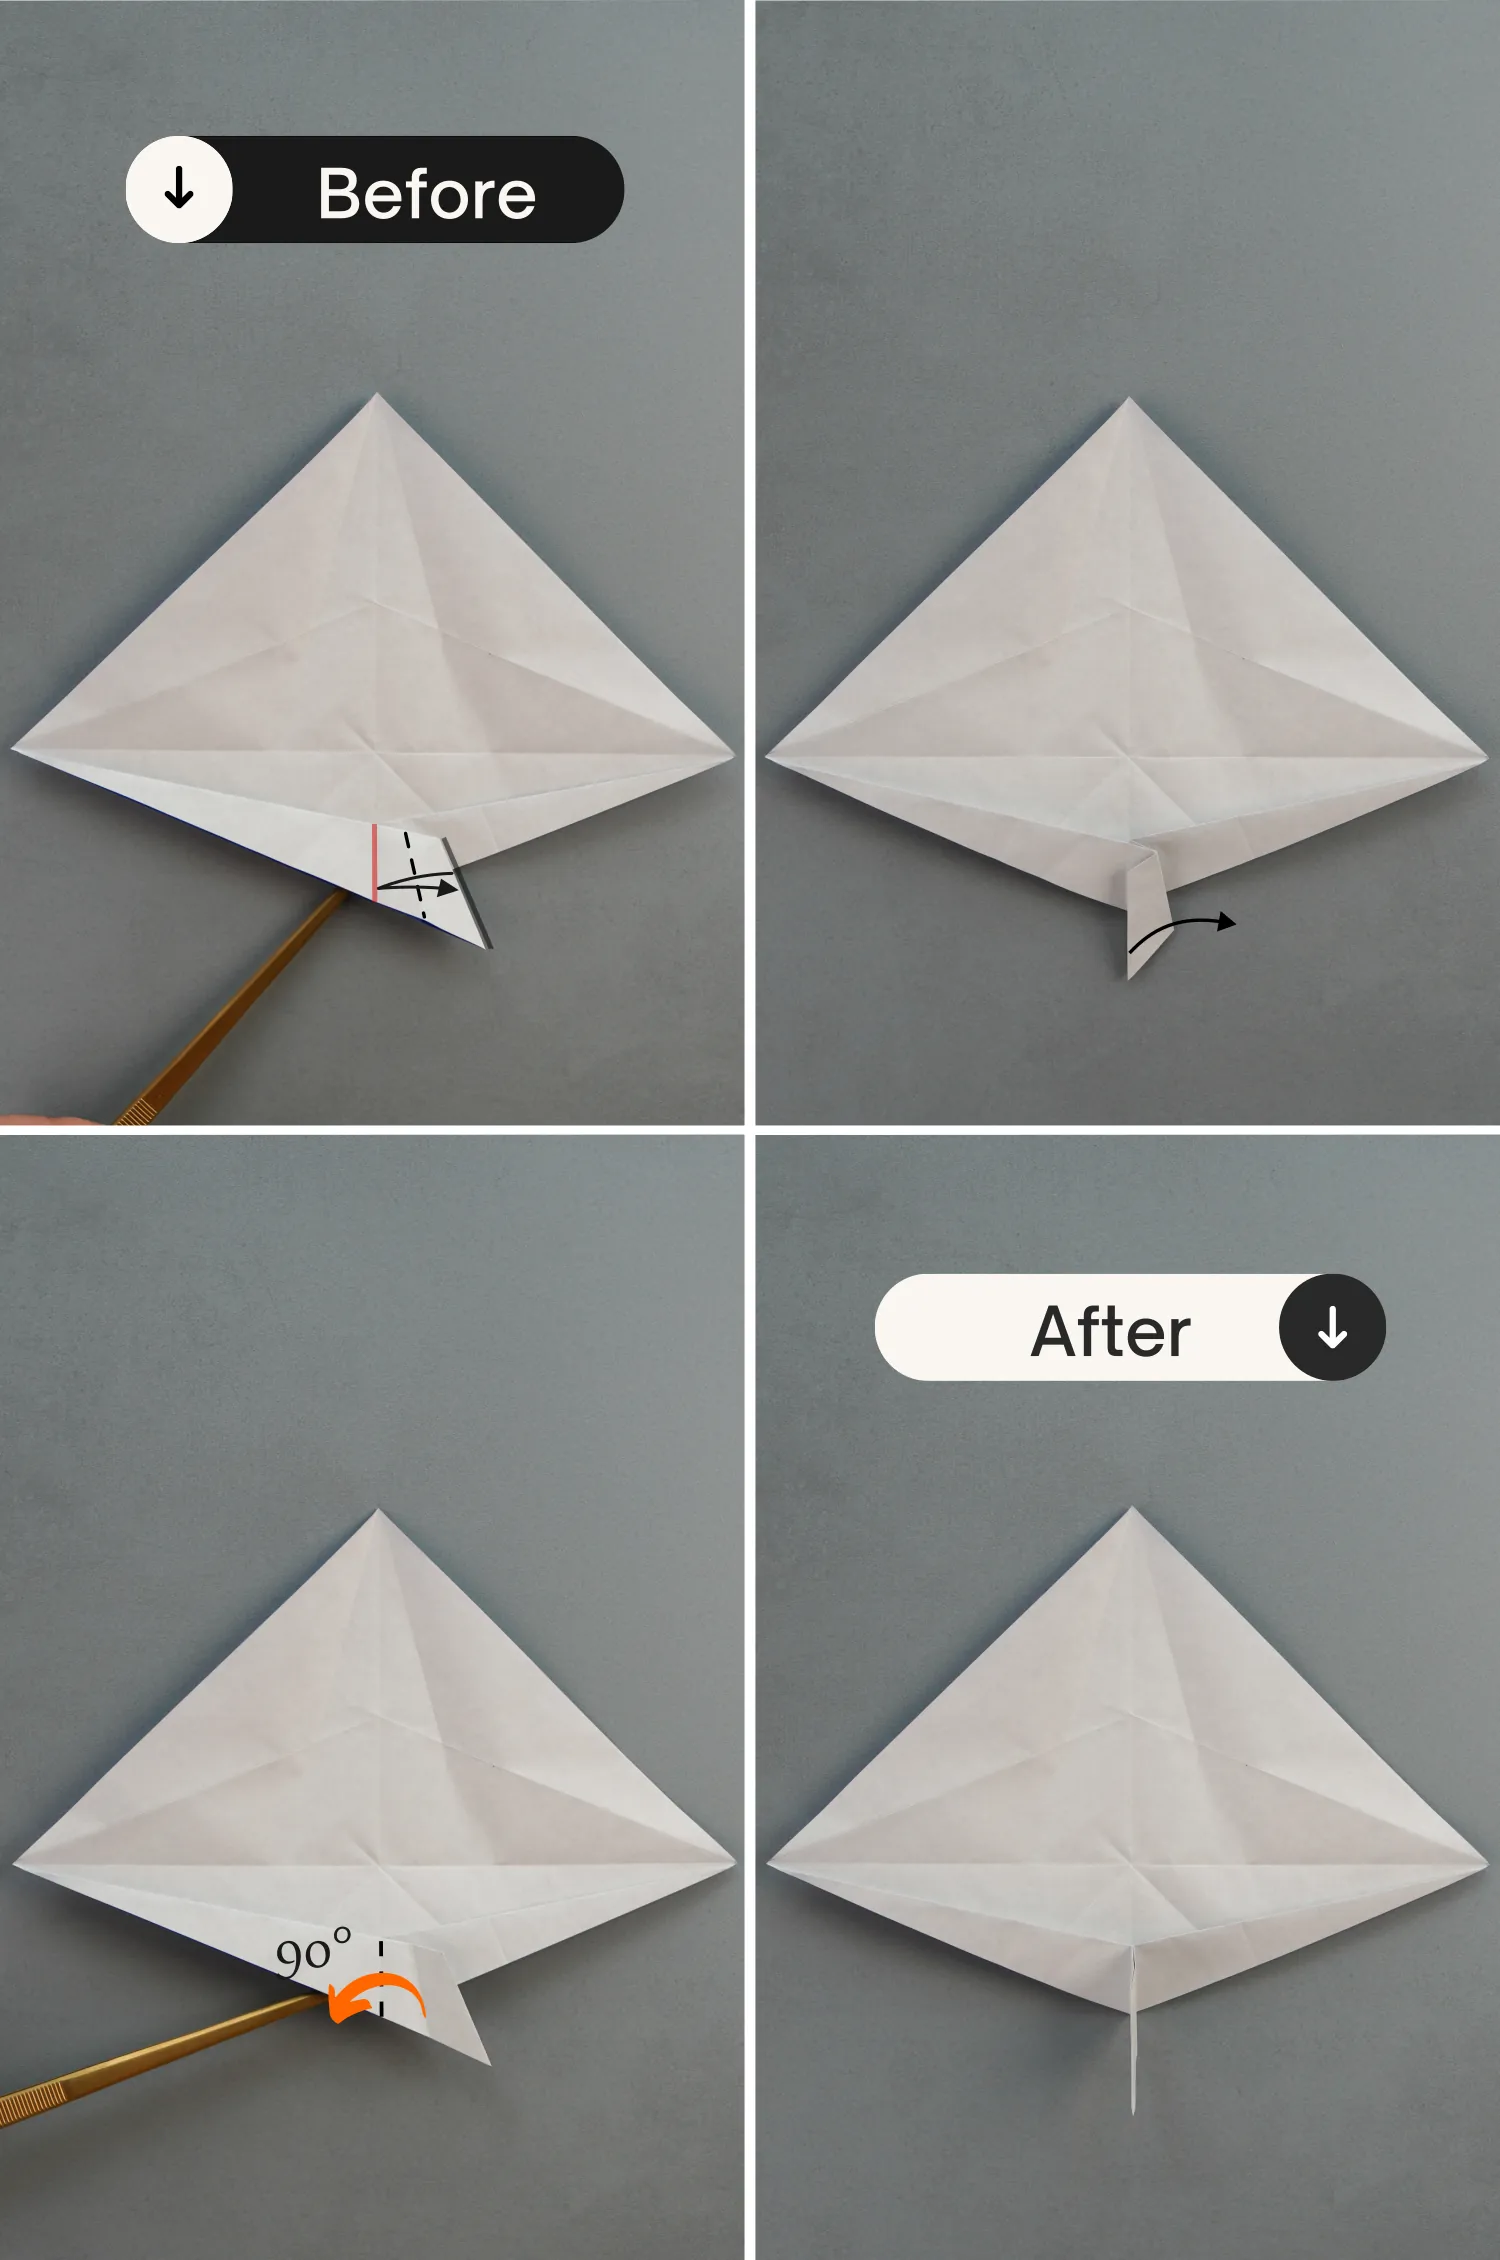
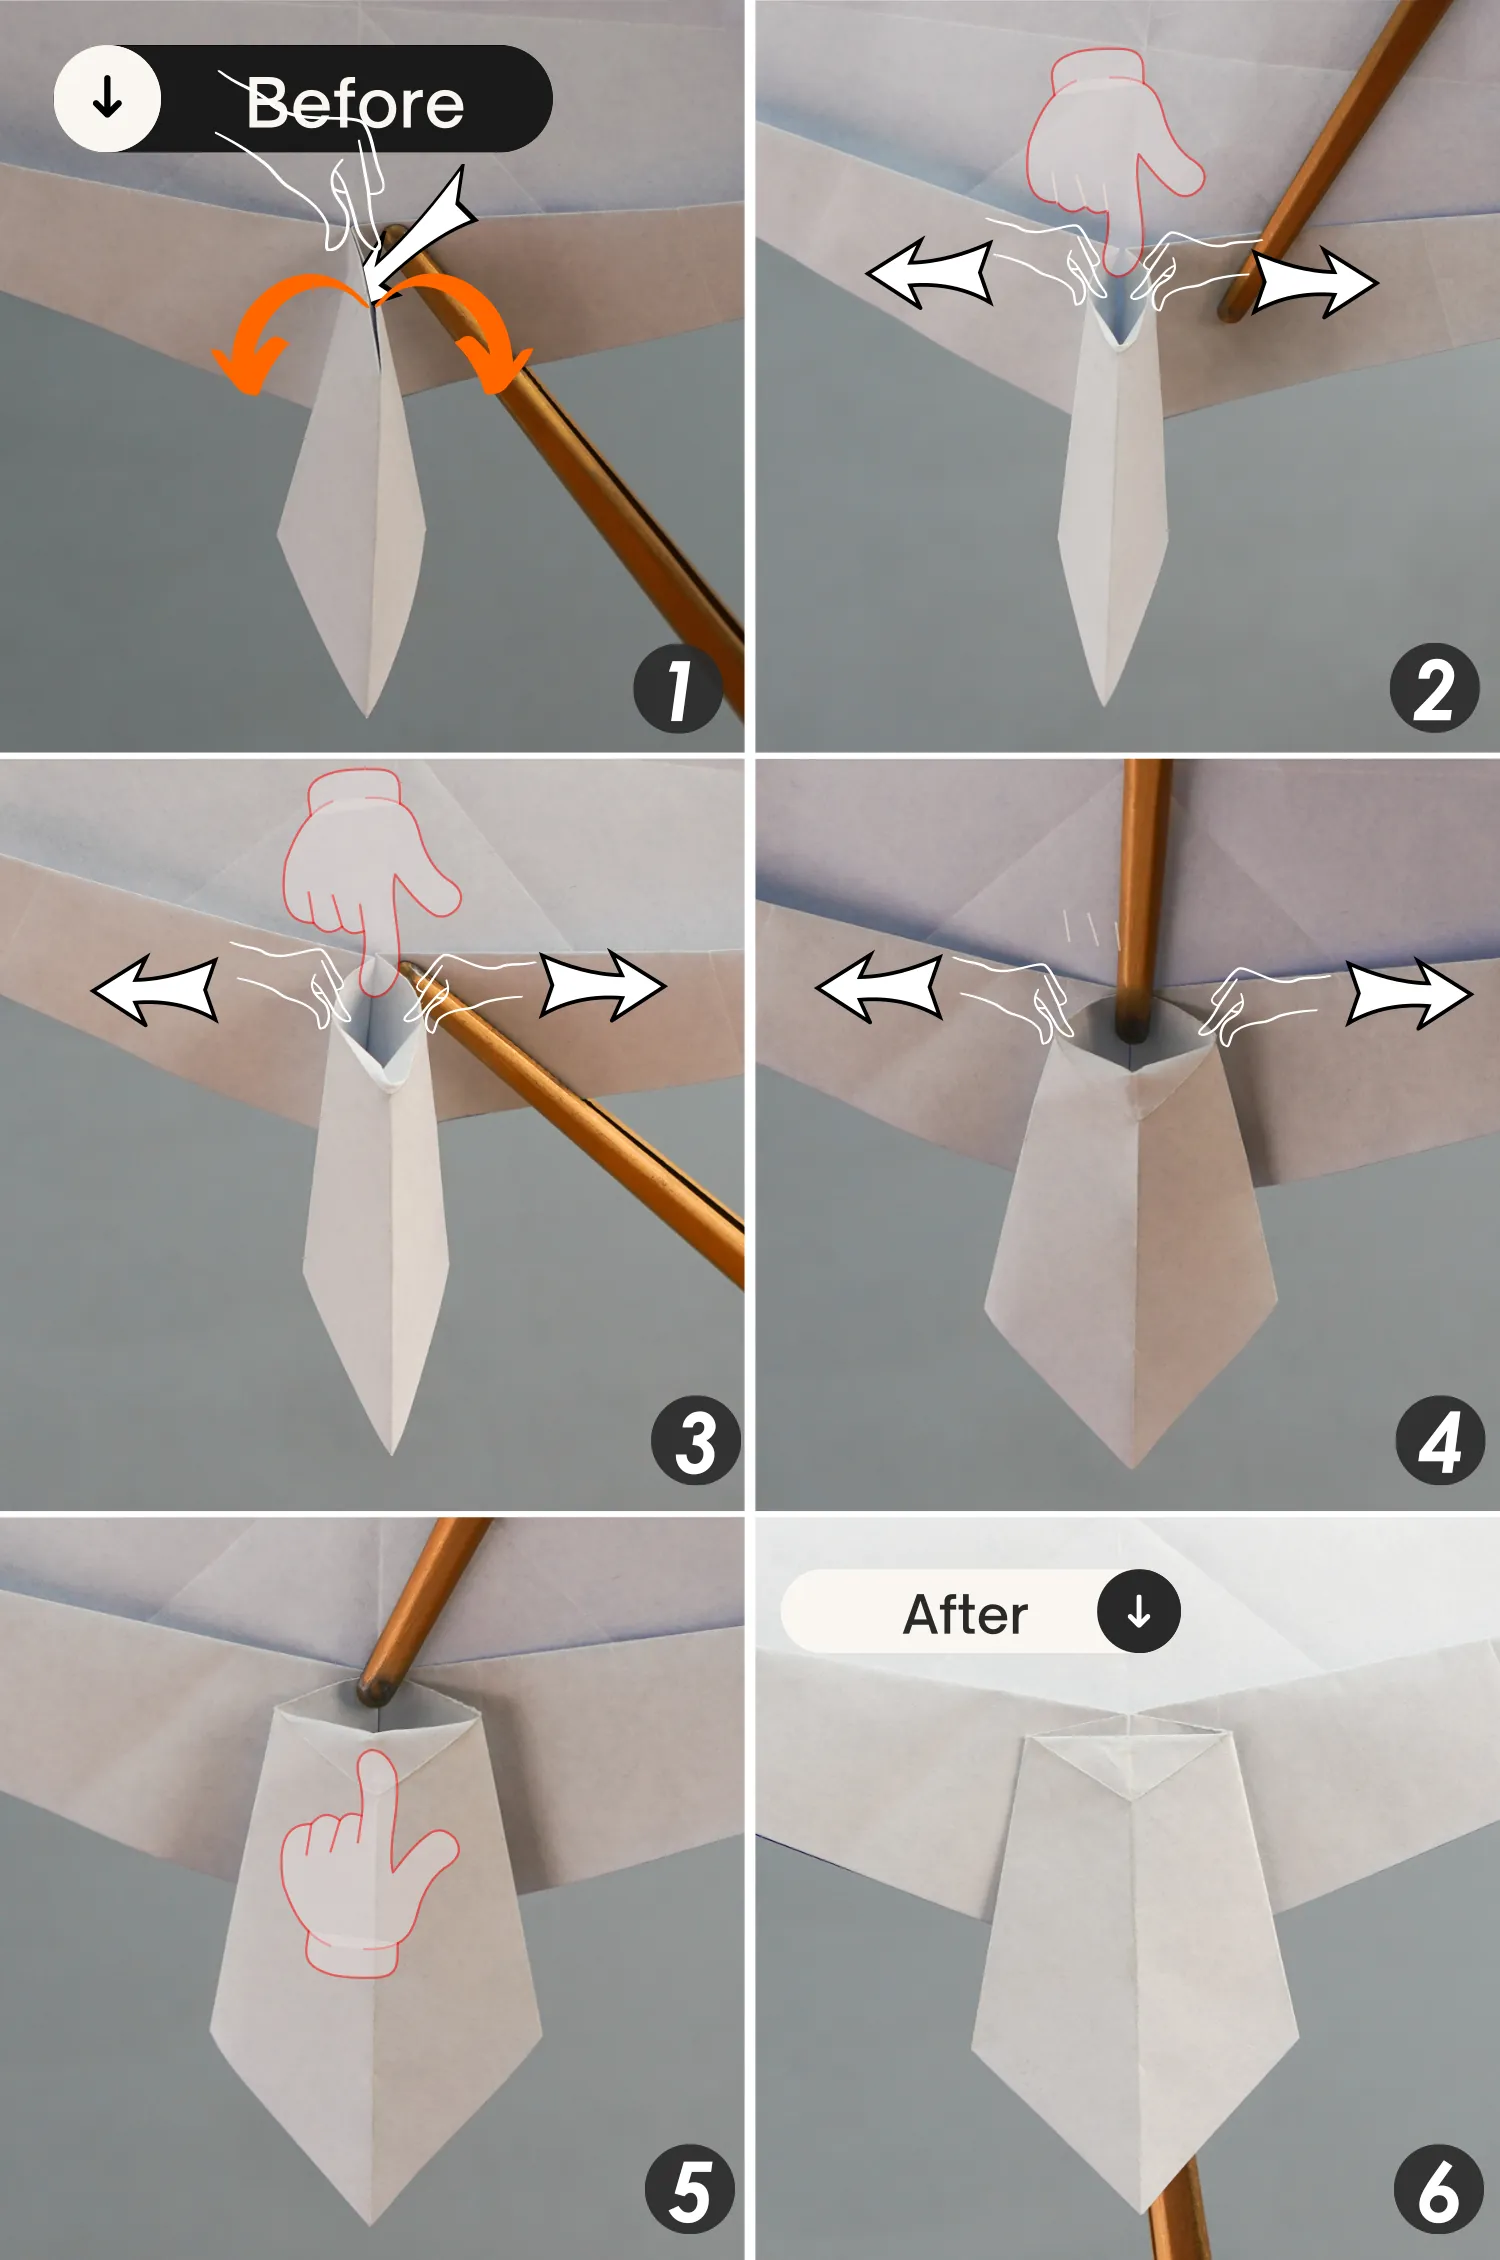
Step 18
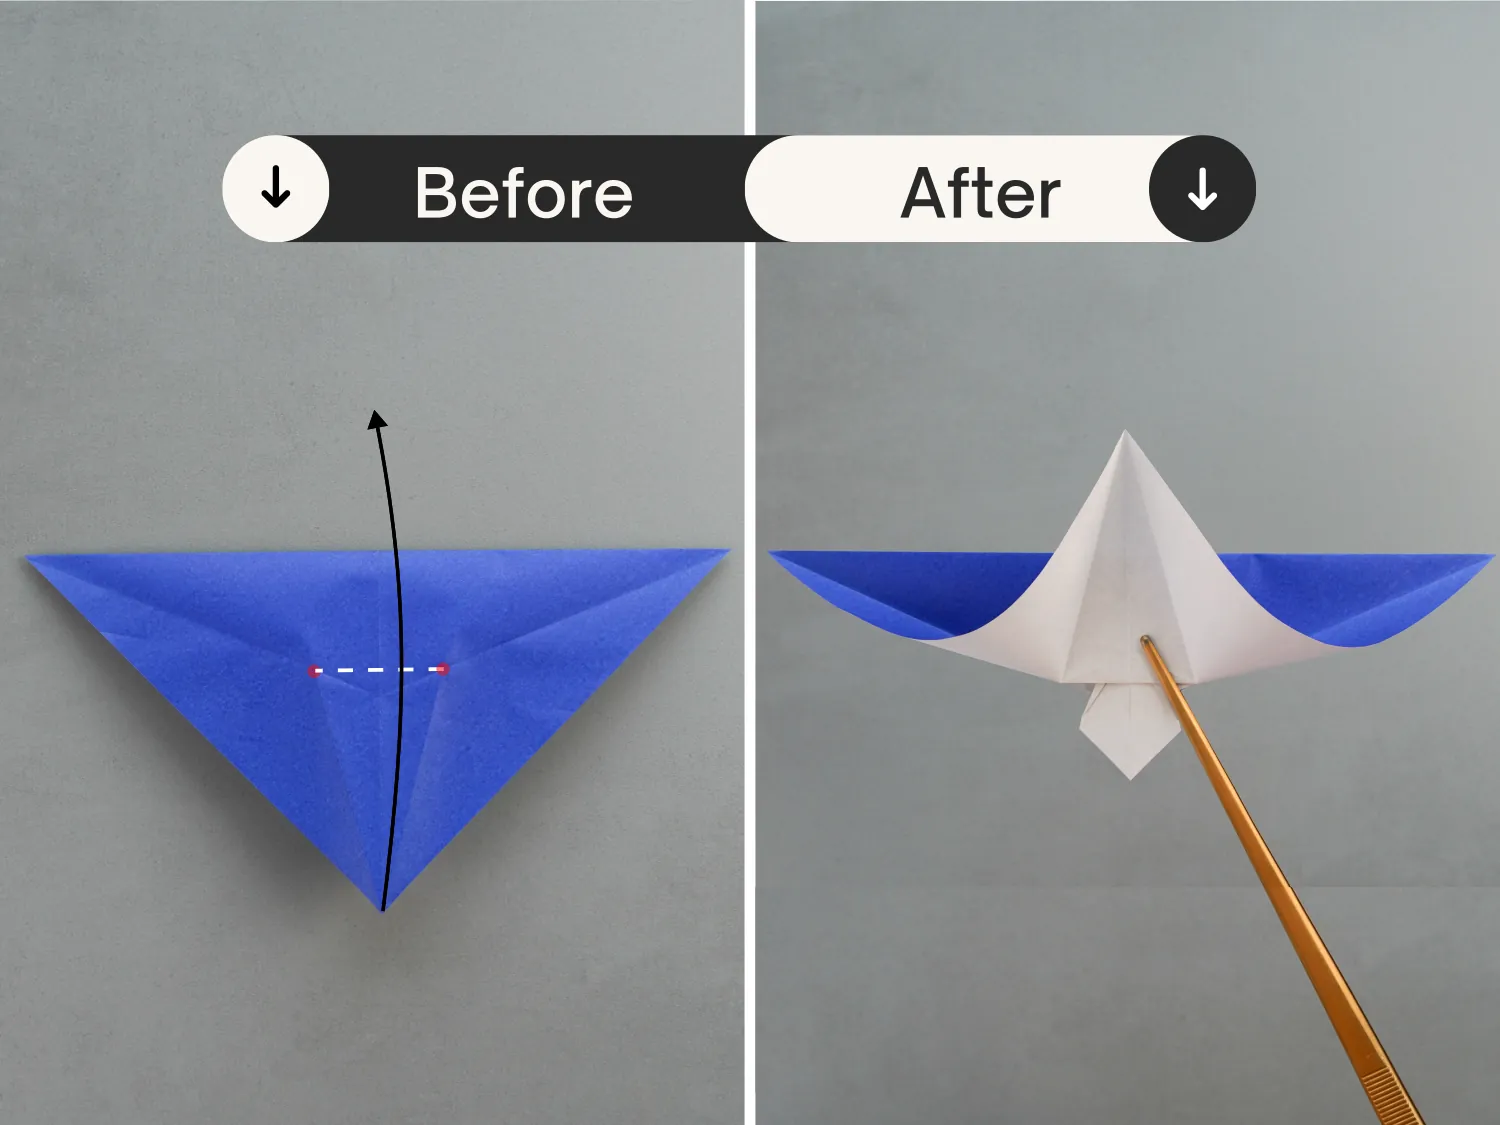
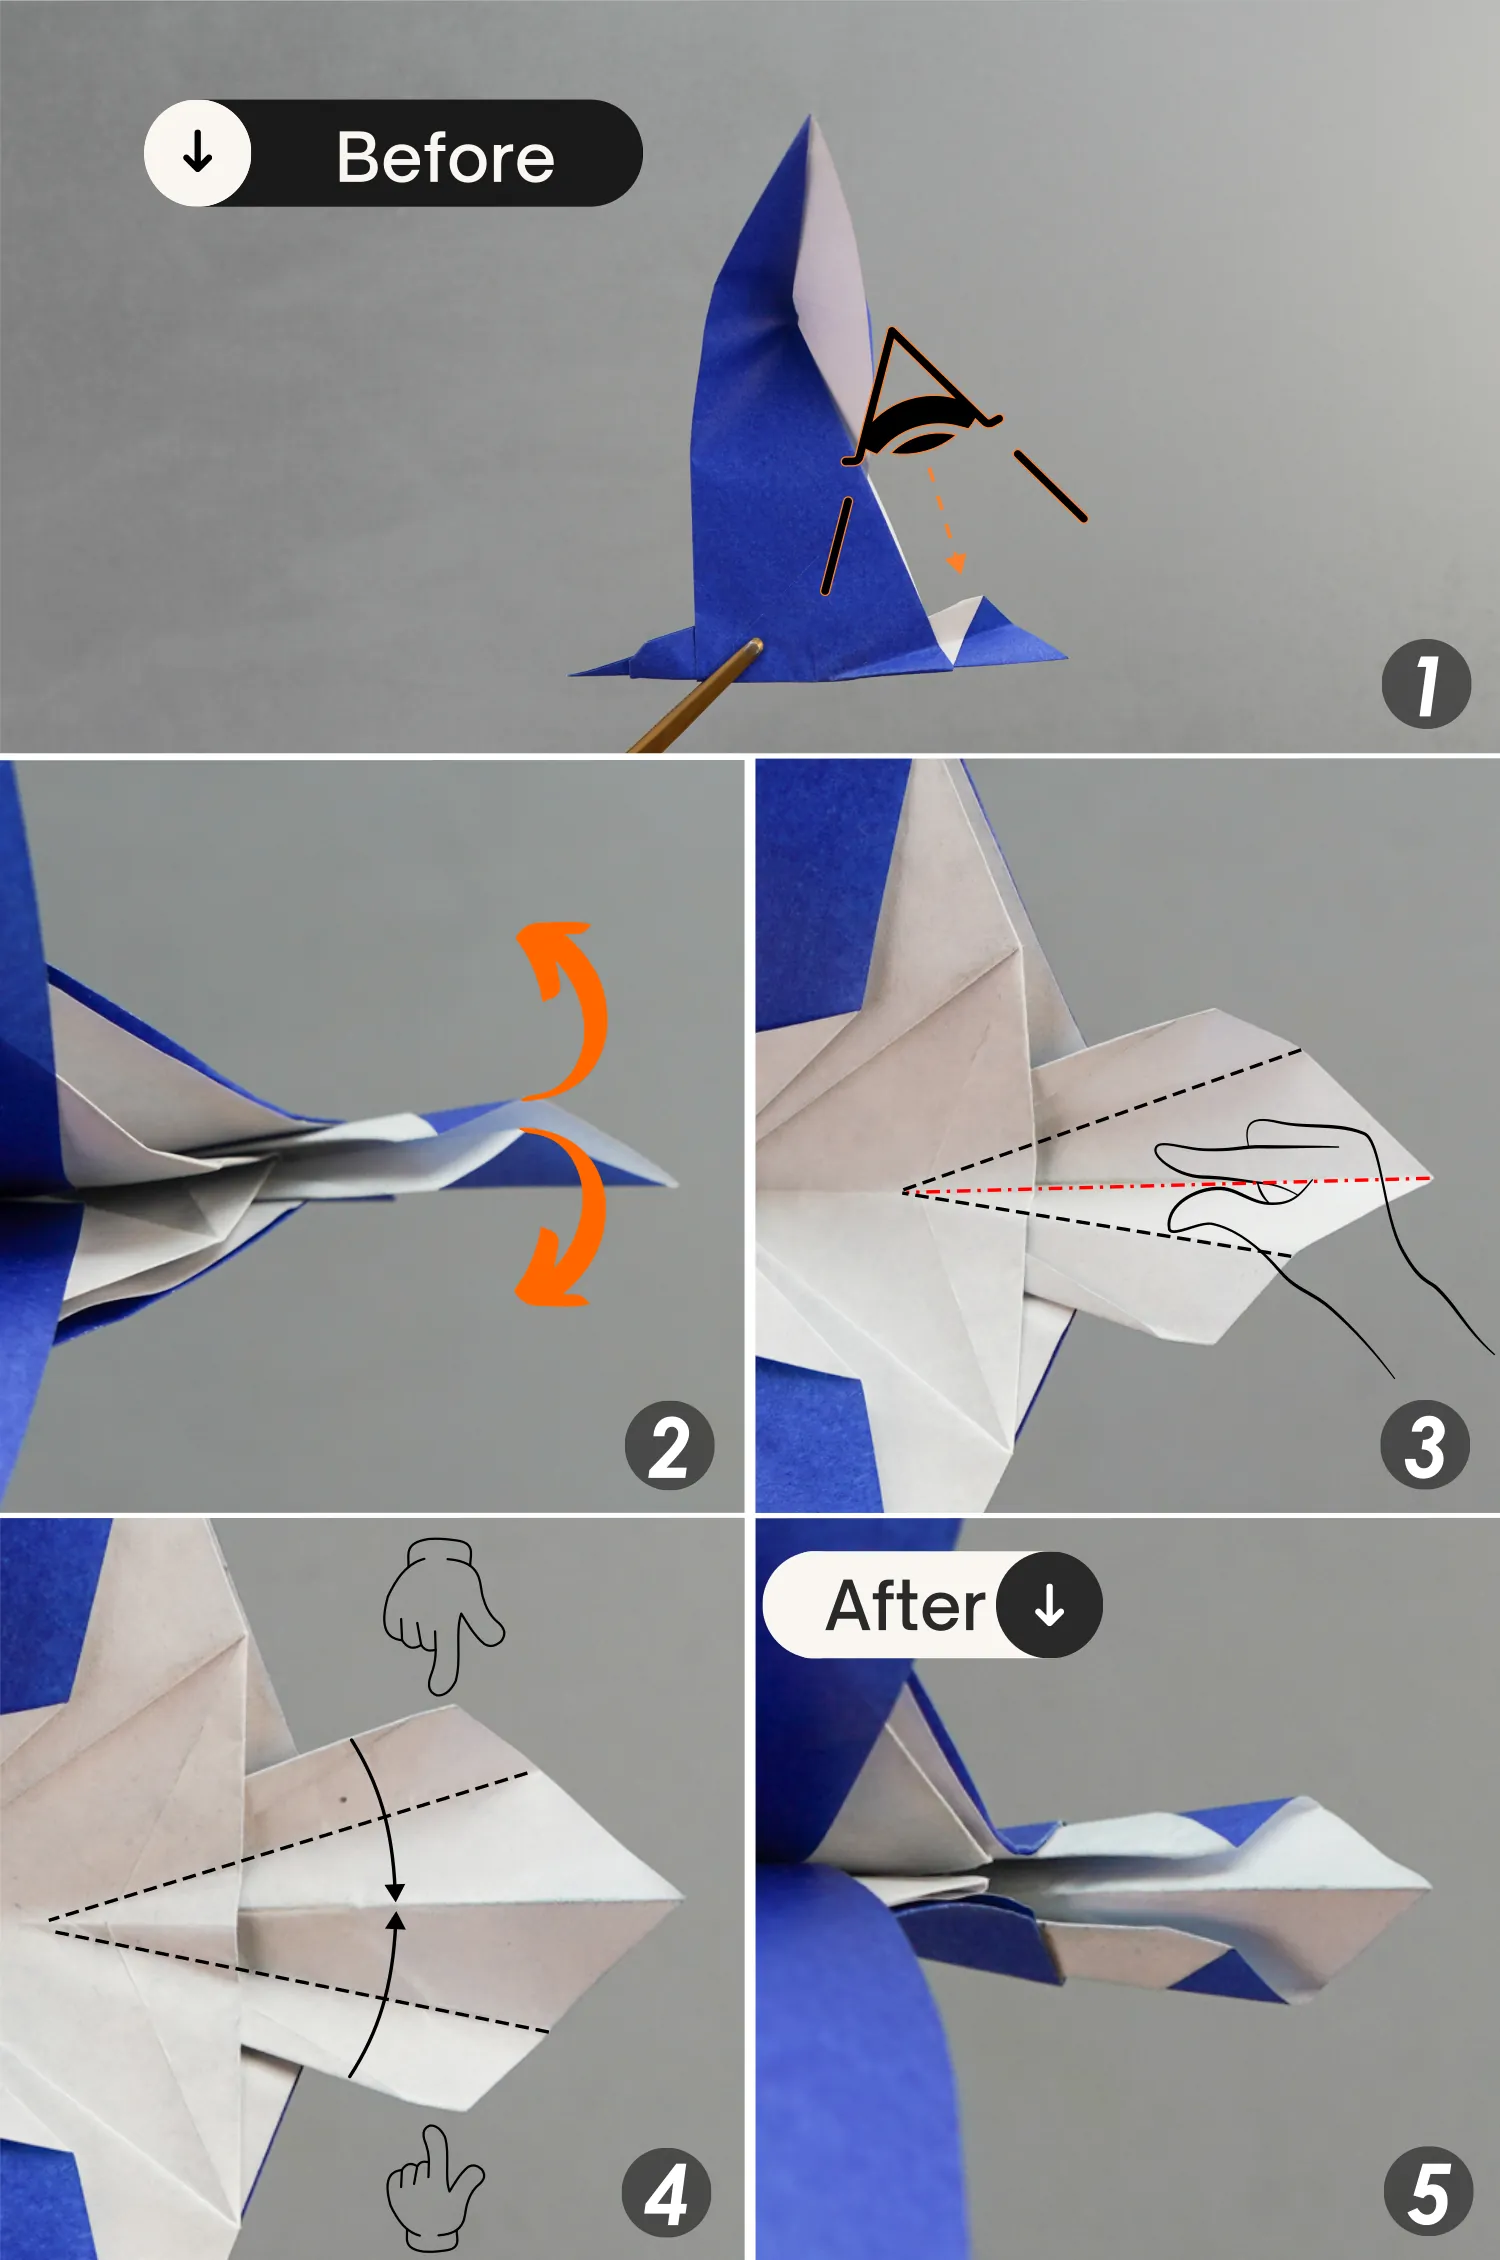
Focus on the standing flap on the bottom, pinch the top of the flap, and open it from the bottom, then slightly squash it.
Step 19
Then open the top opening gently, when the opening is big enough, press down its top back point, then squash this flap, and flatten it along the creases you made in steps 16 and 17.
During this process, you can stick your finger through the opening at the bottom to make adjustments for a better shape.
Step 20
Now fold the top left and right corners toward the center to meet the middle vertical crease.
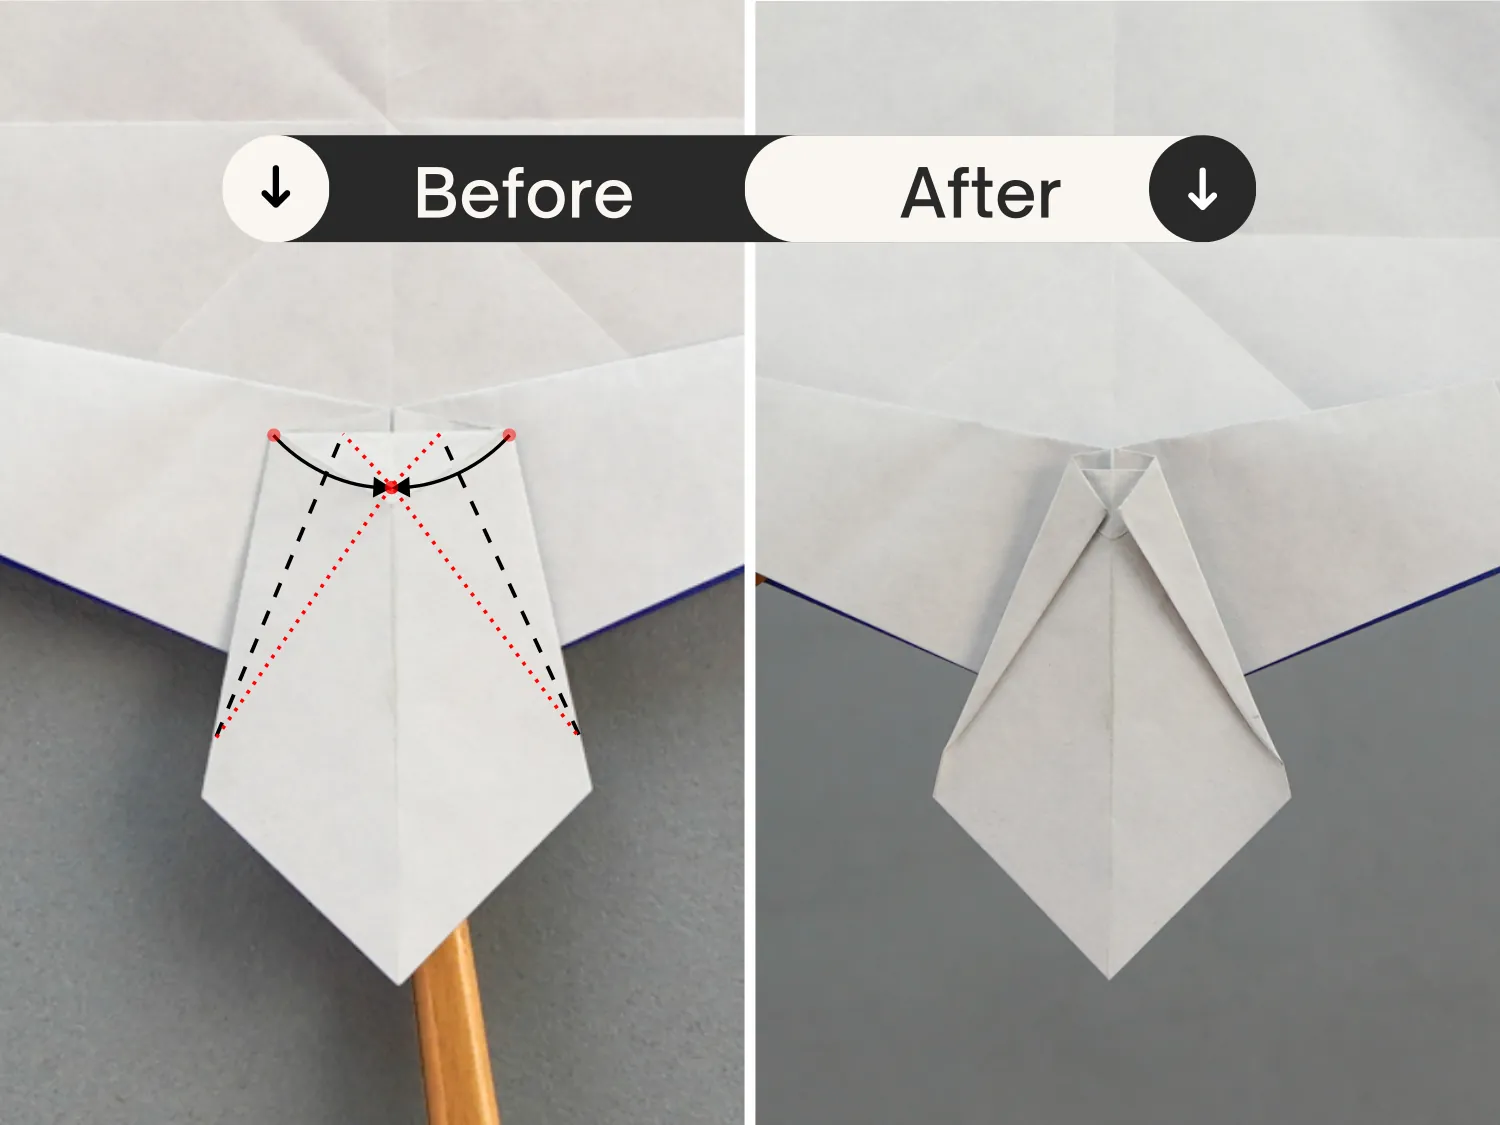
Step 21
Fold the top point of the paper down along the middle horizontal crease.
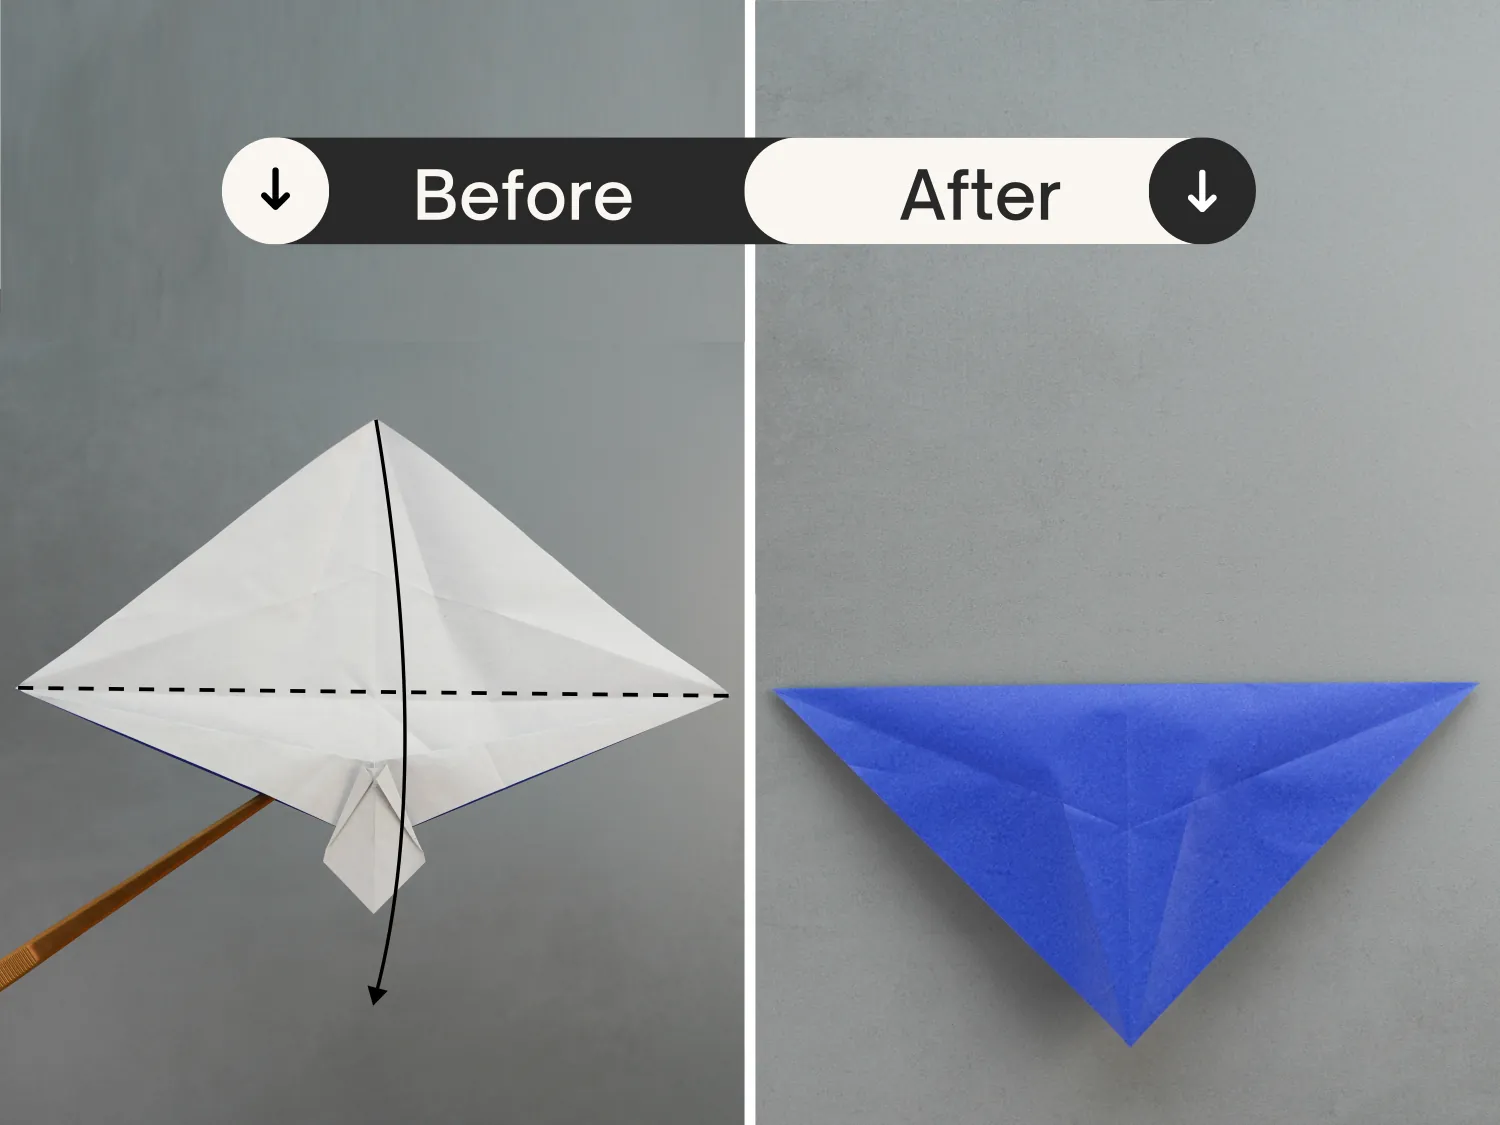
Step 22
Fold the bottom point up along the dotted line connecting the two intersection points [shown by the red spots] formed by the creases you made in the previous steps.
Step 23
Fold the bottom left edge up and the left edge of the middle part to the right along the existing creases, and flatten it to the right. Then fold the right edge of the small triangle on the top to align with its left edge.
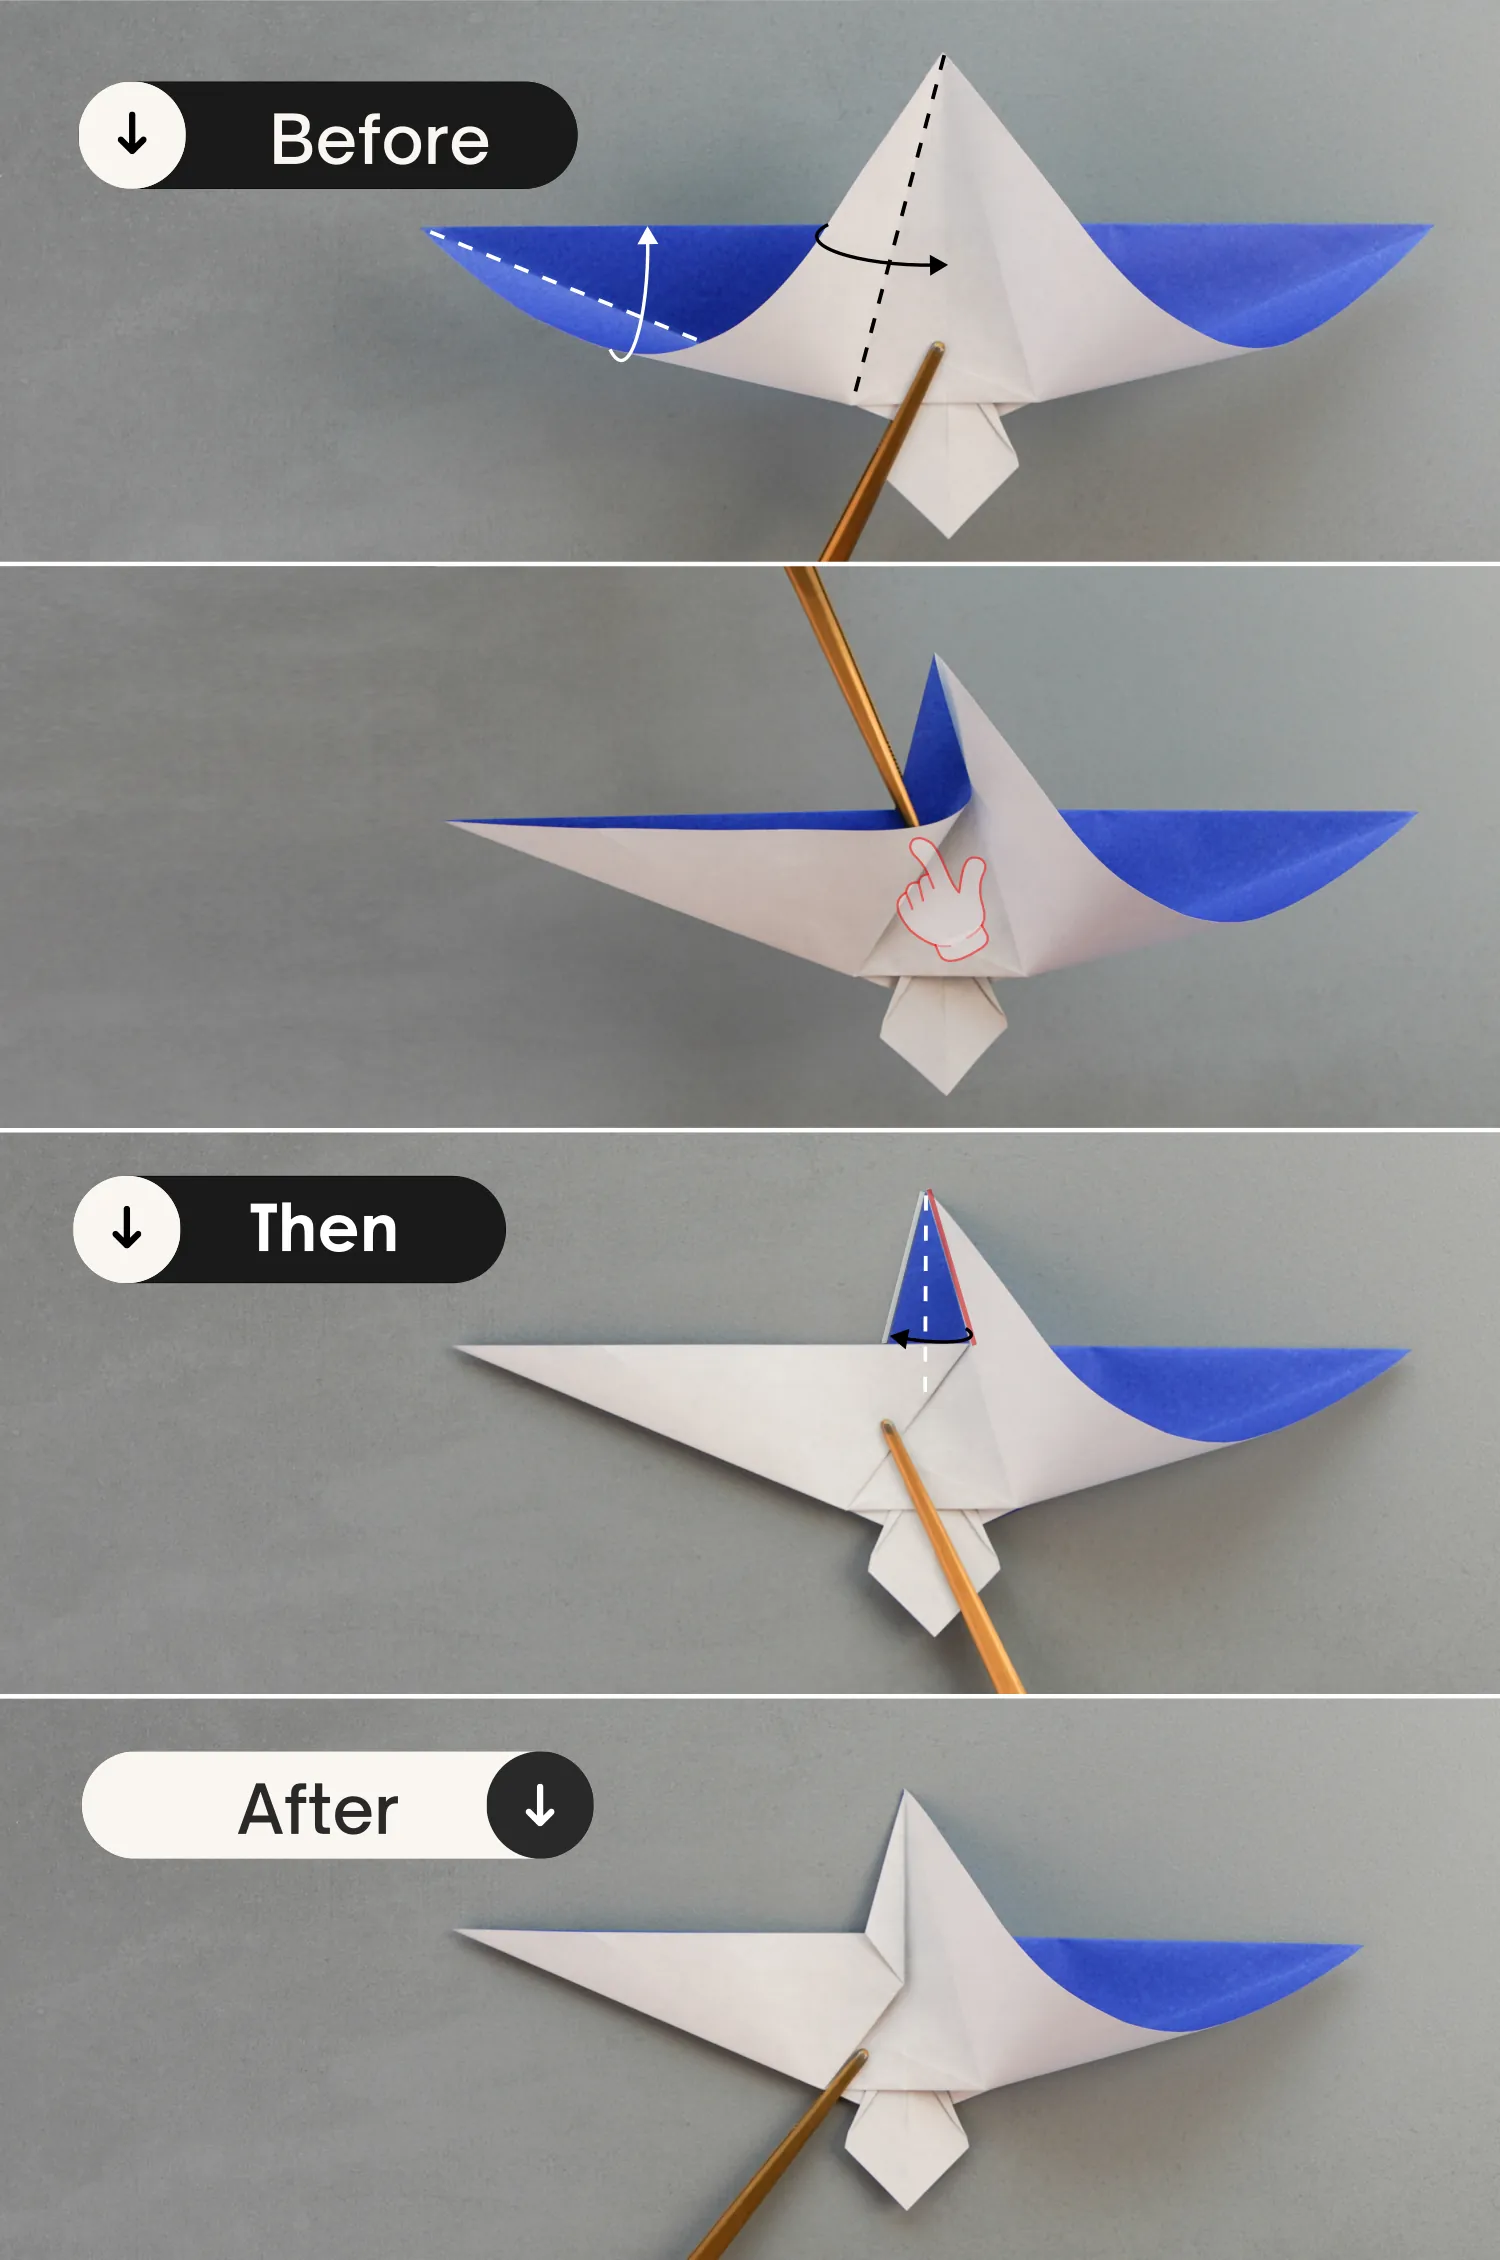
Step 24
Similarly, flatten the right part to the left, then fold the left edge of the triangle to align with its right edge.
Step 25
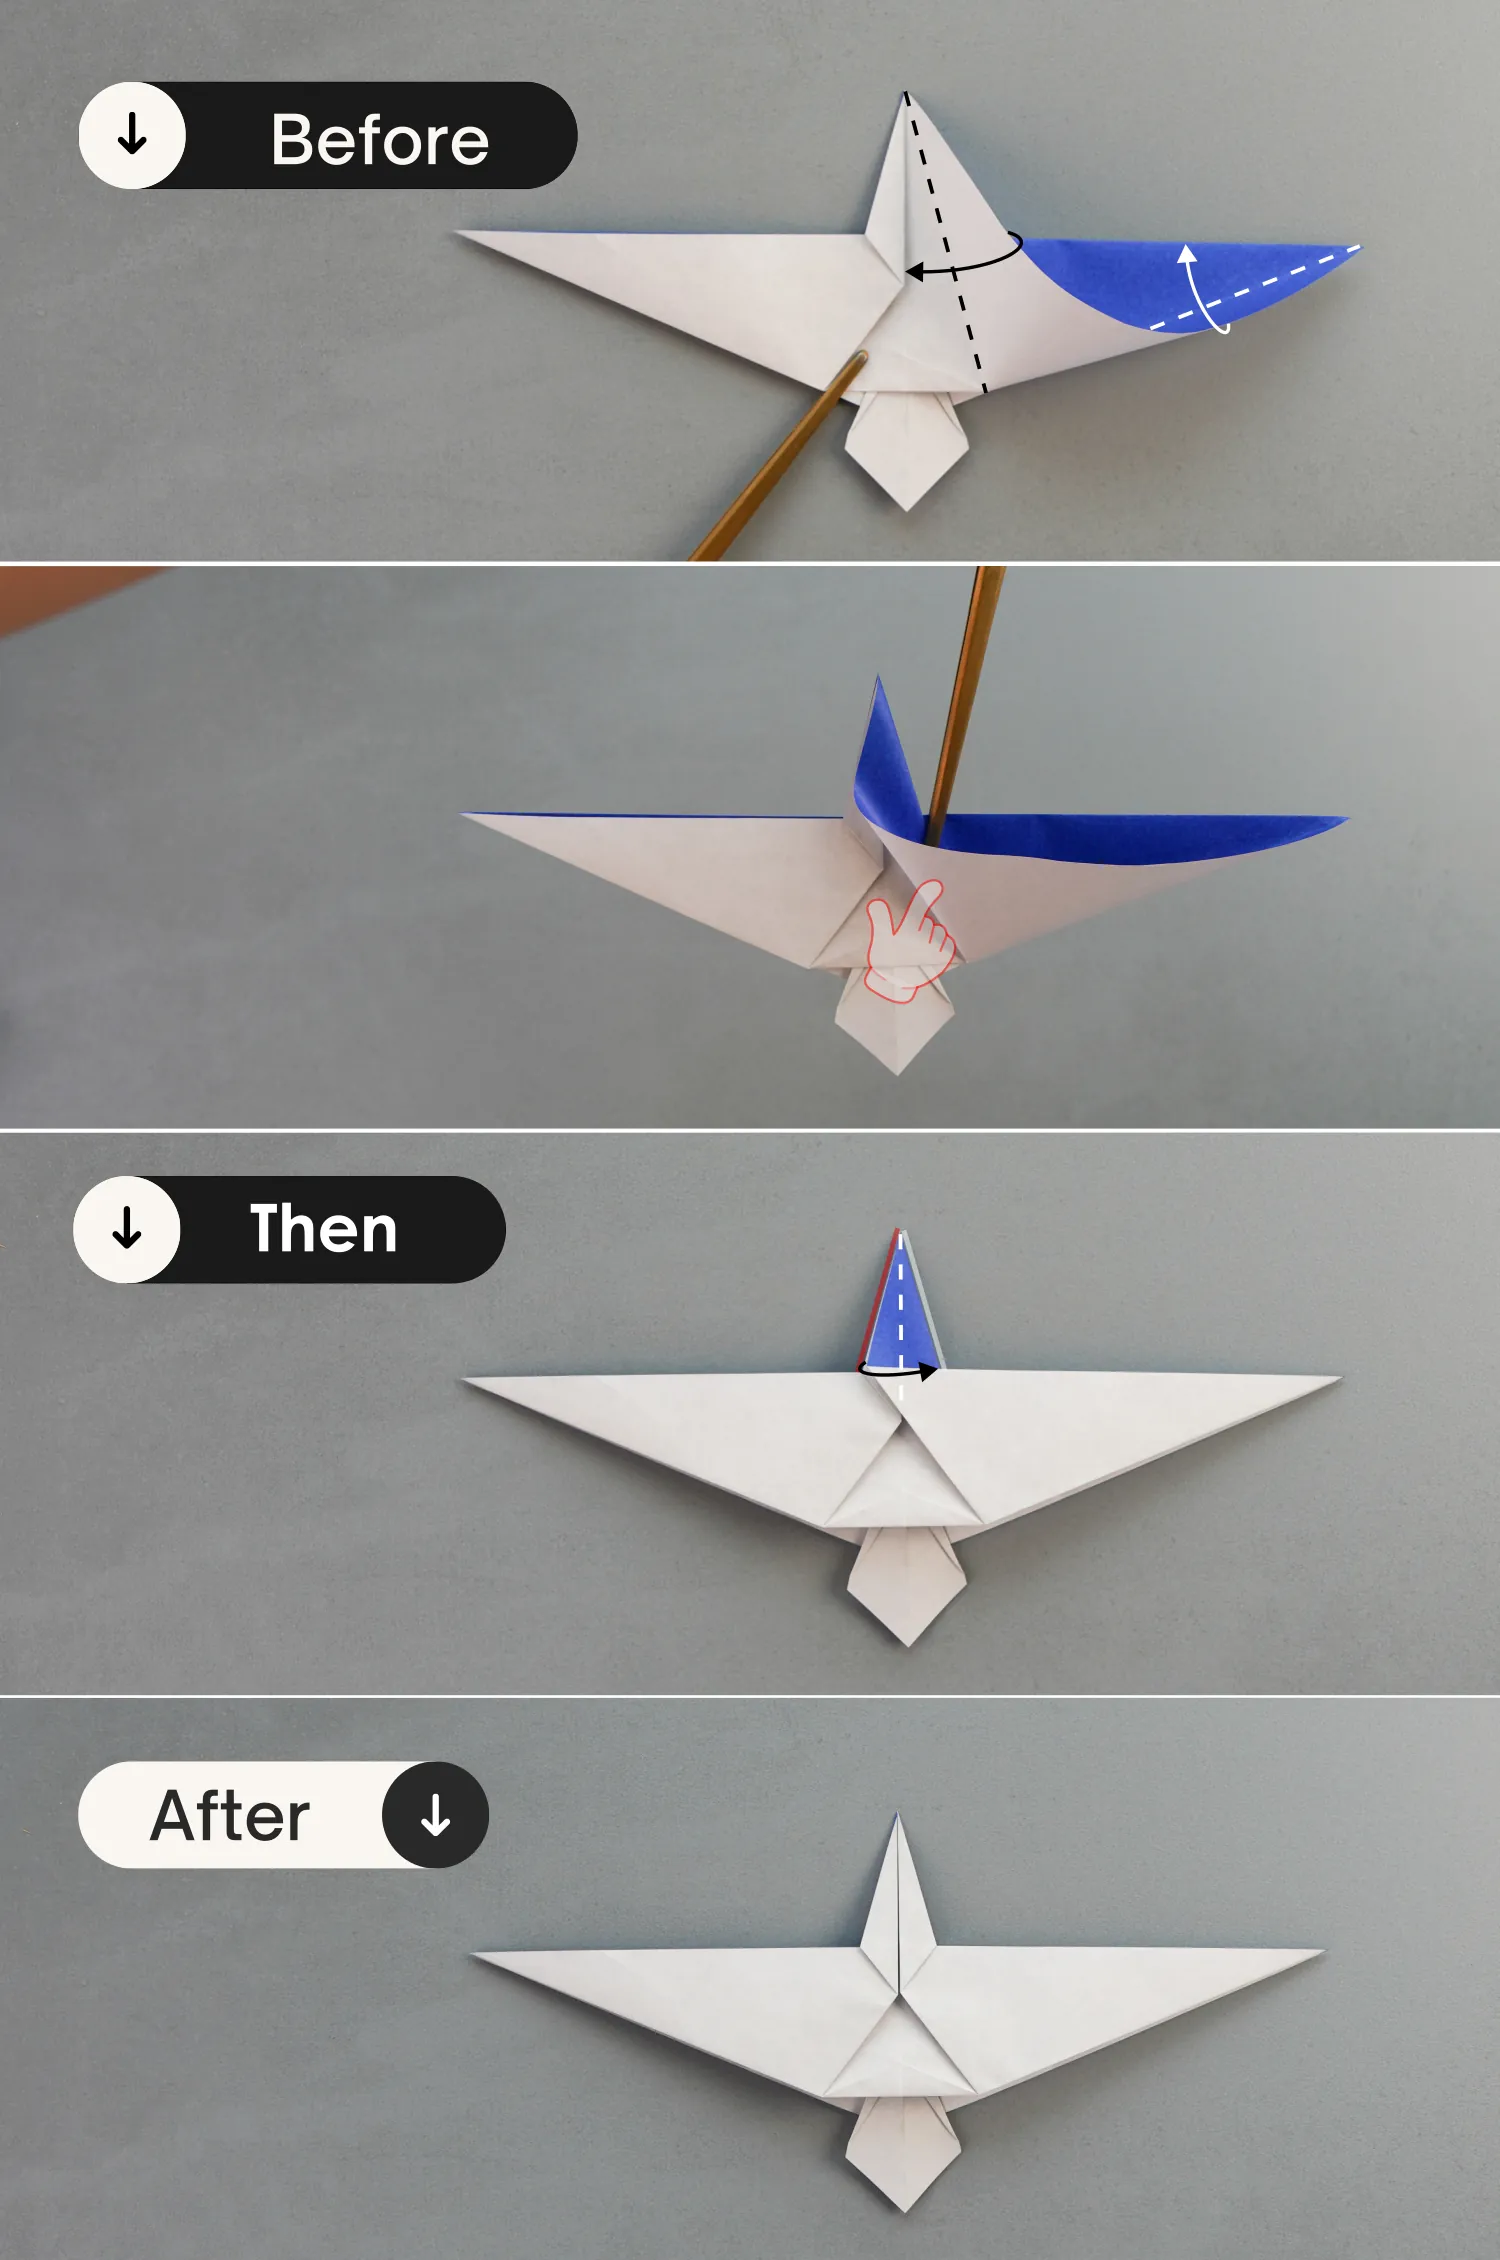
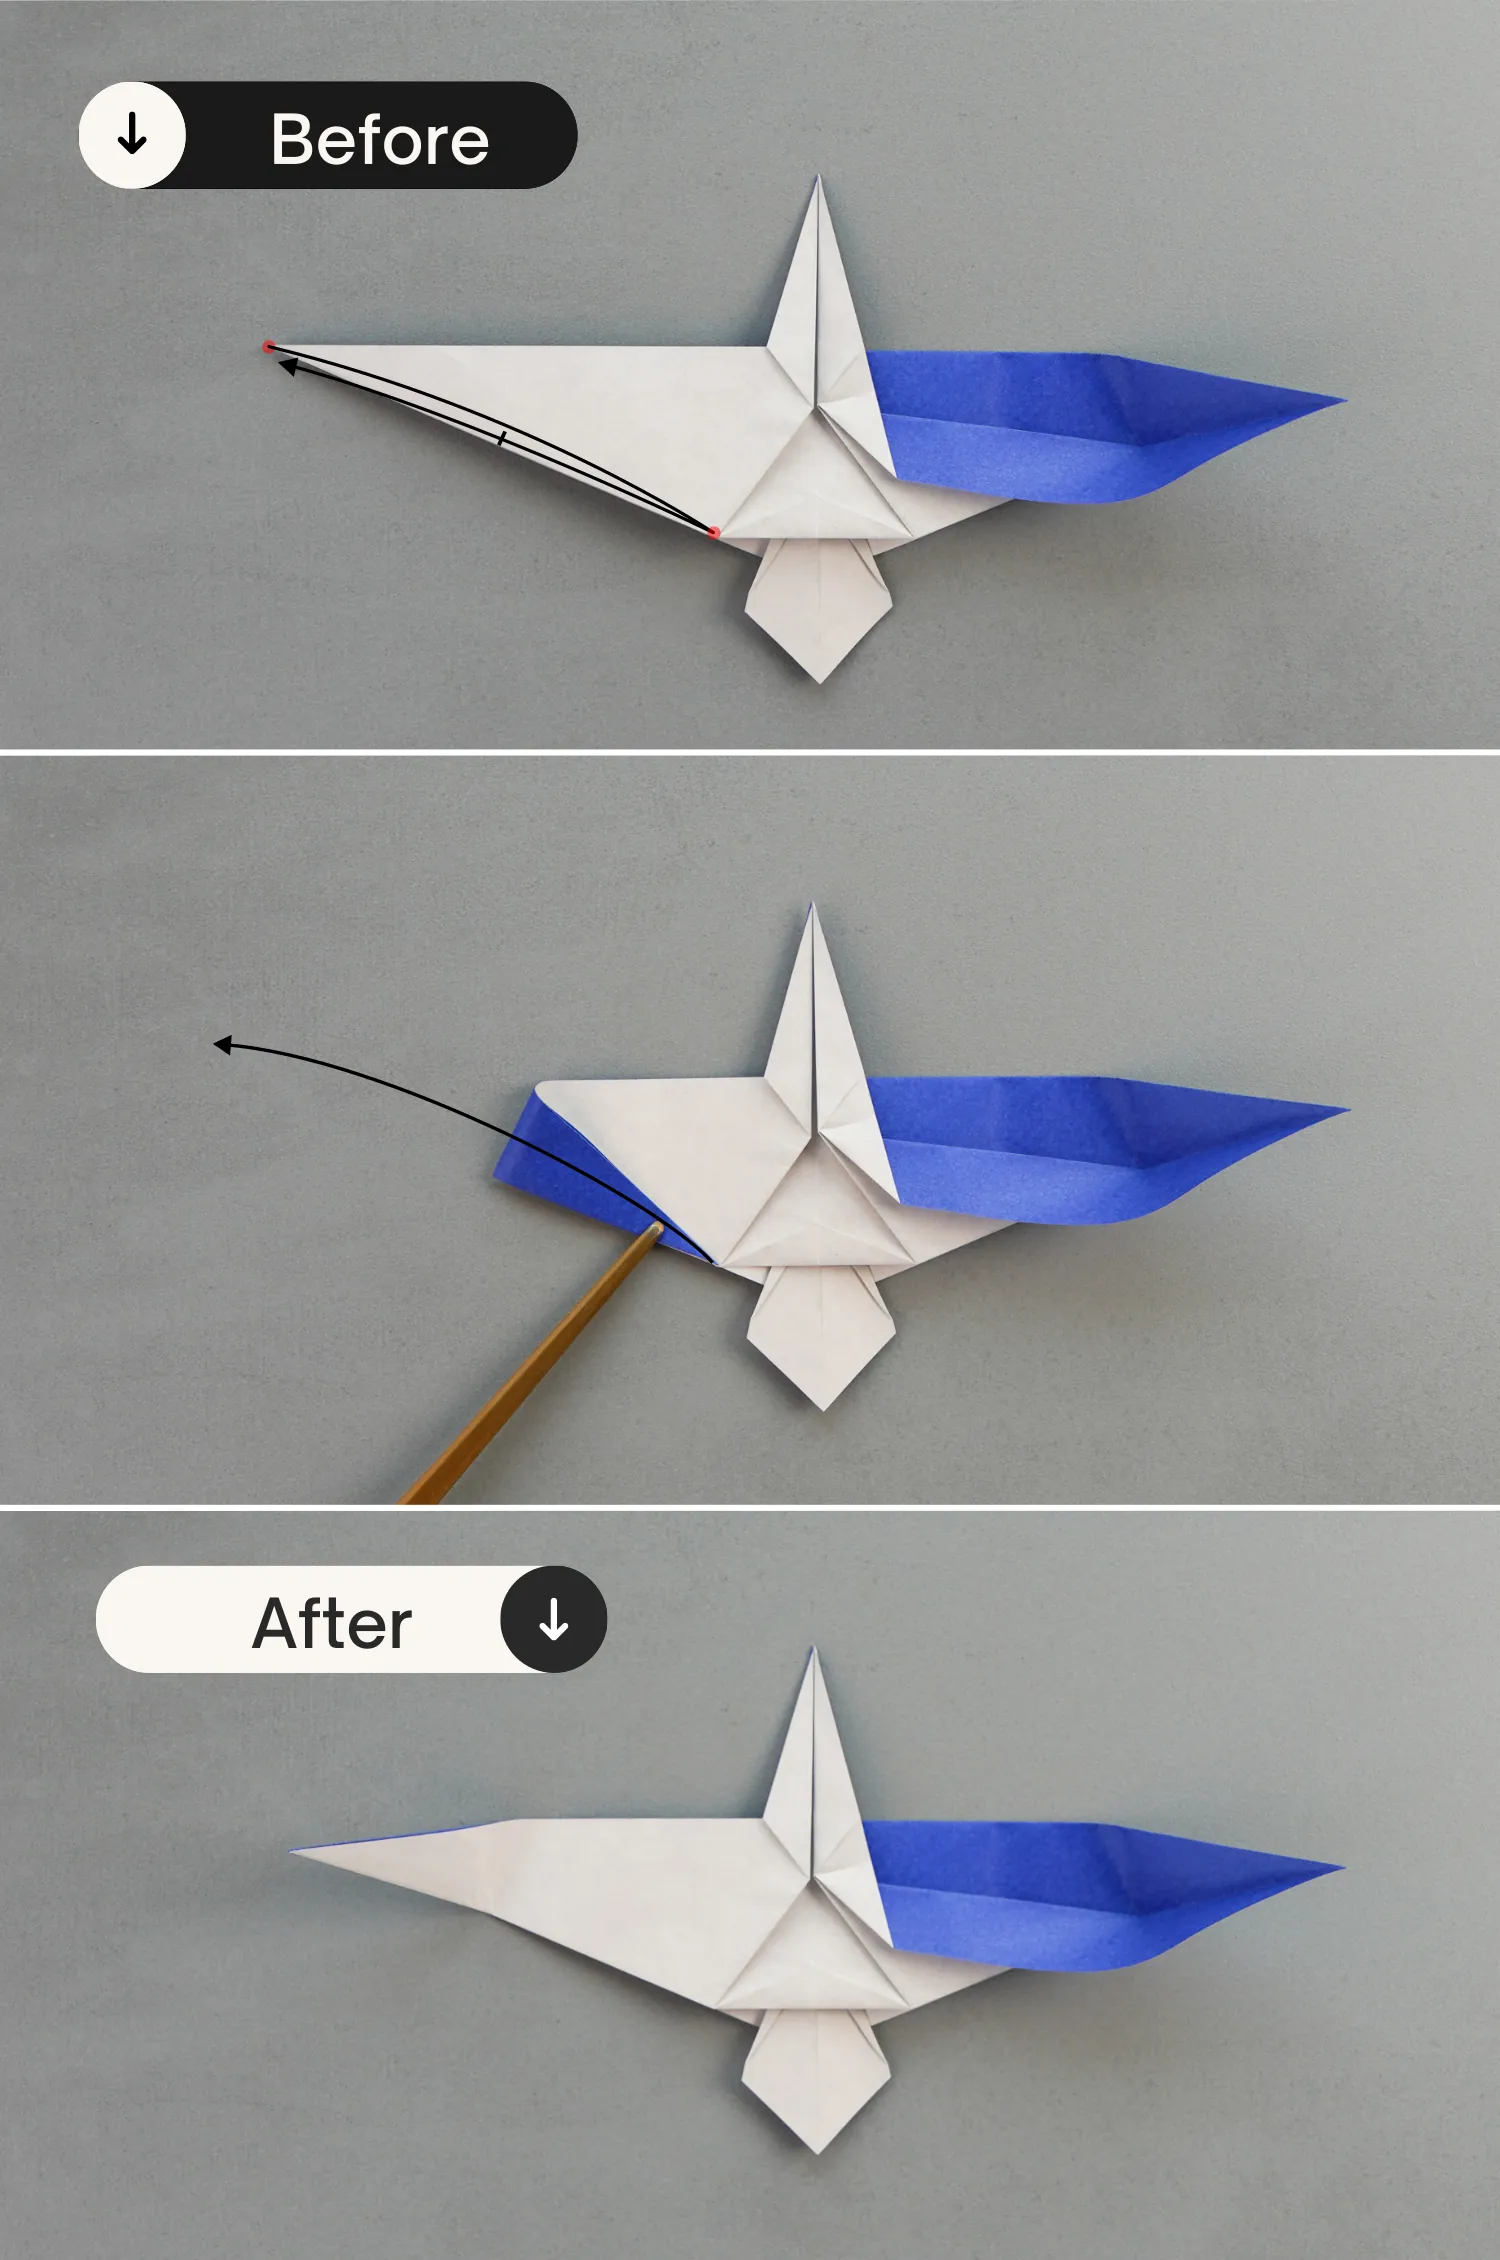
Fold the right point to meet the point shown by the red spot, crease it well then unfold.
Step 26
Lift the right layer on the top to the left, then fold the top edge of the right part down along the dotted line, and finally flatten the fold.
Step 27
Fold the left point to the right to meet the red spot, mark the crease point then unfold.
Step 28
Fold the left layer on the top to the right, then fold the top edge of the left part down along the dotted line, and finally flatten the fold.

Step 29
Slightly press down the middle white part, and push the intersection point formed by these three creases from the bottom to the top, while pressing down the right tip, making the right part arch, and finally pushing the middle white part to its original position.

Step 30
Repeat this for the left side, push the middle white part down a little, and push the intersection point formed by these three creases from the bottom to the top, while pressing down the left tip, making the left part arch, and finally pushing the middle white part to its original position.
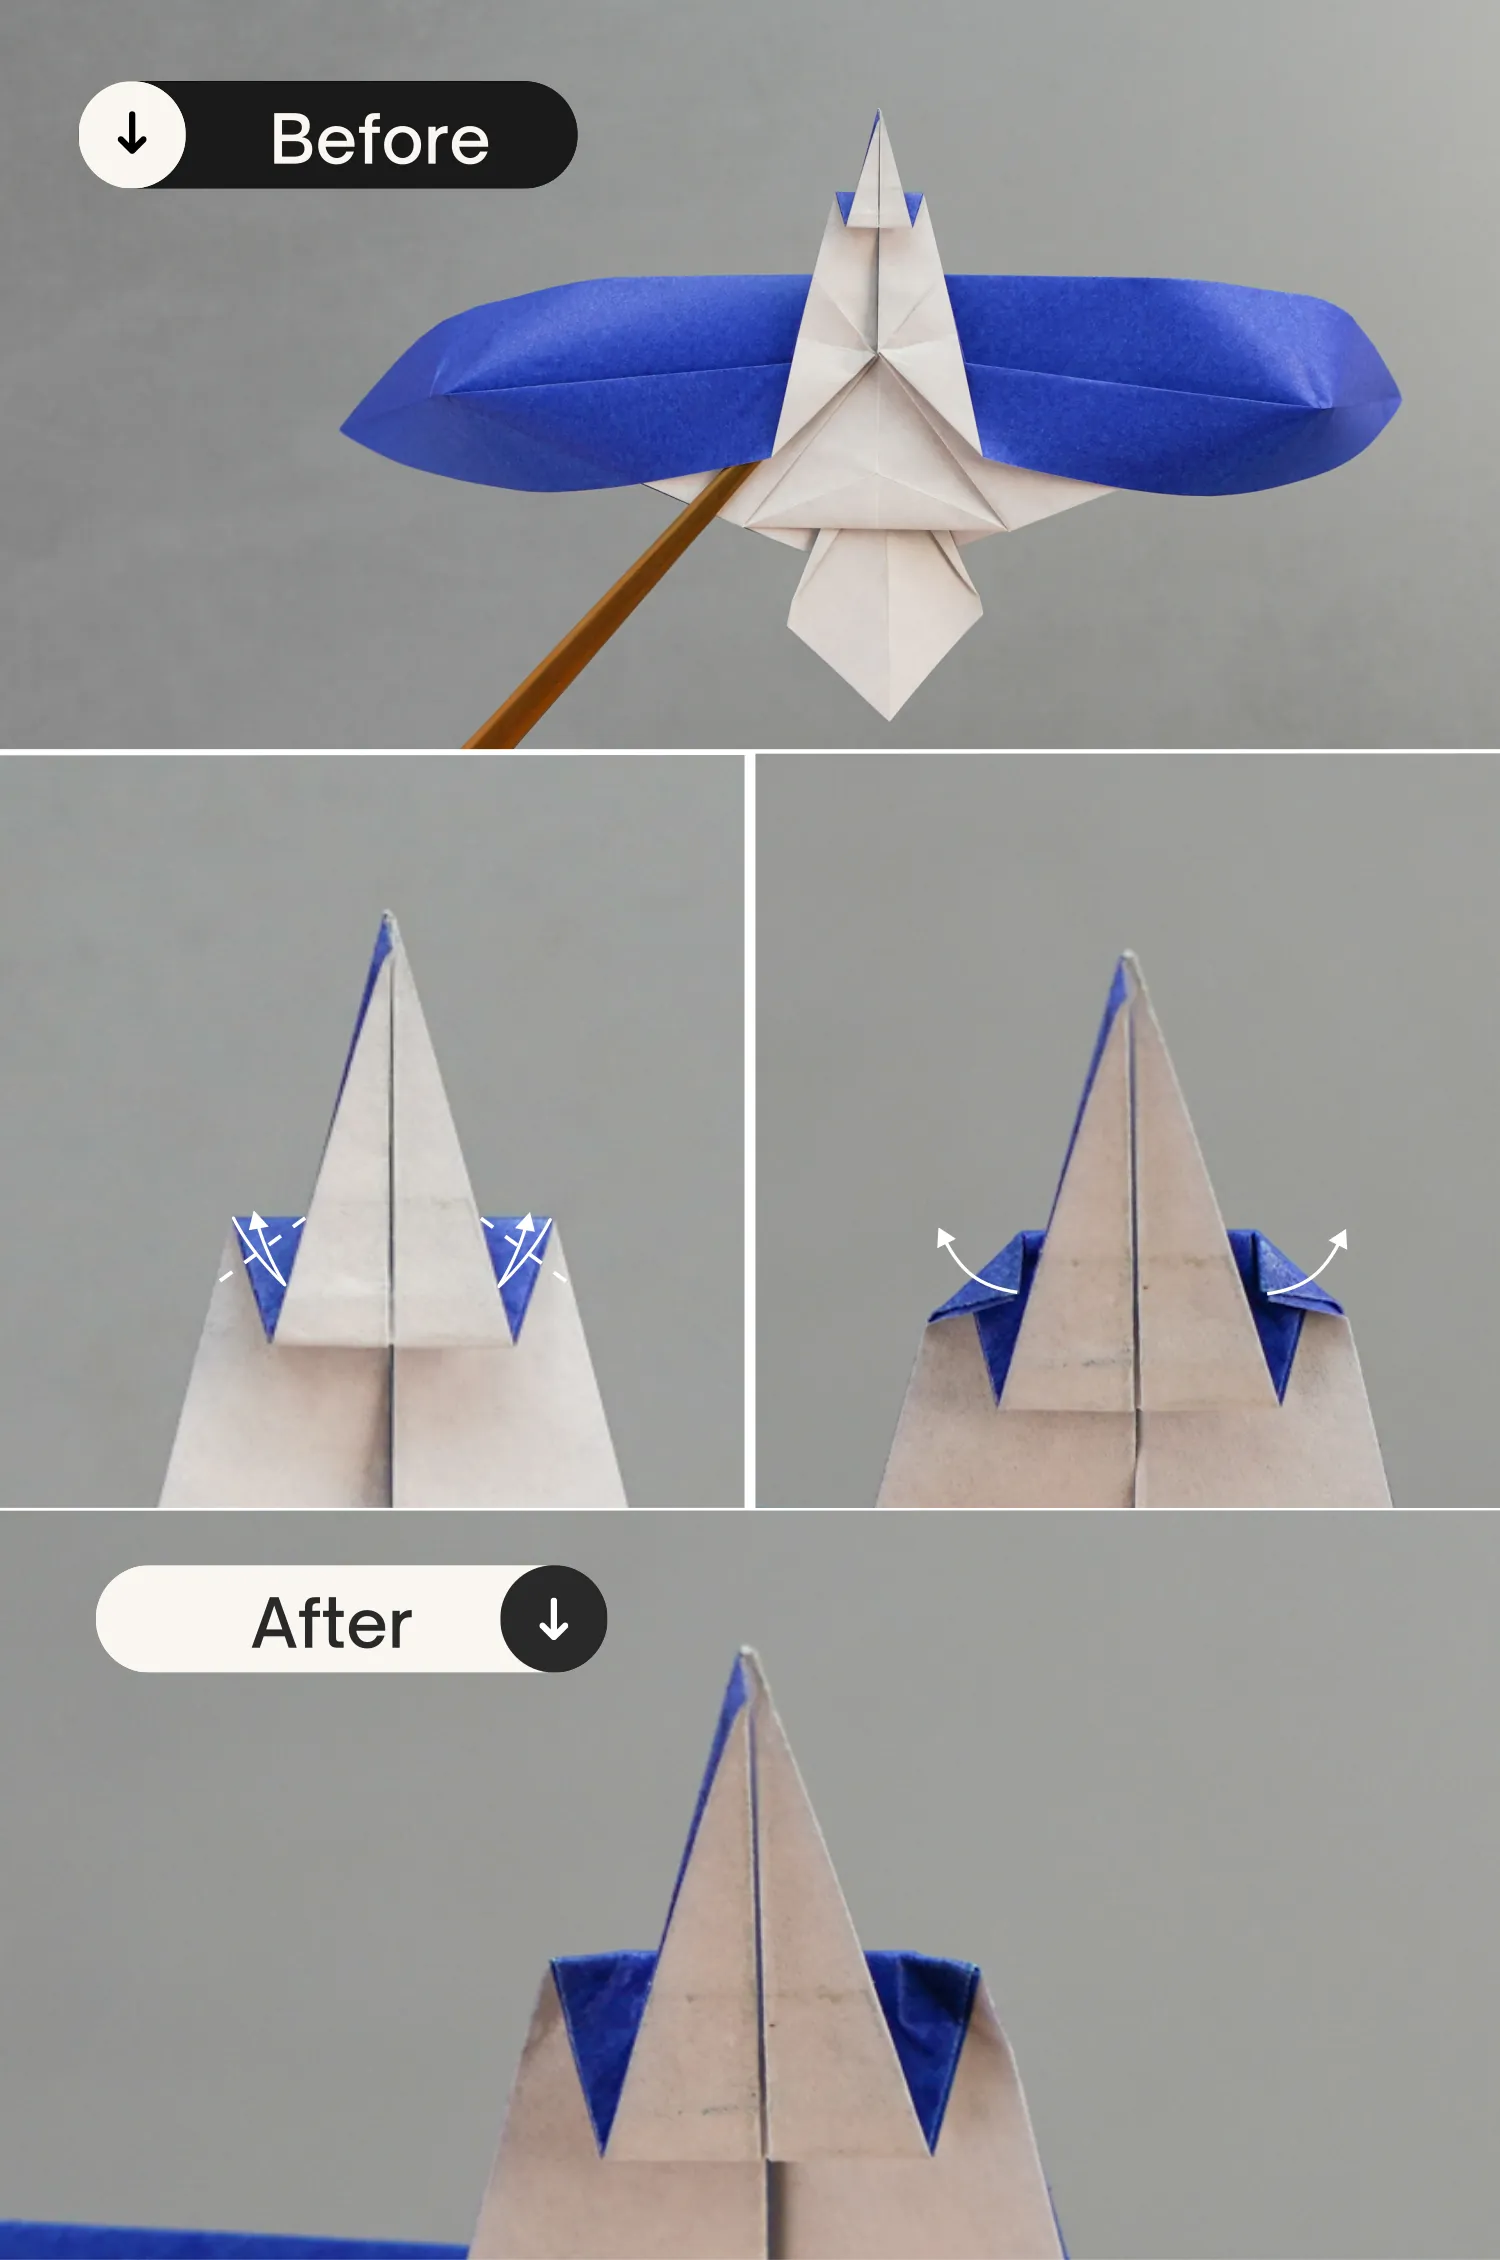
Step 31
Fold the top point down diagonally, then fold it back to the top for a short section along the white dotted line.
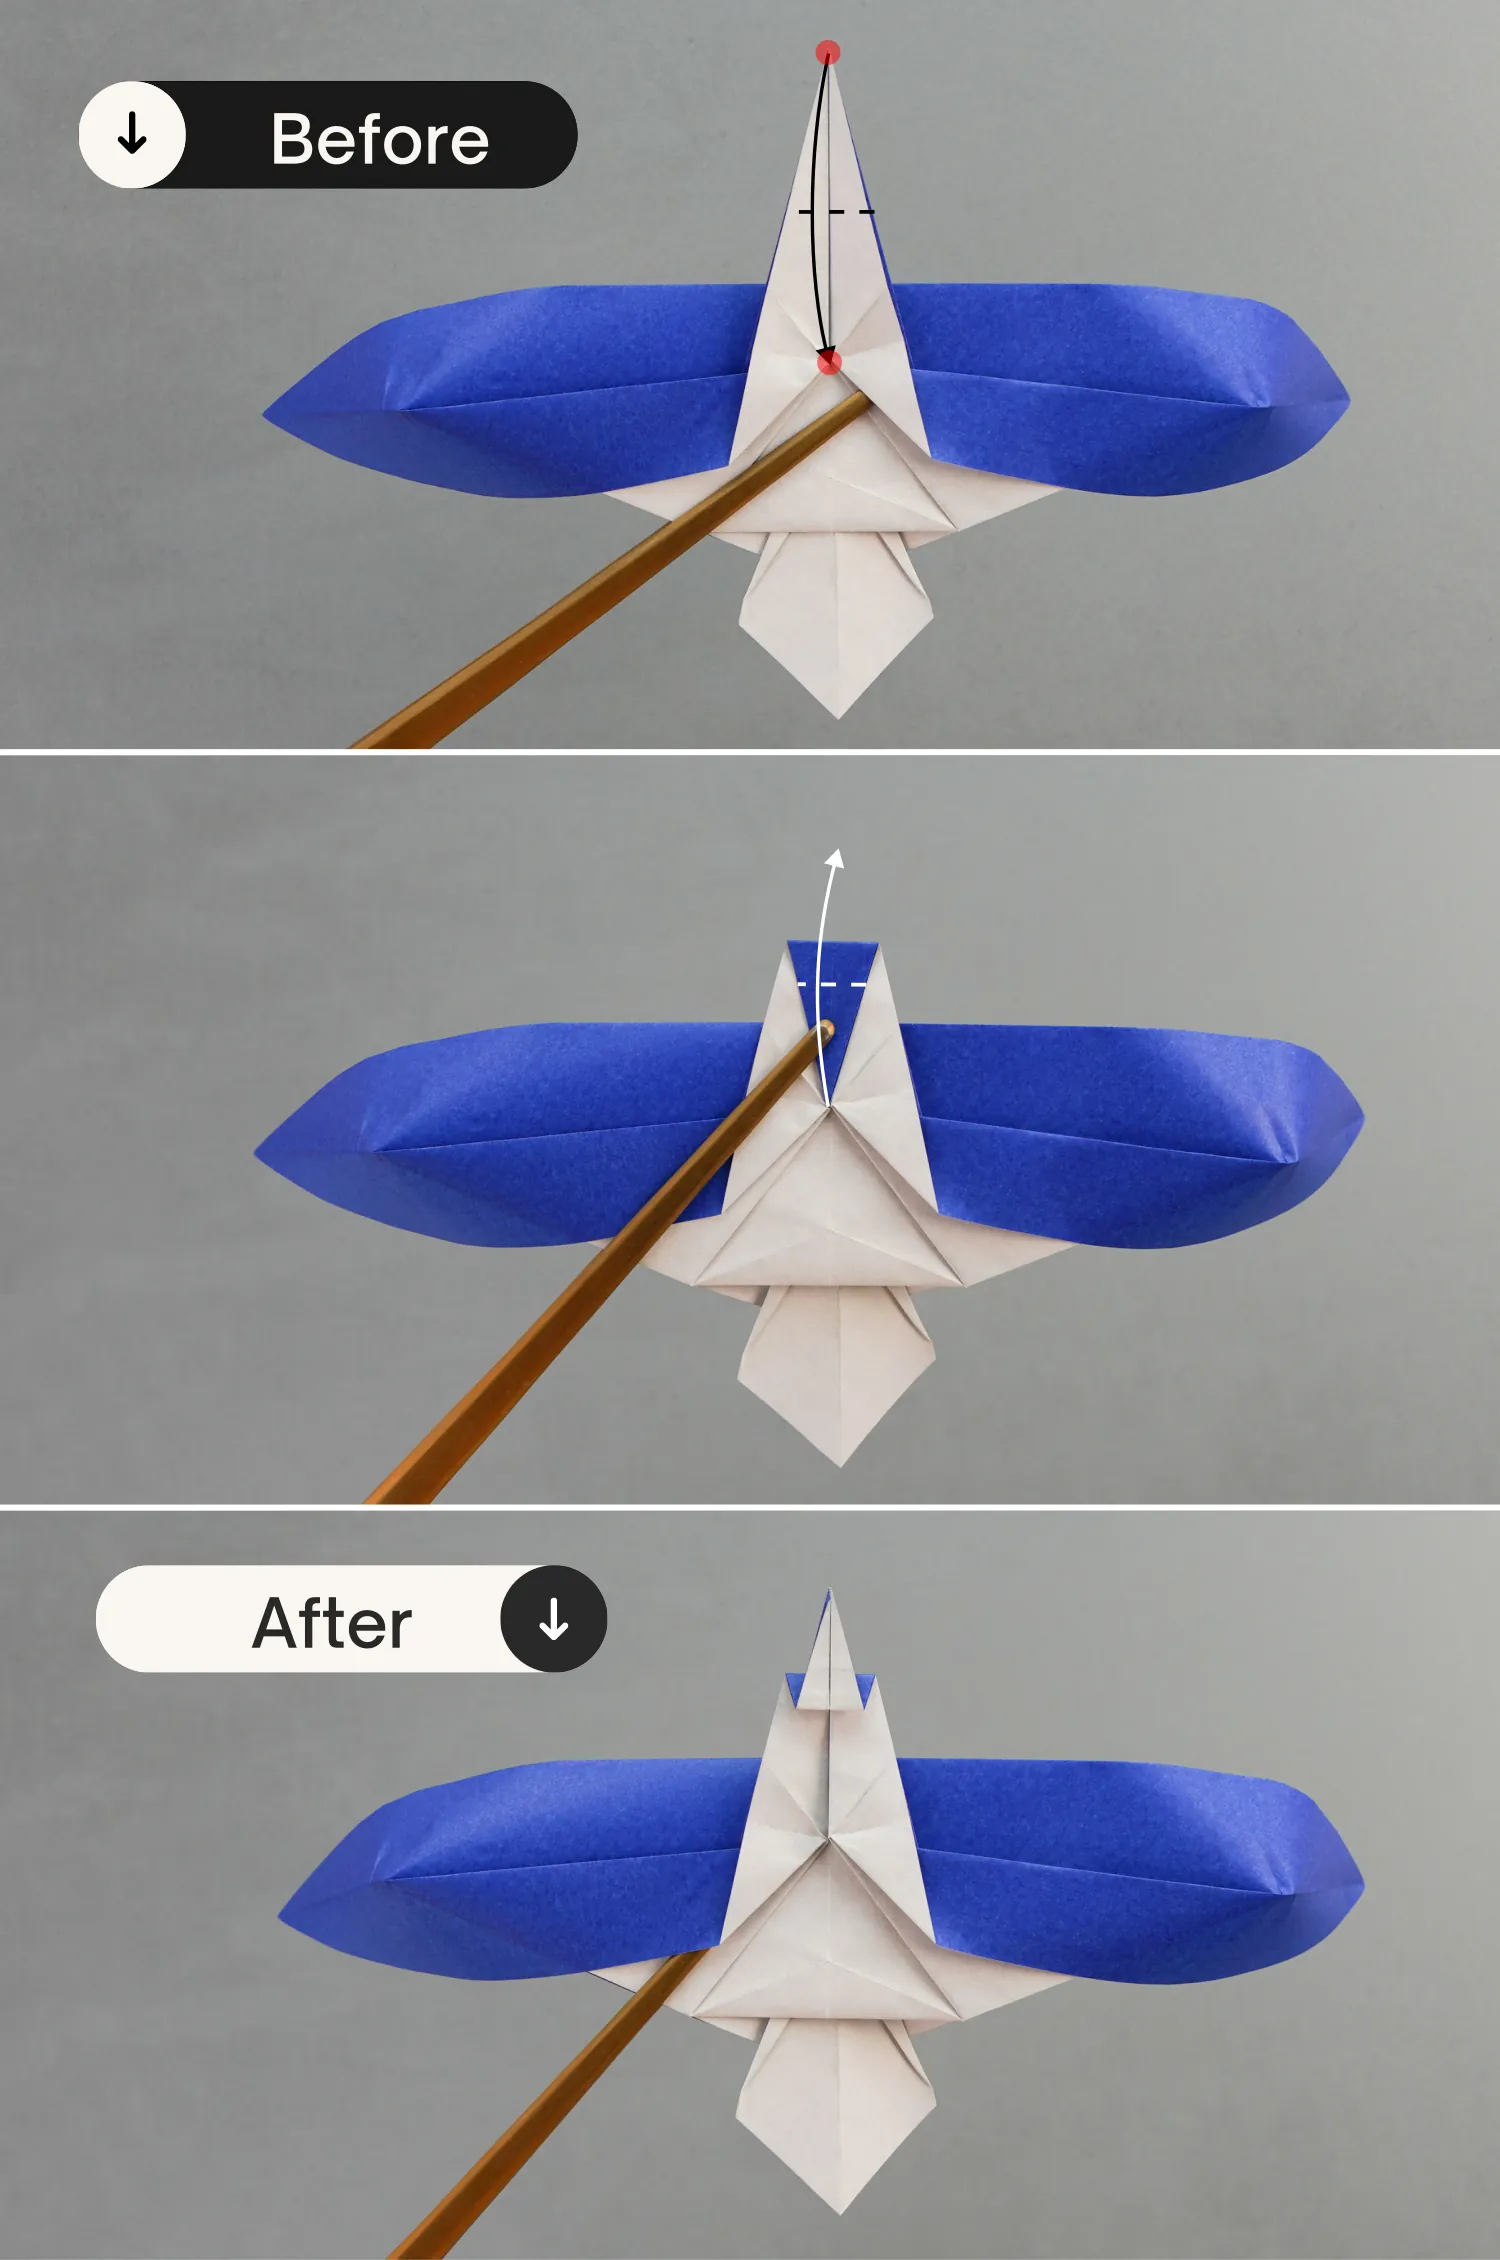
Step 32
Fold down the left and right corners formed in the previous step, crease them well then unfold.
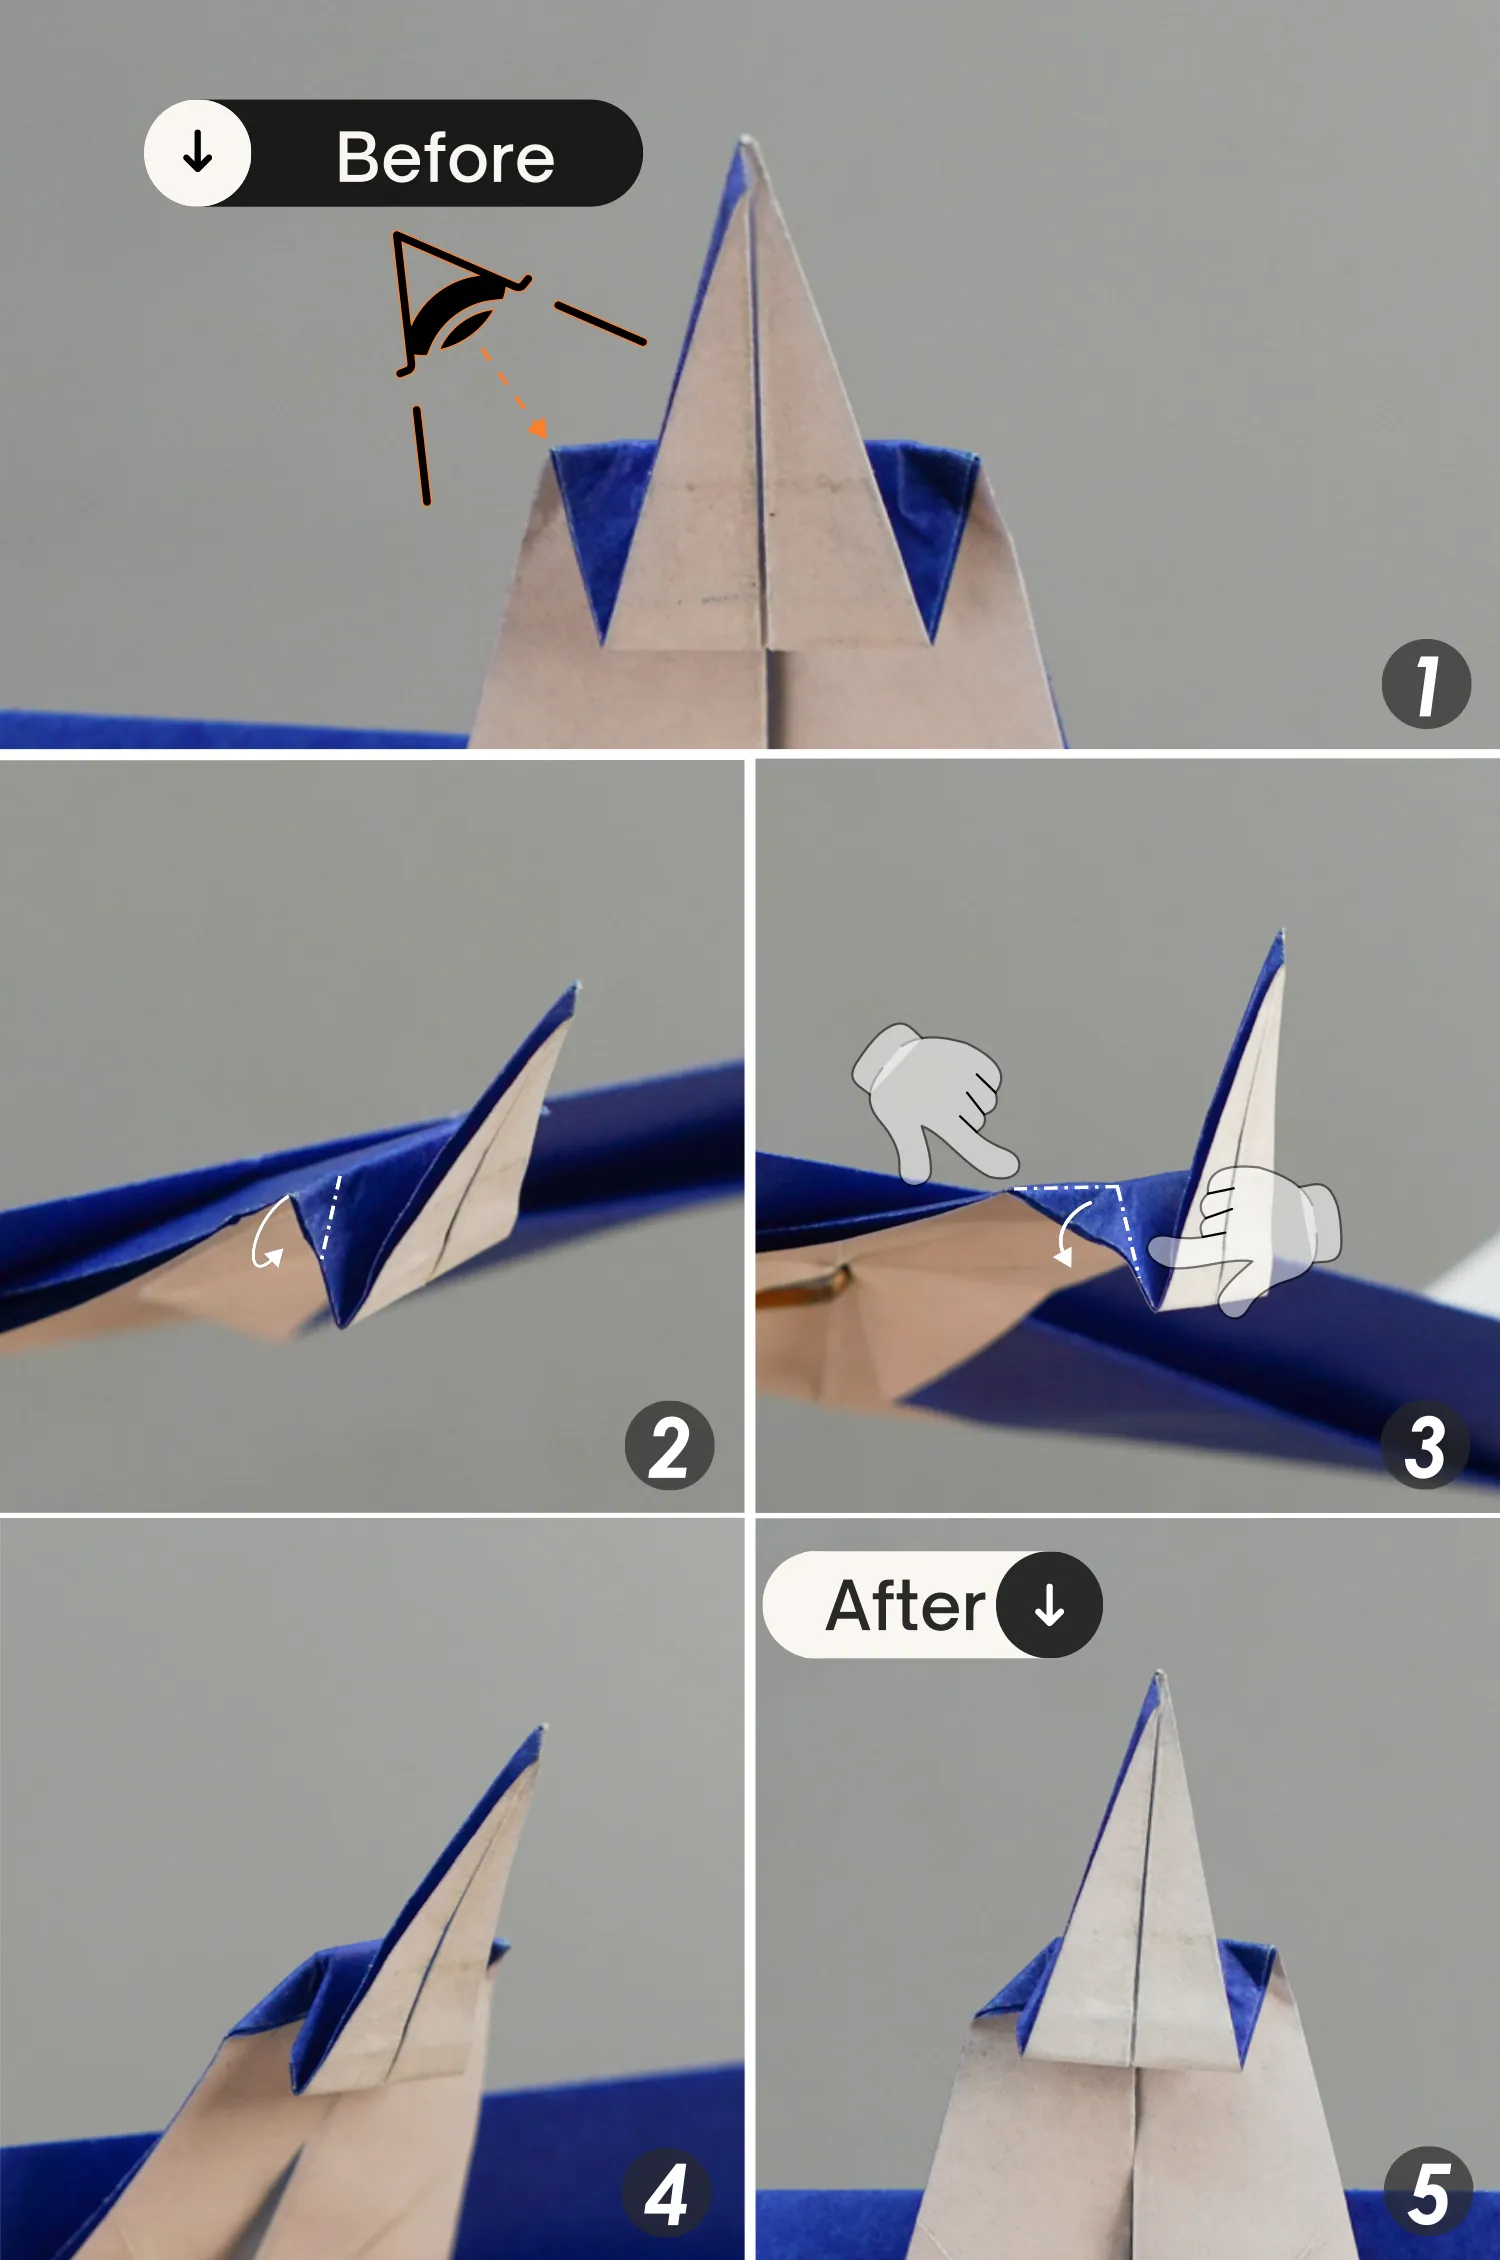
Step 33
View it from the top left side to focus on the left corner, open it, and press down the tip to make it tuck between the layers, and finally flatten it along the creases you made in the previous step.
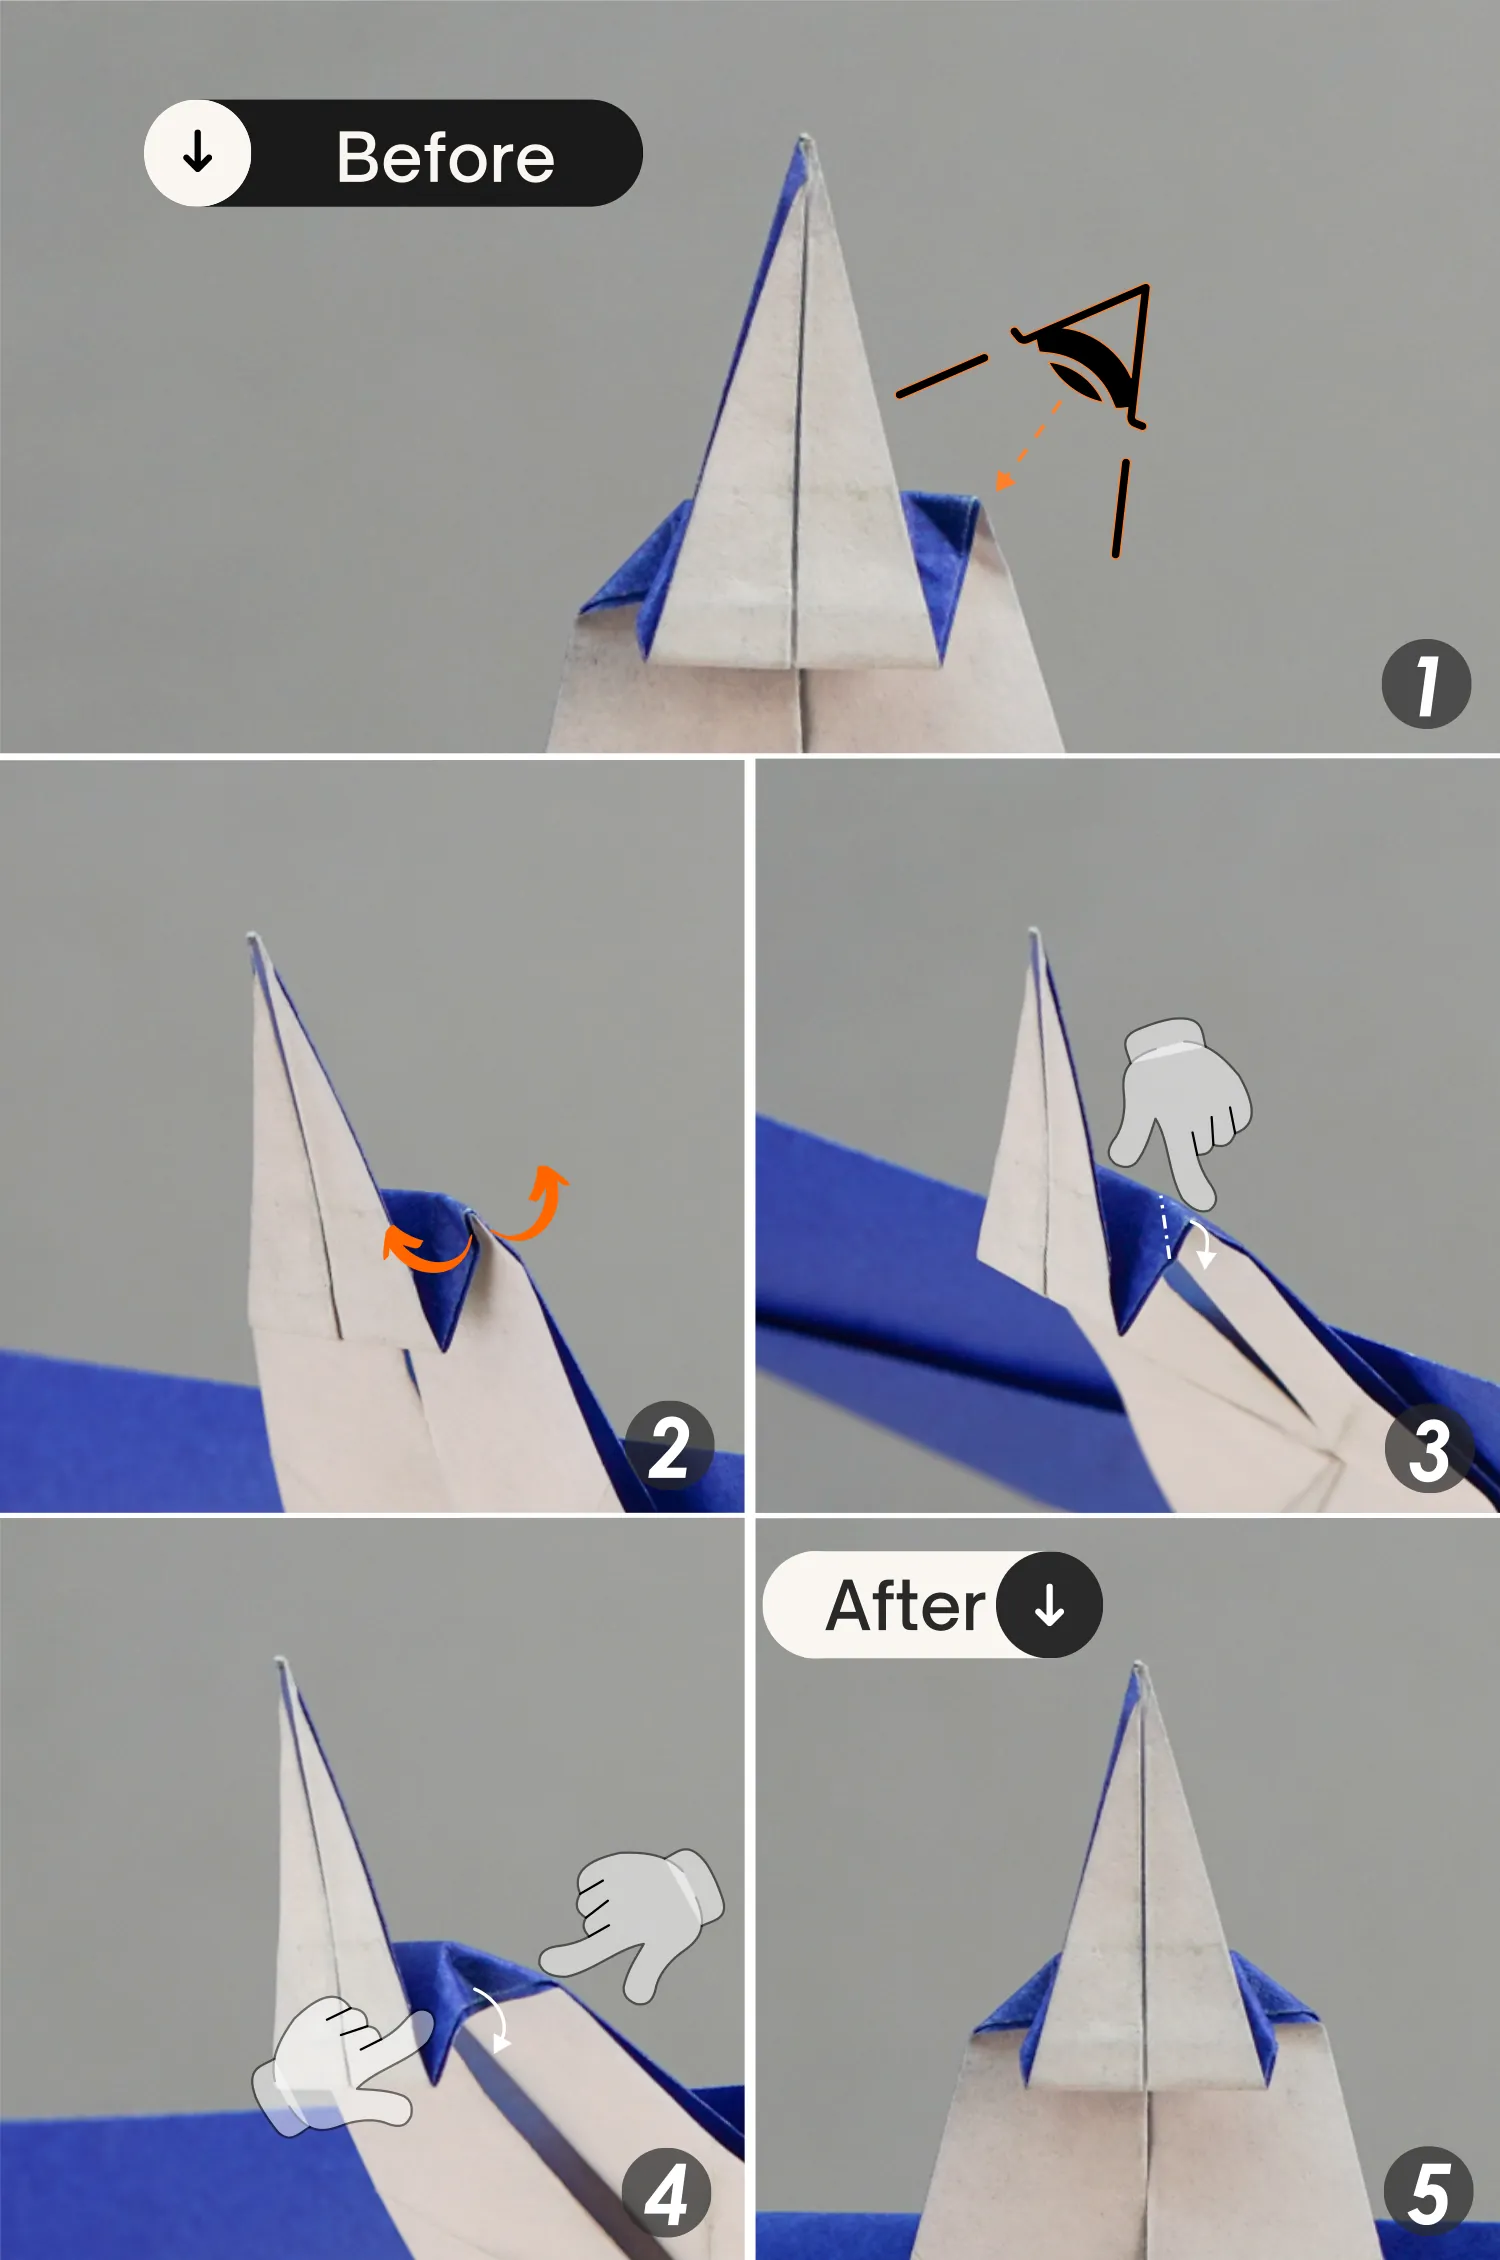
Step 34
Focus on the right corner and repeat the previous step, open this corner, press down the tip to make it tuck between the layers, and finally flatten the fold along the existing creases.
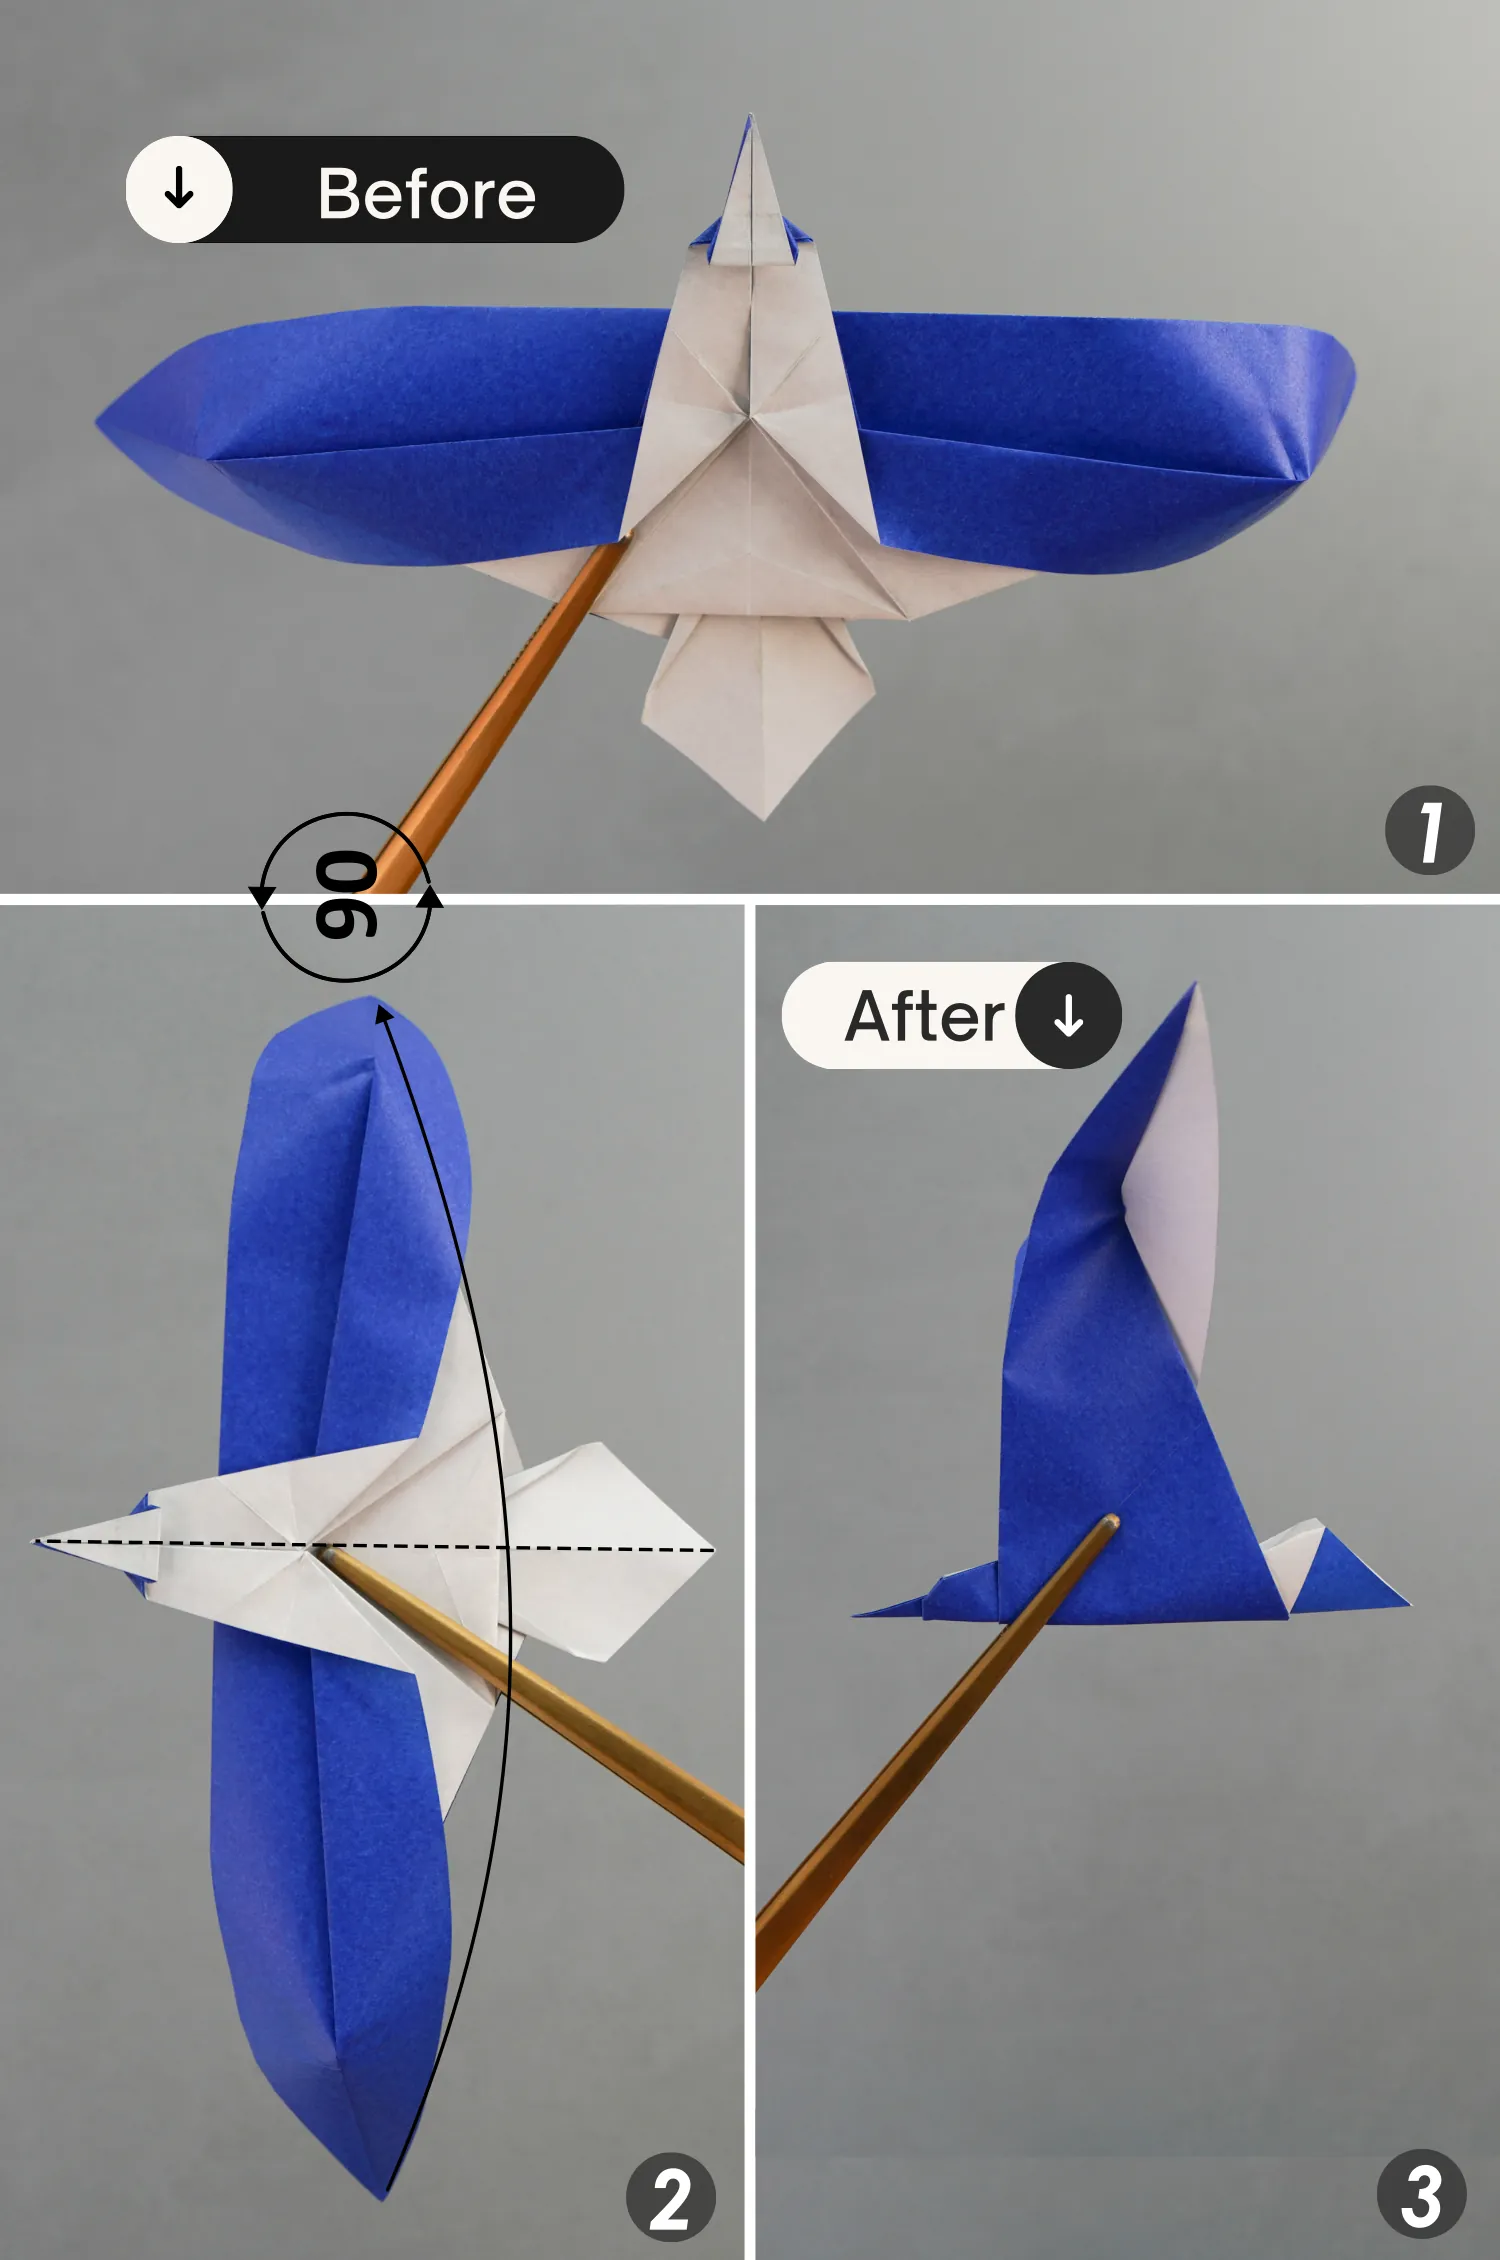
Step 35
Rotate it 90 degrees counterclockwise, and fold the paper in half from the bottom to the top.
Step 36
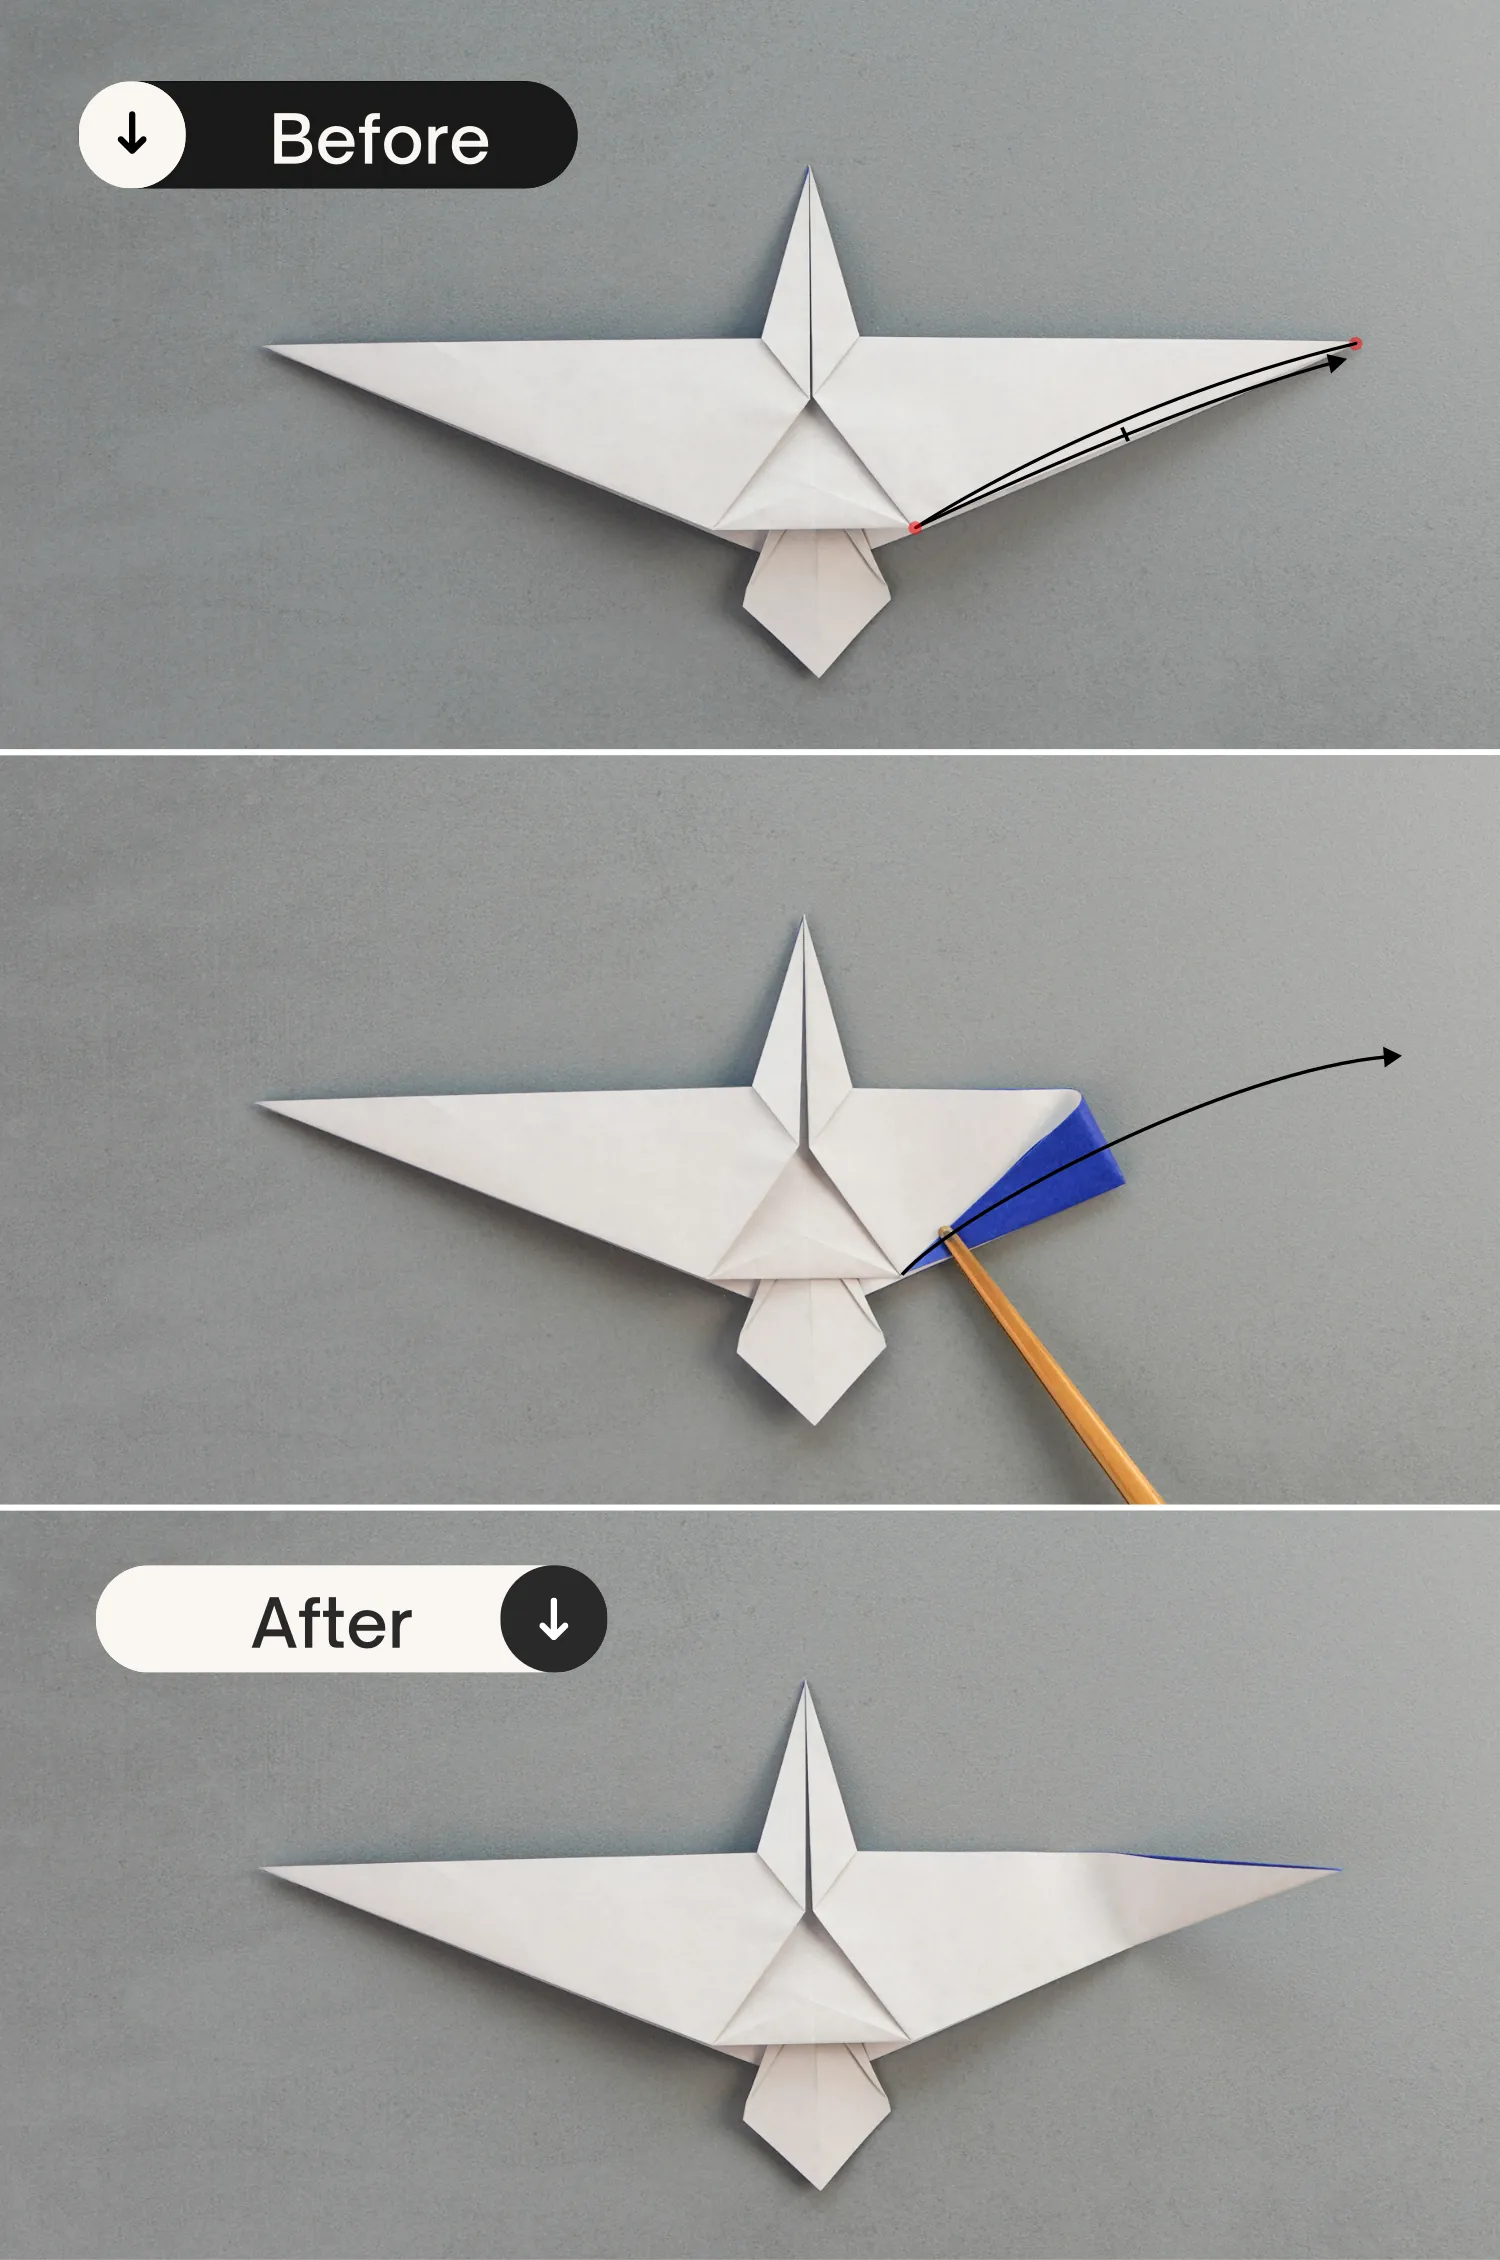
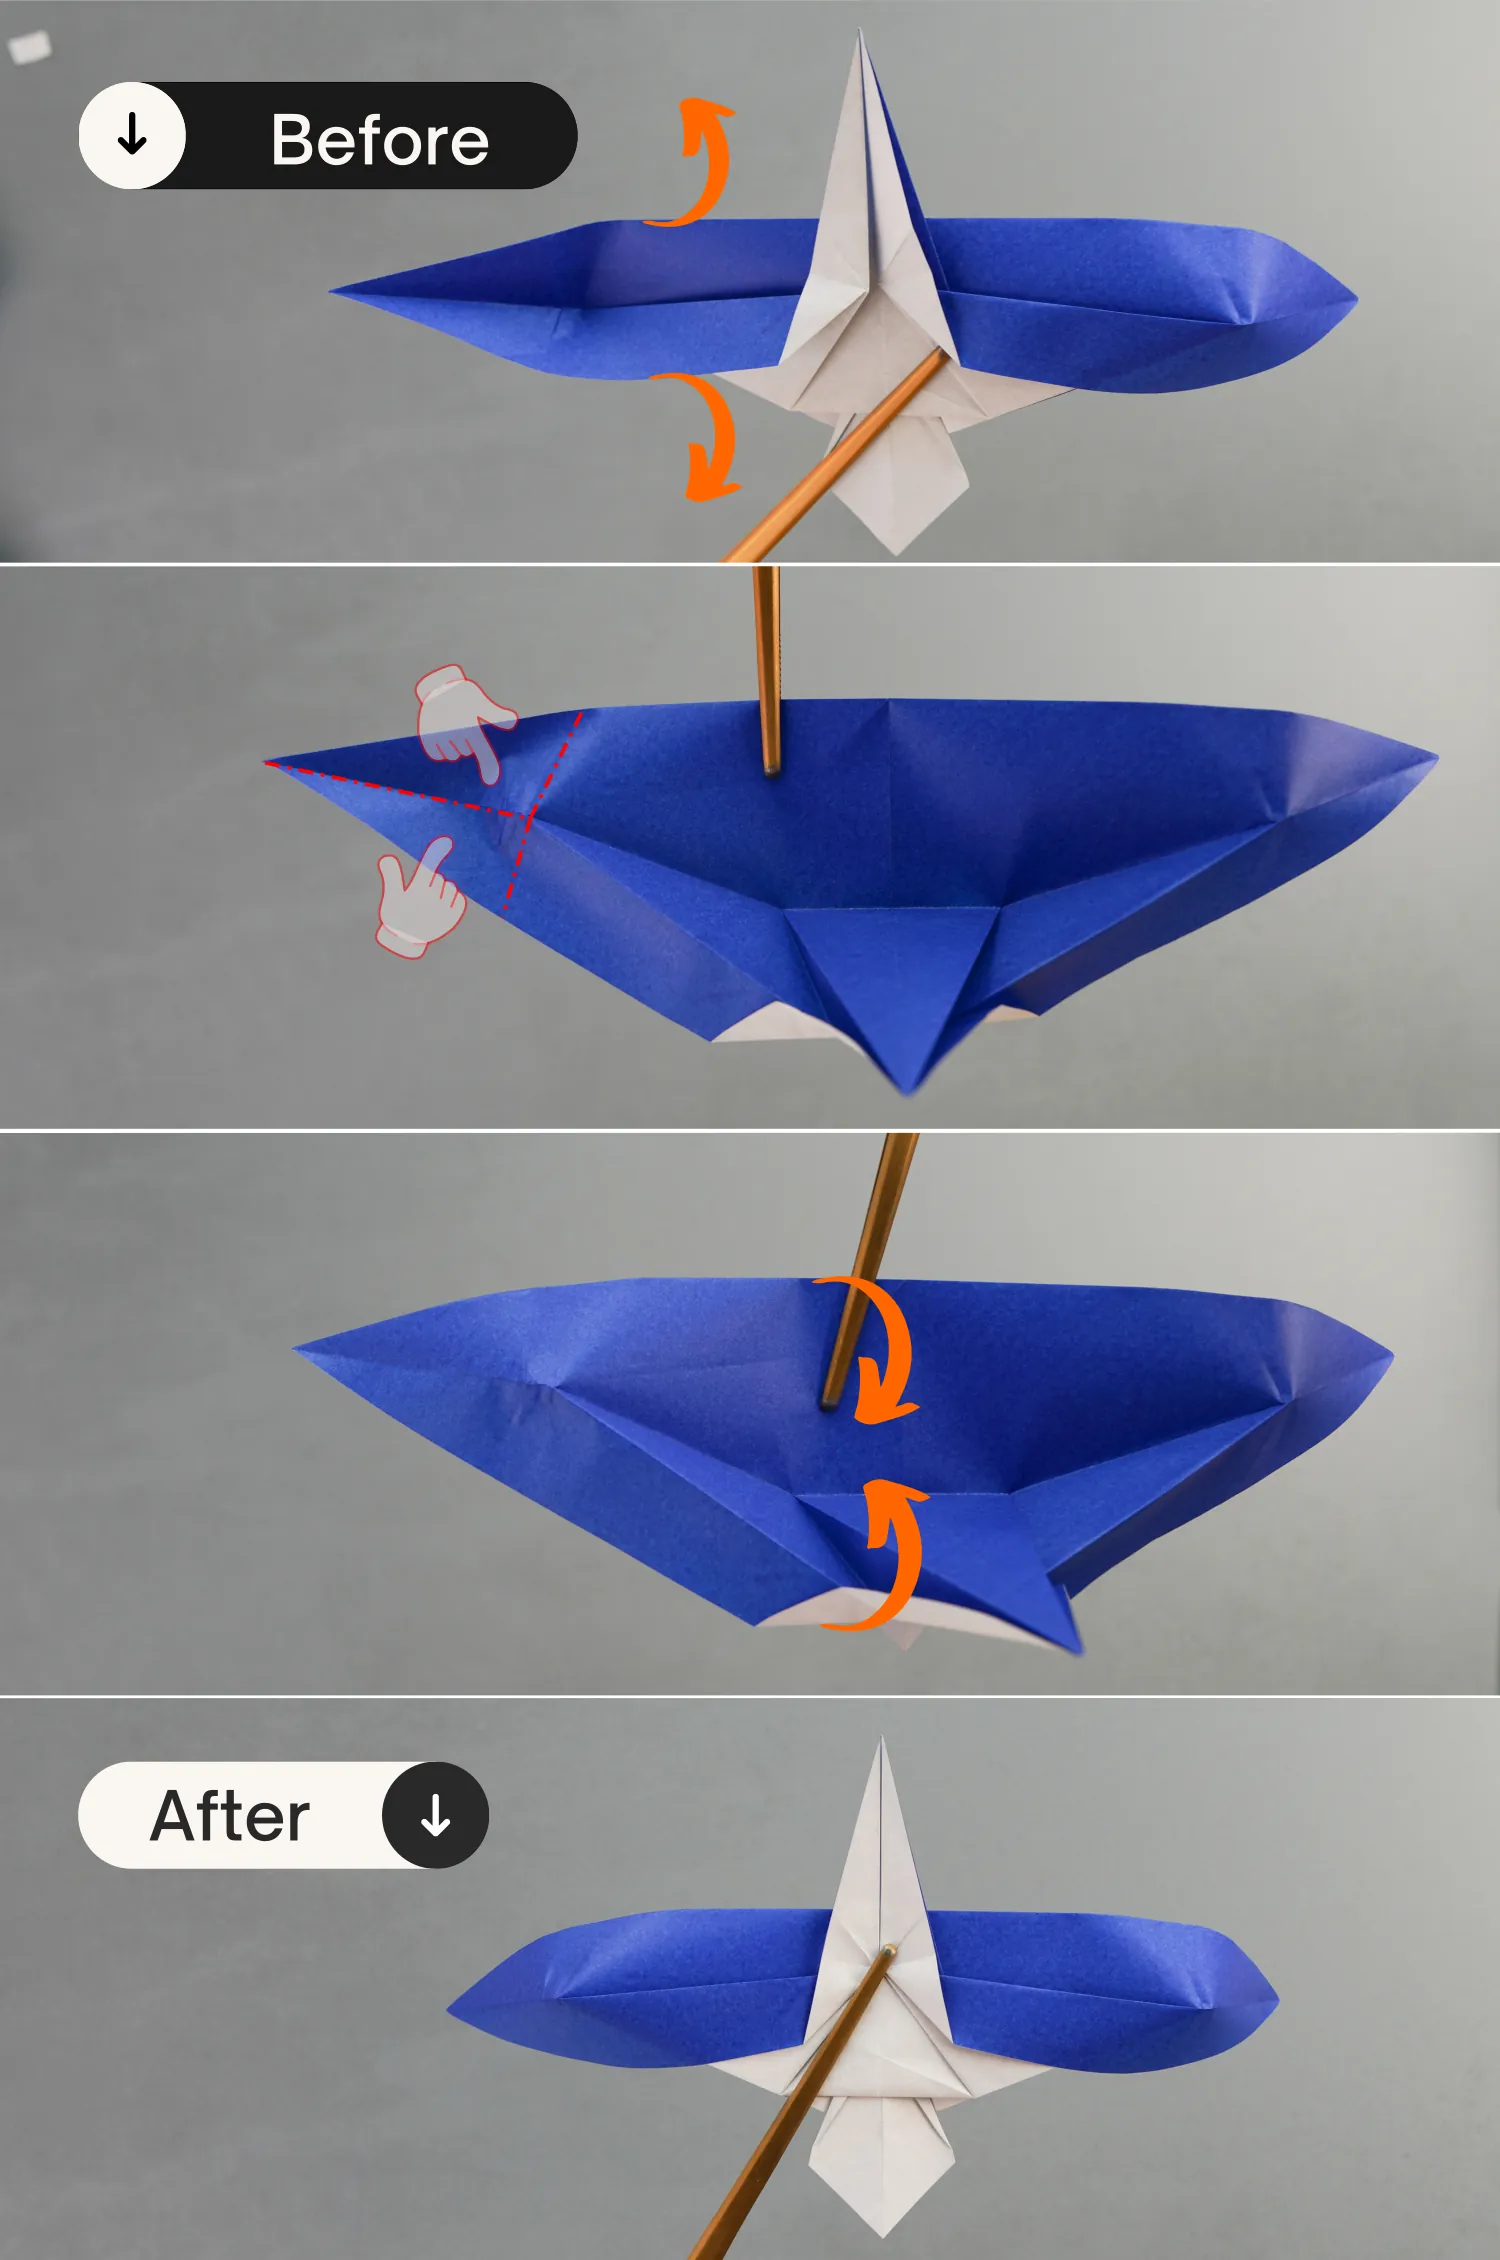
Fold up the bottom edge of the tail to align with its left edge, crease it well then unfold.
Step 37
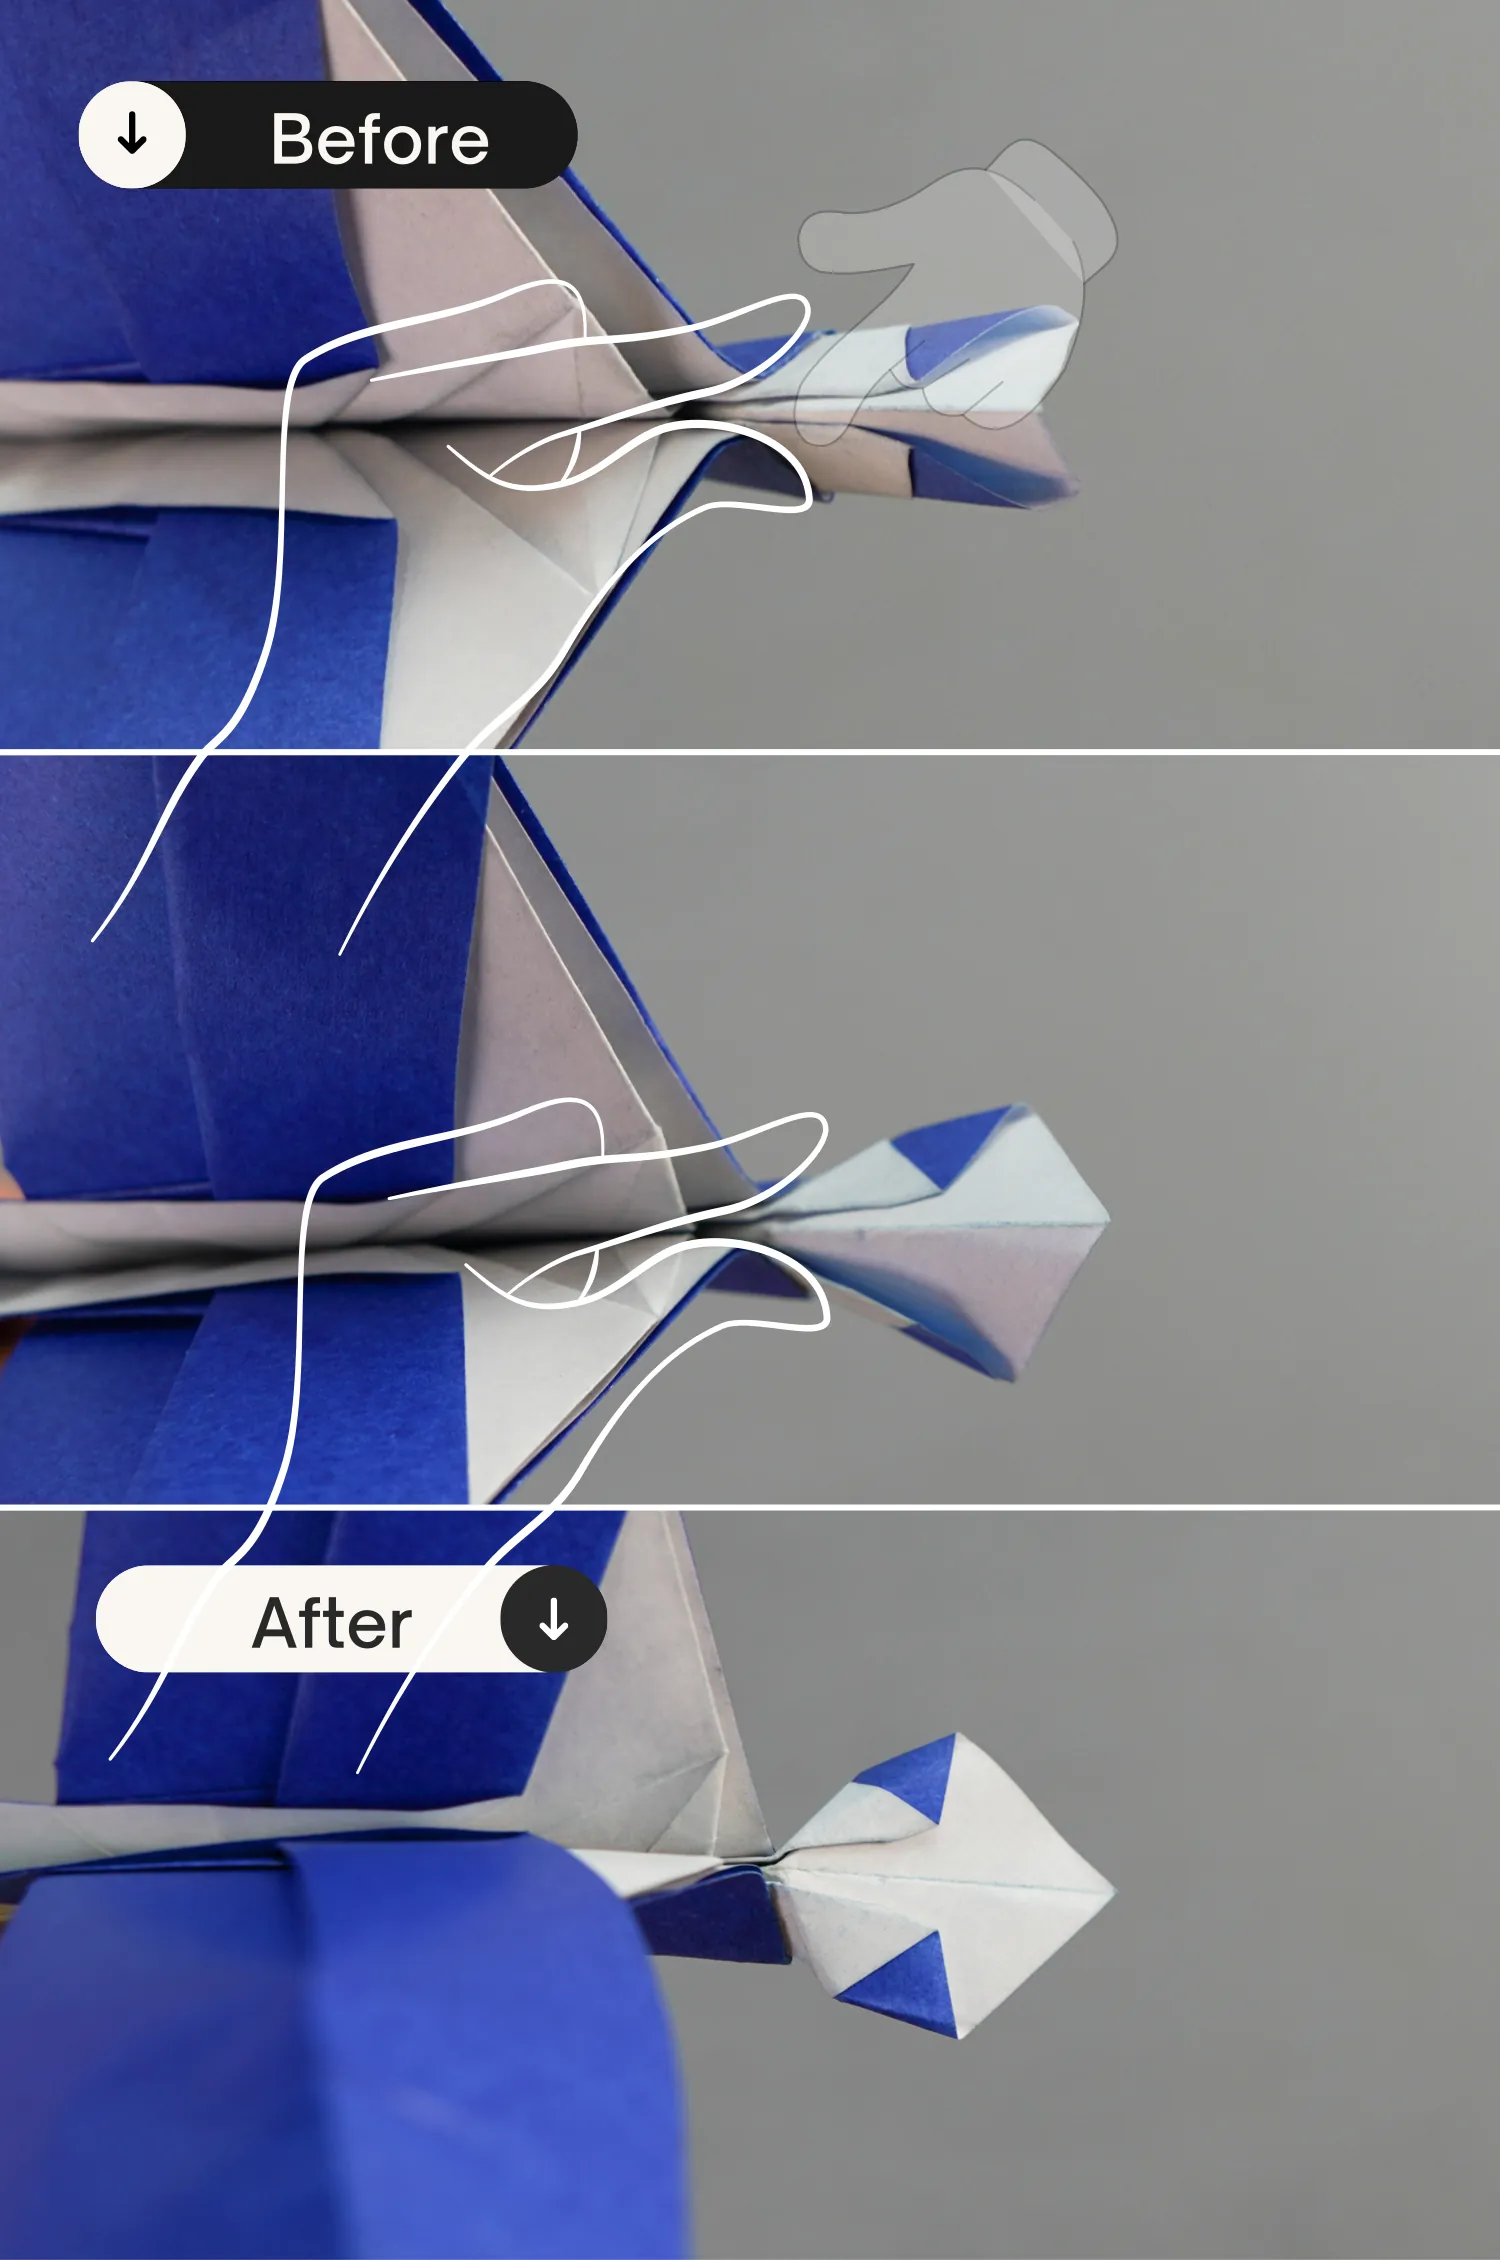
View the tail from the top side, expand it, and pinch its middle crease, then close it based on the creases on both sides you made in the previous step.
Step 38
Pinch the part of the tail that links to the body and spread the tail flat.
Step 39
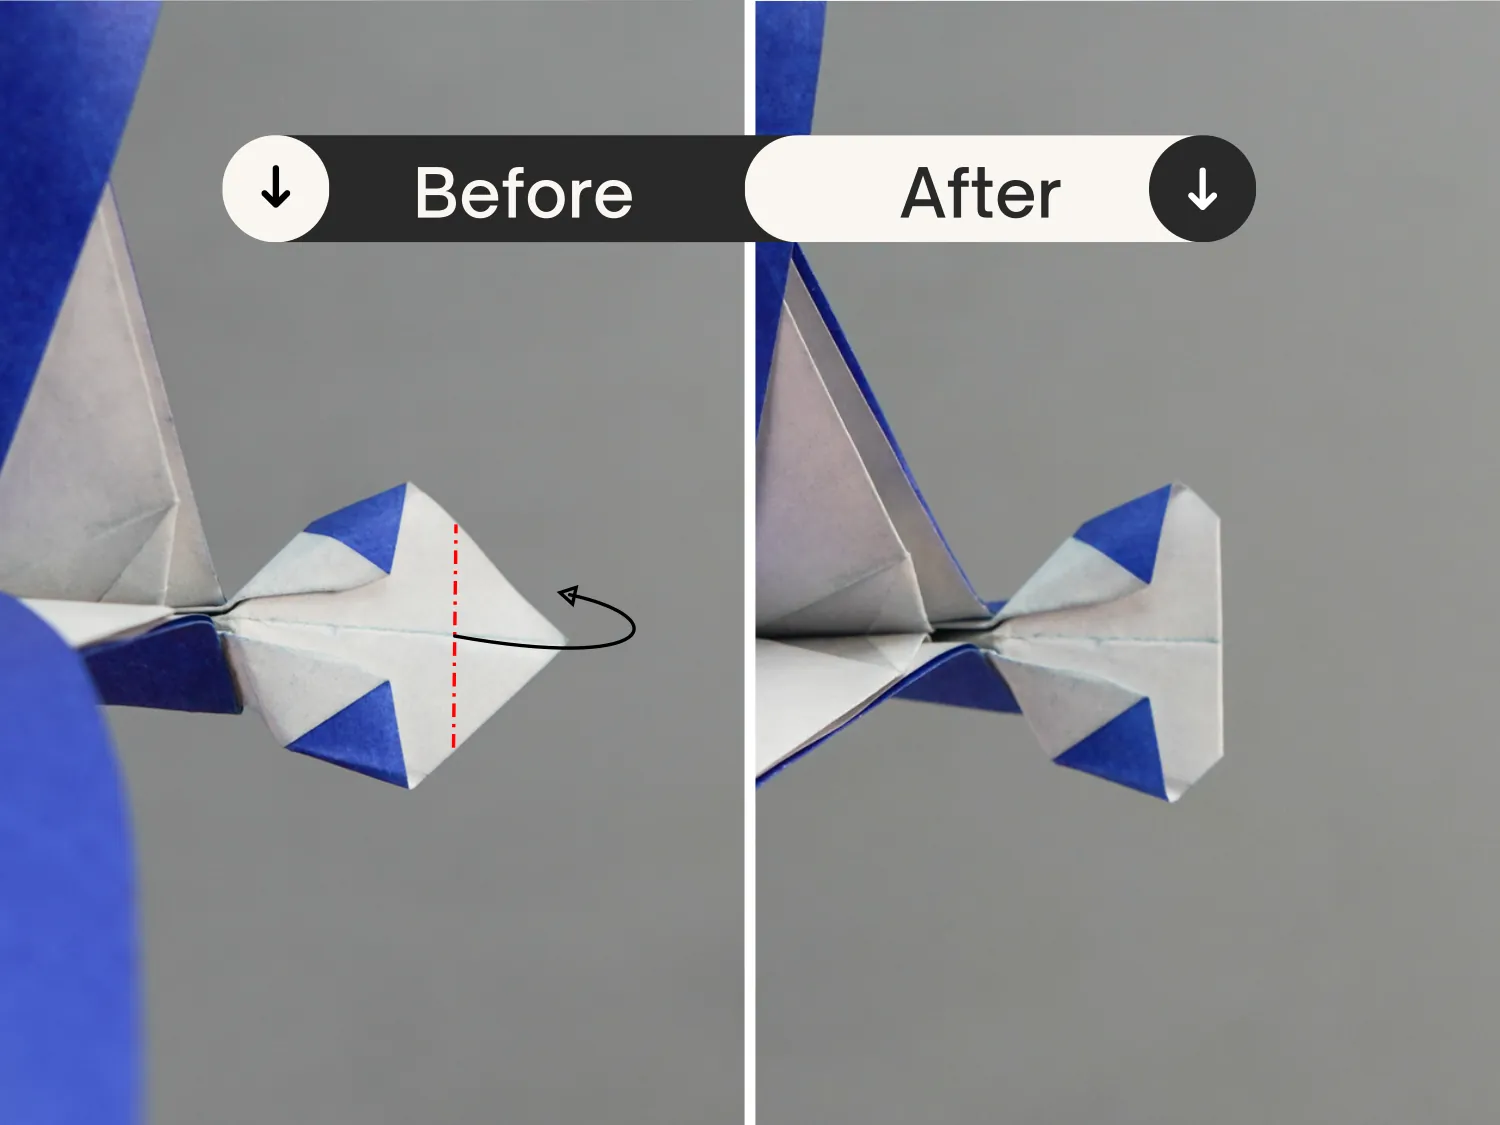
Fold the right point of the tail backward a little.
Step 40
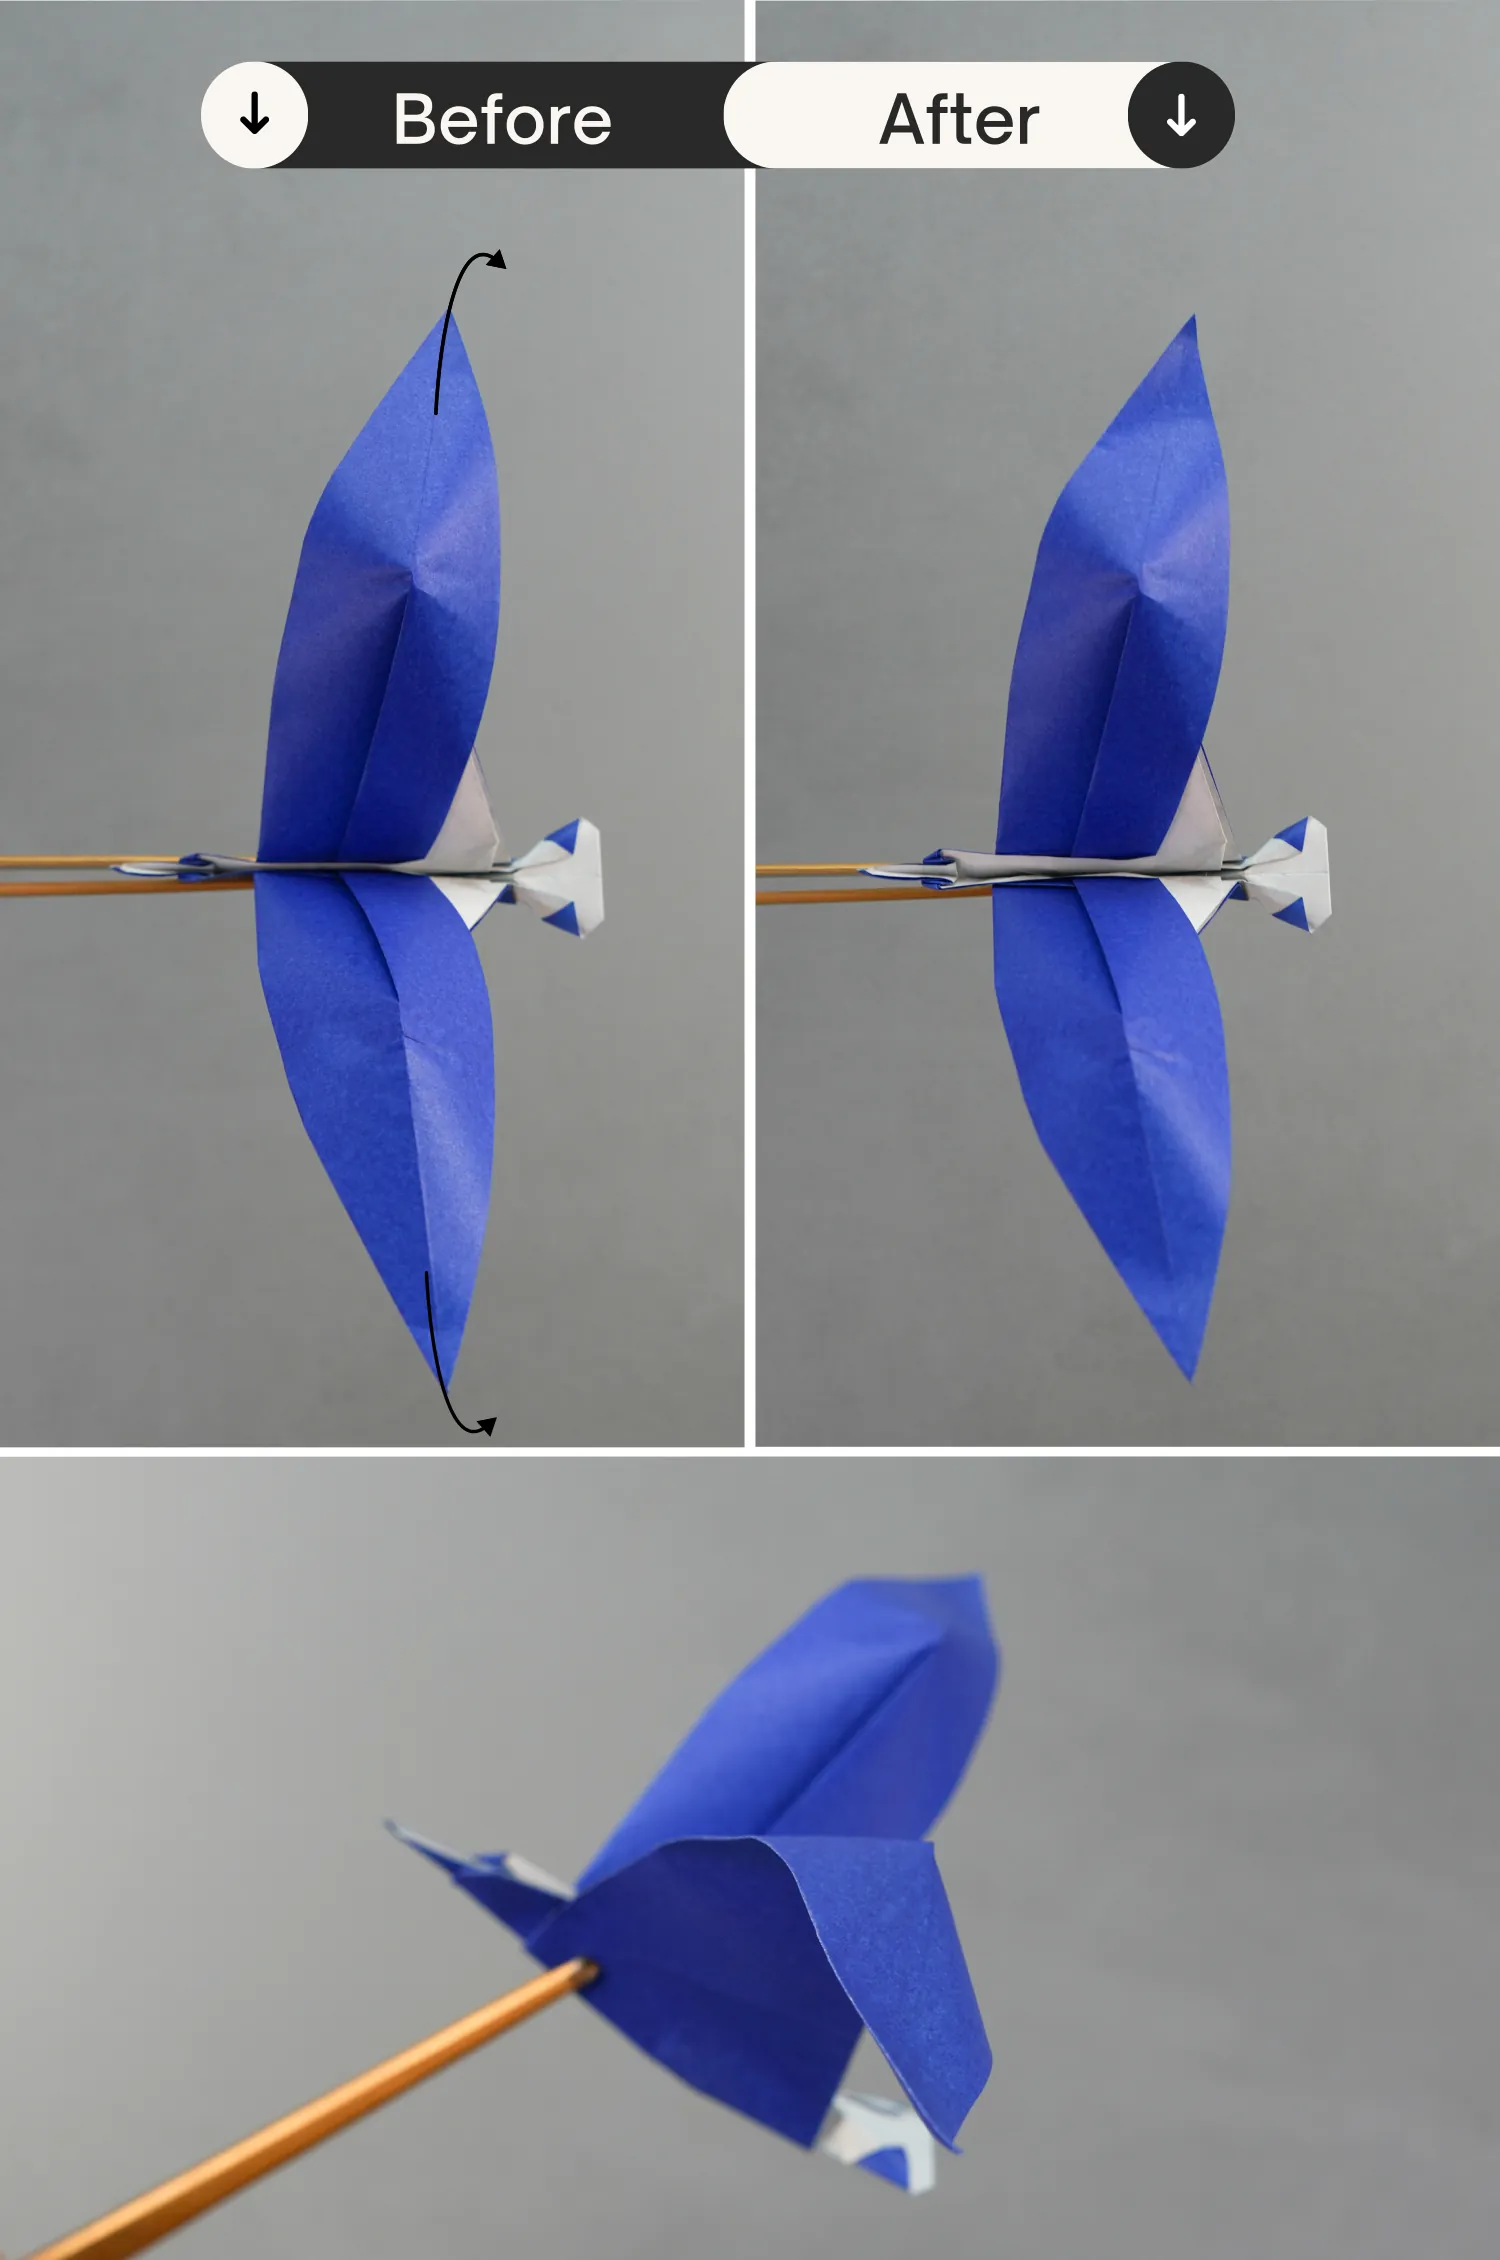
Bend both wing tips upwards a little to give the seagull a more natural stance.
What’s Next
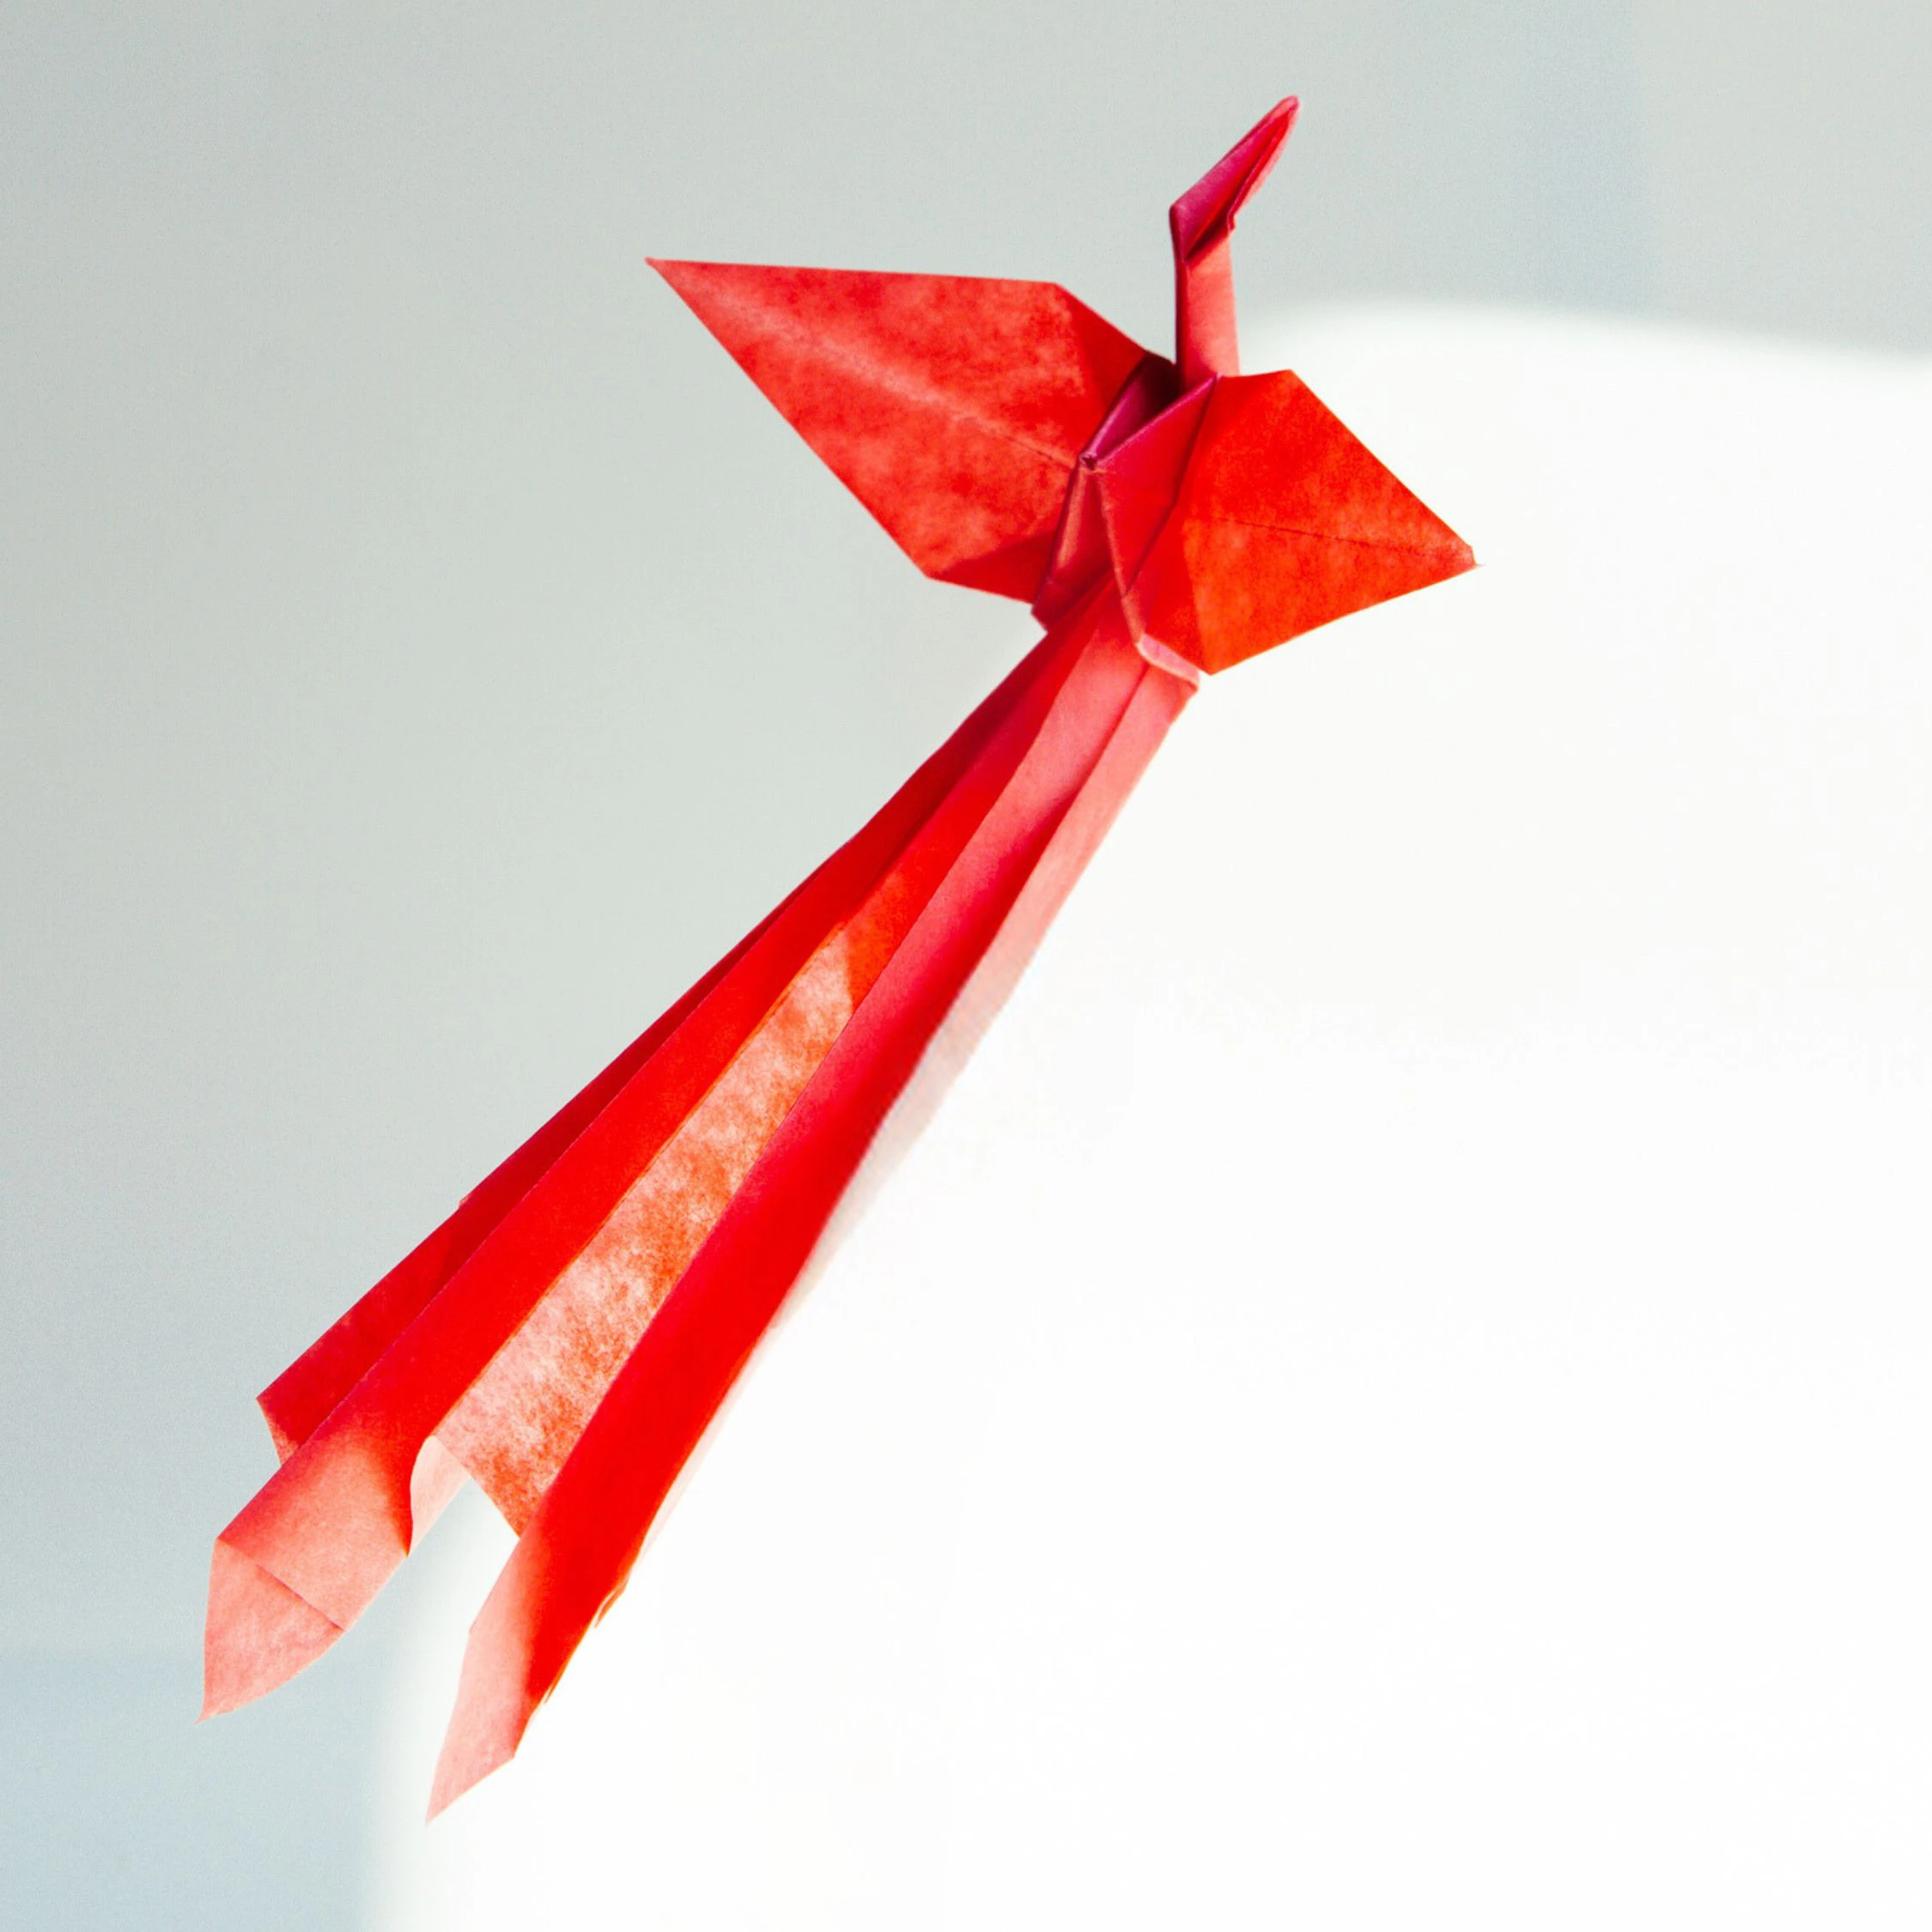
This is the final shape of an origami seagull, whether you use it as a decoration or give it as a gift, it will surely be appreciated. Now you can explore our other origami bird instructions. Happy folding!
Other Origami Bird Ideas