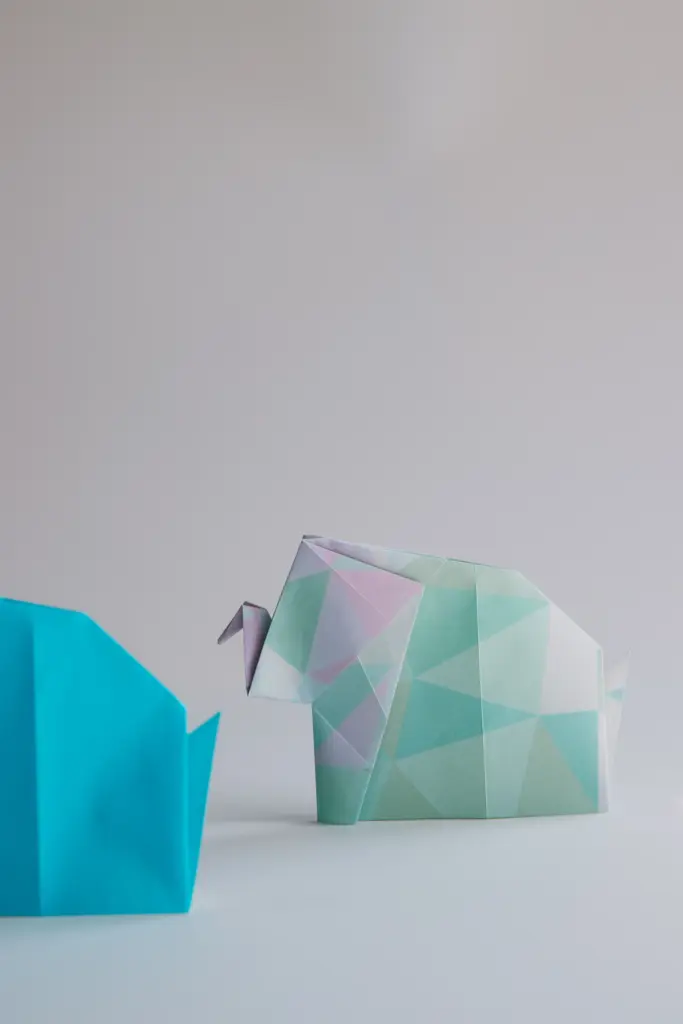
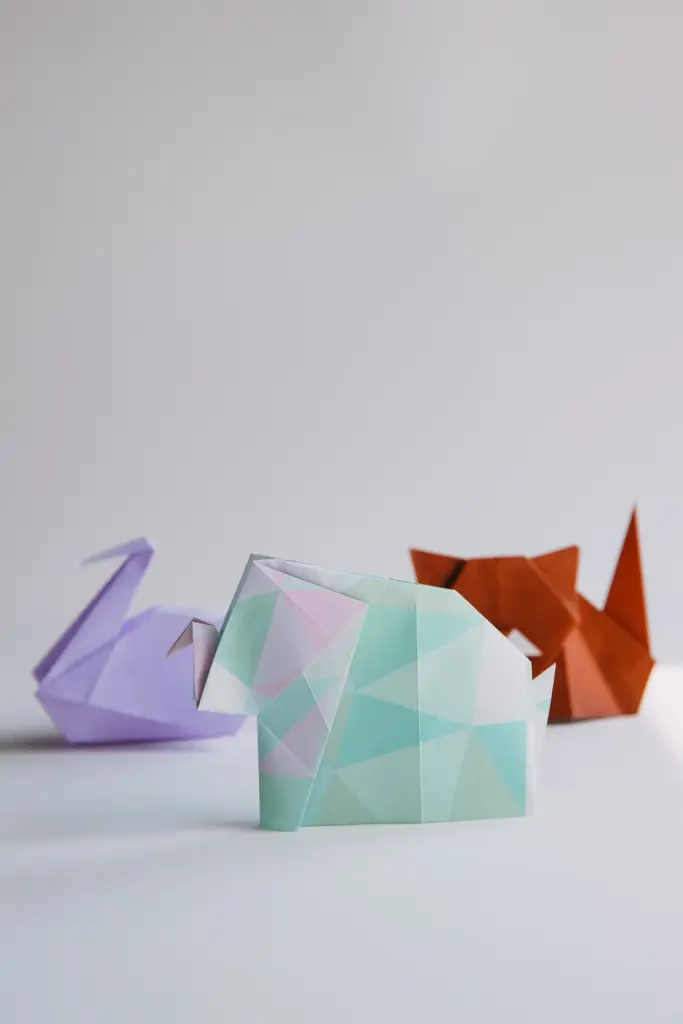
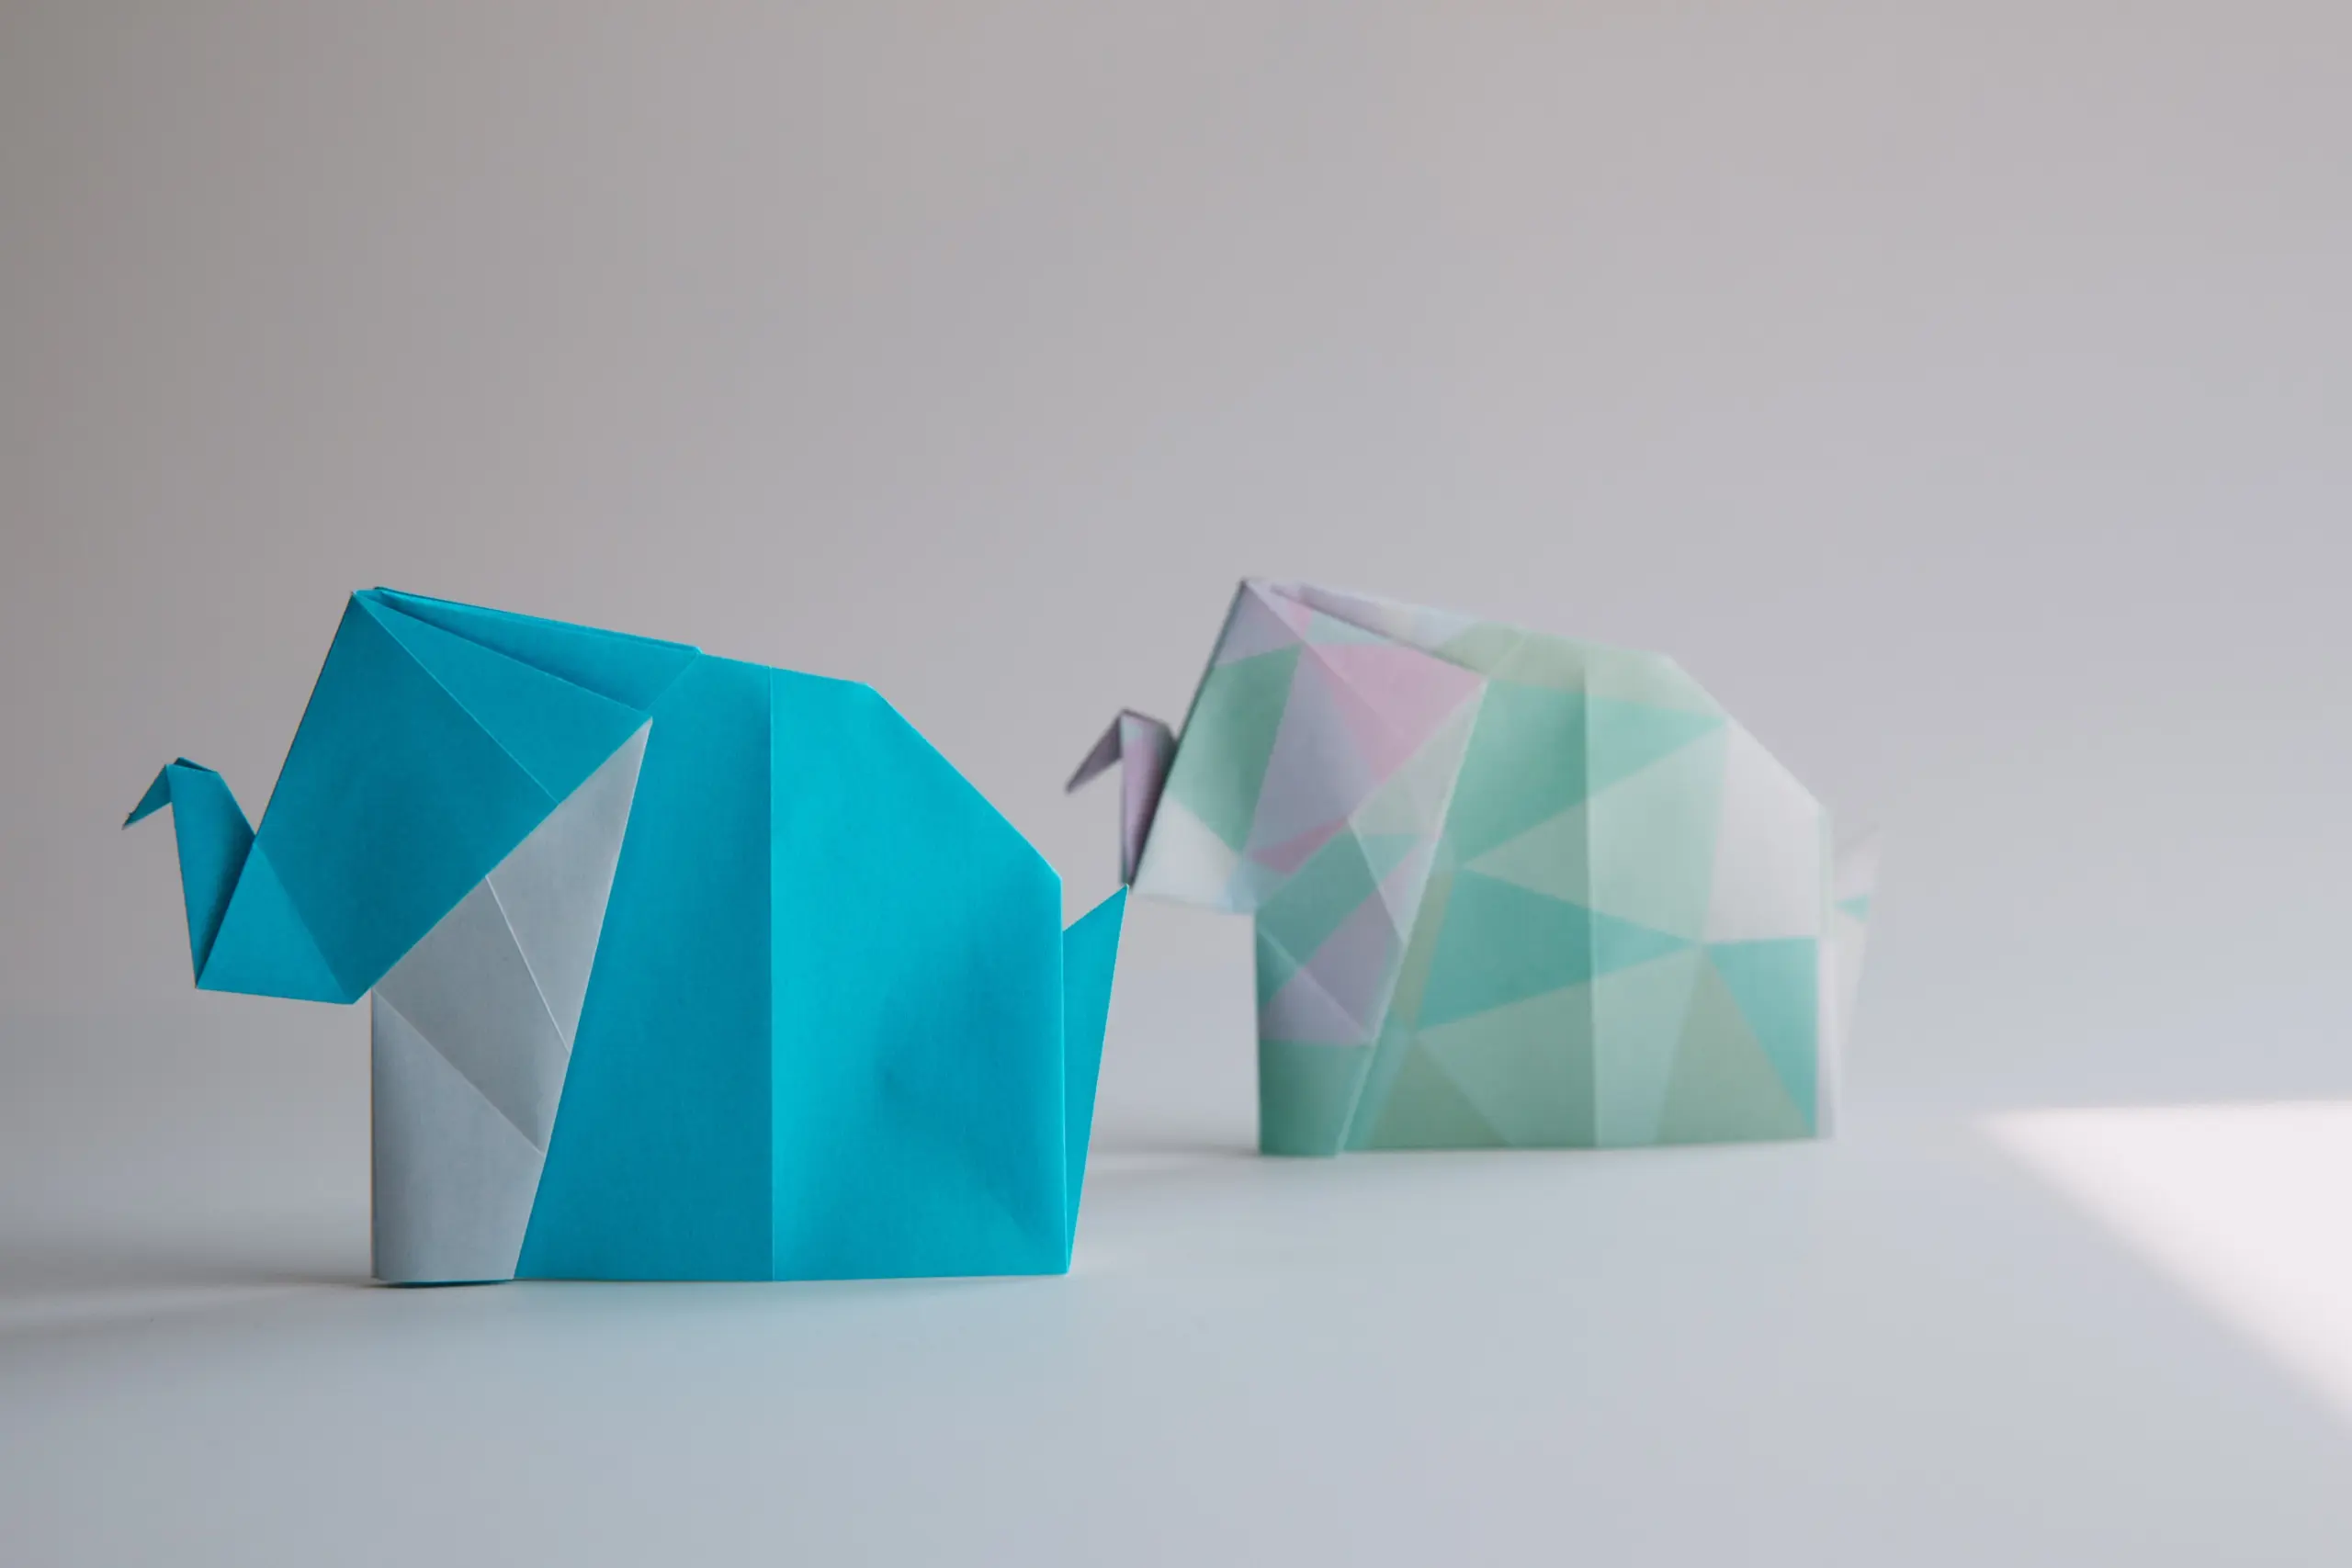
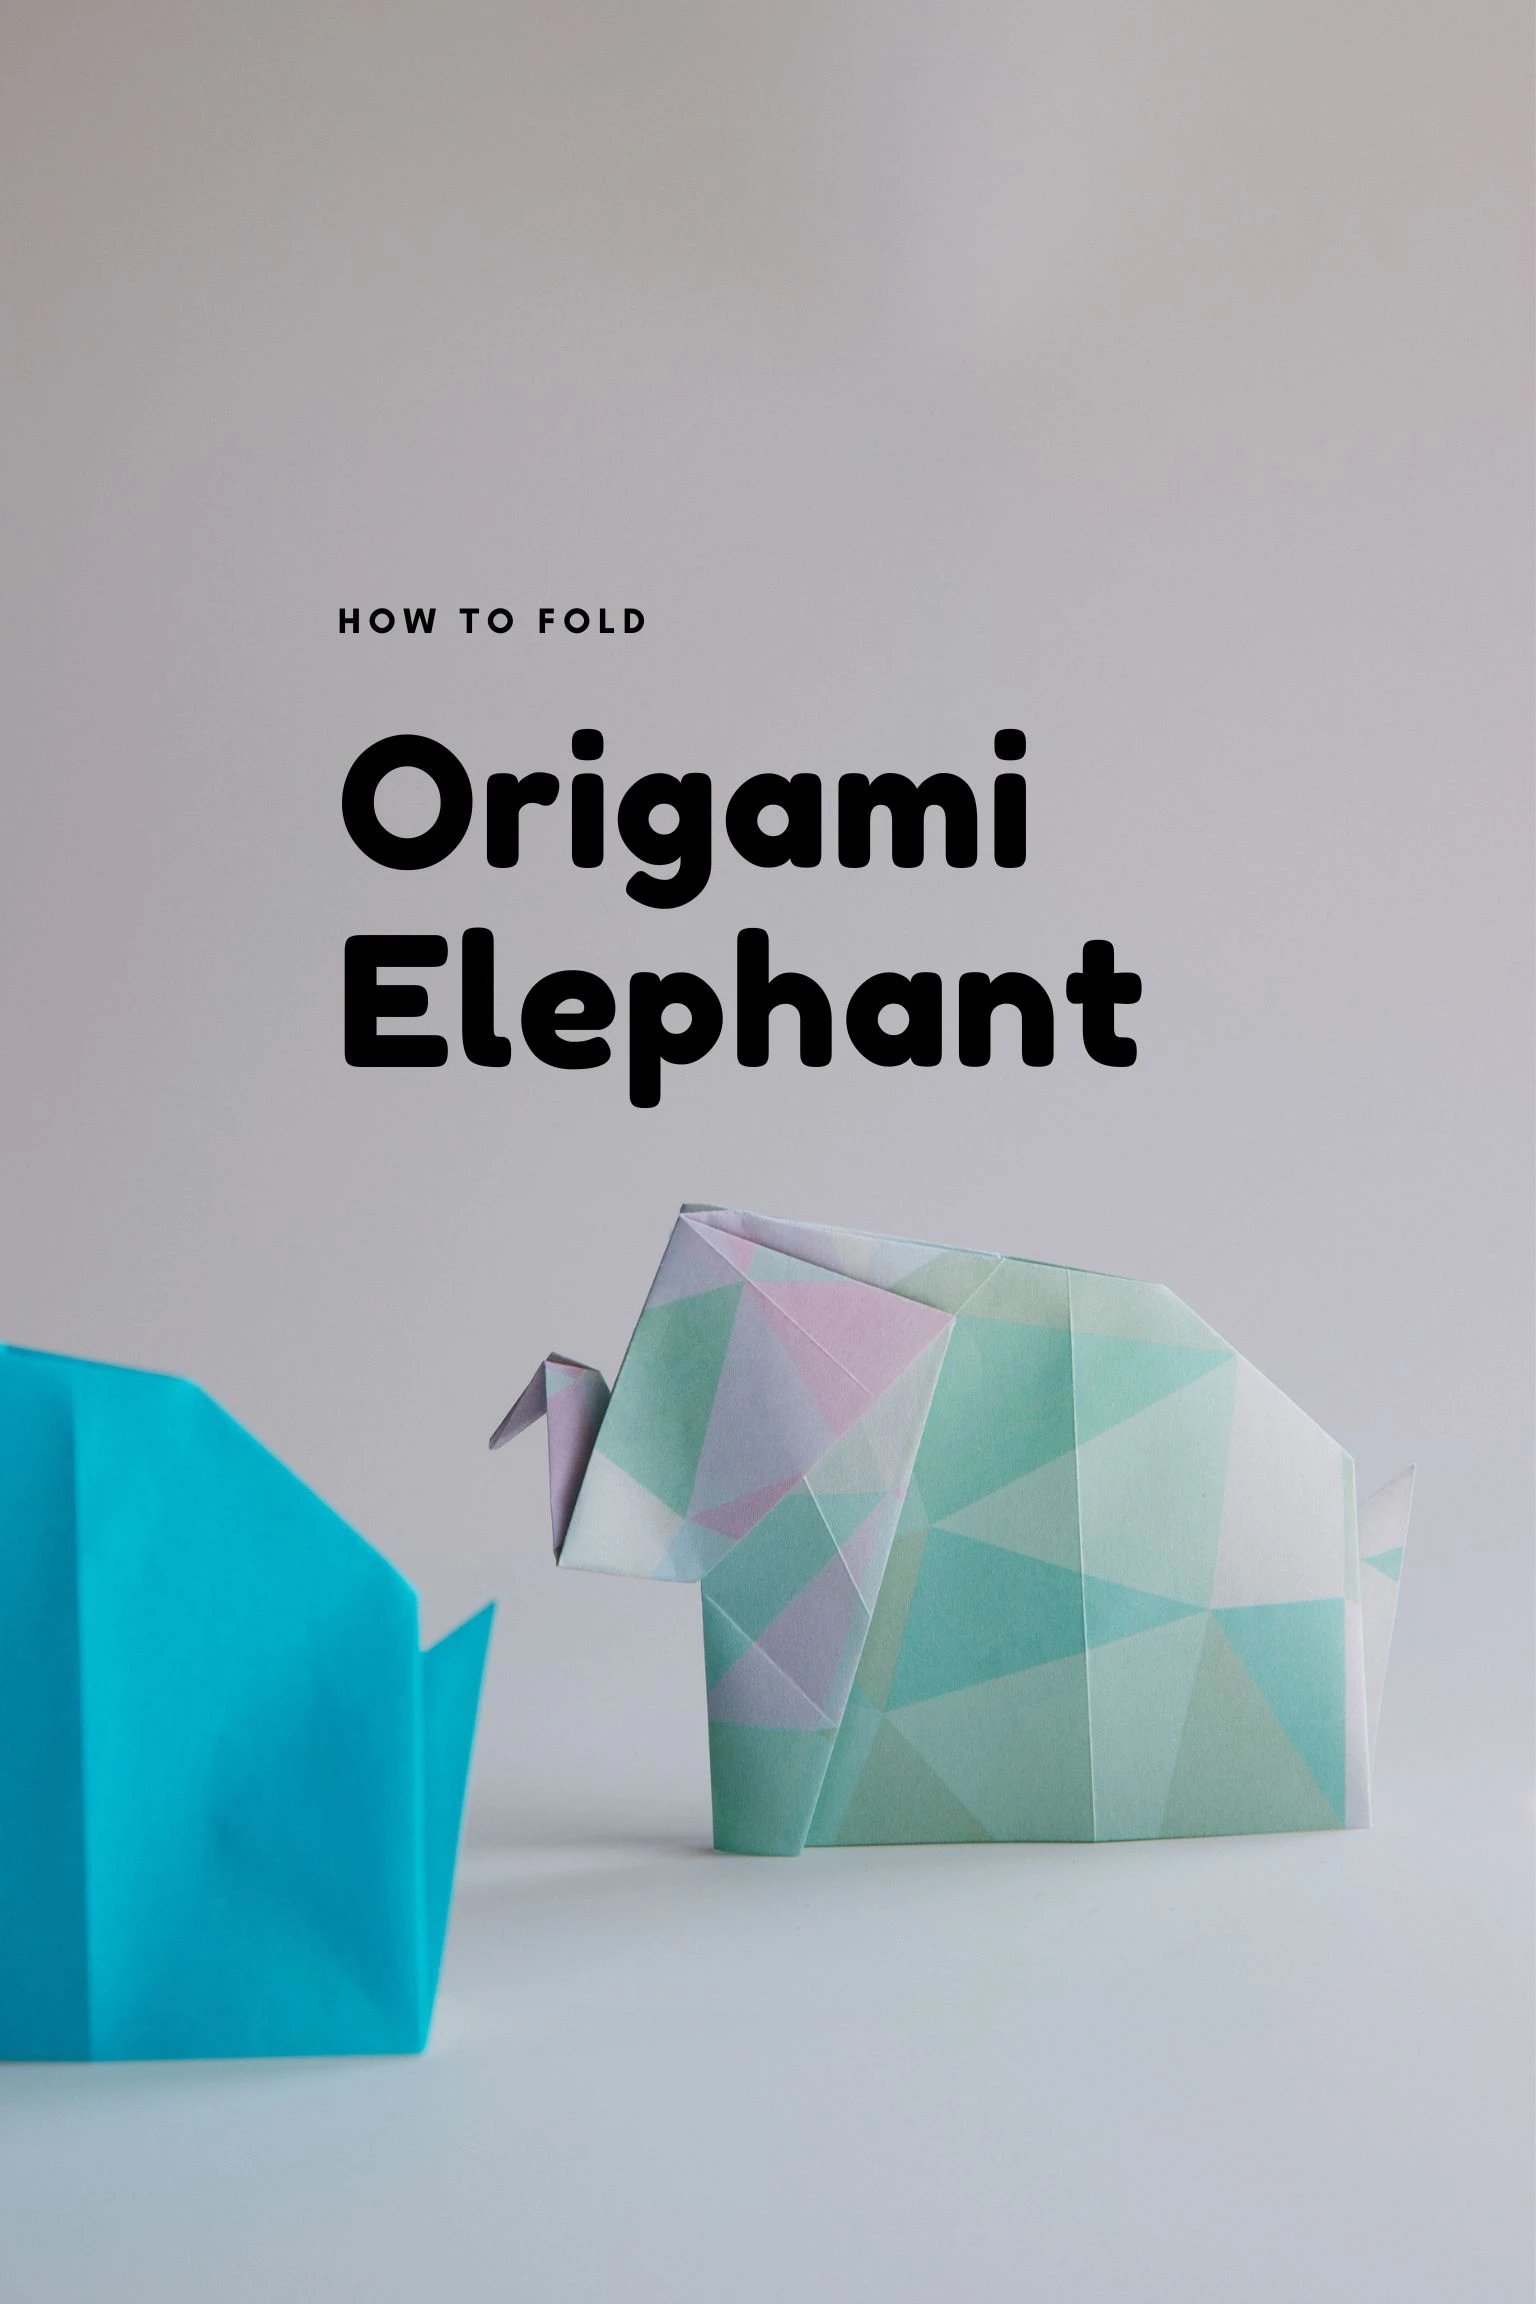
Making a chubby and adorable origami elephant with a single piece of paper, not only improves your origami skill but is also a great gift for your hand-making lover friends.
Don’t forget our Origami Elephant Face, this is also super cute and easier to make.
In this tutorial, we use Inside Reverse Fold to shape the tails and nose of the elephant while the back is shaped with an open sink.
If you are new to origami, start here from our beginner guide to know the basics and how to read the step-by-step instructions.
- Folding time: 15 minutes
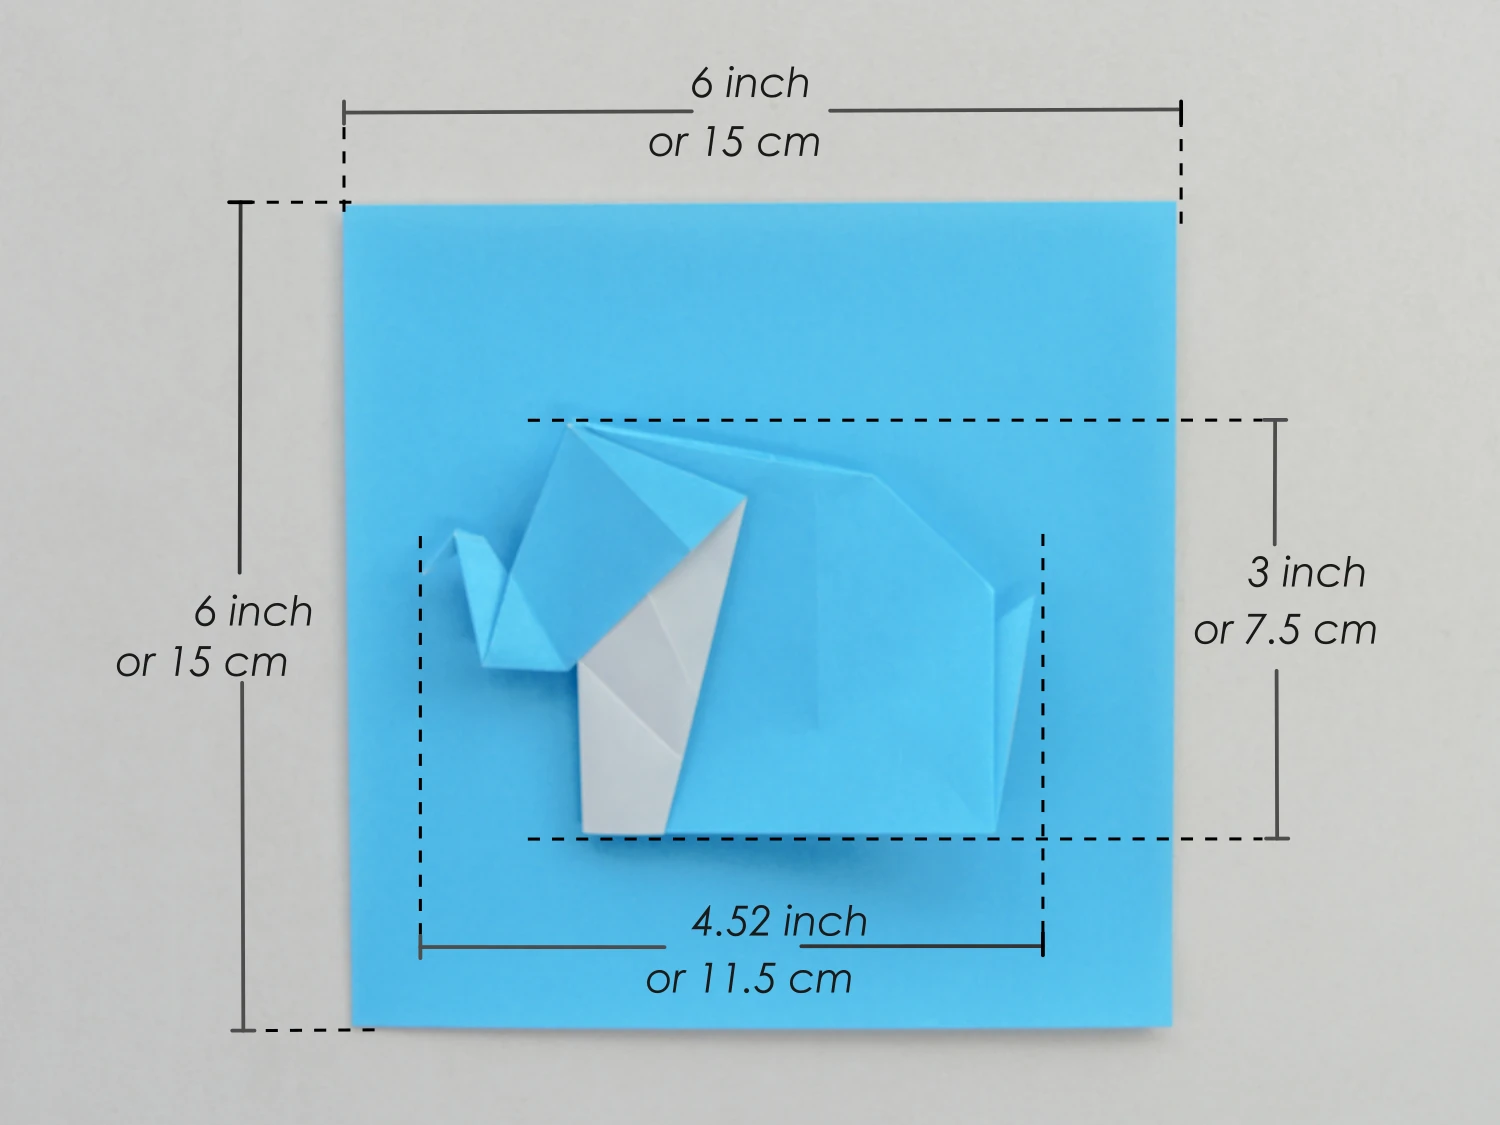
- Paper: 15×15 cm
- Difficulty: Middle
Material
Get a 15×15 cm origami square paper with different colors on each side, this paper will be divided into 7 pieces of small paper, we will show you the detailed way to cut it.
You can choose patterned papers, making your origami elephant more unique and outstanding in appearance.
Origami Elephant Video
Step by Step Instructions
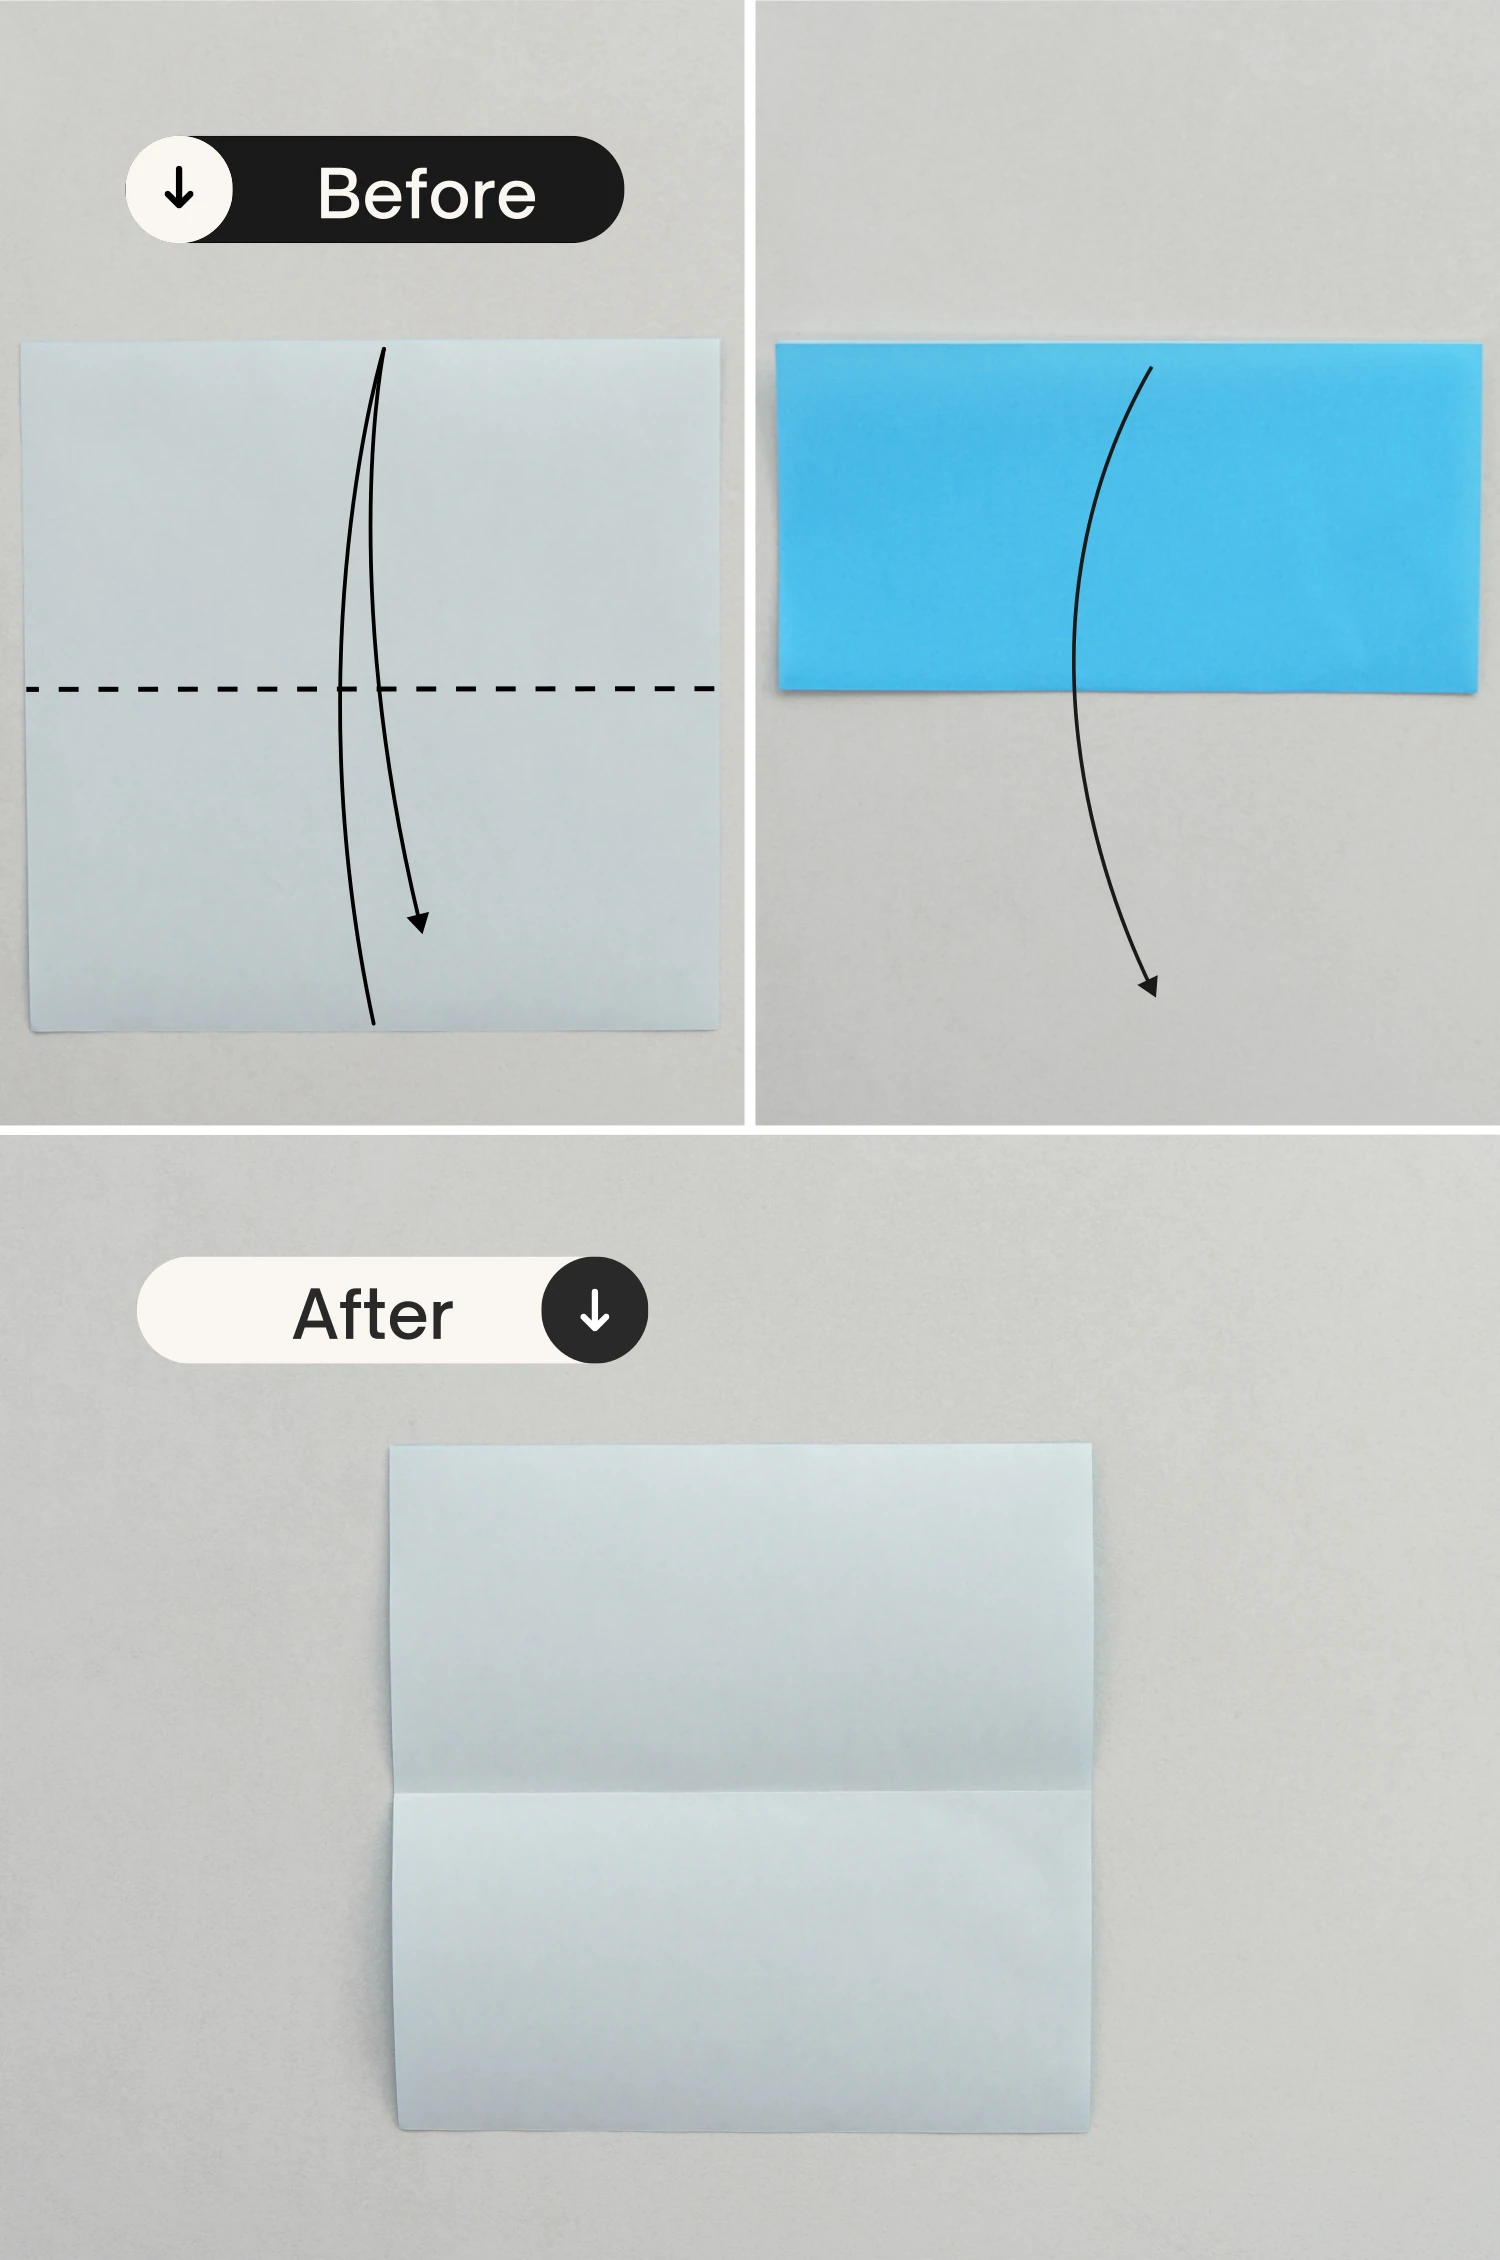
Step 1
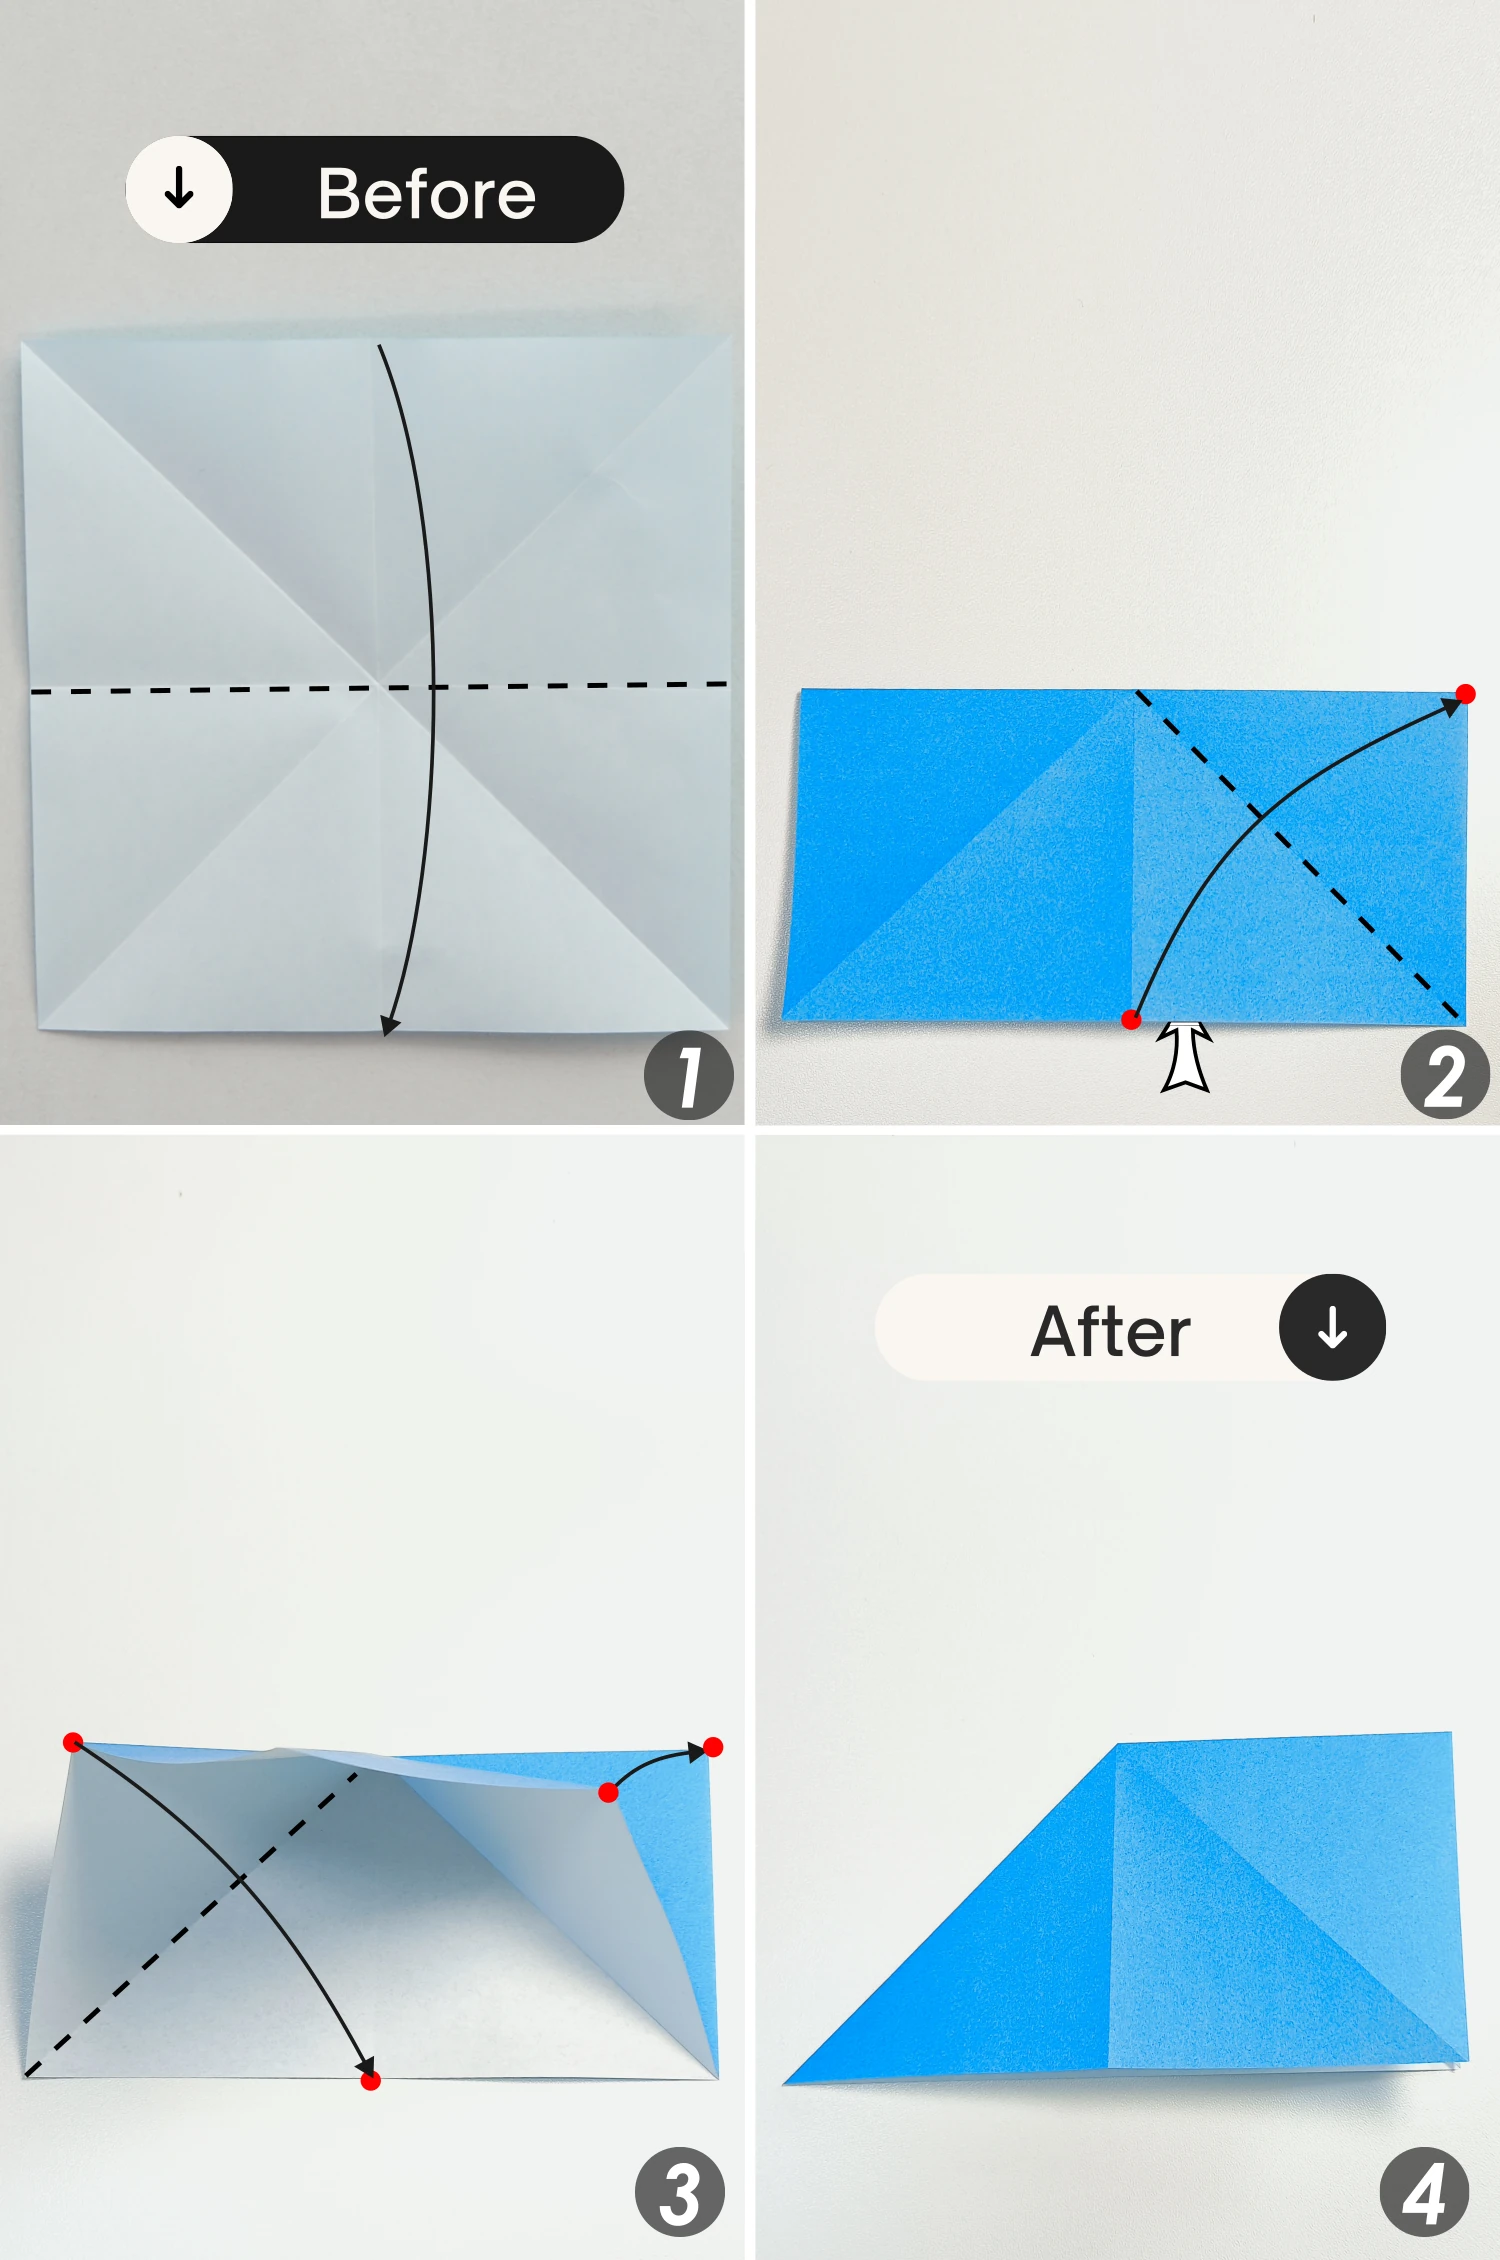
Start with the white side of the paper facing up, fold it in half horizontally, and unfold it.
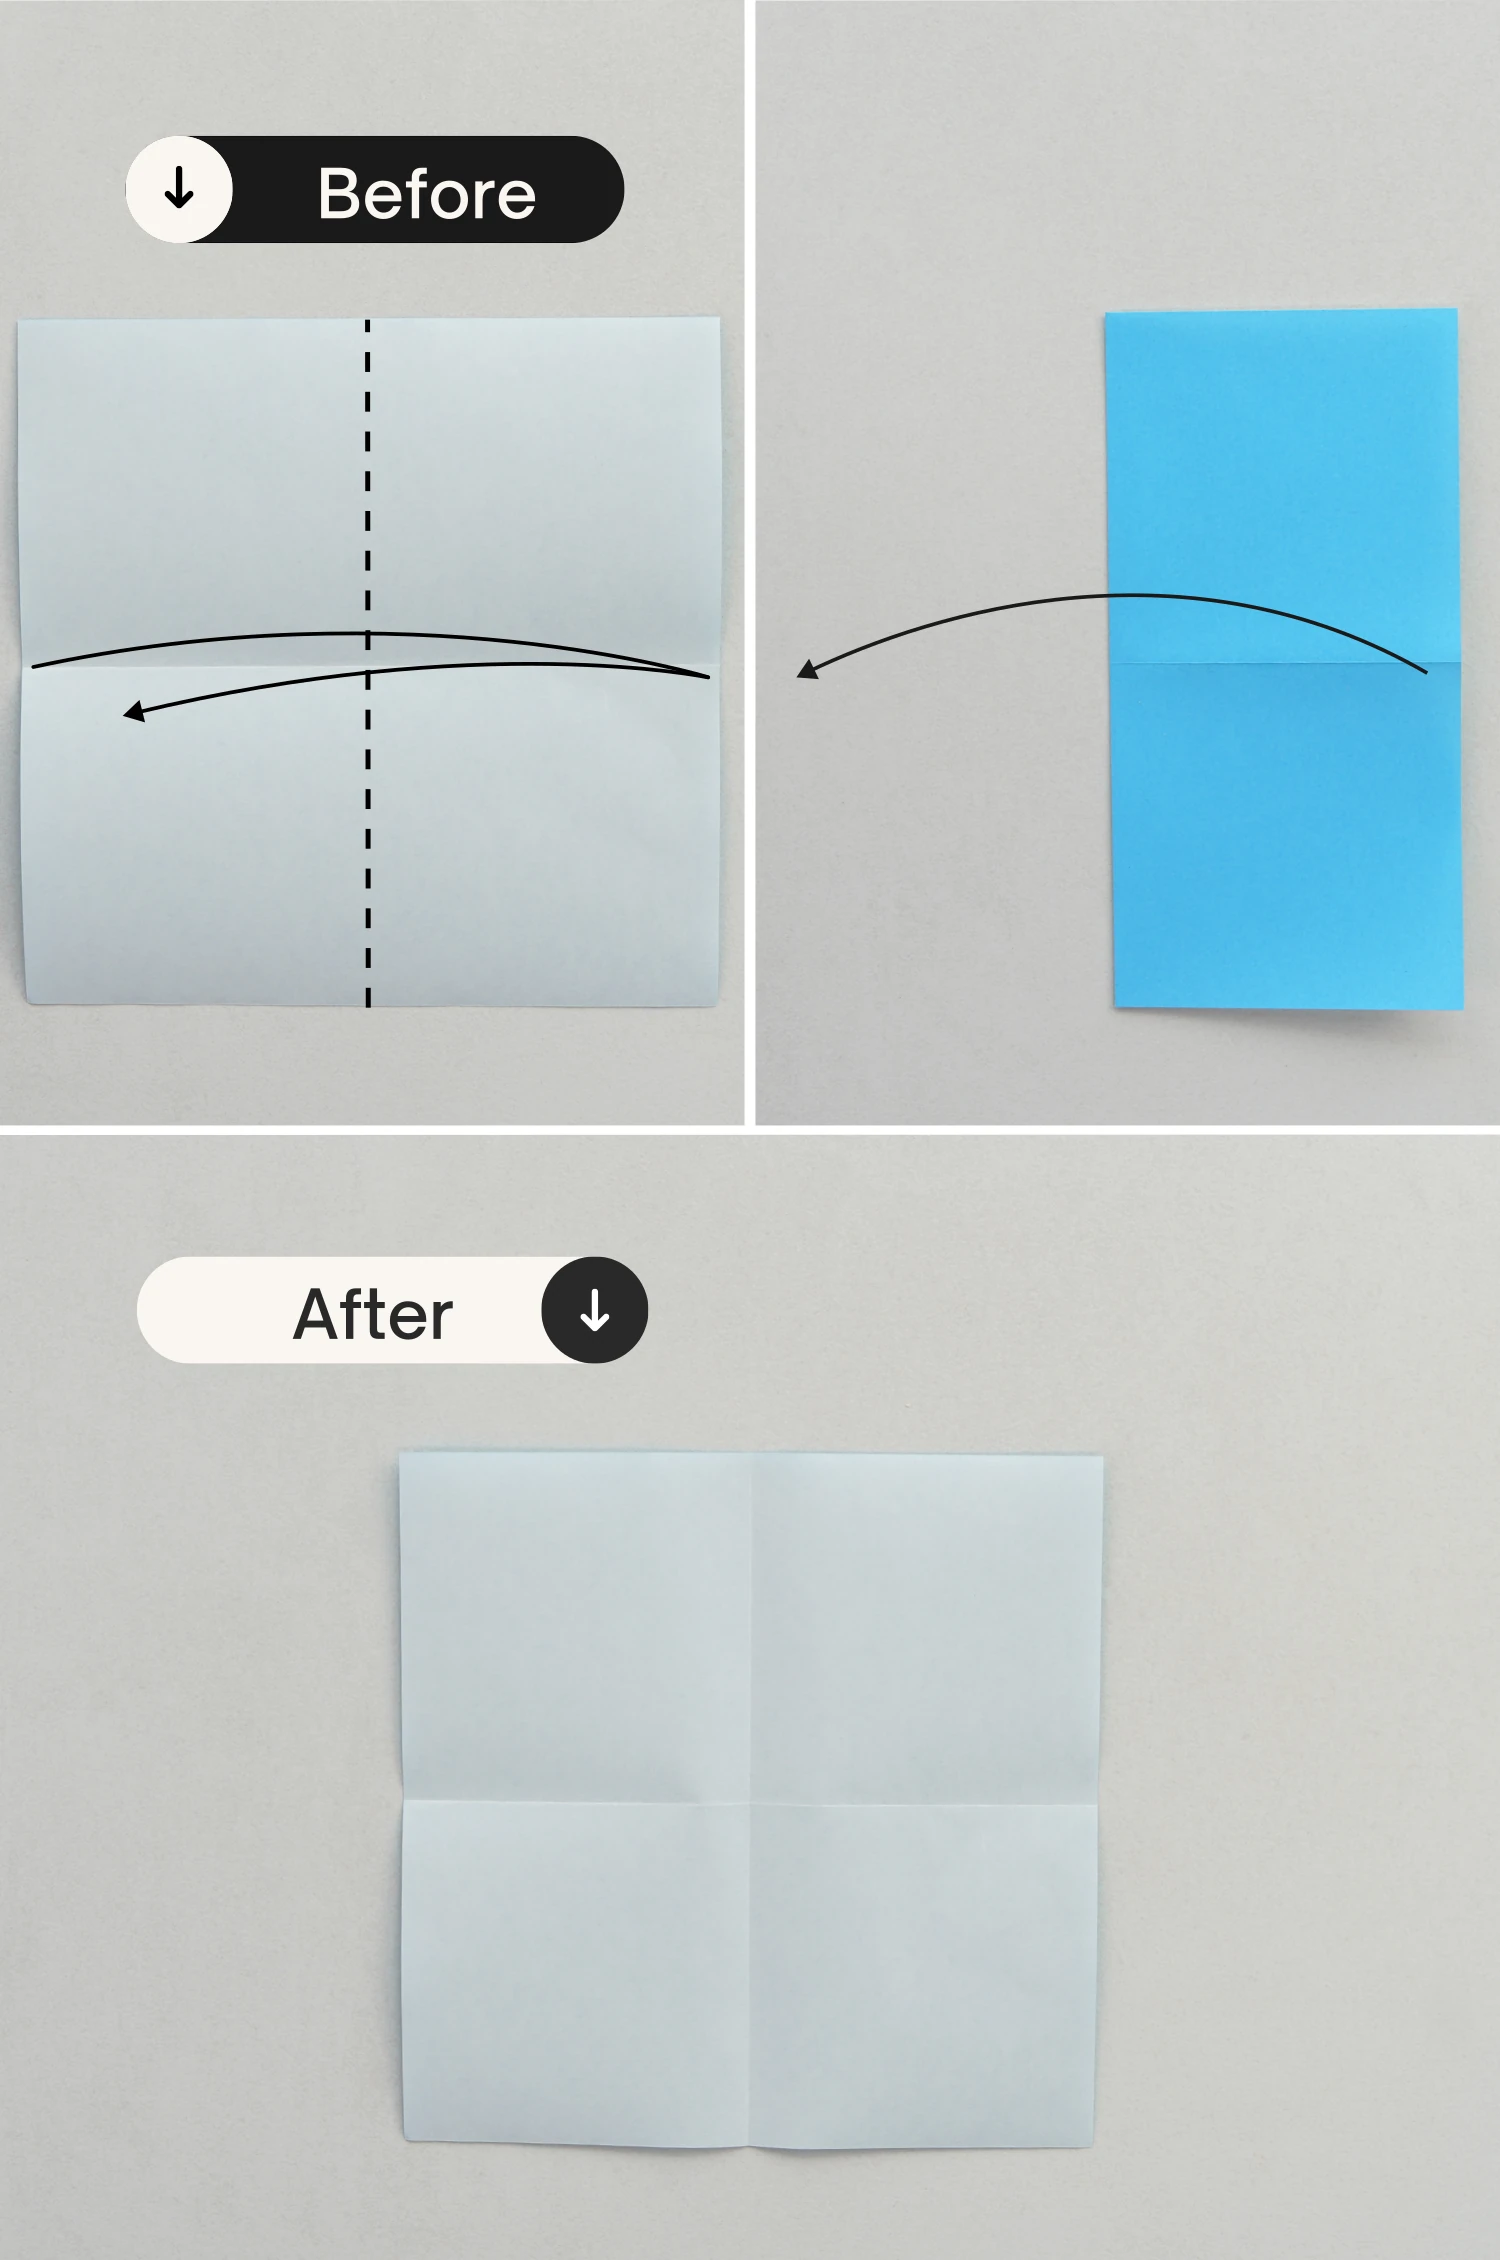
Step 2
Fold it in half vertically, crease it well then unfold.
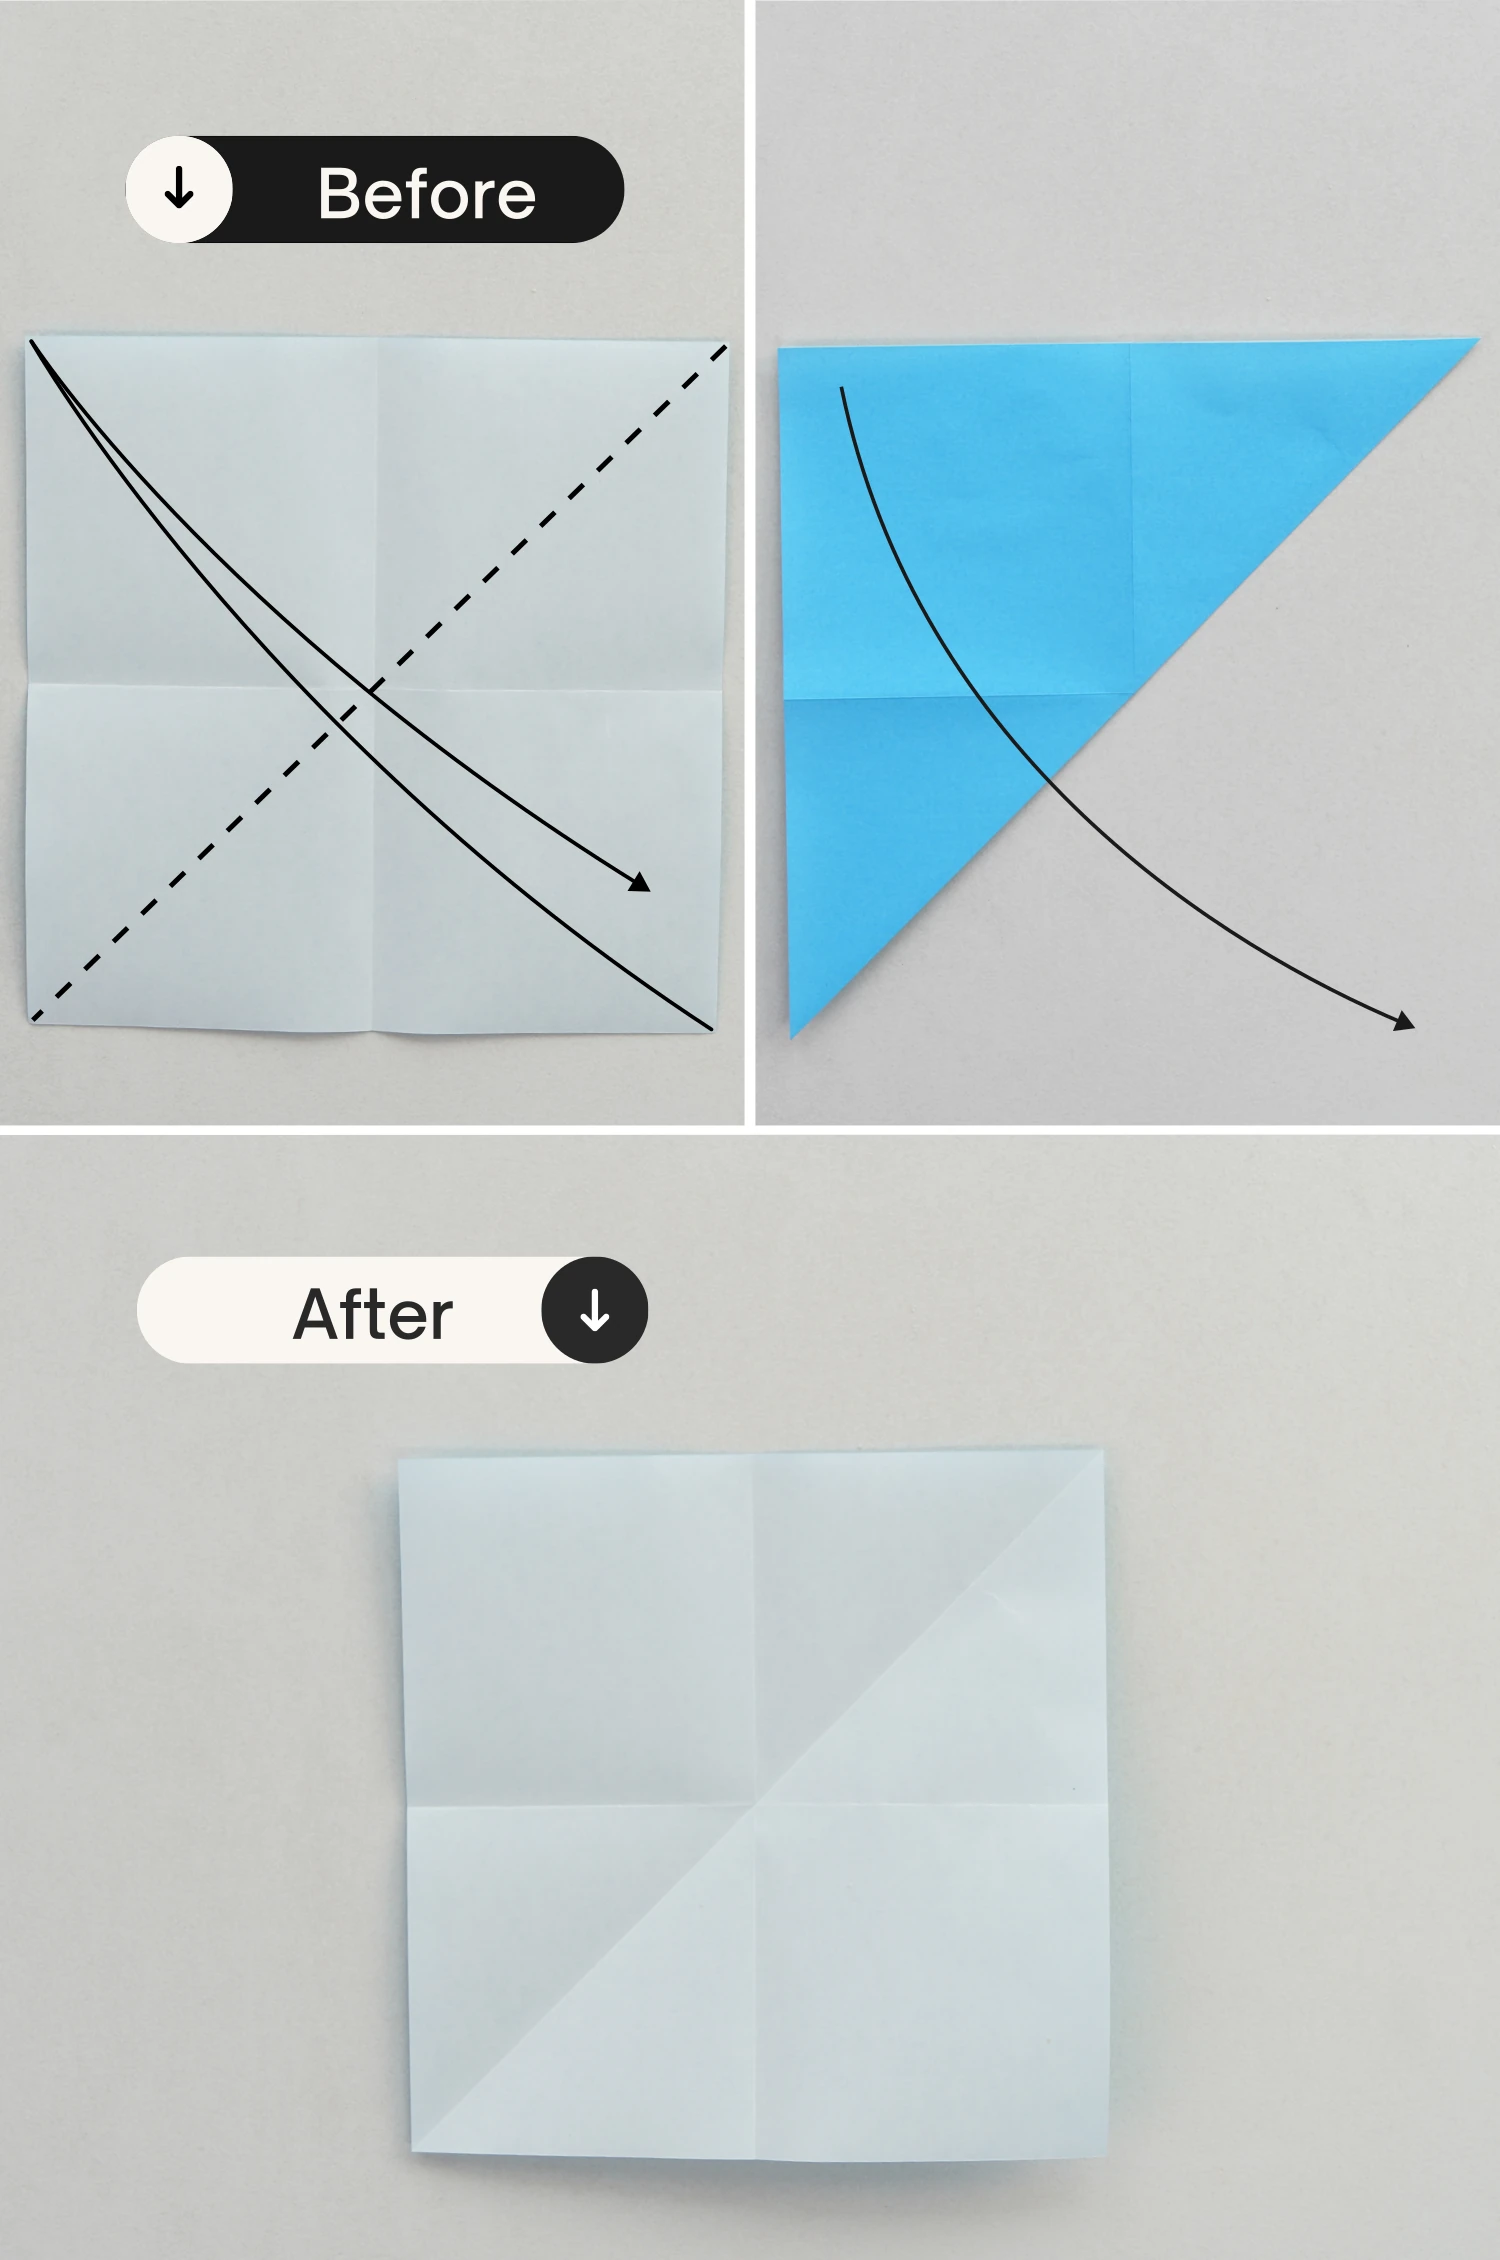
Step 3
Fold it in half diagonally, getting a crease, and unfold it.
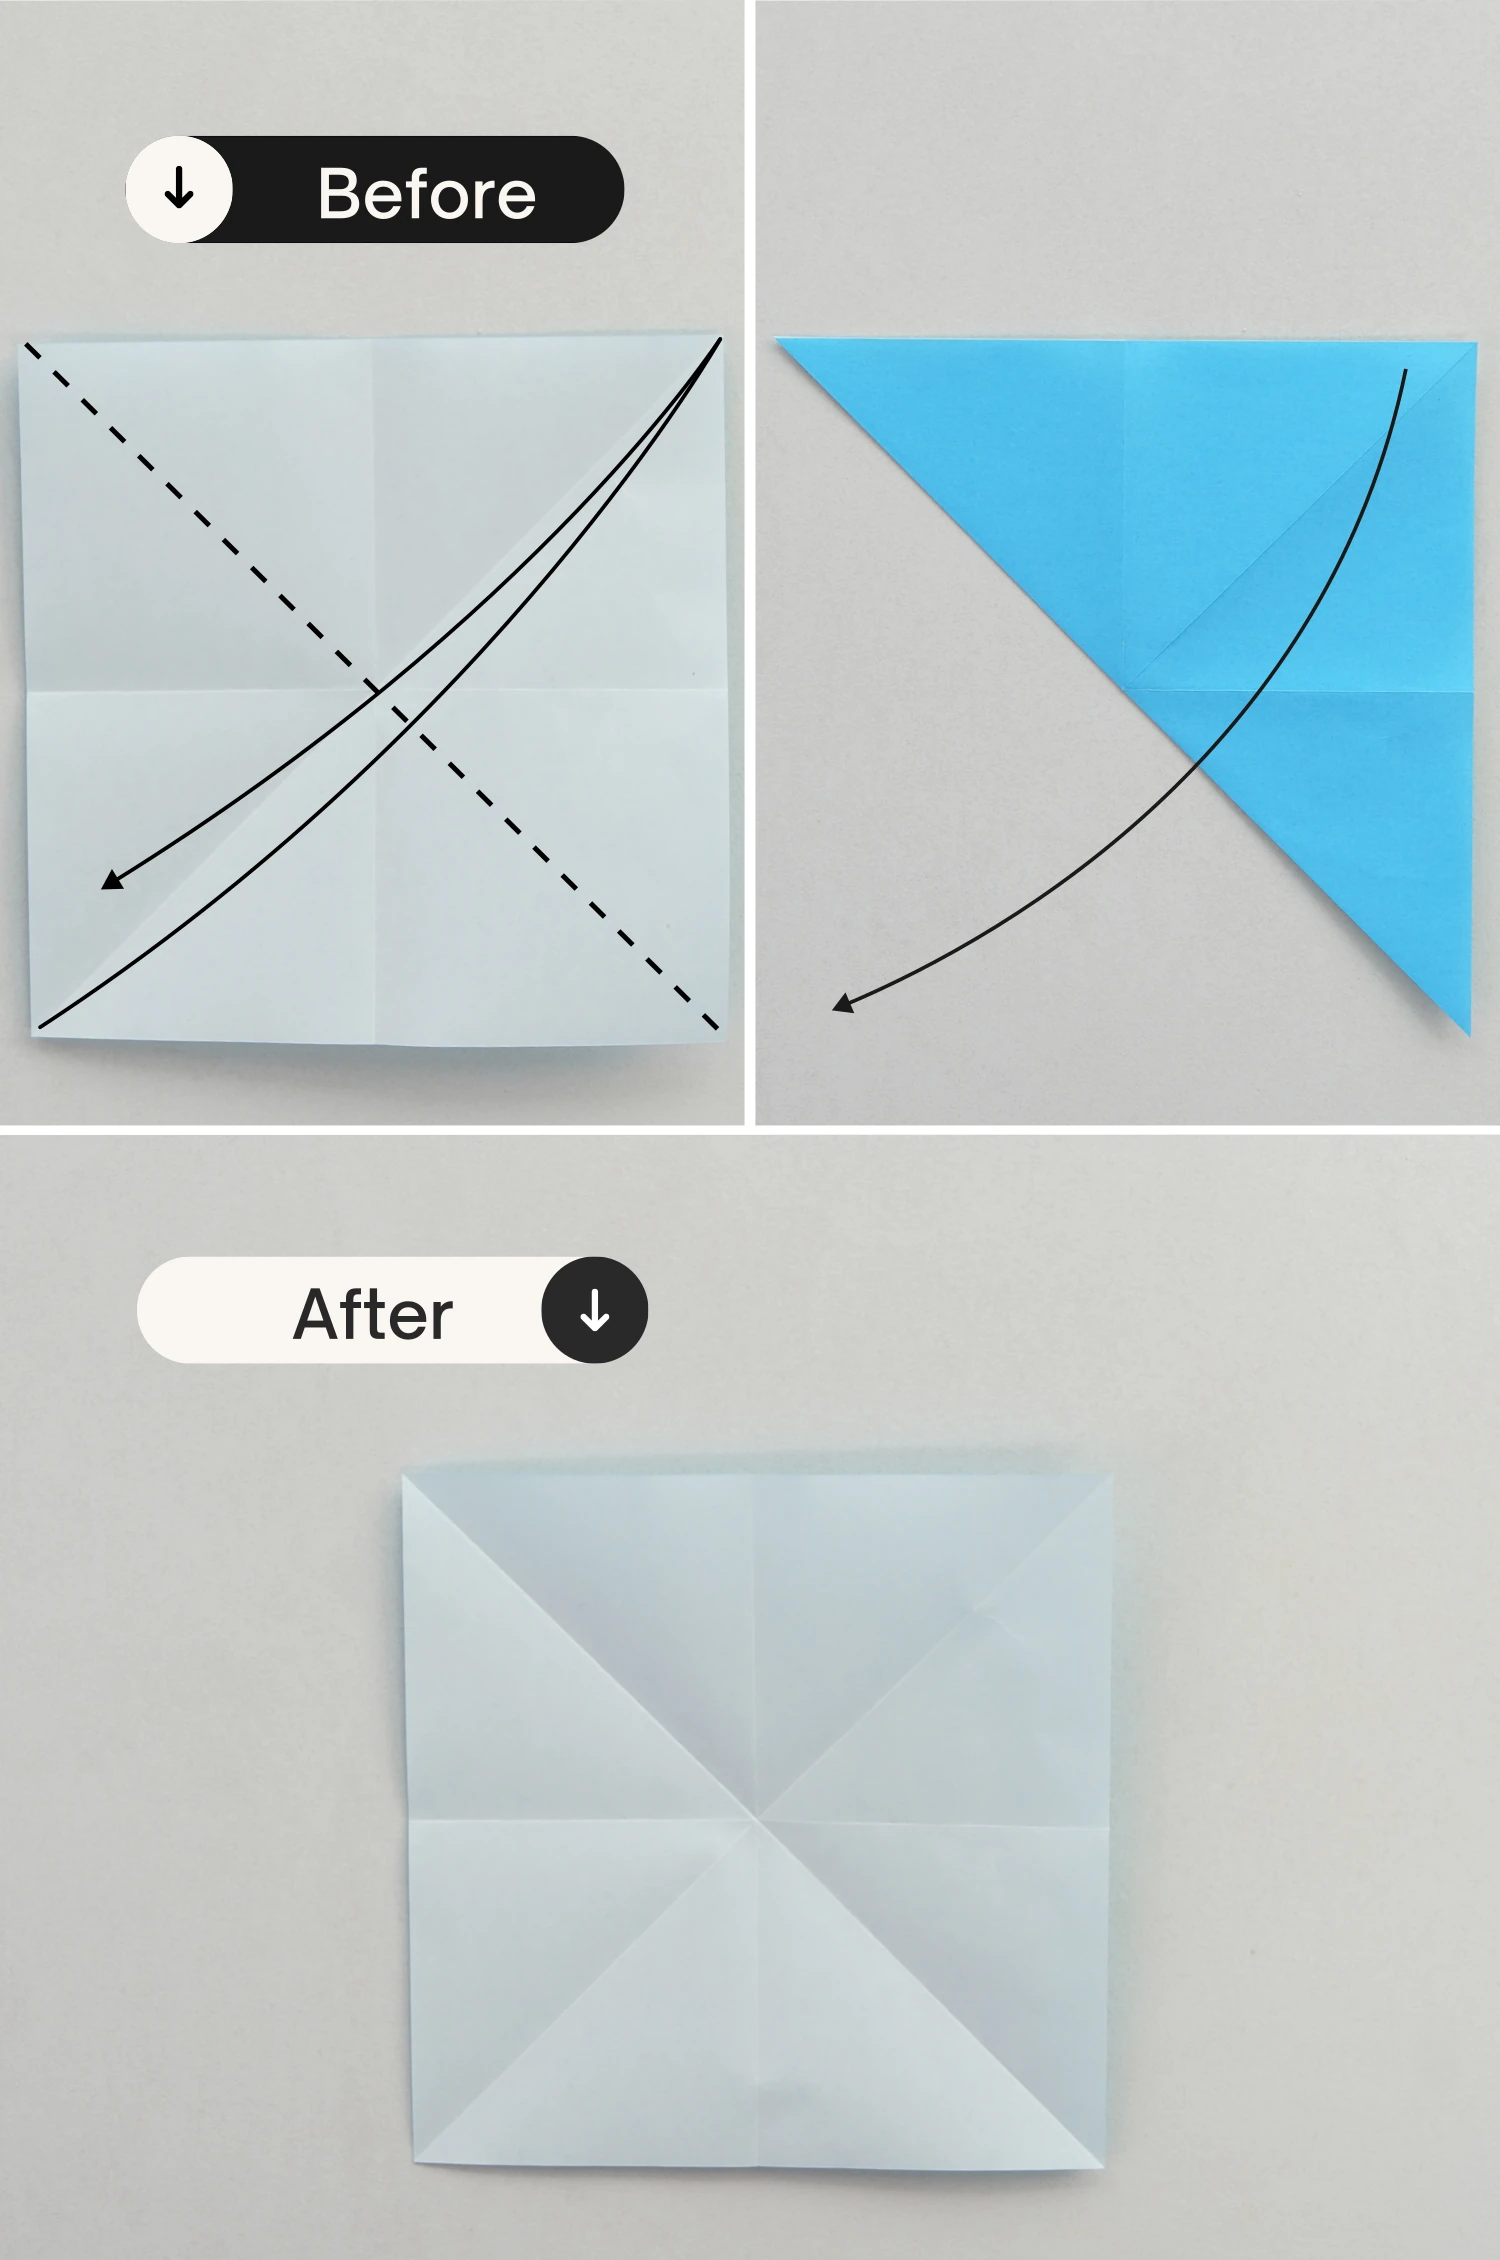
Step 4
Then fold it in half diagonally from the other side, getting a new crease then unfold it.
Step 5
Fold the top edge to the bottom, then take the midpoint of the bottom edge of the top layer, and fold it to the top right corner along the crease shown by the dotted line, and the top left corner will be folded to the midpoint of the bottom edge.
Step 6
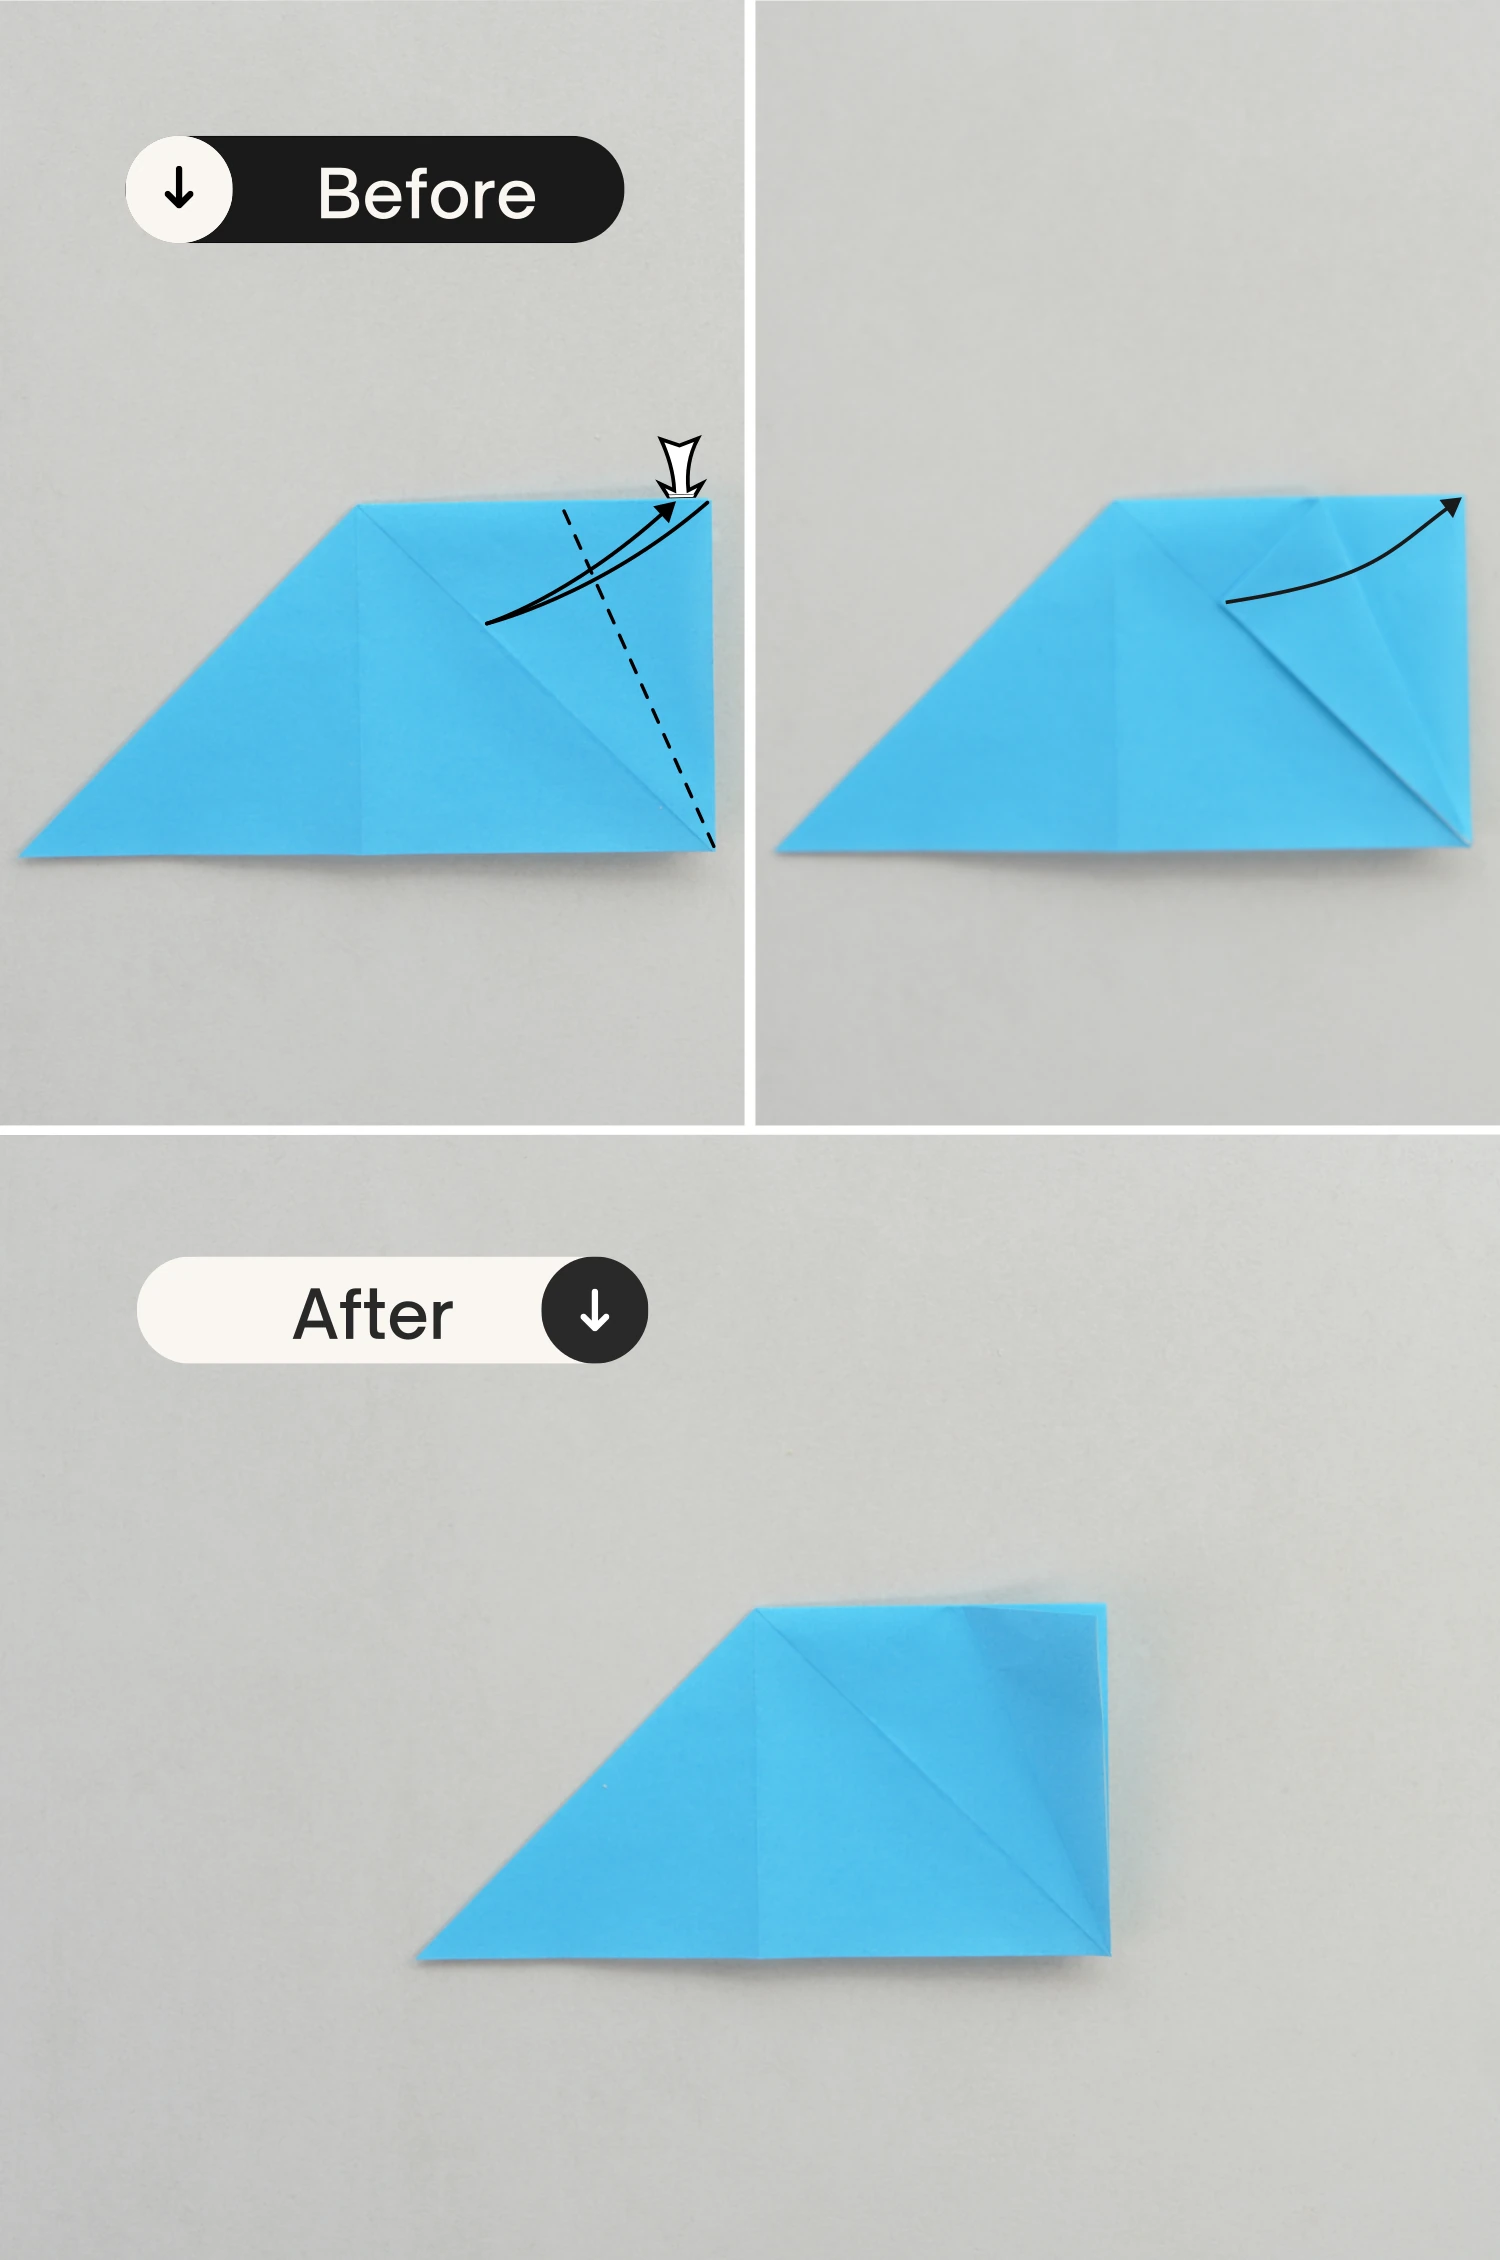
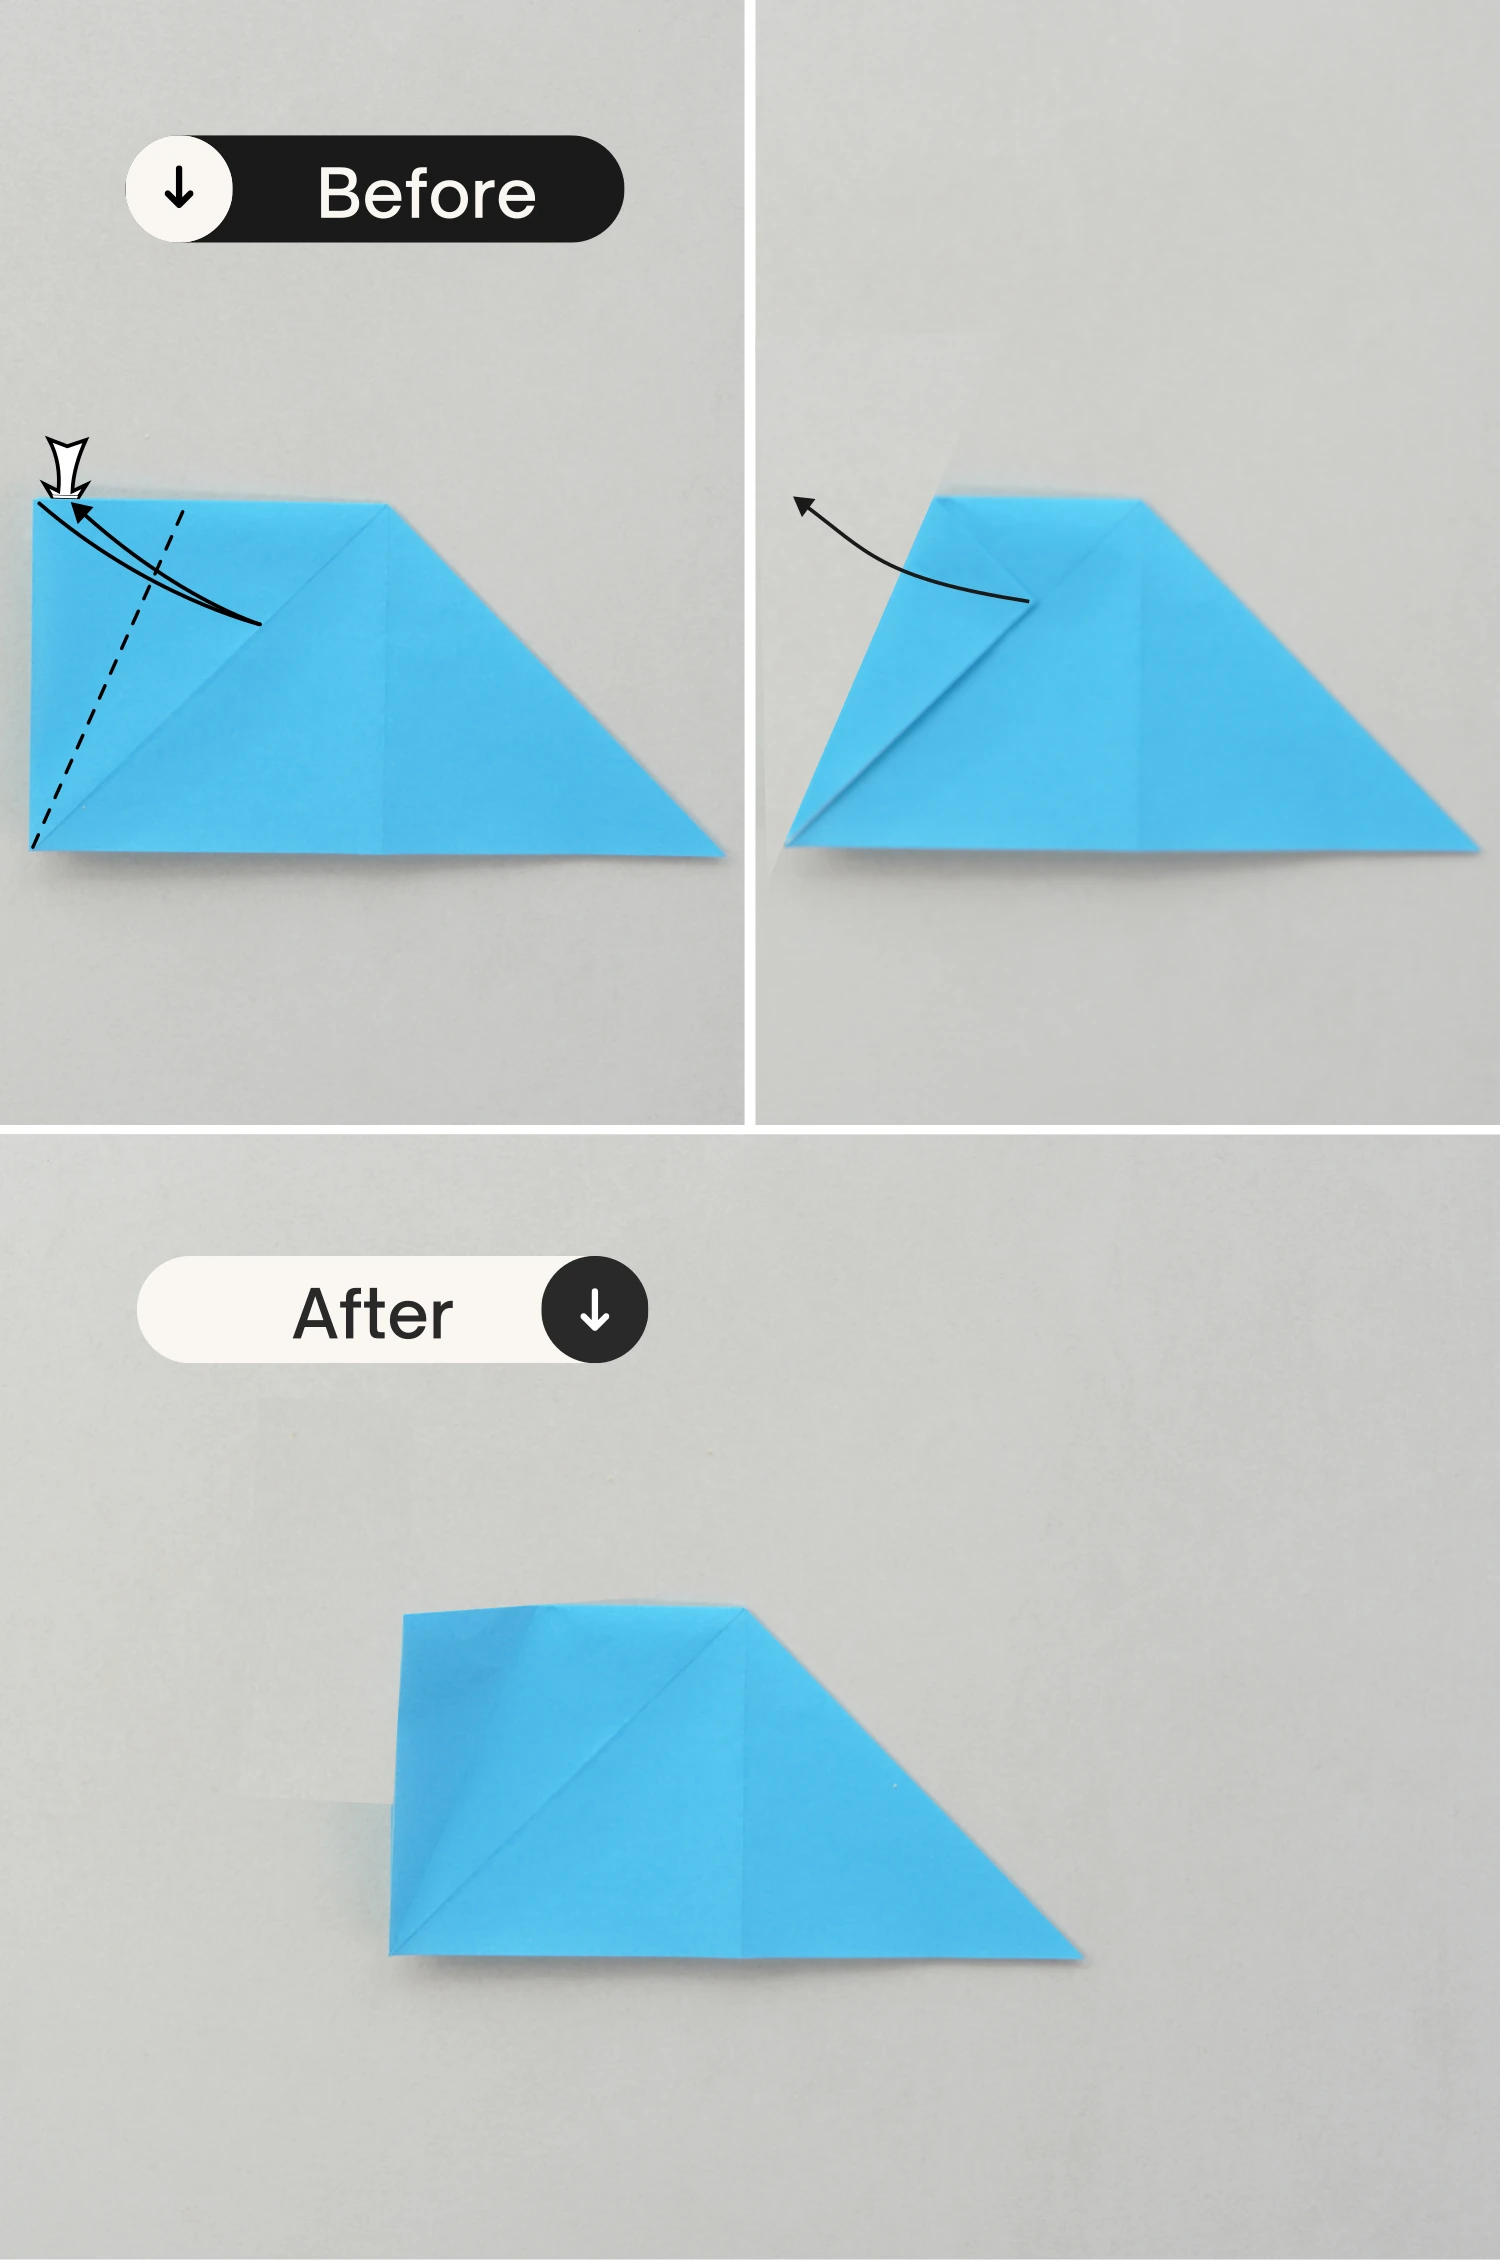
Take the right edge of the top layer, and fold it to align with the diagonal crease along the dotted line, crease it well then unfold it.
Step 7
Lift the right edge of the top layer along the dotted line, press it to the left then flatten the corner.
Step 8
Flip the paper over.
Step 9
Similarly, fold the left edge to the right to align with the diagonal crease along the dotted line, and unfold it.
Step 10
Bring up the left edge of the top layer along the dotted line, press it to the right then flatten the corner, as you did in step 7.
Finally flip it over.
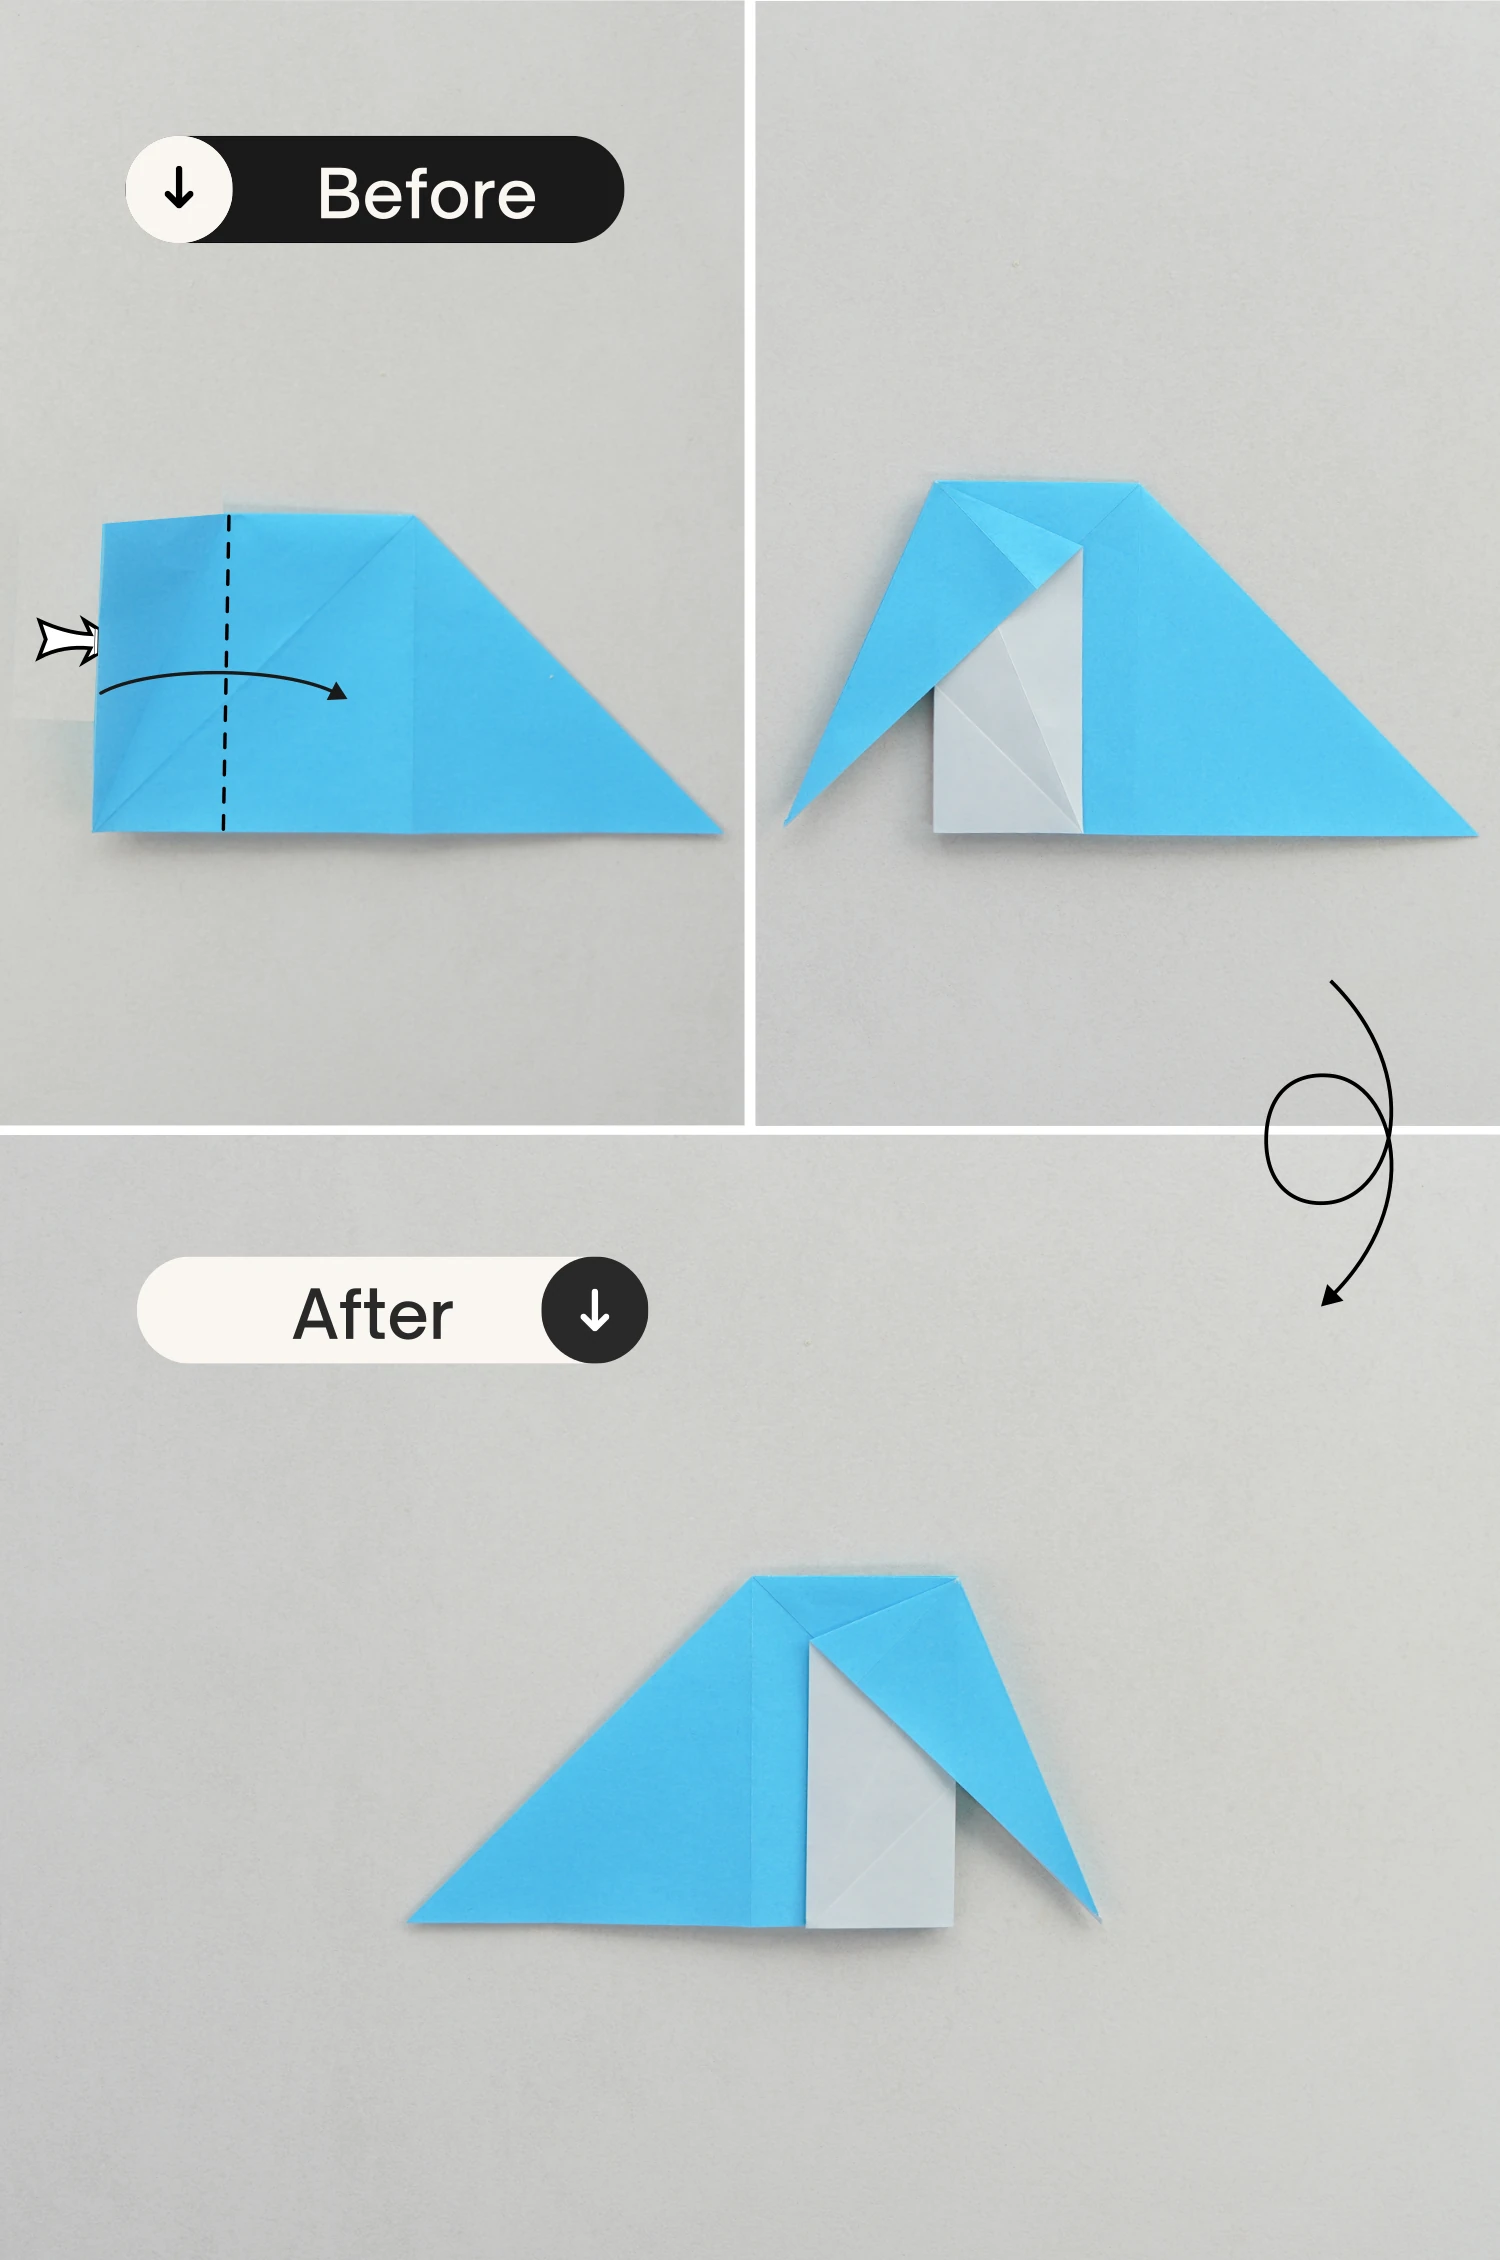
Step 11
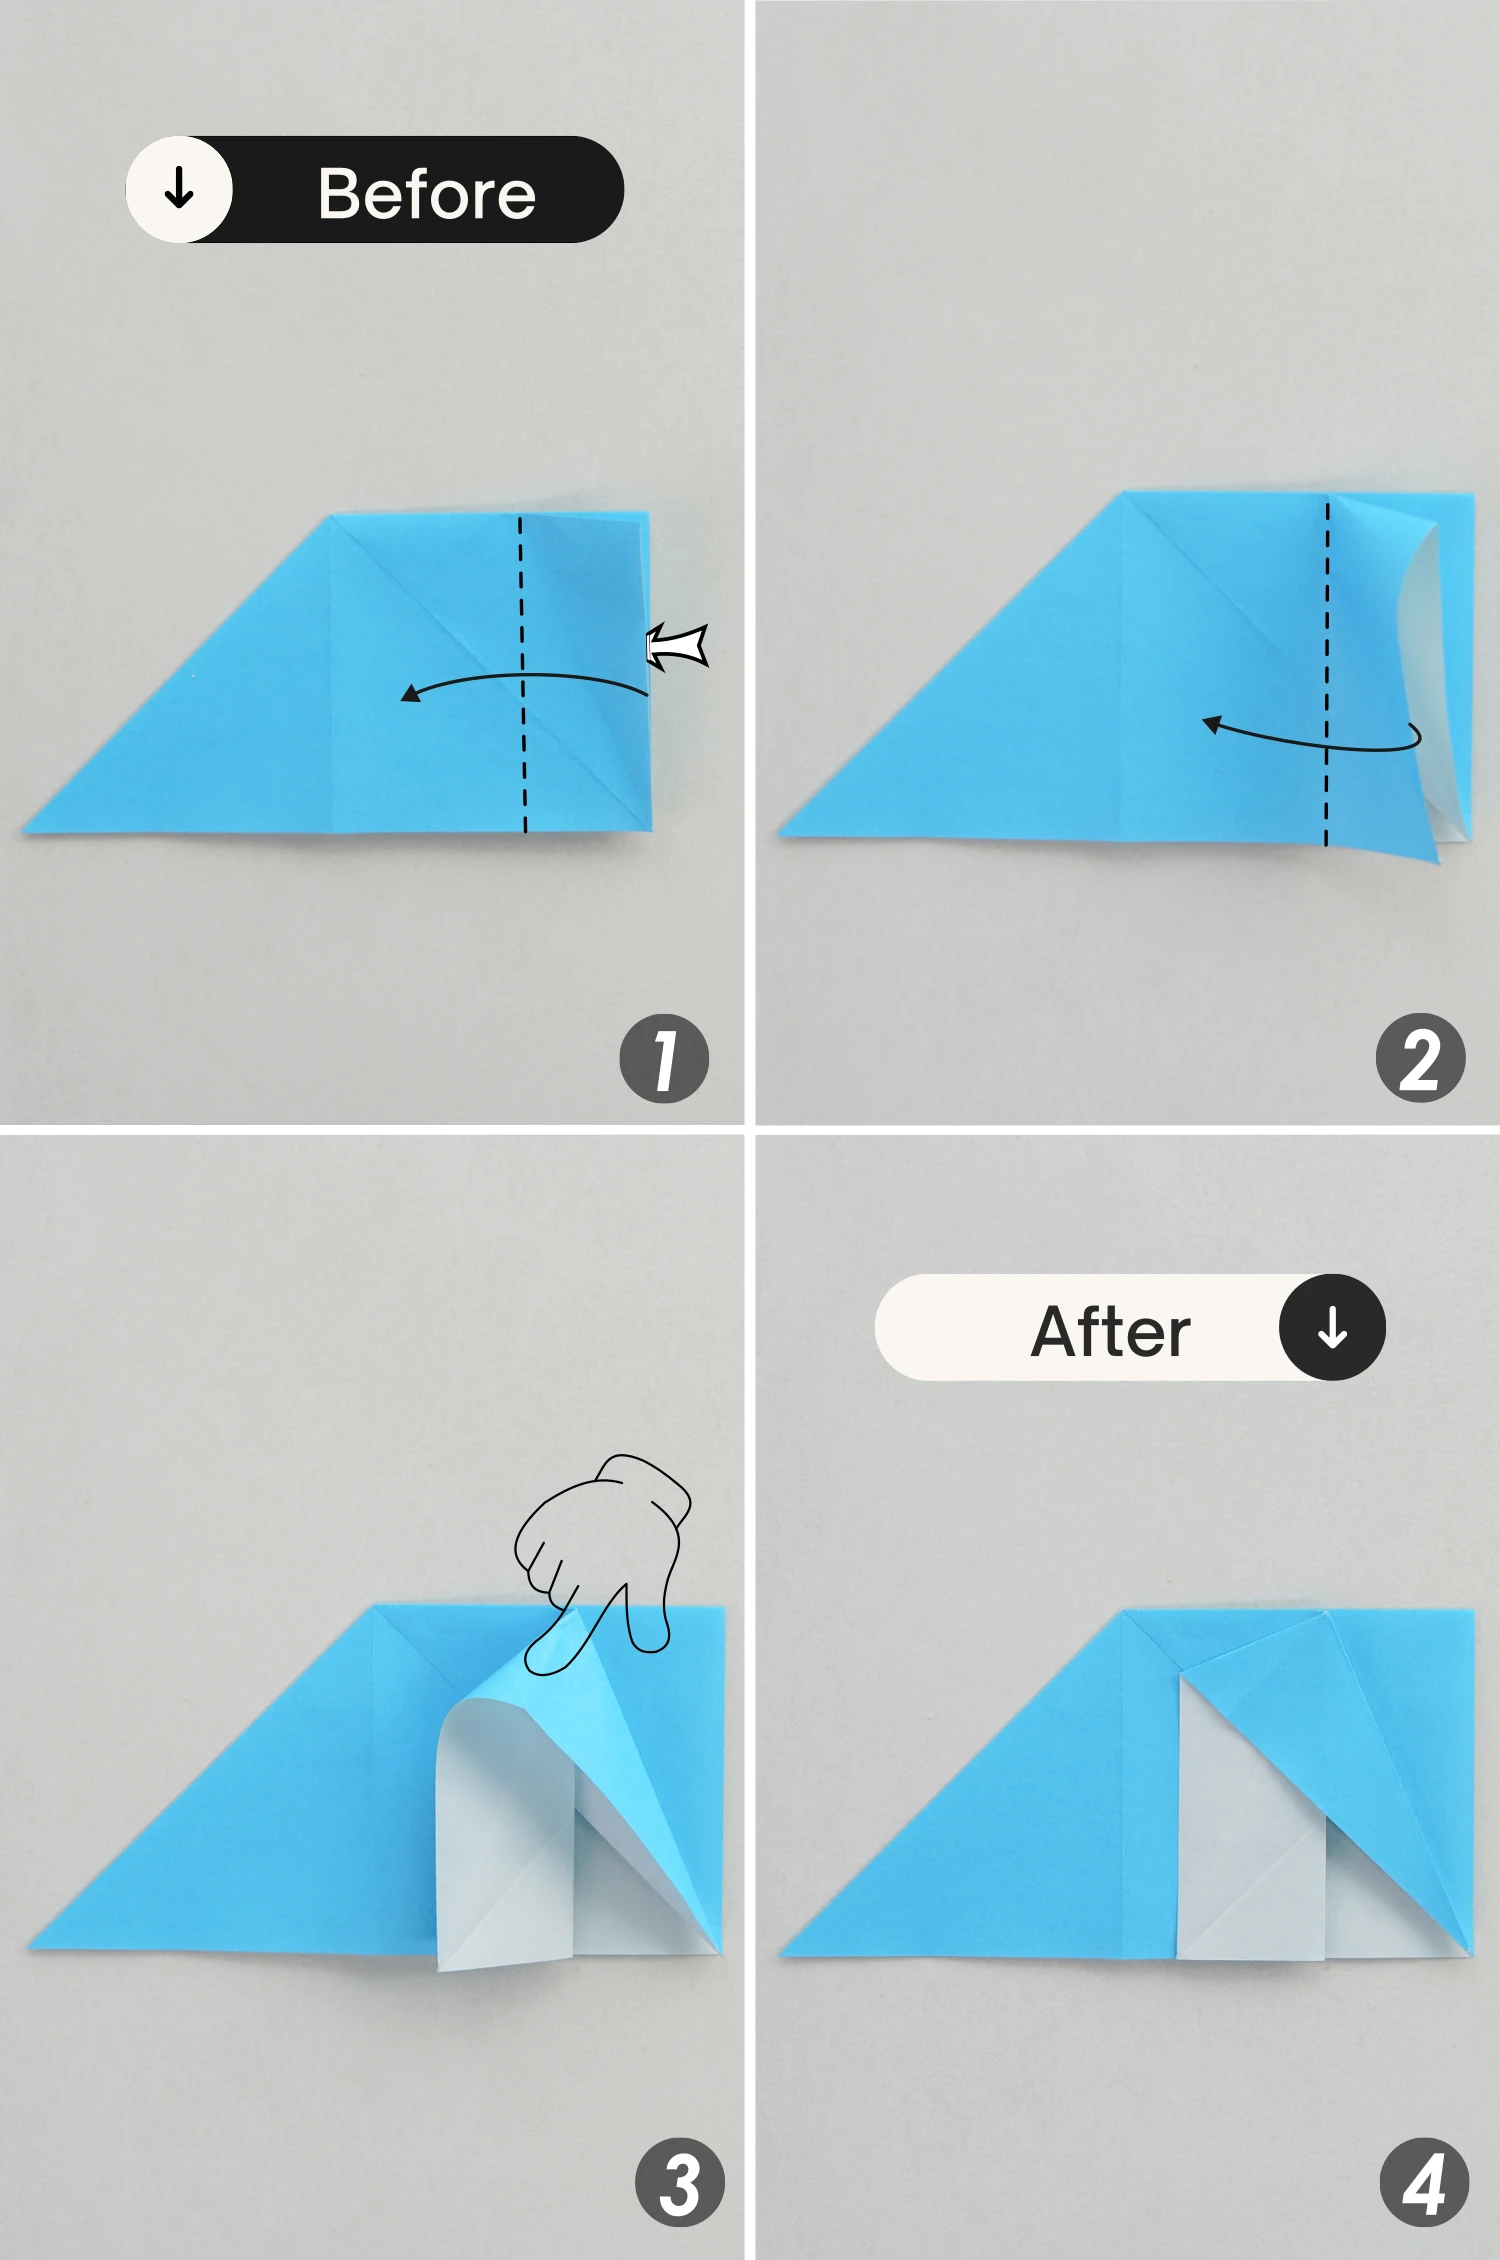
Fold the top edge down a little along the dotted line, to align with the slanted edge, then unfold it.
Step 12
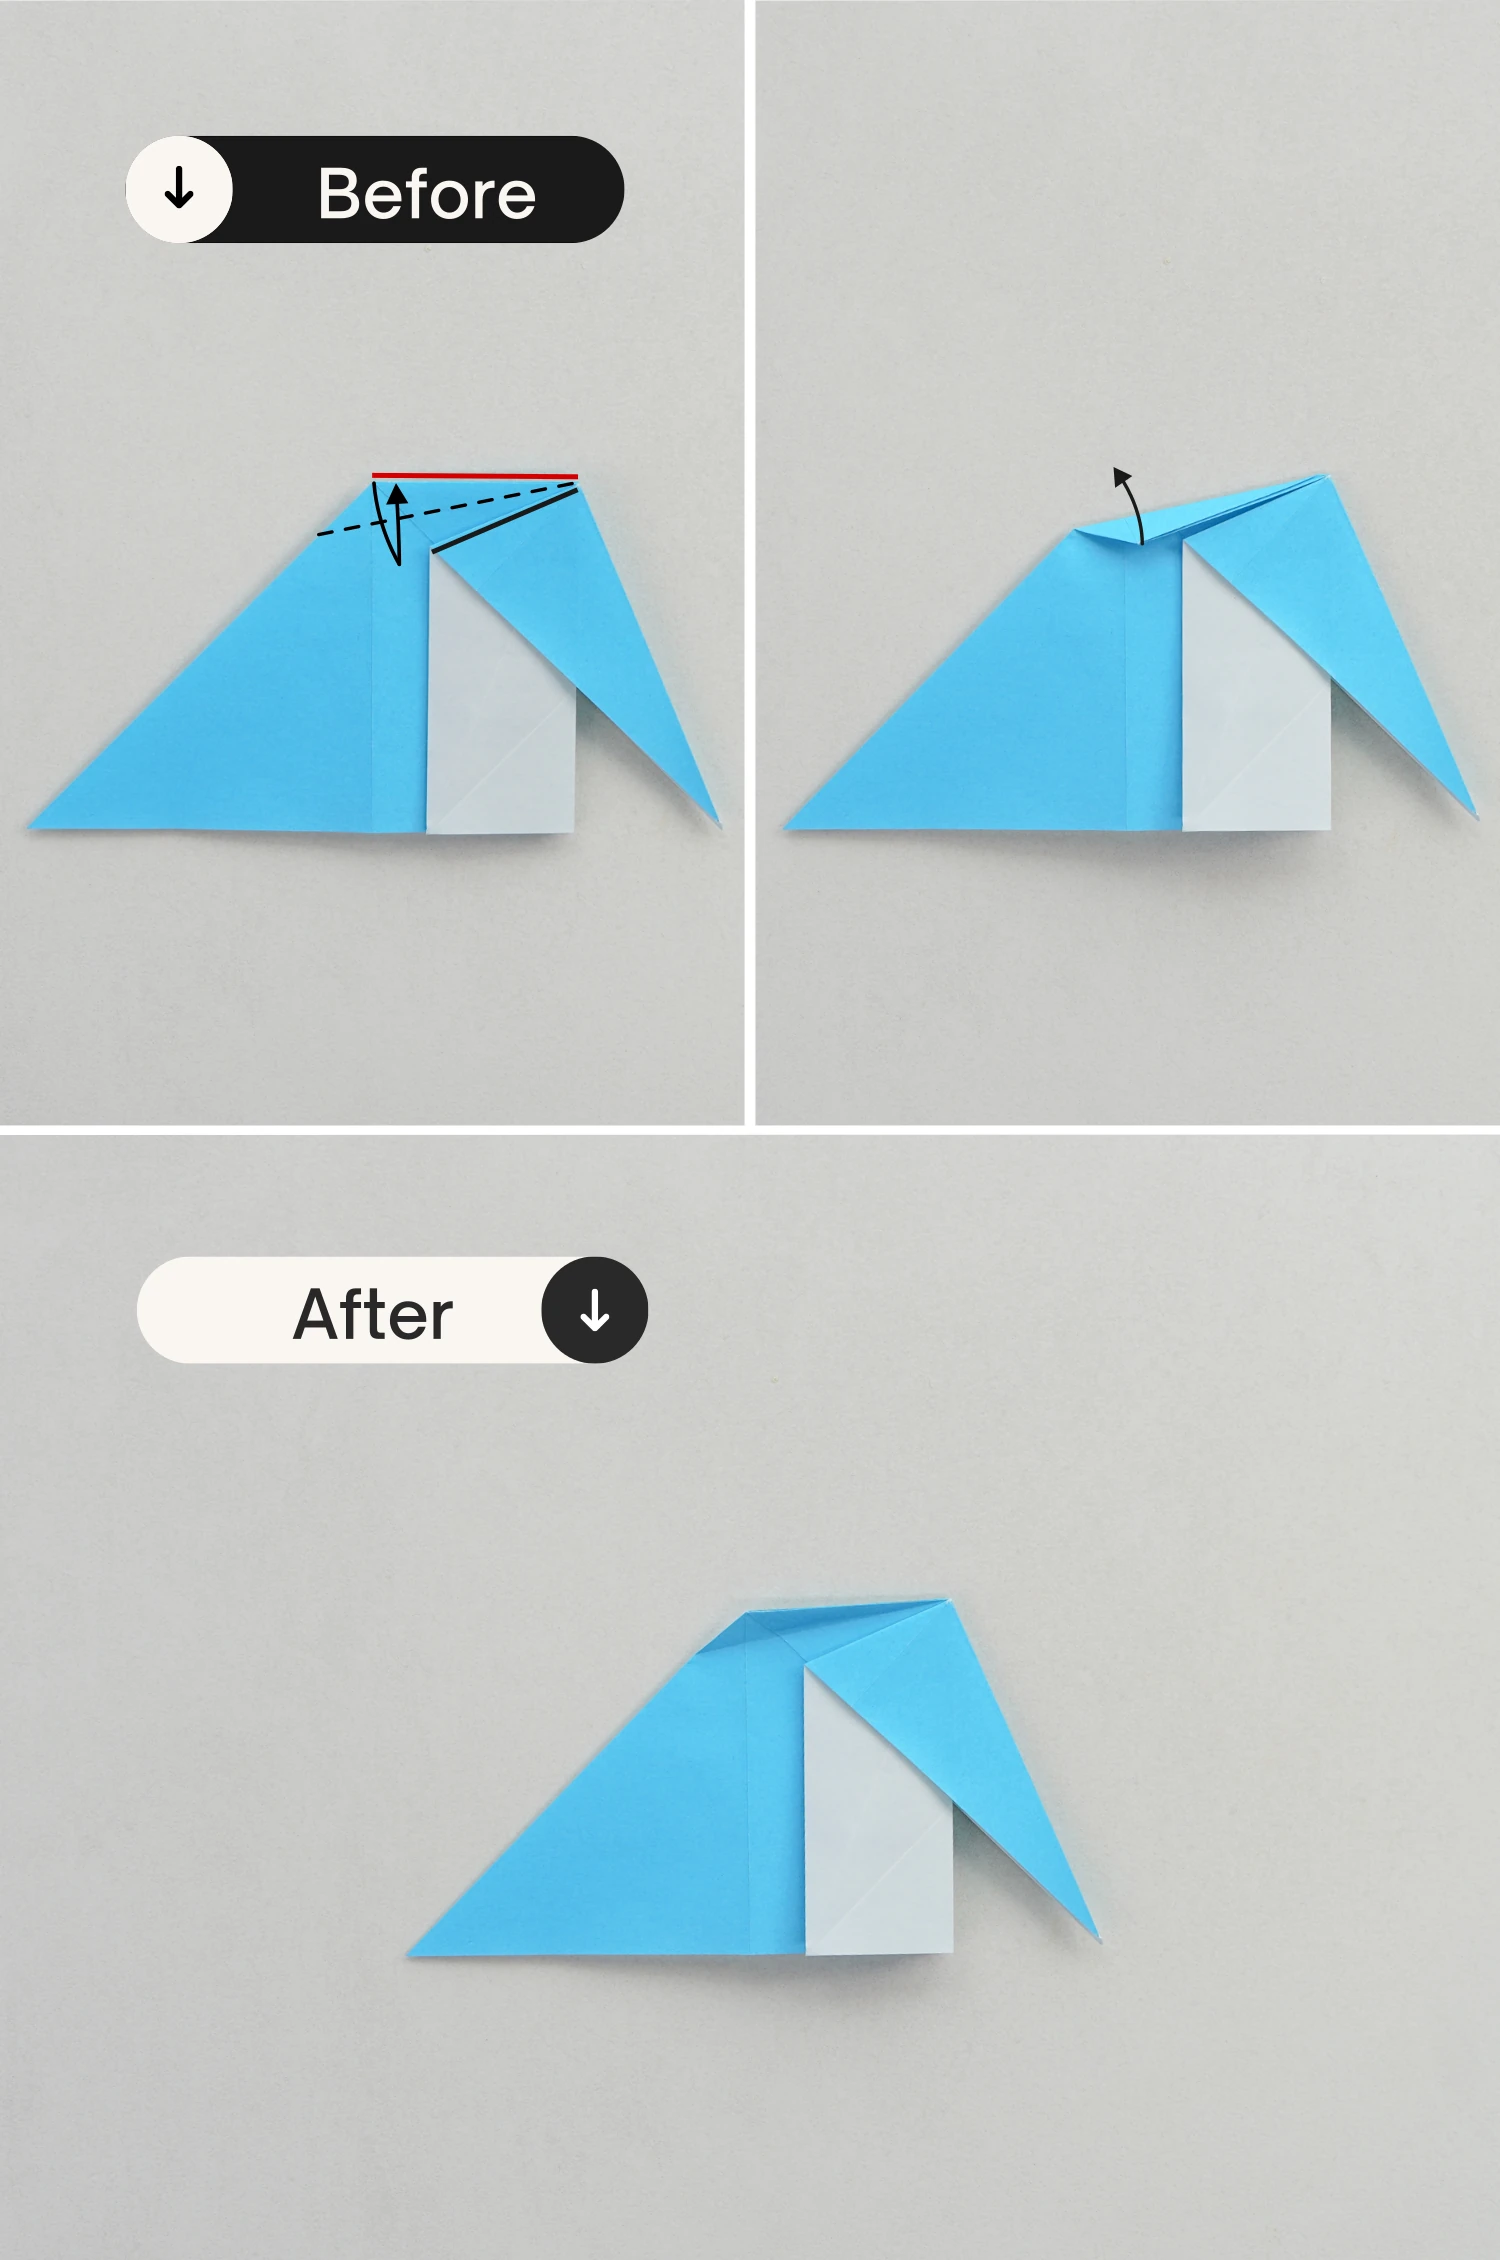
View it from the top, pull the two top edges, and slightly open the model from the bottom. Look at the top, here are six slanted creases, now use your finger to press down the two slanted creases in the middle. Then shape the four creases on the left and right, finally, close it and view it from the original sight.
Step 13
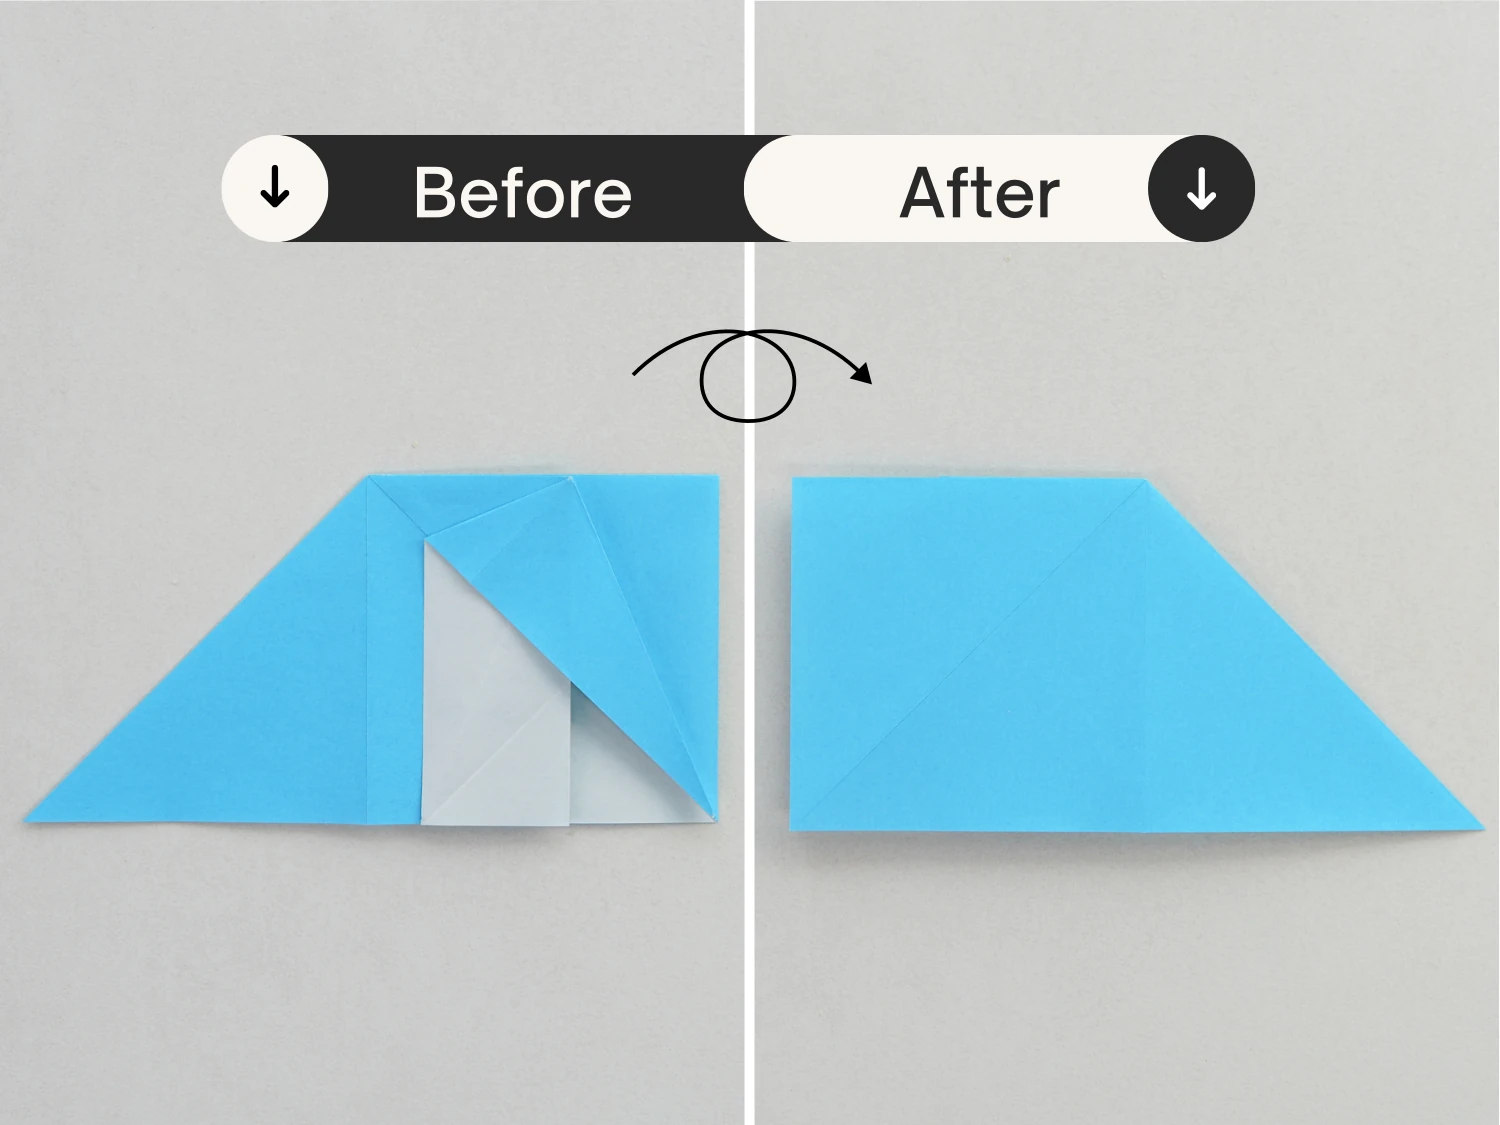
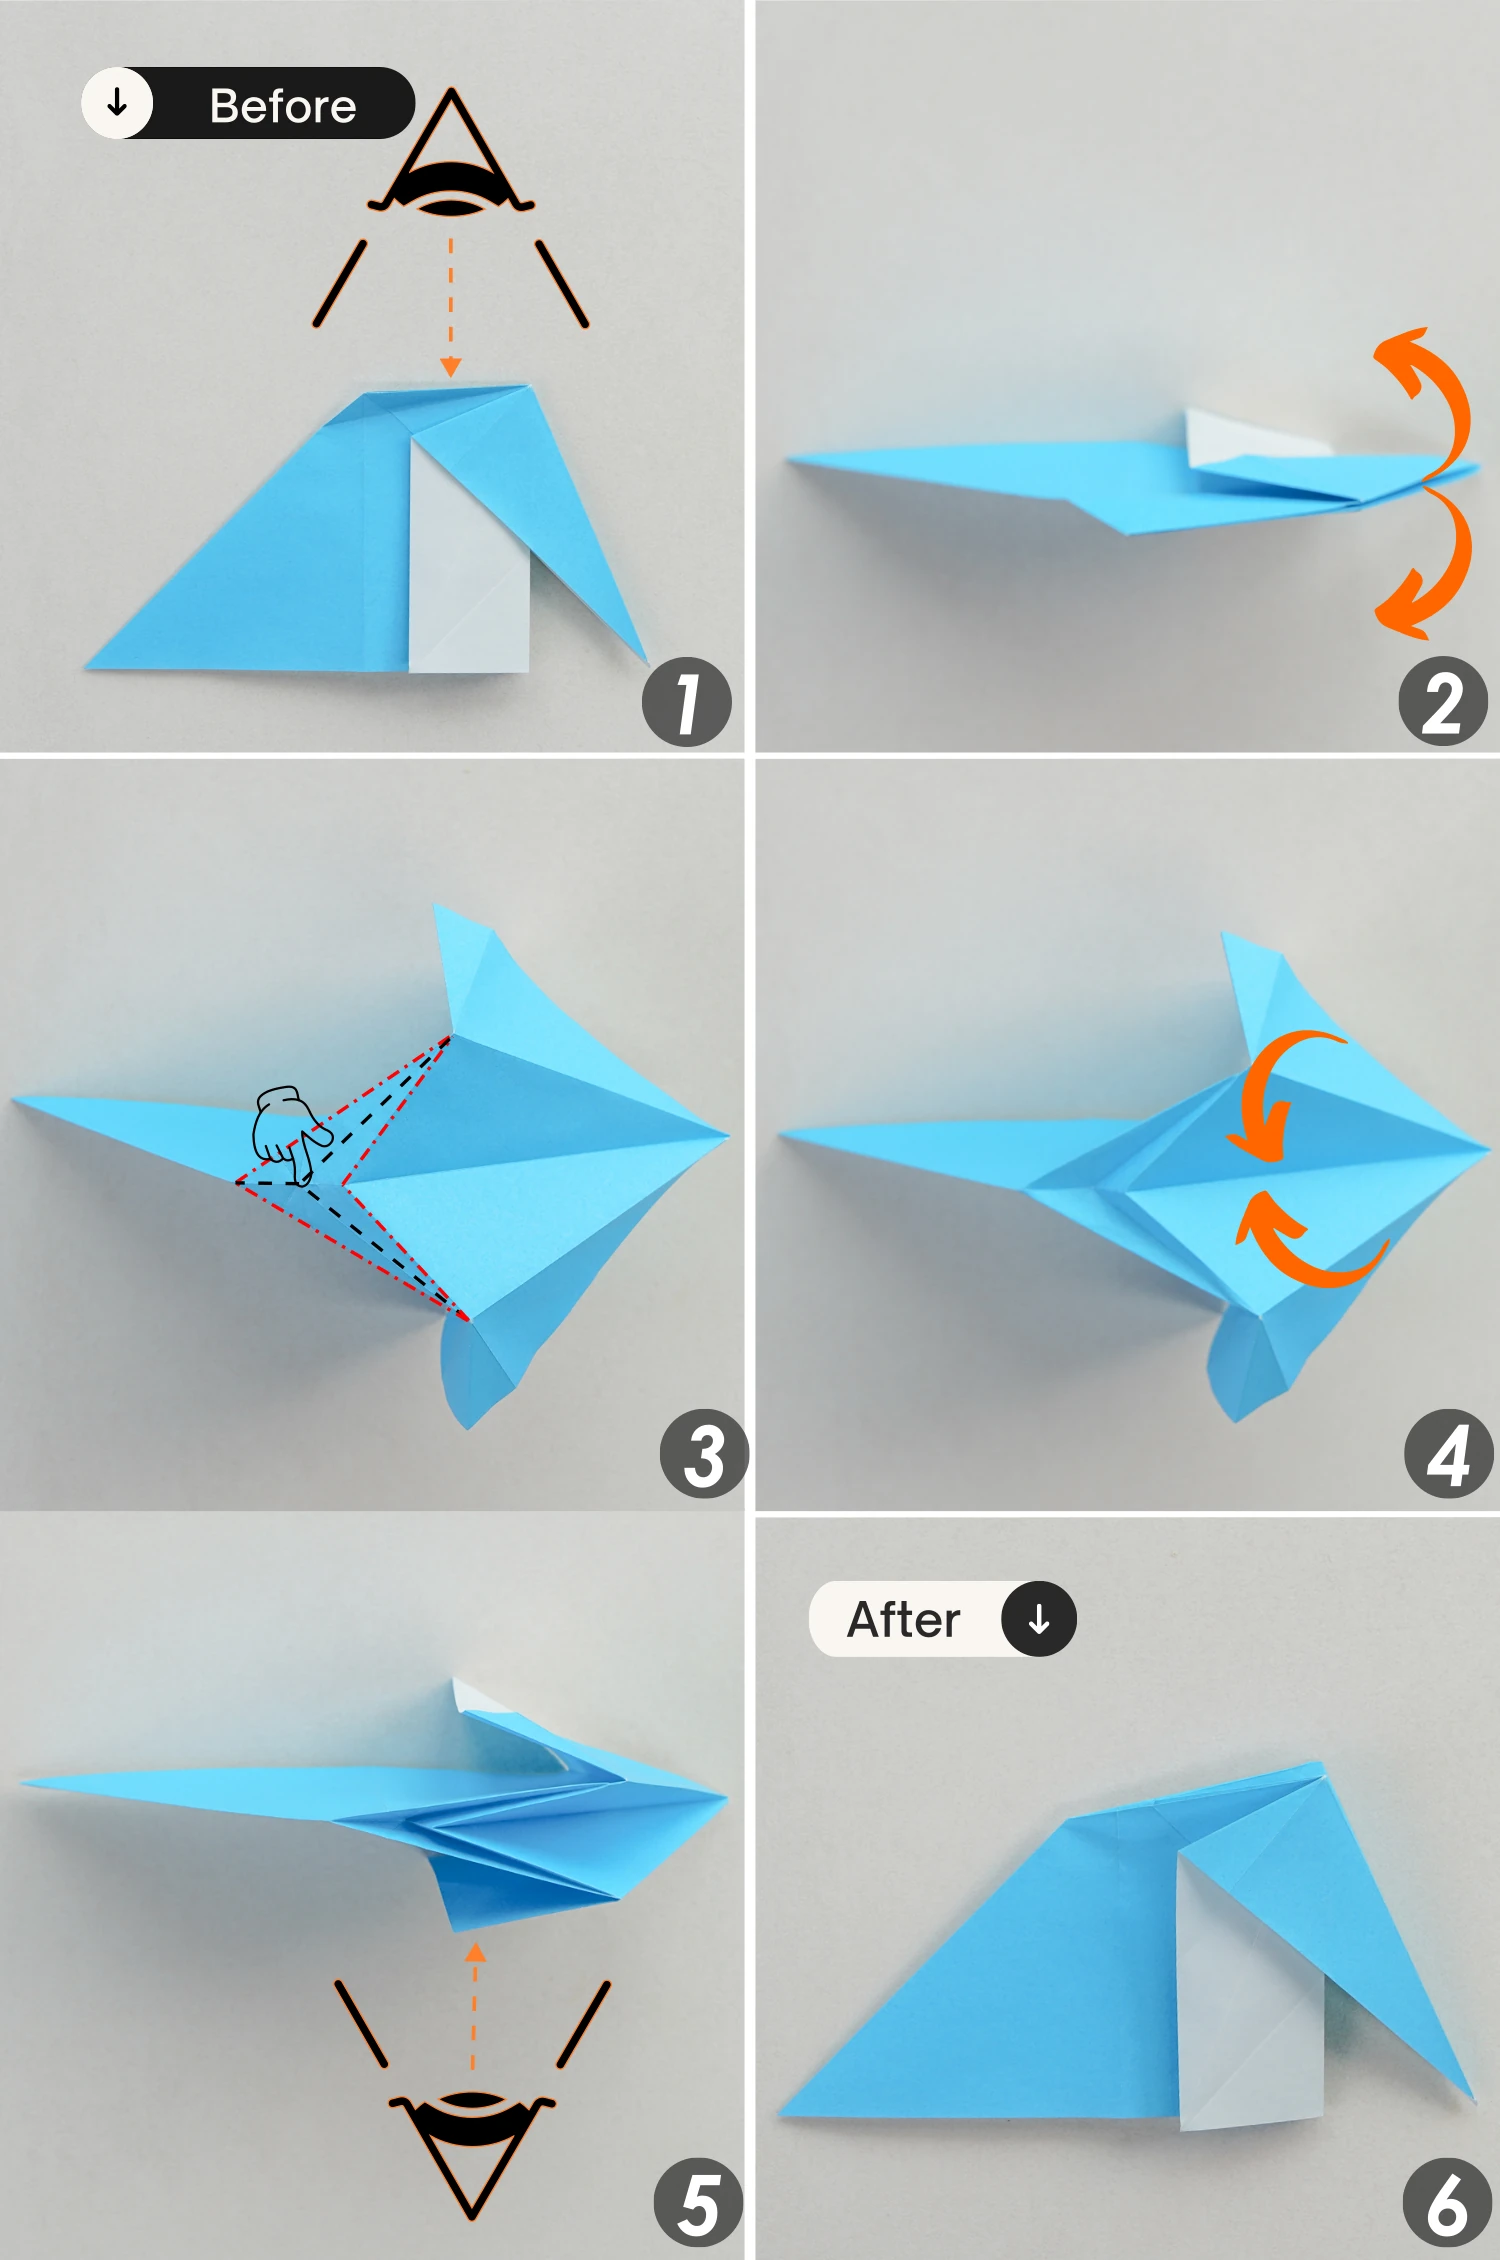
Fold the bottom left point toward the right along the dotted line.
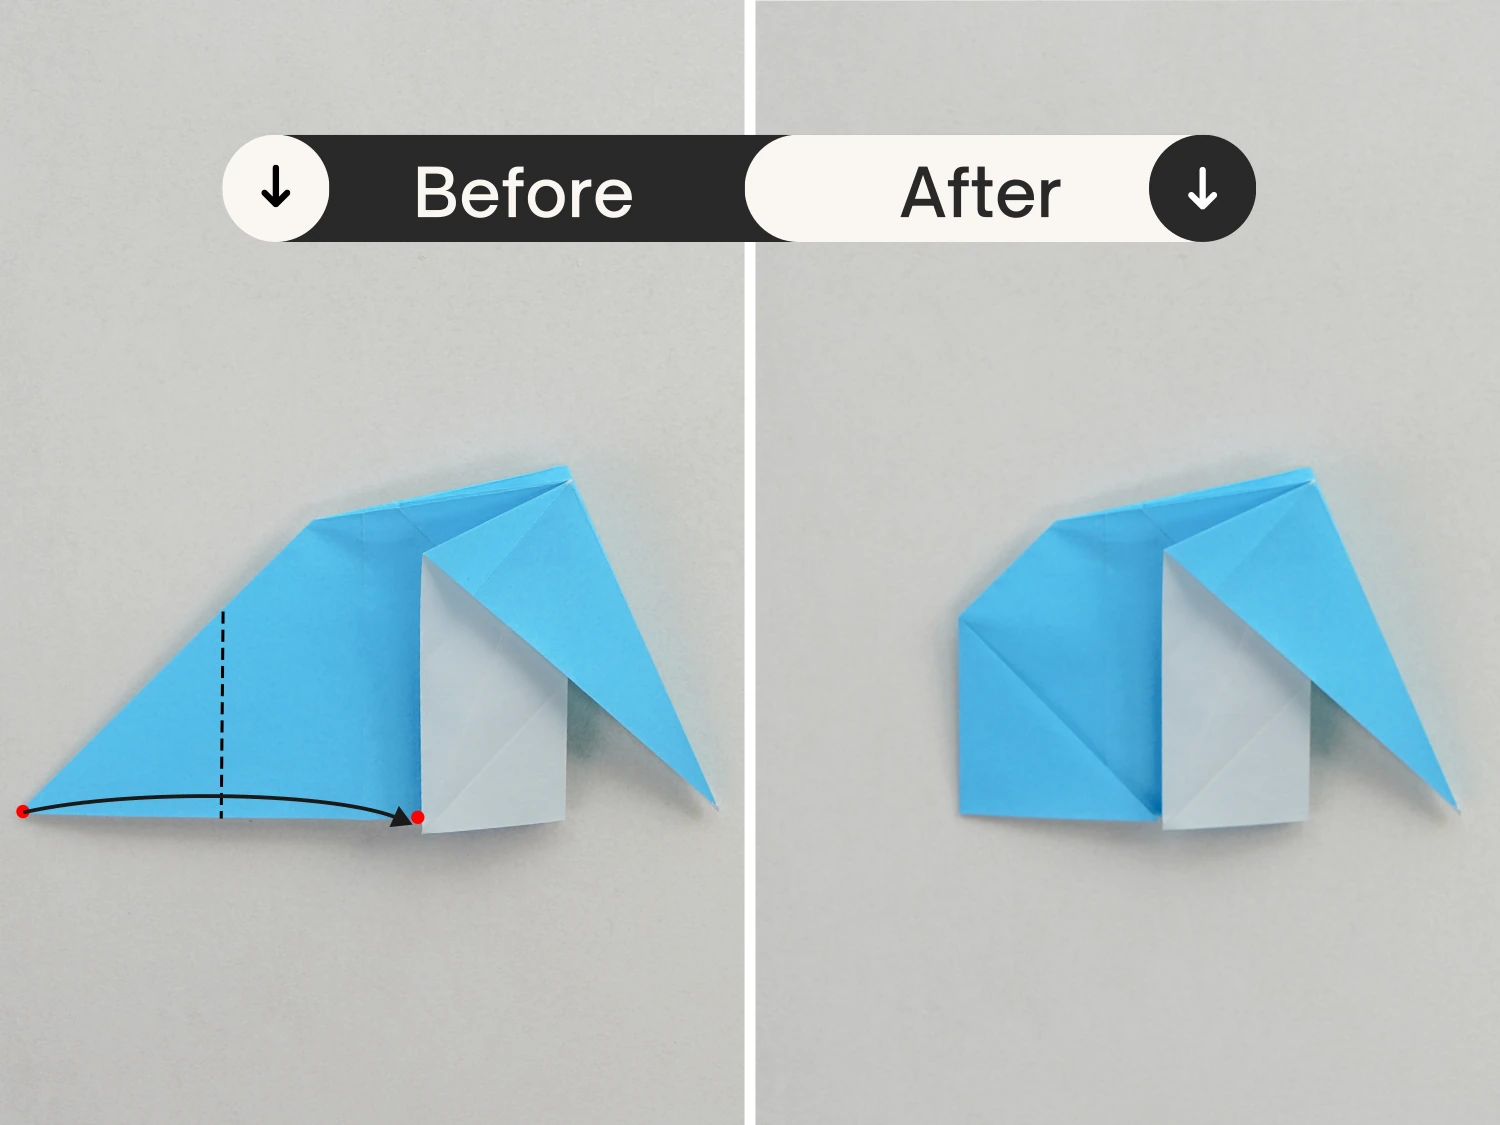
Step 14
Take the corner you folded in the previous step, fold it up along the dotted line, and then unfold the corner back to the state before the last two steps.
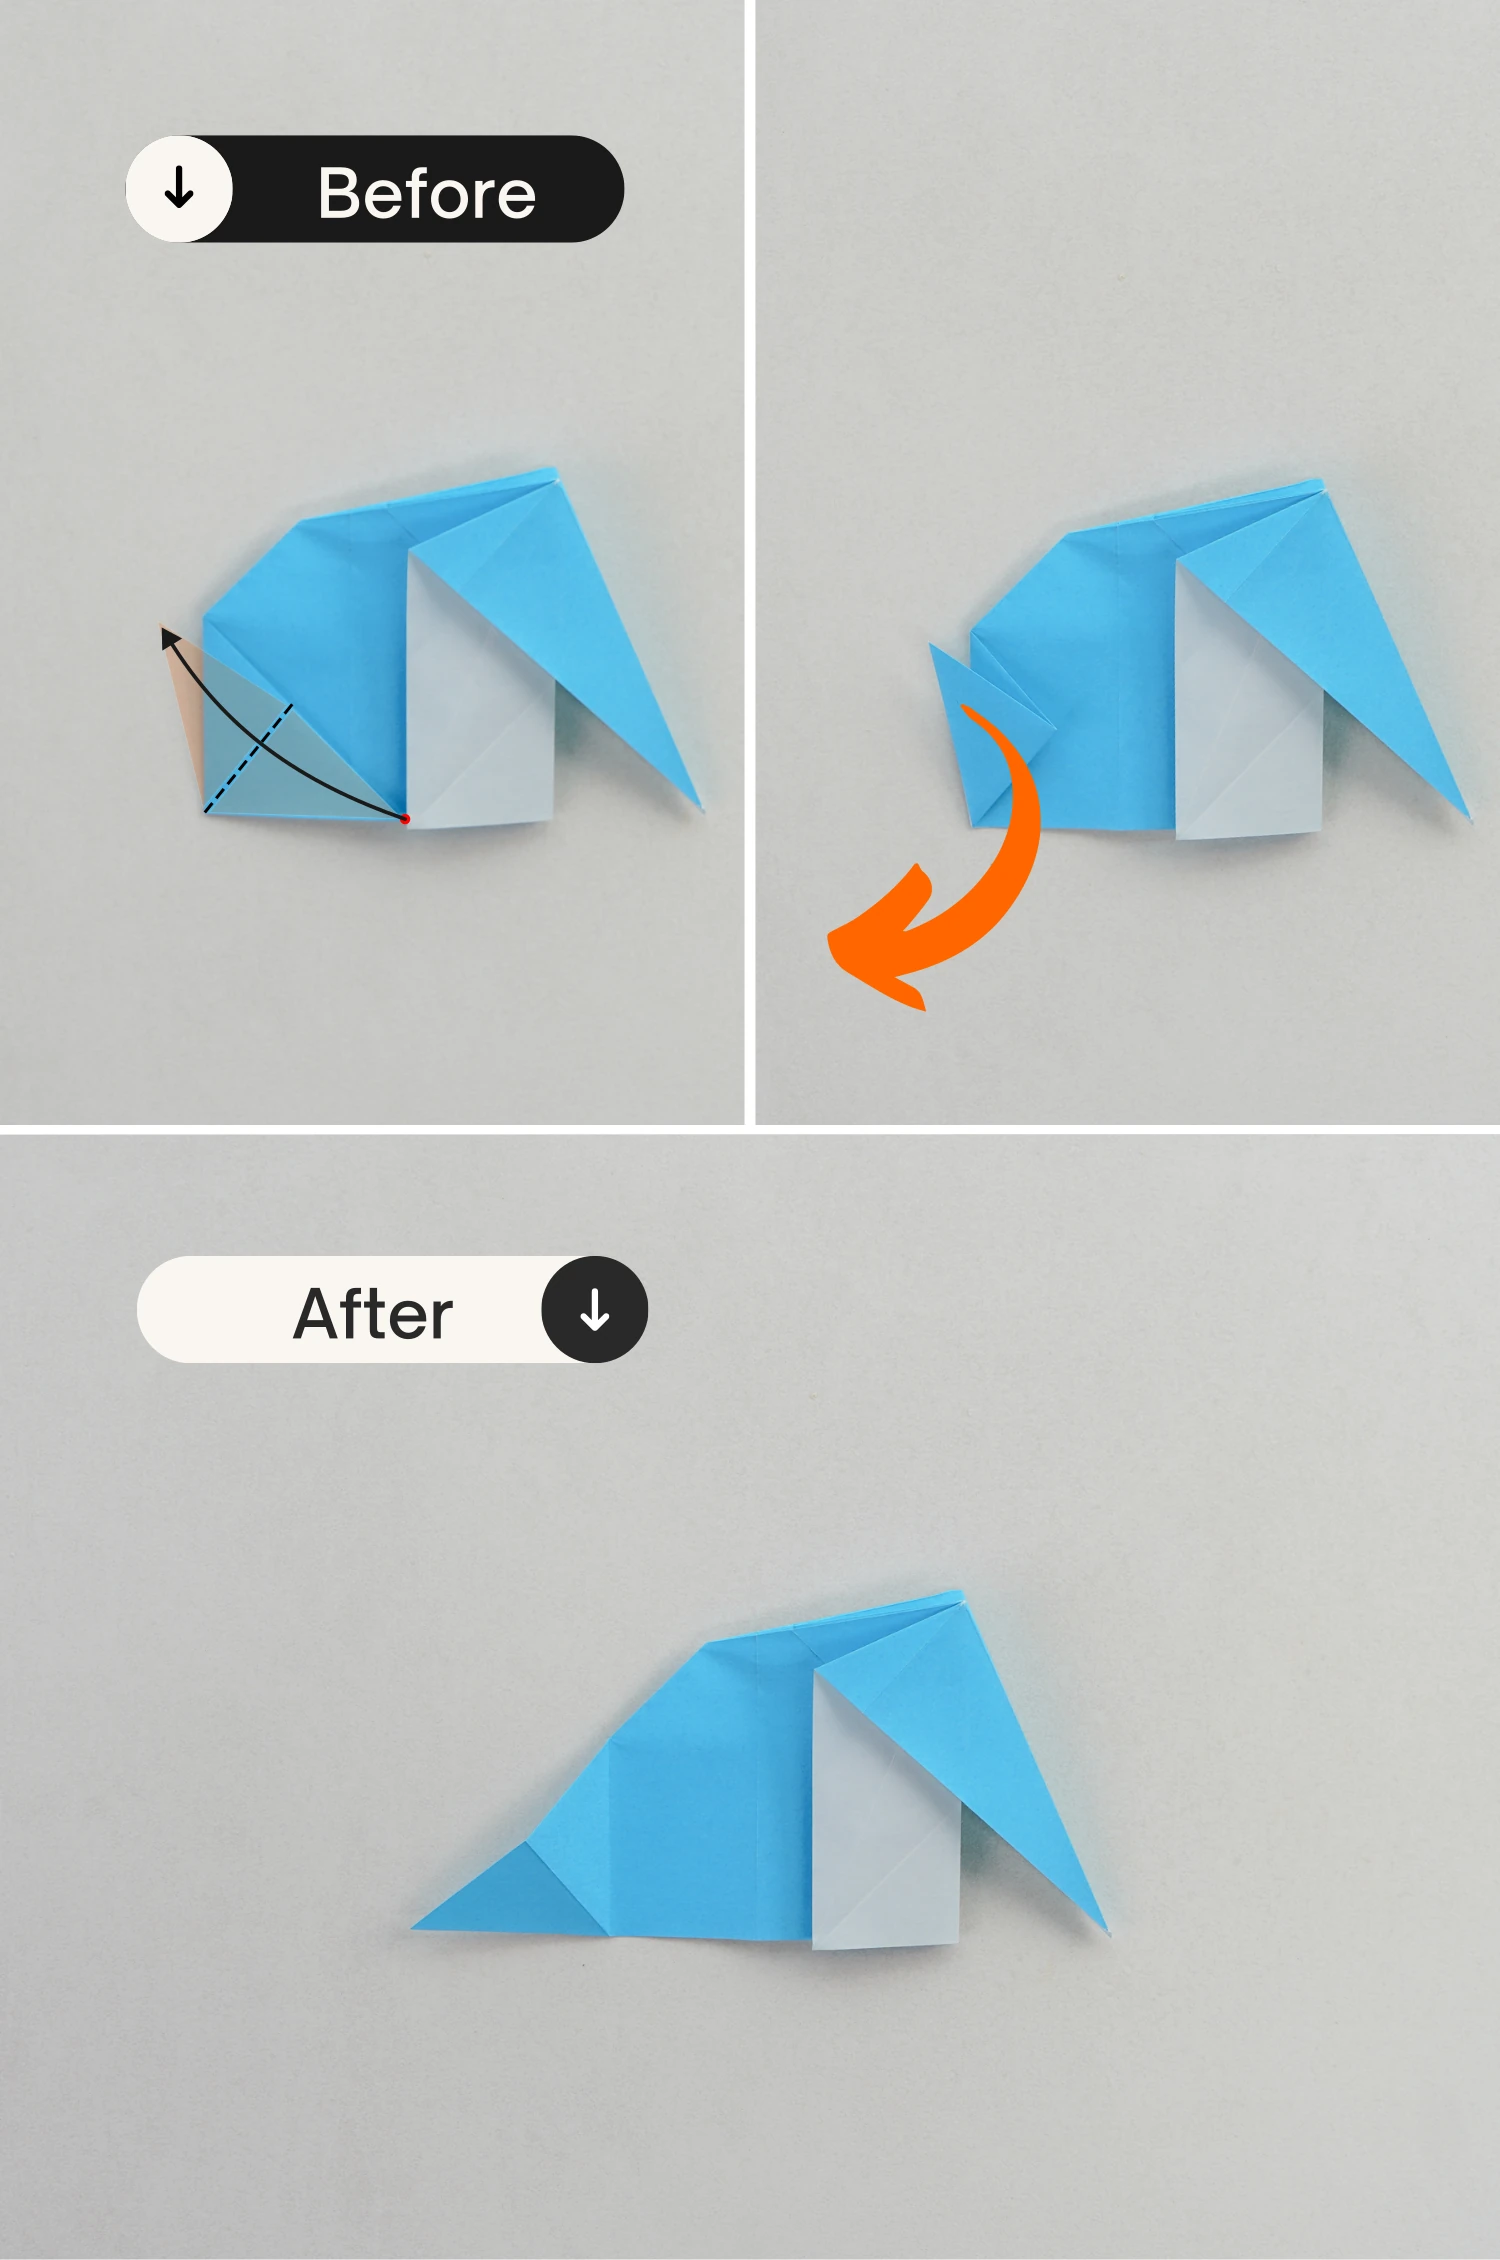
Step 15
Lift the bottom edge of the top layer, press down the crease you made in step 14, and fold the left point outwards, then flatten the paper and lay it flat.
Step 16
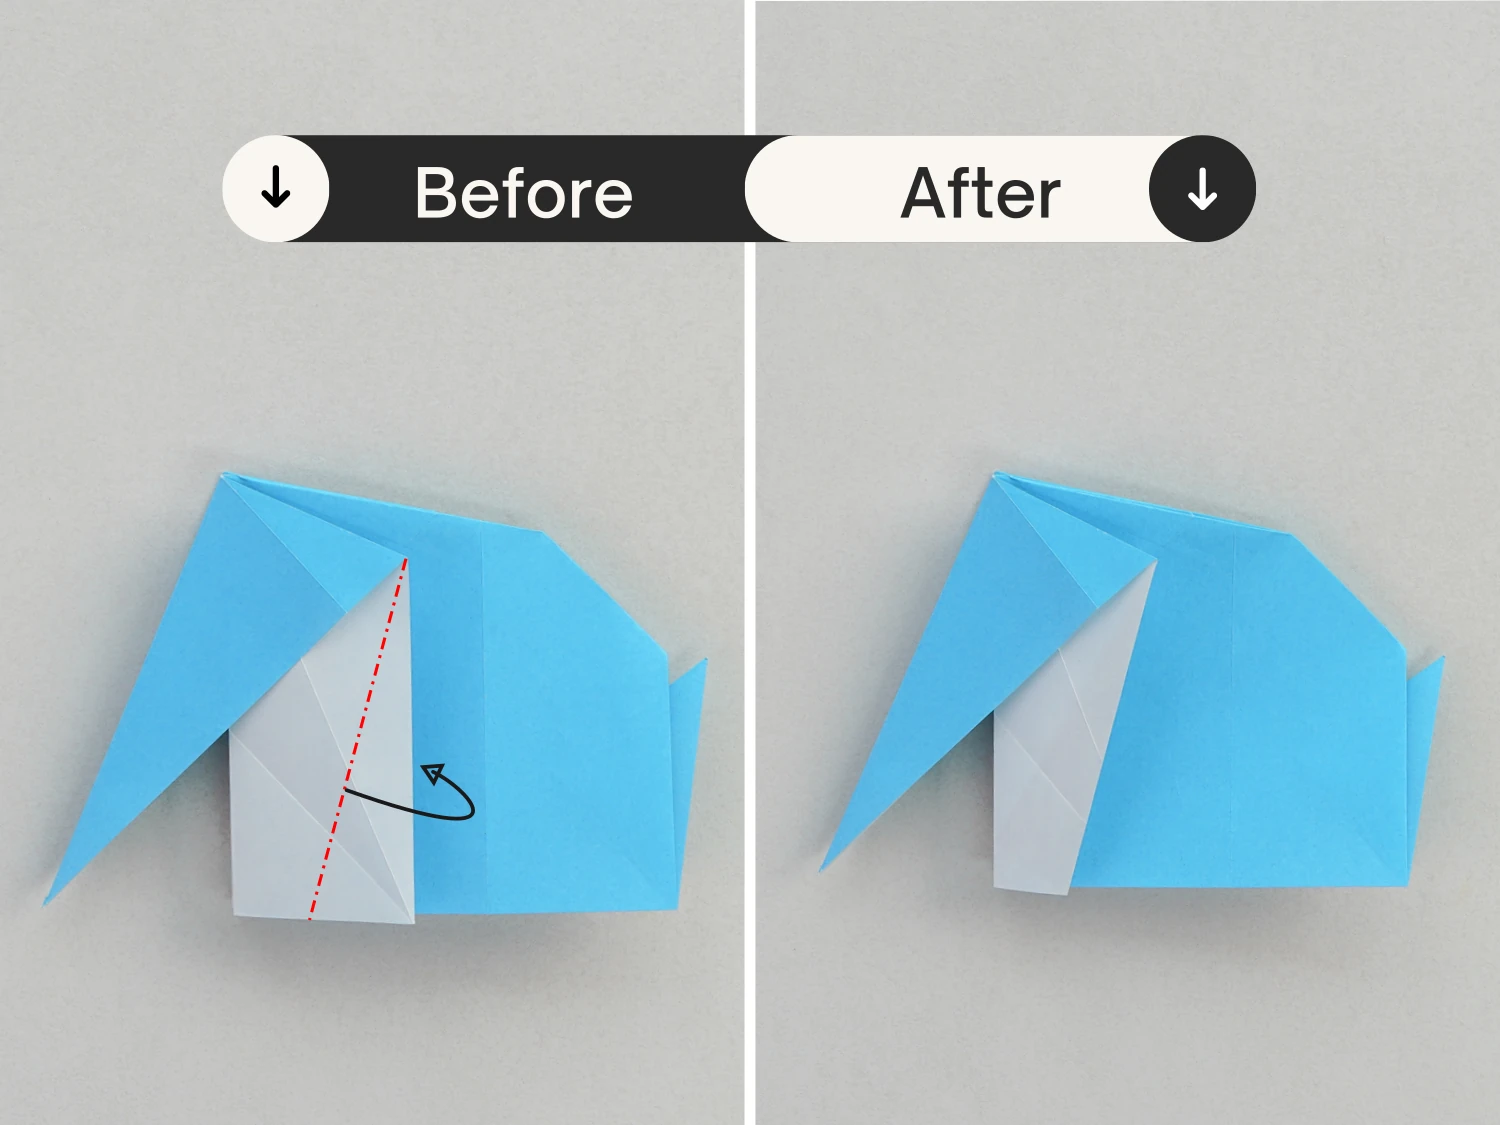
Fold the left edge of the white part backward along the red dotted line.
Step 17
Flip the model over.
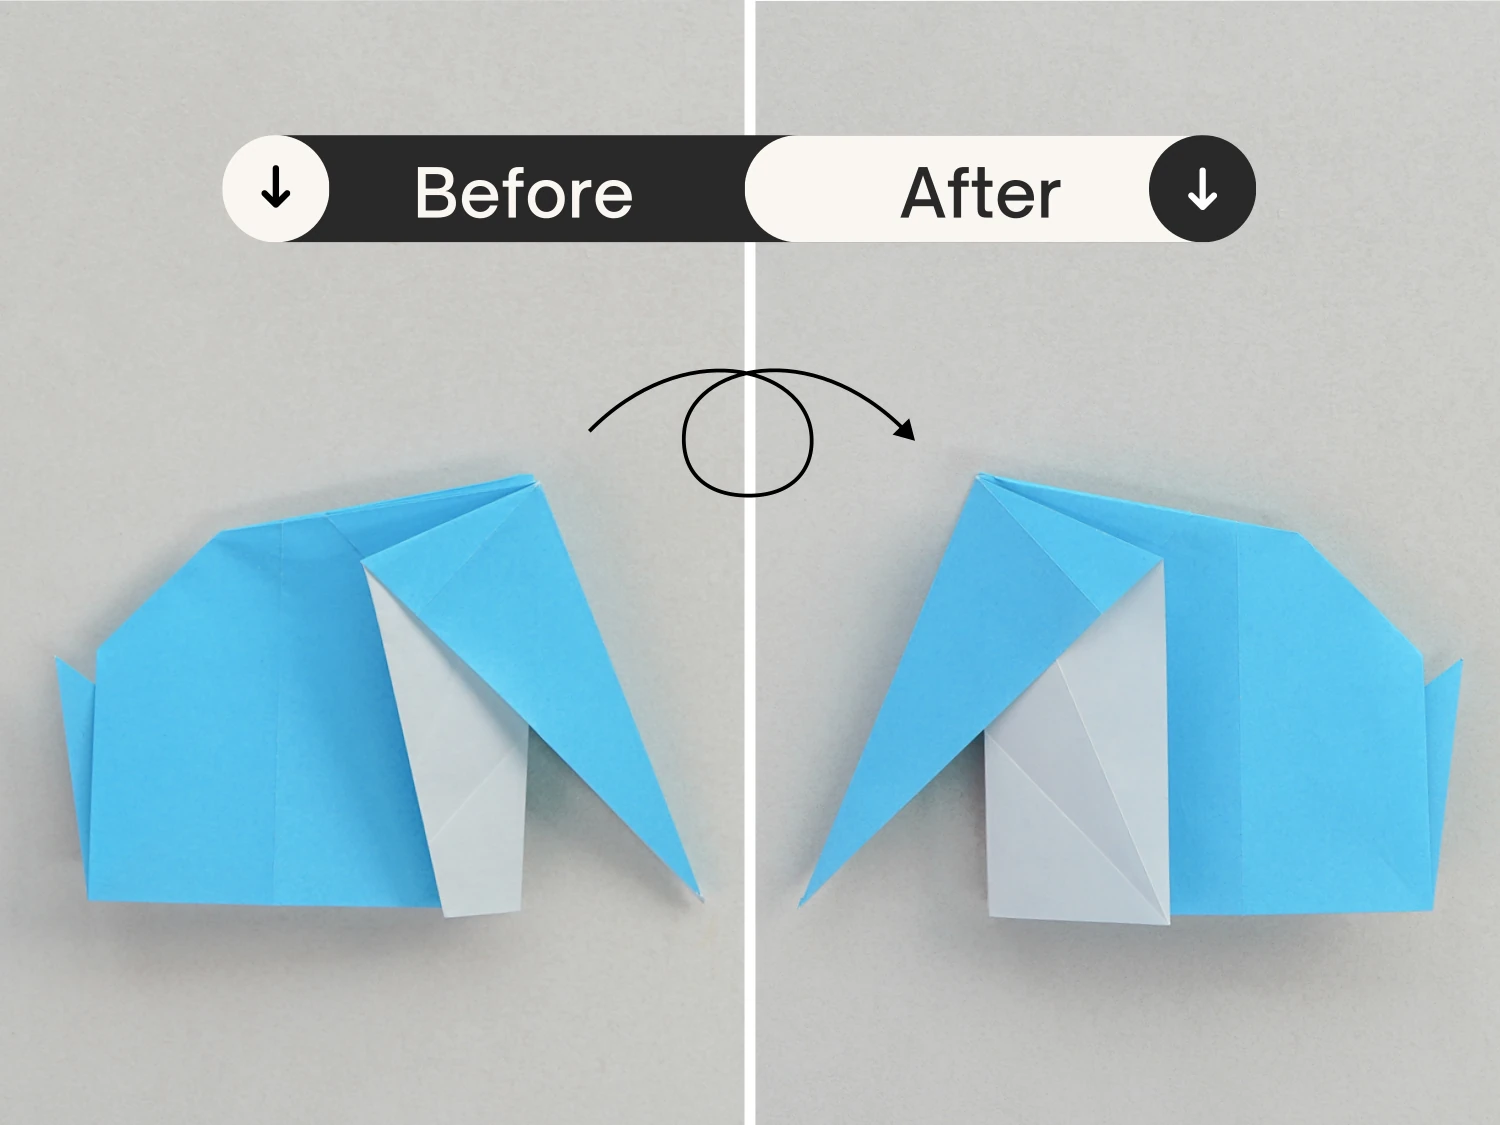
Step 18
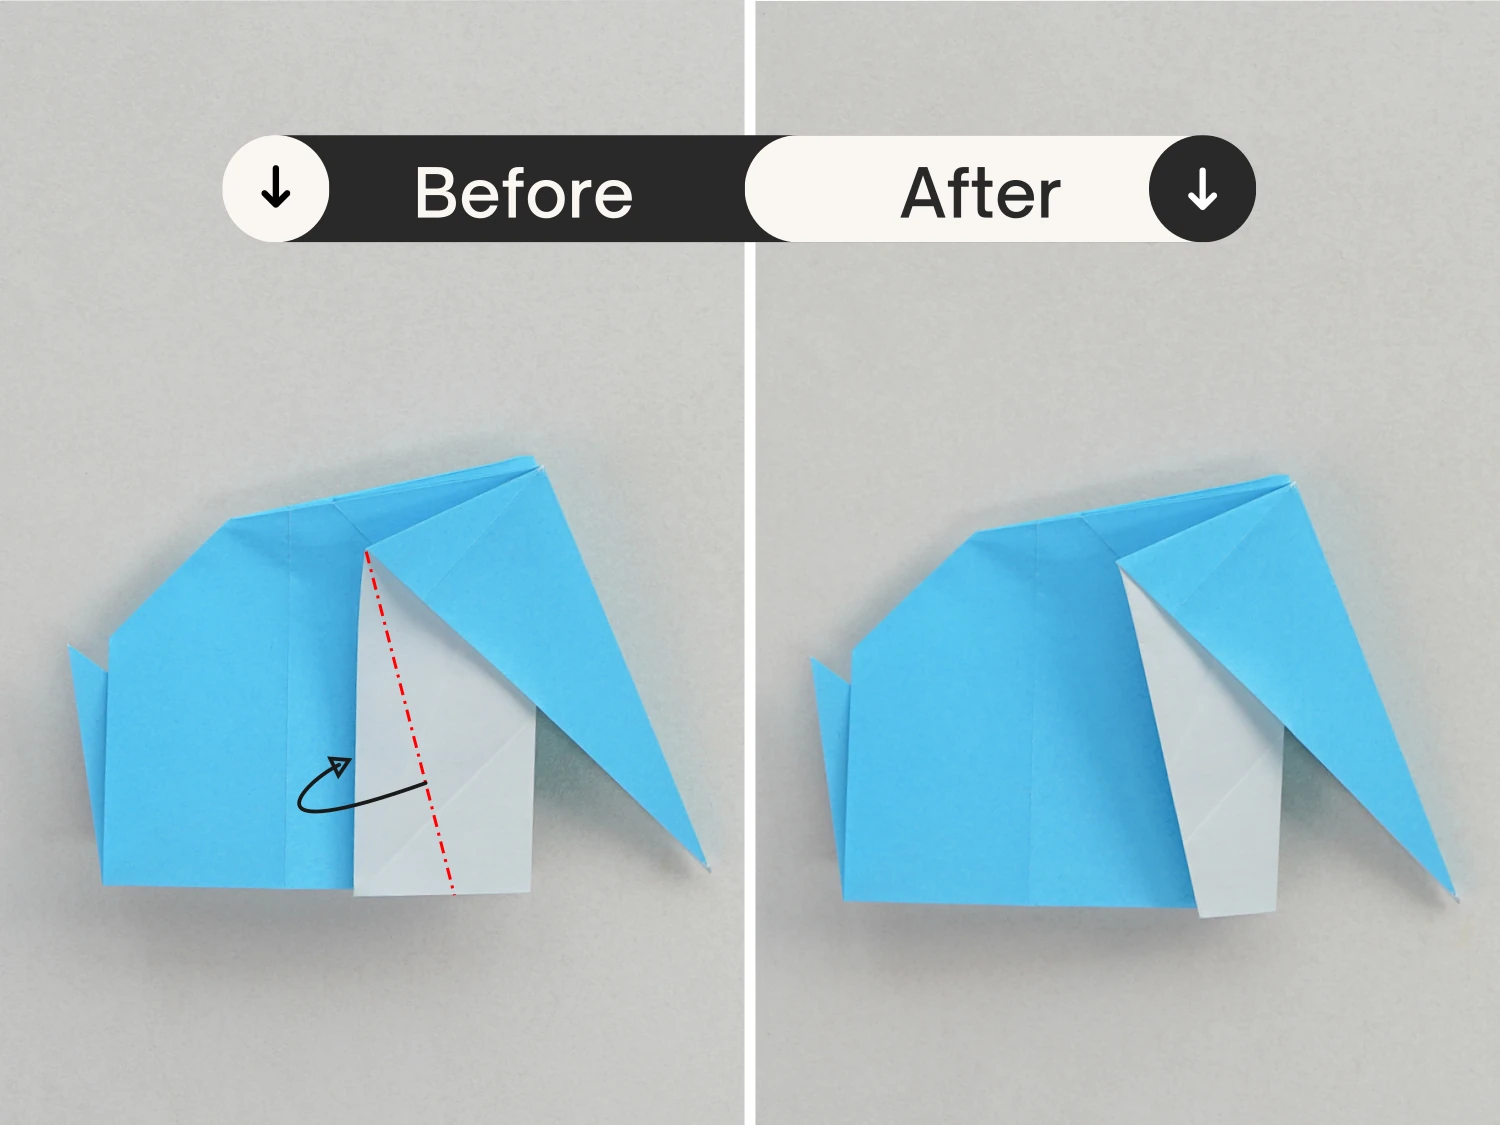
Fold the right edge of the white part backward along the dotted line as well.
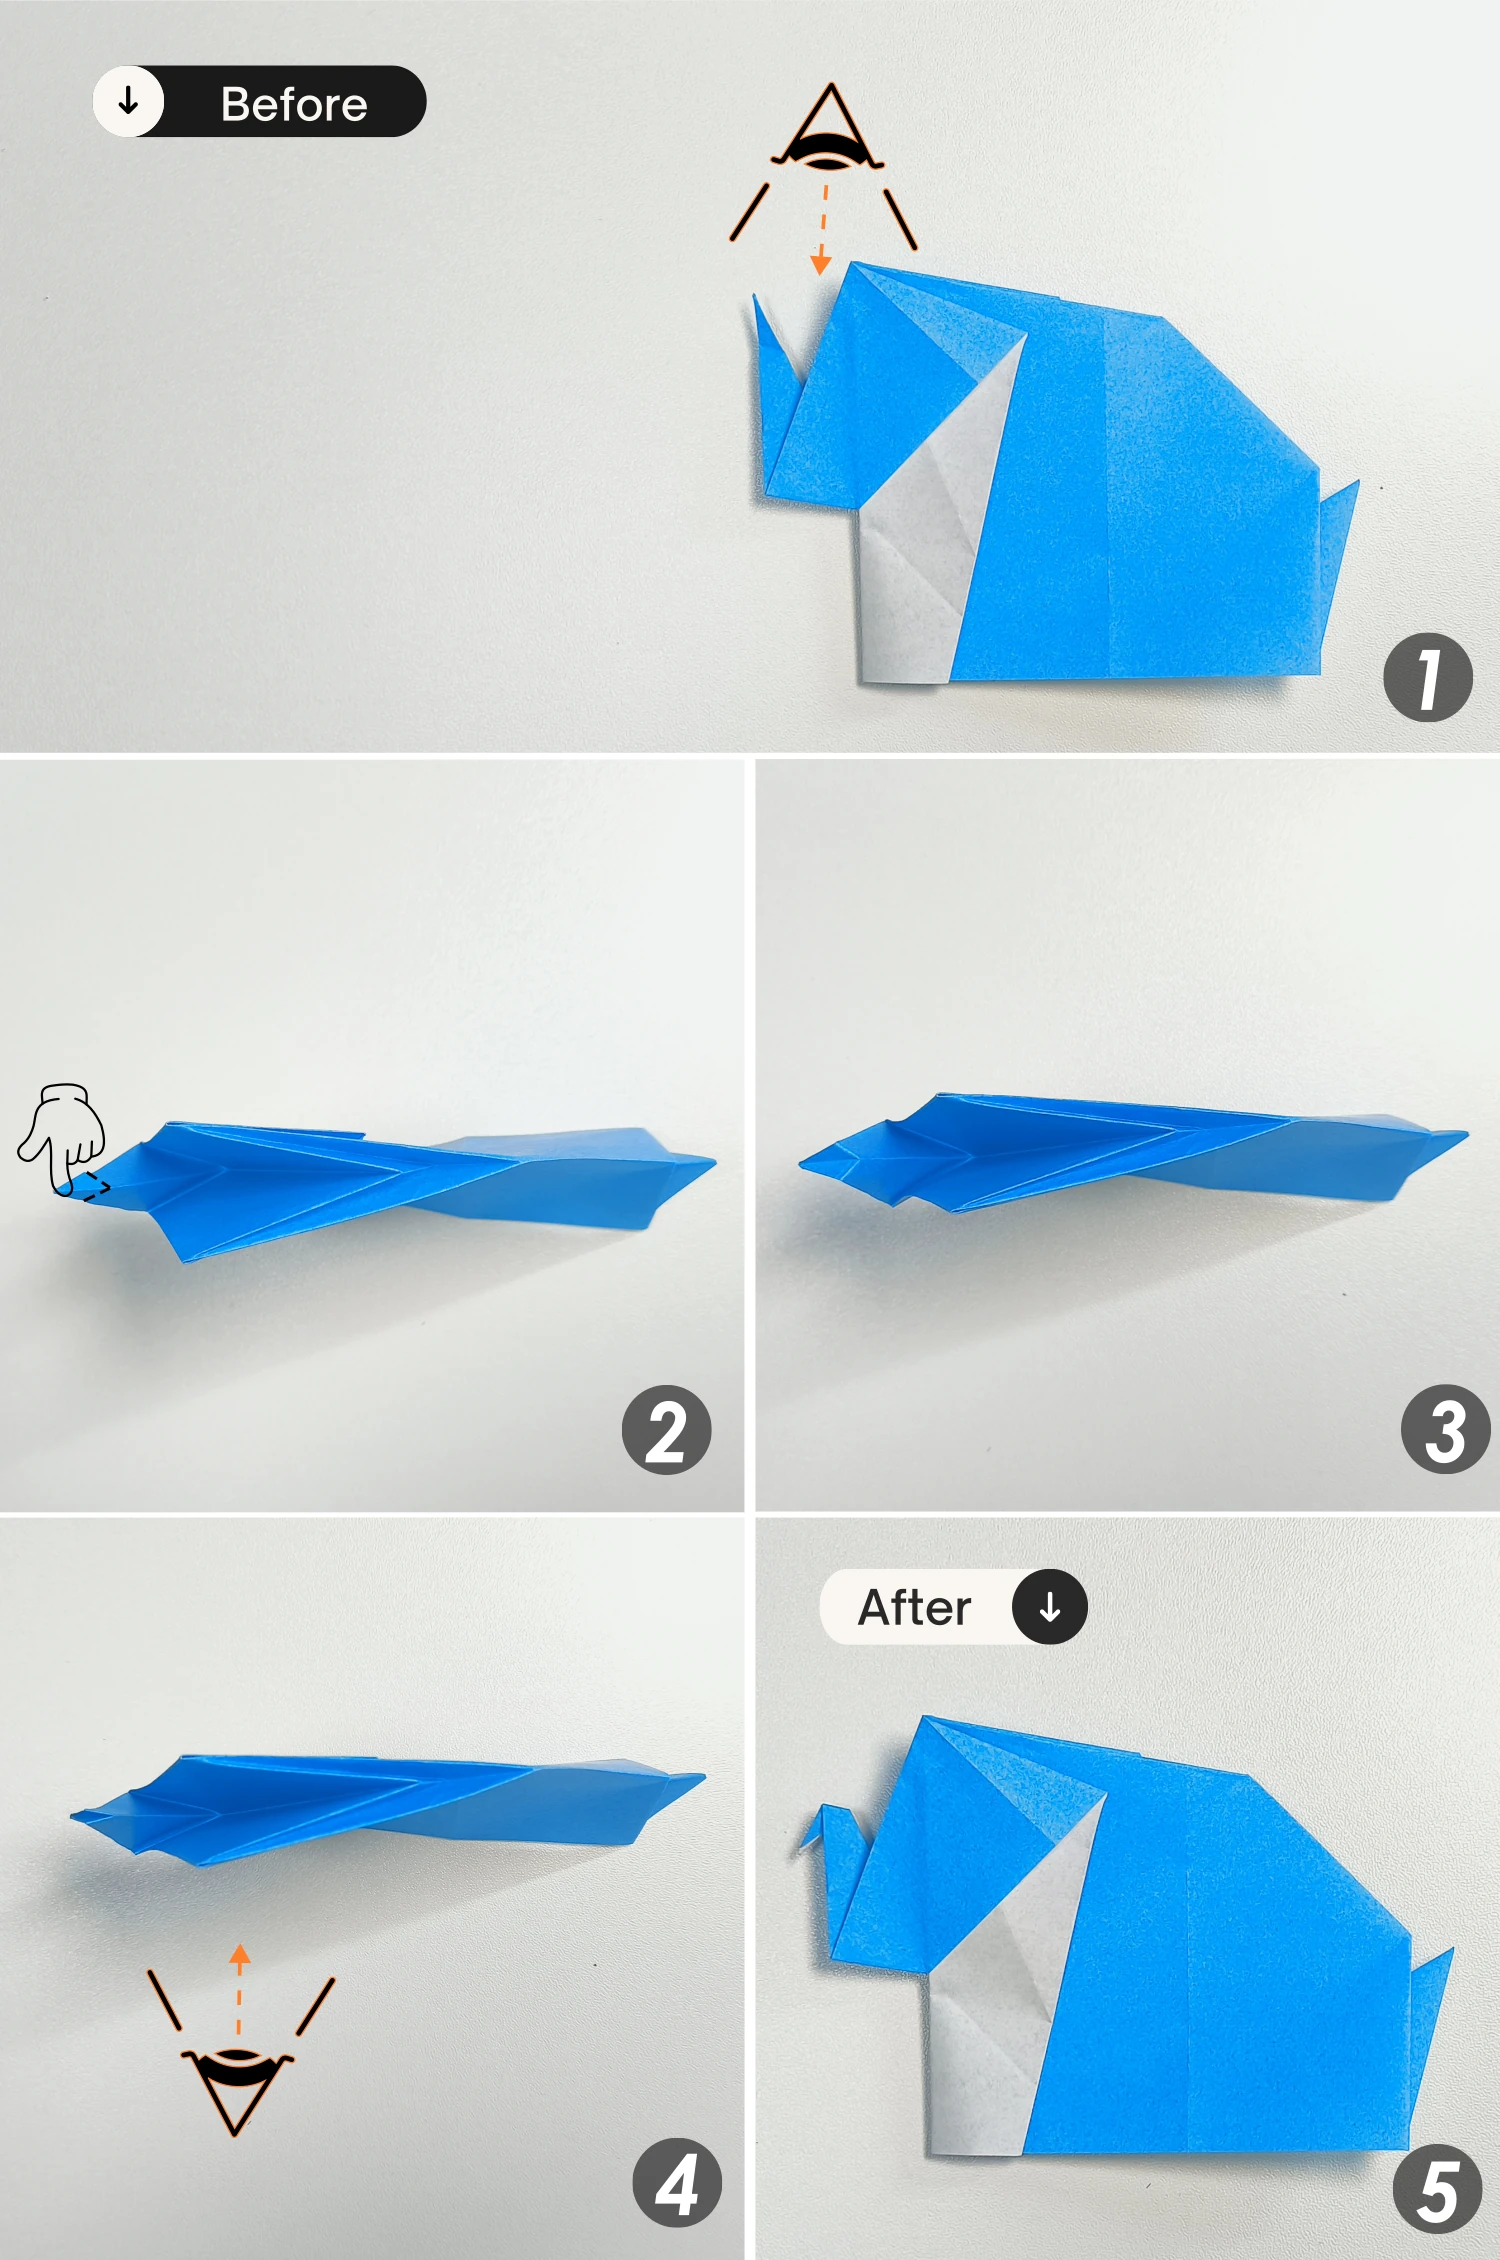
Step 19
Fold the bottom corner of the nose up, crease it well then unfold it.
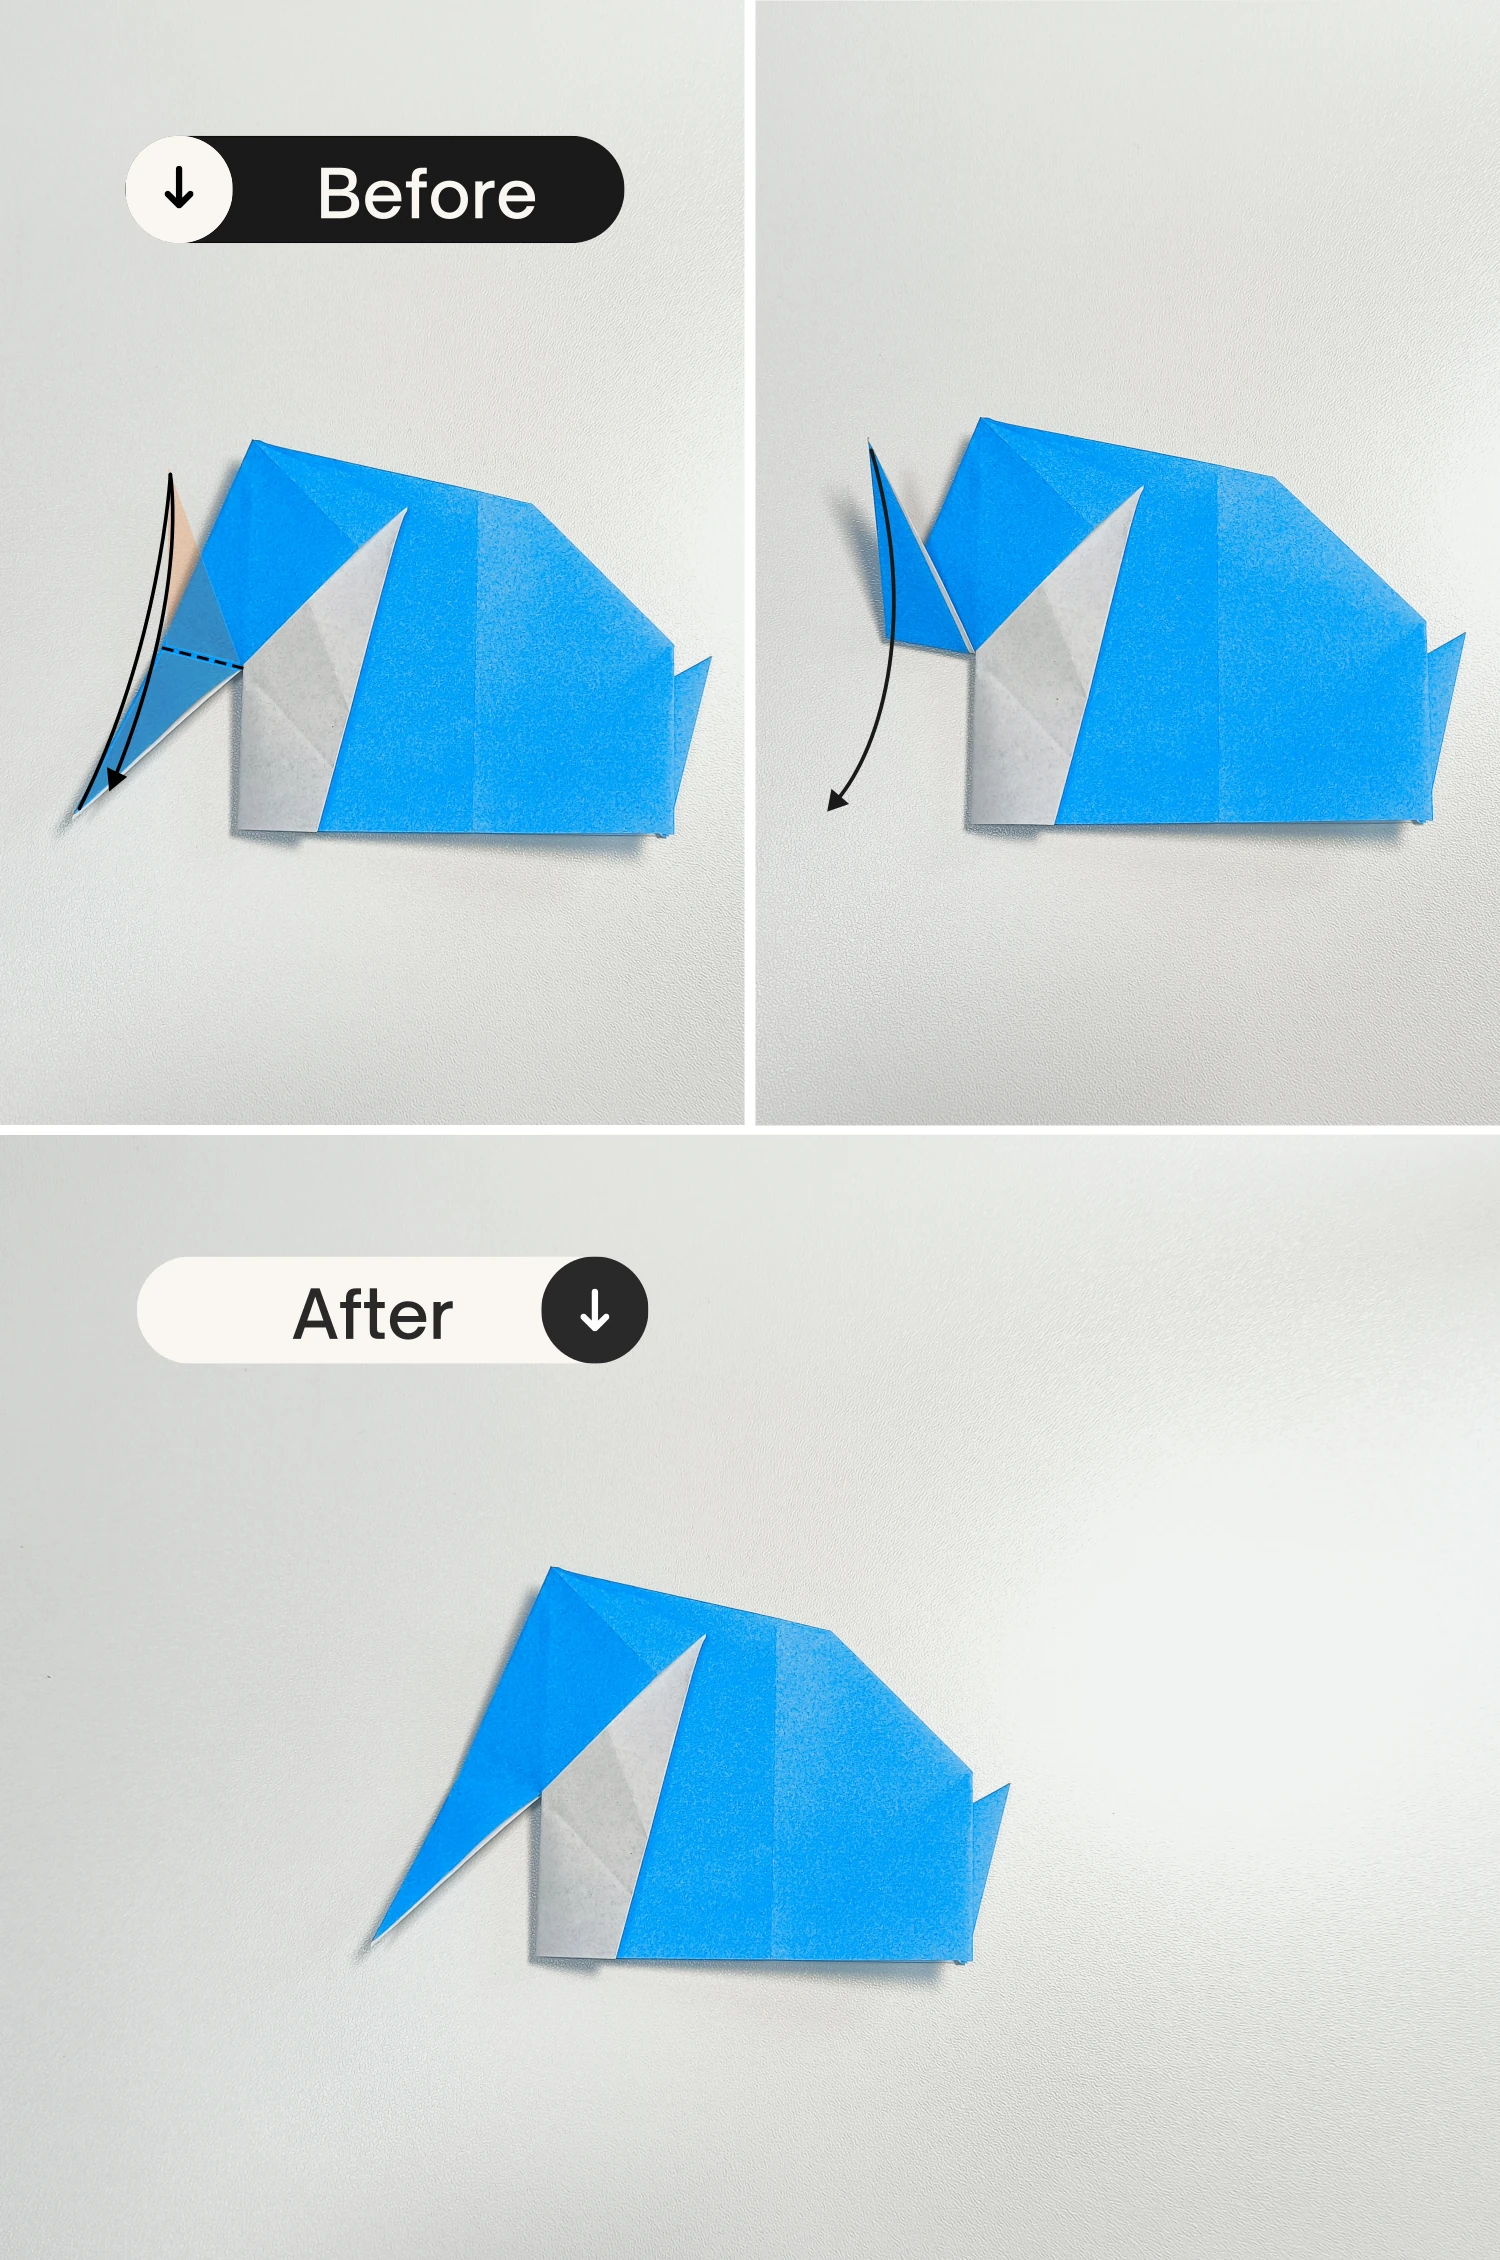
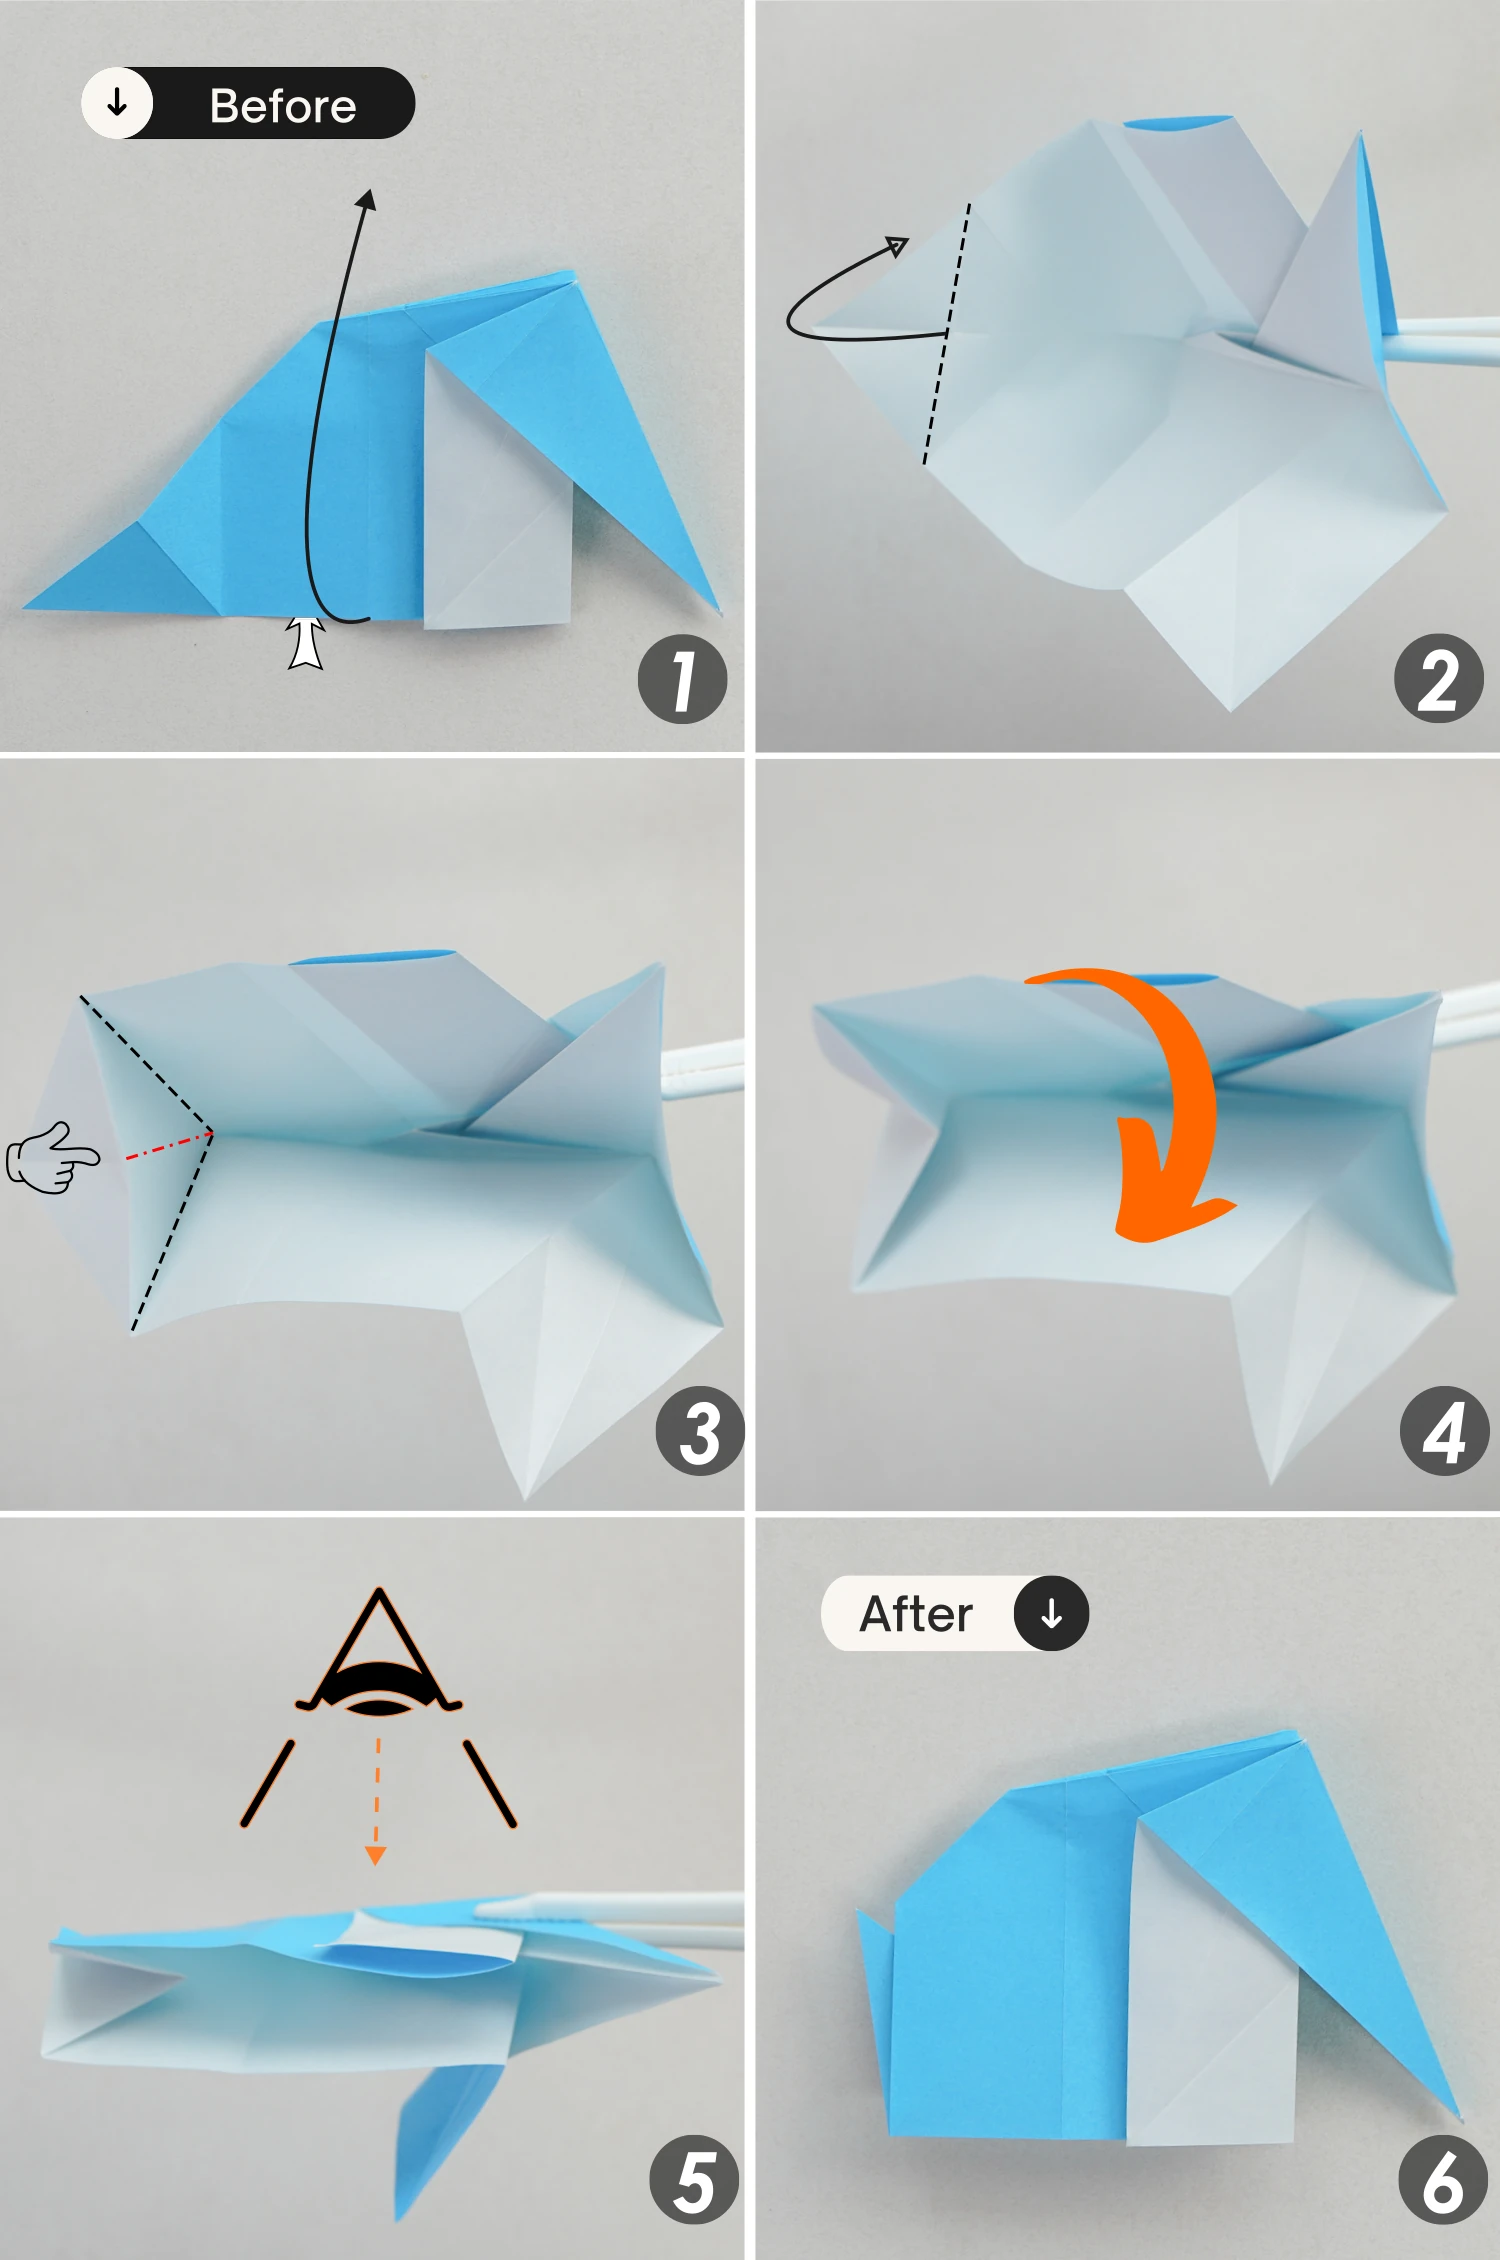
Step 20
View it from the top, and pull the top two edges to slightly open the nose.
Slightly push the tip and use your finger to shape the creases on both sides that you made in the previous step. Push the corner you just folded inwards, tucking it between the two layers of paper.
Finally, flatten it, and view it from the original sight, lay it flat.
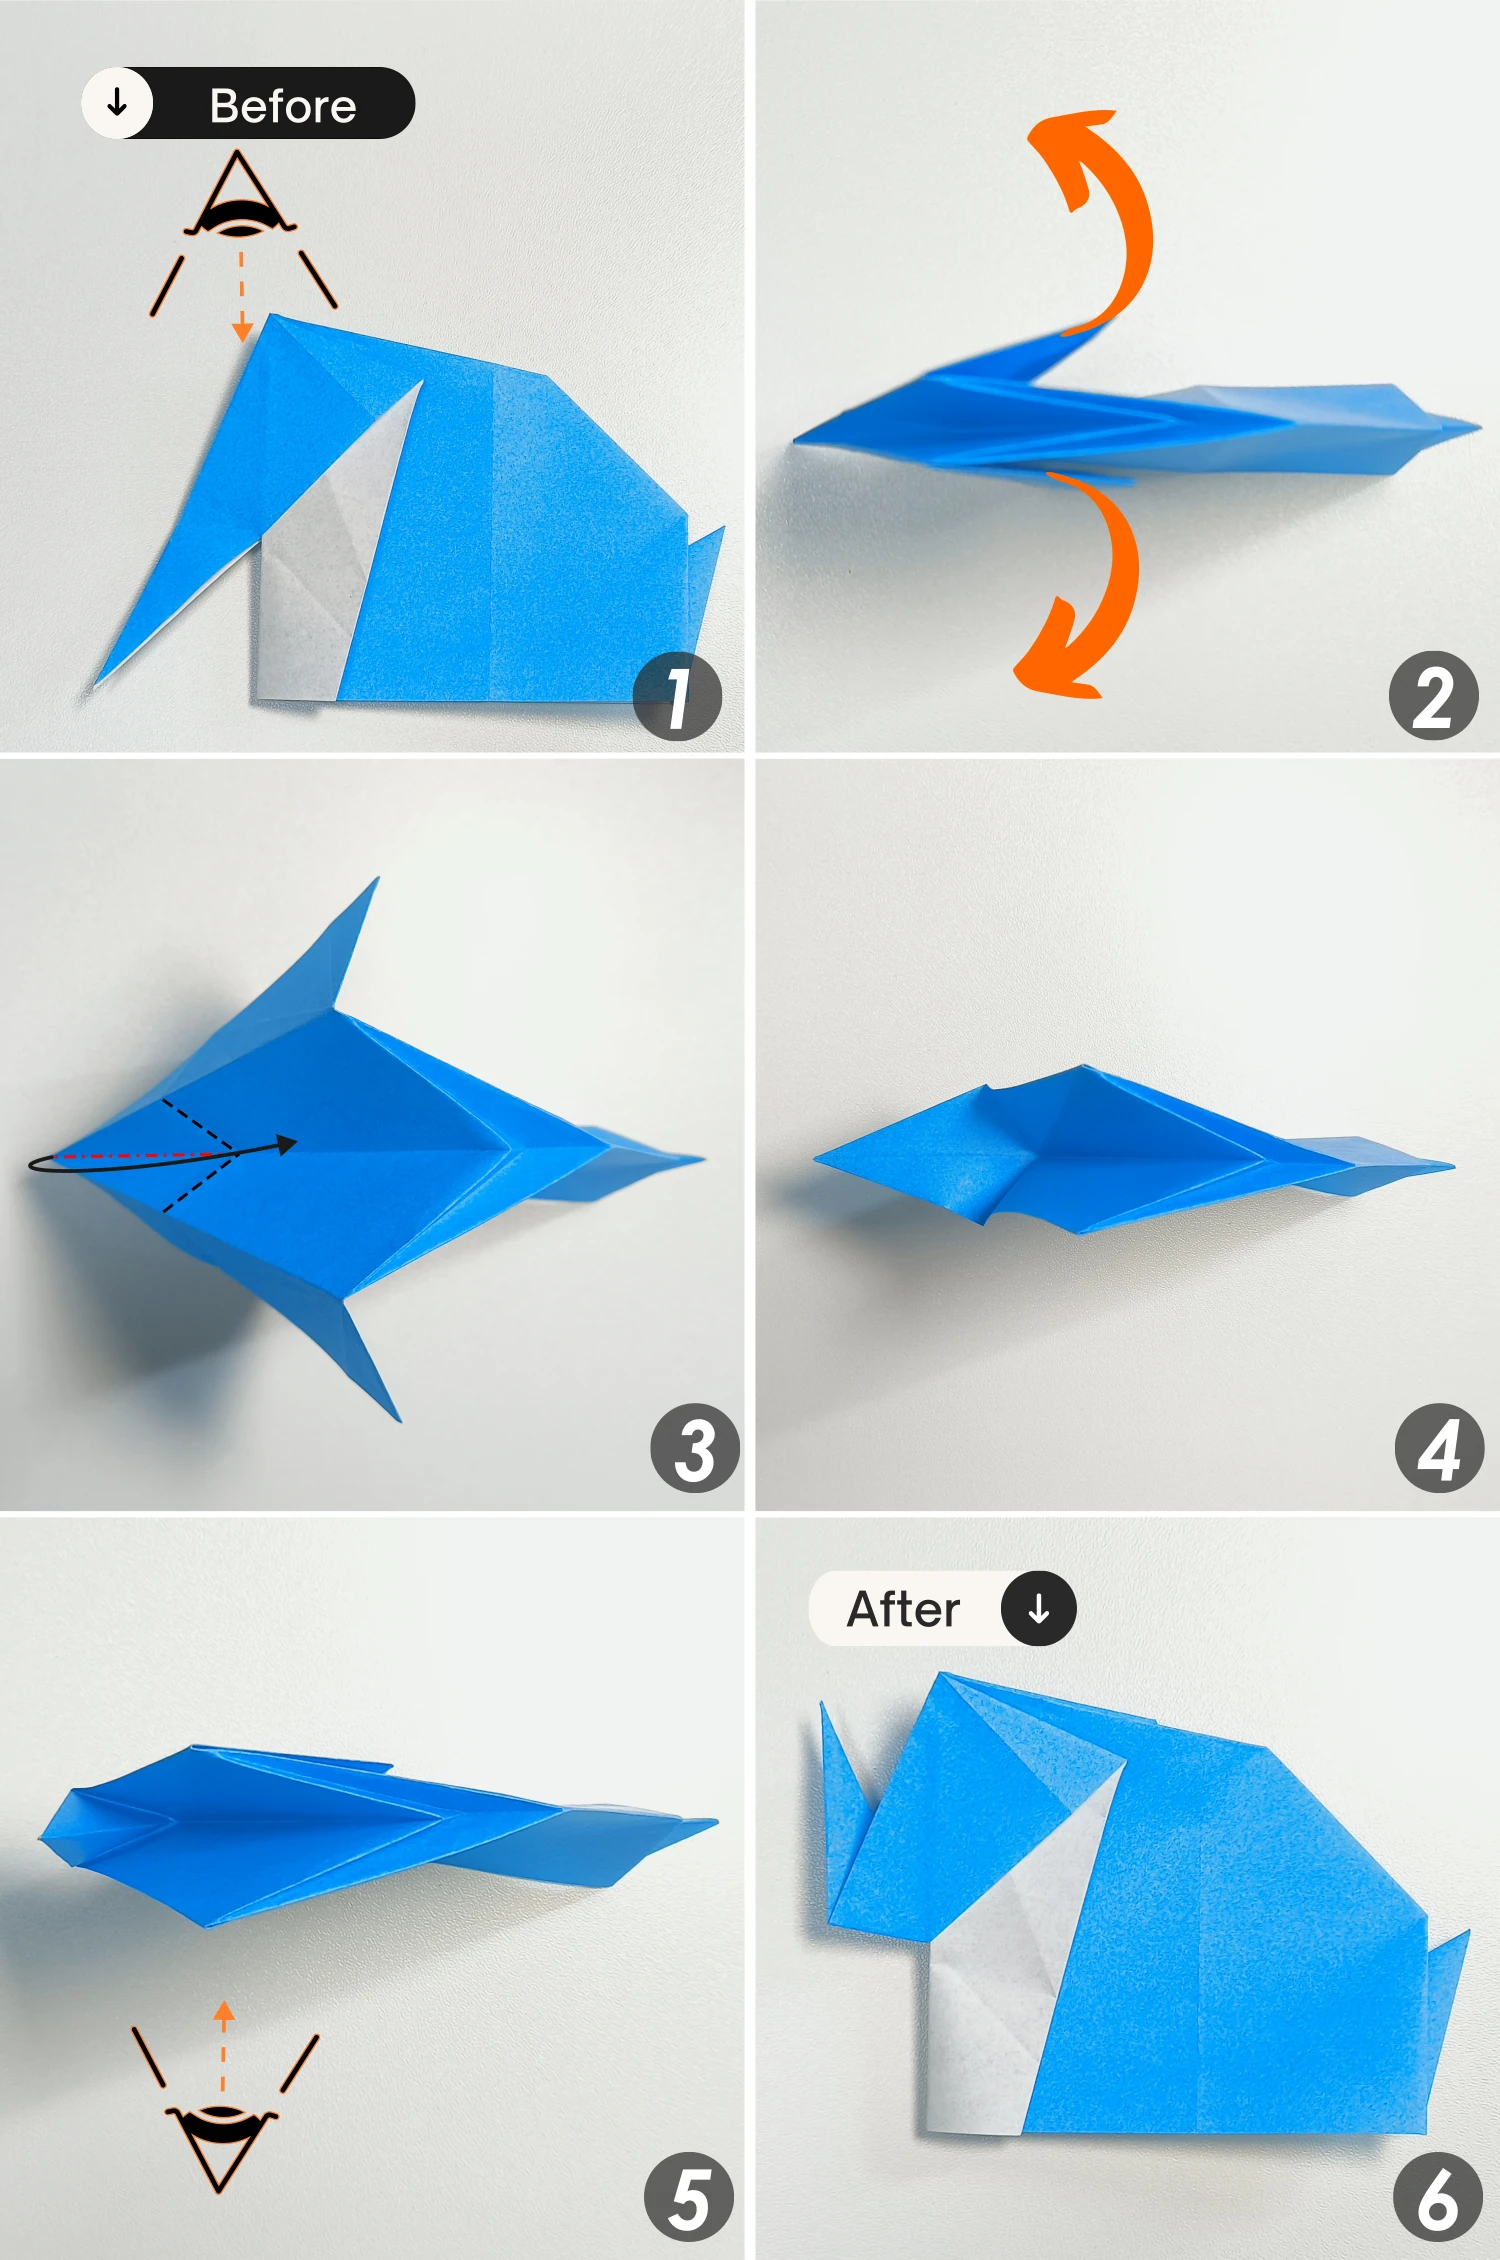
Step 21
Fold the tip of the nose down a little, and unfold it.
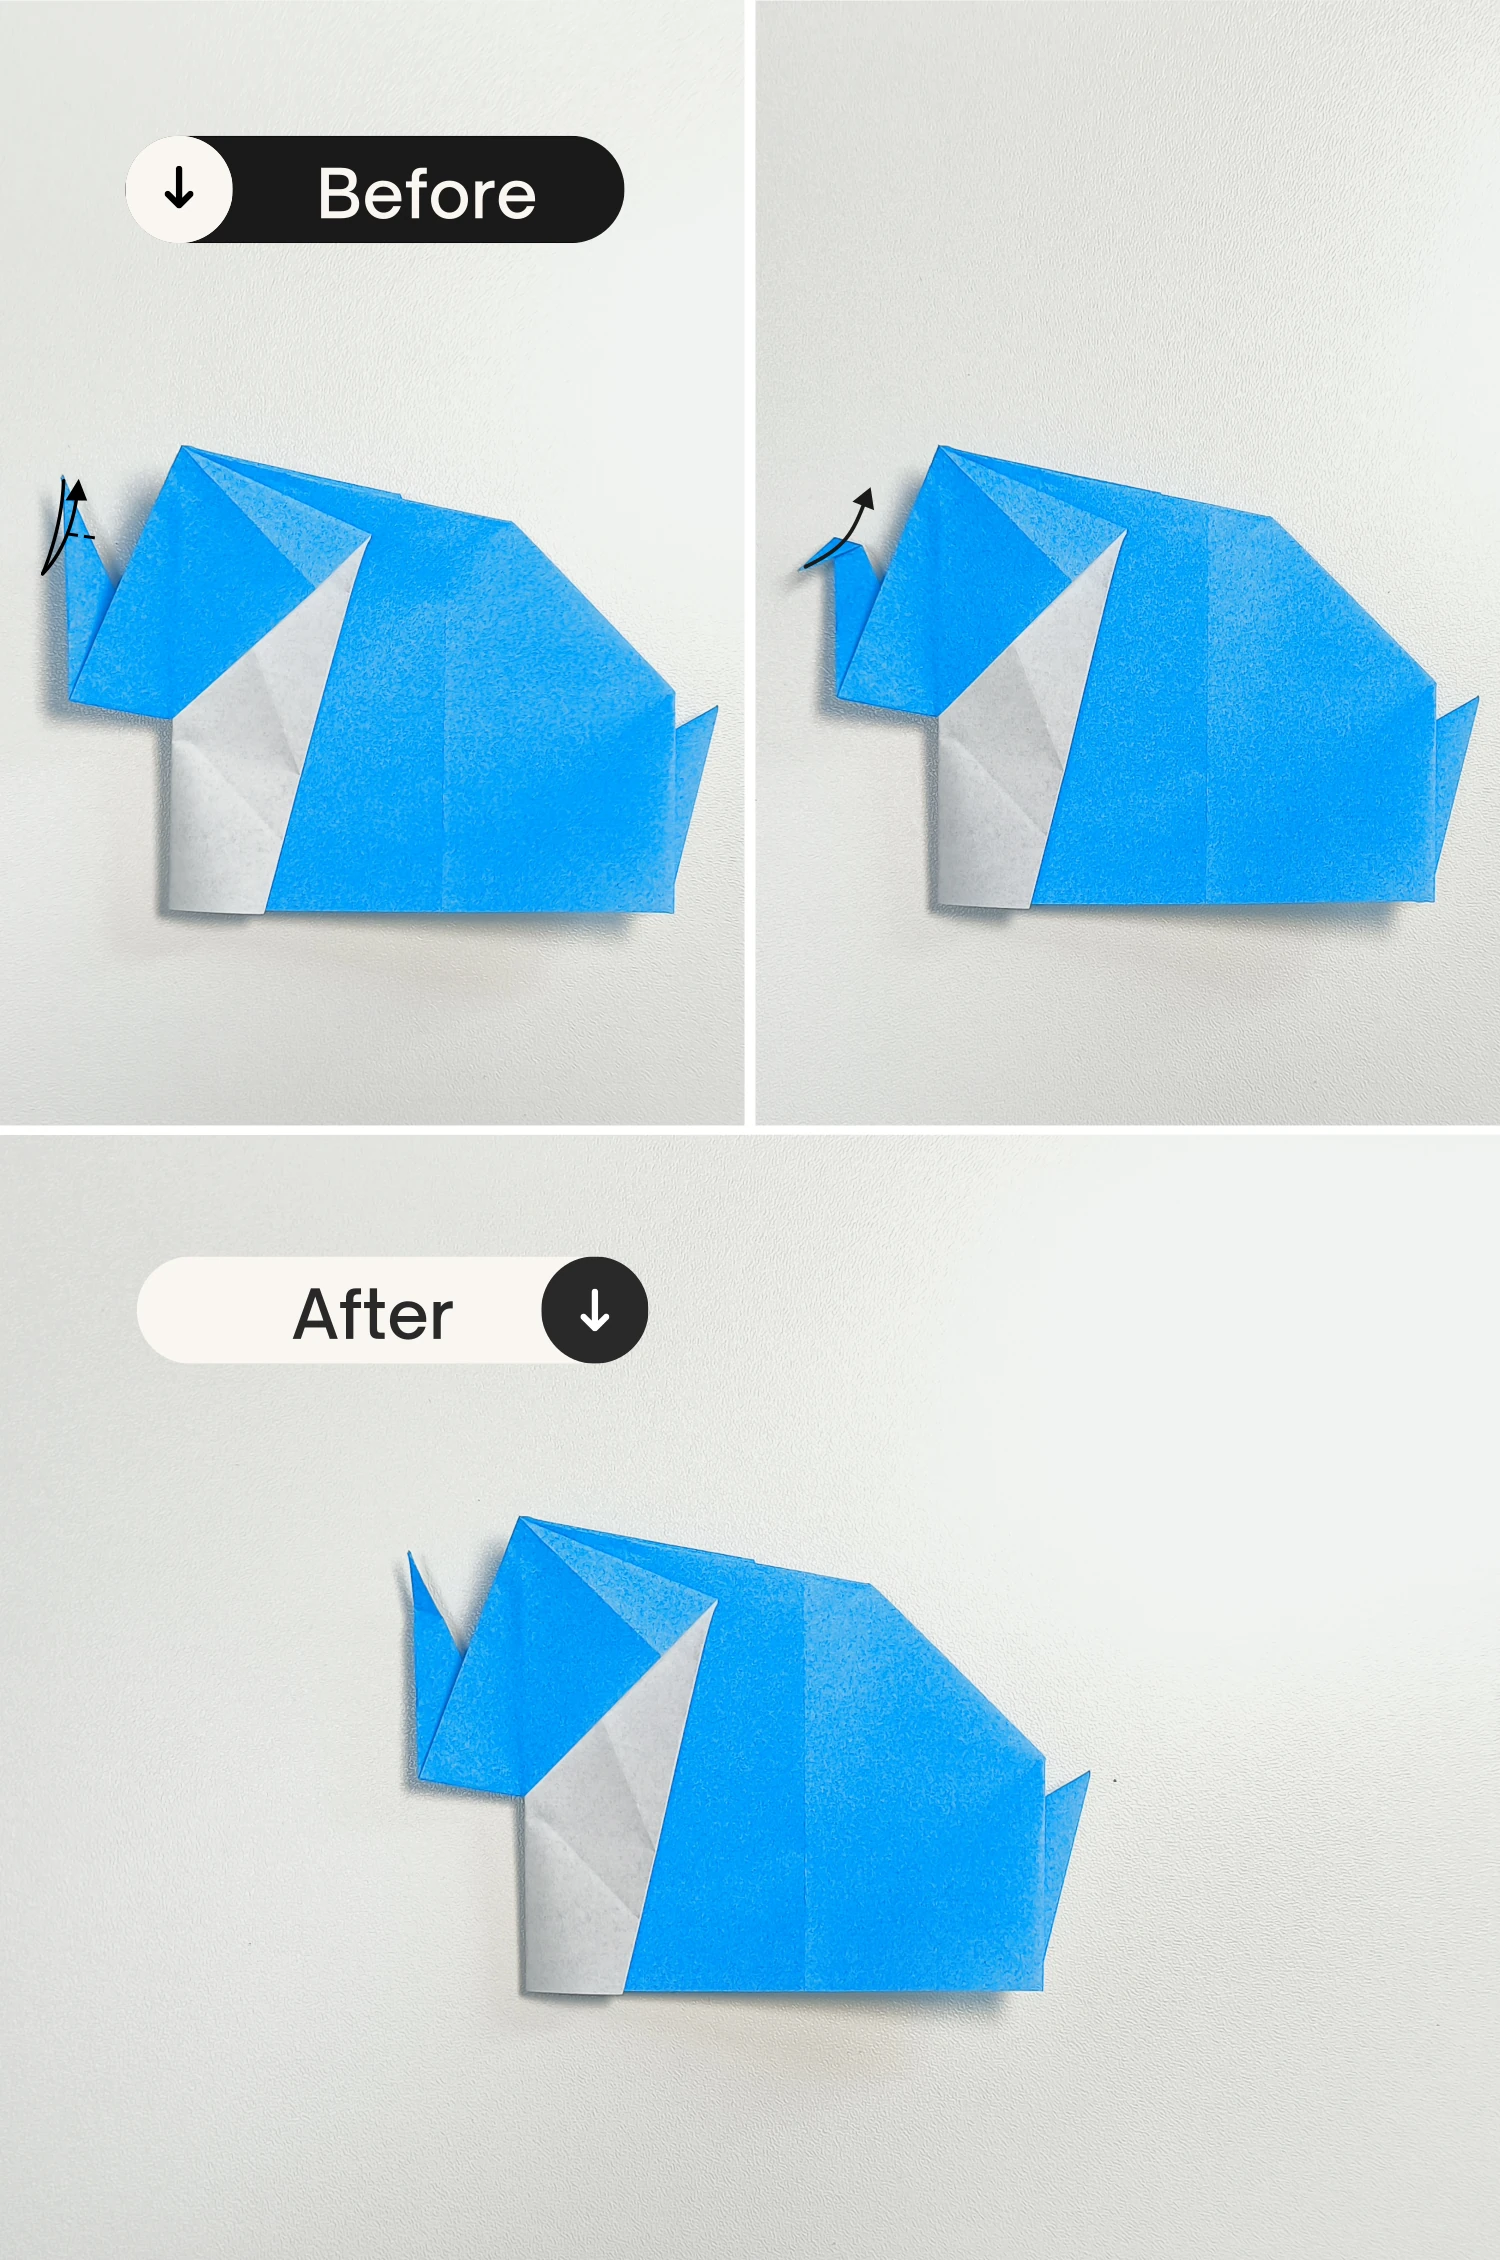
Step 22
Similarly, view it from the top, slightly open the nose part, and press down the tip, then shape the creases on both sides. Push the corner and tuck it between the two layers.
That’s the final shape of the origami elephant.
What’s Next
Now that you’ve completed the adorable origami elephant, feel free to explore our other origami animals. We hope you will enjoy creating them! Have fun folding!