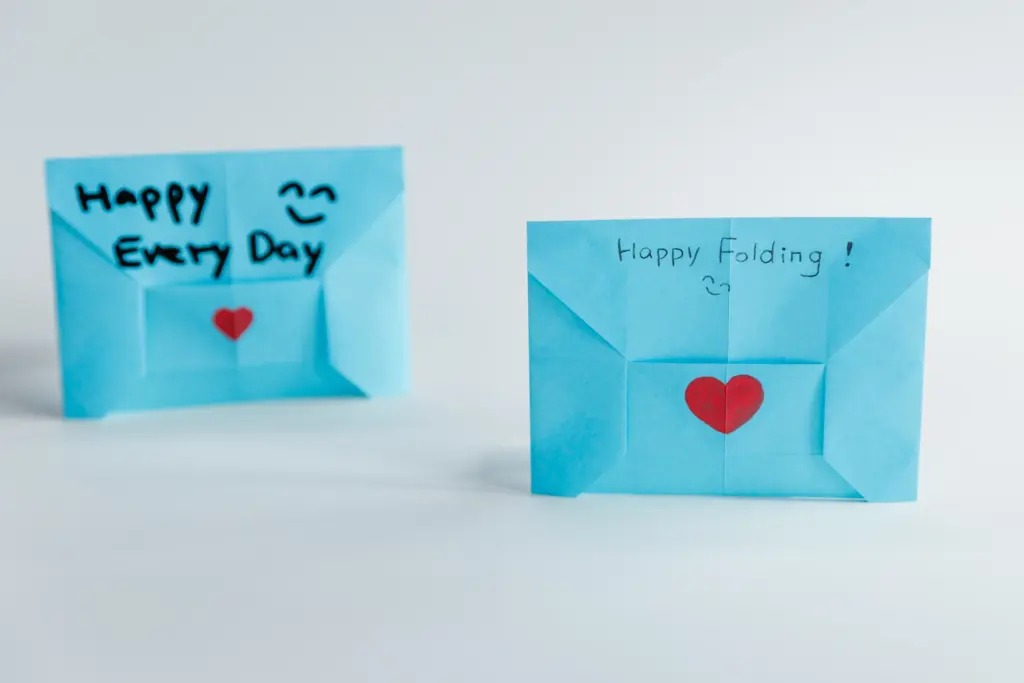
How to Make an Easy Origami Envelope
If you want to send your message to loved ones, hidden it in an origami envelope can be an amazing idea.
This diagram can make a ready to use envelope. And you can choose to add some hand drawing decorations. Also it can be used as a card holder for hidden messages. Let’s get started.
We provide step-by-step diagram instructions and beginner-friendly videos. Check both for quicker learning.
If you are new to origami, start here from our beginner guide to know the basics and how to read the step-by-step instructions.
- Folding time: 5 minutes
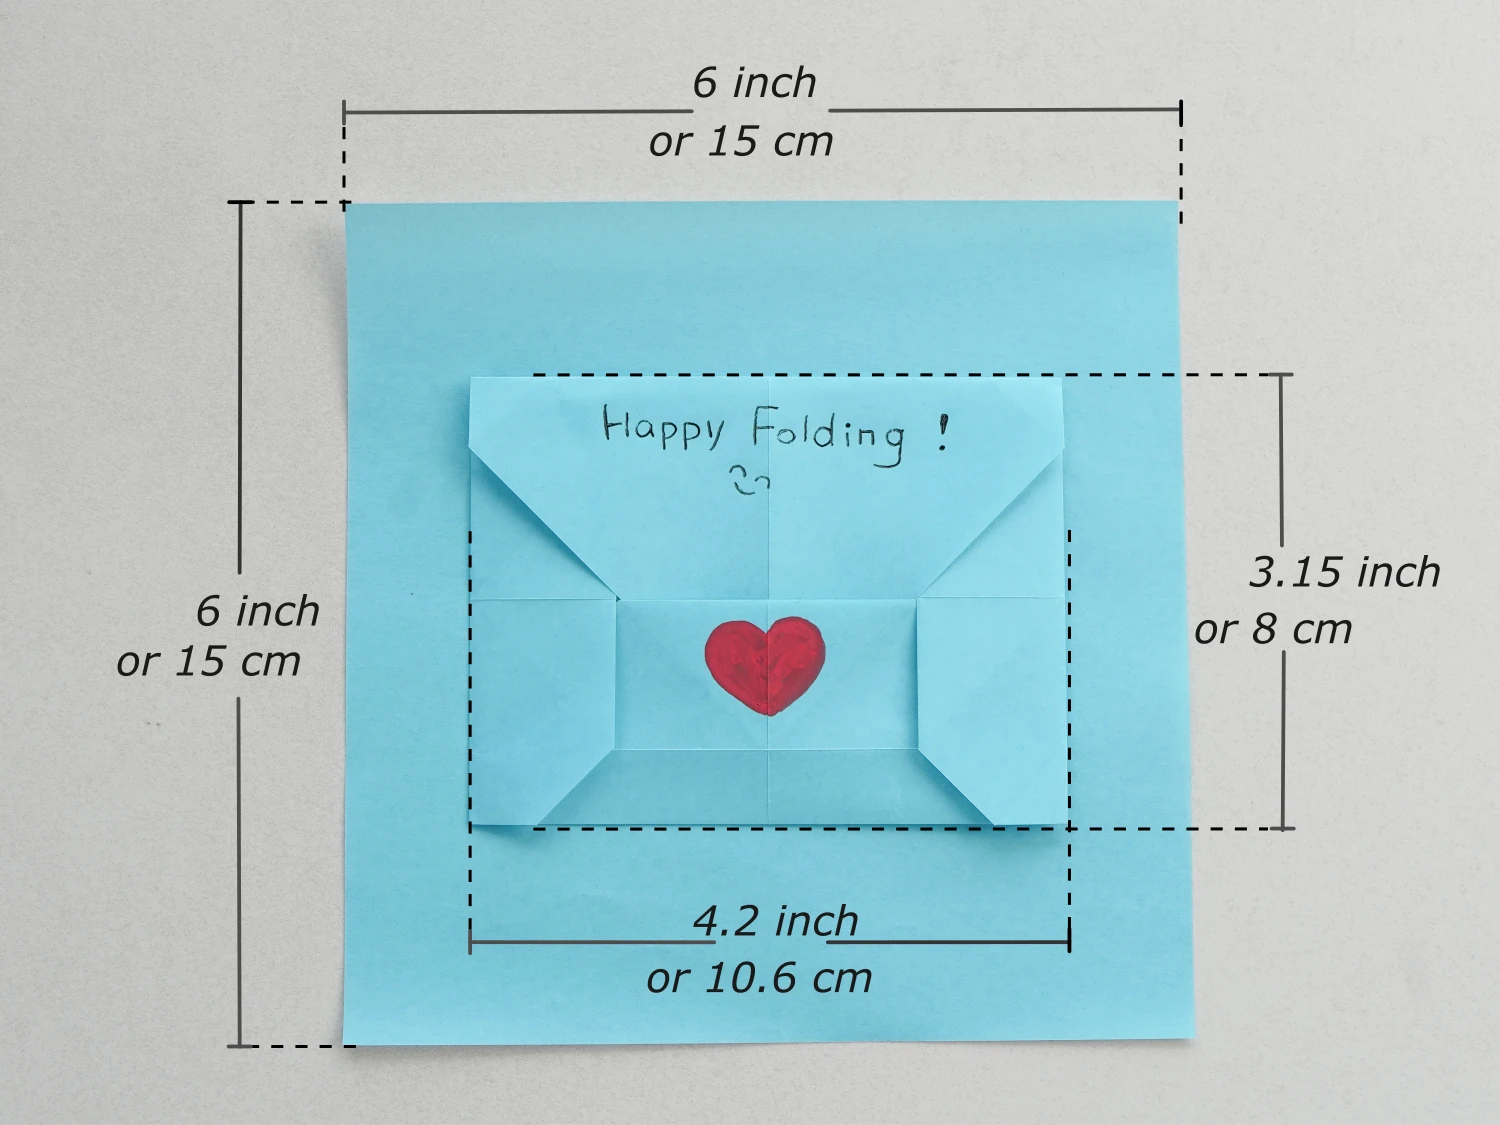
- Paper: 15×15 cm
- Difficulty: Easy, Beginner friendly
Material
Get a 15*15 cm origami paper, one light blue and one white side. You can choose any color or even other pattered paper.
Easy Origami Envelope Video
Step by Step Instructions
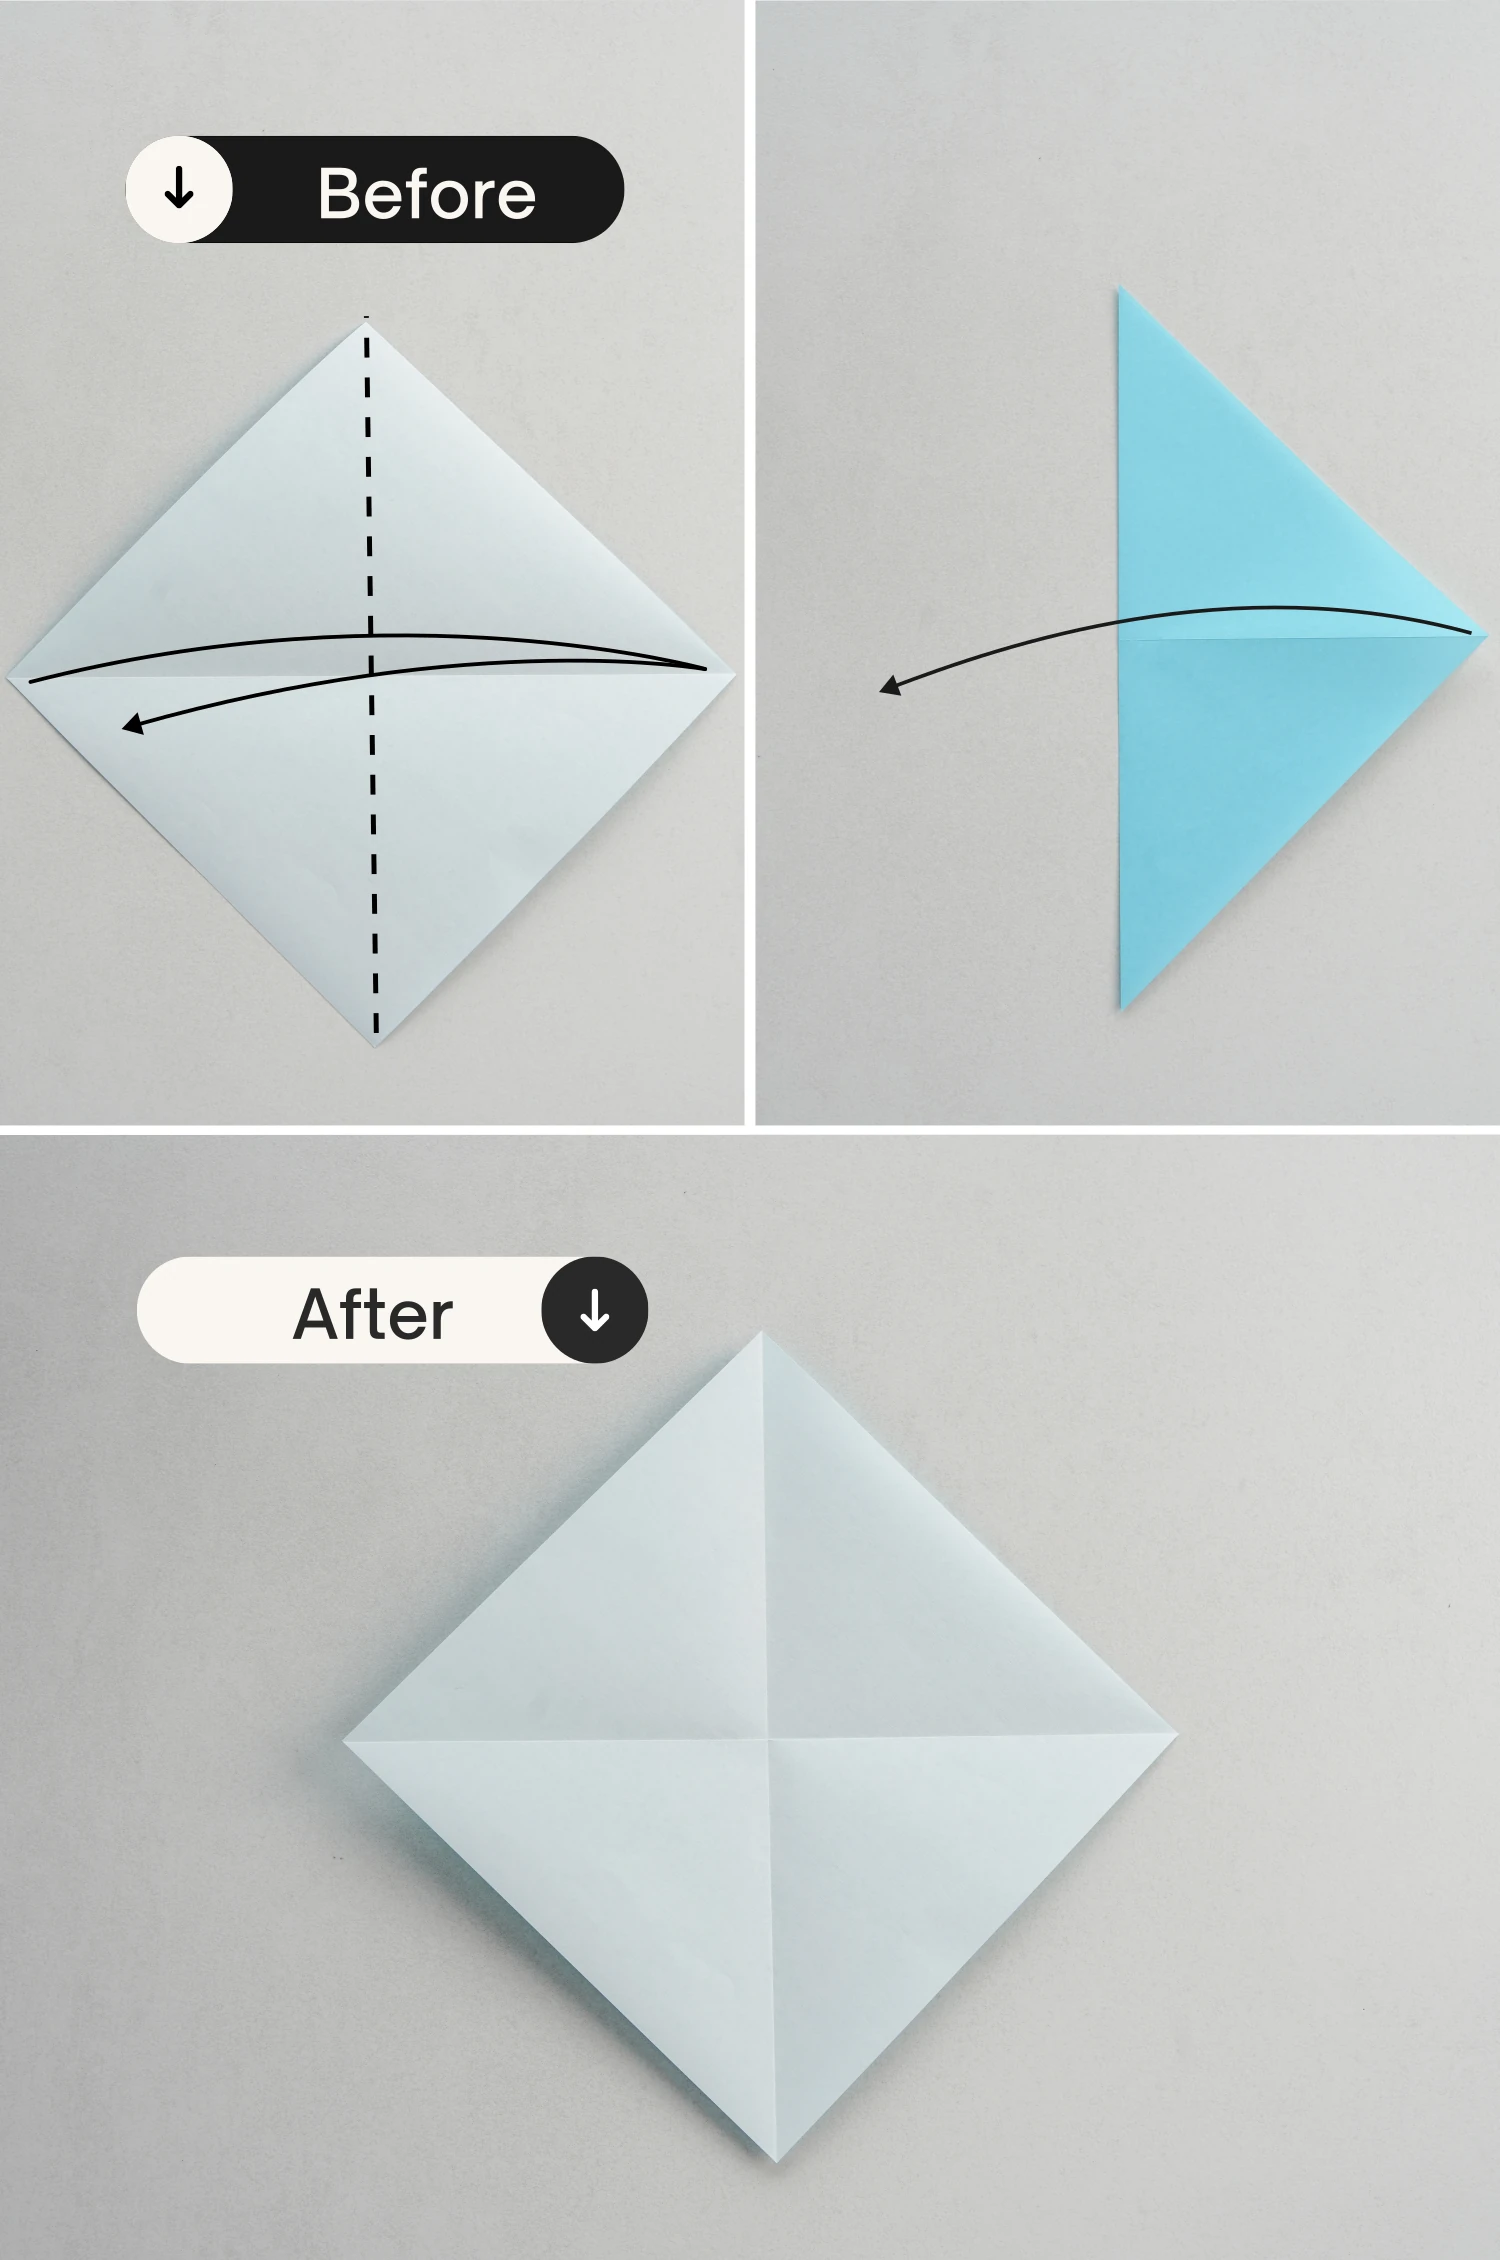
Step 1
Start with the white side of the paper facing up, and fold it in half diagonally, crease it well then unfold it.

Step 2
Fold it in half vertically, crease it well and unfold it.
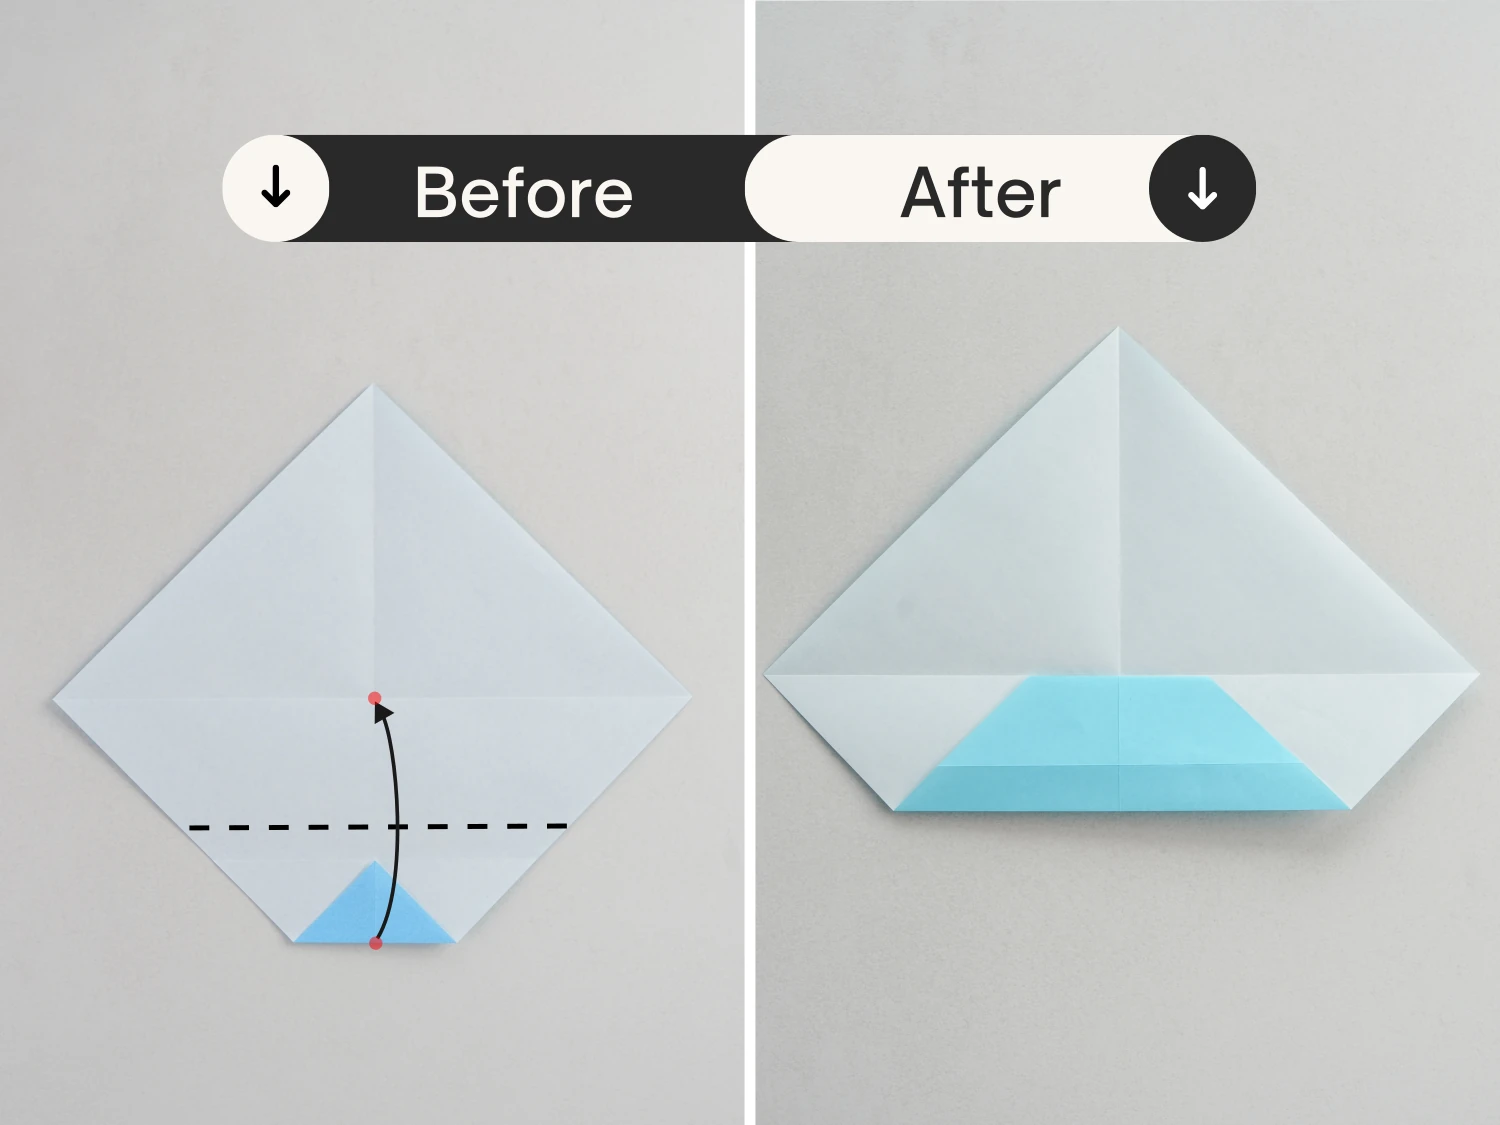
Step 3
Fold the bottom point up diagonally to meet the intersection point formed by two creases you just made.
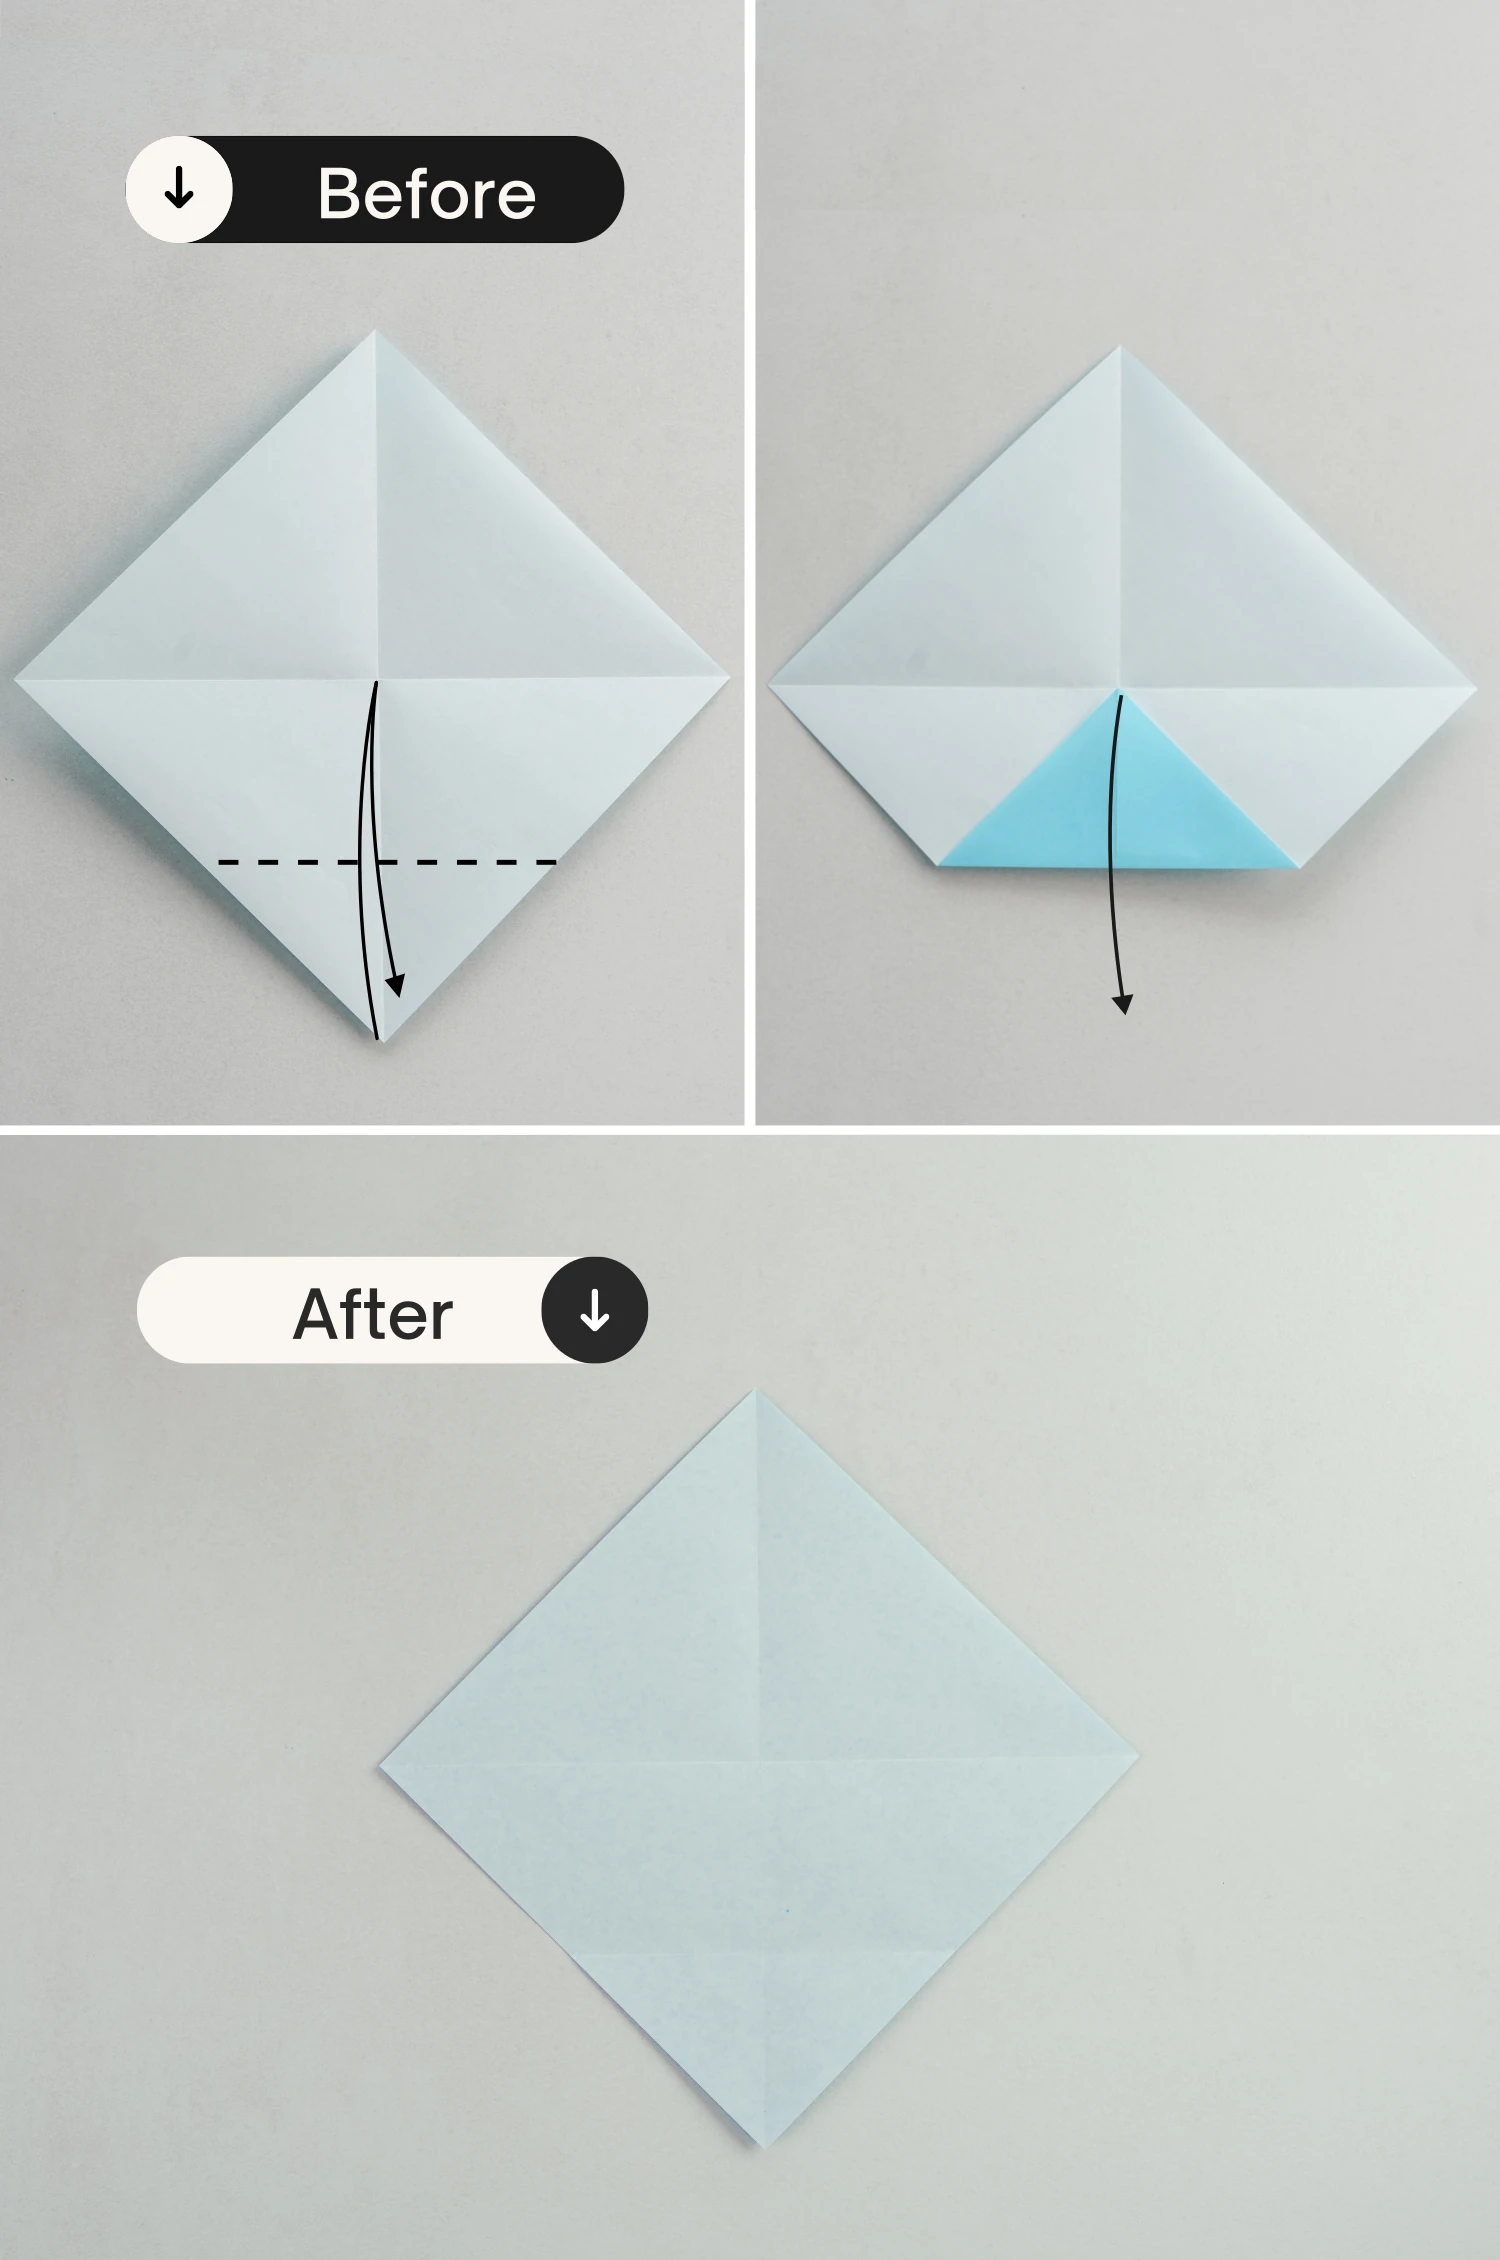
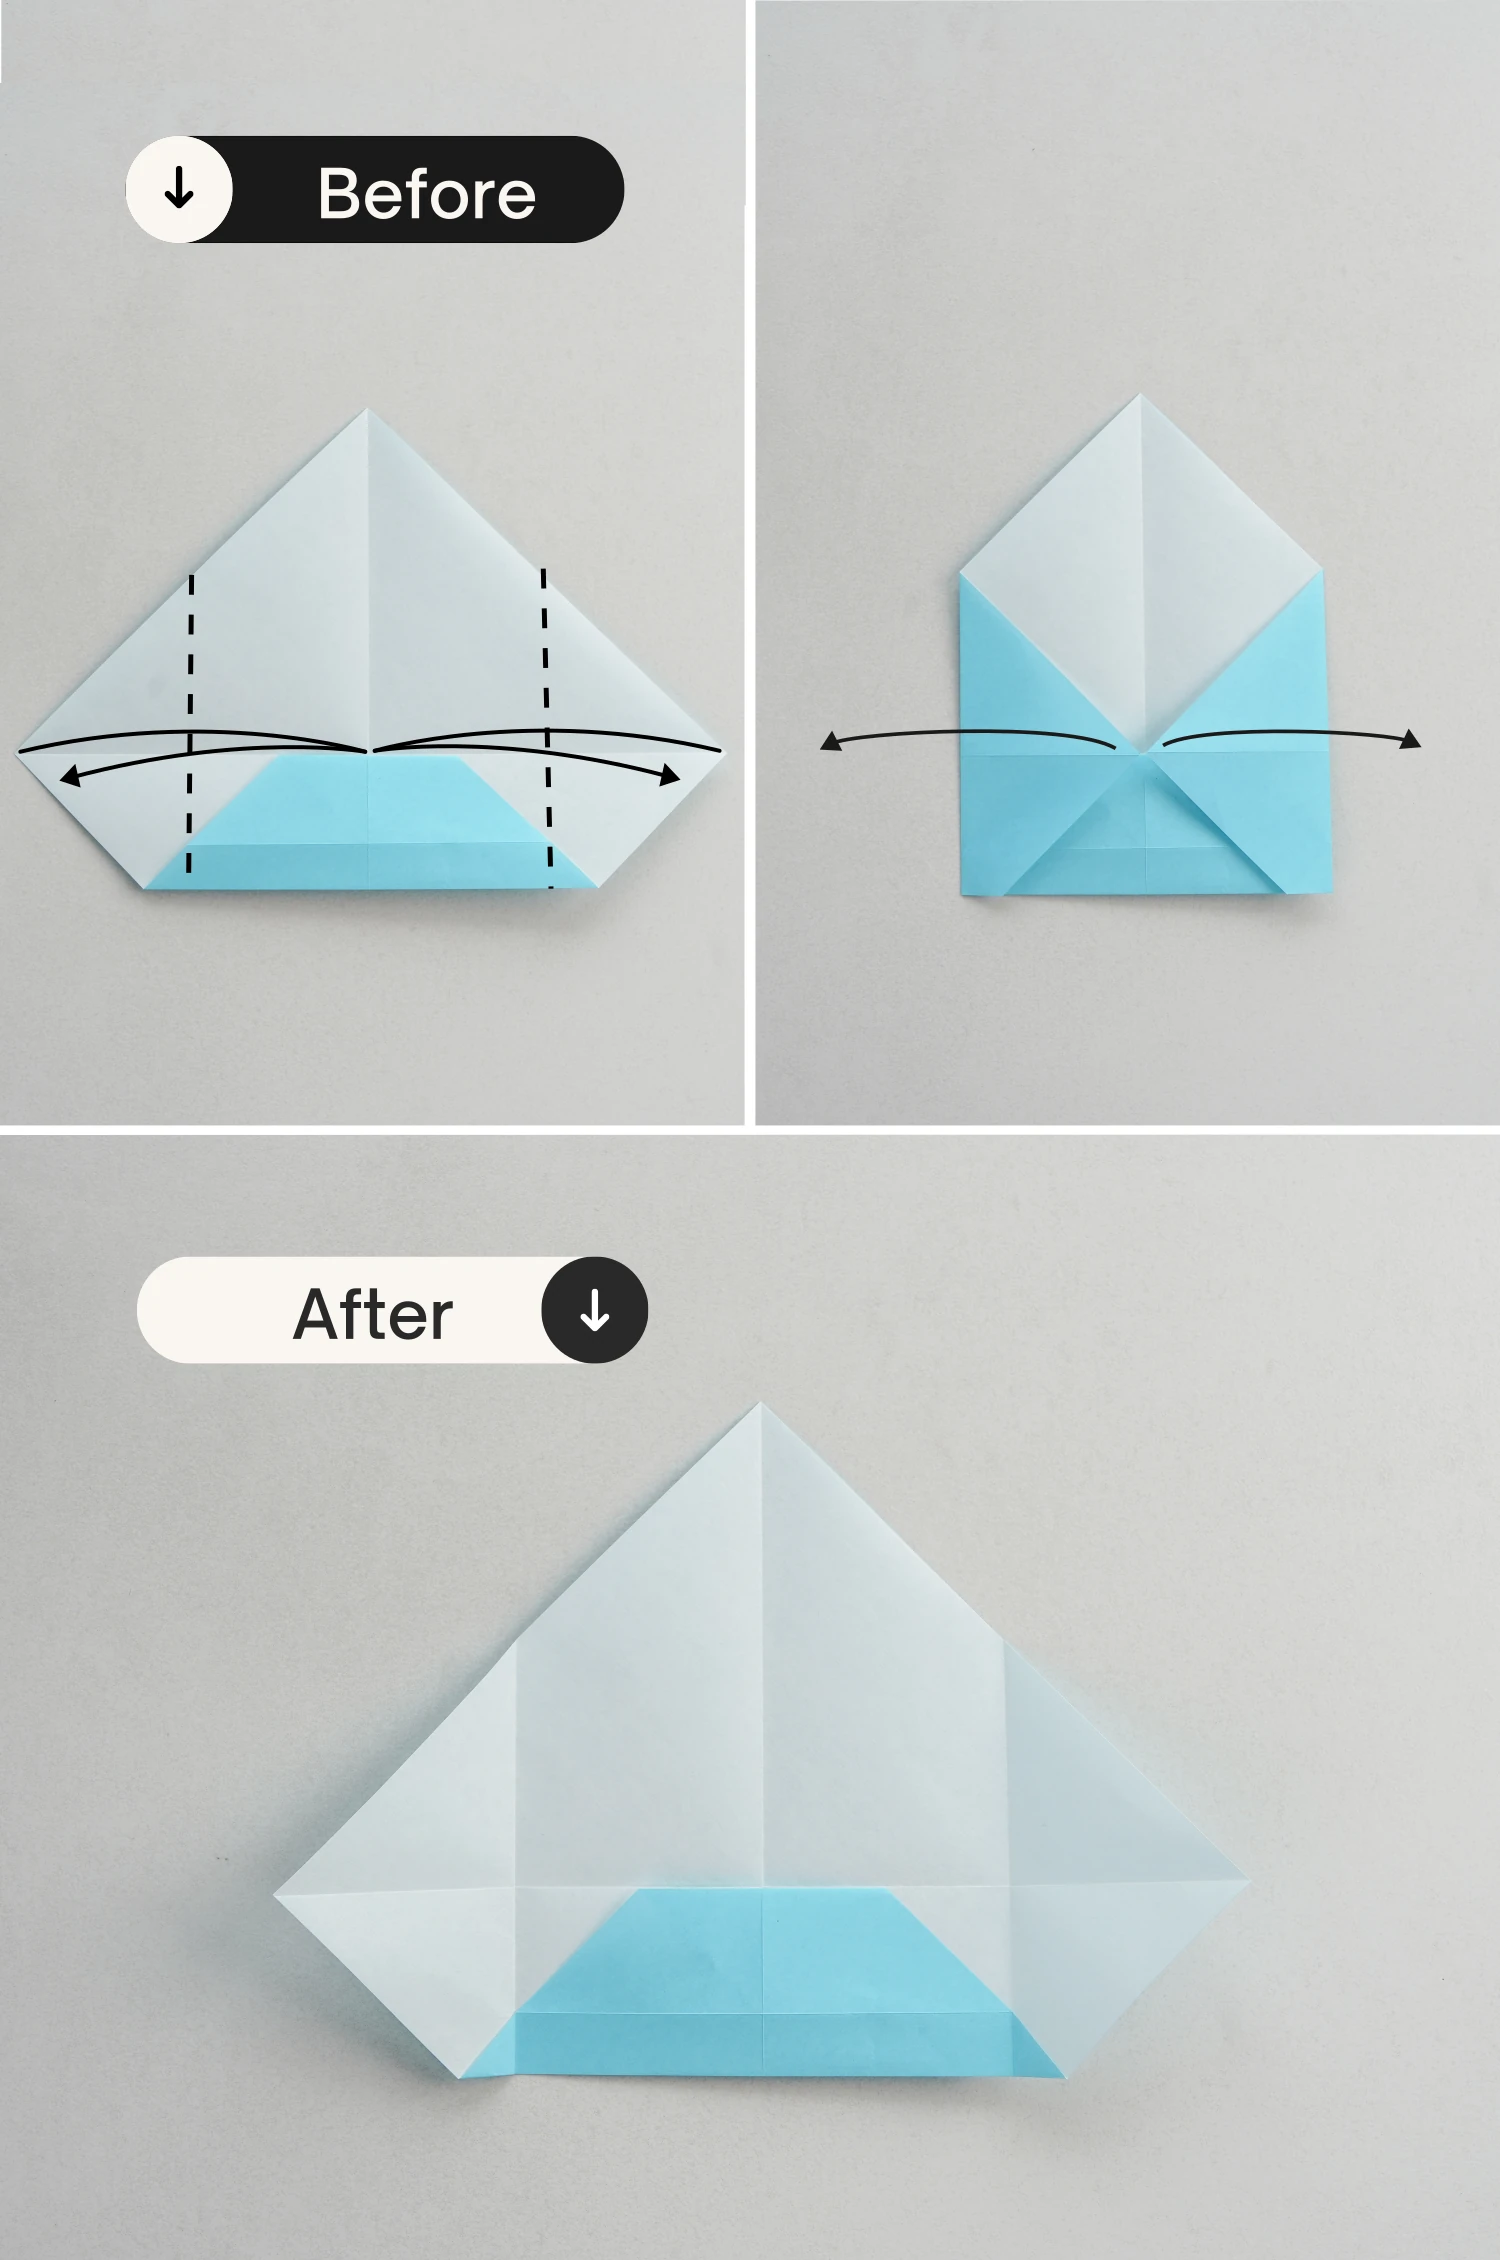
Step 4
Then fold it up again to meet the crease you made in the previous step.

Step 5
Then fold the bottom edge up along the dotted line to meet the middle crease.
Step 6
Fold the left and right corners to meet the middle intersection point, crease it well then unfold.
Step 7
Then fold left and right points toward the center diagonally again, to meet the crease you made in the previous step.
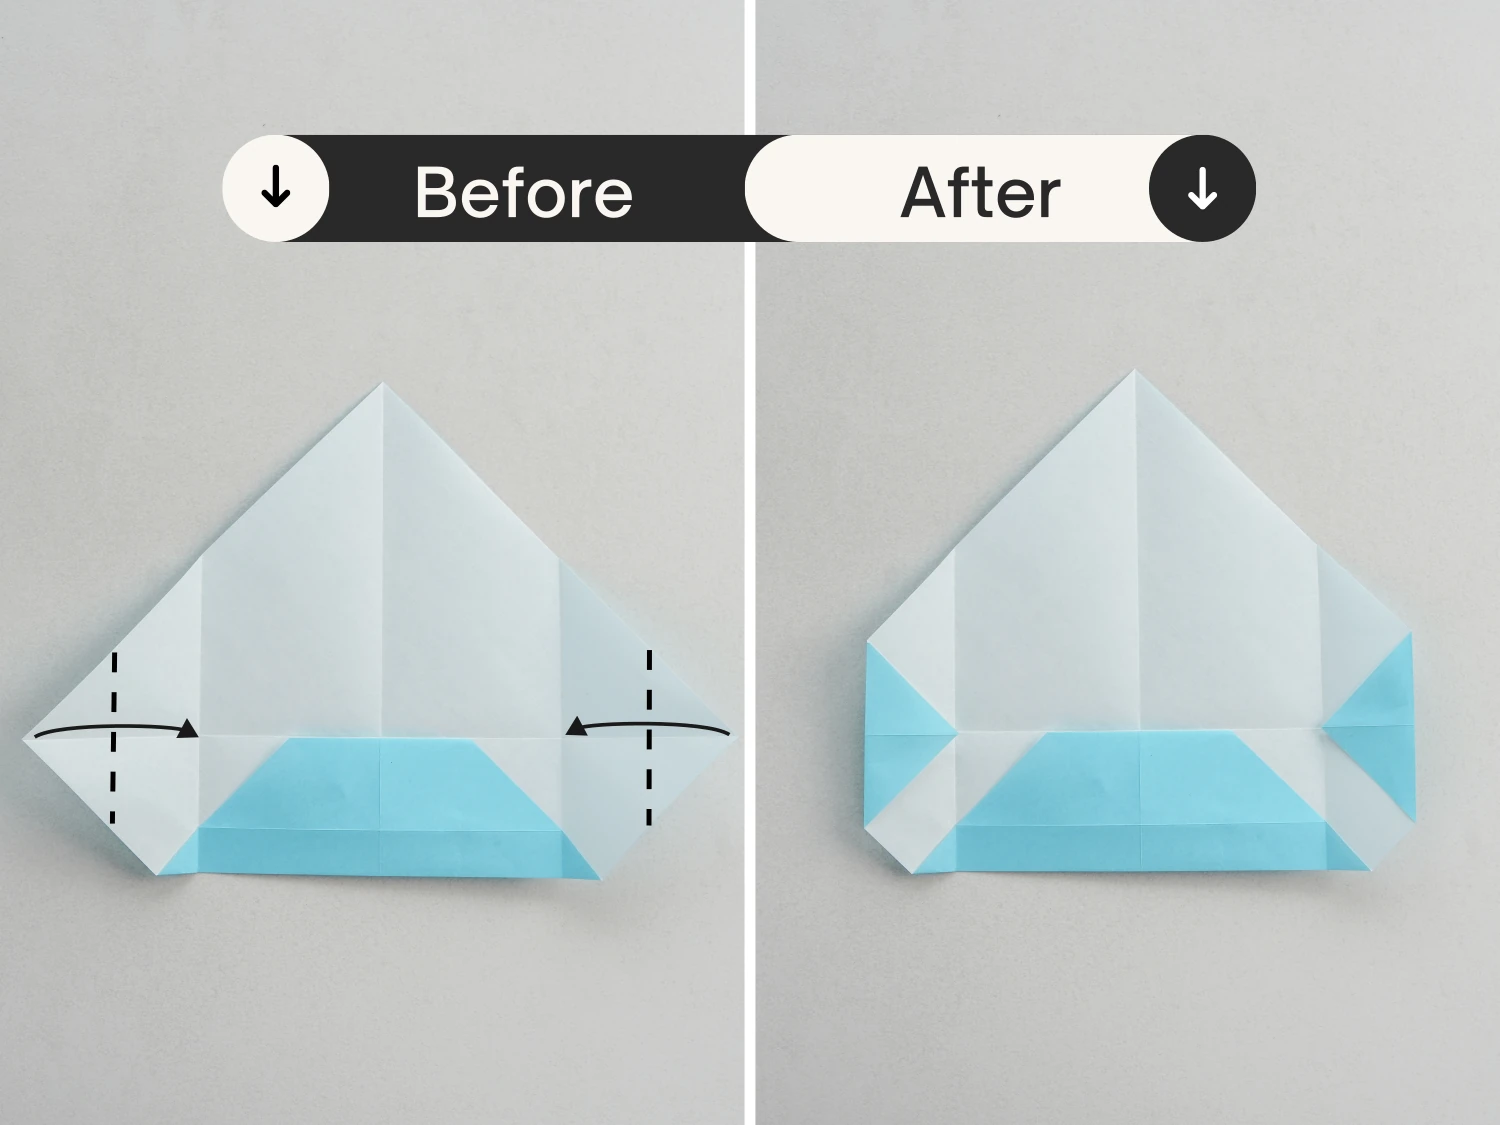
Step 8
Fold the left and right edges along the dotted line.
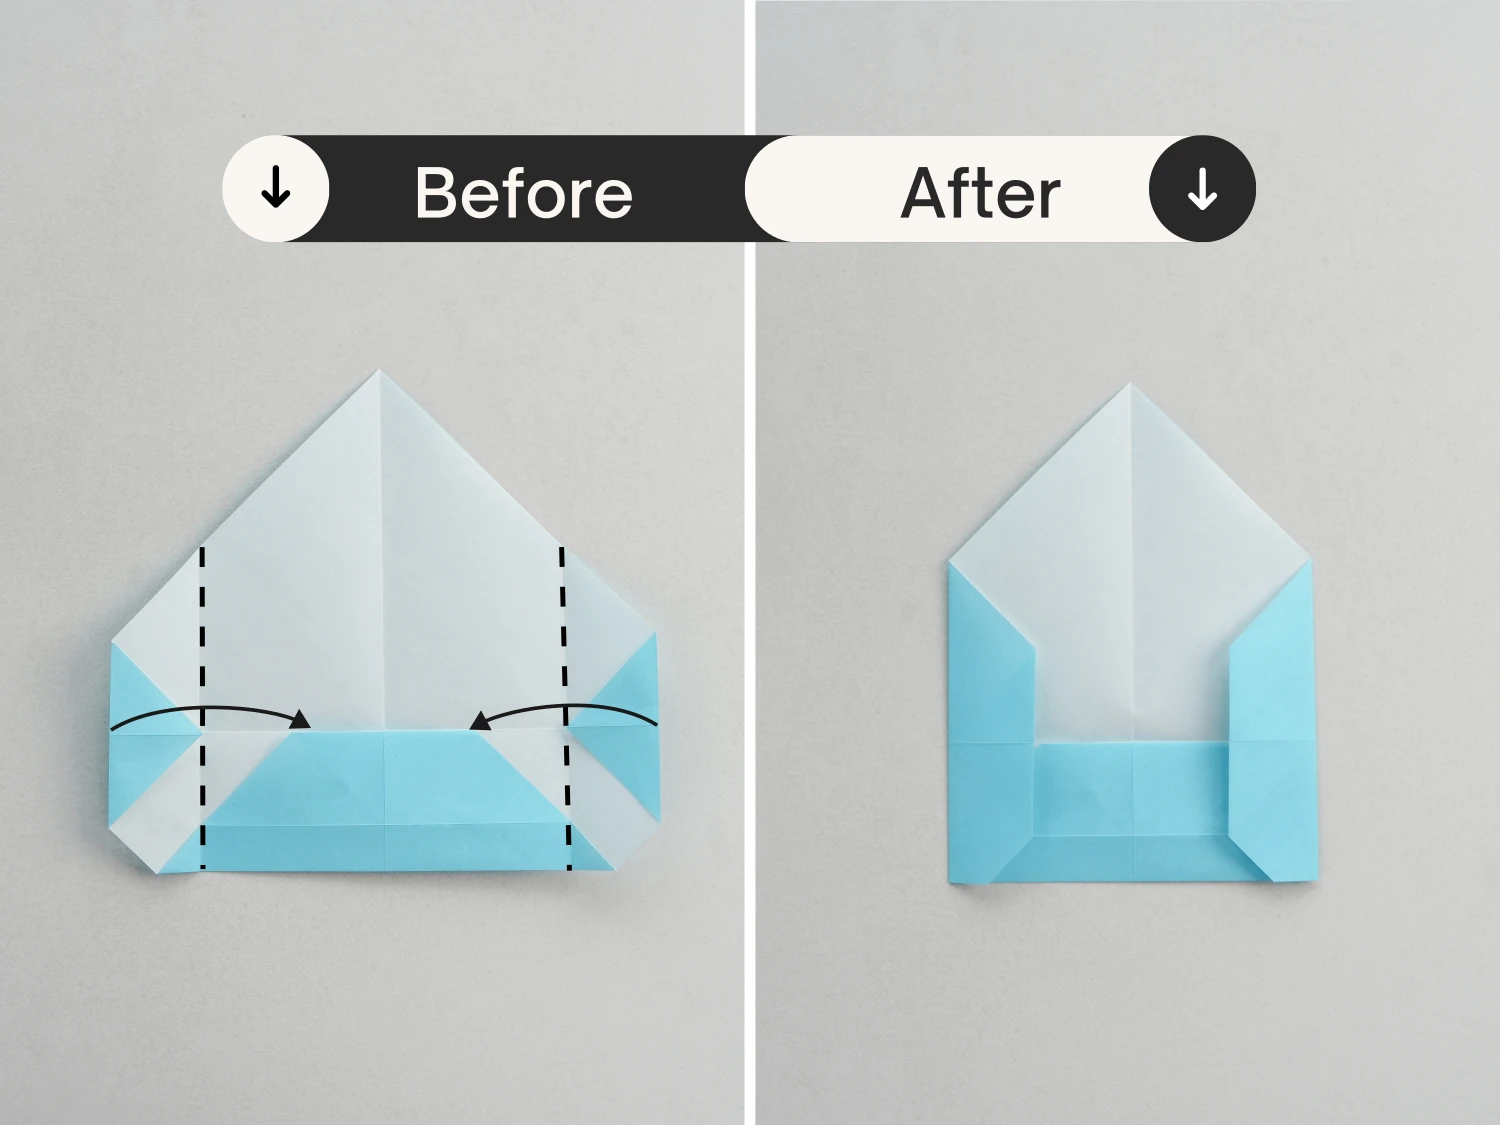
Step 9
Now fold the top corner down along the dotted line, and tuck it into the bottom pocket.
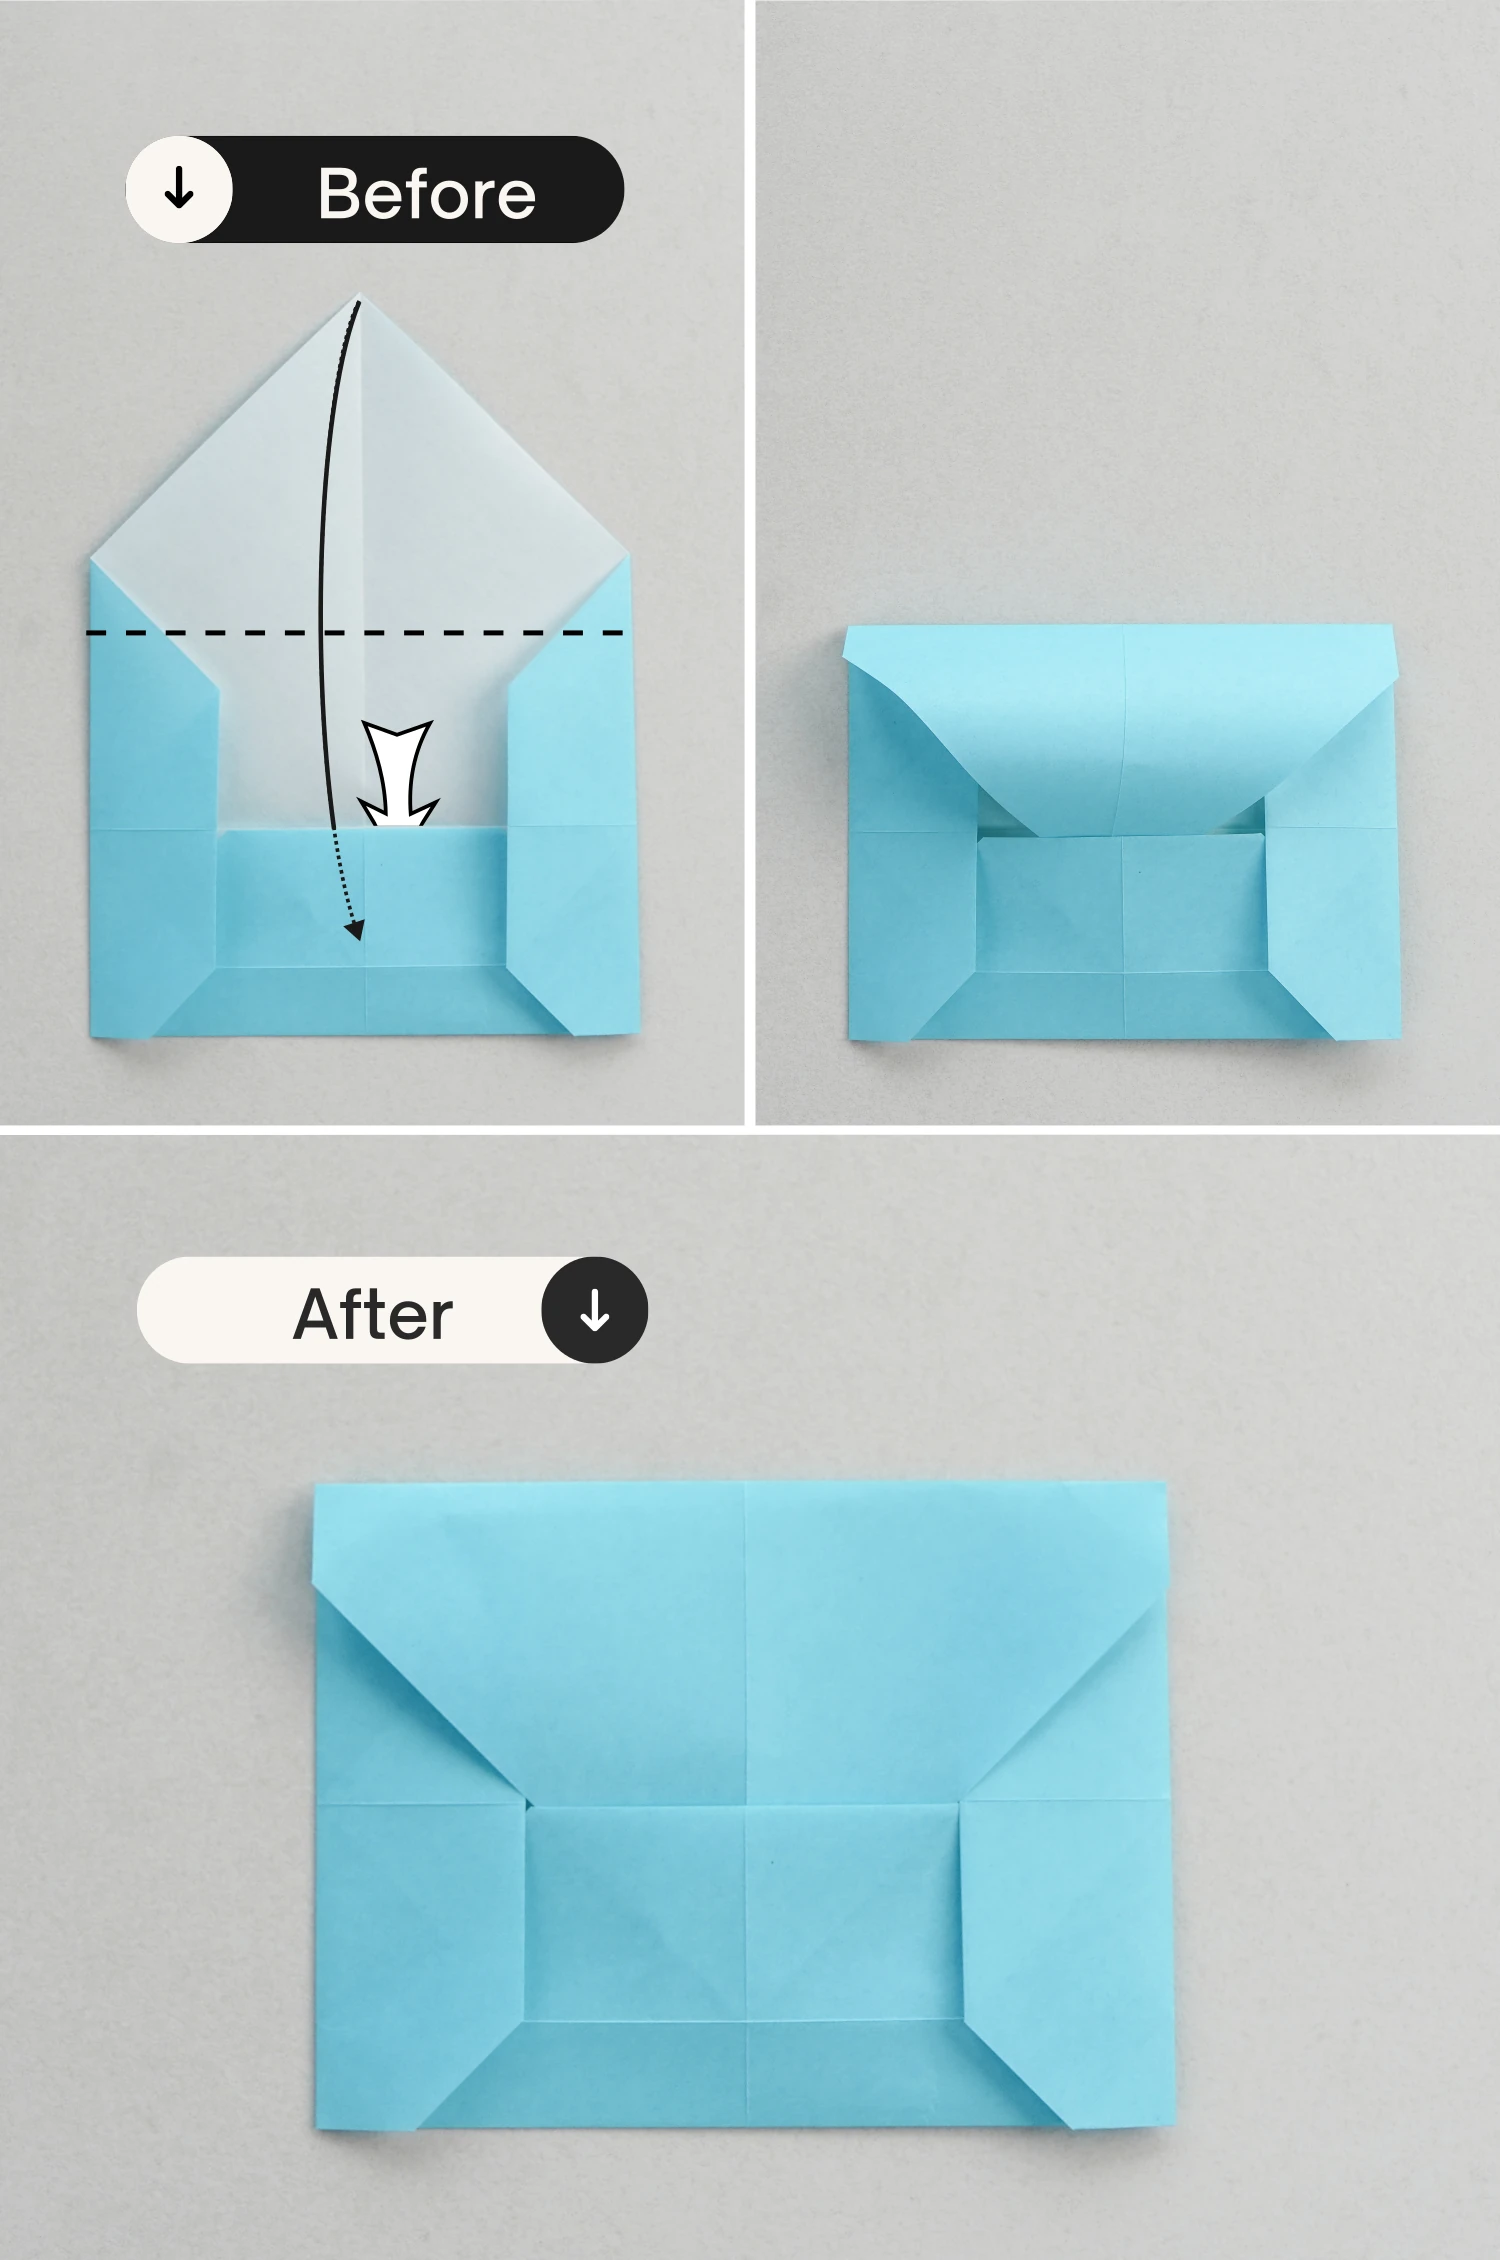
Step 10
Draw your favorite pattern or words on it.
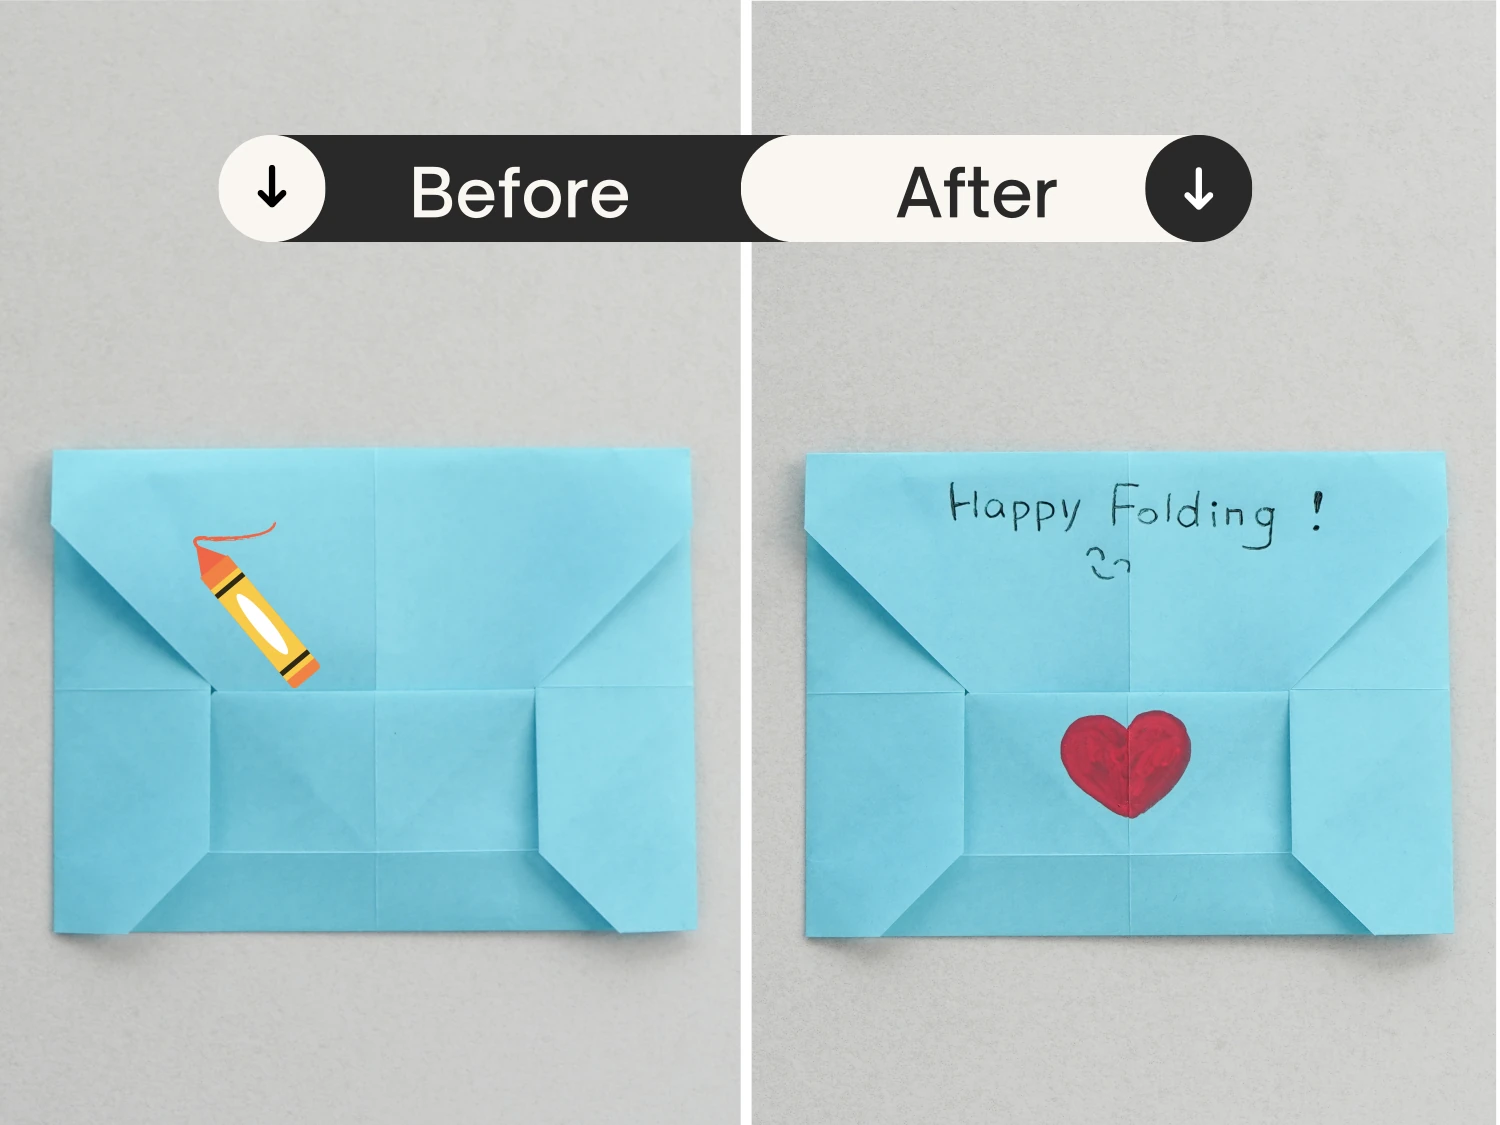
Now we have finished our origami envelop. You can go ahead and make some other cute origami flowers or small origami crane as a attachment. Happy folding.

Other easy origami ideas


Want more origami ideas or more instructions? Remember to subscribe our Newsletters. We will send the newest inspiration to your box.