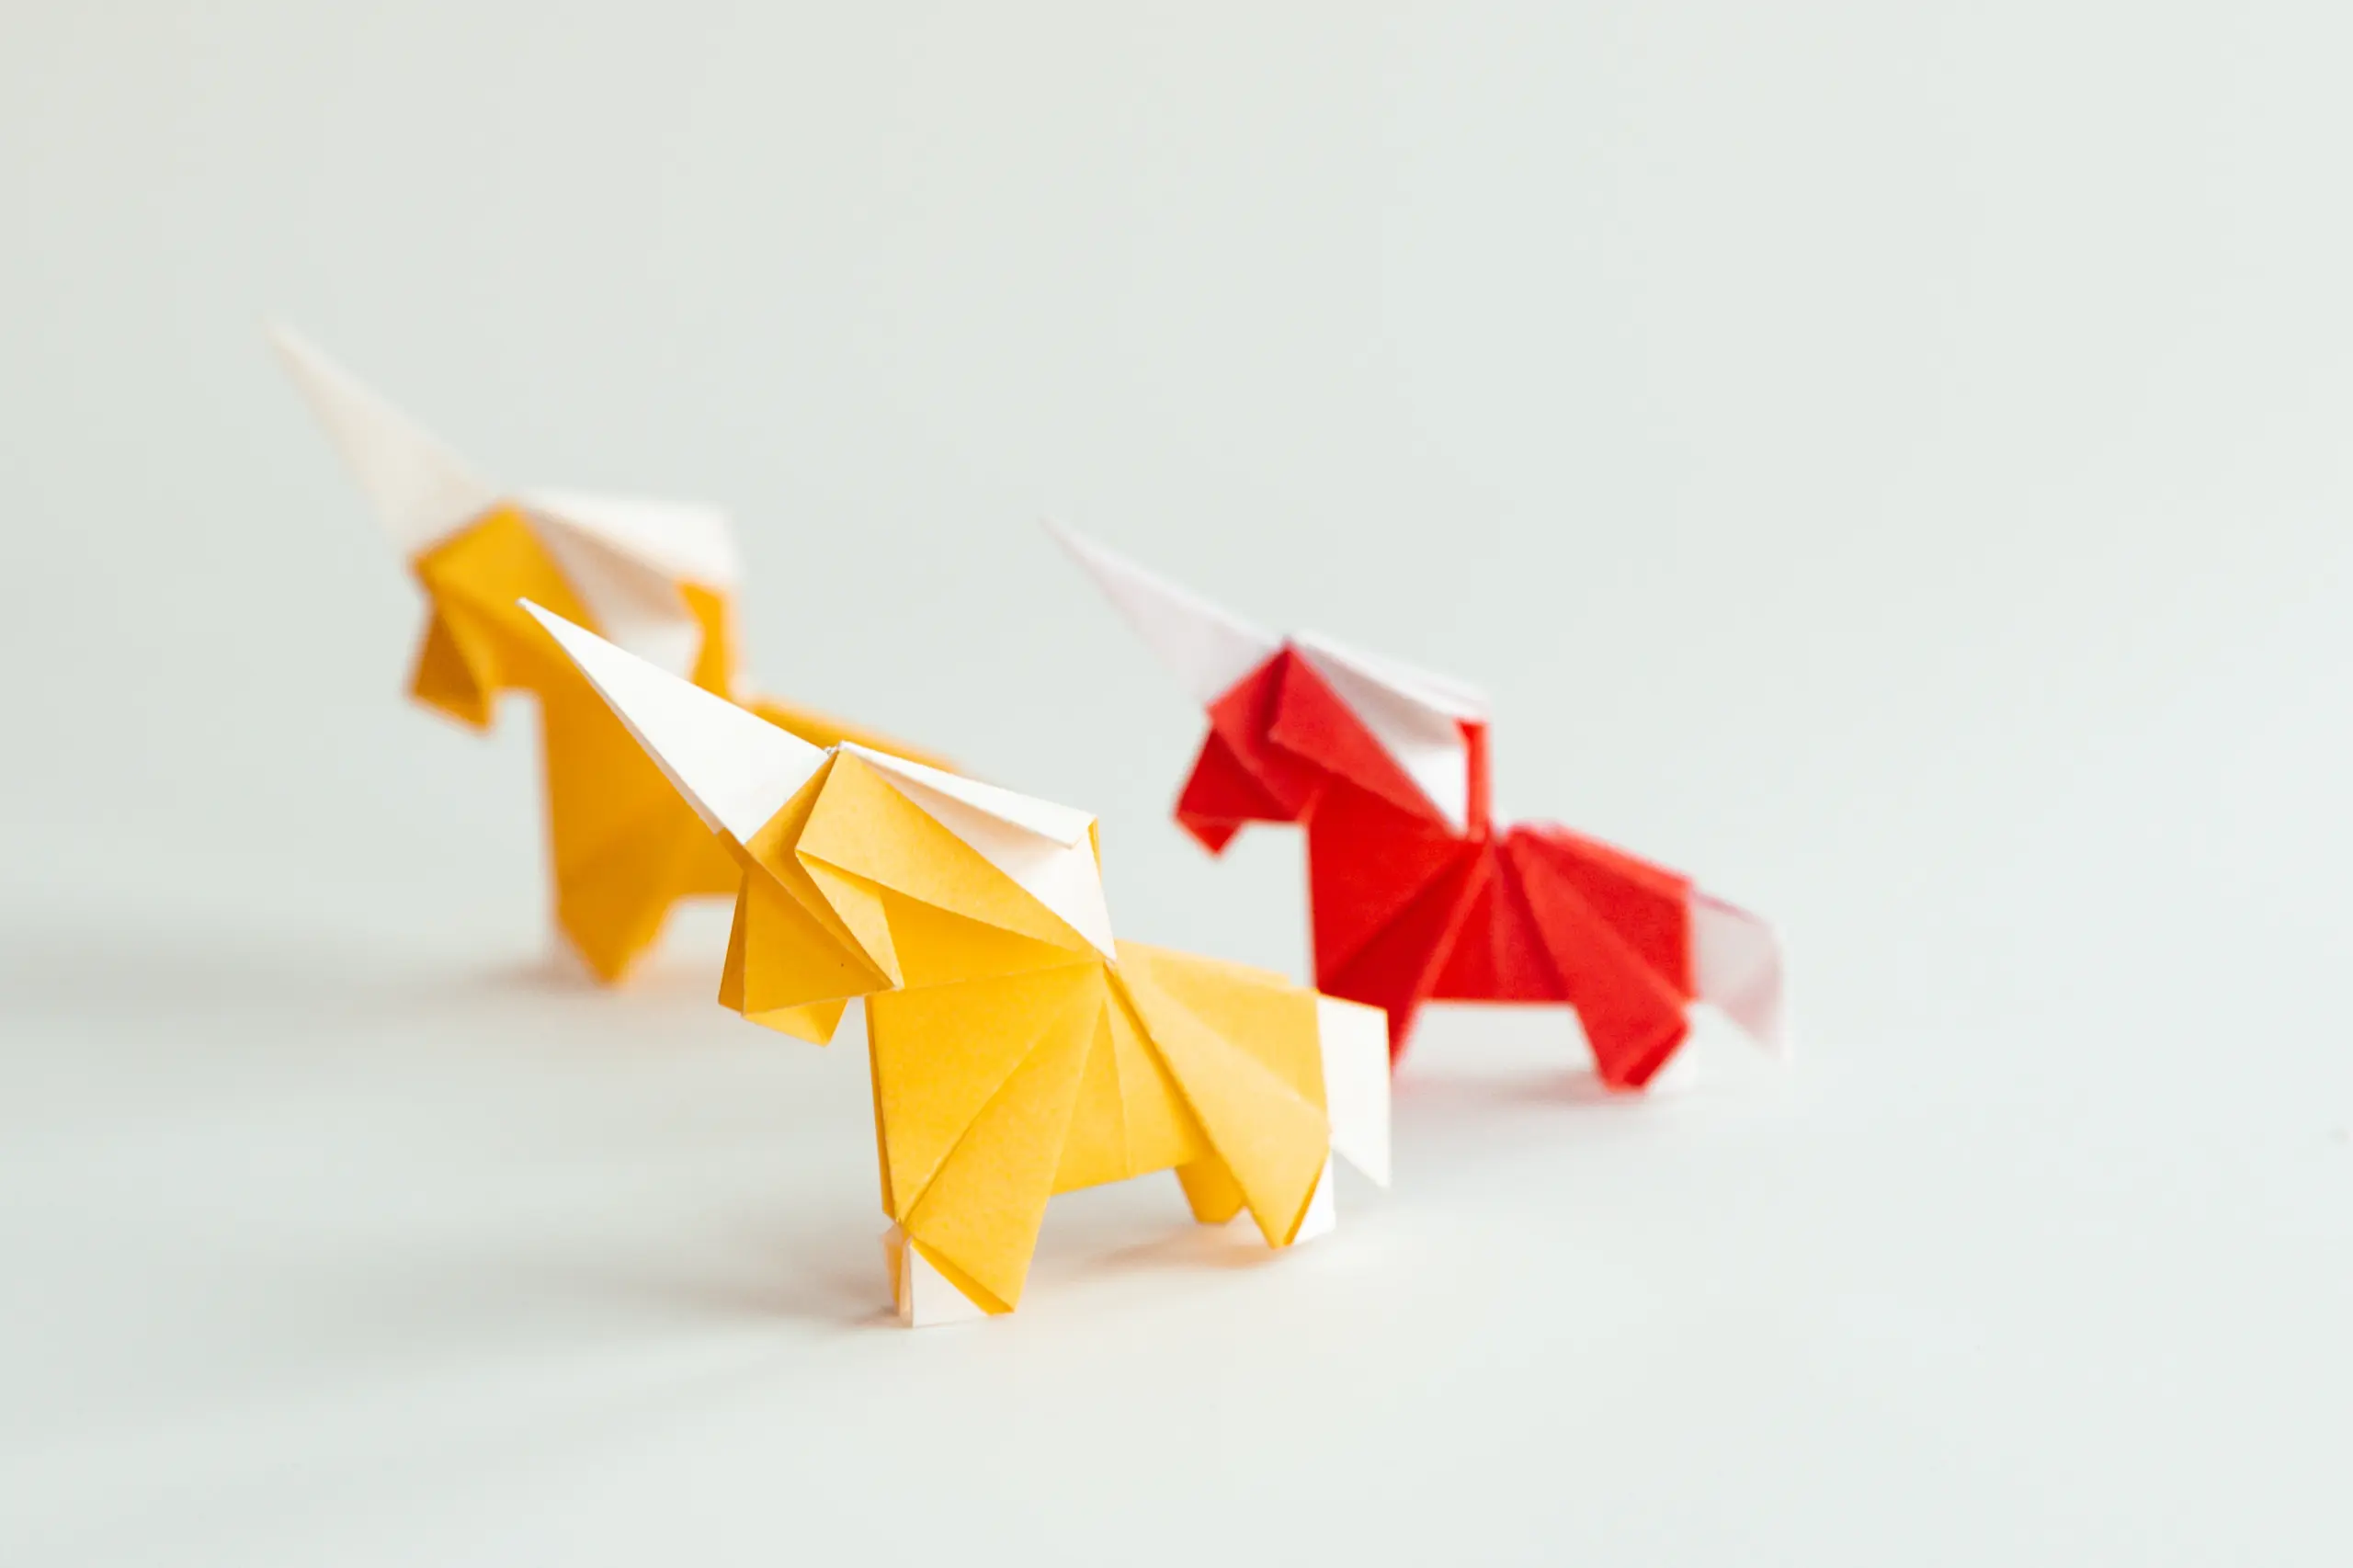
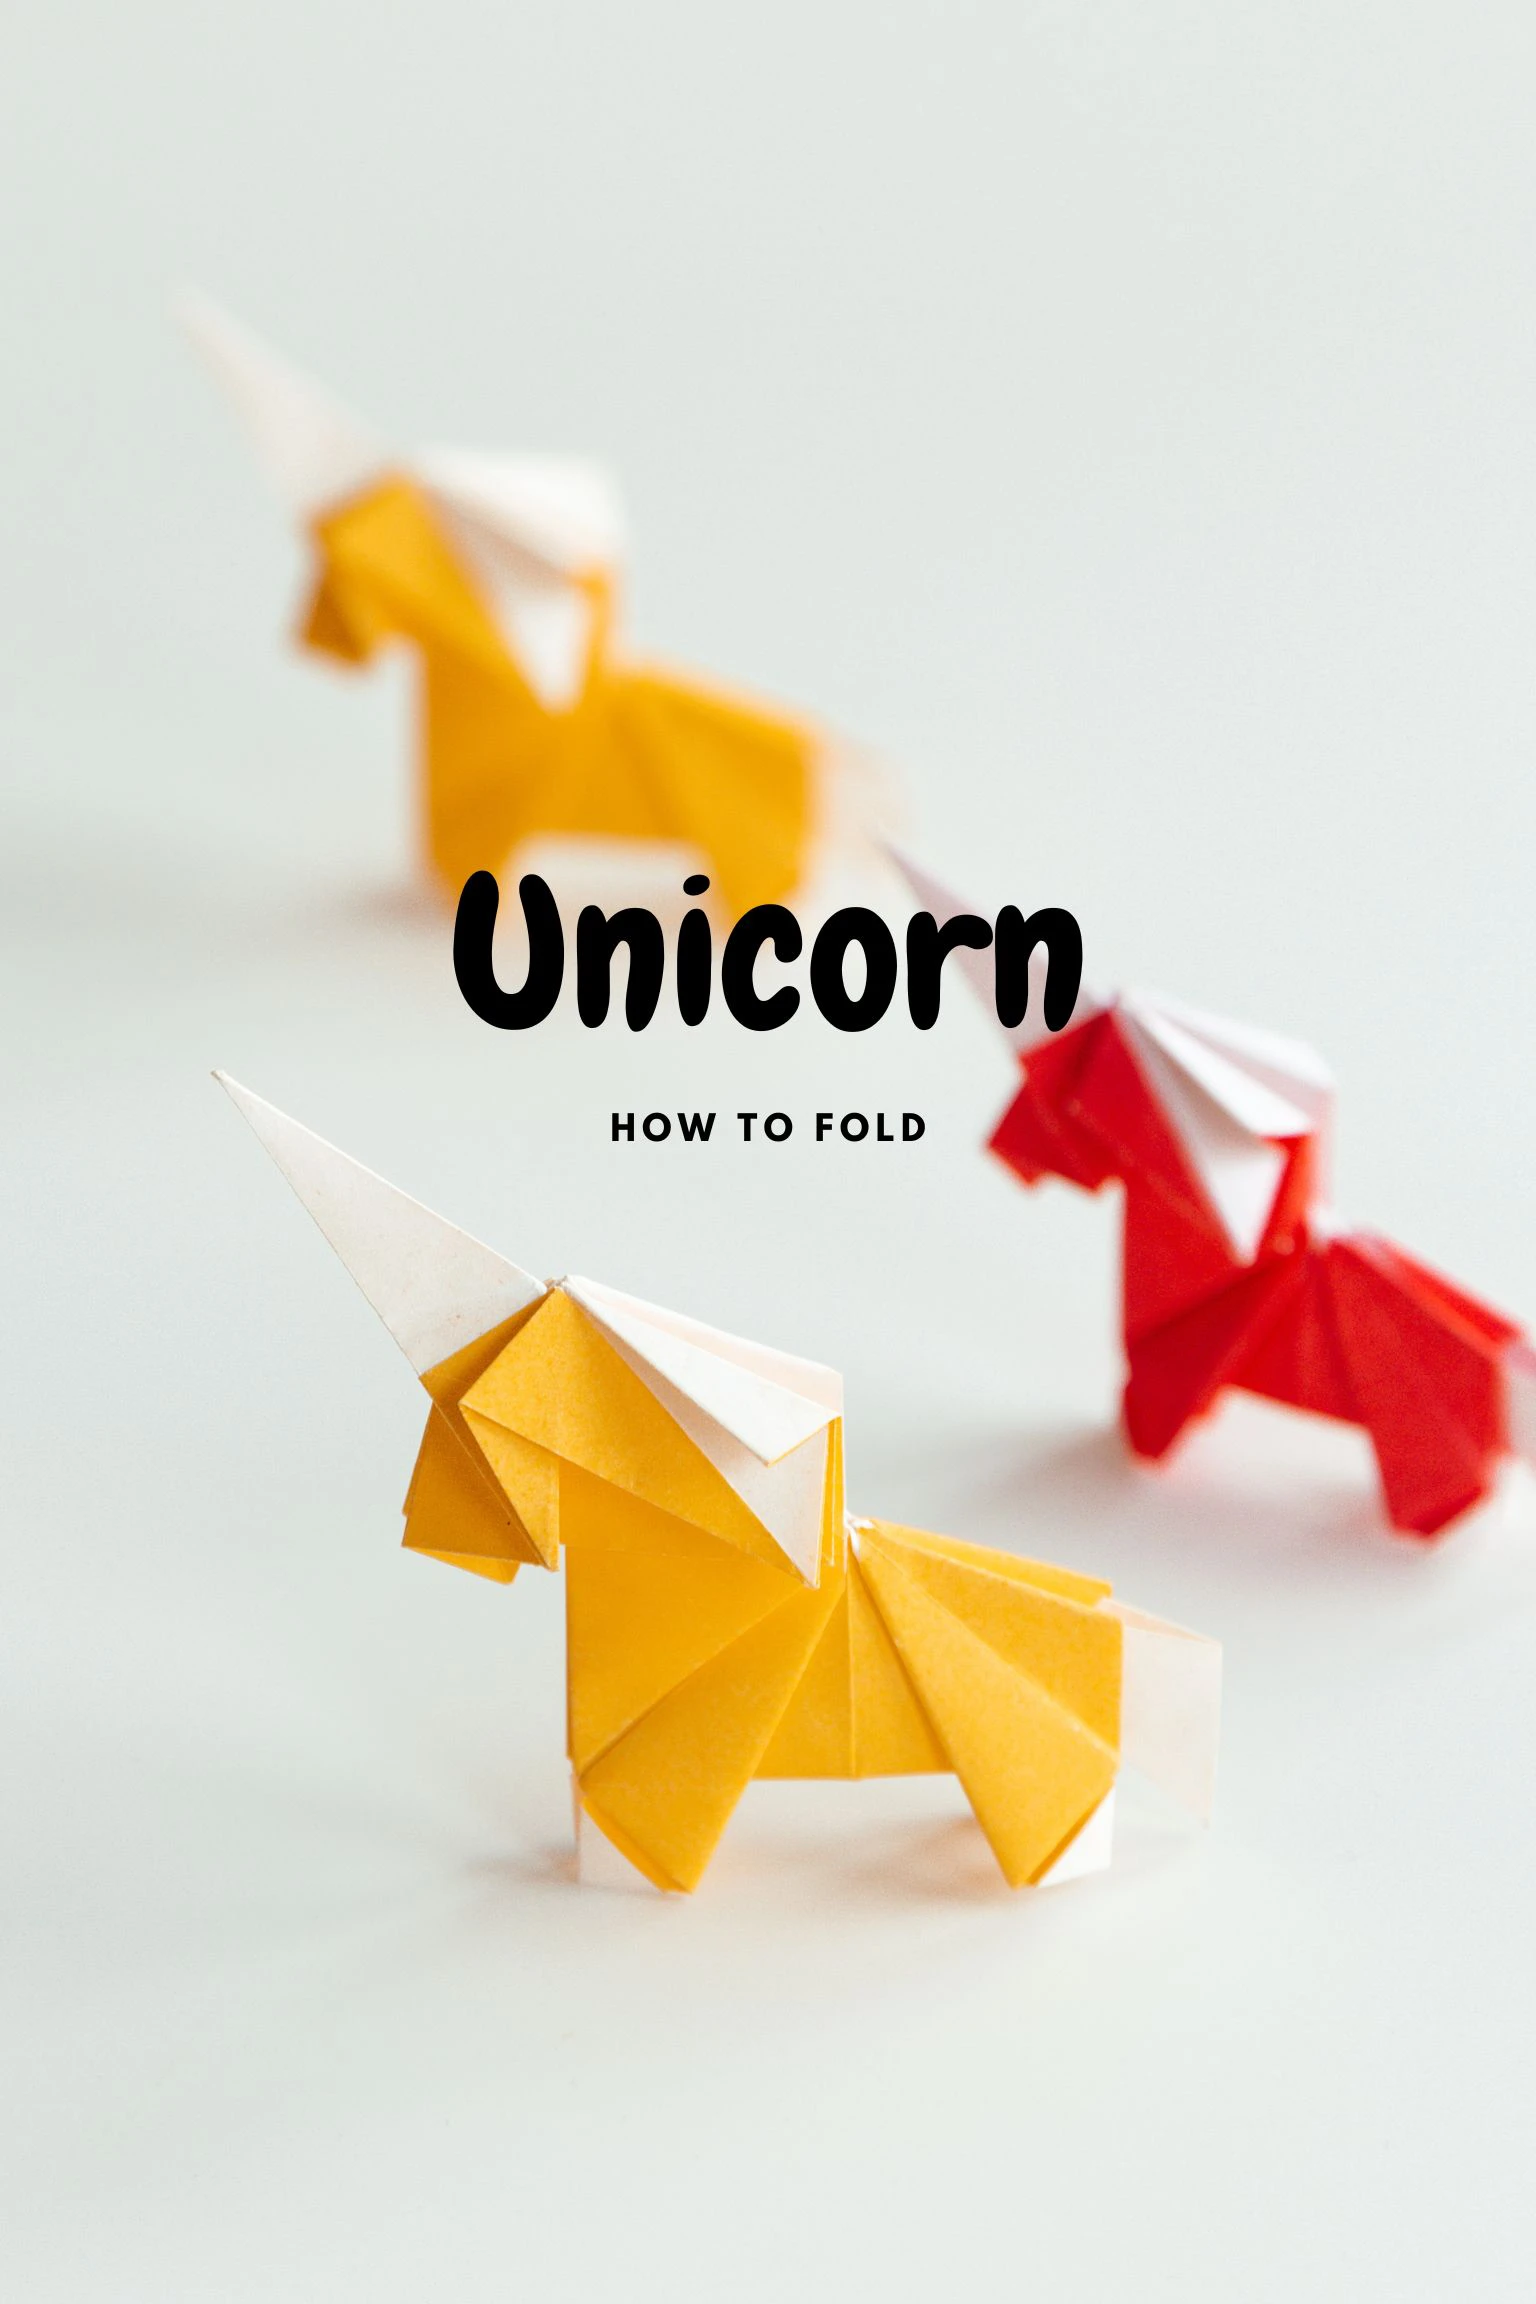
The unicorn is a mythical creature that is often described as a horse-like animal with a horn on its forehead. Unicorns are often associated with purity and magical powers, and it is believed to have healing powers. Anyone who loves cute creatures can’t resist a unicorn!
This time, we are going to create a unicorn with just a single piece of paper. This model perfectly captures the graceful charm of a unicorn with its unique horn, graceful stance, and cute tail. It is certain to evoke feelings of awe and wonder. Gather your paper and let’s start folding! It may bring you lucky!
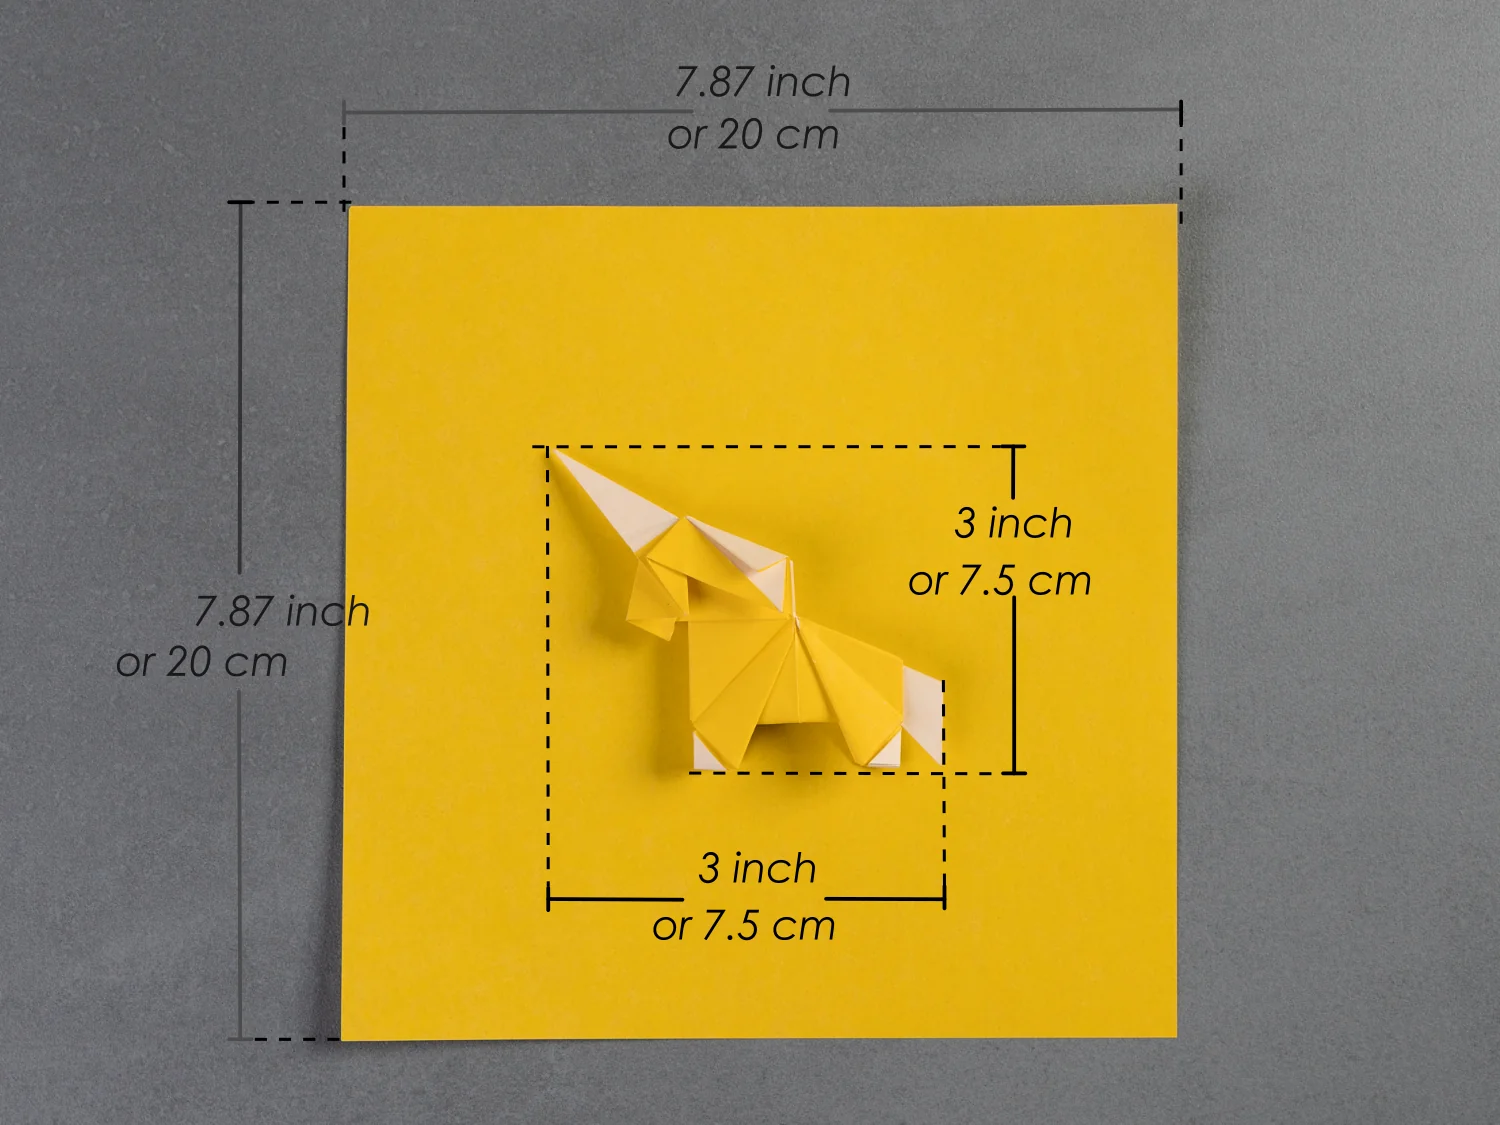
Since it’s an advanced version involving complex steps, using a large paper is recommended.
If you are new to origami, start here from our beginner guide to know the basics and how to read the step-by-step instructions.
- Folding time: 30 minutes
- Paper: 20×20 cm
- Difficulty: Advanced
Material
Prepare a piece of 20×20 cm origami square paper, with different colors on each side, to create a 7.5×7.5 cm origami unicorn. Experiment with different colors and patterns to create a unique product and match your style.
Step by Step Instructions
Step 1
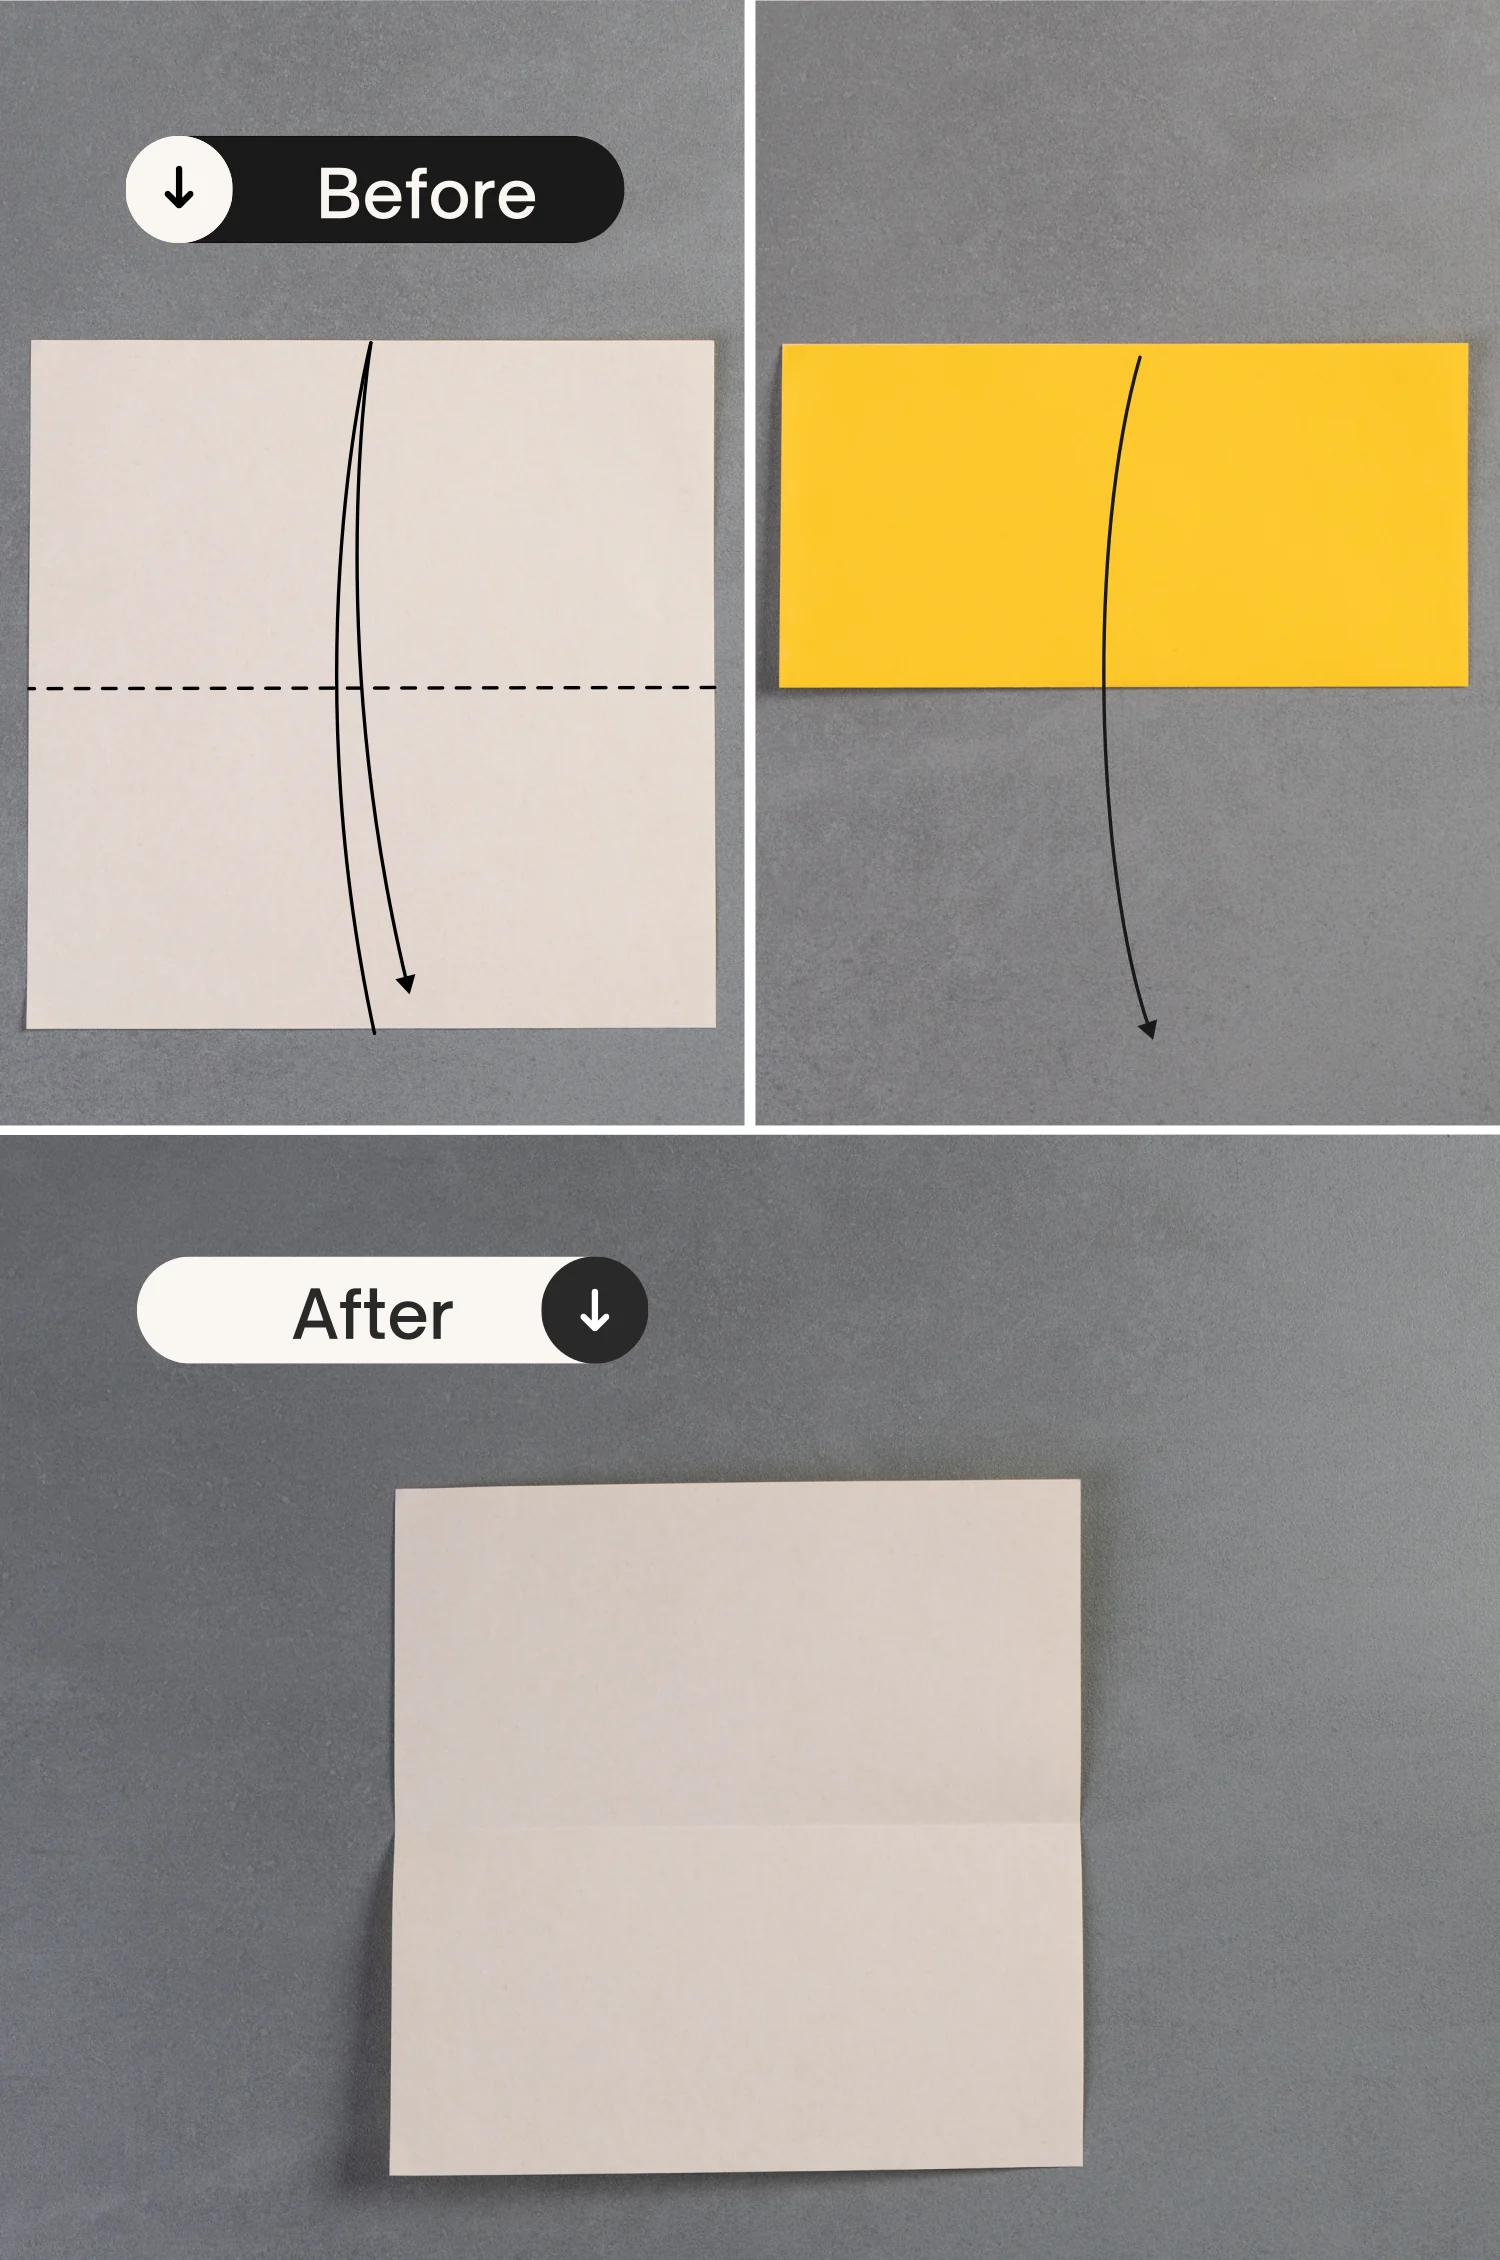
Place the paper with the desired display color side down to begin folding, fold it in half horizontally, and unfold it.
Step 2
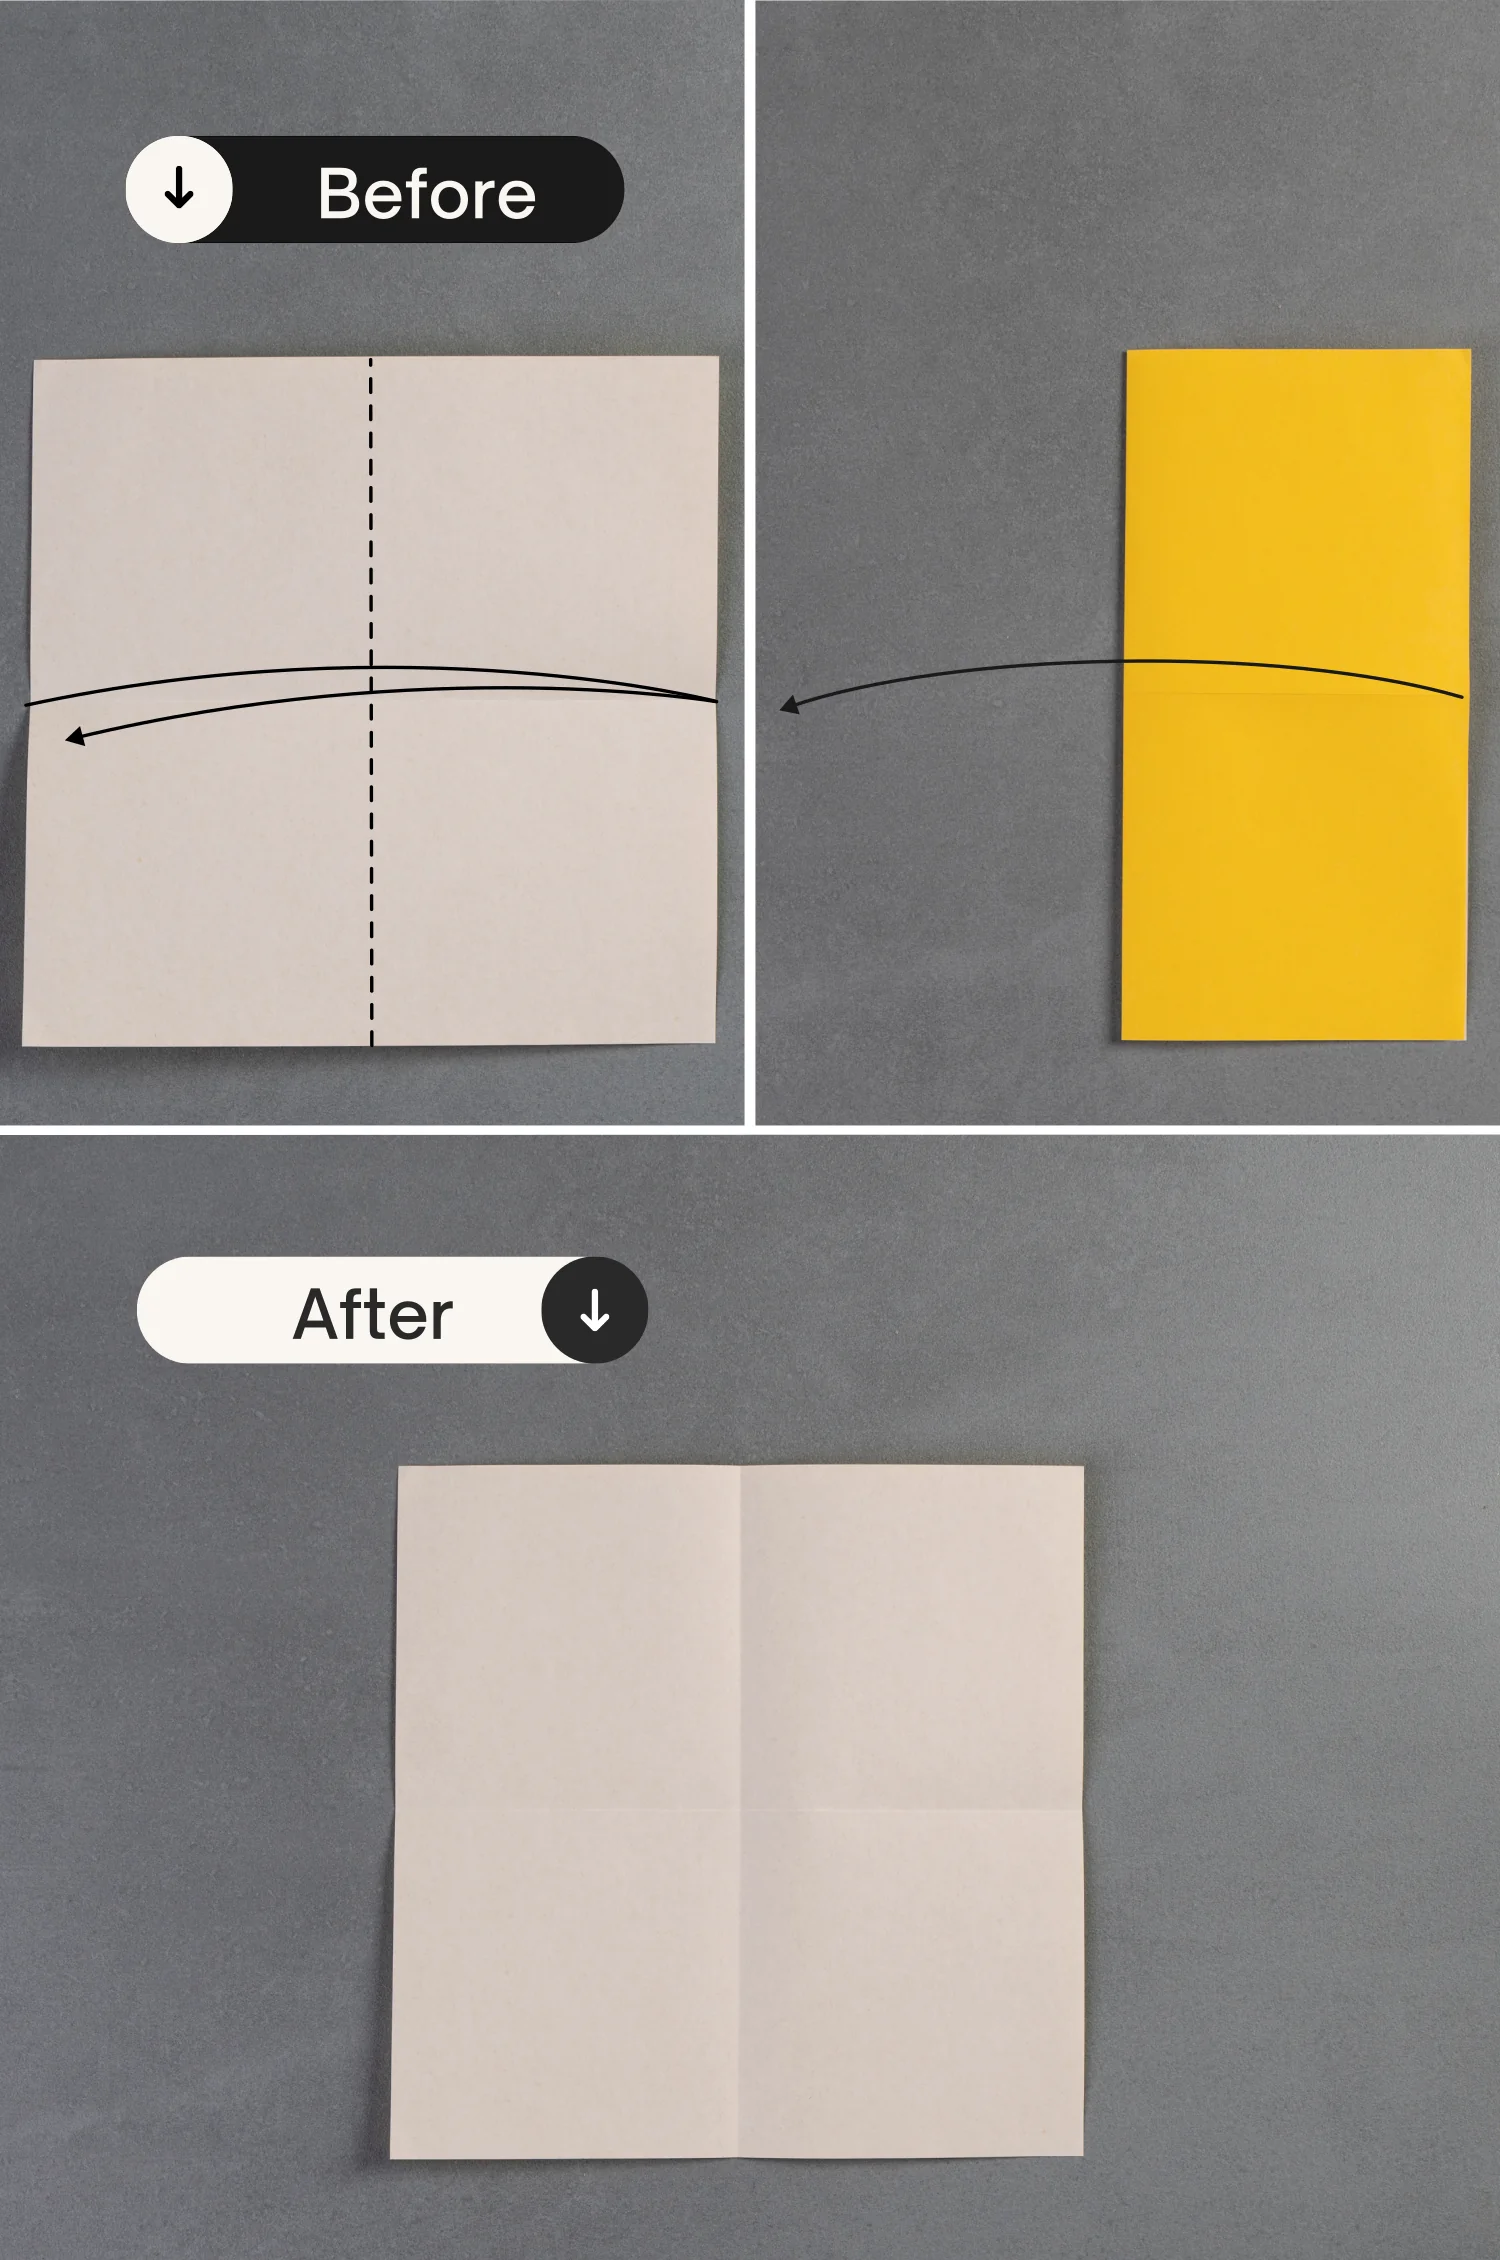
Fold it in half vertically, leaving a crease then unfold it.
Step 3
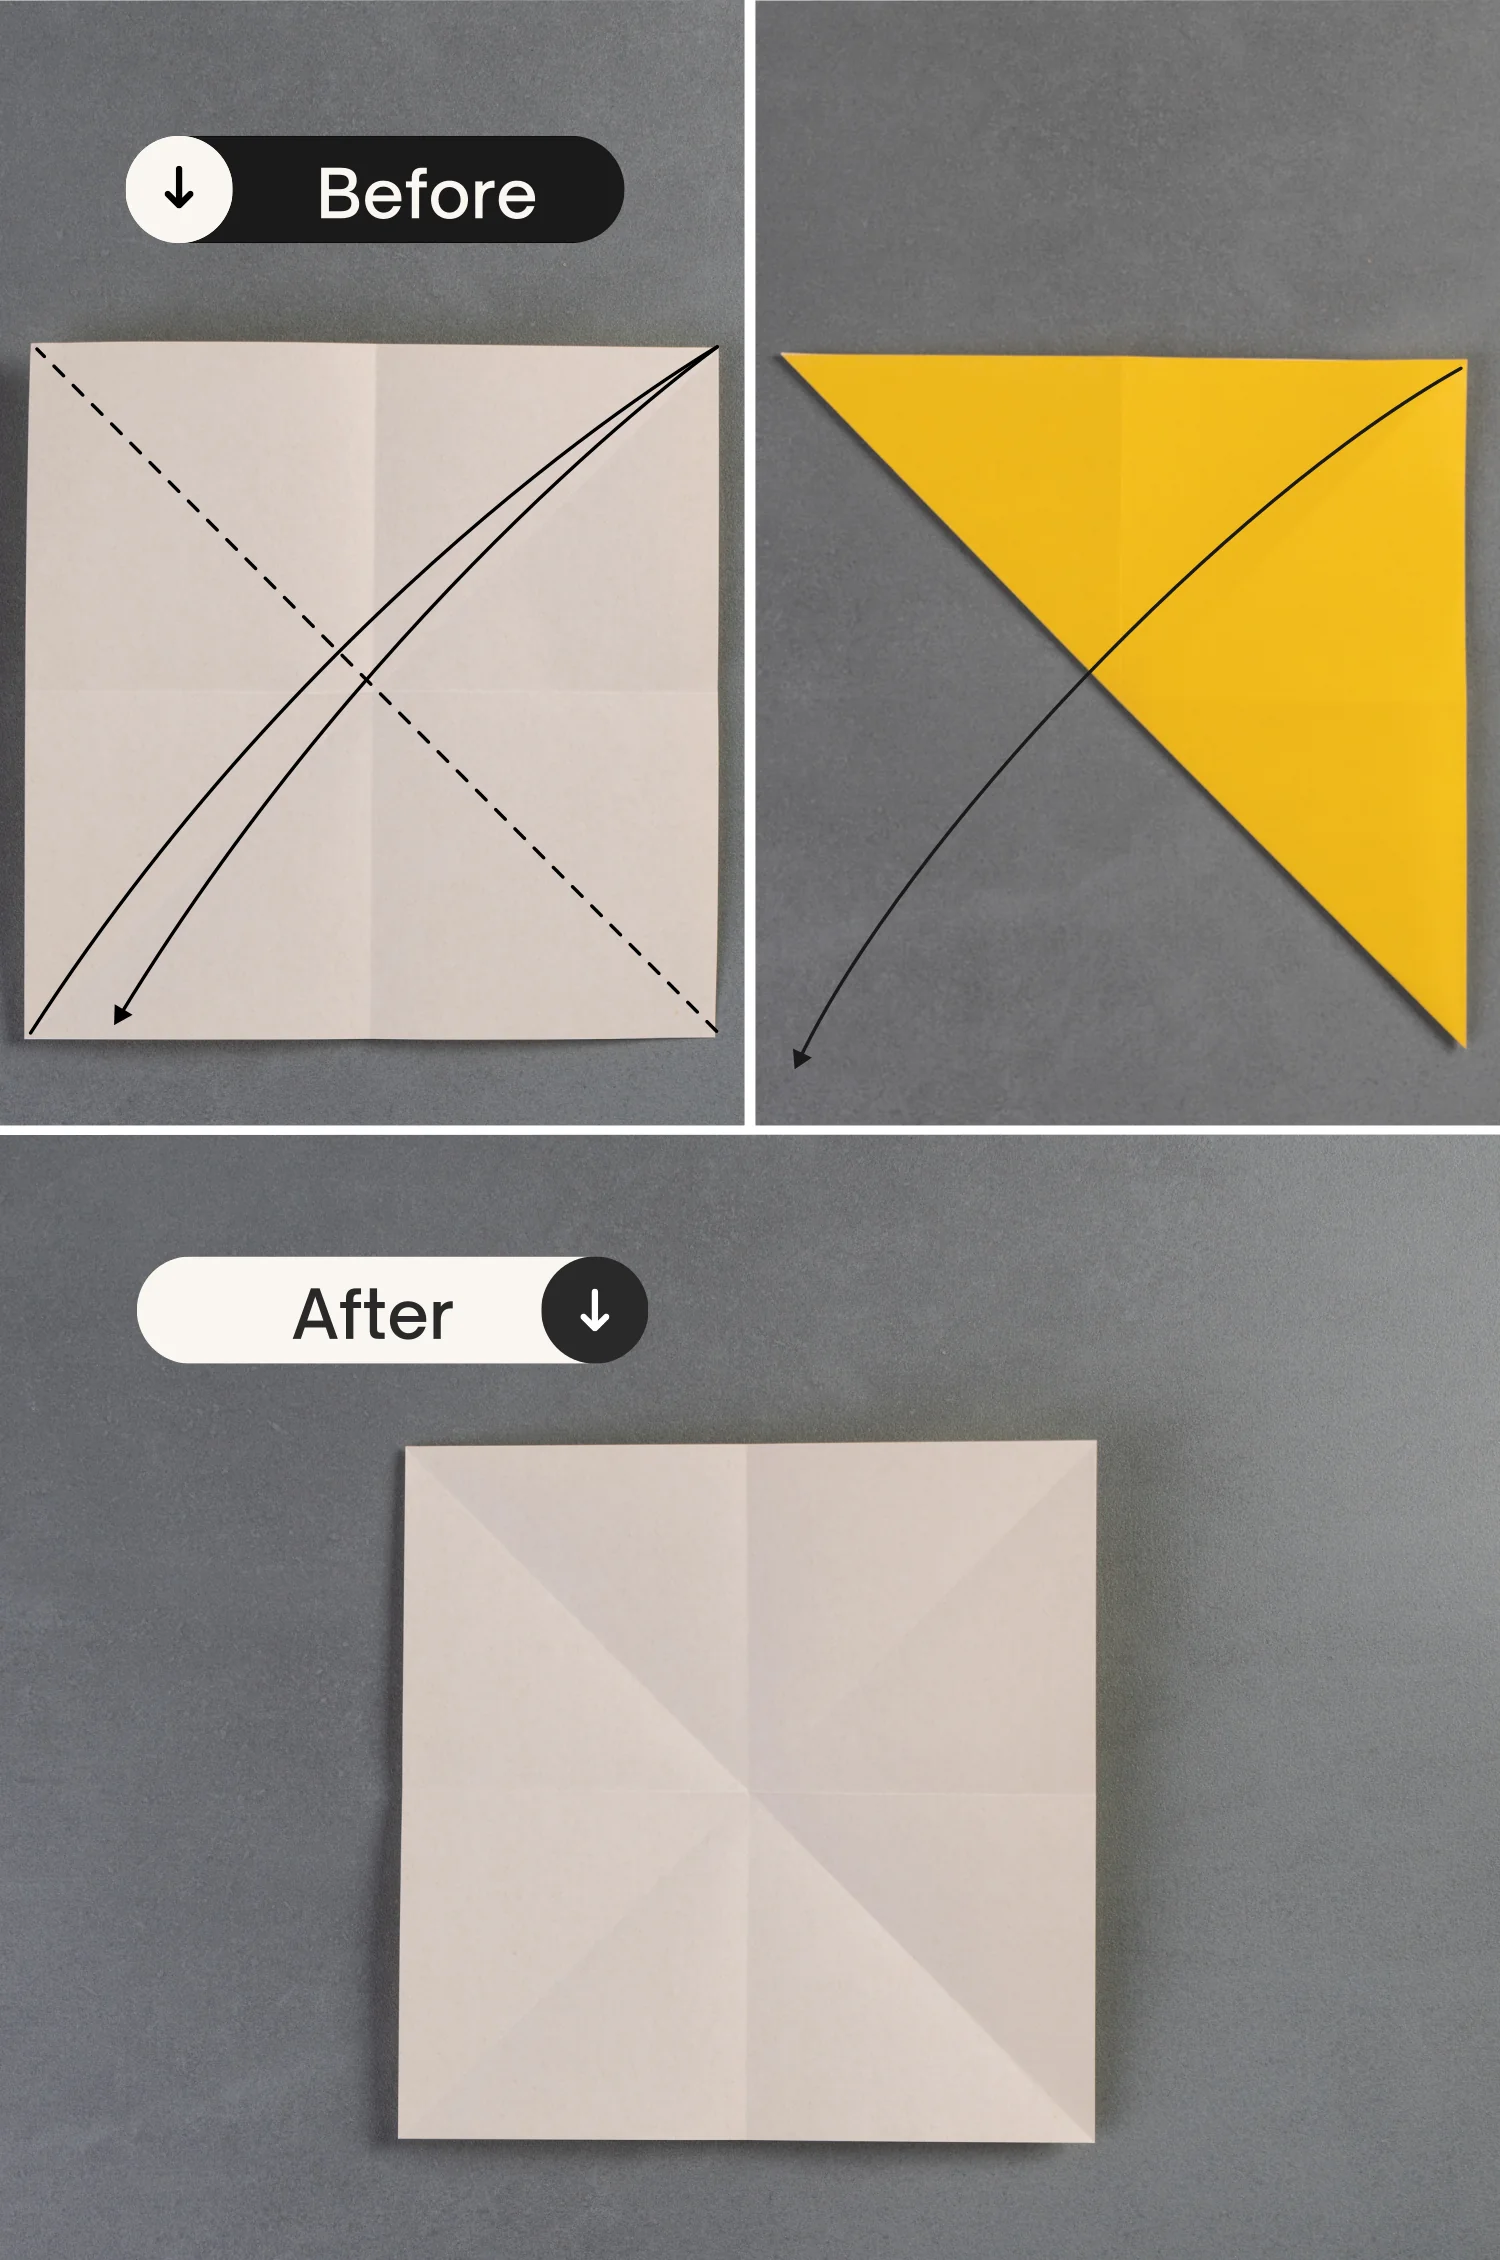
Fold it in half diagonally, and unfold it.

Step 4
Fold it in half diagonally from another side, and unfold it.
Step 5
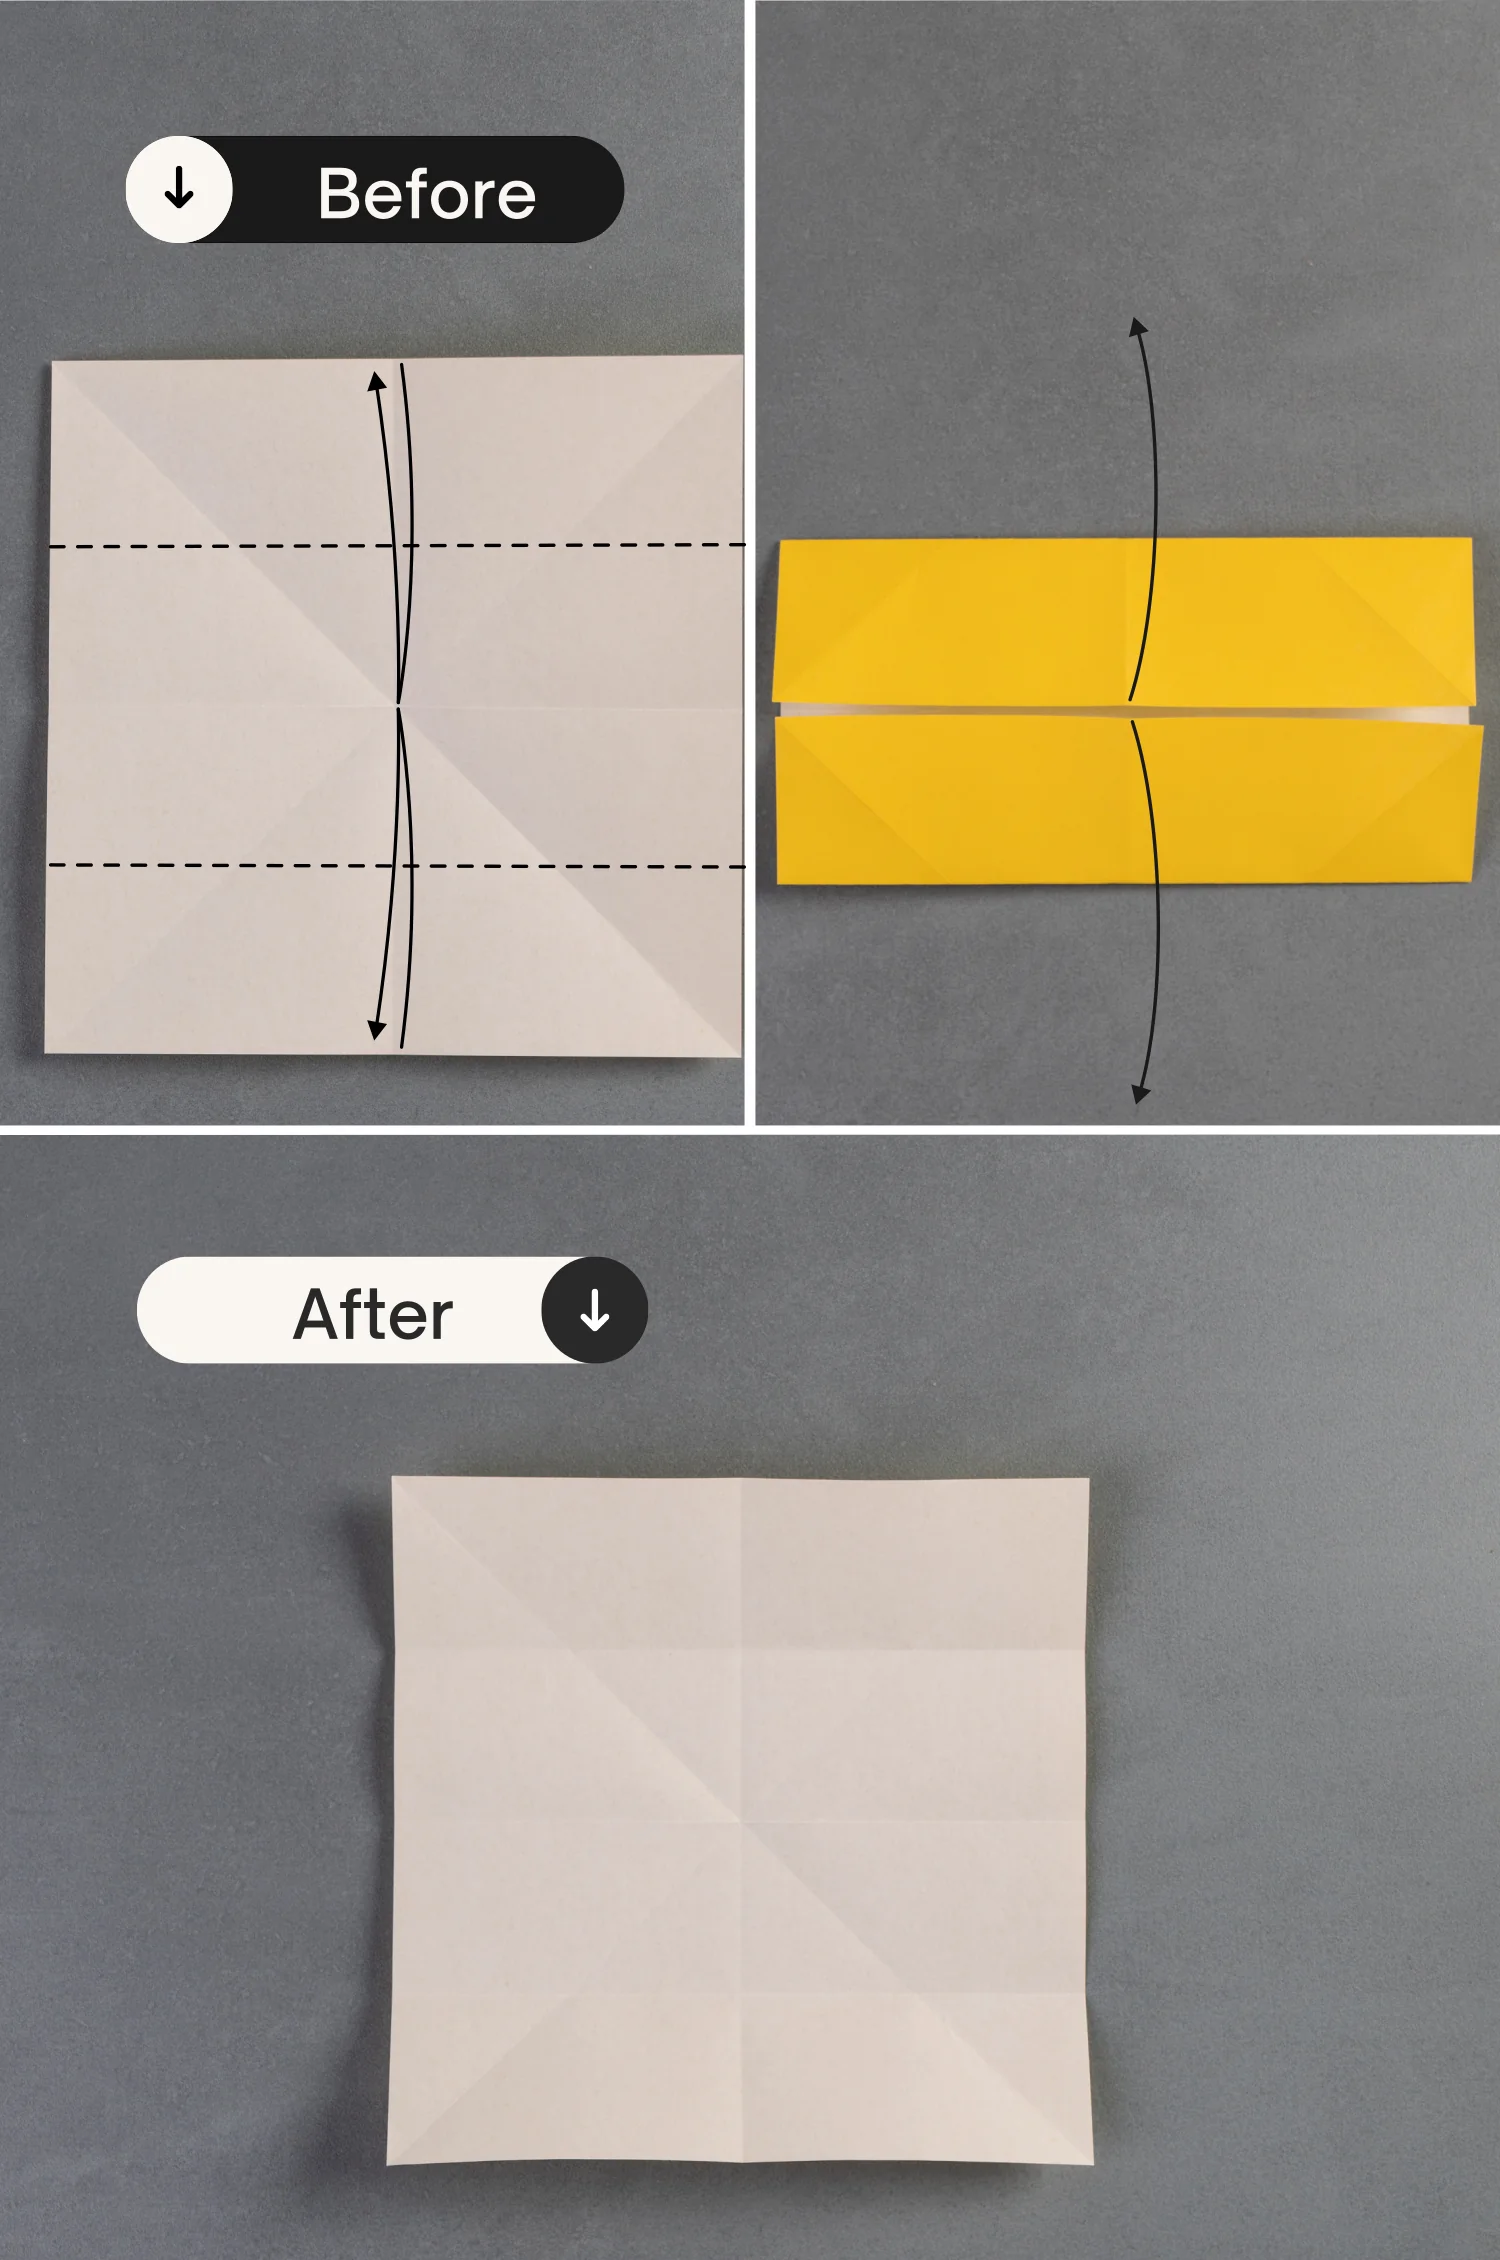
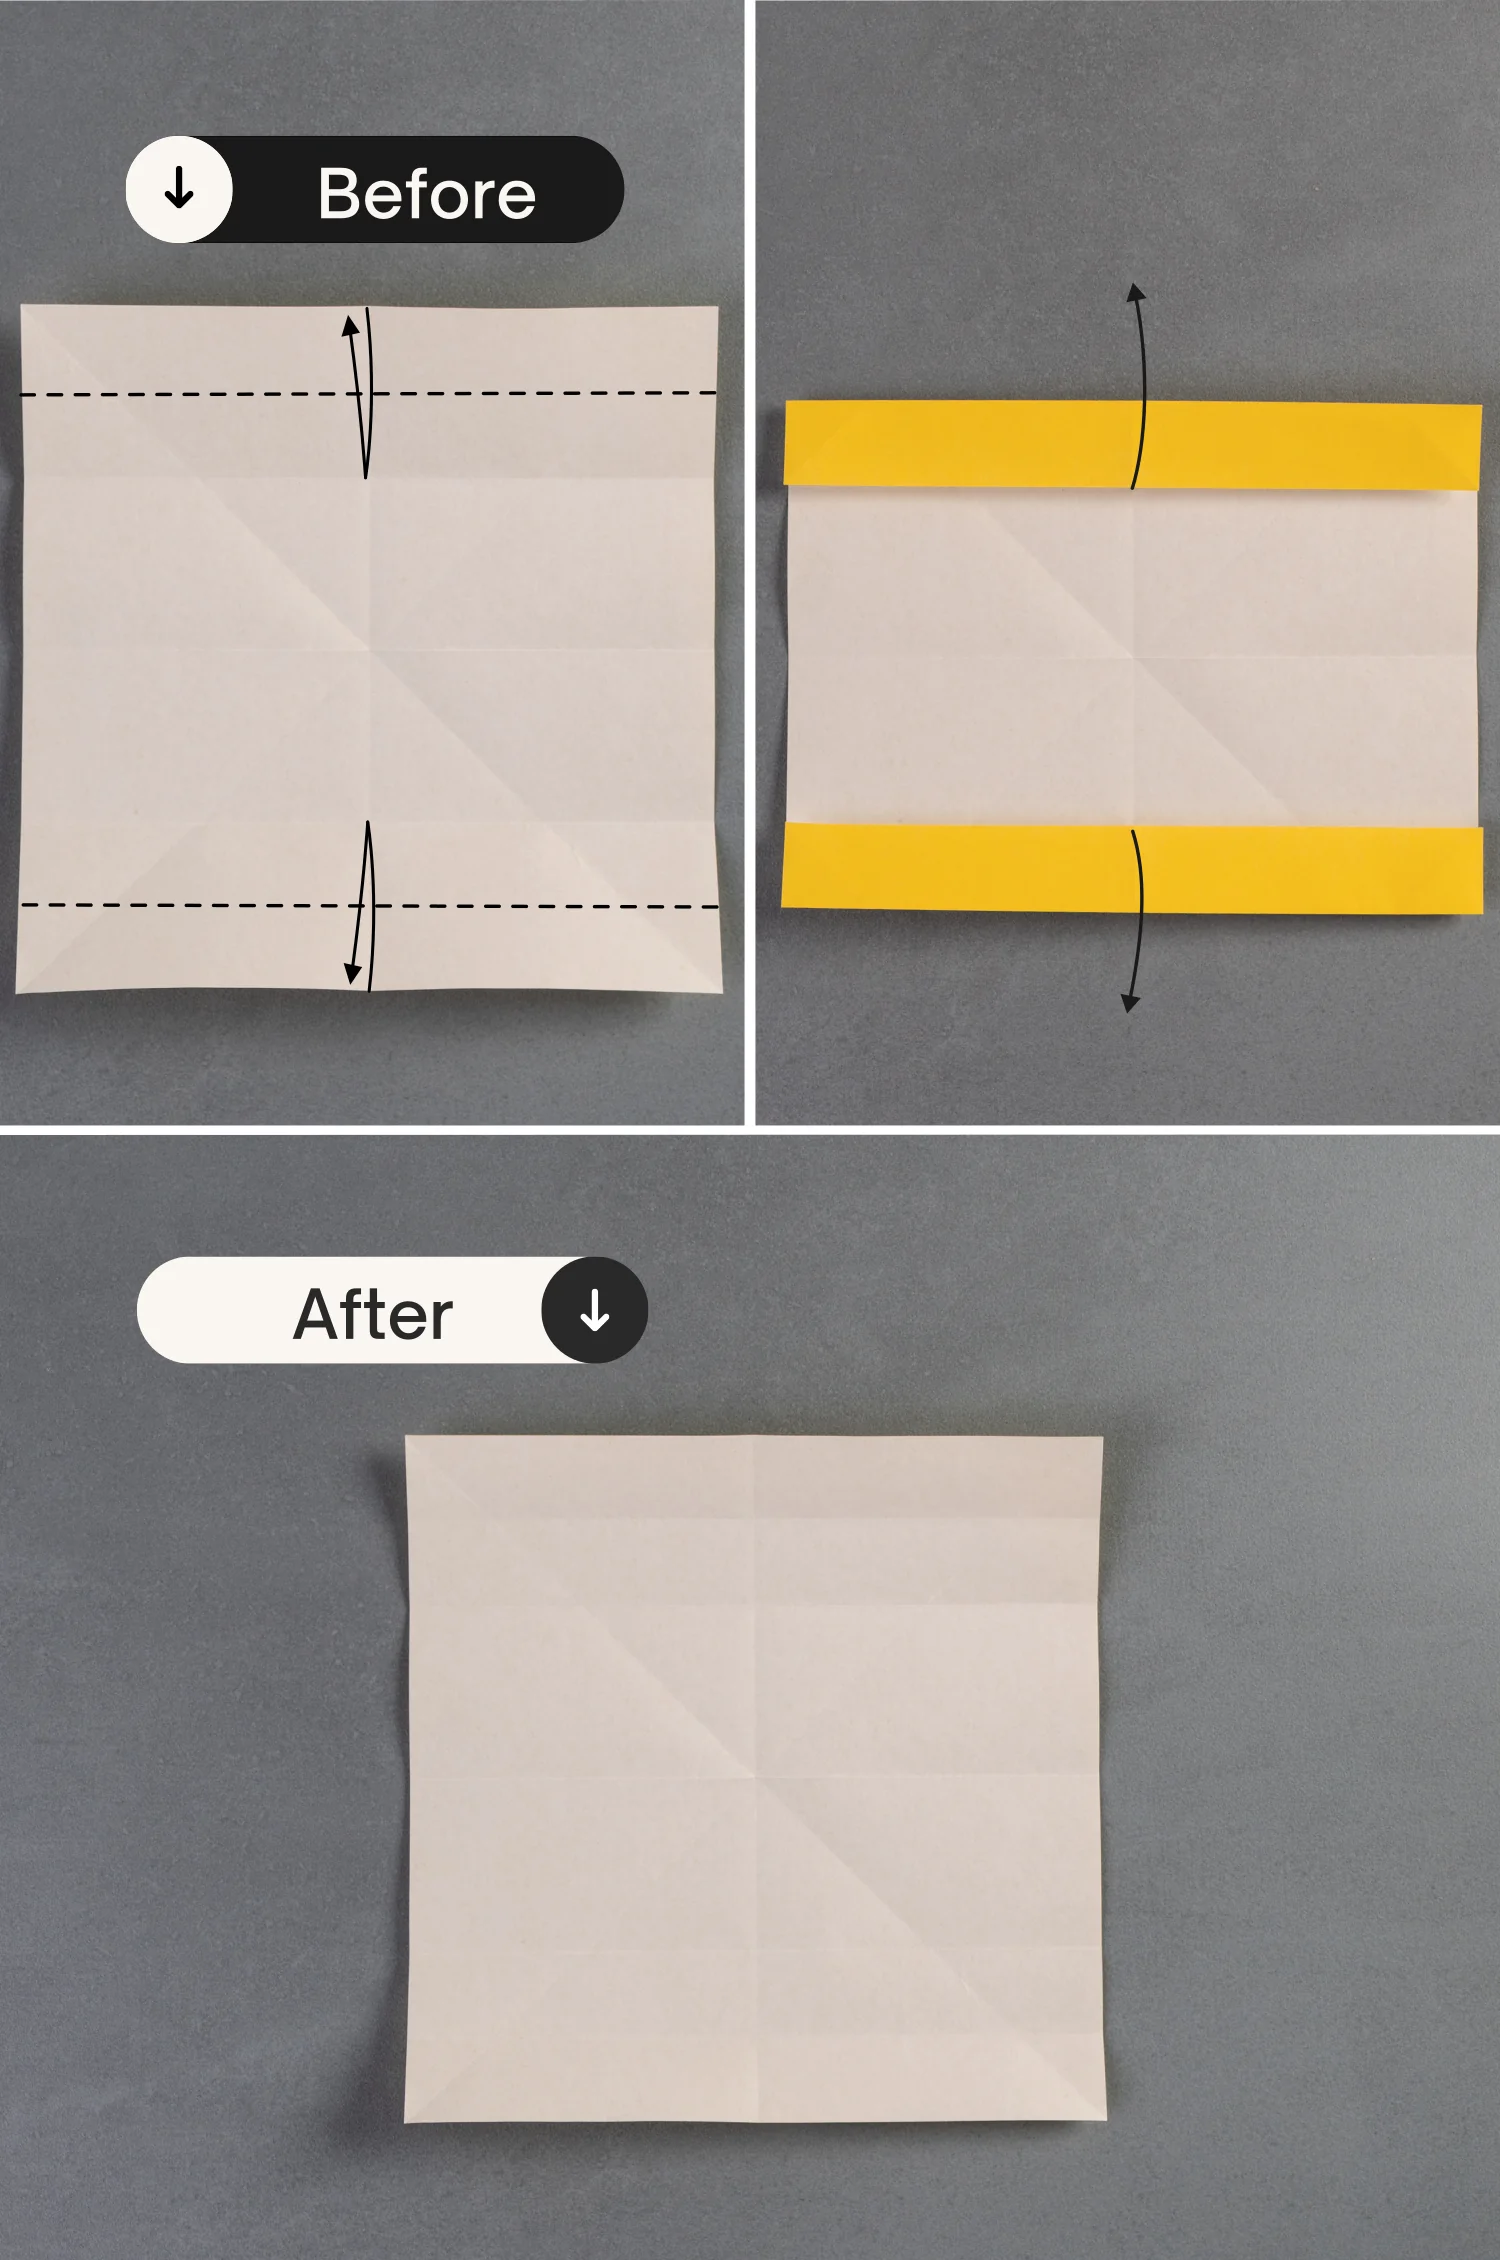
Fold the top and bottom edges to align with the horizontal crease, leaving two creases, and unfold them.
Step 6
Fold the top and bottom edges to align with the creases you made in the previous step, and unfold them.
Step 7
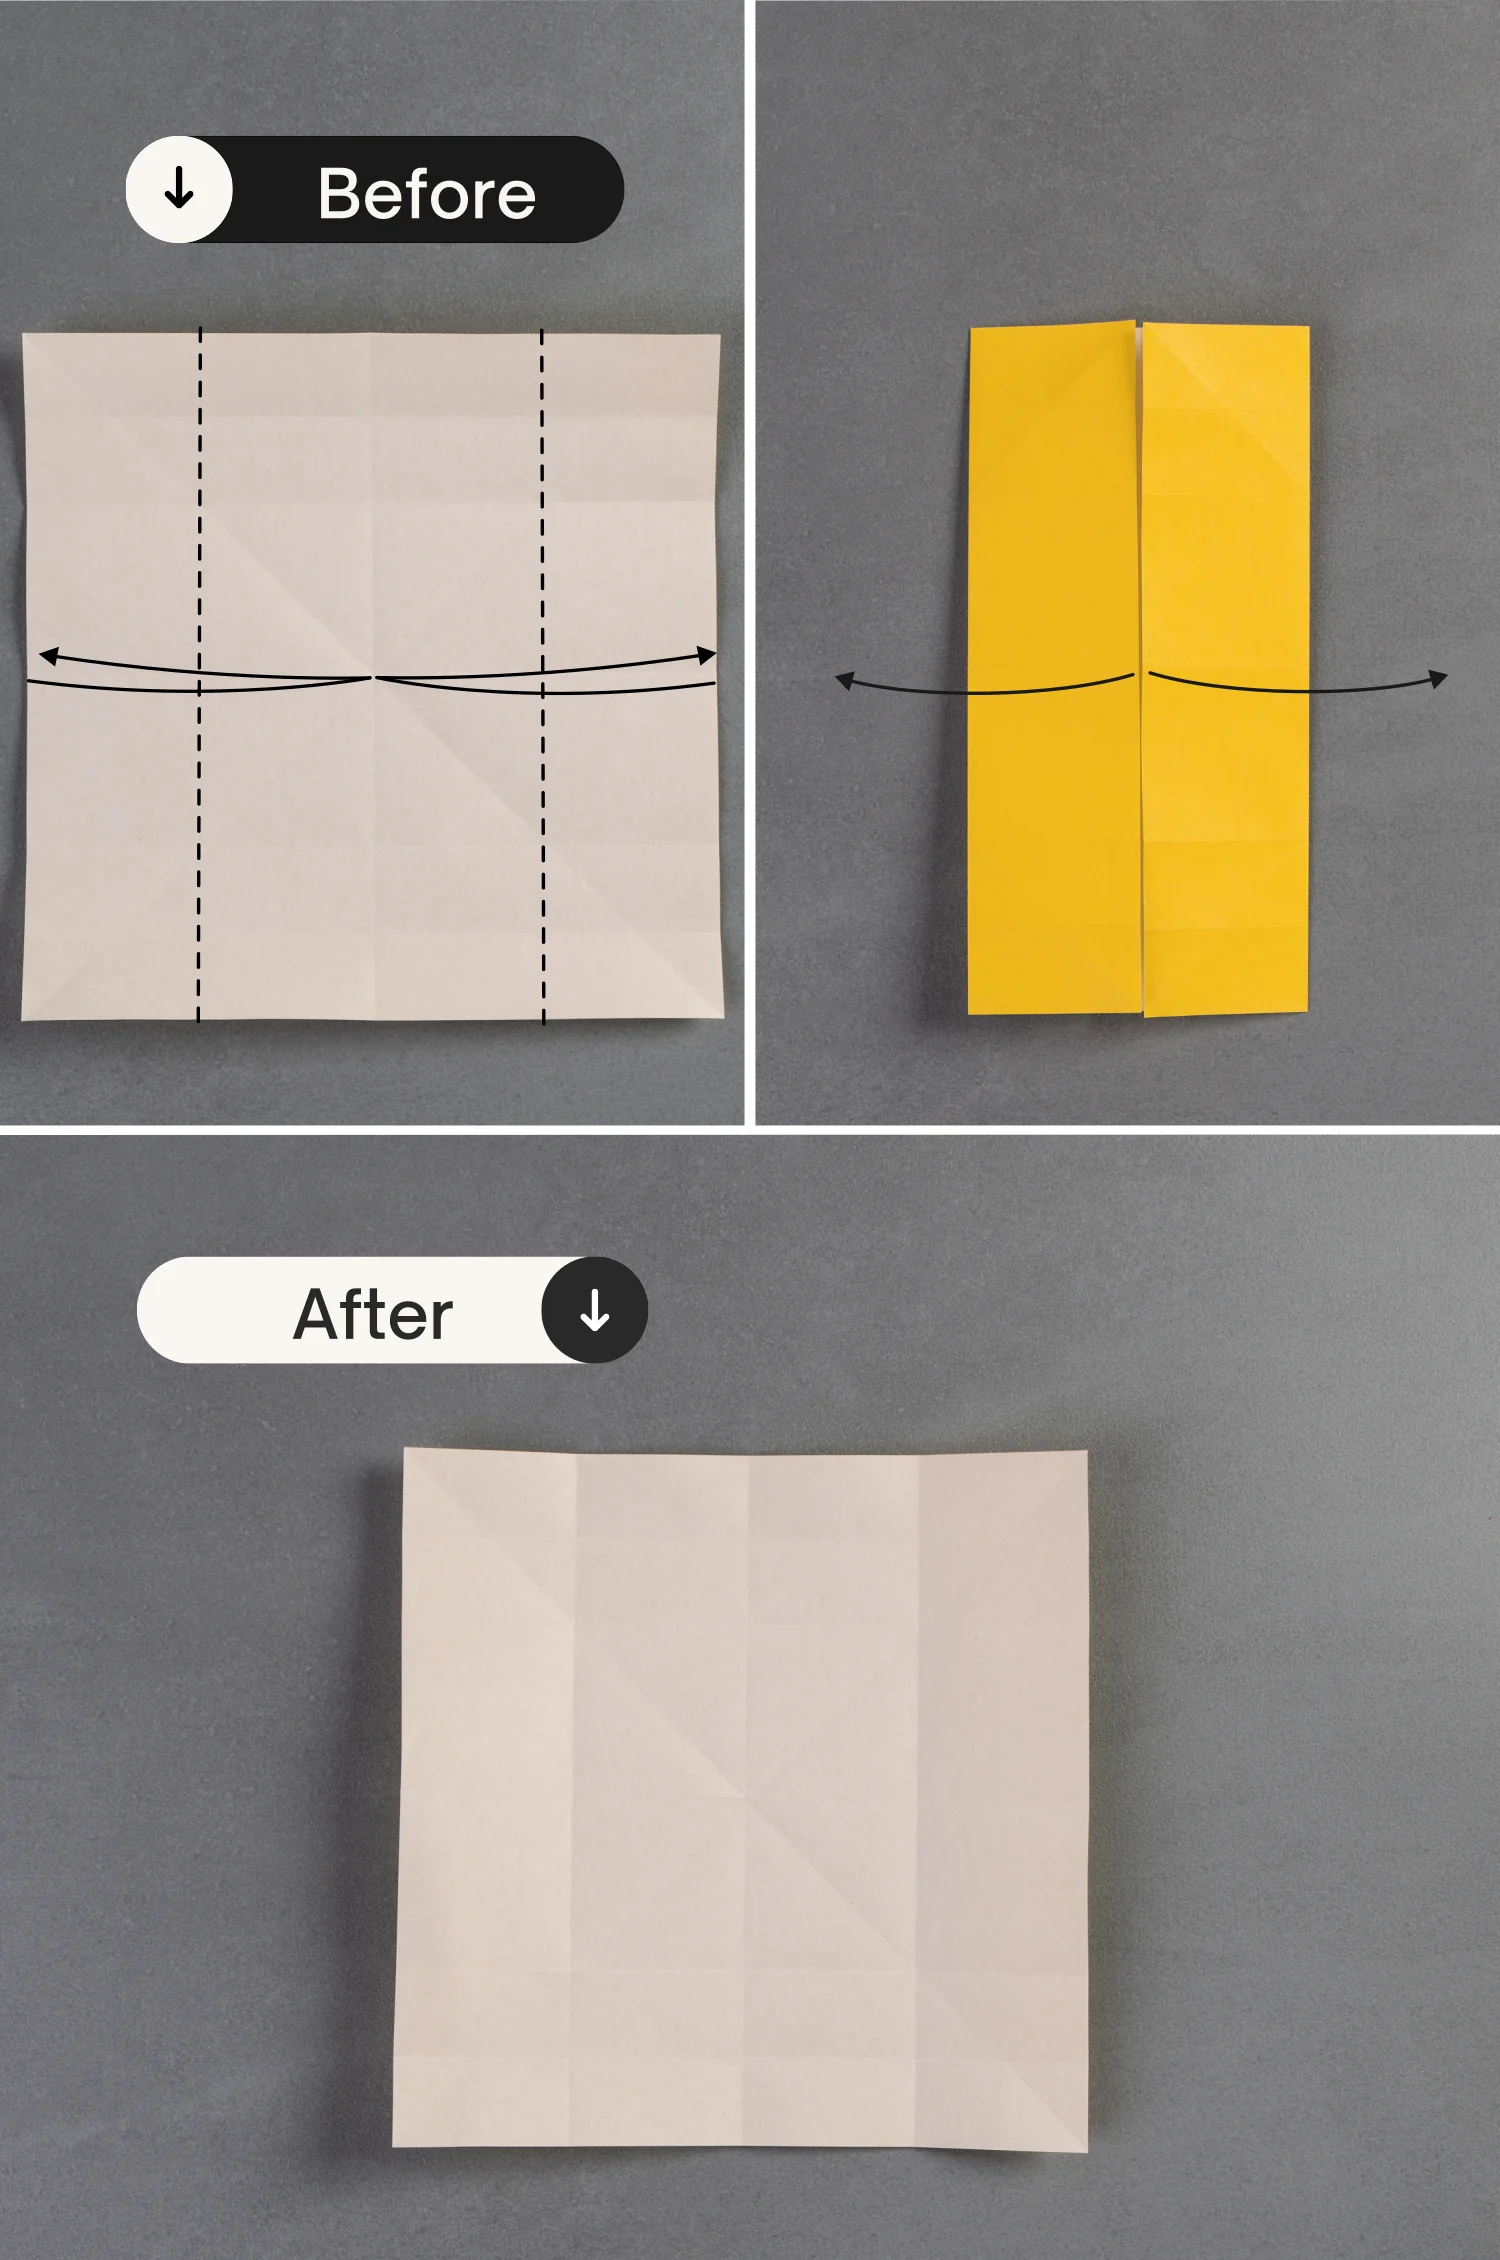
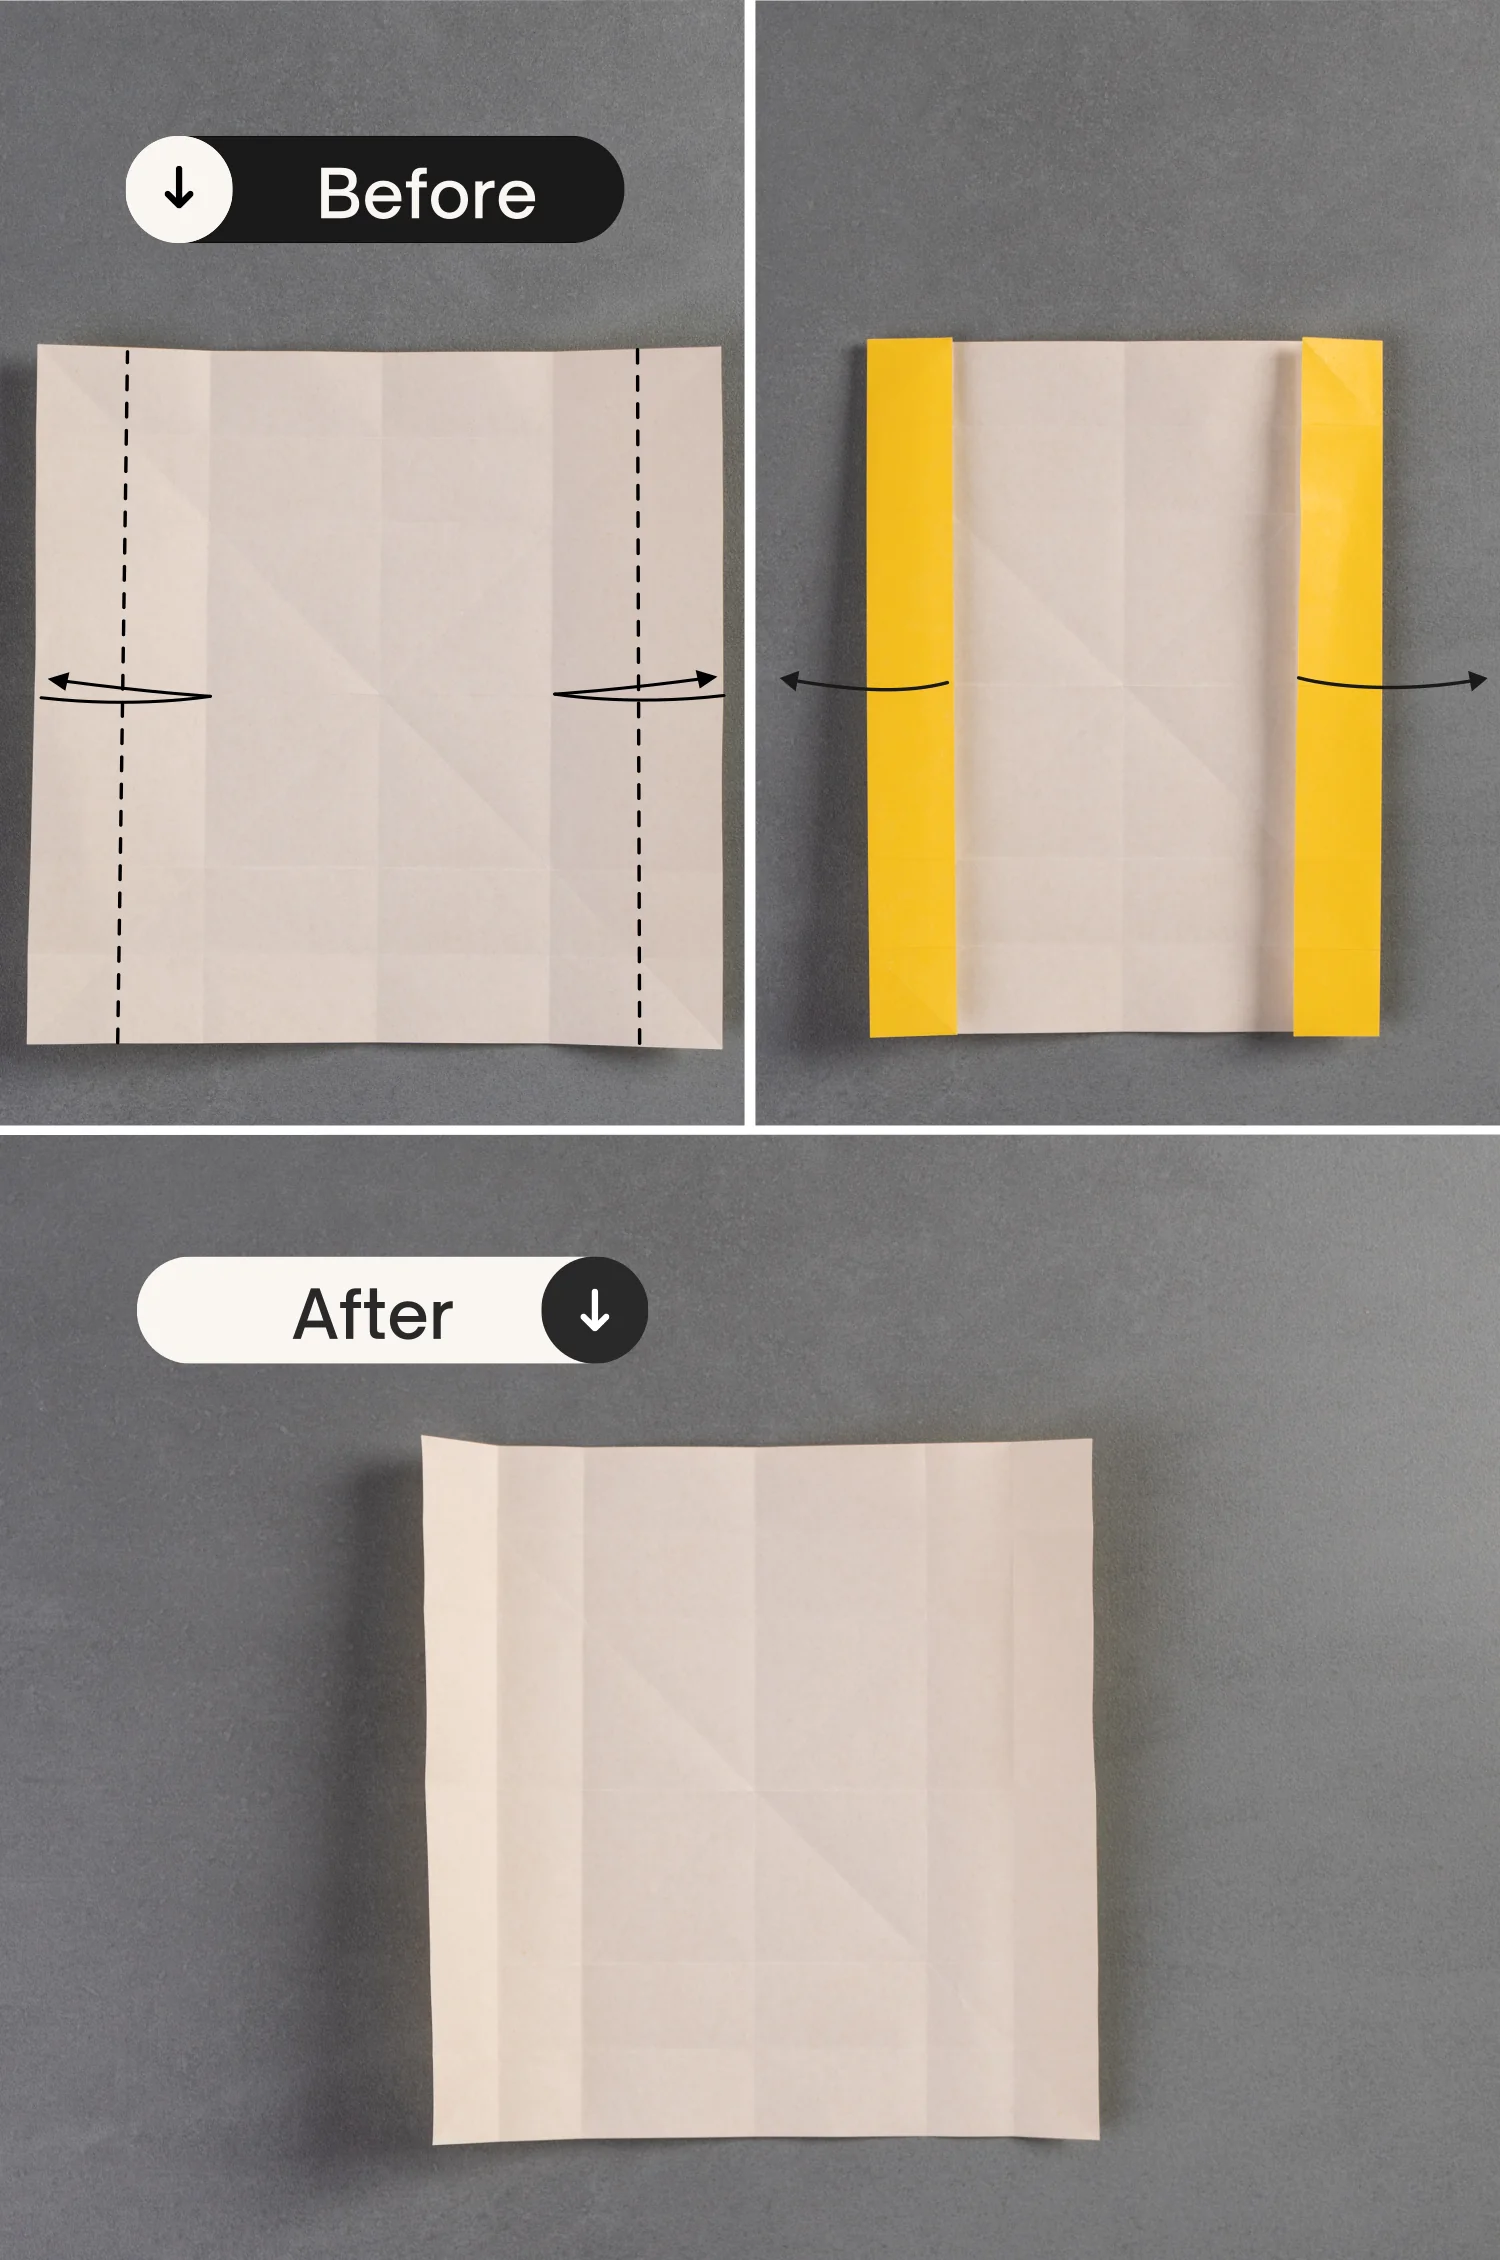
Fold the left and right edges to align with the vertical crease, leaving two creases, and unfold them.
Step 8
Fold the left and right edges to align with the two creases you made in the previous step, and unfold them.
Step 9
Take the bottom left point of the paper indicated by the red spot, and fold it up to meet the intersection point formed by the creases, indicated by the red spot as well, crease it well, and unfold it [pictures 1 to 3].
Then fold the bottom left point to meet the center point indicated by the red spot, and unfold it [pictures 4 to 6].
Finally, fold the bottom left point to meet the intersection point on the top right, indicated by the red spot, and unfold it [pictures 7 to 9].
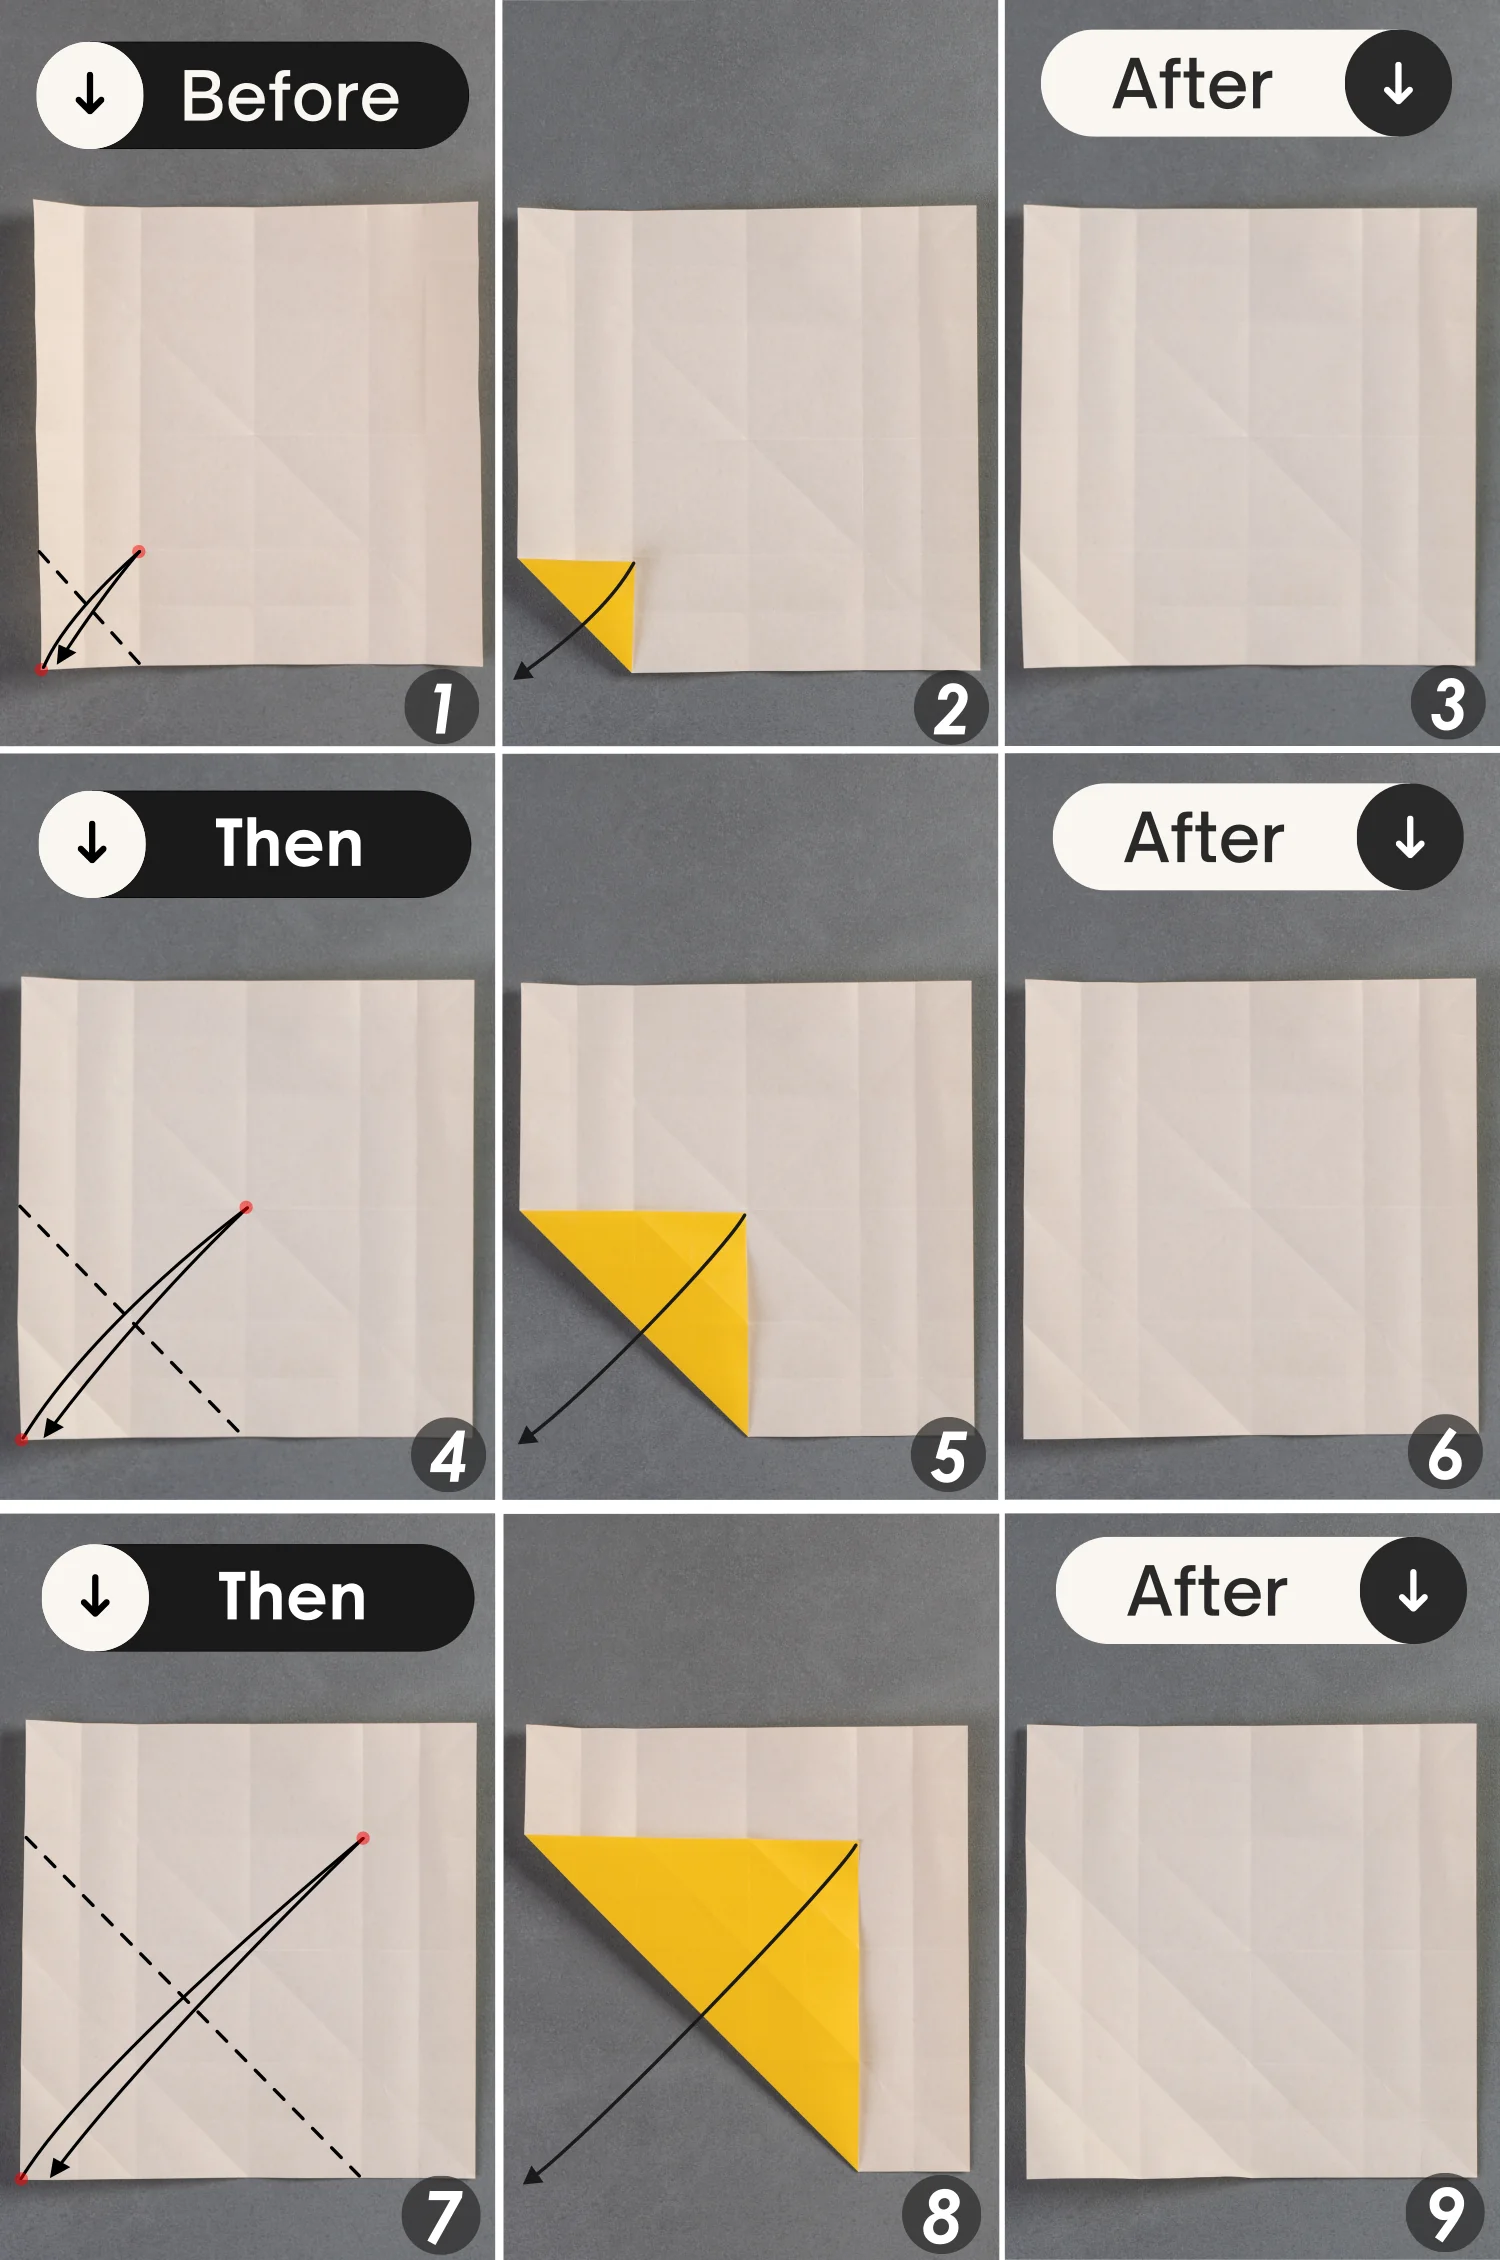
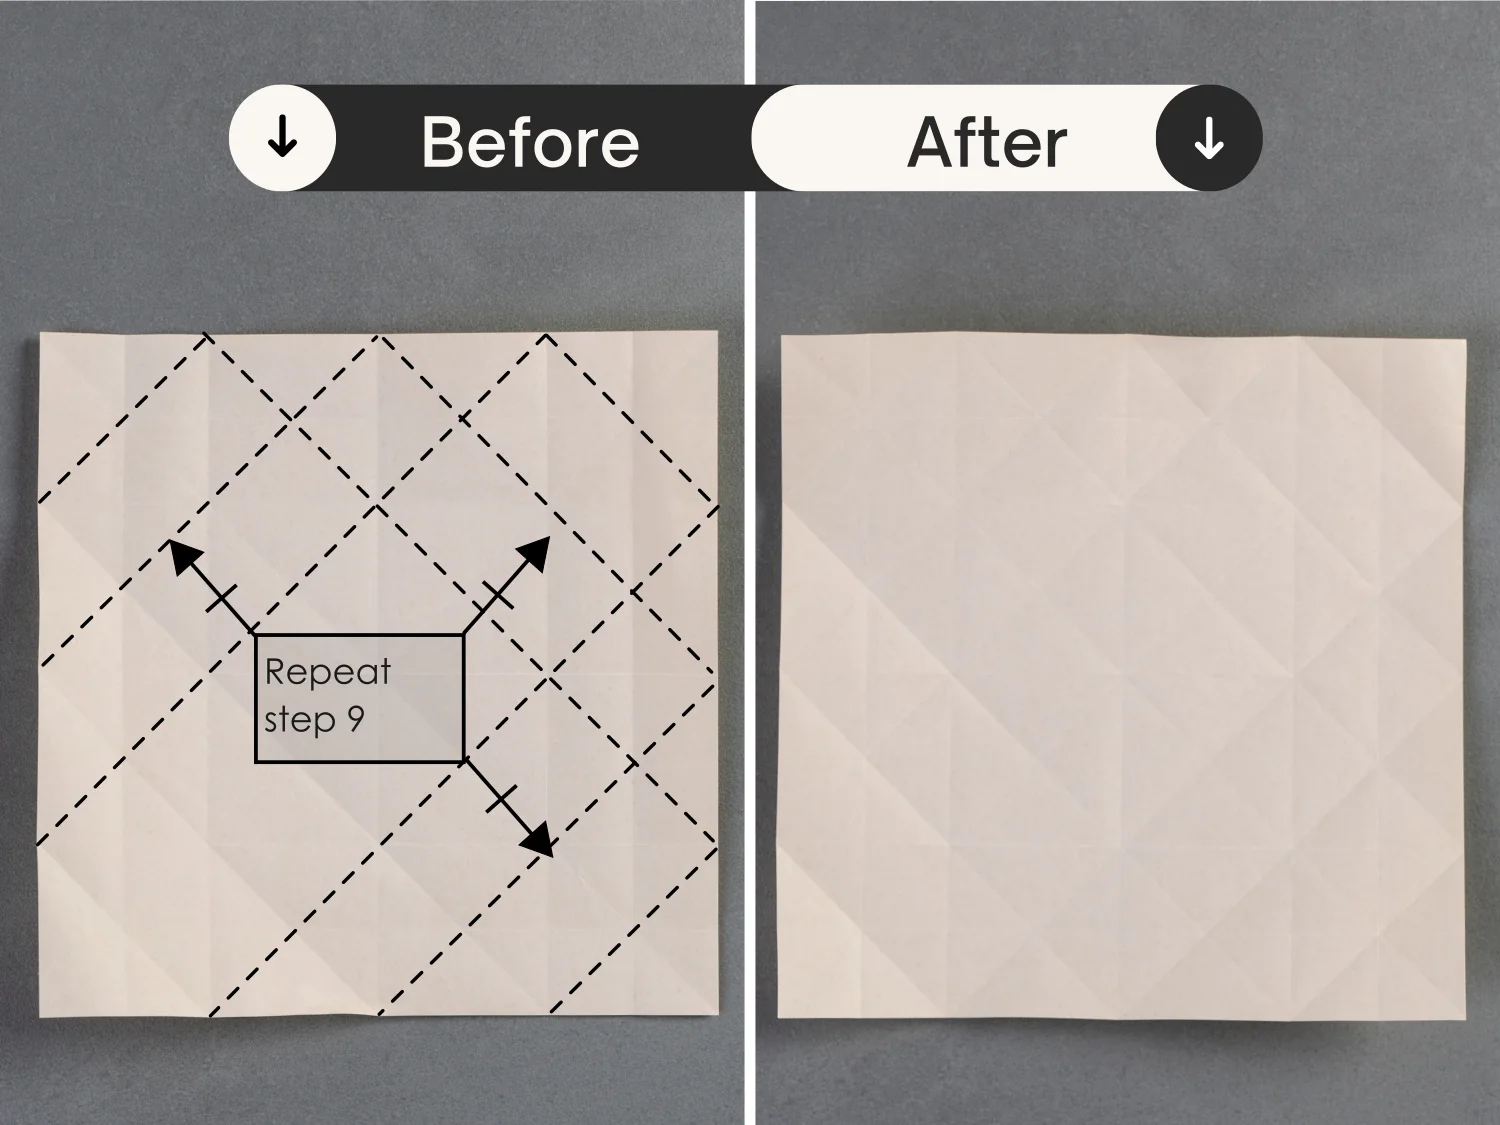
Step 10
Repeat step 9 for the other three points of the paper.
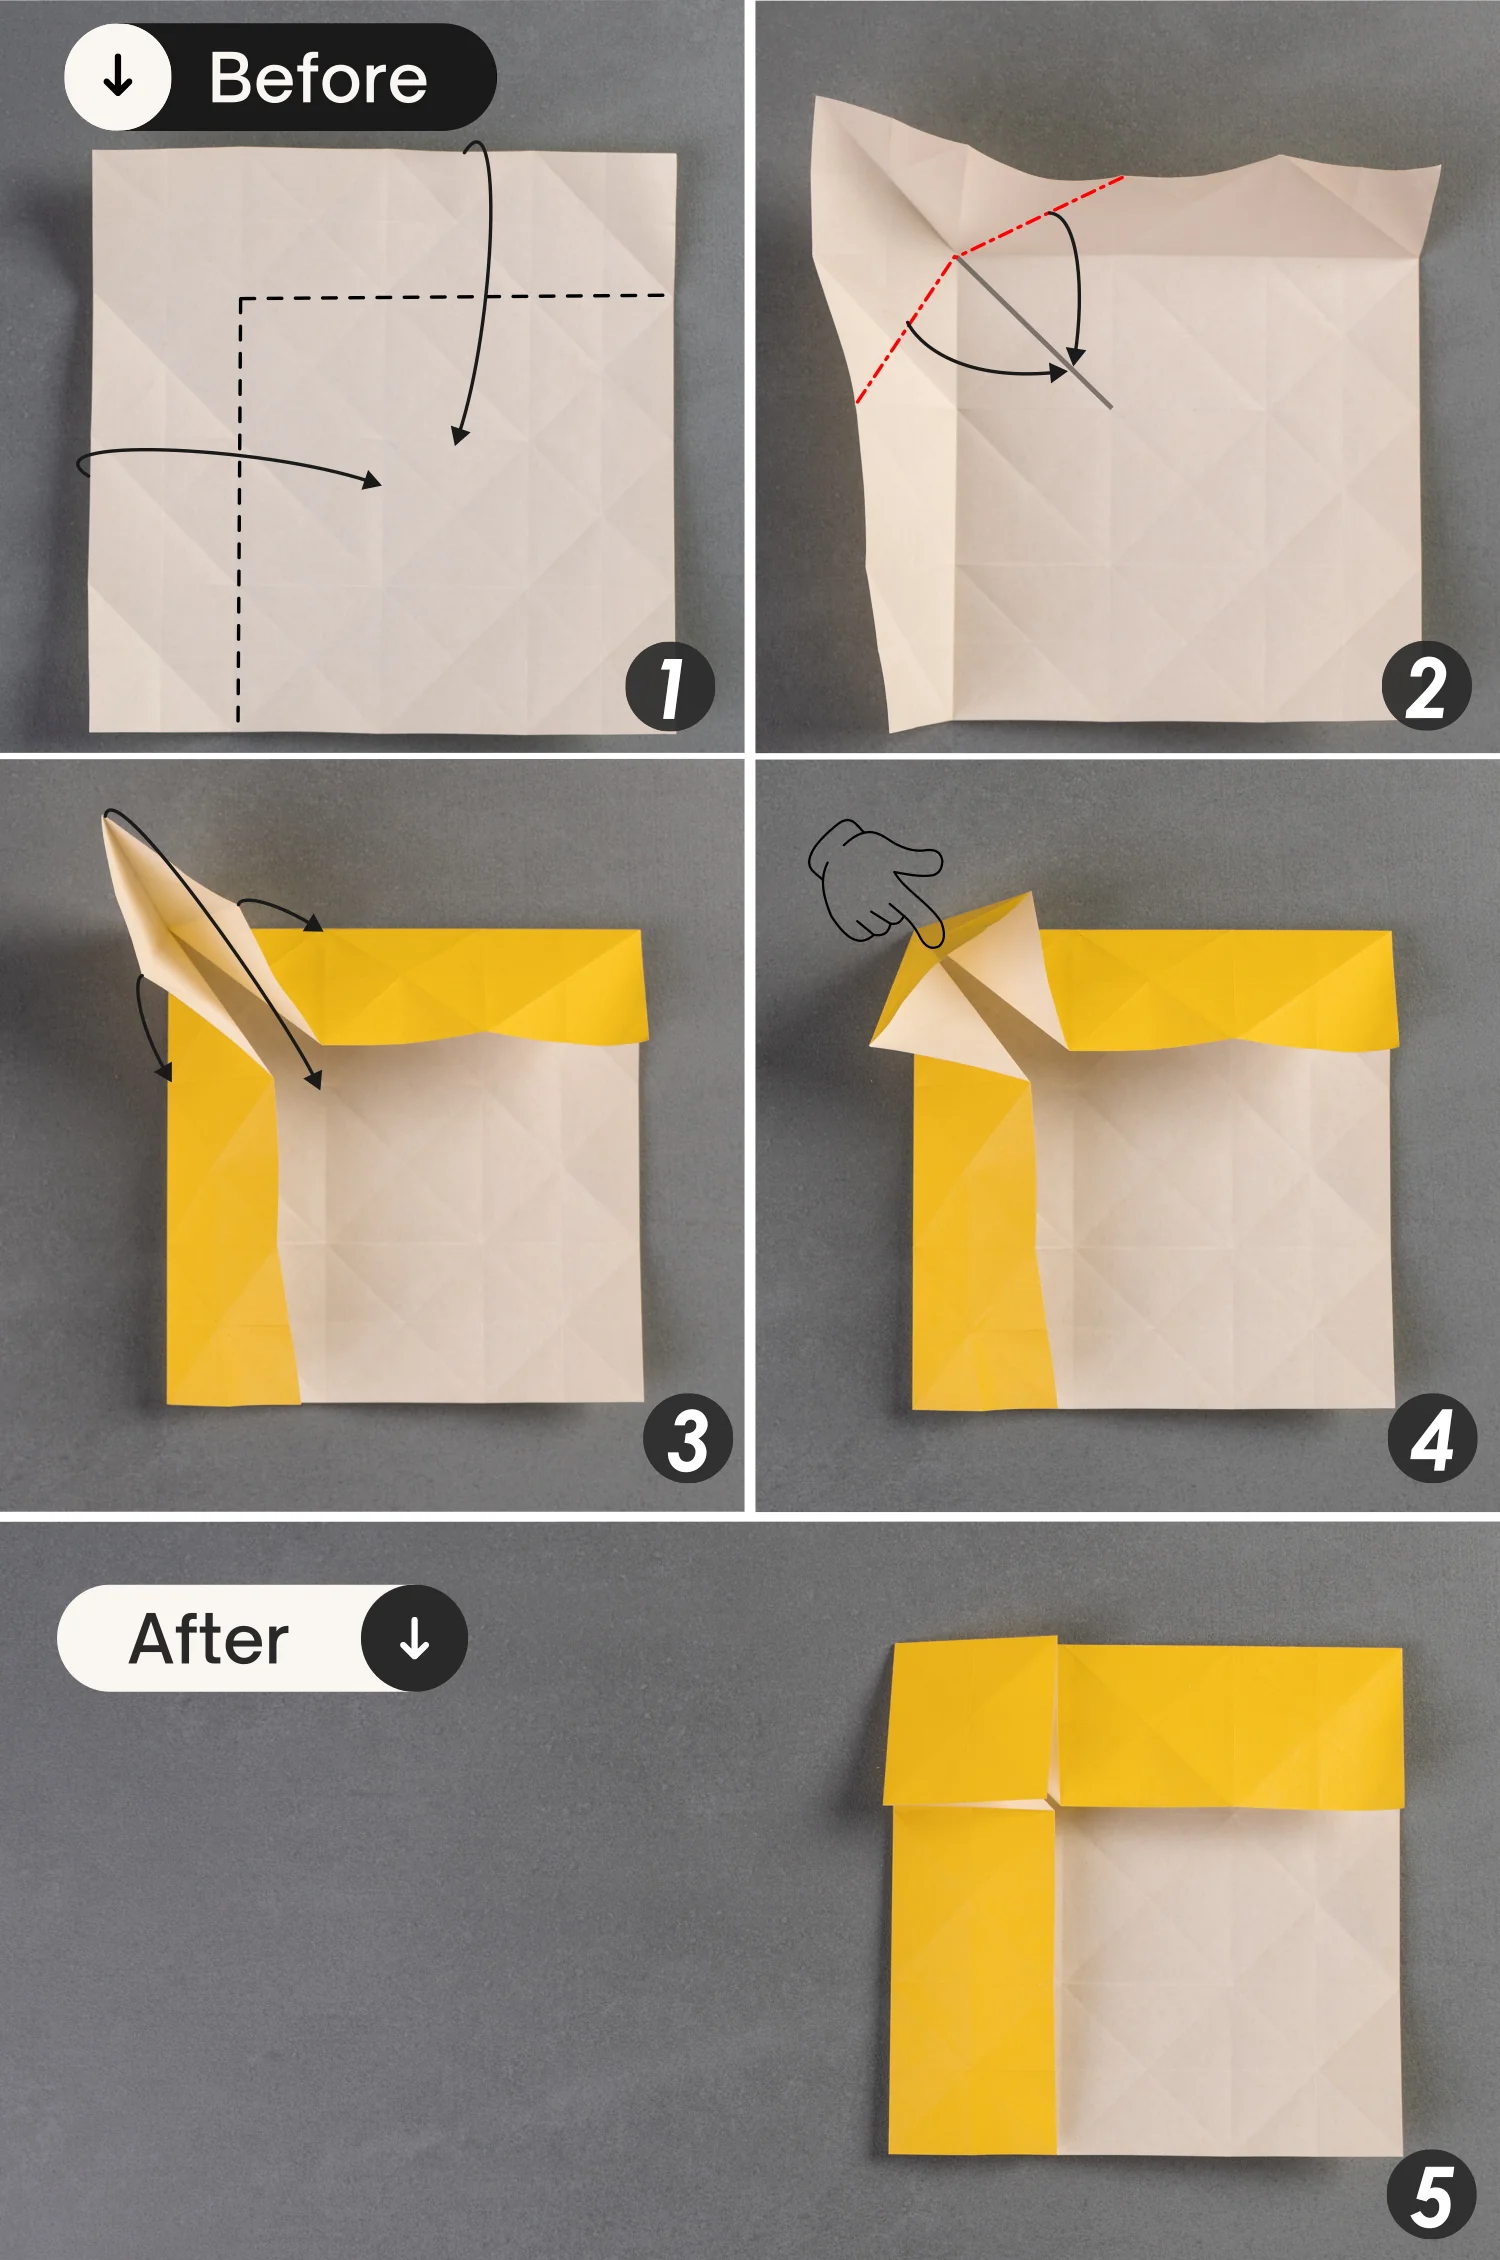
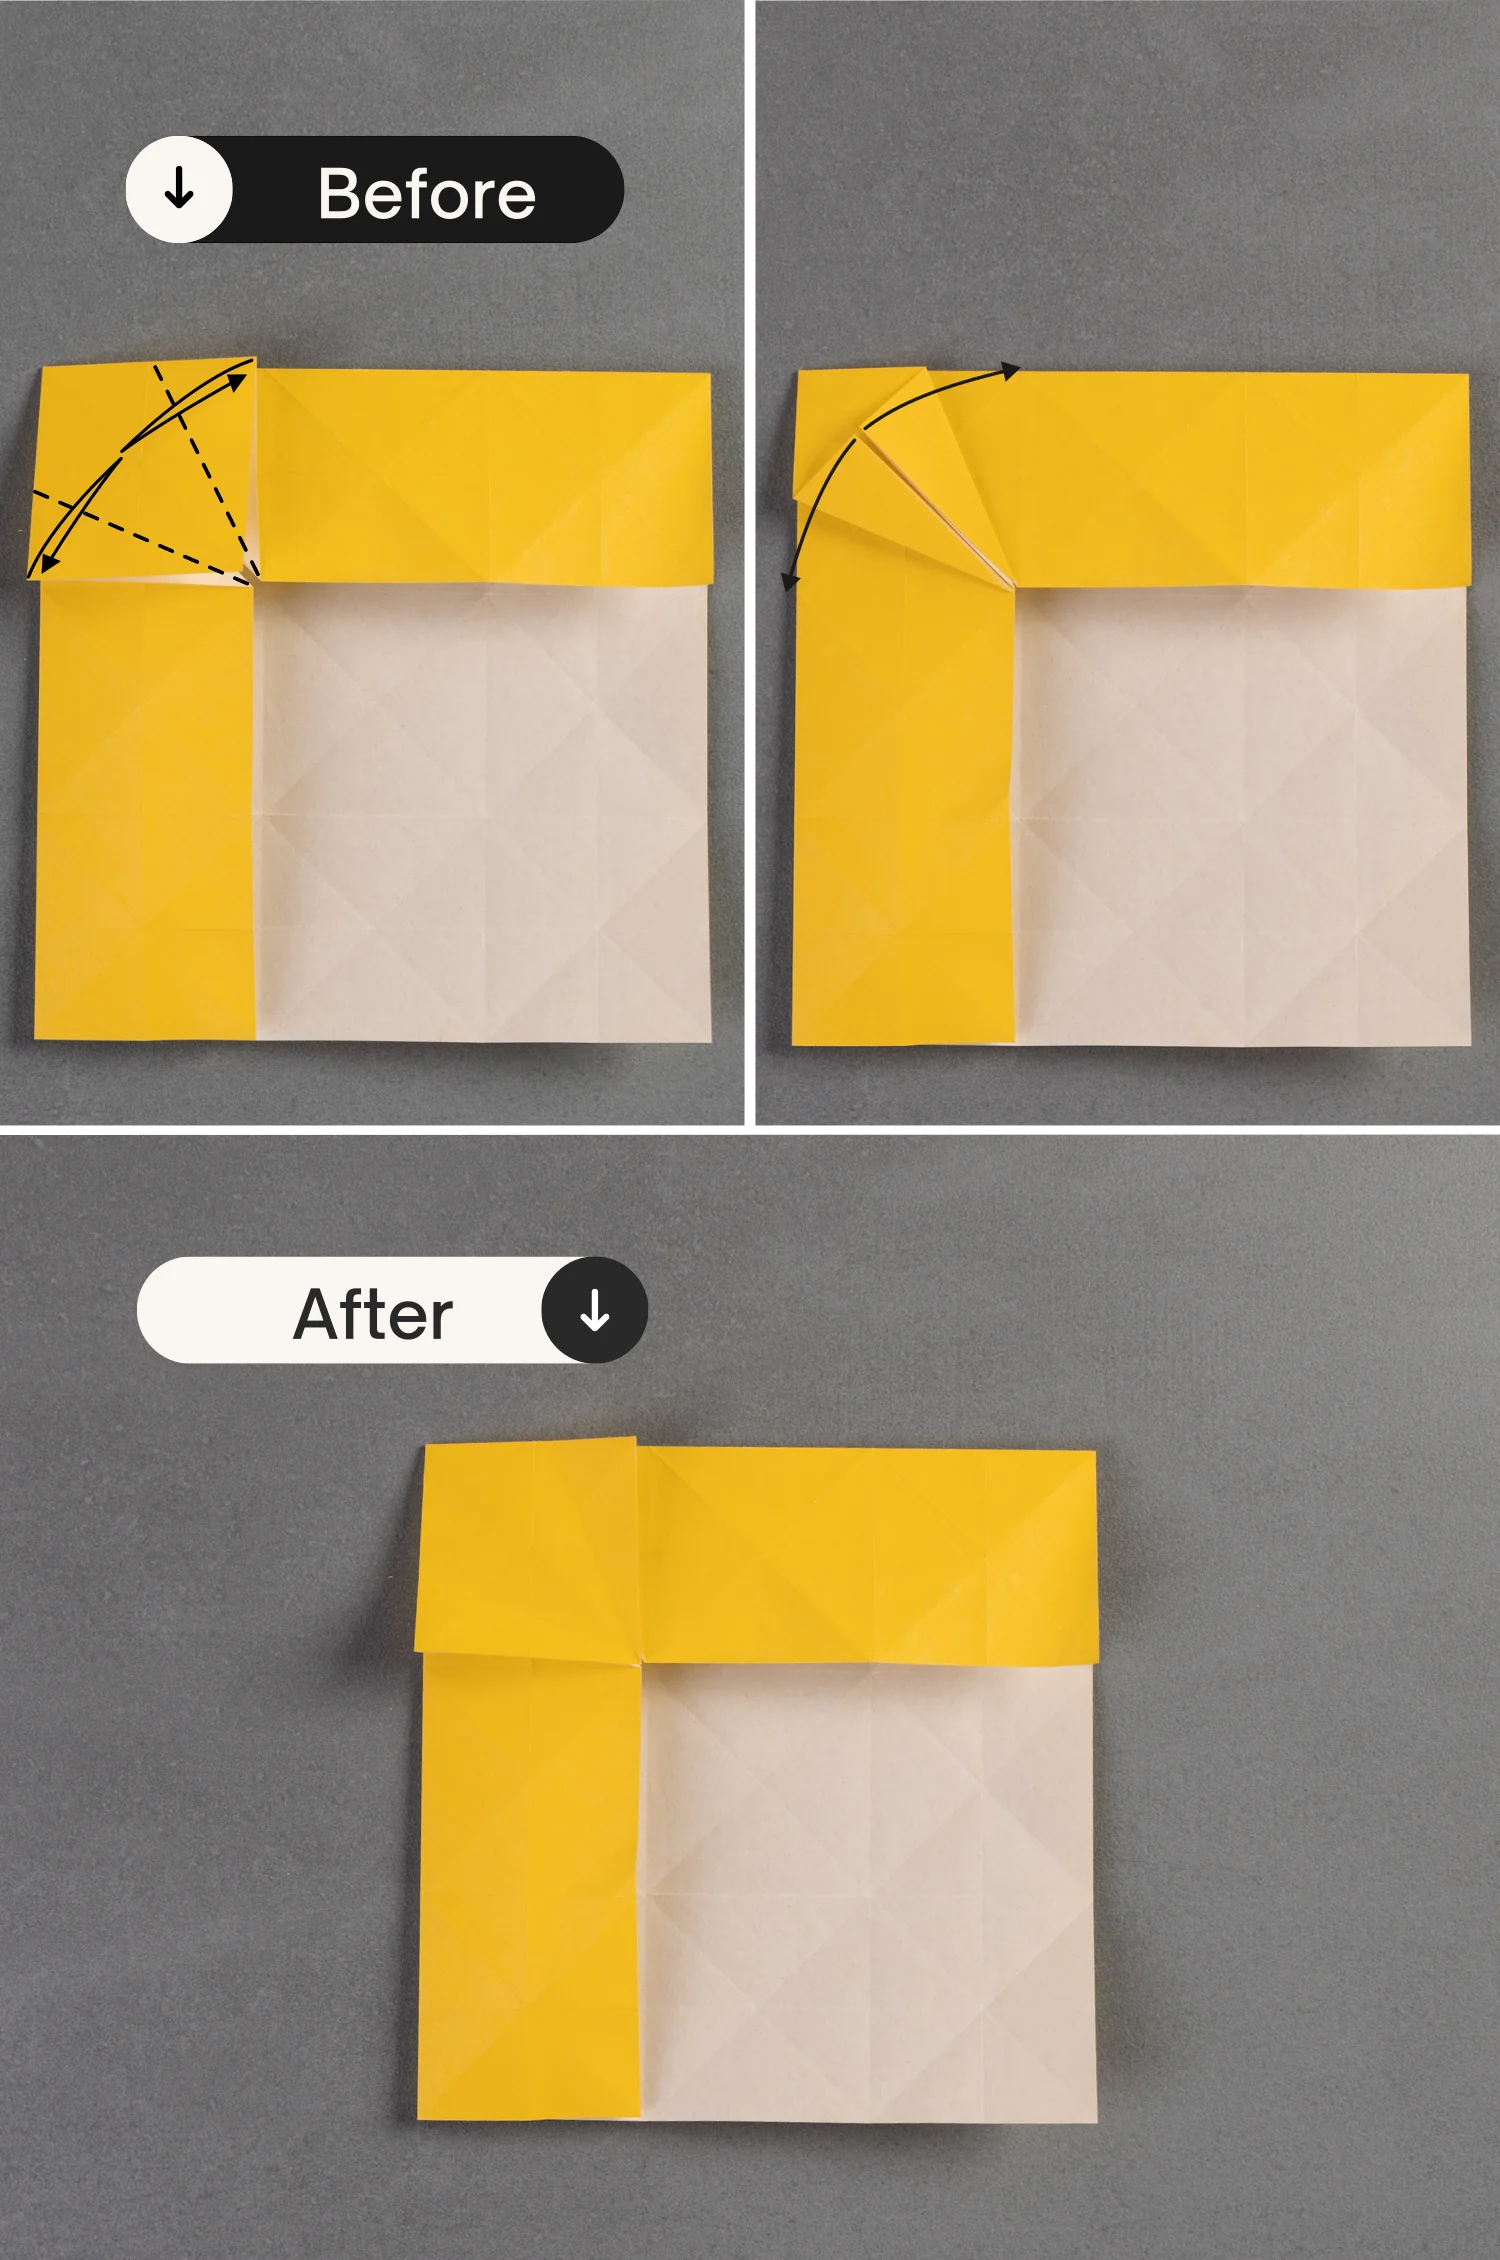
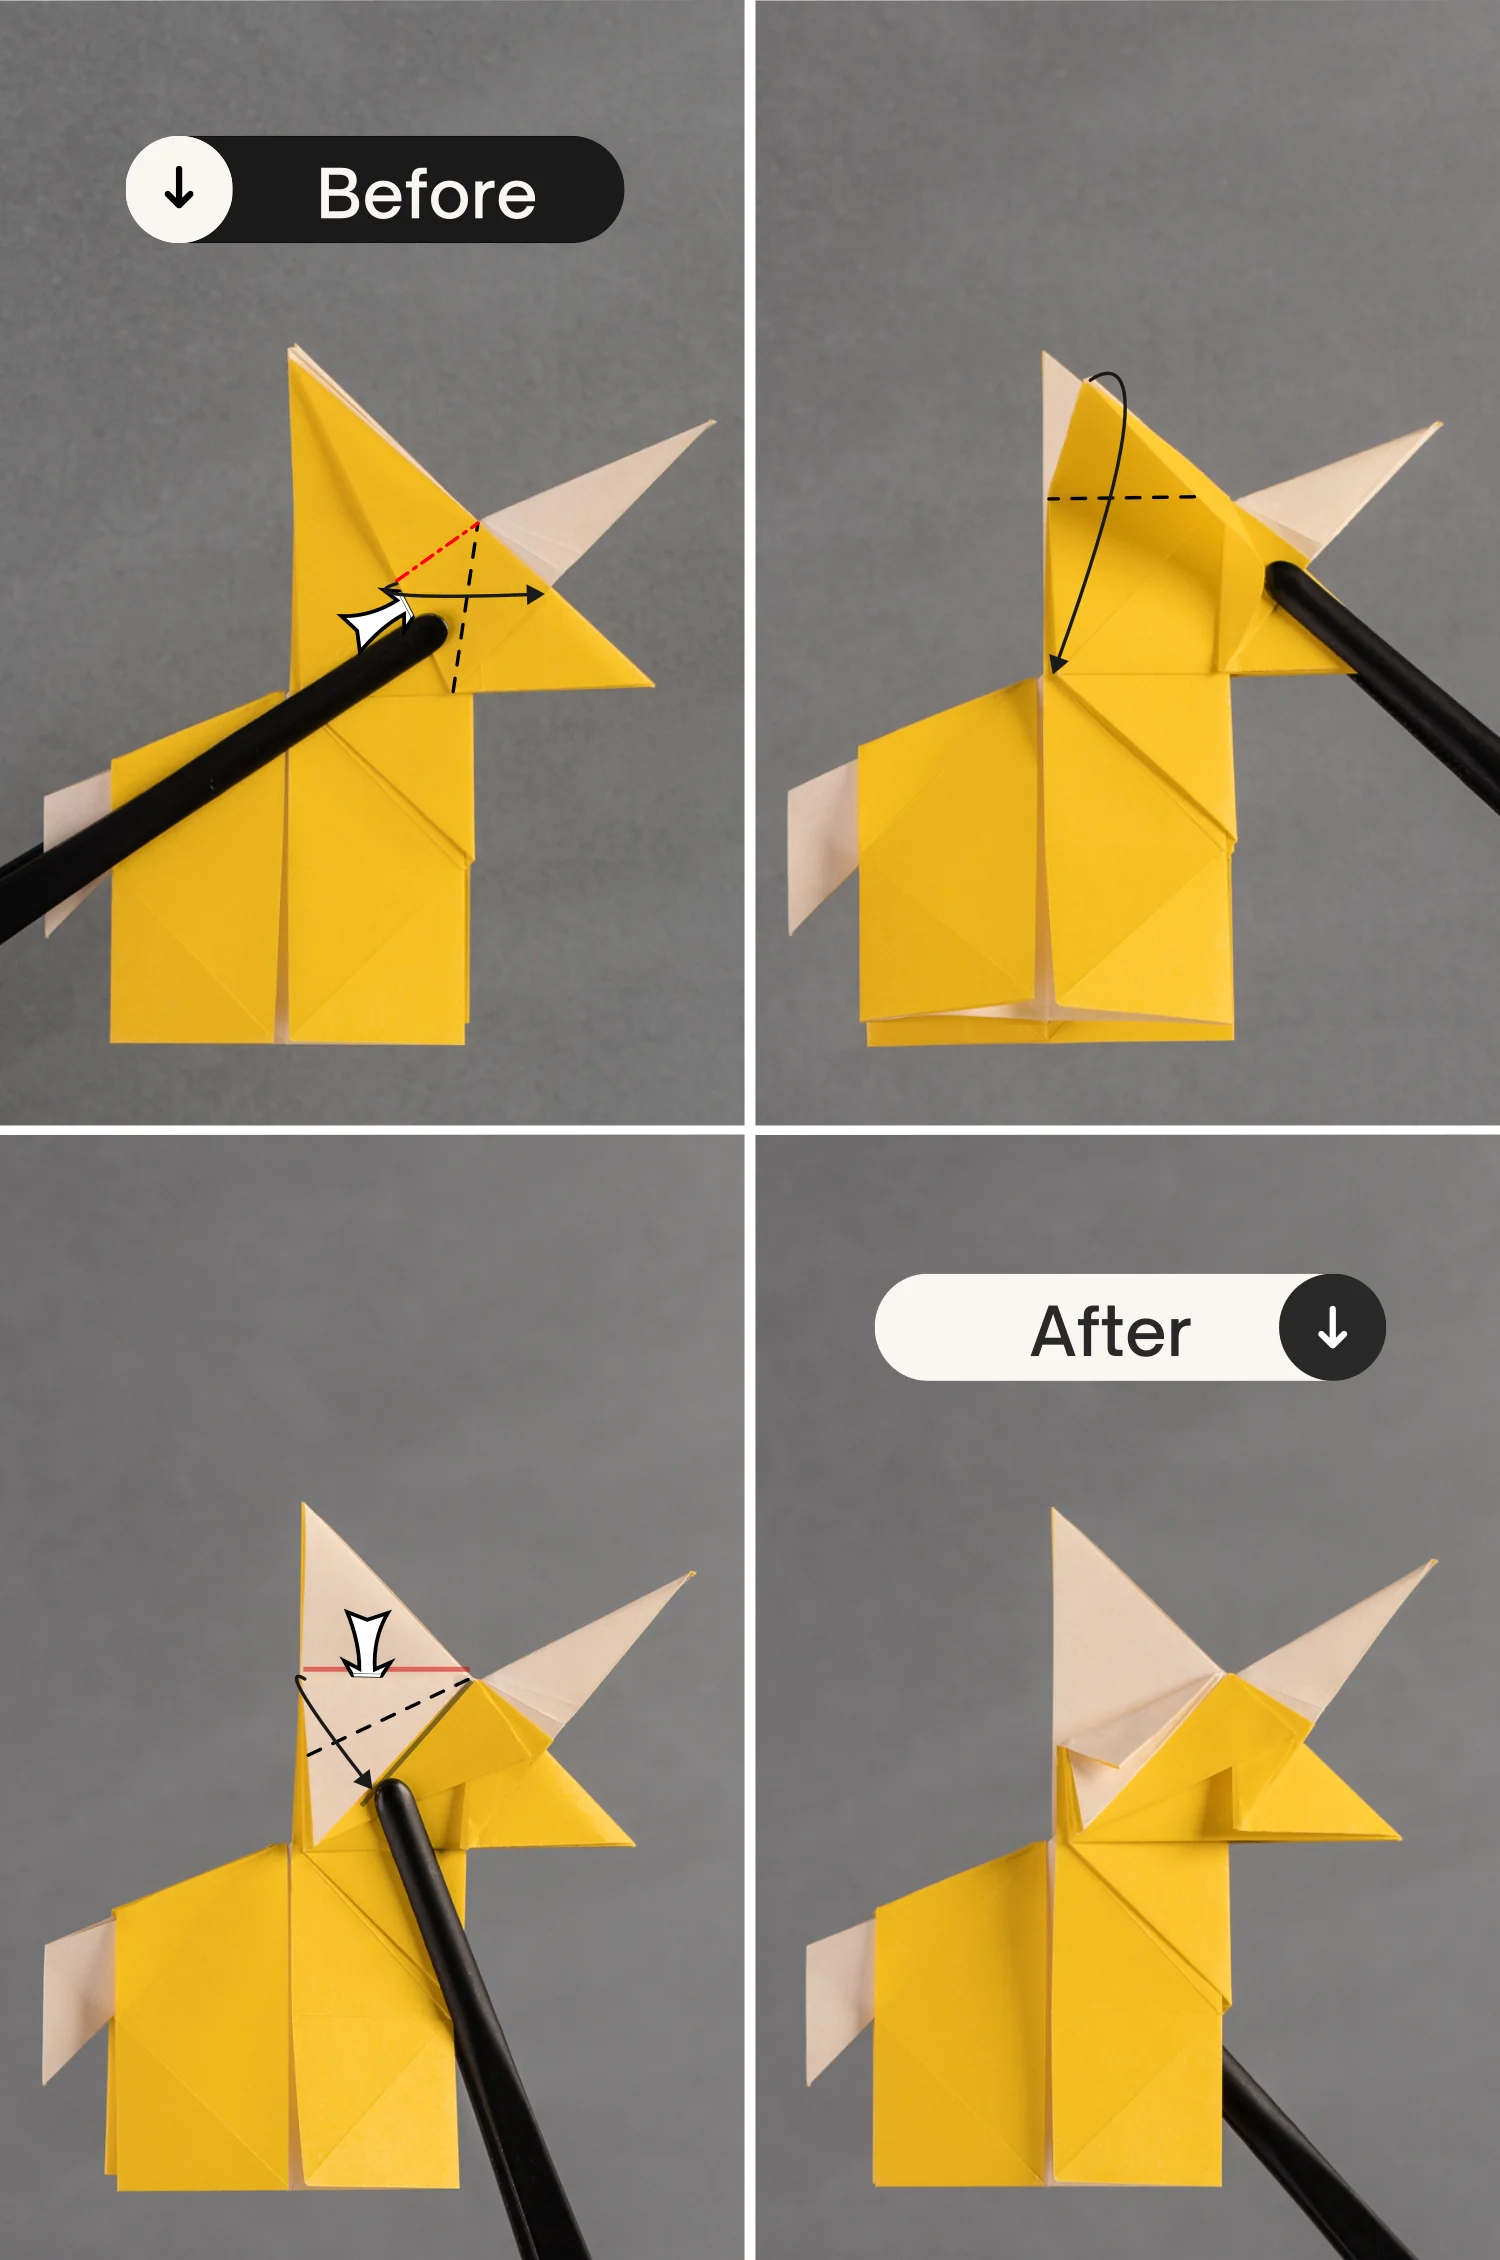
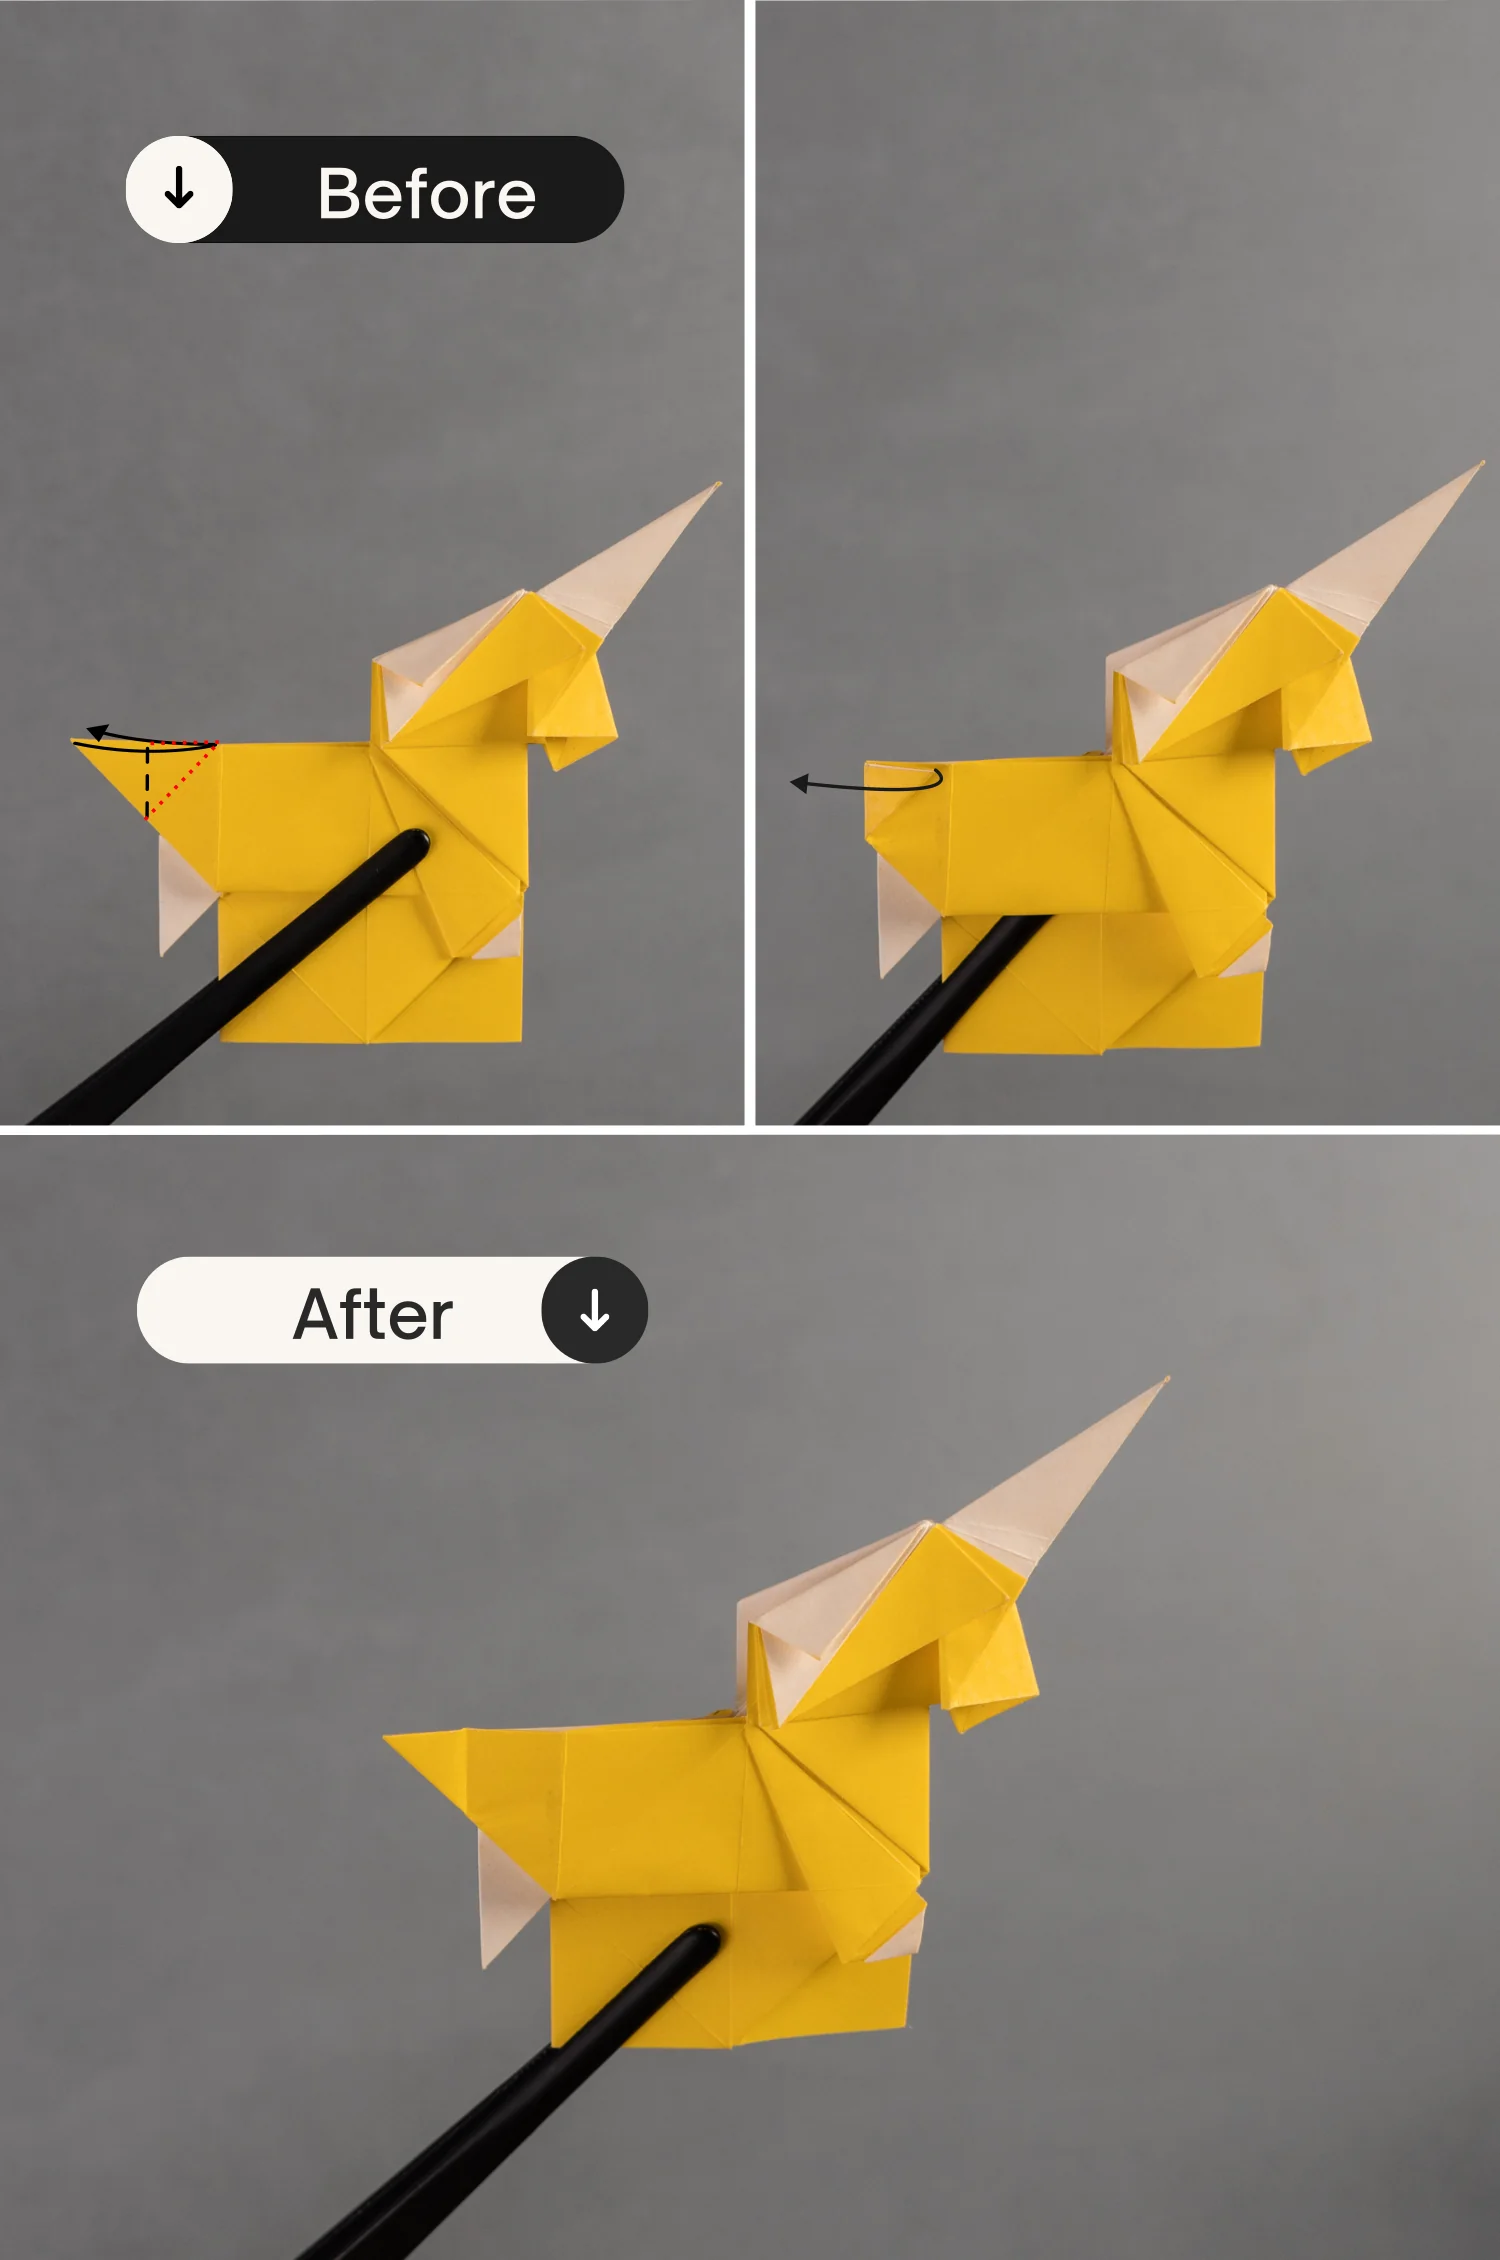
Step 11
Bring up the top and left edges along the creases indicated by the black dotted lines, and sharpen the top left point of the paper. Then press down the top and left edges, creating a standing flap based on the existing creases indicated by the red dotted lines. [pictures 1 and 2]
Next, open and squash this standing flap along the existing creases, getting a small square on the top left.
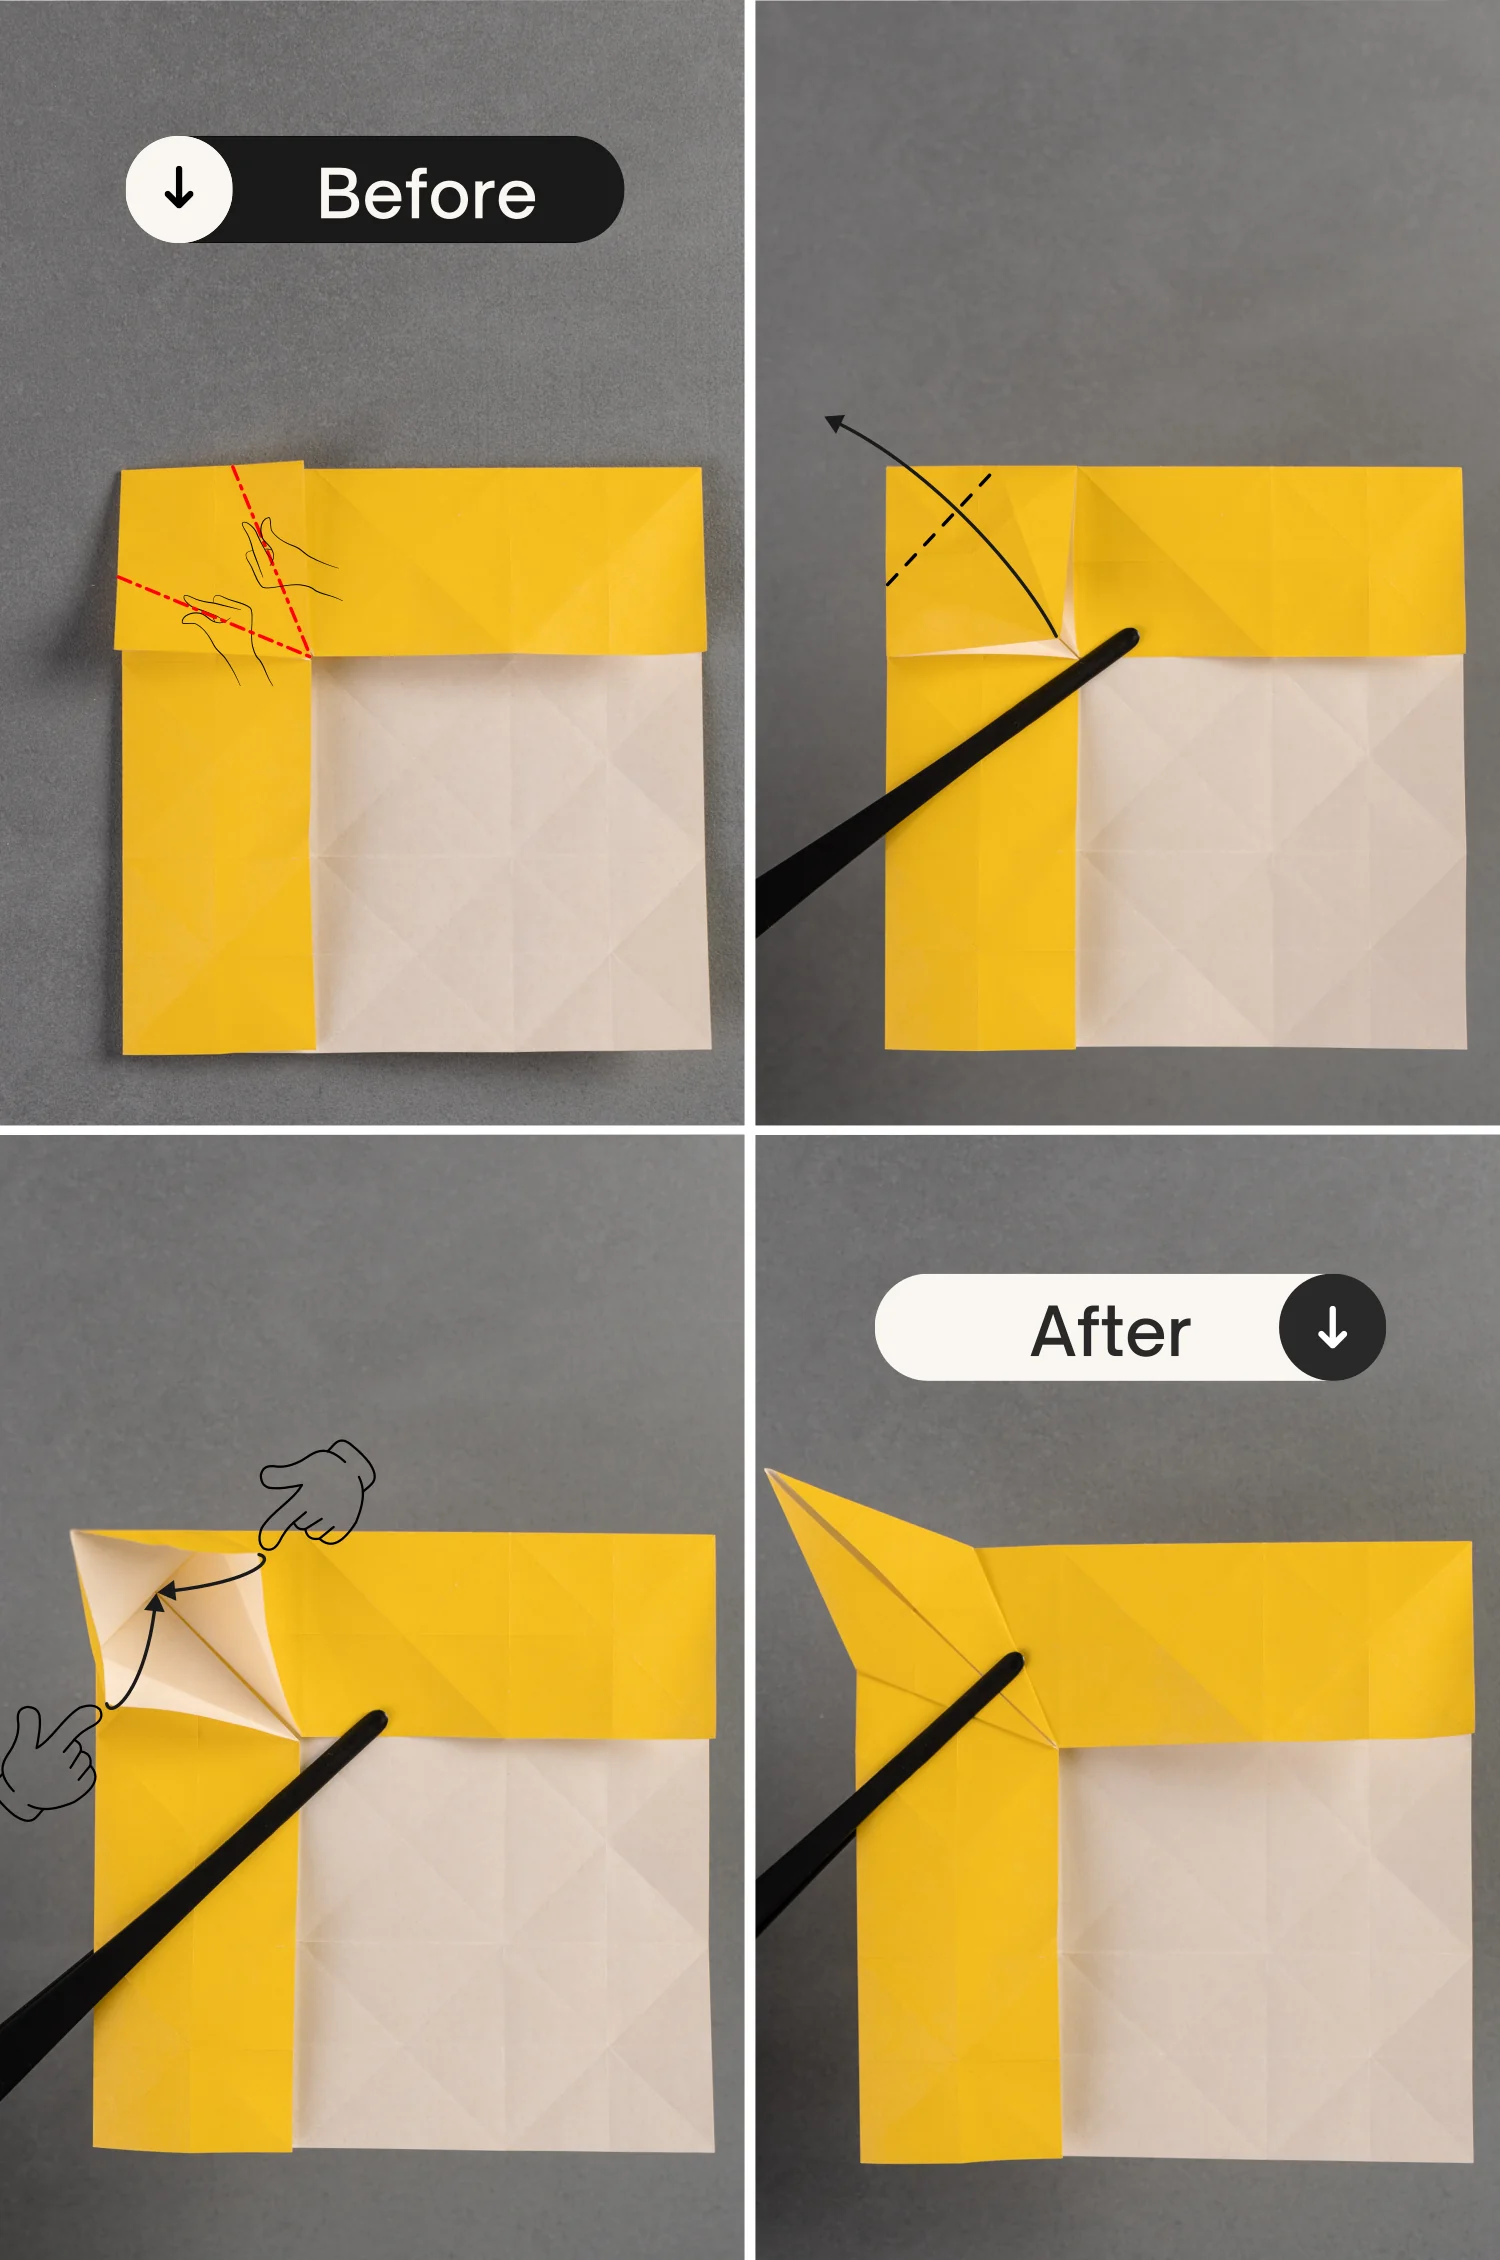
Step 12
Fold the bottom and right edges of the small square to align with its diagonal crease, crease them well, and unfold them.
Step 13
Mountain fold the two creases you made in the previous step on the small square, then bring up the bottom right point and fold it along the black dotted line toward the top left, in the same time, push the top right and bottom left points toward the center. Finally, flatten the fold.
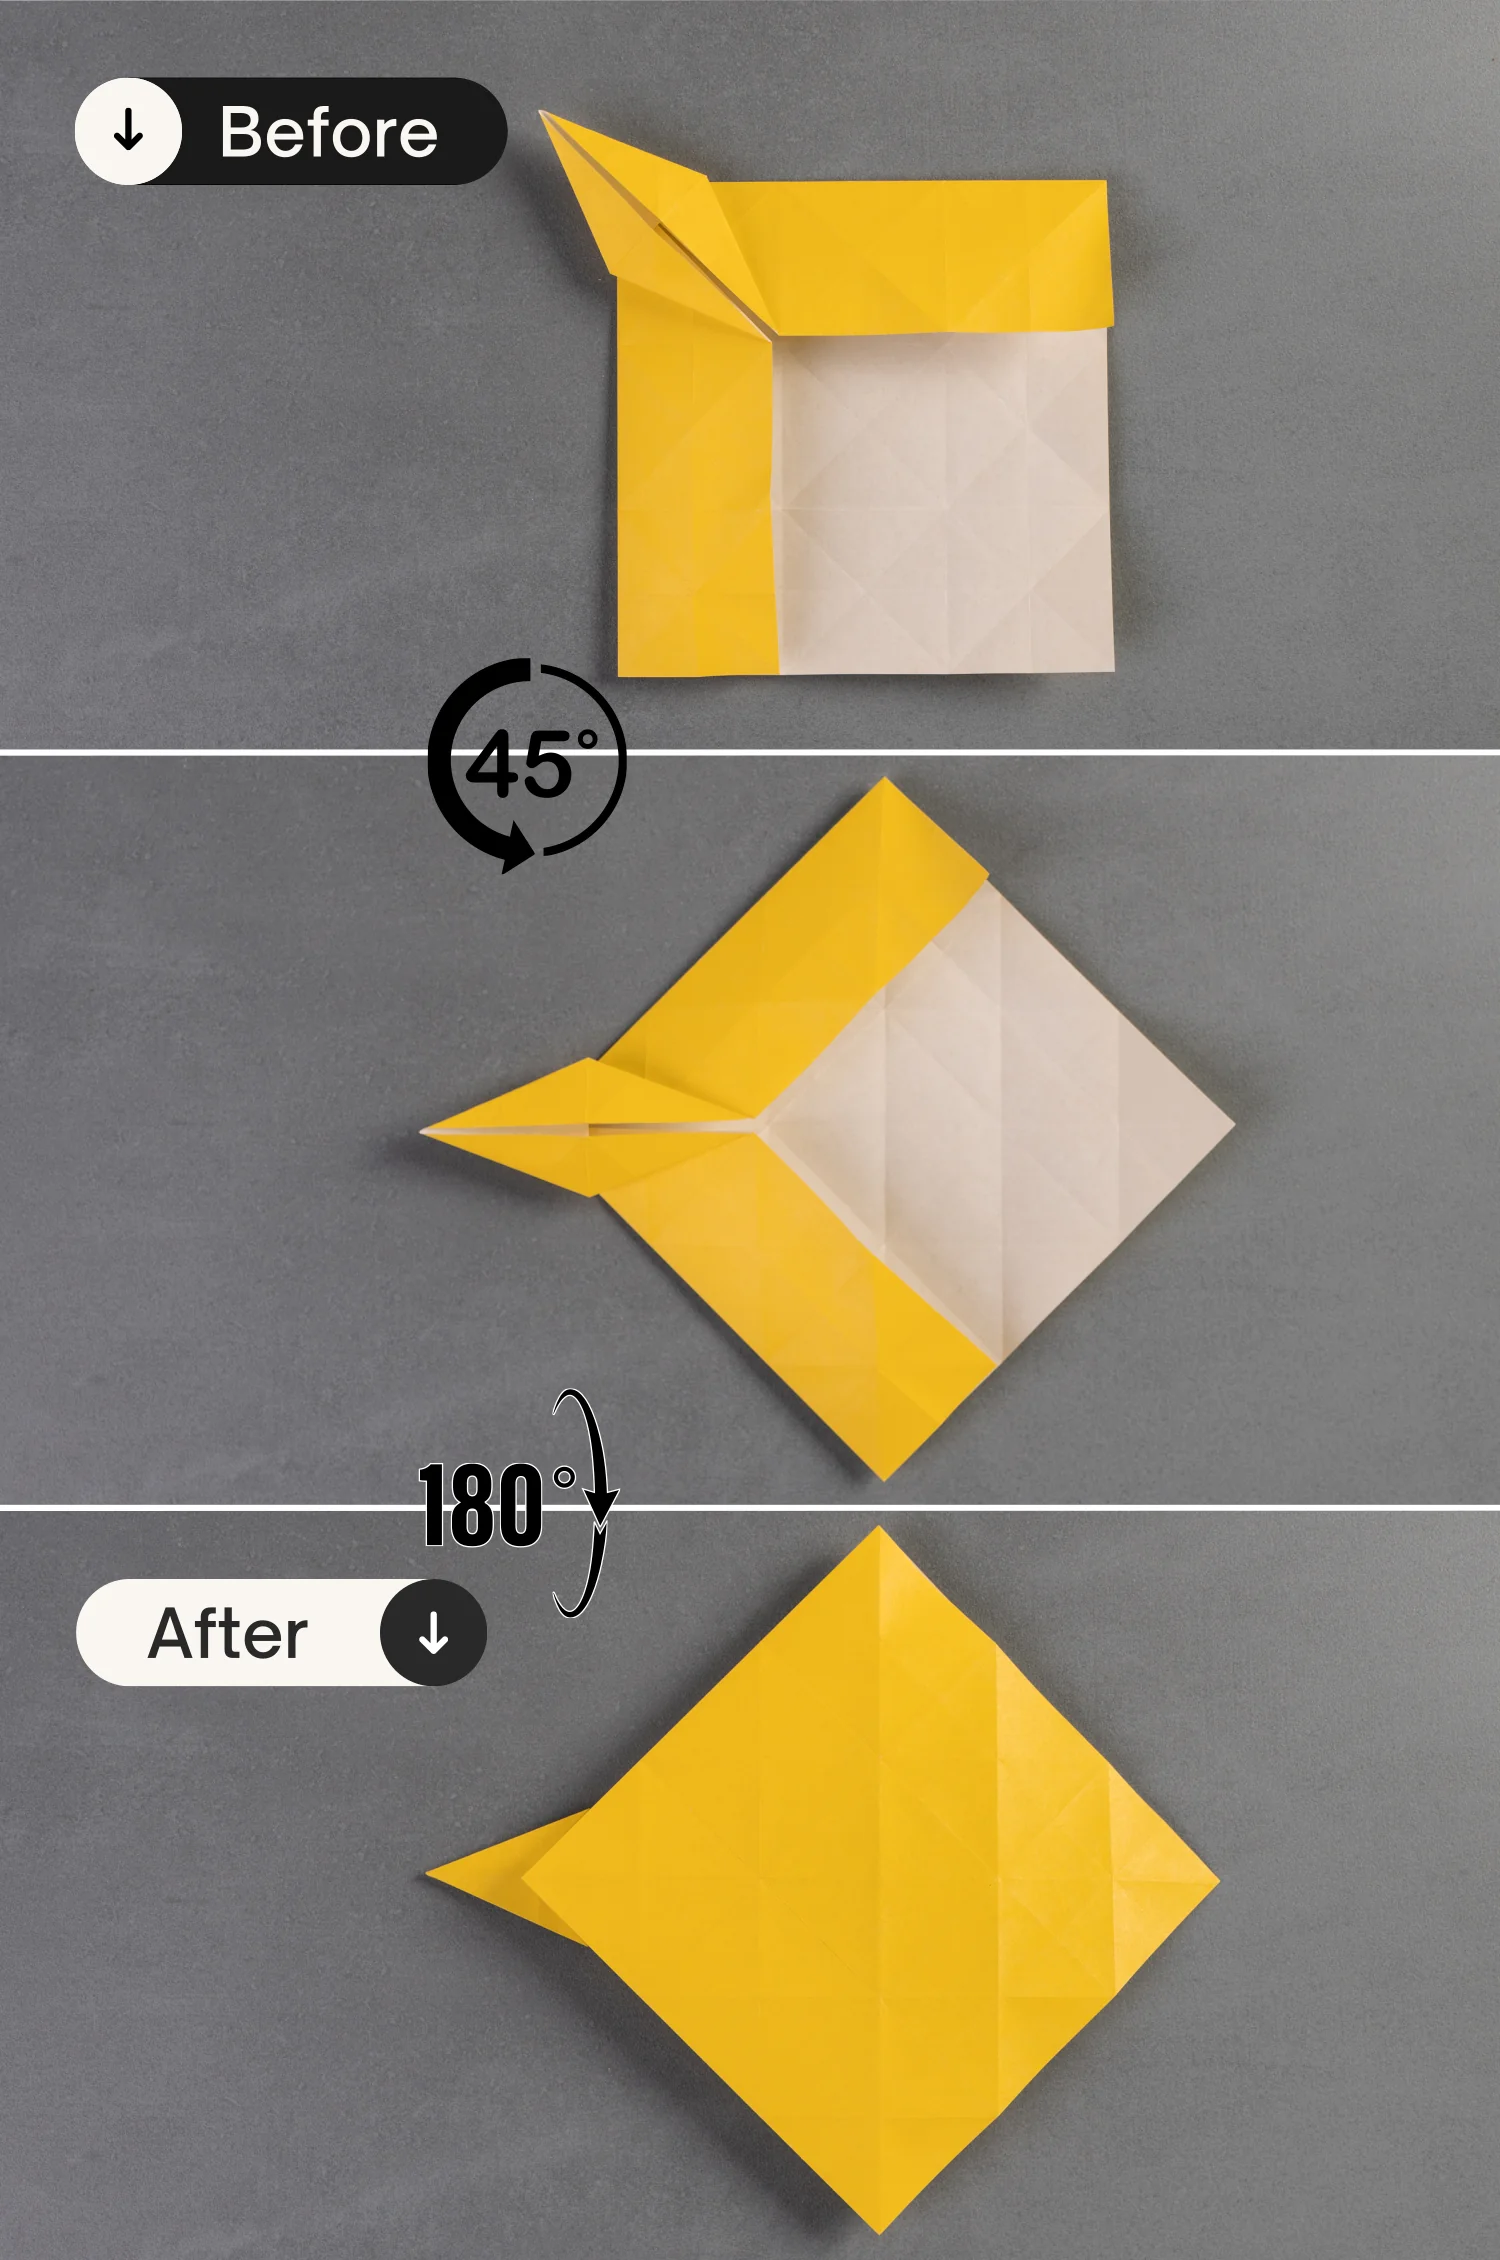
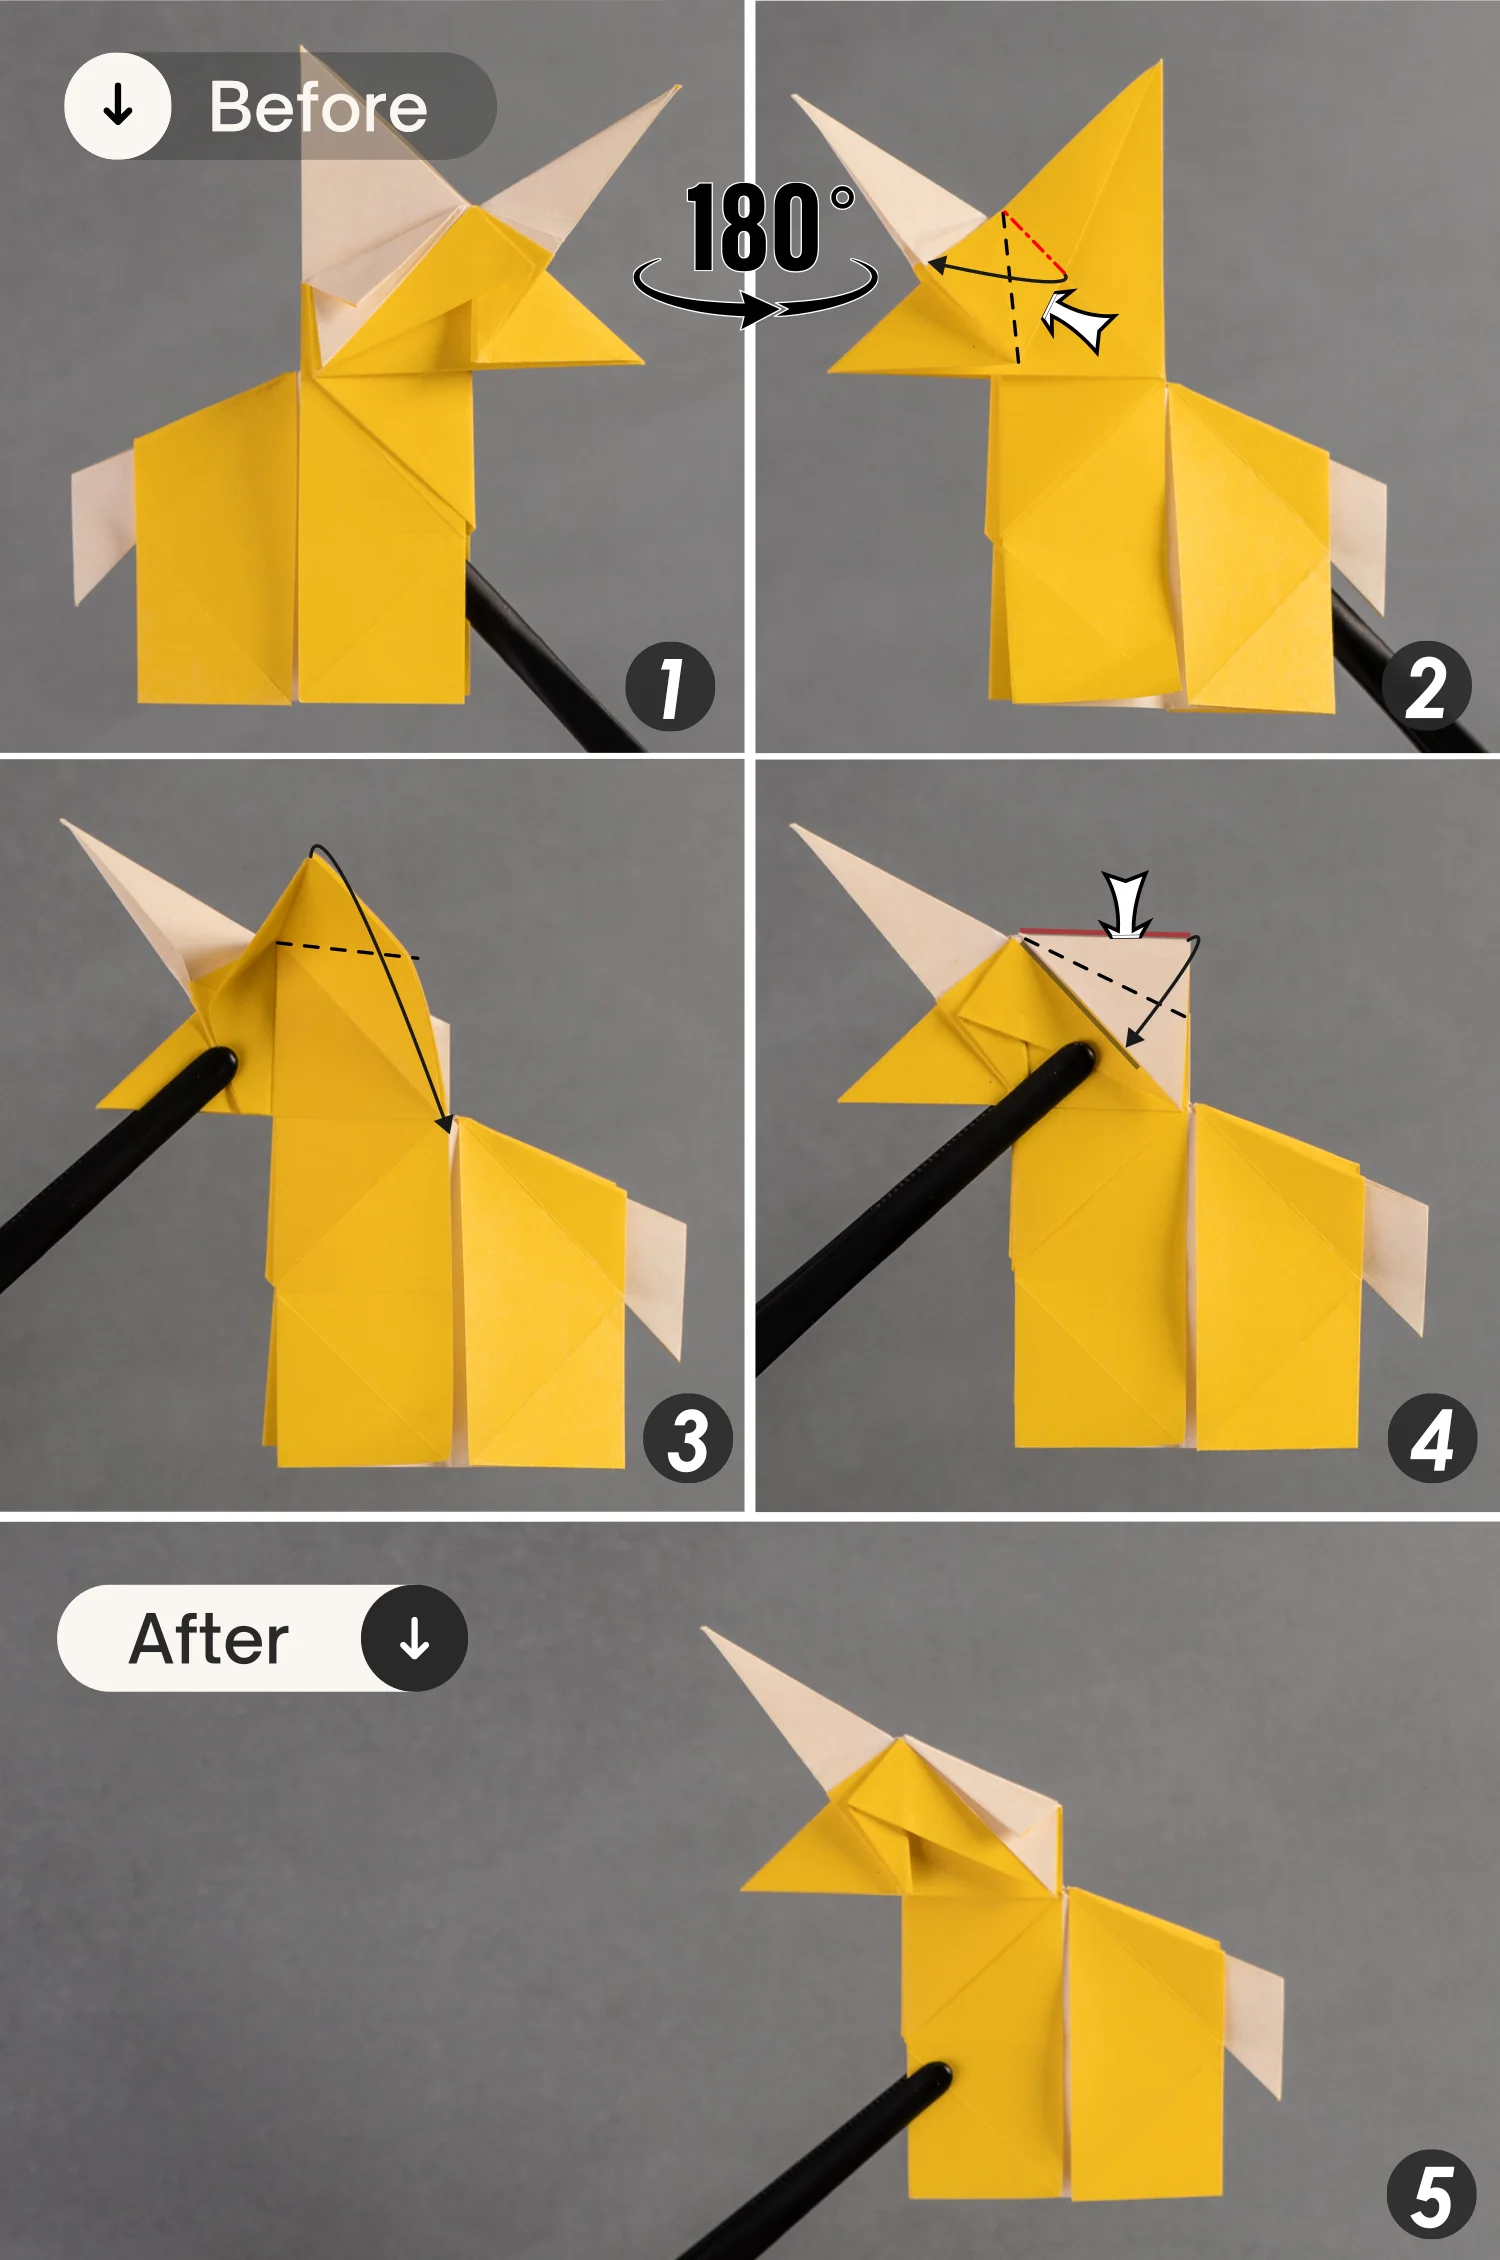
Step 14
Rotate the paper 45 degrees counterclockwise, and rotate it 180 degrees from front to back to flip the paper over.
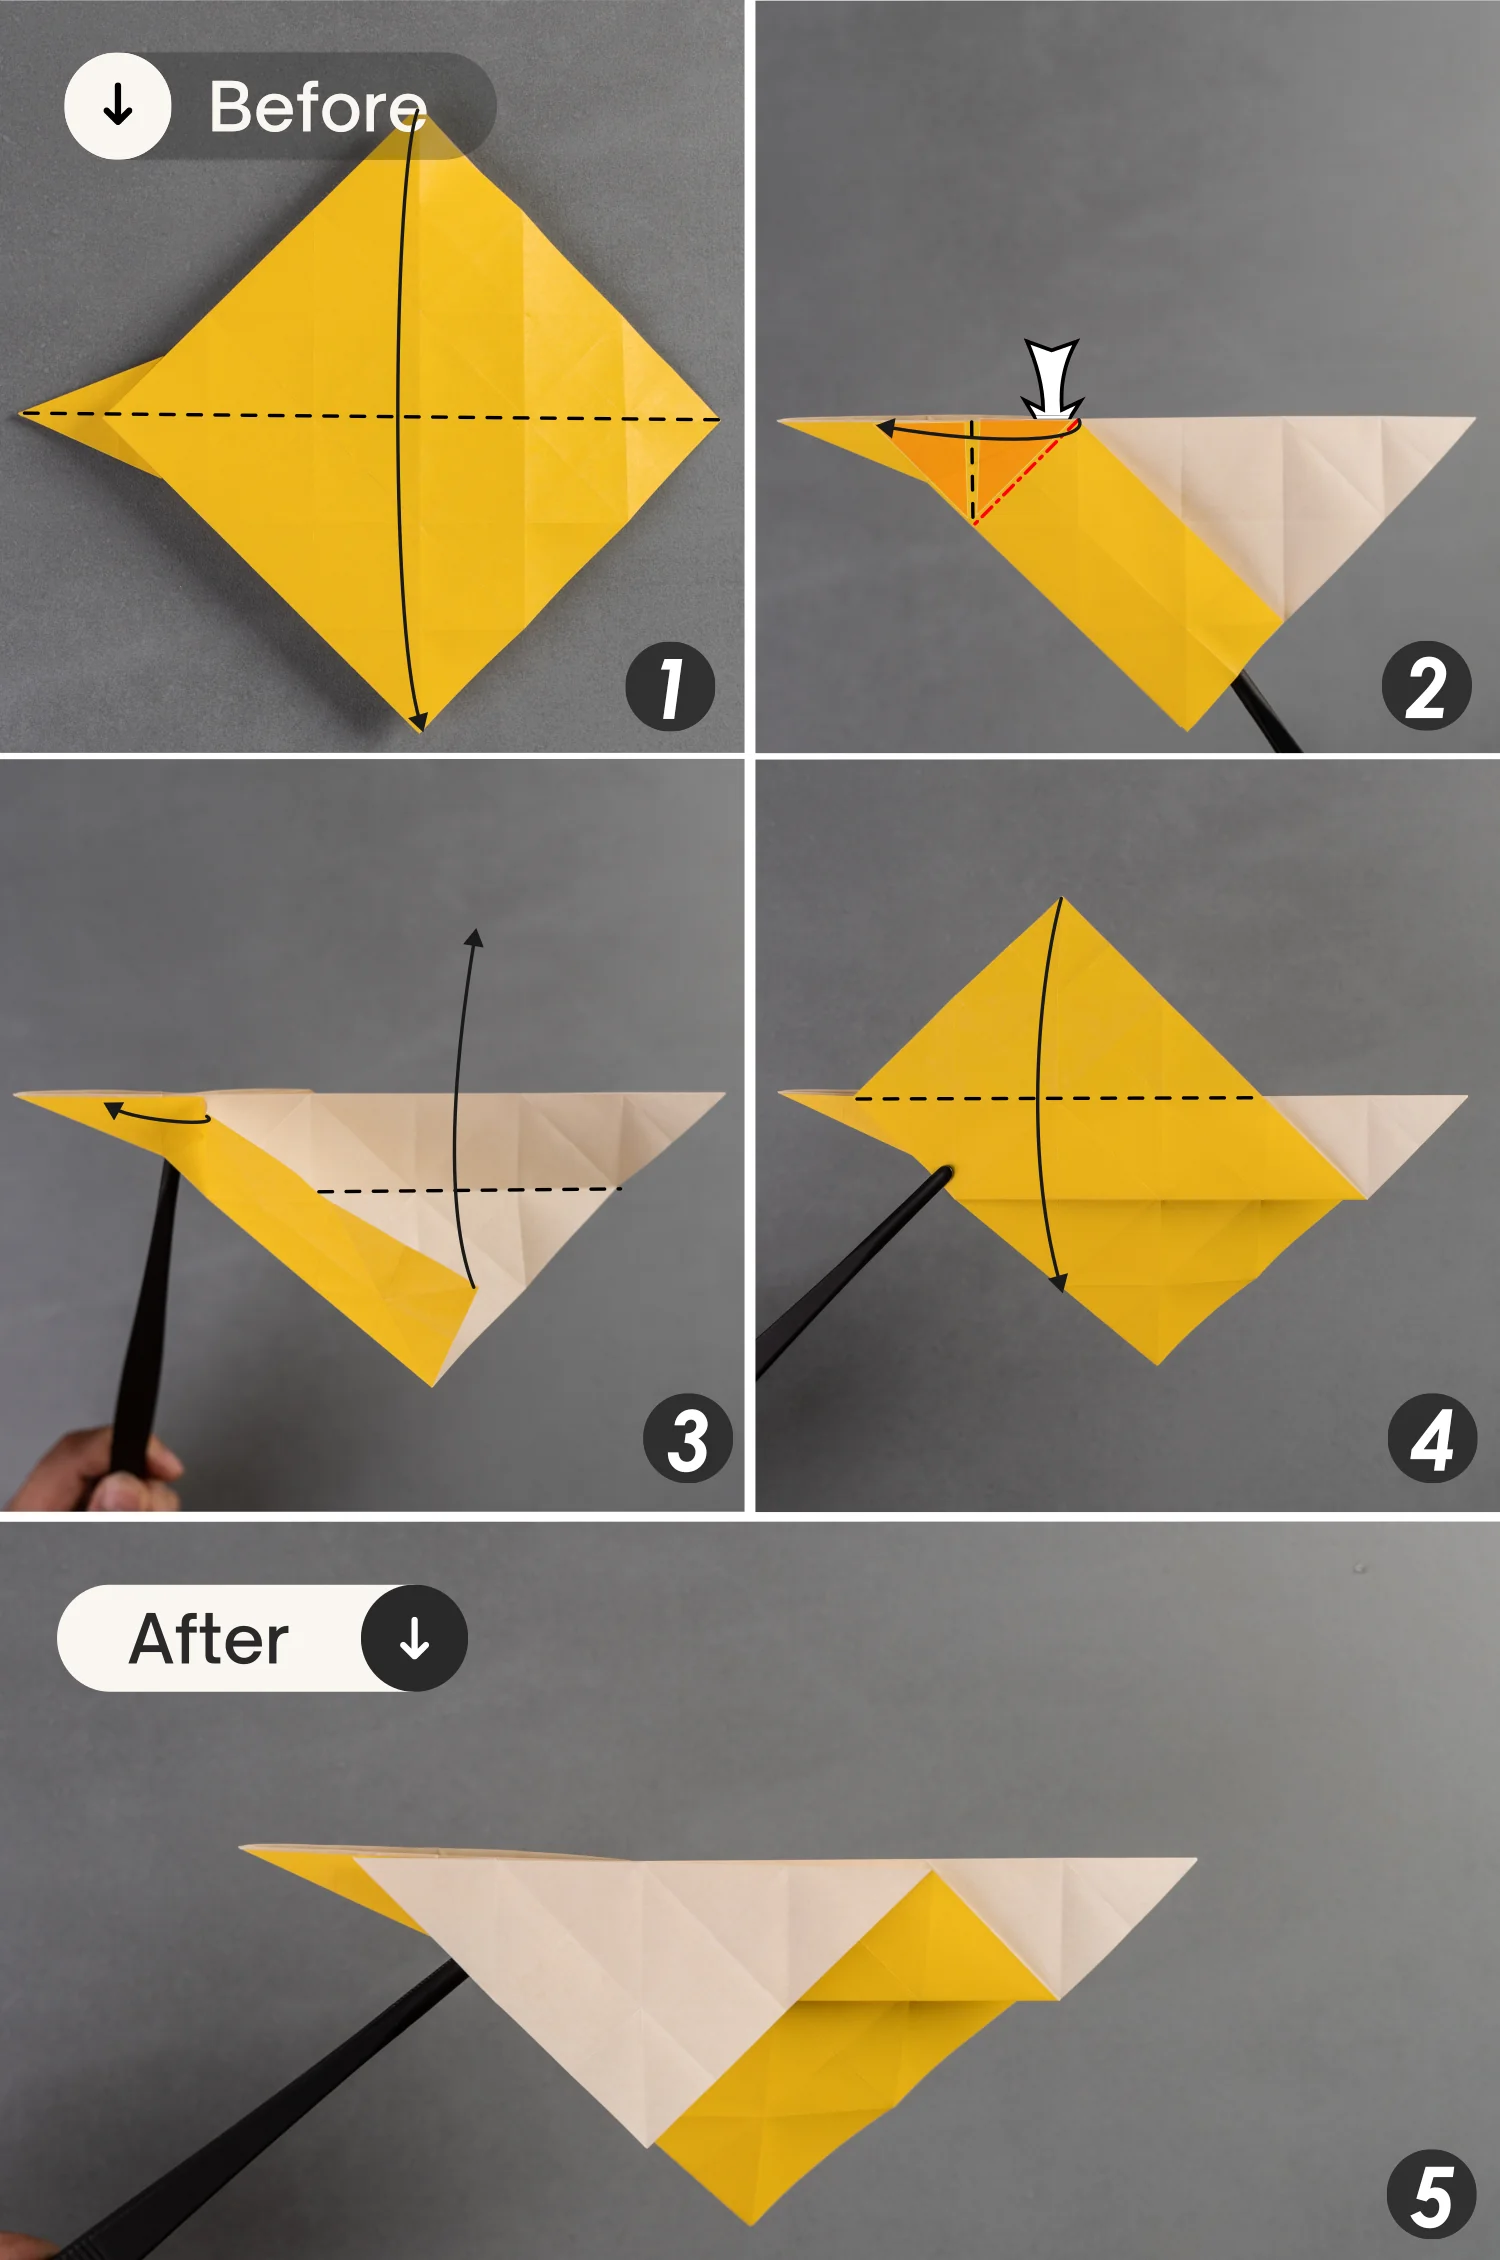
Step 15
Fold the top point to the bottom point, fold the right corner of this triangle, located on the upper left, horizontally to the left along the black dotted line, at which point the layer on the face of this paper will be lifted in the process. [pictures 1 to 2]
While folding the right corner of the triangle to the left, fold the bottom point of this top layer up along the existing crease shown by the black dotted line and flatten it.
Finally, fold down the top triangle.
Step 16
Rotate it 180 degrees from left to right, then just as you did in the previous step. Fold the left corner of the triangle, located on the top right, horizontally to the right along the black dotted line, at which point the layer on the face of this paper will be lifted in the process. [pictures 1 to 2]
While folding the left corner of the triangle to the right, fold the bottom point of this top layer up along the existing crease and flatten it.
Finally, fold down the top triangle.
Step 17
Rotate the paper 180 degrees from front to back, then fold the right edge of the white triangle along the crease indicated by the dotted line.
Step 18
Rotate the paper 180 degrees from left to right, then fold the left edge of the white triangle along the crease indicated by the dotted line (Note that you need to fold the other two layers that are located behind this left edge in addition to the left edge of the triangle, which means that there are three layers in total.)
Next, shape the two edges as the third picture shows.

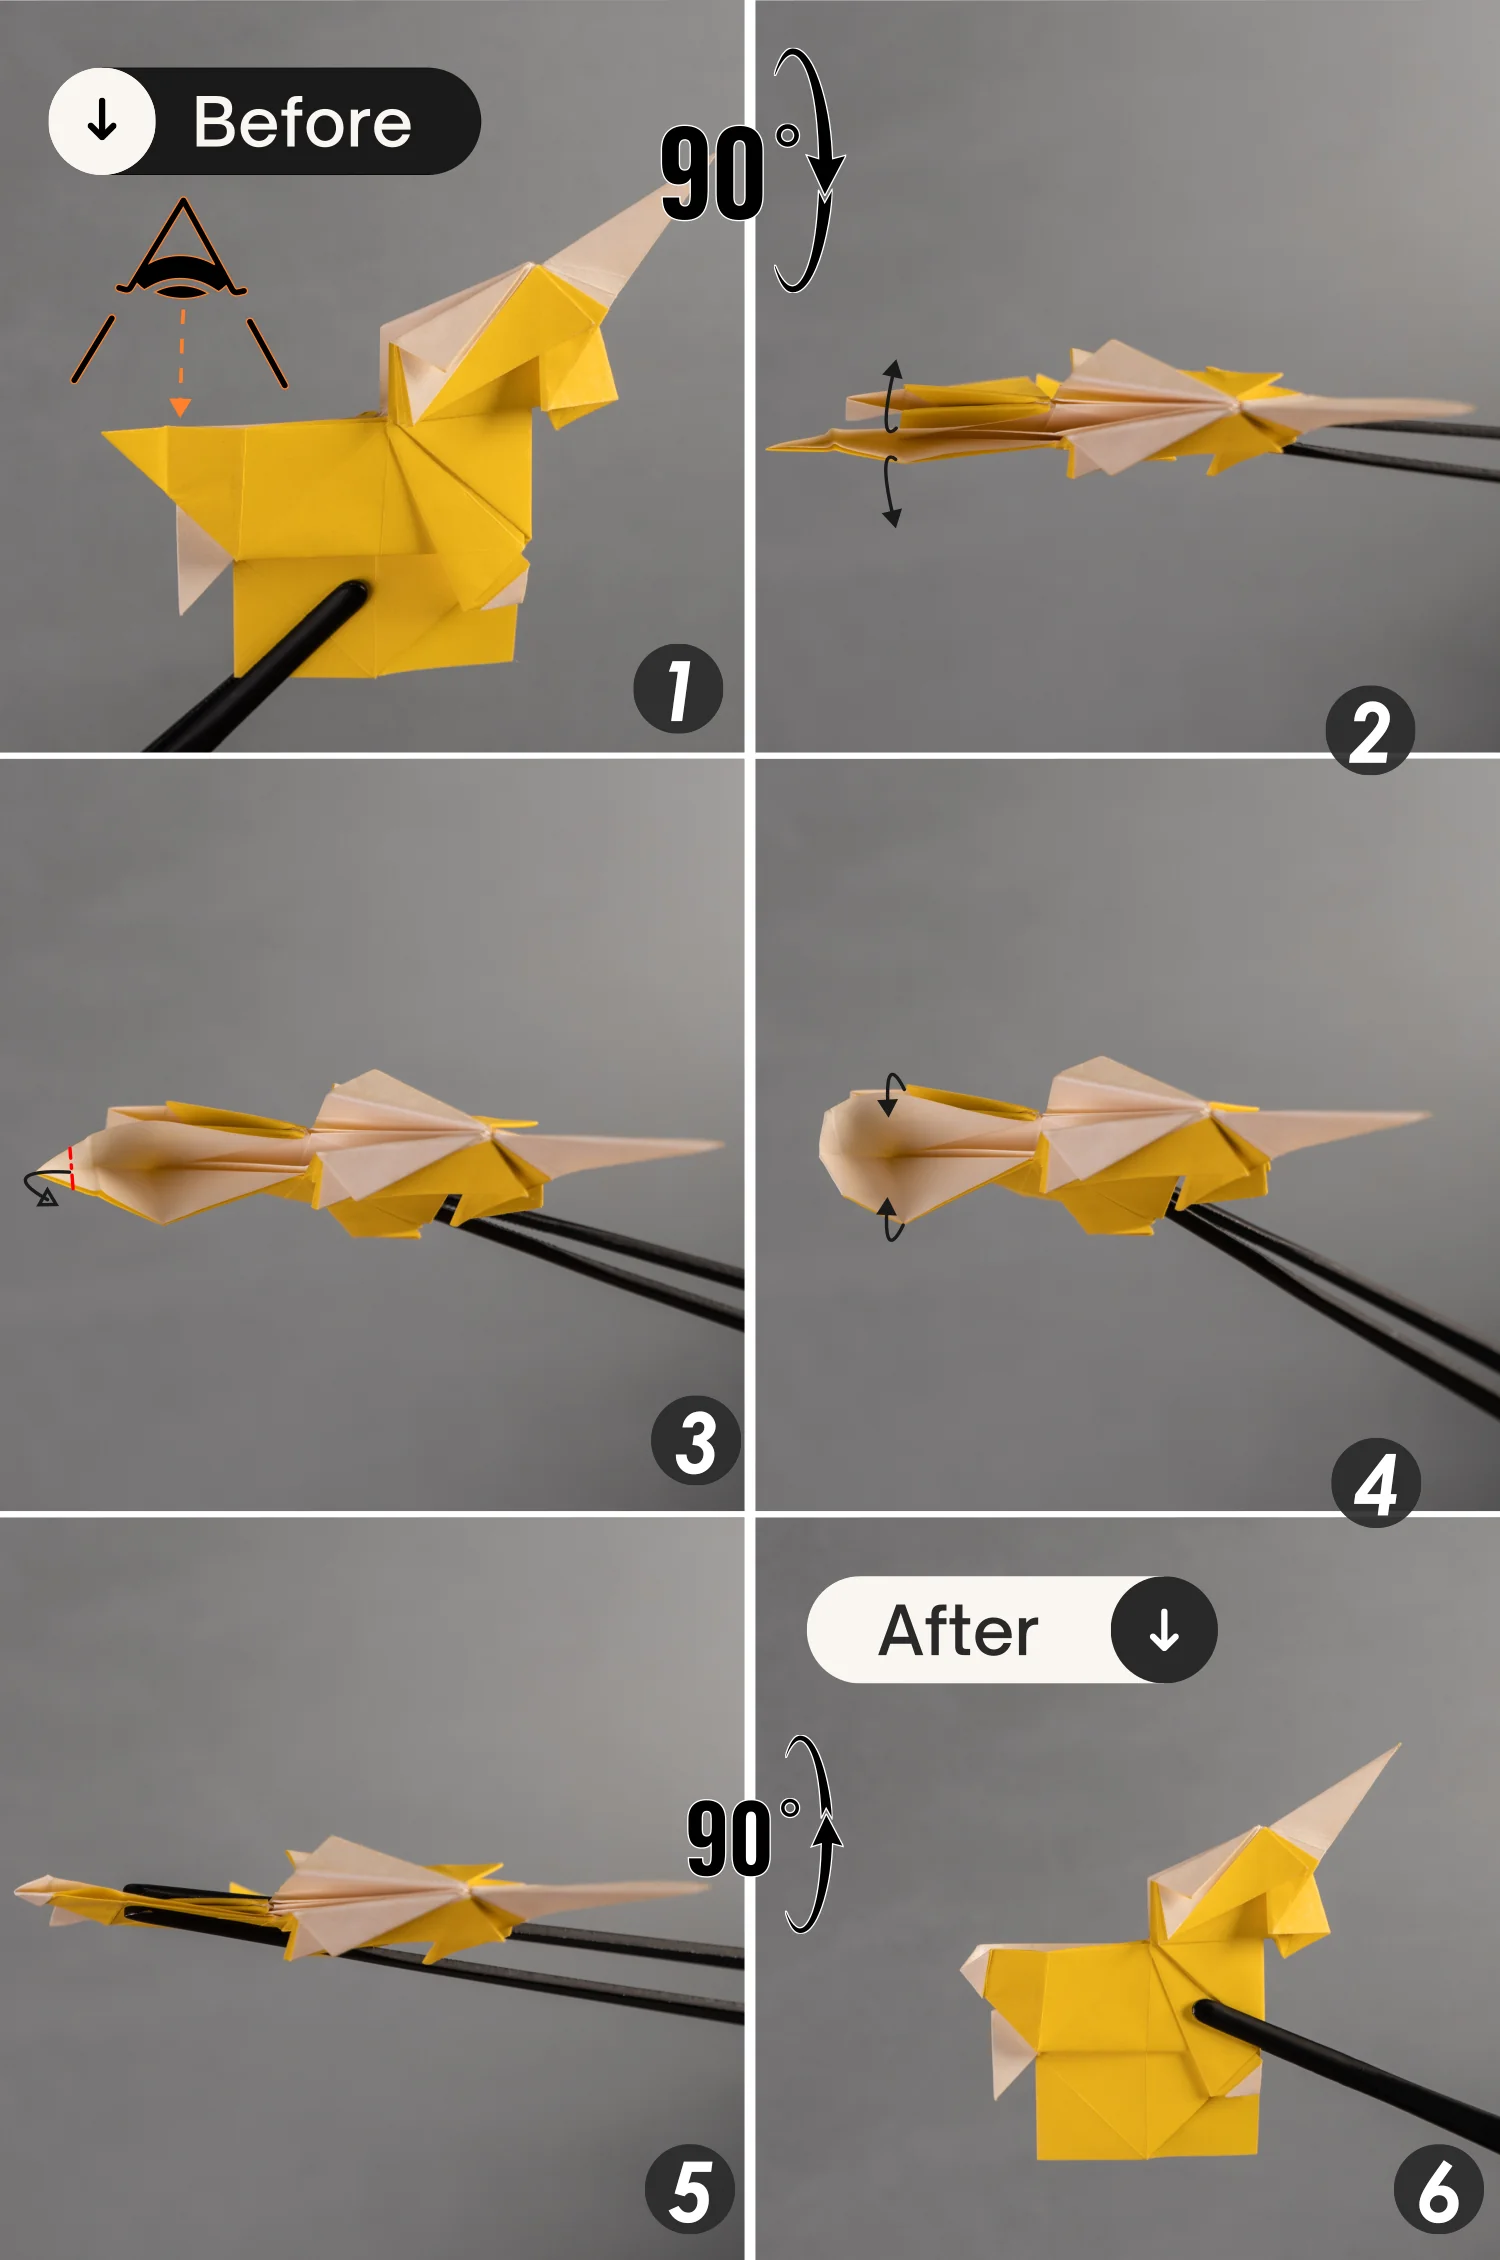
Step 19
Rotate the paper 90 degrees from back to front, then expand the paper from the bottom [pictures 1 and 2].
Then, fold the two middle horizontal edges toward the sides along the creases indicated by the dotted lines to open the pocket, at the same time, bring up the right part along the dotted line [pictures 3 and 4].
Next, fold the layer you brought up in half along the middle crease, and flatten the fold [pictures 5 and 6].
Finally, rotate the paper 90 degrees from back to front to lay it flat.
Step 20
Rotate it 90 degrees from the right to the left, then expand this opening and flatten this layer. Then, fold the top left and right edges backward along the creases indicated by the dotted lines. Finally, close this opening, rotate it 90 degrees from left to right.
Step 21
Fold down the top point of the right part along the black dotted line, and unfold it.
Step 22
Rotate the paper 90 degrees from right to left, then expand the opening and lift the layers behind. Next, fold down the top point and the top left and right layers along the creases you made in the previous step [pictures 1 to 3].
Finally, close this opening, flatten the fold, and rotate the paper 90 degrees from left to right [pictures 4 to 6].

Step 23
Rotate the paper 90 degrees from right to left, expand this top opening to get a side, and press down its top point. Mountain fold the crease indicated by the red dotted line, and valley fold the creases indicated by the black dotted lines. Finally, close this opening and rotate the paper 90 degrees from left to right.
Step 24
Fold down the top edge of the right part along the black dotted line, leaving a crease, and unfold it. Rotate the paper 180 degrees from left to right, fold down the top edge of this side similarly, and unfold it.
Step 25
Rotate the paper 90 degrees from front to back, and tuck these two corners, which were folded in the previous step, into the pocket between them. Finally, rotate the paper 90 degrees from back to front to lay it flat.
Step 26
Bring up this triangle, then rotate the paper 180 degrees from right to left.
Step 27
Fold the bottom left point of this quadrilateral to meet its top right point diagonally, then fold the top edge of this folded layer to align with its left edge, leaving a crease, and unfold it.
Similarly, fold the right edge of this folded layer to align with its left edge, leaving a crease, and unfold it.
Step 28
Fold down the triangle that was folded up in the previous step to return to its original position, then open this pocket and along the crease shown by the black dotted line so that the intersection formed by the creases shown by the red dots intersects [pictures 1 to 3].
Mountain fold the crease indicated by the black dotted line, and valley fold the crease indicated by the black dotted line, then flatten the fold and close this pocket [picture 4].
Finally, press the top left layer backward along the crease indicated by the red dotted line.
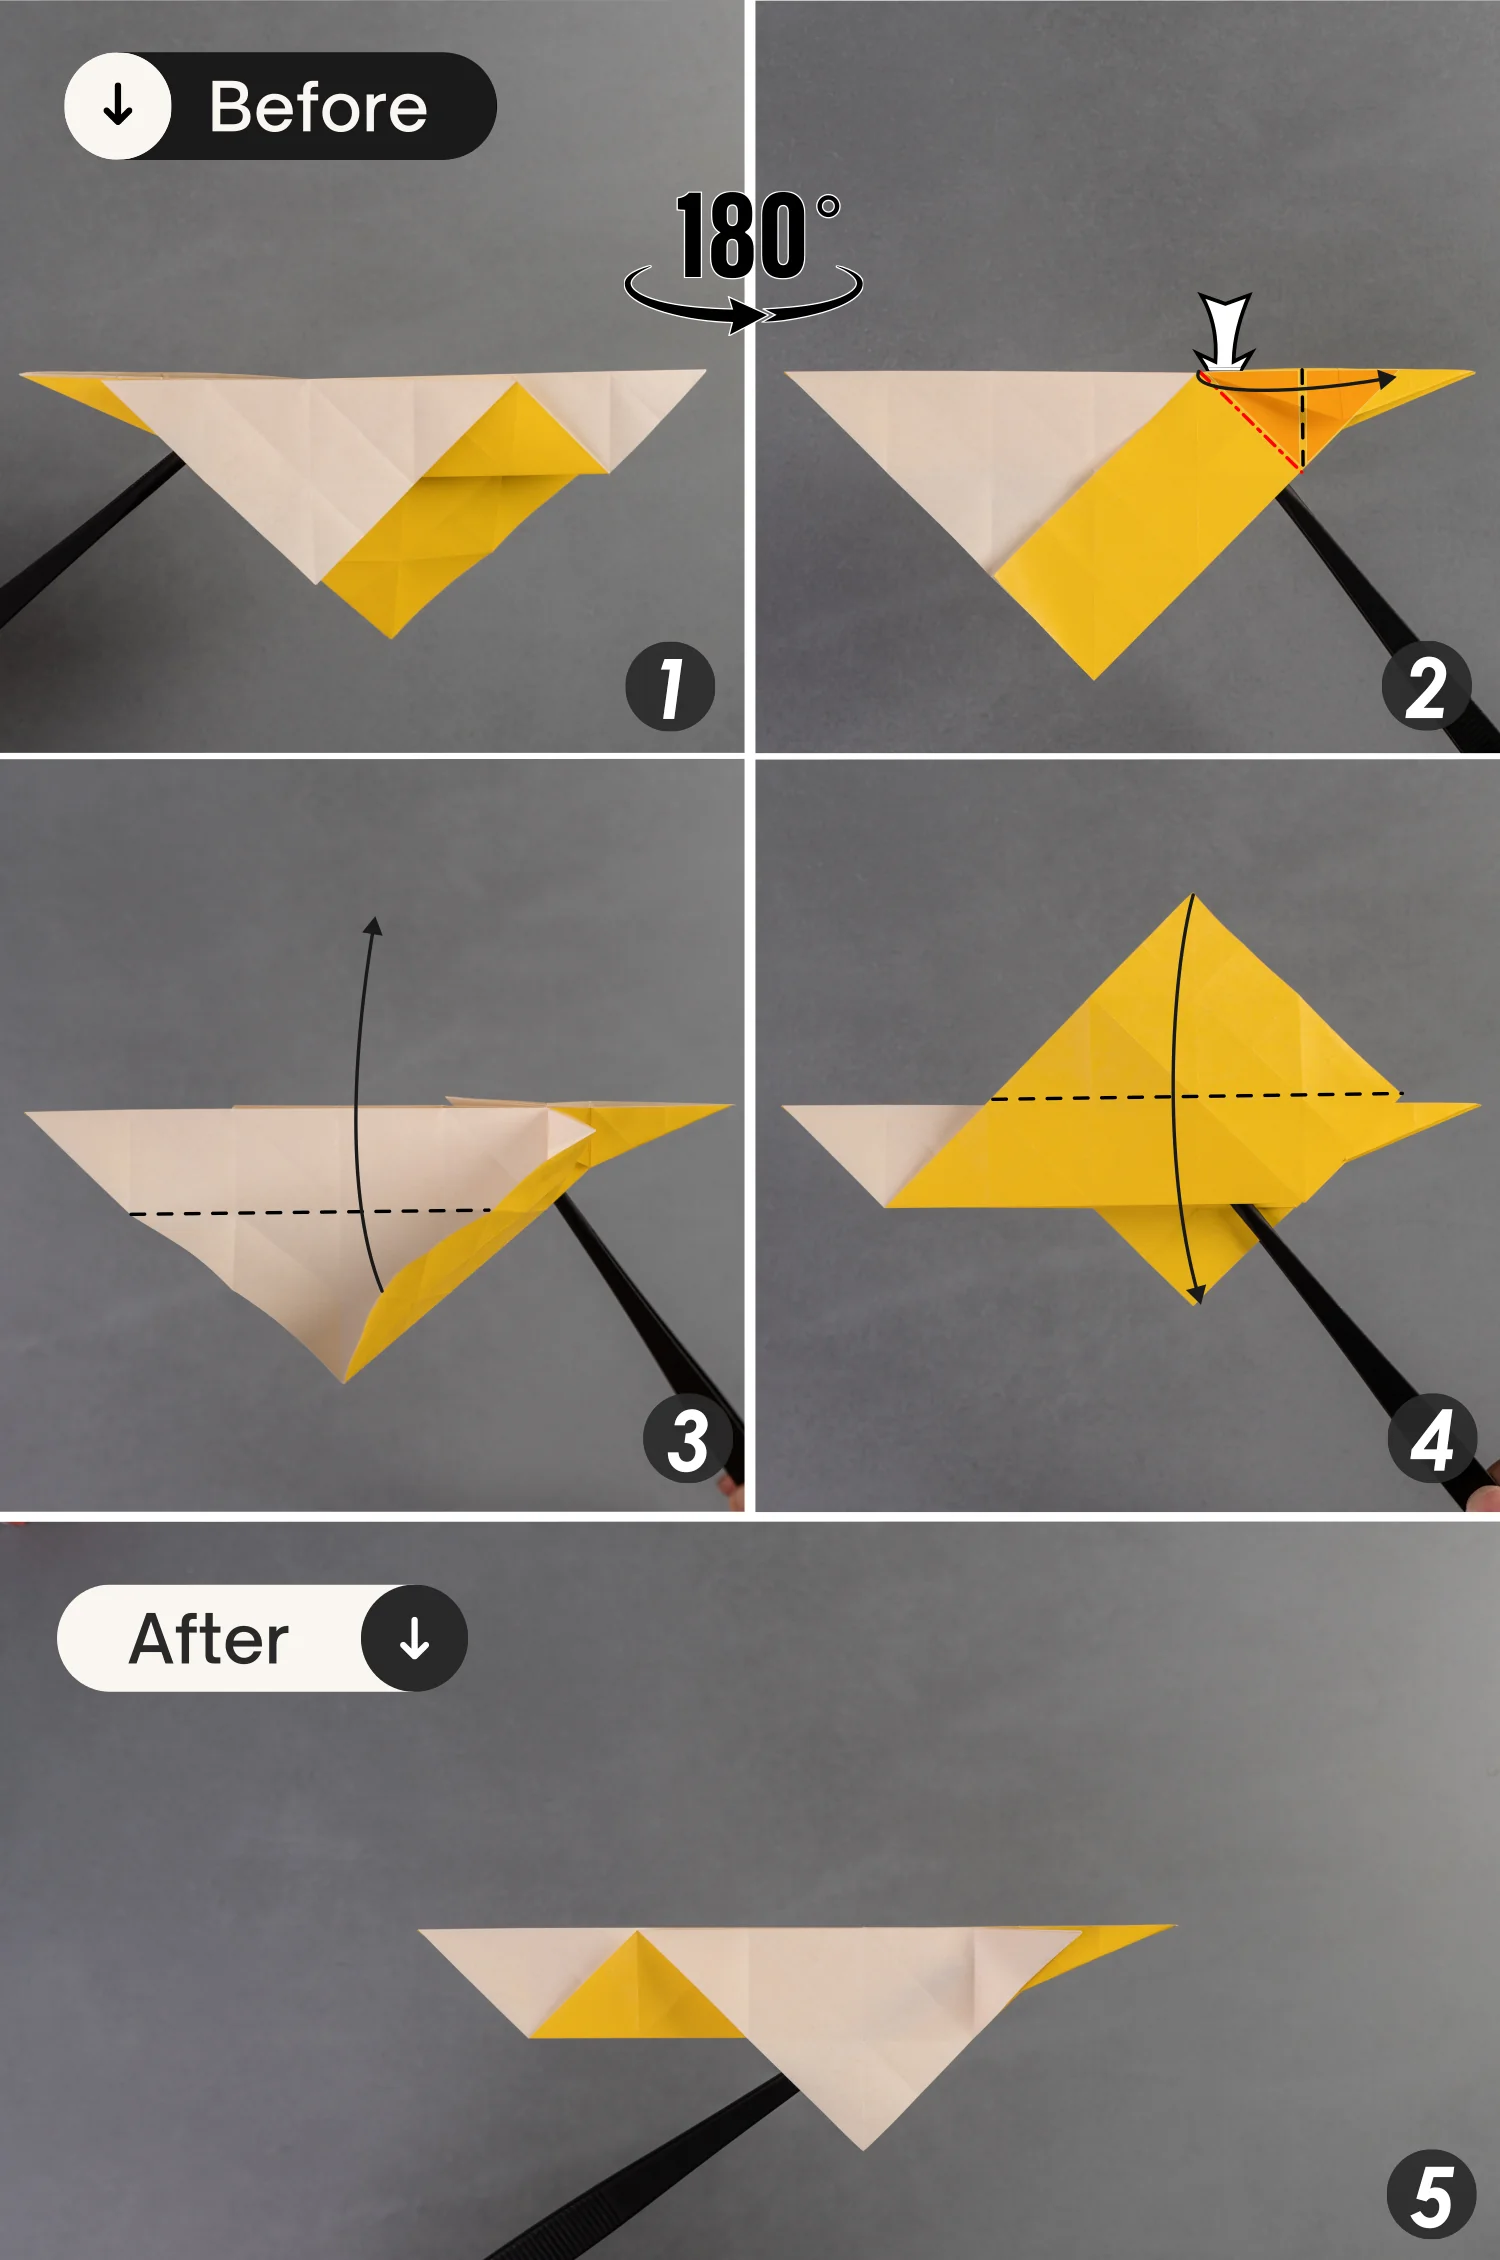
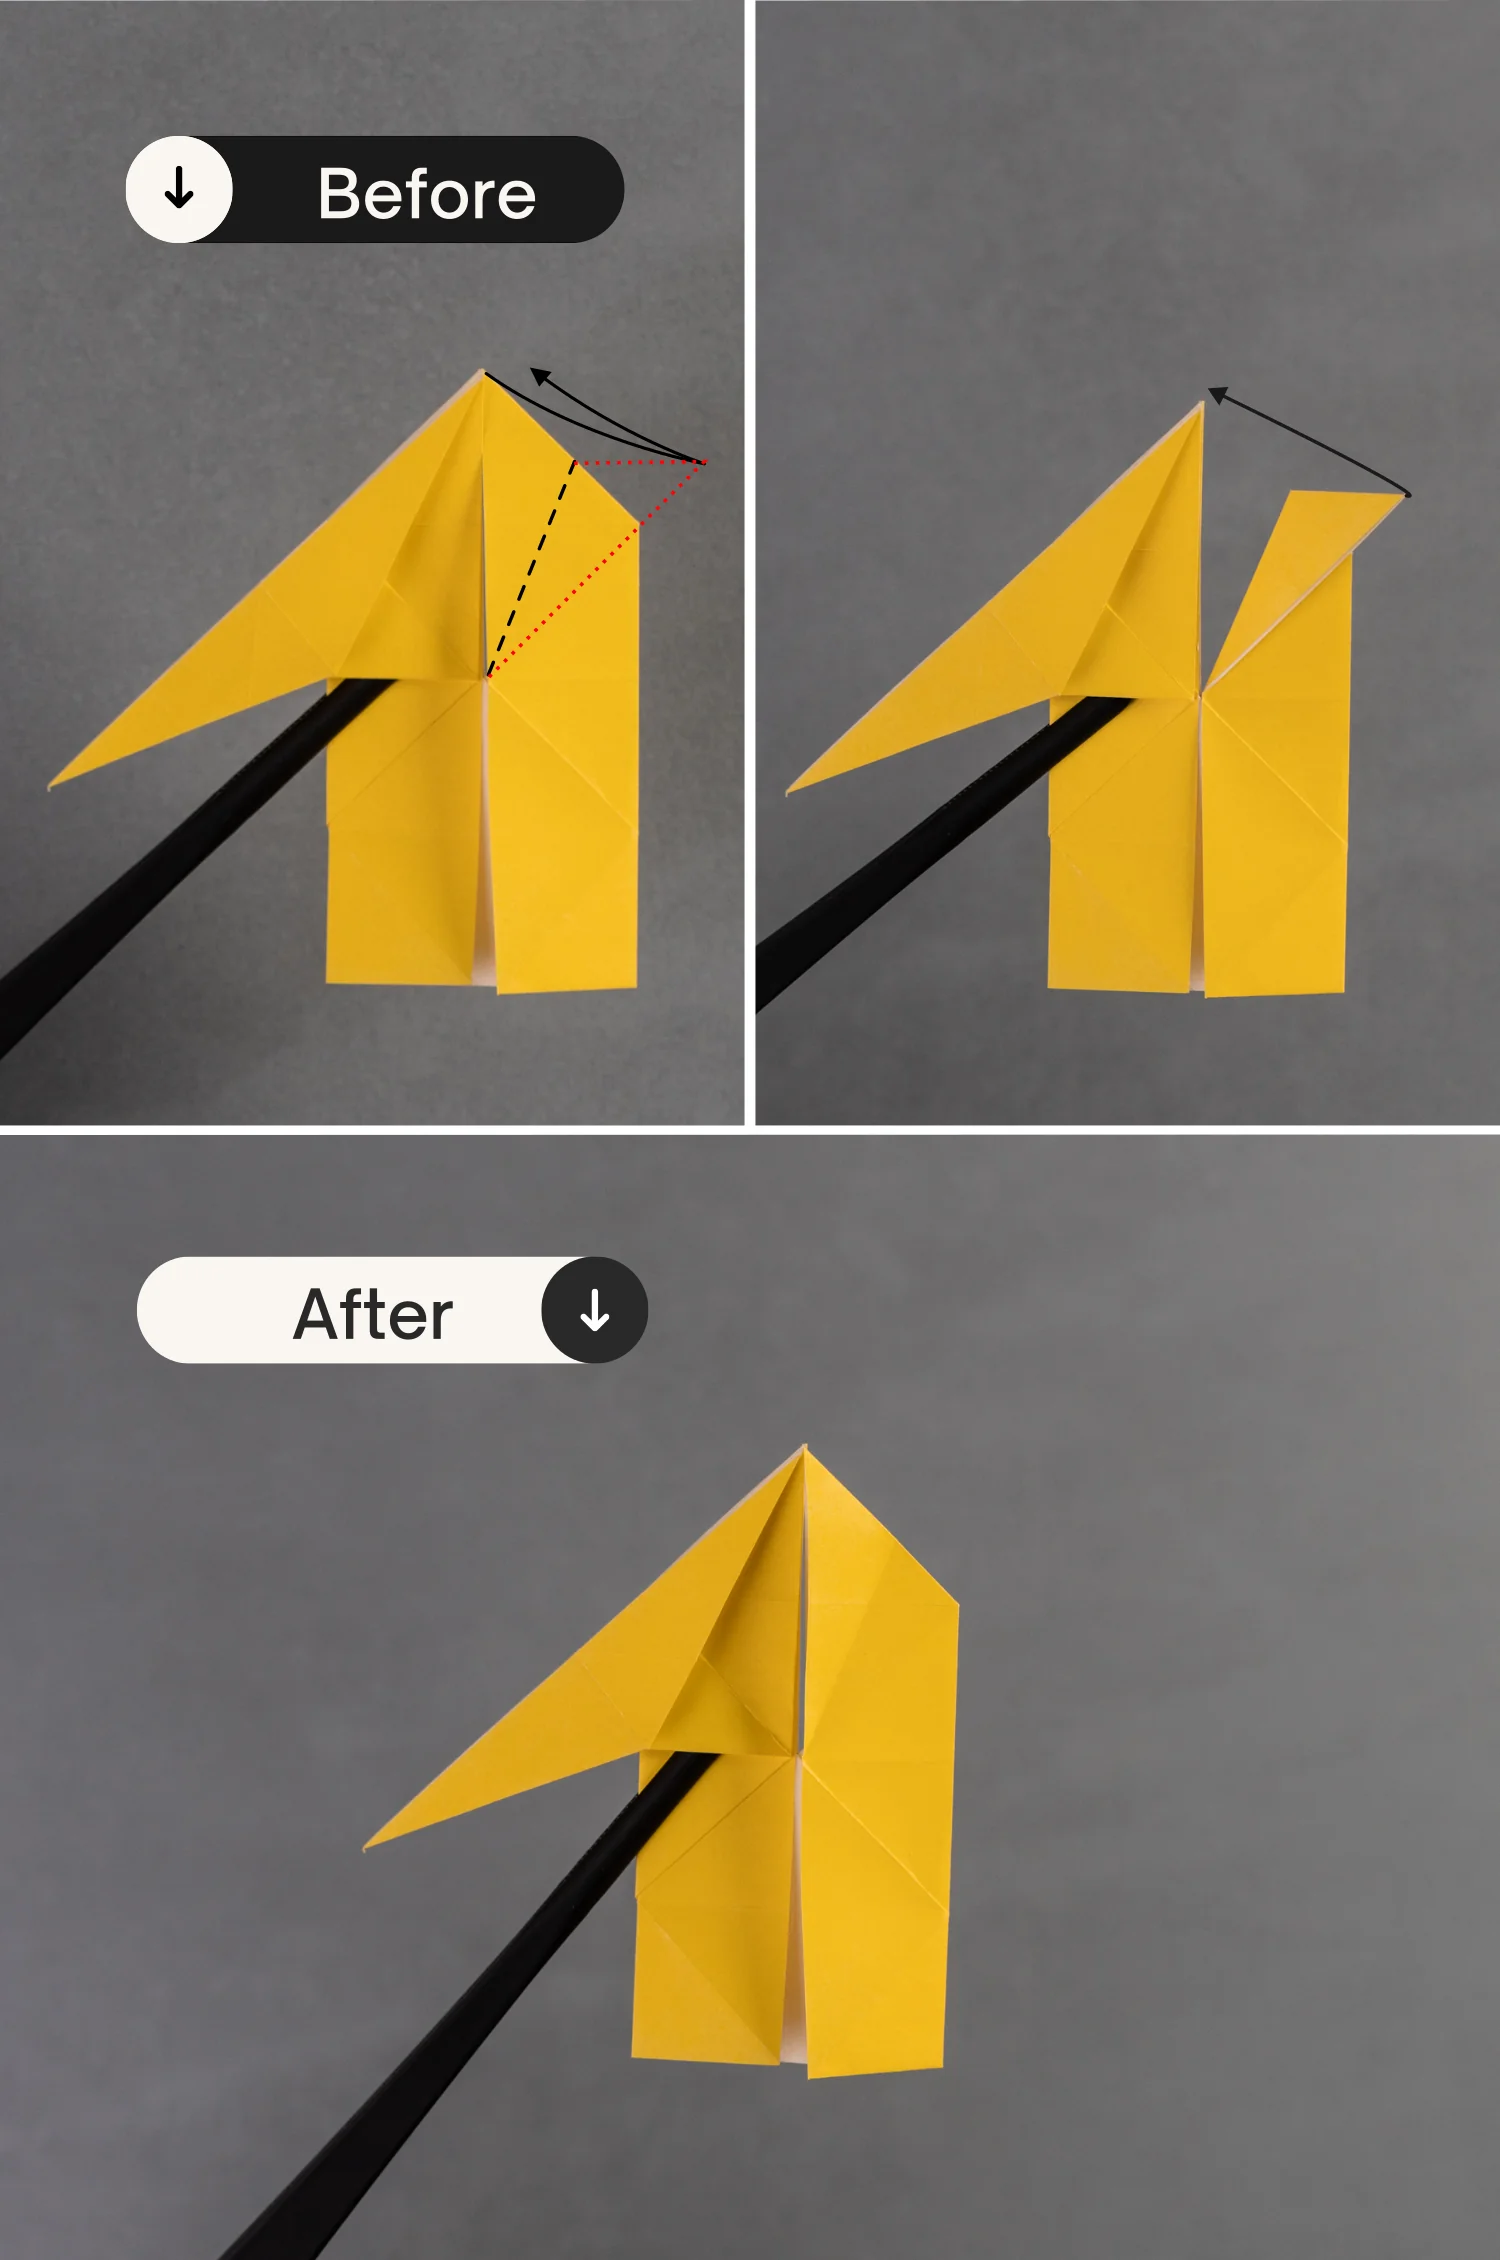
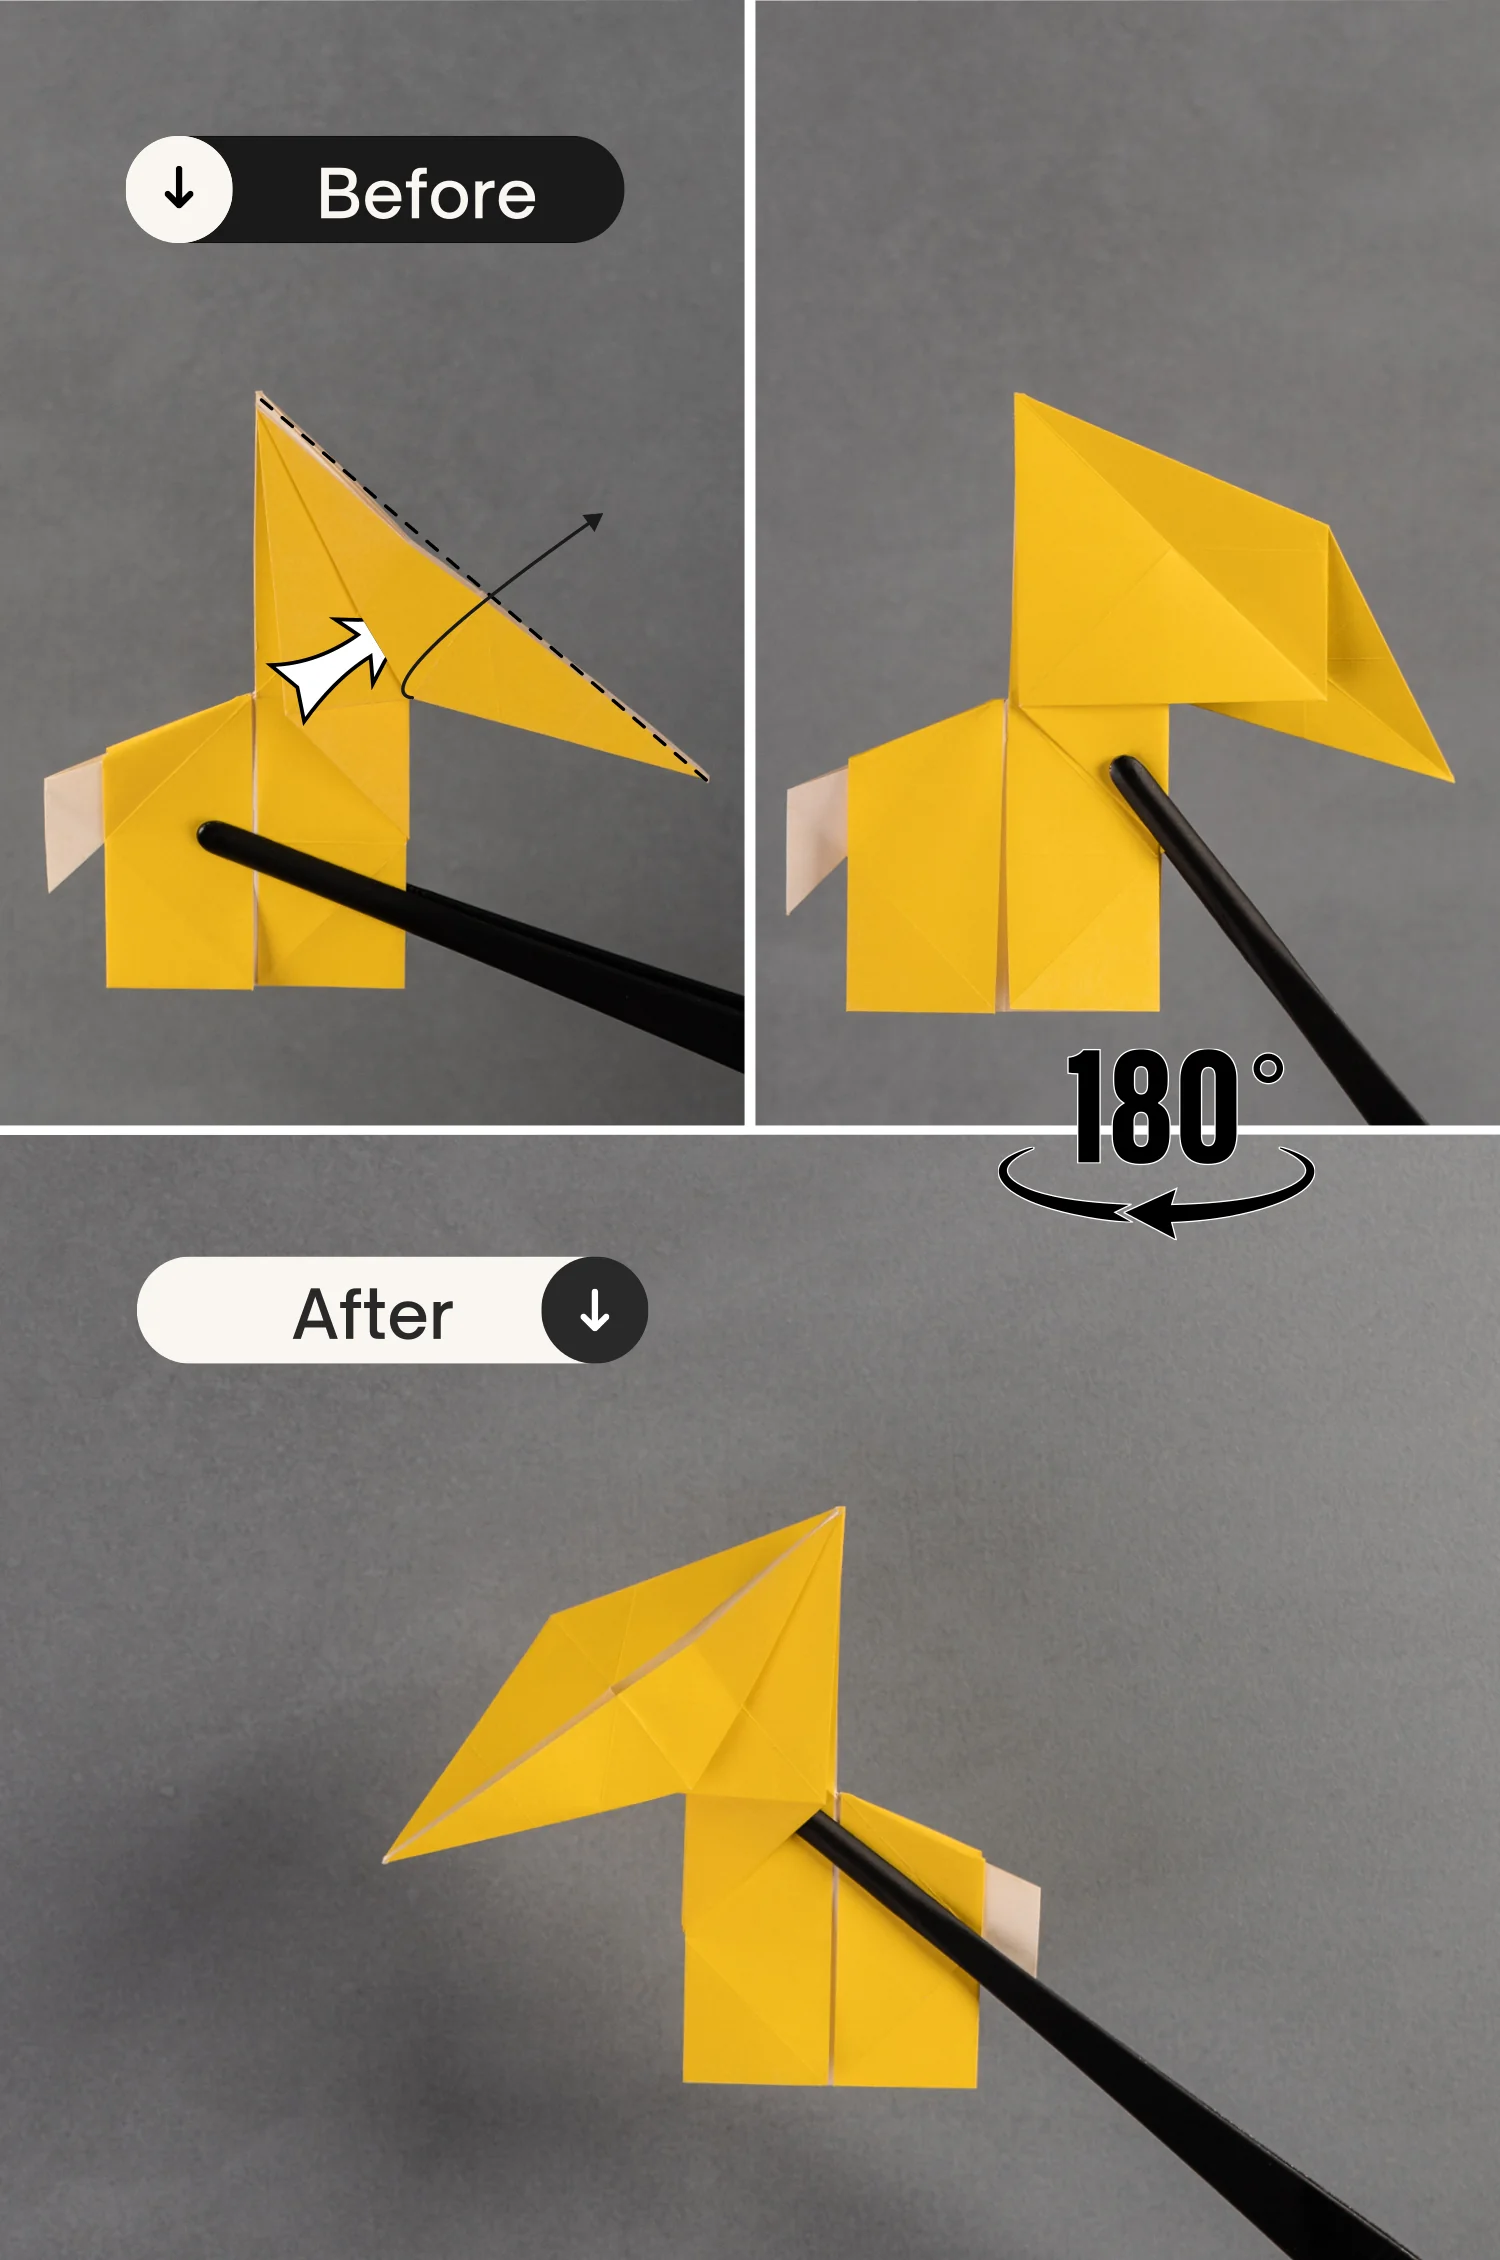
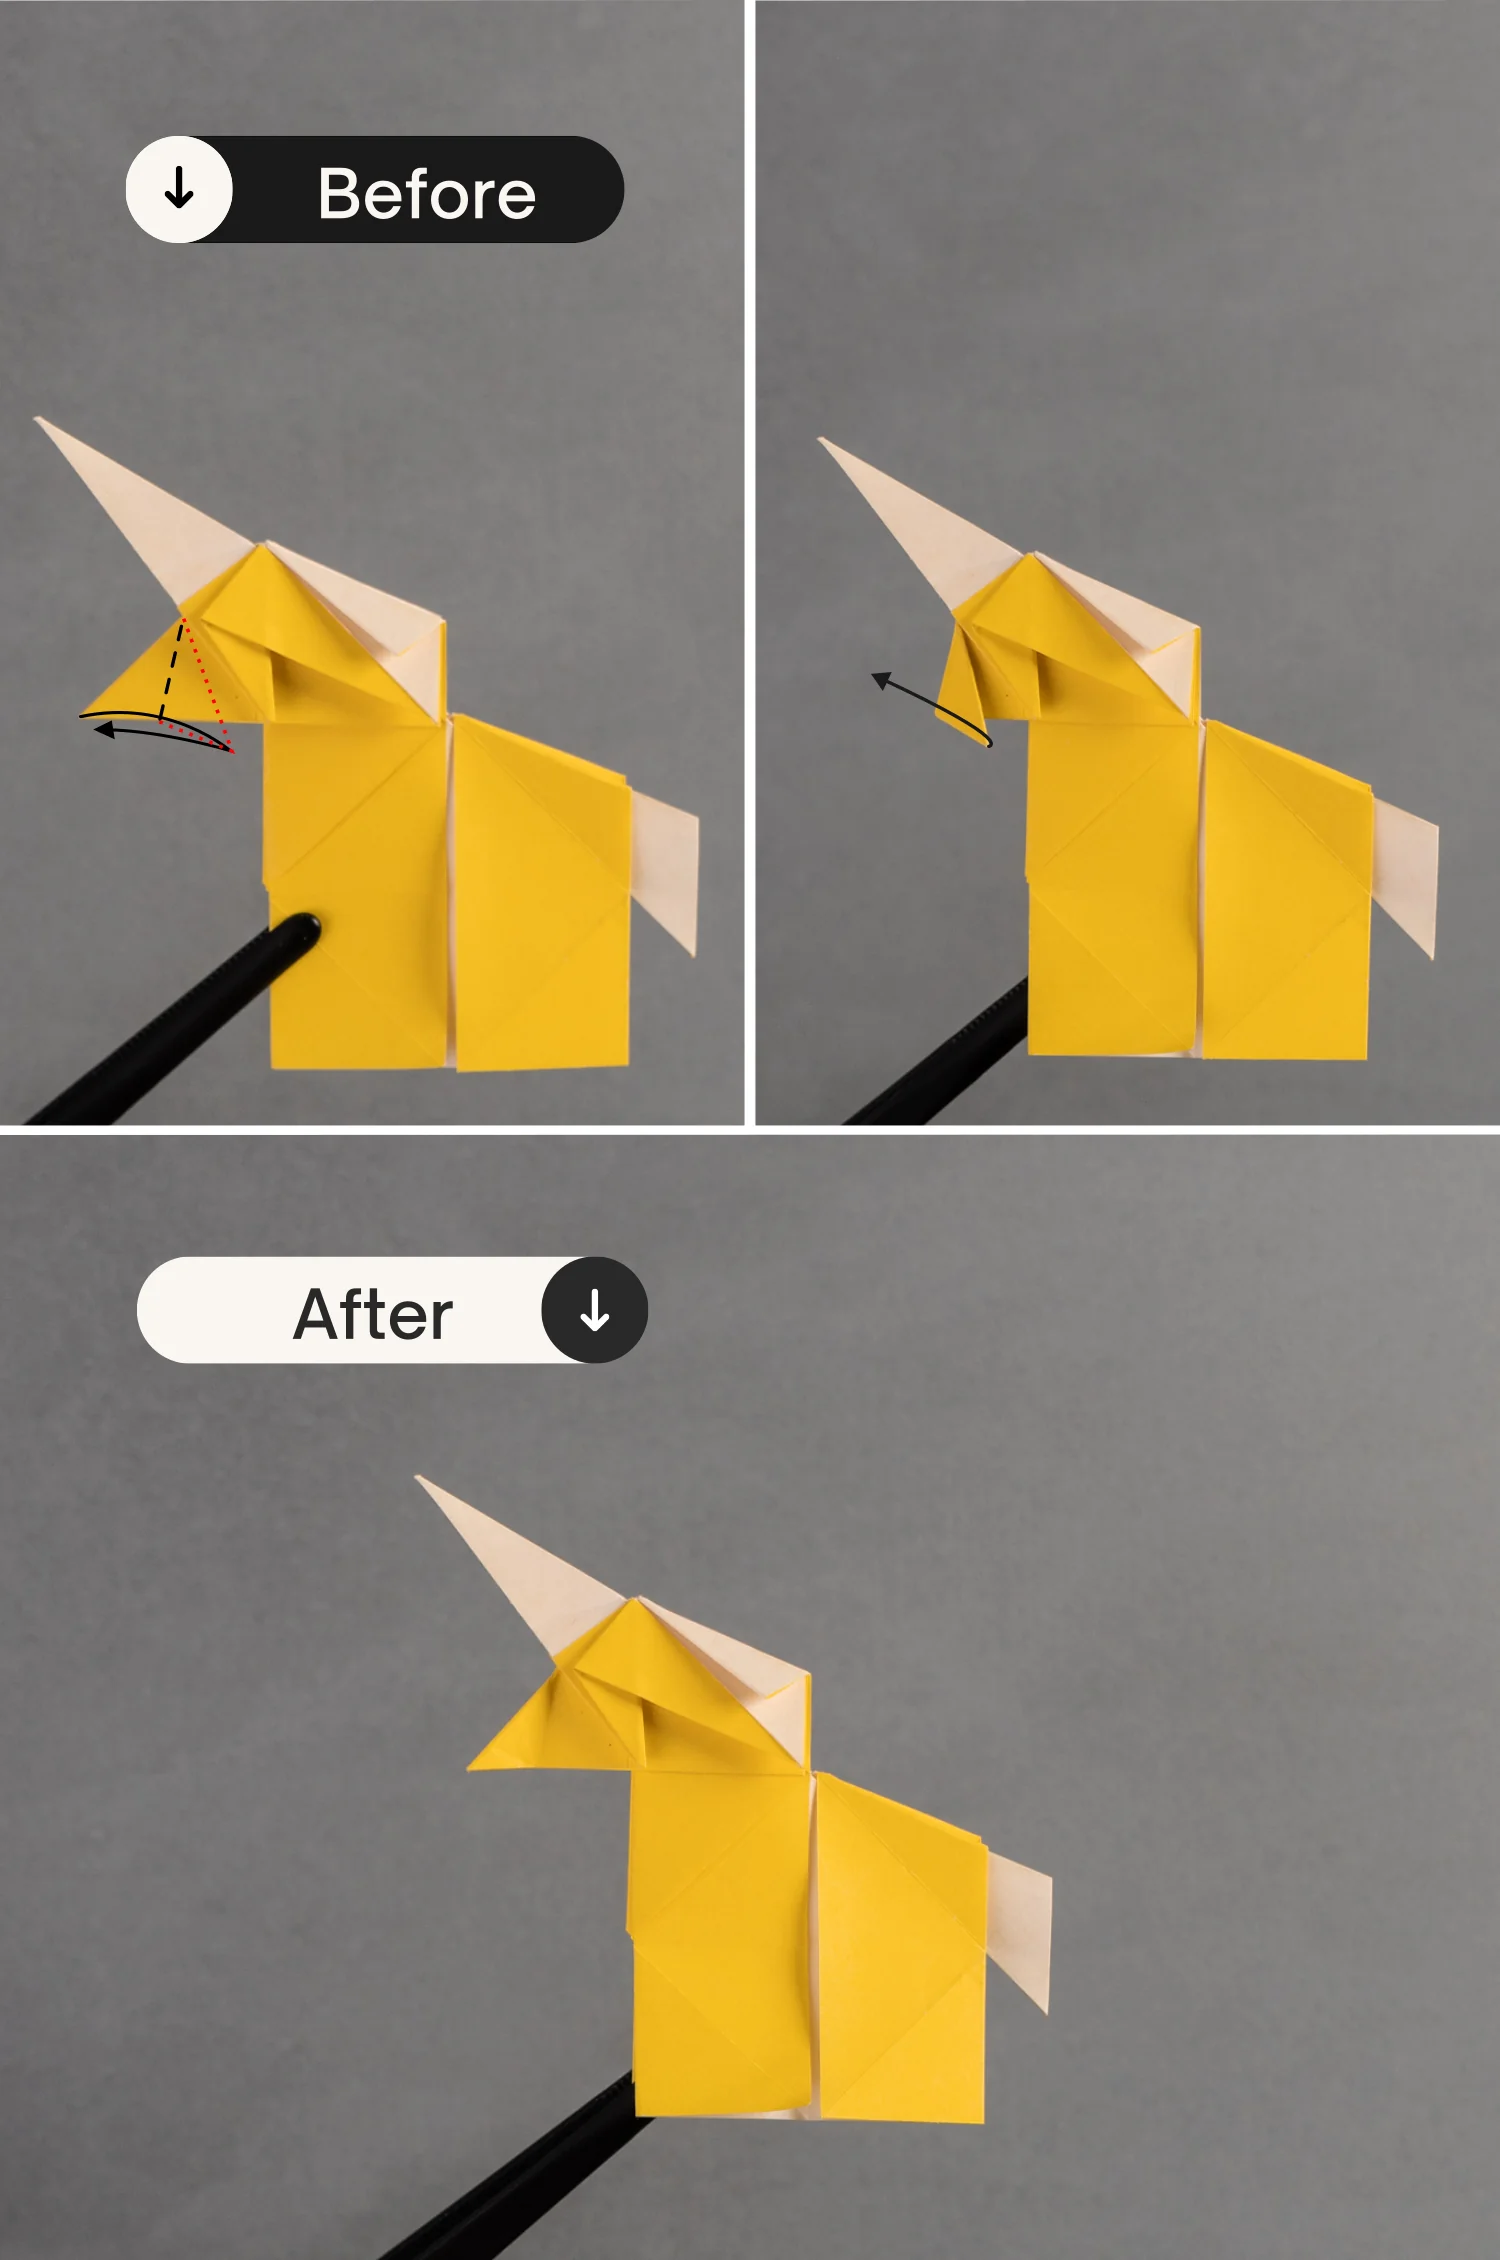
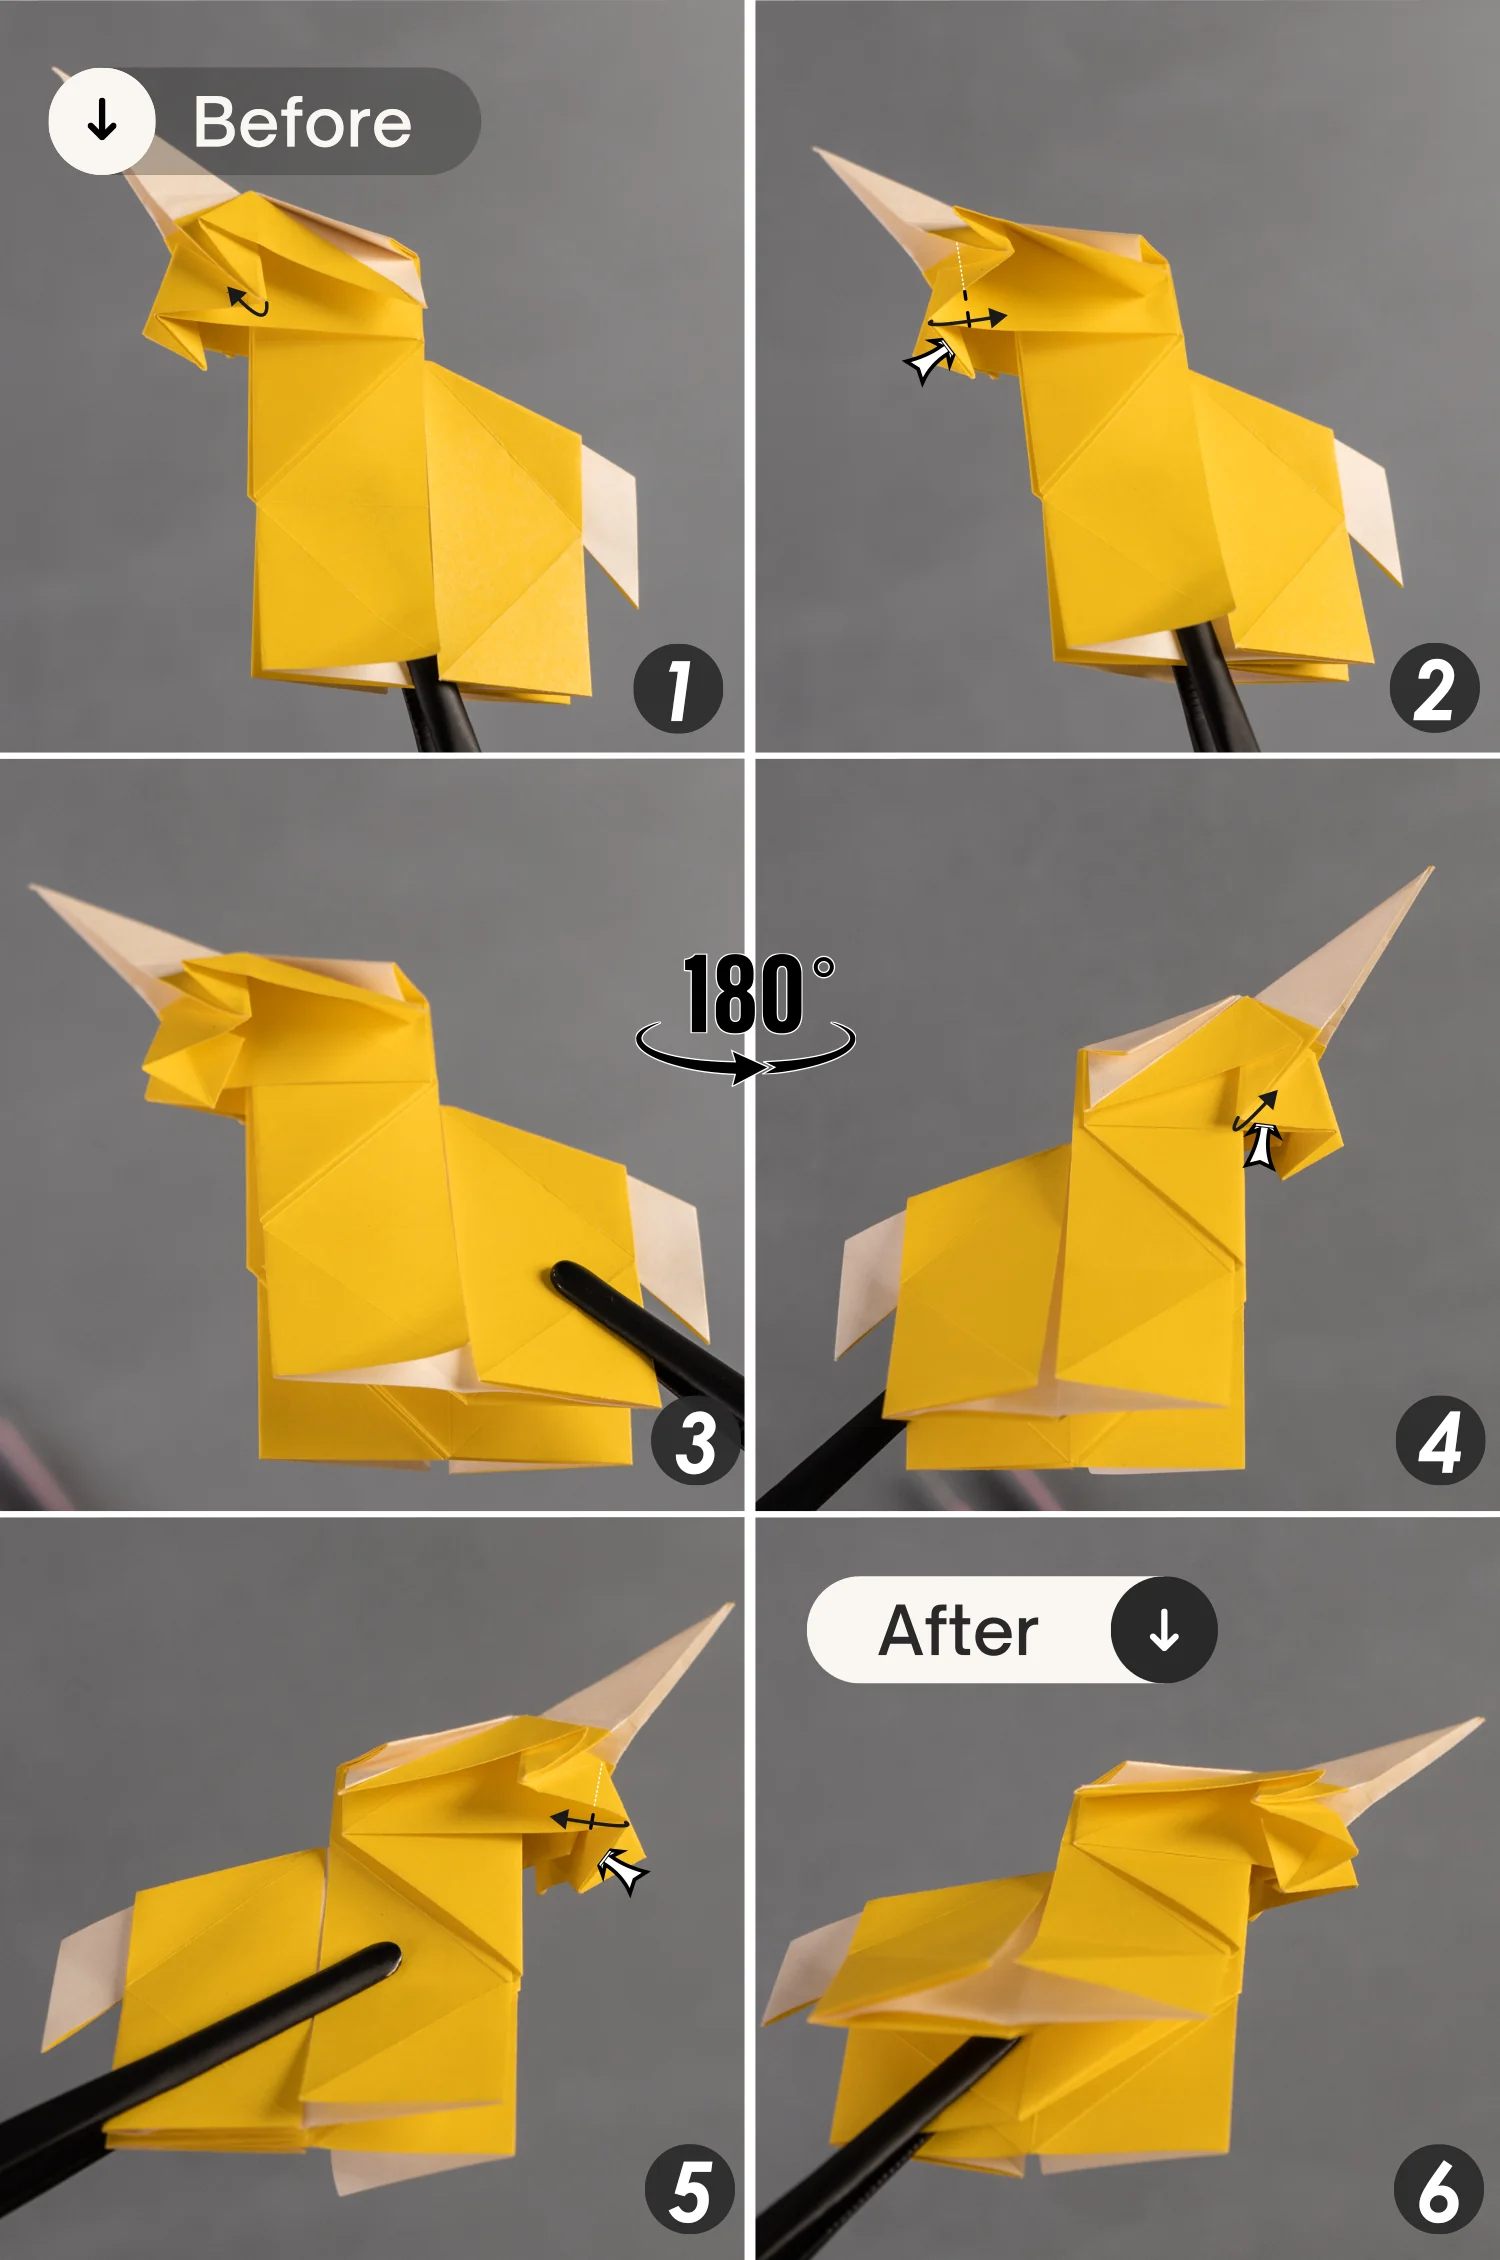
Step 29
Fold this layer backward along the crease indicated by the red dotted line. Then, rotate the paper 180 degrees from left to right and fold the layer on this side backward as well. This will create the horn of the unicorn.
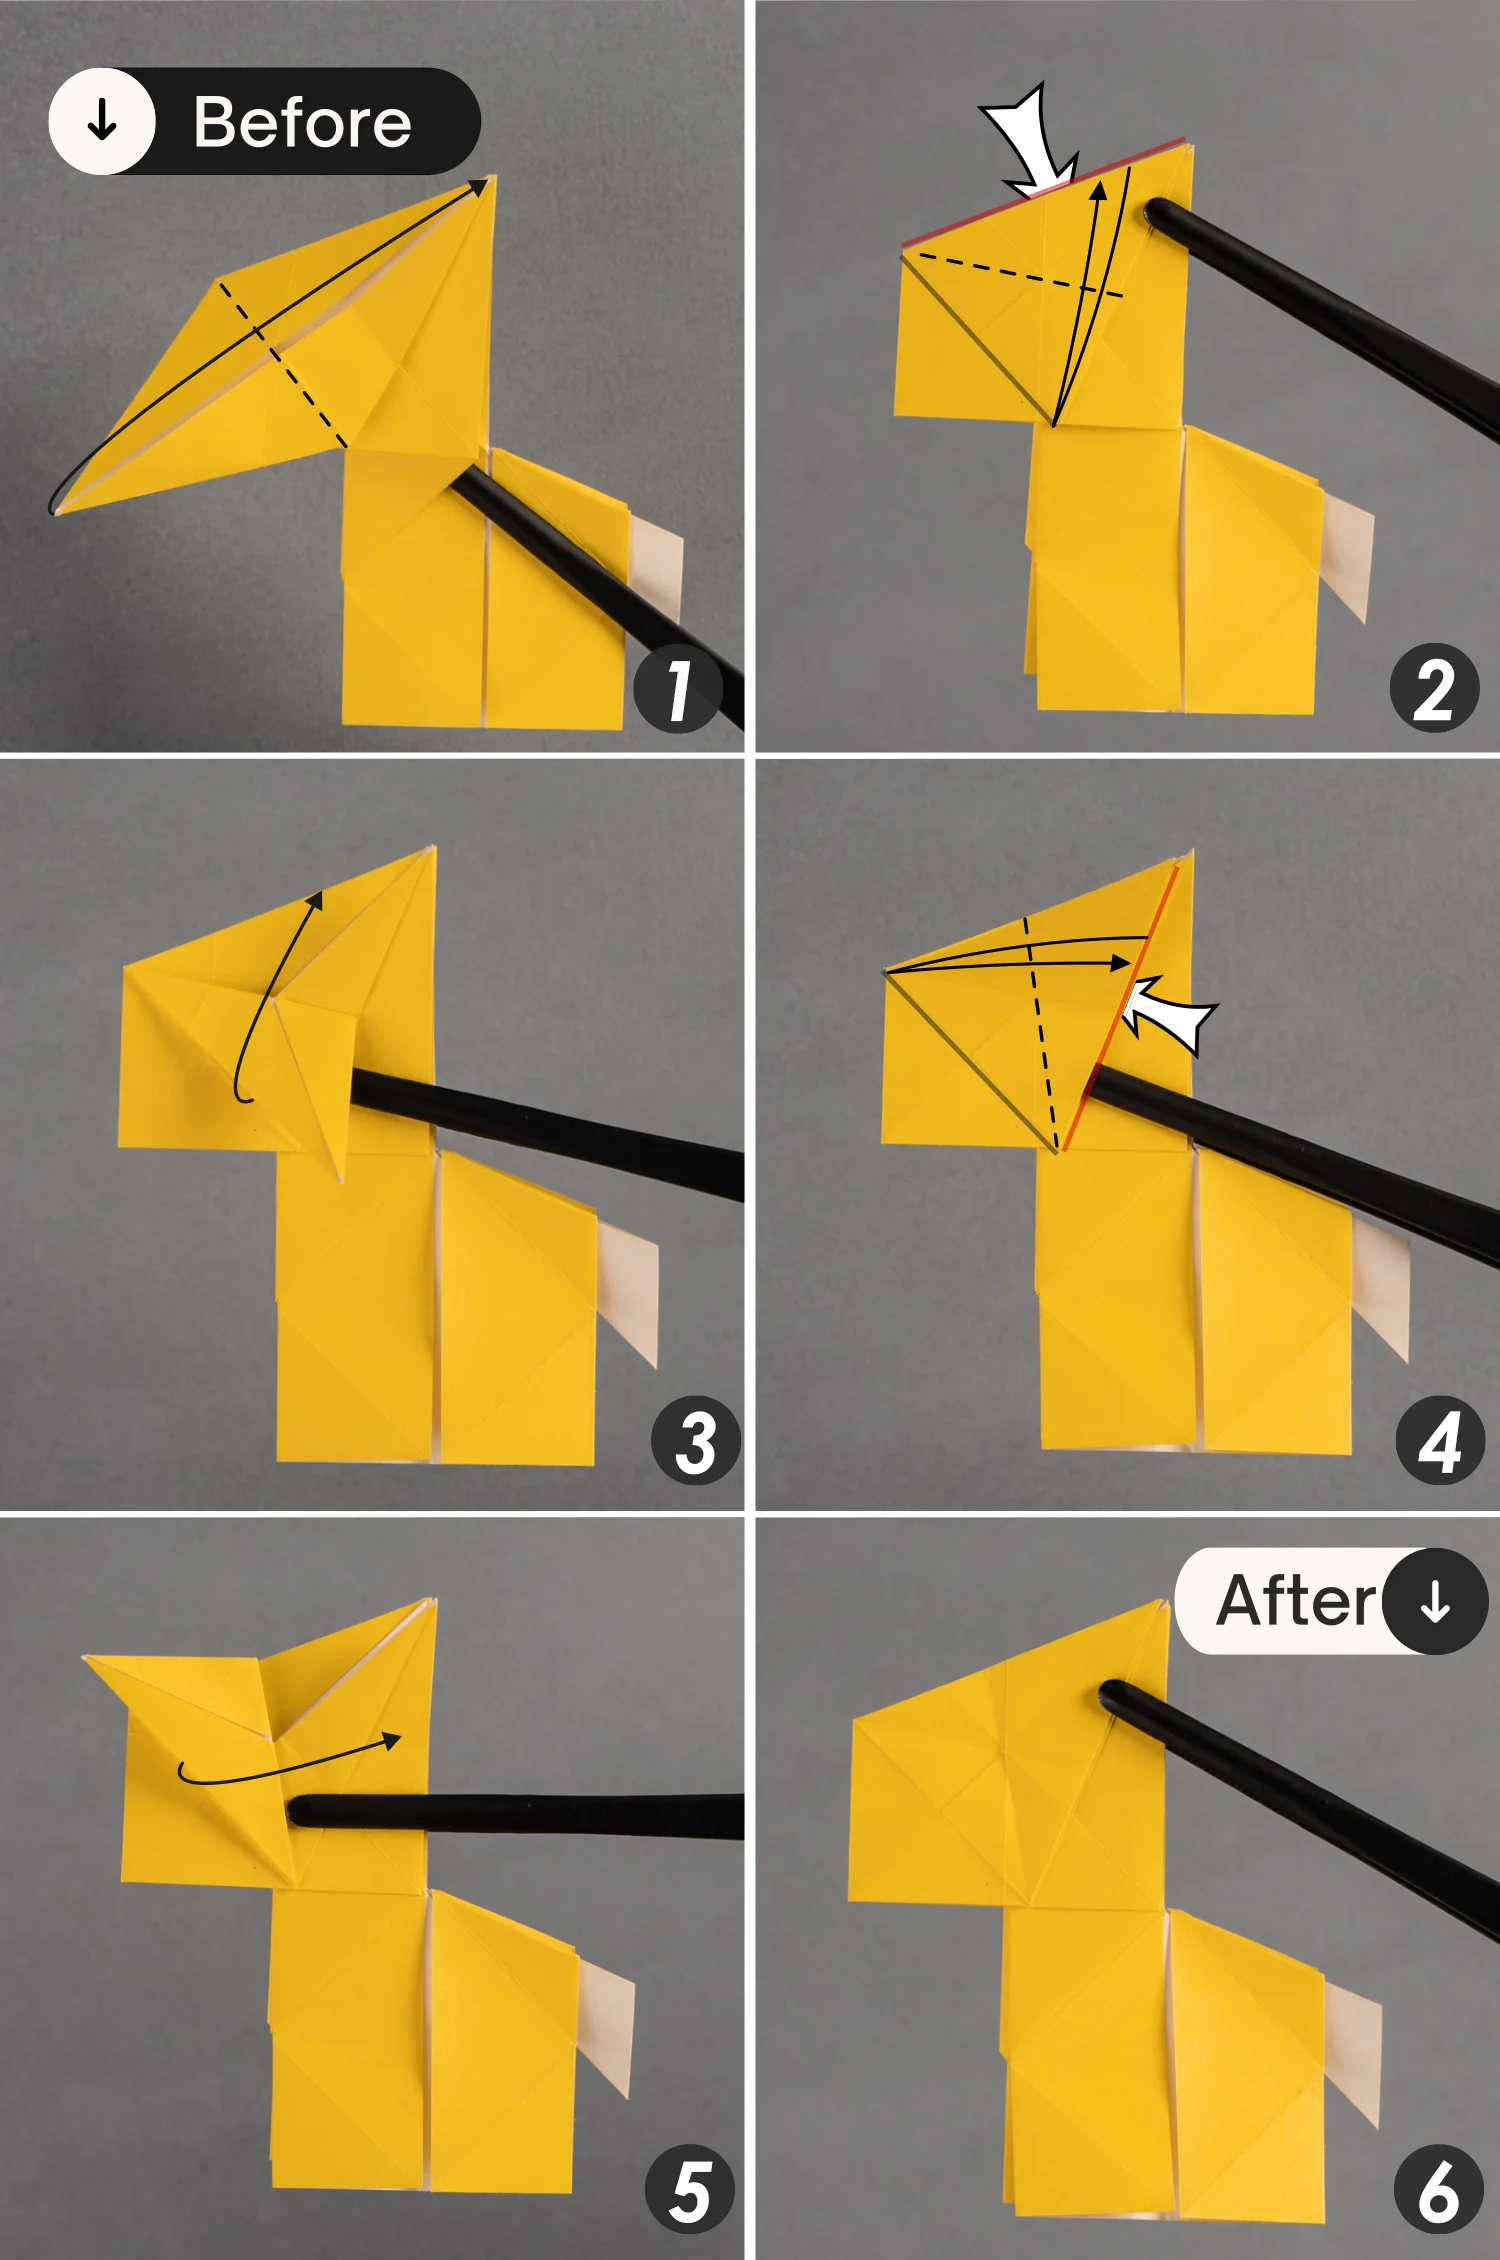
Step 30
Take the top right layer and fold its left edge toward the right side along the black dotted line [picture 1], and this will create an opening pocket, then press down the top point along the black dotted line [picture 2].
Next, fold down the edge indicated by the red line to align with the edge indicated by the black line [picture 3].
Step 31
Rotate the paper 180 degrees from left to right to turn over the paper, then just as you did in the previous step, fold the right edge of the top left layer toward the left side along the black dotted line [picture 1 and 2].
Then, press down the top point of this opening pocket, flatten the fold, and fold the edge indicated by the red line to align with the edge indicated by the black line [pictures 3 and 4].
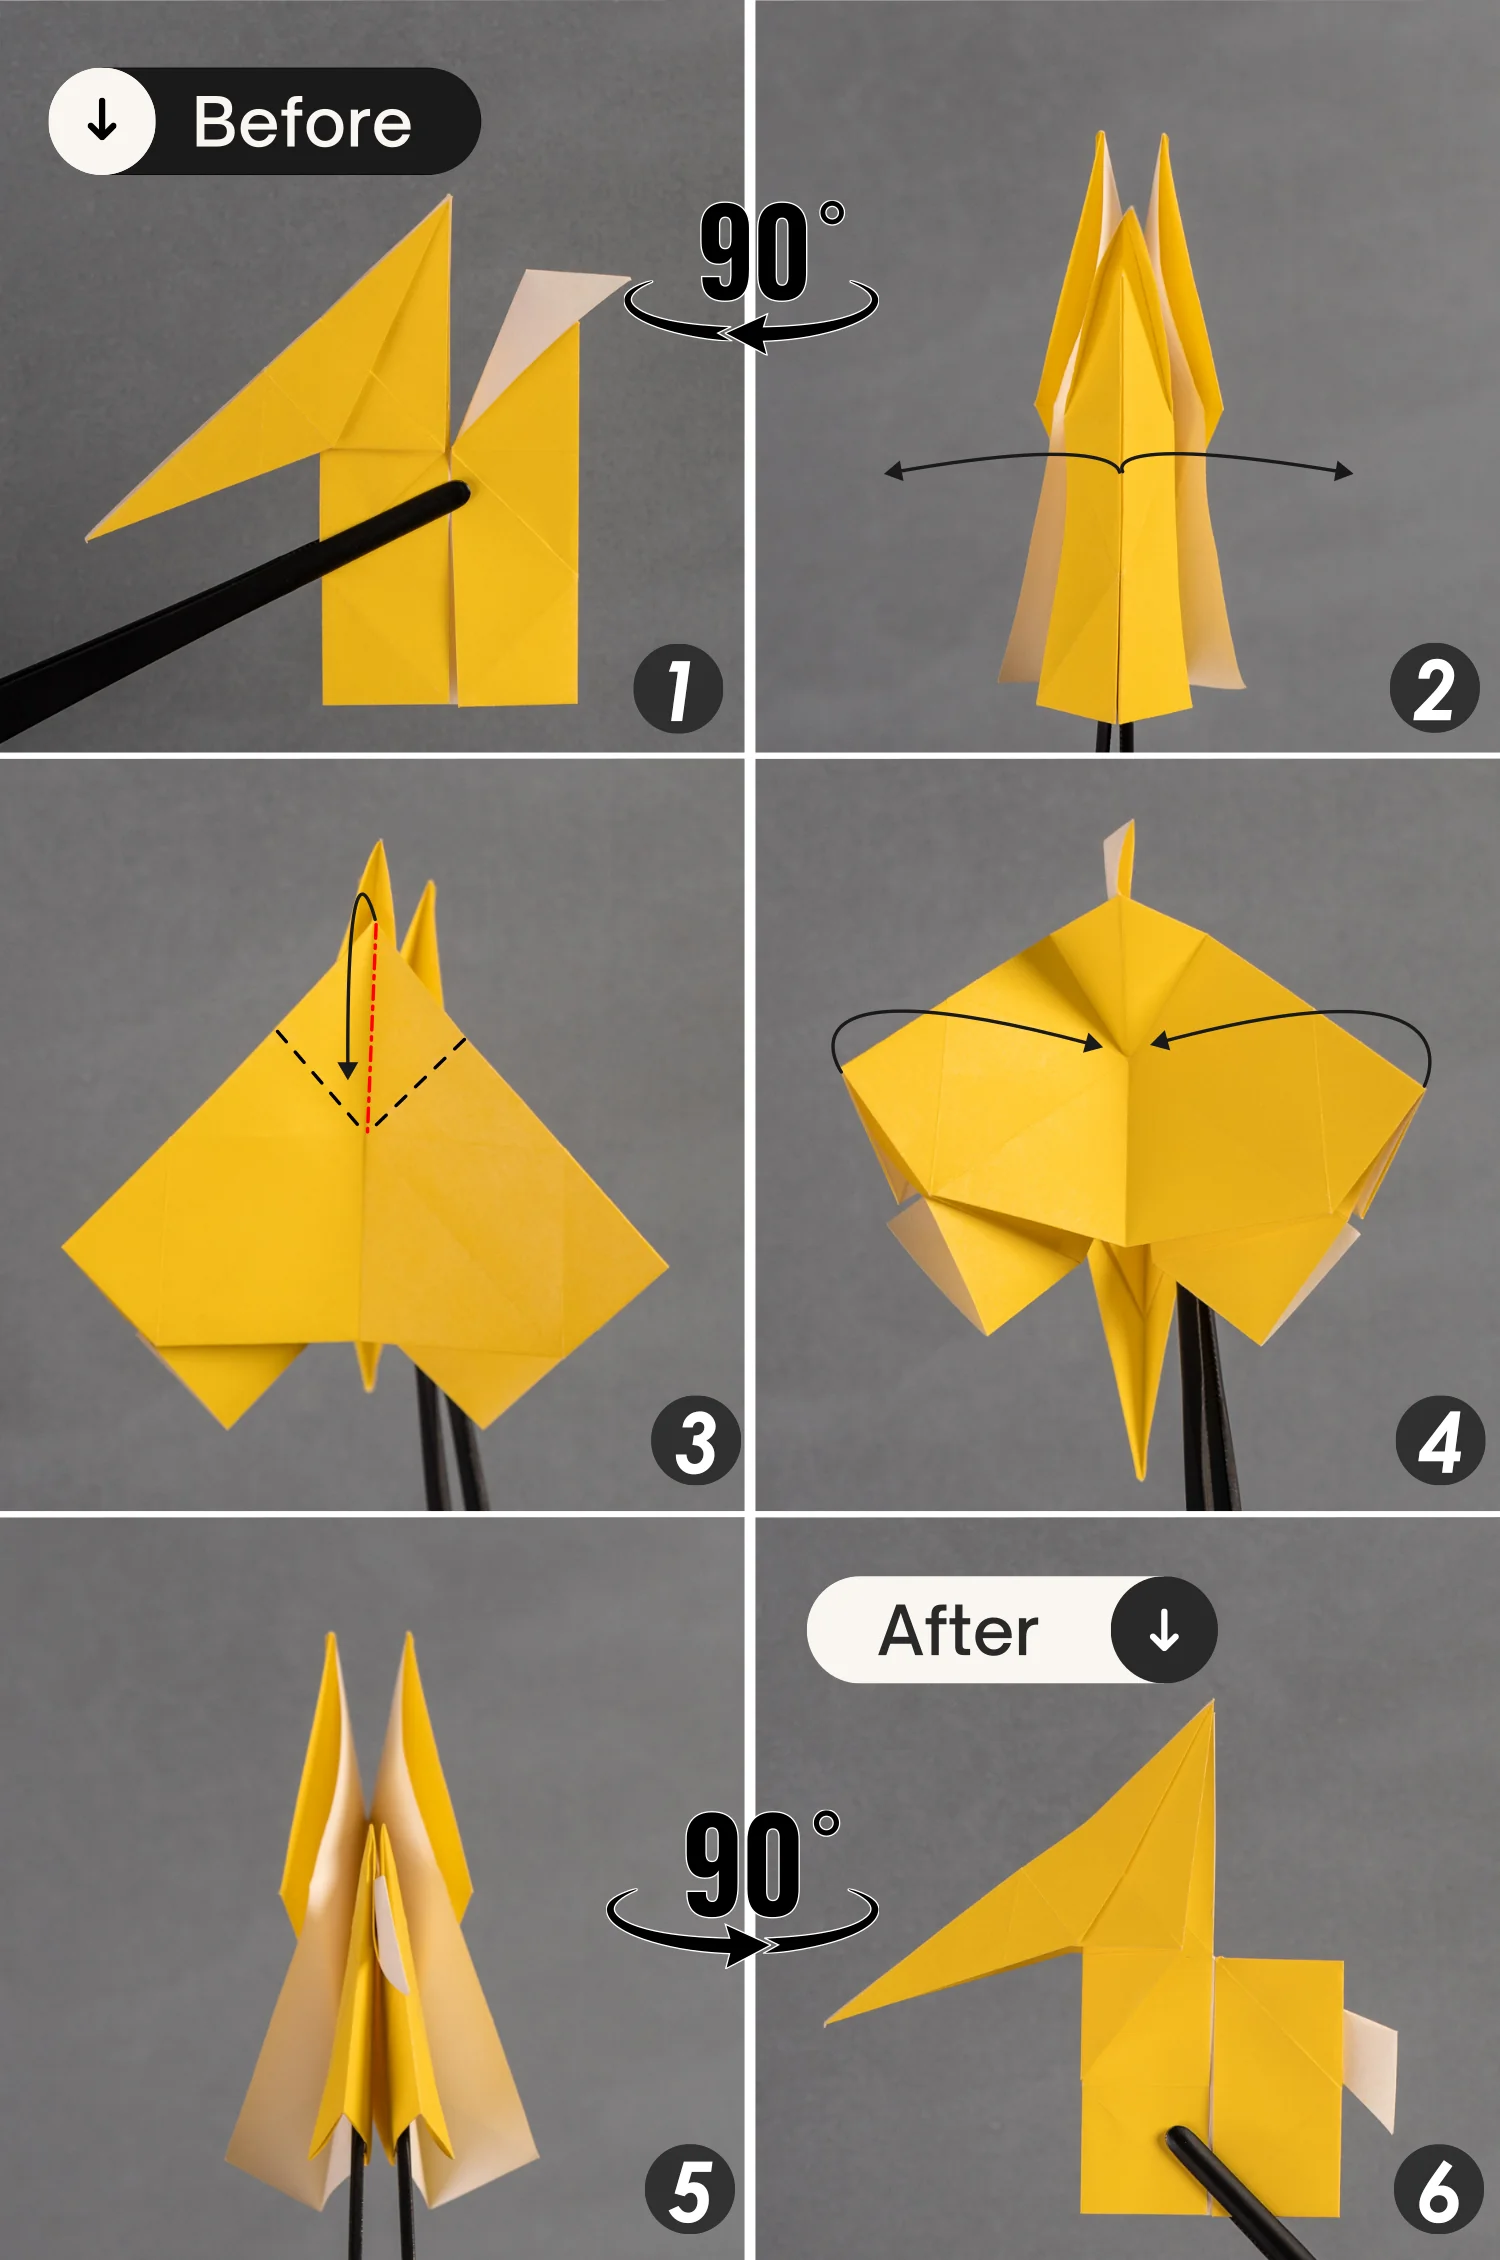
Step 32
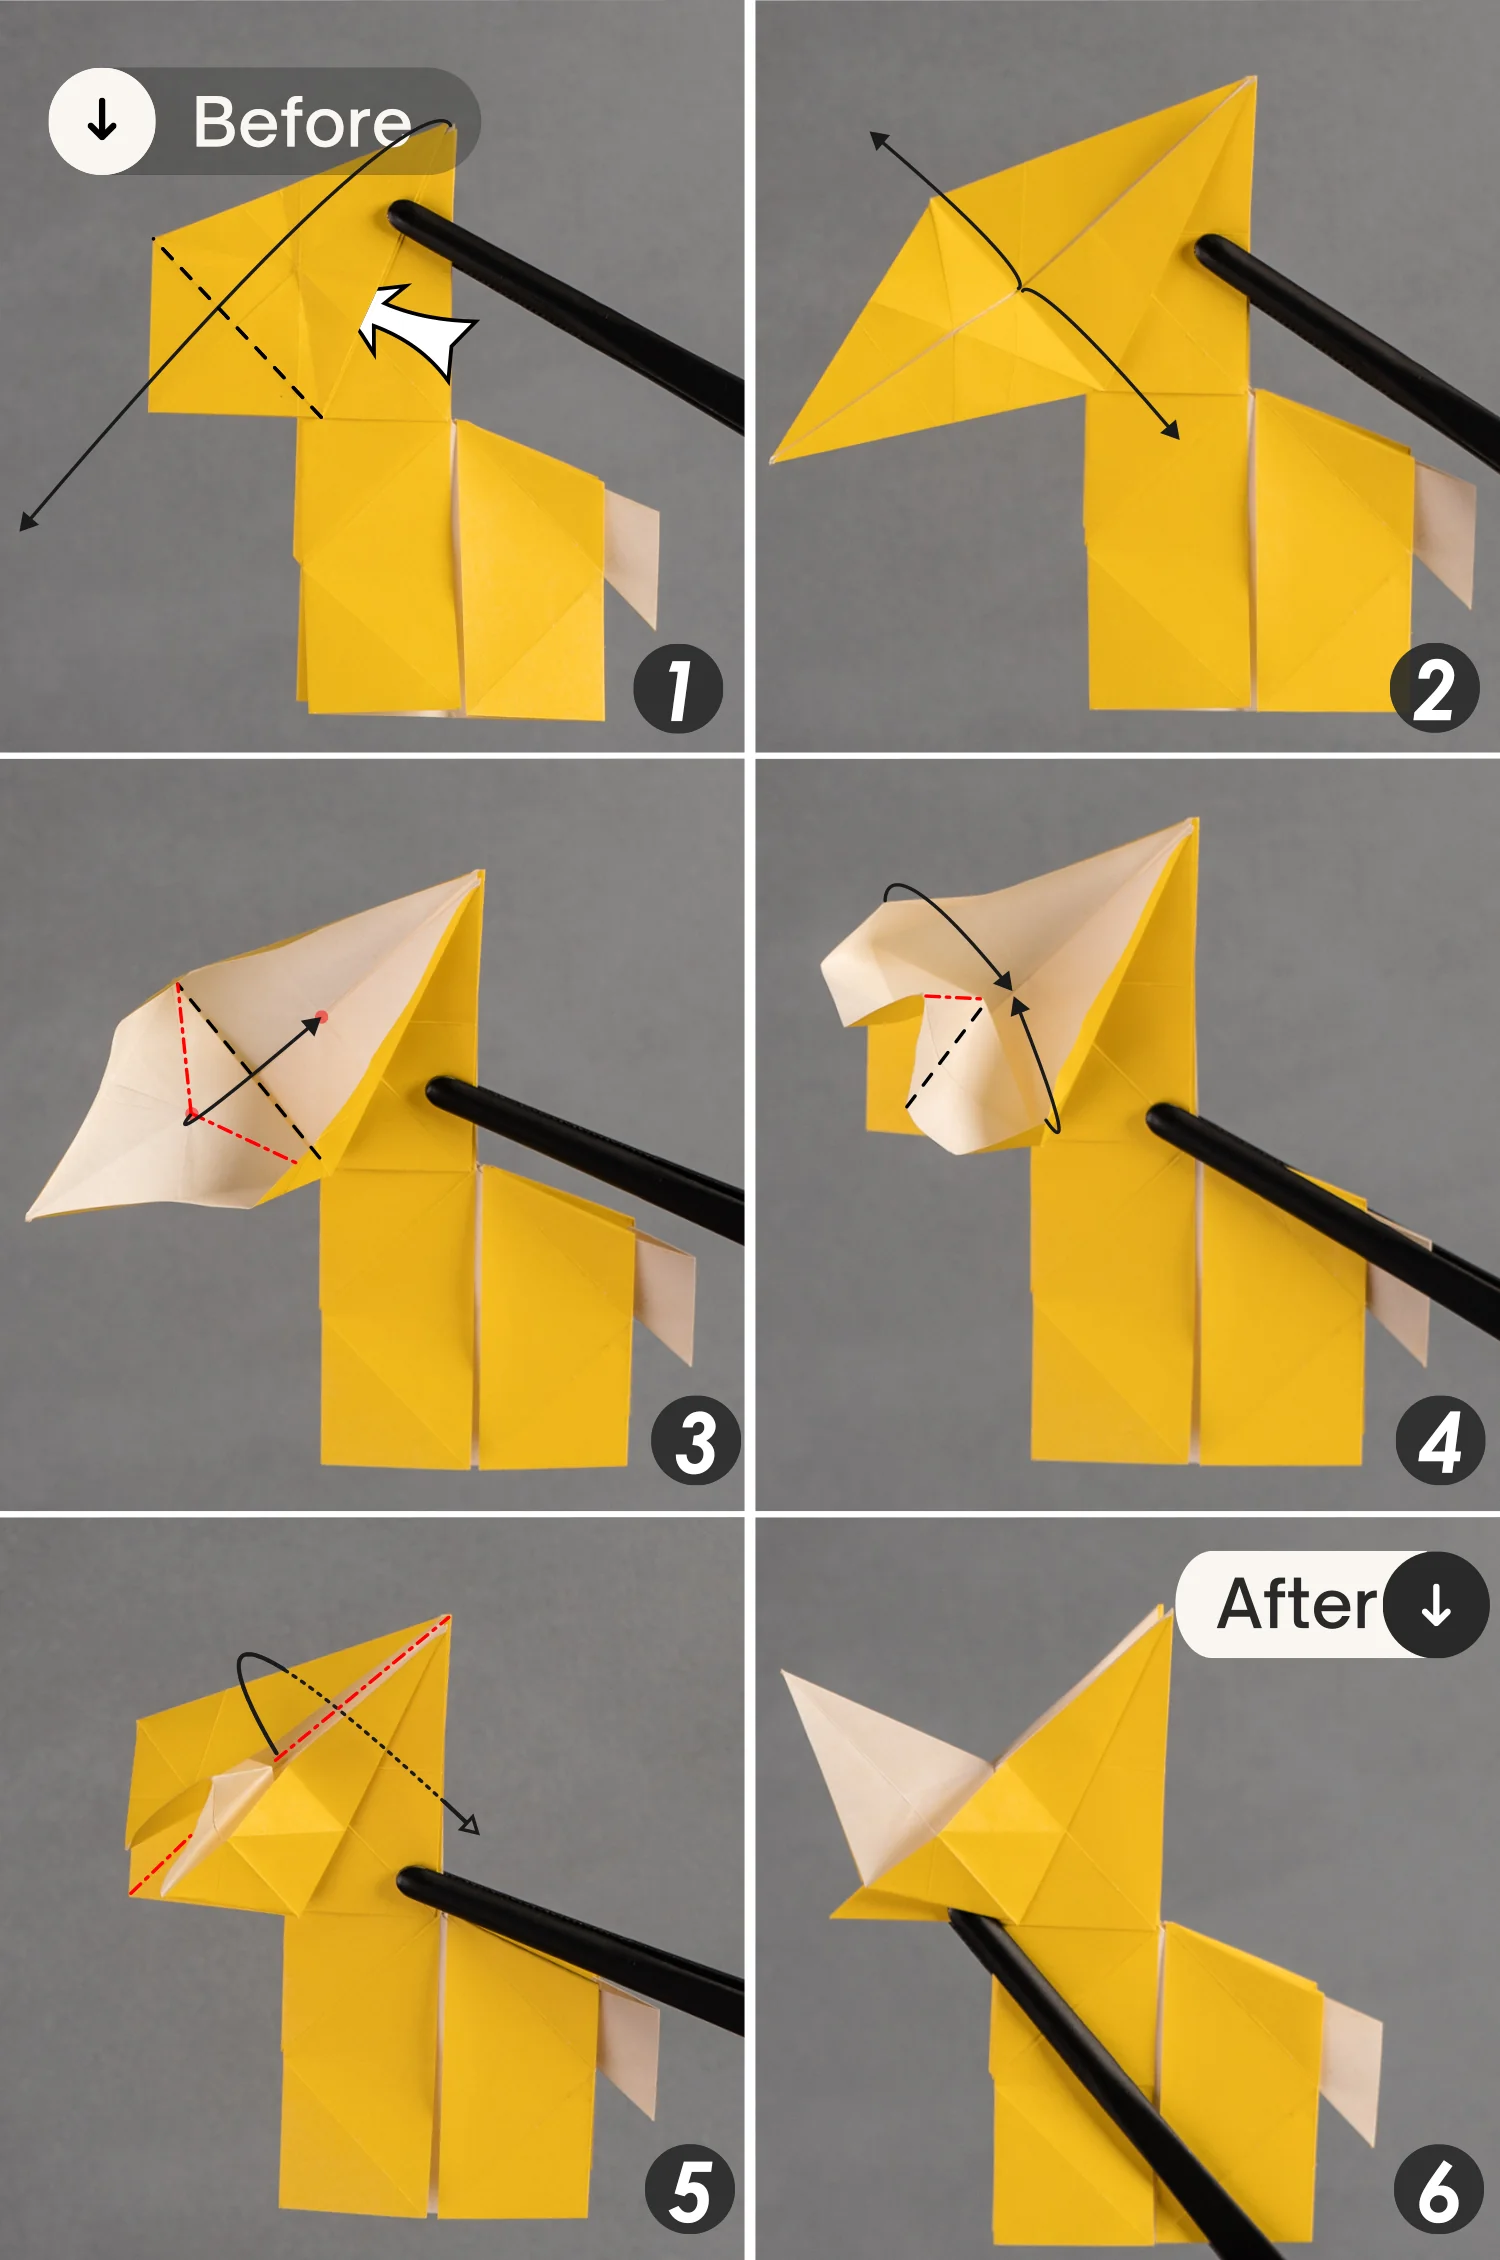
As the following picture shows, fold this corner to the right along the black dotted line, crease it well, and unfold it.
Step 33
View the paper from the top left side, then open the corner you folded in the previous step [pictures 1 and 2].
Then mountain fold the creases you created in the previous step, indicated by the red dotted lines, and valley fold the middle crease, indicated by the black dotted line, then close this opening and flatten the fold [pictures 3 and 4].
Finally, view the paper from the side you started with.
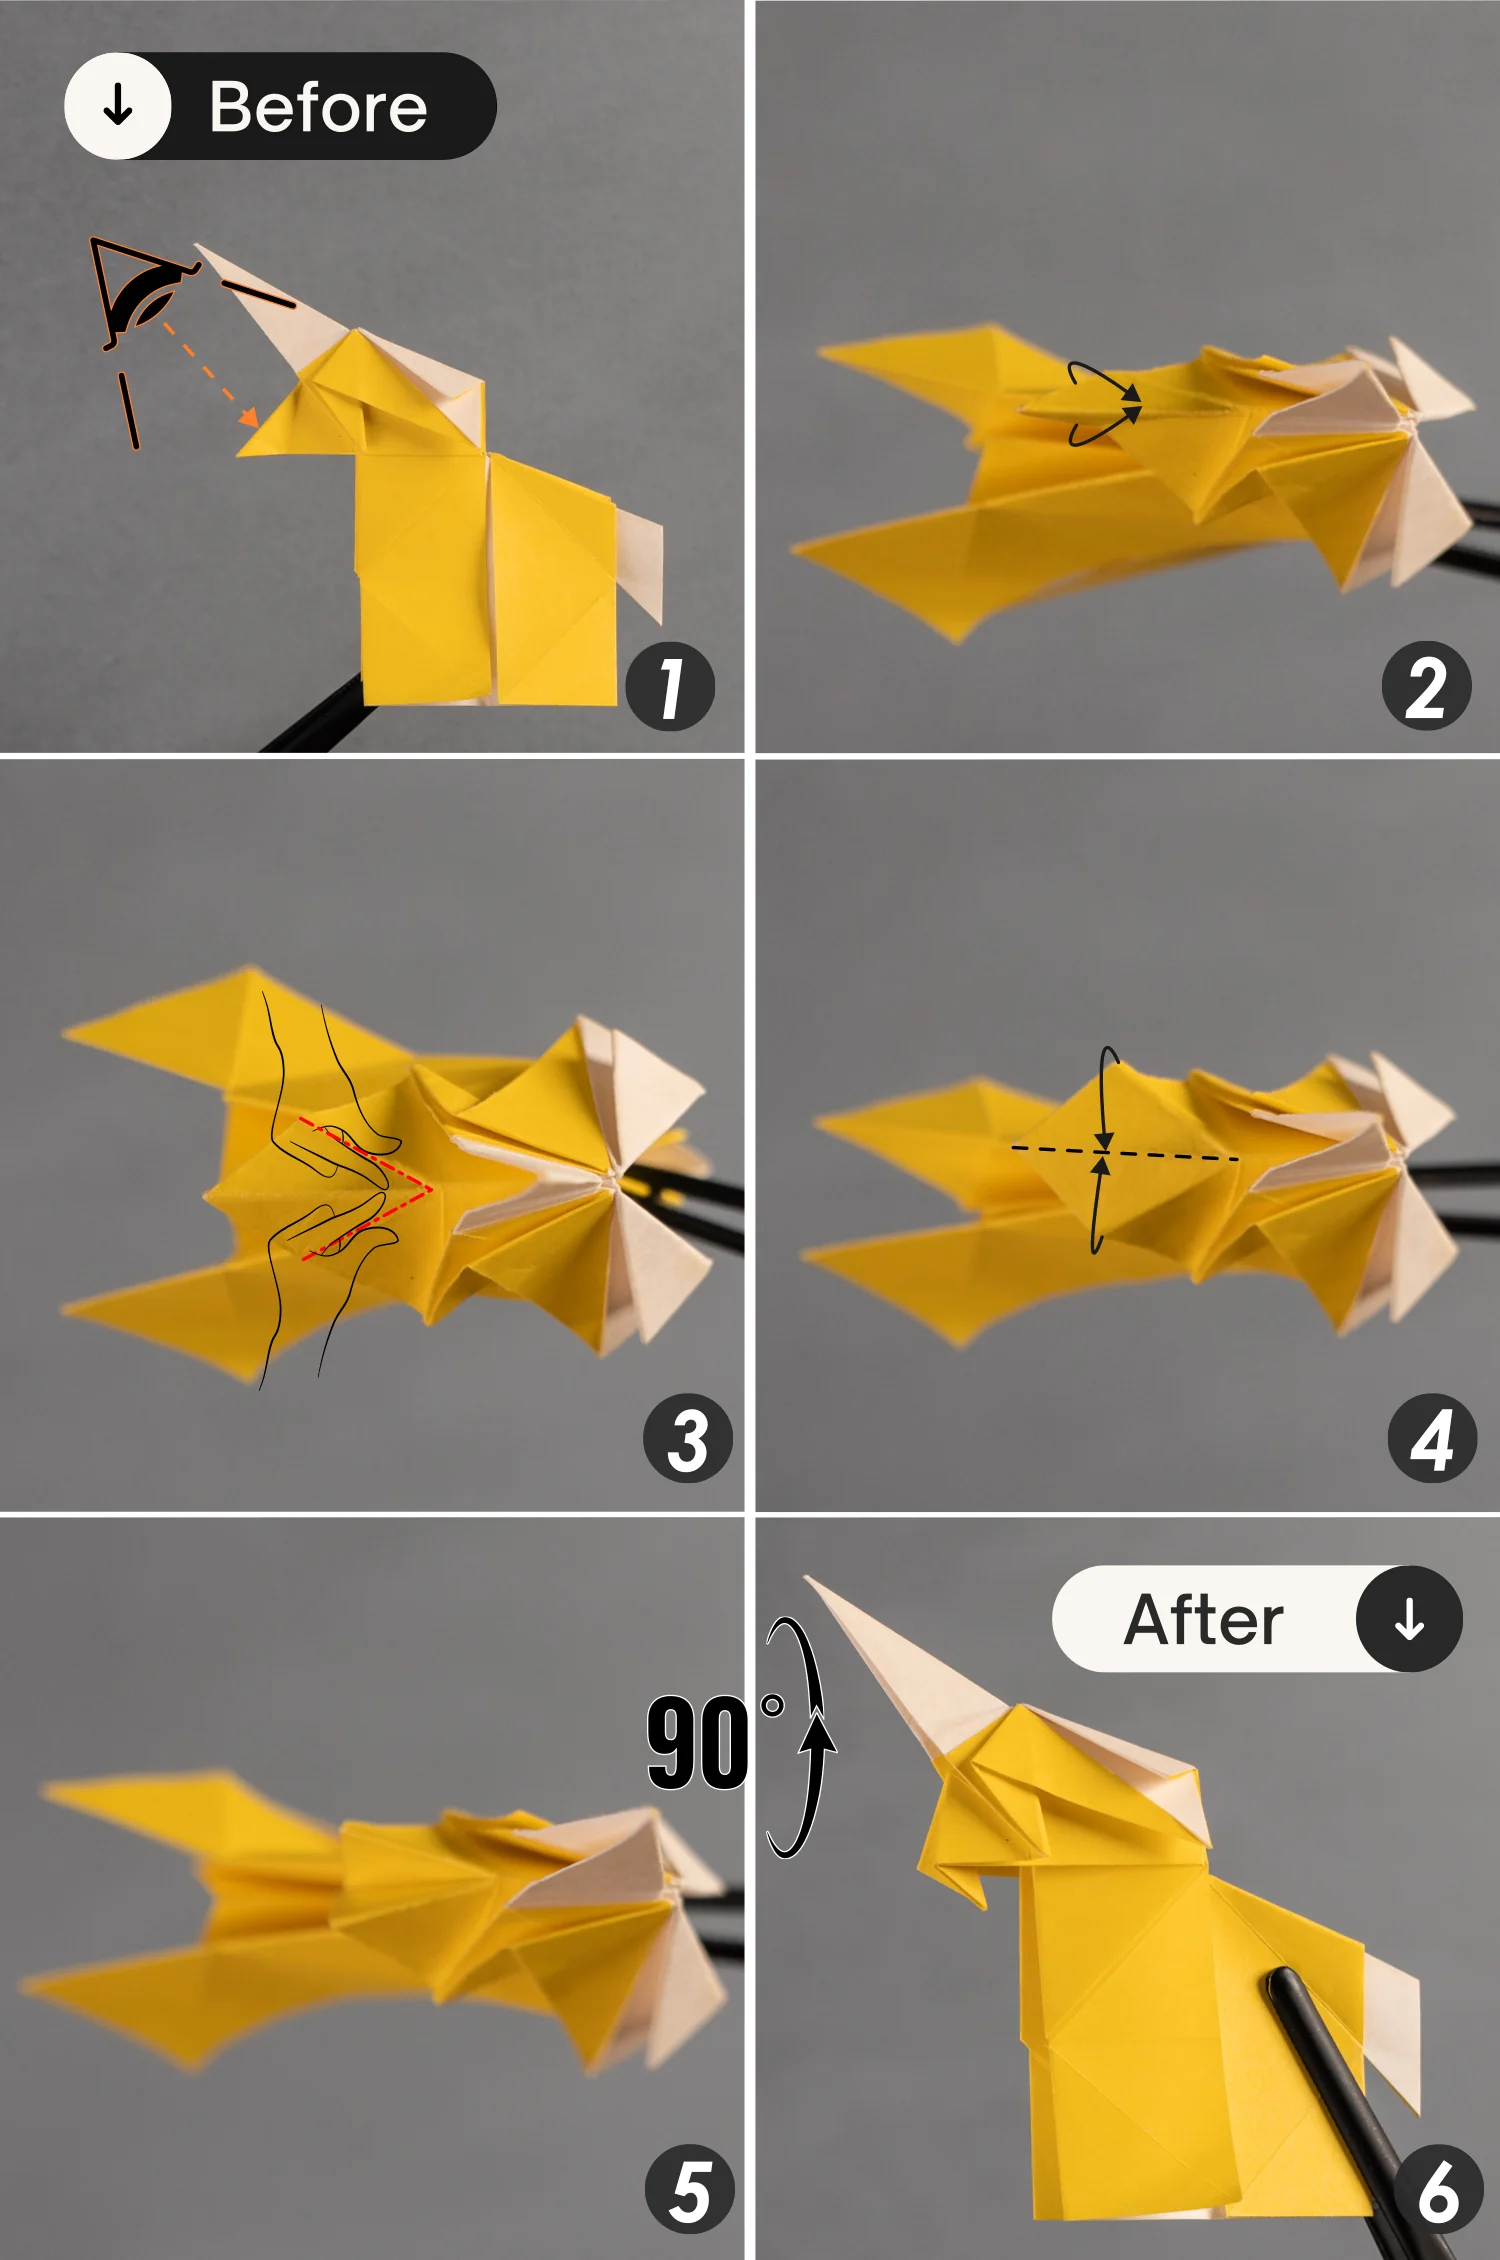
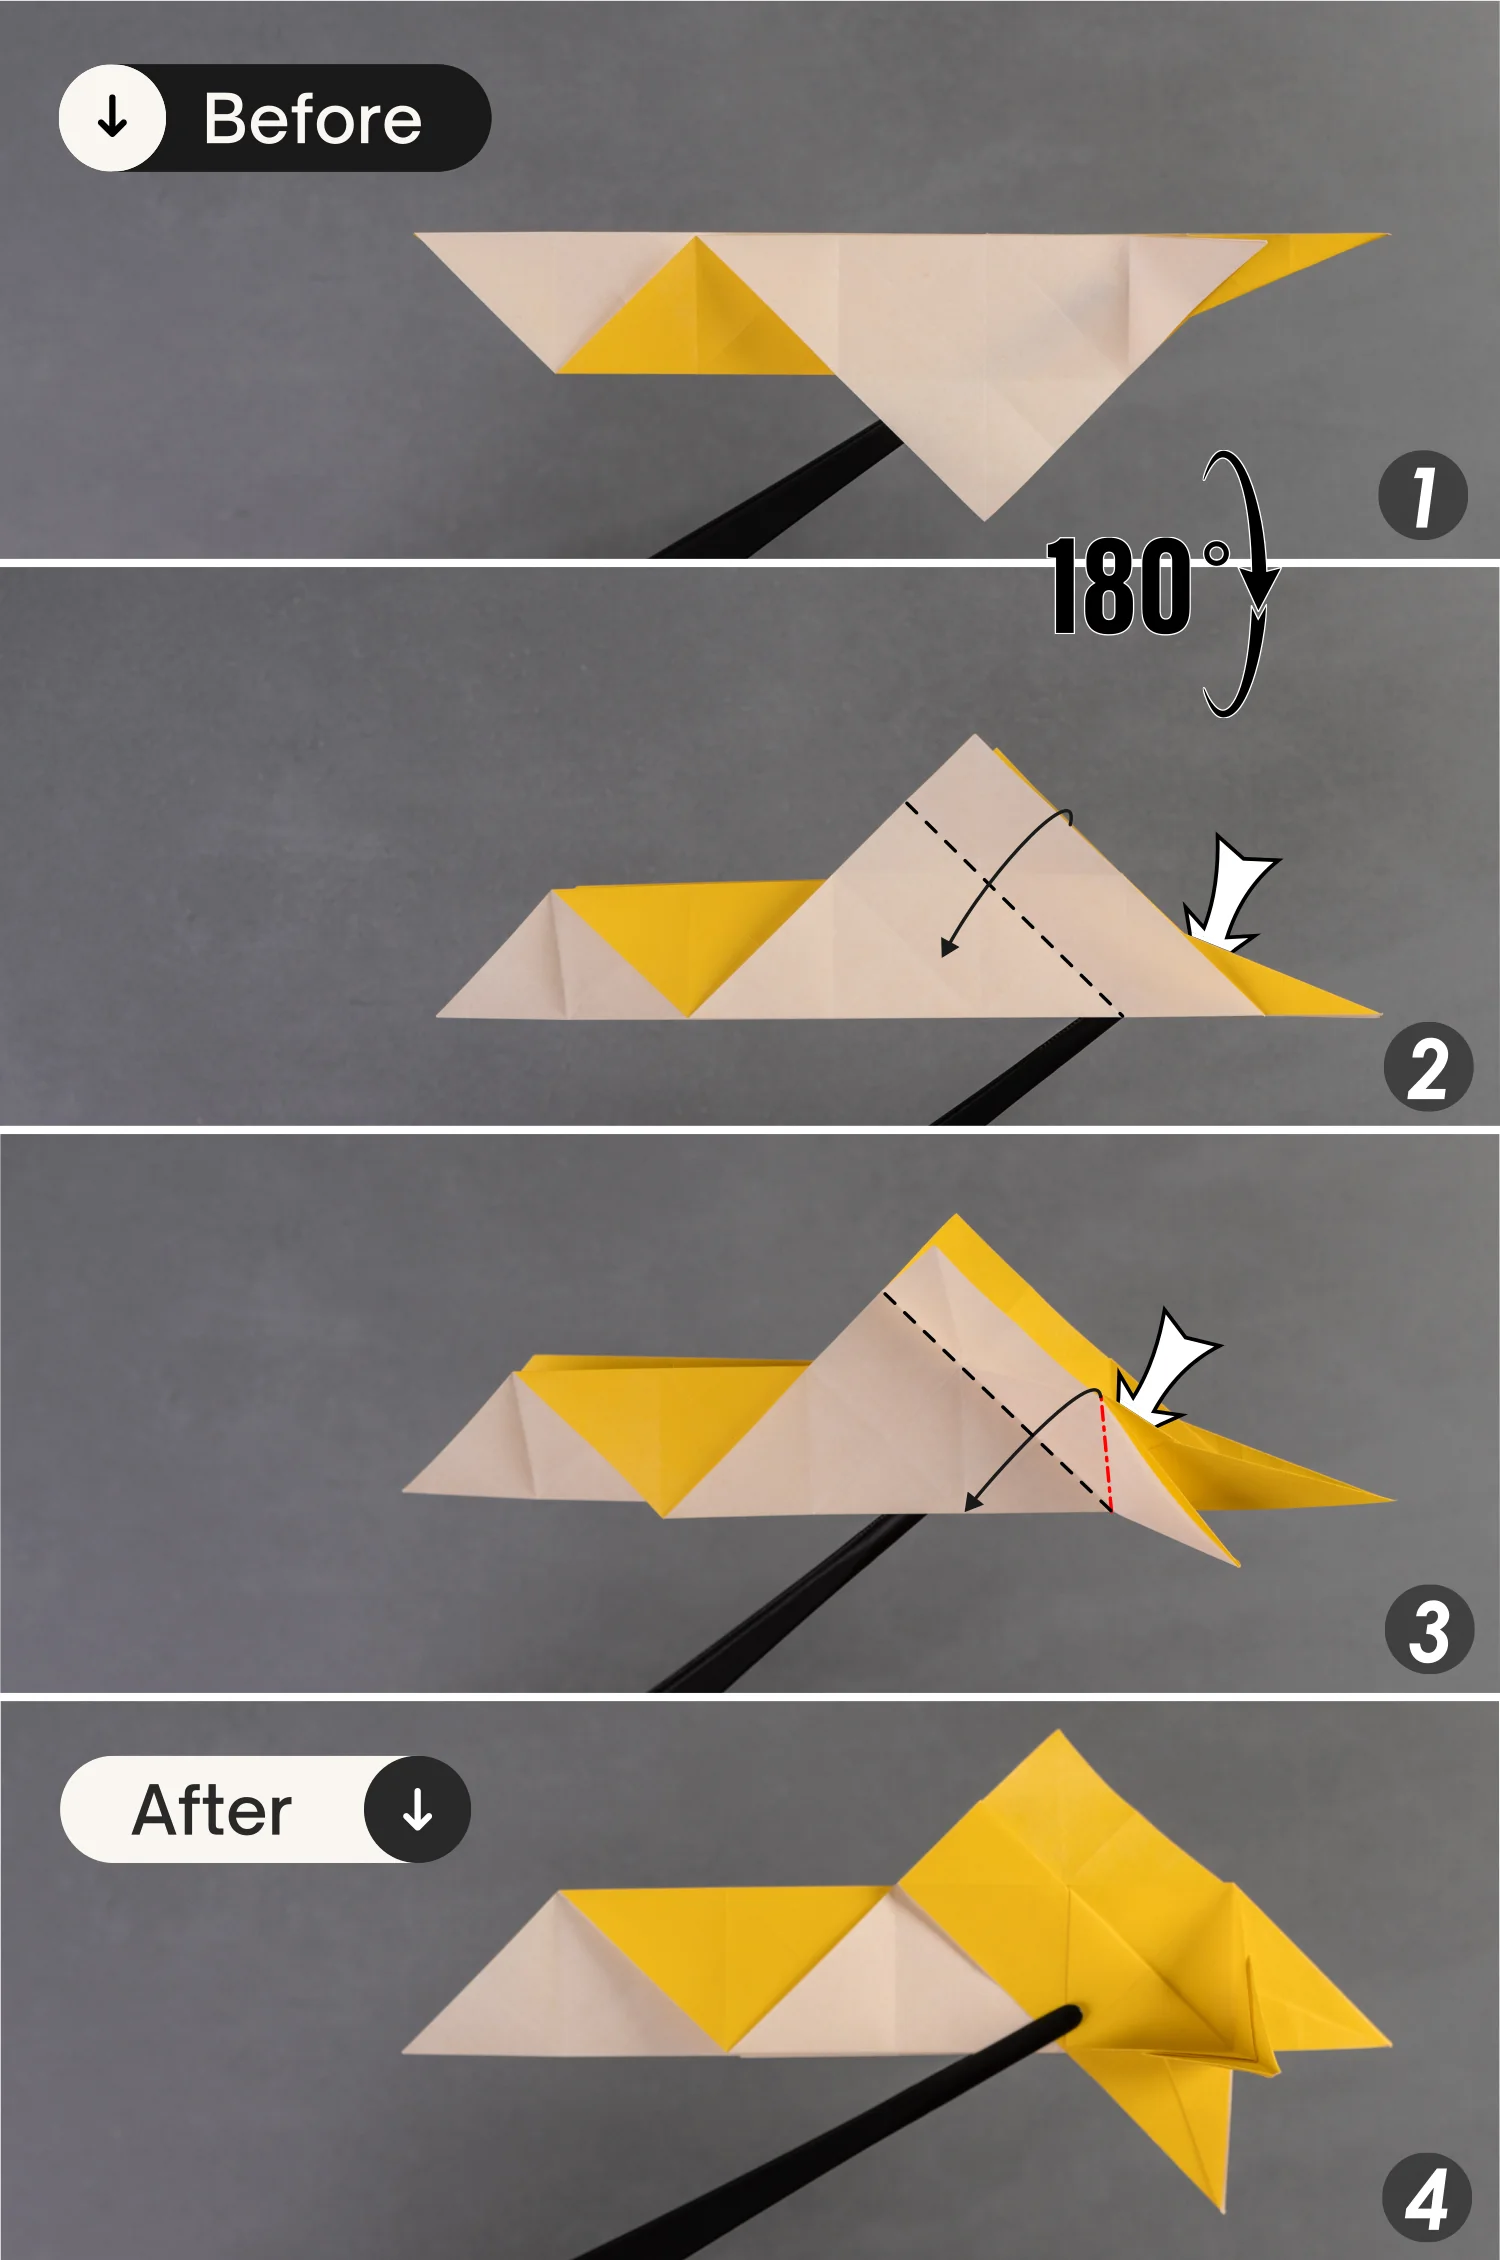
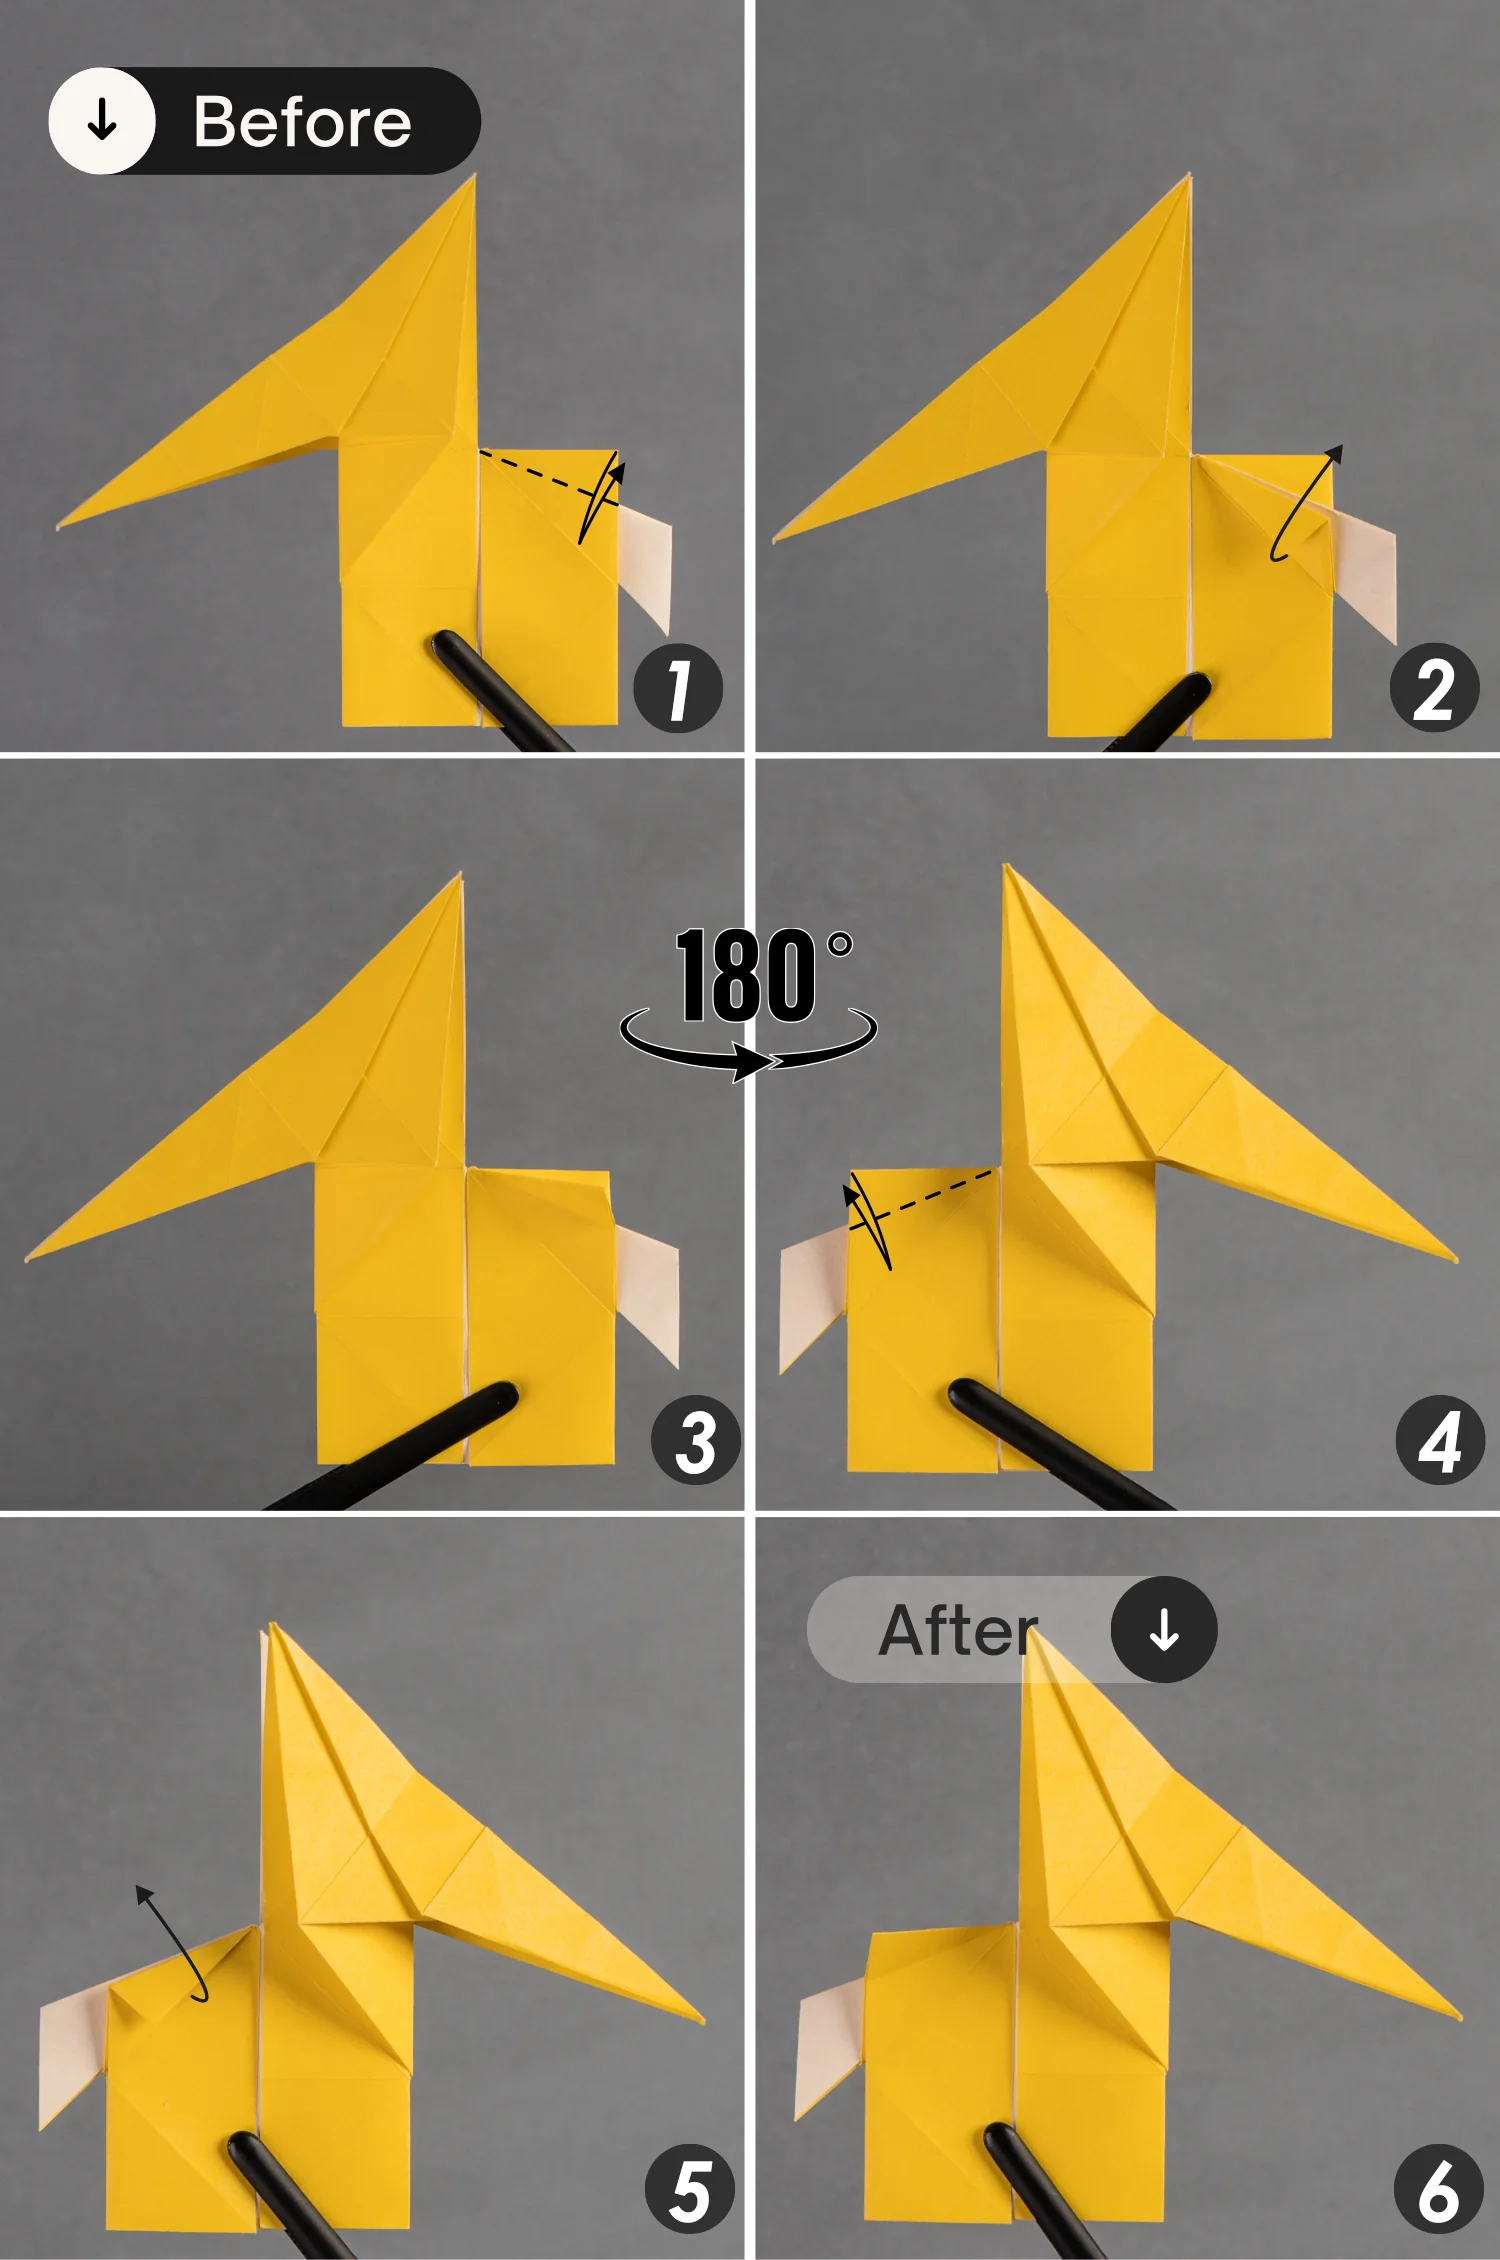
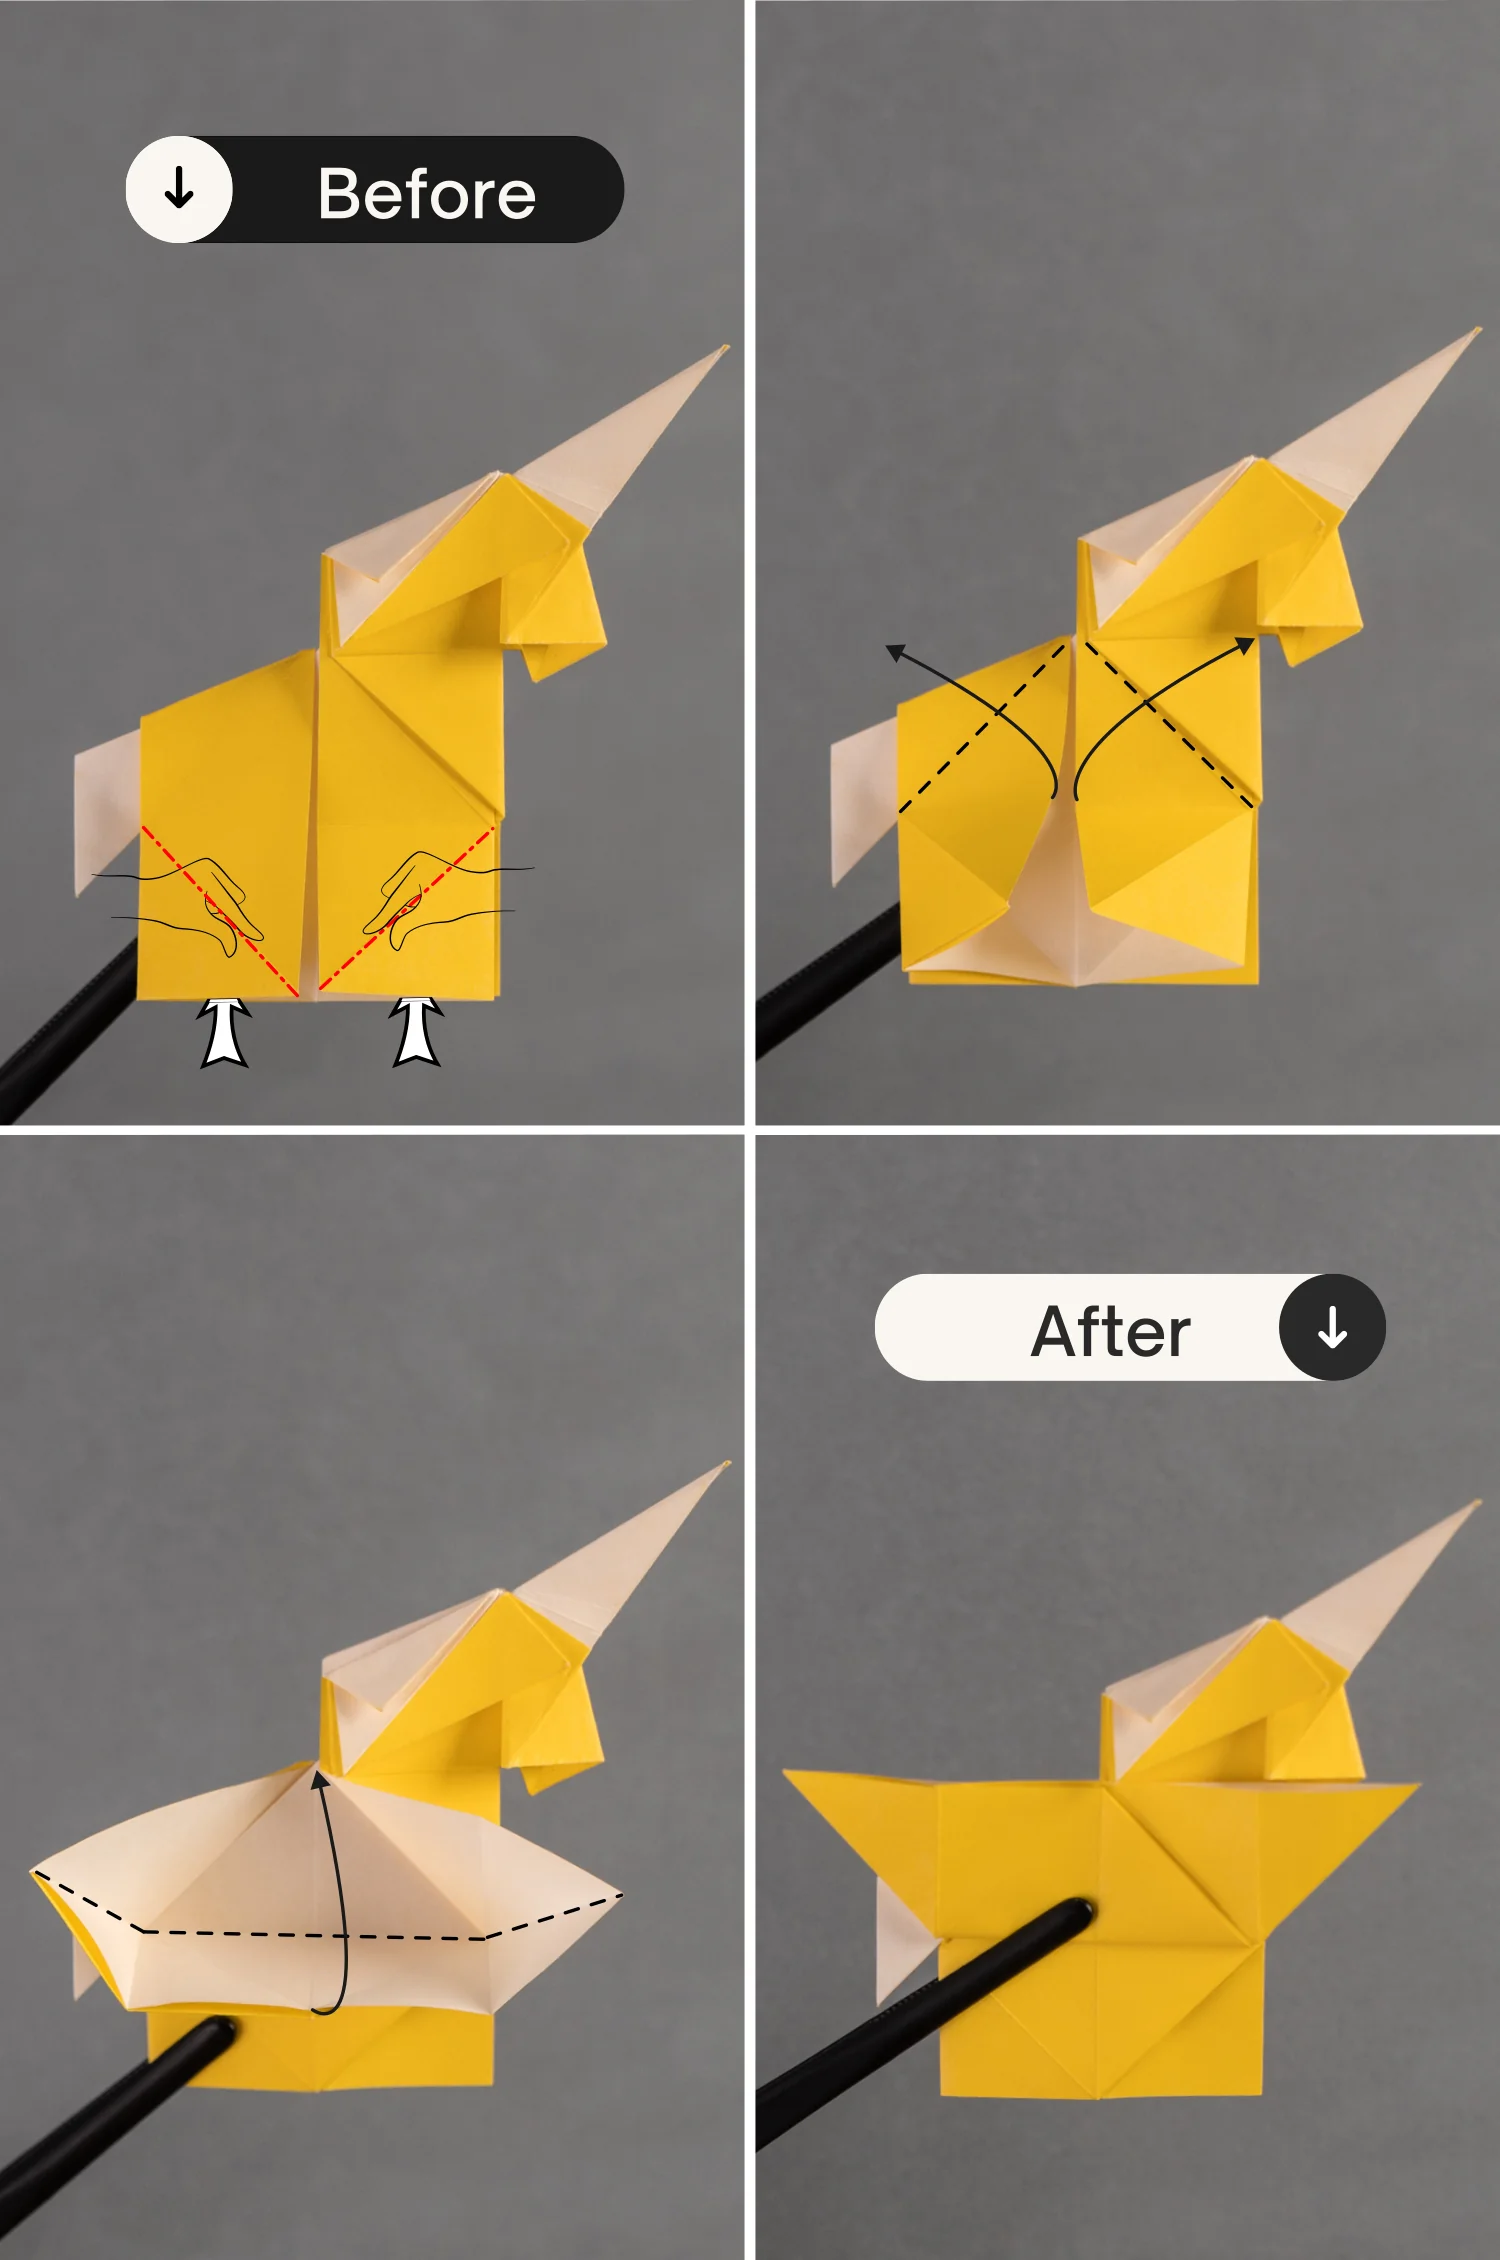
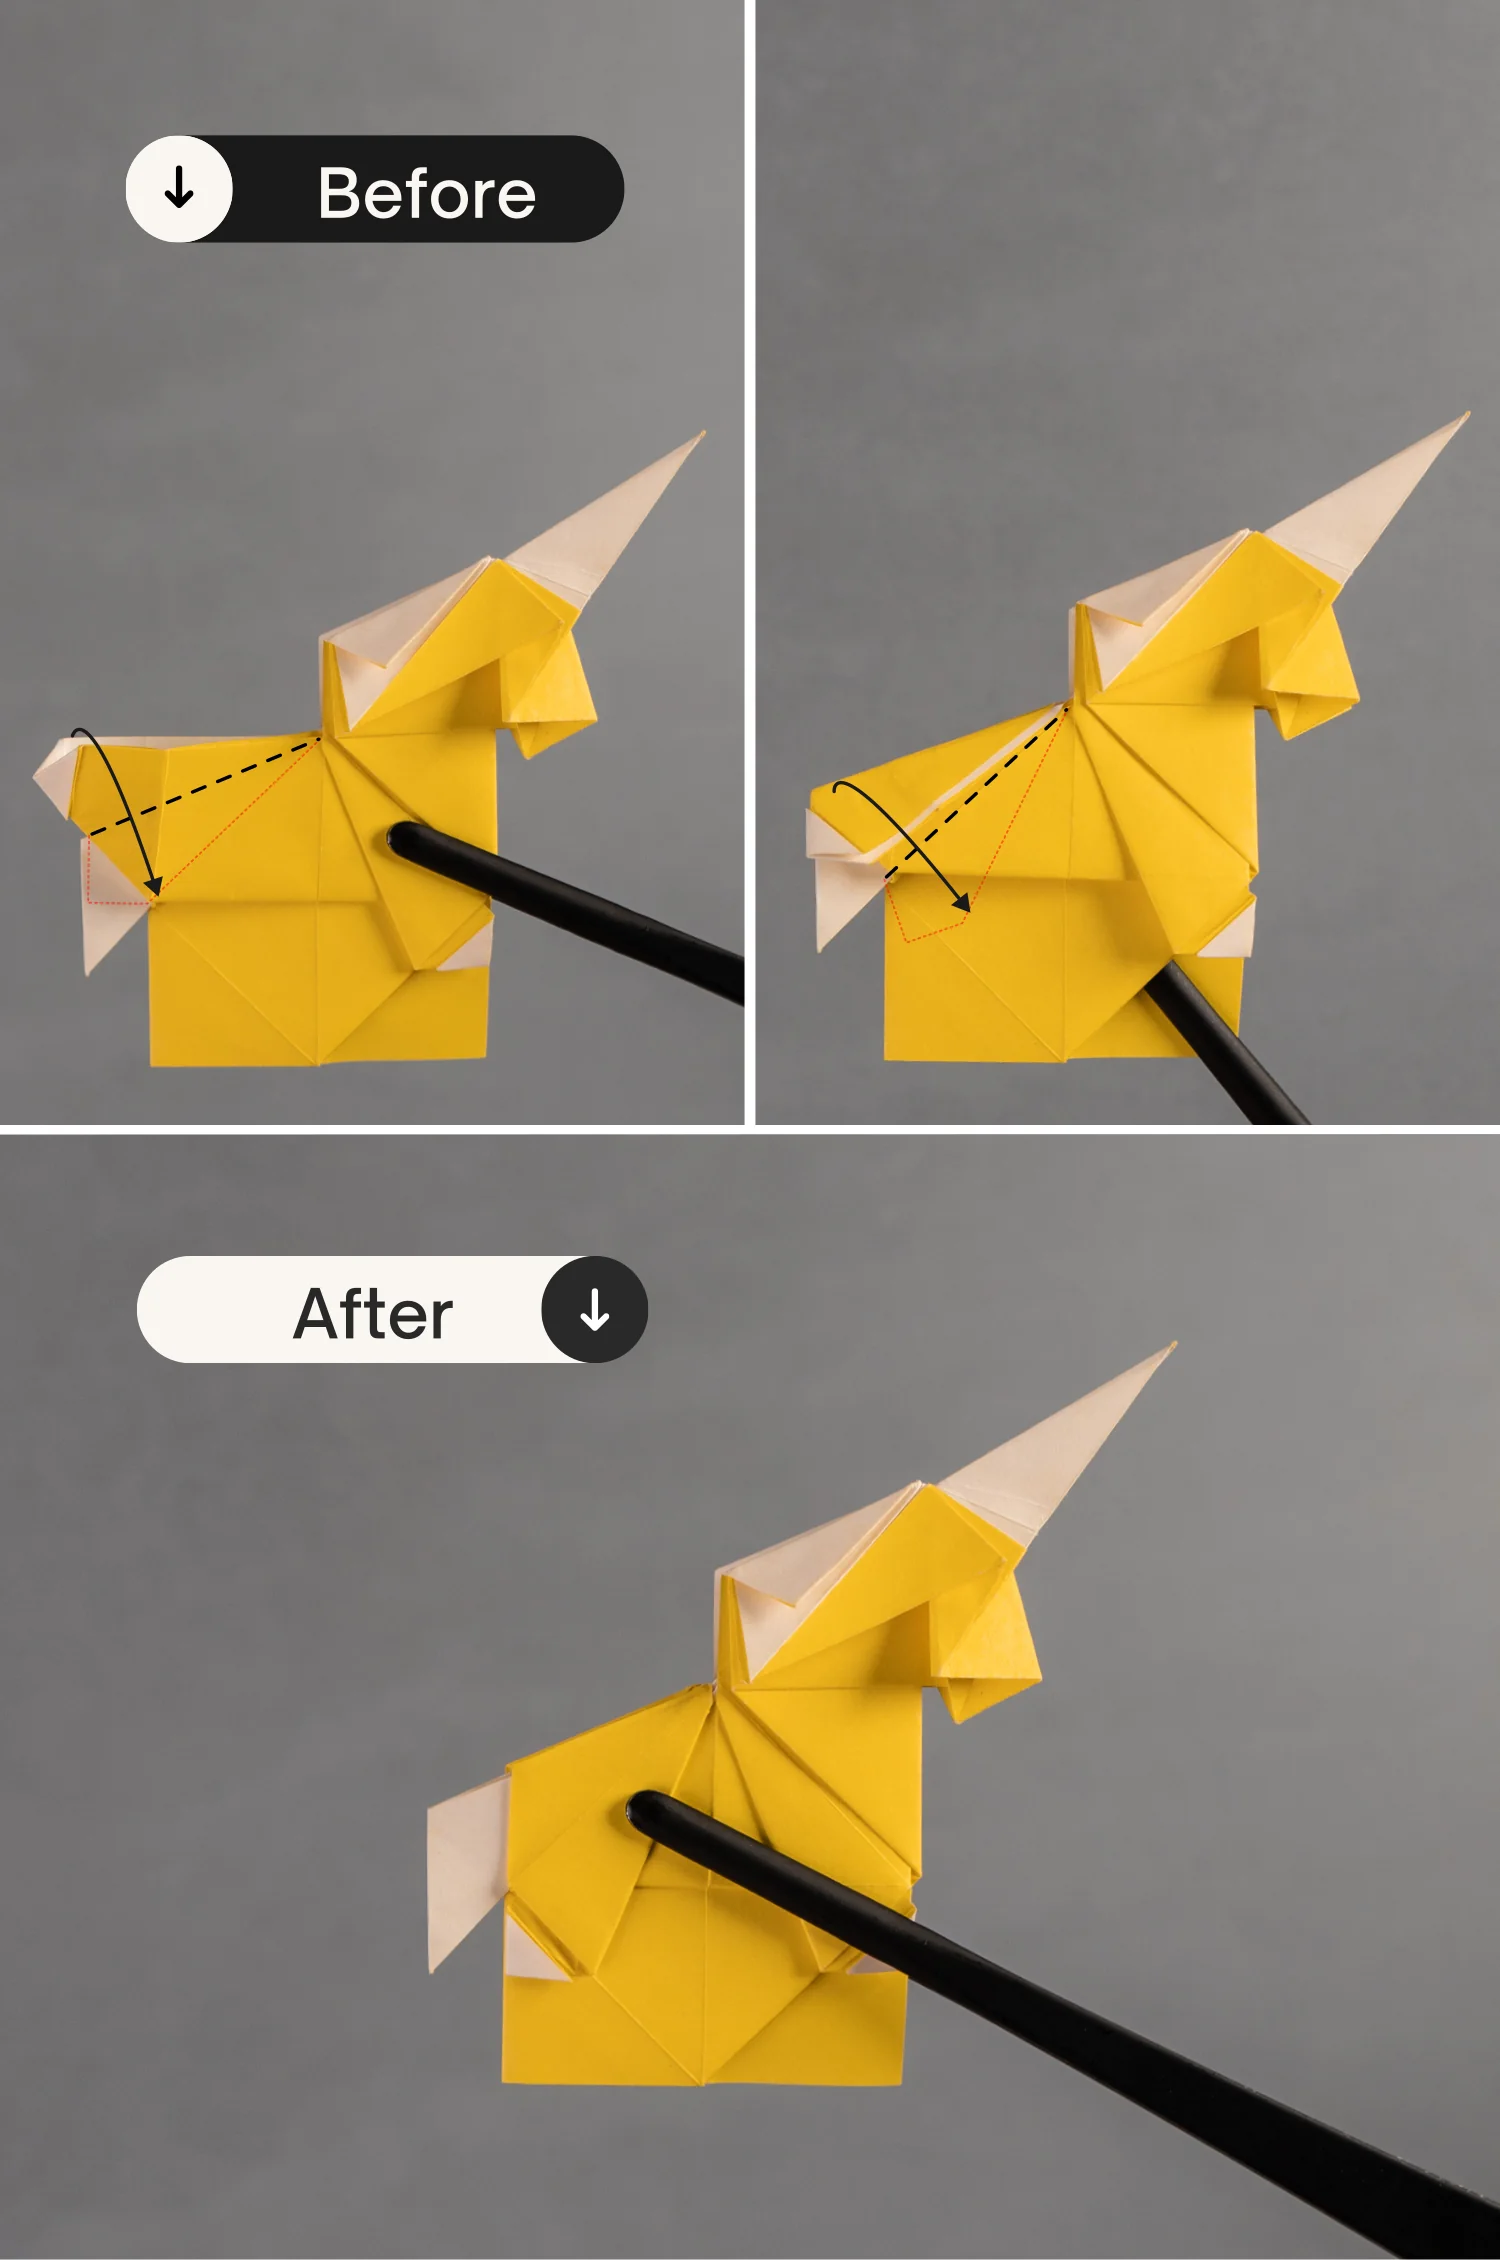
Step 34
Lift this top left layer, and we can see here a small layer that is under this layer, then fold this layer to the right side along the black dotted line [pictures 1 to 3].
Then, flip the paper over from left to right, similarly, lift the top right layer and fold the small layer underneath it to the left side.
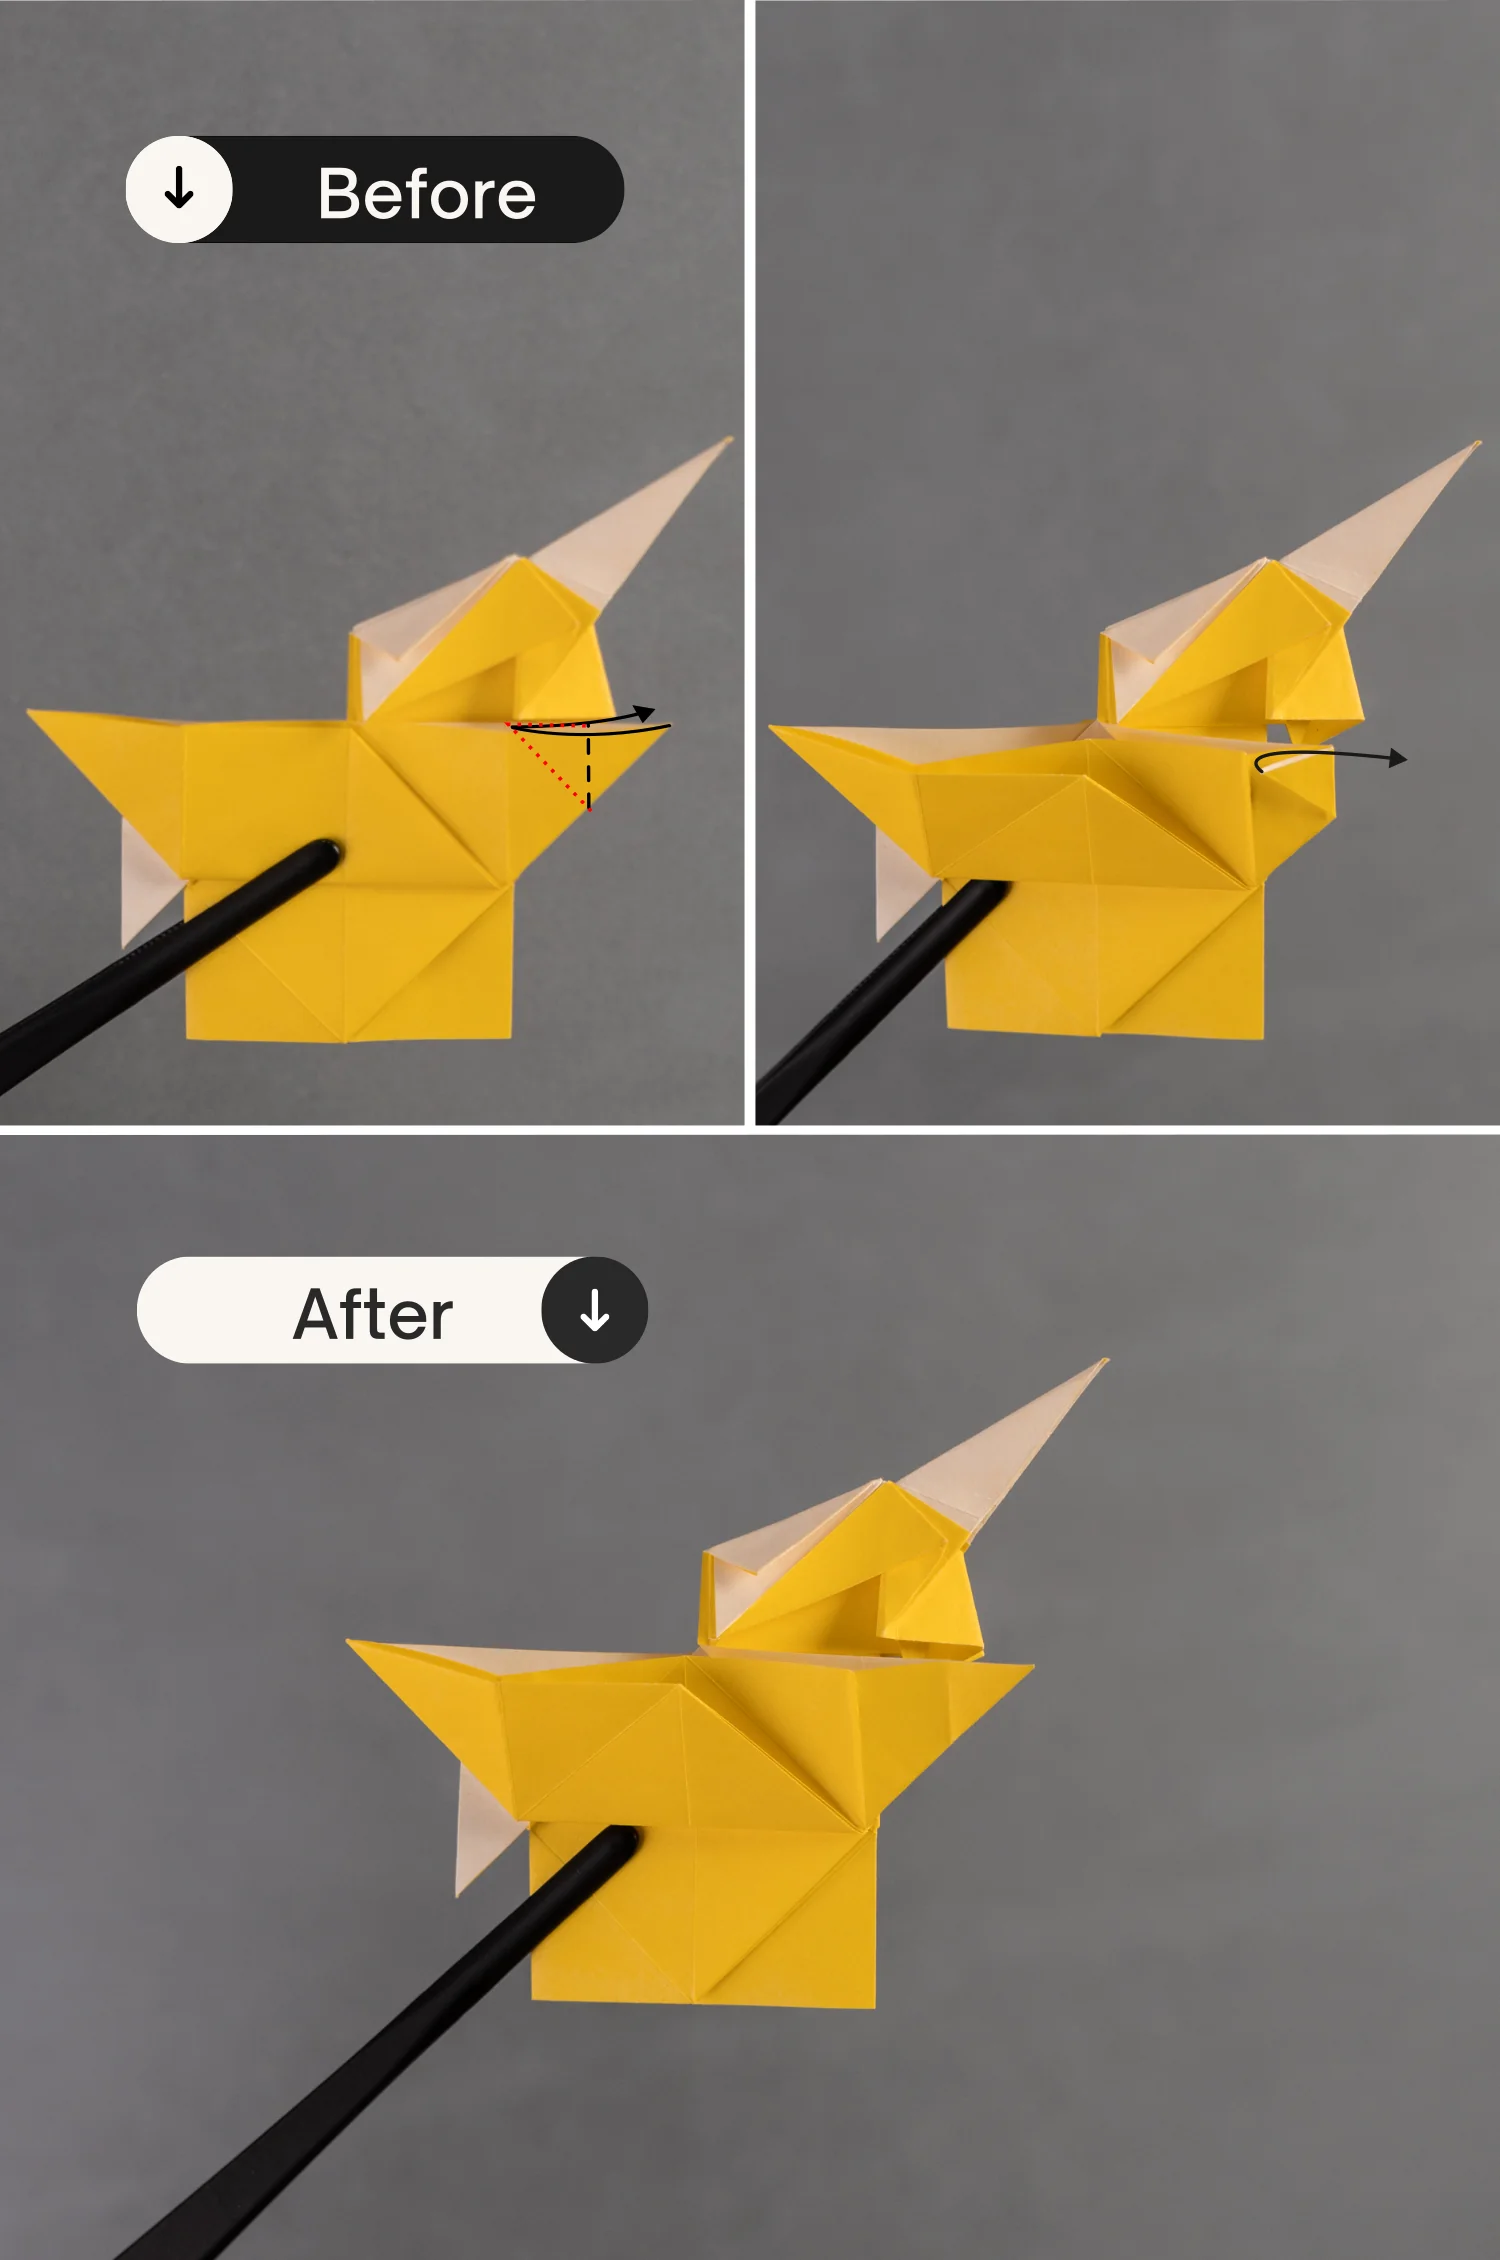
Step 35
Mountain fold the two creases indicated by the red dotted lines, then fold these two layers toward the sides along the creases indicated by the black dotted lines [pictures 1 and 2].
Fold up the bottom edge along the crease shown by the black dotted line [pictures 3 and 4].
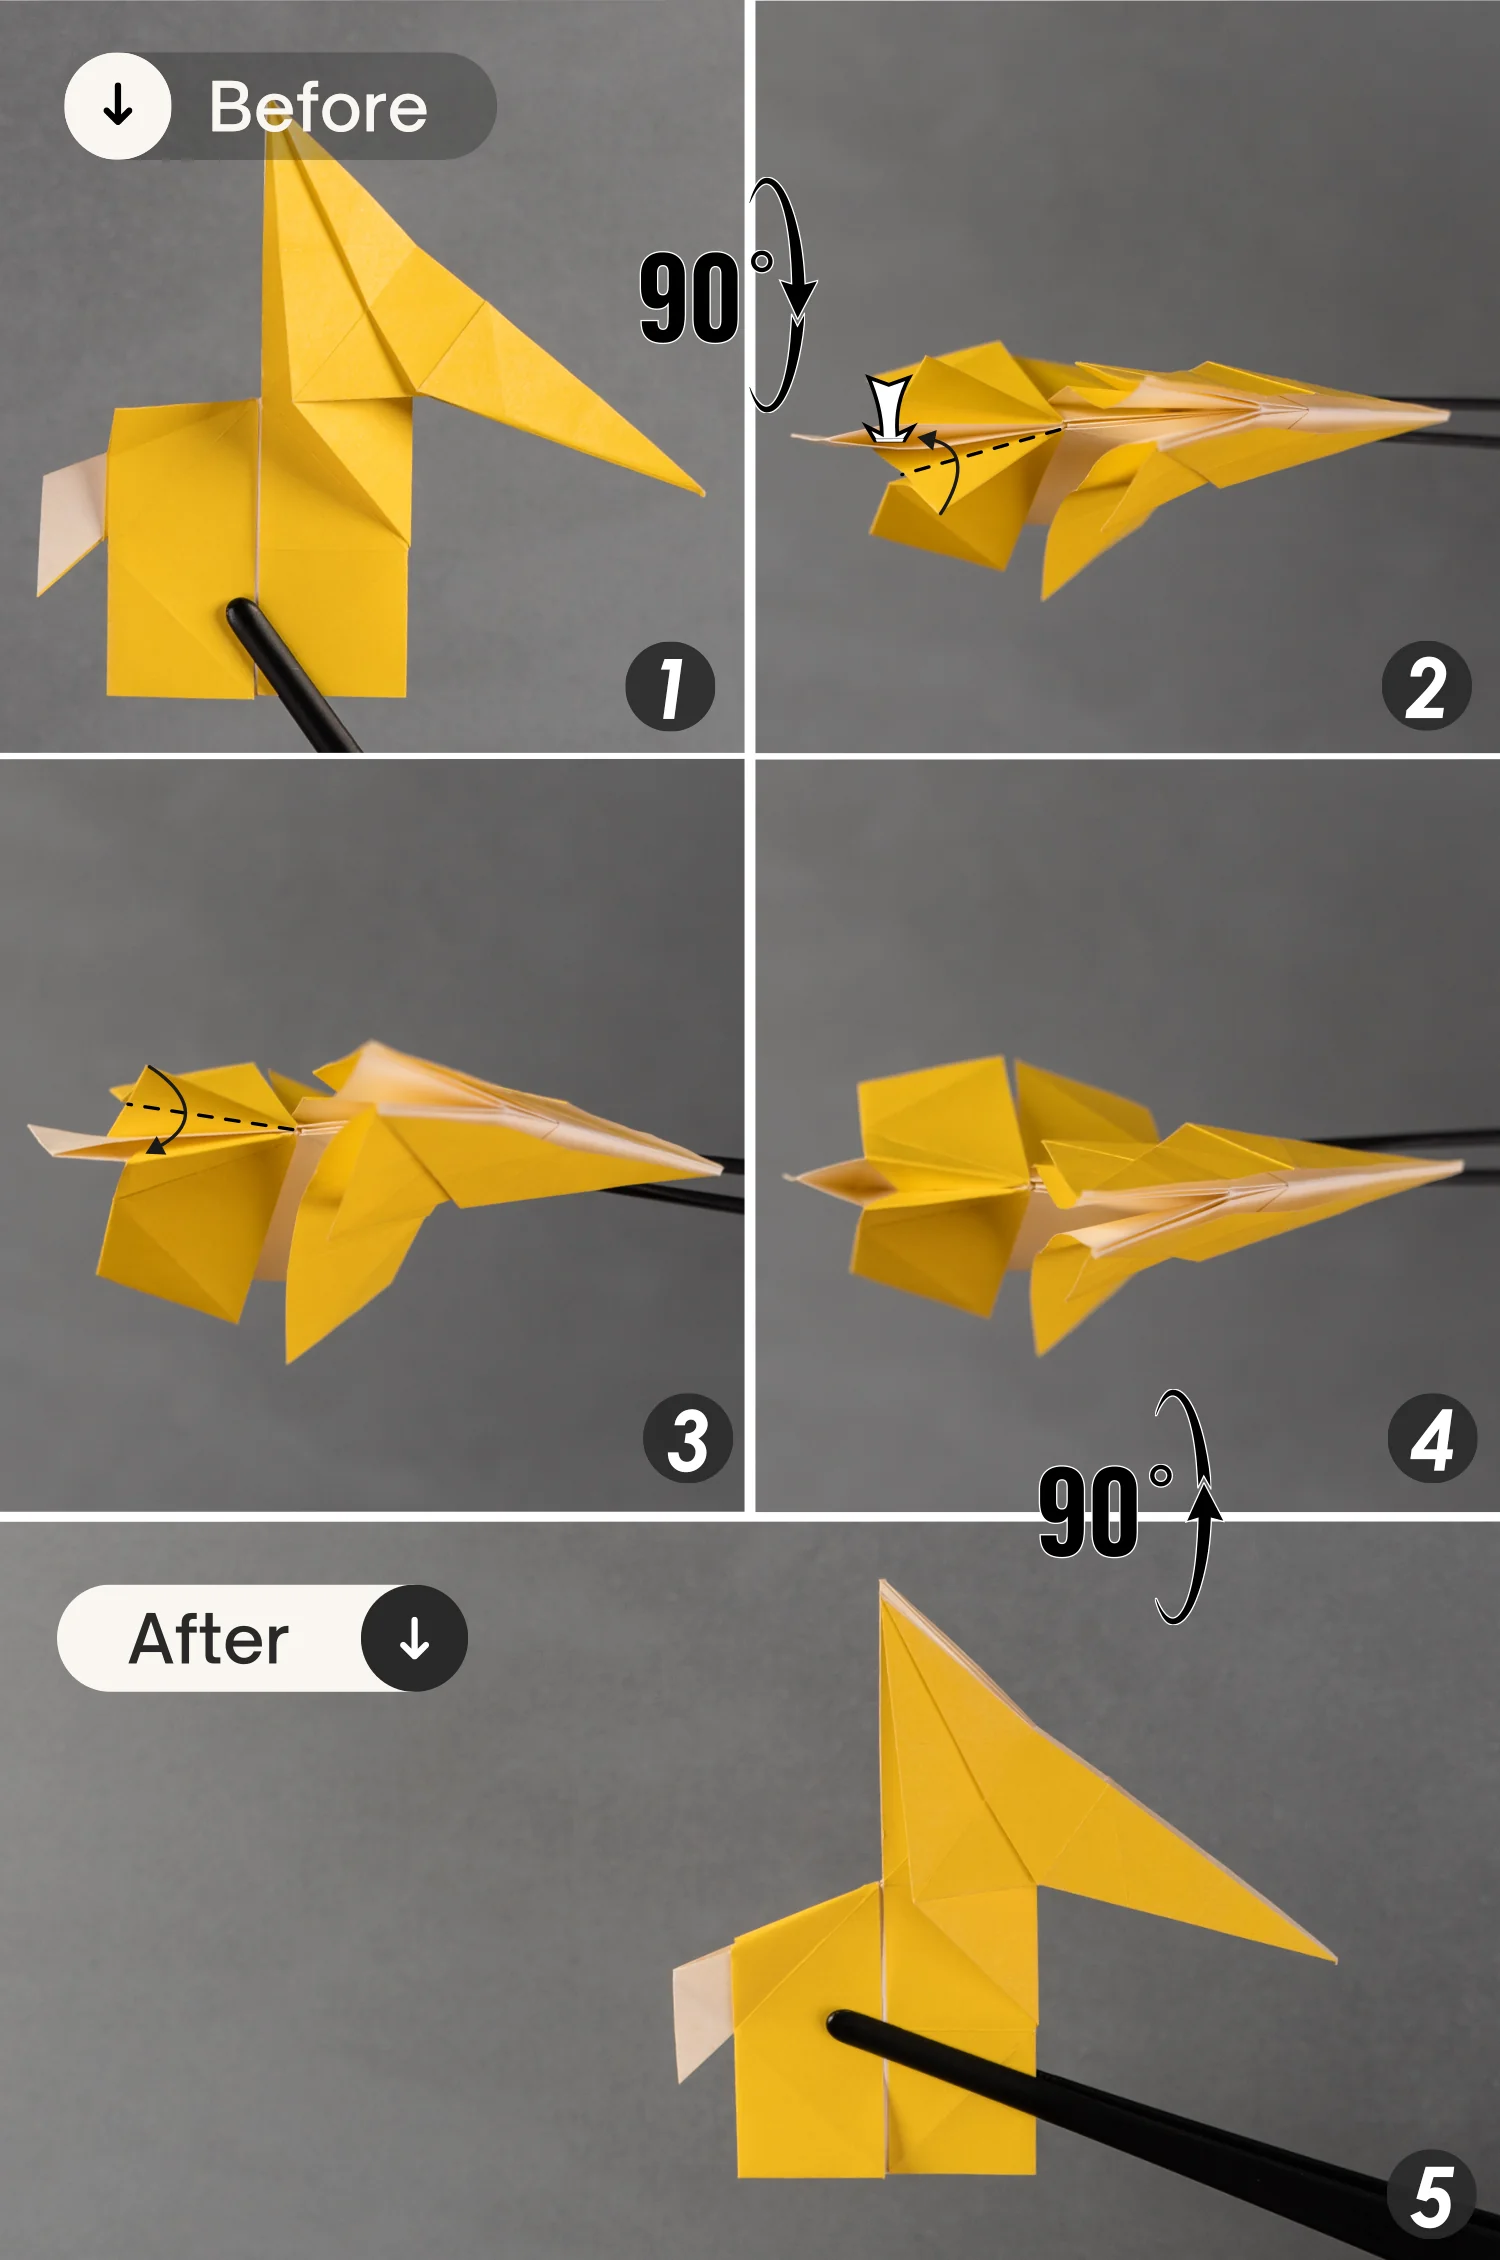
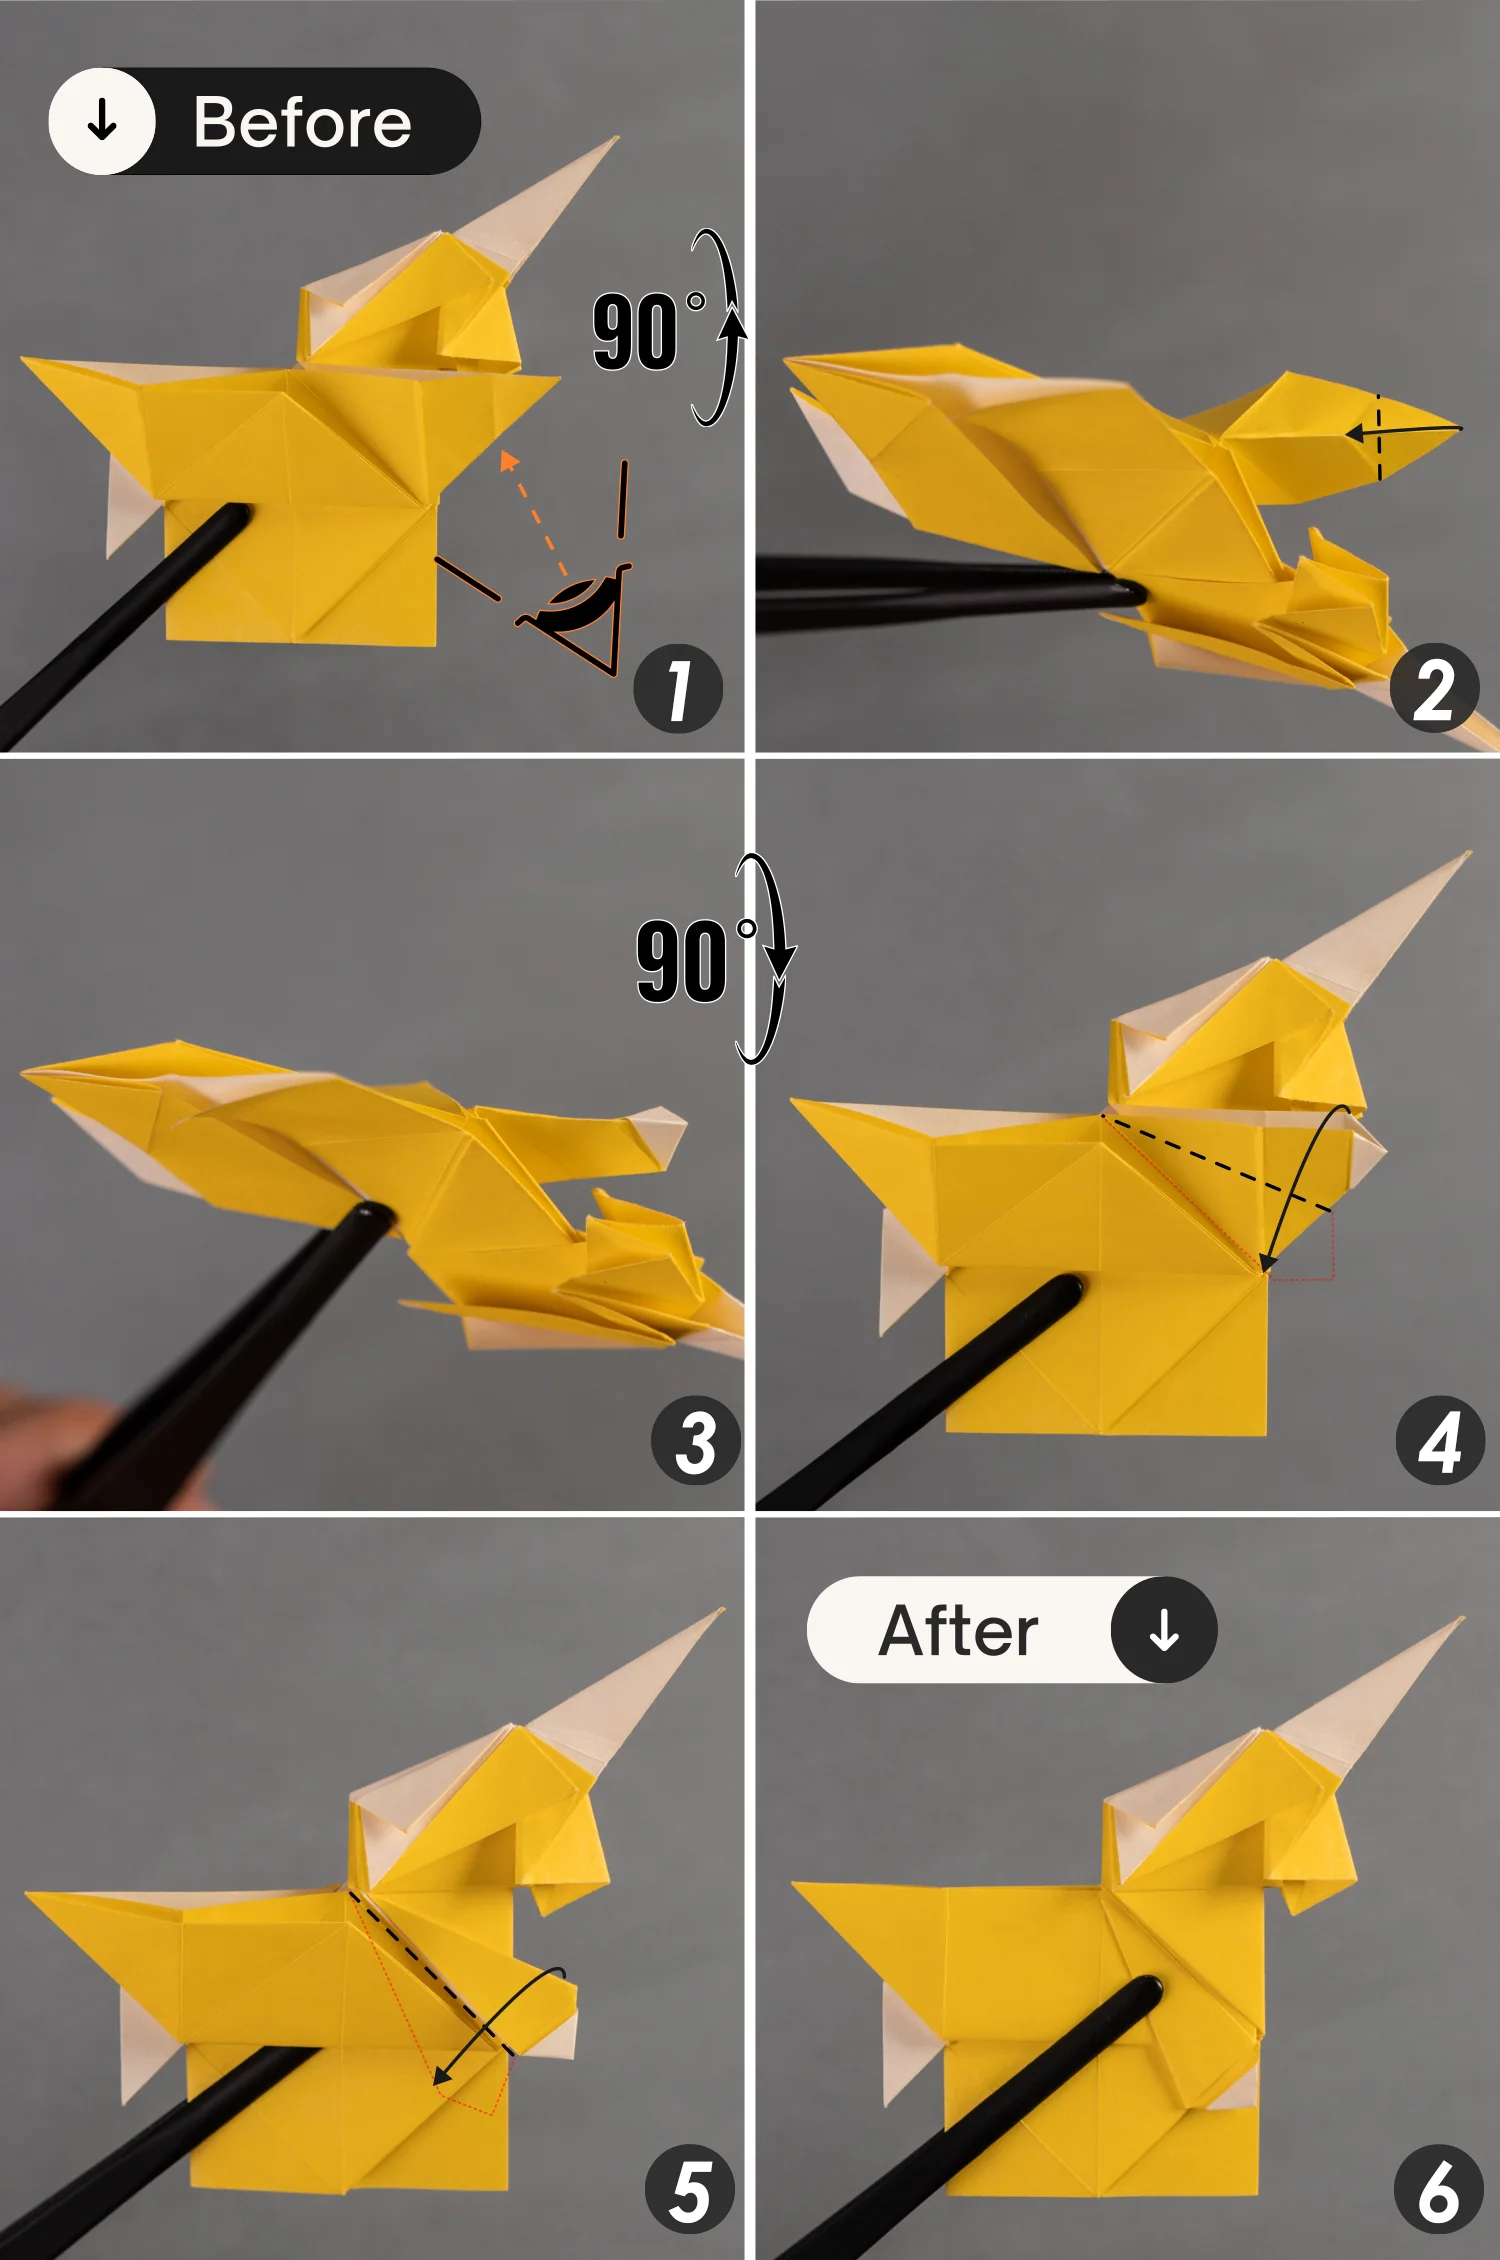
Step 36
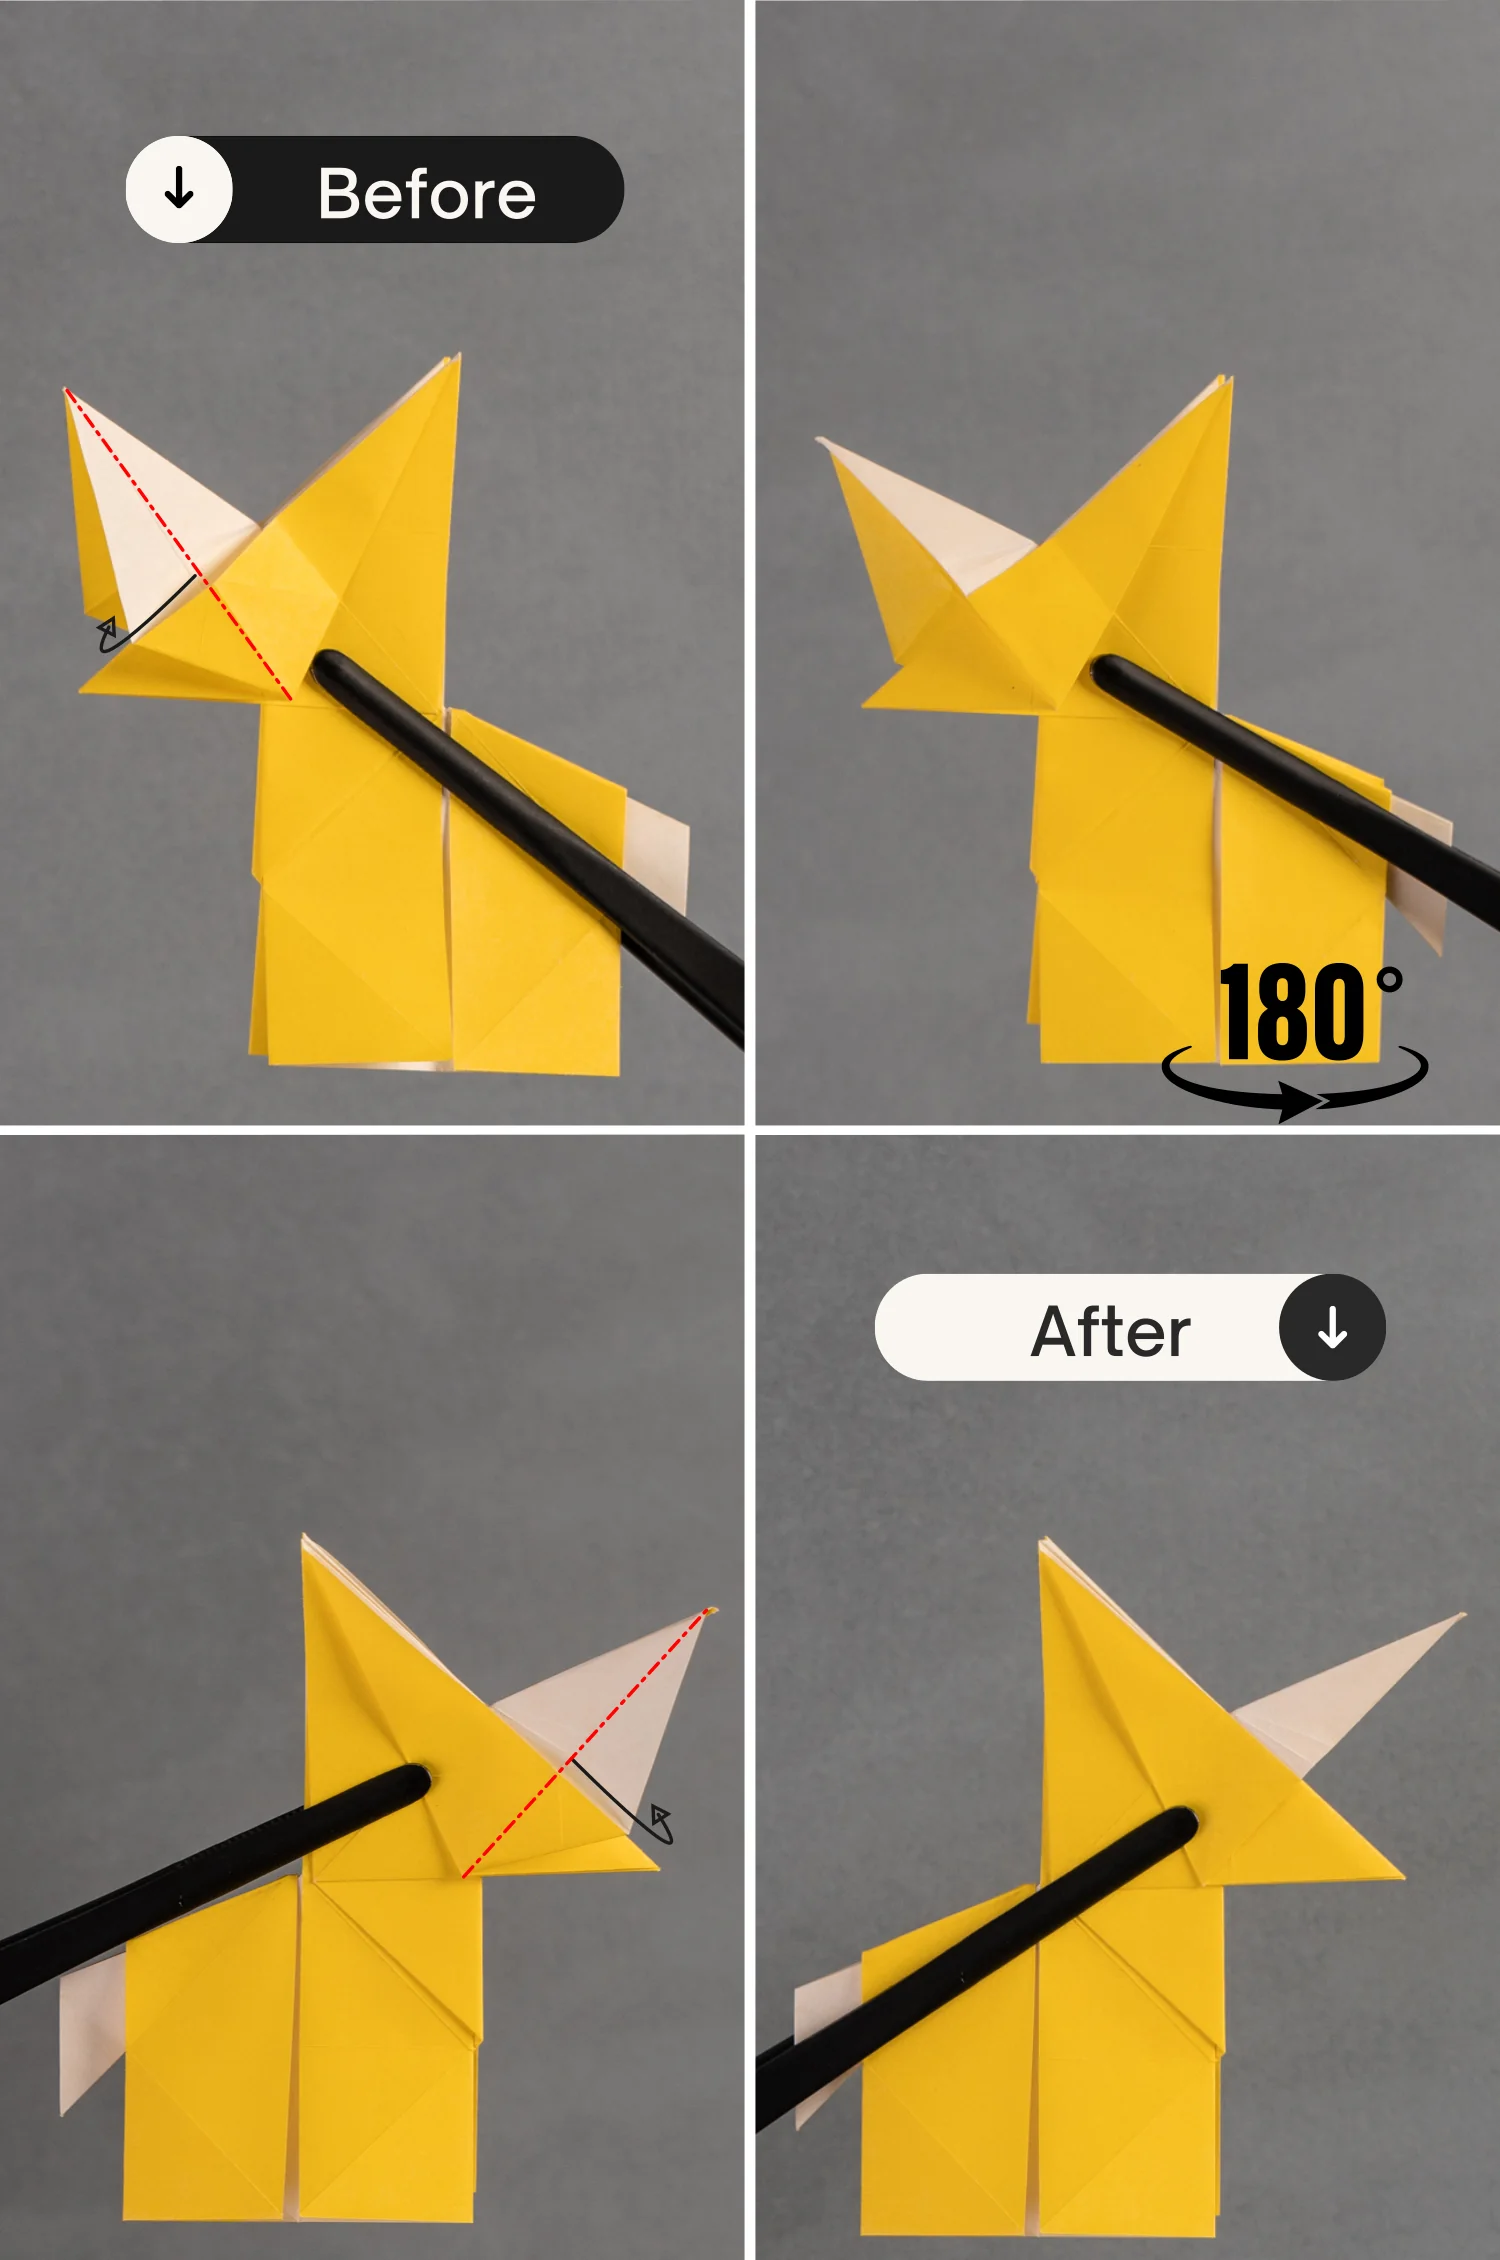
Fold the right point to the left side along the black dotted line, leaving a crease, and unfold it.
Step 37
Rotate the paper 90 degrees from back to front and focus on the right corner that you folded in the previous step [picture 1]. Open the right corner, and fold the right point to meet the intersection point formed by the creases [picture 2].
Then, close this corner and rotate the paper 90 degrees from front to back. Next, fold down the right part along the black dotted line, and finally, fold down this flap [pictures 3 to 6].
Step 38
Similarly, fold the left point to the right along the black dotted line, leaving a crease, and unfold it.
Step 39
Rotate it 90 degrees from front to back and focus on the left point you folded in the previous step, then open this left corner [pictures 1 to 2].
Next, fold down the left point along the red dotted line, then lose this corner [pictures 3 to 4].
Finally, close this corner and rotate the paper 90 degrees from back to front.
Step 40
Fold down the left part along the black dotted line, then fold down this flap as you did in step 37.
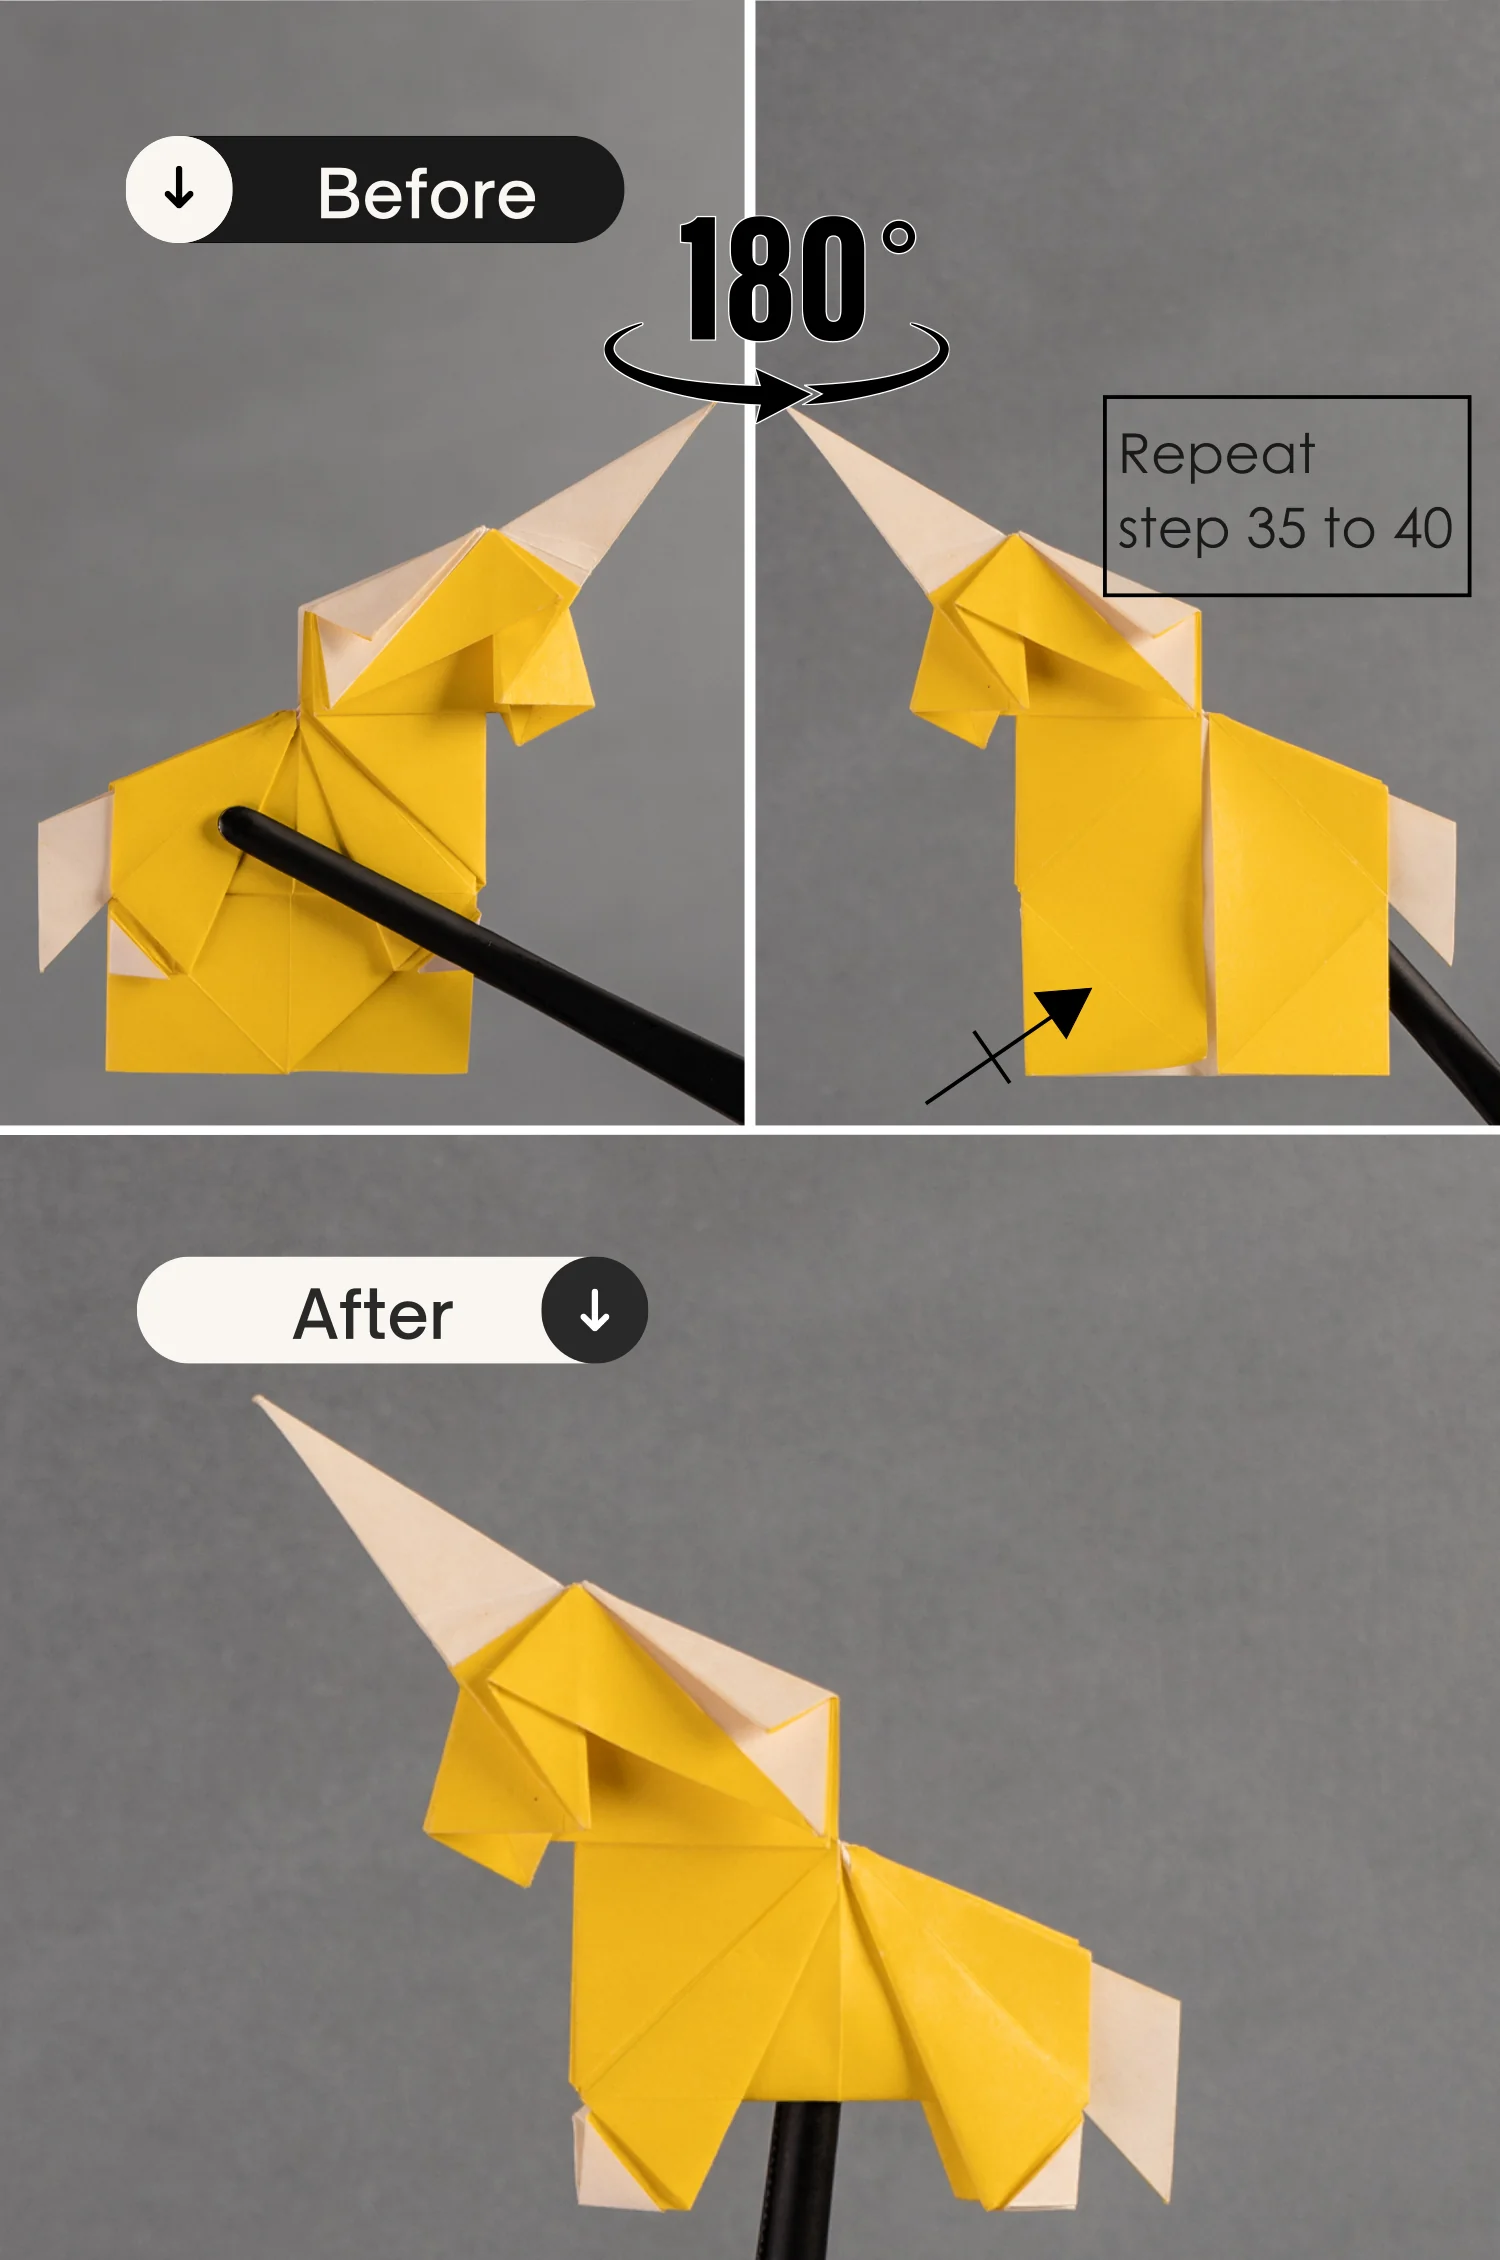
Step 41
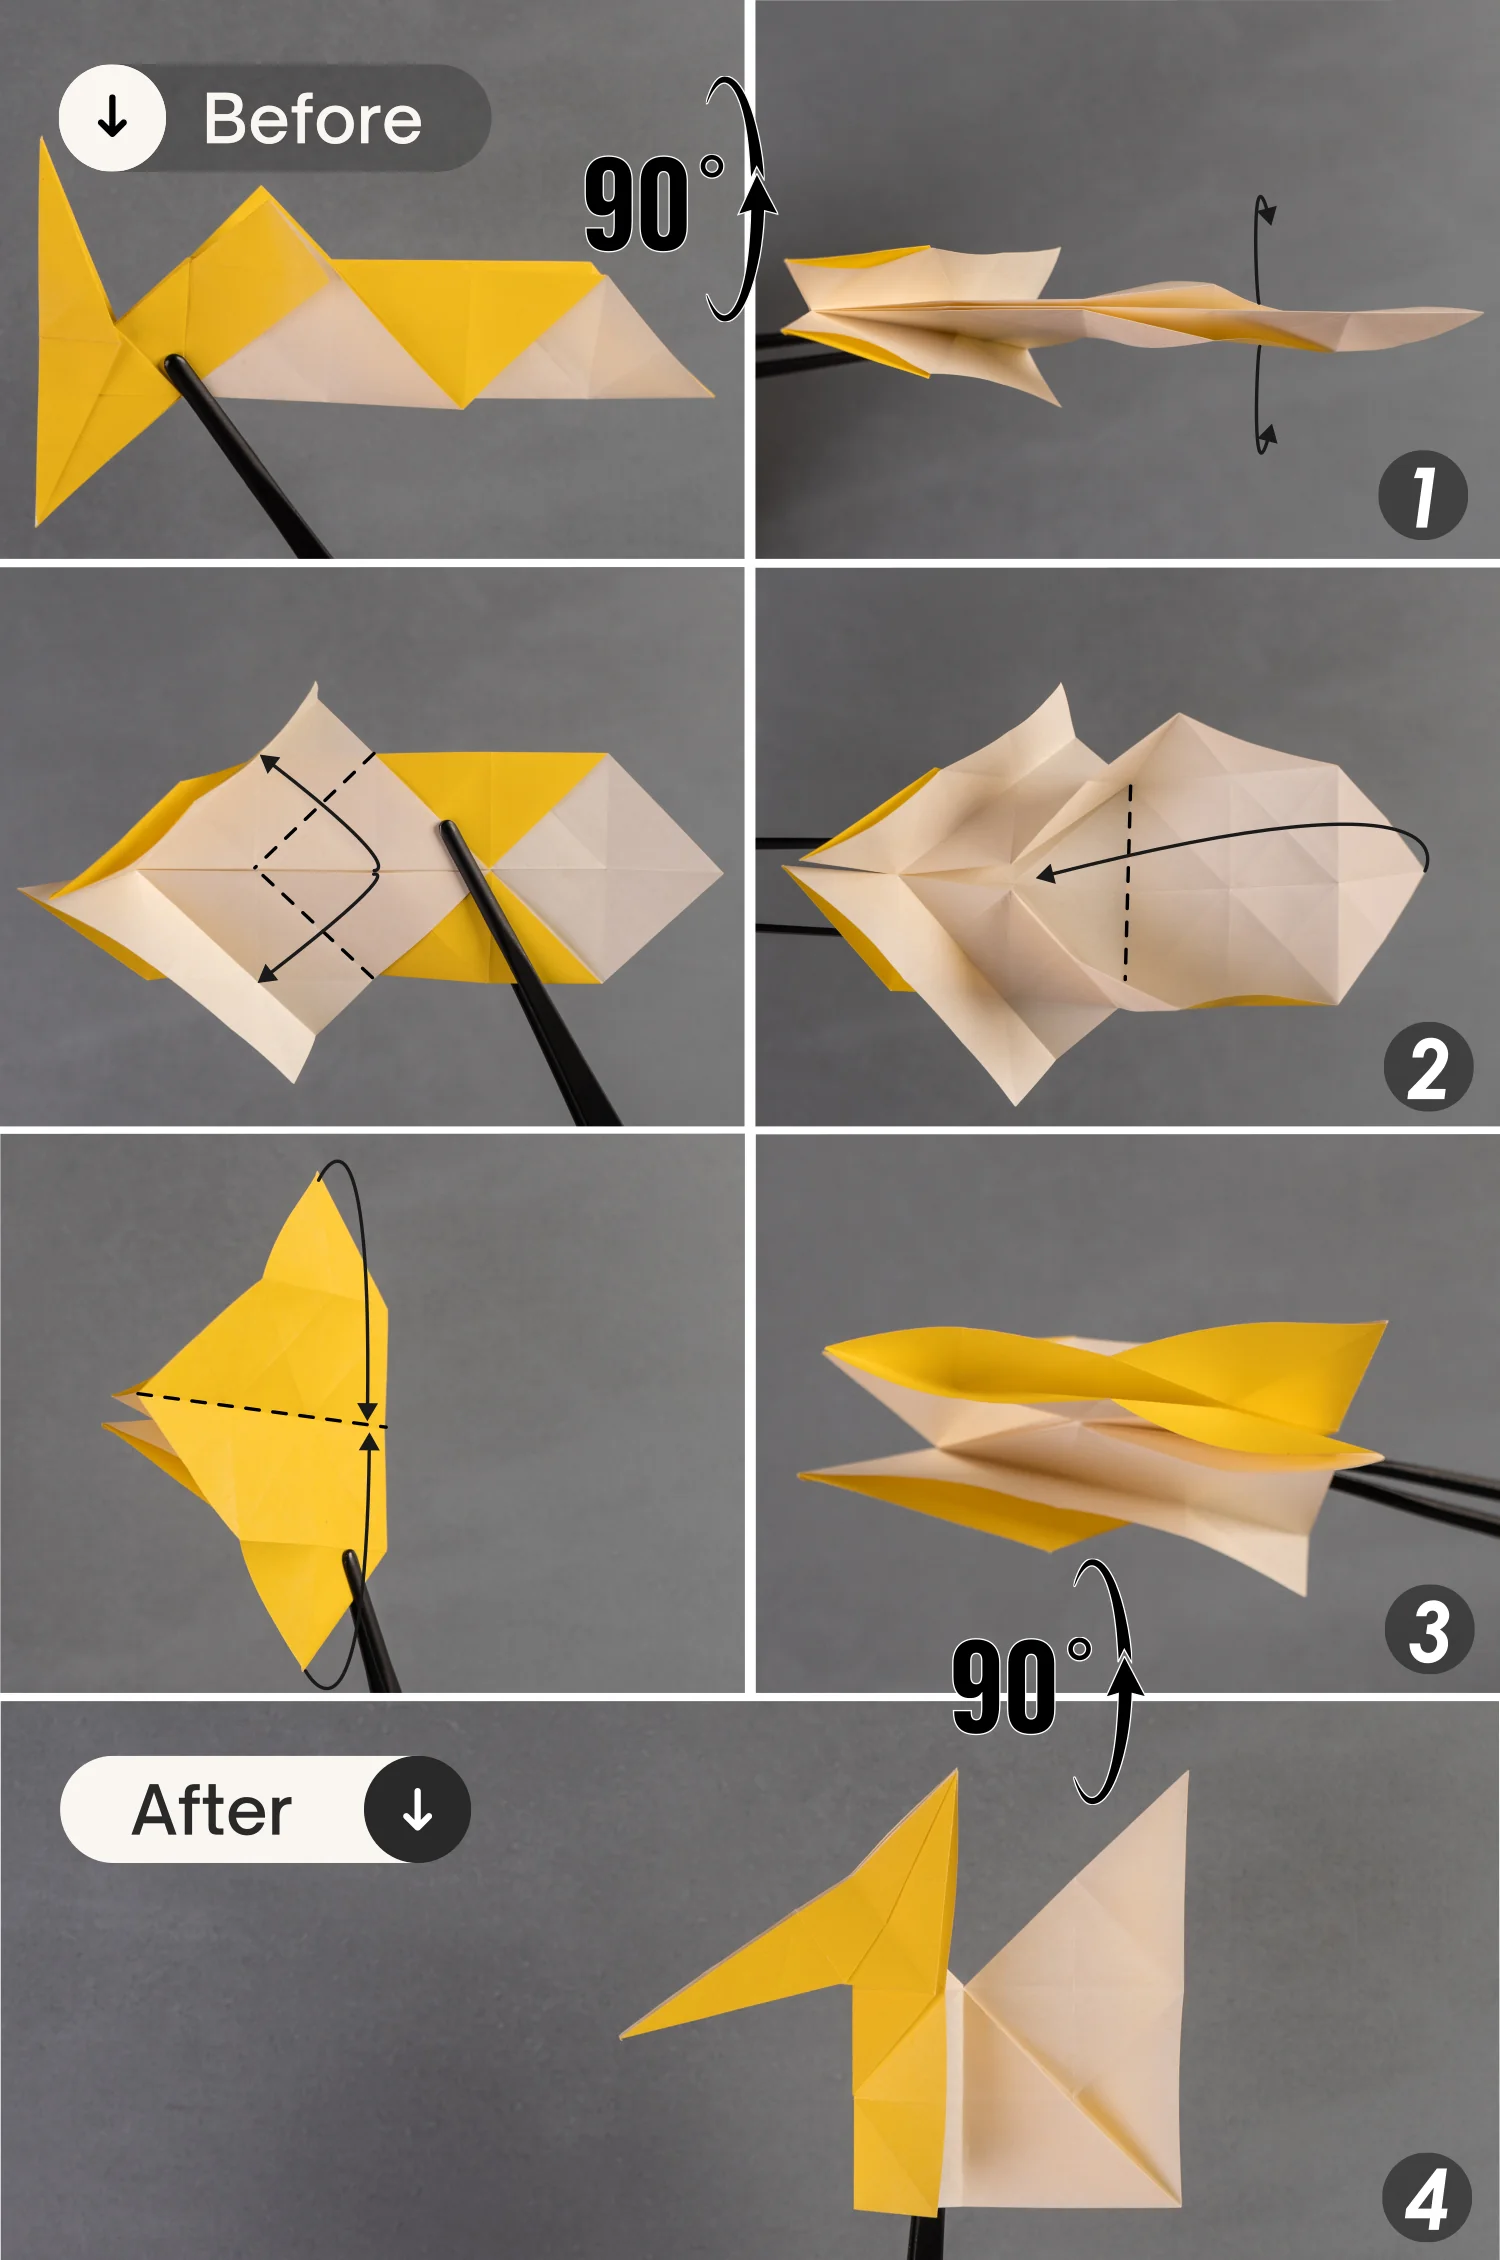
Rotate the paper 180 degrees from left to right to flip it over, then repeat steps 35 to 40.
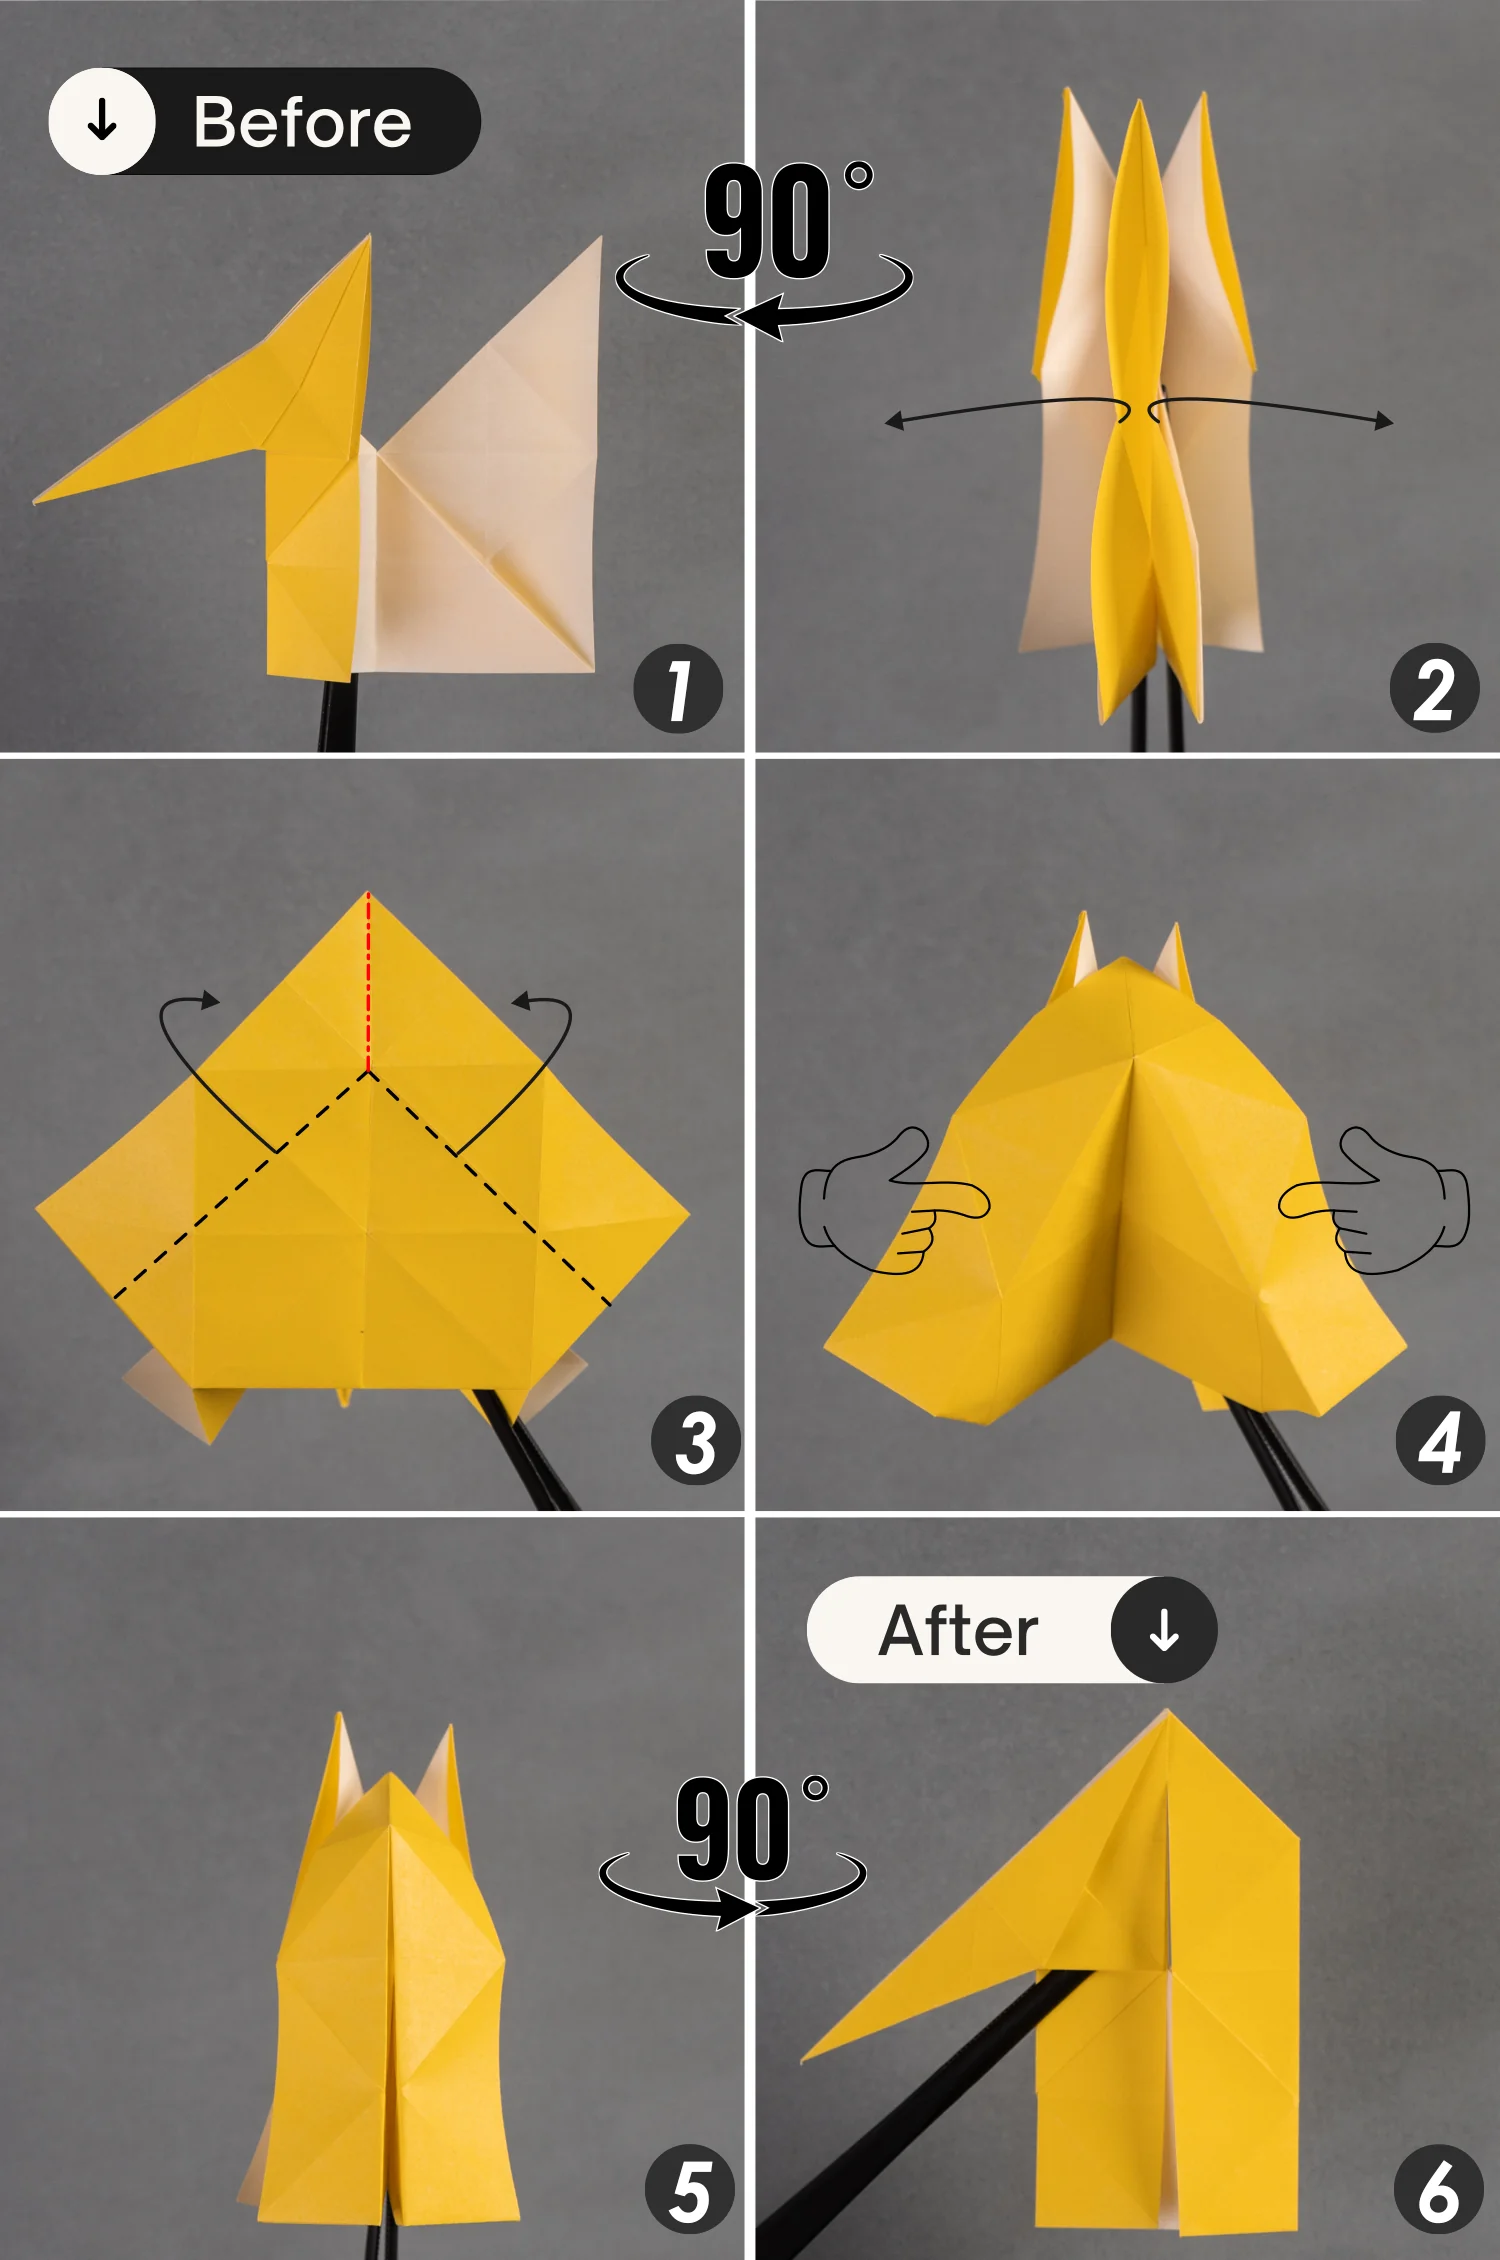
What’s Next
That’s your lovely origami unicorn, it can be used as a decorative piece for your home, or office. Next, you can explore our other origami animal instructions. Happy folding!
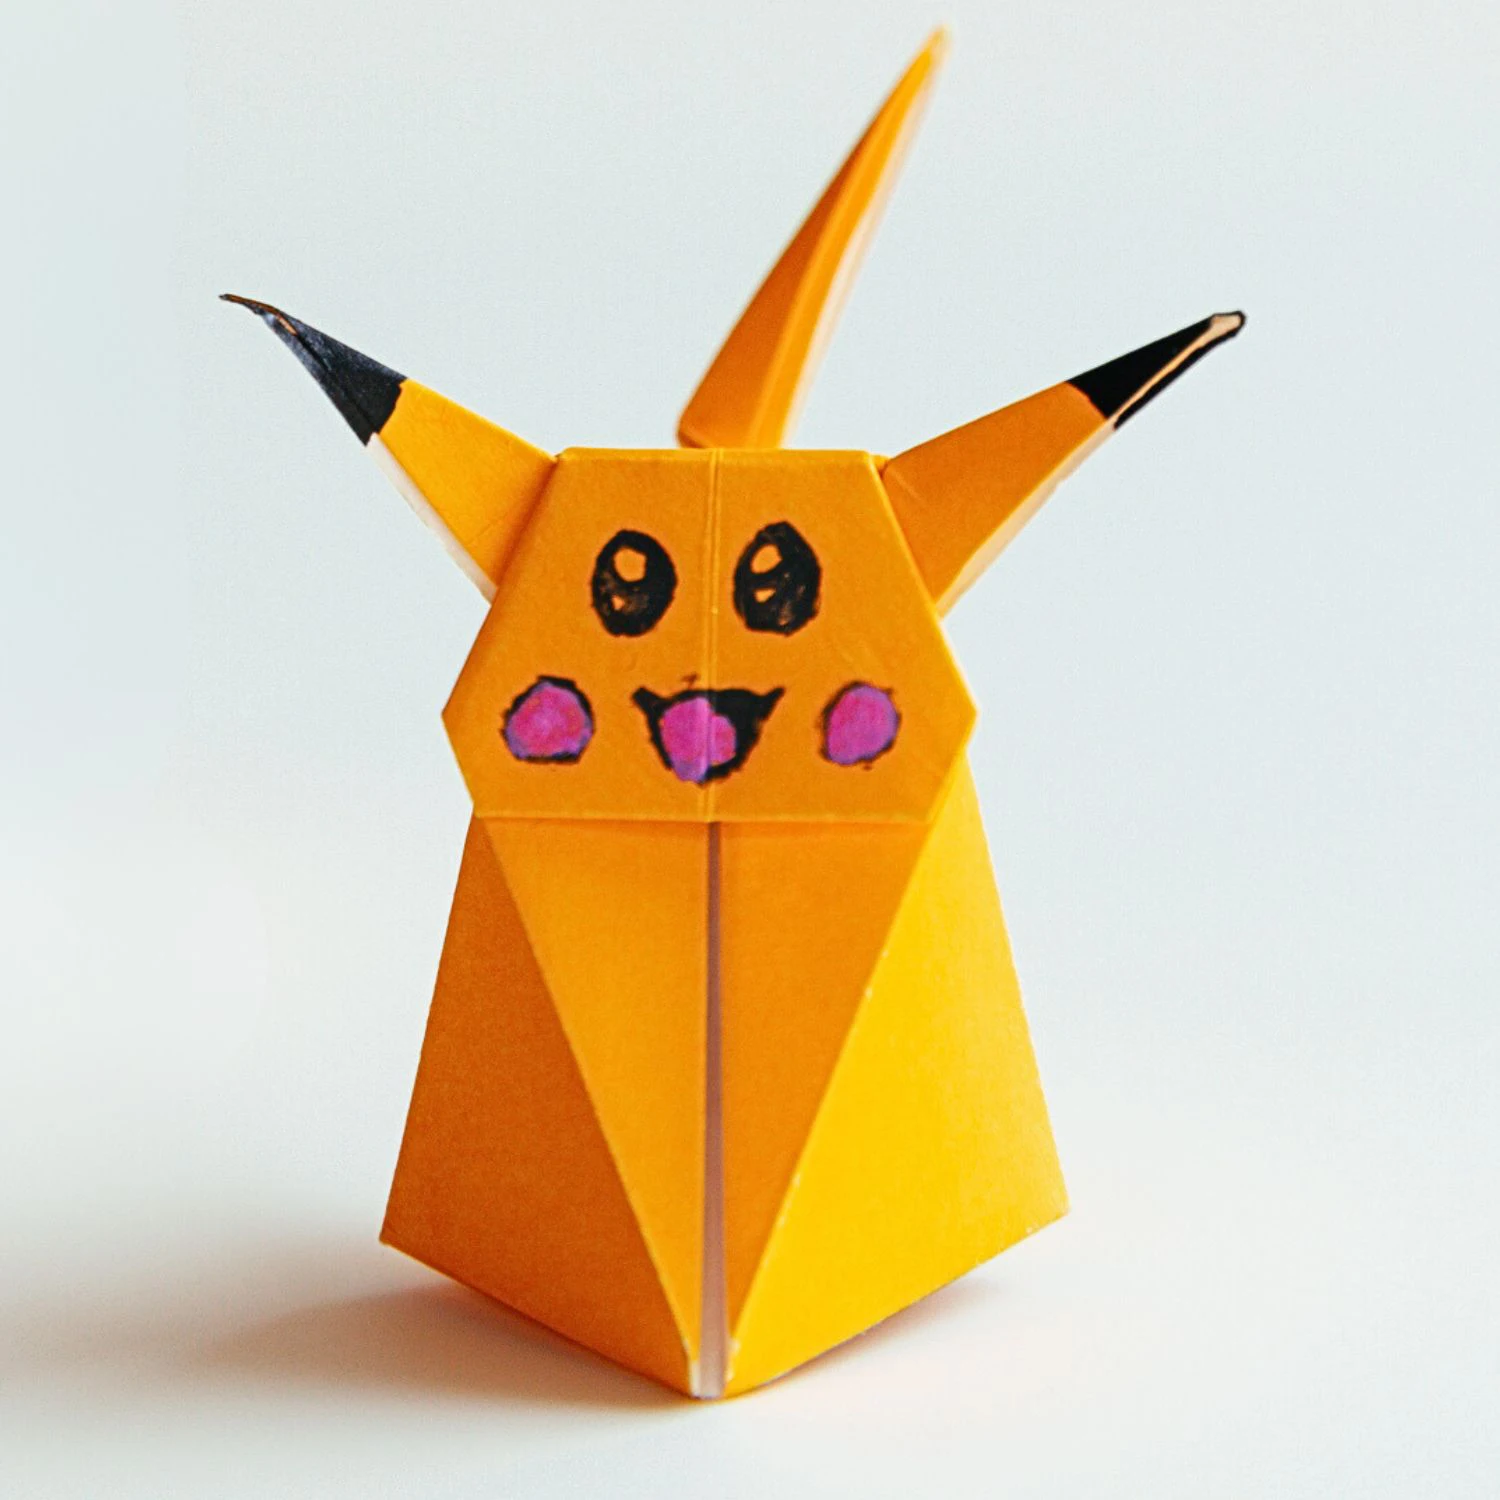
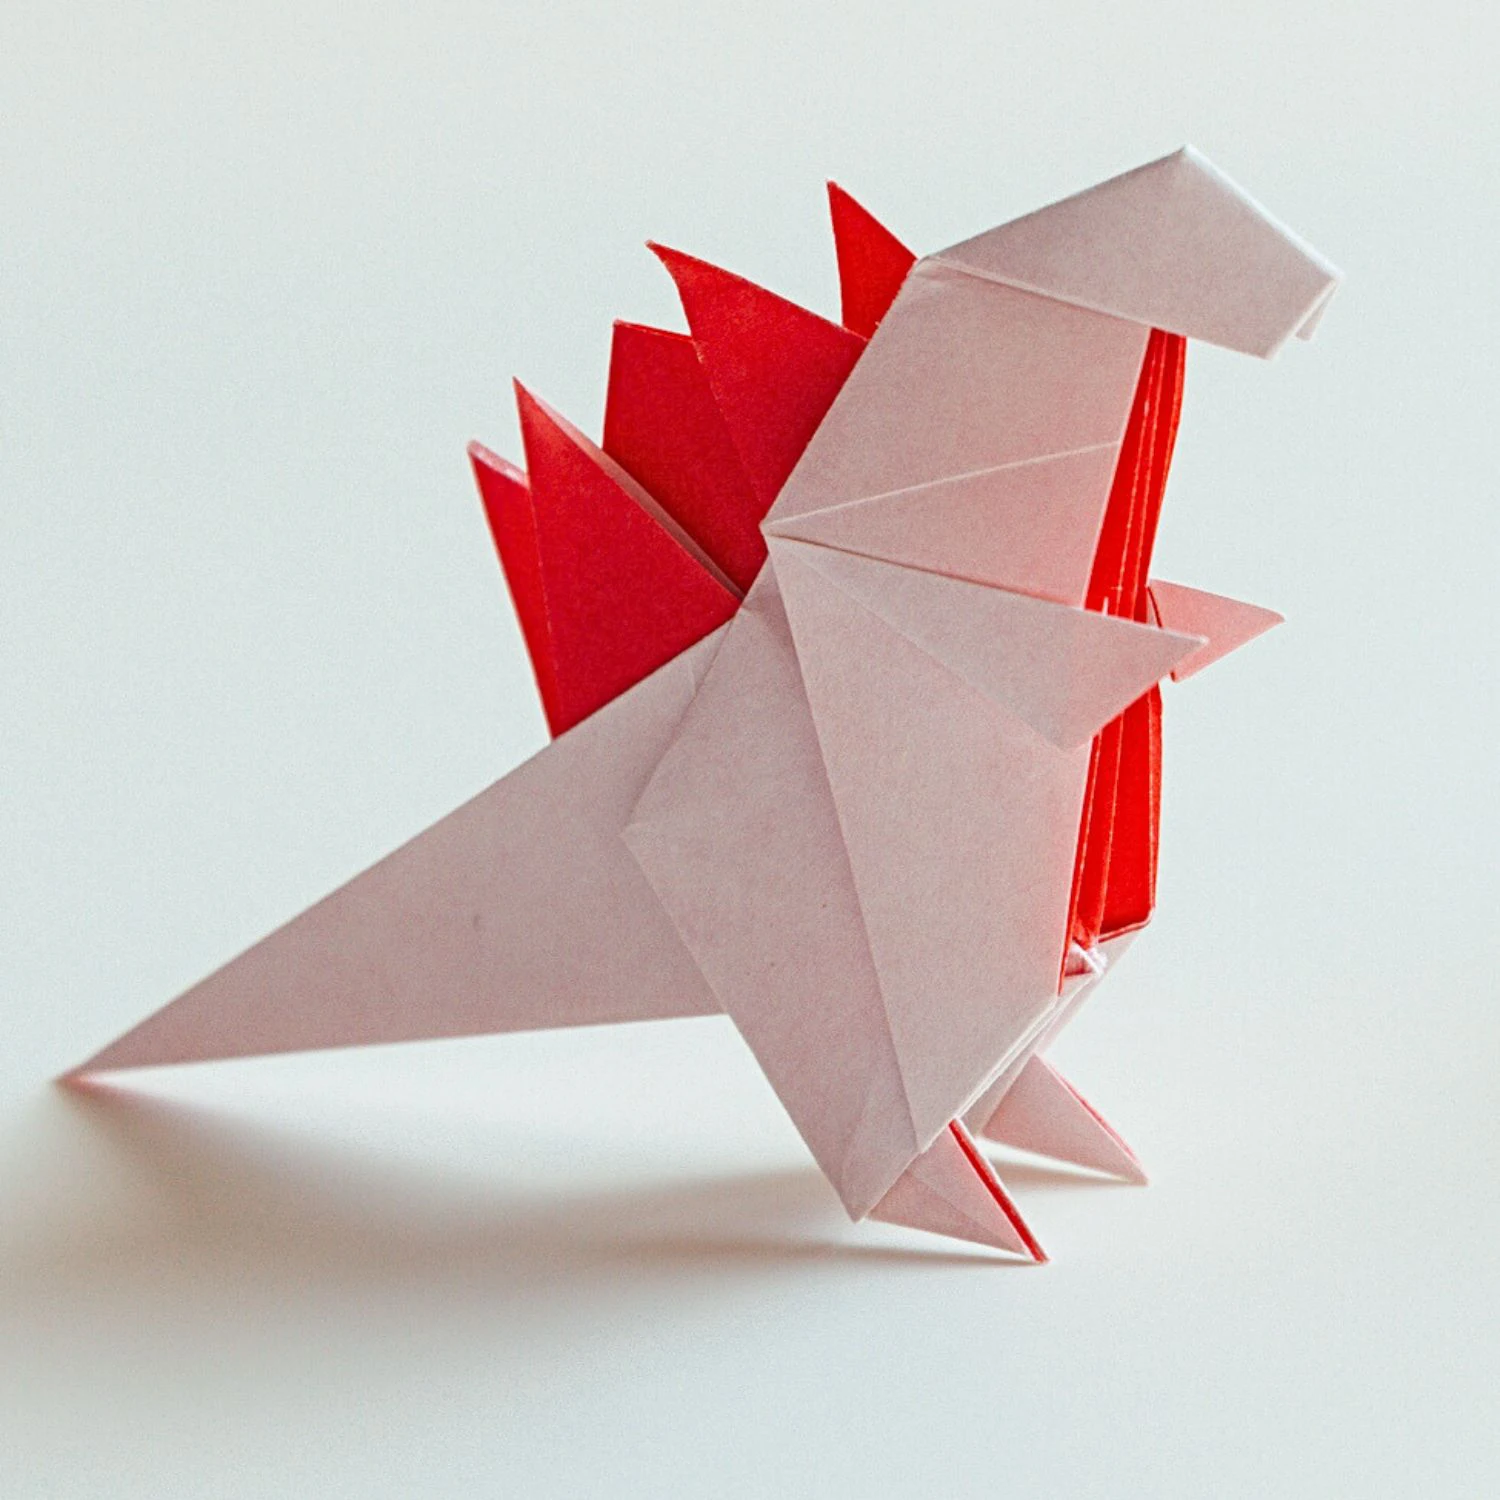
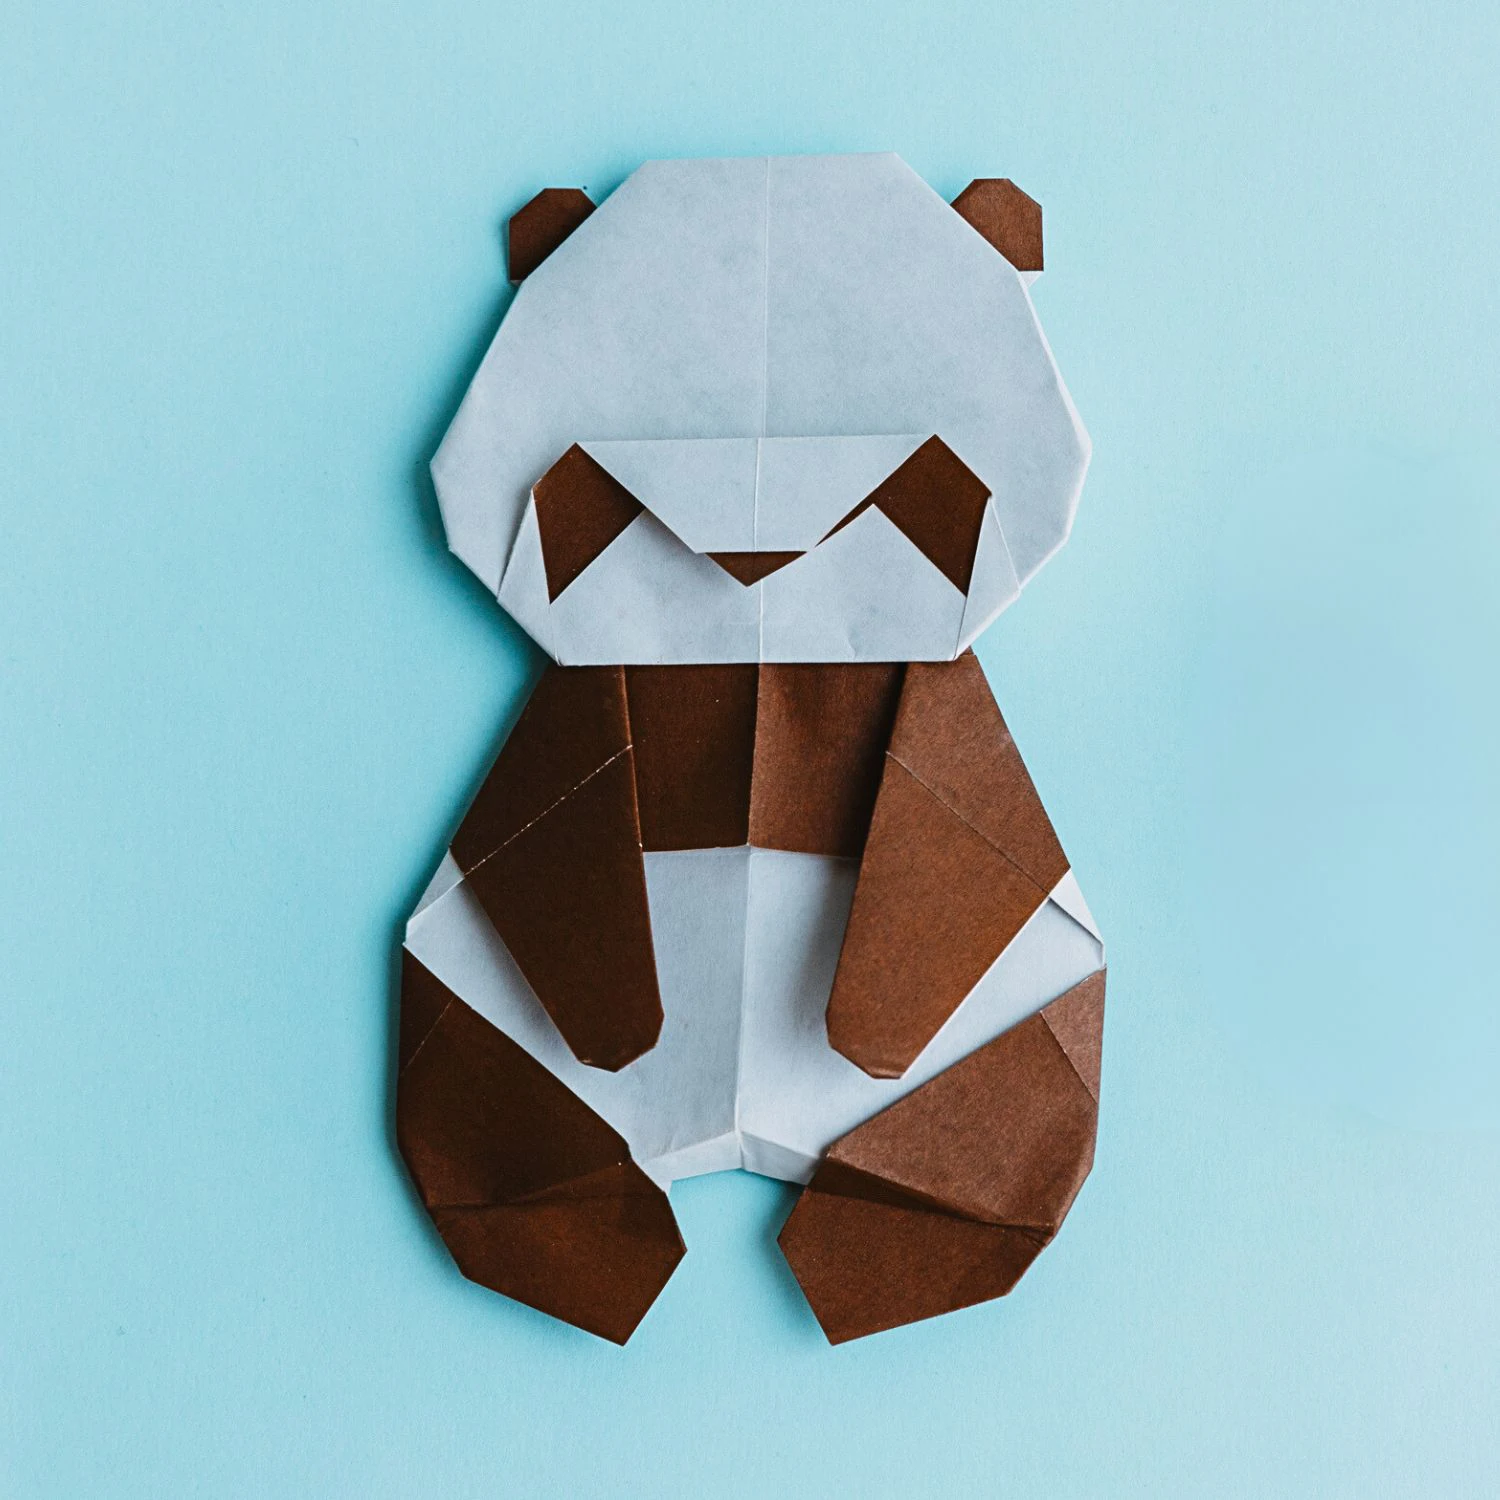
Other Origami Animal Ideas