Thanksgiving Day is a wonderful opportunity for families, children, and friends to come together, you may always feel anxious or agitated about what to cook to entertain your family and friends, so how about changing the activity, and trying something that you never experienced?

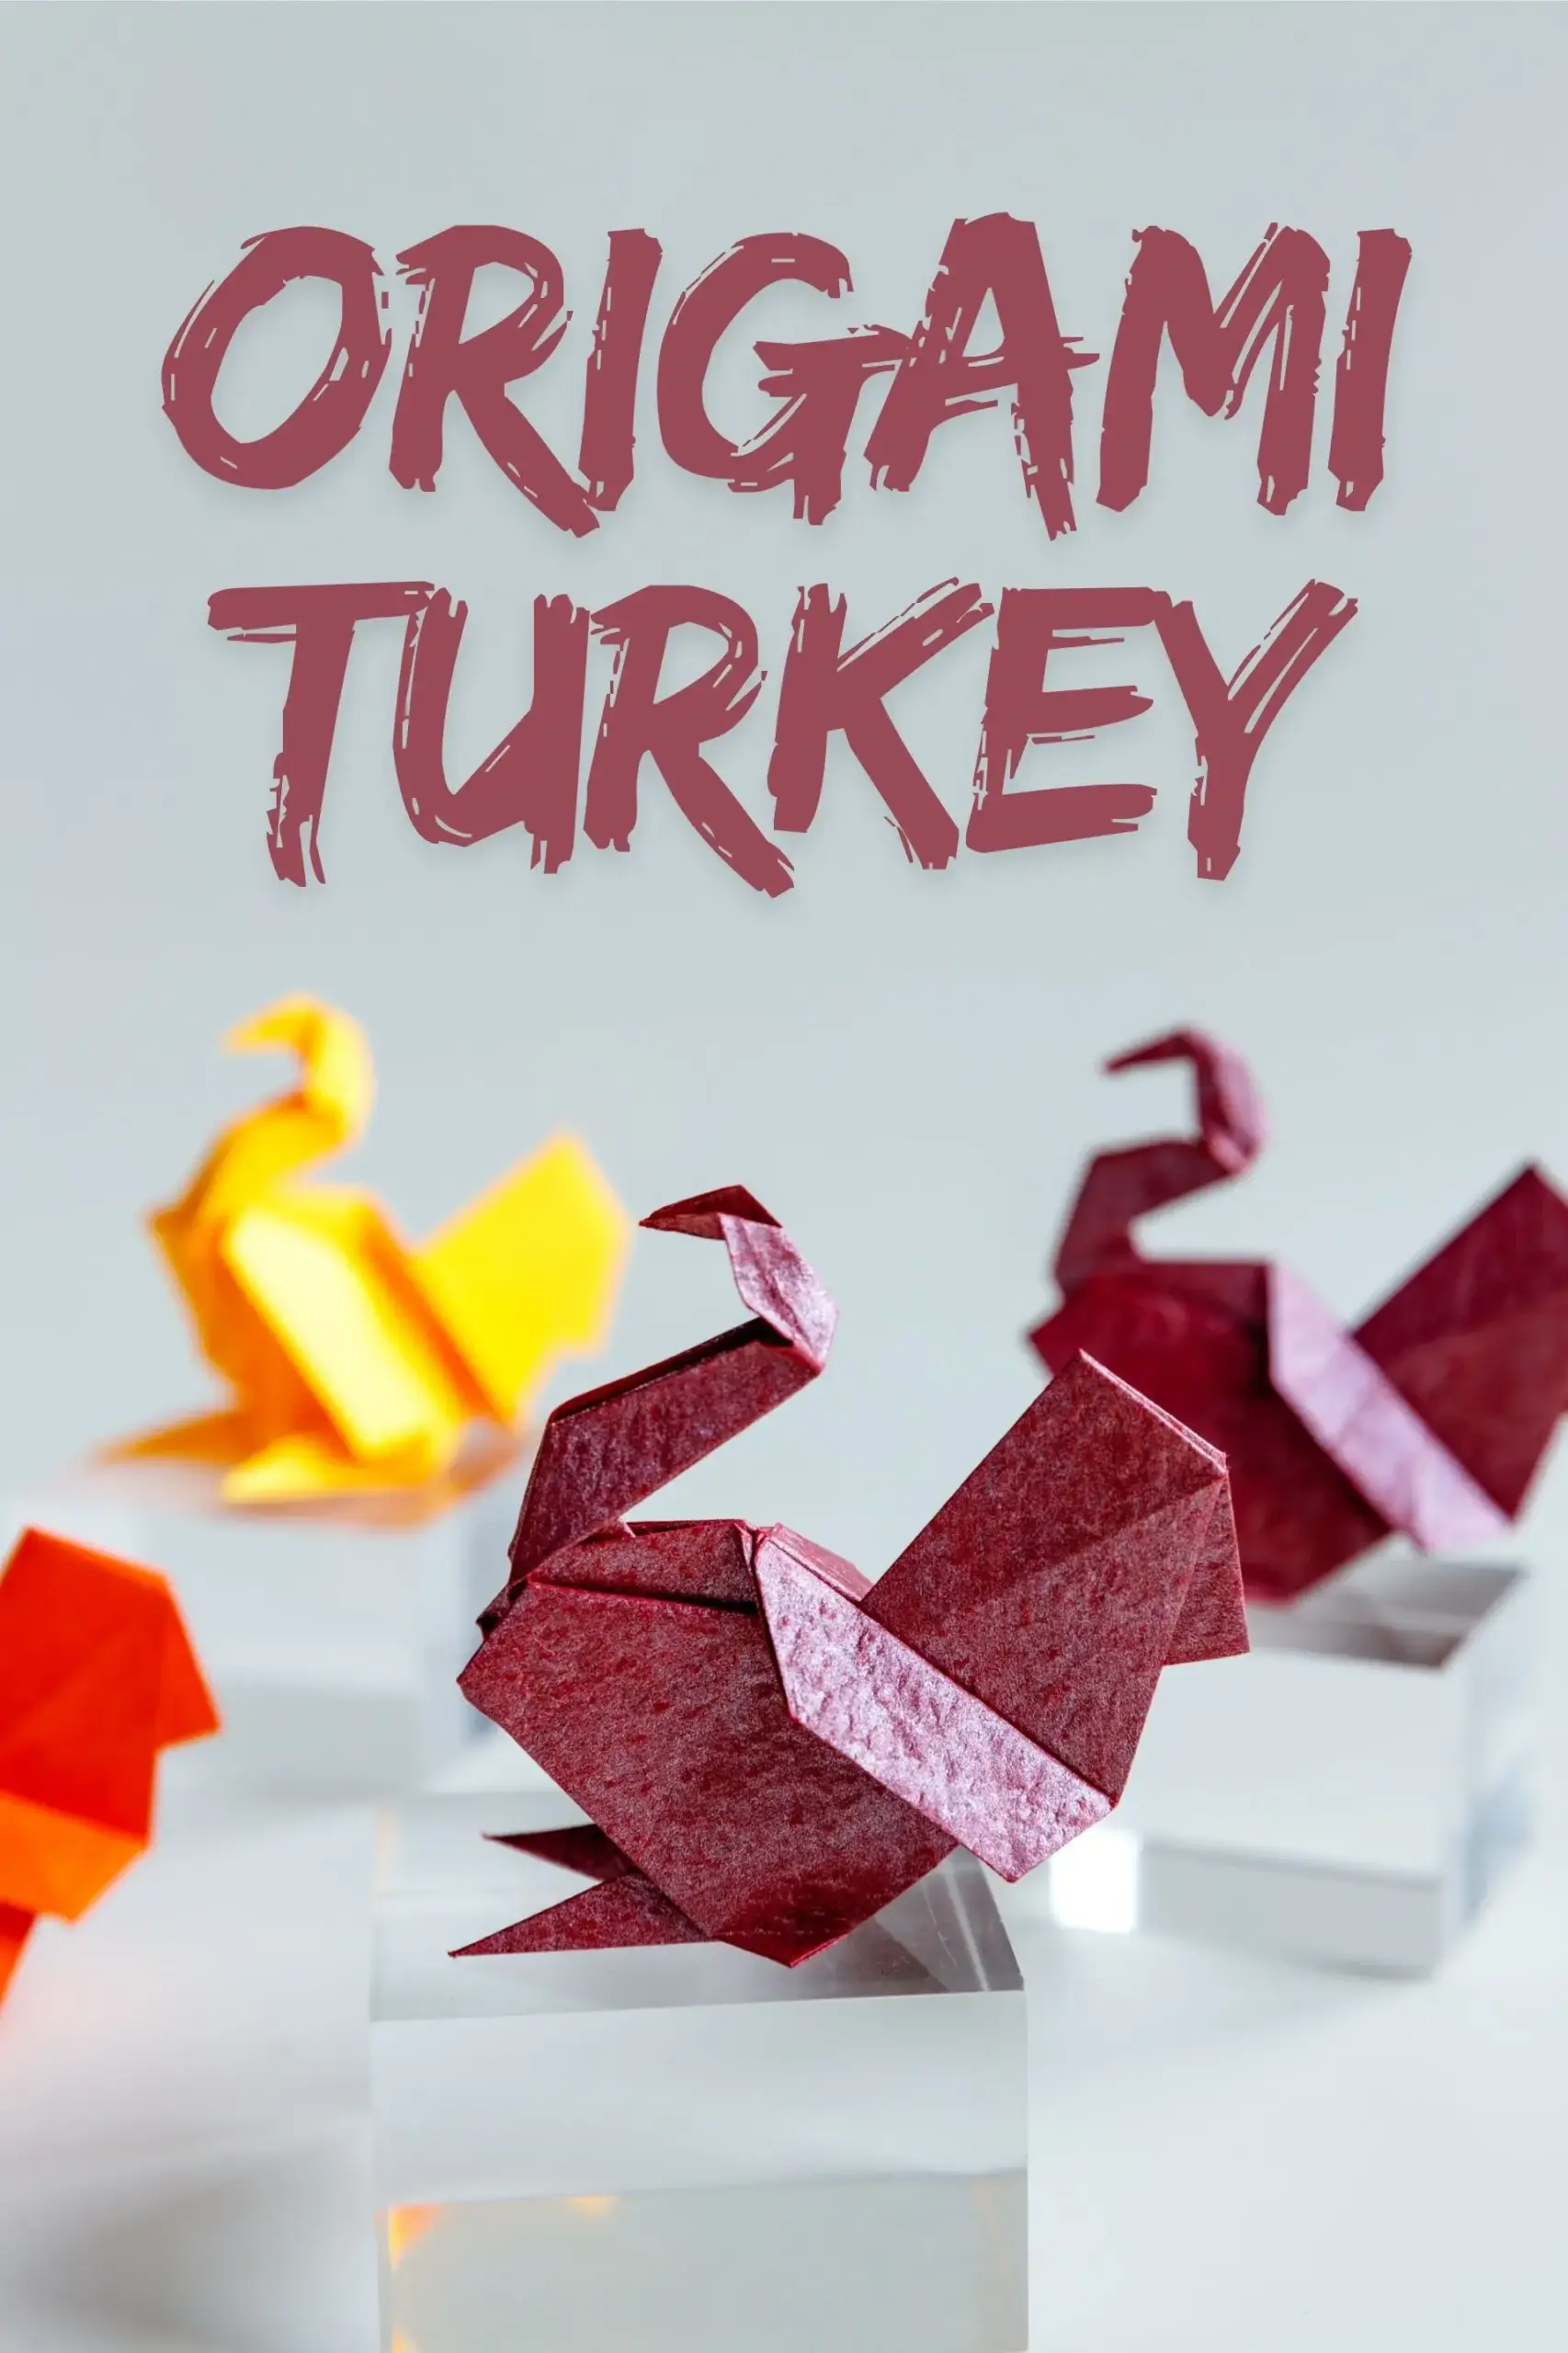
Let’s make a lovely origami turkey with our easy-to-follow steps, it would be a great decoration for Thanksgiving day or as a thanksgiving family activity. It can be super fun and enjoying.
This origami turkey is based on the Bird Base and Open Sink Fold, along with some inside reverse folds.

If you are new to origami, start here from our beginner guide to know the basics and how to read the step-by-step instructions.
- Folding time: 20 minutes
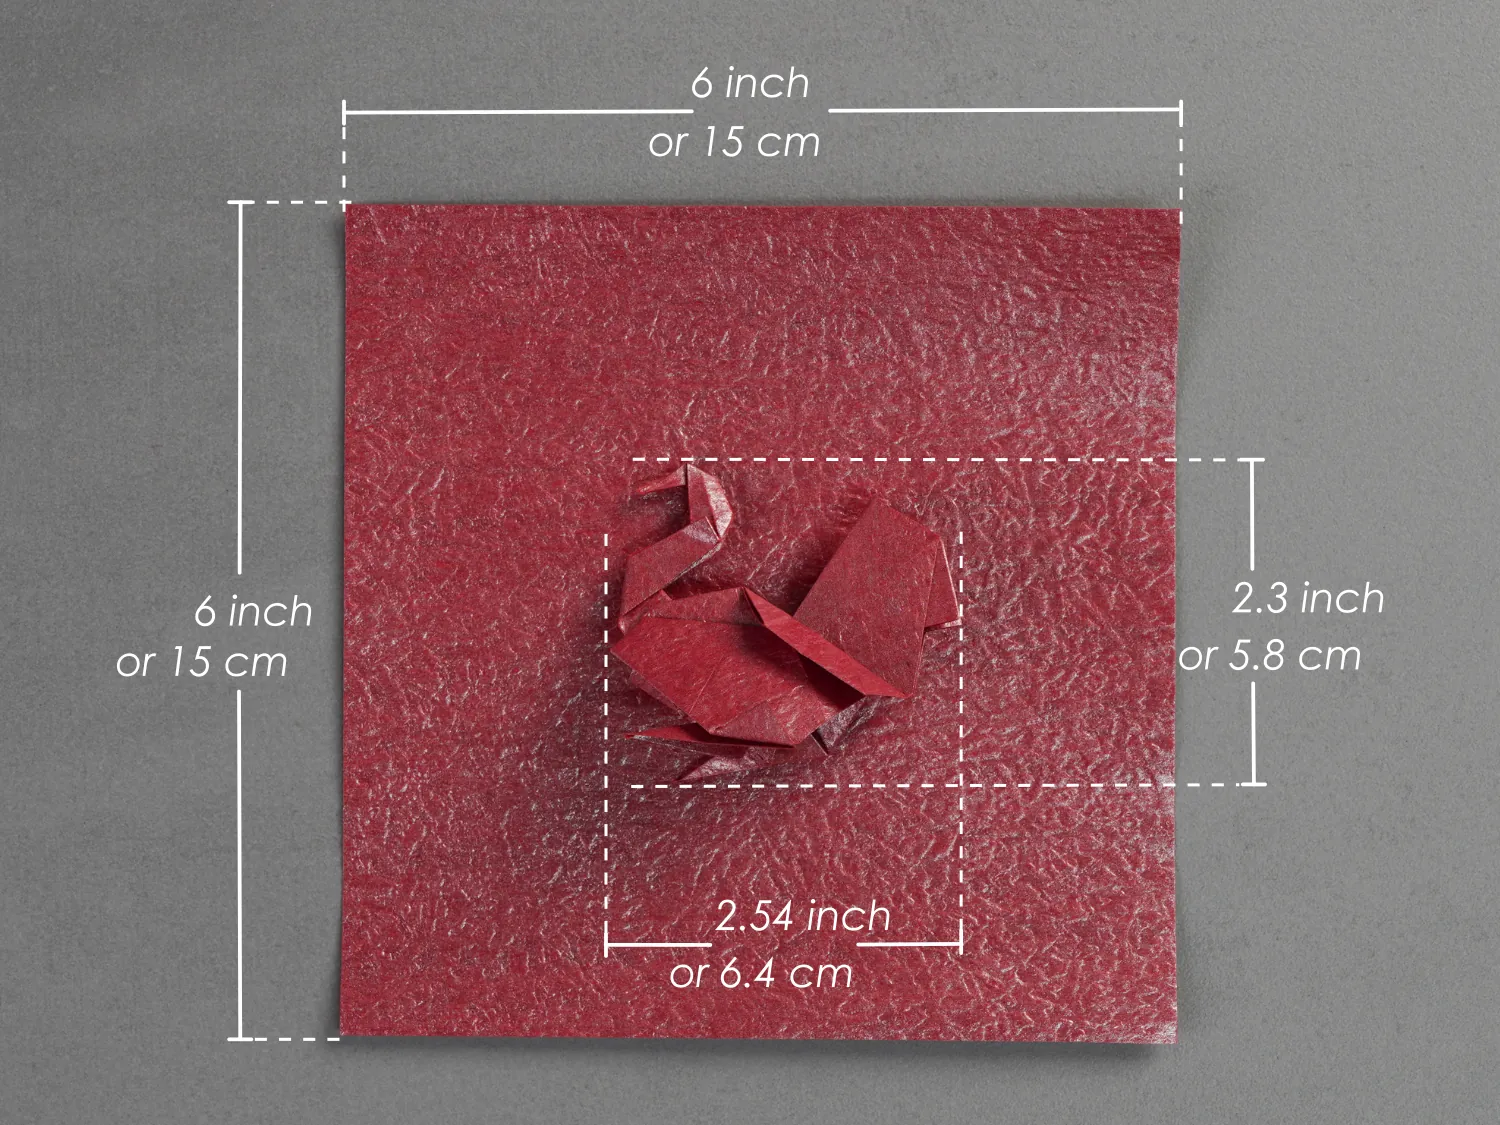
- Paper: 15×15 cm
- Difficulty: Advanced
Material
Prepare a piece of 15×15 cm origami square paper, and you will get a 5.8×6.4 cm origami turkey. Use textural and pattern paper to create a more special turkey.
Origami Turkey Video
Step by Step Instructions
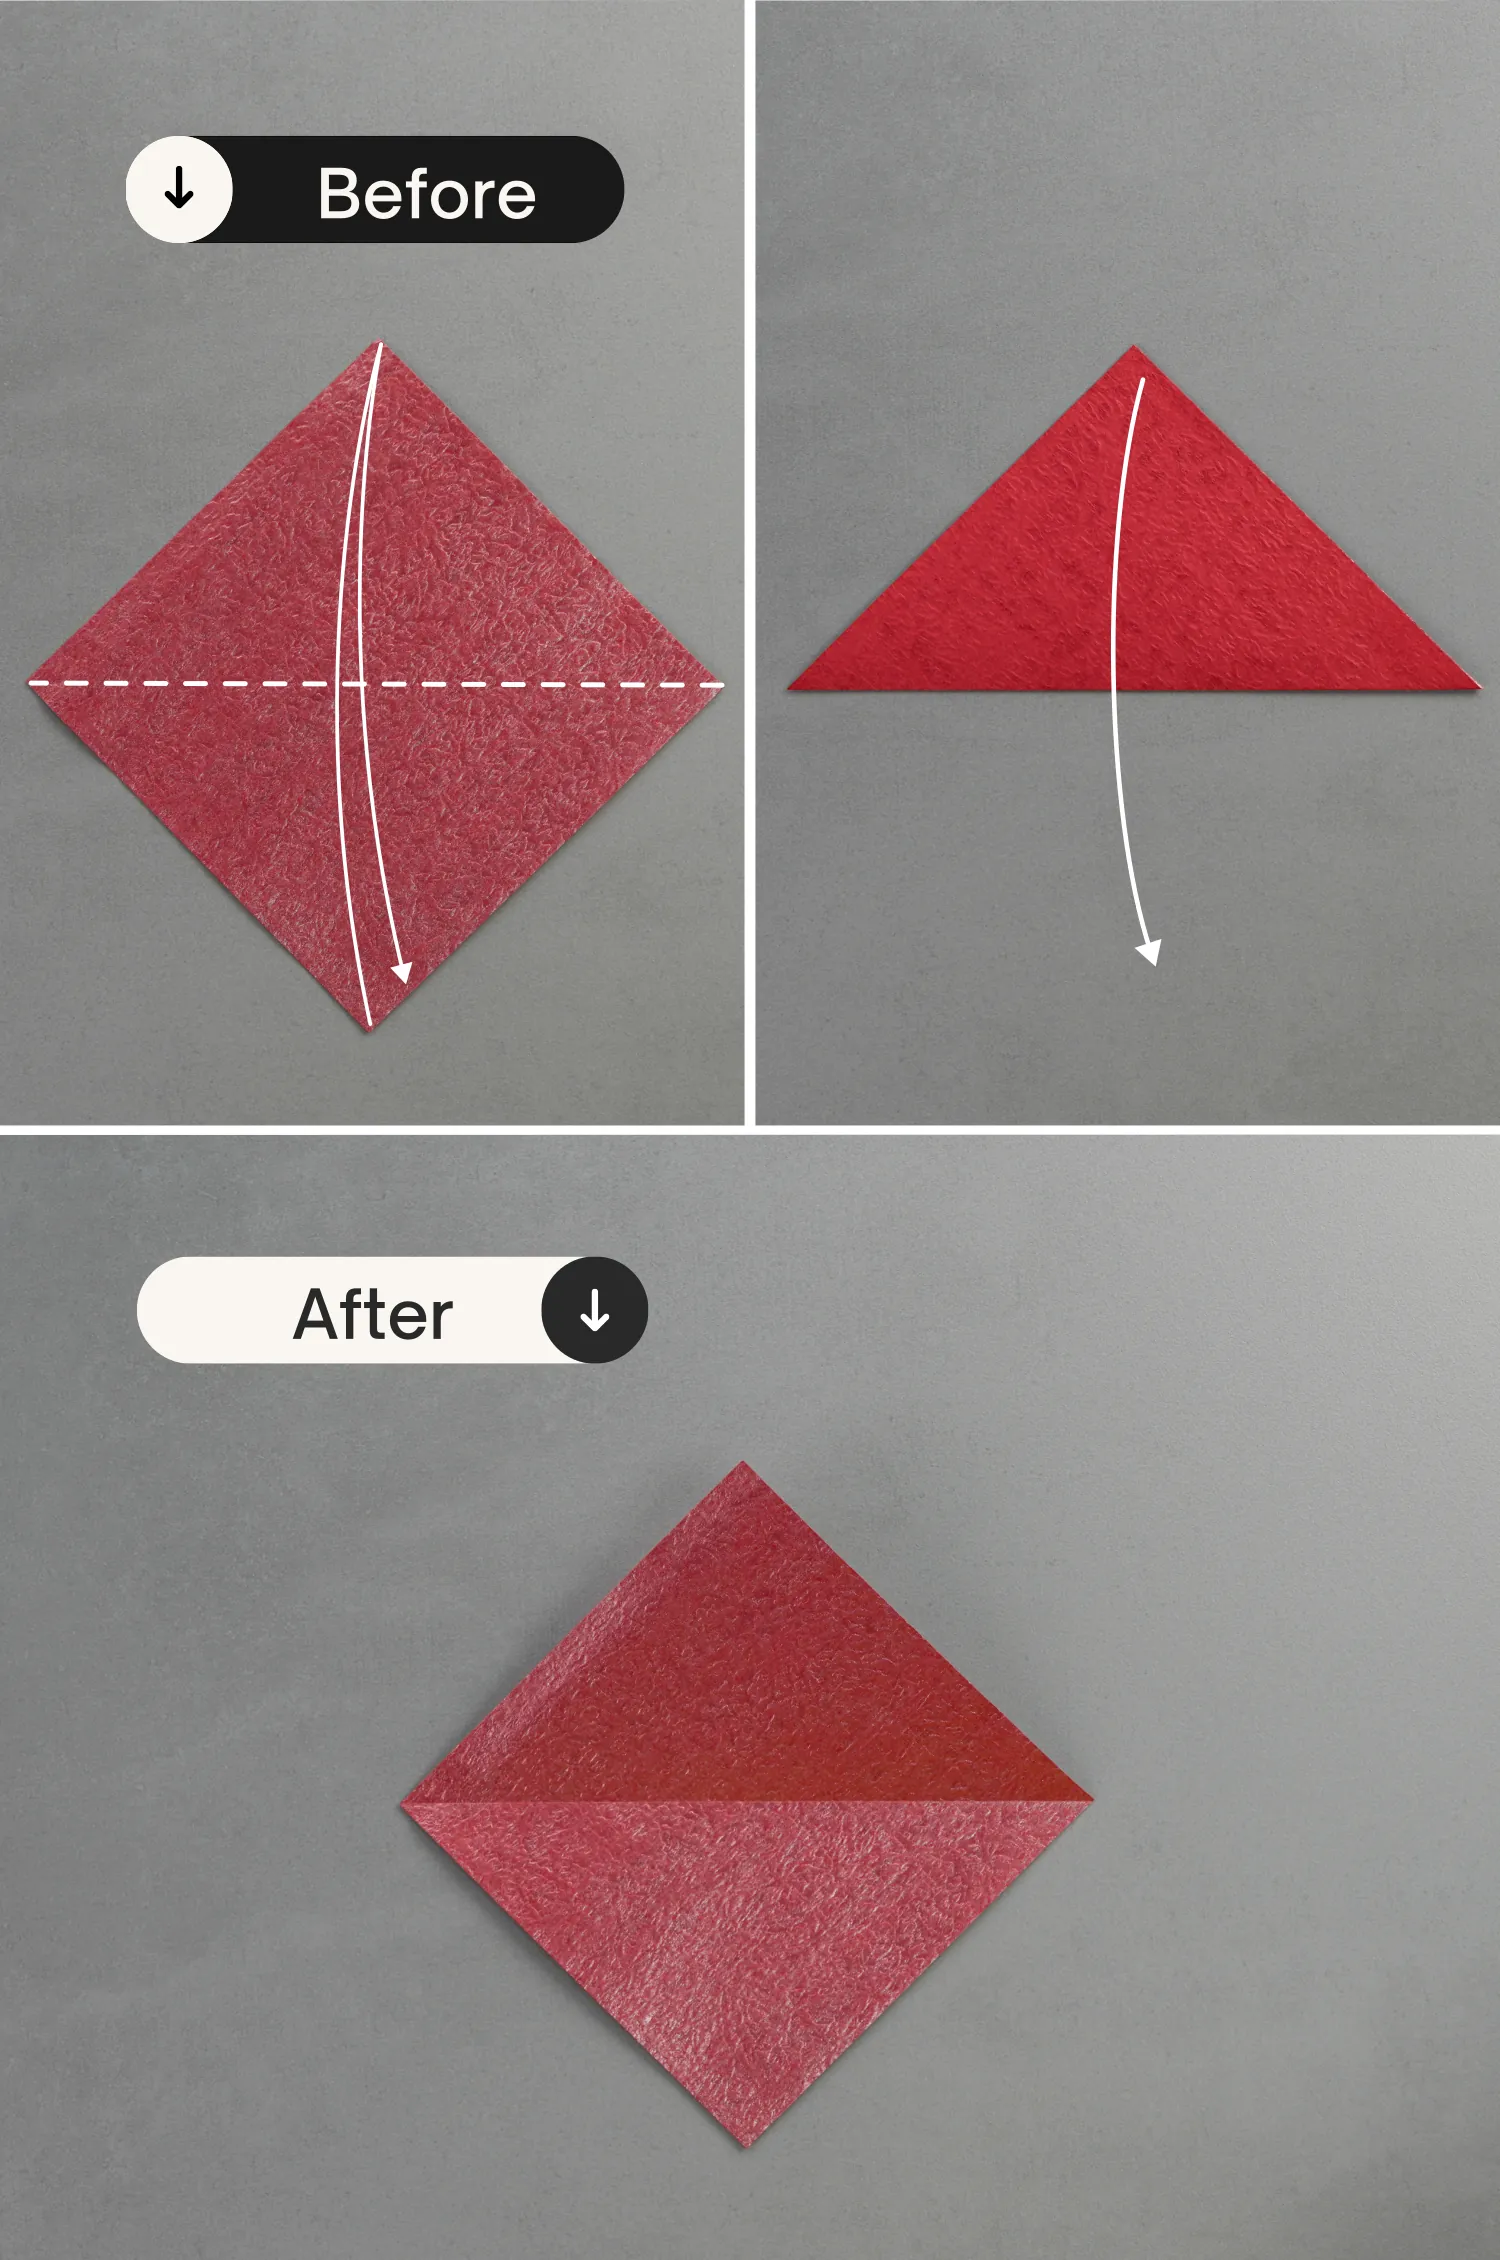
Step 1
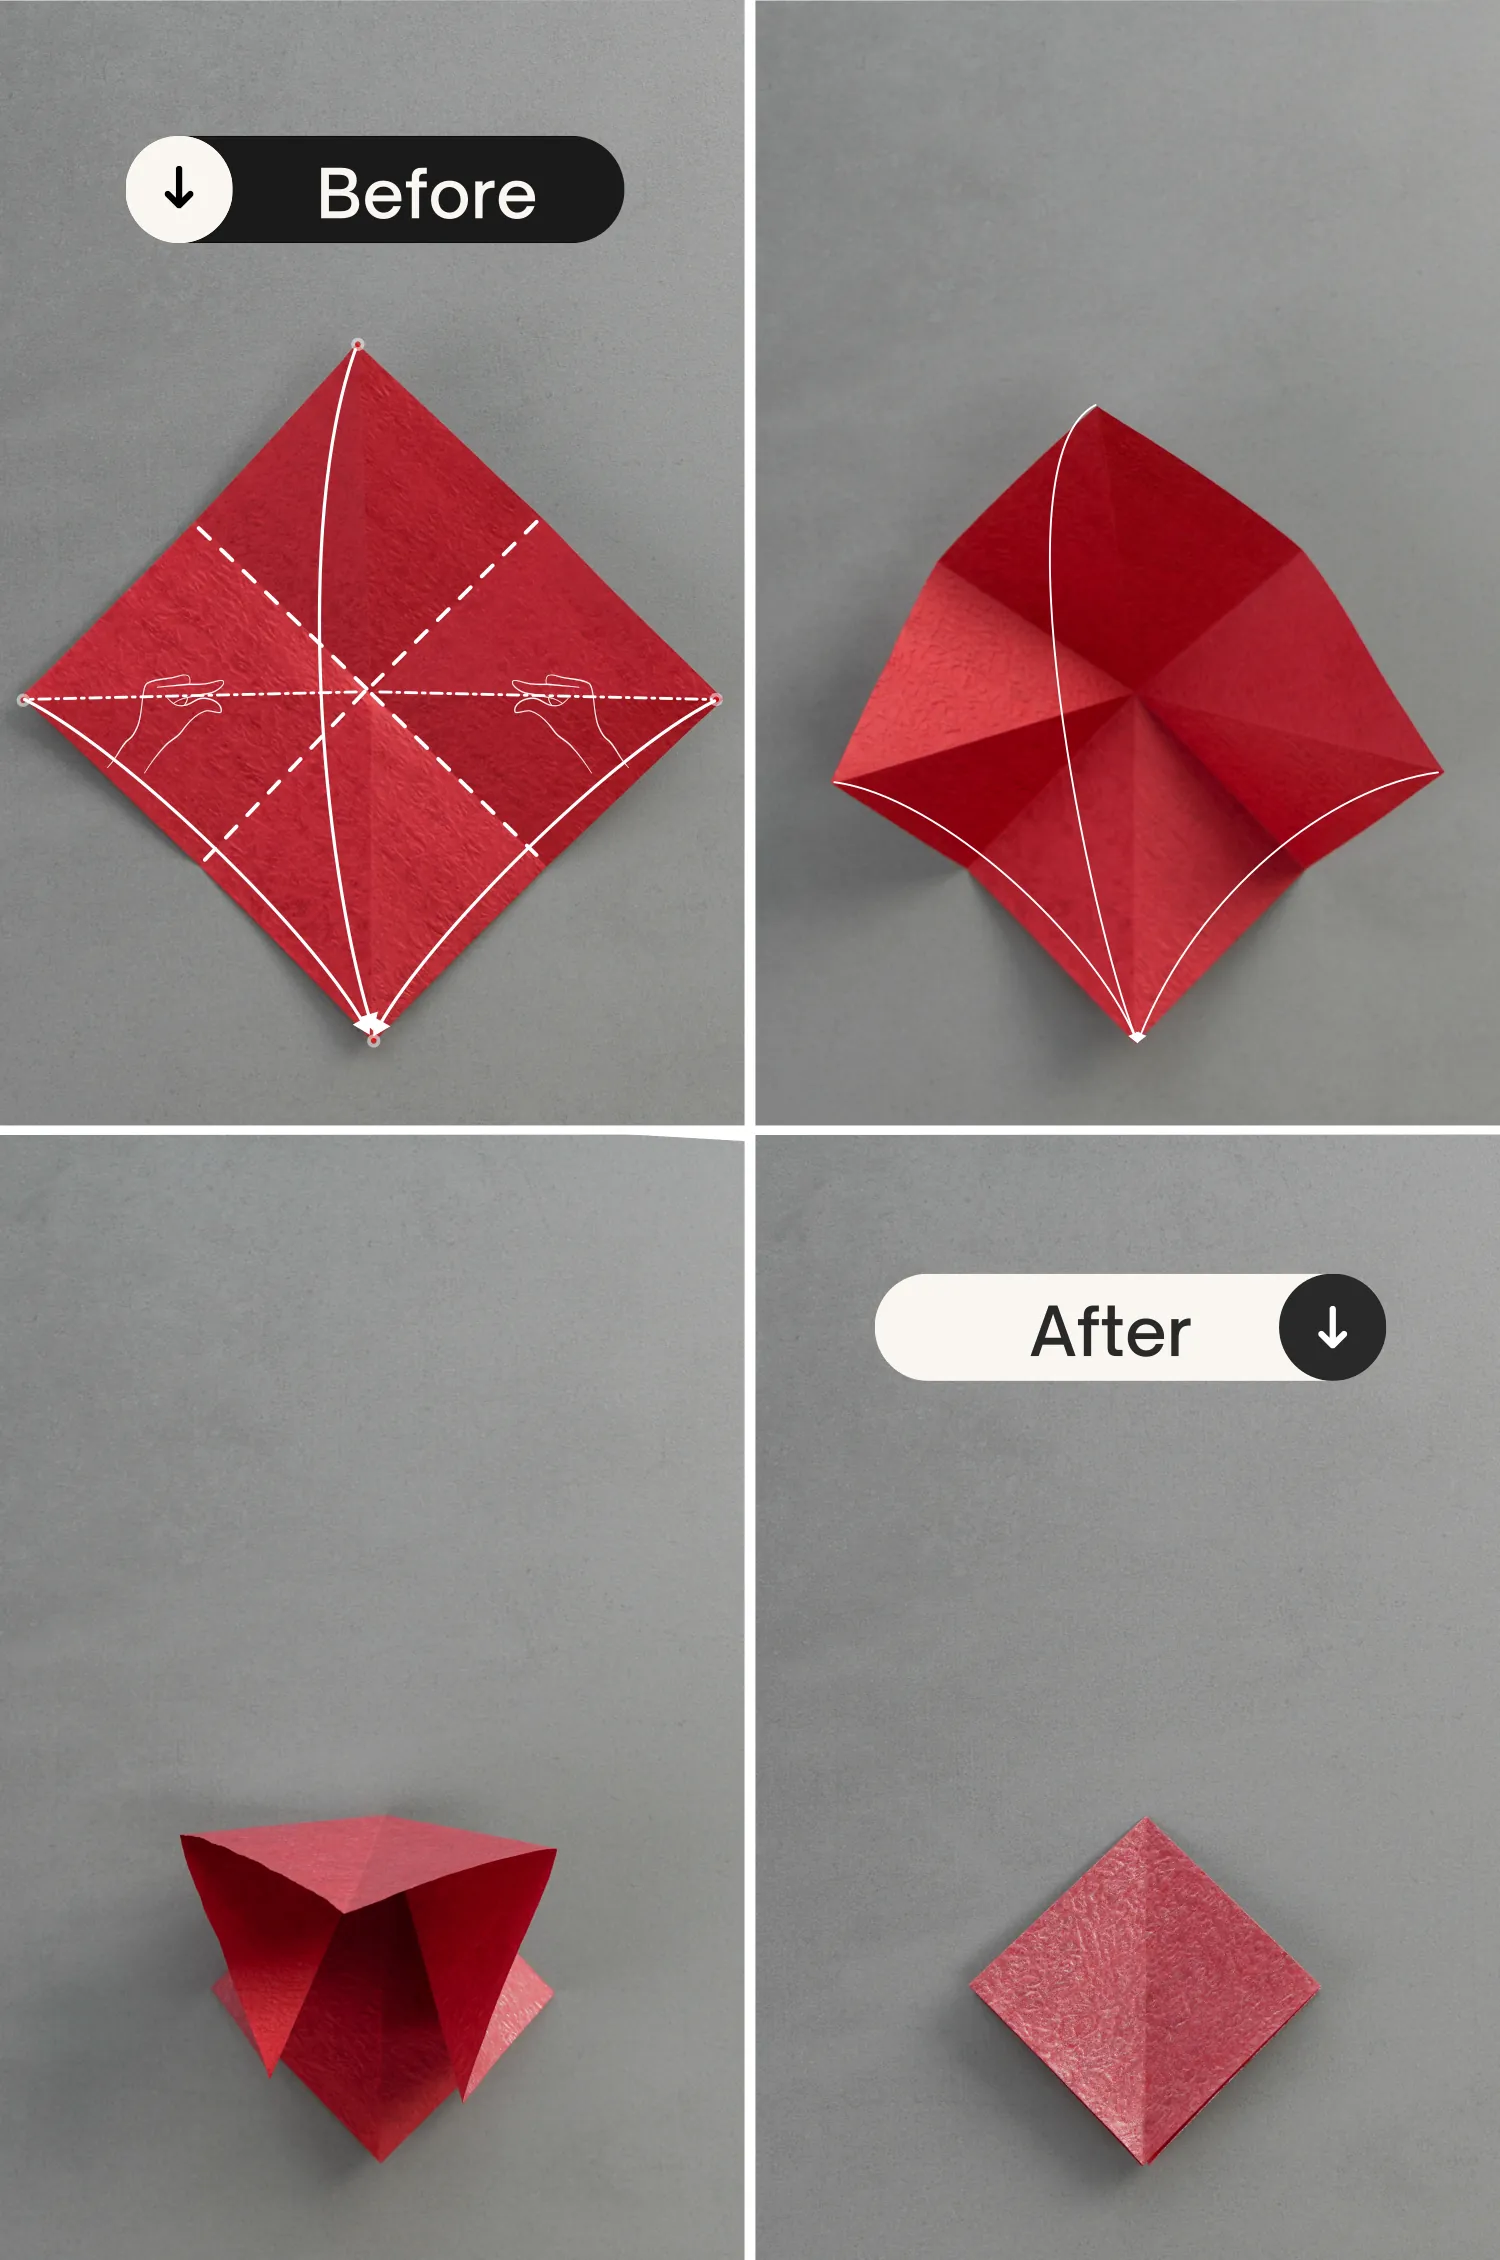
Place the paper with the desired display color side up to begin folding, fold the bottom point to the top diagonally, leaving a crease then unfold it.
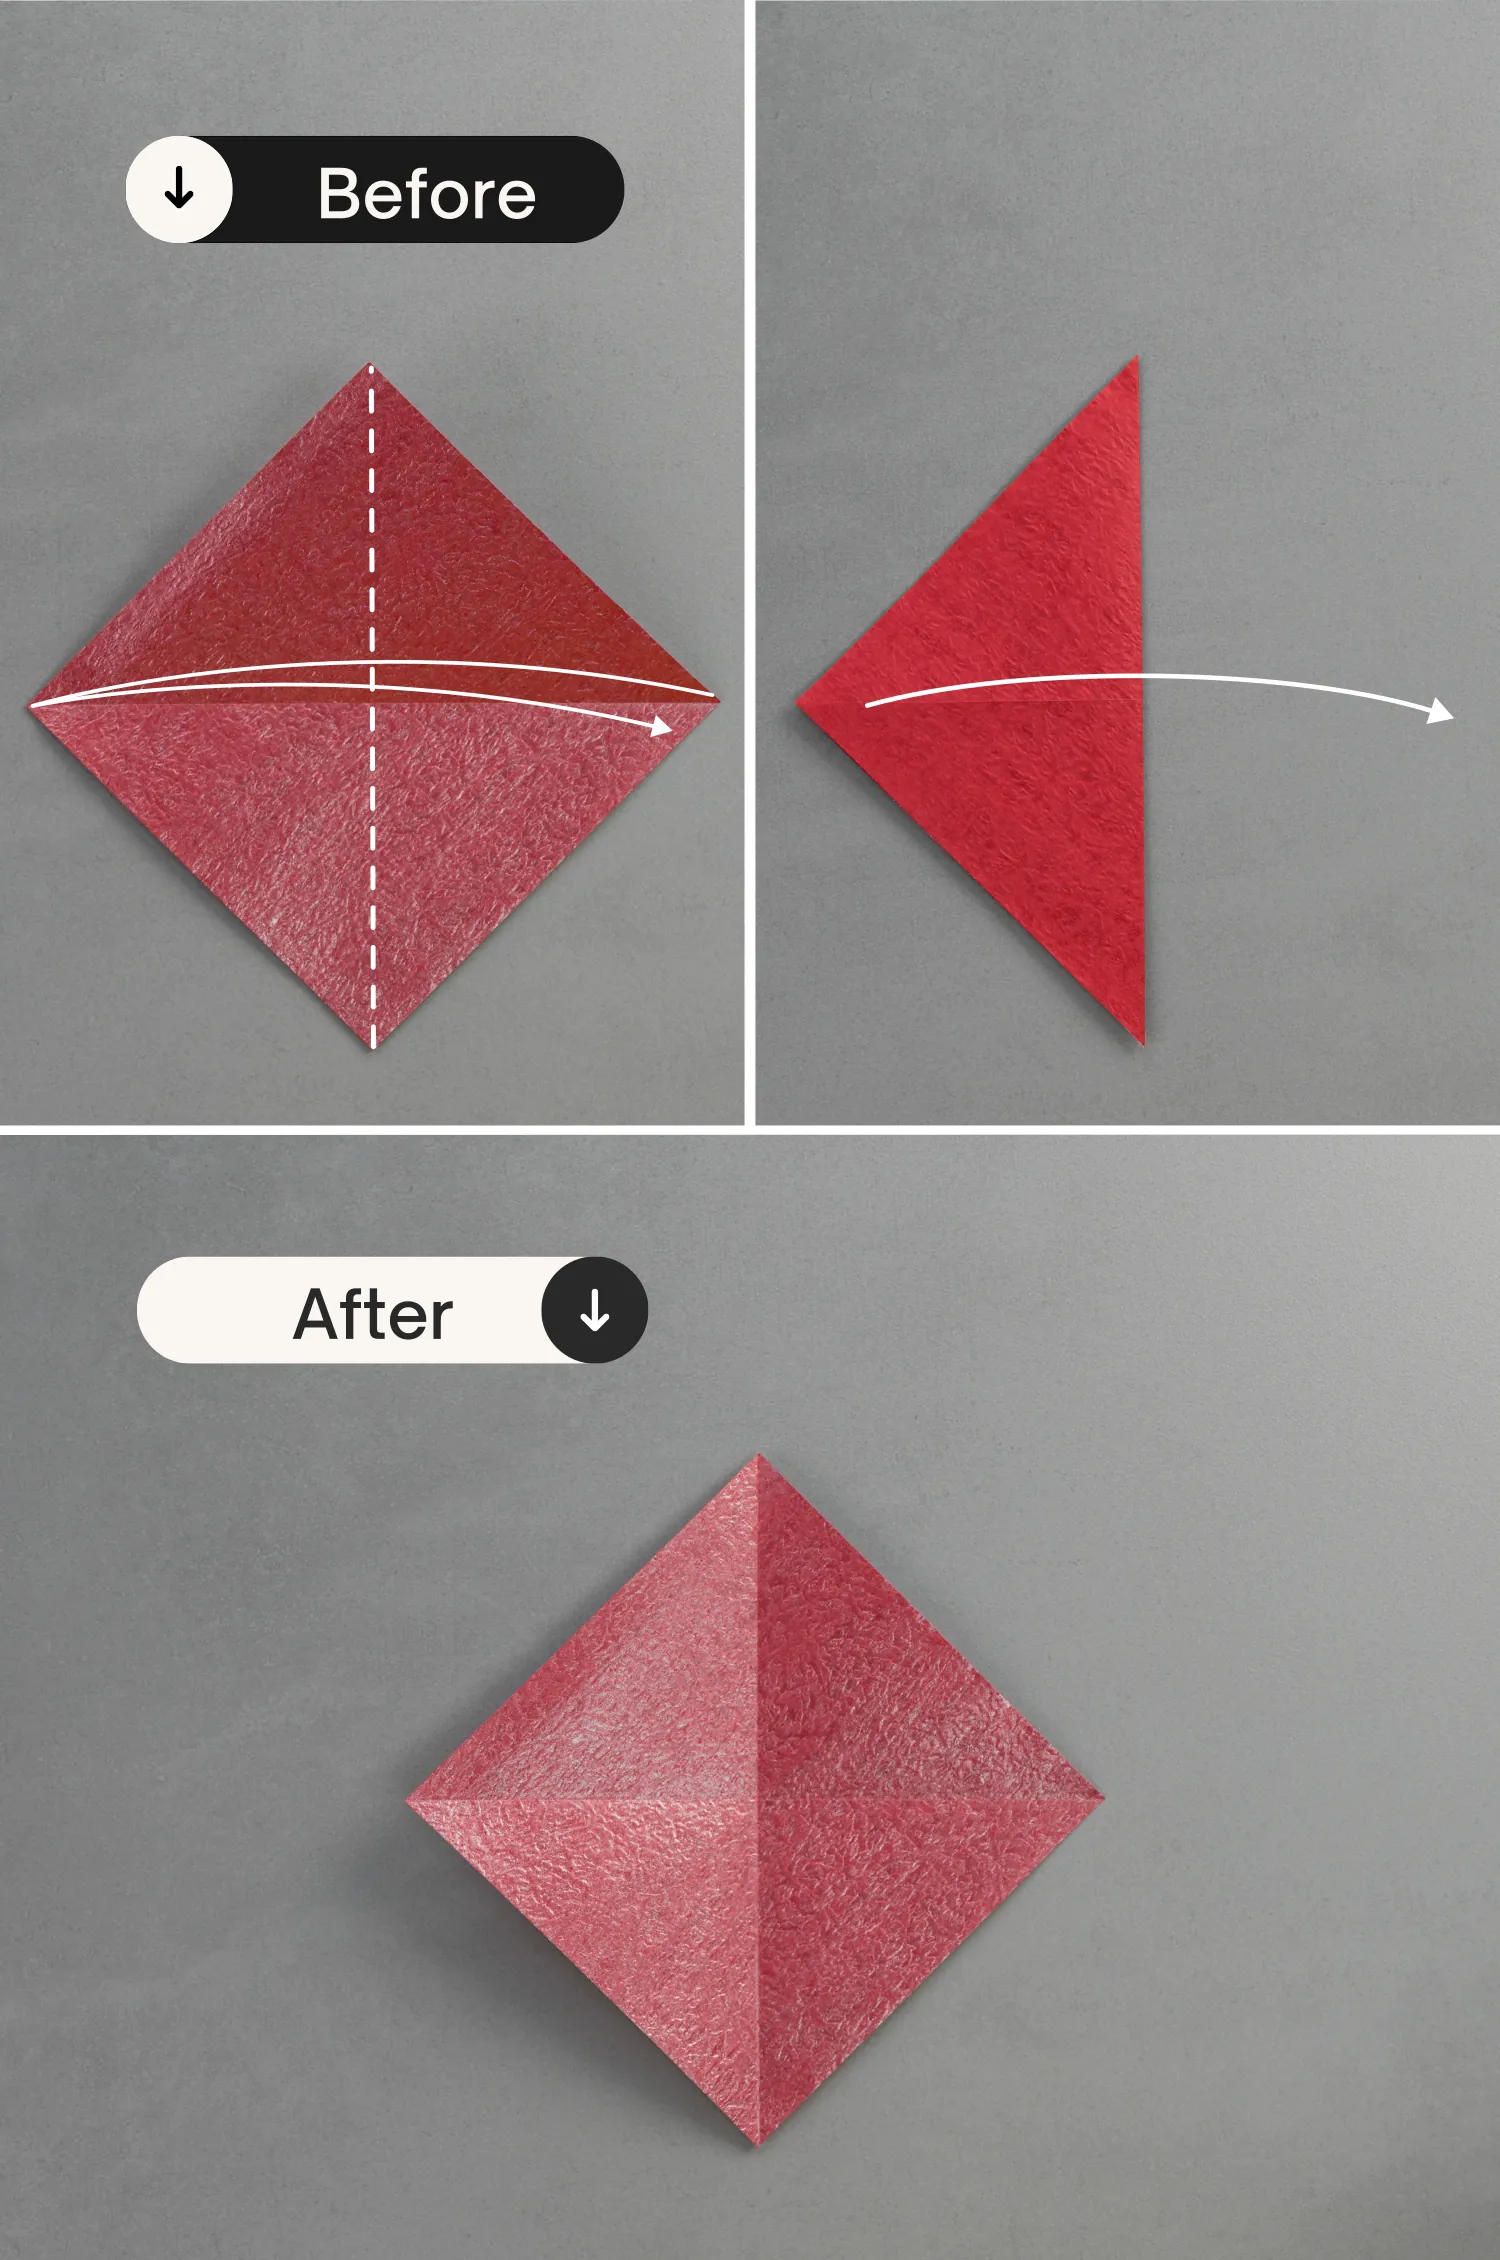
Step 2
Fold the right point to the left diagonally, crease it well then unfold.
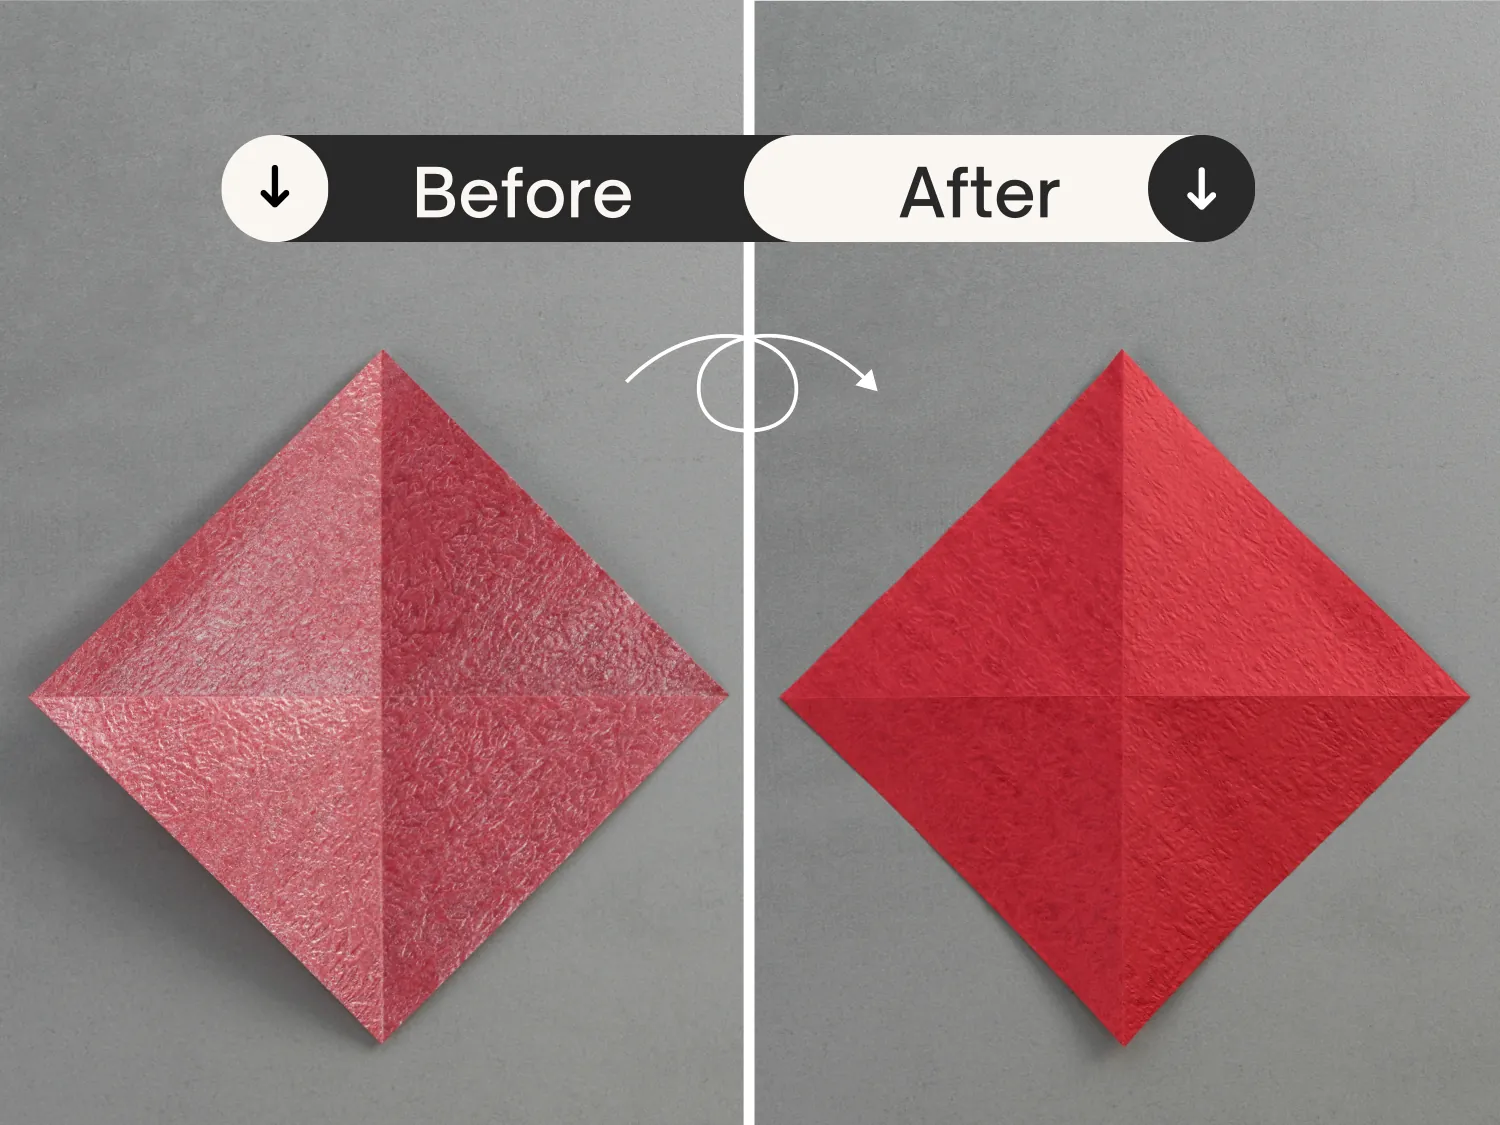
Step 3
Flip it over.
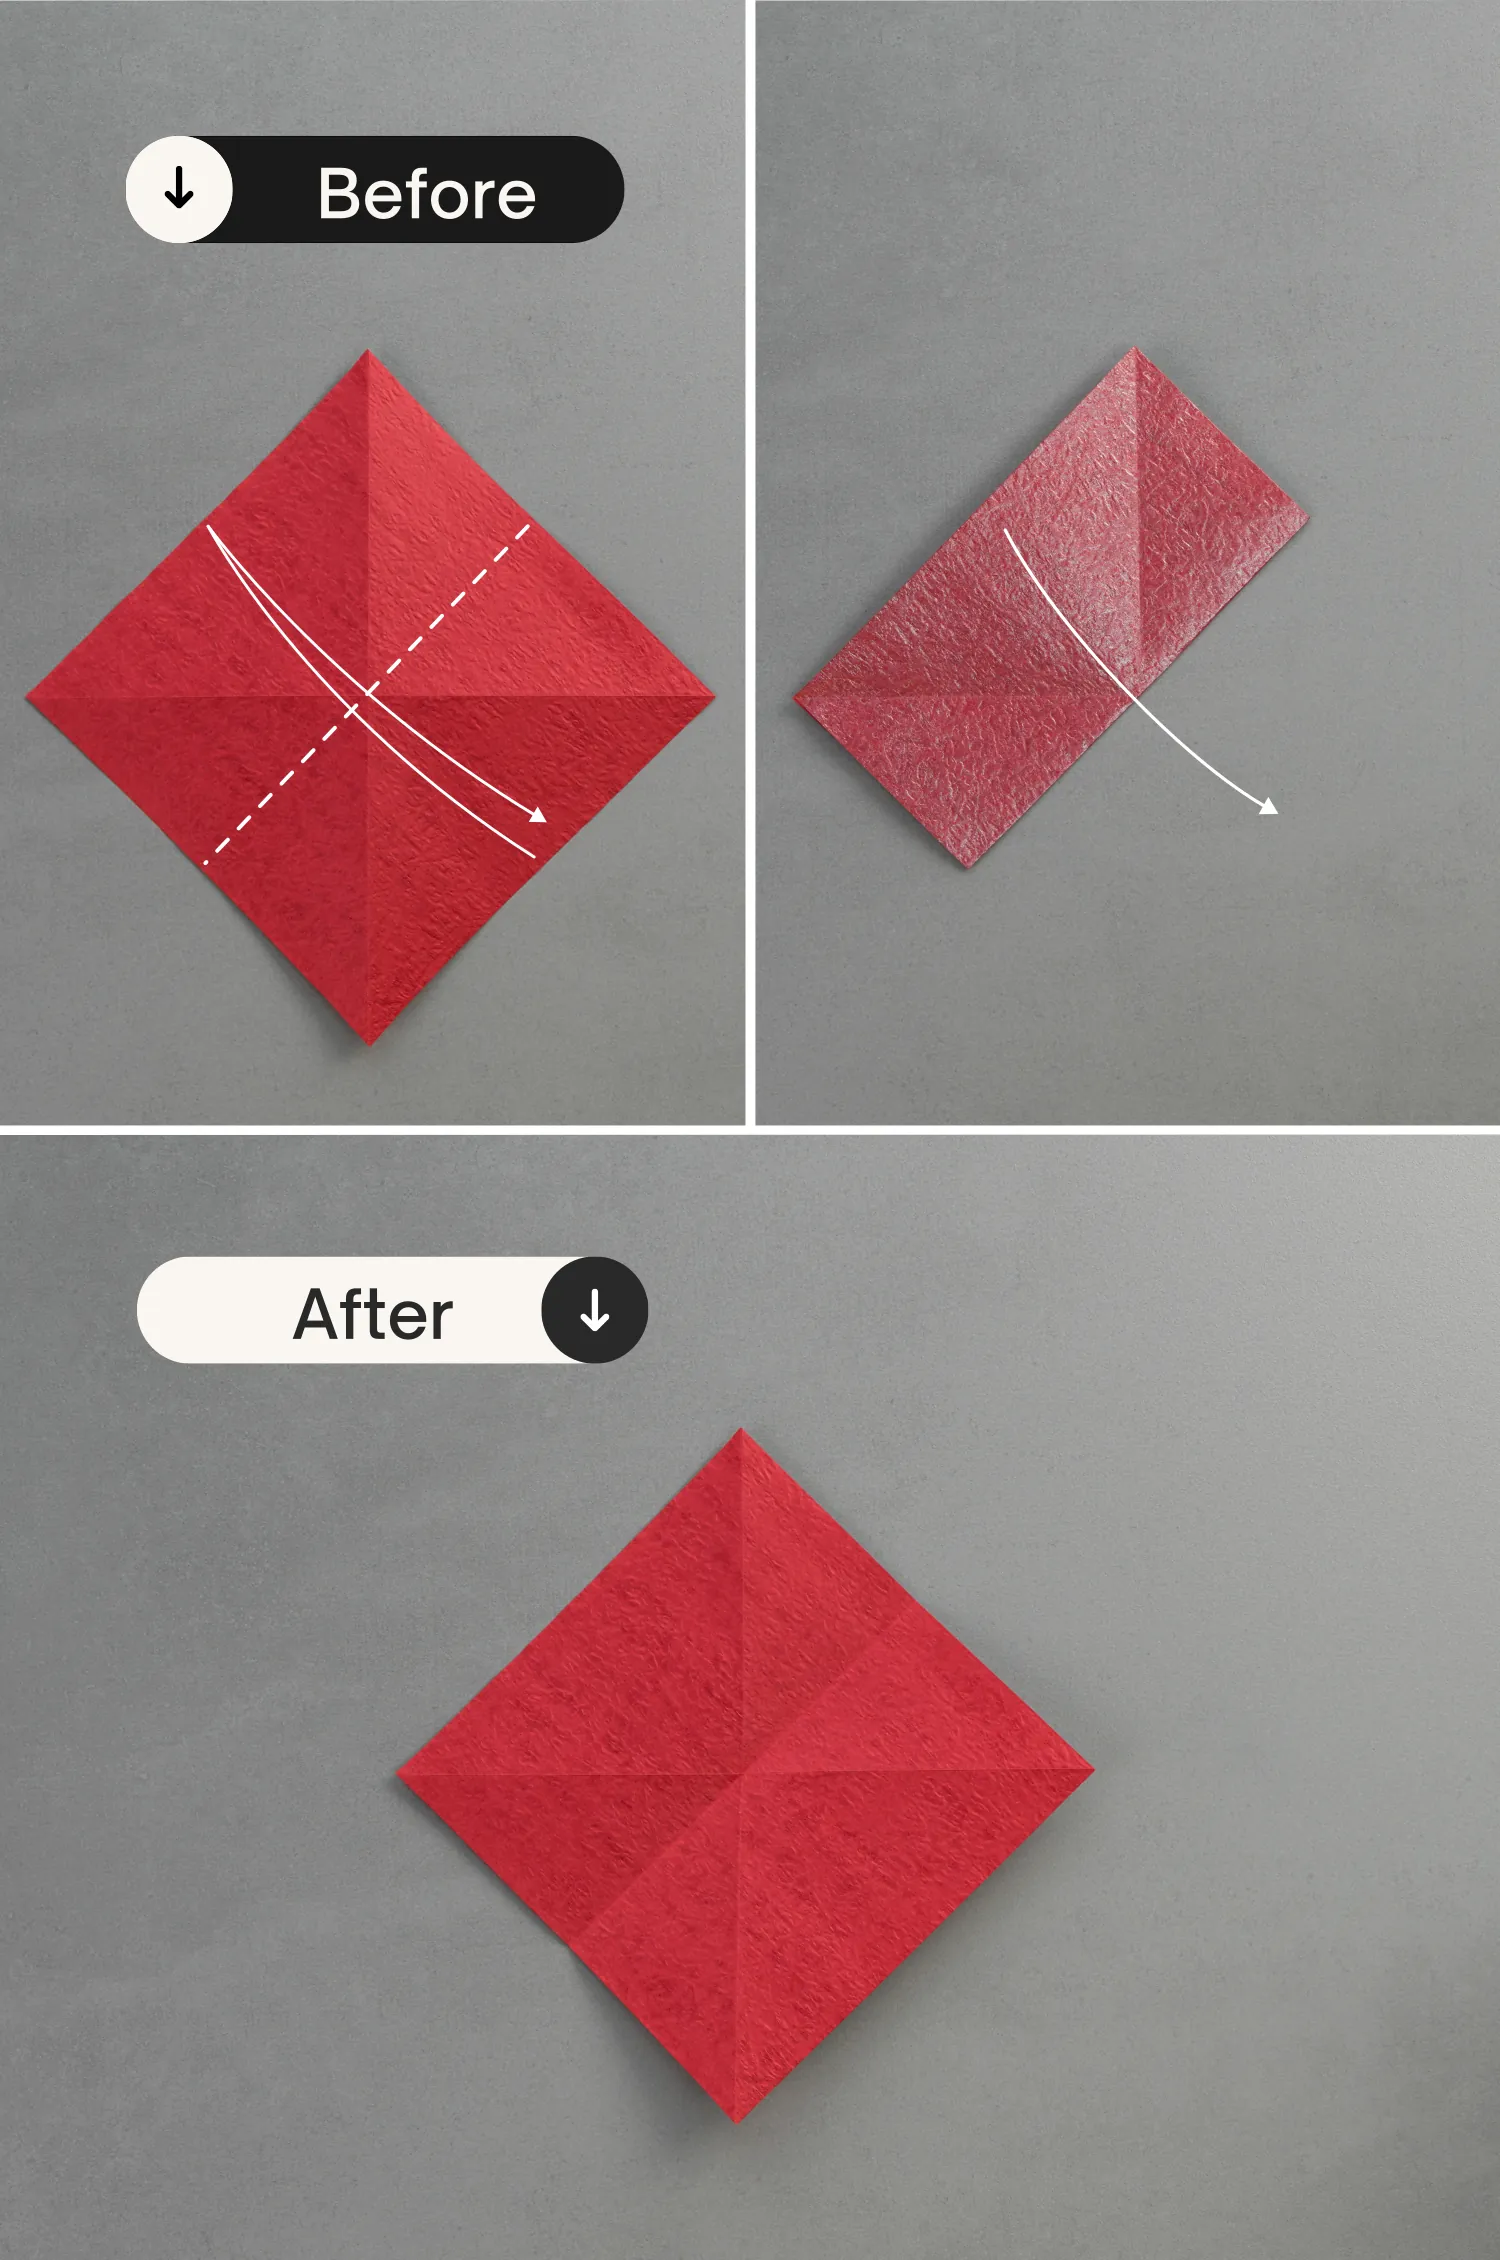
Step 4
Fold the bottom right edge to align with the top left, crease it well then unfold.
Step 5
Fold the bottom left edge to align with the top right edge, leaving a crease, and unfold.

Step 6
Now, shape the left and right creases, and use both hands to press the left and right points, then push them down to meet the bottom point.
Flatten the fold along the existing creases.
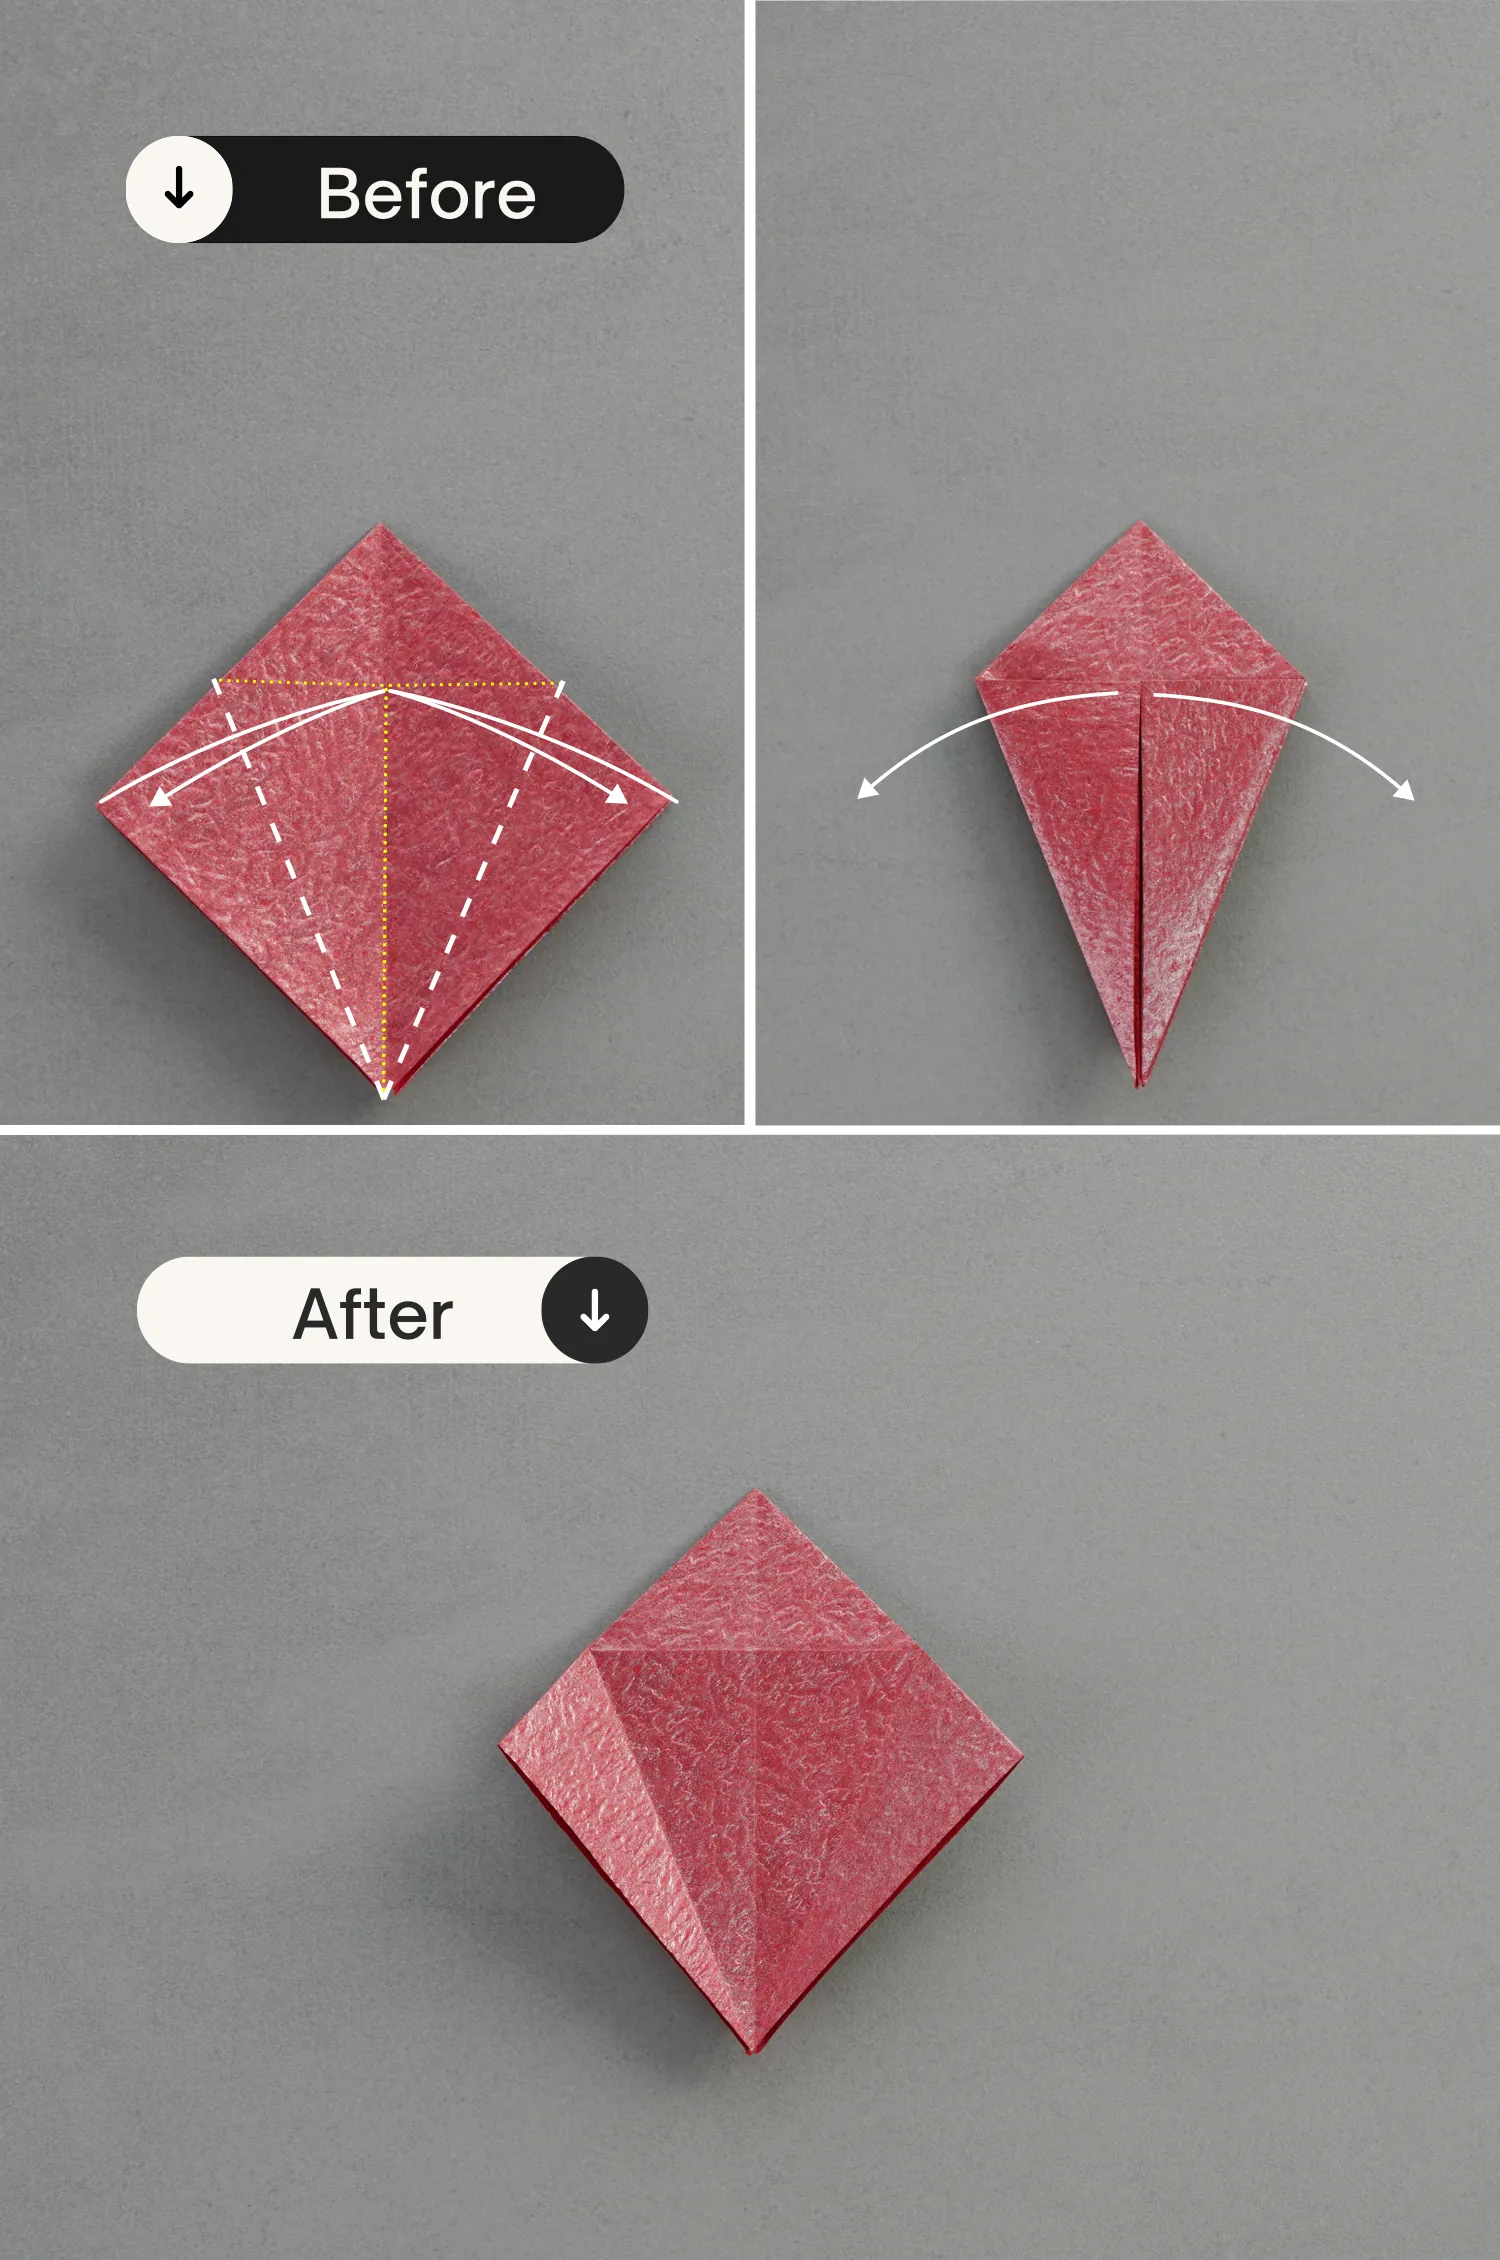
Step 7
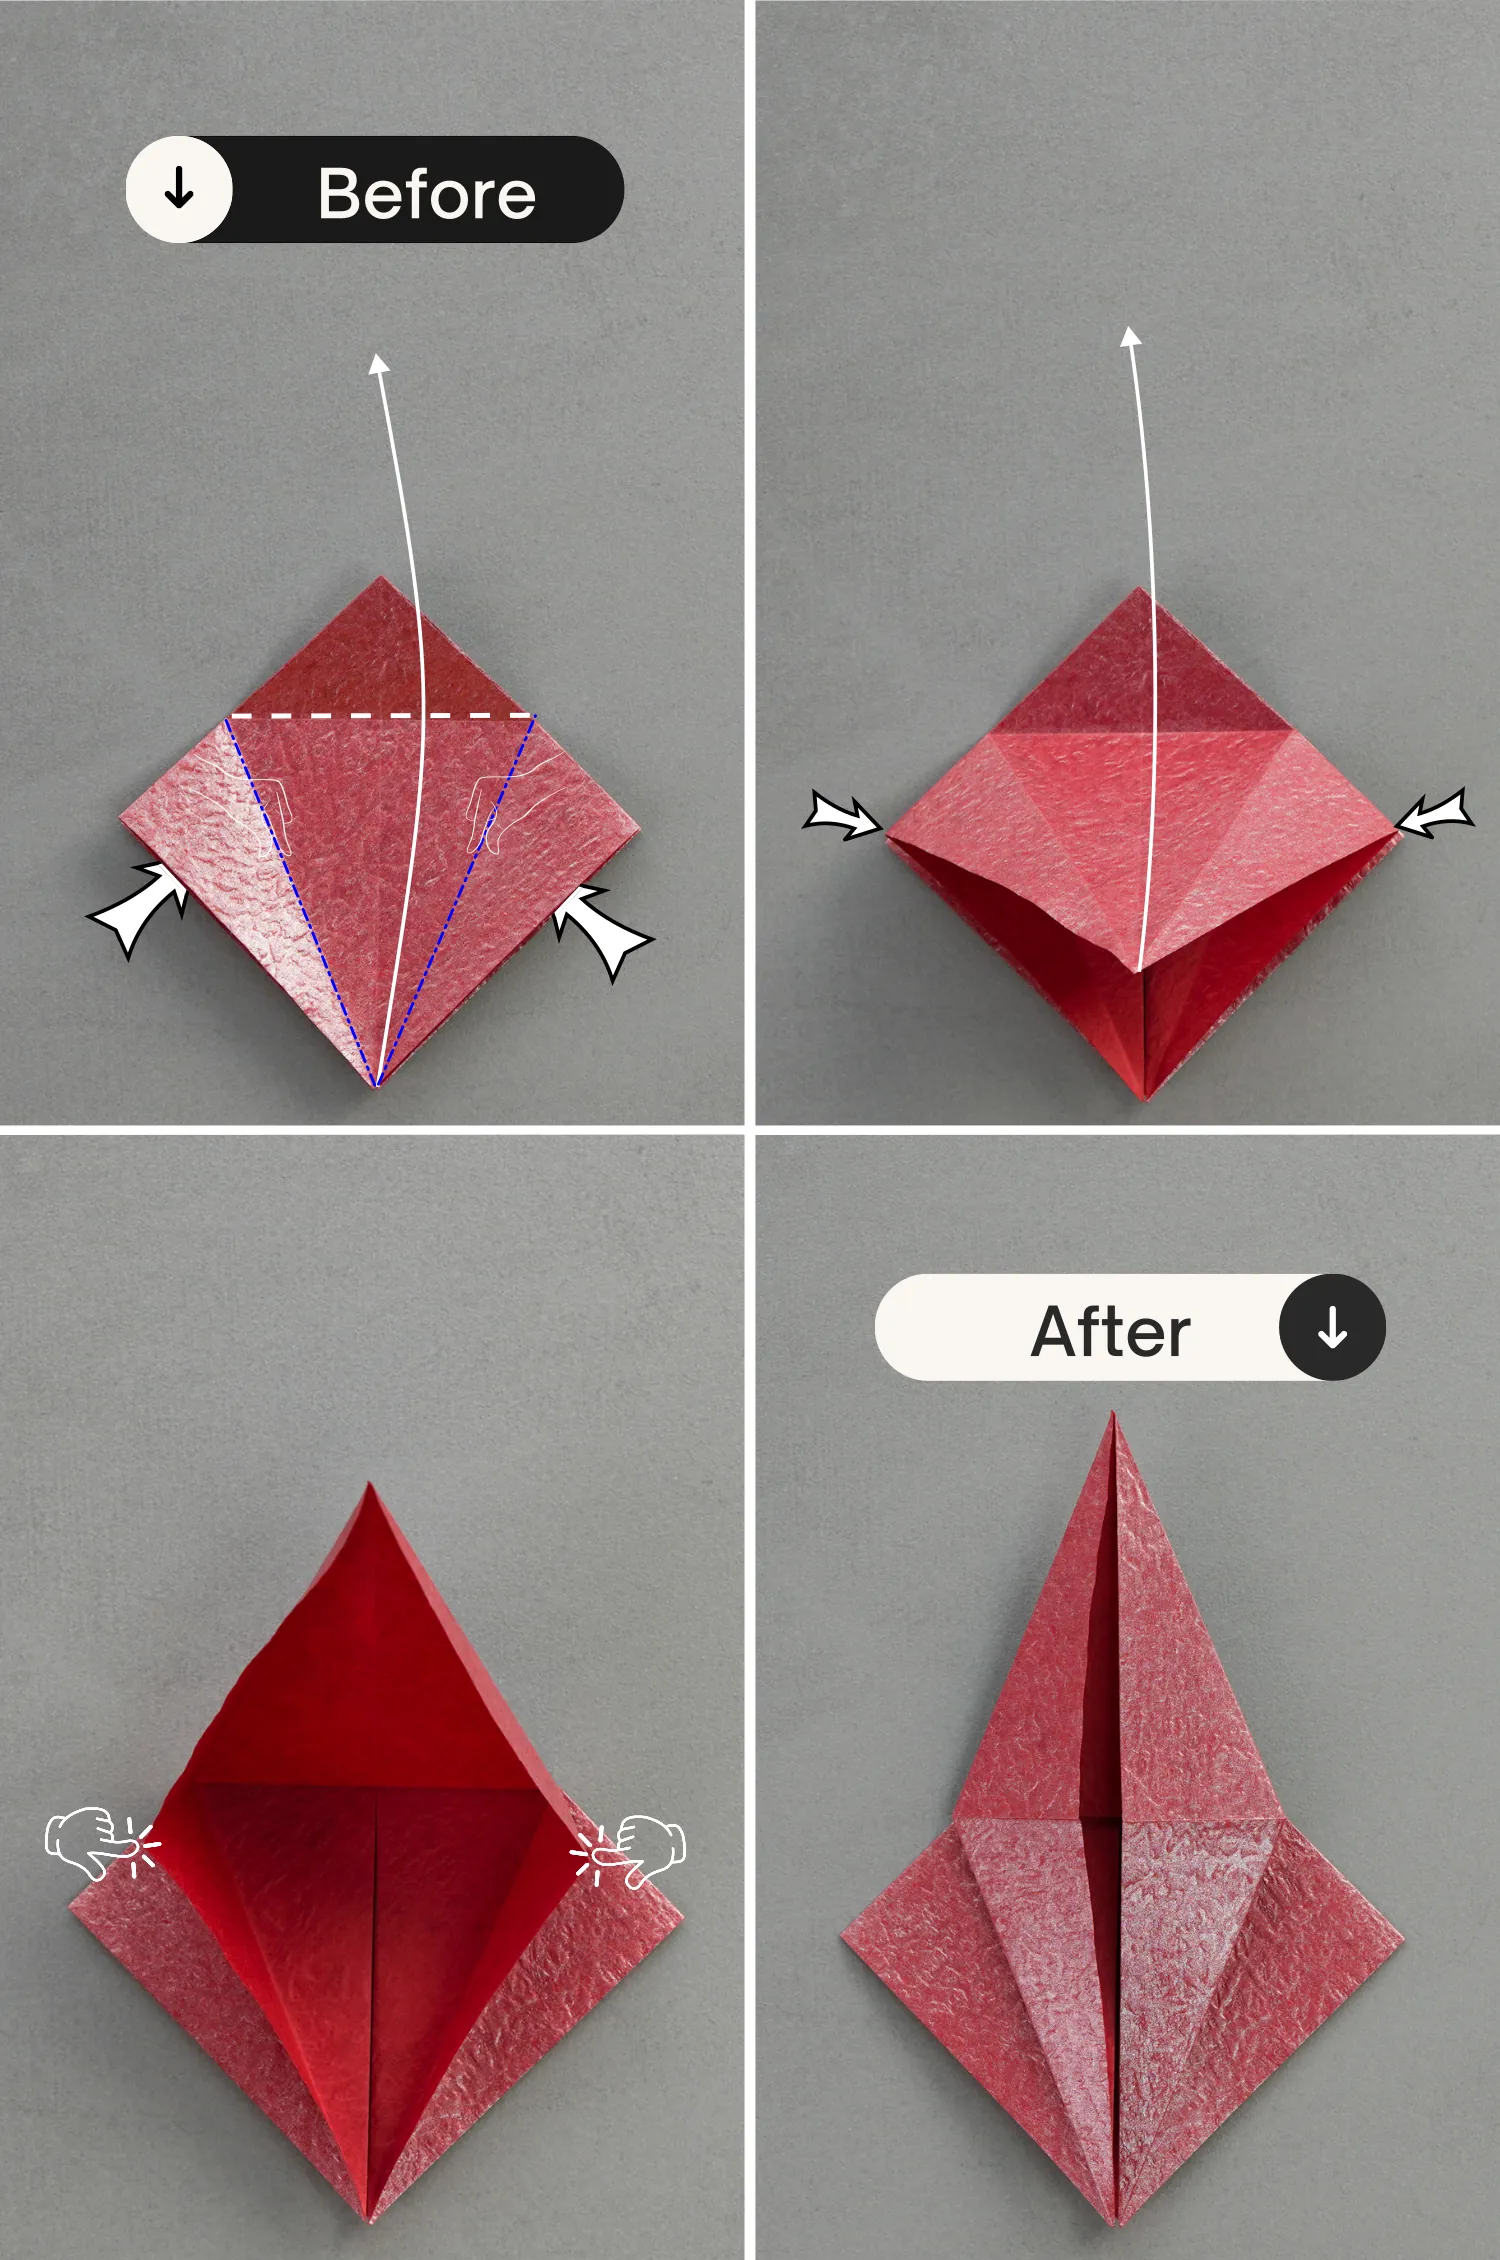
Fold the bottom left and right edges of the top layer to align with the middle vertical crease, crease them well then unfold.

Step 8
Fold the top corner down along the dotted line, and unfold it.

Step 9
Open the pocket based on the crease created by the previous step. Then lift up the top layer, push the left and right points to the center, and flatten the pocket.
Step 10
Fold the top triangle down.
Step 11
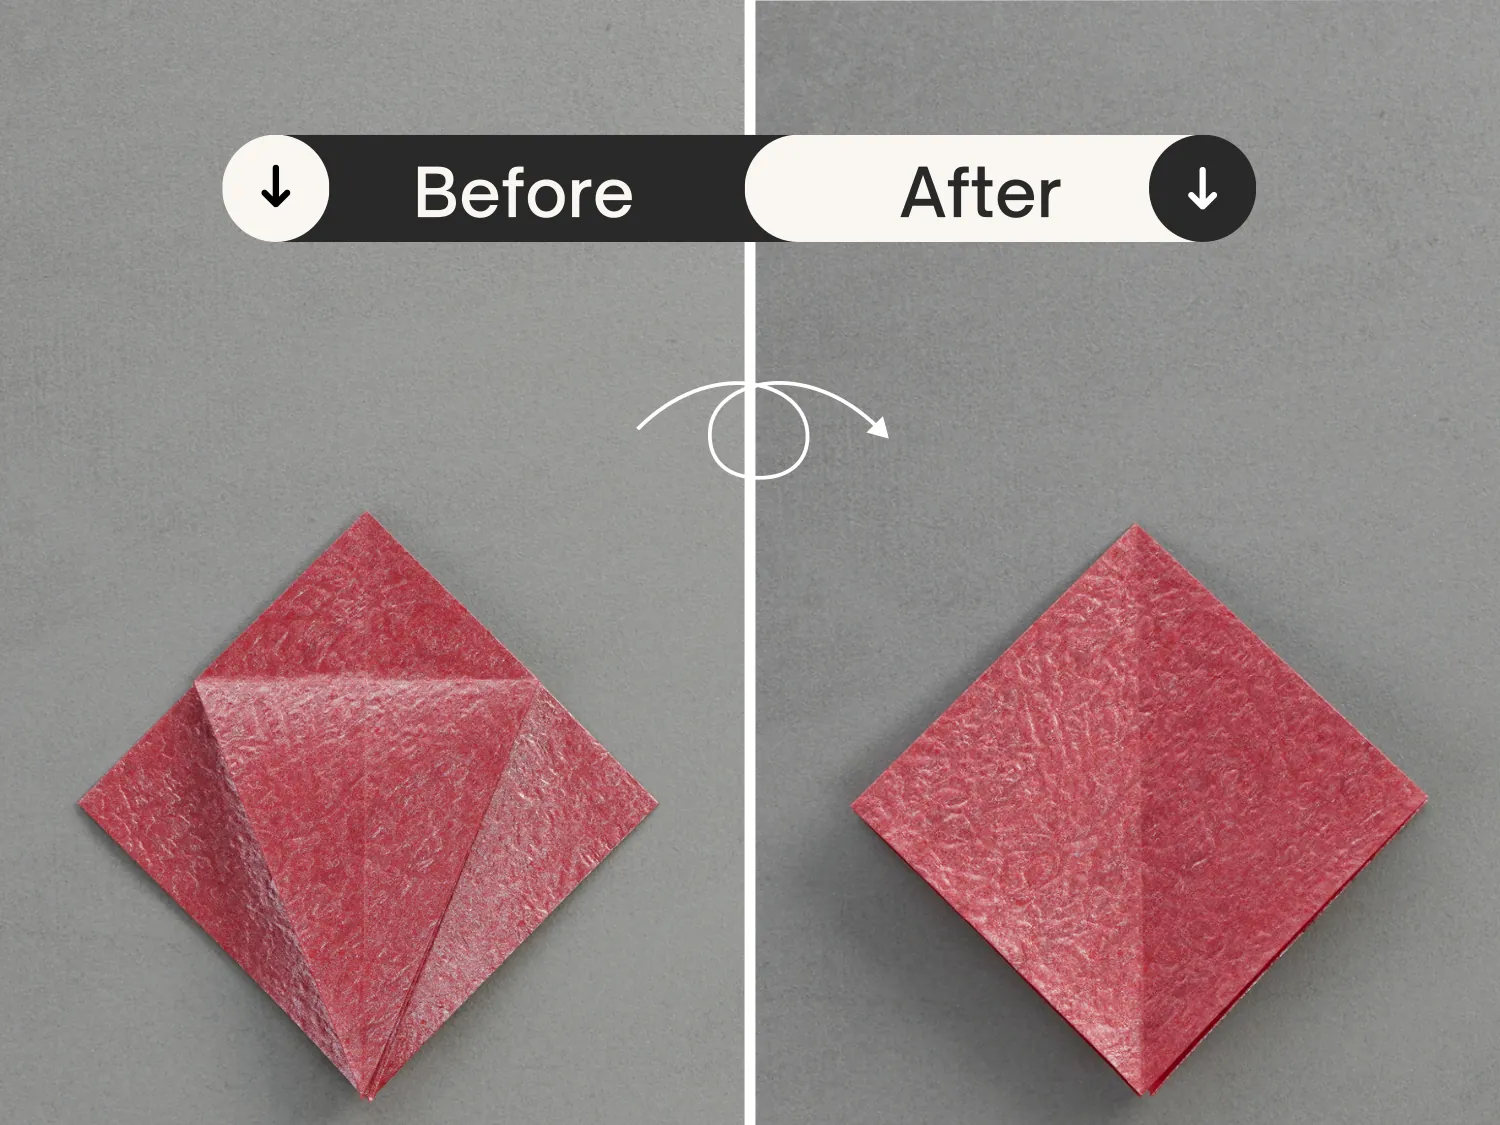
Flip it over.
Step 12
Like before, fold the bottom left and right edges to the center, and unfold.
Step 13
As you did in step 9, open the pocket based on the crease created by the previous step. Then lift up the top layer, push the left and right points to the center, and flatten the pocket.
Step 14
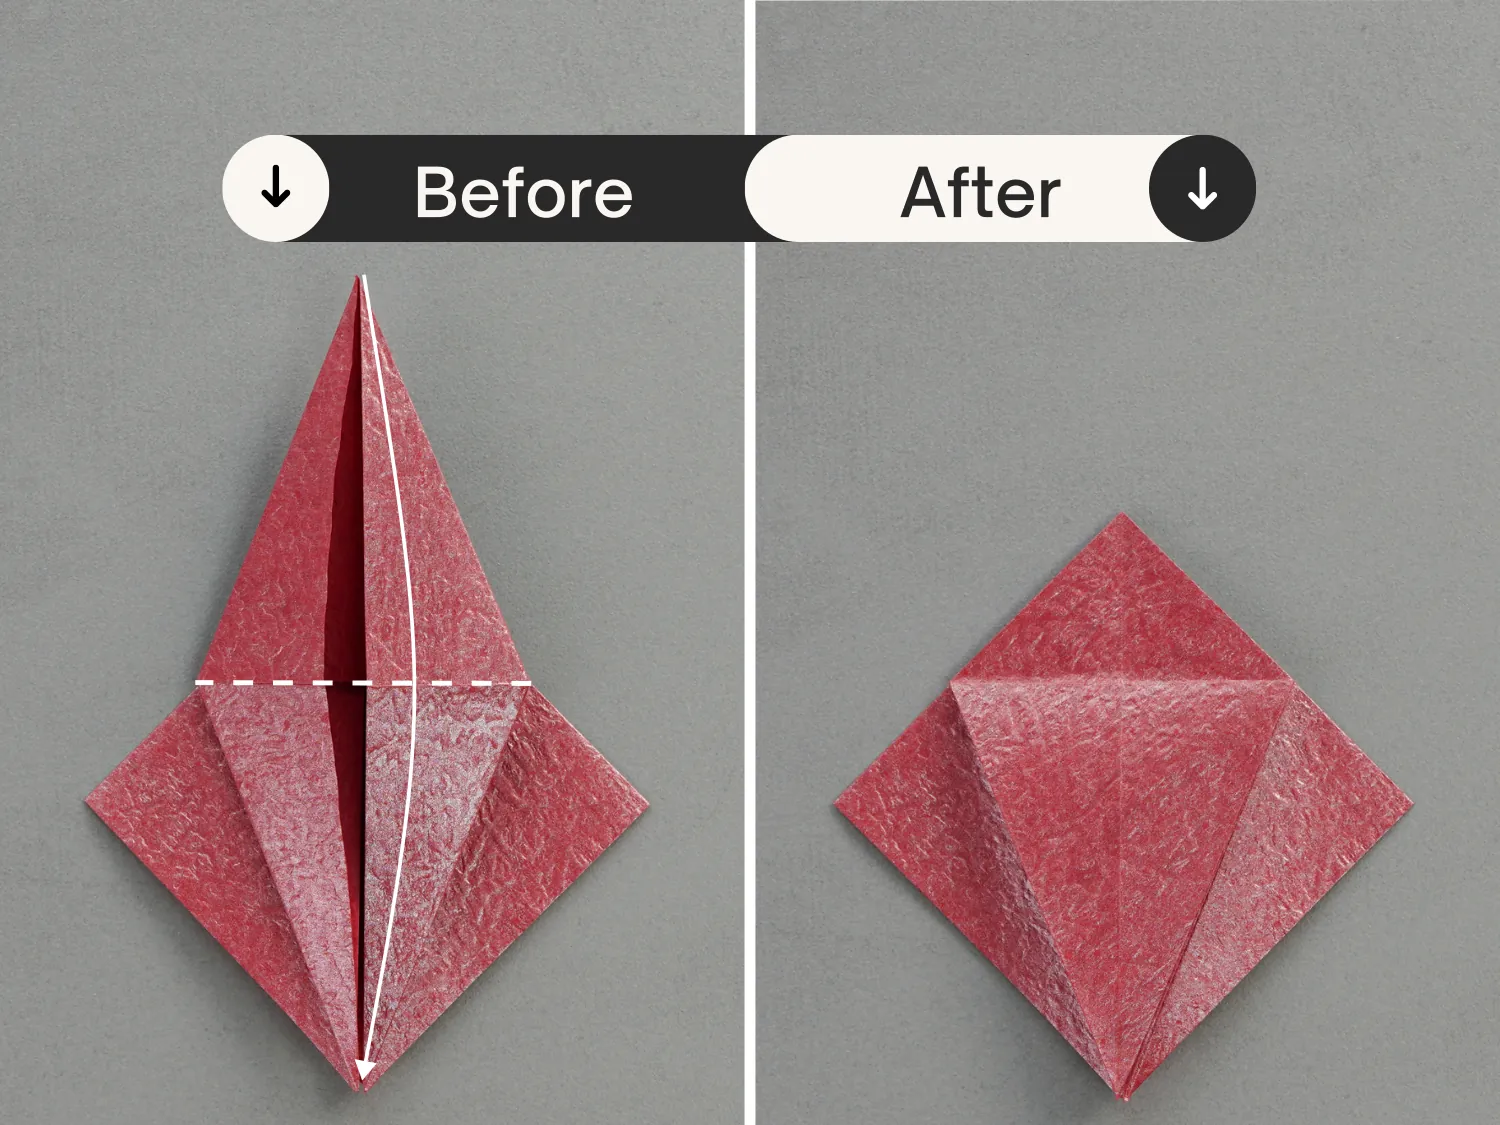
Fold the top triangle down.
Step 15
Fold the top corner down diagonally to meet the intersection point, crease it well then unfold.
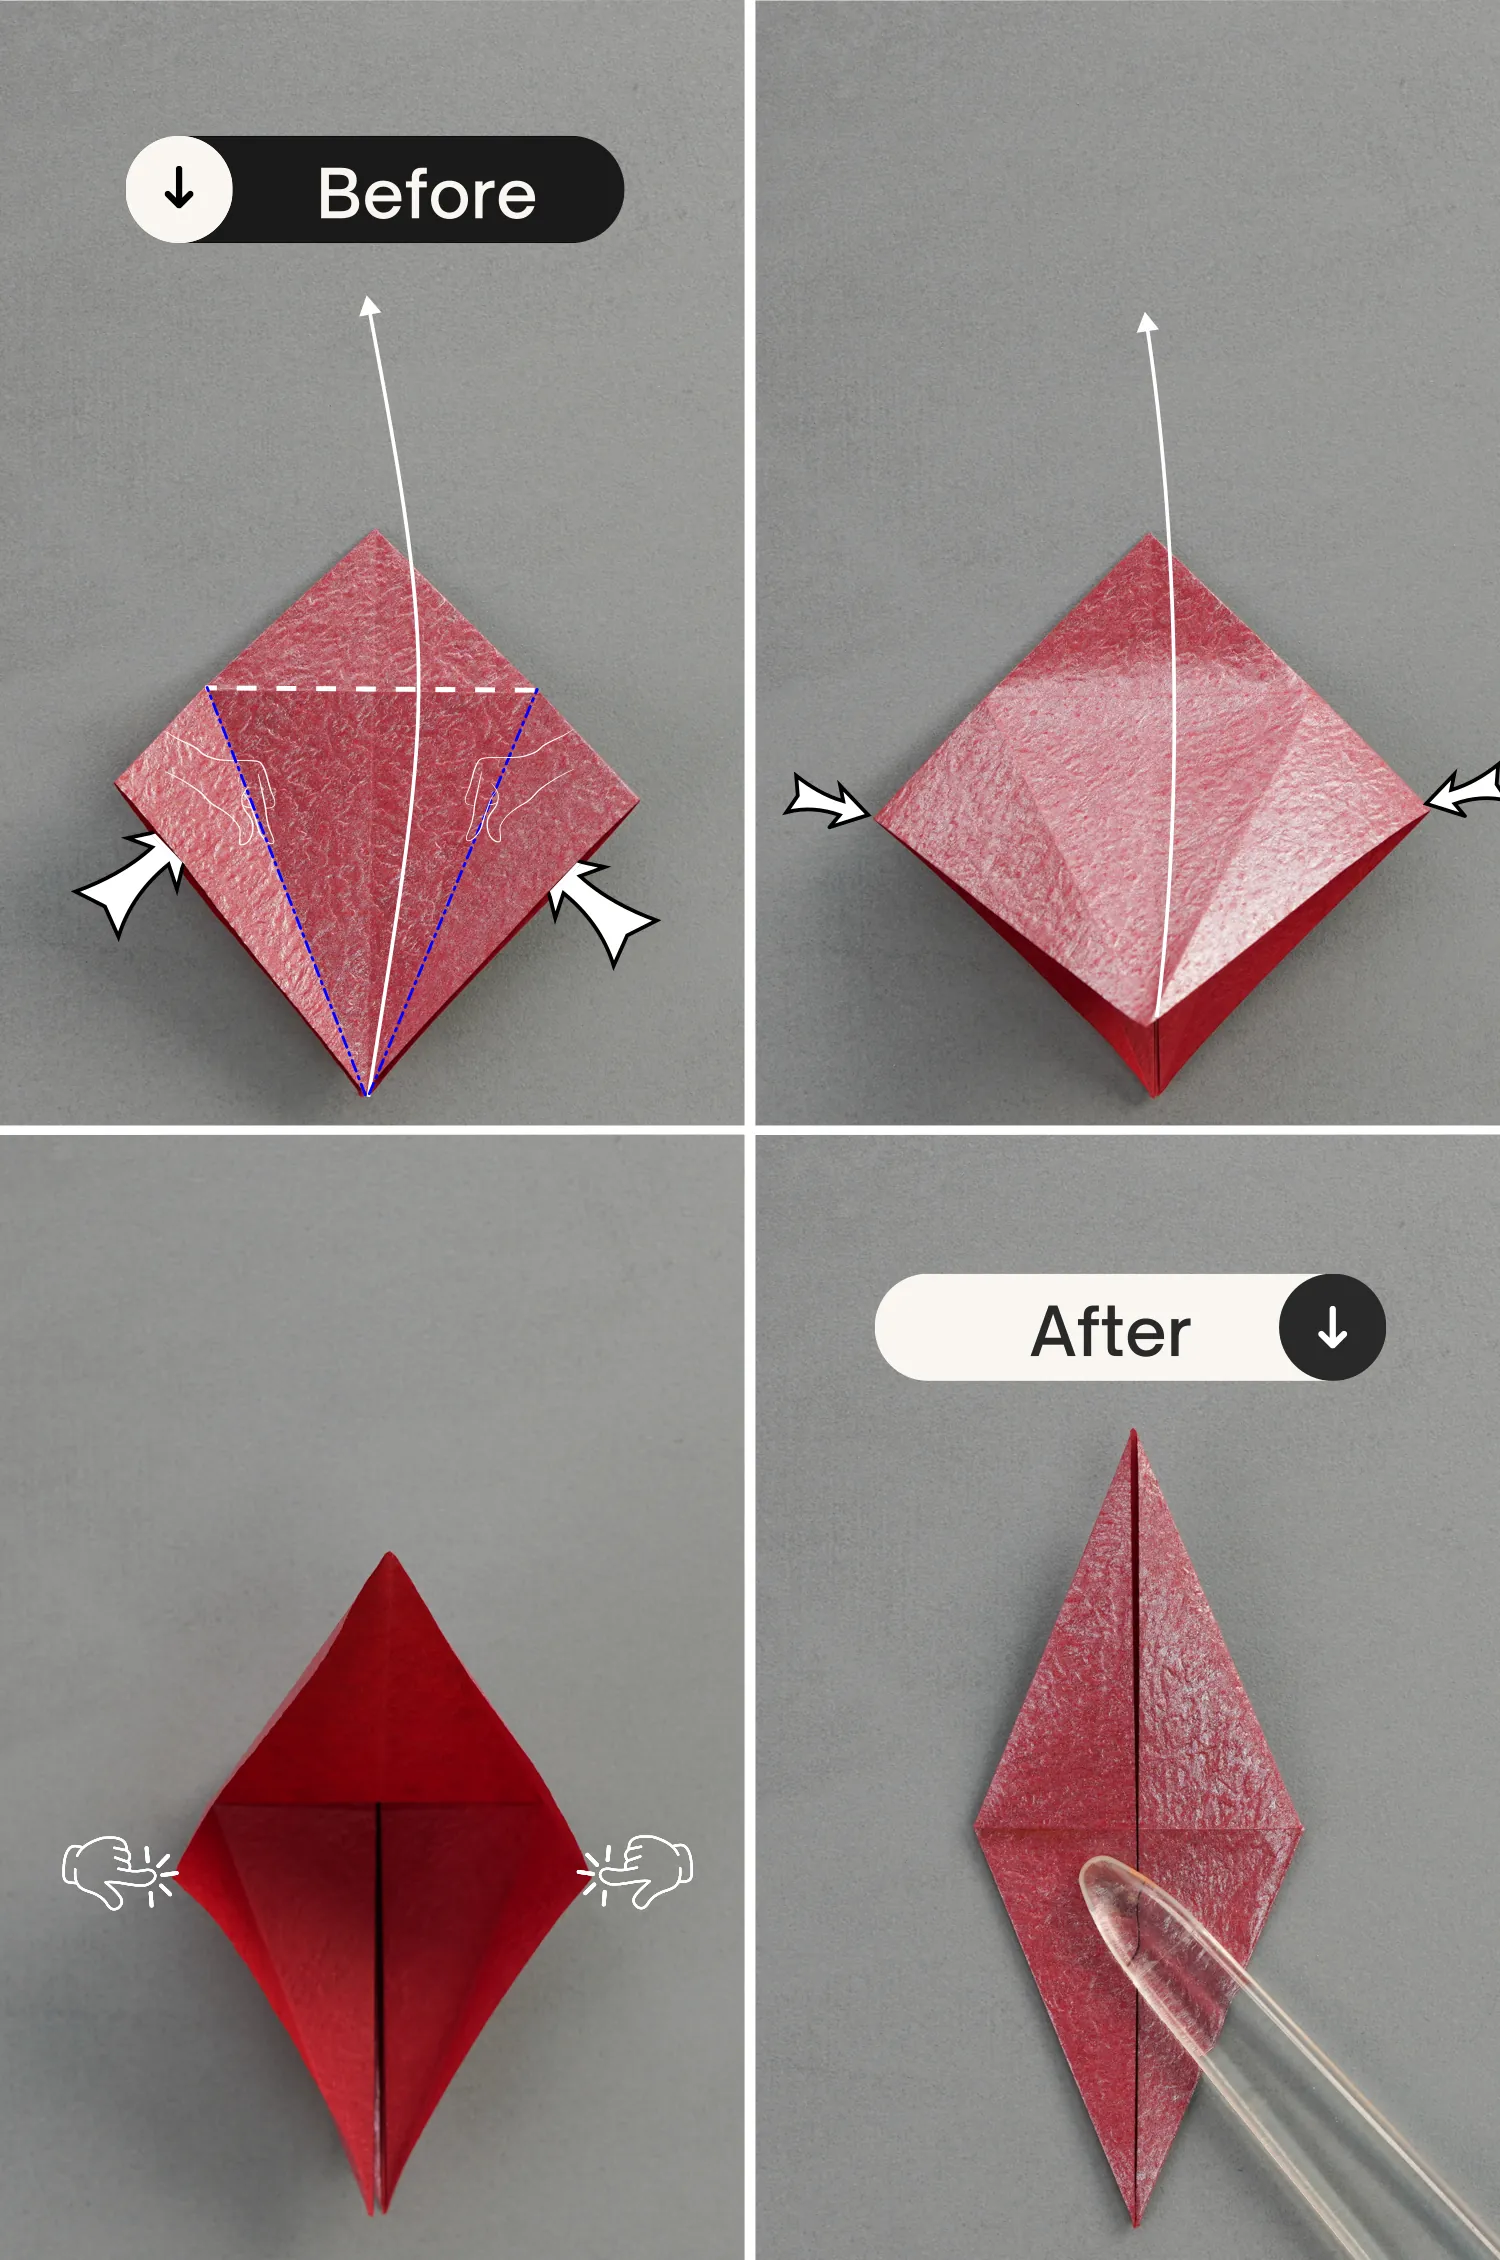
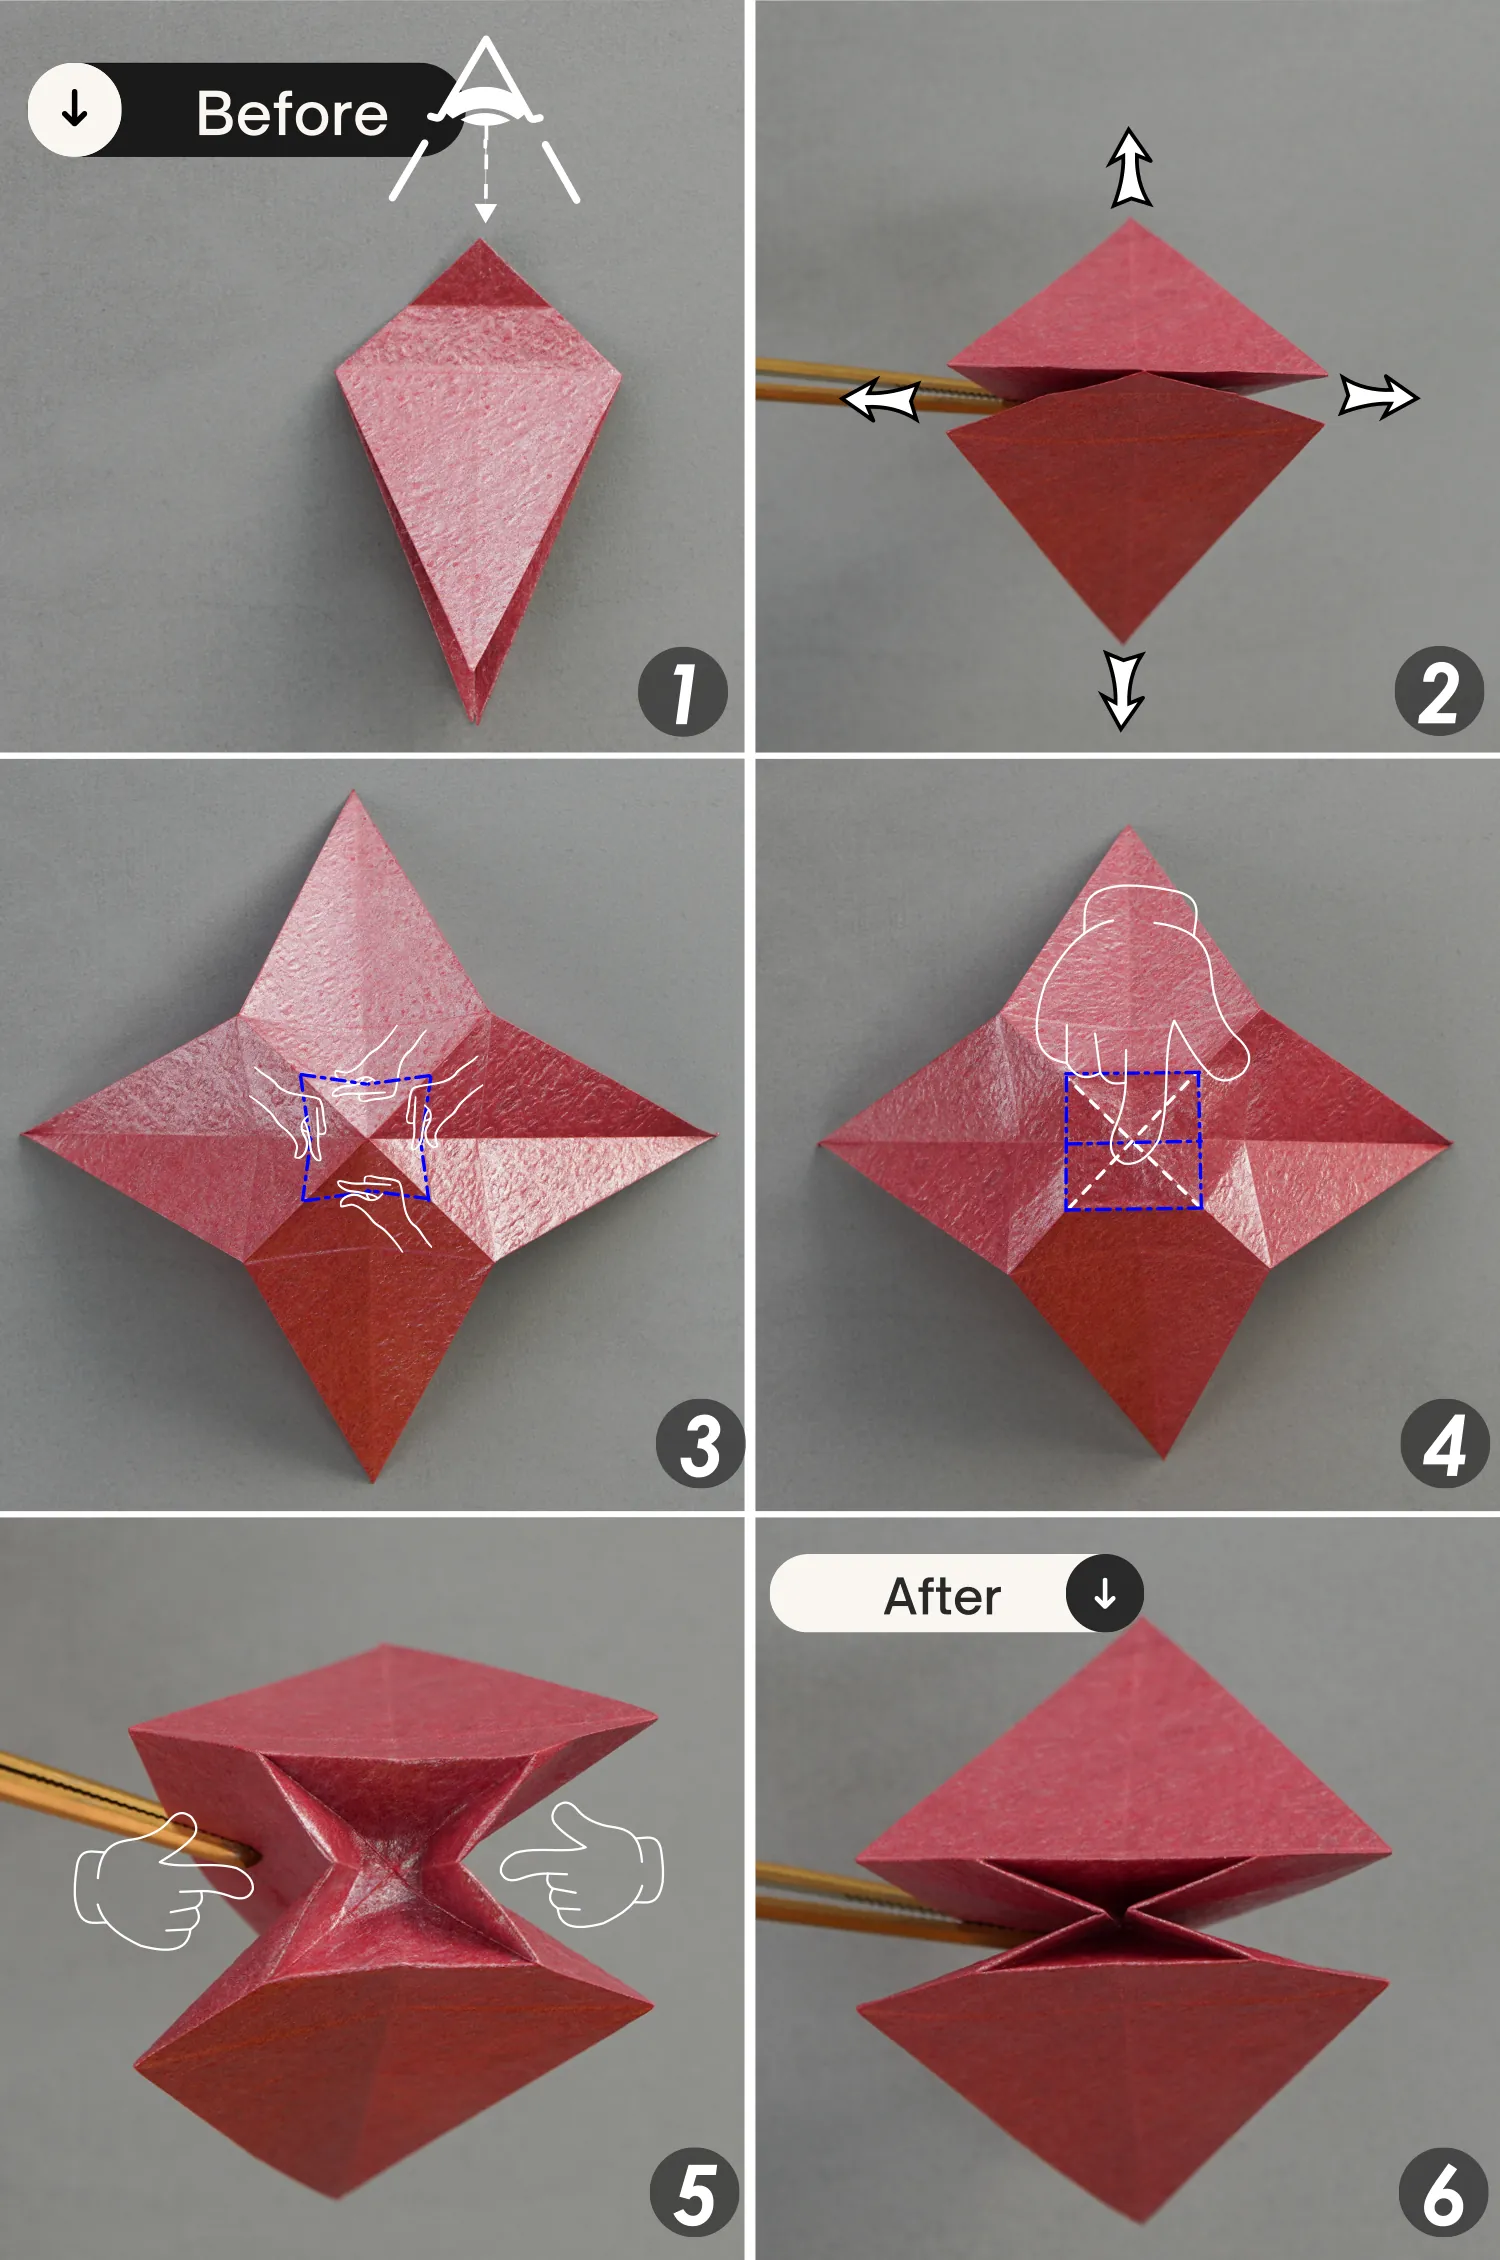
Step 16
View it from the top and open the paper. You will find a square in the center, use your fingers to press the four creases and transfer them into mountain folds.
Press the center of the square, and at the same time push the left and right edges toward the center.
Fold the paper completely flat. You completed an open sink fold.
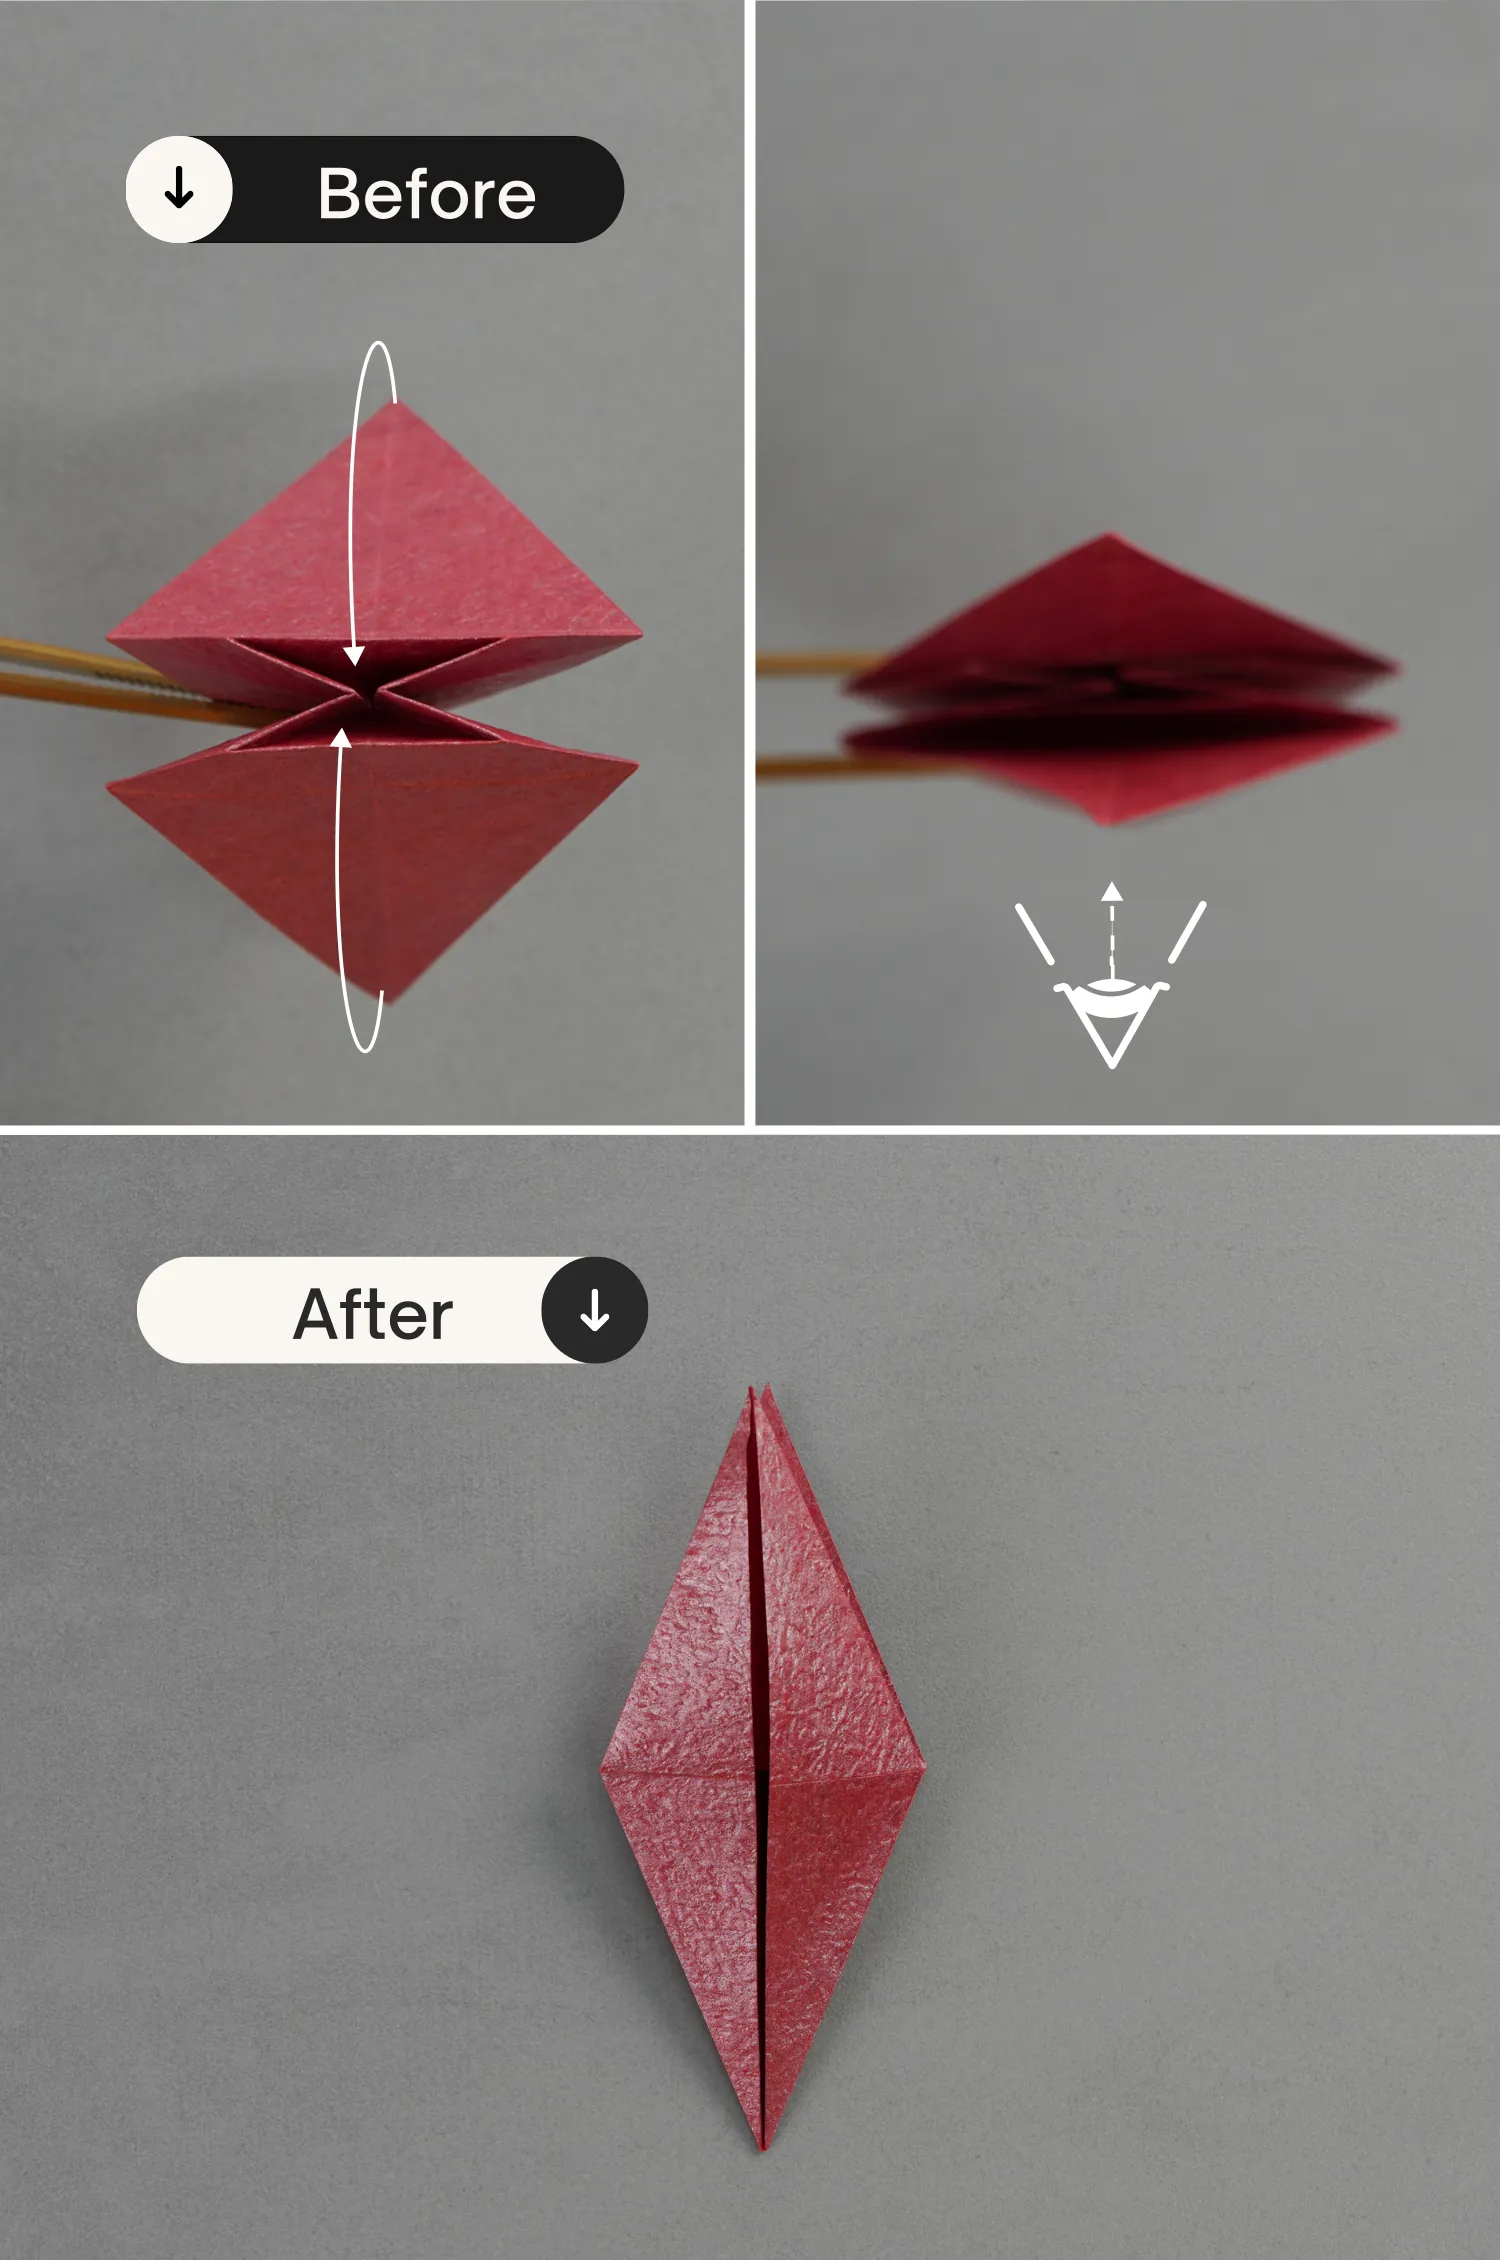
Step 17
Fold the back and front triangles to the top.
Step 18
Take the bottom right edge of the top layer, and fold it to align with the middle vertical line. Flip it over, and fold the bottom left edge to align with the middle vertical line.
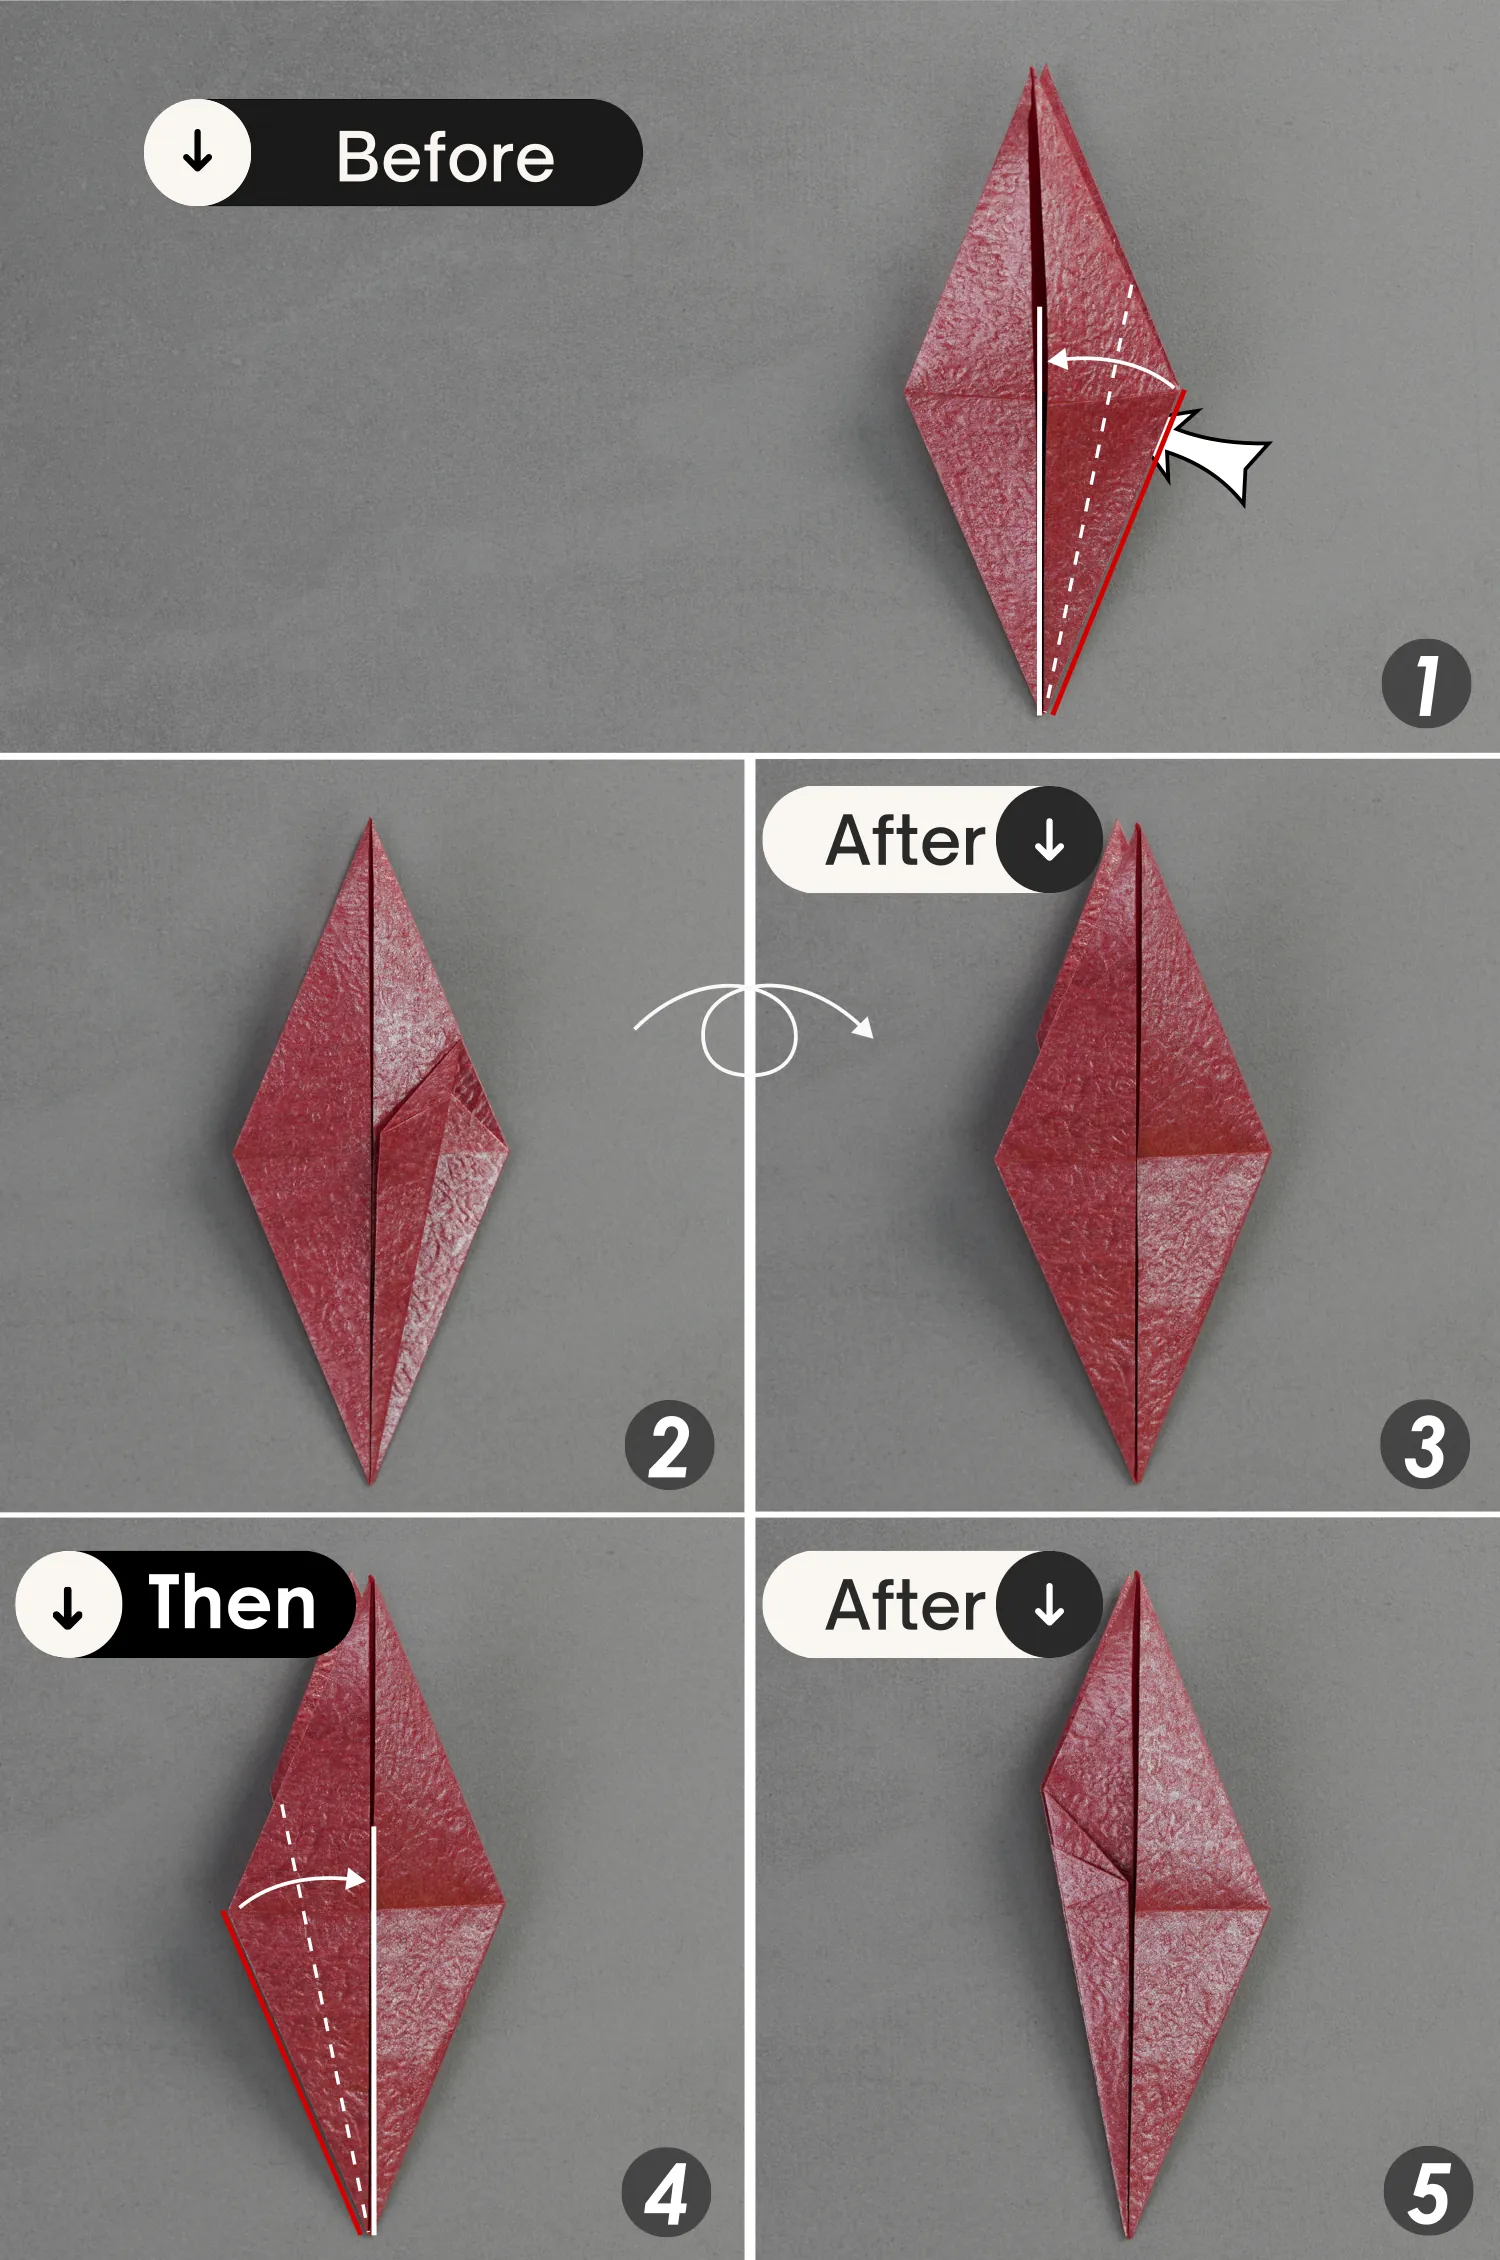
Step 19
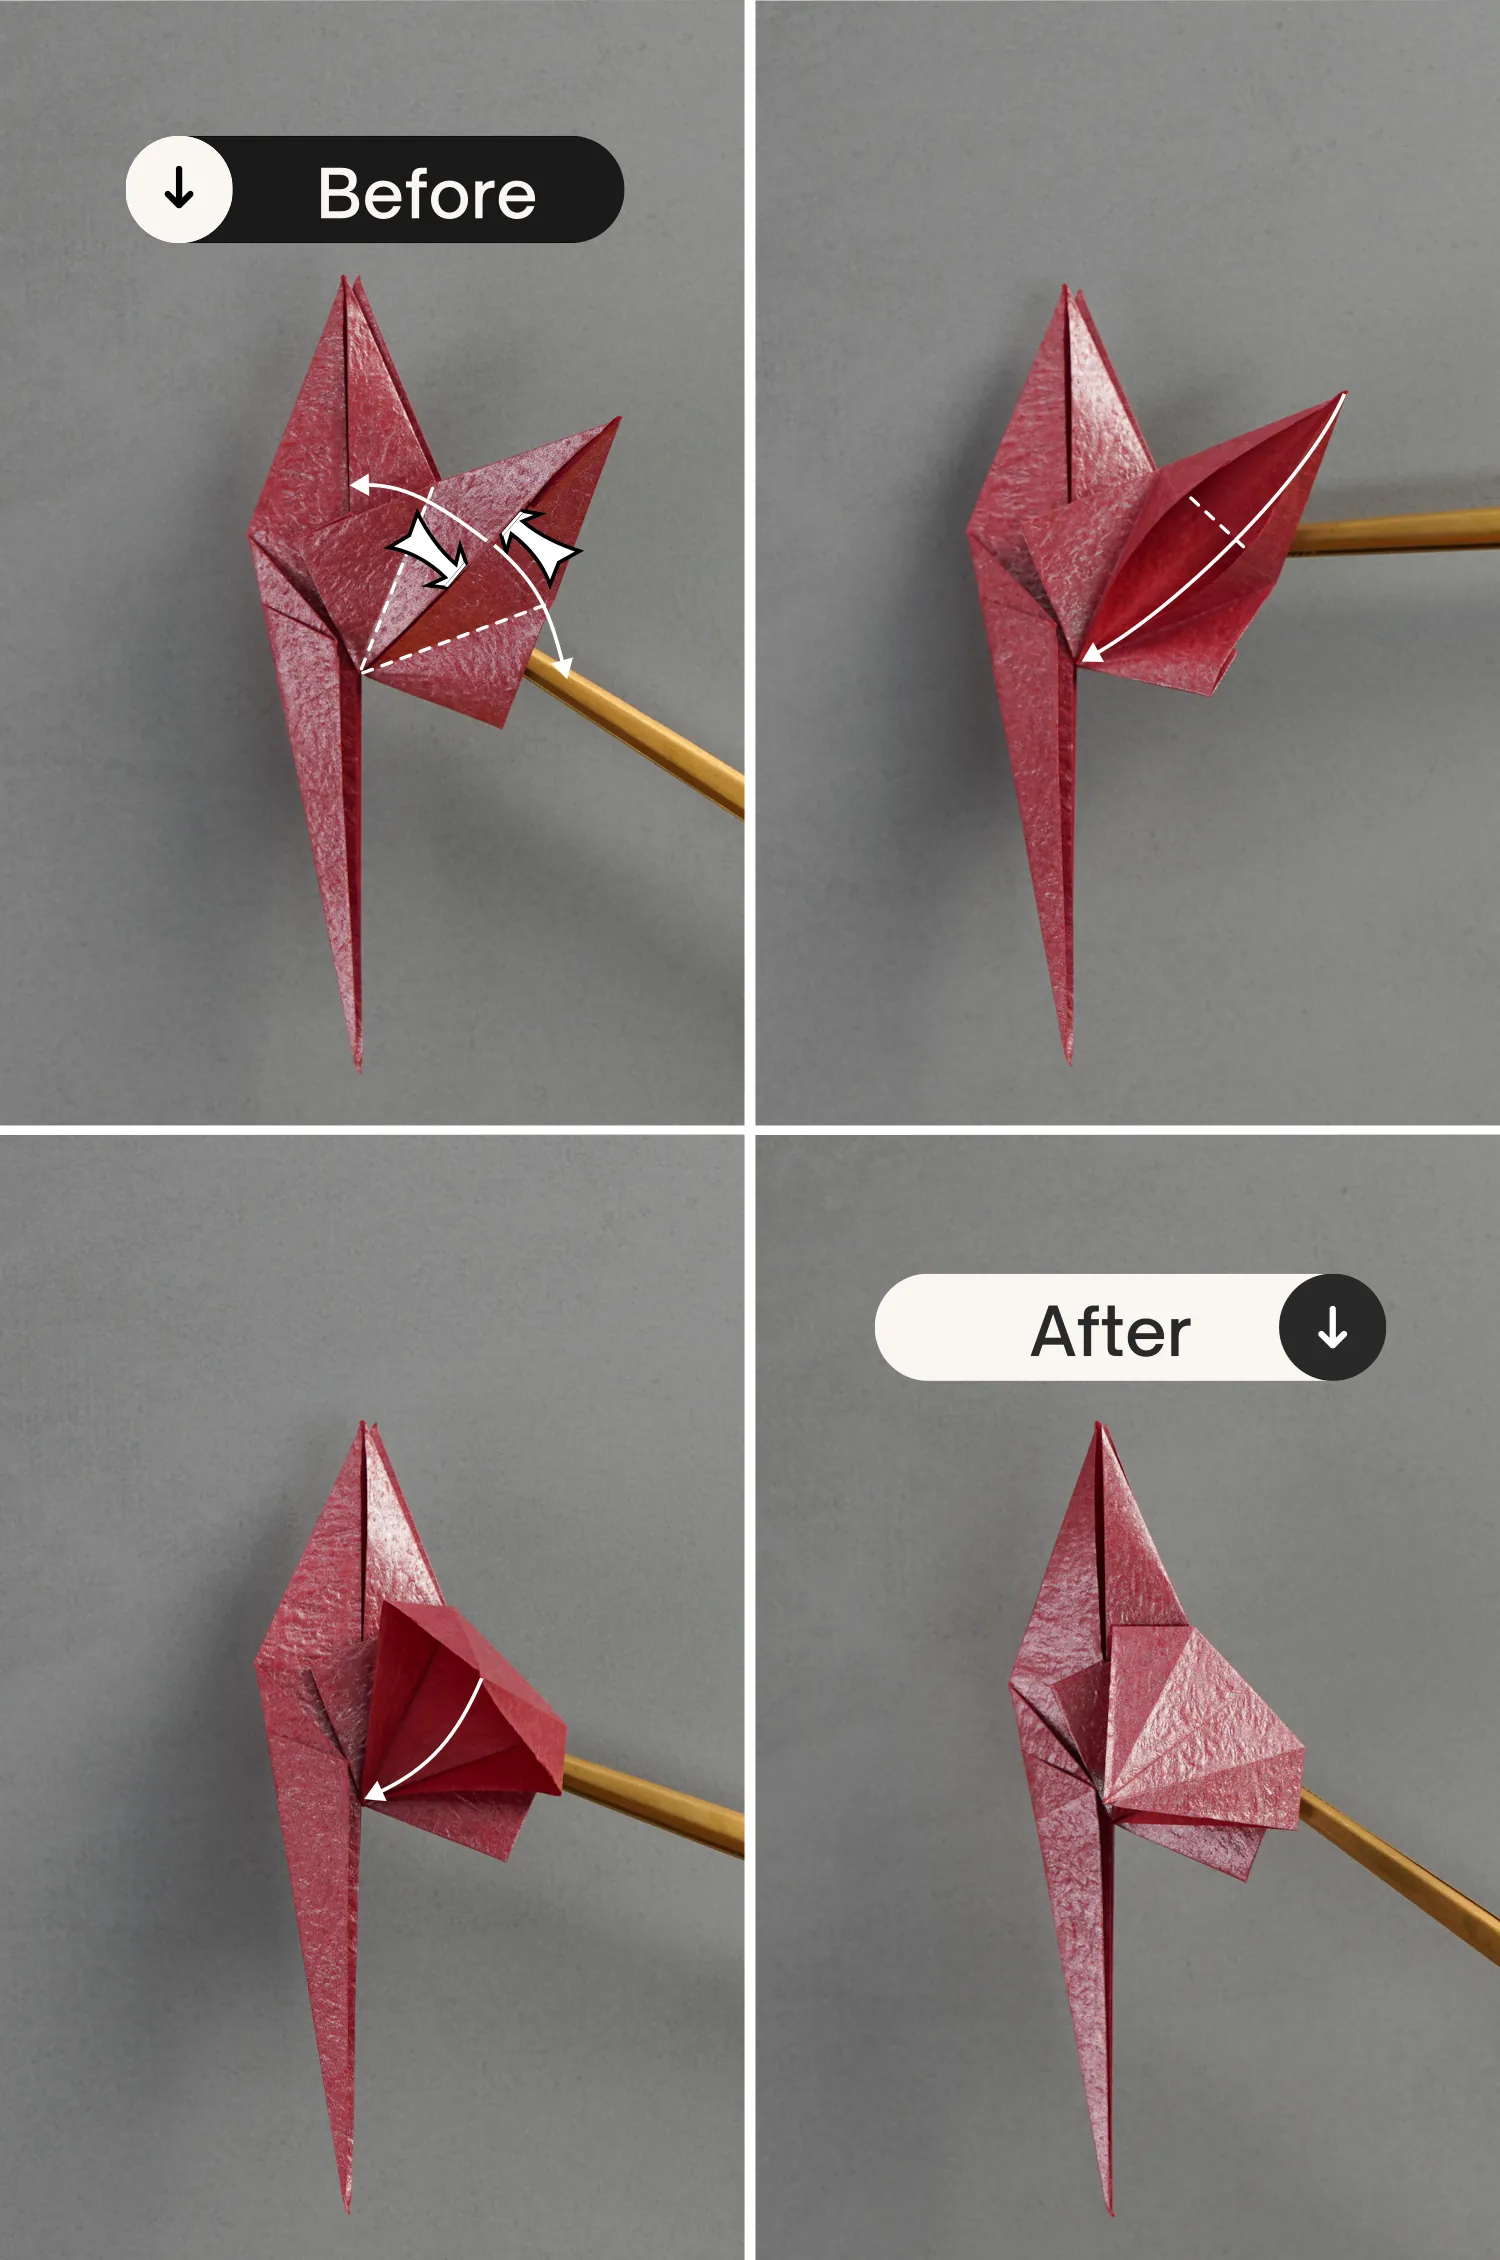
Fold the bottom right corner upward along the dotted line, crease it well then unfold it.
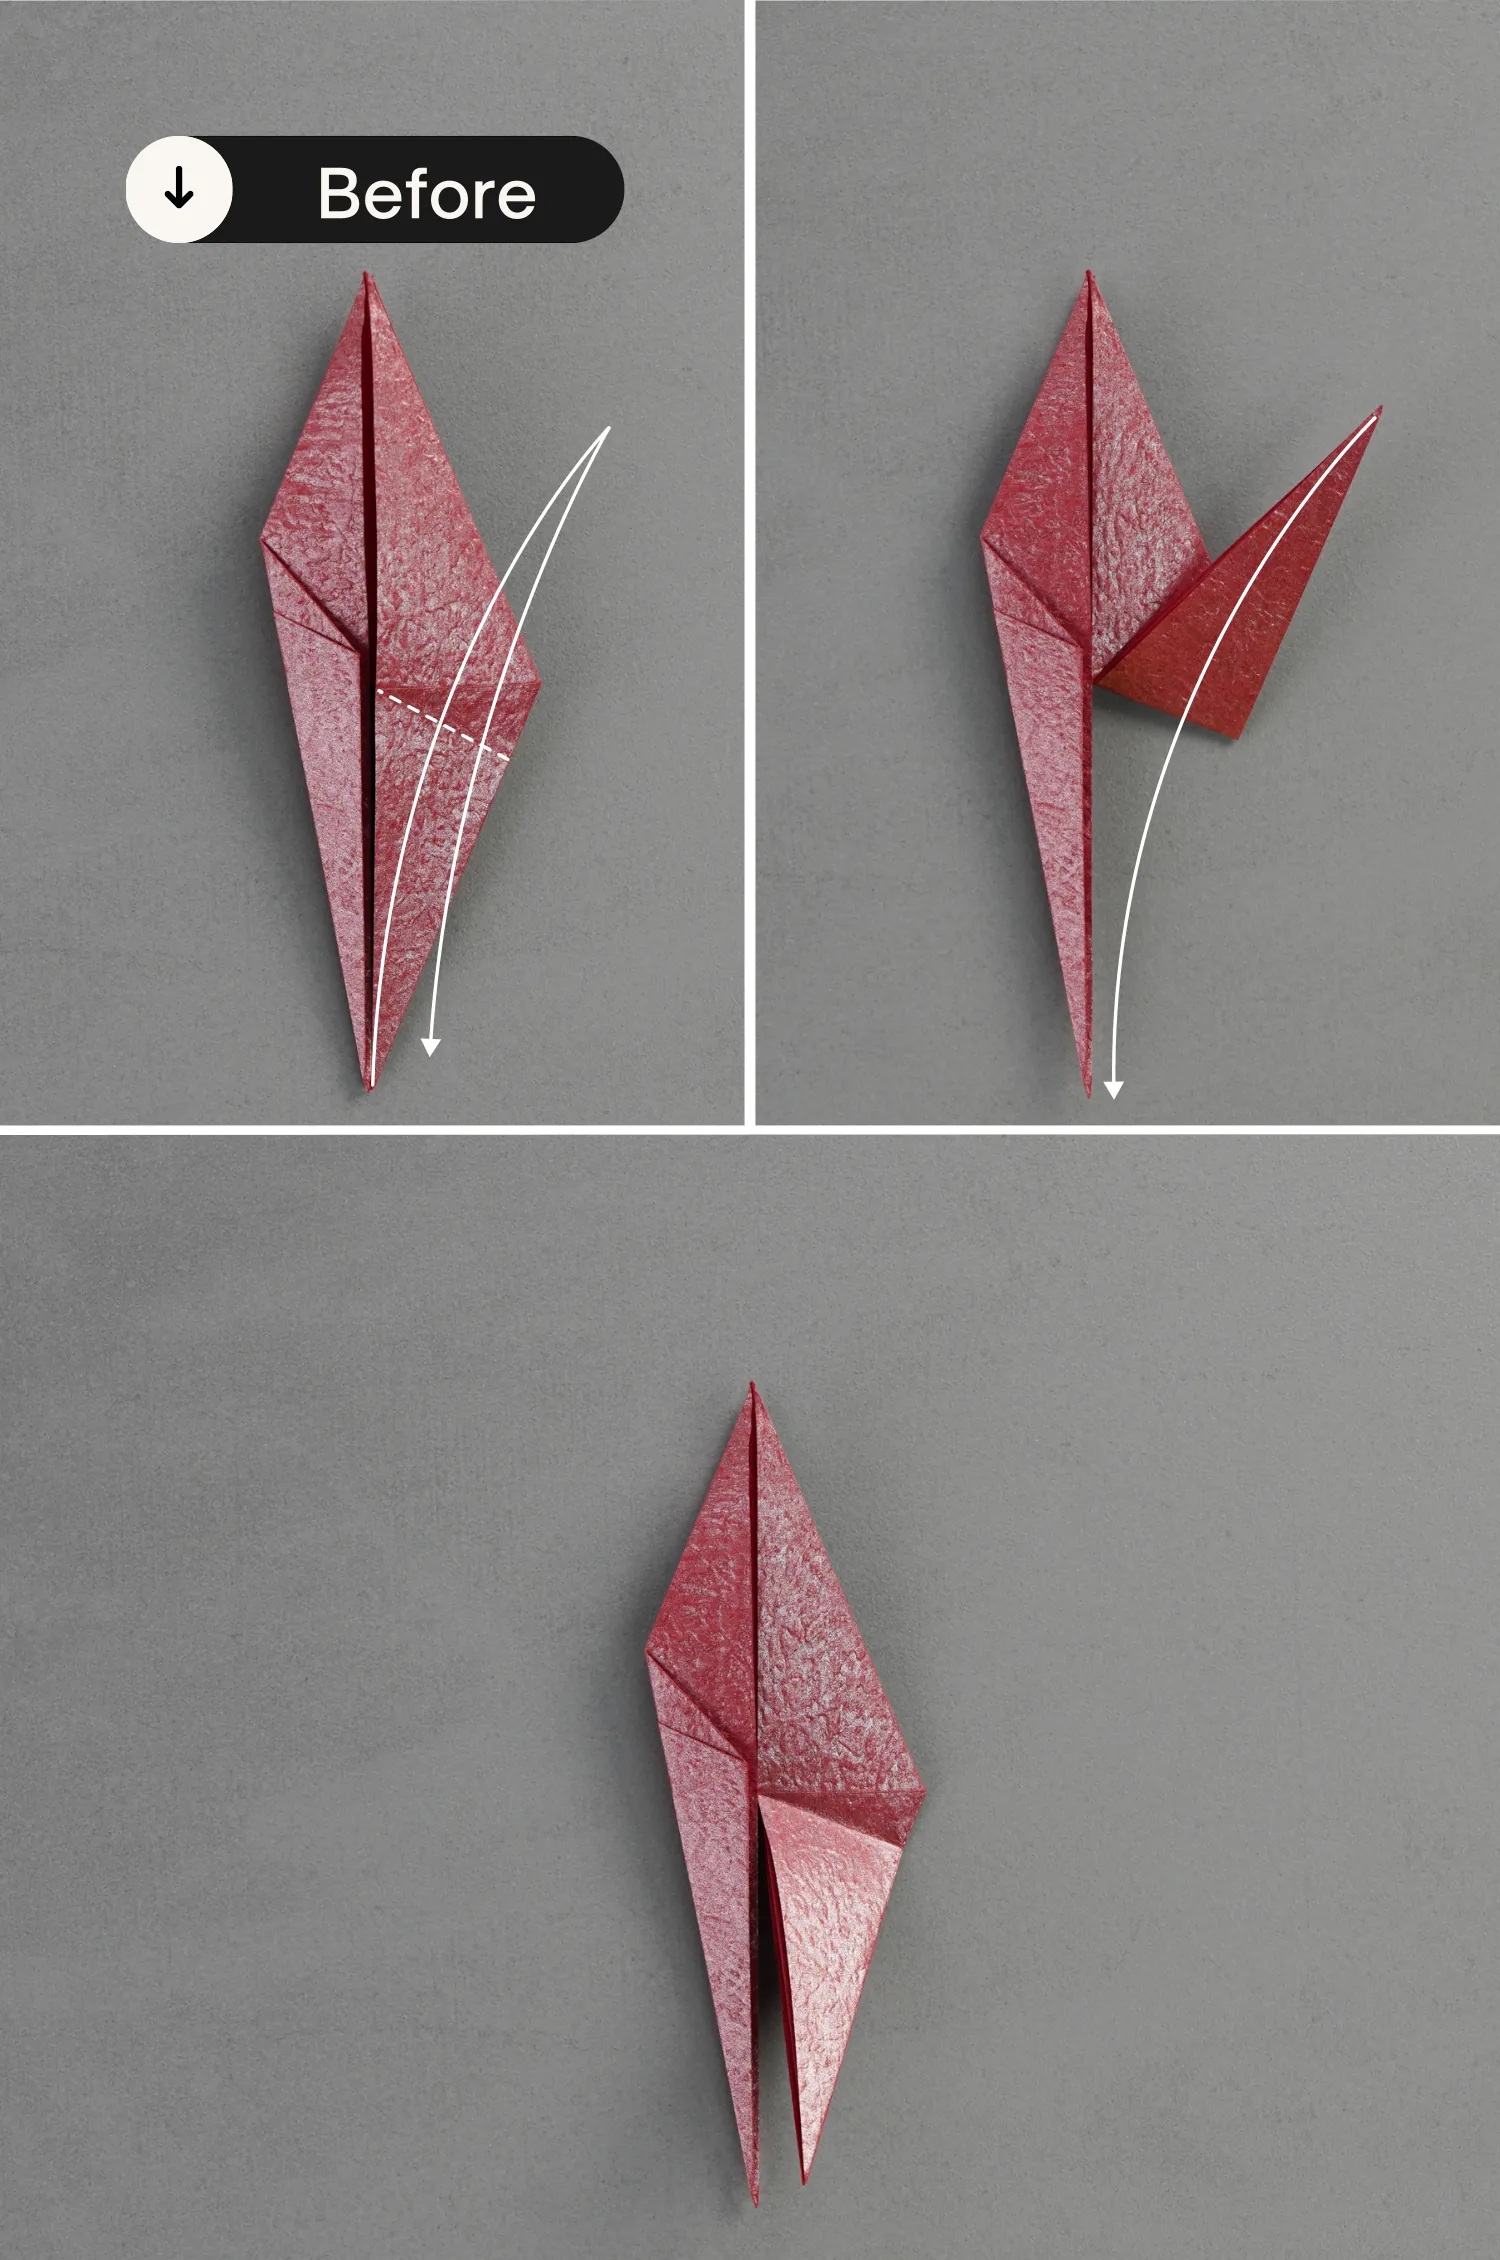
Step 20
Flip it over vertically and view it from the right side, open the opening, and fold the right corner to the left along the crease on both sides you made in the previous step, at the same time shape the middle crease.
Finally, close and flatten the paper, and view it from the original sight.
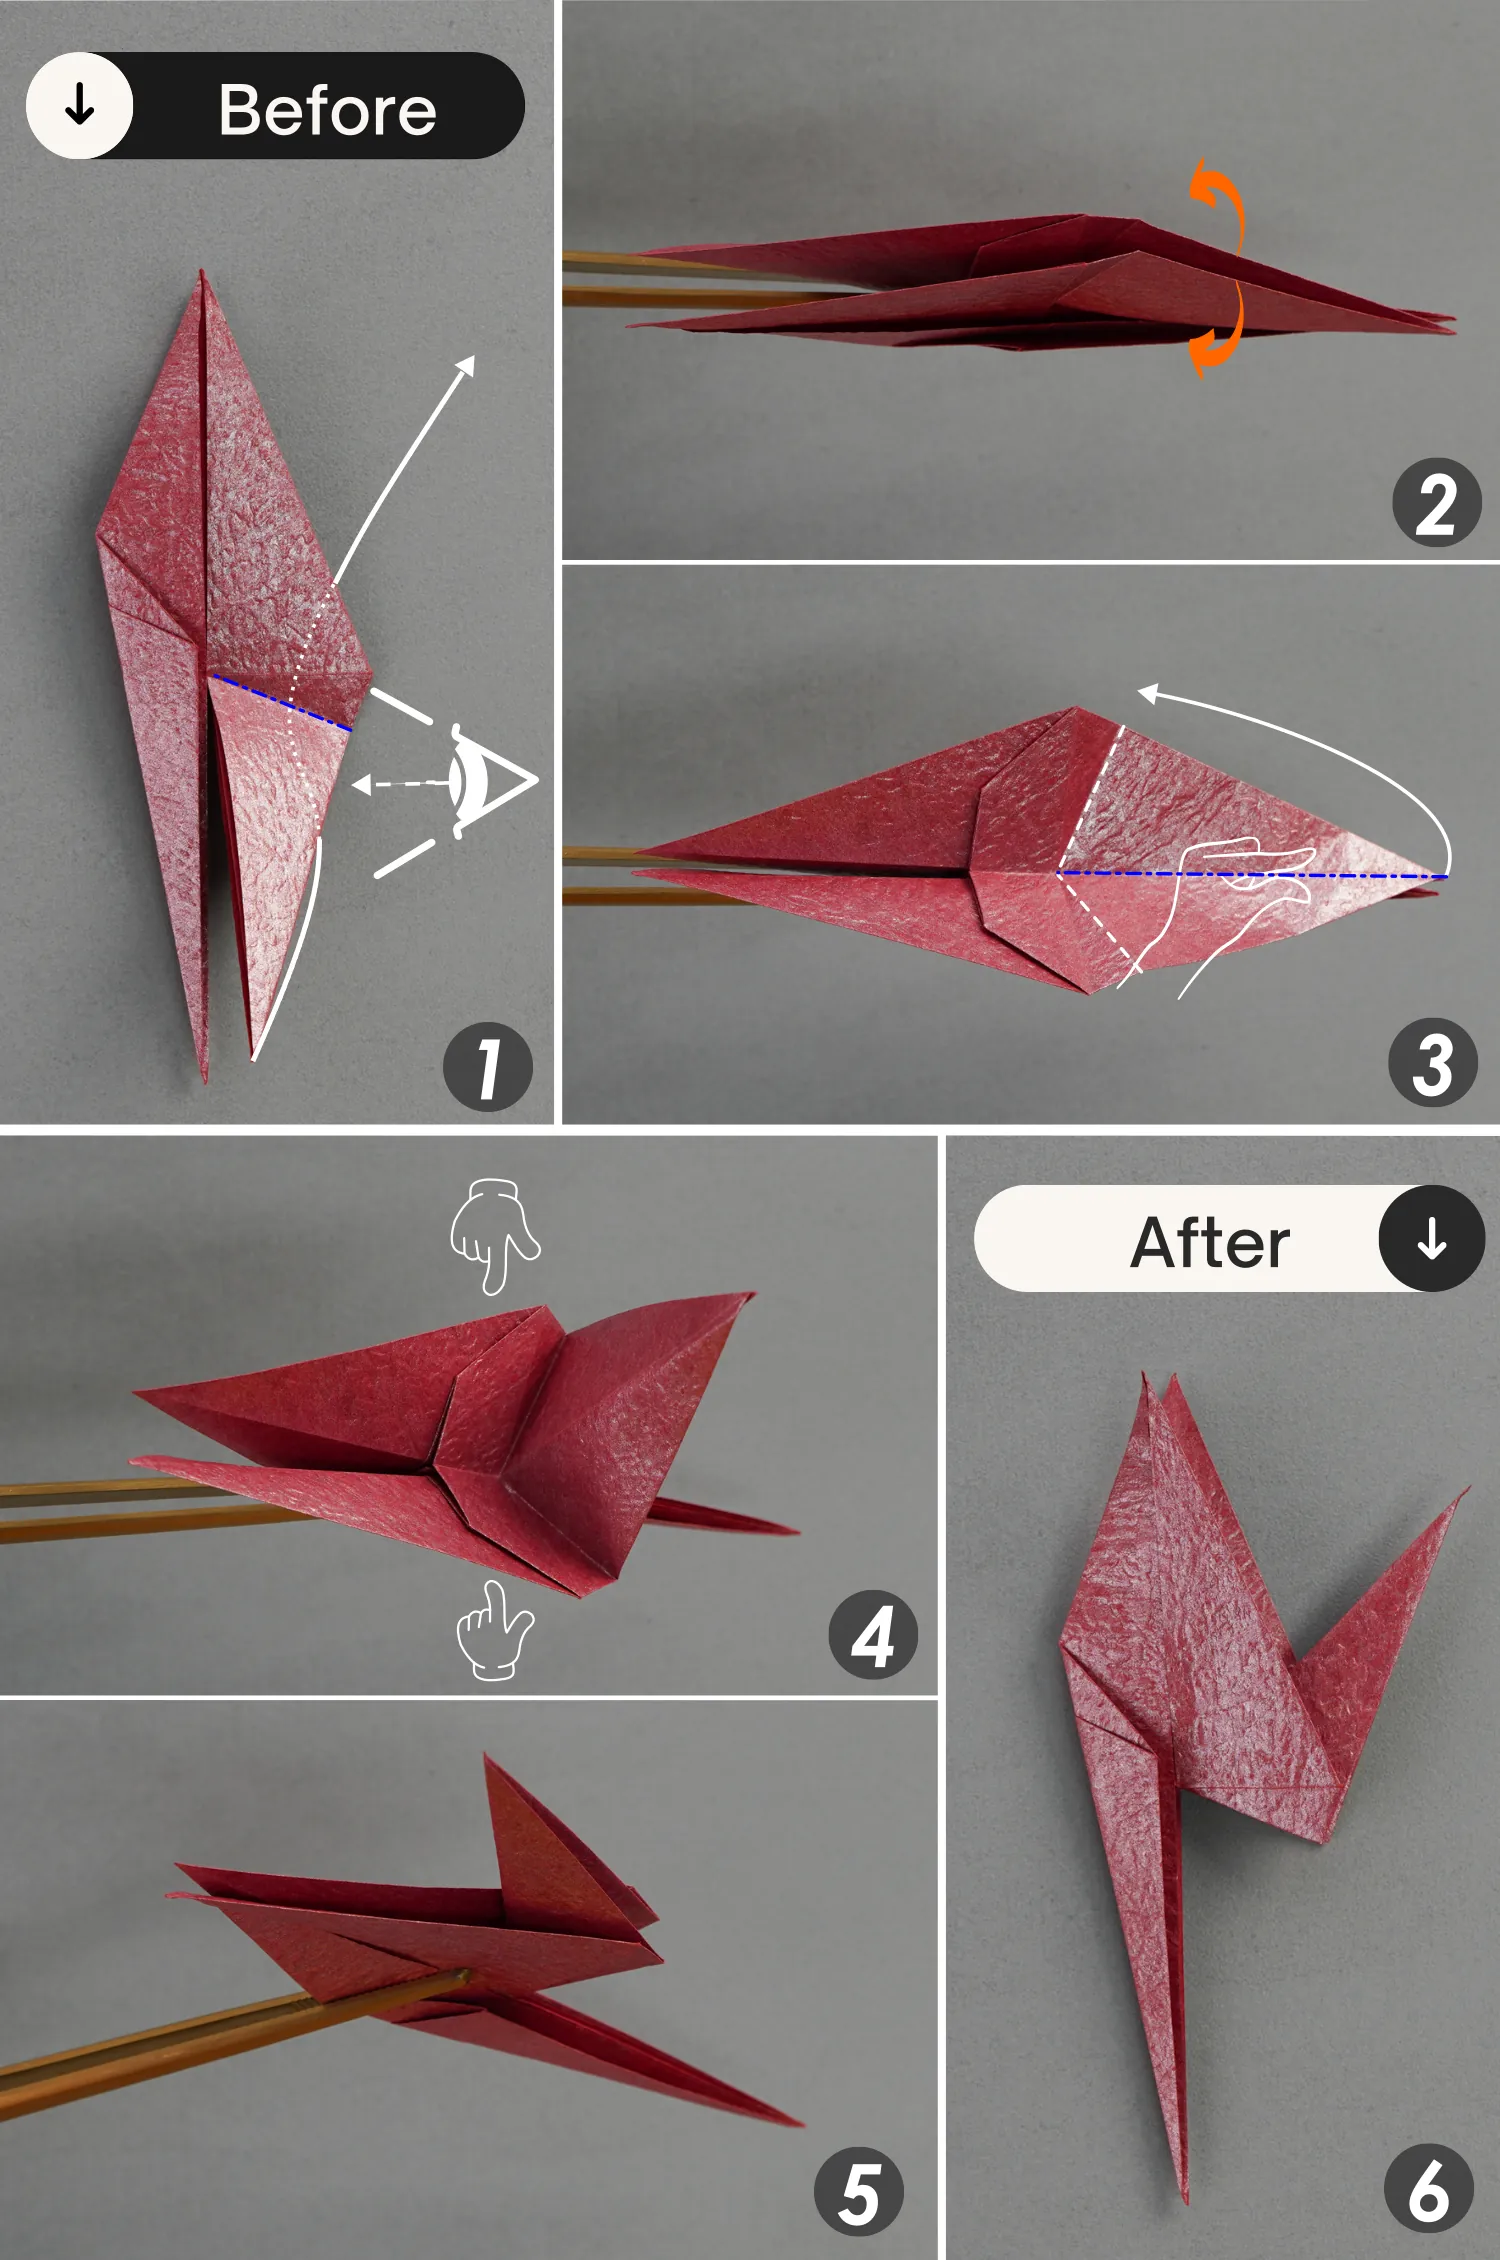
Step 21
Open the flap you made in the previous step, by folding its top layer up along the dotted line.
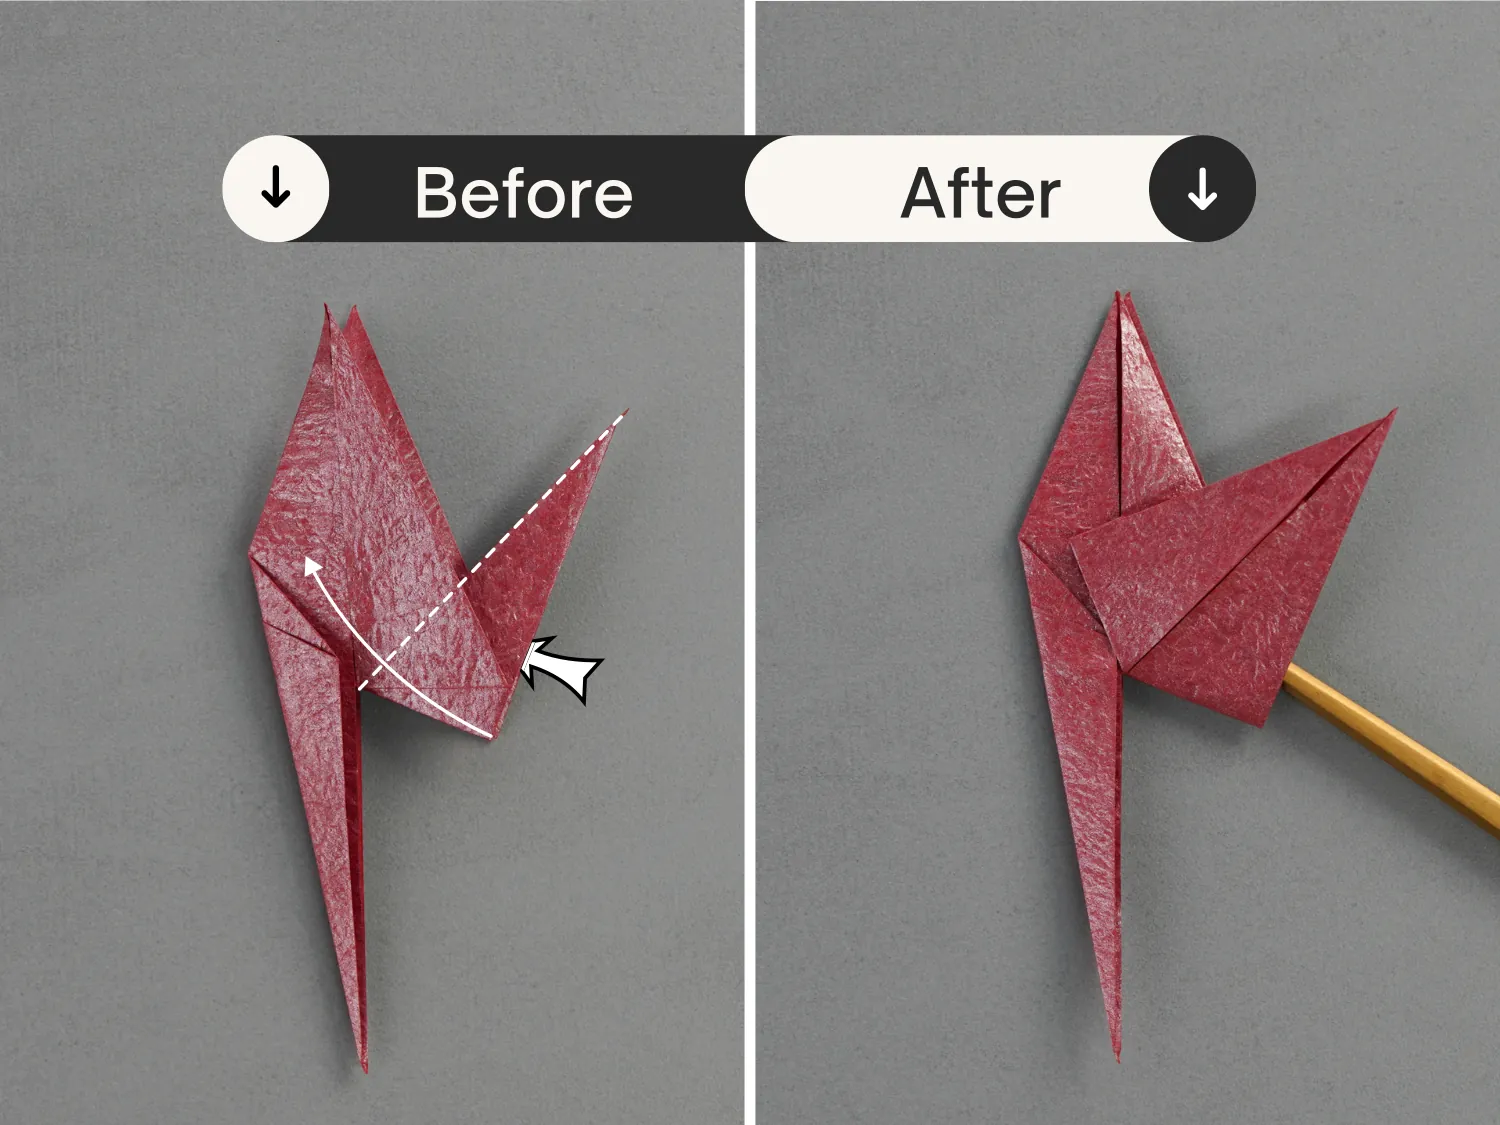
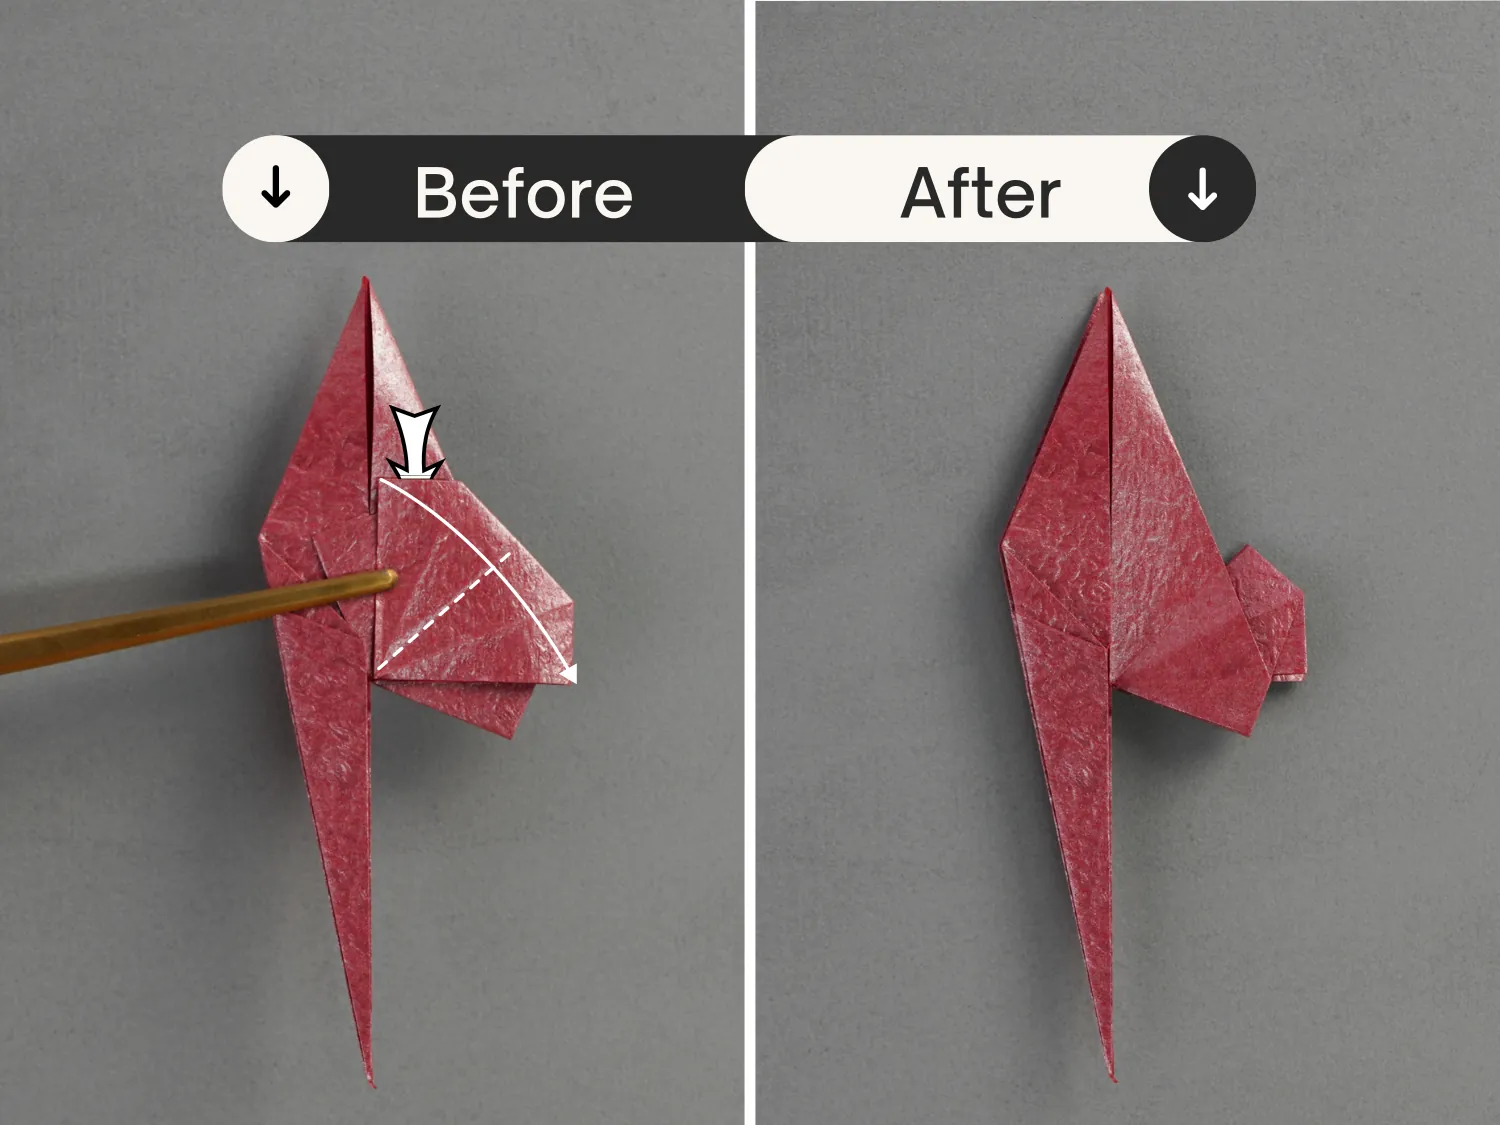
Step 22
Then fold the right corner along the dotted line diagonally, and unfold.
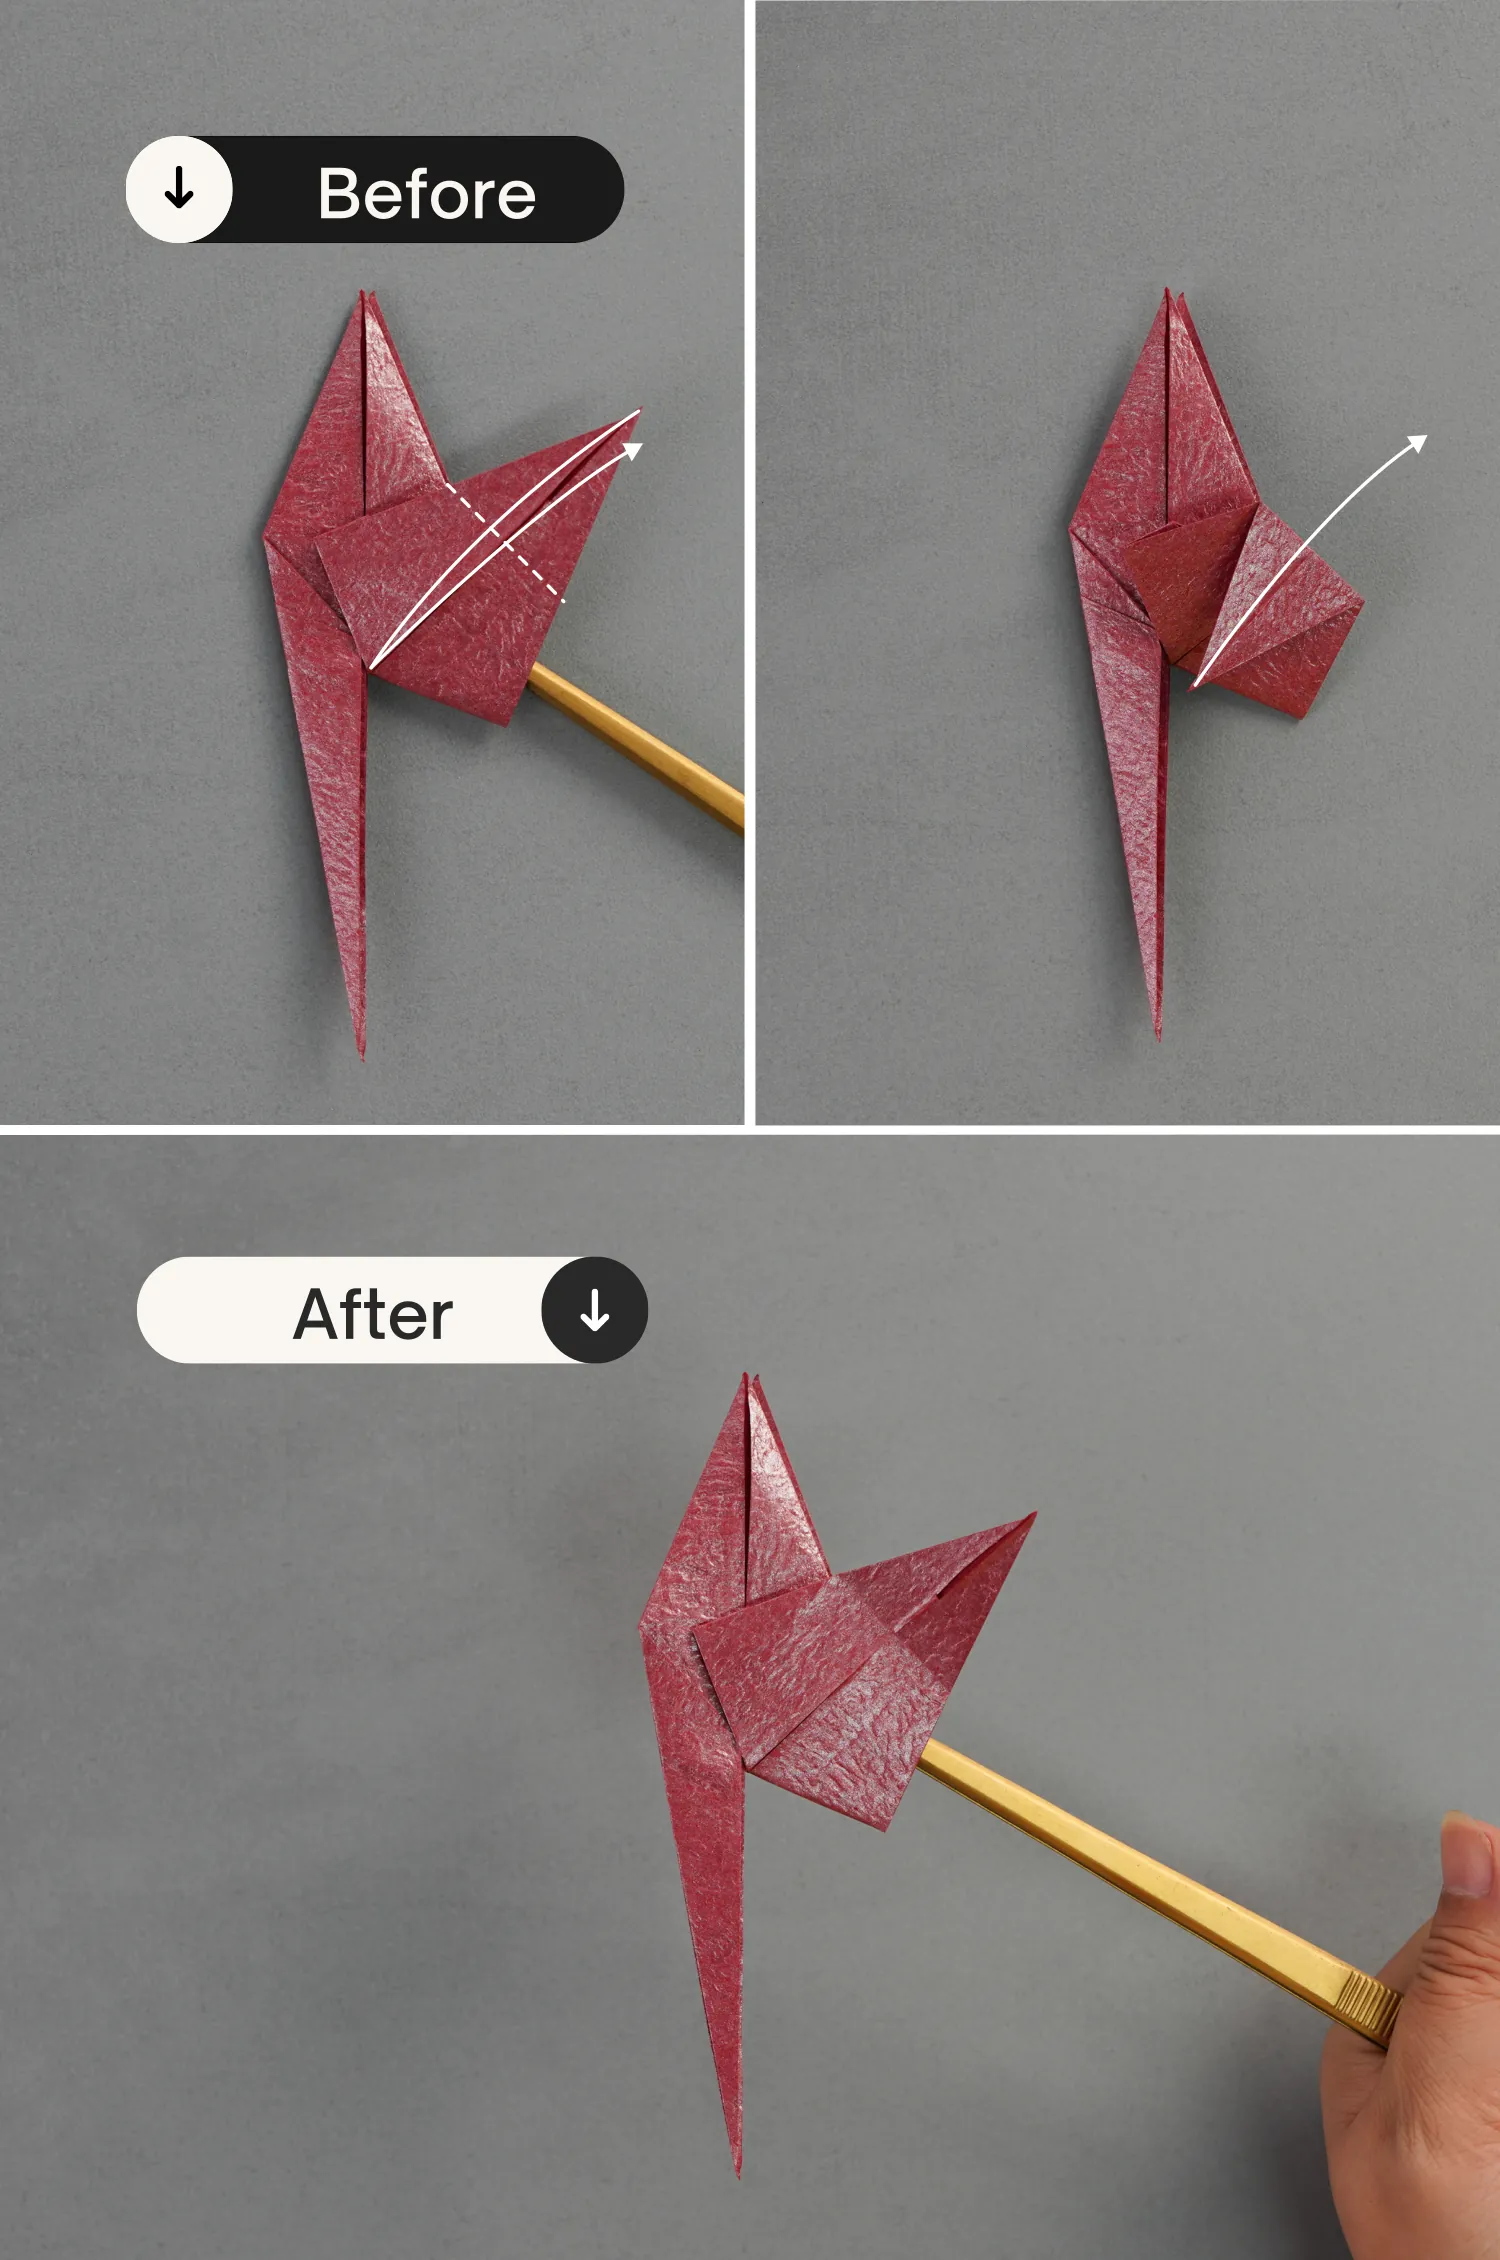
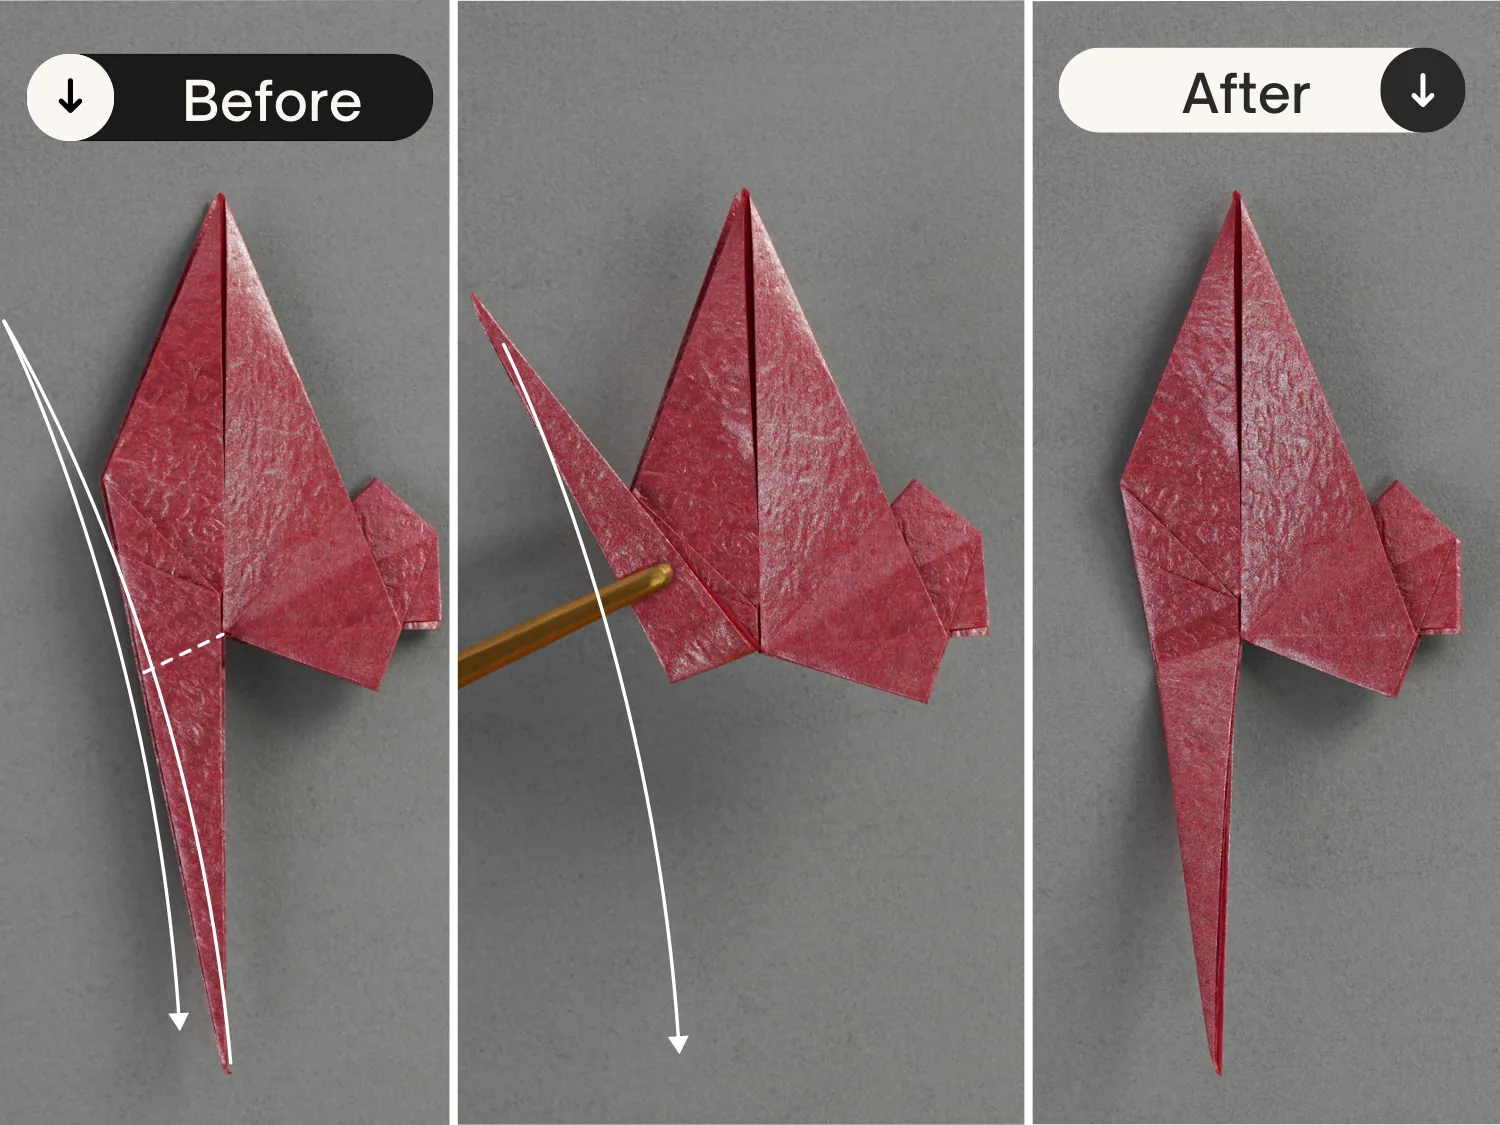
Step 23
Fold its left corner to the right along the dotted line, crease it well then unfold it. Then fold the right corner up along the dotted line as well, and unfold.
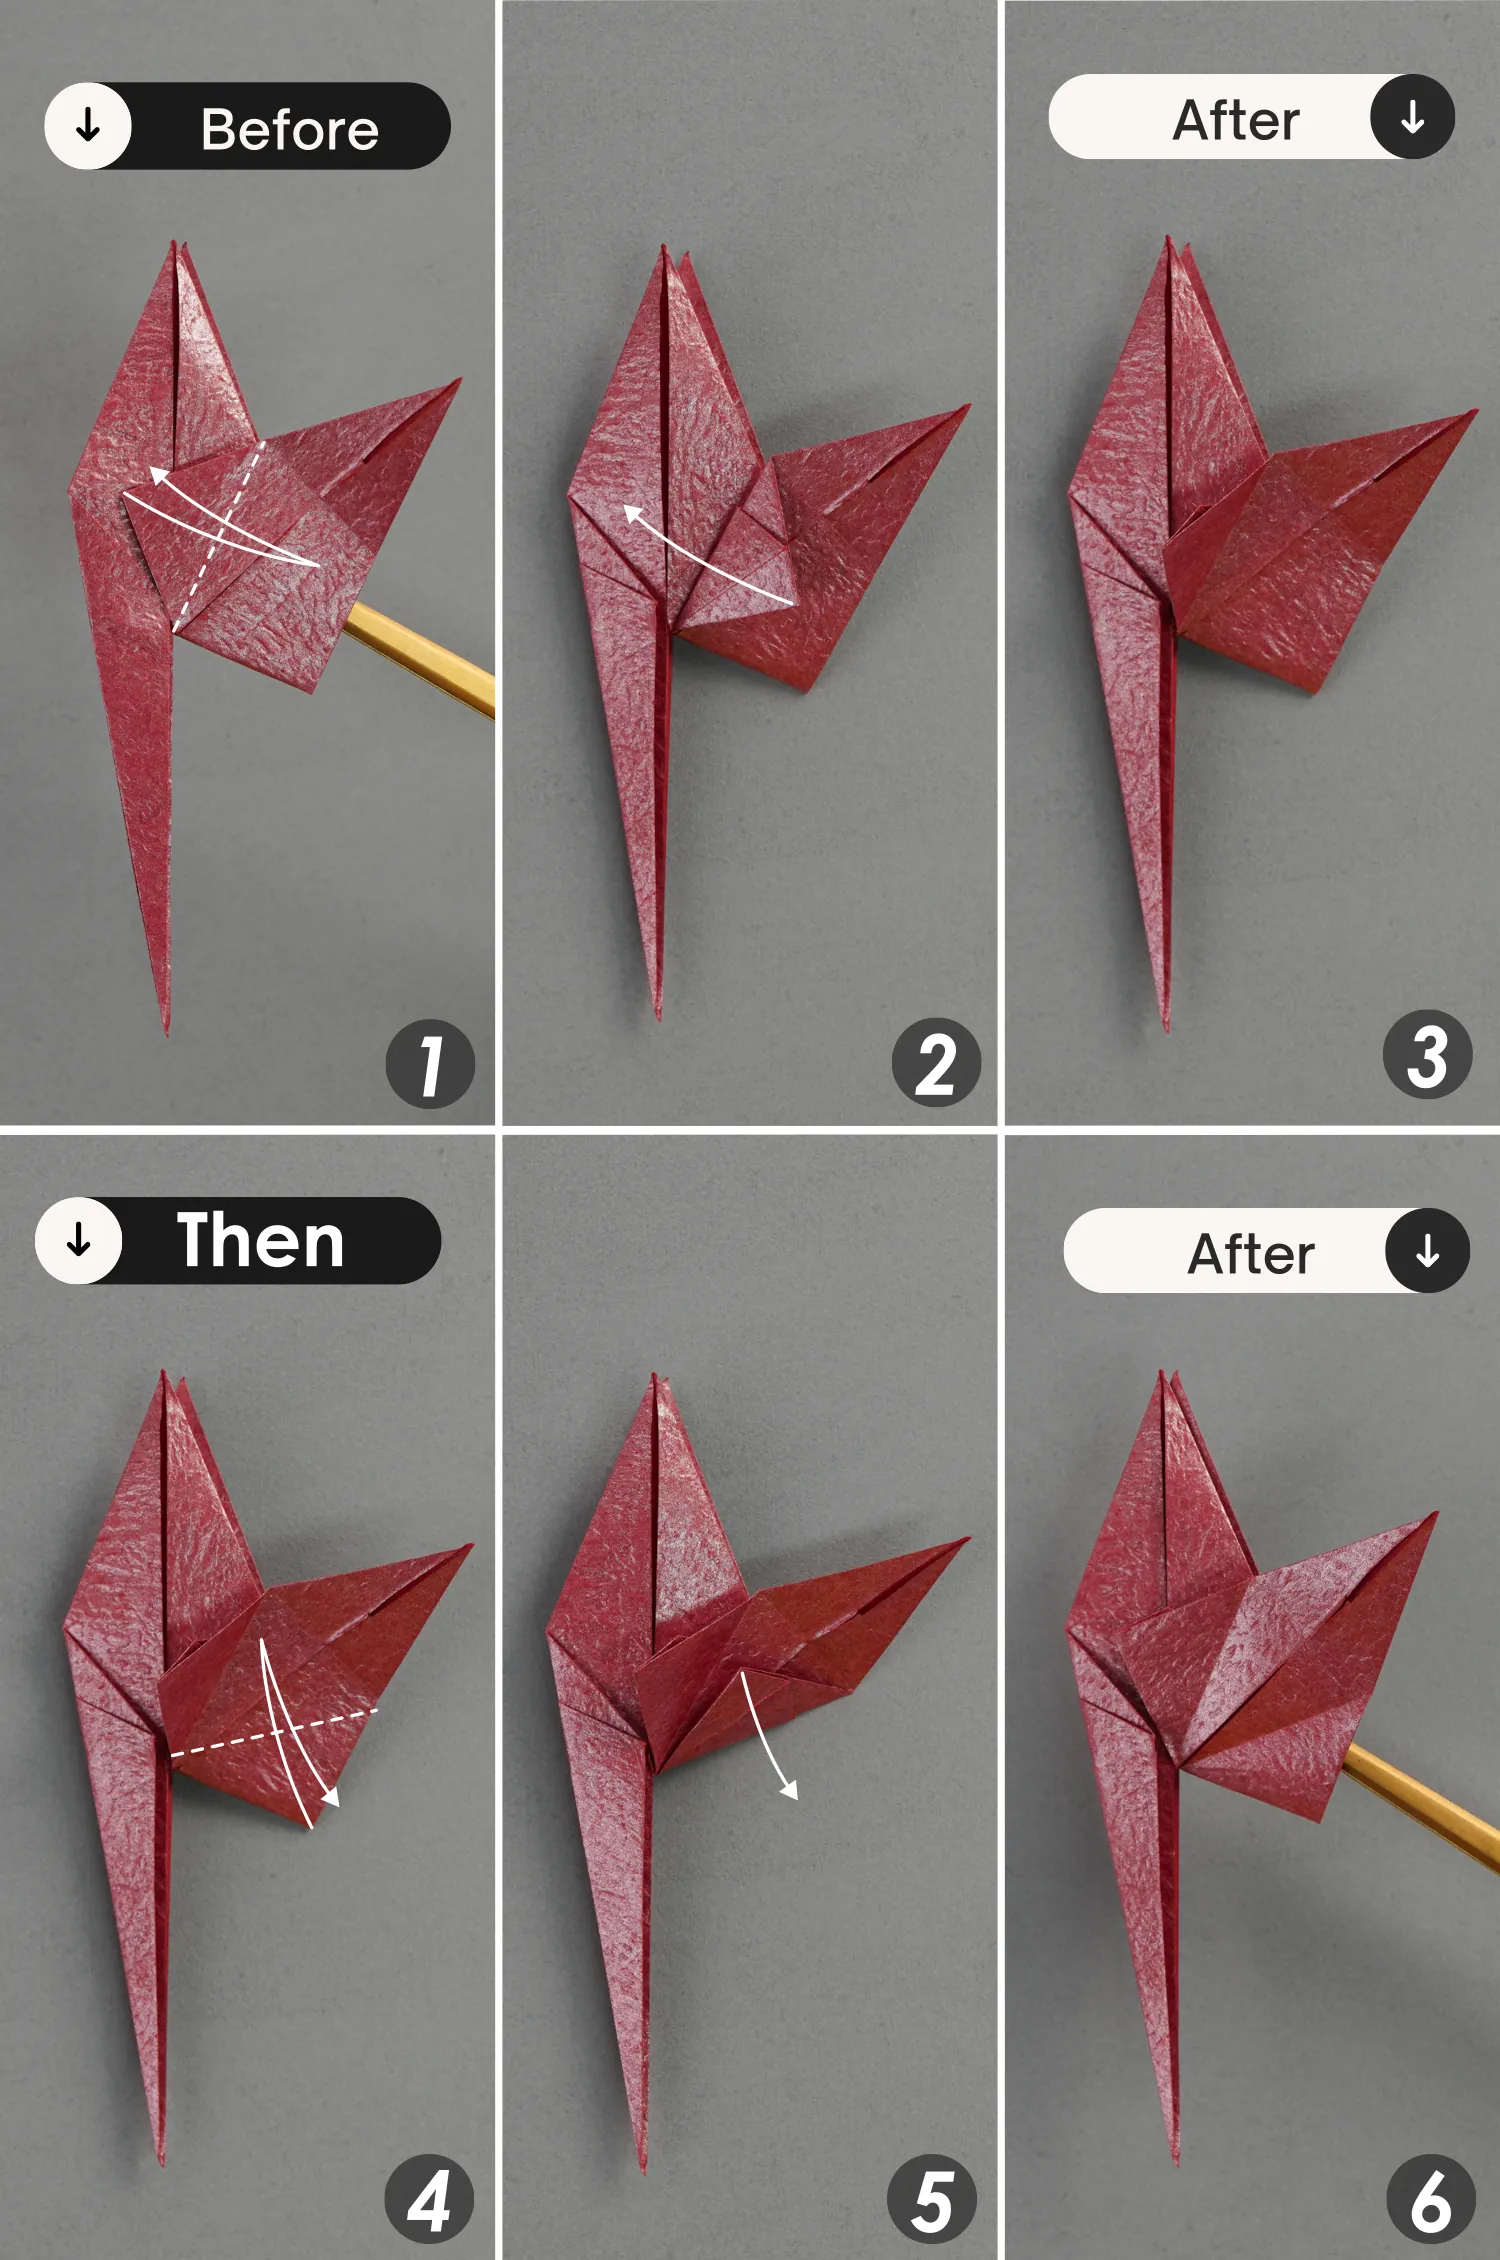
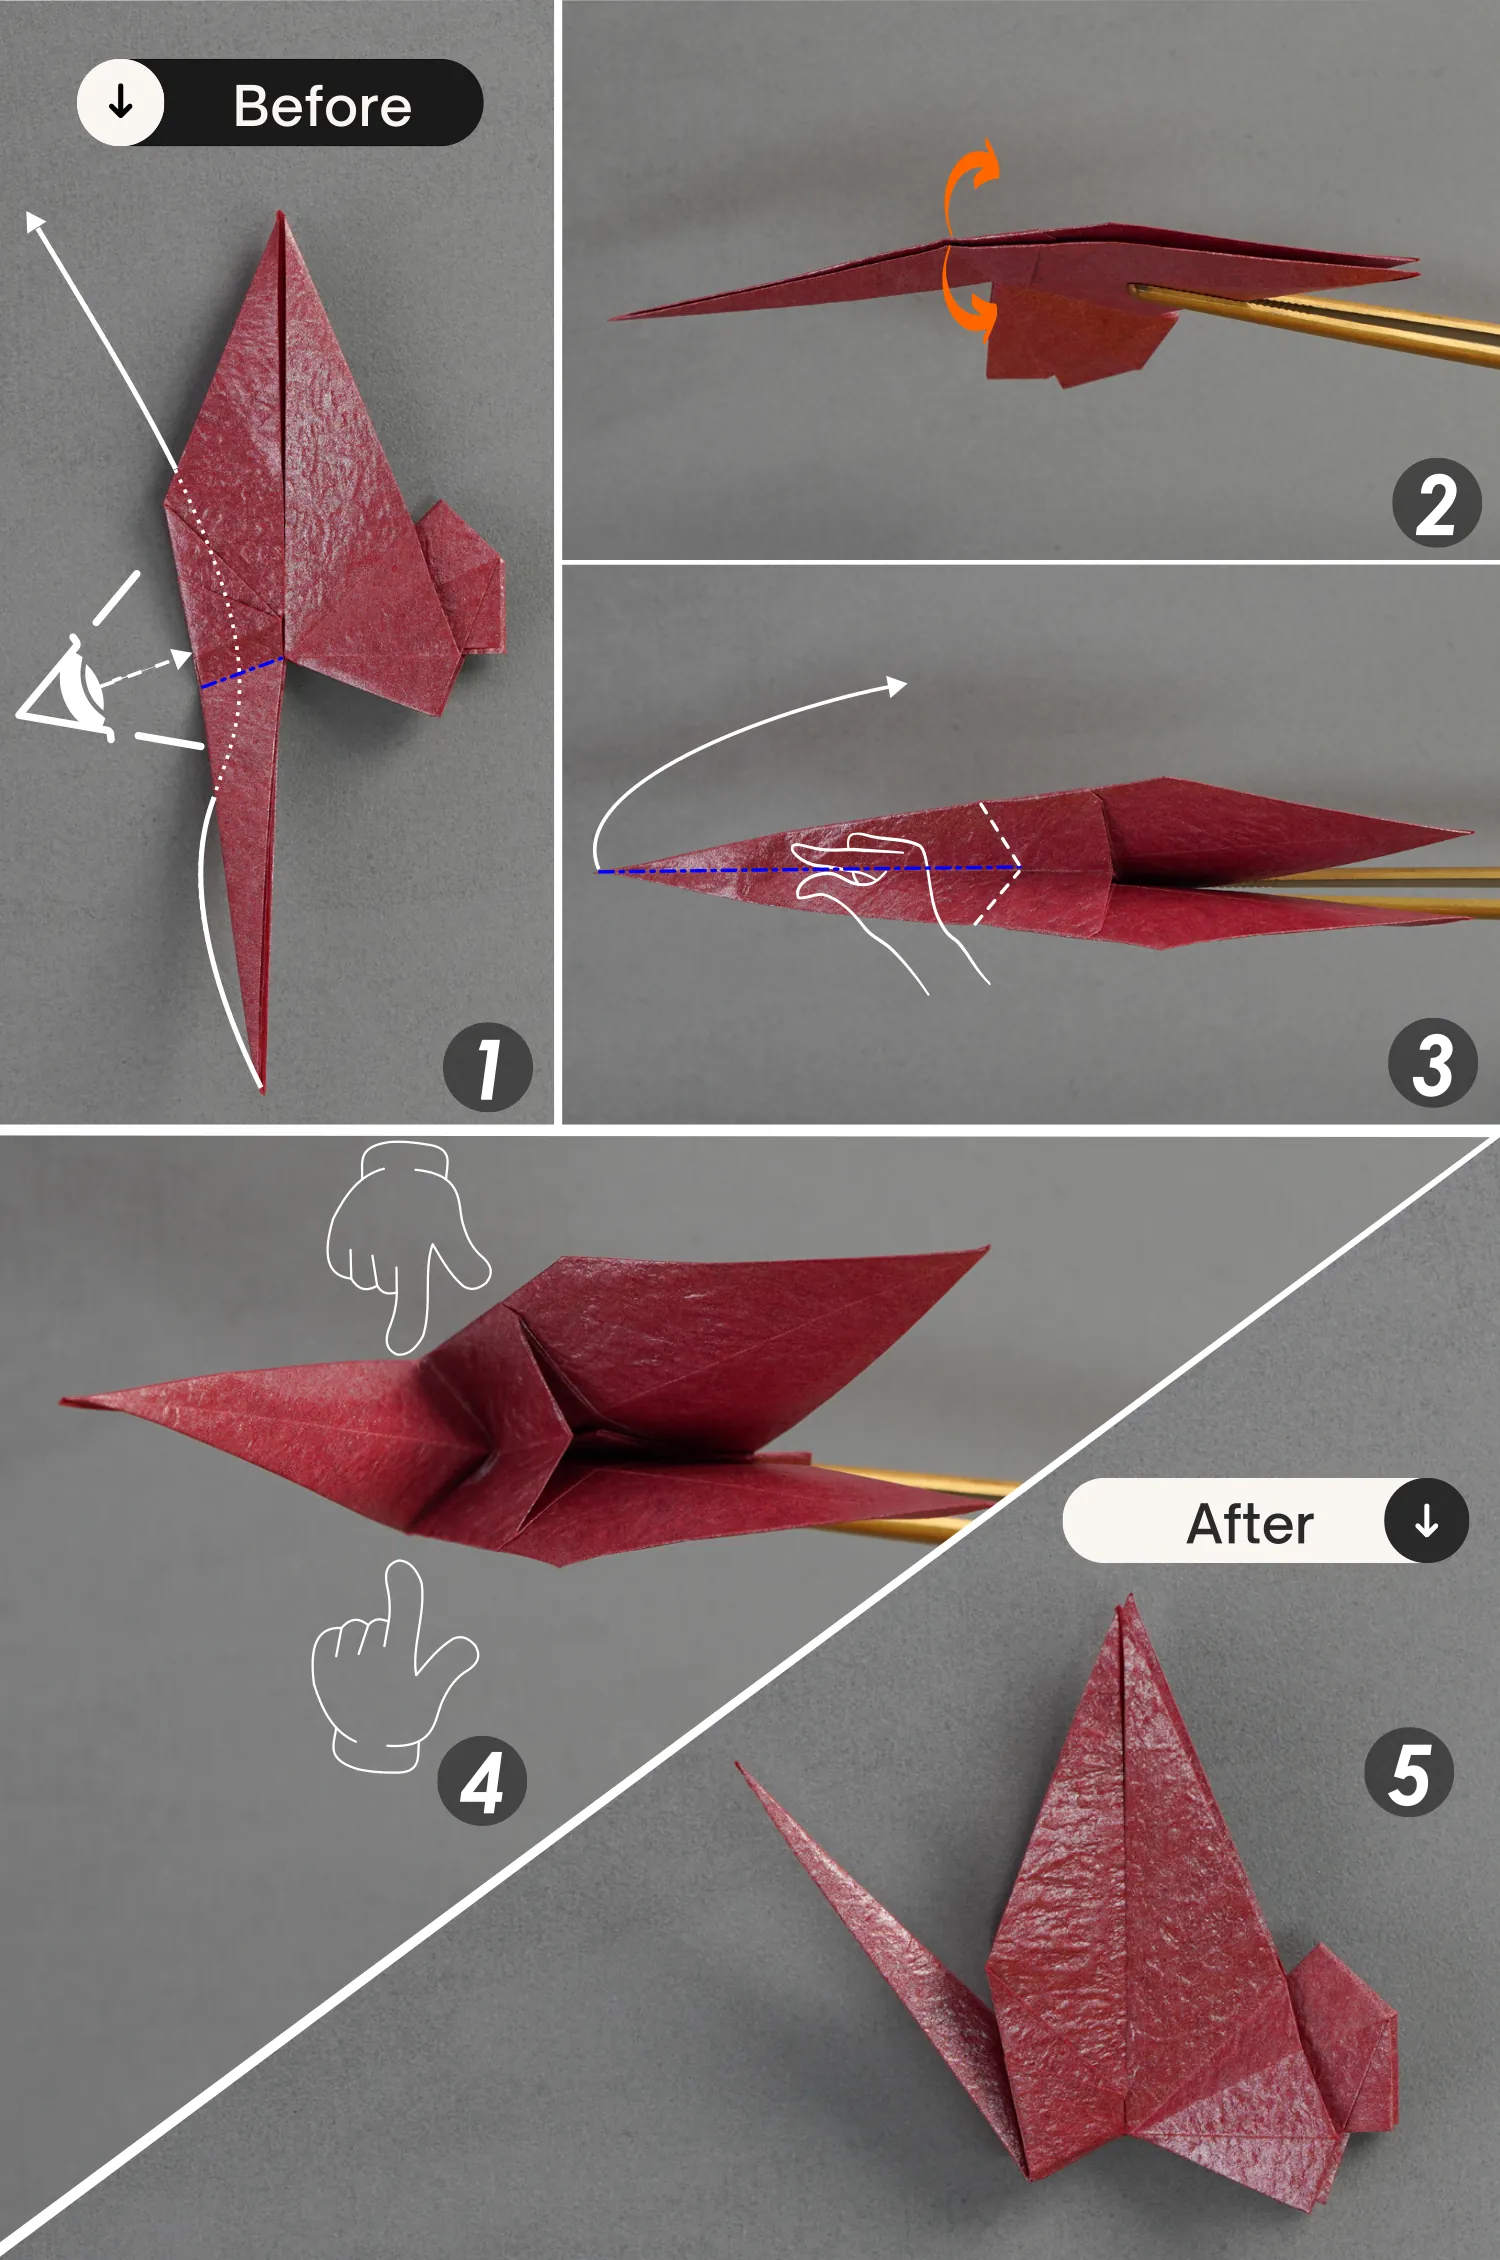
Step 24
Now open this flap from the center, lift the two layers along the creases you made in the previous step, then press the right corner to the bottom left corner along the crease shown by the dotted line. Finally, flatten the fold, creating a diamond shape.
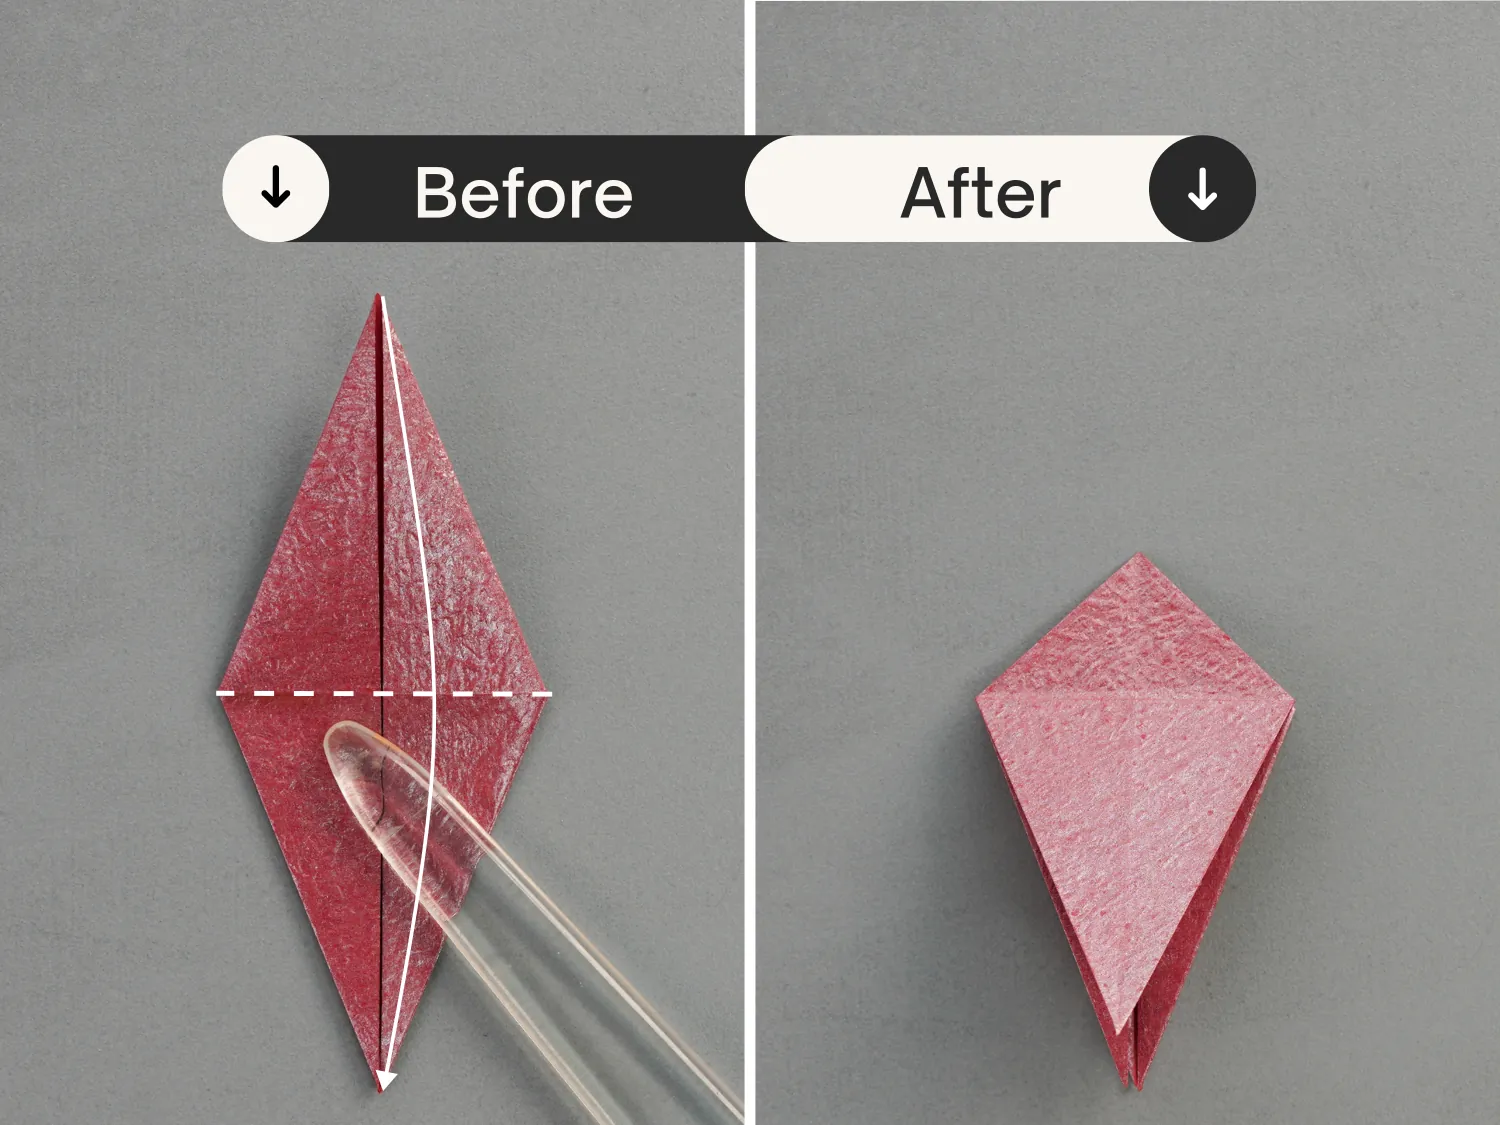
Step 25
Take the top part of the diamond, and fold it down along its middle crease.
Step 26
Fold the bottom flap up along the dotted line, and unfold it.
Step 27
Flip it over vertically and view it from the left side. Slightly open it from this side, pinch up the middle crease, and fold the left corner to the right along the creases on both sides you made in the previous step (as the third picture shows).
Finally, close this opening and flatten the paper, then view it from the original sight.
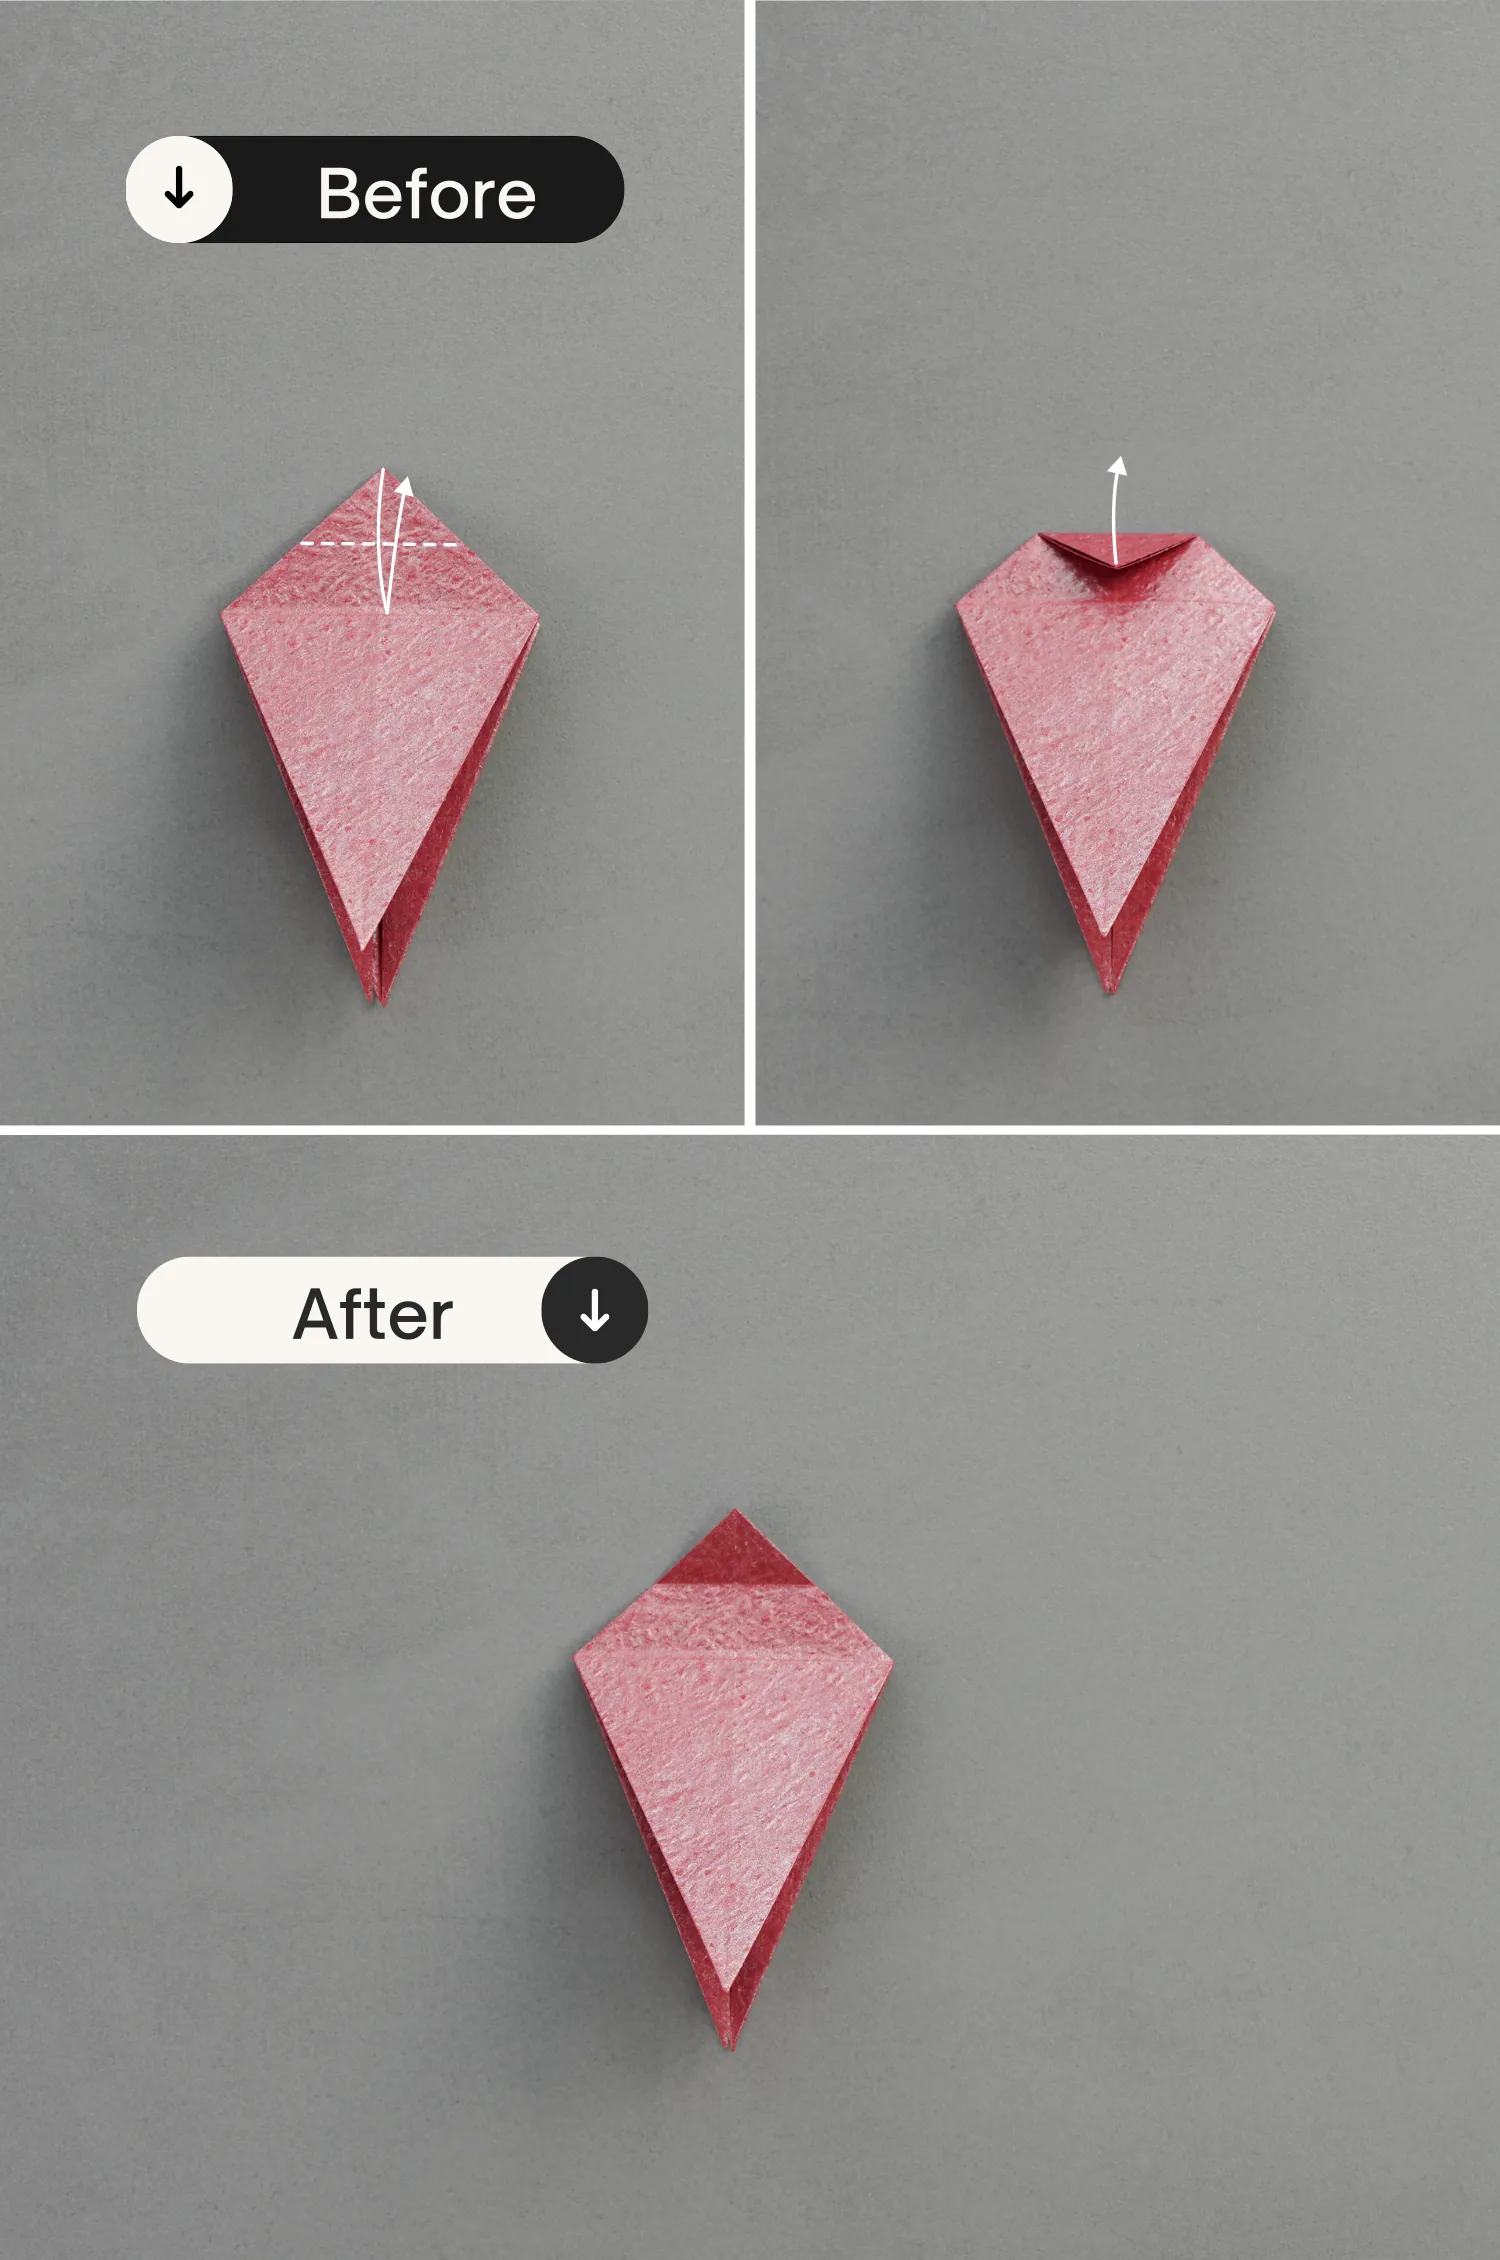
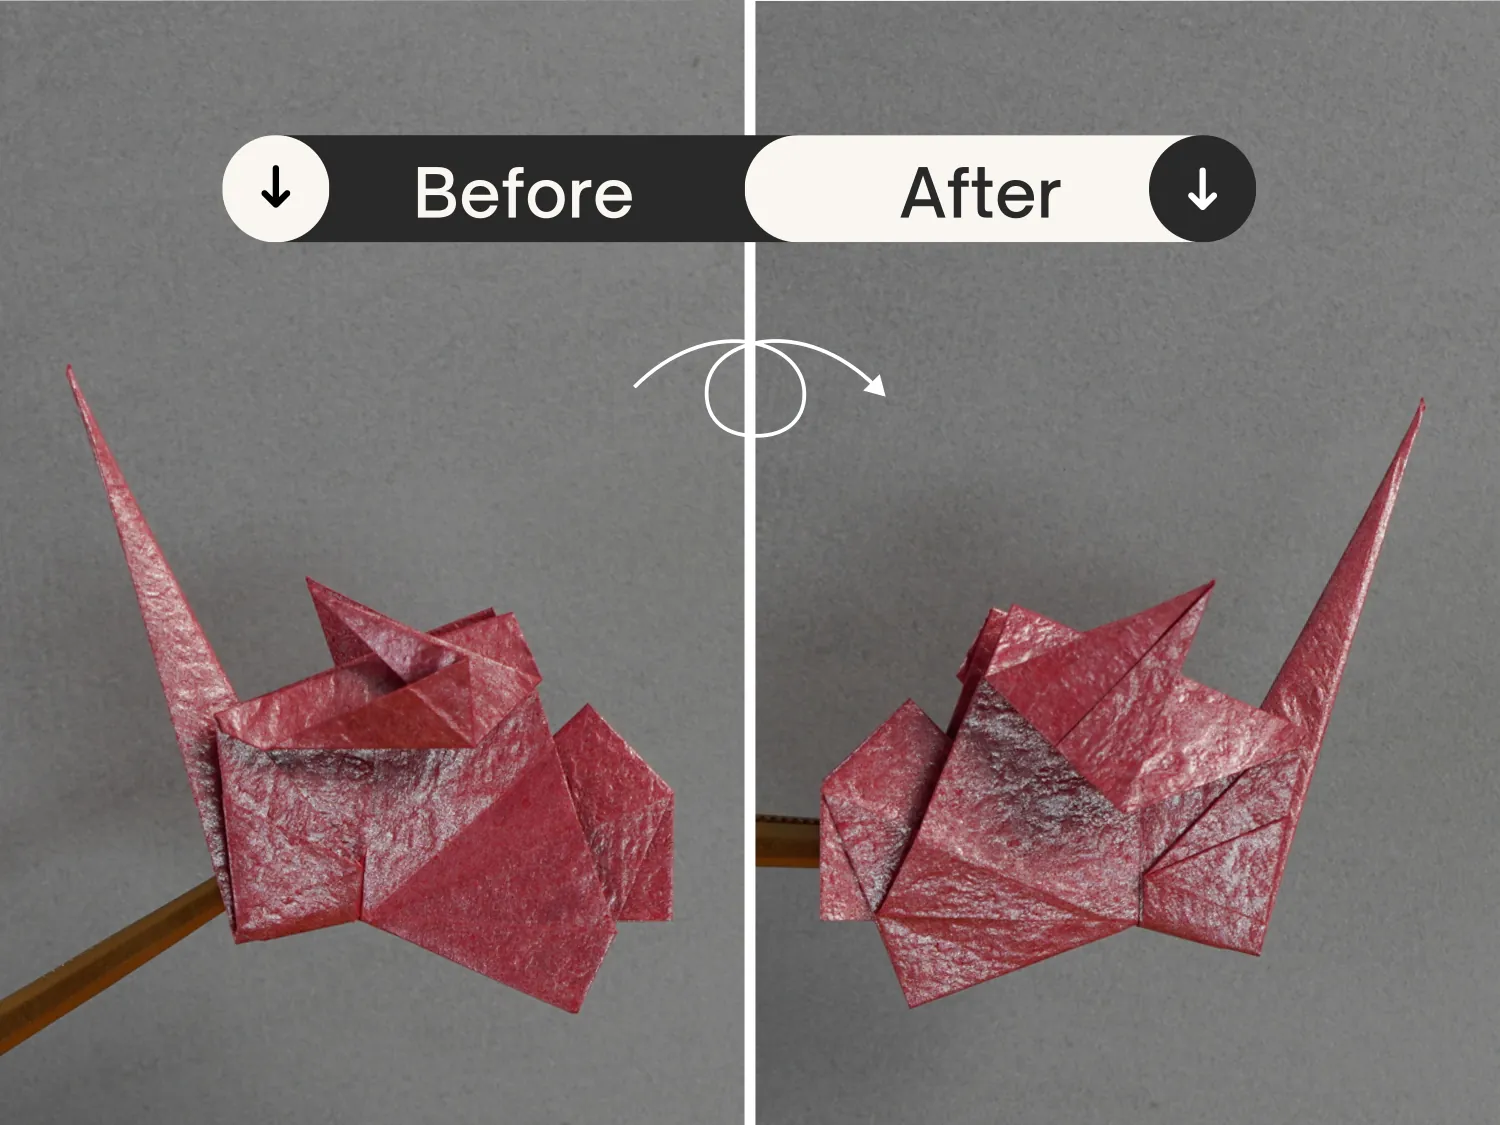
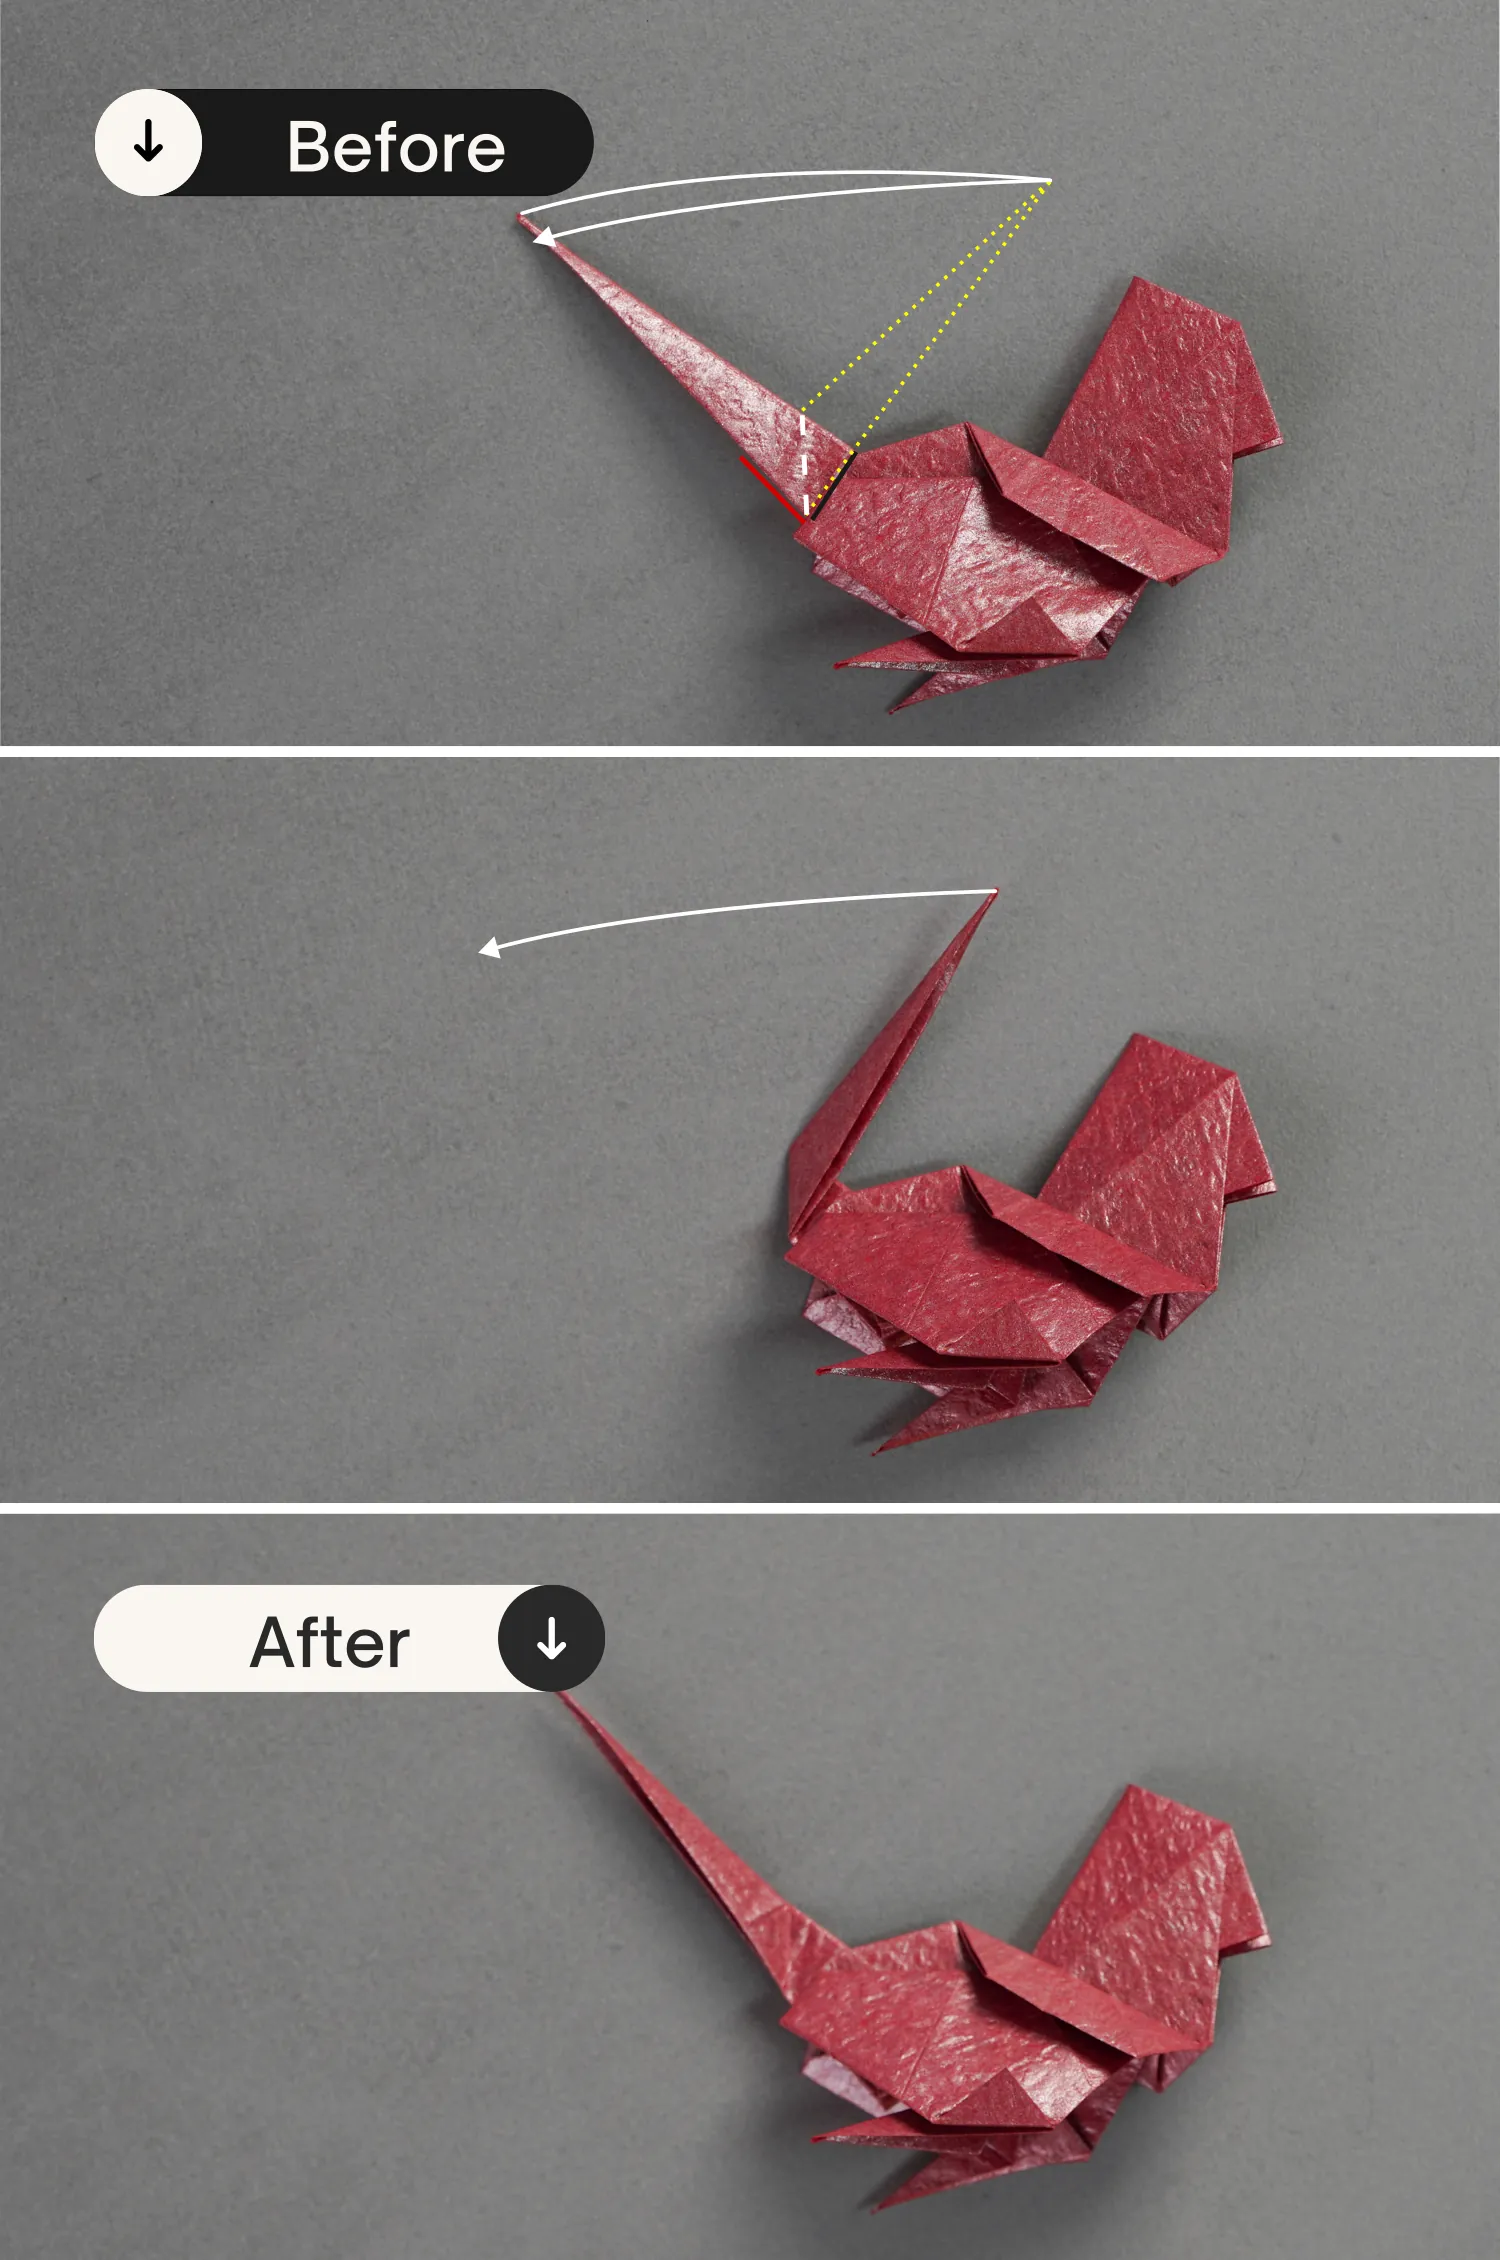
Step 28
Fold the top point of the top layer down along the dotted line, to meet the corner shown by the yellow spot, then fold it back to the top.
Then flip the paper over, to fold another wing. Like before, fold the top point down and then fold it back to the top.
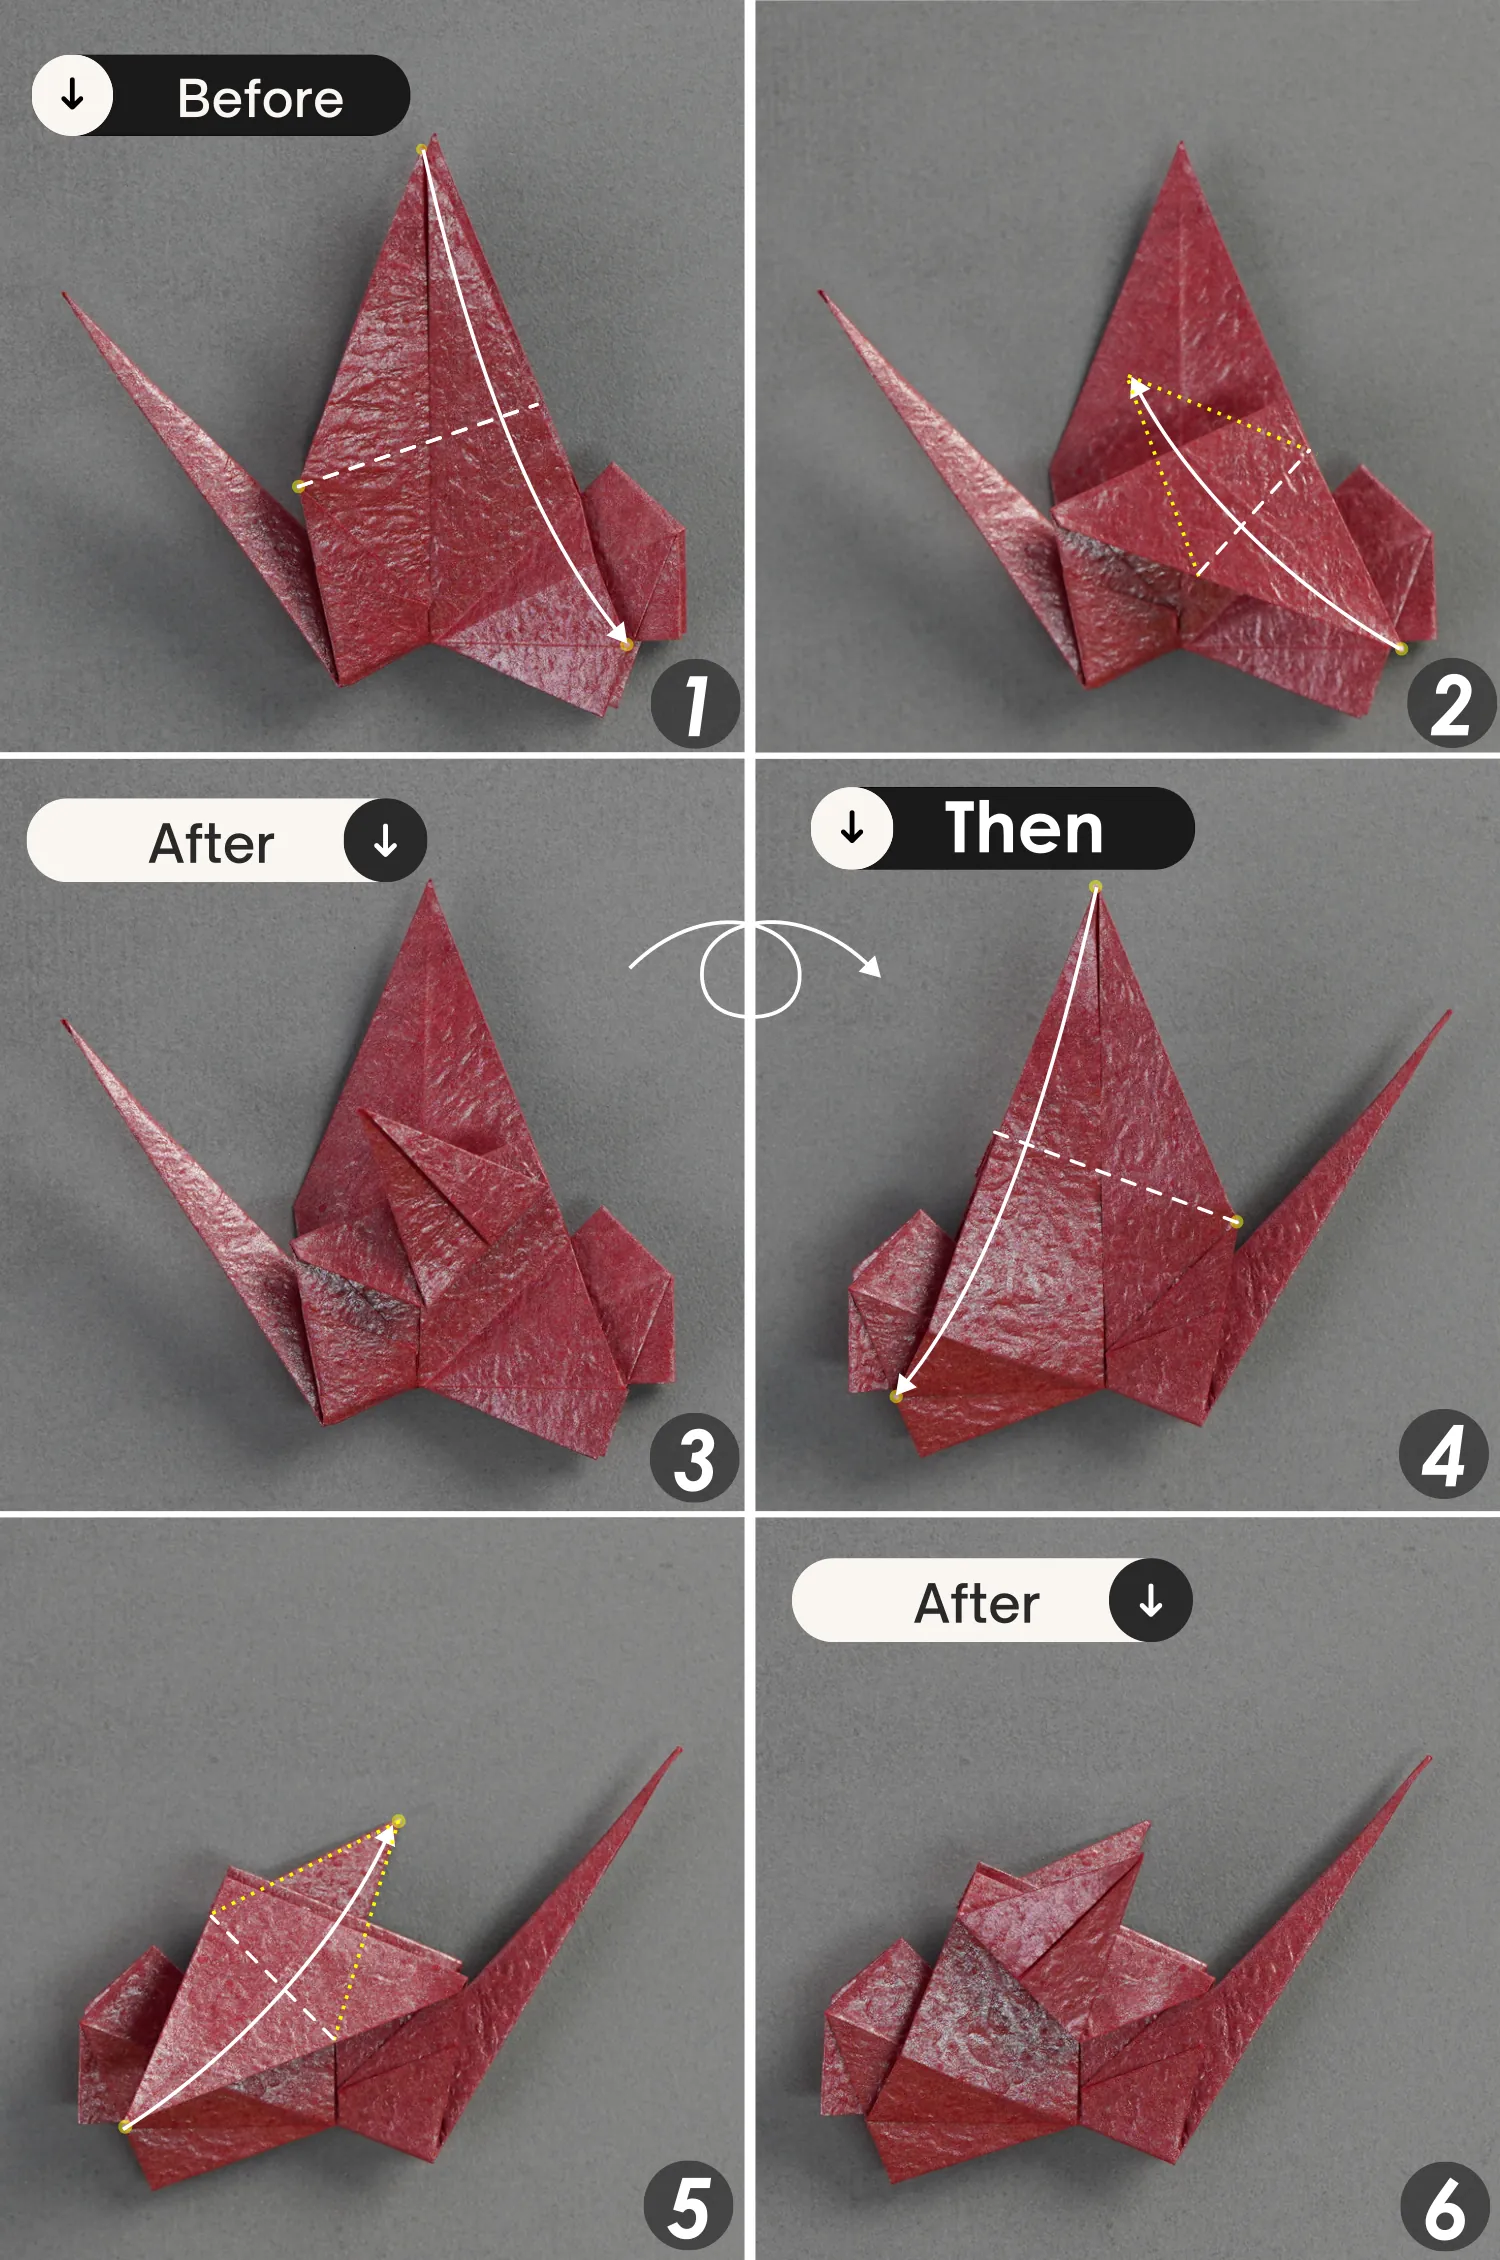
Step 29
Turn over the paper.
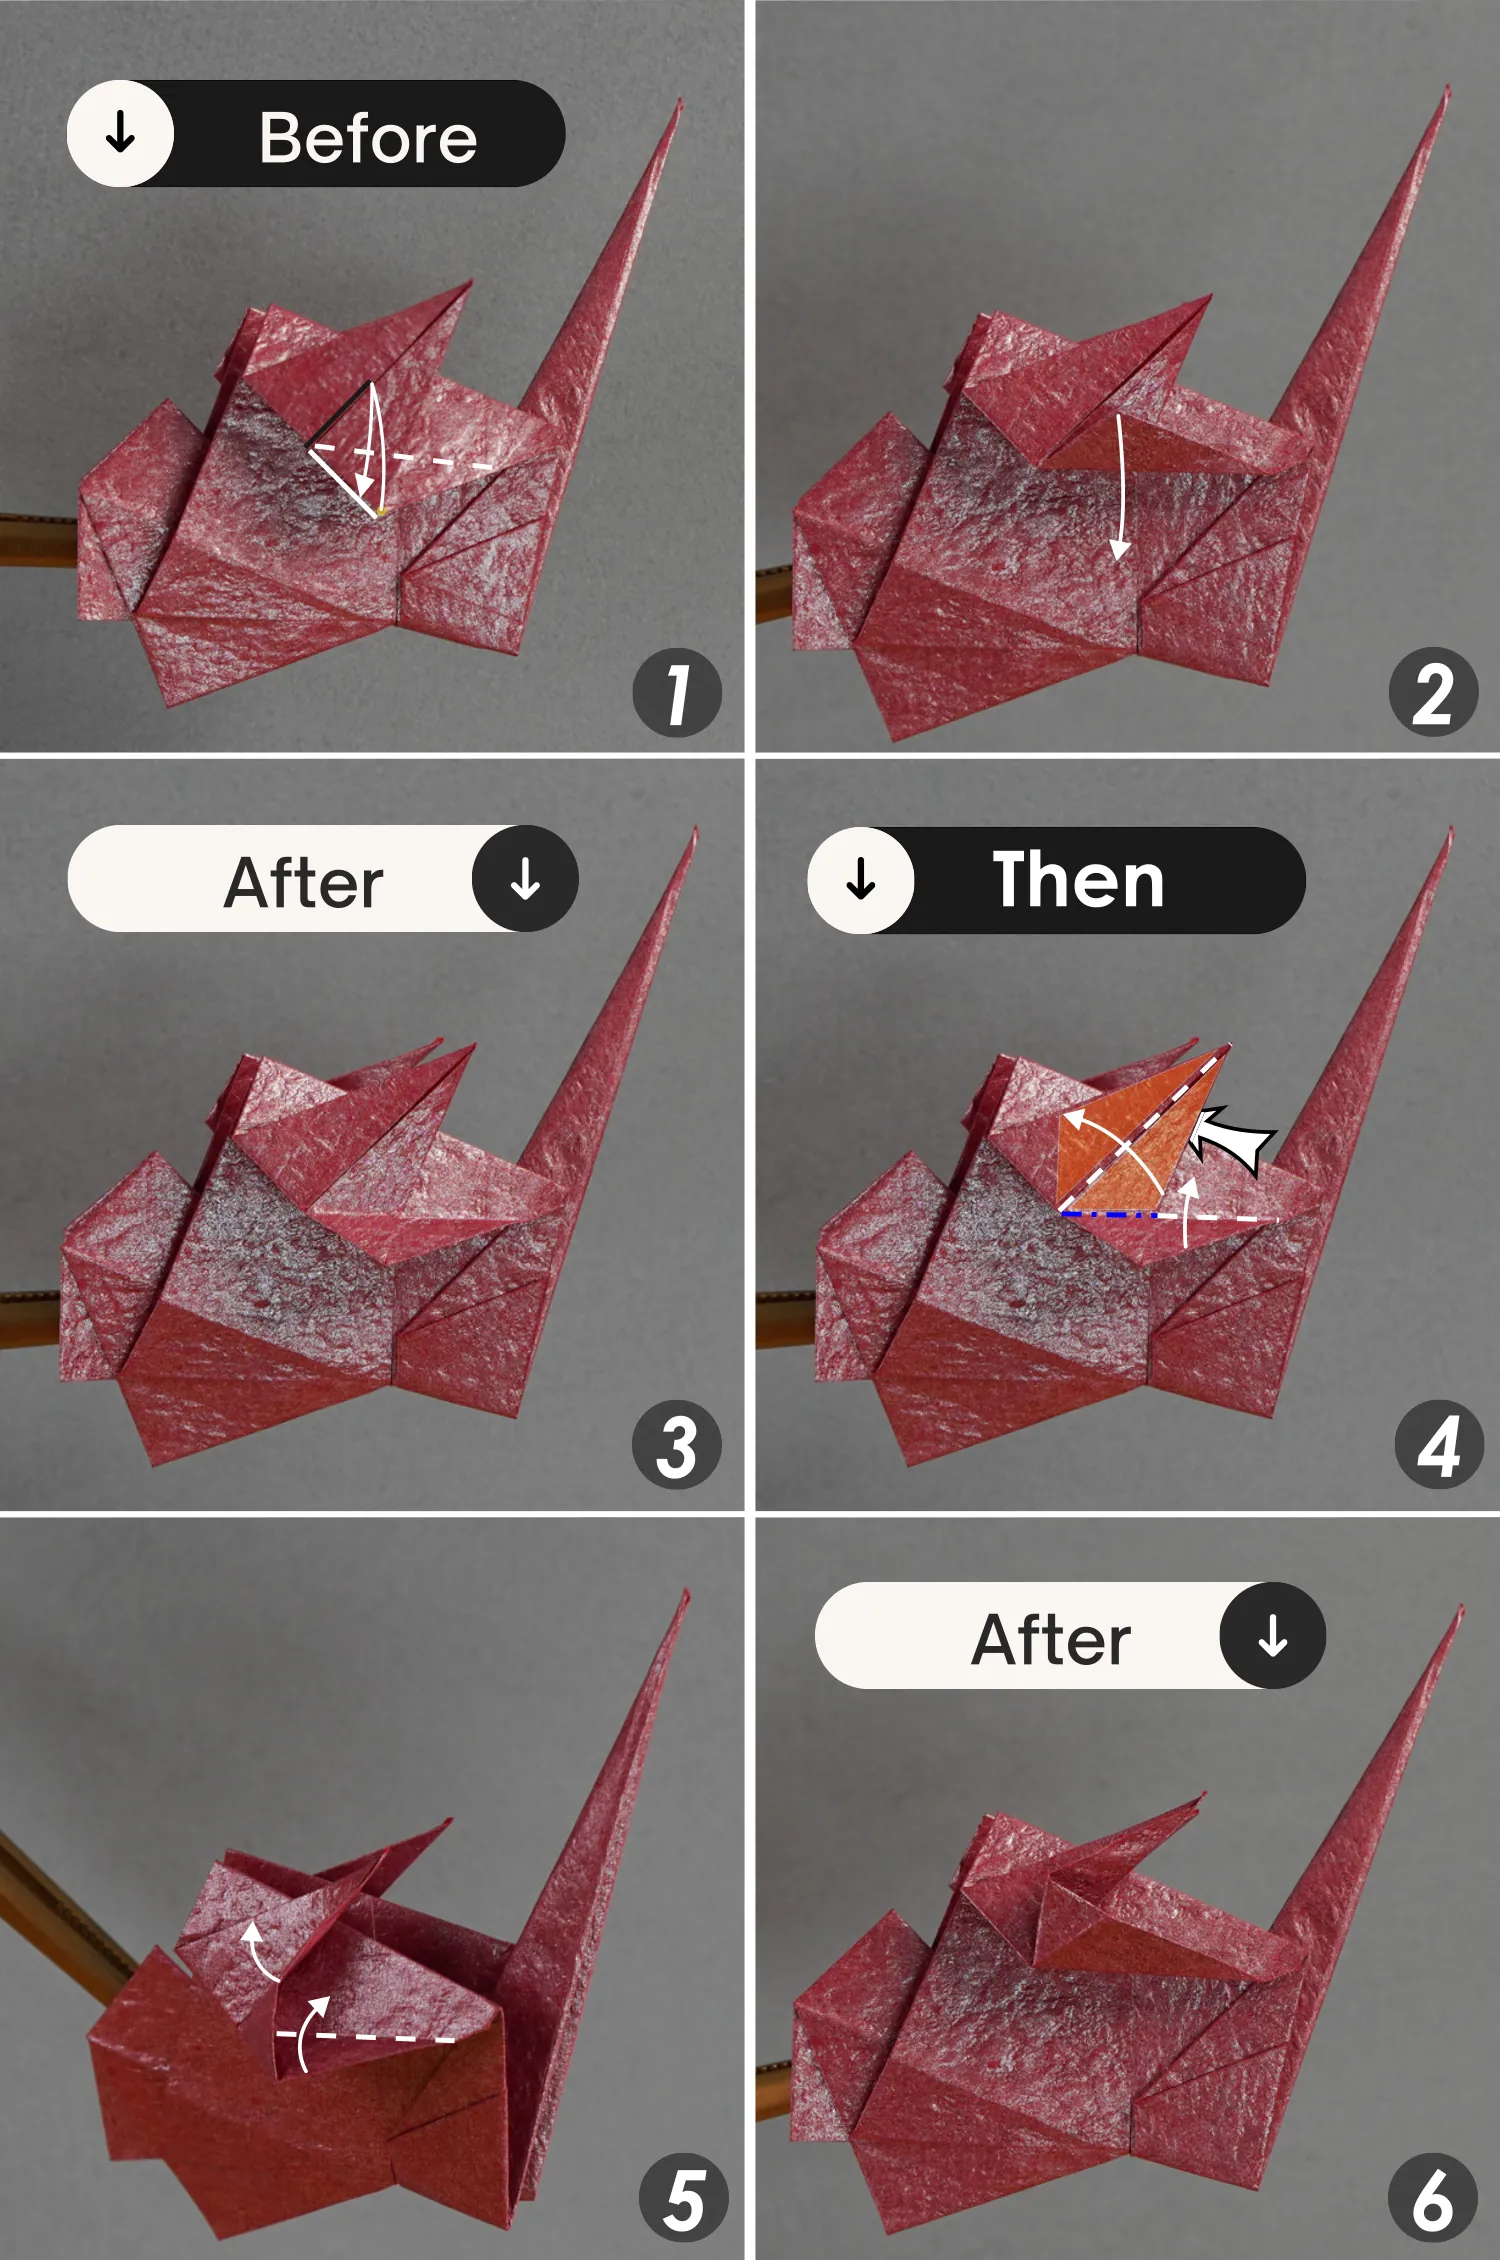
Step 30
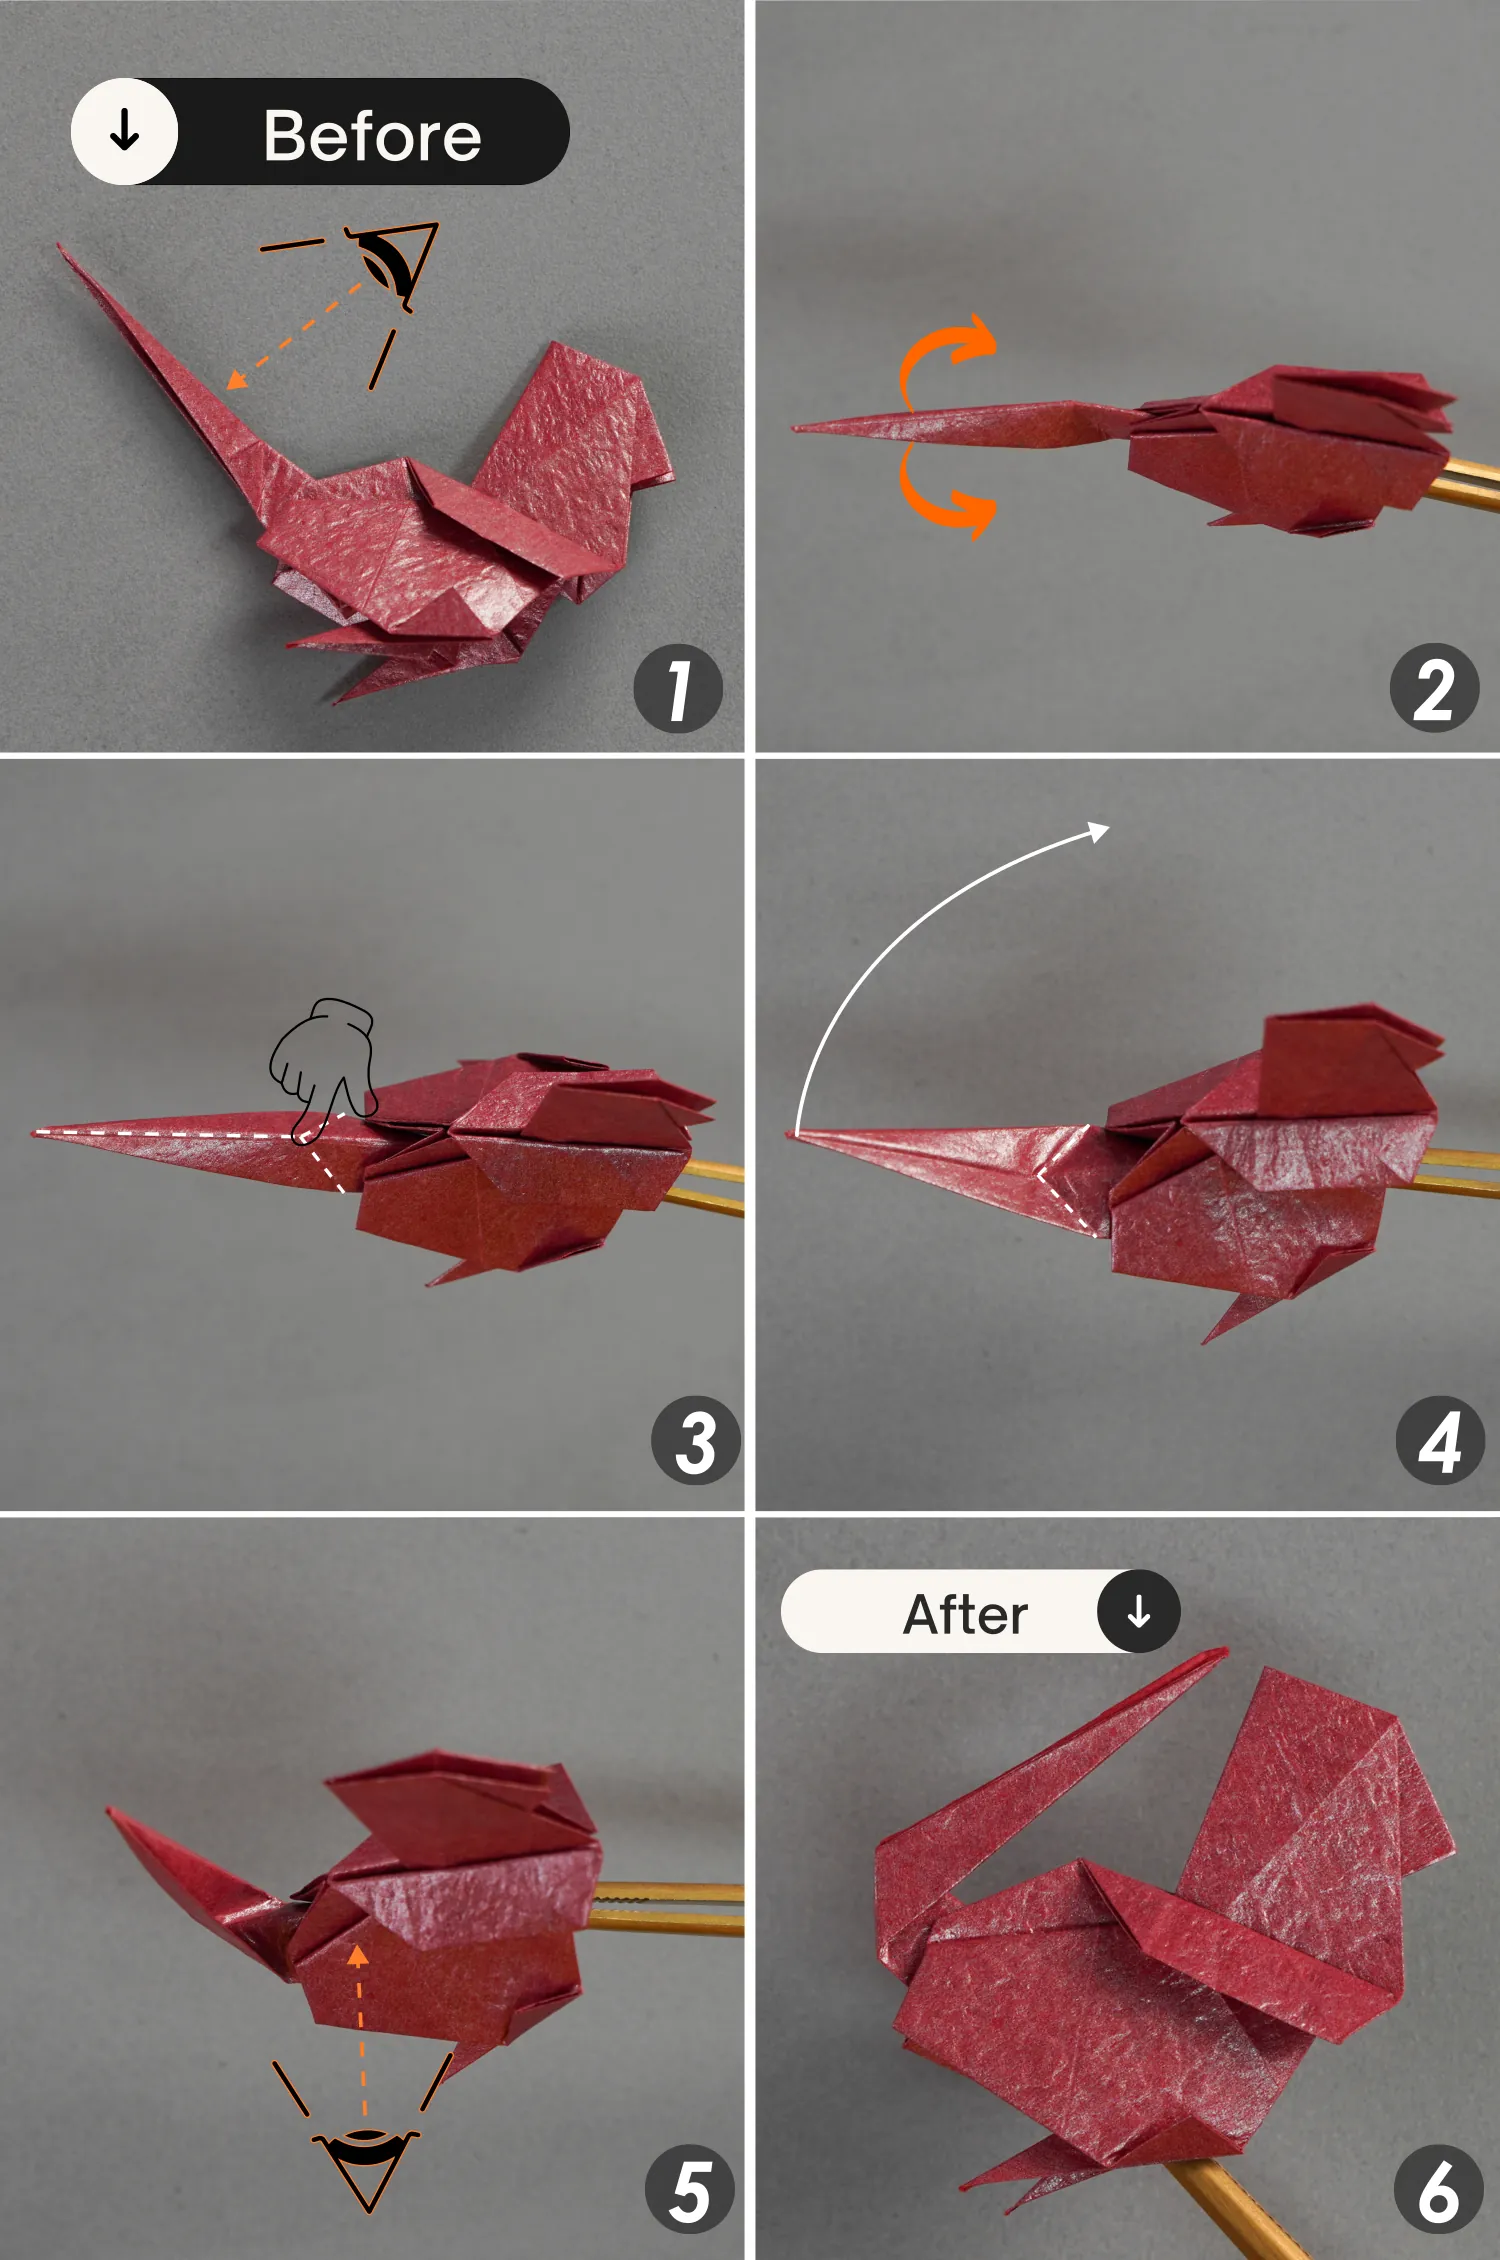
Fold the bottom corner of the wing up along the dotted line, and ensure the bottom right edge(shown by the white line) of the folded part aligns with the middle crease(shown by the black line) of the triangle. Crease it well then unfold it.
Step 31
Now focus on the small triangle, lift its bottom left edge to open the bottom corner of the wing, then fold this edge to the top right along its middle line, then push the bottom corner up, and finally flatten it along the existing creases.
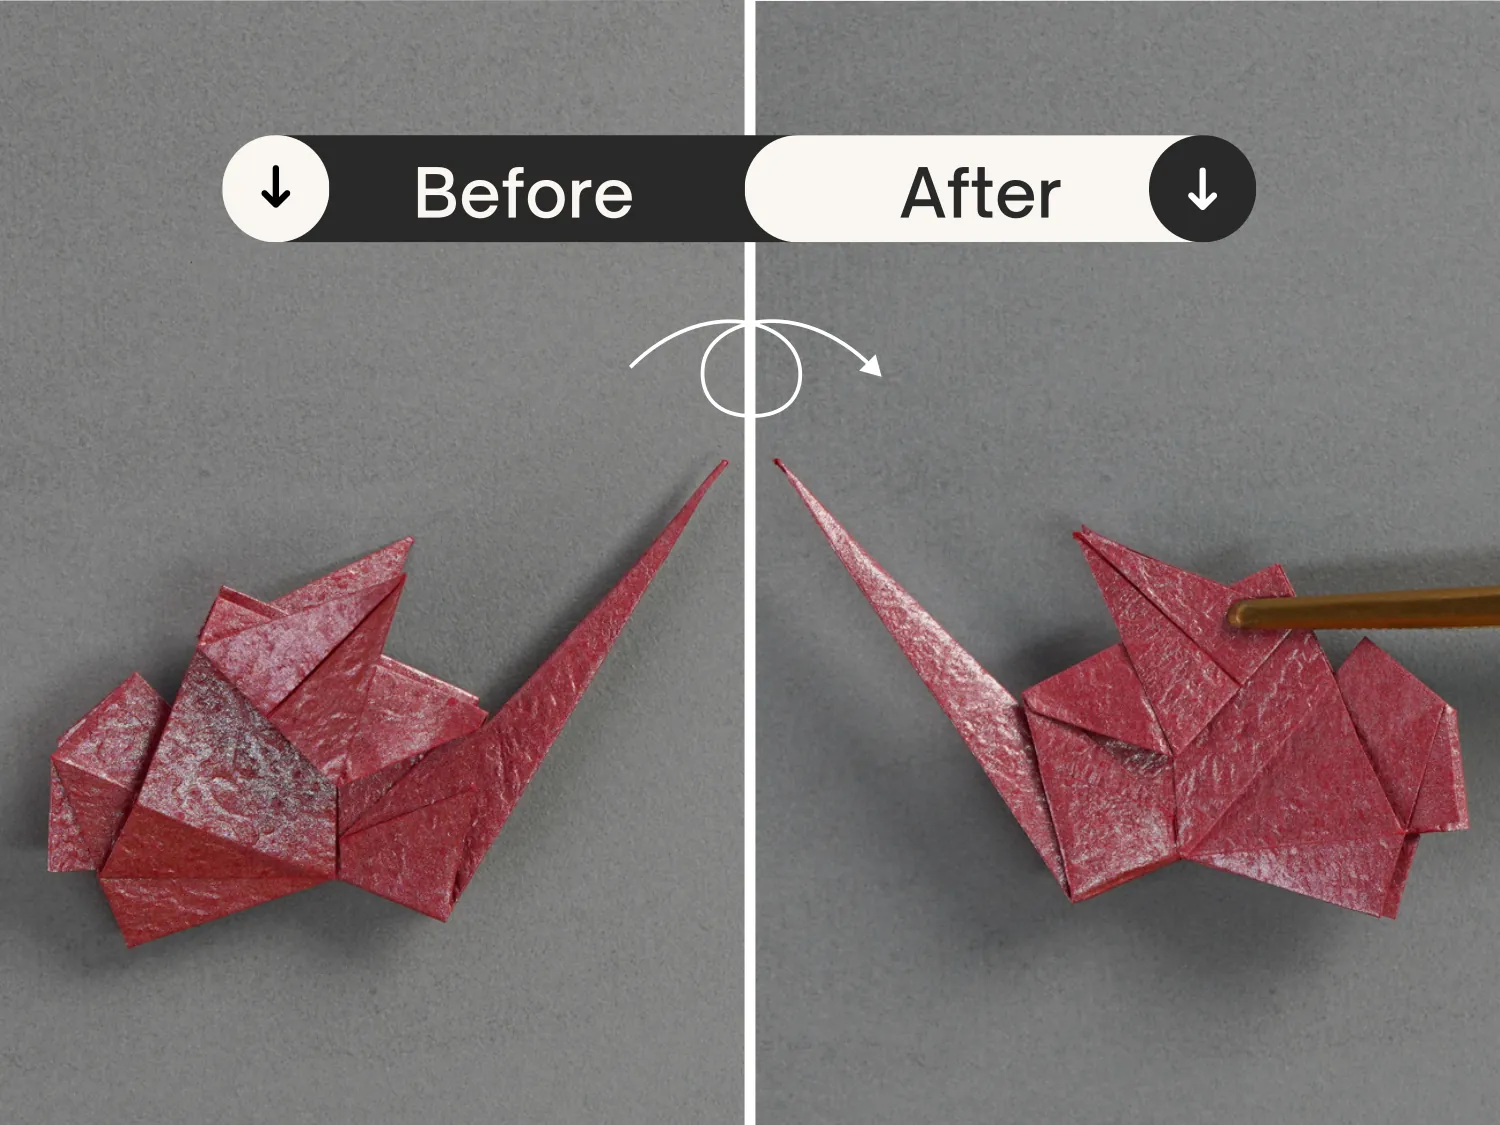
Step 32
Flip the paper over.
Step 33
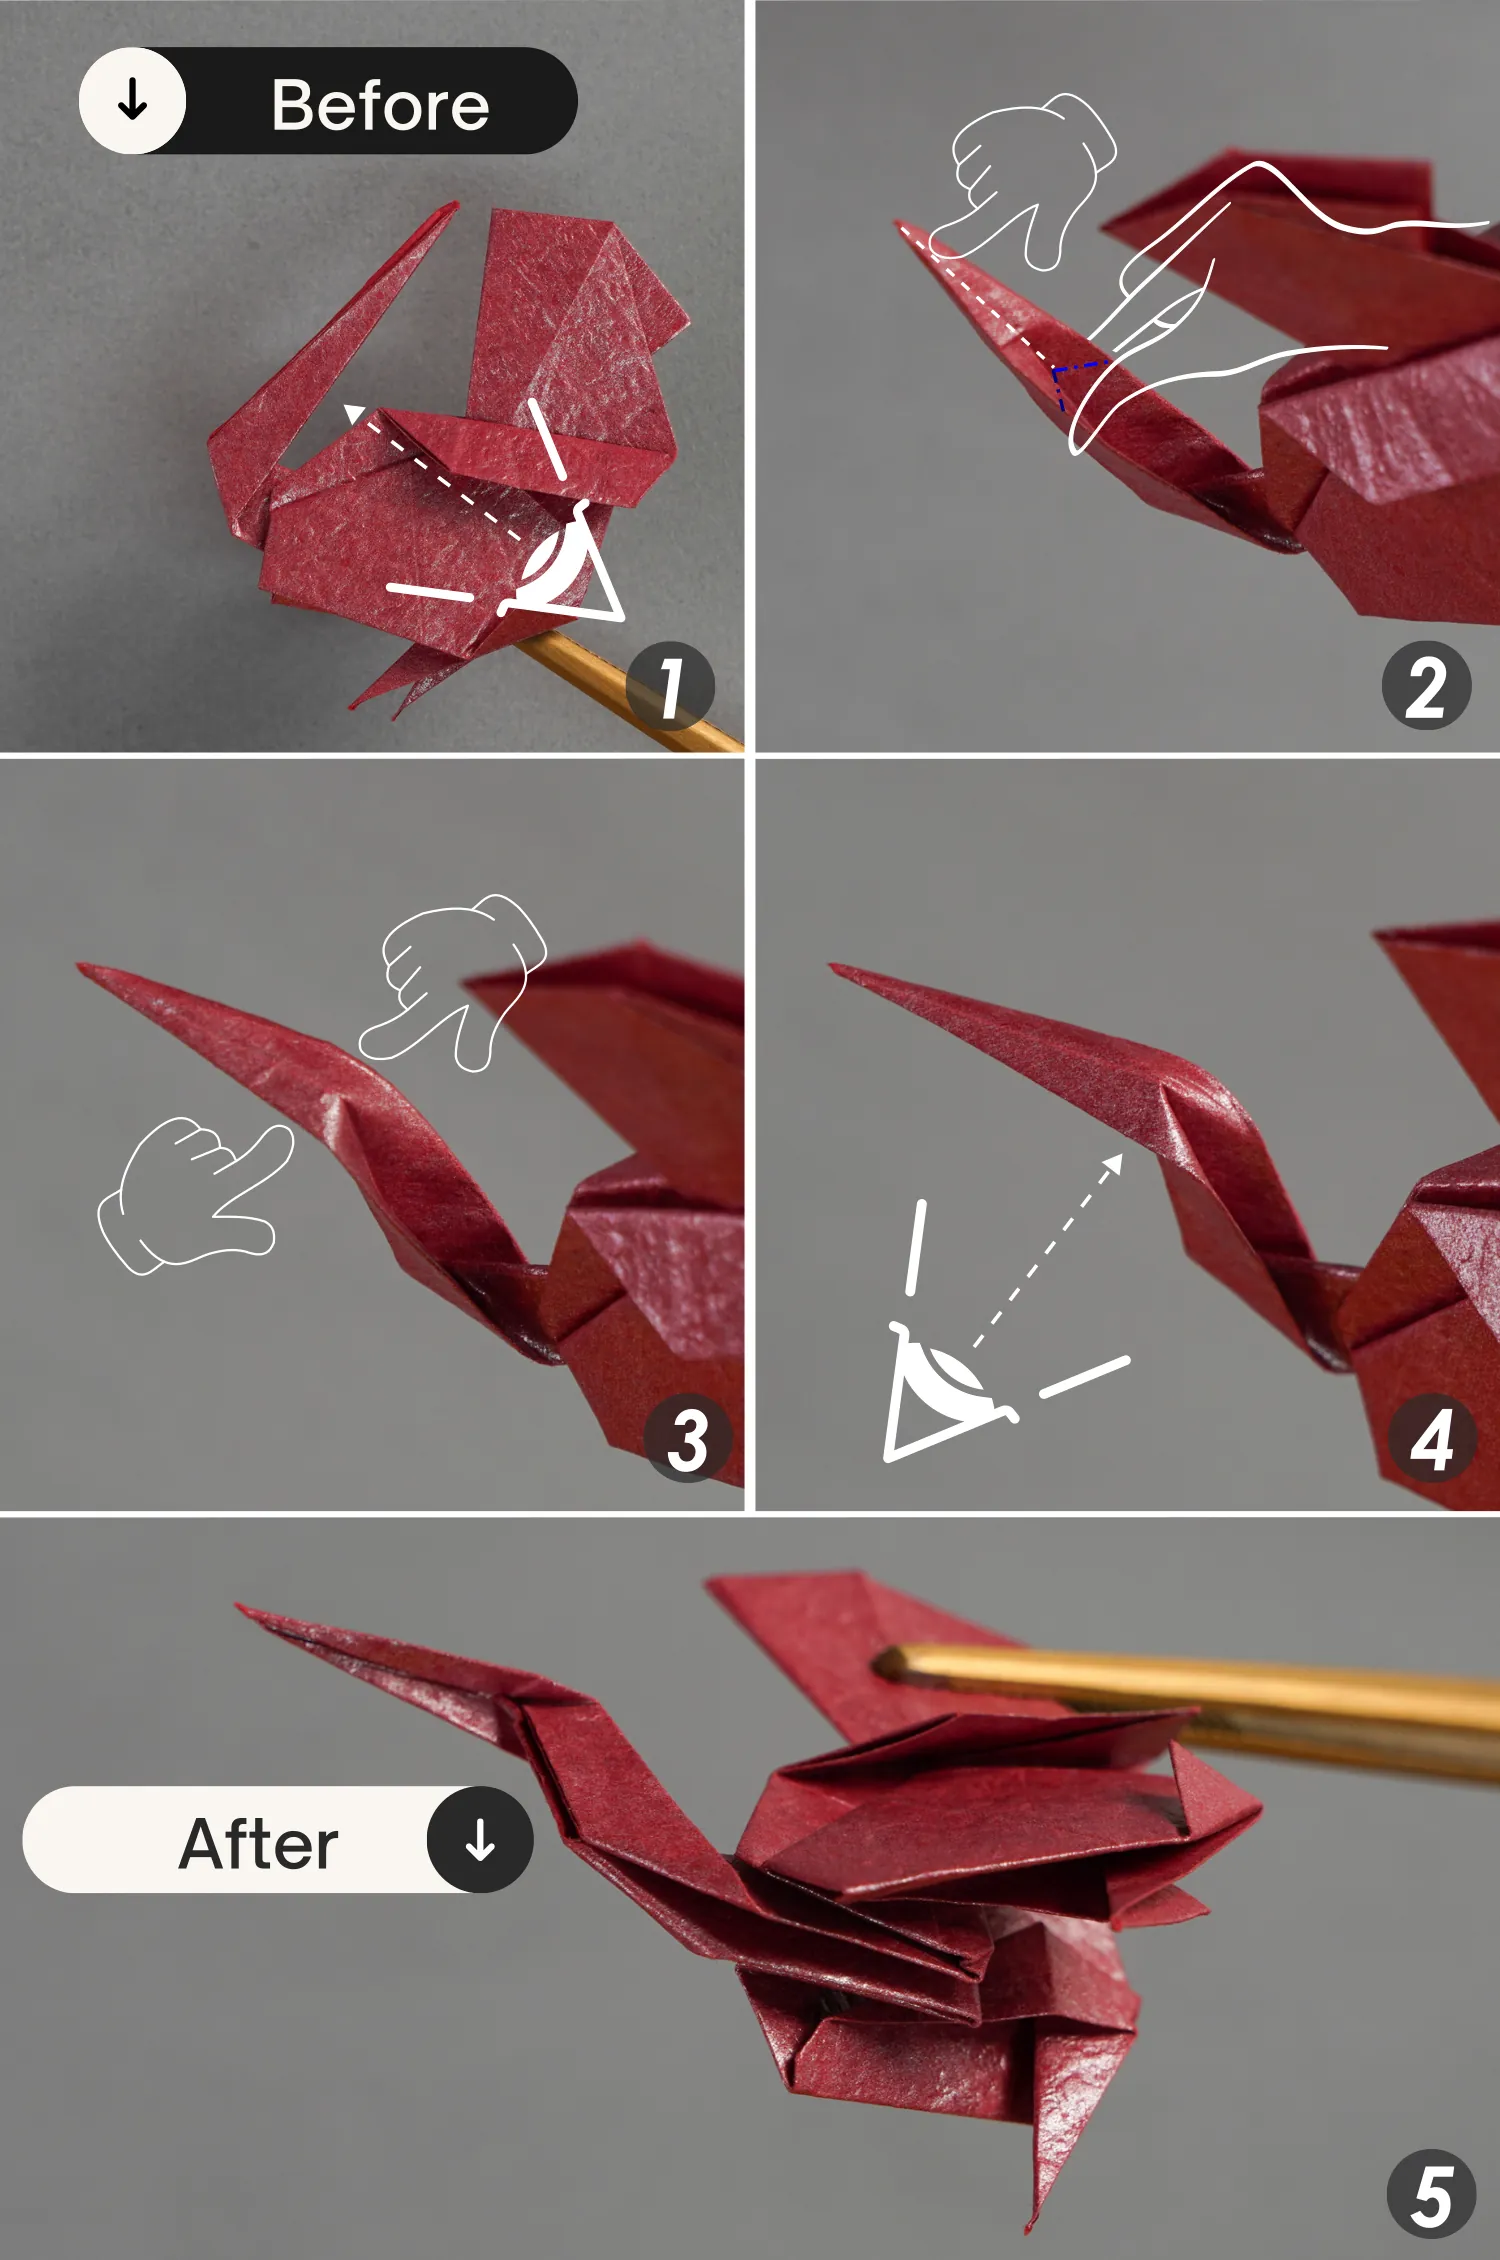
Similarly, fold the bottom corner of the wing up along the dotted line, crease it well then unfold it. Ensure the bottom left edge(shown by the white line) of the folded part aligns with the middle crease(shown by the black line) of the triangle.
Then lift the bottom right edge of the triangle to open the bottom corner of the wing, fold this edge to the top left along its middle line, then push the bottom corner up, and finally flatten it along the existing creases.
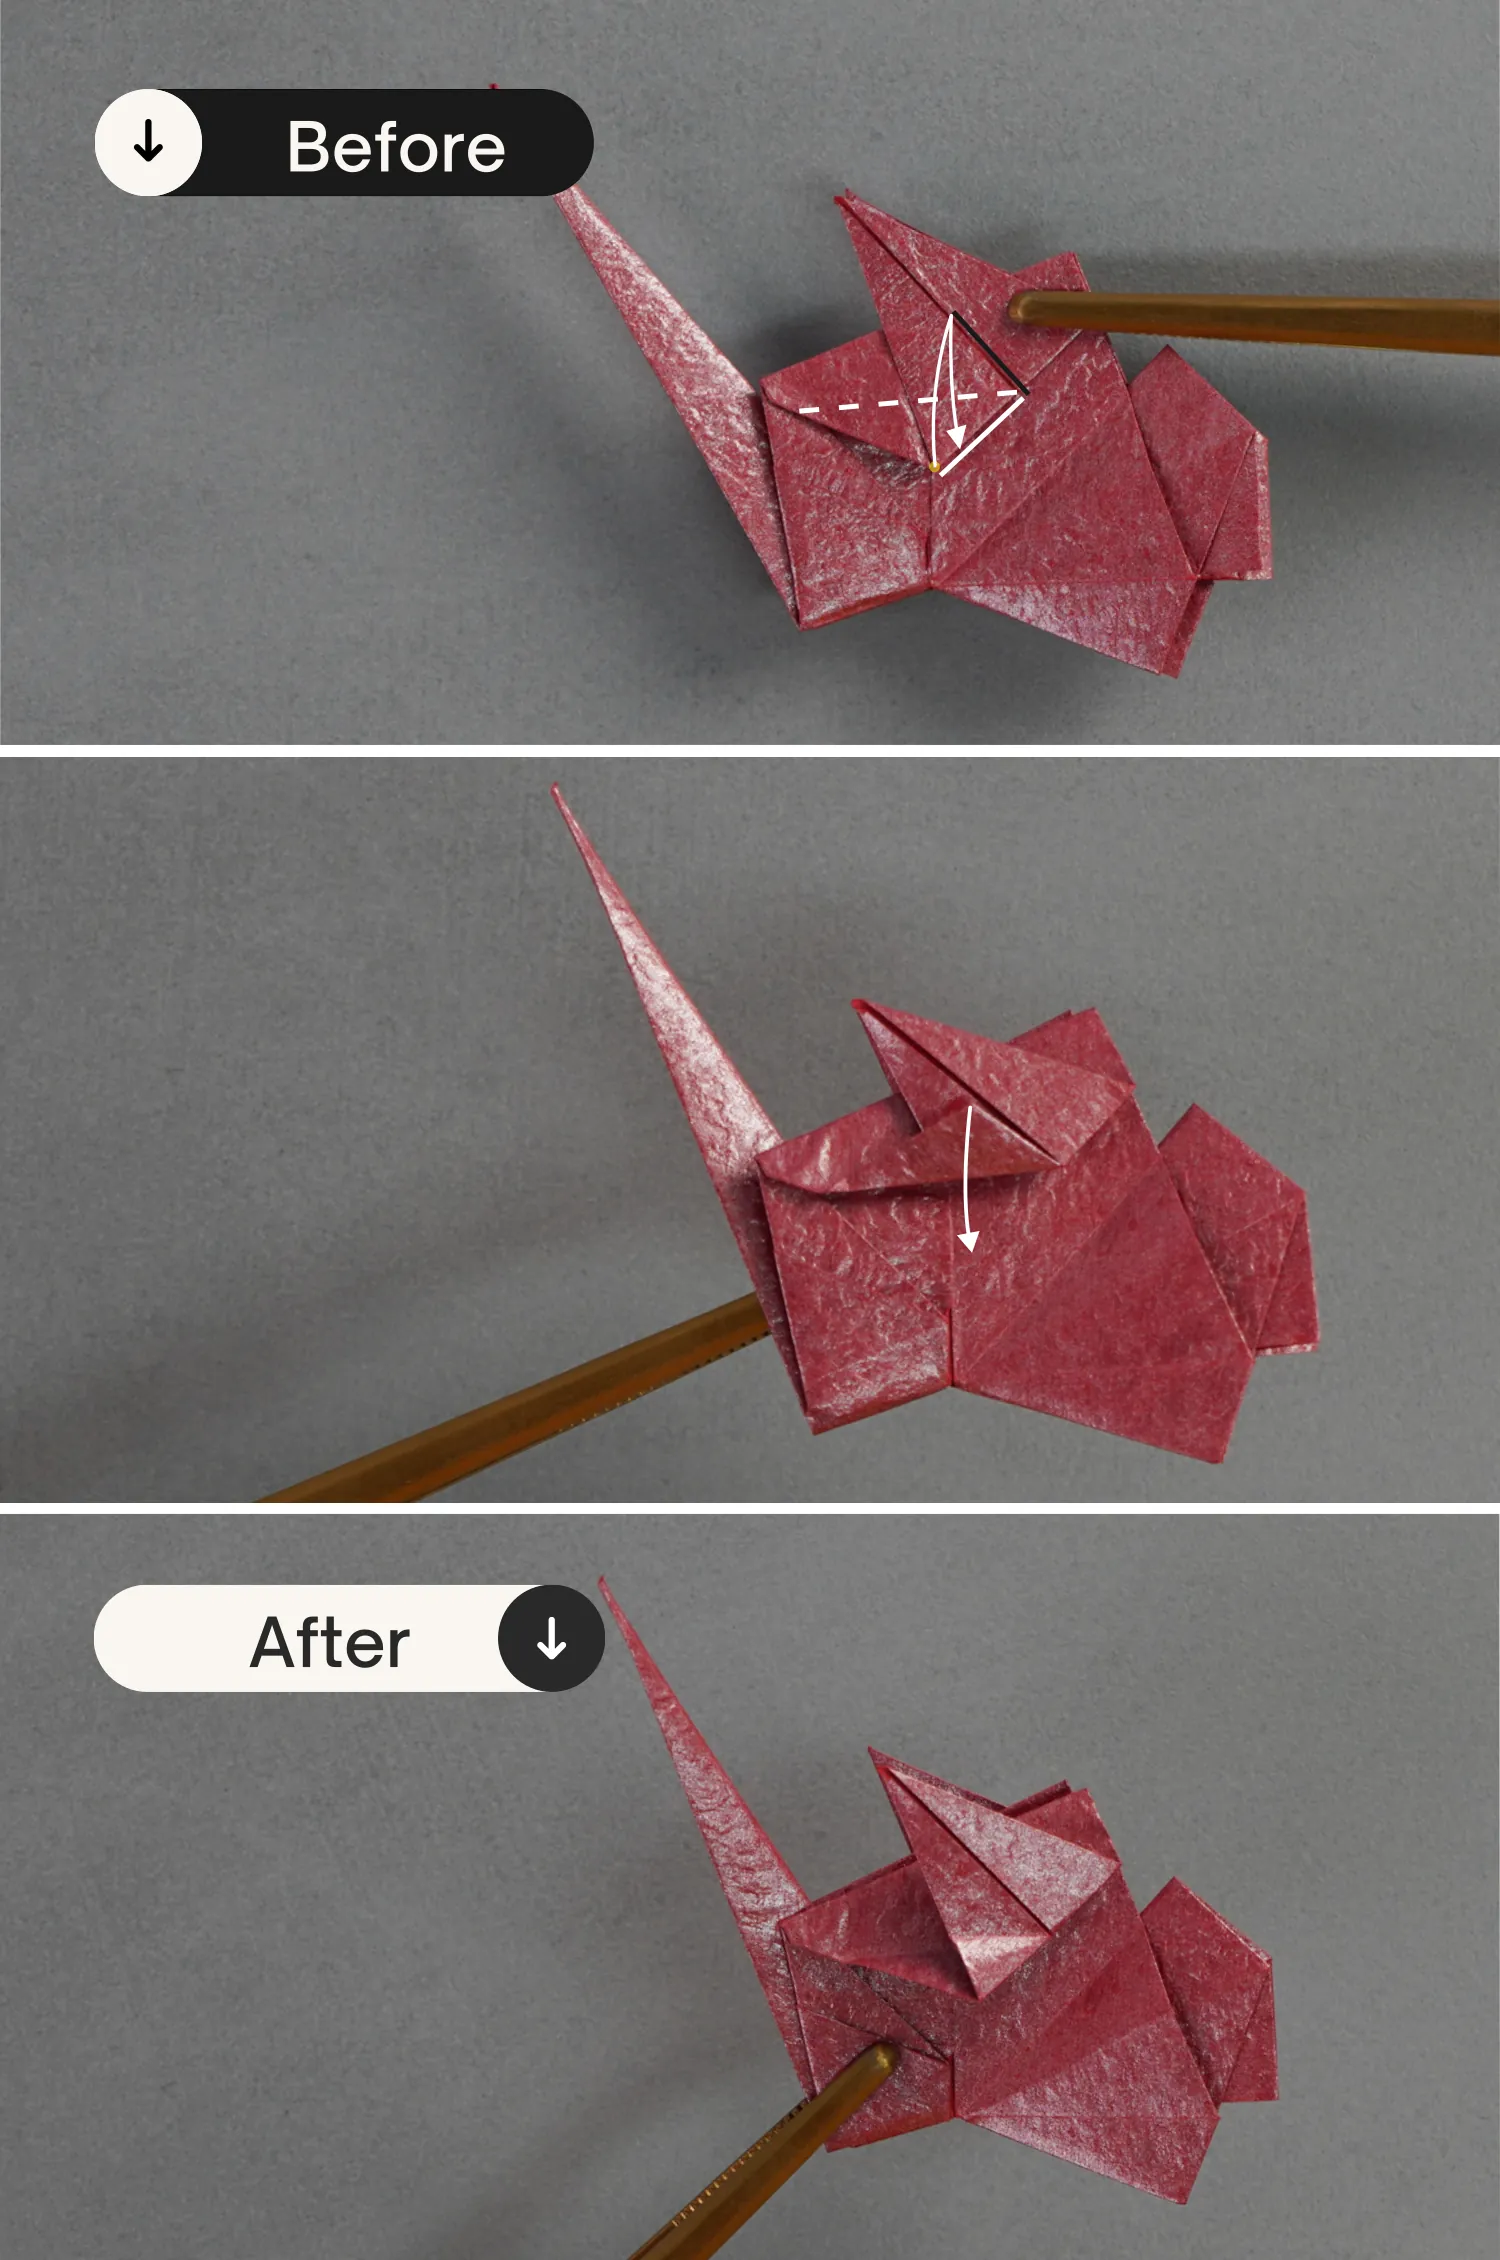
Step 34
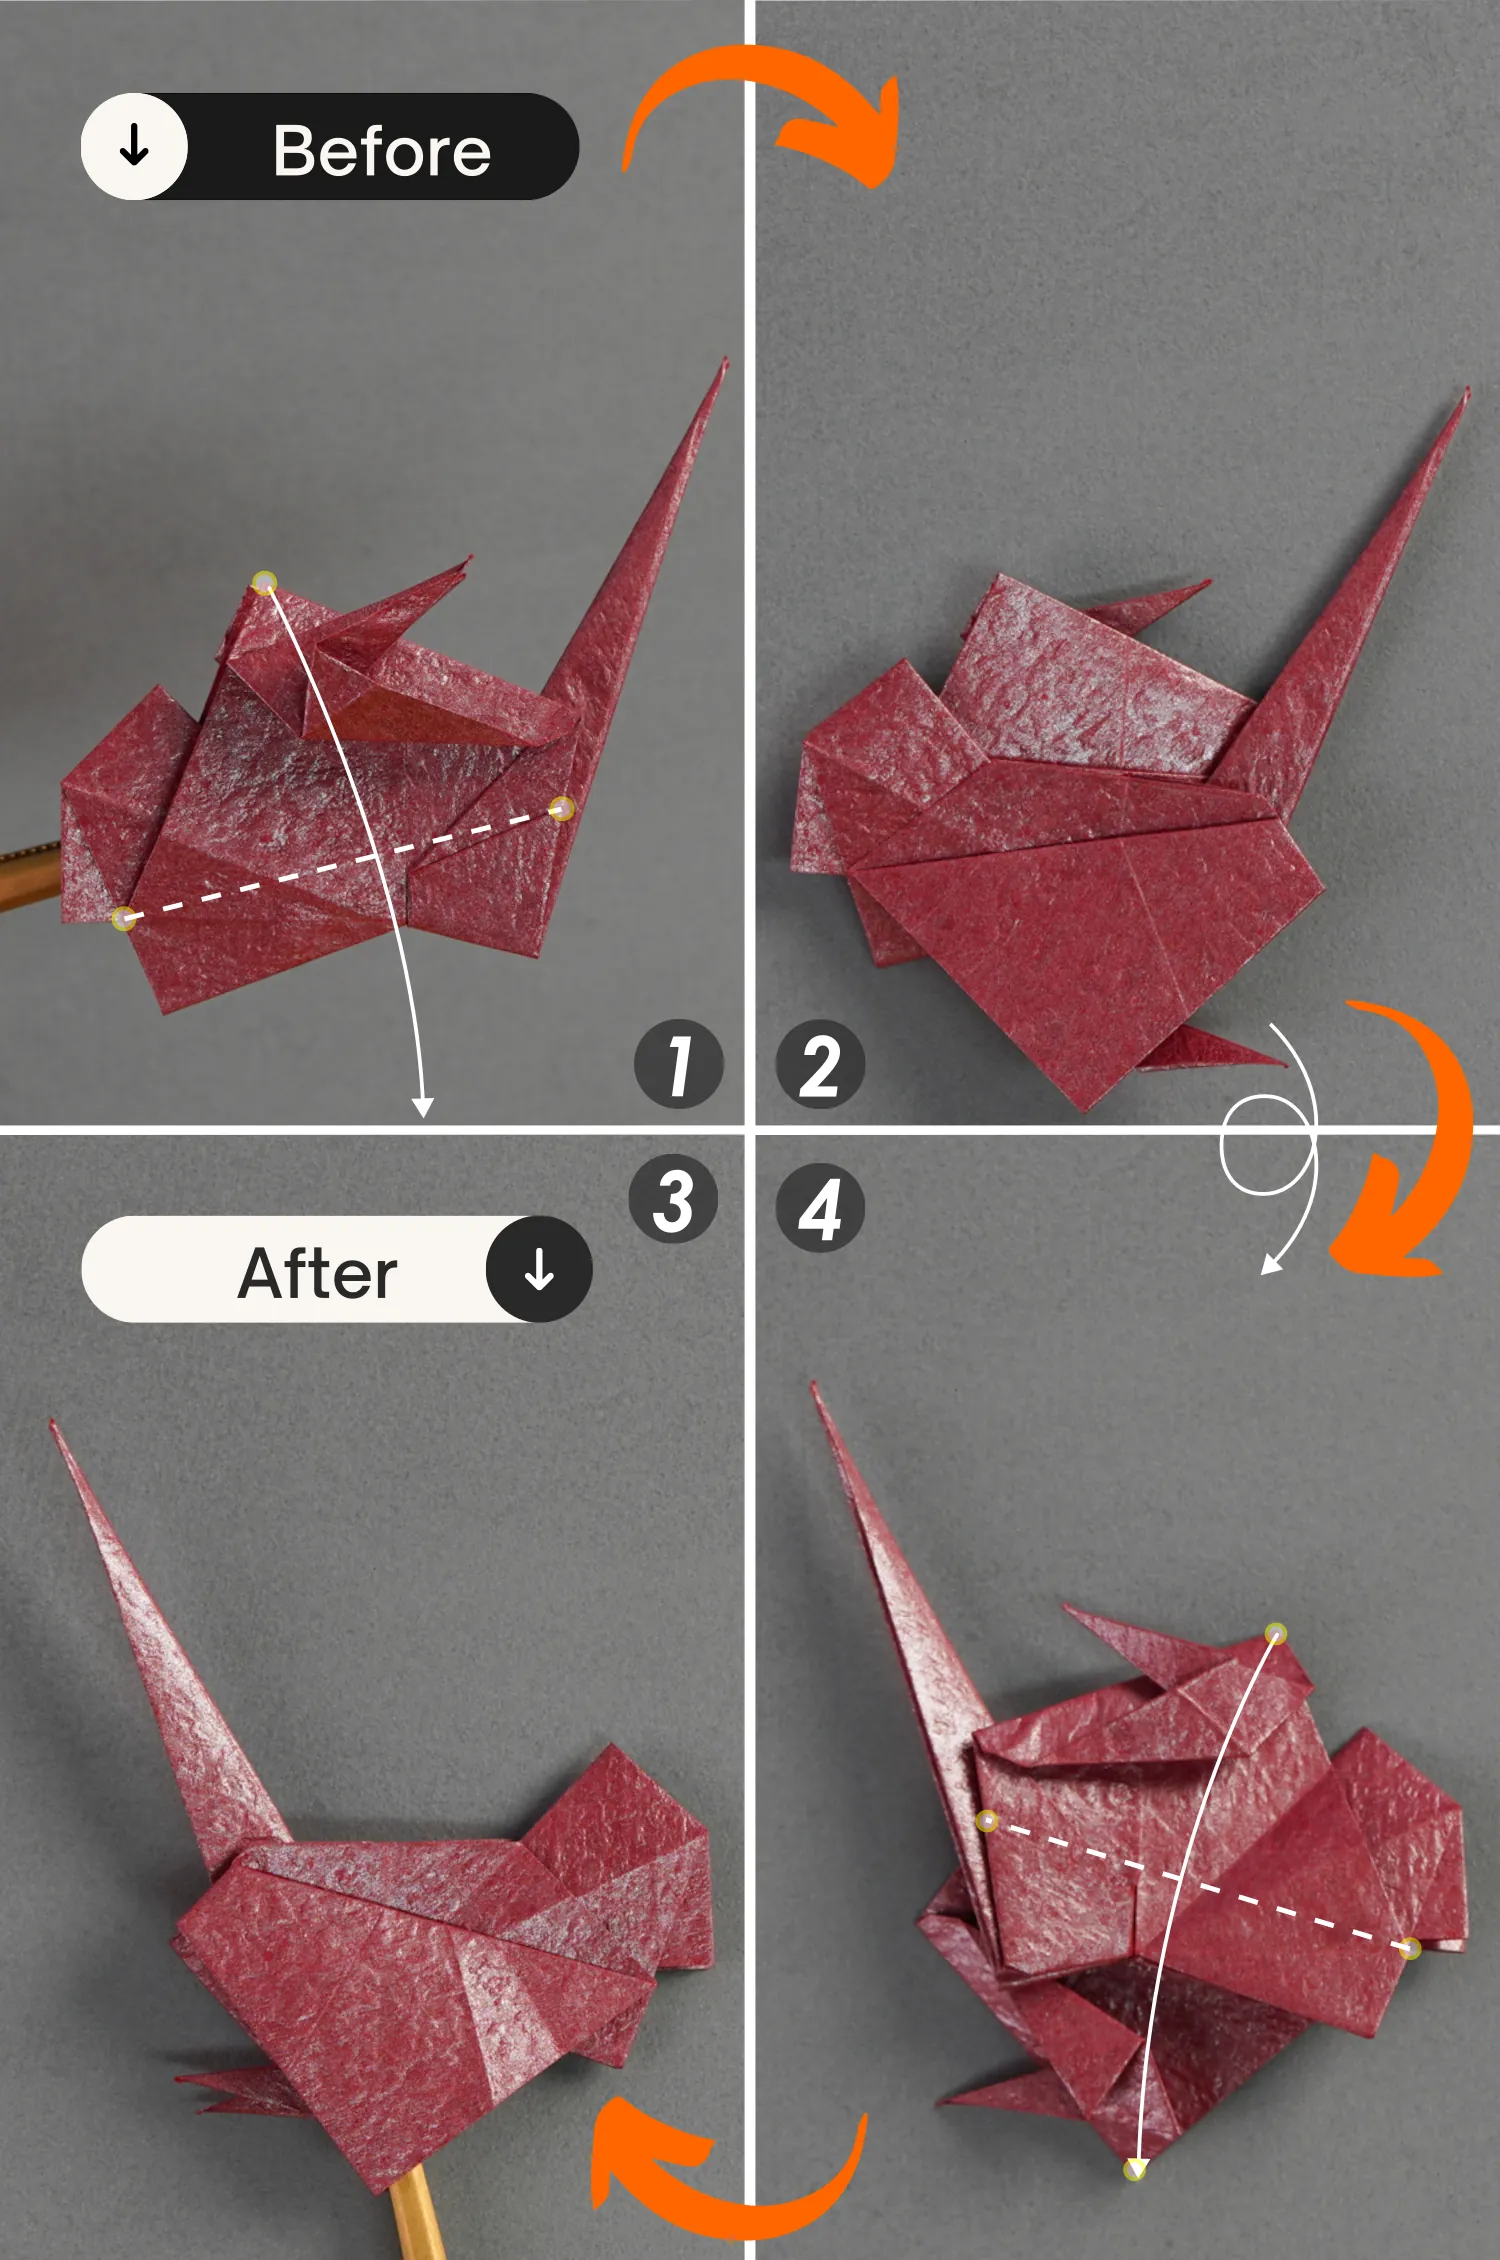
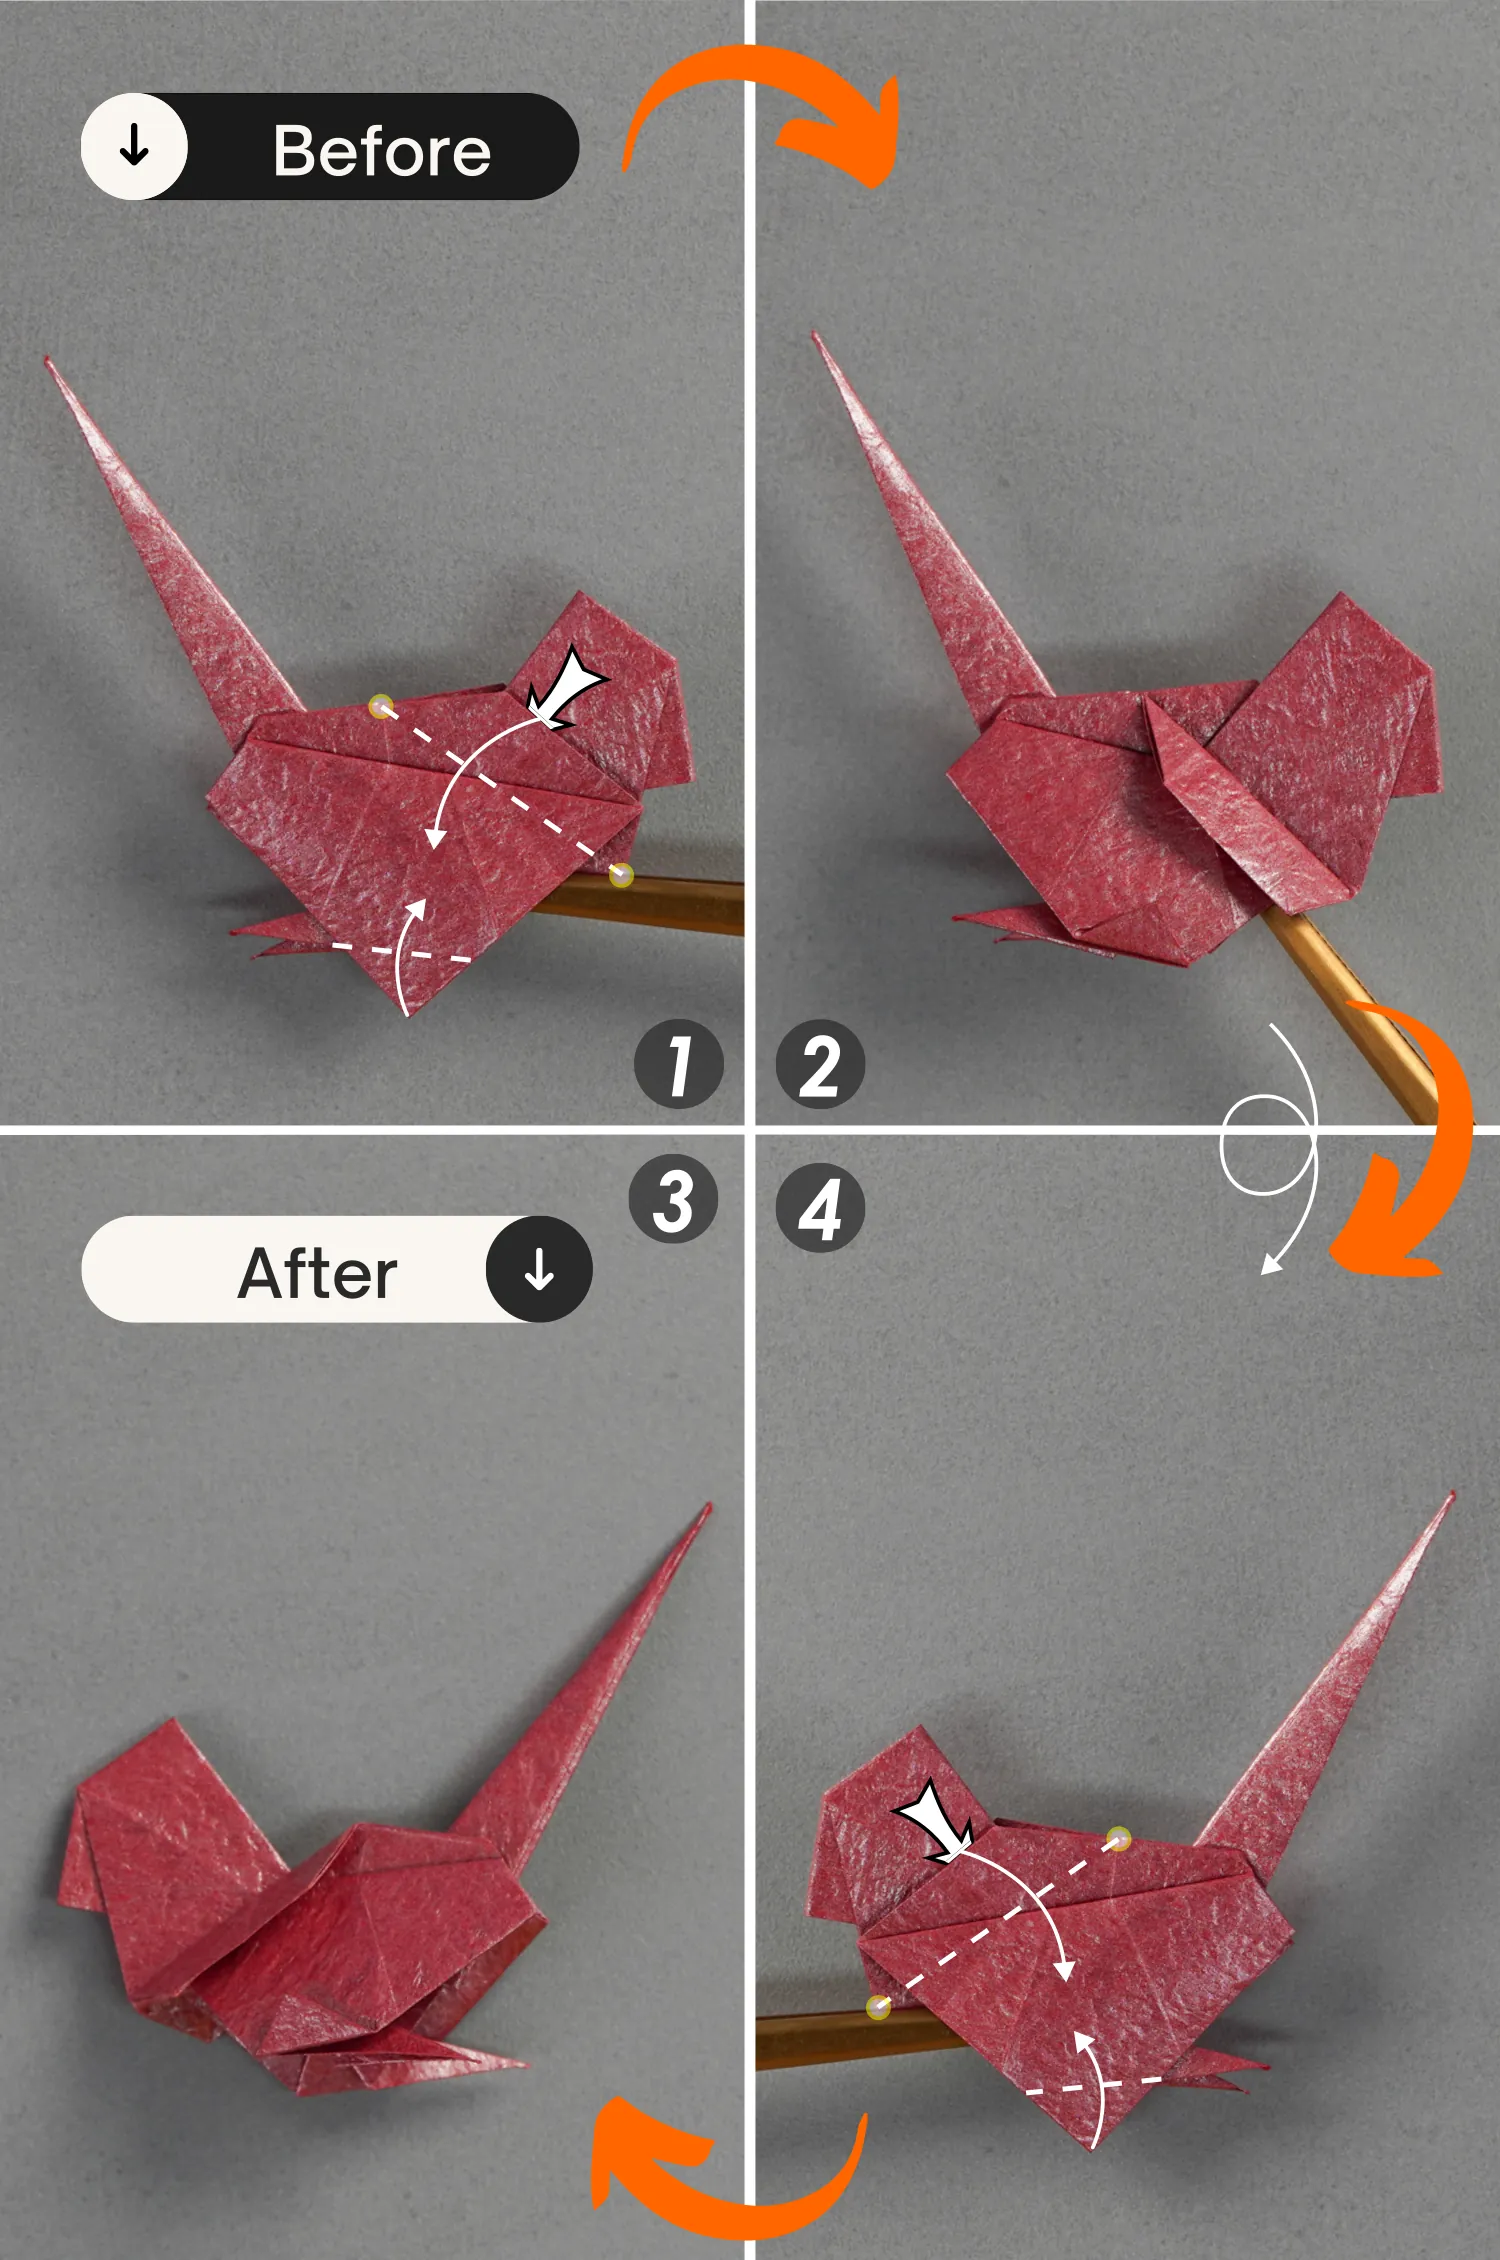
Fold the top corner of the upper layer down along the dotted line. Then, flip the paper over and fold the top corner down in the same manner.
Step 35
Fold the bottom corner up along the dotted line, and fold the right edge of the top layer down along the dotted line that connects the two yellow spots.
Then flip it over, and repeat this for this side.
Fold the bottom corners of both sides up so that they are parallel to the bottom layer so the turkey can stand upright.
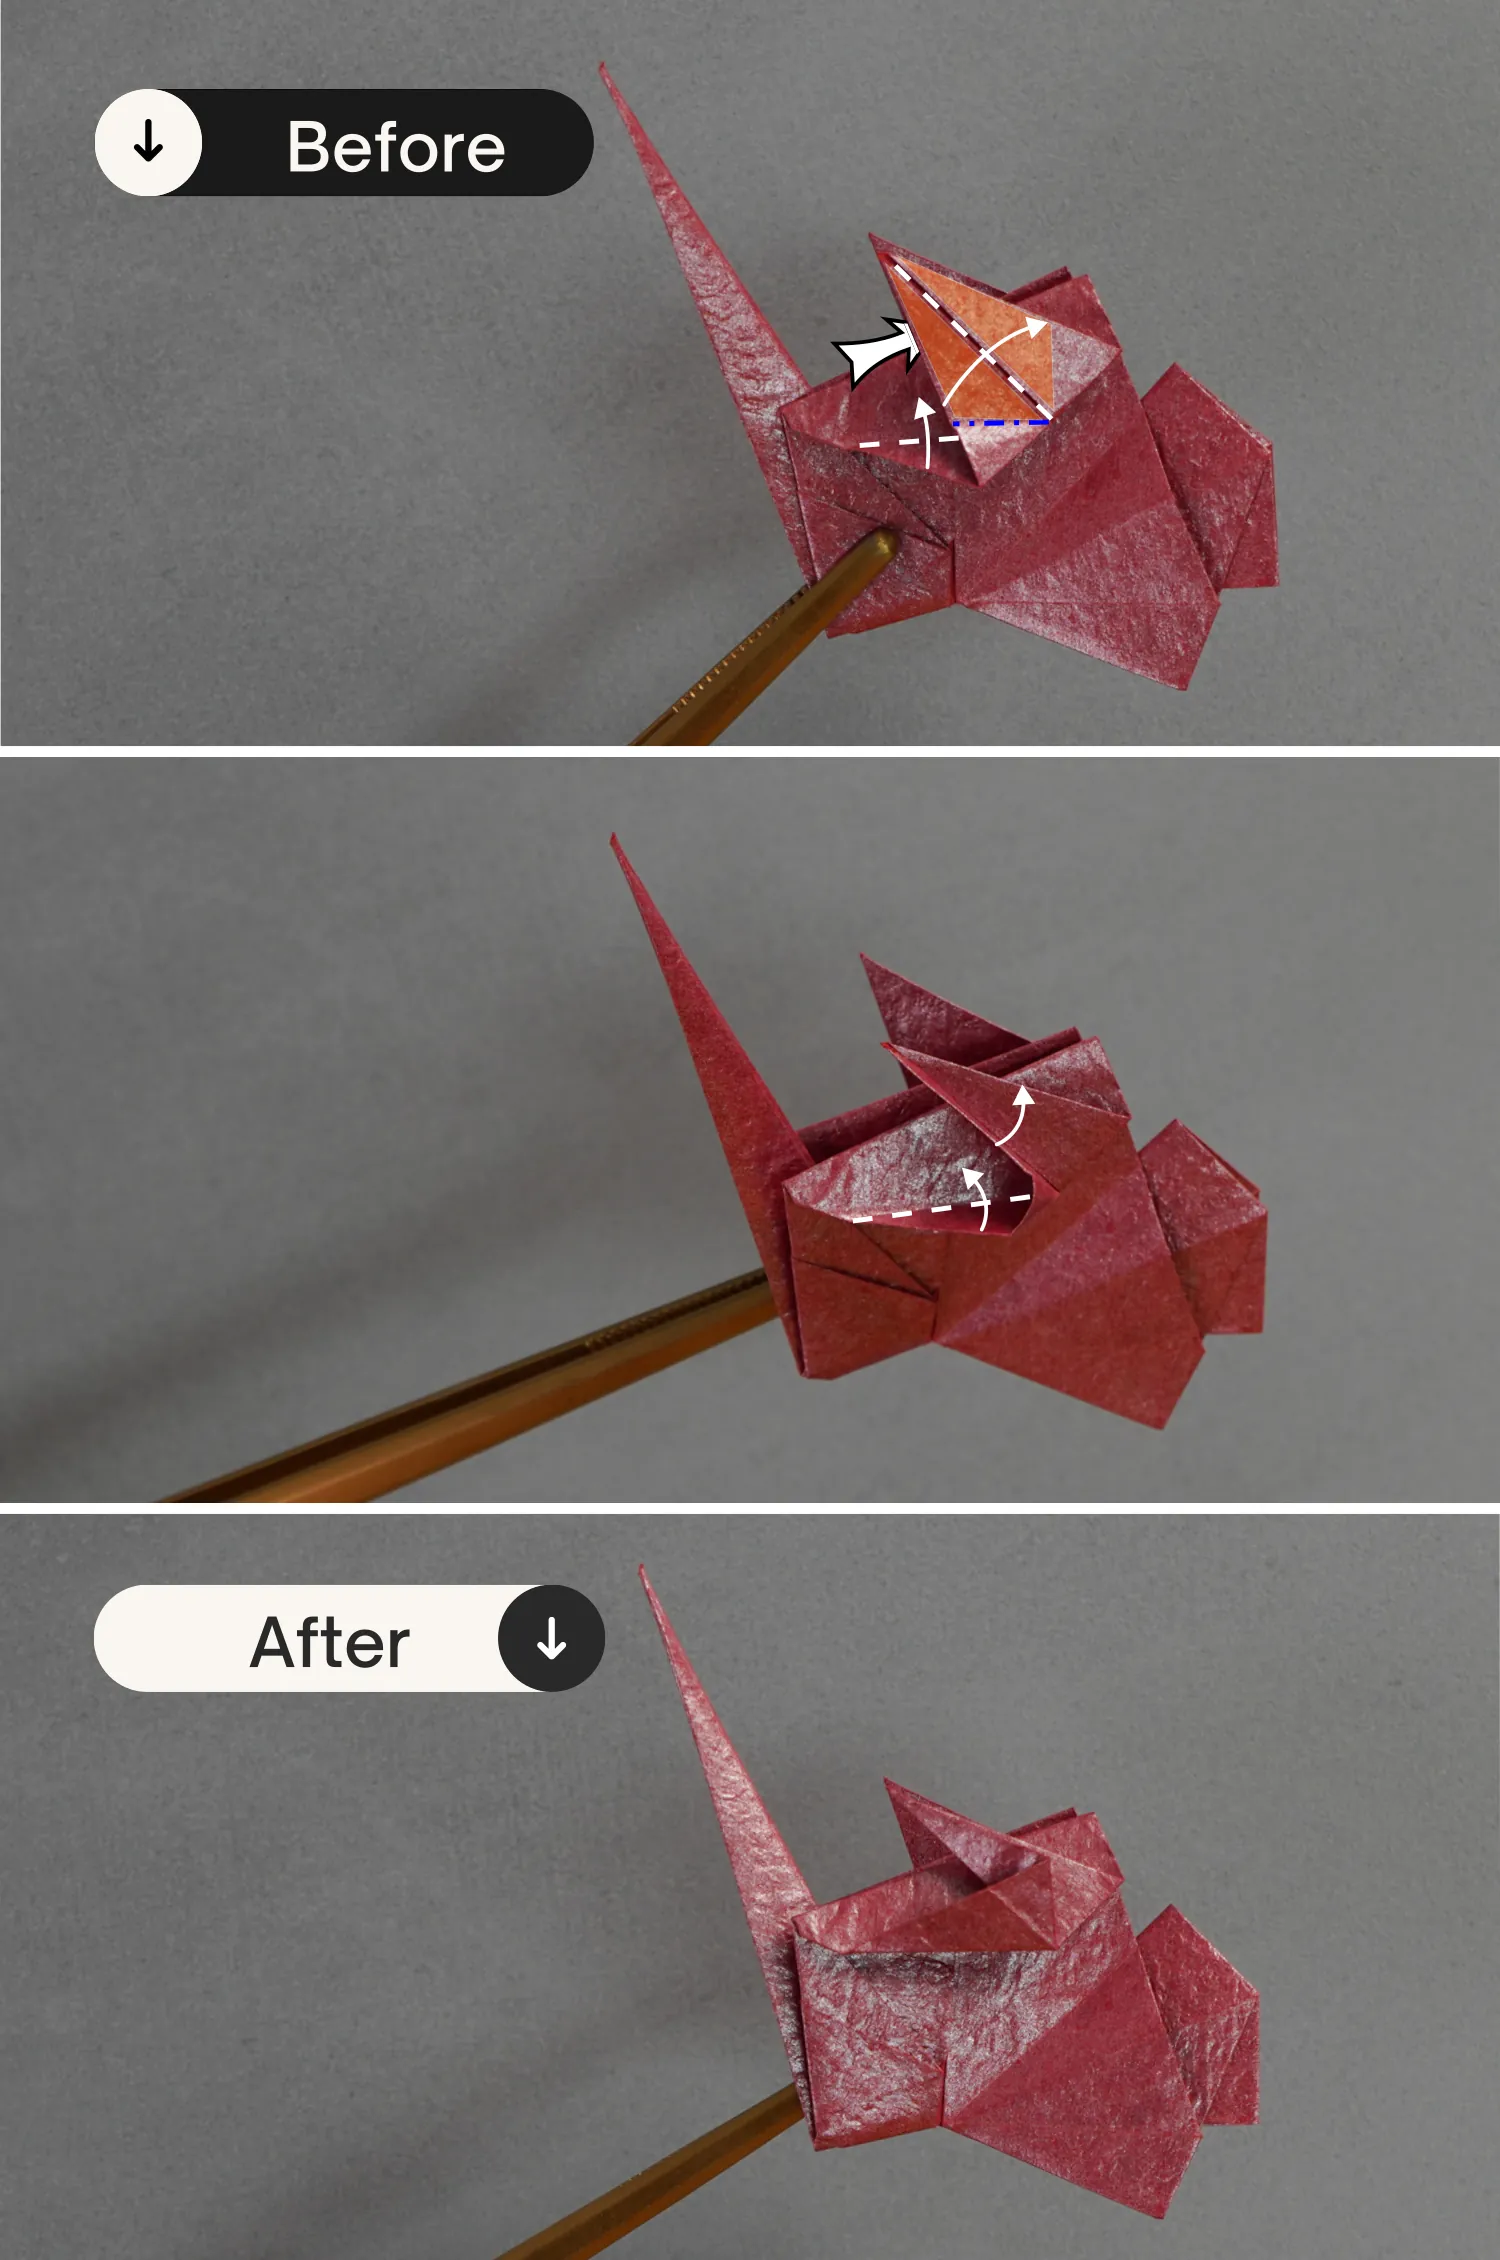
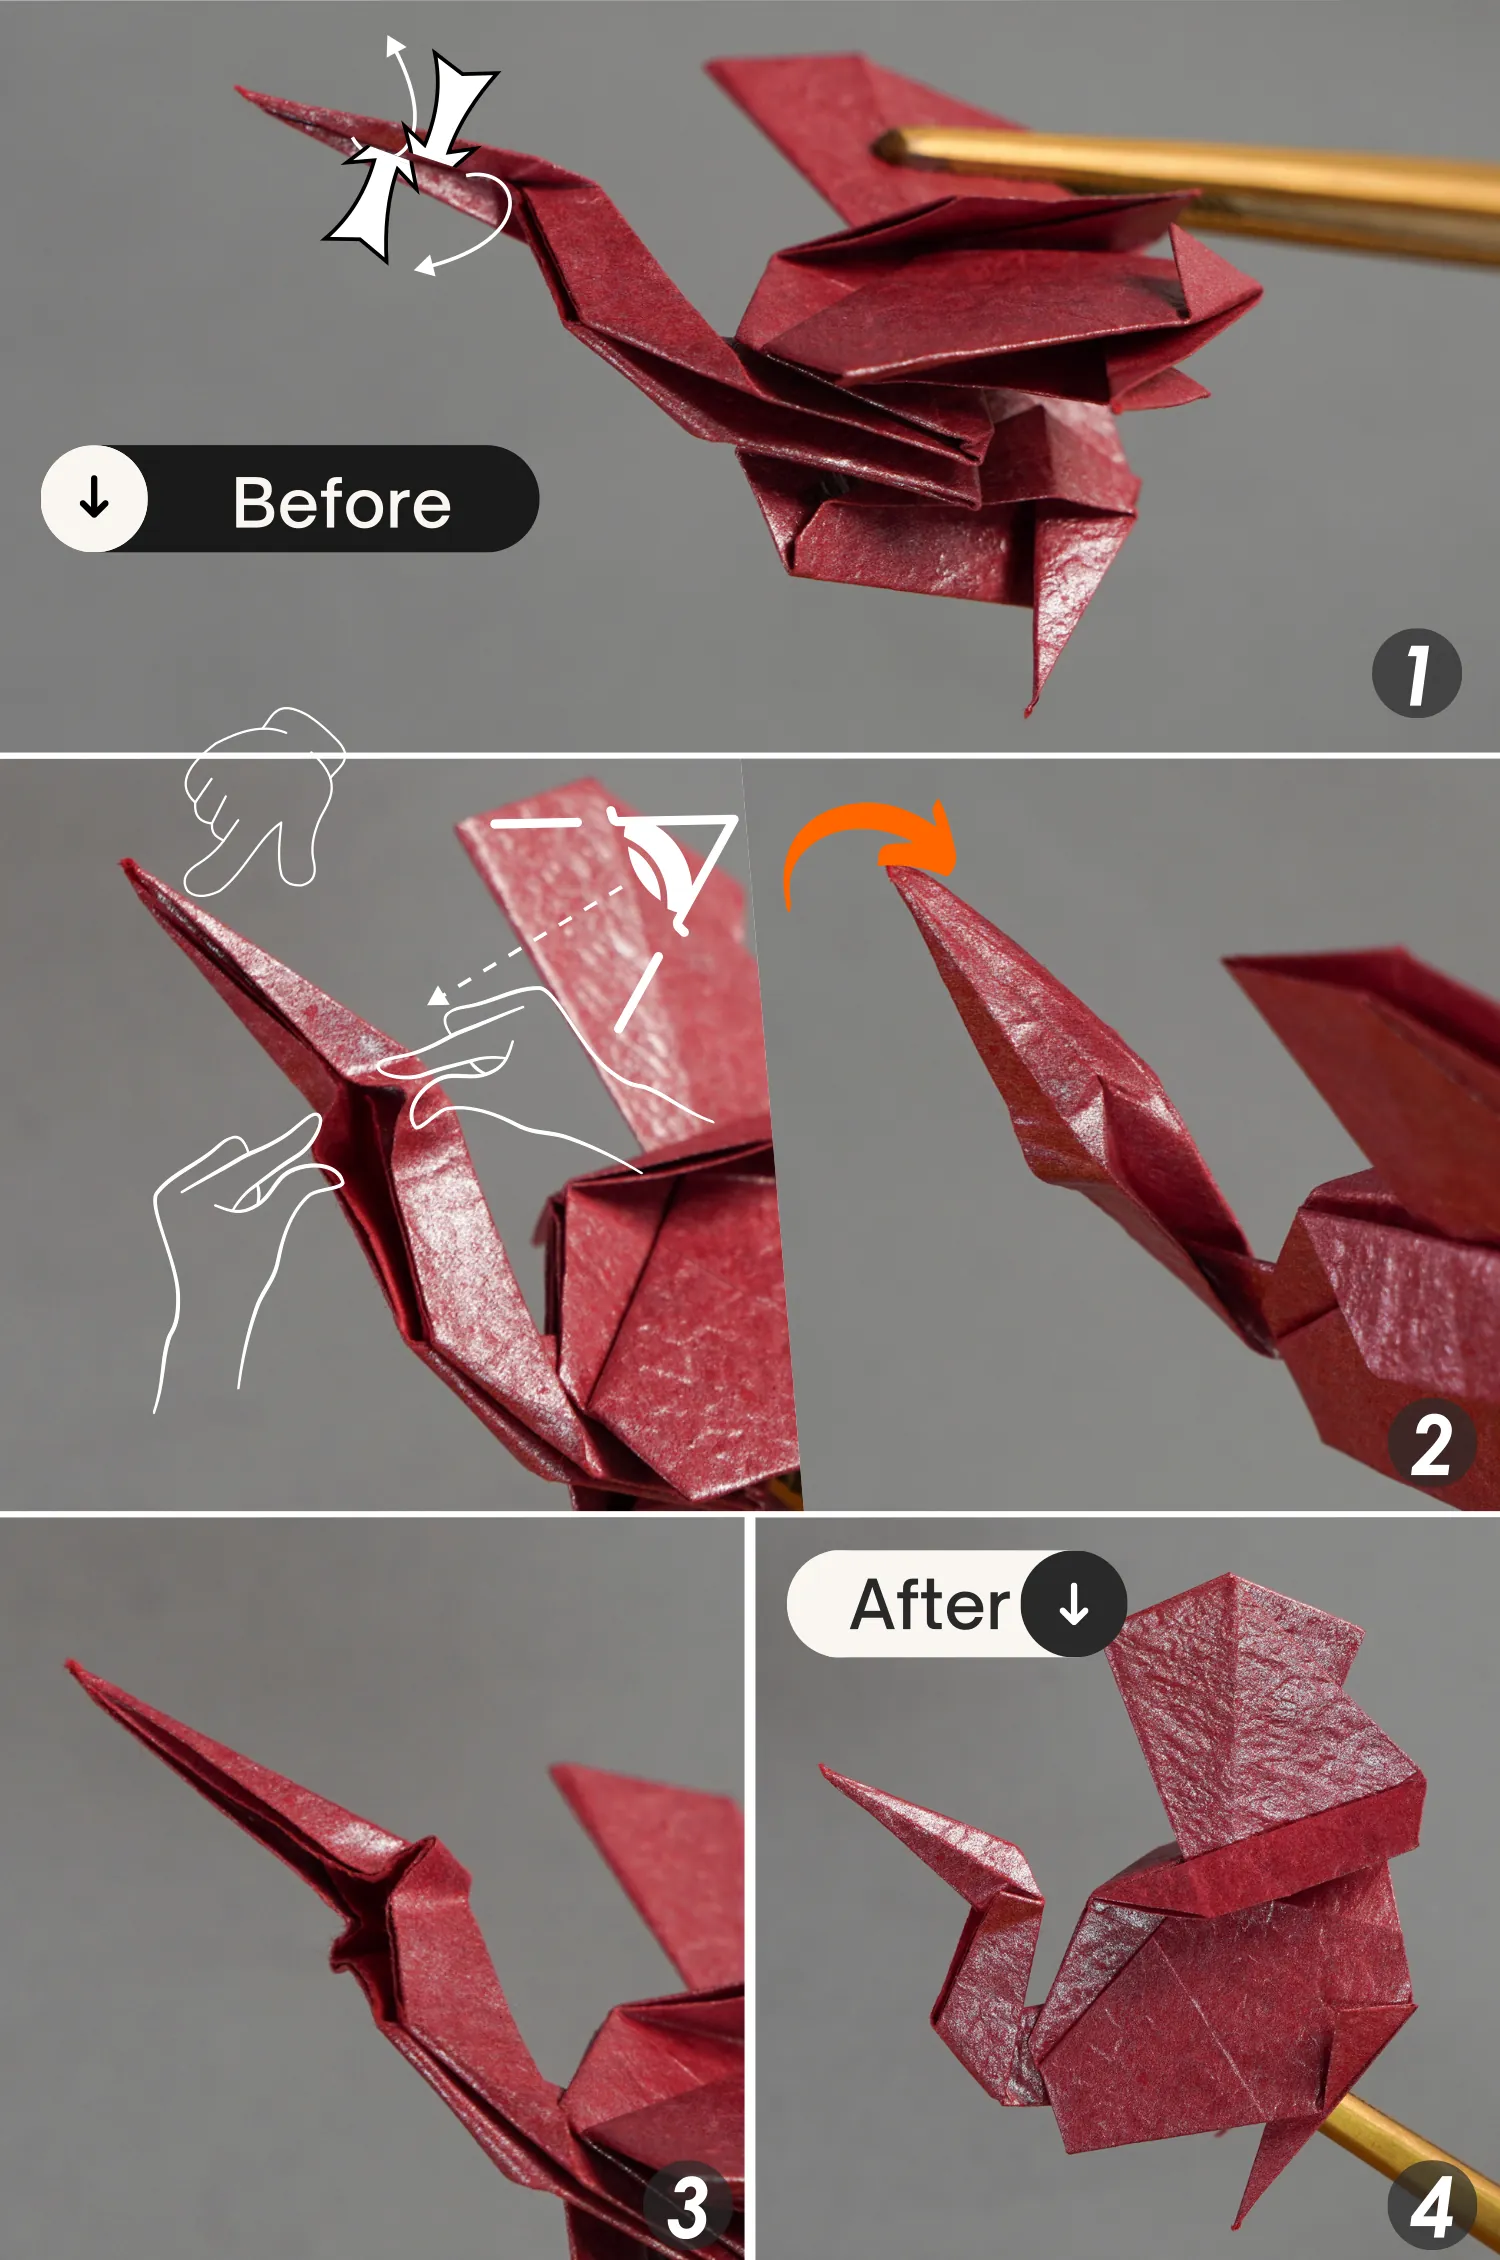
Step 36
Fold the left flap to the right, creating a vertical crease, then unfold it.
Step 37
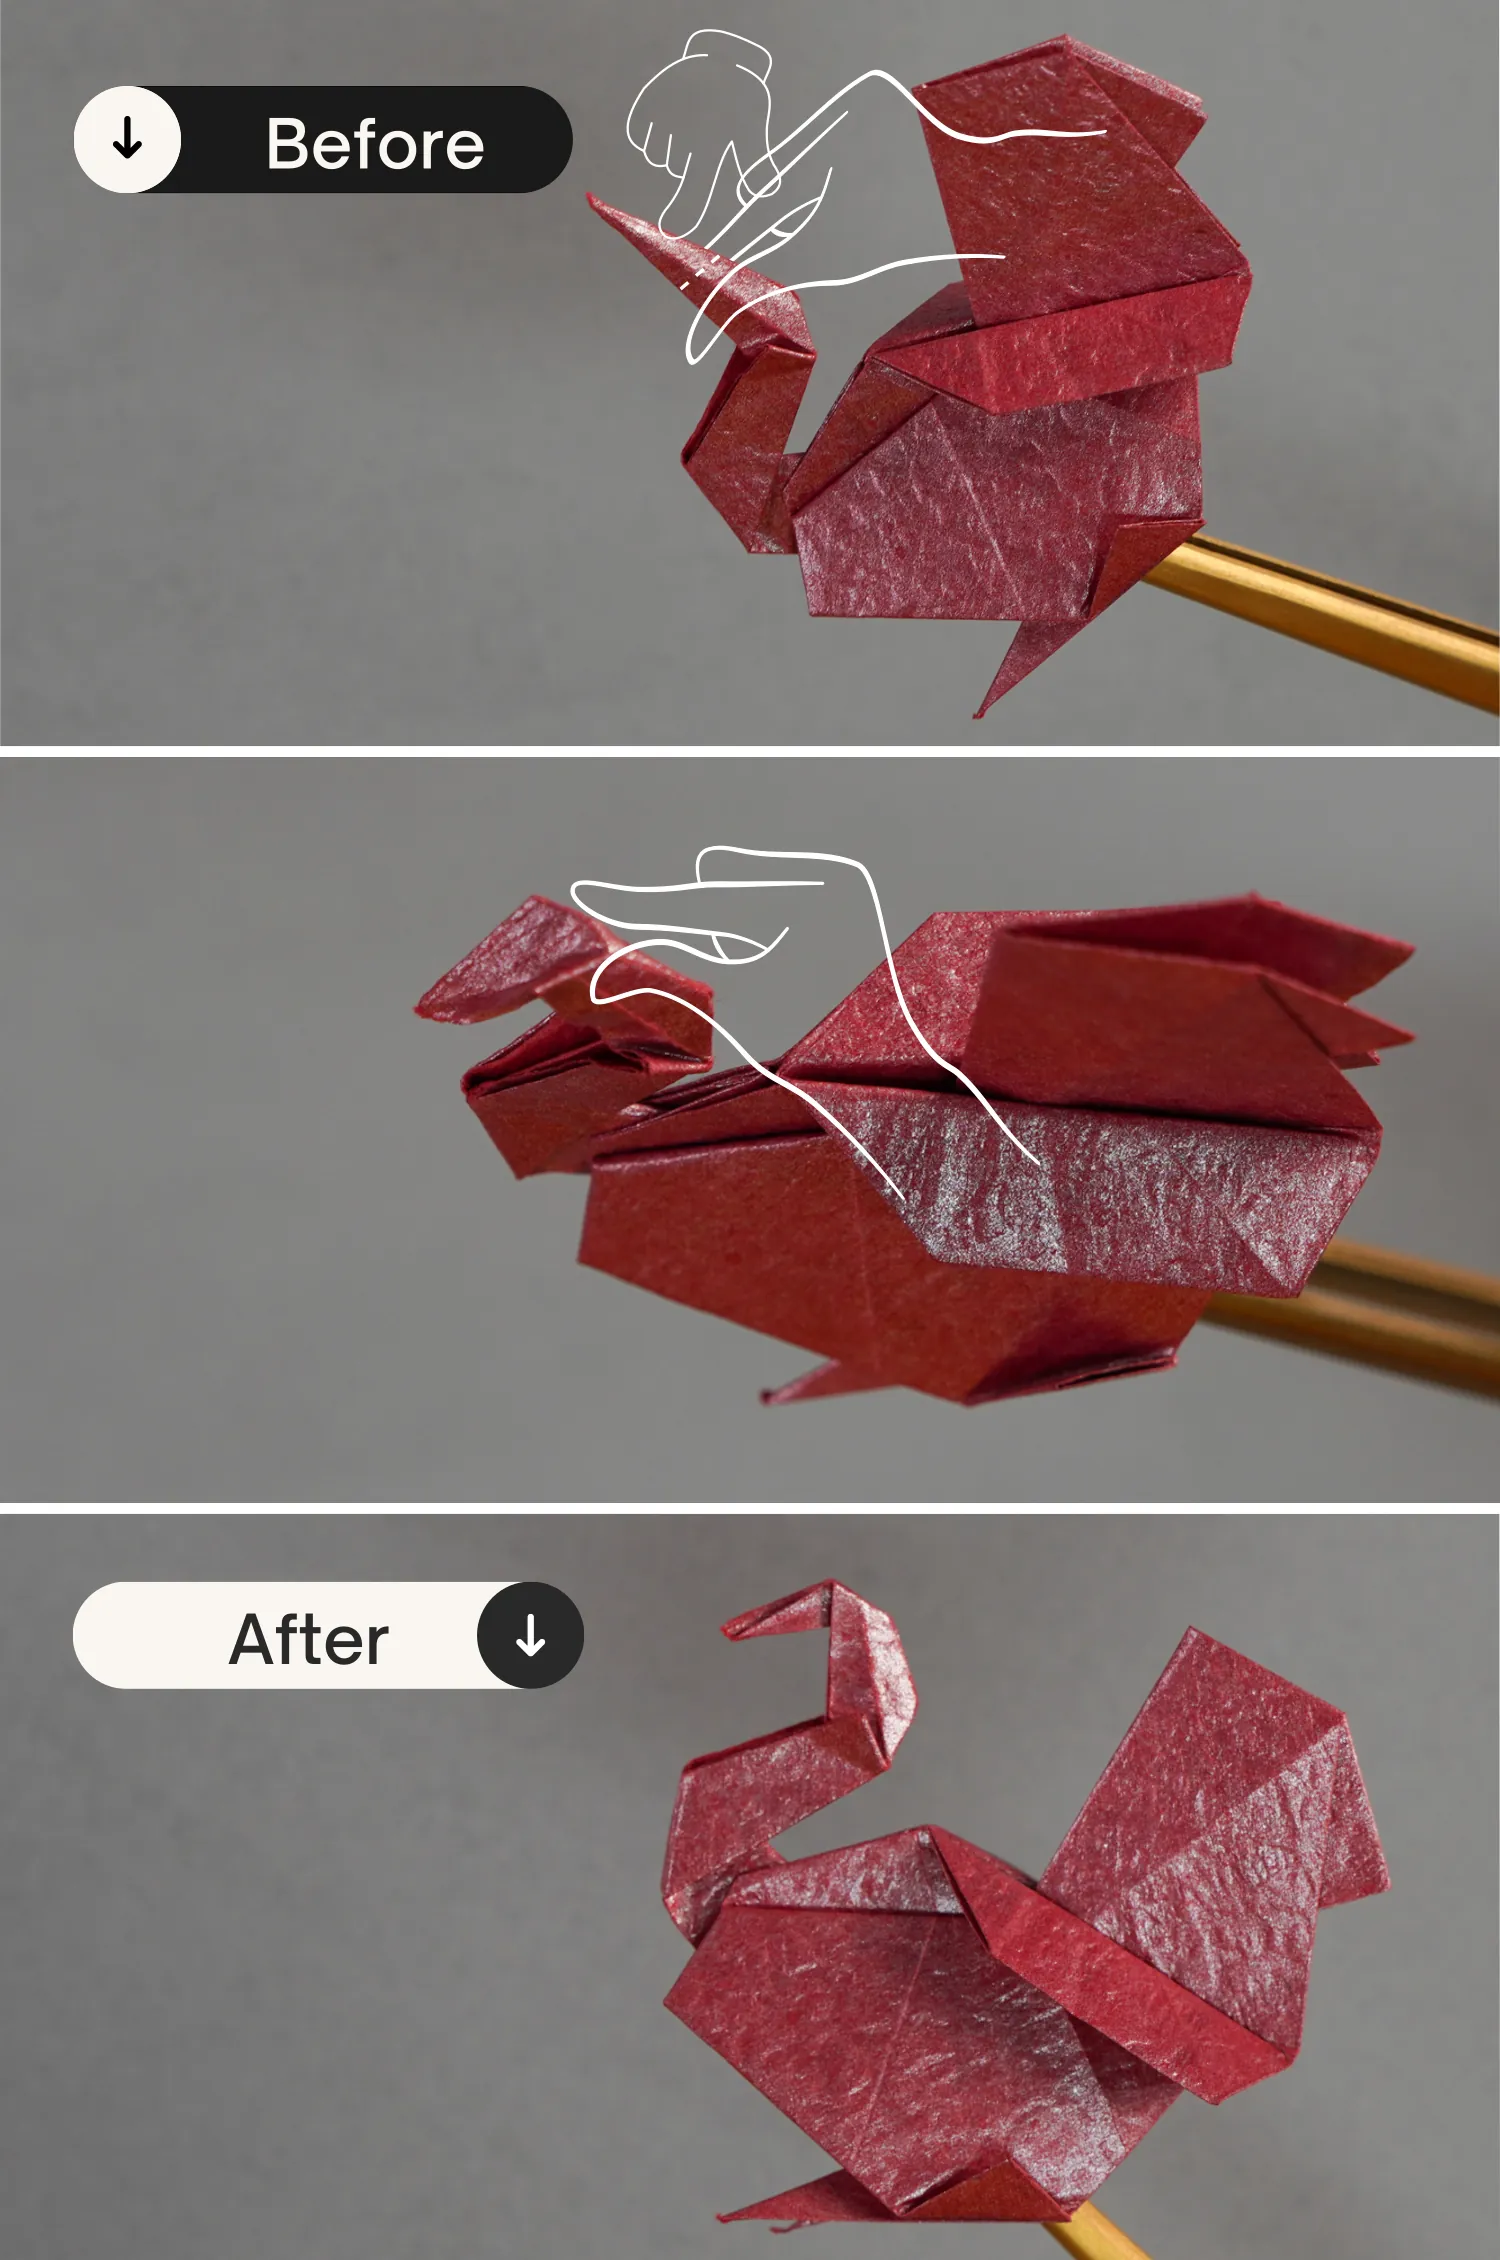
View it from the top right and focus on this neck part, open it from the bottom, then press down the intersection point formed by the creases on both sides you made in the previous step, and fold the neck to the right along these two creases. Finally, flatten it.
Step 38
Still the neck part, push the tip down to form the head, then pinch the neck part tightly.
Step 39
Unfold the tip, pinch, and form two small corners on both sides, then flatten it.
Step 40
Fold the tip down for a little part, and make an inside reverse fold to tuck the tip between the layers, creating the beak.
What’s Next
This is the final shape of an origami turkey, now you can explore our other origami bird instructions, hope you will love them.
Other Origami Bird Ideas