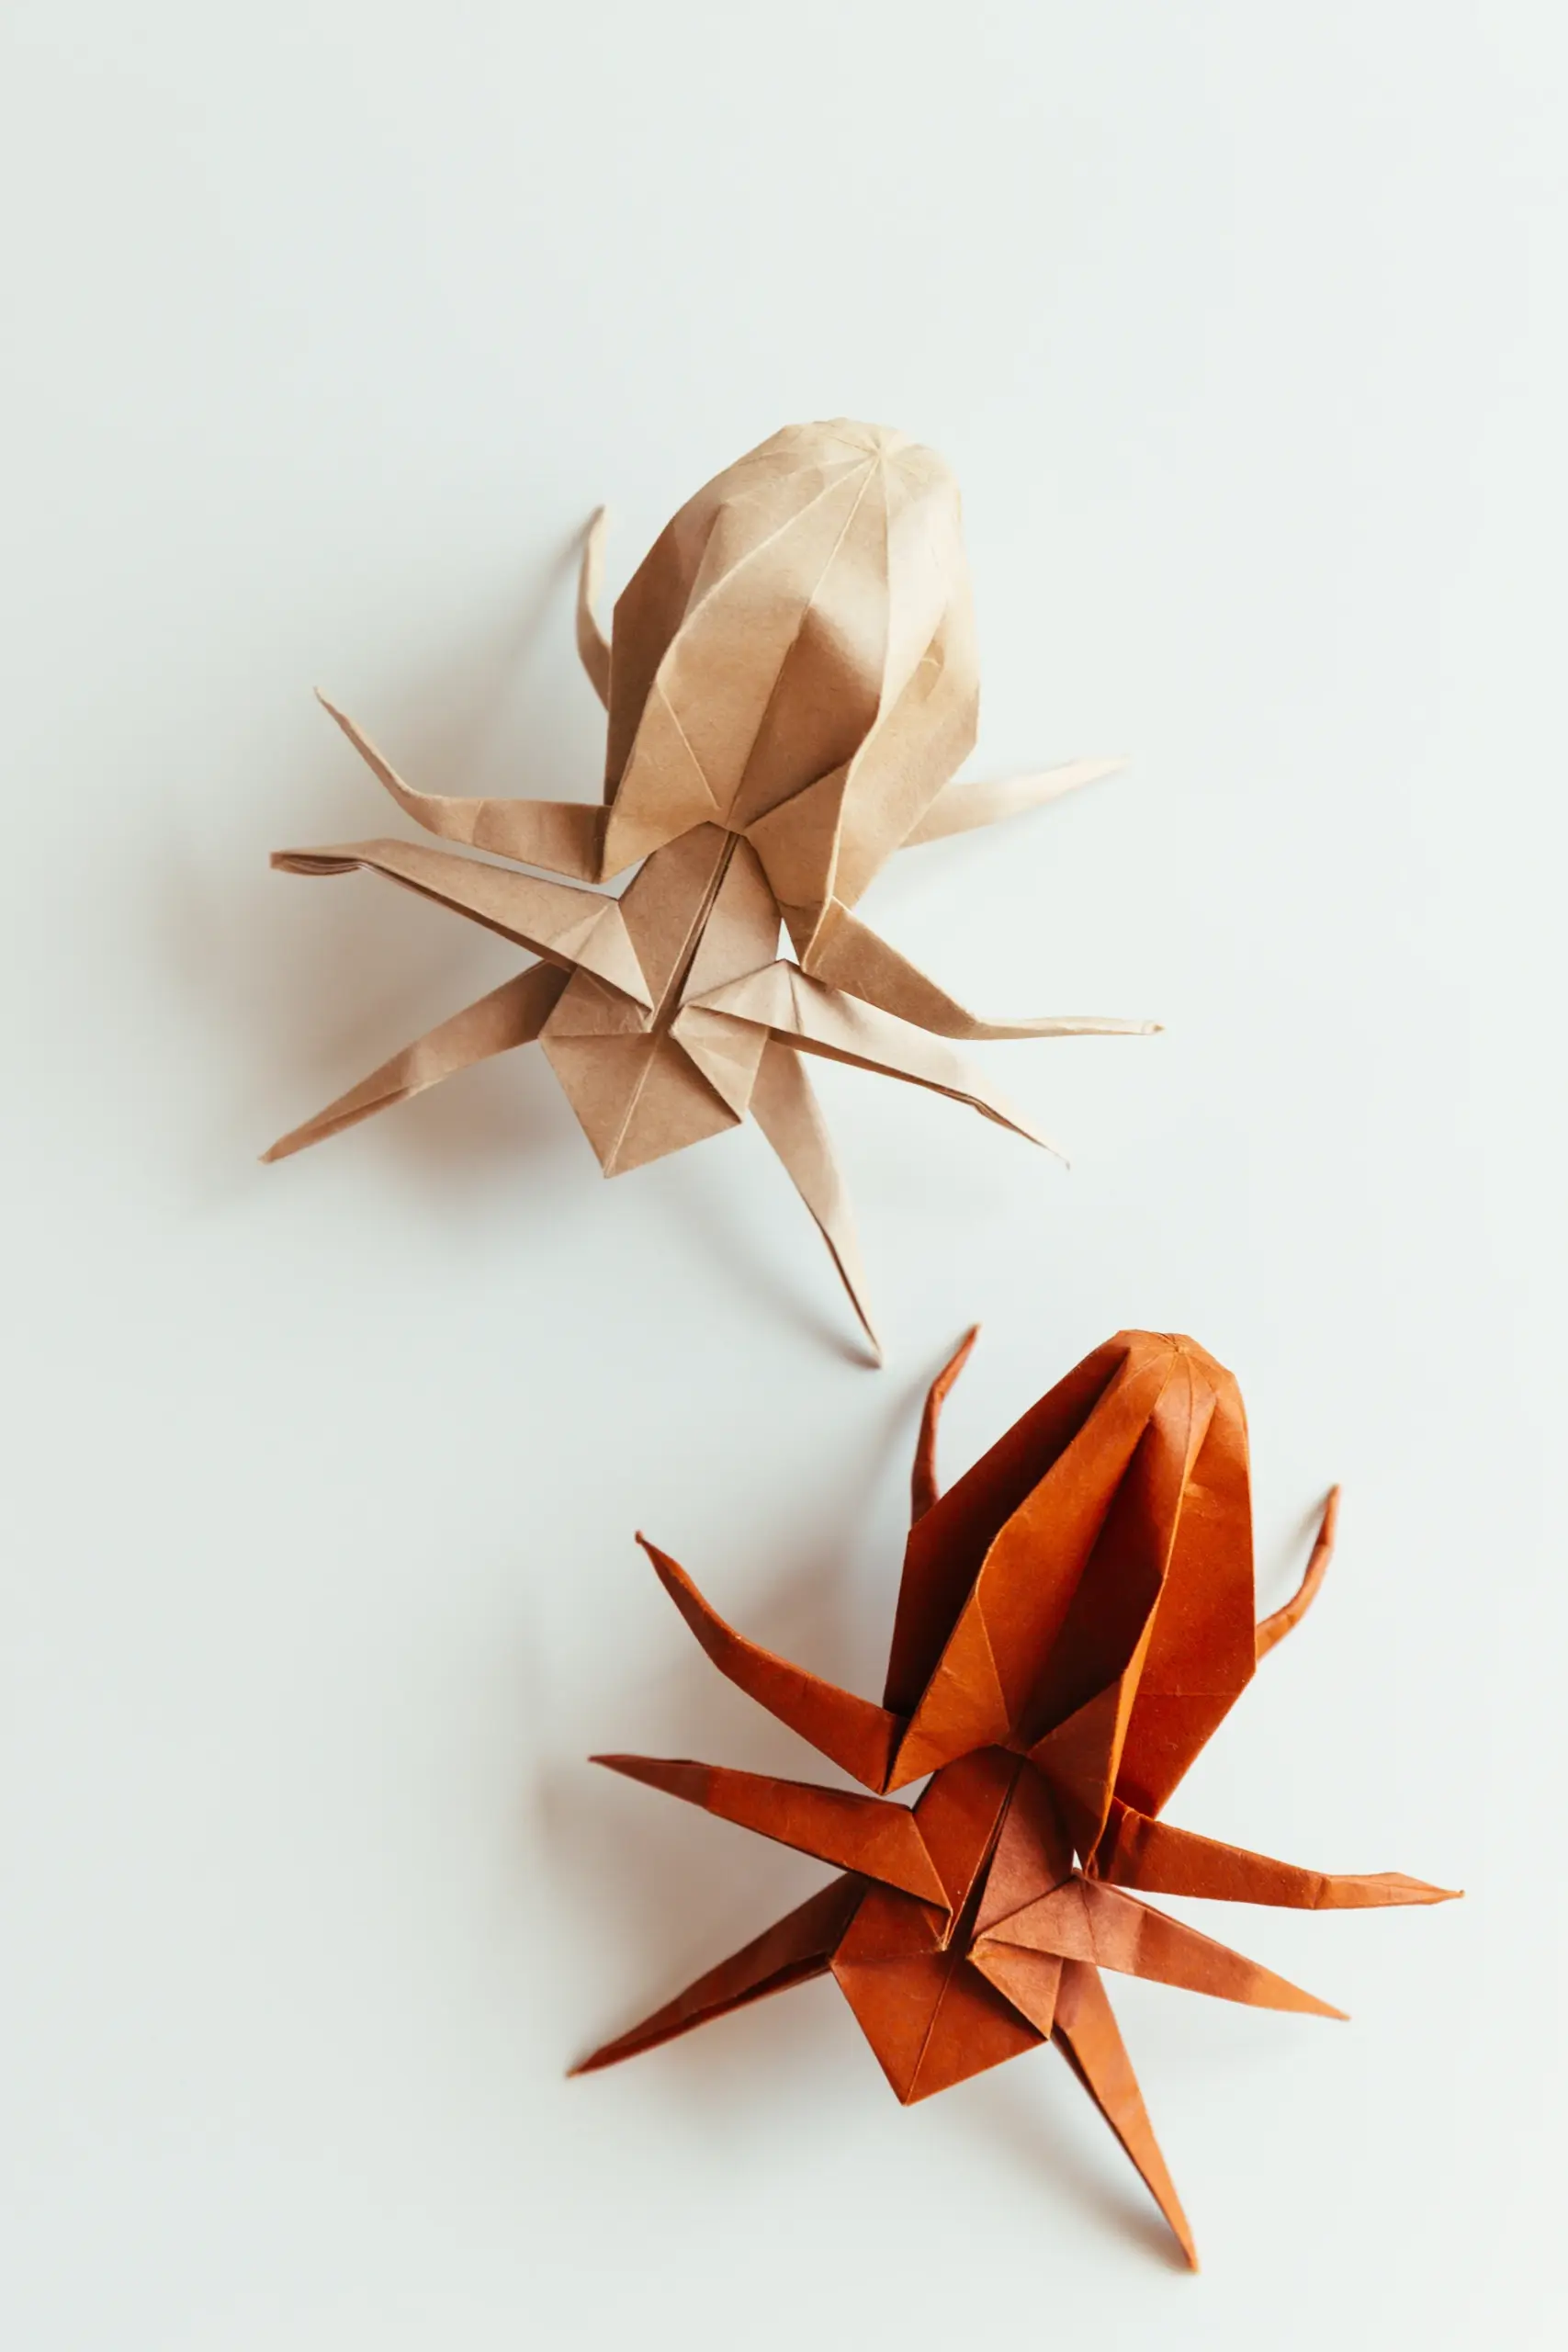
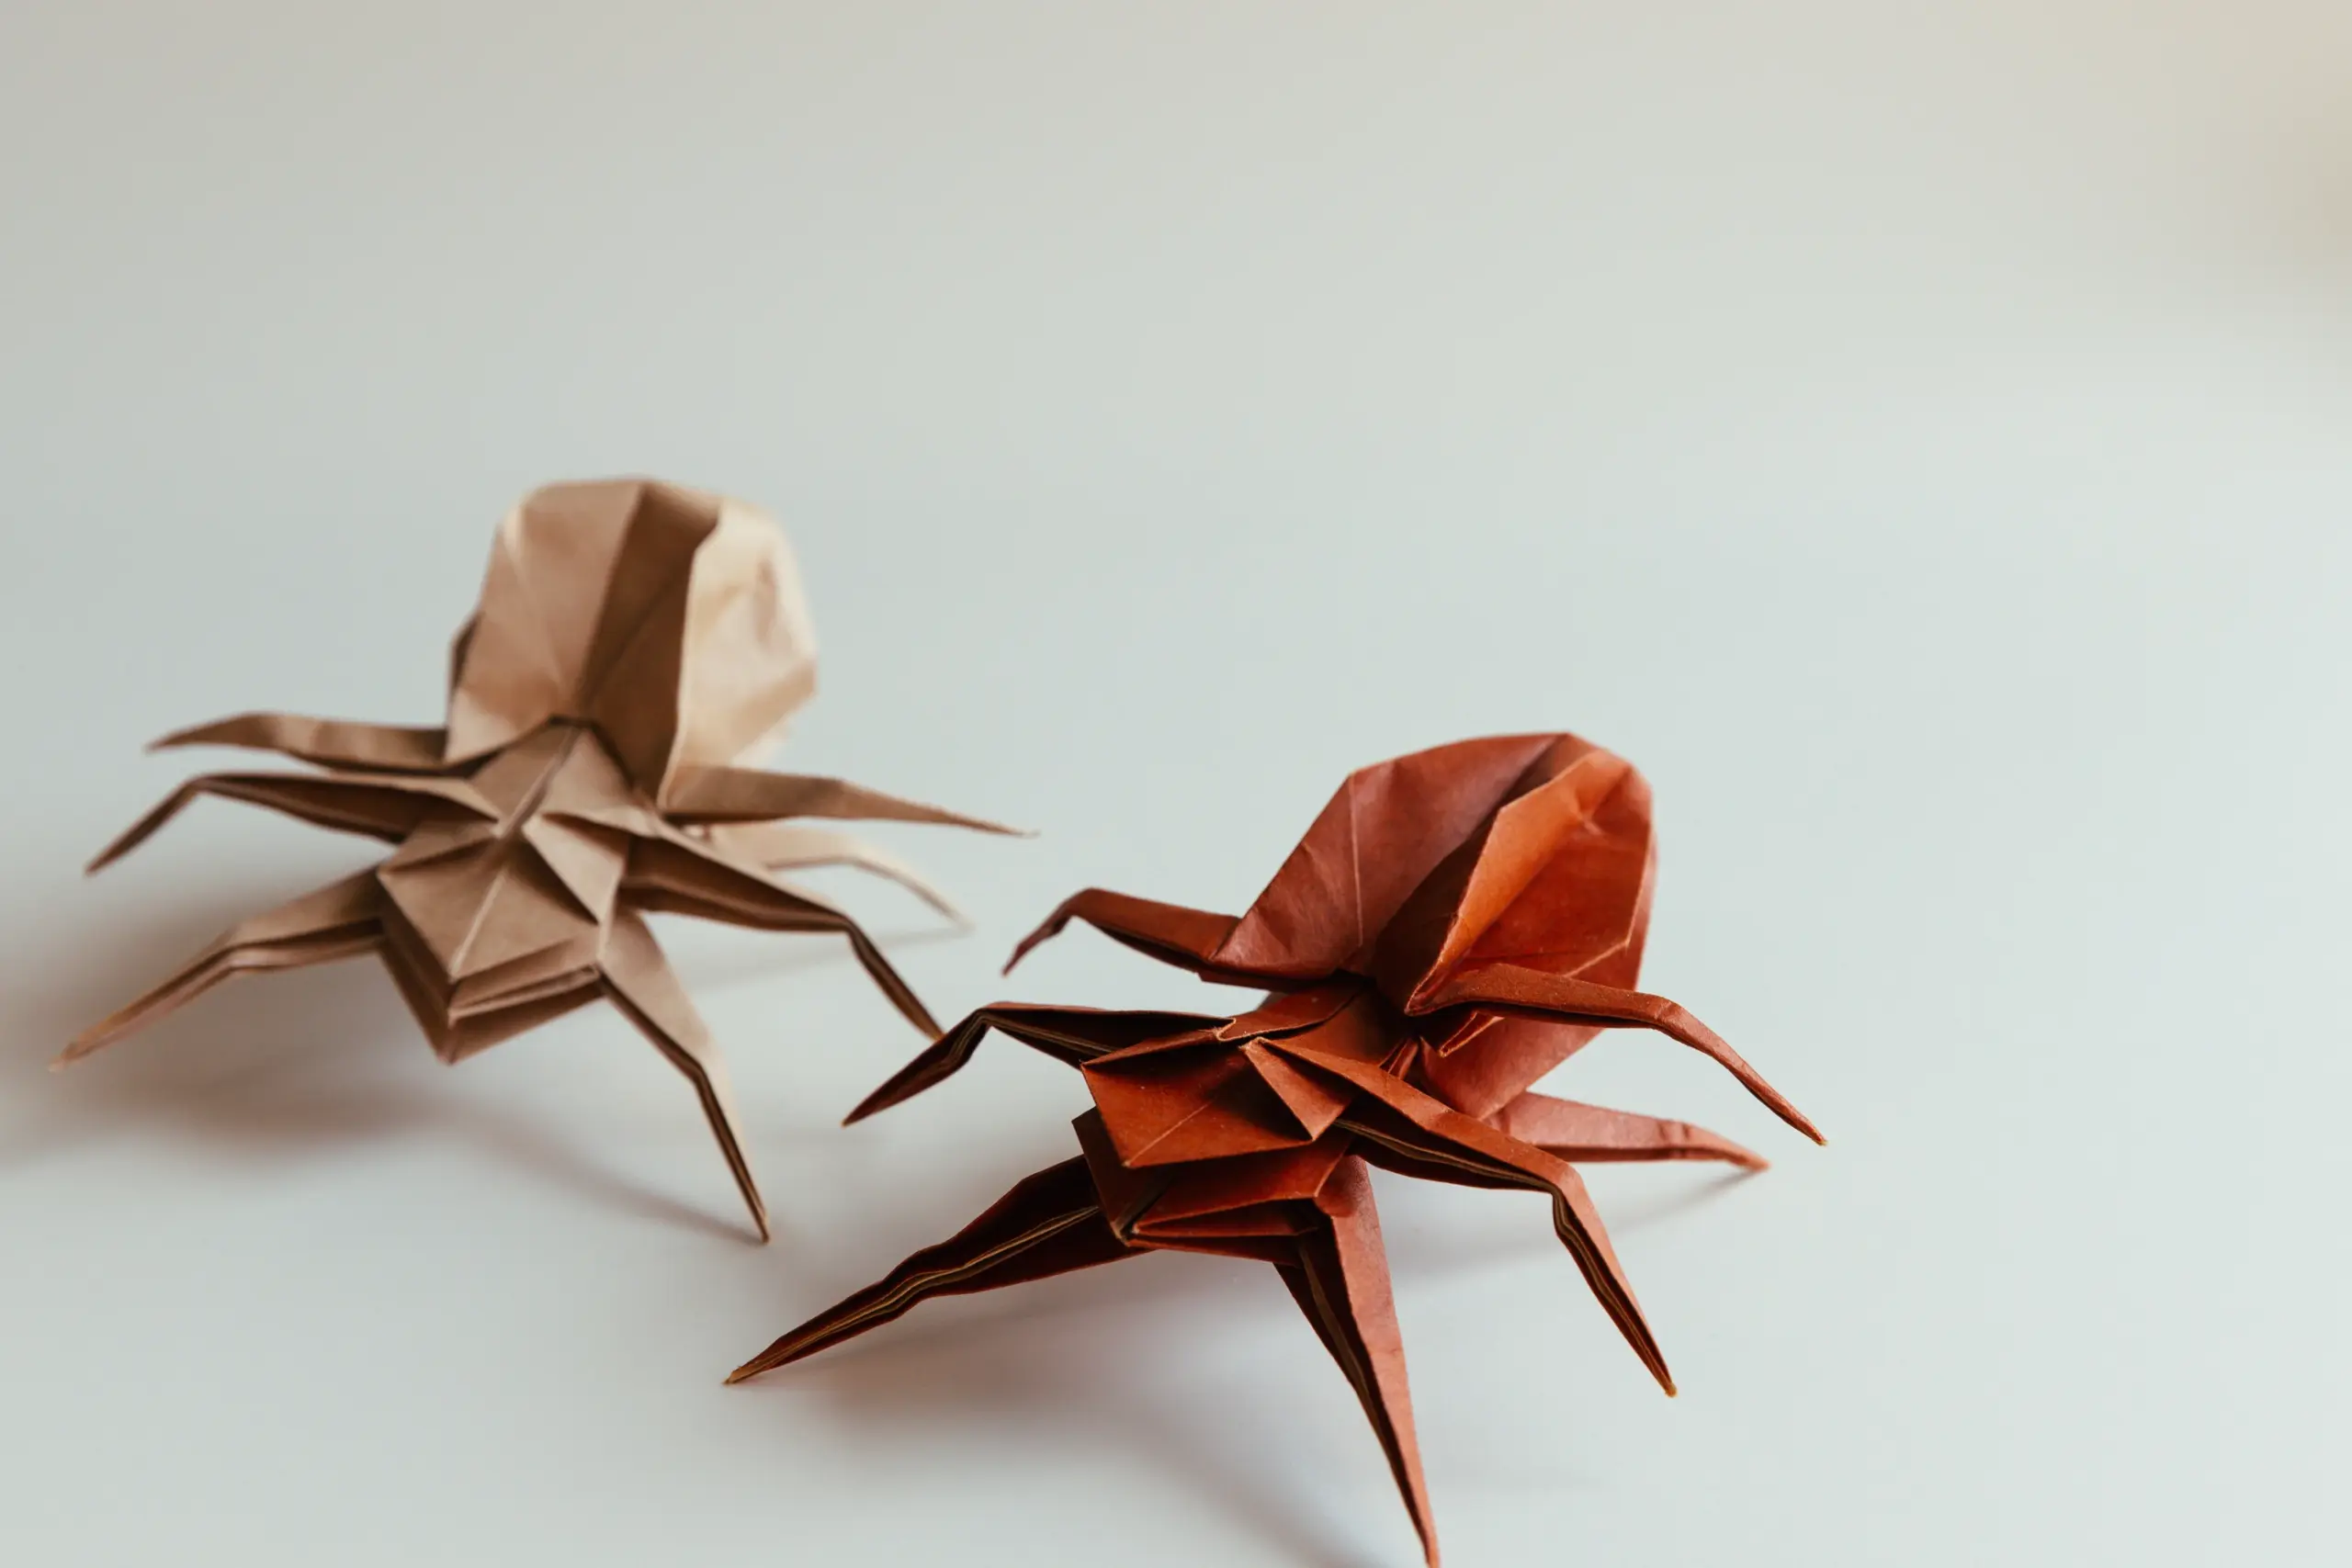
Are you afraid of spiders, creatures with many legs? Try to make one out of paper, it would be cool and great for decorating your house for Halloween, maybe your friends will get a big scare when they see it without realizing it! That would be so much fun!
This lifelike origami spider is based on the Frog Base, don’t be intimidated by the number of steps, many of them are repetitive and you just need a little more patience and care to succeed.
If you are new to origami, start here from our beginner guide to know the basics and how to read the step-by-step instructions.
- Folding time: 40 minutes
- Paper: 15×15 cm / 2
- Difficulty: Advanced
Material
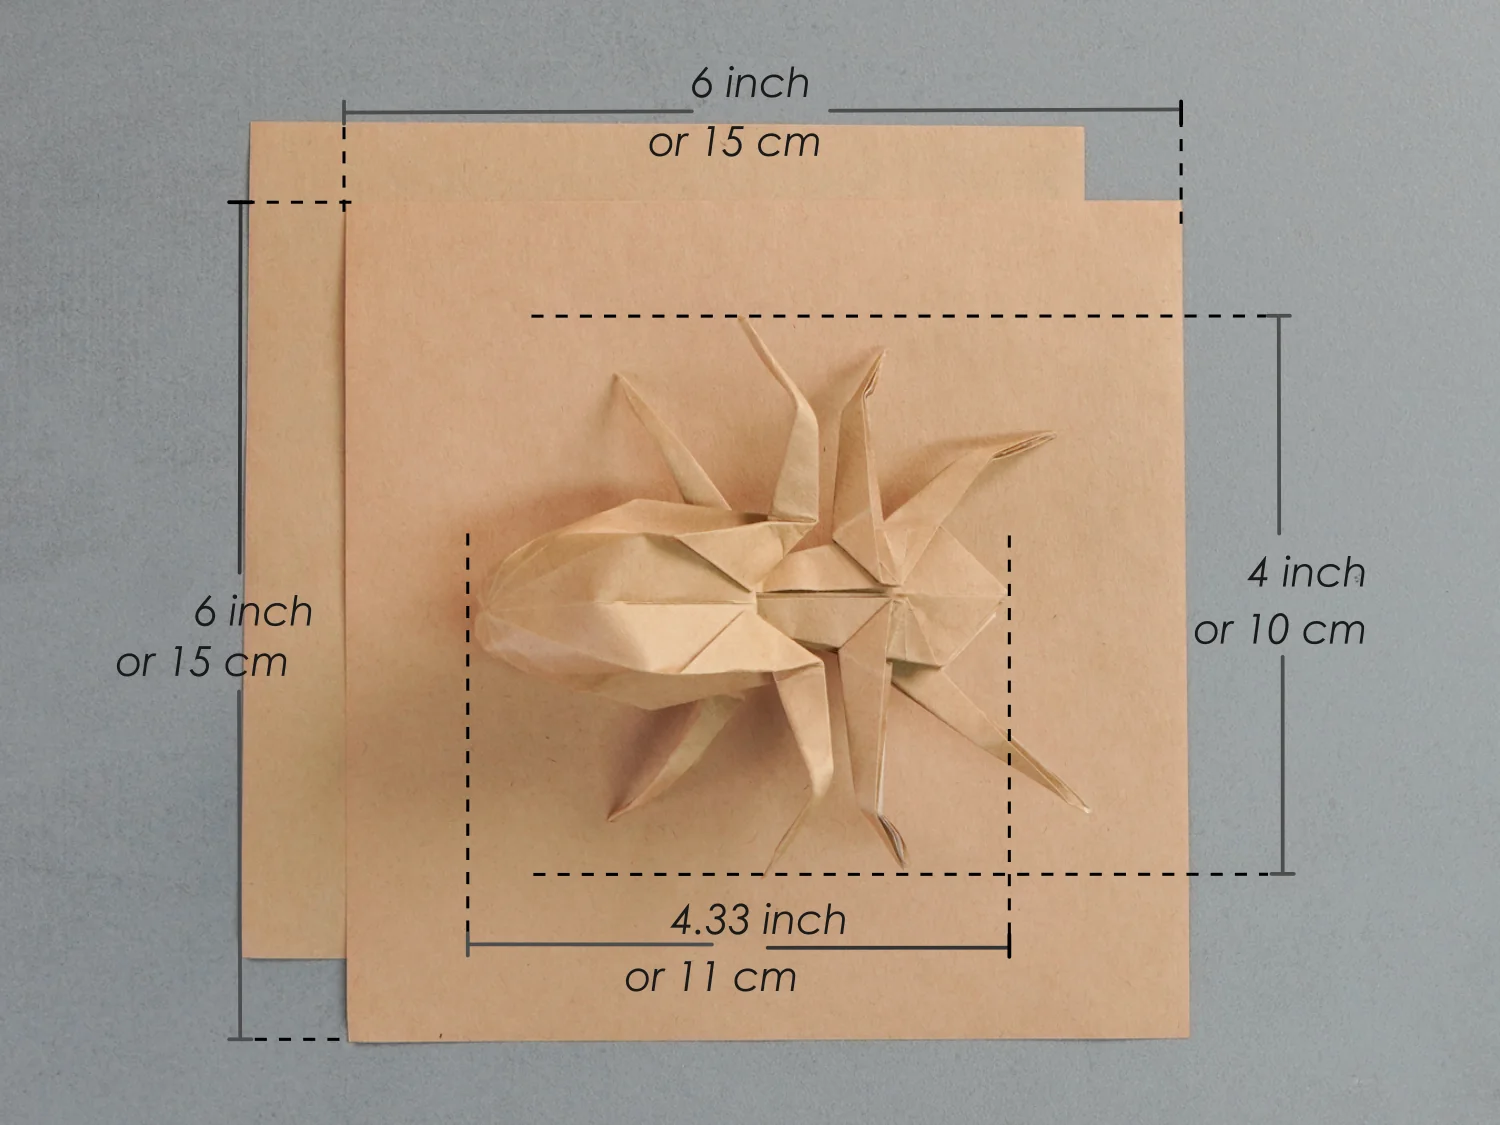
Prepare two pieces of 15×15 cm origami square paper, with different colors on each side, to create a 10×11 cm origami spider. Various sizes of square paper are practicable, but we suggest you use slightly resilient paper for there are a lot of fine and repeated steps.
Step by Step Instructions
Step 1
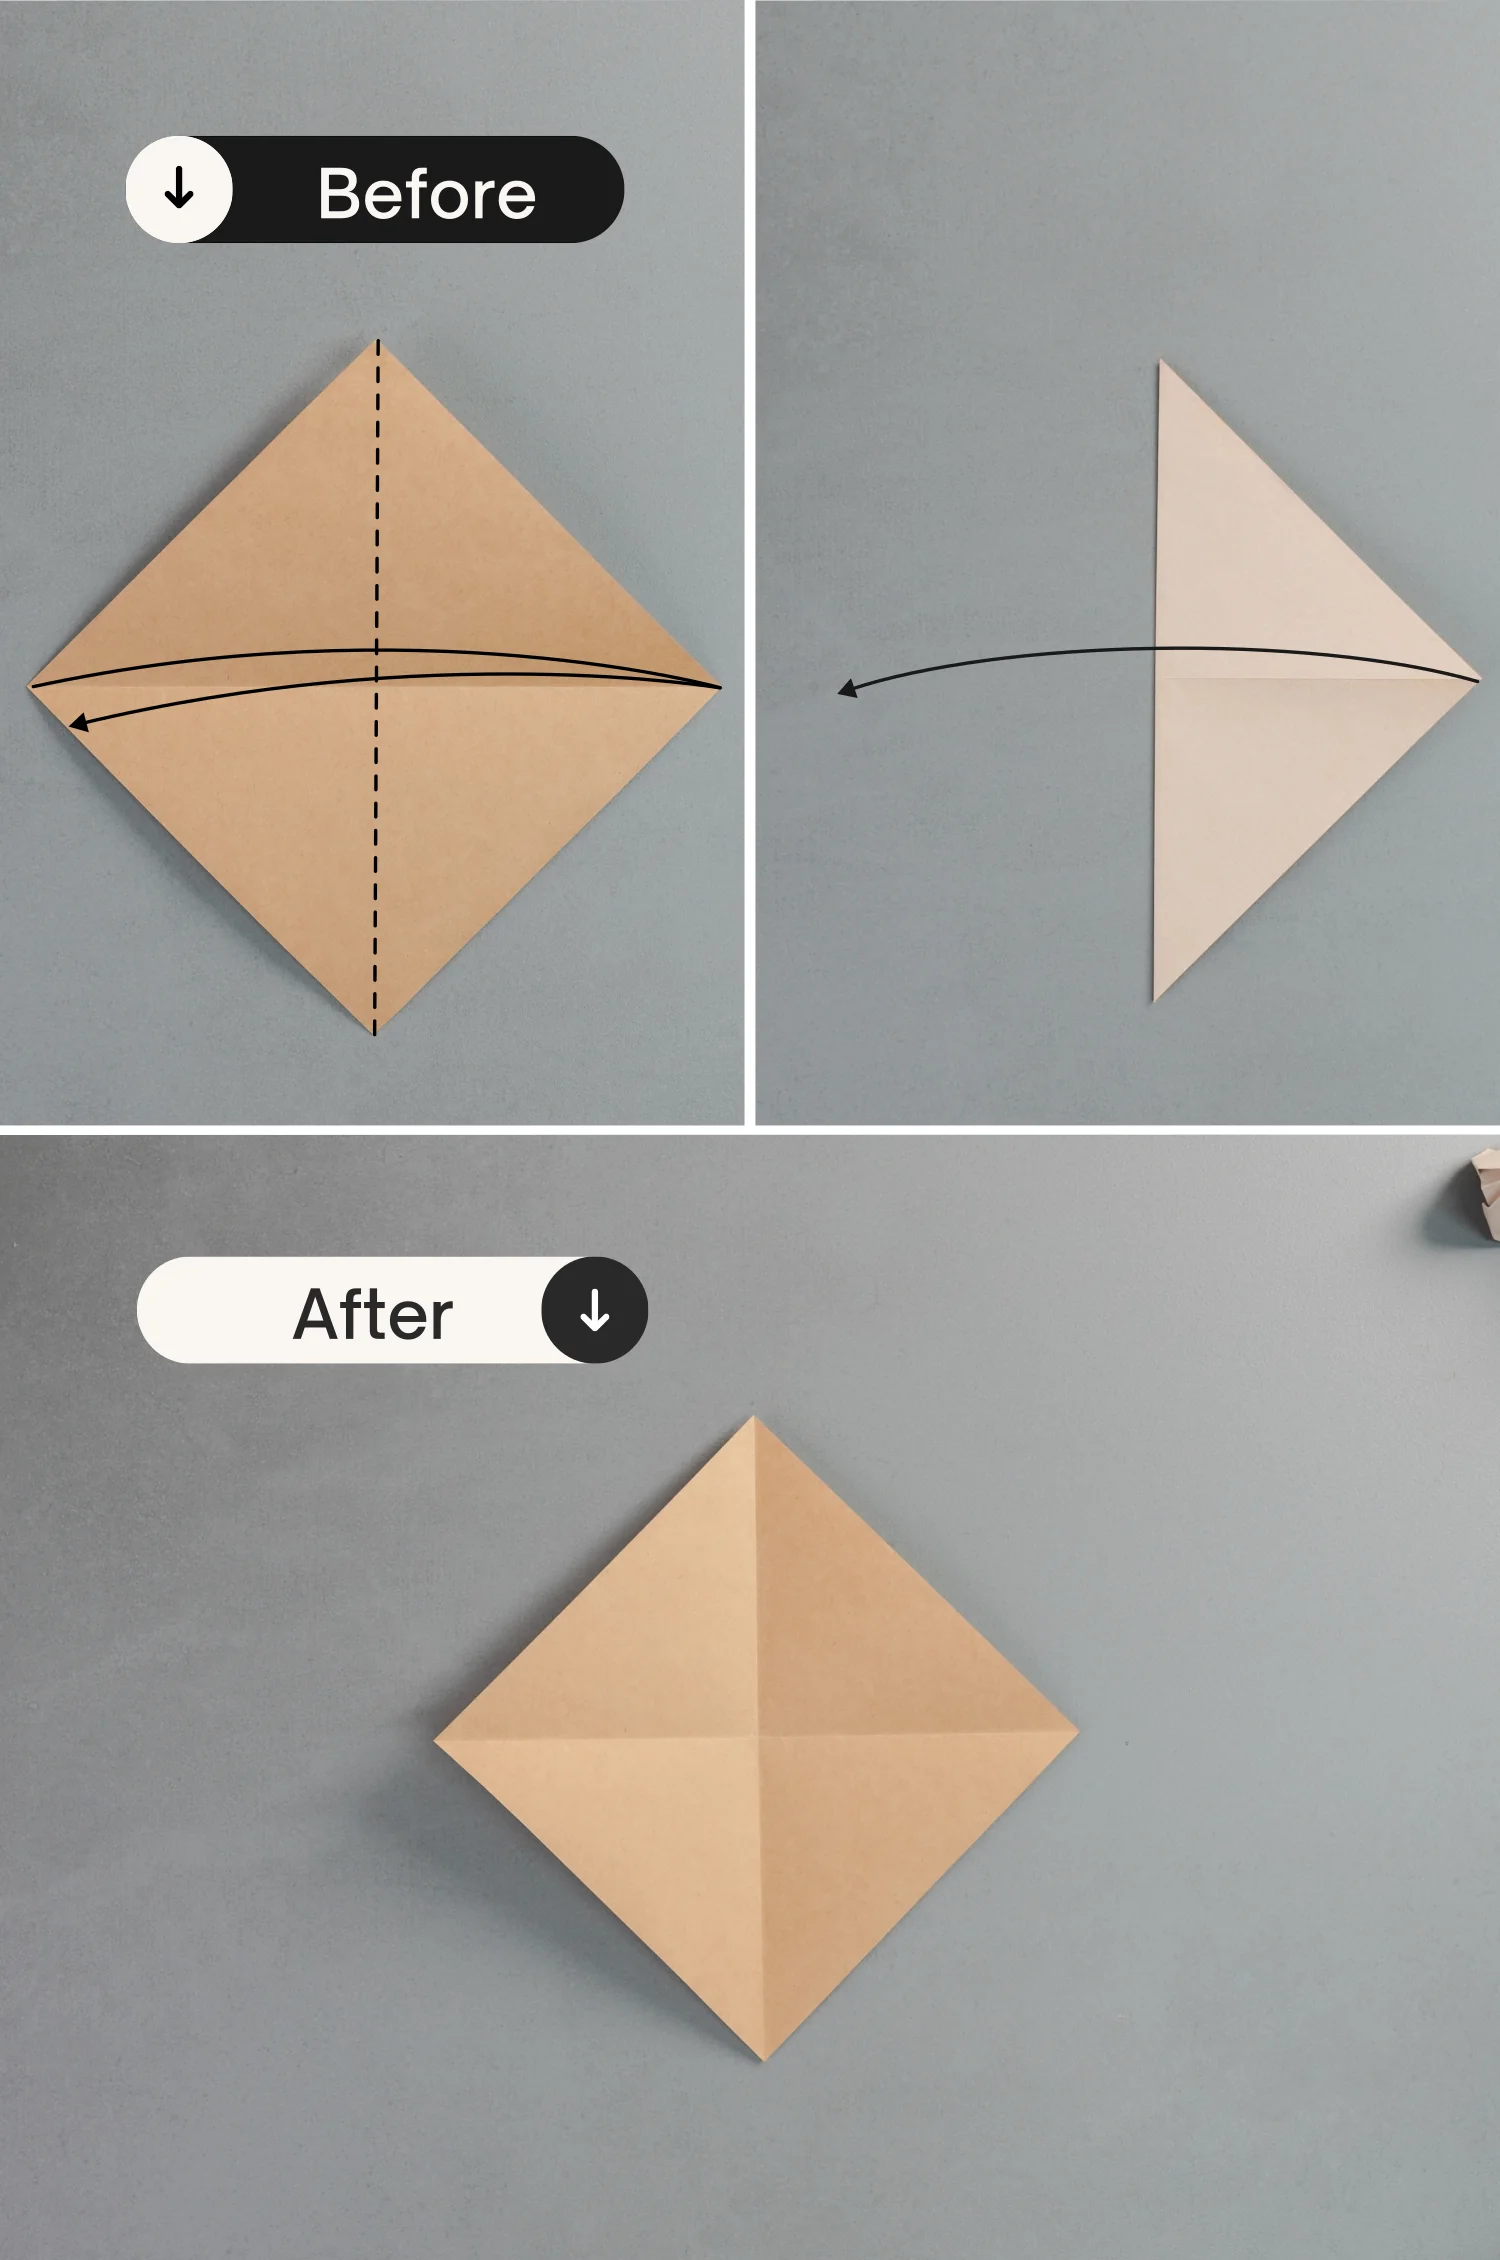
Take out one of the papers, place it with the desired display color side up to begin folding, fold it in half horizontally, and unfold it.
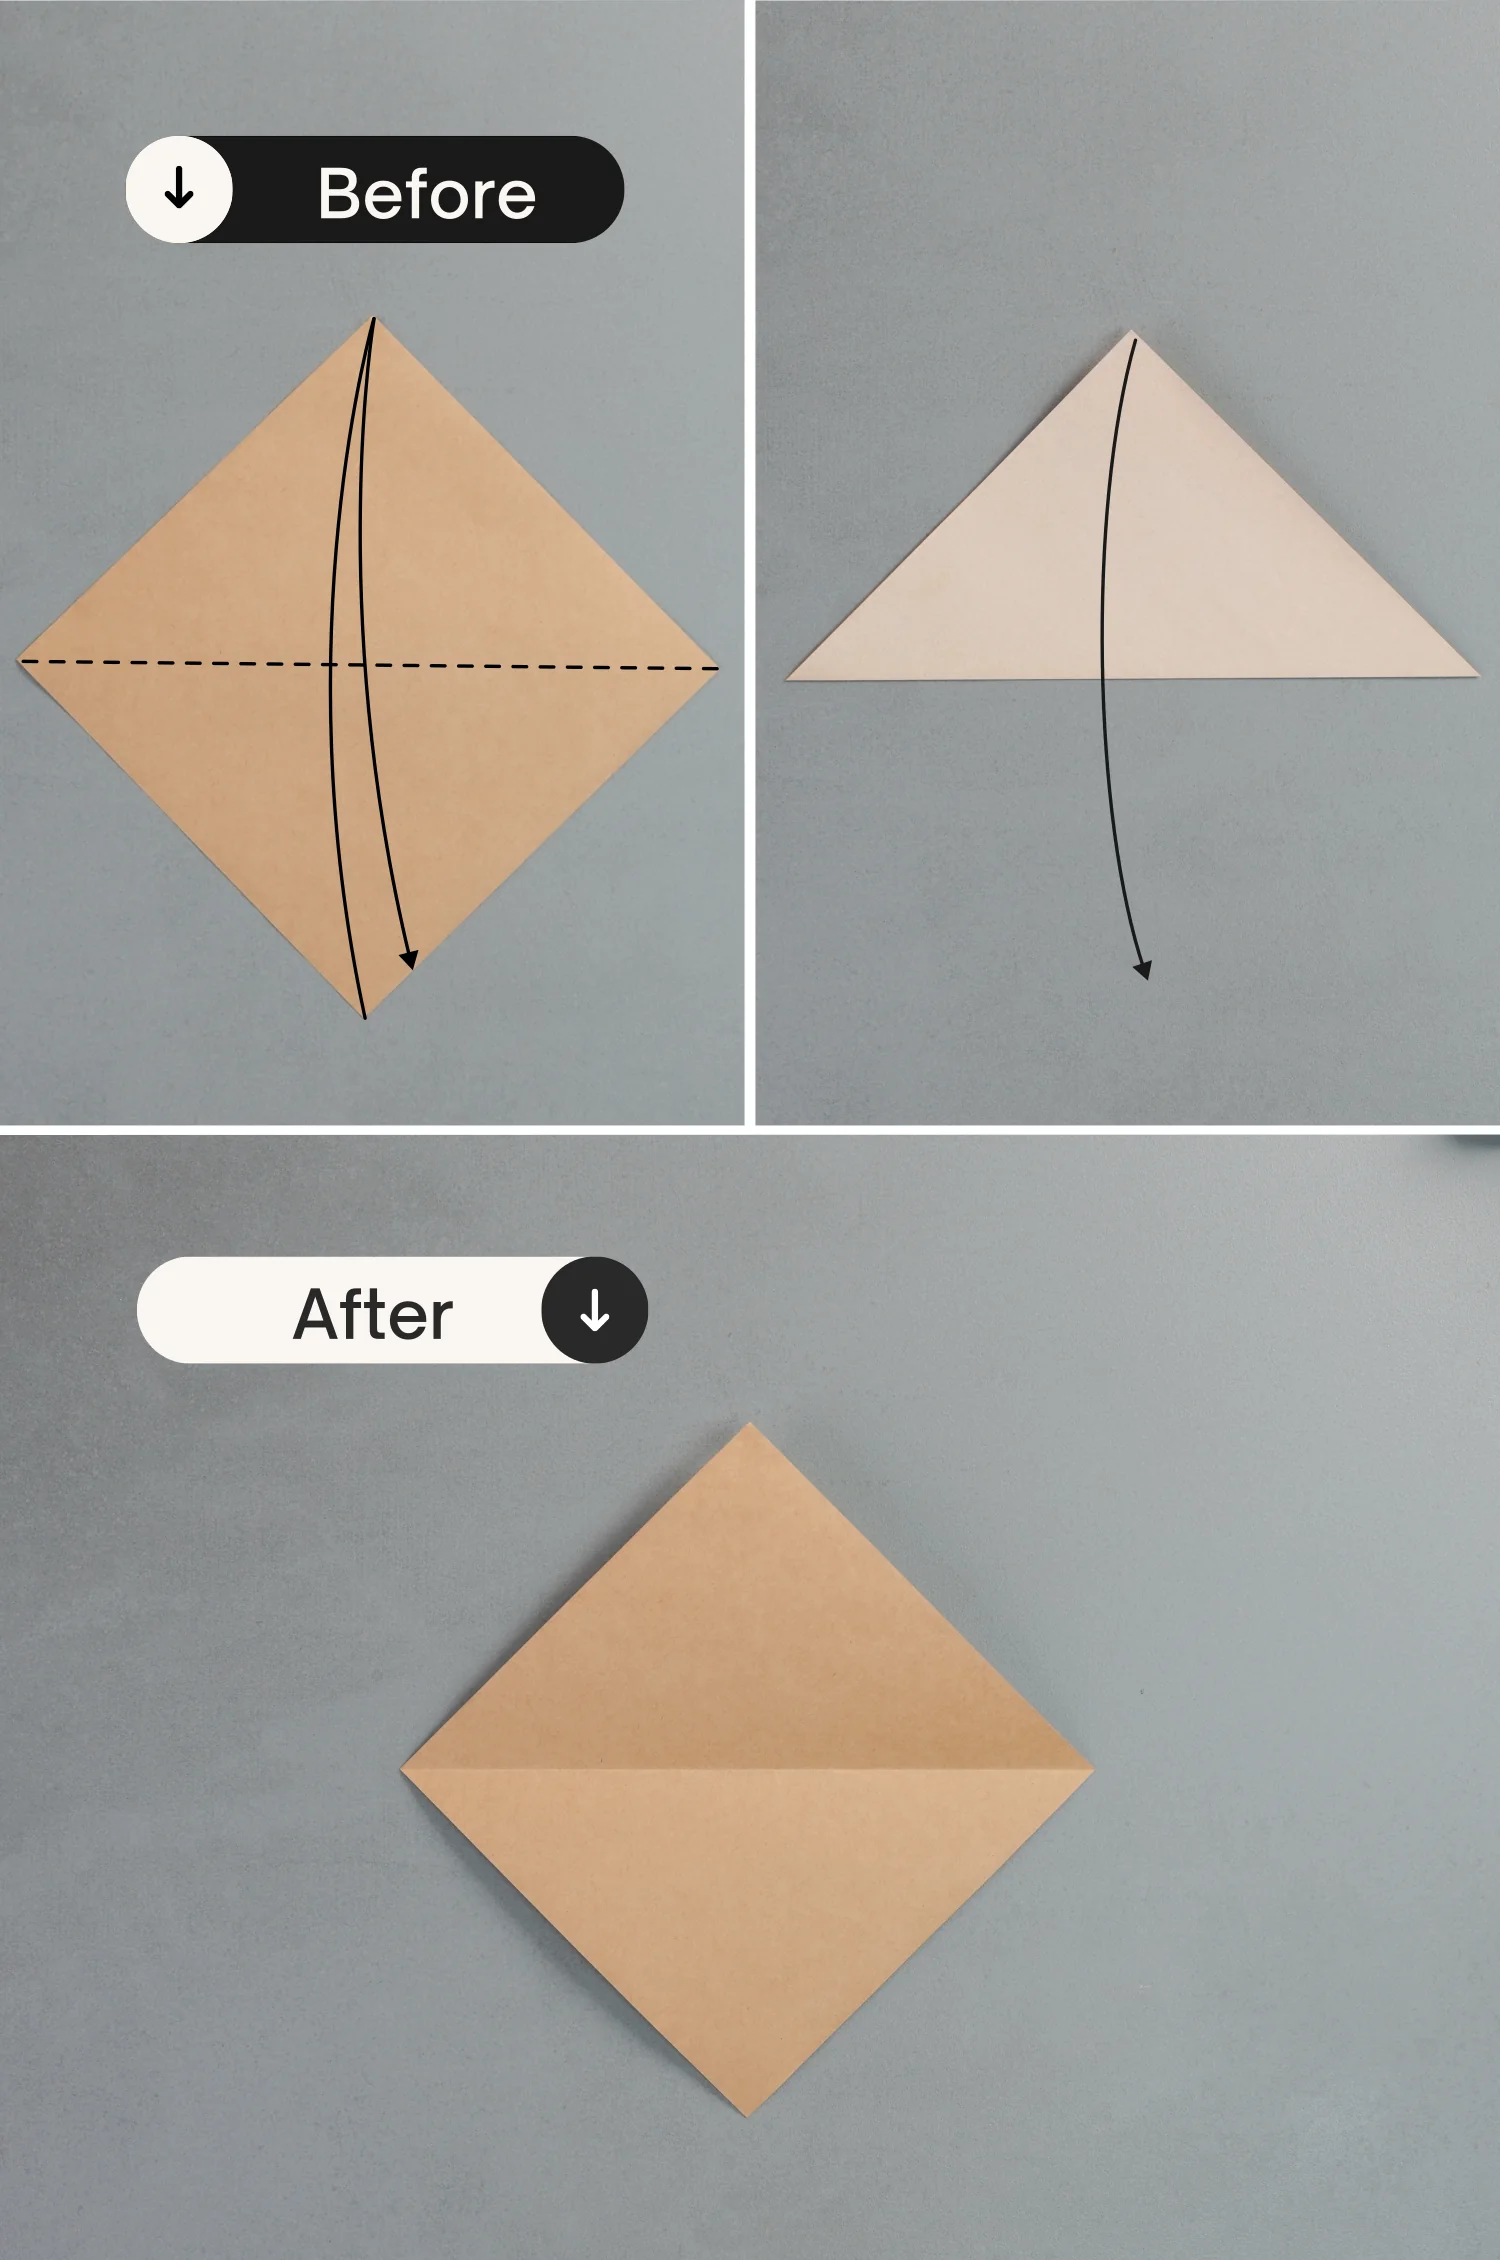
Step 2
Fold it in half vertically, and unfold it.
Step 3
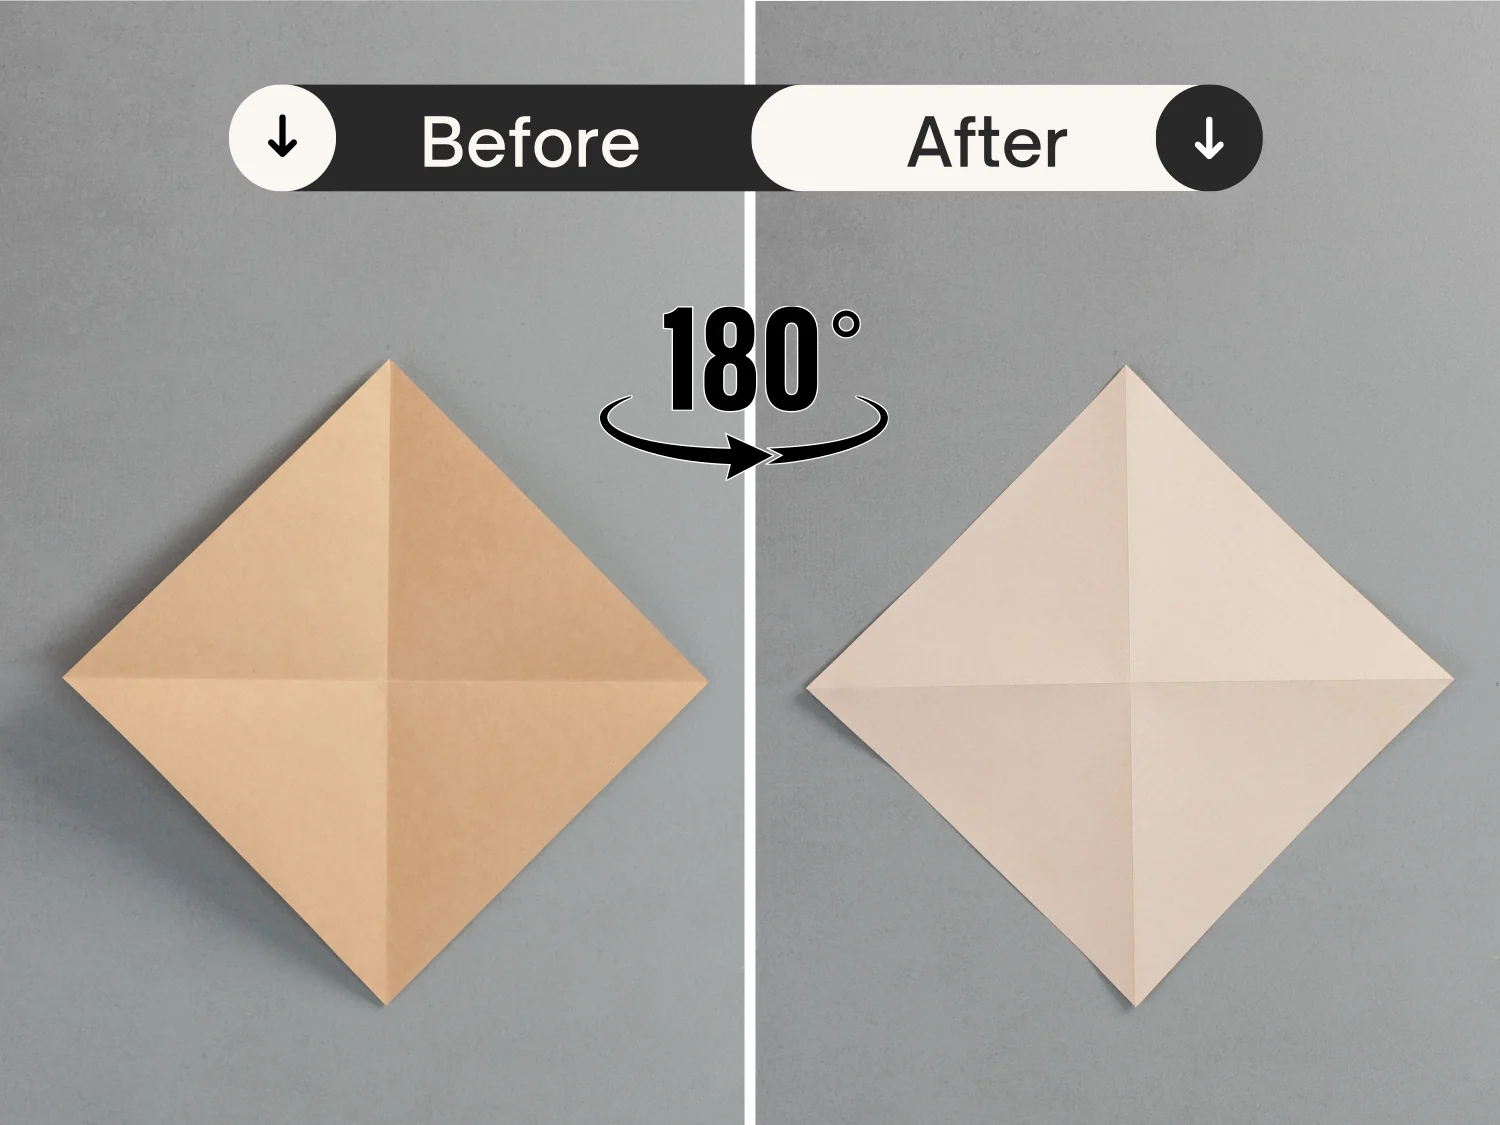
Flip it over.
Step 4
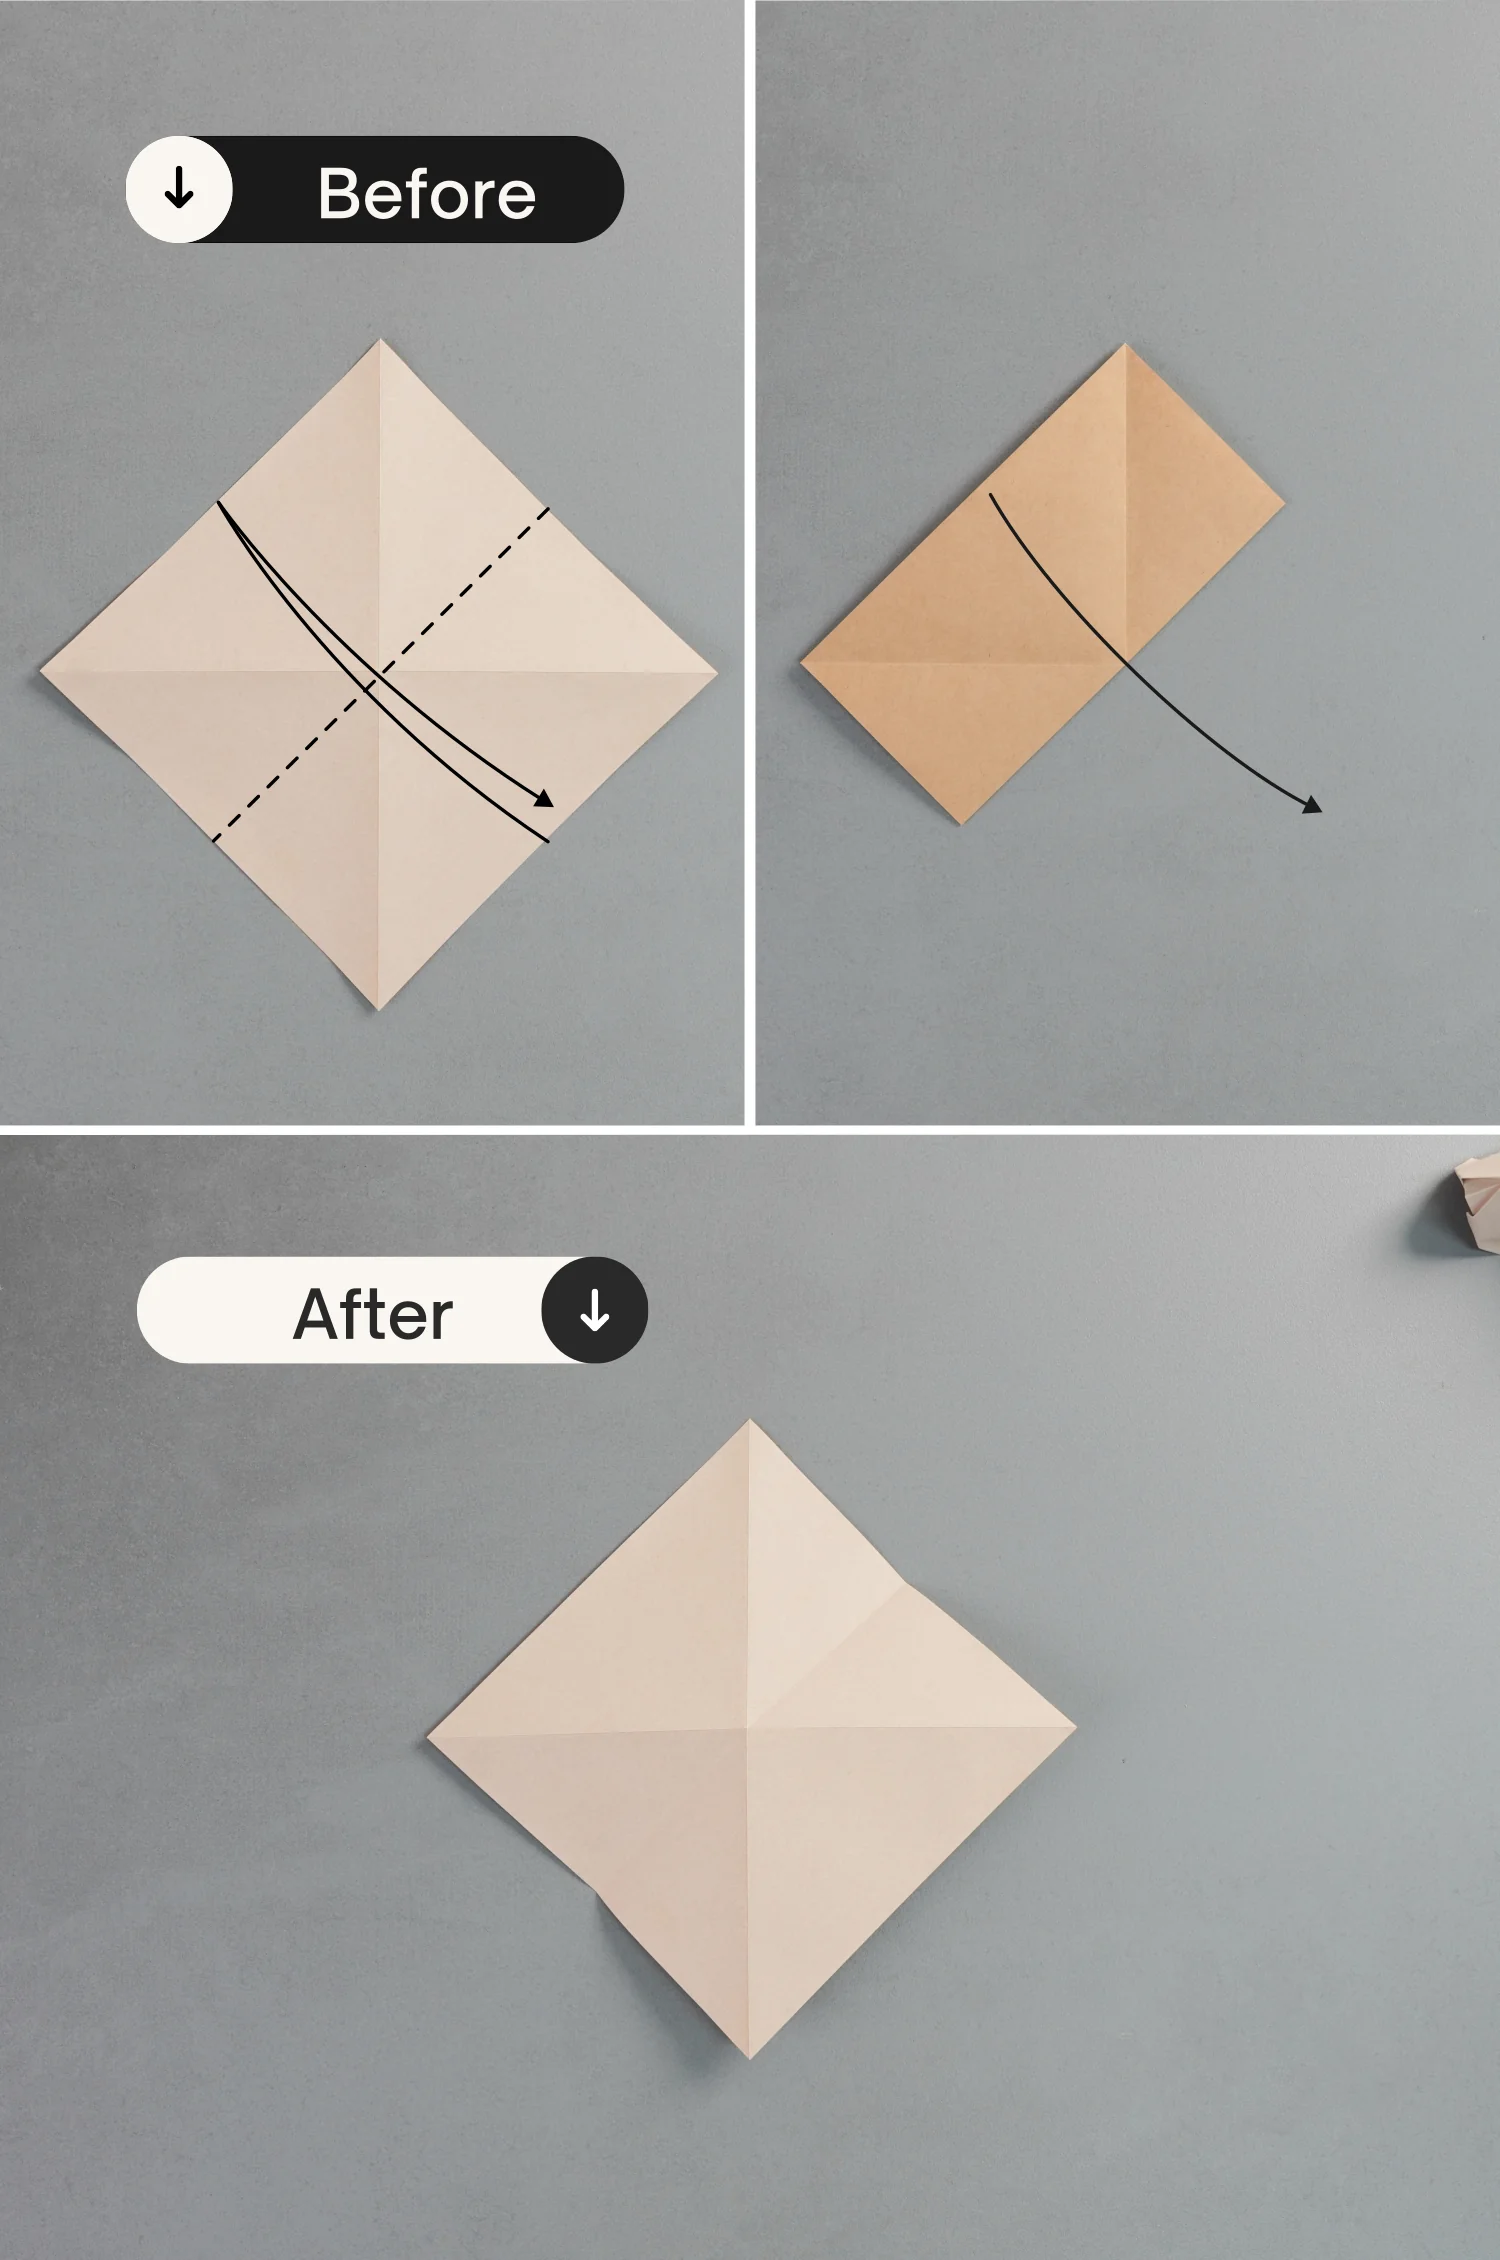
Fold the bottom right edge to align with the top left, crease it well then unfold.
Step 5
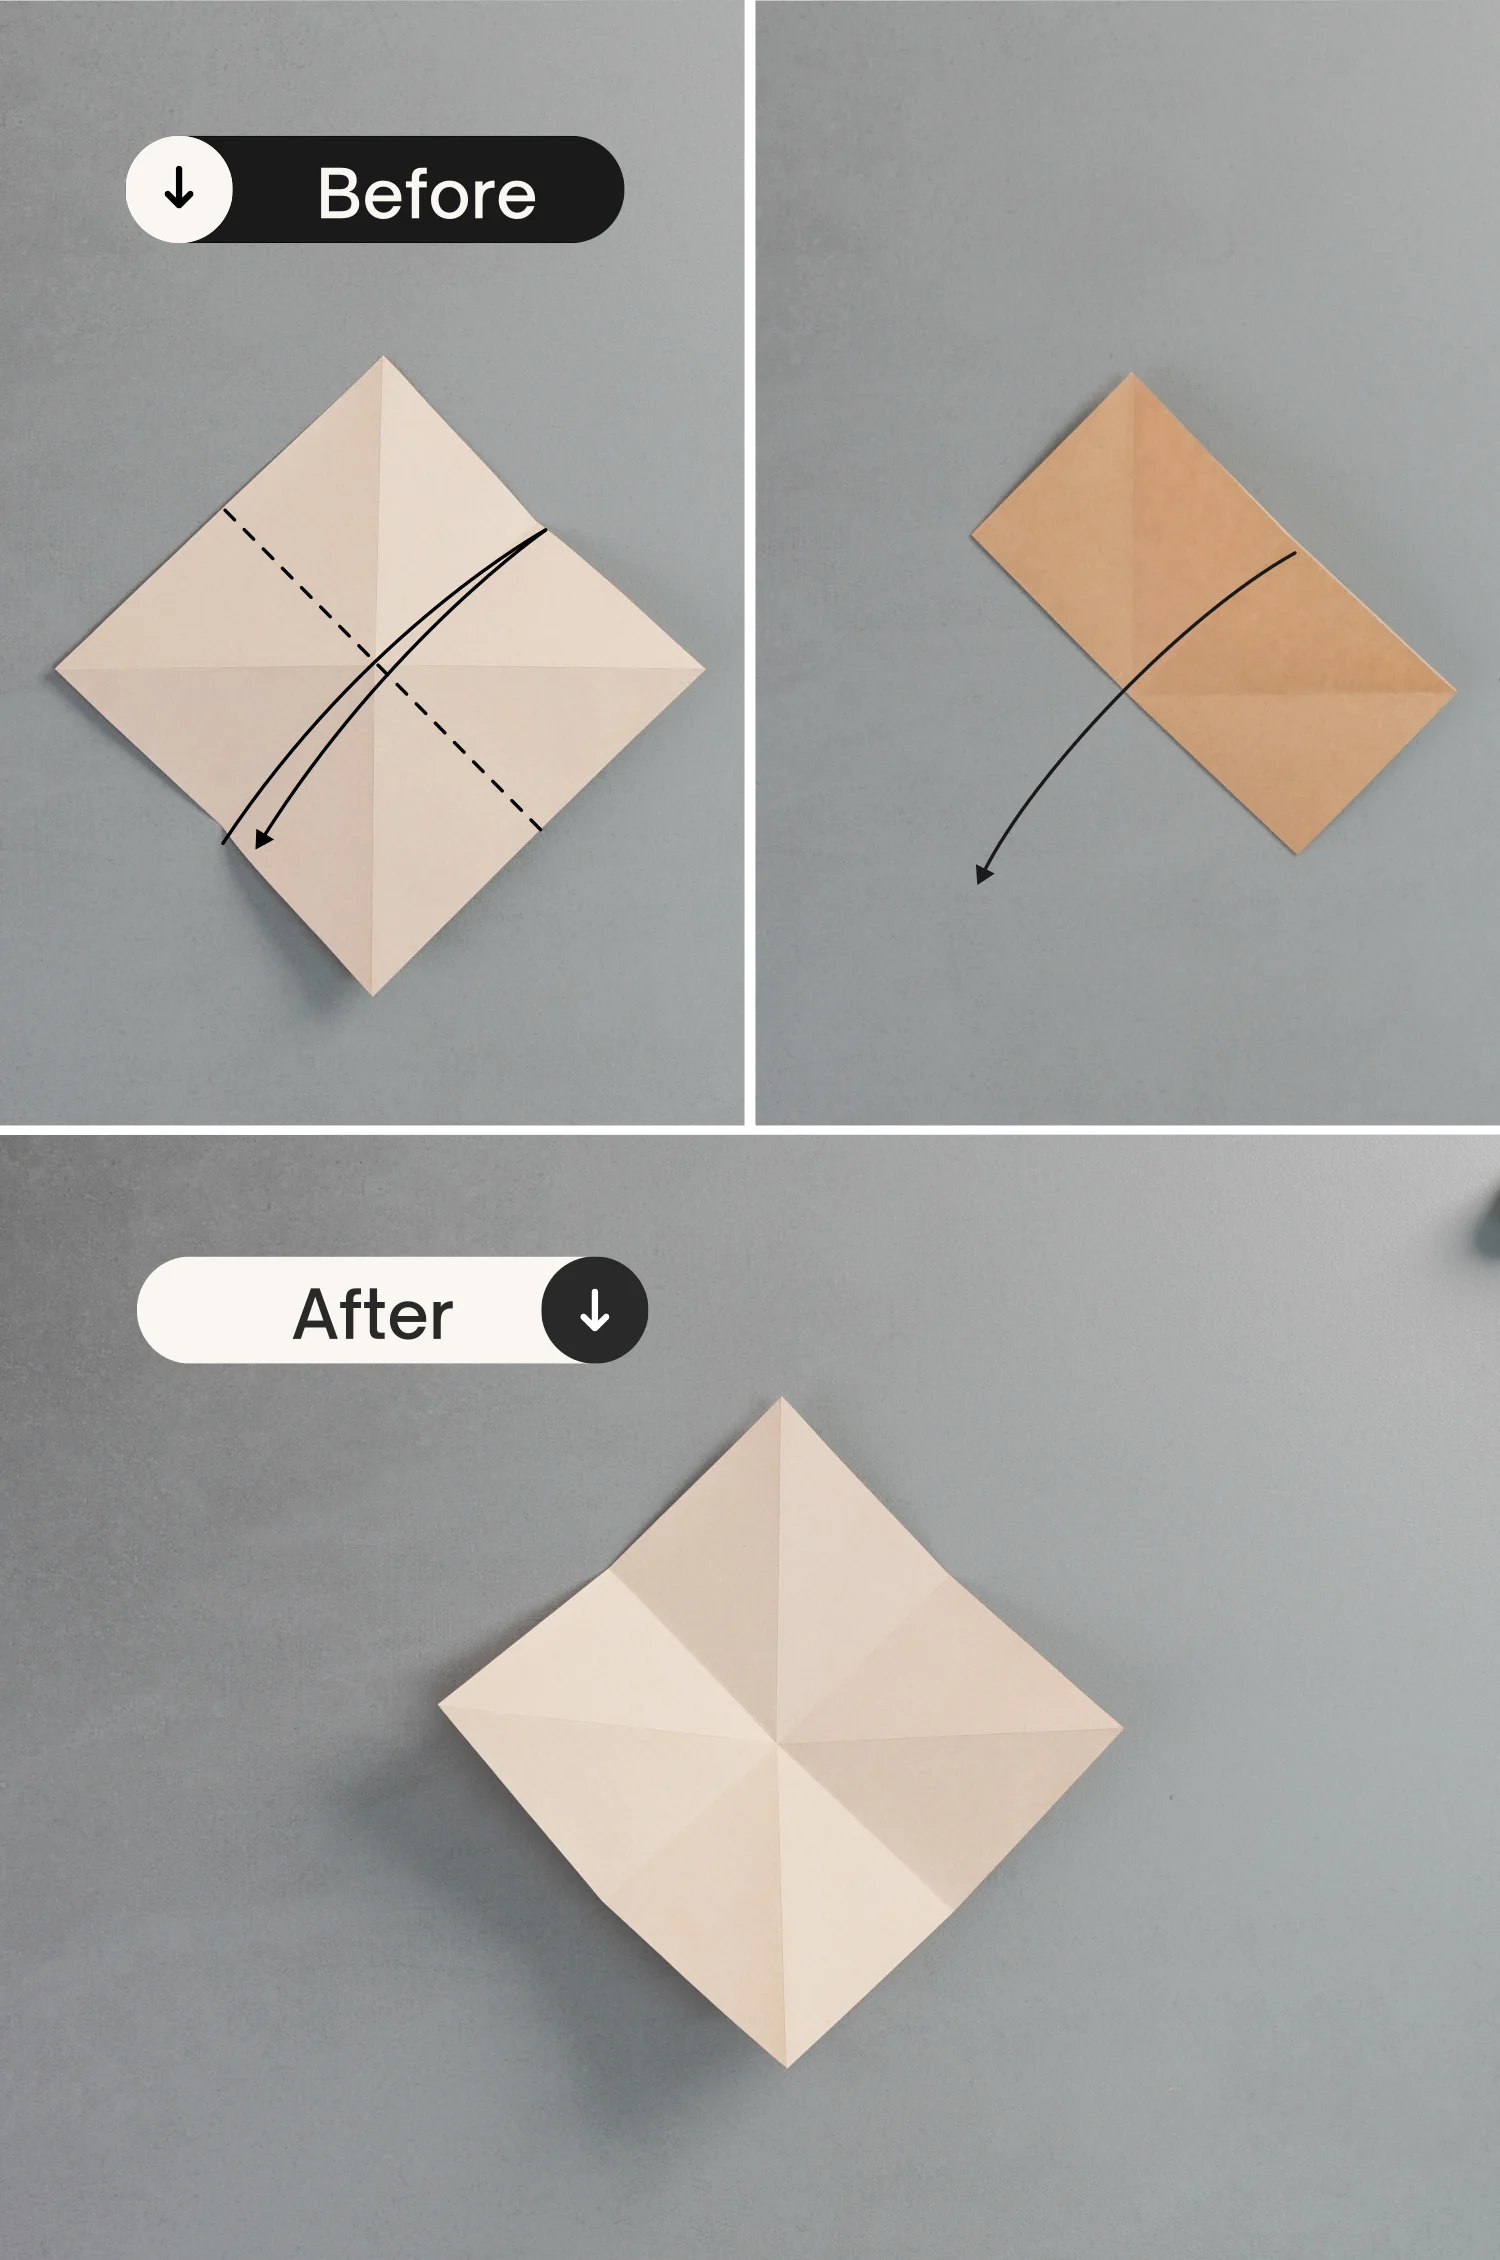
Fold the bottom left edge to align with the top right edge, leaving a crease, and unfold.
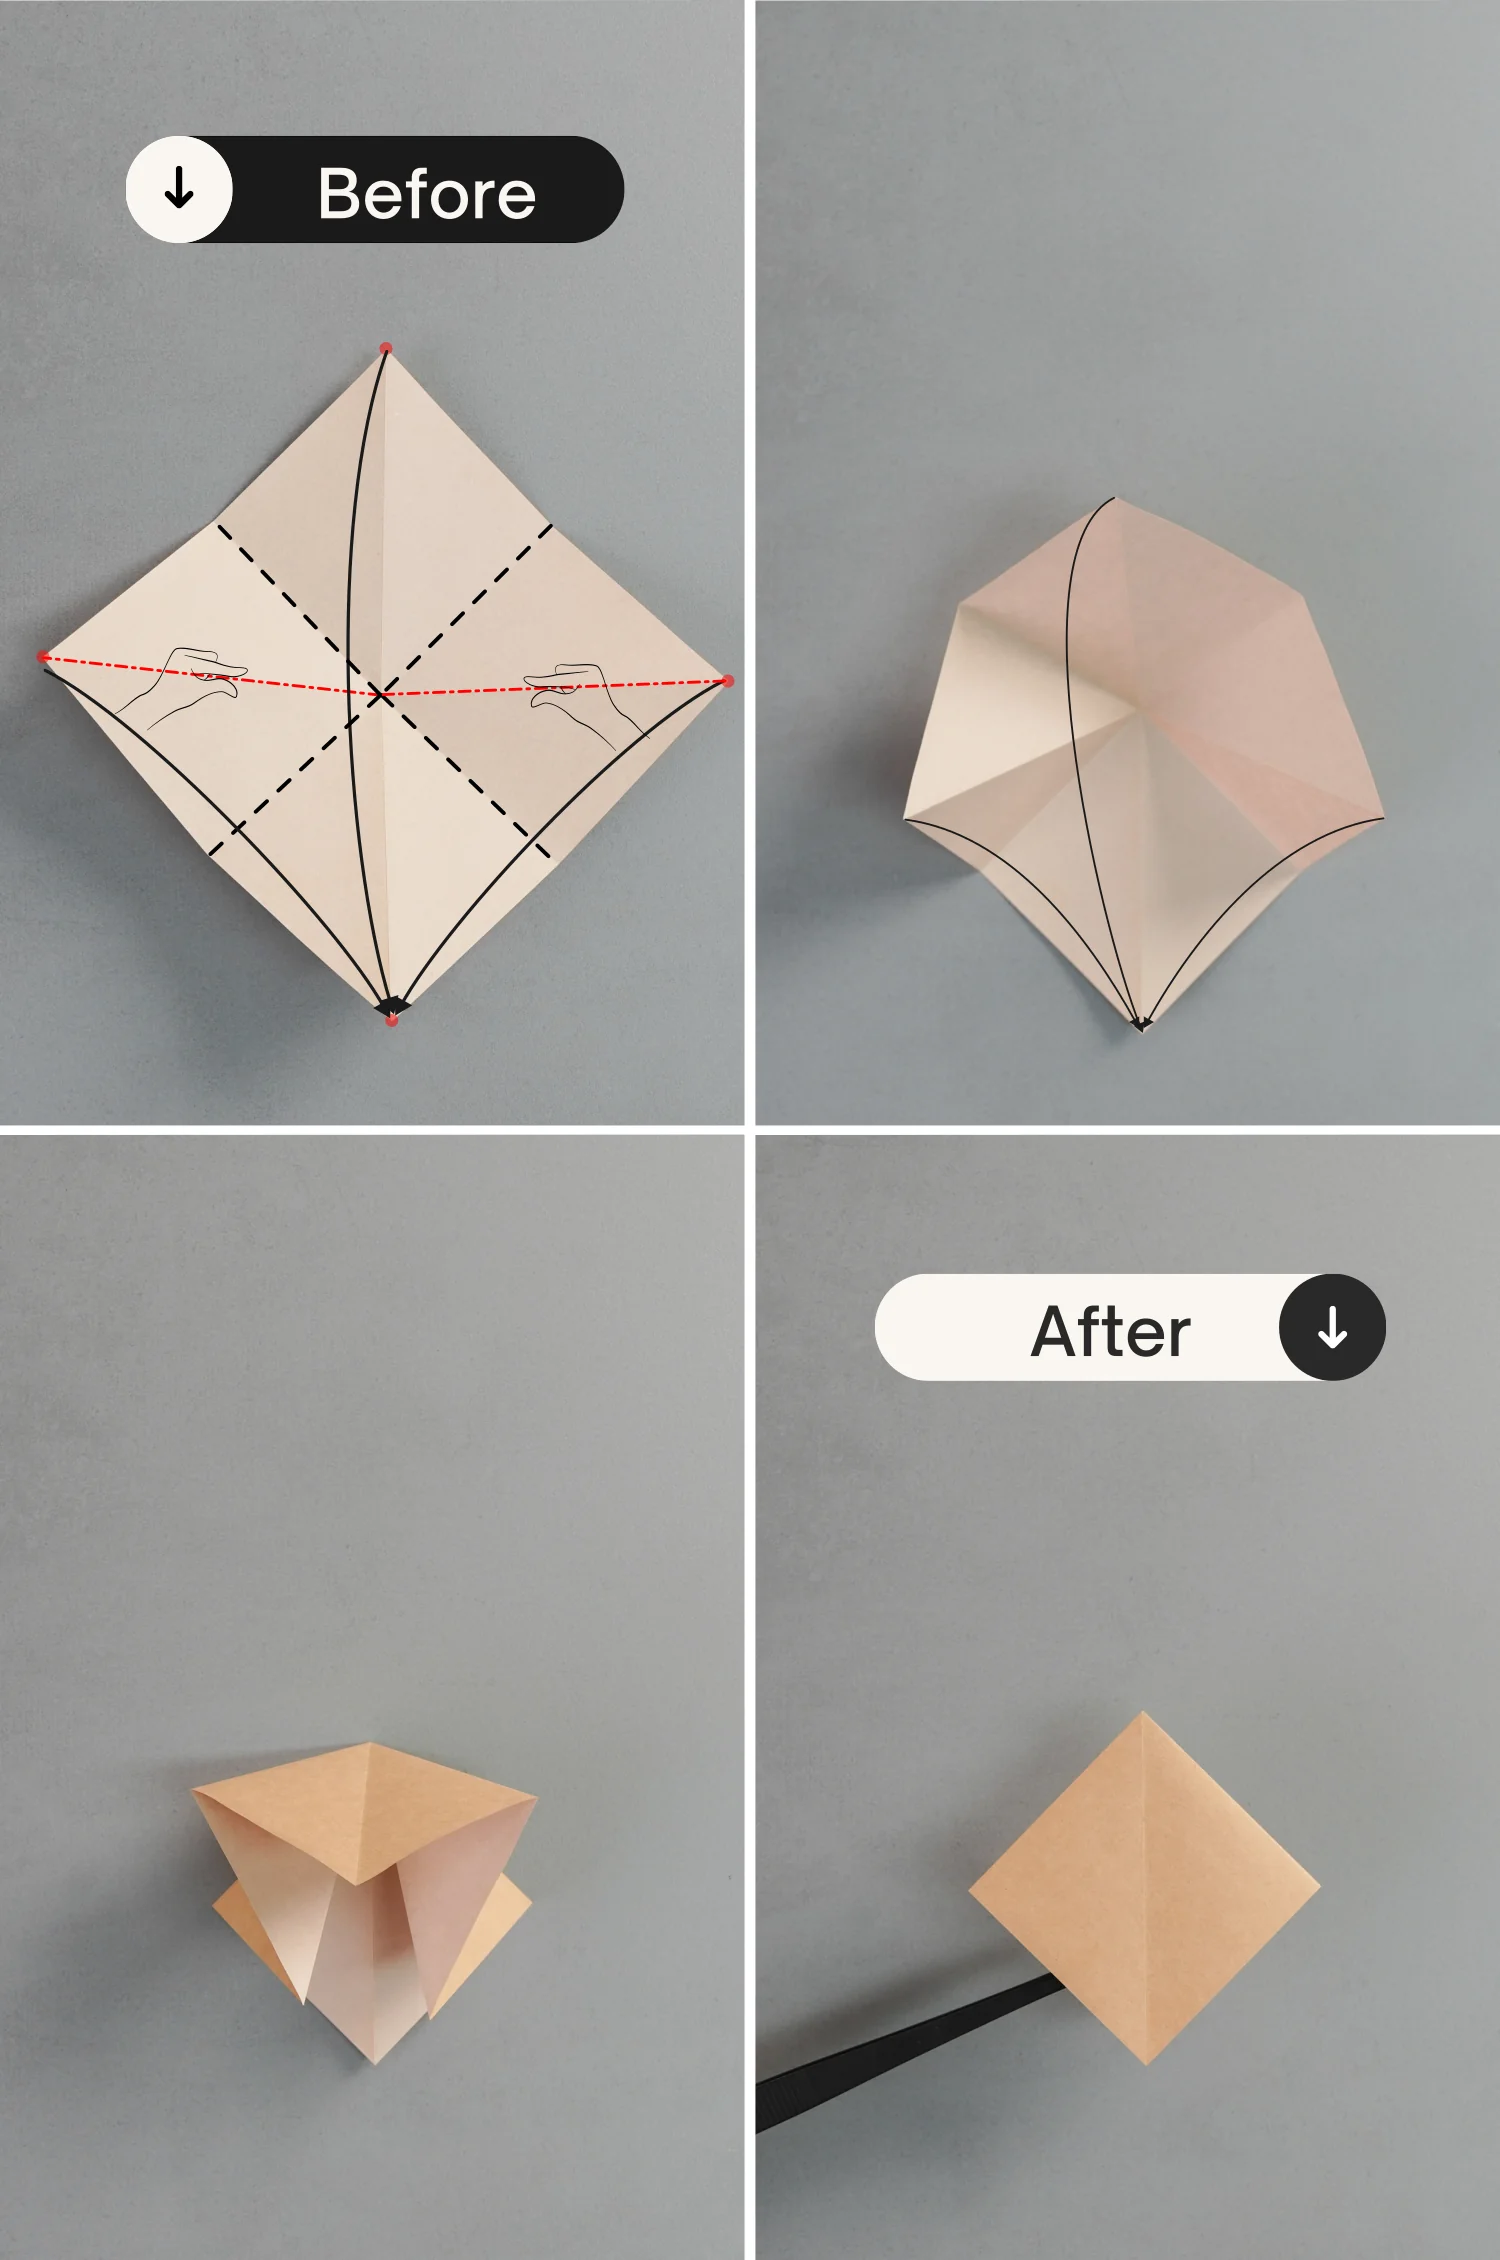
Step 6
Now, shape the left and right creases, and use both hands to press the left and right points, then push them down to meet the bottom point.
Flatten the fold along the existing creases.
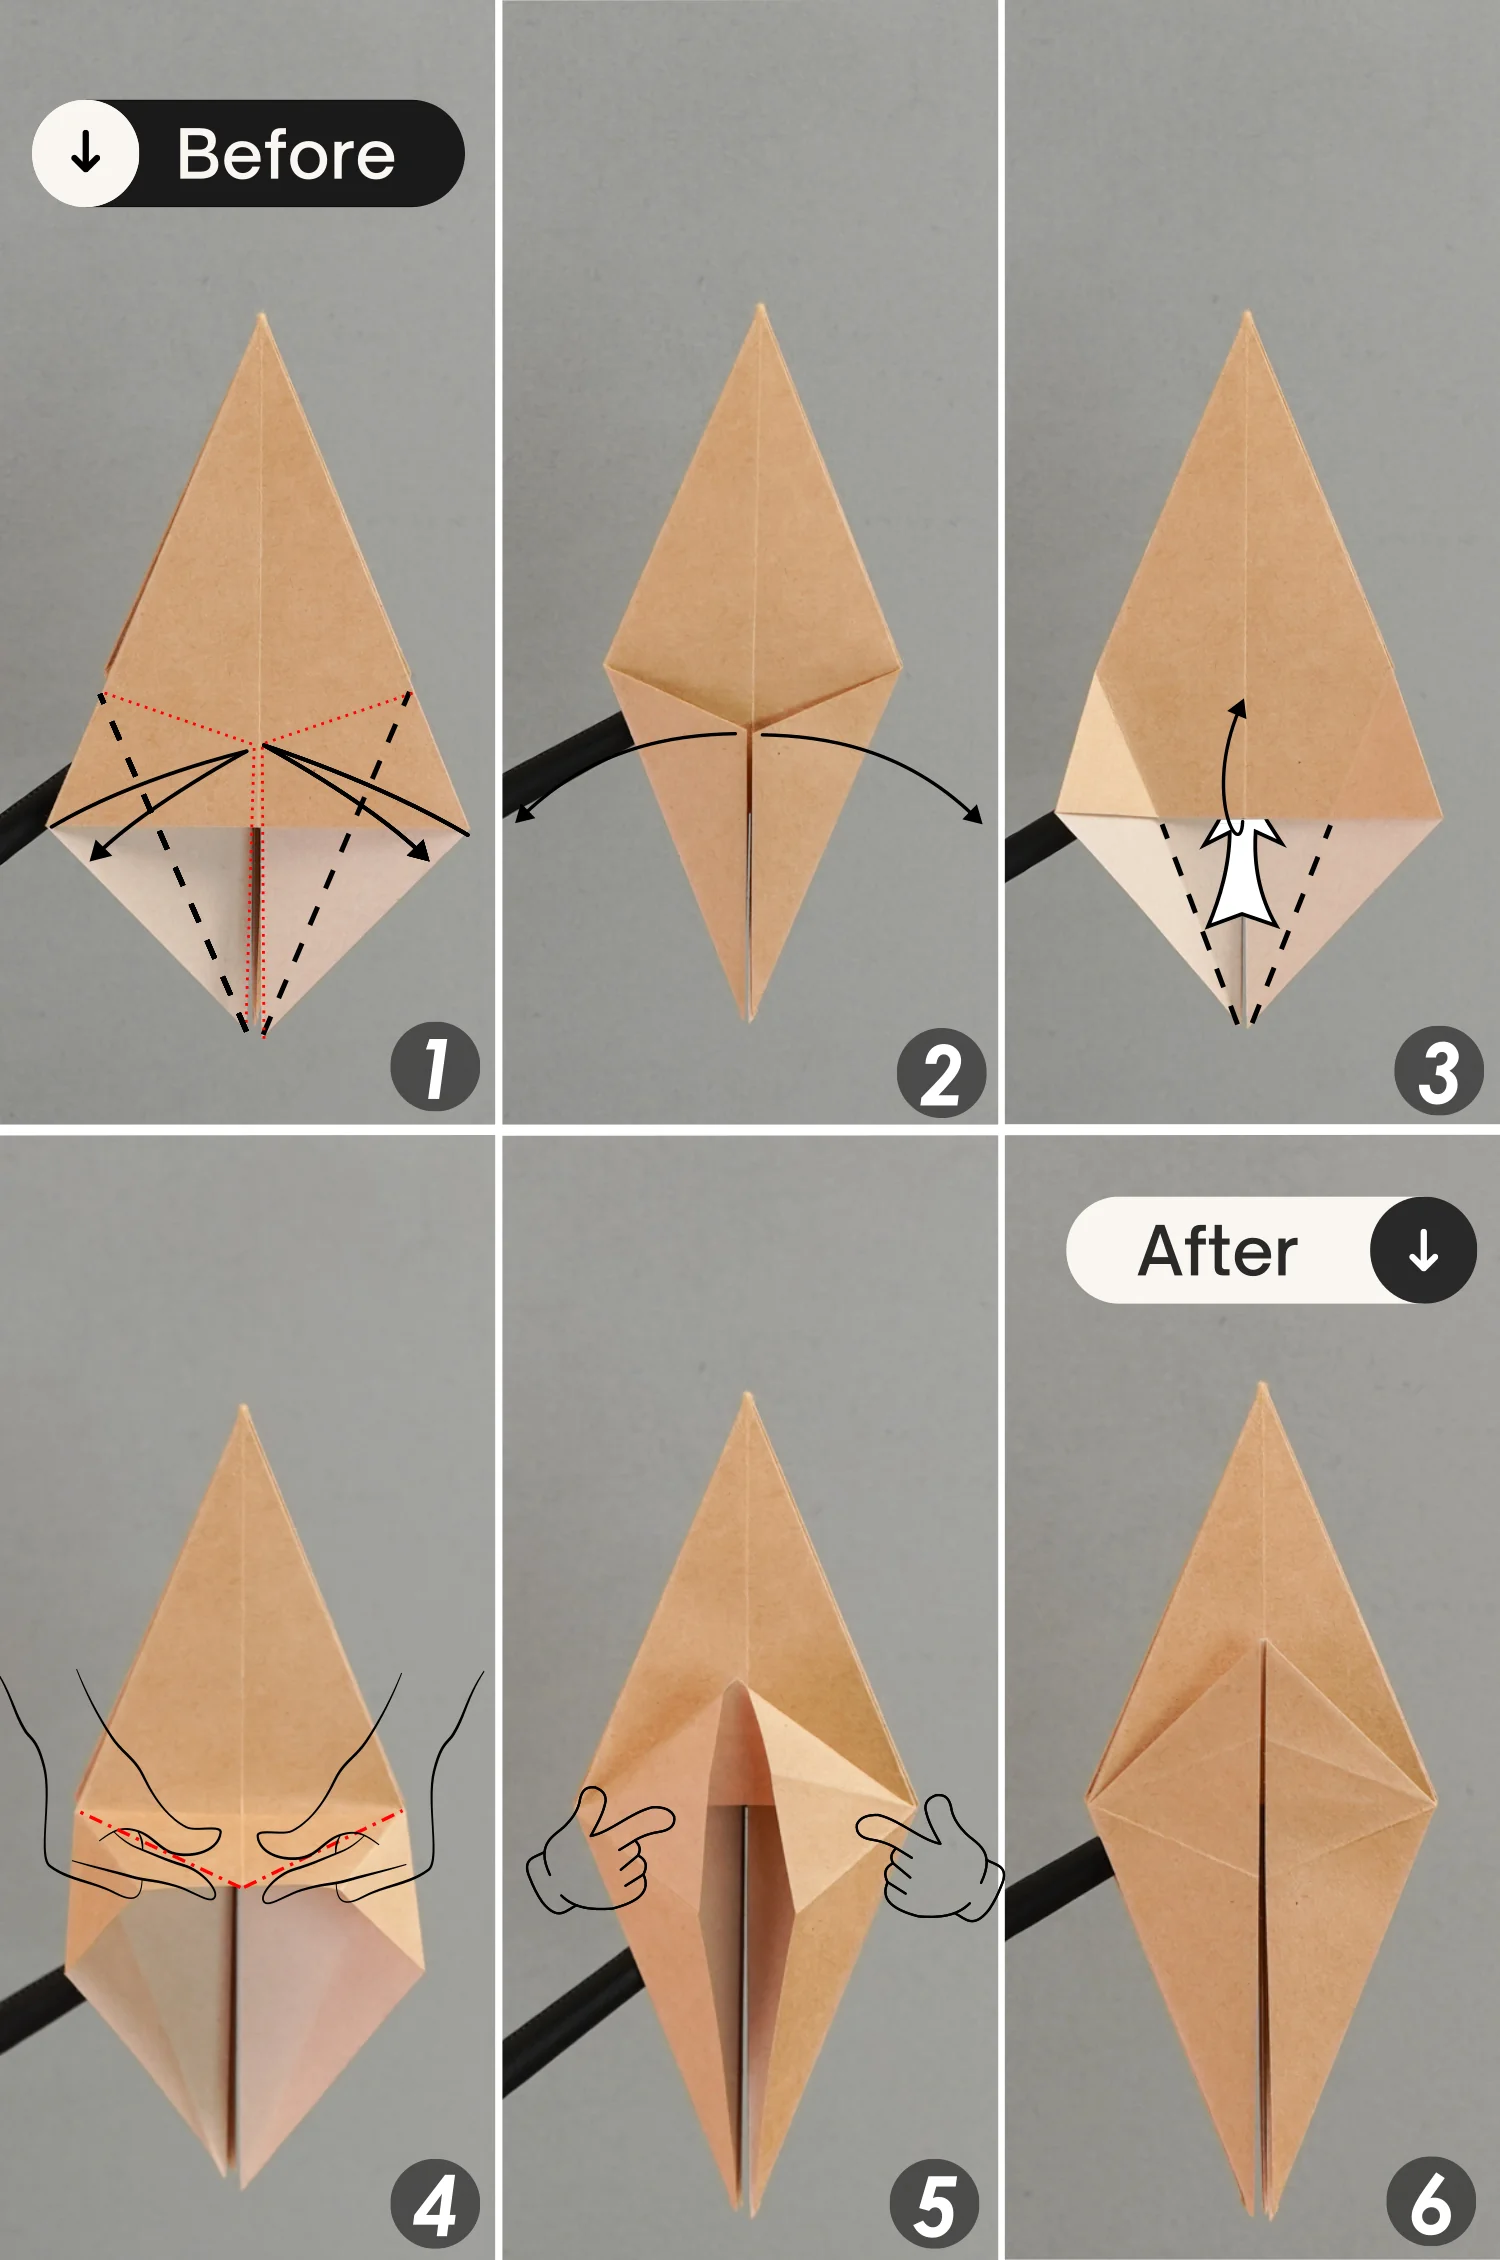
Step 7
Fold the top left and right edges of the top layer to align with the middle vertical crease, crease them well then unfold.
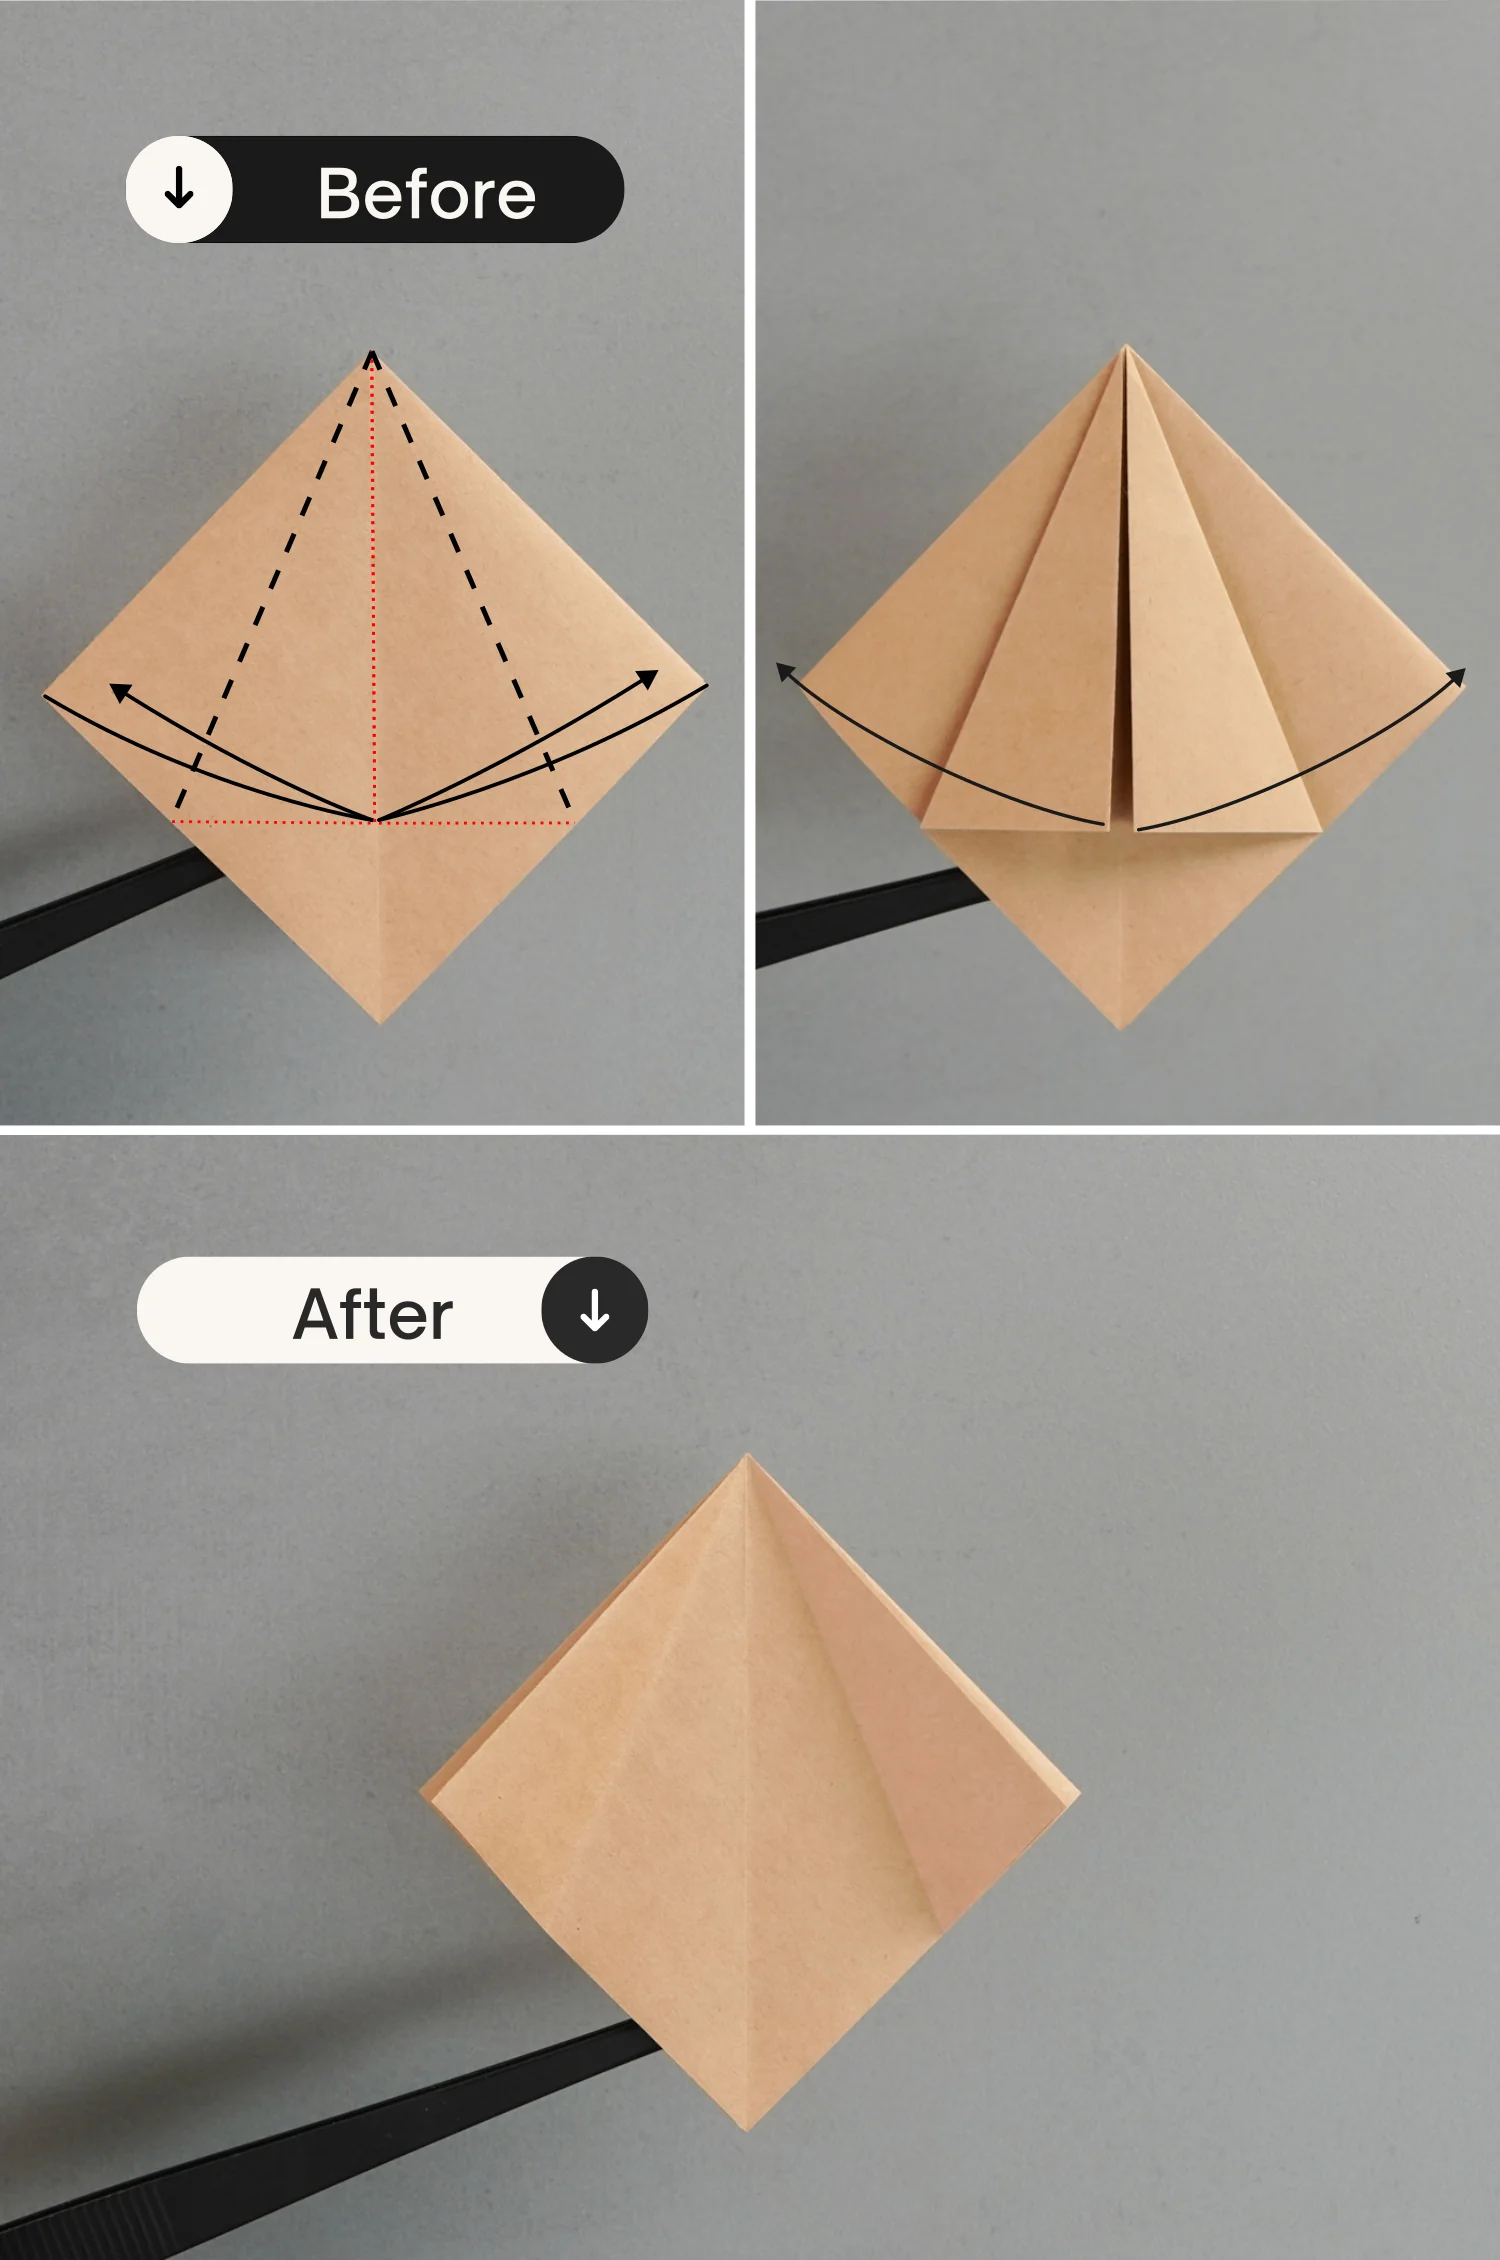
Step 8
Lift the left top layer along the middle vertical crease, making it stand, then squash it along the creases you made in the previous step.
Step 9
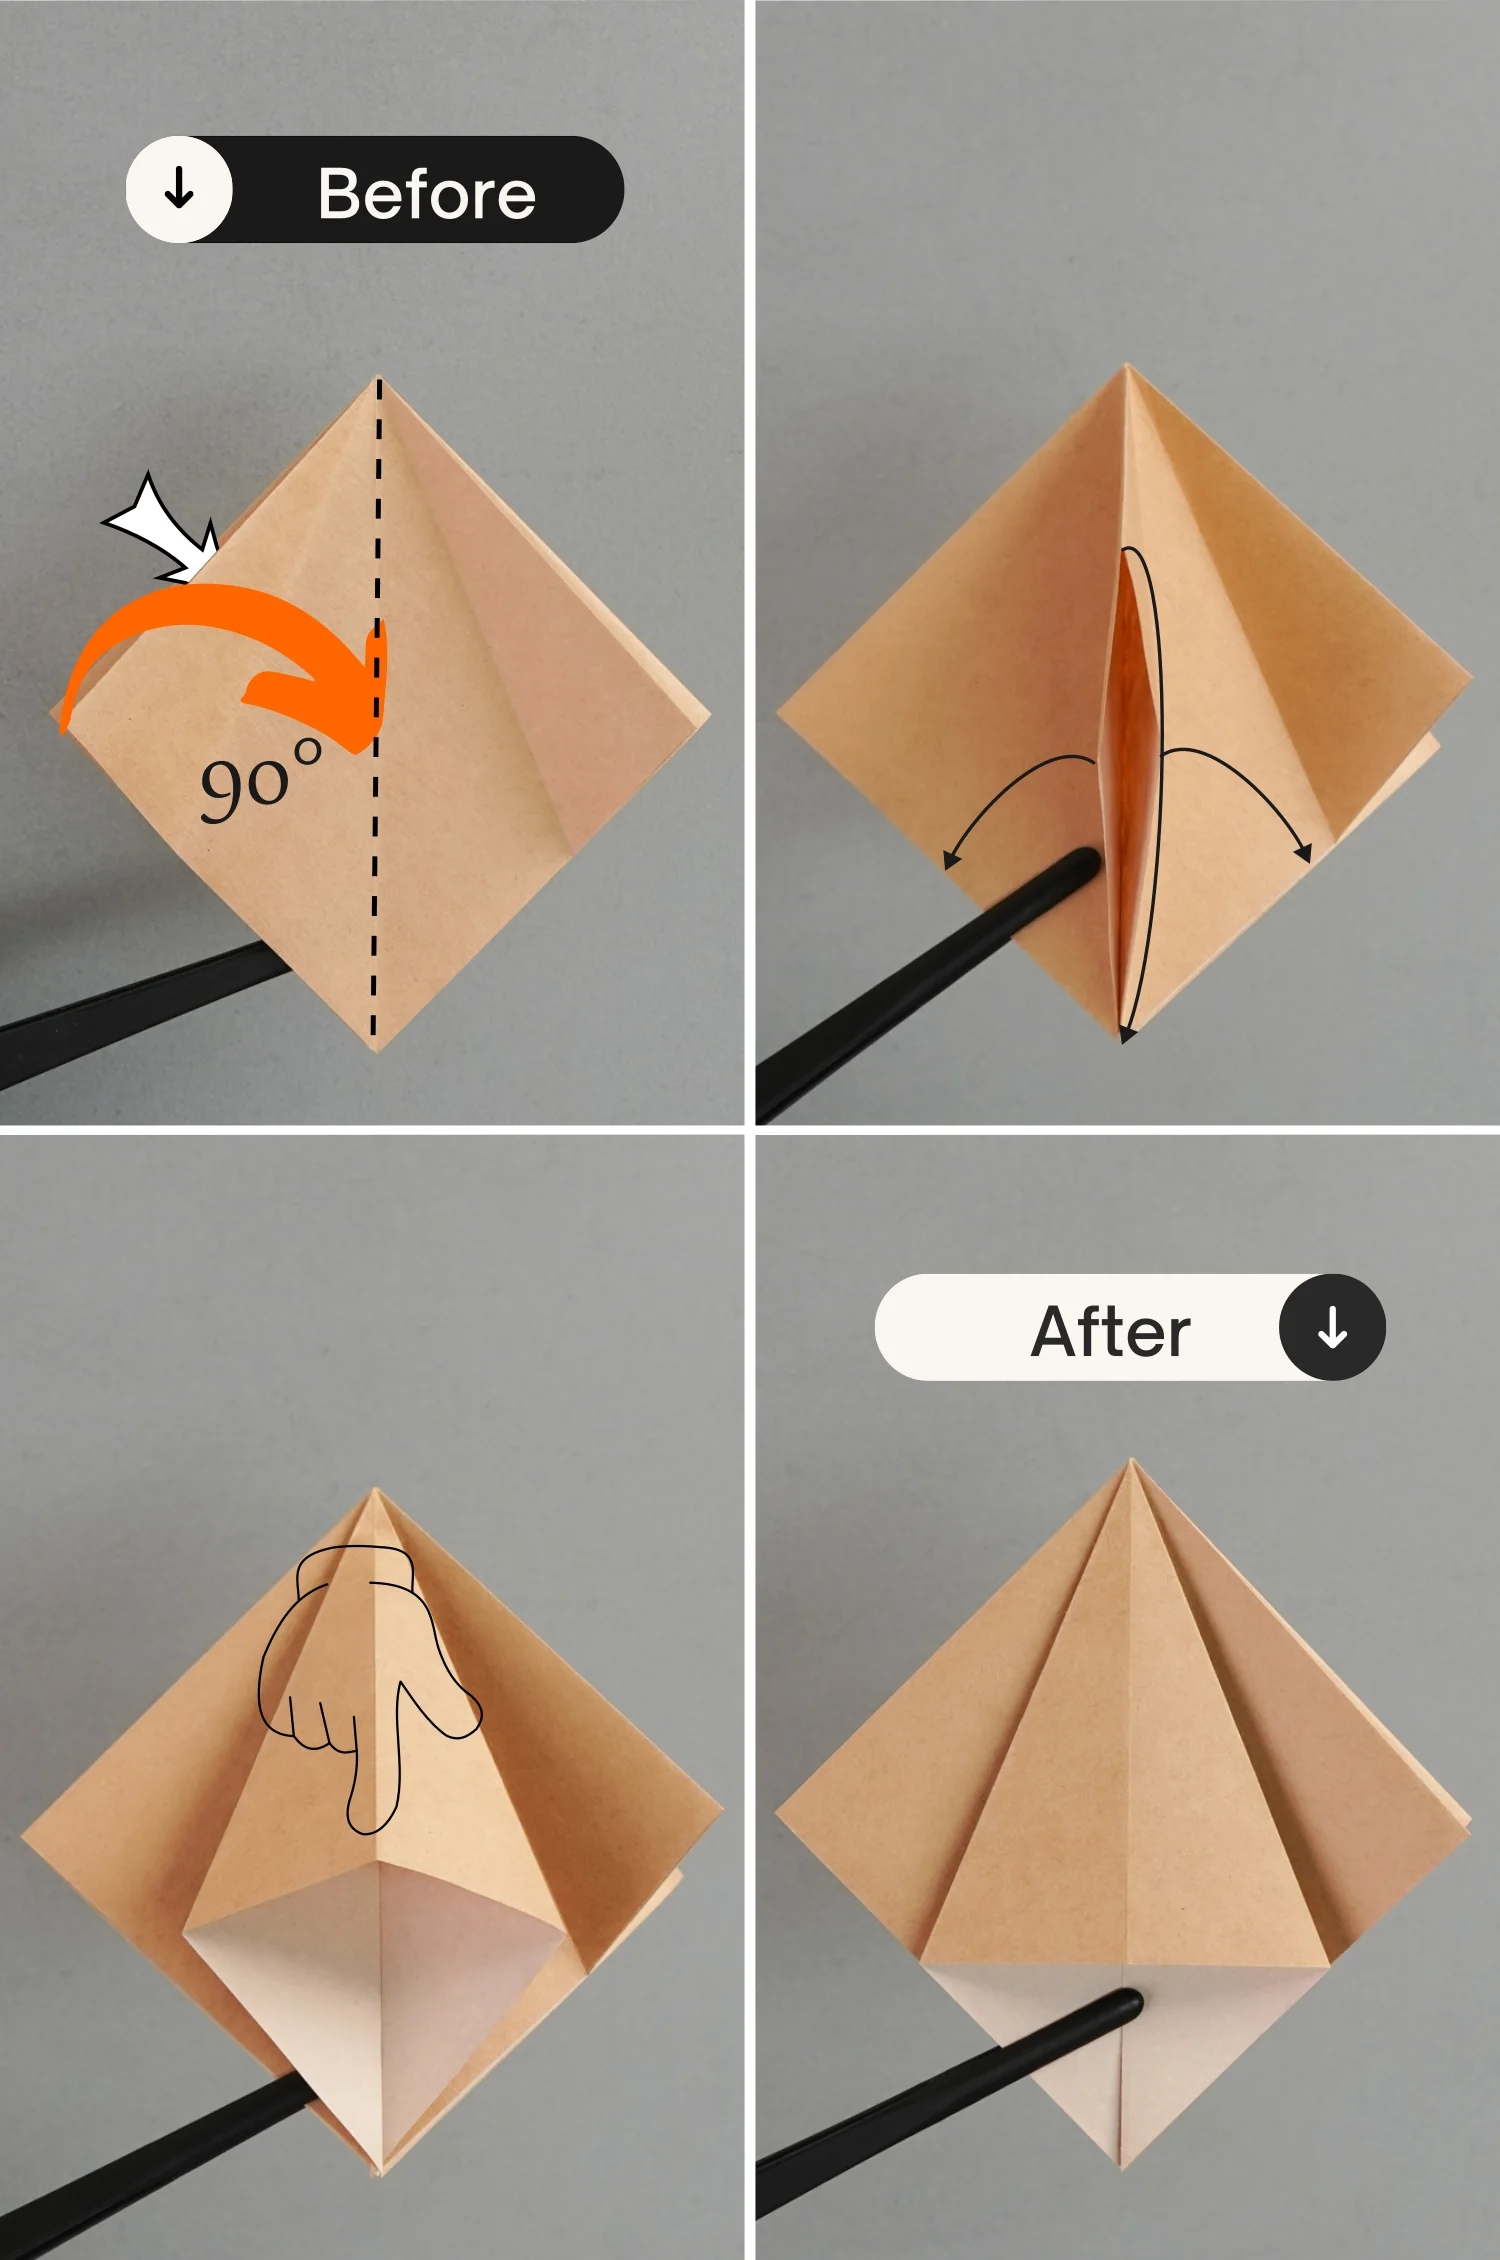
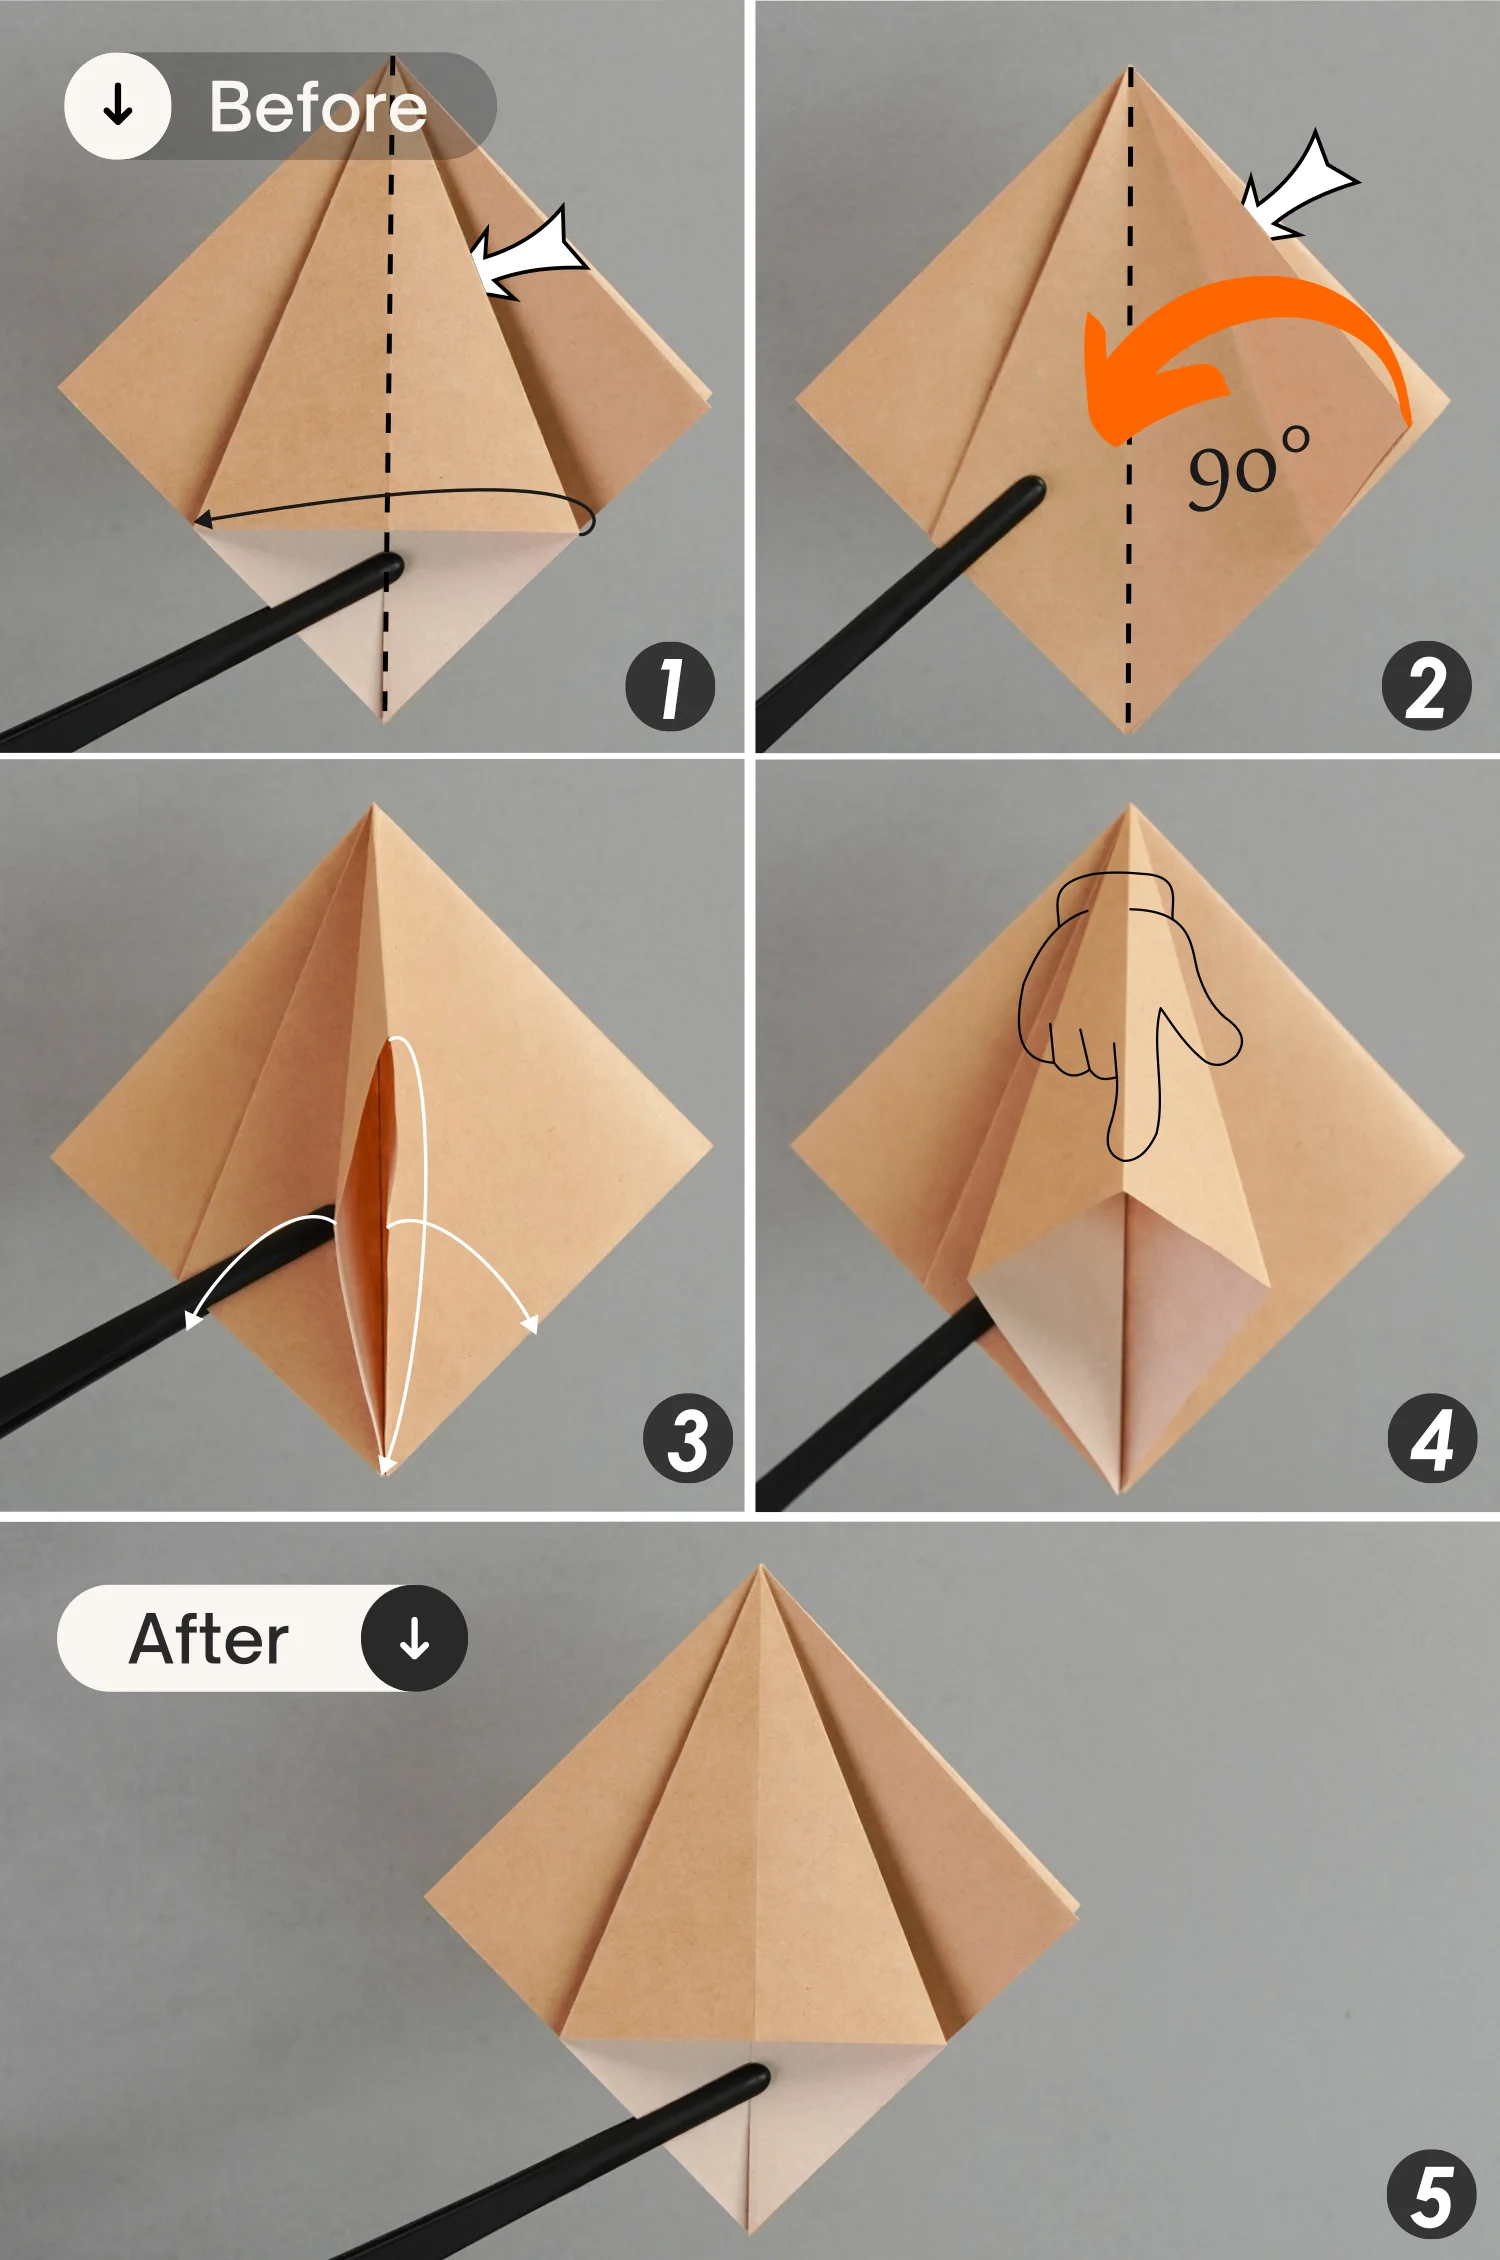
Firstly, fold the top right part of the top layer to the left along the vertical crease, then lift the right layer to make it stand, and finally squash it as you just did.
Step 10
Flip the paper over from the left to the right.
Step 11
Fold the top left and right edges to align with the middle vertical crease, and unfold them.
Step 12
Like before, lift the left layer, and squash it along the creases you just made.
Step 13
As you did in step 9, fold the right part of the top layer to the left along the vertical crease, then lift and squash the right layer.
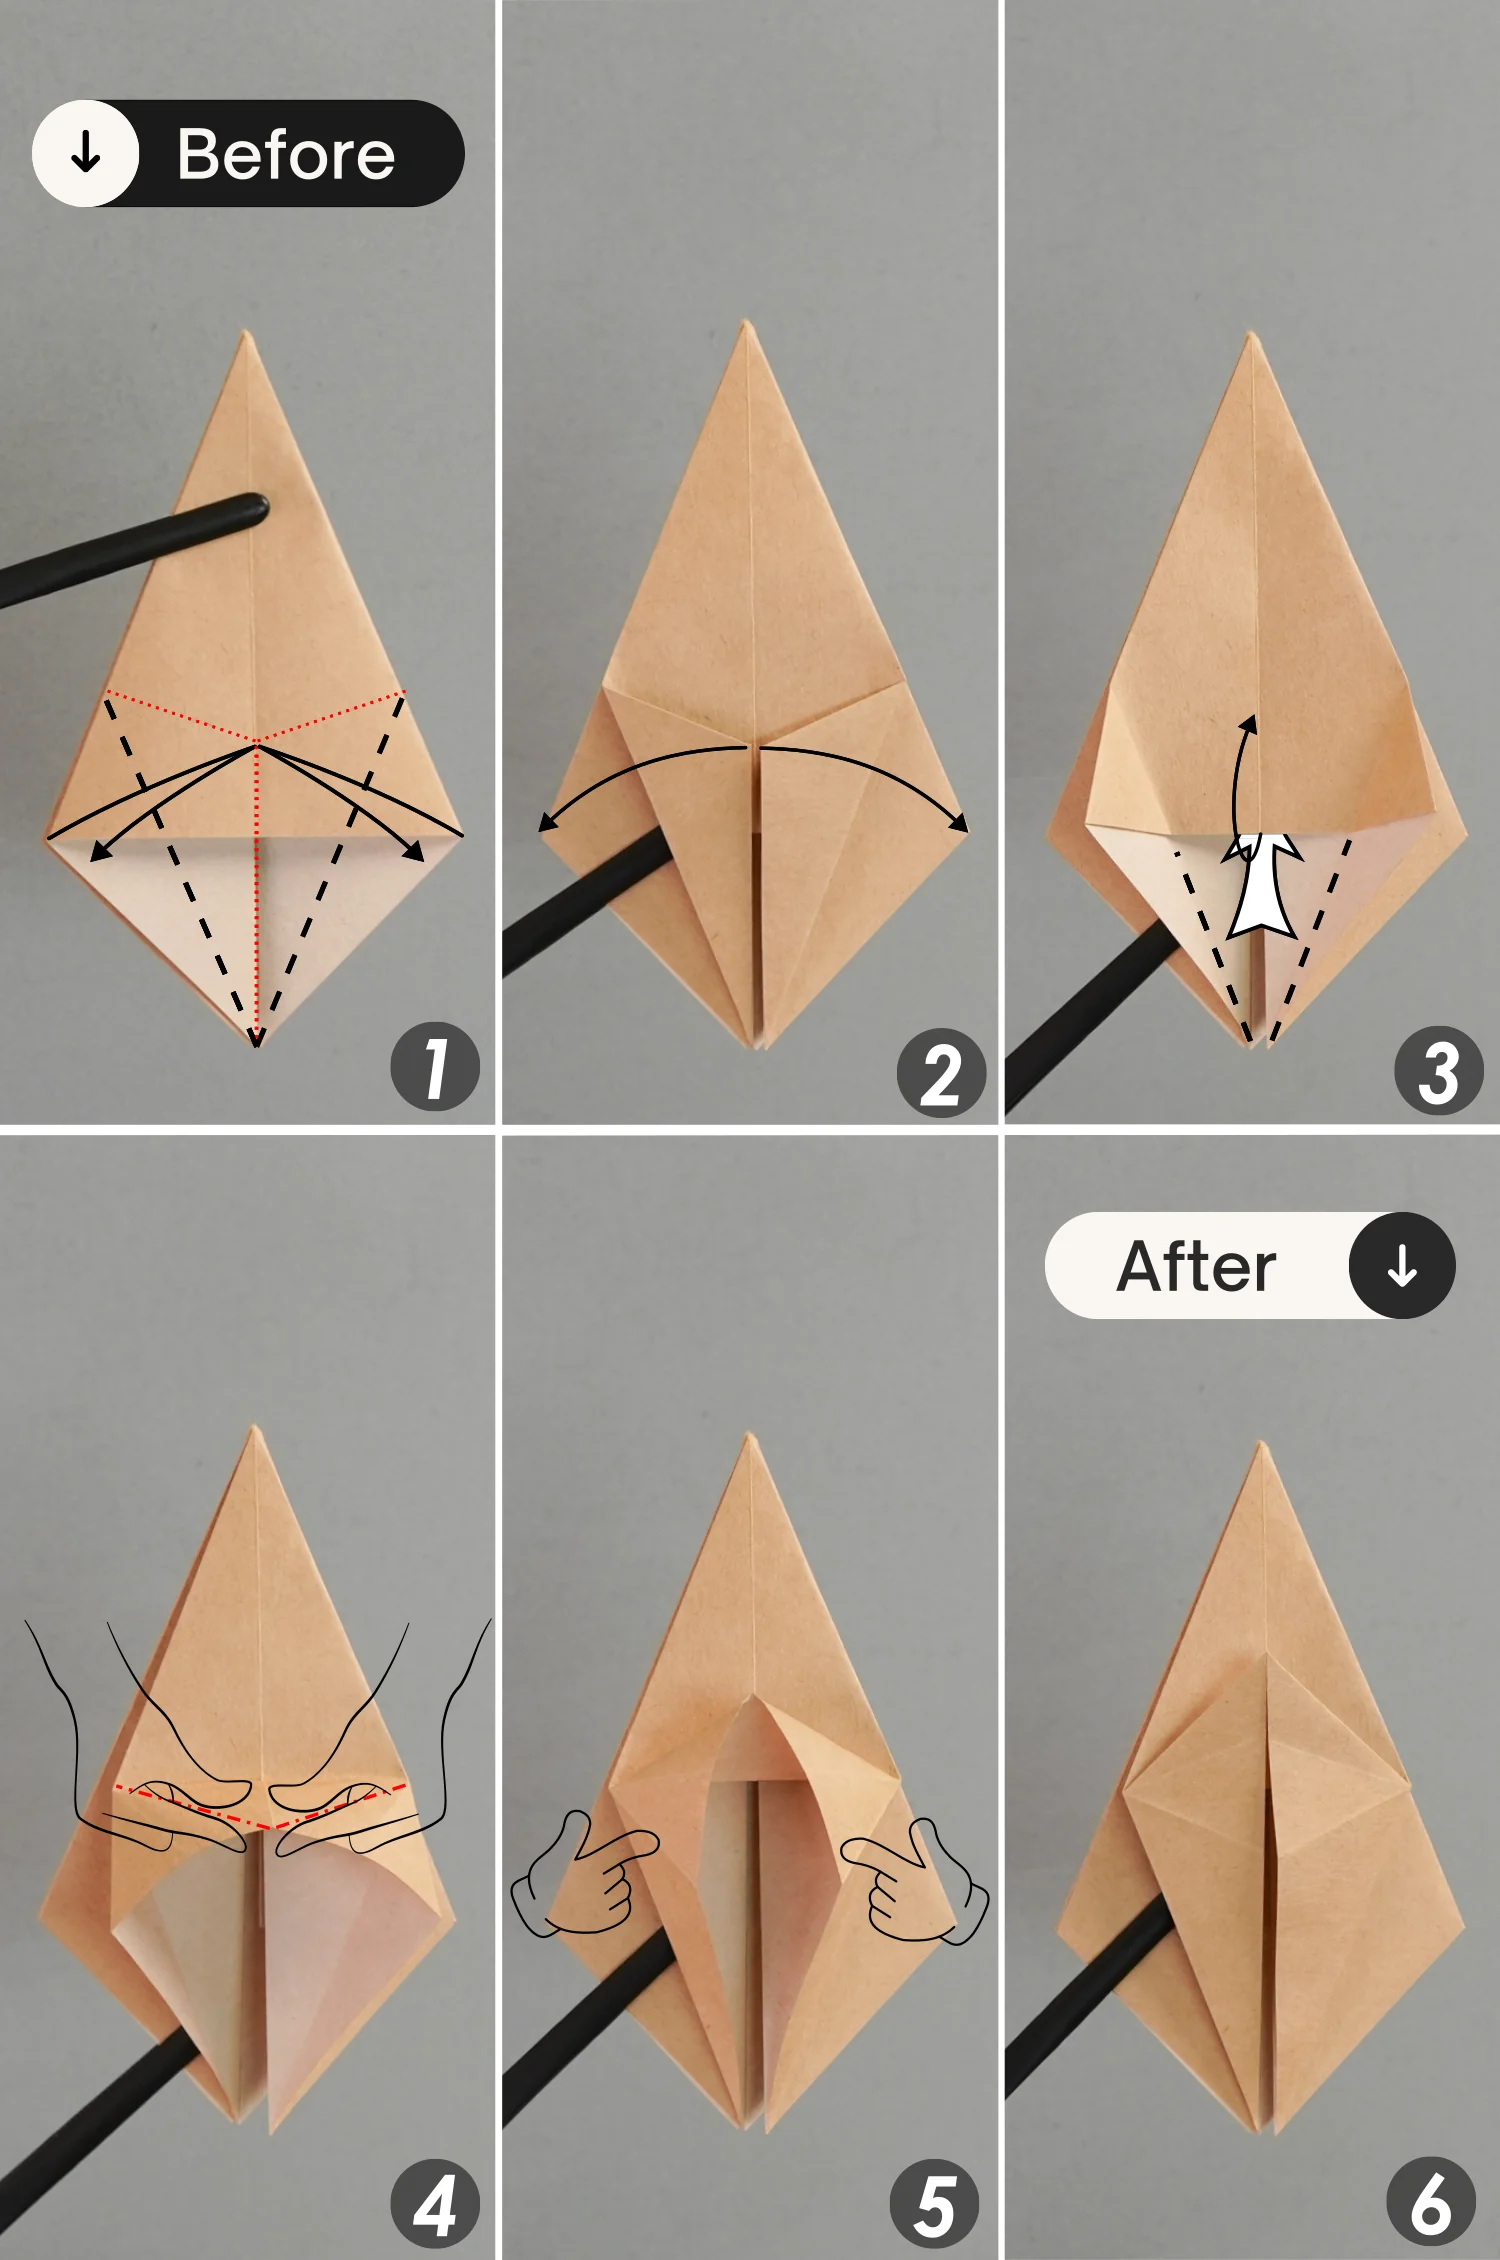
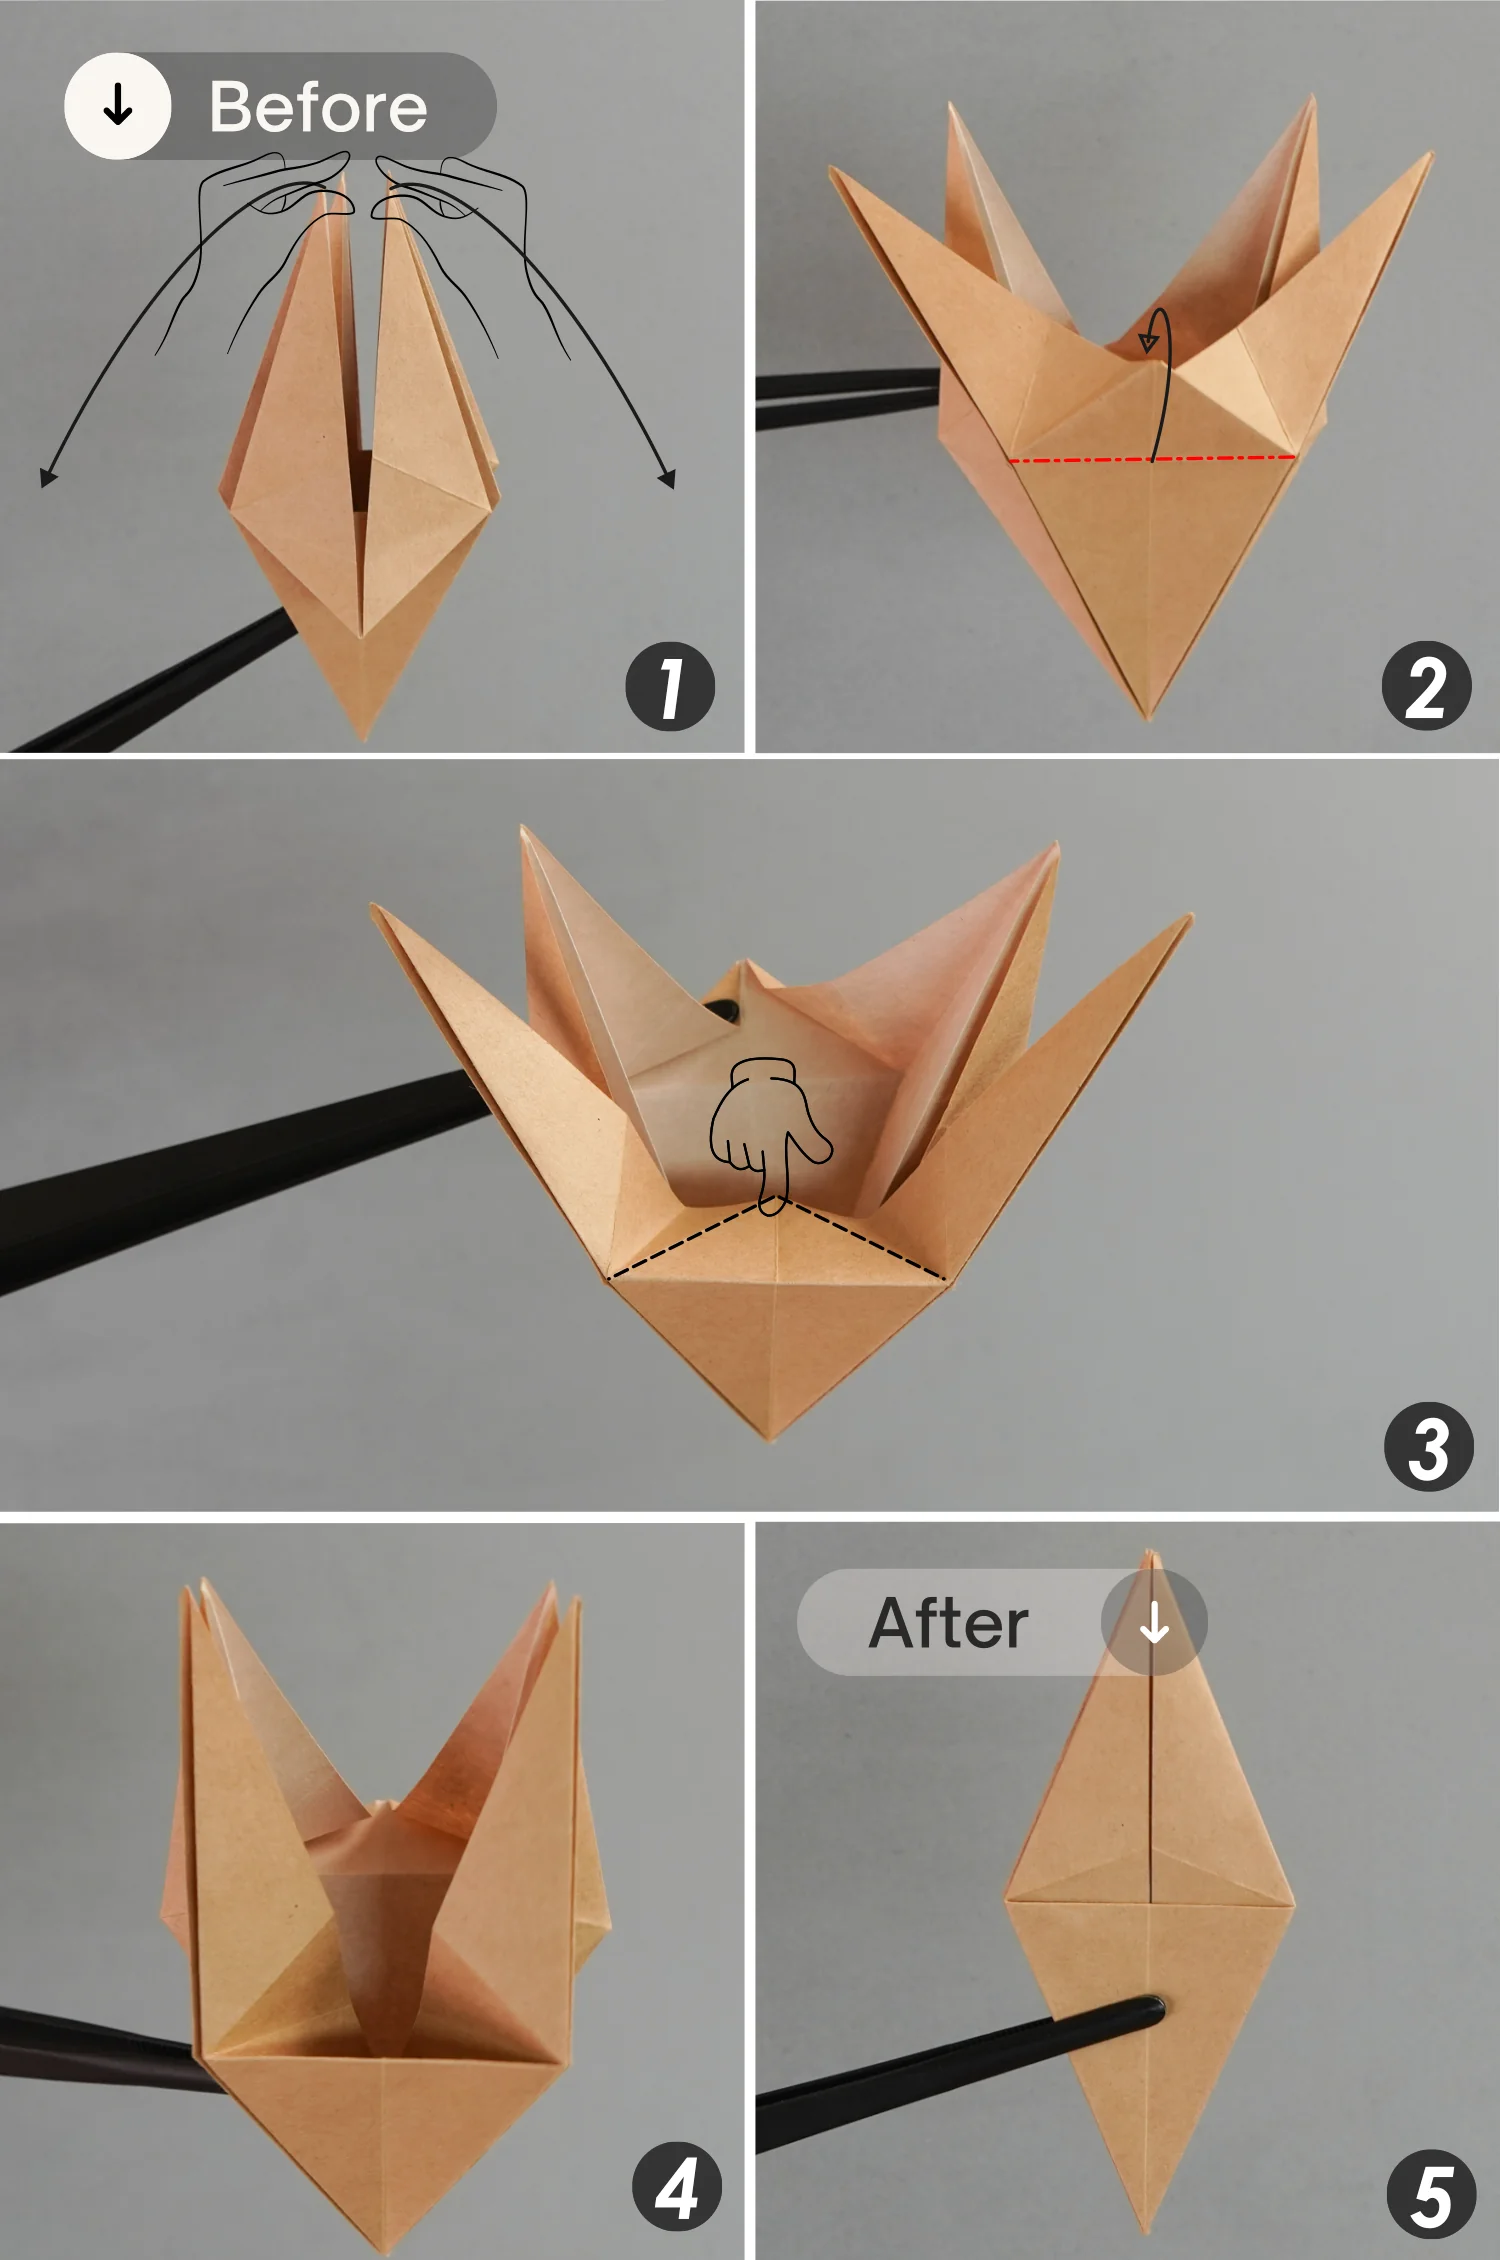
Step 14
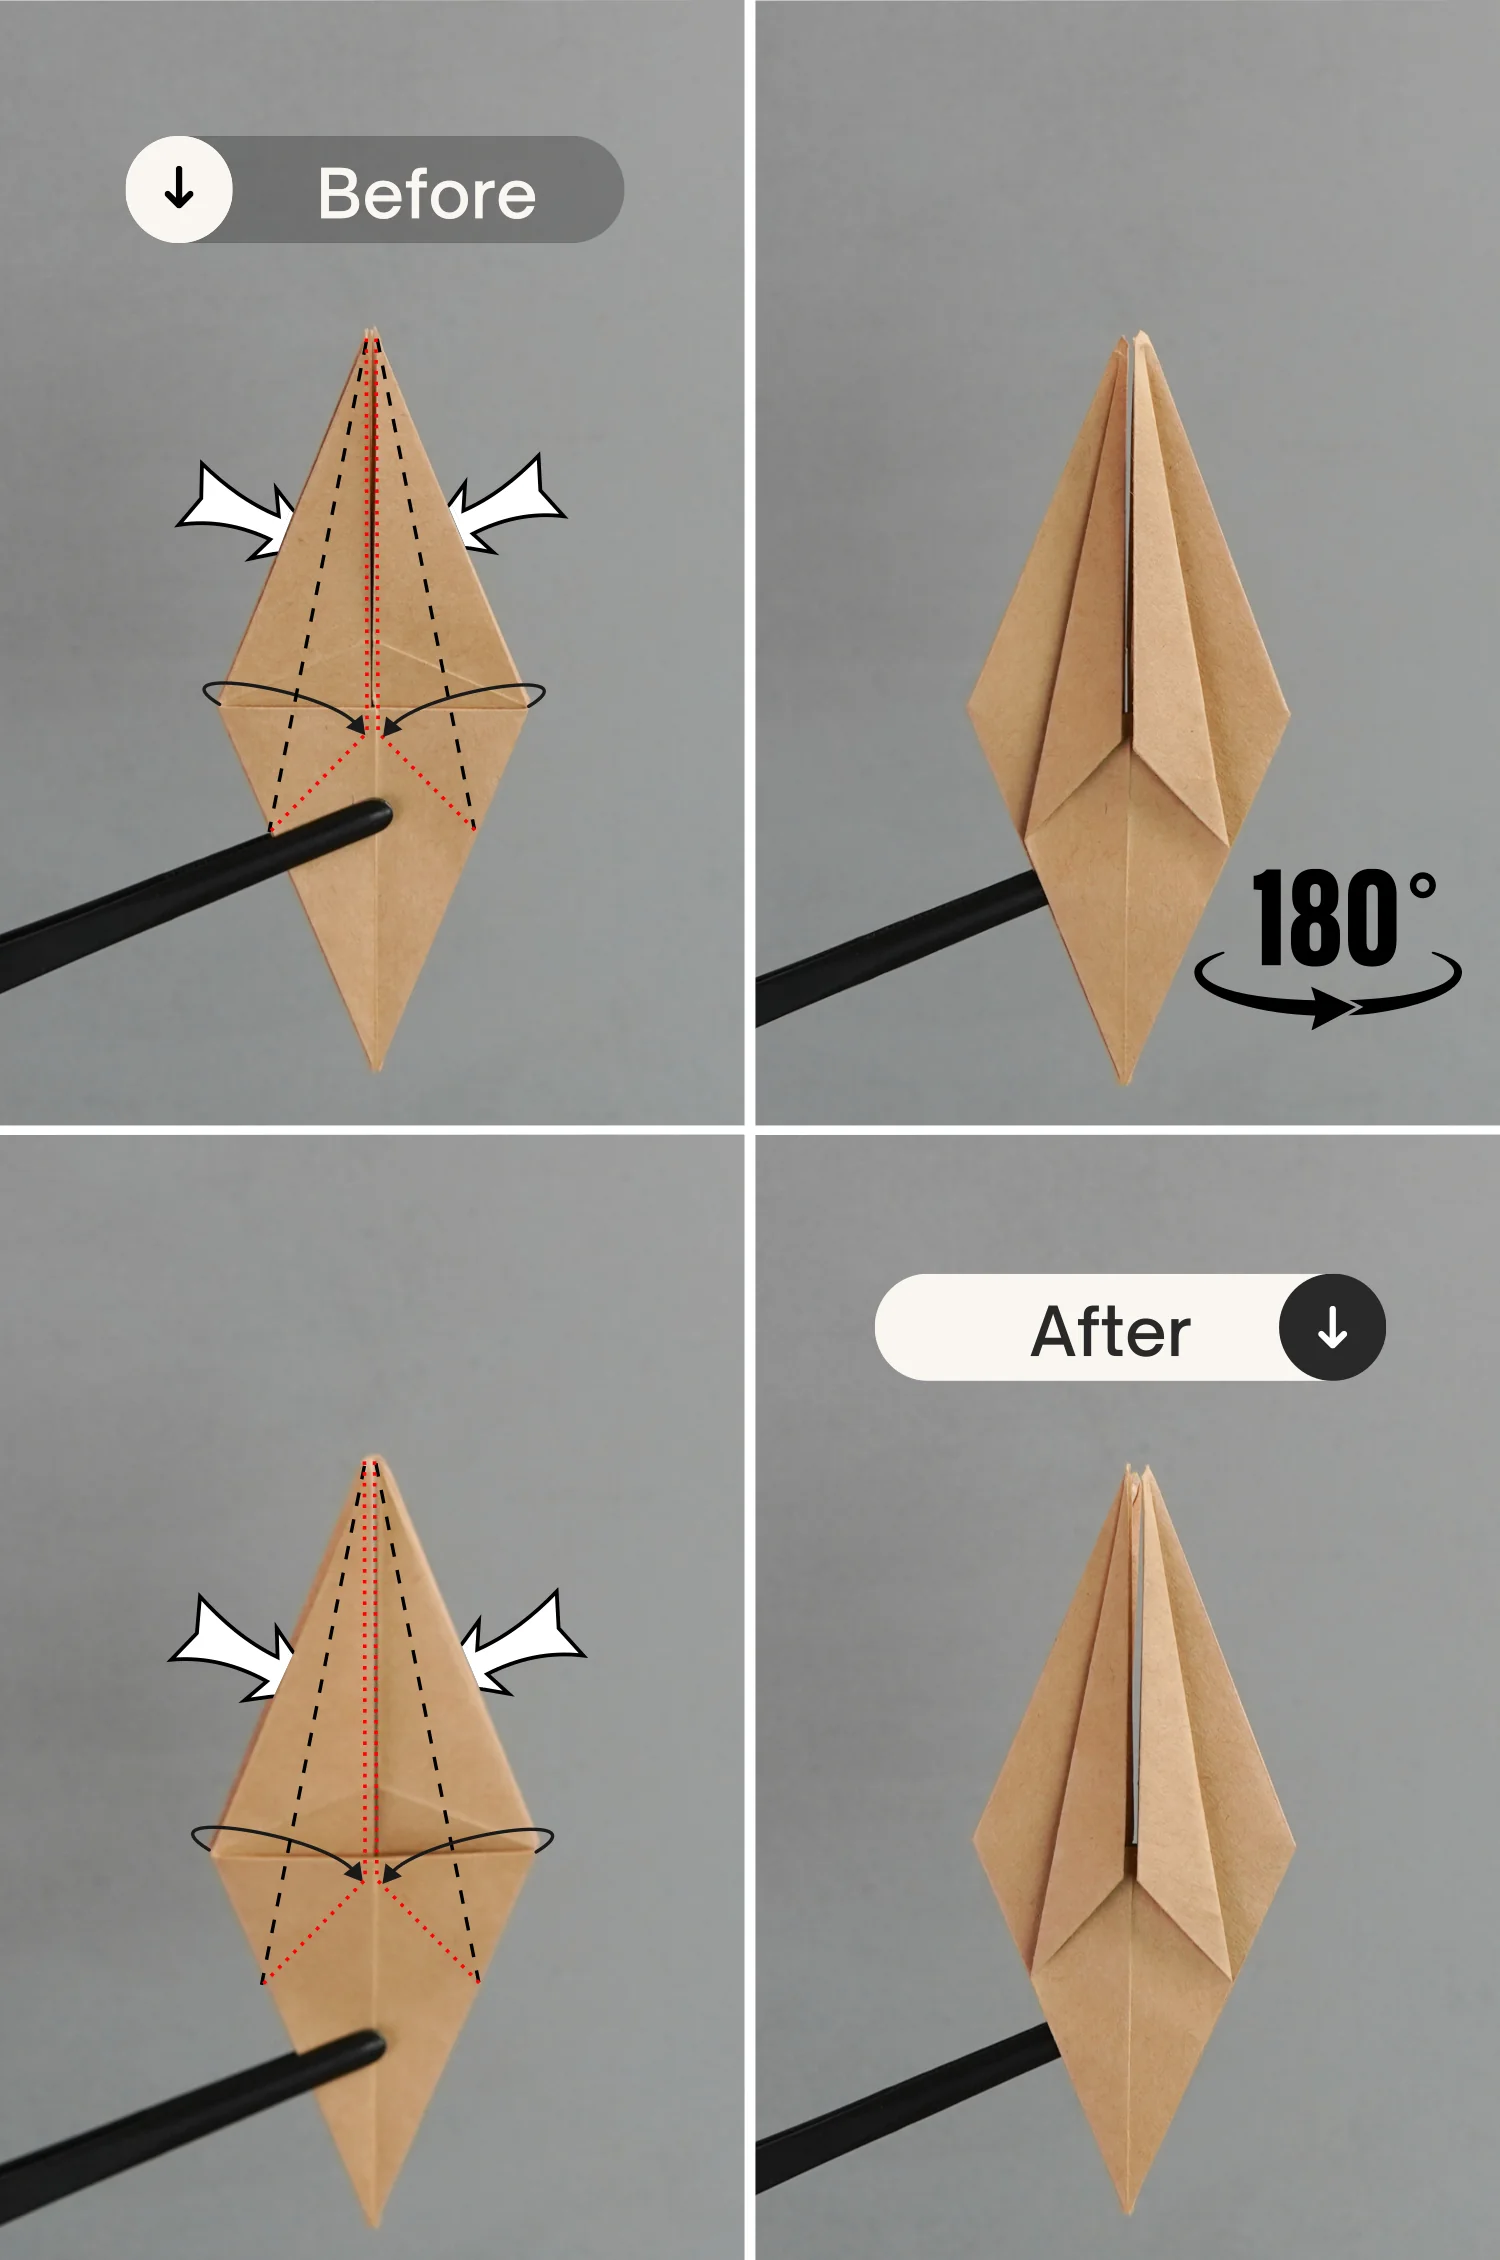
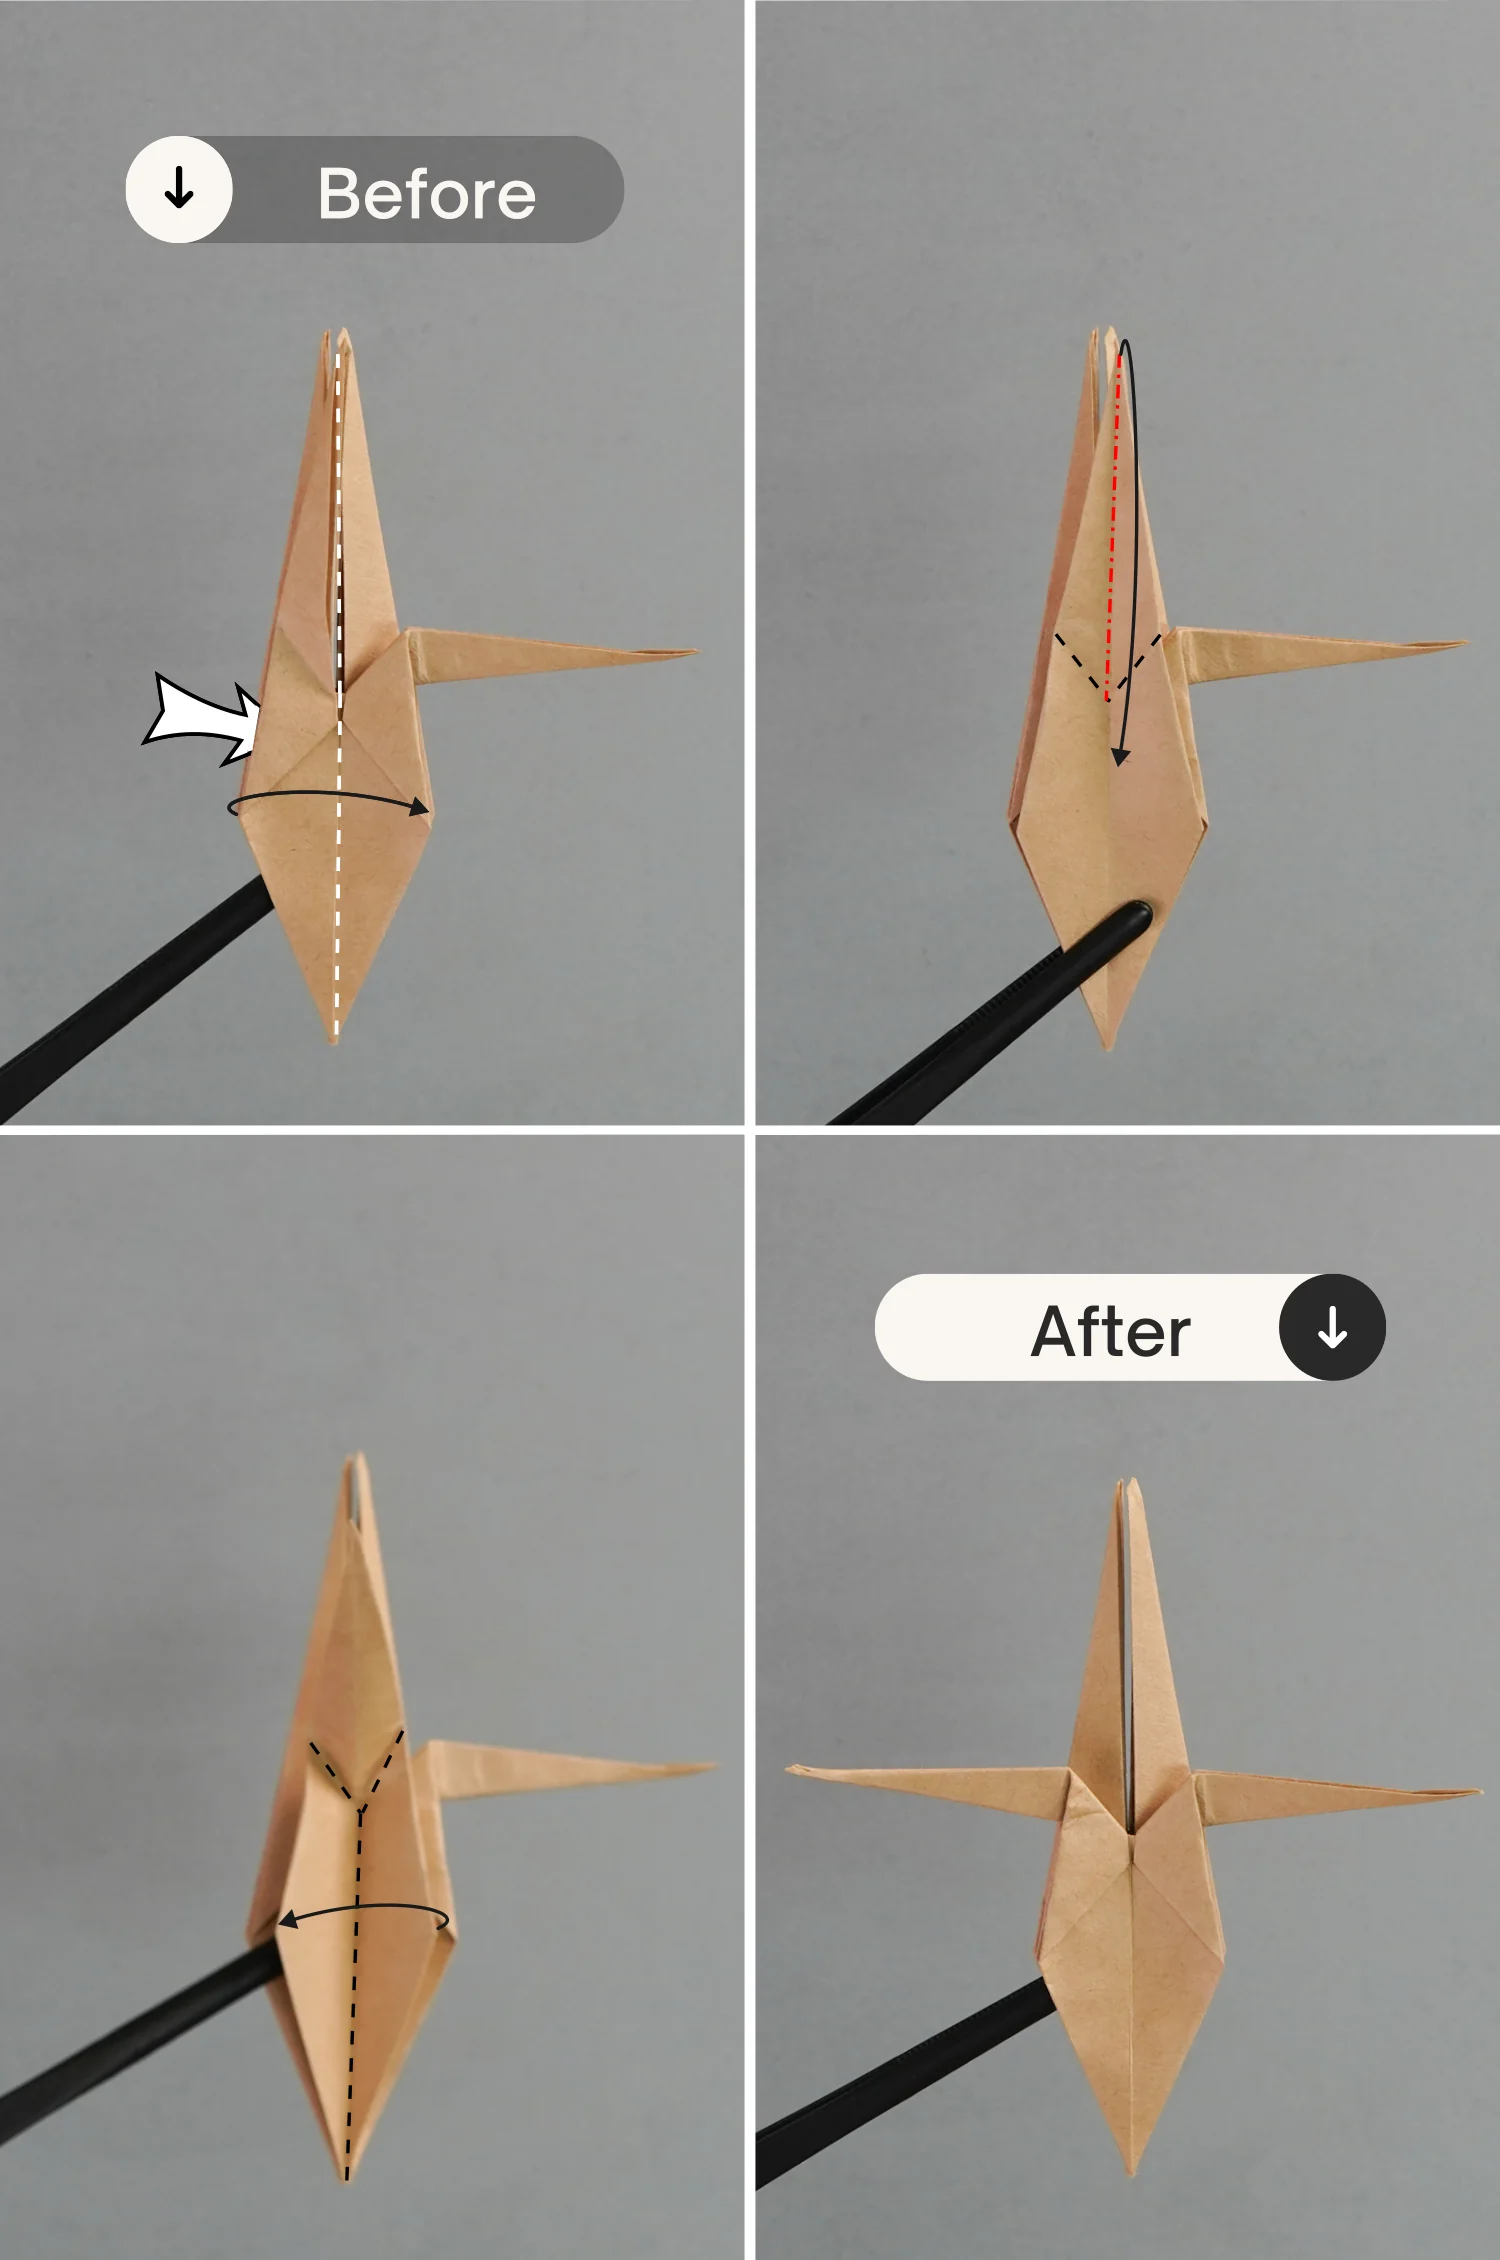
Fold the two bottom edges of the top layer to meet the vertical crease, then unfold.
Lift the top layer to open the pocket, transfer the two short oblique valley creases into mountain creases, push the left and right points toward the center with fingers, and finally flatten the pocket.
You’ll repeat this step three more times in the following steps.
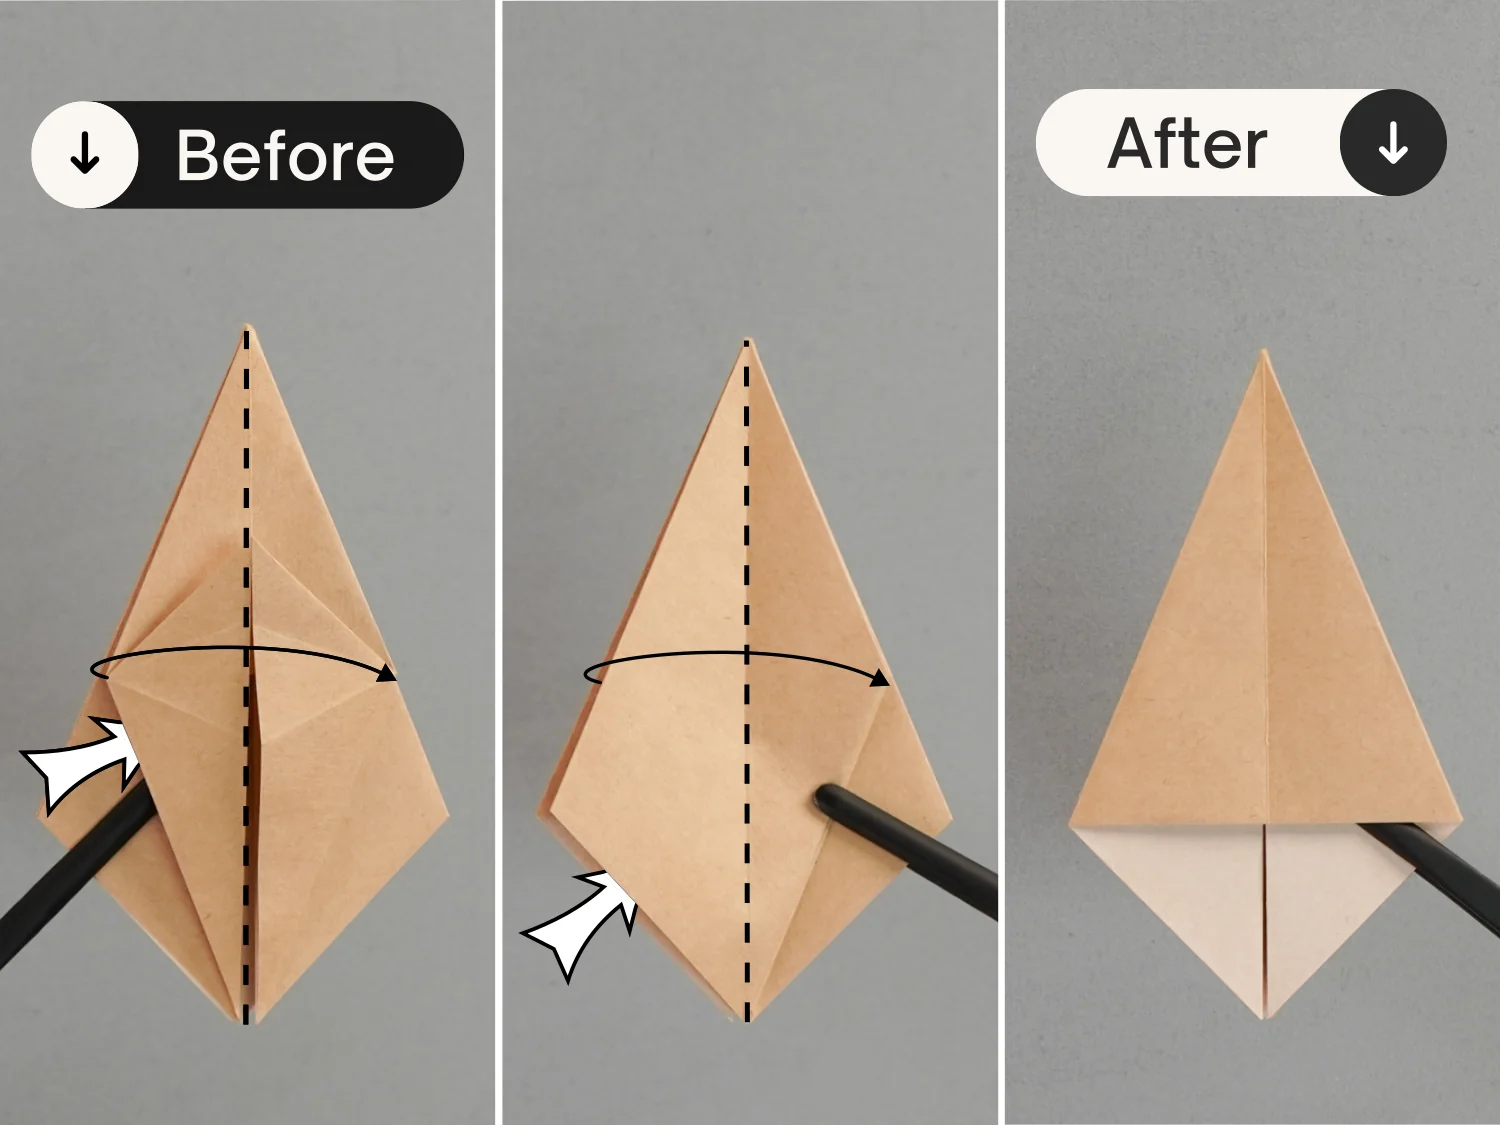
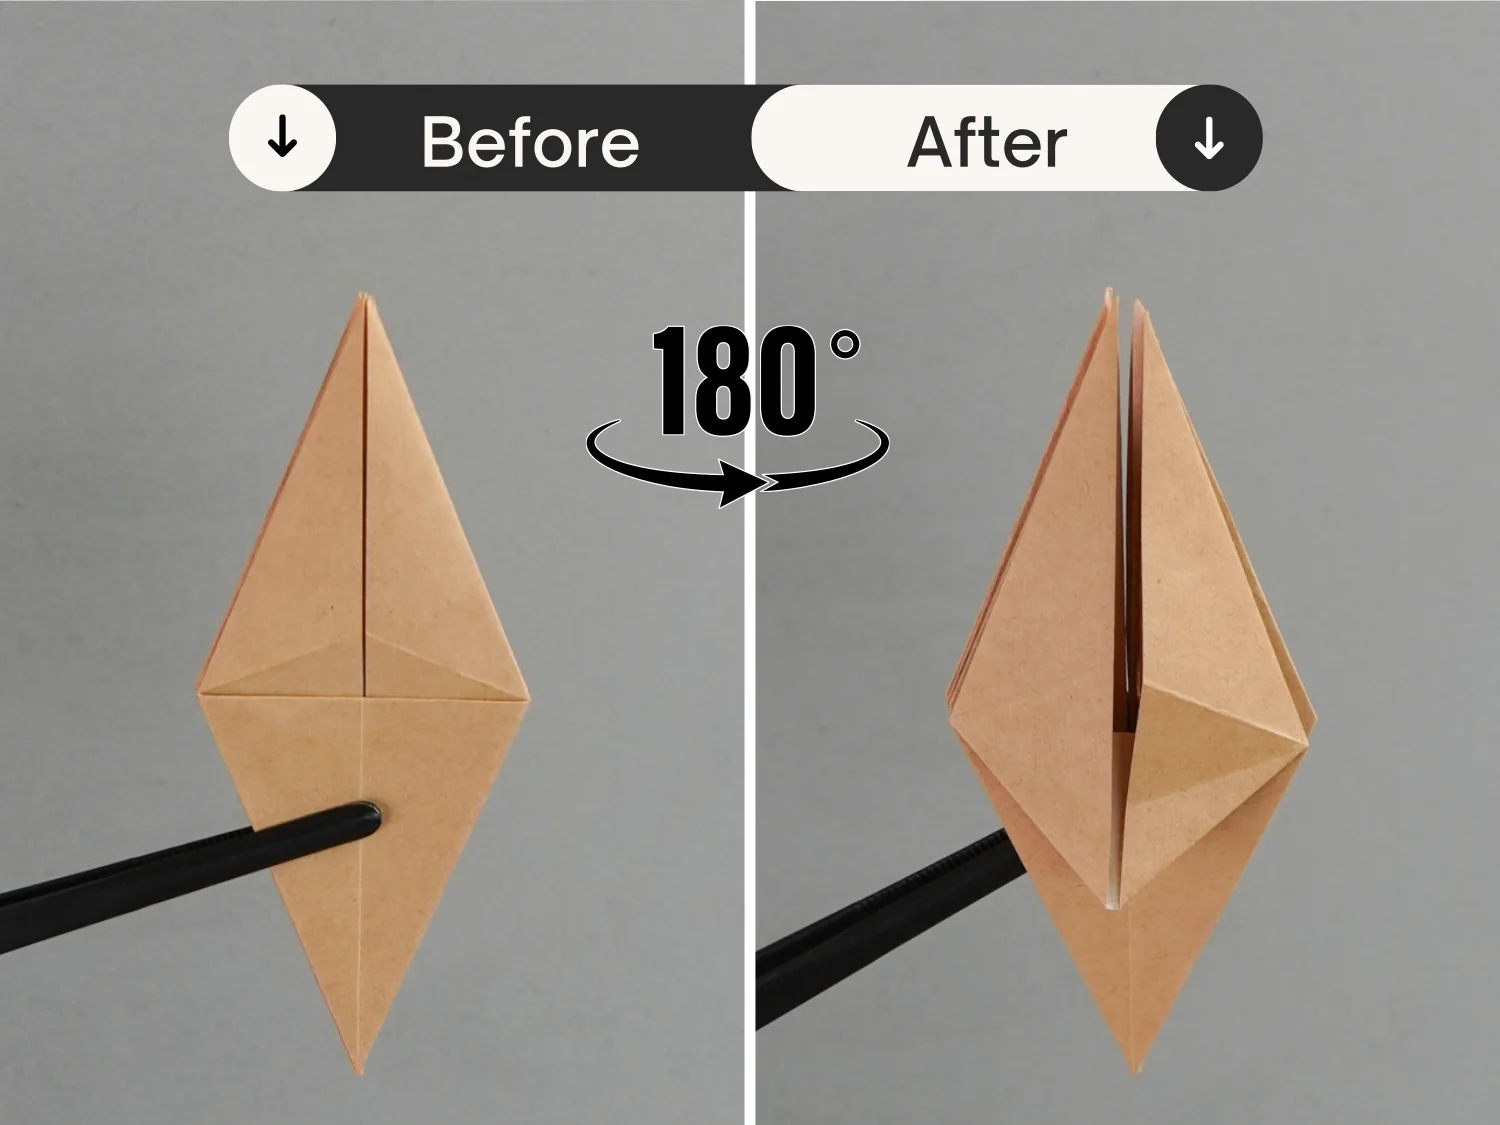
Step 15
Fold the top two layers on the left to the right along the middle vertical crease.
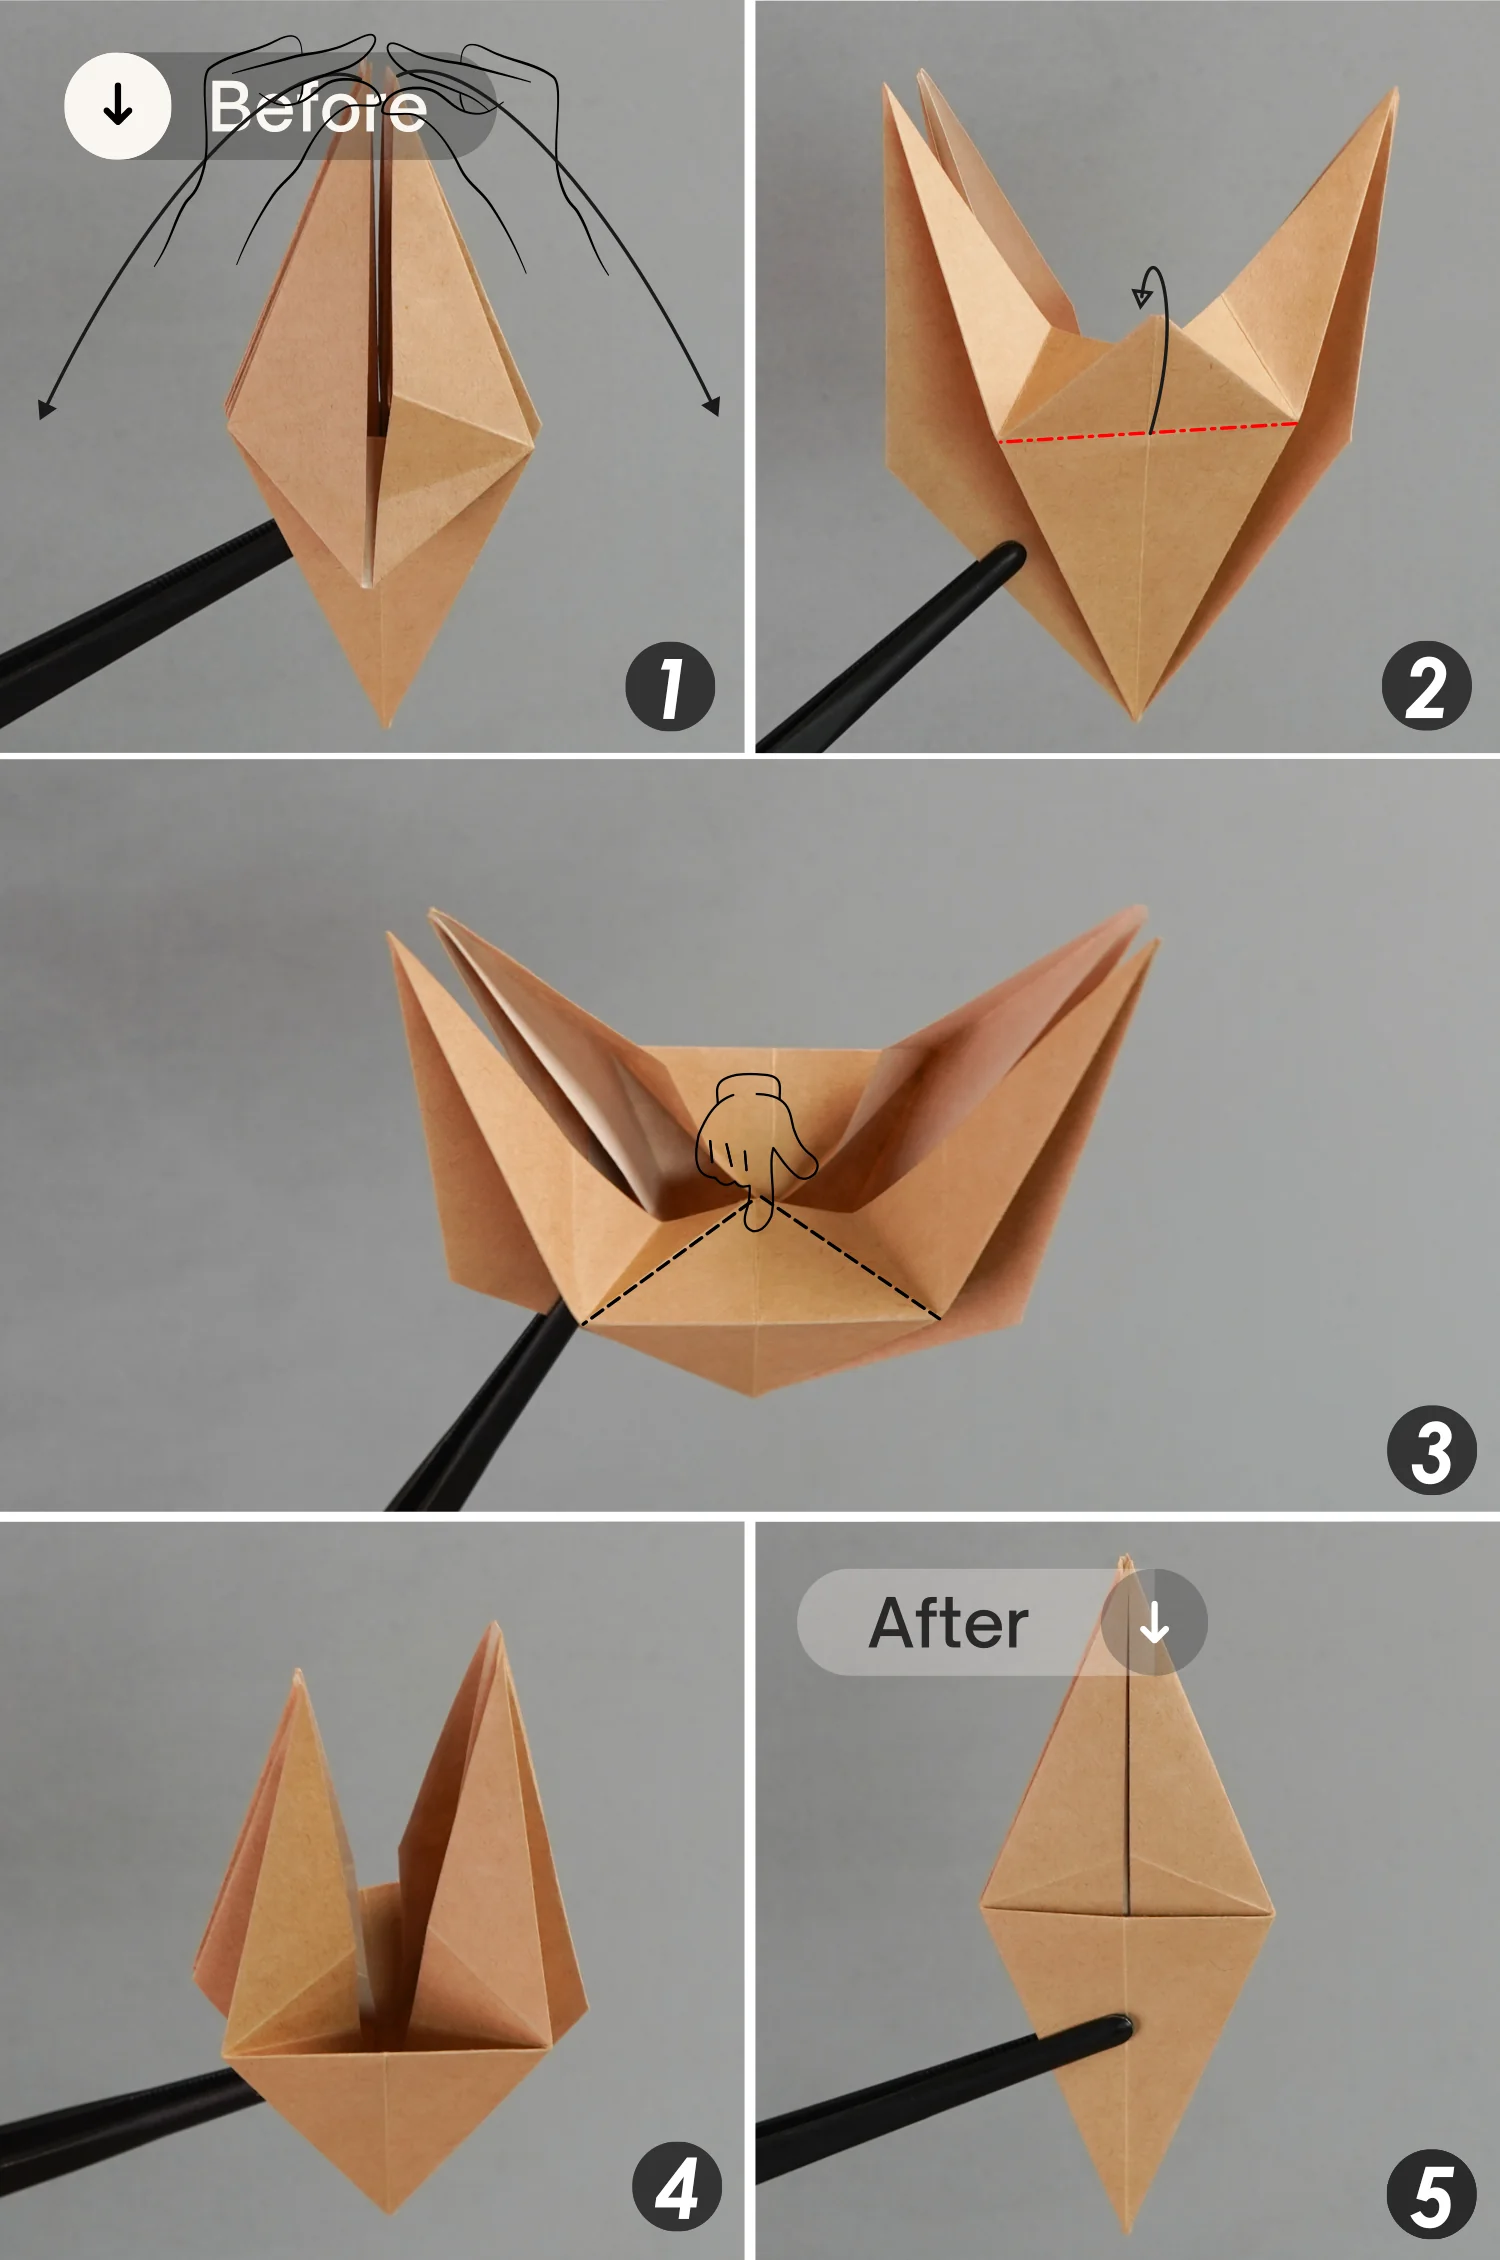
Step 16
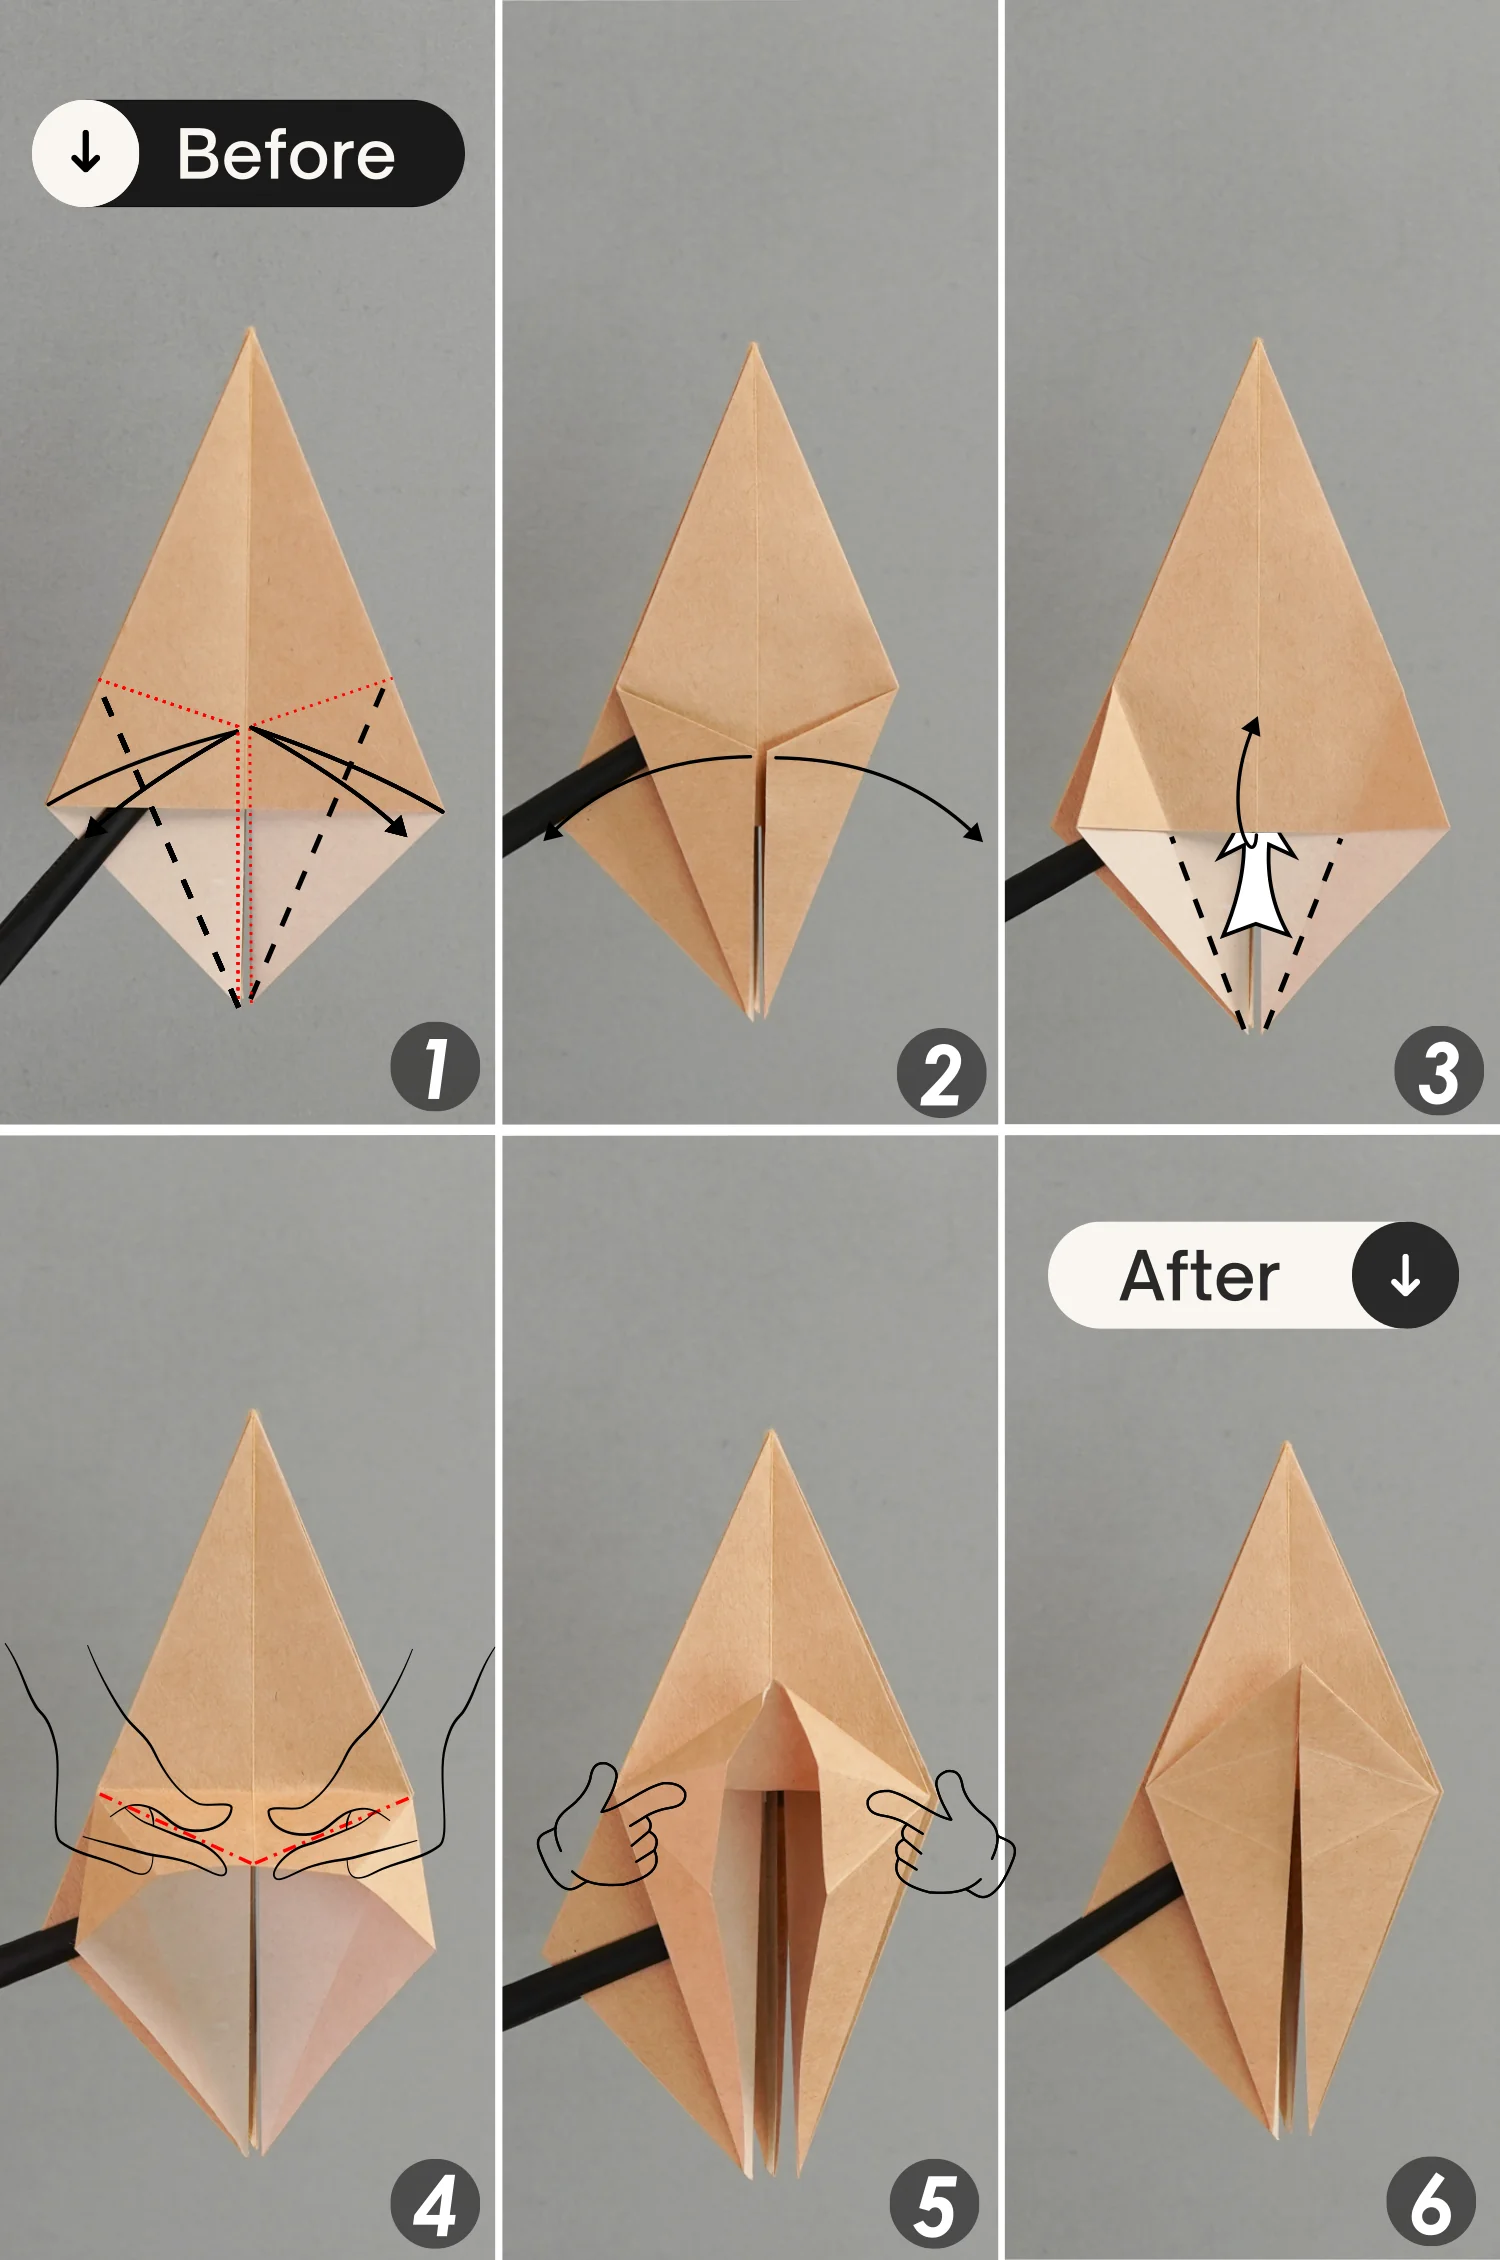
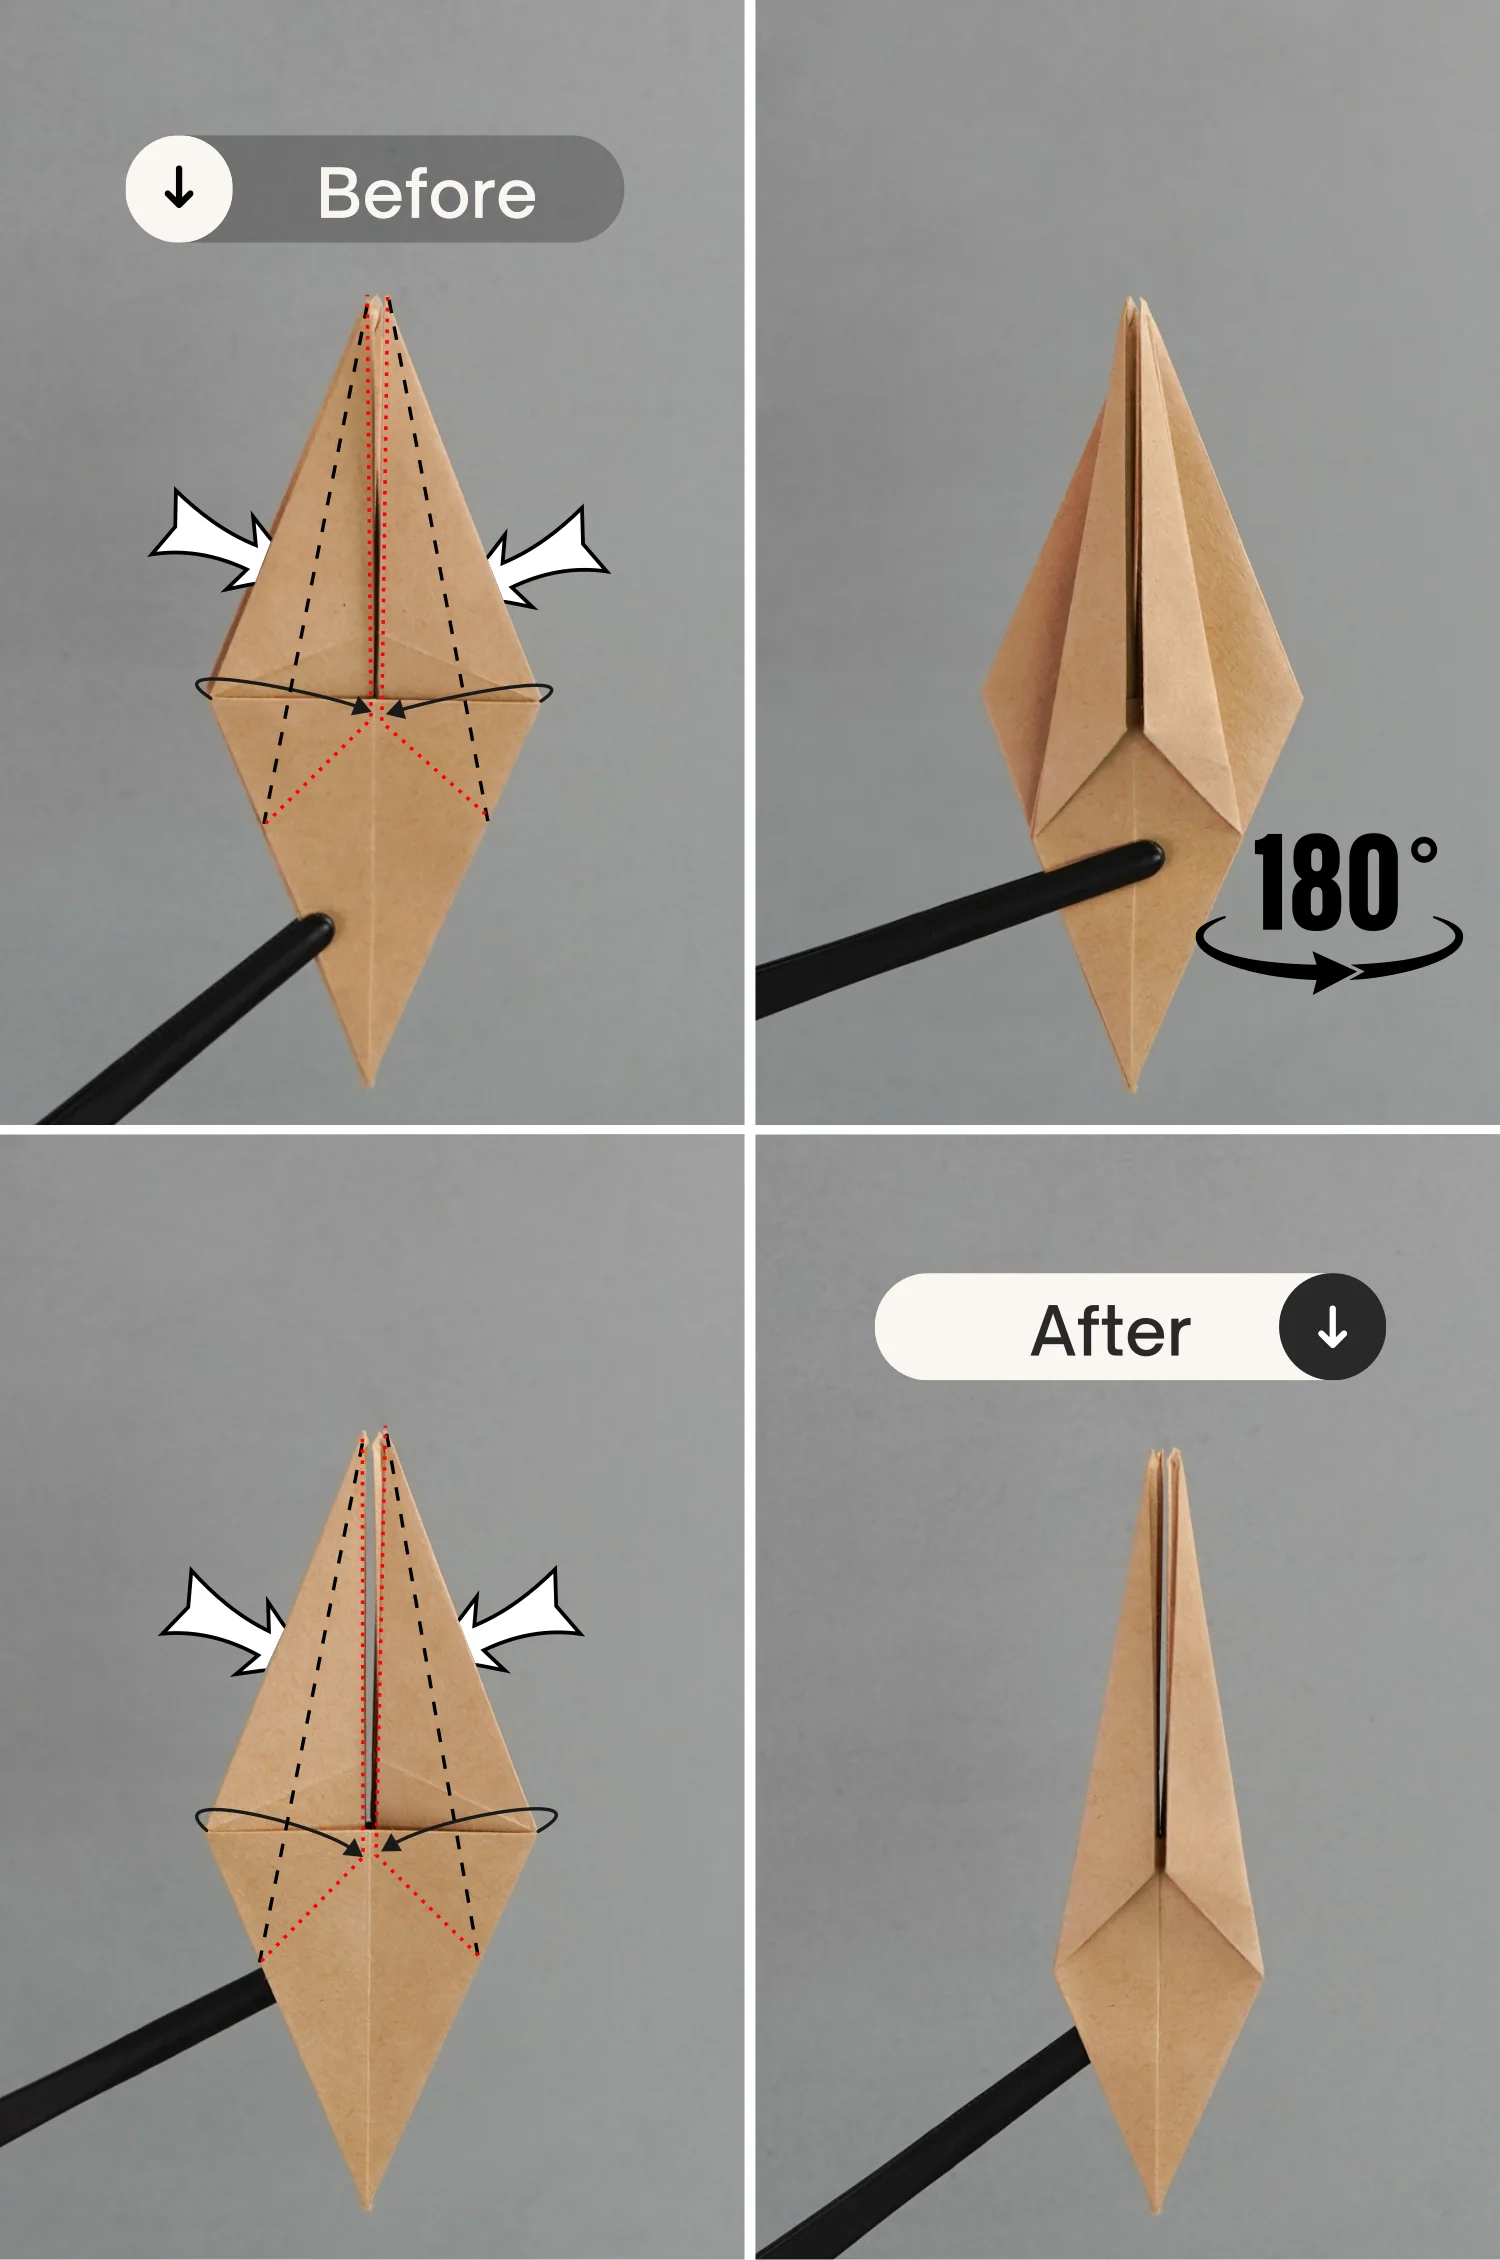
Repeat step 14.
Fold the two bottom edges to meet the center crease, then unfold.
Lift the top layer to open the pocket, transfer the two short oblique valley creases into mountain creases, push the left and right points toward the center with two fingers, and finally flatten the pocket.

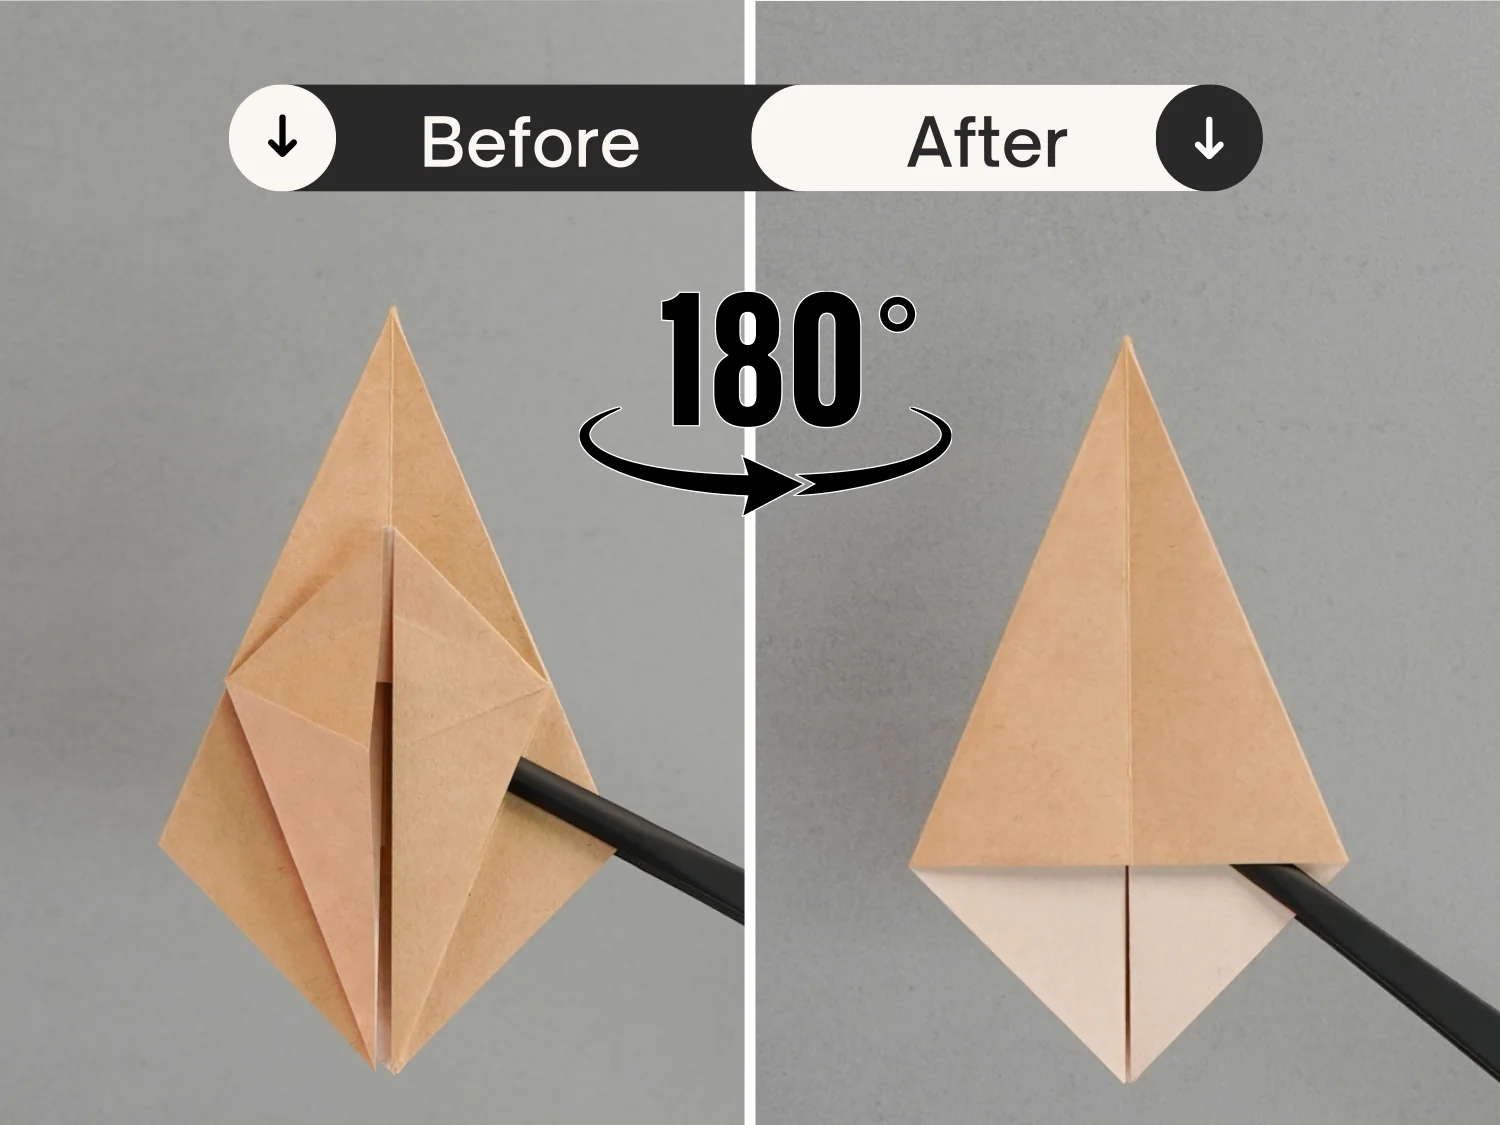
Step 17
Turn over the paper
Step 18
Repeat step 14.
Step 19
Fold the top two layers on the left to the right along the middle vertical crease.

Step 20
Repeat step 14.
Step 21
Fold another piece of paper into the same shape following the steps above.

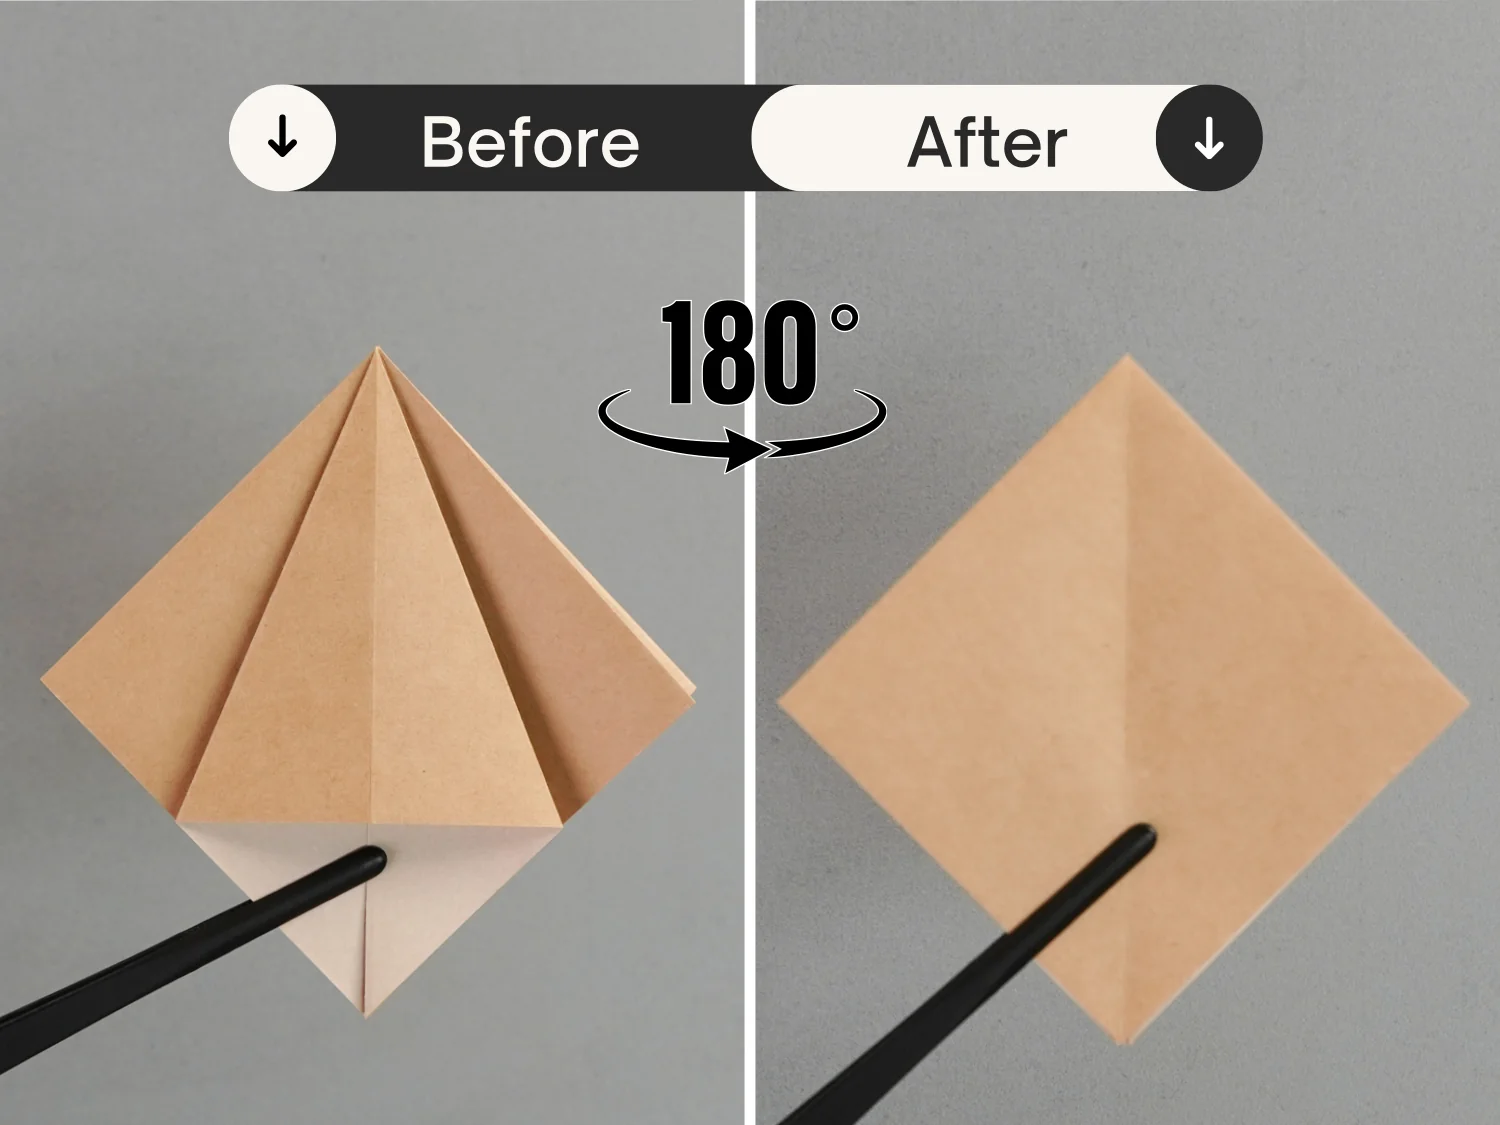
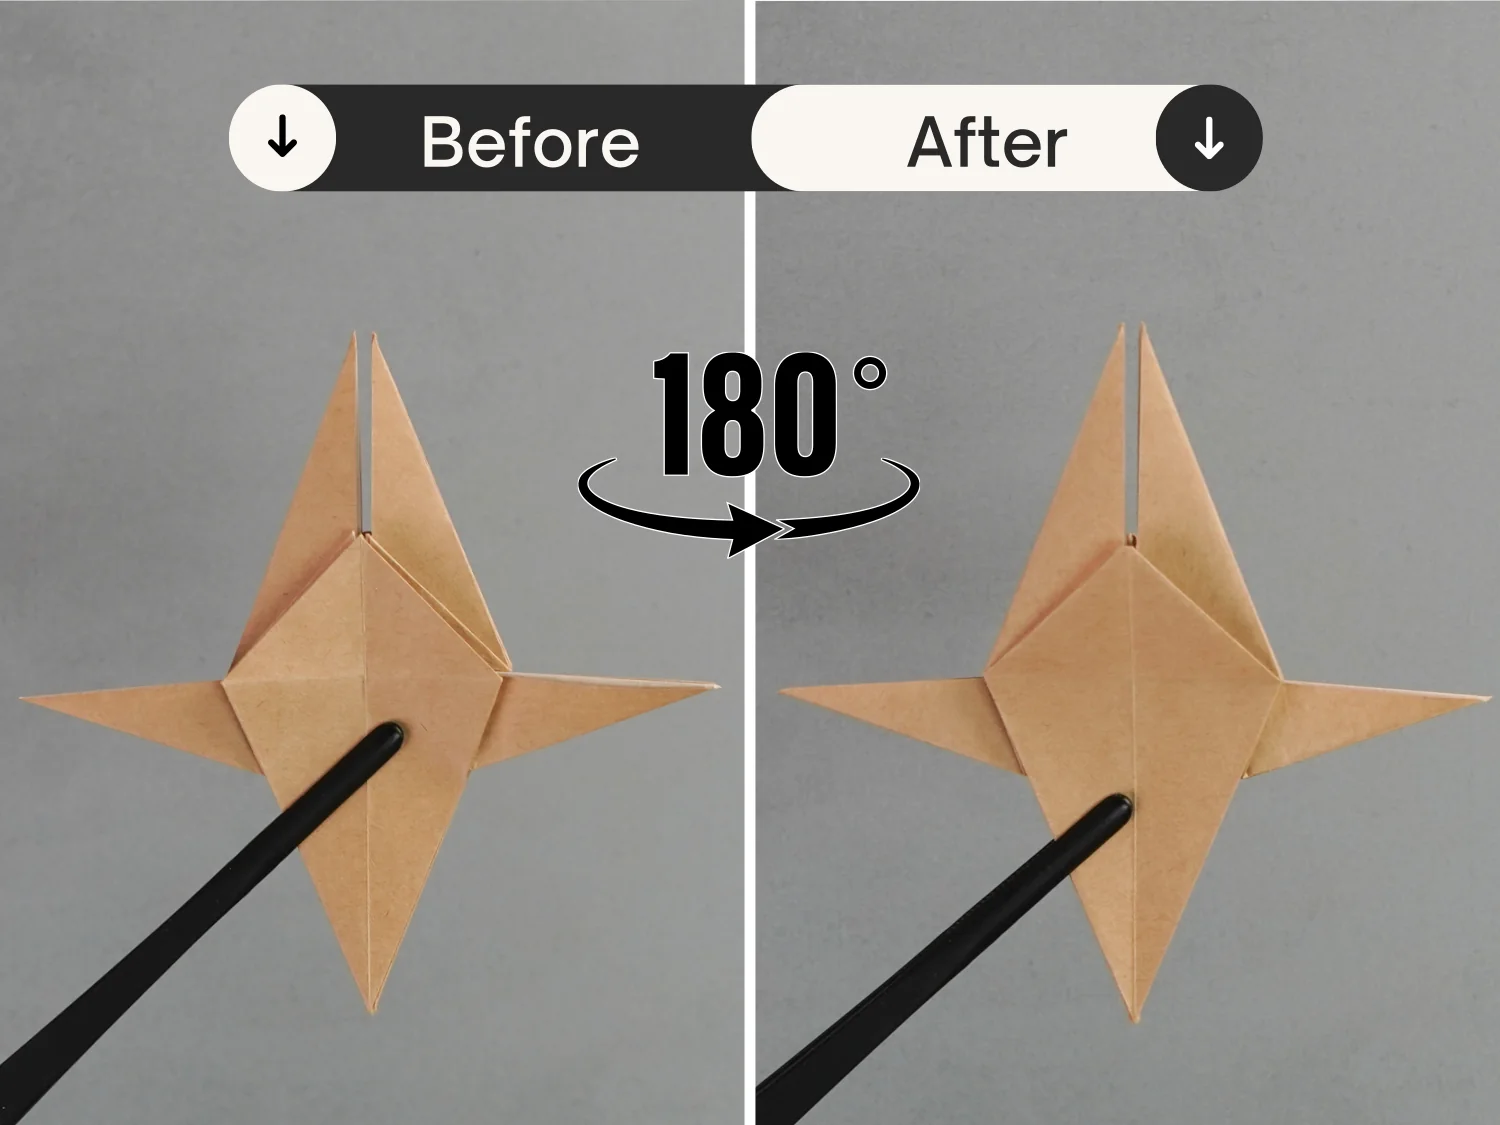
Step 22
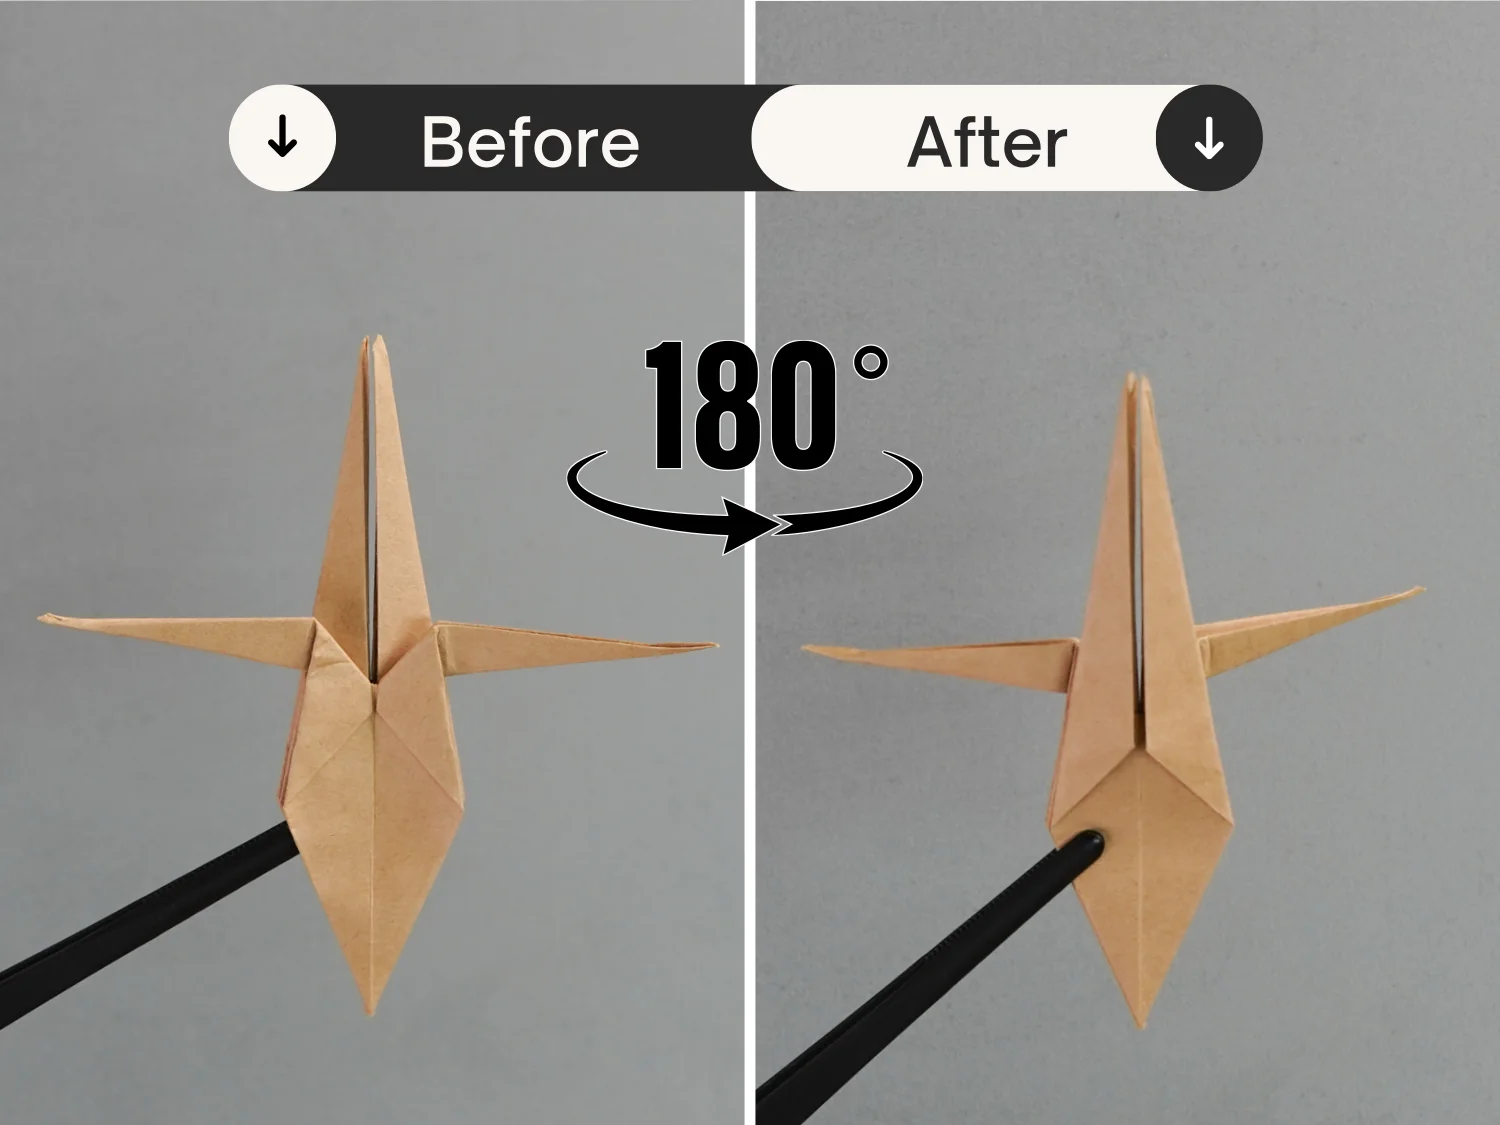
Take out one of the papers, we are going to make the body and back legs part.
Rotate it 180 degrees clockwise.

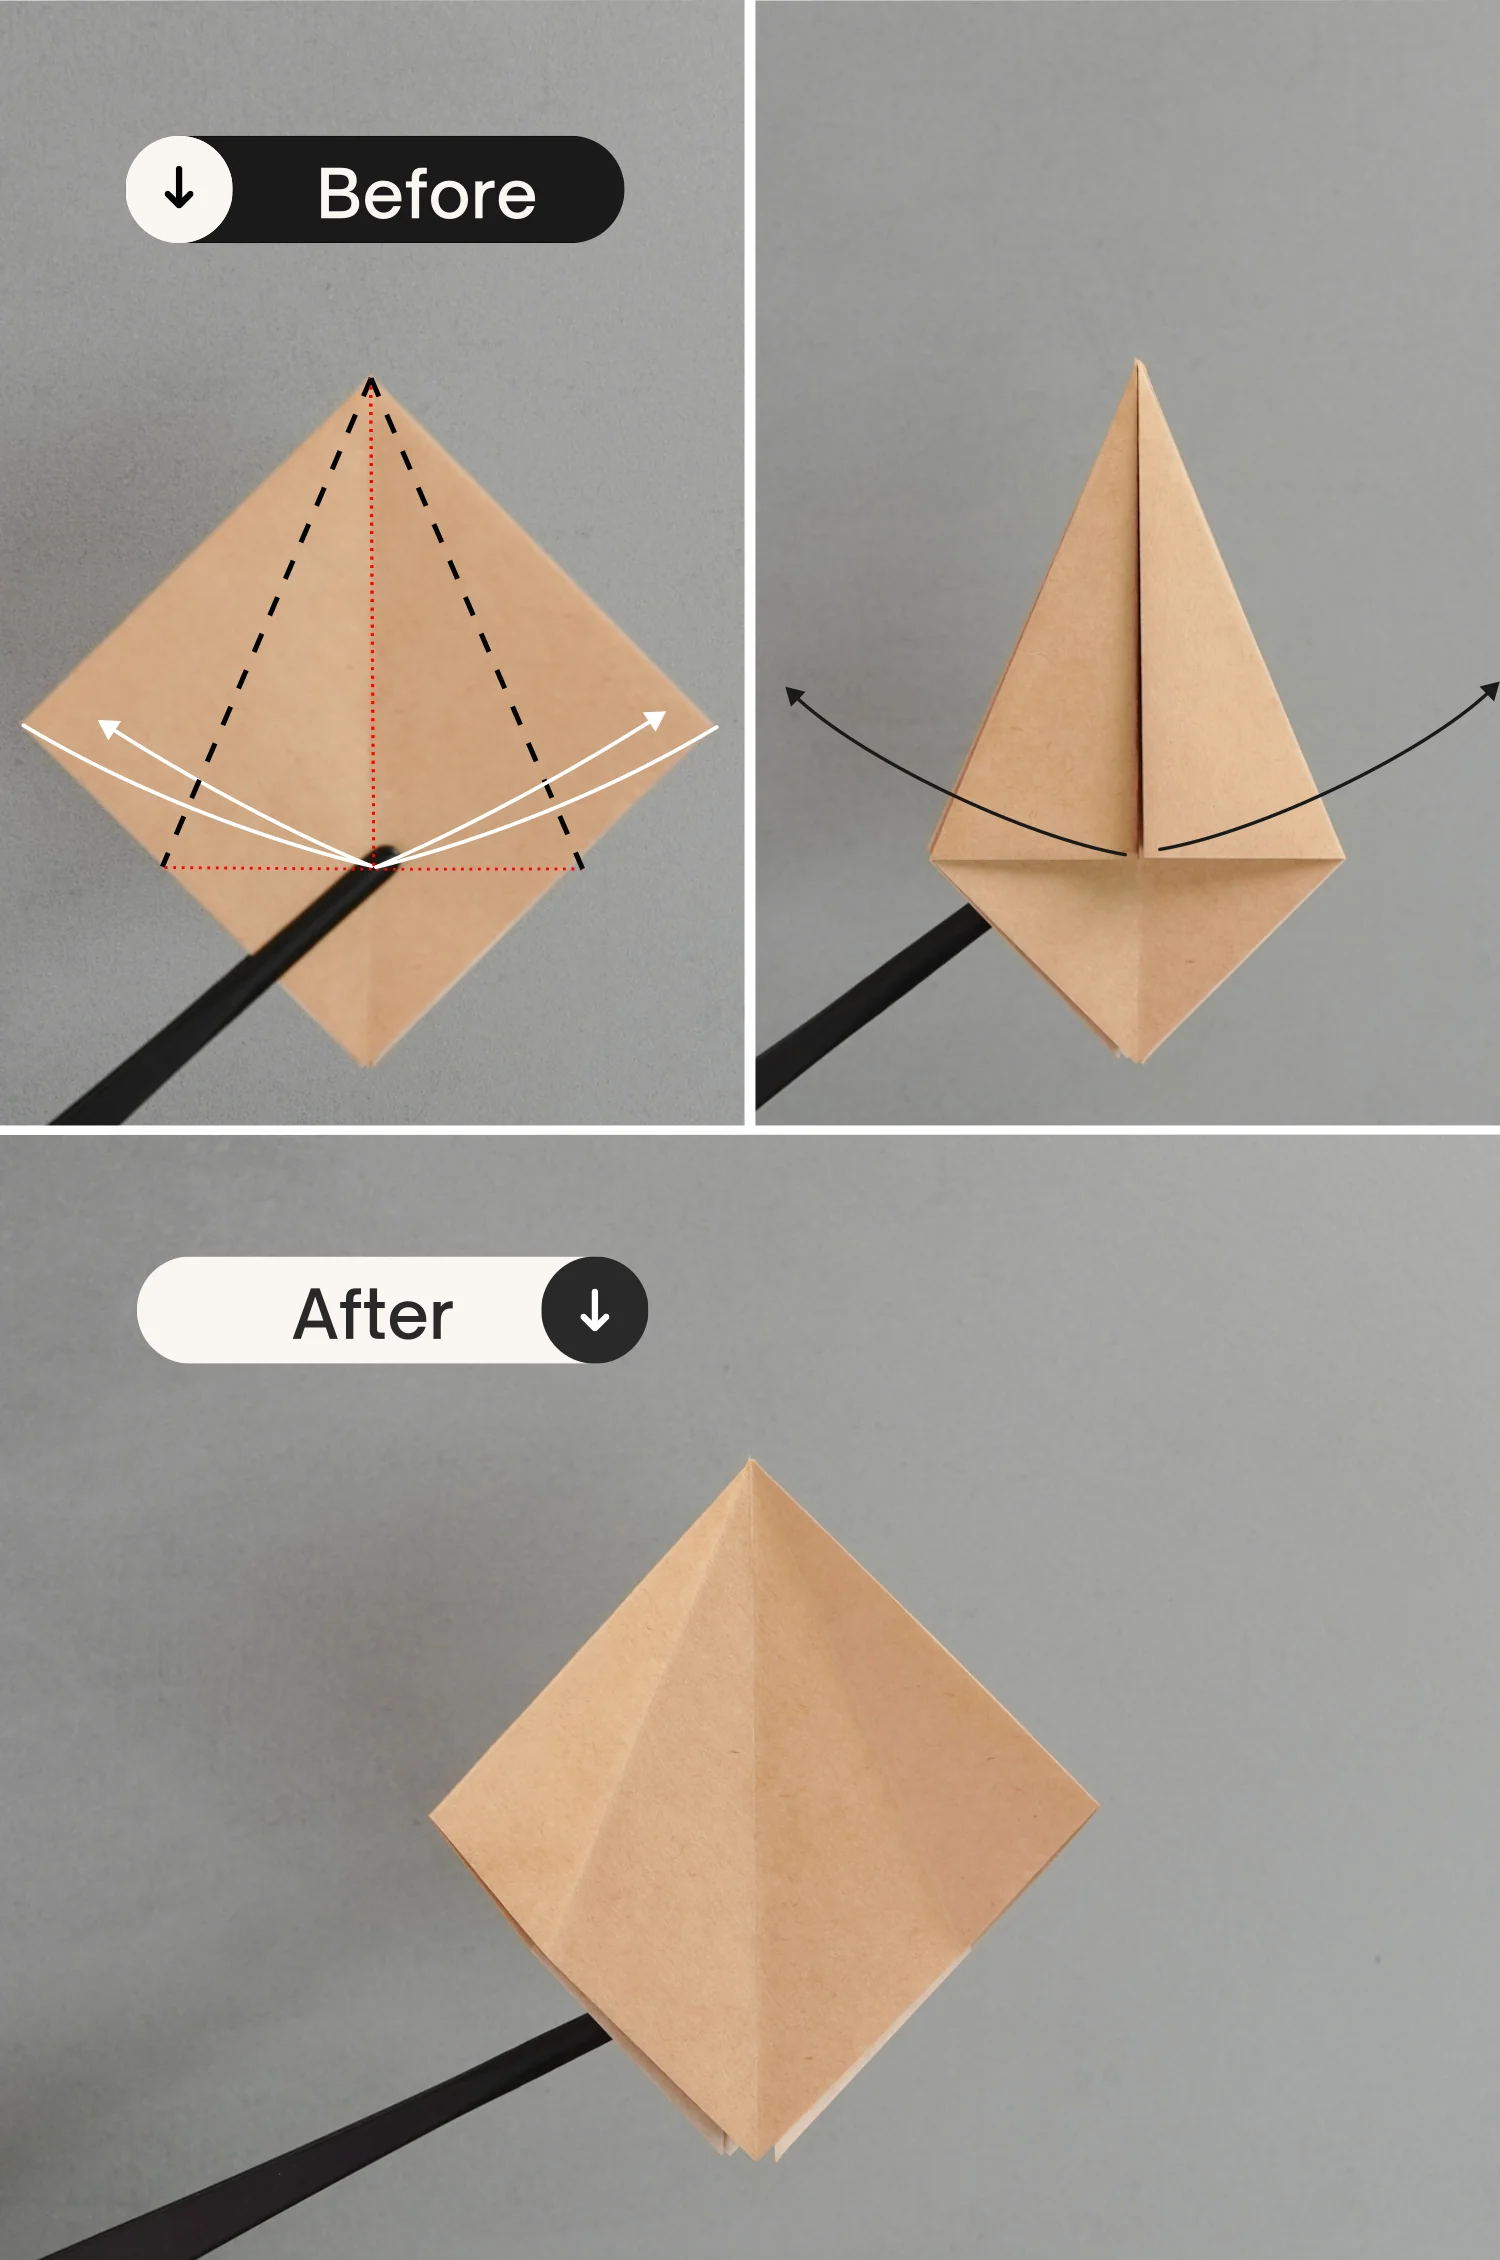
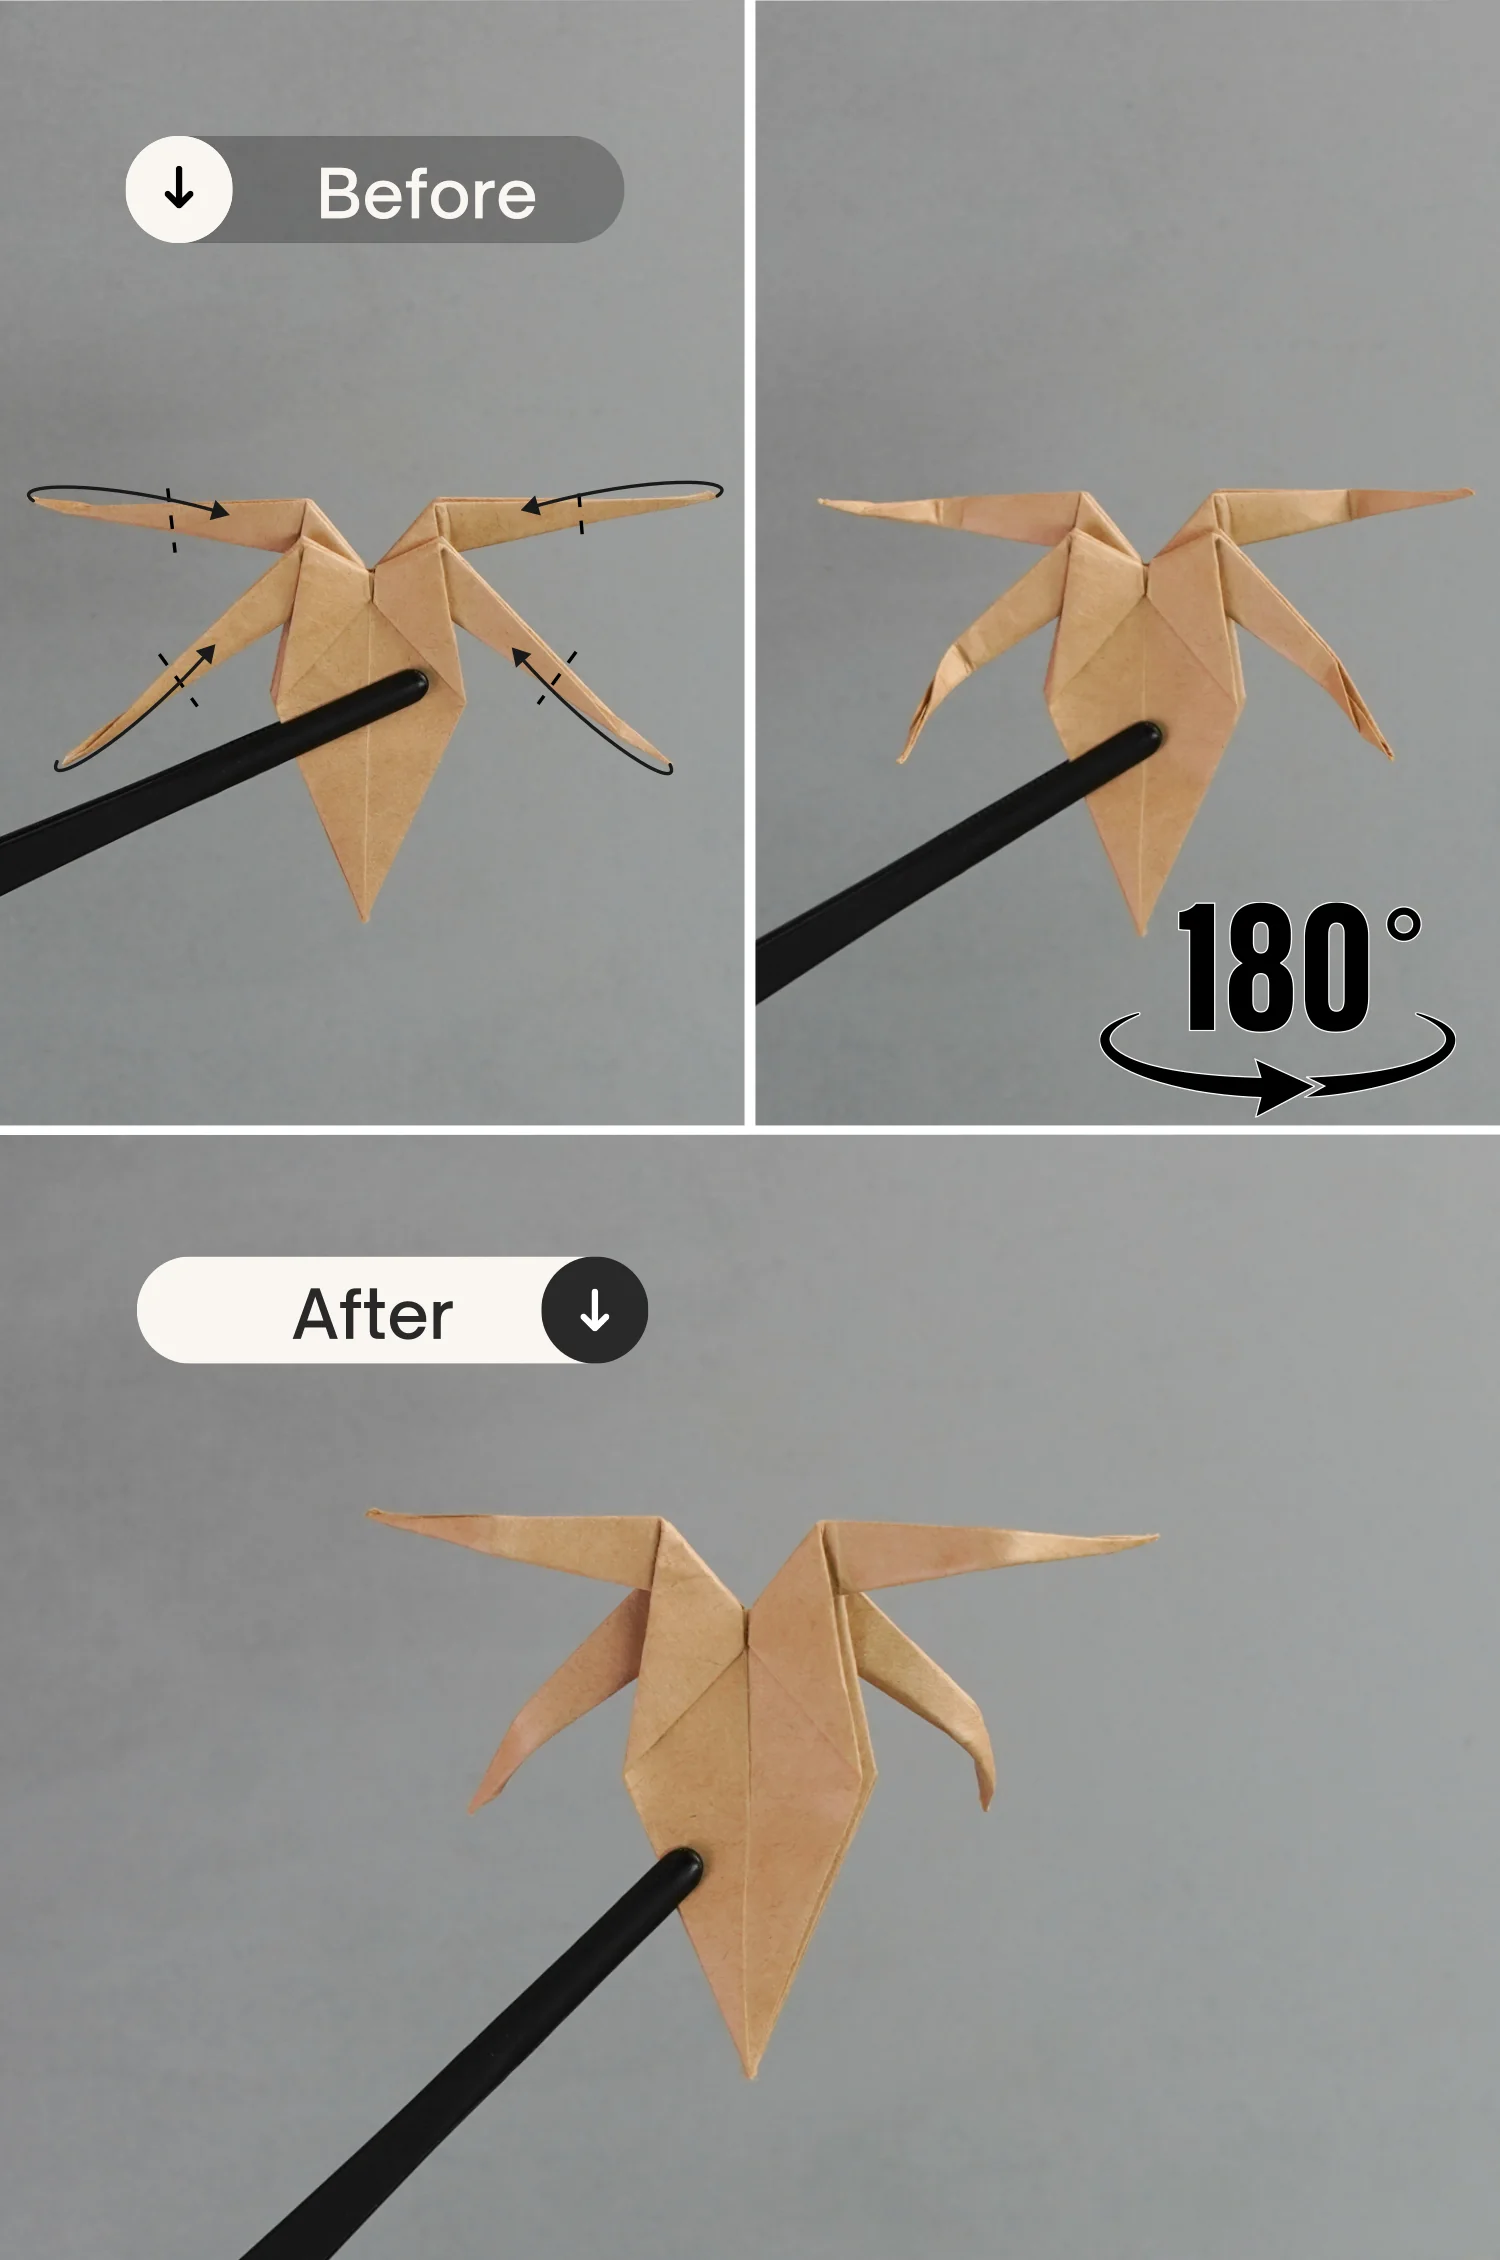
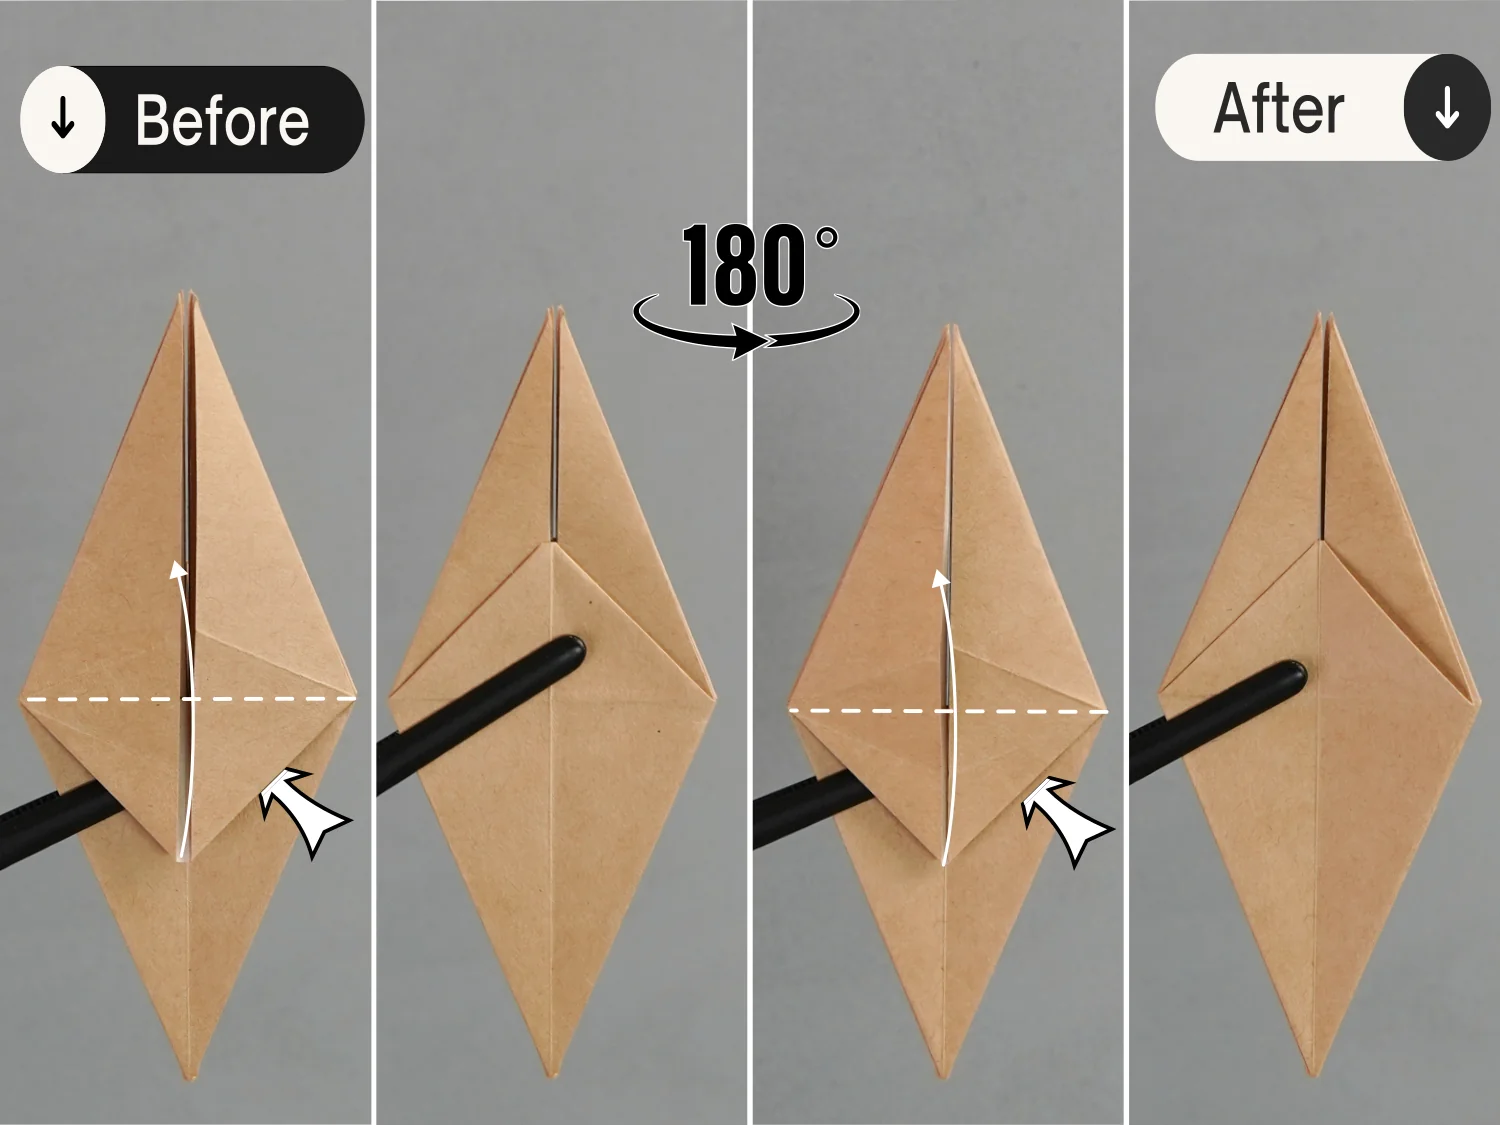
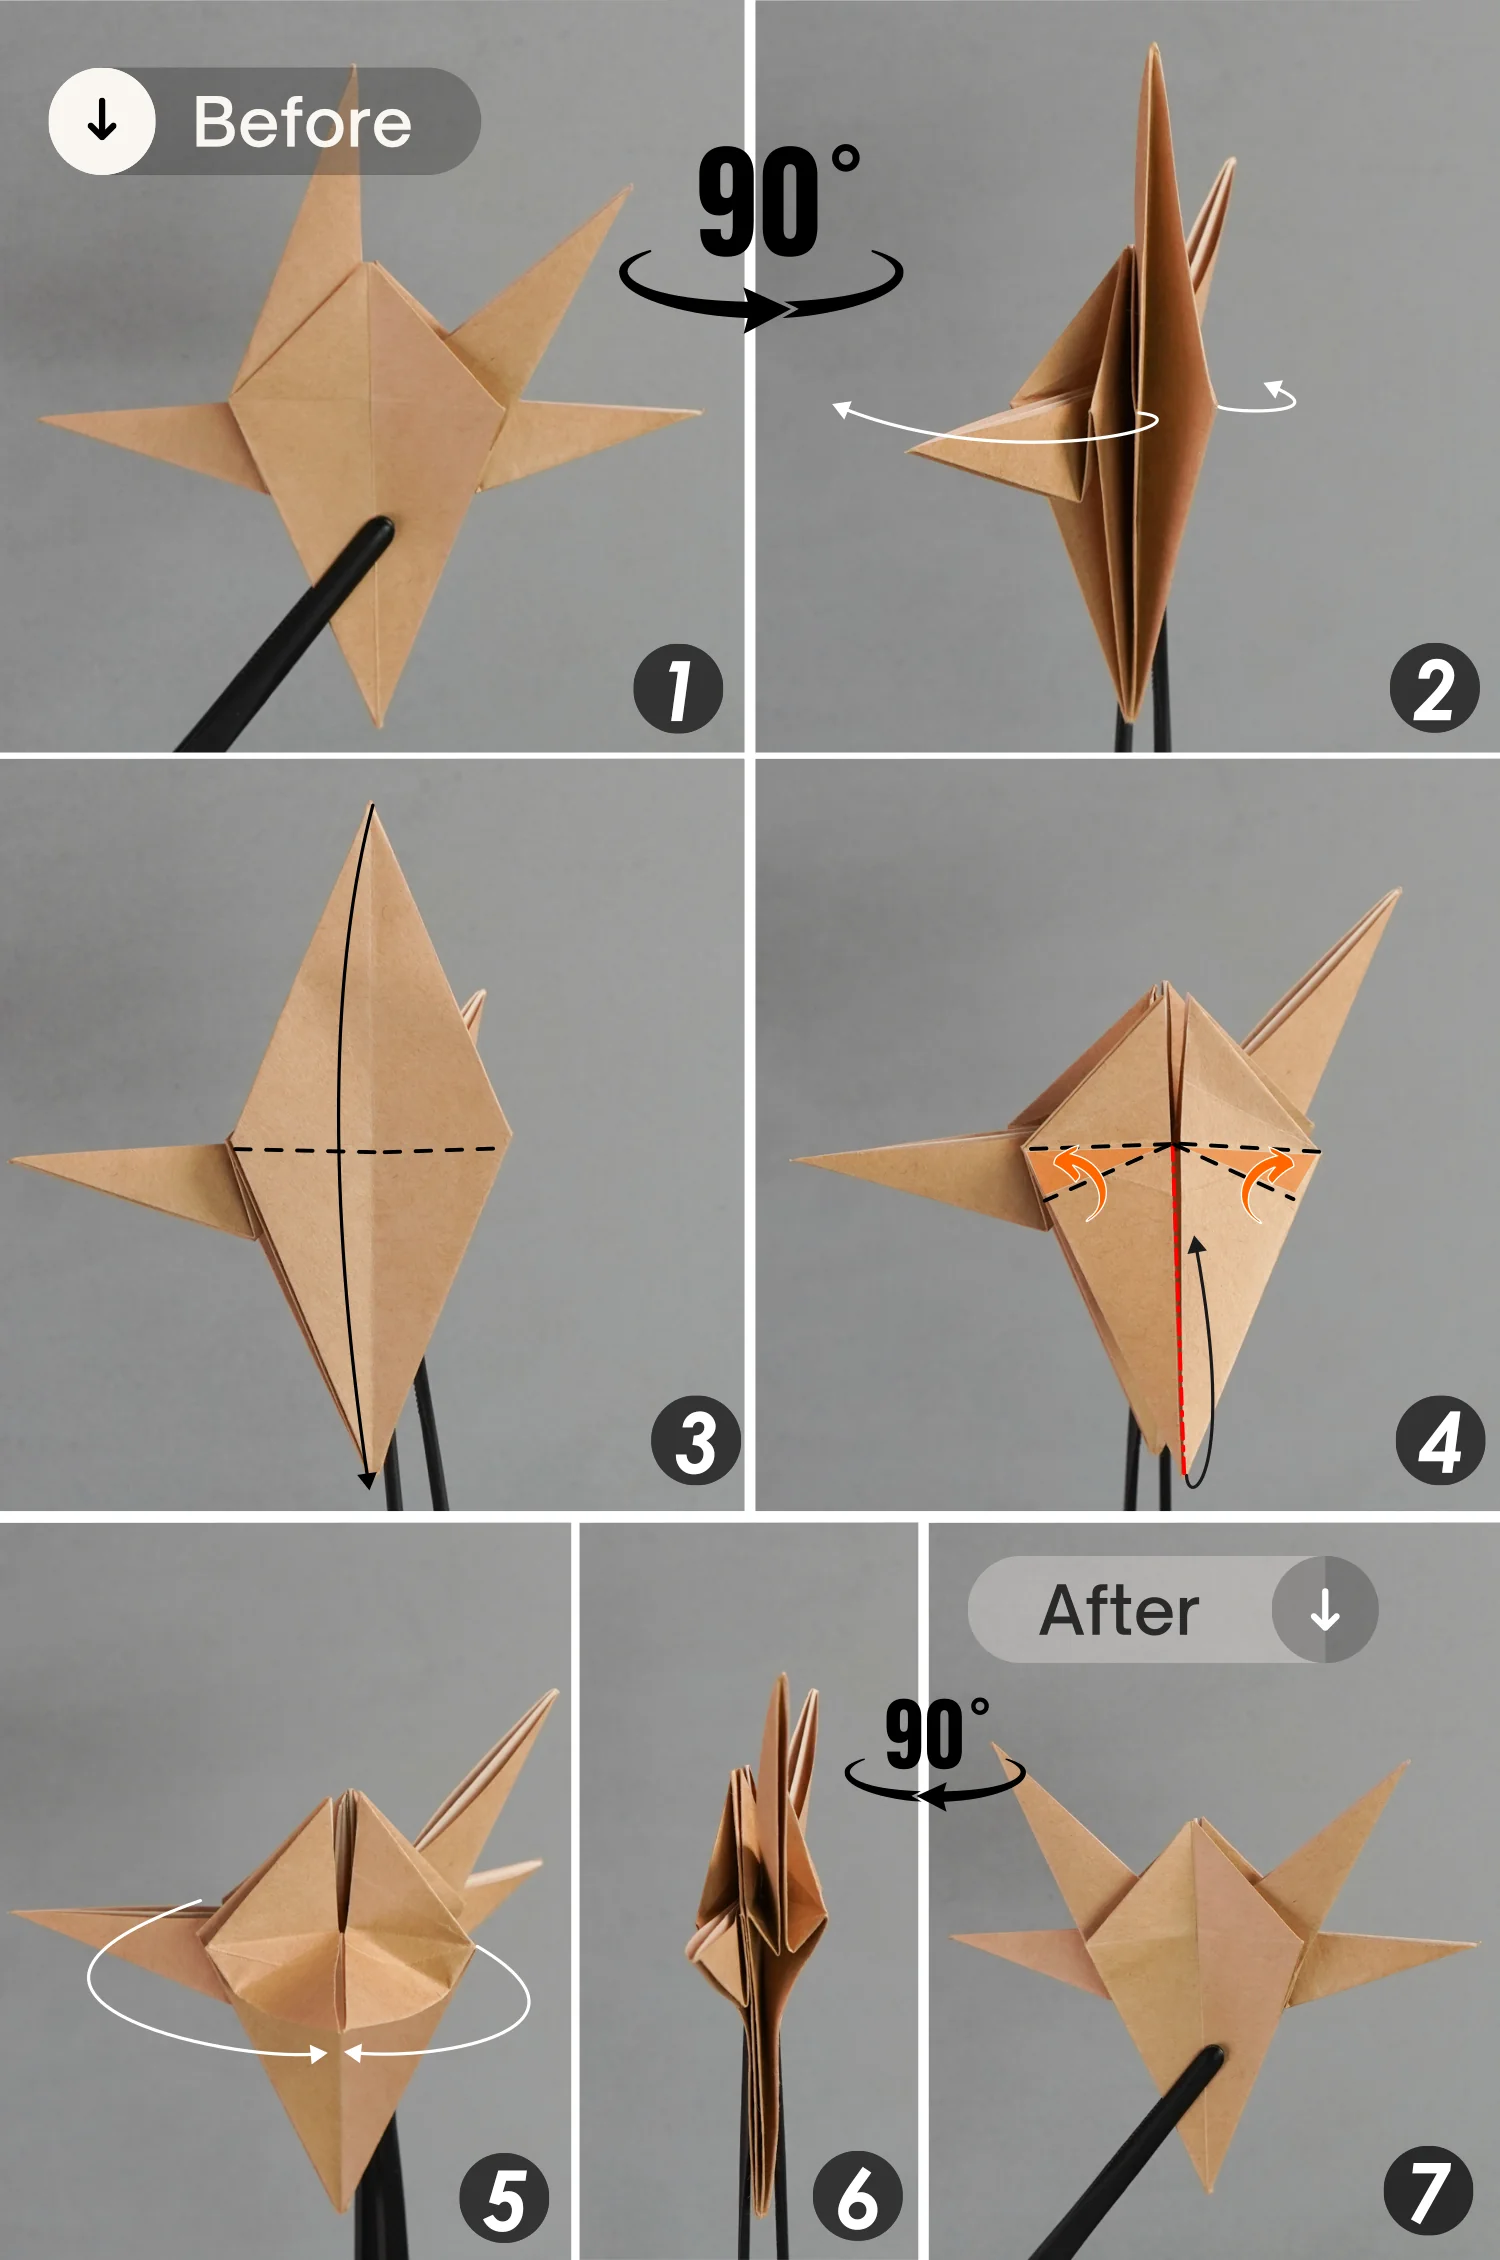
Step 23
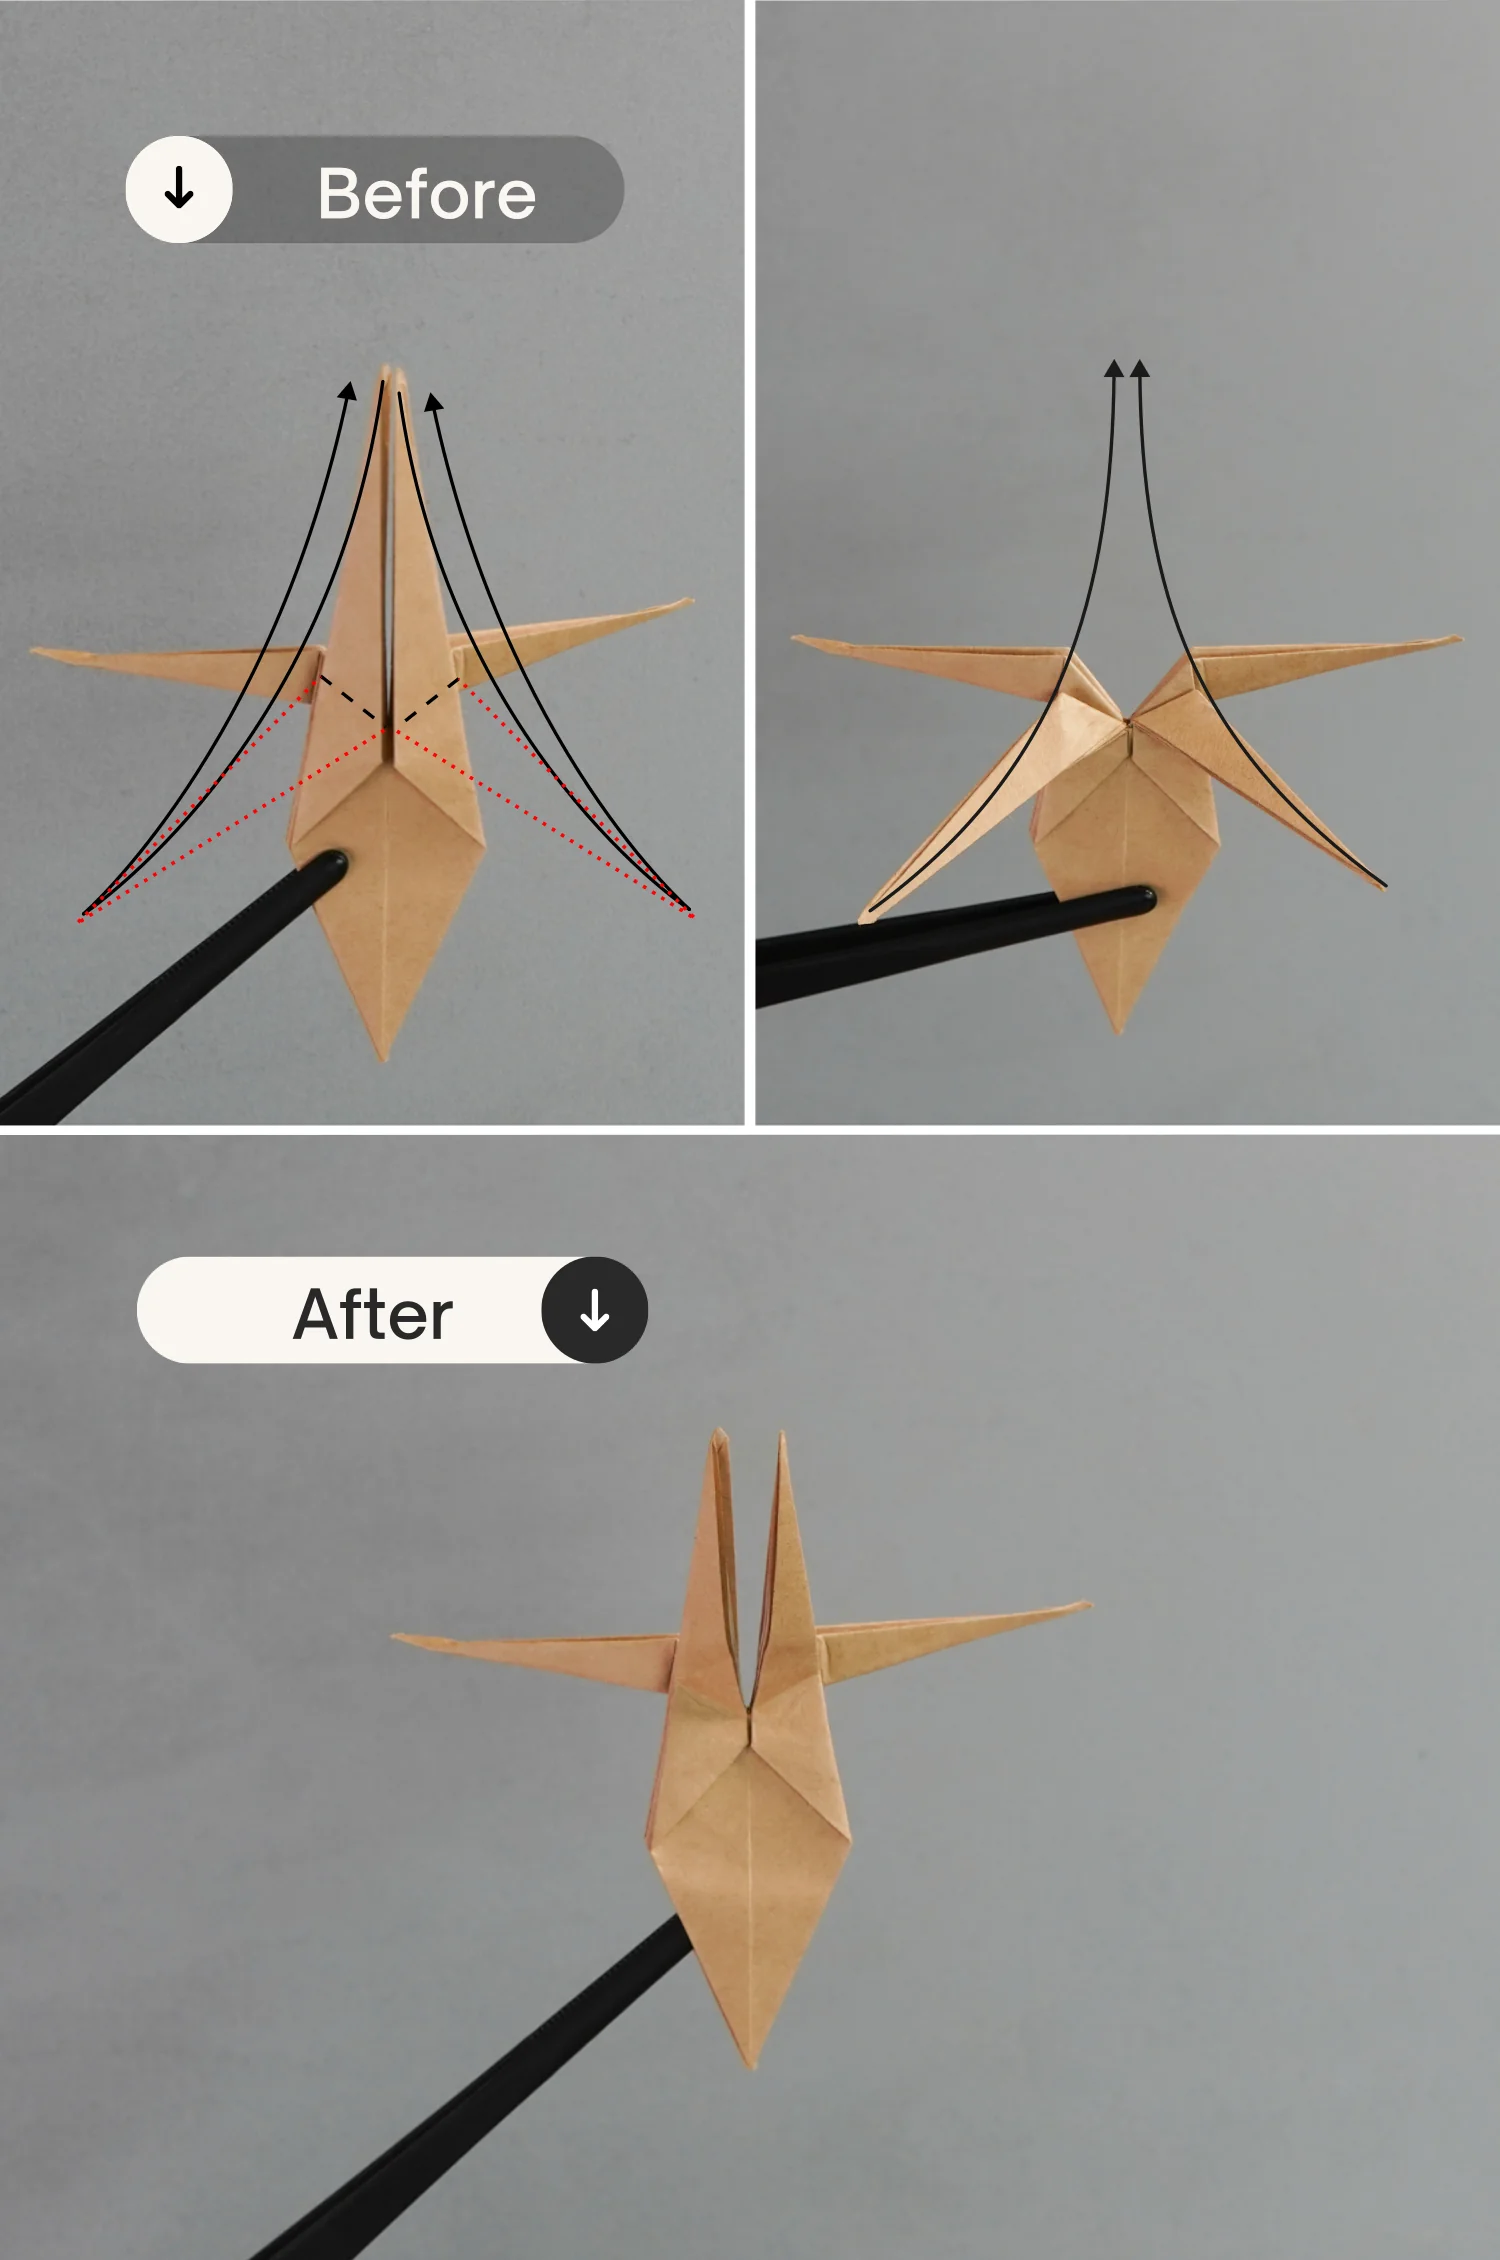
Pull the top four points toward the outside, then fold the small triangle on the front backward, and finally flatten the fold.
You’ll repeat this step three more times in the following steps.
Step 24
Flip the paper over from the left to the right.
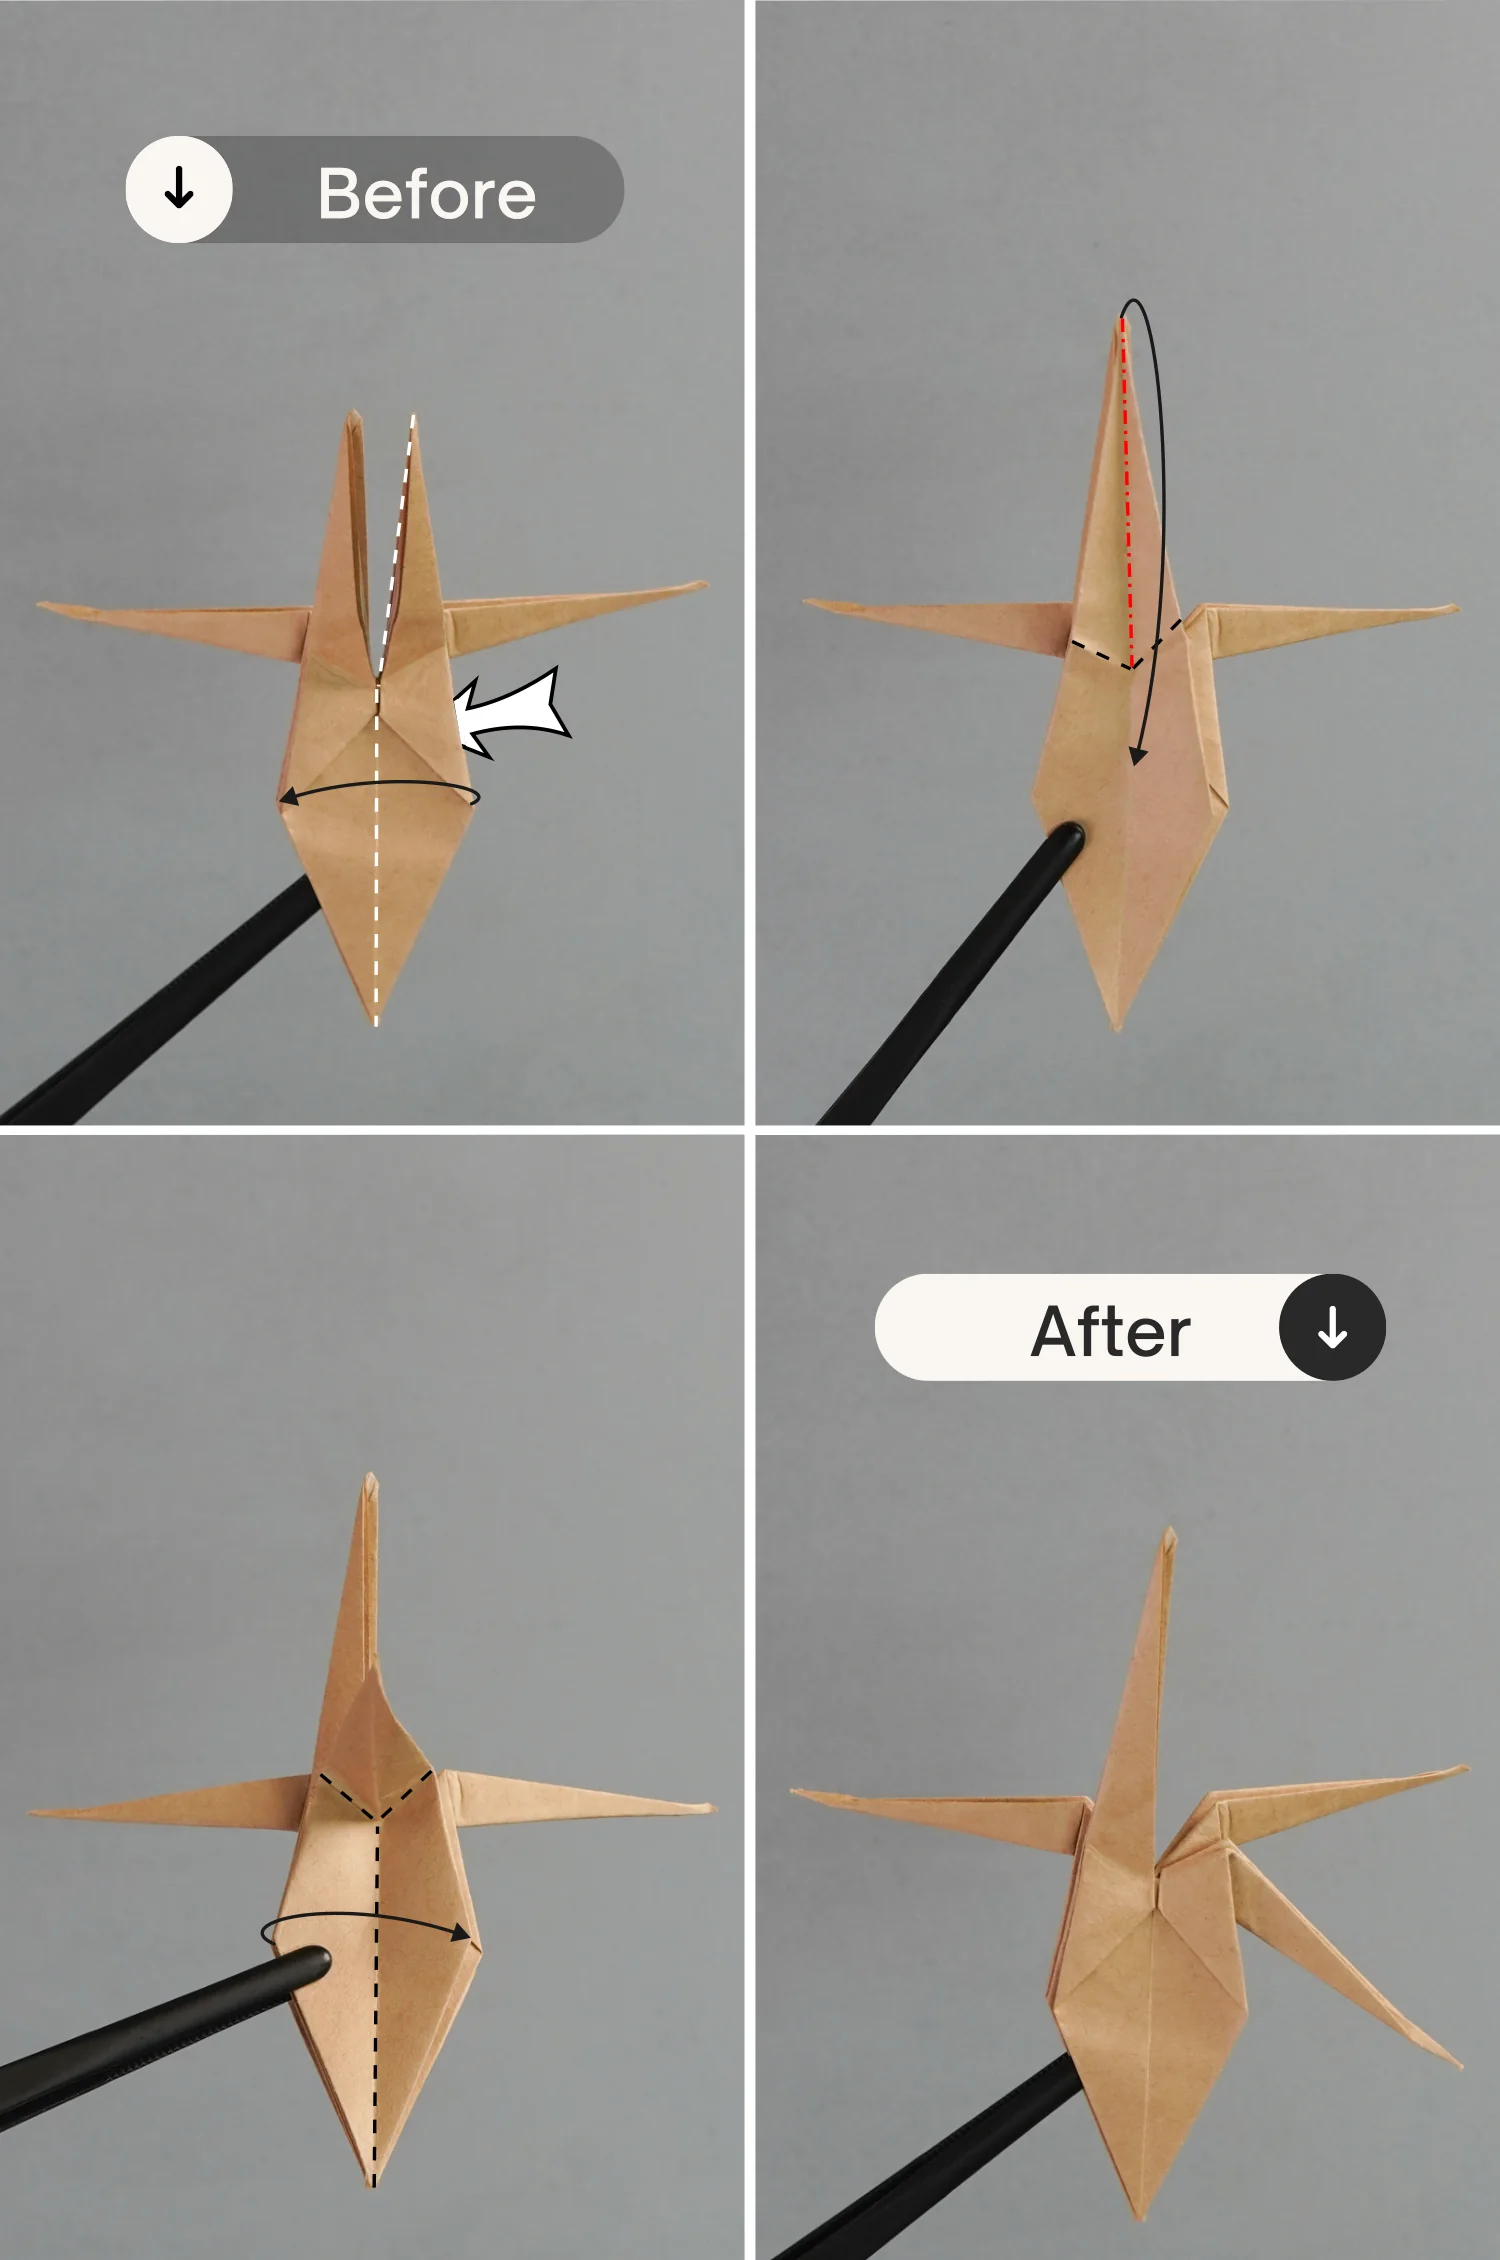
Step 25
Repeat step 23.
Pull the top four points toward the outside, fold the middle triangle backward, and finally flatten the fold.
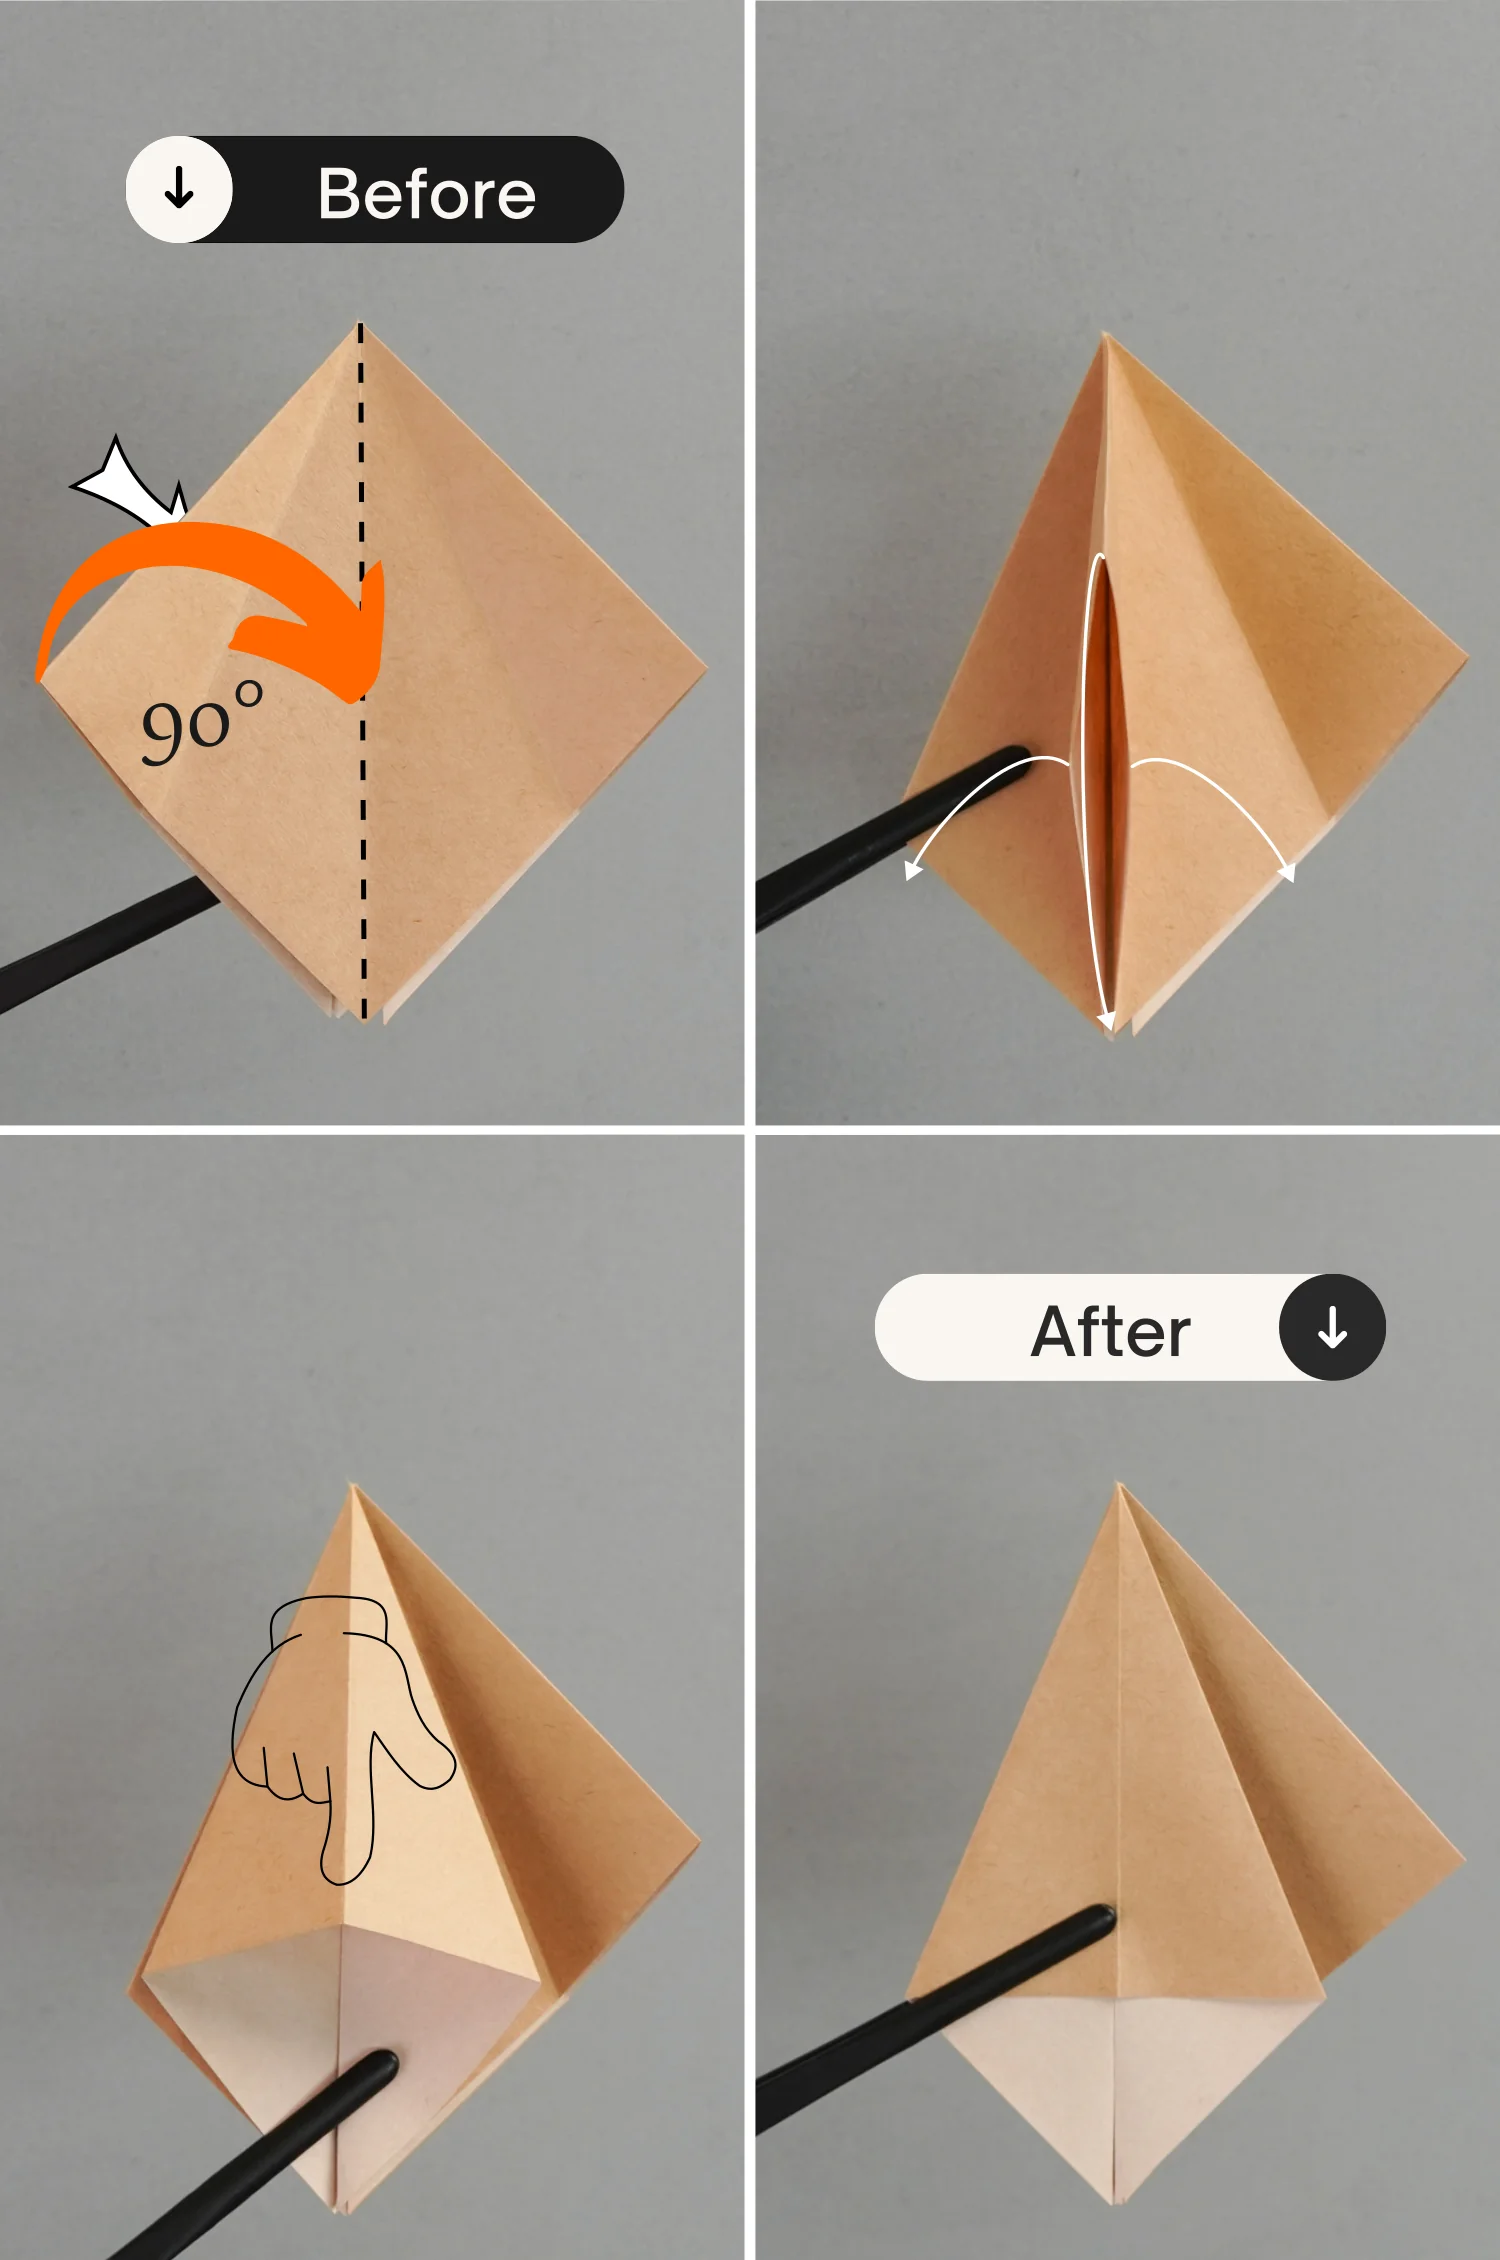
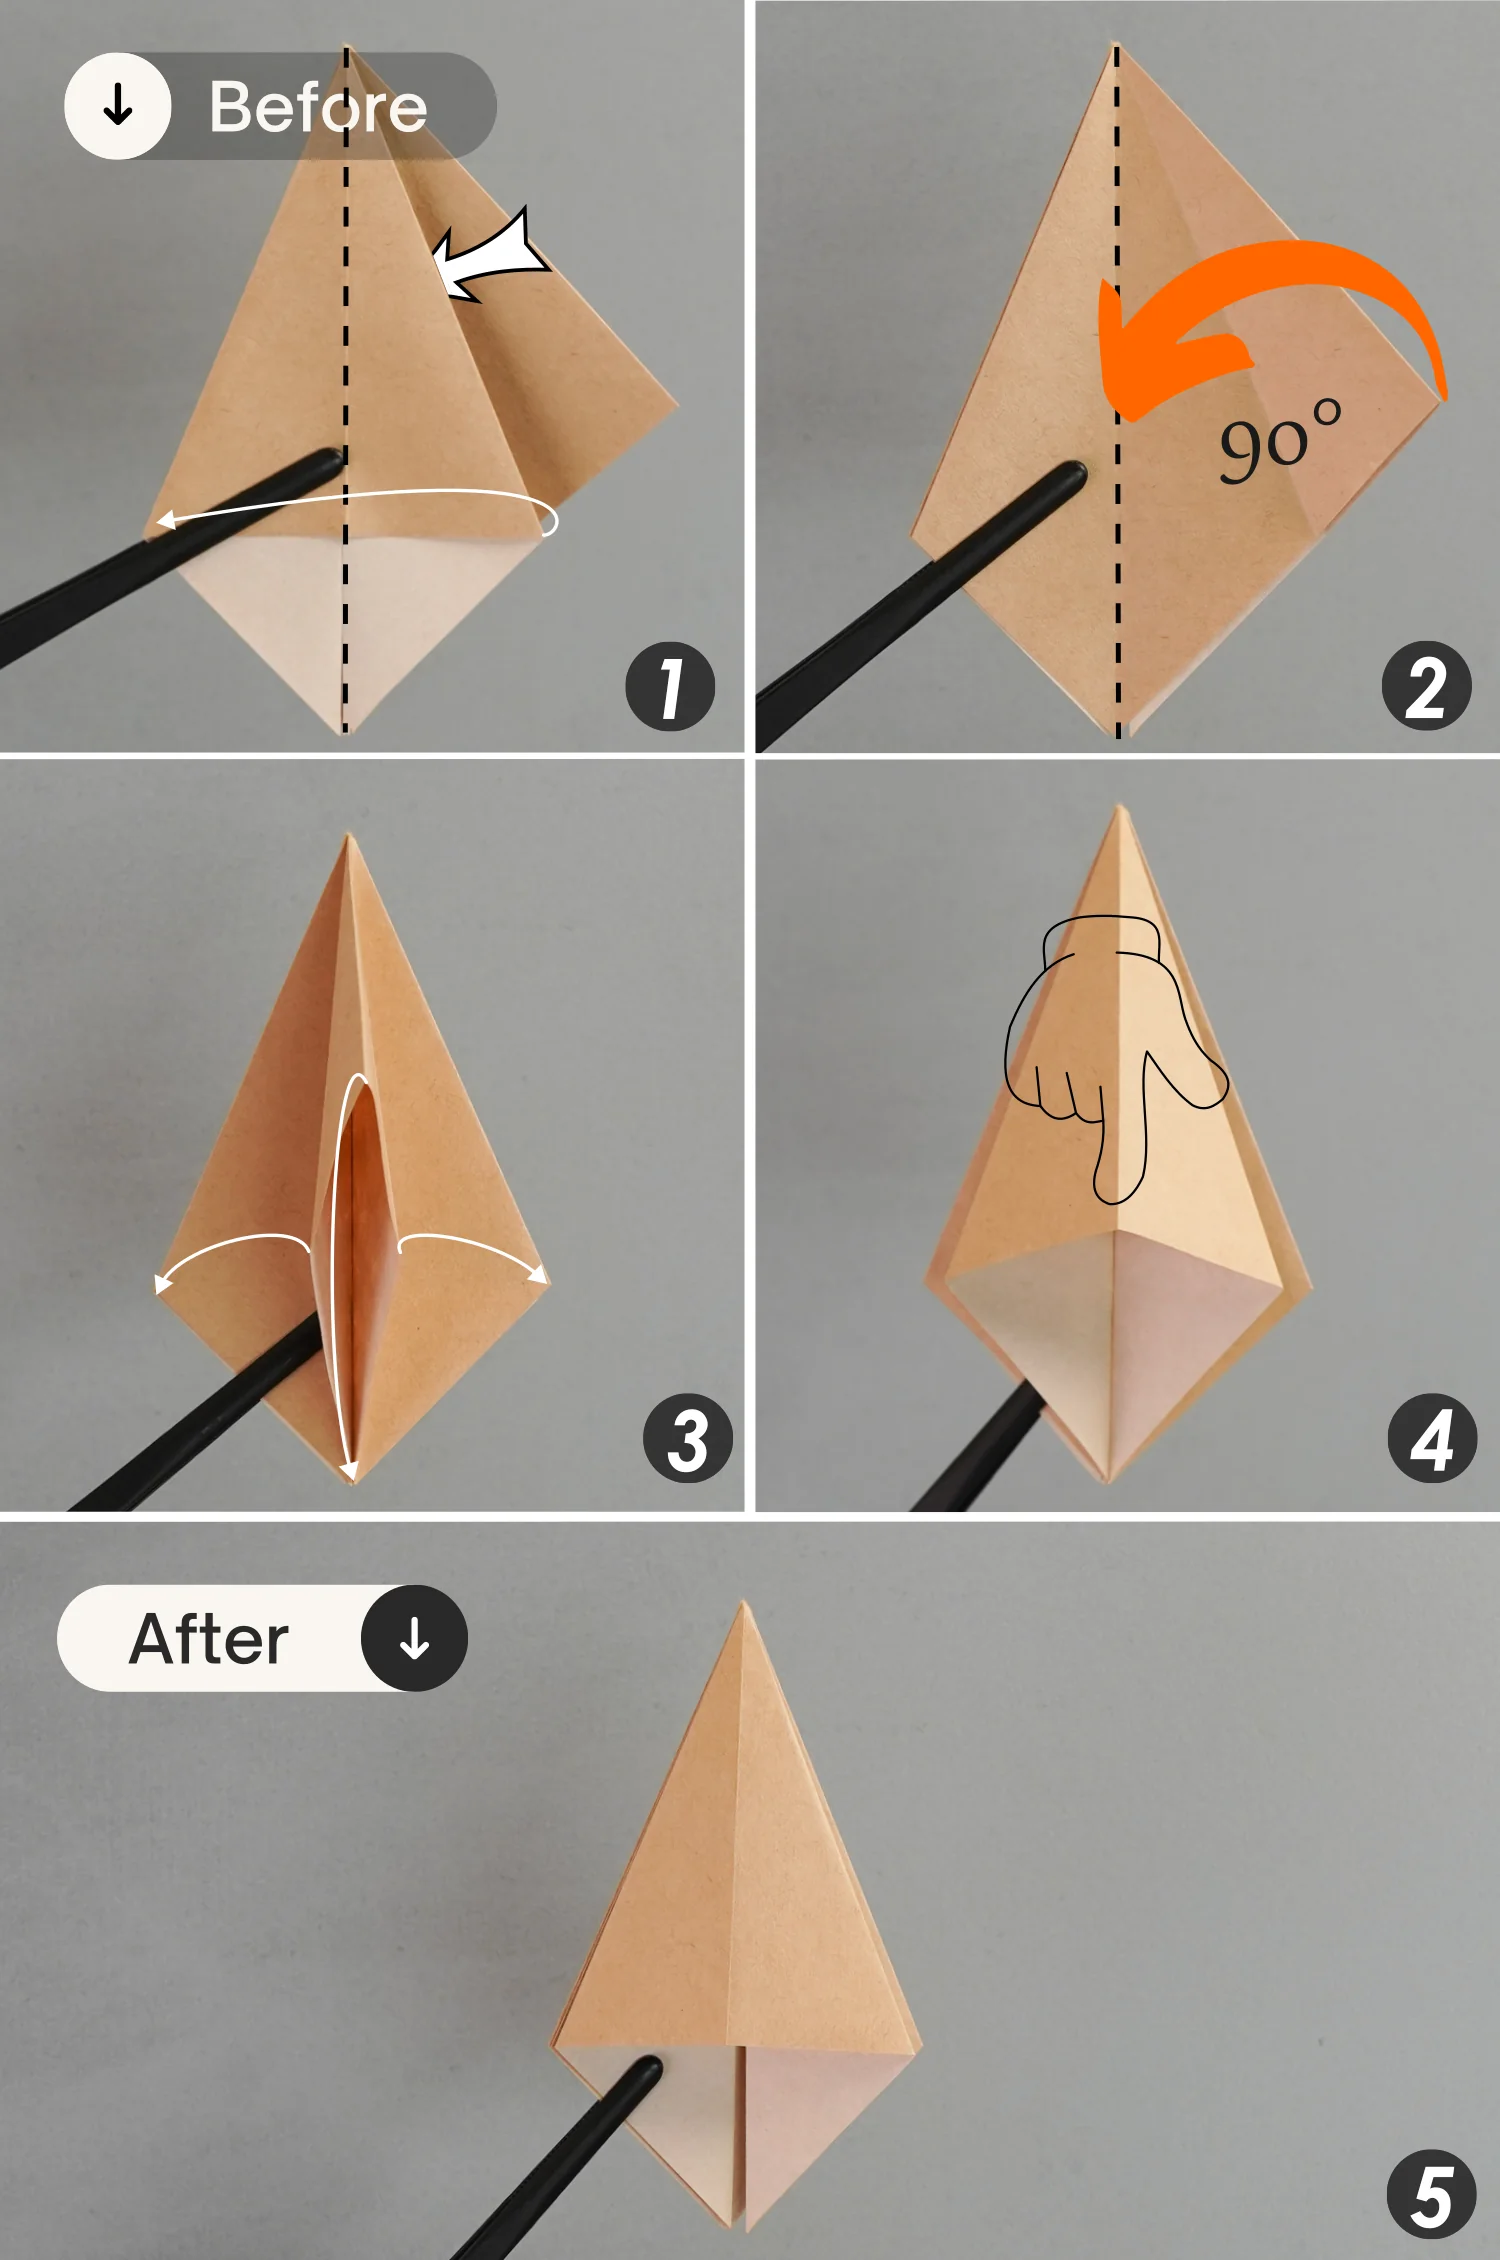
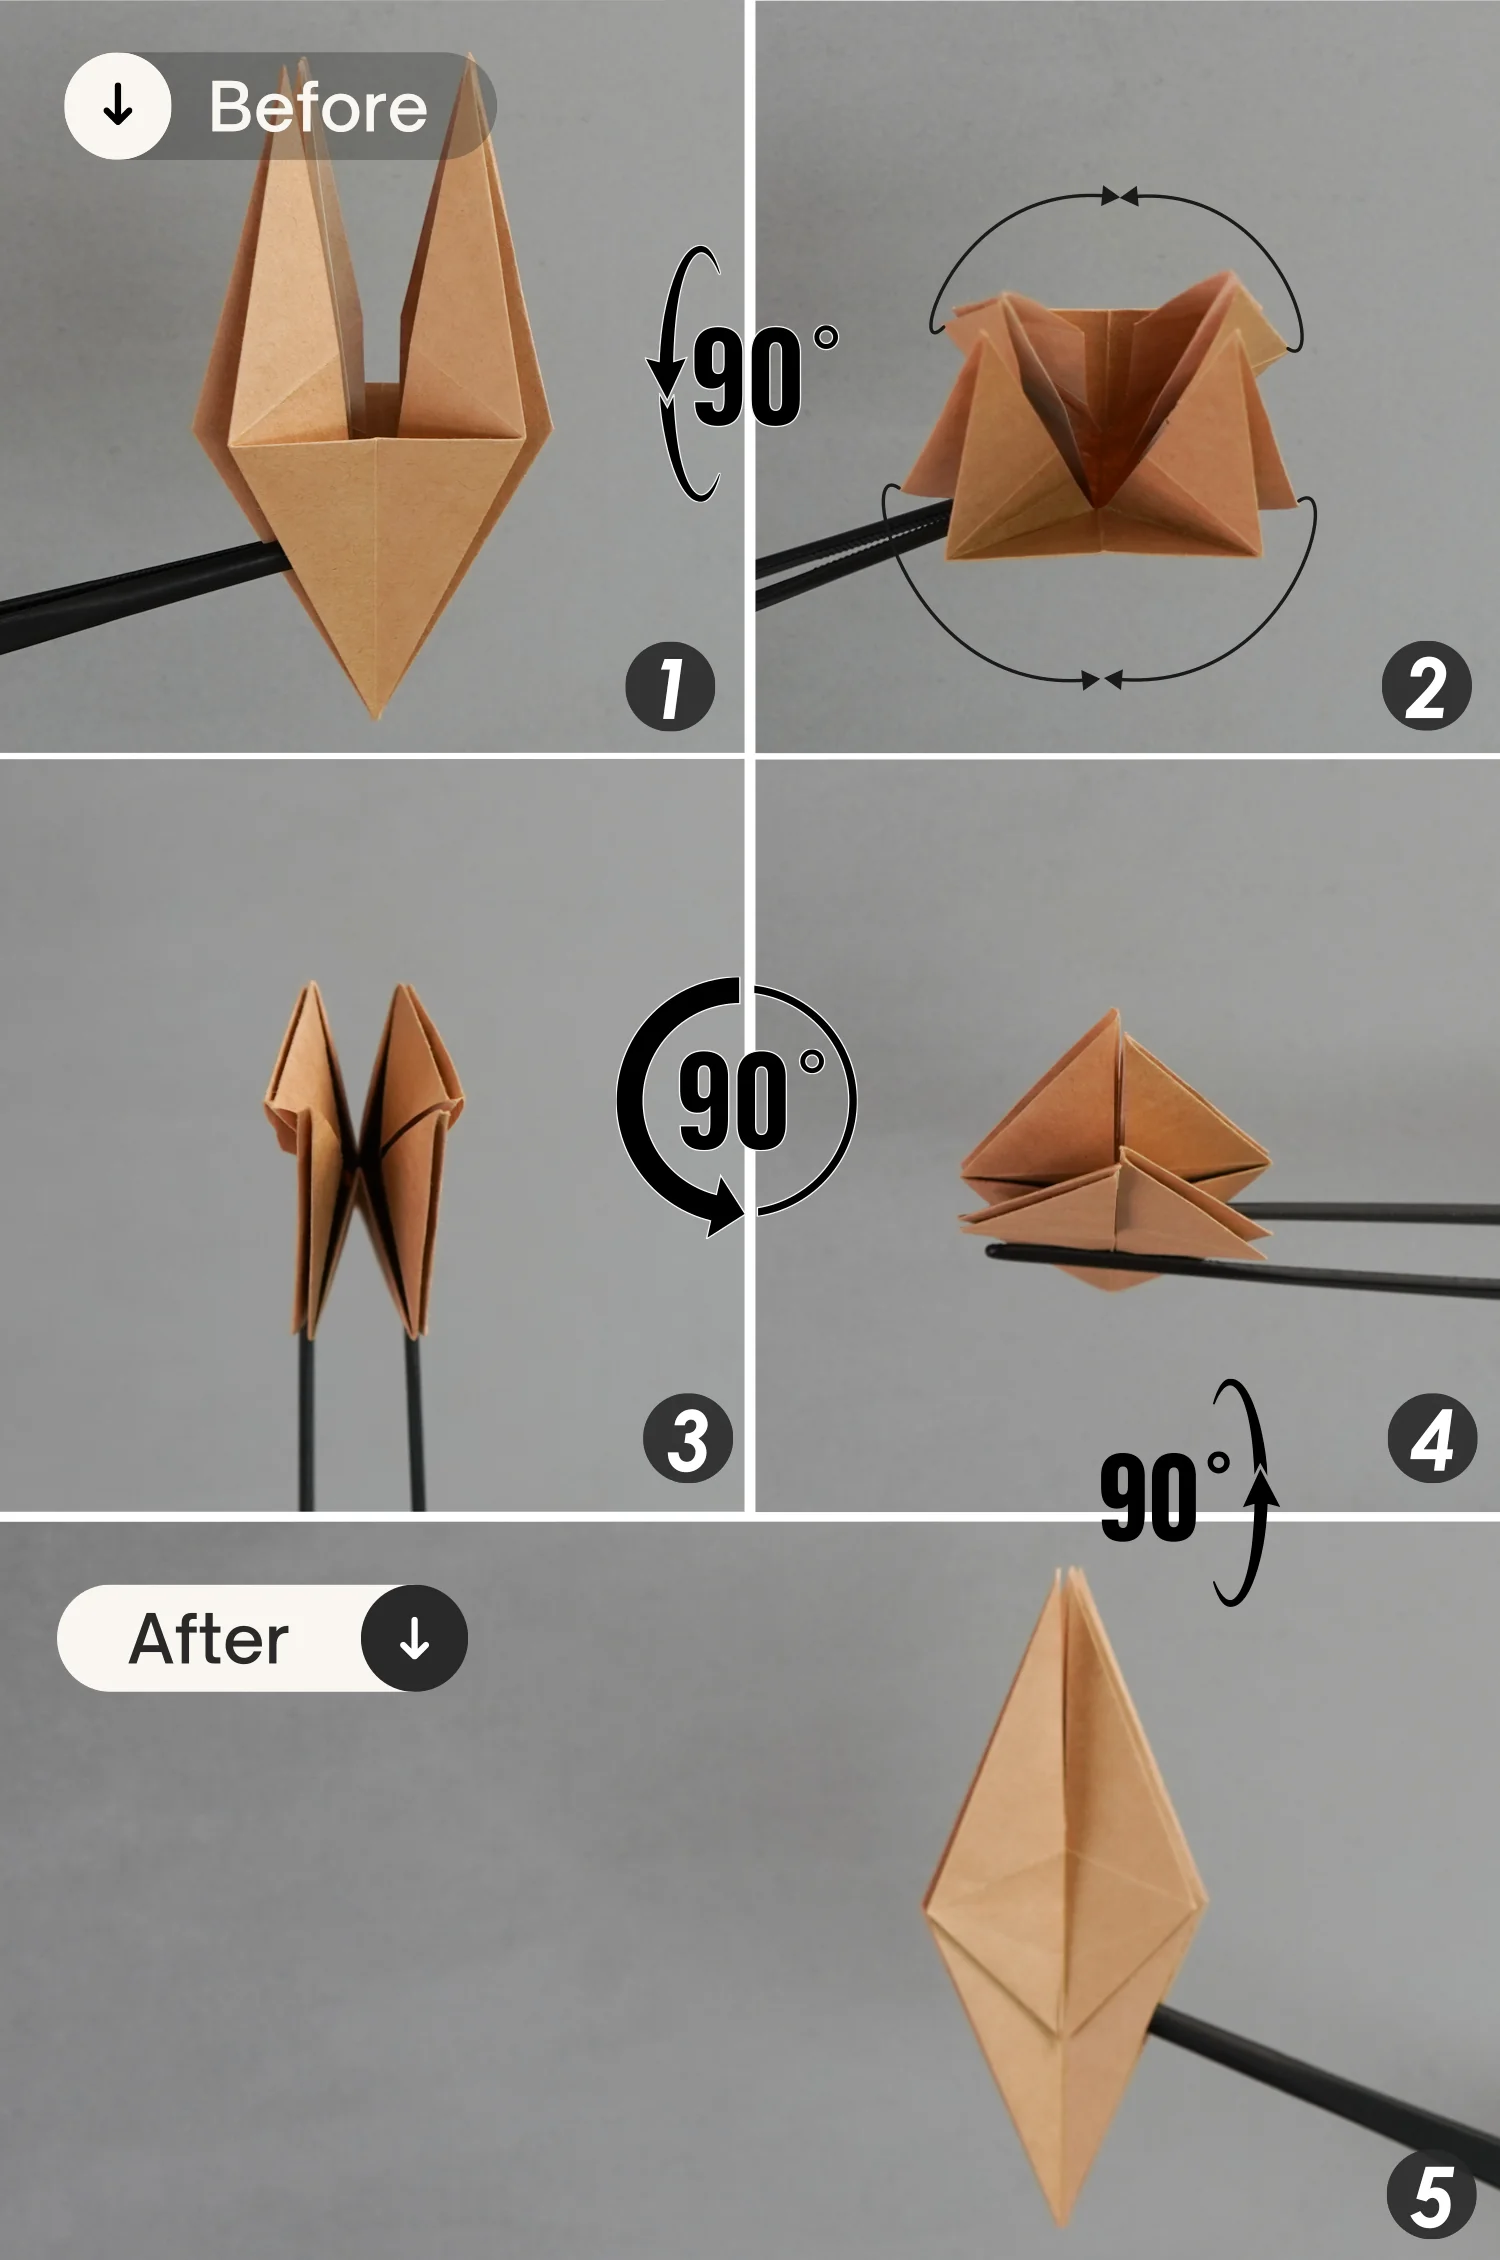
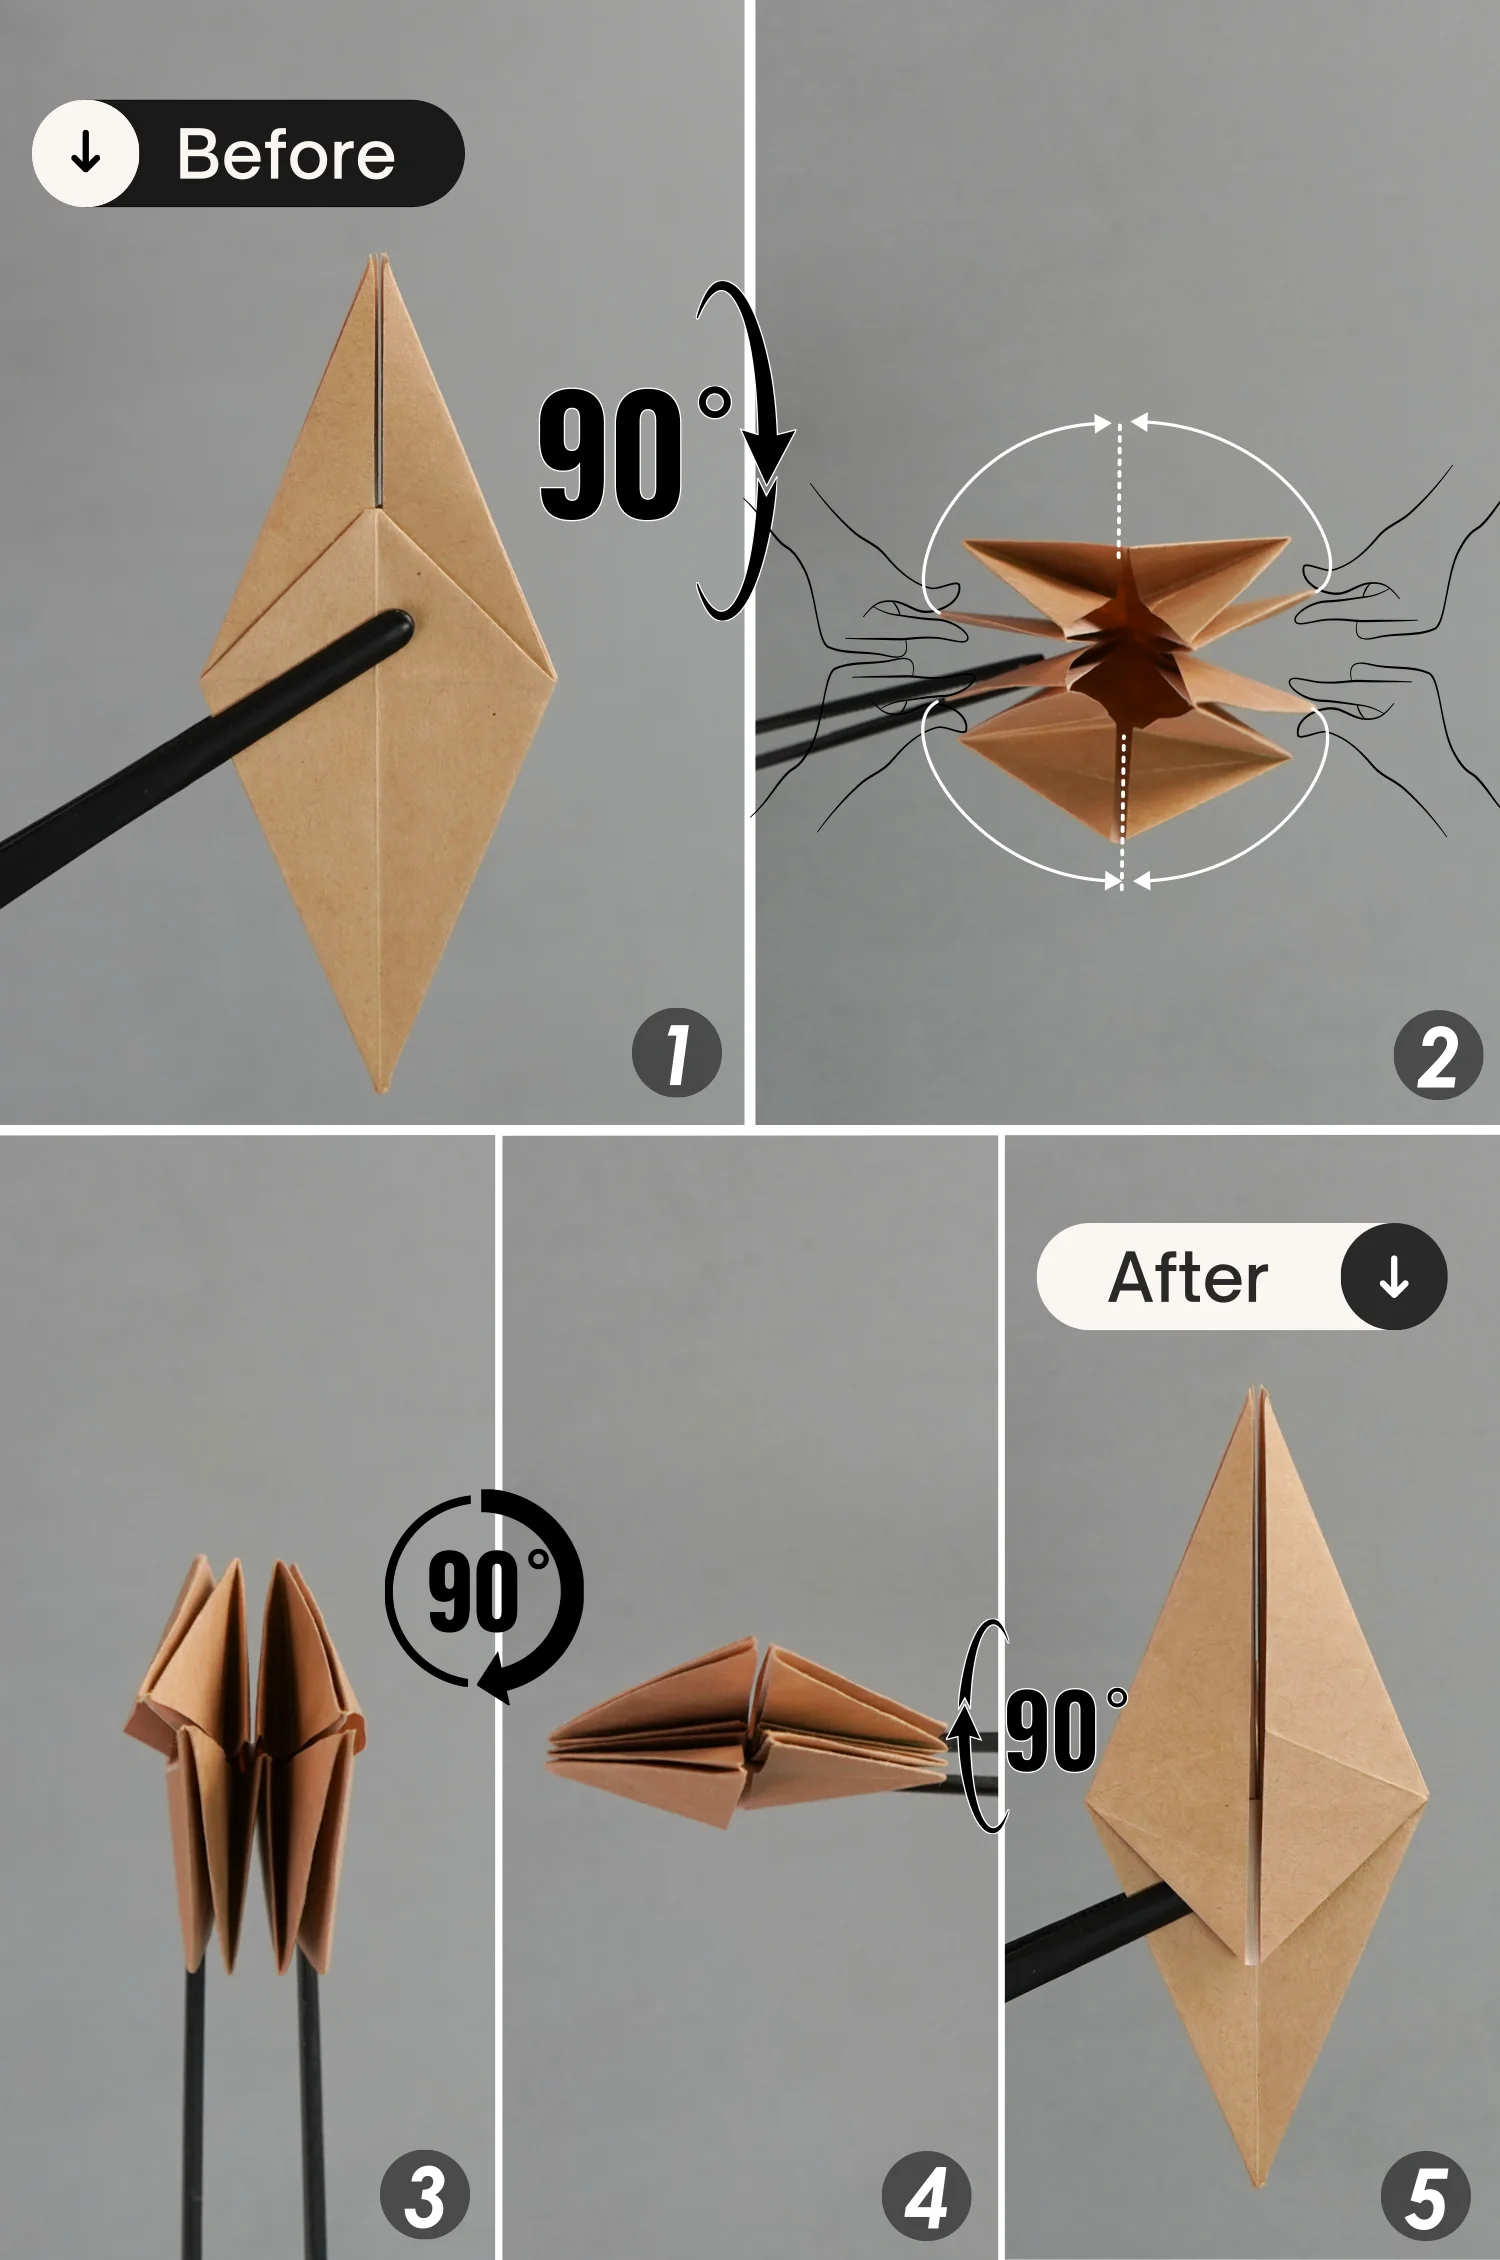
Step 26
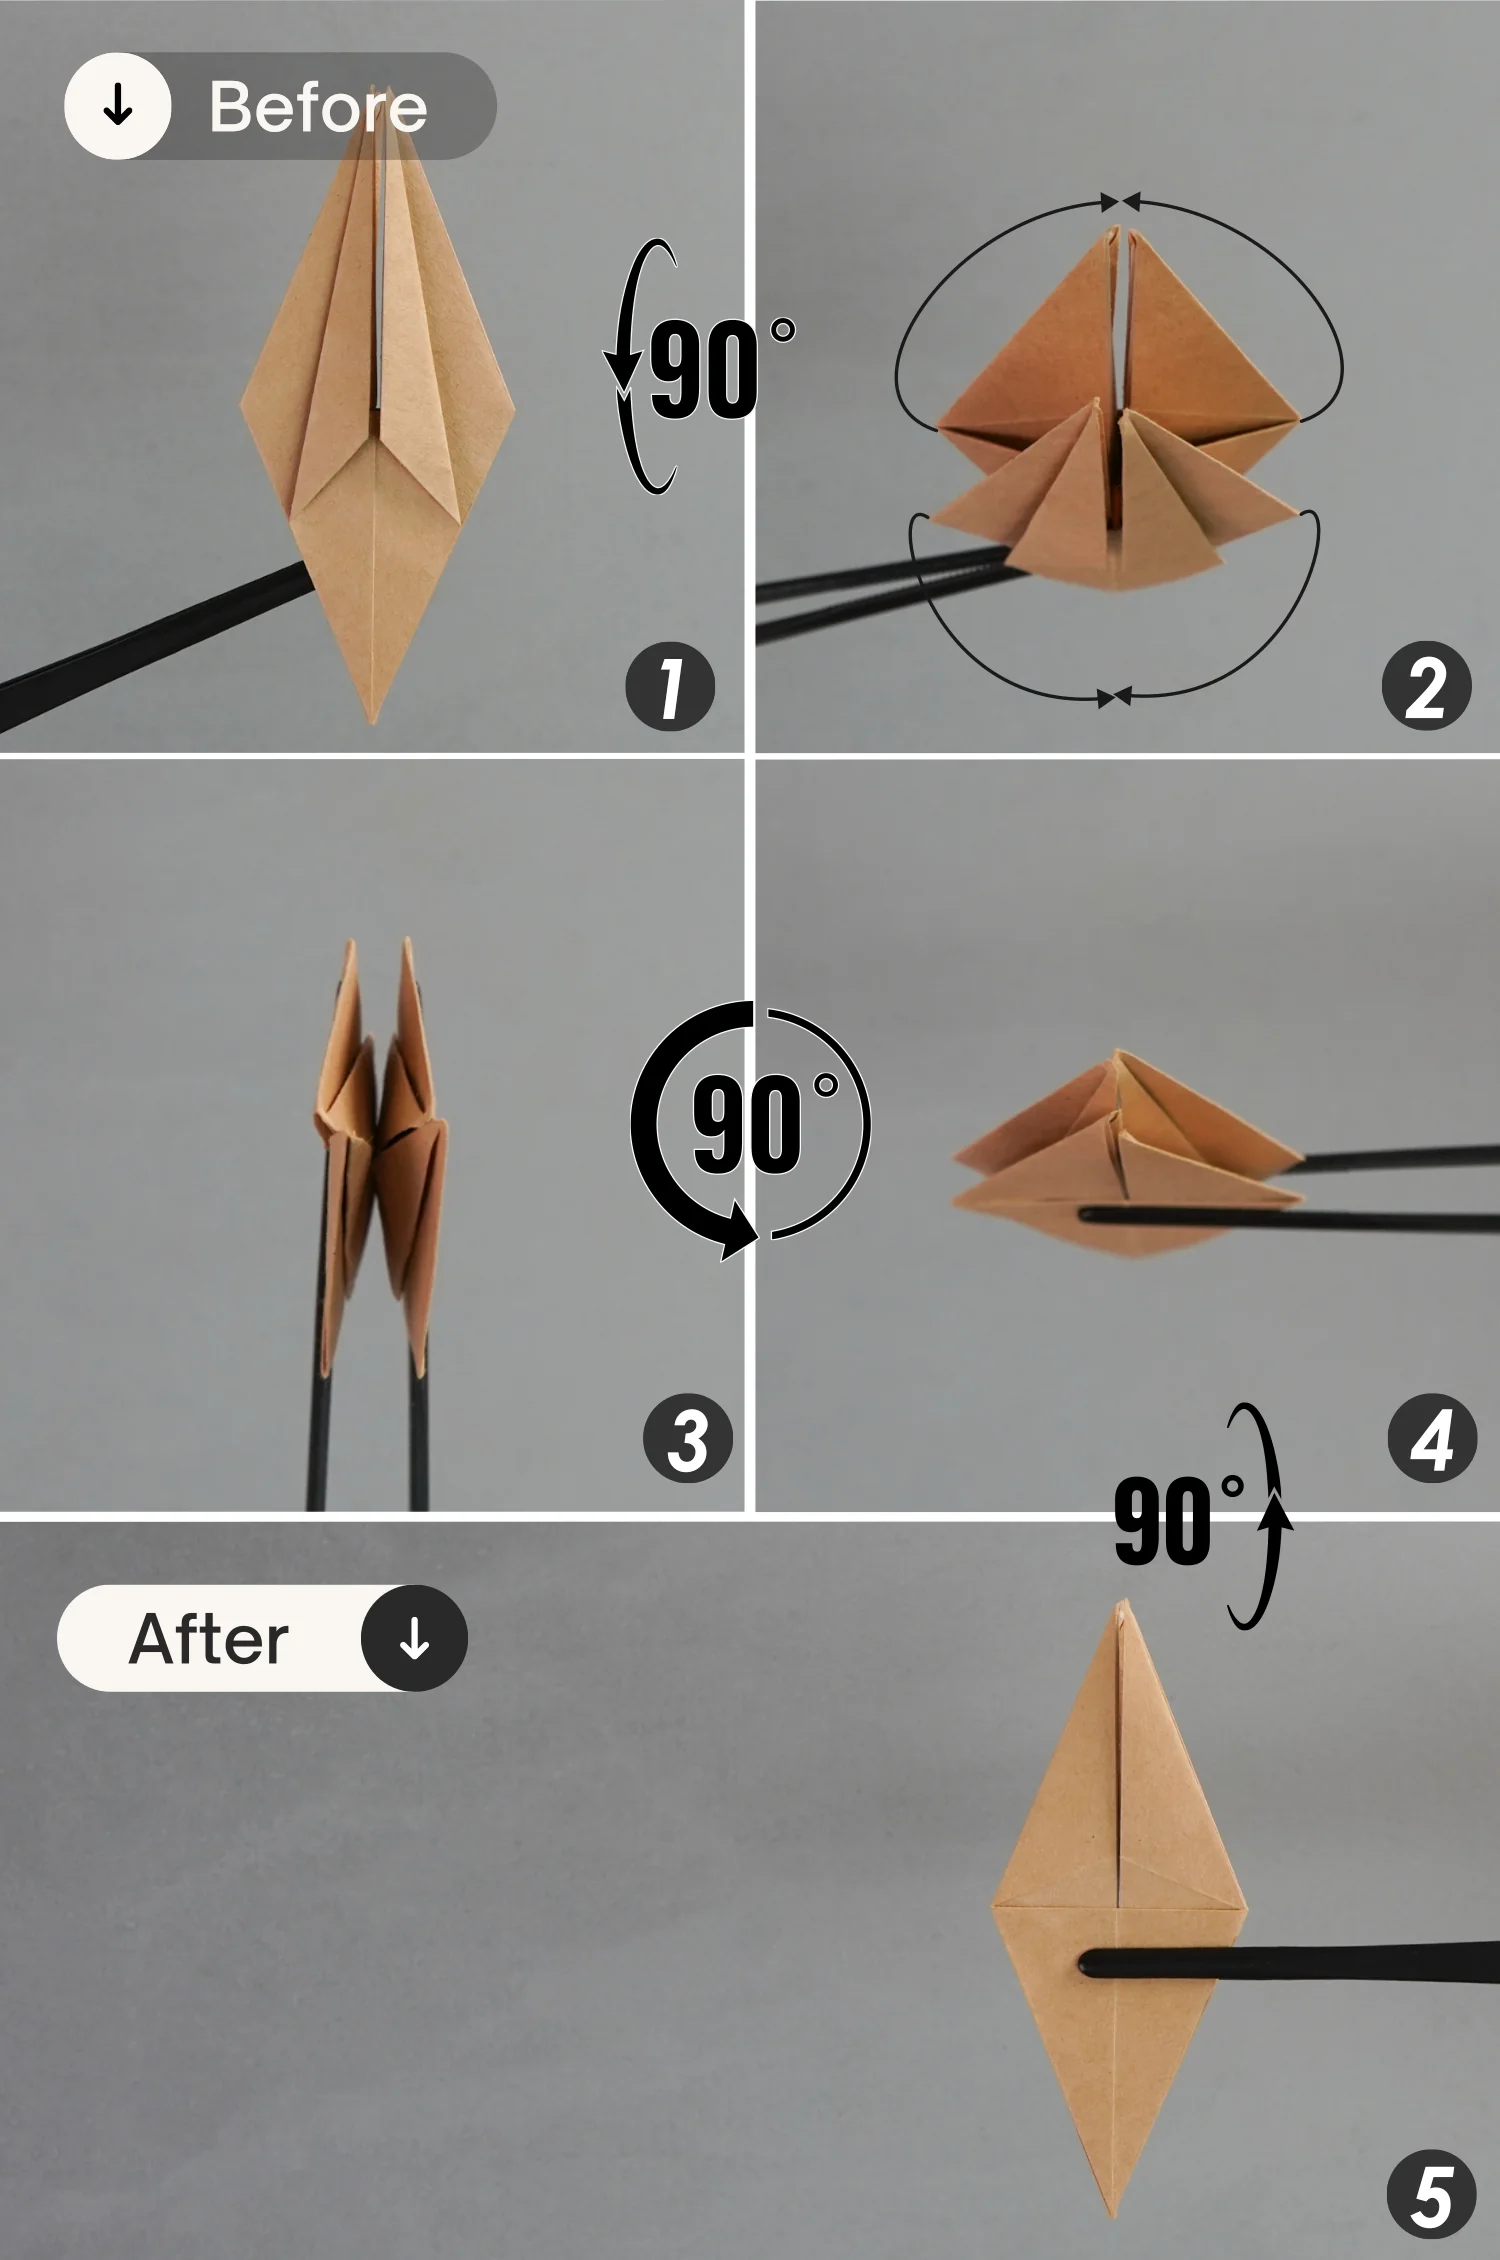
Rotate it 90 degrees from the front to the back, then bring the upper two flaps together on the top, and bring the lower two flaps together on the bottom, as you can see in the second and third pictures.
Next, rotate it 90 degrees counterclockwise, then rotate it 90 degrees again from the back to the front.
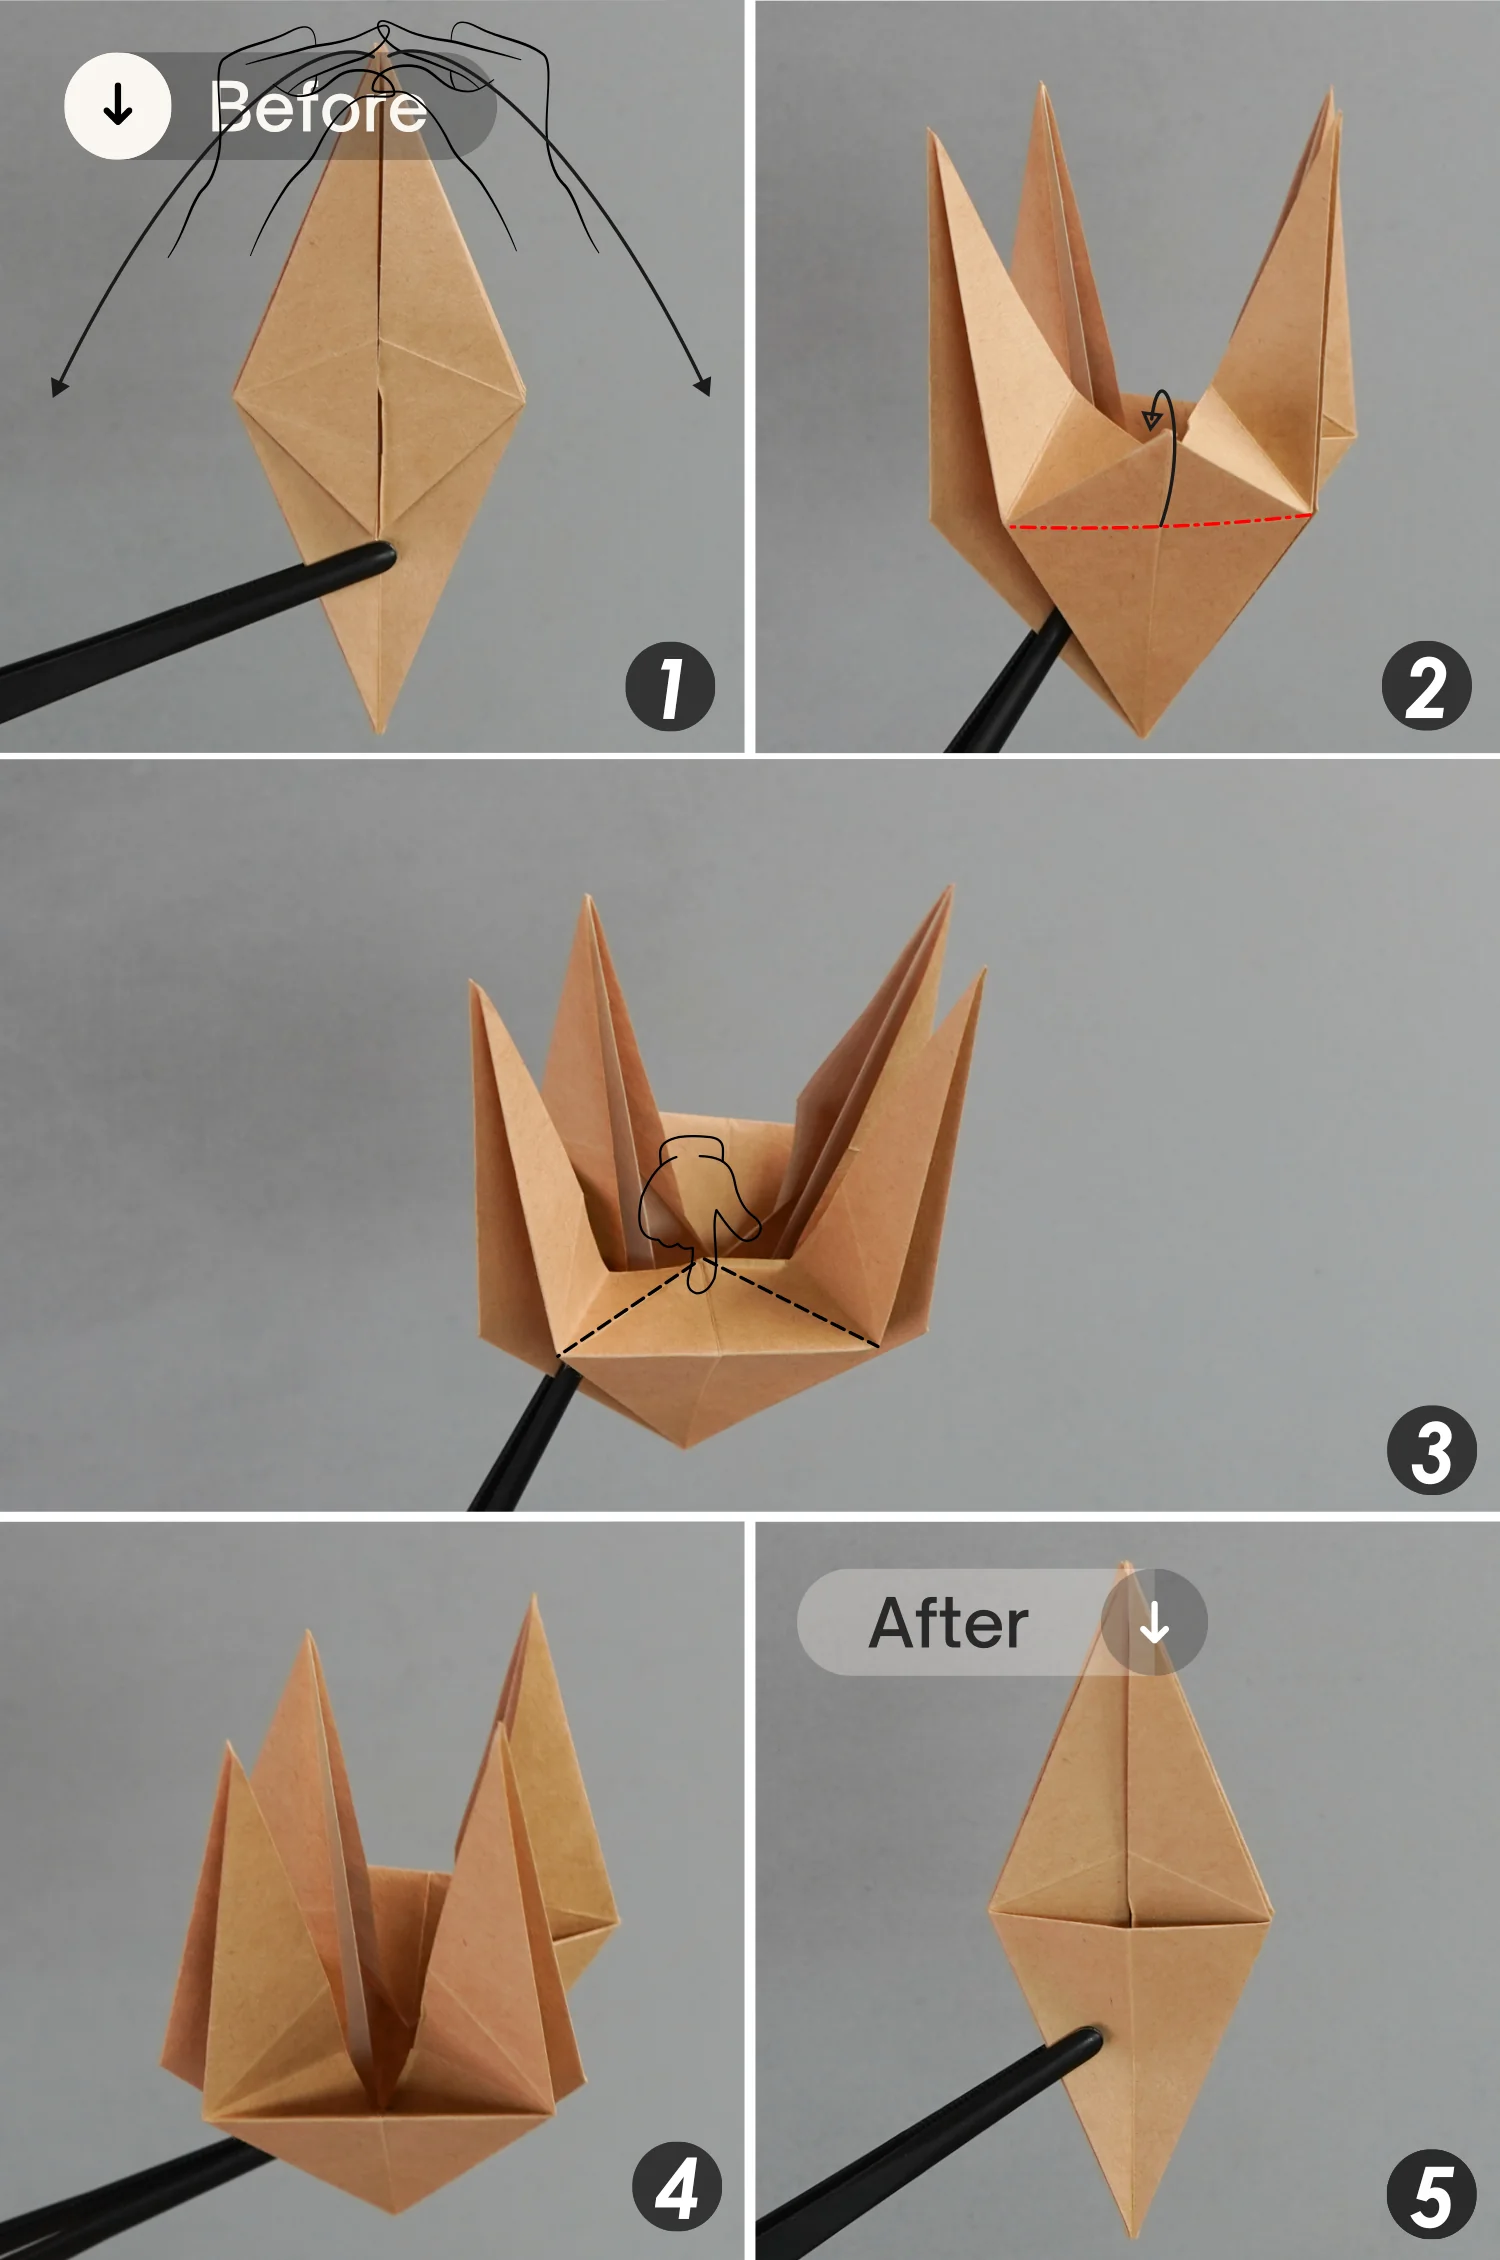
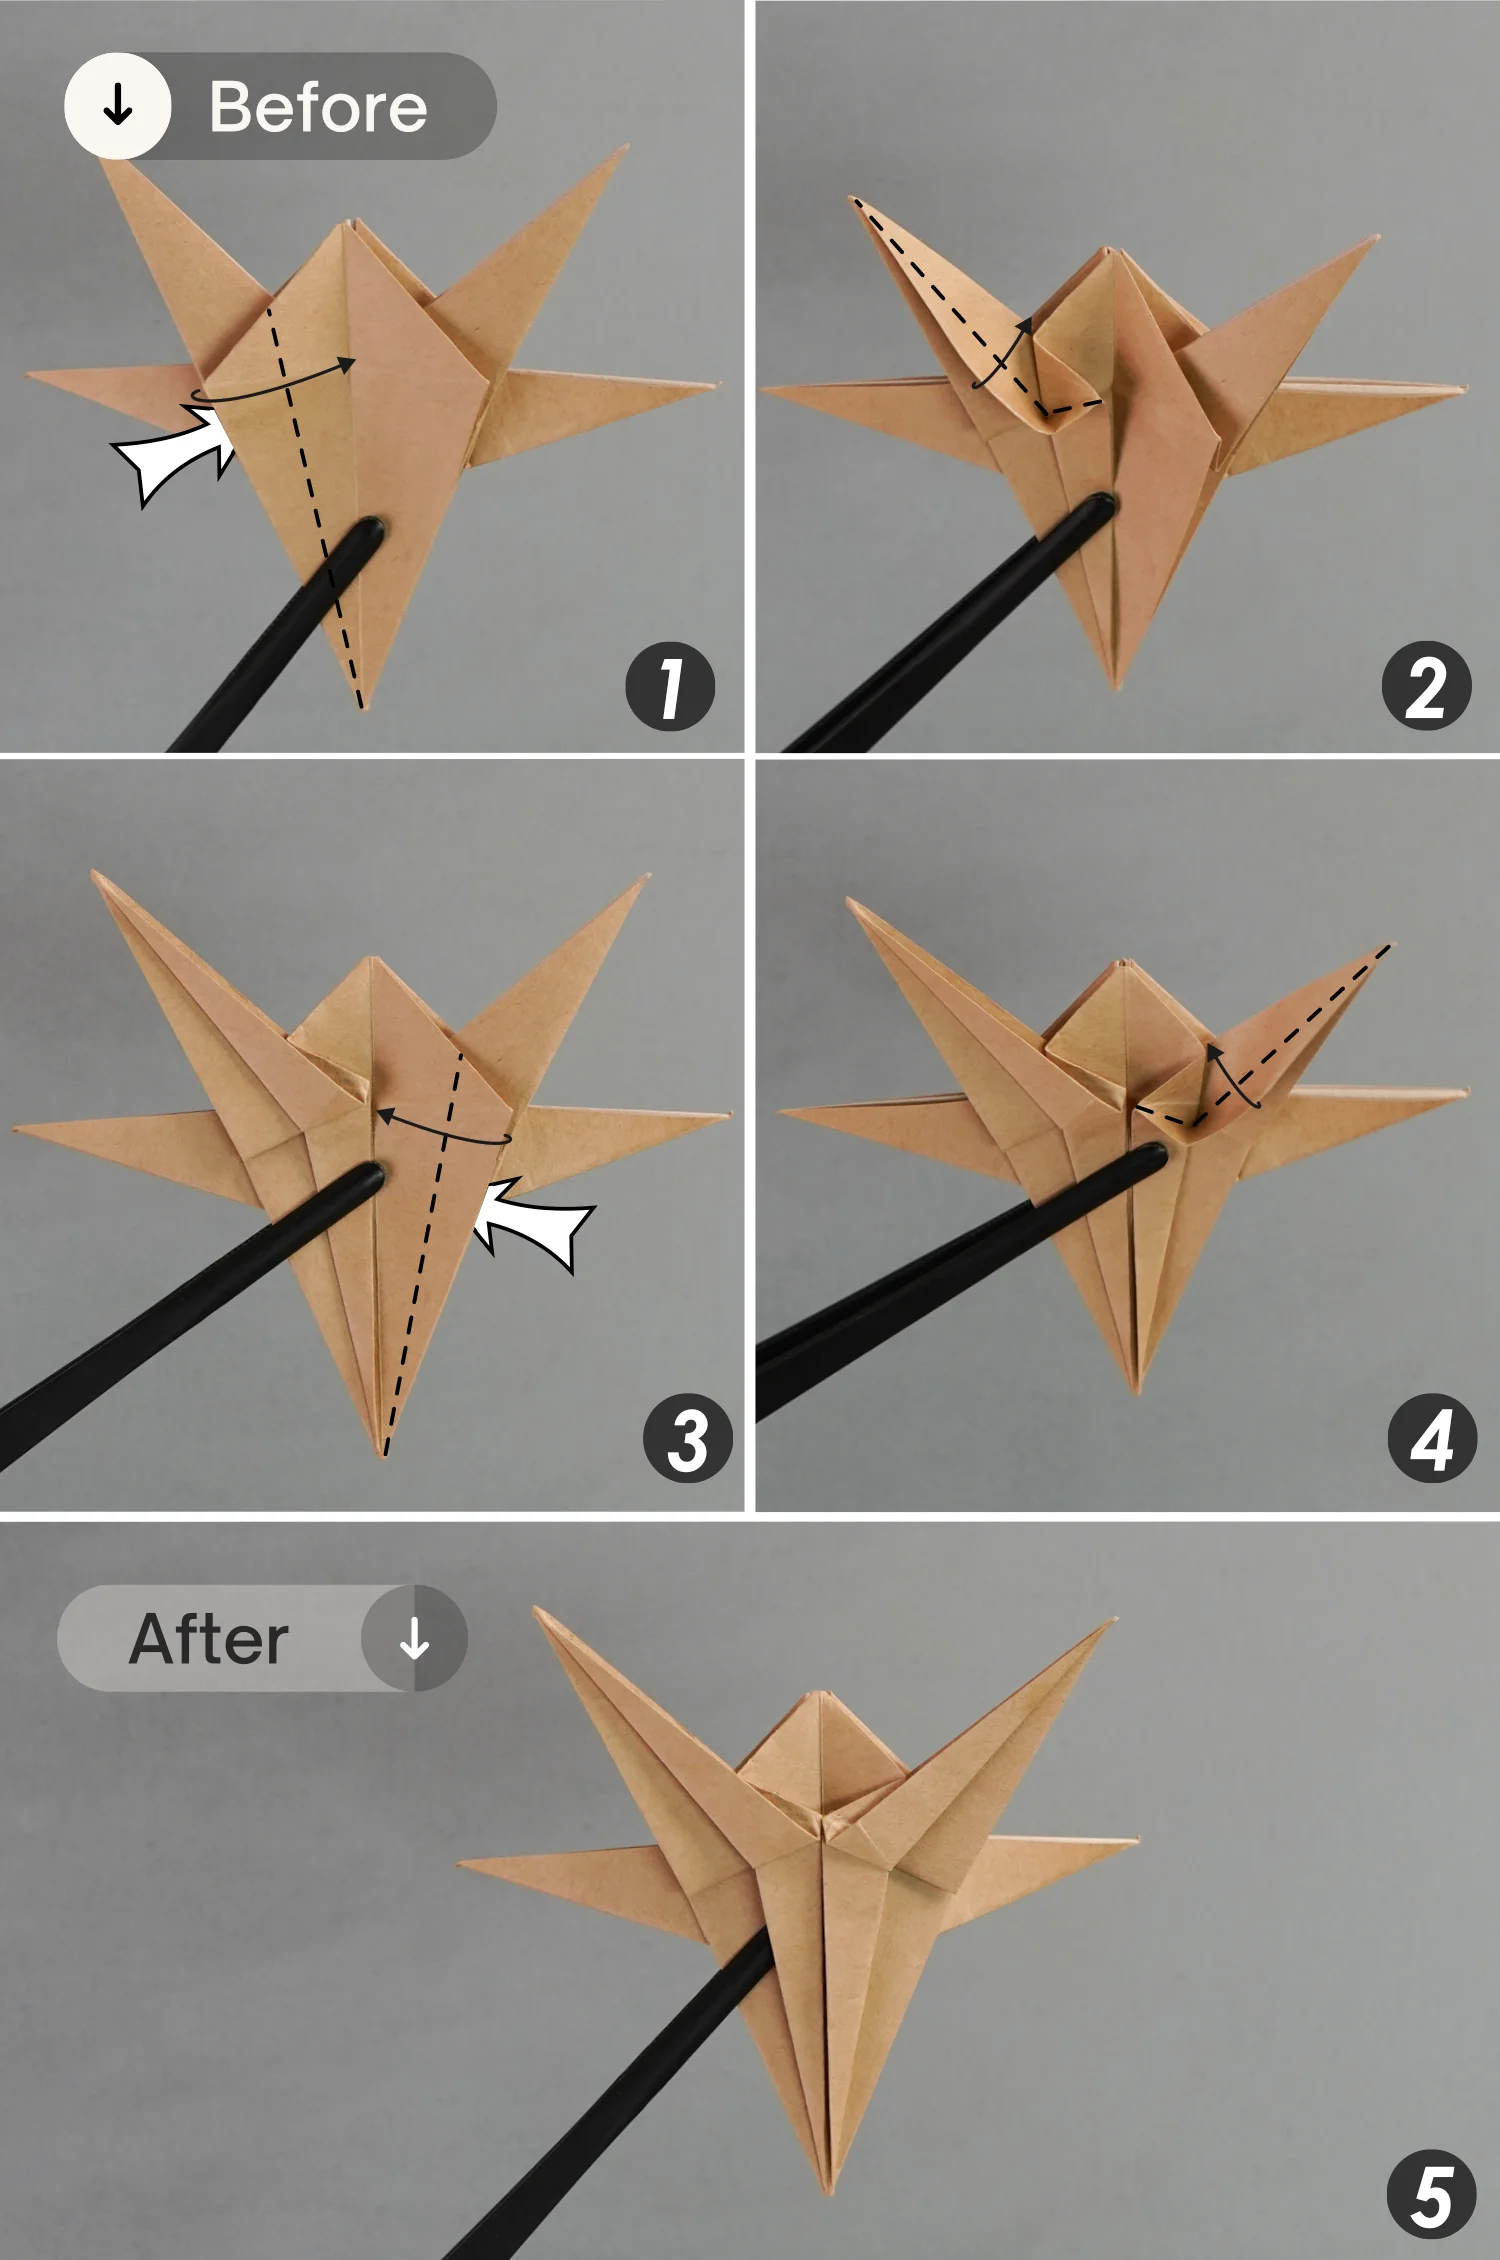
Step 27
Repeat step 23.
Pull the top four points toward the outside, then fold the small triangle on the front backward, and finally flatten the fold.
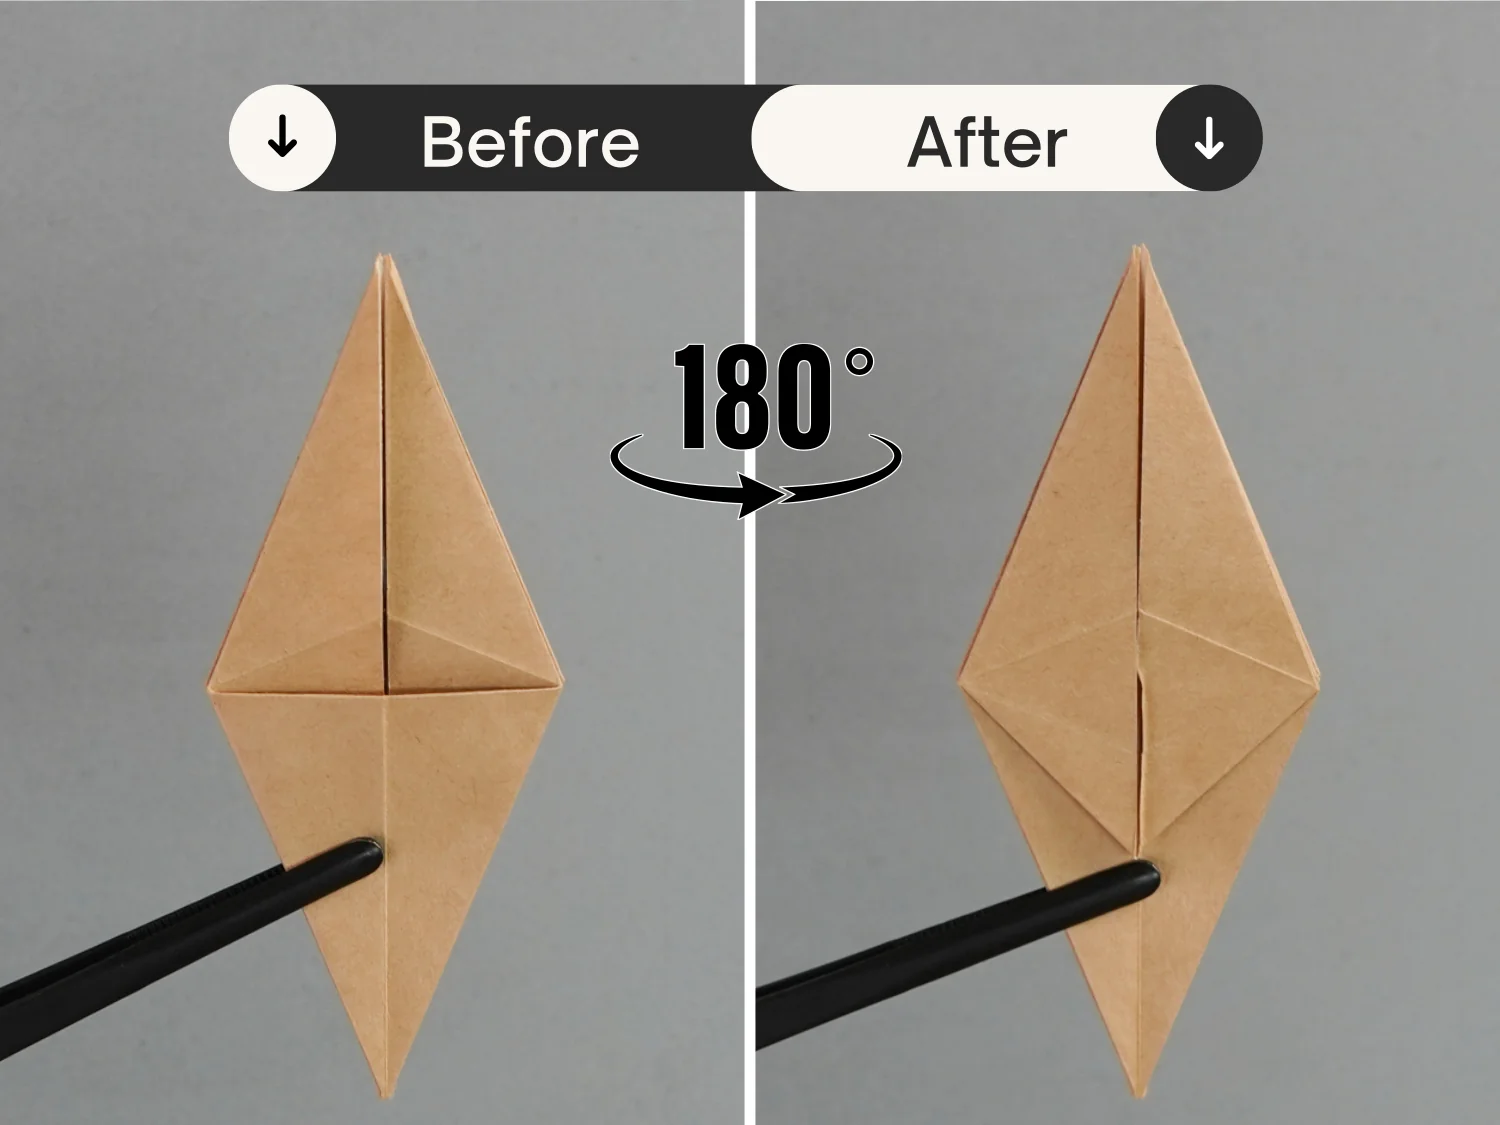
Step 28
Flip the paper over from the left to the right.
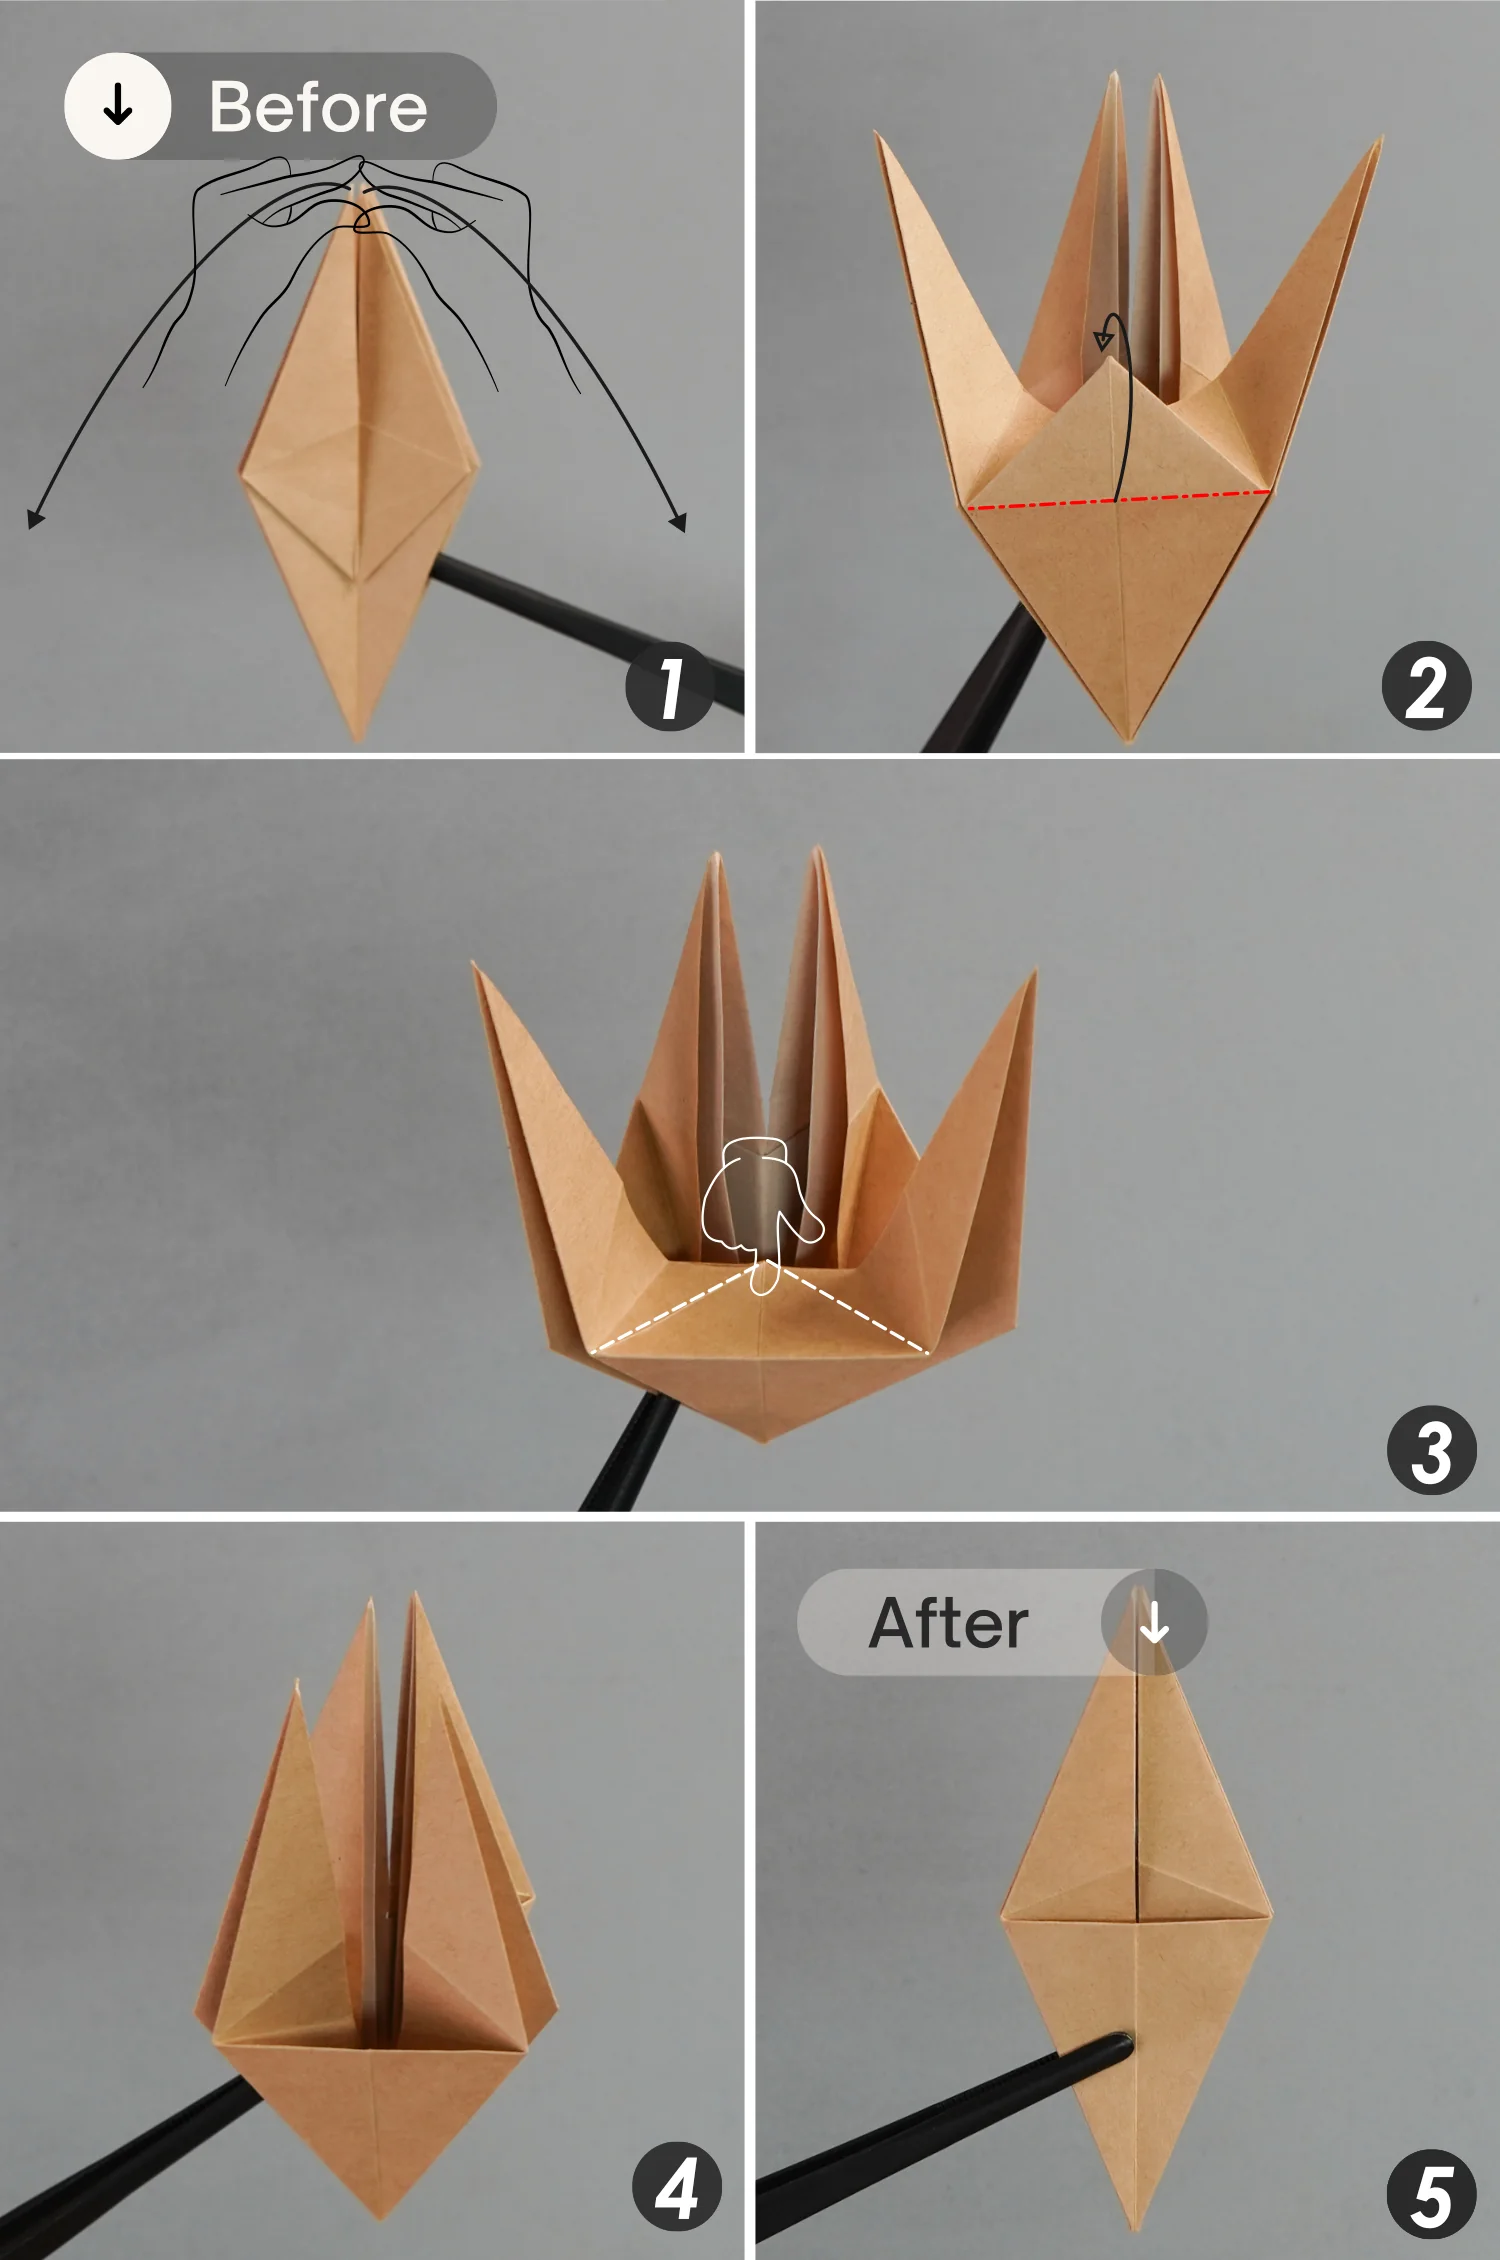
Step 29
Repeat step 23.
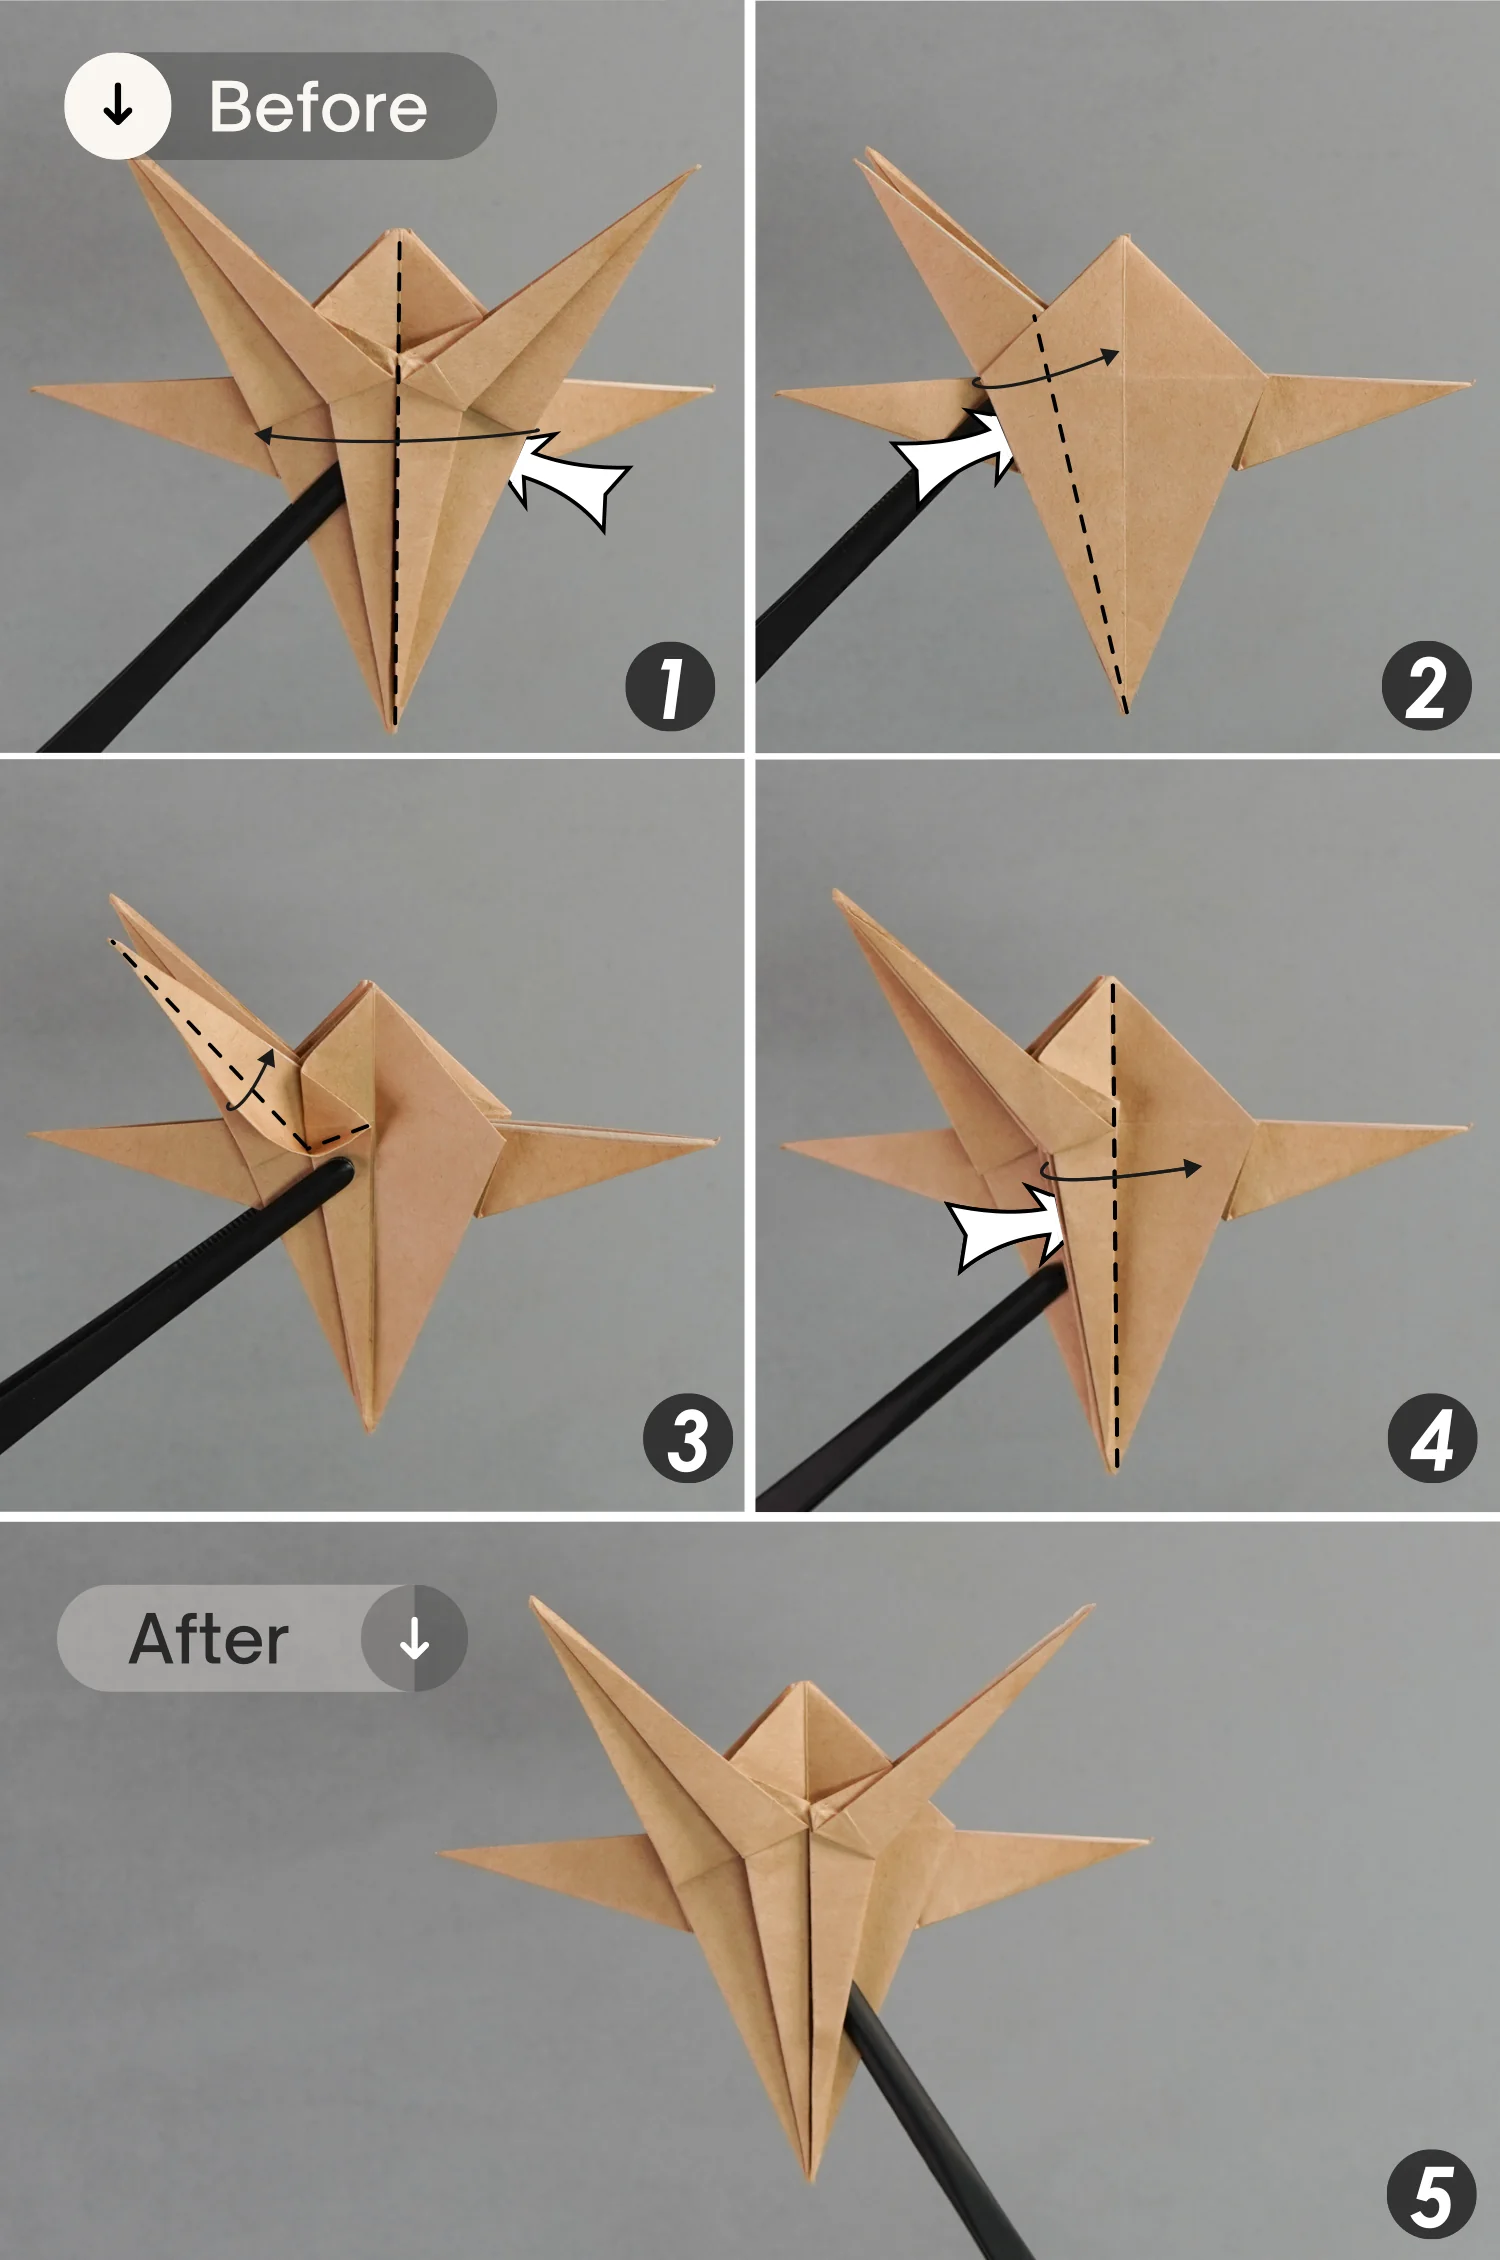
Step 30
Fold the top left and right edges to align with the middle vertical crease, then flip it over from the left to the right, and fold the top left and right edges to align with the middle vertical crease.
Step 31
As you didi in step 26. Rotate it 90 degrees from the front to the back, then bring the upper two flaps together on the top, and bring the lower two flaps together on the bottom, as you can see in the second and third pictures.
Next, rotate it 90 degrees counterclockwise, then rotate it 90 degrees again from the back to the front.
Step 32
Fold the top left and right edges to align with the middle vertical crease, then flip it over from the left to the right, and fold the top left and right edges to align with the middle vertical crease.
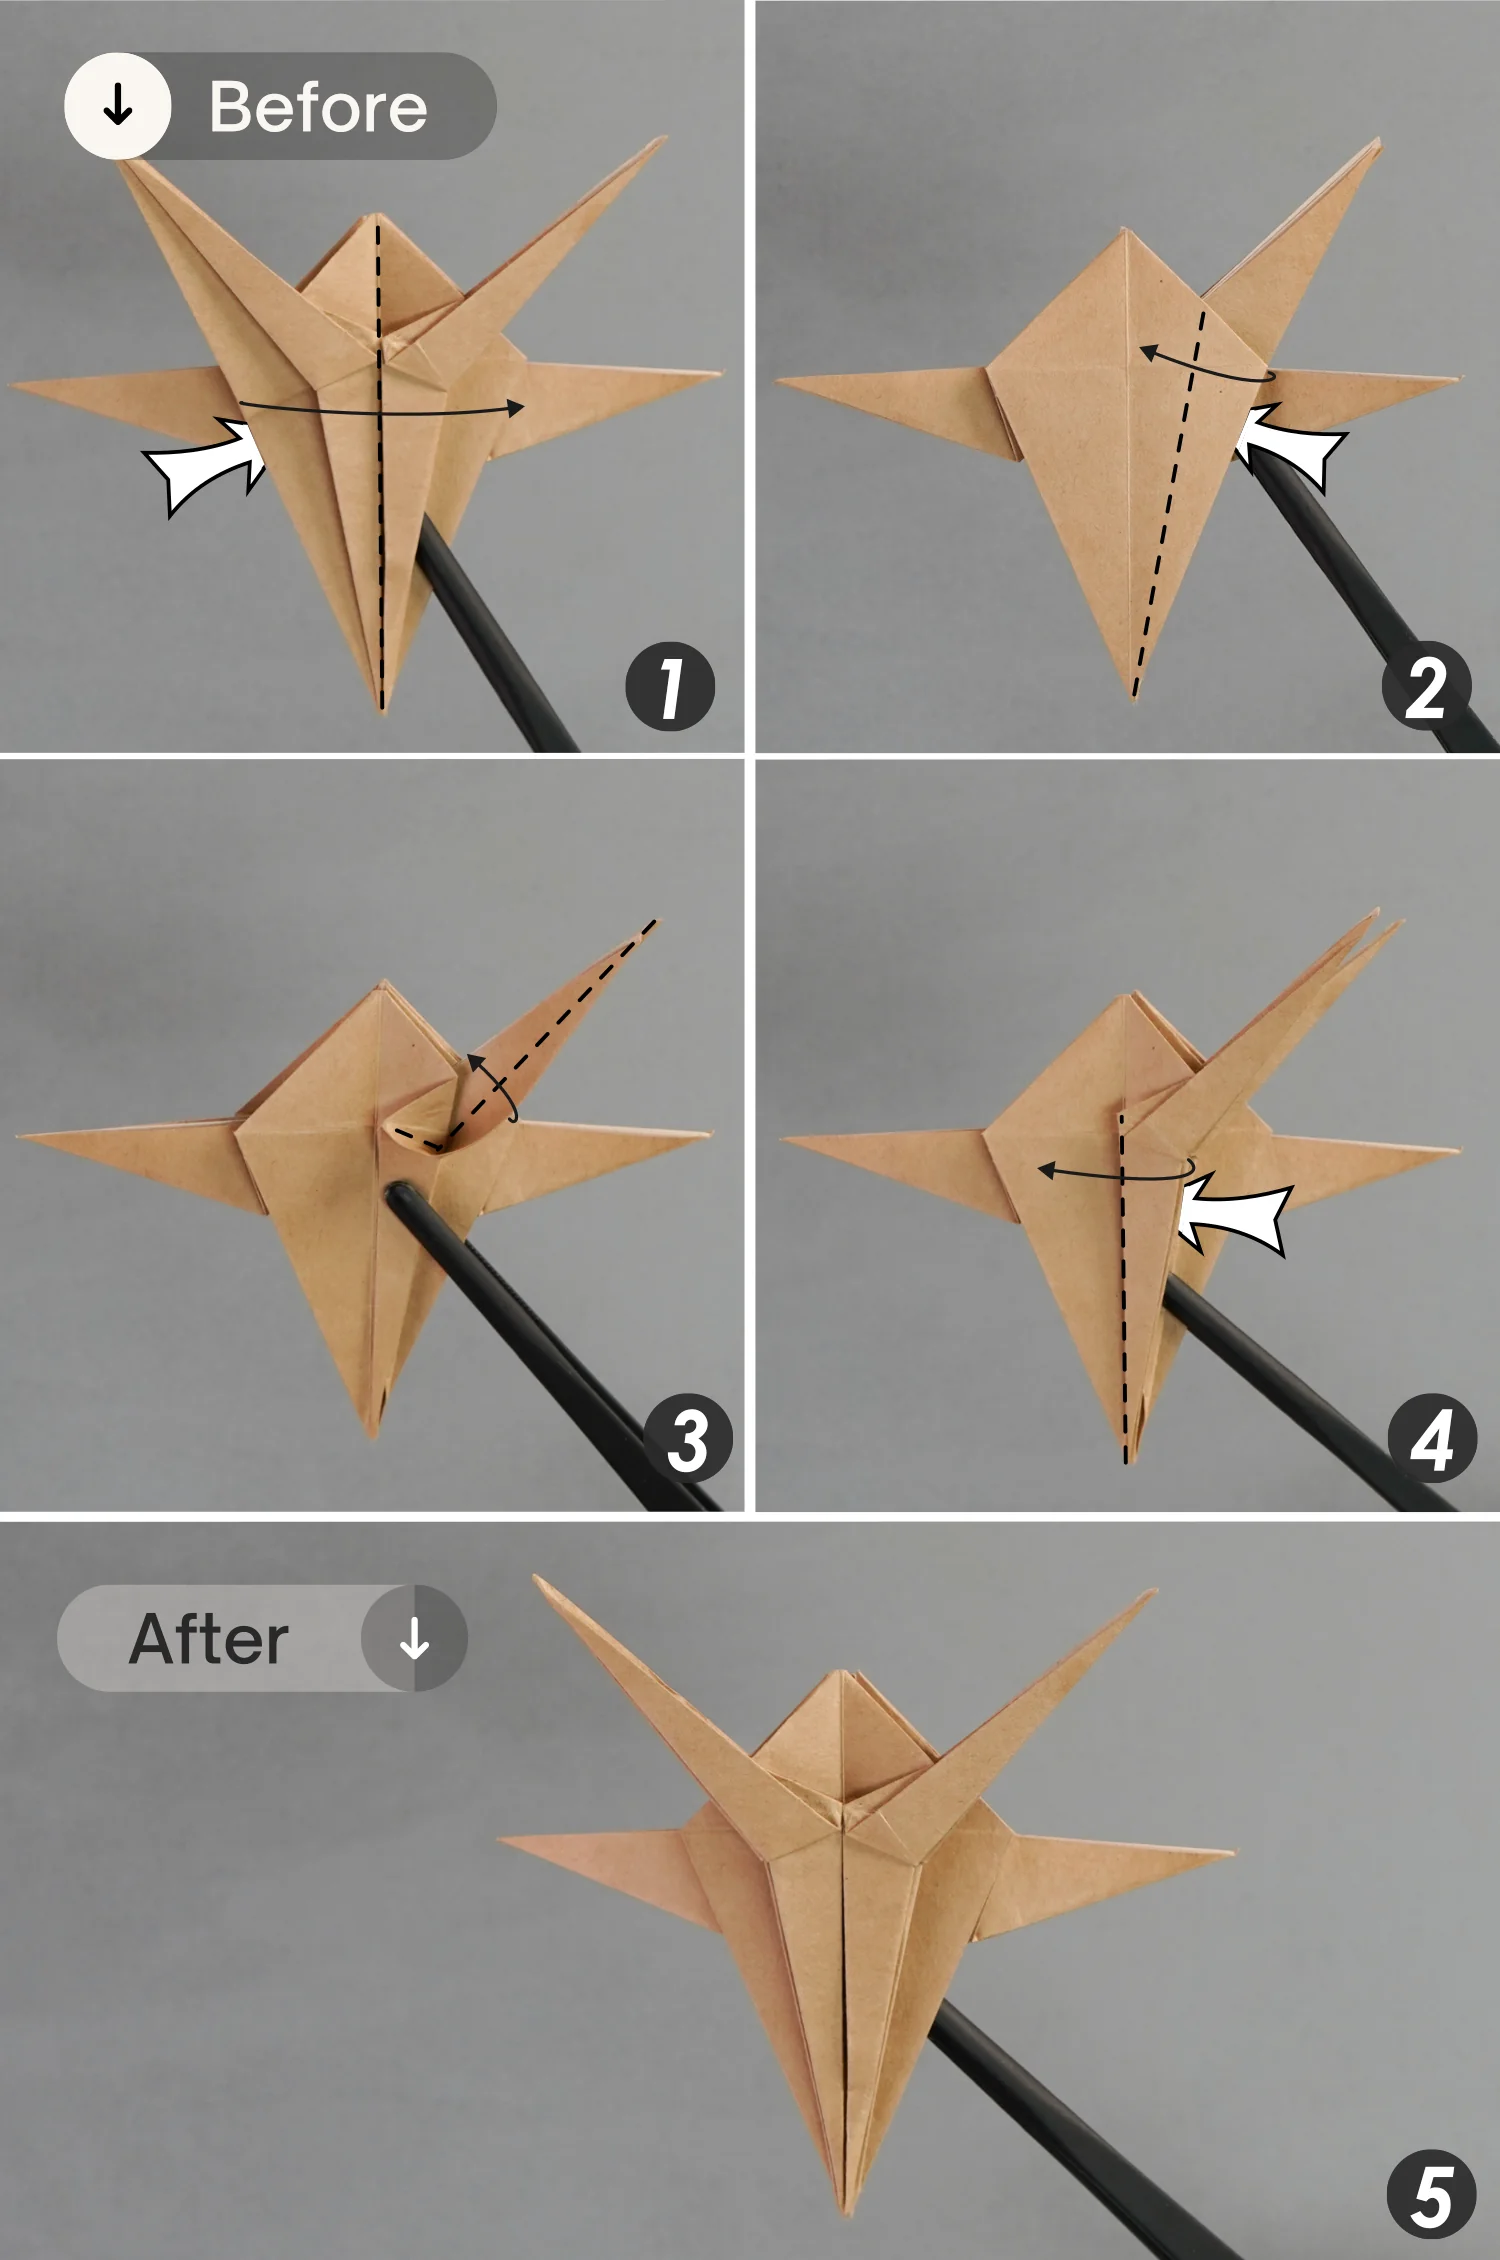
Step 33
Fold down the top two flaps along the black dotted lines, crease them well, and unfold them.

Step 34
Fold the right top layer to the left along the vertical crease, then press down the top point along the creases you just made, and finally fold the left layer back to the right side.
Step 35
Fold the left layer to the right along the vertical crease, then press down the top point along the creases you made in step 33, and finally fold the right layer back to the left side.
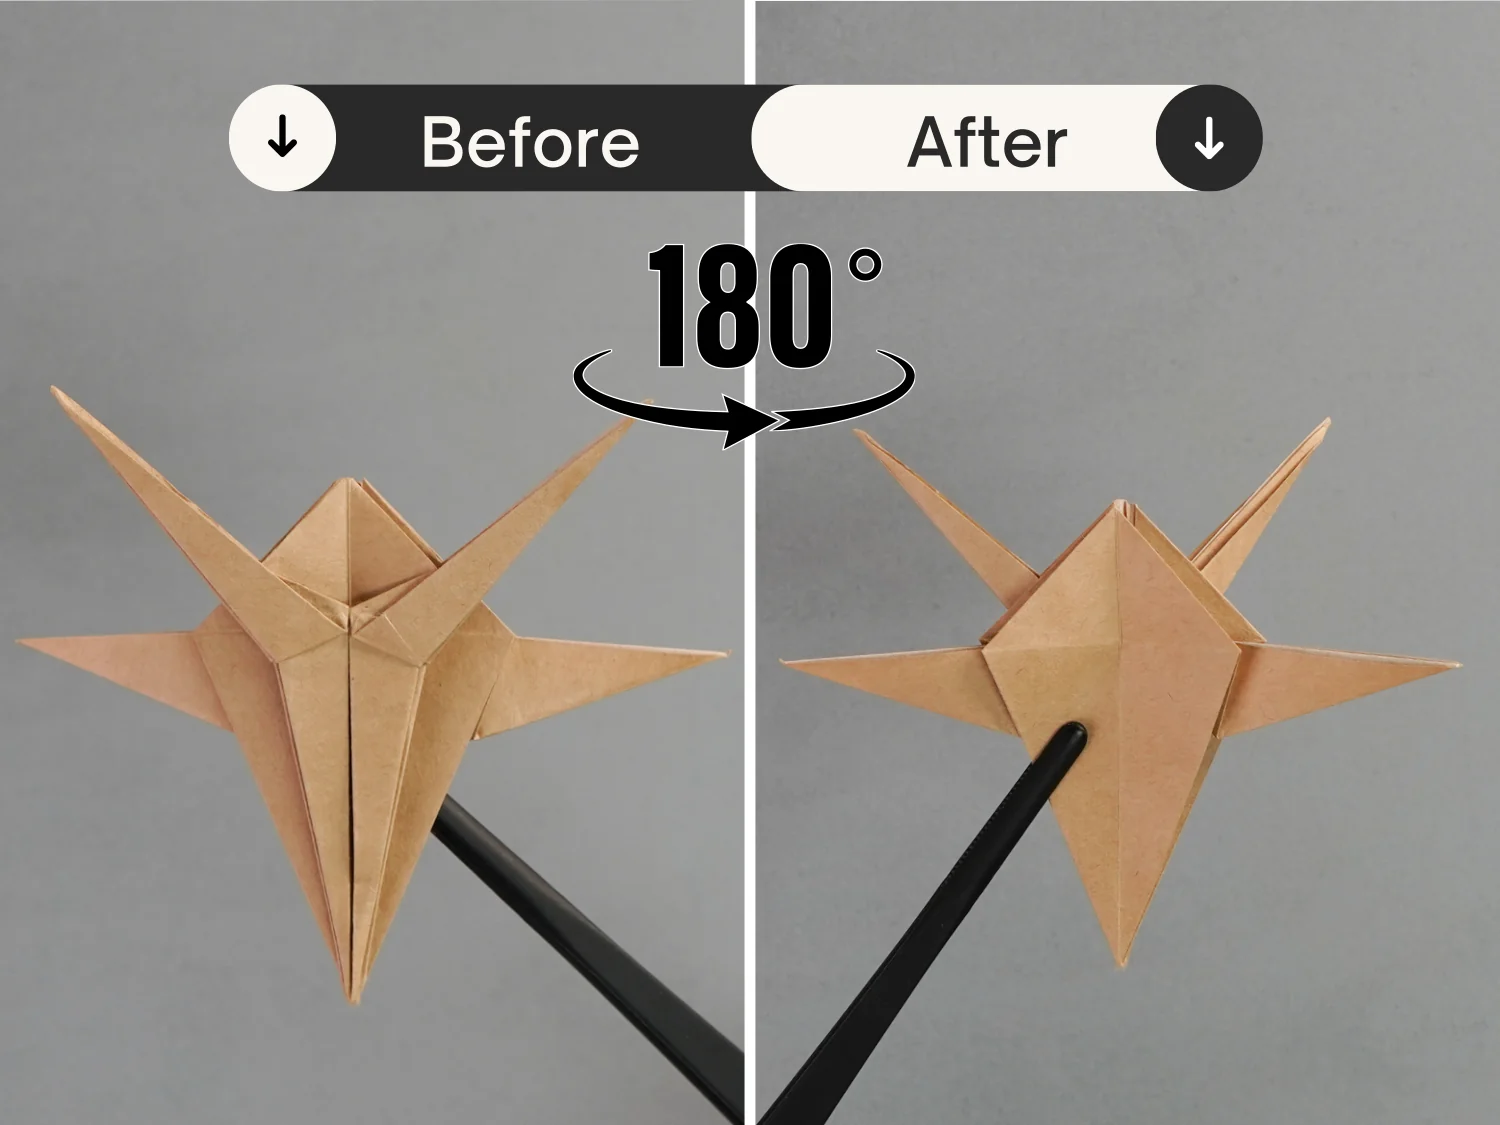
Step 36
Turn the paper over from the left to the right.
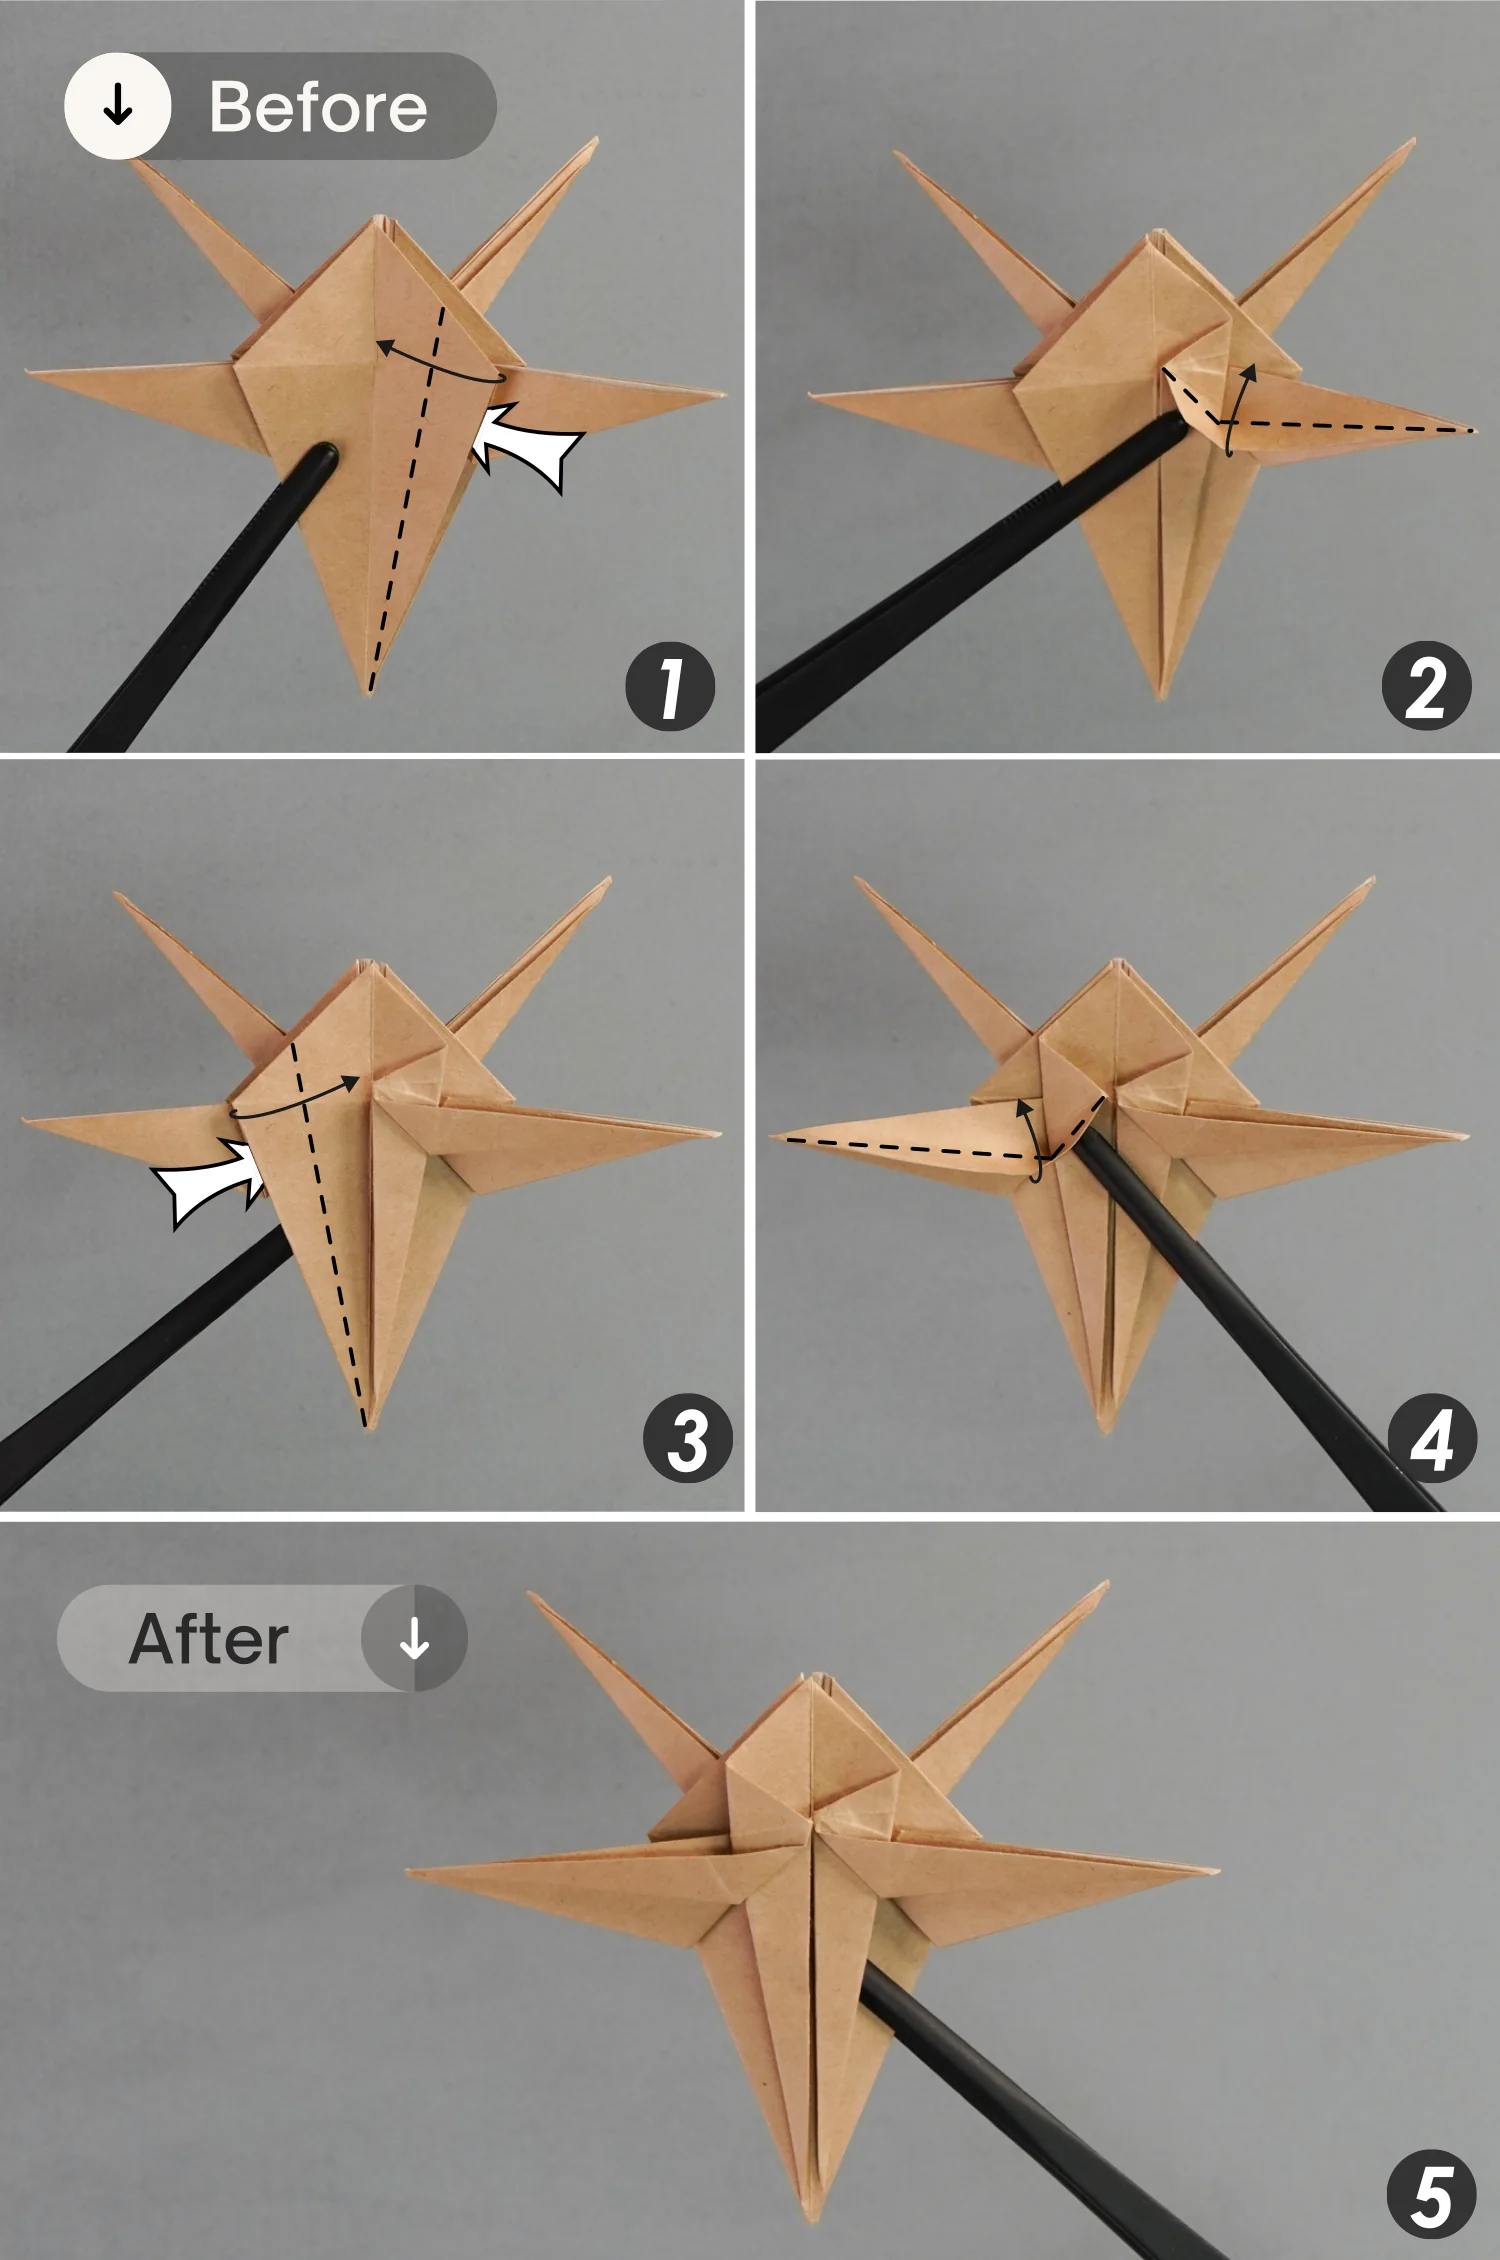
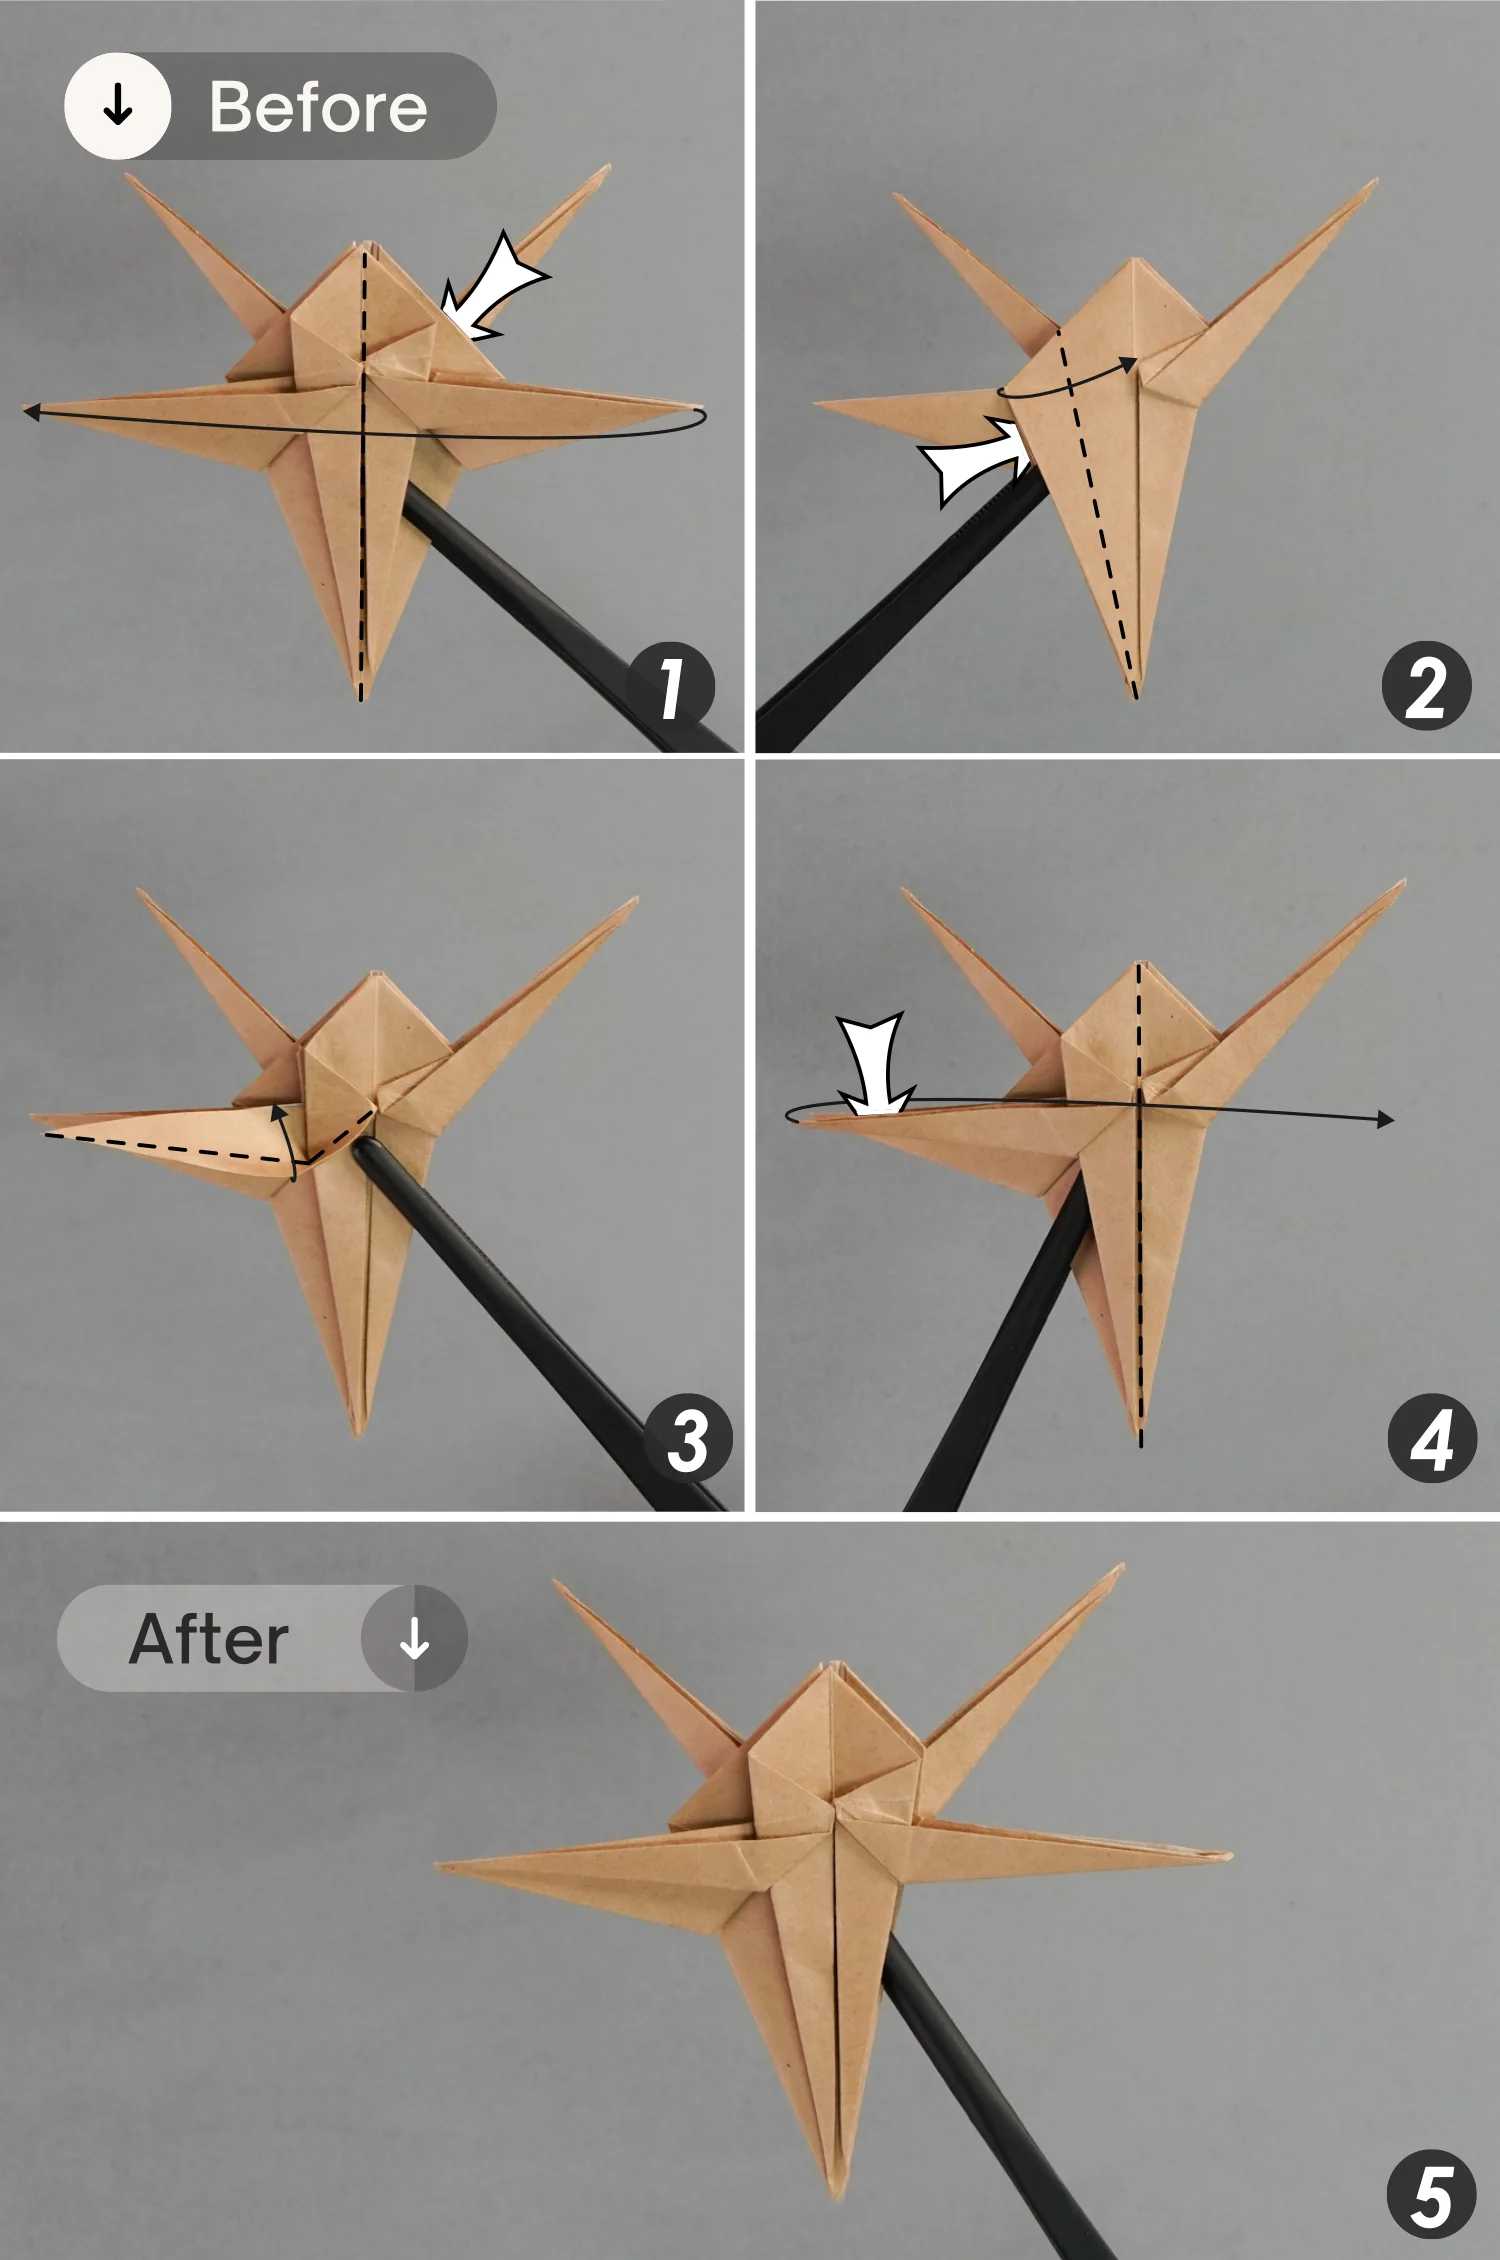
Step 37
As you did in step 33, fold down the two top points, crease them well, and unfold them. [Ensure the fold section is slightly longer than the section in step 33]
Step 38
Fold the right layer to the left along the vertical crease, then press down the top point along the creases you just made, and finally fold the left layer back to the right side.
Step 39
Fold the left layer to the right along the vertical crease, then press down the top point along the creases you just made, and finally fold the right layer back to the left side.

Step 40
Bend these four legs, then flip it over from the left to the right.
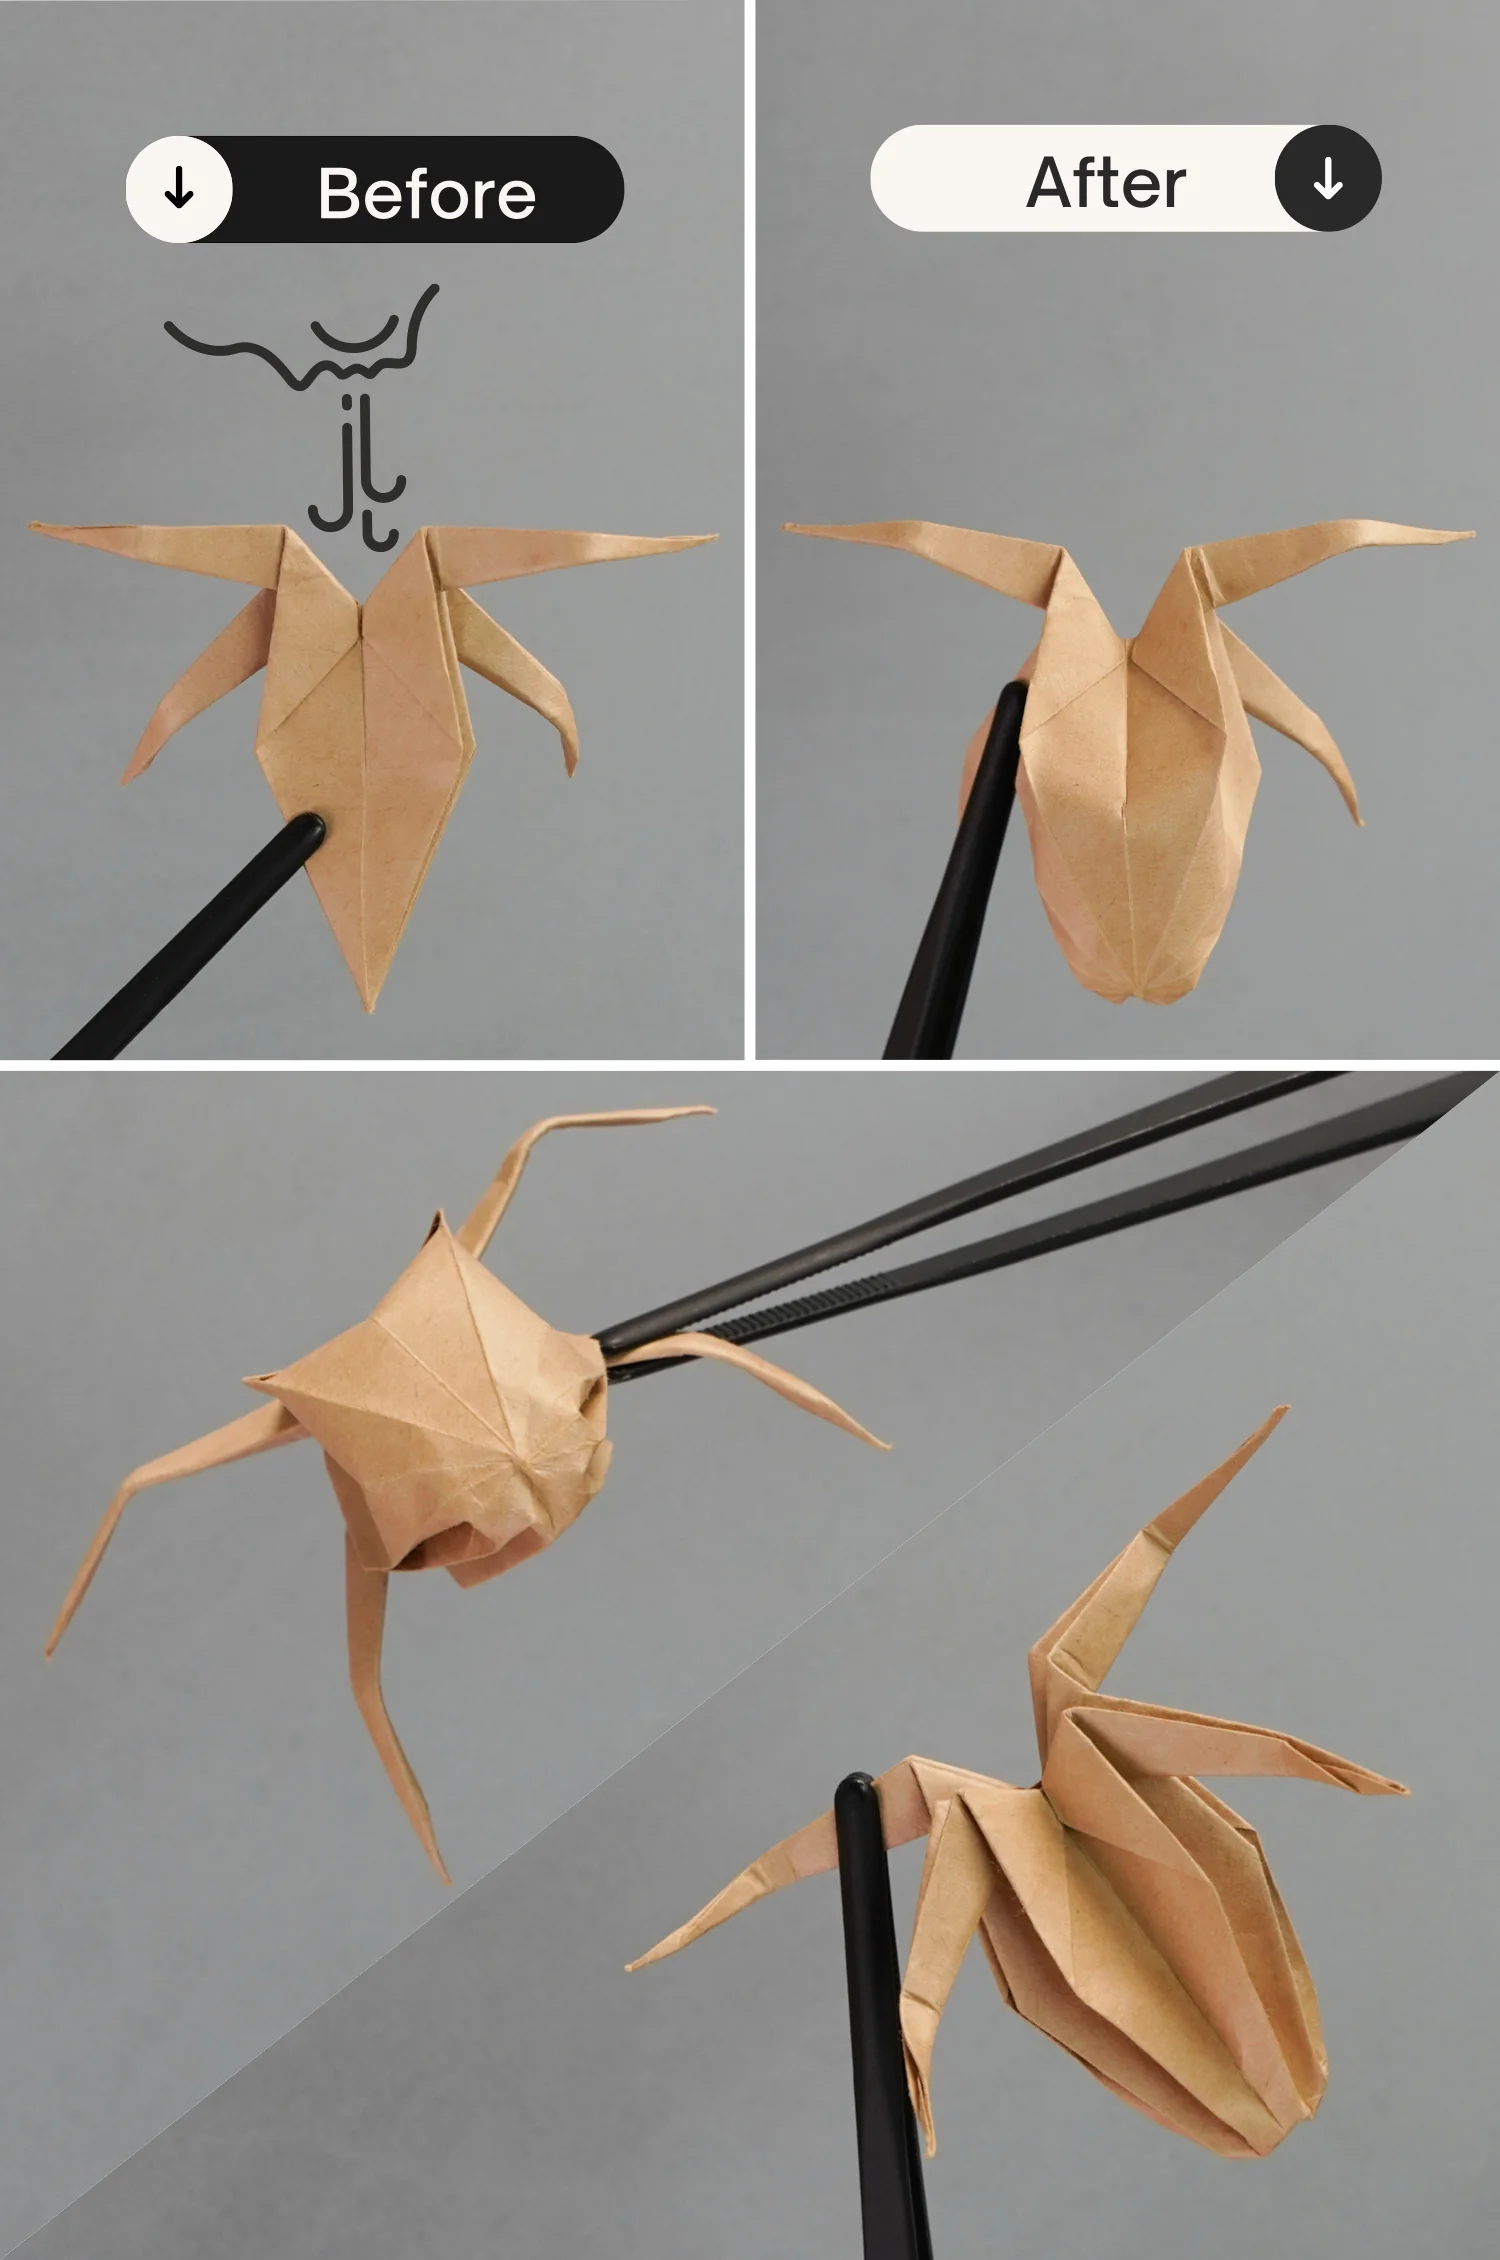
Step 41
Blow it from the hole on the top to inflate it. That’s the body and back legs part.
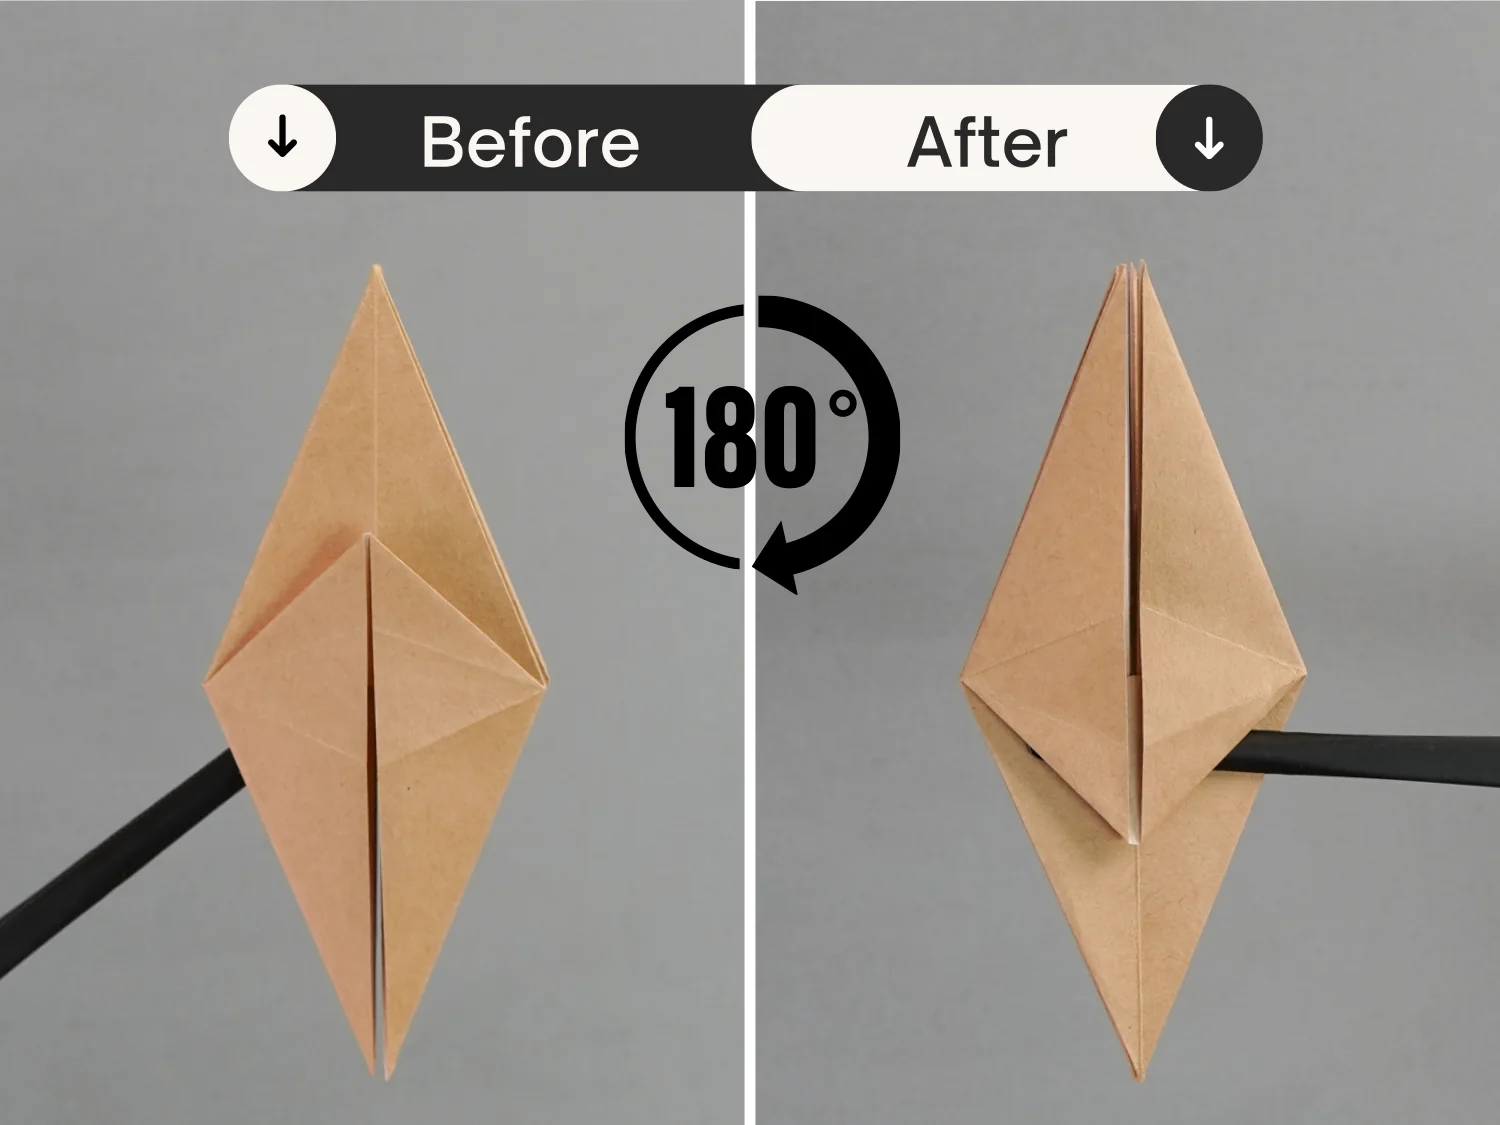
Step 42
Take out another model, and rotate it 180 degrees clockwise.
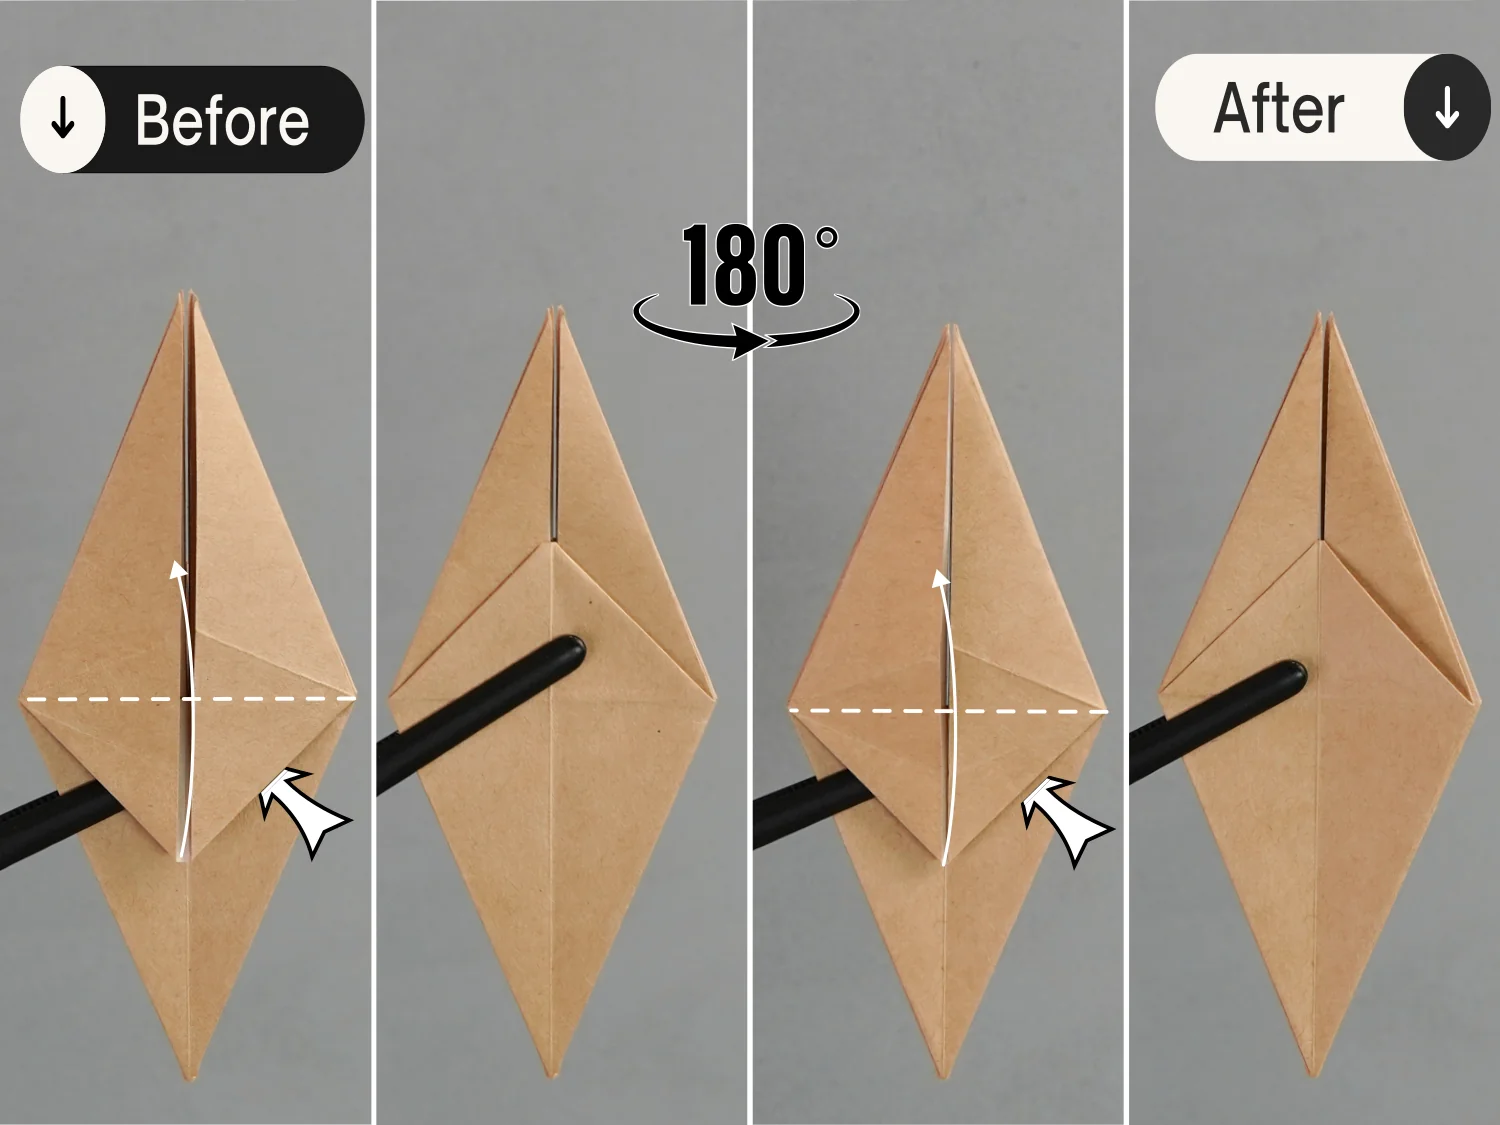
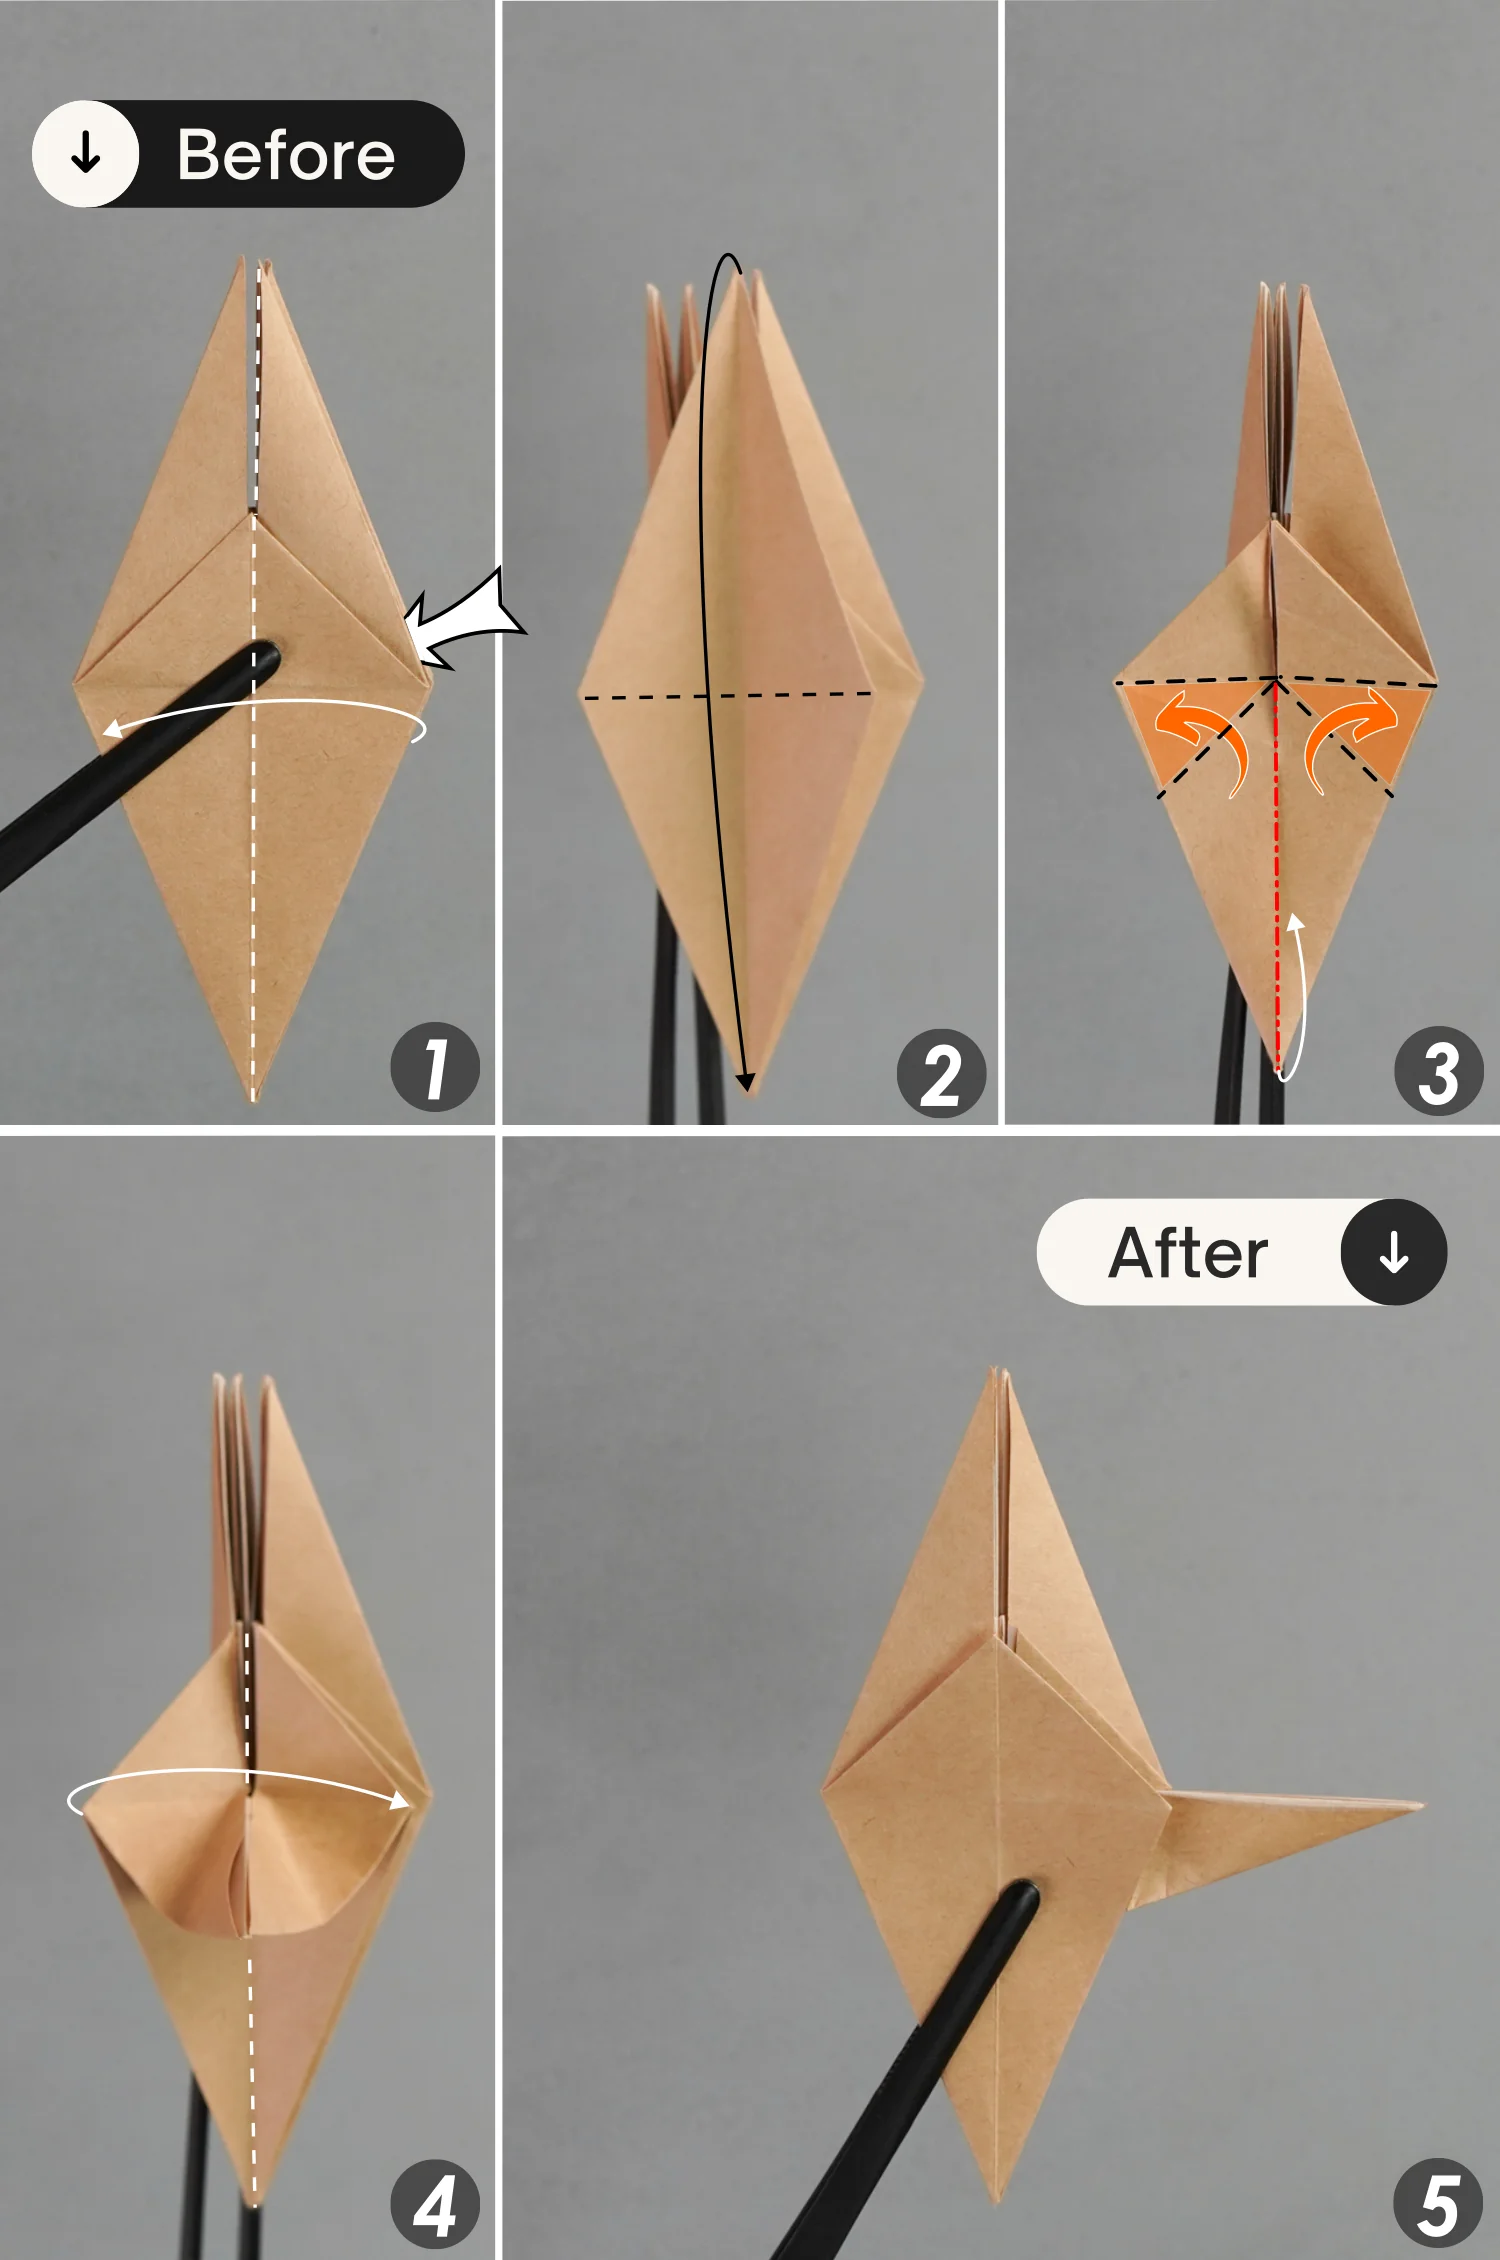
Step 43
Fold up the middle triangle, then rotate it 180 degrees from the left to the right, and fold up the triangle on this side.
We will fold up another two triangles on the other two sides.
Step 44
Now we are going to flip it to another two sides.
Rotate it 90 degrees from the front to the back, then bring the upper two flaps together on the top, and bring the lower two flaps together on the bottom. Next, rotate it 90 degrees clockwise, and finally rotate it 90 degrees from the back to the front.
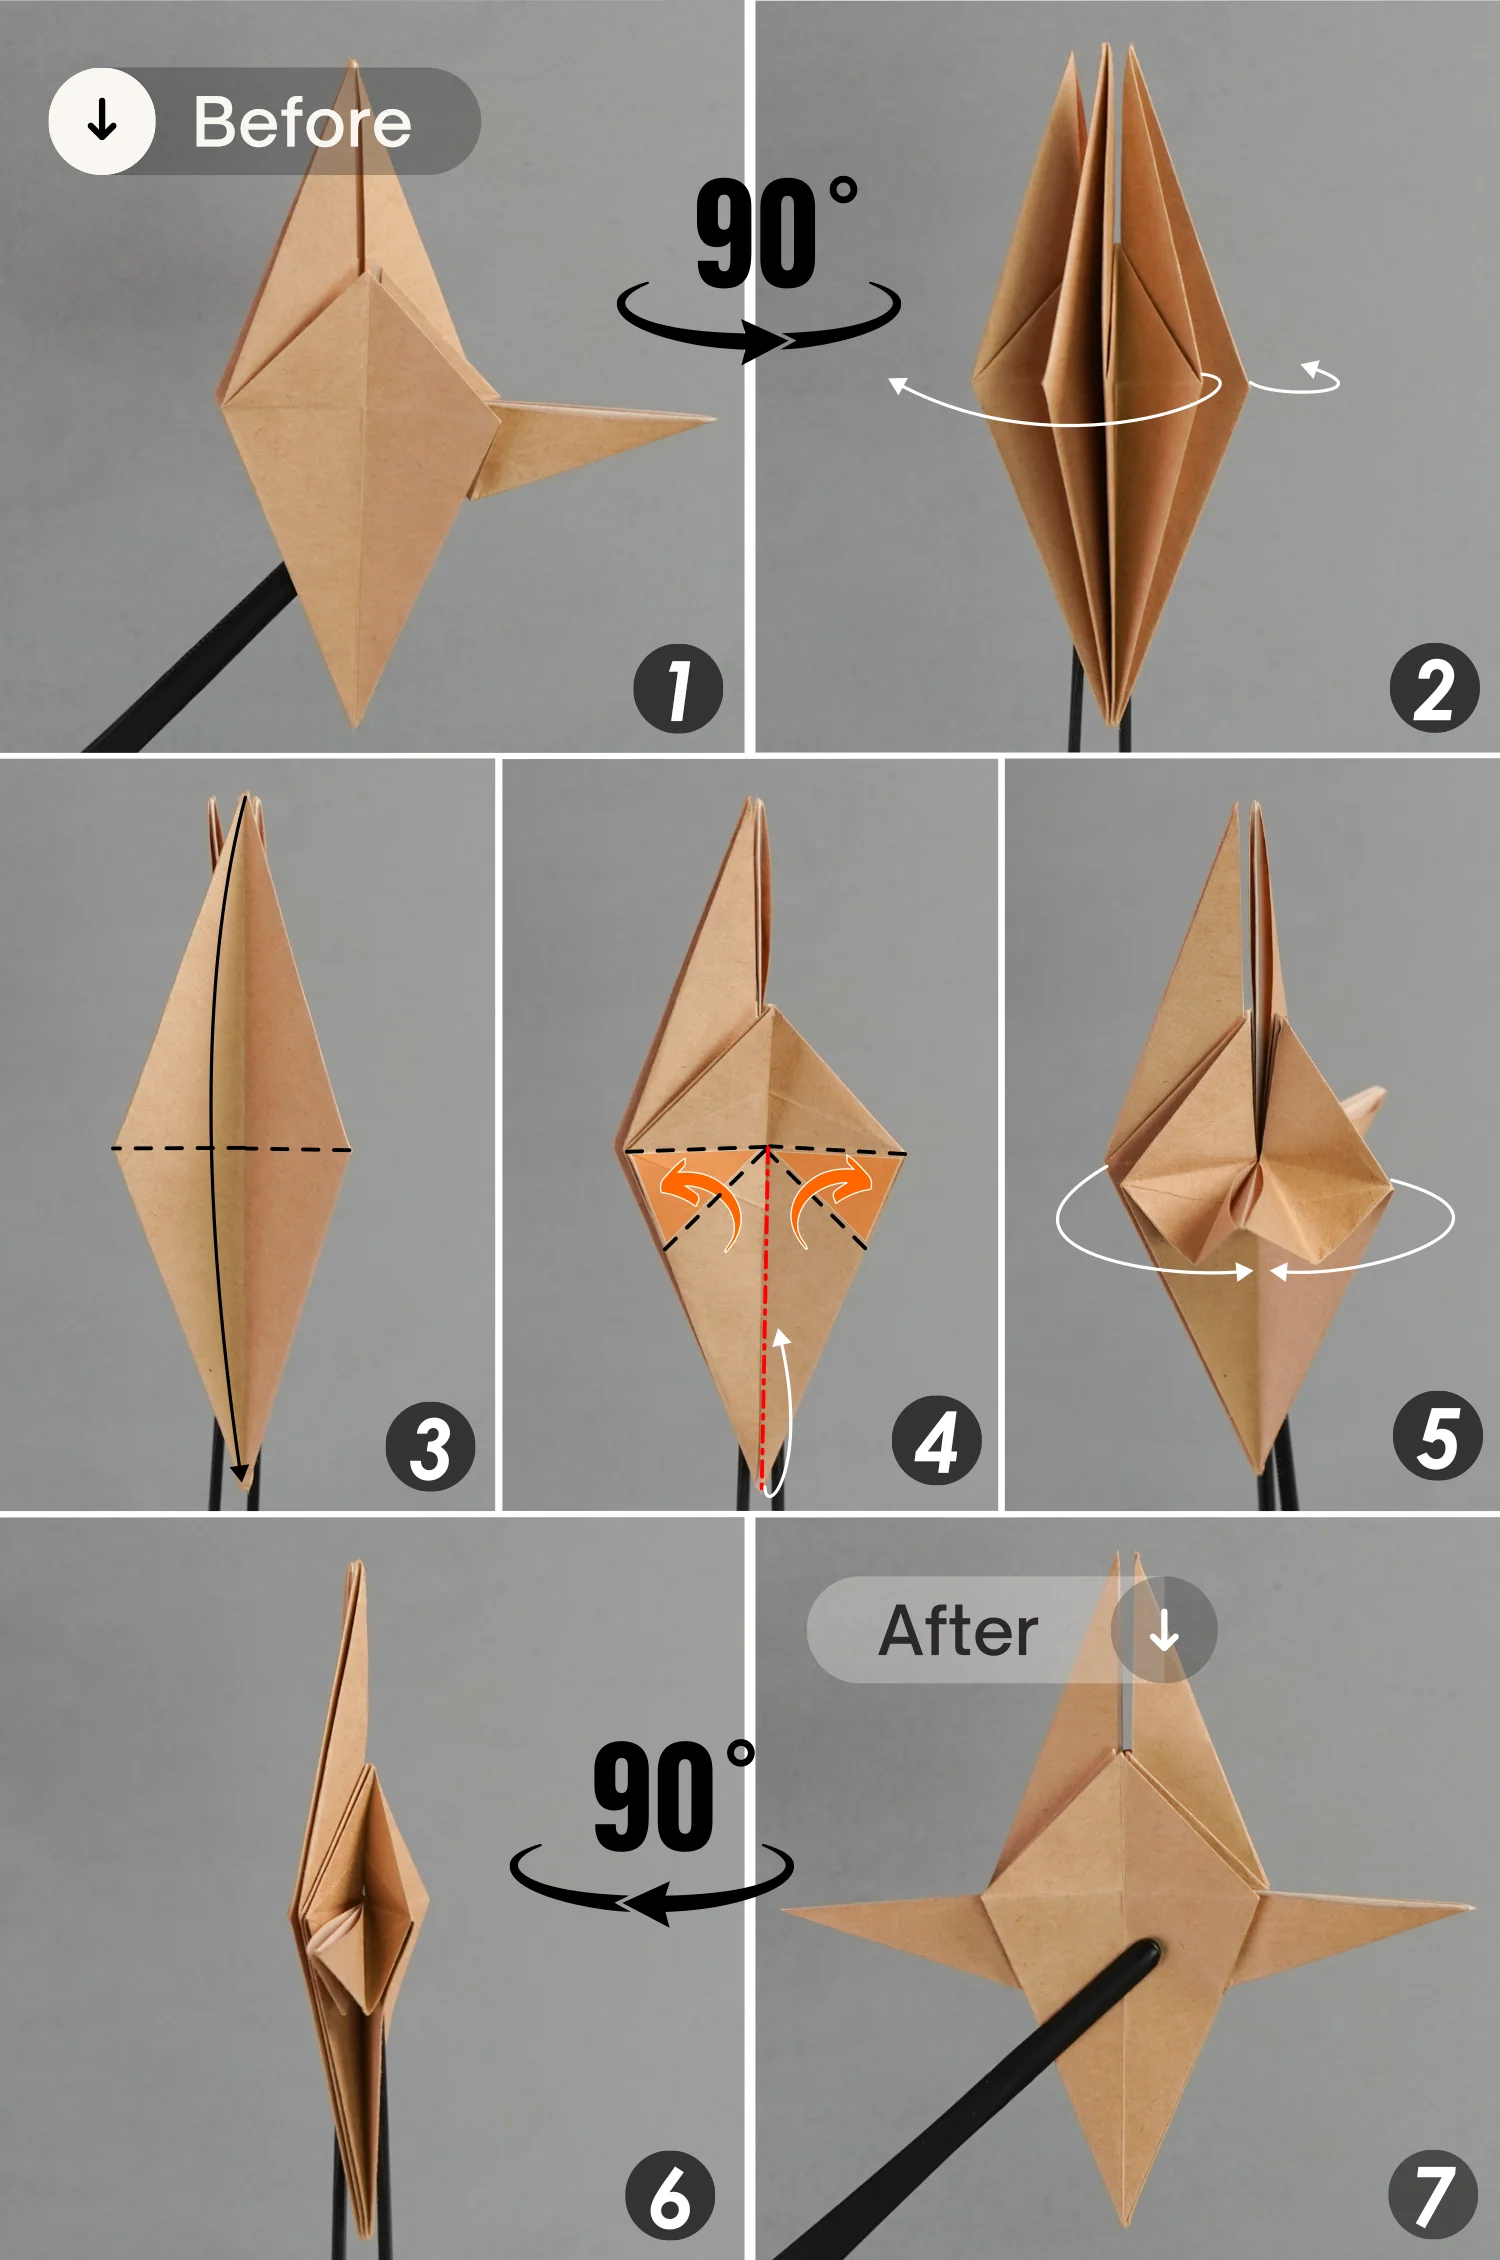
Step 45
Fold up the middle triangle, then flip the paper over, and fold up the middle triangle on this side.
Step 46
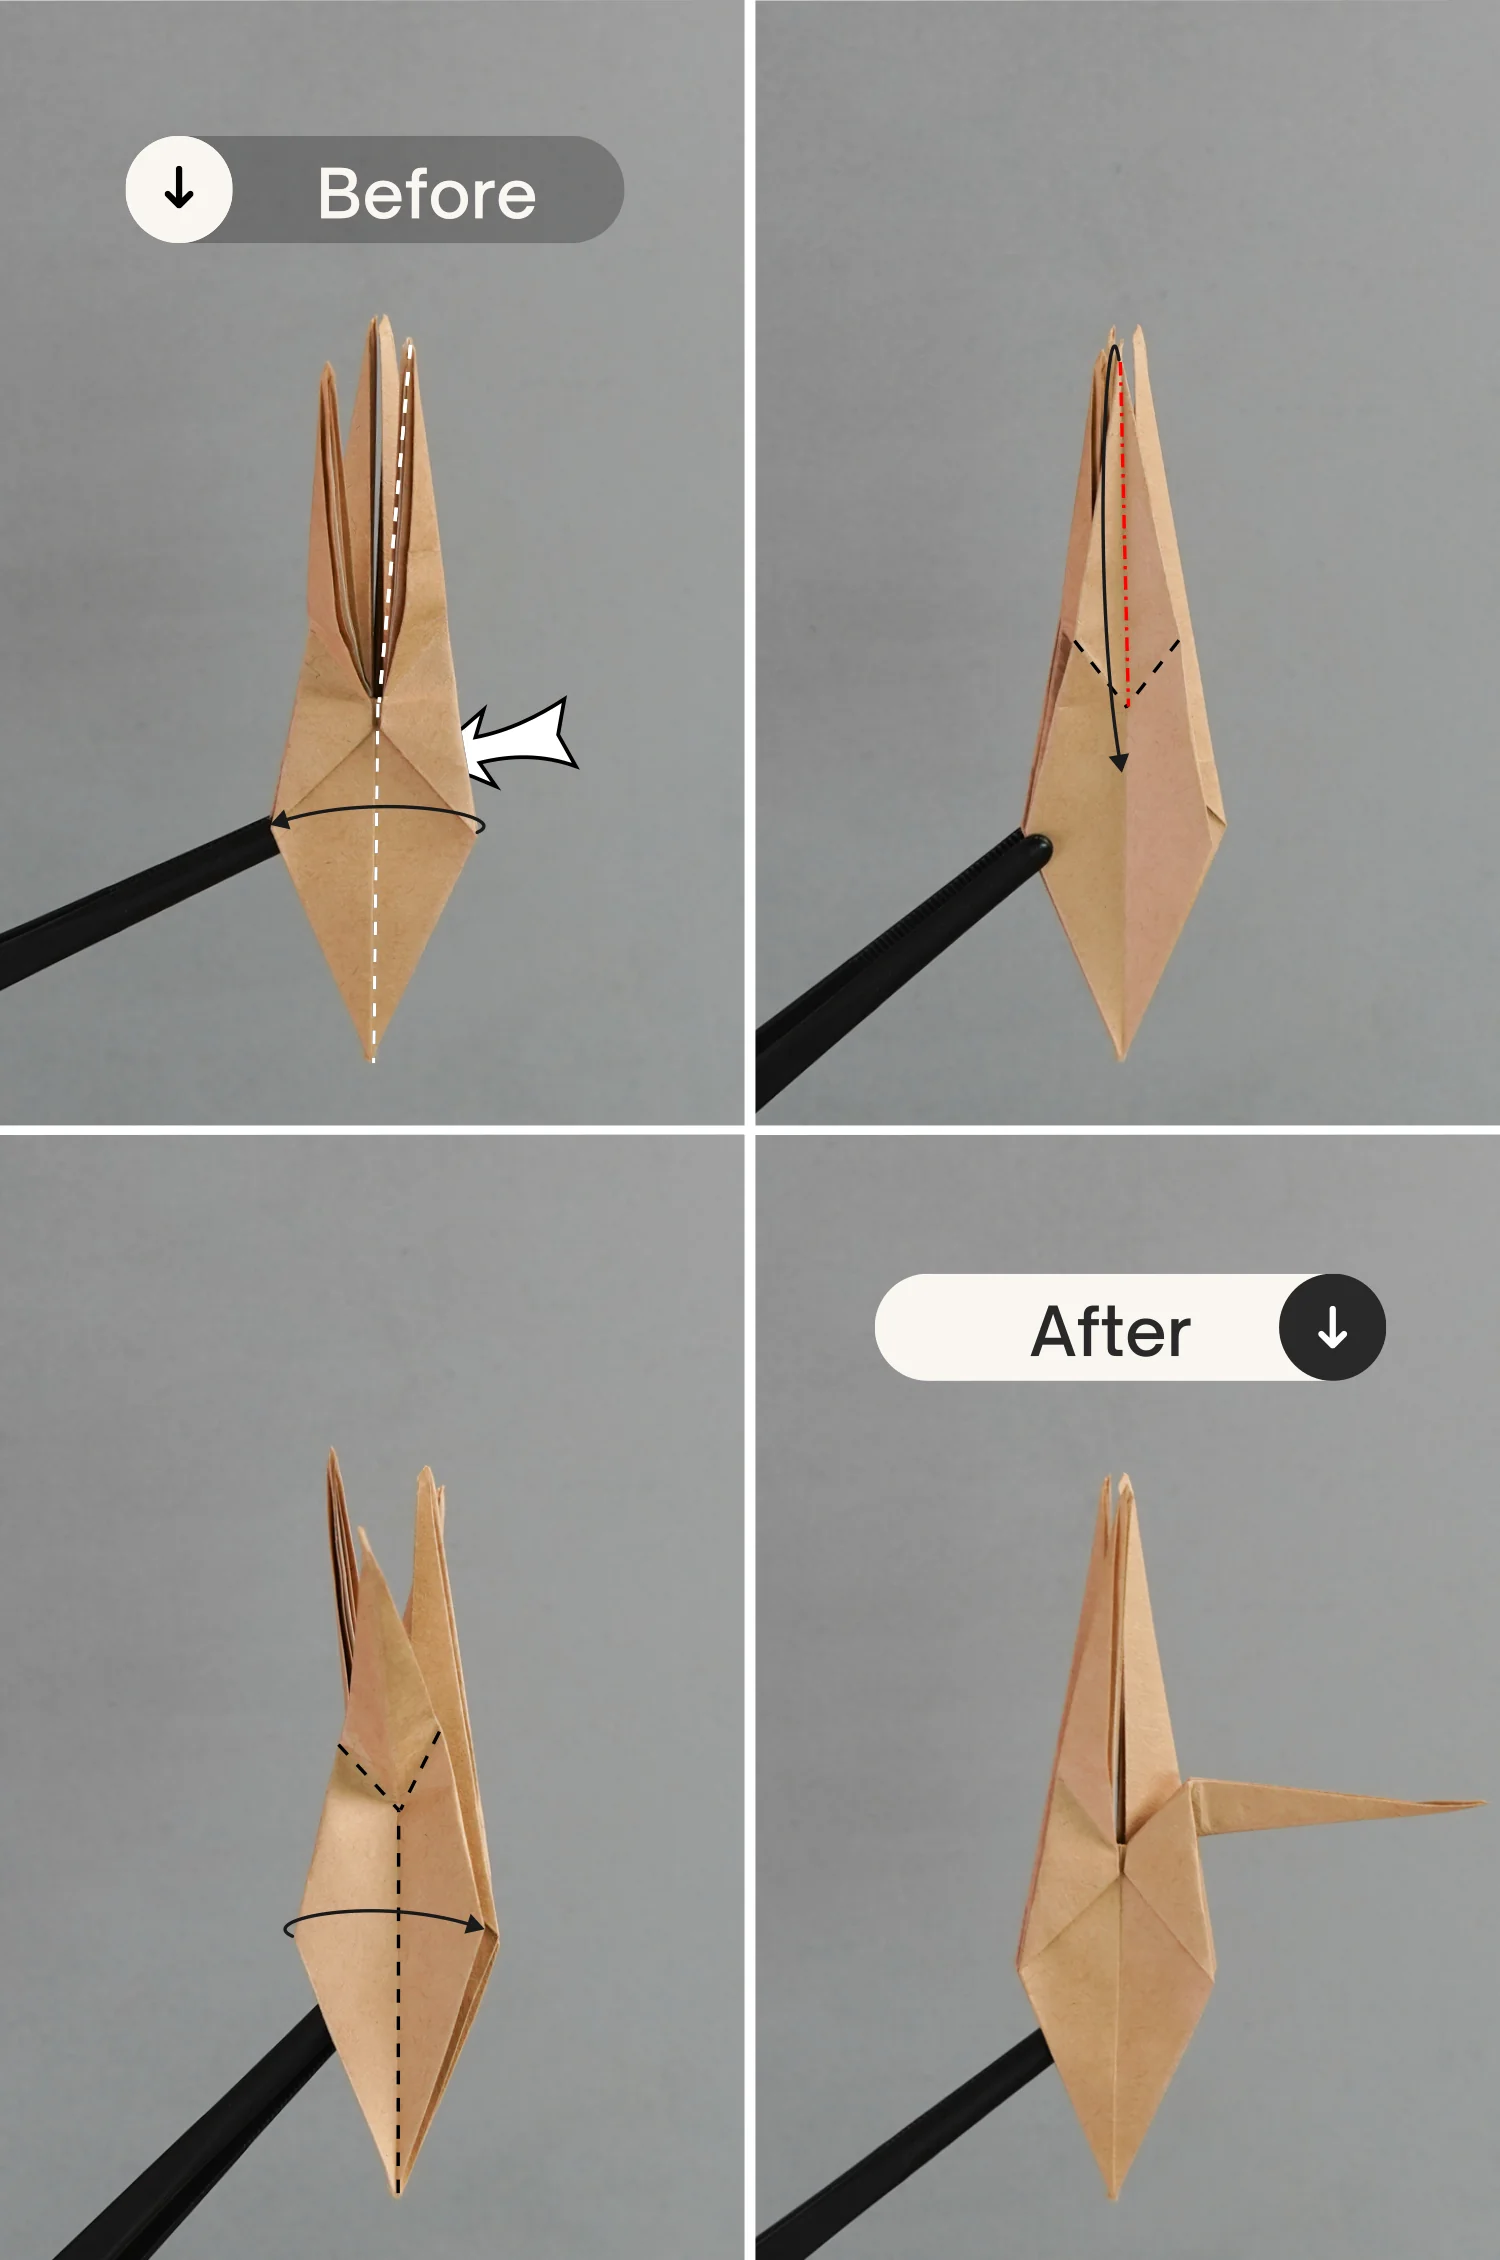
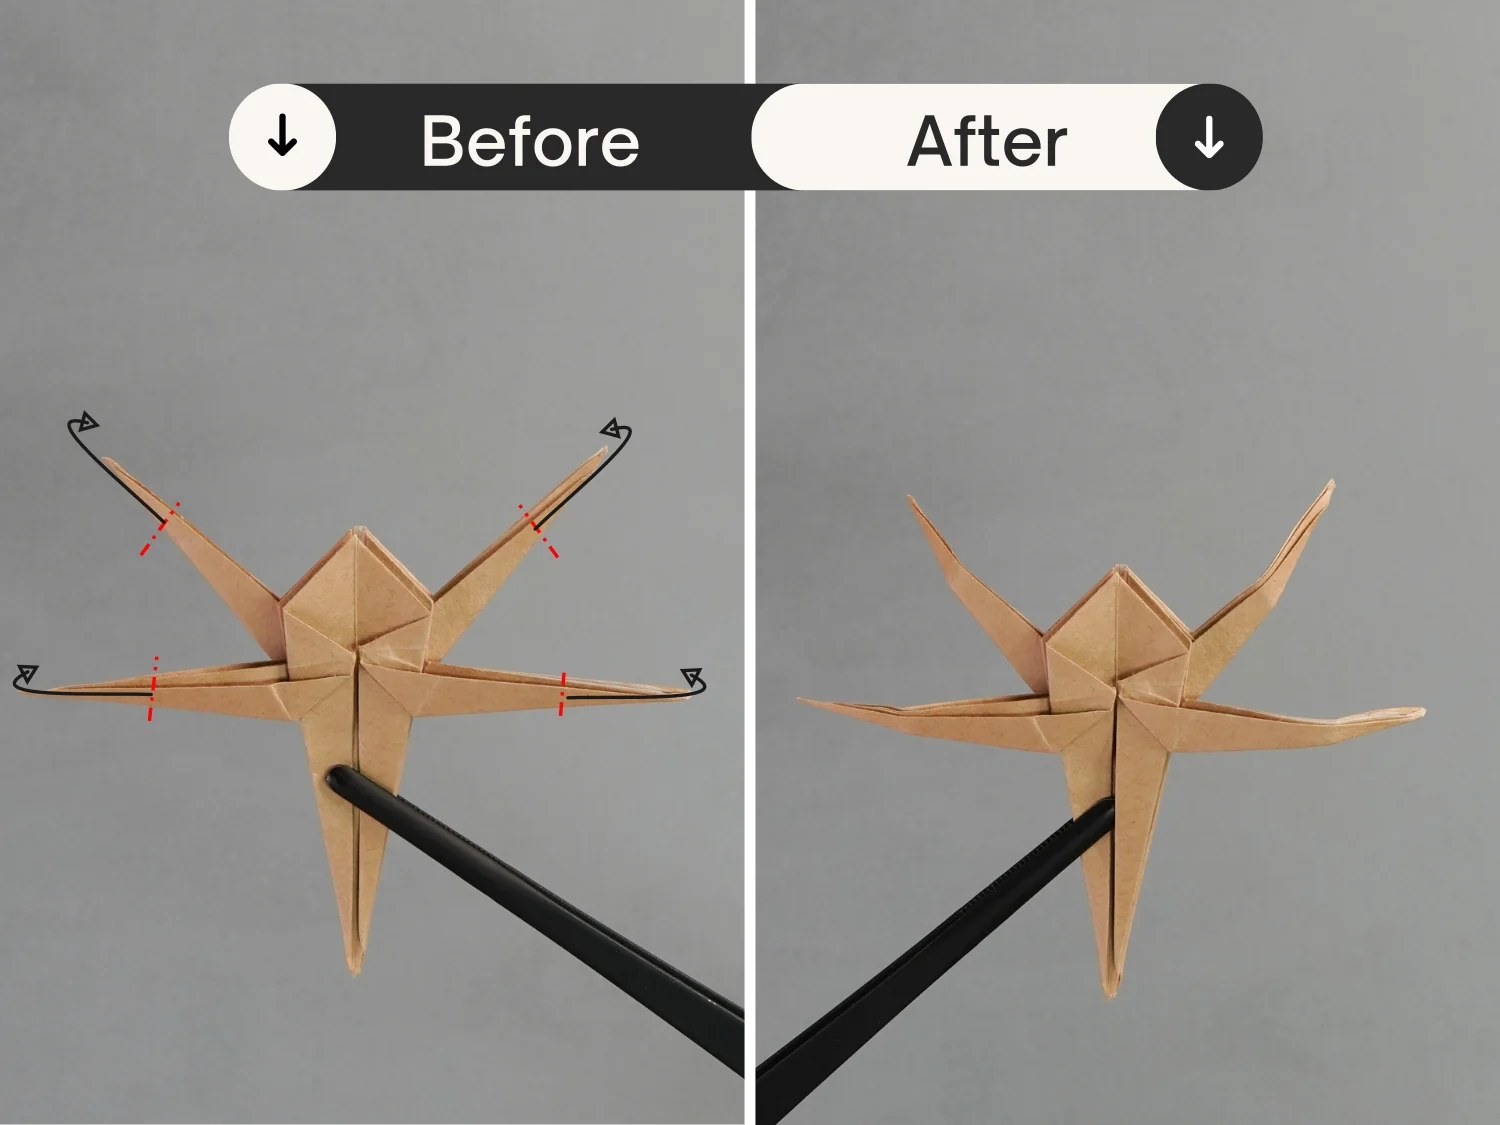
Fold the right upper layer to the left along the vertical crease, fold the top point to meet the bottom point, then lift the bottom layer along the two slanted short dotted lines. Finally, fold the left layer back to the right side, and flatten the fold to create one of the legs.
You will repeat this step three more times in the following steps to create another three legs.
Step 47
Rotate it 90 degrees from the left to the right, there are four layers as you can see in the second picture, then push the three layers on the left to the left side.
Next, fold down the top point to meet the bottom point, then lift the bottom layer along the two slanted short dotted lines. Finally, bring the left and right layers together forward, and finally rotate it 90 degrees from the right to the left to lay it flat.
Step 48
Rotate 180 degrees to turn the paper over.
Step 49
Rotate it 90 degrees from the right to the left, we can see there are two openings, and open the left one as the second picture shows.
Fold the top point down to meet the bottom point, then take this layer and fold it up along the two slanted short dotted lines as you did in the previous step [these two slanted dotted lines are much closer to the horizontal dotted line than those in steps 46 and 47]
Finally, close this opening to flatten the fold, and rotate it 90 degrees from the left to the right.

Step 50
Rotate it 90 degrees from the left to the right, and open the right opening as the second picture shows.
Next, fold the top point down to meet the bottom point, then lift this bottom layer along these two slanted dotted lines.
Finally, close this opening, and rotate it 90 degrees from the right to the left.
Step 51
Fold the bottom left edge to align with the middle vertical crease, then fold the left edge of the top left leg to align with its right edge, and finally flatten the fold.
Repeat this for the right side, fold the bottom right edge to align with the vertical crease, then fold the right edge of the top right leg to align with its left edge, and finally flatten the fold.
Step 52
Fold the right upper layer to the left along the vertical line, then fold the bottom left edge to align with the vertical crease.
Next, fold the left edge of the top left leg to align with its right edge, and finally flatten the fold, and push this leg to the right side.
Step 53
Fold the left top layer to the right, then fold the bottom right edge to align with the vertical crease, then fold the right edge of the top right leg to align with its left edge, and finally flatten the fold.
Next, push this leg to the left side.
Step 54
Rotate it 180 degrees from the left to the right to flip the paper over.
Step 55
Fold the bottom right edge to align with the vertical crease, then fold the bottom edge of the bottom right leg to meet its top edge, and finally flatten the fold.
Repeat this for the right side. Fold the bottom left edge to align with the vertical crease, then fold the bottom edge of the bottom left leg to meet its top edge, and finally flatten the fold.
Step 56
Fold the bottom right leg to the left side along the middle vertical line, then fold the bottom left edge to align with the middle vertical crease.
Next, fold the bottom edge of this leg that folded to the left to align with its top edge, then flatten it, and finally fold this leg back to the right side.
Step 57
Push the bottom left leg to the right side along the middle vertical crease, and fold the bottom right edge to align with the middle vertical crease.
Next, fold the bottom edge of this leg that folded to the right side to align with its top edge, then flatten it, and finally fold this leg back to the left side.

Step 58
Bend these four legs a little.
Step 59
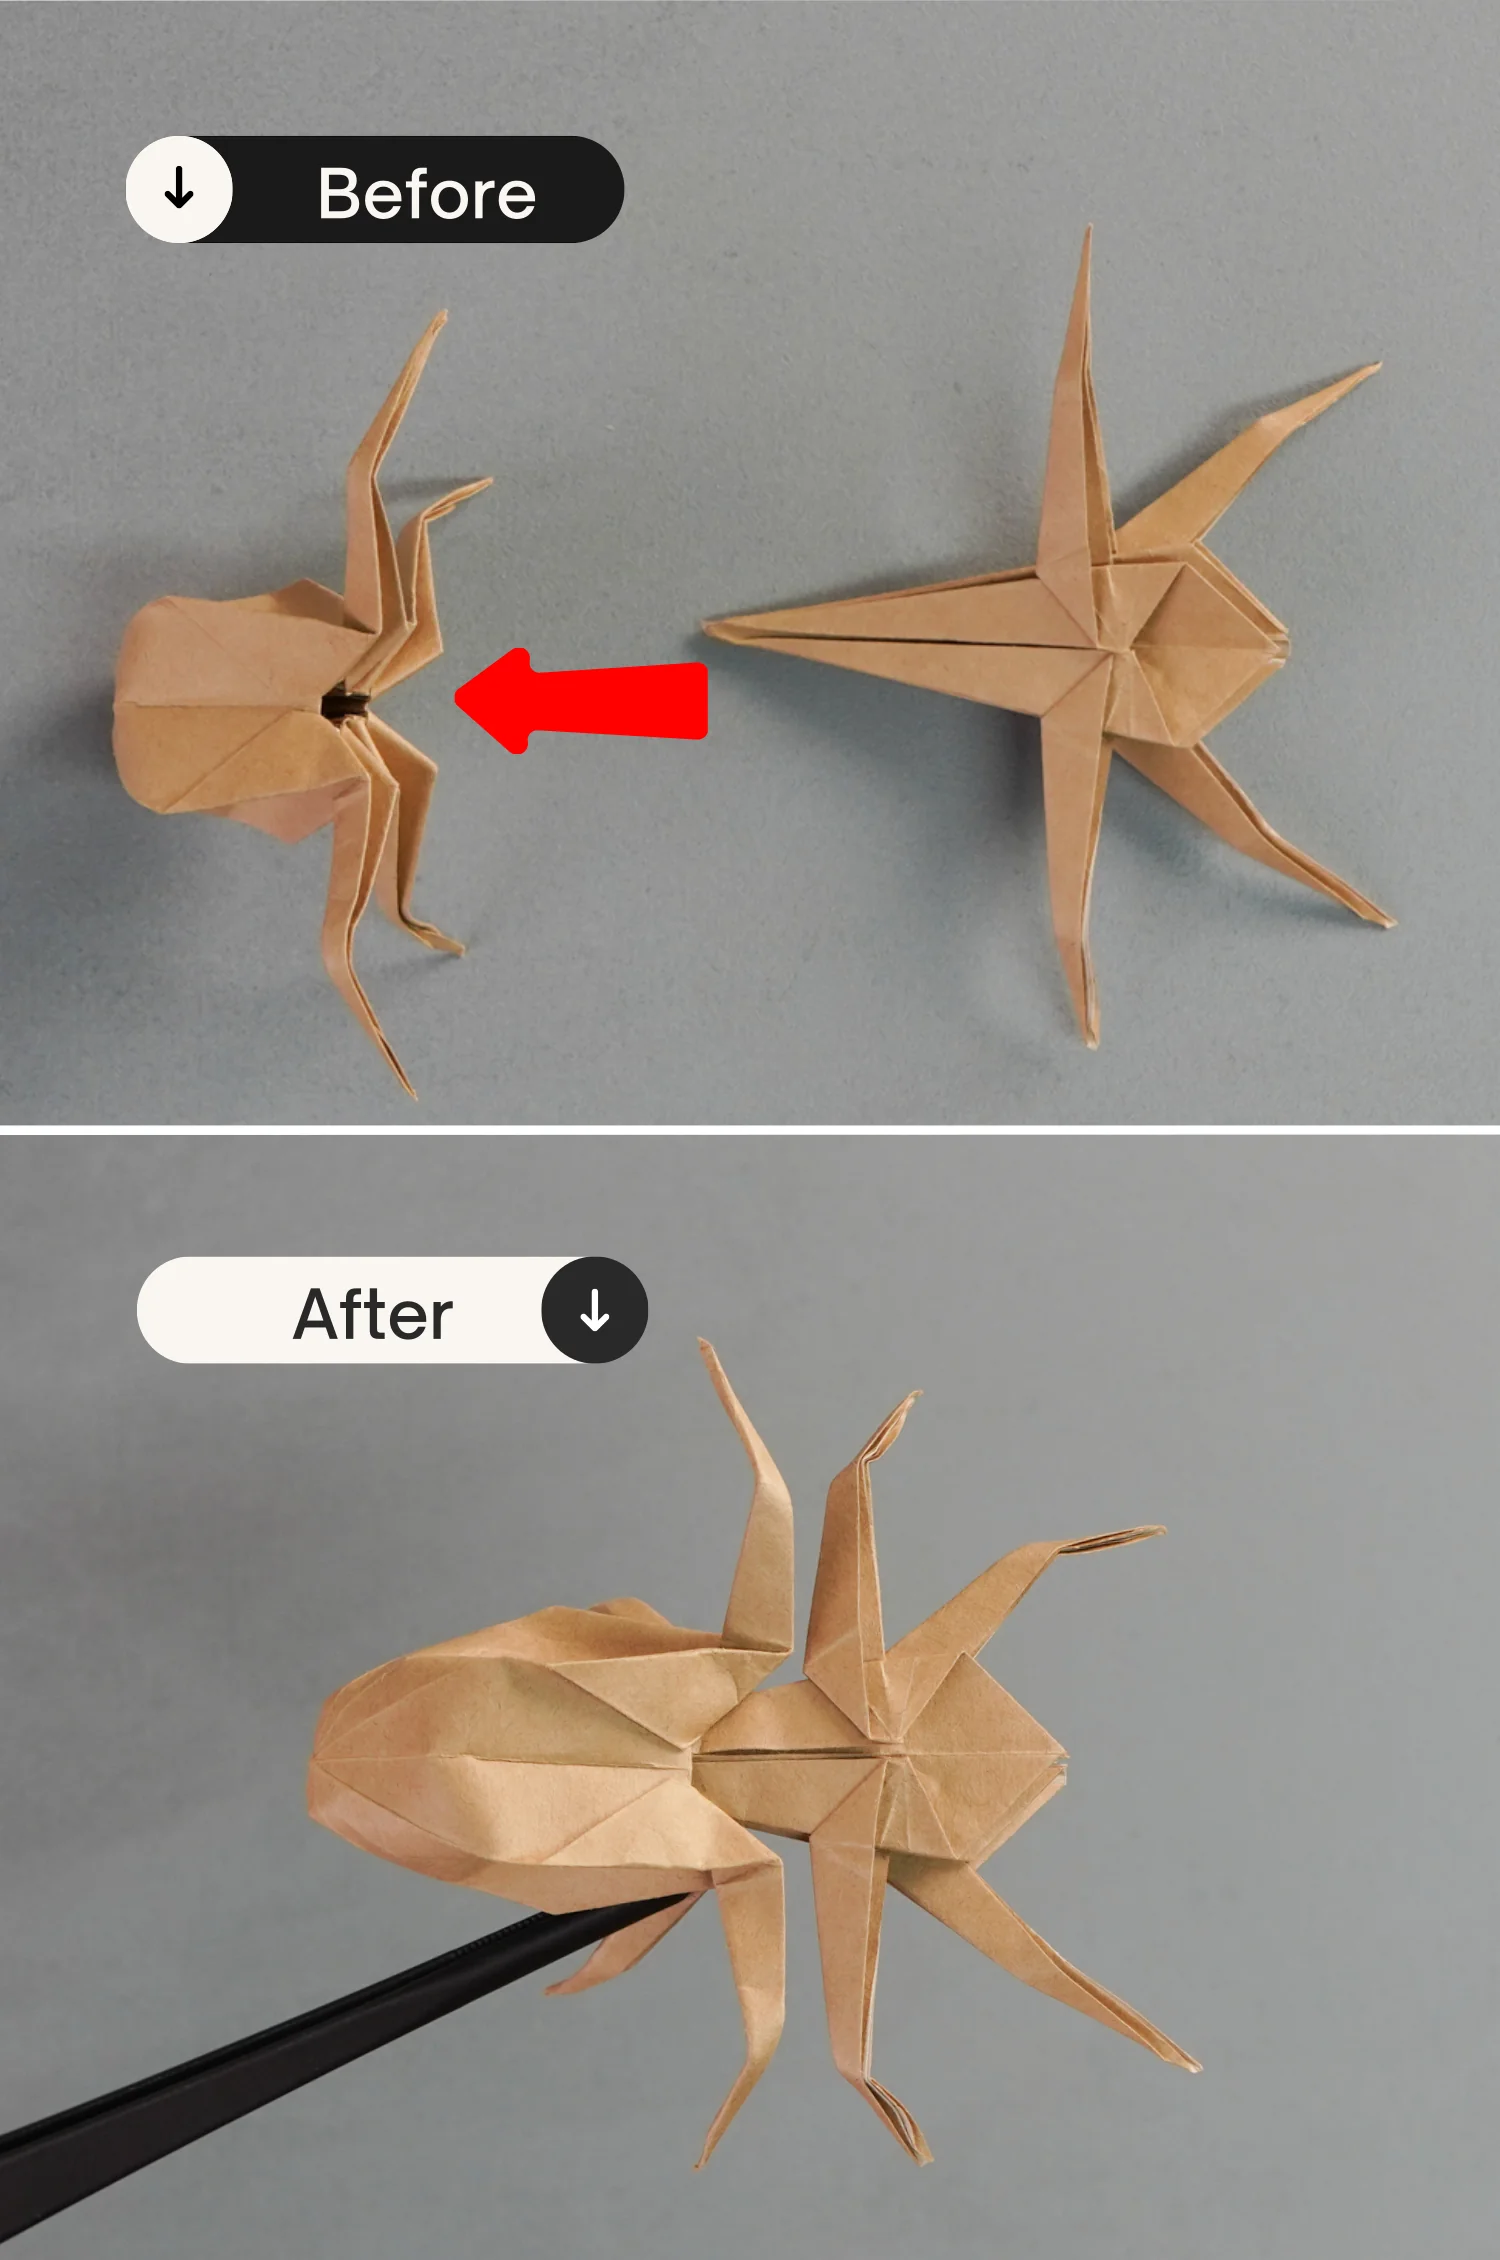
Assemble them as the picture shows, ensuring all the legs are bent downwards.
What’s Next
That’s your cool origami spider, now you can explore our other origami animal instructions. Happy folding!
Other Origami Animal Ideas