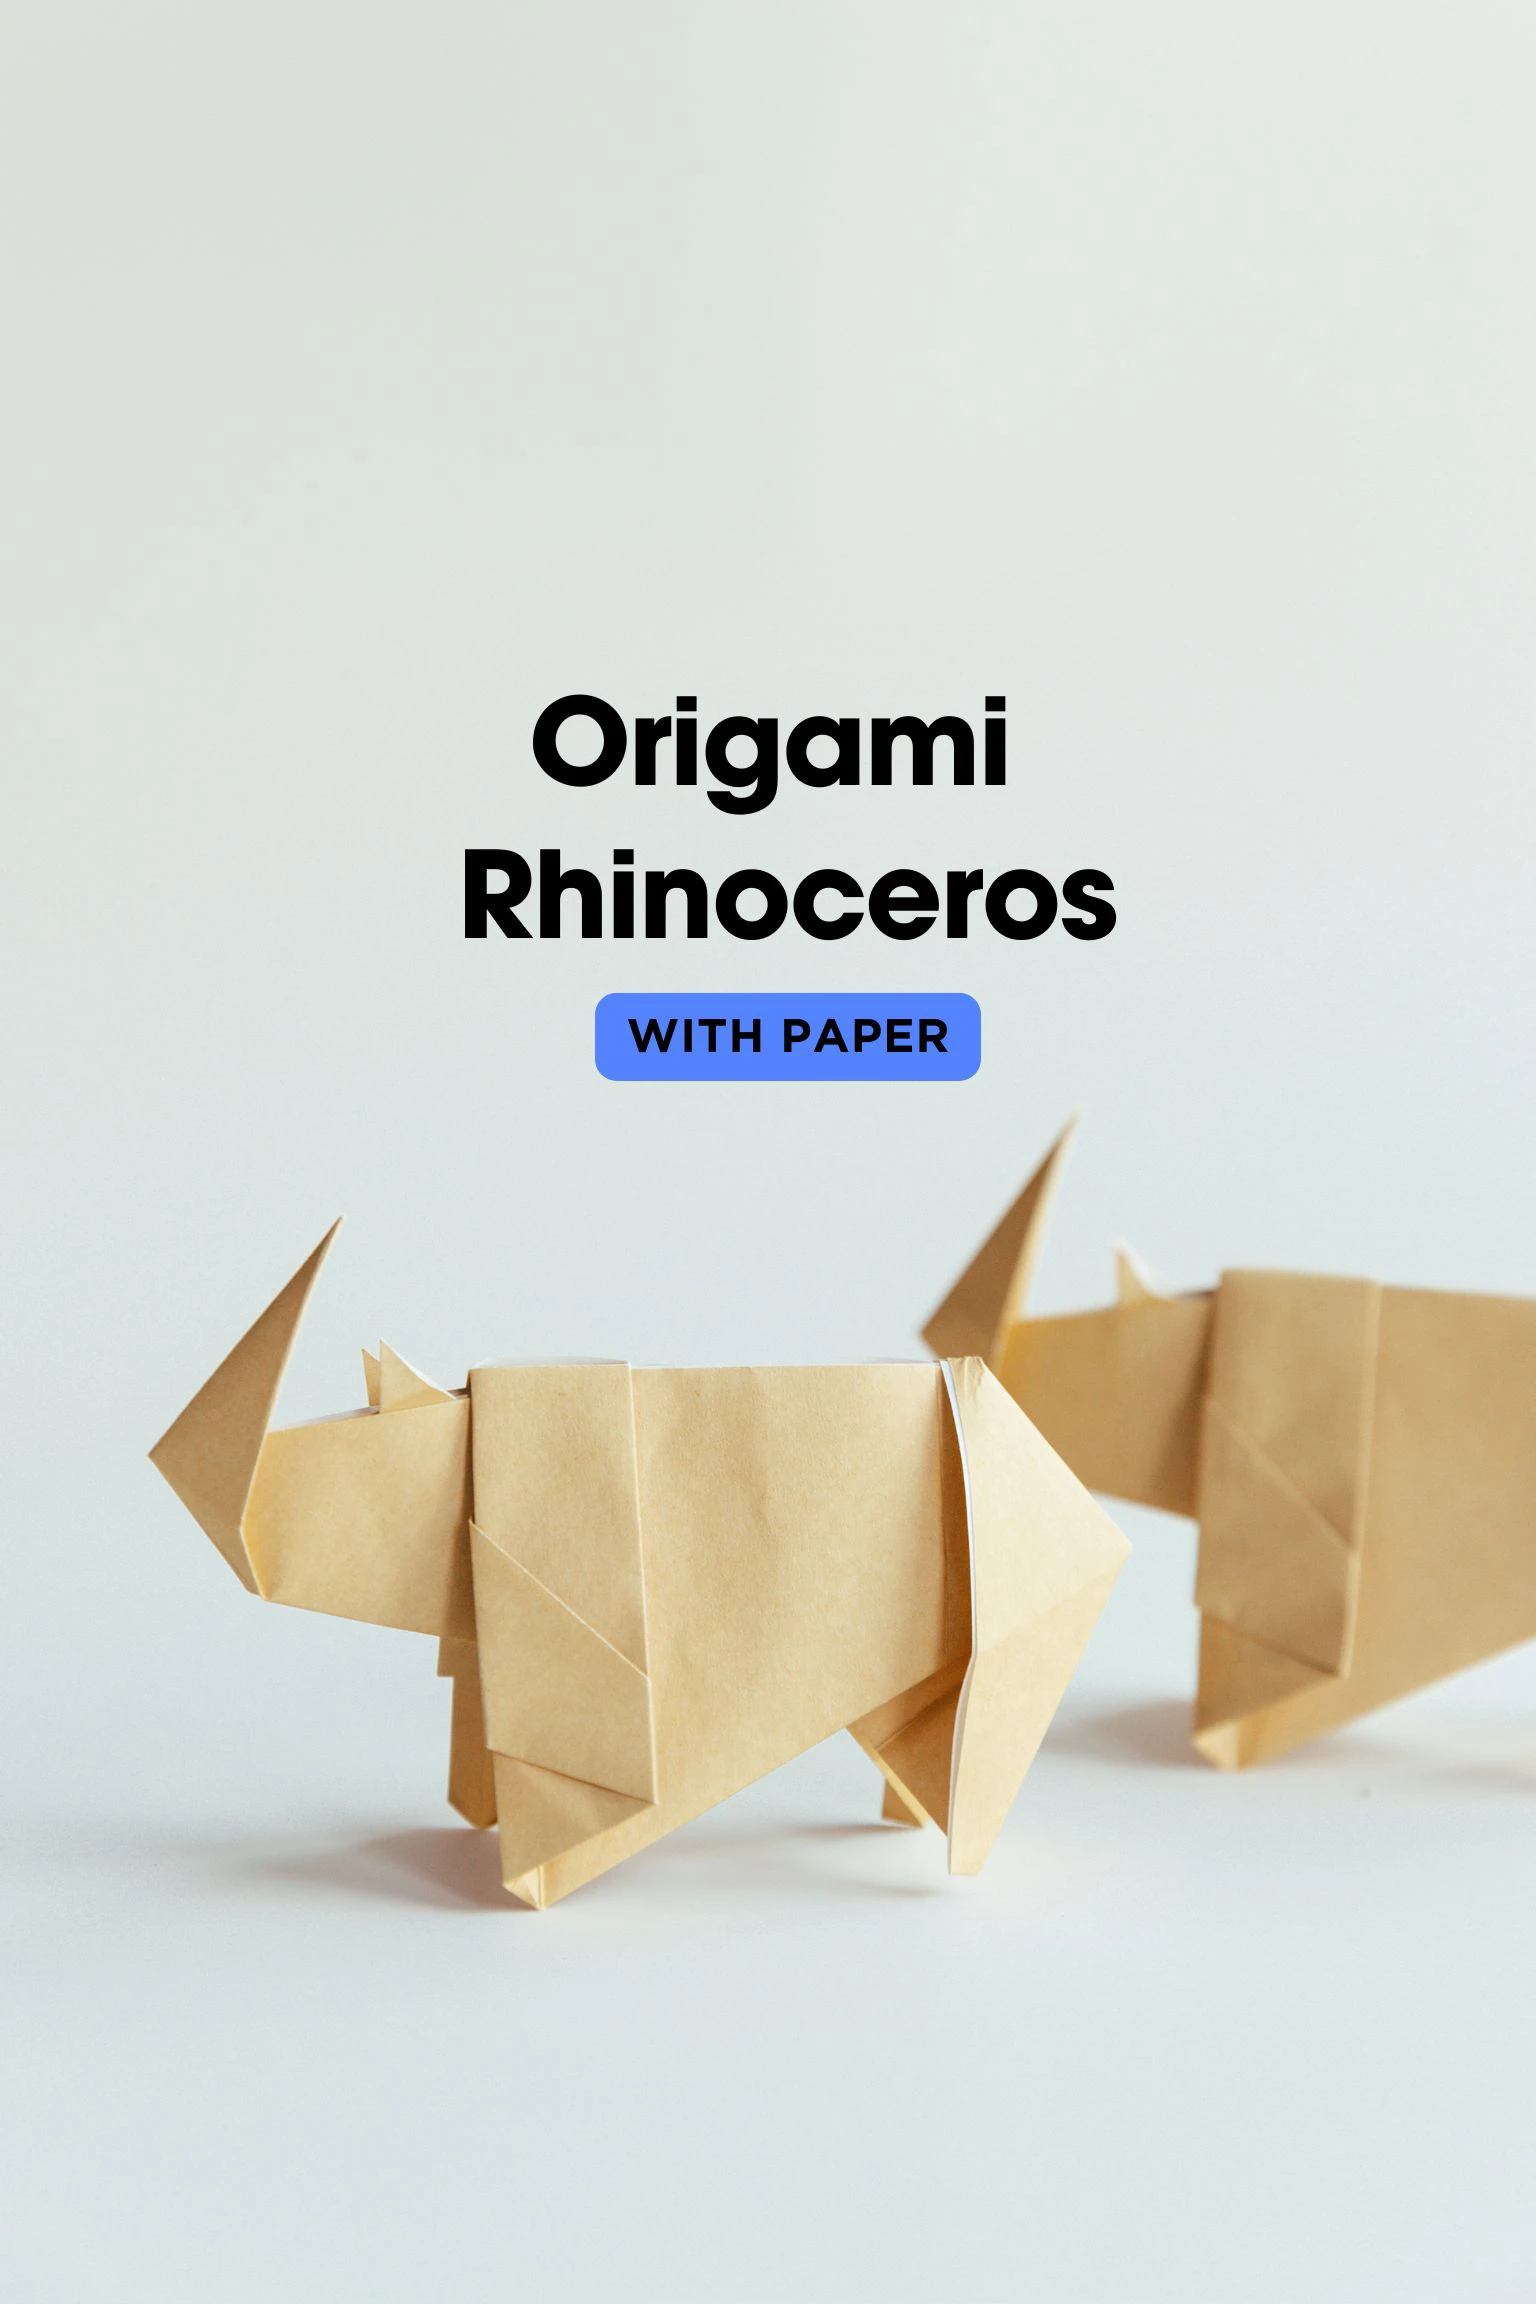
This post will teach you how to make an origami rhinoceros. The model features a sharp horn and a robust body, showcasing the strength of a real rhinoceros. It is not very complex, and the process is accessible to folders of all skill levels, whether you are a beginner or an experienced folder.

If you are new to origami, start here from our beginner guide to know the basics and how to read the step-by-step instructions.
- Folding time: 15 minutes
- Paper: 20×20 cm
- Difficulty: Middle
Material
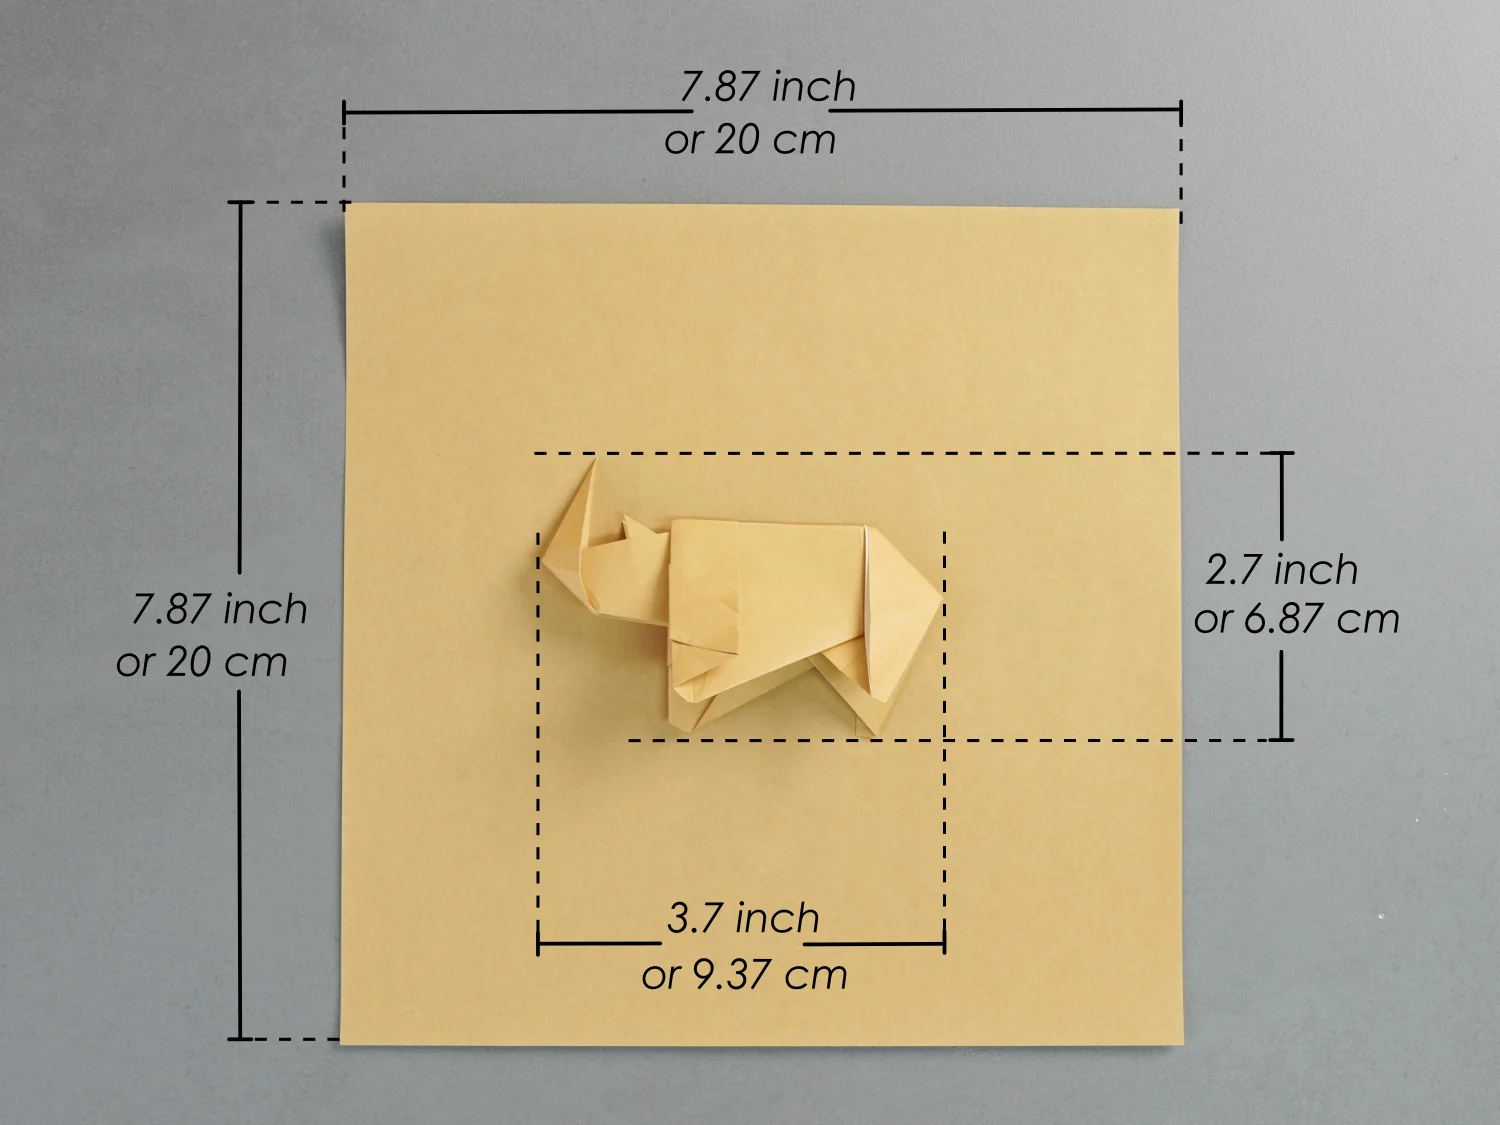
Get a piece of 20×20 cm origami square paper, with different colors on each side, to create a 6.87×9.37 cm origami rhinoceros. Choose any other paper in your preferred color to better match your style.
Step by Step Instructions
Step 1
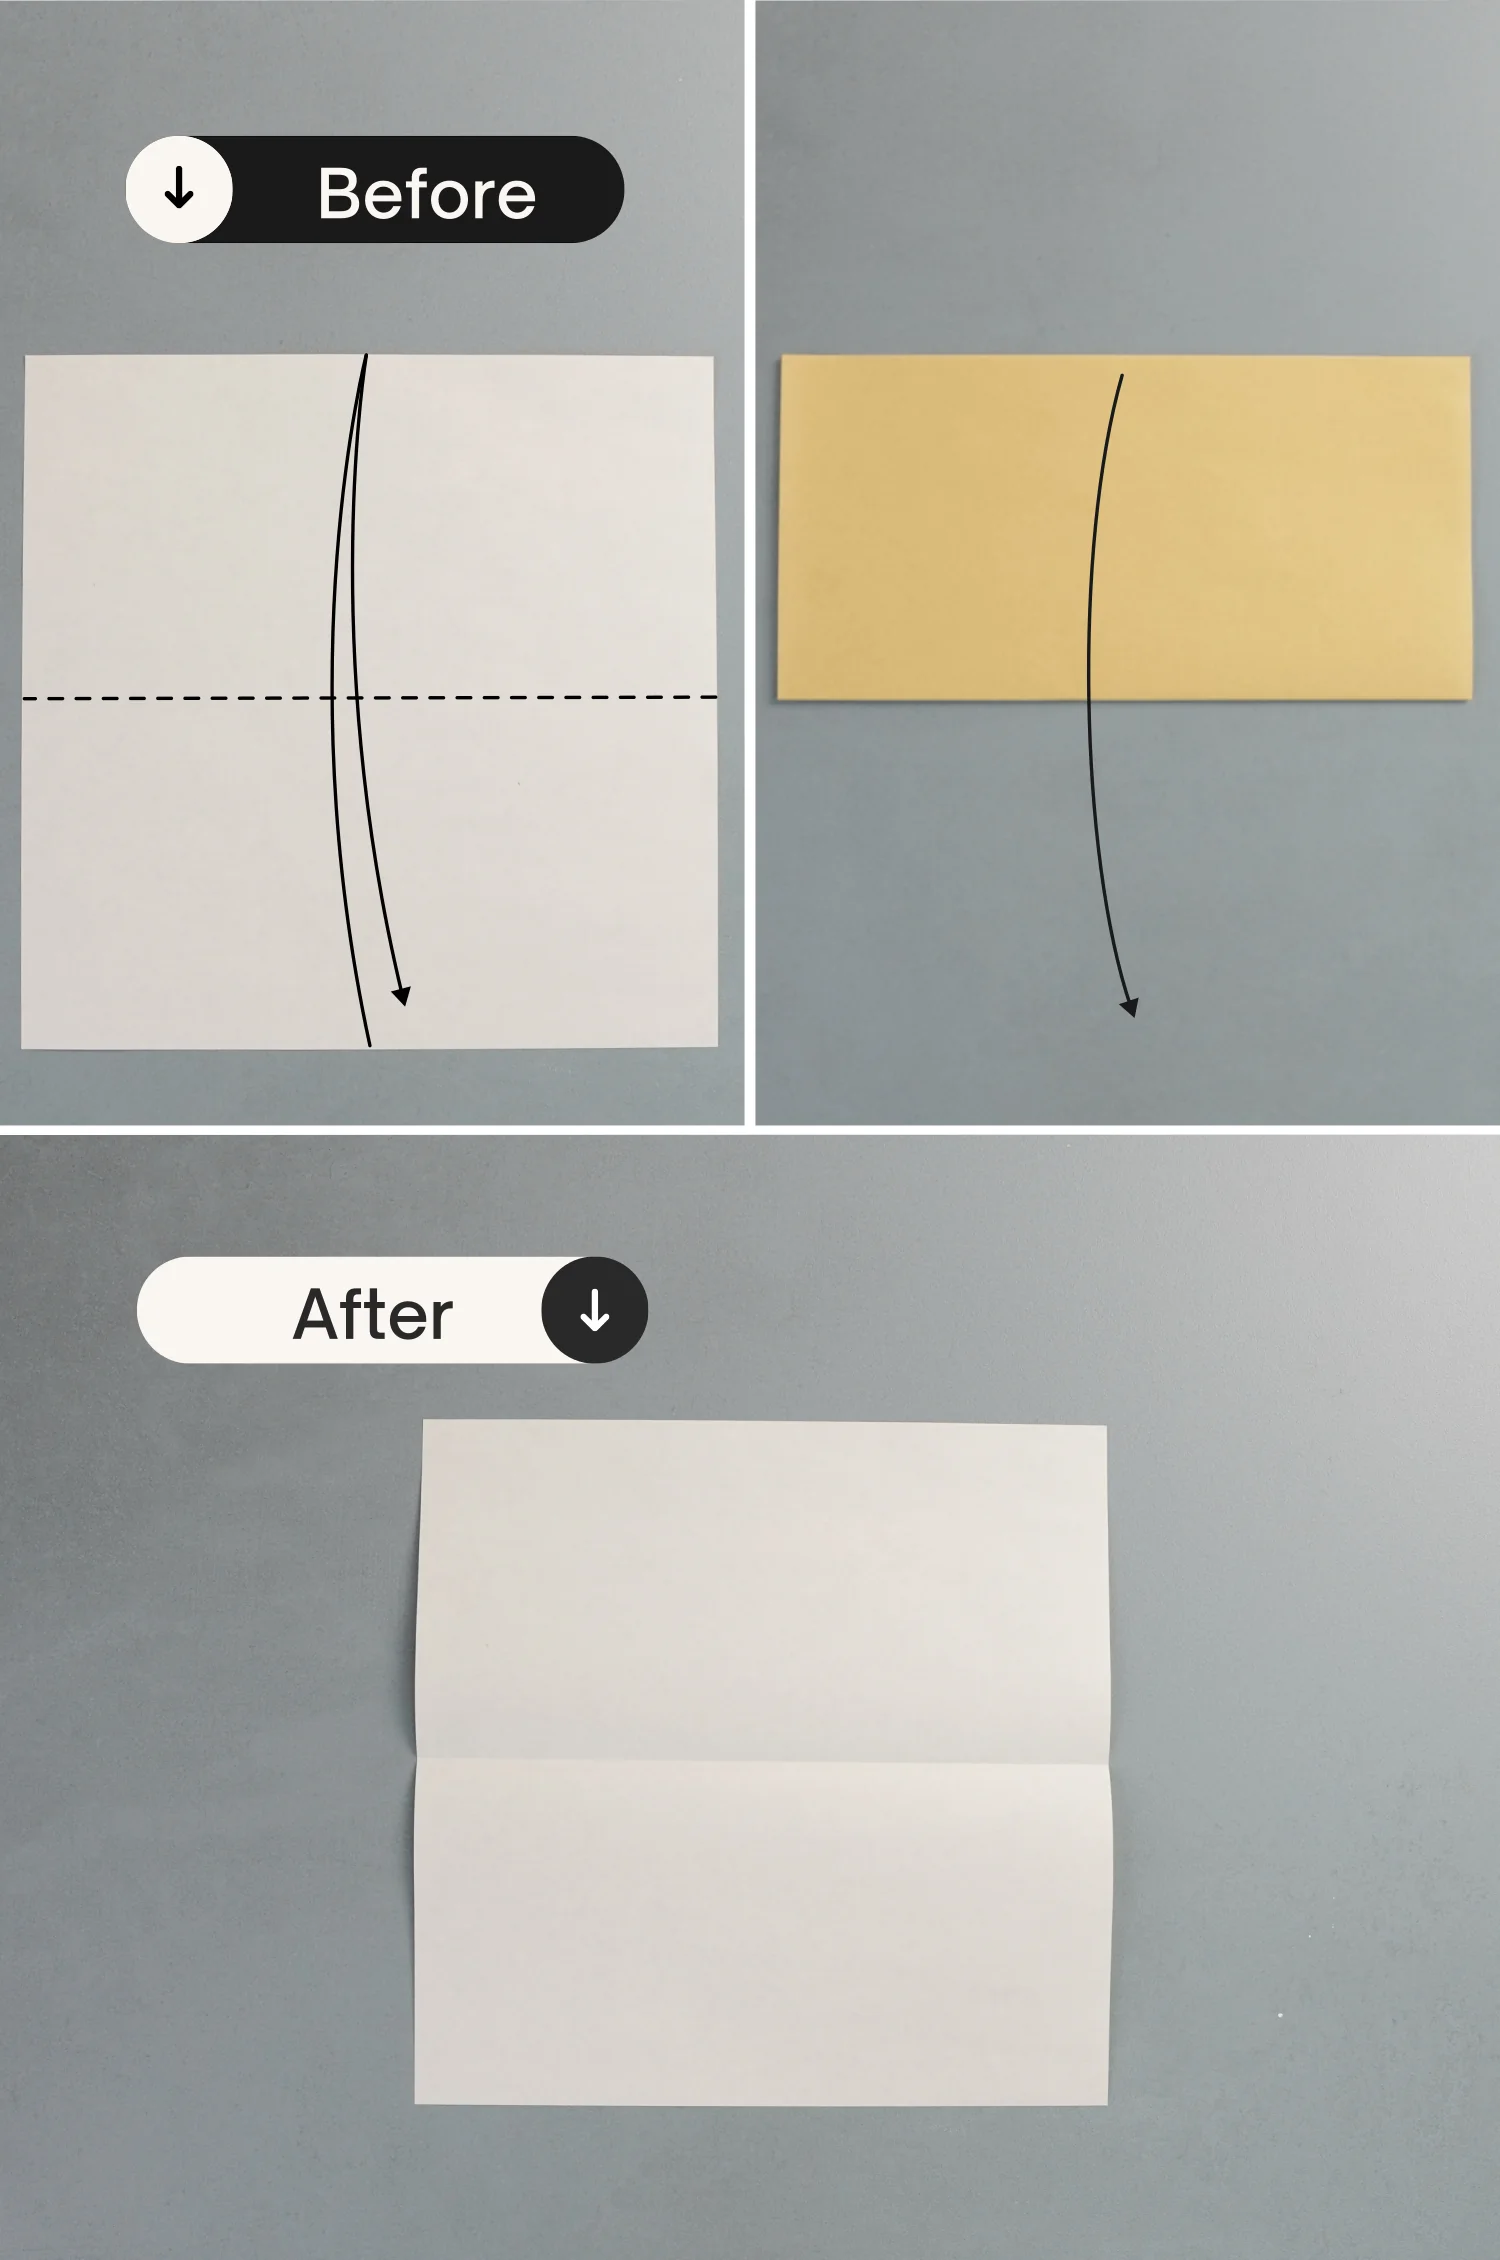
Place the paper with the desired display color side down to begin folding, fold it in half horizontally, and unfold it.
Step 2
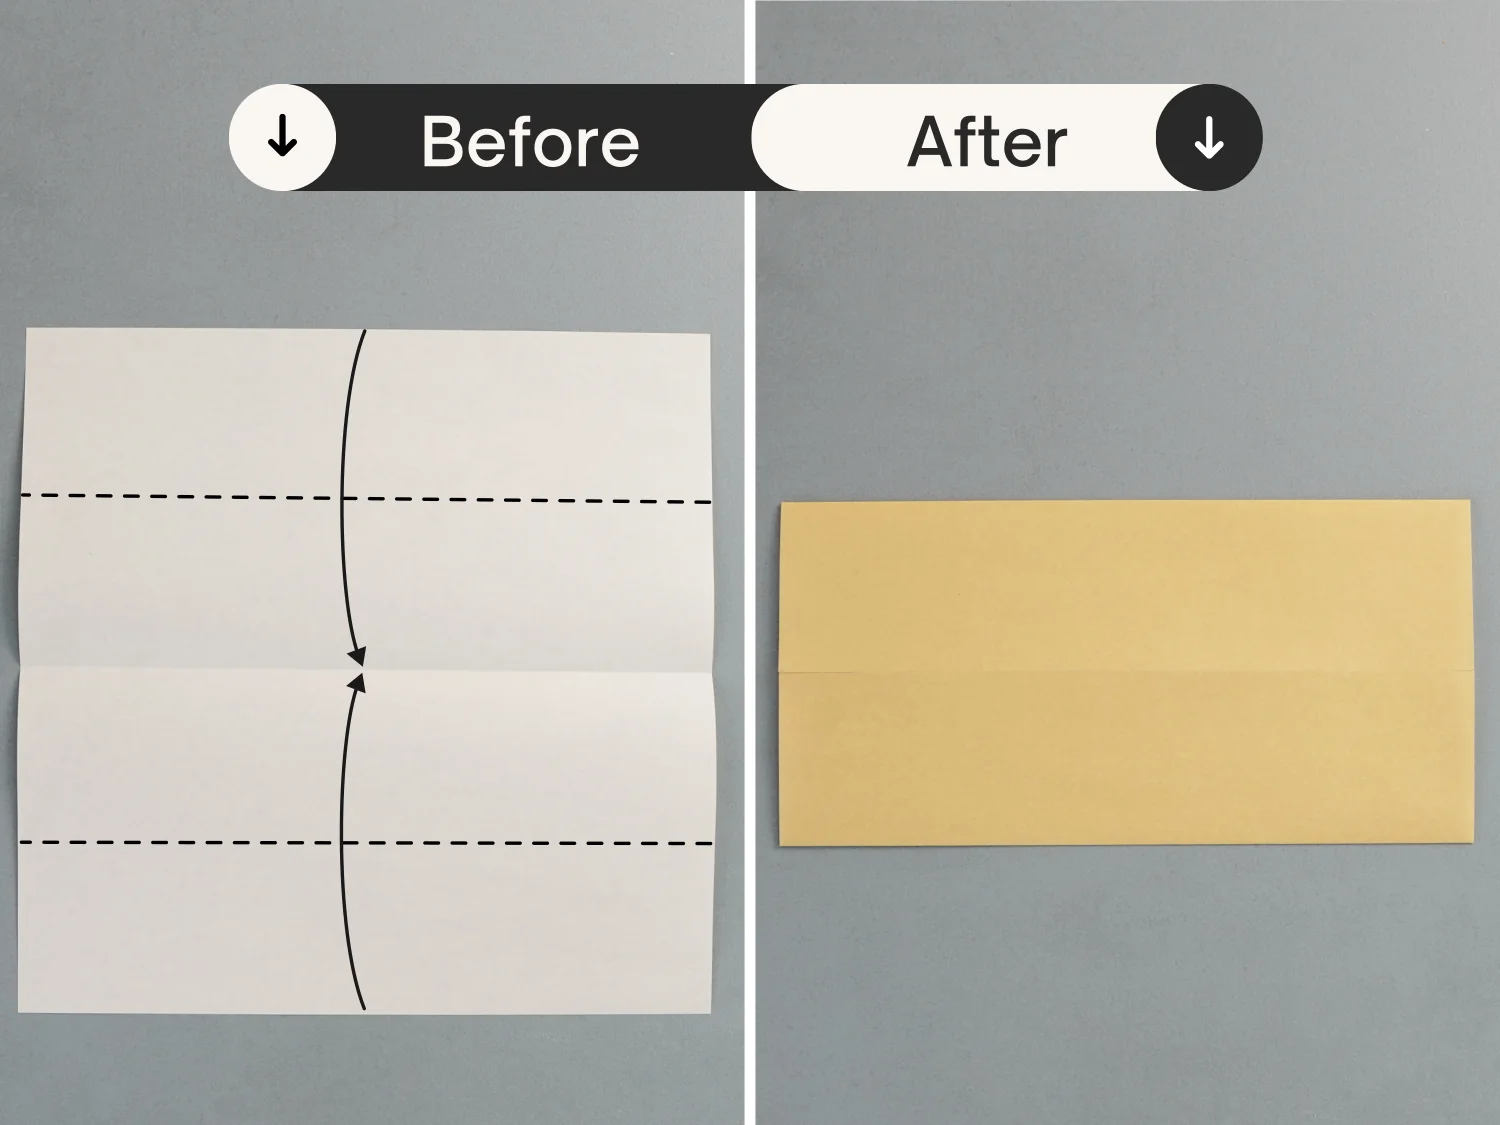
Fold the top and bottom edges to align with the middle horizontal crease.
Step 3
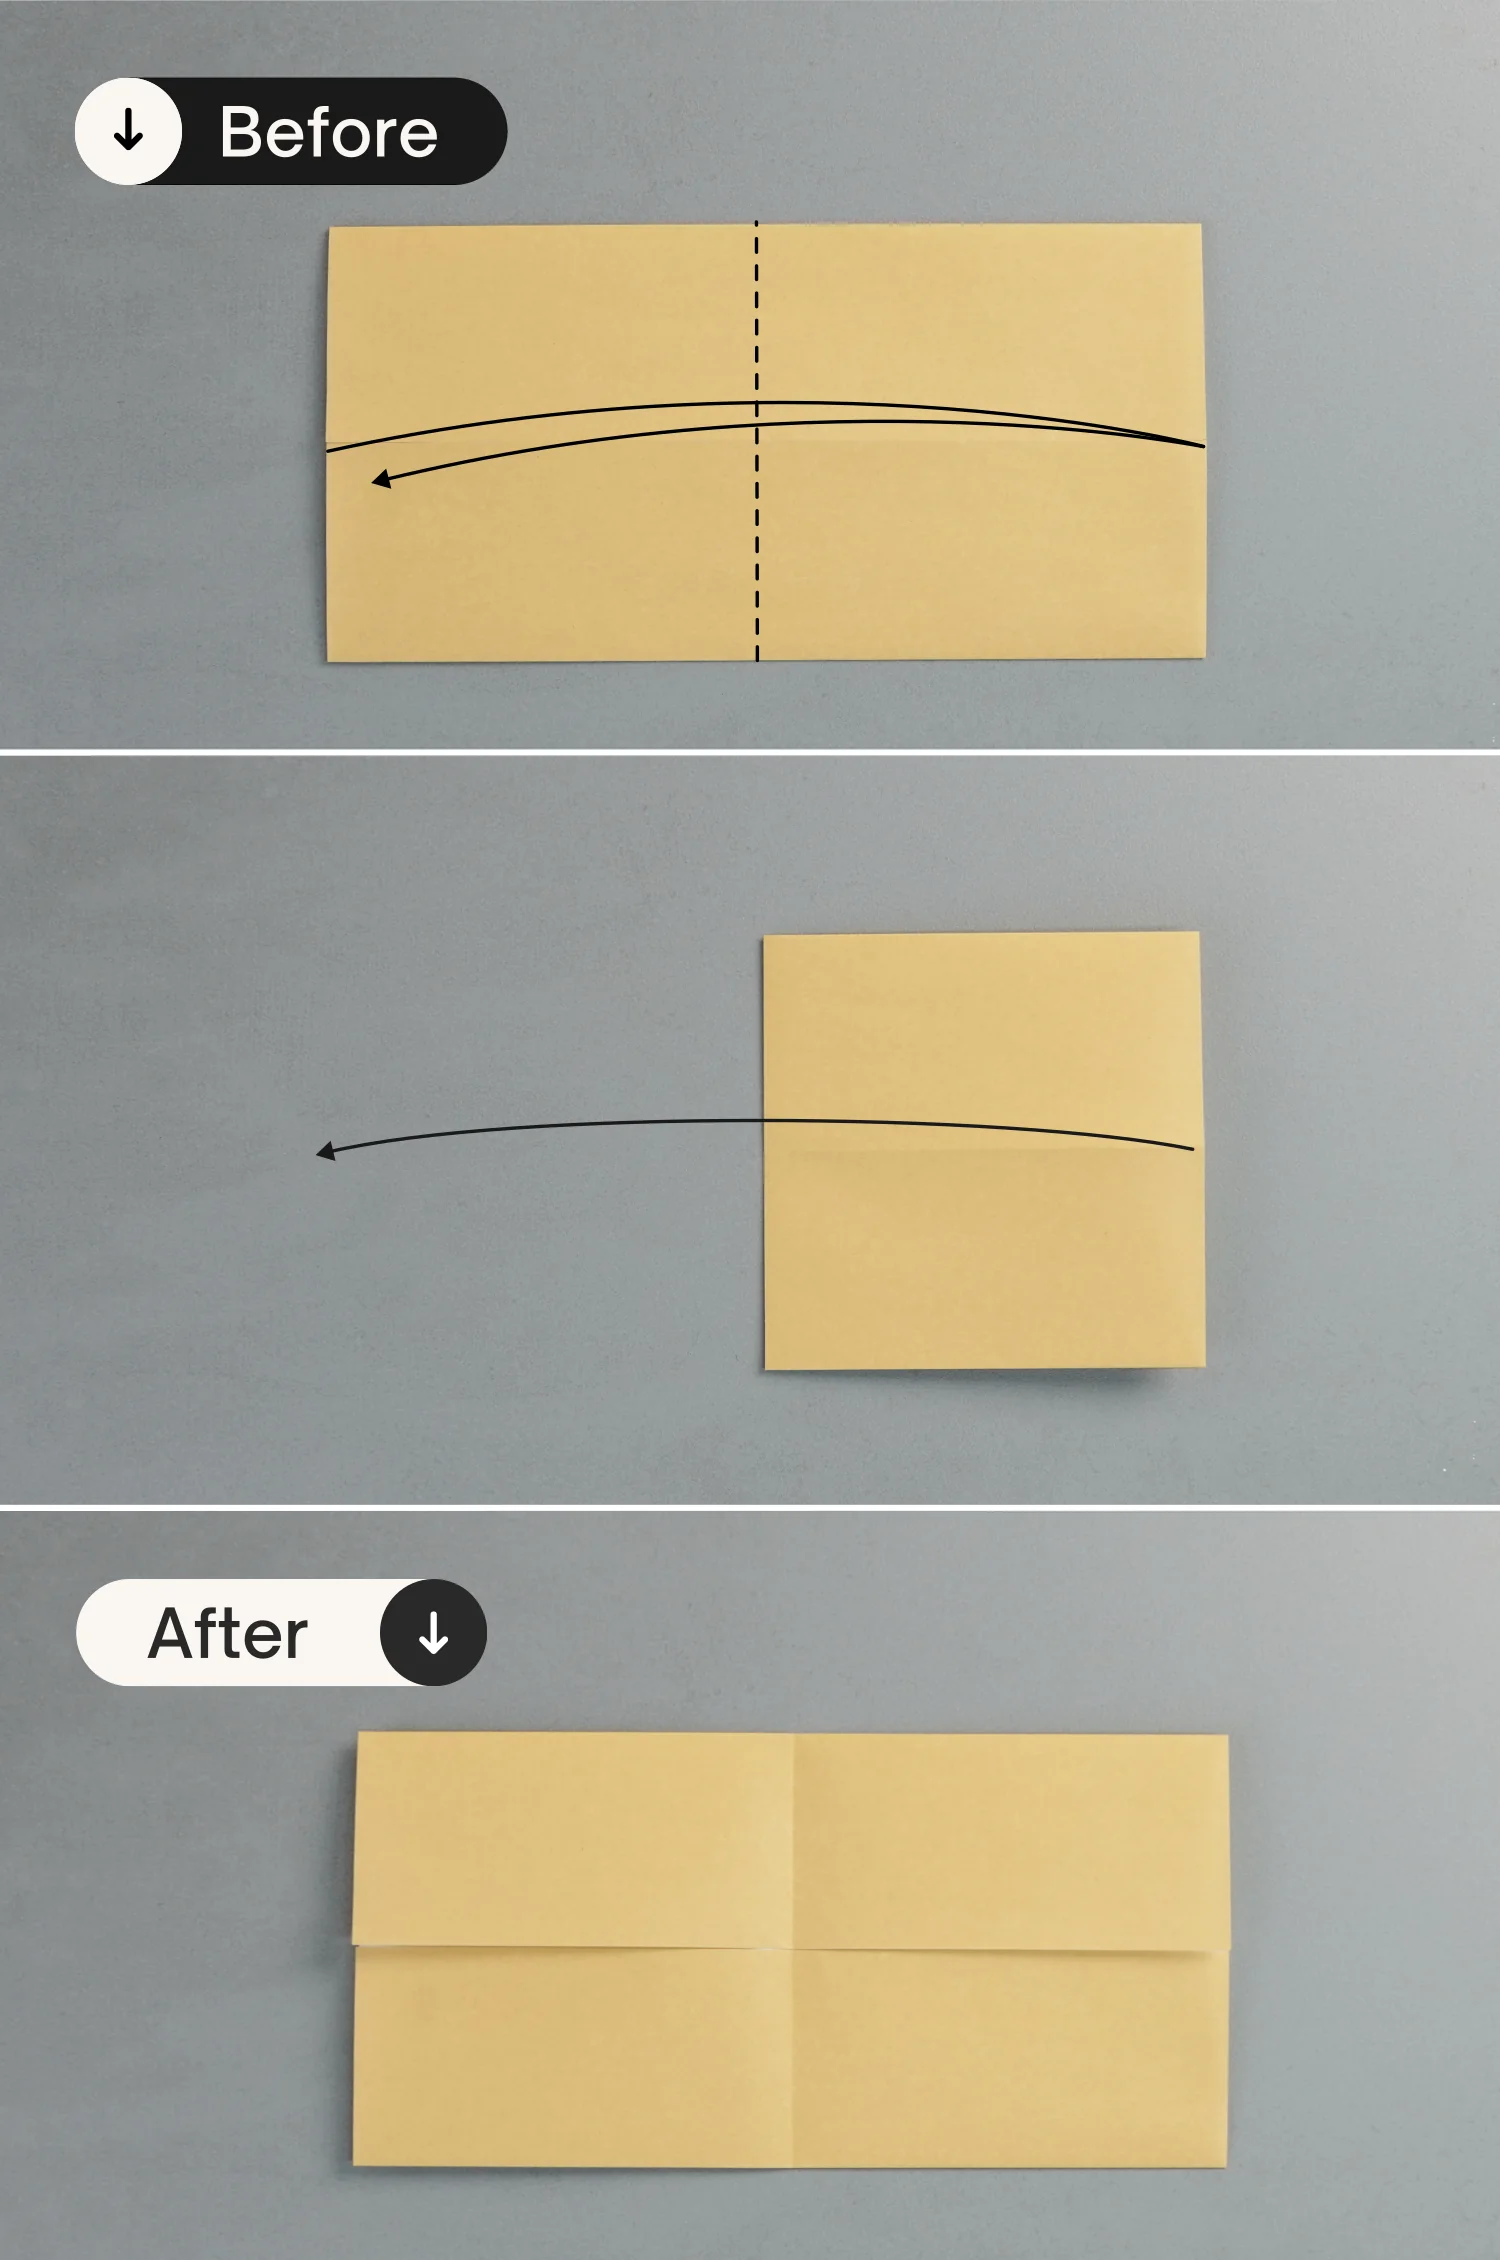
Fold the paper in half vertically, leaving a crease, and unfold it.
Step 4
Fold the left edge to align with the middle vertical crease, leaving a crease, and unfold it.

Step 5
Fold both the top and bottom left points to meet the intersection point formed by the crease you just made and the horizontal crease. Crease them well and unfold them.
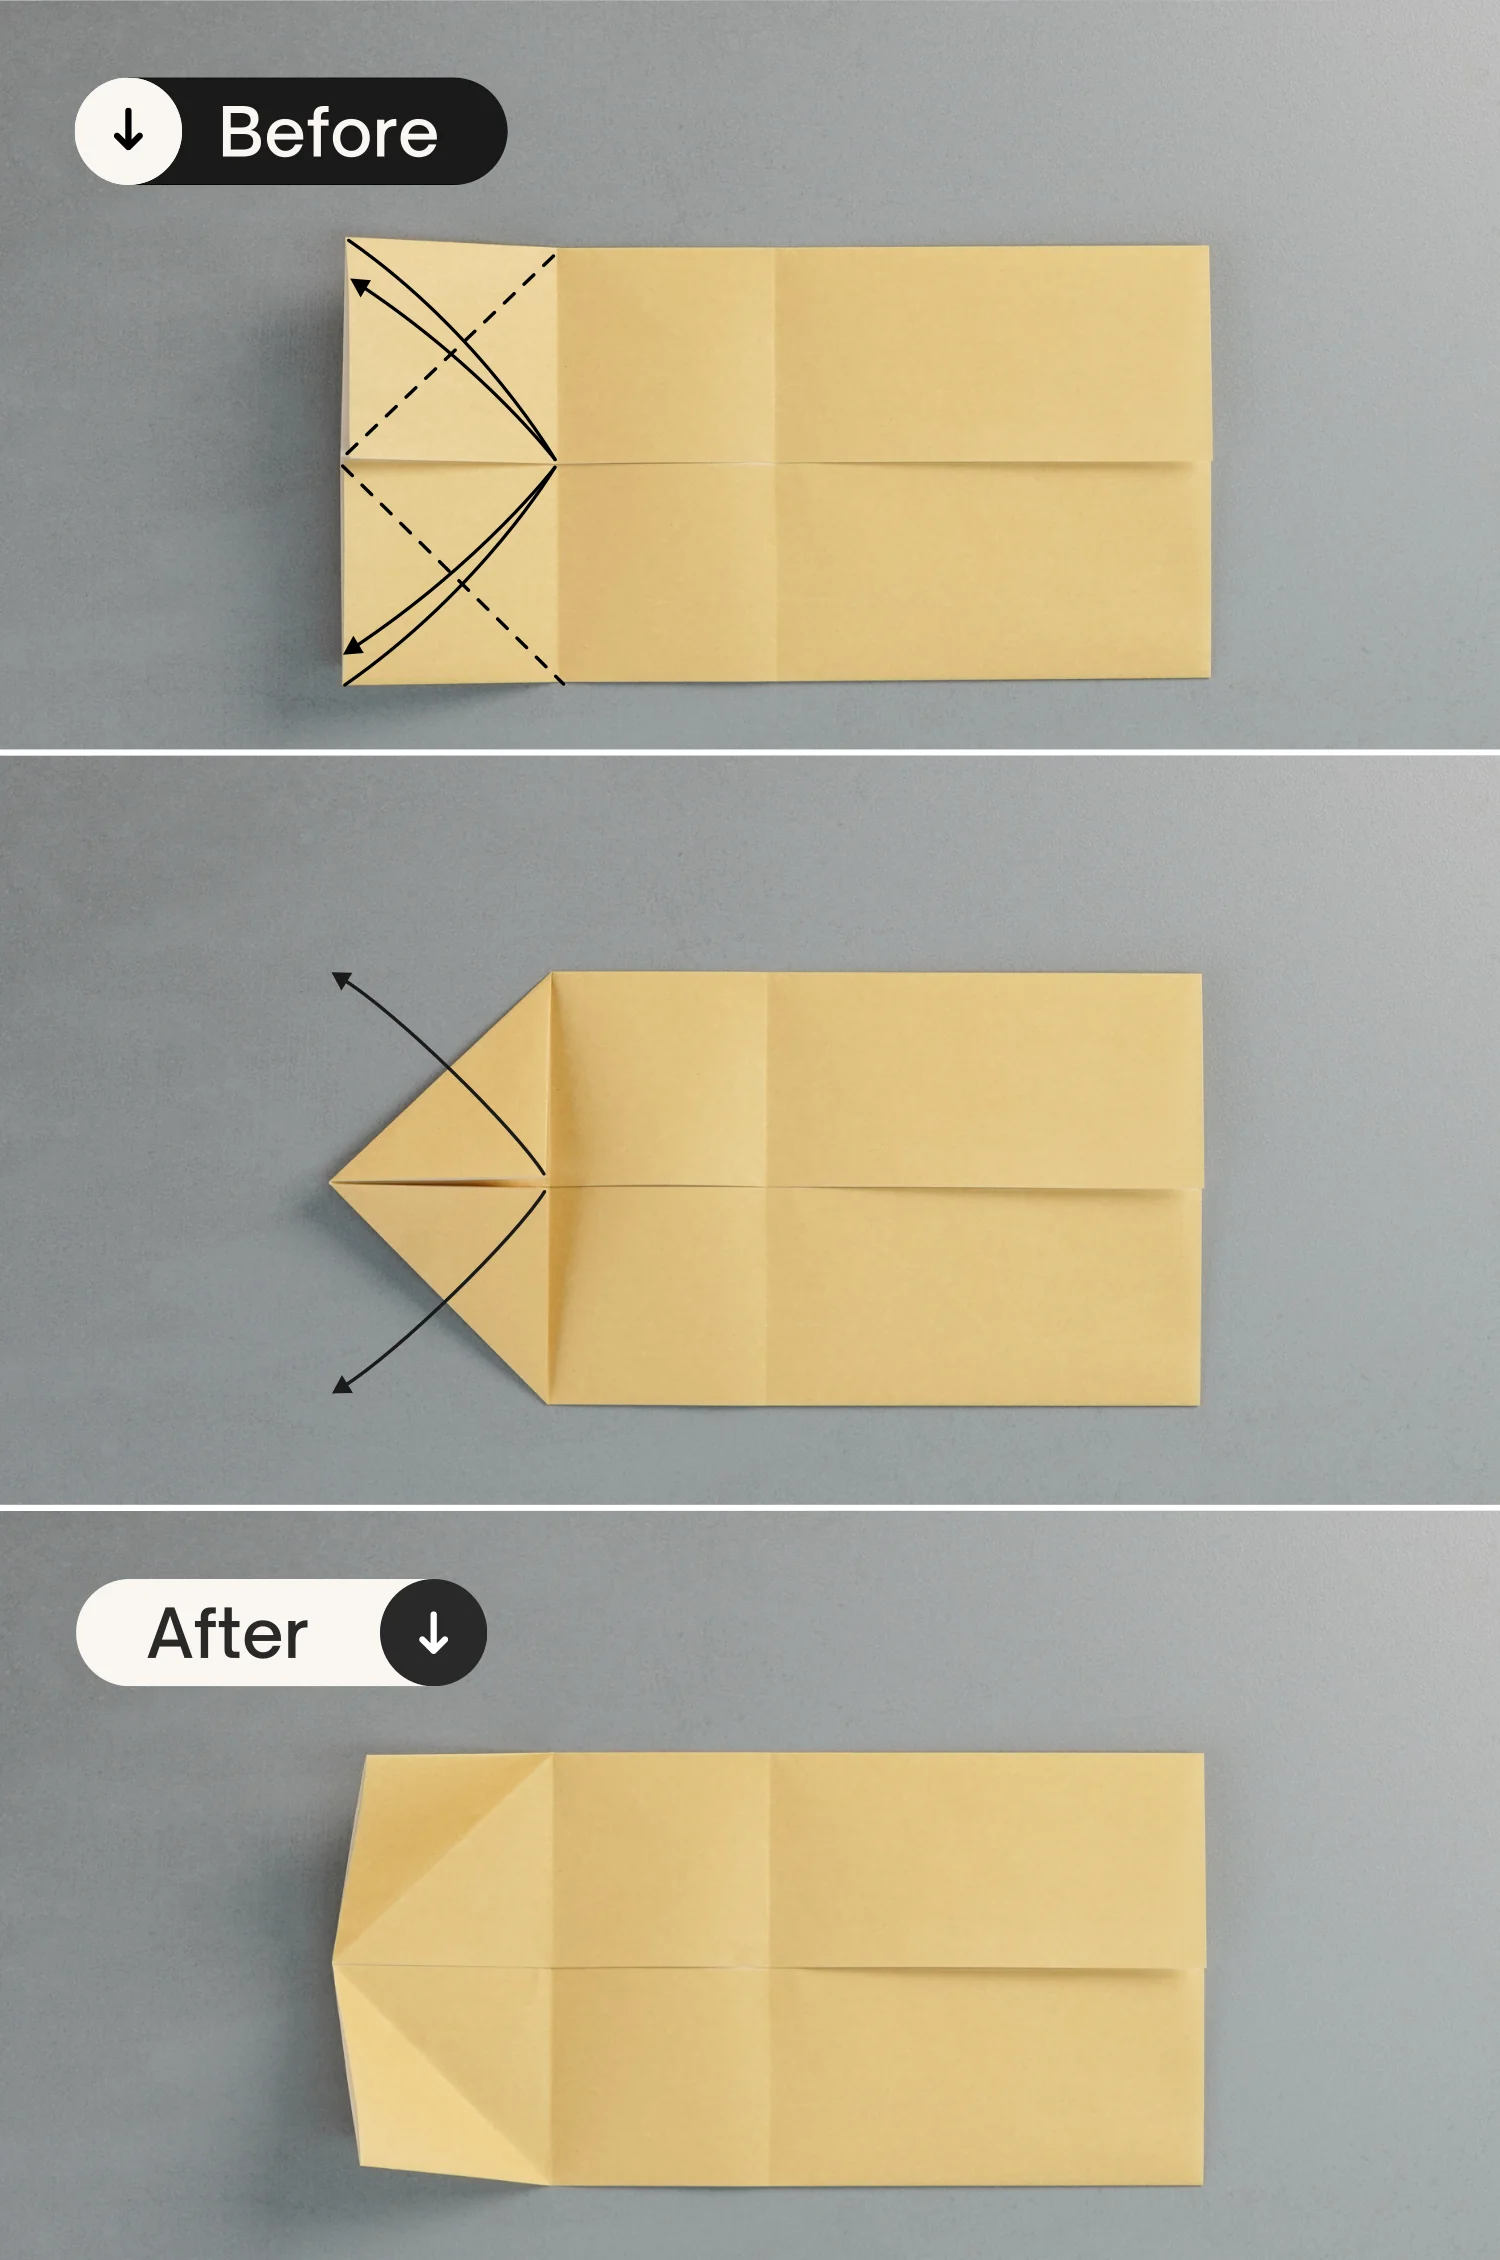
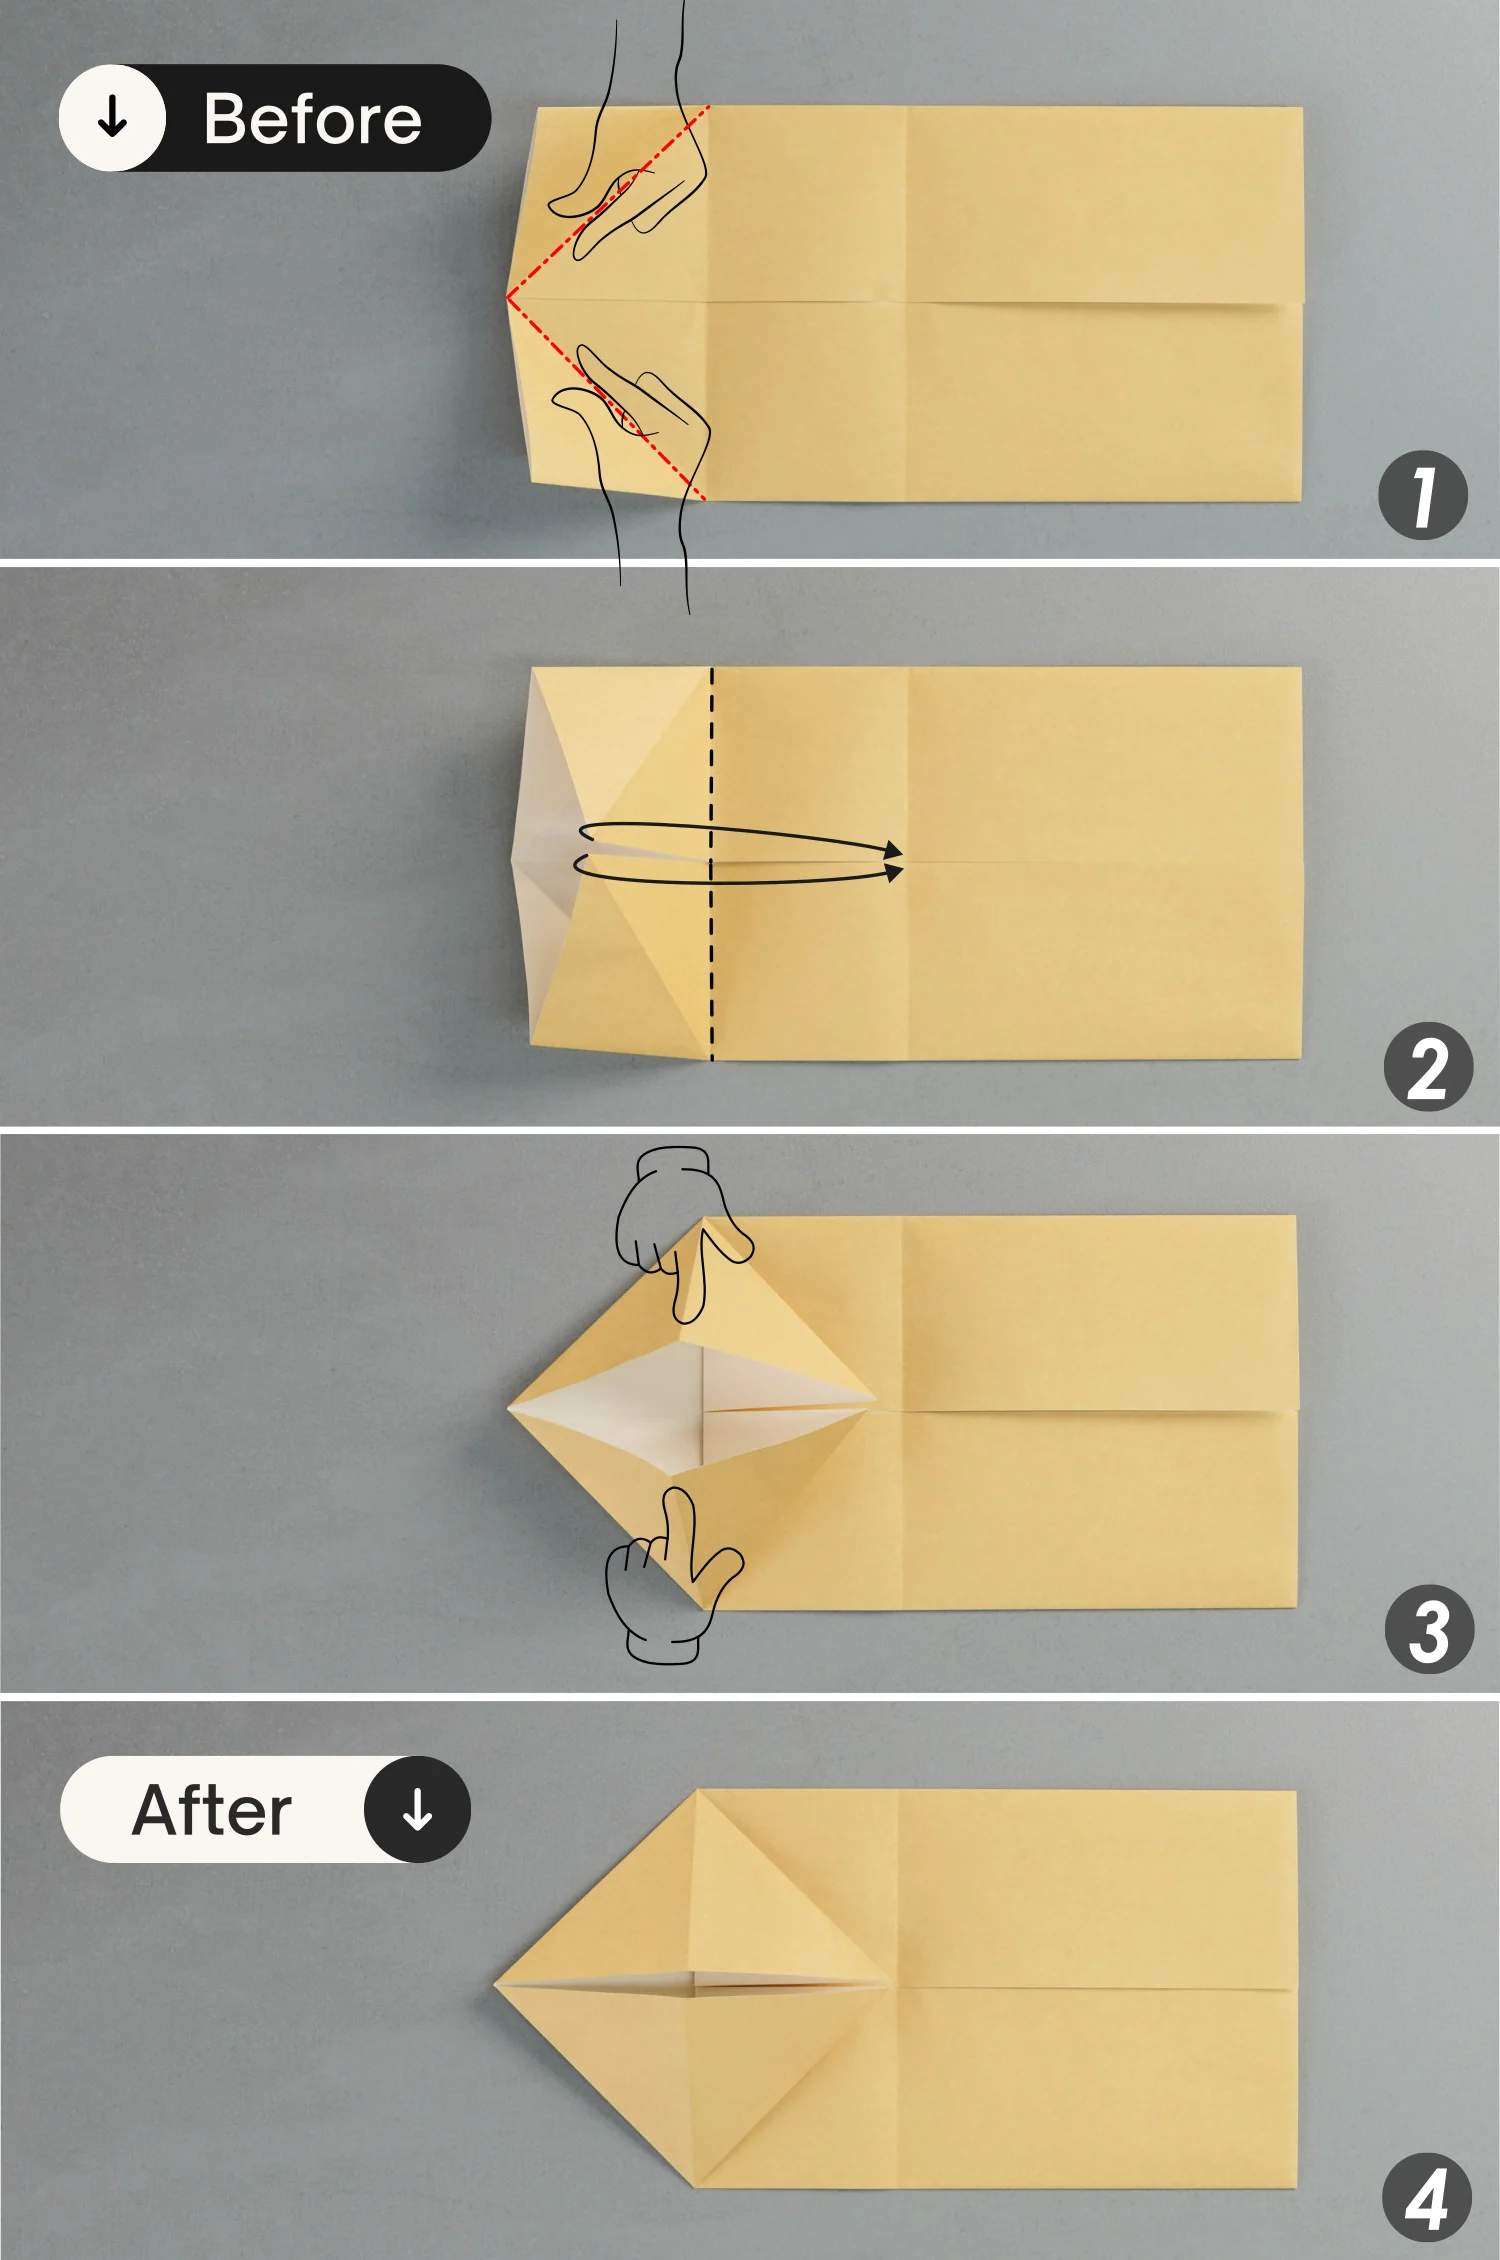
Step 6
Shape the two creases you just made, indicated by the red dotted lines, then push the middle two points on the left side toward the center intersection point, and finally flatten the fold.
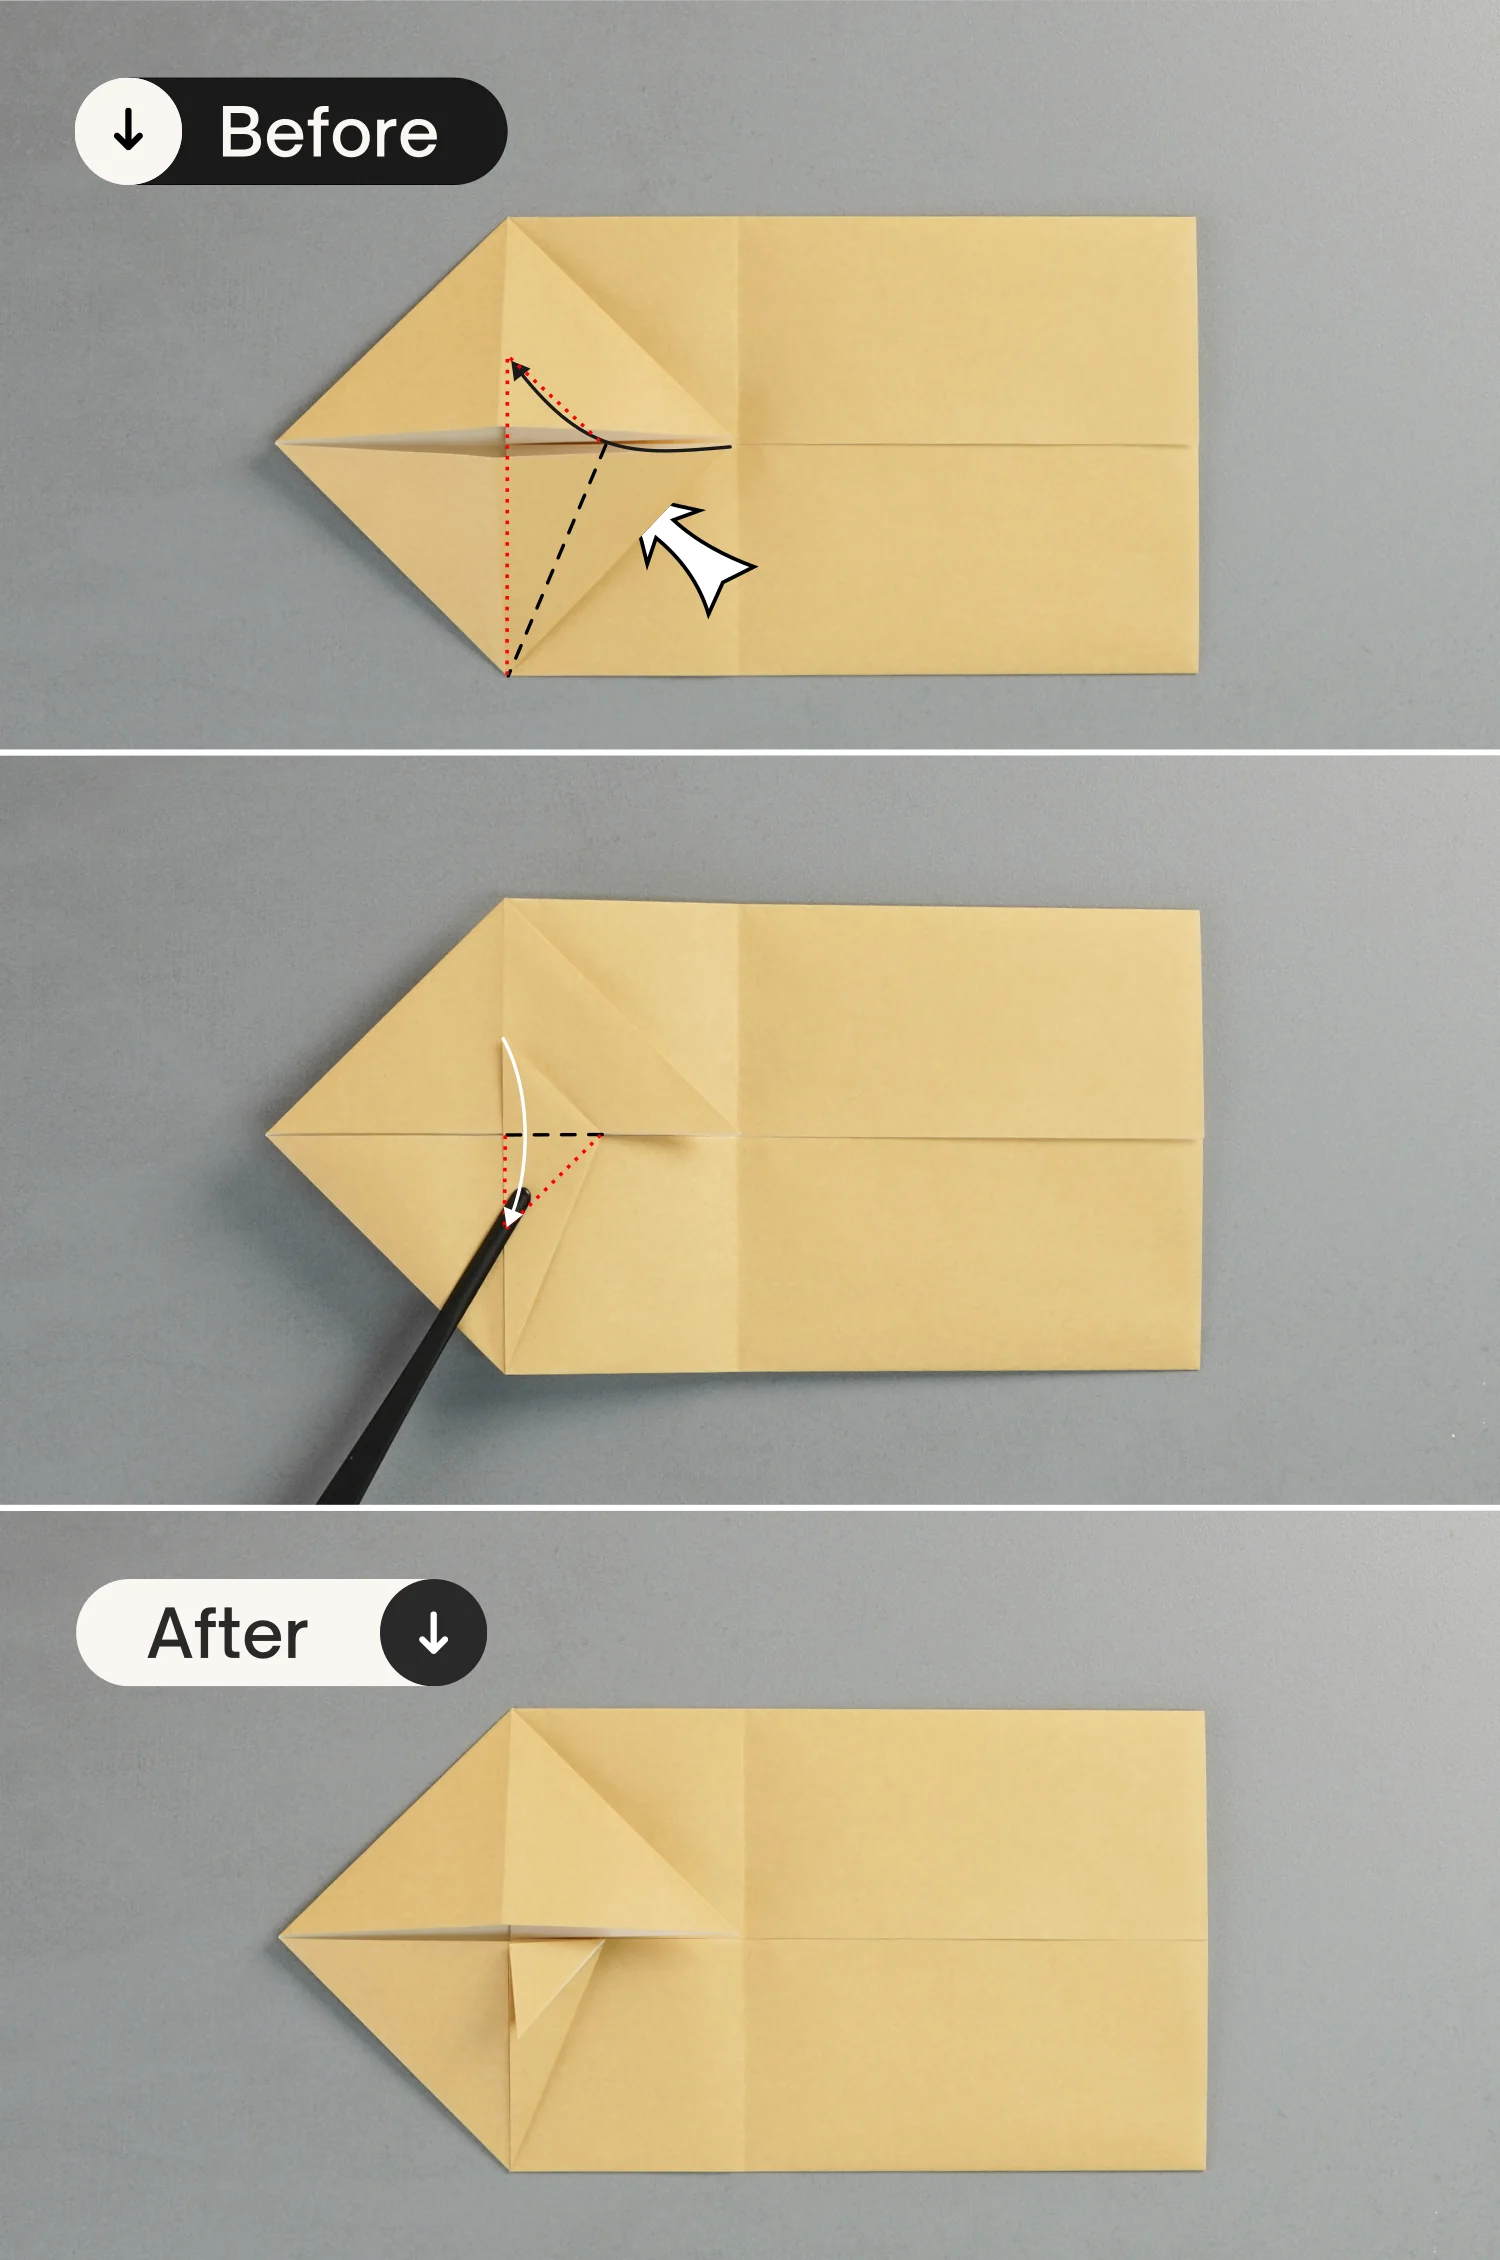
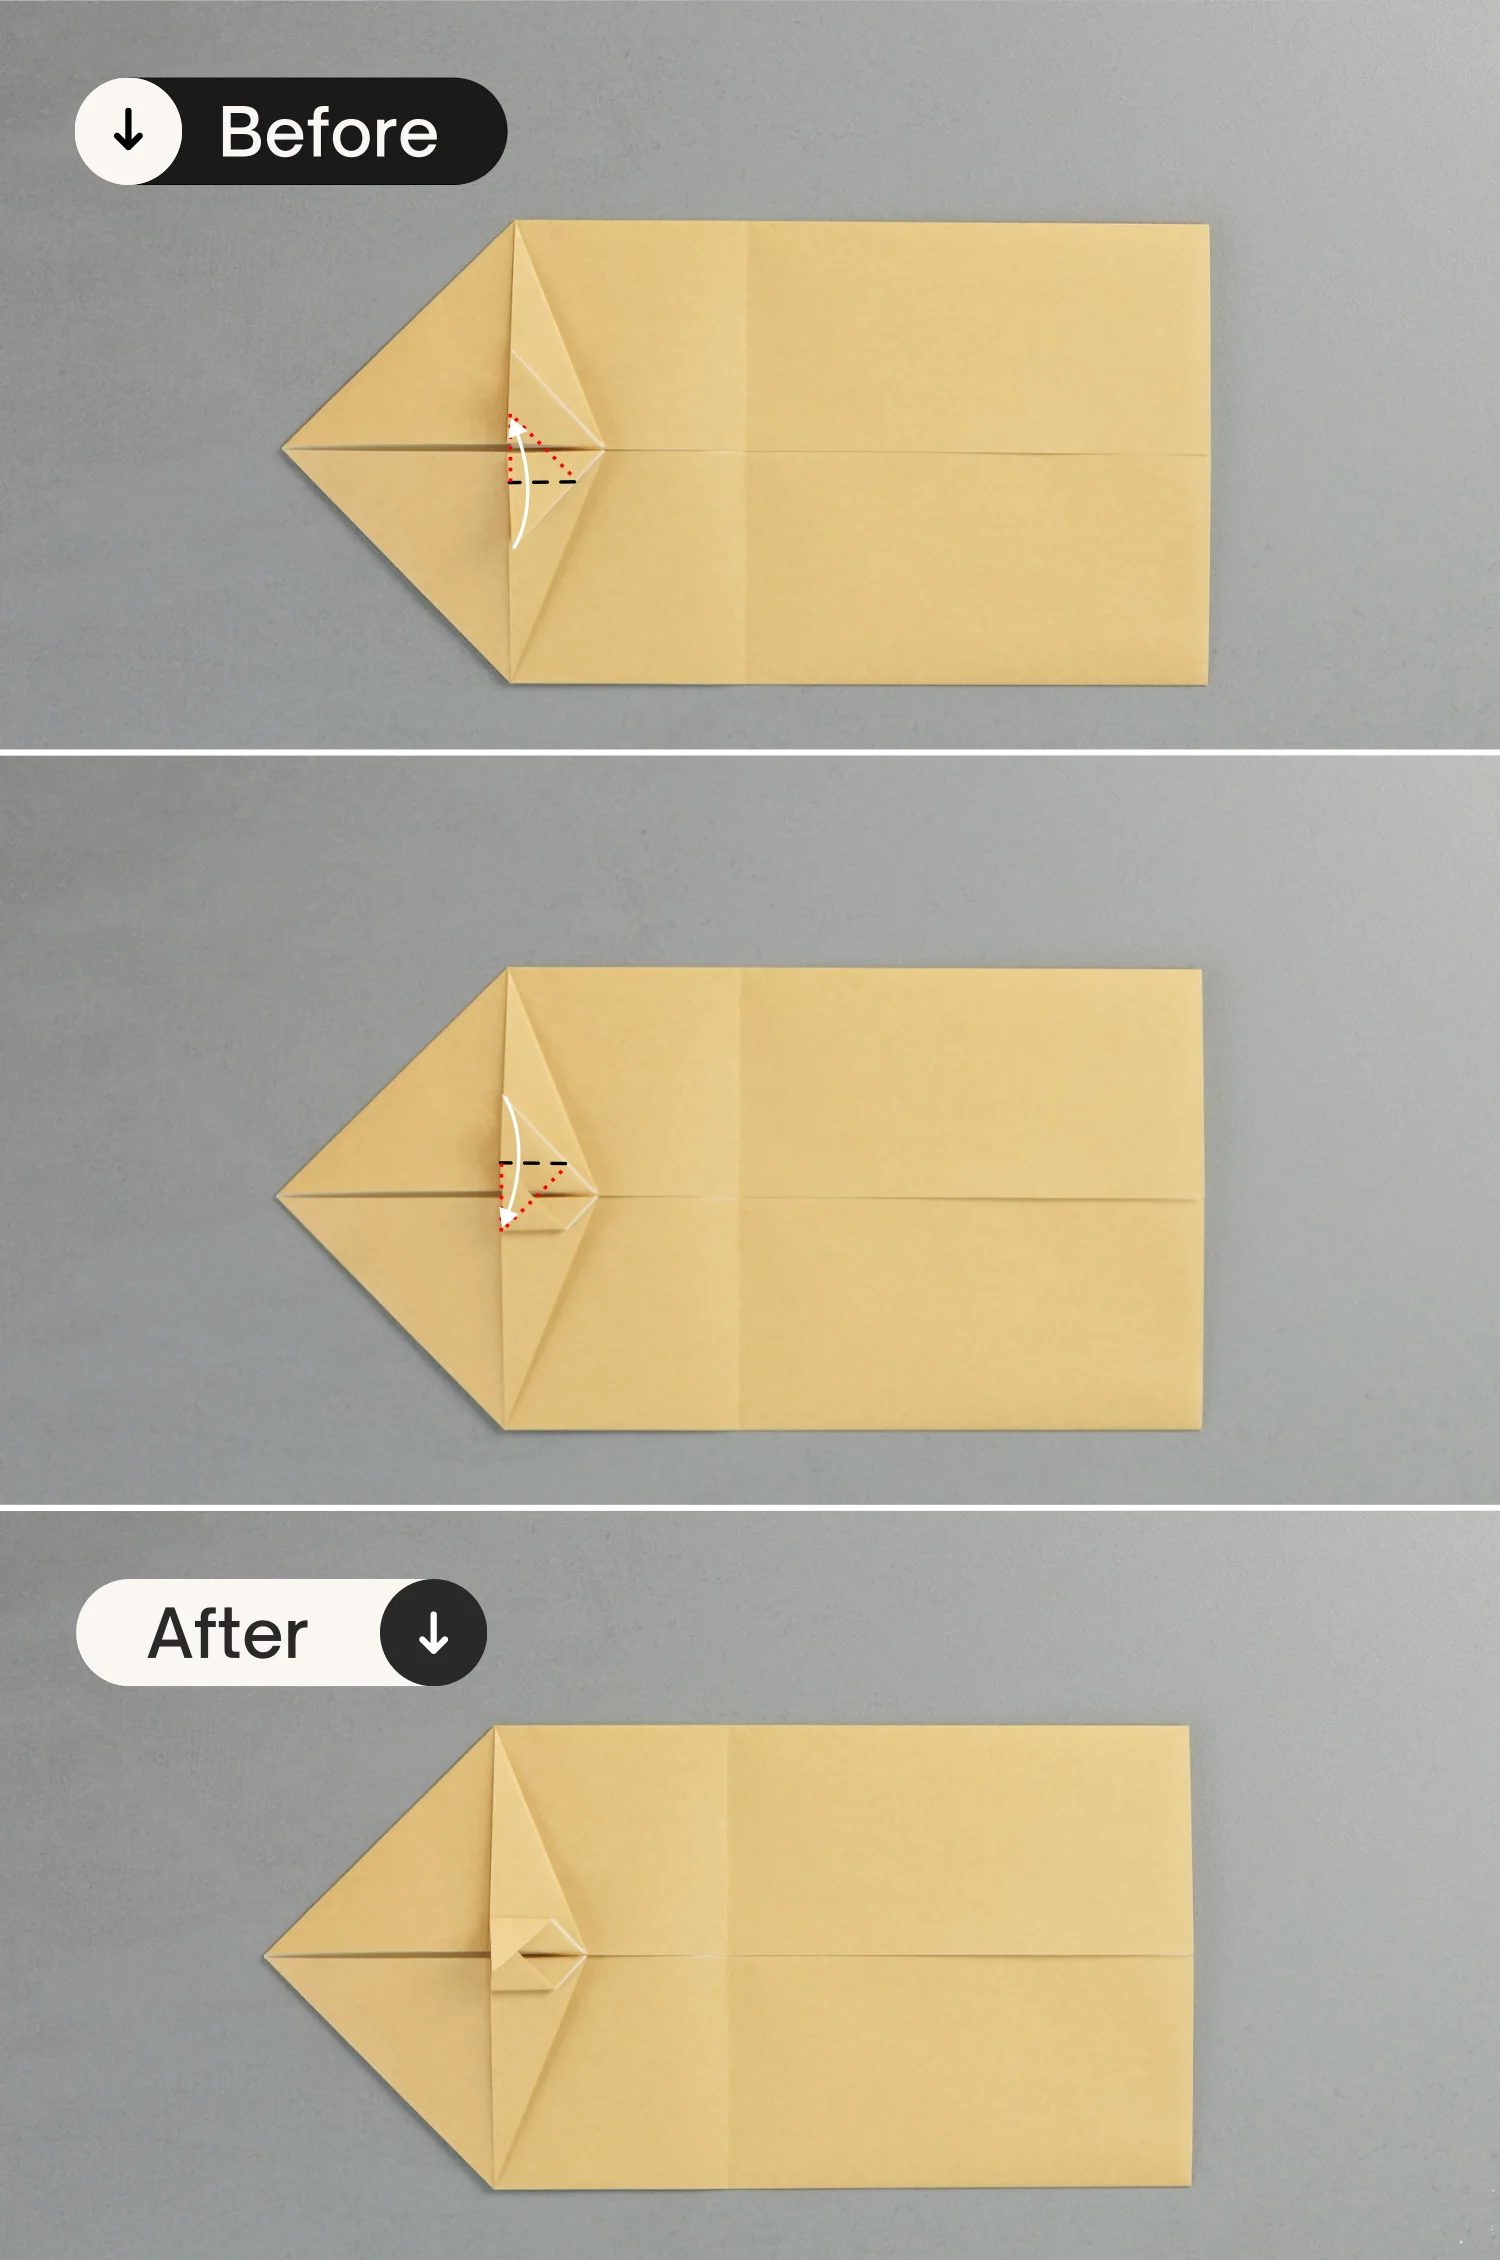
Step 7
Fold up the right edge of the bottom triangle on the left side to align with its middle vertical crease, then press down the top point of the folded part along the horizontal crease of the paper.
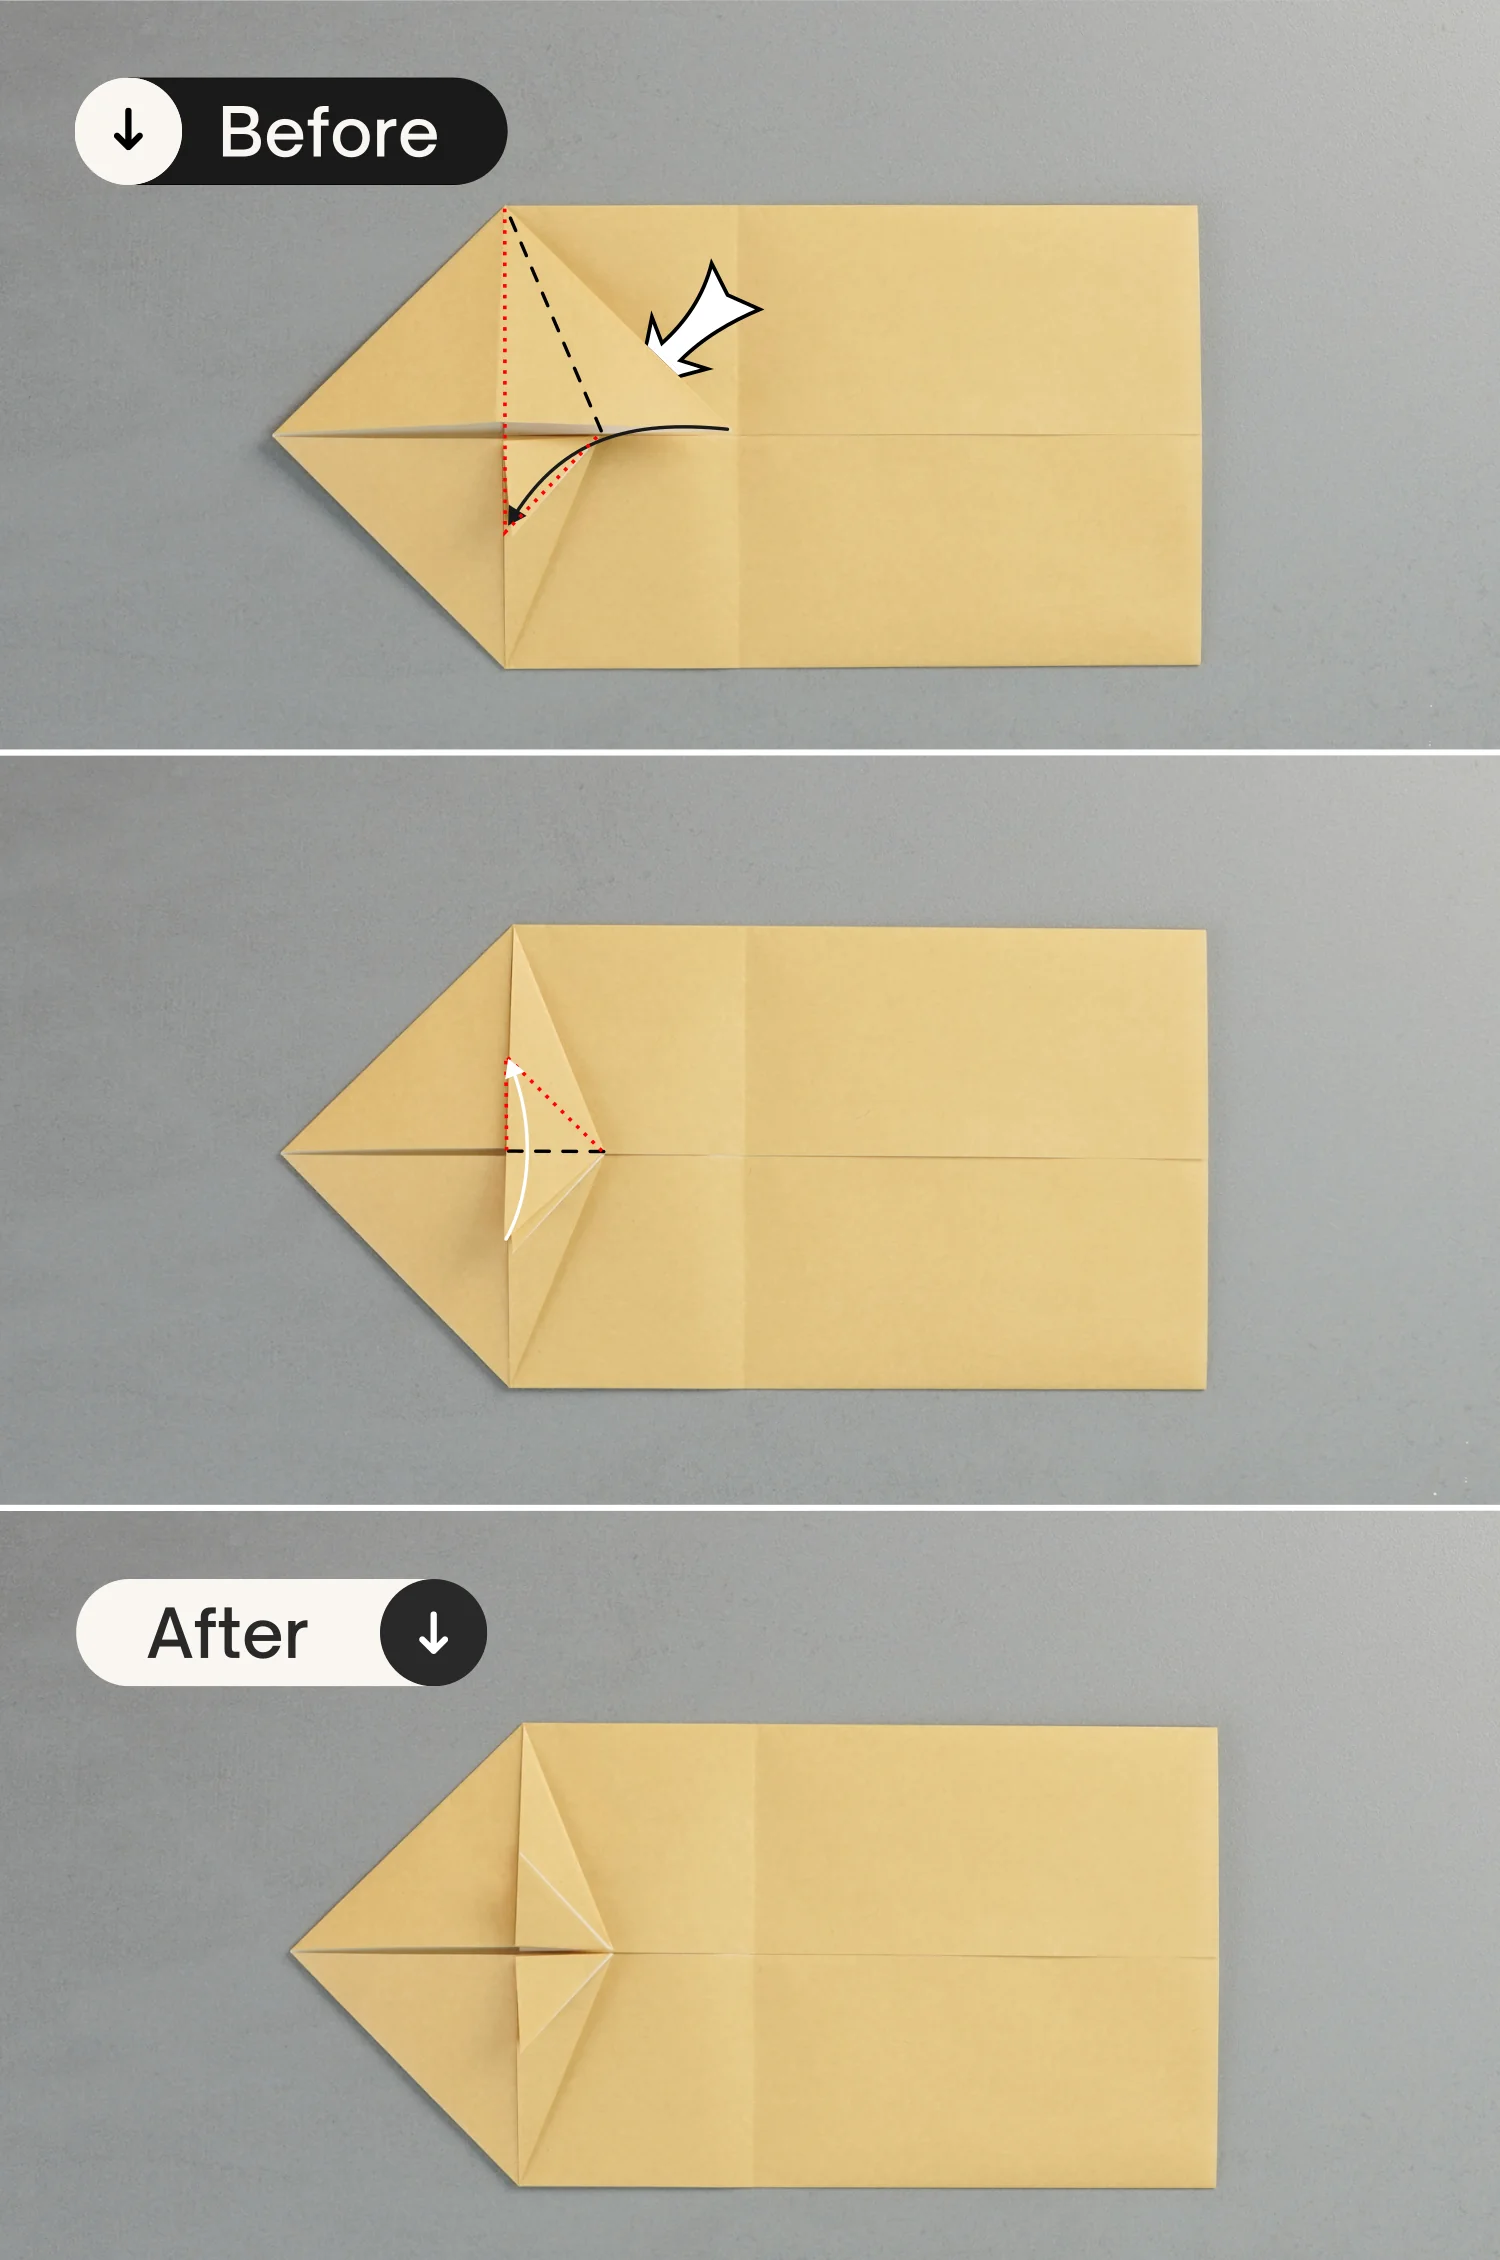
Step 8
Fold down the right edge of the top right triangle to align with its middle vertical crease, then fold up the bottom point of the folded part along the horizontal crease of the paper.
Step 9
Fold up the bottom point of the lower small triangle, and fold down the top point of the upper small triangle.
Step 10
Fold the top and bottom left edges to align with the middle horizontal crease.
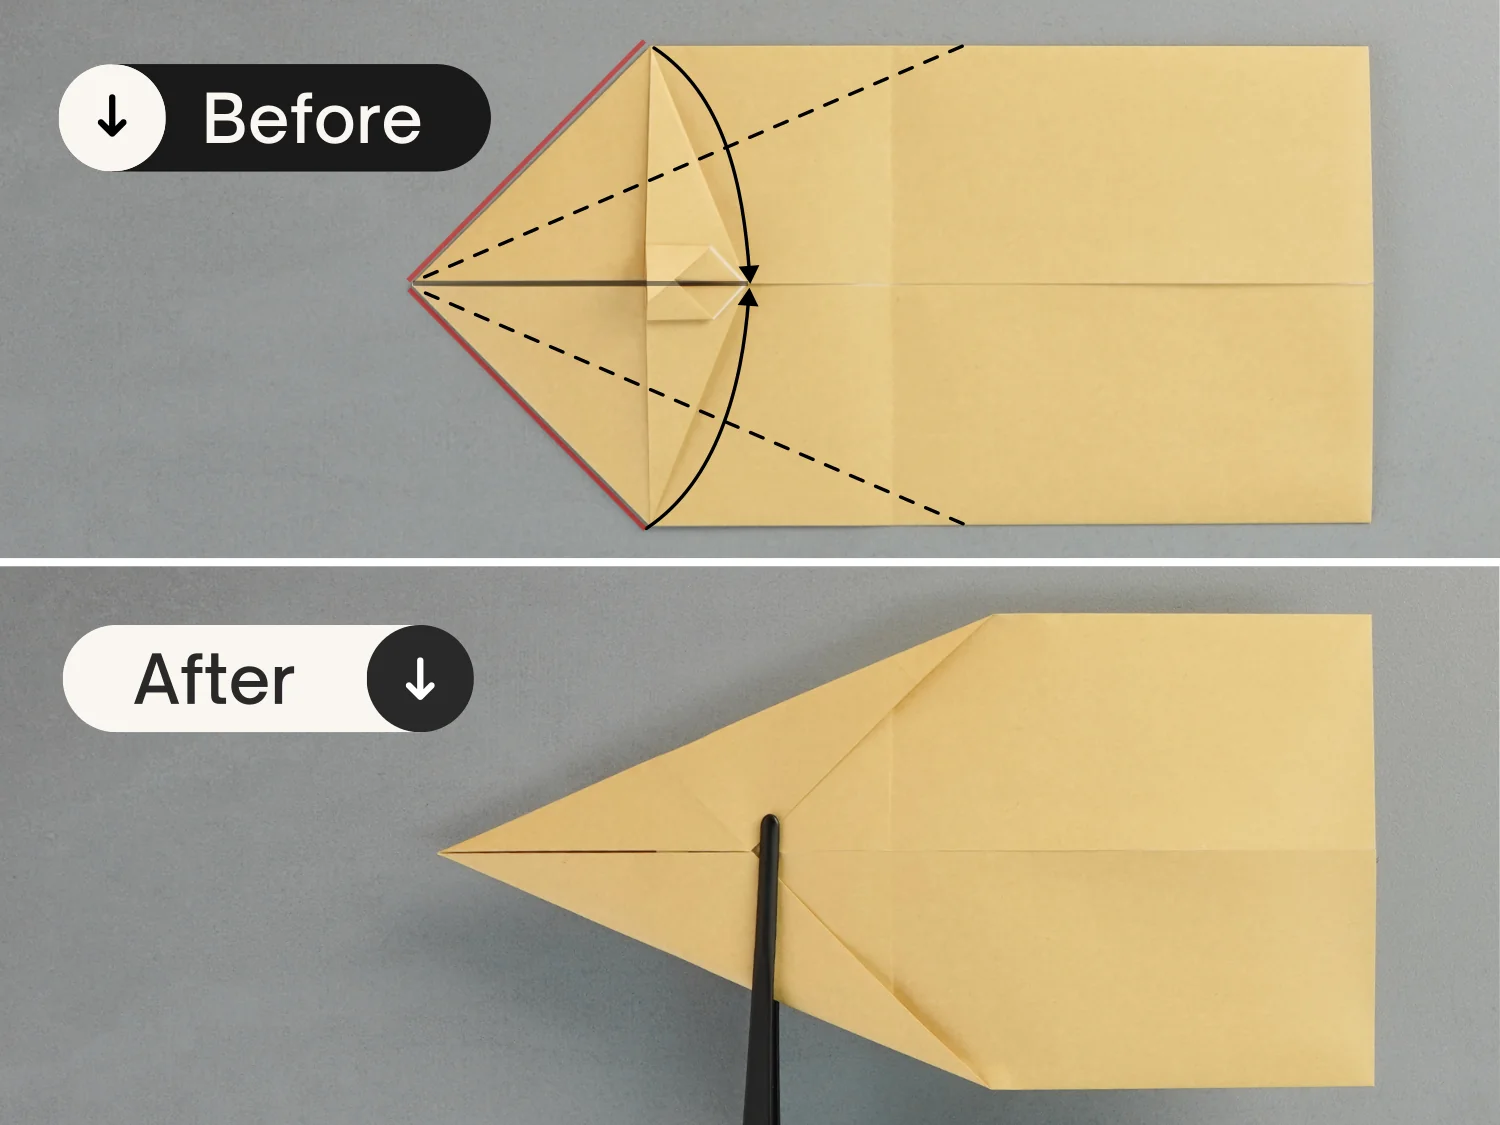
Step 11
Fold the right edge to the left along the dotted line that connects the two red spots, crease it well, and then unfold it.
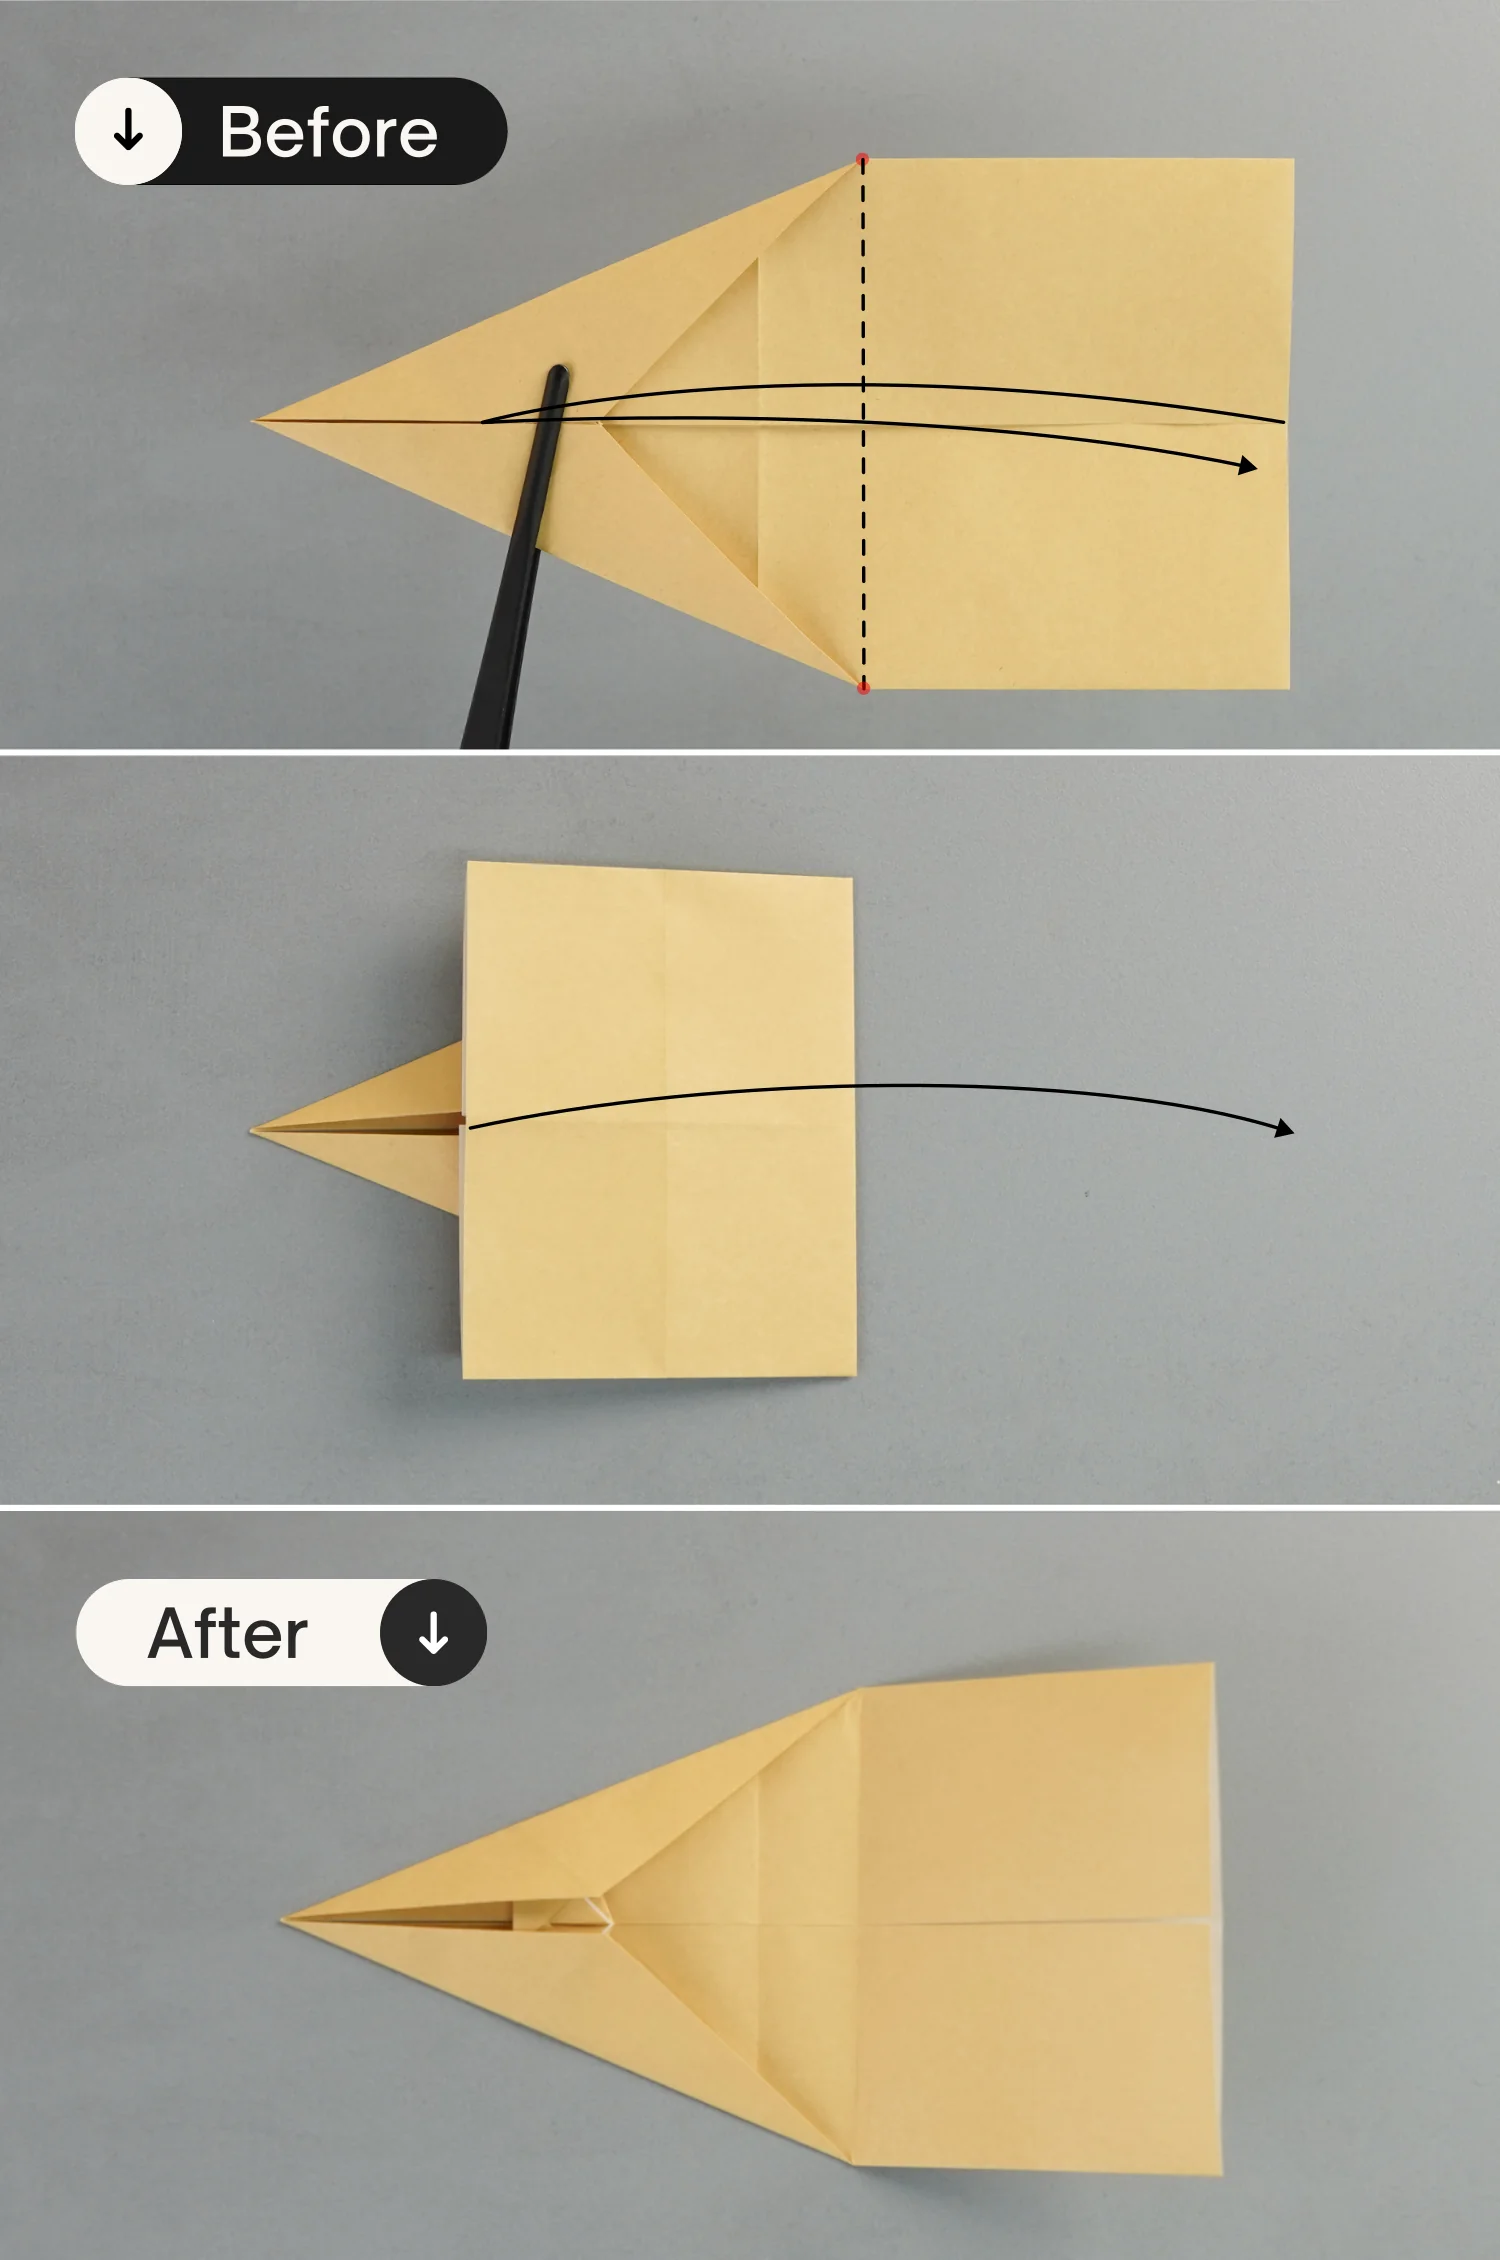
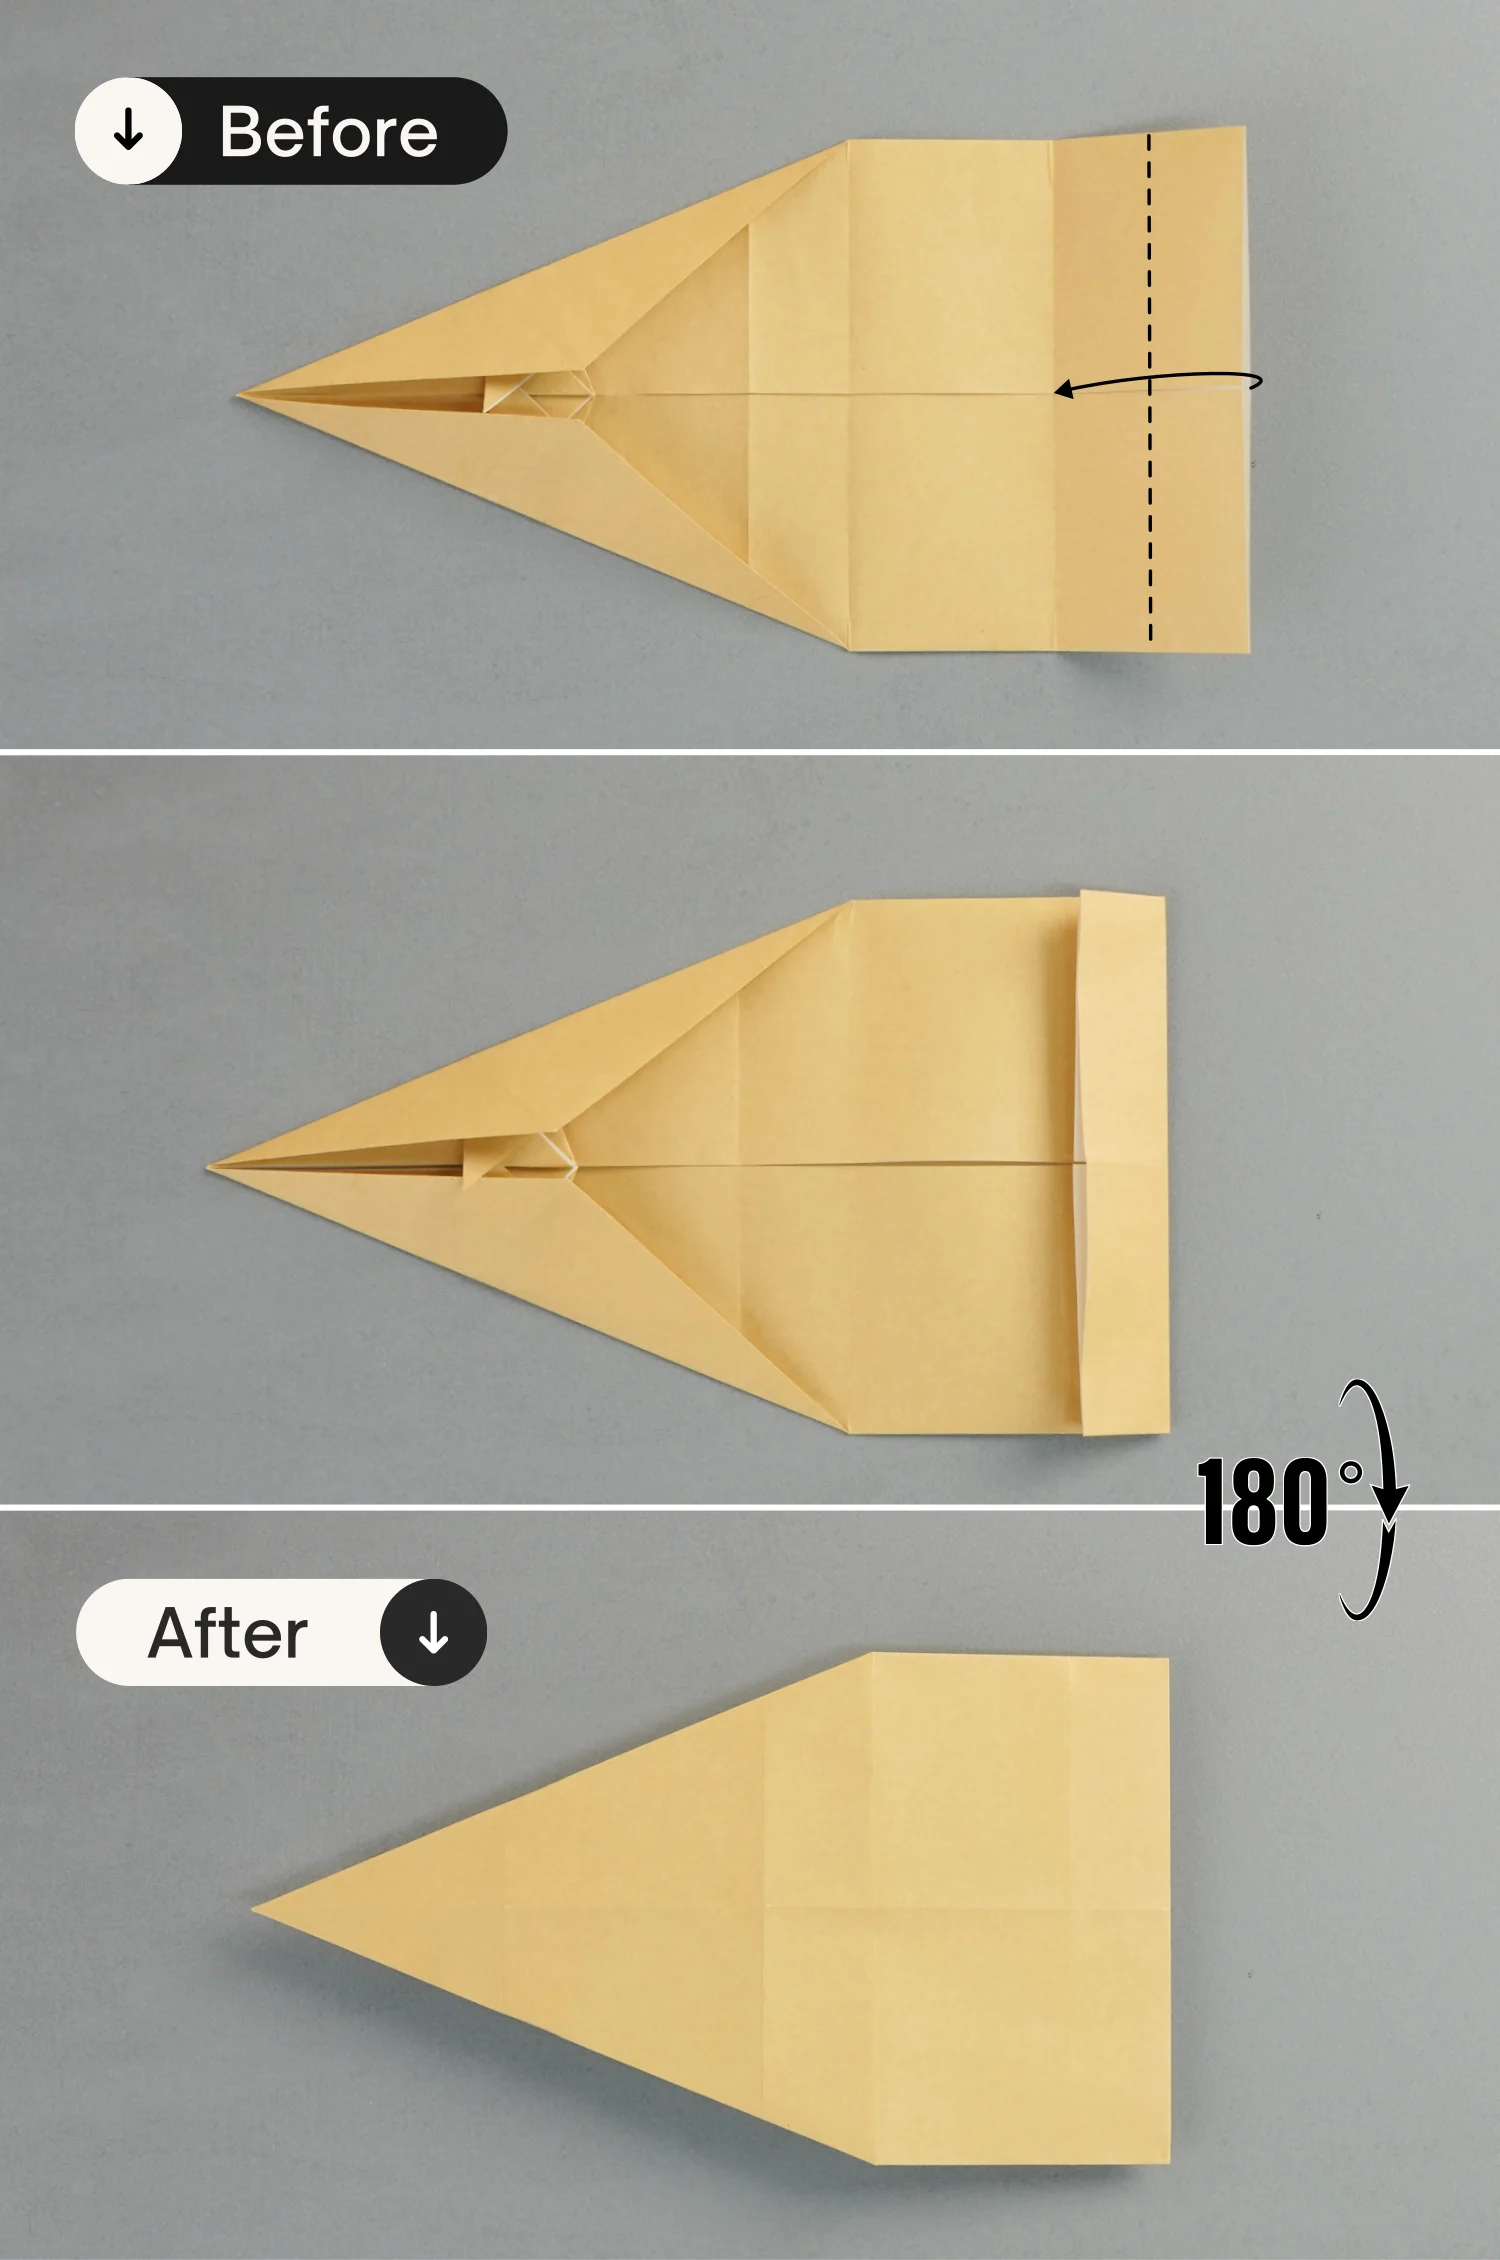
Step 12
Fold the right edge to align with the vertical crease you made in the previous step, leaving a crease, and unfold it.
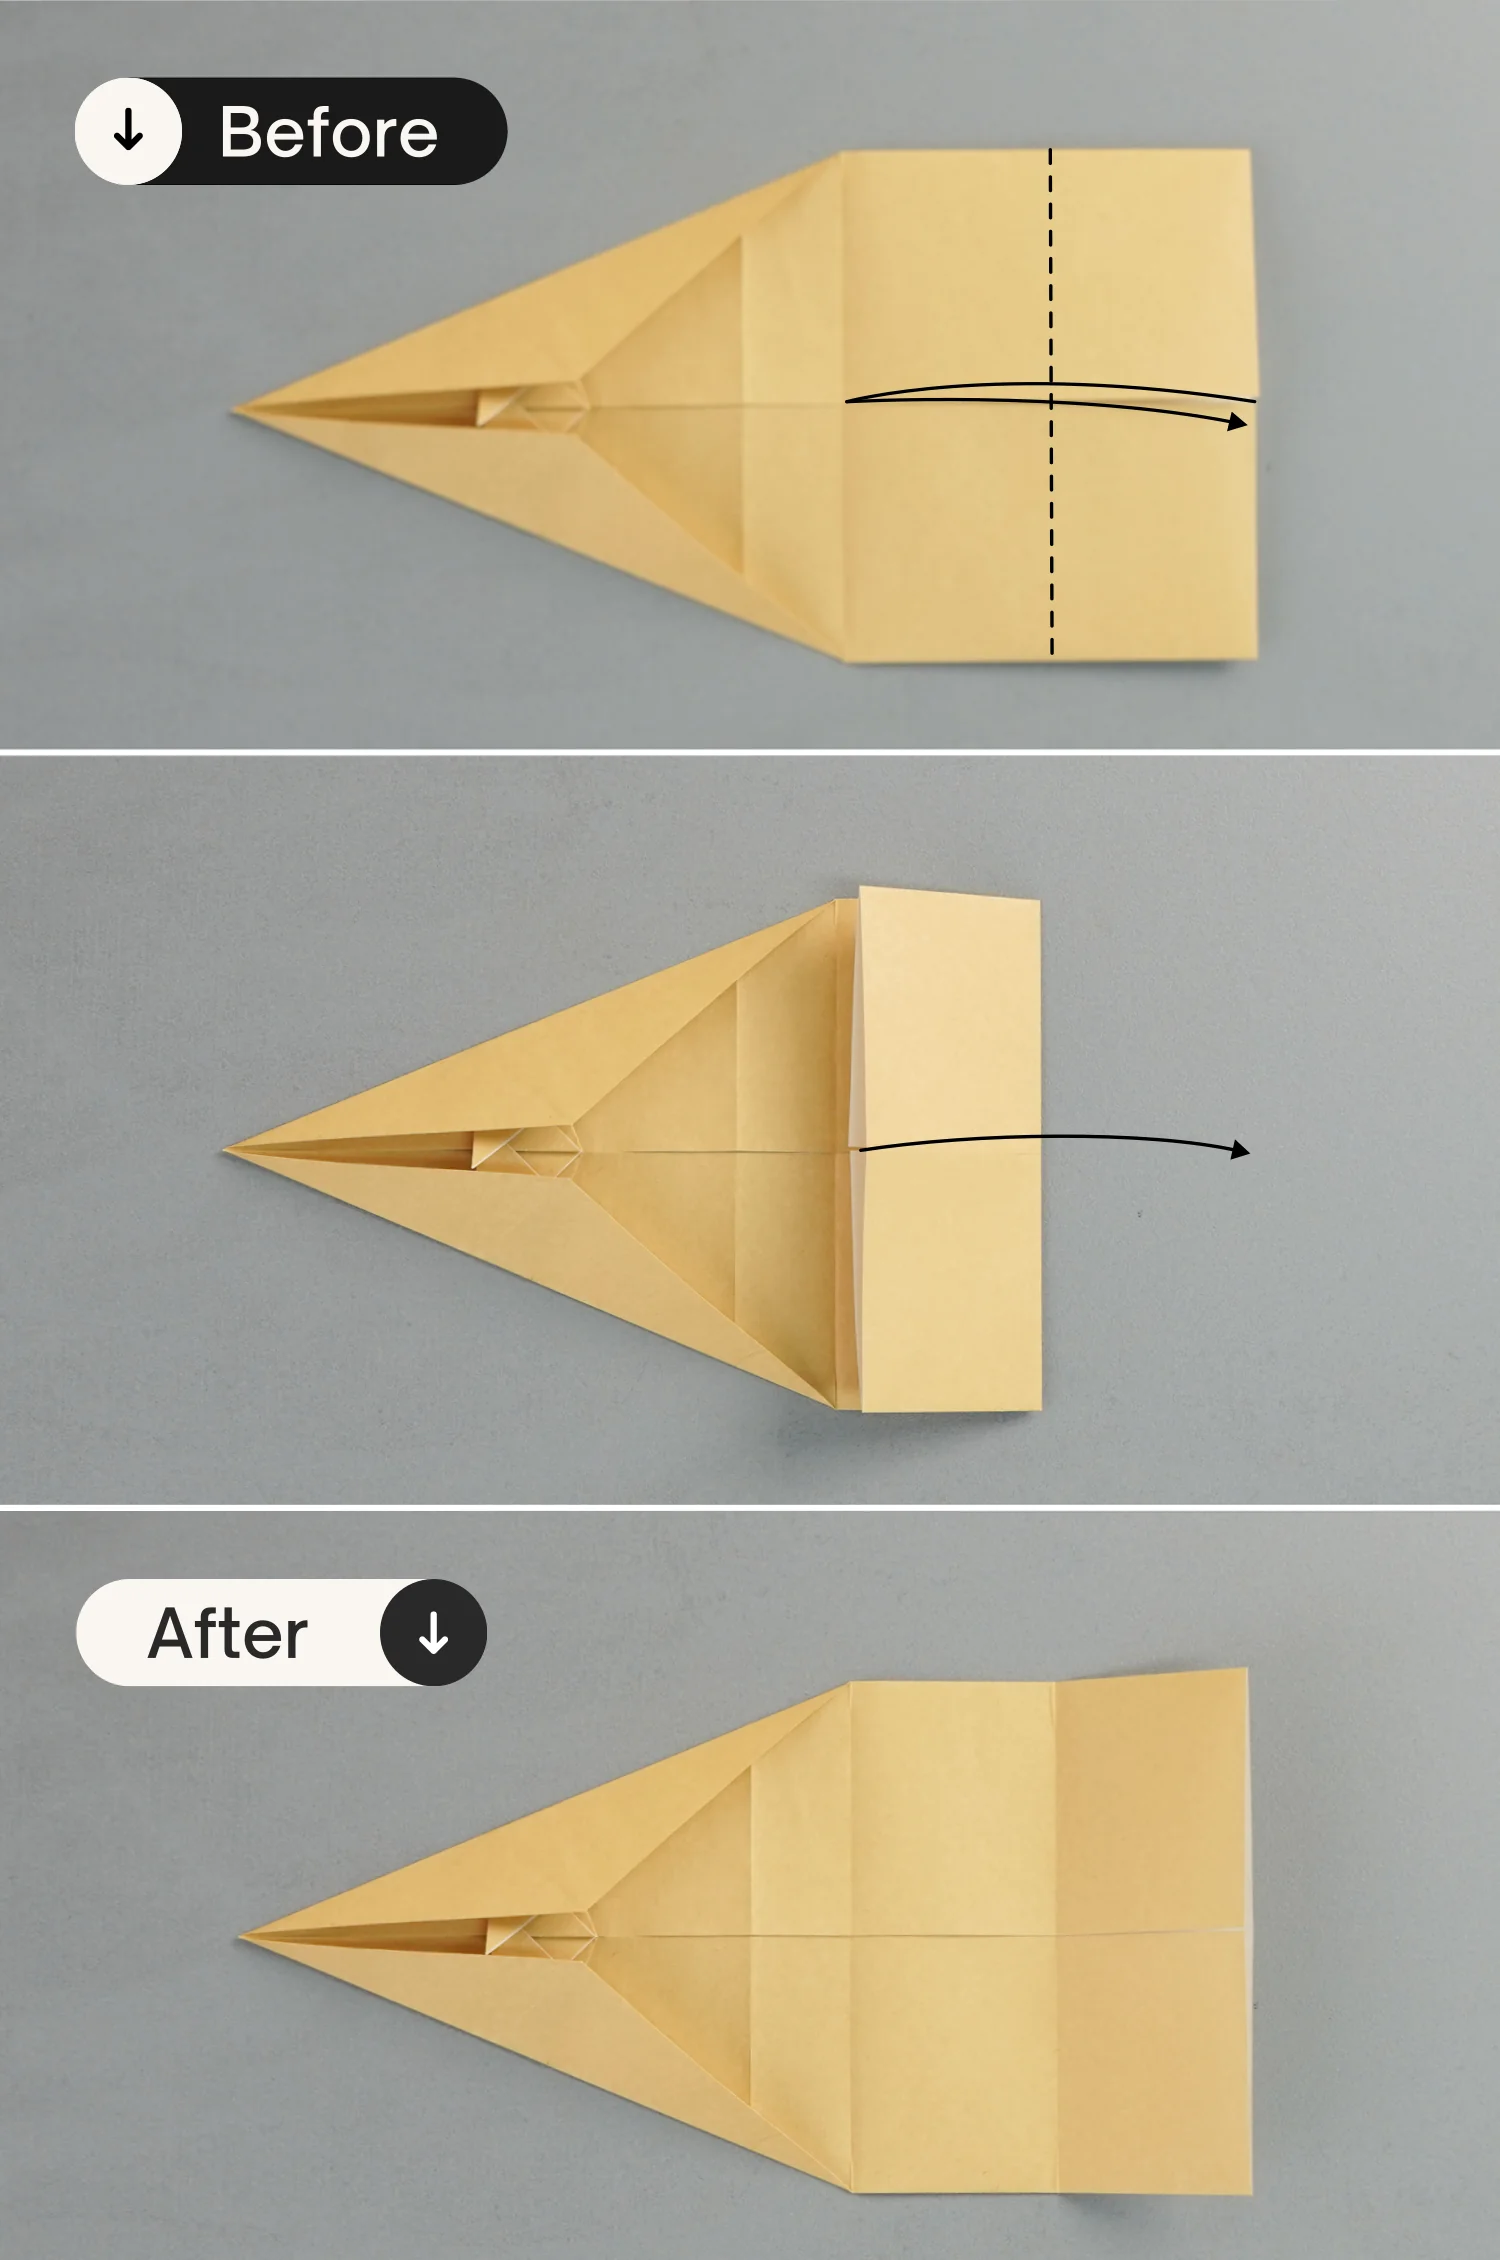
Step 13
In the same way, fold the left edge to align with the crease you just made, then rotate the paper 180 degrees from front to back to flip the paper over.
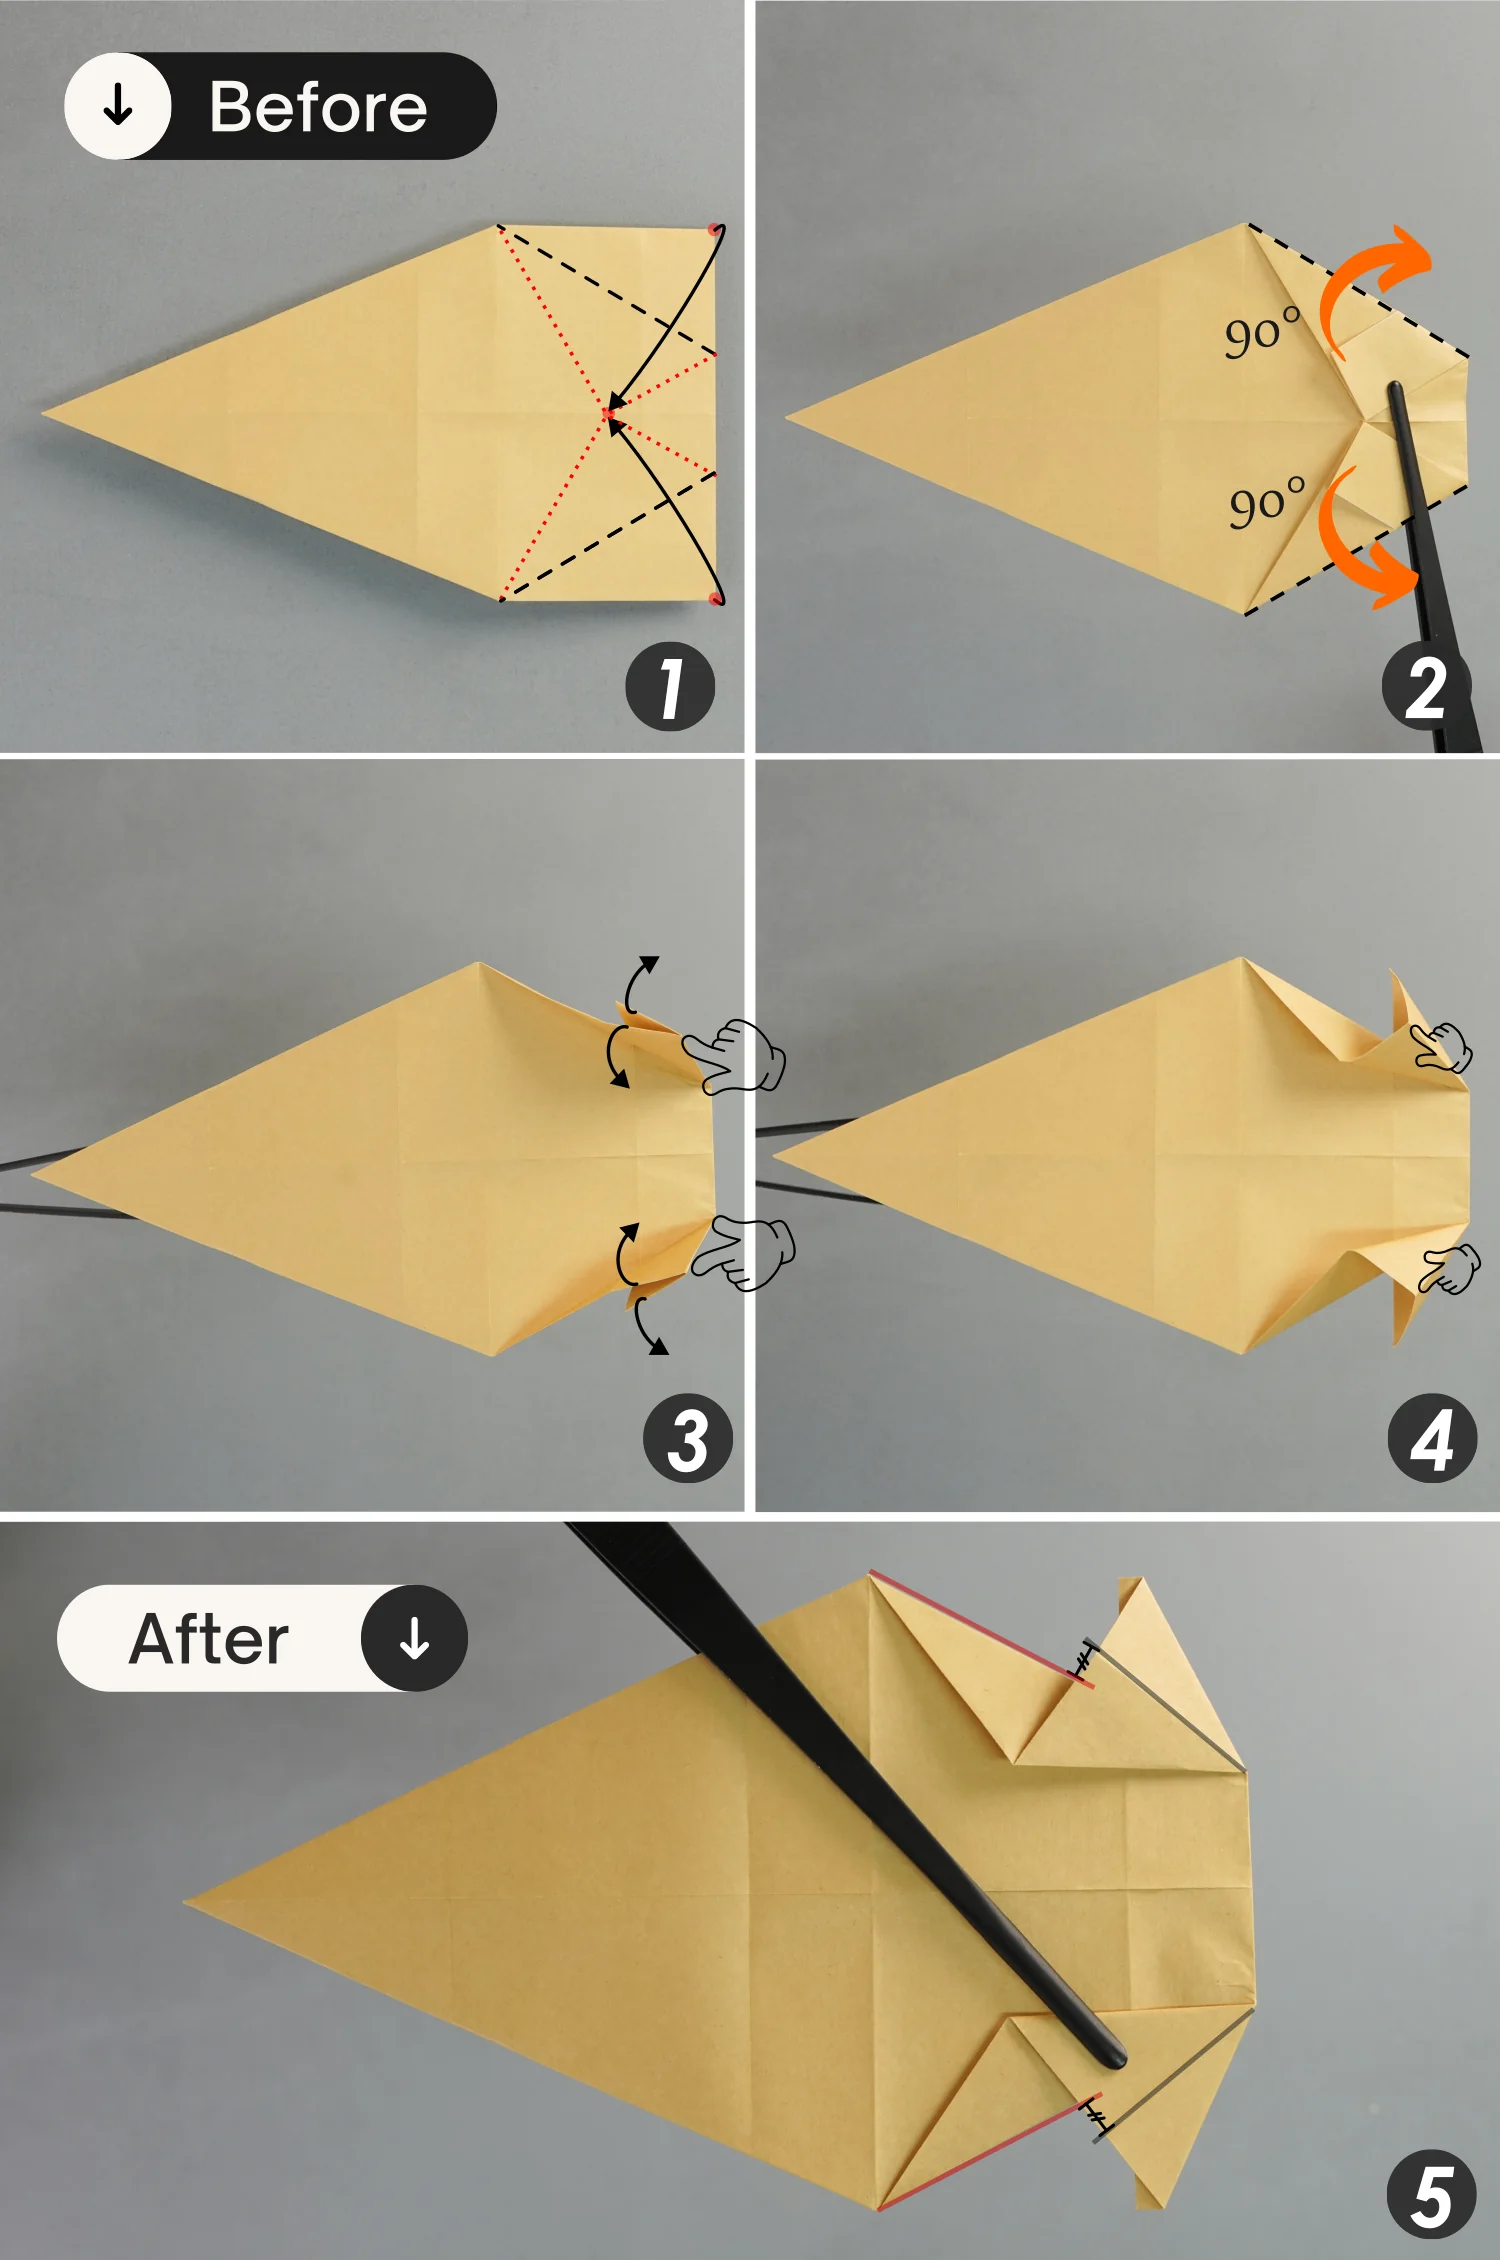
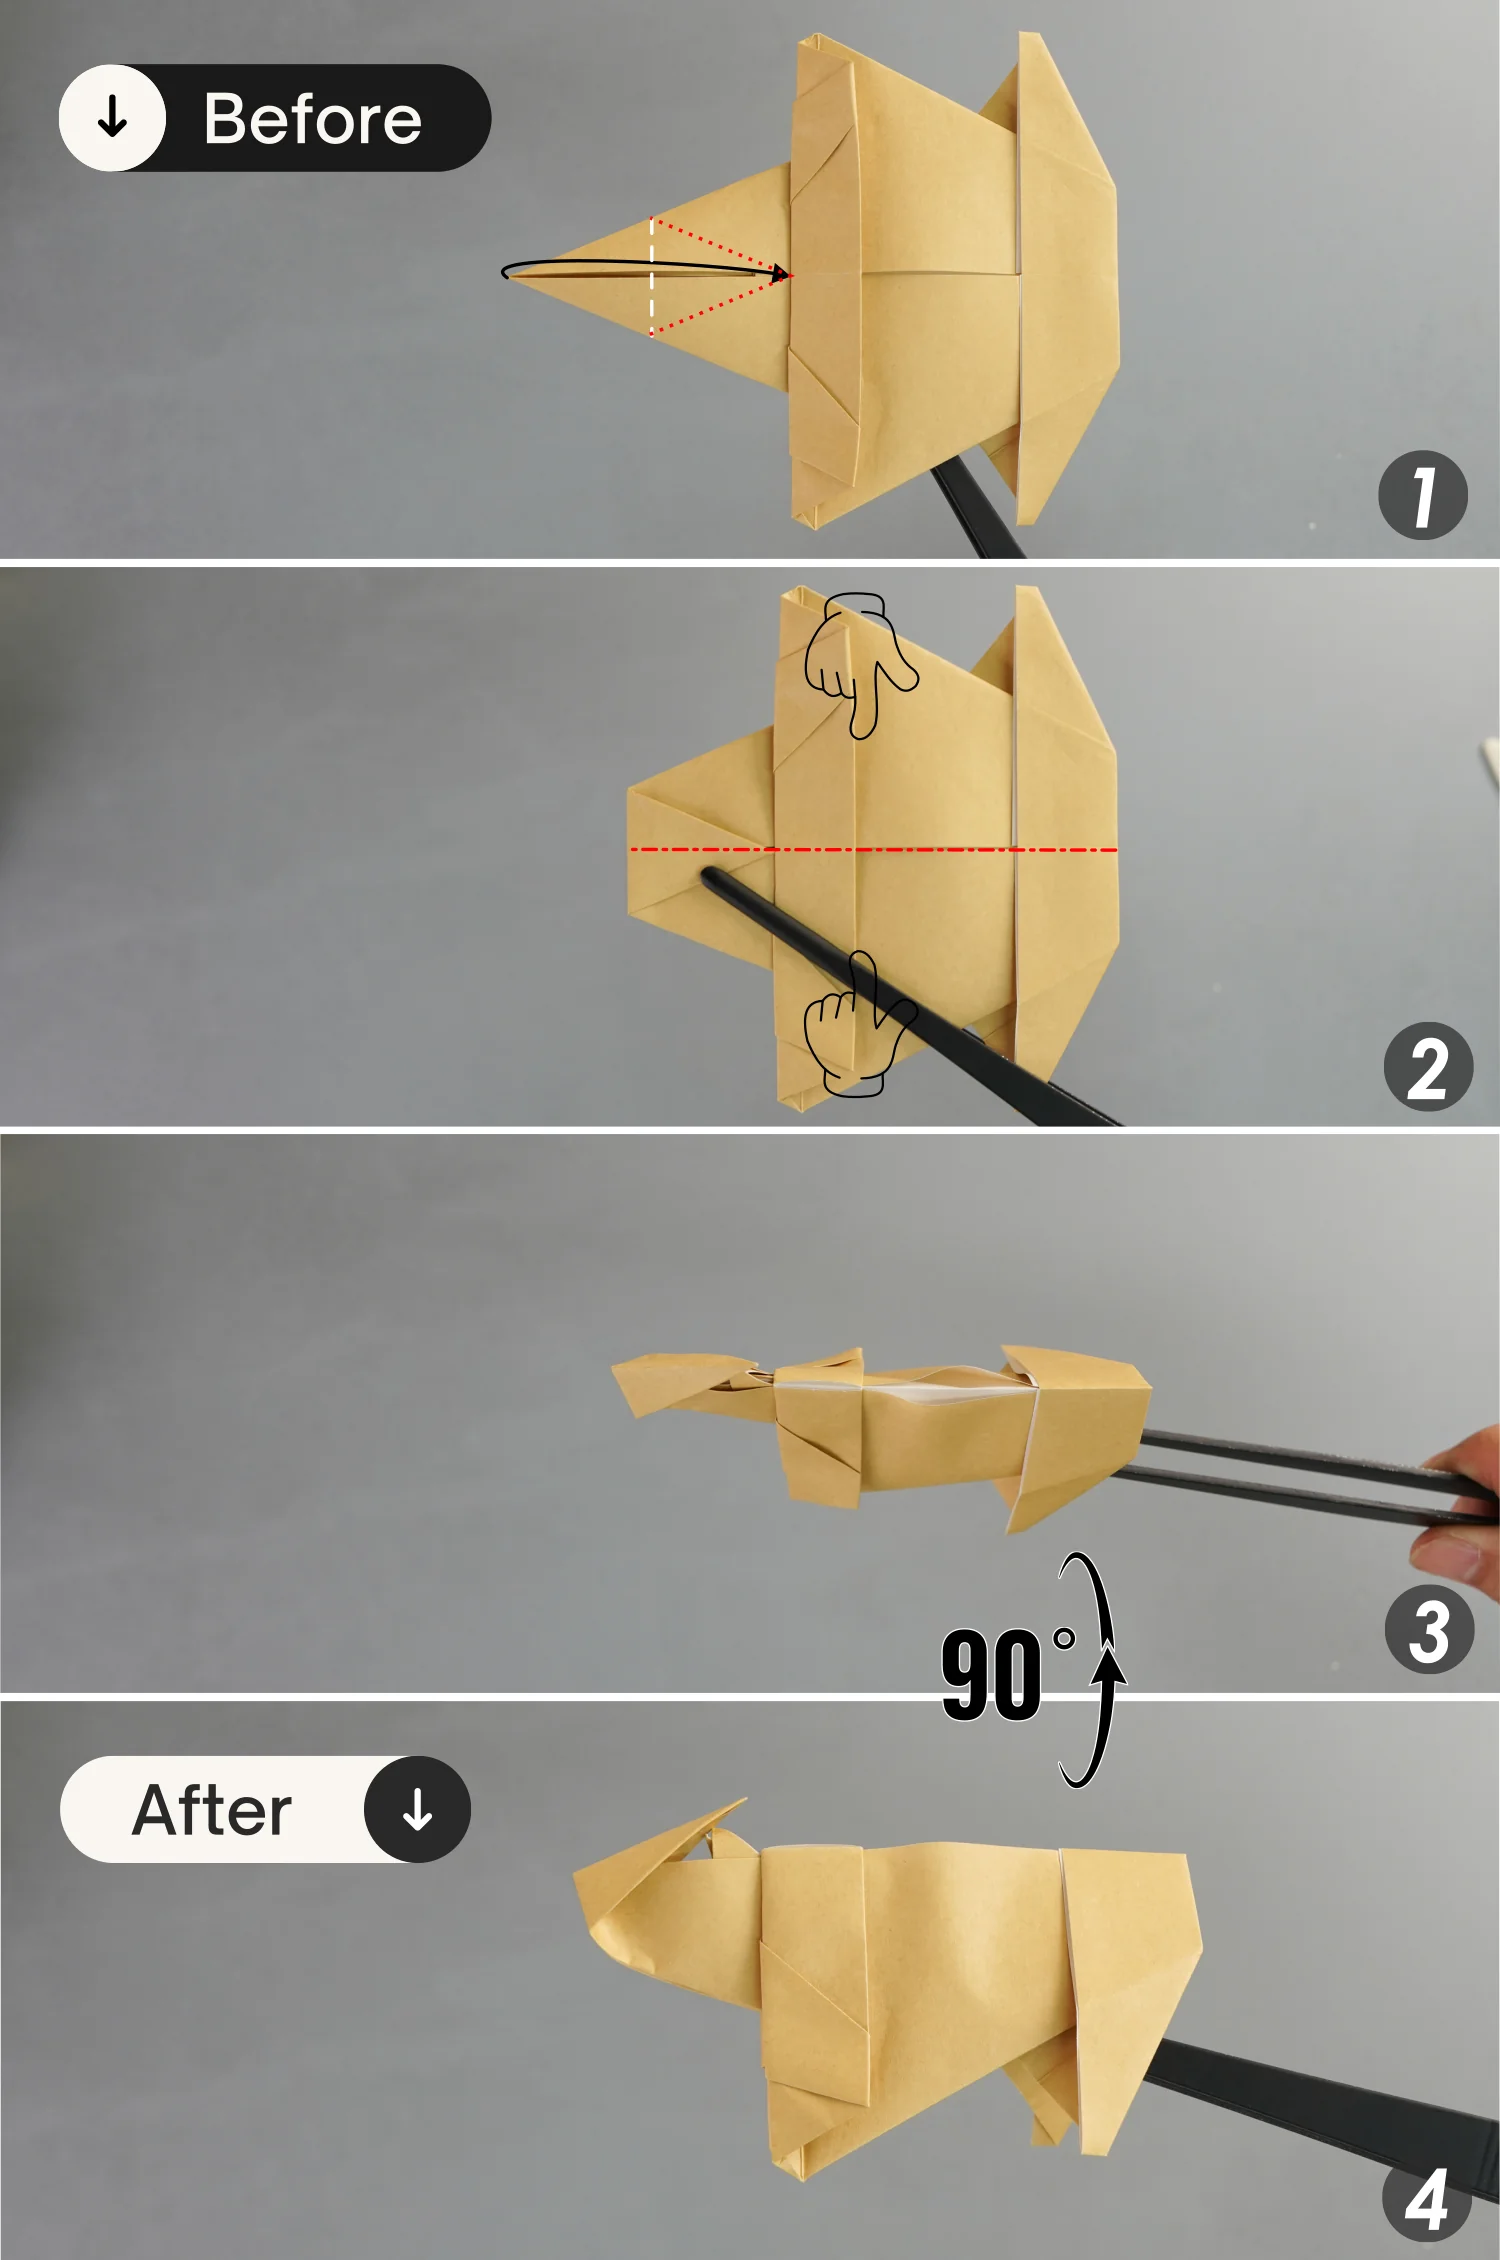
Step 14
Fold the top and bottom right points to meet the horizontal crease along the black dotted lines, then unfold them for only 90 degrees to make these two flaps stand [pictures 1 and 2].
Then open and squash these two flaps, making sure that the creases shown by the black lines and the edges shown by the red lines are offset and not overlapped, as shown in the last picture [pictures 3 to 5].
Step 15
Fold the left point to the right side along the crease shown by the white dotted line, then fold this point back to the left side for a short section along the white dotted line.
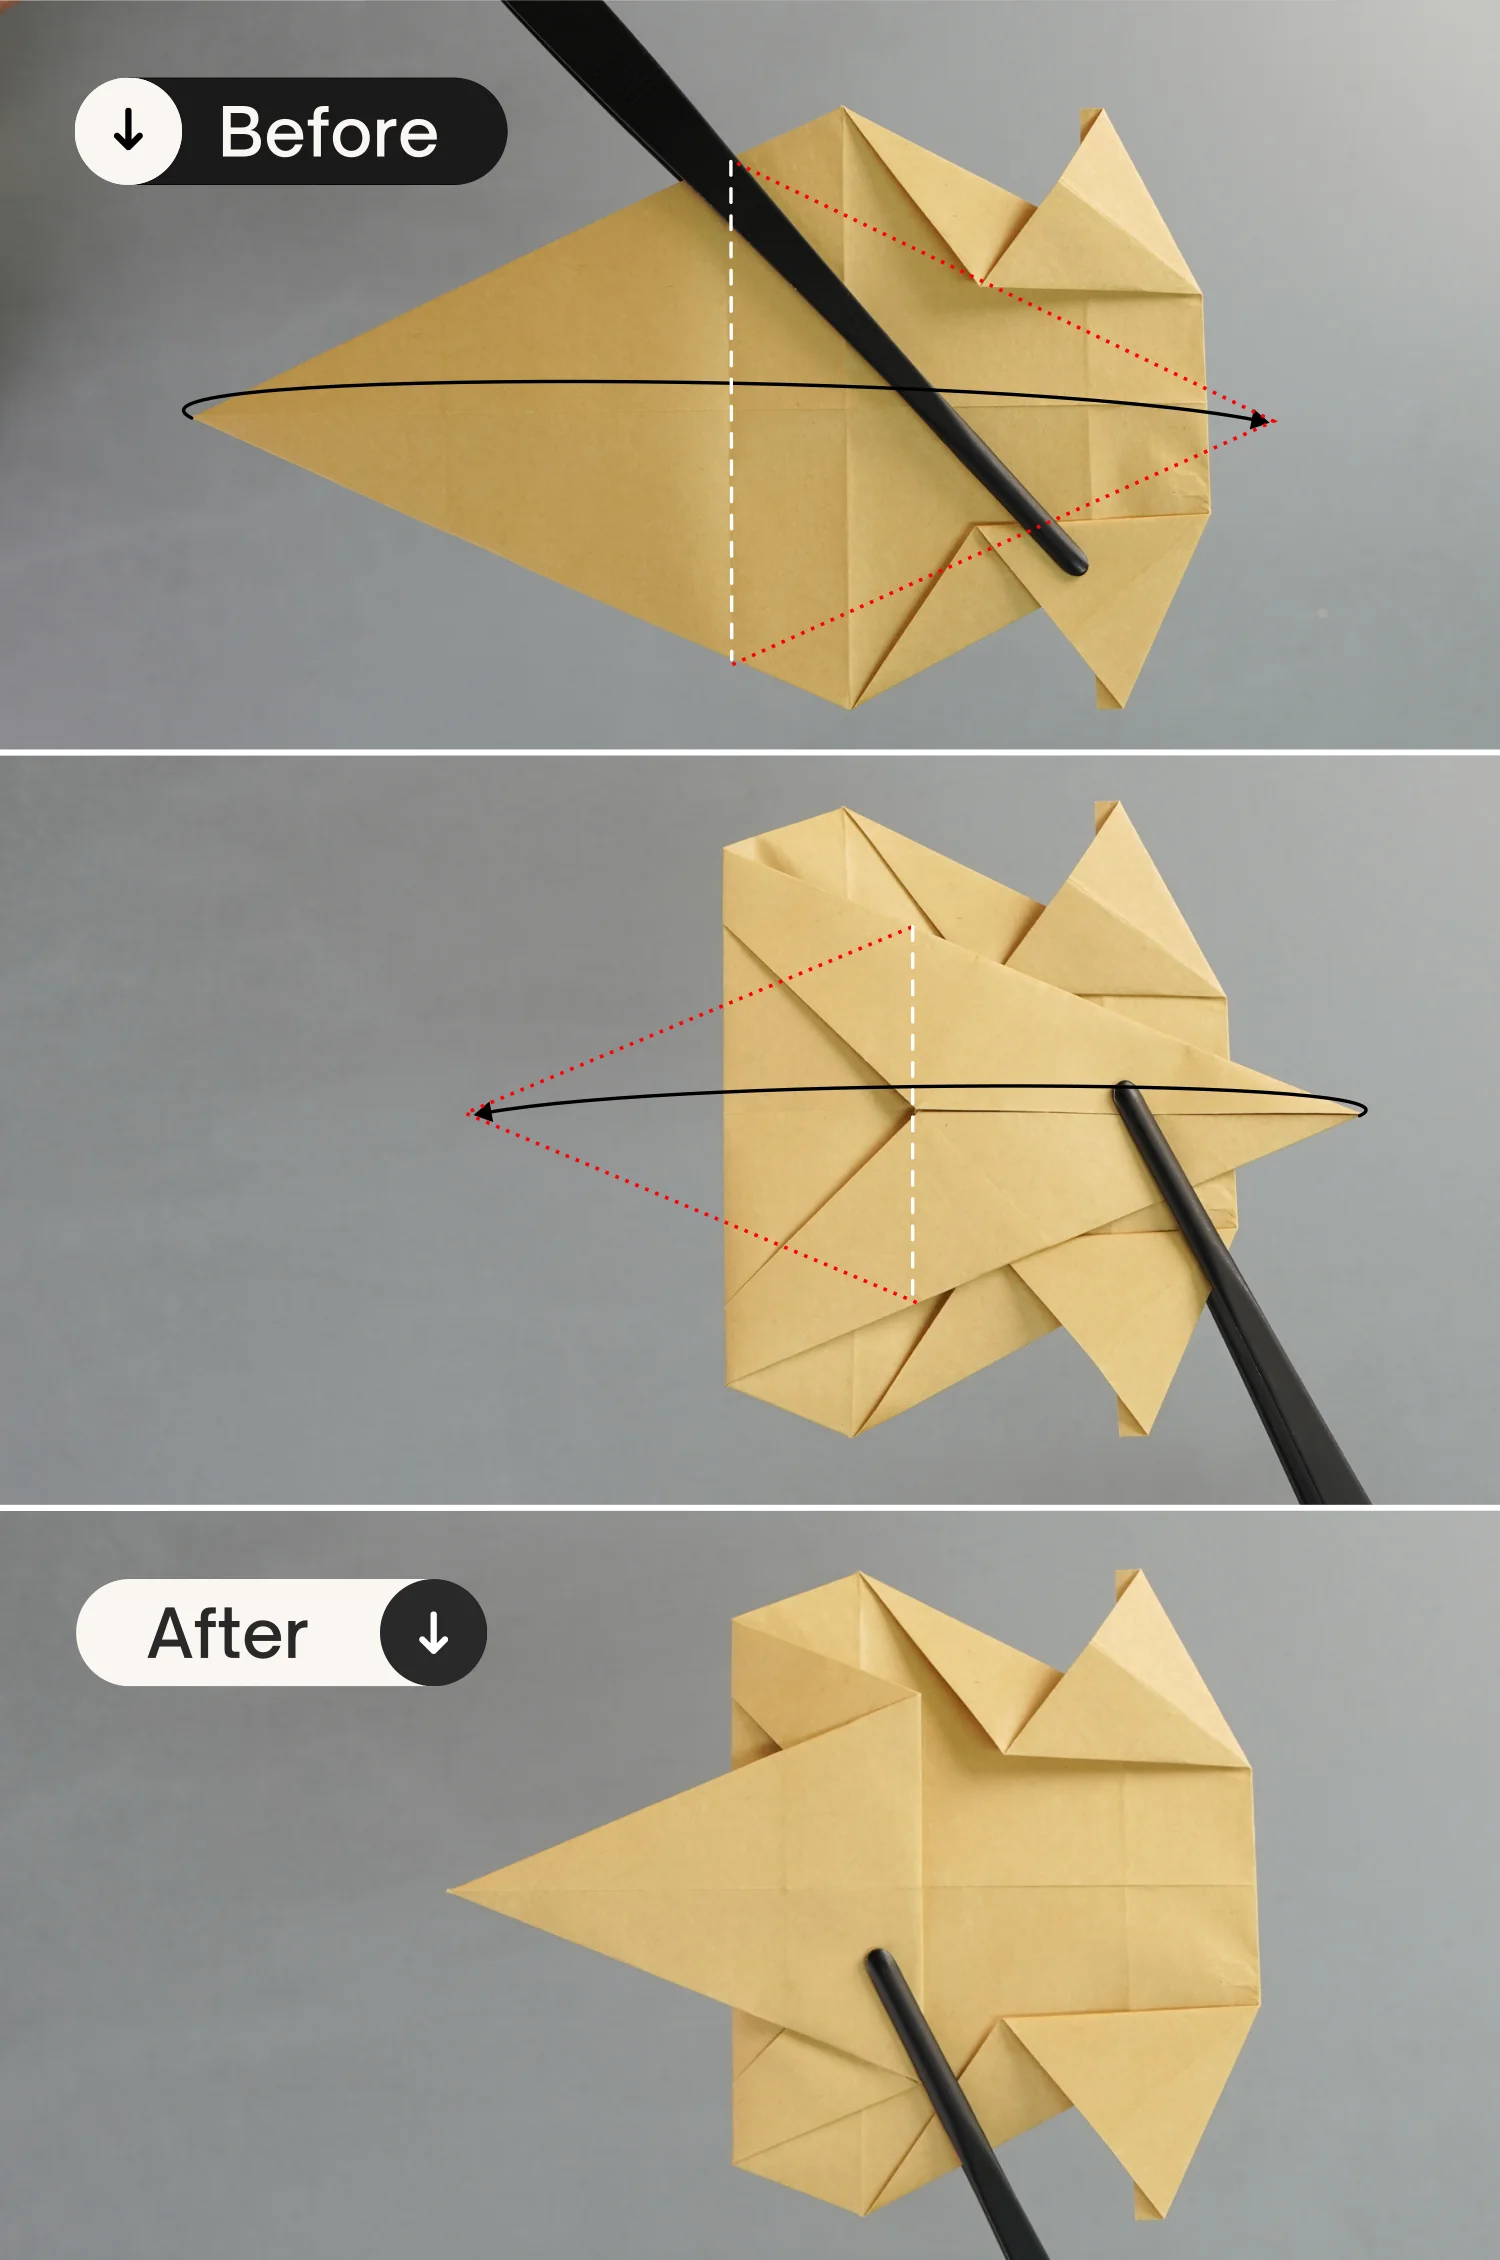
Step 16
Rotate it 180 degrees from front to back to flip the paper over, then fold the left edge of the left part to the right side along the white dotted line.
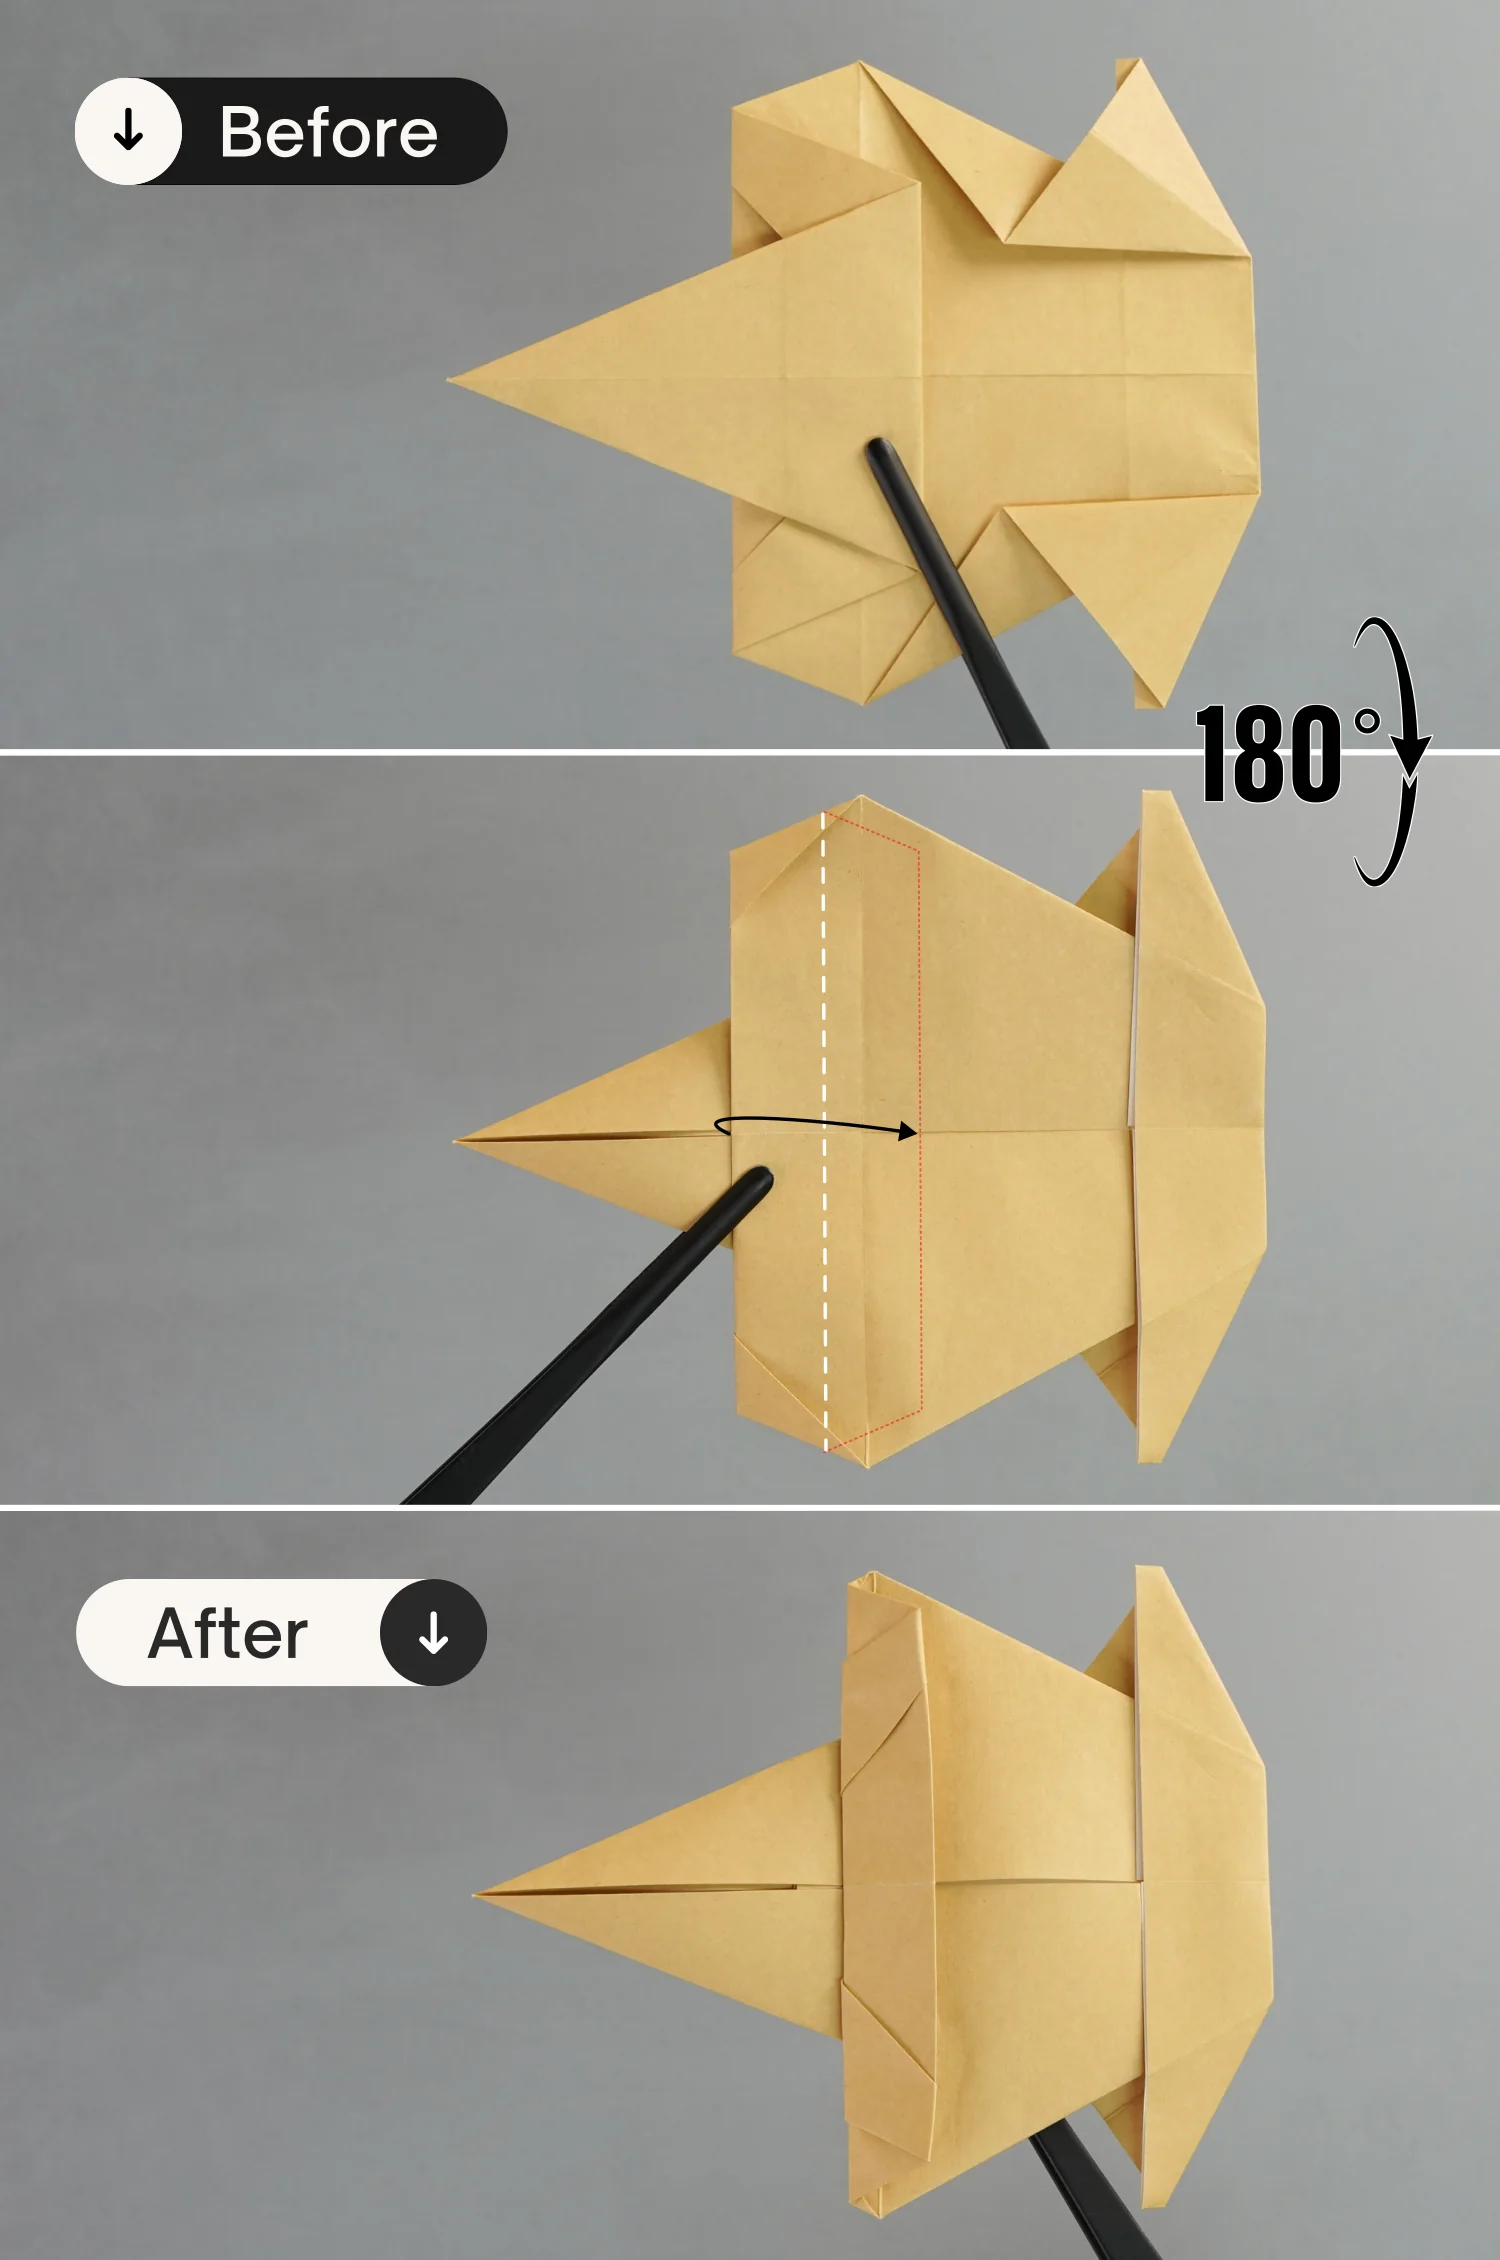
Step 17
Fold the left point toward the right side along the white dotted line, then fold the paper in half horizontally backward, and finally rotate it 90 degrees from back to front.
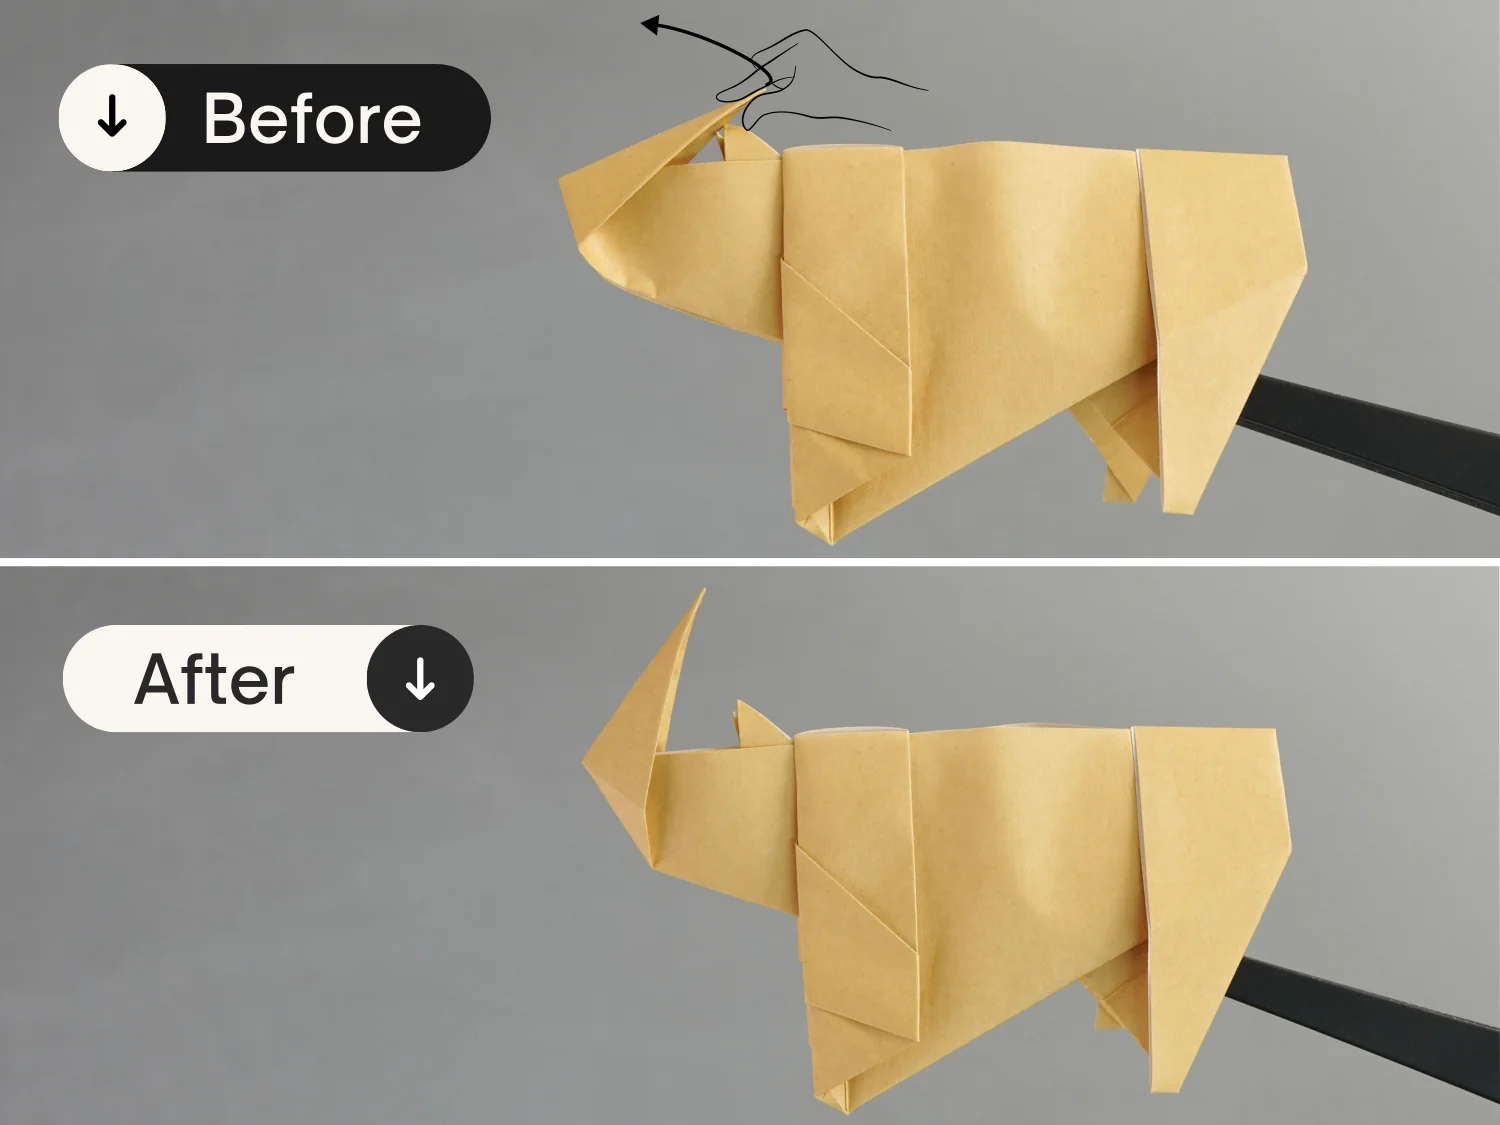
Step 18
Lift this corner a little bit to form the horn.
Step 19
Fold down the top right corner diagonally, leaving a crease, and unfold it.
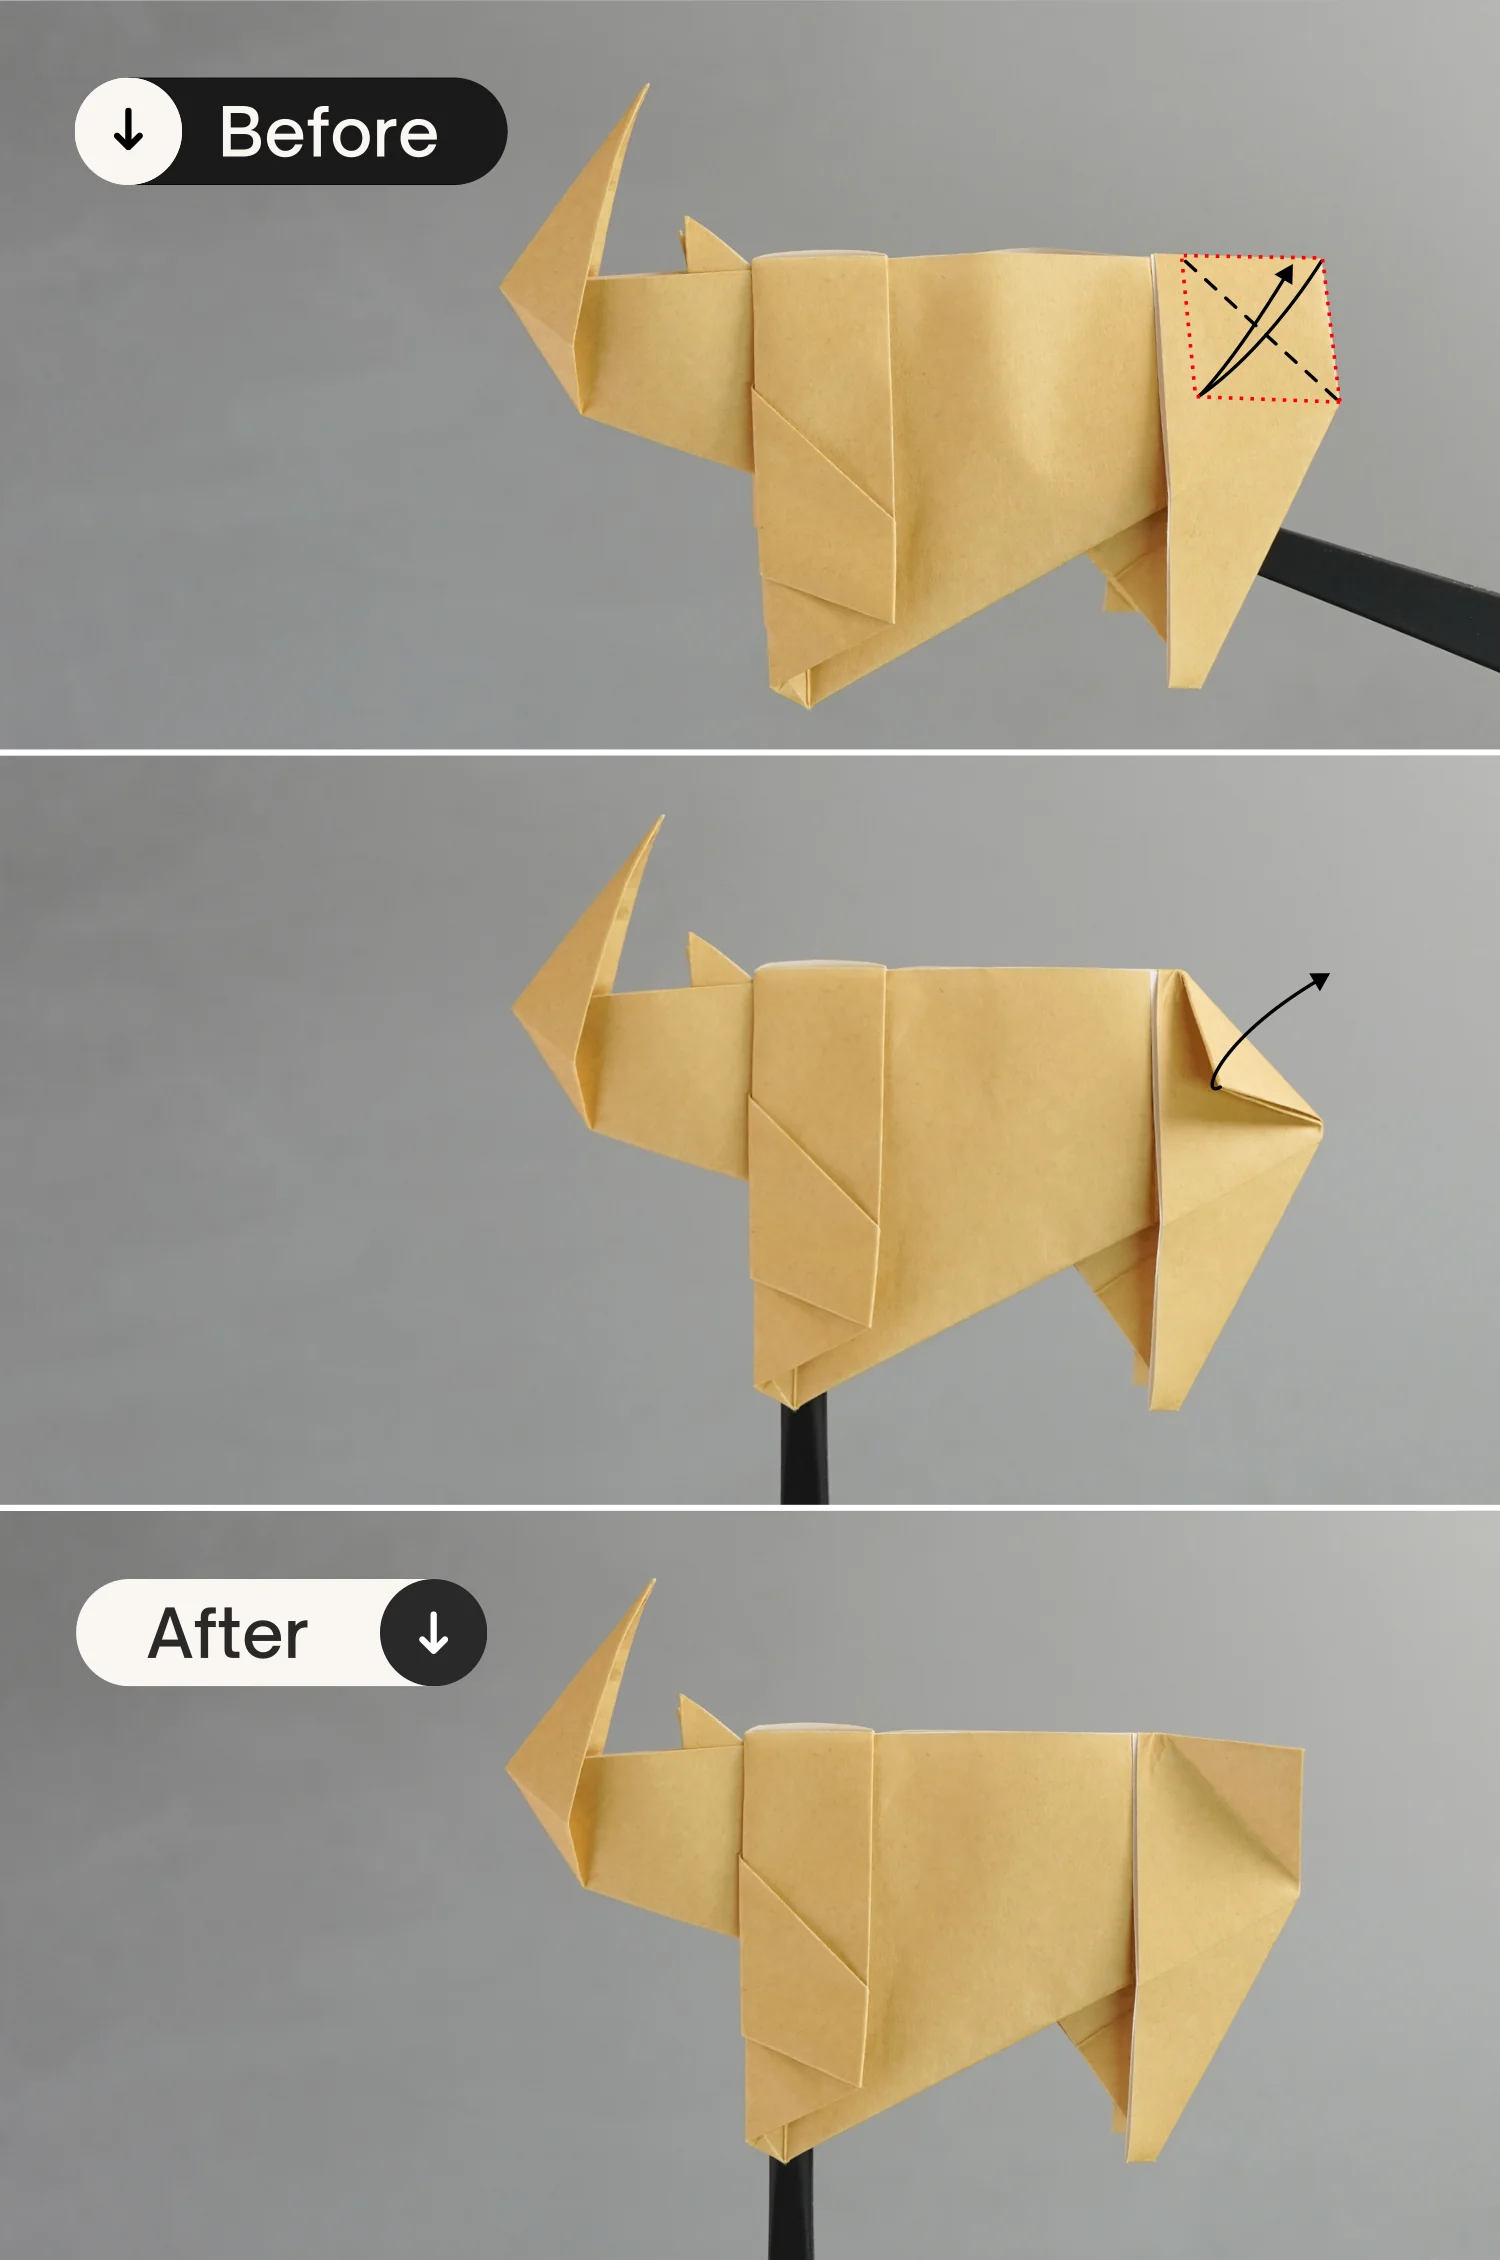
Step 20
Rotate it 90 degrees from front to back, then expand the paper from the bottom. Shape the two creases you made in the previous step, and press down the right corner to make it tuck between the layers. Finally, flatten the fold, close the bottom opening, and rotate it 90 degrees from back to front.

What’s Next
This is the final shape of your origami rhinoceros. Now you can explore our other interesting origami animal instructions. Happy folding!
Other Origami Animal Ideas