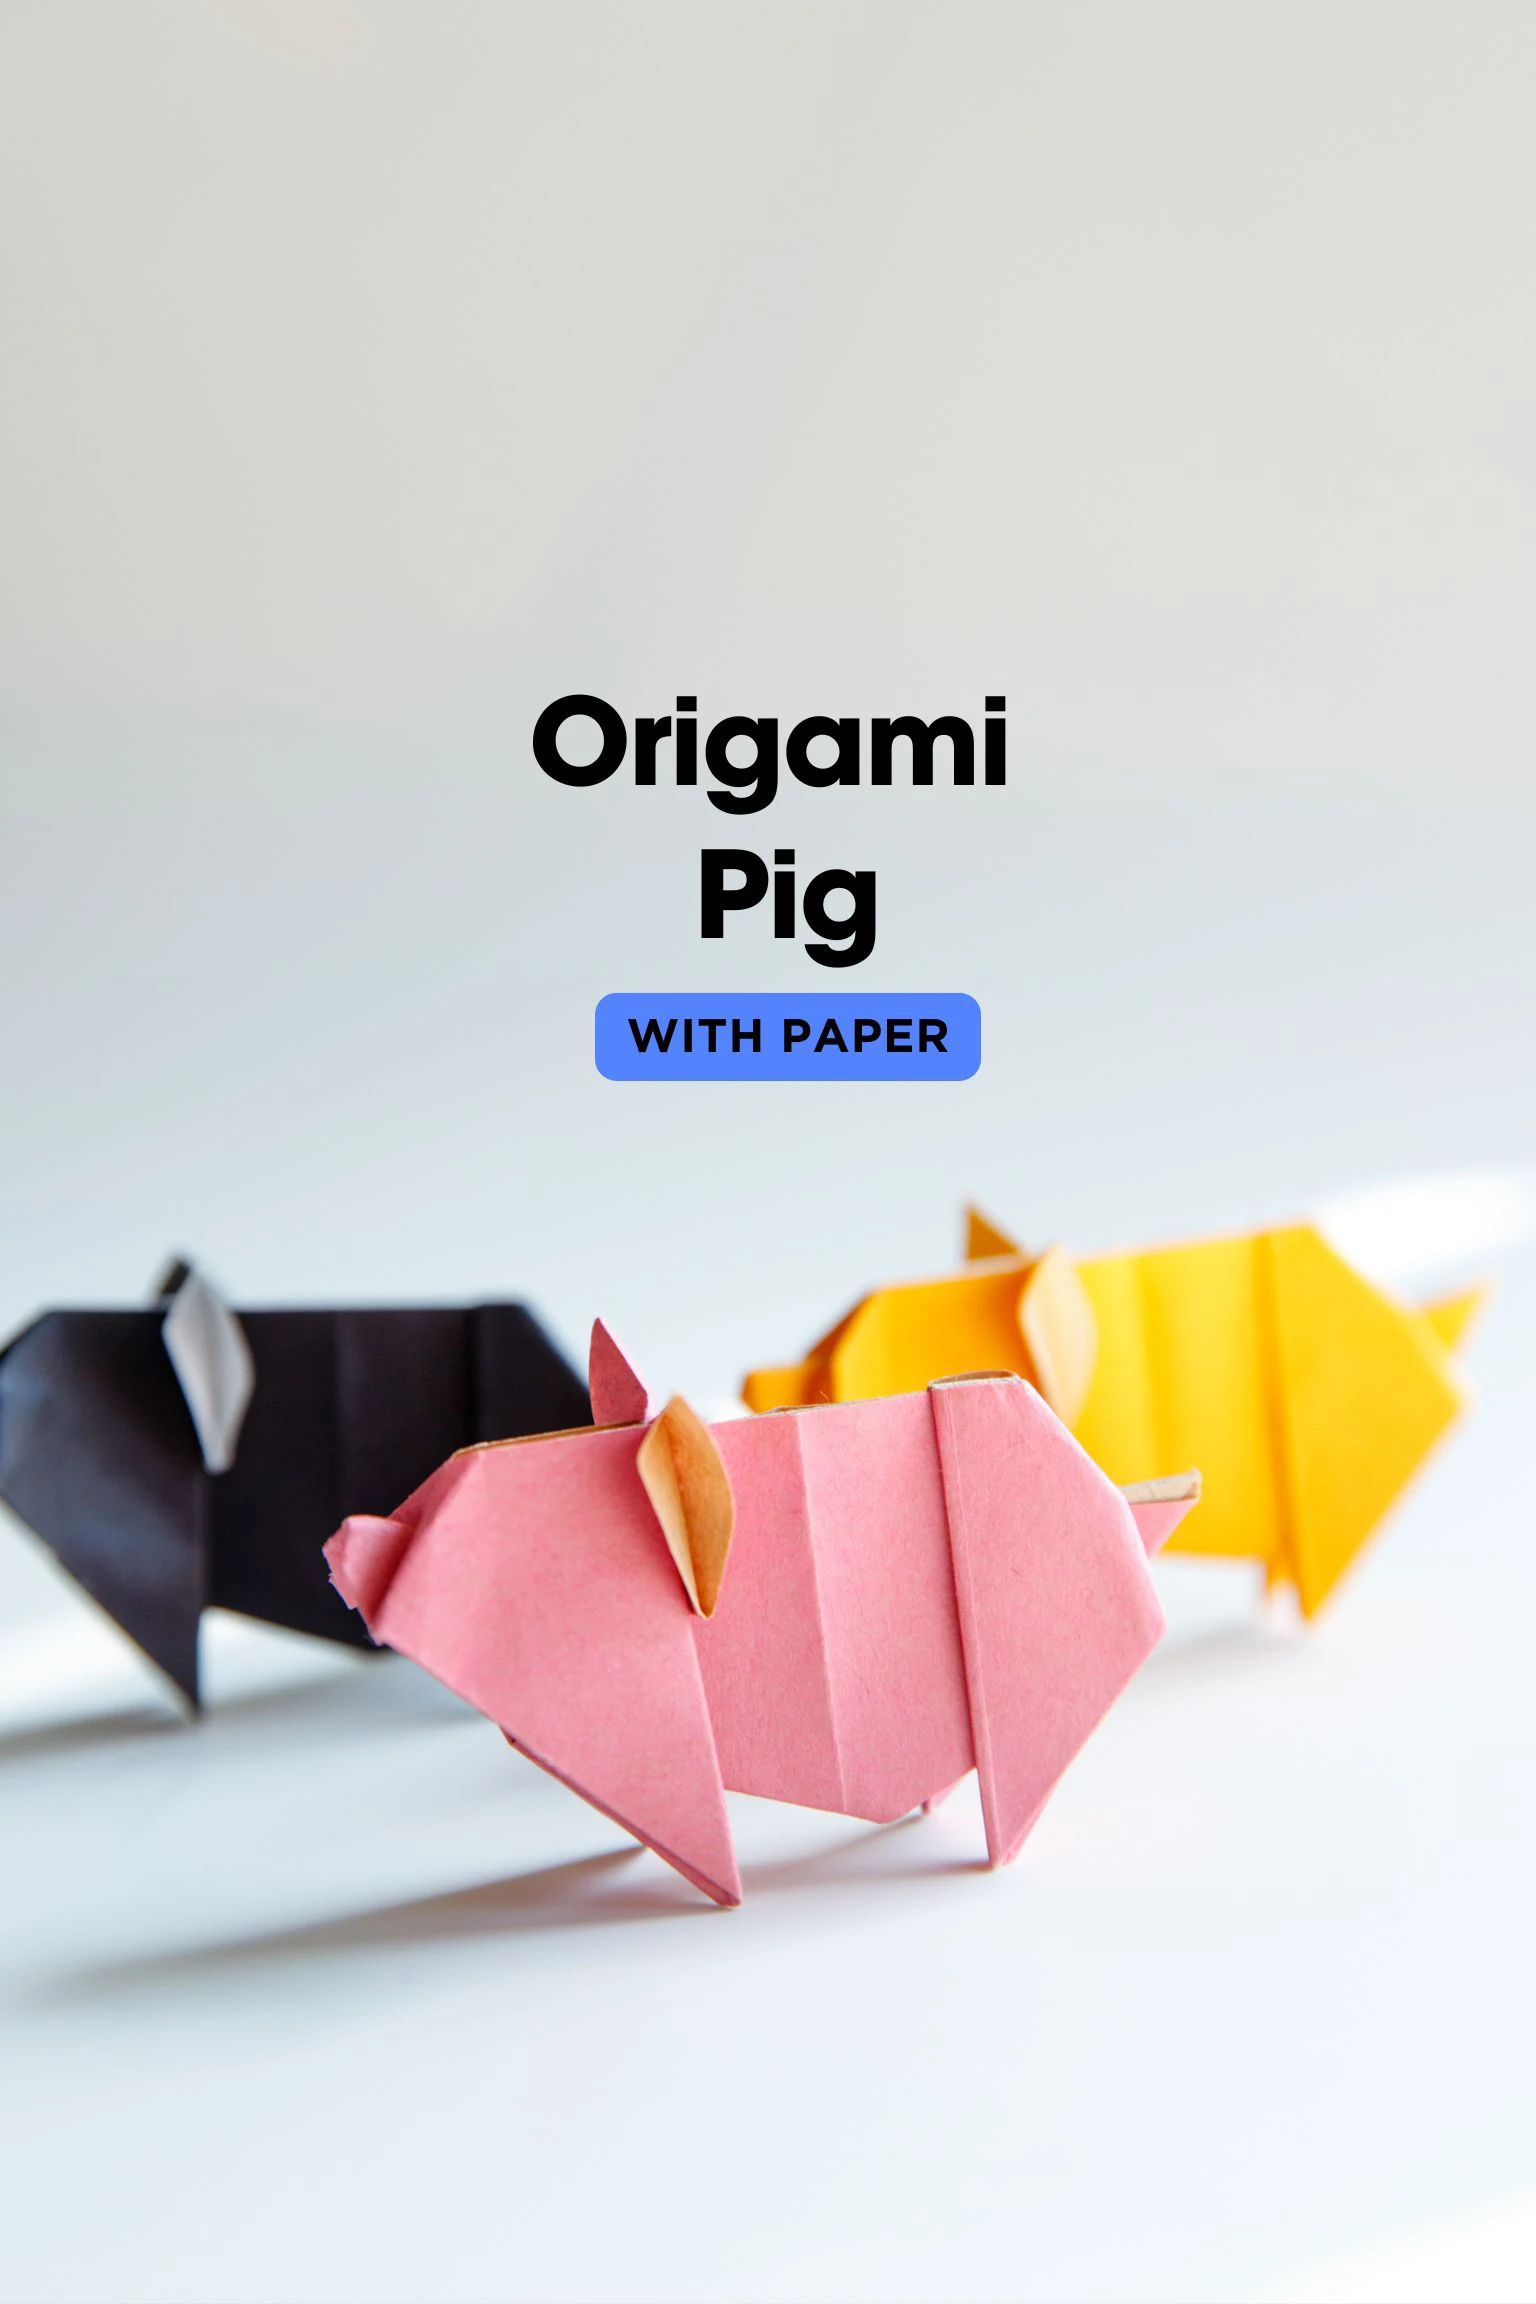
This cute origami pig is very similar to a real pig, complete with its rounded and fat body, funny snout, and adorable ears, it is sure to bring joy and a smile to anyone who creates it.
We use Crimp Fold to form its tail and snout, if you are new to origami, you can check our Easy Origami Pig Face, this is also a lovely pig but more suitable for beginners.

If you are new to origami, start here from our beginner guide to know the basics and how to read the step-by-step instructions.
- Folding time: 15 minutes
- Paper: 15×15 cm
- Difficulty: Middle
Material
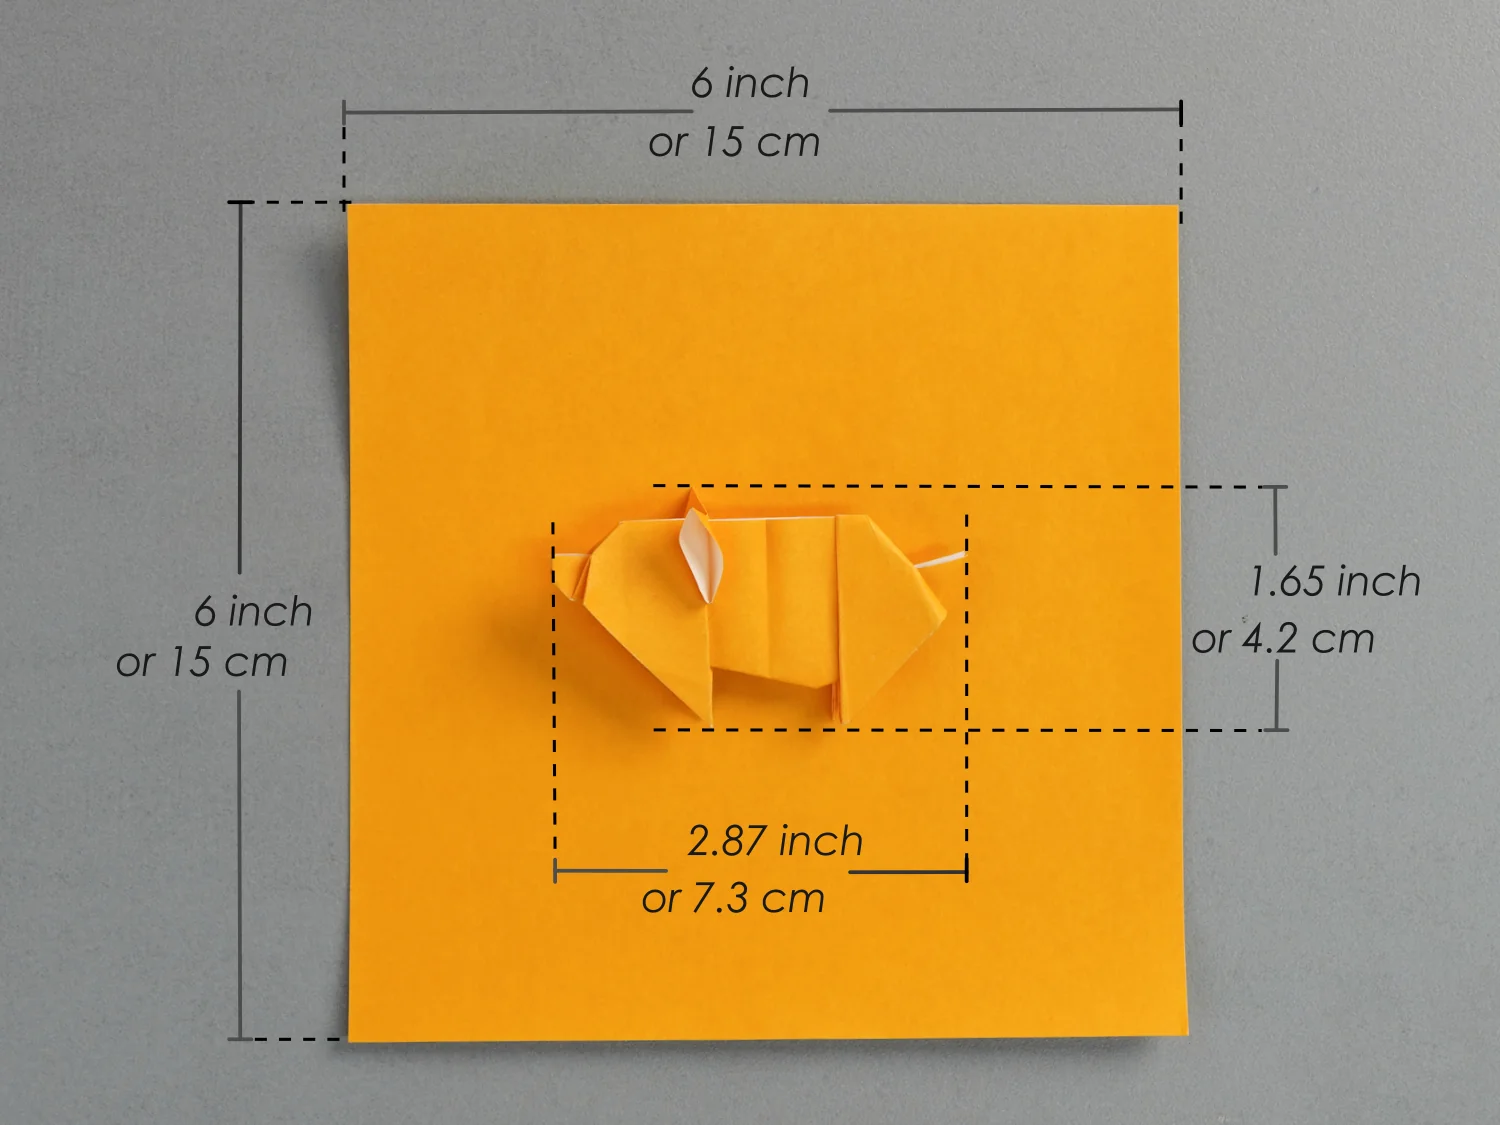
Get a piece of 15×15 cm origami square paper or any other size of square paper, with different colors on each side, to create a 4.2×7.3 cm origami pig.
Step by Step Instructions
Step 1
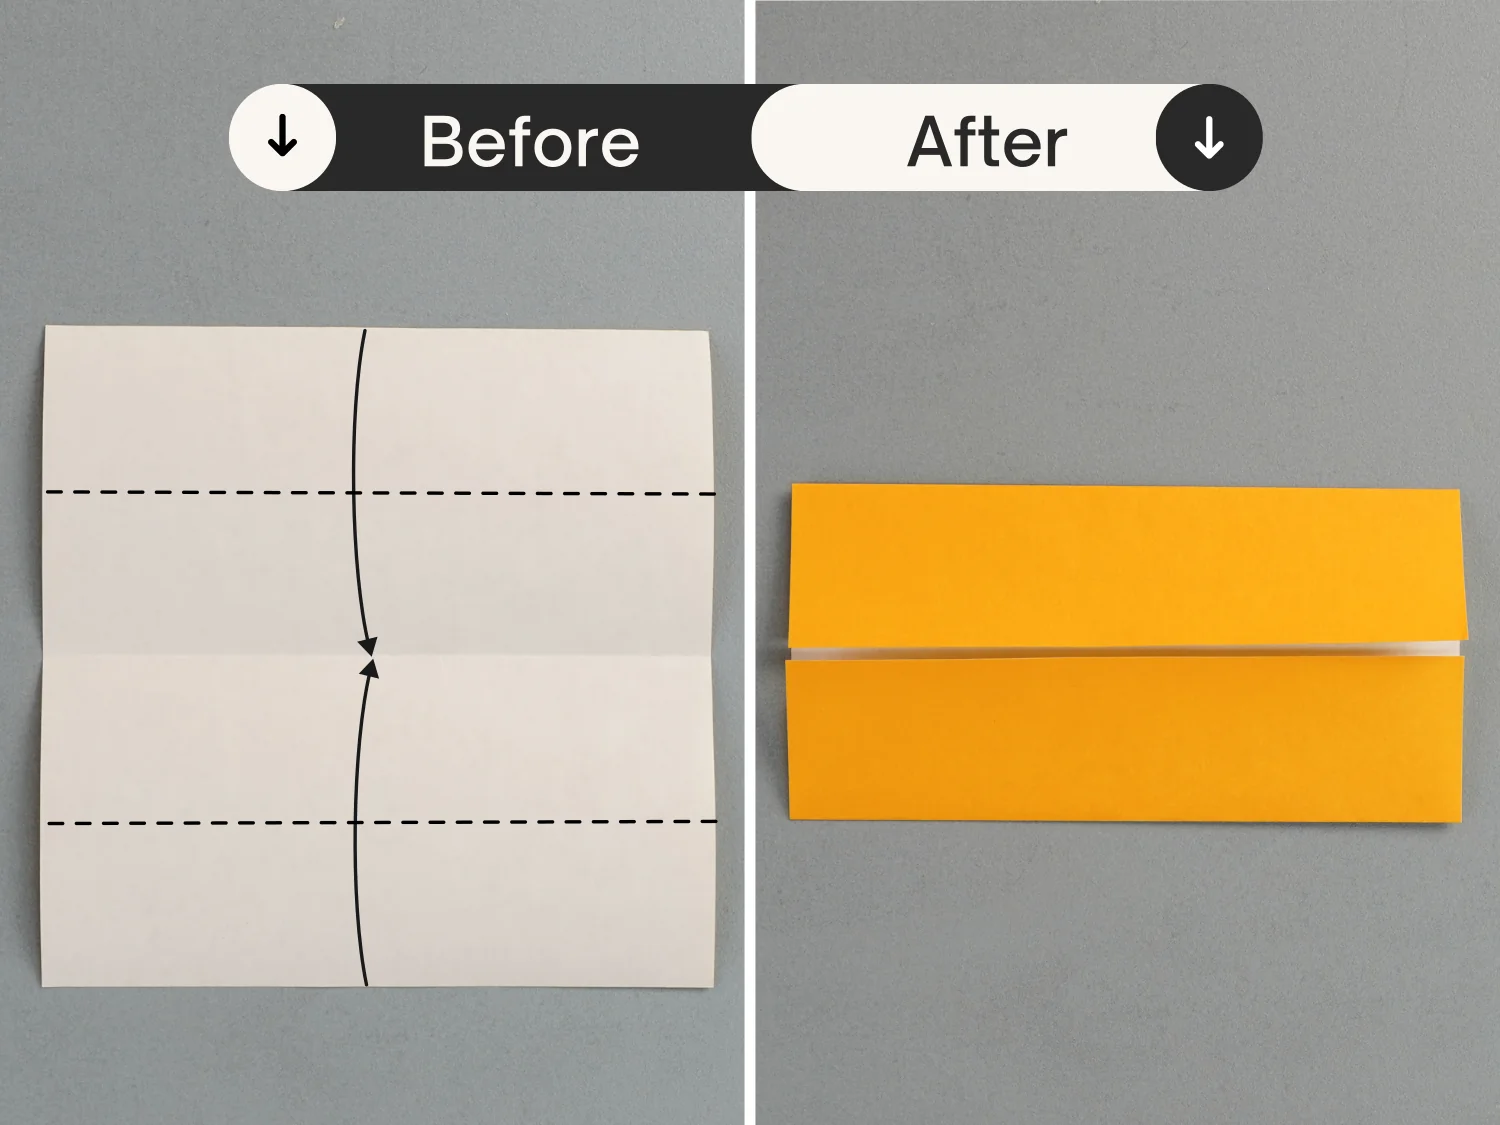
Place the paper with the desired display color side down to begin folding, fold it in half horizontally, leaving a crease then unfold it.

Step 2
Fold the top and bottom edges to align with the horizontal crease.
Step 3
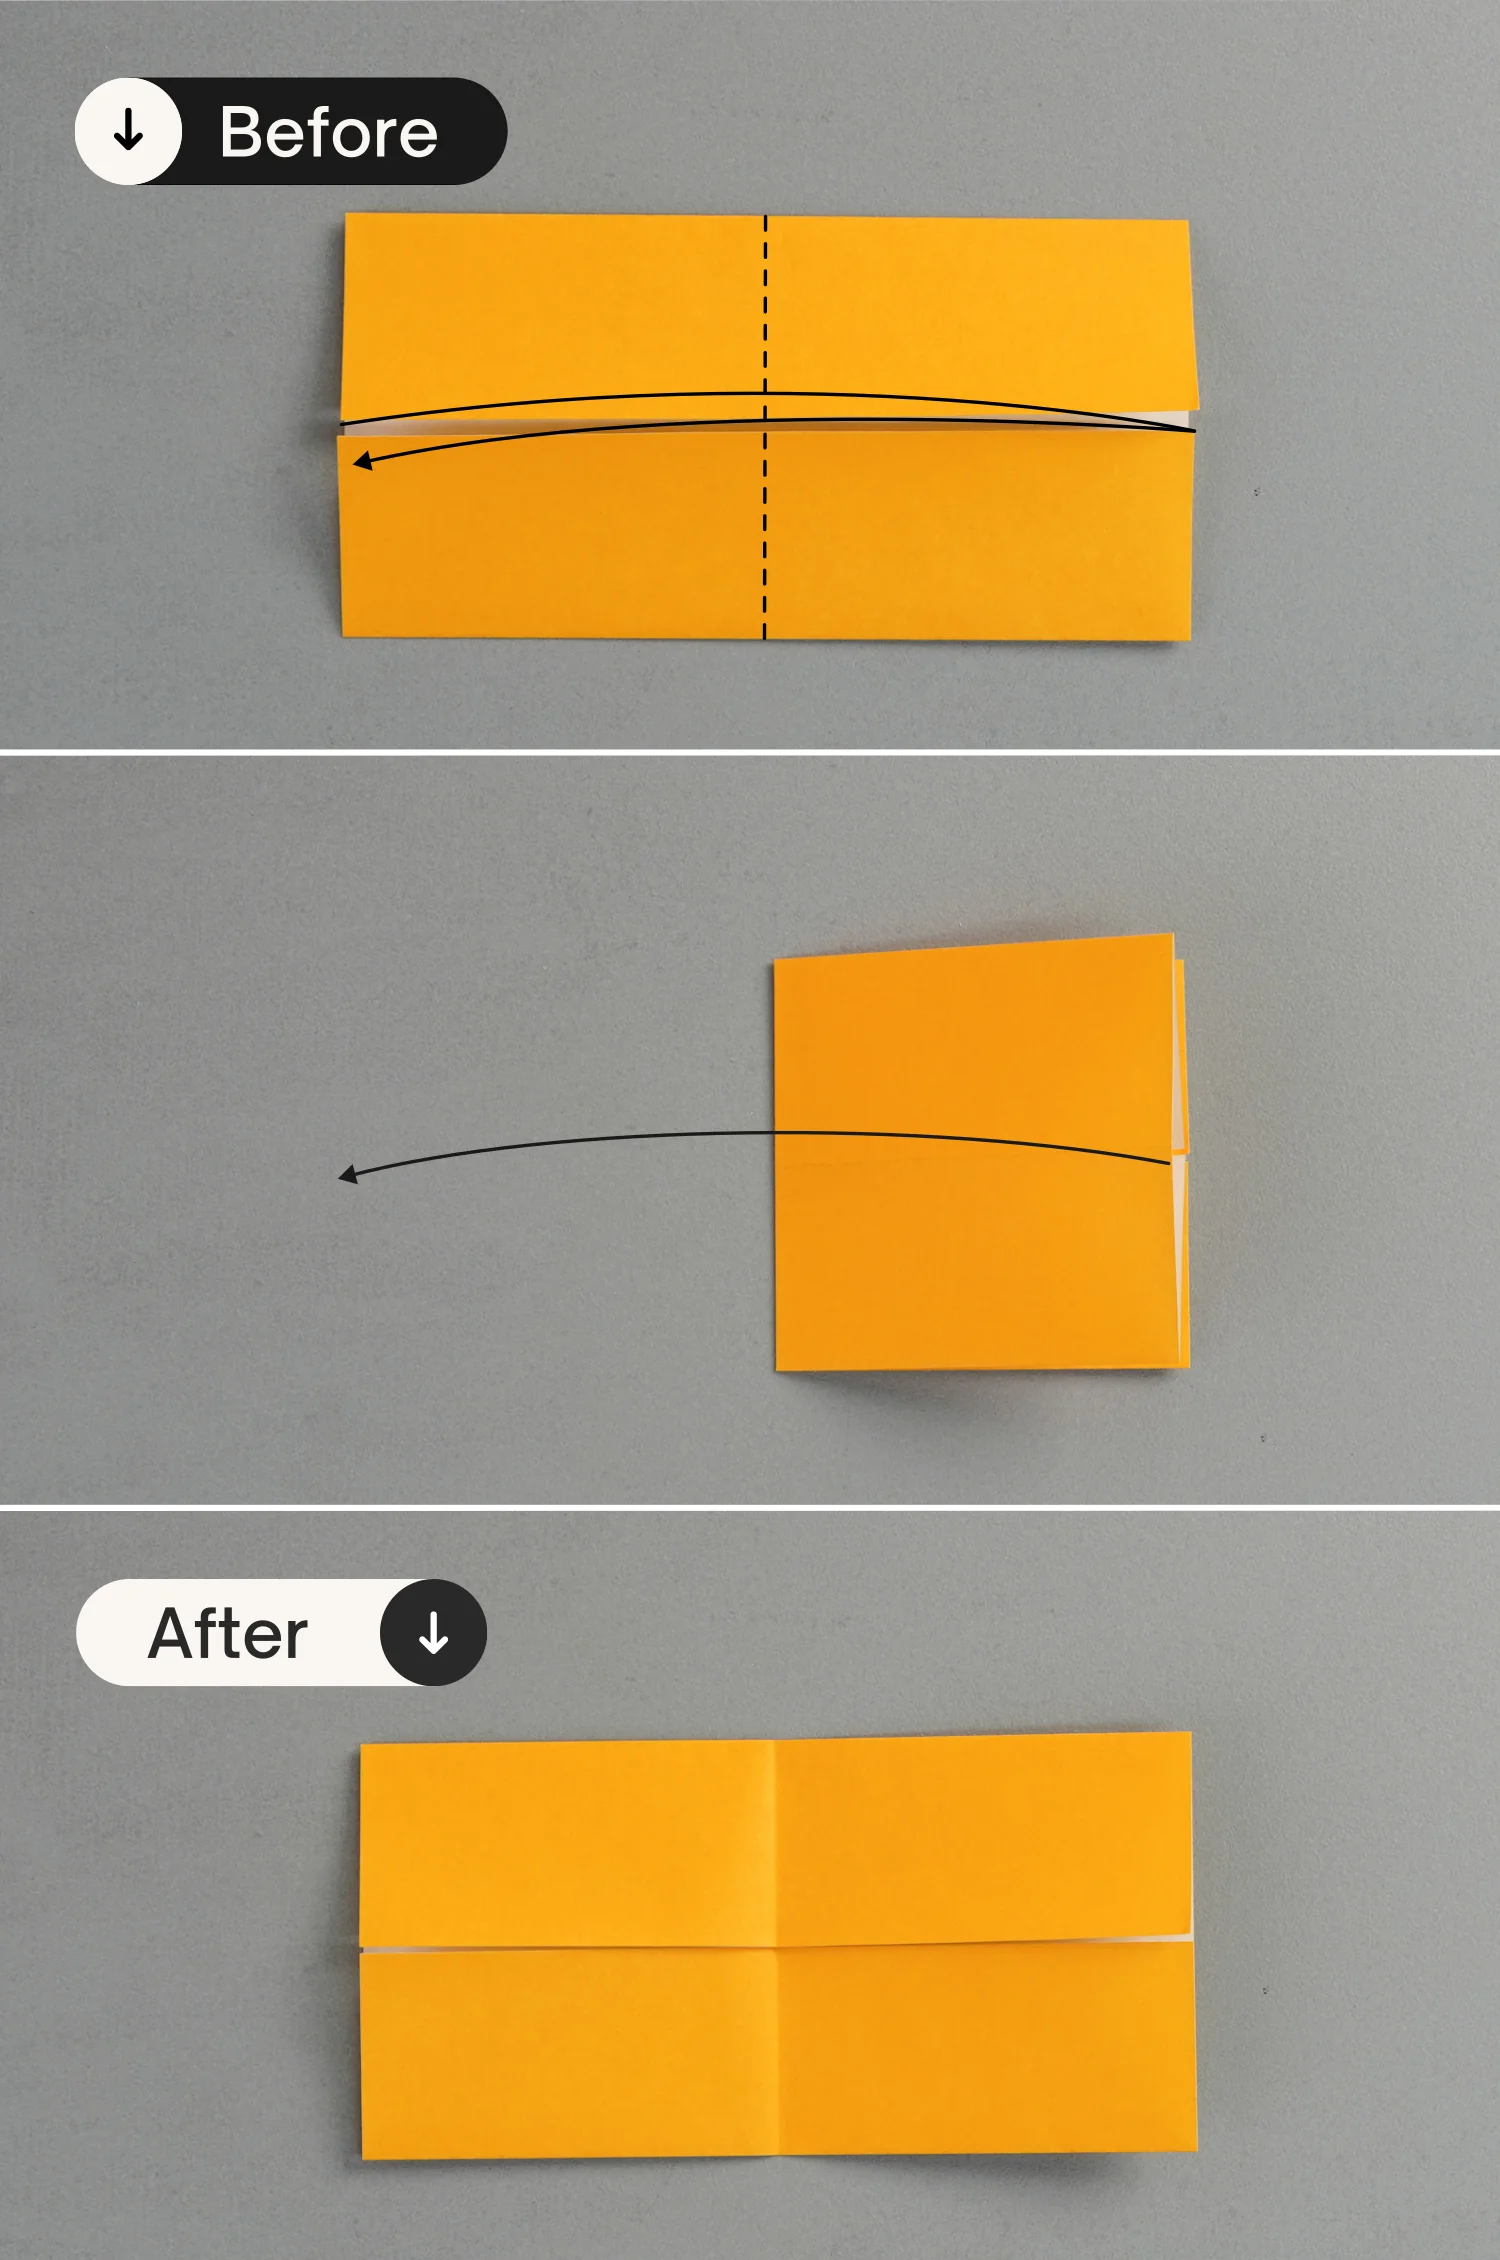
Fold the paper in half vertically, crease it well then unfold it.
Step 4
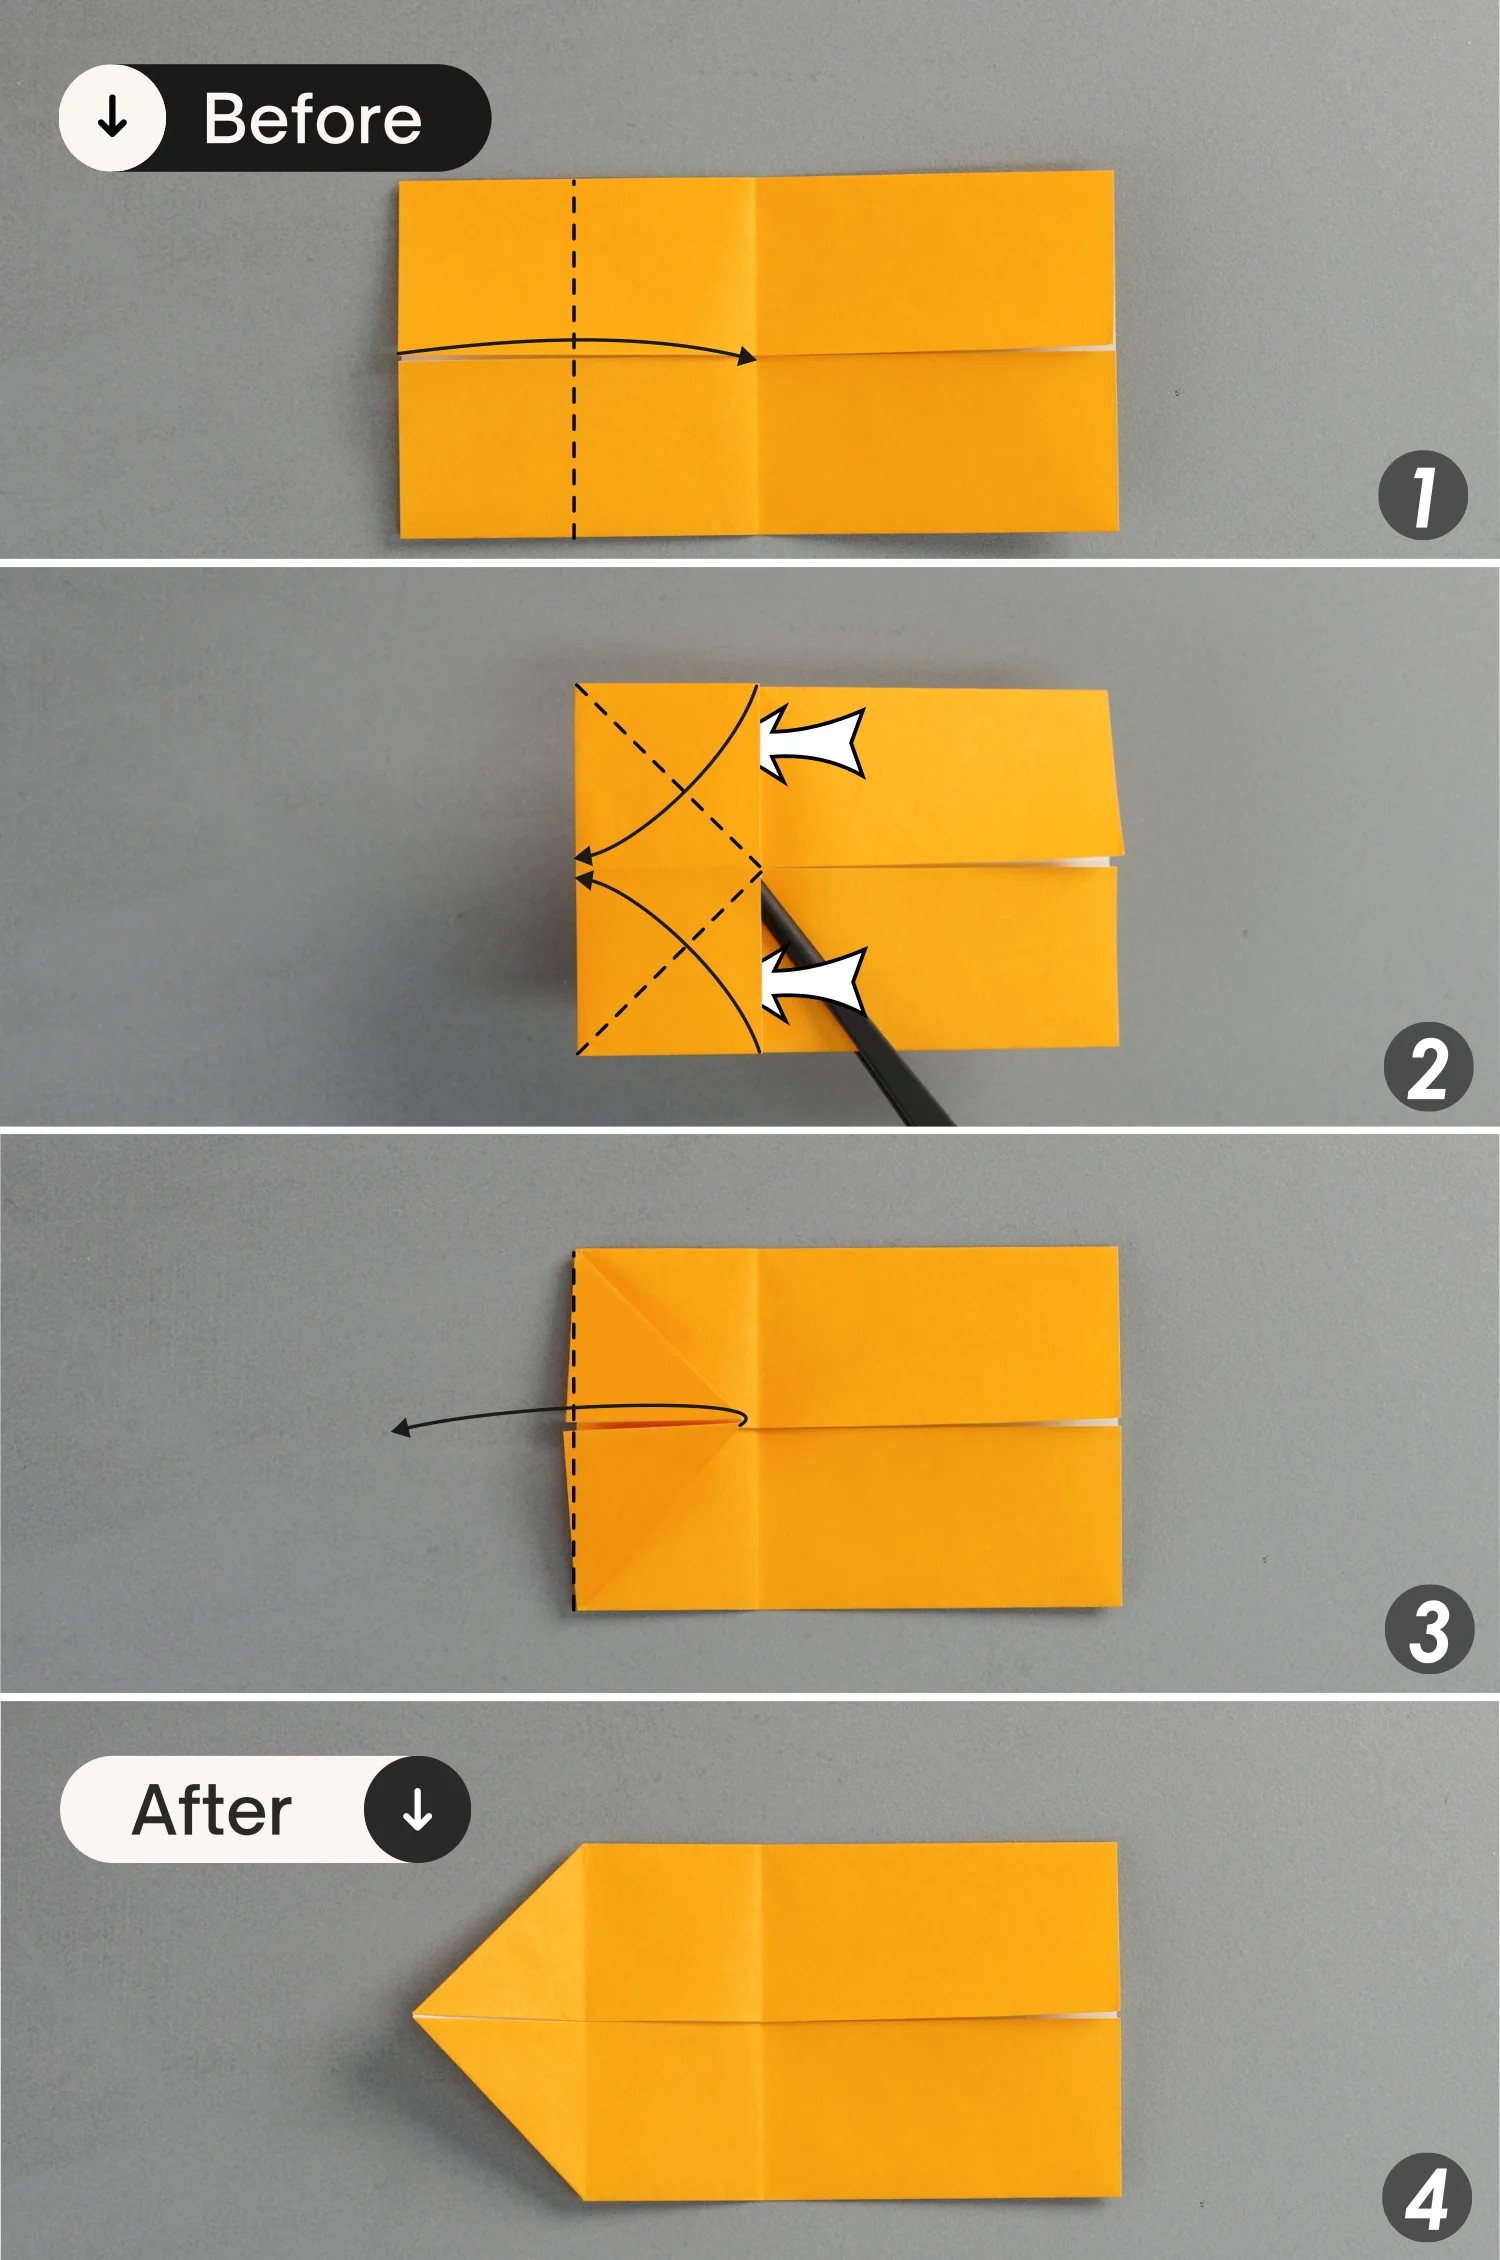
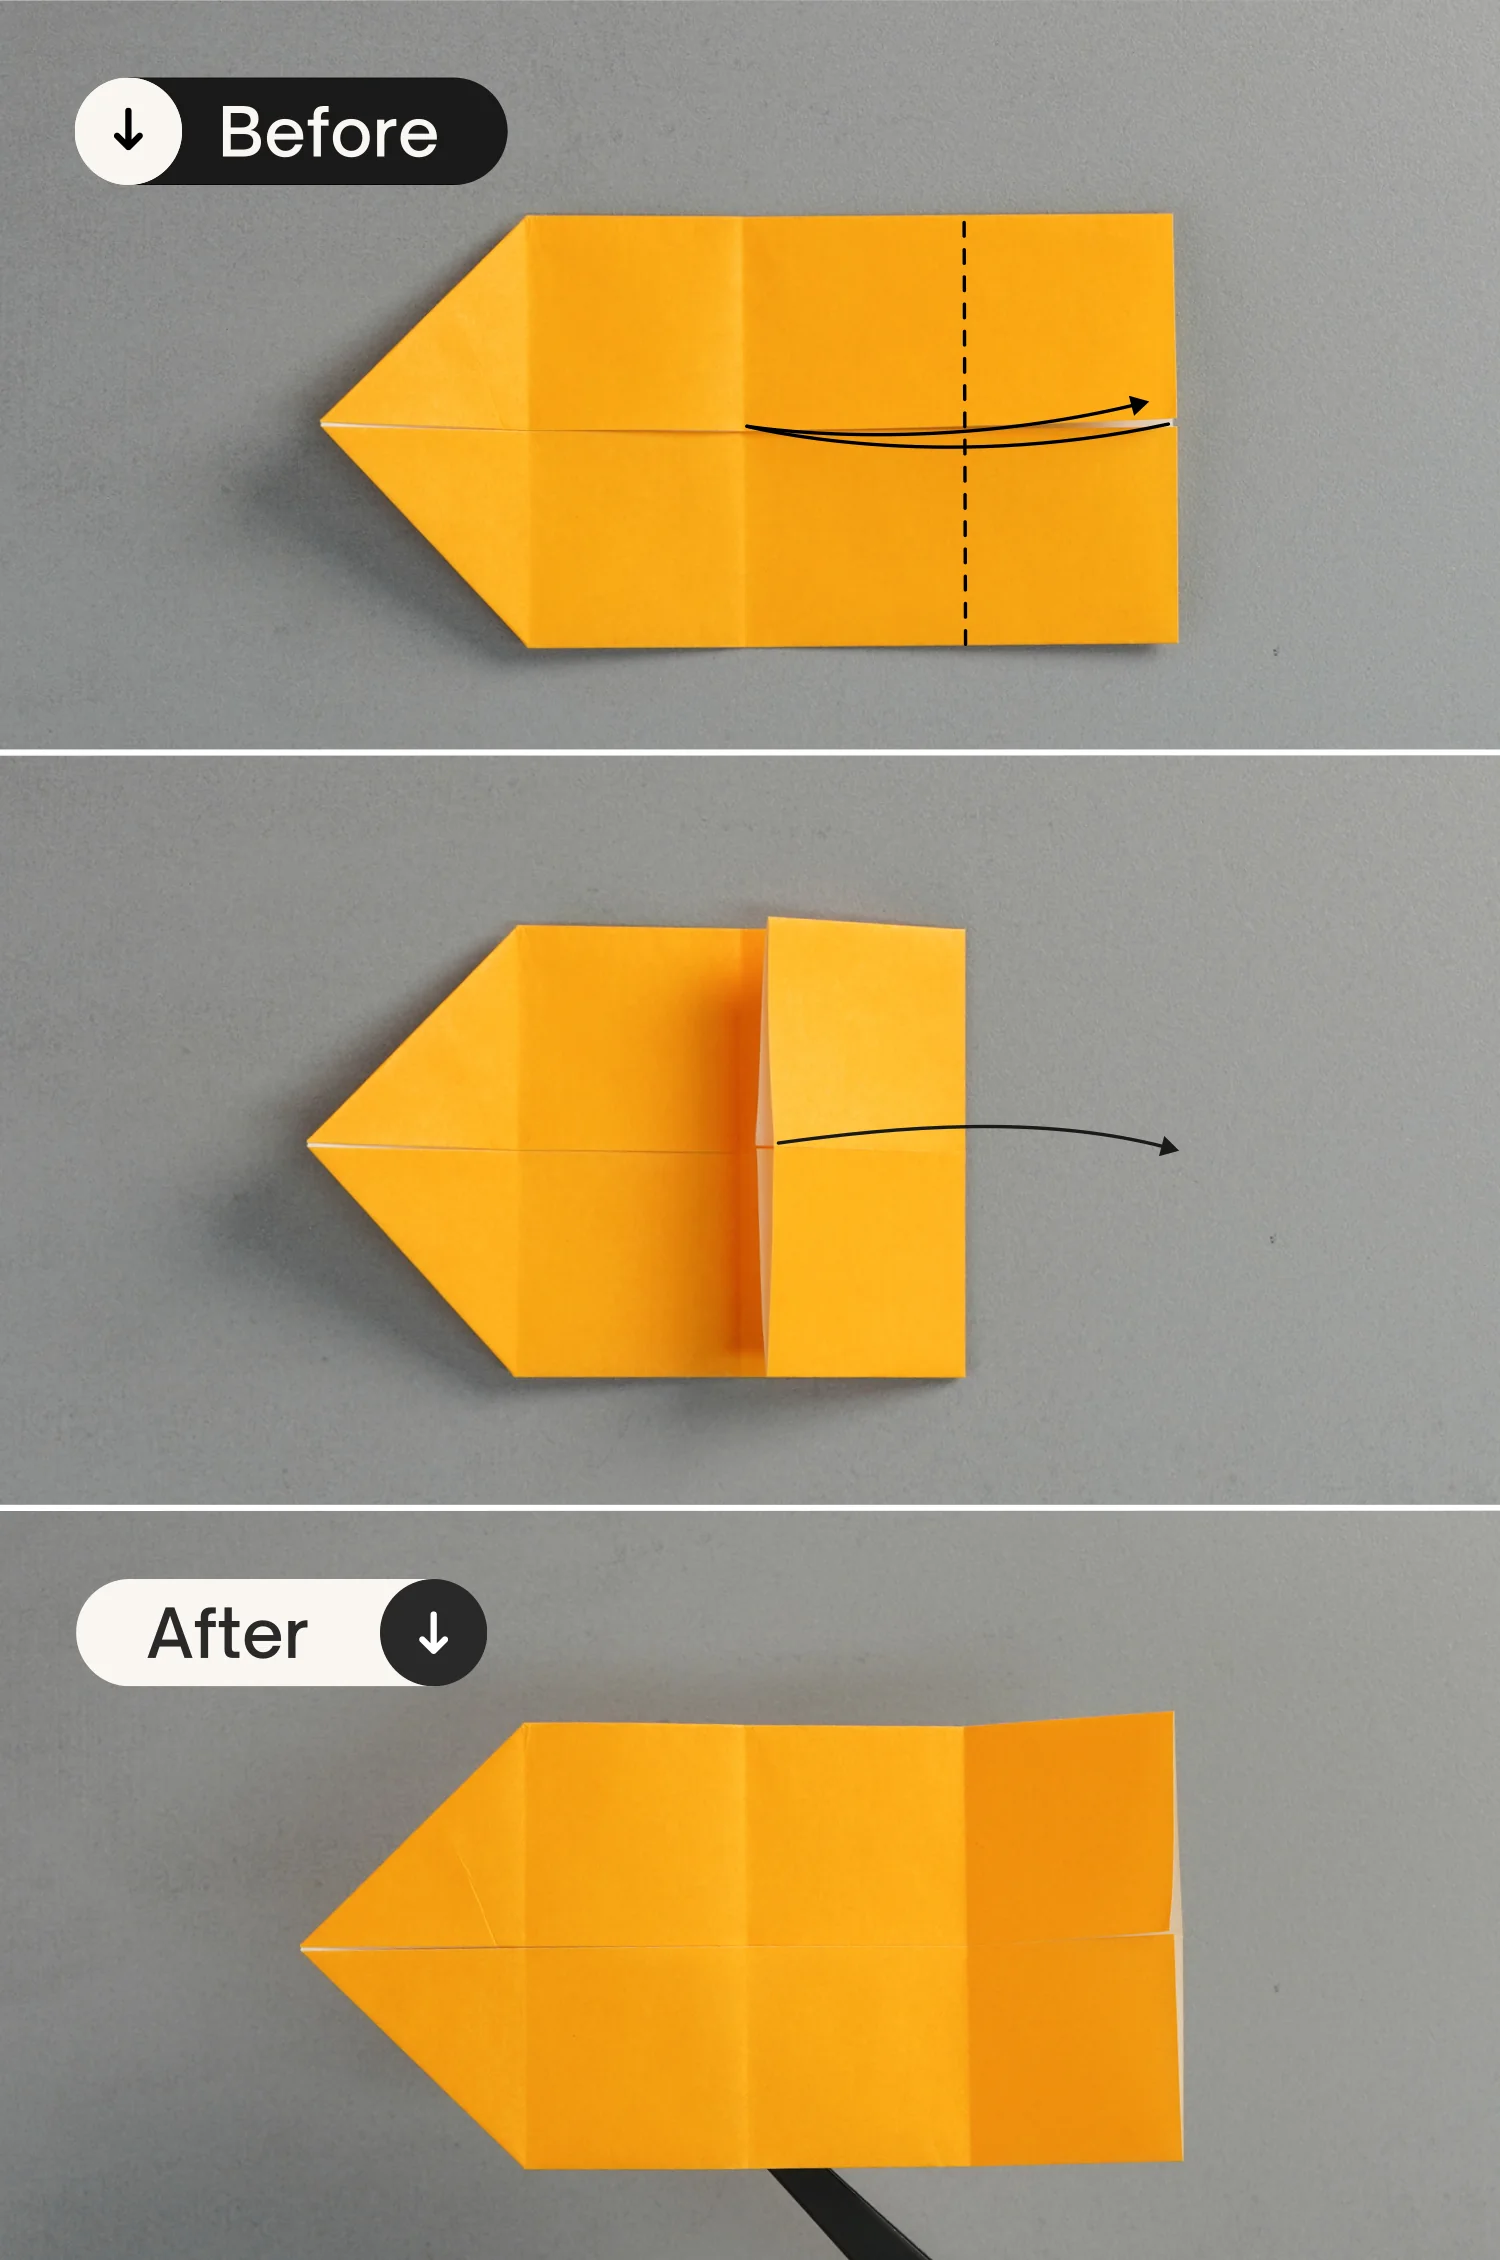
Fold the left edge to align with the middle vertical crease, then fold the top and bottom right points of the left layer to meet the midpoint of the left edge, and finally fold the left triangle to the left.
Step 5
Fold the right edge to align with the middle vertical crease, leaving a crease then unfold it.
Step 6
Fold the top and bottom right points of the paper to meet the midpoint of the crease you just made, and unfold them.
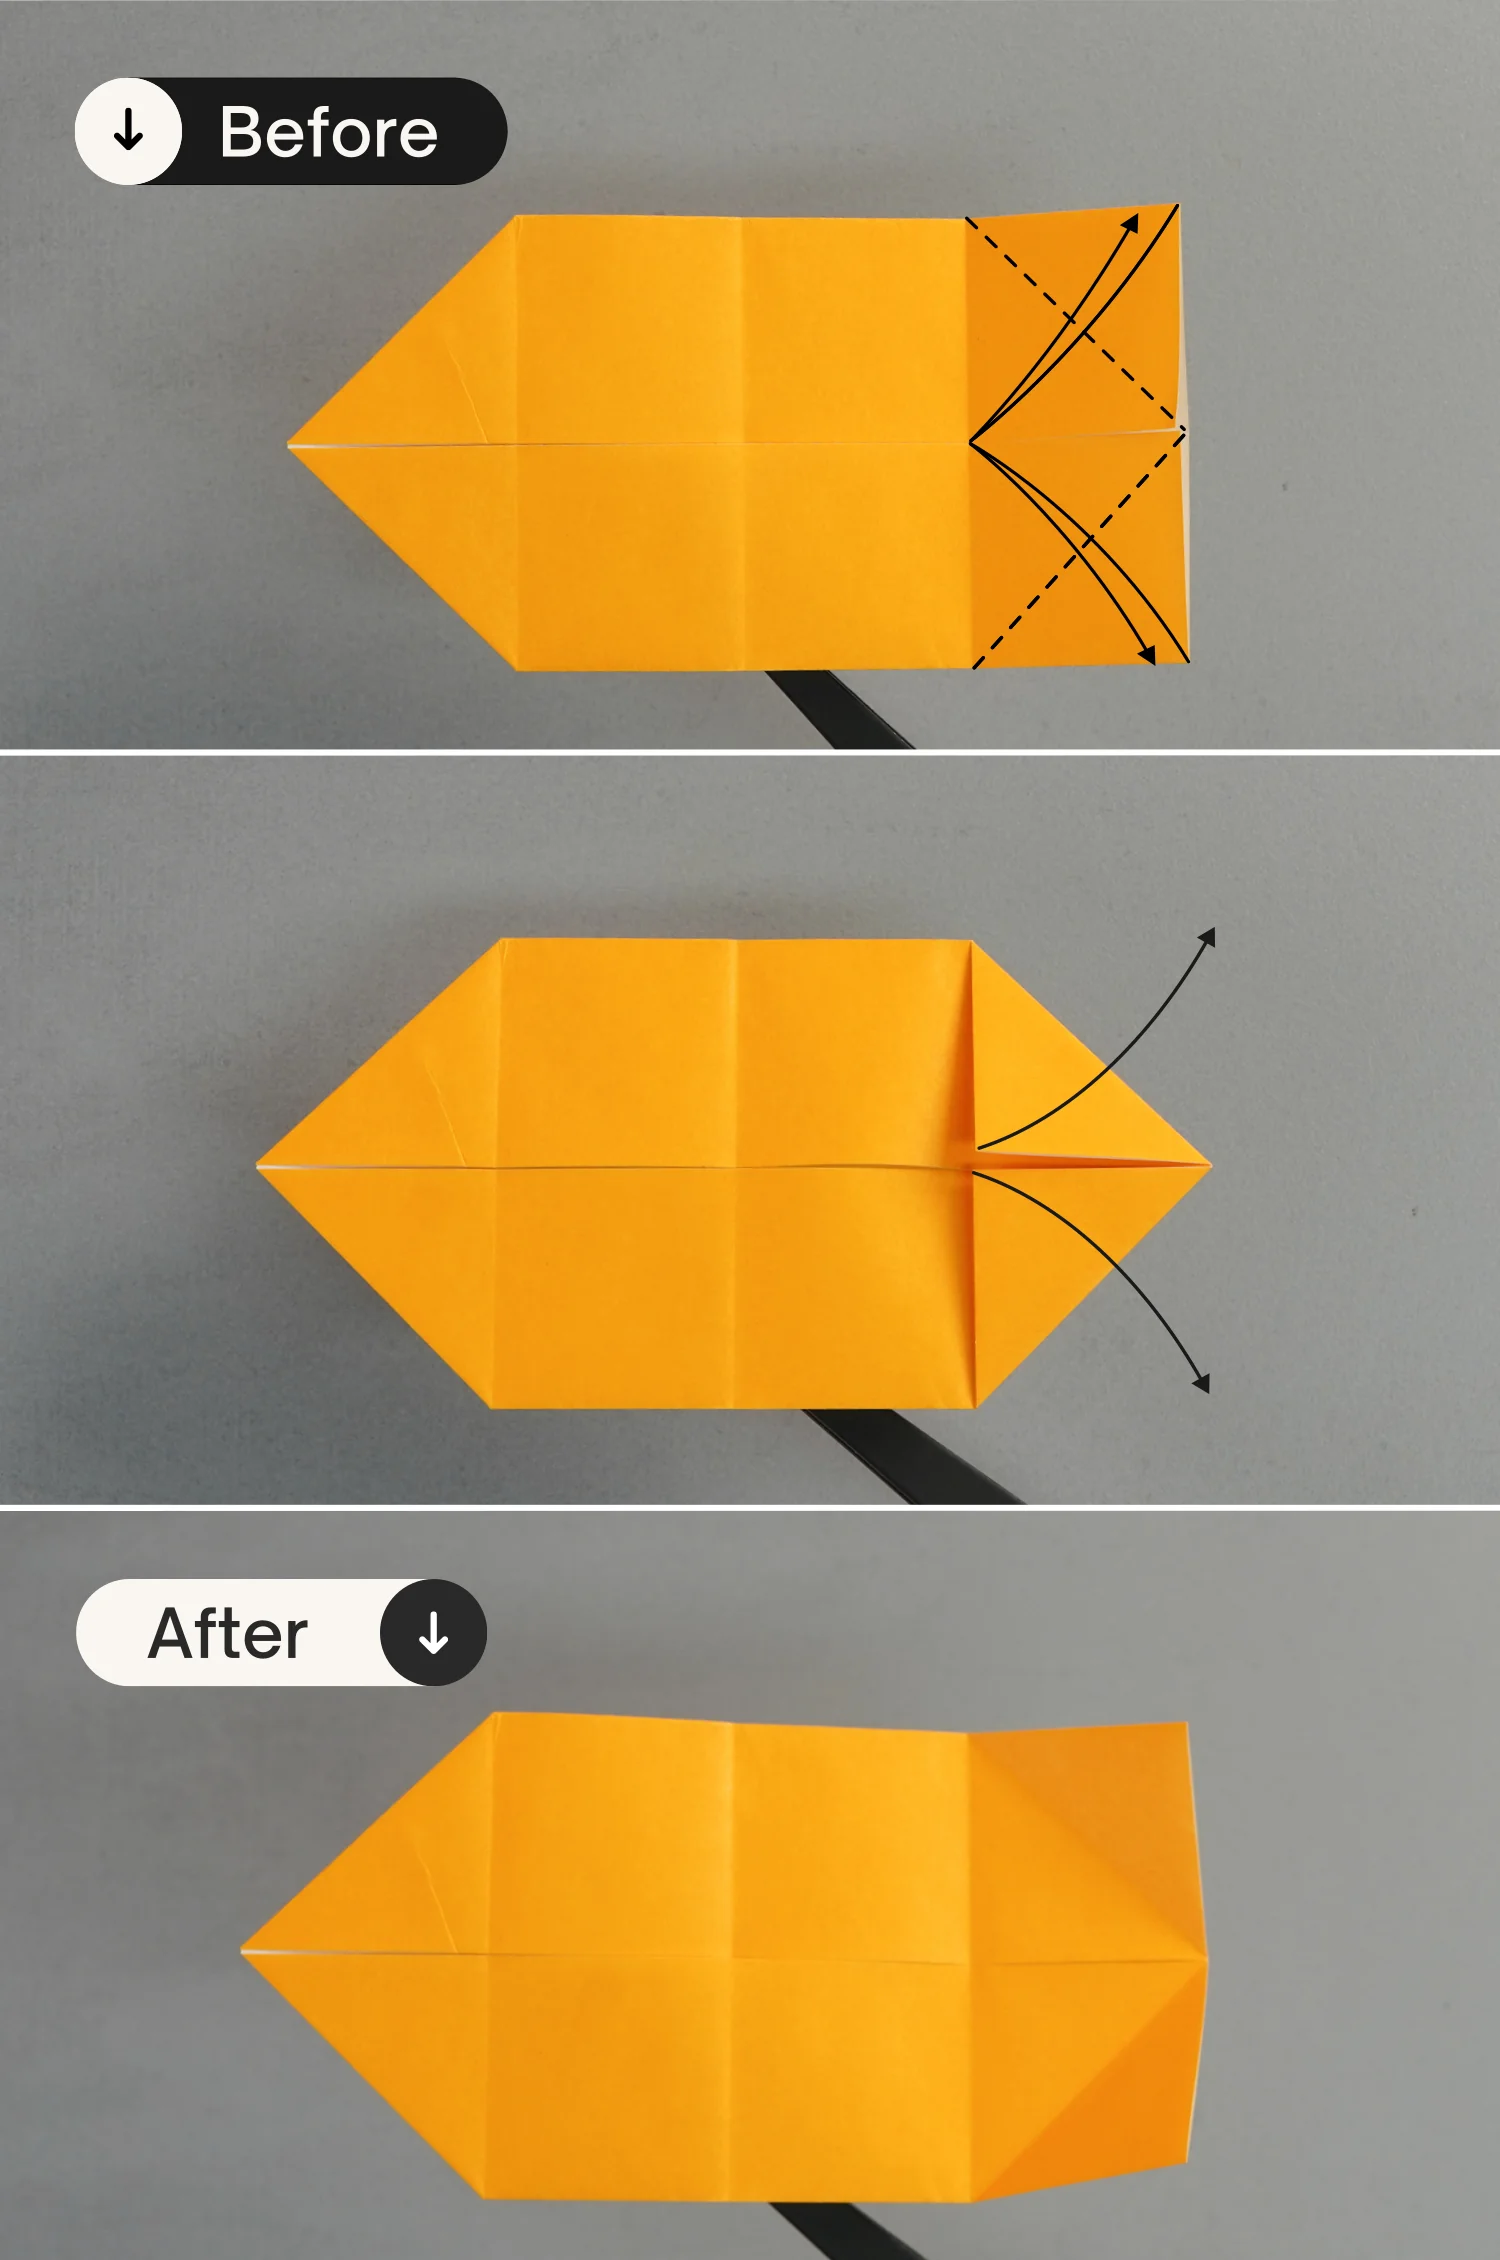
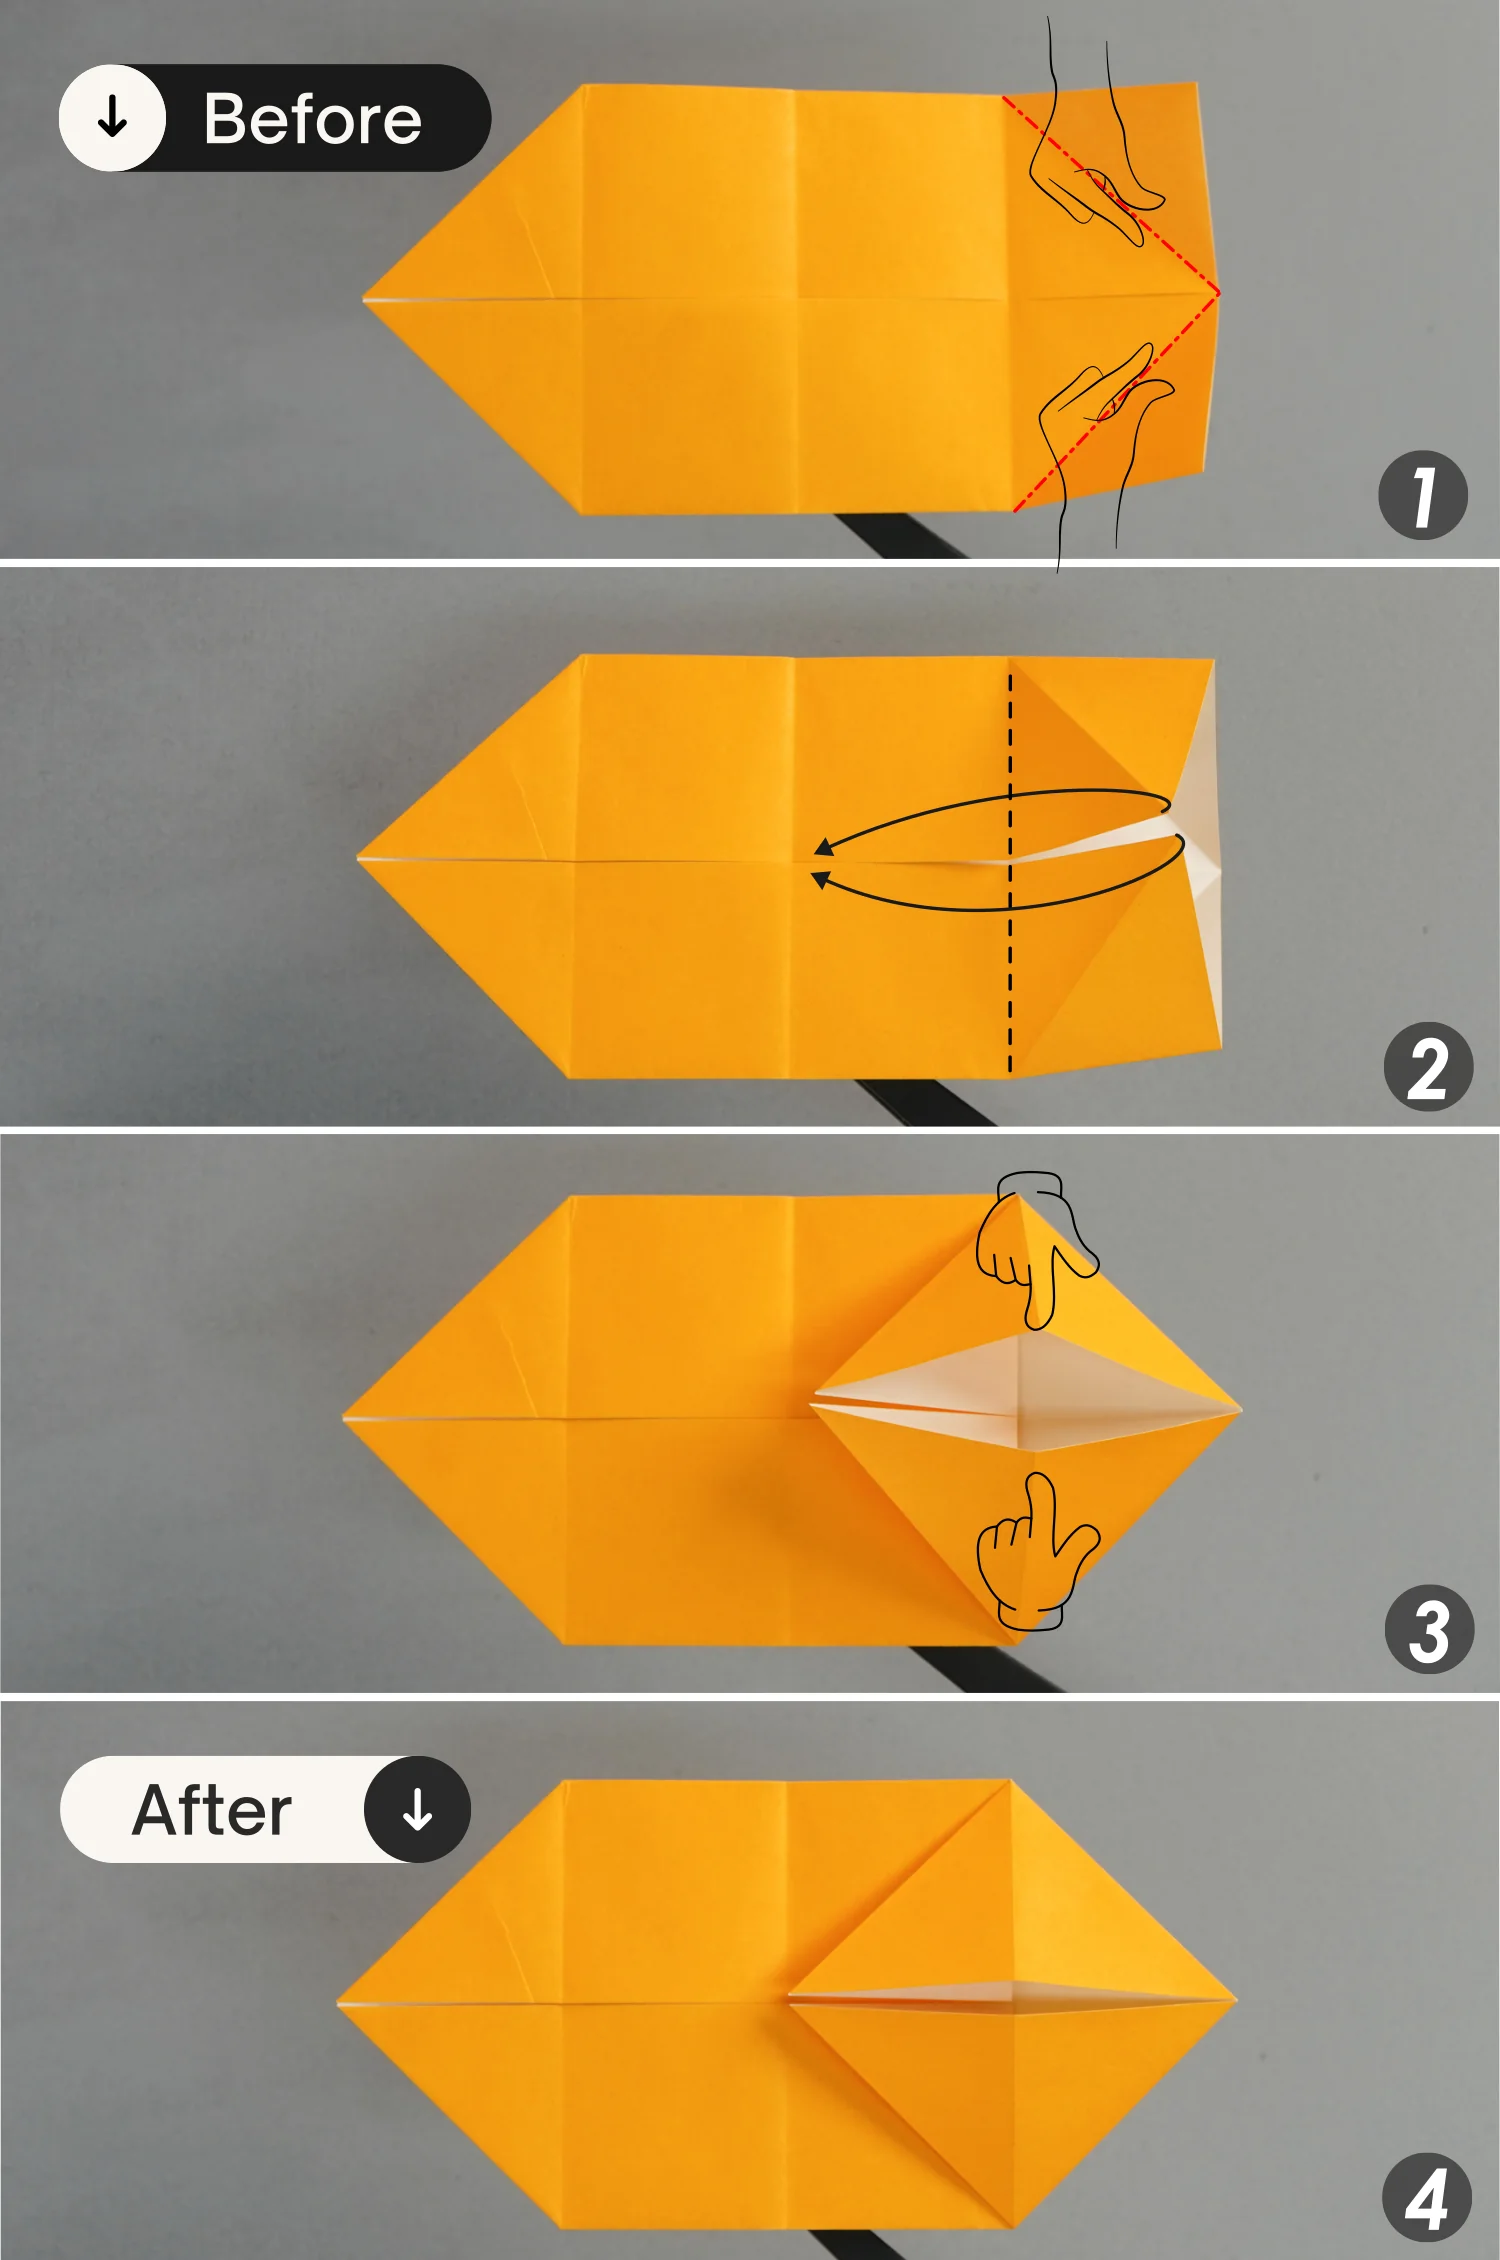
Step 7
Shape the creases you just made on the top layer, then fold this layer toward the left side along the first vertical crease from the right, and finally flatten the fold along the existing creases.
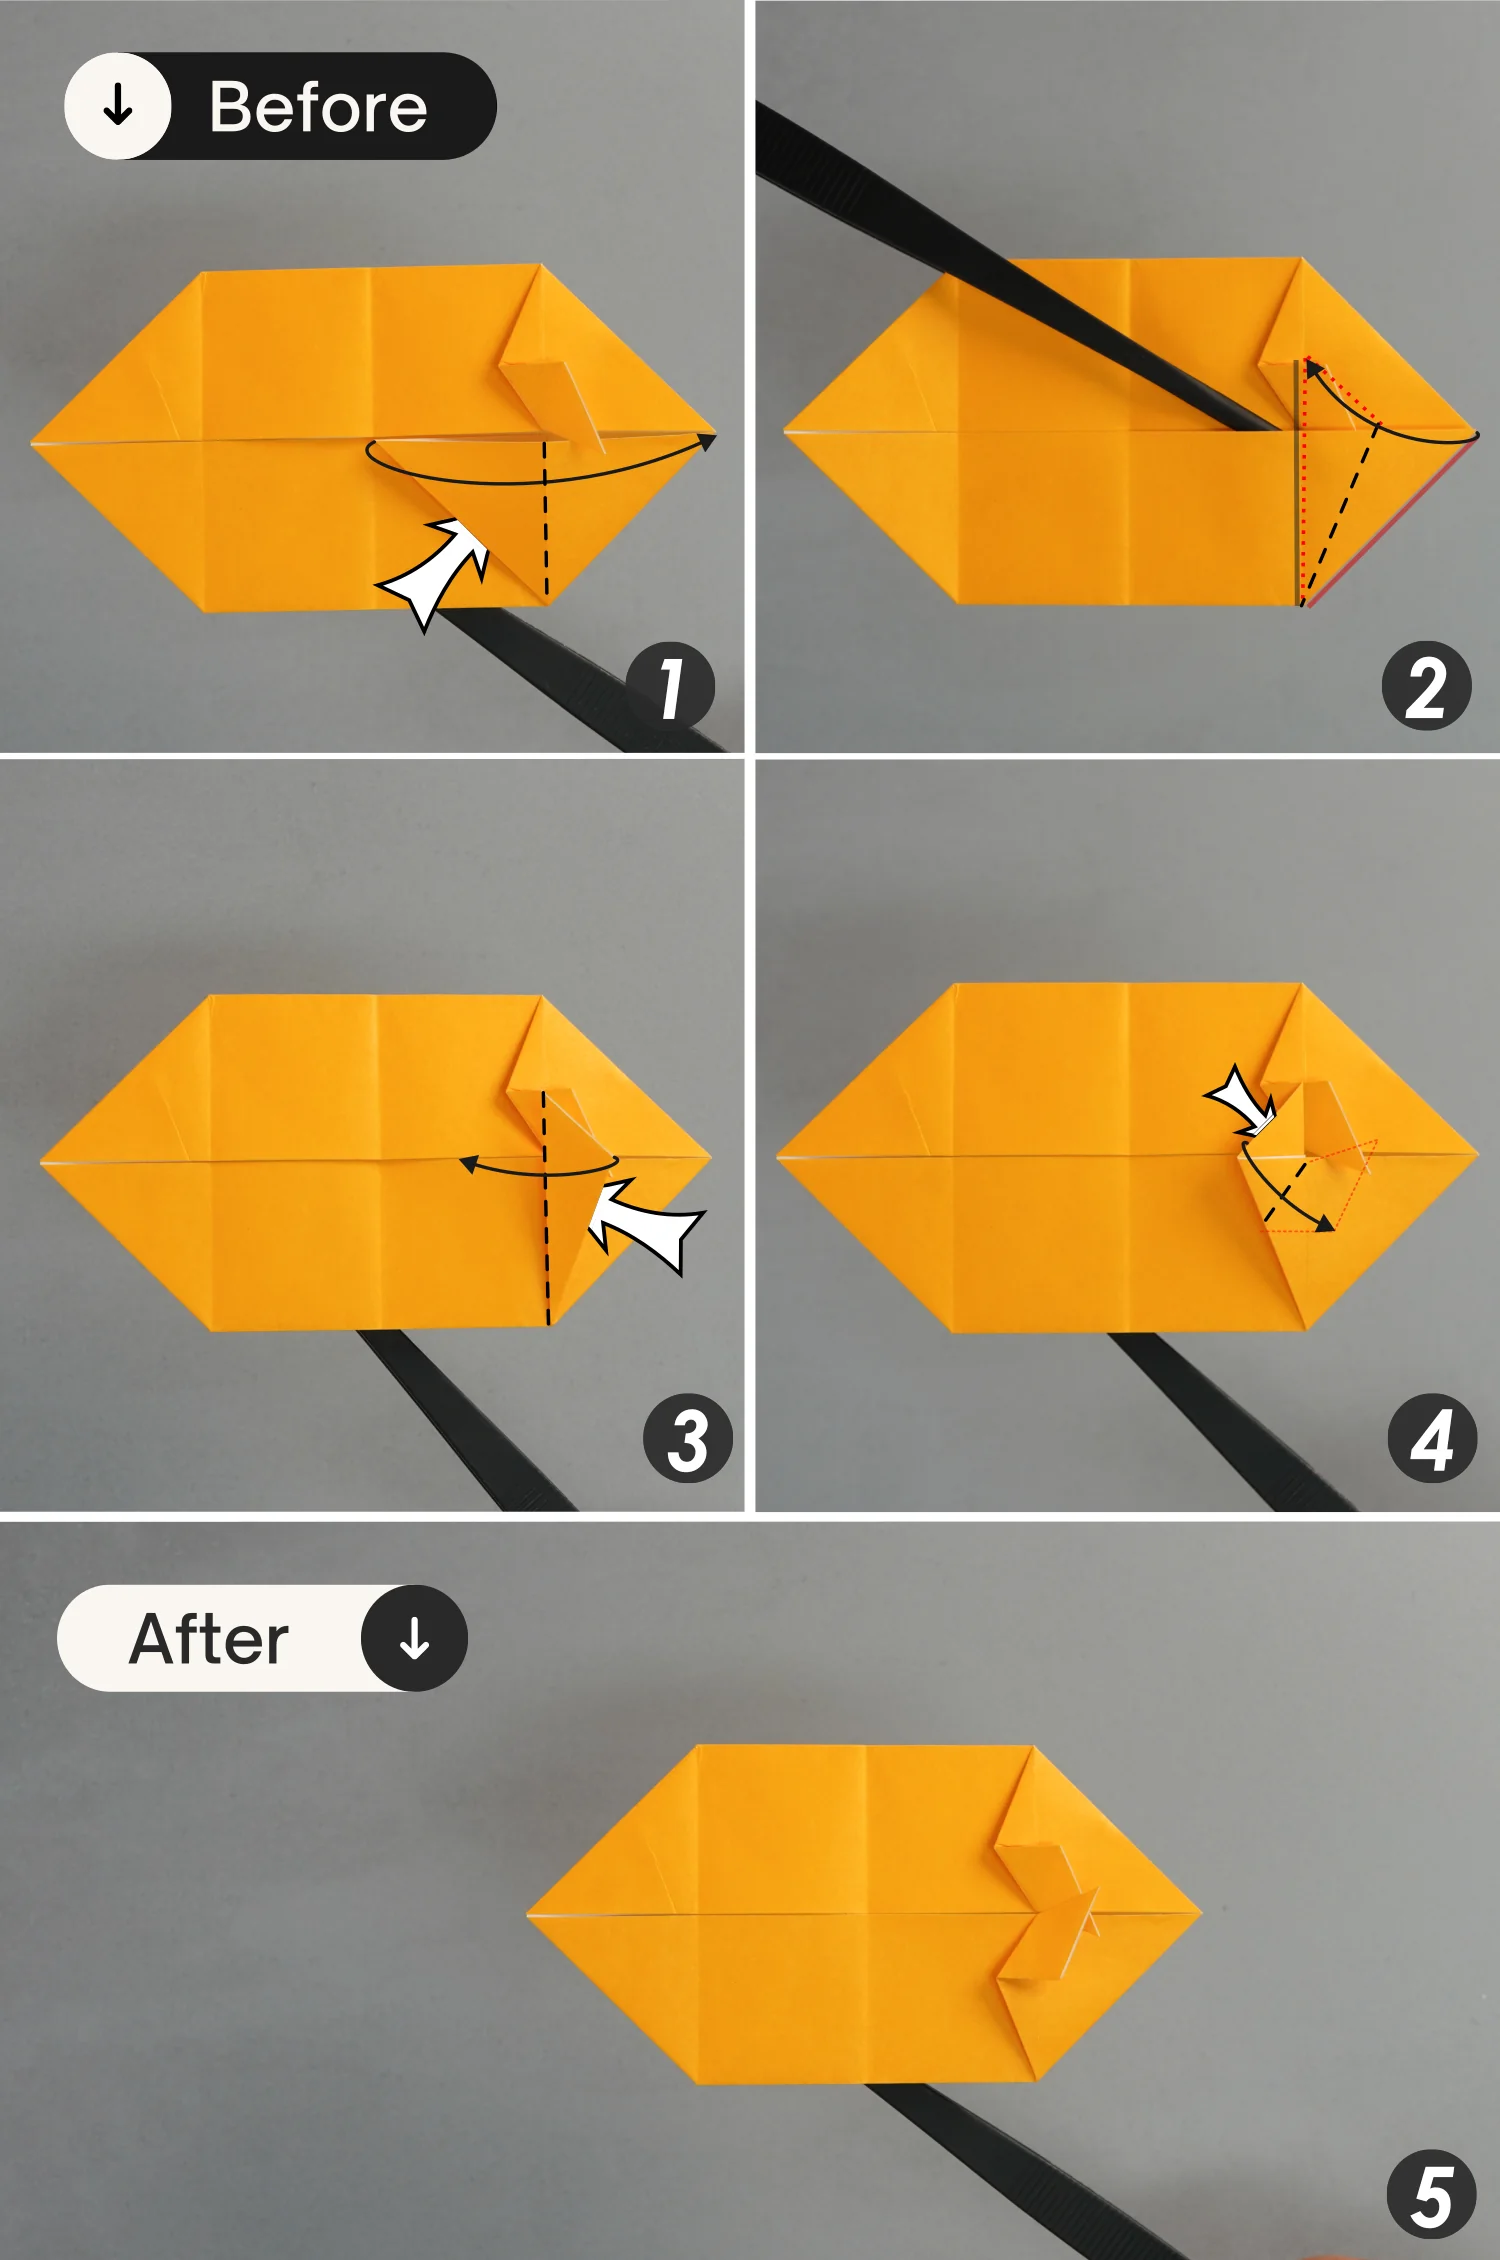
Step 8
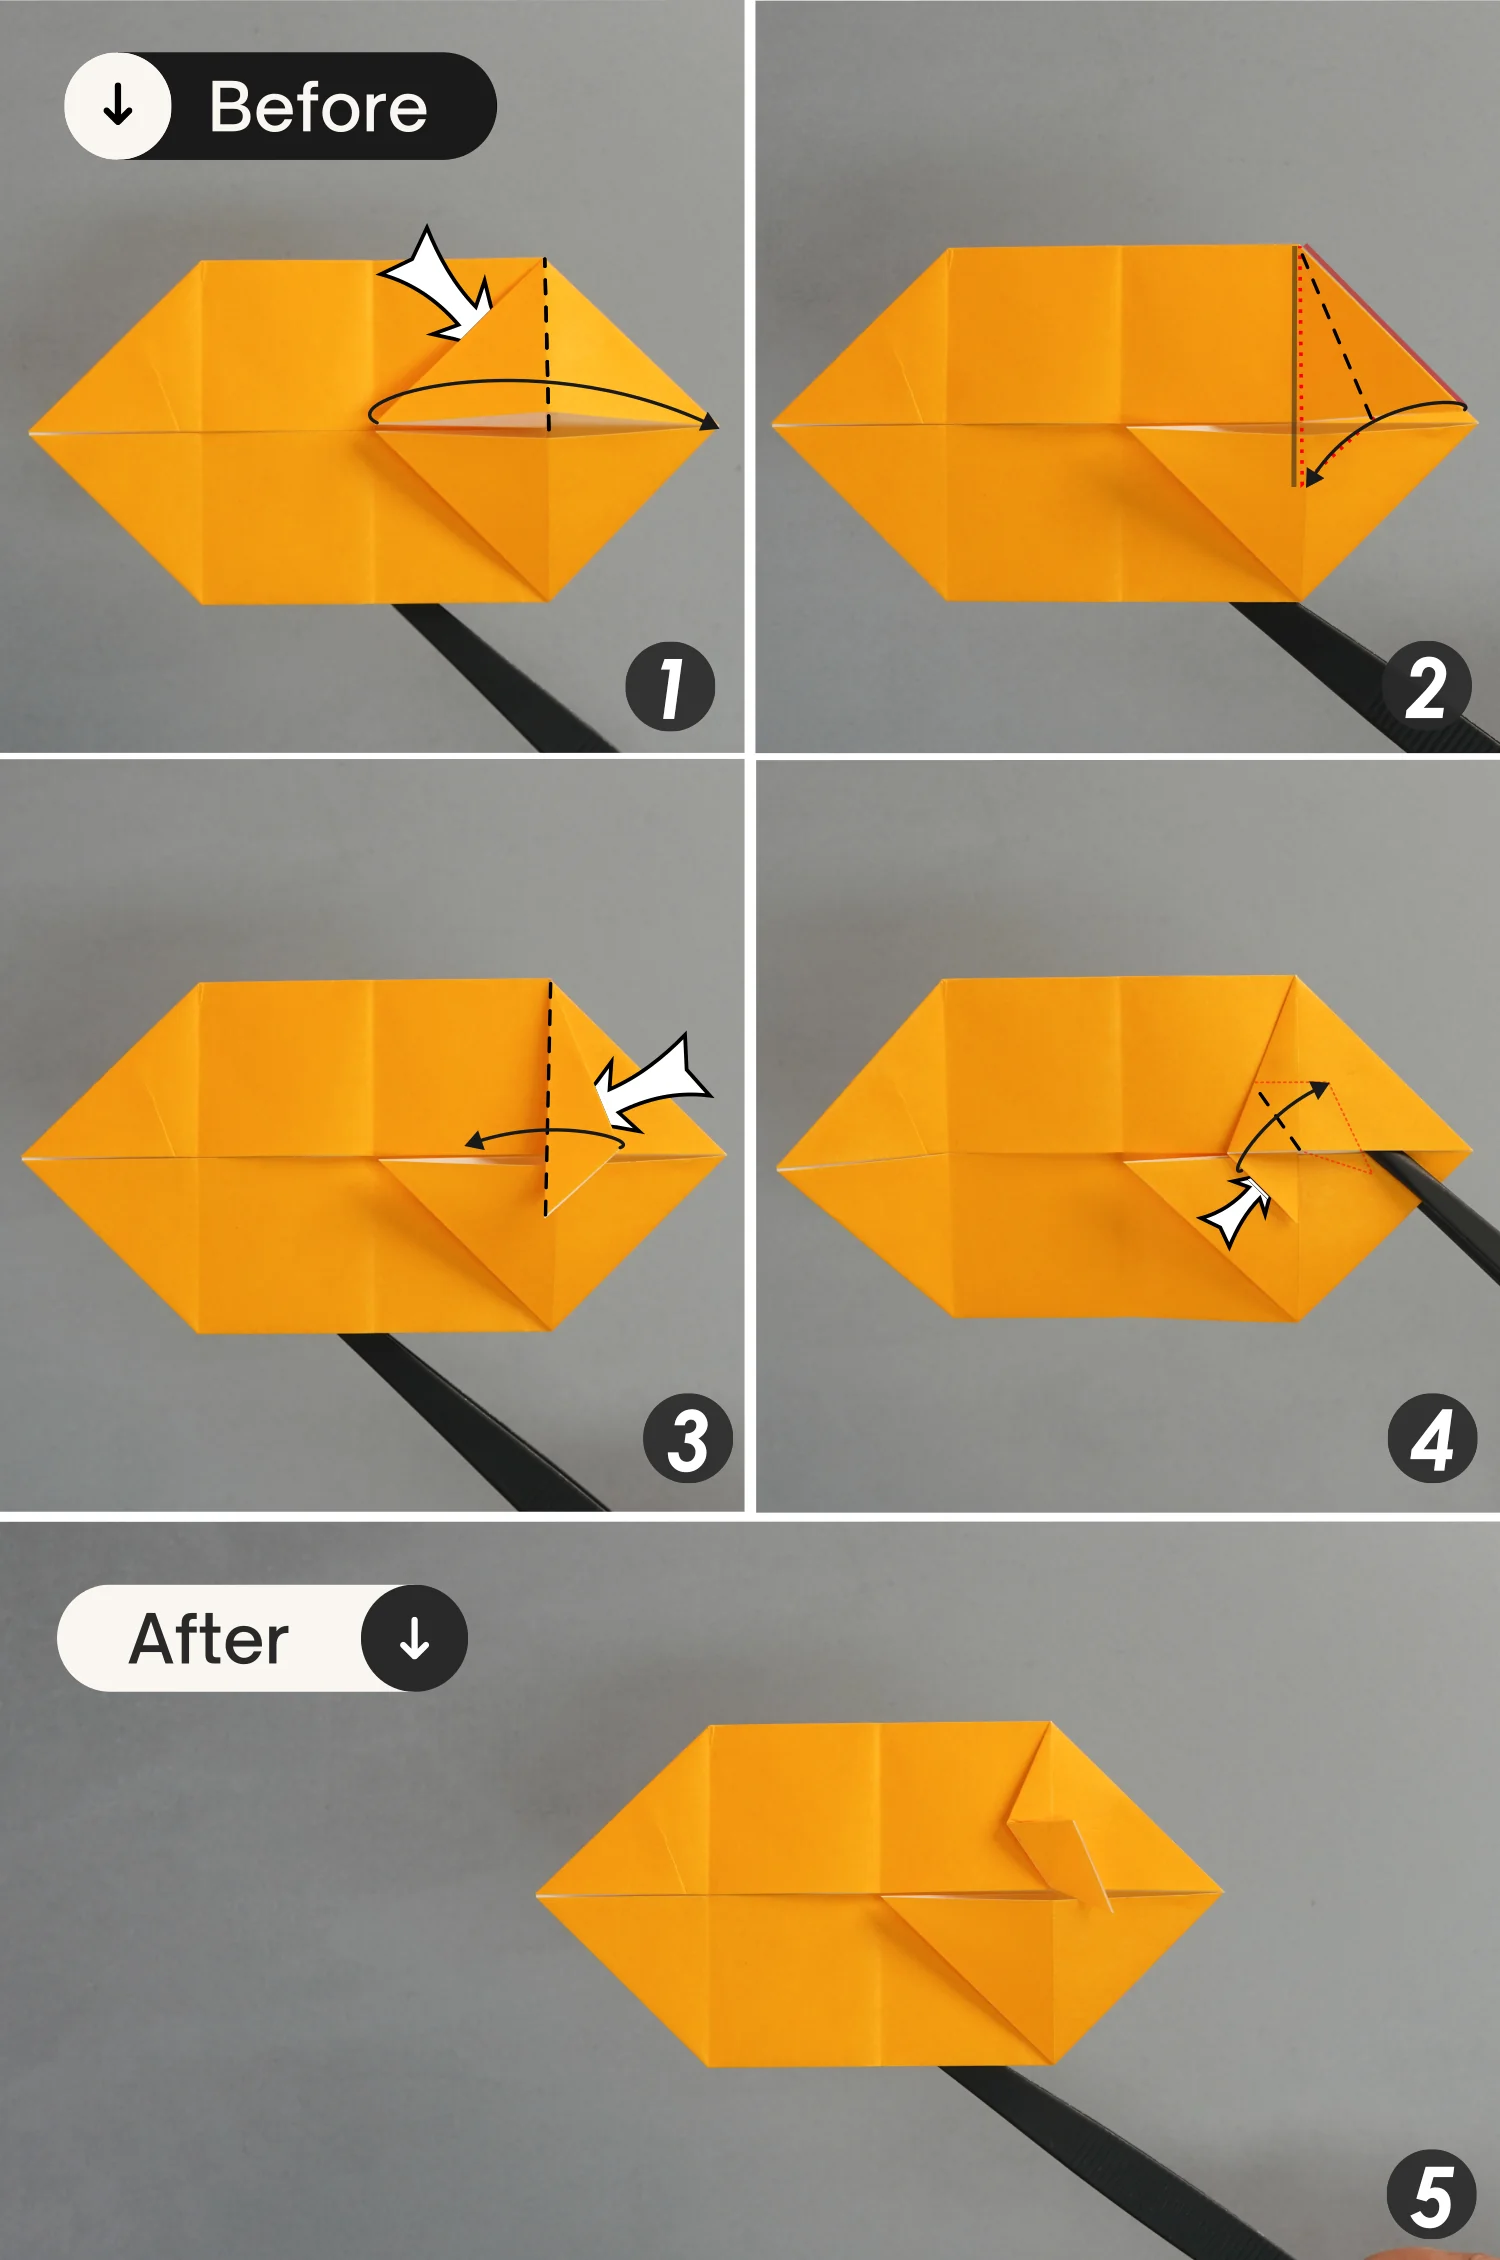
Fold the left edge of the top right triangle to align with its right edge, then fold this edge toward its original side to align with the vertical crease [pictures 1 and 2].
Next, fold this small triangle to the left side along the vertical crease, then fold the bottom part of this triangle toward the top right side along the black dotted line [pictures 3 and 4].
Step 9
Similarly, the left edge of the bottom right triangle aligns with its right edge, then fold this edge toward its original side to align with the vertical crease [pictures 1 and 2].
Next, fold this small triangle to the left side along the vertical crease, then fold the top part of this triangle toward the bottom right side along the black dotted line [pictures 3 and 4].
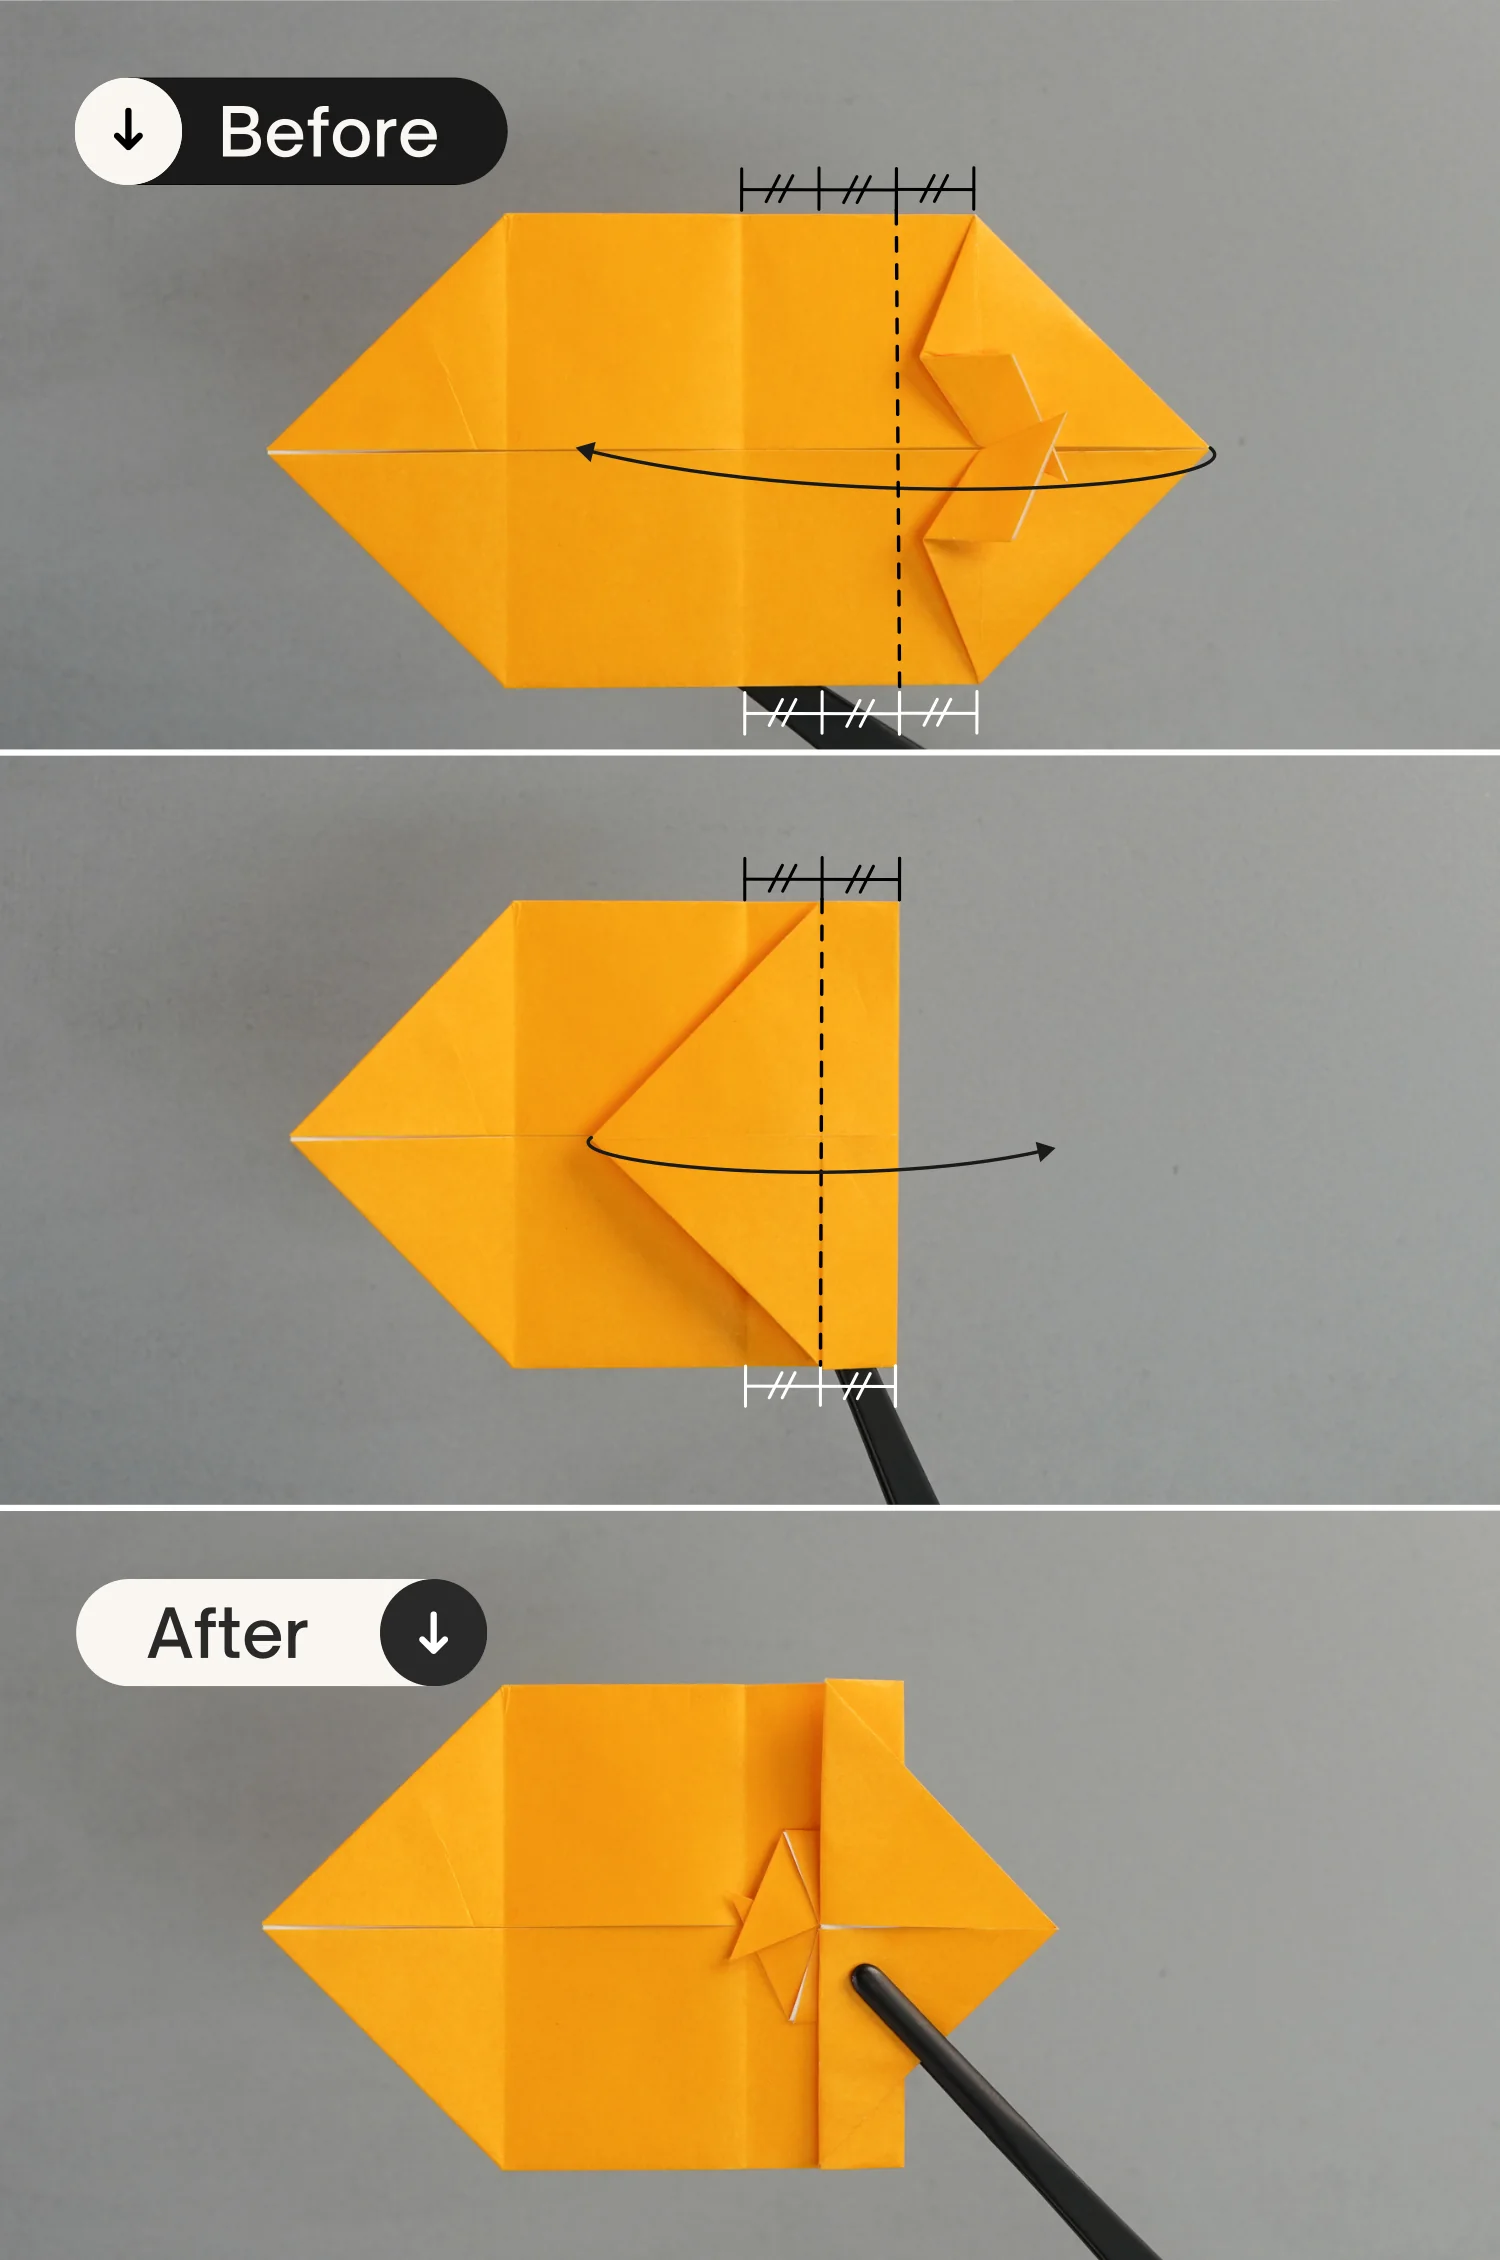
Step 10
Label the right section of the top and bottom edges with four points each, so these four points divide the two edges into equal fourths.
Then fold the right part of the paper to the left along the line that connects the second points from the right, indicated by the black dotted line in the following first picture.
Finally, fold the left triangle to the right side along the crease indicated by the black dotted line.
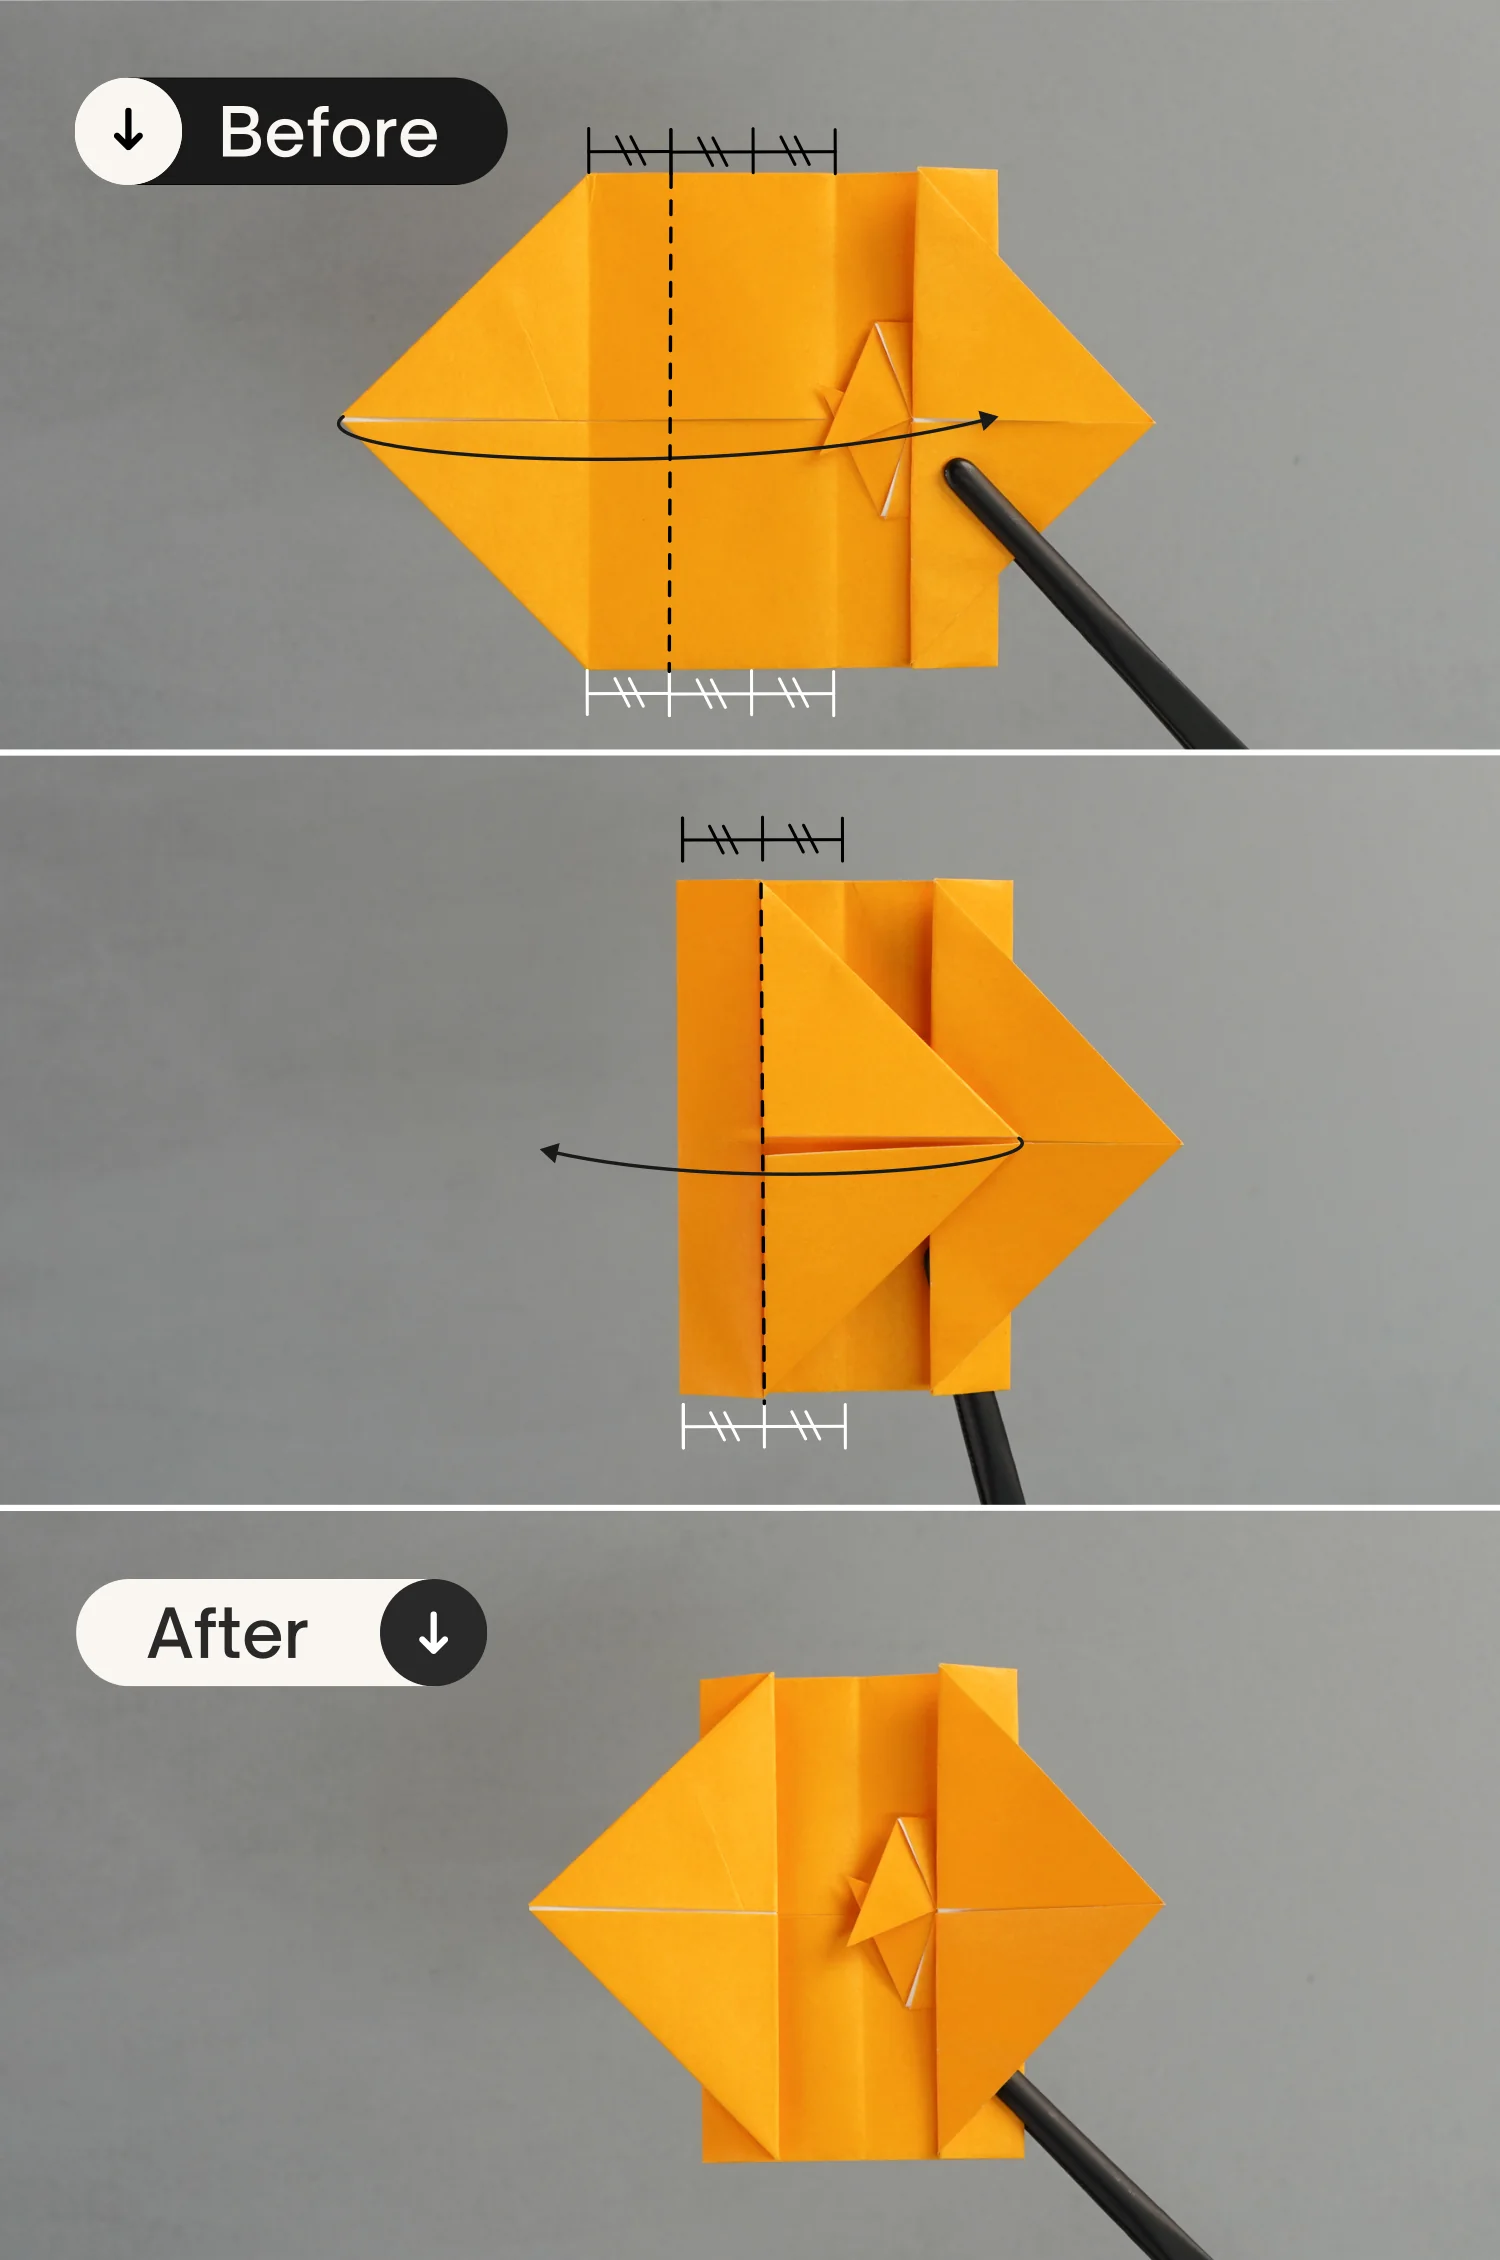
Step 11
Similarly, label the left section of the top and bottom edges with four points each, so these four points divide the two edges into equal fourths.
Then fold the left part of the paper to the right along the line that connects the second points from the left, indicated by the black dotted line in the following first picture.
Finally, fold the right triangle to the left side along the crease indicated by the black dotted line.
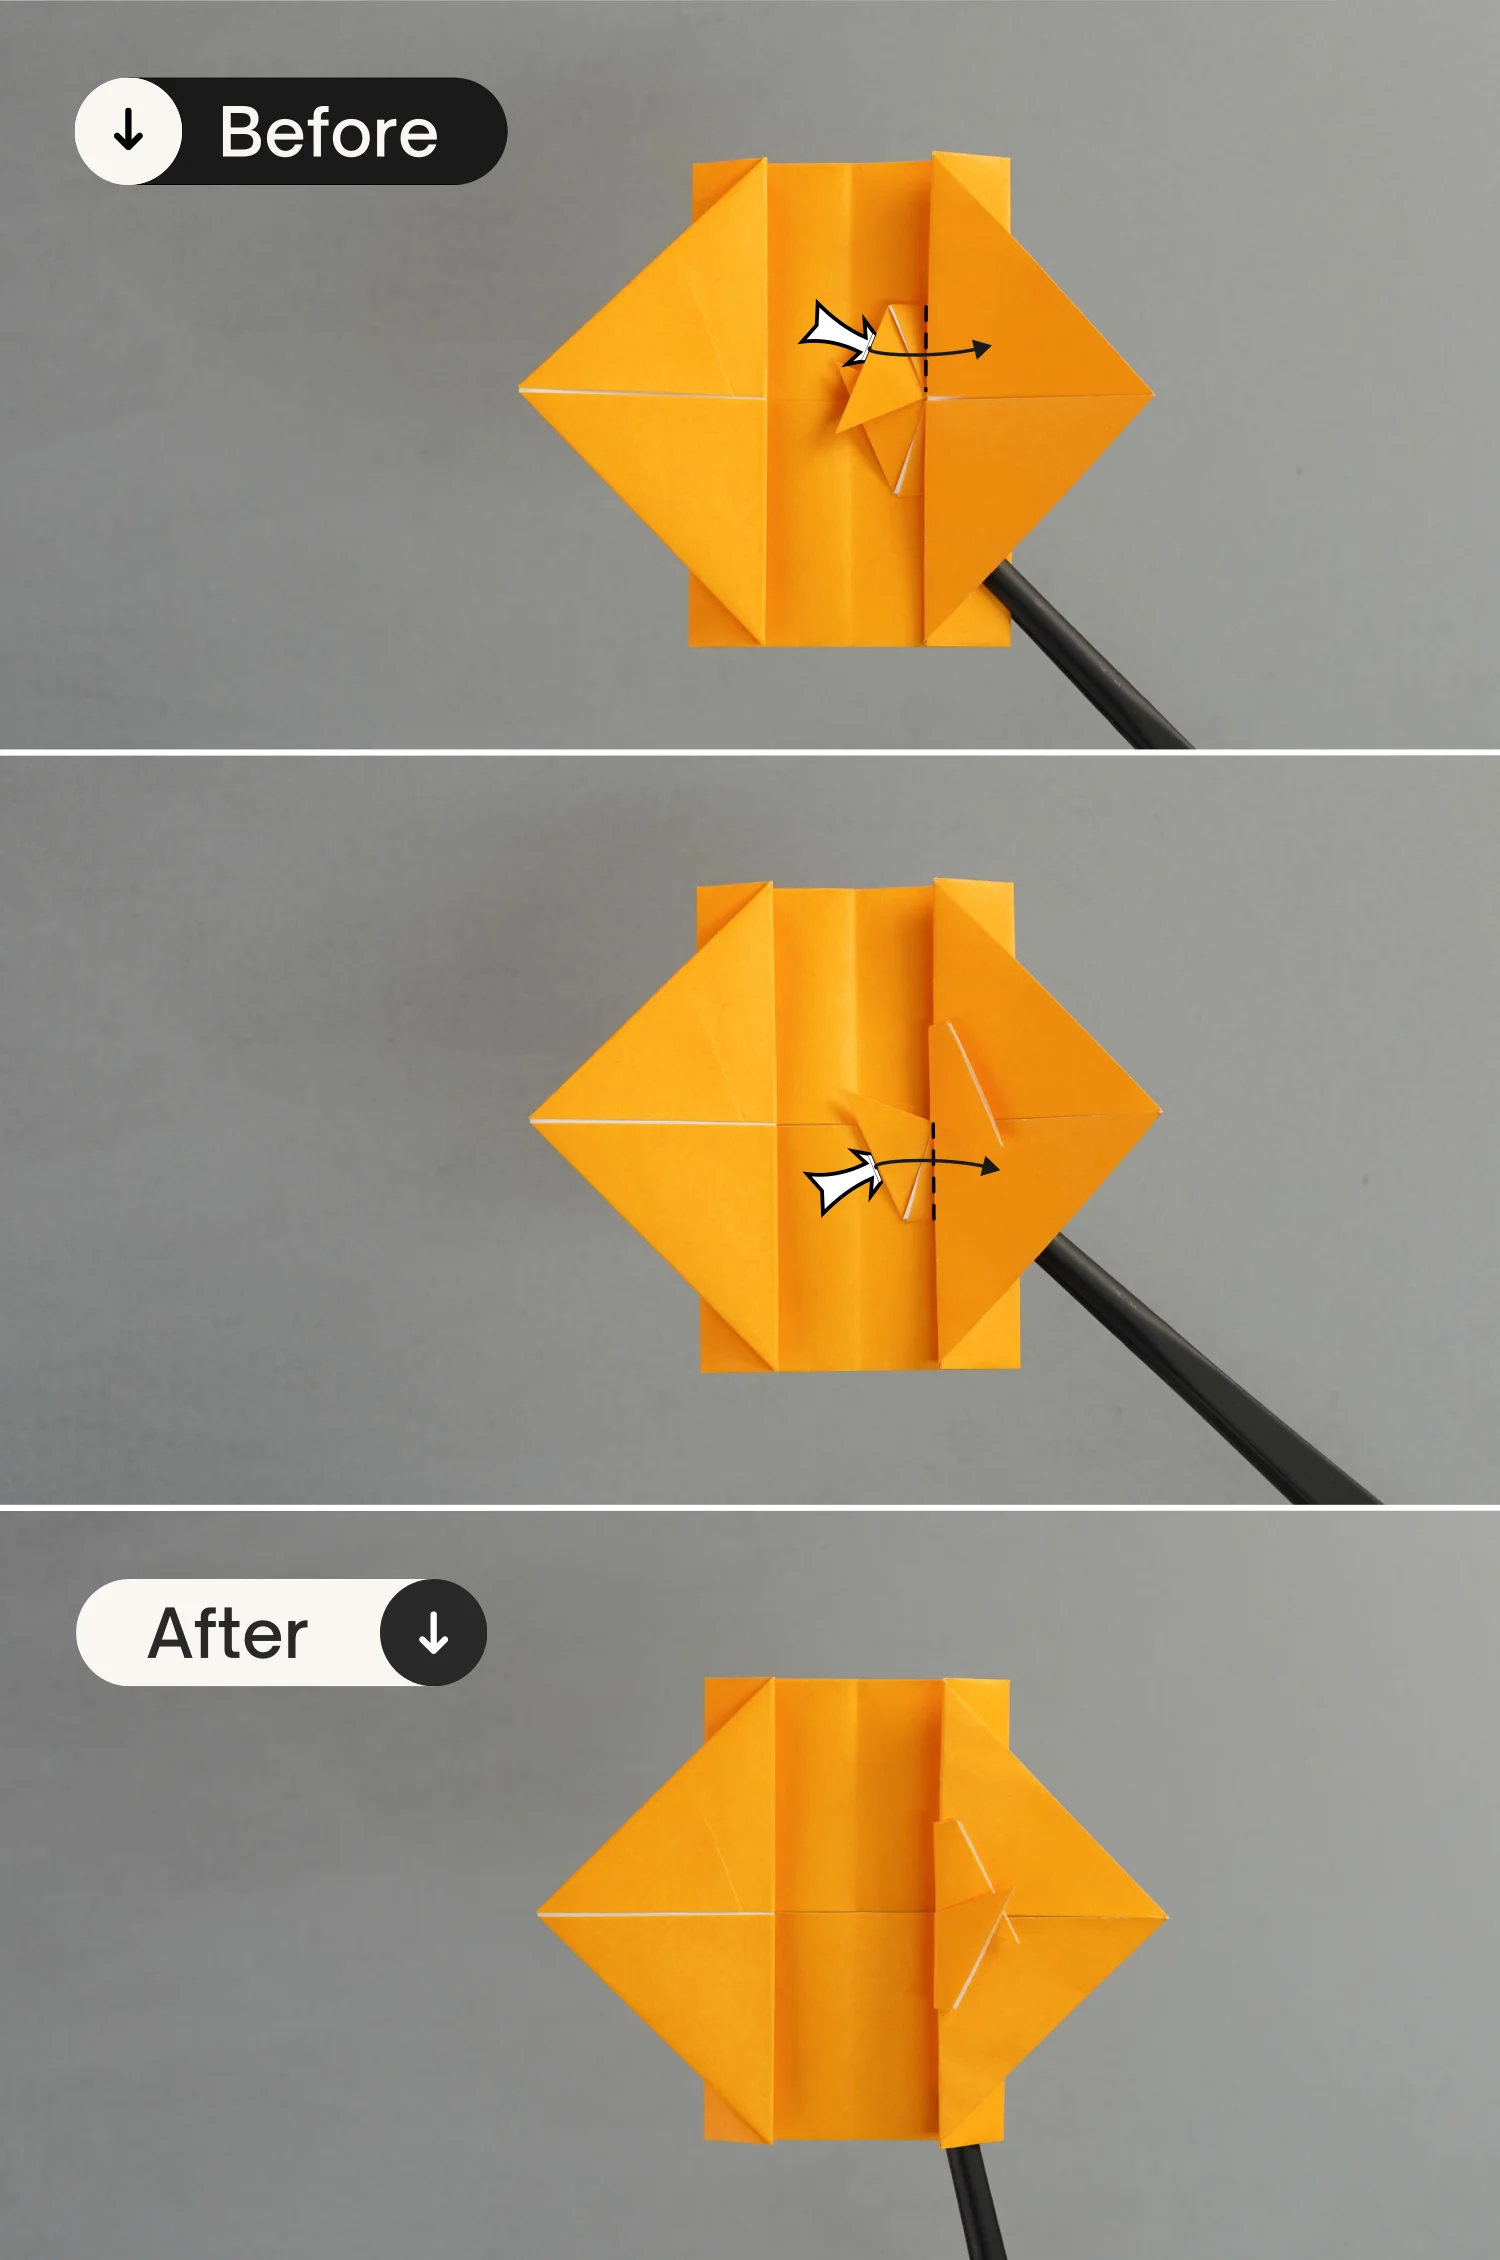
Step 12
Lift these two small layers.
Step 13
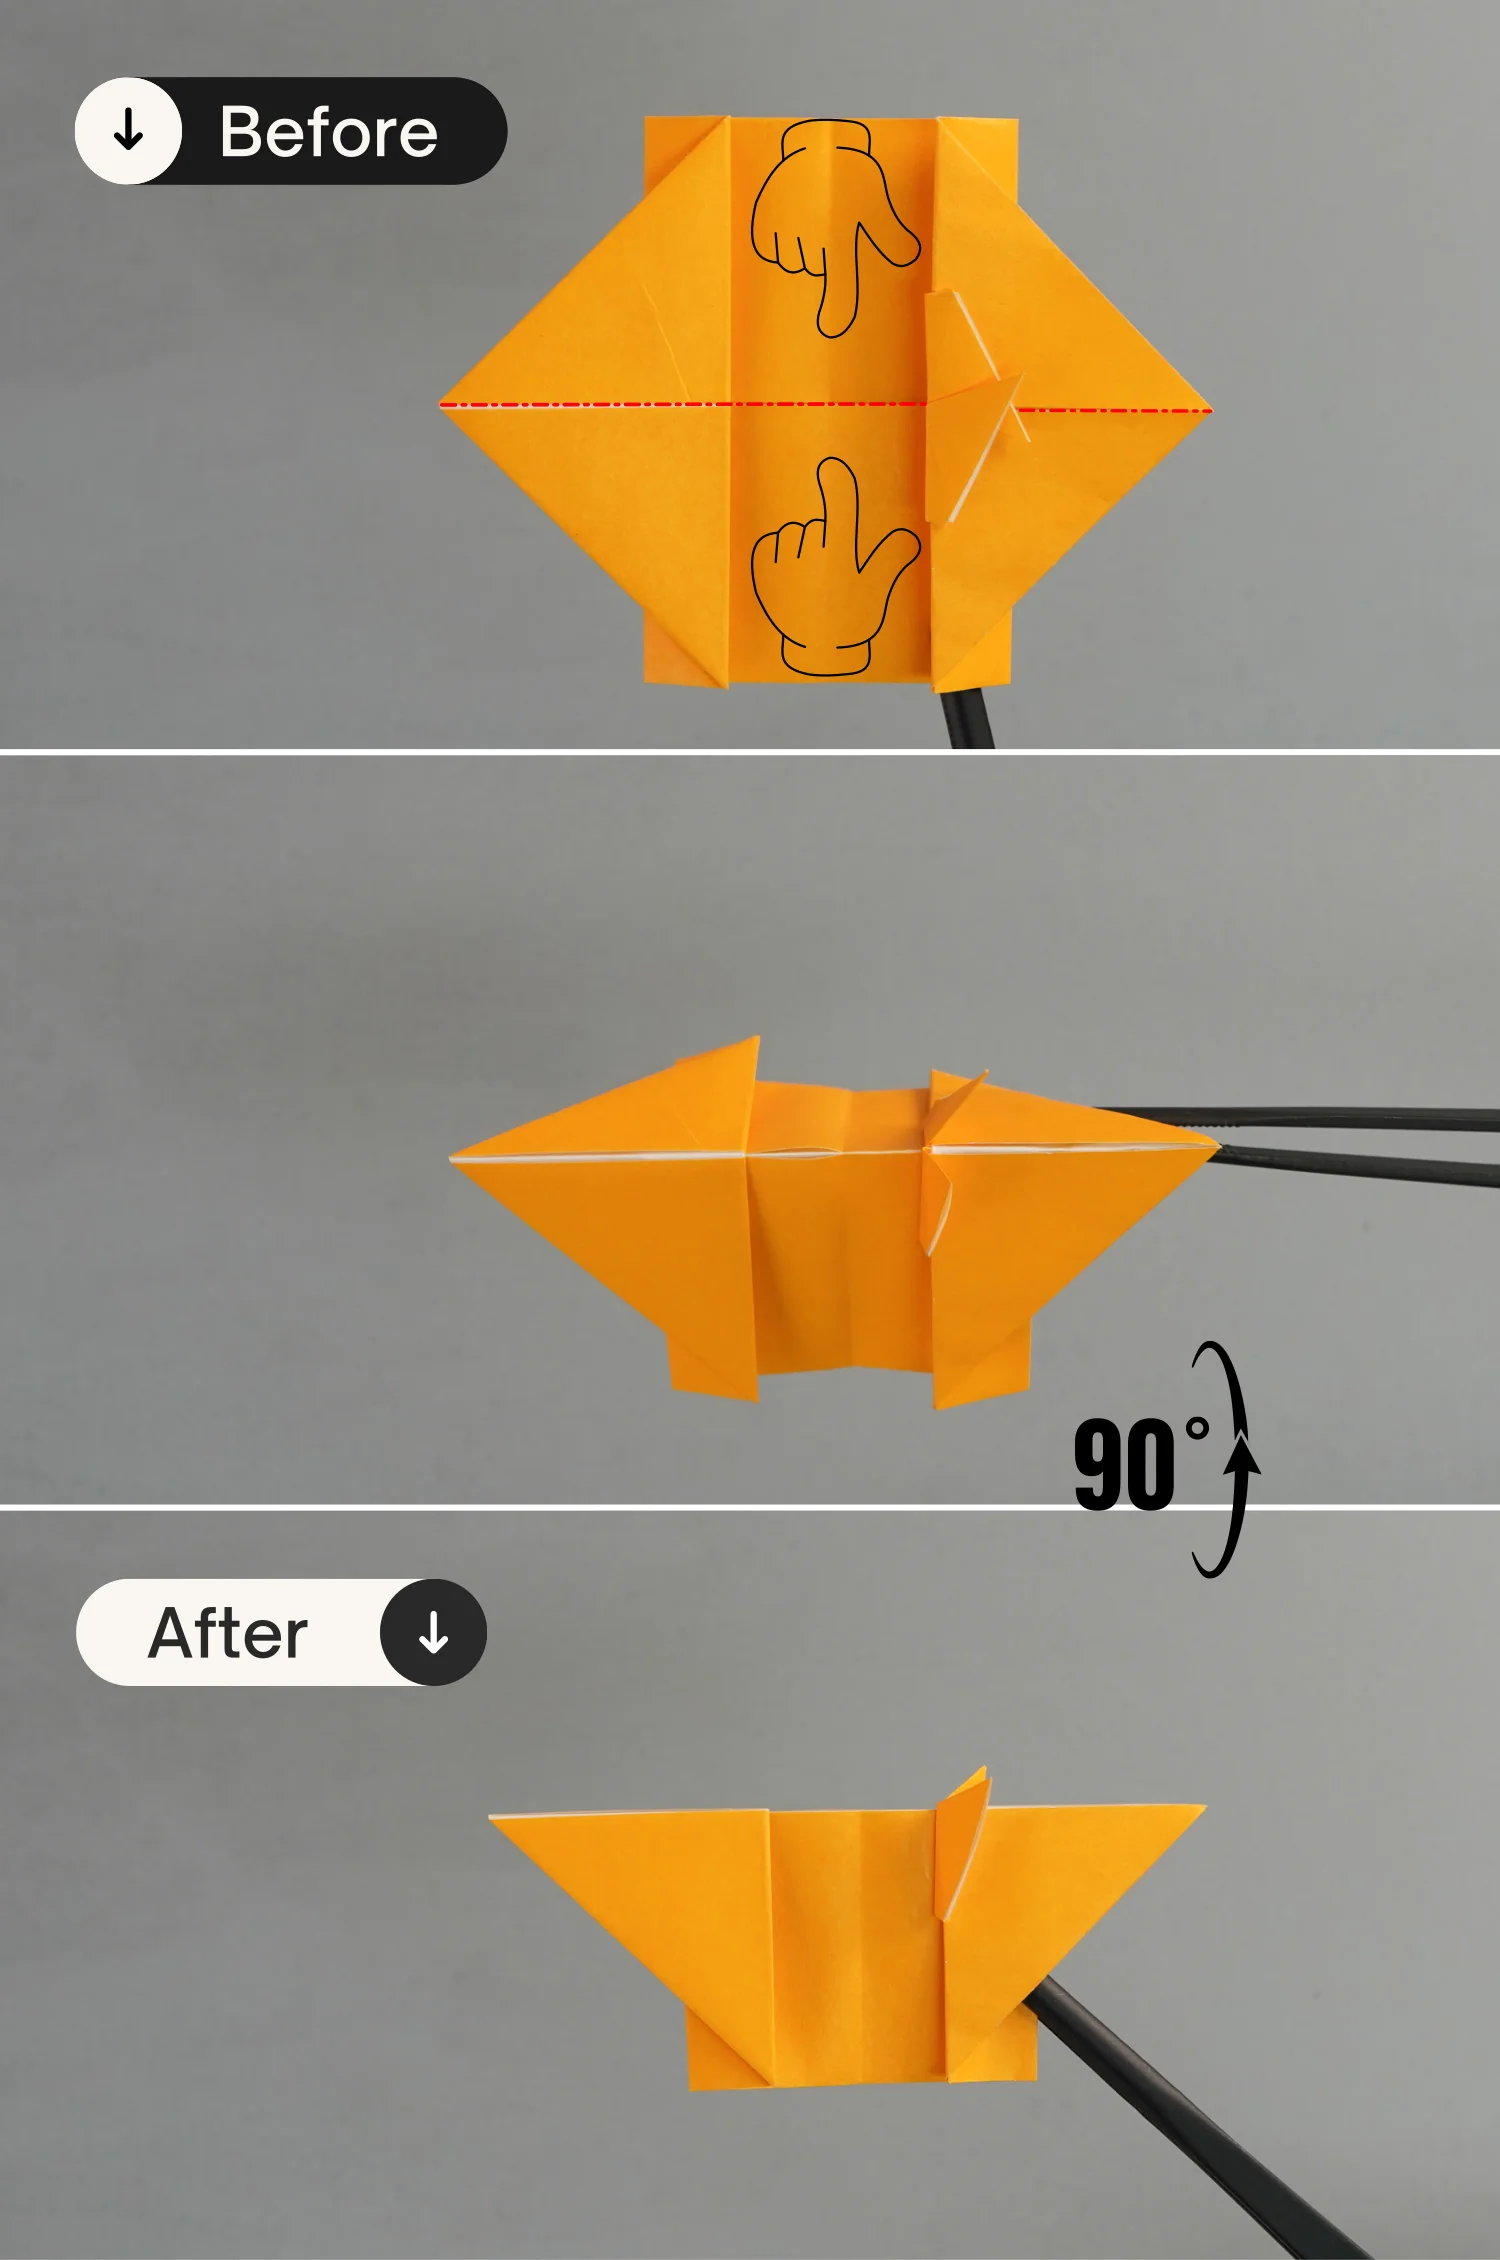
Press down the top and bottom parts along the middle horizontal crease, to fold the paper in half horizontally downward, then rotate it 90 degrees from back to front.
Step 14
Fold down the top left point diagonally along the black dotted line, then fold it up for a short section, and parallel to the first fold. Finally, unfold them.

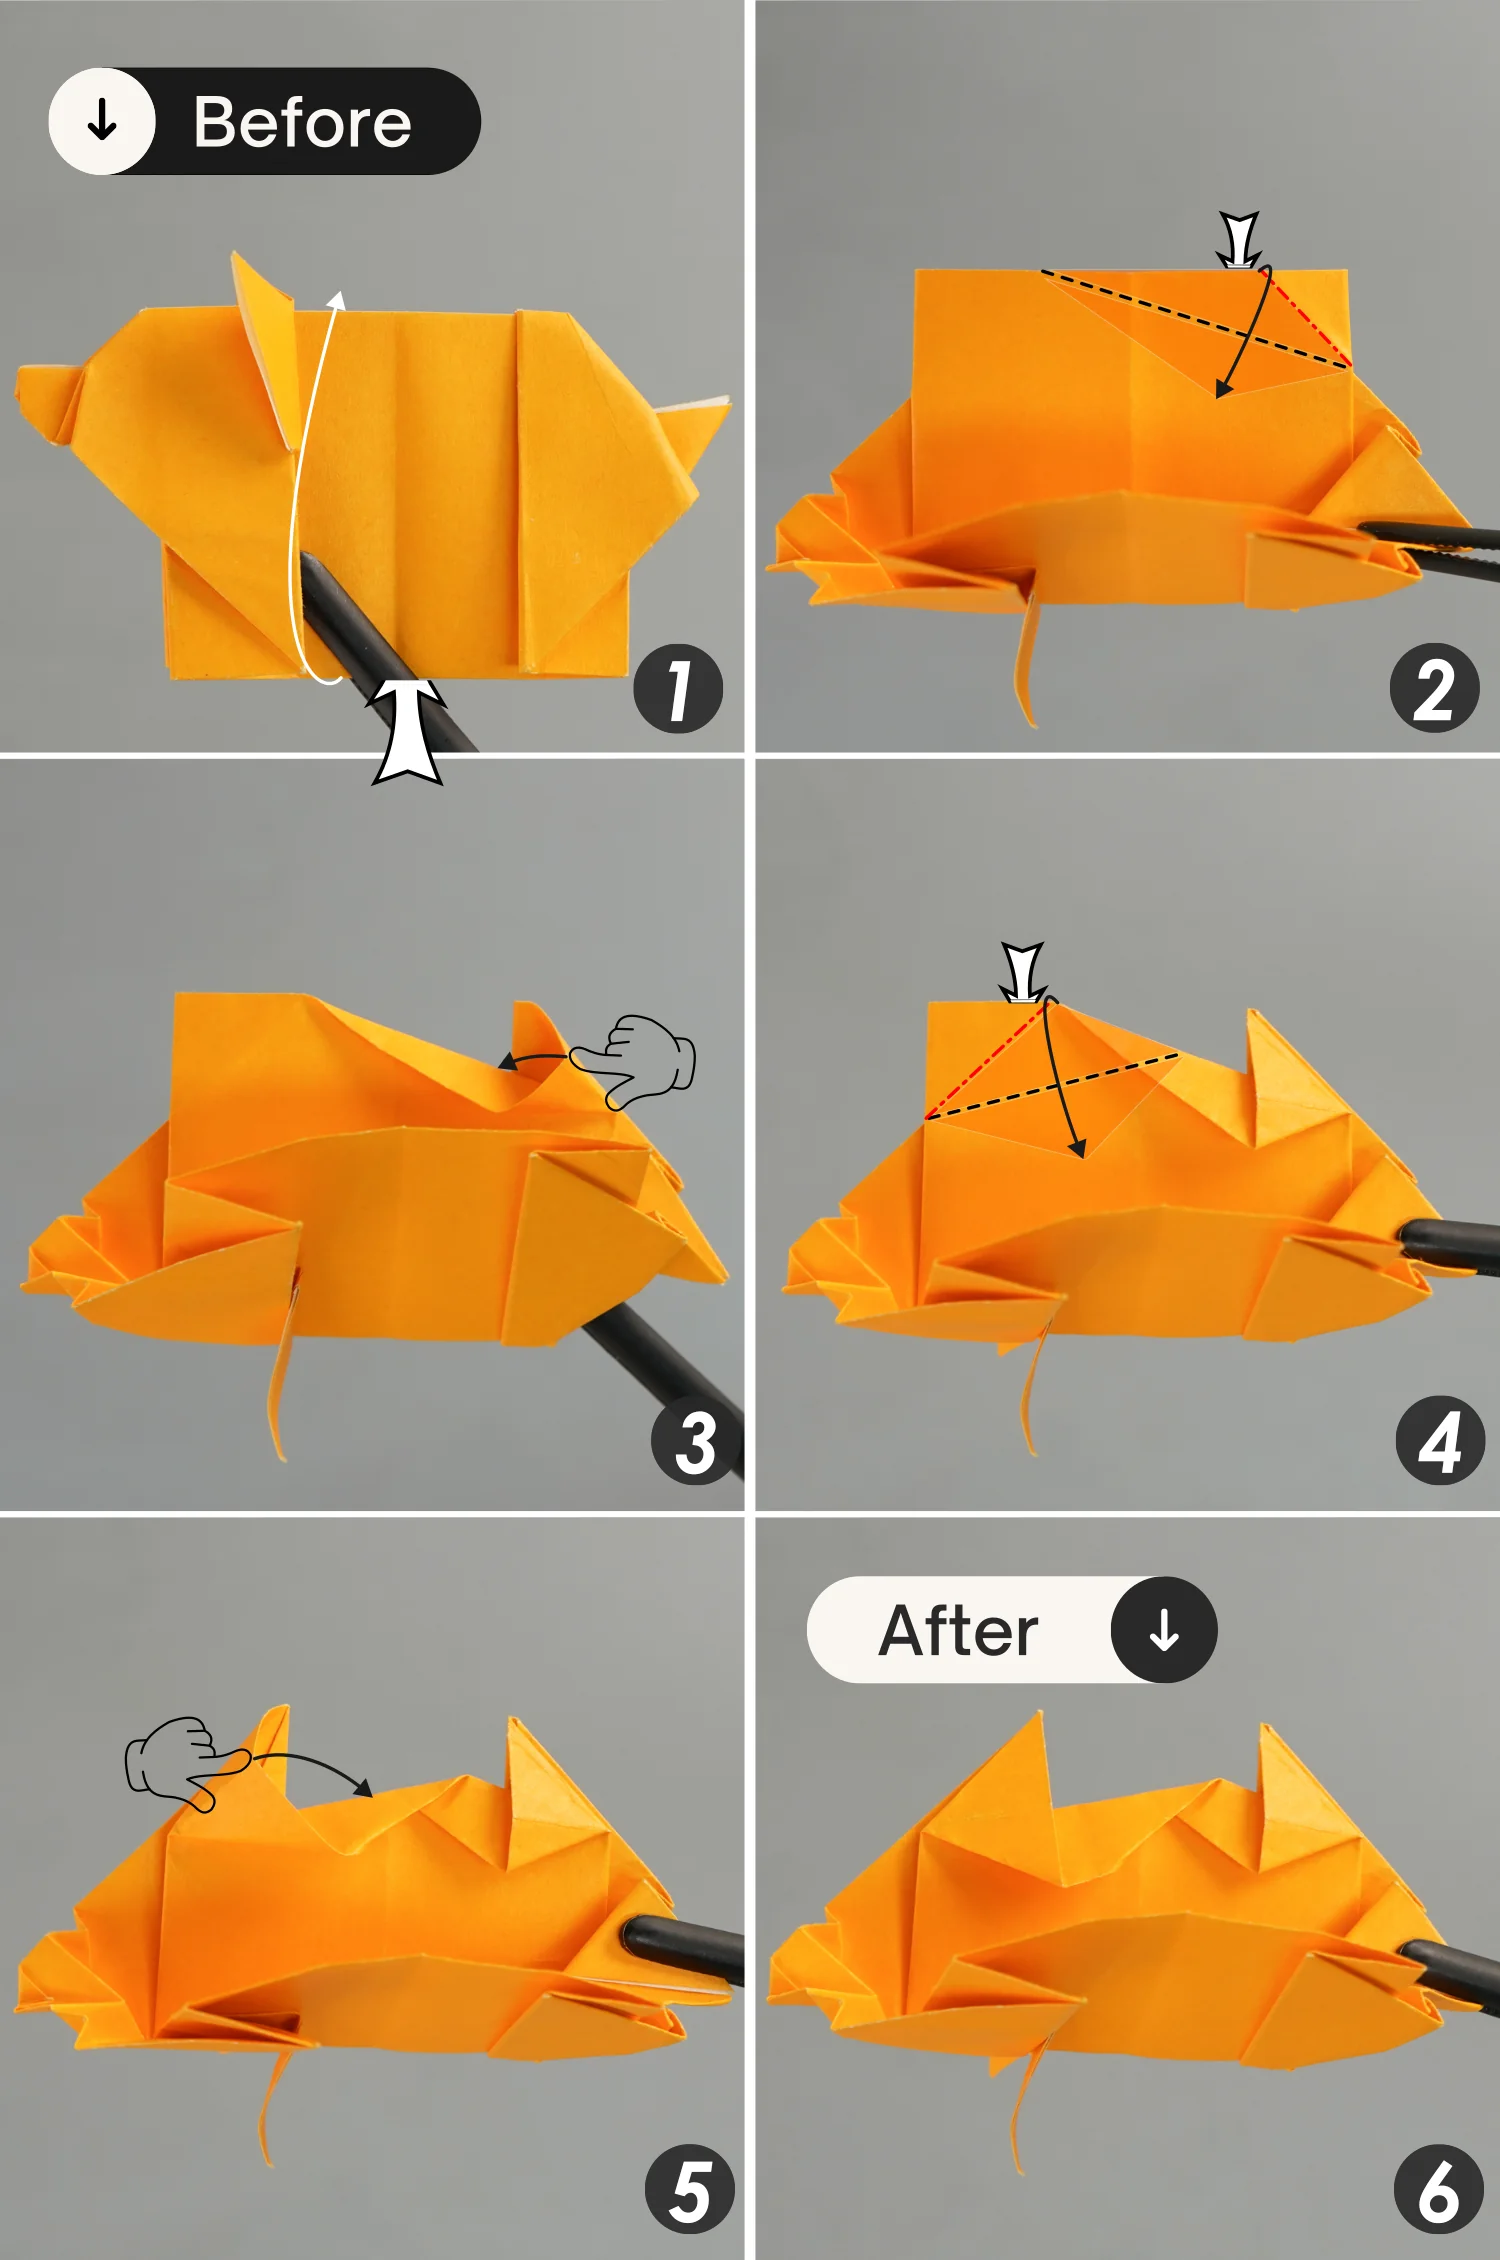
Step 15
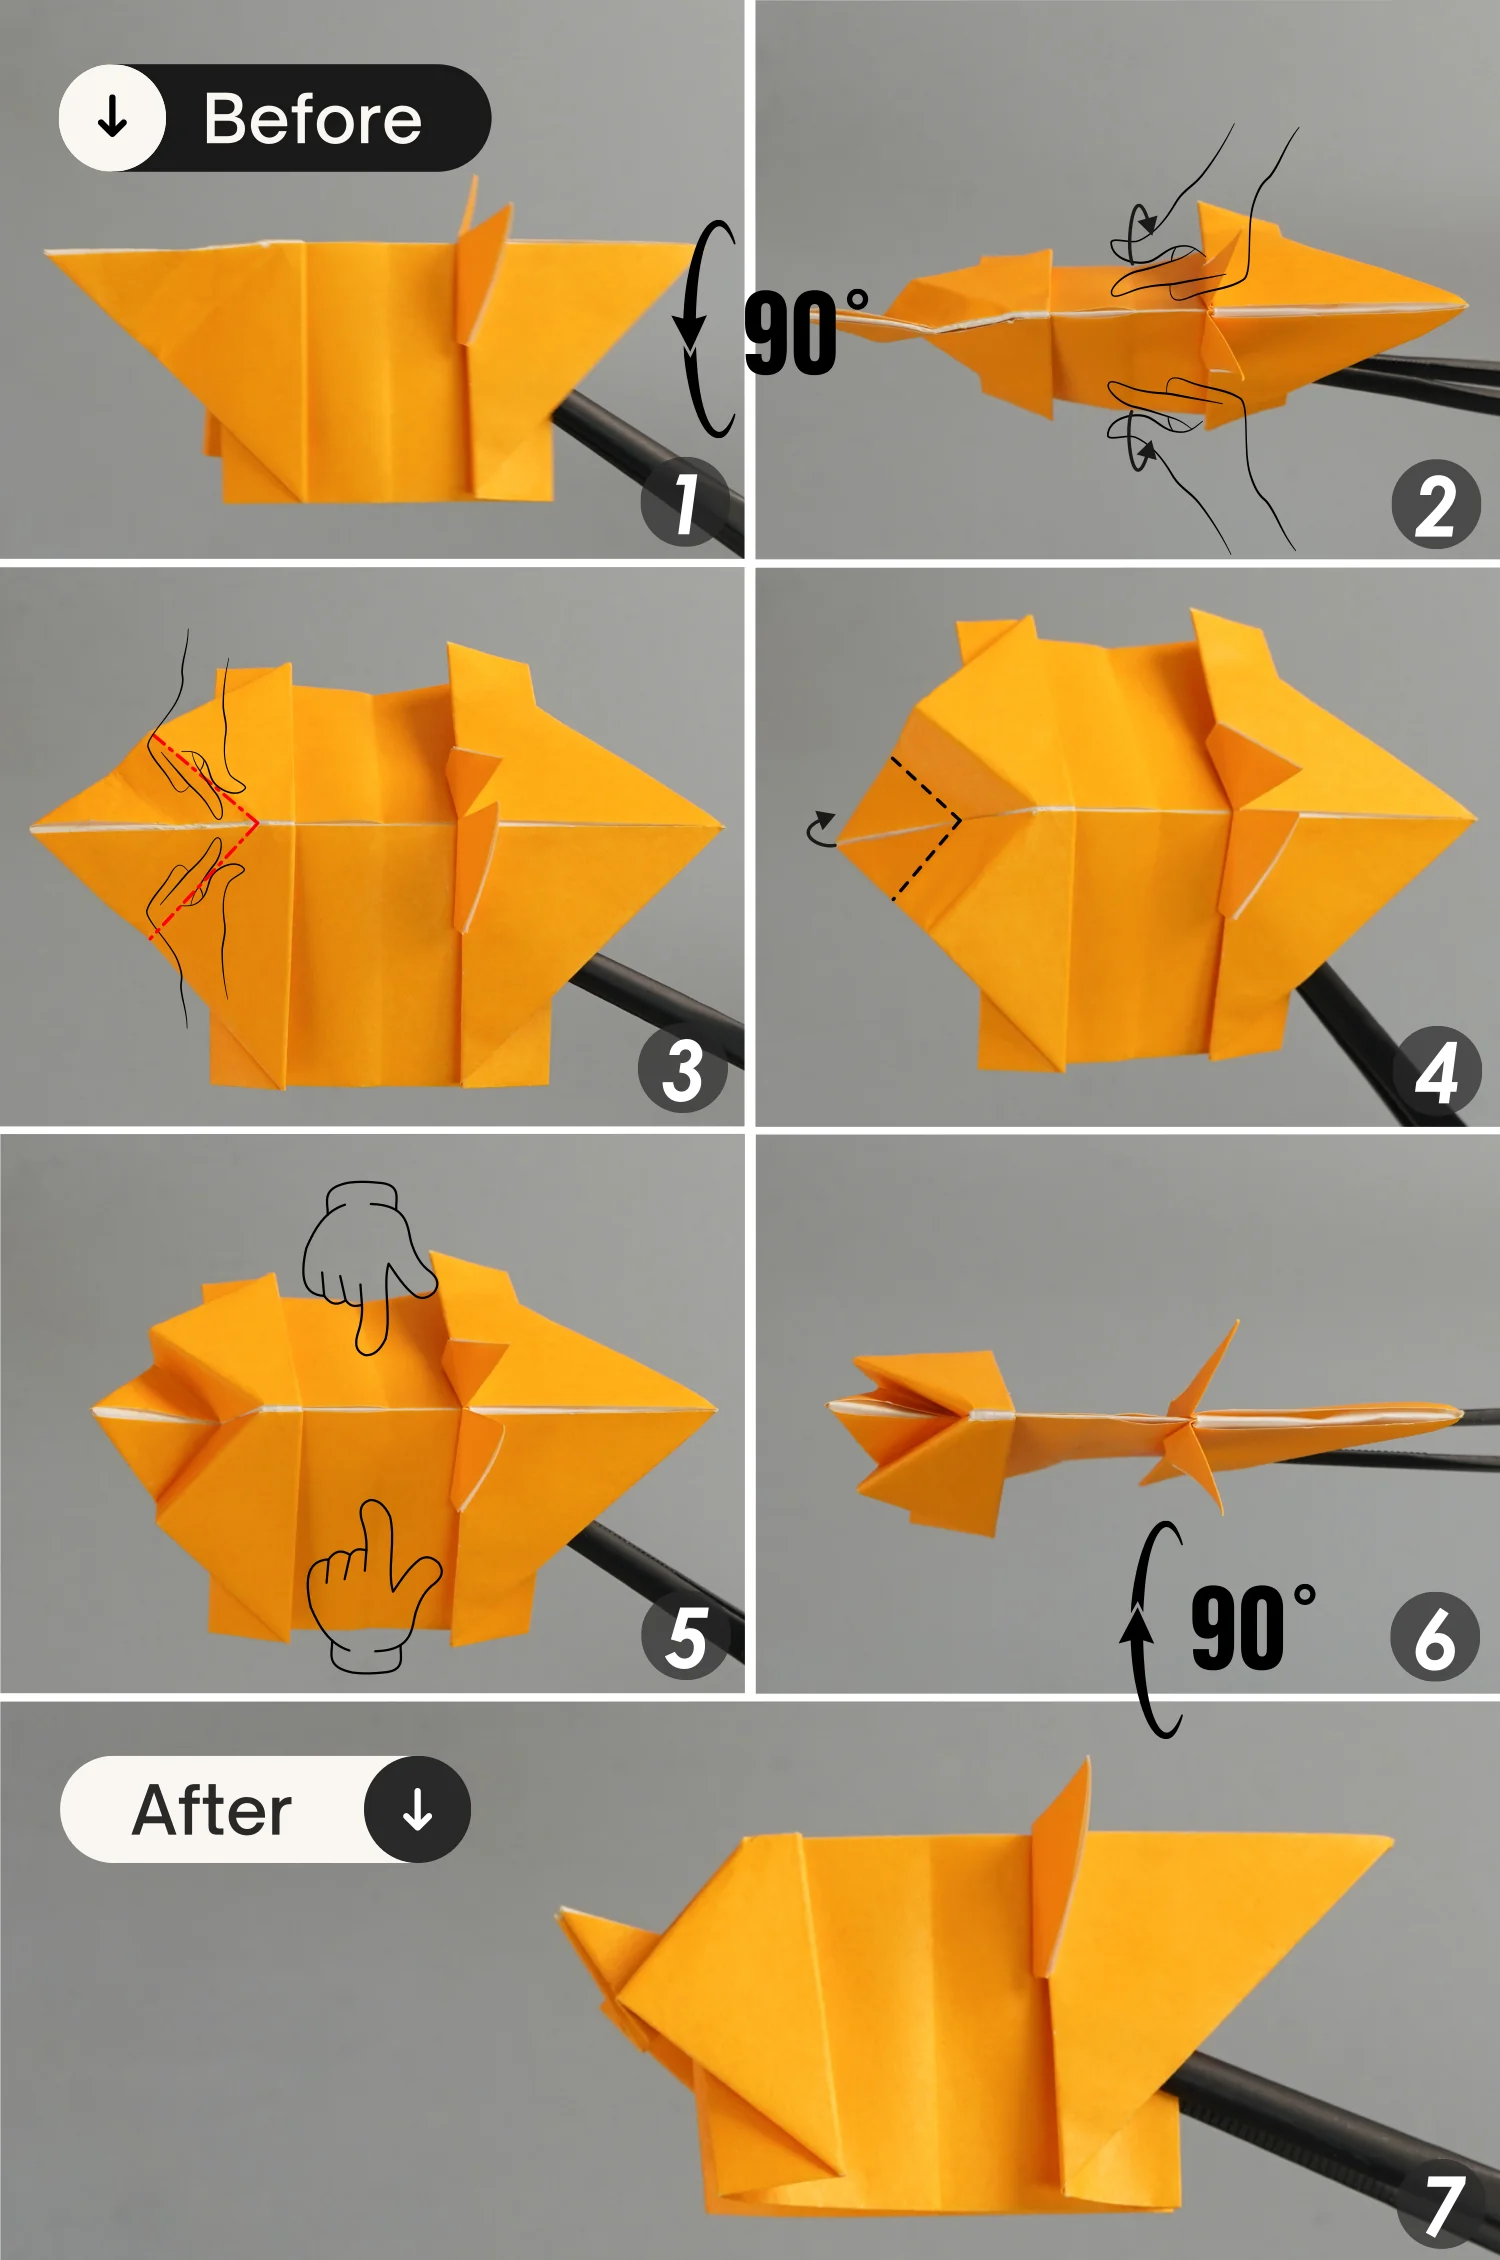
Rotate it 90 degrees from front to back, then expand the paper from the bottom [pictures 1 and 2].
Next, shape the creases that you made in the previous step of the first time, indicated by the red dotted lines, and bring up the left point along the crease you made in the second time, indicated by the black dotted lines [pictures 3 and 4].
Finally, close the bottom opening of the paper, flatten the fold to get the pig’s tail, then rotate the paper 90 degrees from back to front.
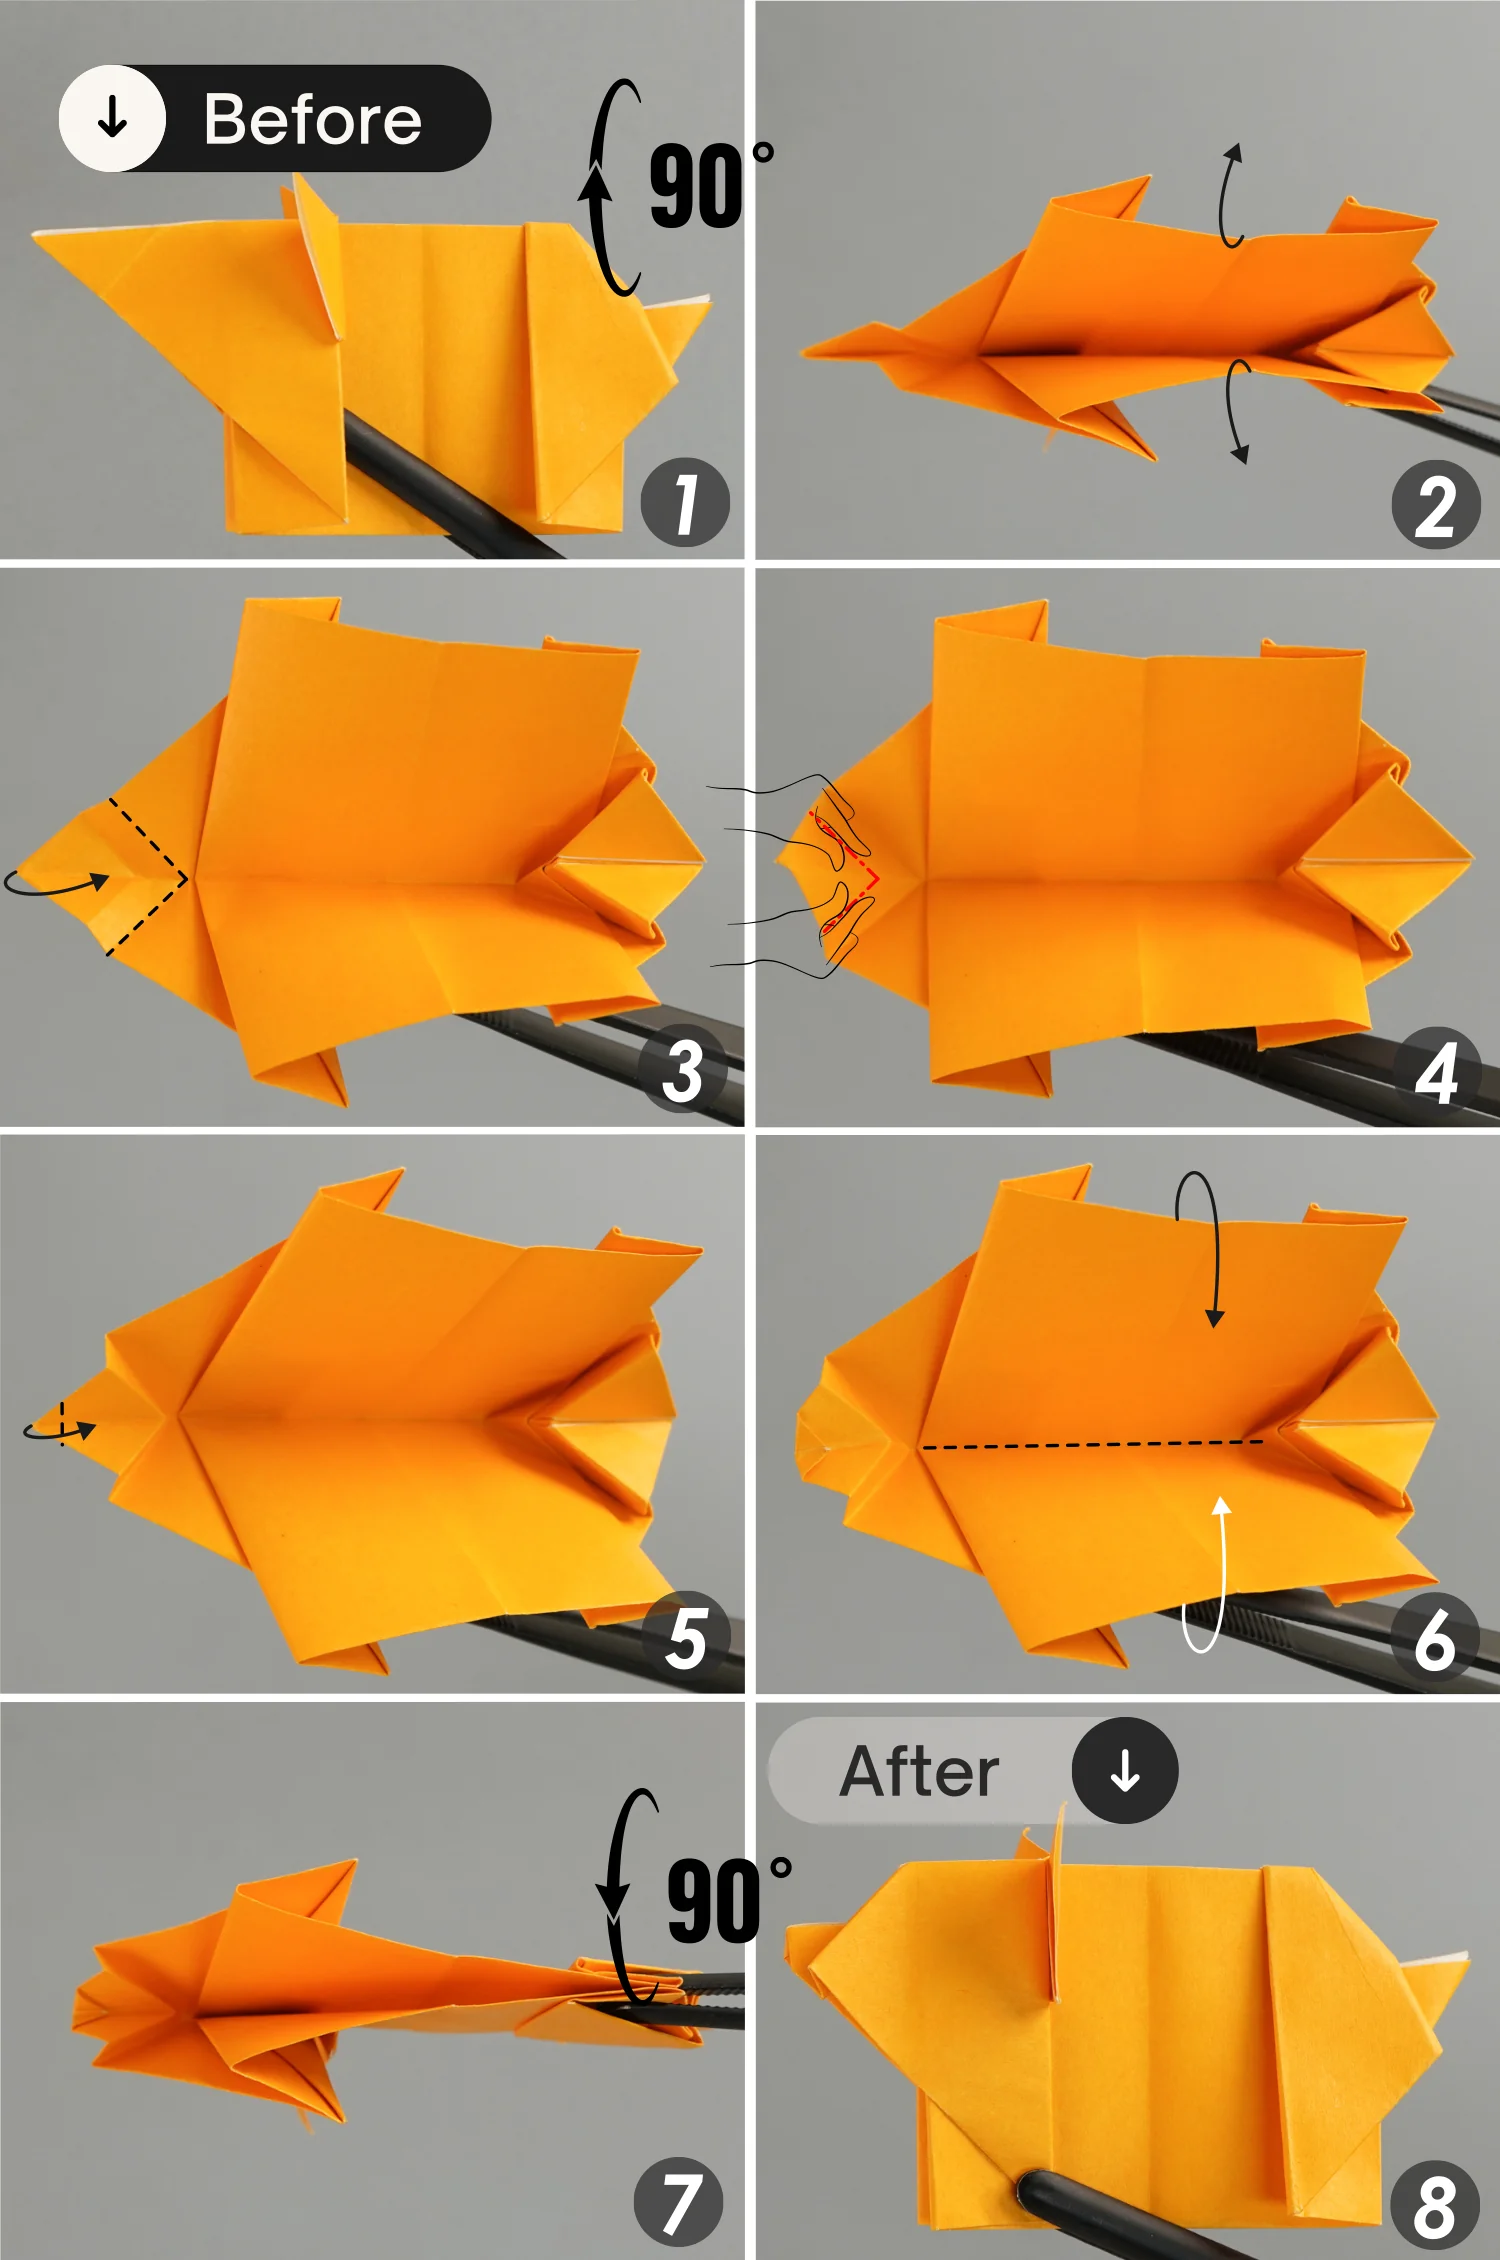
Step 16
Fold this small corner slightly backward, then flip the paper over from left to right, and fold the same small corner on this side slightly backward as well.
Step 17
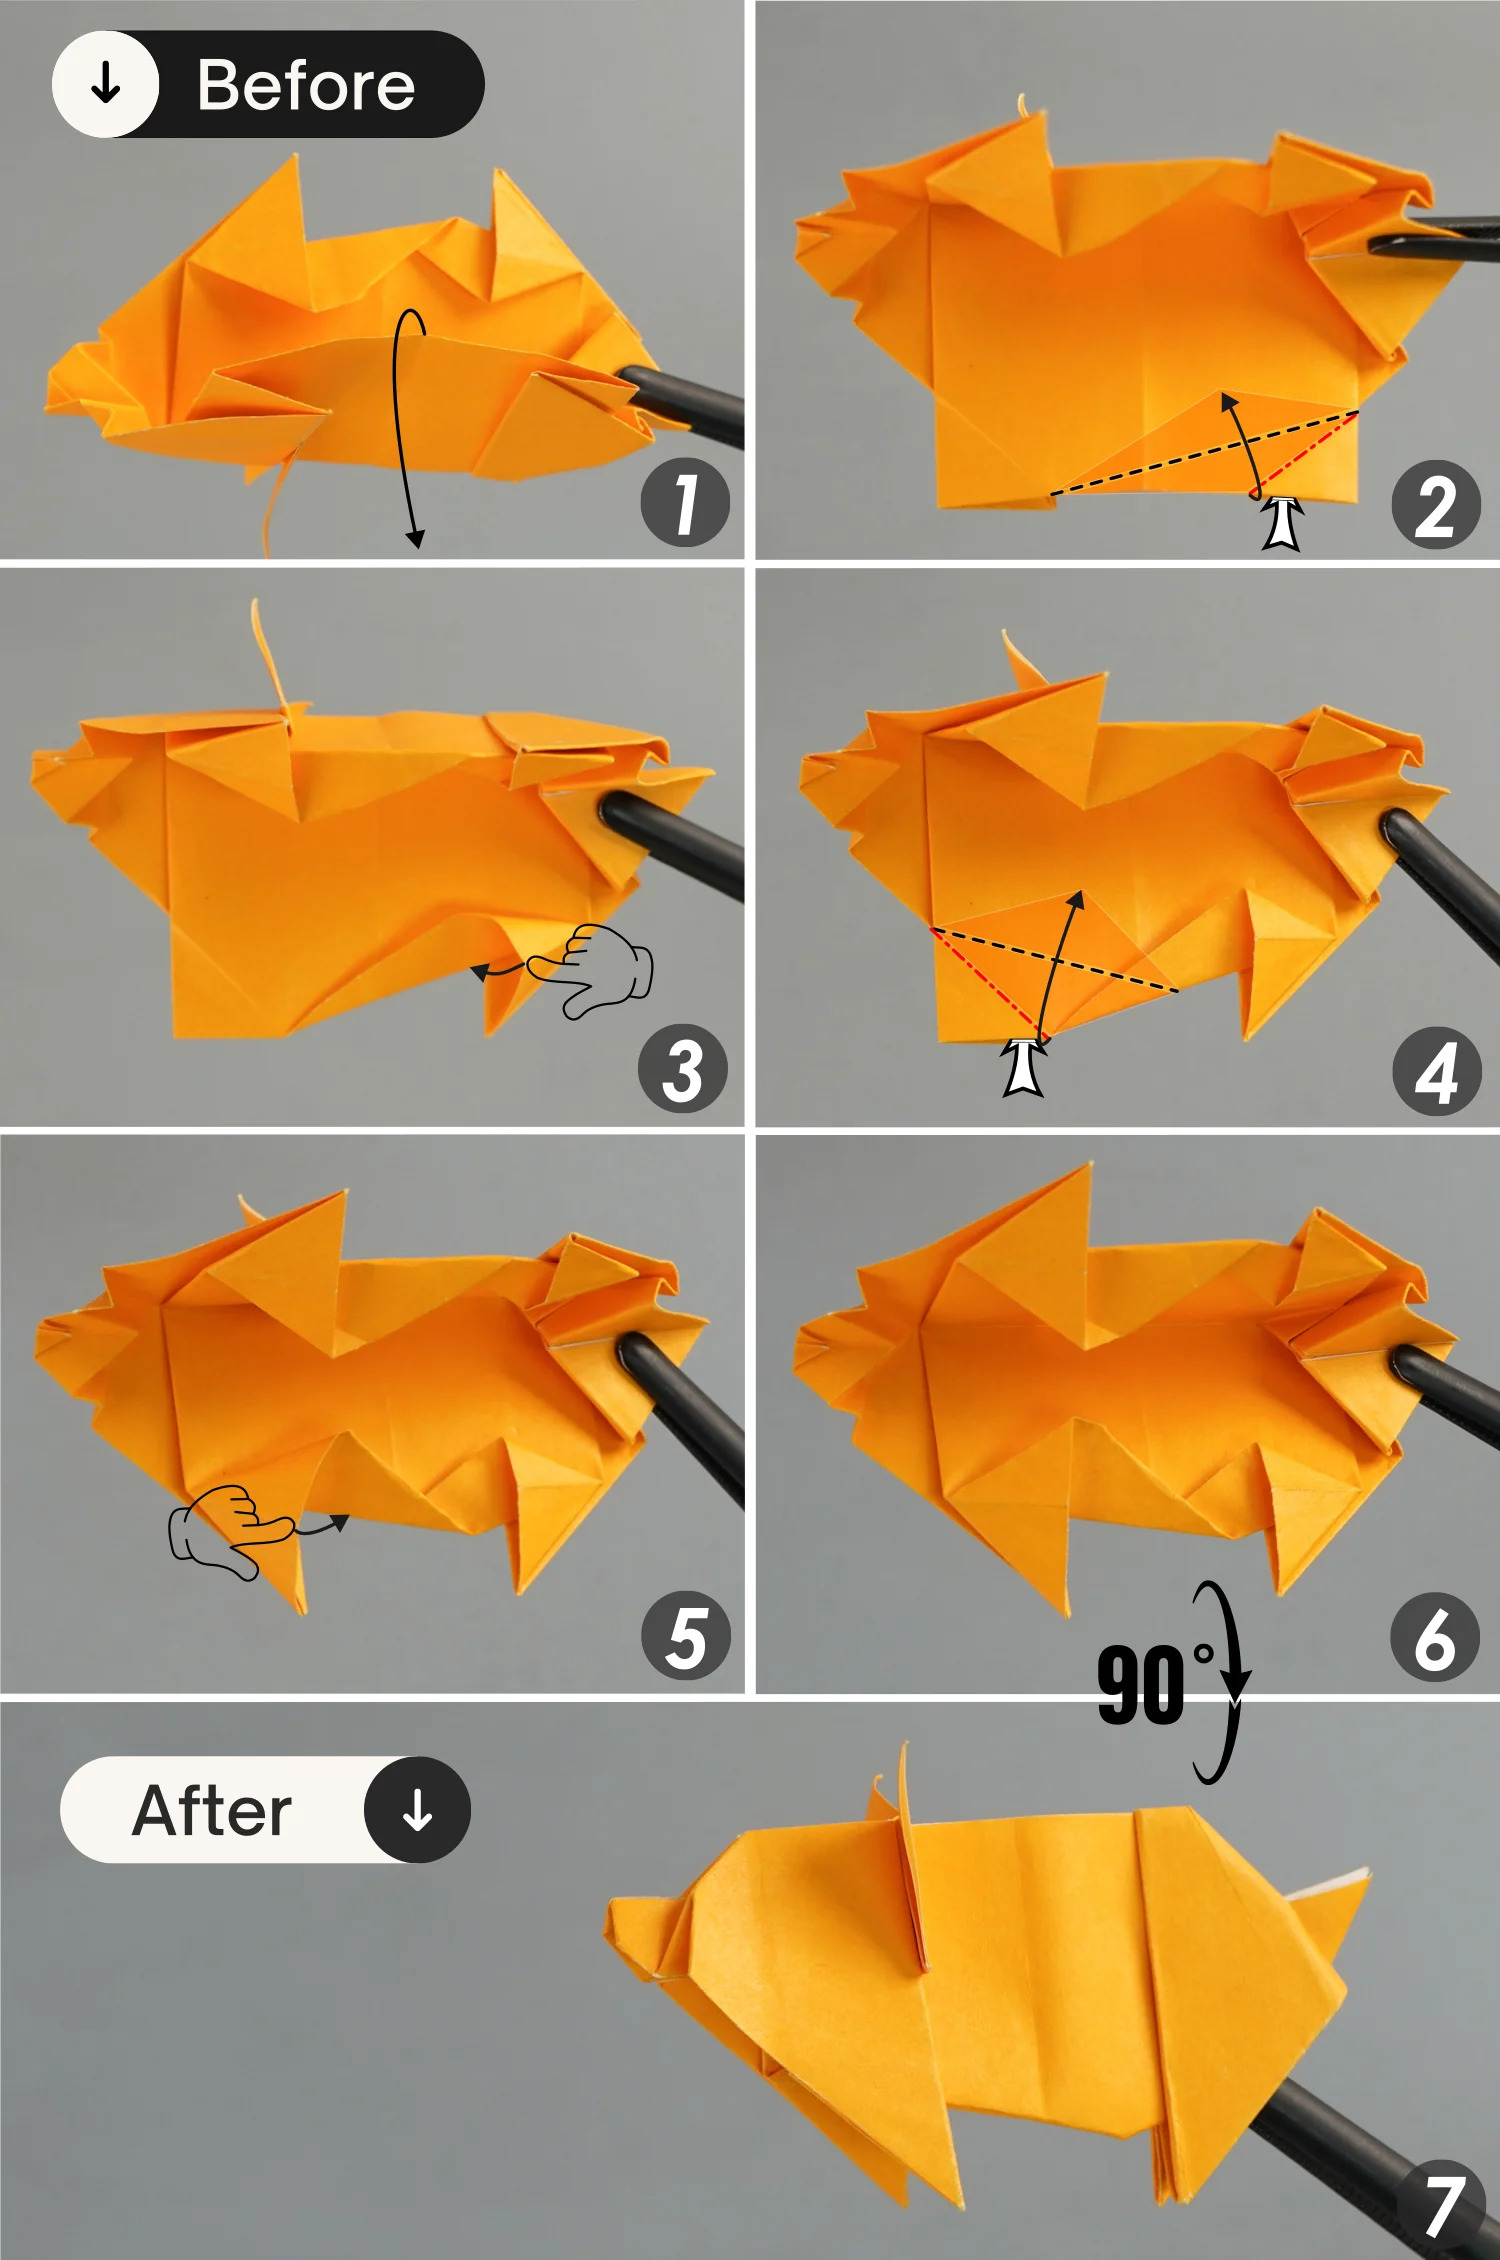
Fold down the top left point diagonally, then fold it up for a short section, and parallel to the first fold. Finally, unfold them.
Step 18
Rotate it 90 degrees from the back to the front, then expand the opening [pictures 1 and 2].
Next, bring up the left point along the creases indicated by the black dotted lines, and shape the creases that you made in the previous step of the second time, indicated by the red dotted lines [pictures 3 and 4].
After that, fold this left point a little toward the right side [pictures 5 and 6].
Finally, close this opening, flatten the fold to get the pig’s nose, then rotate the paper 90 degrees from front to back.
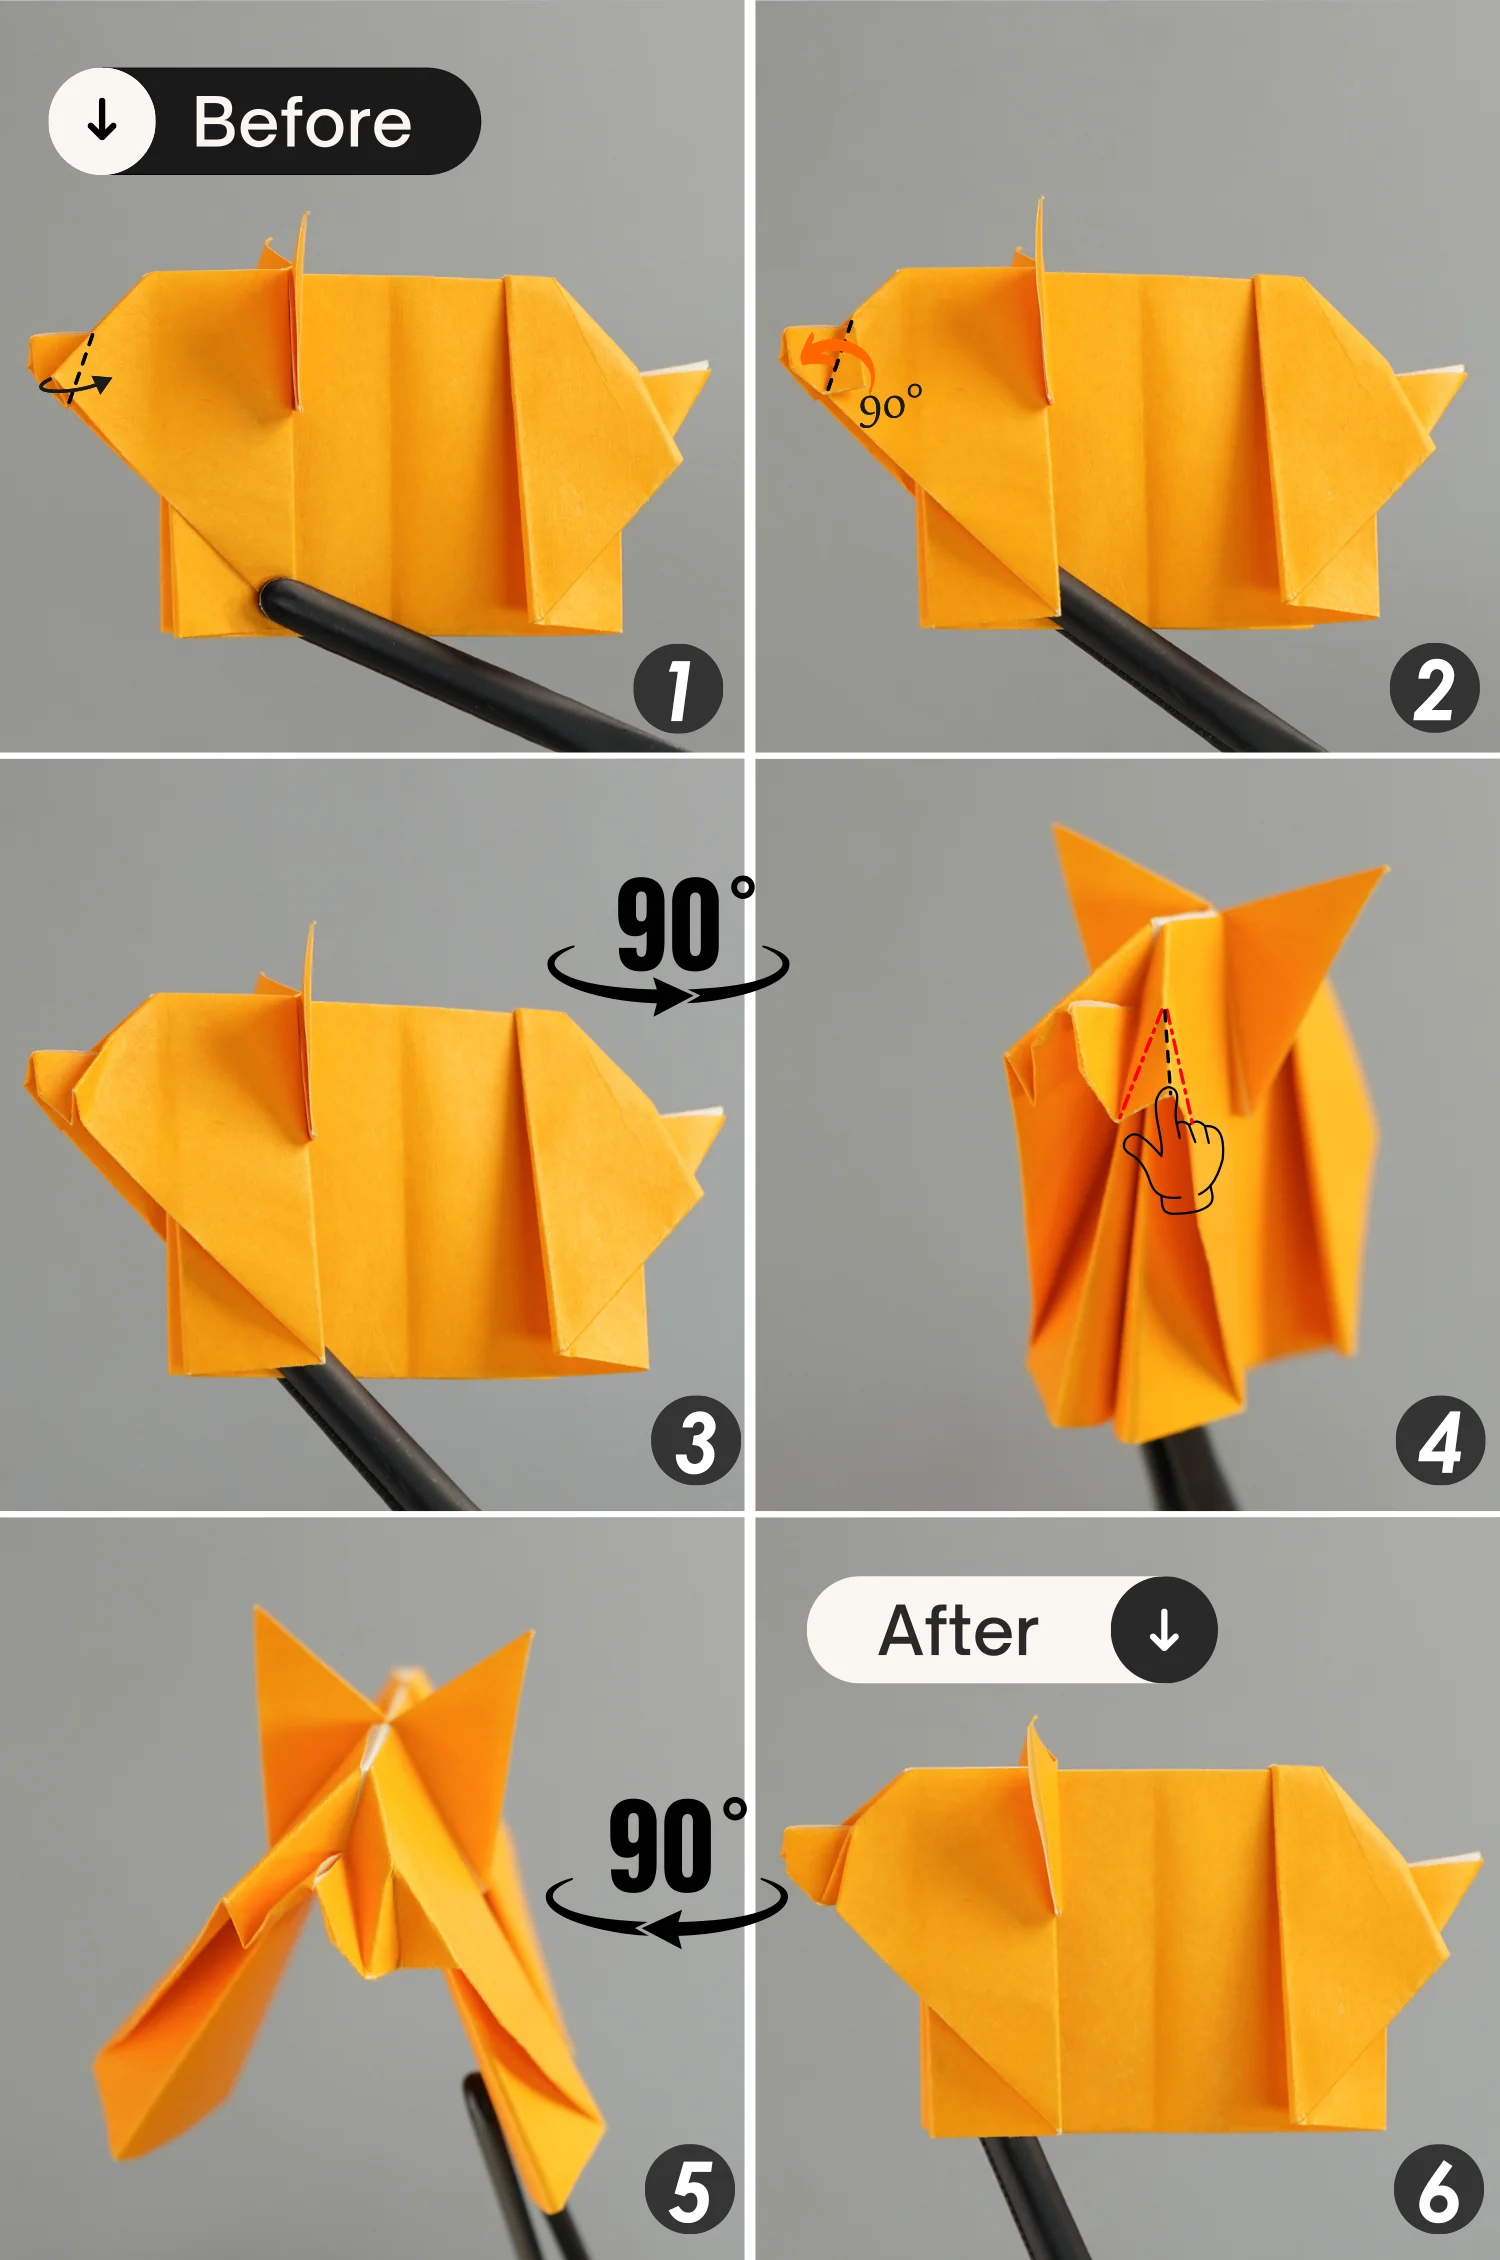
Step 19
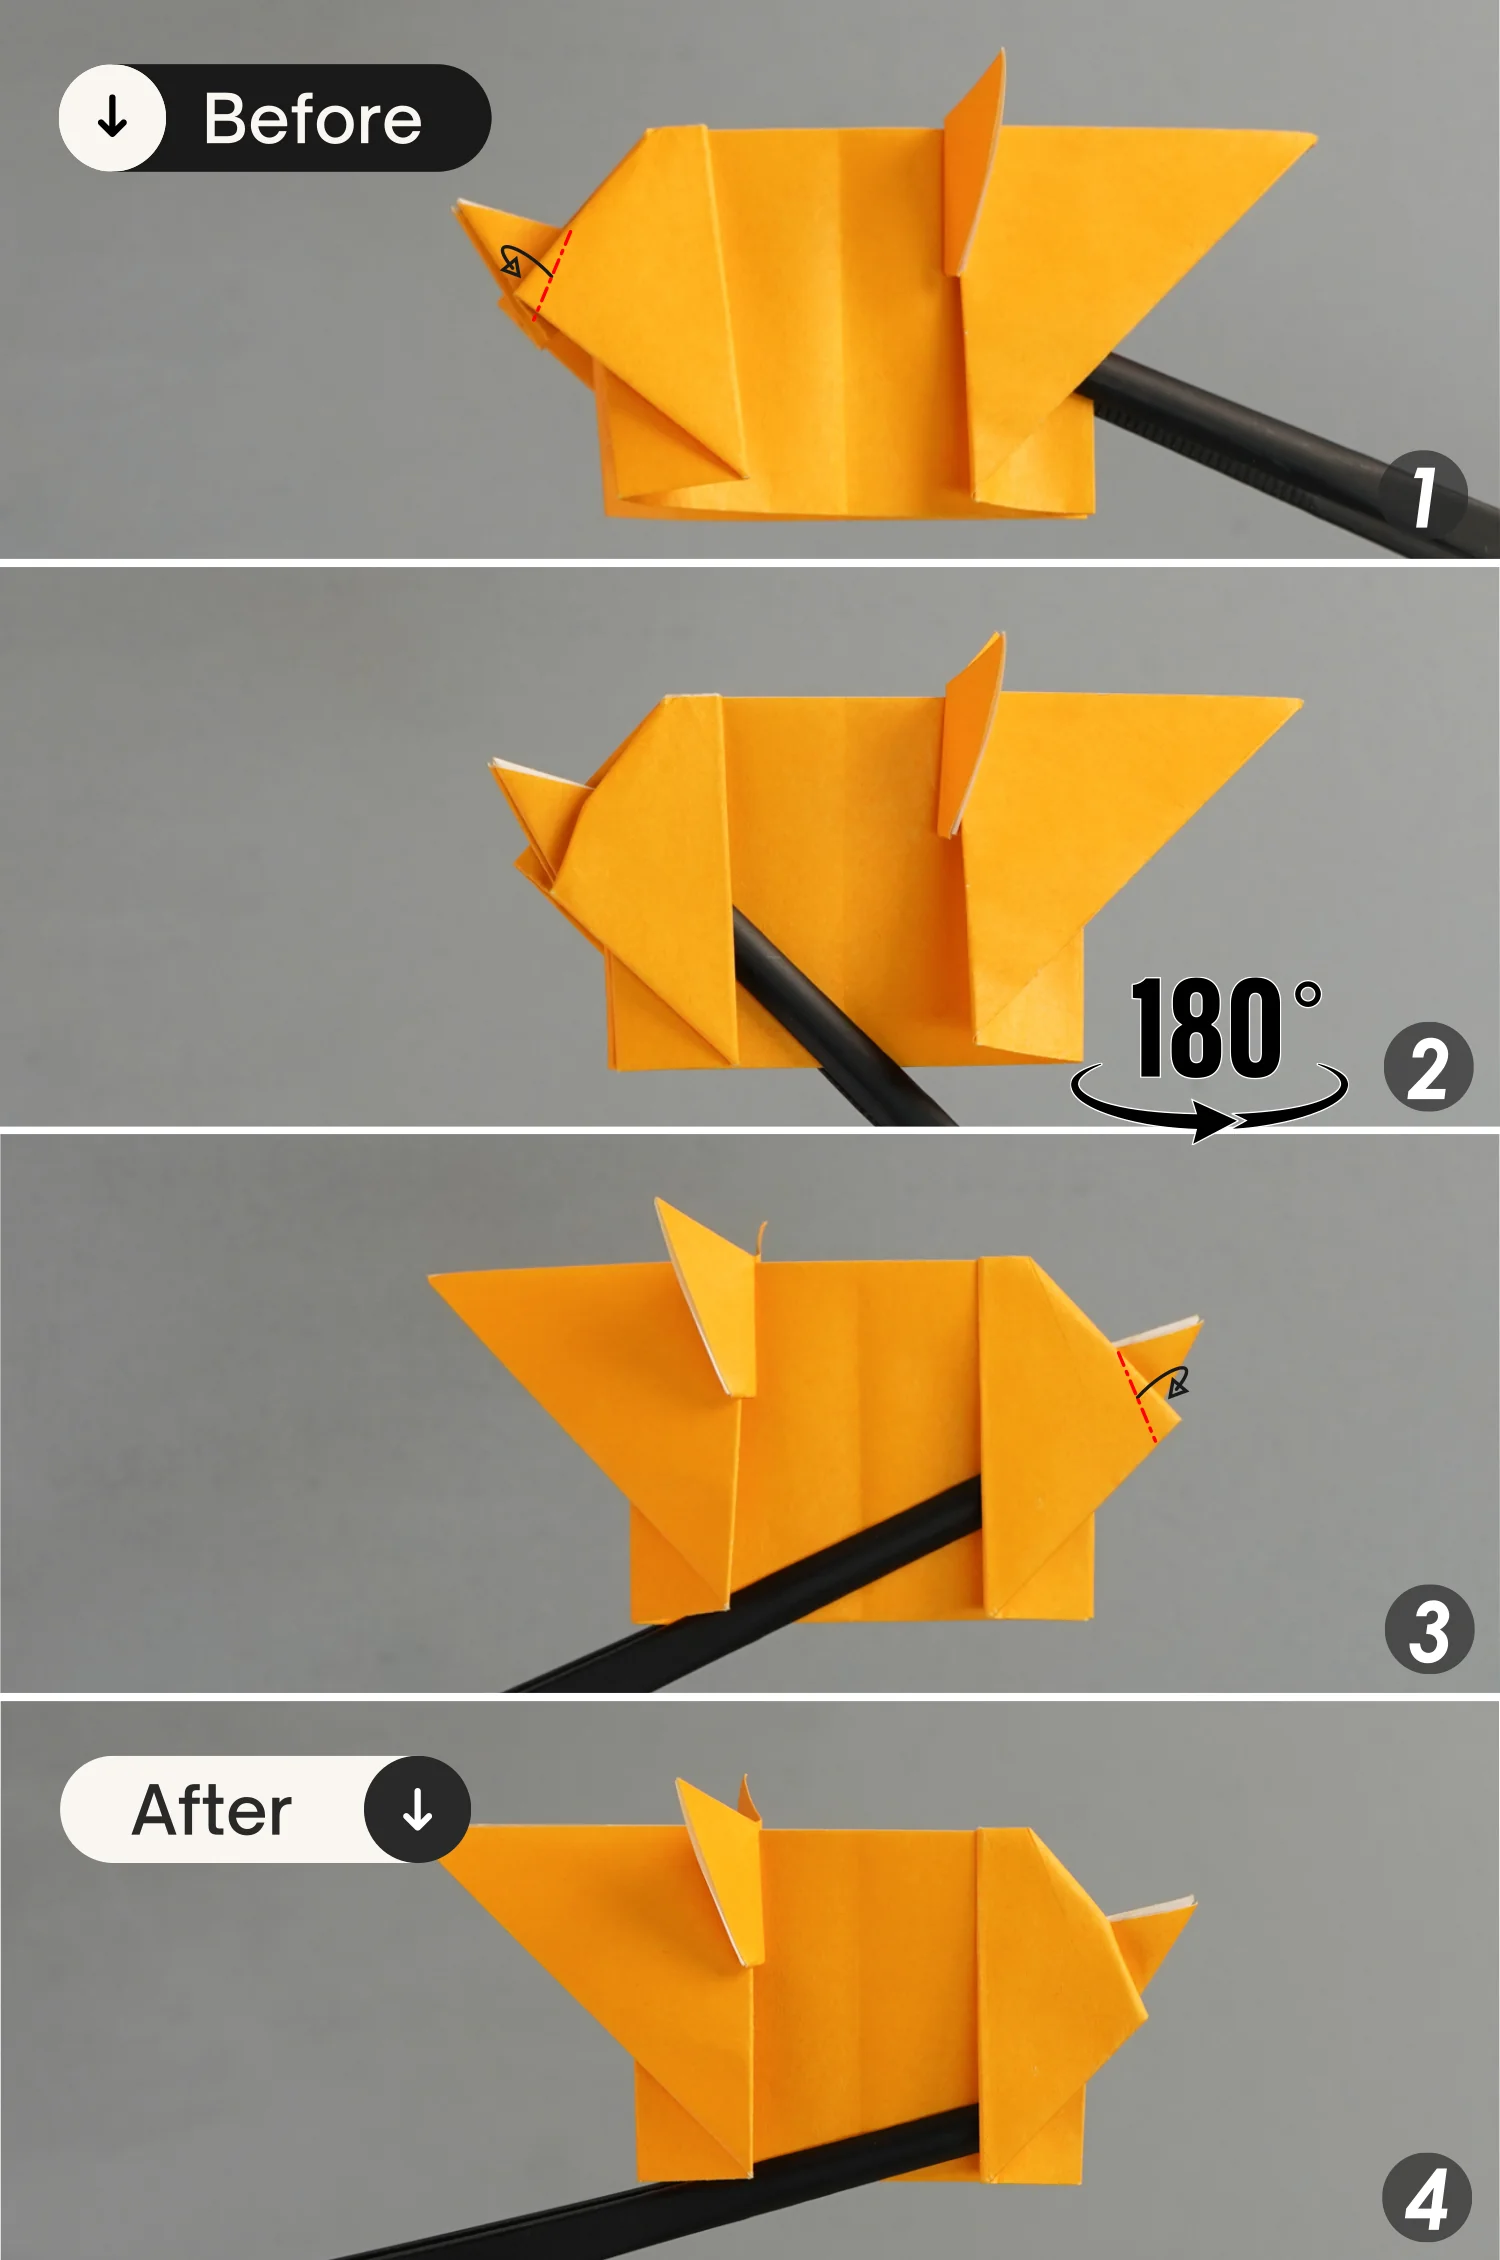
Fold this small corner a little to the right, then unfold it for only 90 degrees to make it stand [pictures 1 and 2].
Next, rotate the paper 90 degrees from left to right, and slightly press the tip, and shape the creases on both sides. Push the corner you just folded inwards, tucking it between the two layers of paper [pictures 3 and 4].
Finally, rotate it 90 degrees from right to left to lay it flat.
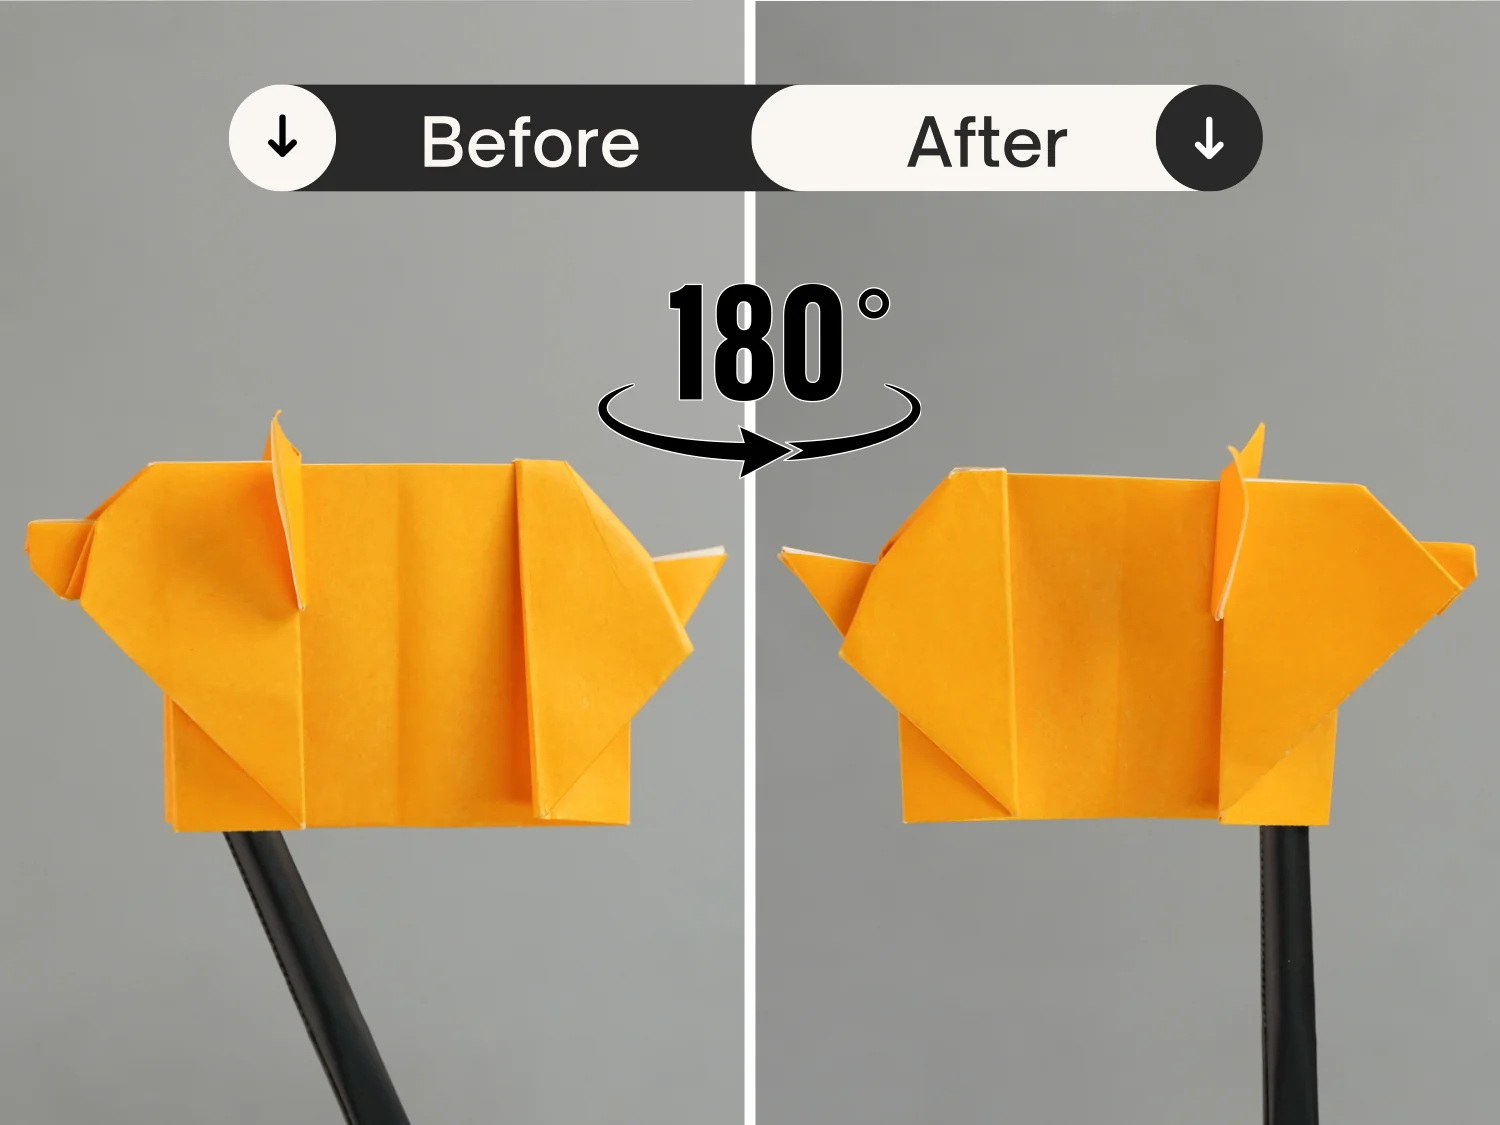
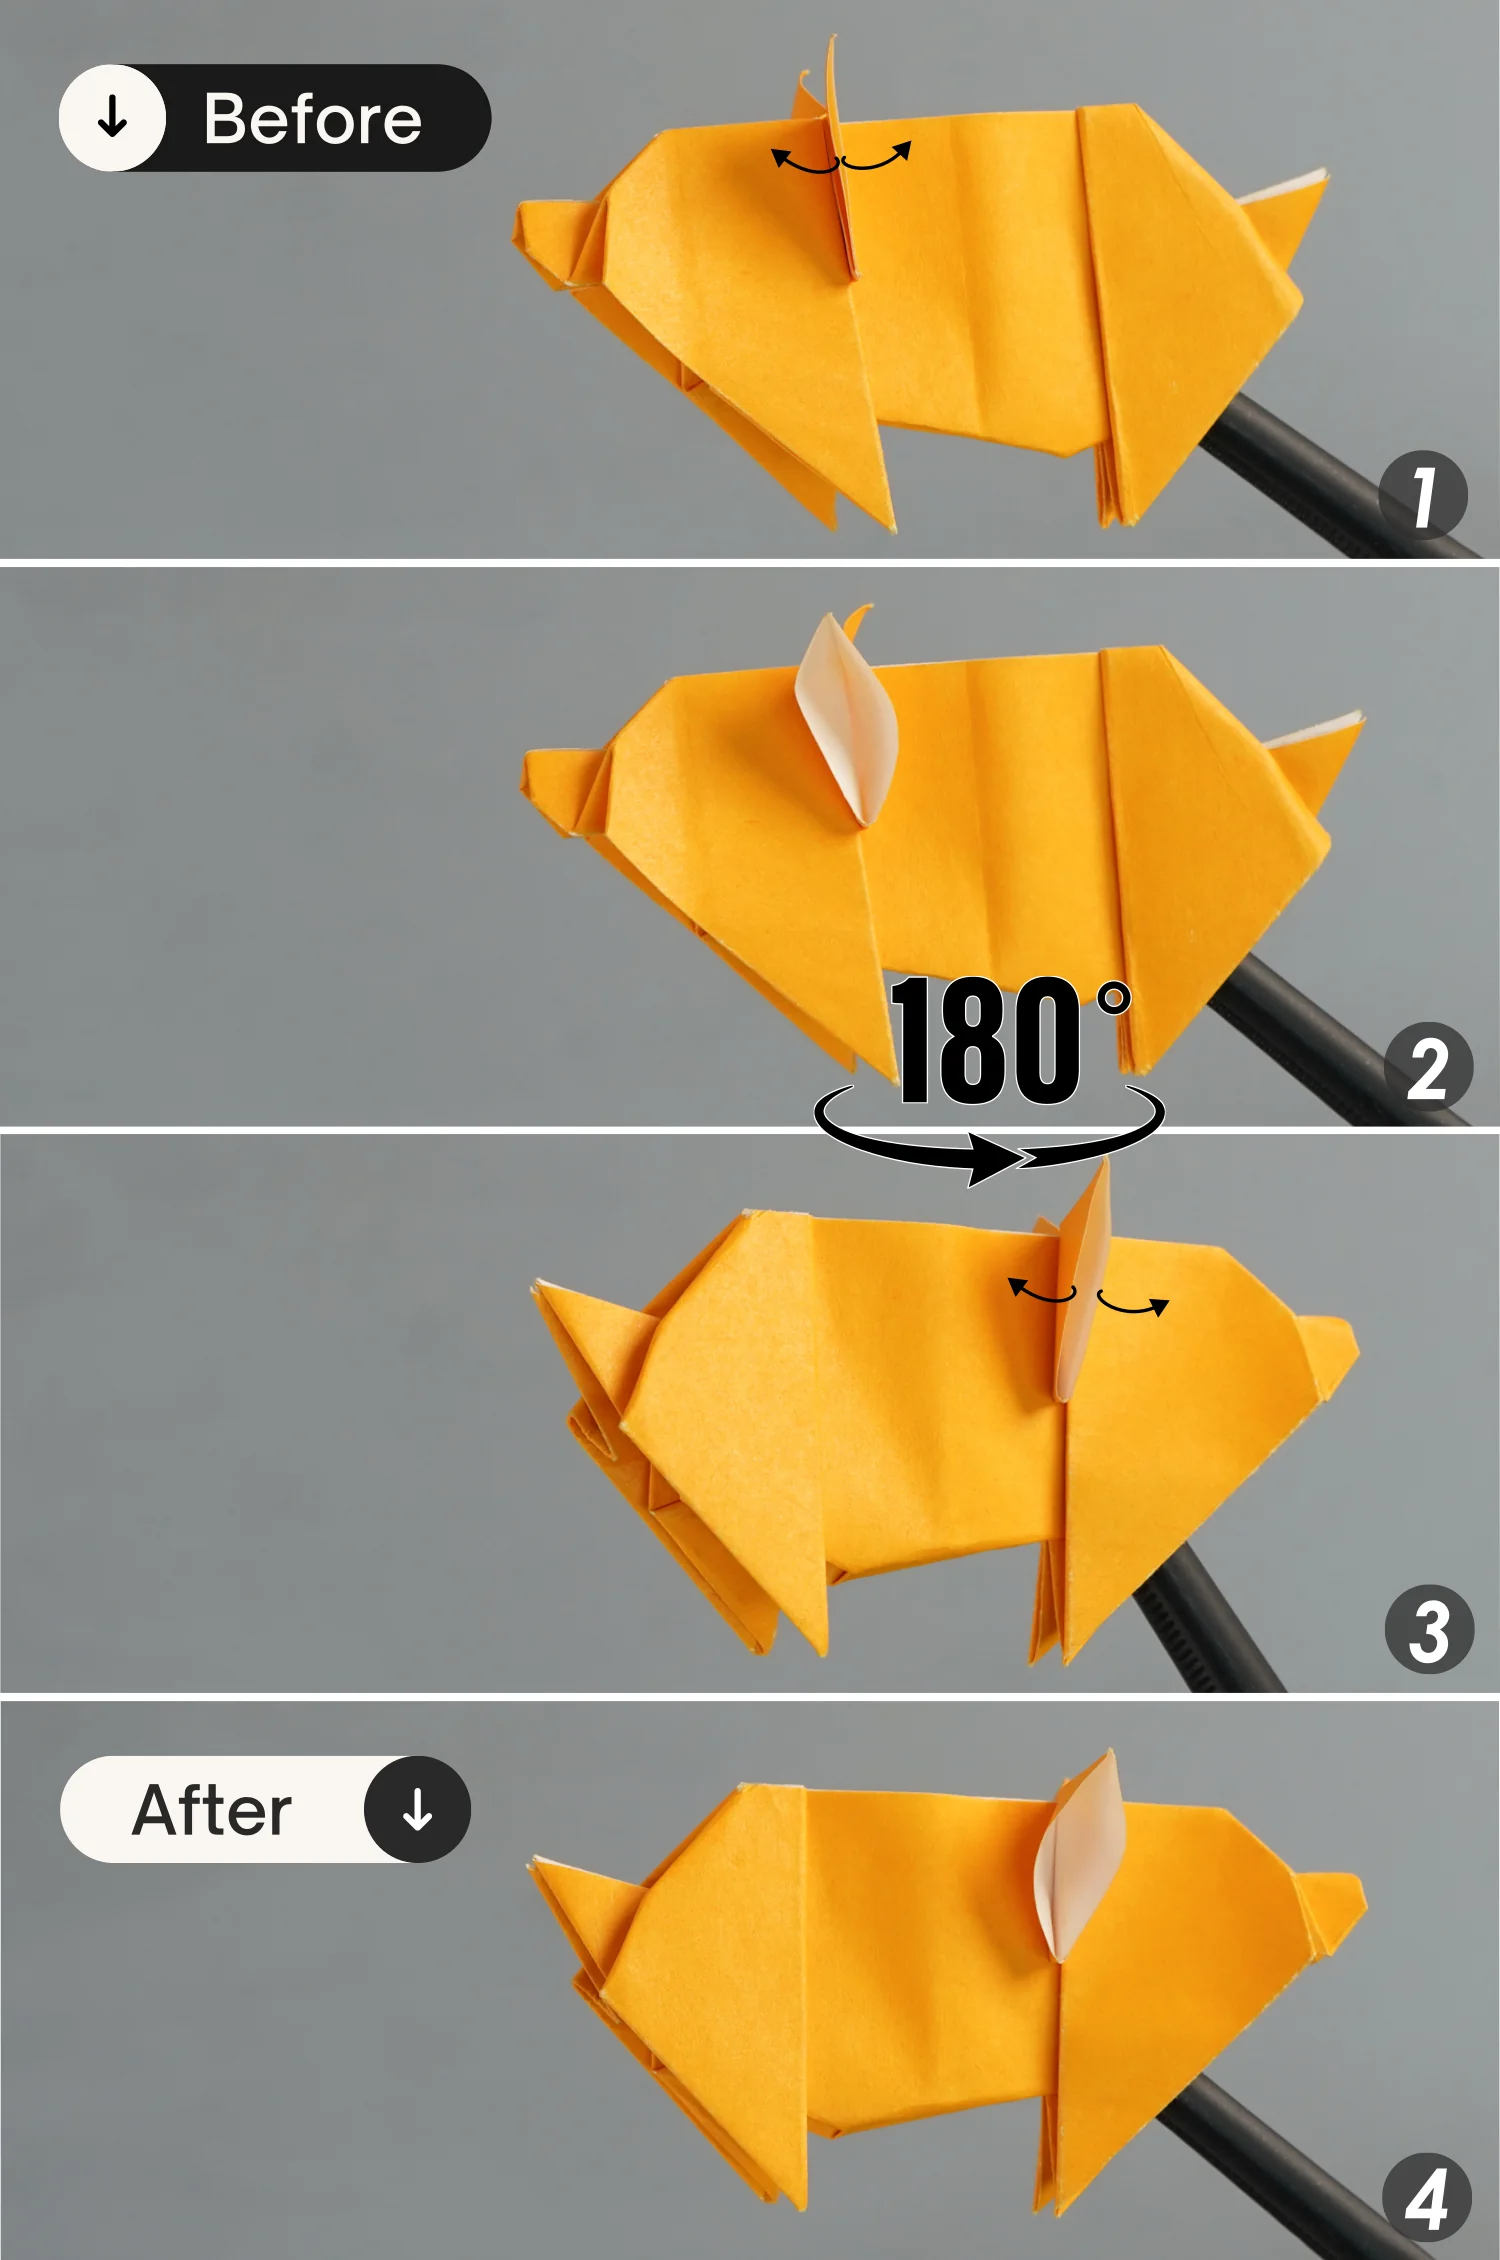
Step 20
Rotate it 180 degrees from the left to the right to flip it over.
Step 21
Just as you did in step 19, fold this small corner on this side a little to the left, then unfold it for only 90 degrees to make it stand [pictures 1 and 2].
Next, rotate the paper 90 degrees from right to left, and slightly press the tip, and shape the creases on both sides. Push this corner you just folded inwards, tucking it between the two layers of paper [pictures 3 and 4].
Finally, rotate it 90 degrees from left to right to lay it flat.

Step 22
Fold the bottom left and right points diagonally, and unfold them. Then flip the paper over from left to right, and fold the bottom left and right points up diagonally as well, crease well, and unfold them.
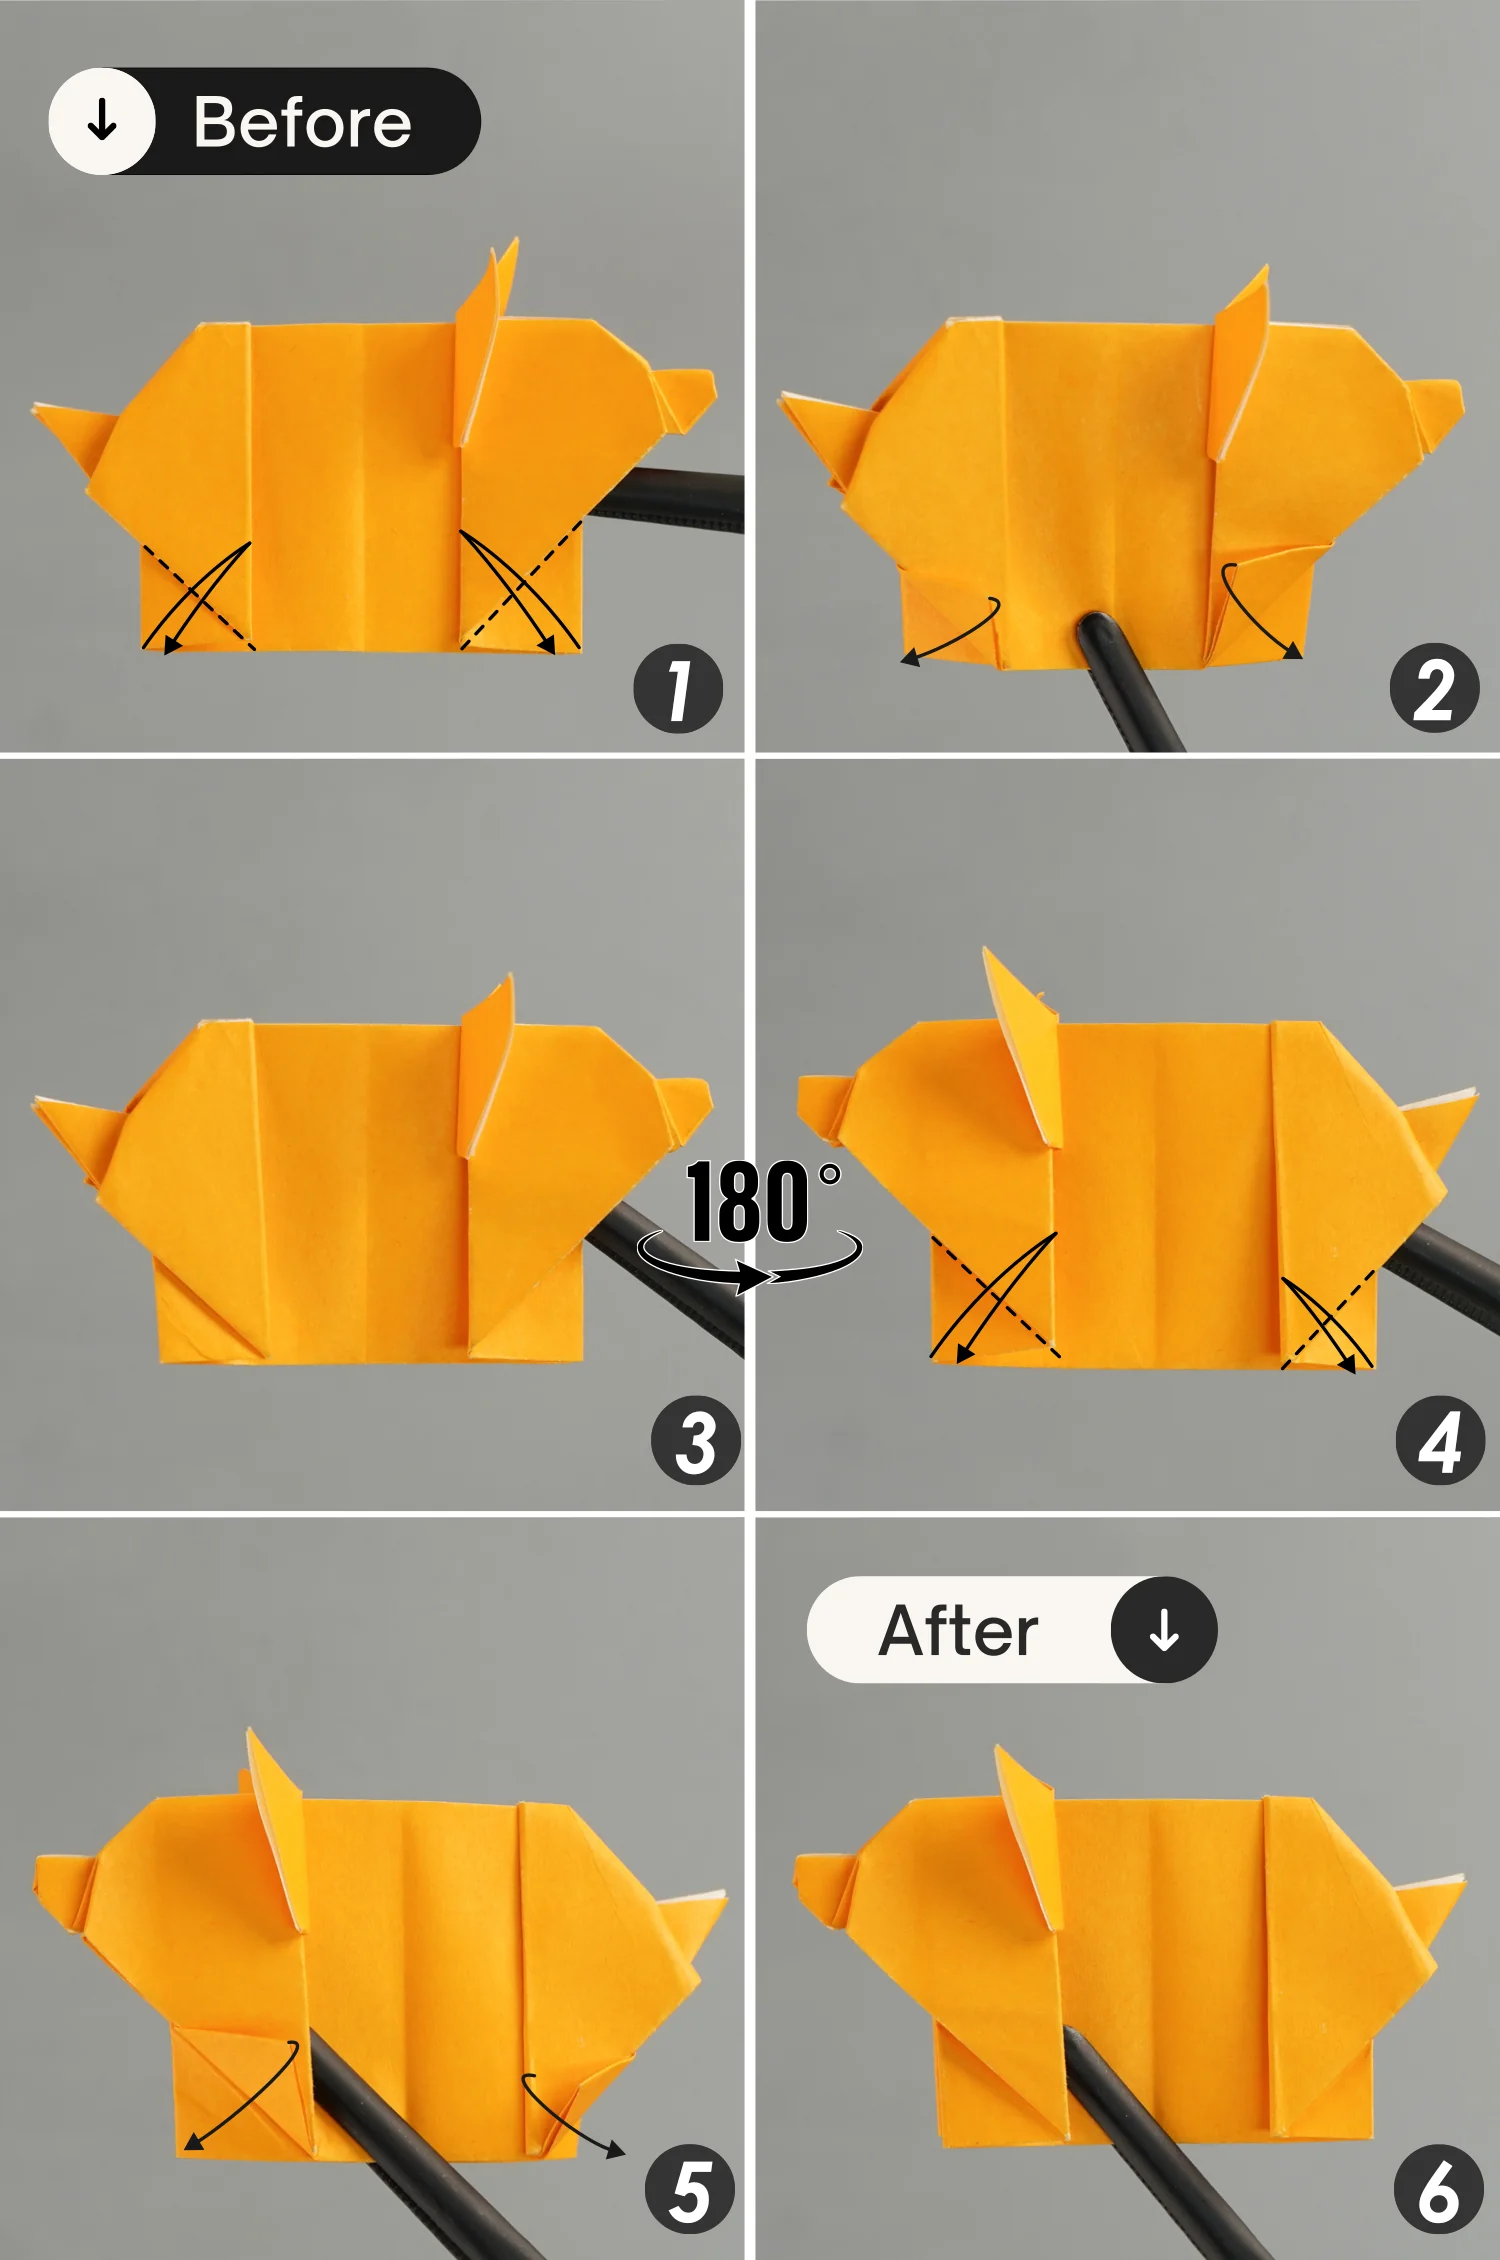
Step 23
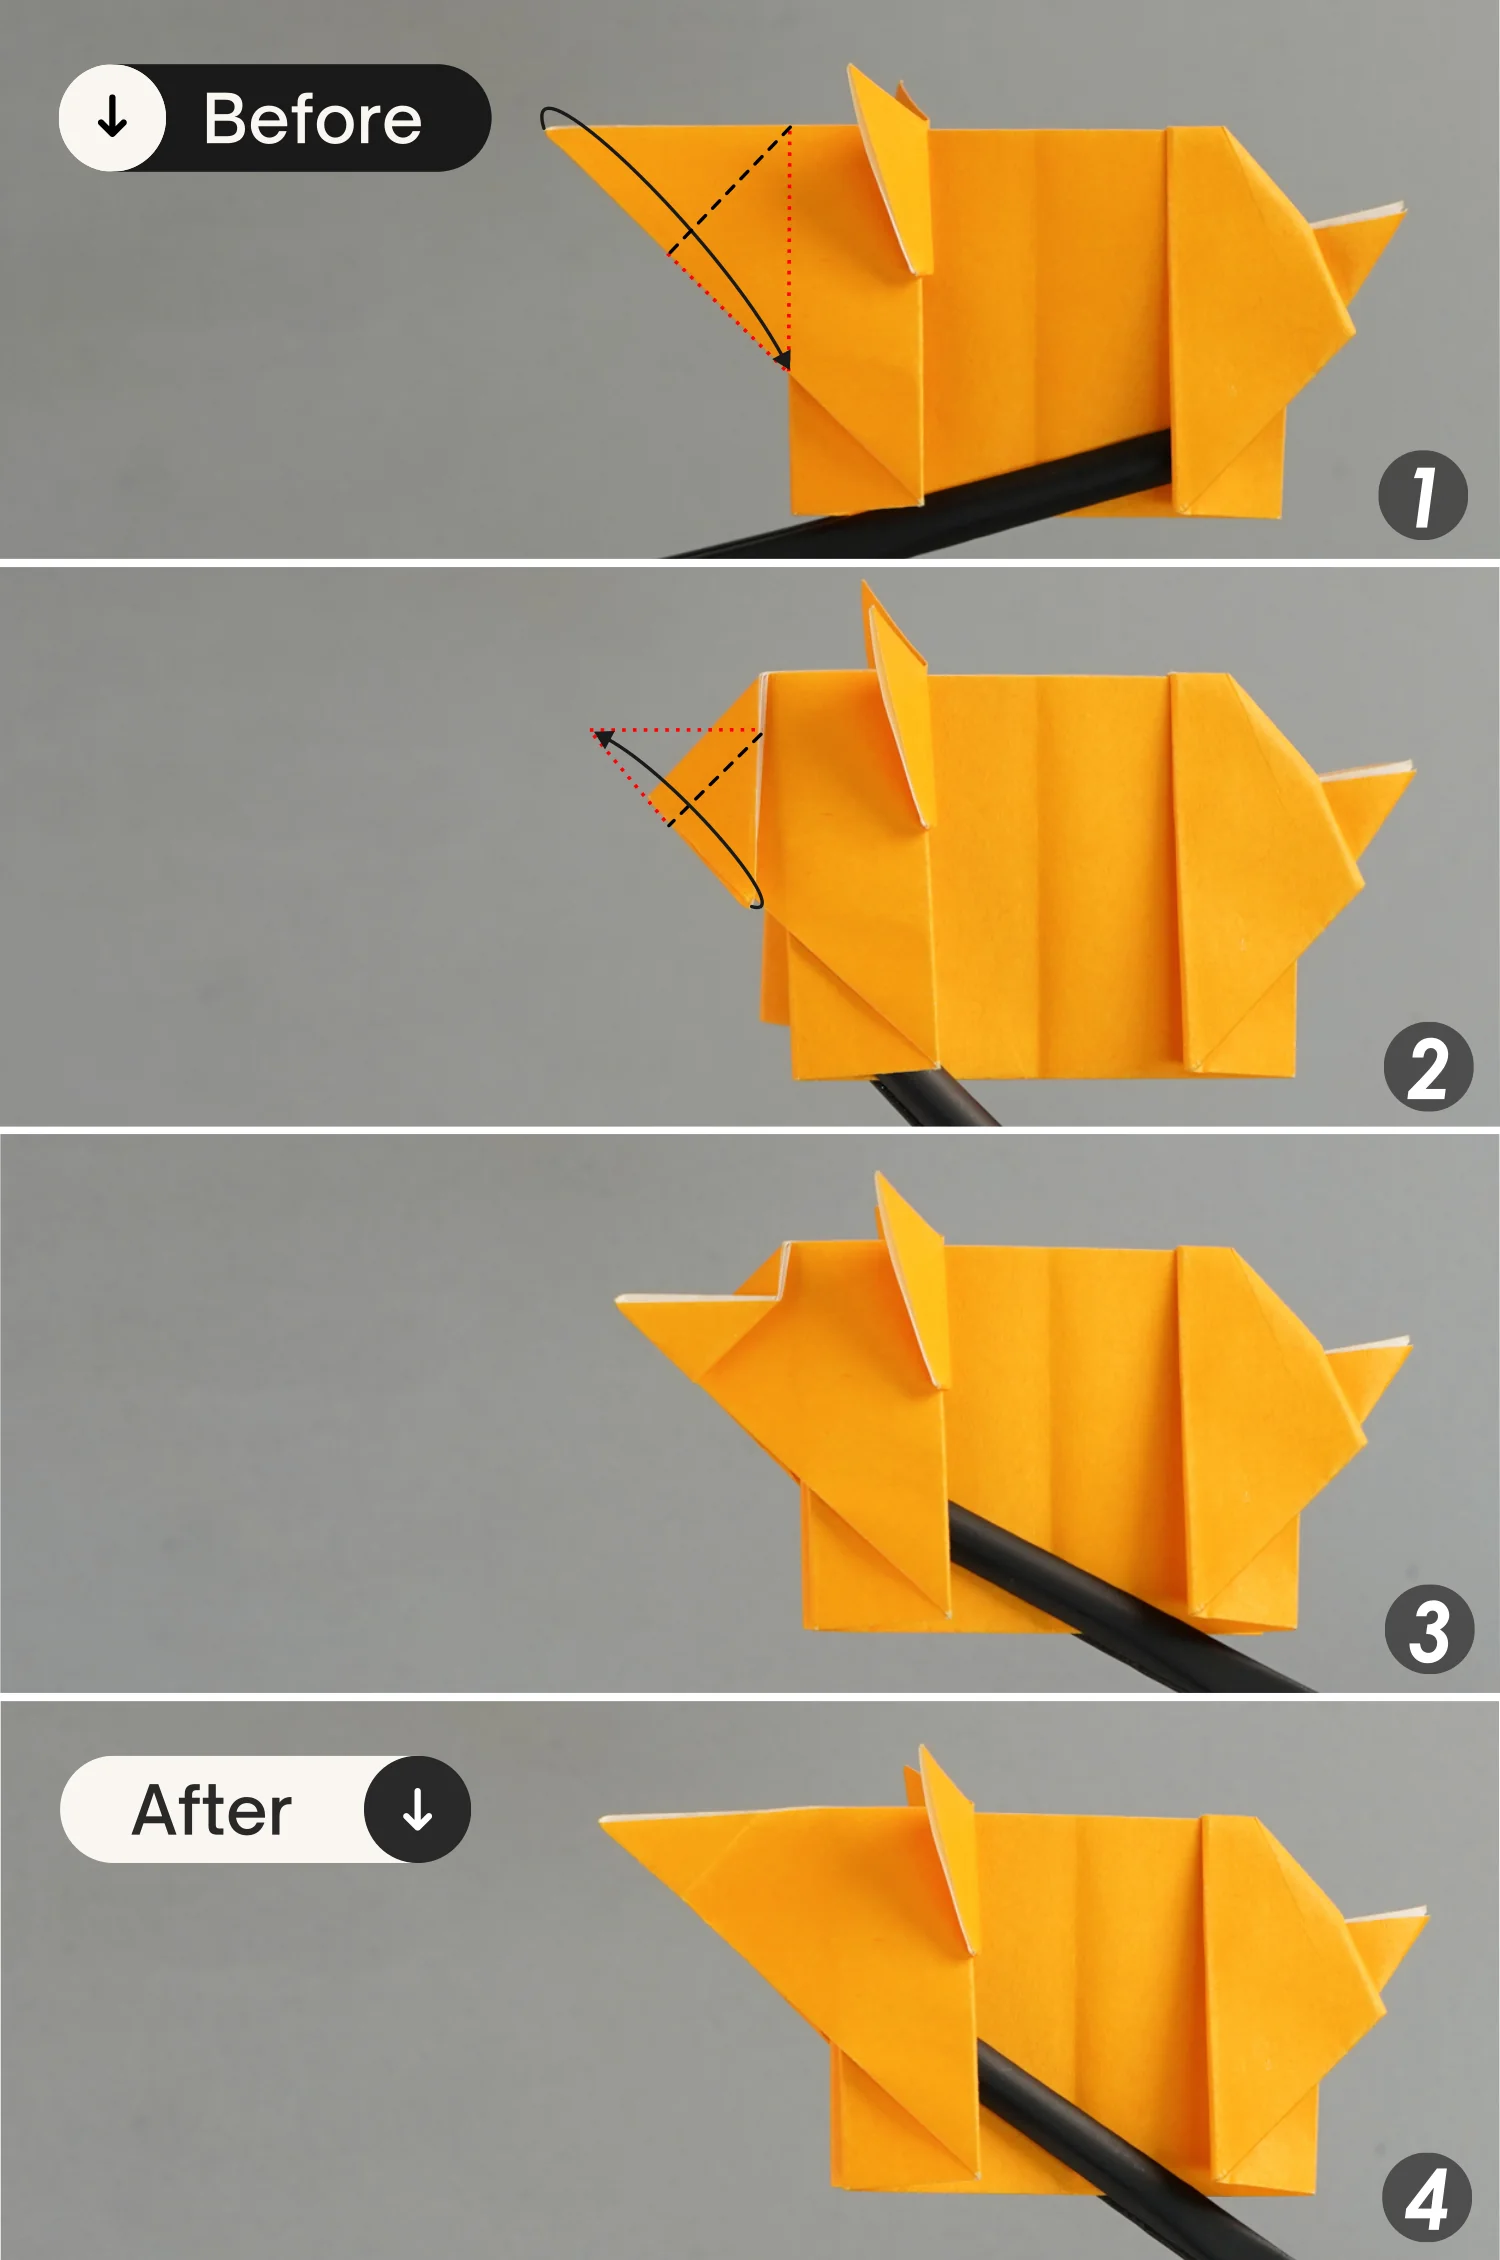
Bring up the top layer, making its back side face up, then press down the top right triangle (the shadow area) along the black dotted line, and squash the top right corner [pictures 1 to 3].
Repeat this for the left side, fold down the triangle along the black dotted line, and squash the corner [pictures 4 to 6].
Step 24
Similarly, press down the front layer, fold up the bottom right triangle (shadow area) along the black dotted line, then squash the corner [pictures 1 to 3].
Repeat this for the left side, fold up the bottom left triangle, then squash that corner [pictures 4 to 6].
Finally, rotate the paper 90 degrees from the front to the back.
Step 25
Slightly open its ear, then rotate the paper 180 degrees from left to right, and open the other ear on this side as well.
What’s Next
This is the final shape of an origami pig, if you are an animal lover, now you can explore our other origami animal instructions, to create an origami farm-themed display. Happy folding!
Other Origami Animal Ideas