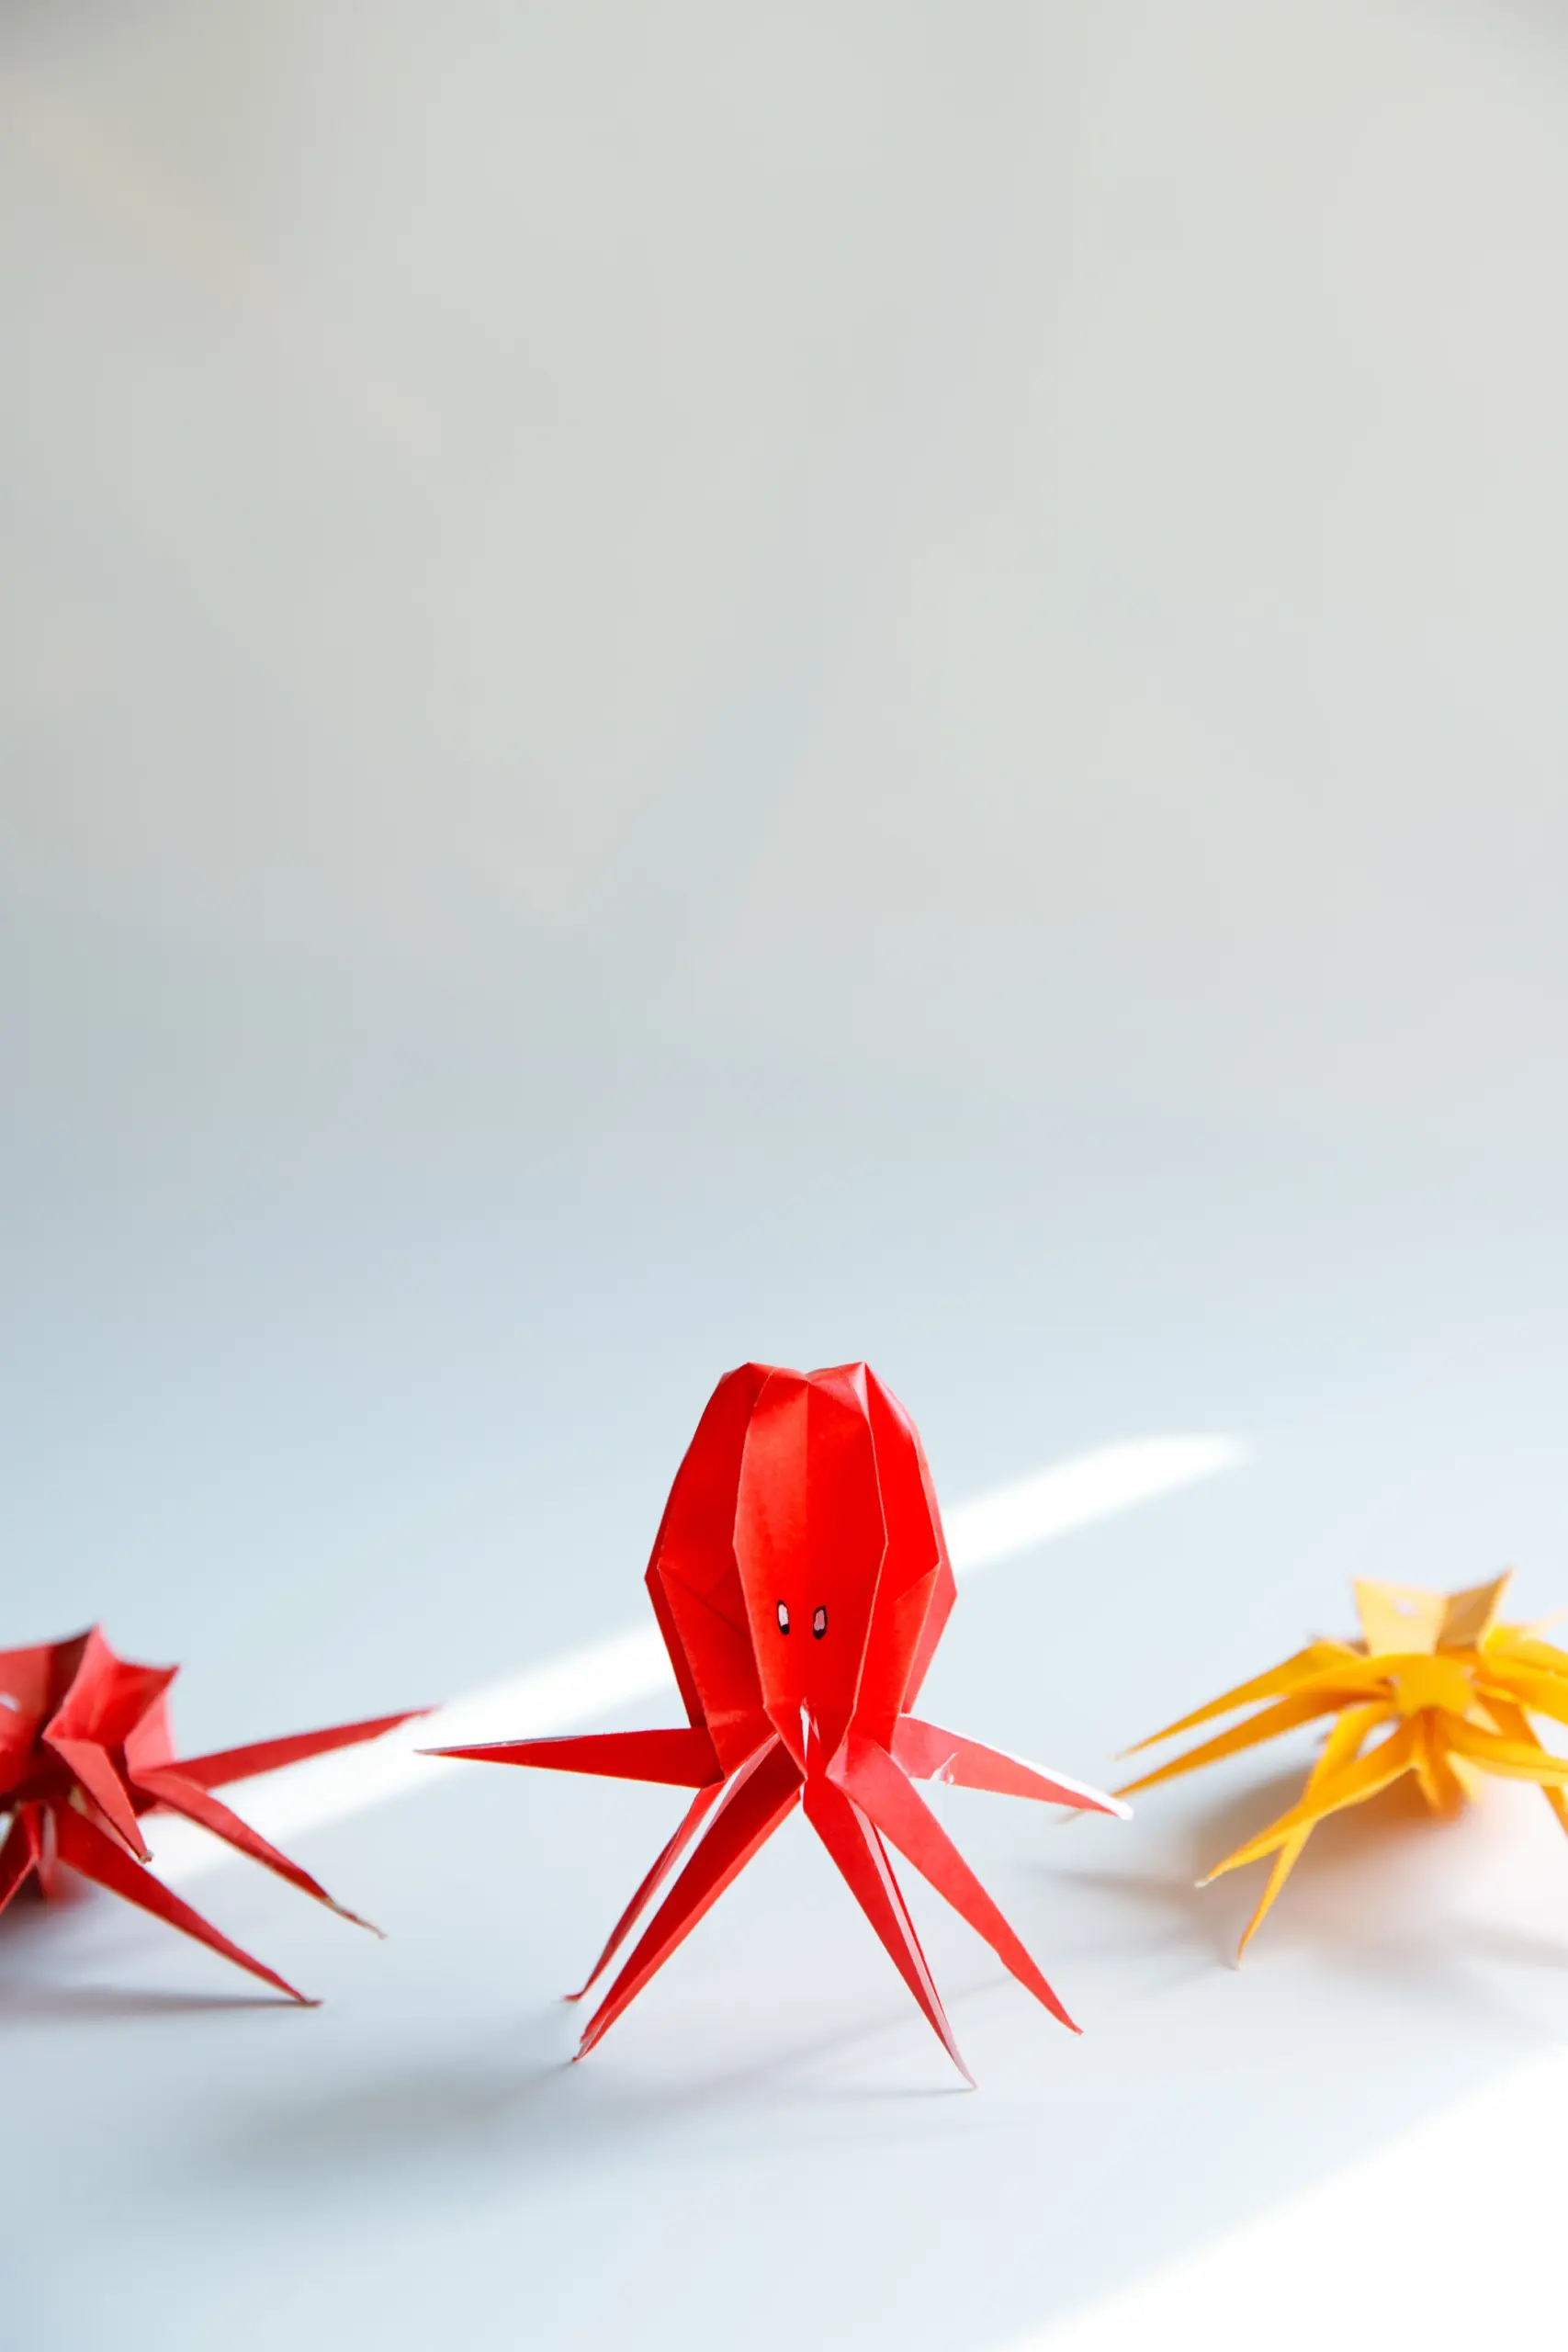
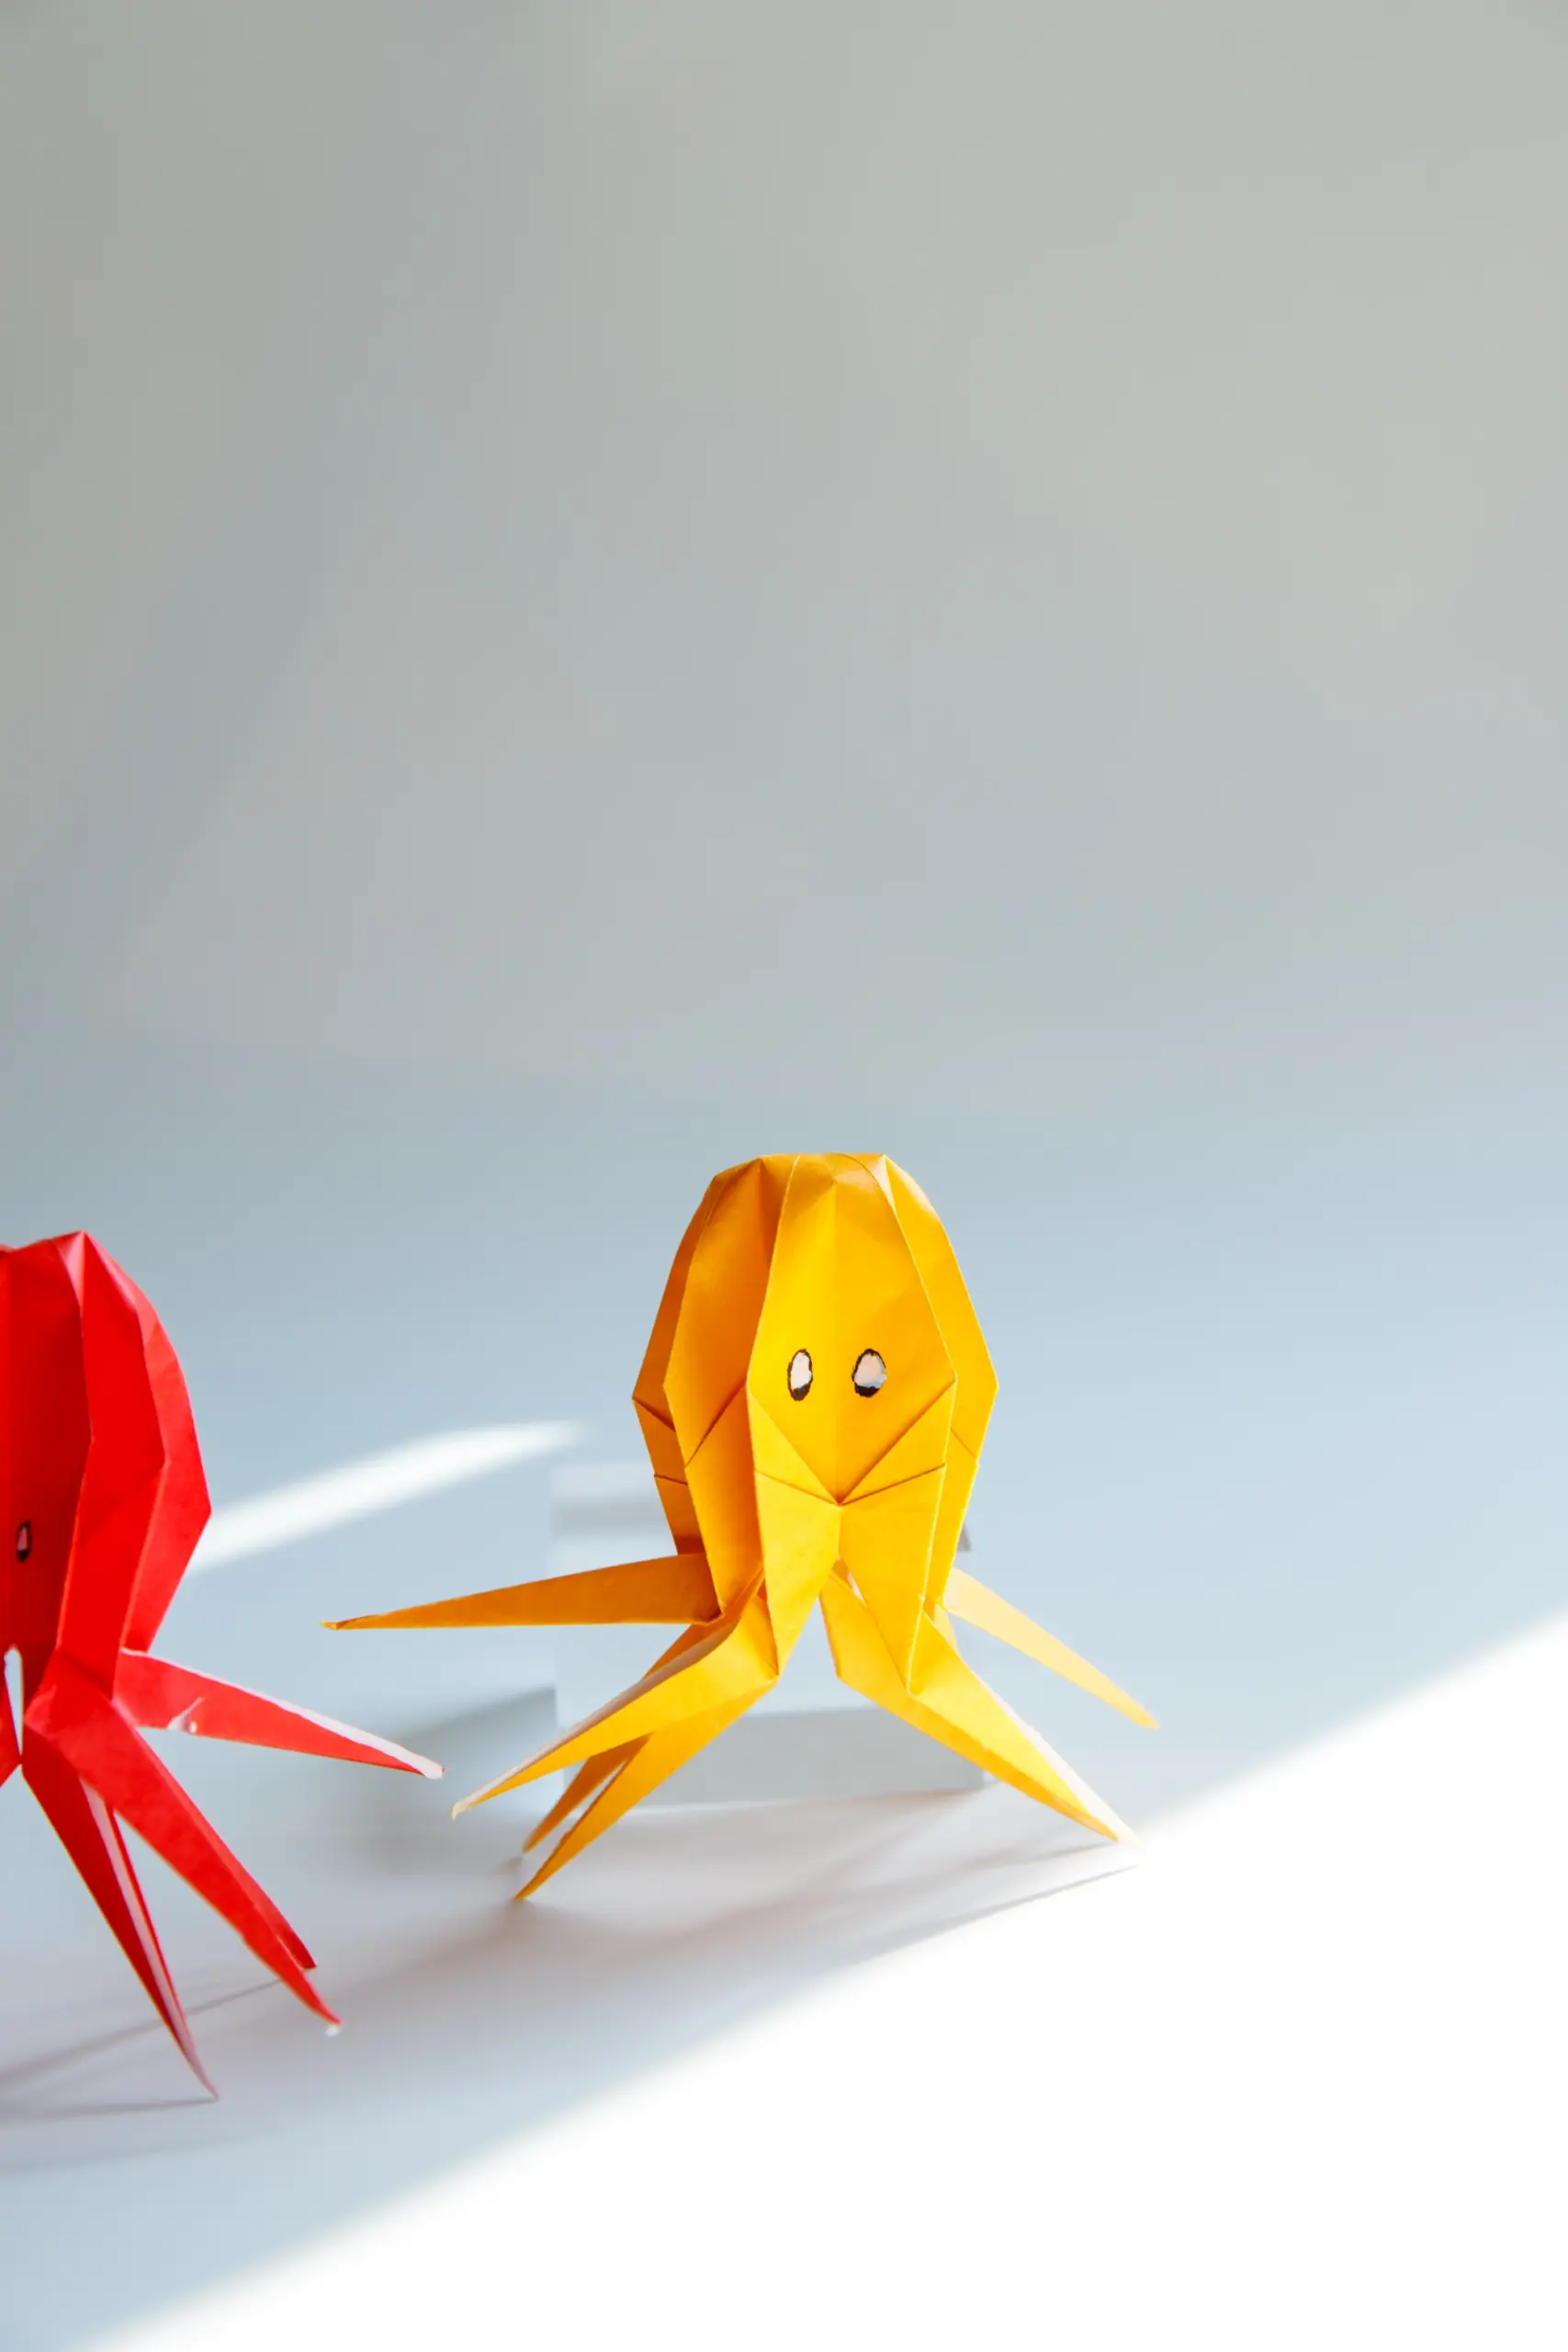
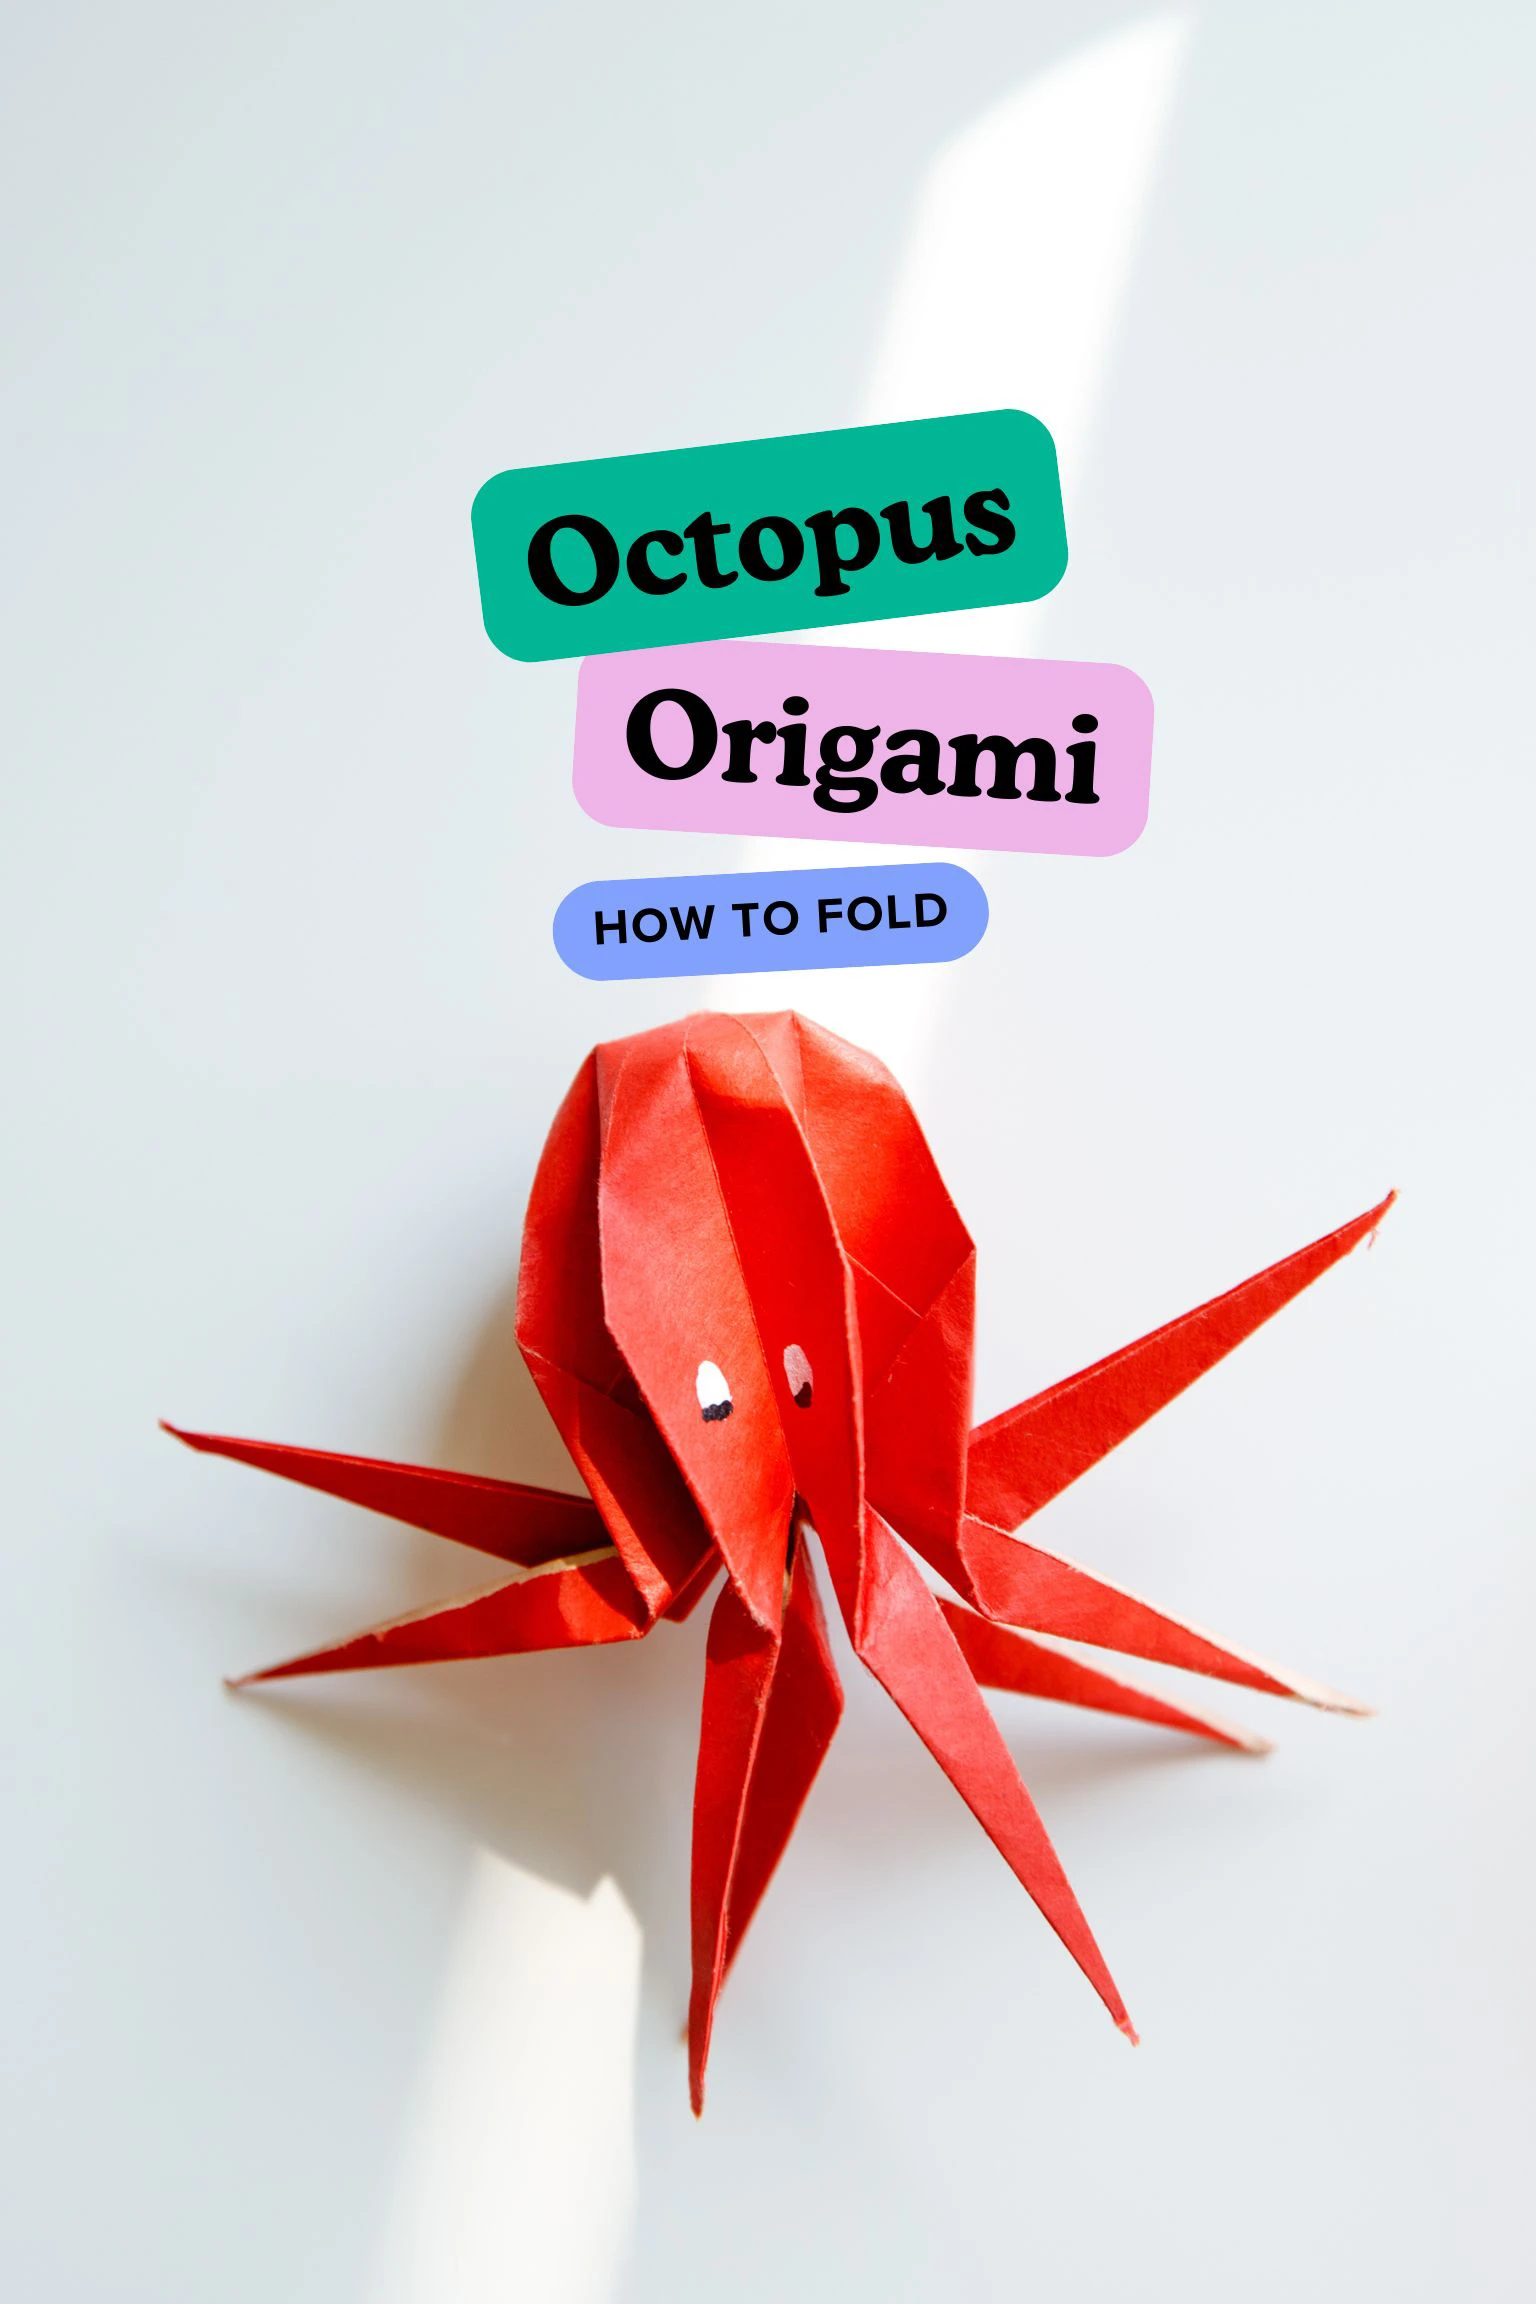
If you’re looking for something new, this origami octopus offers a unique experience. Unlike the common animals we often see in life or cartoons—such as cats, dogs, rabbits, or bears, an octopus is rare to see. However, the octopus is also very popular due to its distinctive appearance, featuring a big head and many long tentacles. This makes it look really special.
This origami octopus is made with a Frog Base, and no special or complex origami skills are required!
If you are new to origami, start here from our beginner guide to know the basics and how to read the step-by-step instructions.
- Folding time: 15 minutes
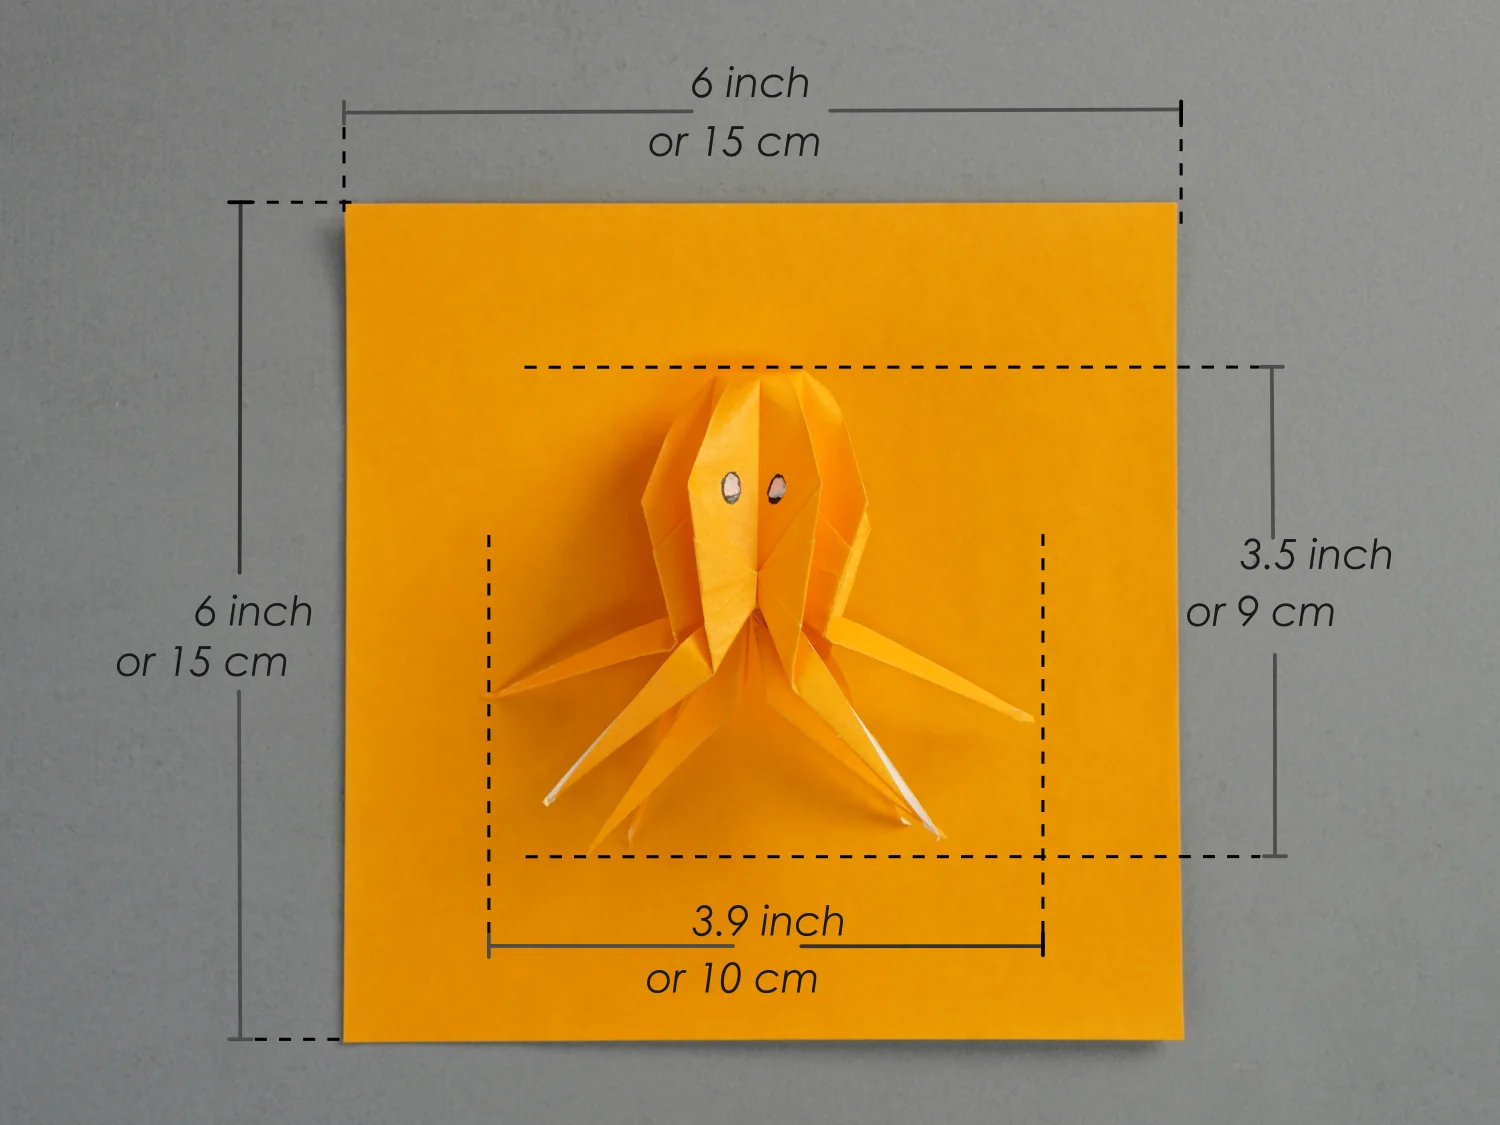
- Paper: 15×15 cm
- Difficulty: Middle
Material
Prepare a piece of 15×15 cm origami square paper, with different colors on each side, to create a 9×10 cm origami octopus. Choose any other paper in your preferred color to better match your style.
Step by Step Instructions
Step 1
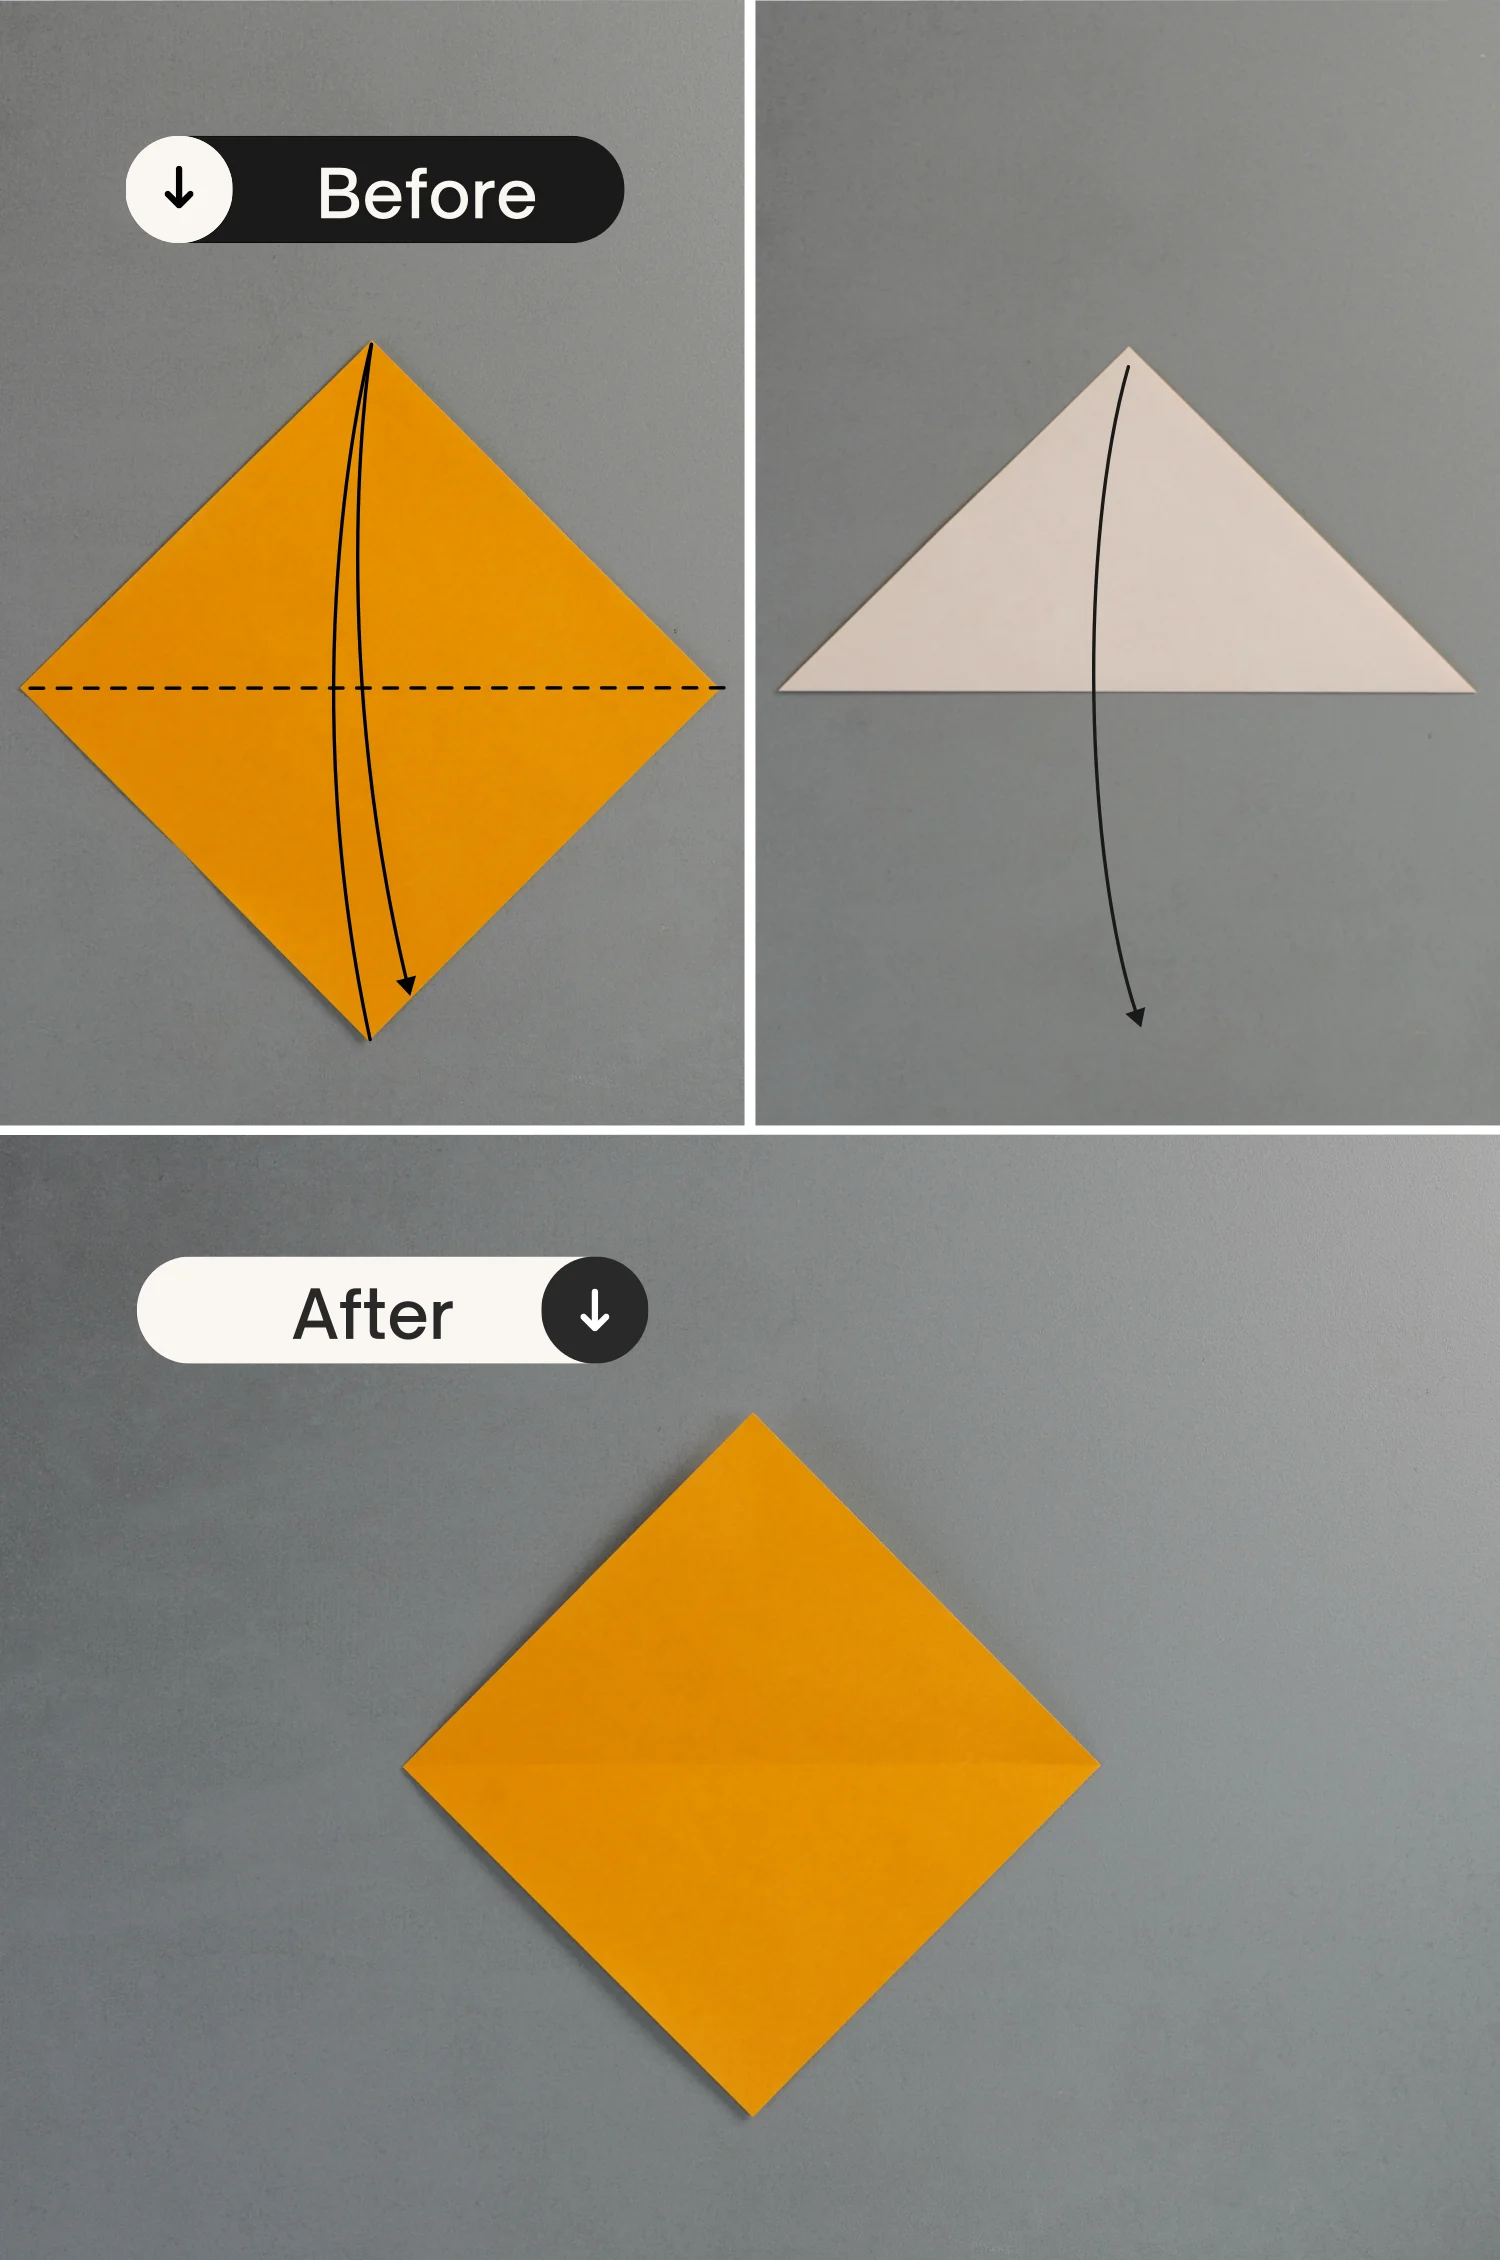
Place the paper with the desired display color side up to begin folding, fold it in half horizontally, and unfold it.
Step 2
Fold it in half vertically and unfold it.
Step 3
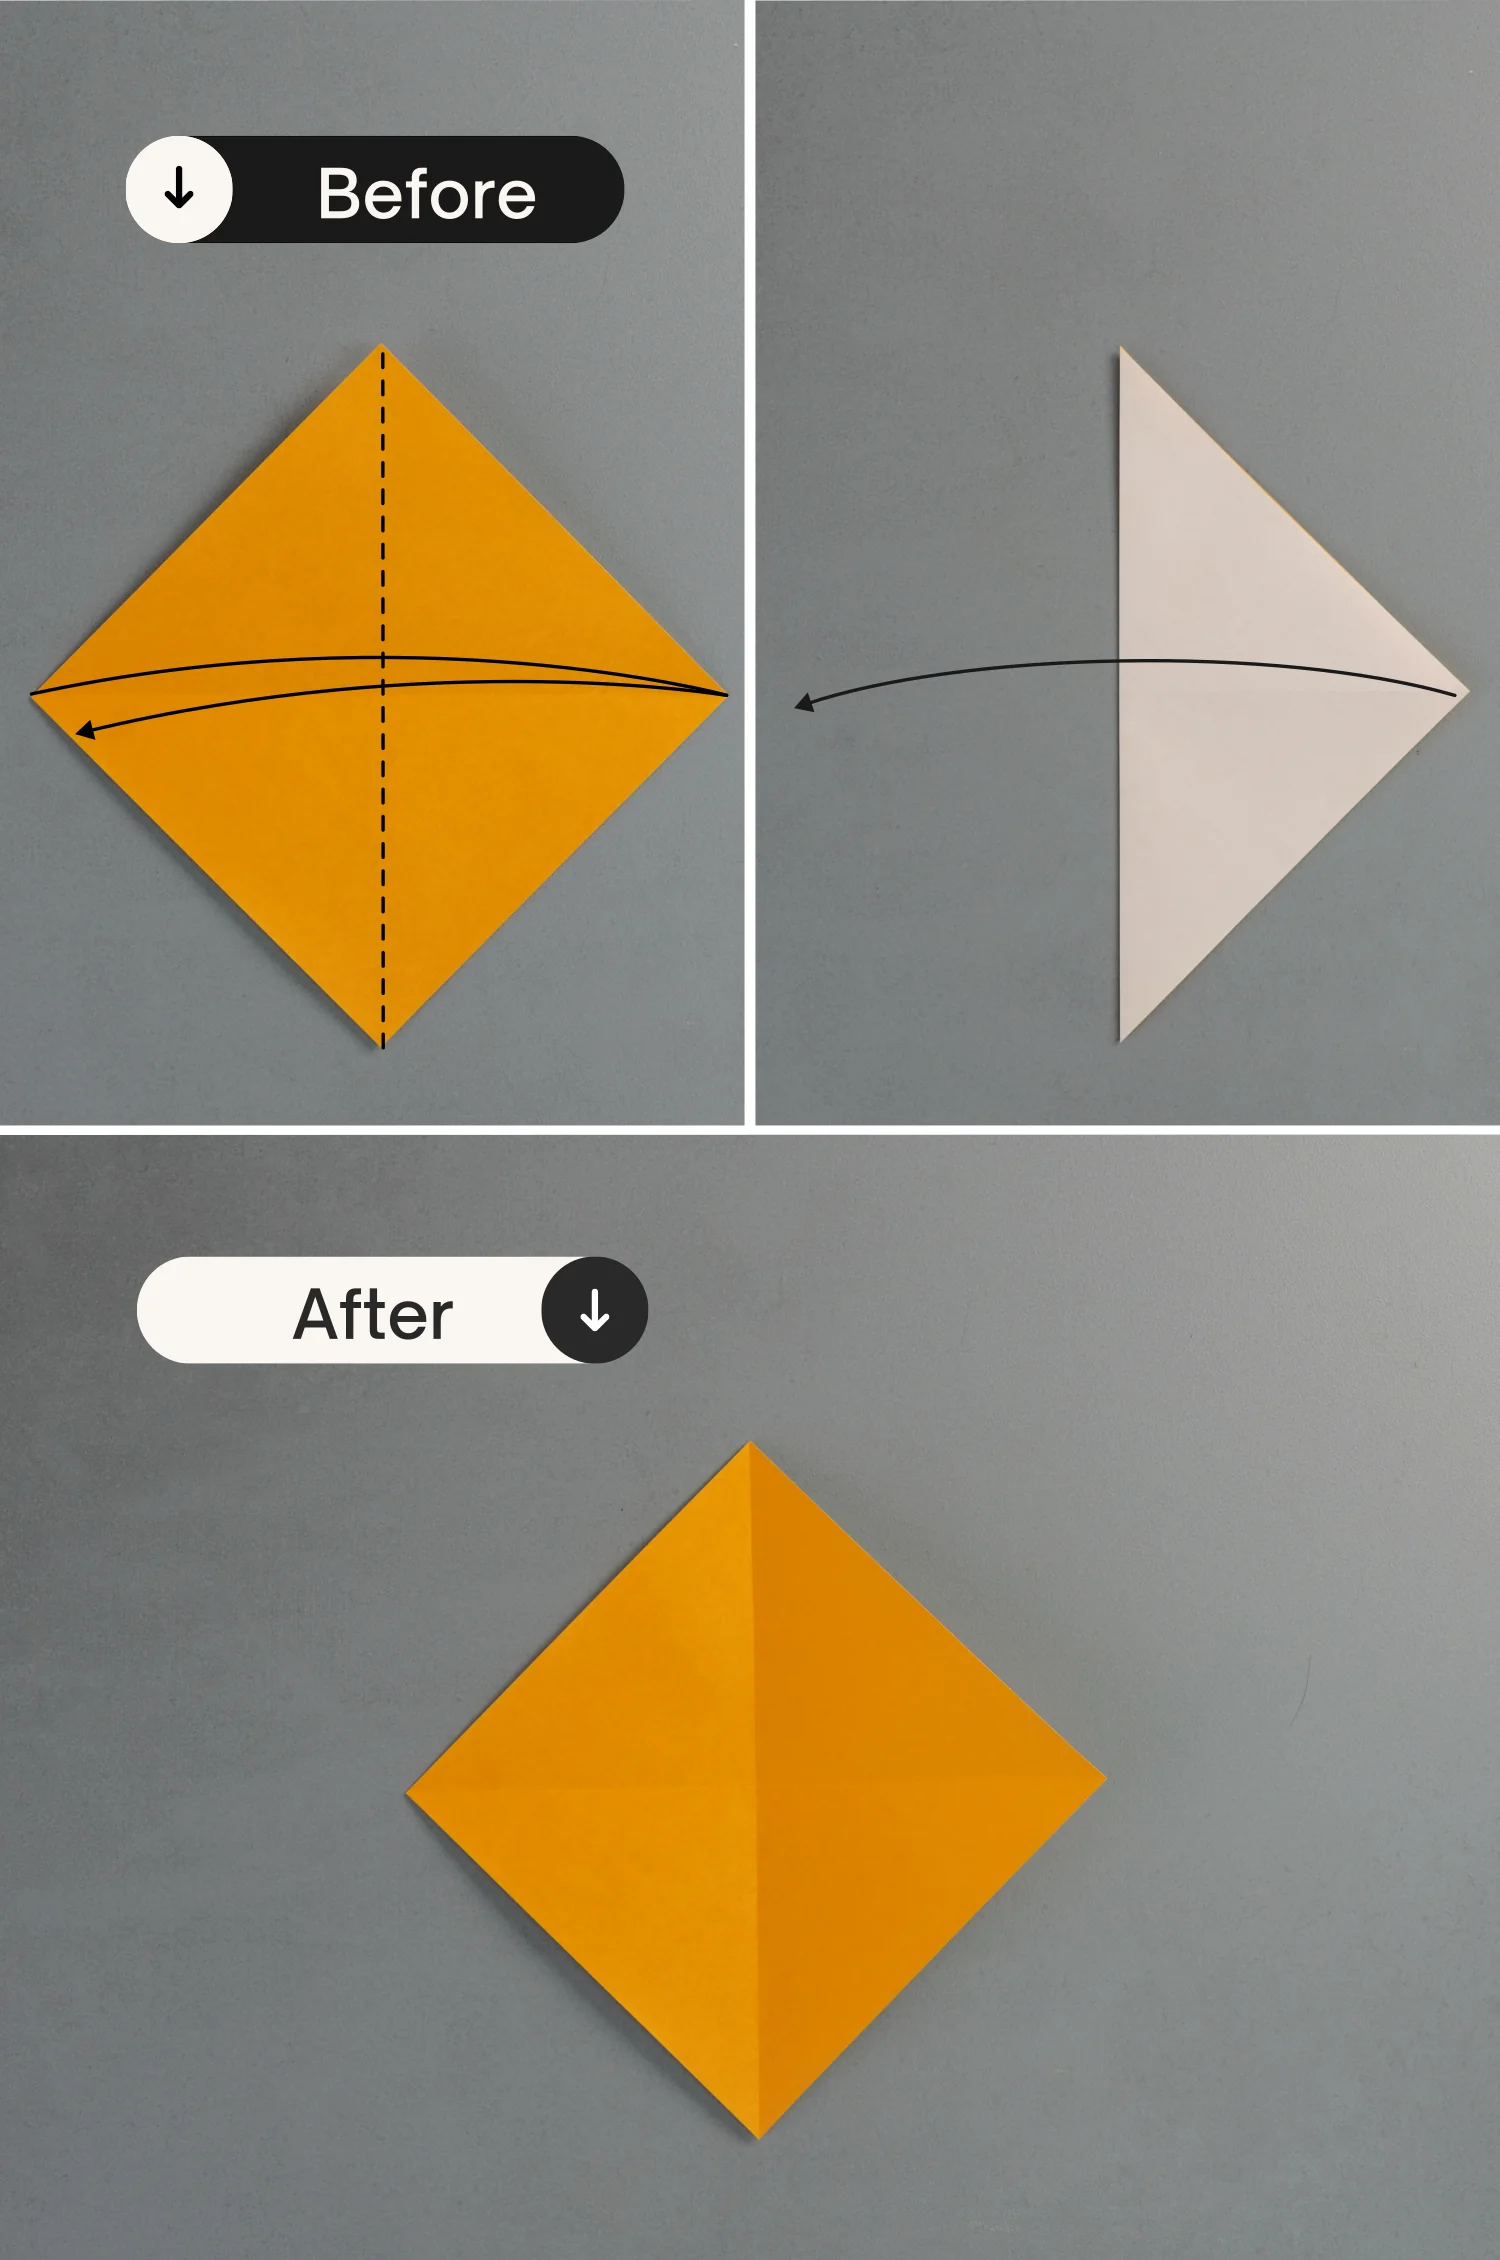
Flip the paper over.
Step 4
Fold the bottom right edge to align with the top left edge, and unfold it.
Step 5
Fold the bottom left edge to align with the top right edge, and unfold it.
Step 6
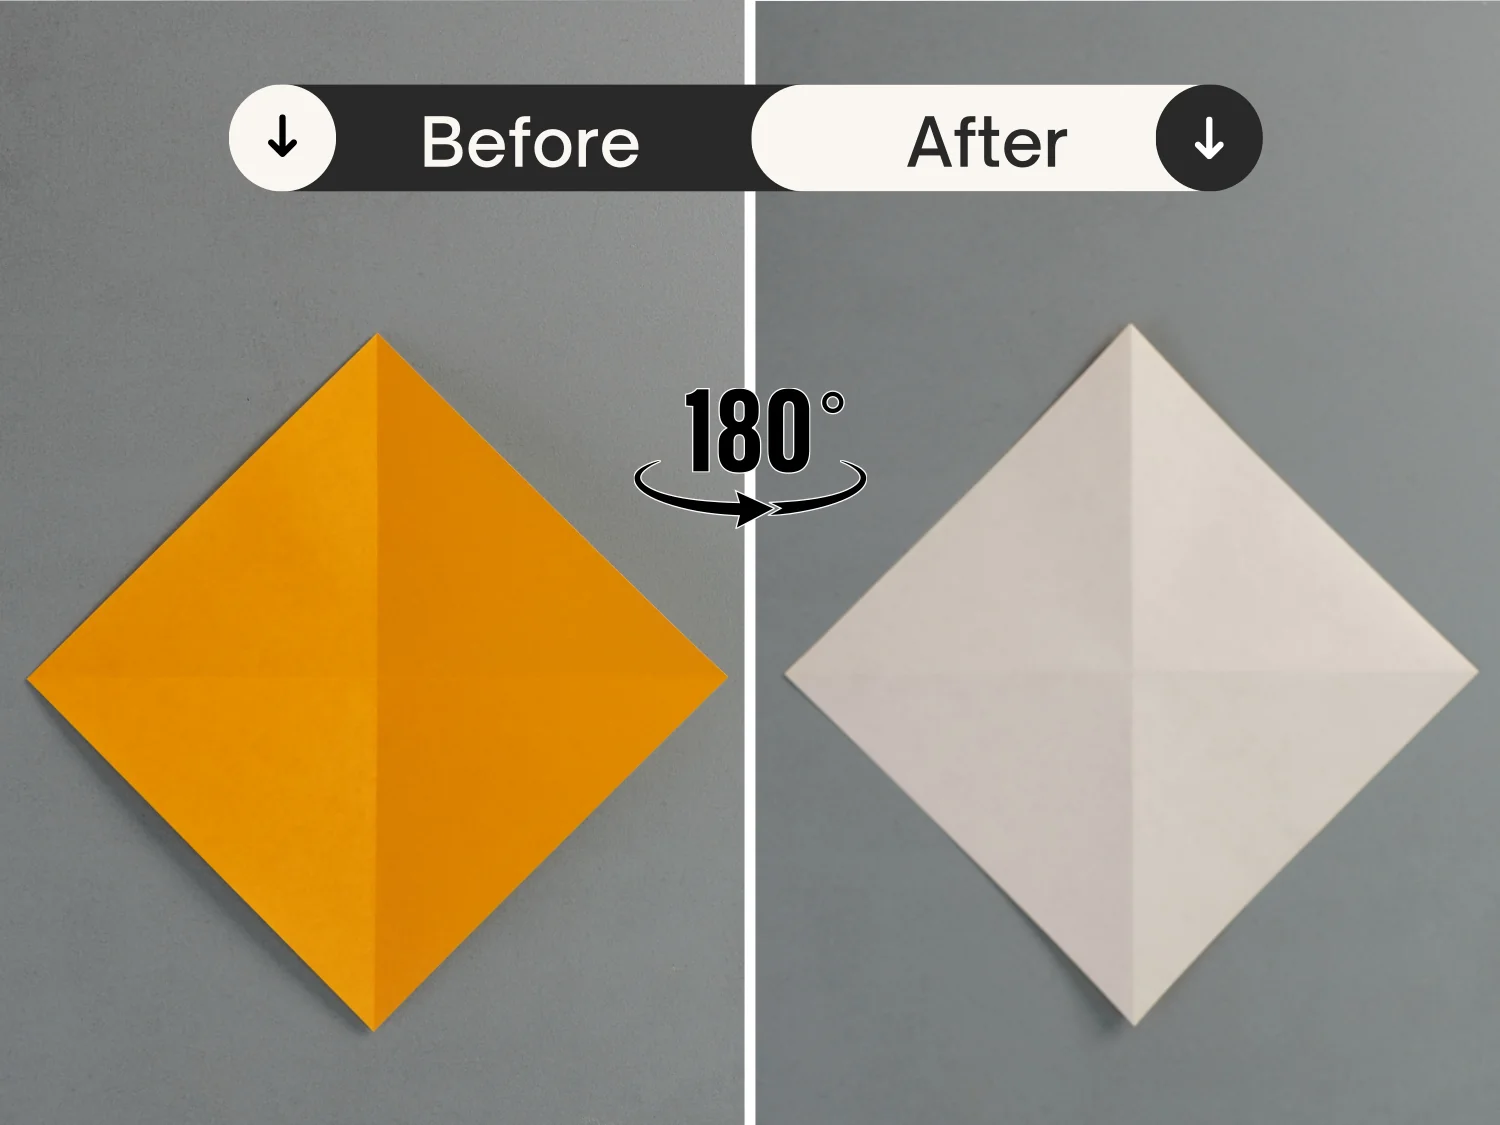
Shape the left and right creases, and push the left, right, and top points to meet the bottom point, flatten the fold to get a small square.
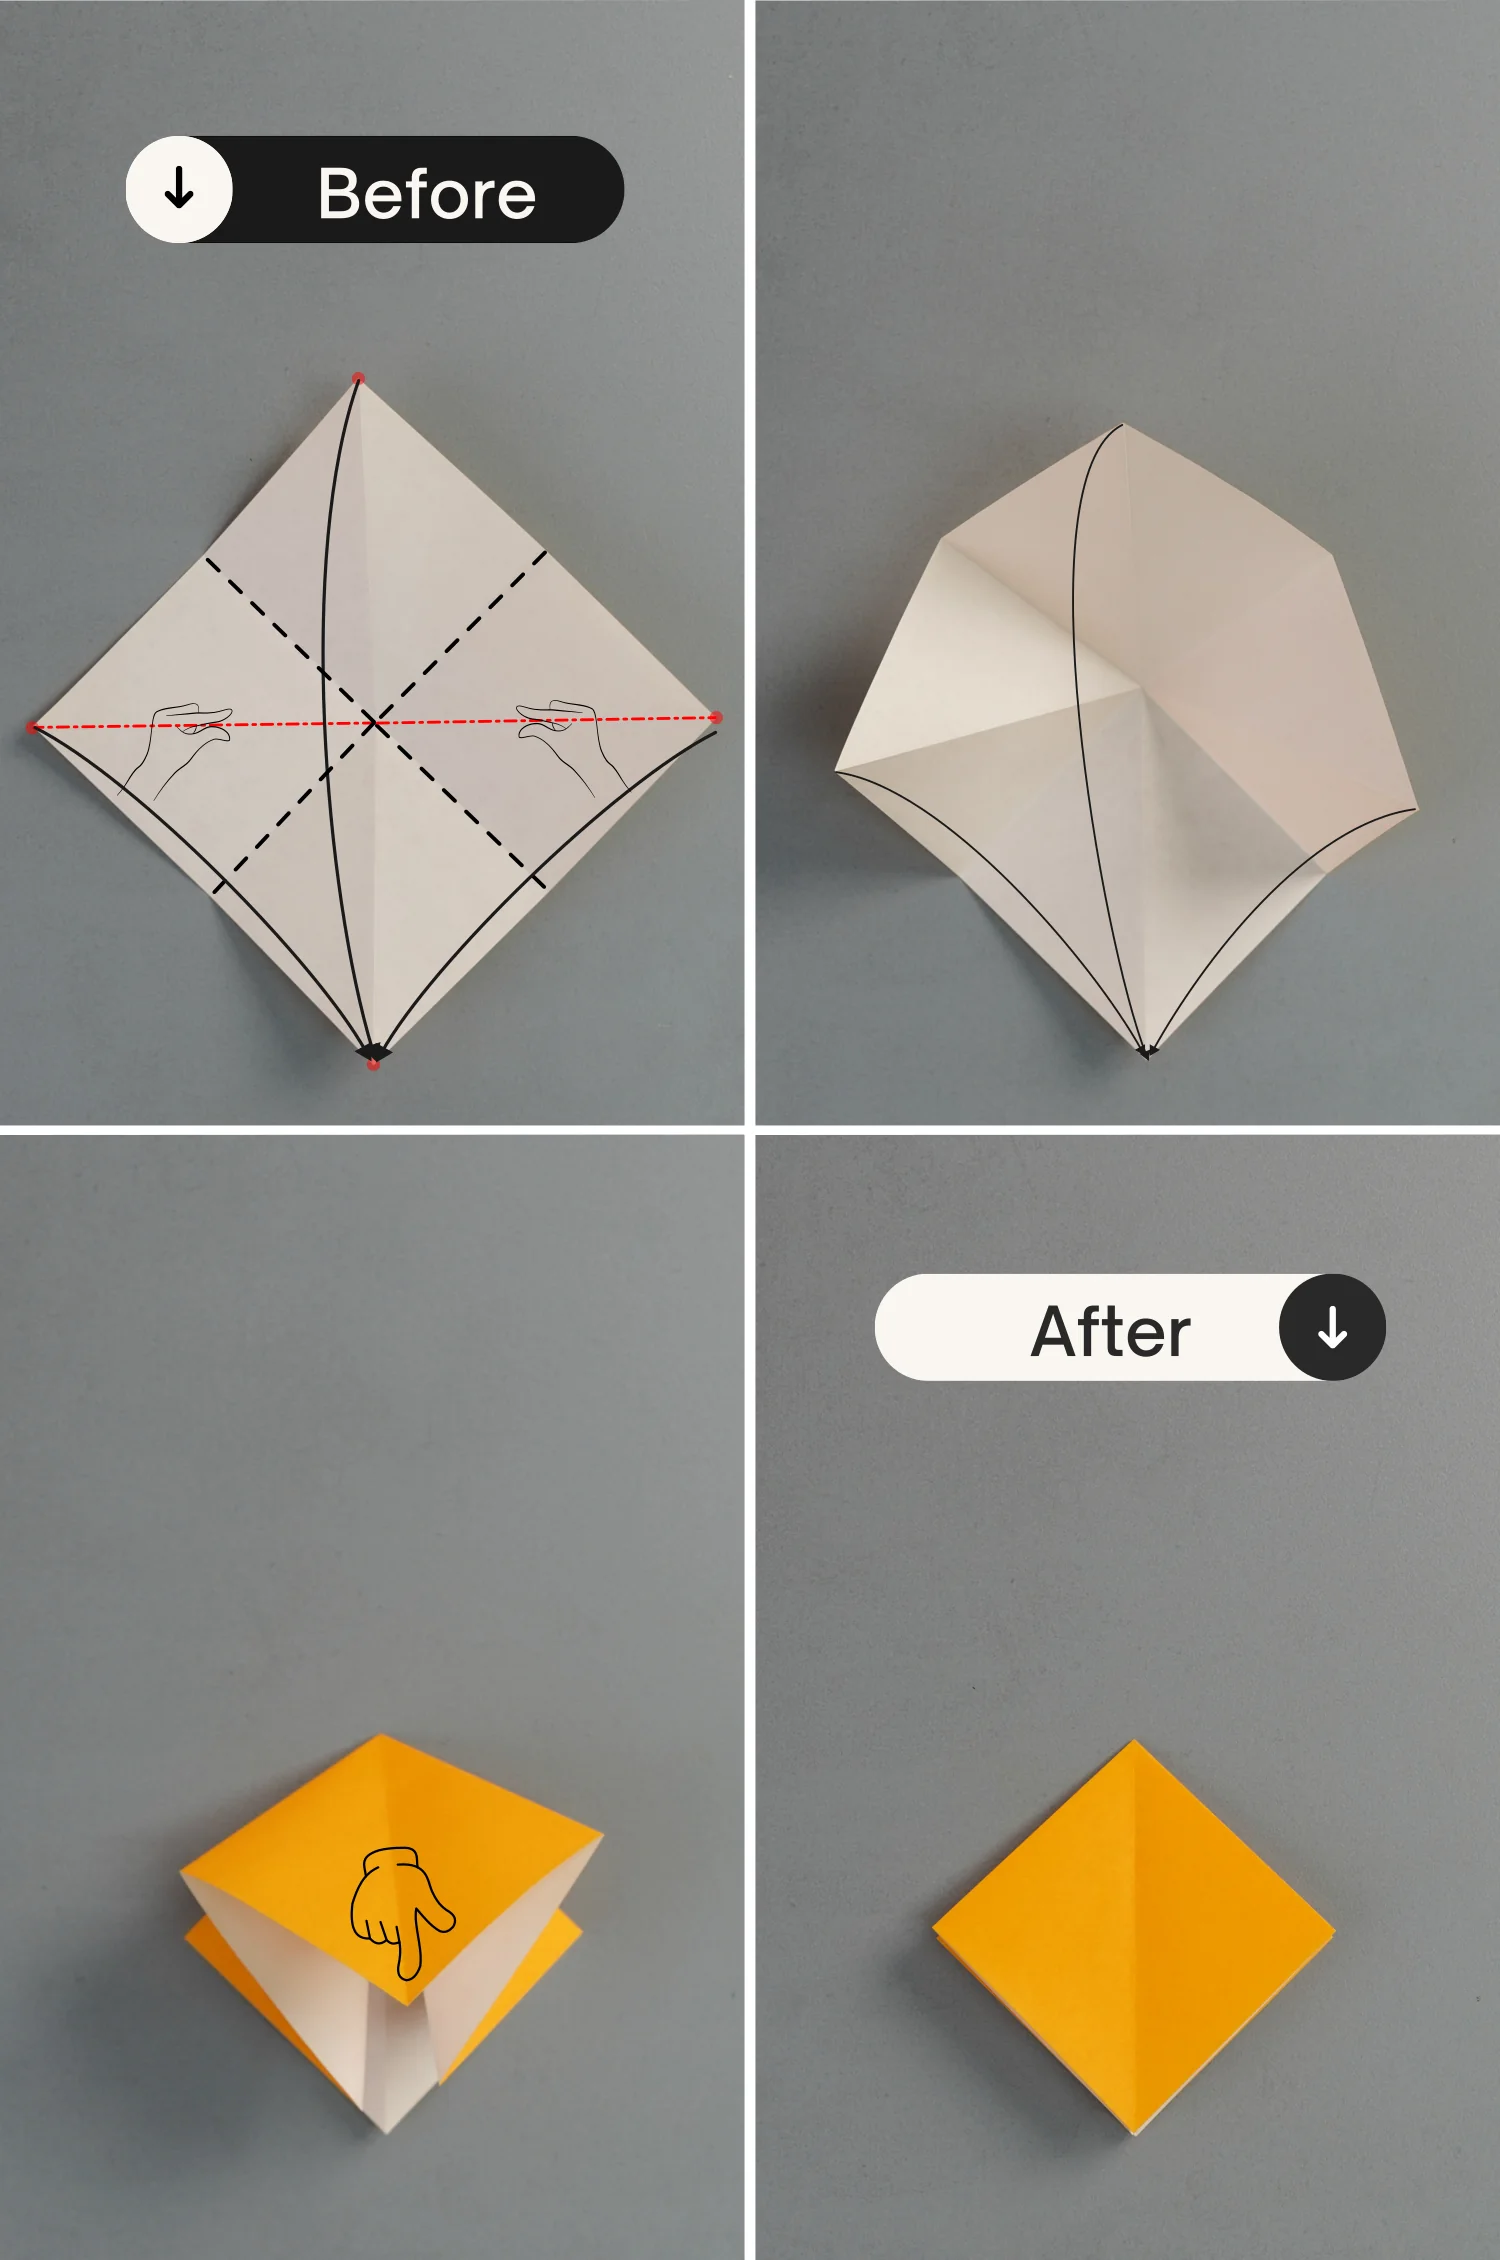
Step 7
Fold the top left and right edges to align with the vertical crease, and unfold them.
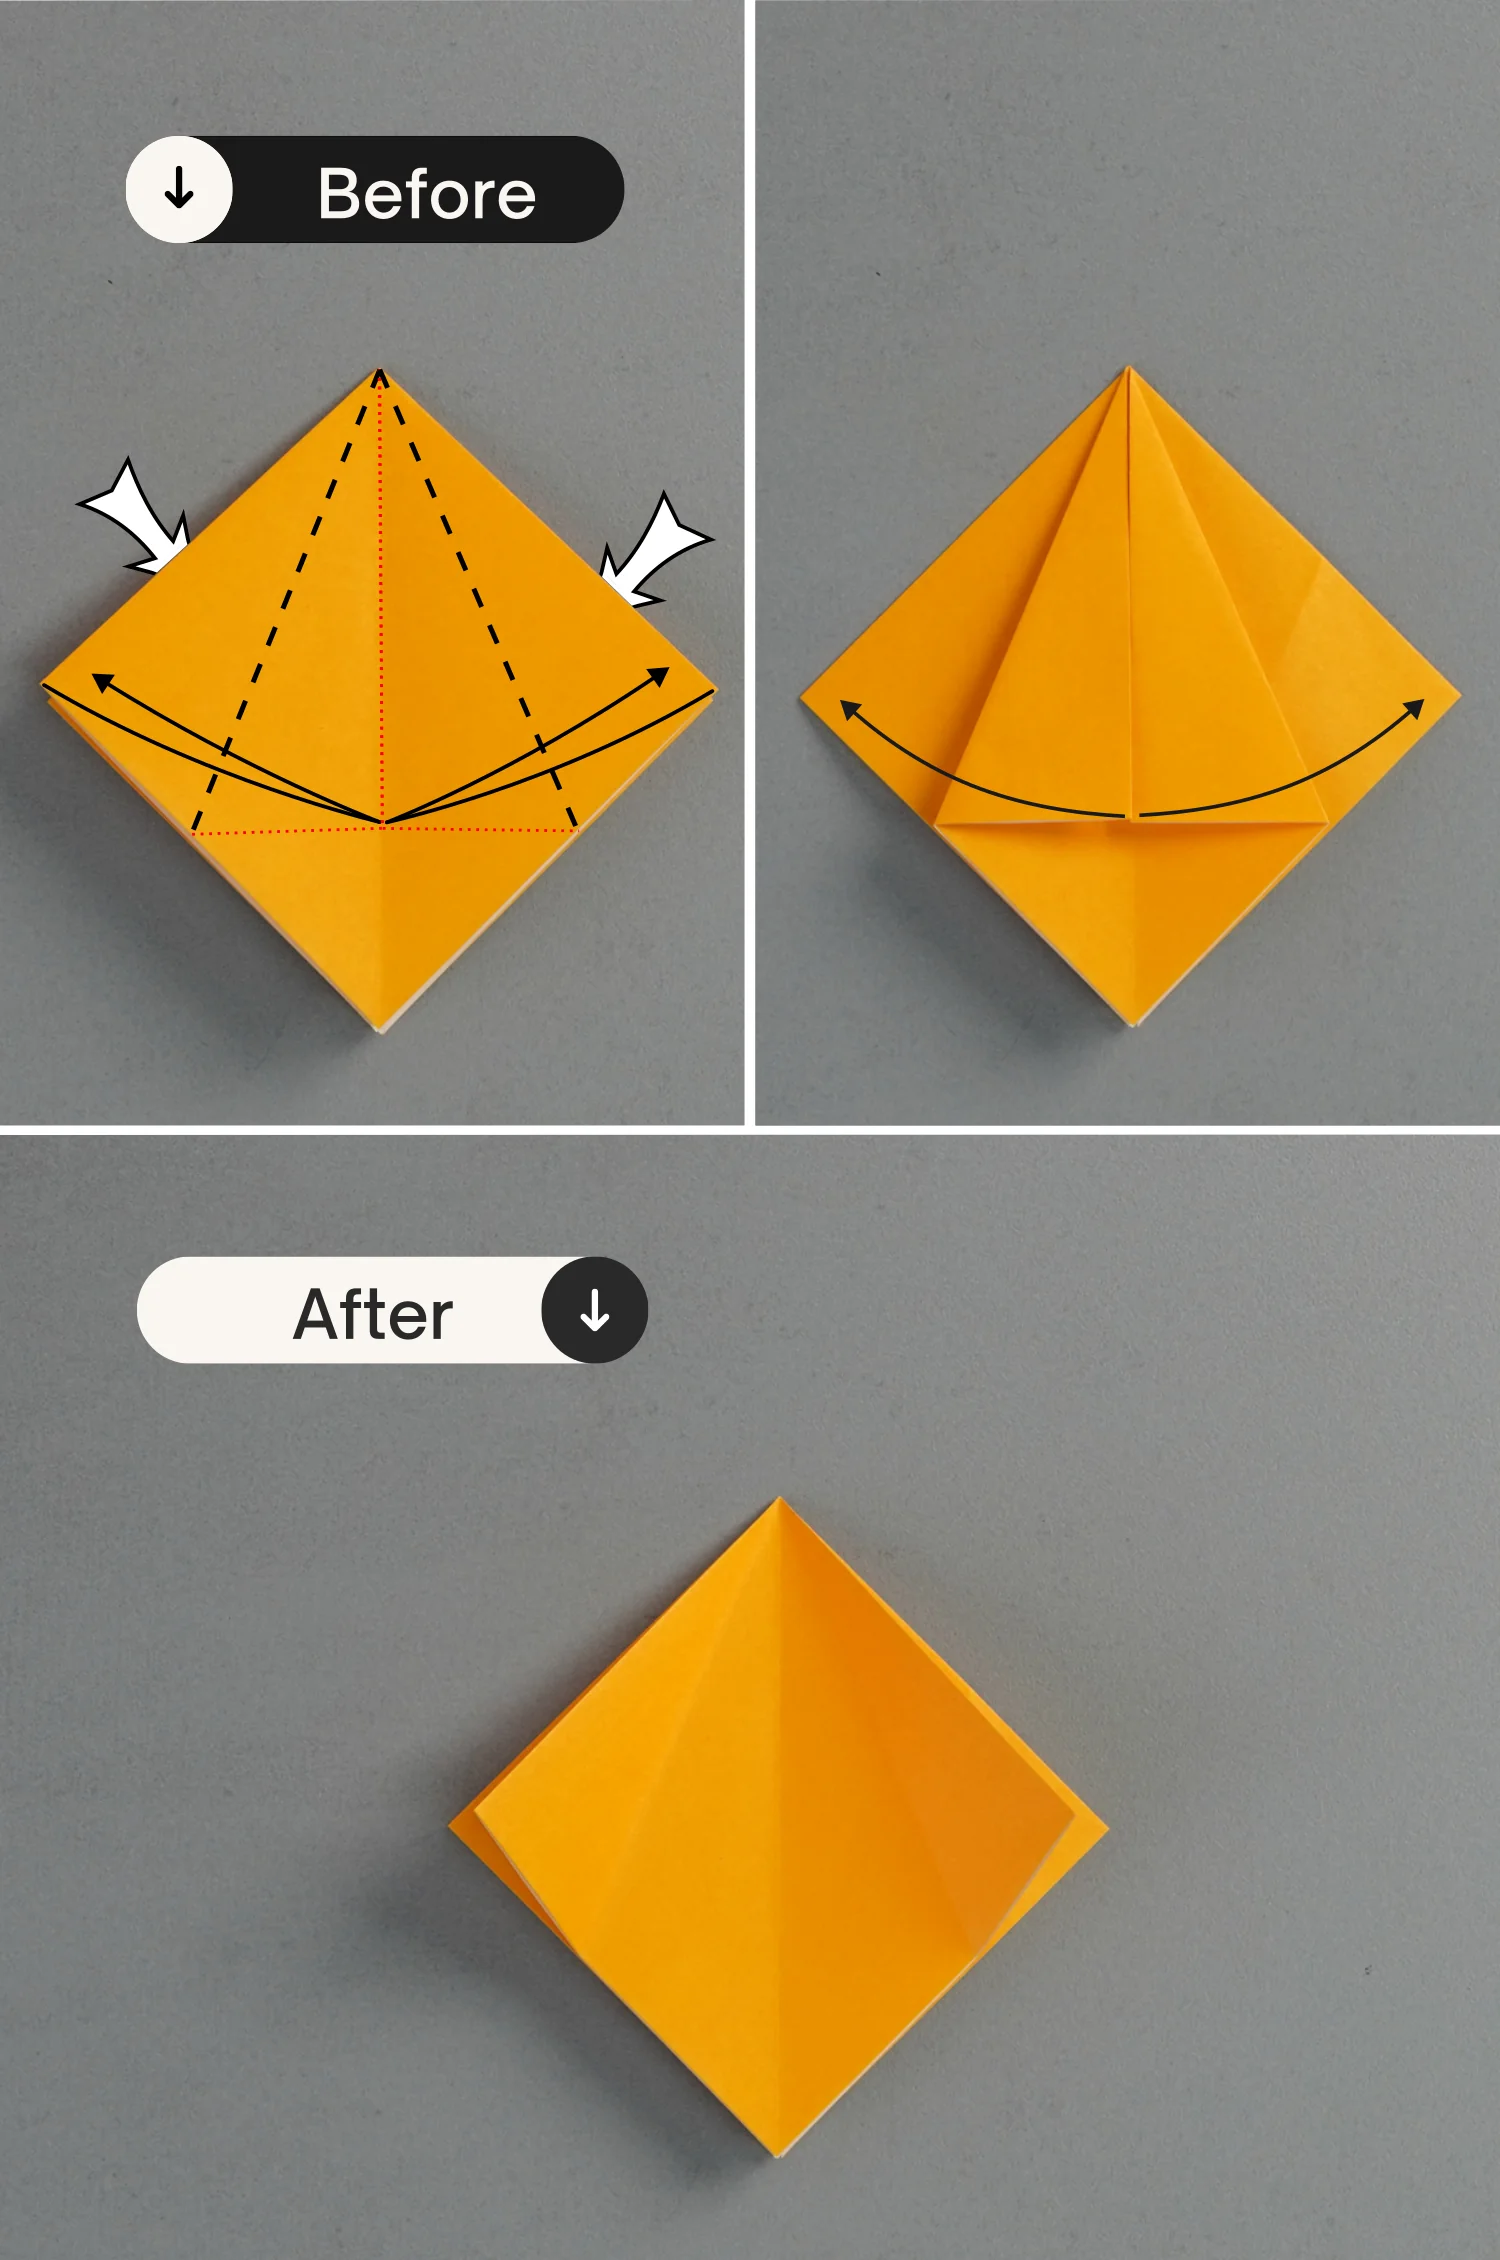
Step 8
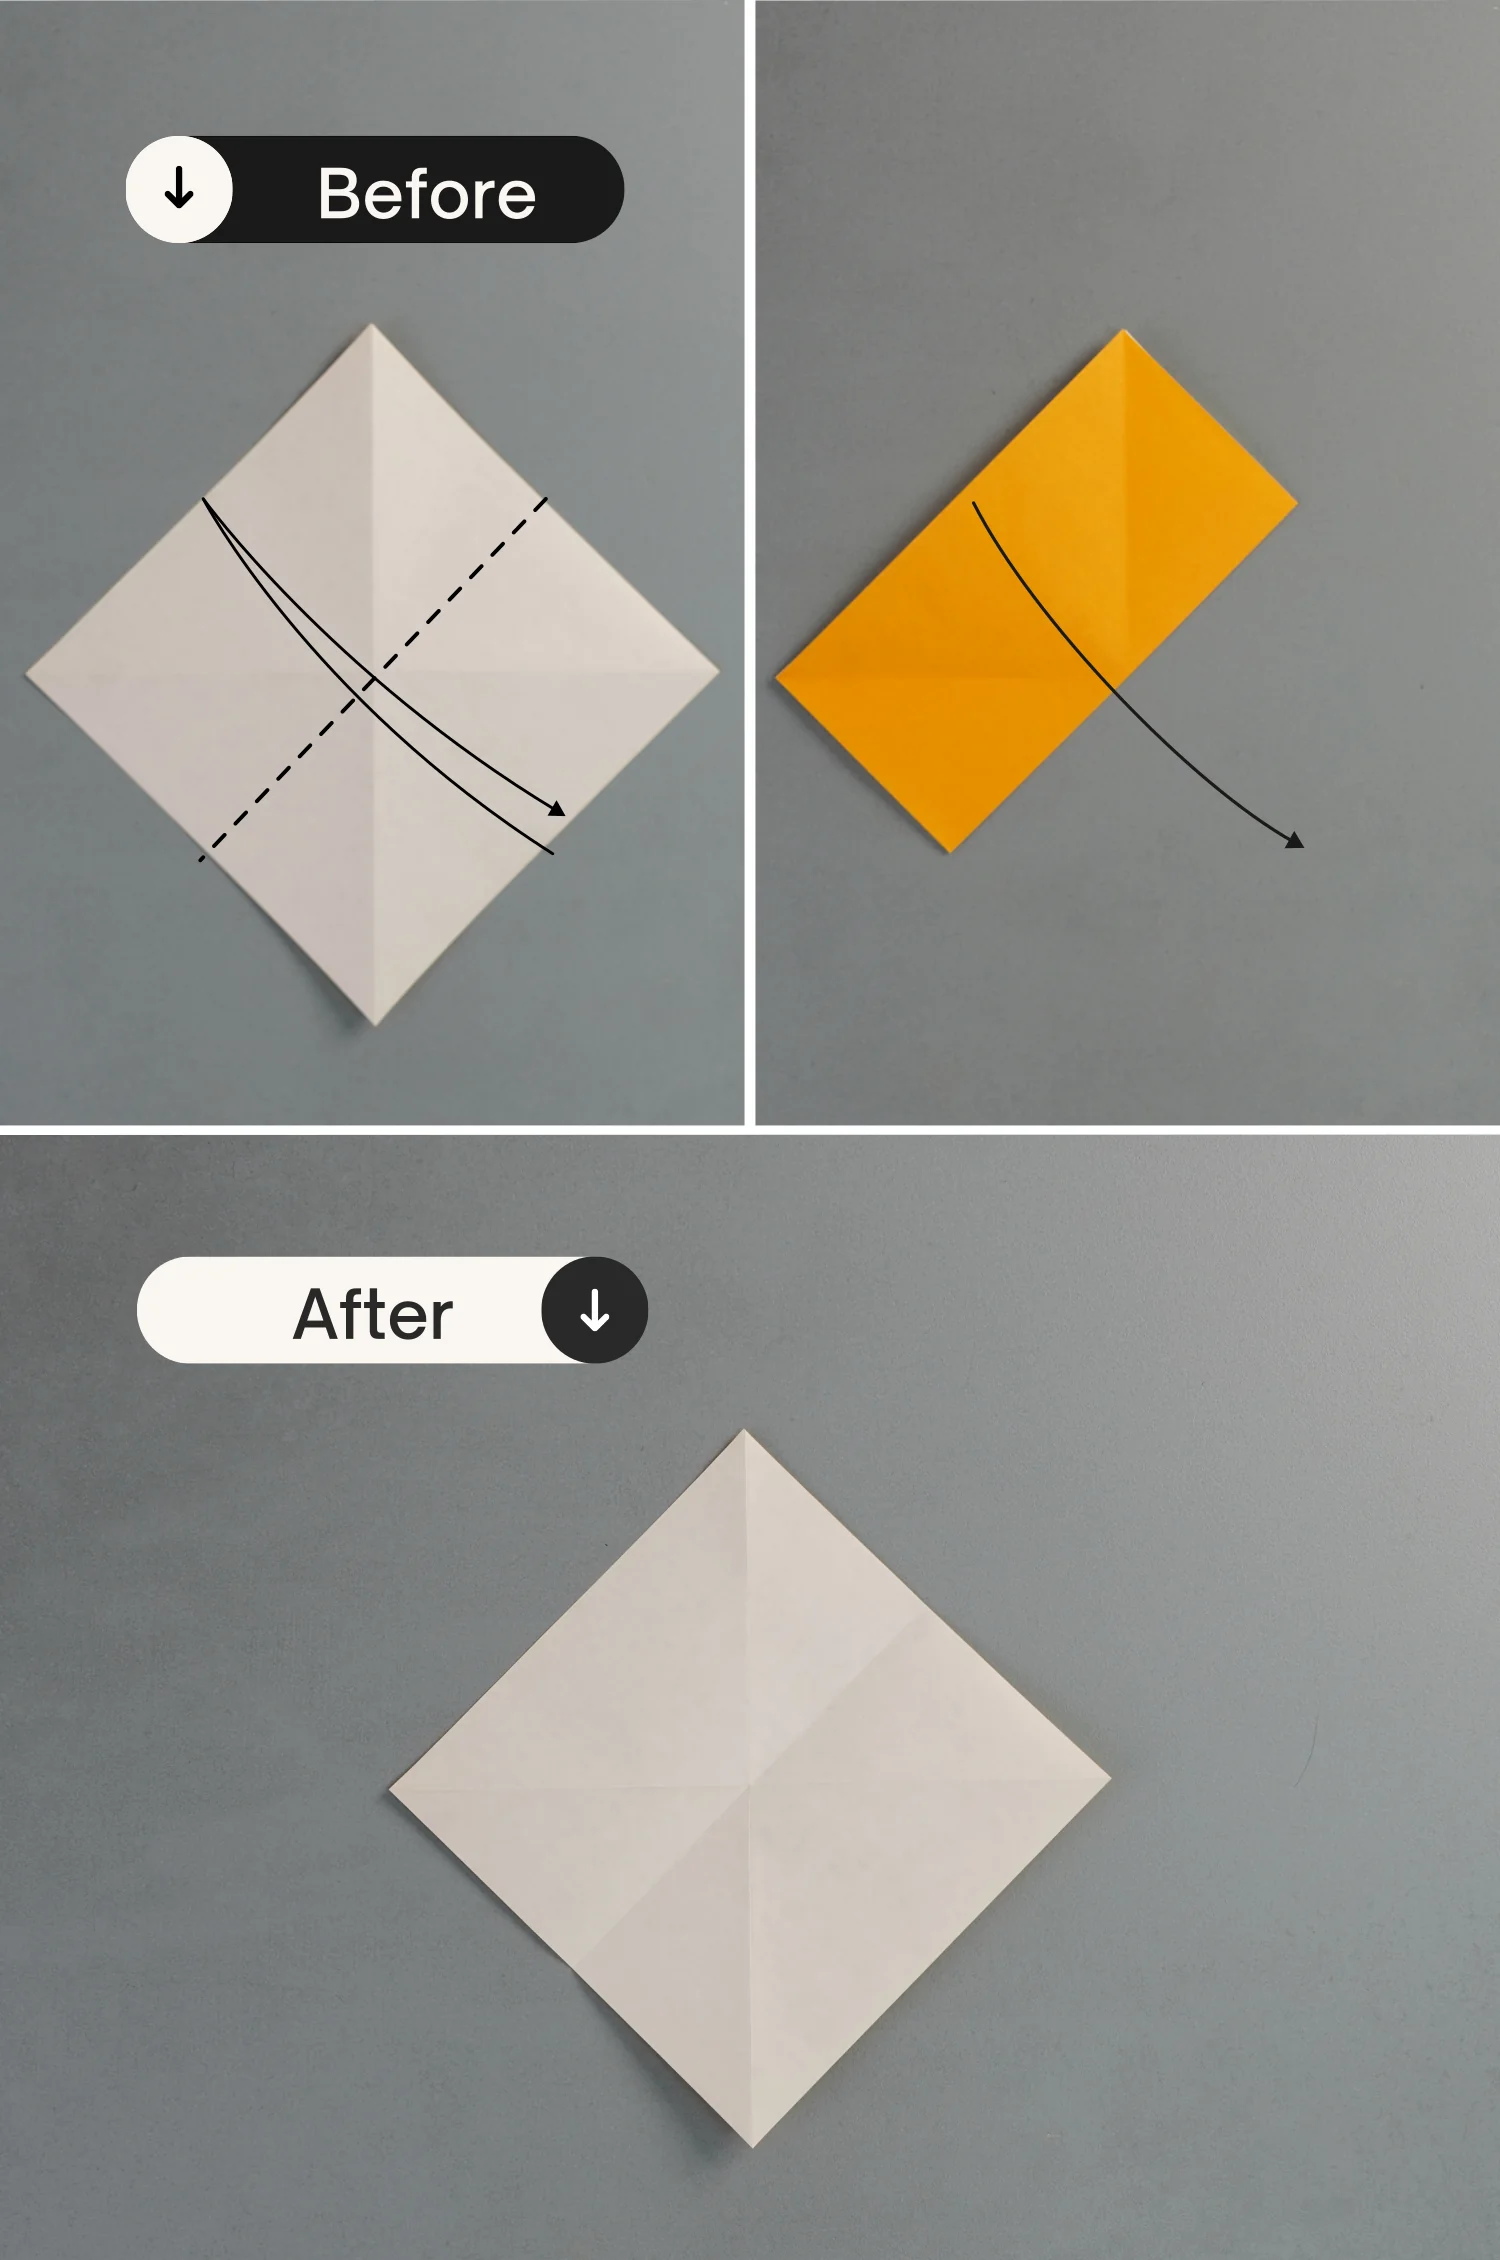
Flip the paper over from left to right, then fold the top left and right edges to align with the vertical crease, crease them well, and unfold them.
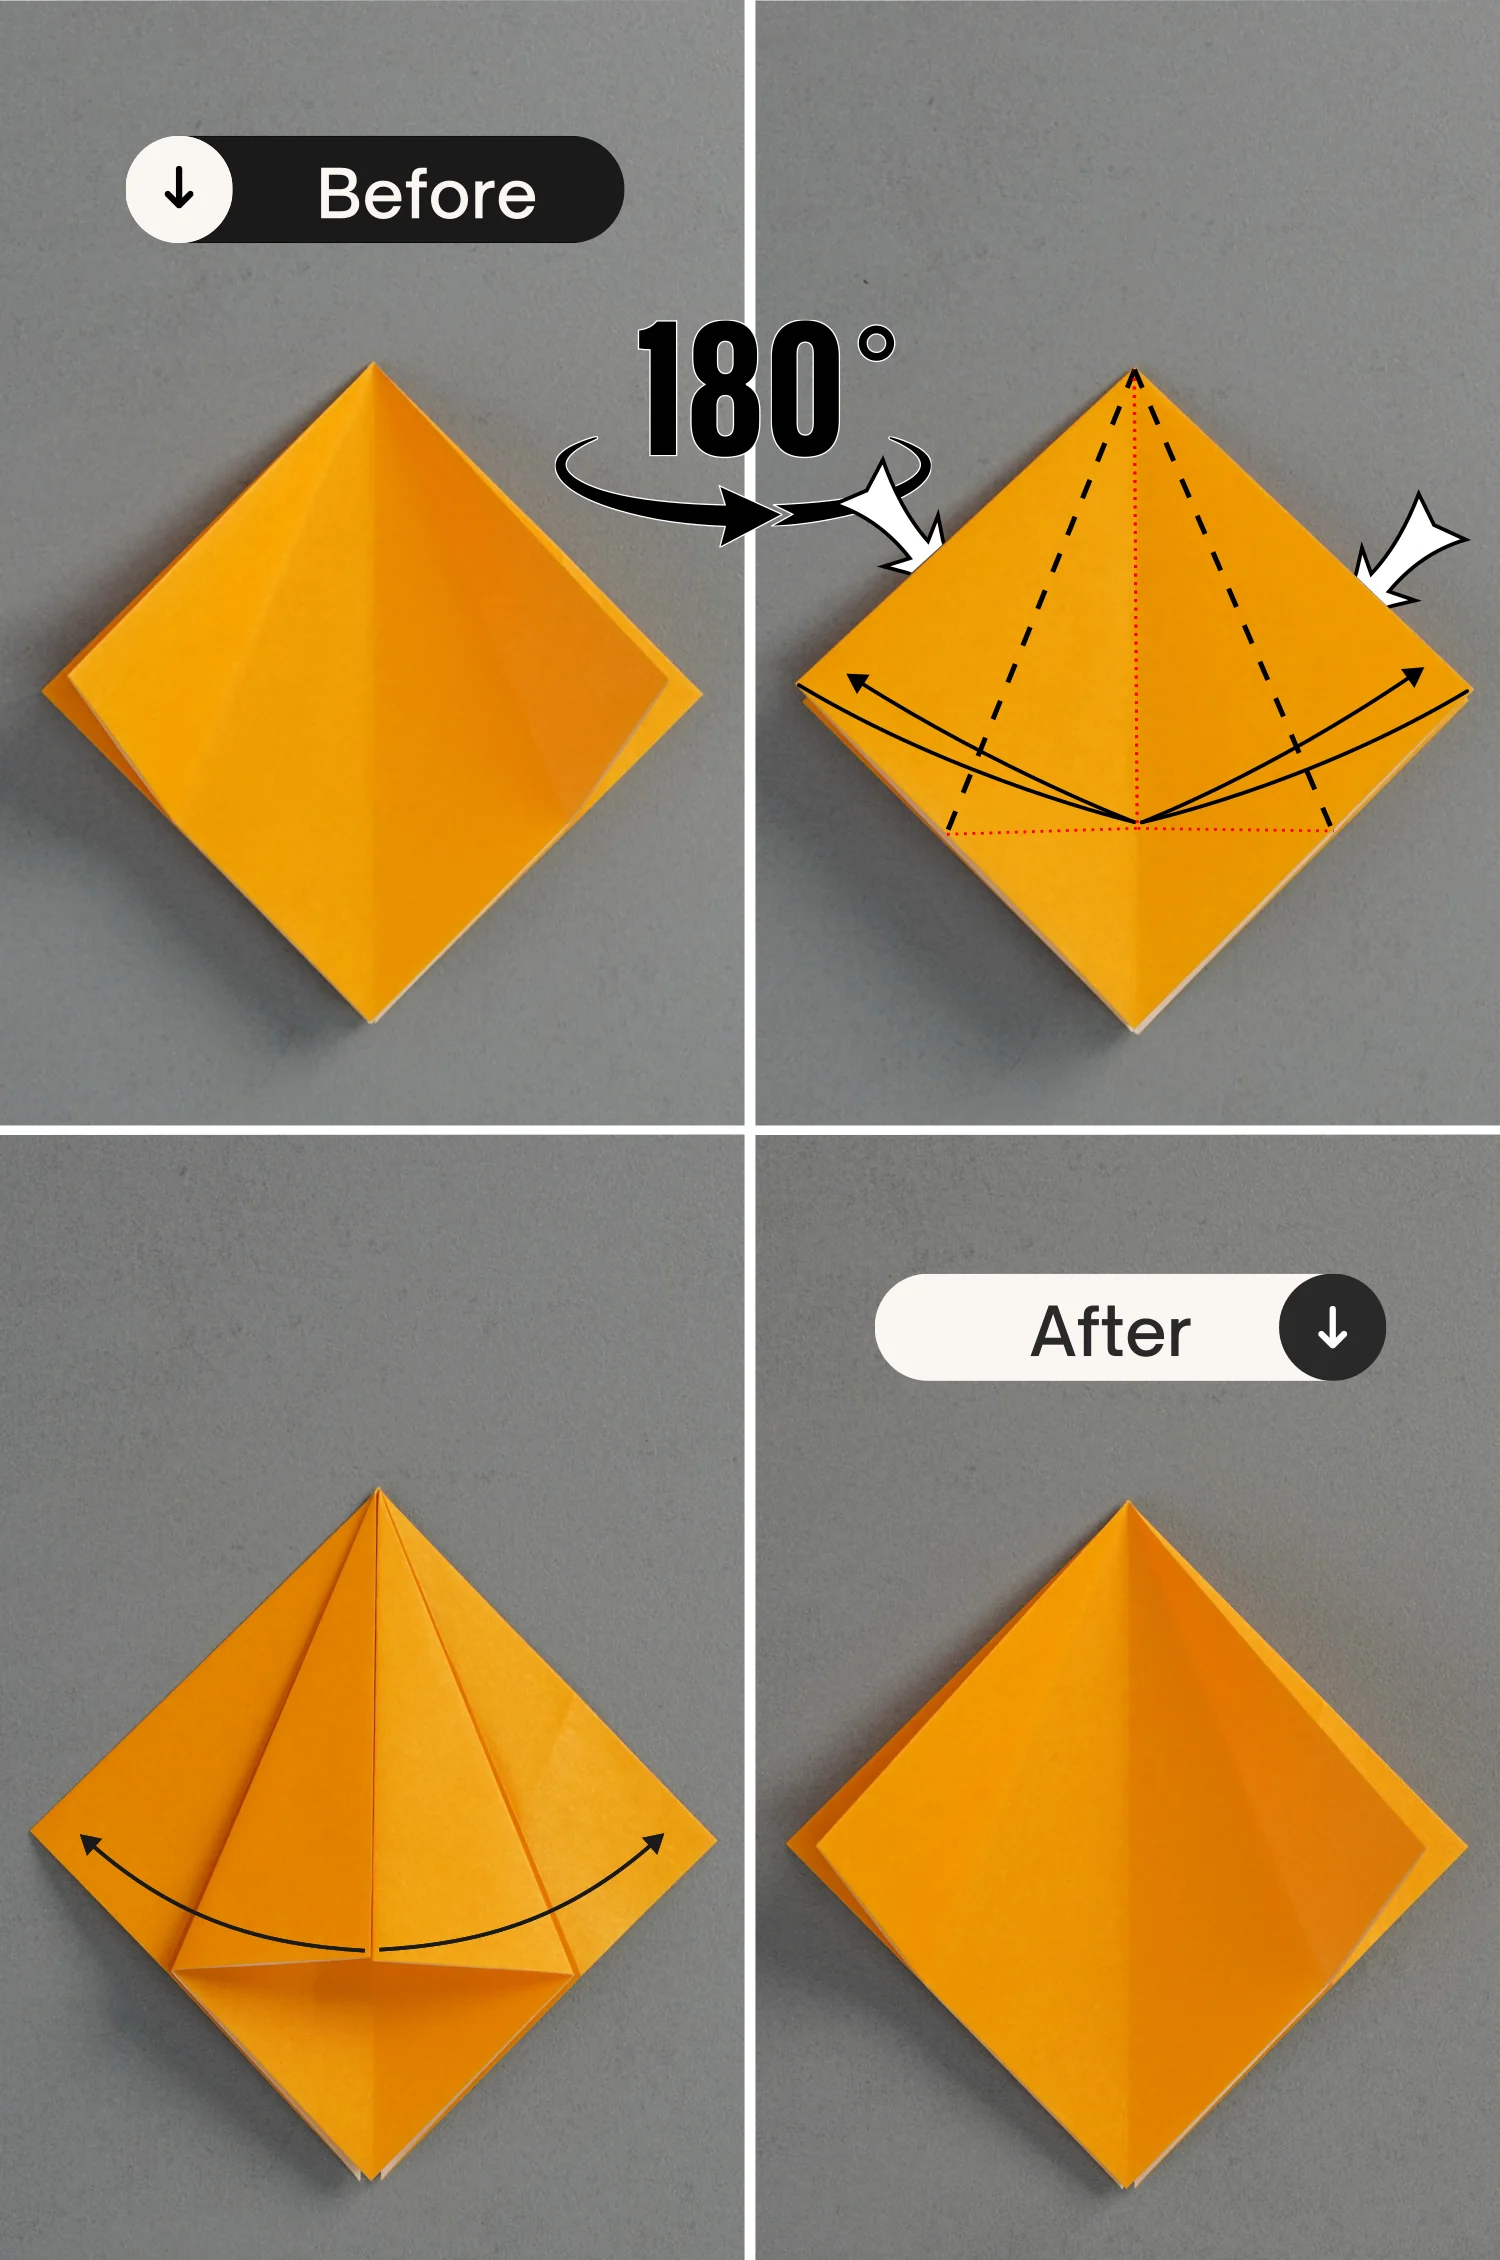
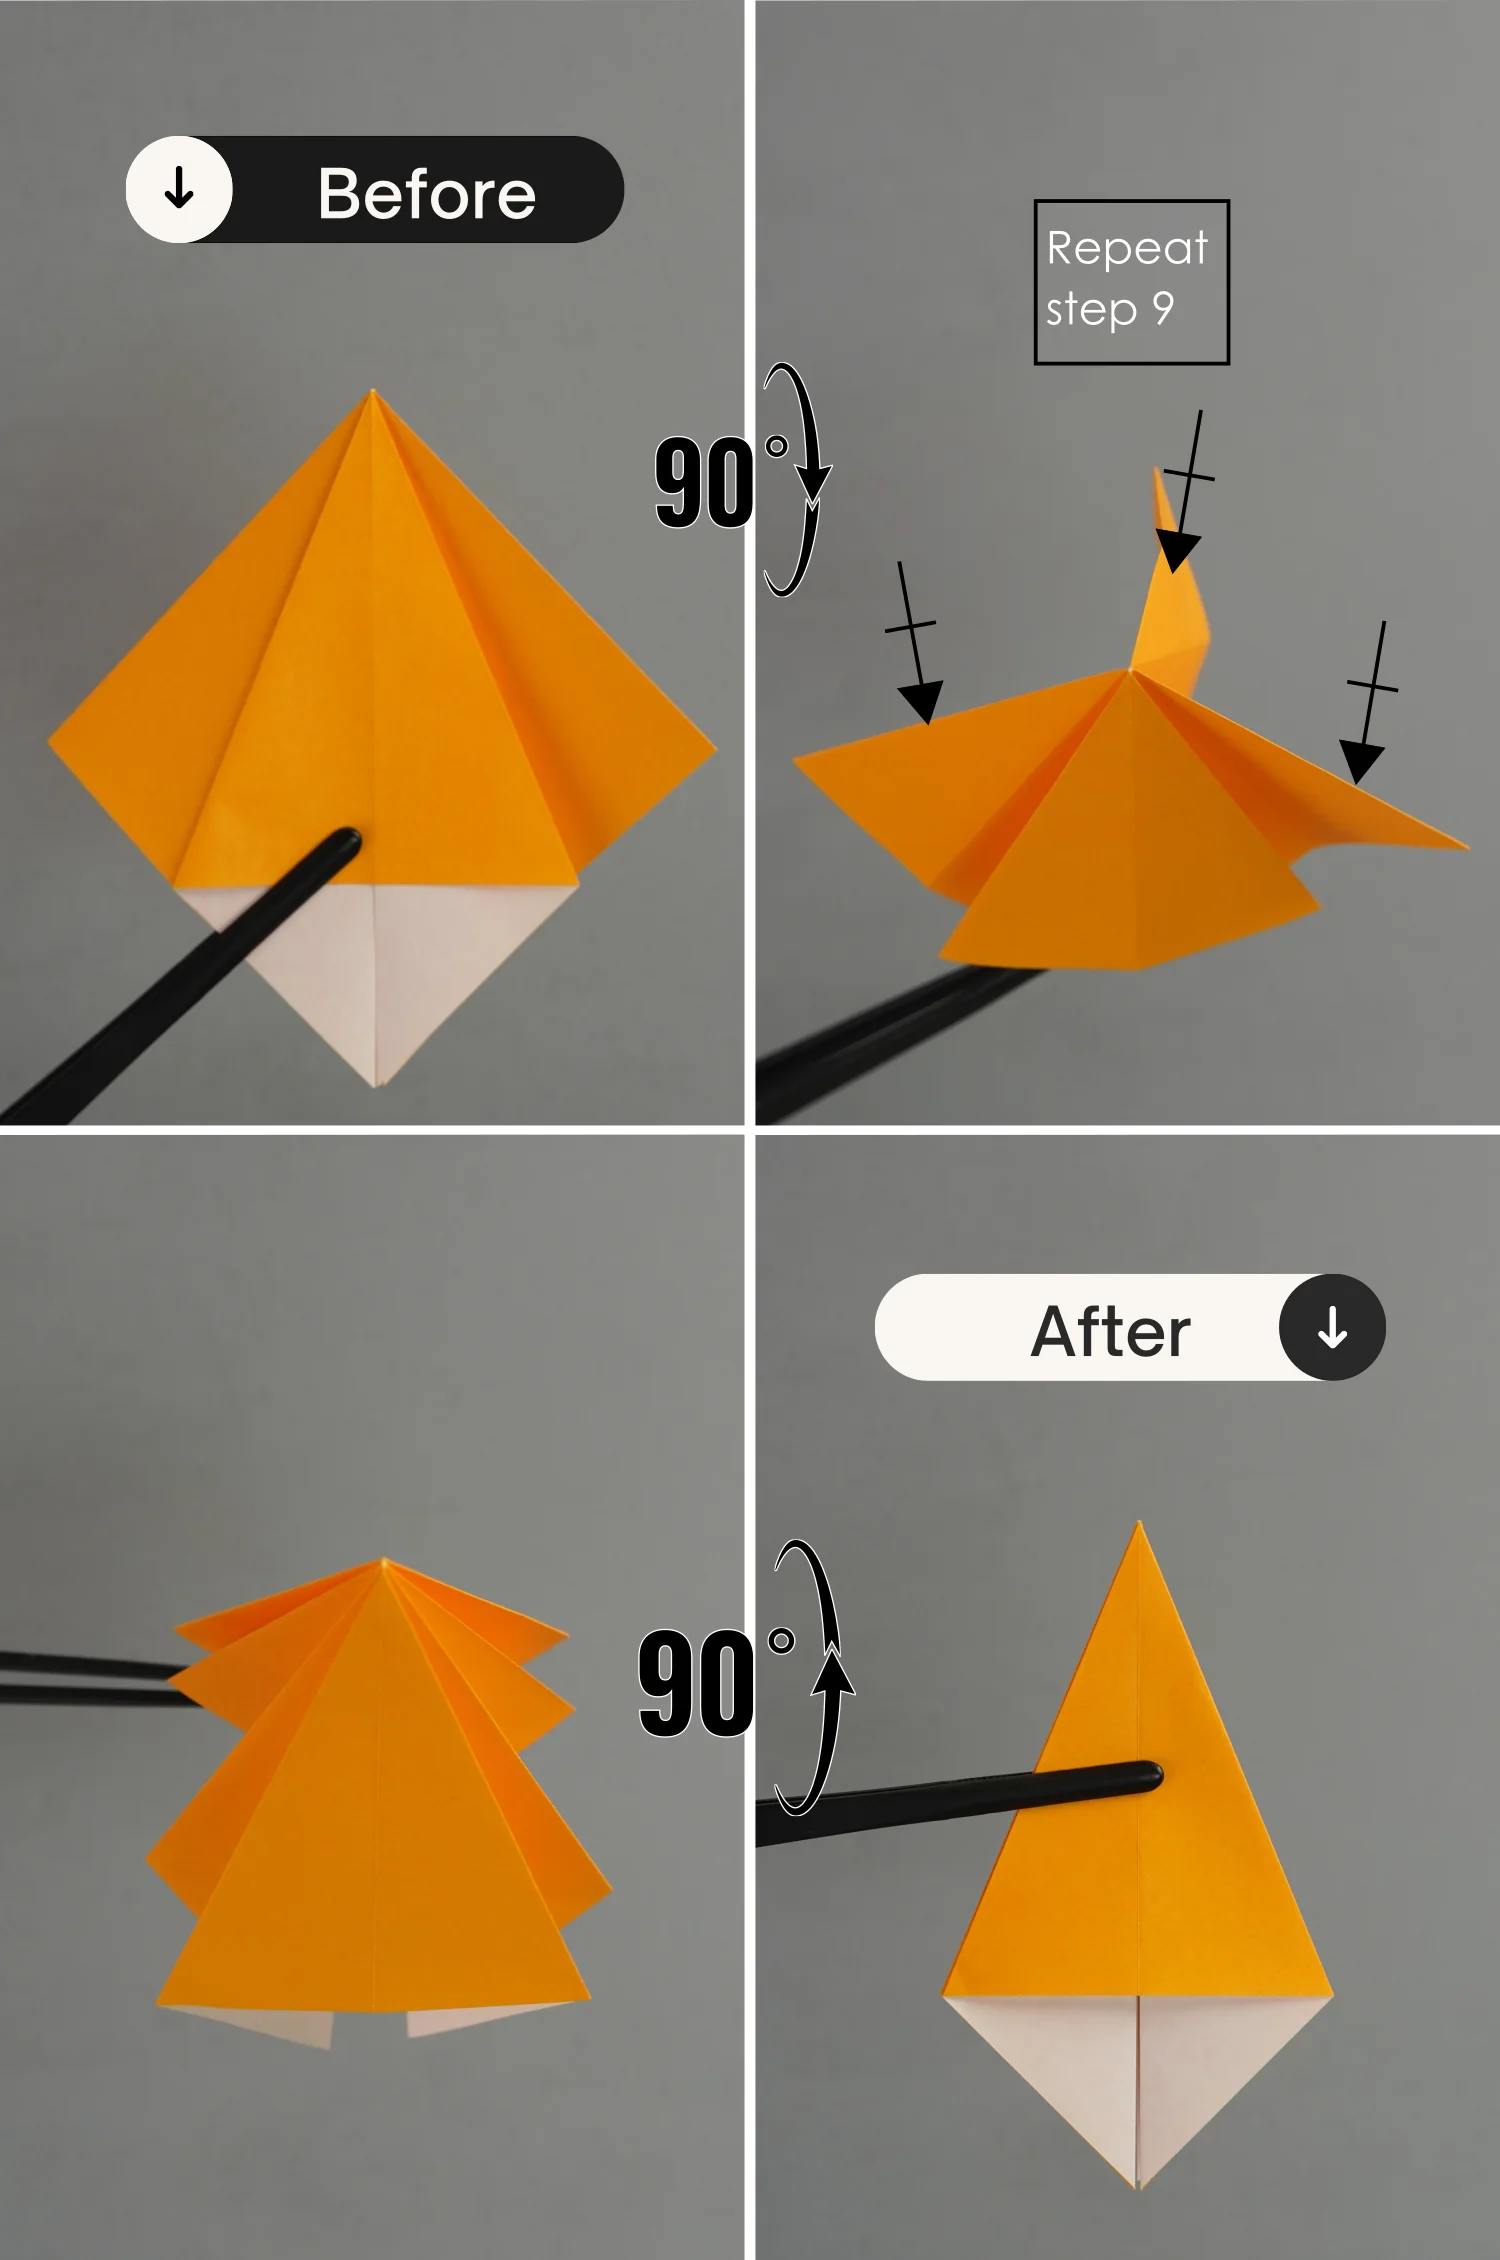
Step 9
Bring up the right triangle, open and squash it along the creases you made in the previous step.
Step 10
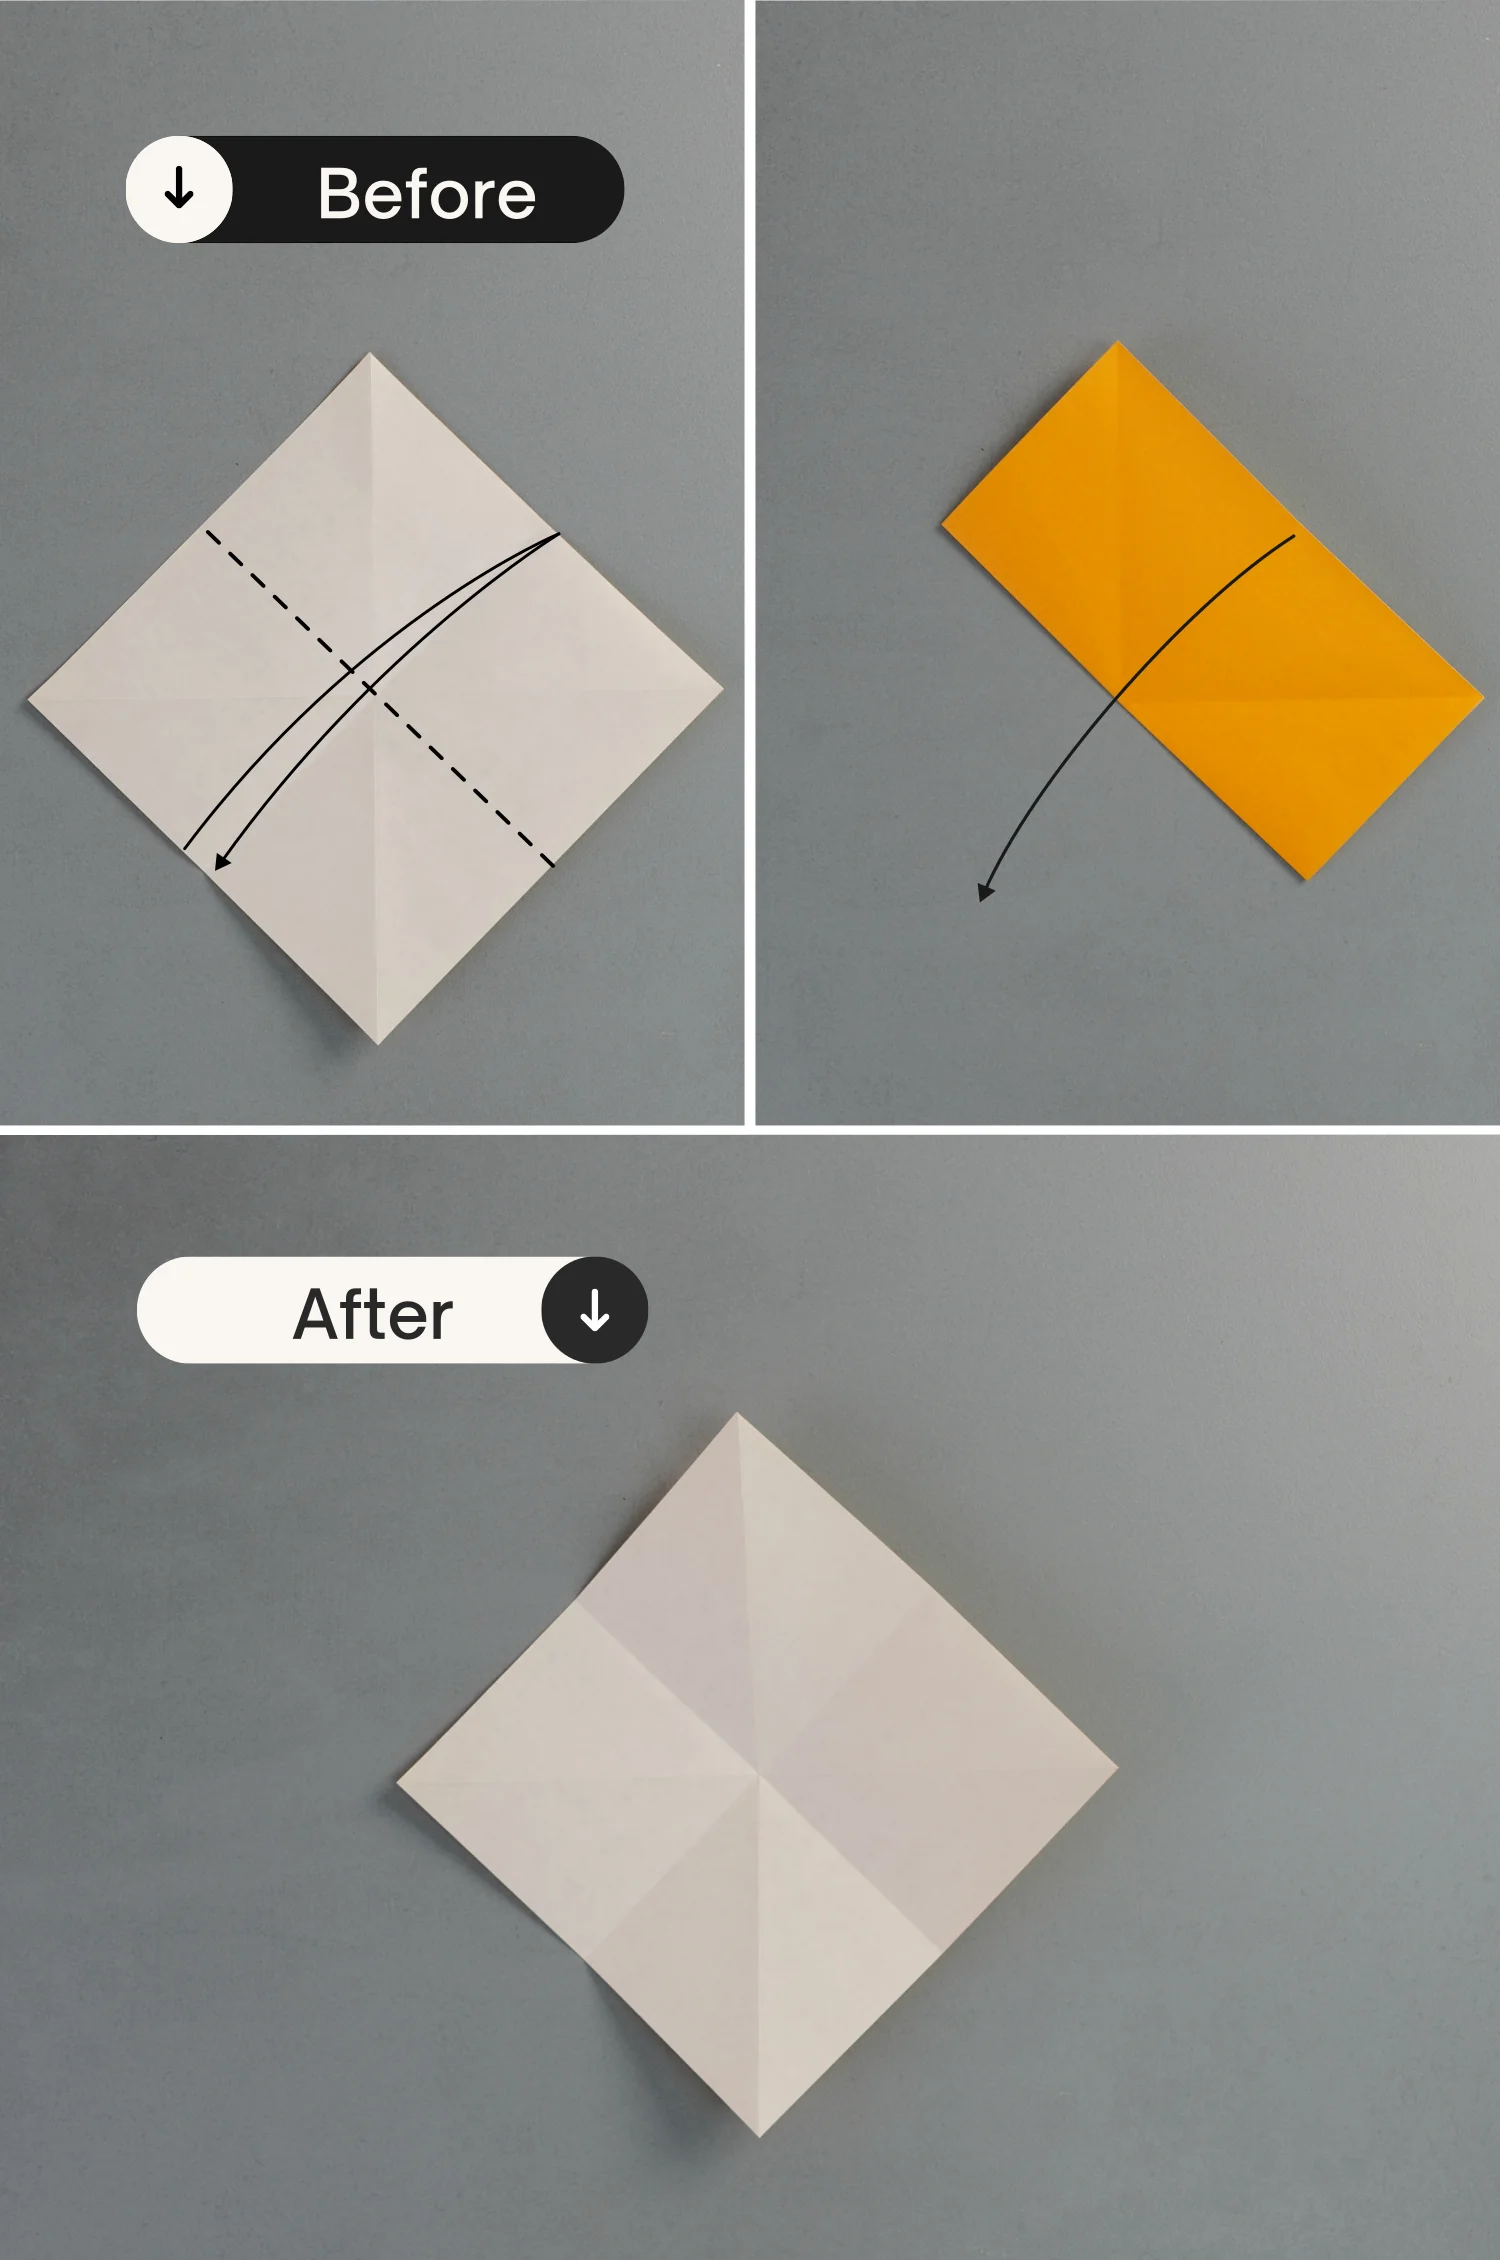
Rotate it 90 degrees from front to back, and repeat step 9 for the other three layers. Then rotate it 90 degrees from back to front.
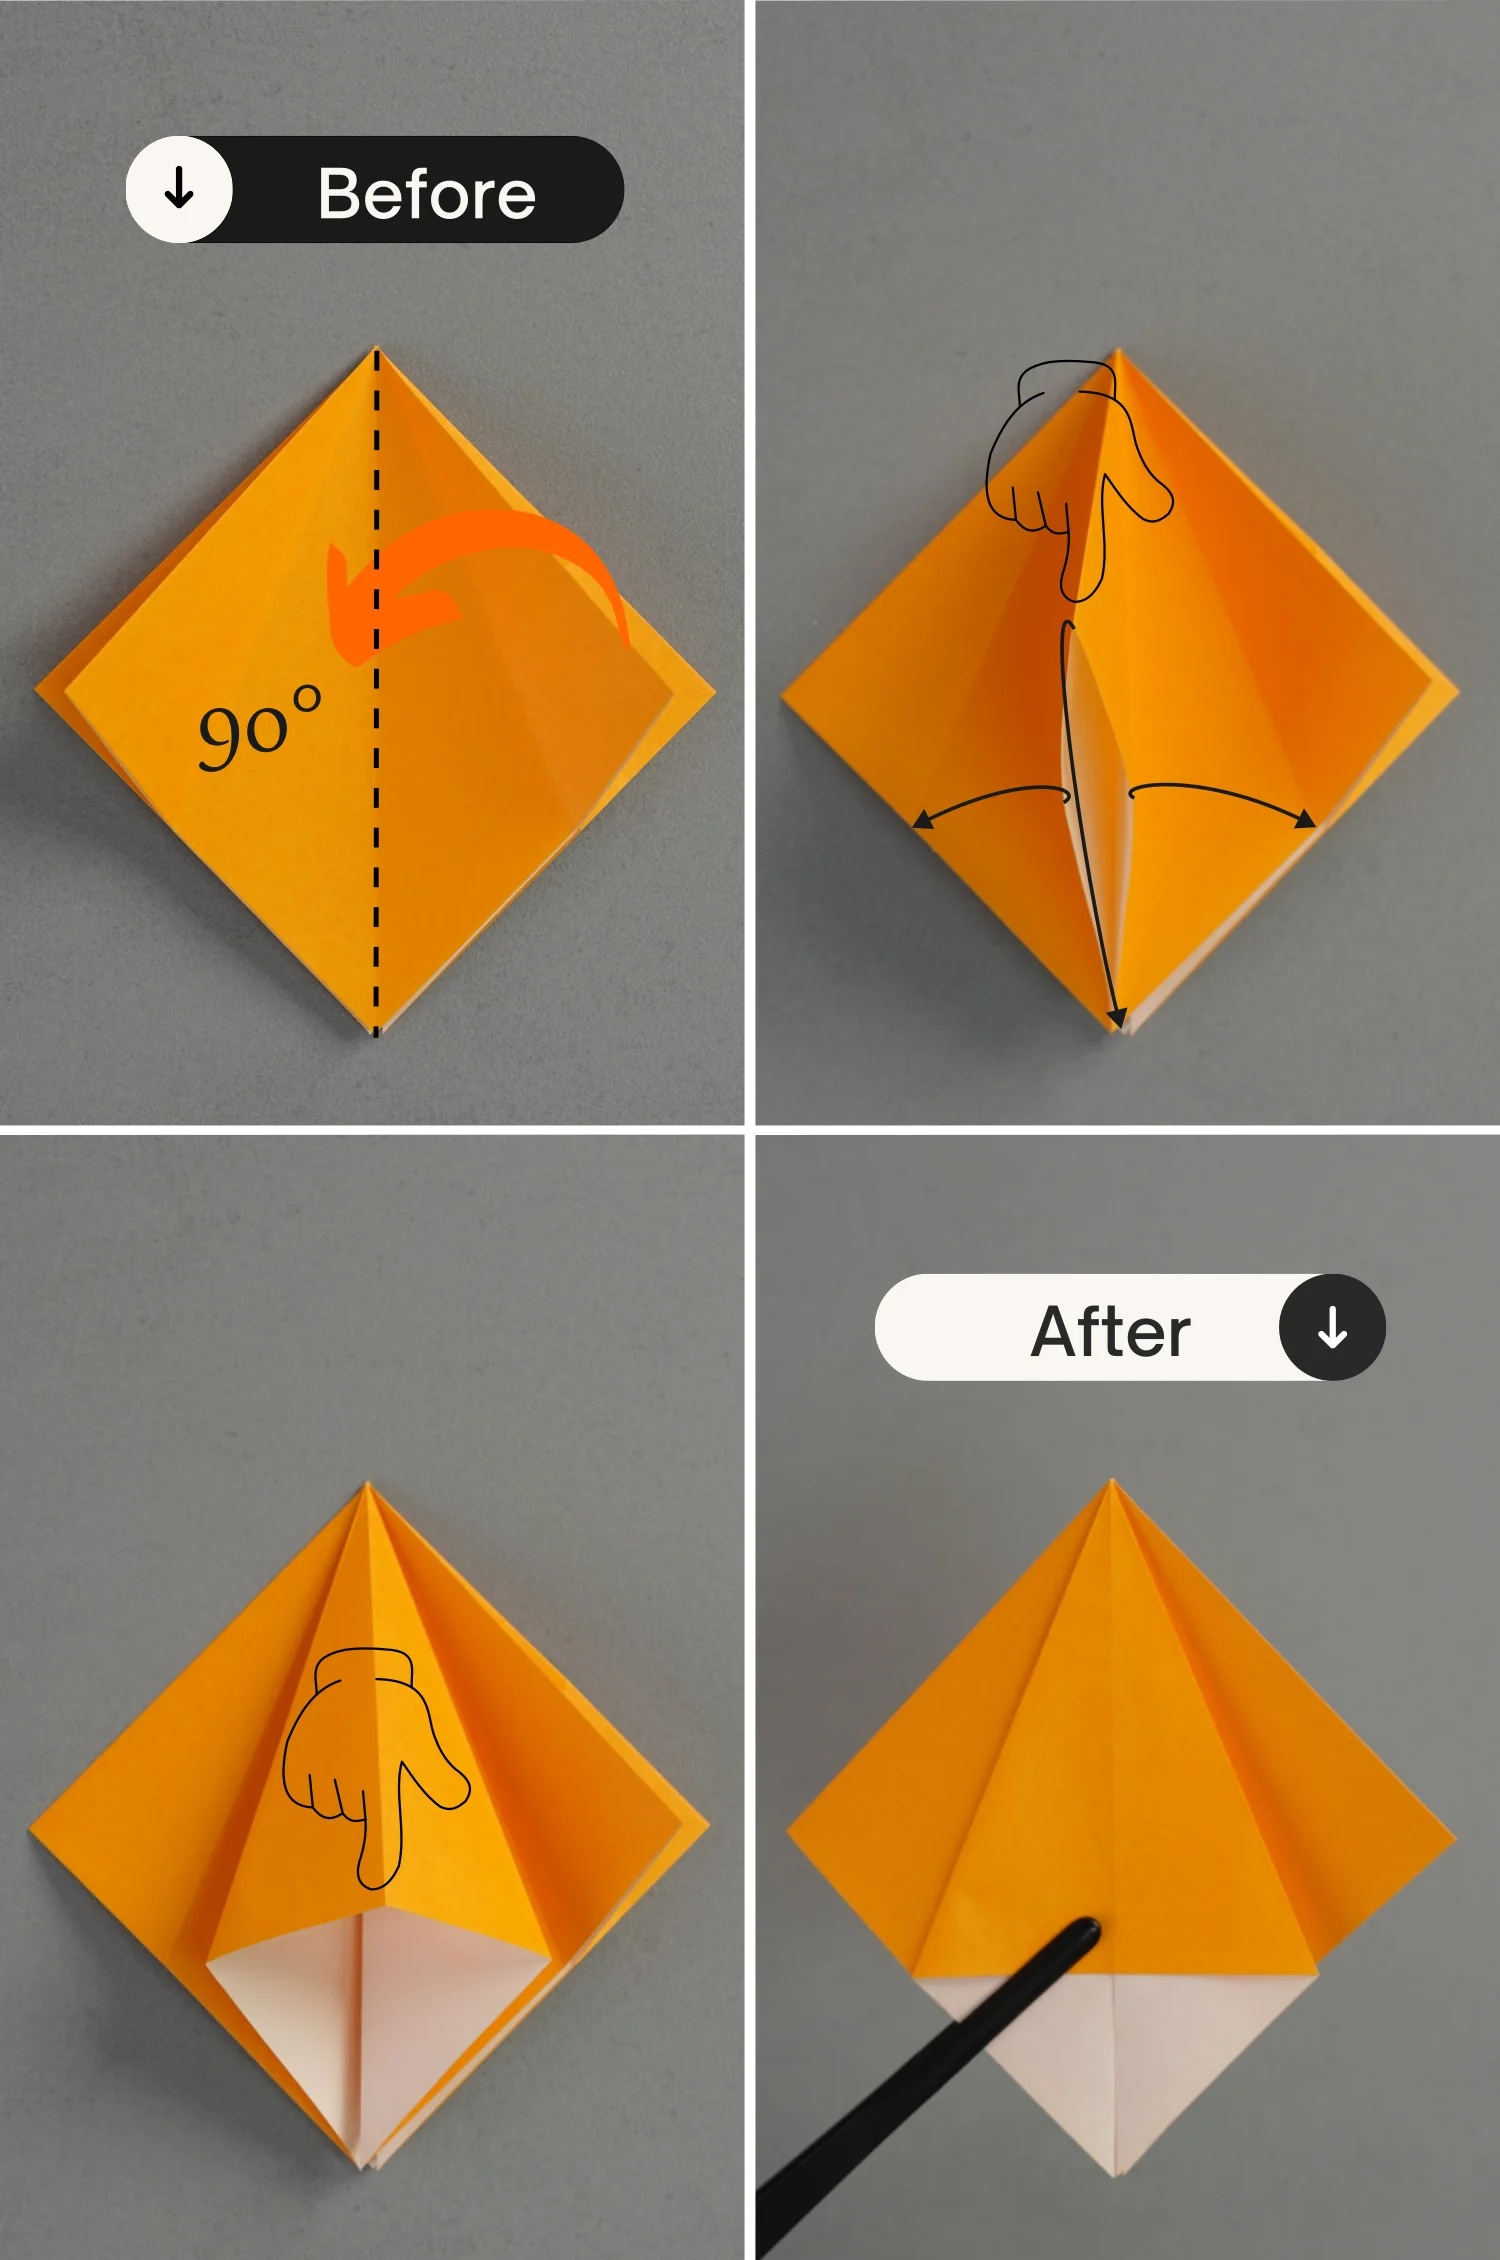
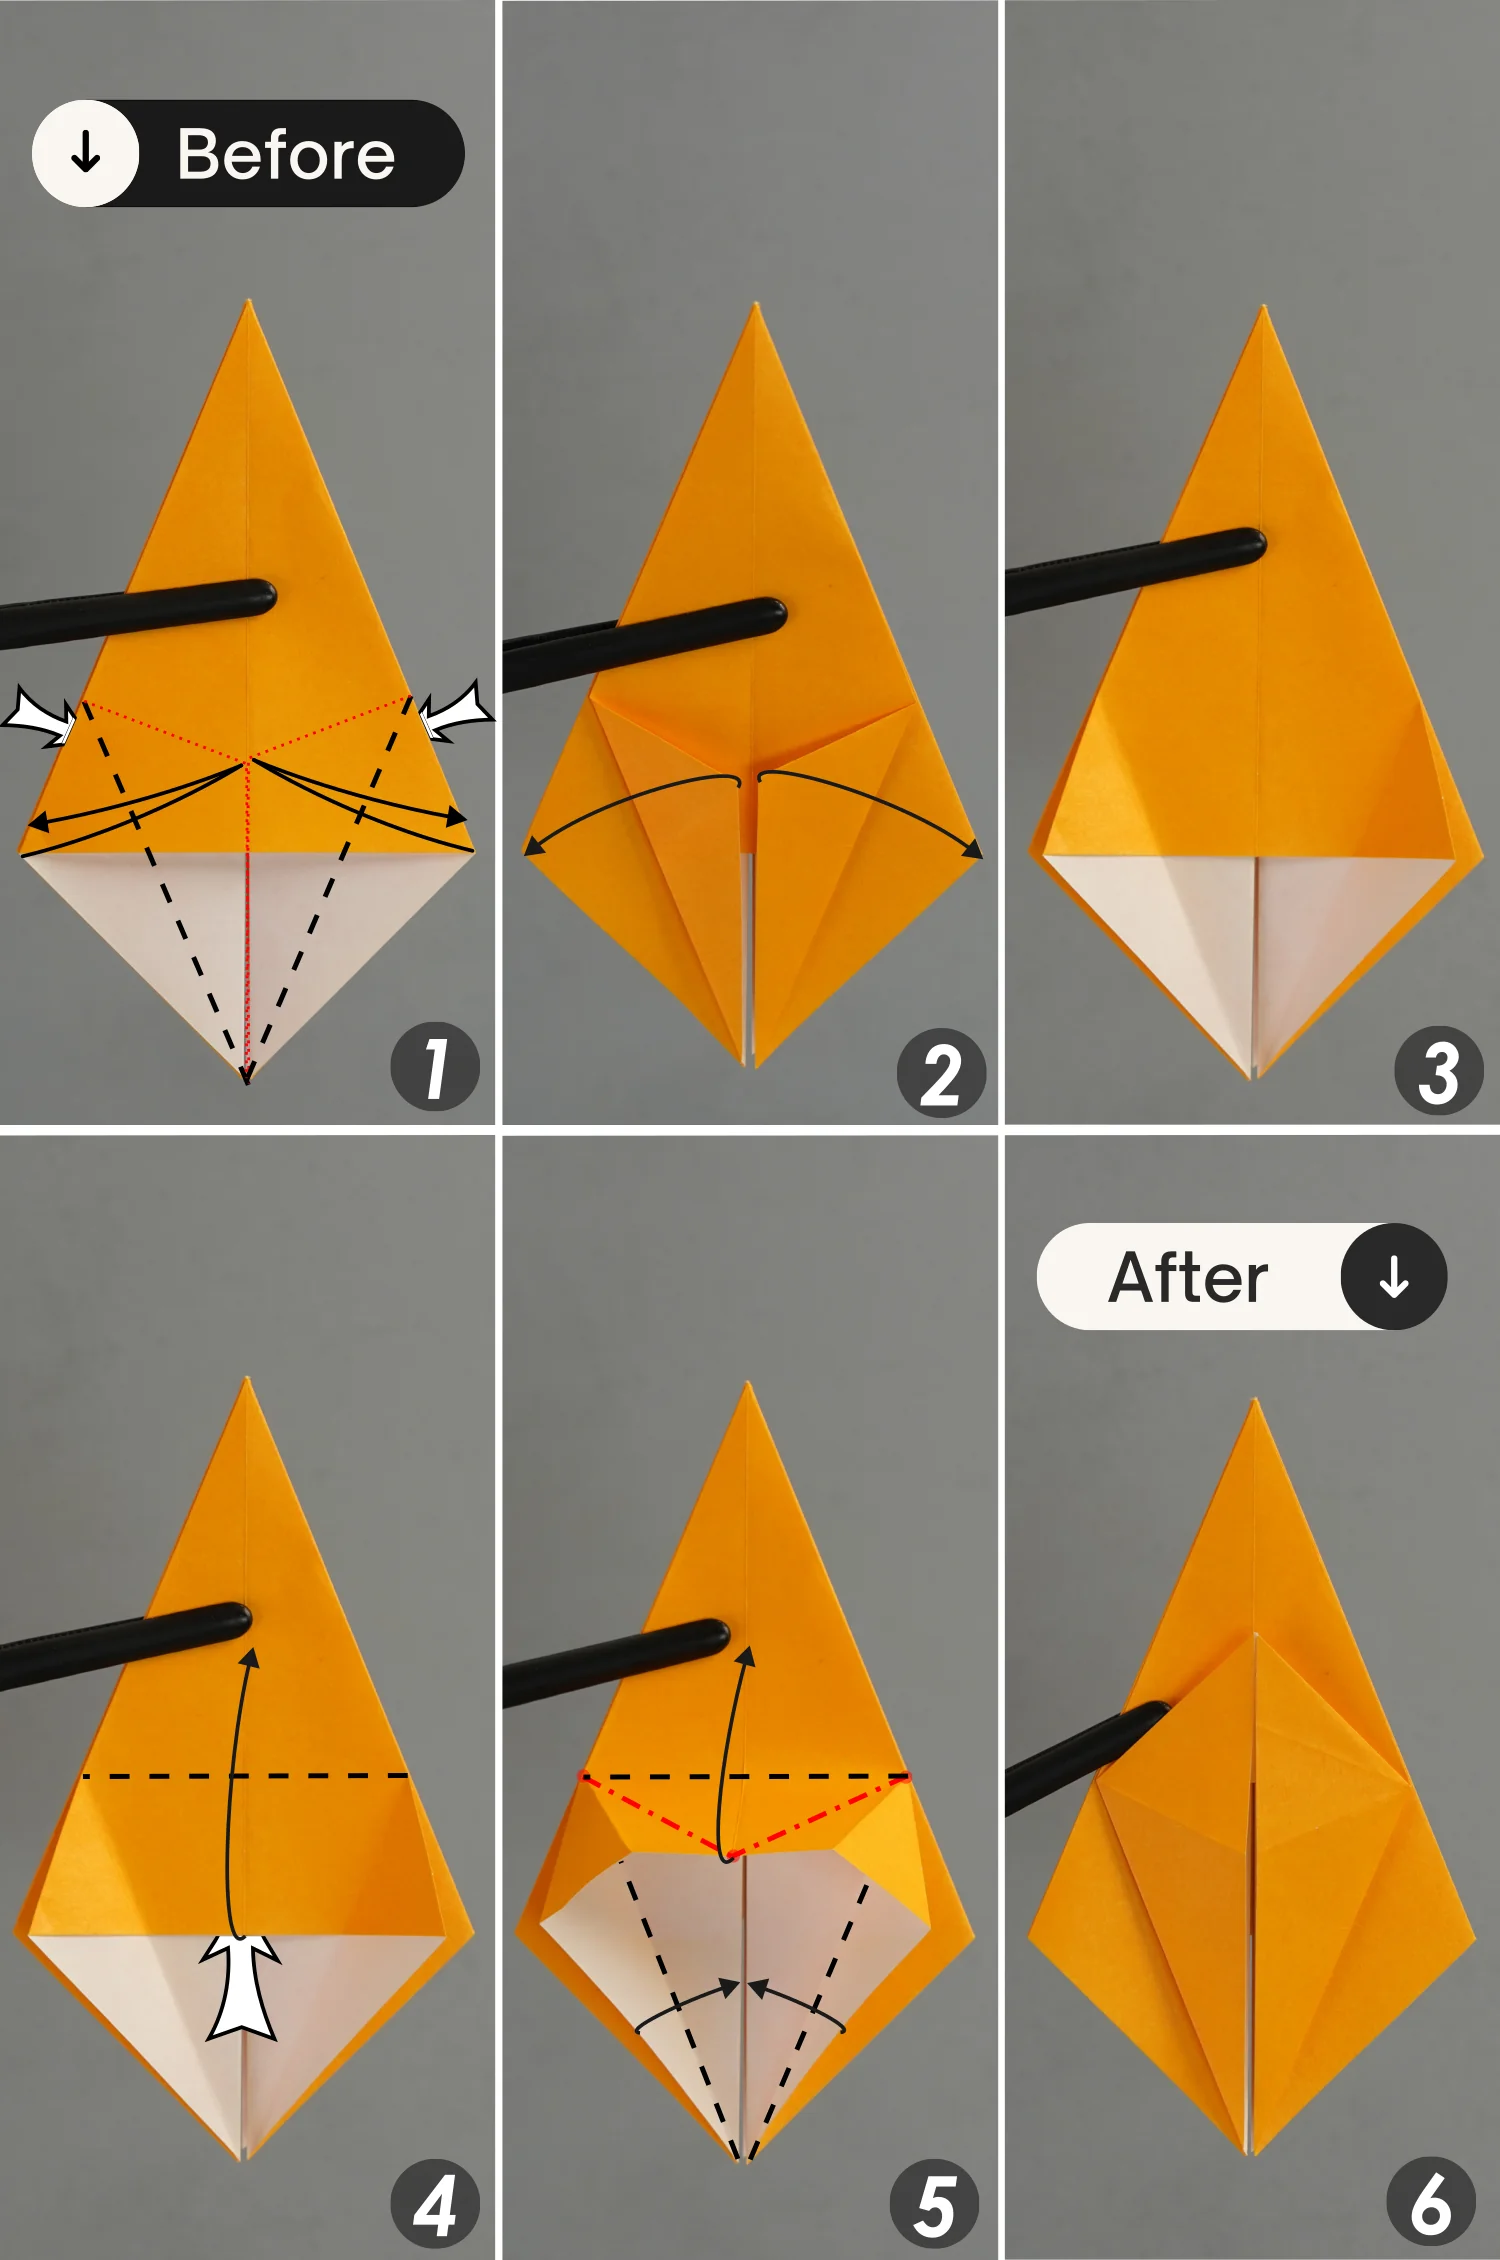
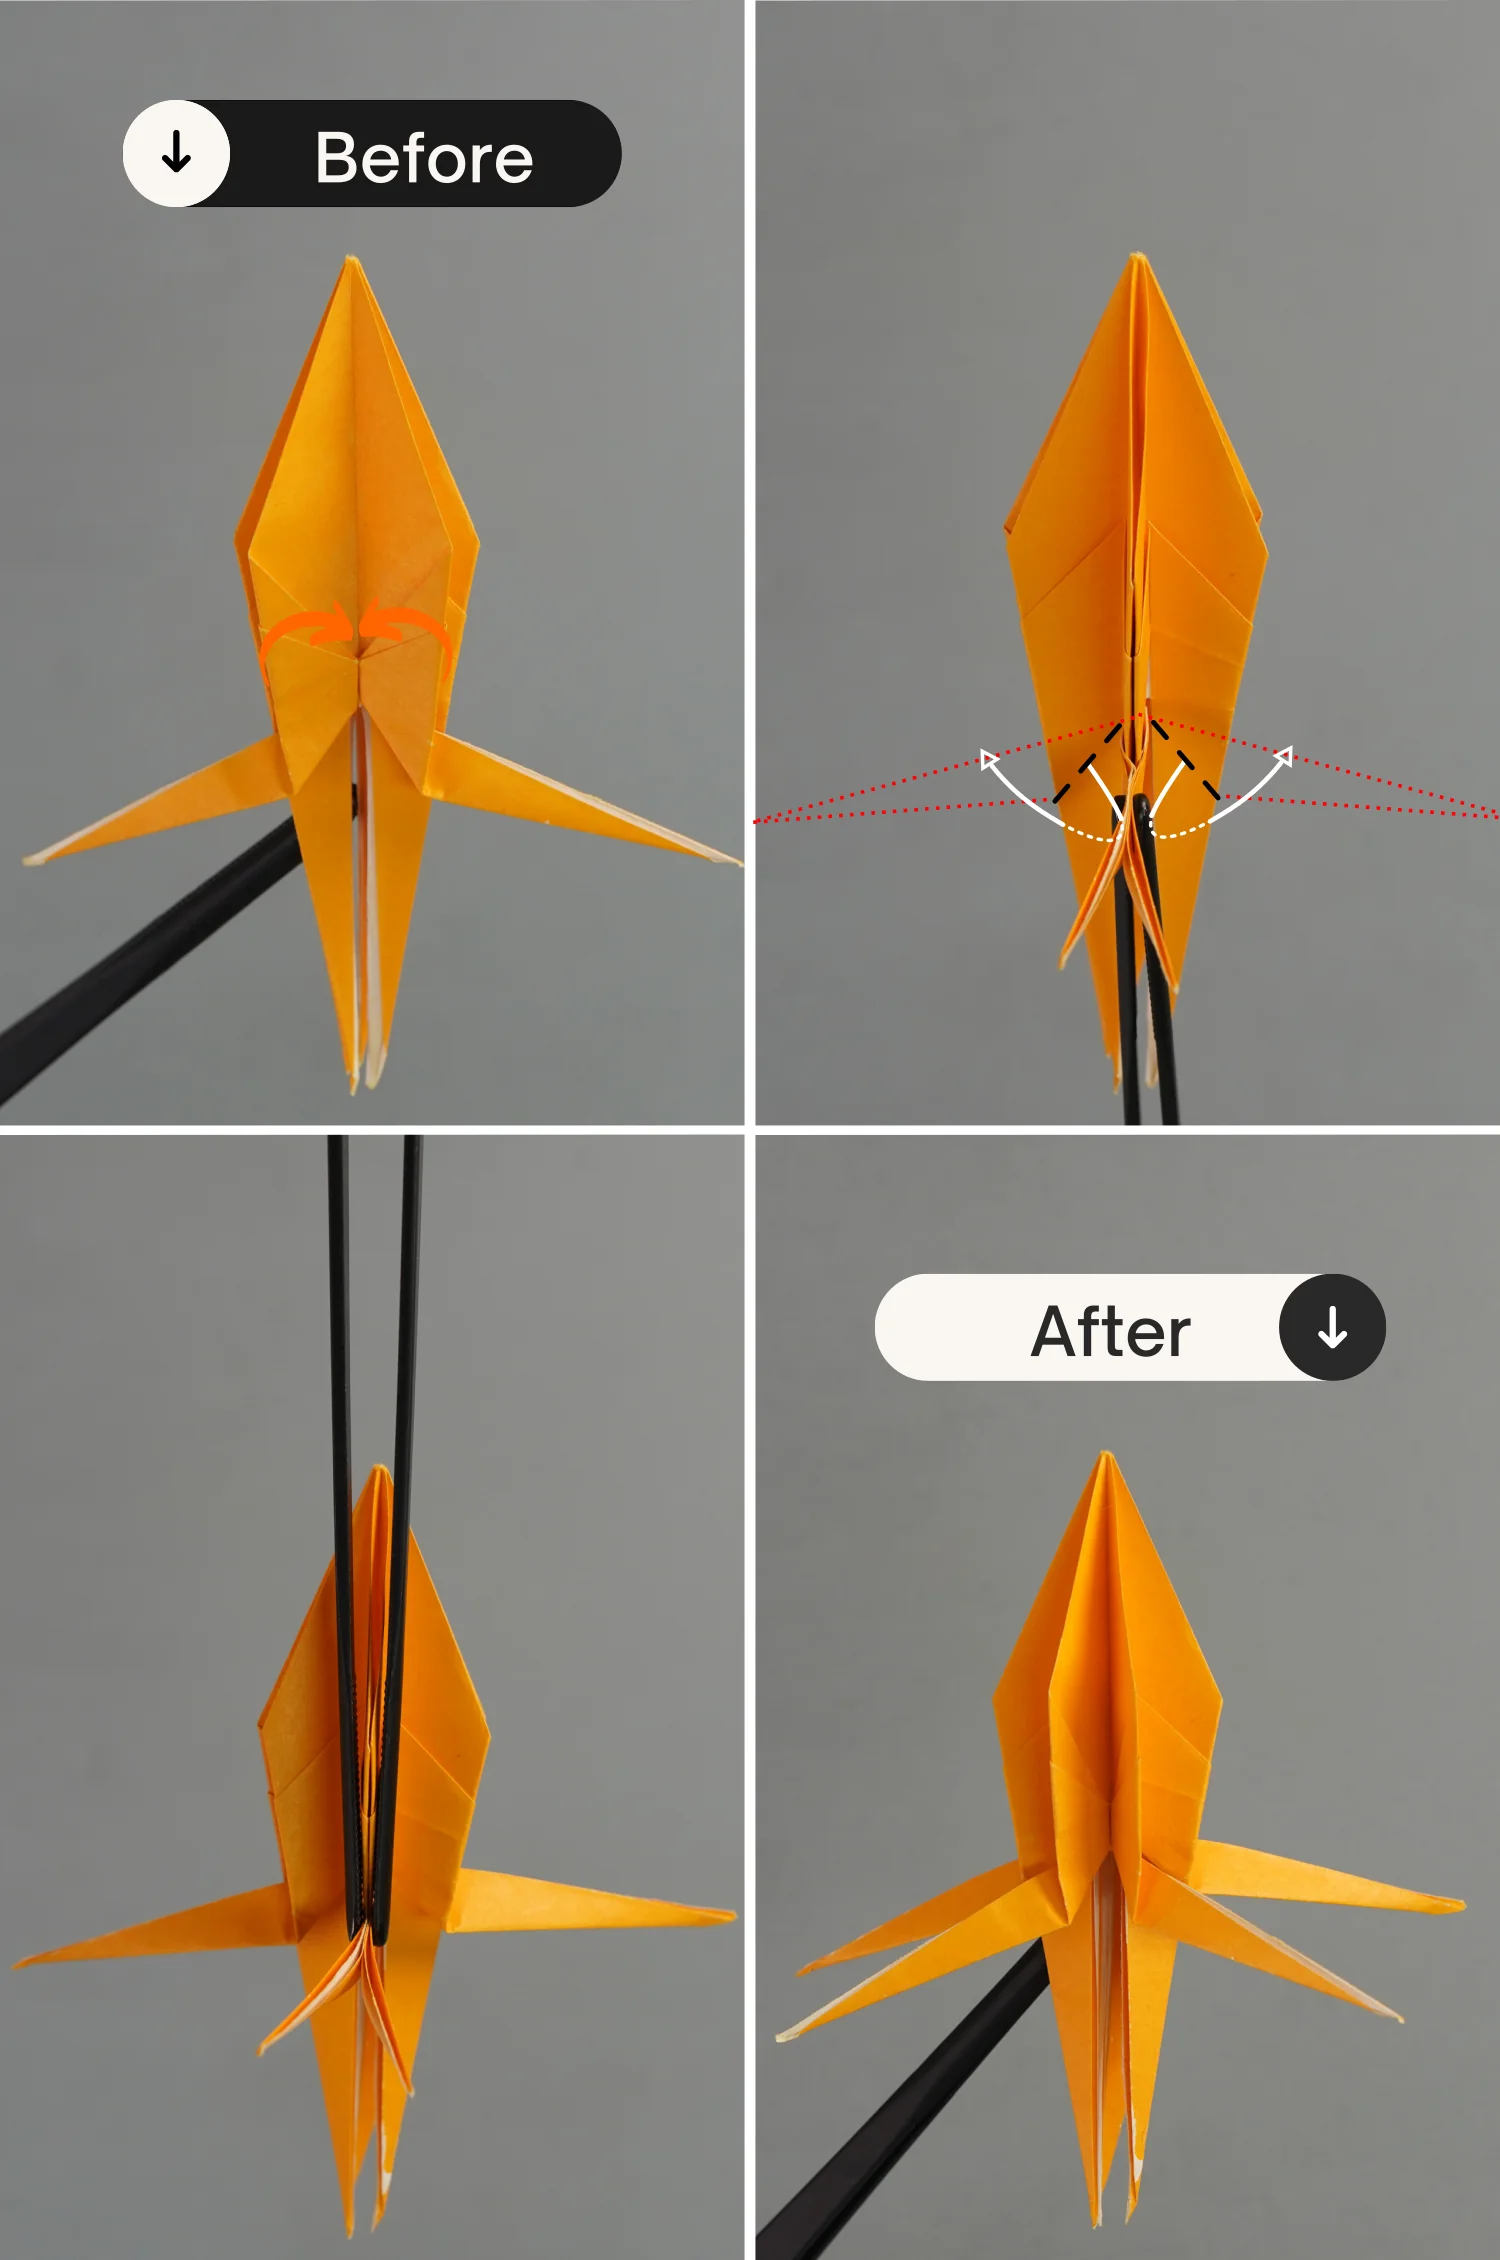
Step 11
Fold the bottom left and right edges of the top layer to align with the vertical crease, and unfold them. [pictures 1 to 3]
Lift the top layer along the black dotted line, push the left and right points toward the center, and finally, flatten the pocket. [pictures 4 to 6]
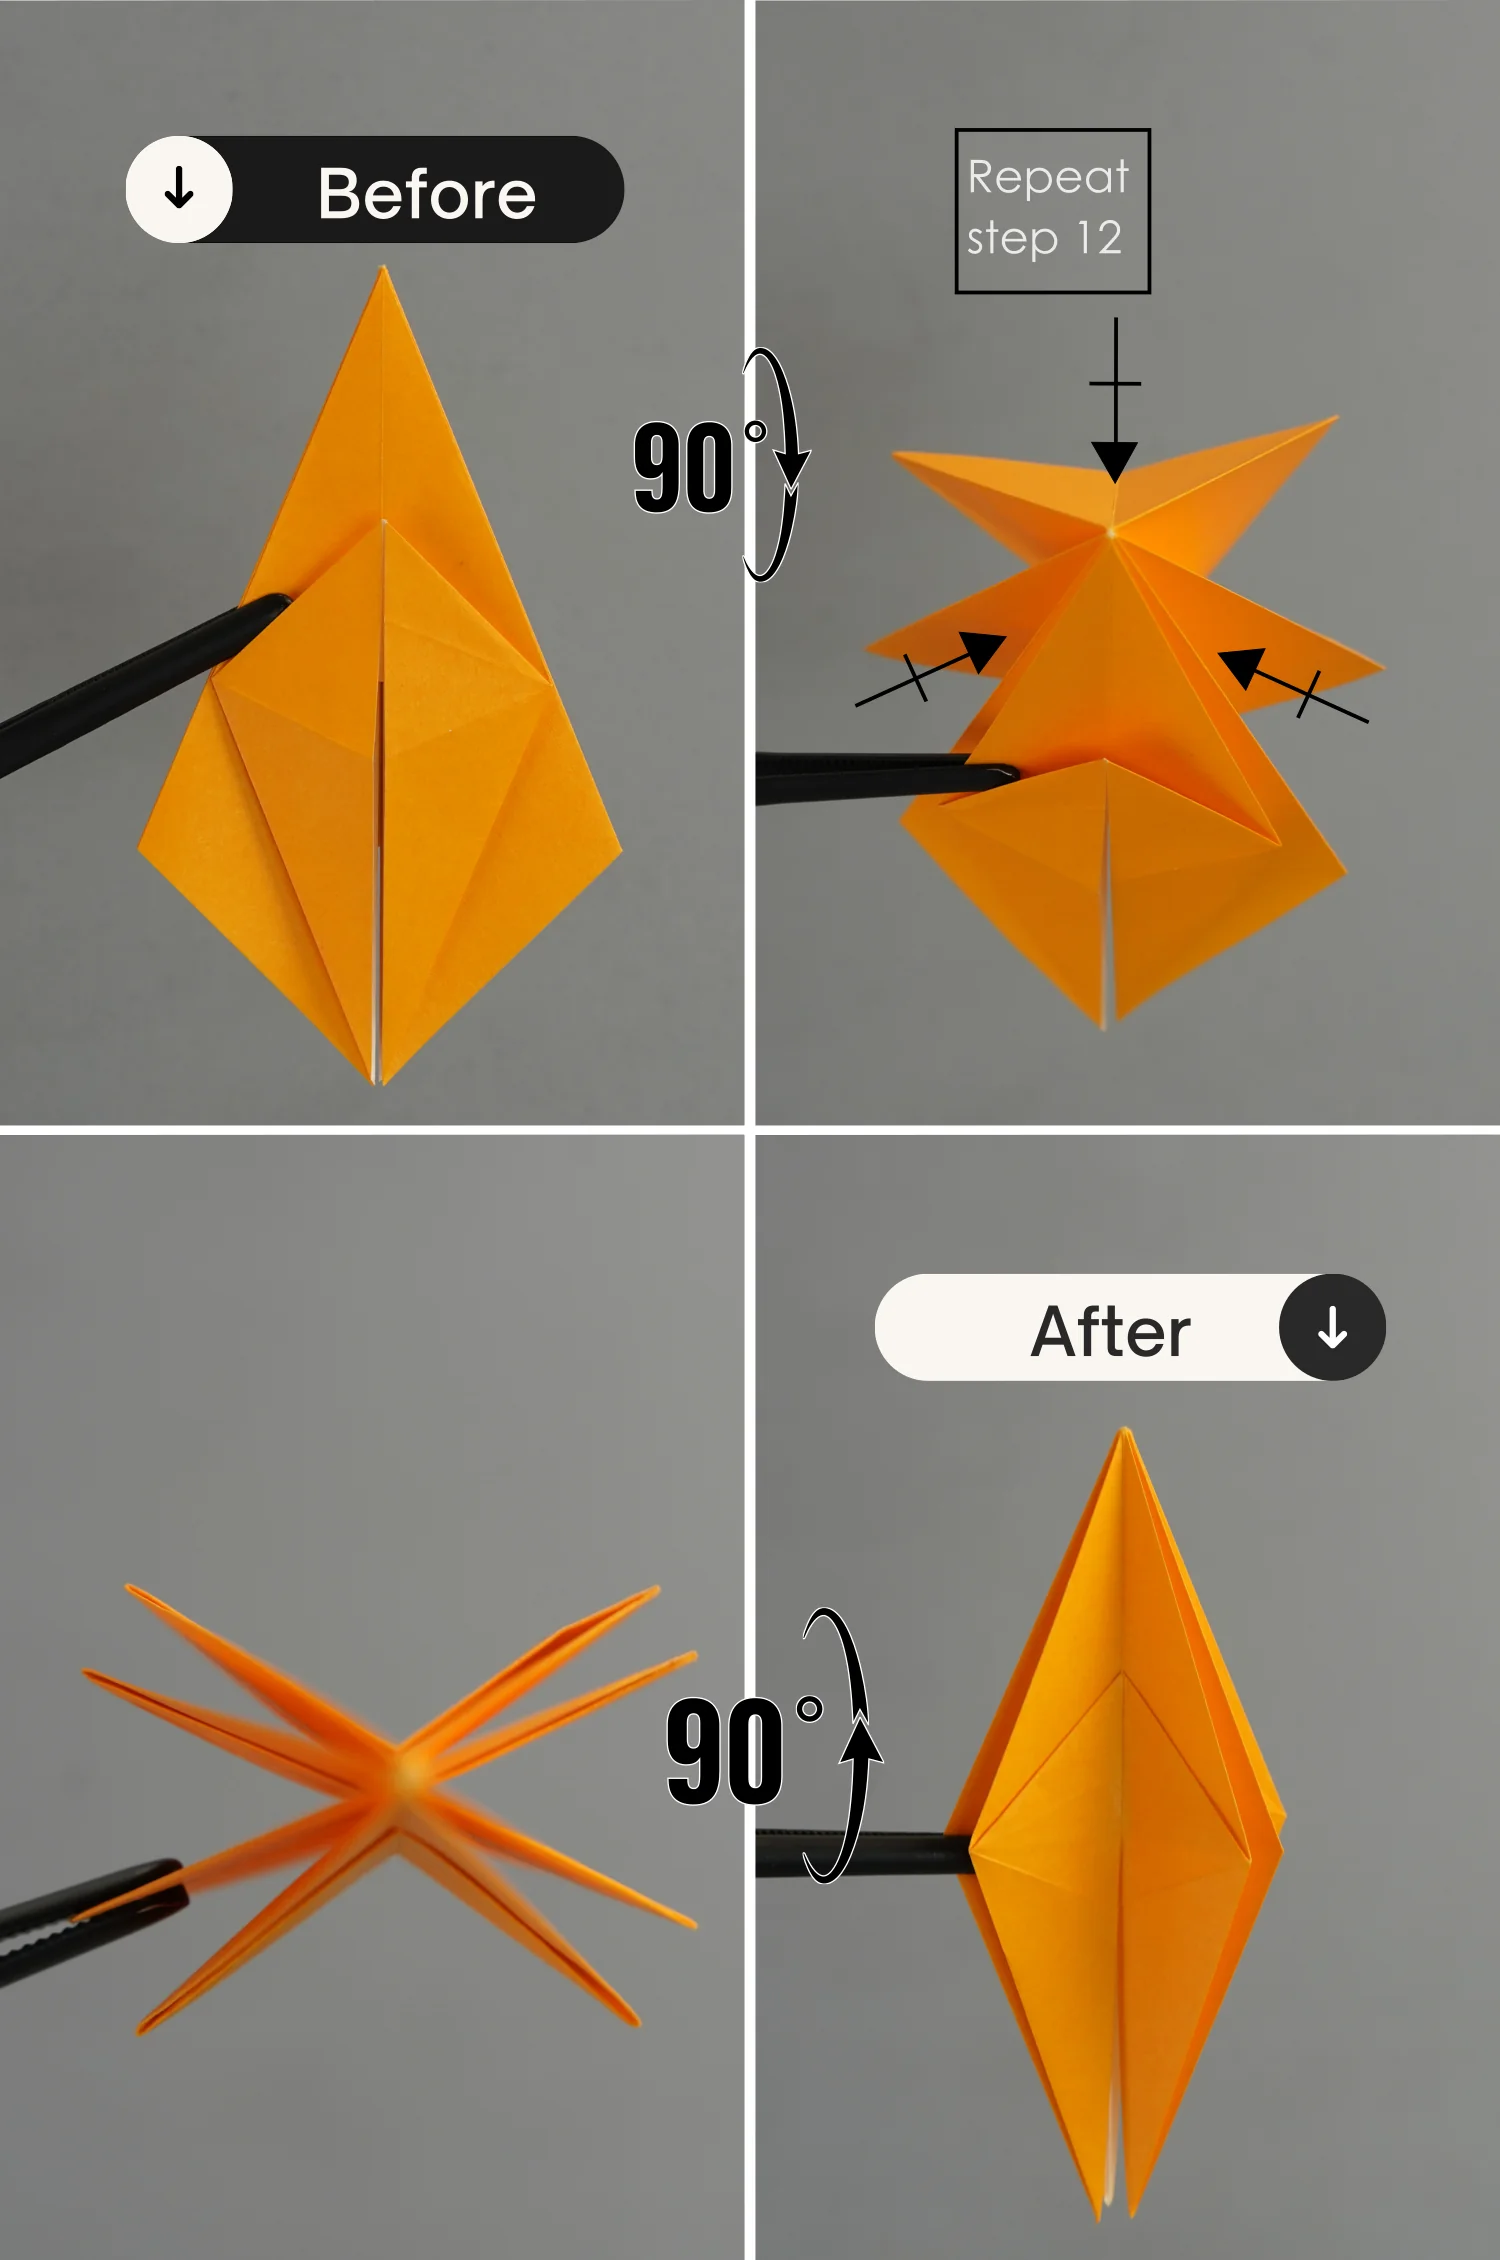
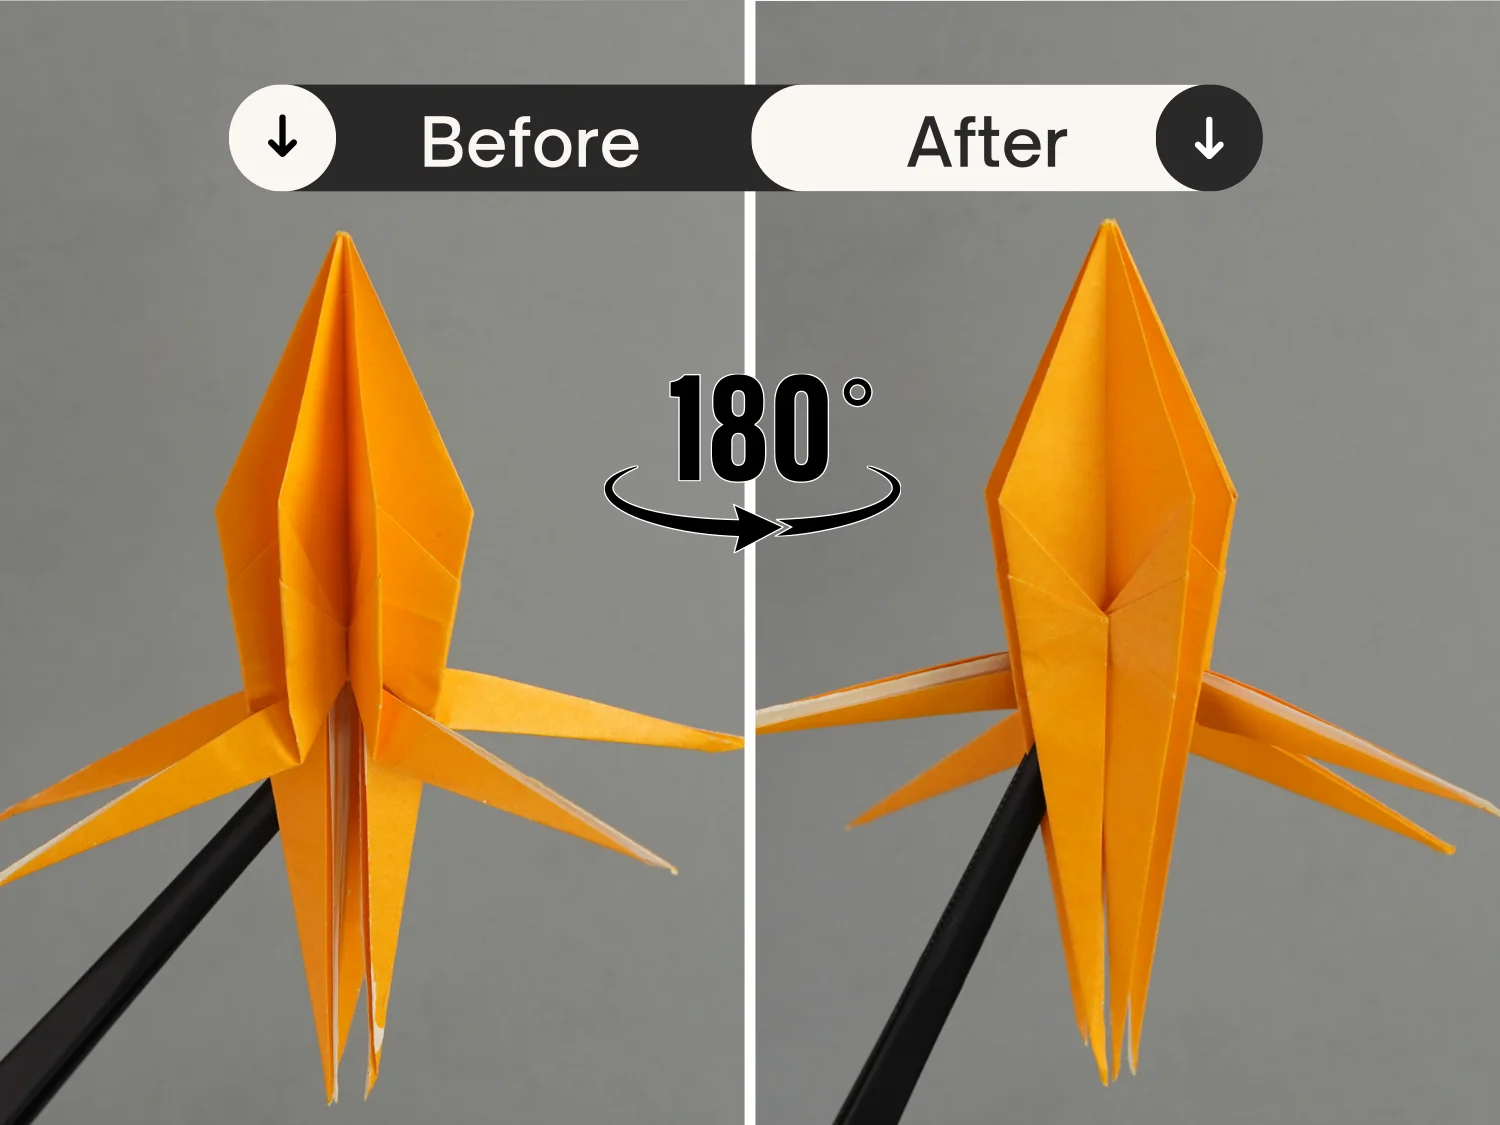
Step 12
Rotate it 90 degrees from front to back, and repeat step 11 for the other three sides, as the second picture shows. Then rotate it 90 degrees from back to front.
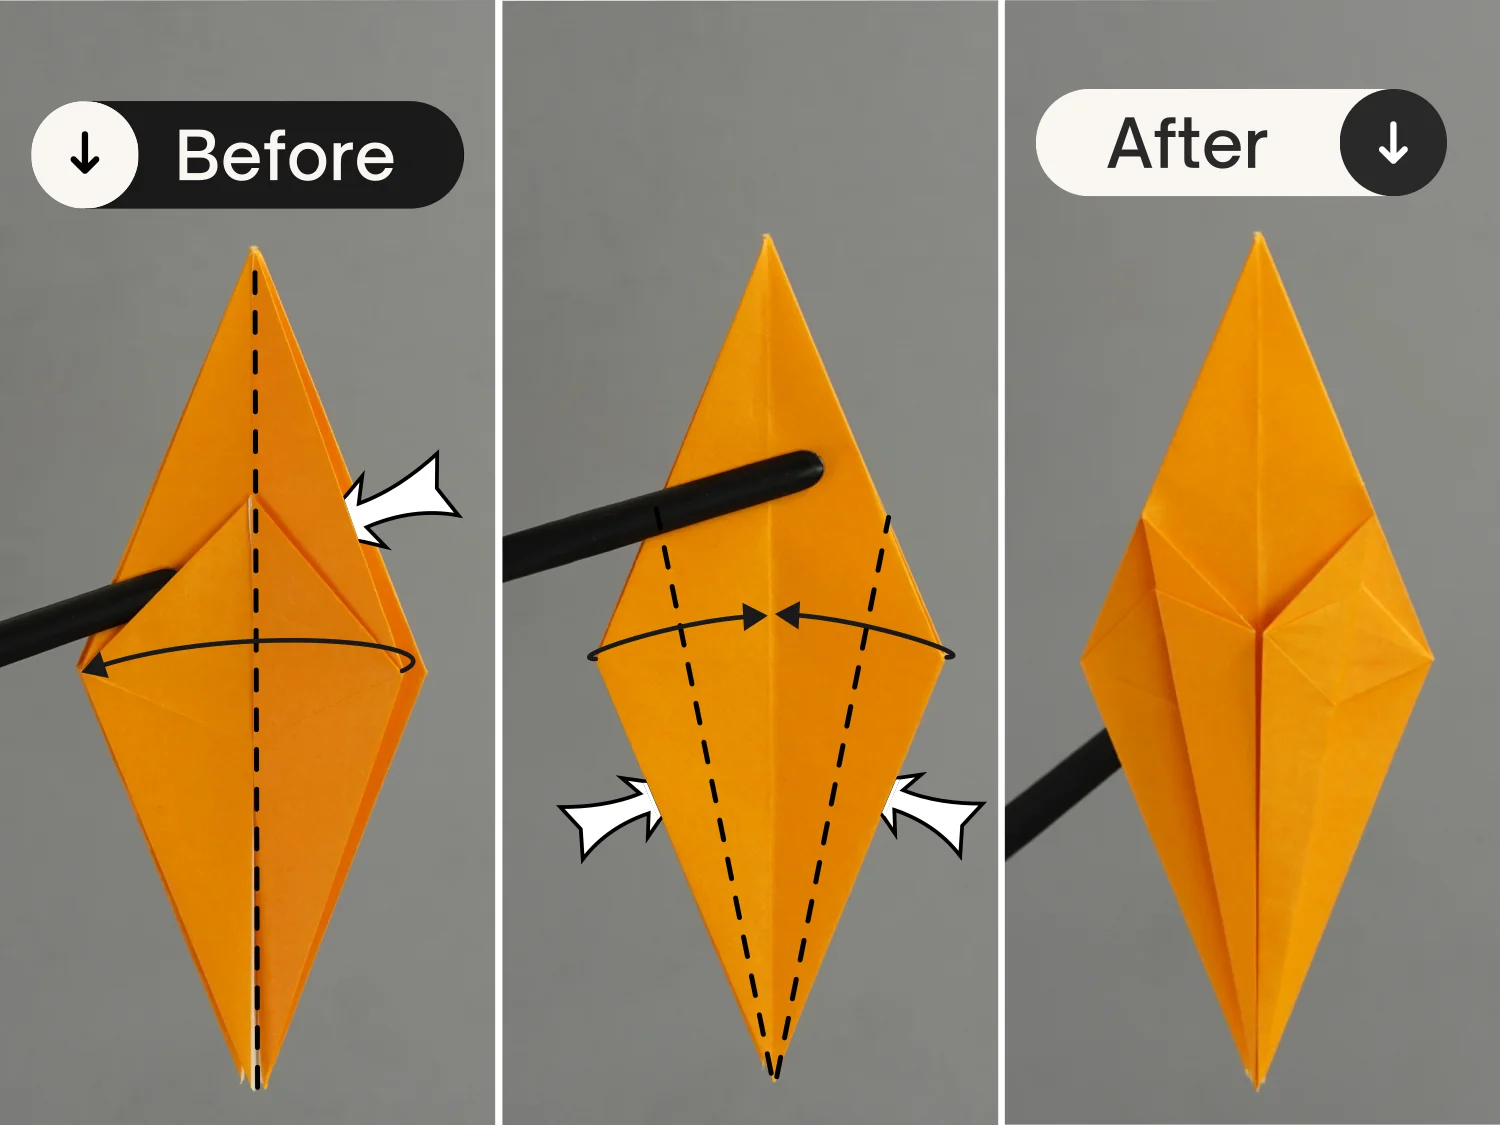
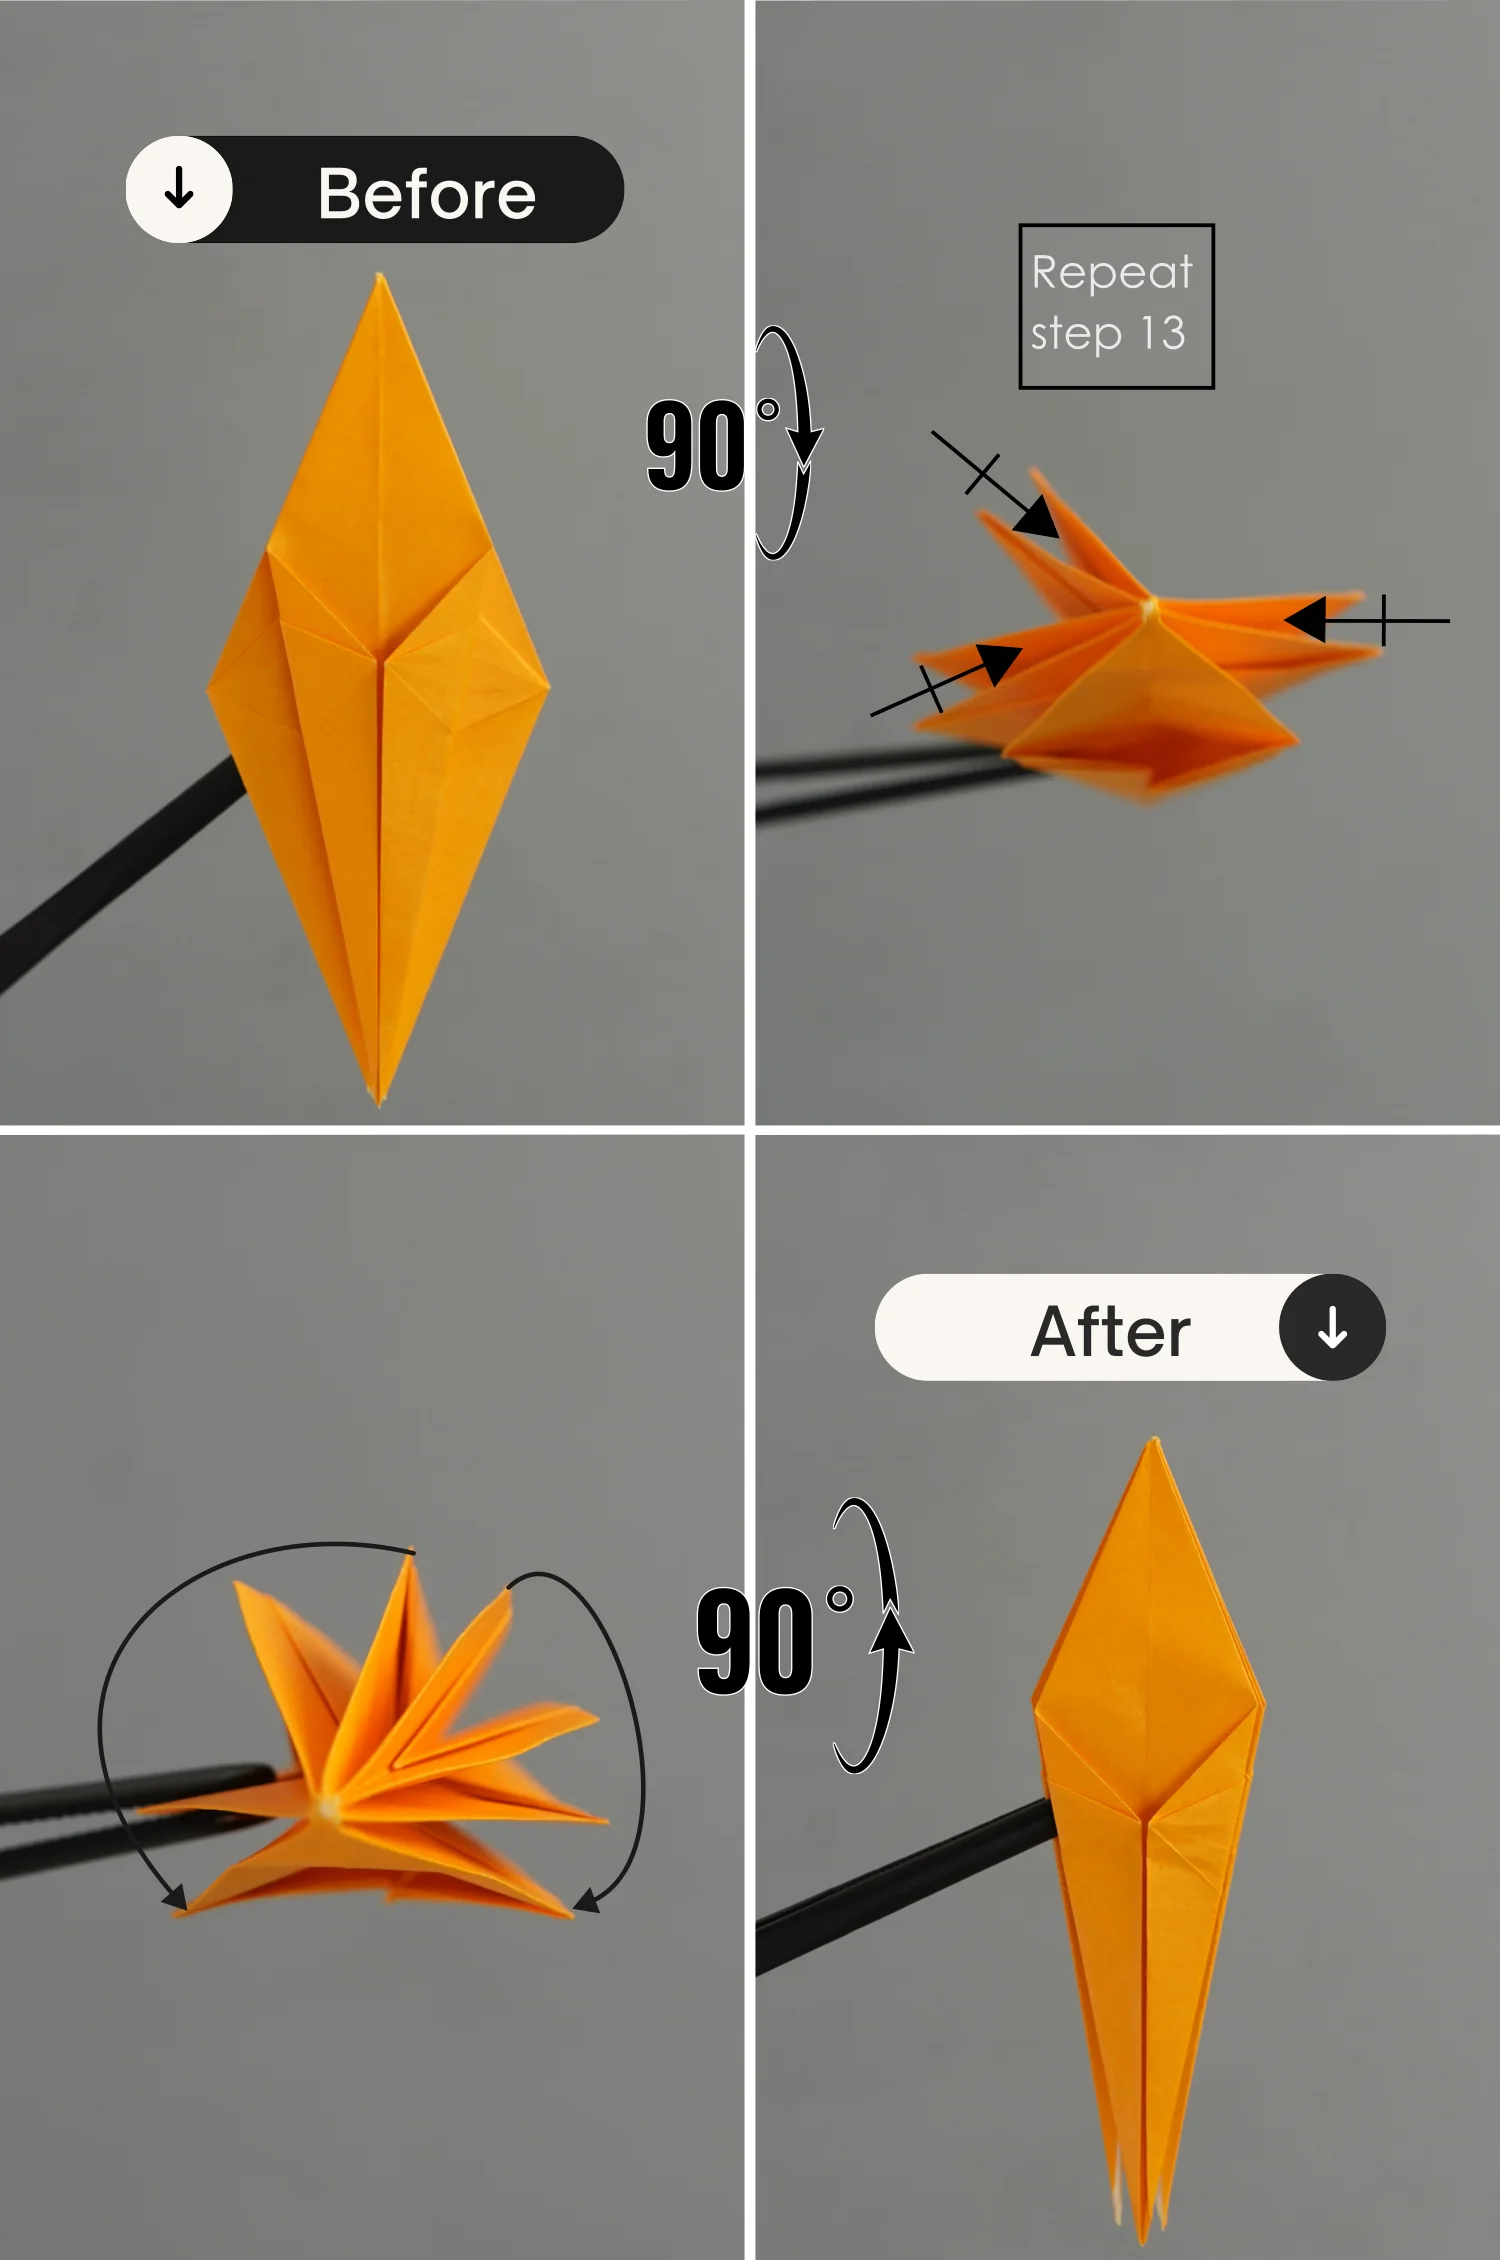
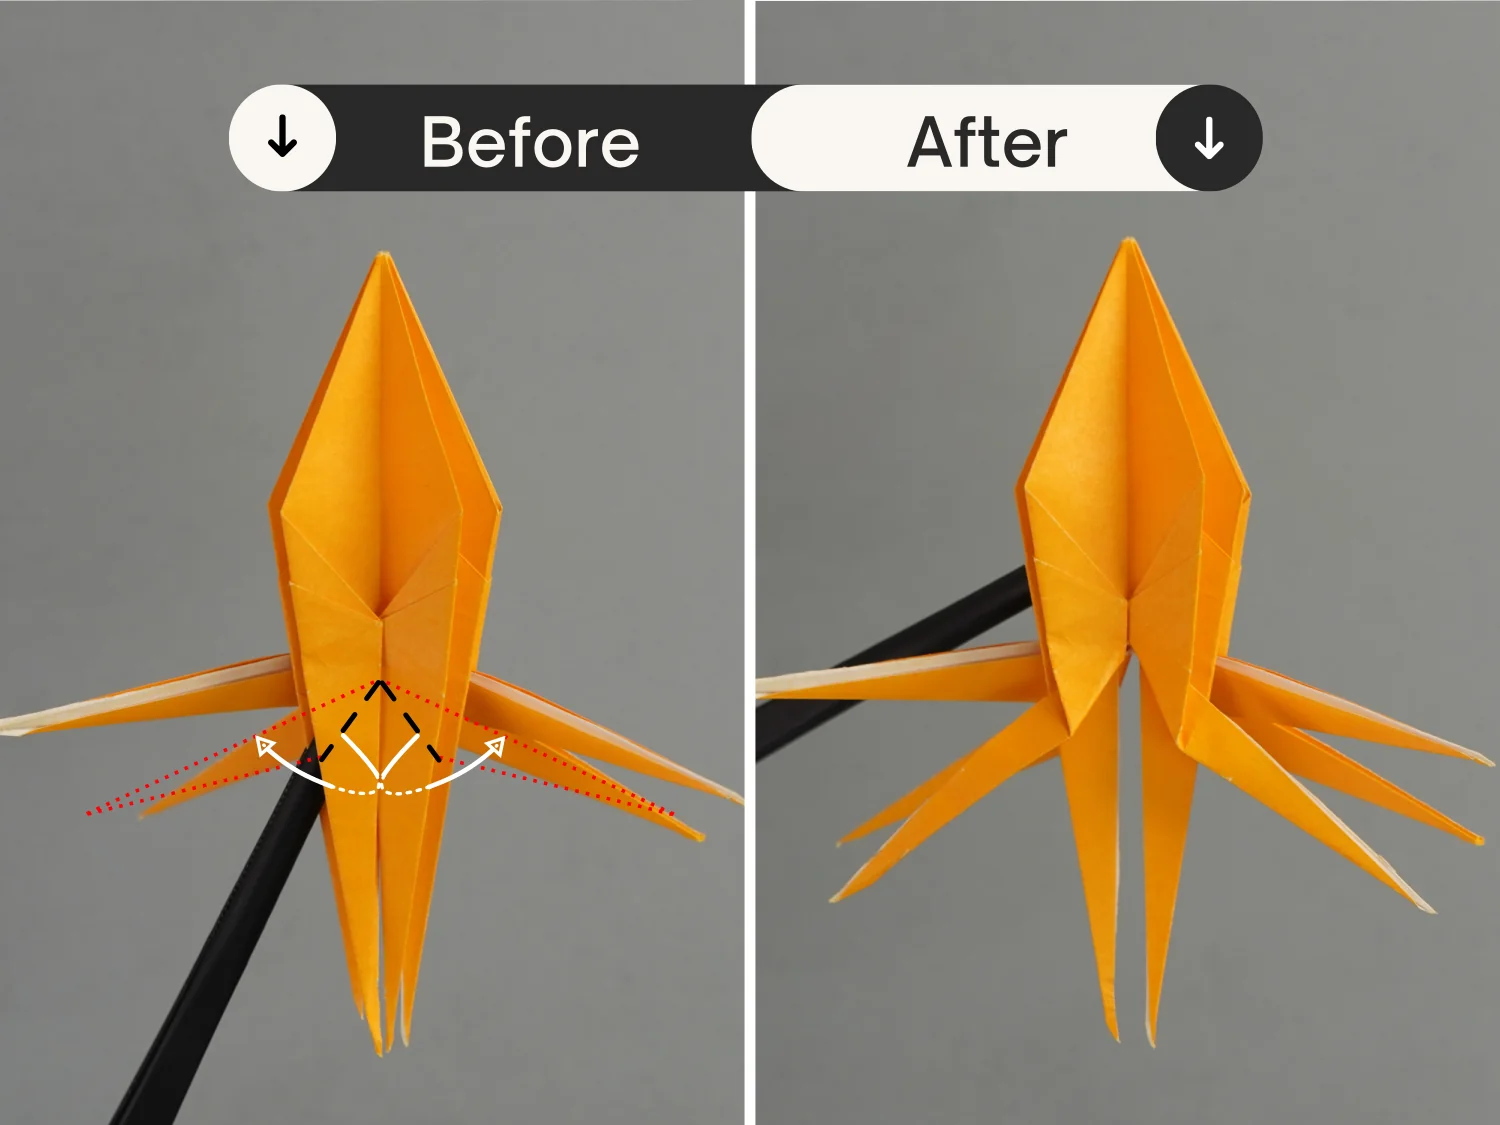
Step 13
Fold the top right layer to the left side, then fold the bottom left and right edges to align with the middle vertical crease.
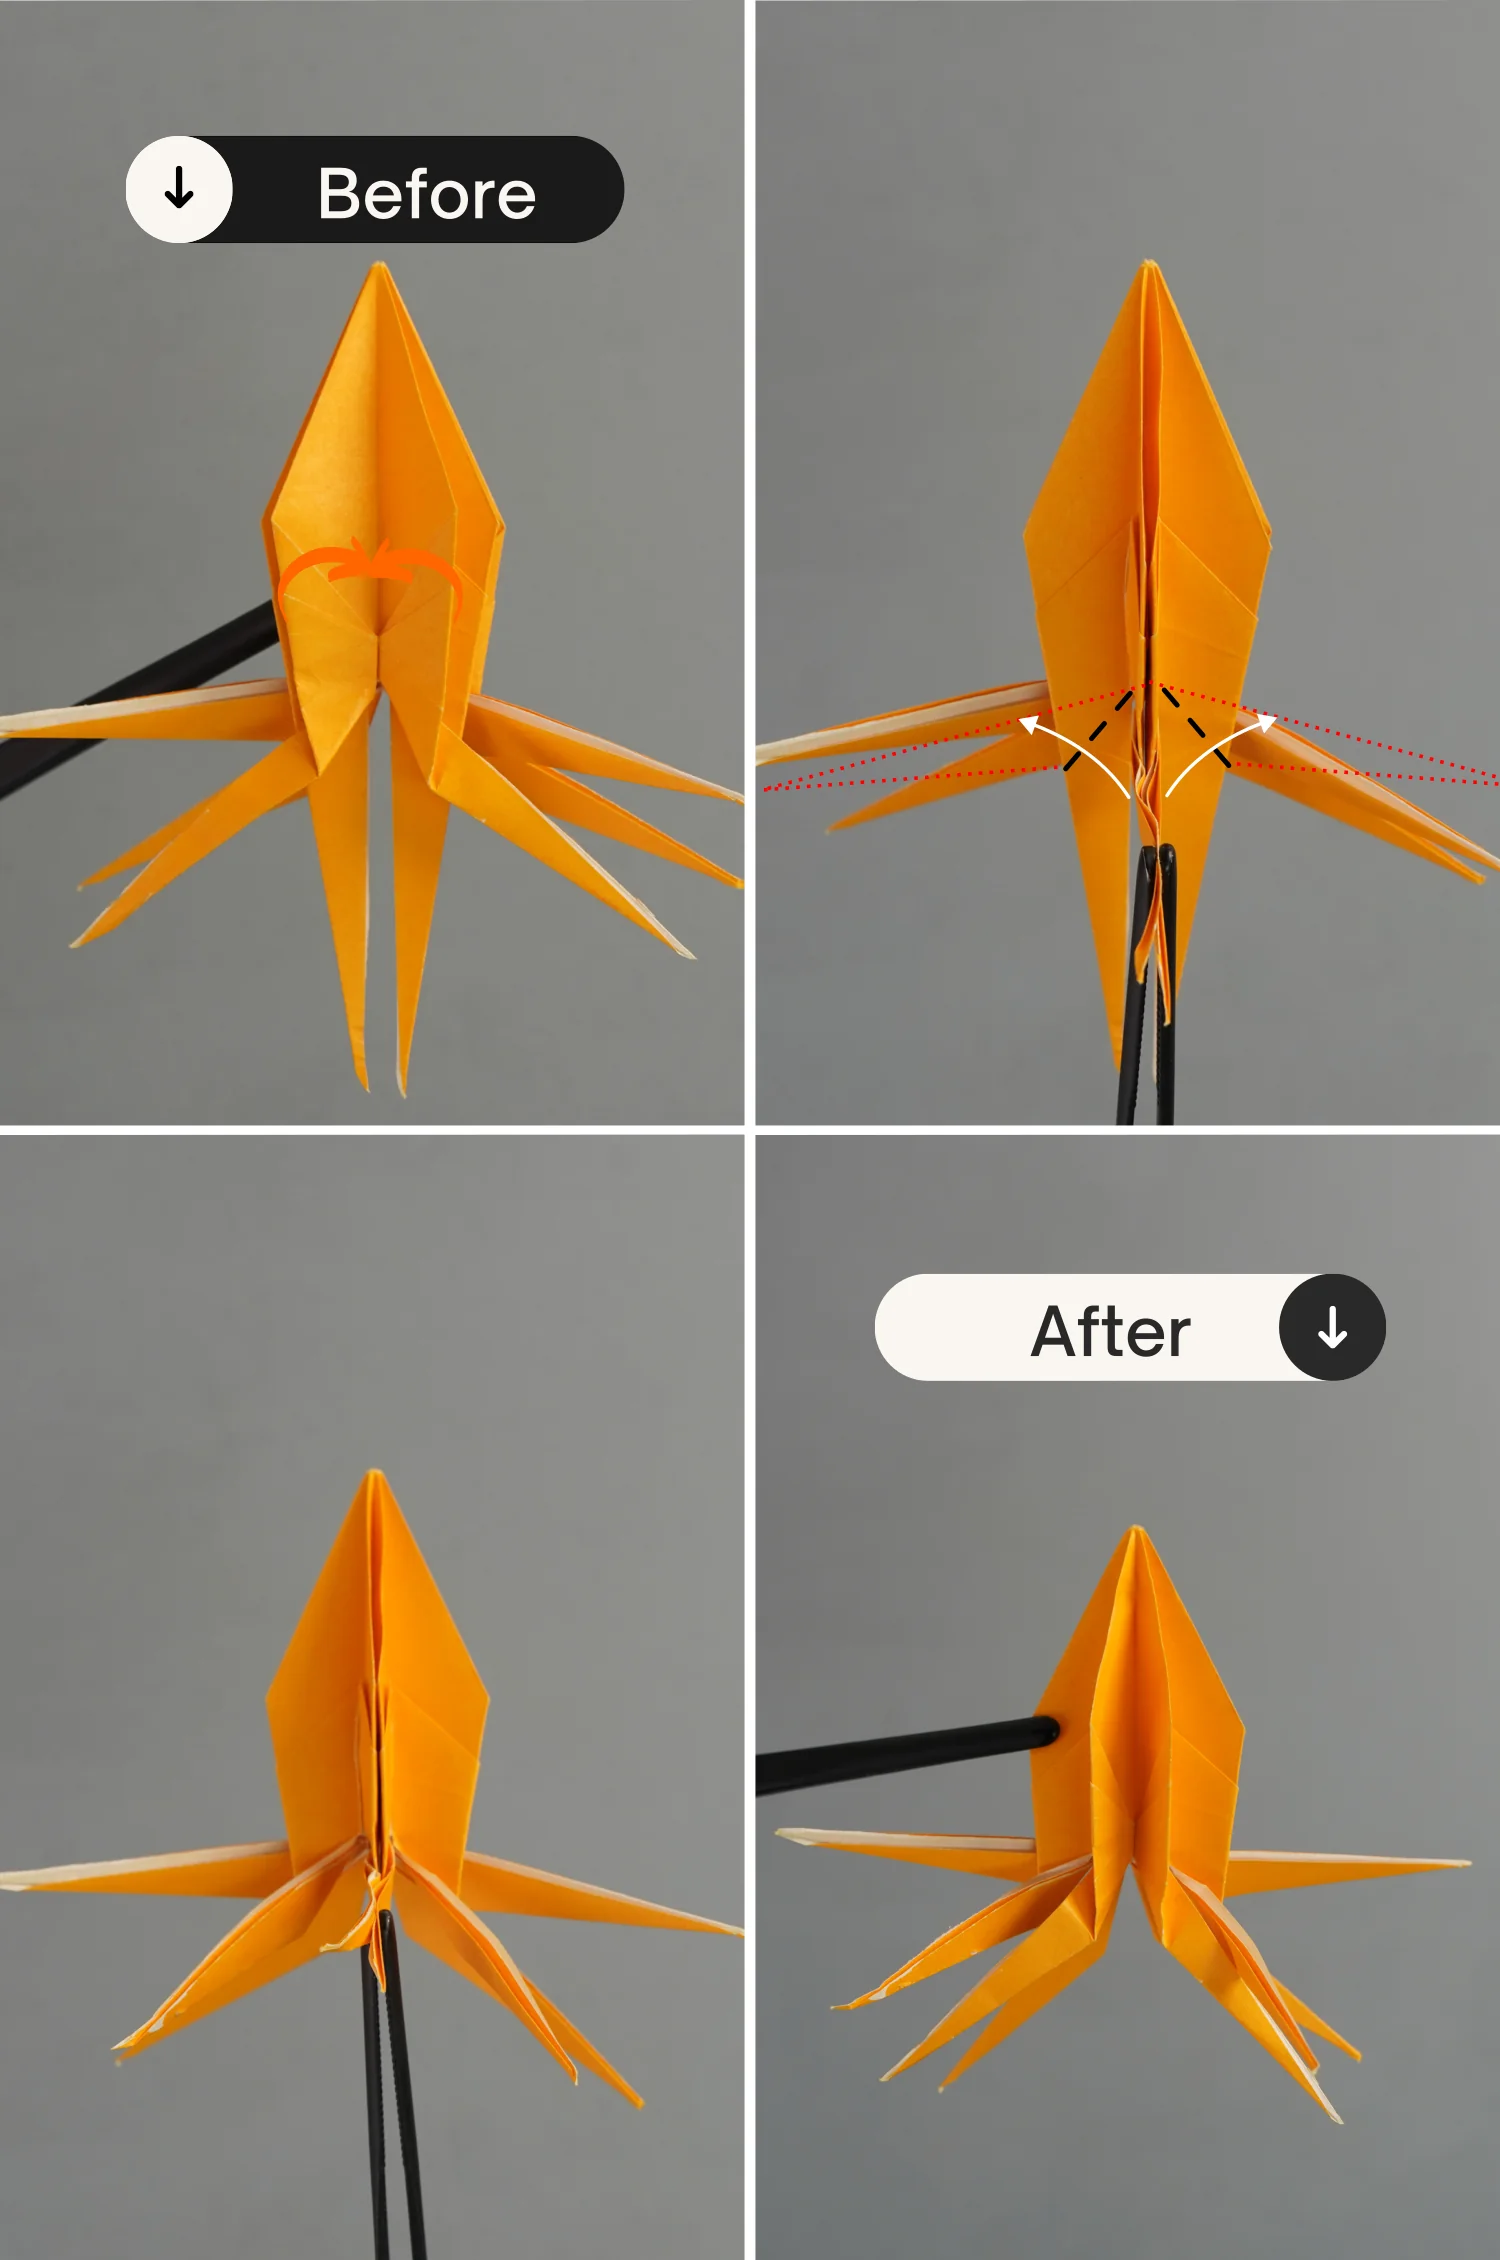
Step 14
Rotate it 90 degrees from front to back, and repeat step 13 for the other three sides, as the second picture shows. Then rotate it 90 degrees from back to front.
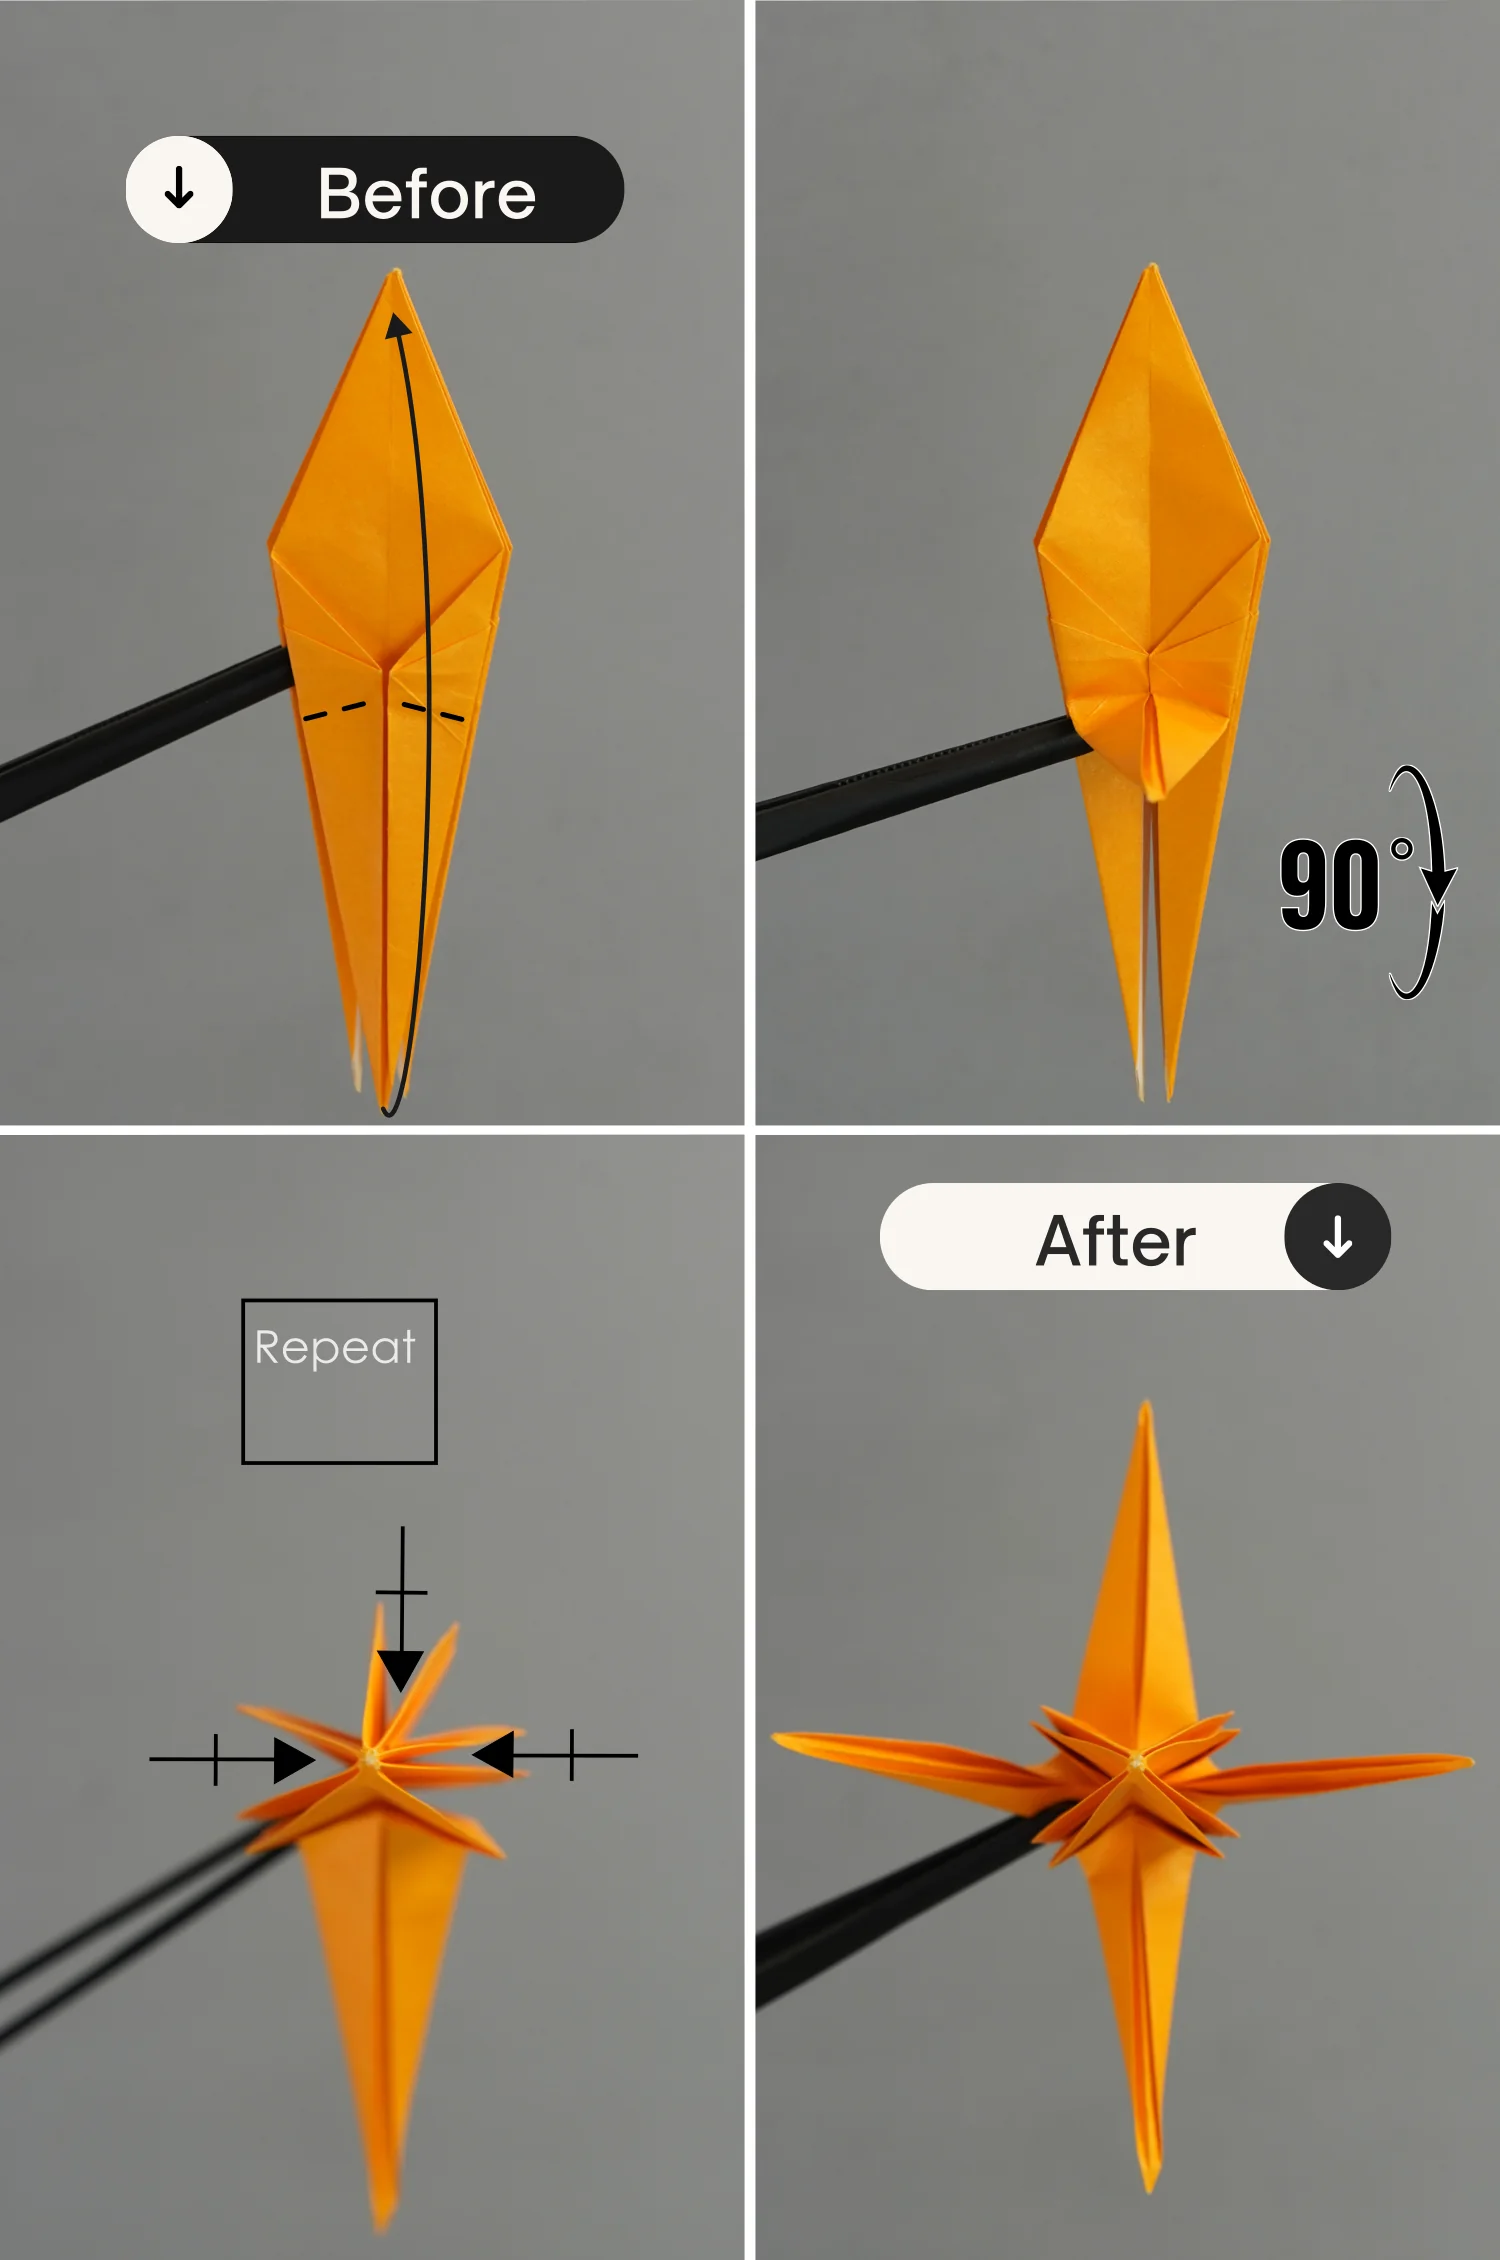
Step 15
Fold up the bottom point, then rotate the paper 90 degrees from front to back, and repeat this for the other three sides.
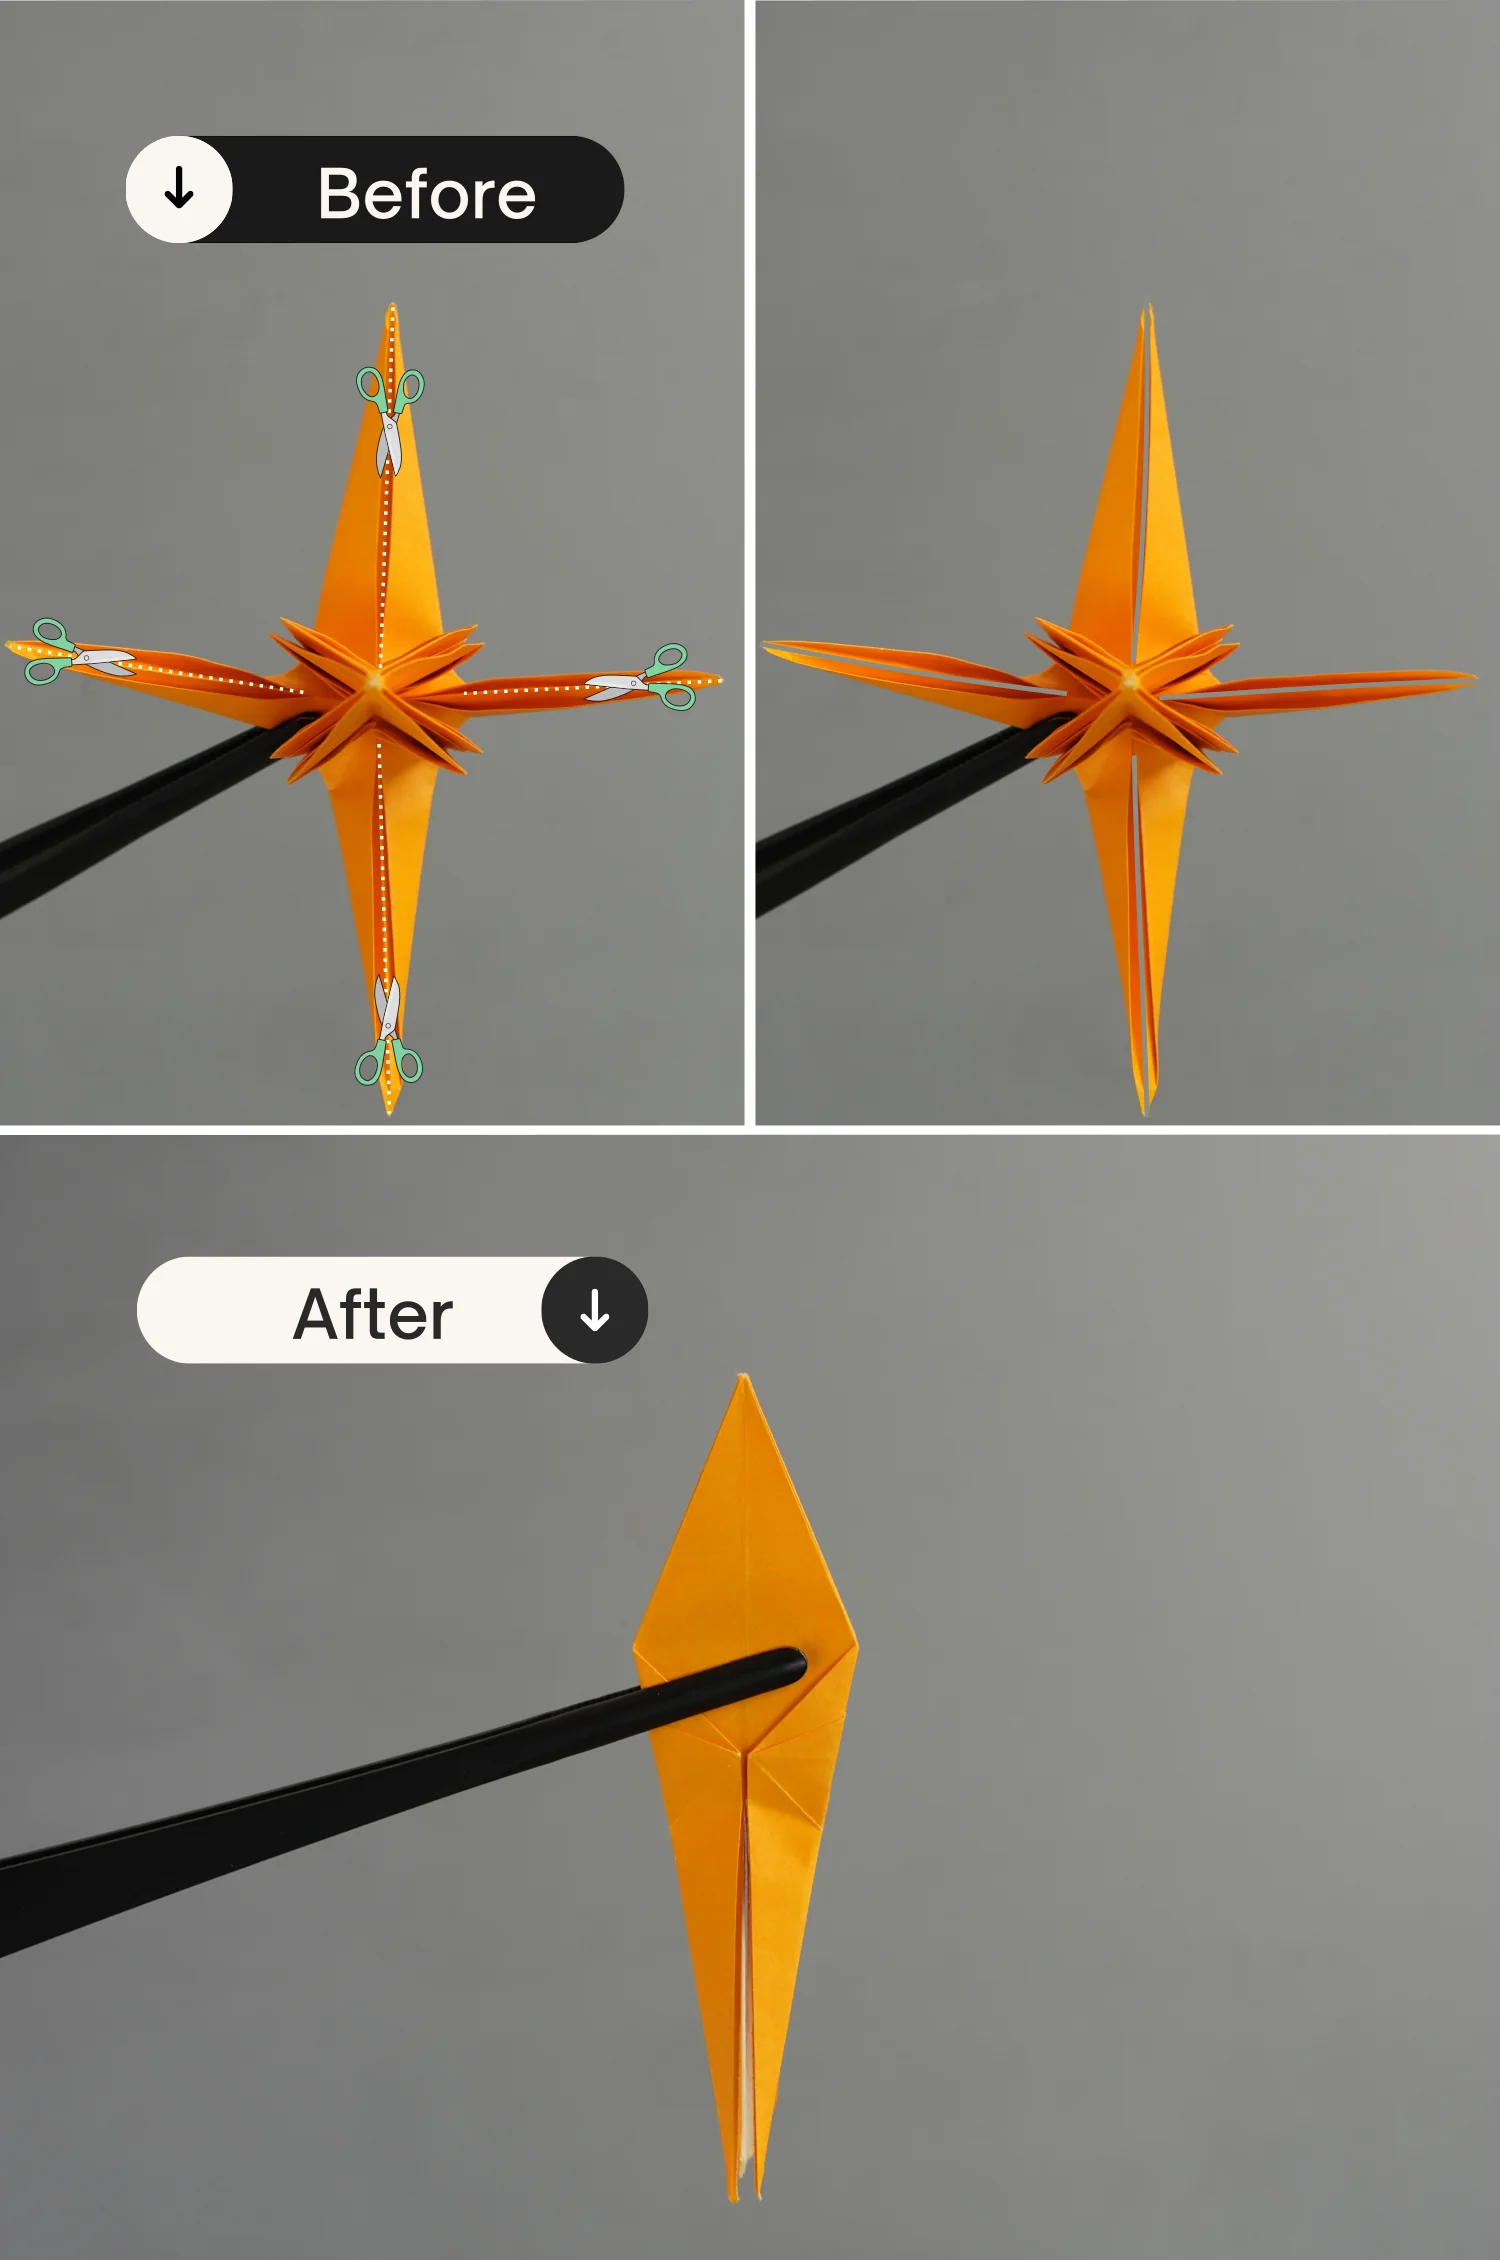
Step 16
Cut the four flaps along their middle crease, then lay it flat like in the third picture.
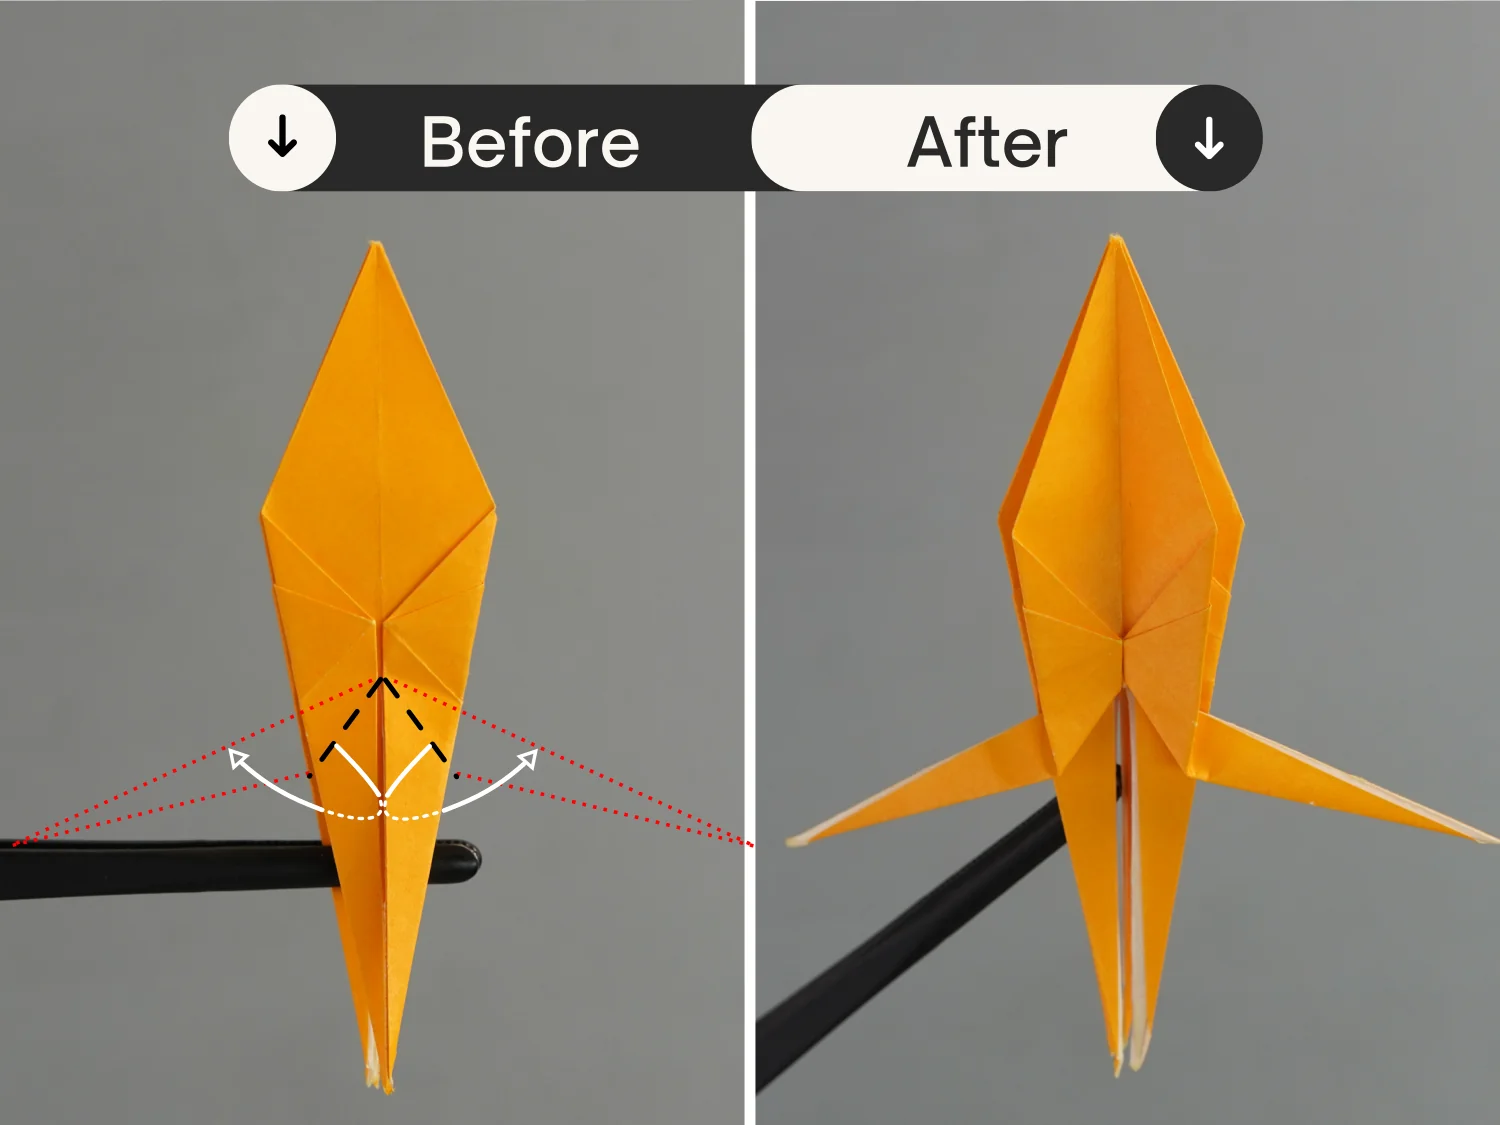
Step 17
Fold the upper two flaps backward to each side.
Step 18
Bring the left and right layers together upward. Then, fold up the two layers underneath along the black dotted lines backward, as shown in the second picture.
Step 19
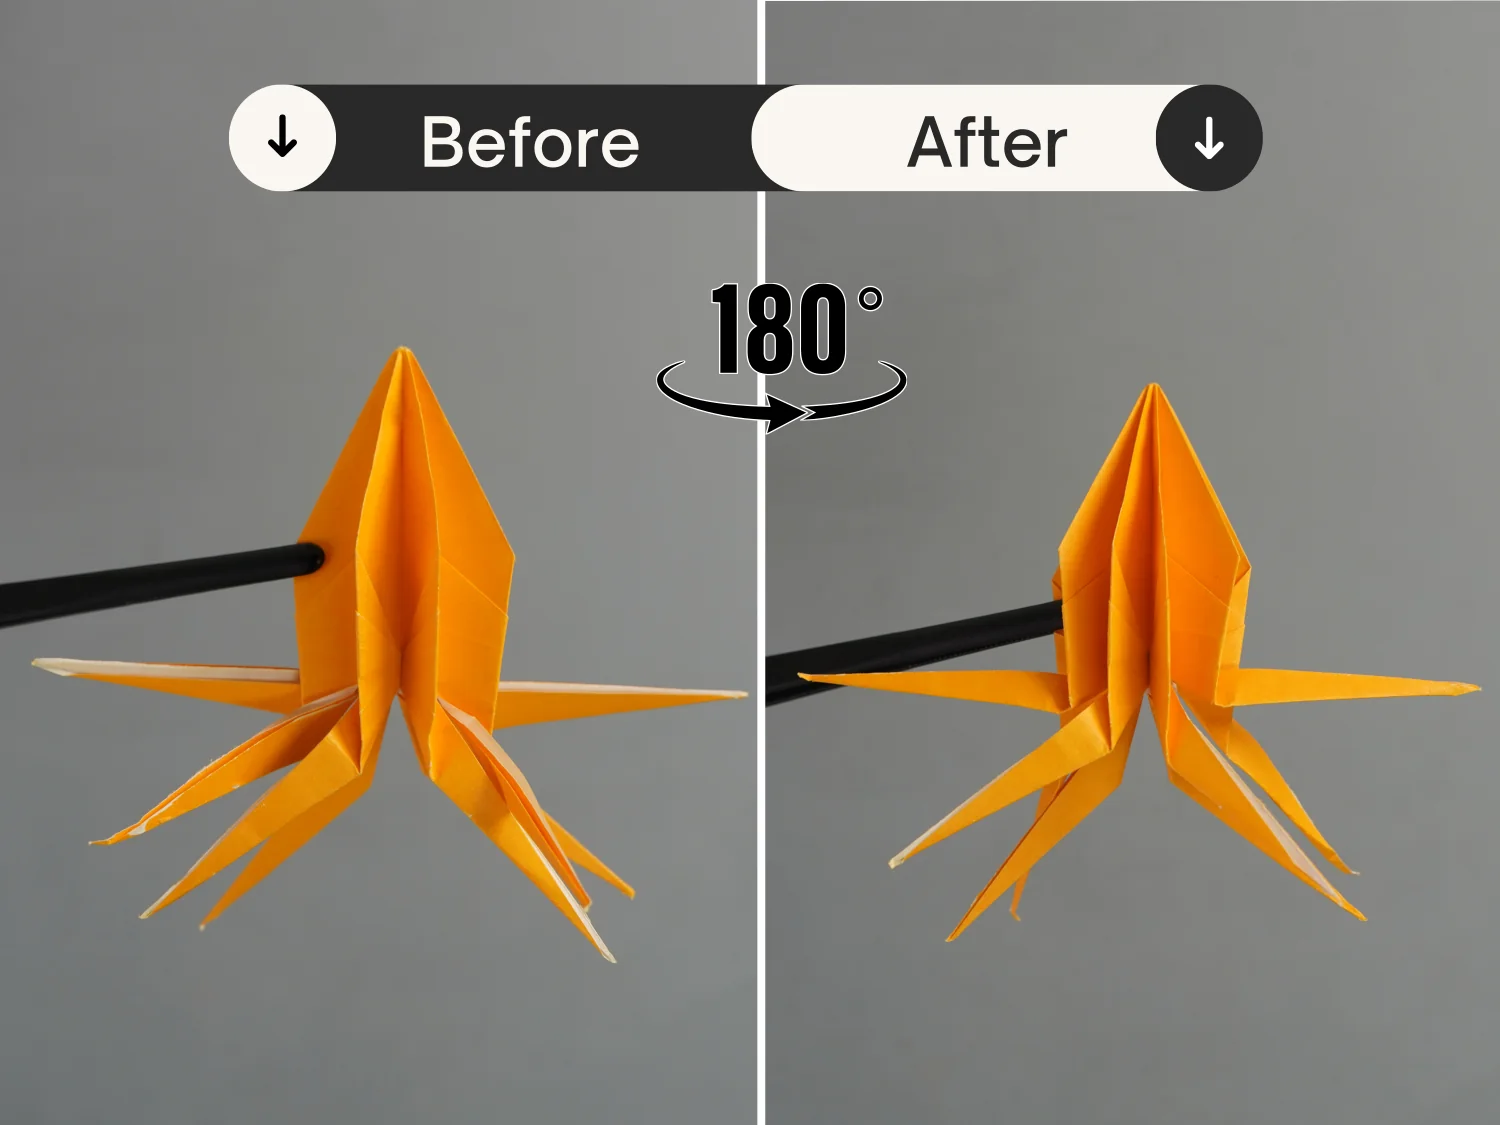
Rotate it 180 degrees from left to right to flip the paper over.
Step 20
Fold the upper two flaps backward to each side, as you did in step 17.
Step 21
Bring the left and right layers together upward. Then, fold up the two layers underneath along the black dotted lines, as shown in the second picture.
Step 22
Flip the model over from left to right.
Step 23
Use your hands to pinch the two opposing flaps and gently pull them outward. Pull each flap like this to prop up the top and form the octopus’s head.

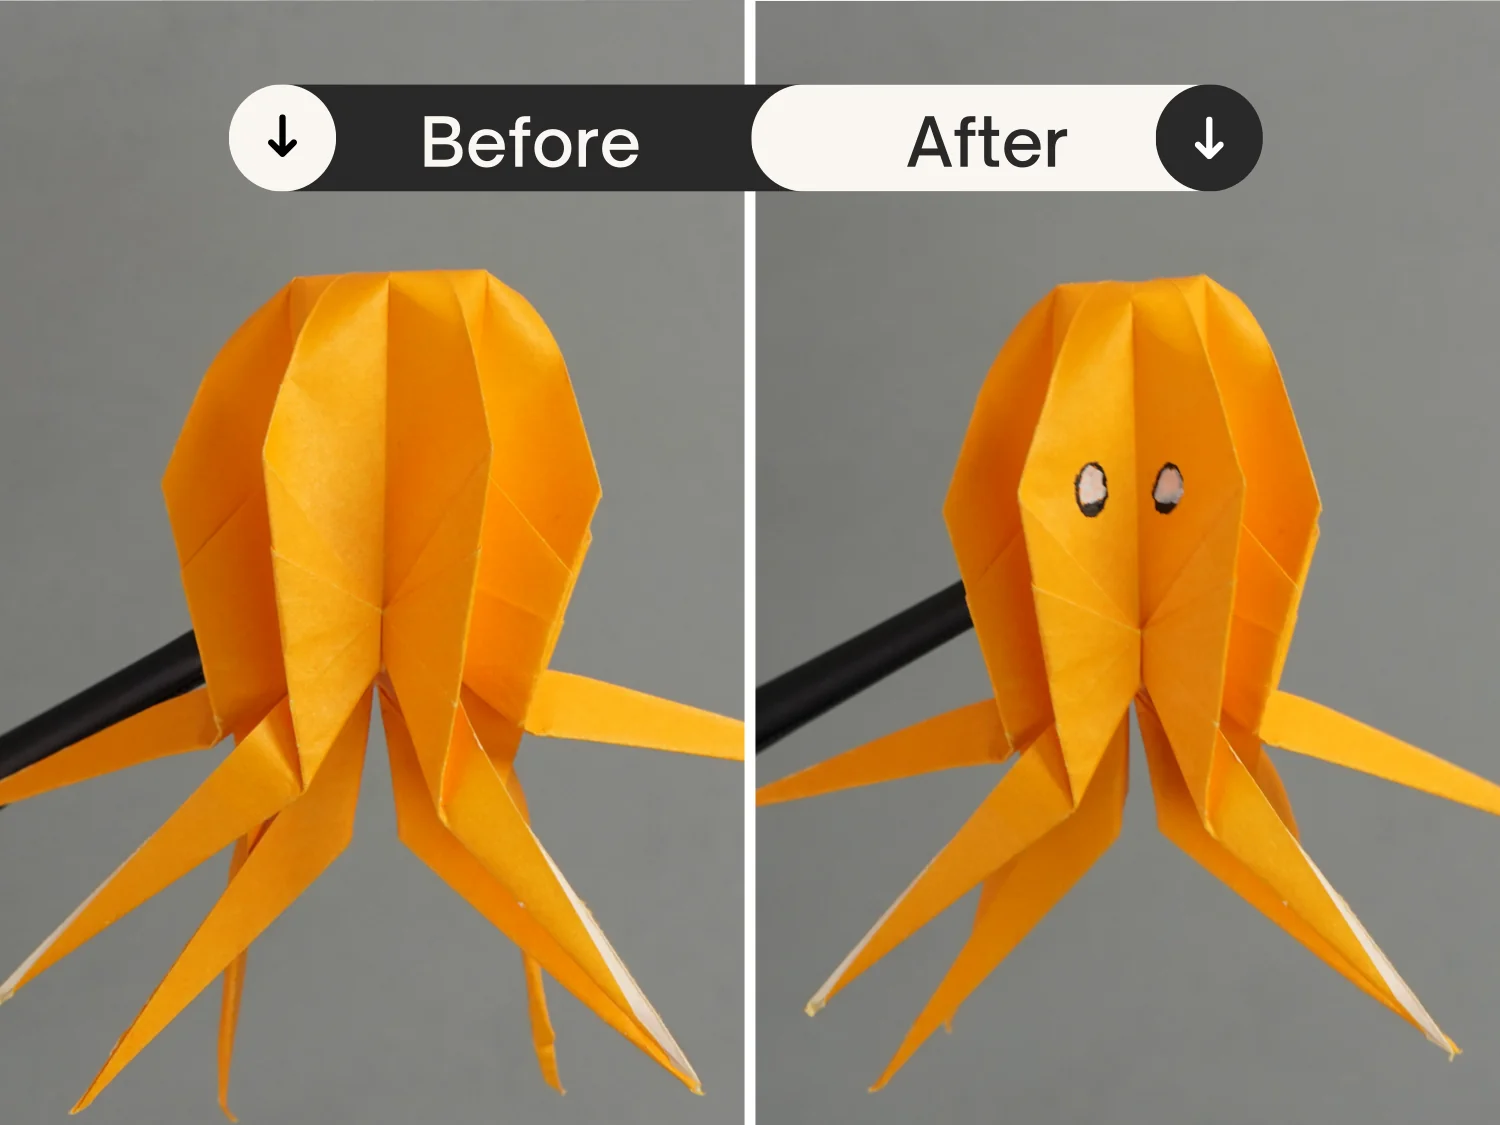
Step 24
Draw eyes for it to make it cuter.
What’s Next
That’s your cute origami octopus. Now you can explore our other interesting origami animal instructions. Happy folding!
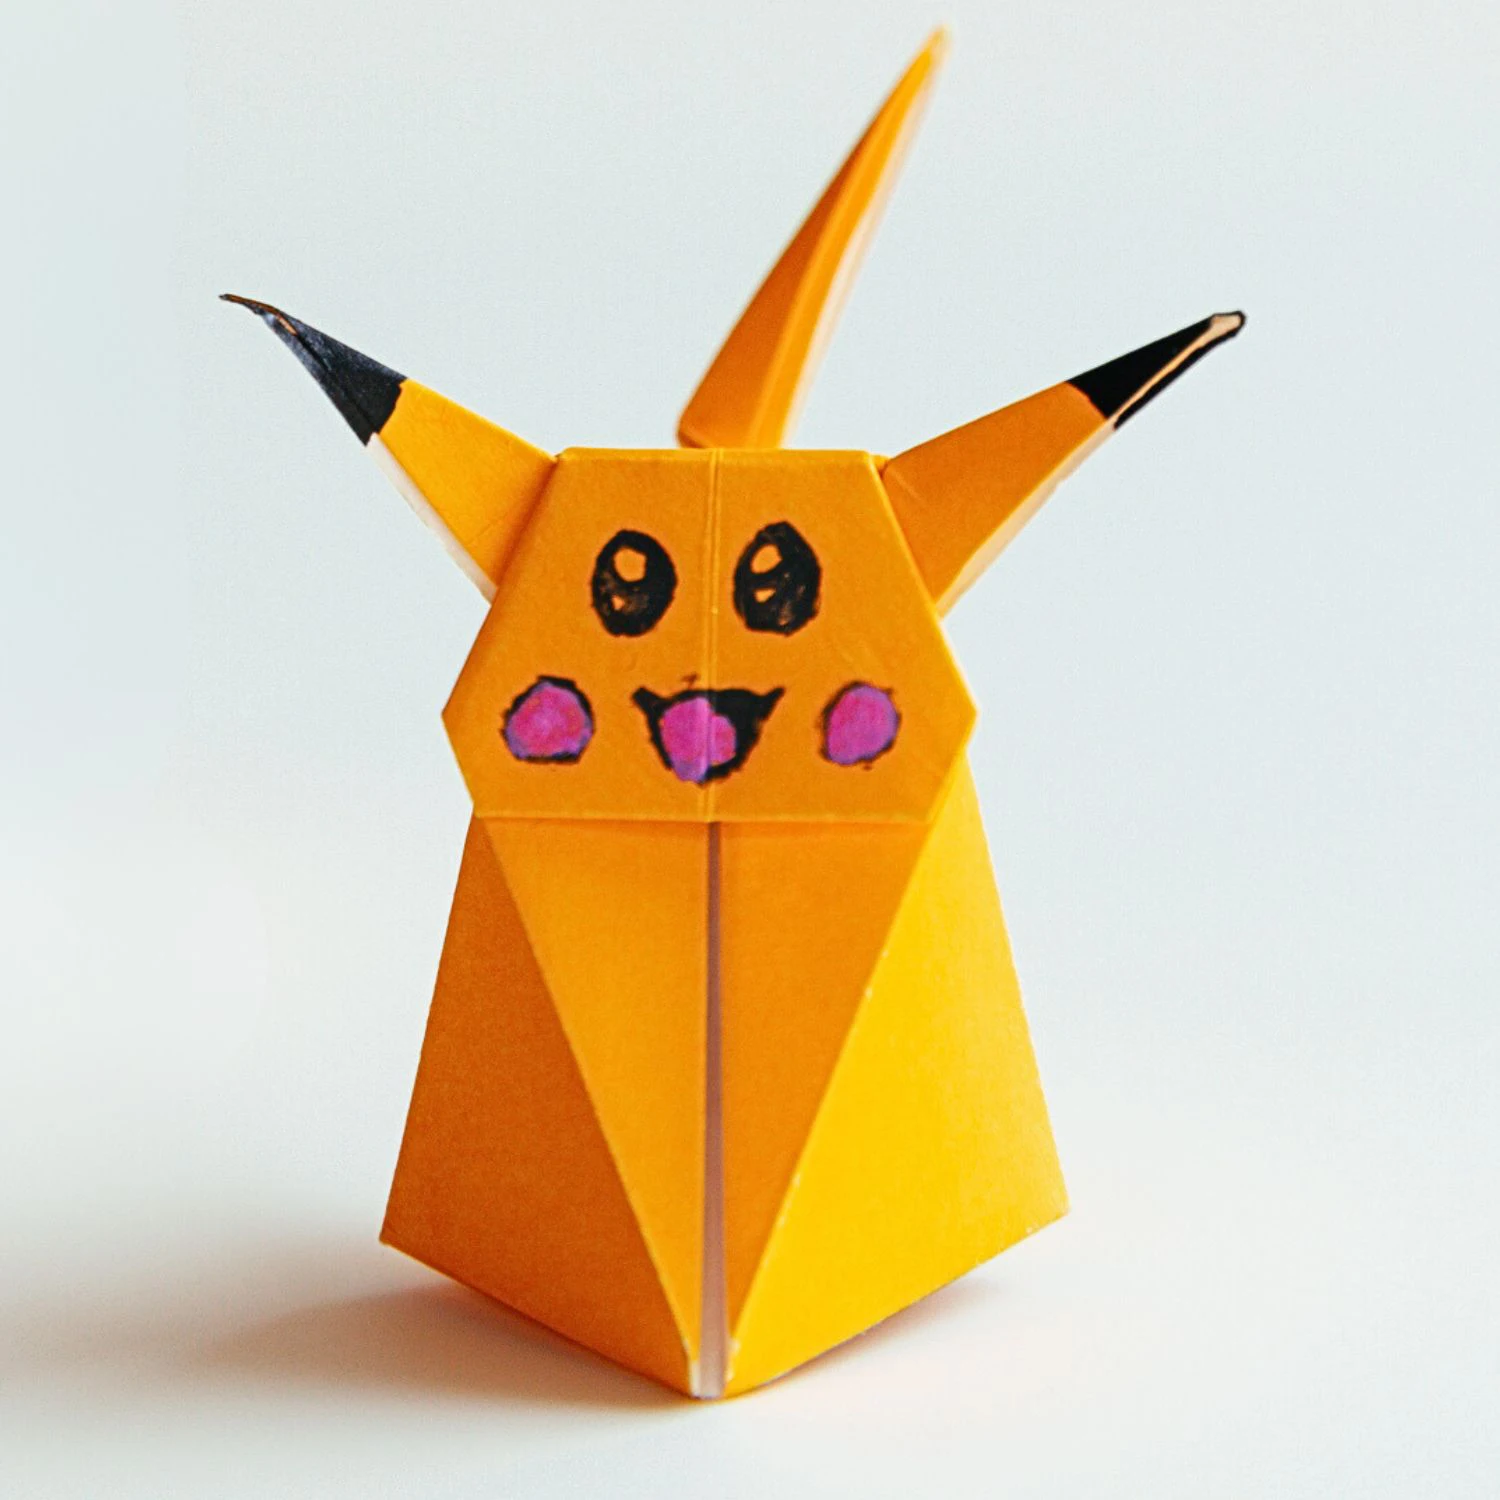
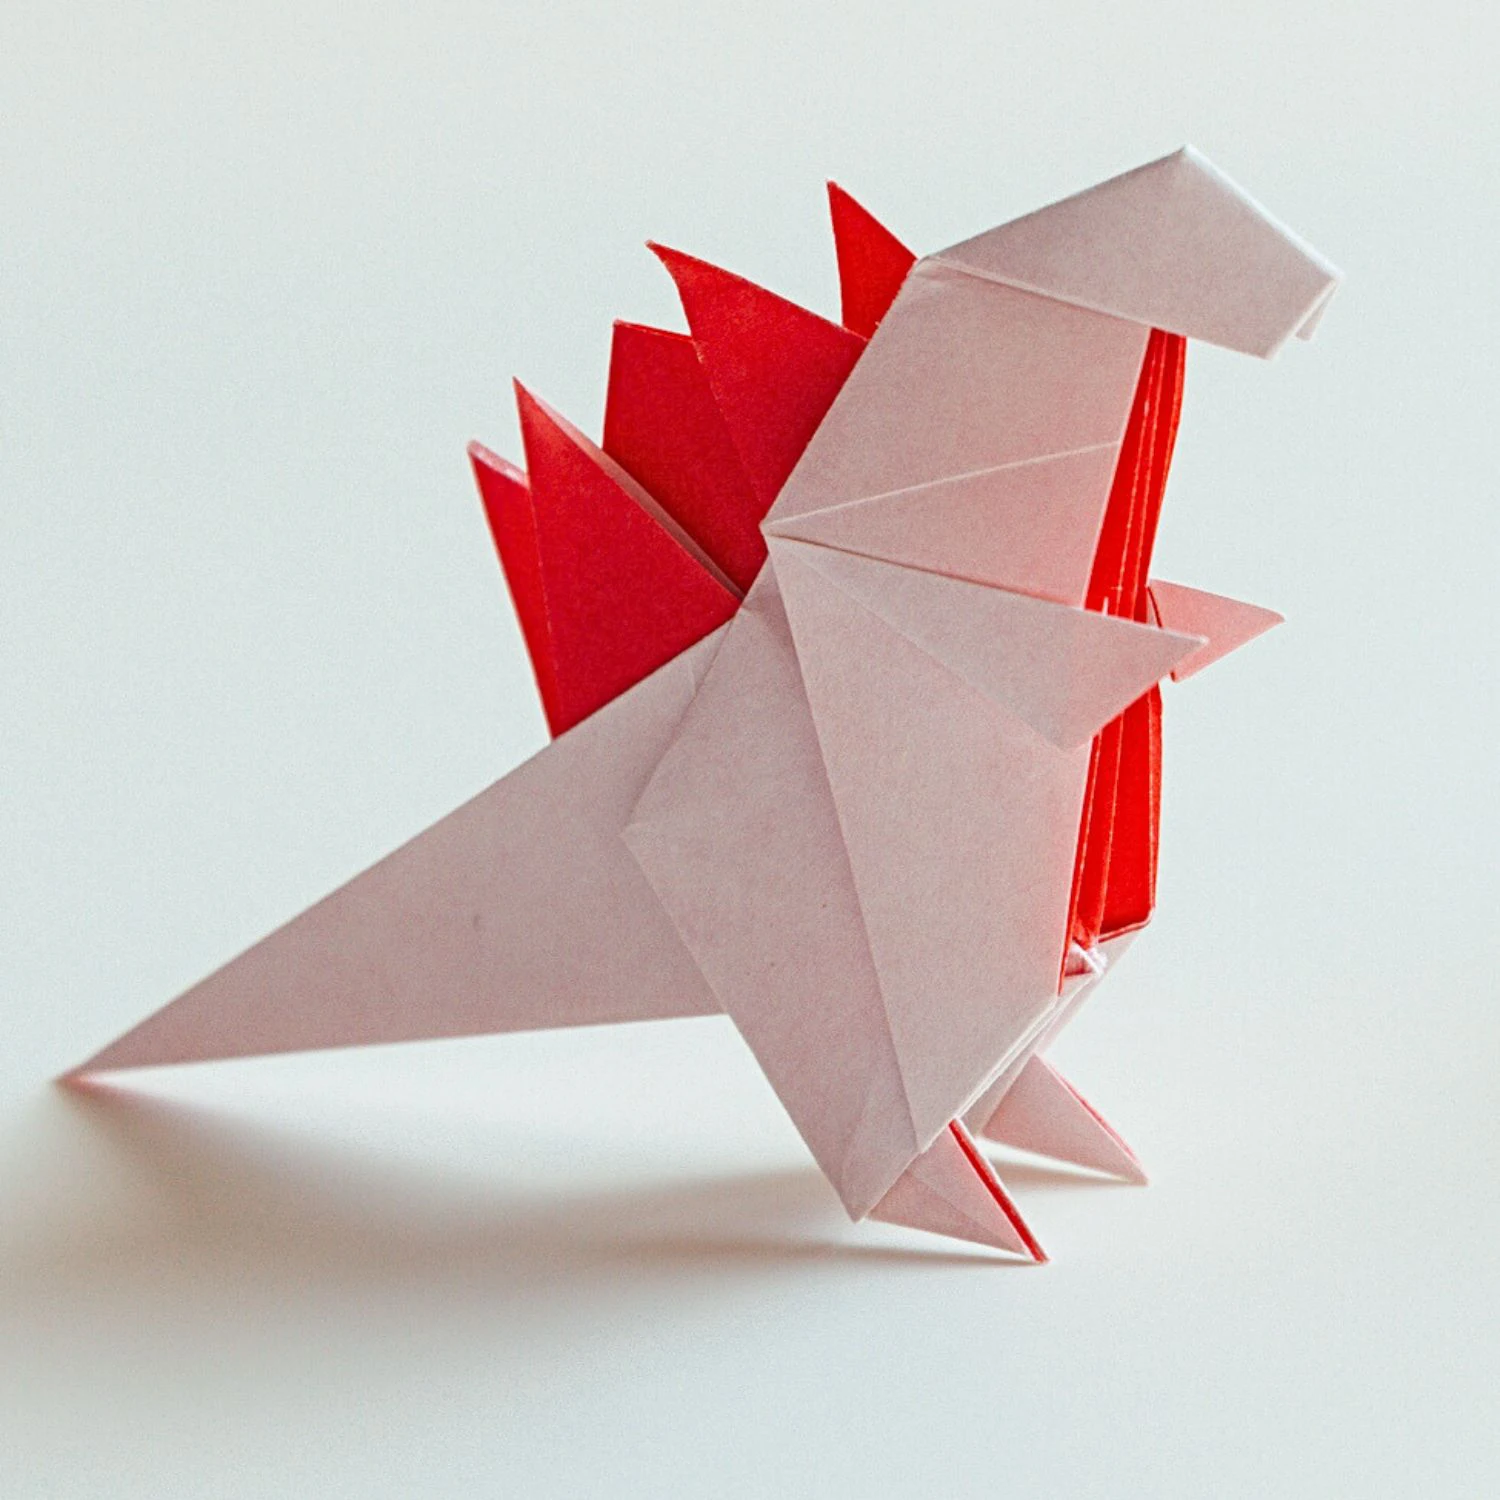
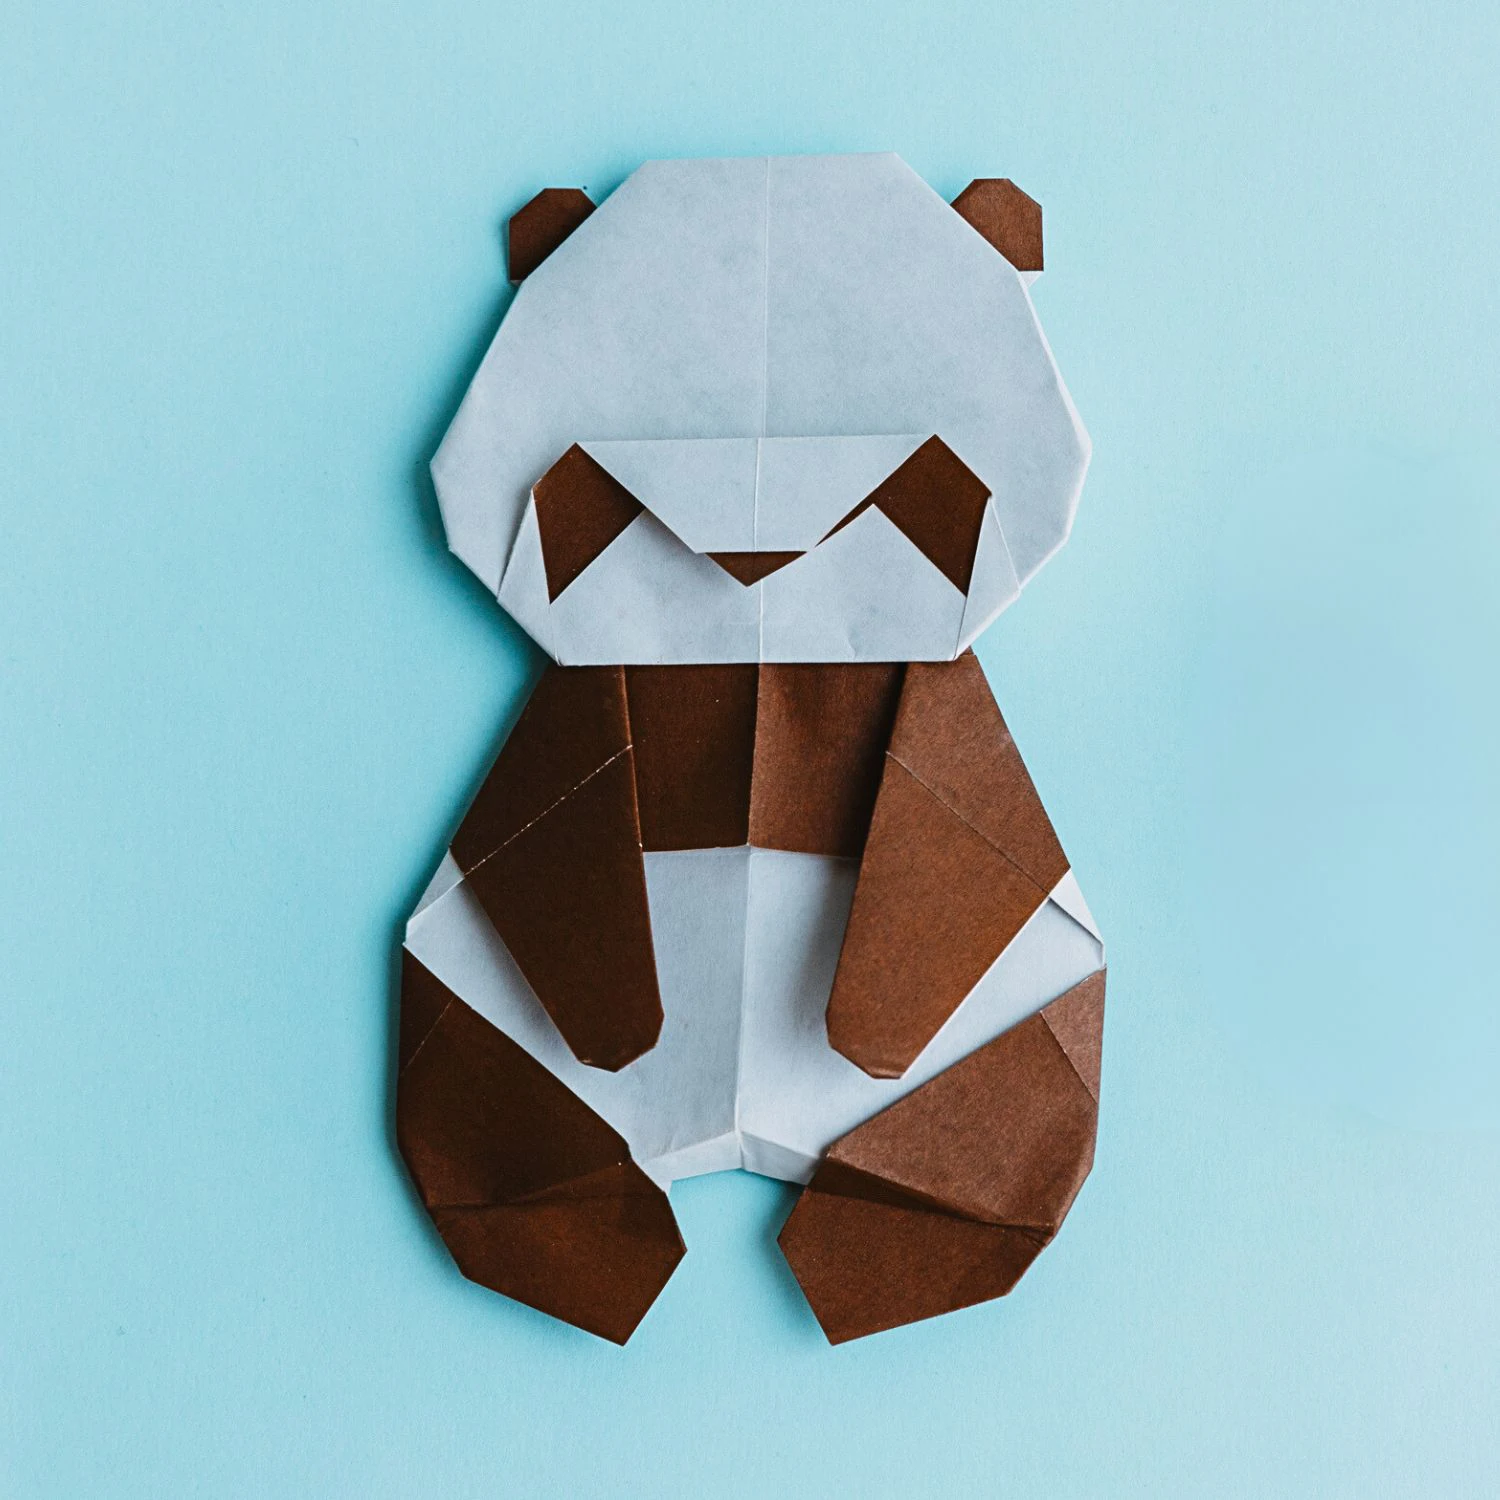
Other Origami Animal Ideas