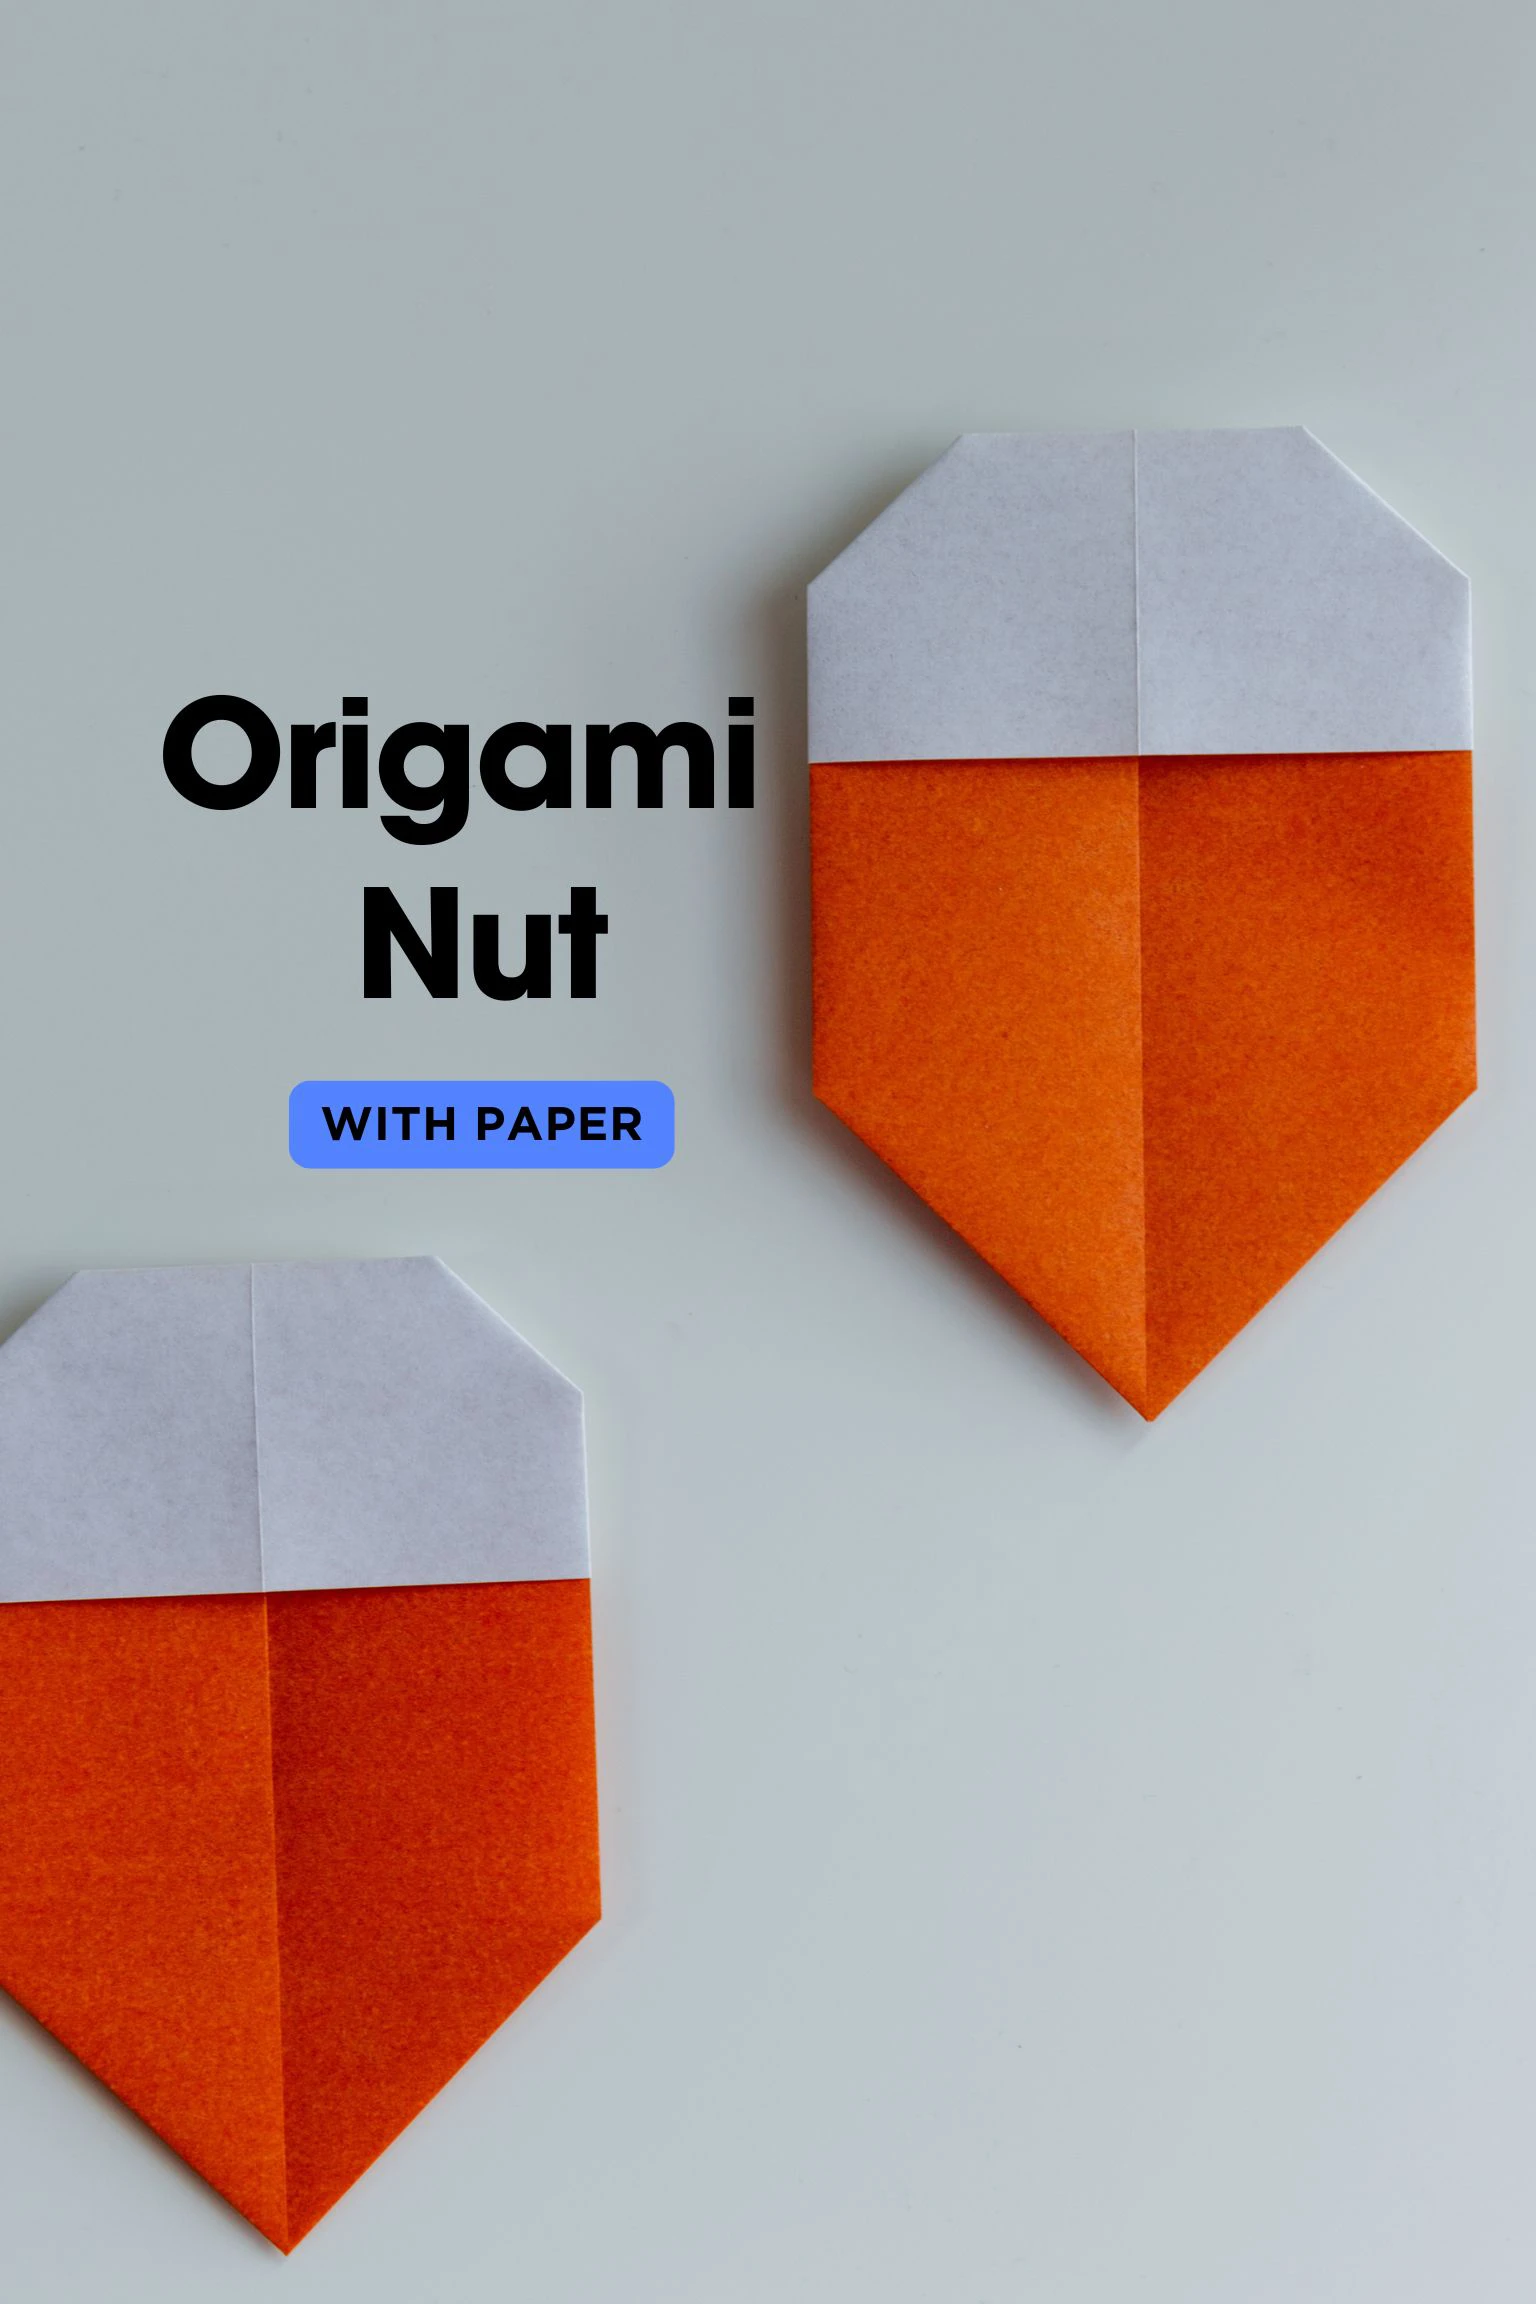
This is a tutorial for a flat origami nut, all the steps are simple and basic, and won’t take too much time, perfect for you to make with your kids.

We provide step-by-step diagram instructions and beginner-friendly videos. Check both for quicker learning.
If you are new to origami, start here from our beginner guide to know the basics and how to read the step-by-step instructions.
- Folding time: 5 minutes
- Paper: 15×15 cm
- Difficulty: Easy, Beginner friendly
Material
Get a 15*15 cm origami paper, with different colors on each side, and you will get a 11*8 cm nut. You can choose to use other sizes of square paper.

Easy Origami Nut Video
Step by Step Instructions
Step 1
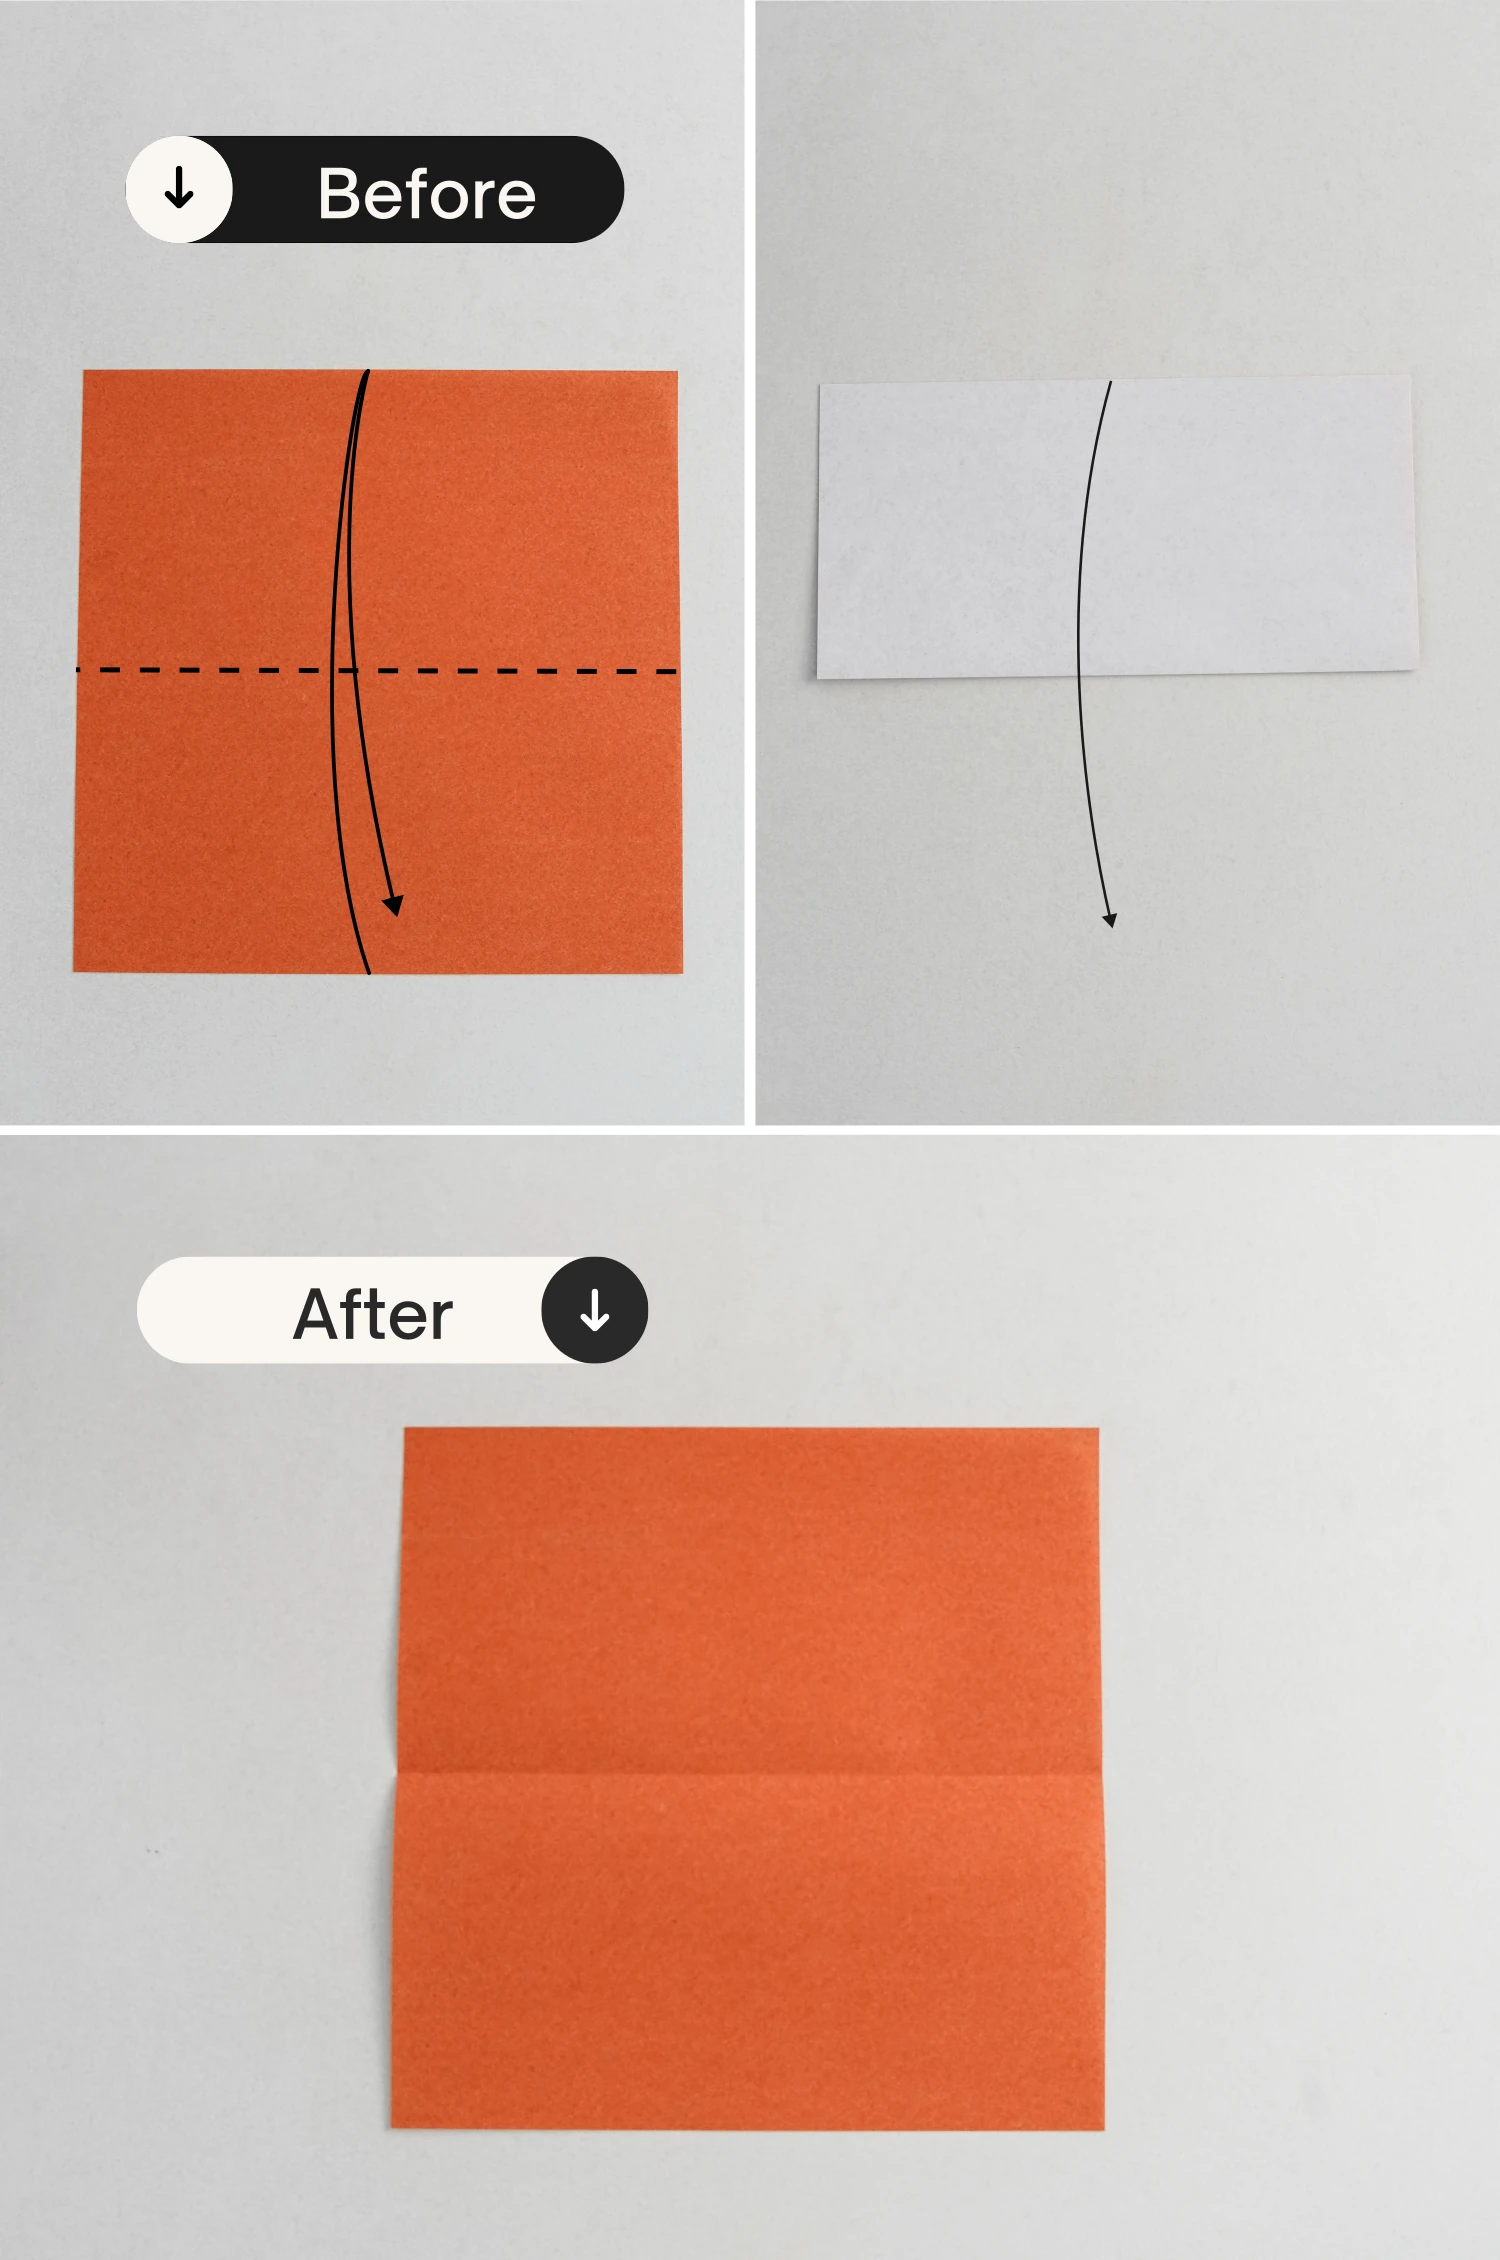
Start with the maroon side of the paper facing up, fold it in half horizontally, crease it well then unfold.
Step 2
Fold it in half vertically, crease it well then unfold.
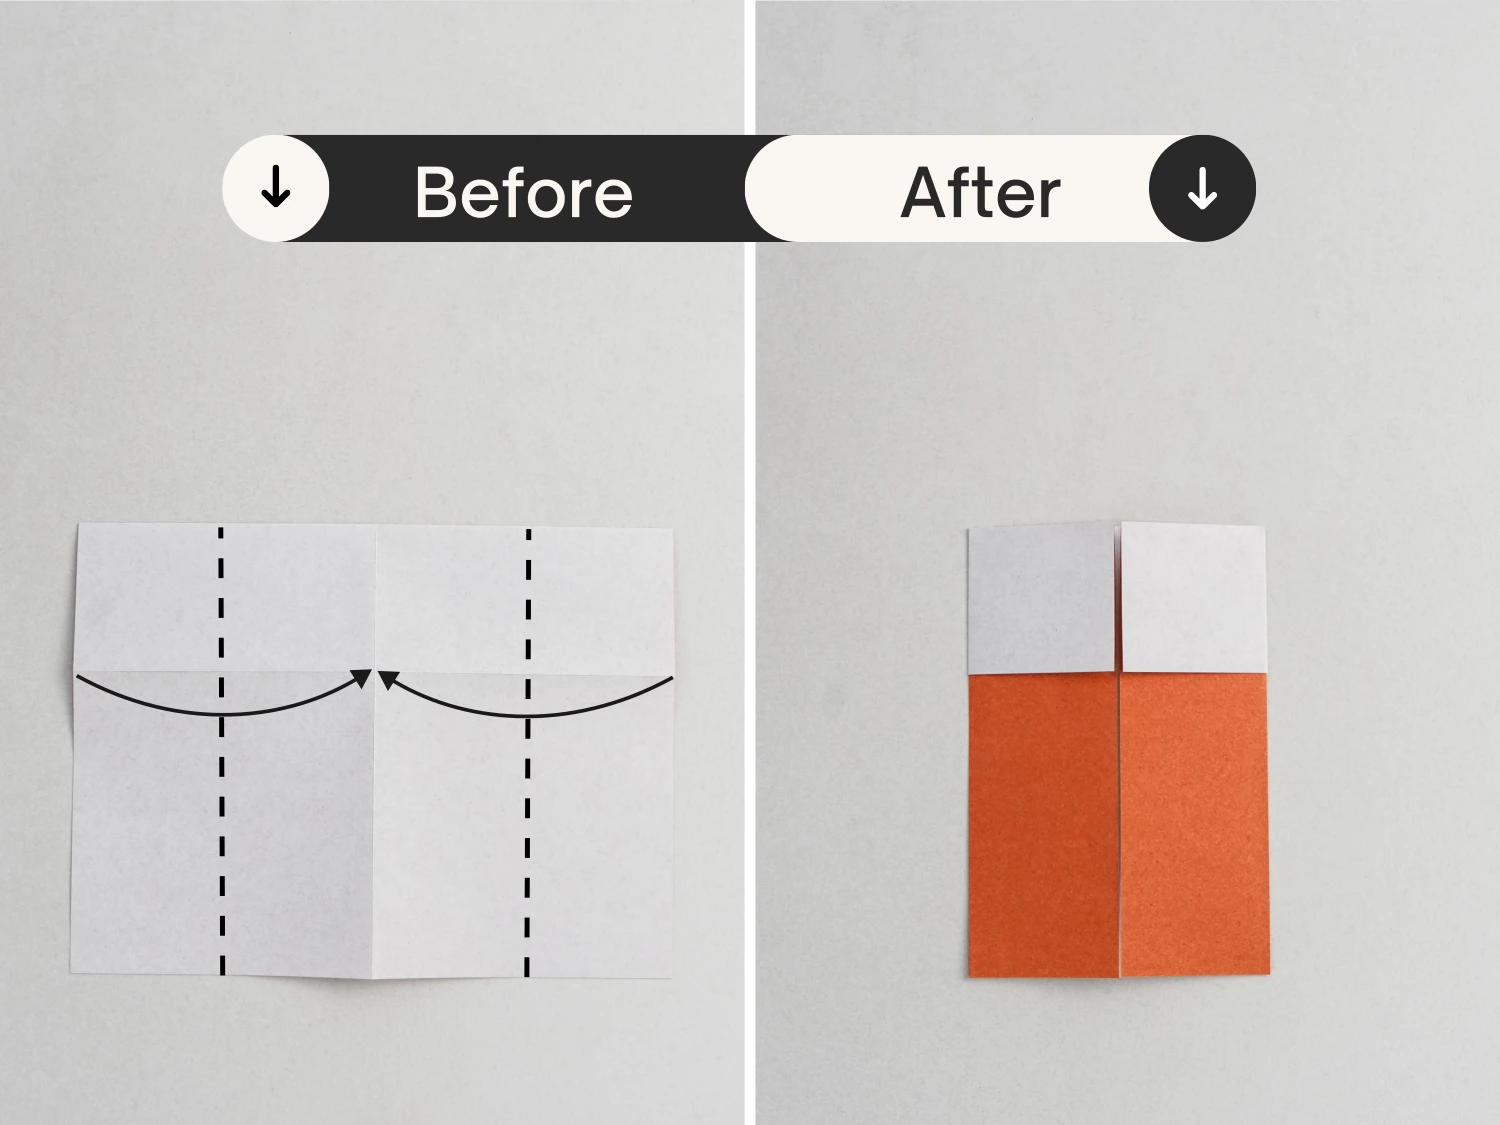
Step 3
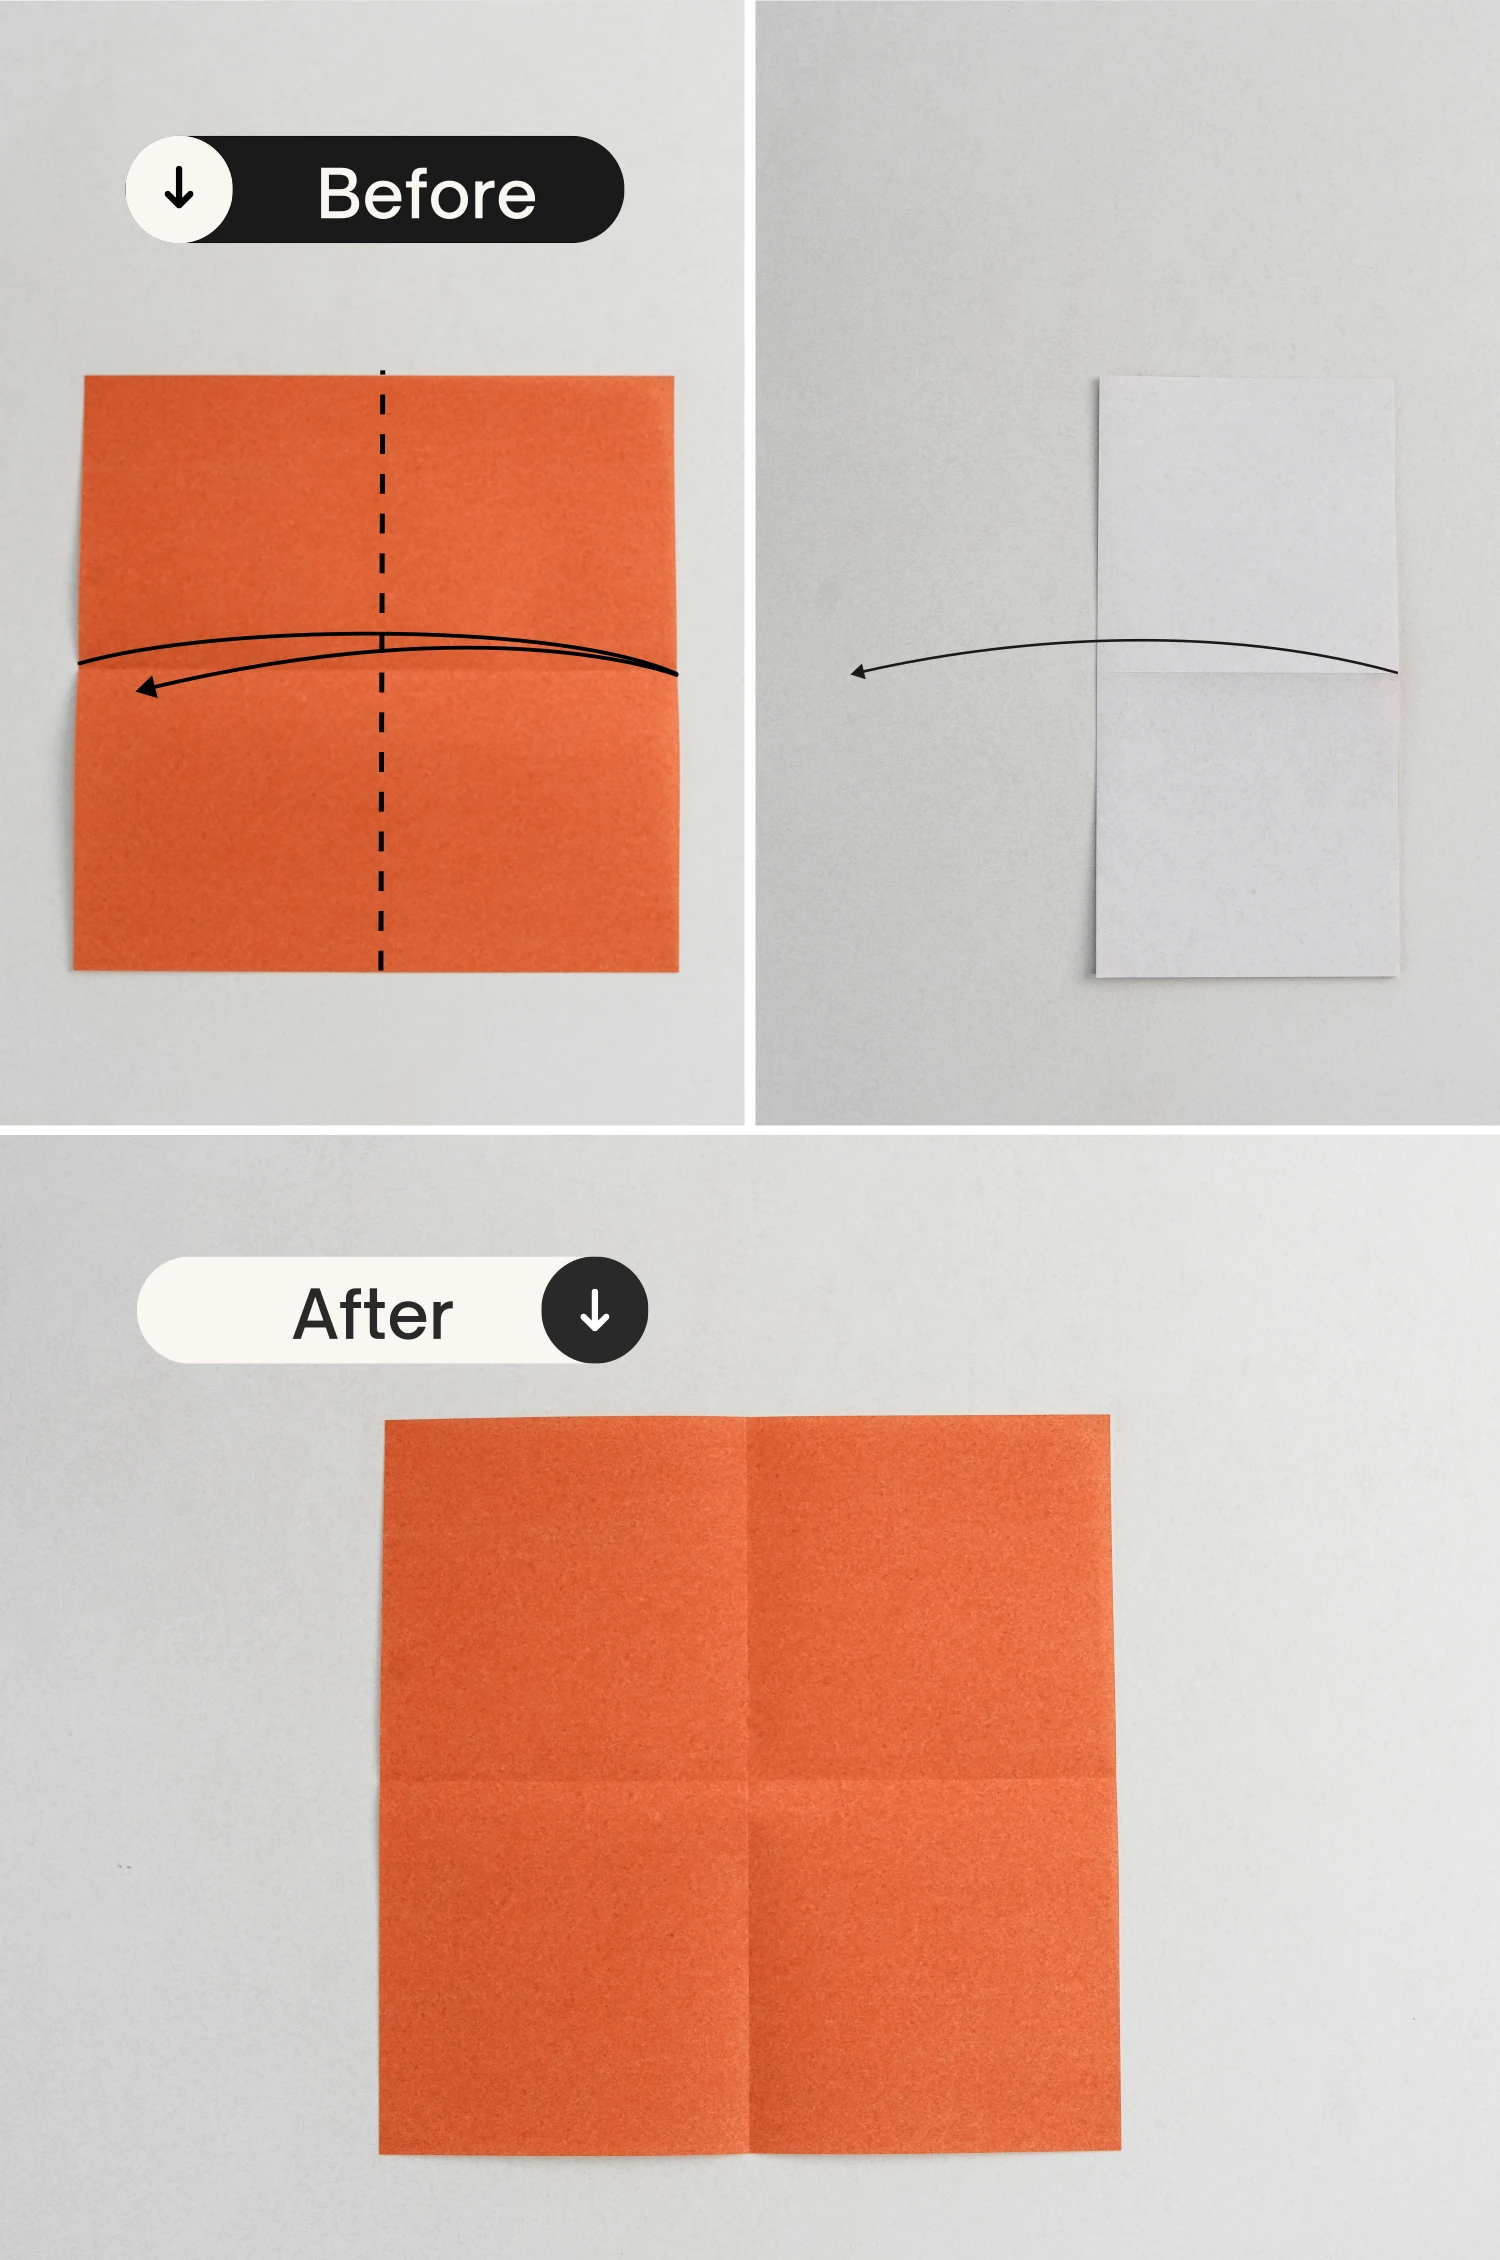
Fold the top edge down to meet the middle crease.
Step 4
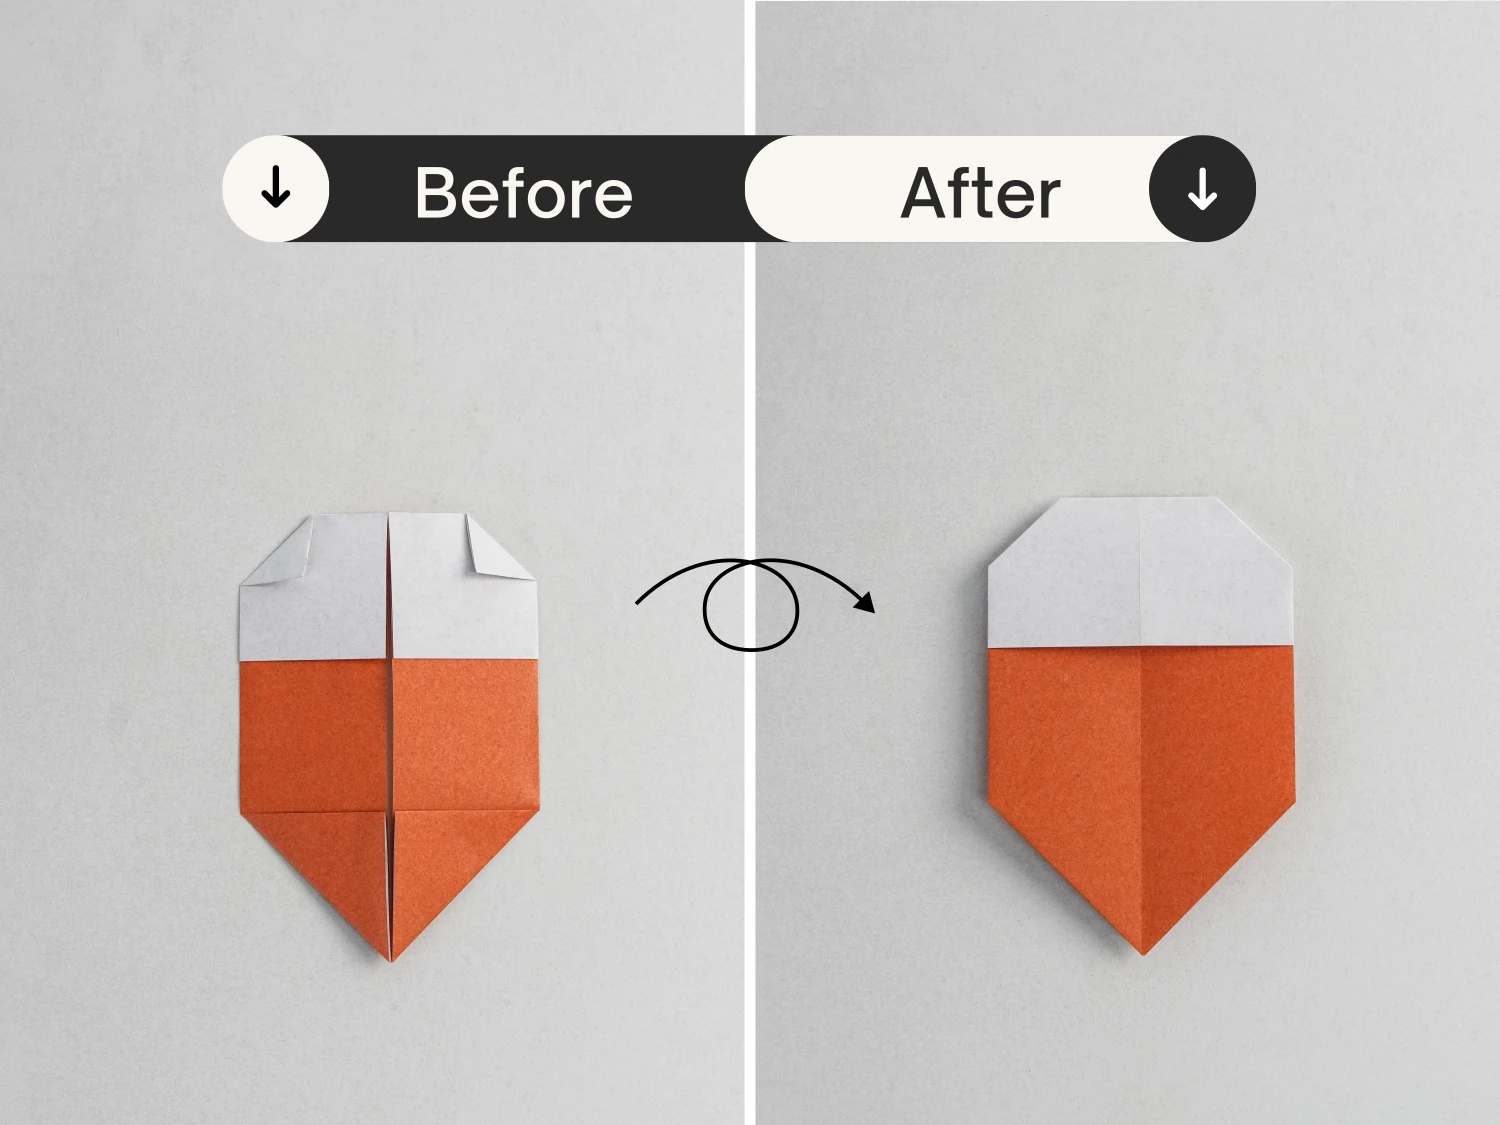
Flip it over.
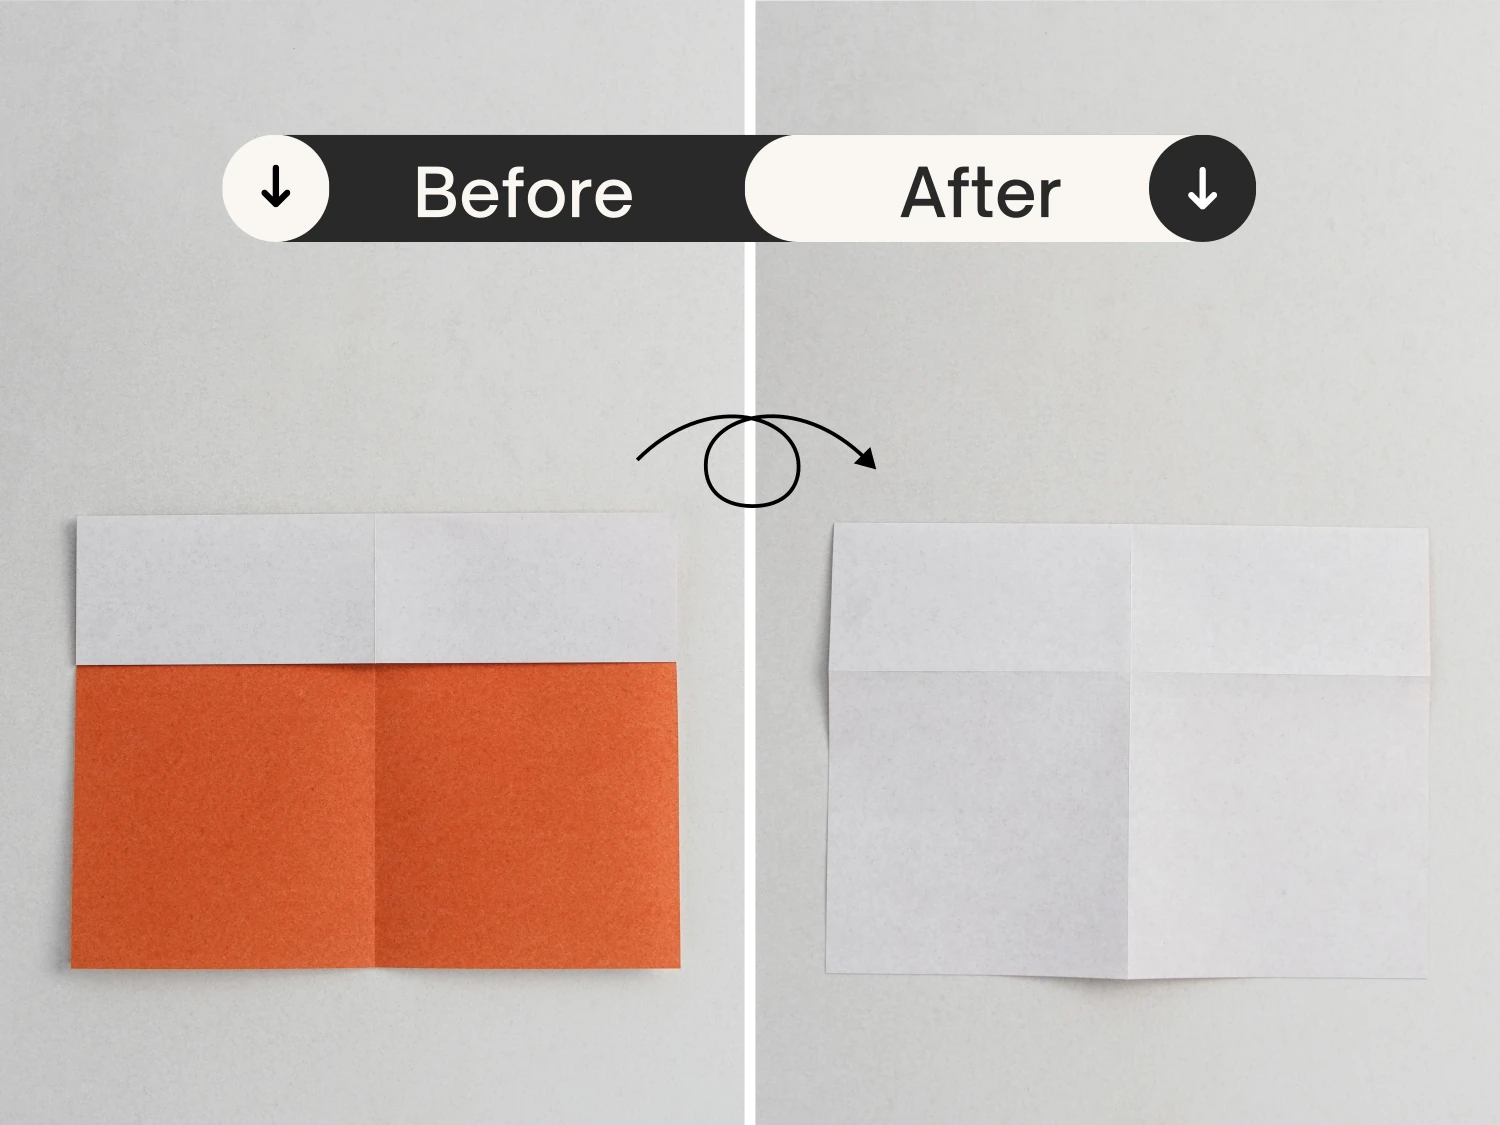
Step 5
Fold the left and right edges to meet the middle vertical crease.
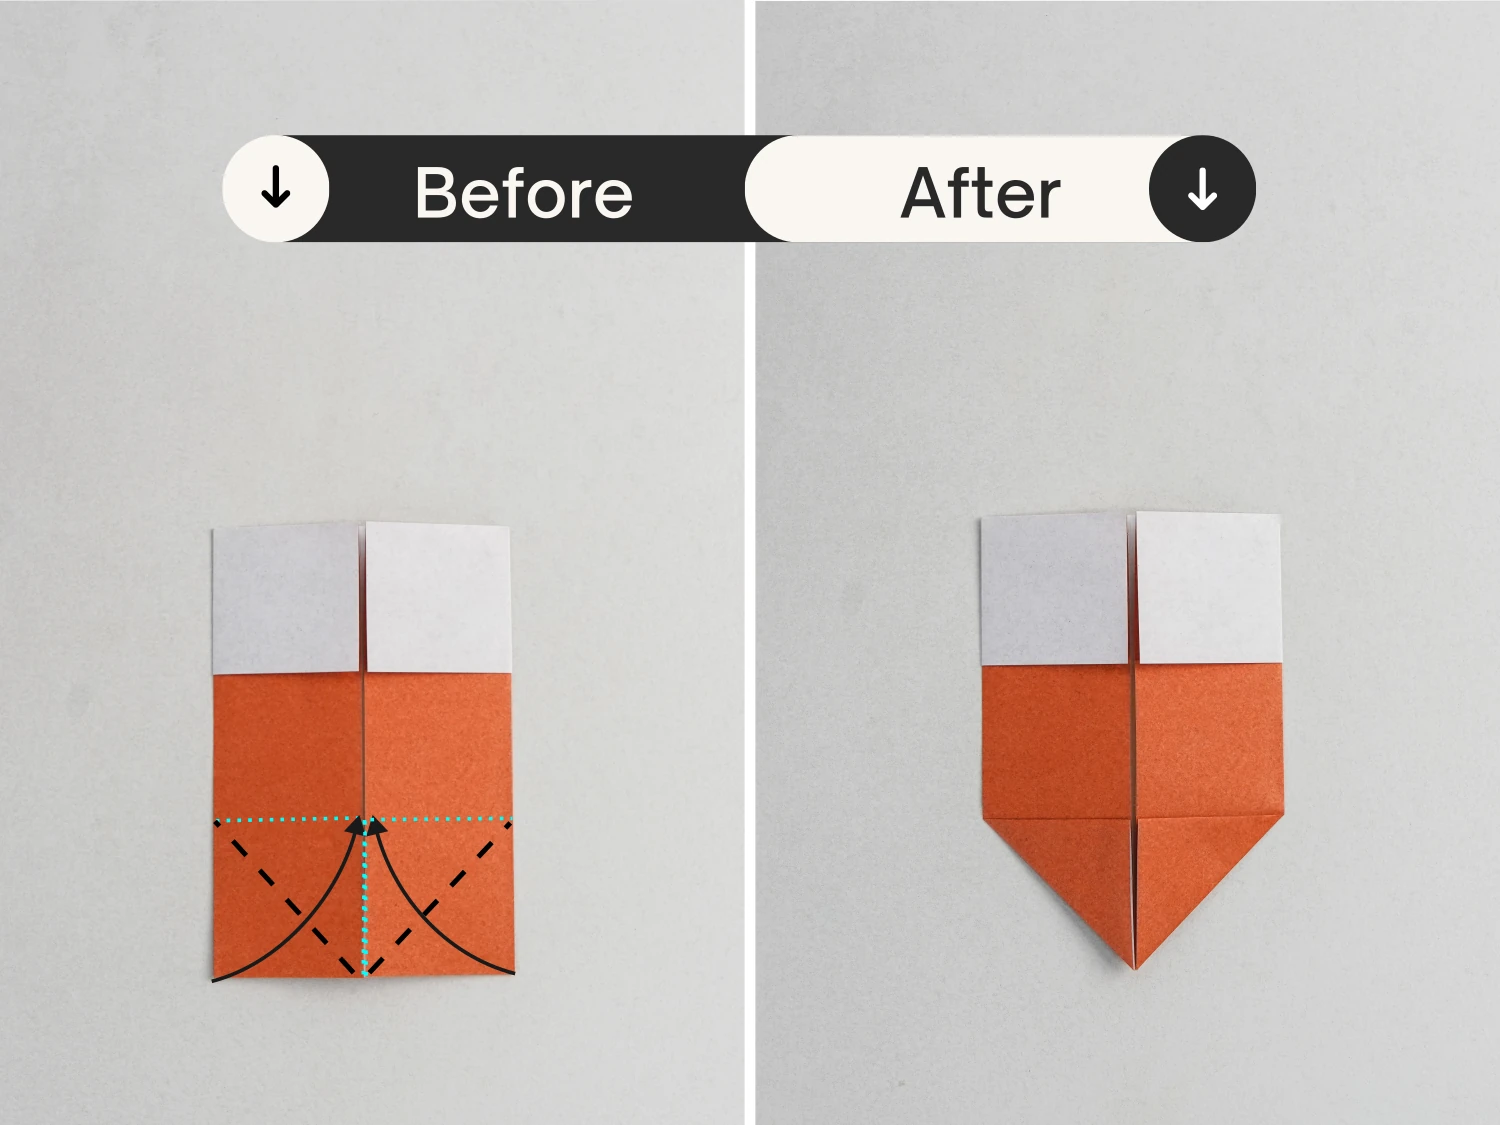
Step 6
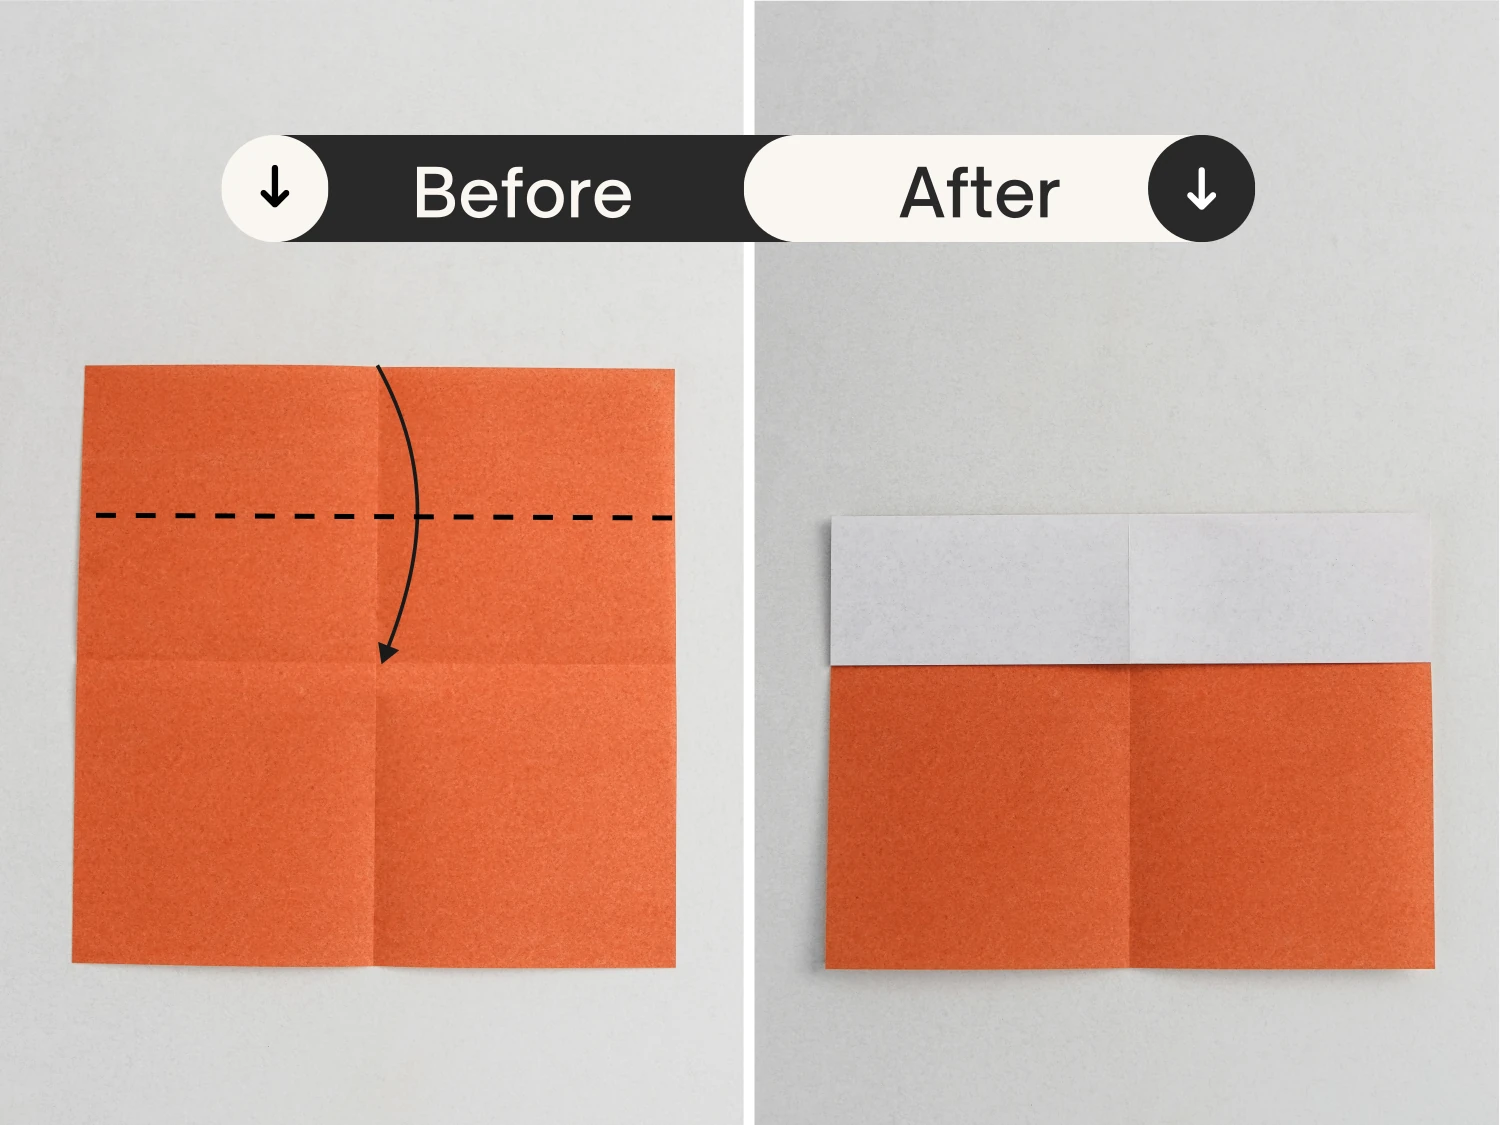
Fold the bottom left and right corners up diagonally along the dotted lines, to meet the middle crease.
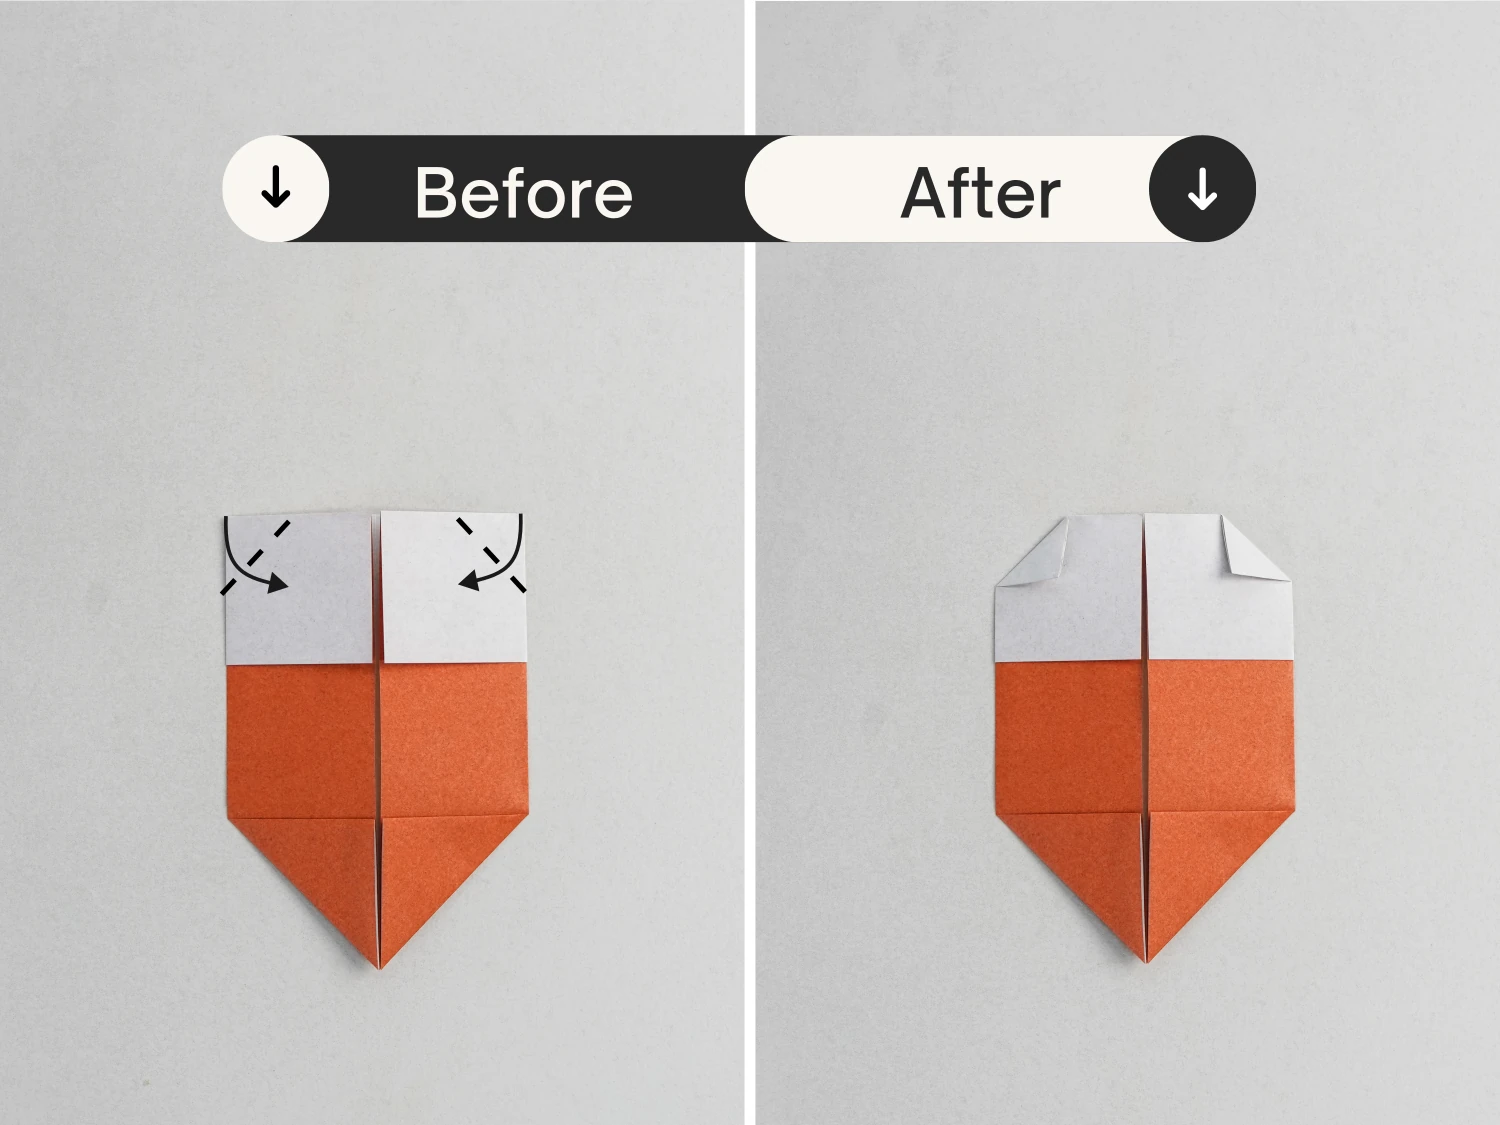
Step 7
Fold the top left and right corners down diagonally a little.
Step 8
Flip the paper over again, this is the final shape of the origami nut, that’s really easy and cute.
What’s Next
If you are interested in the category of edible things, we currently offer a fruit series, we hope you will like it. In addition, we have many other simple and interesting origami tutorials, please check them at will.
Other easy origami fruit ideas