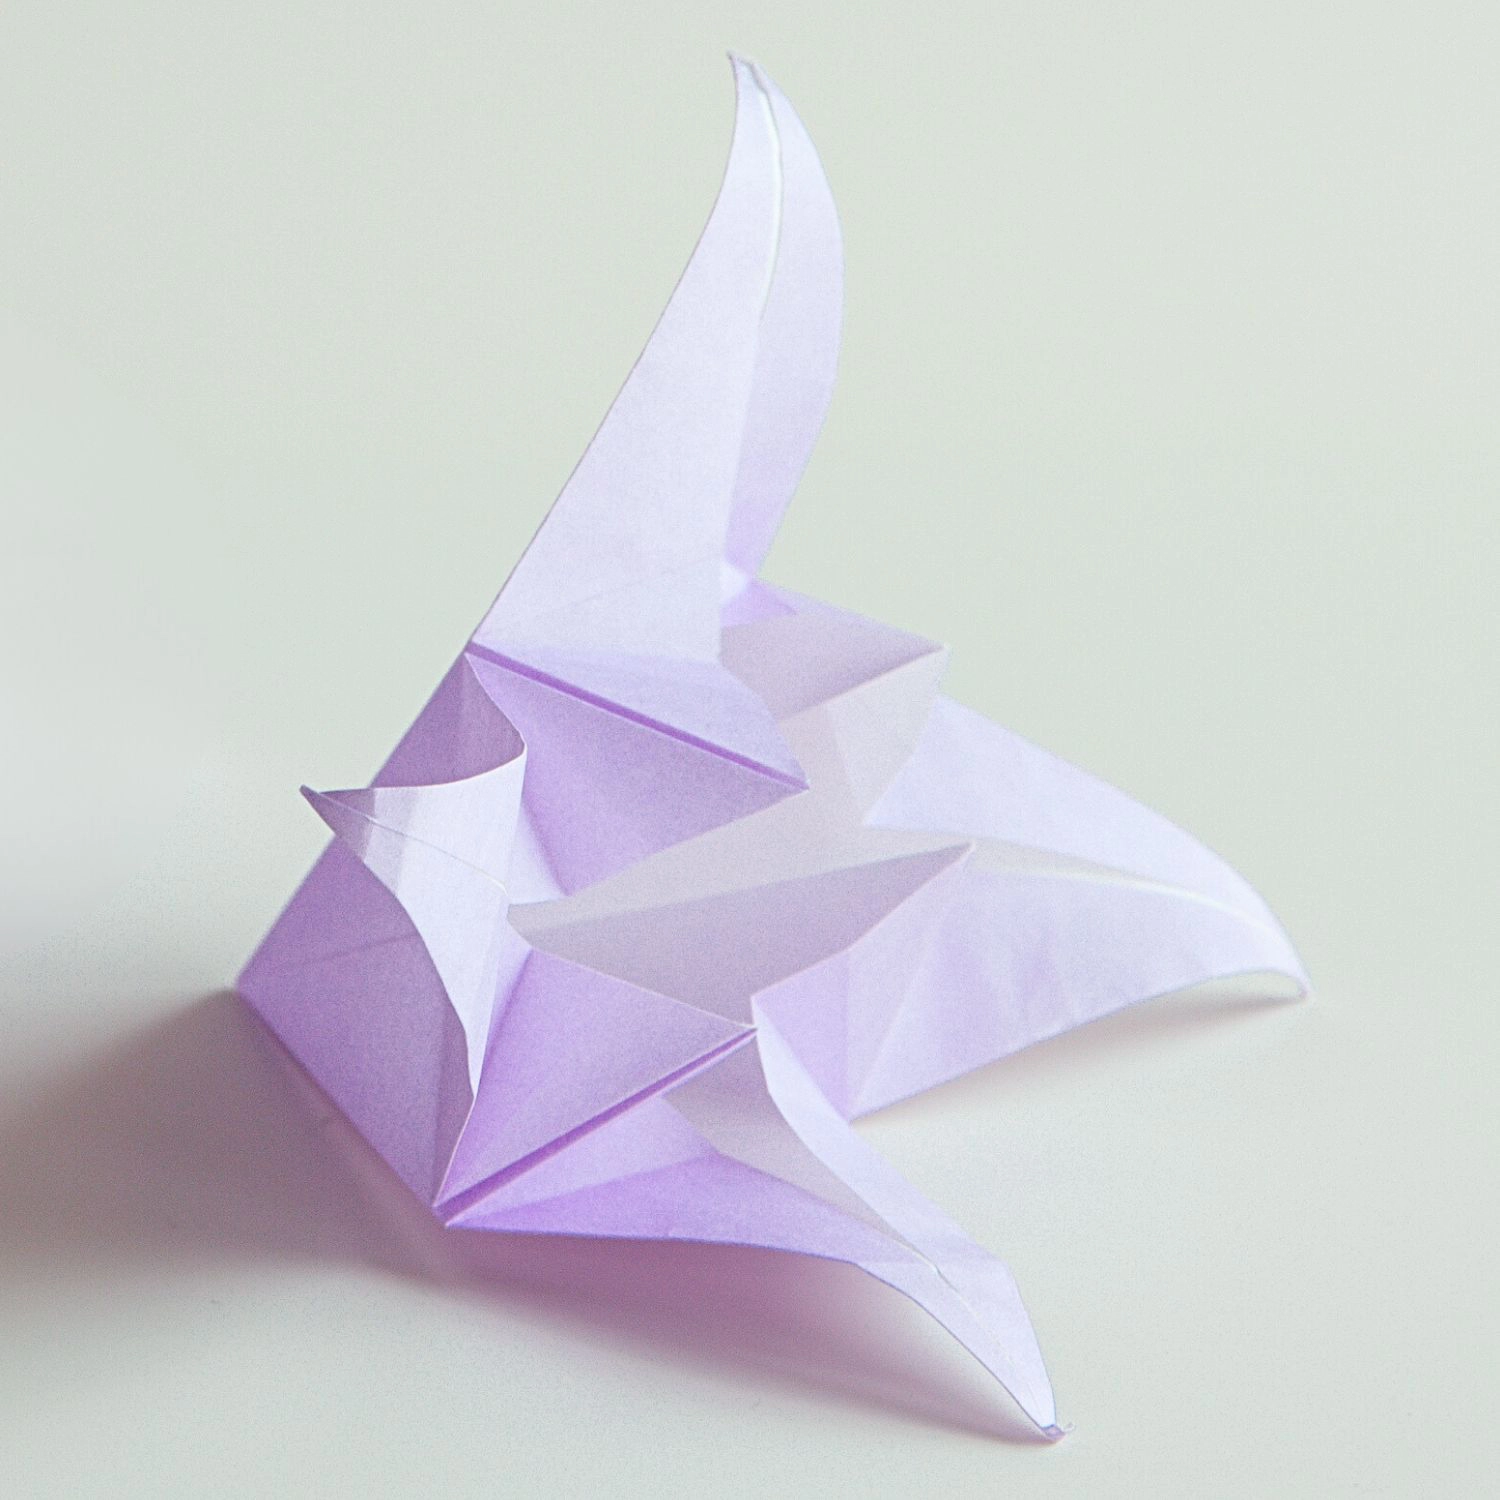
This origami crescent moon is a super beautiful creation with an elegant shape that will add a unique charm to your origami collection. Despite being a project of middle-level difficulty, the process is not as complex as you might think. All you need is patience and careful attention to the steps, and you will definitely succeed.
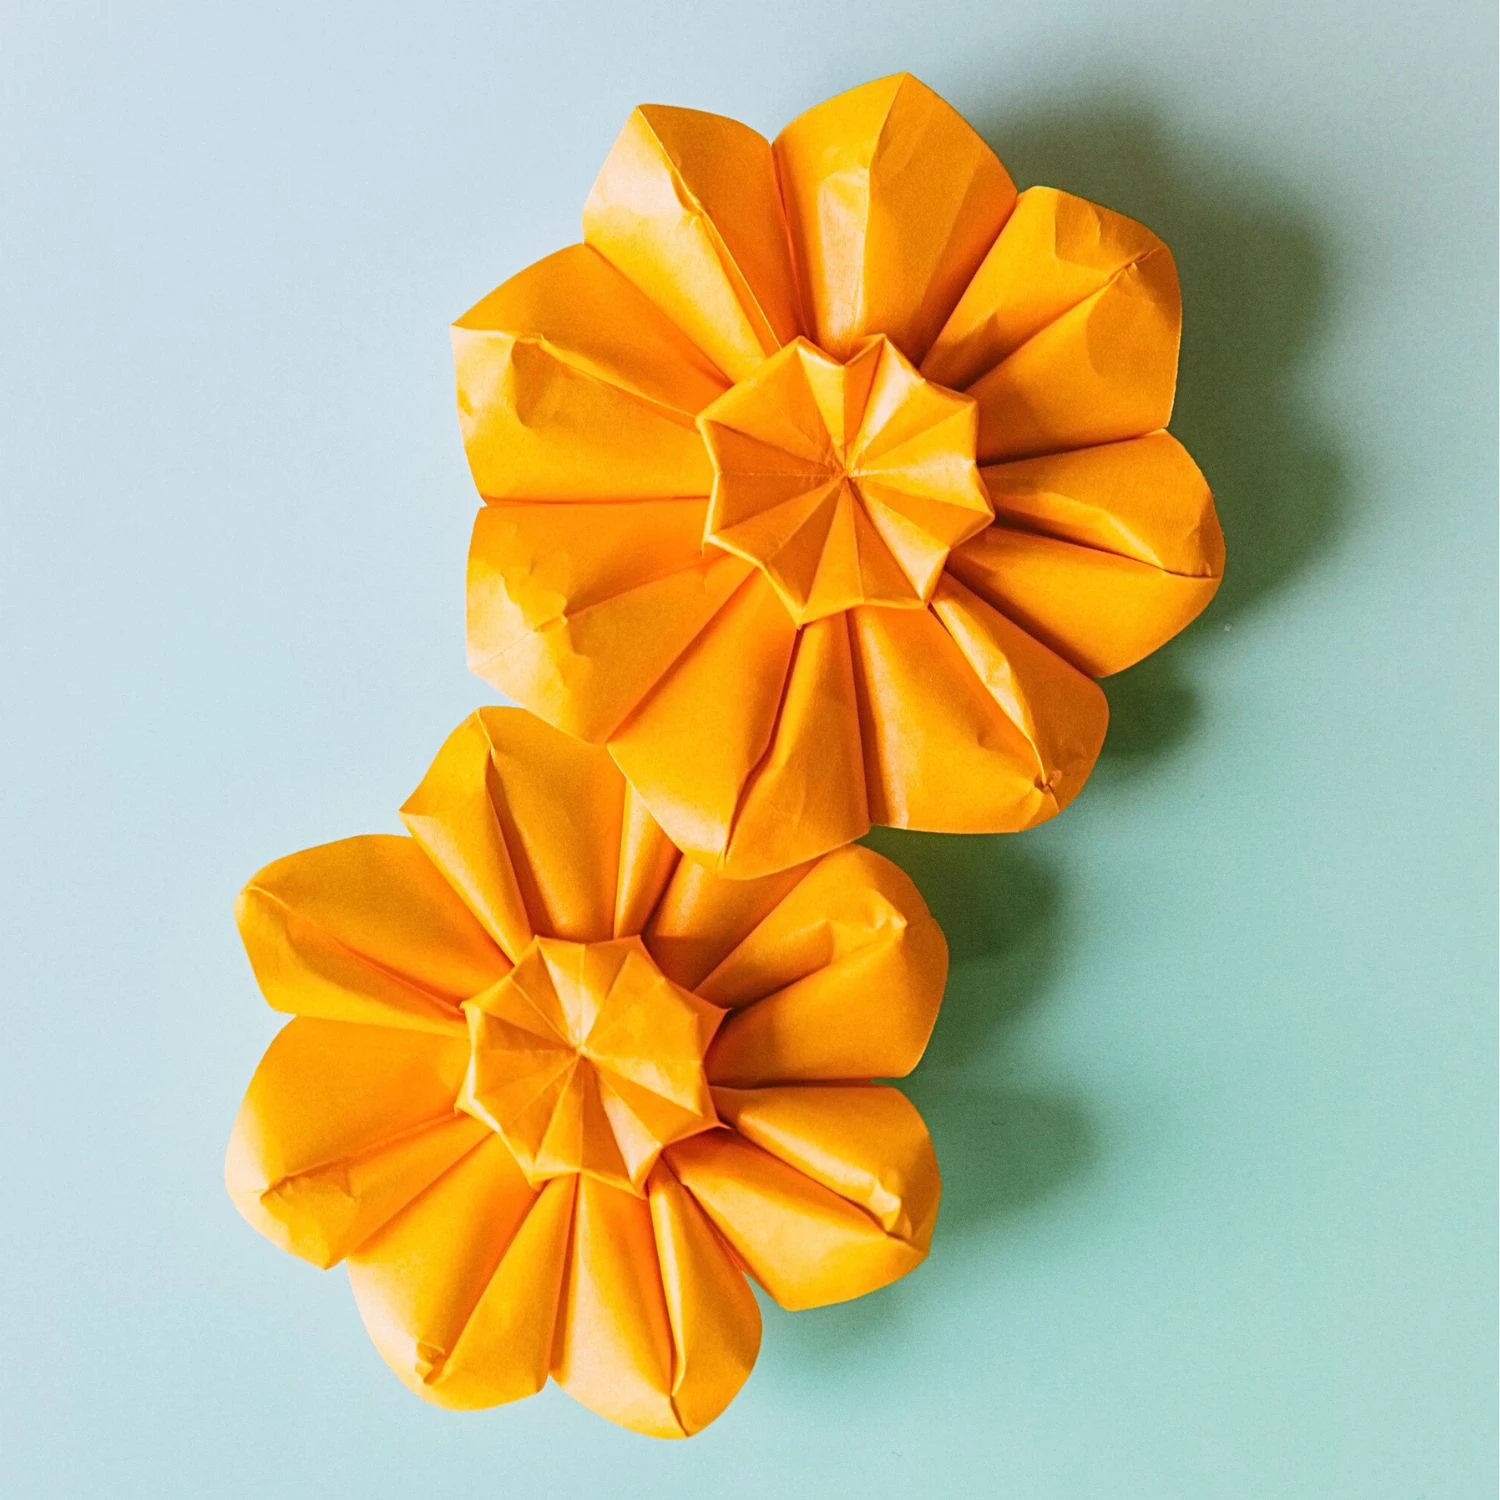
Check our Origami Star, it complements the moon and will beautifully decorate your origami sky.

If you are new to origami, start here from our beginner guide to know the basics and how to read the step-by-step instructions.

- Folding time: 15 minutes
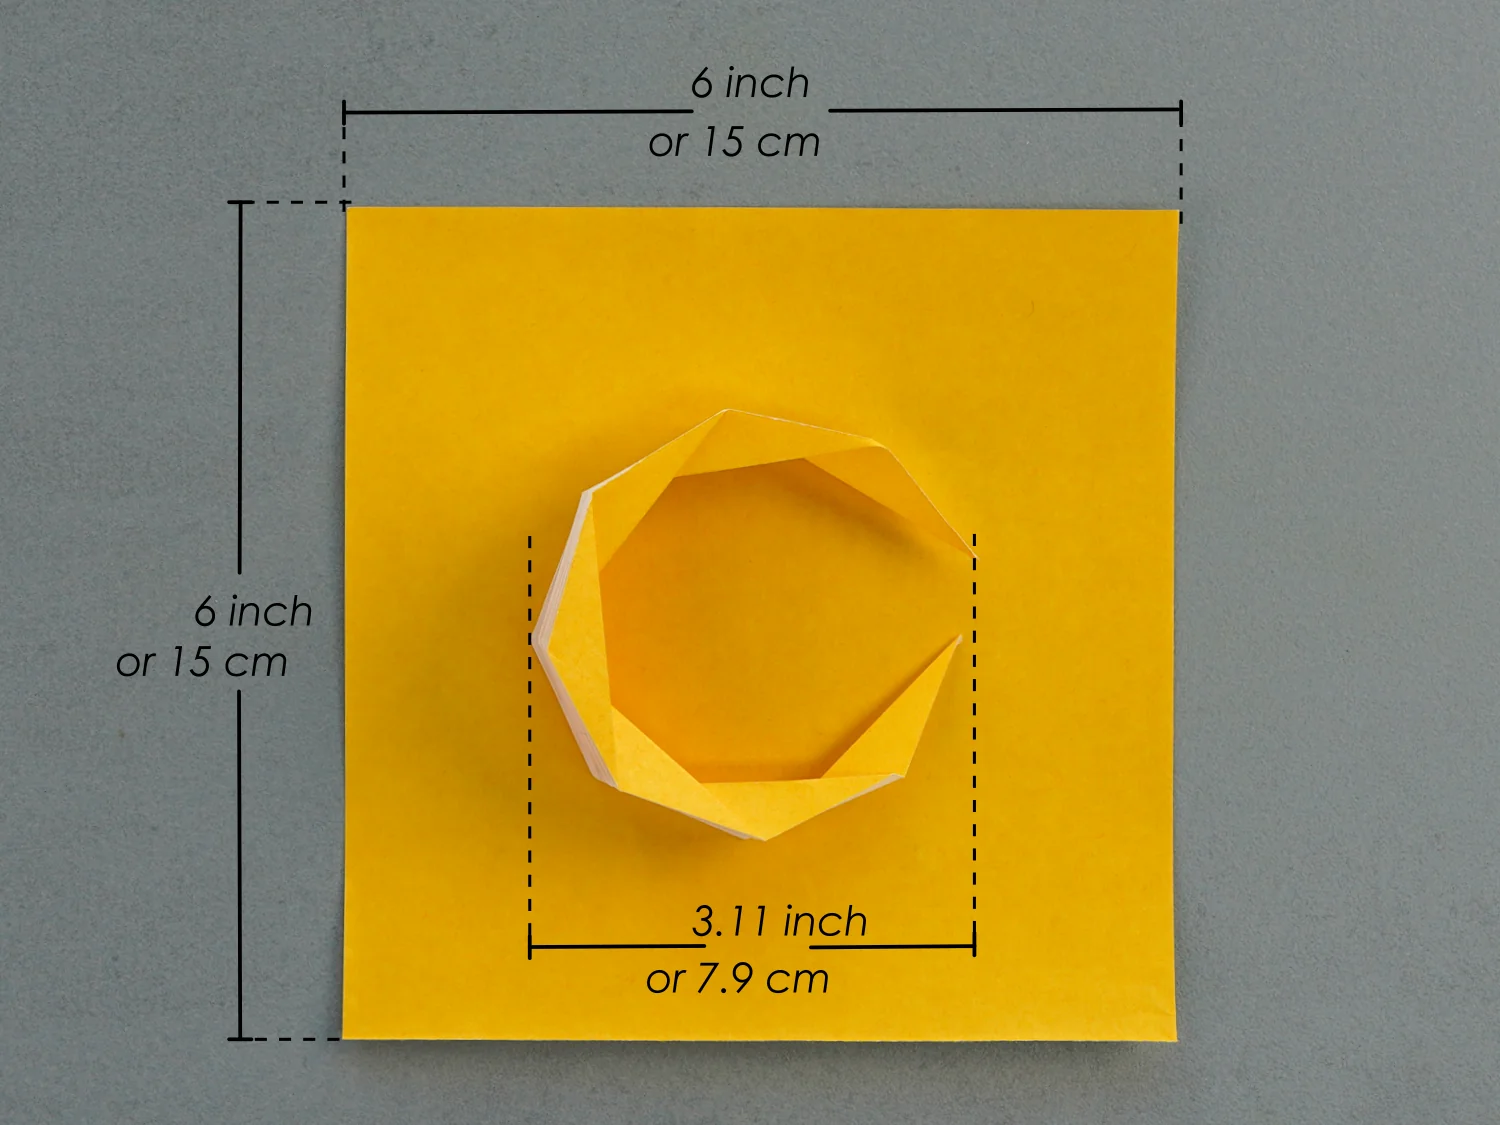
- Paper: 15×15 cm
- Difficulty: Easy
Material
Prepare a piece of 15×15 cm origami square paper, with one yellow and one white side, and you will get a 7.9×7.9 cm moon. Other sizes and colors of square paper are also practicable.
Origami Moon Video
Step by Step Instructions
Step 1
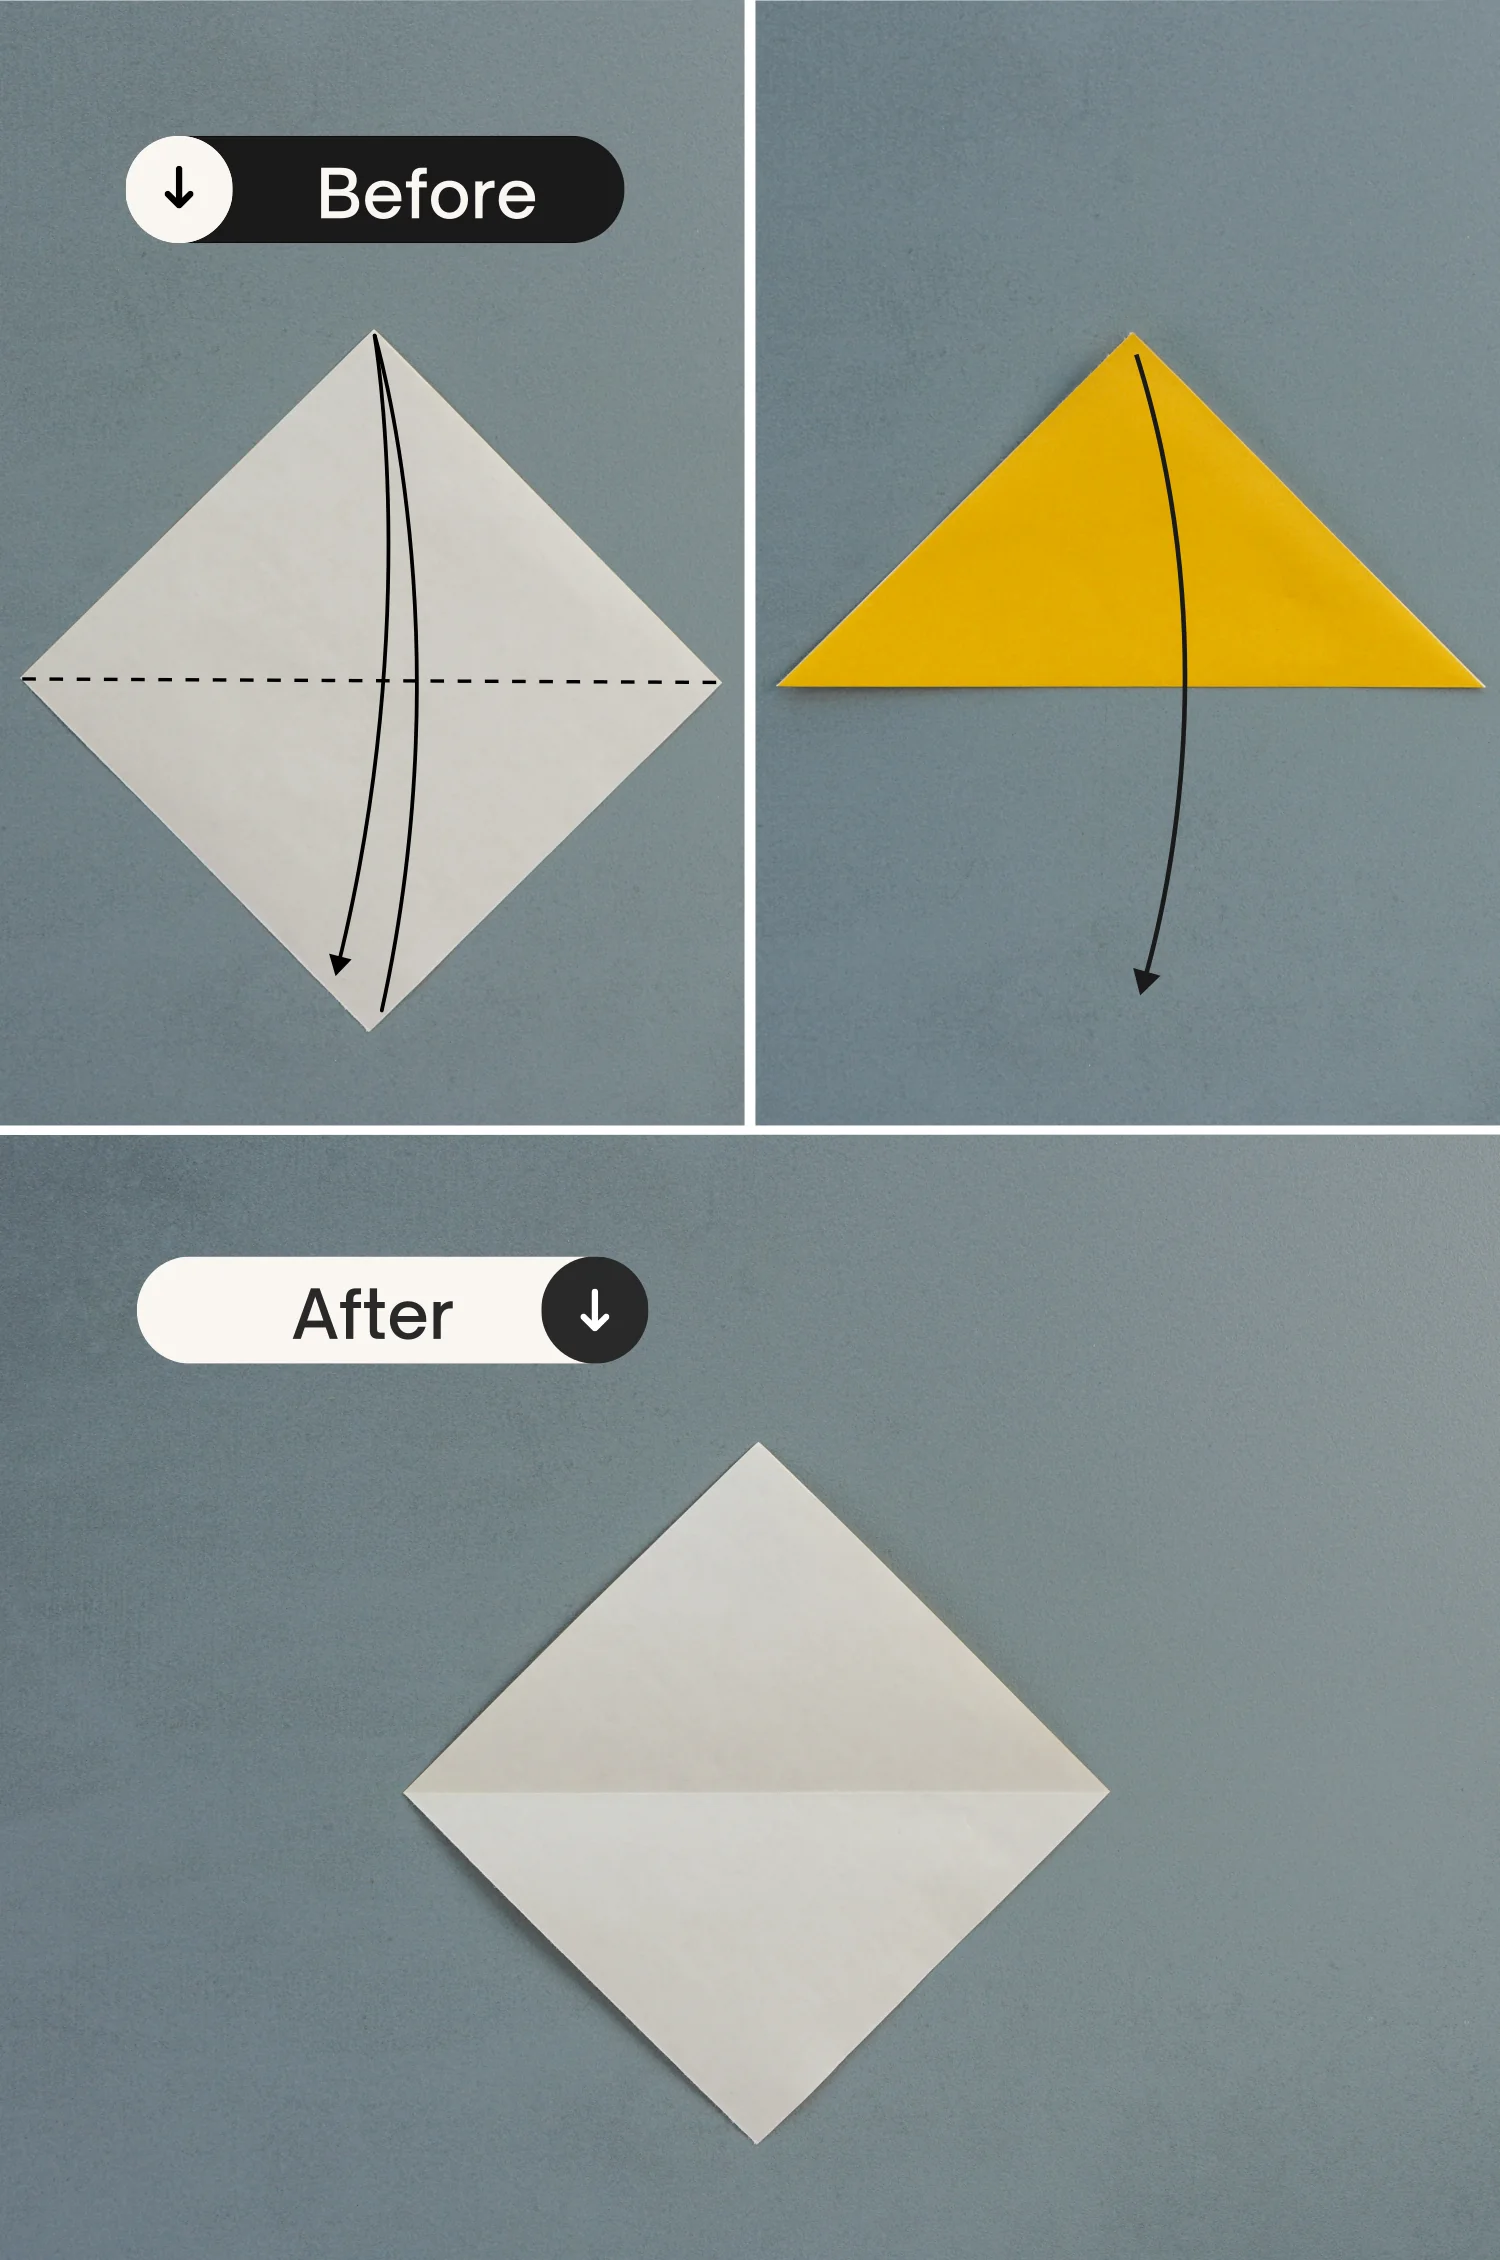
Start with the white side of the paper facing up, fold it in half horizontally, and unfold it.
Step 2
Fold the bottom left edge to align with the middle horizontal crease, crease it well then unfold.
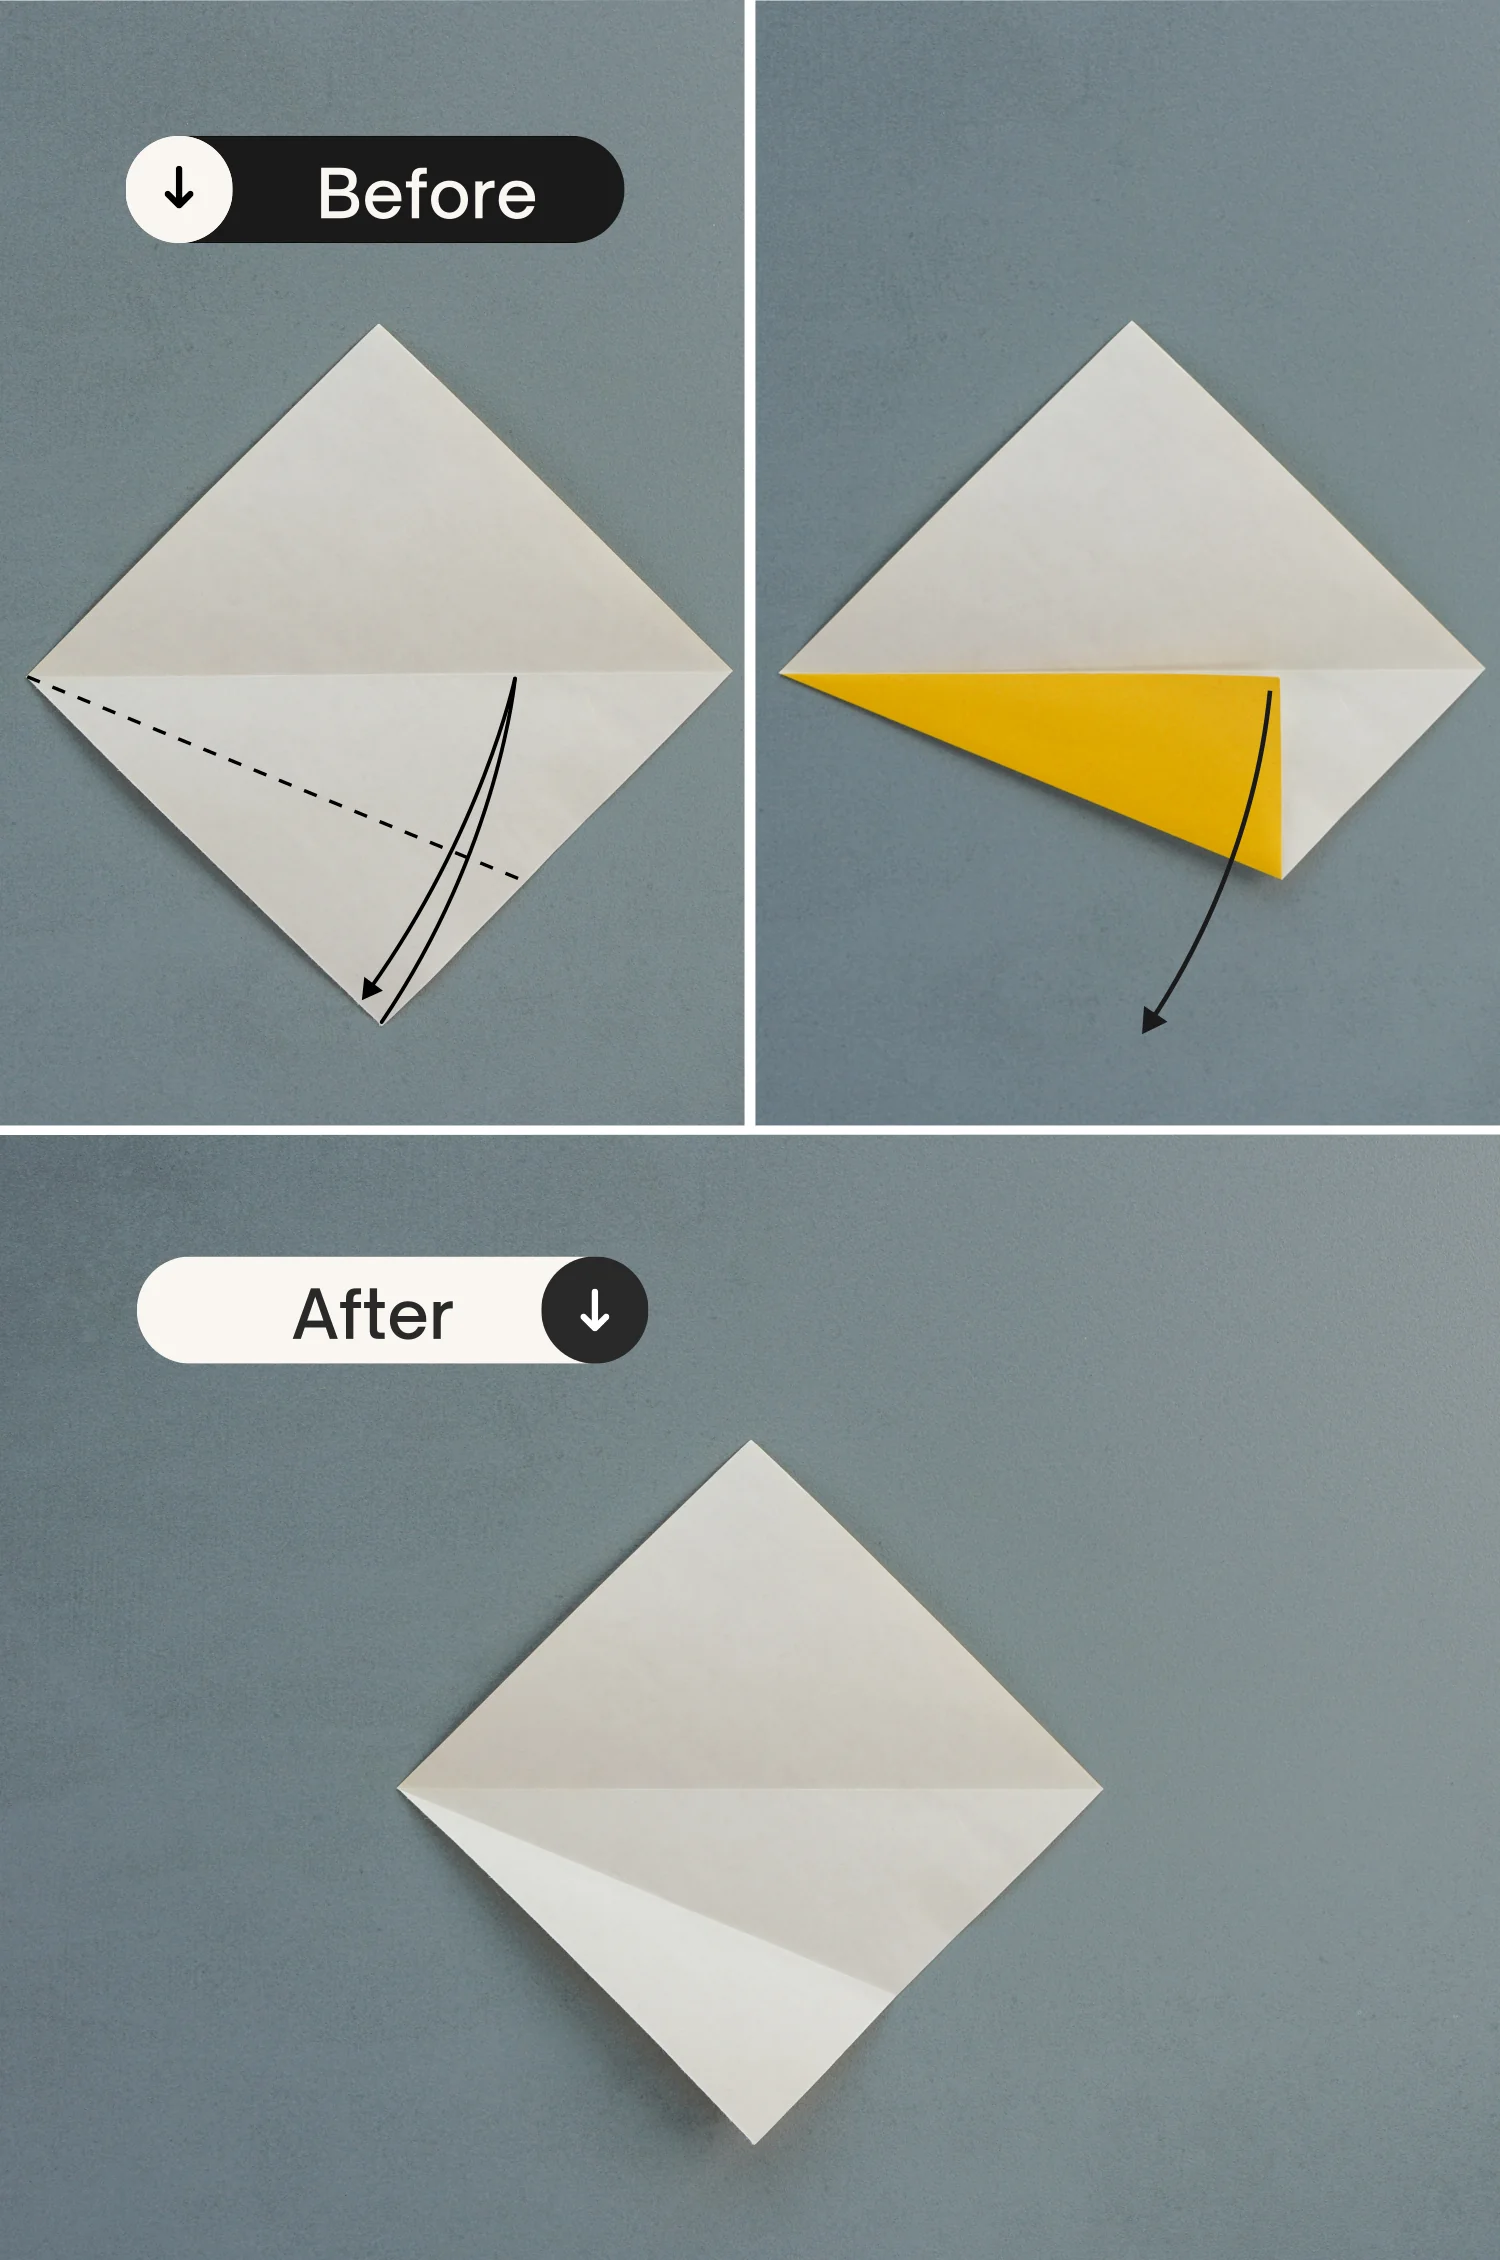
Step 3
Fold the bottom right edge to align with the horizontal crease, and unfold it.
Step 4
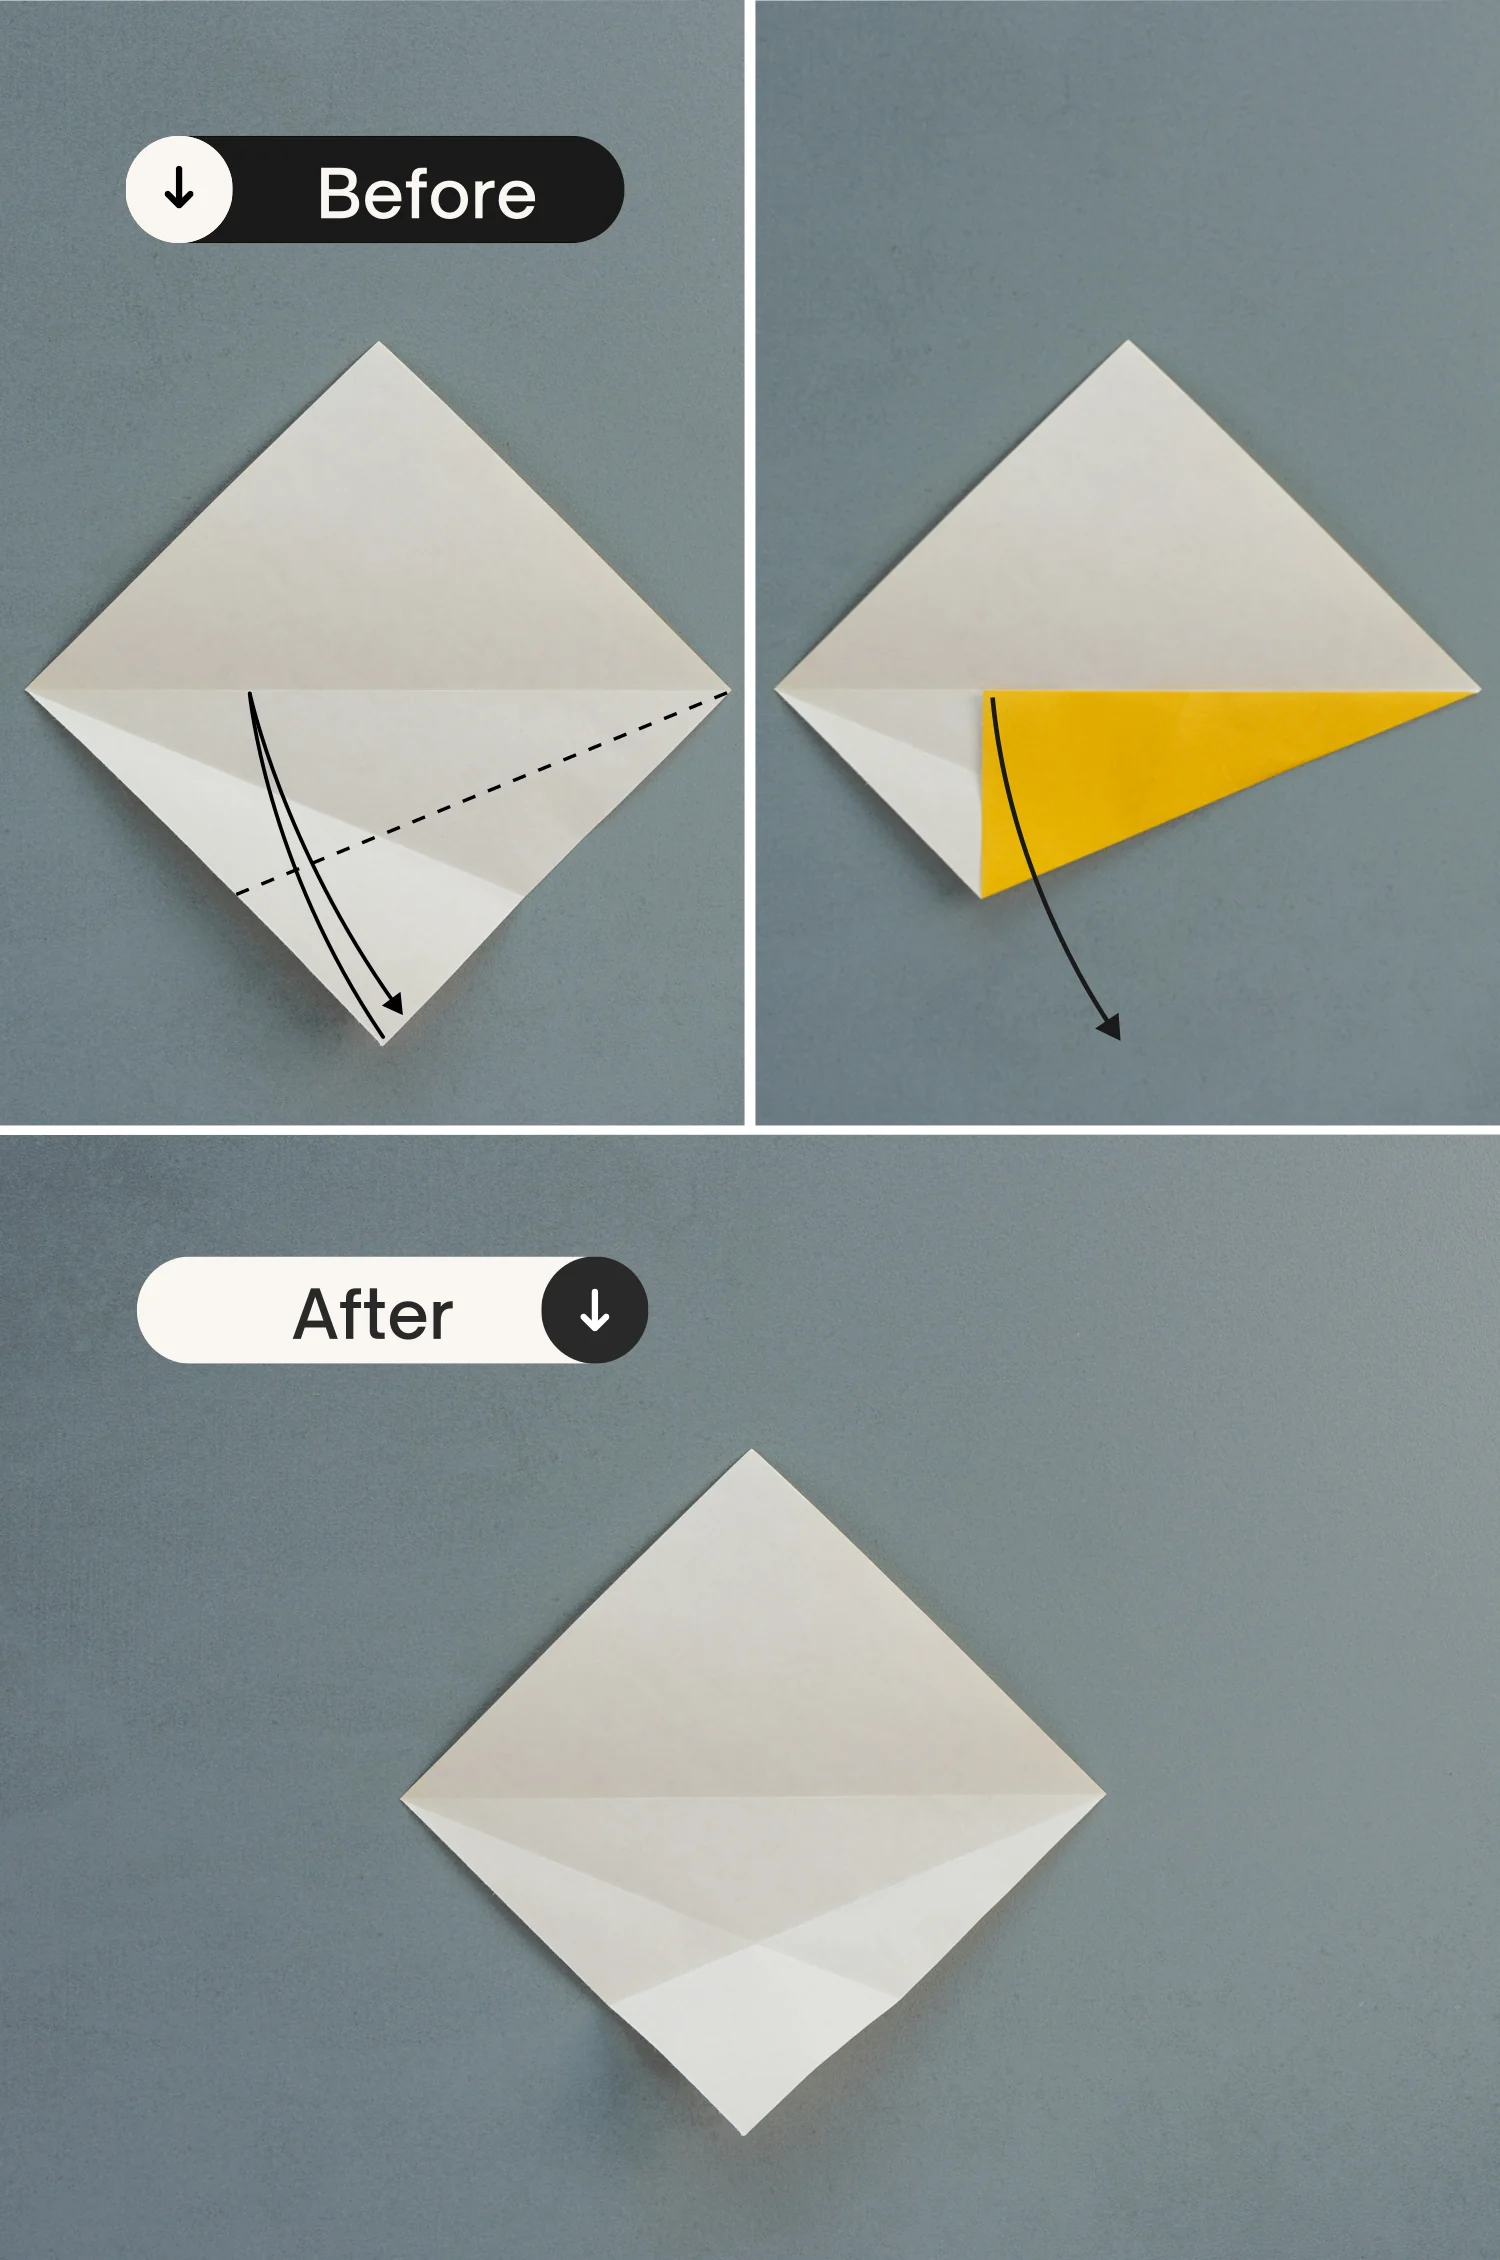
Like before, fold the top left and right edges to align with the middle horizontal crease, and unfold them.
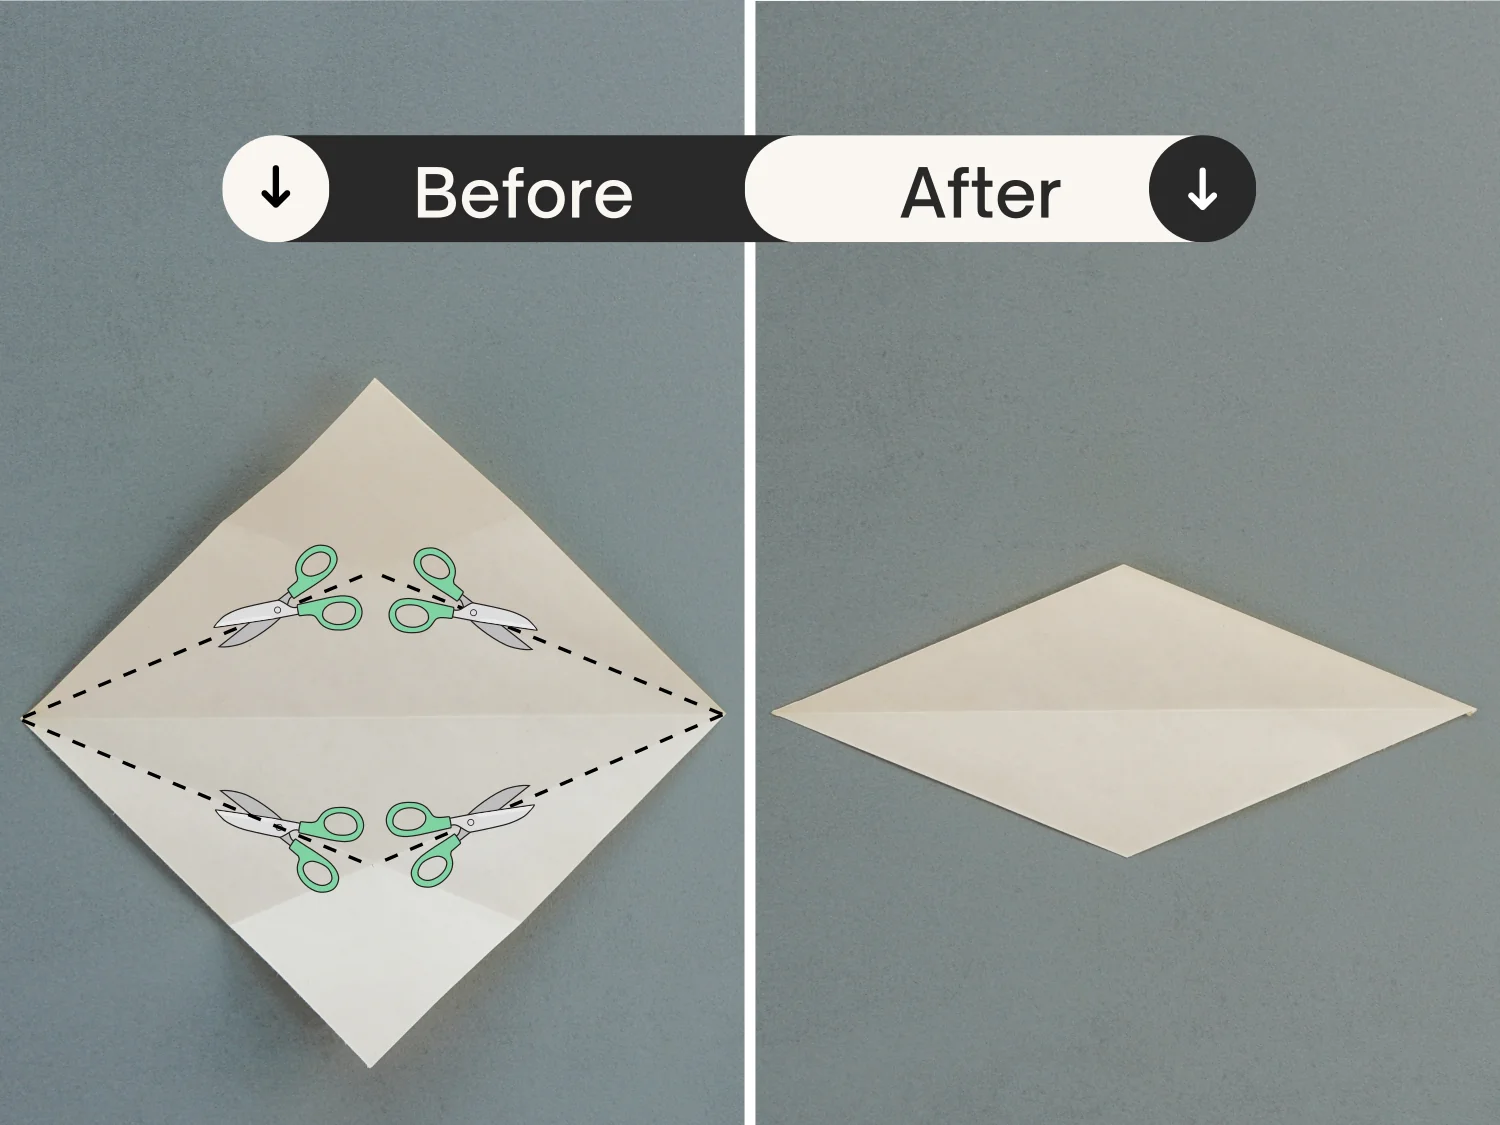
Step 5
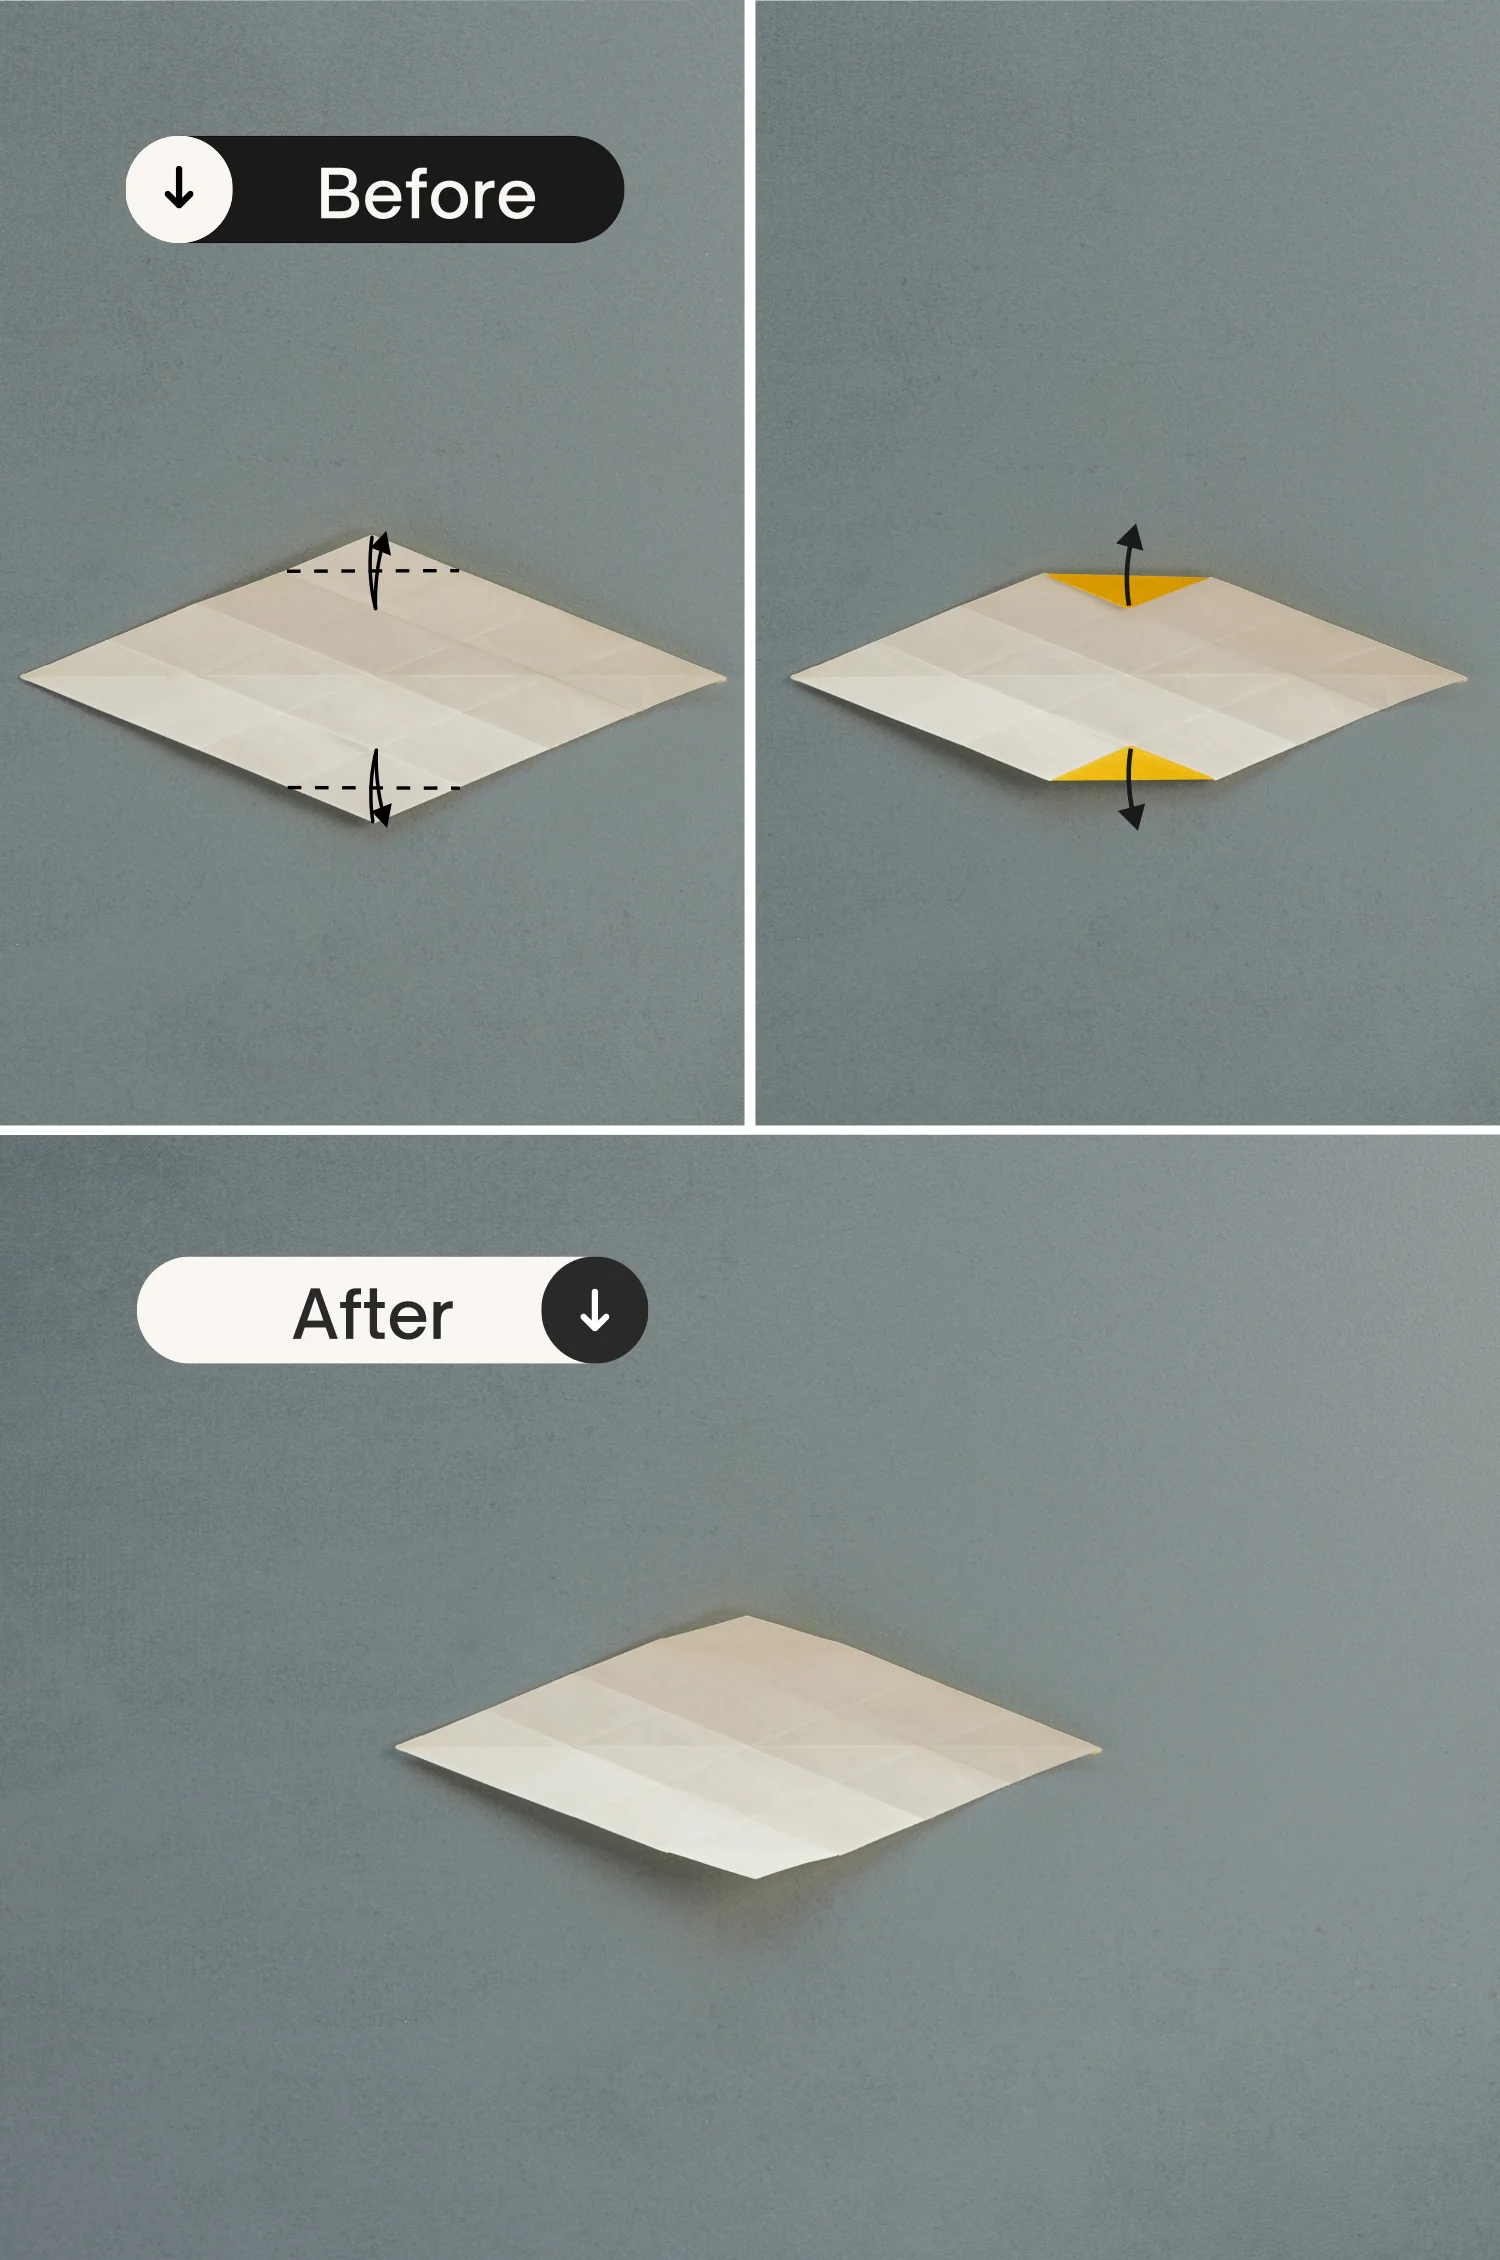
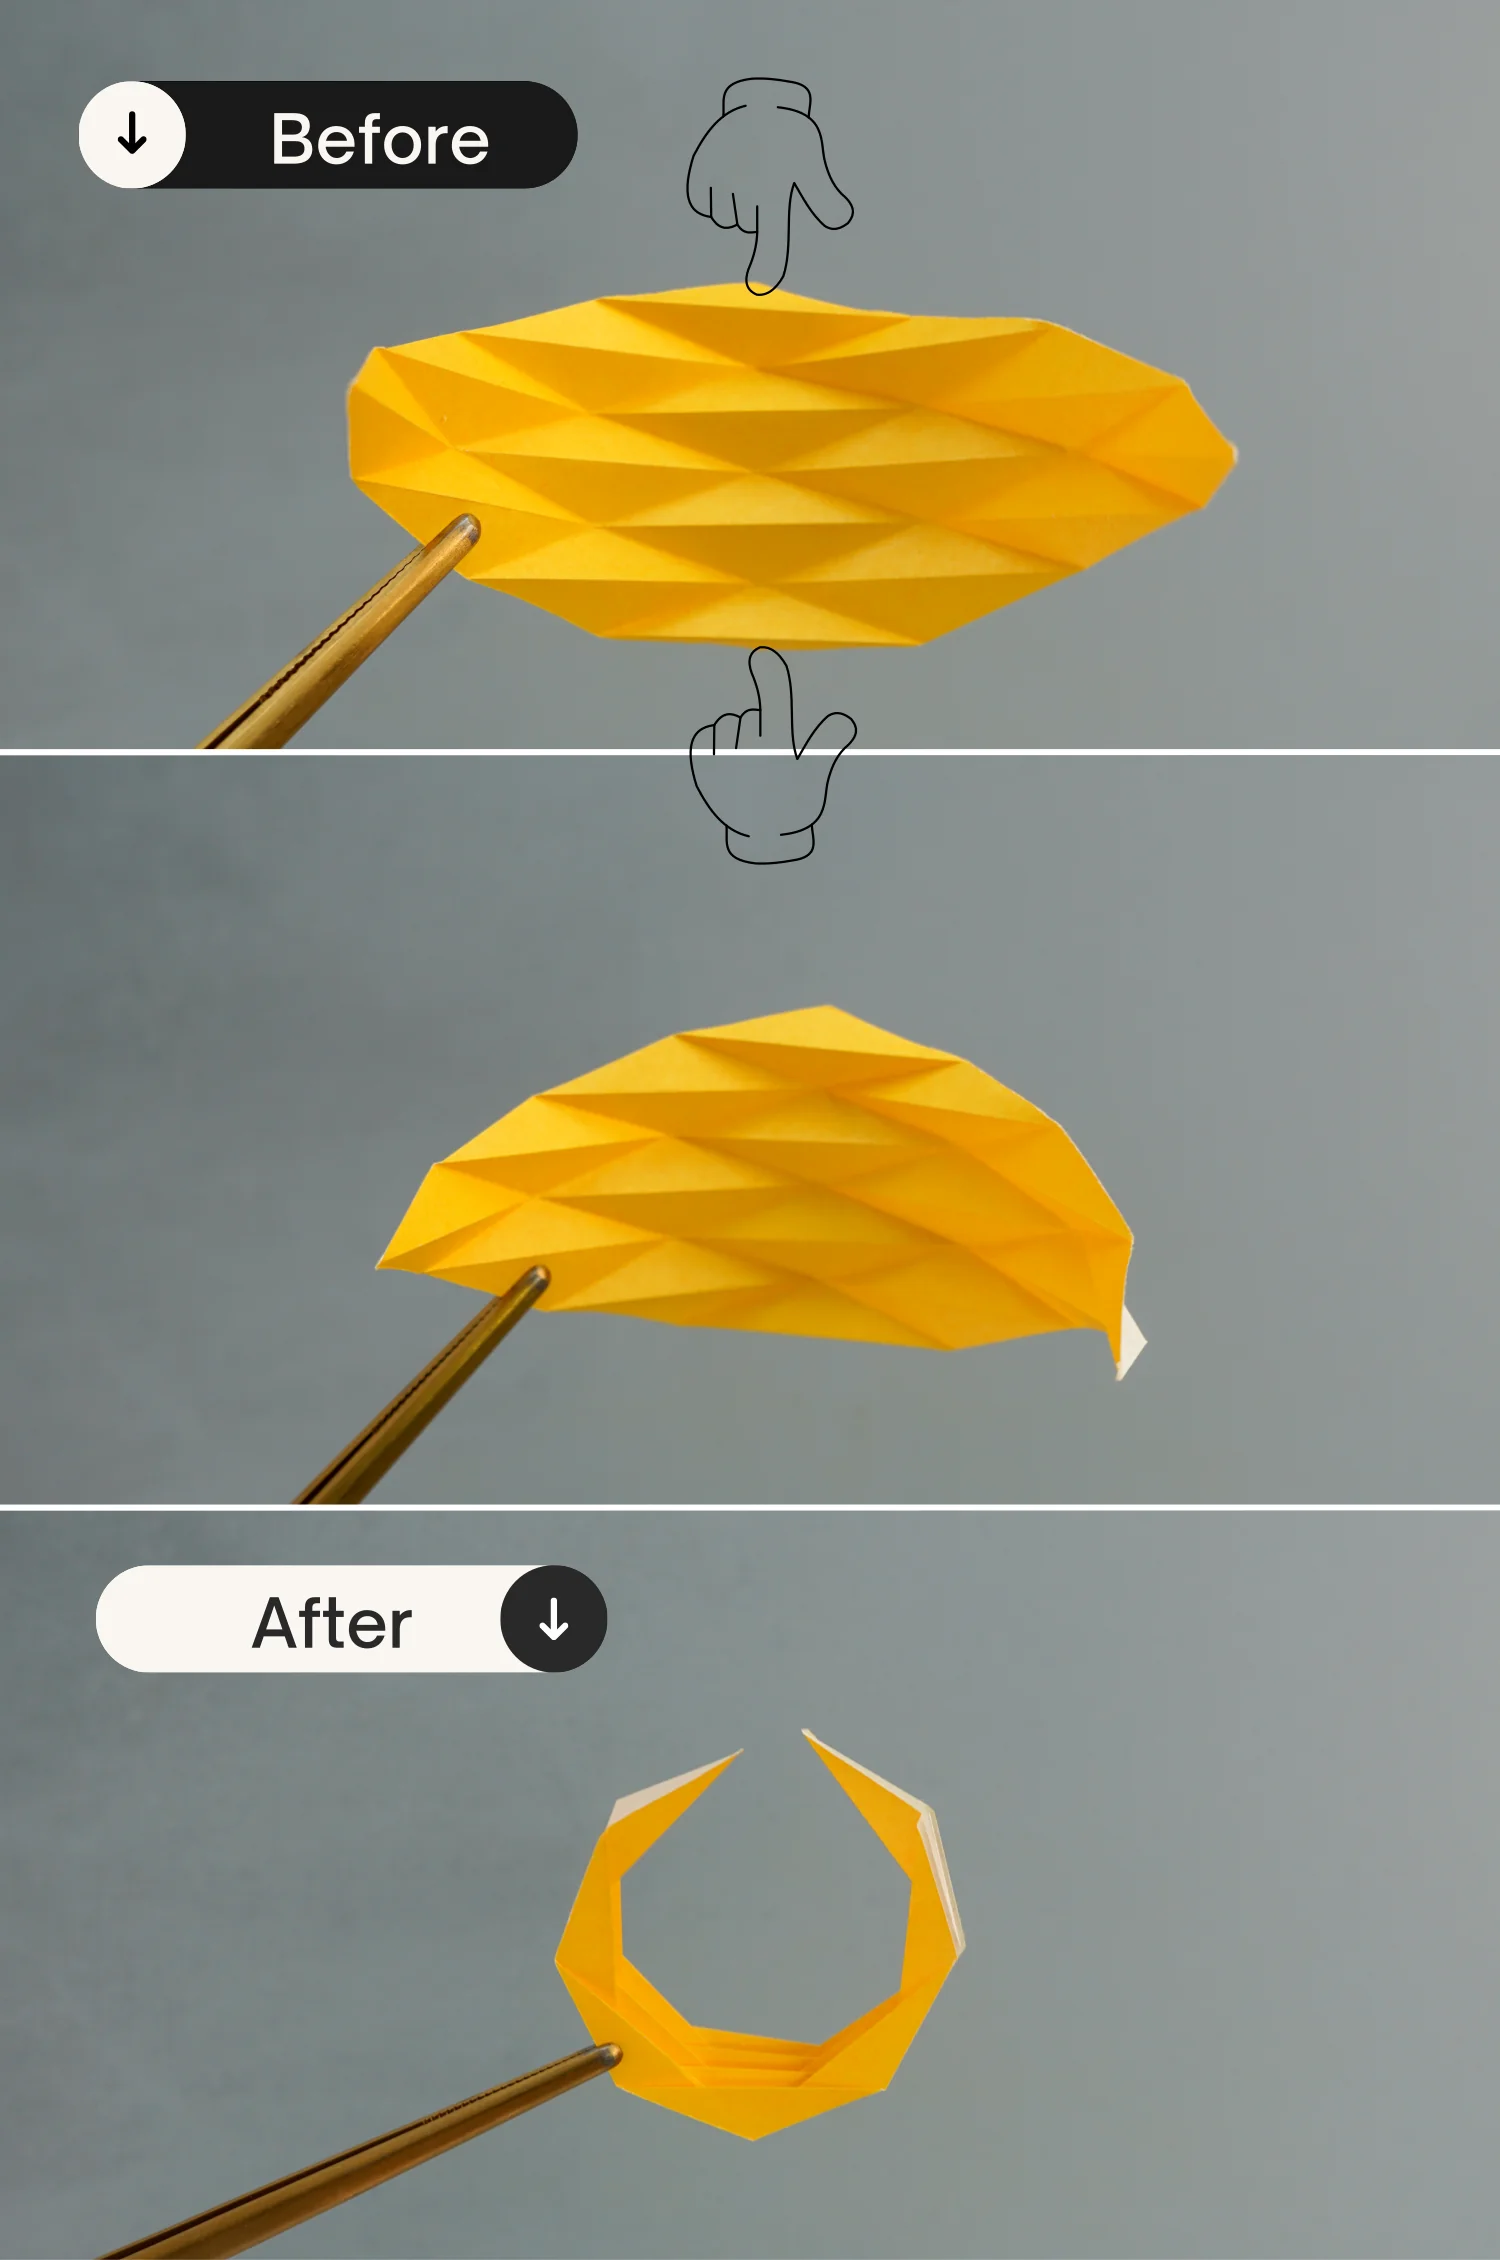
Cut the creases shown by the dotted lines.
Step 6
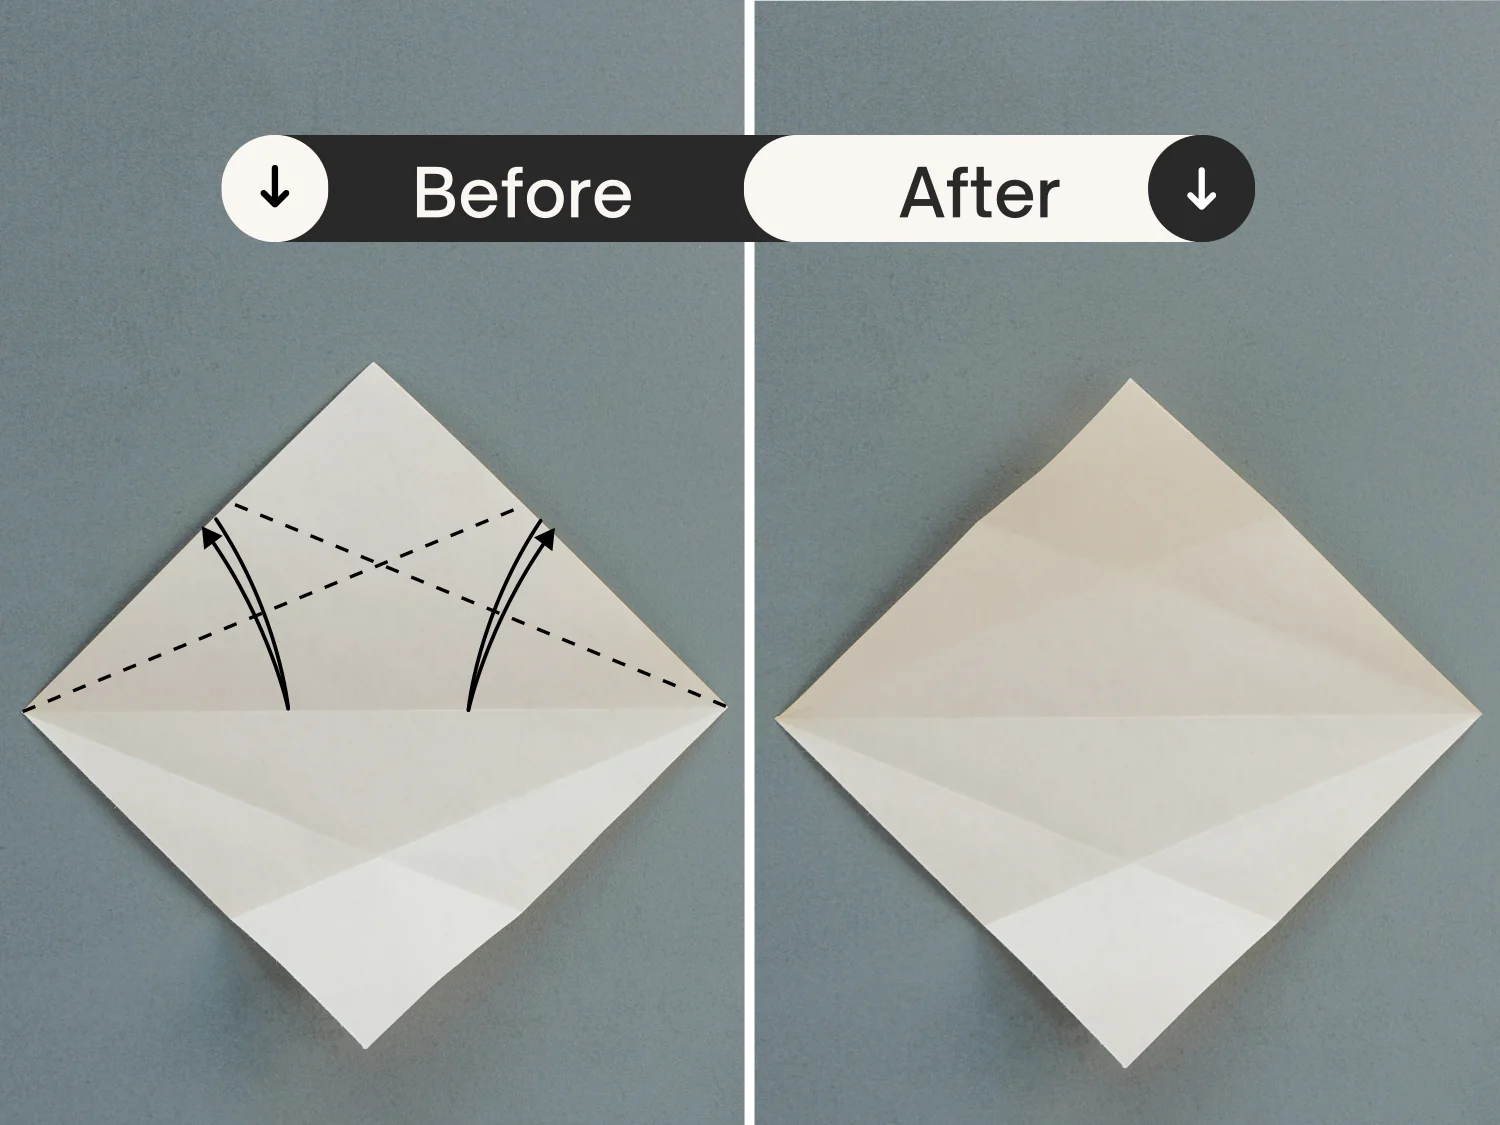
Fold the bottom right edge to align with the top left edge, leaving a crease then unfold it.
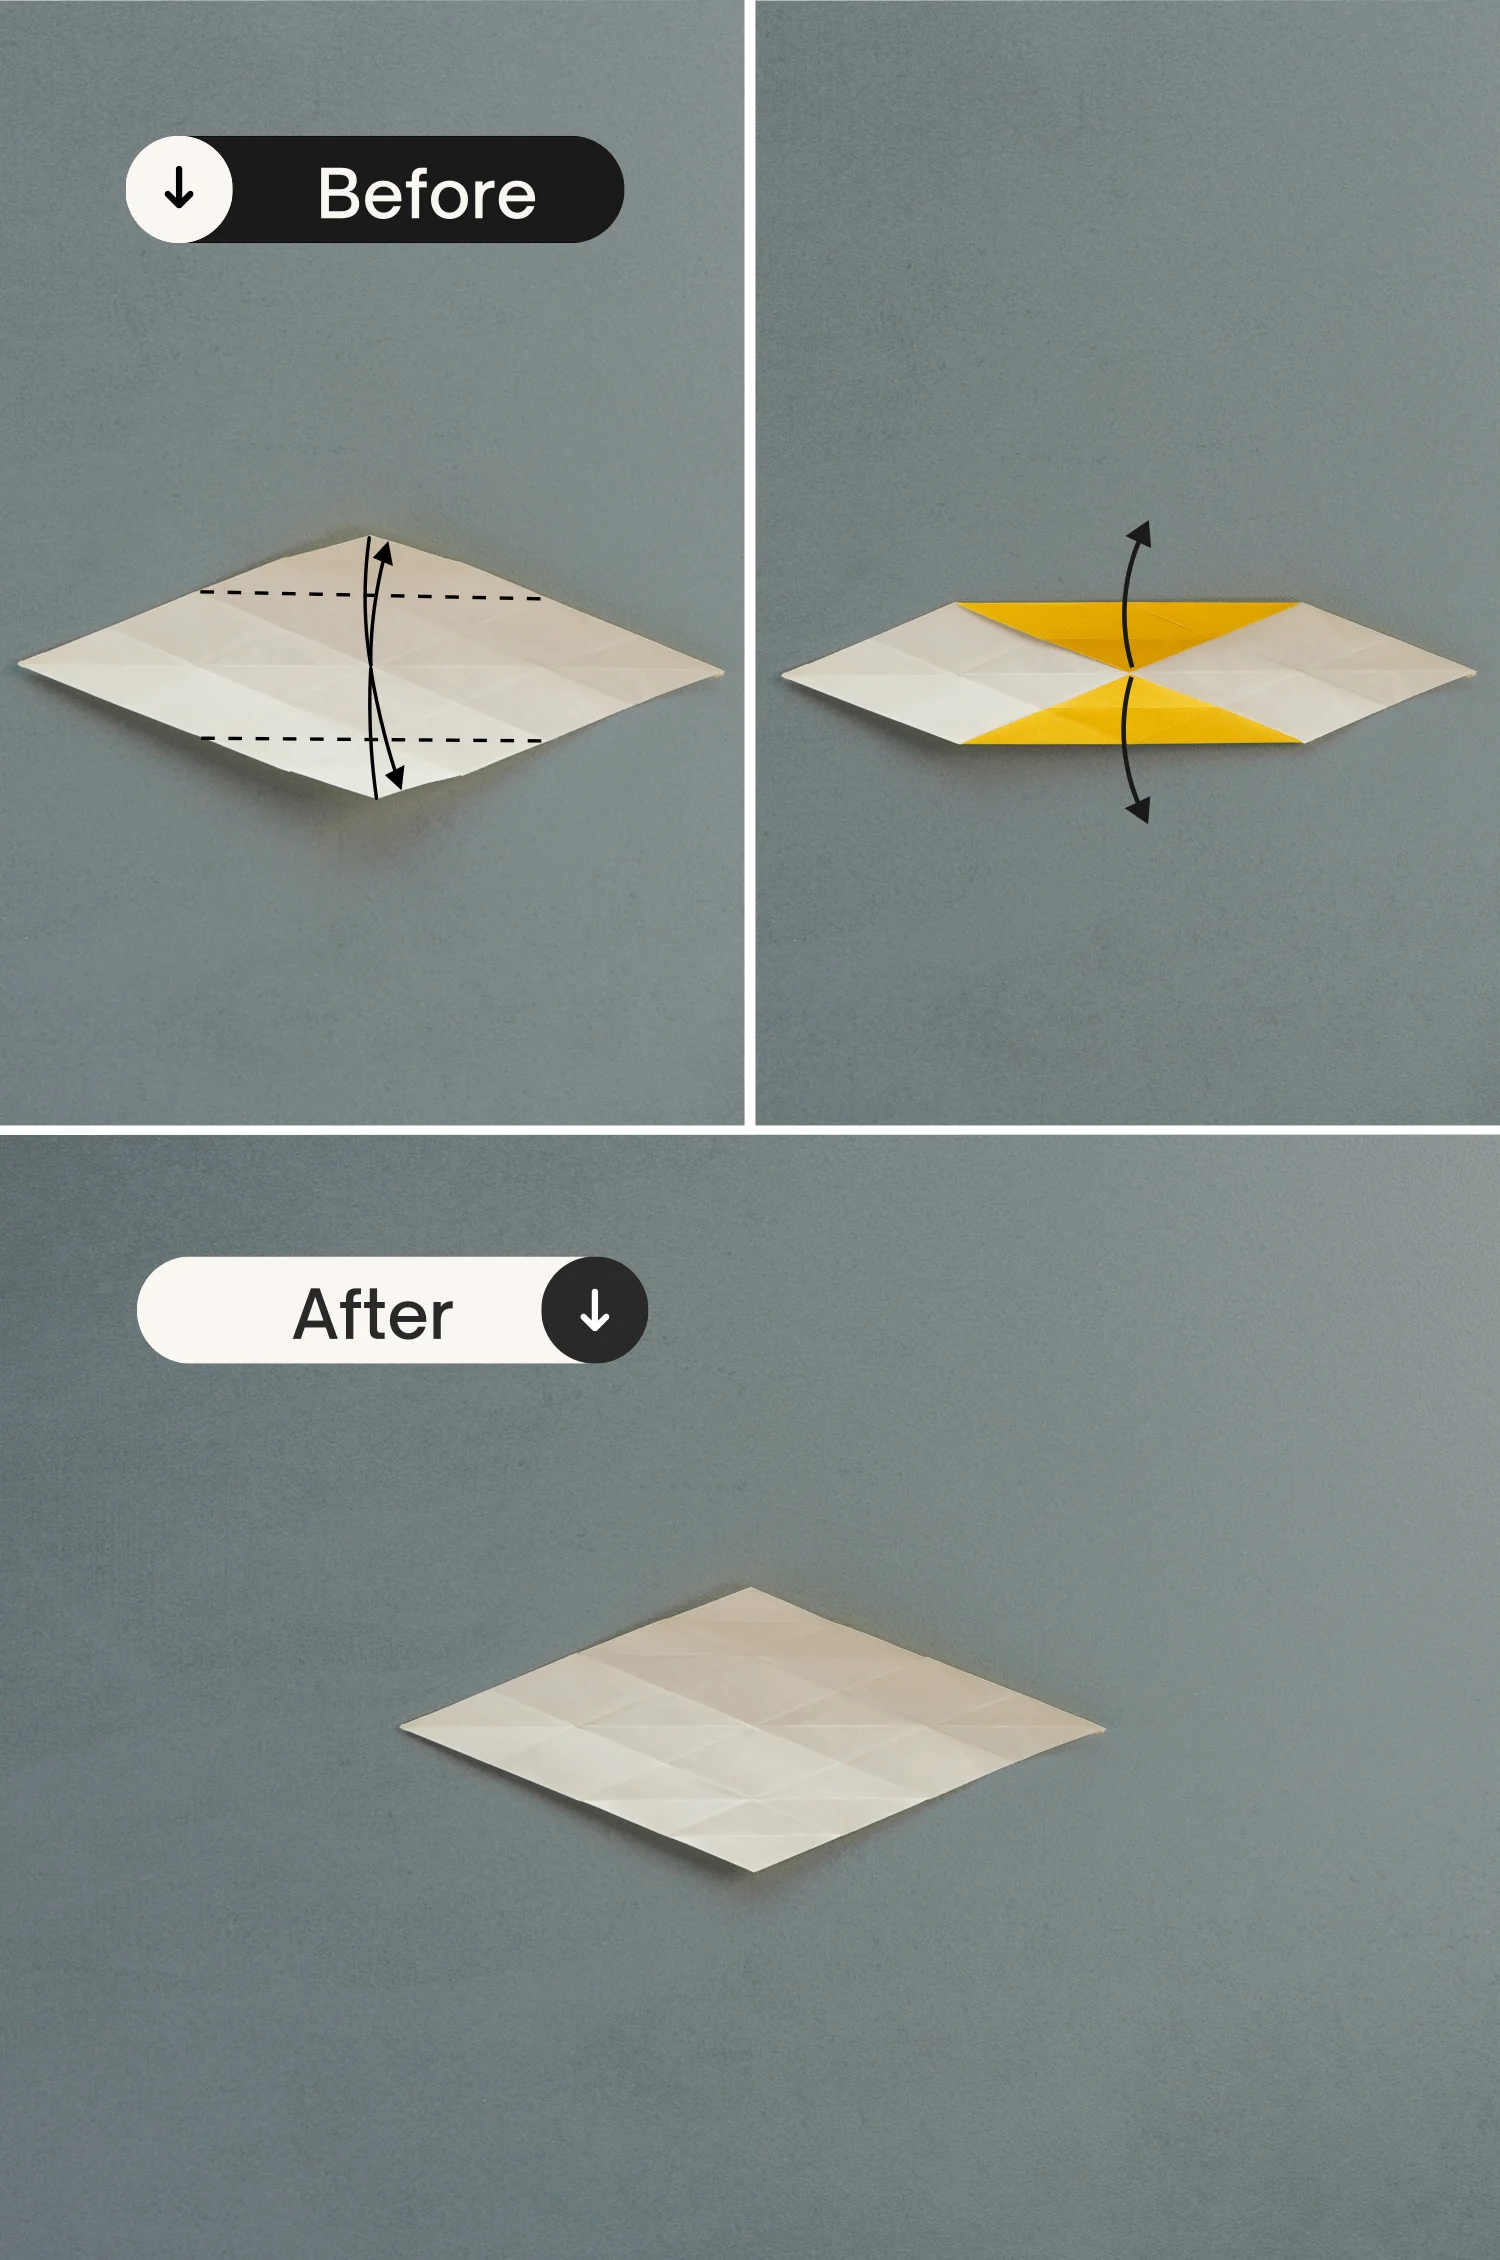
Step 7
Fold the bottom right and top left edges to align with the crease you made in the previous step, and unfold them.
Step 8
Fold the bottom left edge to align with the top right edge, leaving a crease then unfold it.
Step 9
Fold the bottom left and top right edges to align with the crease you made in the previous step, crease them well then unfold.
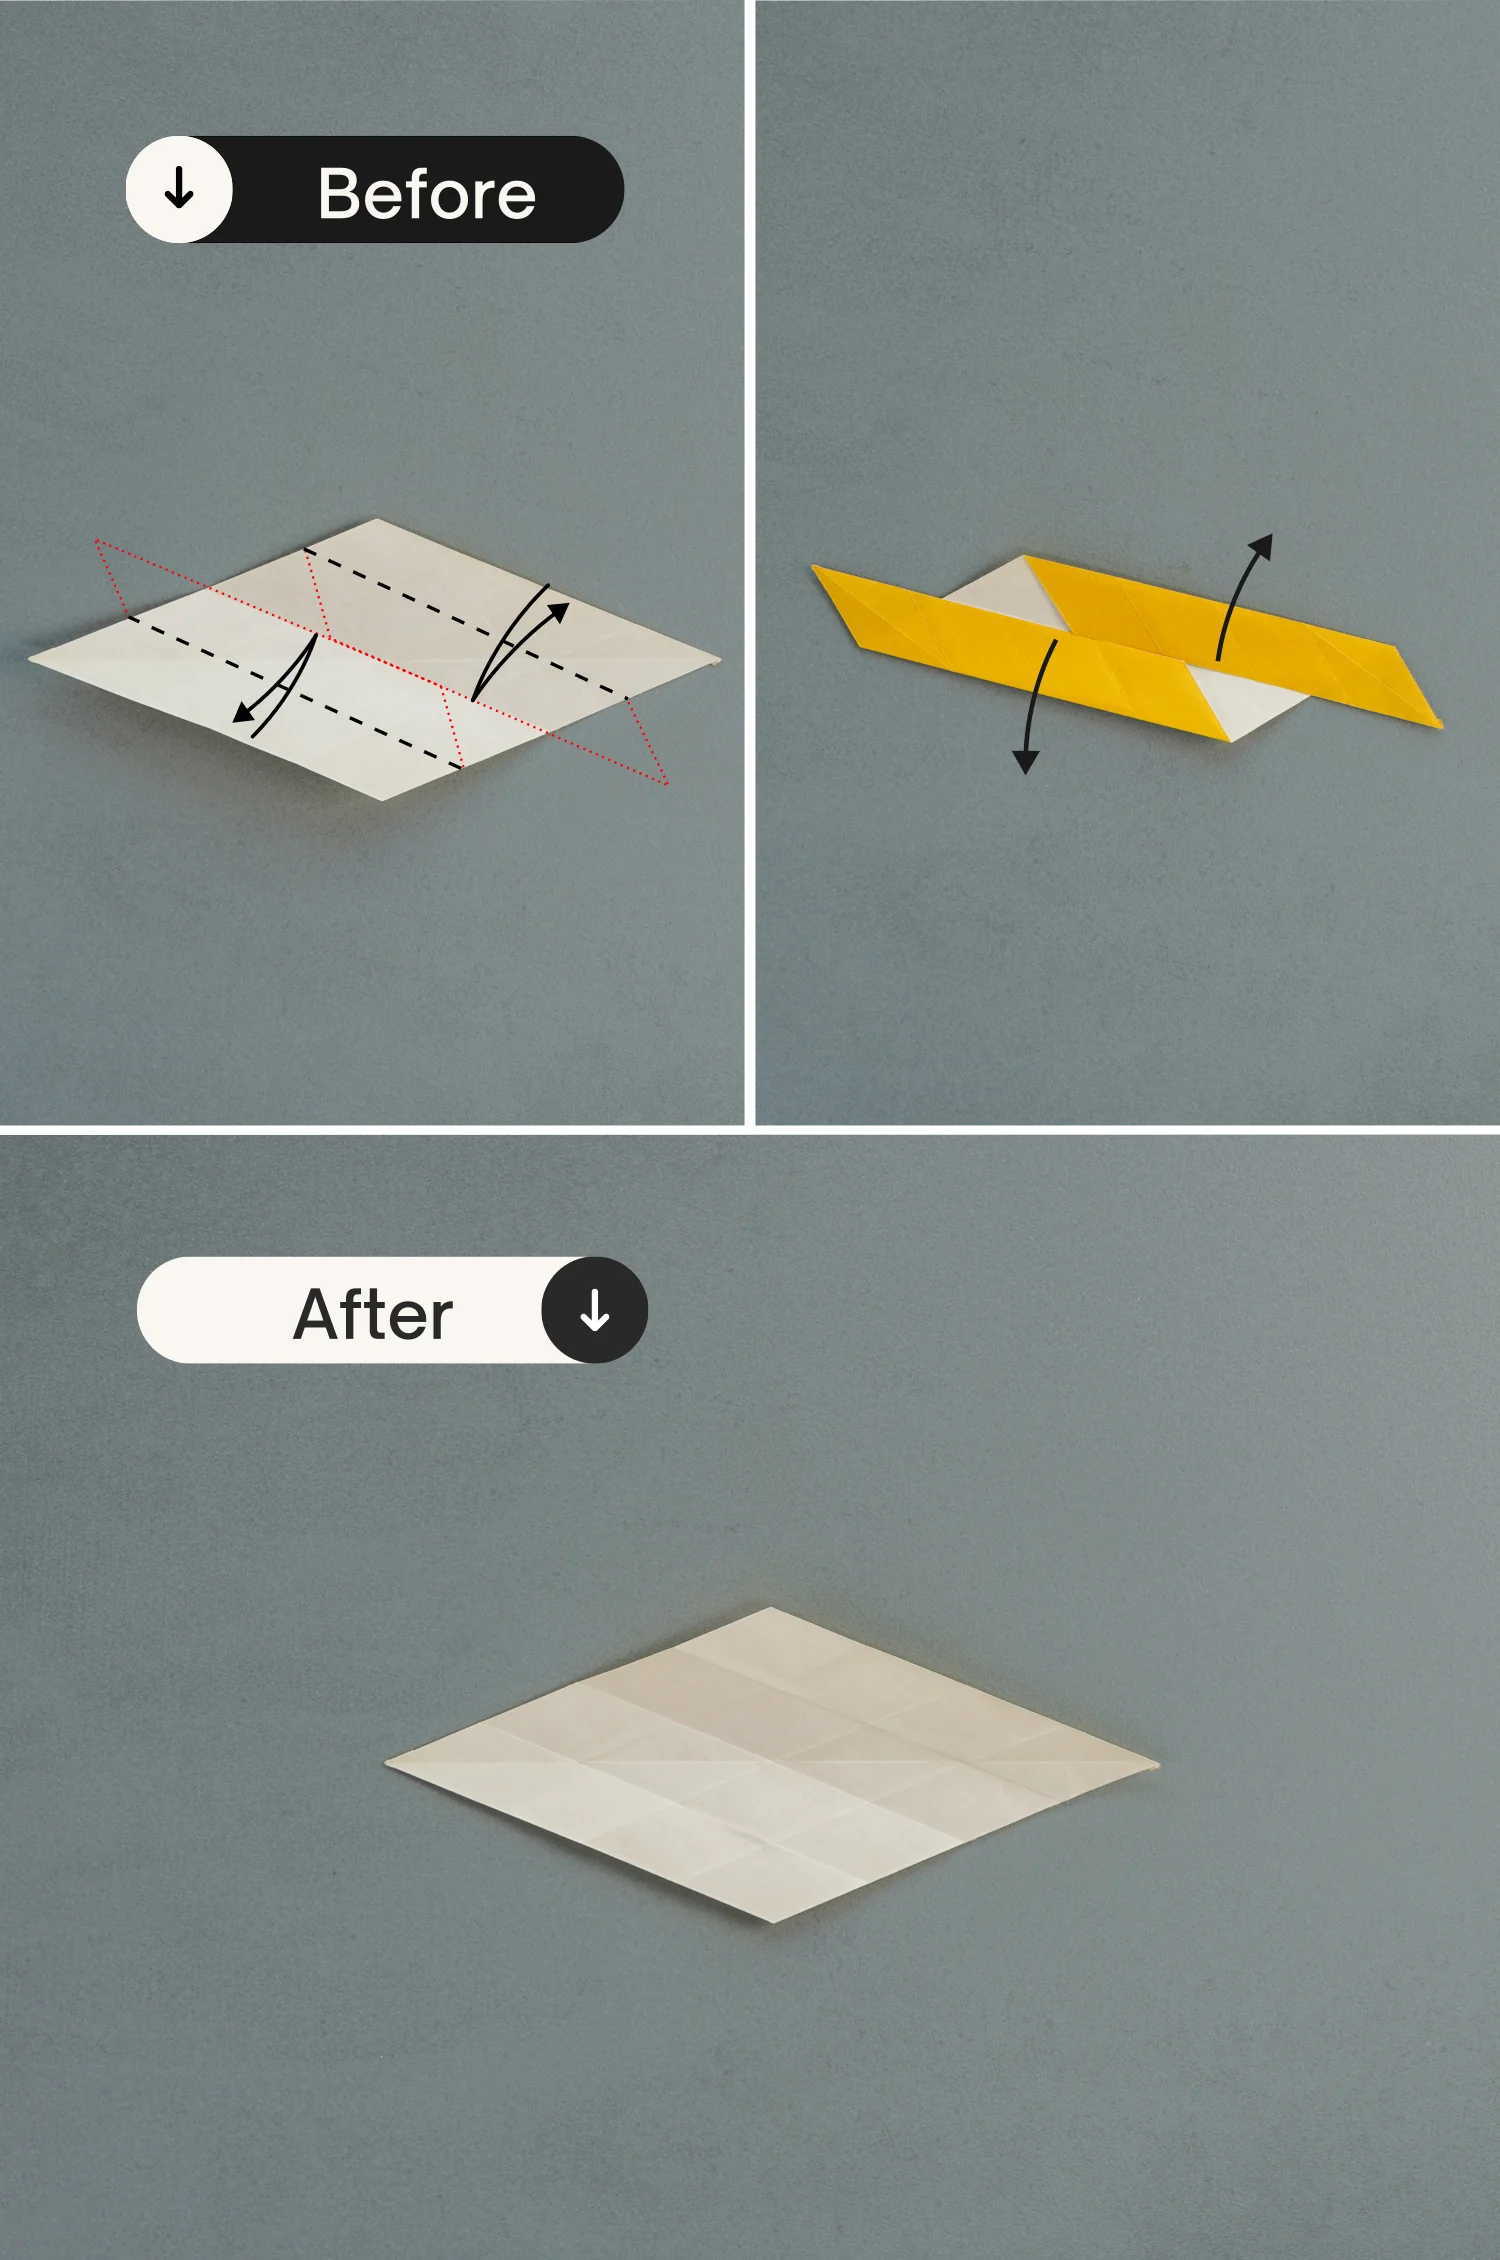
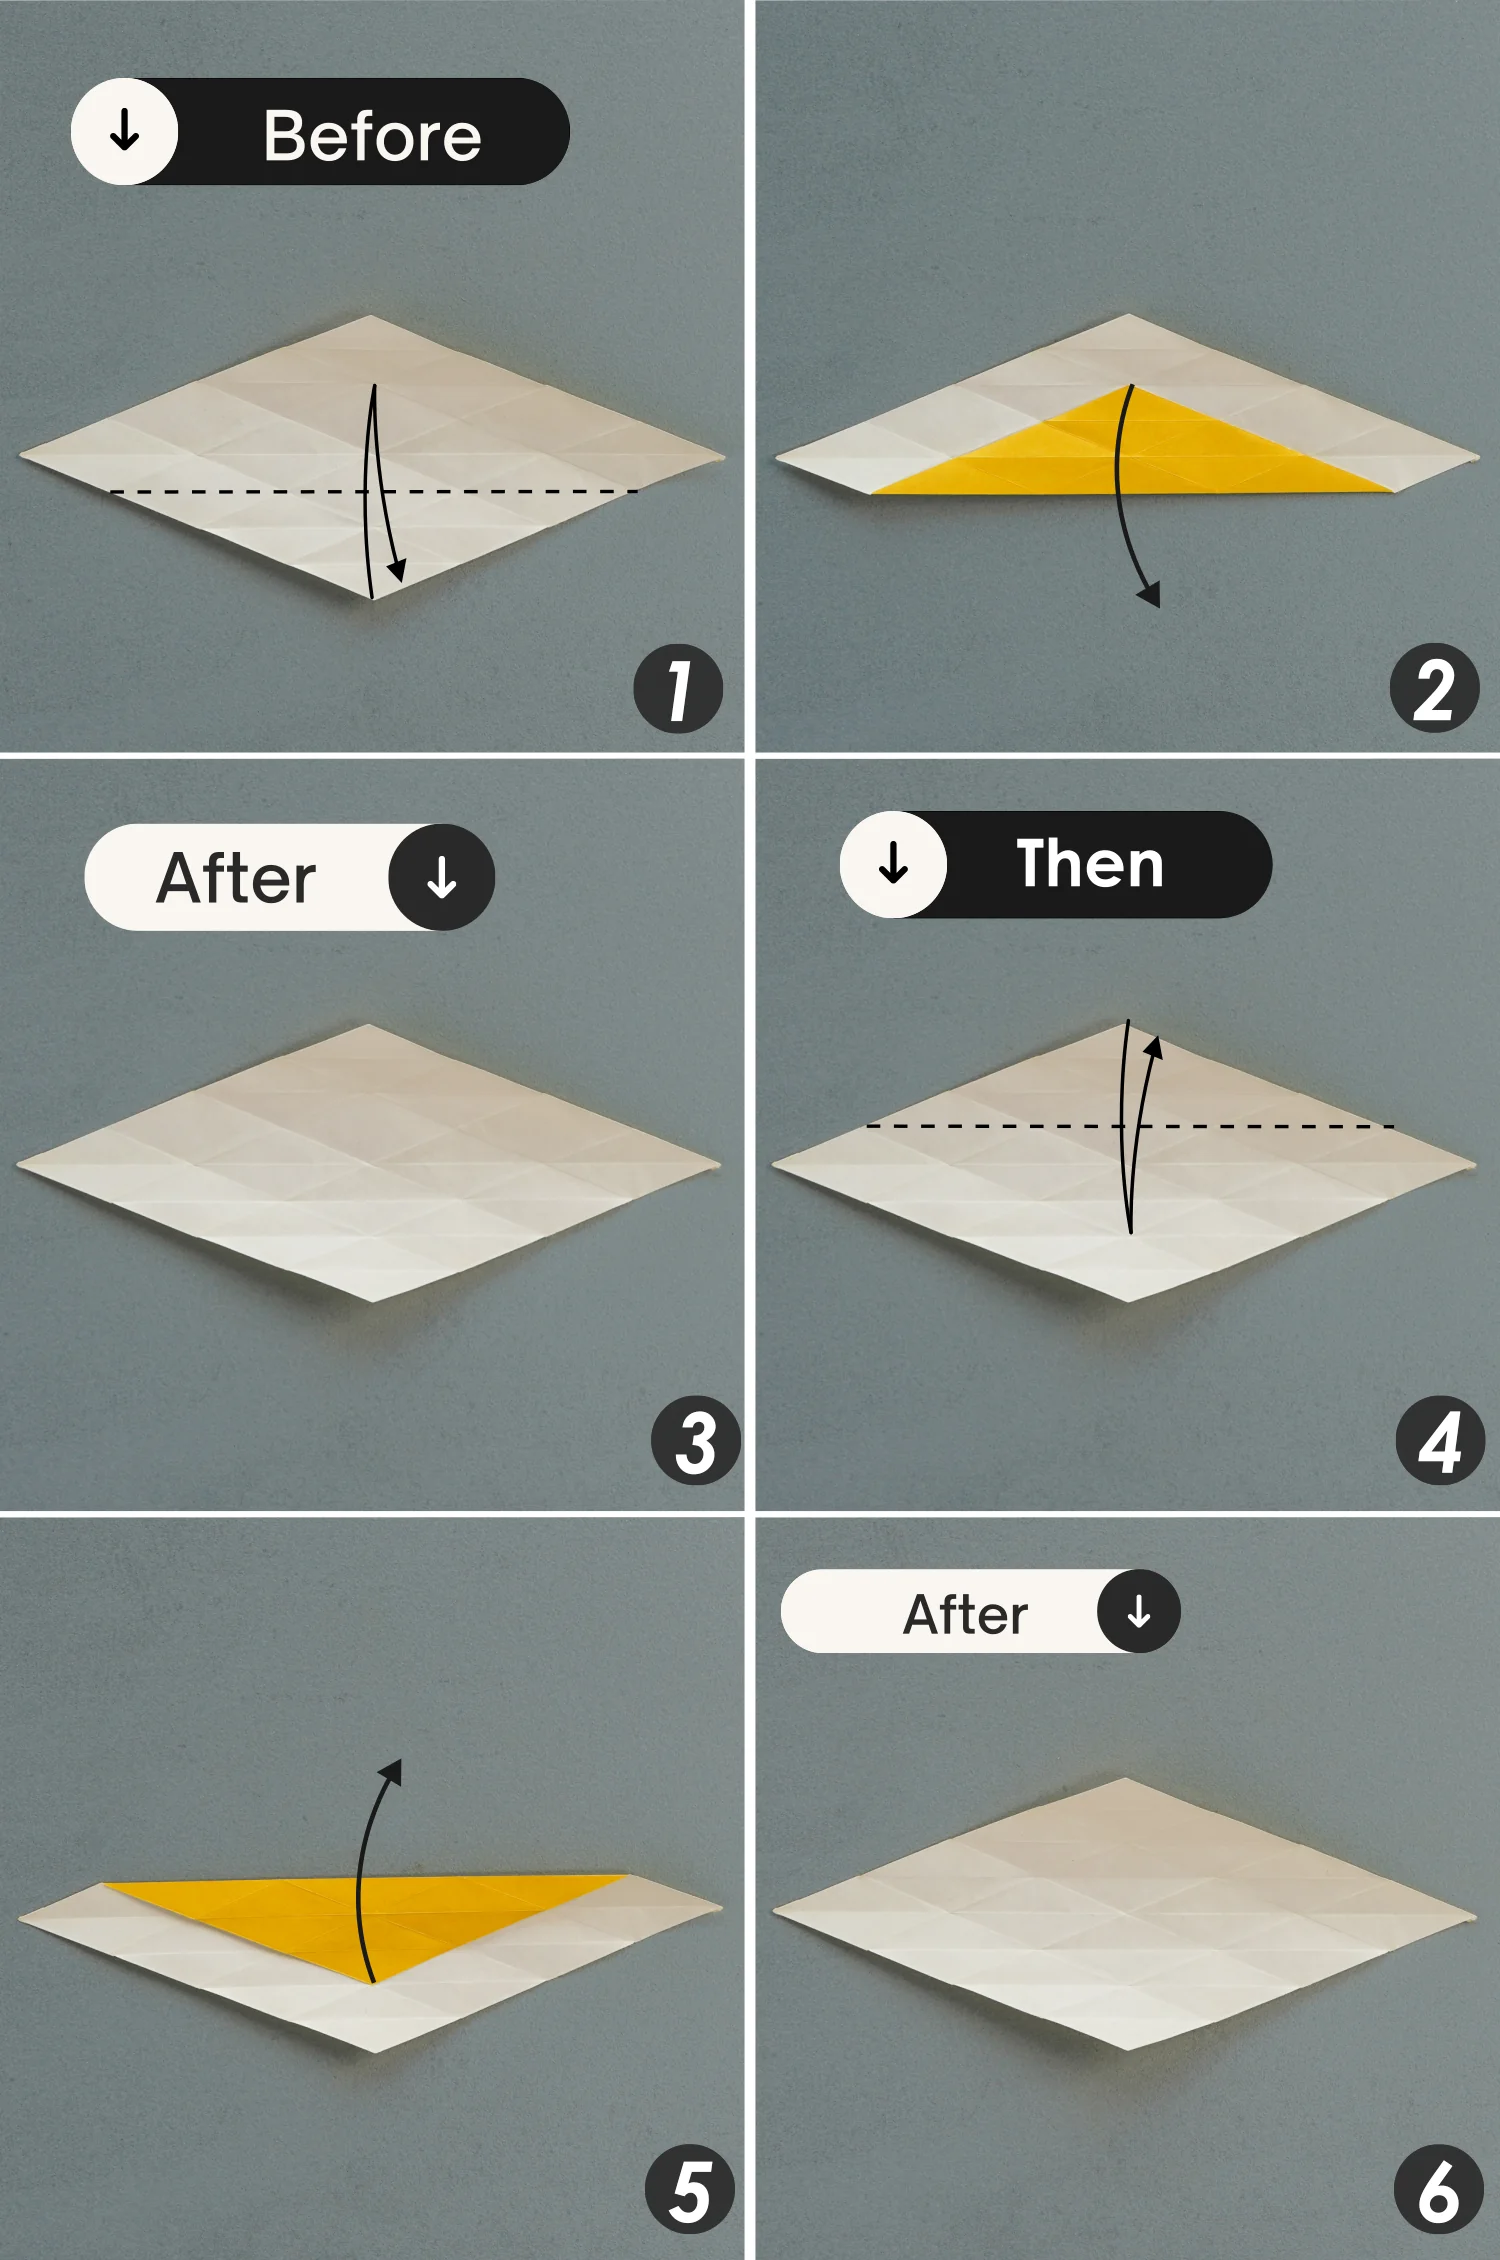
Step 10
Fold the top and bottom points toward the center diagonally to meet the intersection points formed by the existing creases, and unfold them.
Step 11
Then fold the top and bottom points to meet the center intersection point, and unfold them.
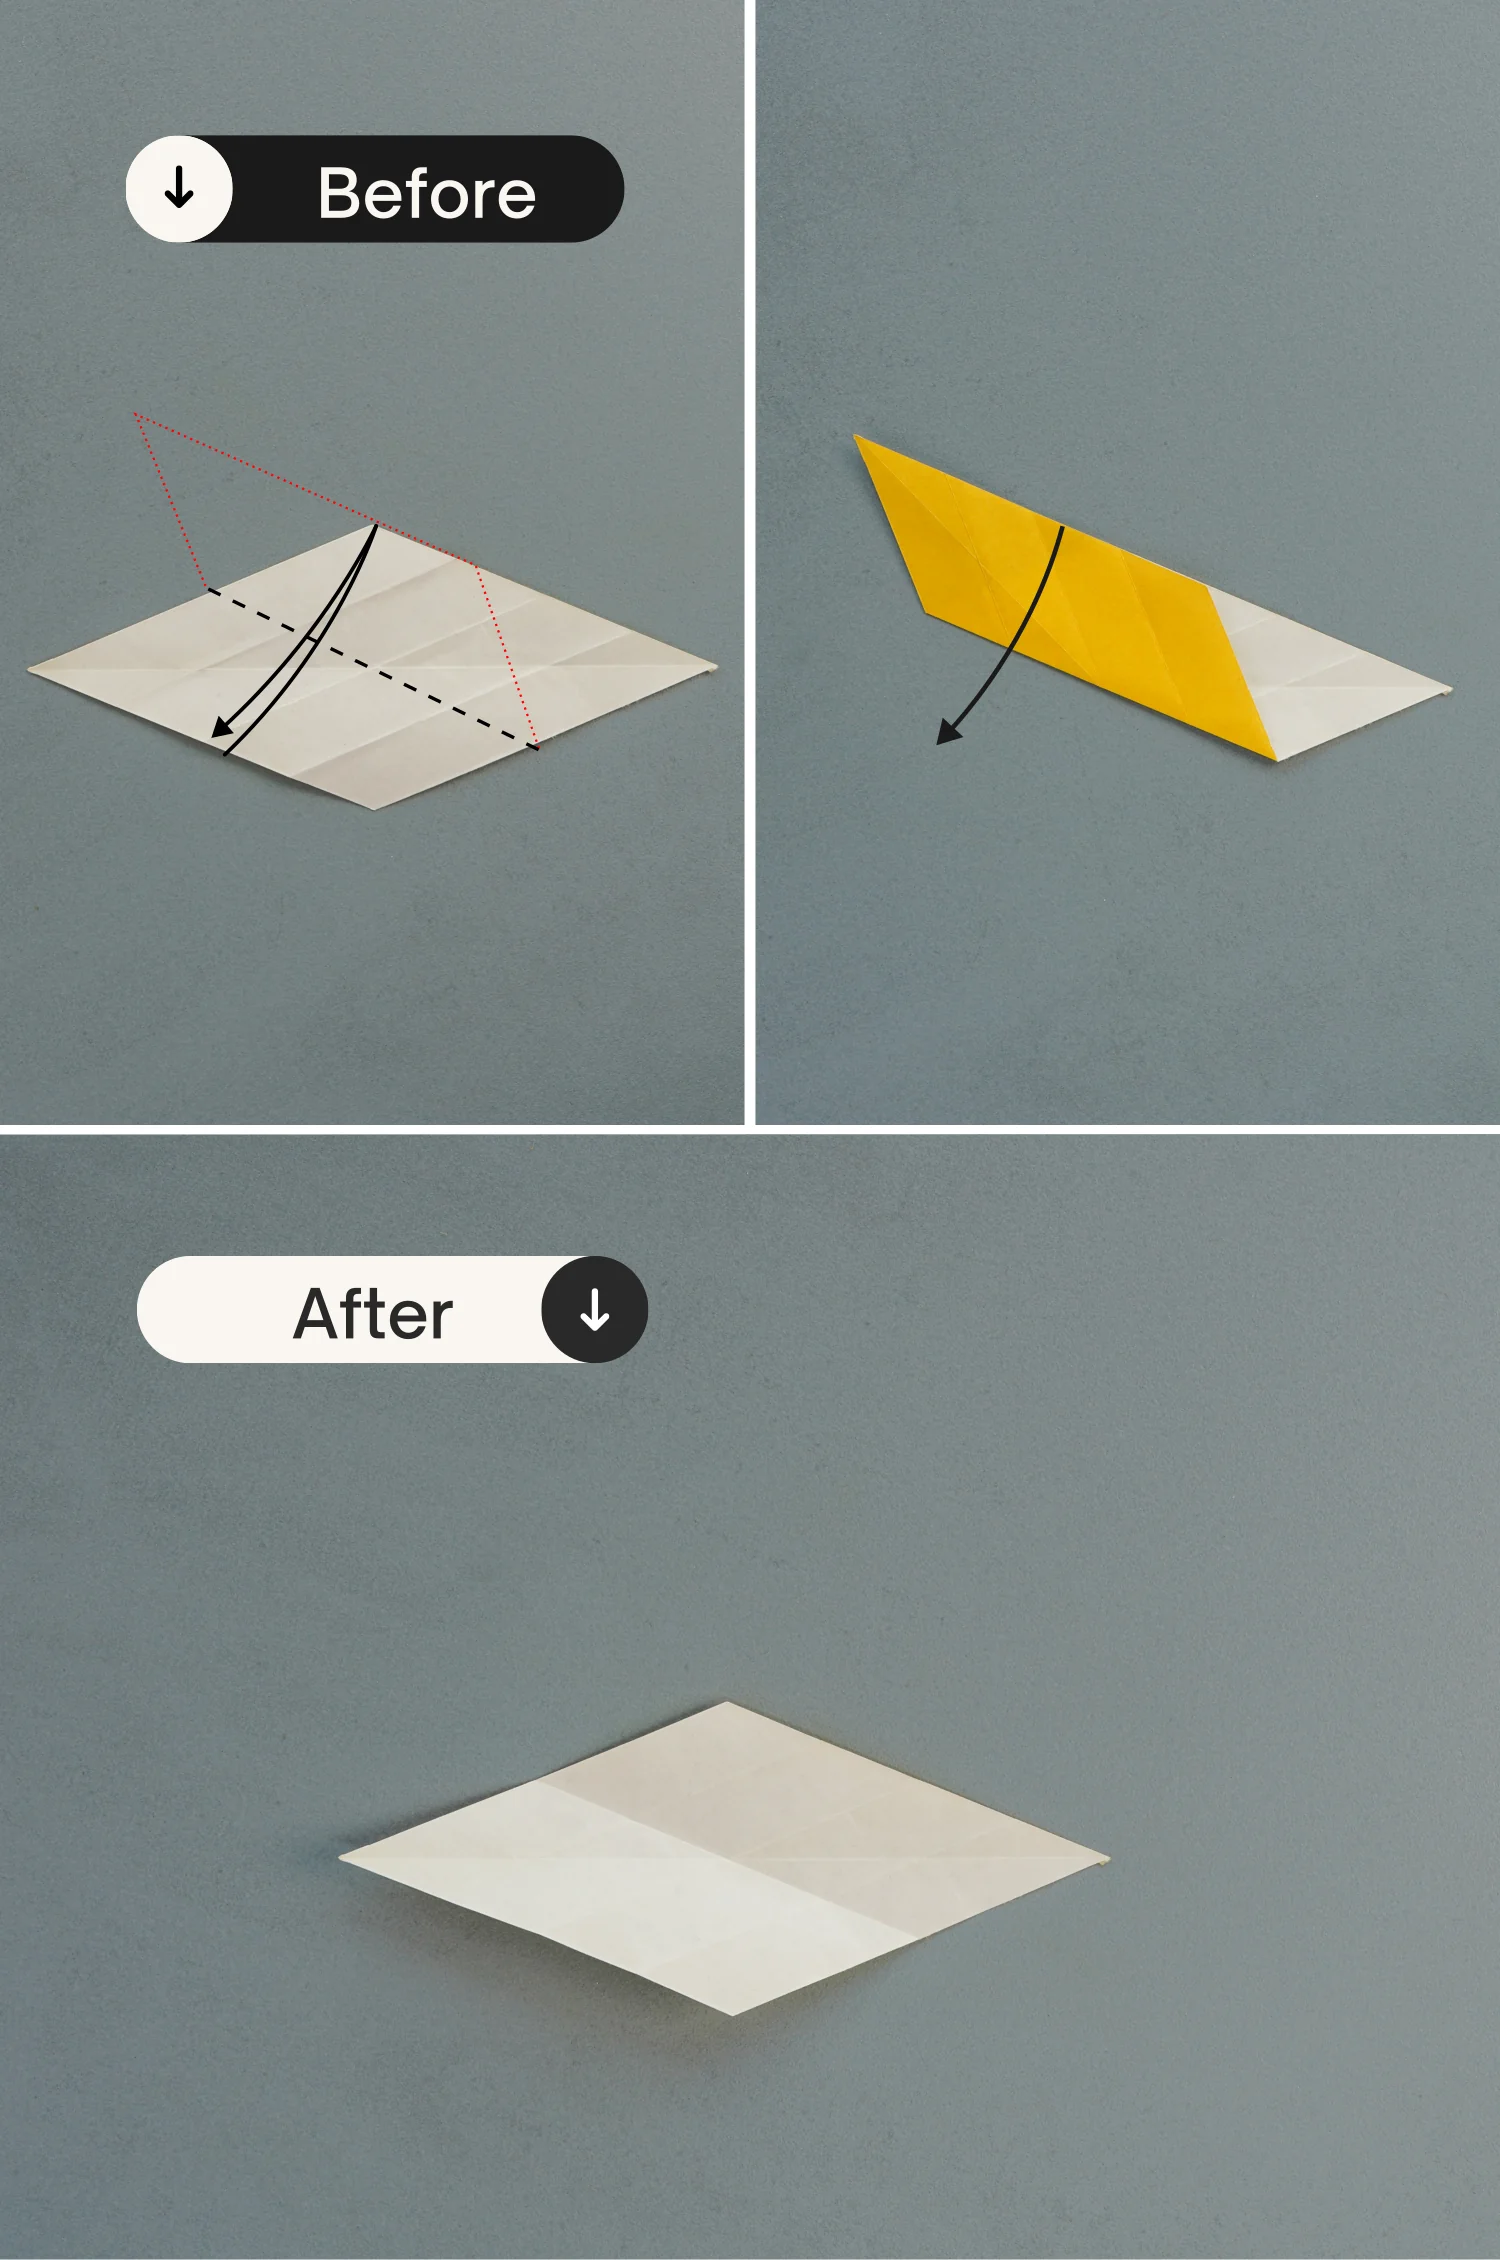
Step 12
Fold the bottom point up along the dotted line to meet the top intersection point, and unfold it. Then fold the top point to meet the bottom intersection point, and unfold it.
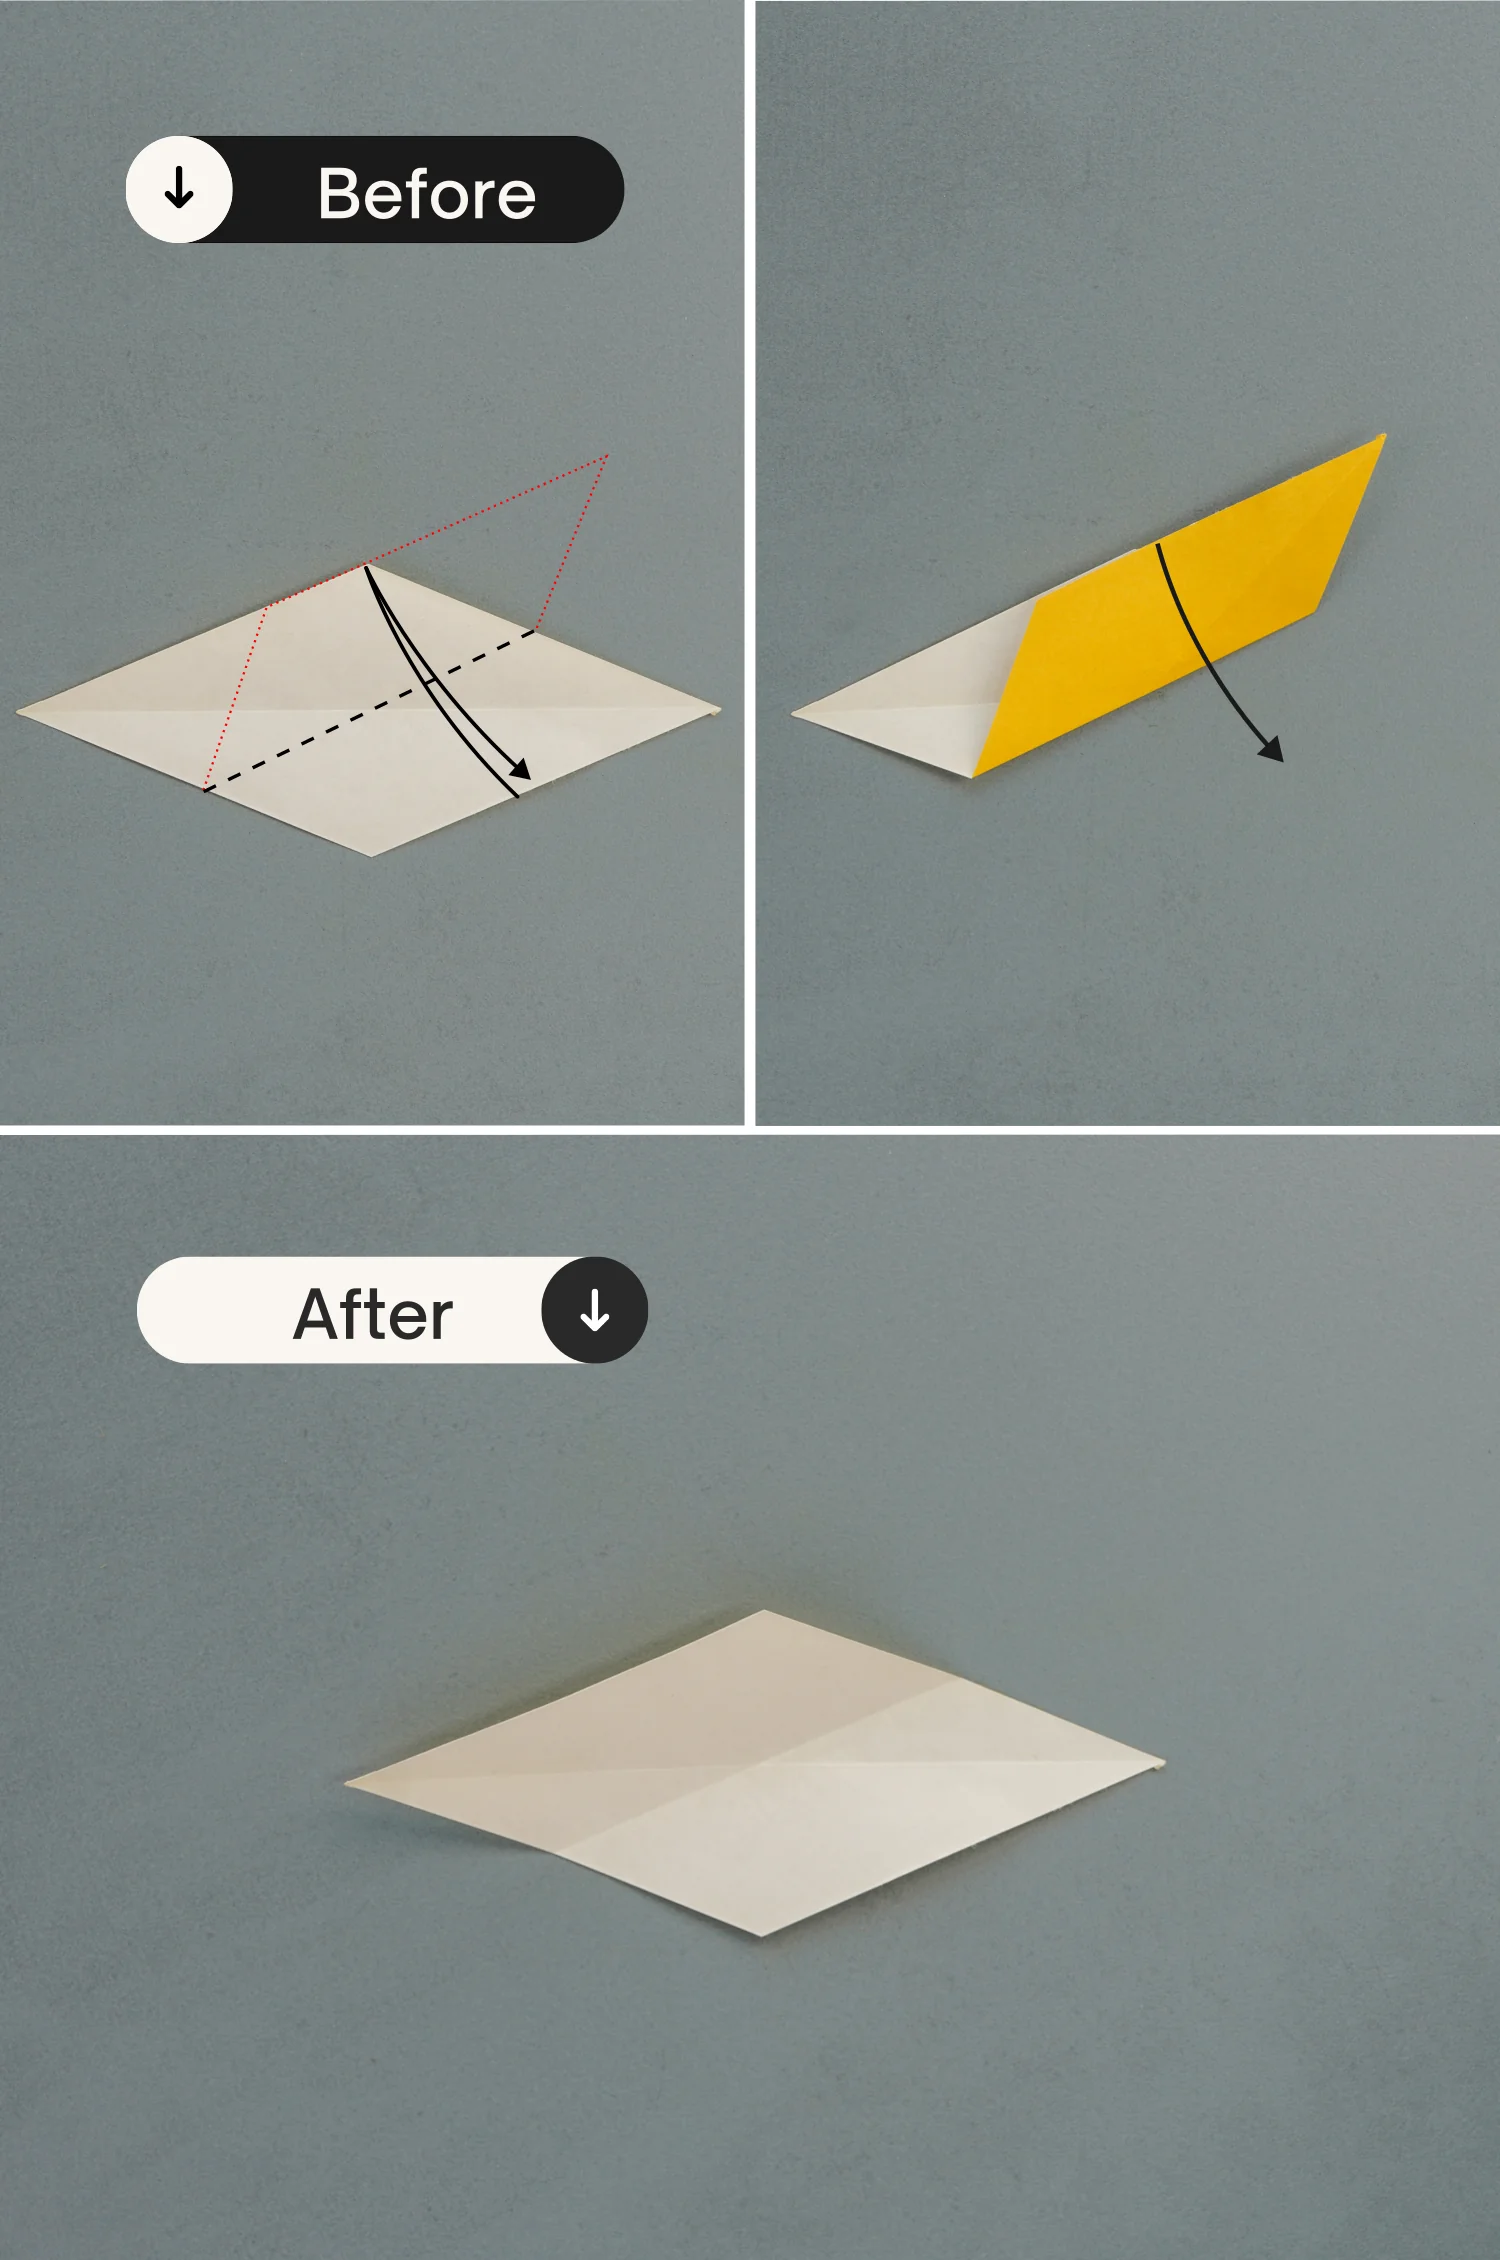
Step 13
Flip the paper over.
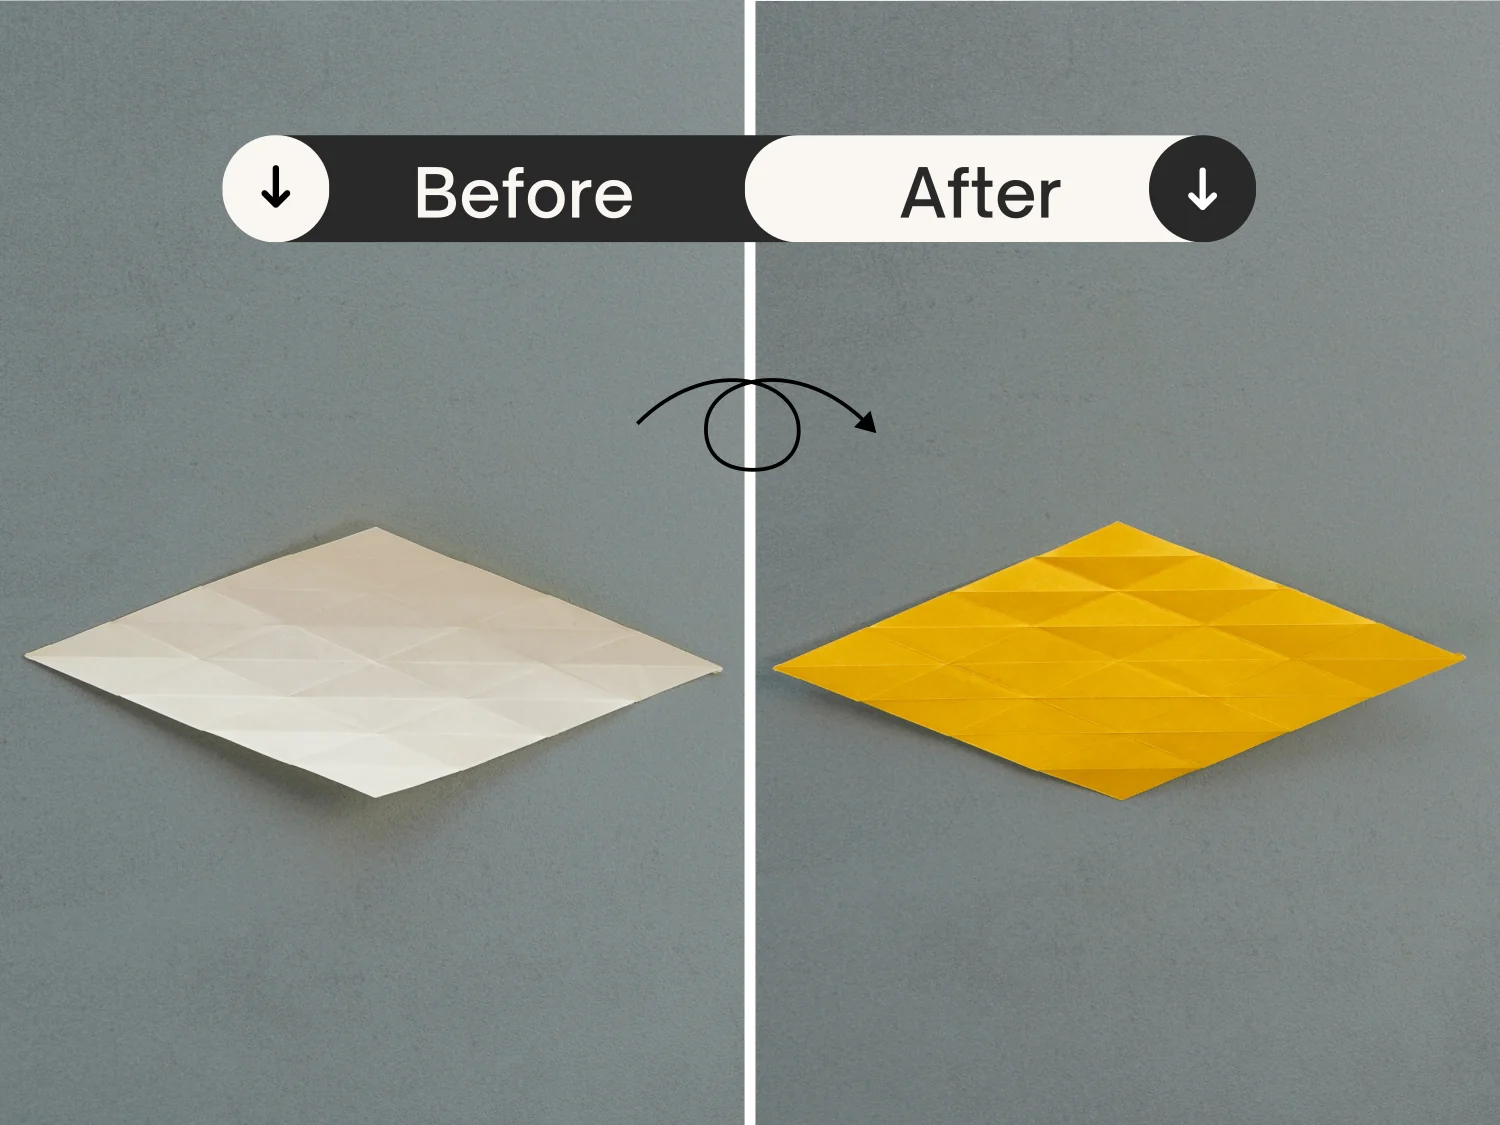
Step 14
Shape the creases shown by the red dotted line, and press down the creases shown by the black dotted line. This step may take some time, so please be patient. If done correctly, the next final step will be completed quickly.
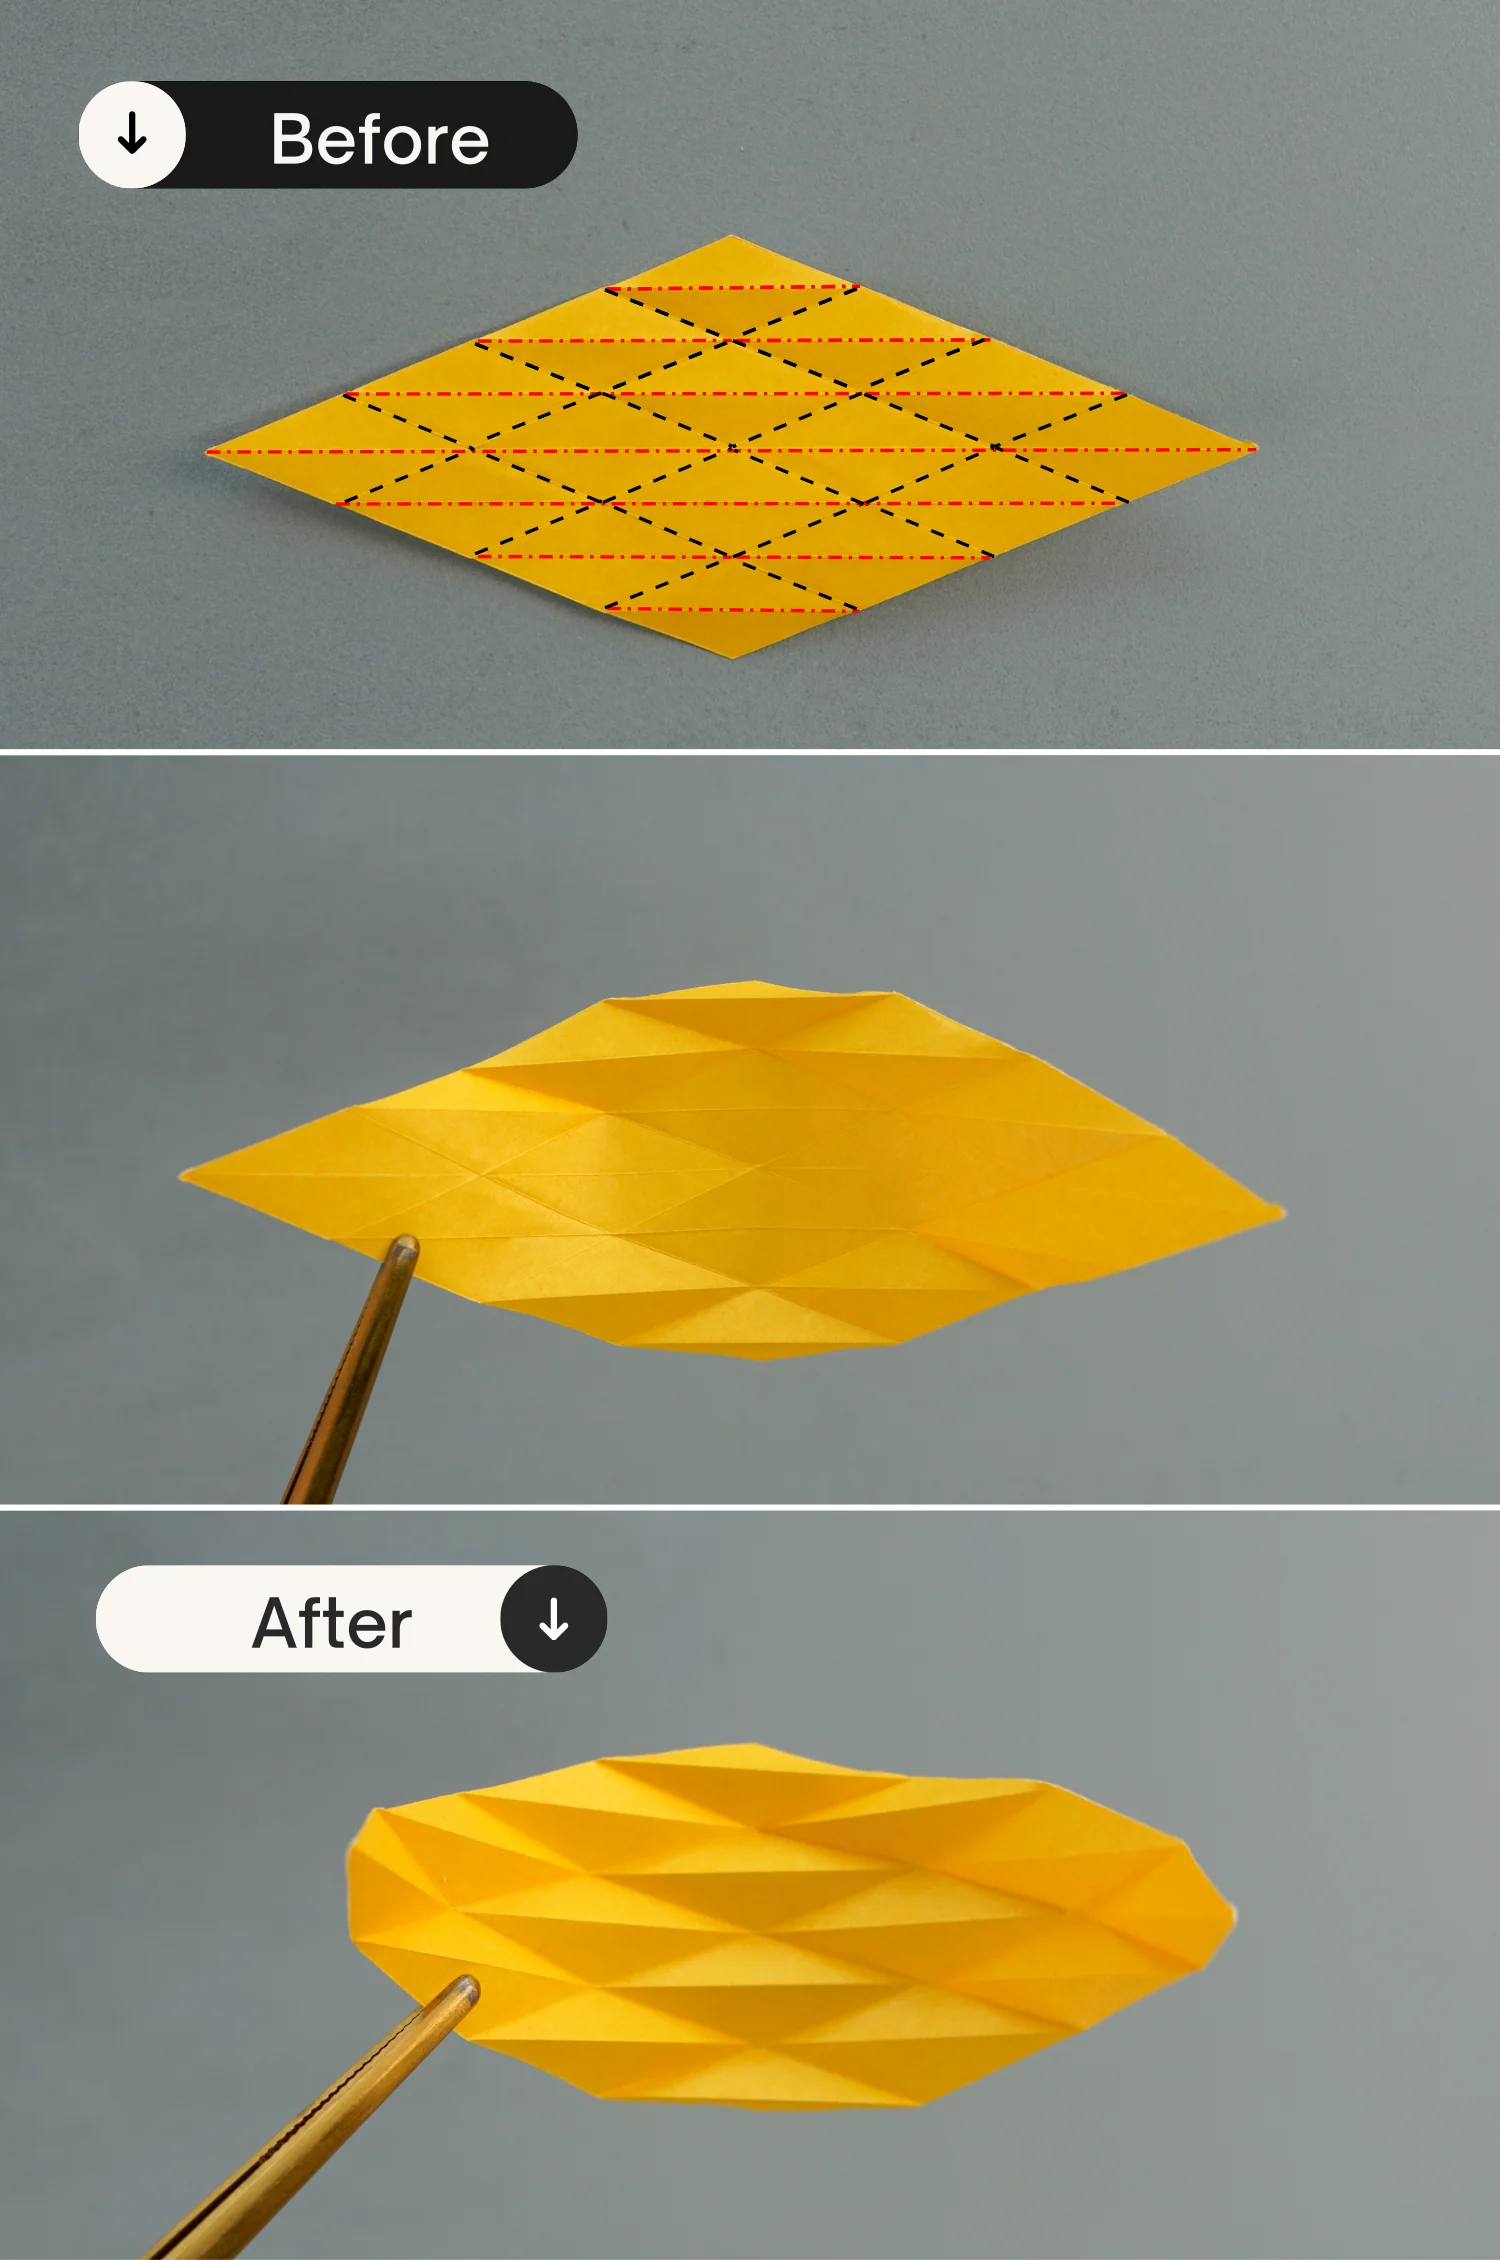
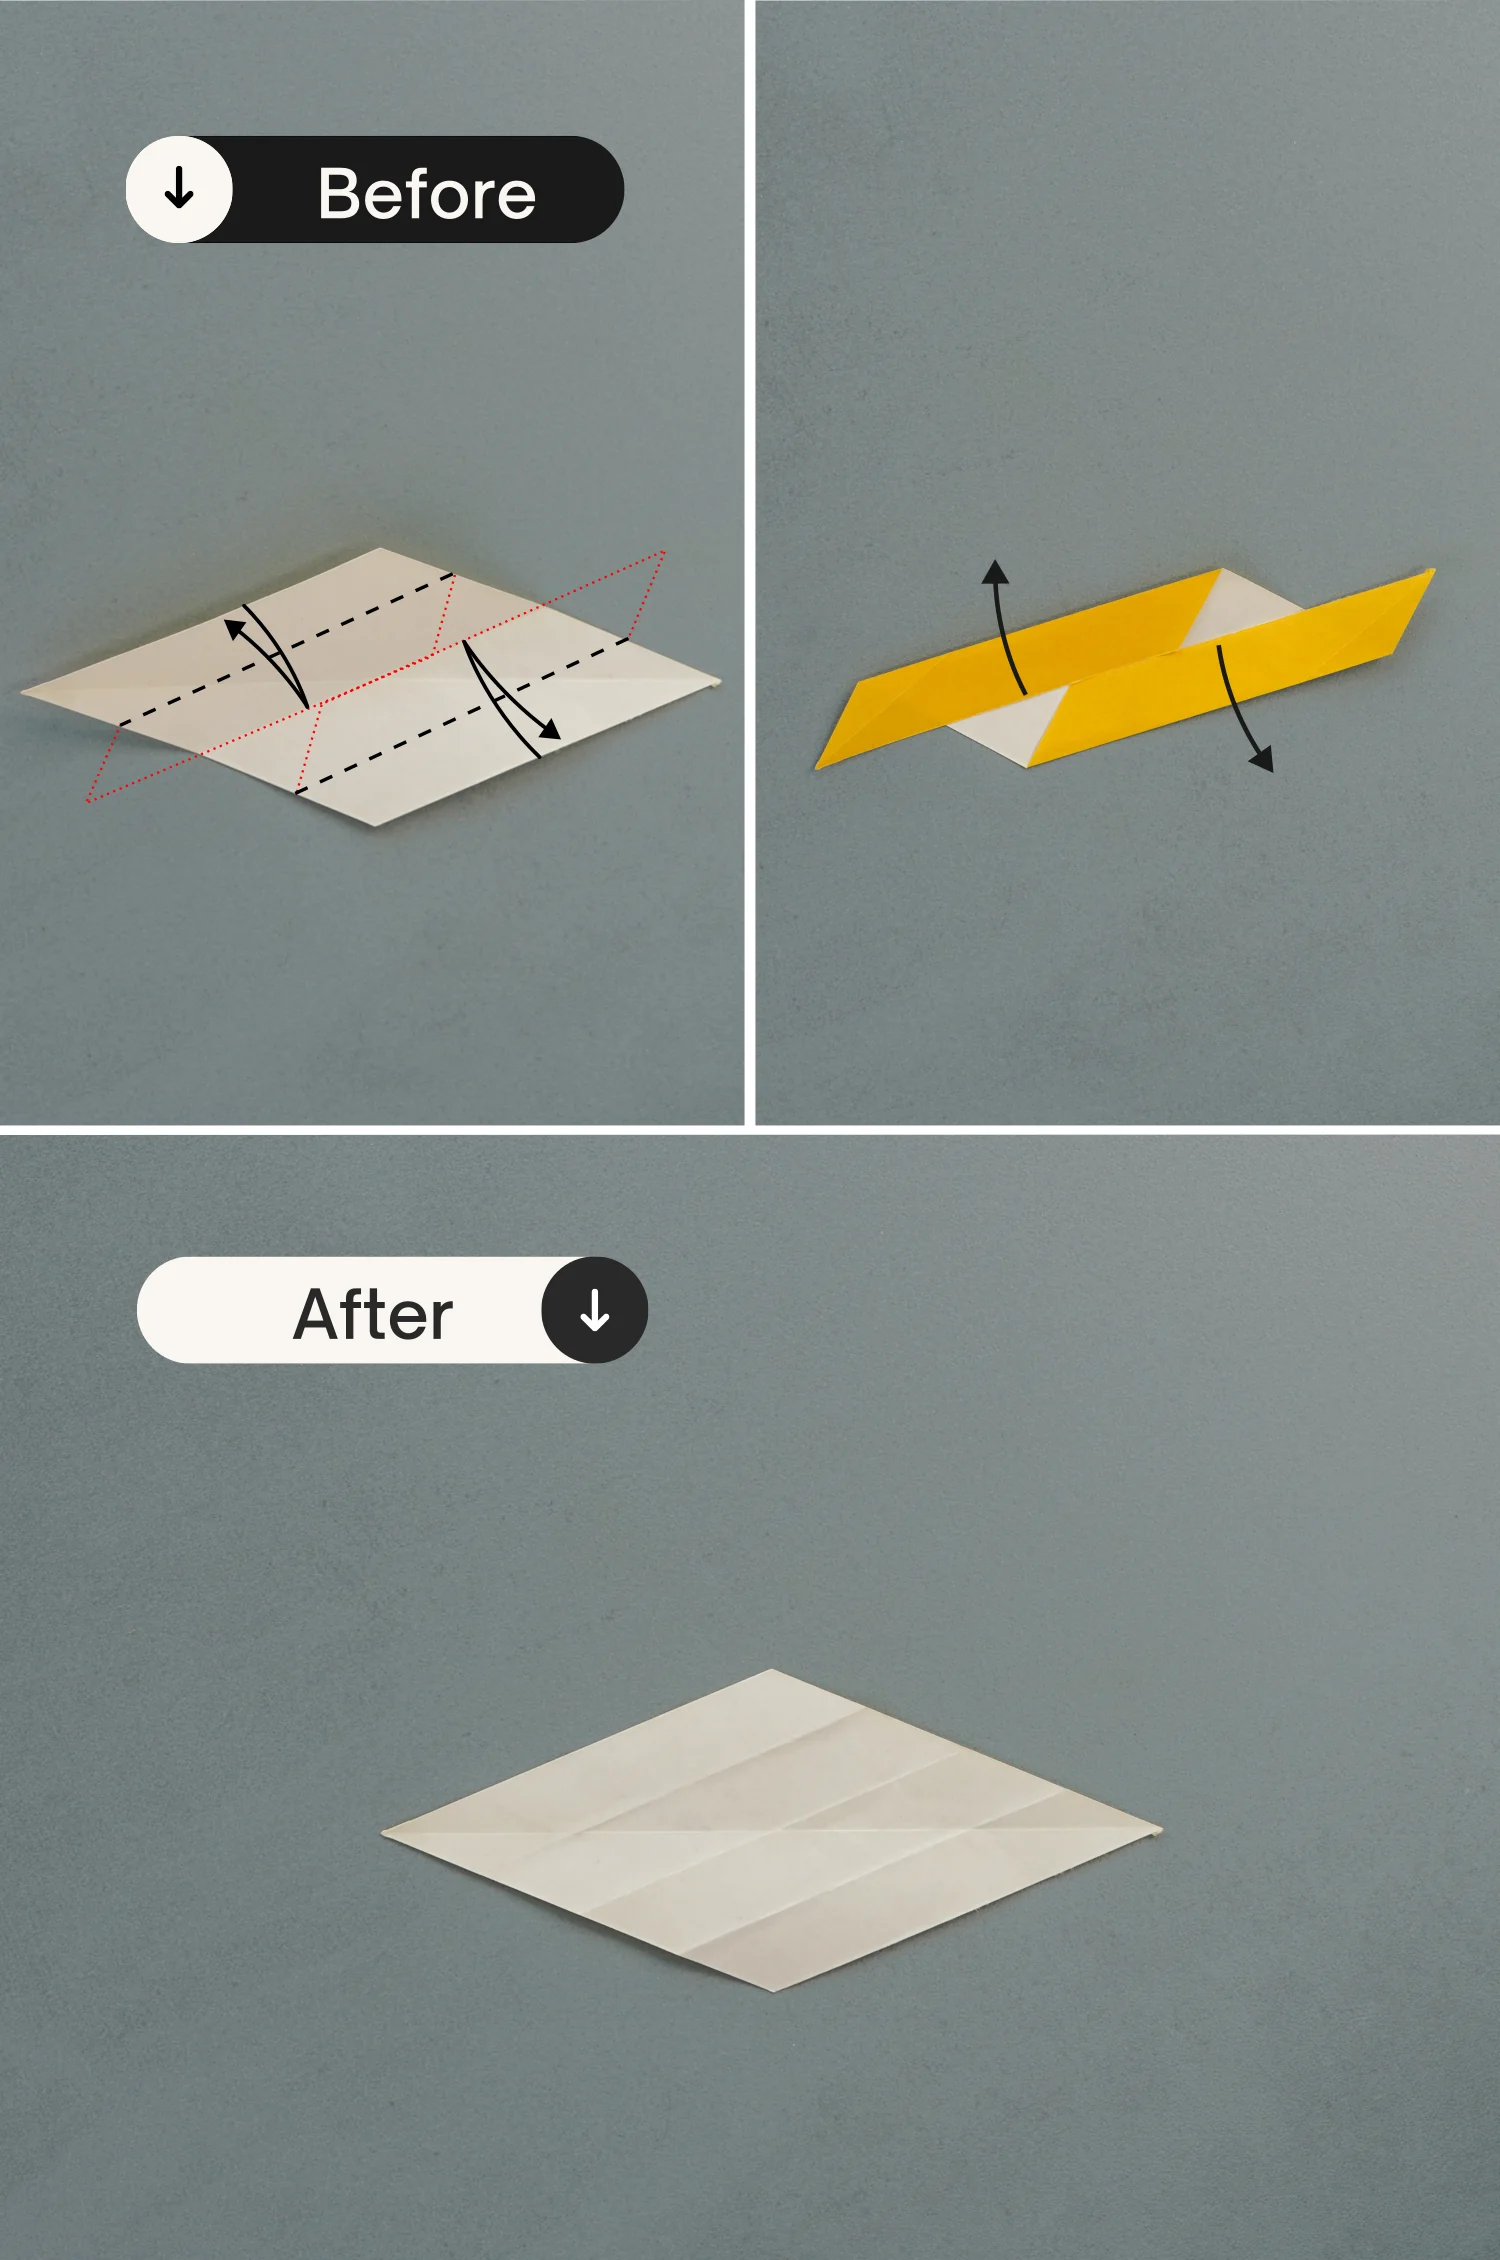
Step 15
Press the top and bottom of the paper toward the center along the creases you made in the previous step, and the paper will bend naturally. Adjust it well and flatten it.
What’s Next
This is your lovely origami moon, next you can explore other origami decoration ideas. Enjoy folding!
Other Origami Decoration Ideas