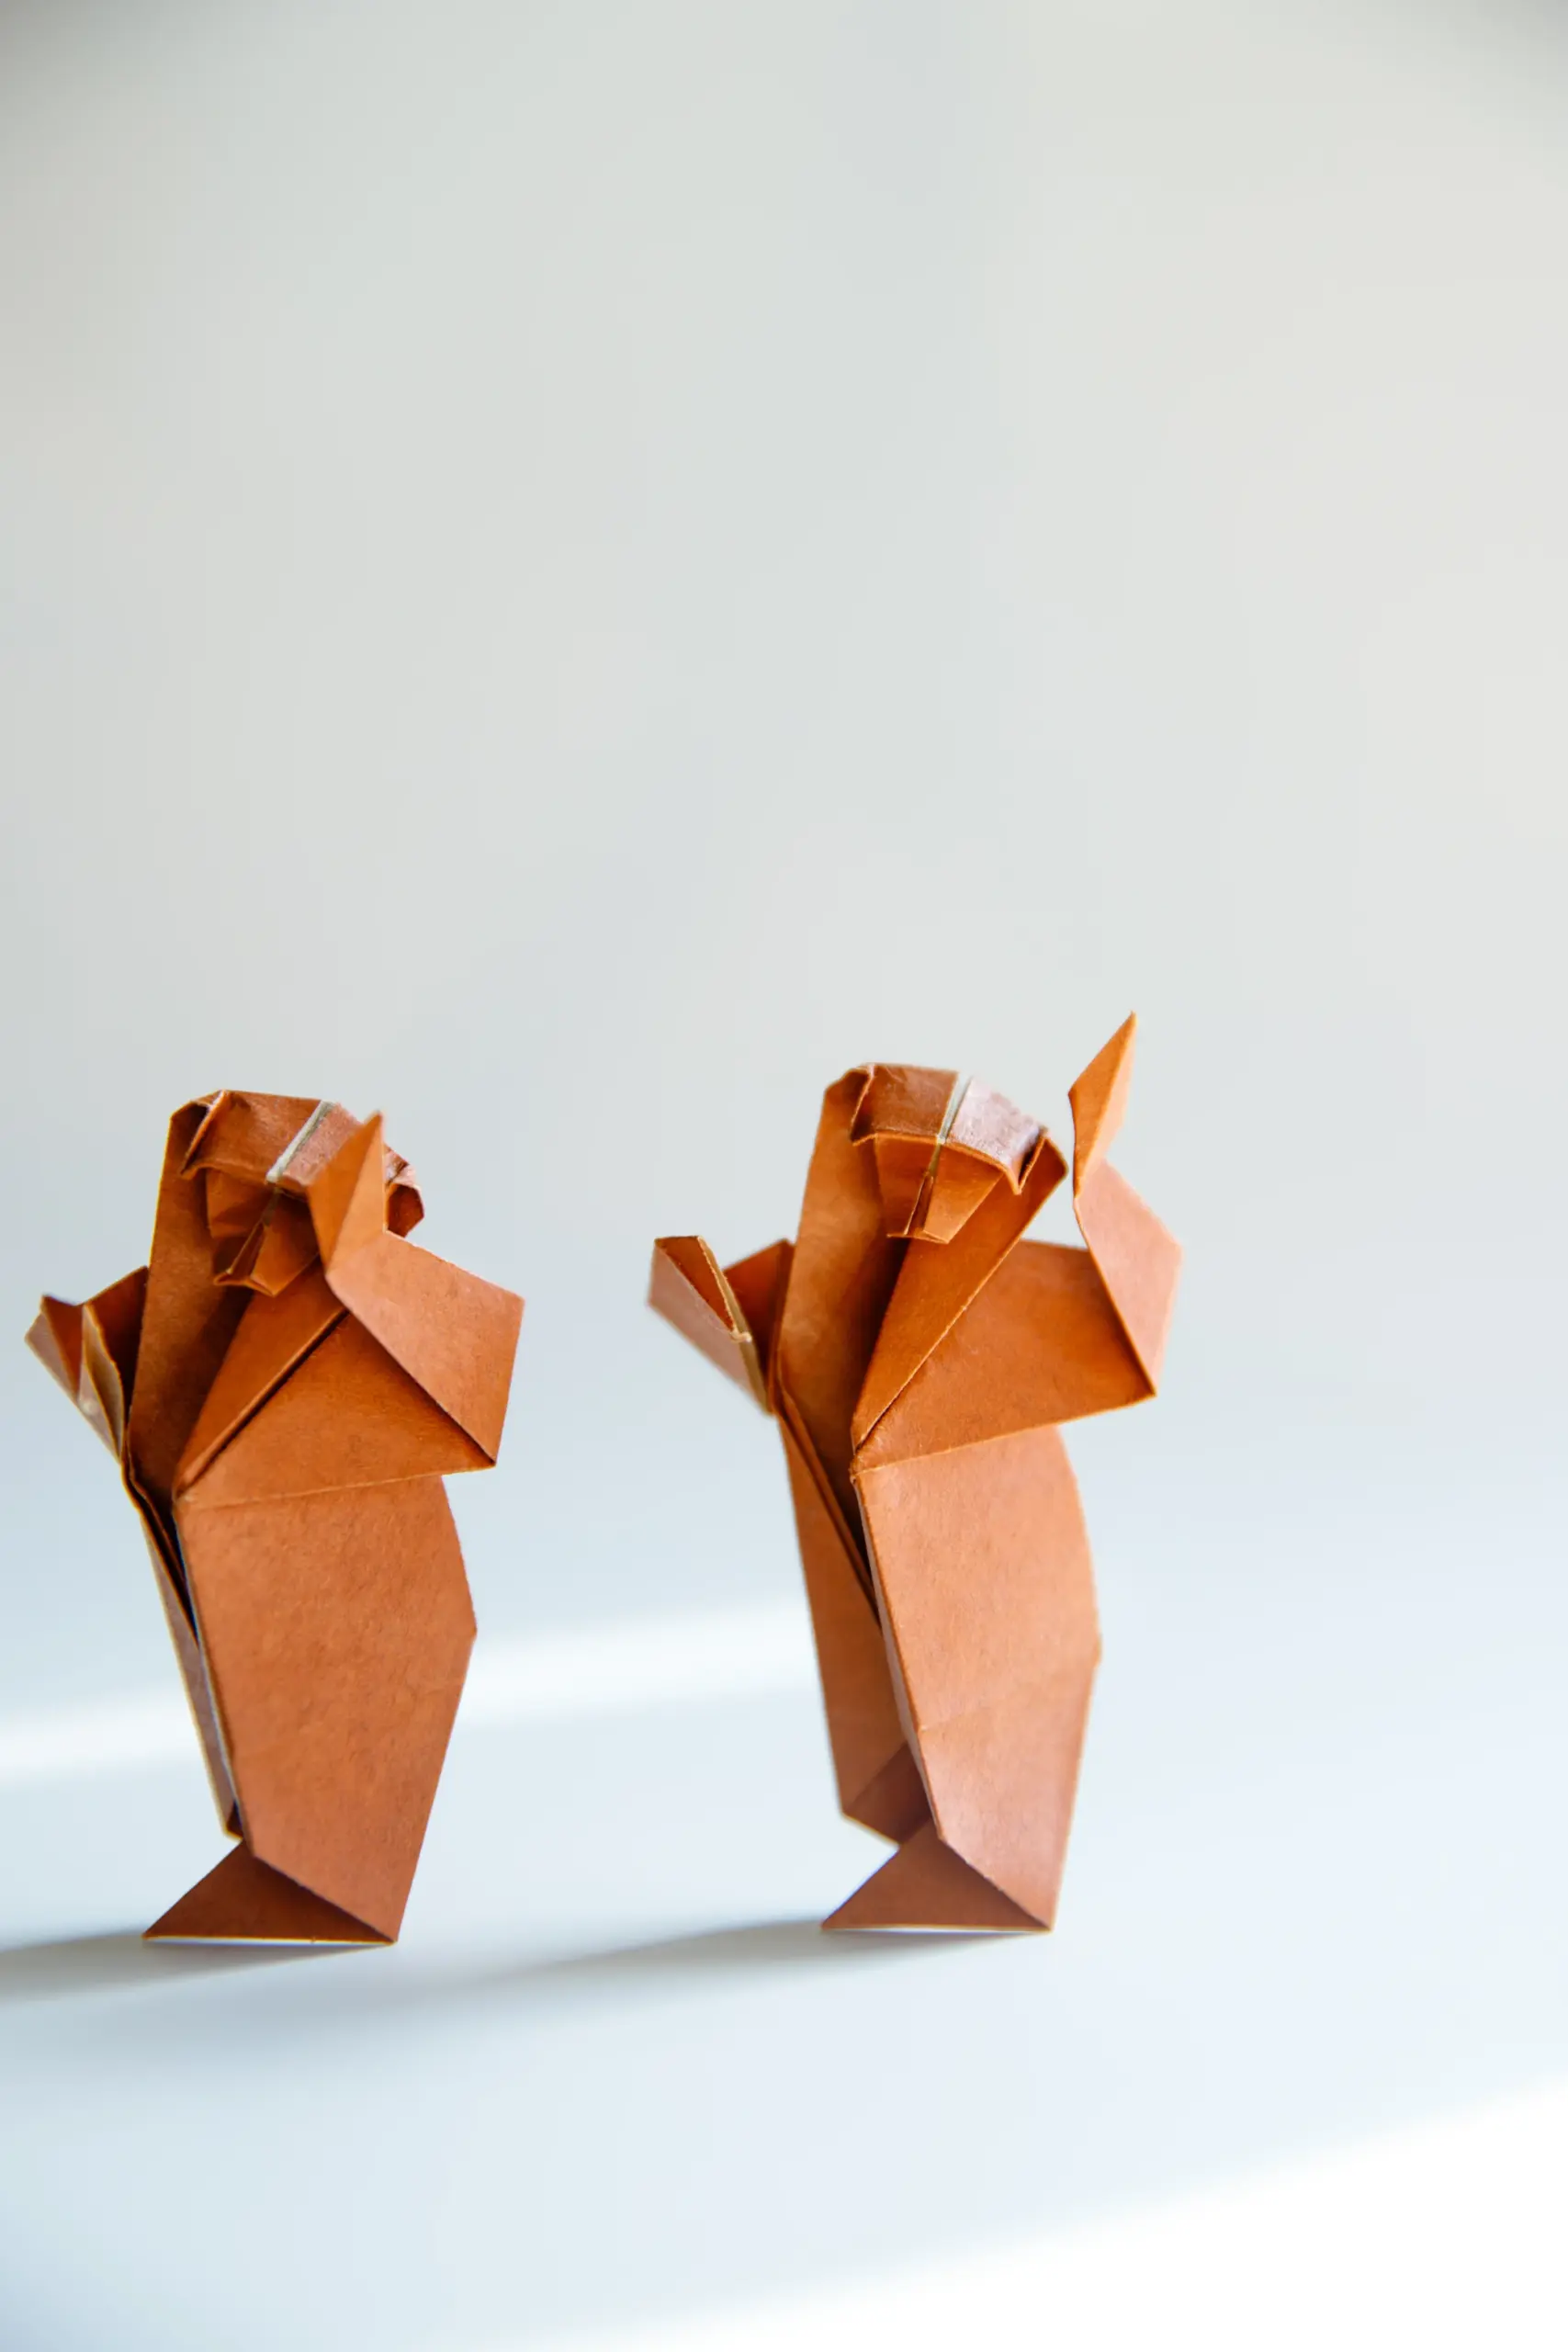
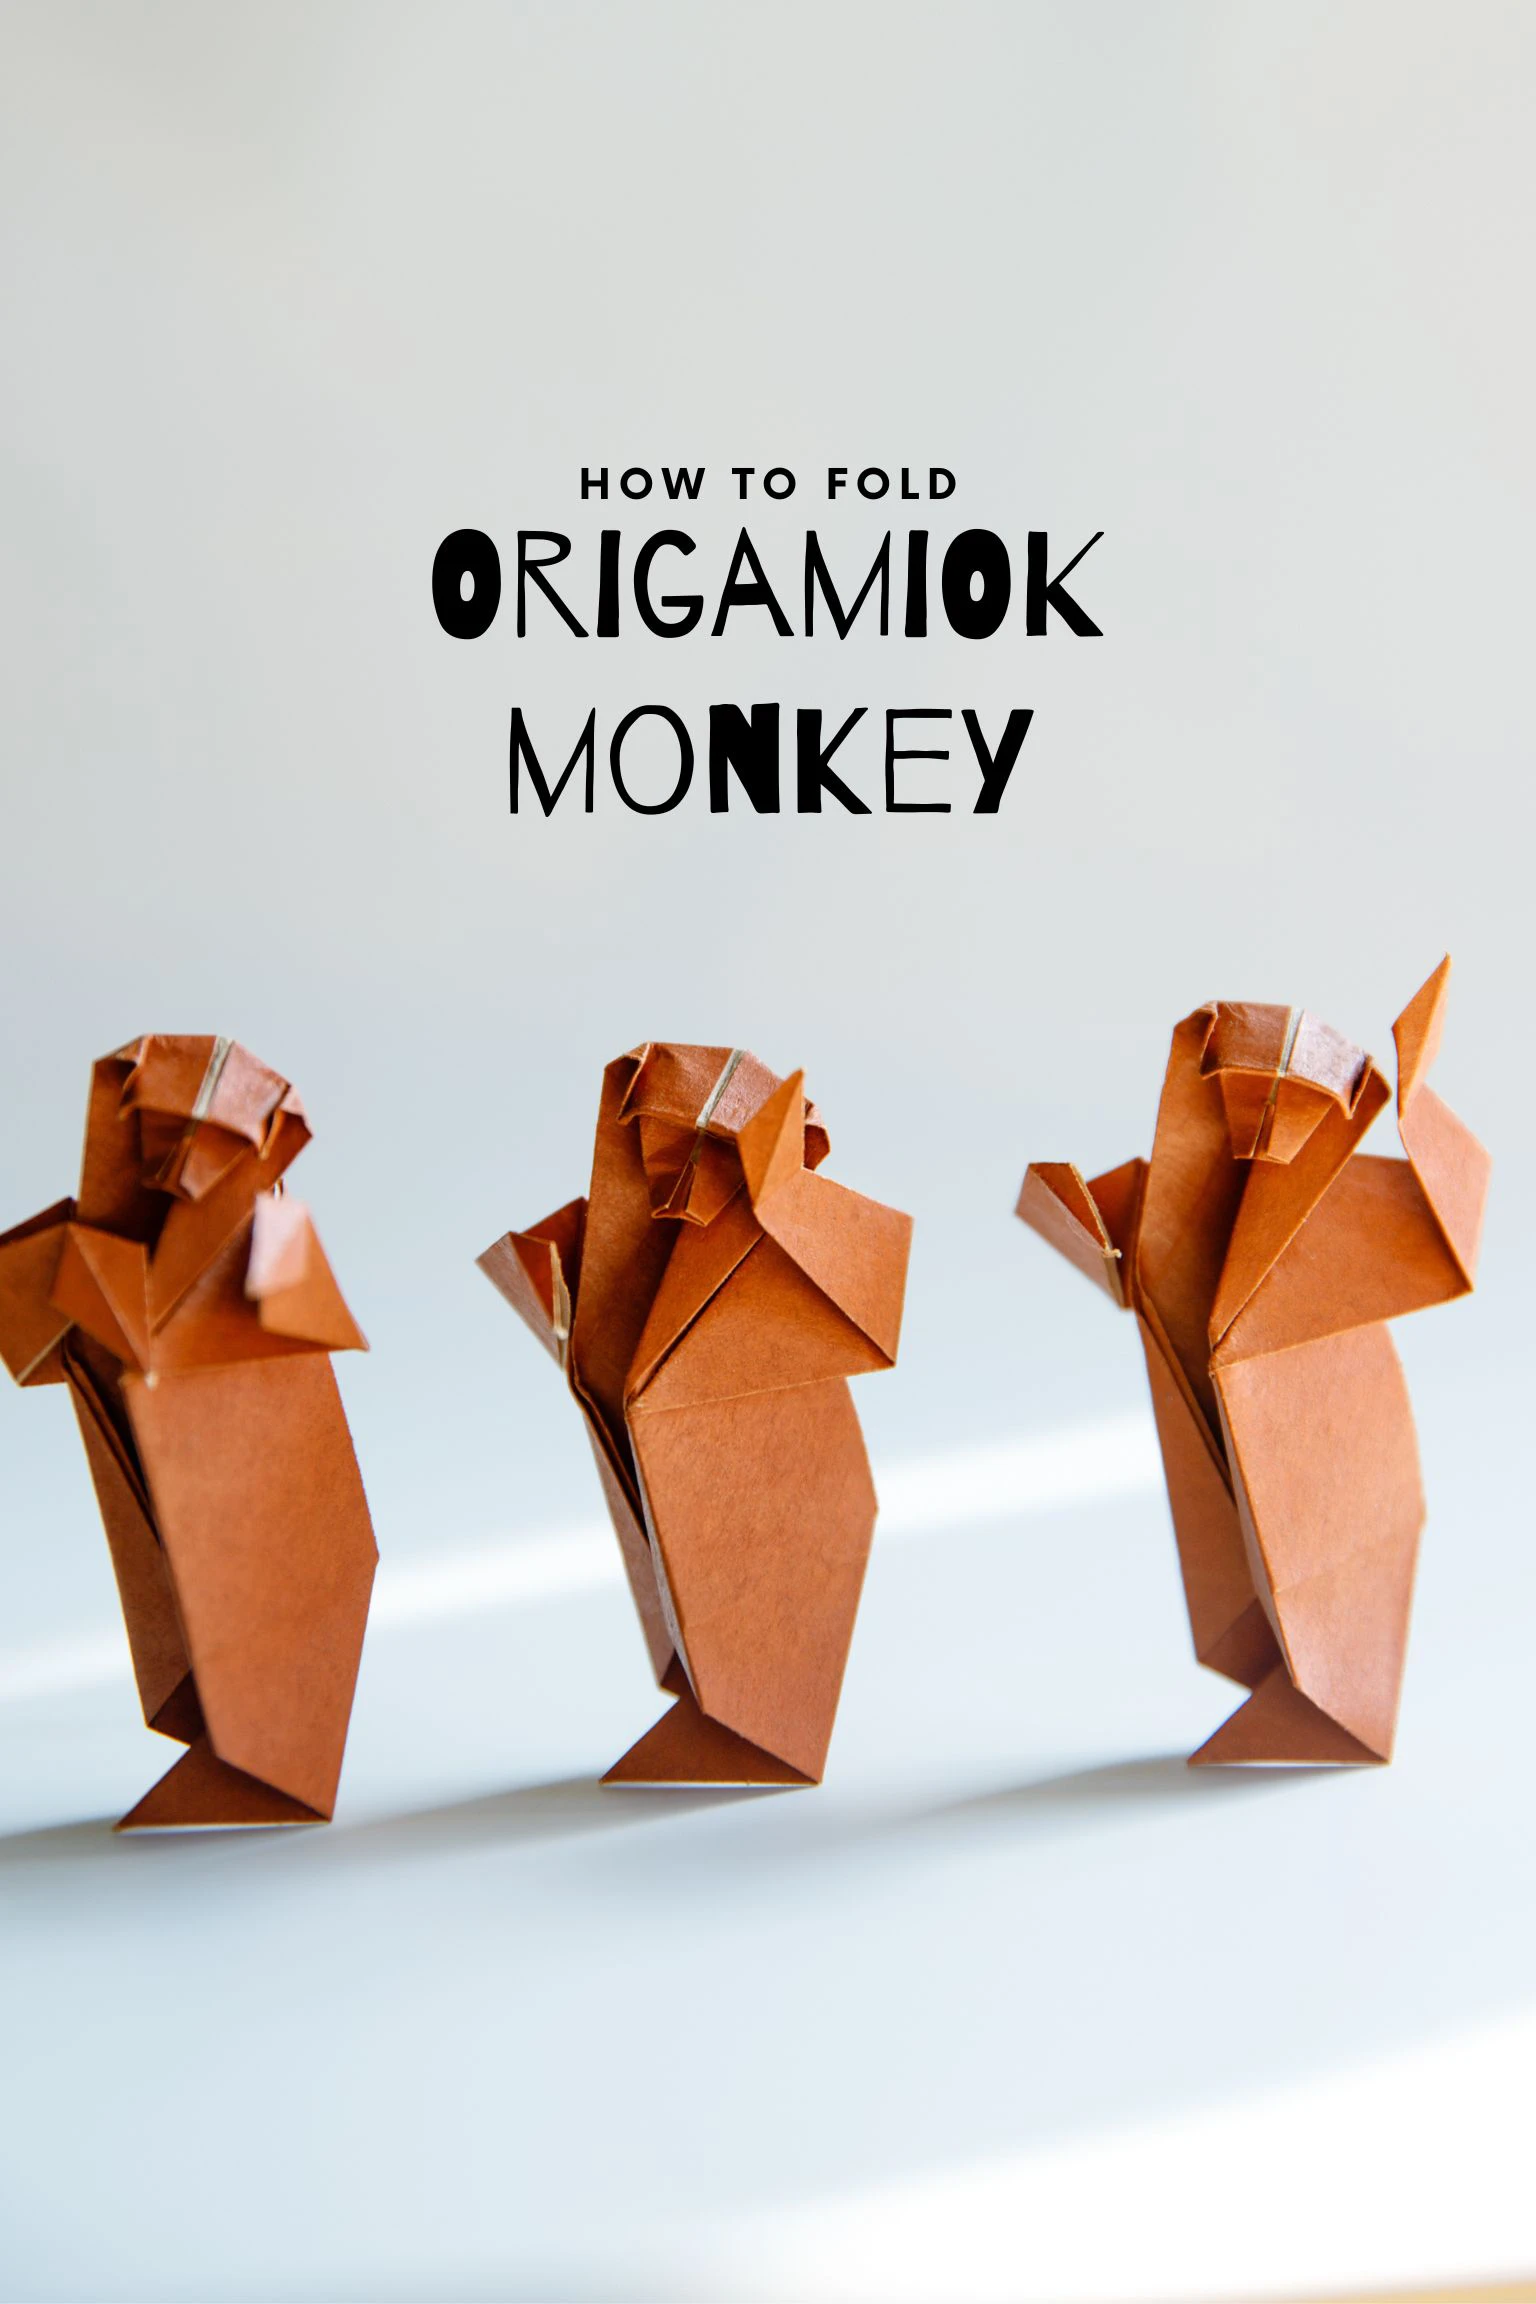
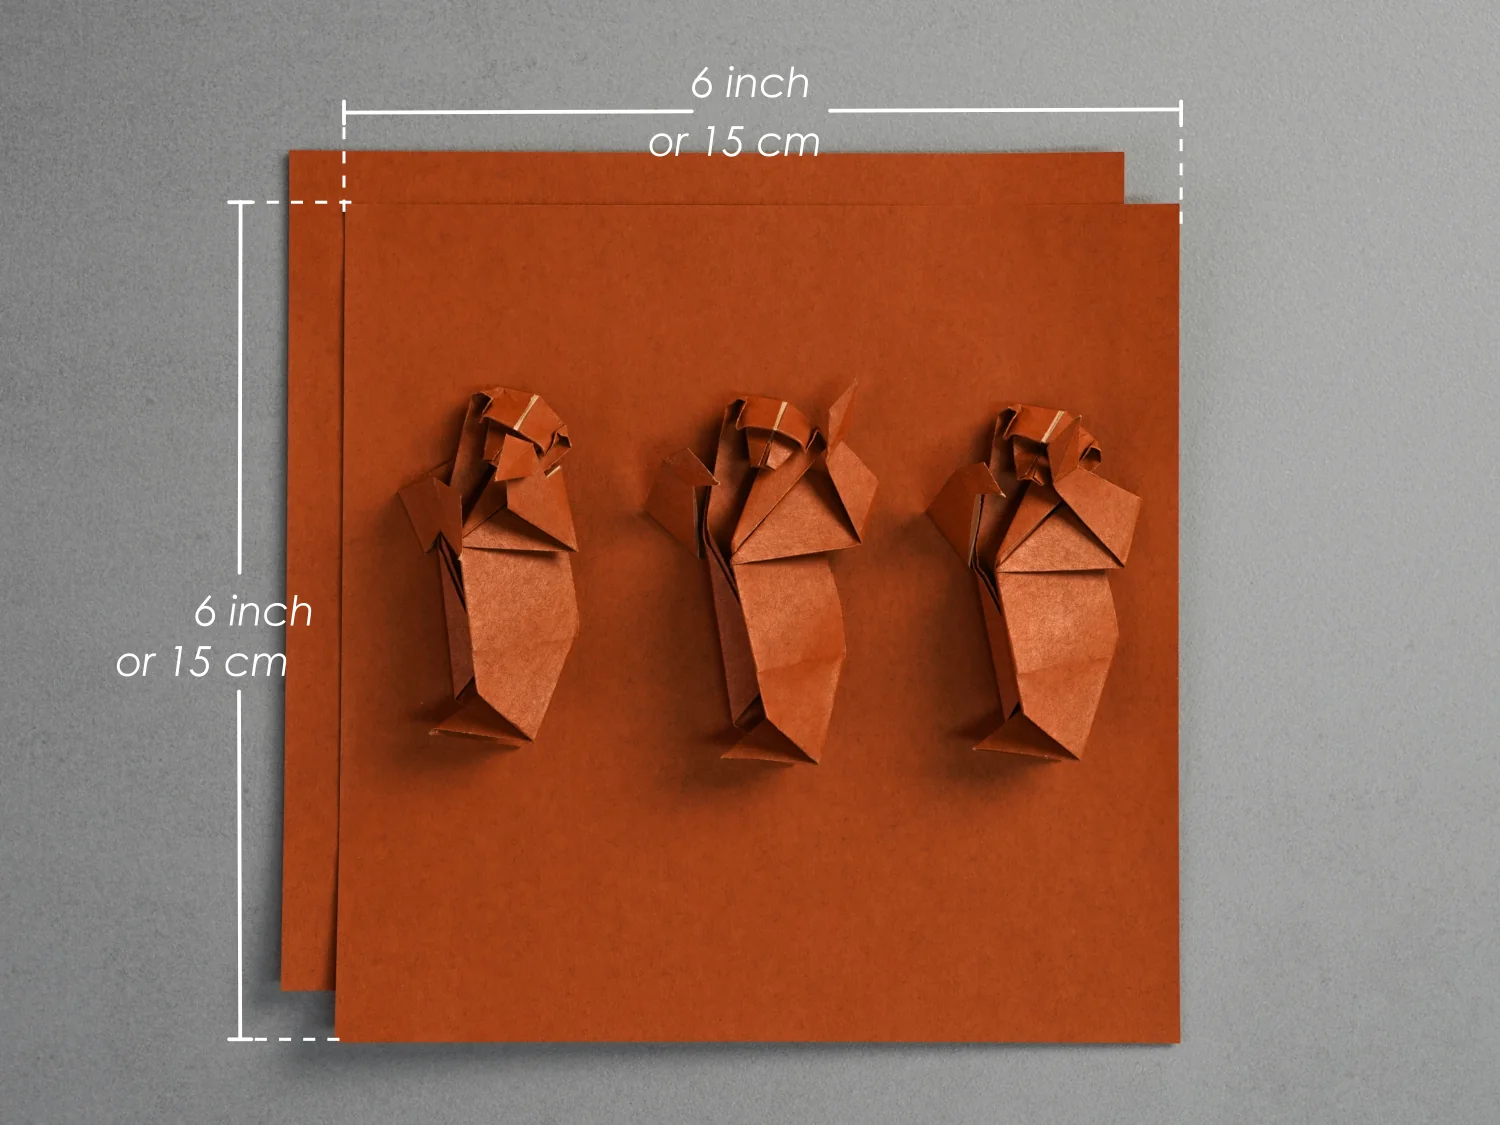
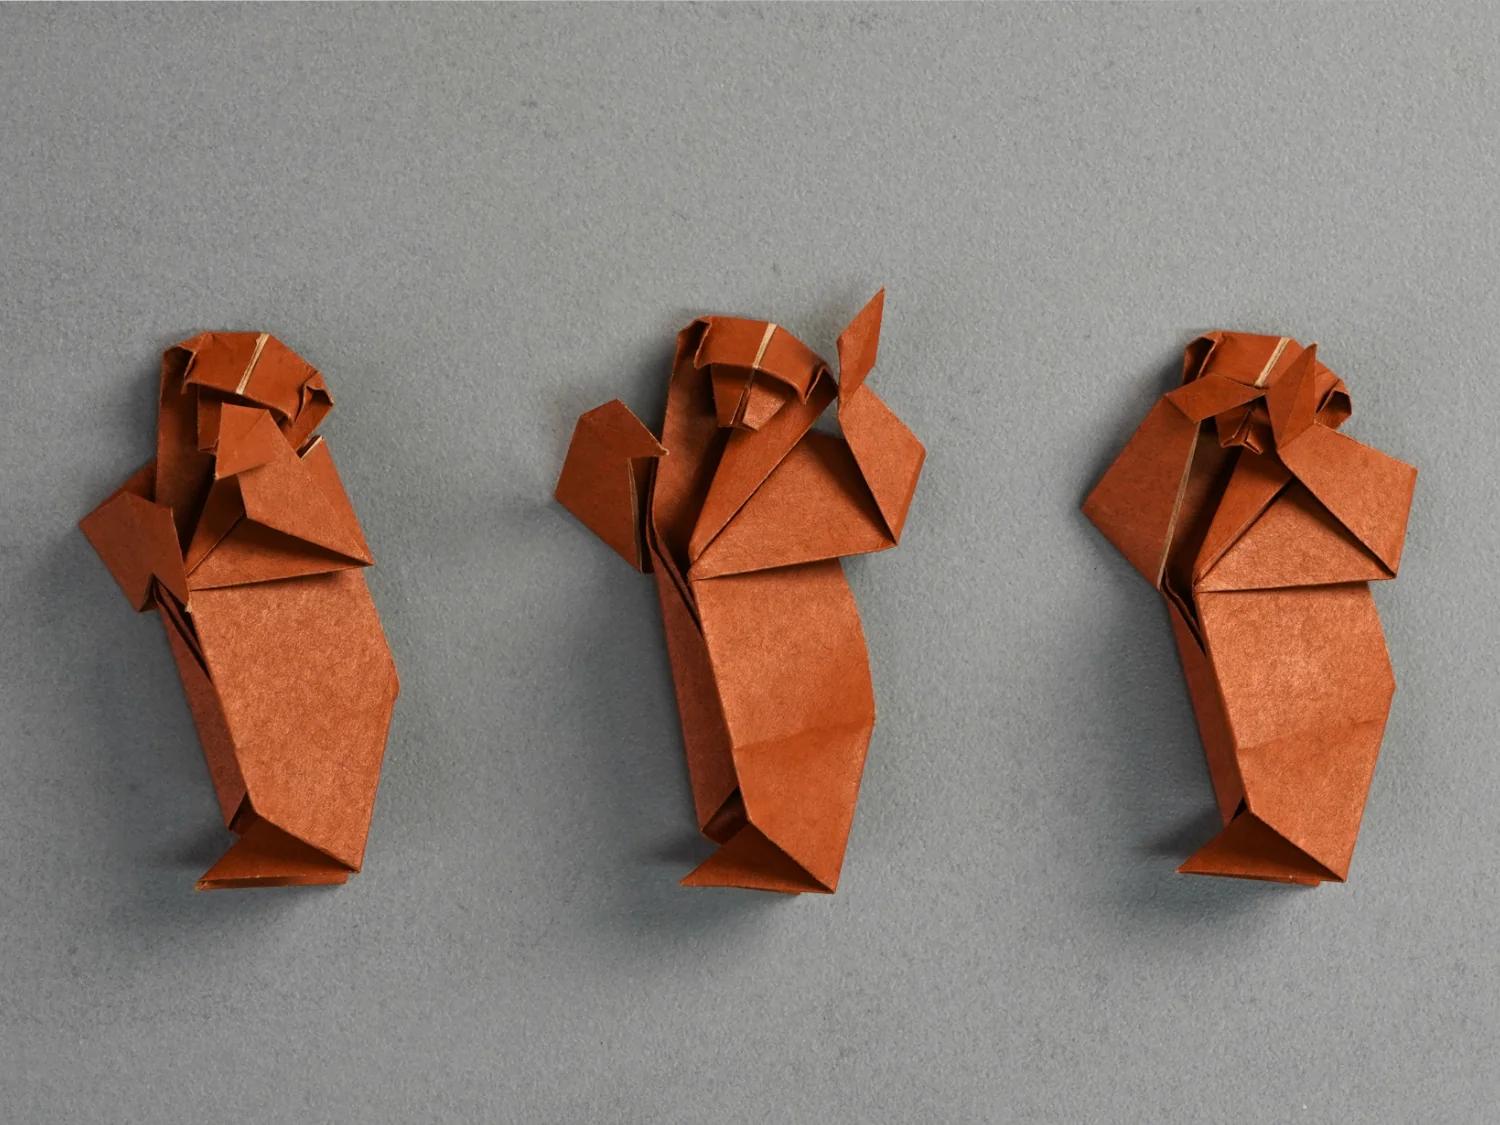
These are three interesting origami monkeys, that capture the playful and energetic spirit of monkeys, each one uniquely posed as if they are dancing happily, and look very funny, sure to bring you a burst of laughter!
The three origami monkeys differ only in the way their hands are folded. Each monkey is made of half of square paper, so you may need to prepare two pieces of paper.

If you are new to origami, start here from our beginner guide to know the basics and how to read the step-by-step instructions.
- Folding time: 20 minutes
- Paper: 15×15 cm / 2
- Difficulty: Middle
Material
Prepare two pieces of 15×15 cm origami square paper, with different colors on each side. Feel free to experiment with different colors to give each monkey its unique personality.
Step by Step Instructions
Step 1
Place the paper with the desired display color side up to begin folding, fold it in half horizontally, and cut the paper along the crease.
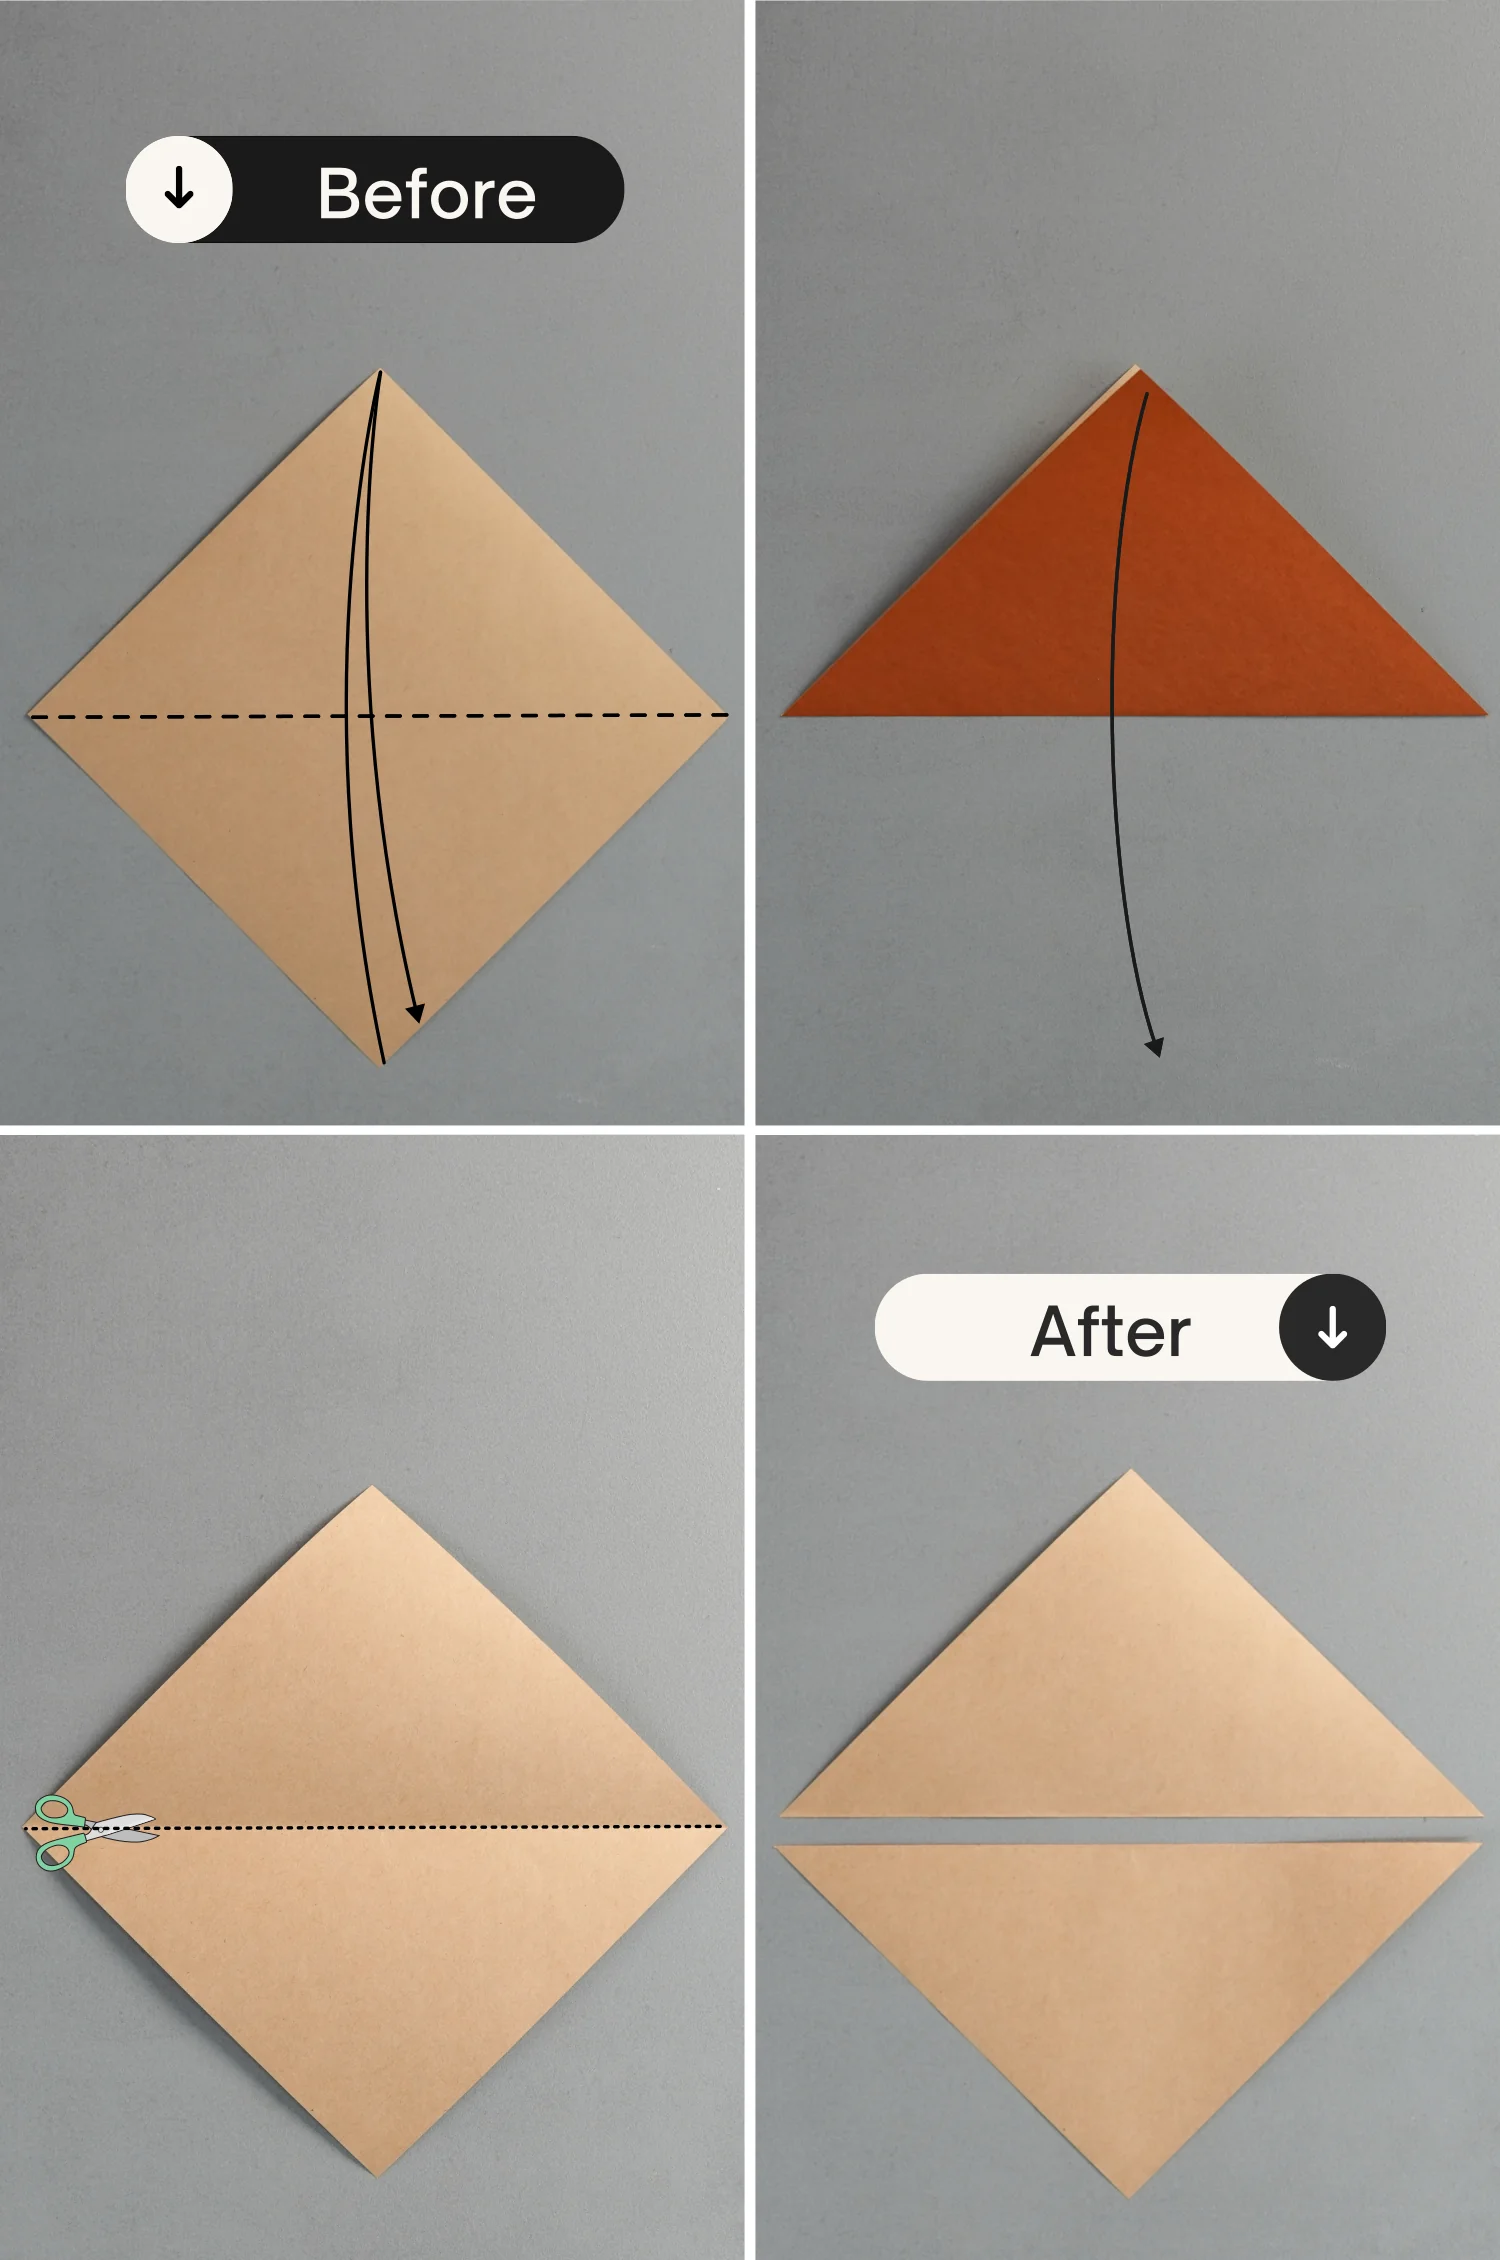
Step 2
Take one of the triangles, and fold the bottom two points to meet the top point.
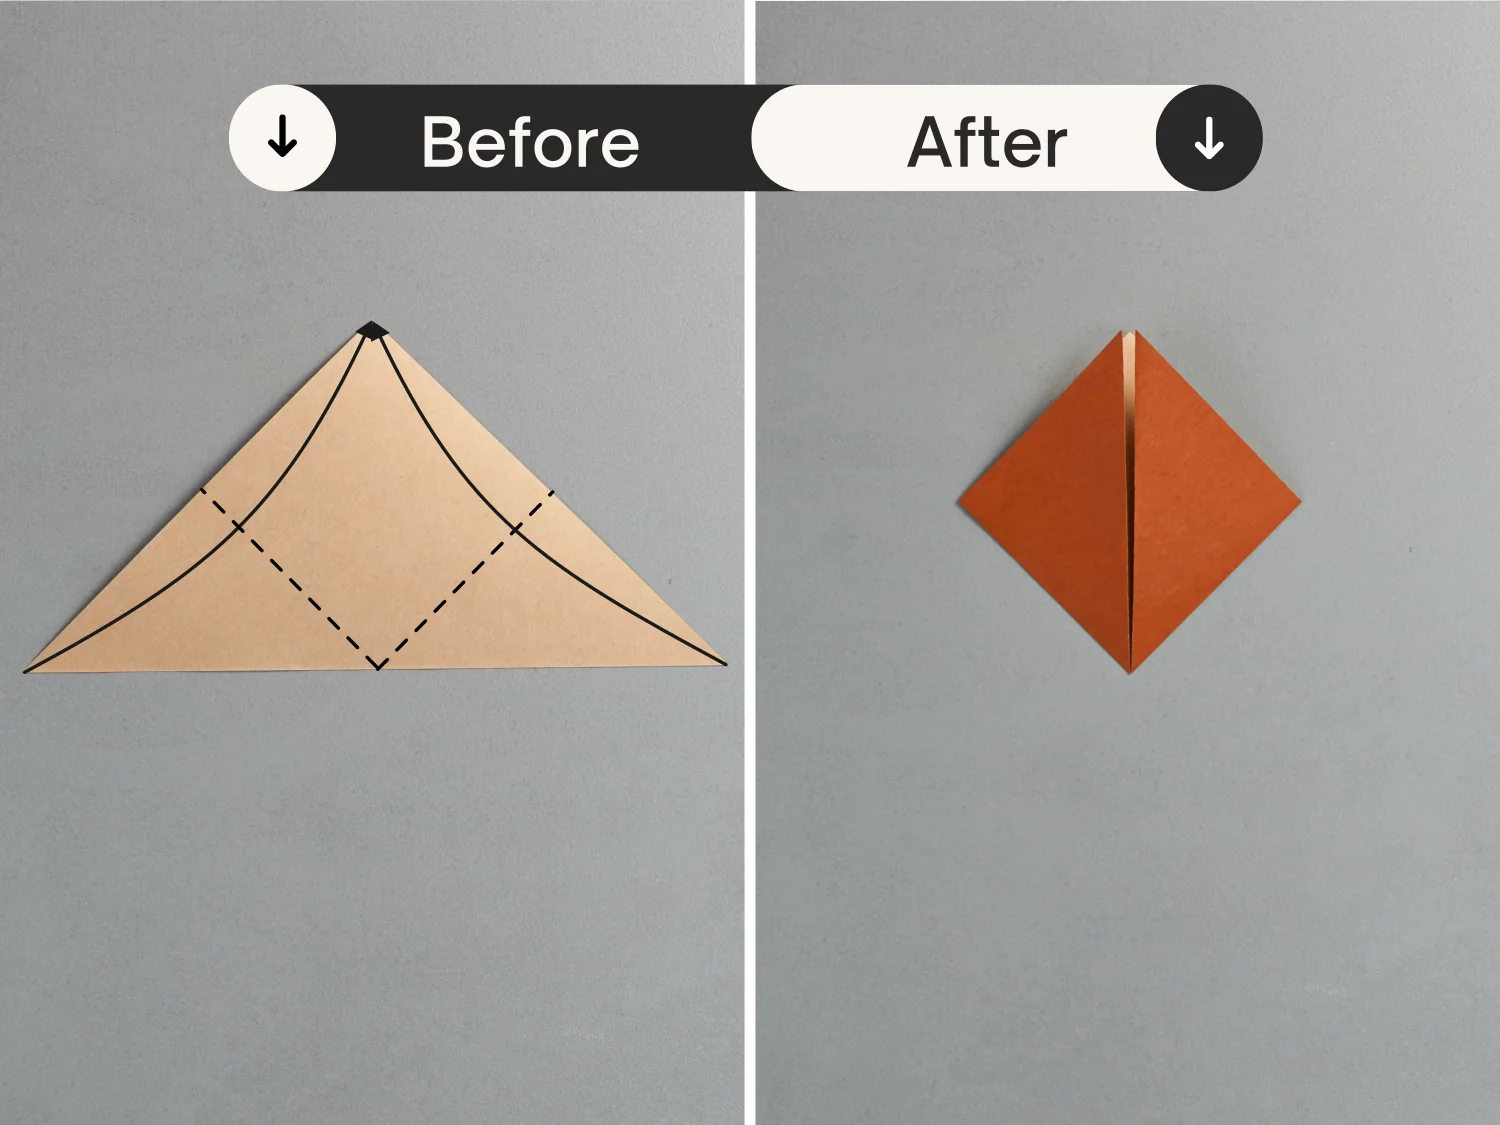
Step 3
Fold the top left and right edges to align with the middle vertical line, and unfold them.
Step 4
Unfold the top right layer, then bring up the top right edge along the existing creases indicated by the white dotted line, and finally, fold the right point to meet the top point.
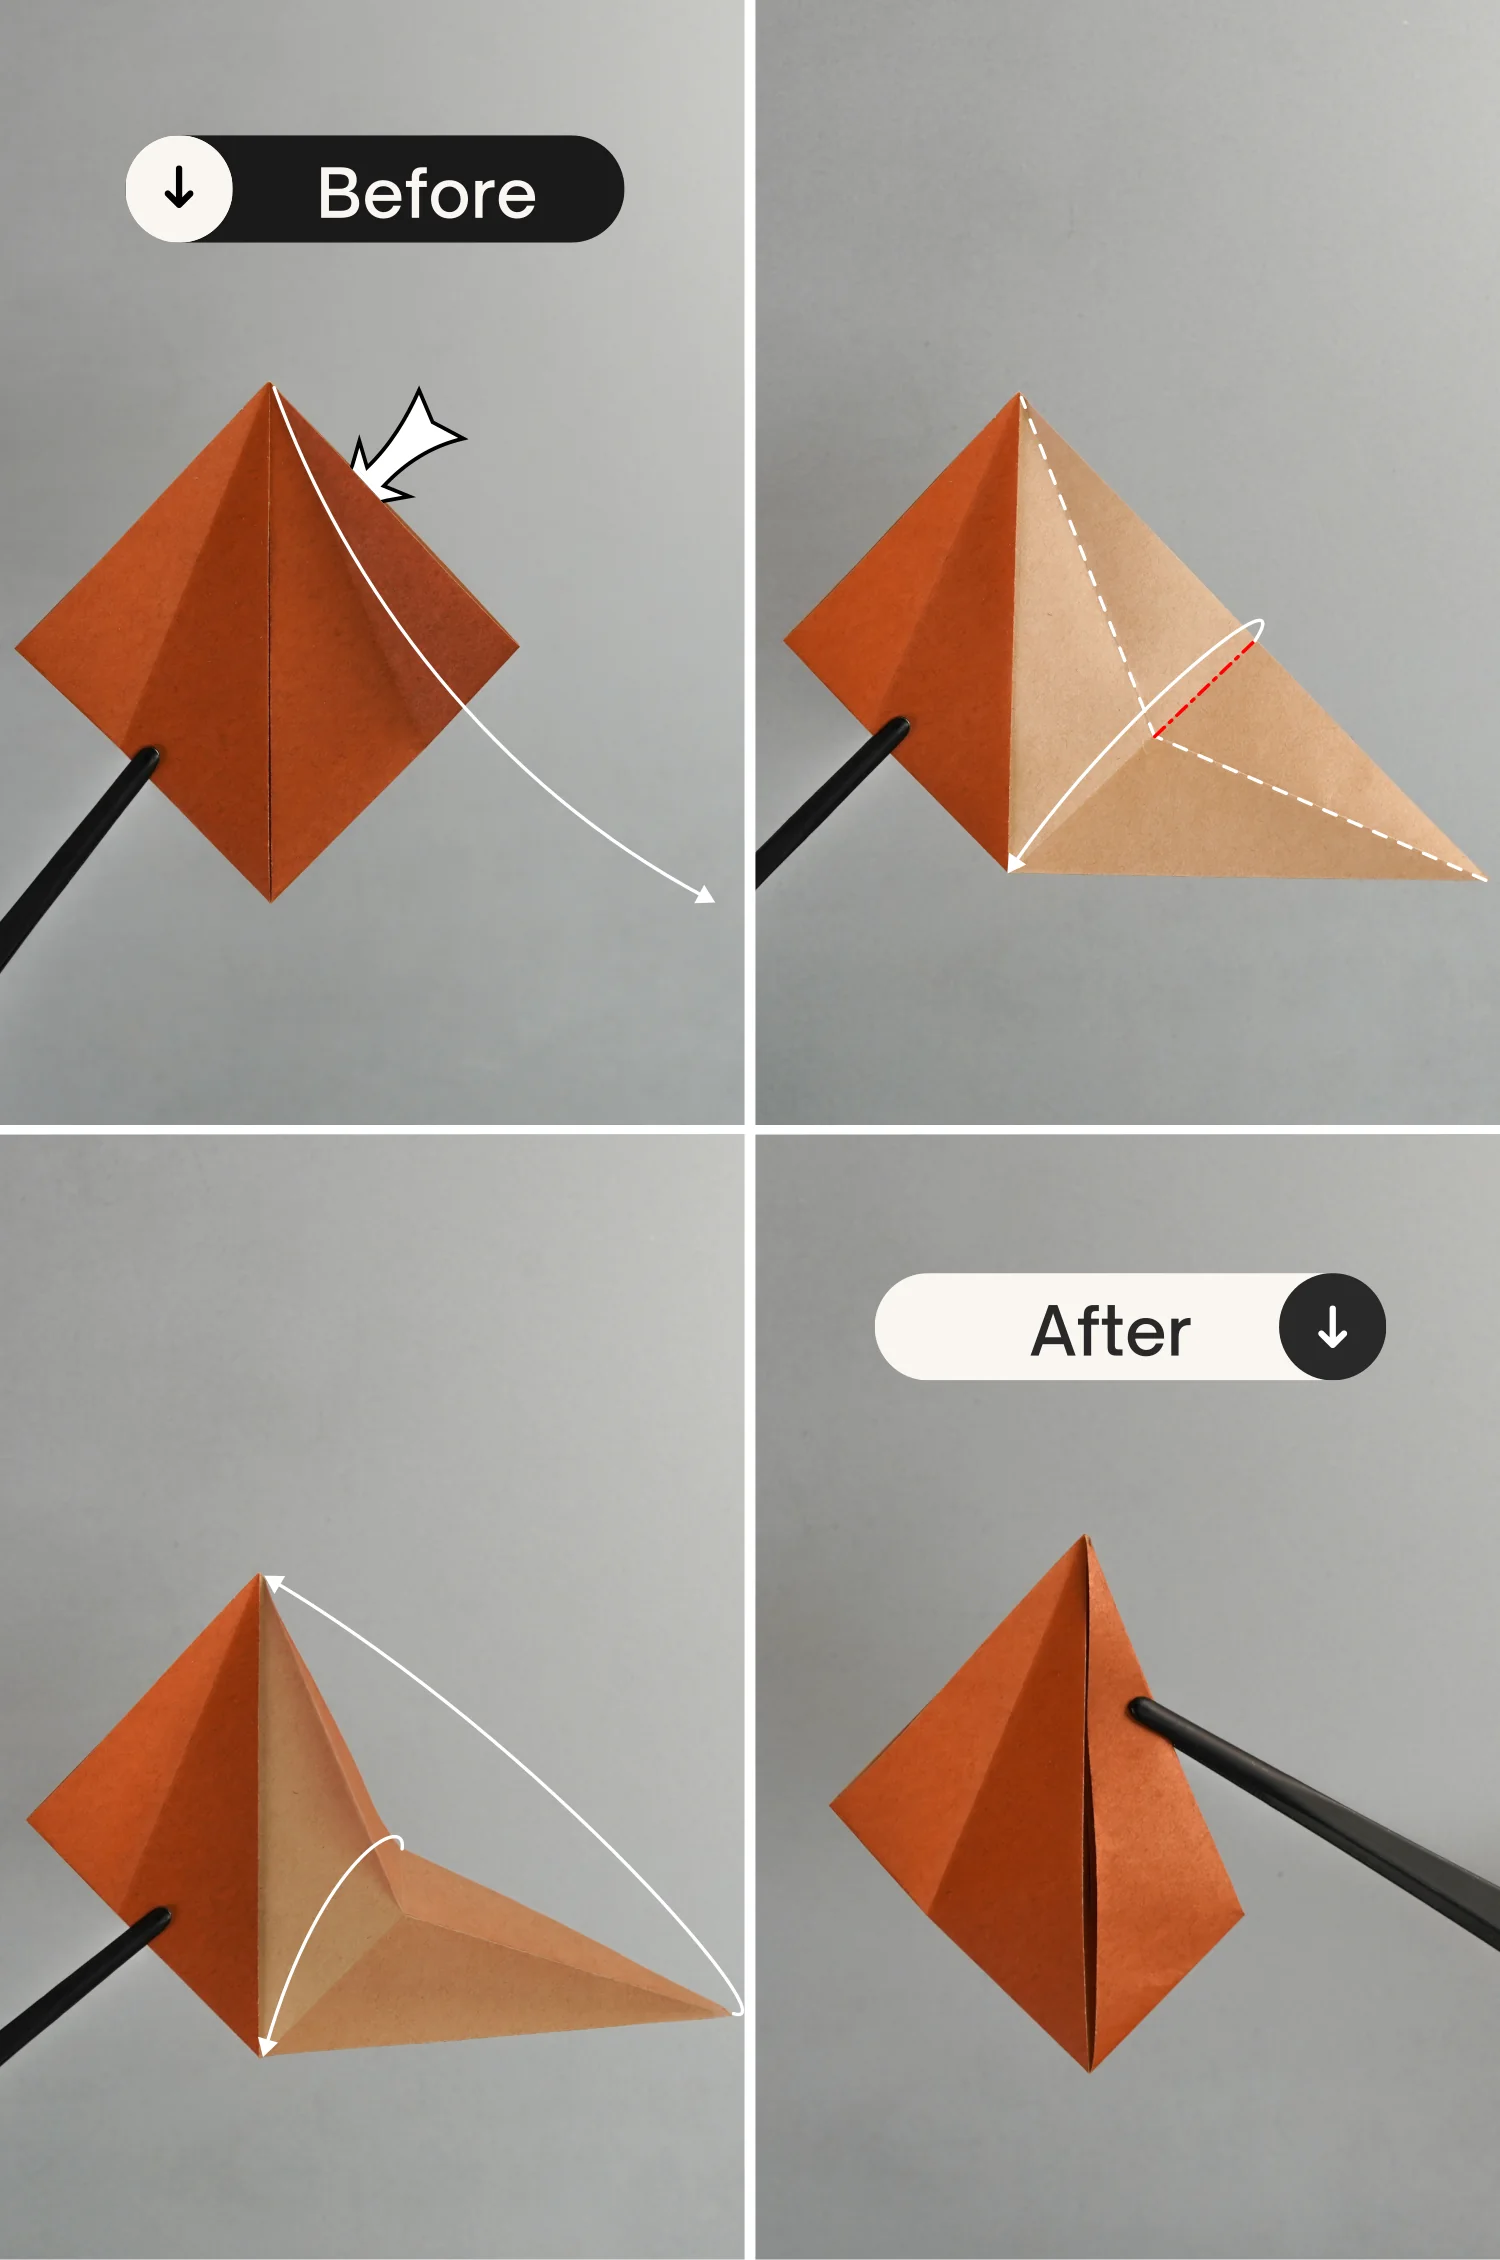
Step 5
Similarly, unfold the left layer, bring up the left edge along the white dotted lines, and then fold the left point back to the top.
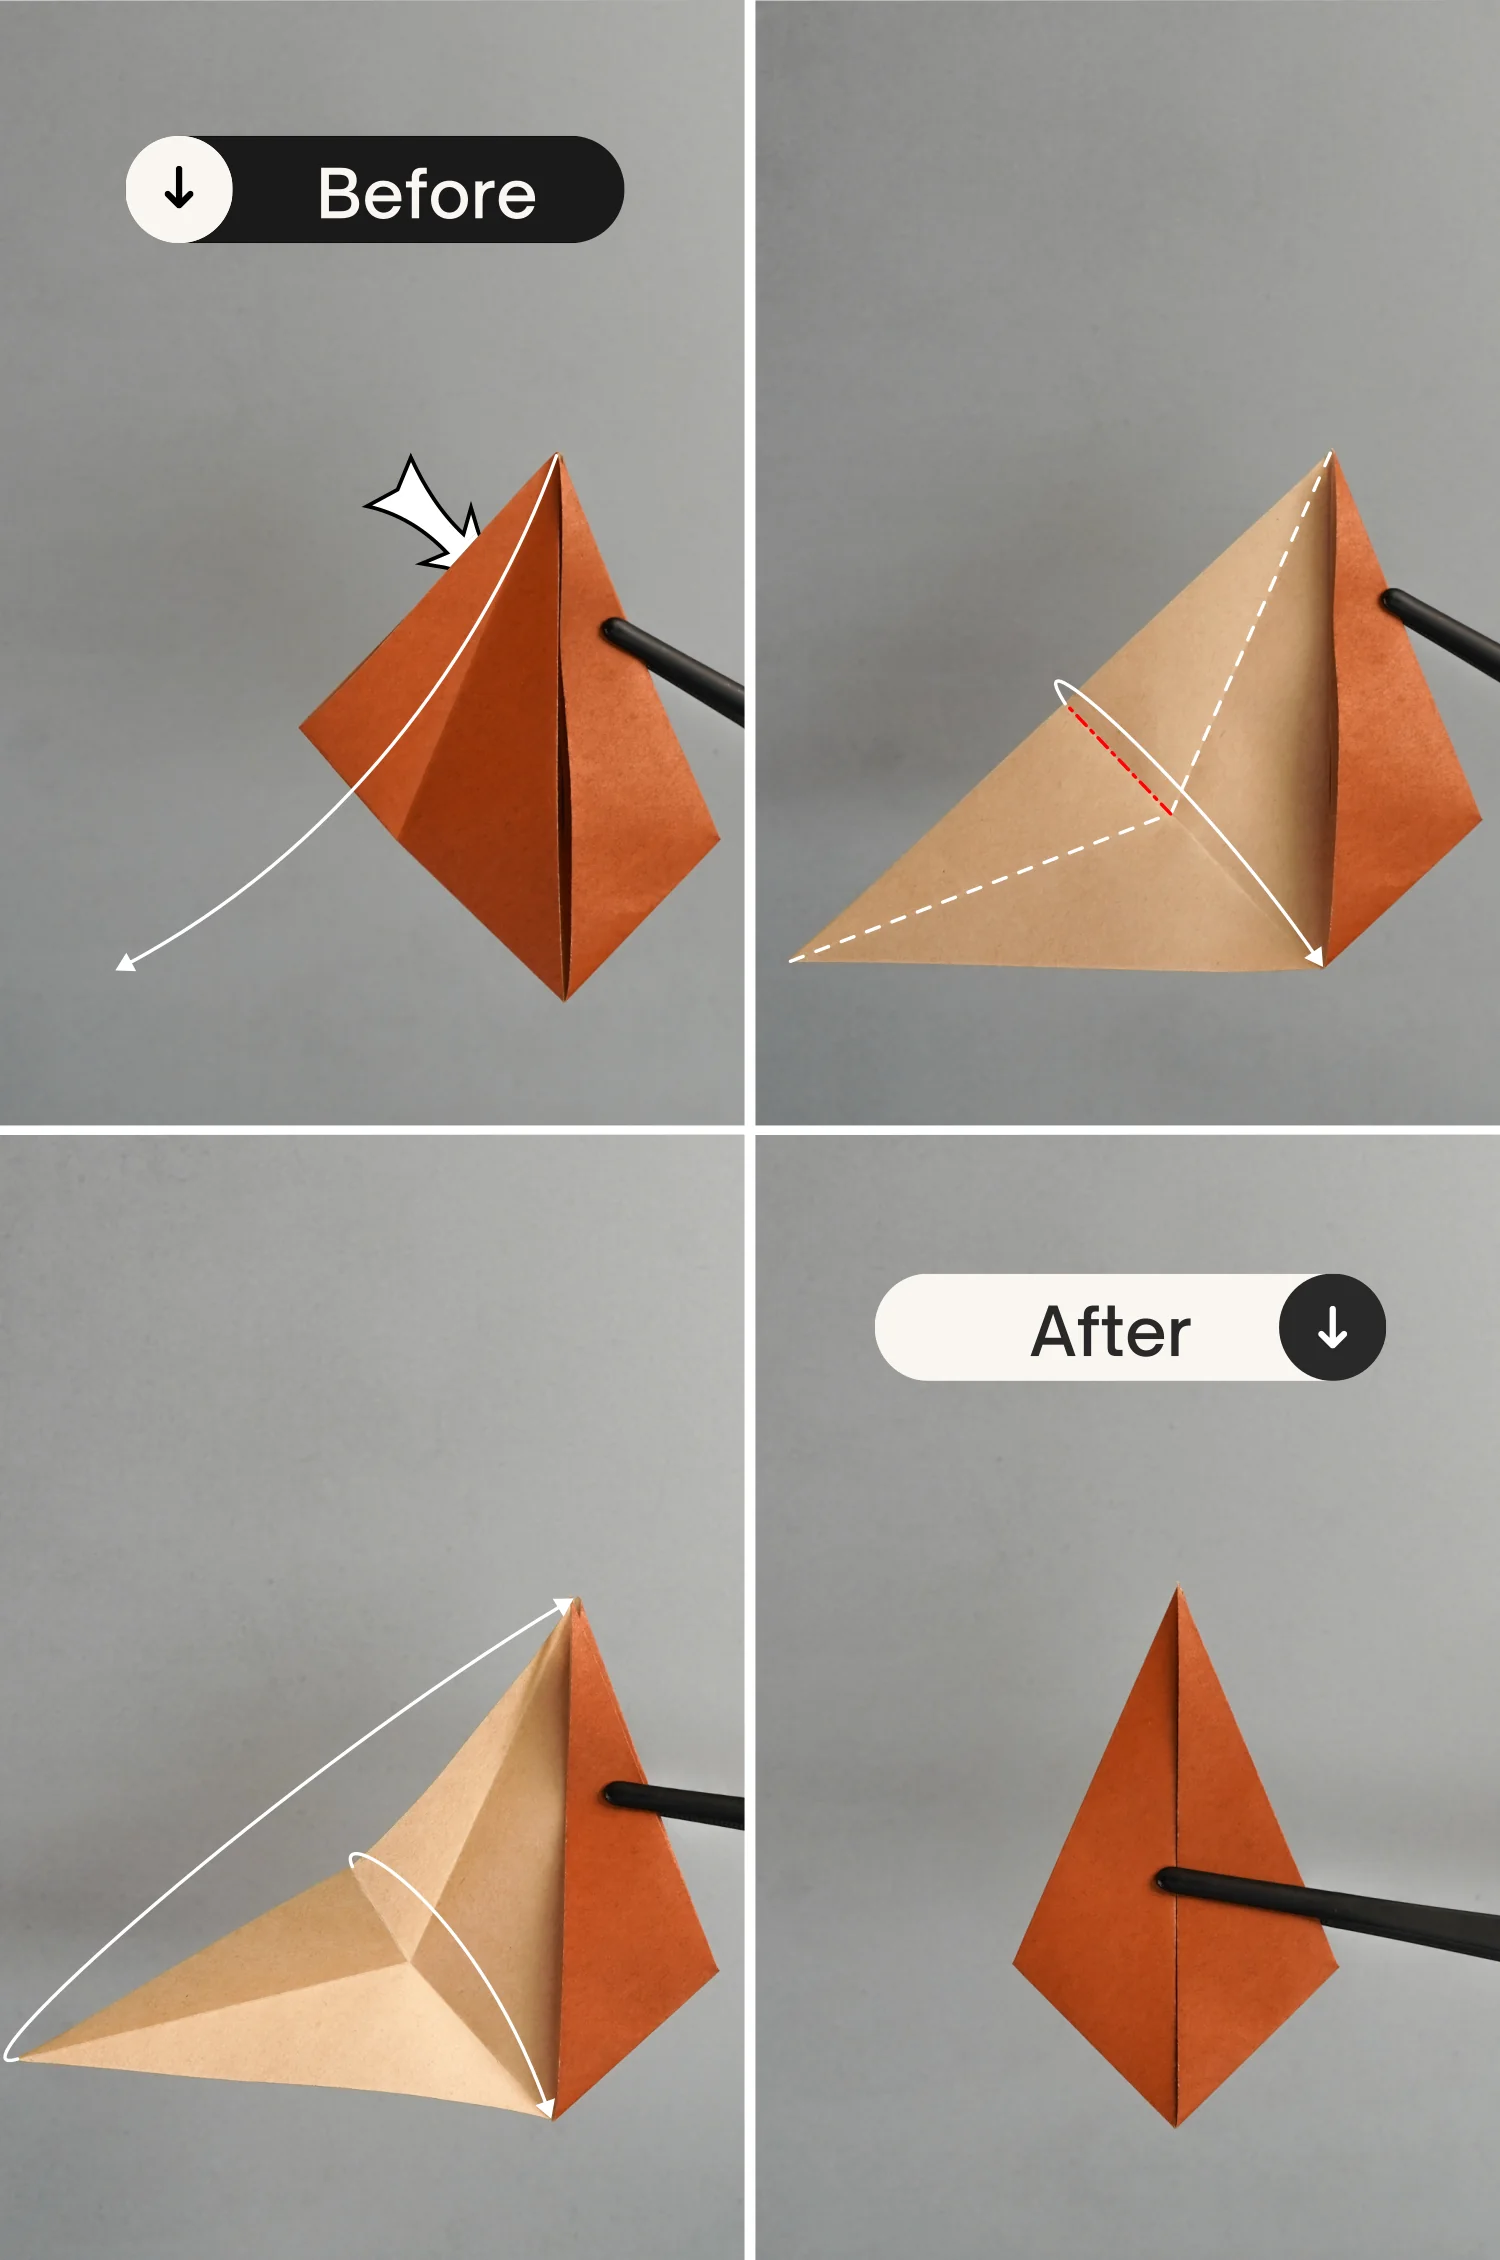
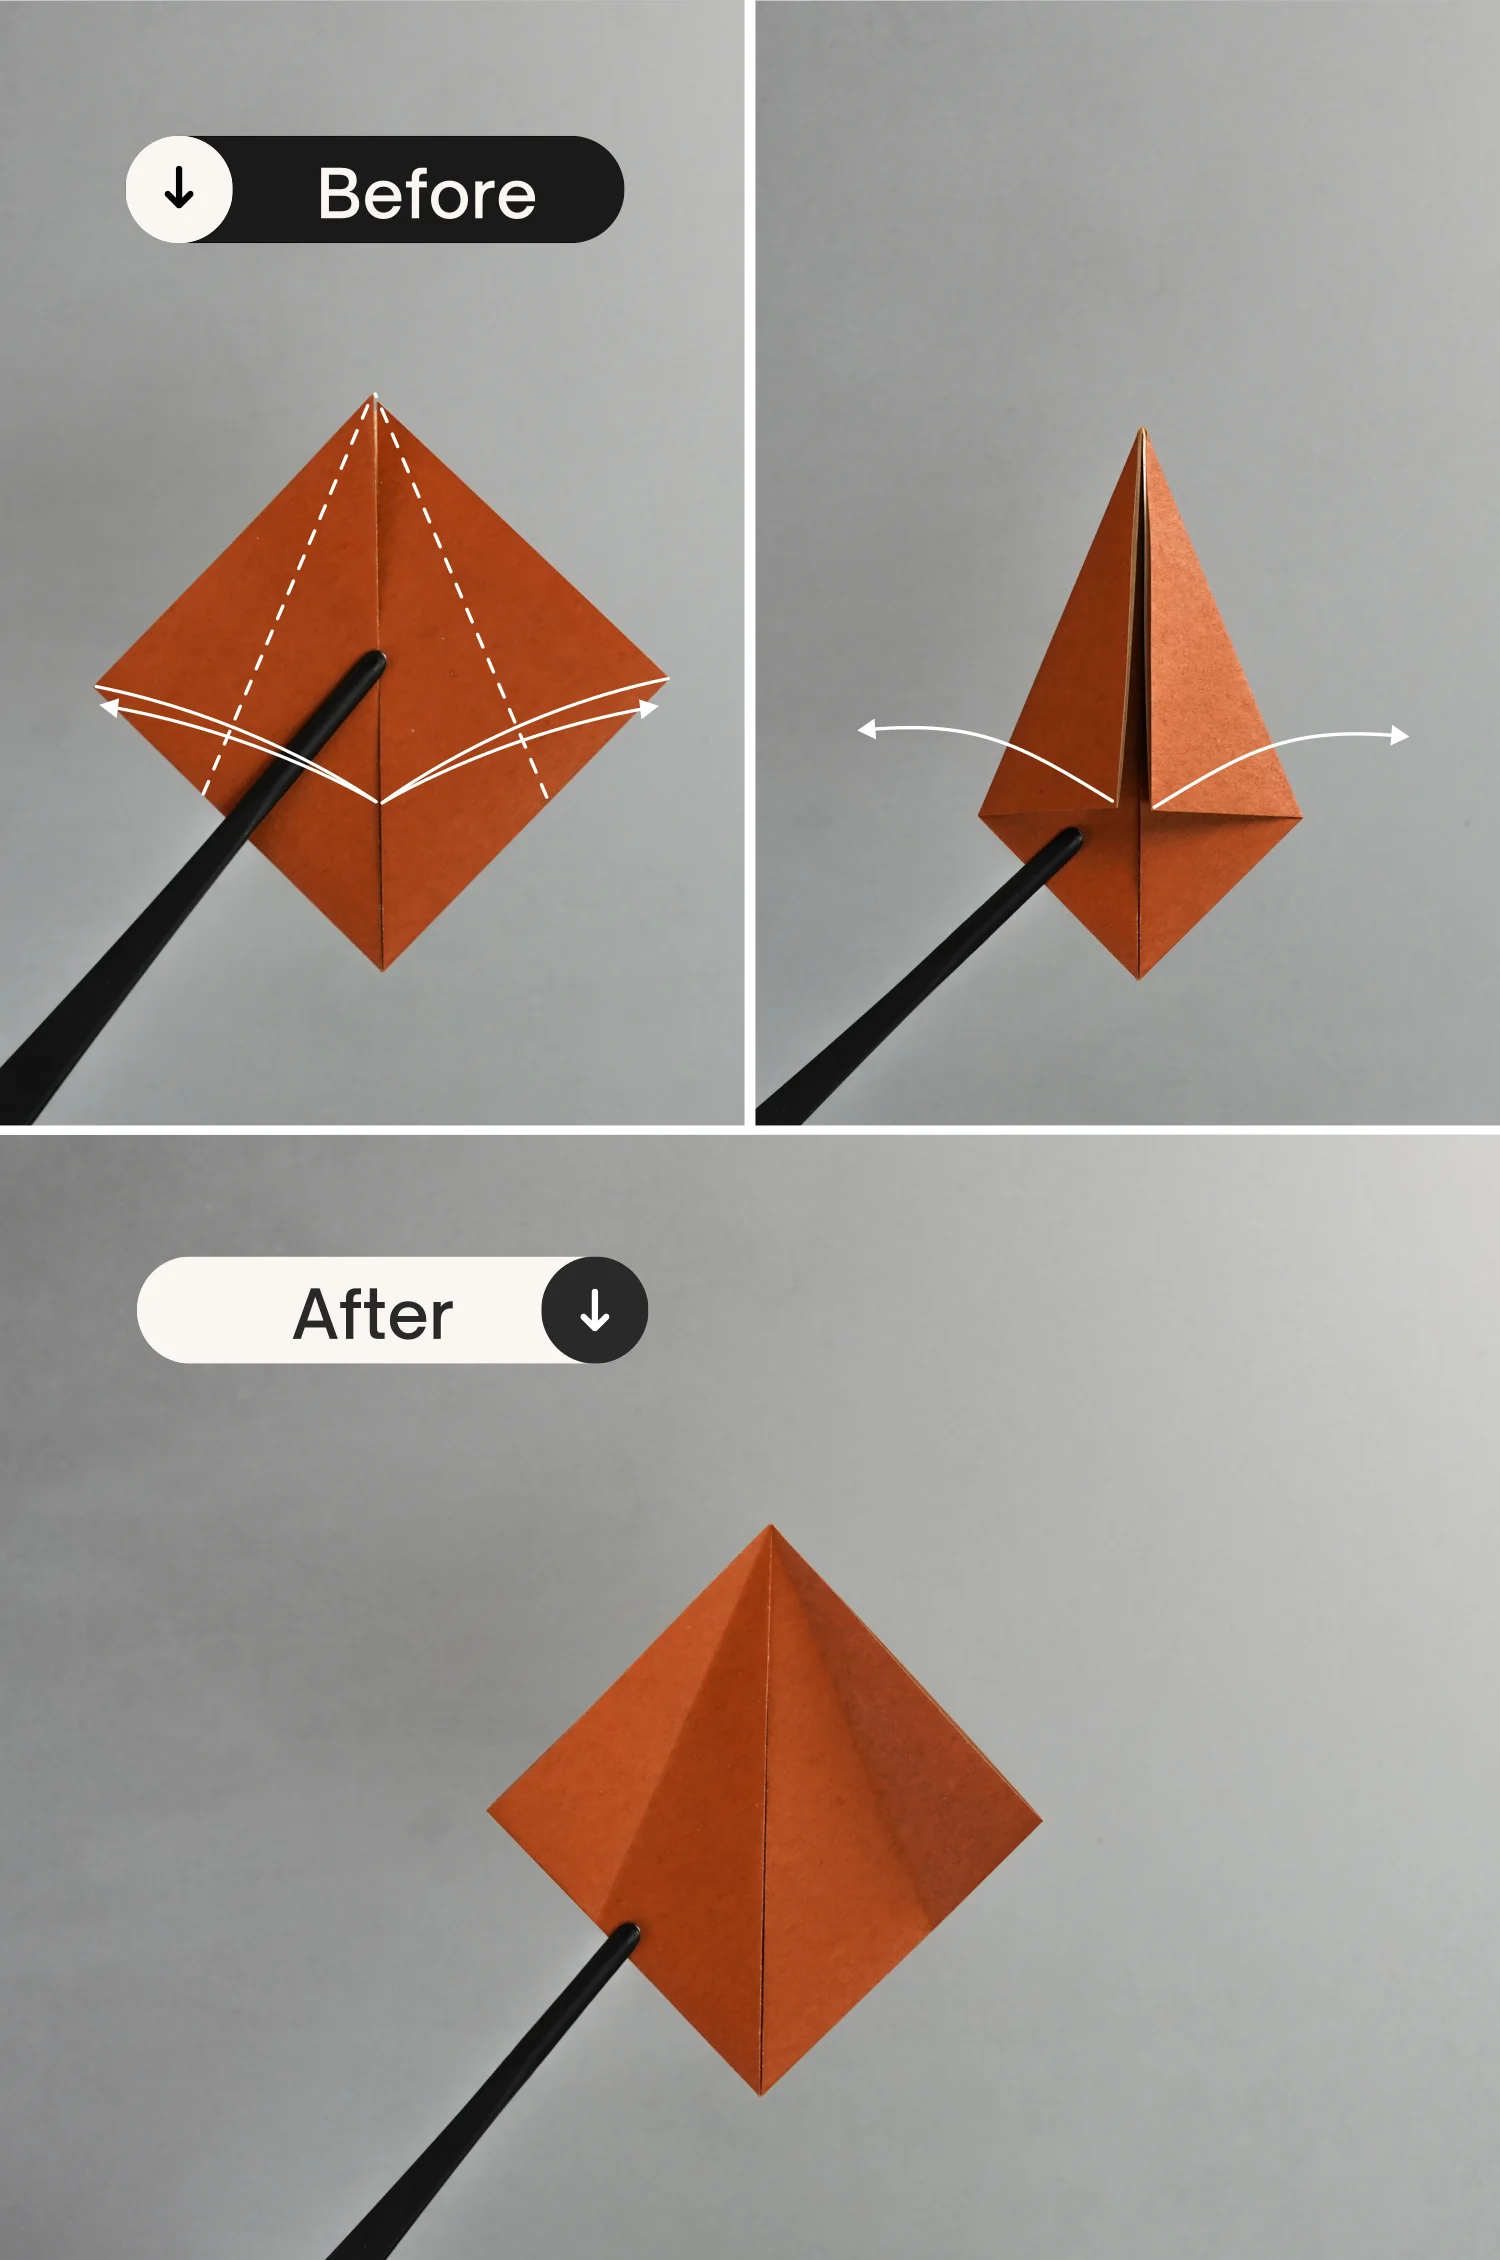
Step 6
Flip the paper over from left to right, then fold it in half vertically from right to left.
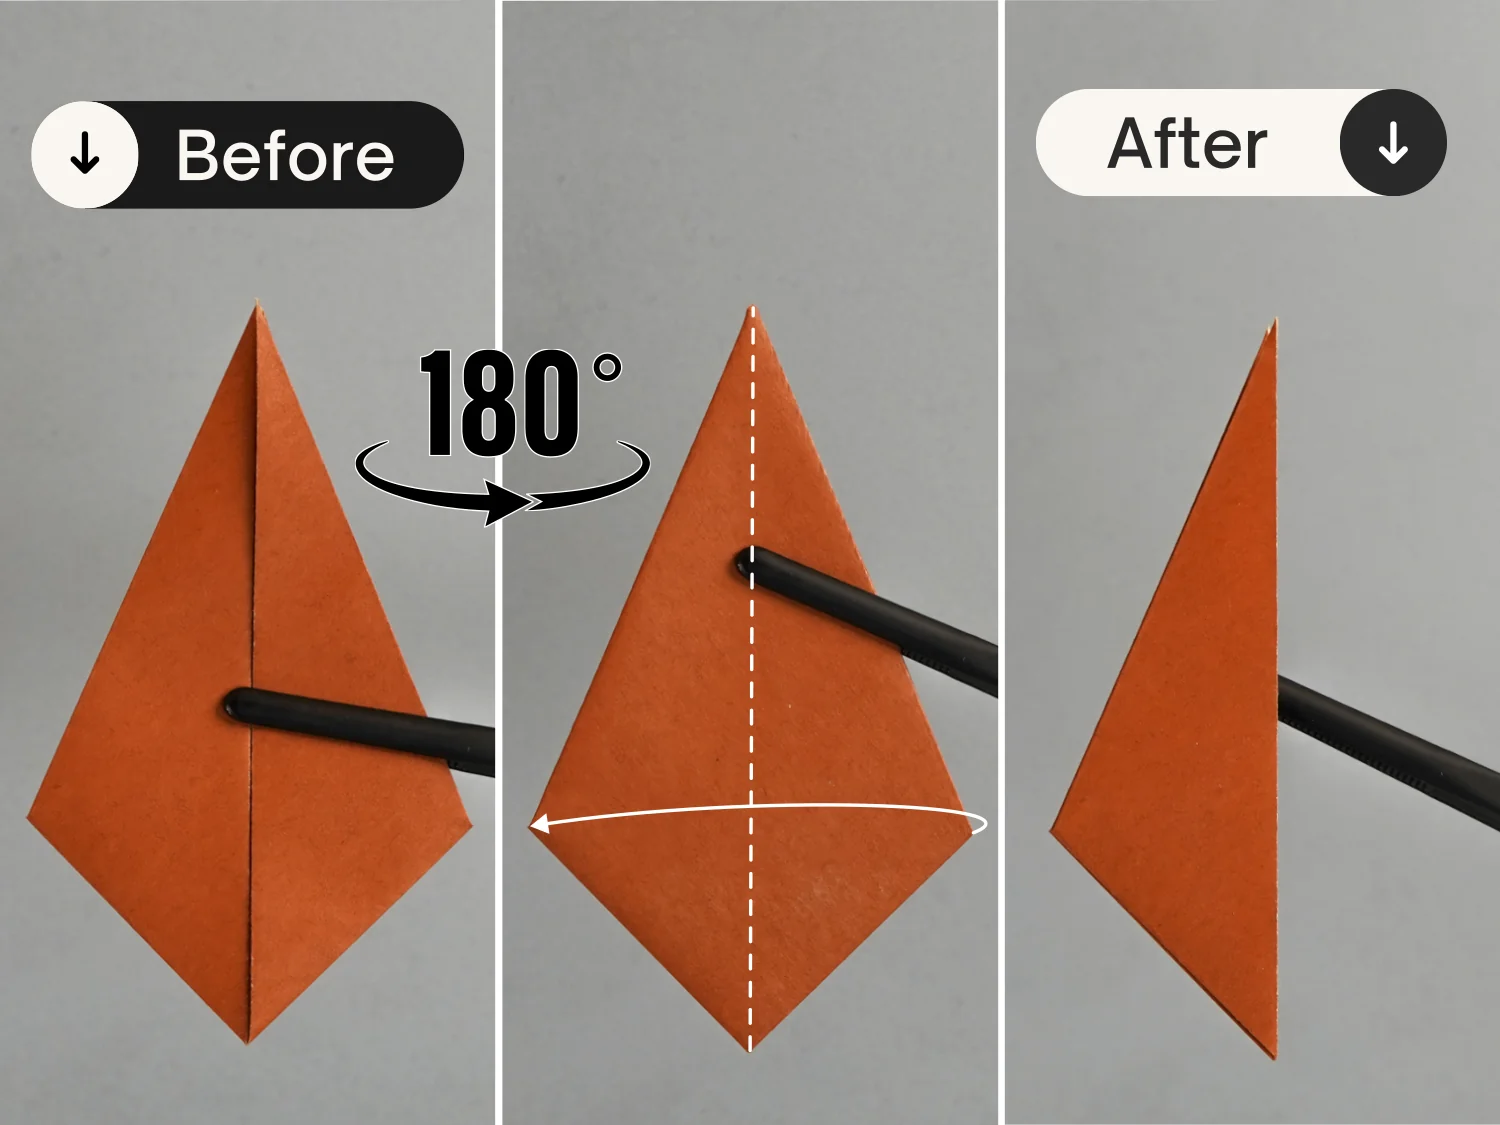
Step 7
Fold down the top point of the top layer, then flip the paper over from left to right, and fold down the top point of the top layer as well.
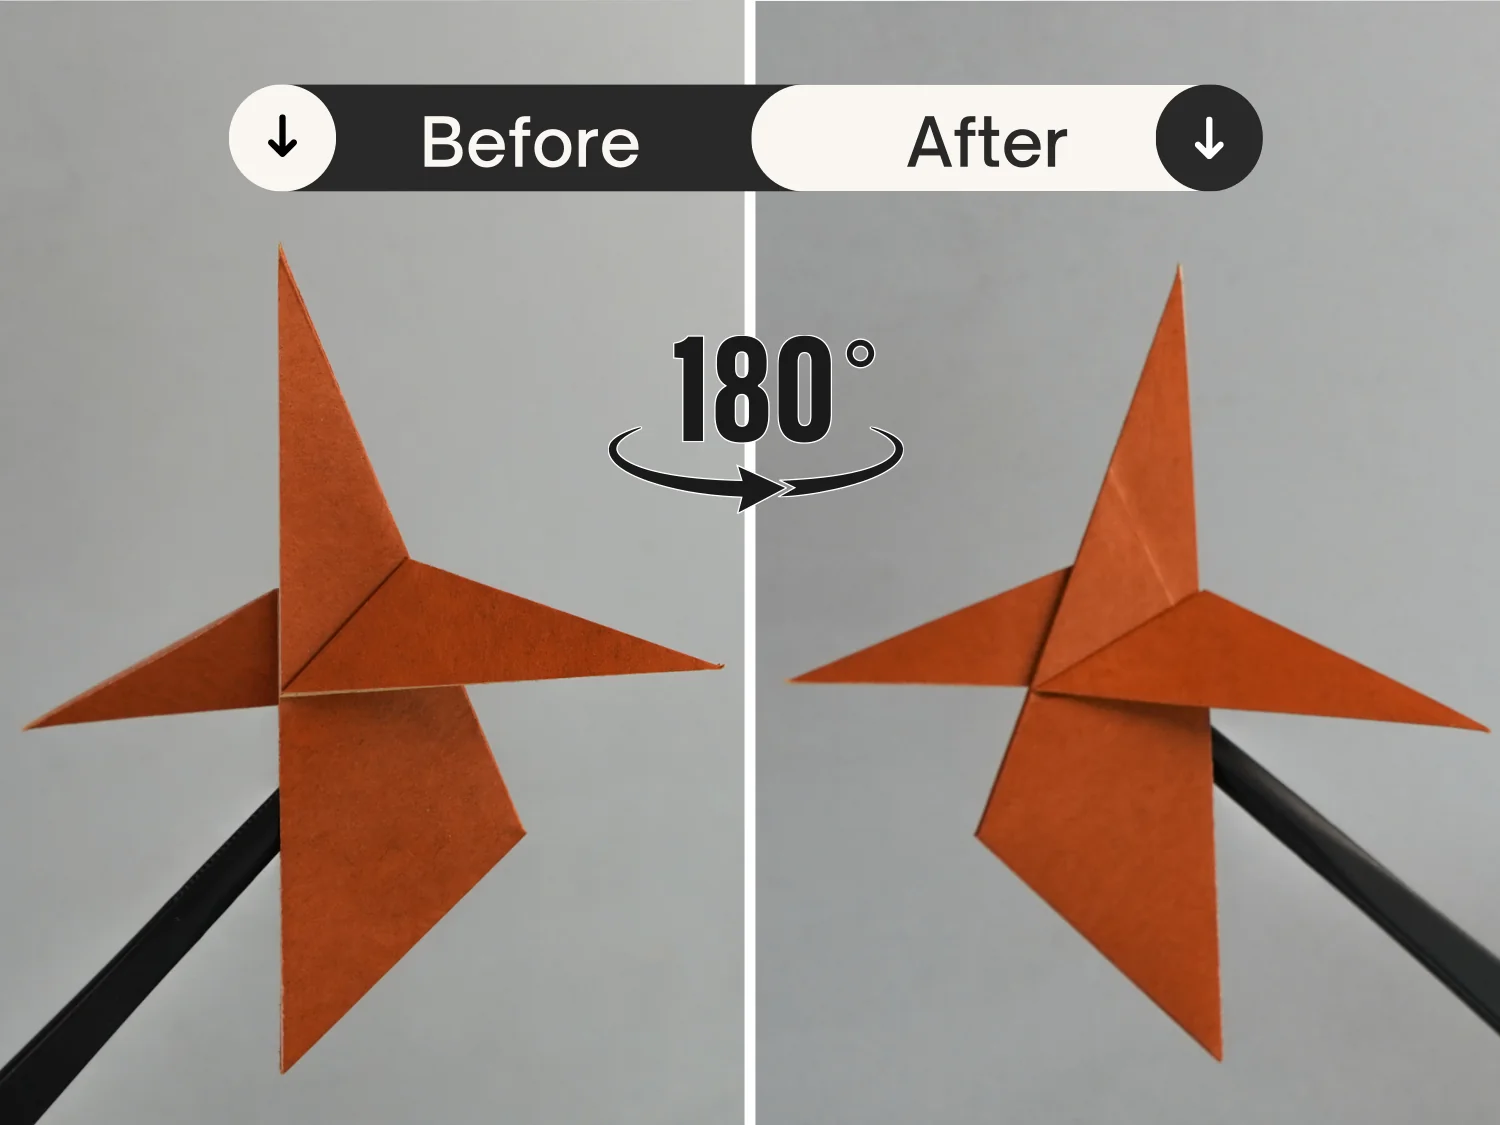
Step 8
Rotate the paper 180 degrees from left to right.
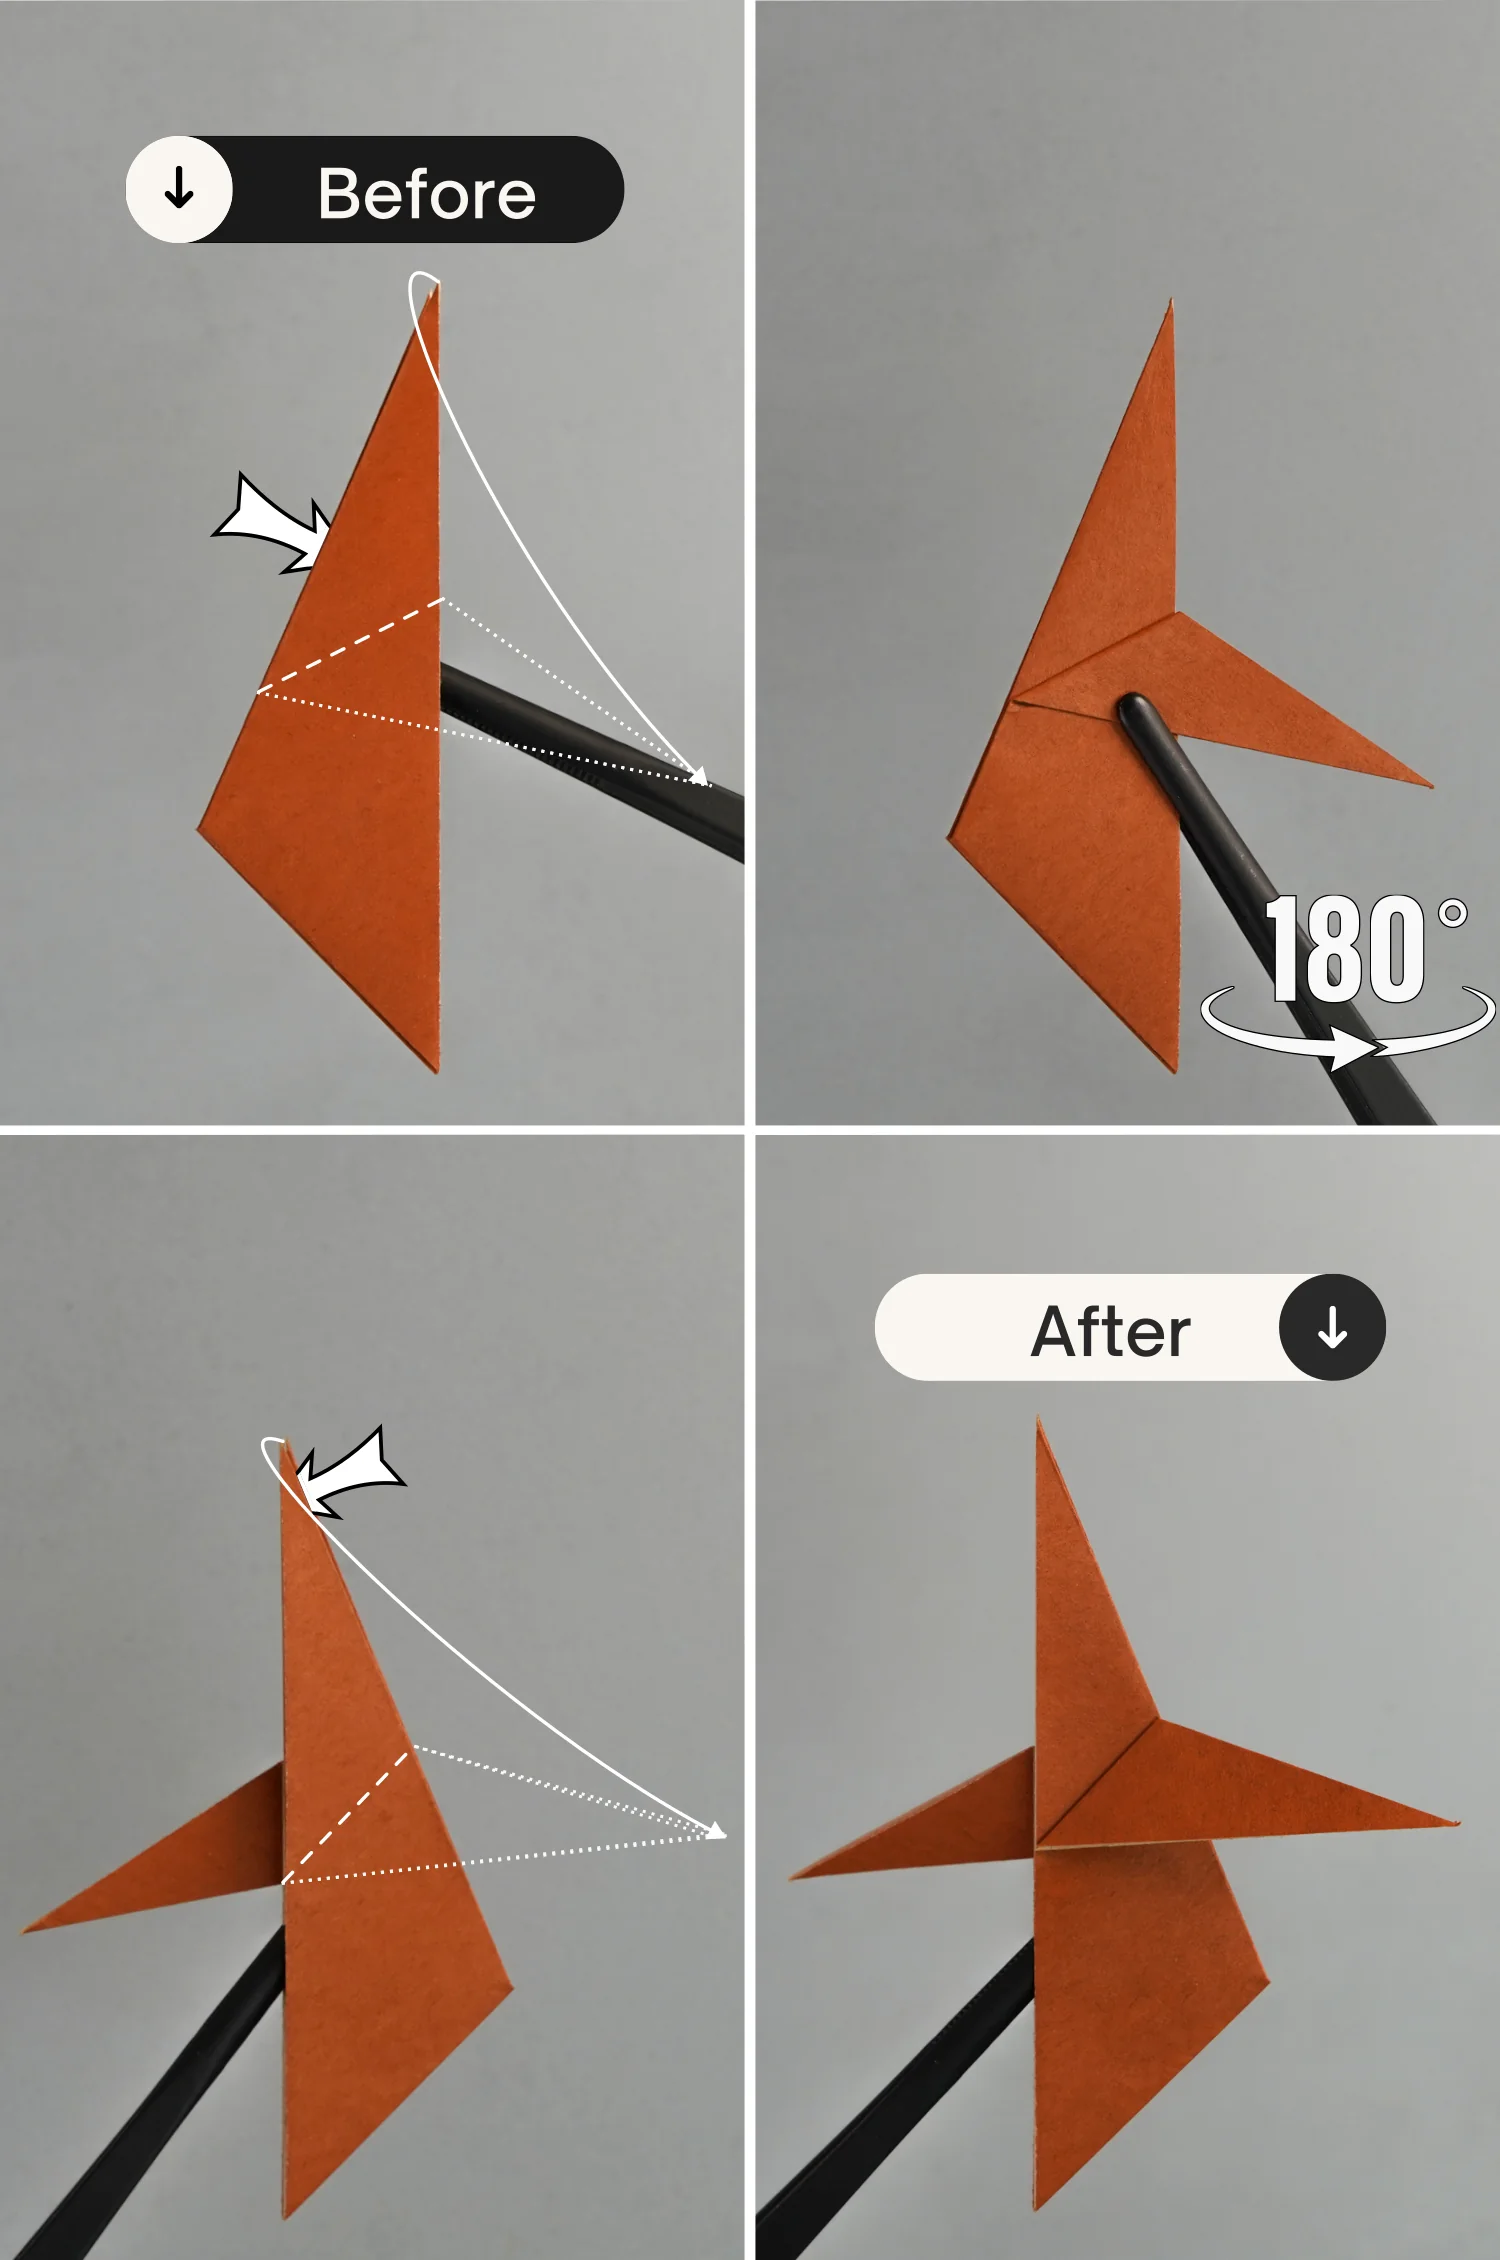
Step 9
Fold down the top point, making the left edge of the middle layer align with the top left edge of the right triangle. Then expand this layer, and fold down its top part.
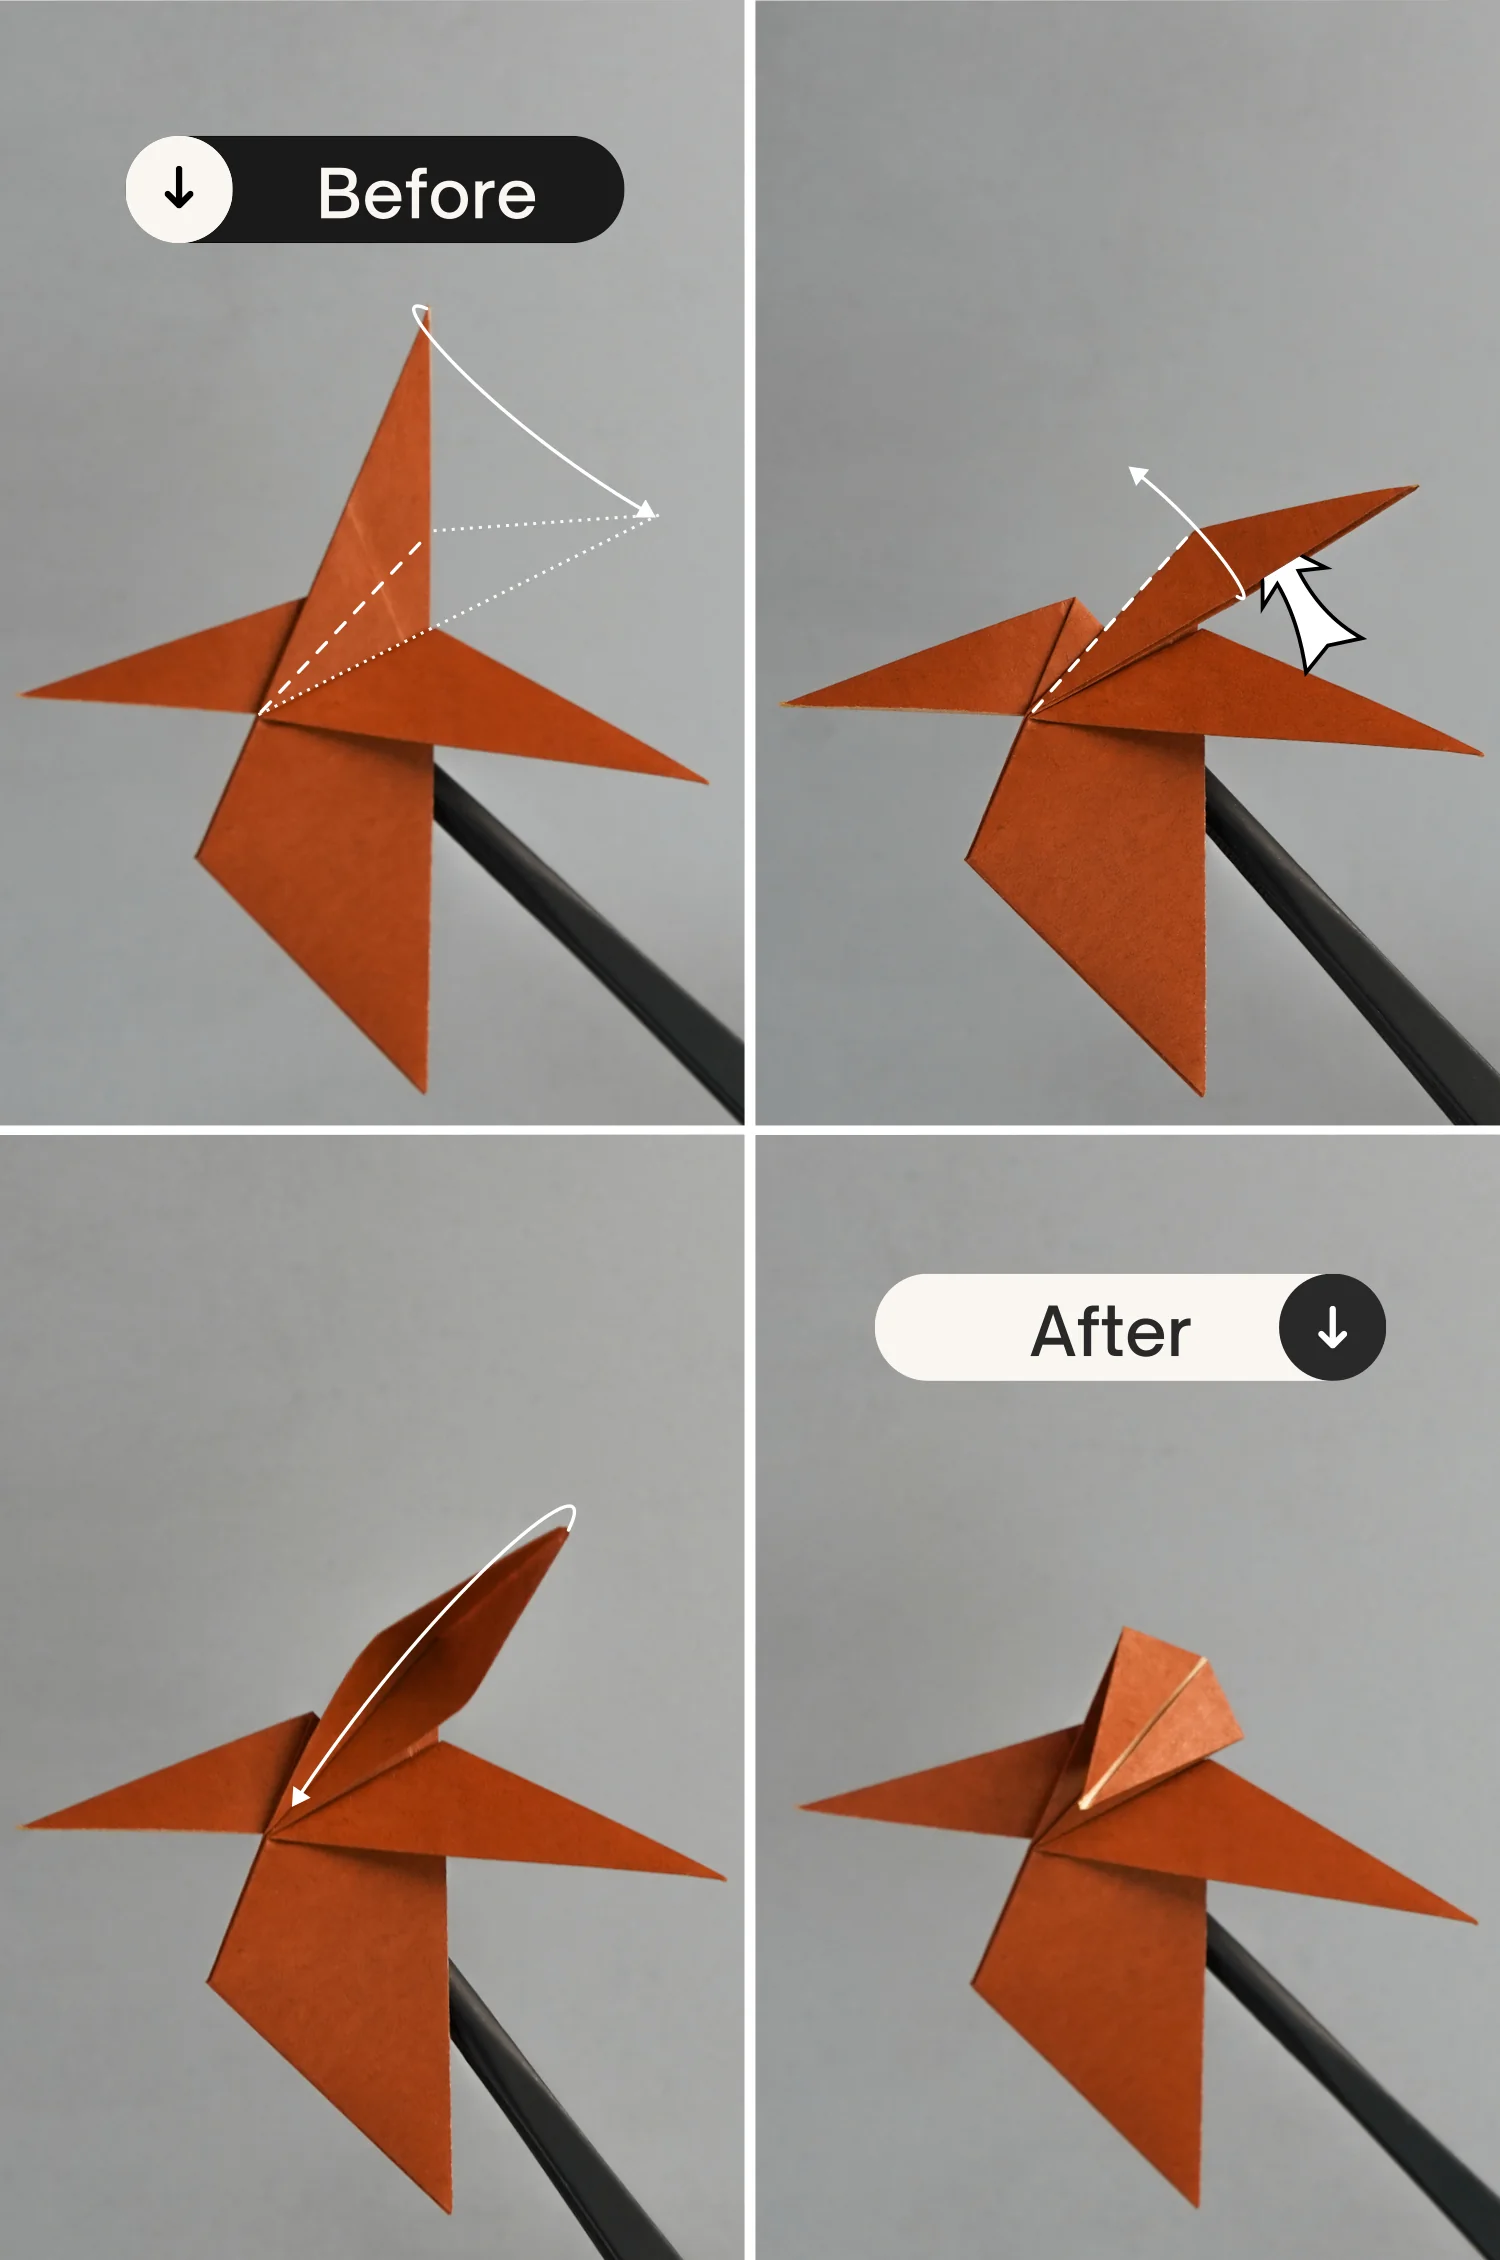
Step 10
Rotate the paper 45 degrees counterclockwise, then fold up the bottom point of the top layer upwards, then downwards, then slightly upwards, and finally unfold.
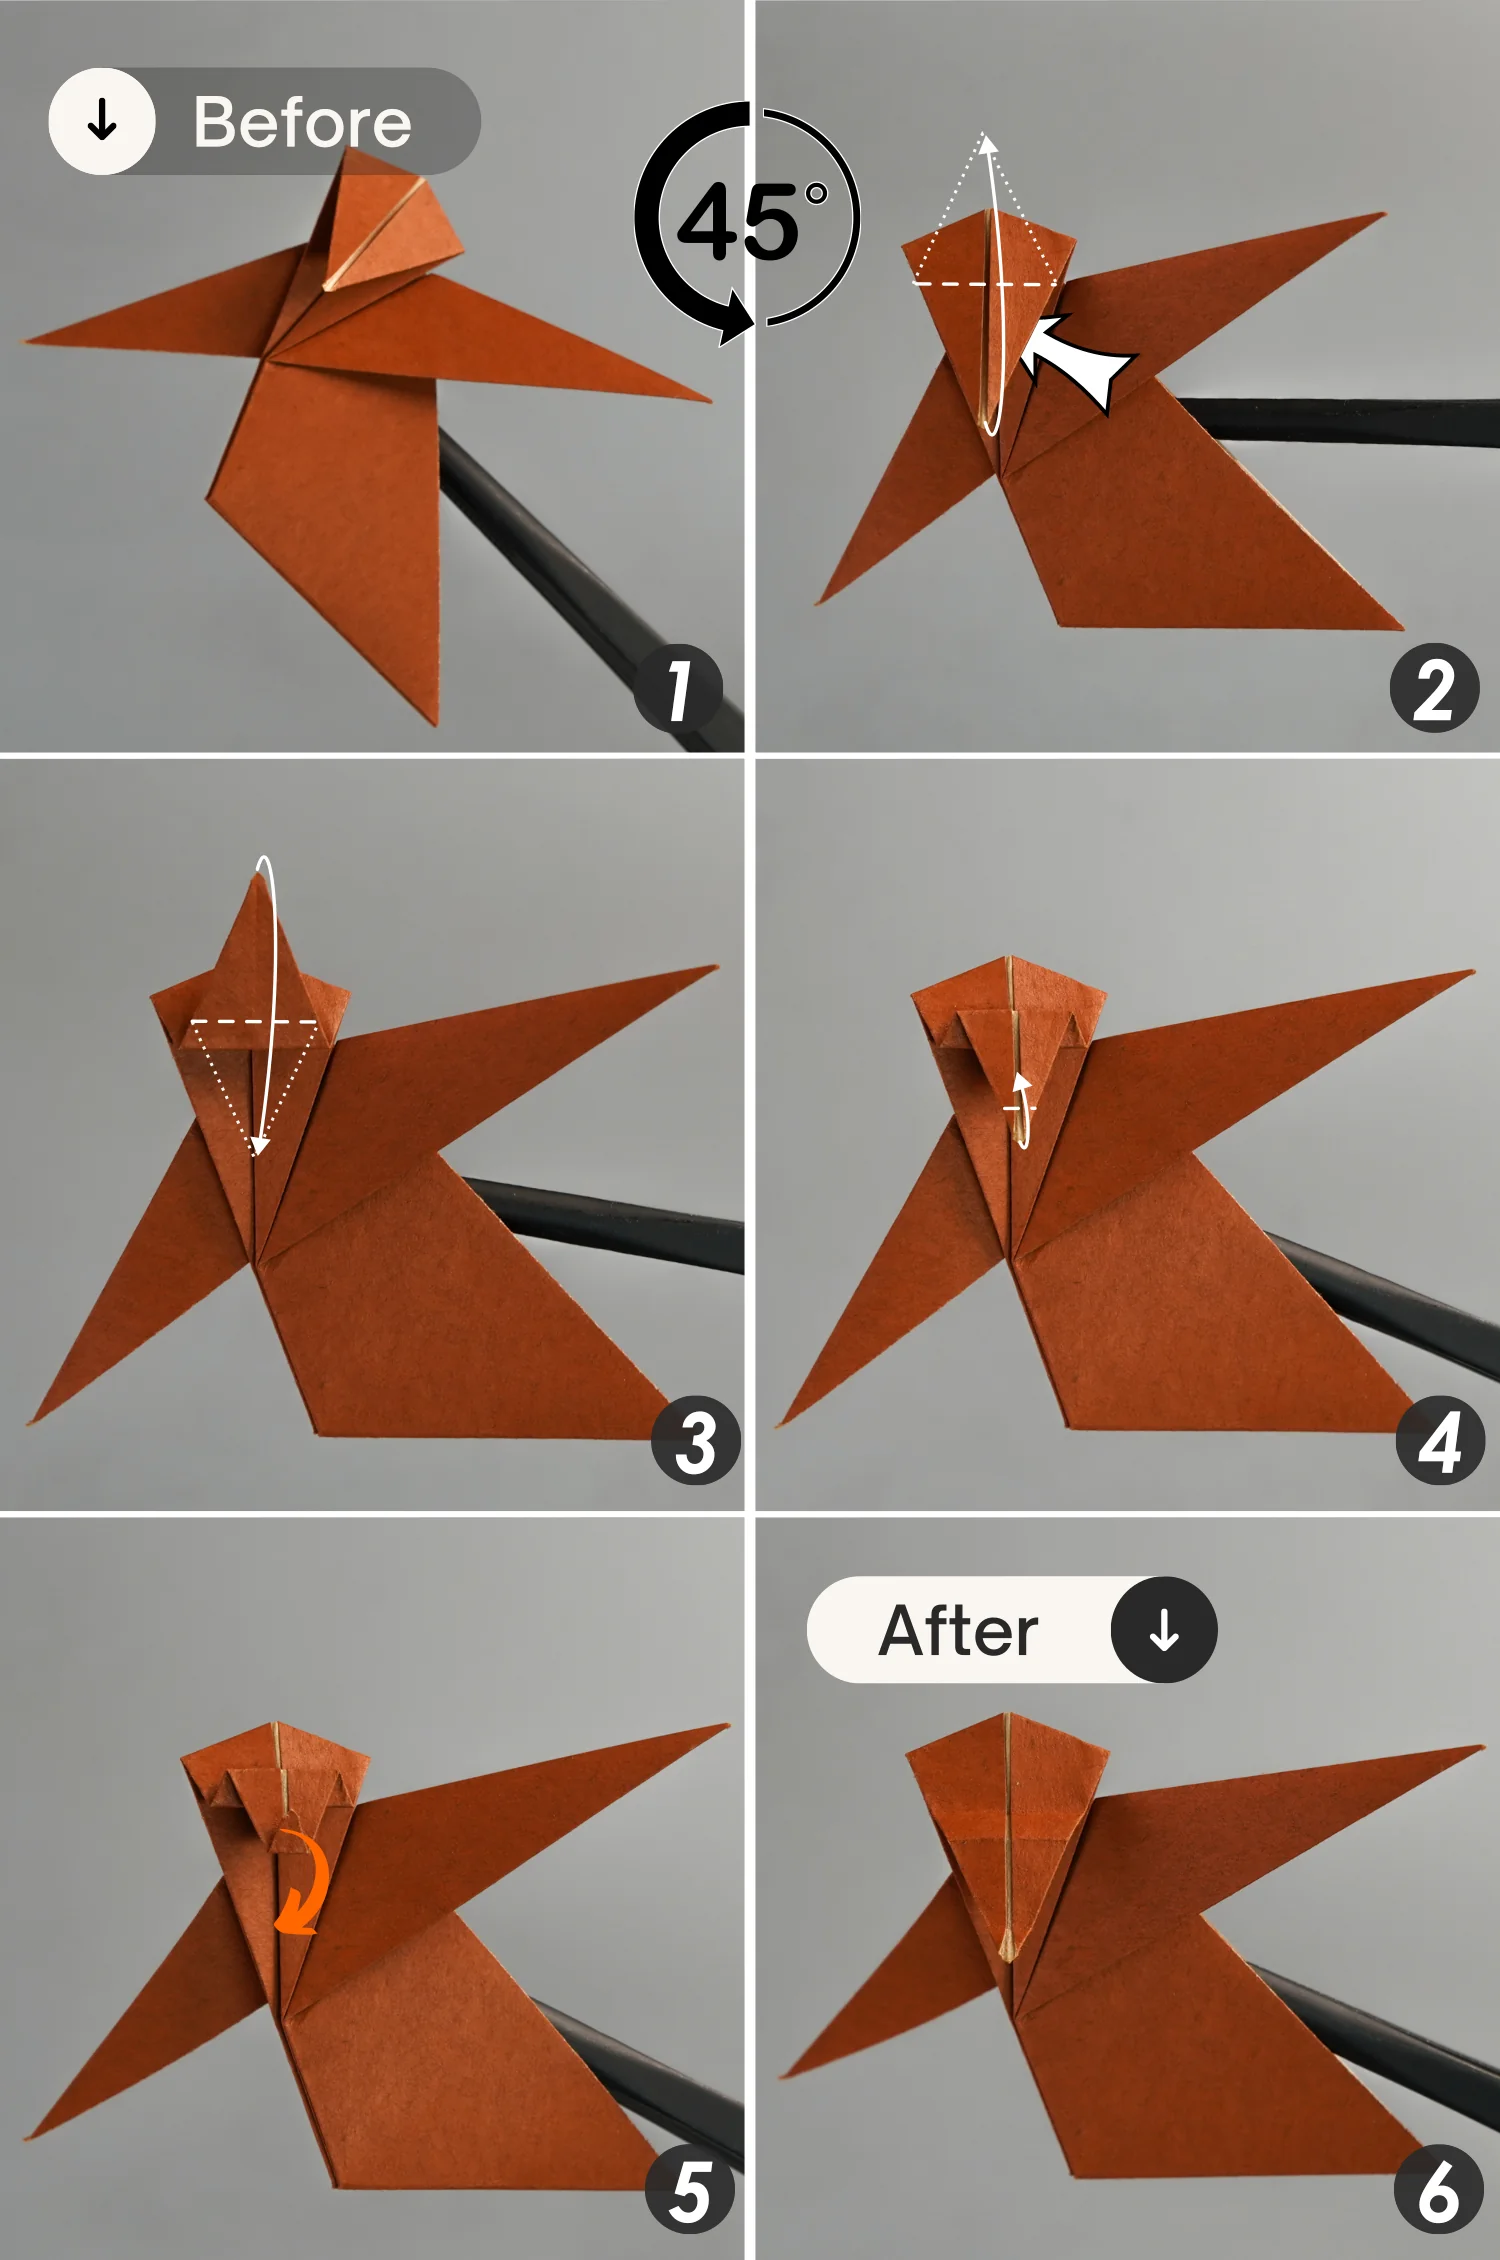
Step 11
Open this pocket, fold up its bottom point along the first crease from the bottom, then close it and flatten the fold.
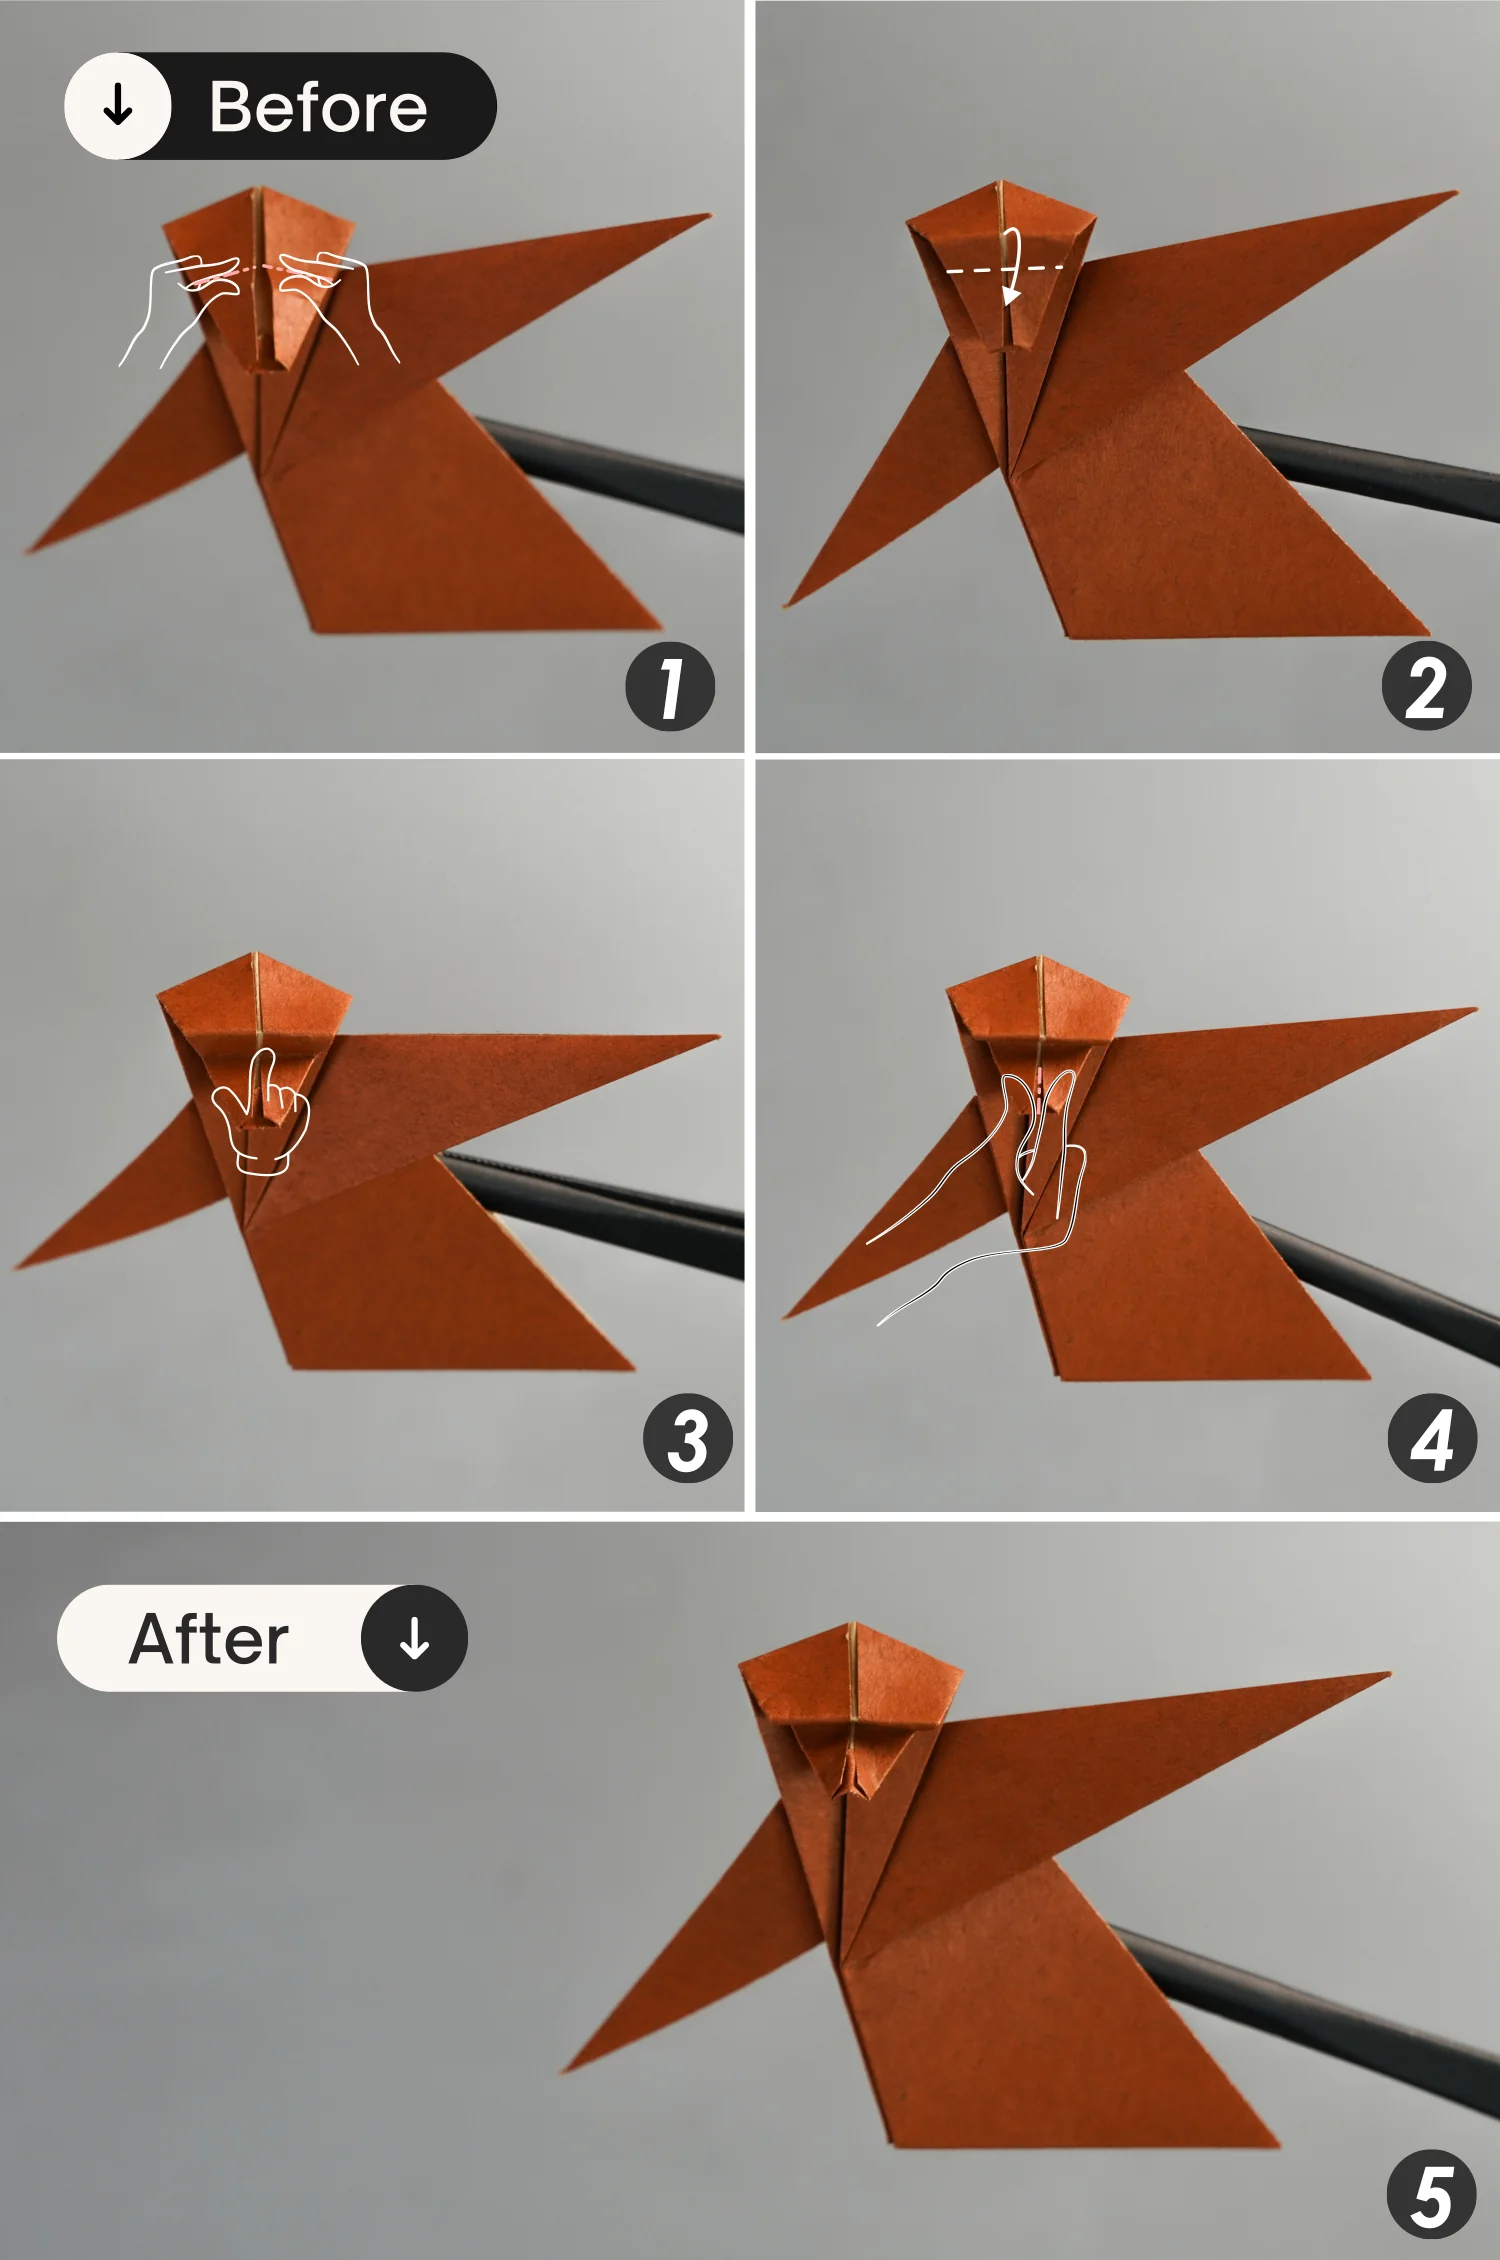
Step 12
Shape the crease indicated by the pink dotted line, then press it down along the crease indicated by the white dotted line. Finally, give the bottom part of this layer a pinch downward along its middle vertical line.
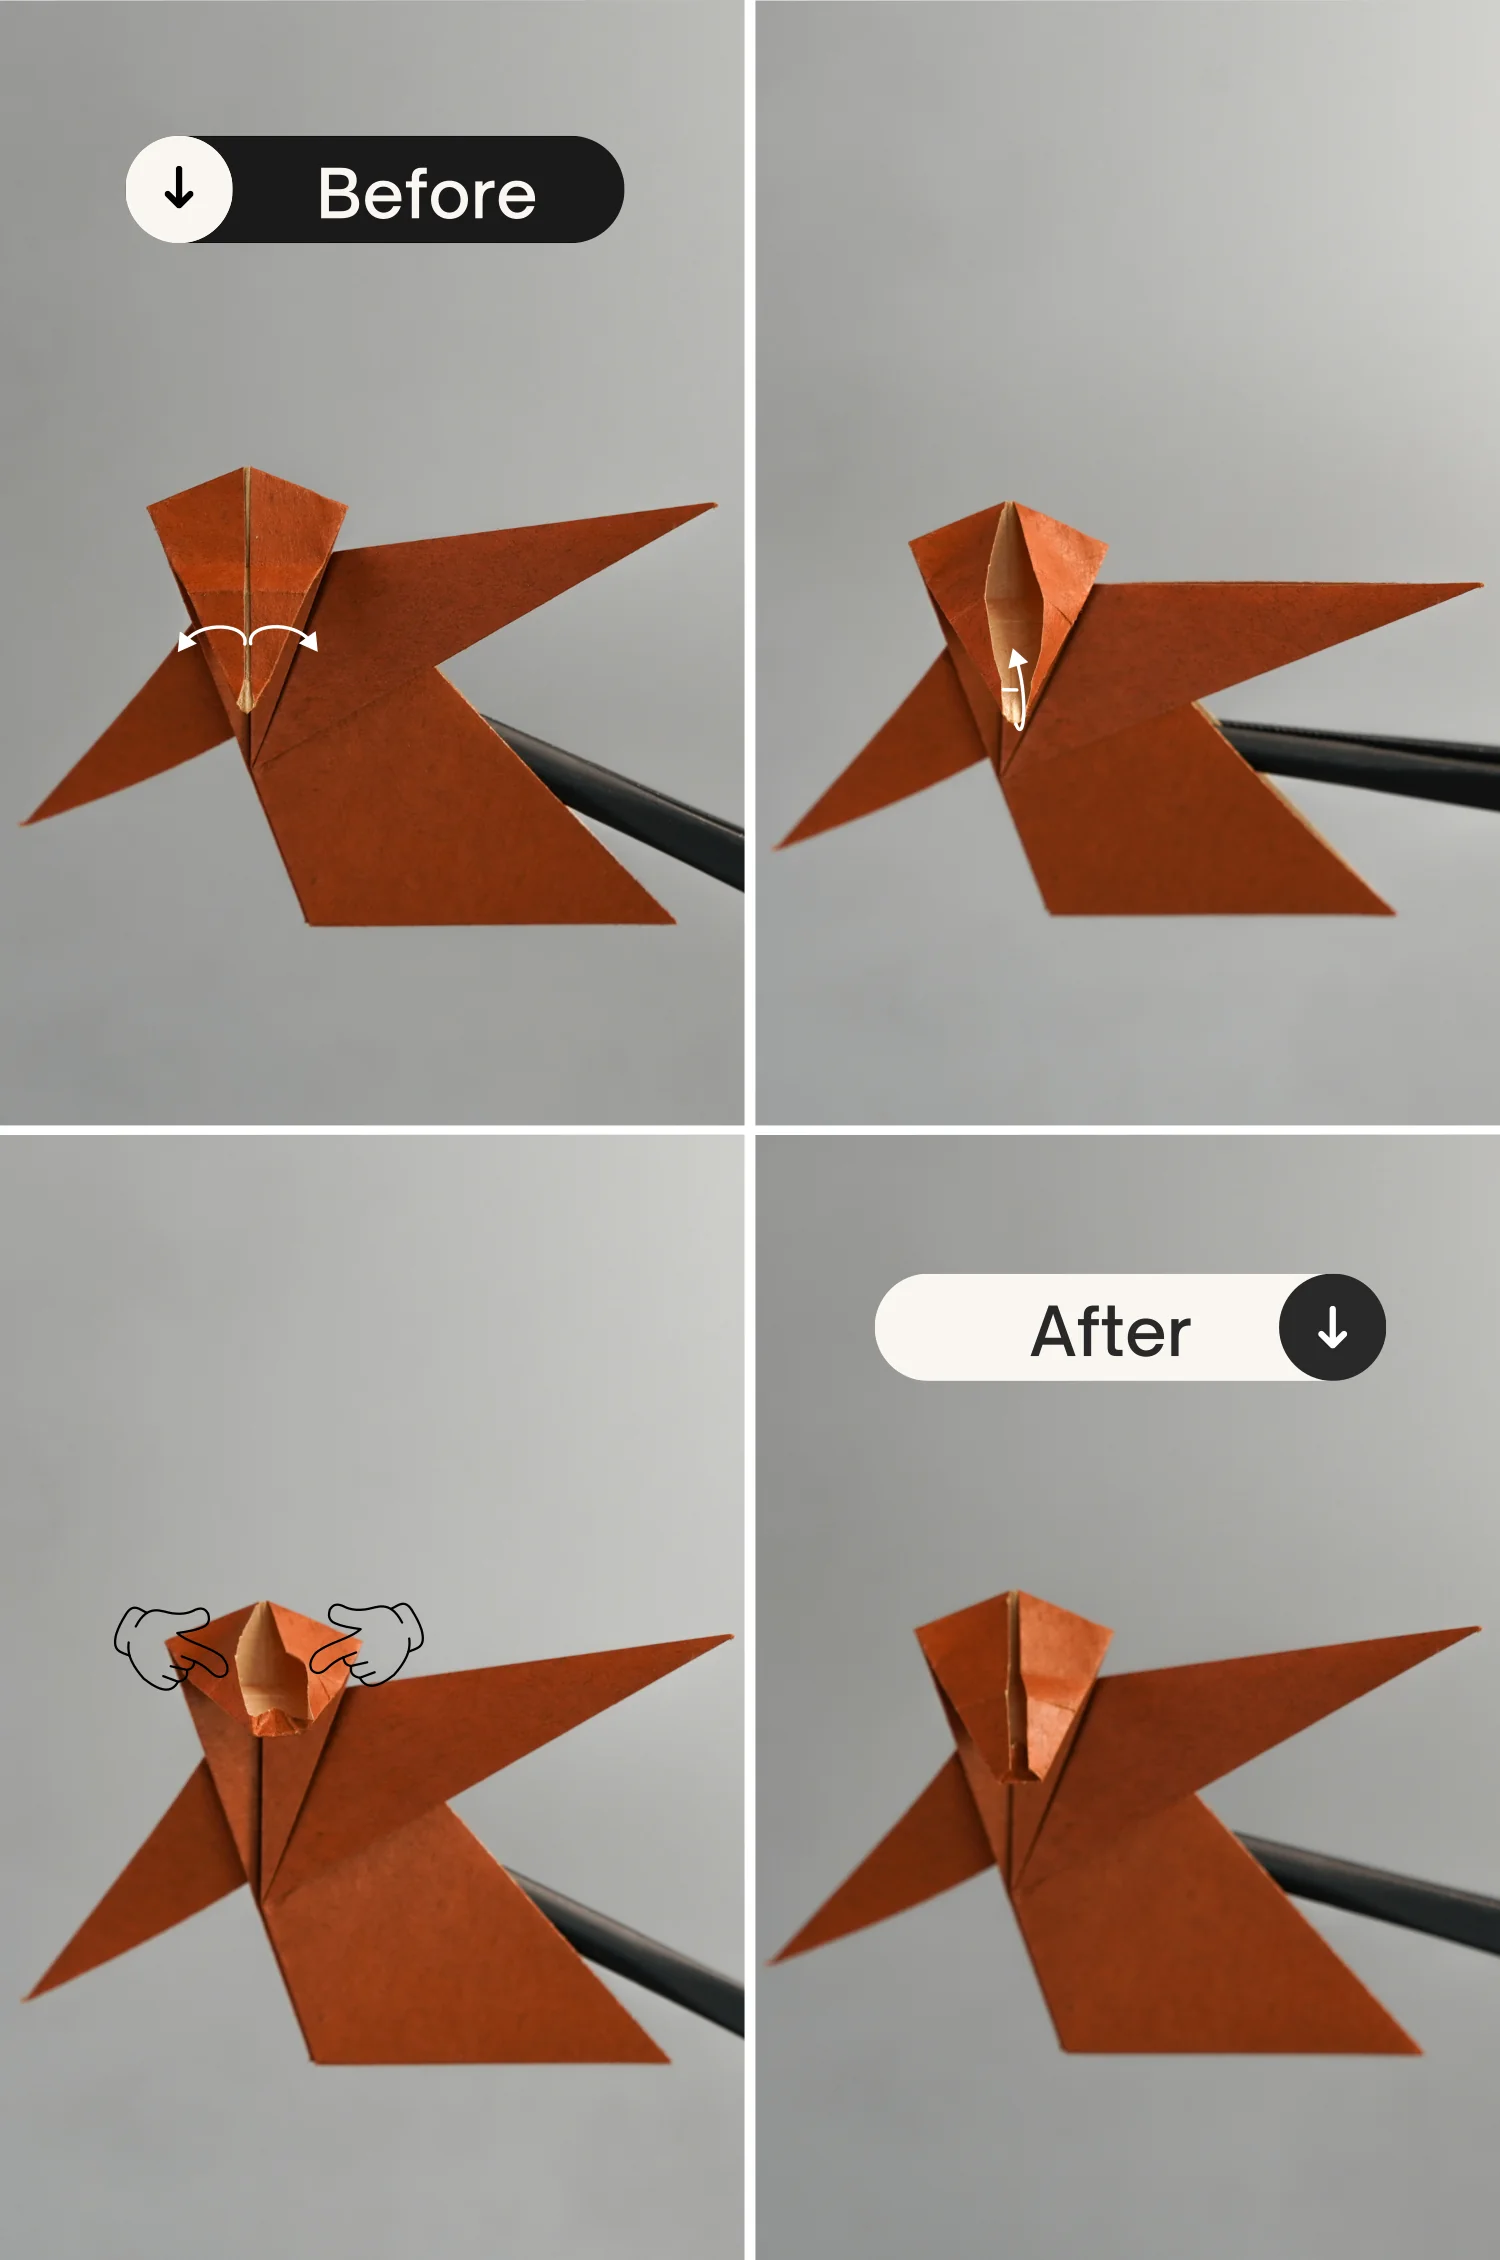
Step 13
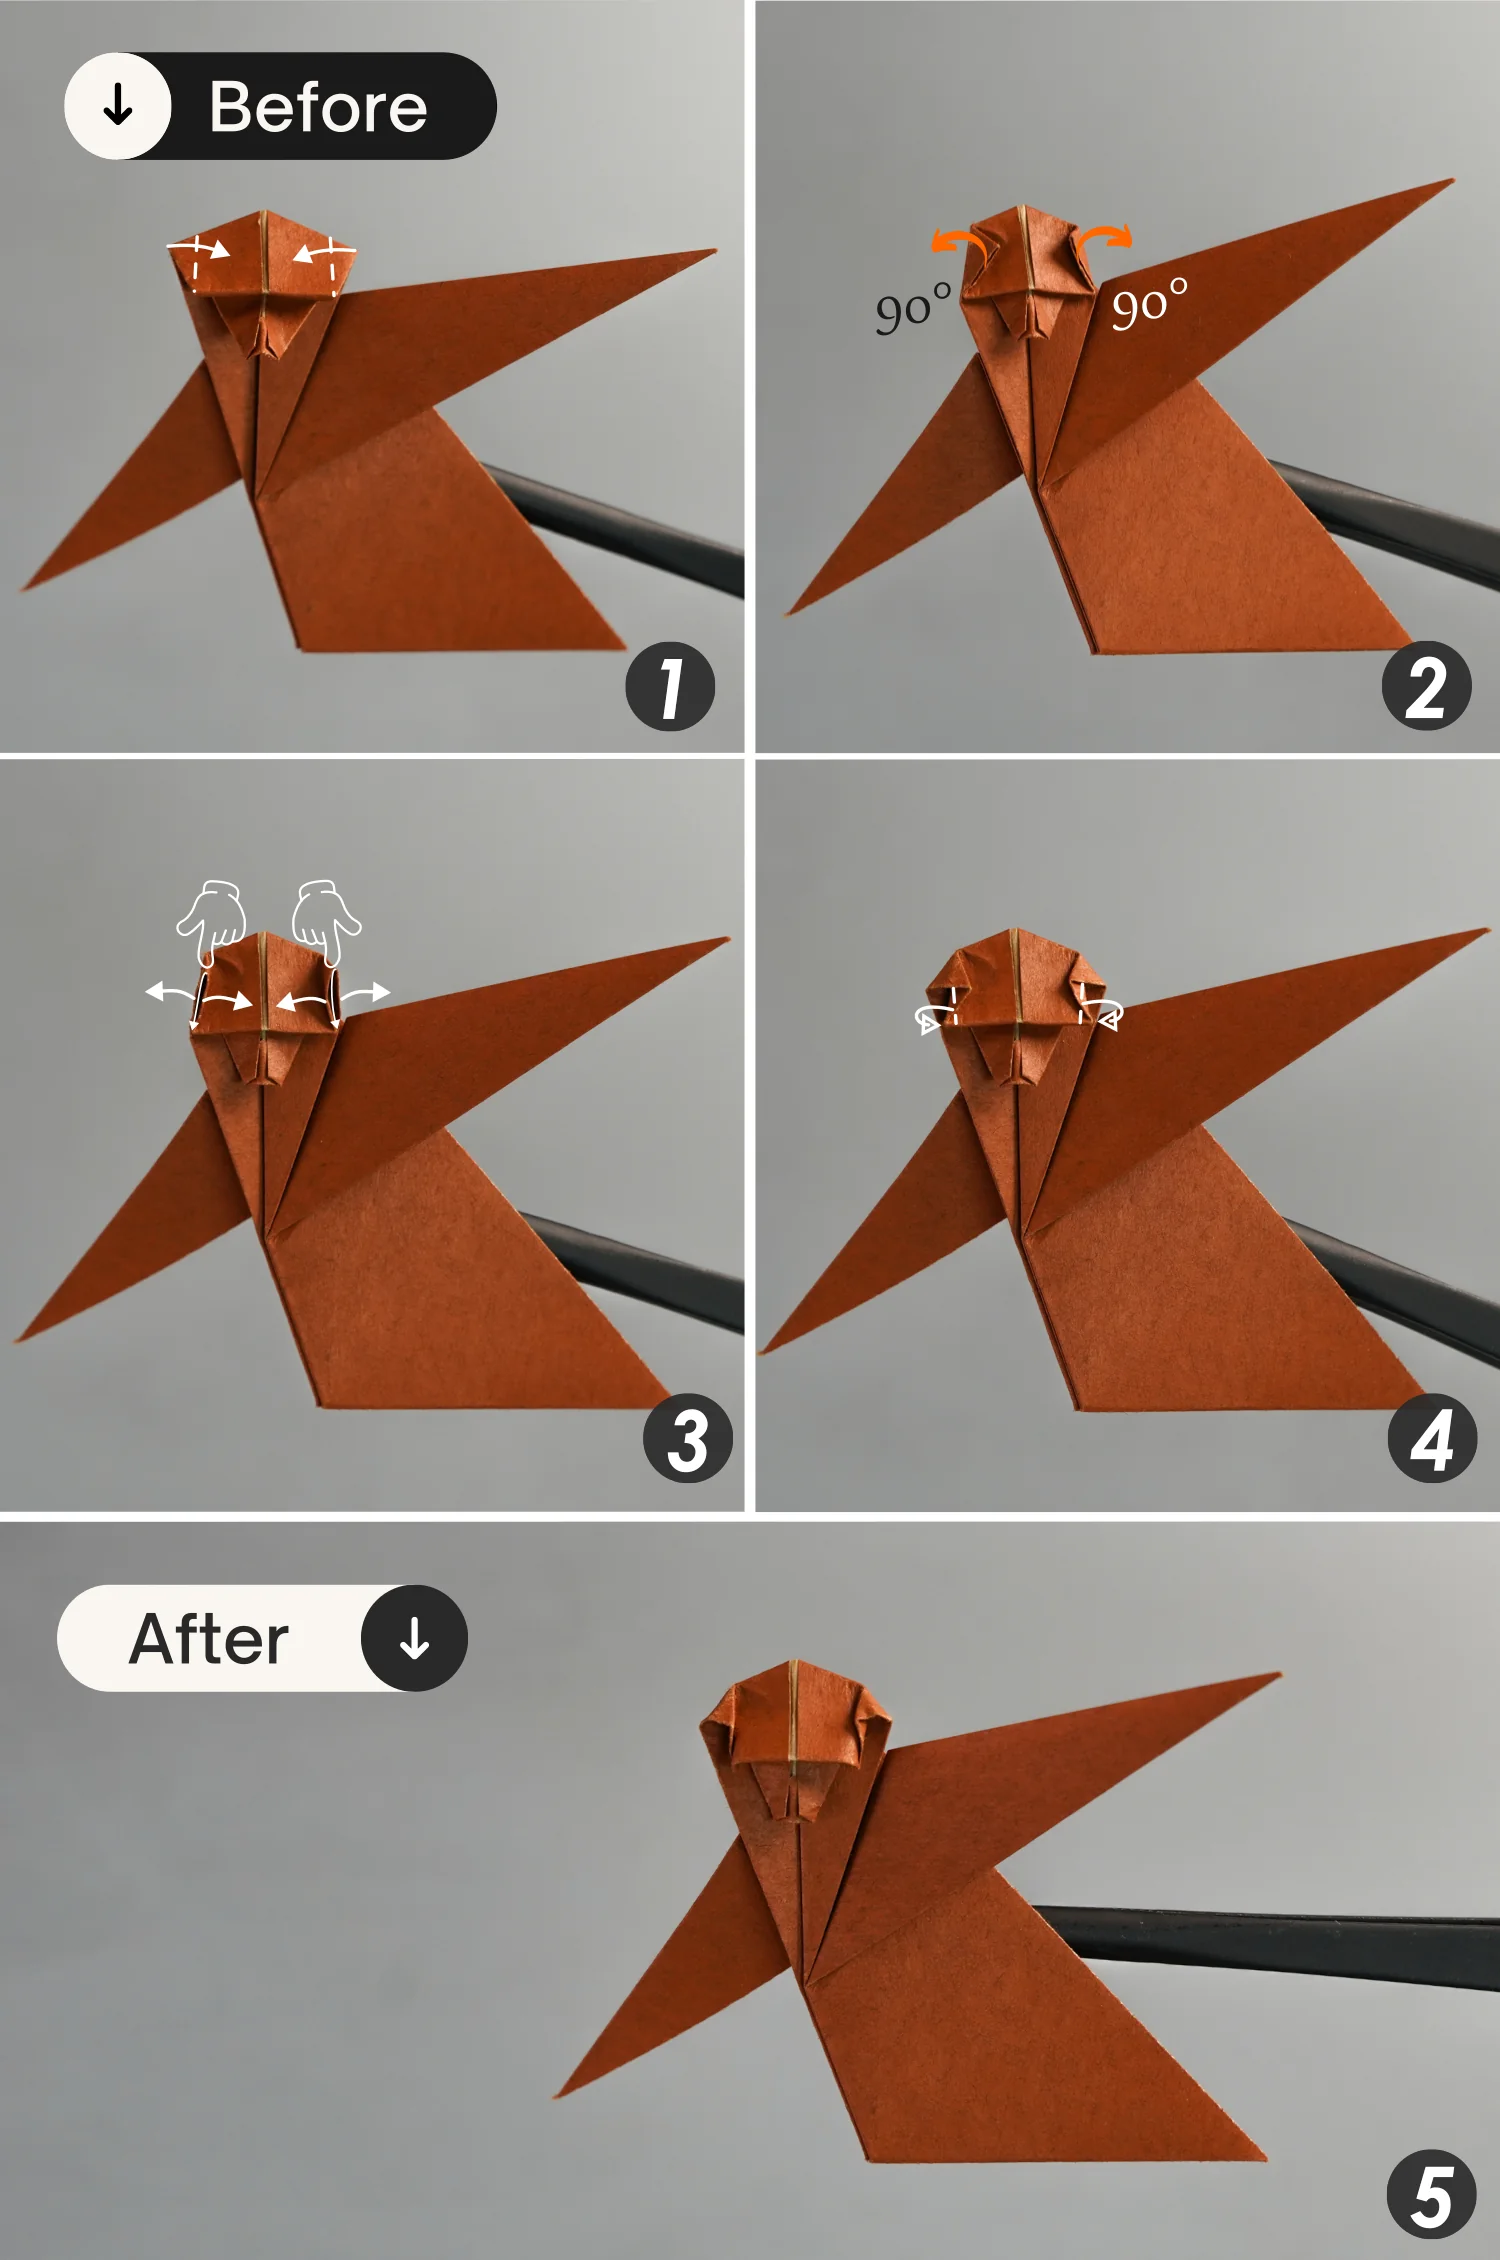
Fold the left and right points toward the center, crease them very well, and unfold them for only 90 degrees to make them stand, then open and squash them [pictures 1 to 3].
Next, fold these two corners backward a little, as you can see in the fourth picture.
Step 14
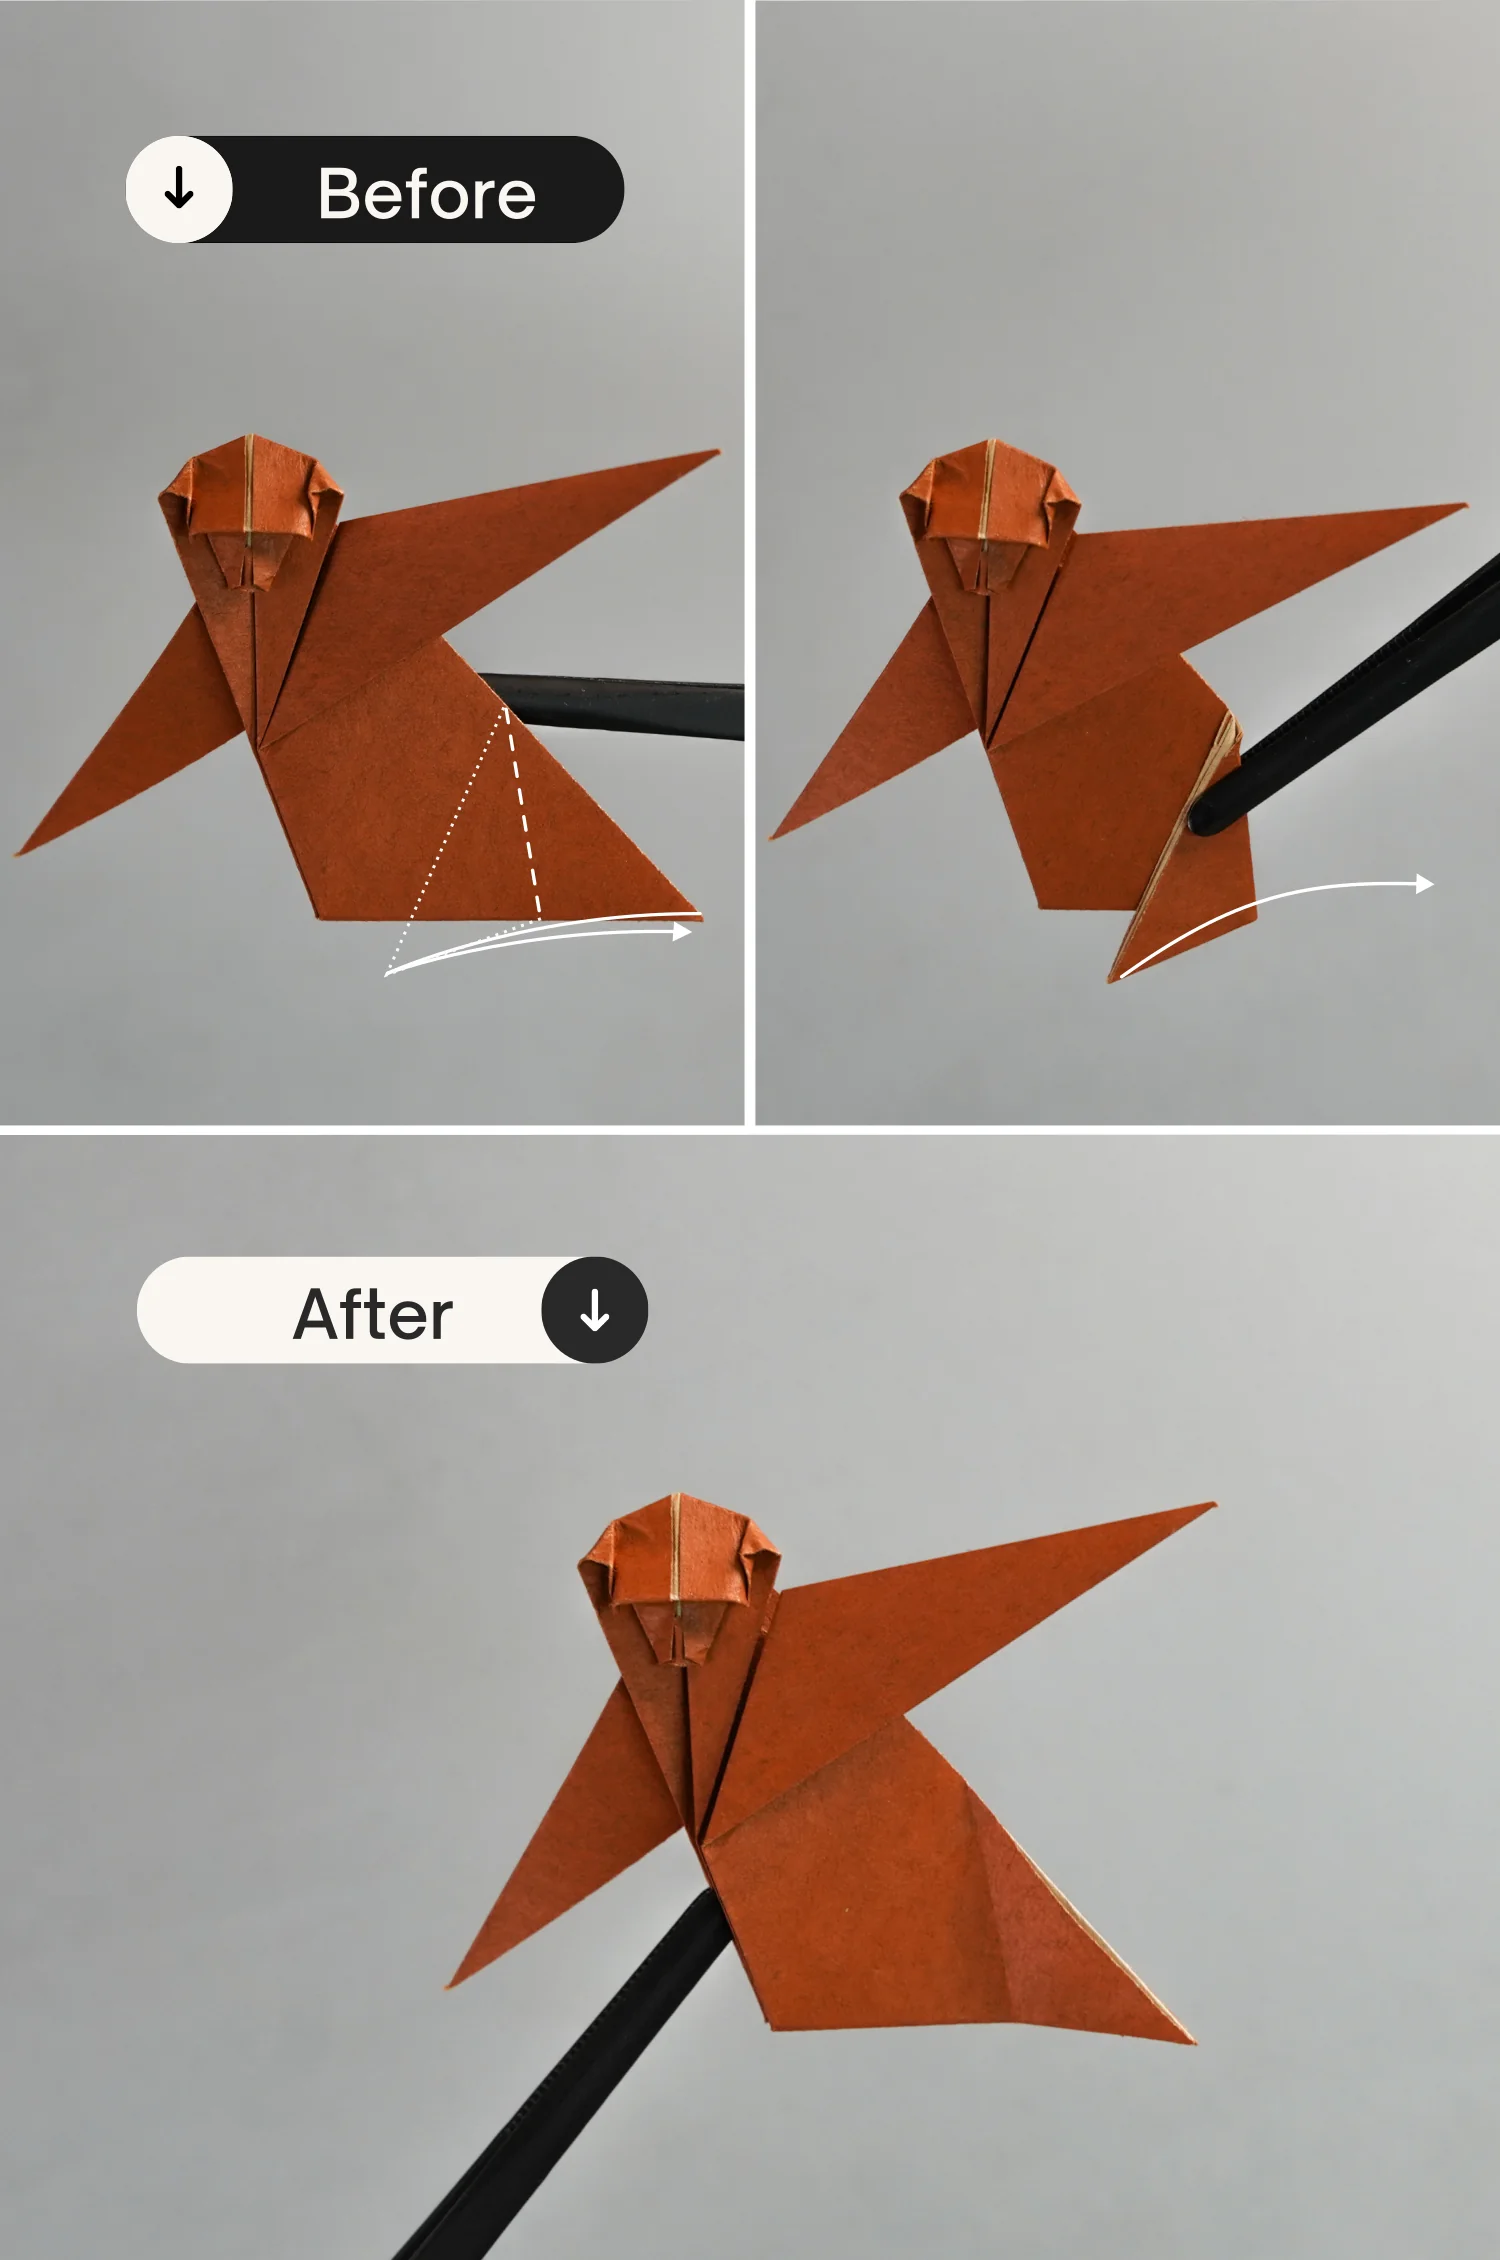
Fold the bottom right point of the paper toward the left side along the dotted line, and unfold it.
Step 15
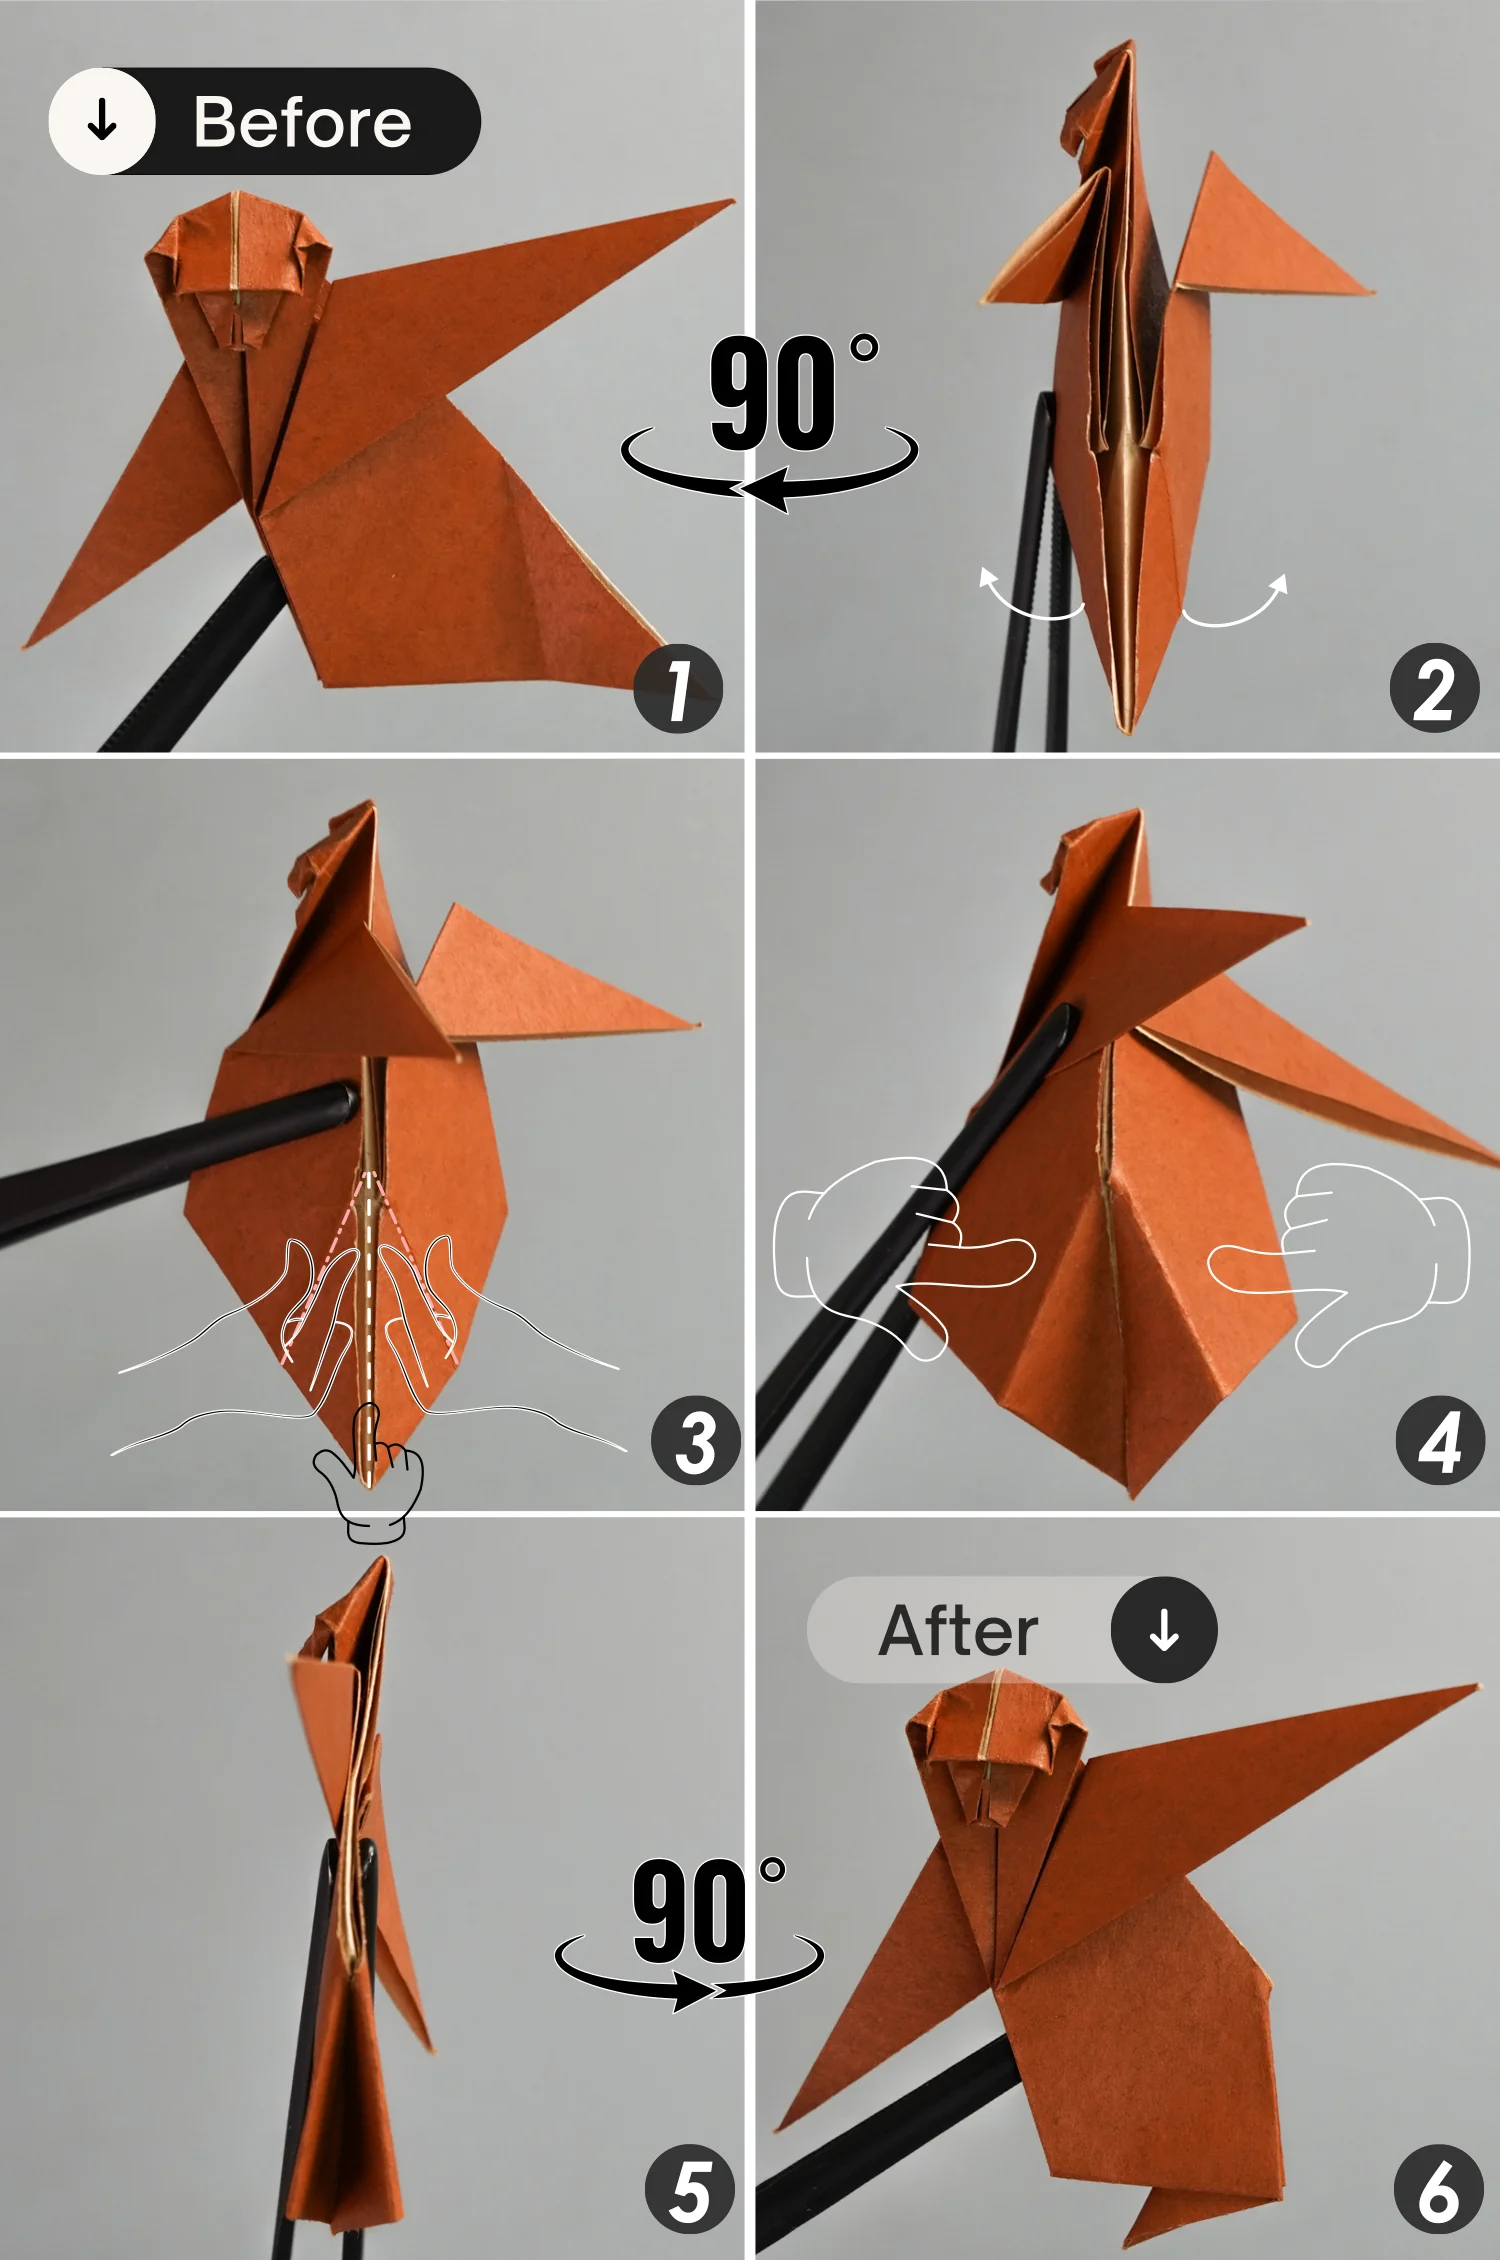
Rotate the paper 90 degrees from the right to the left, then open the bottom opening, shape the creases you made in the previous step, and push down the bottom point. Finally, close the opening and flatten the fold, then rotate the paper 90 degrees from left to right.
Step 16
Fold the left point of the belly layer backward along the dotted line, as well as the back layer of its belly, and fold the left point along the dotted line forward.
Step 17
Fold the other two monkeys according to the steps above.
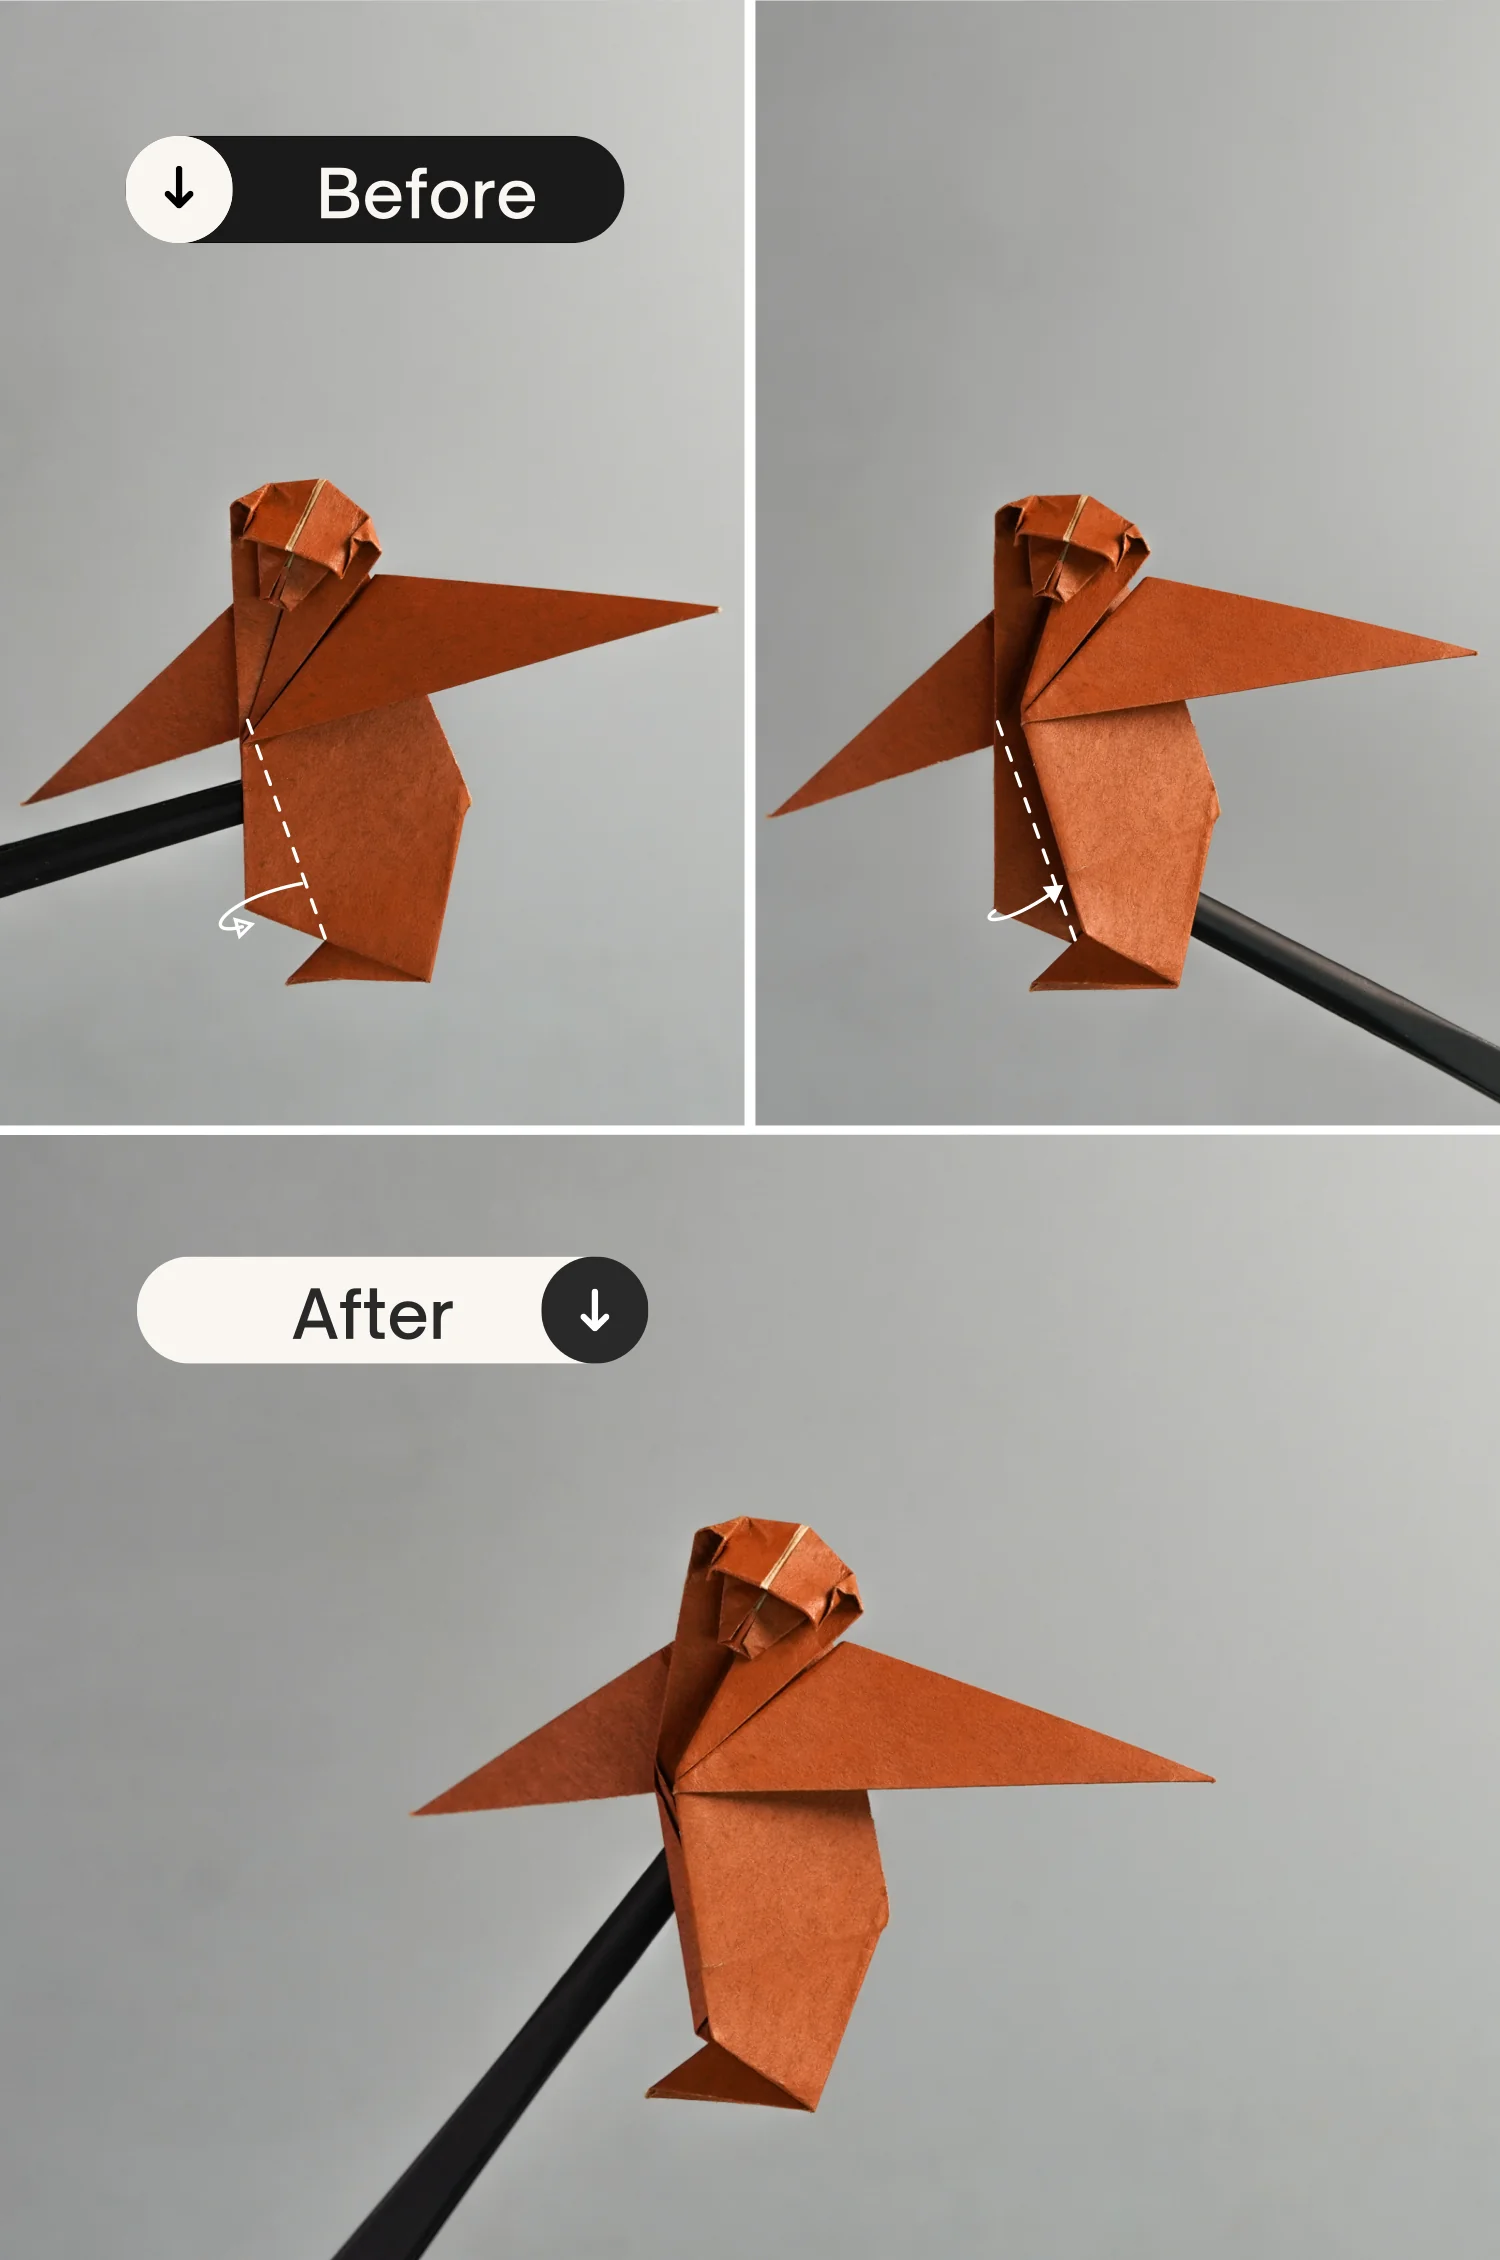
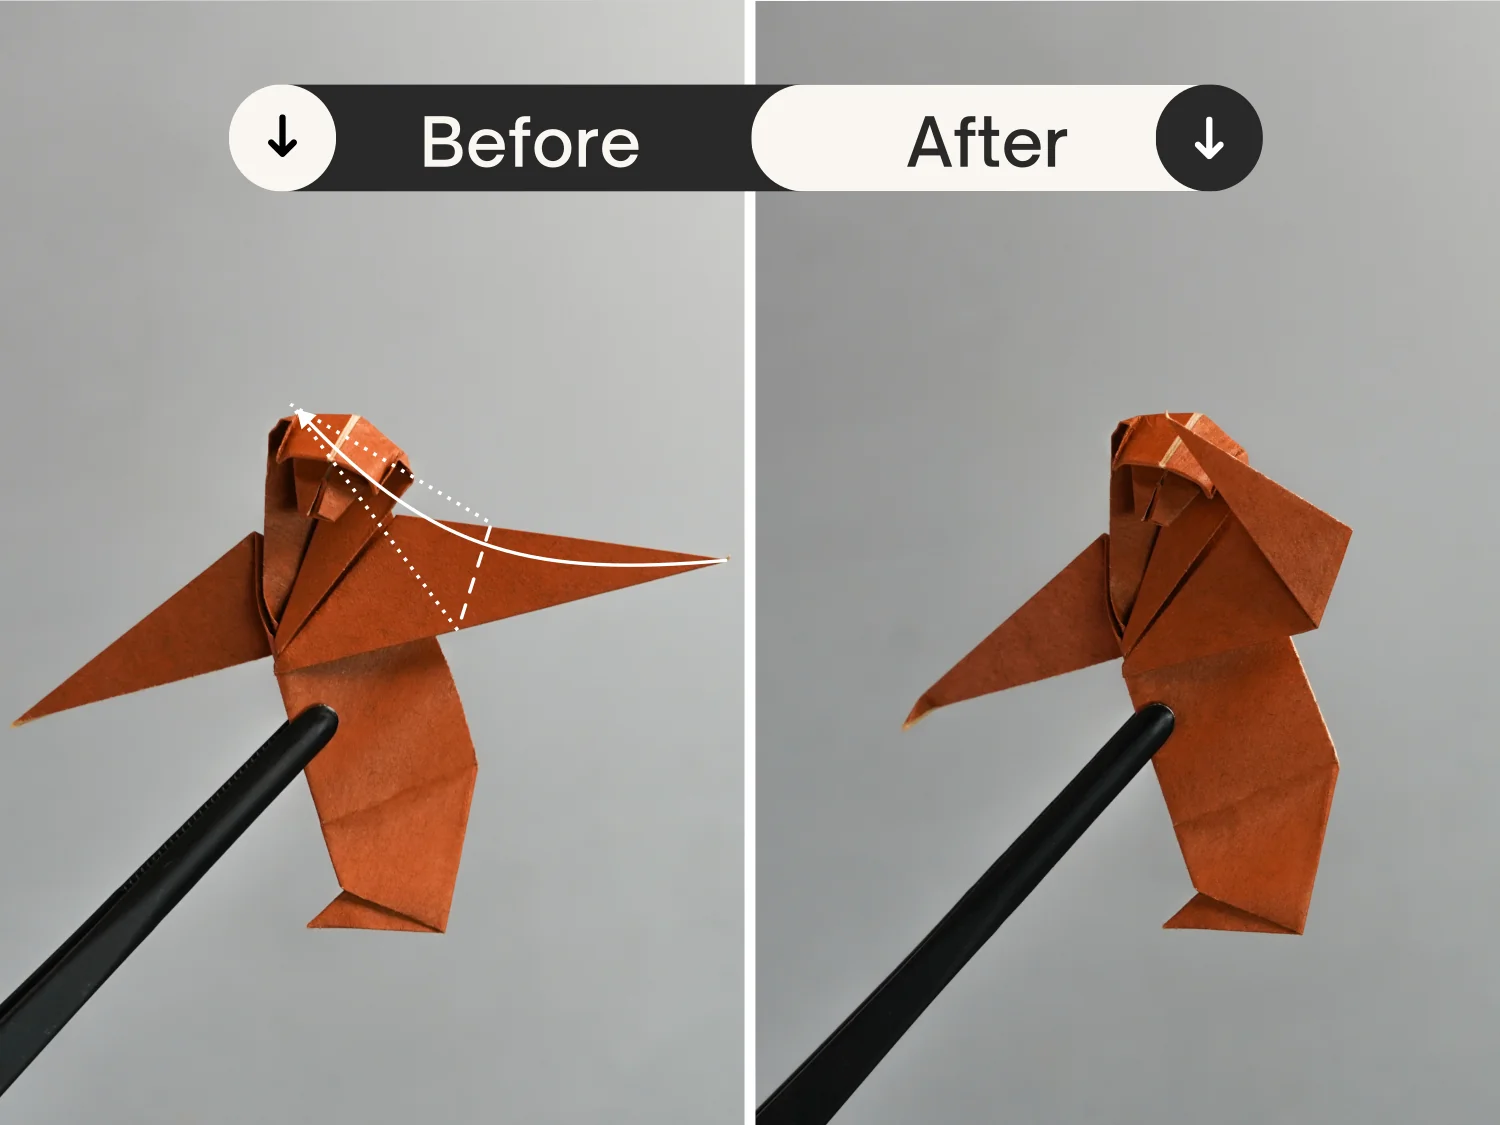
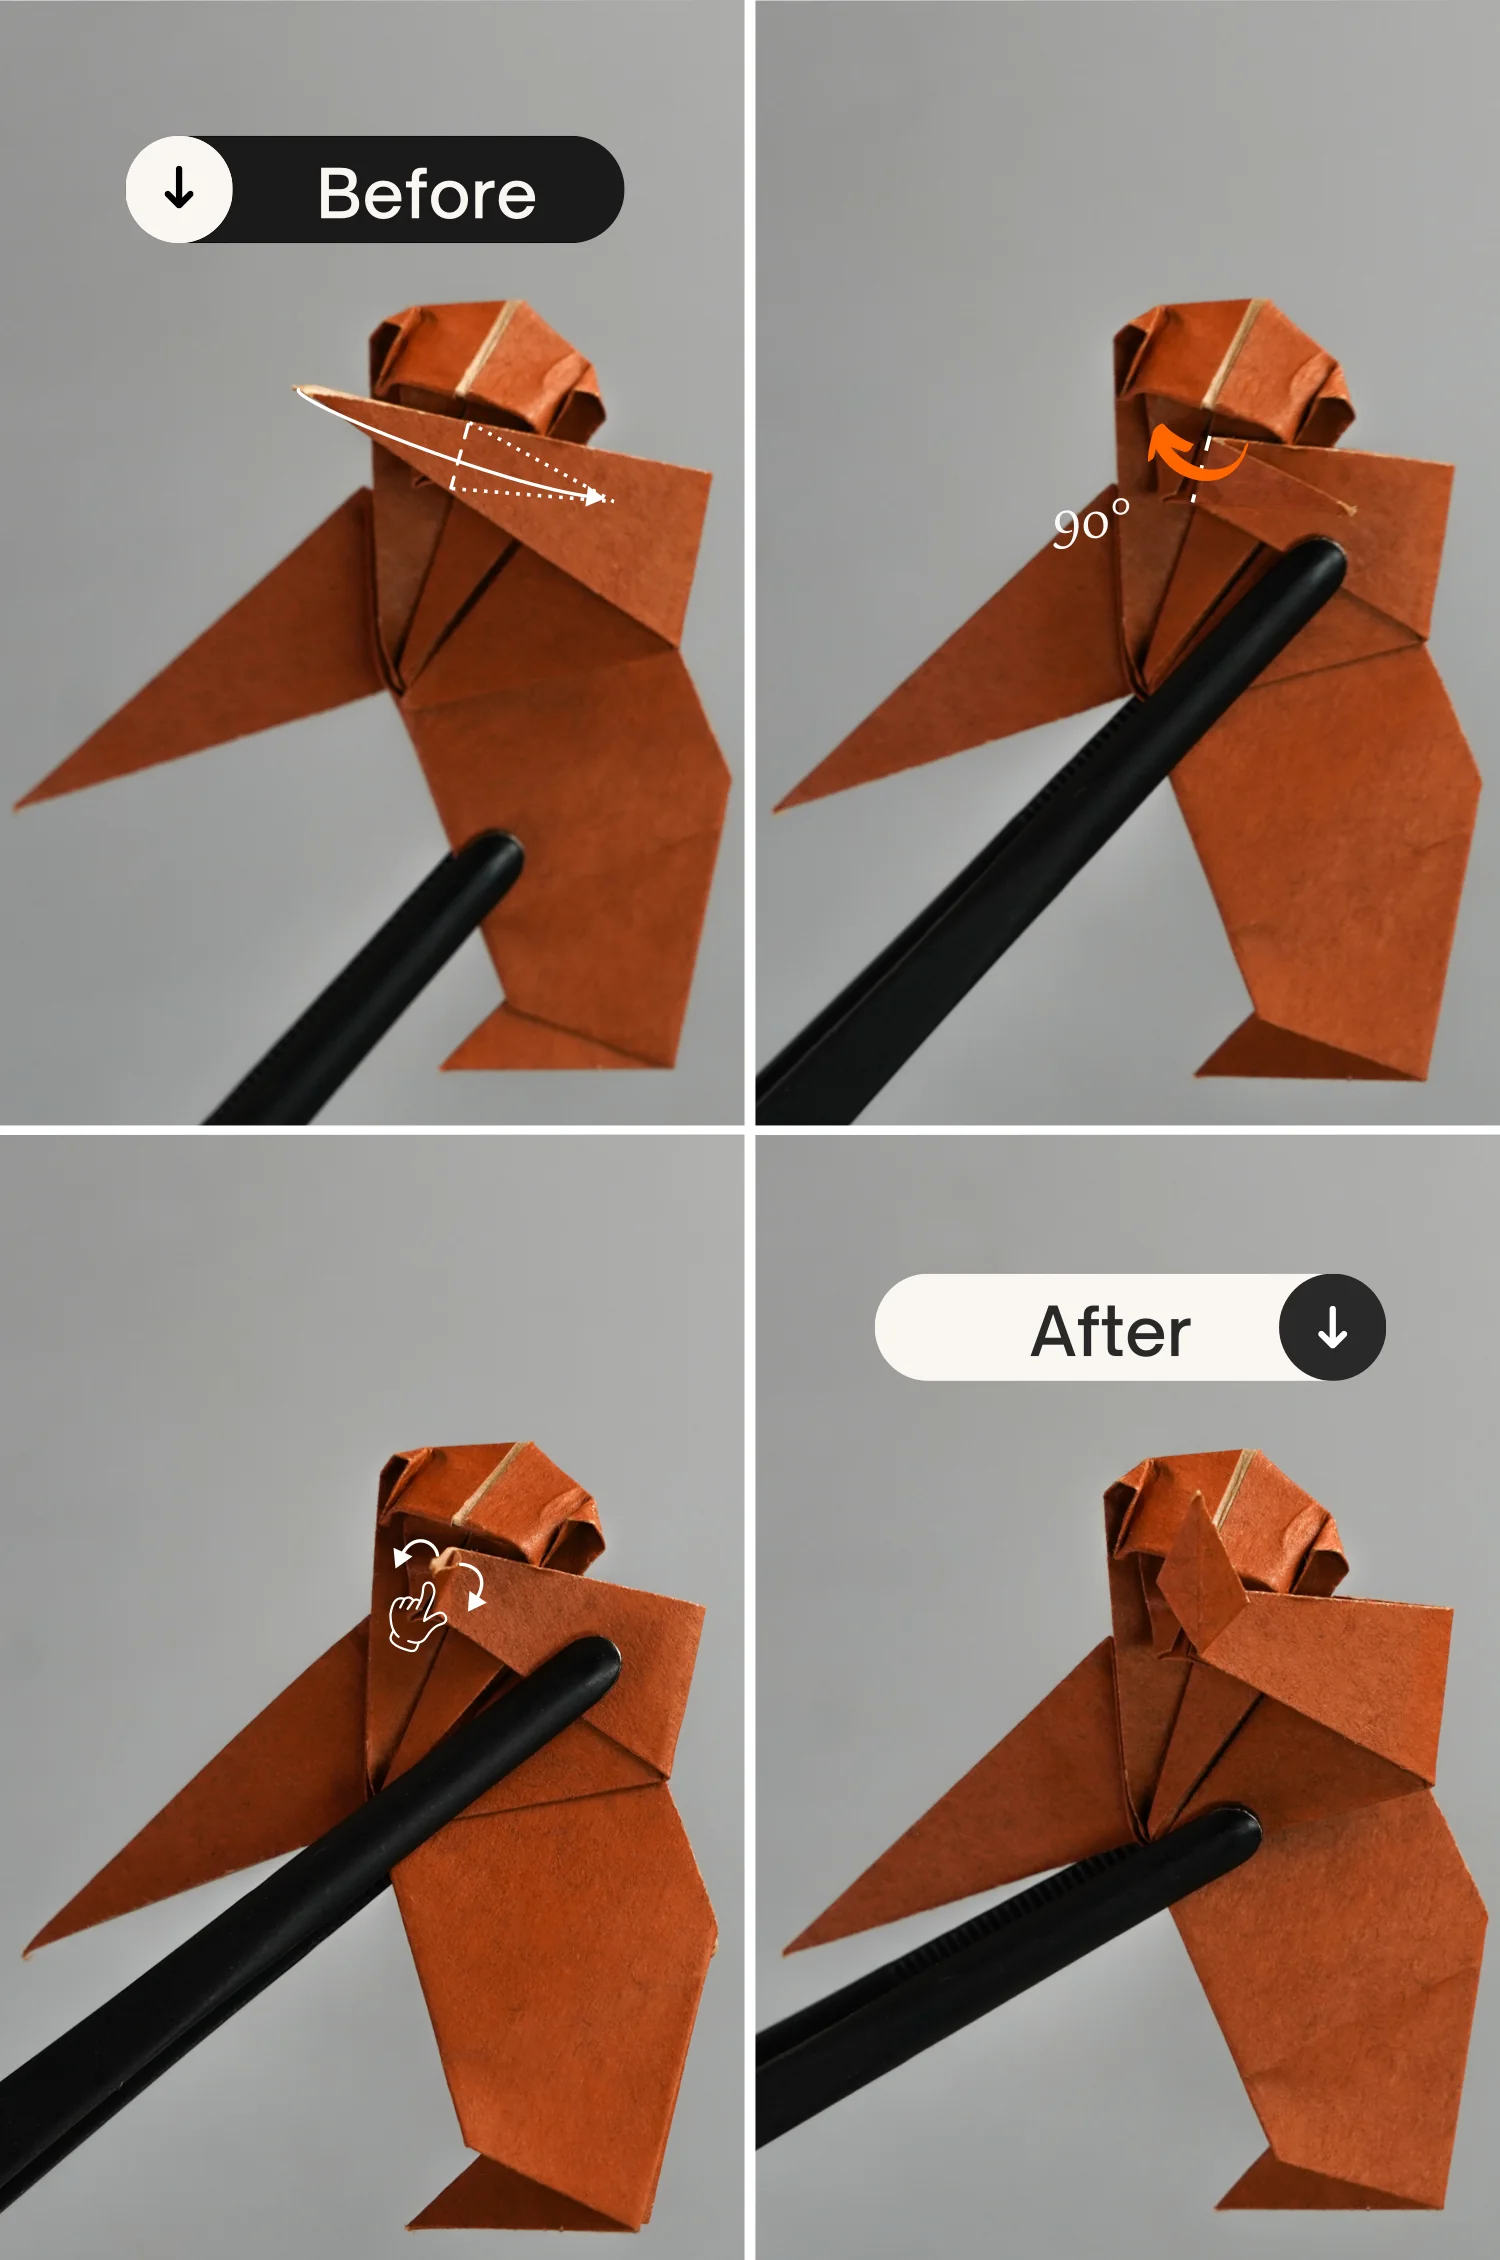
Step 18
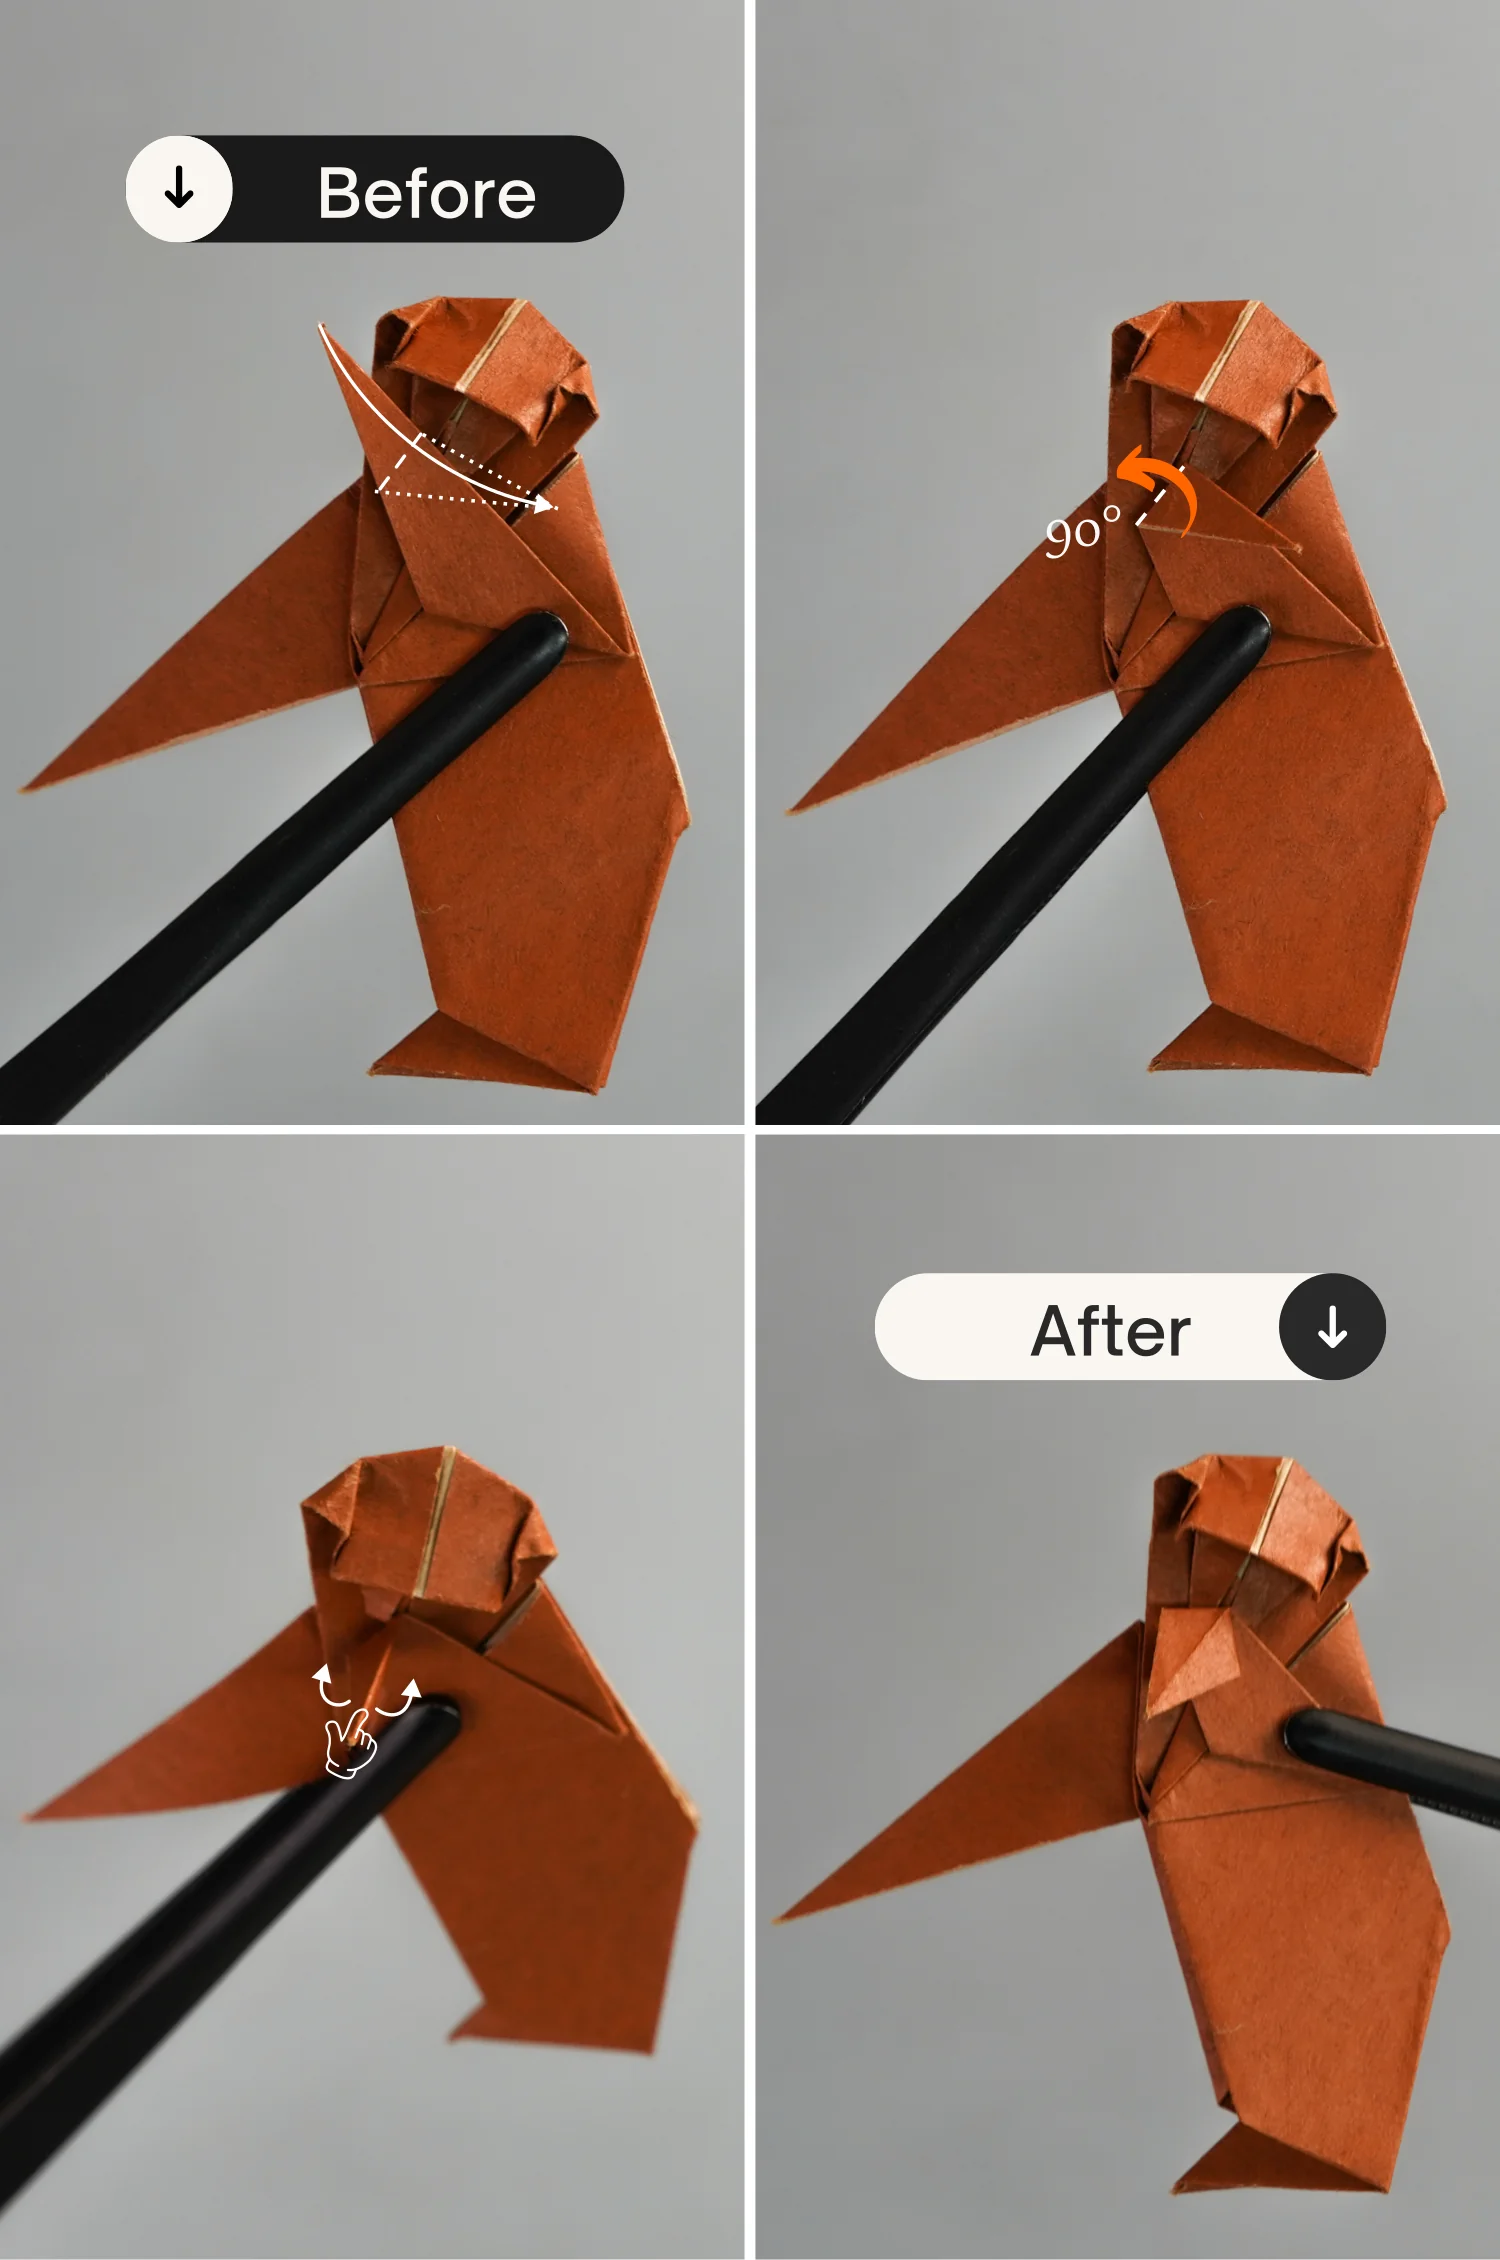
Fold the right arm to the left side, then fold it upward.

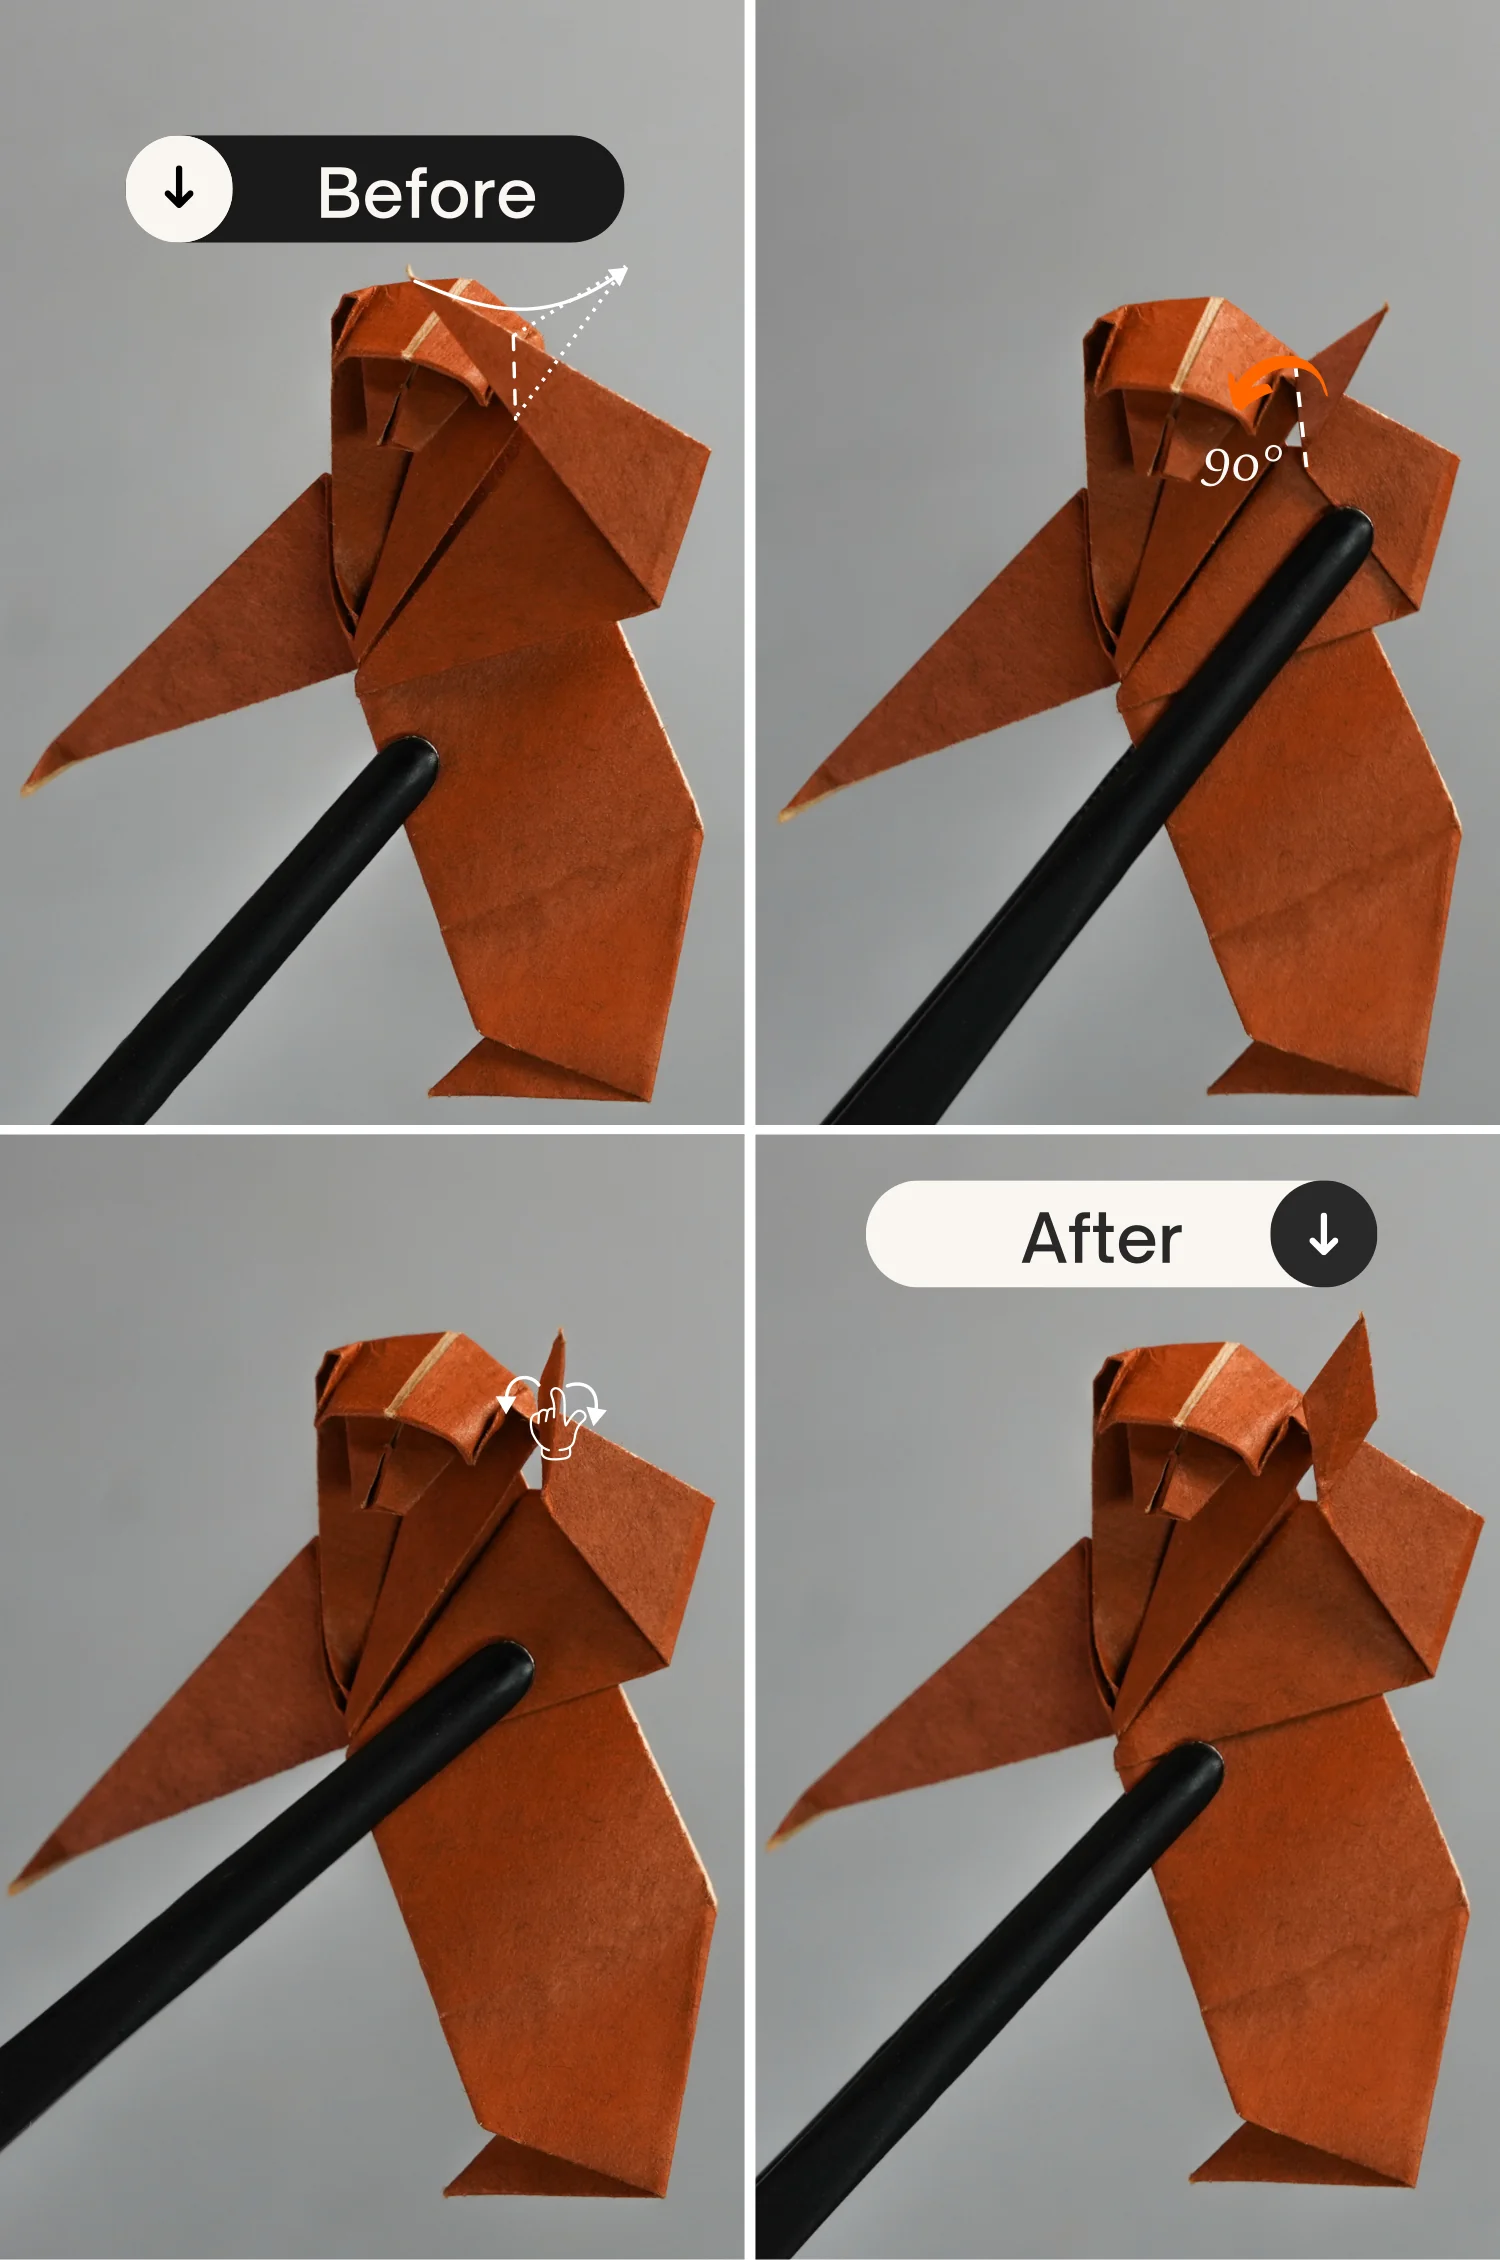
Step 19
Fold down the top part of the right arm, and unfold it for only 90 degrees to make it stand, then open and squash it.
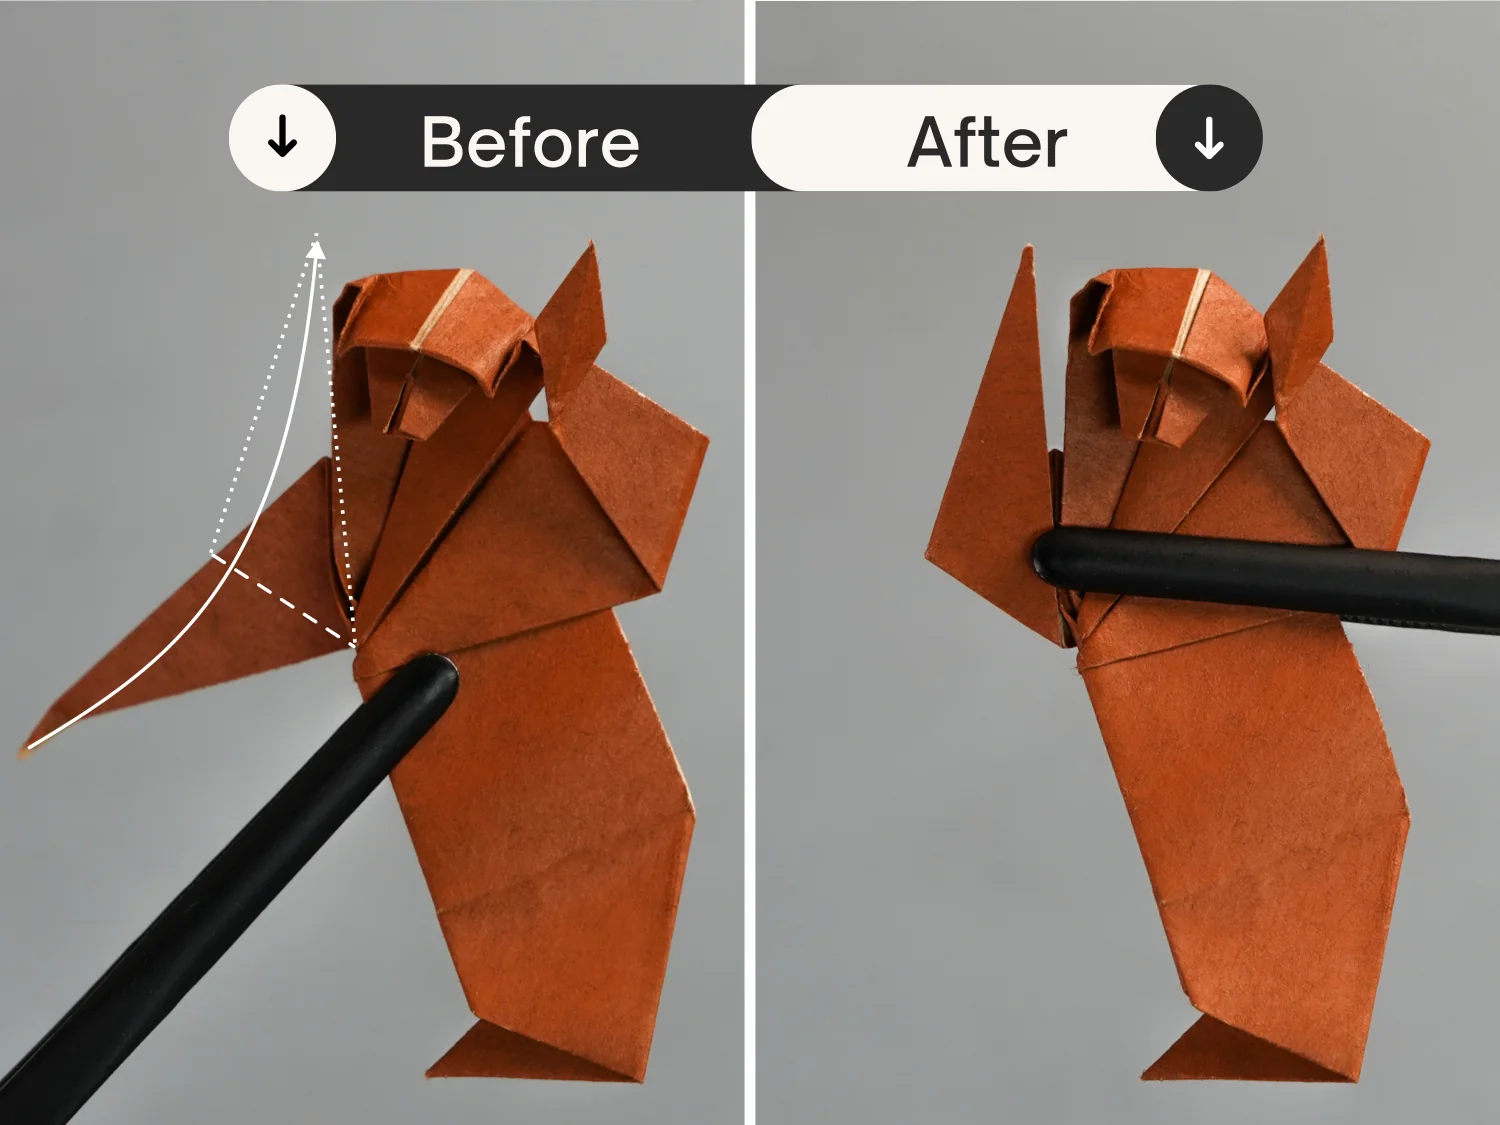
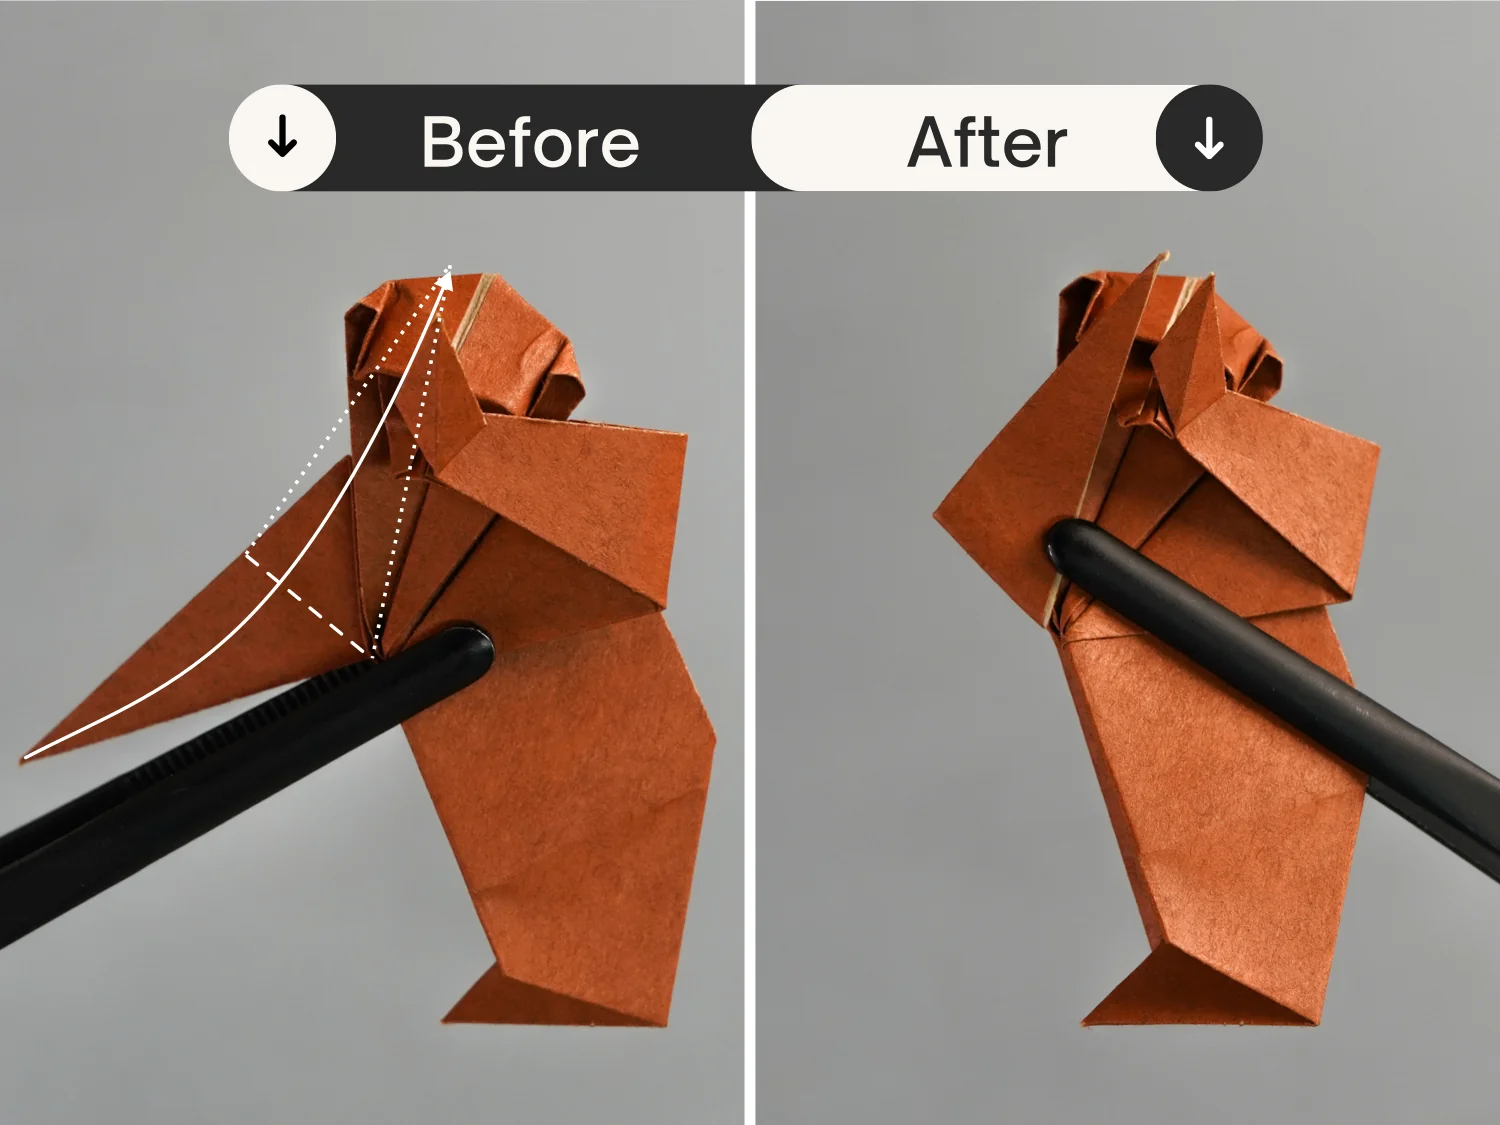
Step 20
Fold the left arm to the right side.
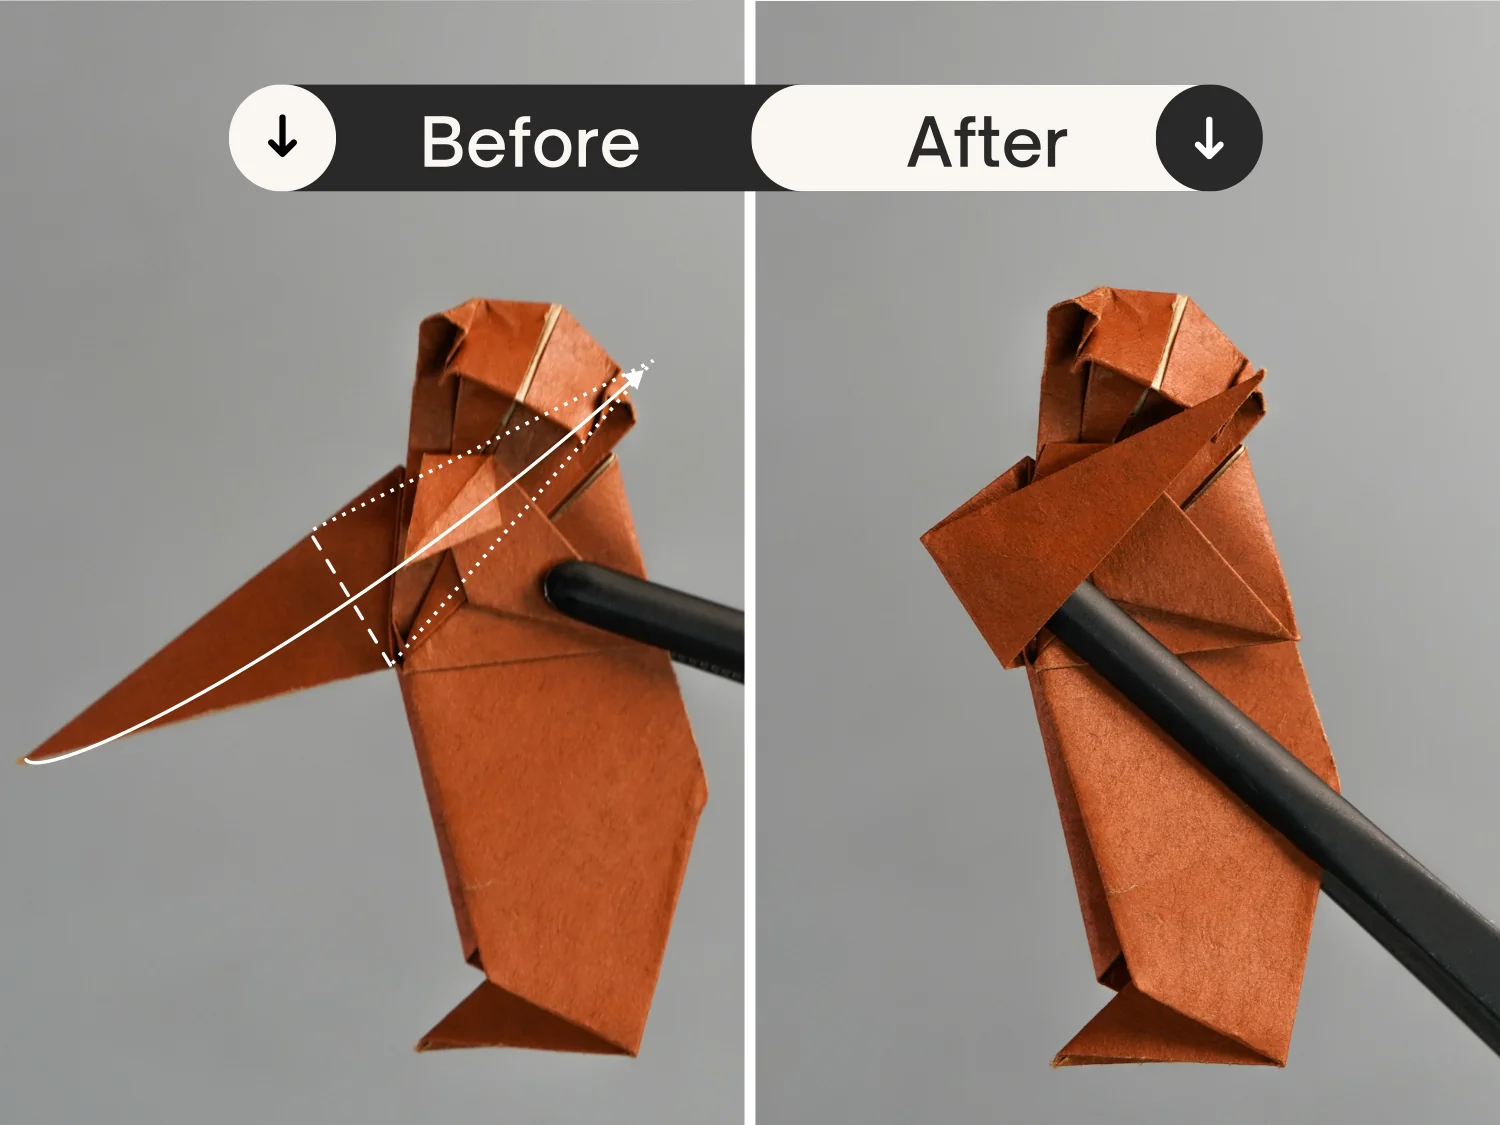
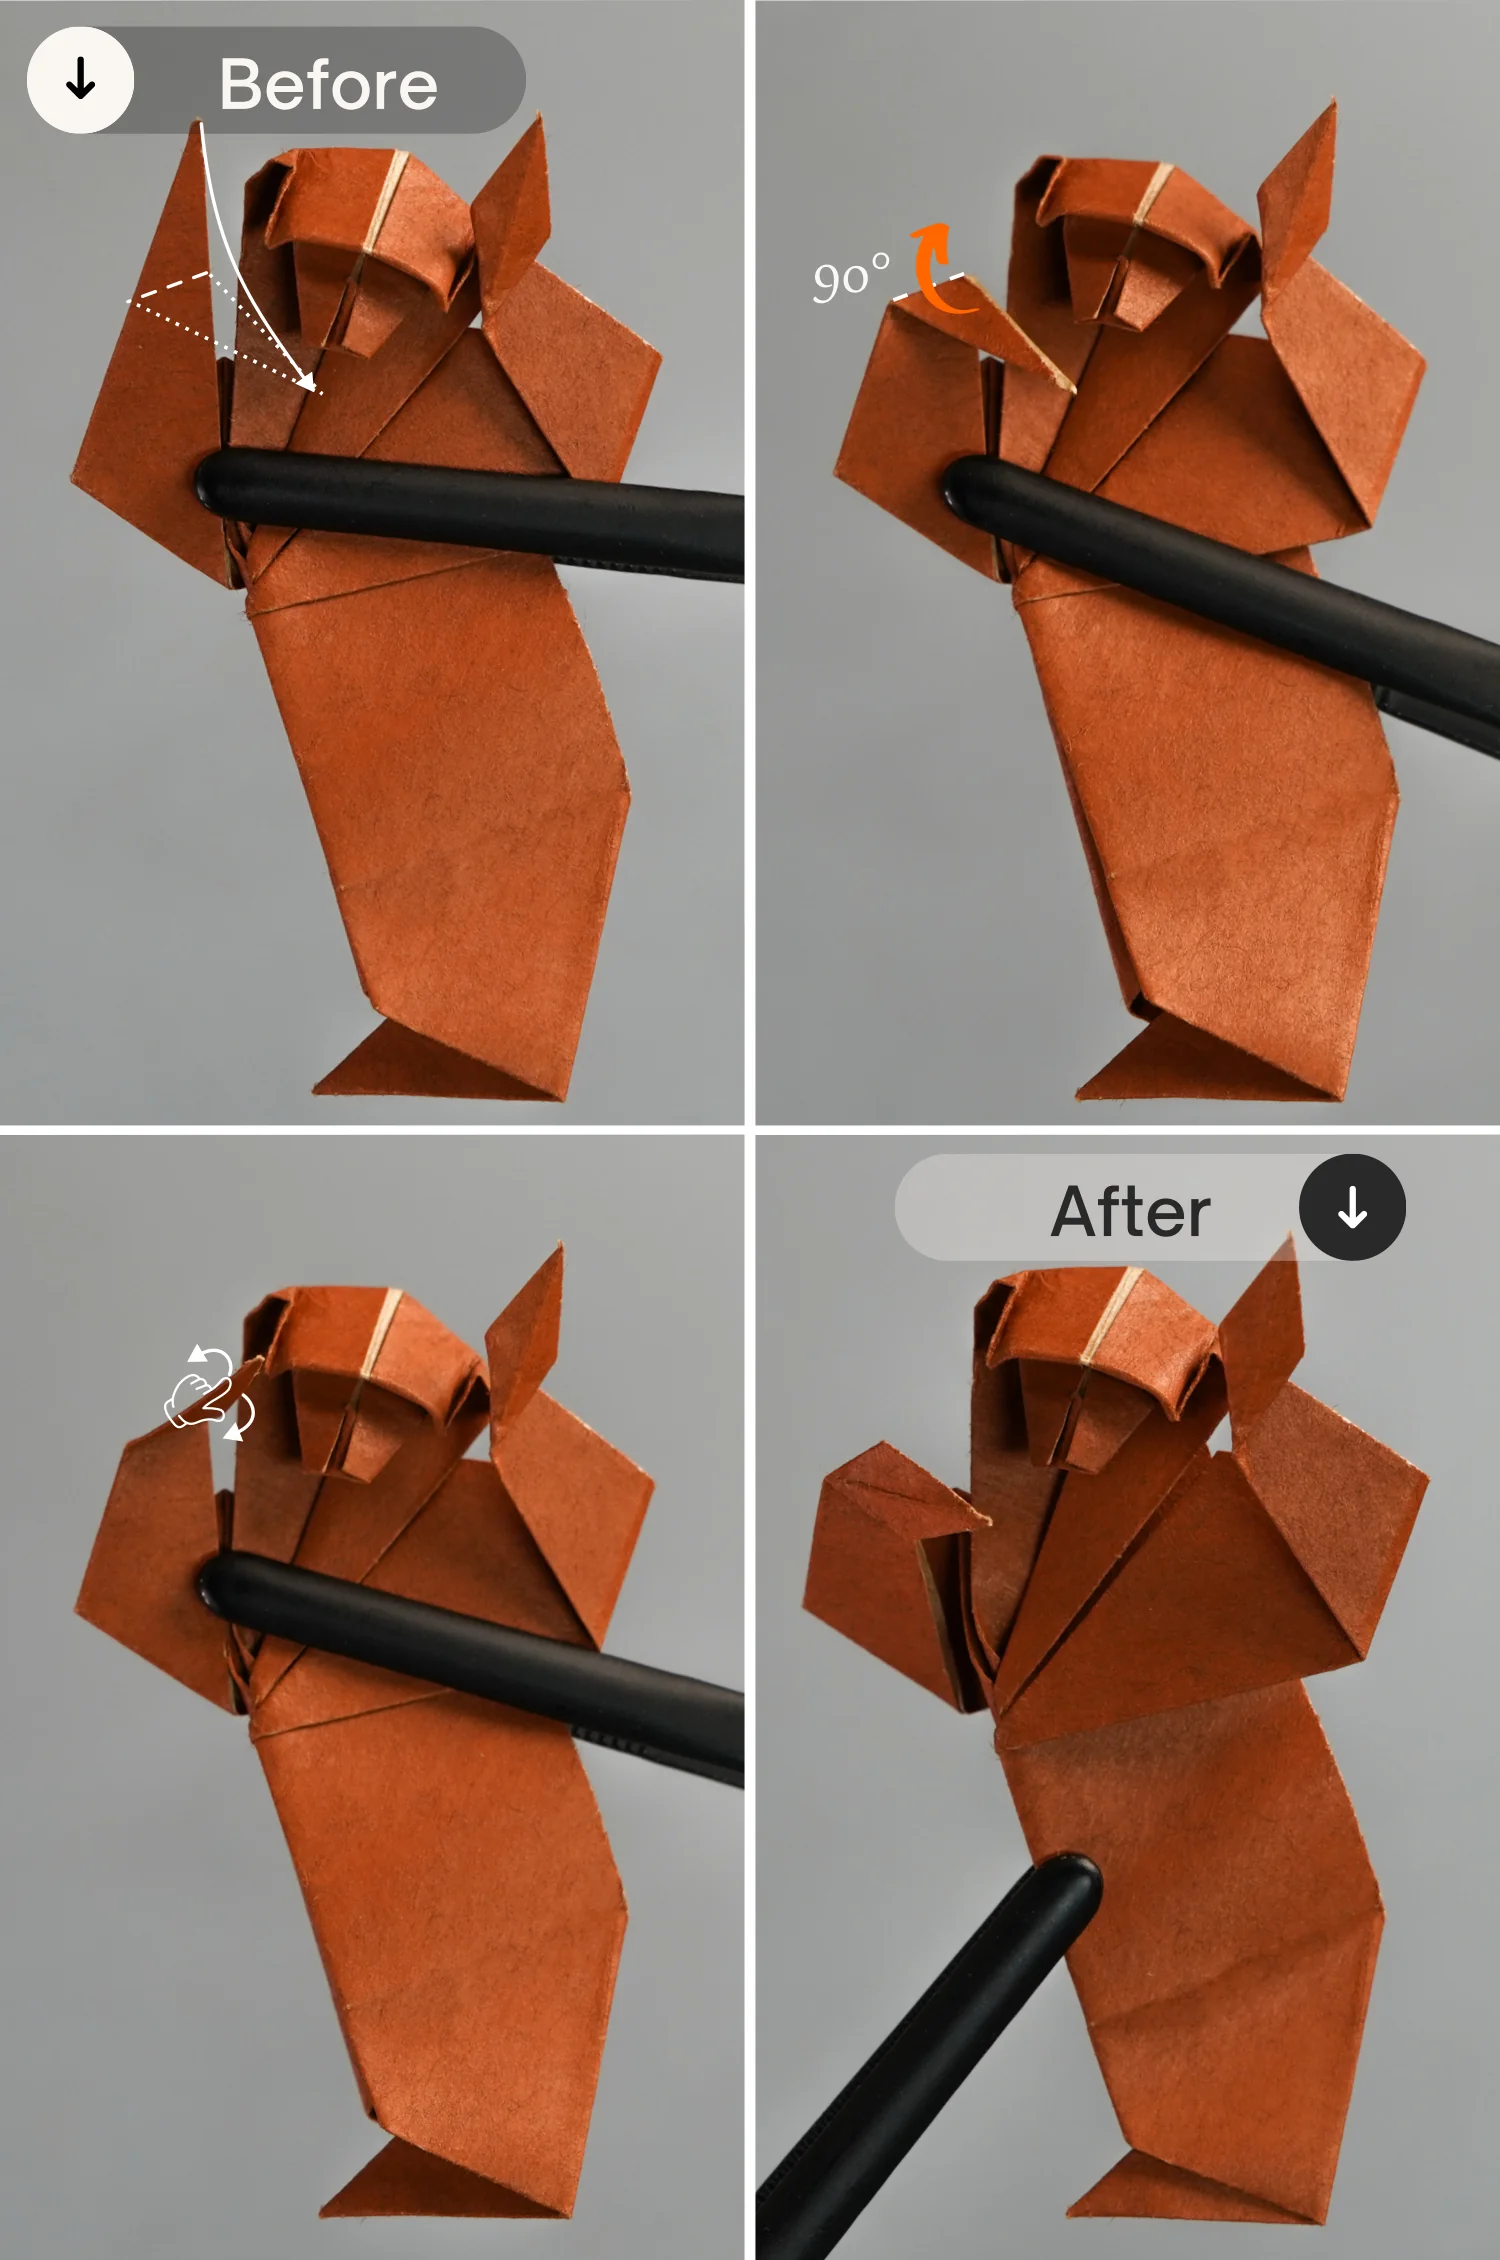
Step 21
Then fold down the top part of the left arm, and unfold it for only 90 degrees to make it stand, next, open and squash it as you did for the right arm. This is the final shape of your first monkey.

Step 22
Take the other monkey, and fold its right arm to the left side.
Step 23
Then fold down the the top part of this arm, next, unfold it for 90 degrees to make it stand, and finally open and squash it.
Step 24
Fold up the left arm.
Step 25
Then fold down the top part. Next, unfold it for 90 degrees to make it stand, and finally, squash it. This is the final shape of your second monkey.
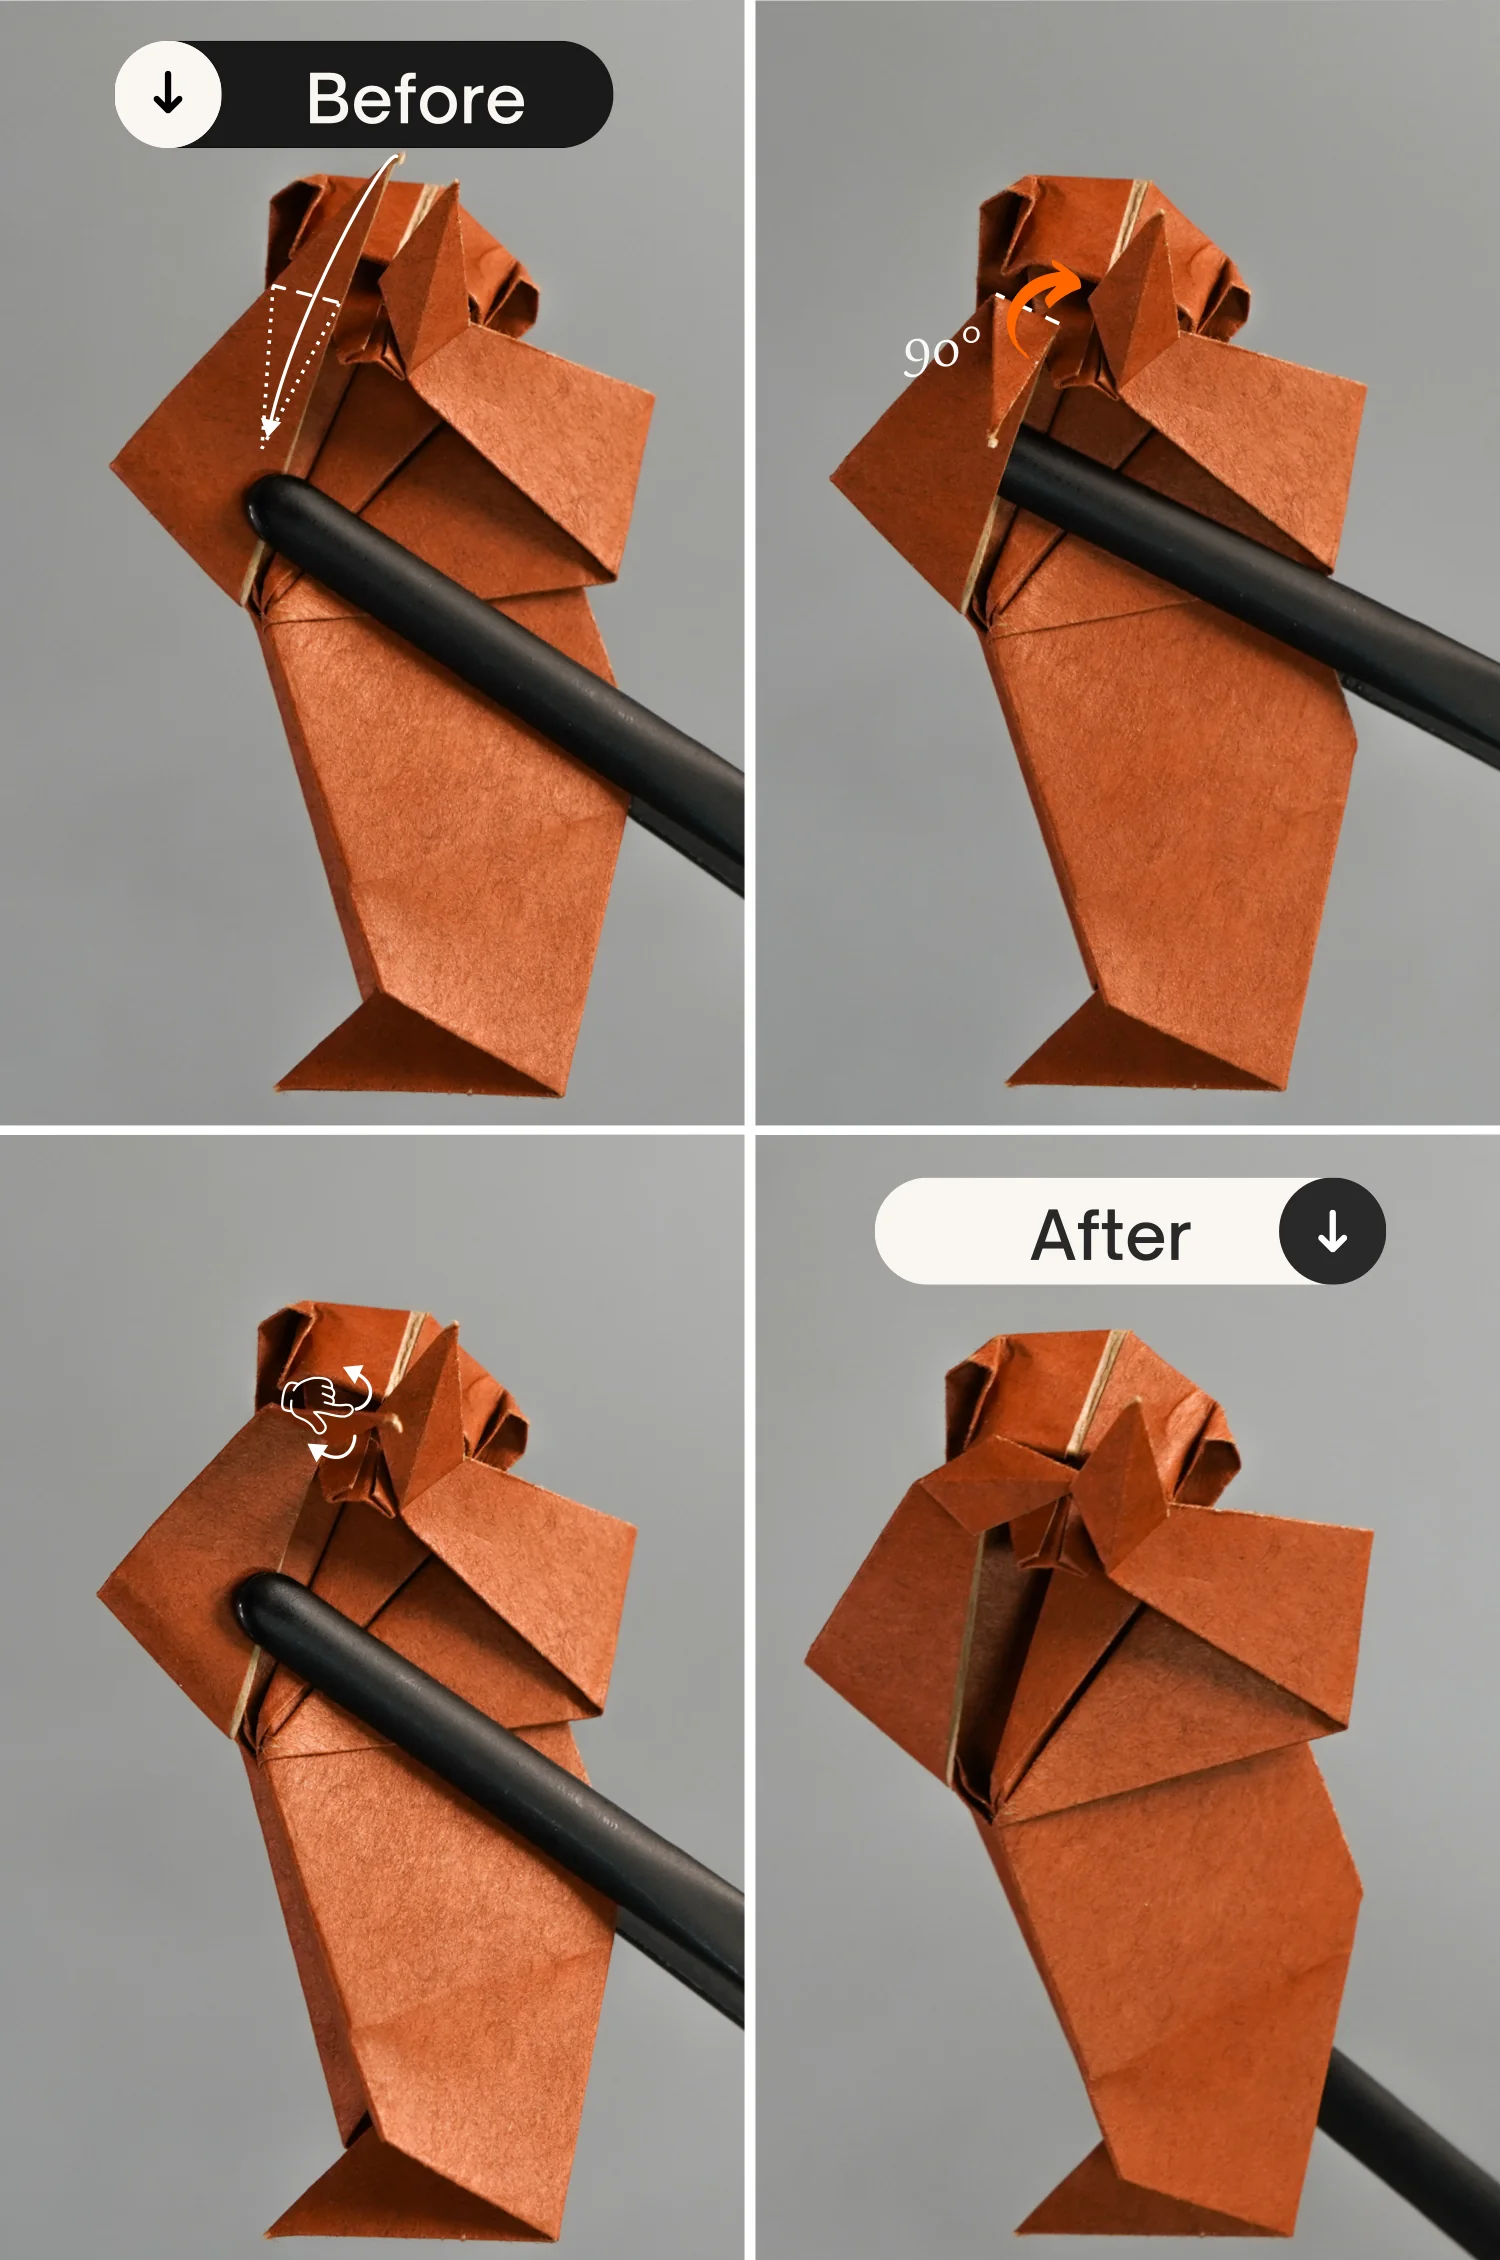
Step 26
Take out the last monkey, and fold its right arm to the left side.

Step 27
Then fold the left point to the right. Next, unfold it for 90 degrees to make it stand, and finally, open and squash it.
Step 28
Fold up the left arm.
Step 29
Then fold down the top part. Next, unfold it for 90 degrees to make it stand, and finally, squash it. This is the final shape of your third monkey.
Step 30
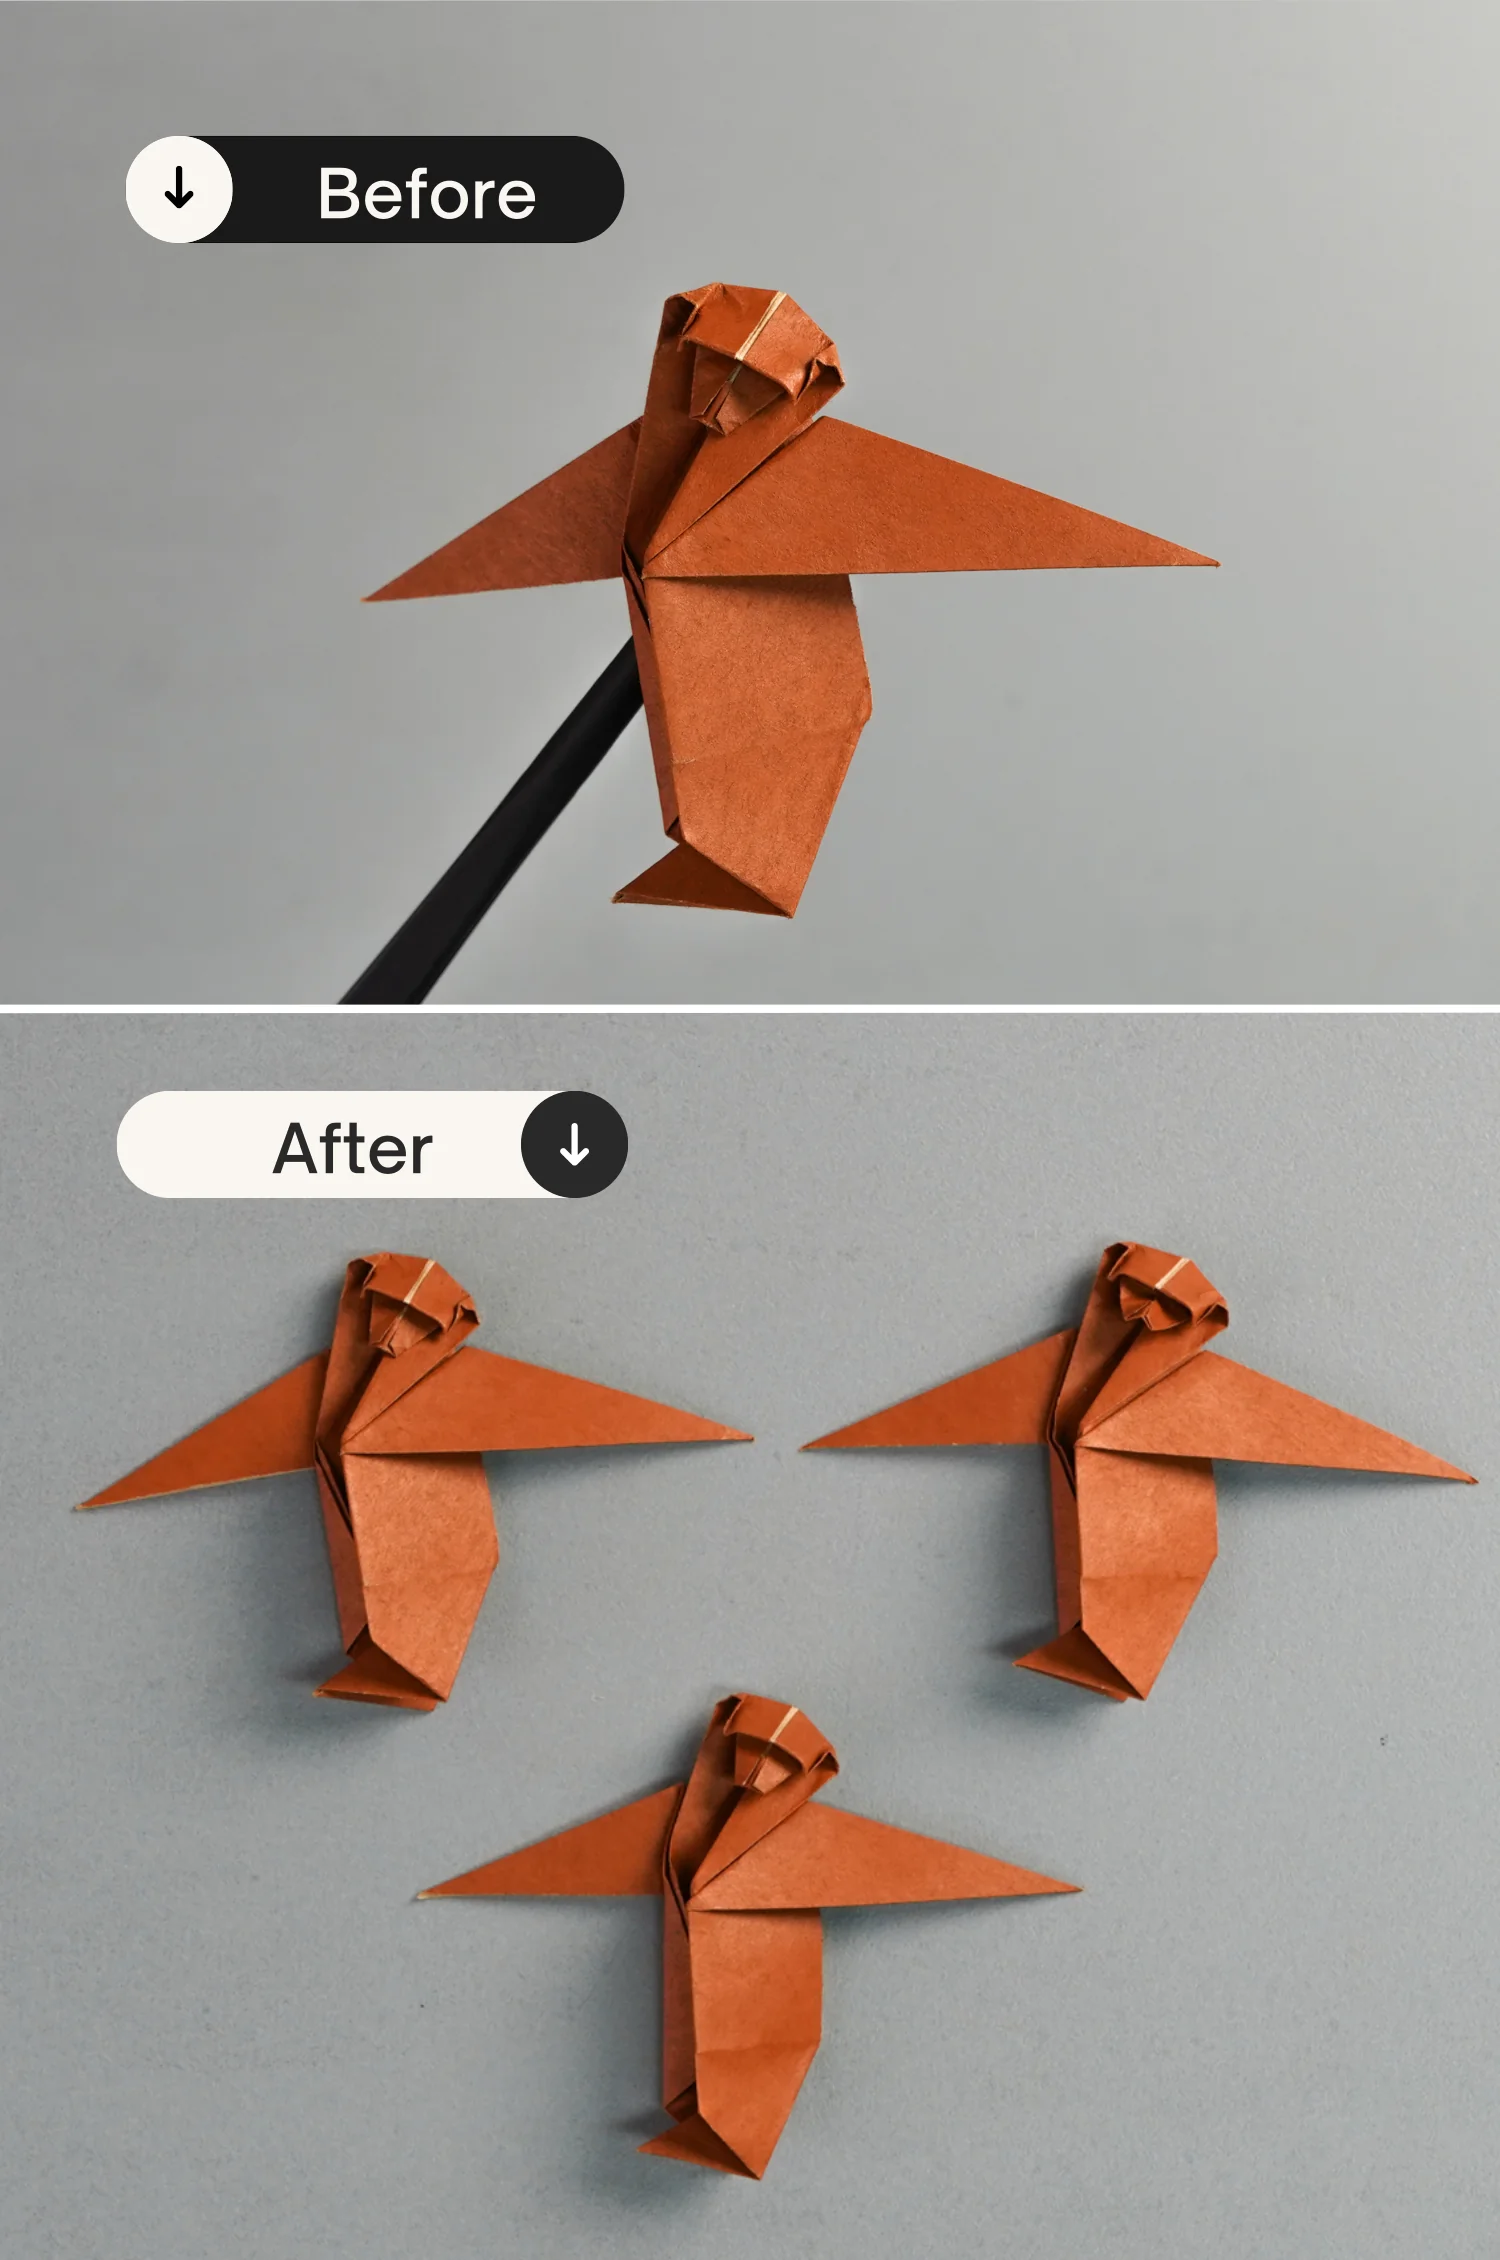
These are your three lovely origami monkeys.
What’s Next
Now you have completed making three origami monkeys. Next, check out our other origami animal tutorials. Happy folding!
Other Origami Animal Ideas