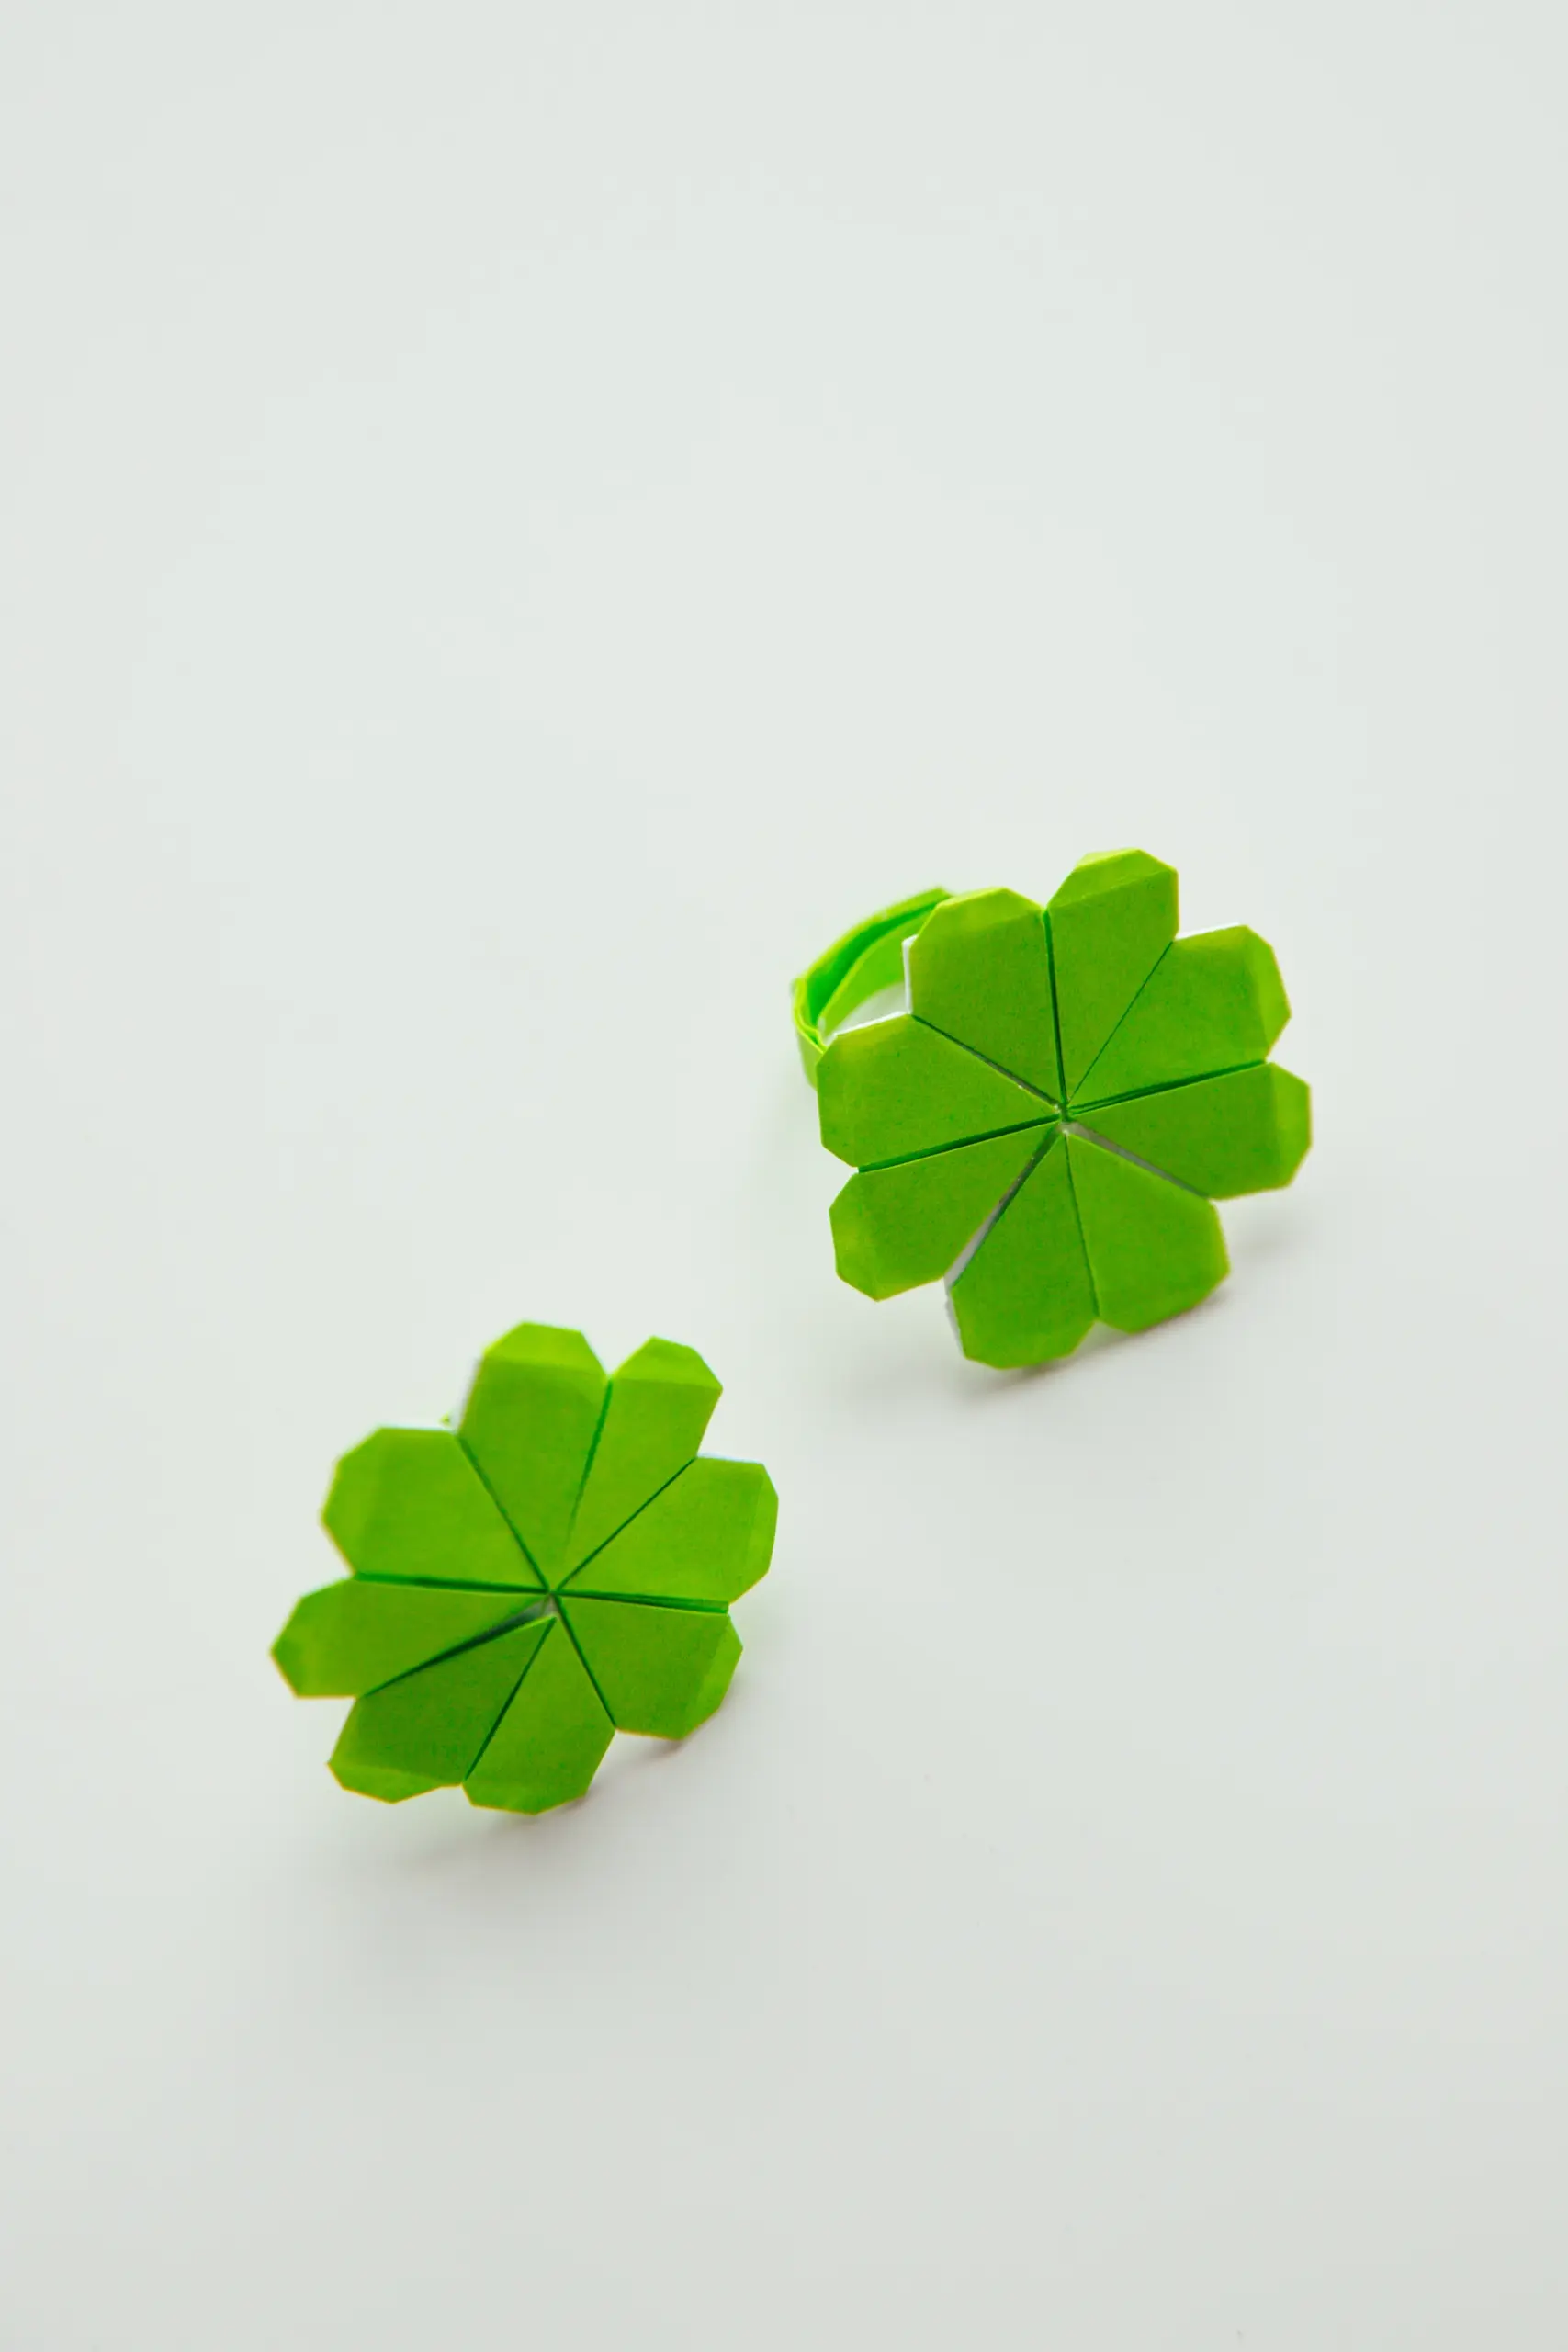
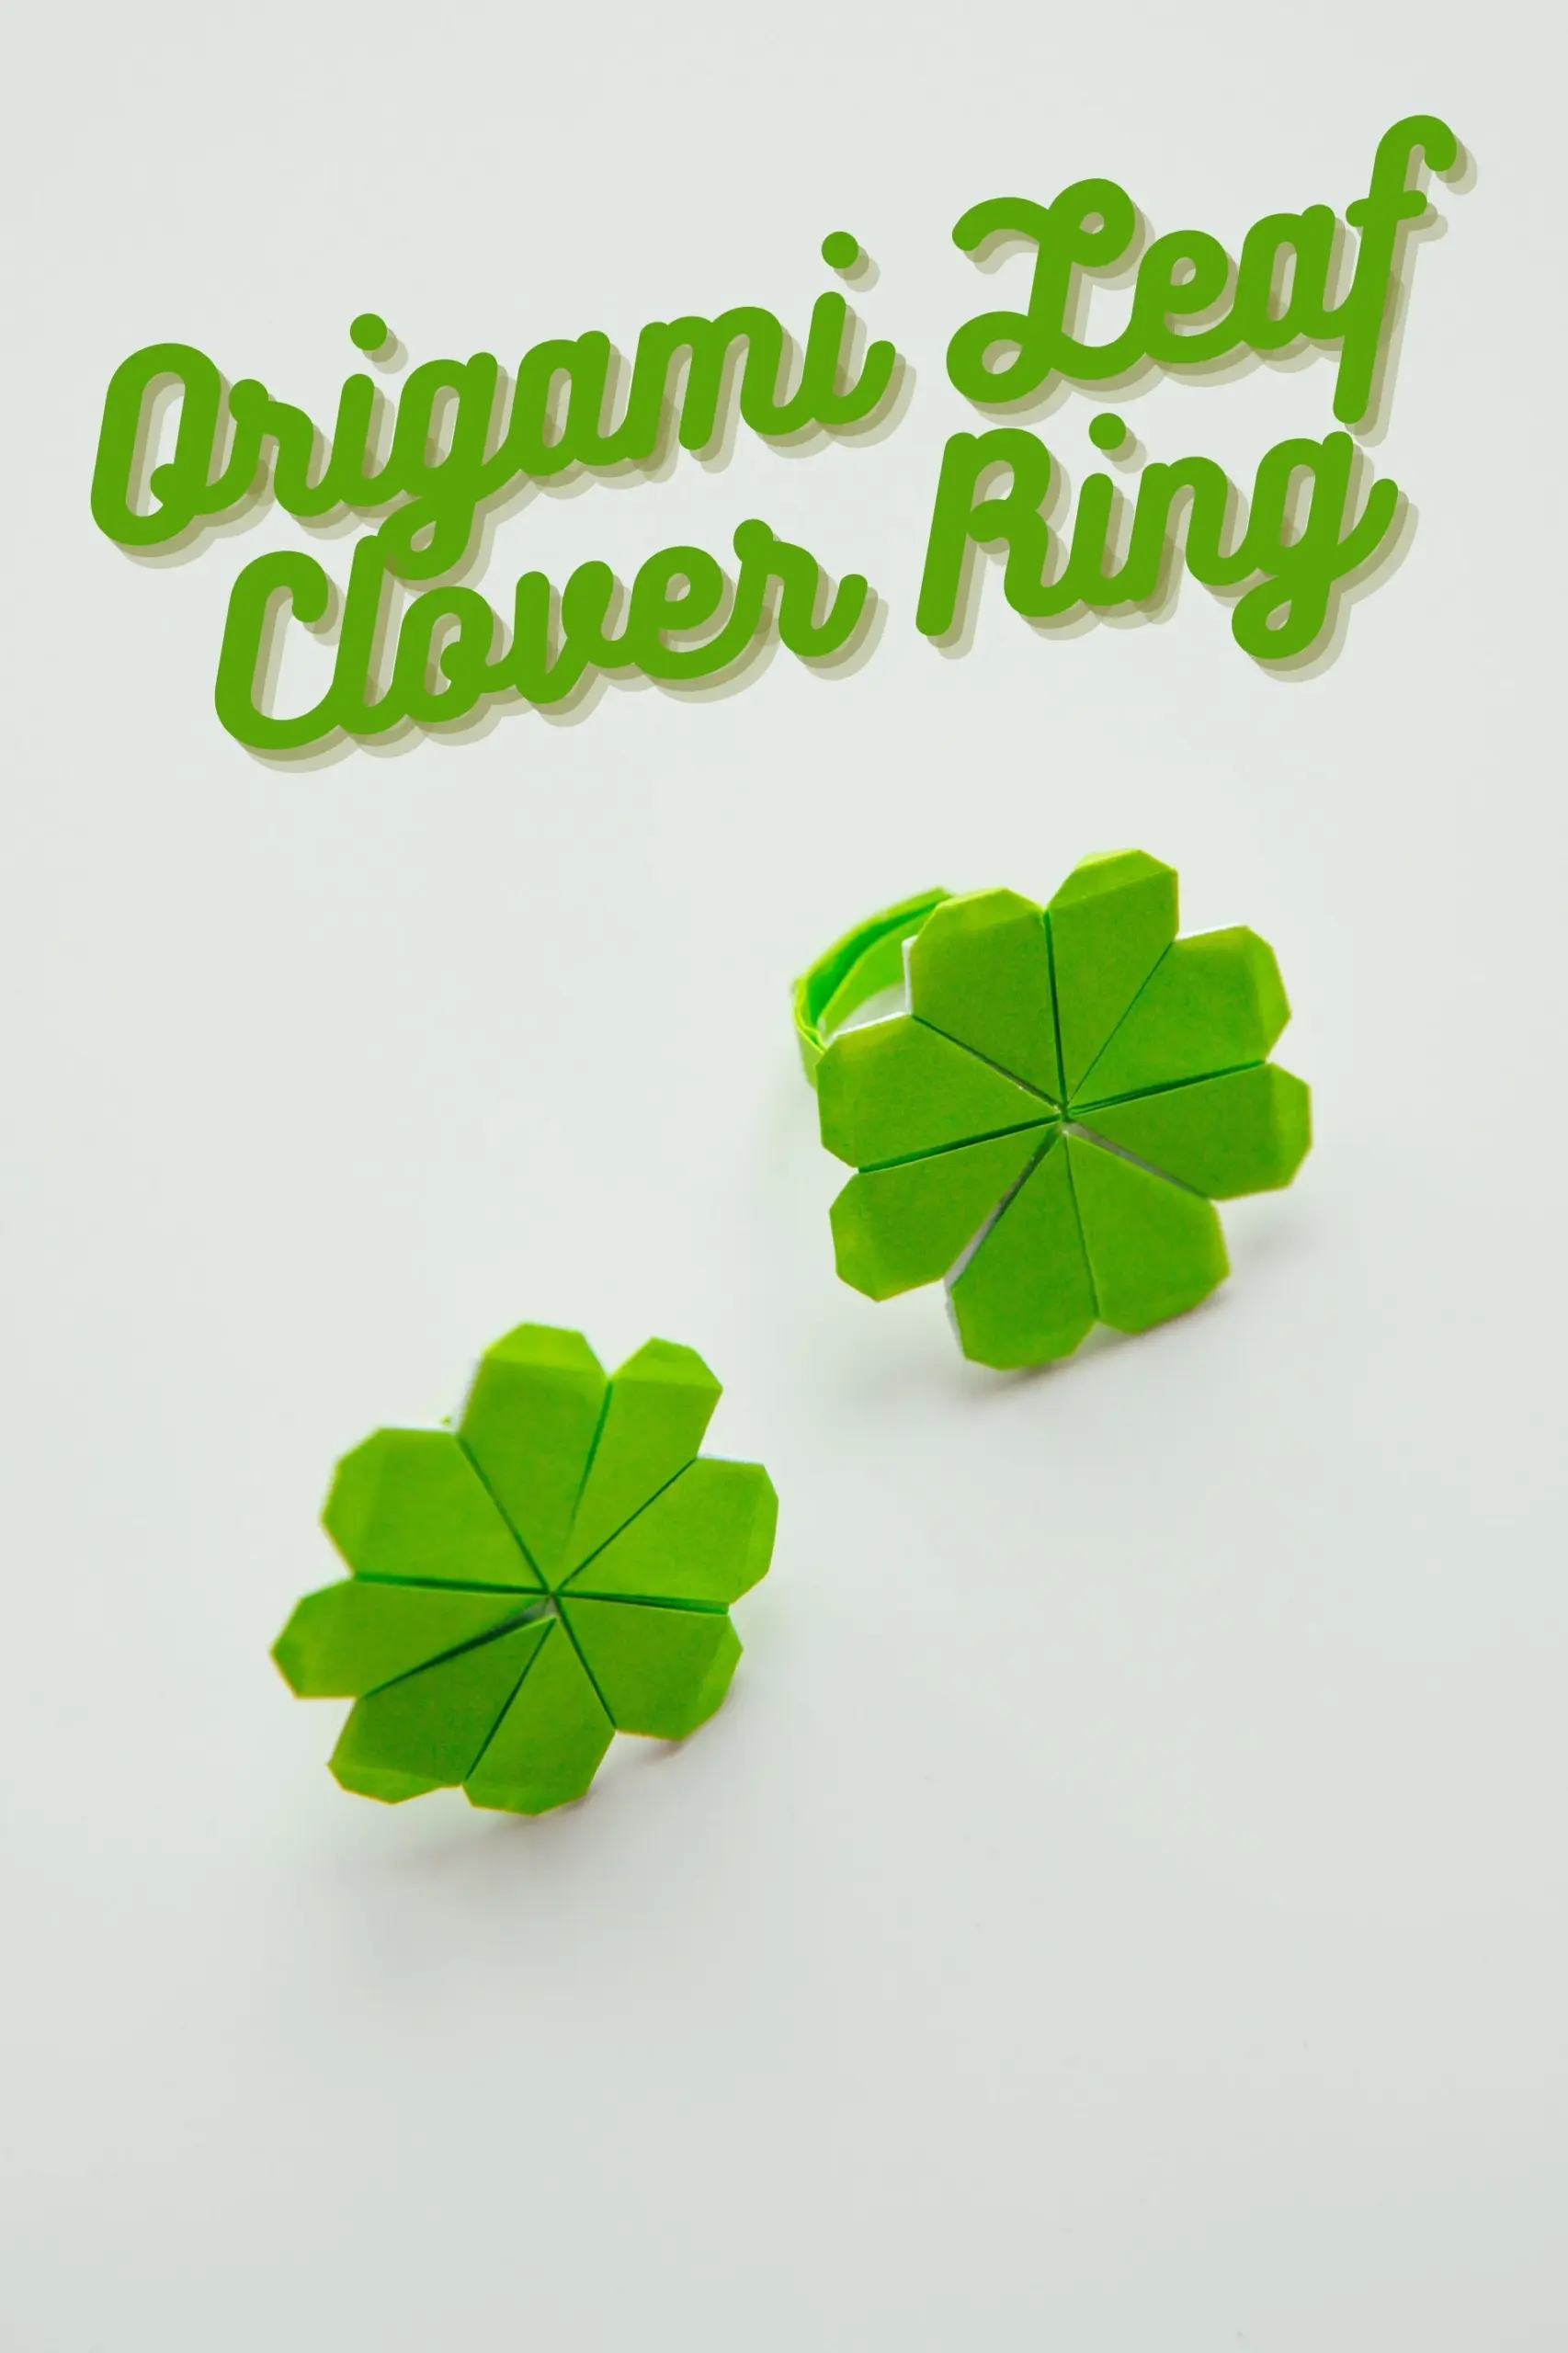
The four leaf clover represents luck. Fold a four leaf clover ring and wear it on your finger, and let luck always be with you!
This is based on the Origami Combined Four Leaf Clover. The flour leaf clover on top is combined by four easy origami heart.
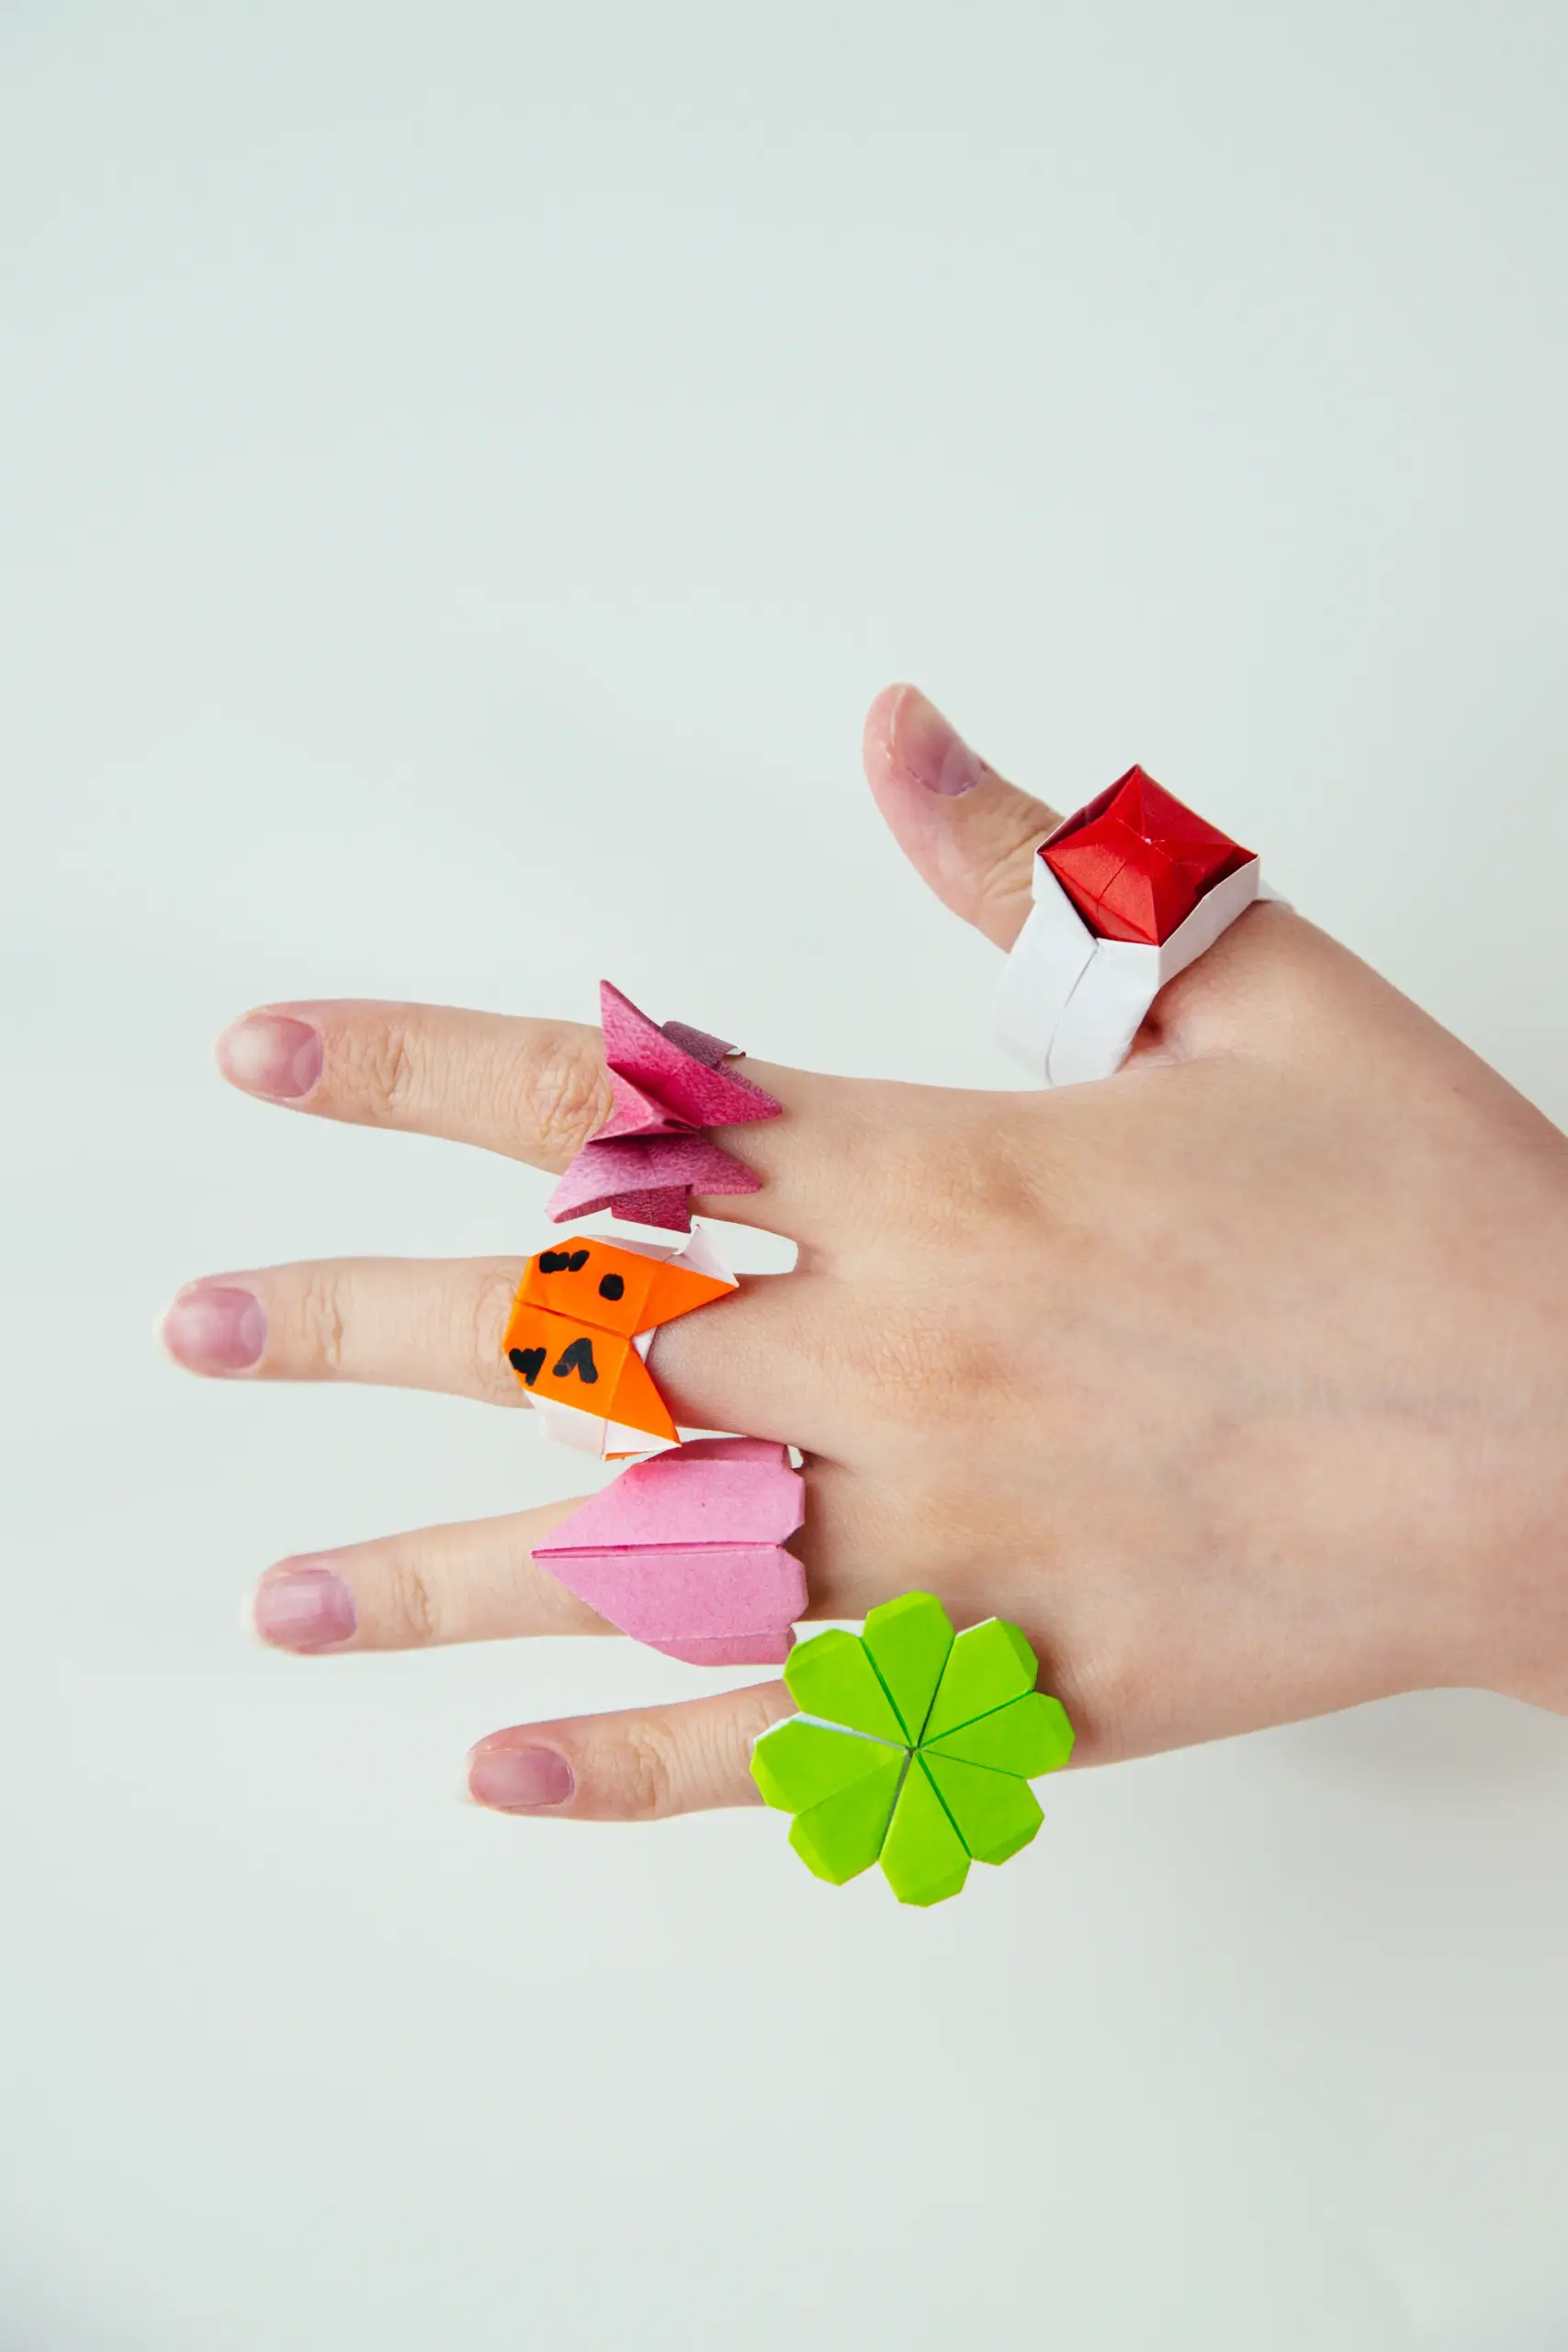
Origami ring is a creative and practical decoration. We have a collection of different shape and styles of origami rings.
- Lovely Stone Origami Ring- You can choose different color to change the color of your stone. Either a emerald, sapphire or a ruby. It’s your choice.
- Origami Butterfly Ring – Butterfly ring is finished with one piece of paper. It has a super cut and lovely butterfly over the basic ring.
- Origami Cat Ring – If you want something cute, try our origami cat ring. Folded by only one piece of paper.
- Origami Heart Ring– Origami heart ring is the most caring and lovely idea if you prefer to give it as a gift.
If you are new to origami, start here from our beginner guide to know the basics and how to read the step-by-step instructions.
- Folding time: 10 minutes
- Paper: 15×15 cm
- Difficulty: Middle
Material
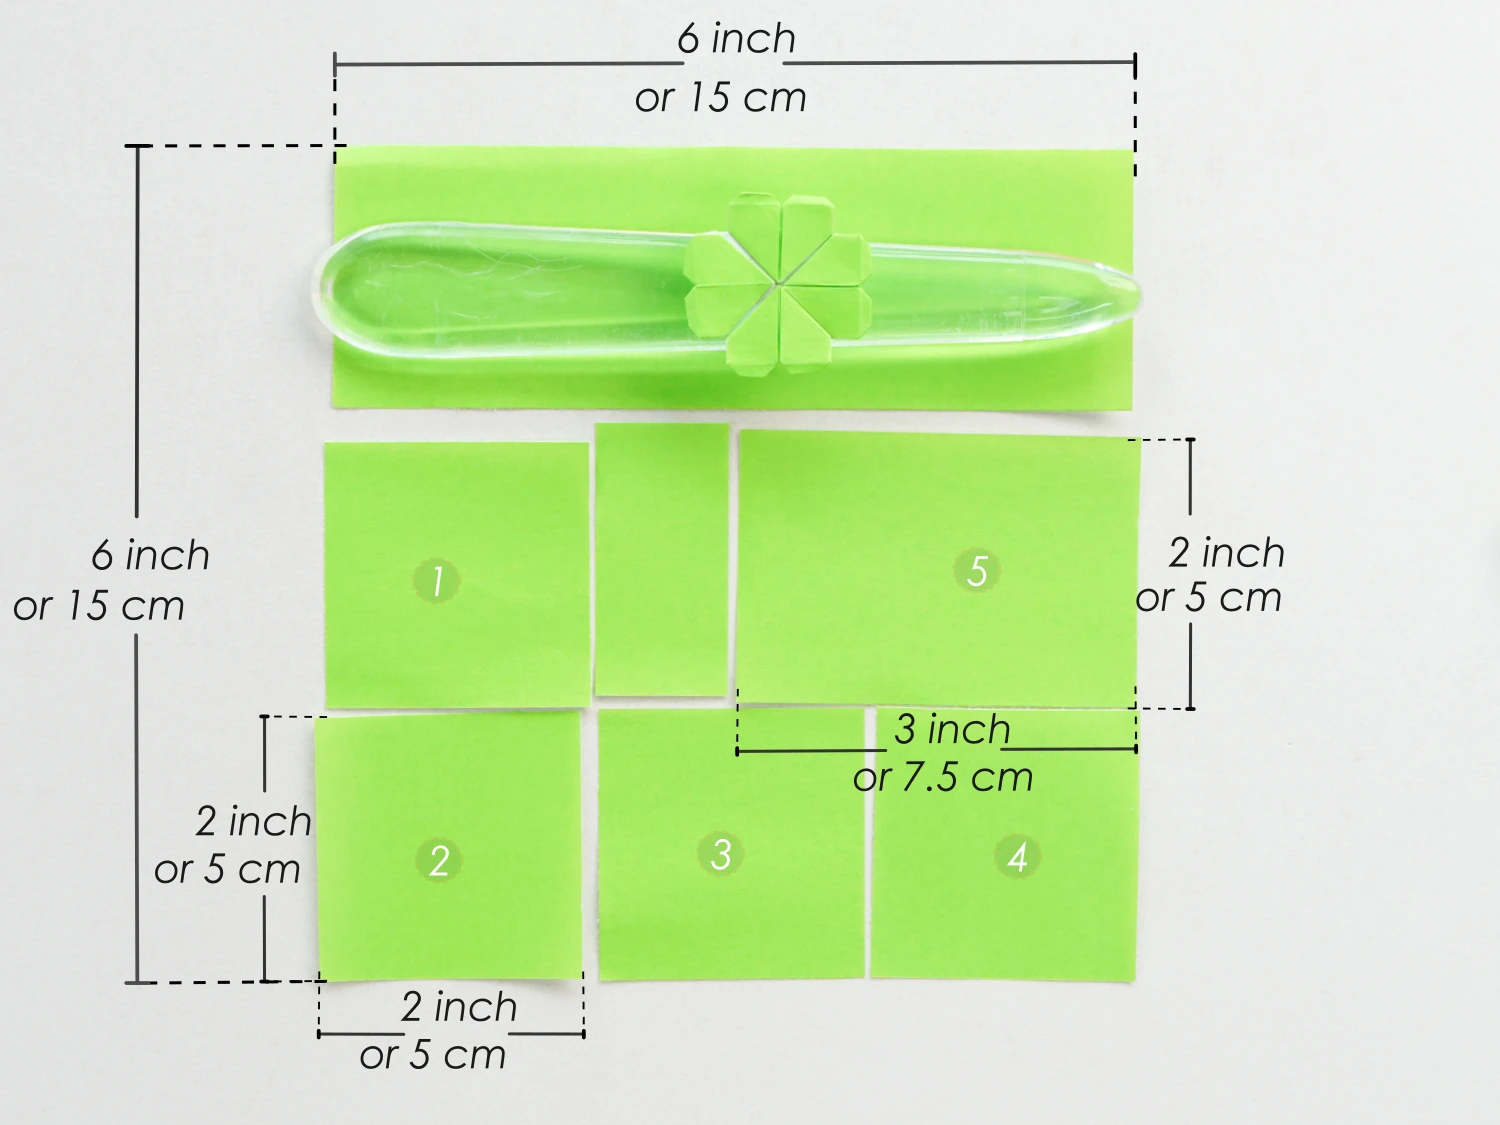
Get a 15×15 cm origami square paper with different colors on each side, this paper will be divided into 7 pieces of small paper, we will show you the detailed way to cut it.
Origami Leaf Clover Ring Video
Step by Step Instructions
Step 1
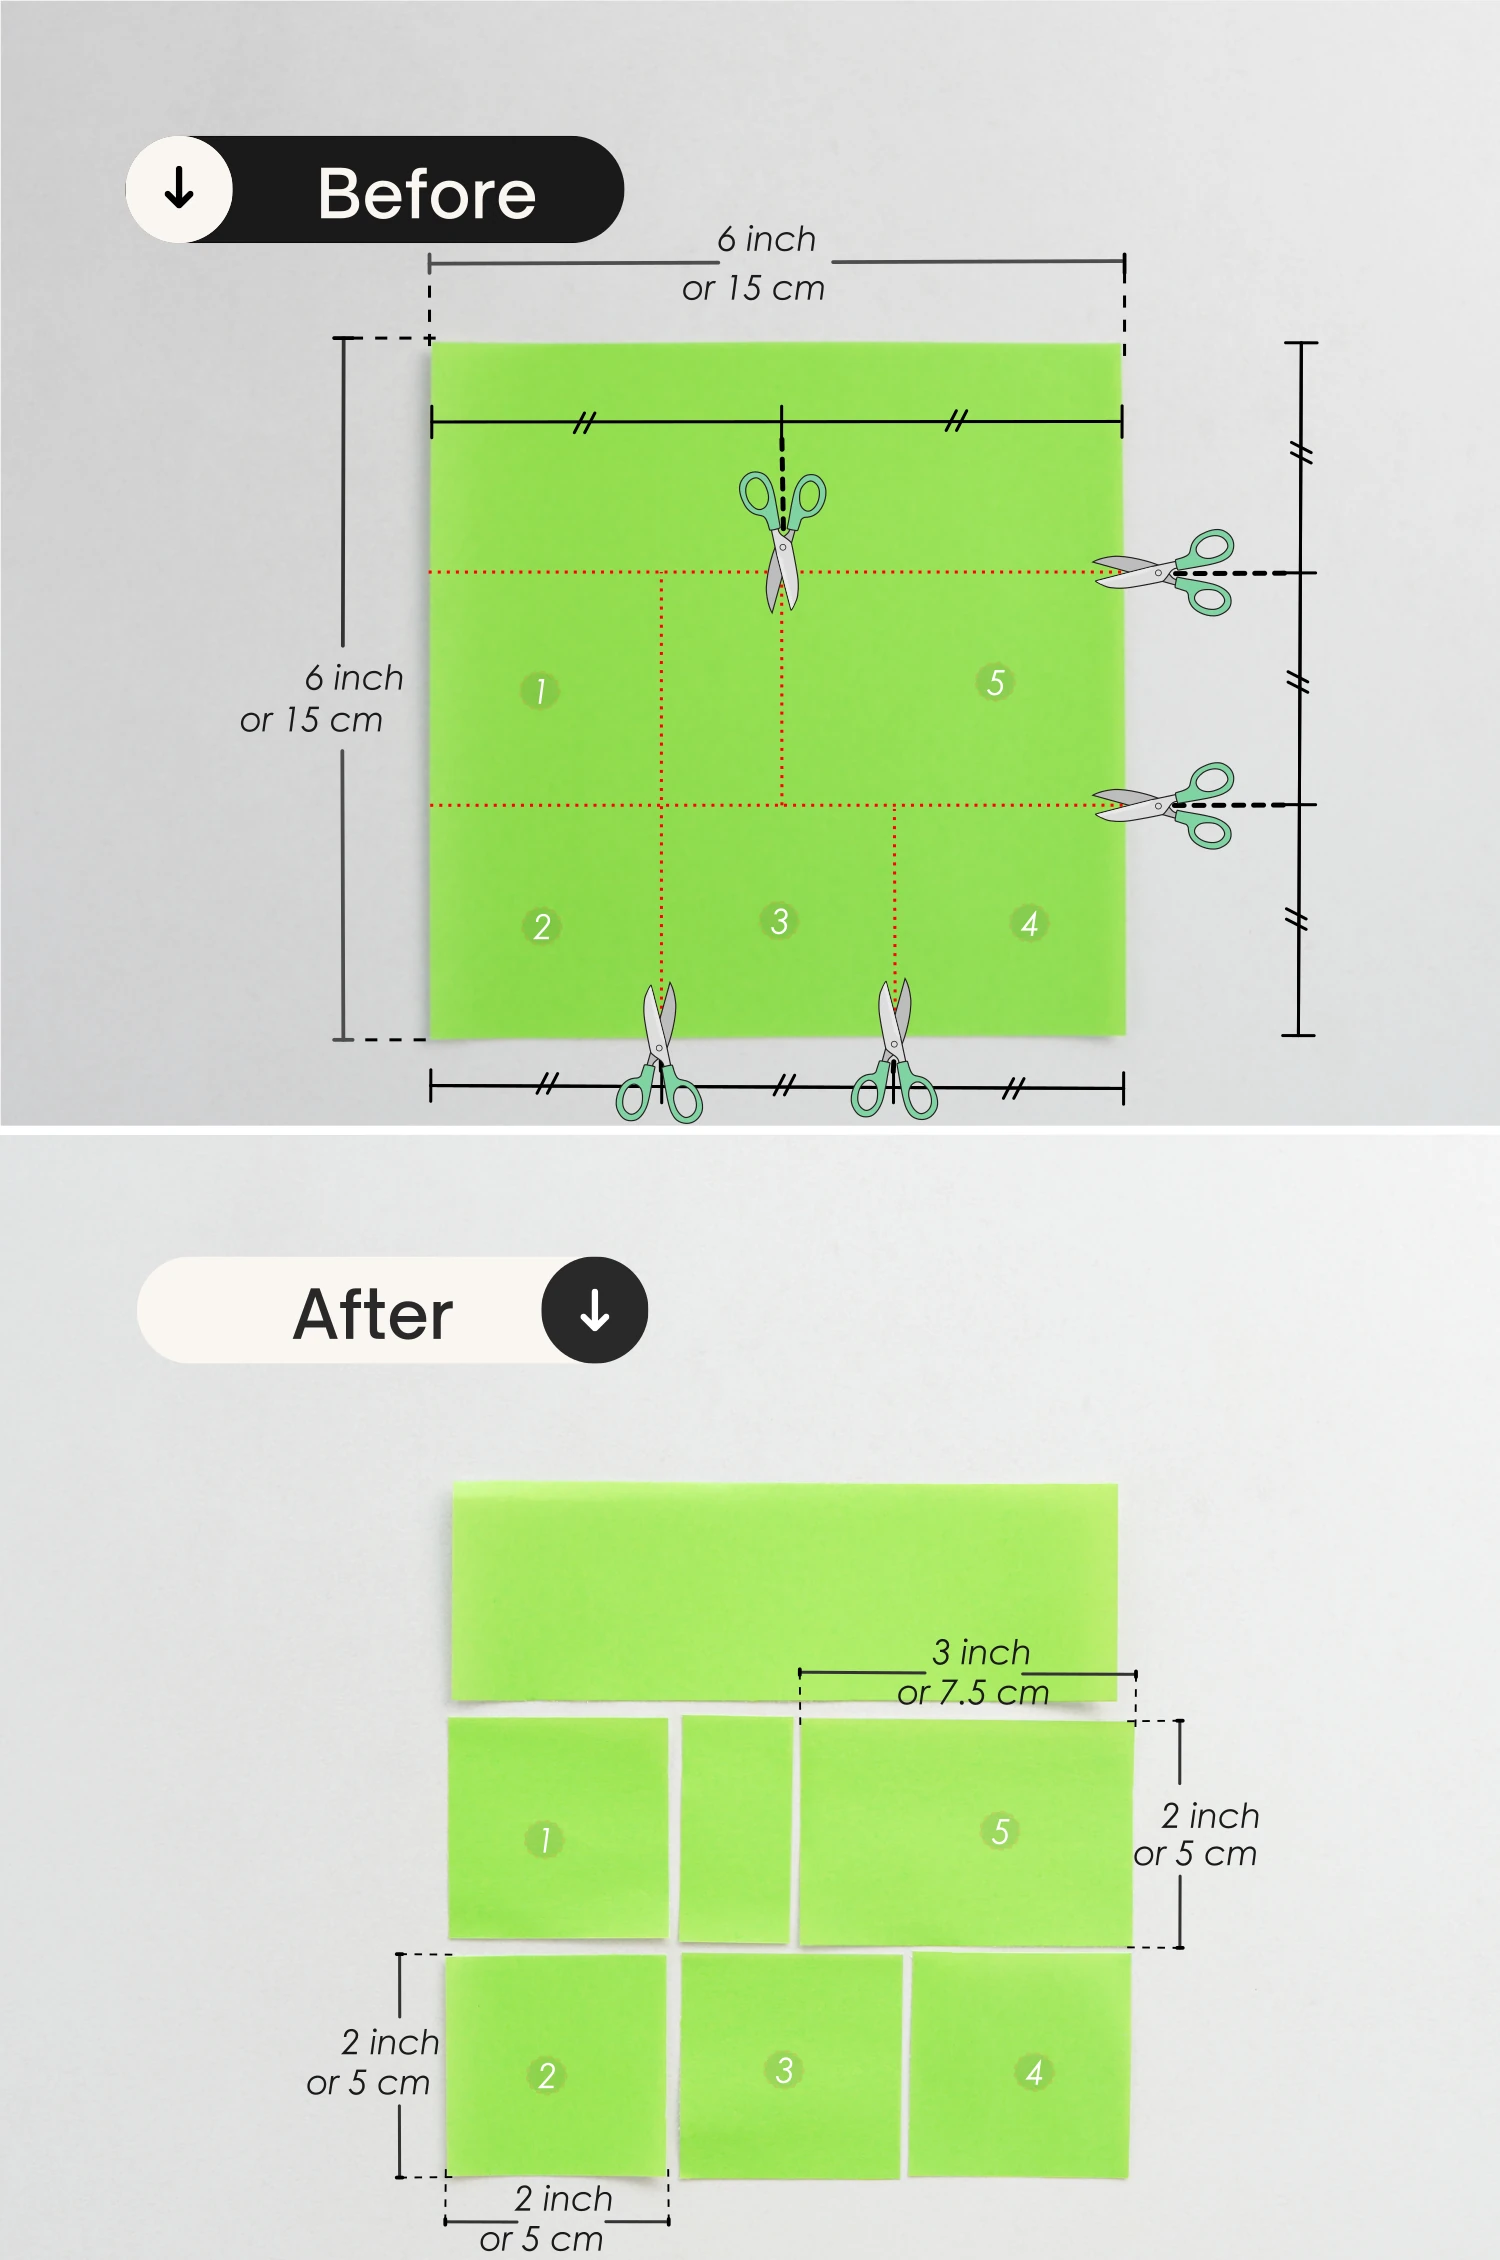
To begin, mark the midpoint of the top edge, and mark two points to divide the right edge and bottom edge into three equal parts.
Then, based on these points, draw vertical or parallel lines as shown by the red dotted lines in the following picture, and then cut along these lines, creating 7 pieces of small paper, including 4 sheets of 5×5 cm square paper for the four leaf clover, marked as numbers 1, 2, 3, 4, and a 7.5×5 cm marked as number 5.
Step 2
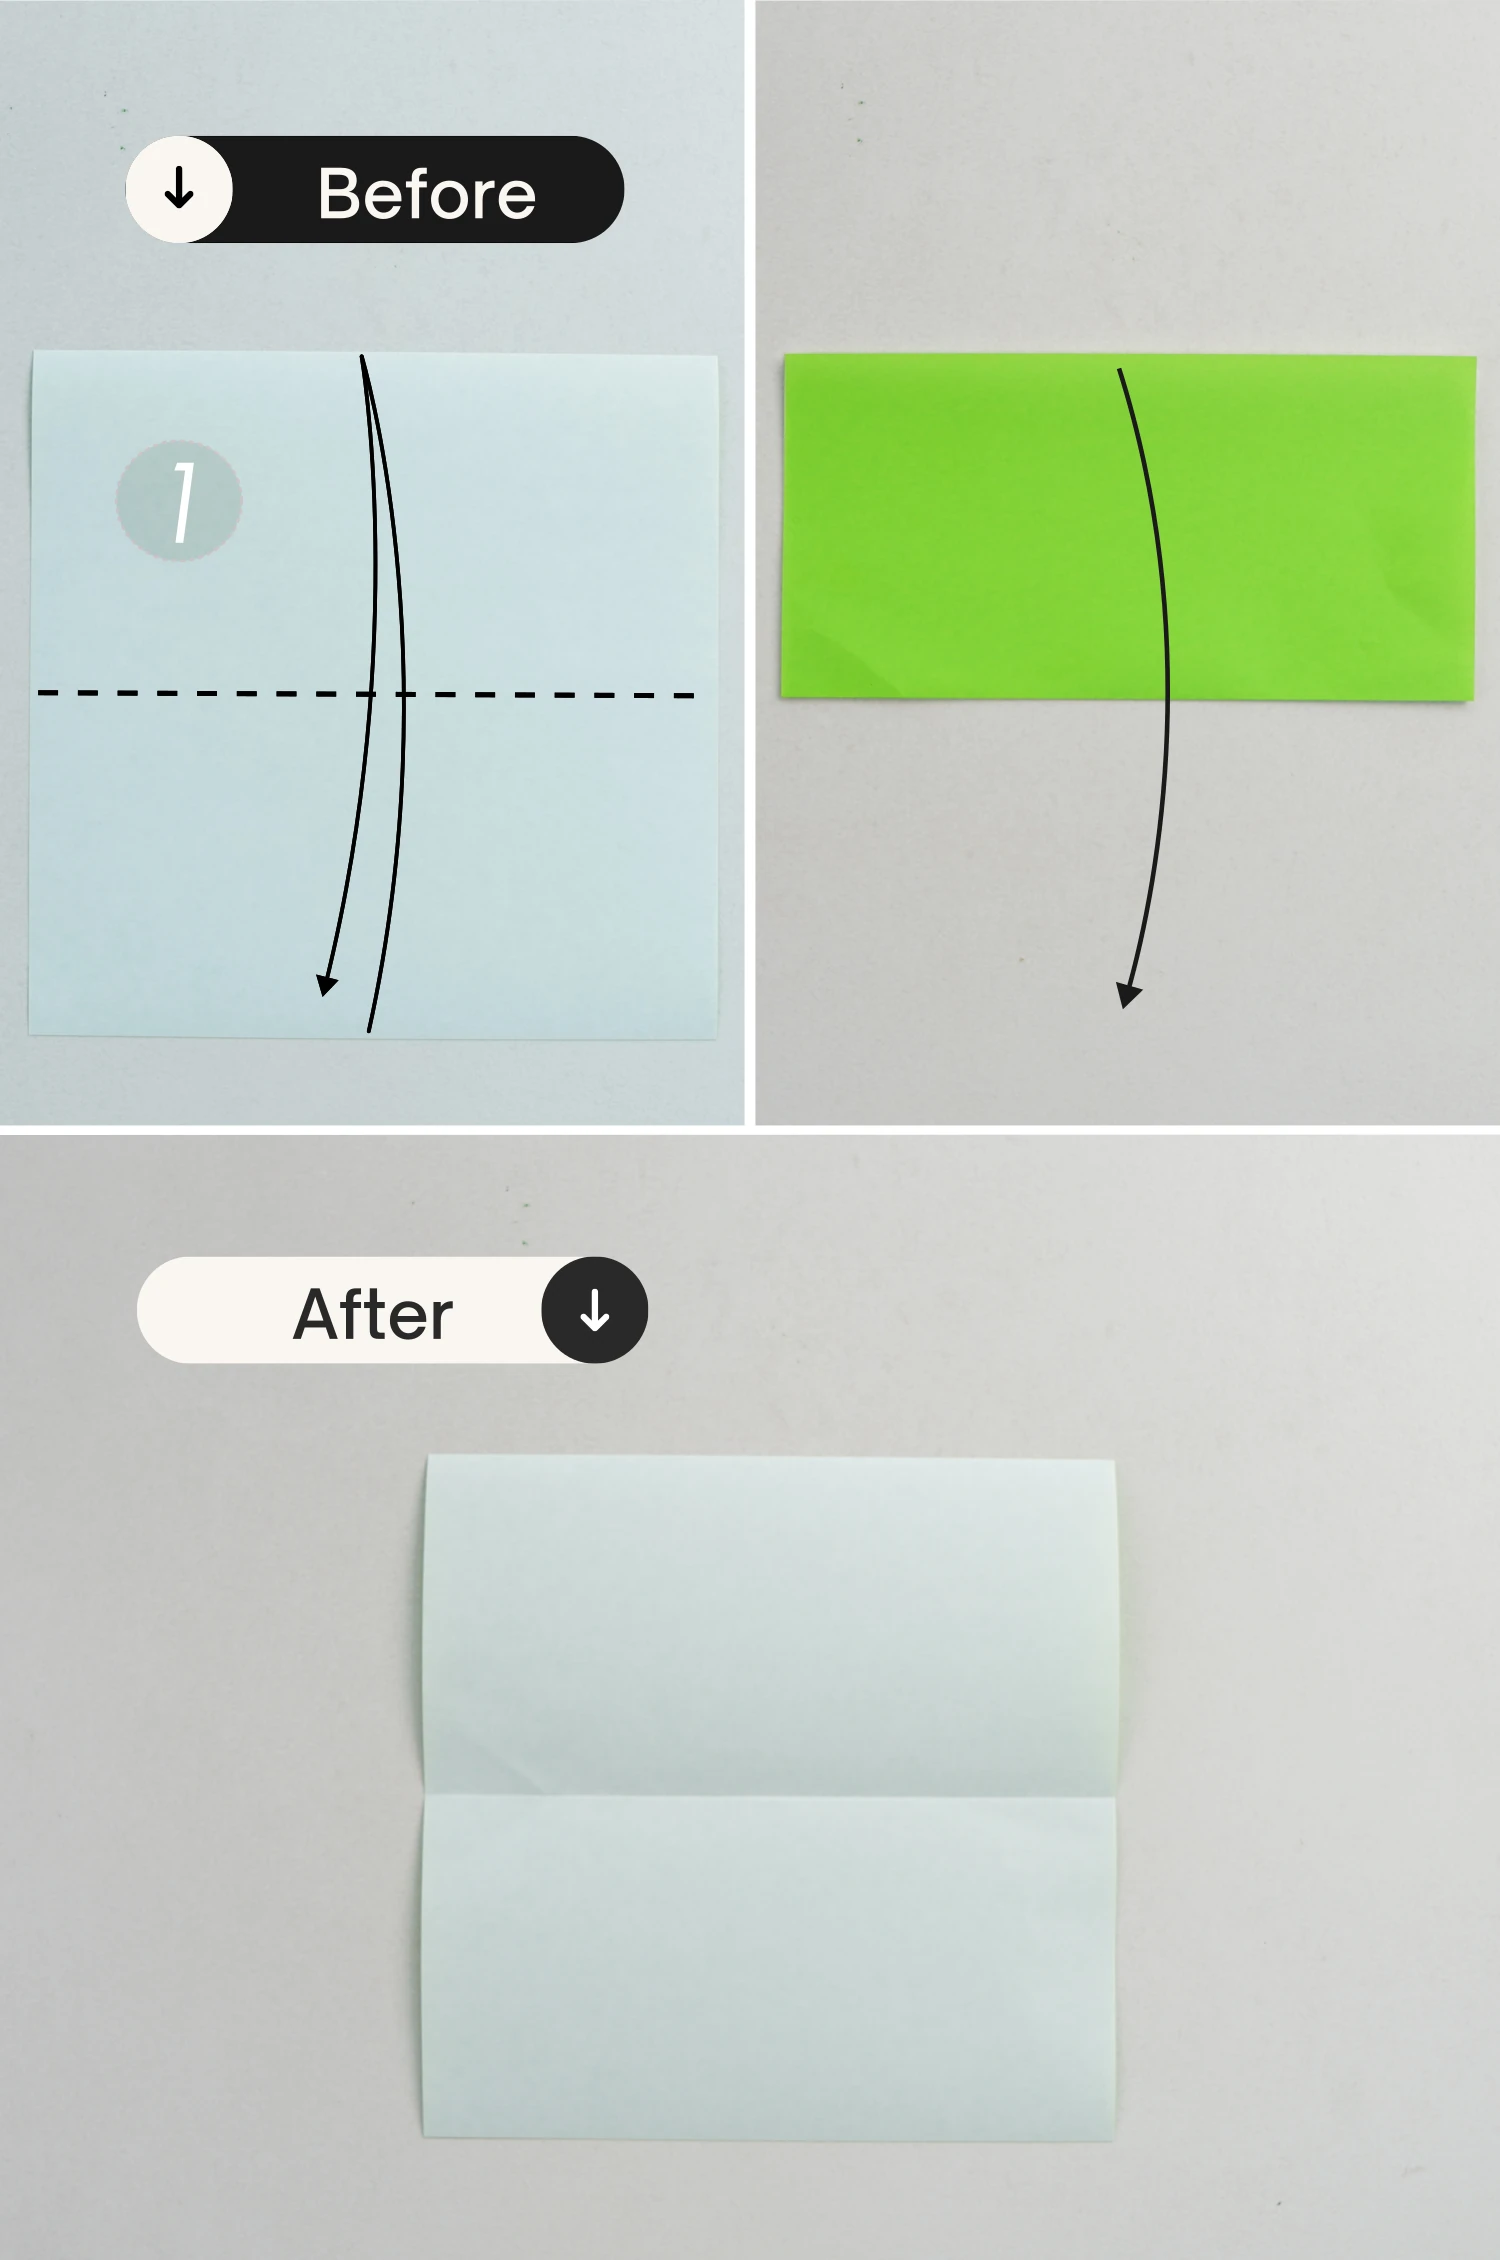
Take out one of the 5×5 cm square pieces of paper, start with the white side of the paper facing up, fold it in half horizontally, crease it well then unfold.
Step 3
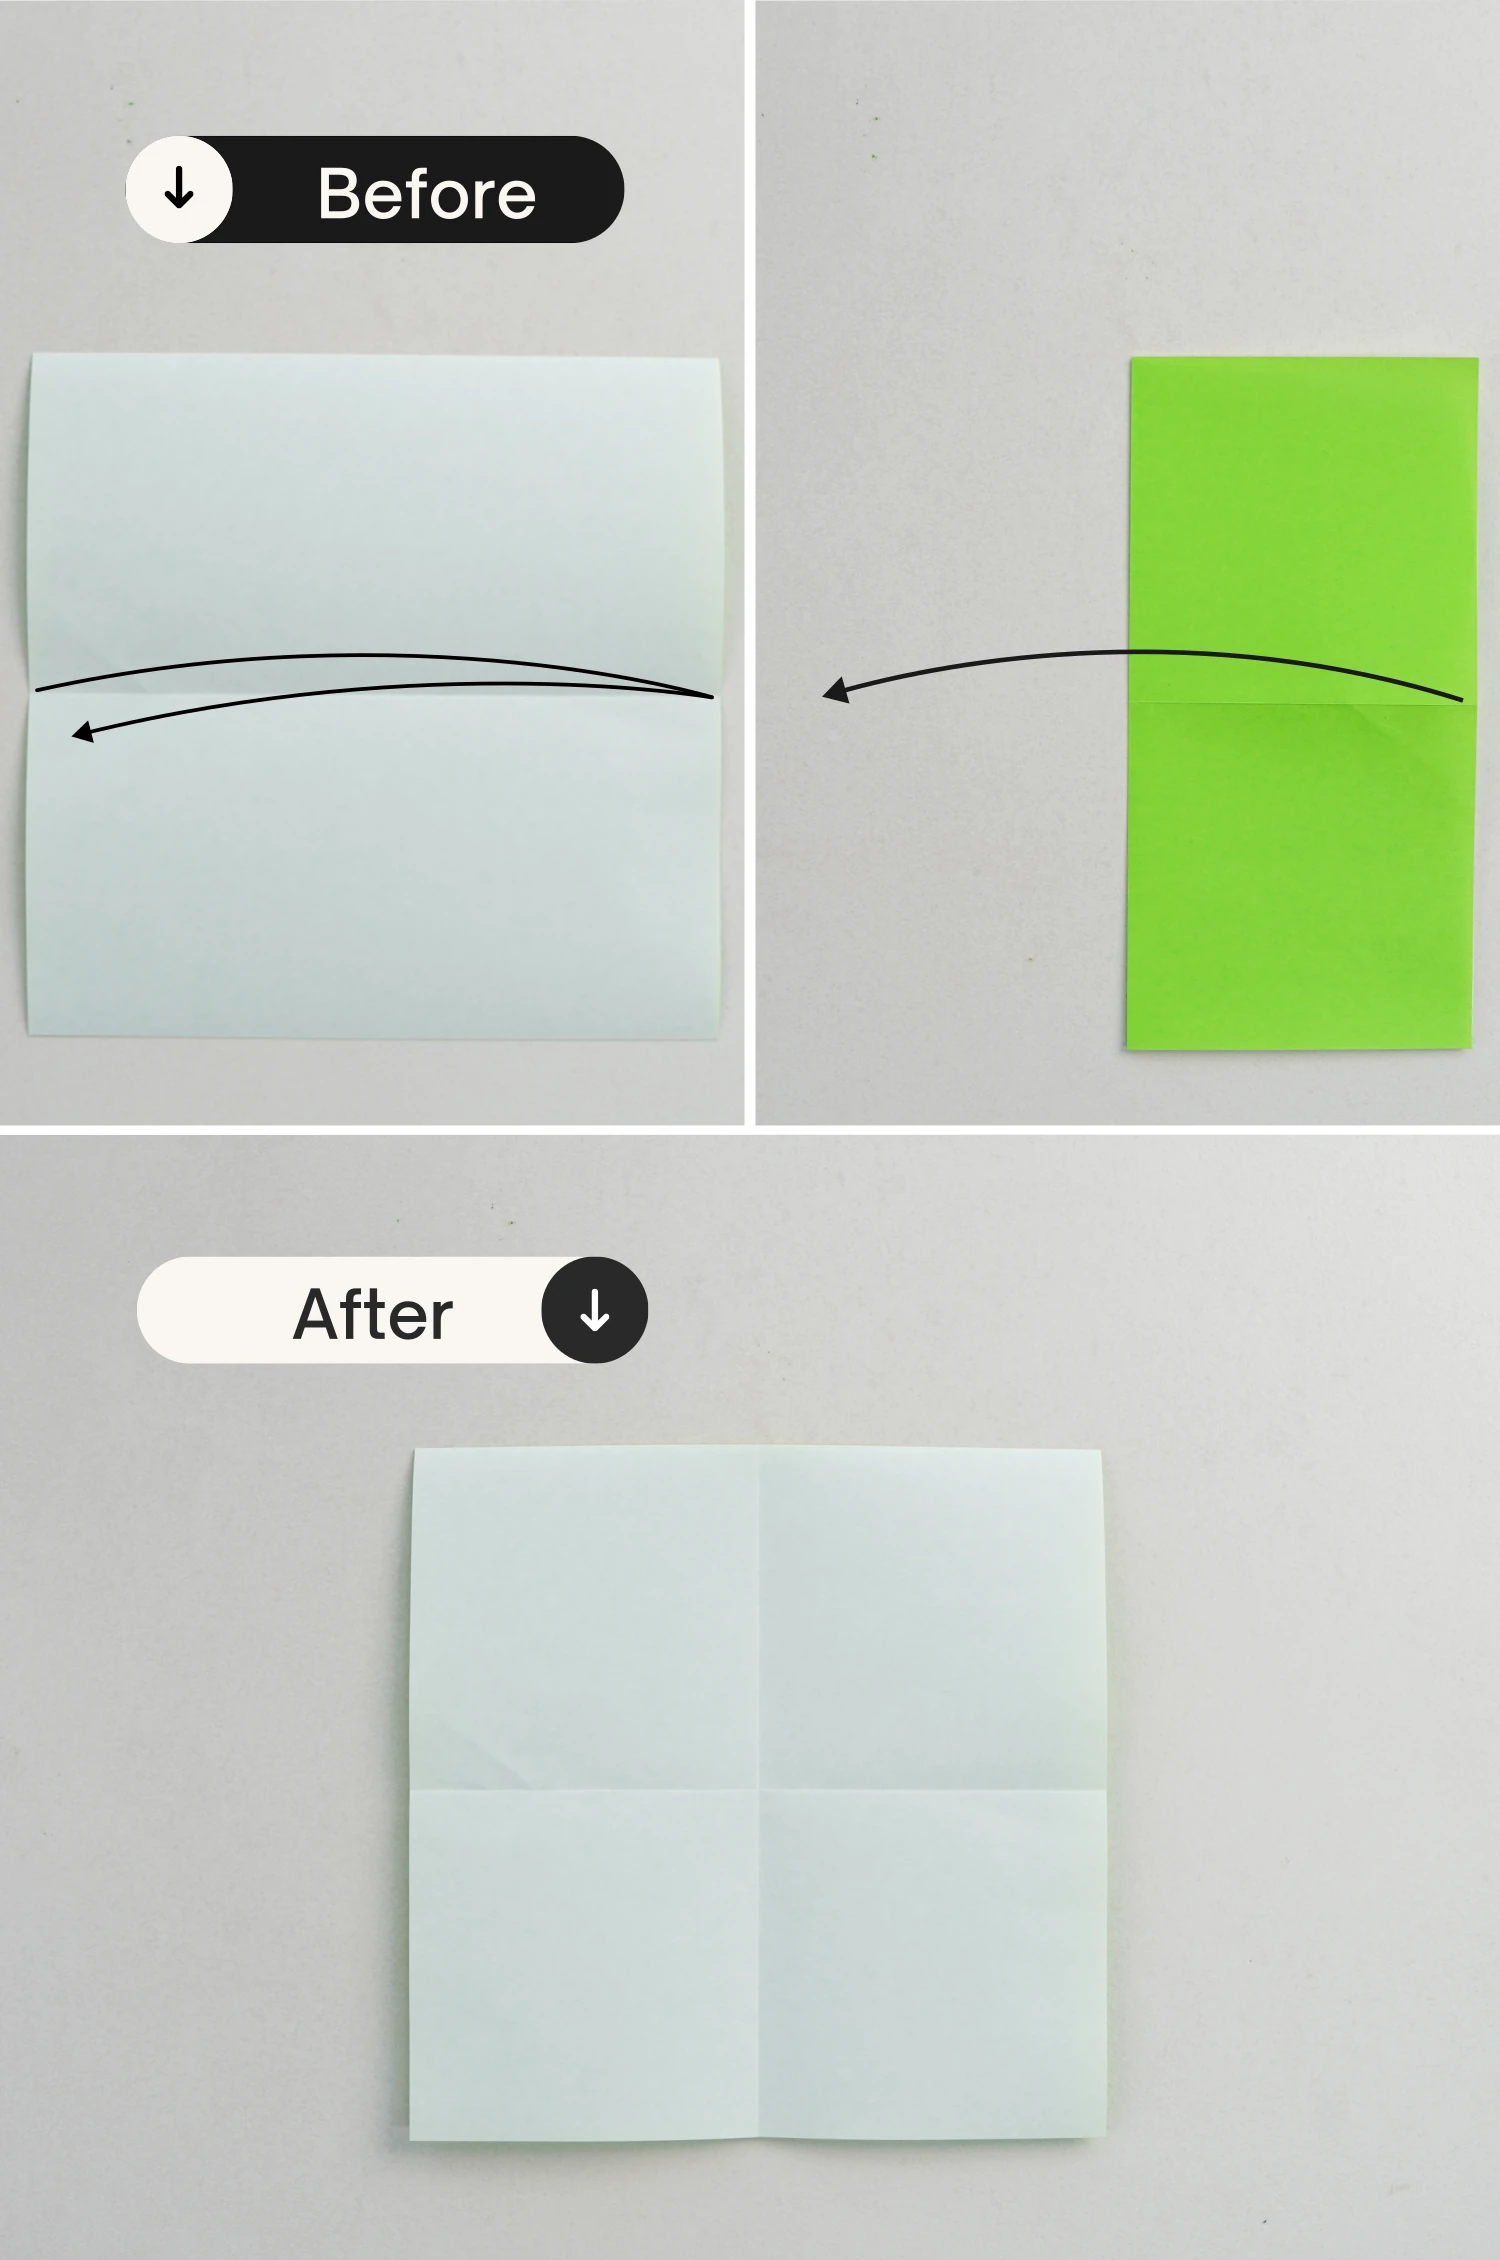
Fold it in half vertically, crease it well and unfold it.
Step 4
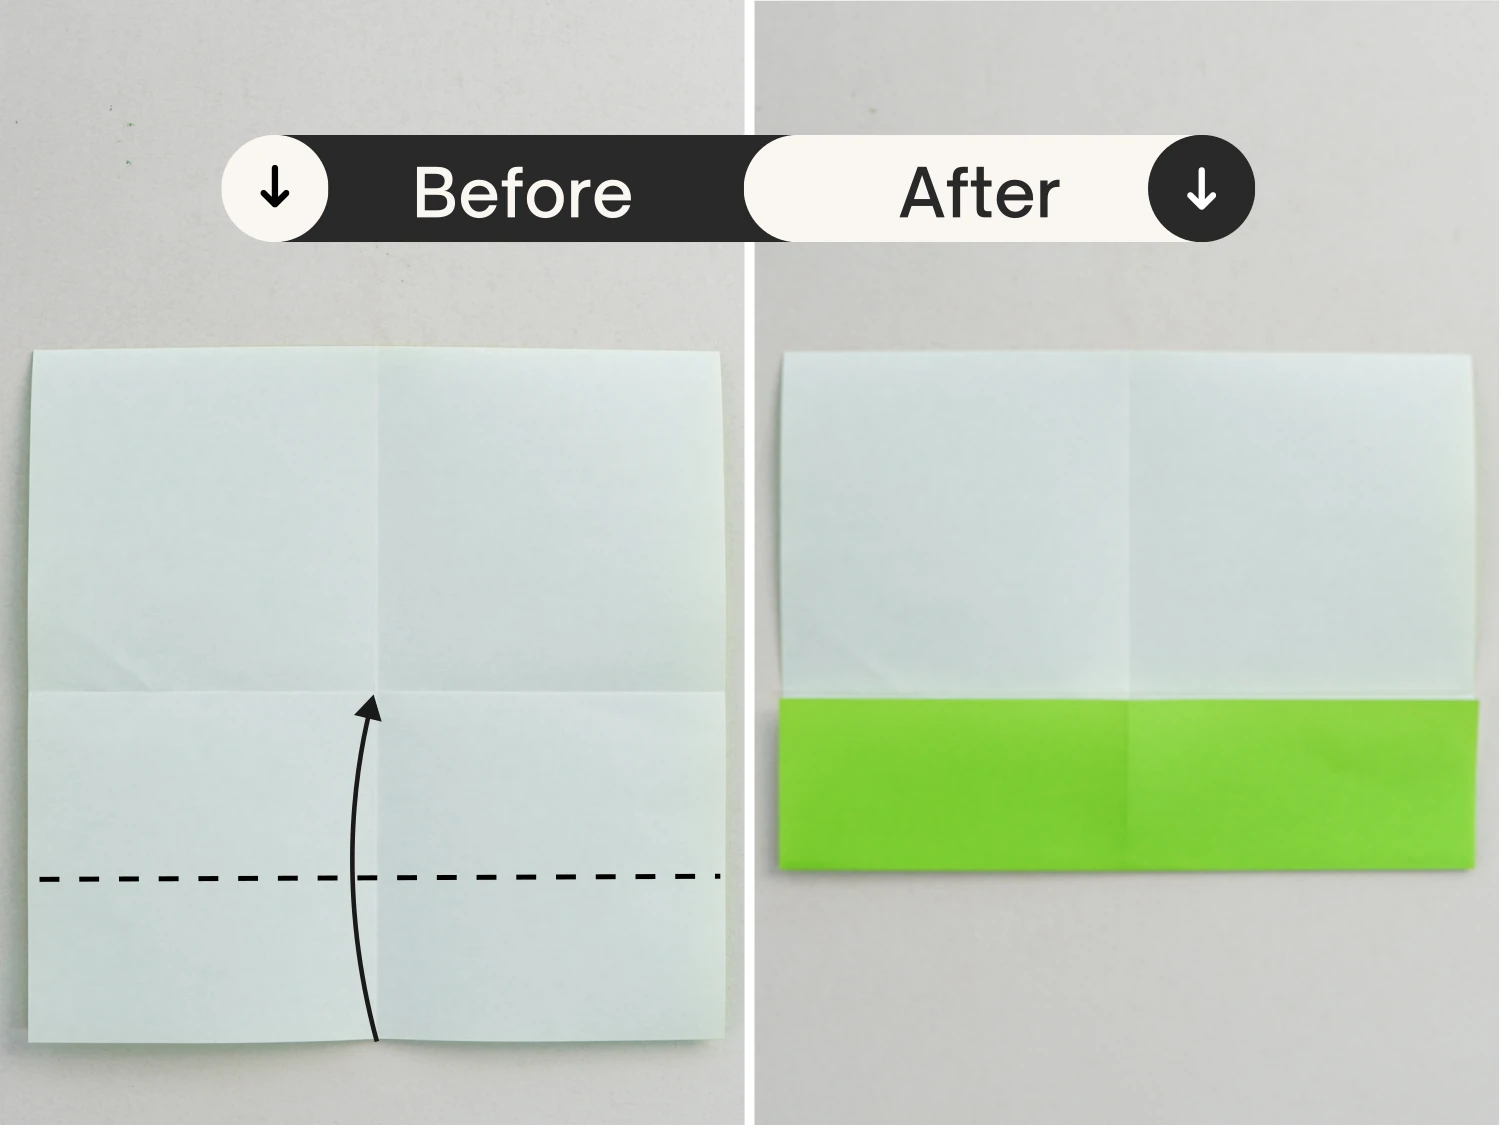
Fold the bottom edge up to align with the horizontal crease.
Step 5
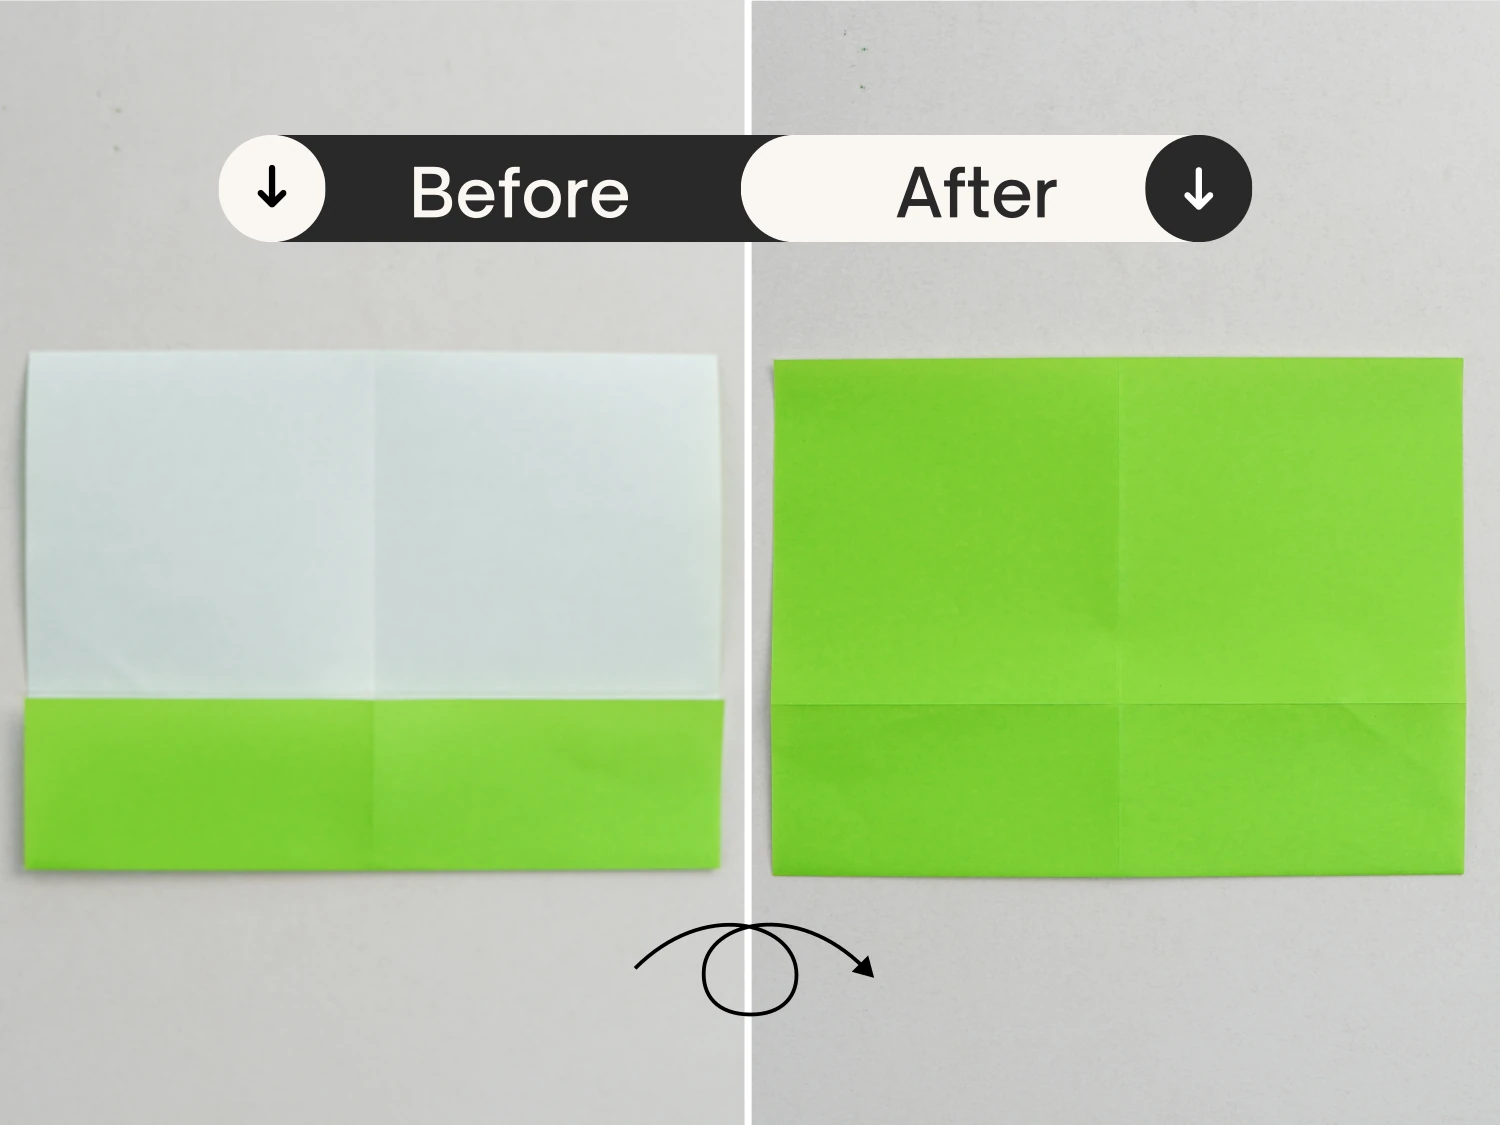
Flip it over.
Step 6
Fold the bottom right and bottom left corners diagonally to meet the vertical crease.
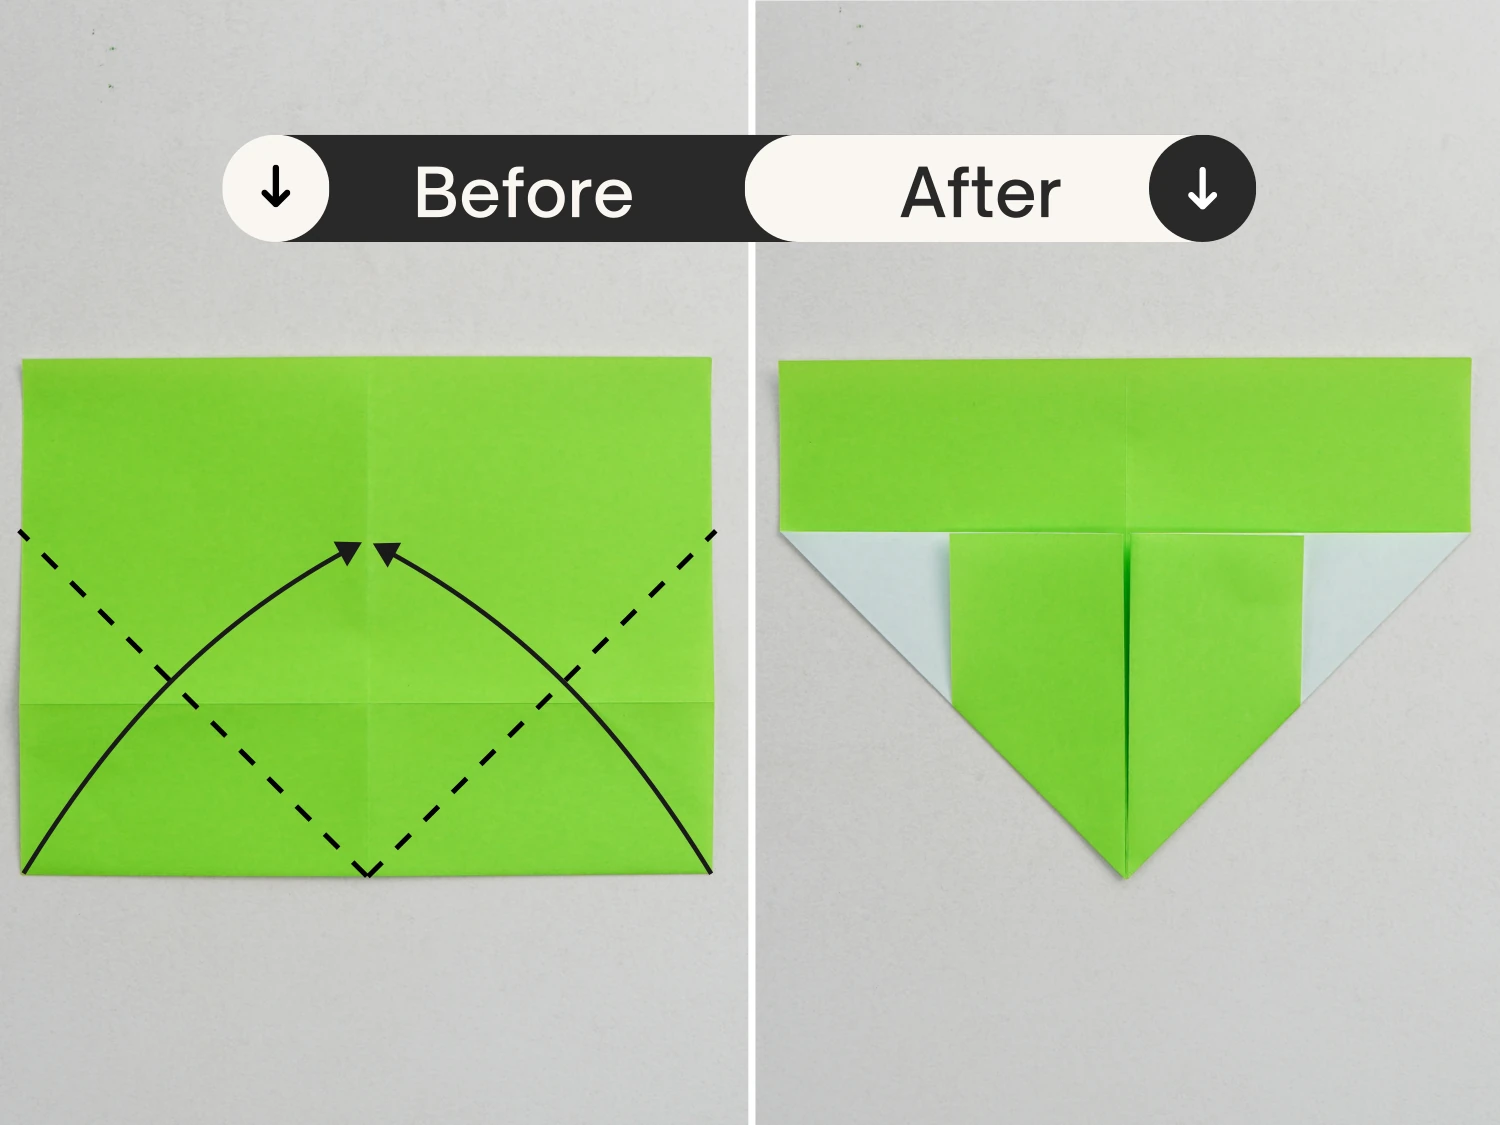
Step 7
Flip the paper over.
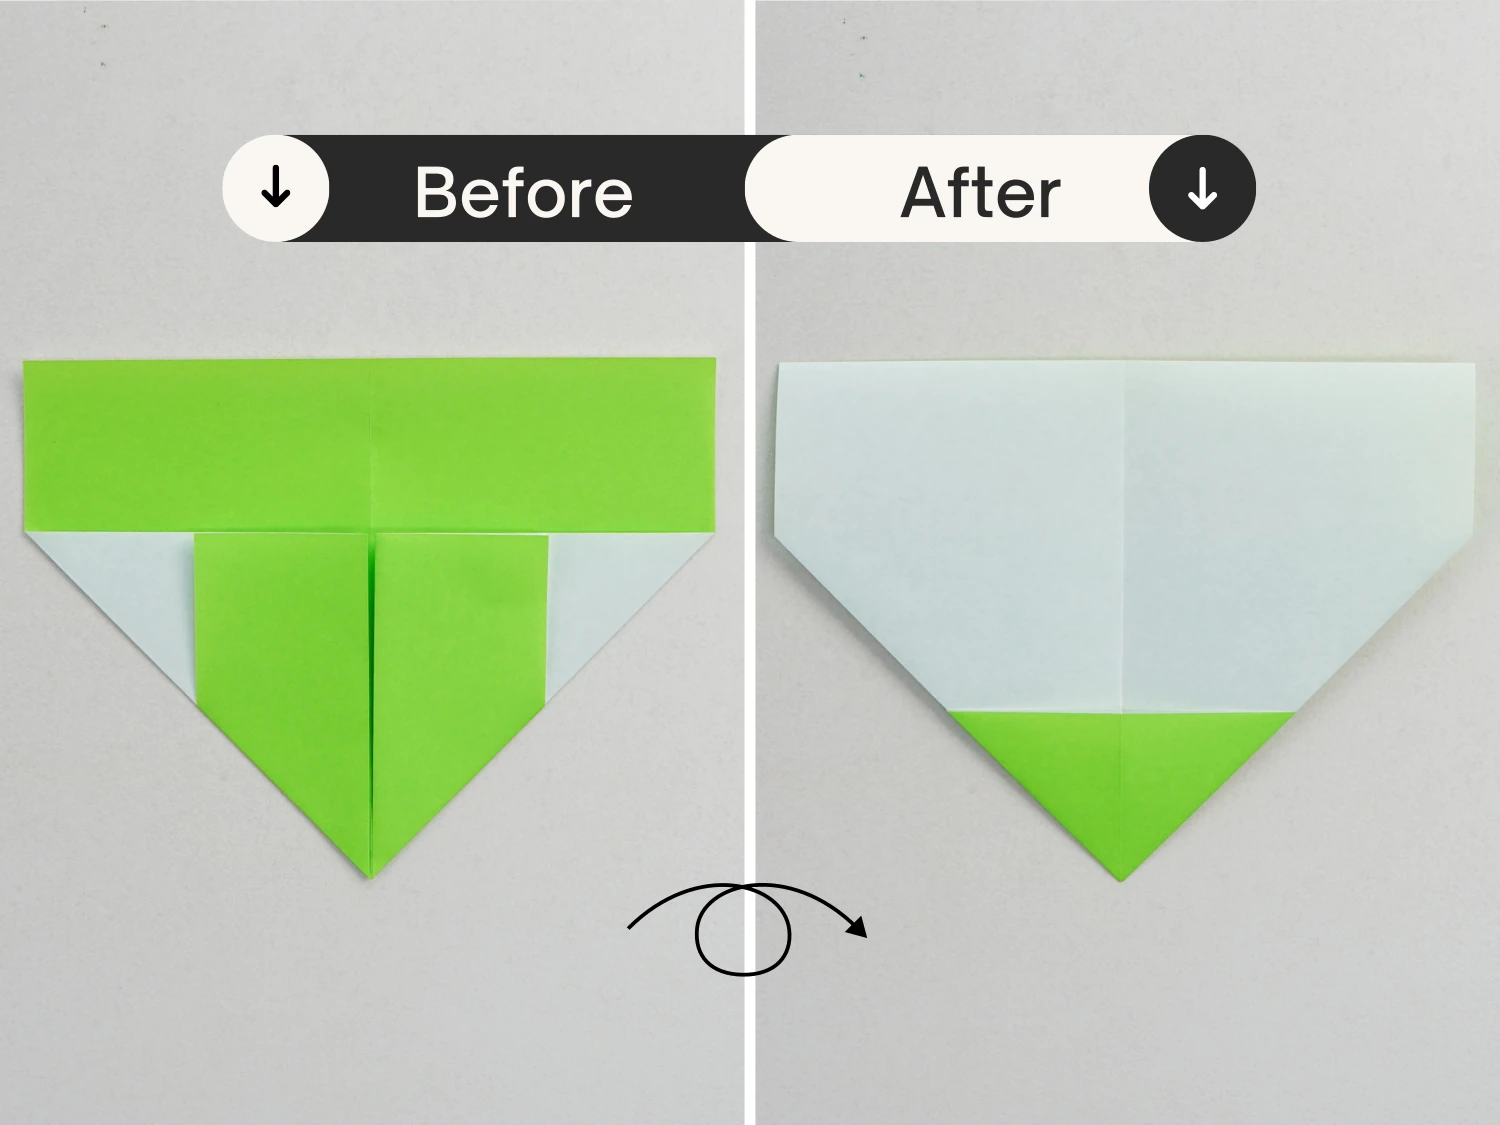
Step 8
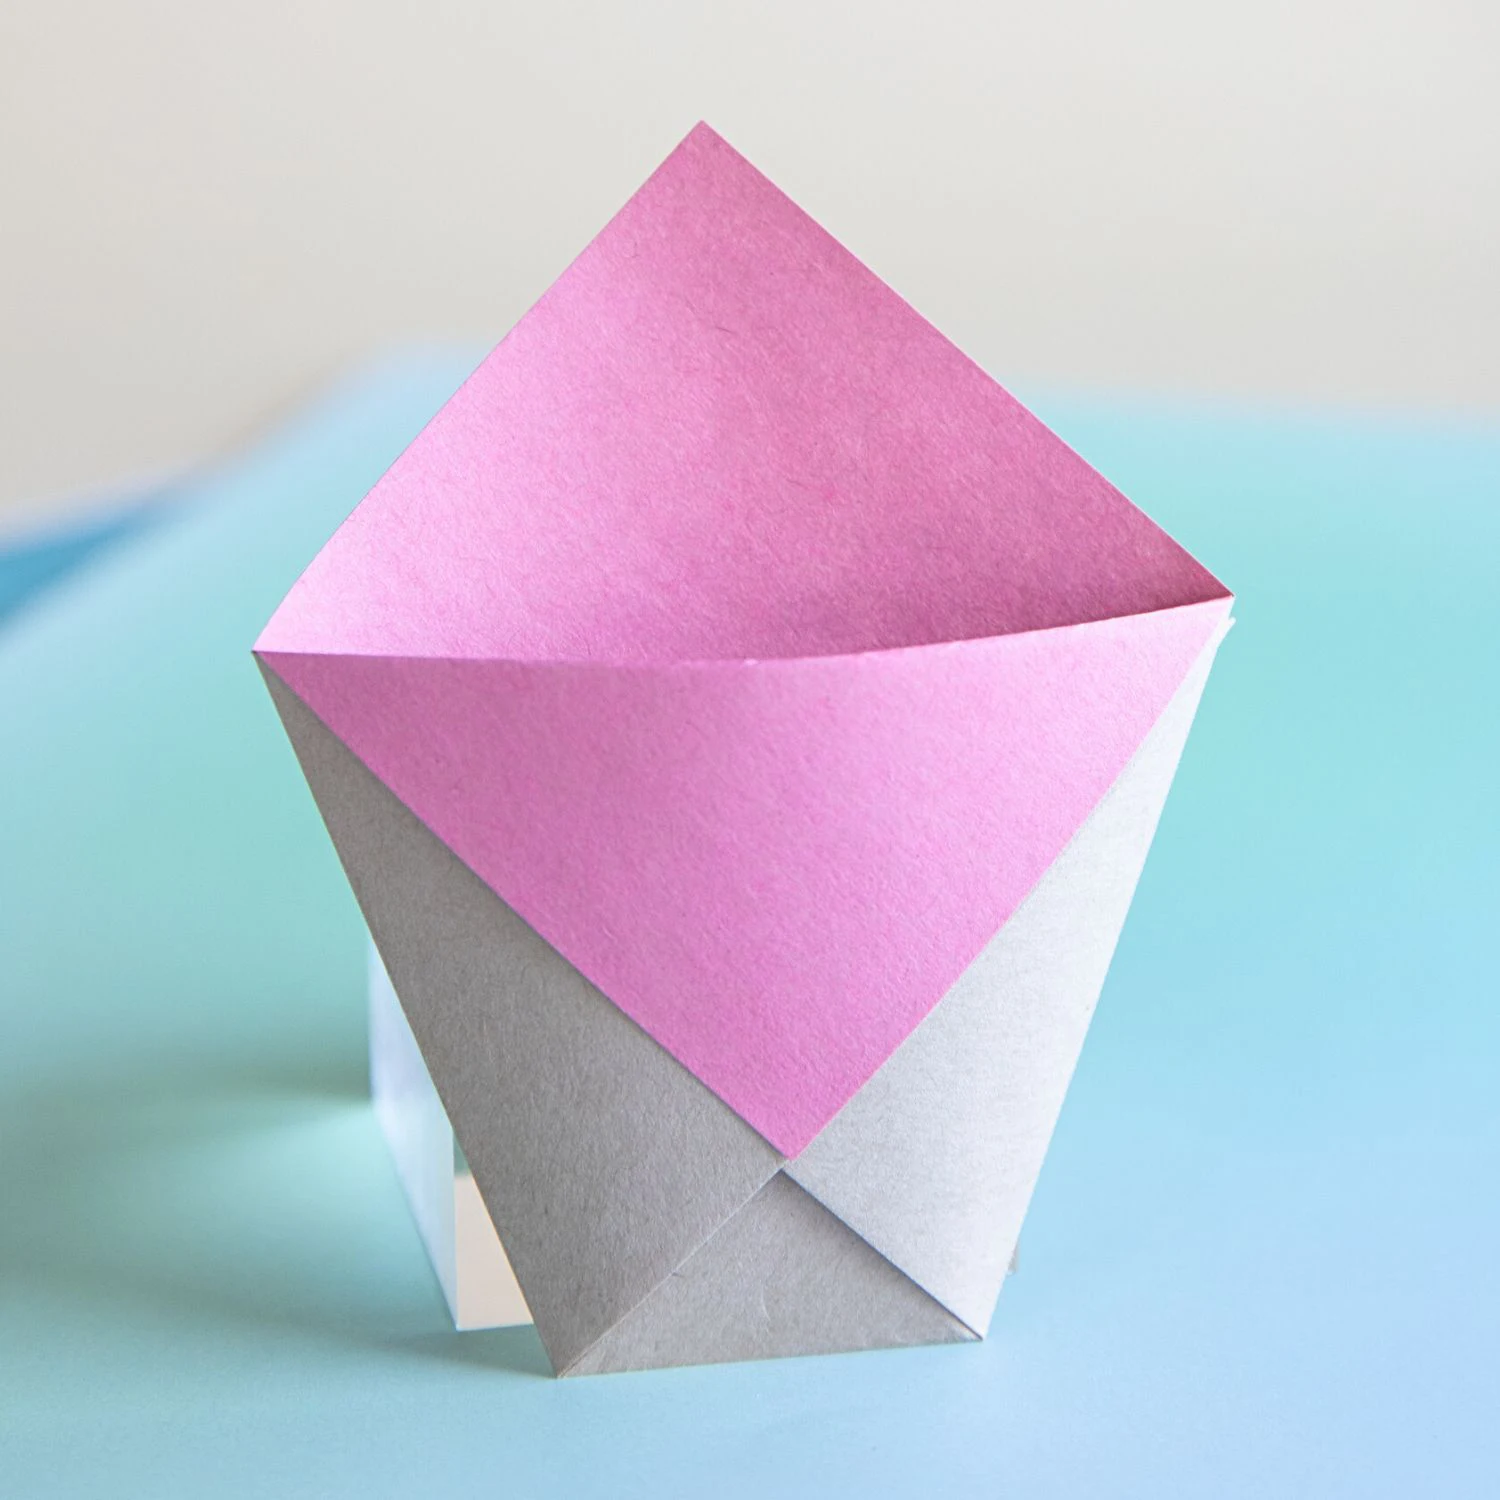
Fold the bottom corner up to meet the midpoint of the top edge.
Step 9
Flip it over again.
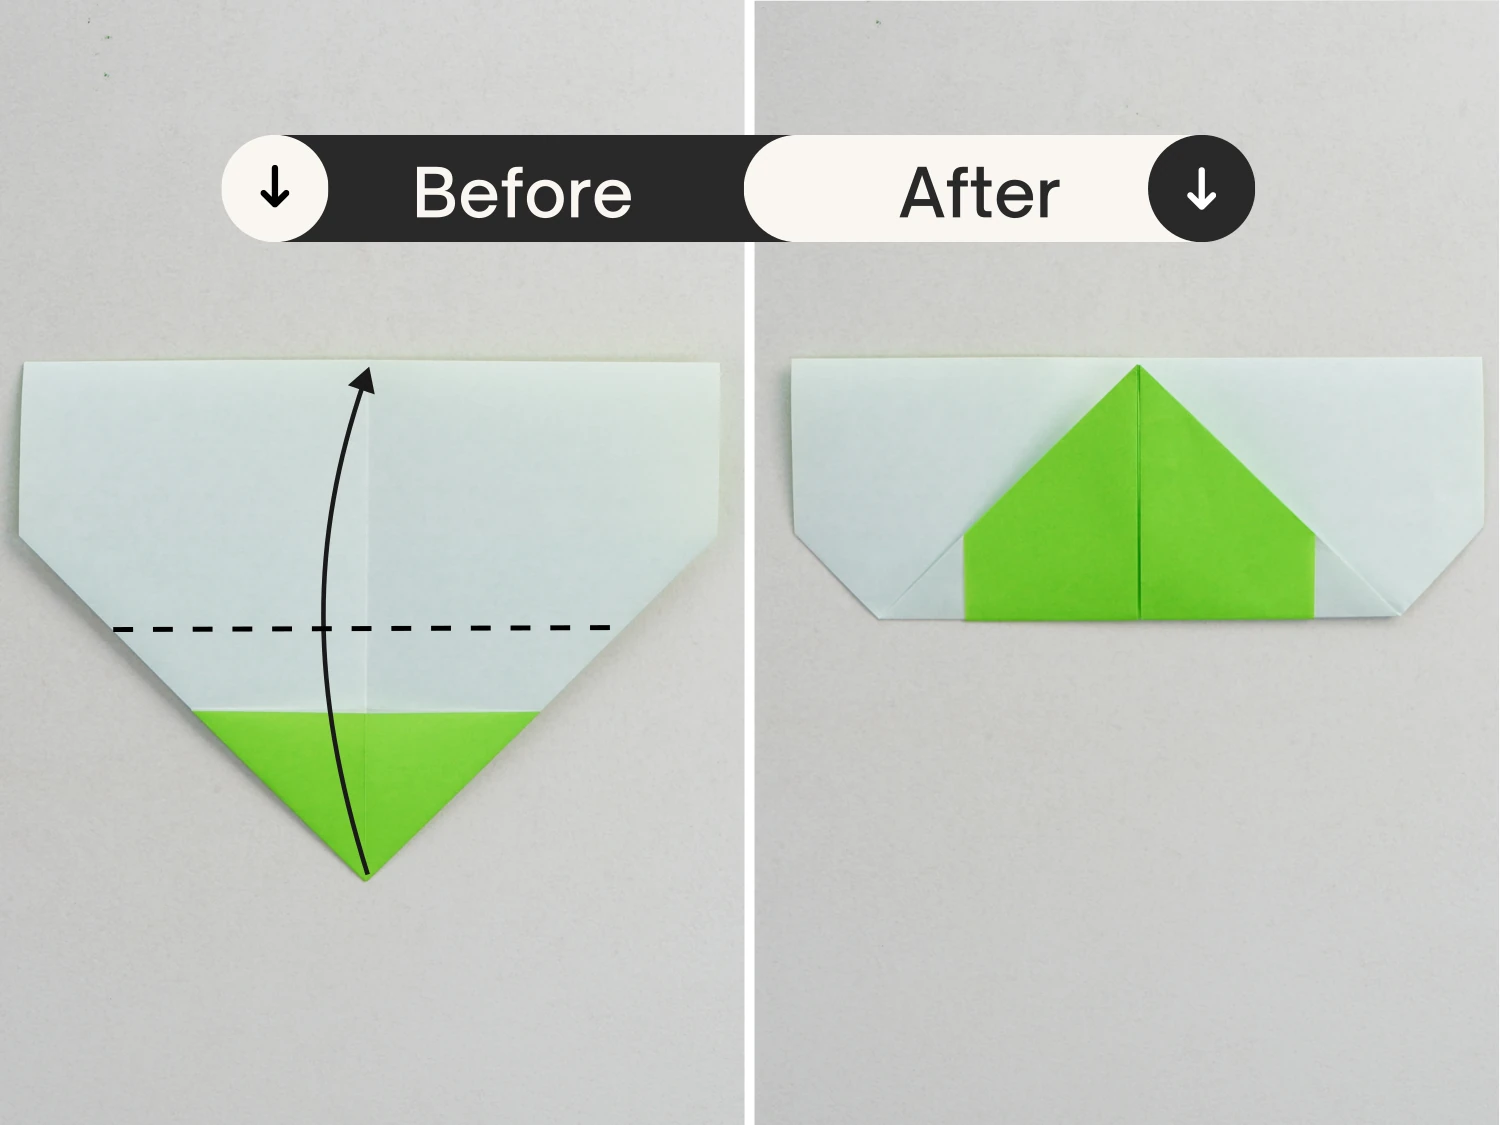
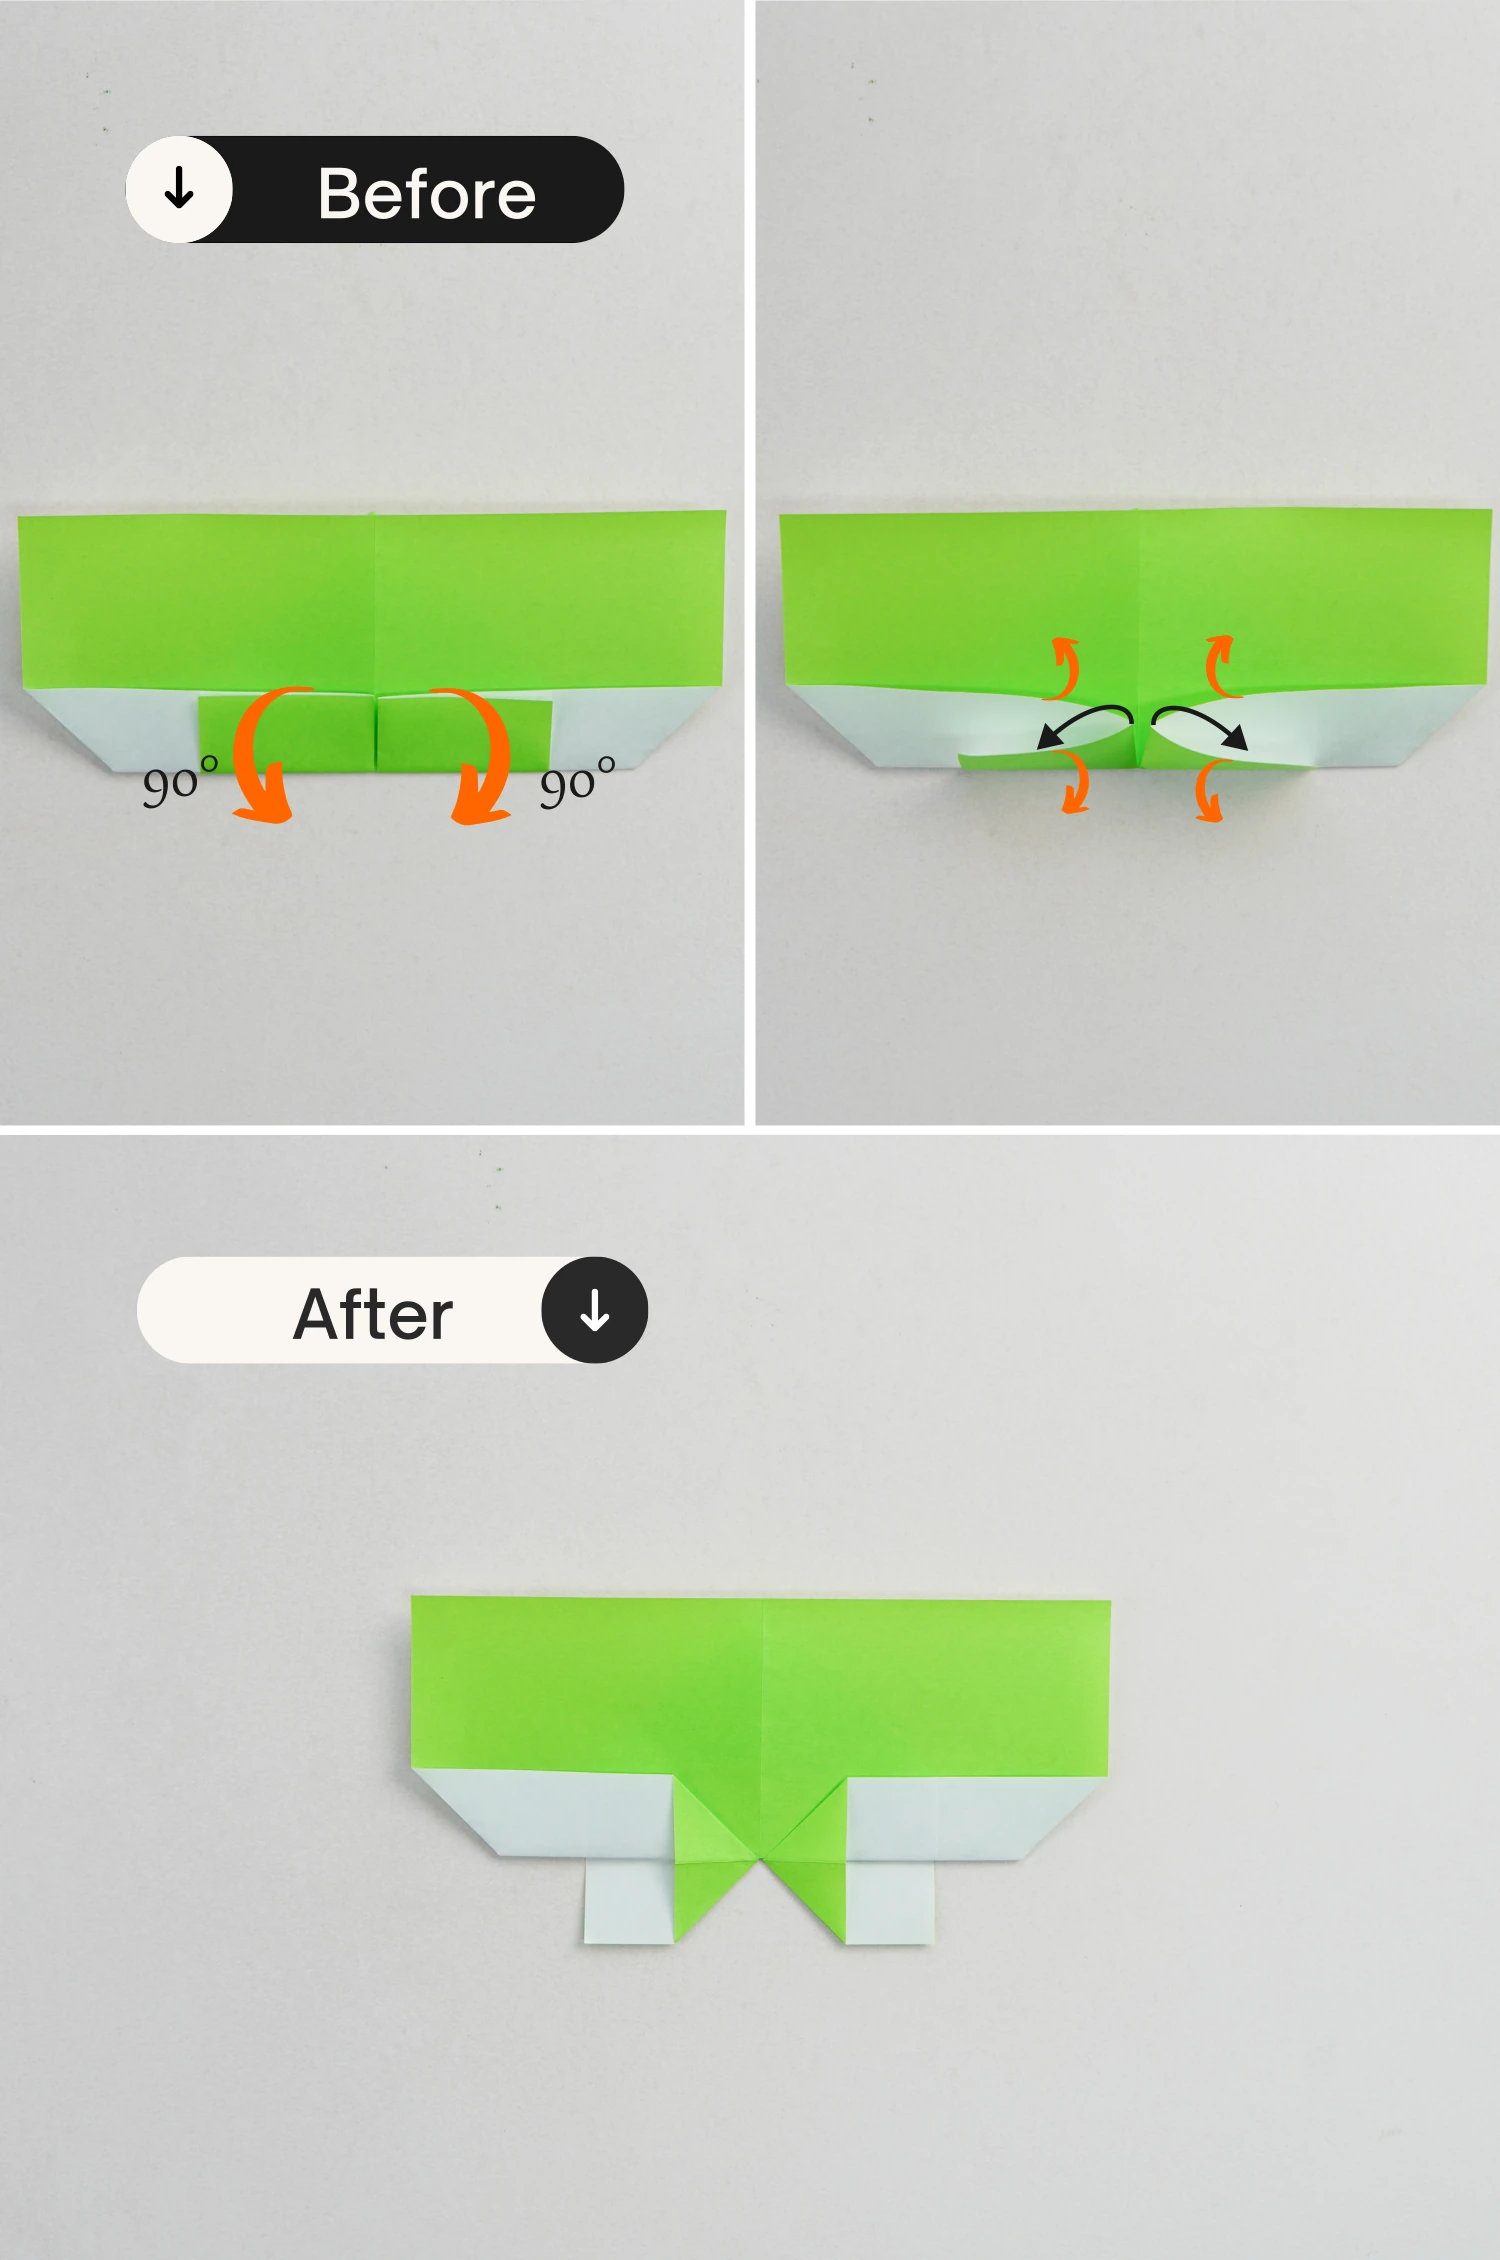
Step 10
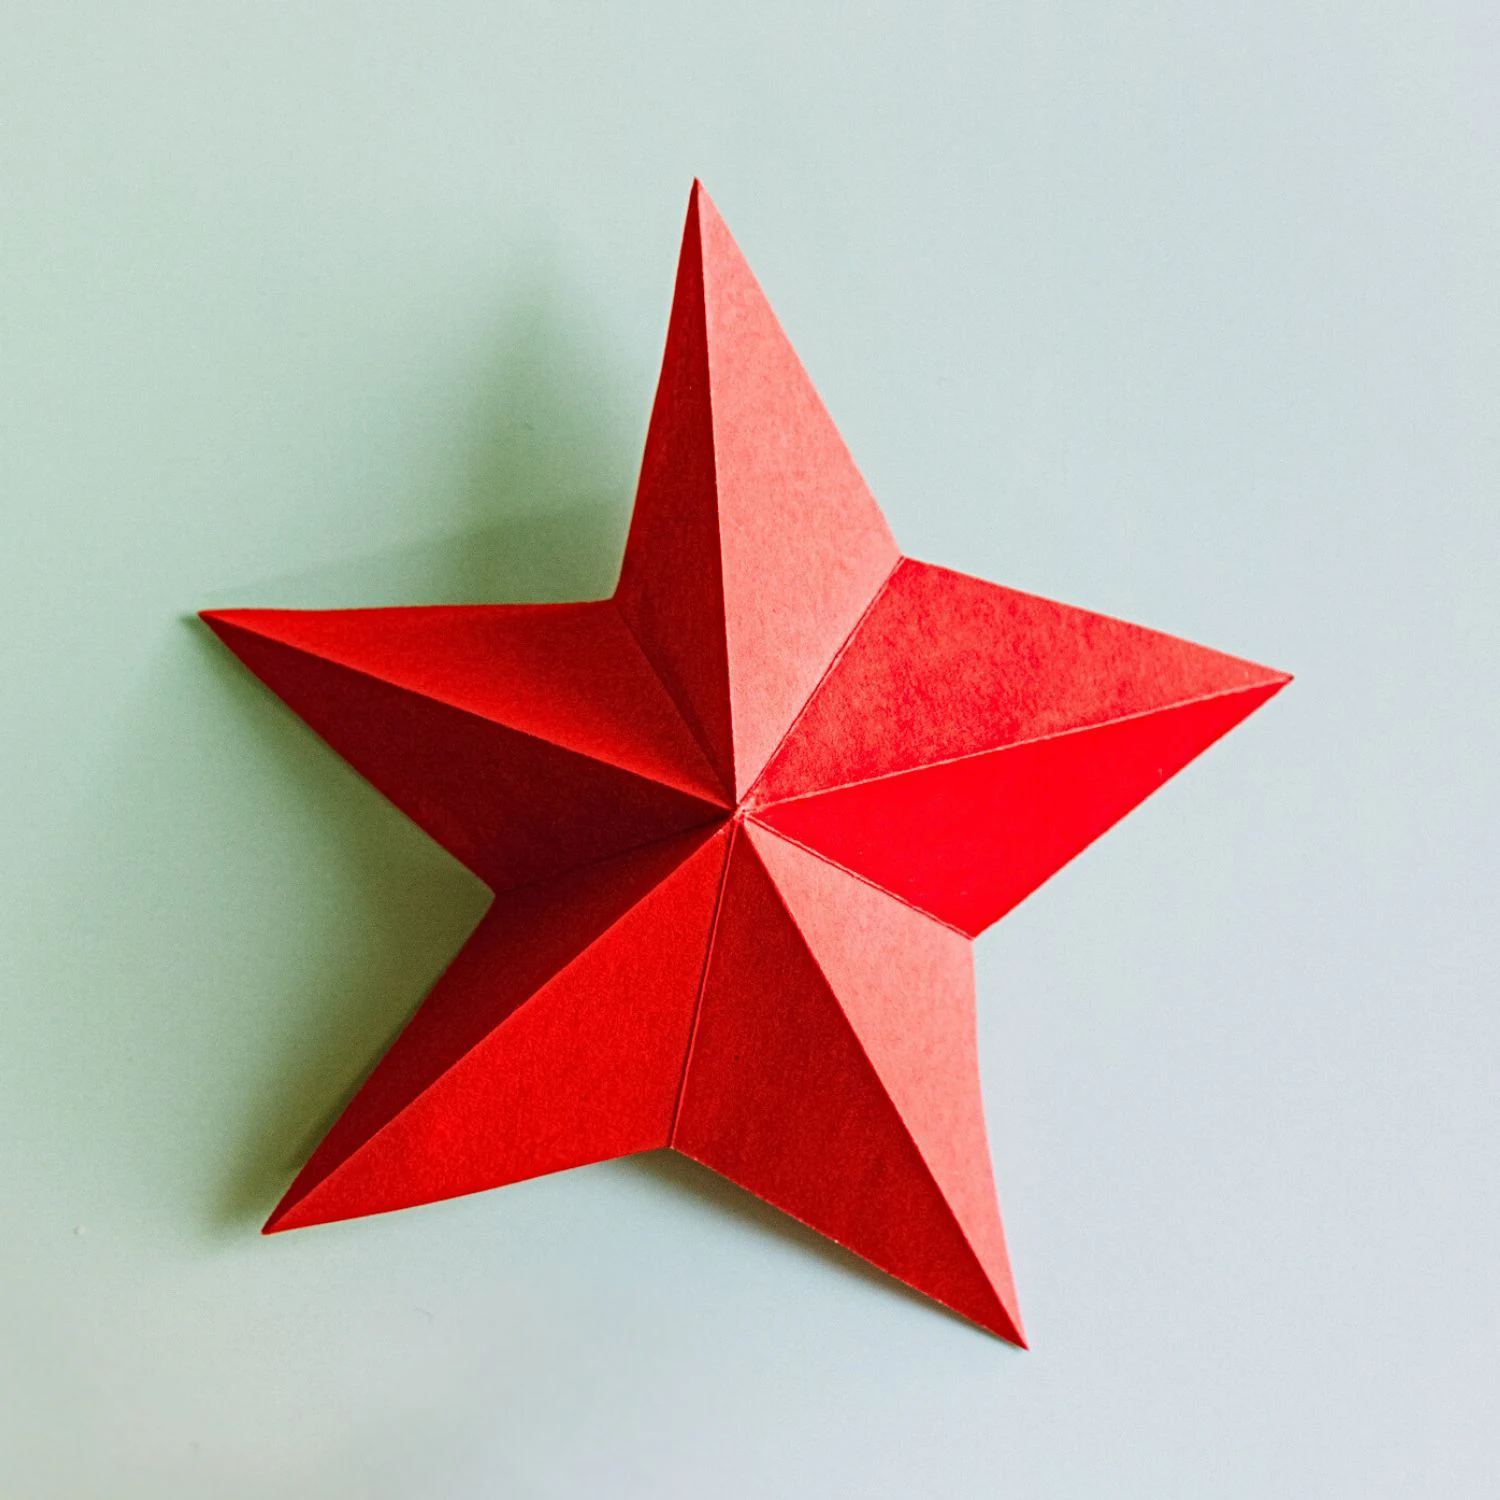
Bring up the lower two flaps, open the corners then squash them, forming two triangles.
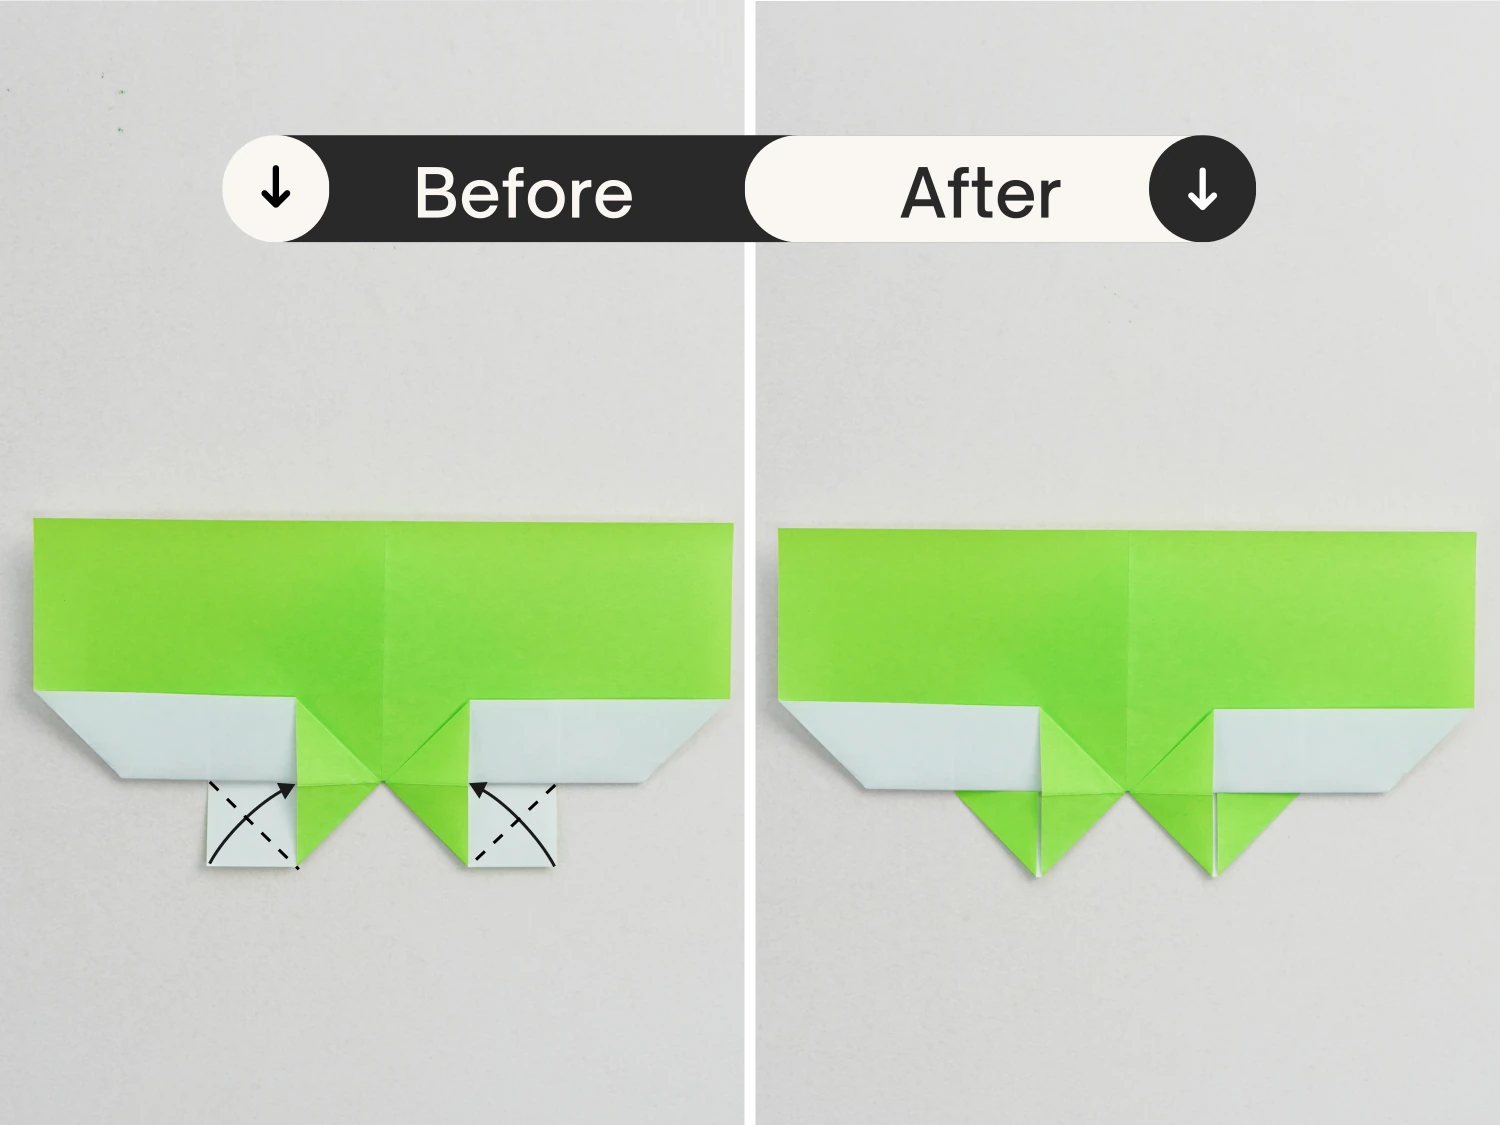
Step 11
Fold the bottom left and bottom right corners diagonally.
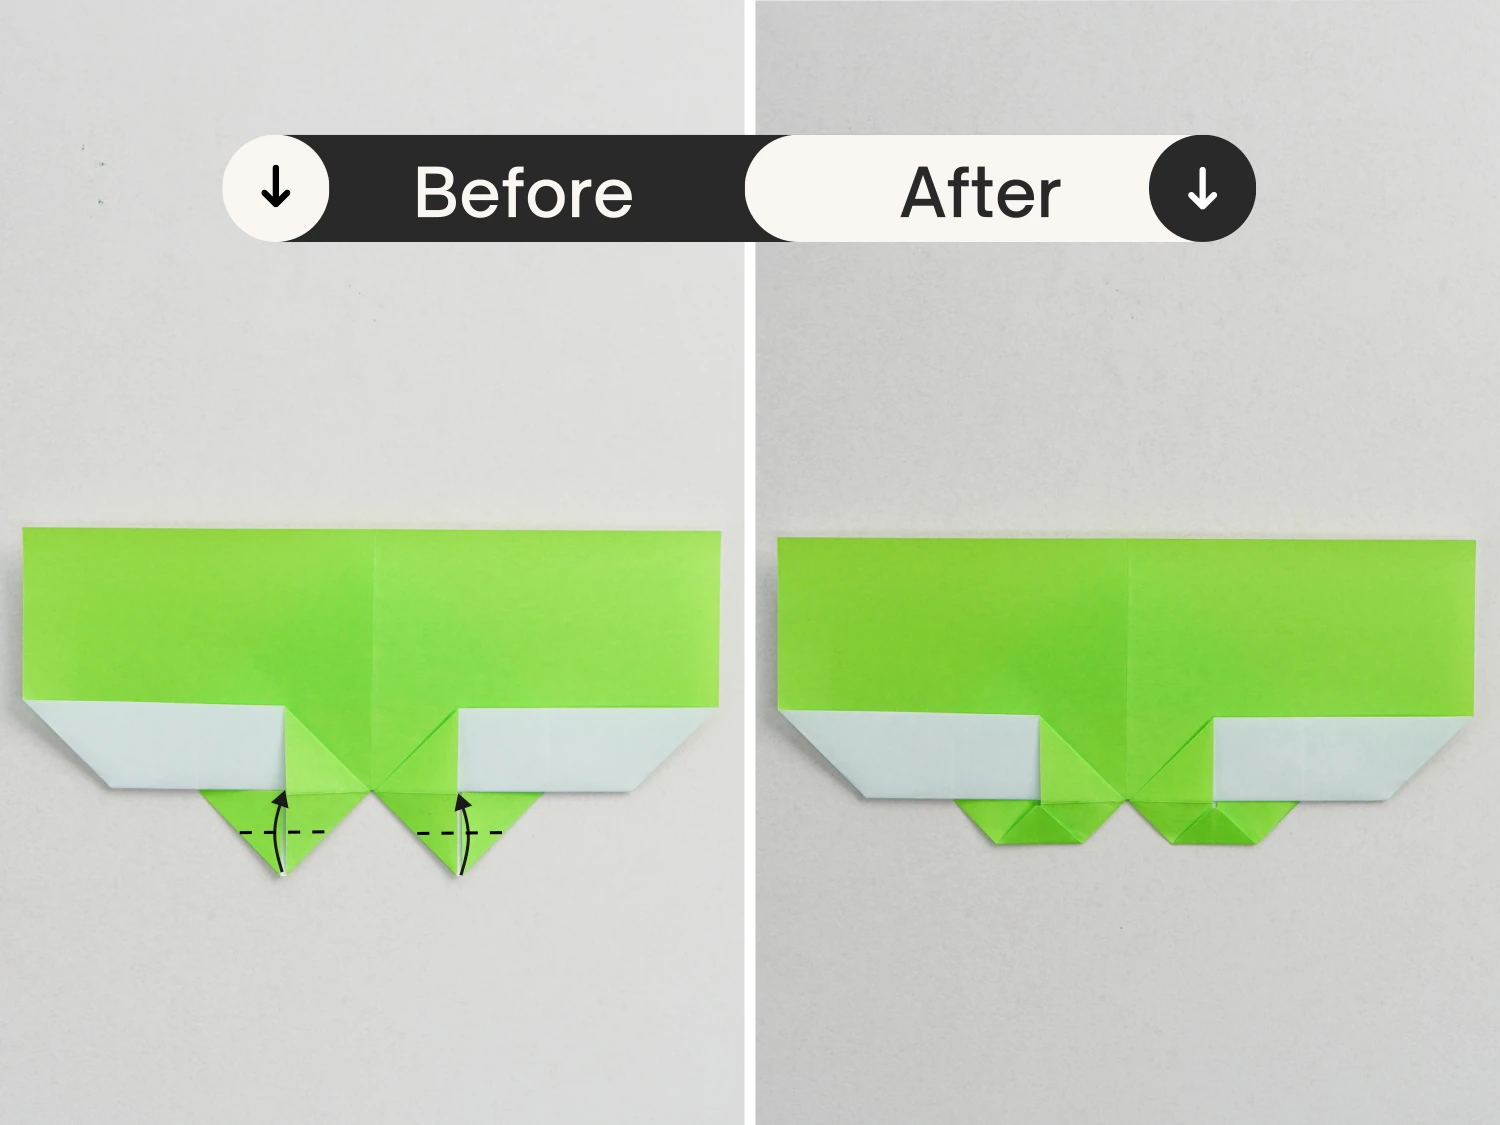
Step 12
Fold these two bottom corners up a little.
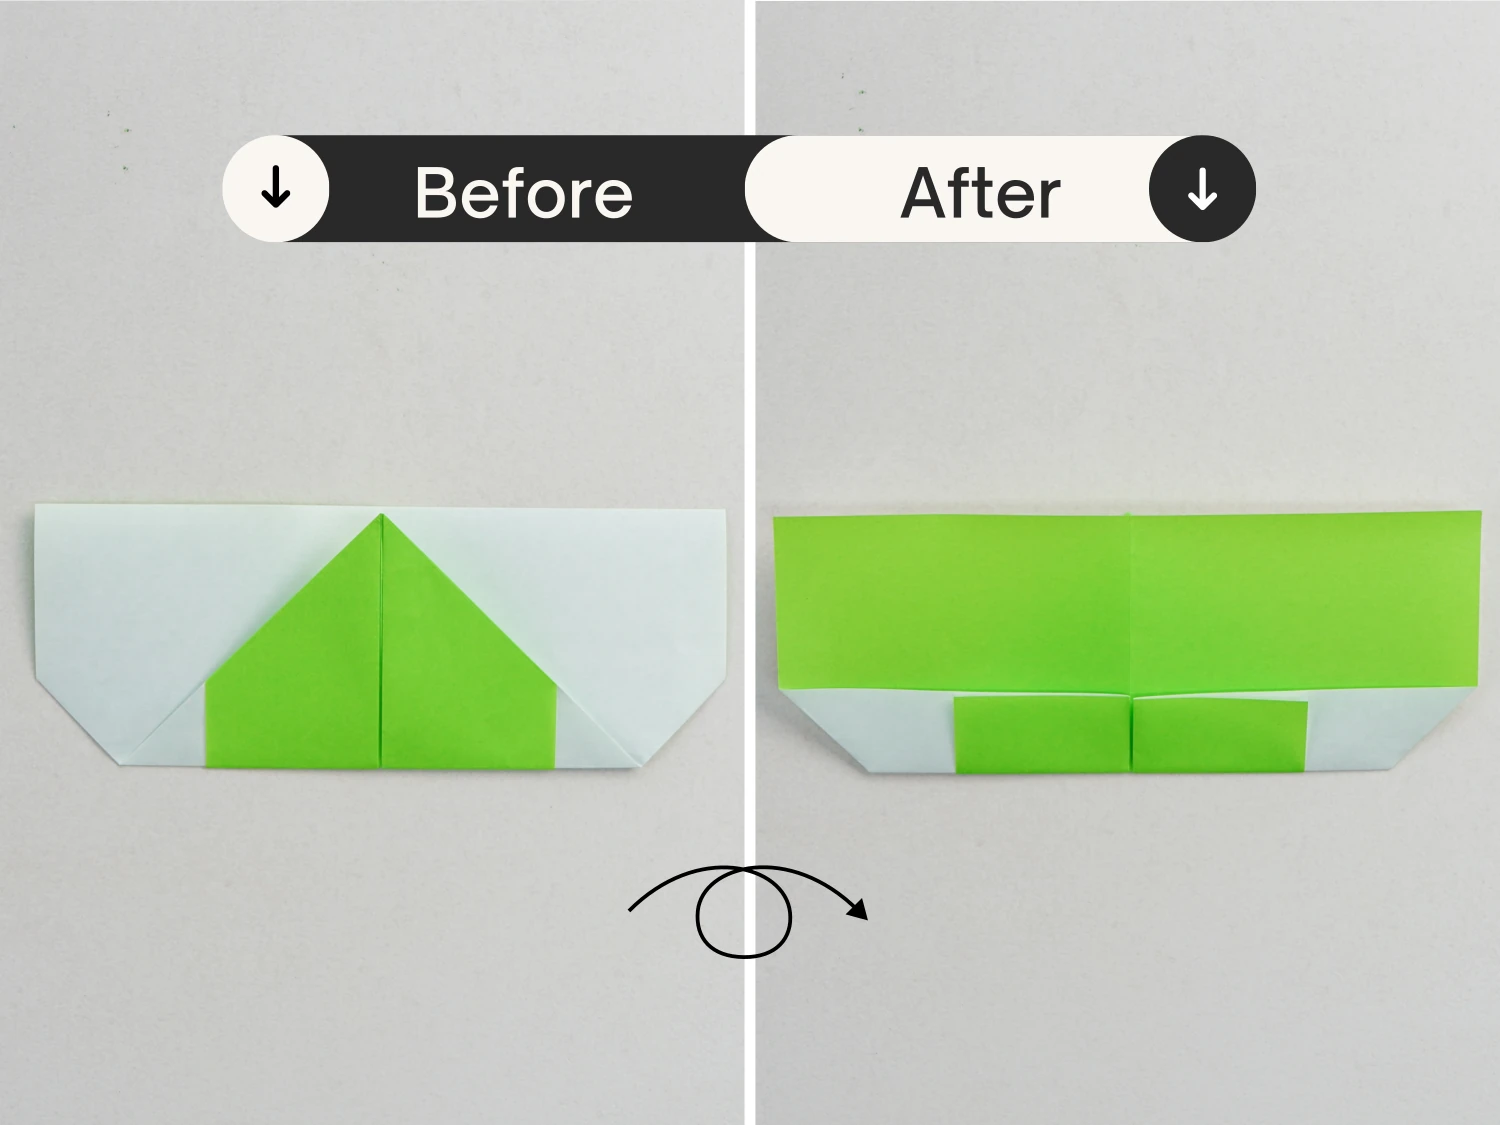
Step 13
Fold the left and right edges to align with the middle vertical crease.
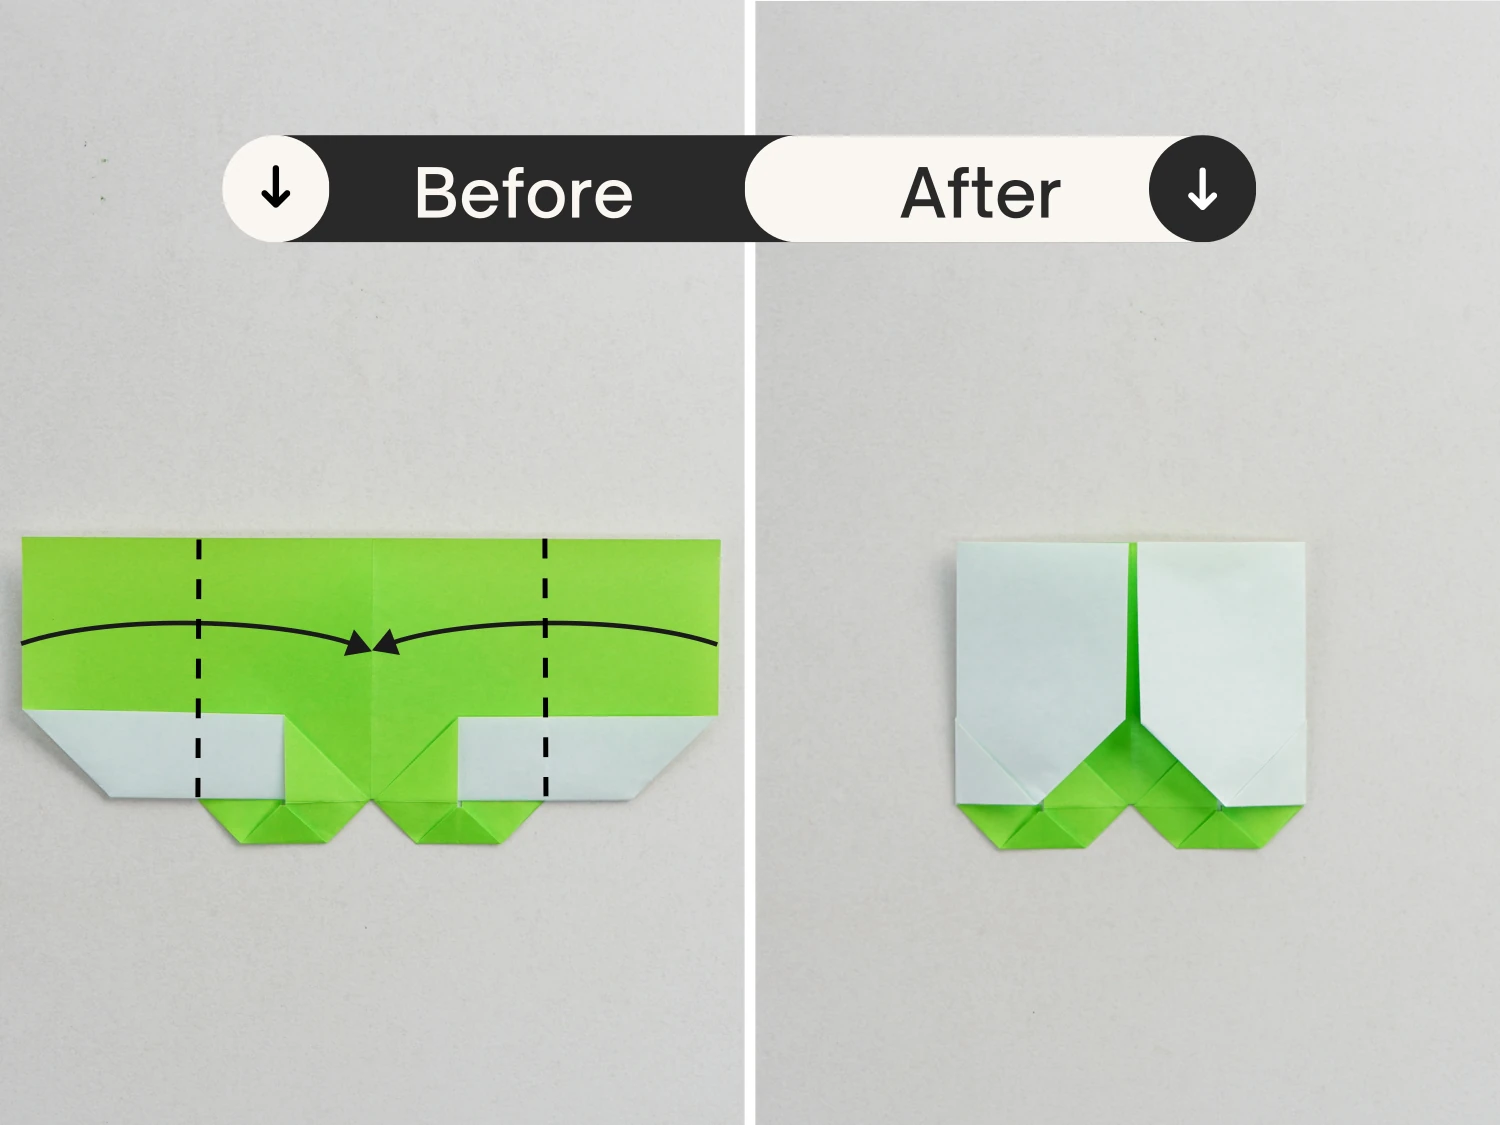
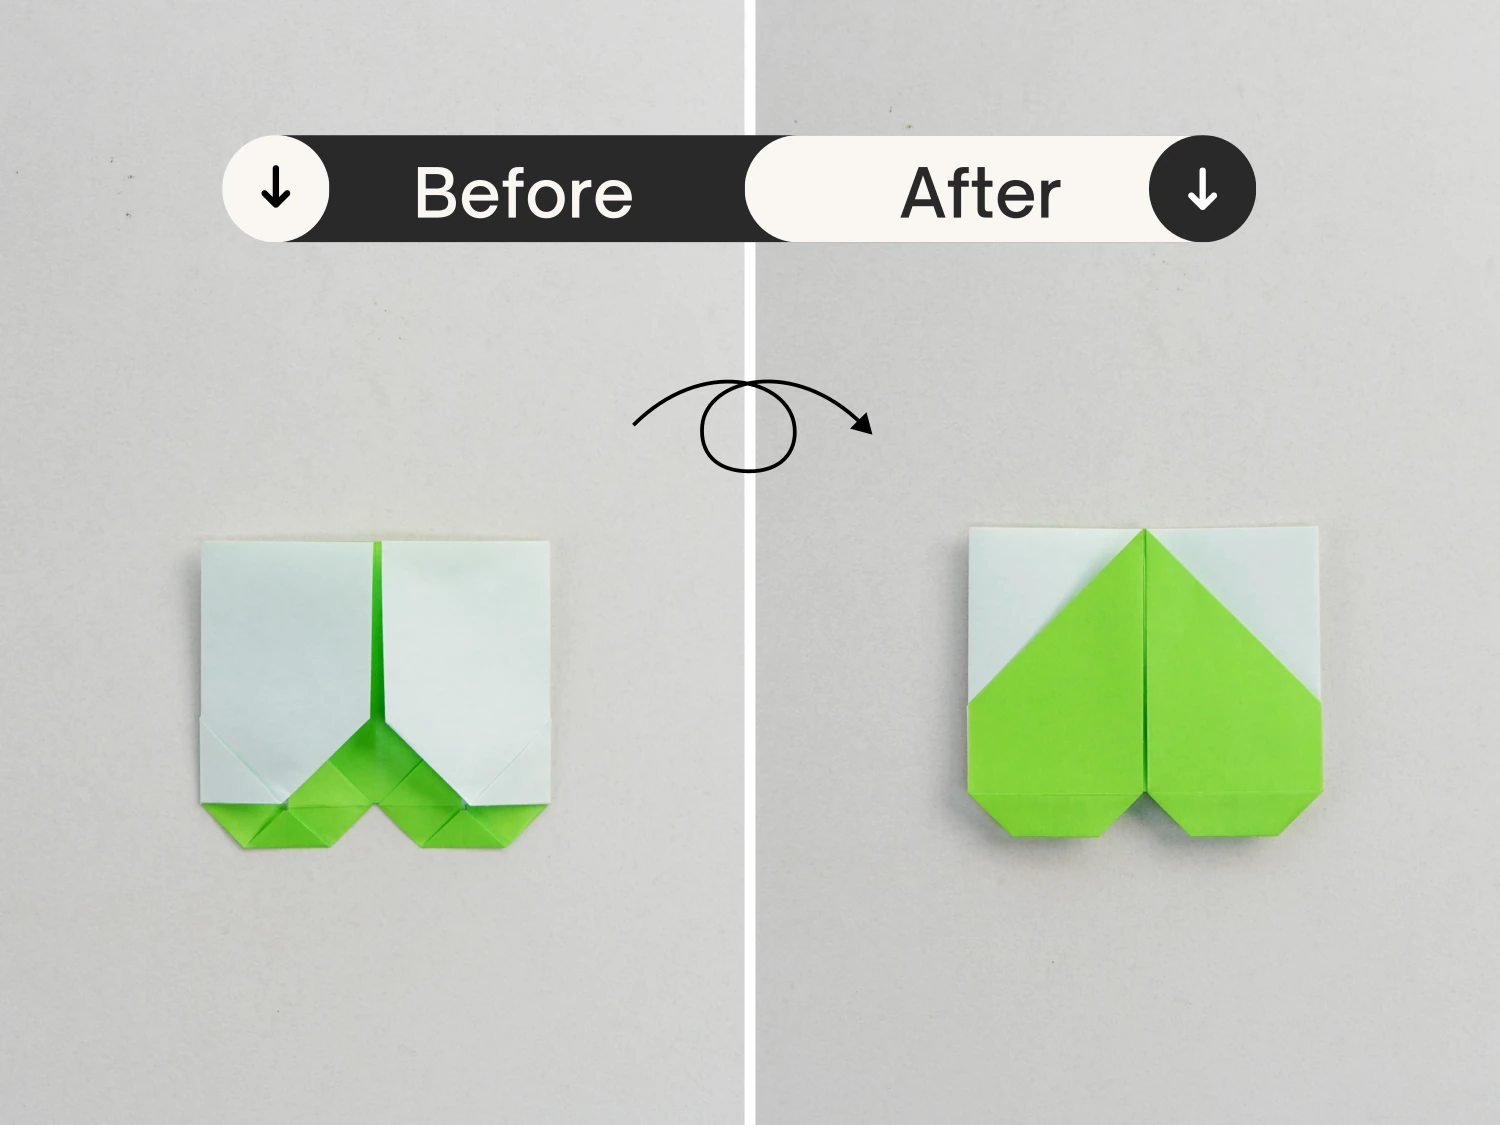
Step 14
Flip the model over, one of the leaves of the four leaf clover is ready.
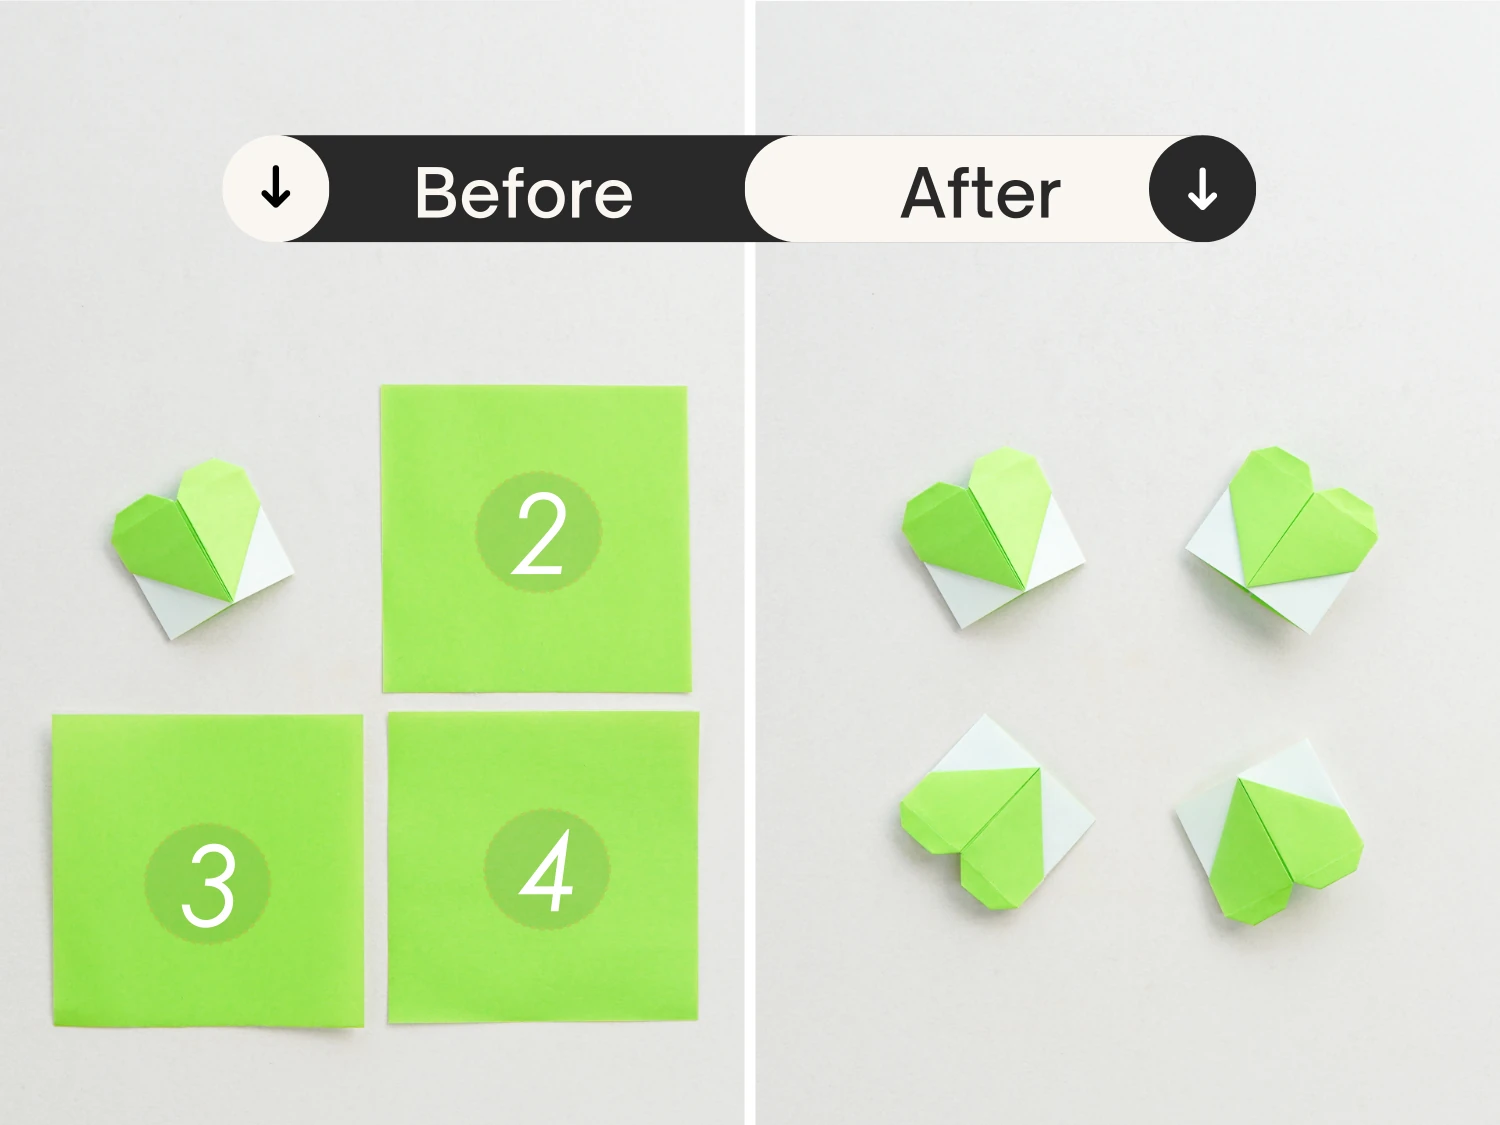
Step 15
Follow the same steps above to finish the remaining three small square papers, getting four leaves.
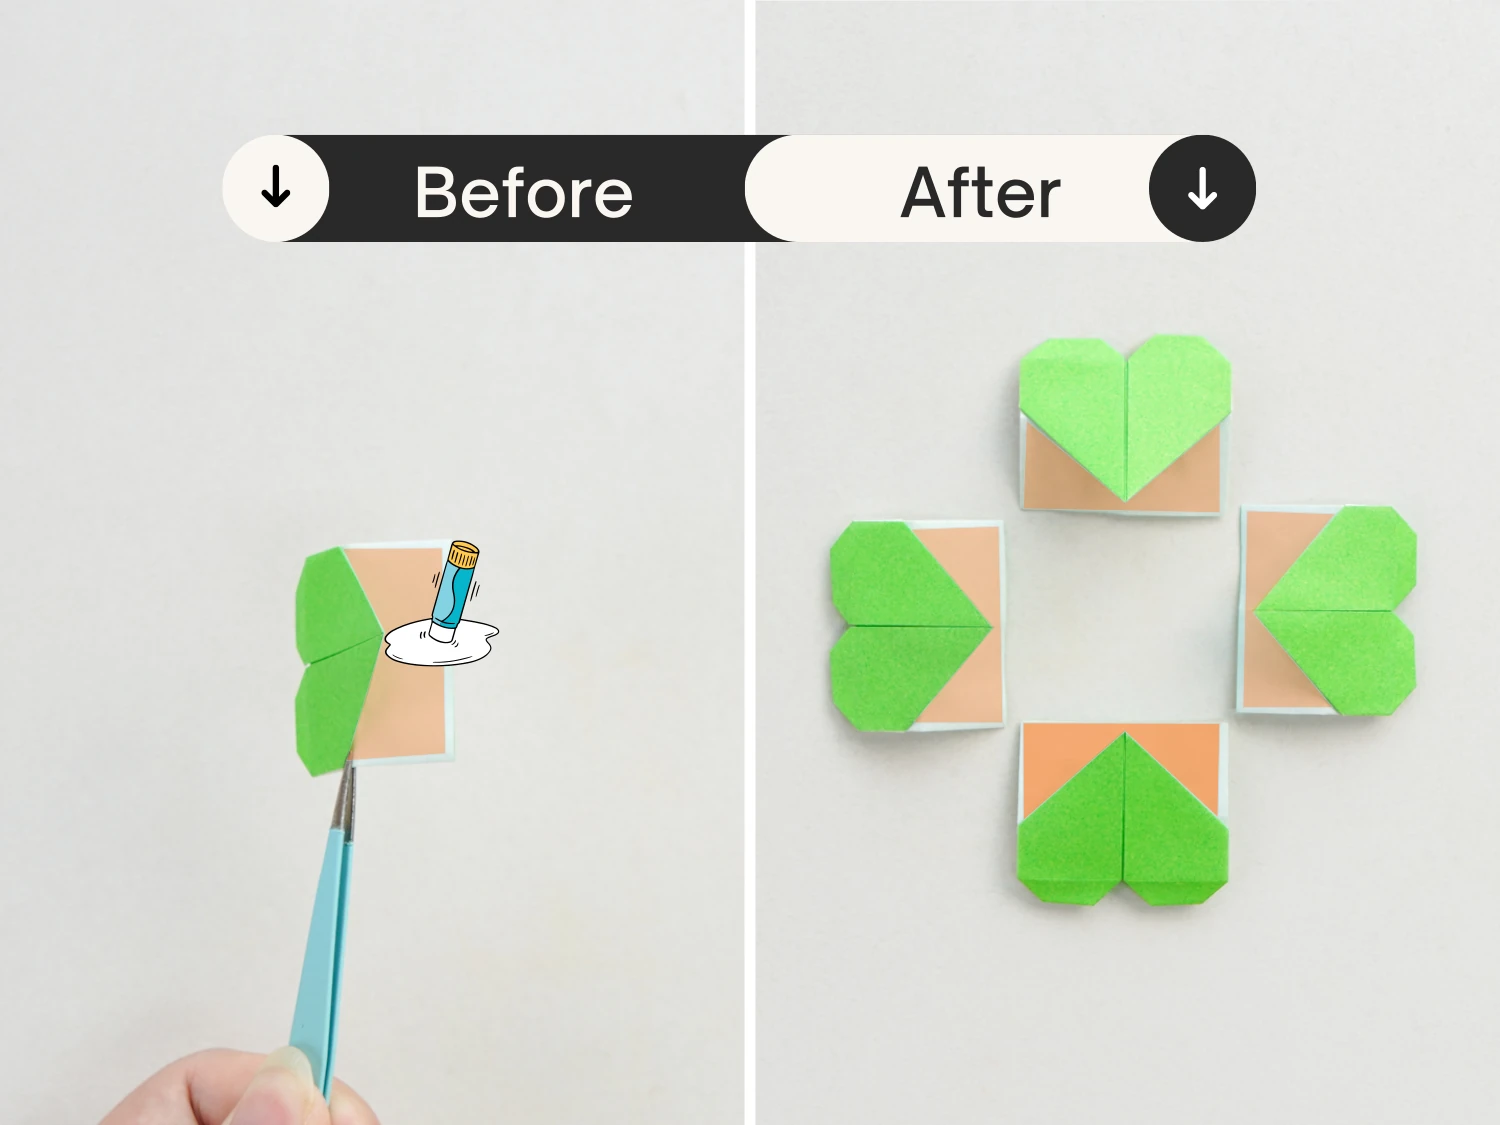
Step 16
Apply glue to the white part under each leaf’s green part.
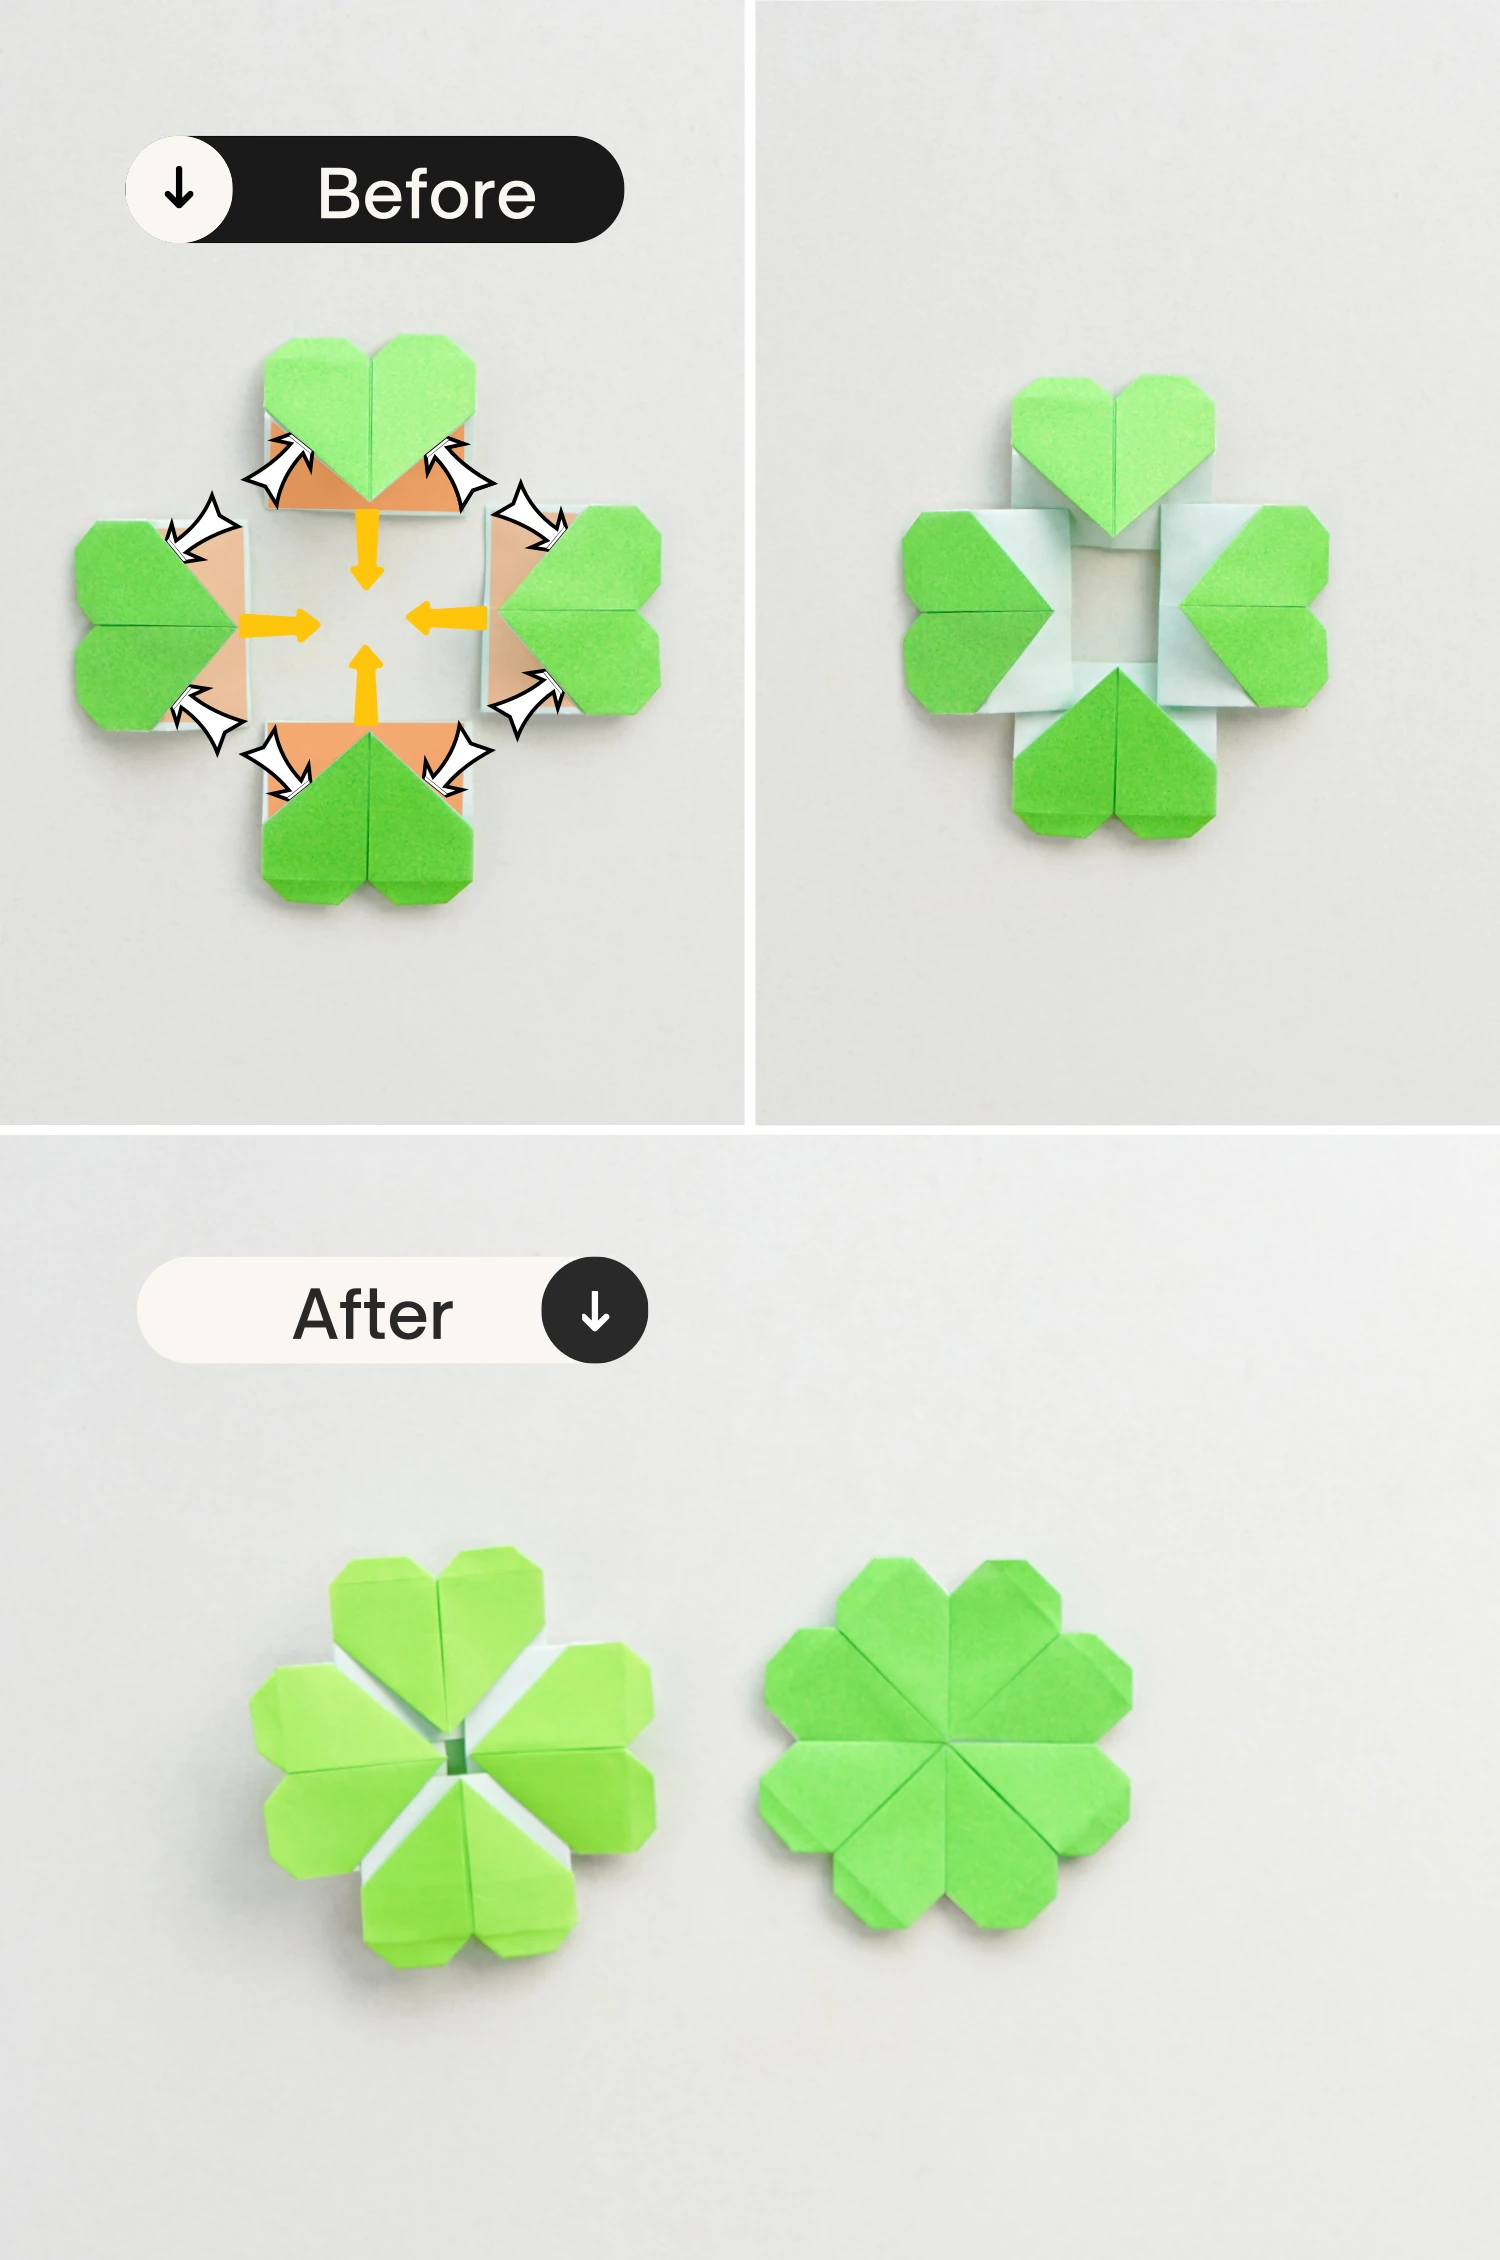
Step 17
Tuck them as the picture shows, and we are done! a lovely four leaf clover.
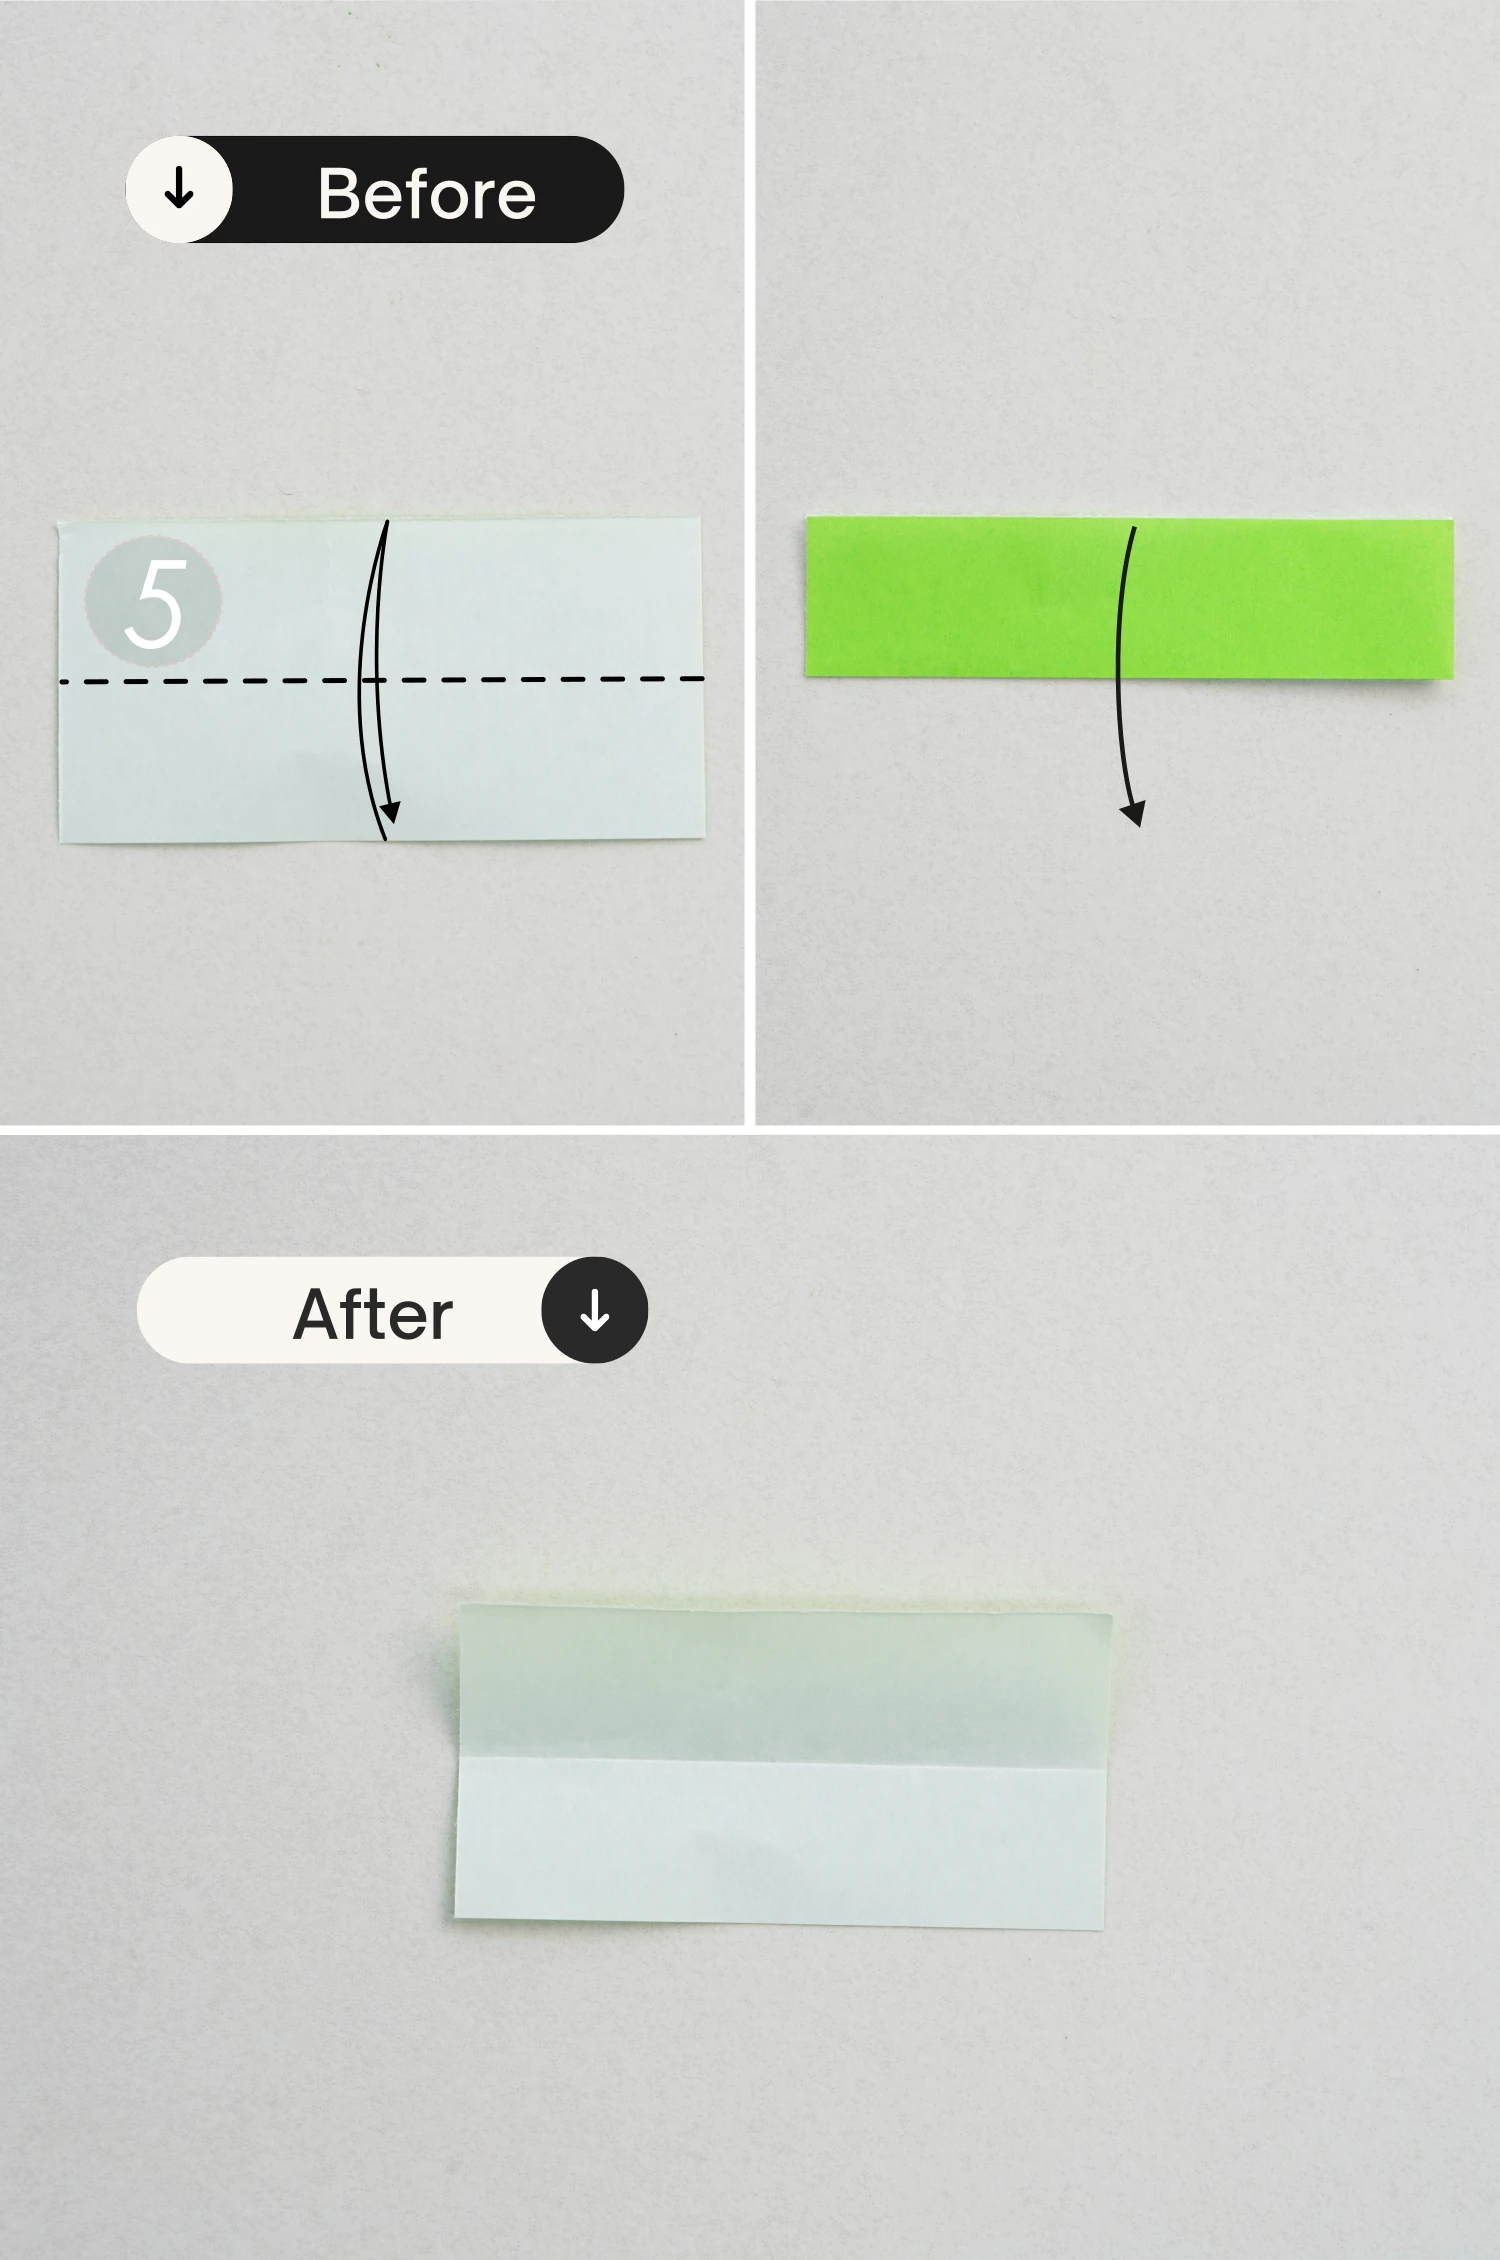
Step 18
Now take out the number 5 rectangle paper, start with the white side of the paper facing up, fold it in half horizontally, crease it well then unfold it.
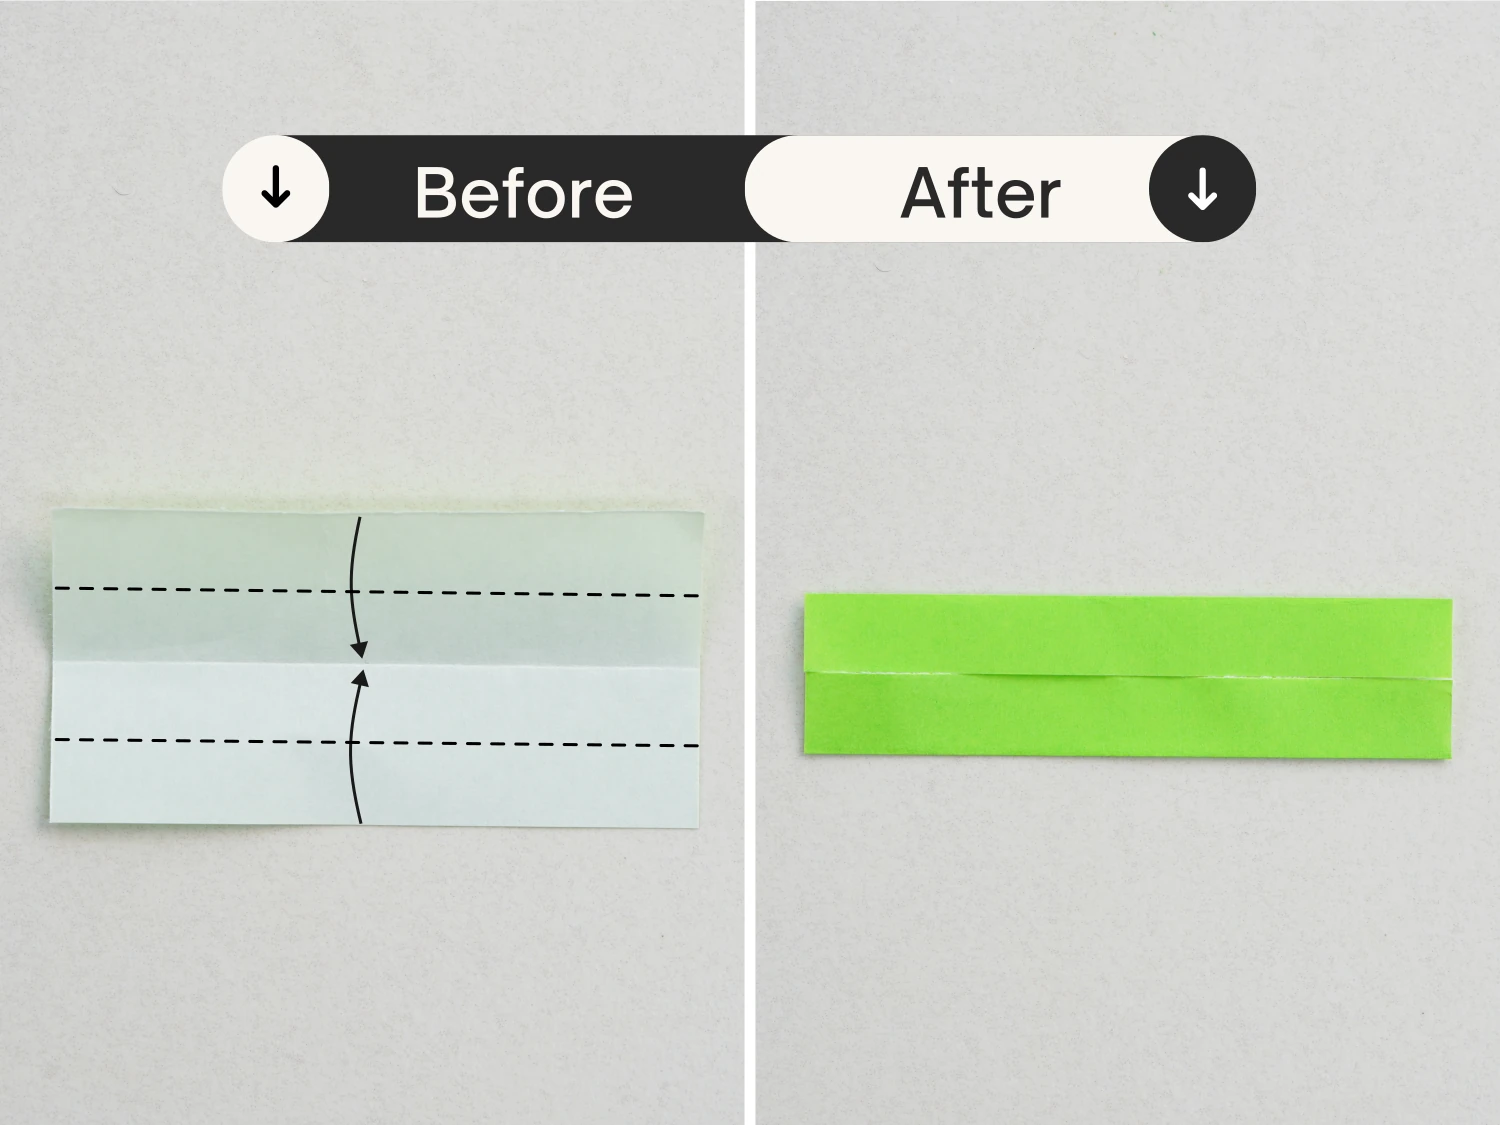
Step 19
Fold both the top and bottom edges to align with the crease you just made.
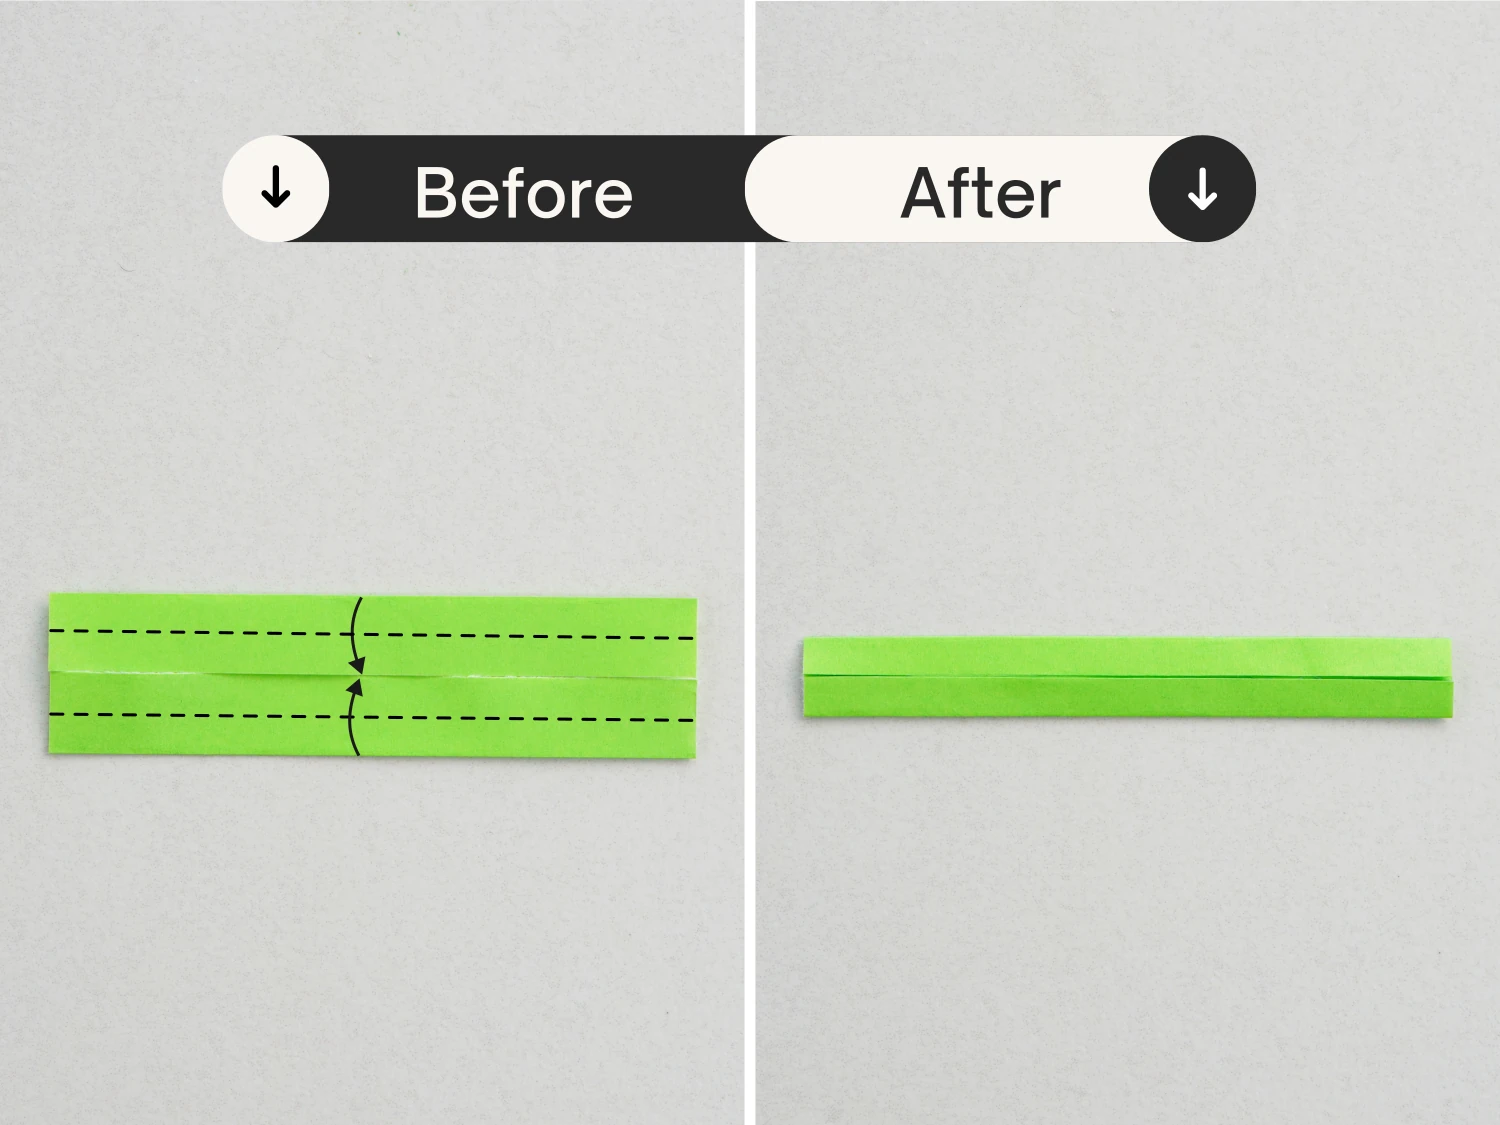
Step 20
Then fold both the top and bottom edges to meet the center creases again.
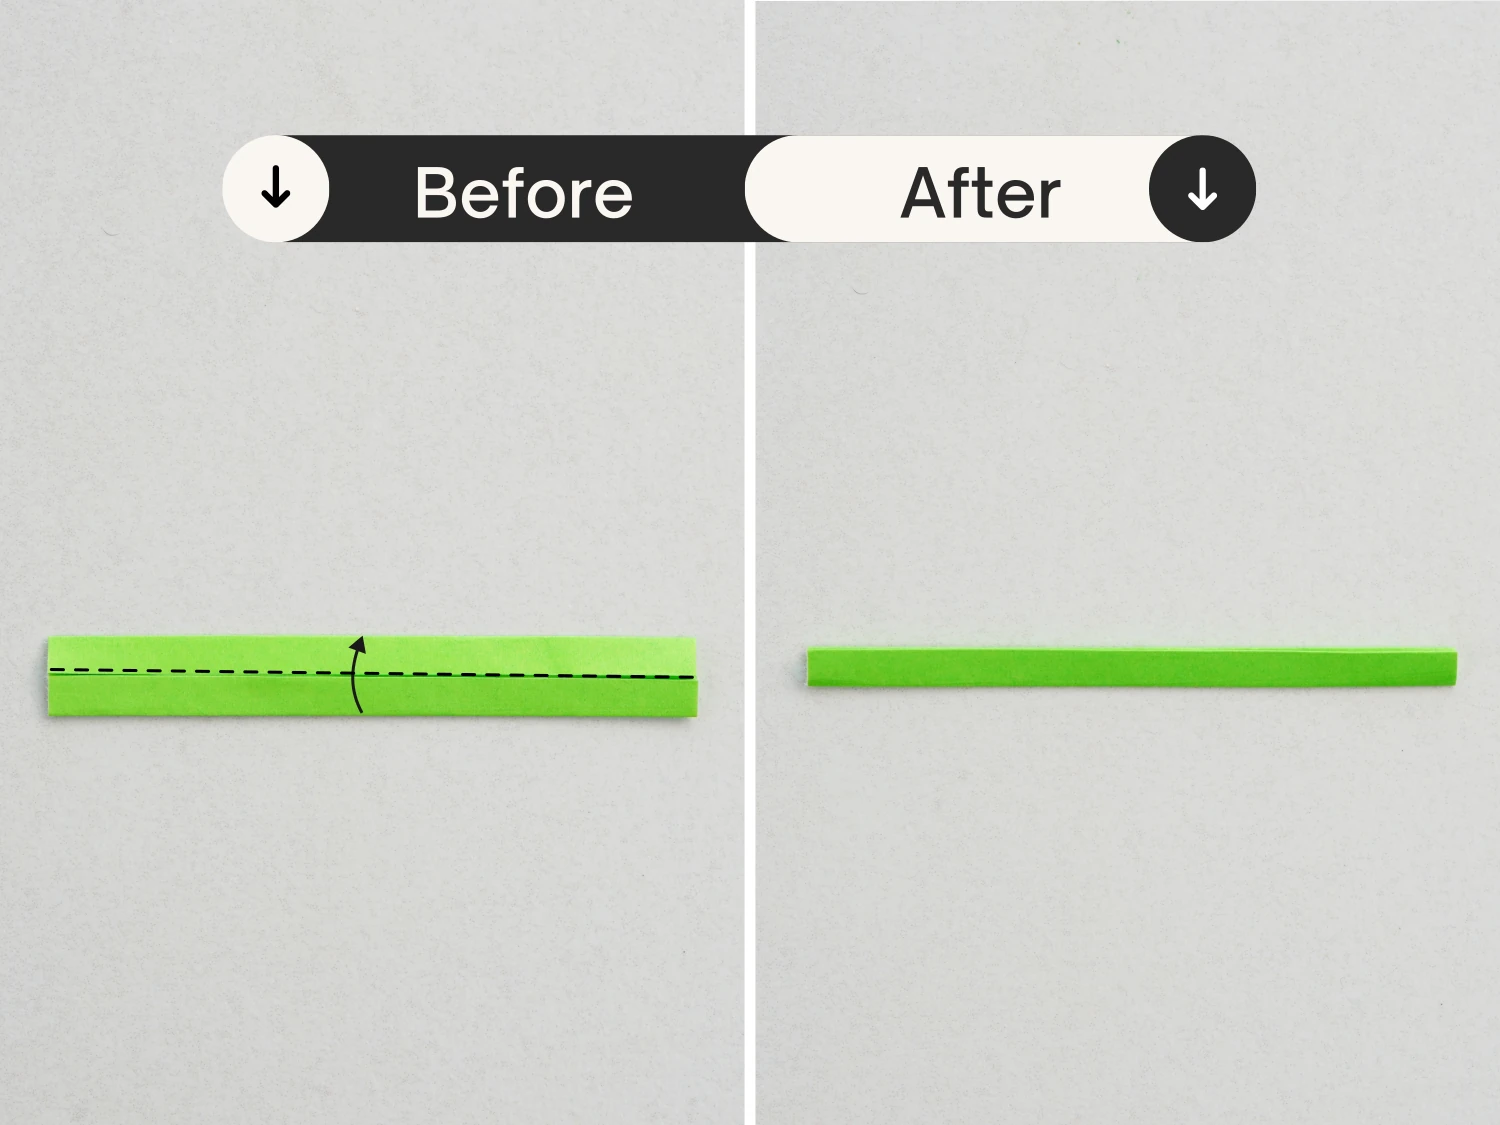
Step 21
Fold it in half horizontally.
Step 22
Bend it.
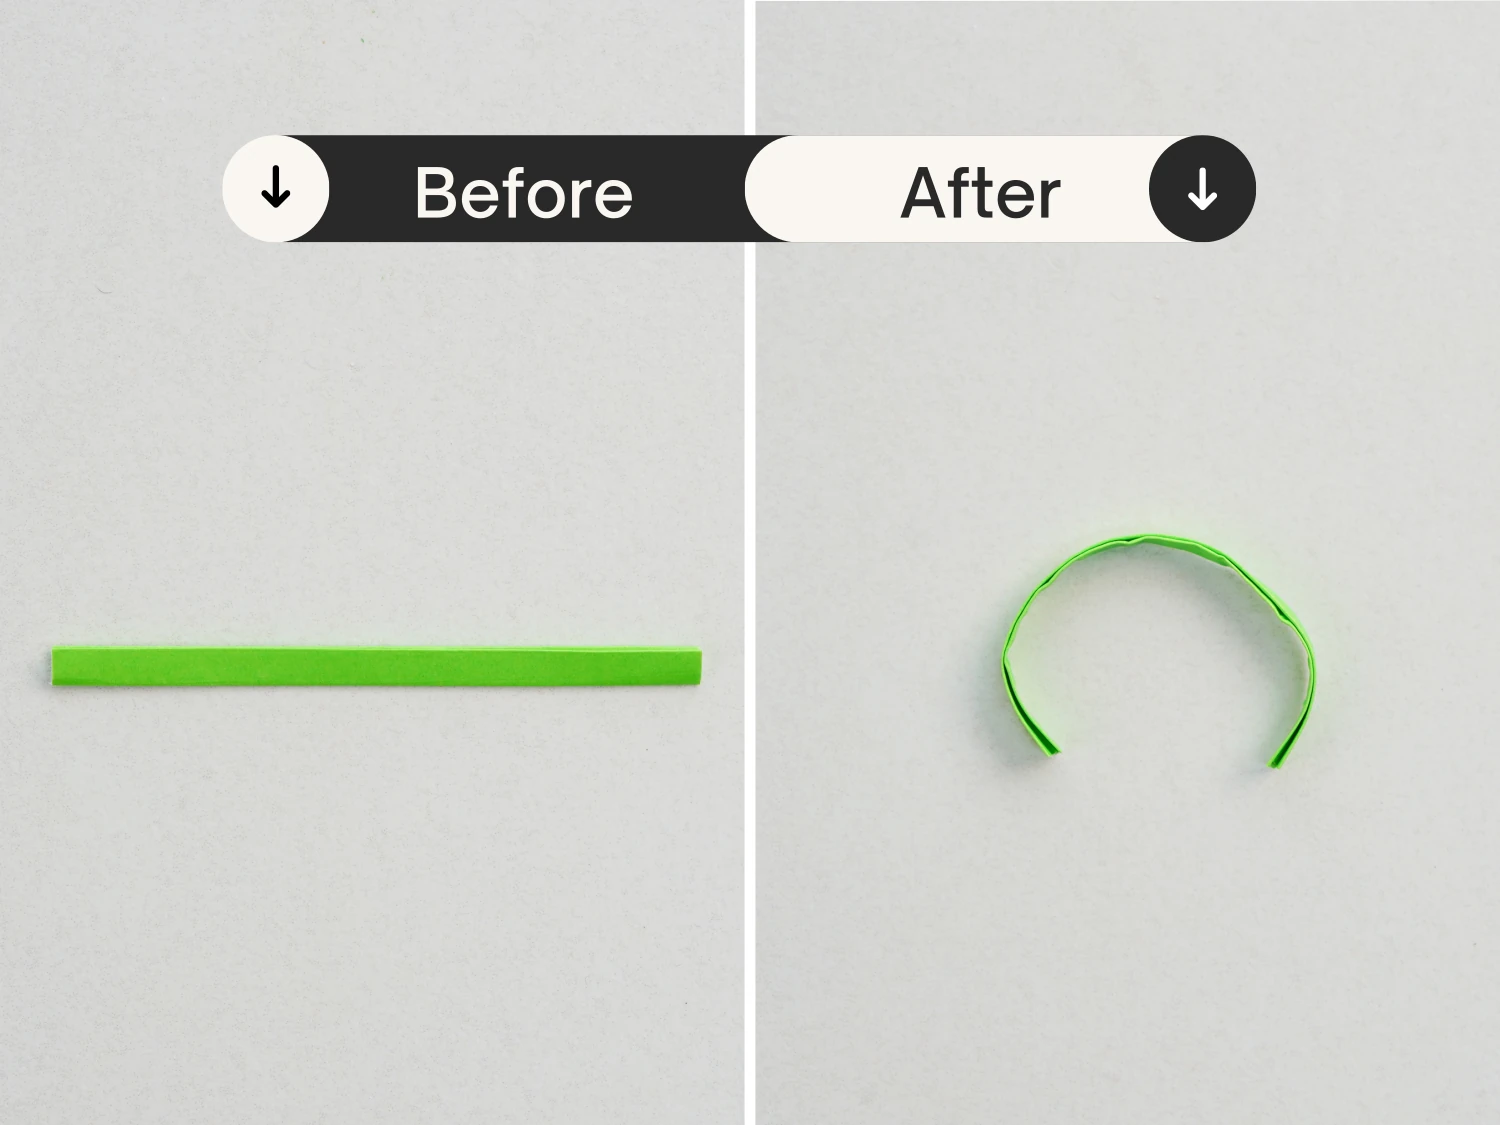
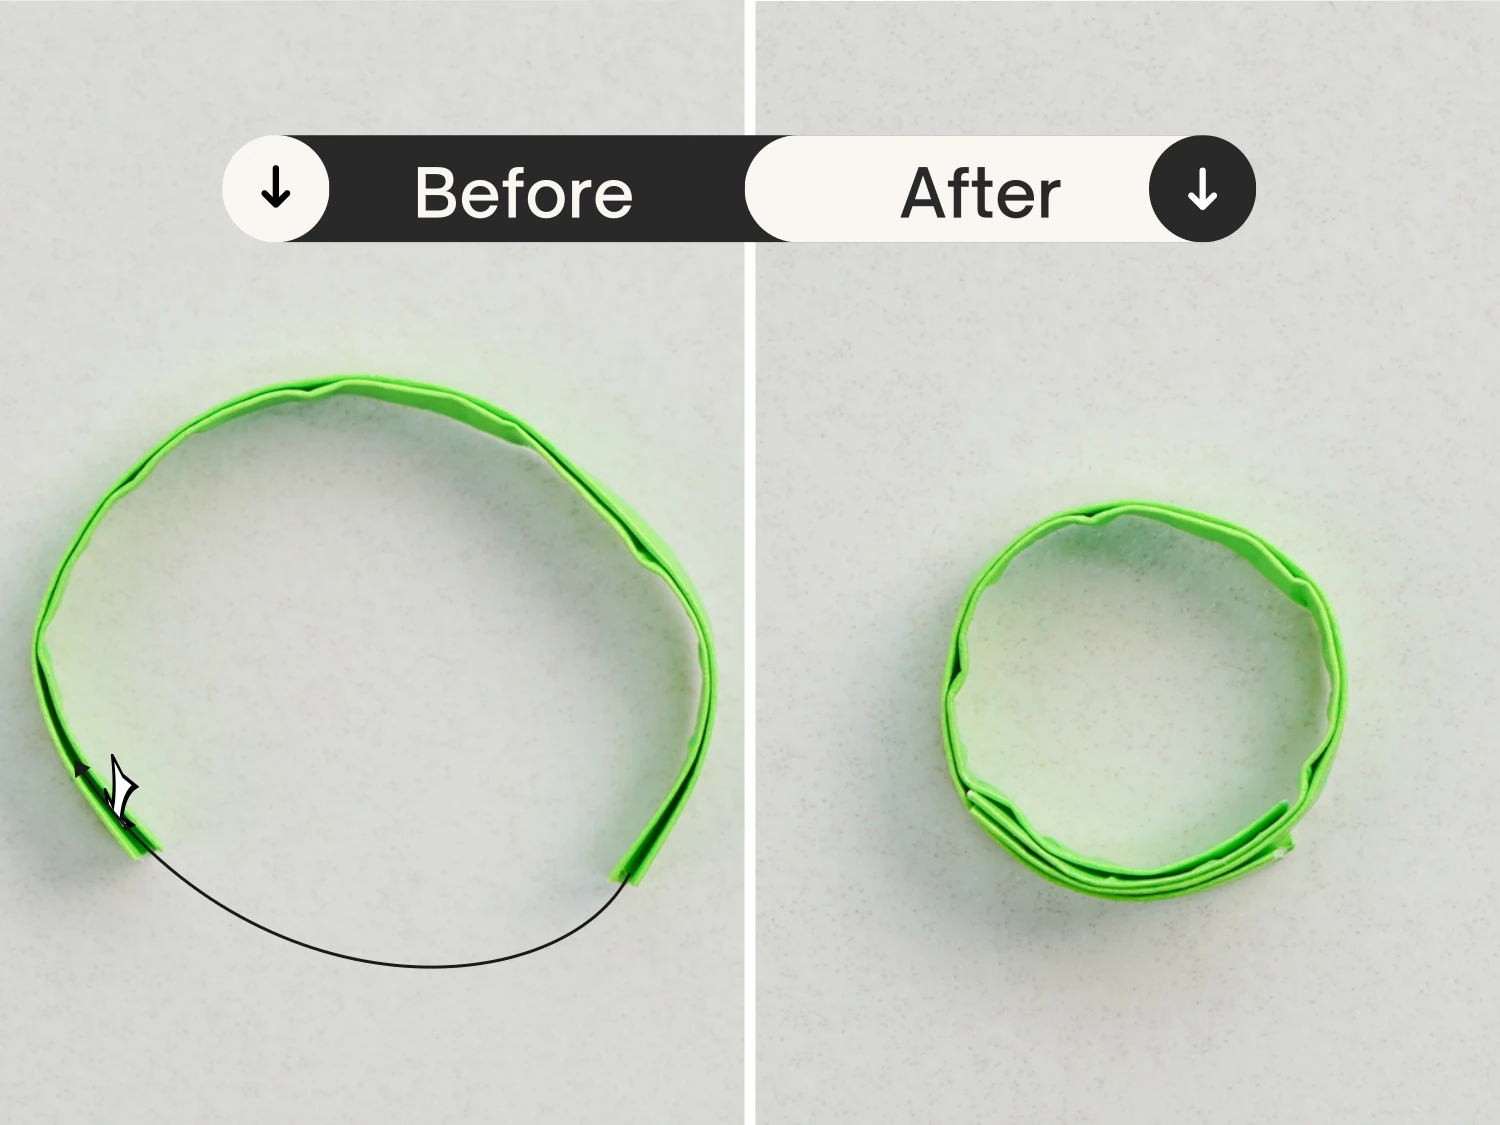
Step 23
Tuck one end into the opening at the other end.
Step 24
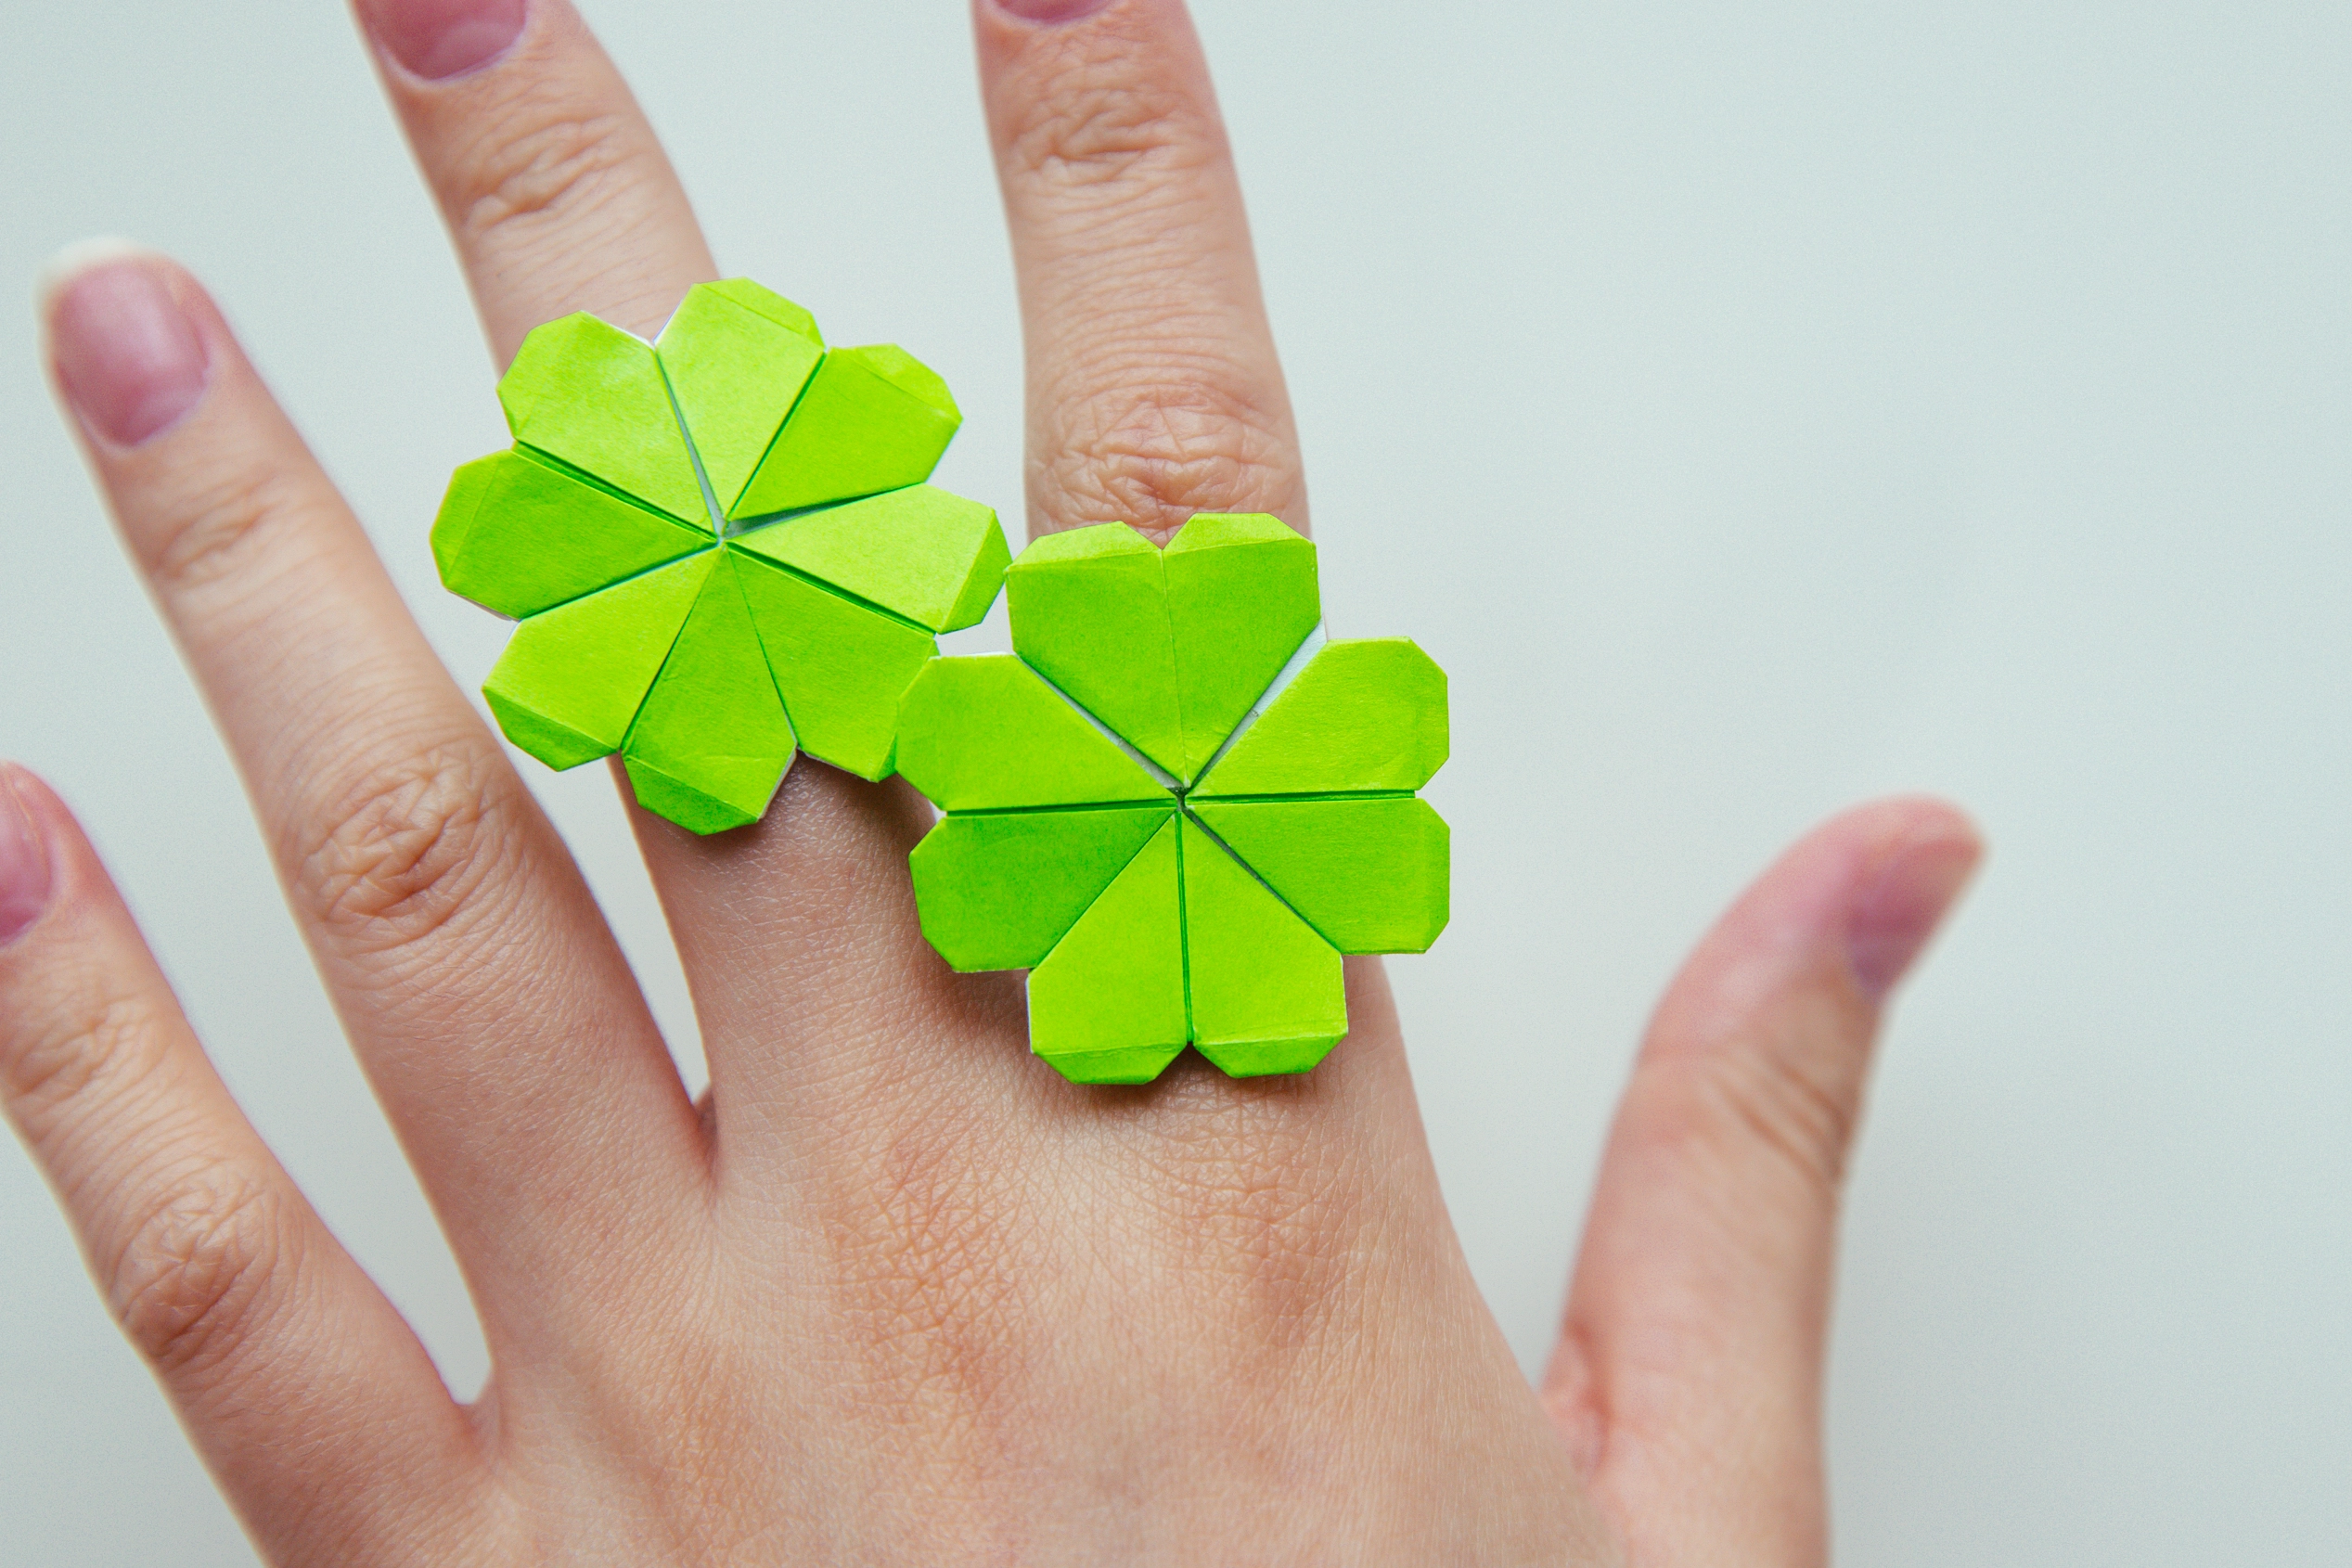
Apply glue to the ring band and stick it to the base of the four leaf clover to create this cute ring.

What’s Next
This is the final shape of an origami four leaf ring, give it to your loved one to show your love! Next, you can explore our other easy origami instructions. Enjoy folding!
Other Easy Origami Ideas