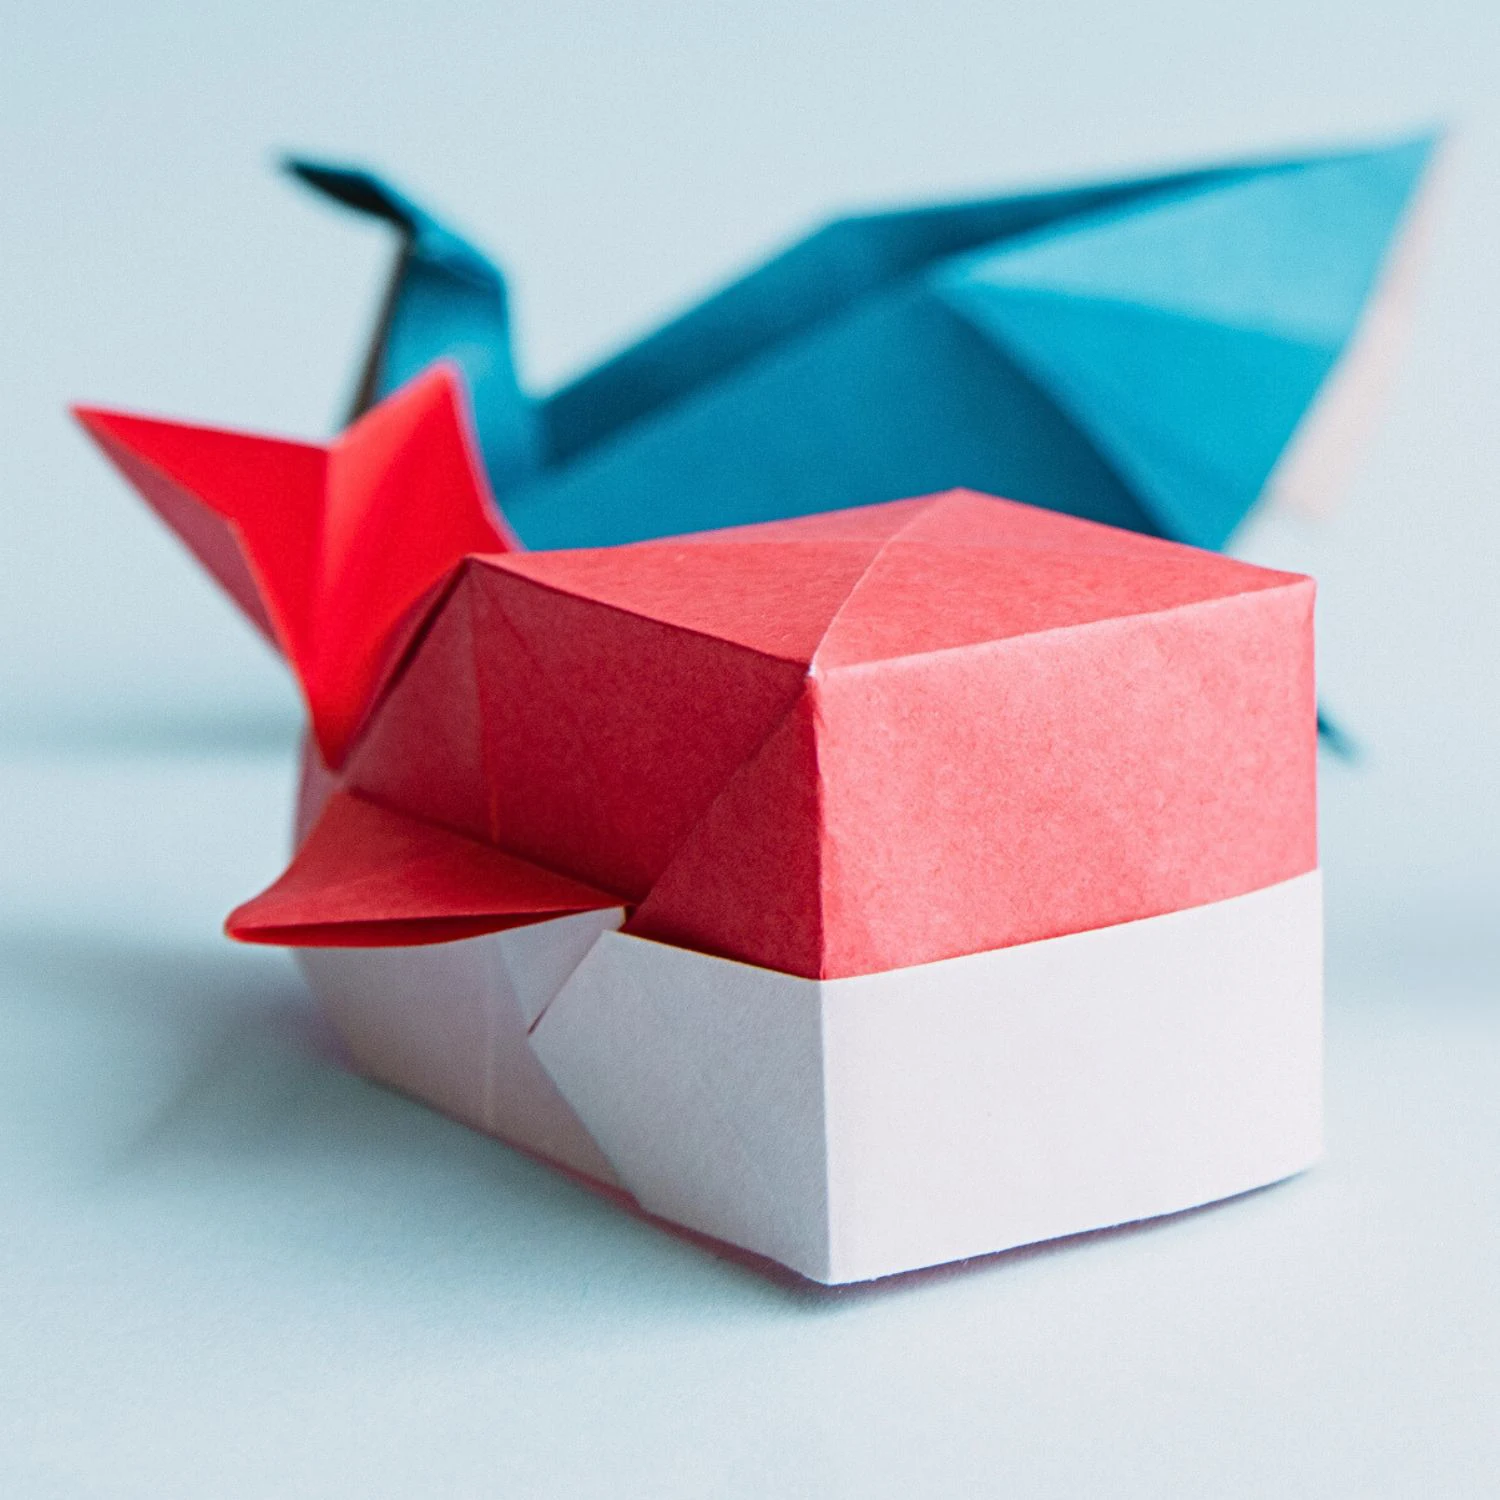
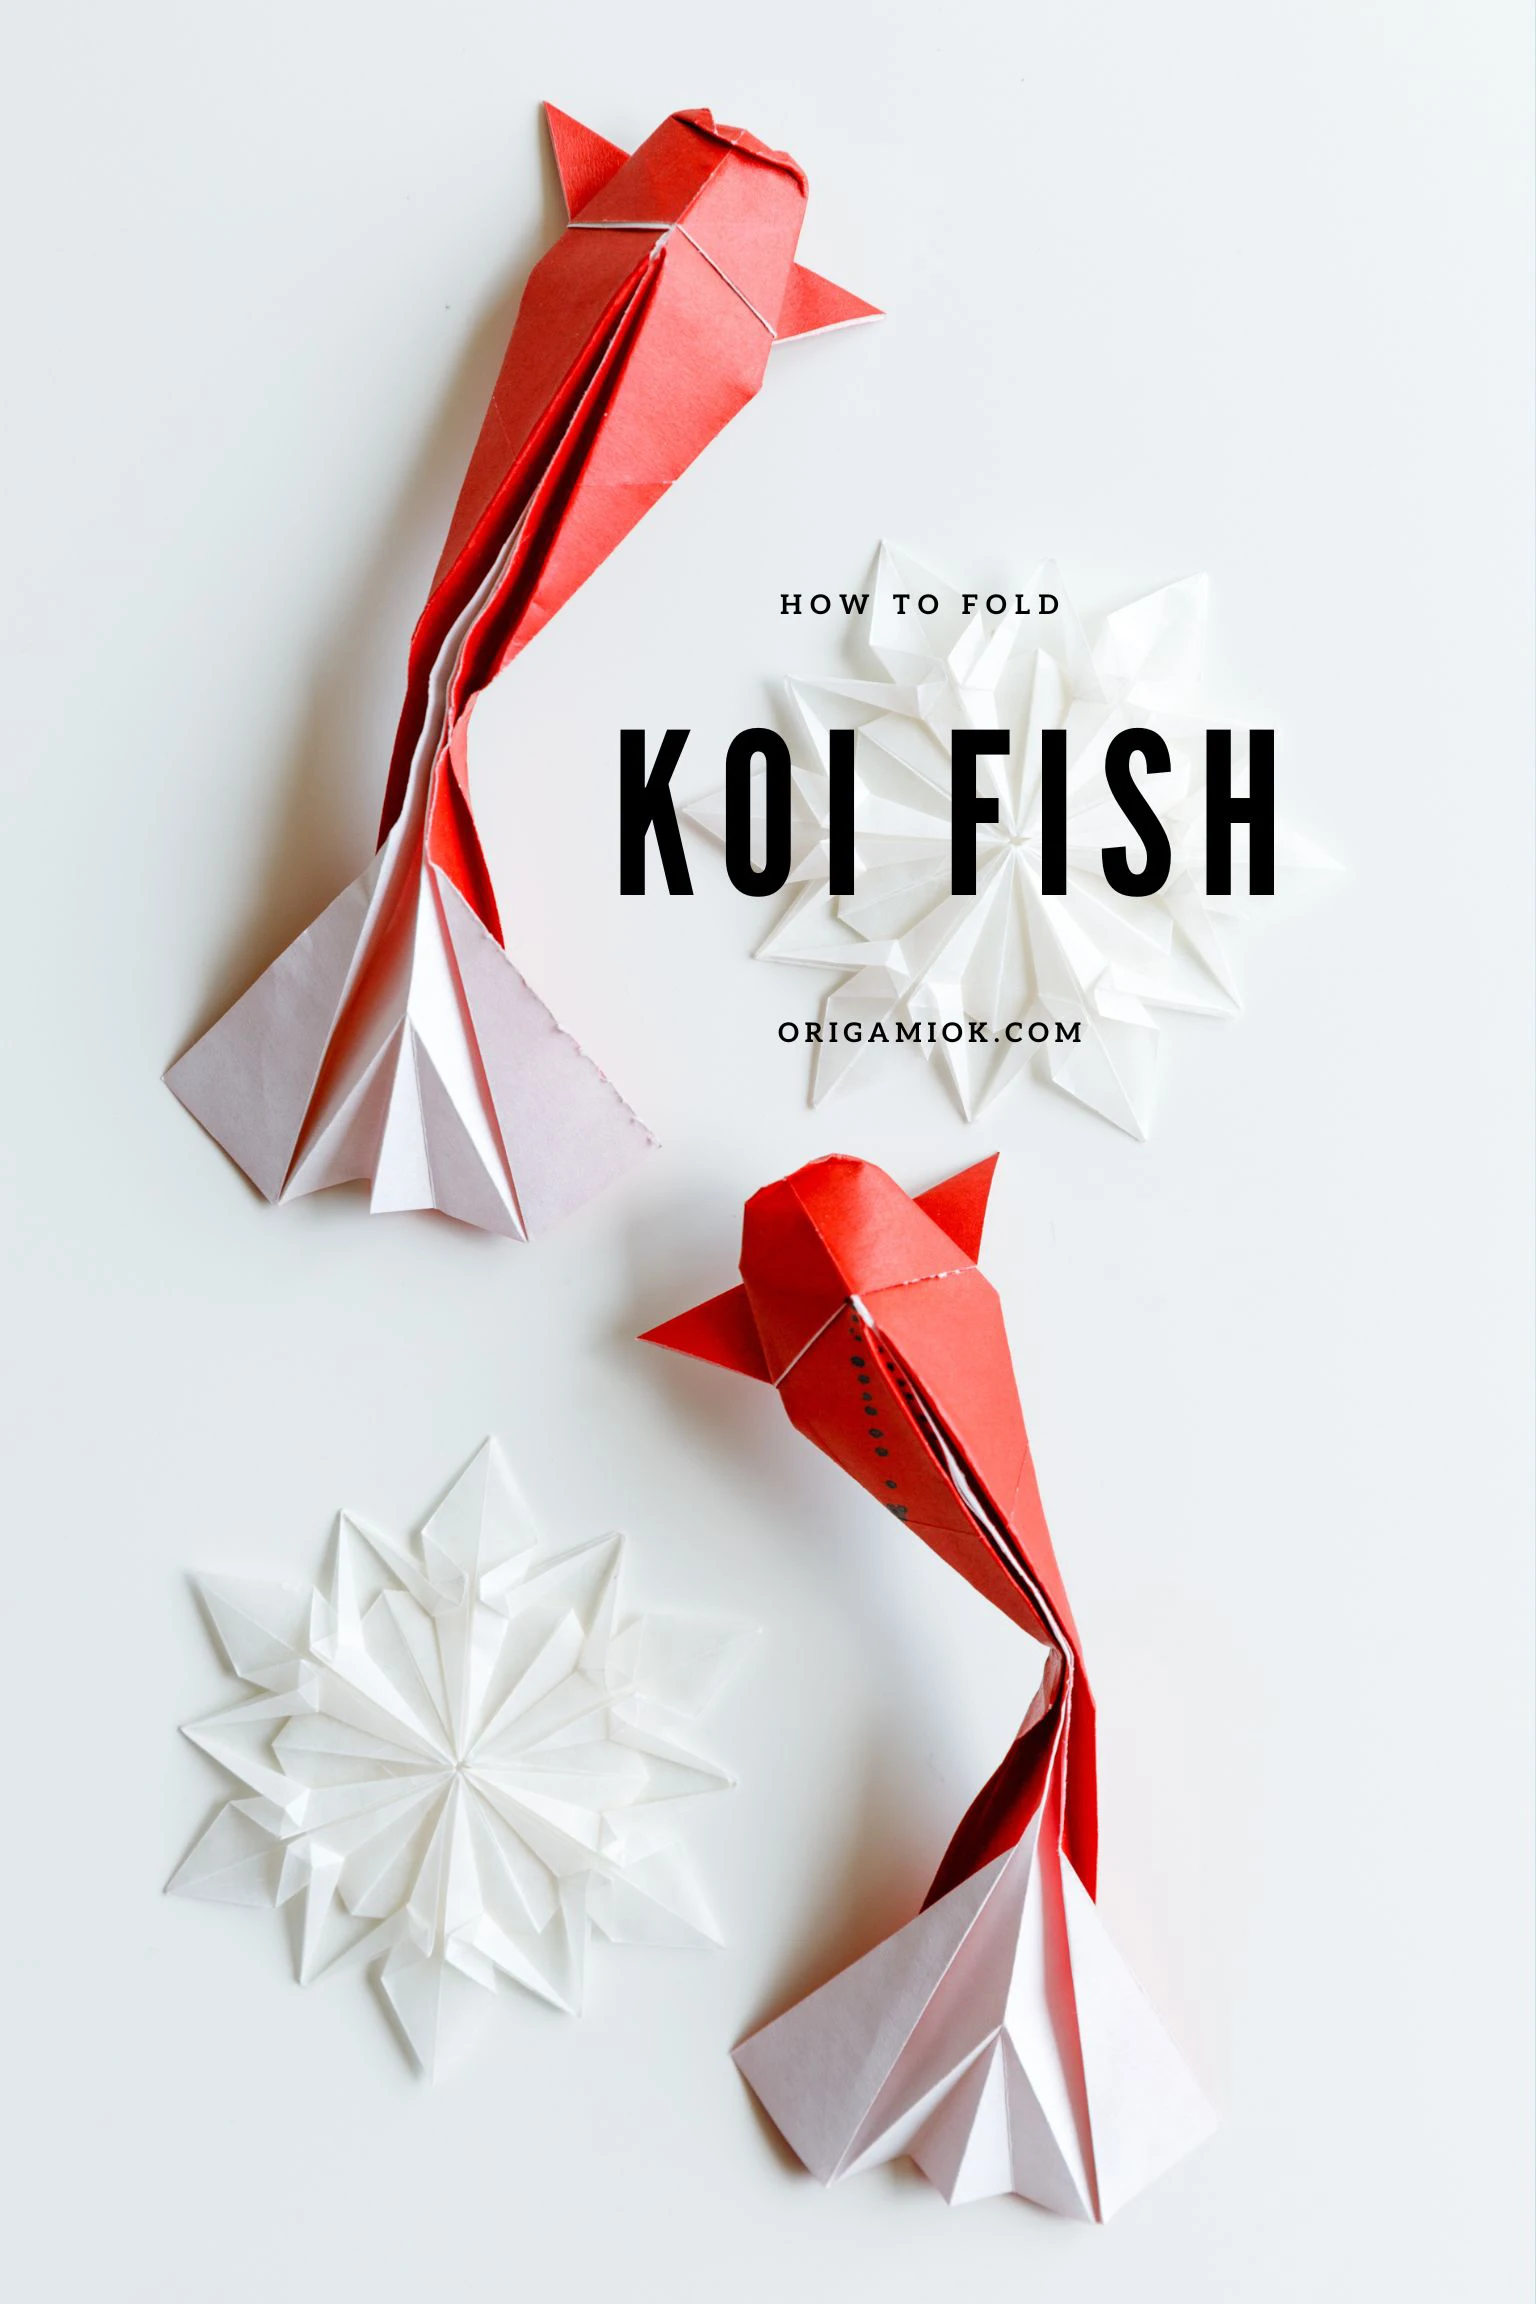
We all know that koi fish can perfectly decorate your pond. Moreover, they are symbols of beauty, strength, and good fortune.
Koi fish are a type of Amur carp. Their Japanese name is Nishikigoi, which translates to “swimming jewel.” This “jewel” comes in more than one color. The most common ones are red, white, black, orange, yellow, etc., with more than a hundred varieties.
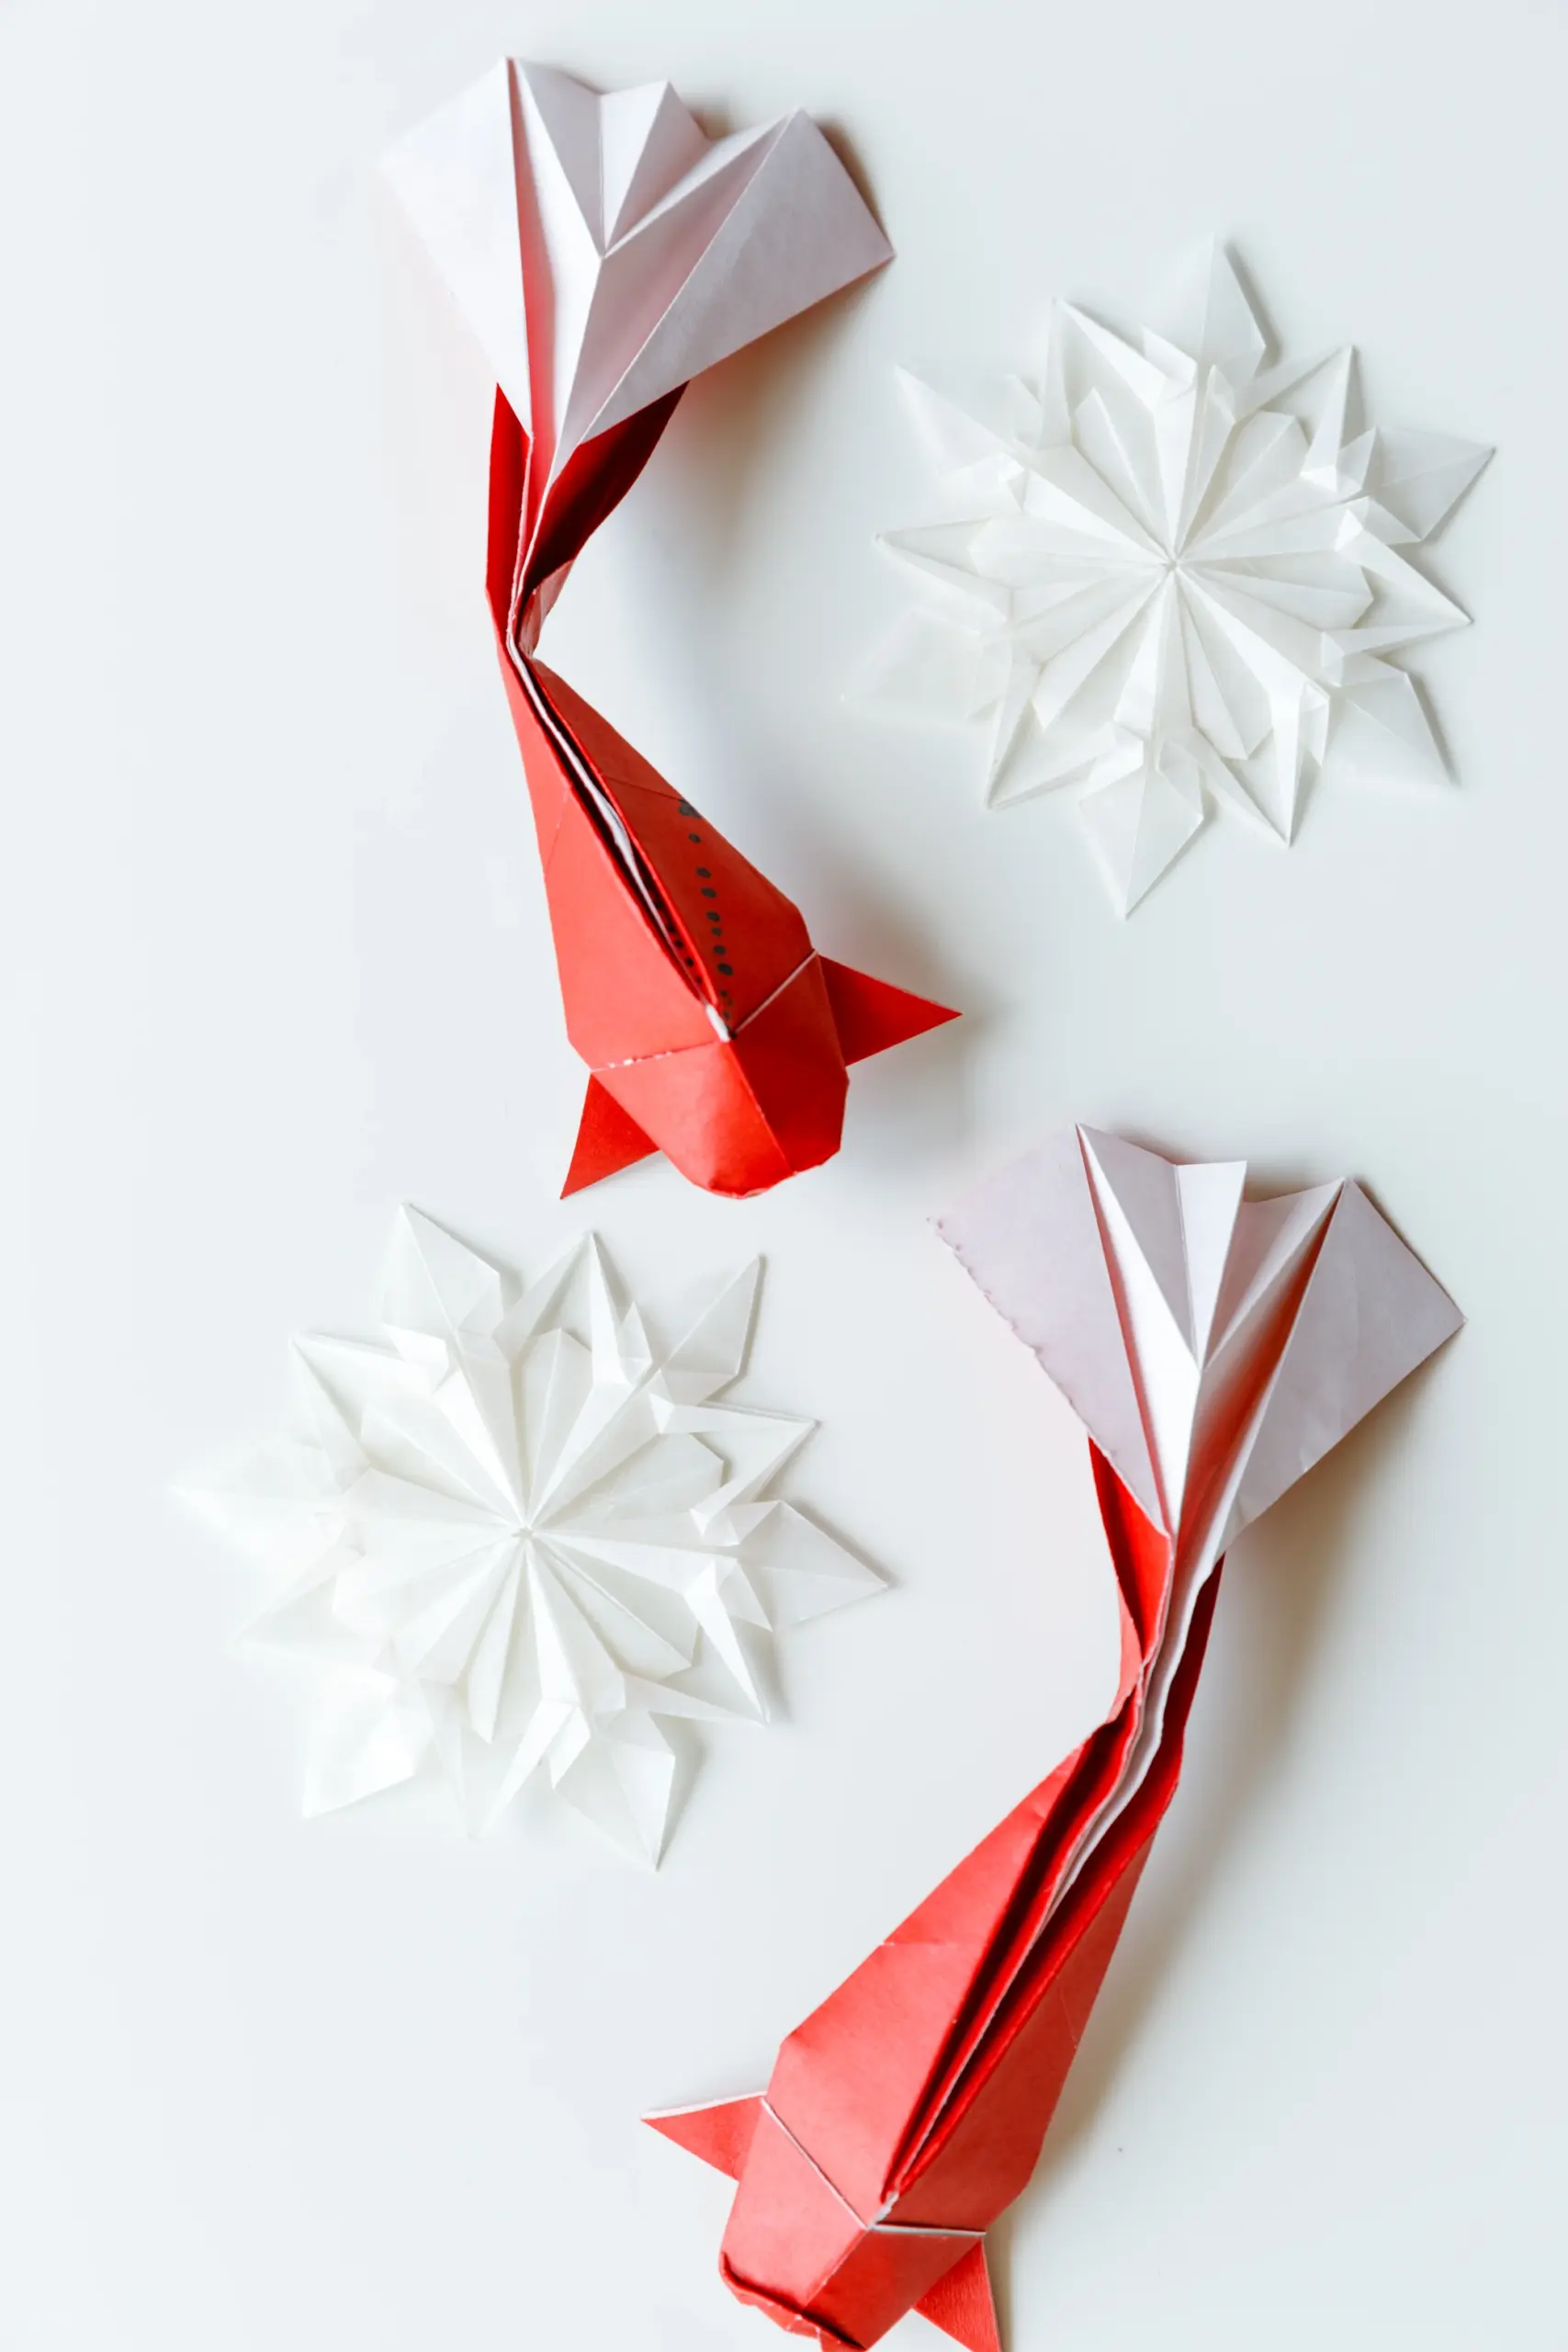
Paper koi fish is one of the most popular models in origami. Why not fold one out of a paper? This origami koi fish features a tail fin that bends like swimming in a pond, making it look flexible and lively.

If you are new to origami, start here from our beginner guide to know the basics and how to read the step-by-step instructions.
- Folding time: 20 minutes
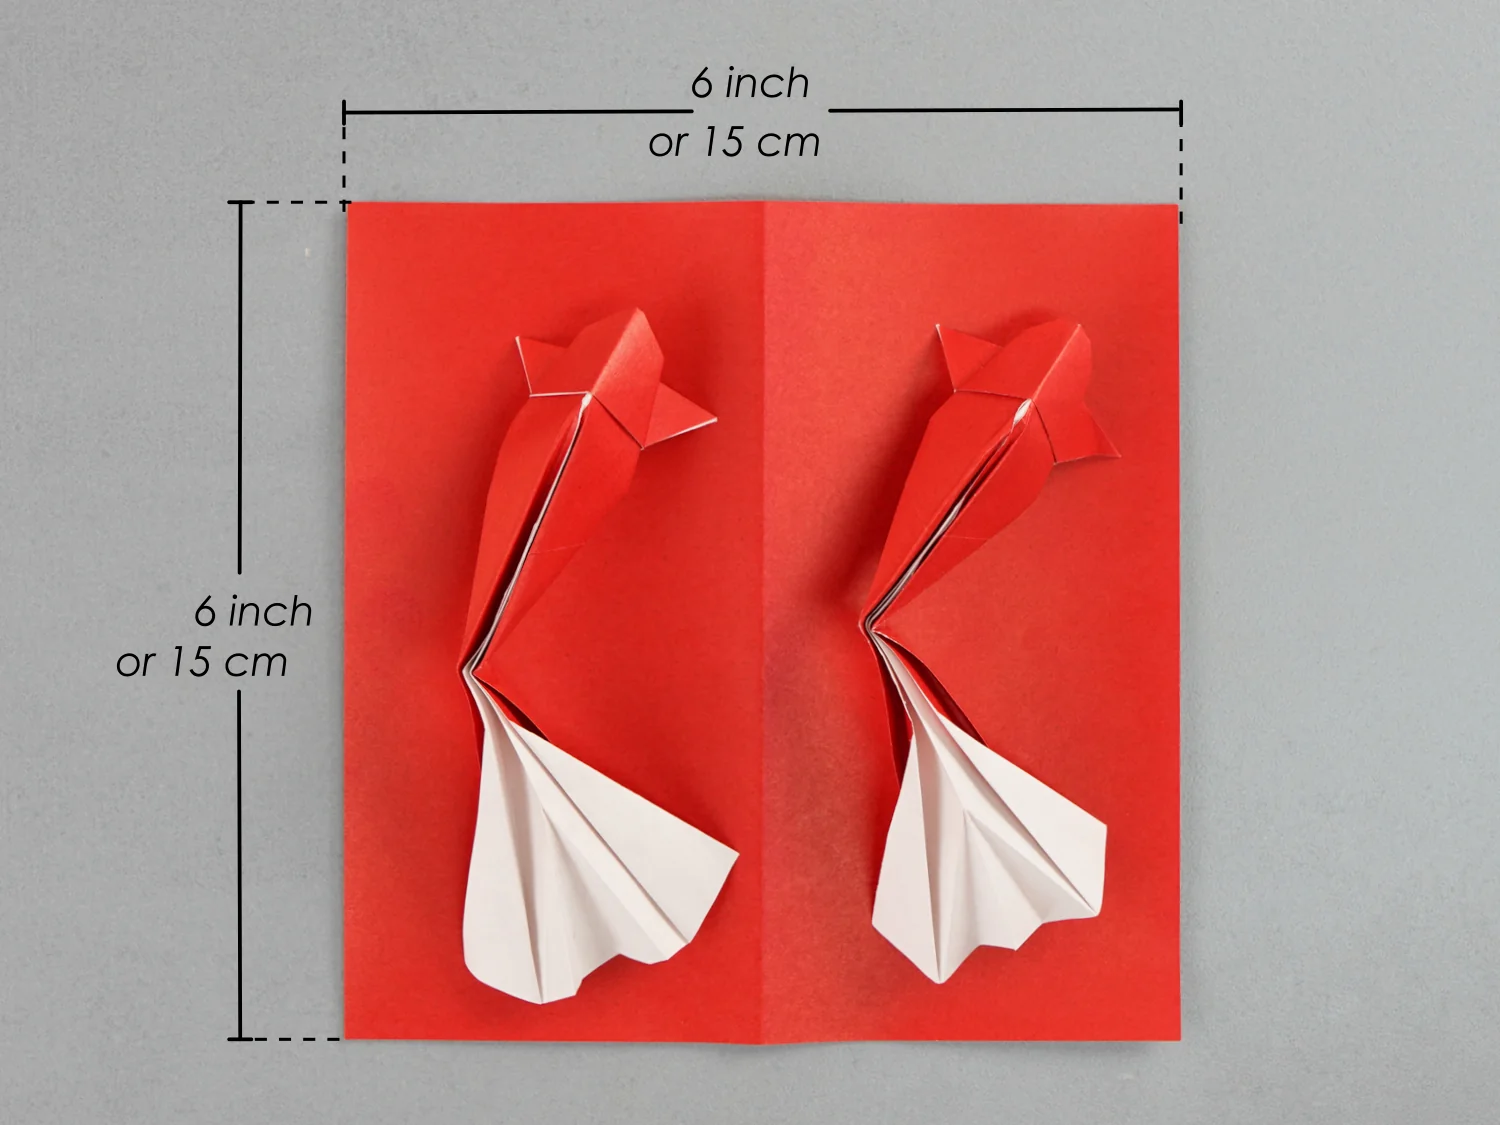
- Paper: 15×15 cm
- Difficulty: Middle
Material
Prepare a piece of 15×15 cm origami square paper, with one red and one white side. The color can be varied, use different colored paper to create a superb and colorful origami fish pond.
Origami Koi Fish Video
Step by Step Instructions
Step 1
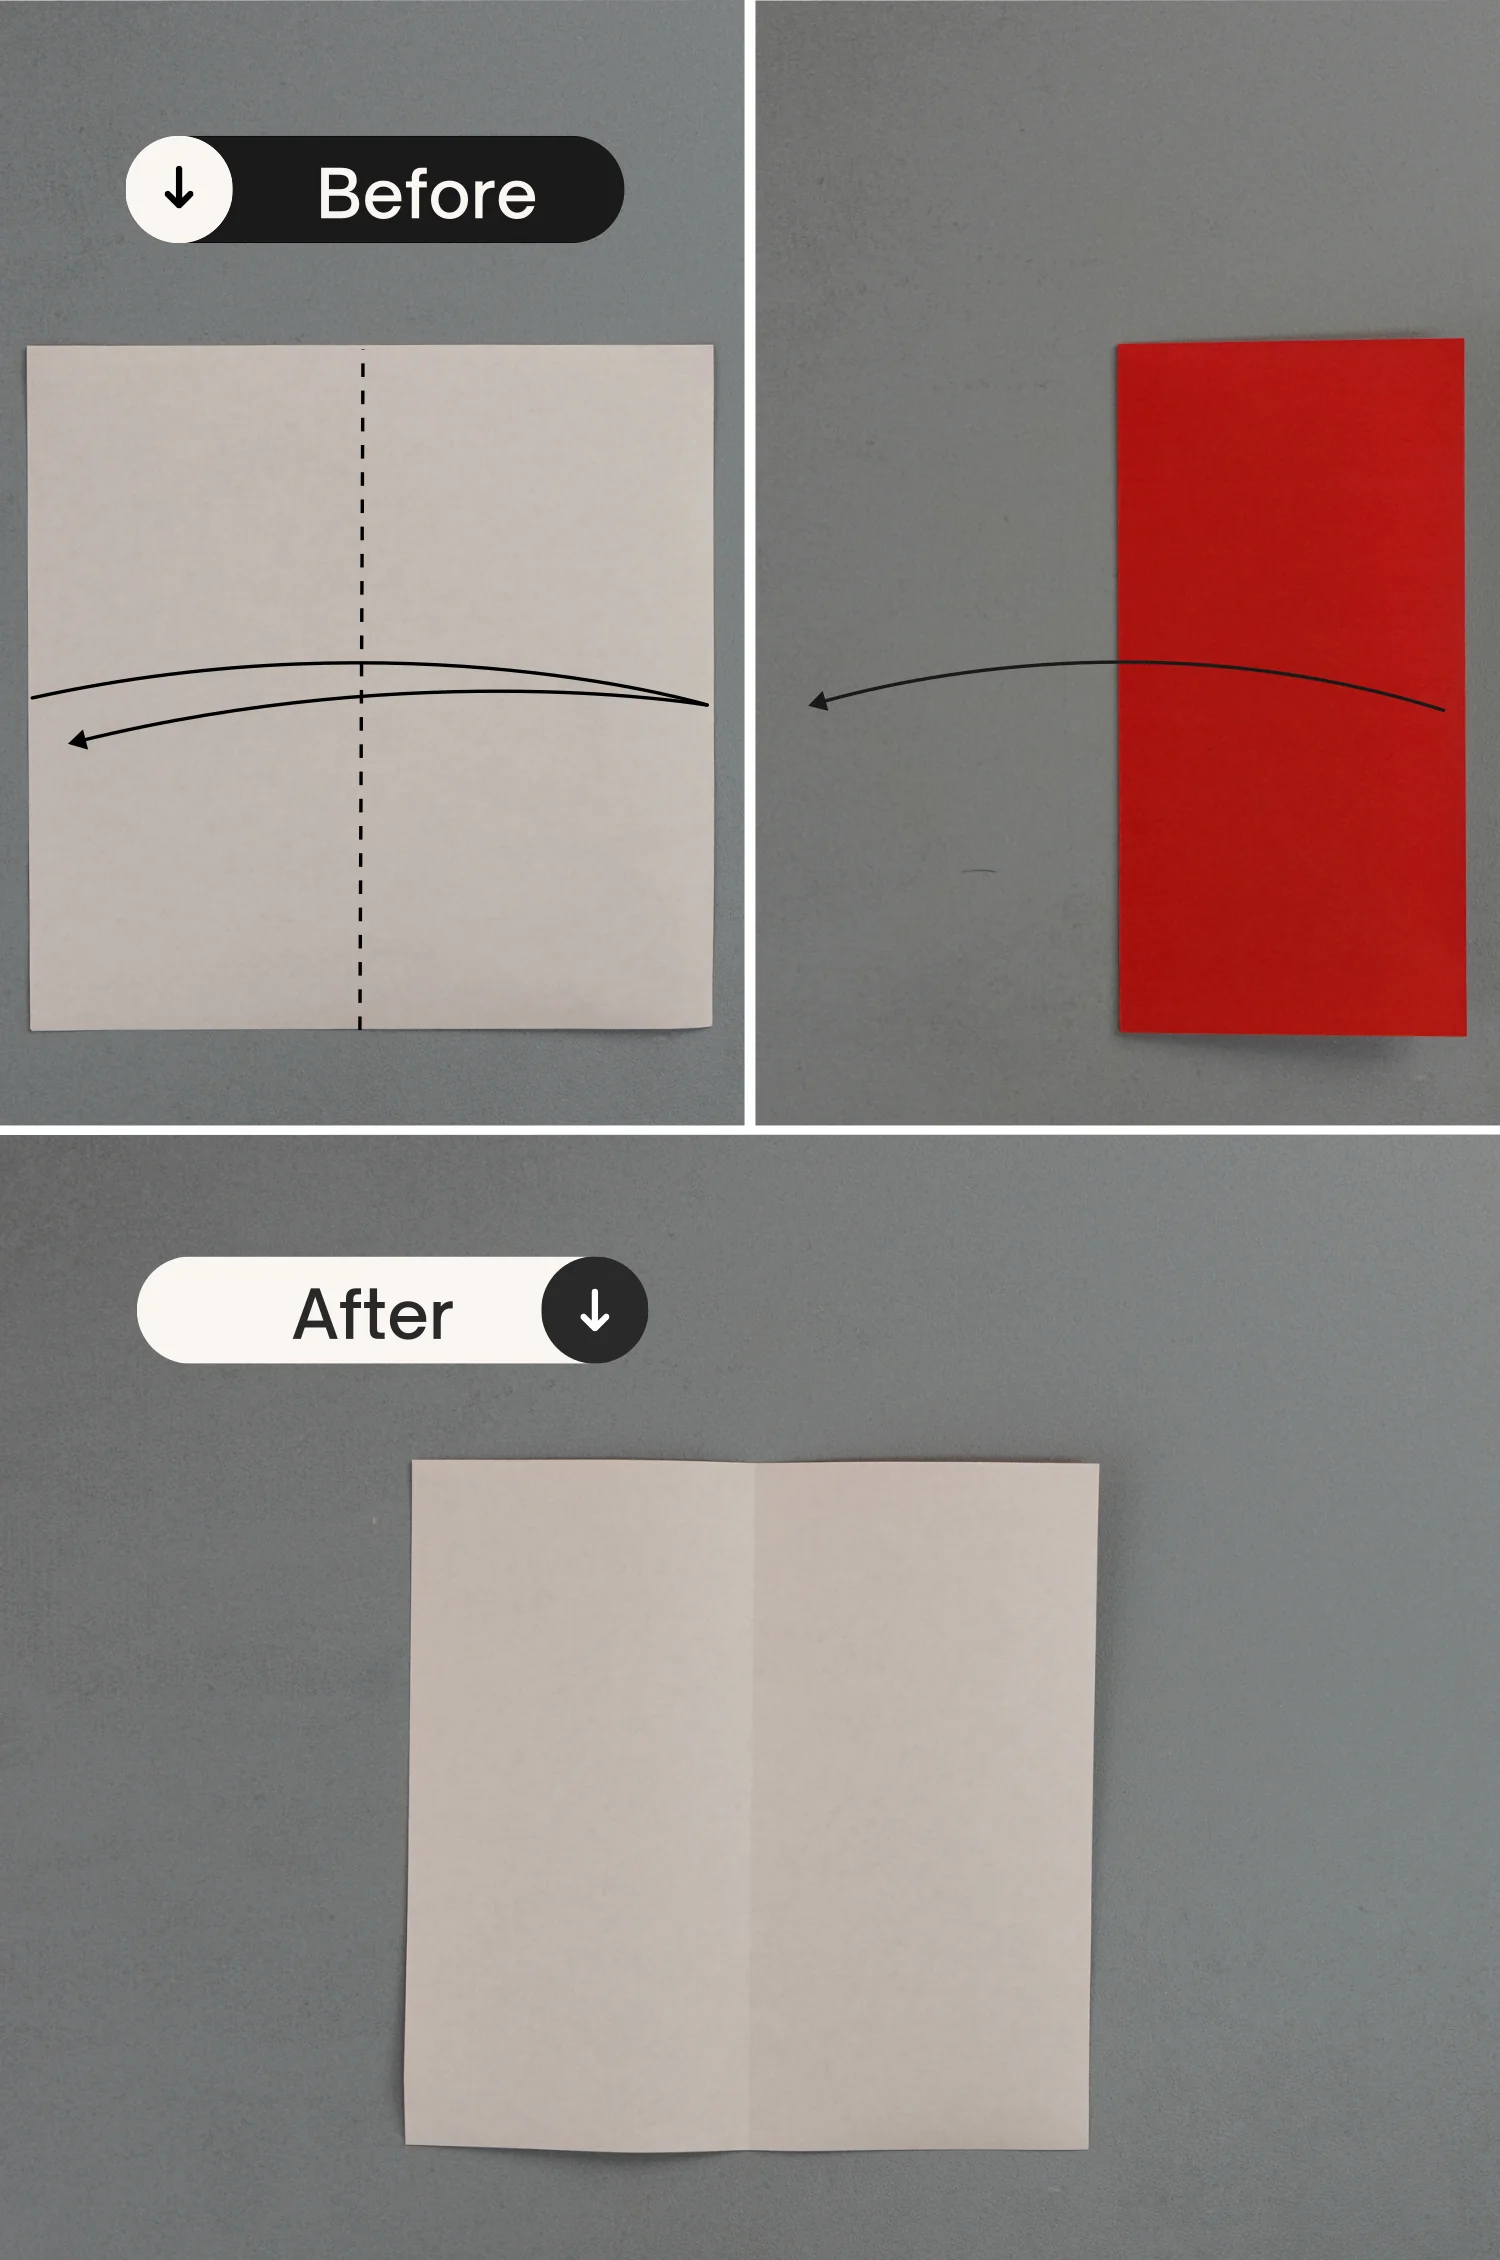
Start with the white side of the paper facing up, fold it in half vertically, leaving a crease then unfold it.
Step 2
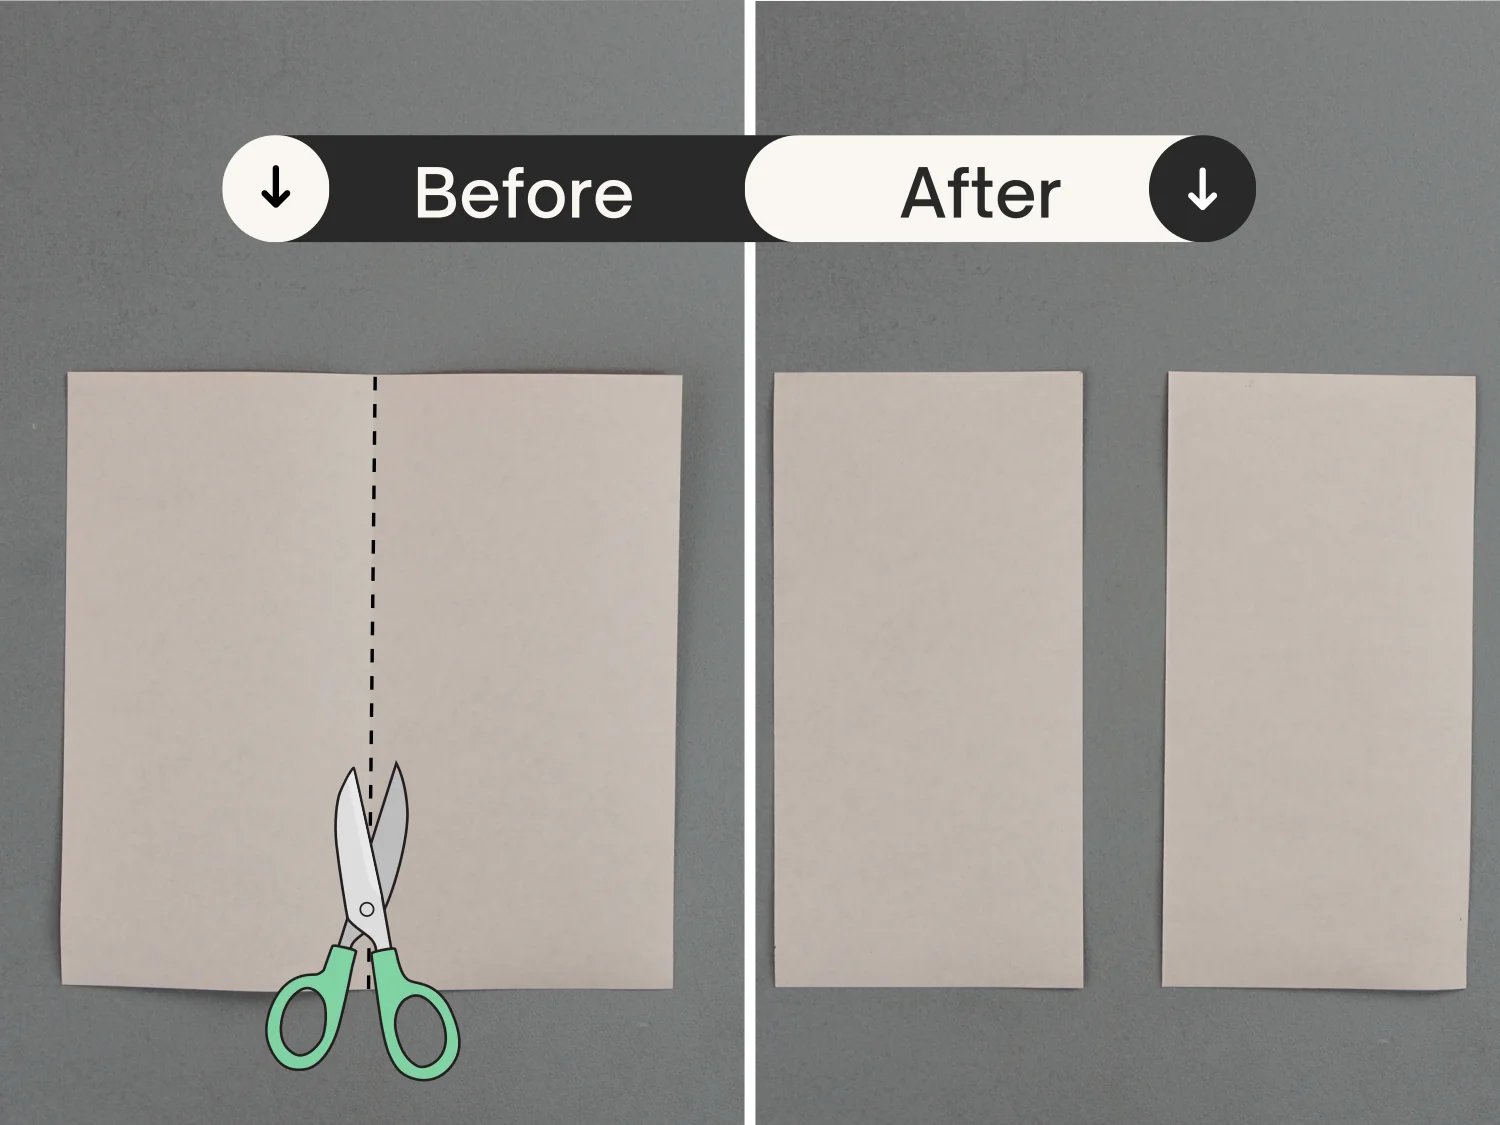
Cut the paper along the crease.
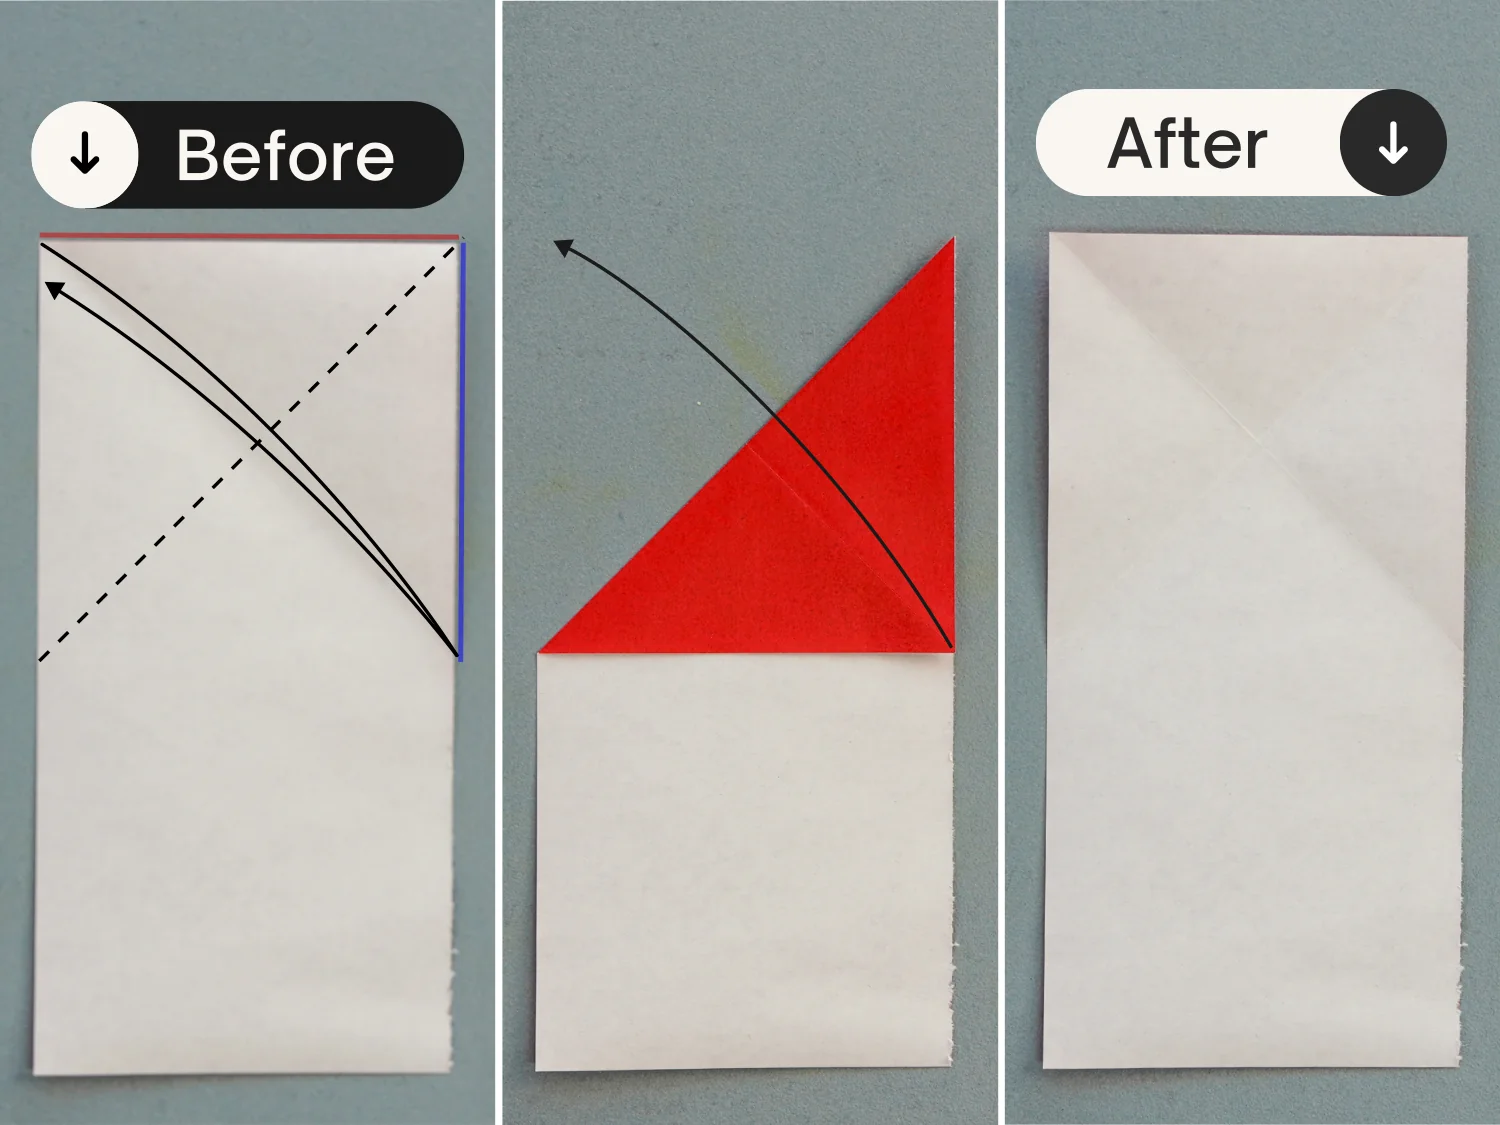
Step 3
Take one of the paper, fold its top edge to align with the left edge, and unfold it.
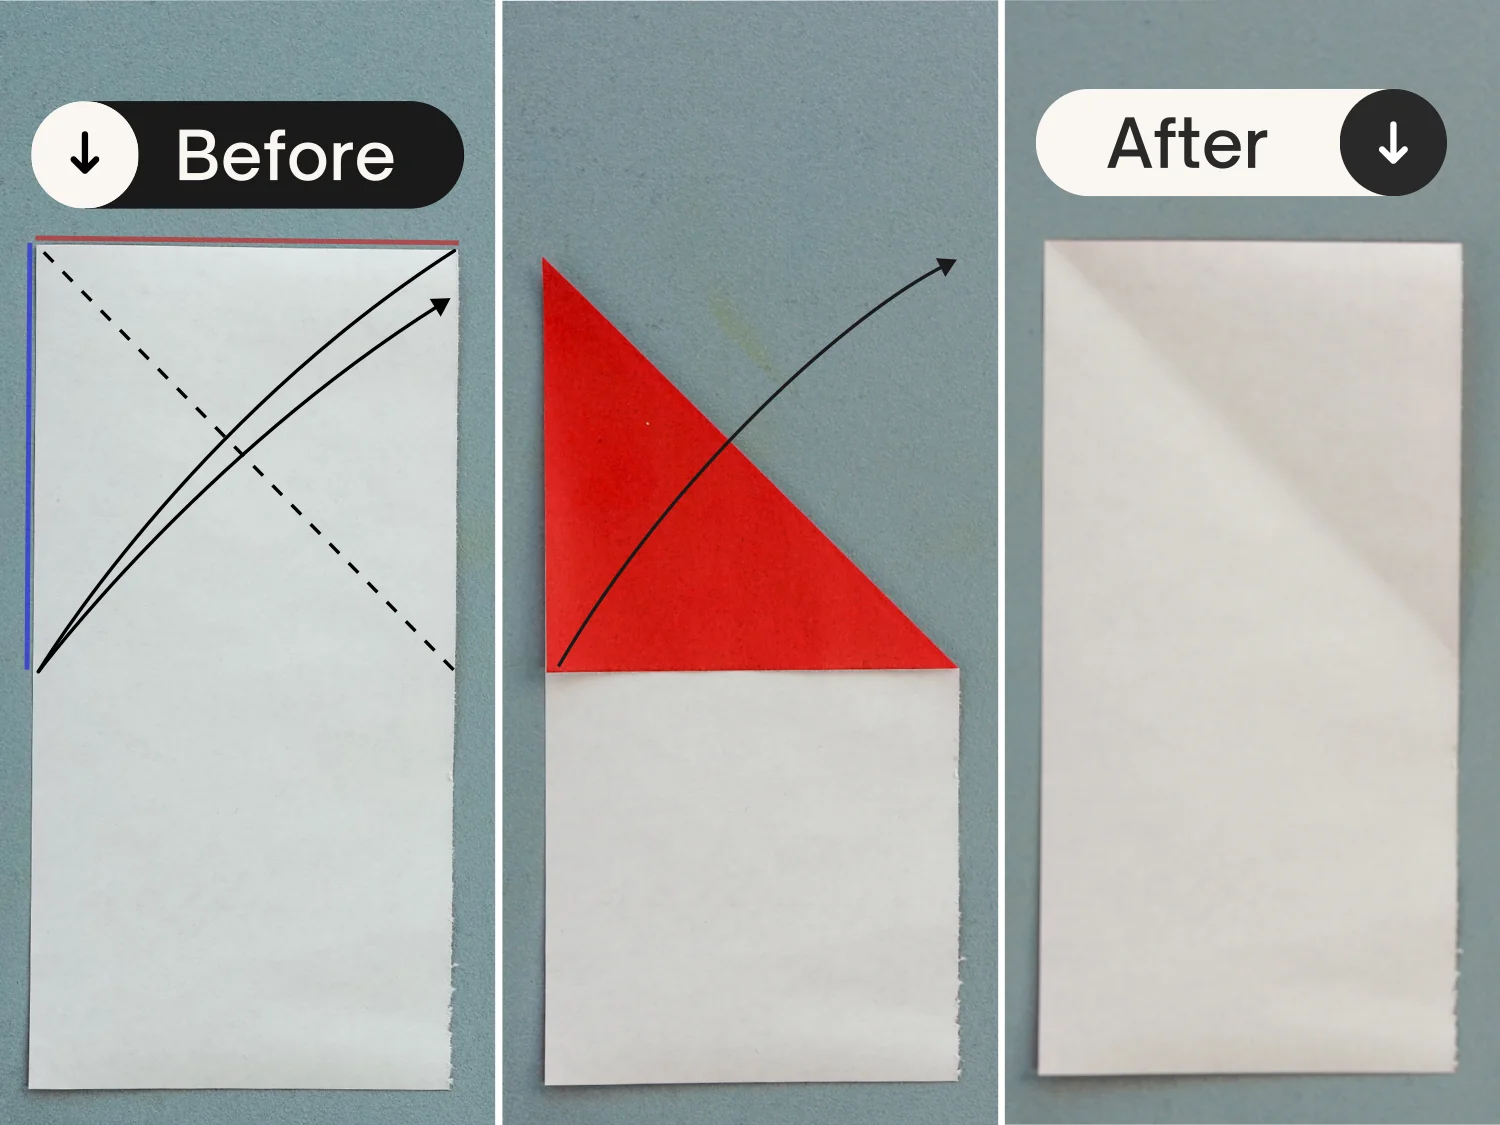
Step 4
Fold the top edge, align with the right edge, crease it well, and then unfold it.
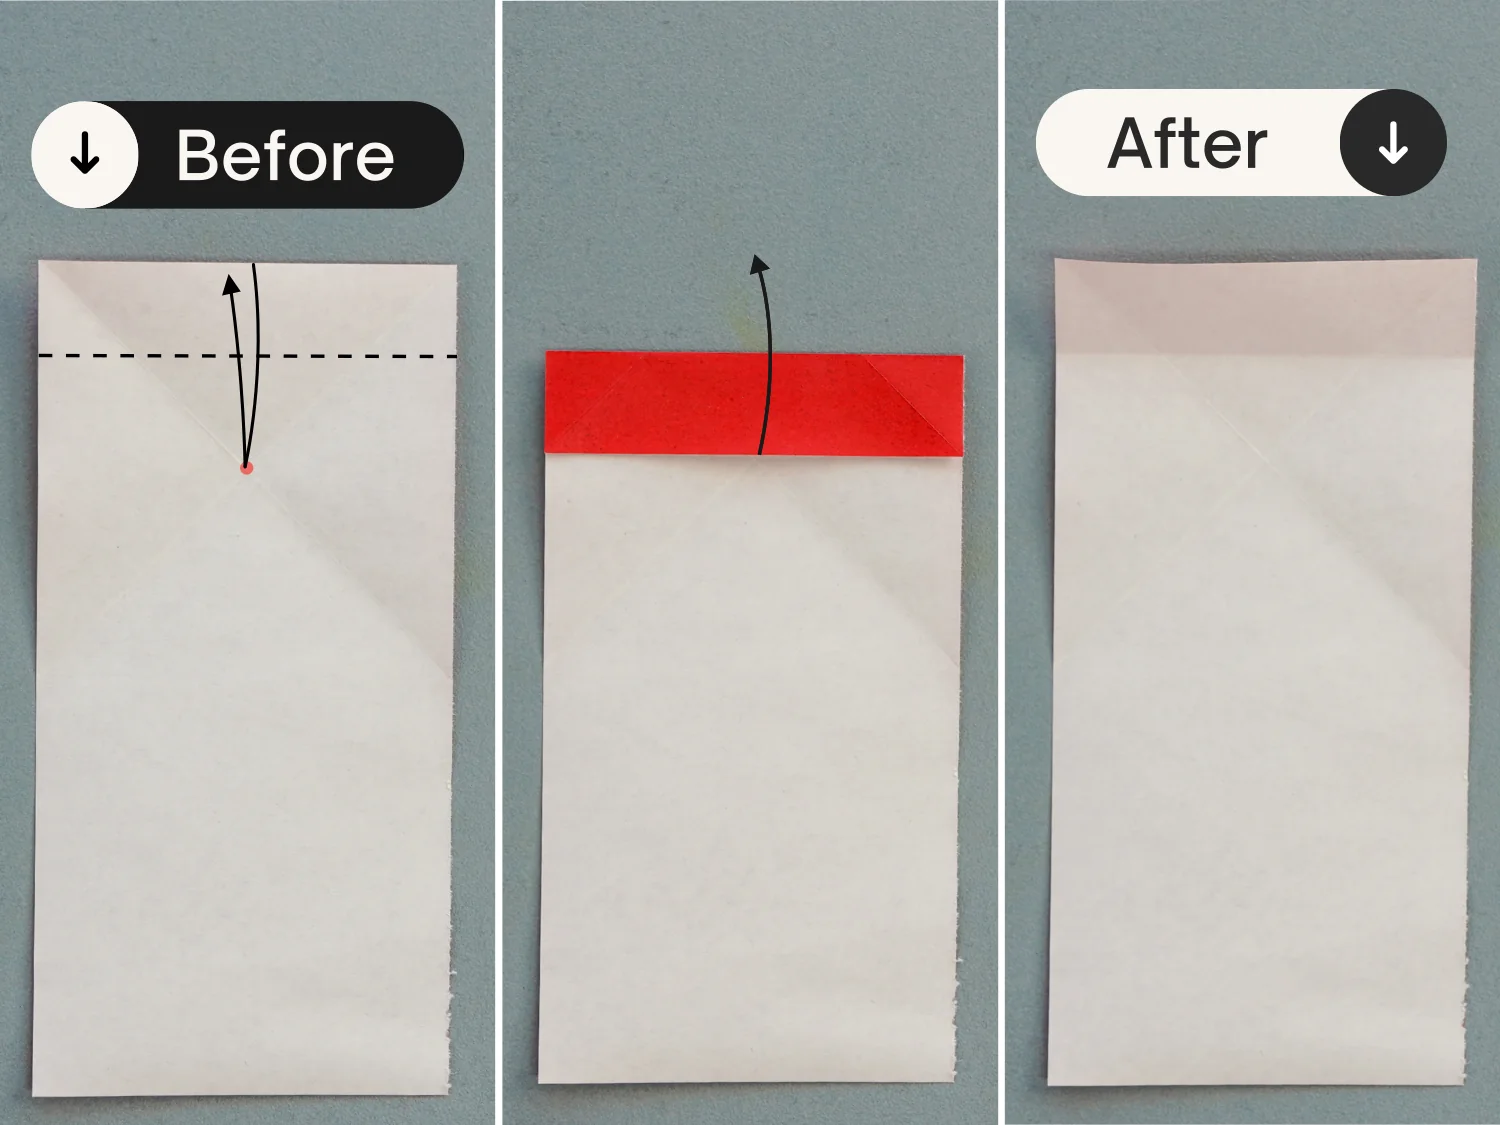
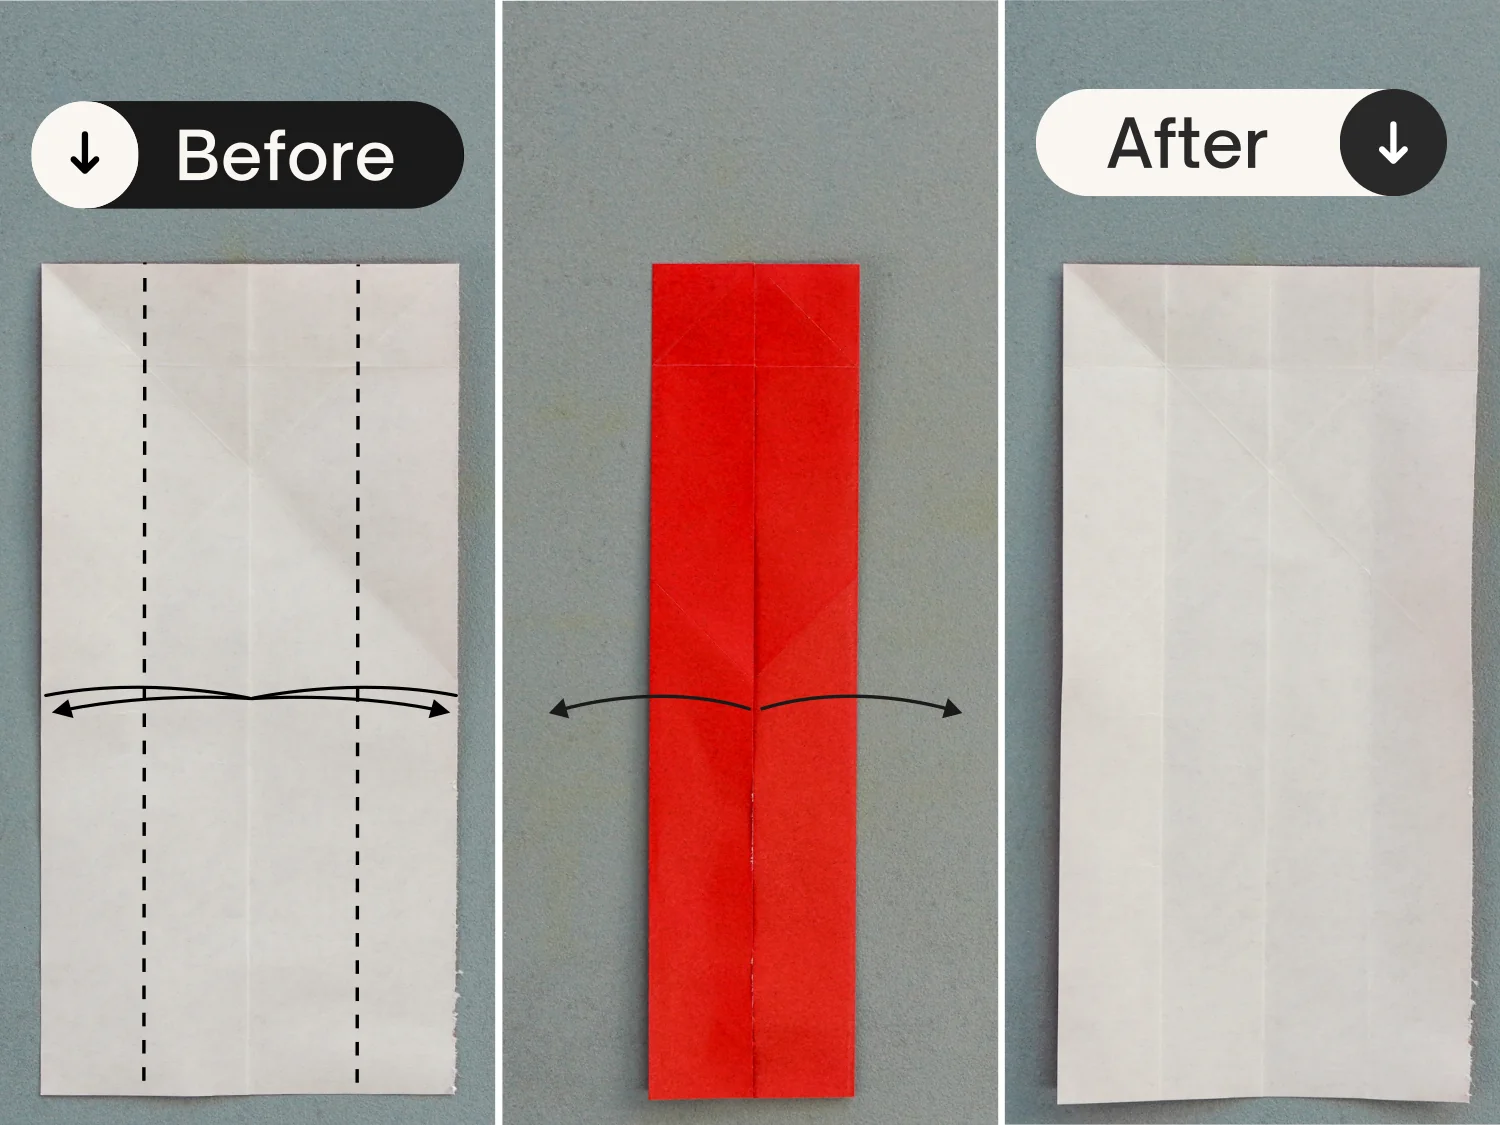
Step 5
Fold the top edge to meet the intersection point formed by the two creases you just made, leaving a crease, then unfold it.
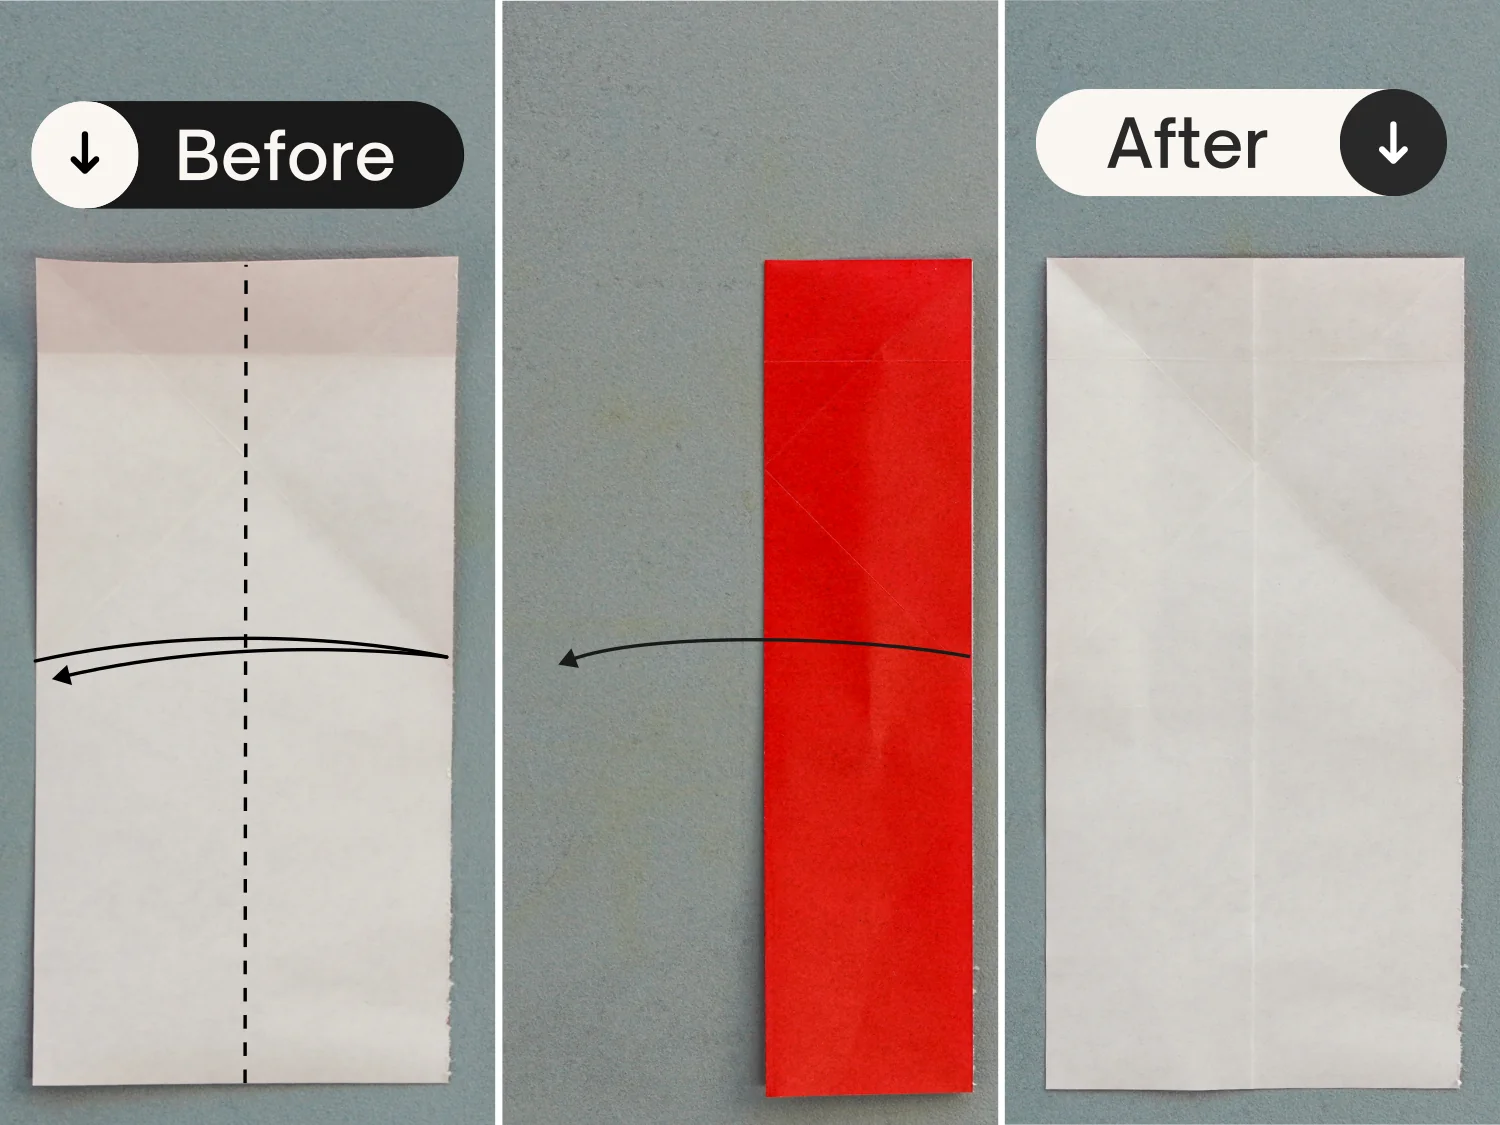
Step 6
Fold the paper in half vertically, crease it well, and unfold it.
Step 7
Fold the left and right edges to align with the middle vertical crease, and unfold them.
Step 8
Bring up the left, right, and top edges along the creases indicated by the dotted lines, then flatten the fold.
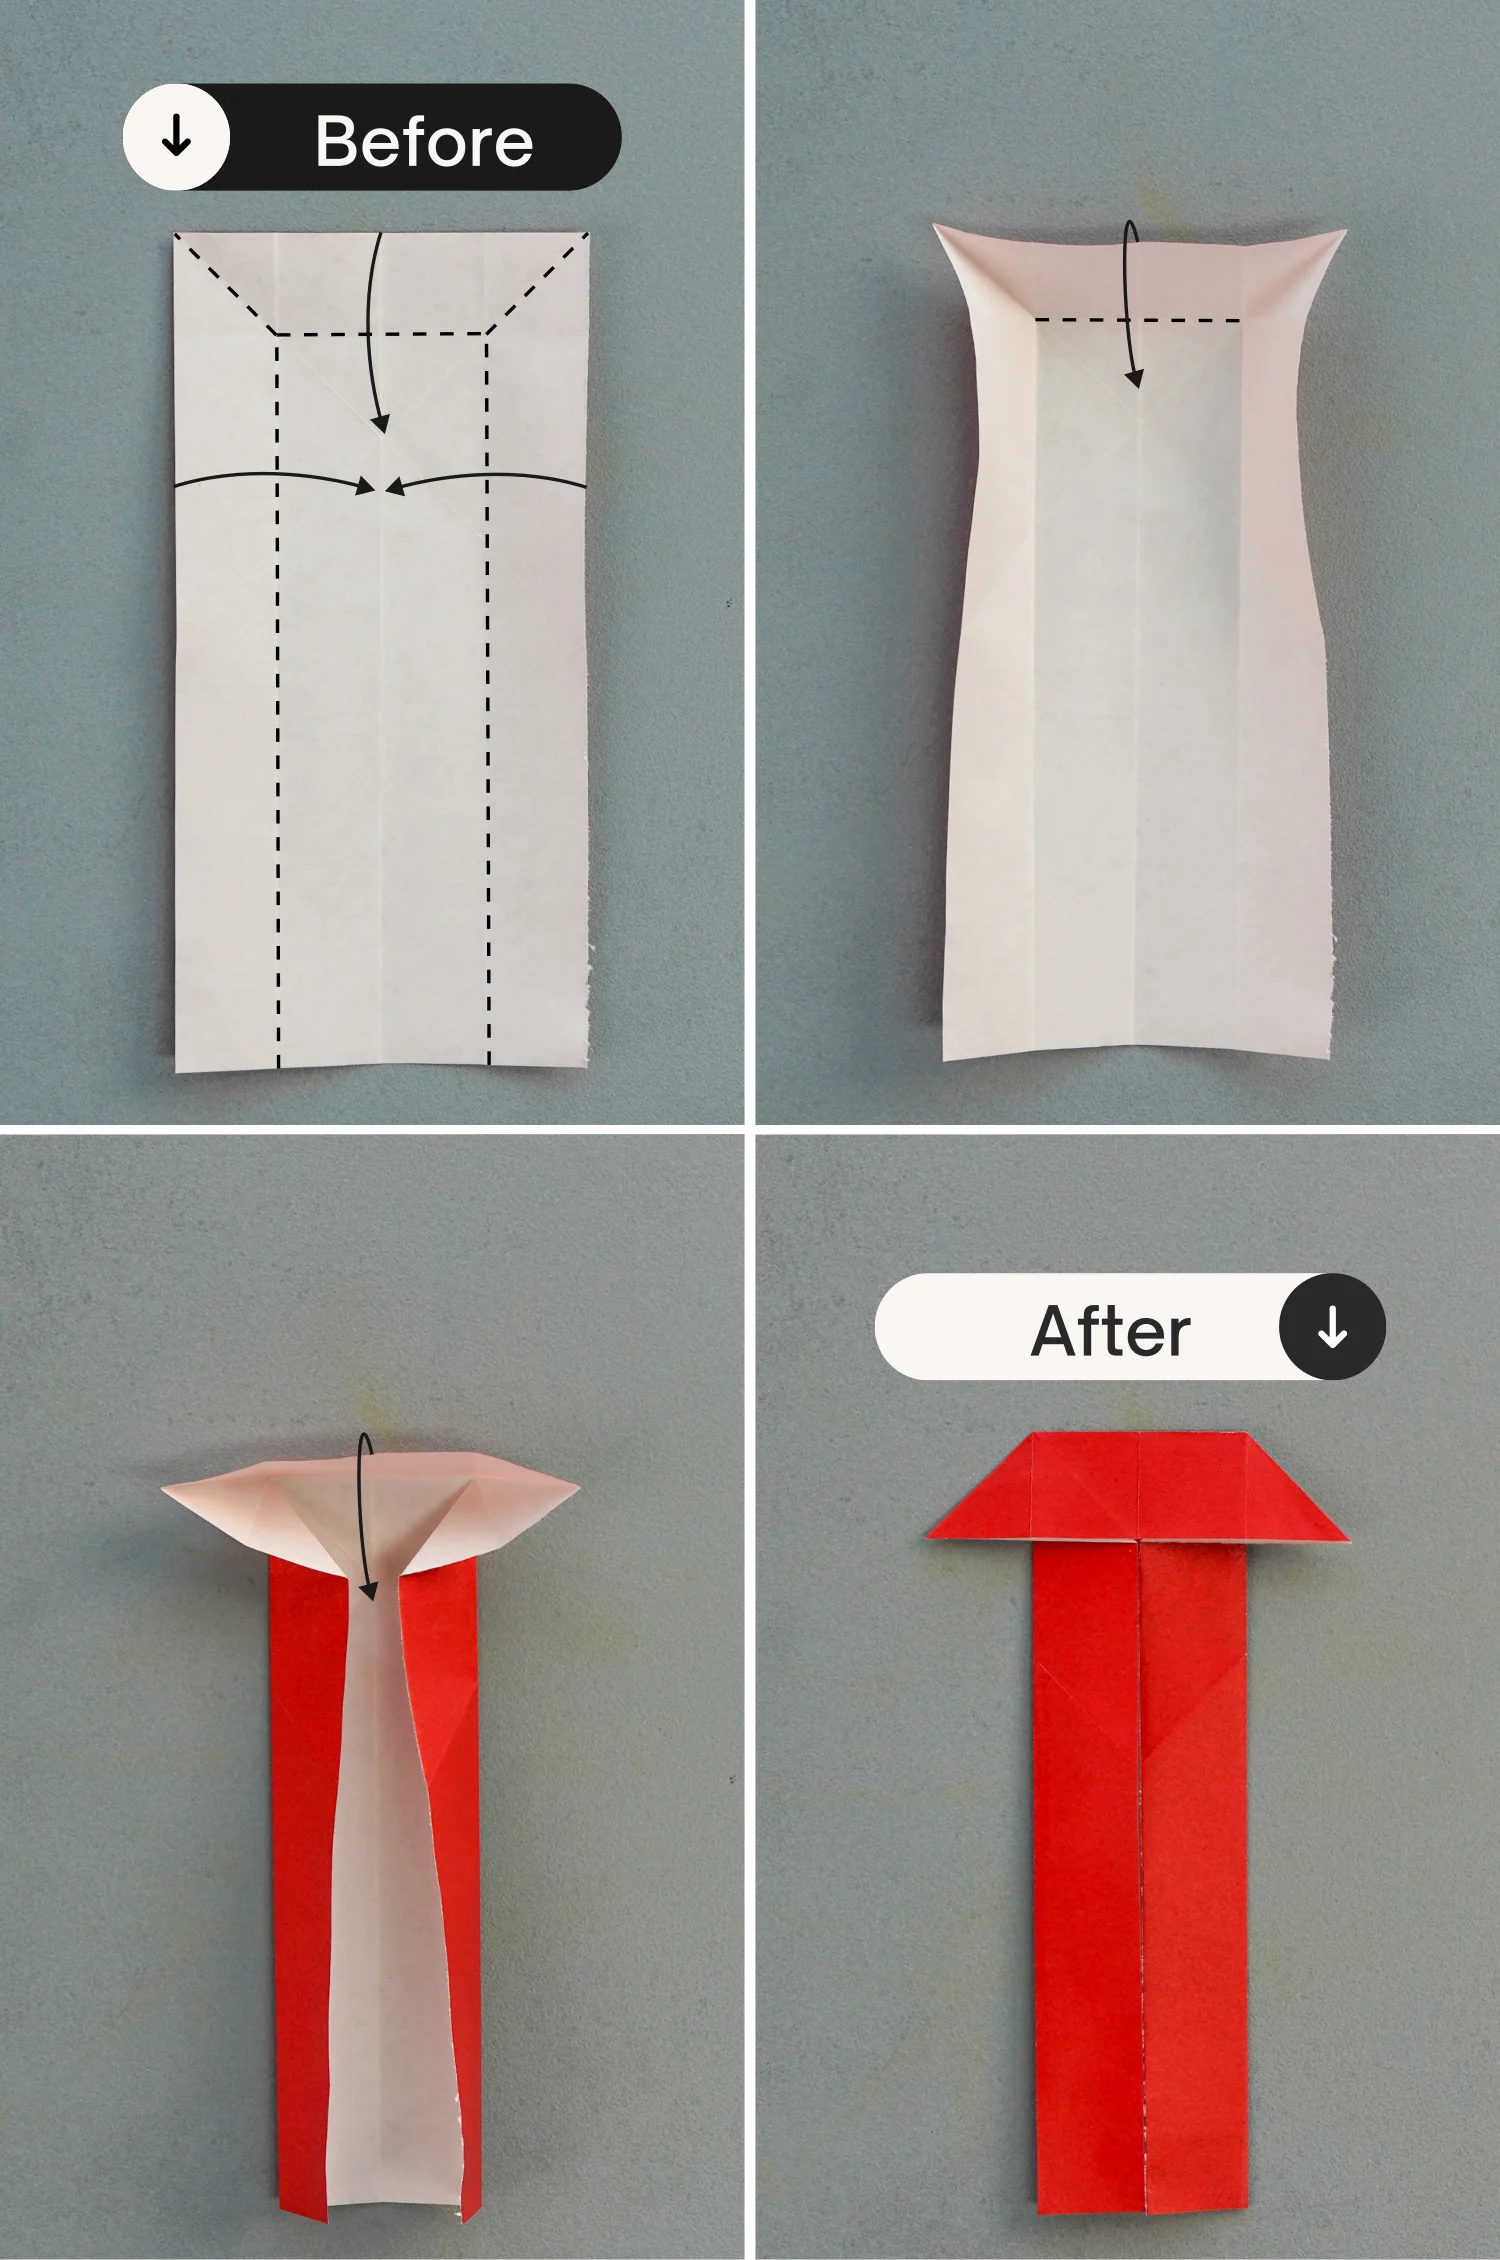
Step 9
Flip the paper.
Step 10
Fold the top left and right corners along the dotted lines to meet the middle vertical line.
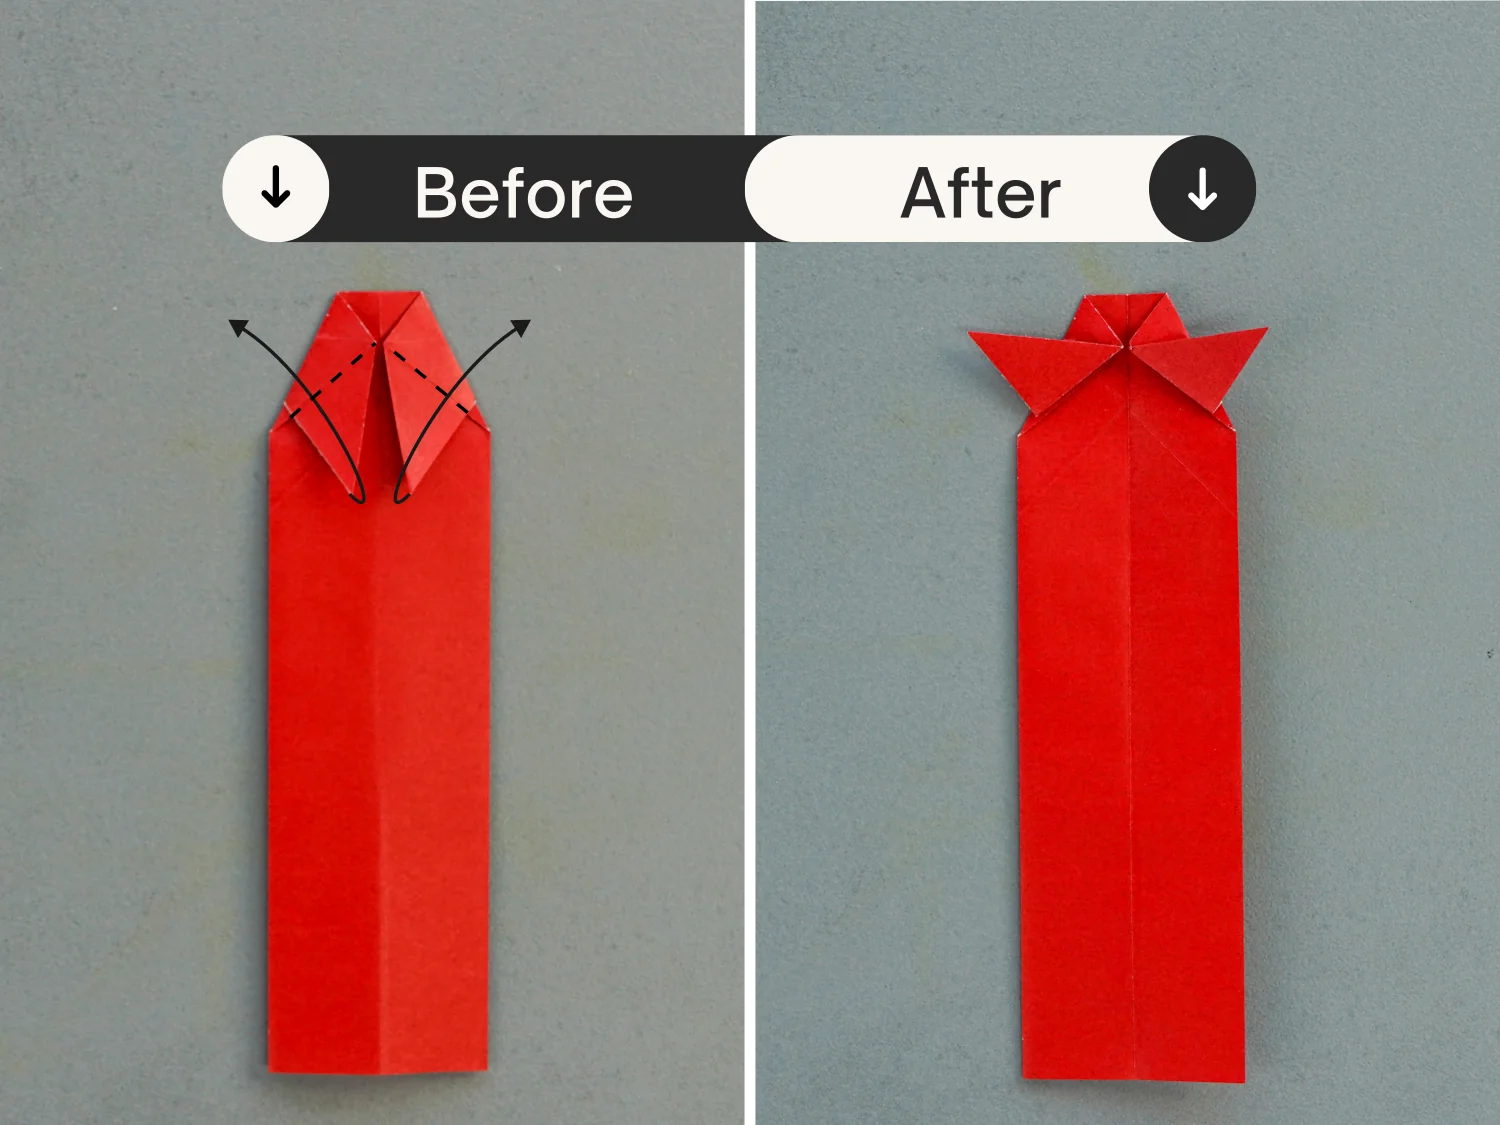
Step 11
Fold up the two points of the two top layers along the dotted lines.
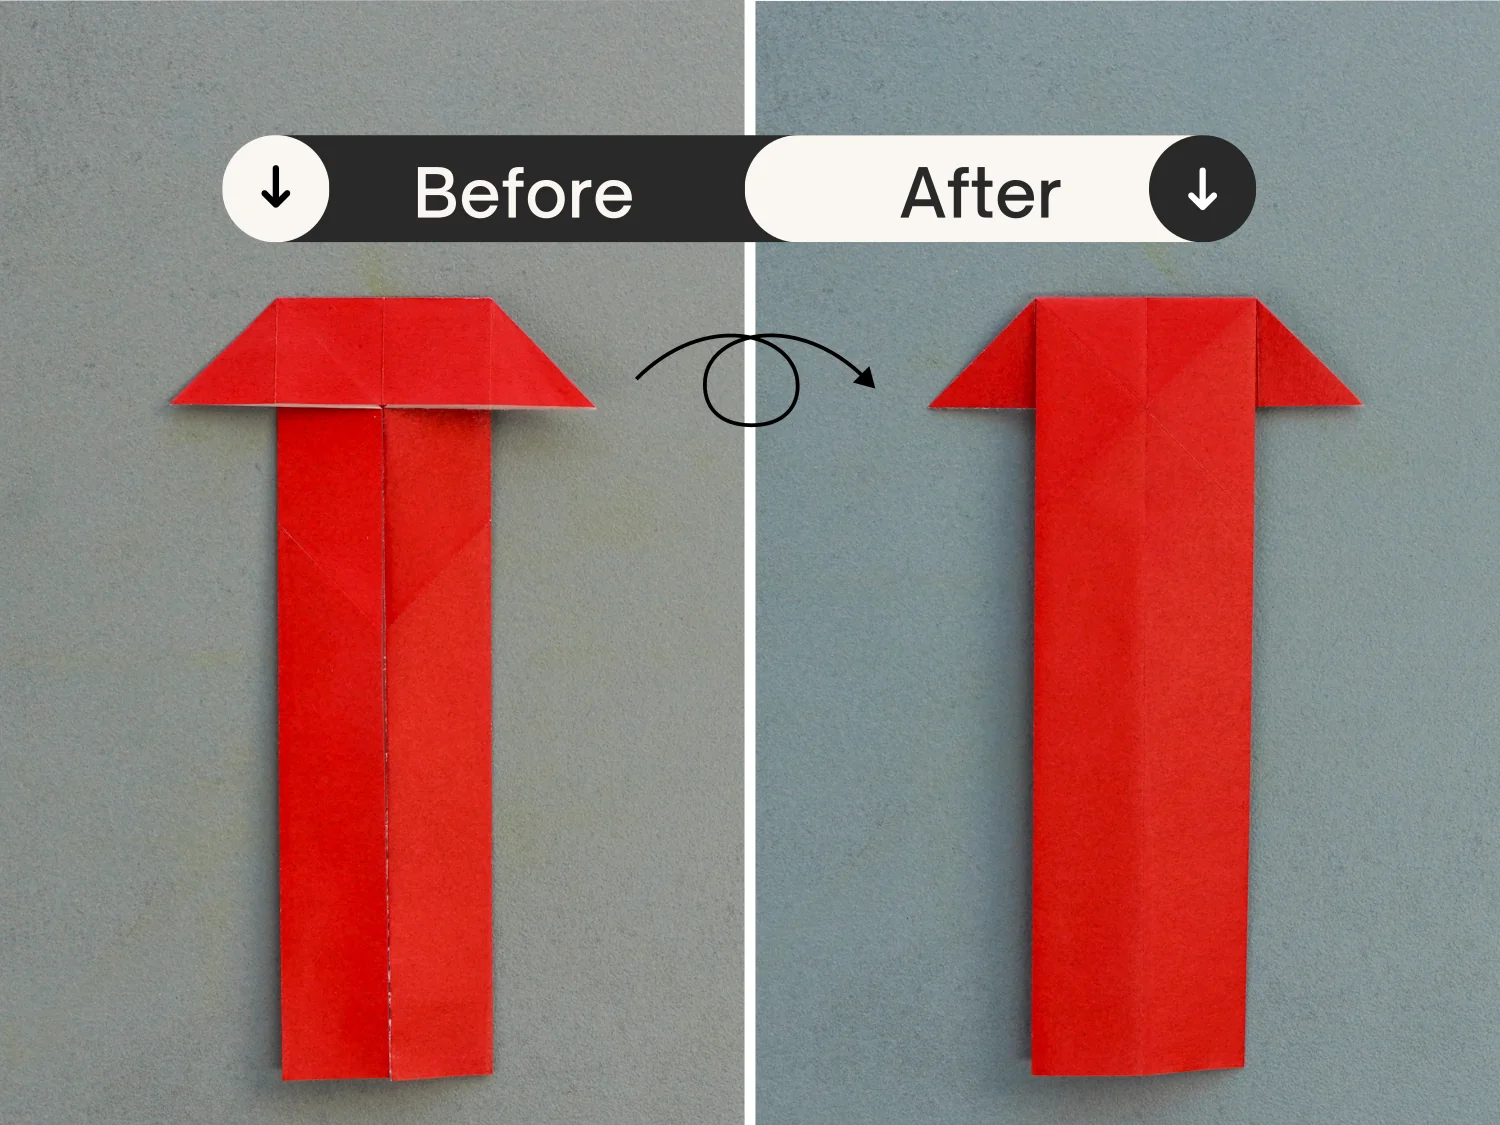
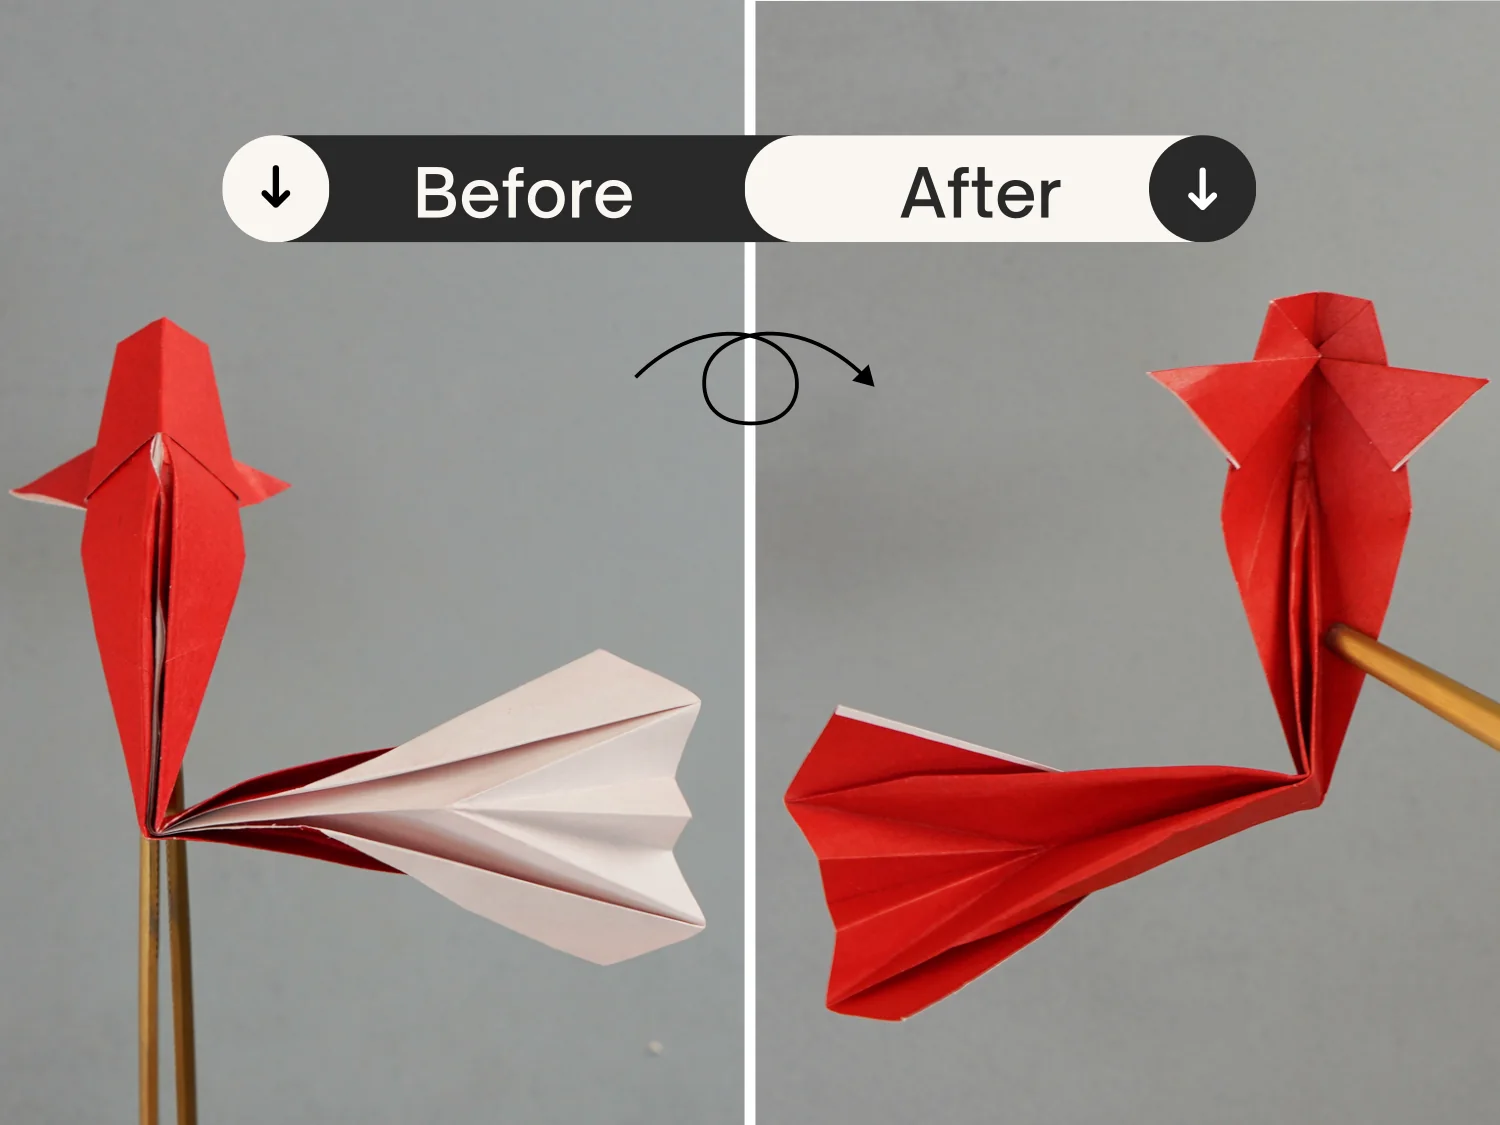
Step 12
Fold the paper in half vertically from the right to the left, then fold the right edge to the left along the dotted line [picture 2], and fold it back to the right to align with the right edge indicated by the red line [picture 3]. Finally, expand the paper to the original shape like the first picture, then flip the paper over.
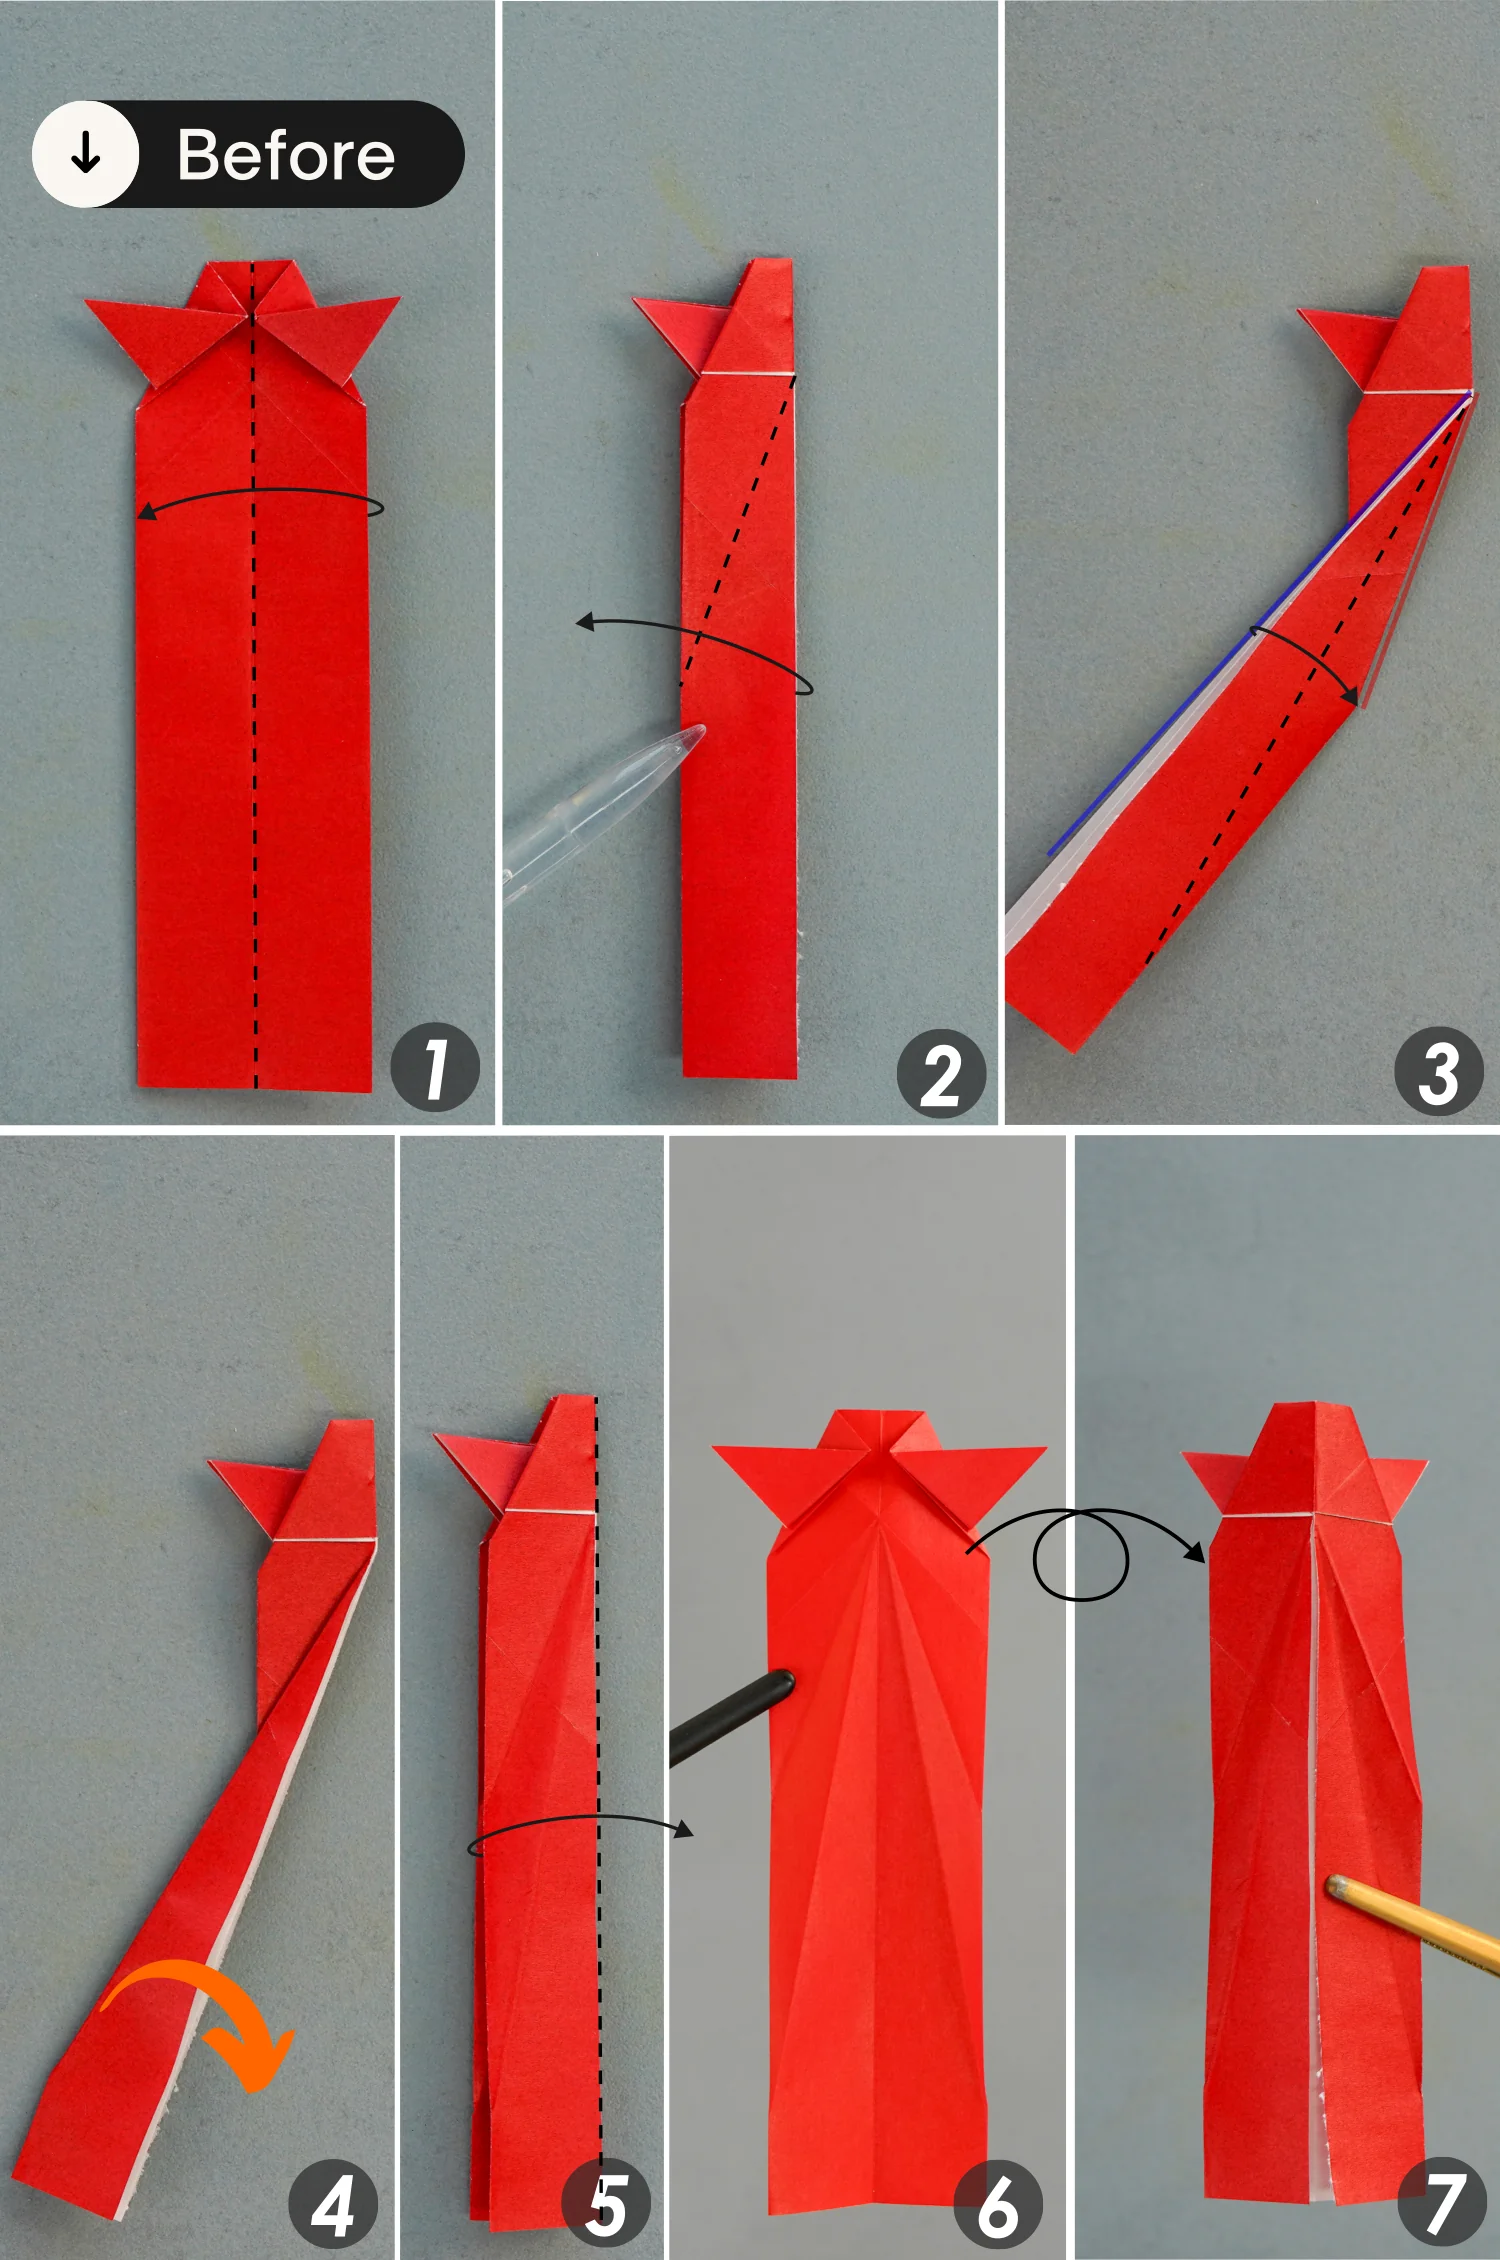
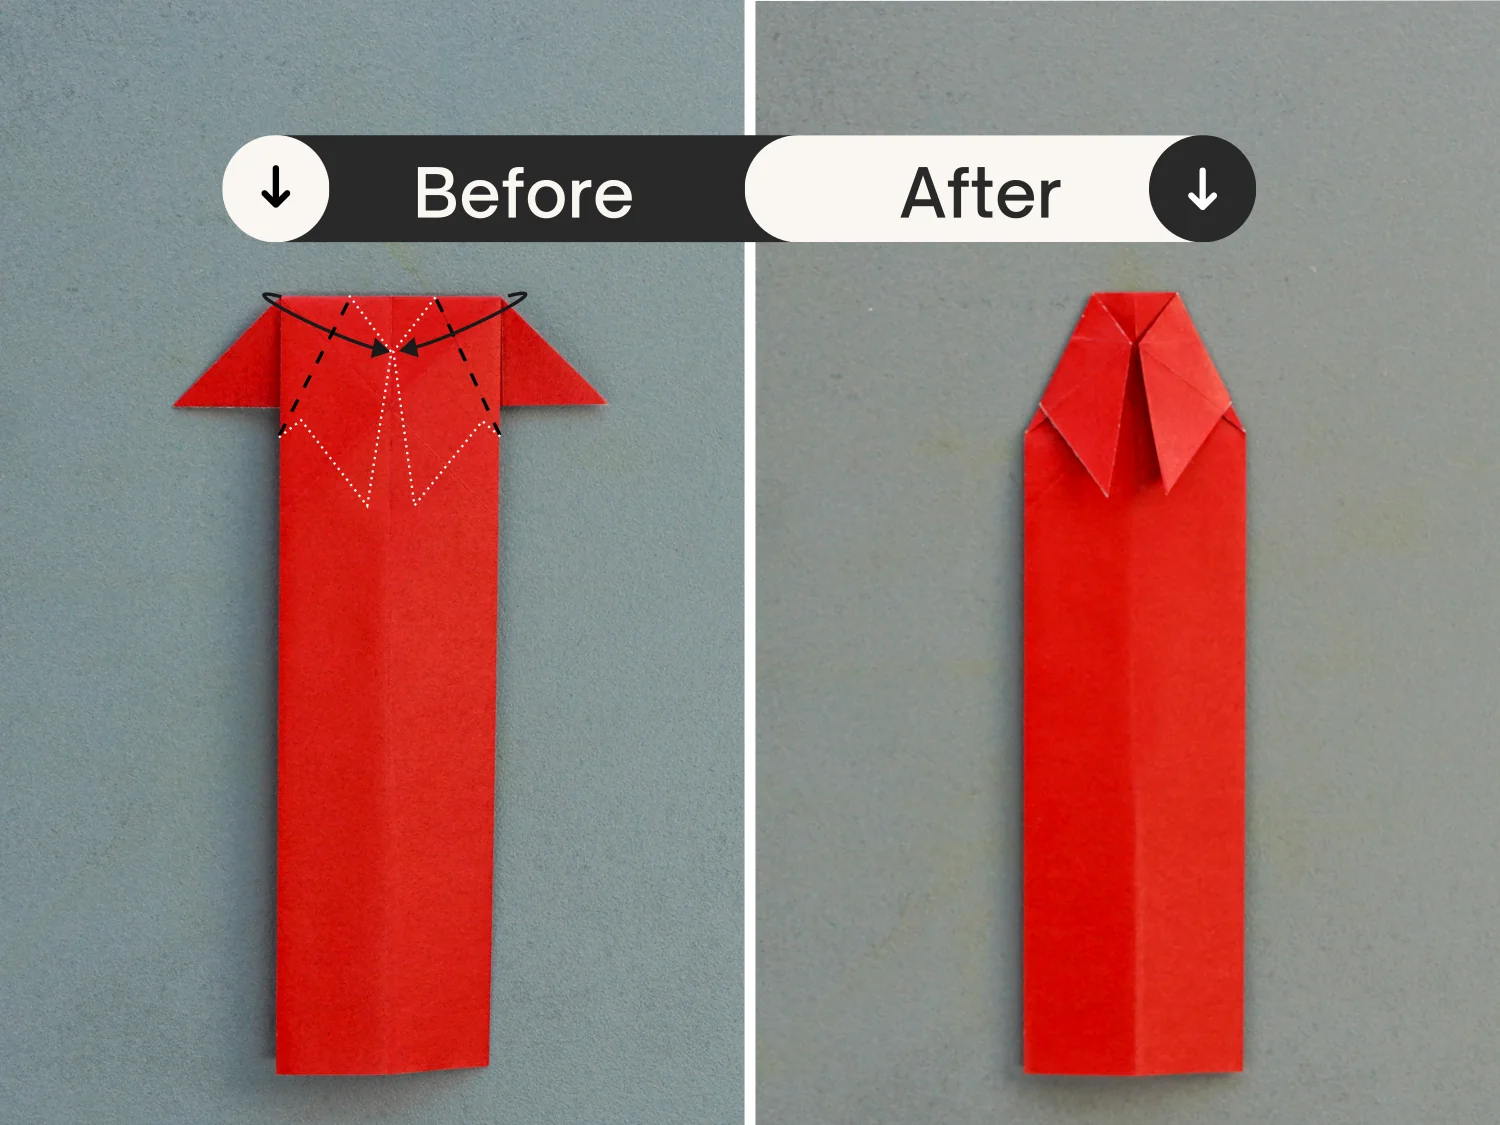
Step 13
Shape the creases shown by the white dotted lines, and fold them to align with the middle vertical crease along the black dotted lines. [Slightly press down the top edge, making the top part arched]
Step 14
Turn over the paper.
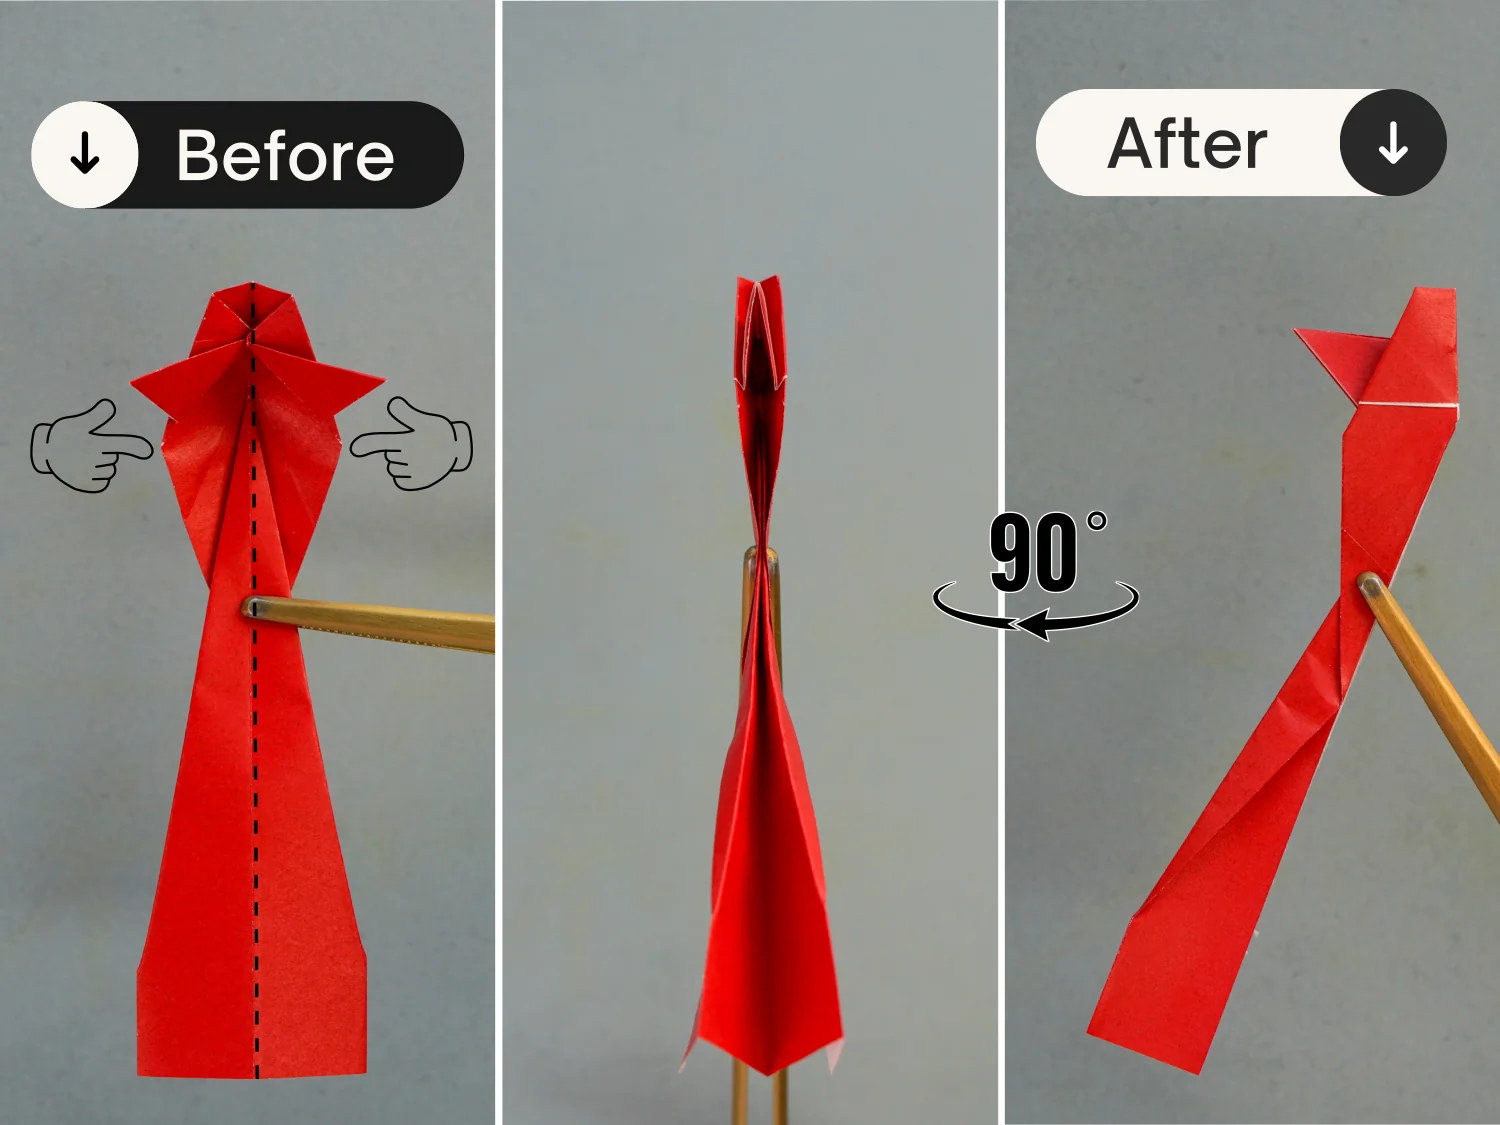
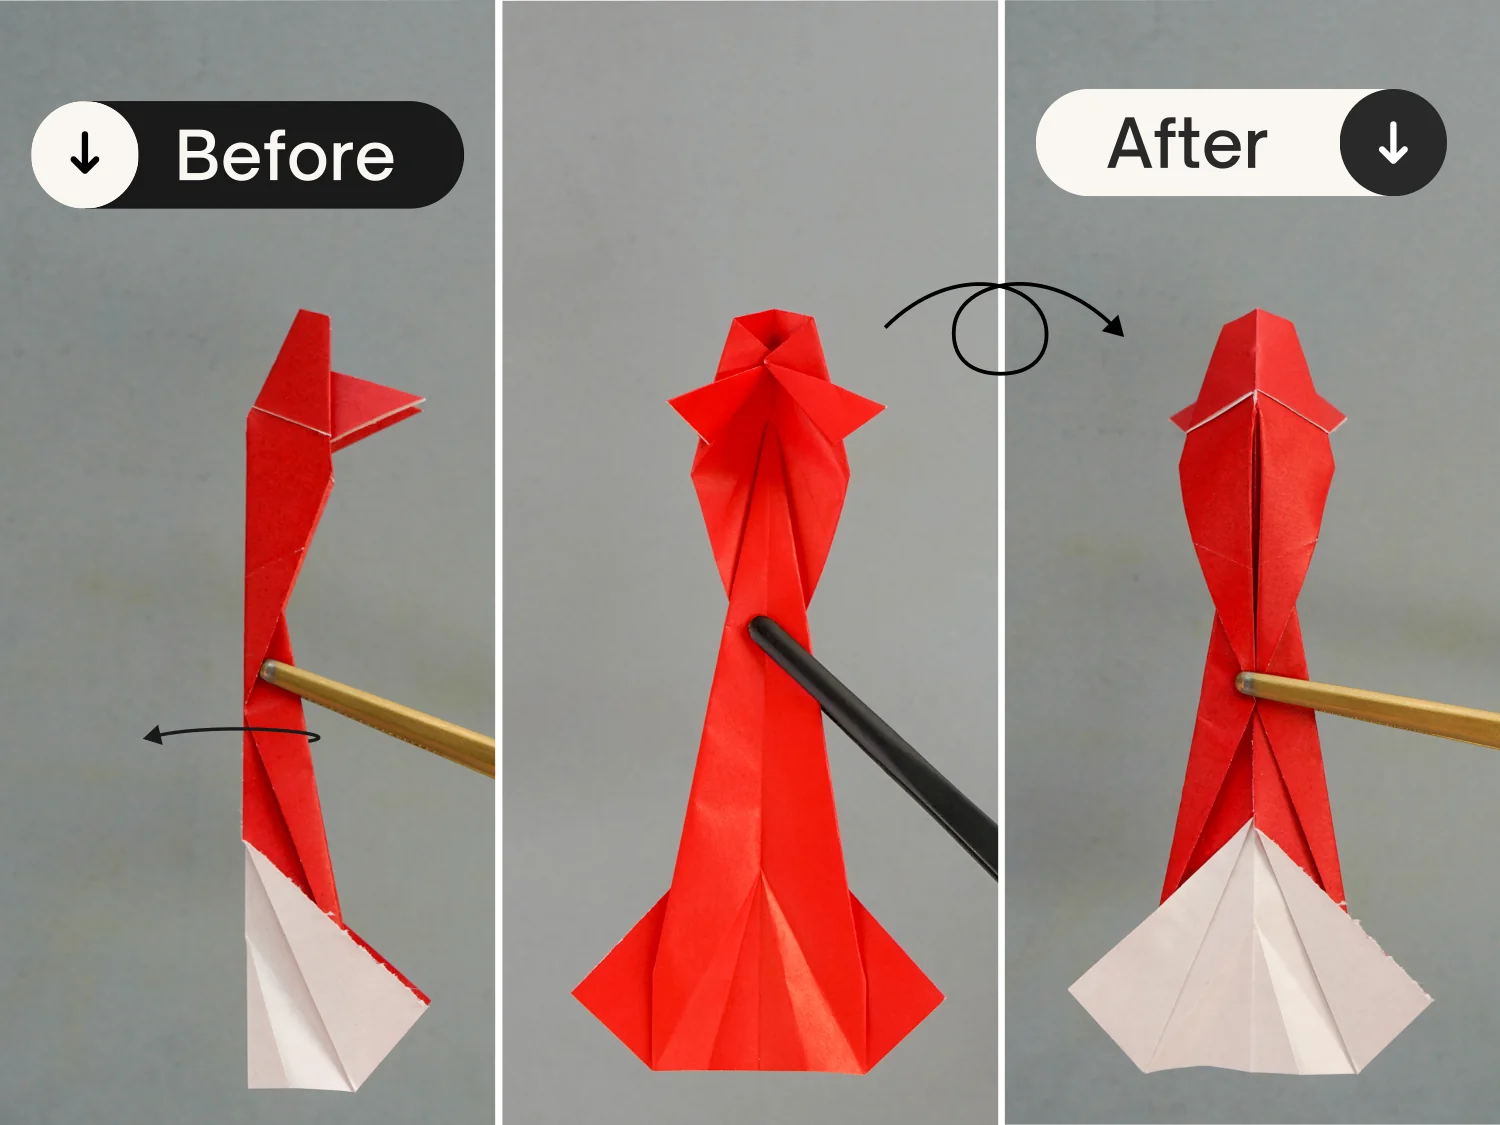
Step 15
Close the paper upward along, and rotate it 90 degrees horizontally.
Step 16
Fold up the bottom right point of the top layer along the black dotted line.
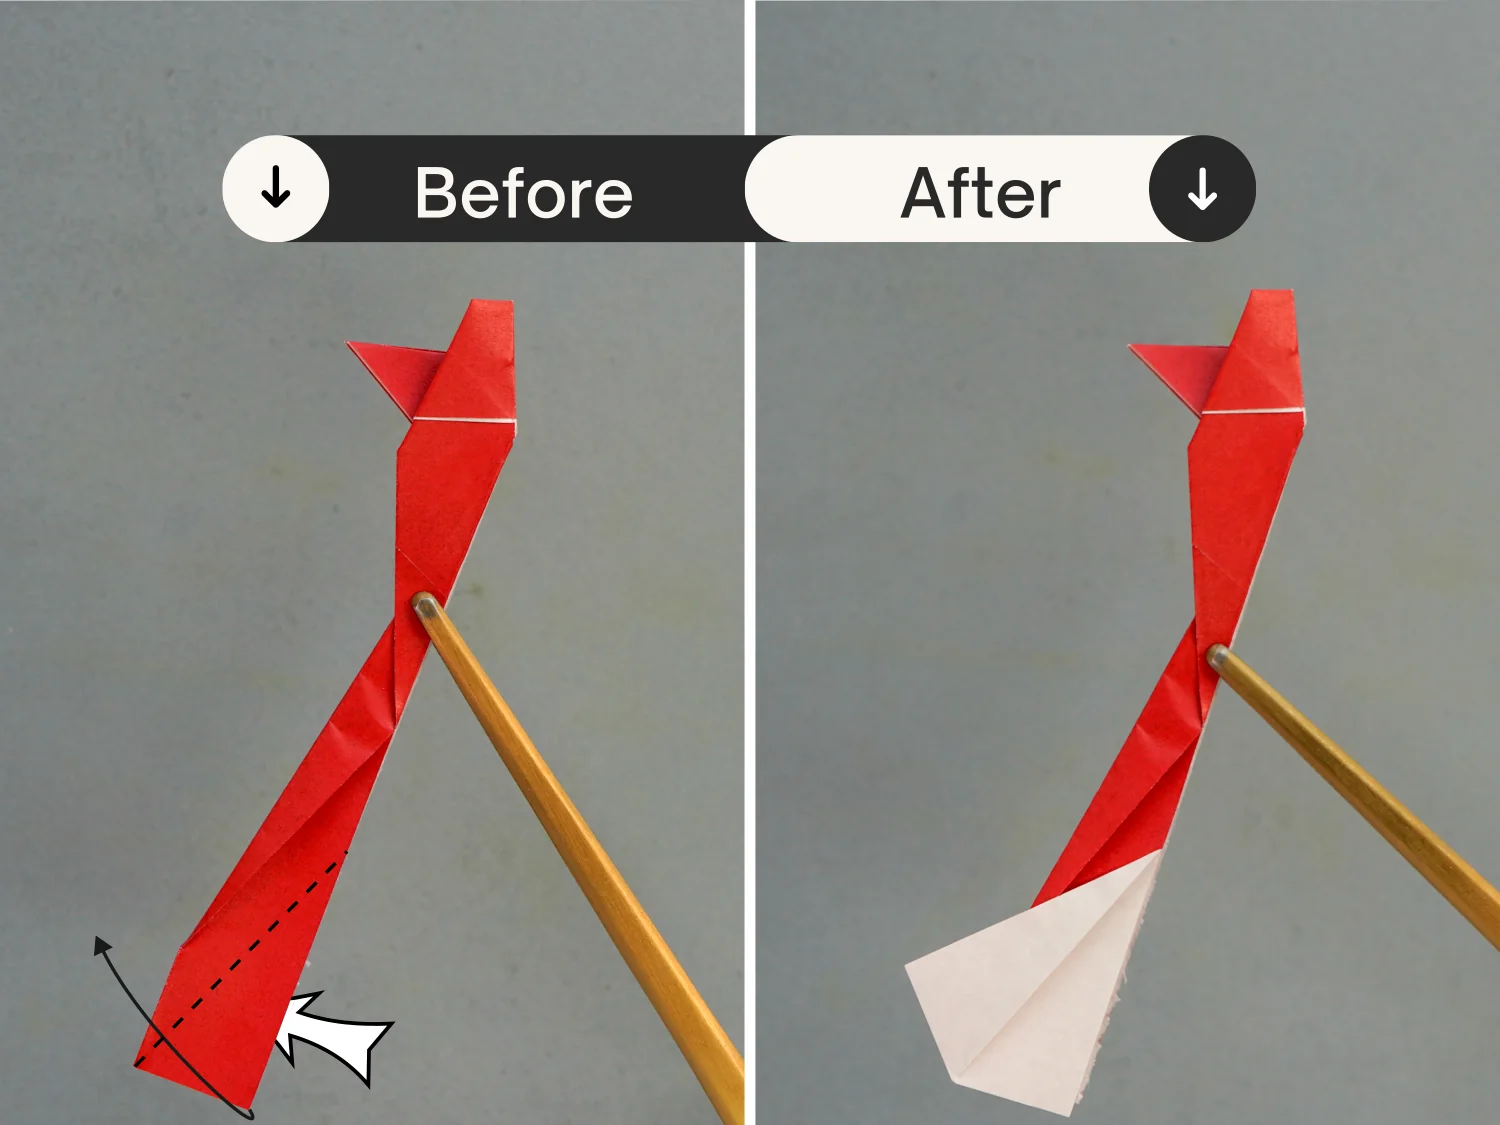
Step 17
Flip the model over.
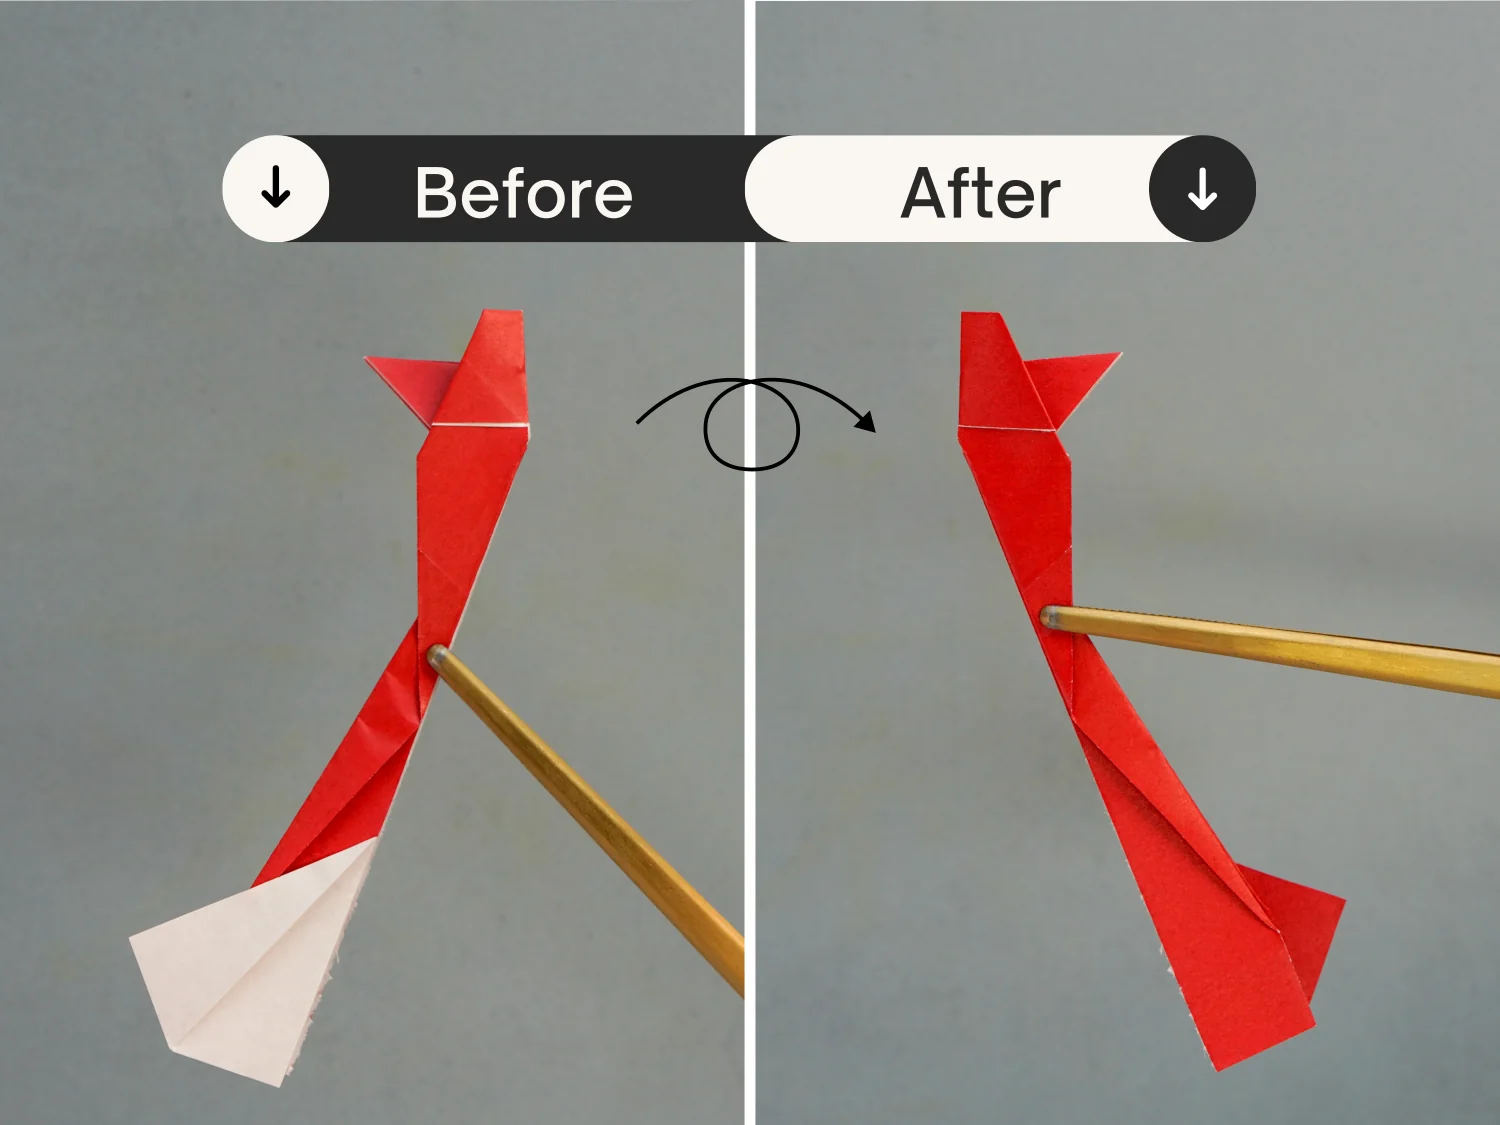
Step 18
Similarly, fold up the bottom left point of the top layer along the dotted line, to overlap the bottom layer you just made.
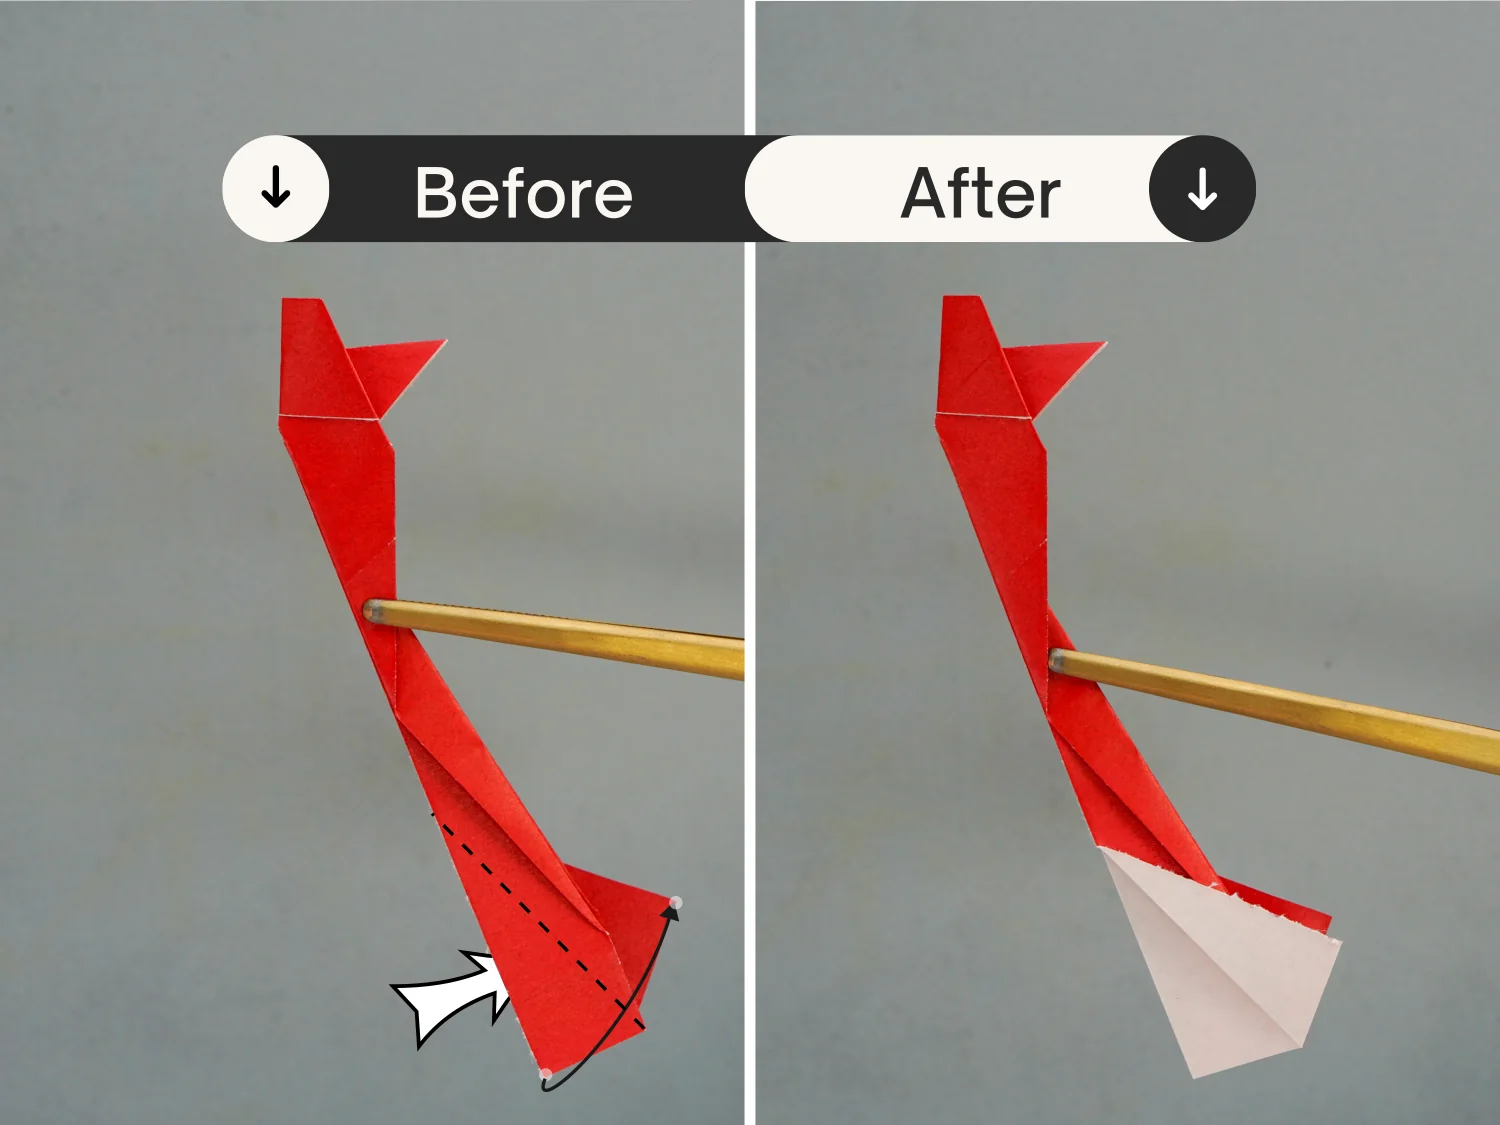
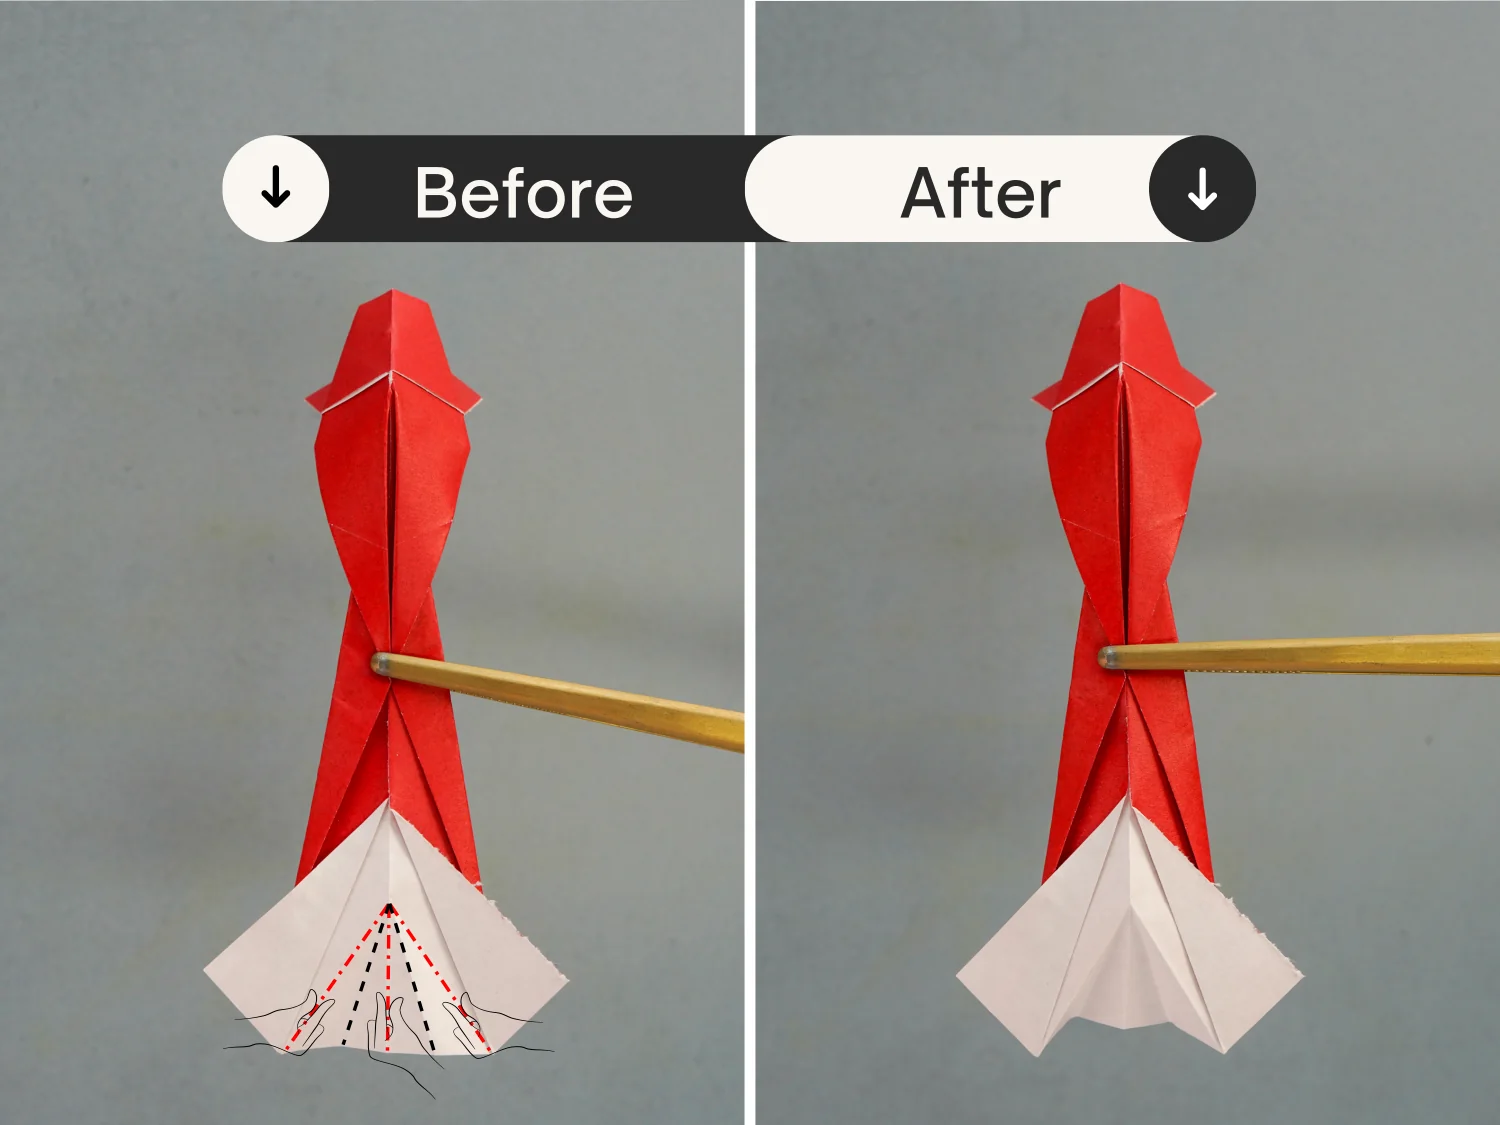
Step 19
Fold up the bottom corner along the dotted line, creating a small triangle. Then fold the top edge of the triangle to align with its bottom edge, and finally unfold them.
Step 20
Expand the model, and flip the paper over.
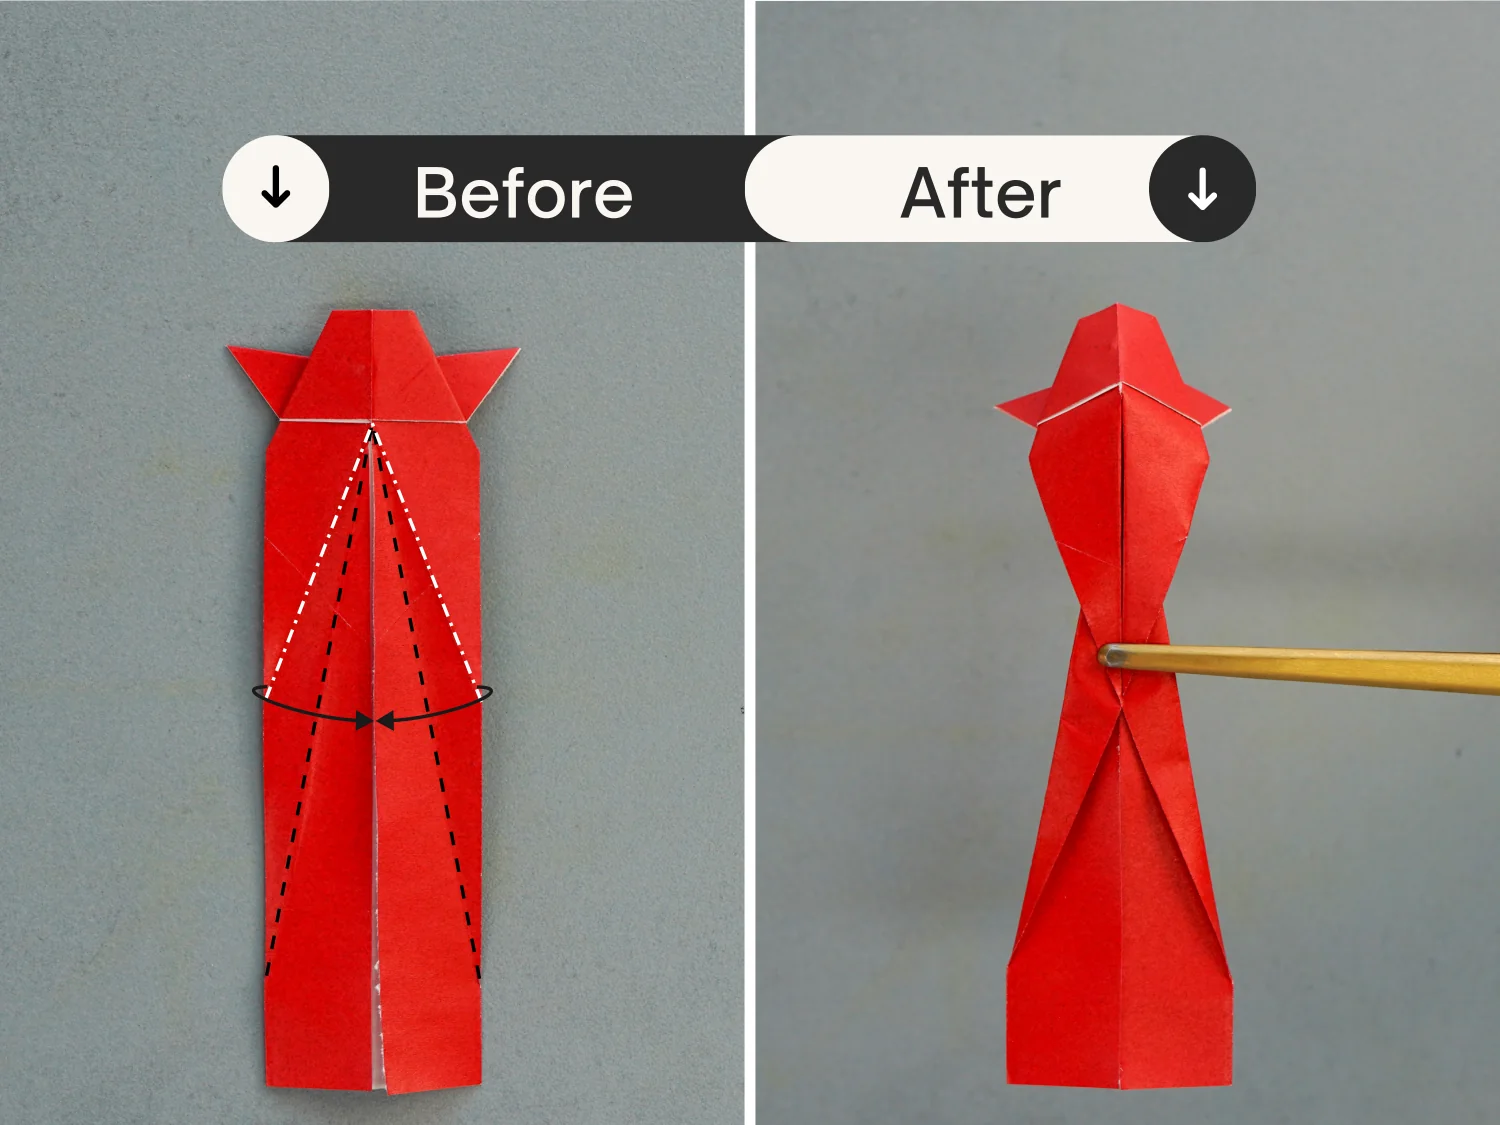
Step 21
Shape these three creases indicated by the red dotted lines.
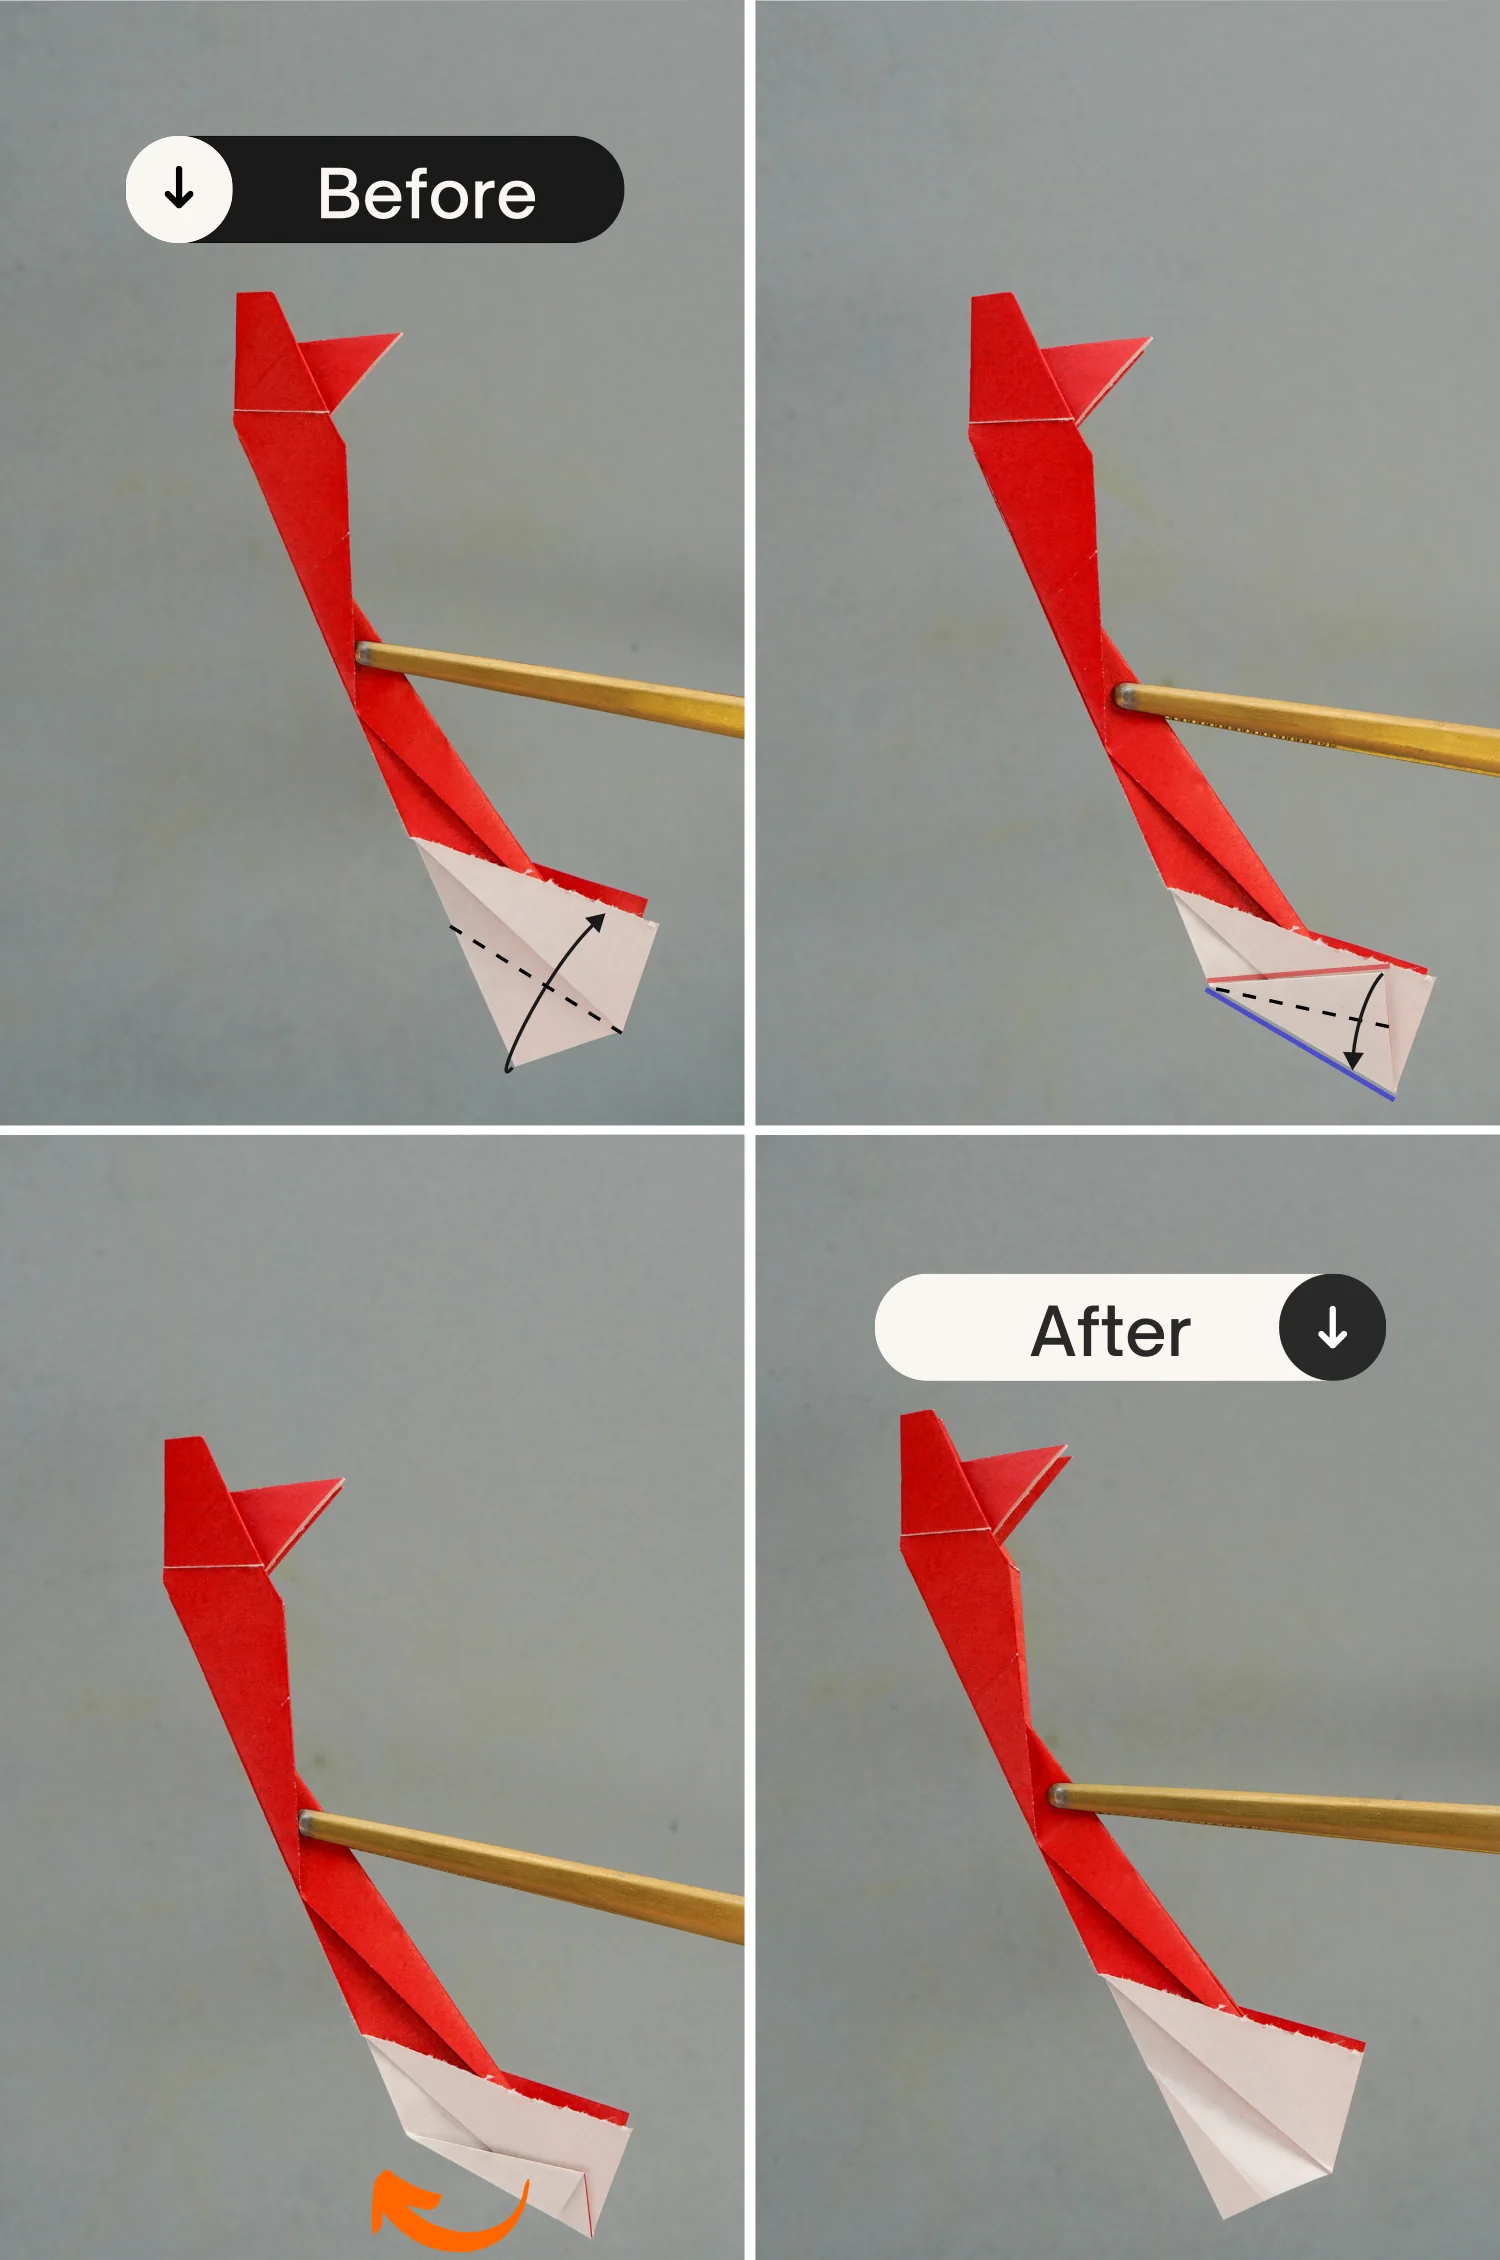
Step 22
Pinch the middle section, and fold up the tail part from the right side, then unfold it to create a natural curved state.
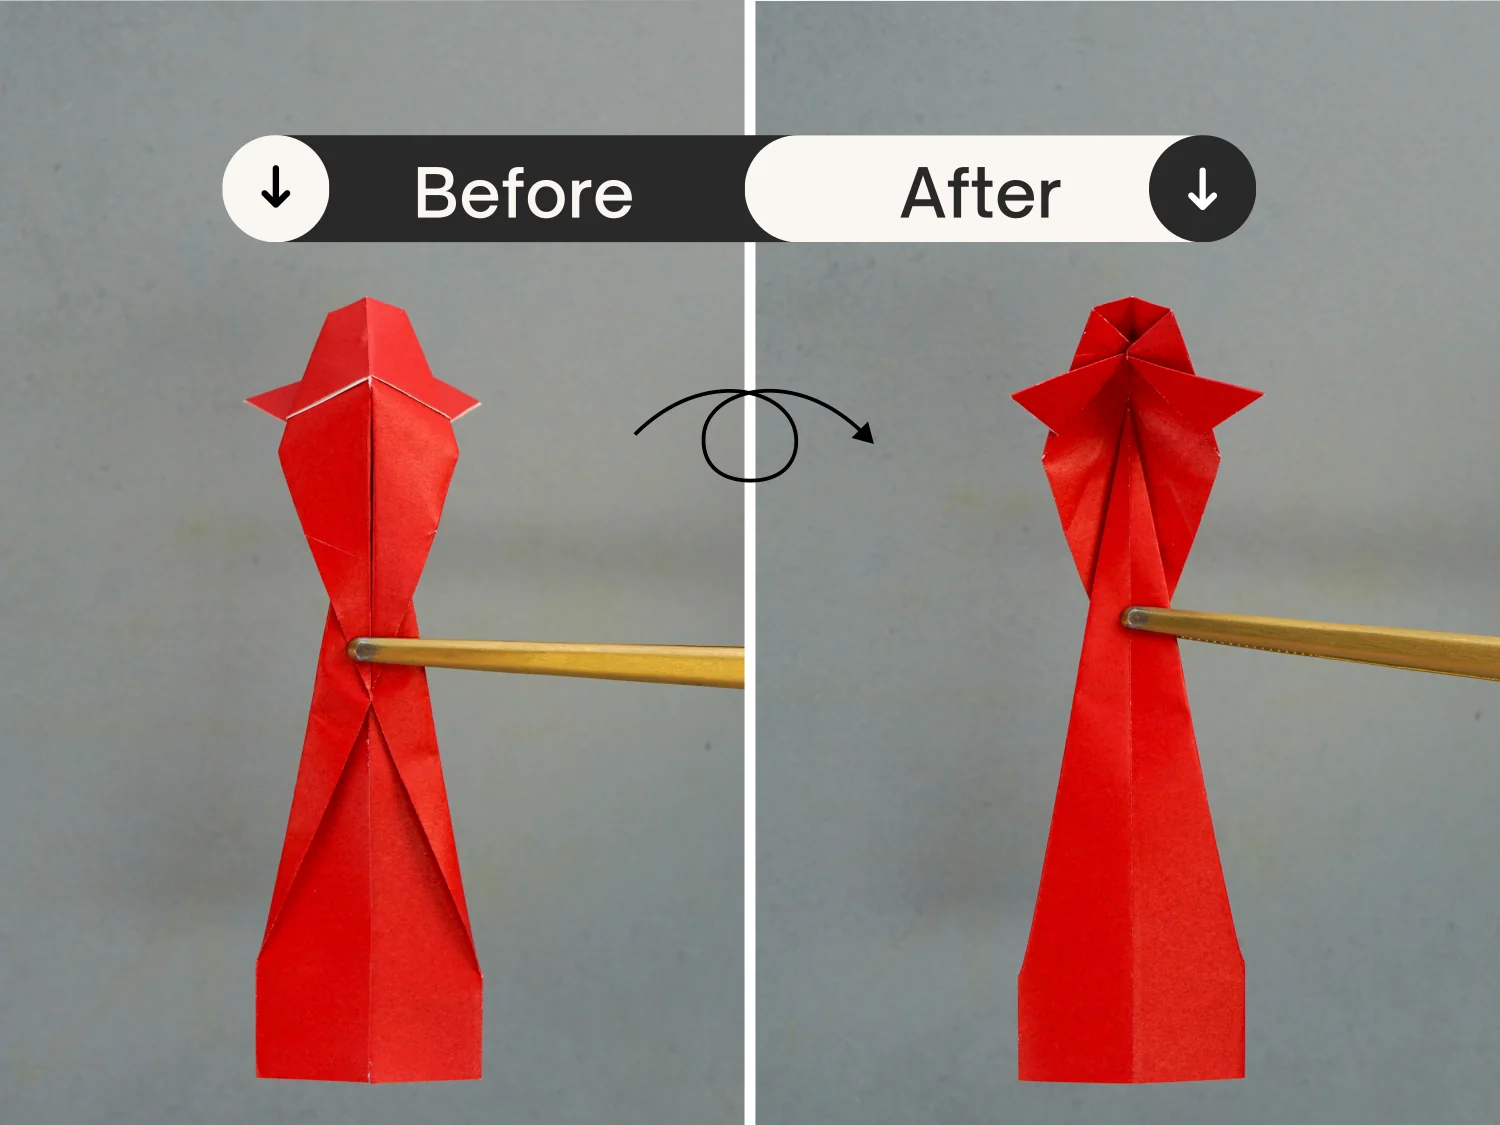
Step 23
Flip the model over.
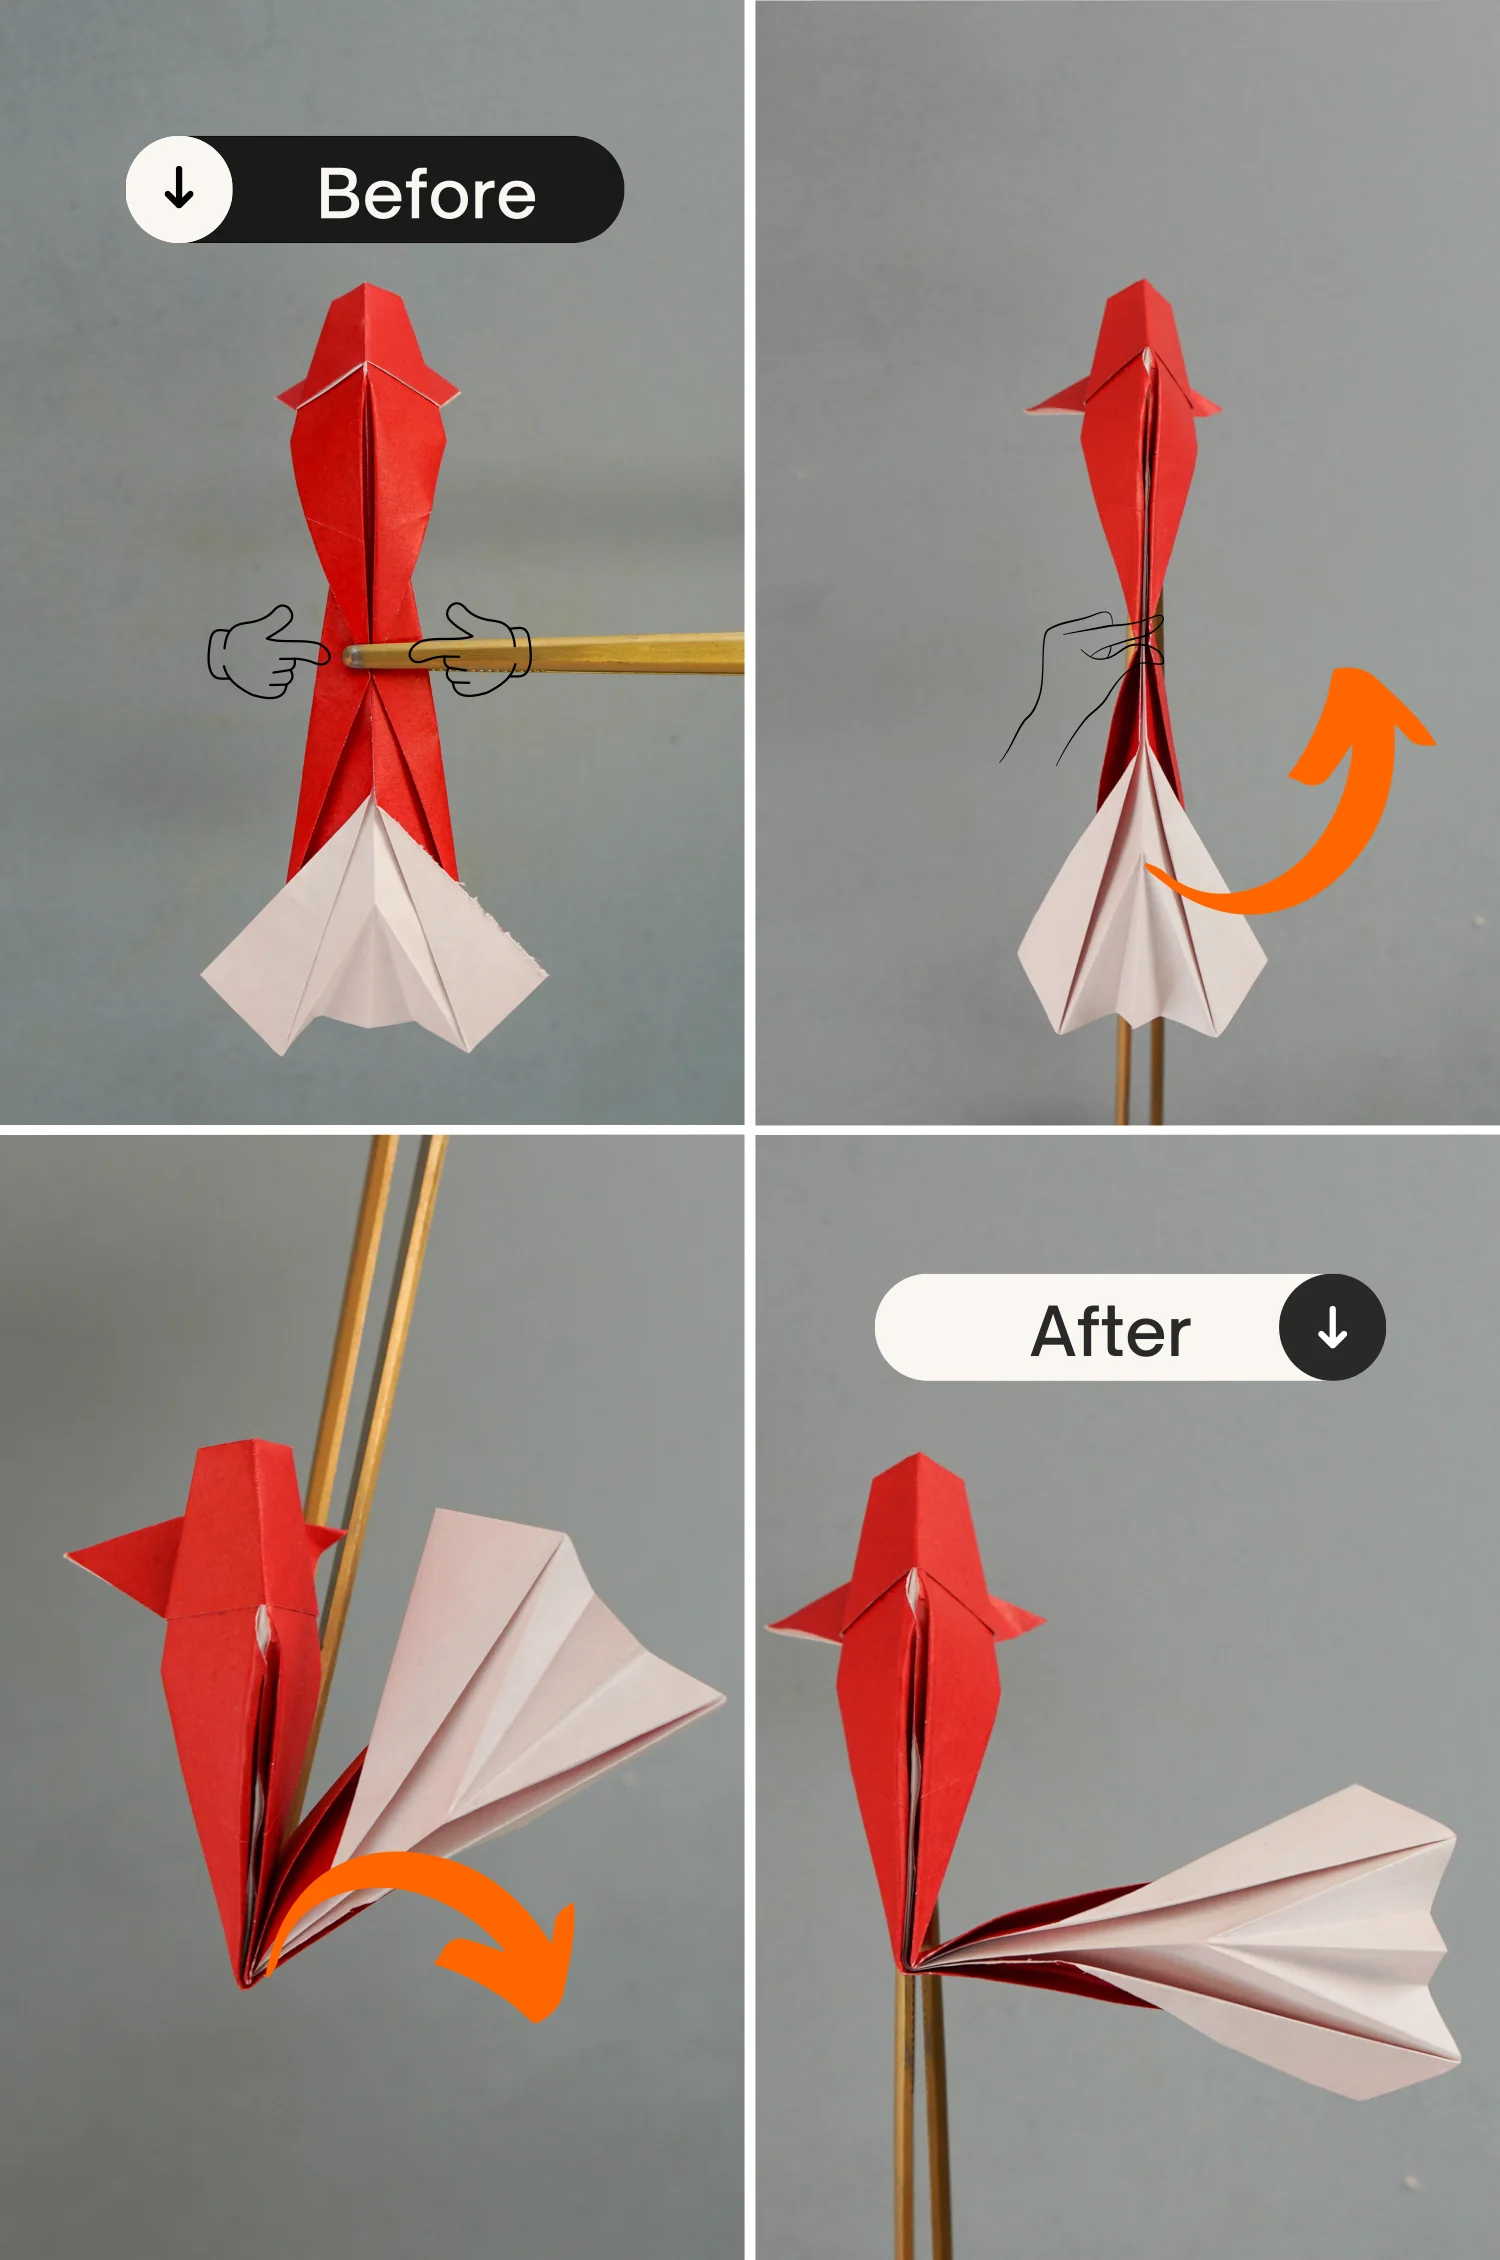
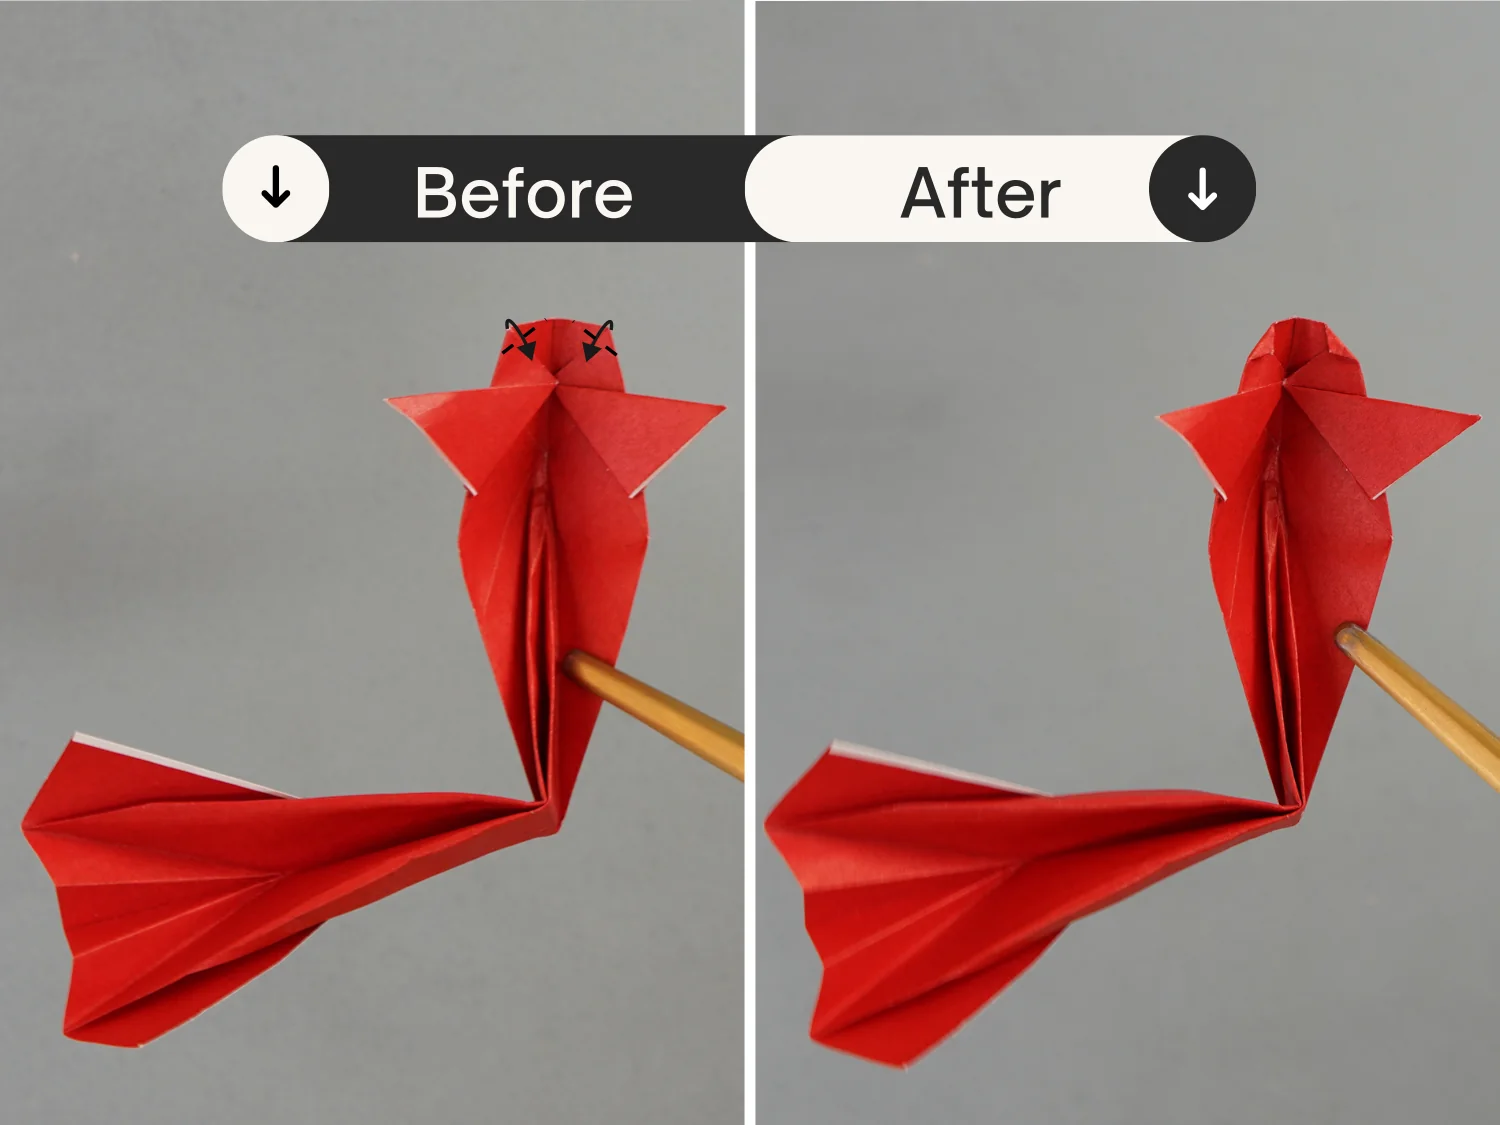
Step 24
Fold down the top left and right corners of the head a little.
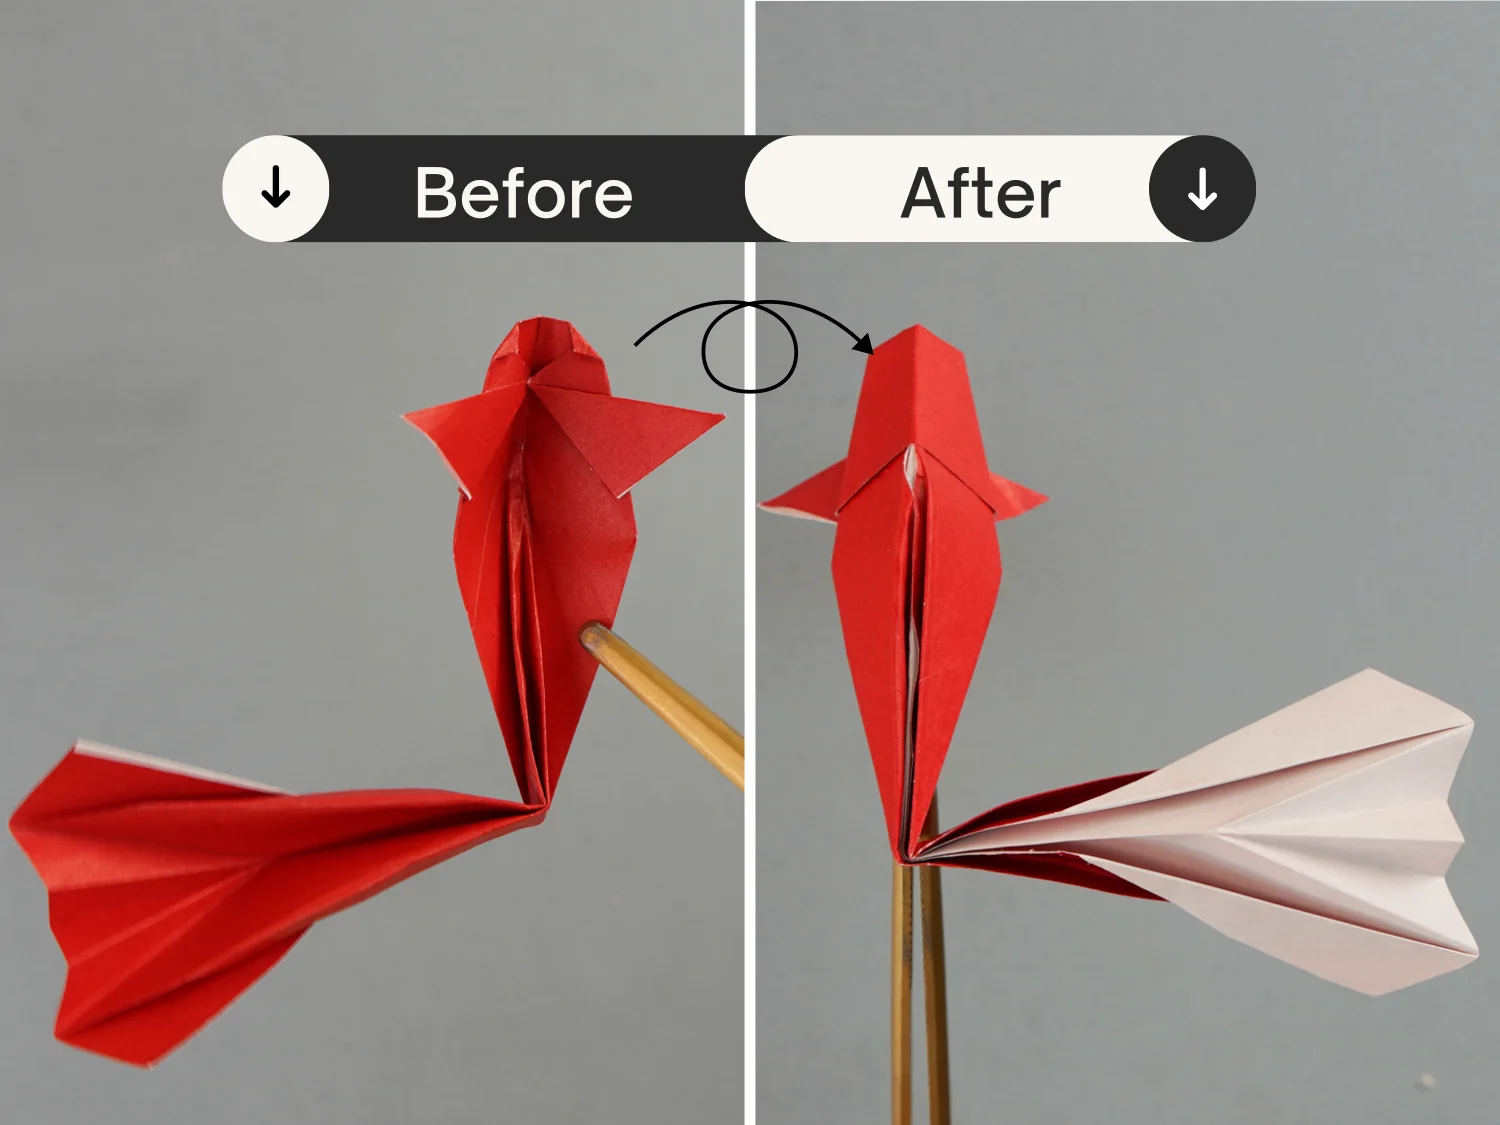
Step 25
Flip the model over, that’s your lovely origami koi fish.
What’s Next
This is the final shape of a lively origami koi fish, now you can explore our other origami fish instructions. Happy folding!
Other Origami Fish Ideas