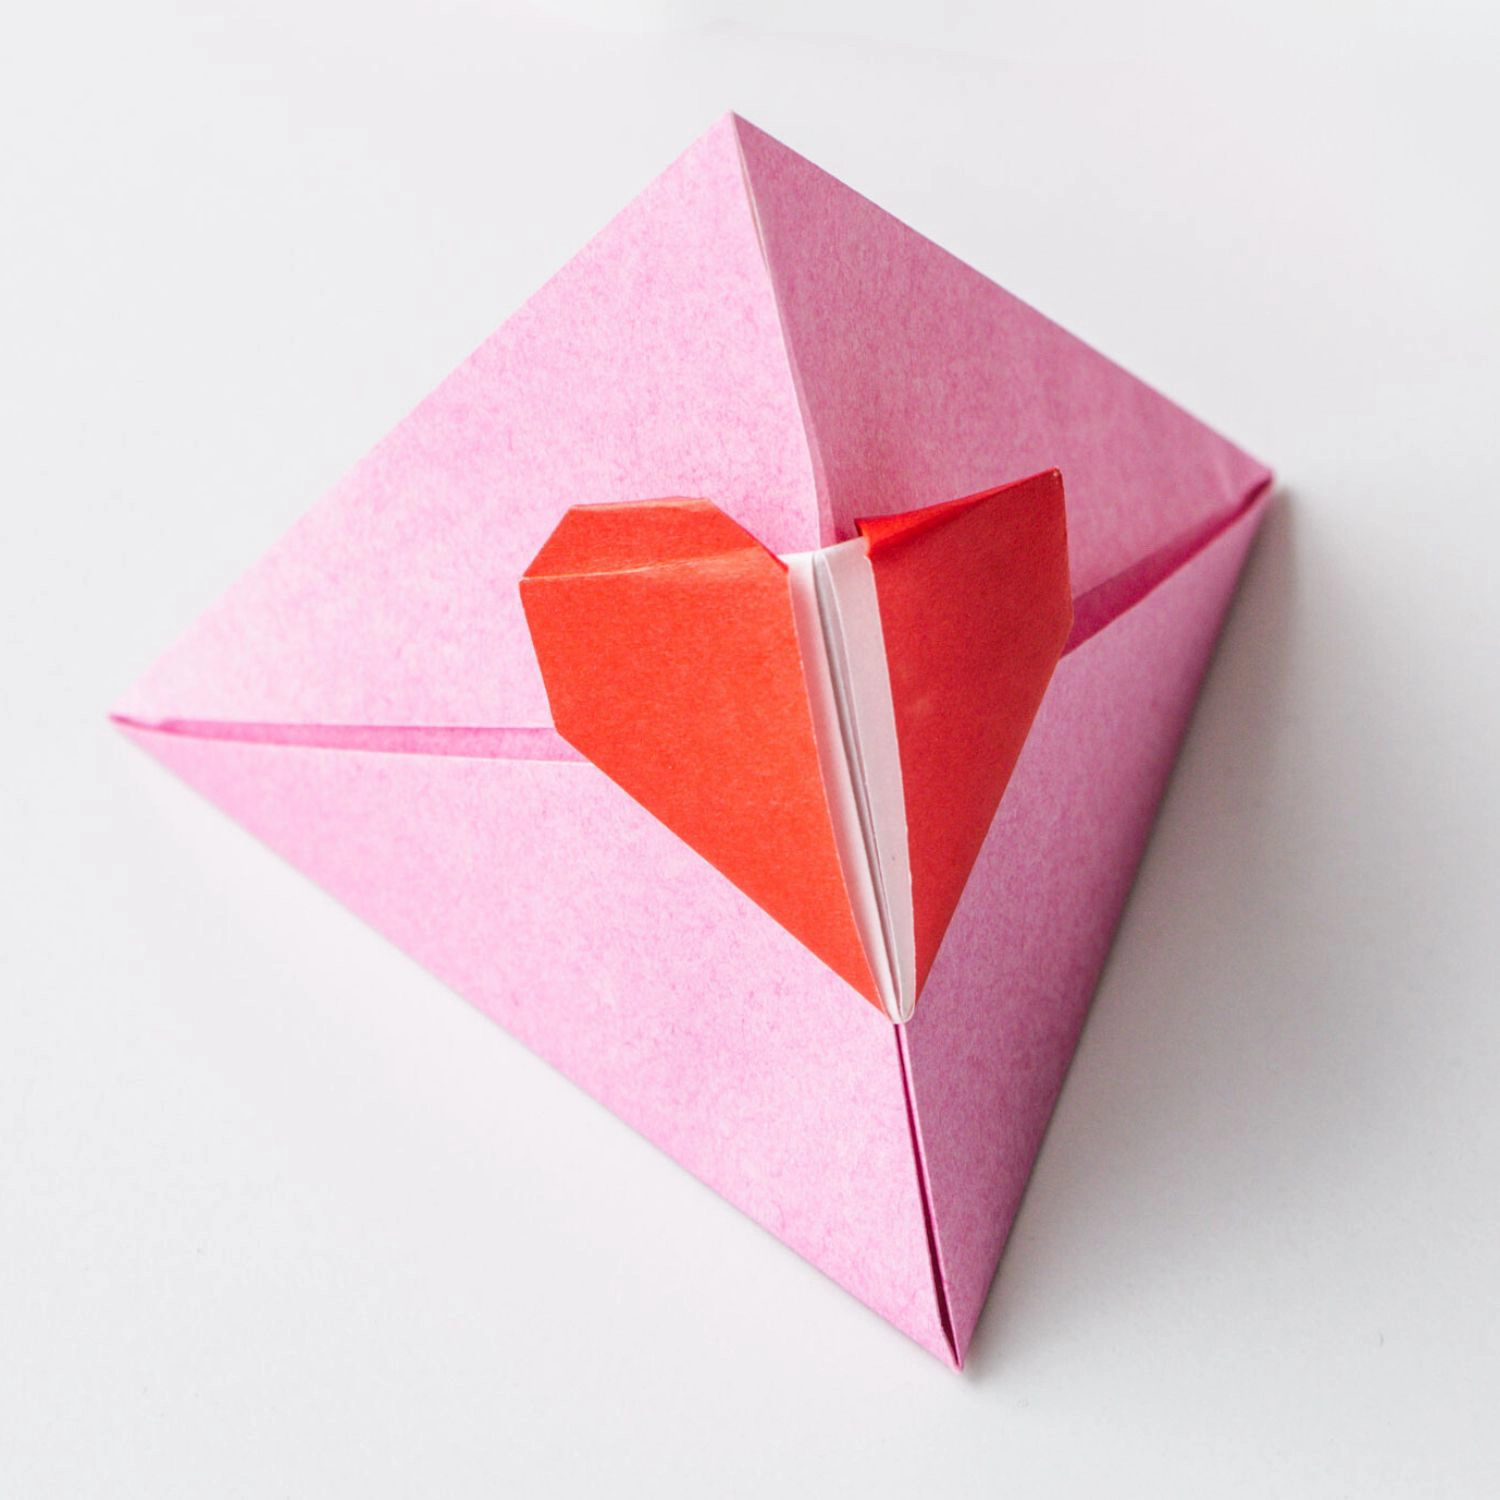
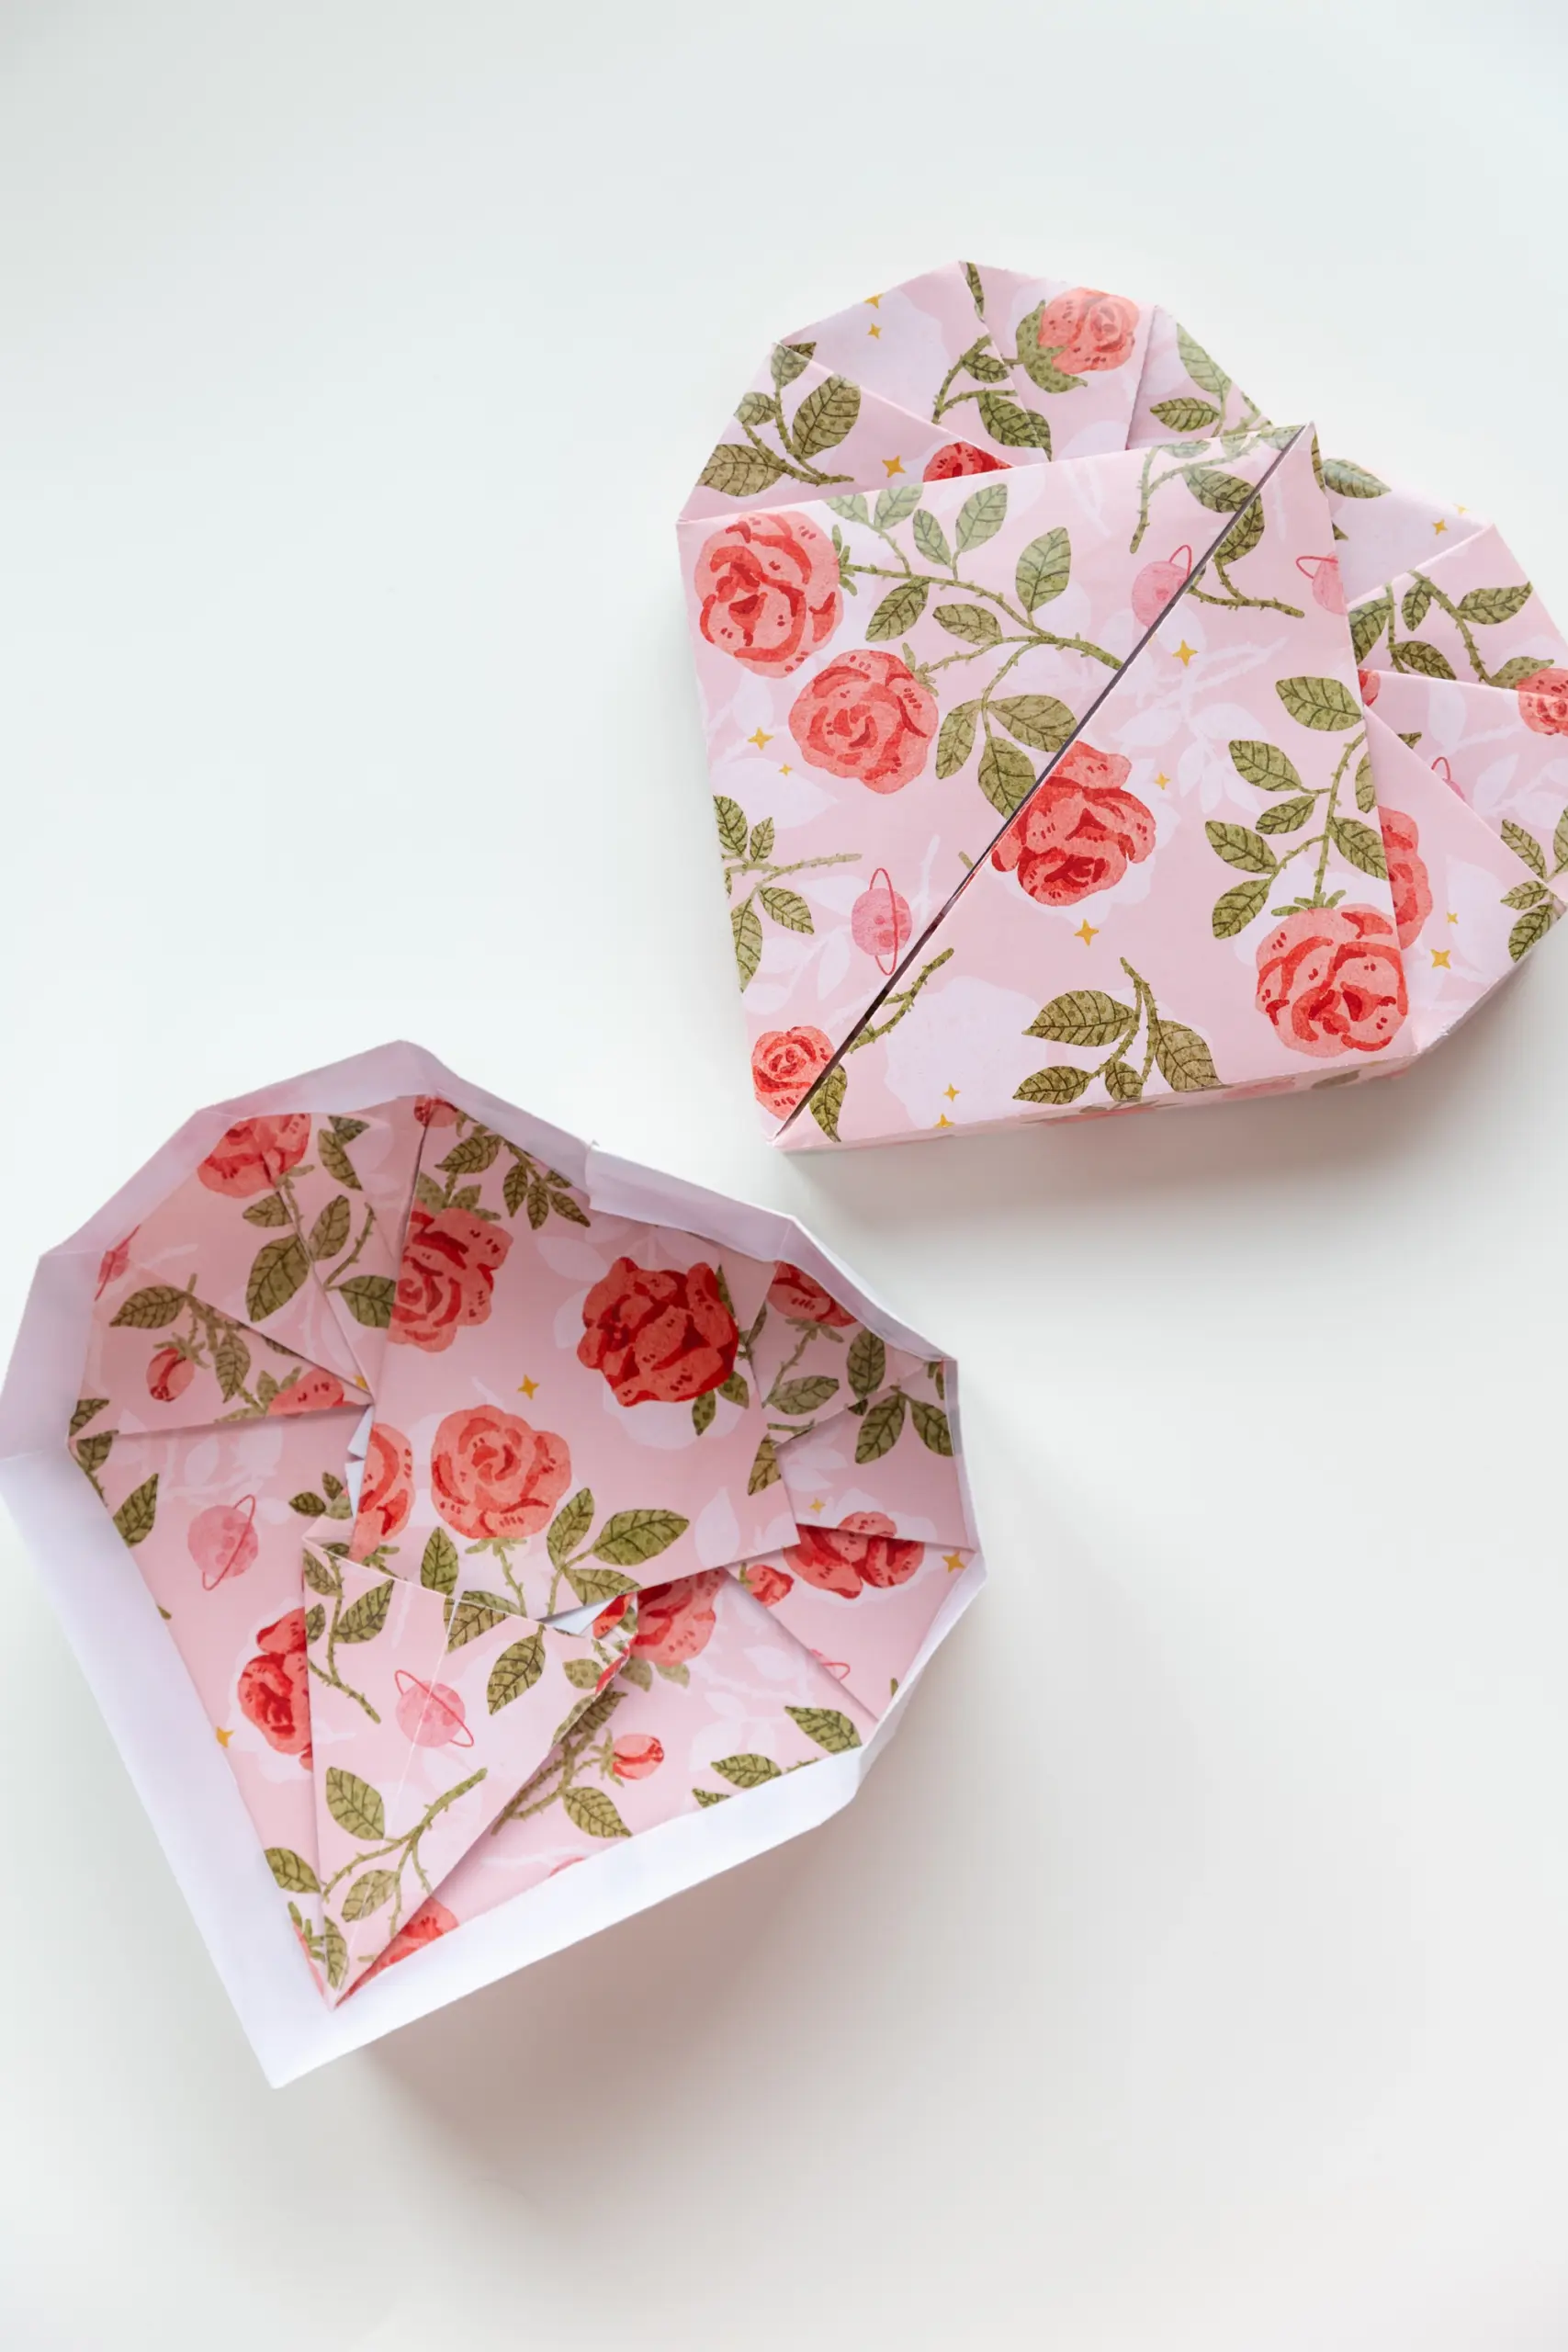
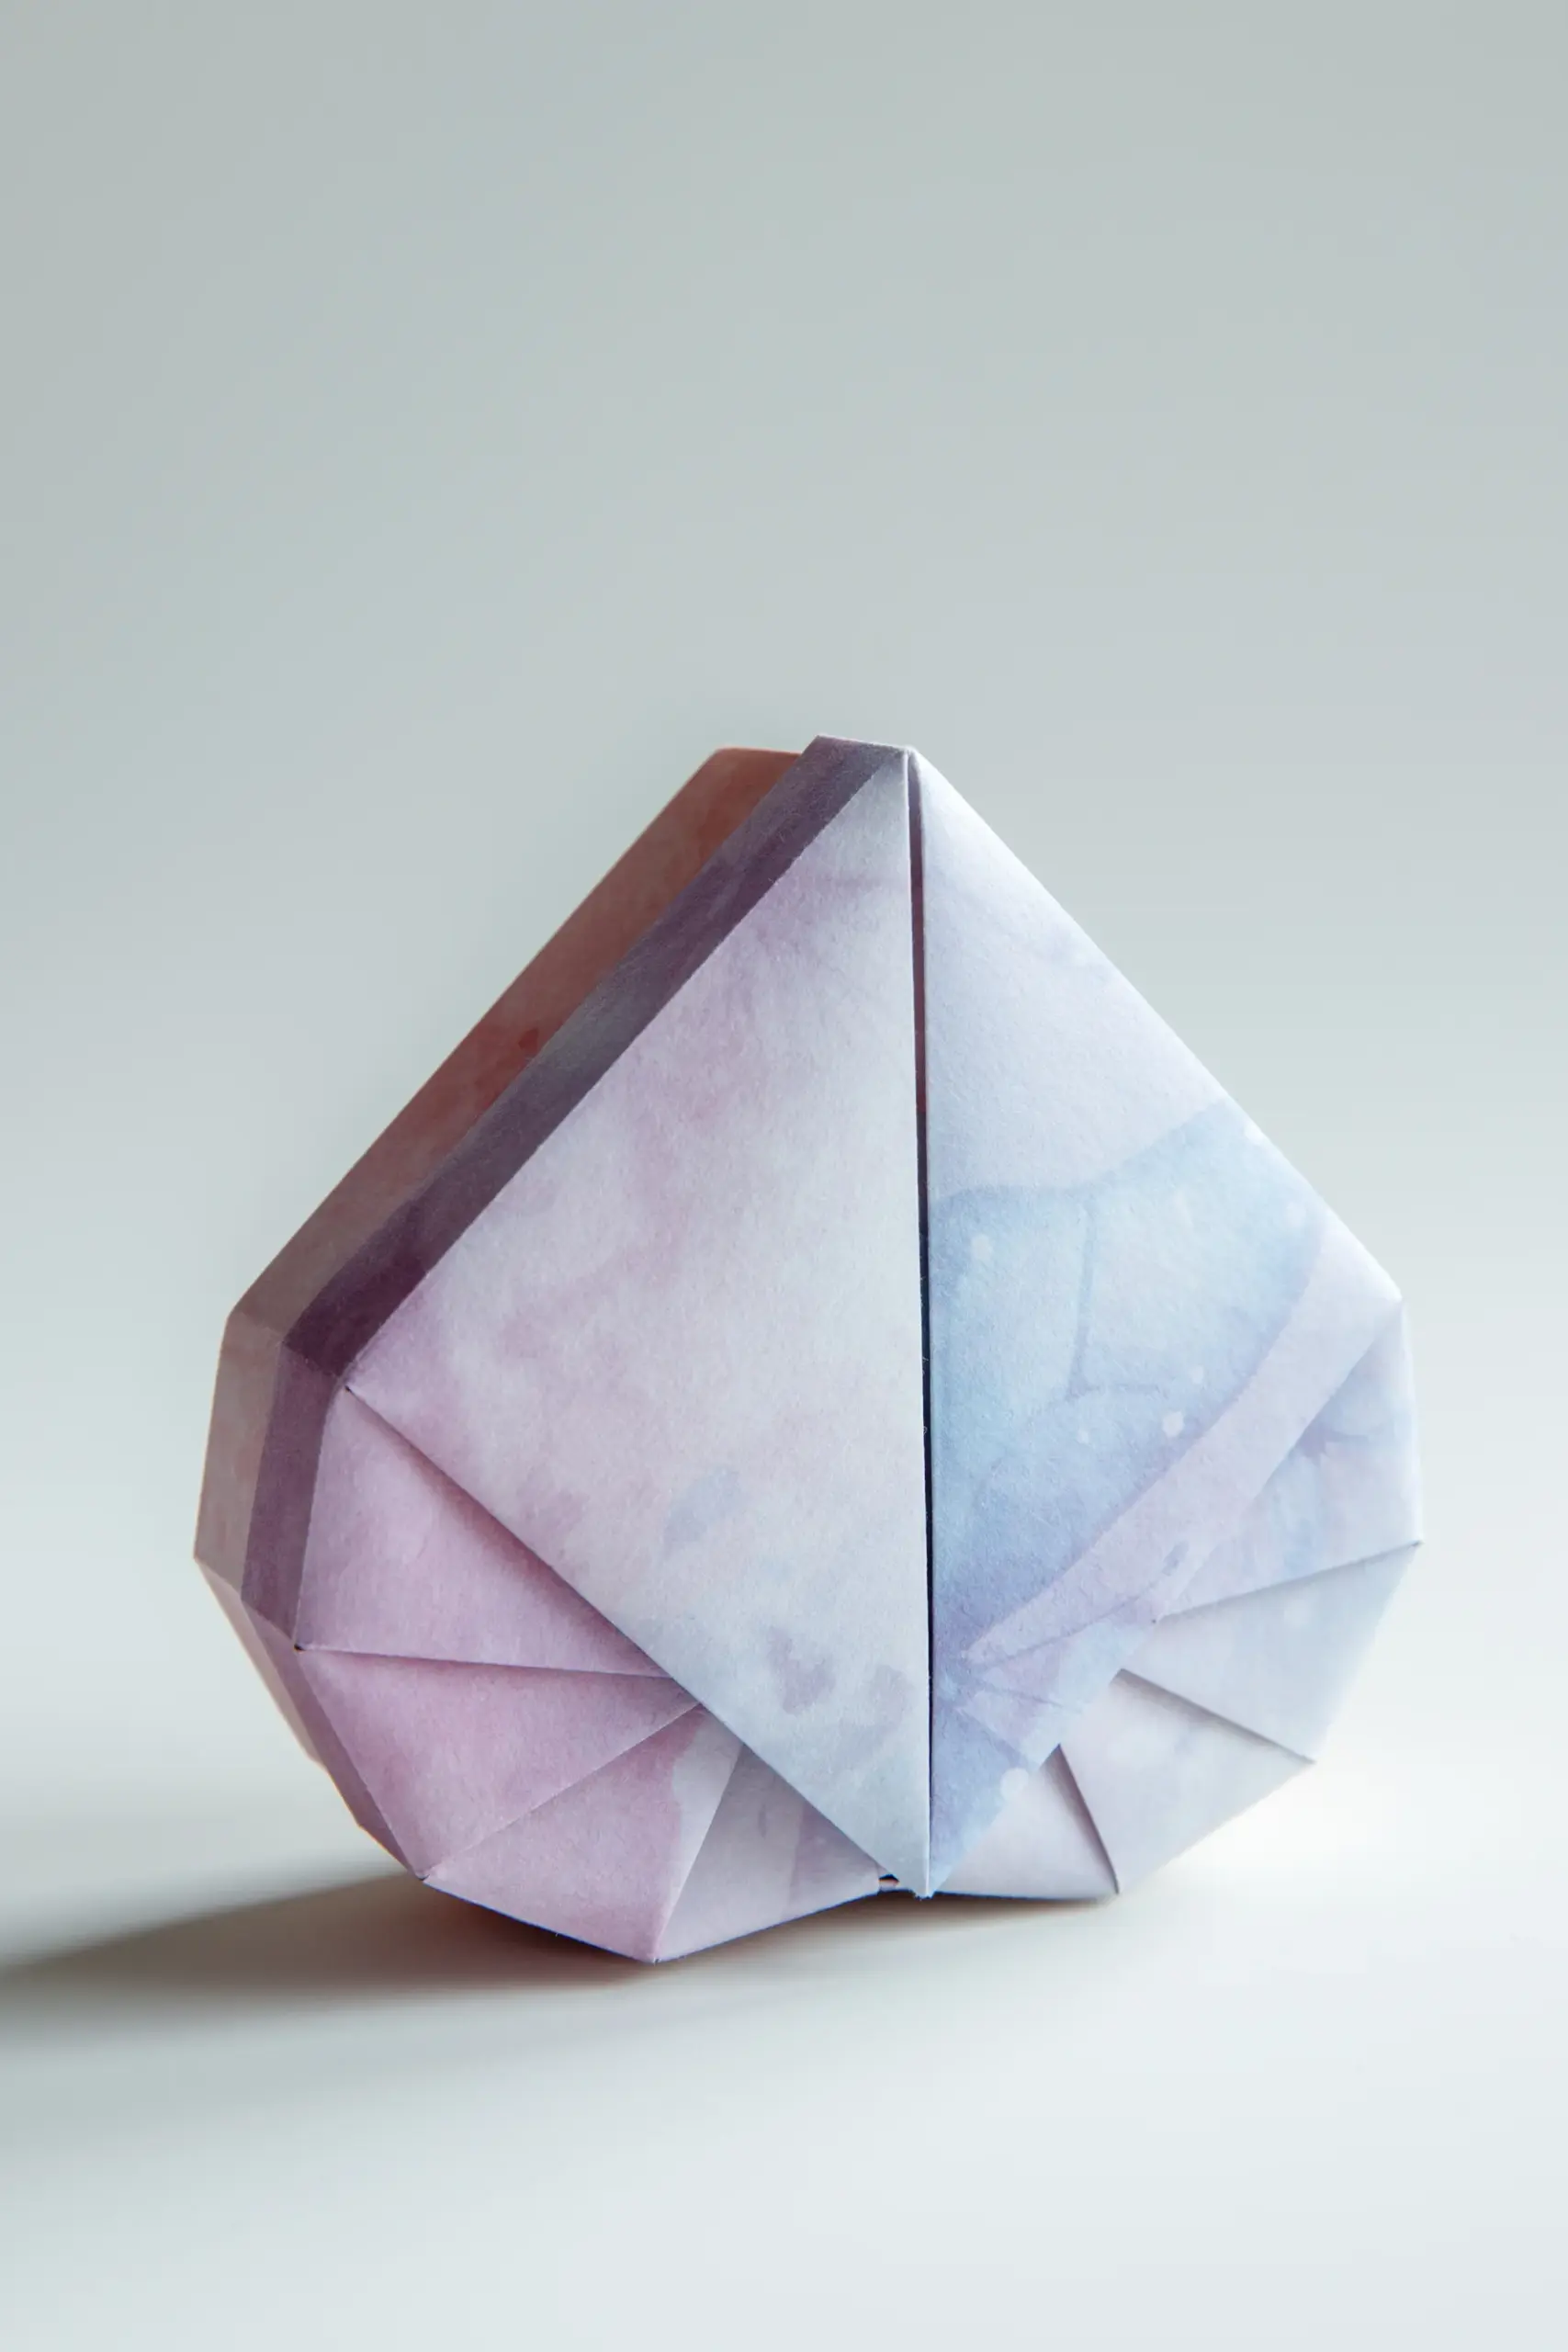
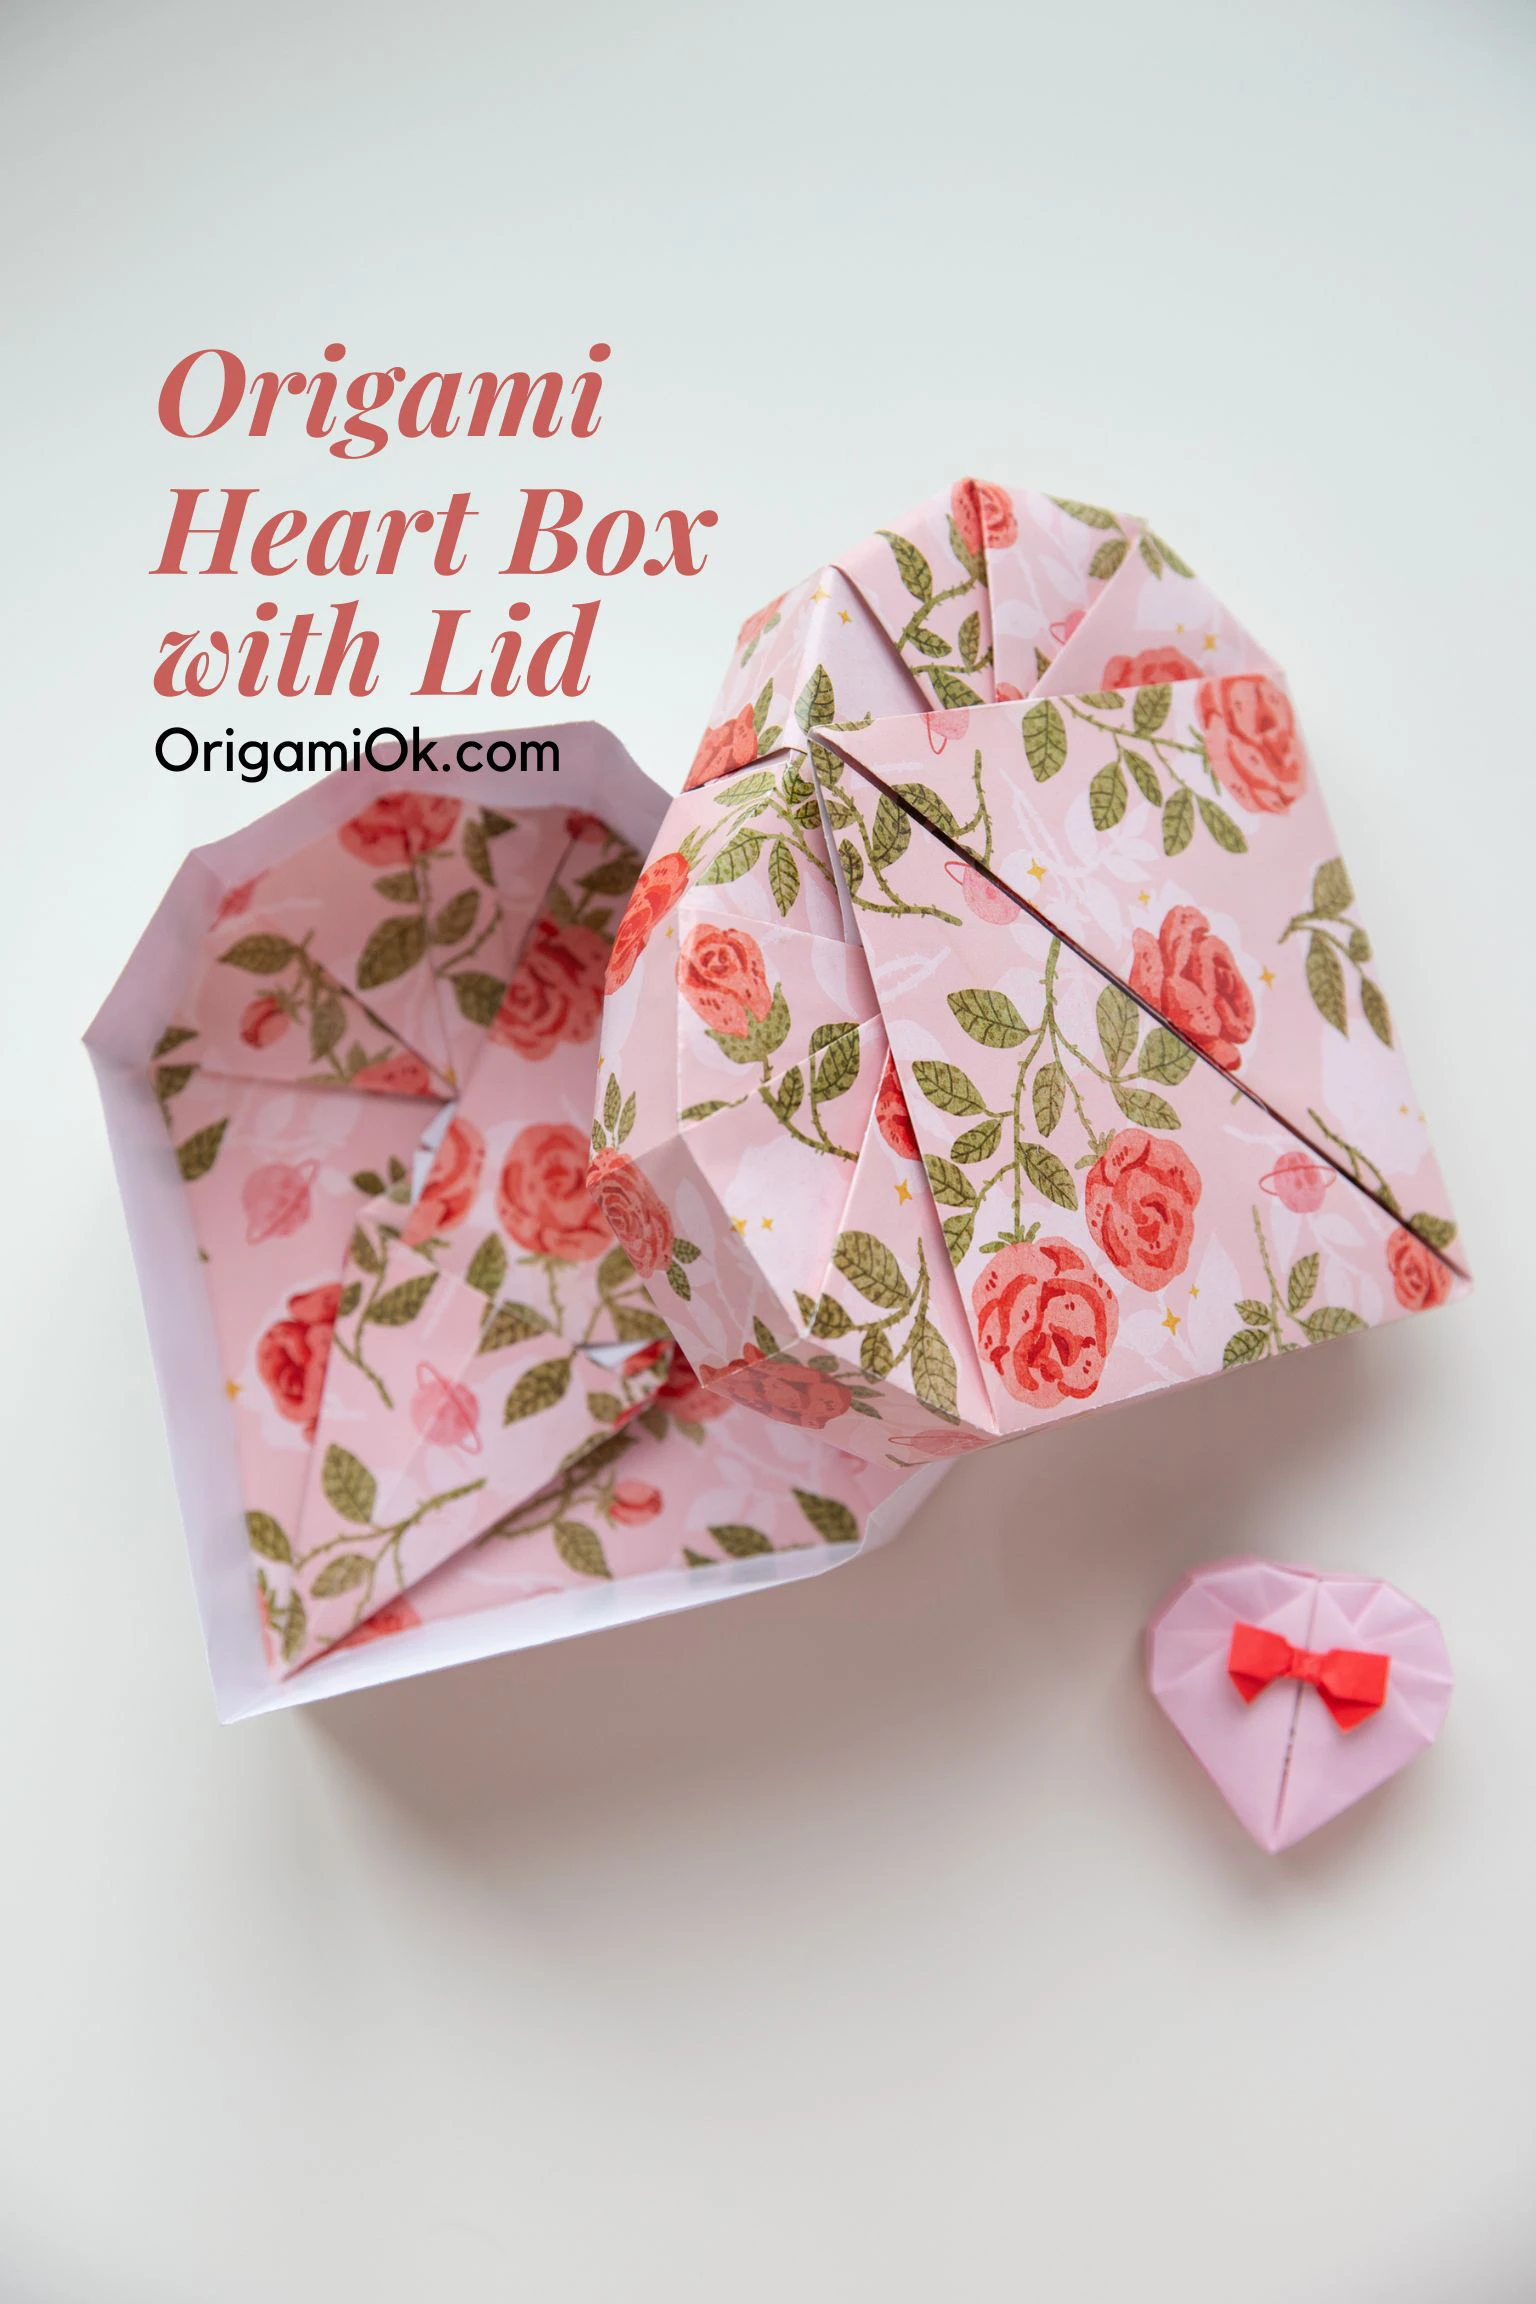
More refined and beautiful origami heart box, what makes it unique is it with a lid, which means this box can better preserve your precious items.
Remember to check our classic origami heart box and origami boat shape heart box if you are planning to make a collection.
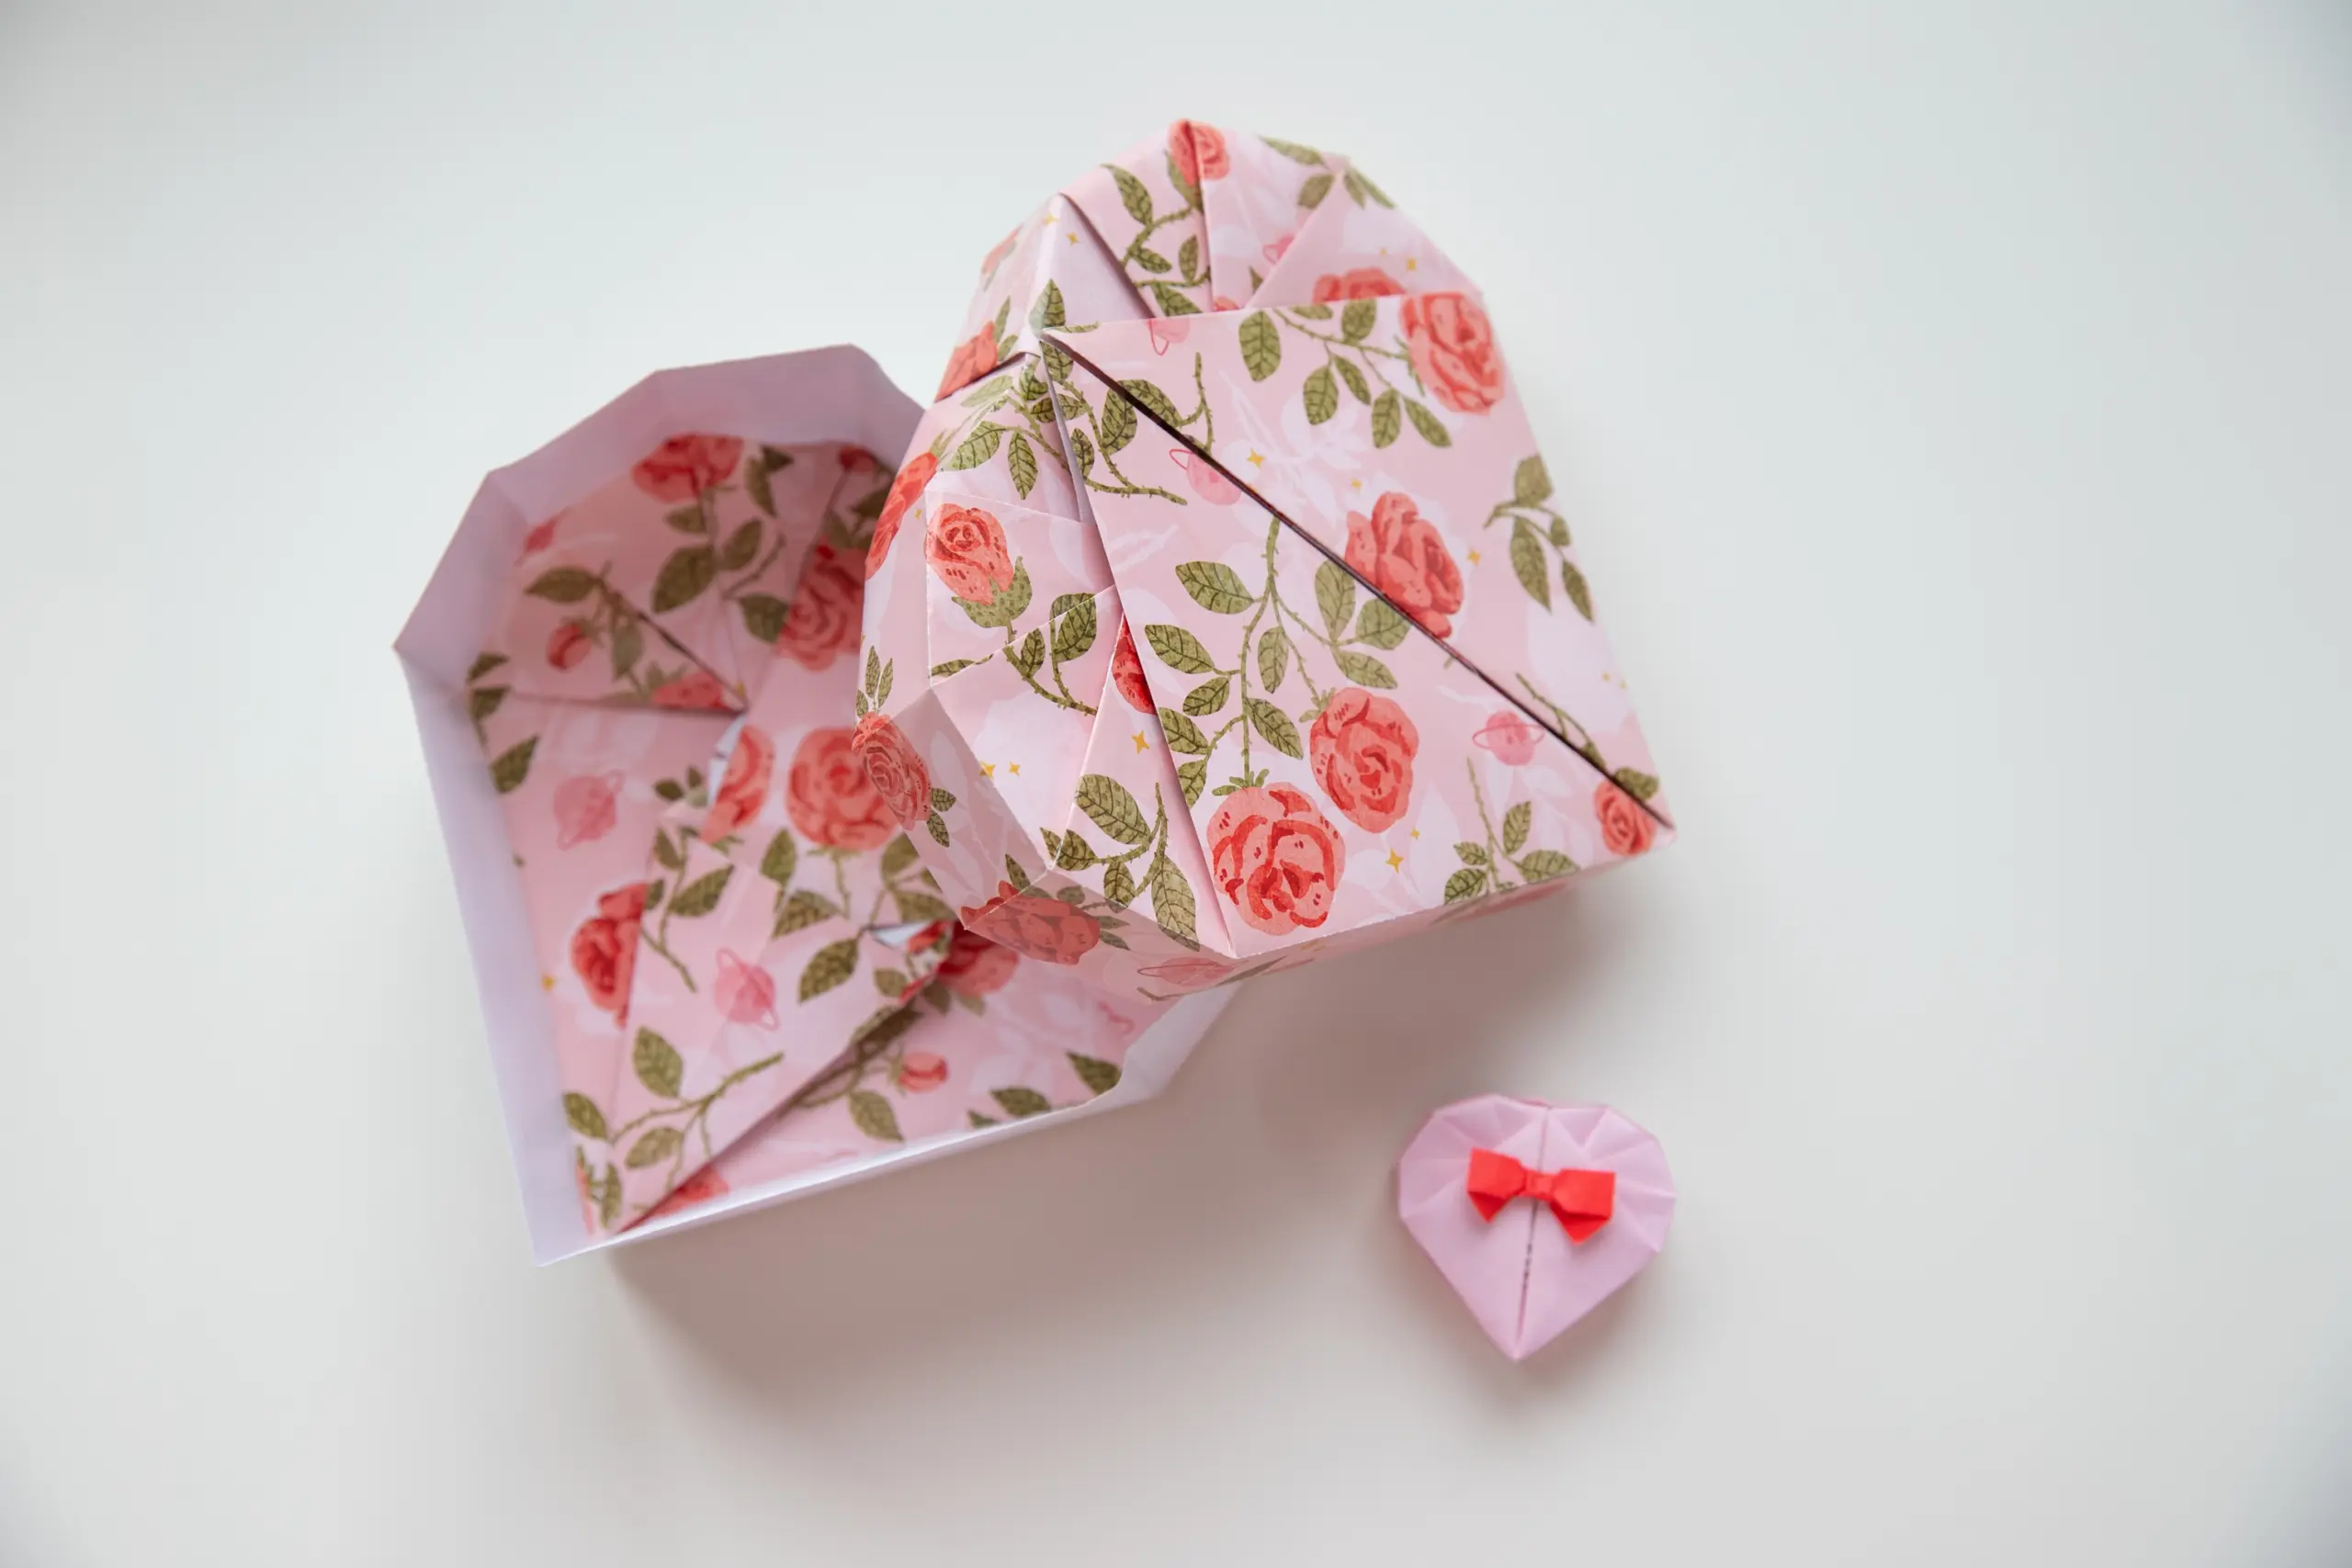
This box can be made as super larger one as the rose one in the picture above or a super small one for holding rings like the pink one. Or you can make a middle size box with the paper size presented in the video.
If you are new to origami, start here from our beginner guide to know the basics and how to read the step-by-step instructions.
- Folding time: 30 minutes
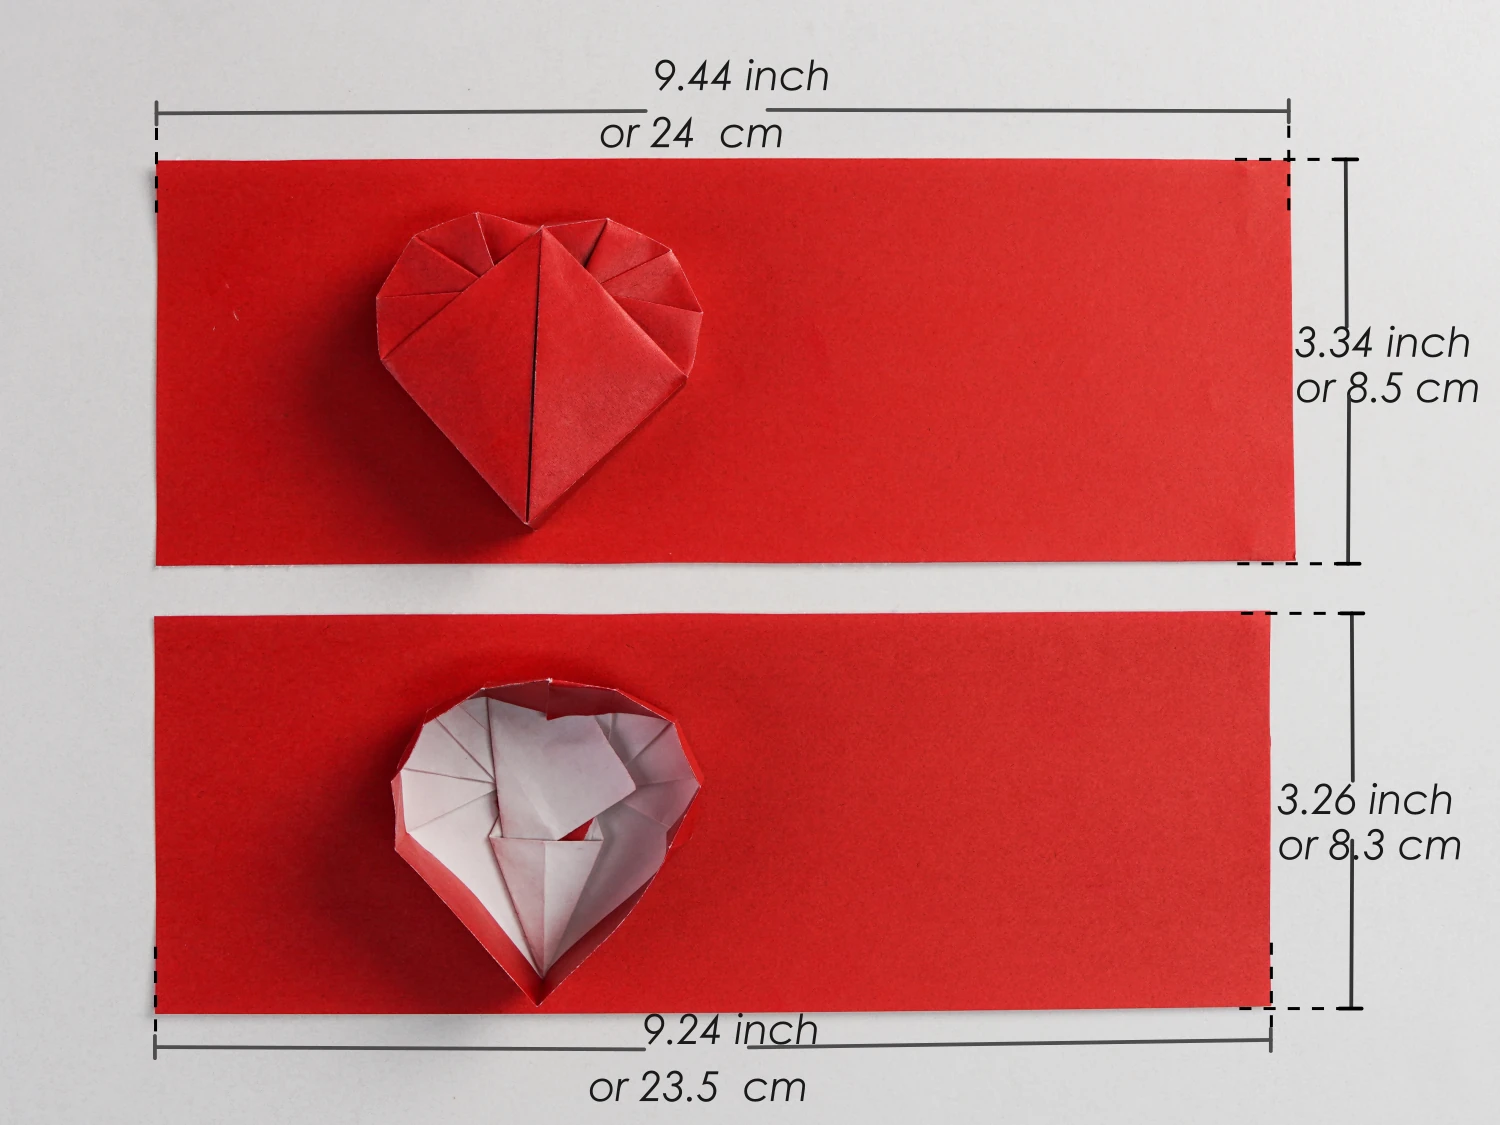
- Paper: 8.5×24 cm / 1, 8.3×23.5 cm / 1
- Difficulty: Advanced
Material
The length-to-width ratio of the heart box has strict requirements, otherwise, it may not be folded successfully and cannot be closed. In the instructions, the lid is made of rectangular paper with a length of 24cm and a width of 8.5cm. The length of the paper used for the box is reduced by 5mm, that is a rectangular paper with a length of 23.5cm and a width of 8.3cm.
If you have A4 paper, you only need to fold the A4 paper in half, half of it can used to fold the lid, and the other half should reduced by 5mm in length to fold the box (since A4 paper is 29.7cm long, the width error can be ignored).
If you want to use paper of other sizes, please make sure that the ratio of width to length is 1:2.83. For example, the width of a 10cm wide paper, the length should be 28.3cm.
Origami Heart Box with Lid Video
Step by Step Instructions
Step 1
Since the way of making the lid and box is the same, we only offer instruction in one of them.
Take out one of the papers, and start with the white side of the paper facing up. Fold in half horizontally and unfold.
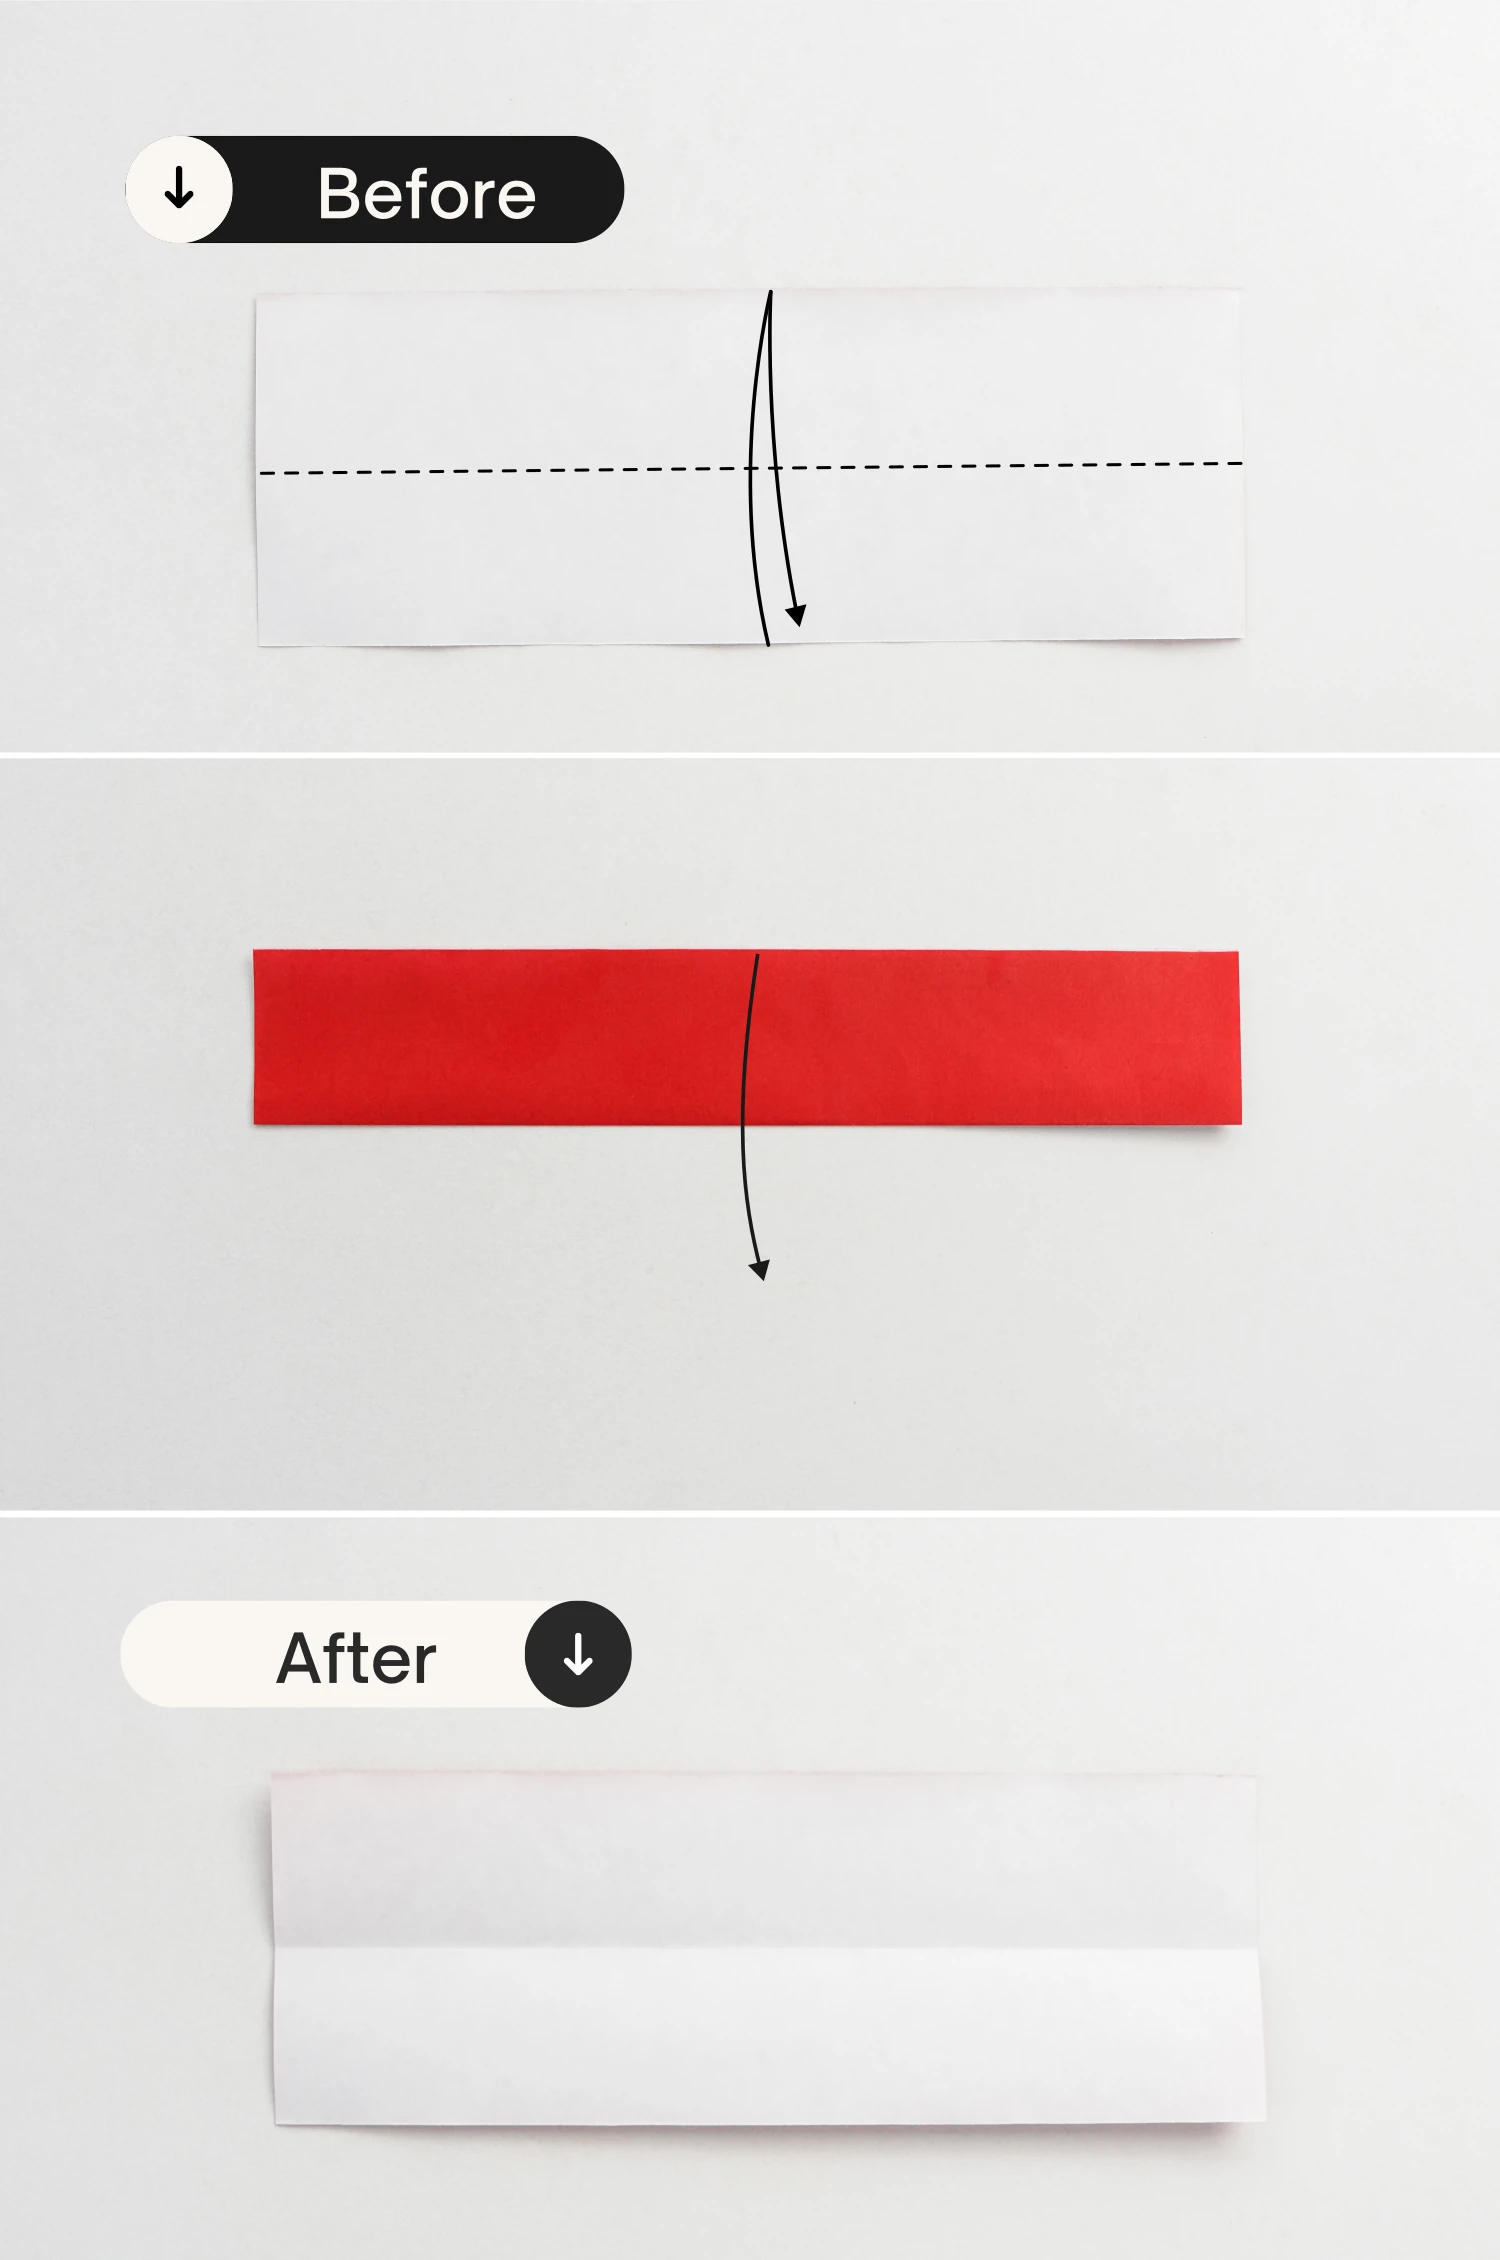
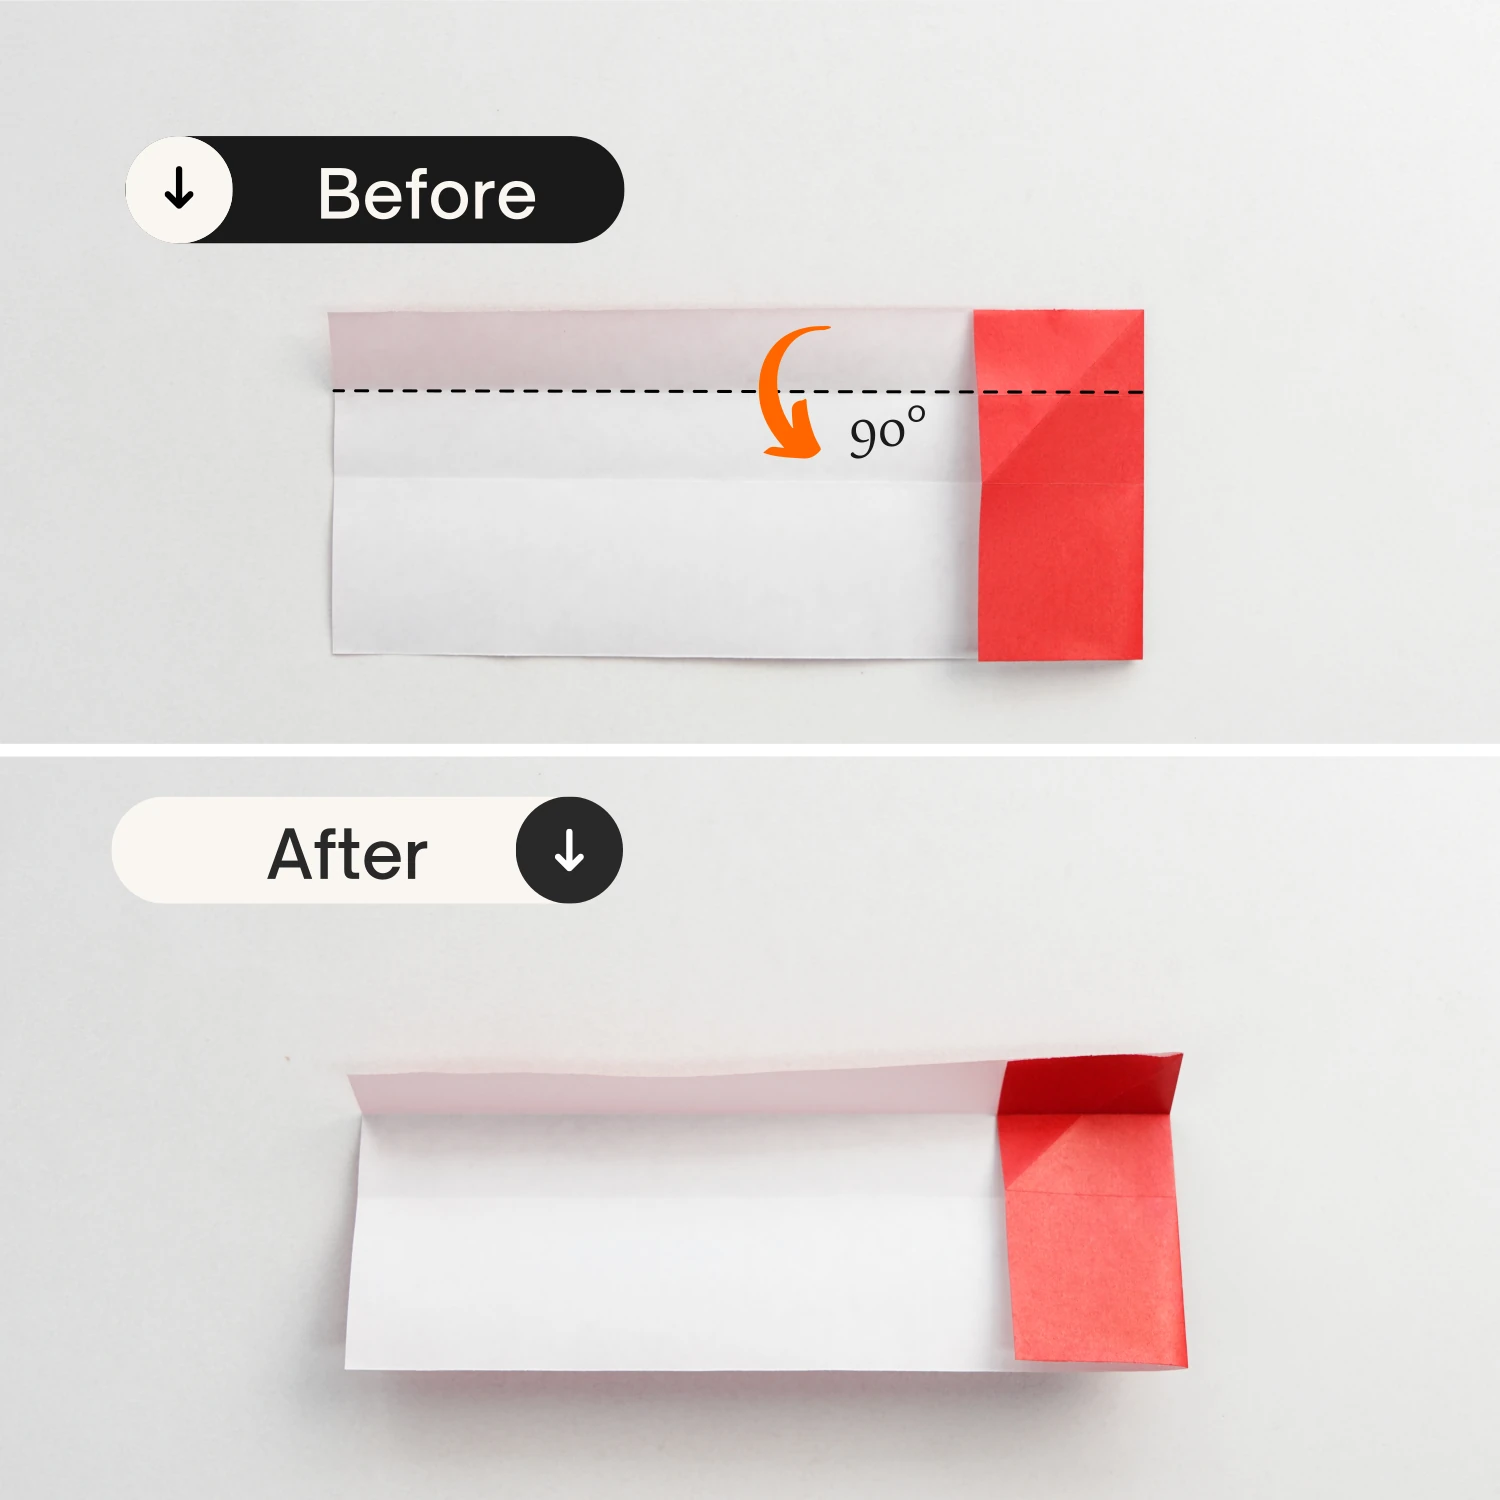
Step 2
Fold the top edge to align with the middle crease, and unfold it.
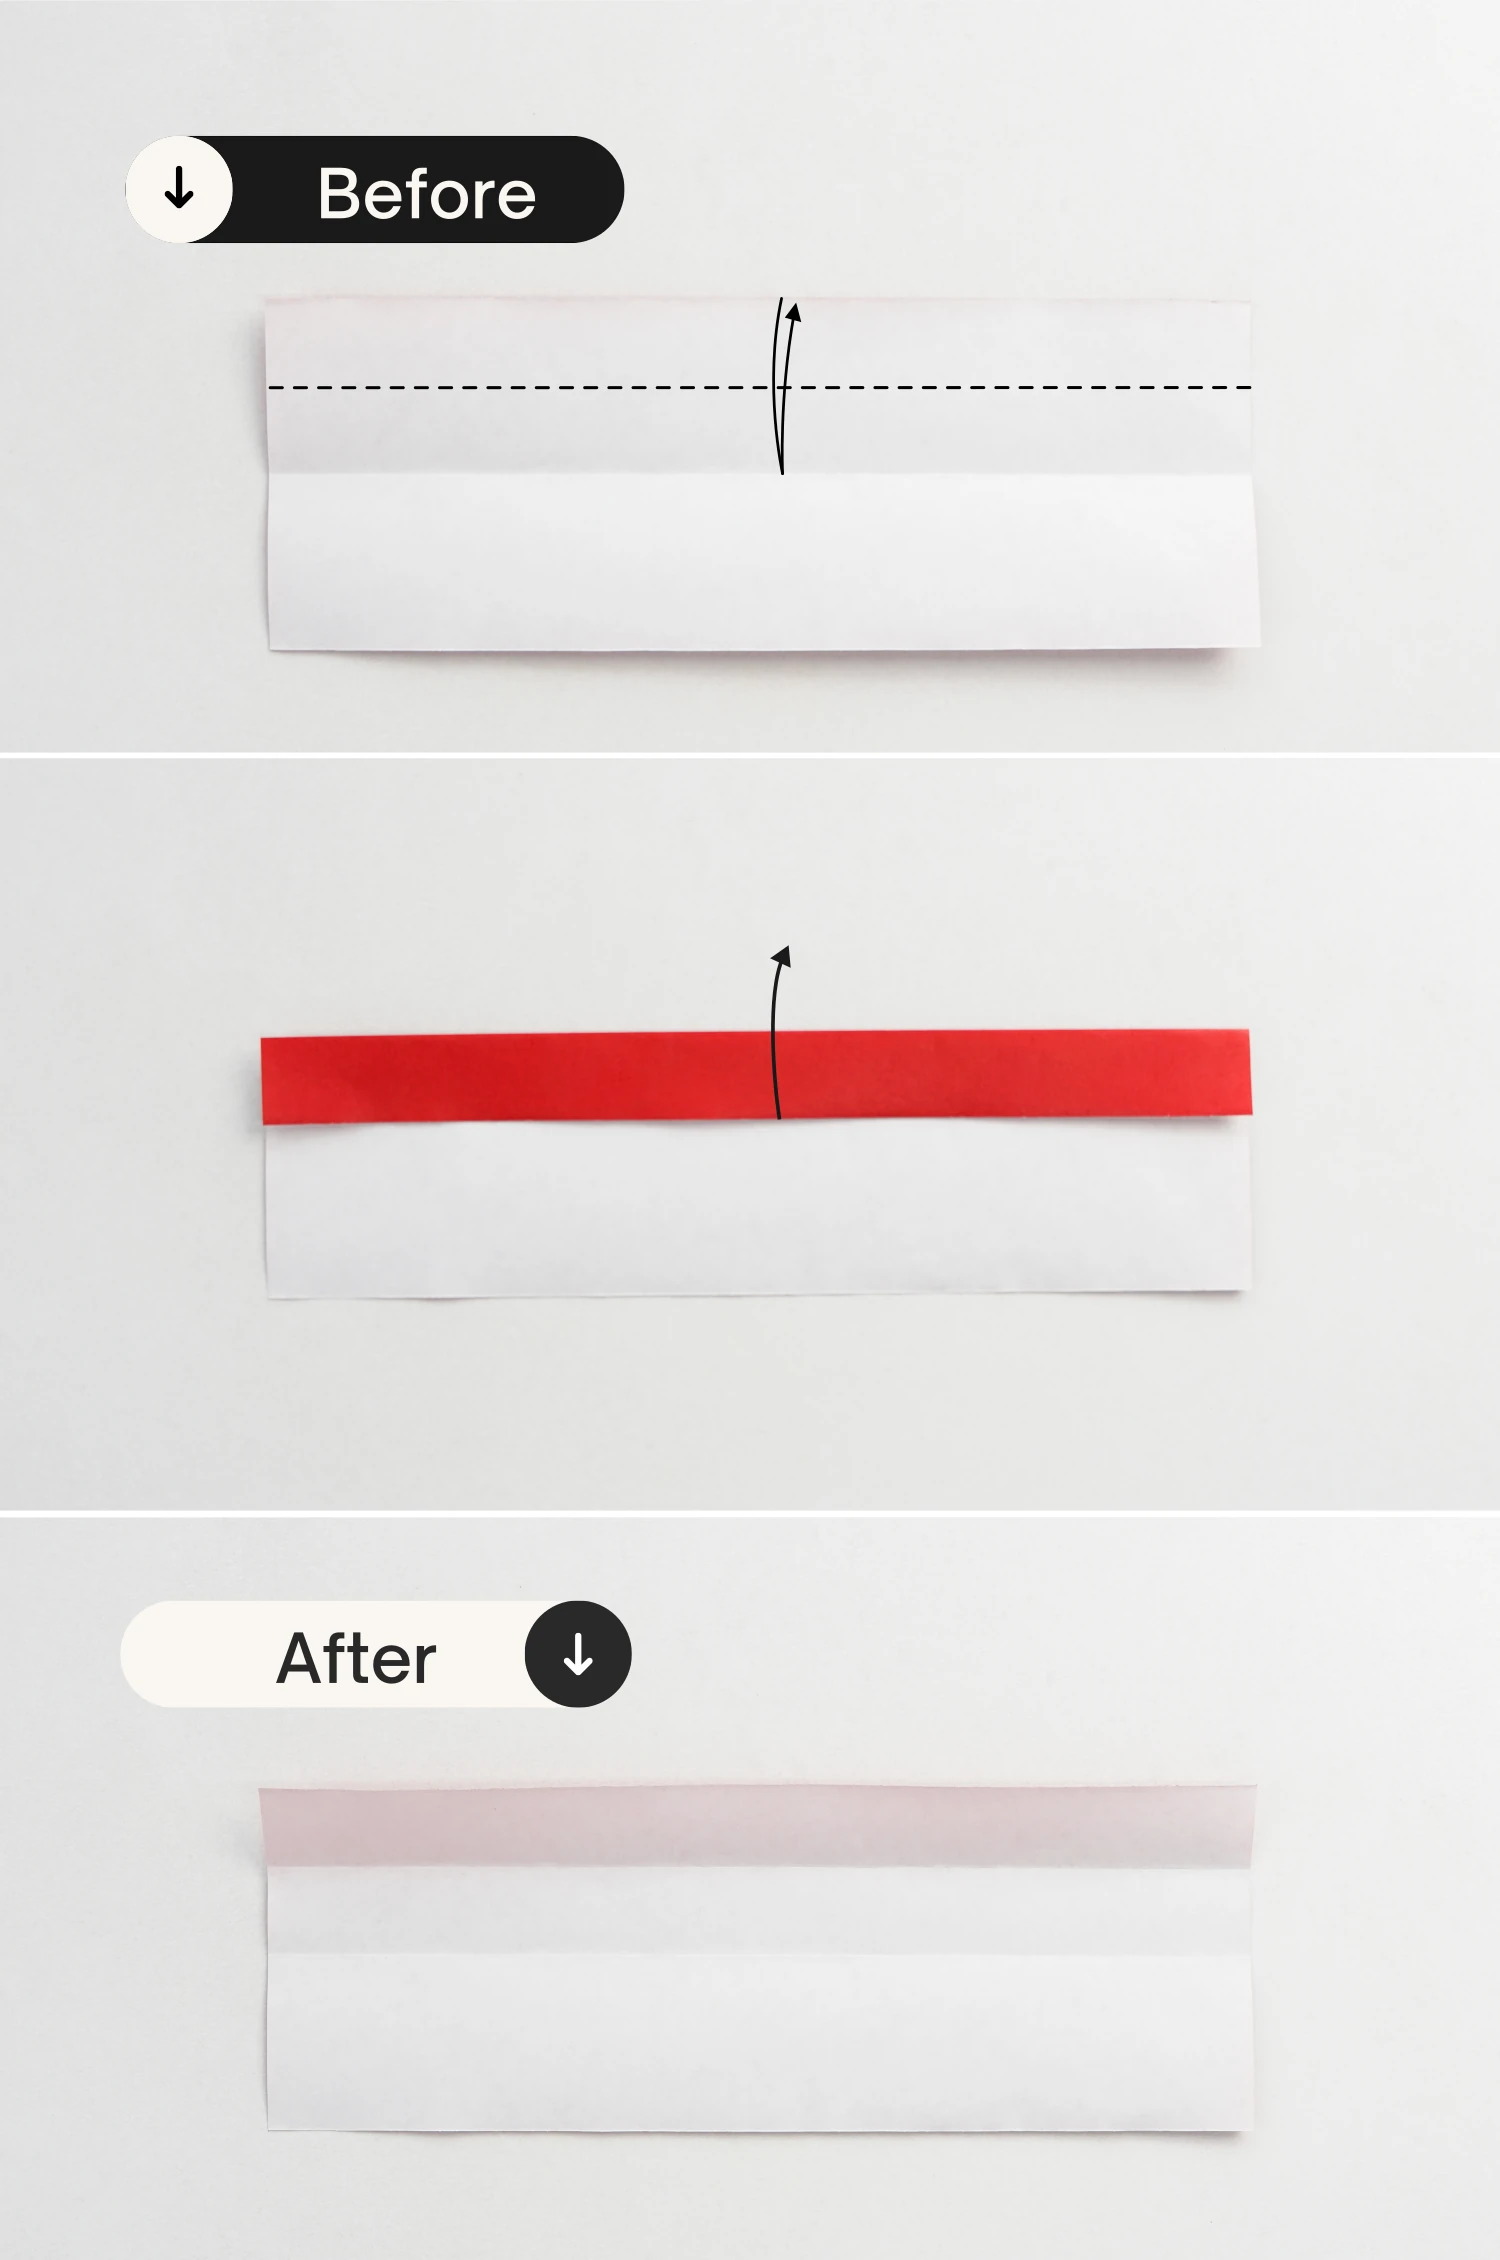
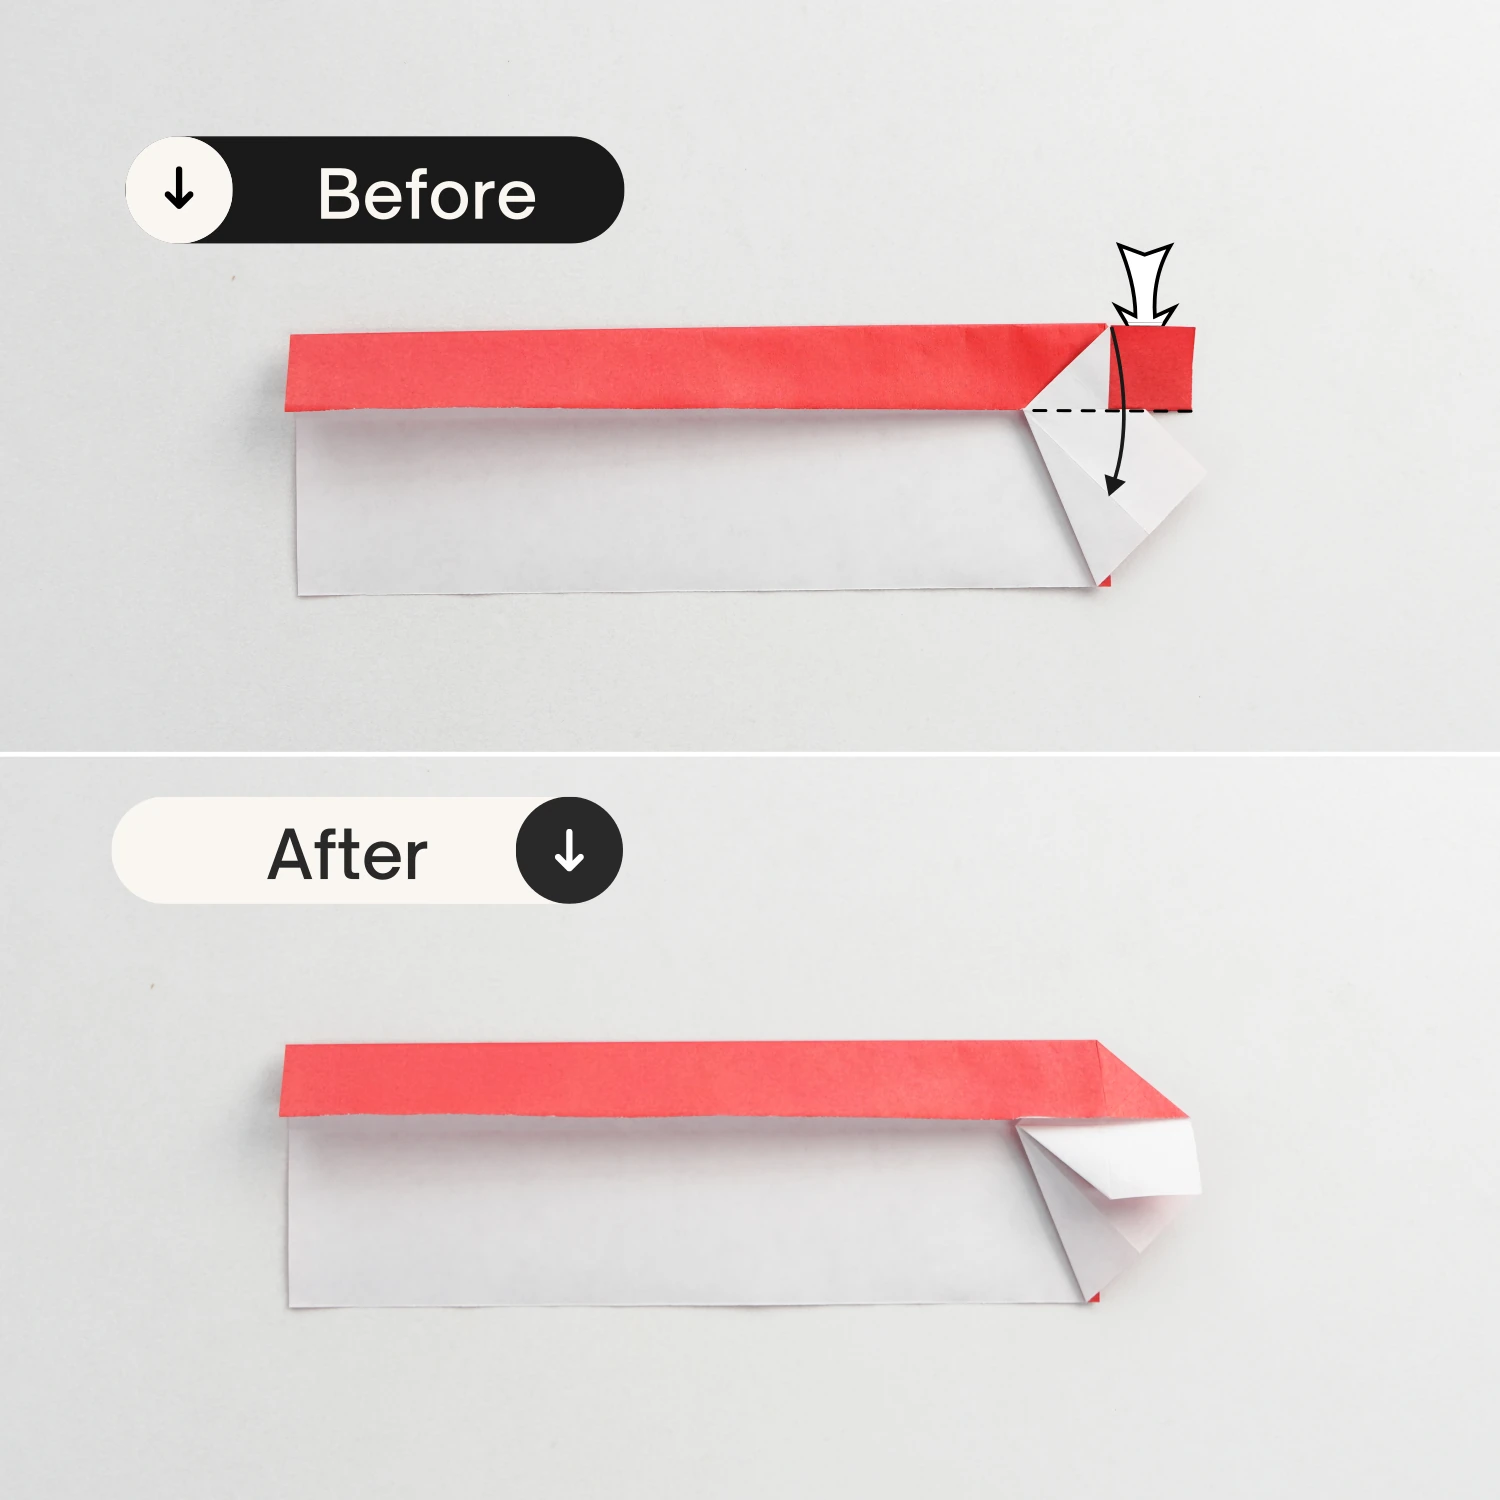
Step 3
Fold the top right point down diagonally to meet the middle crease, crease it well then unfold.
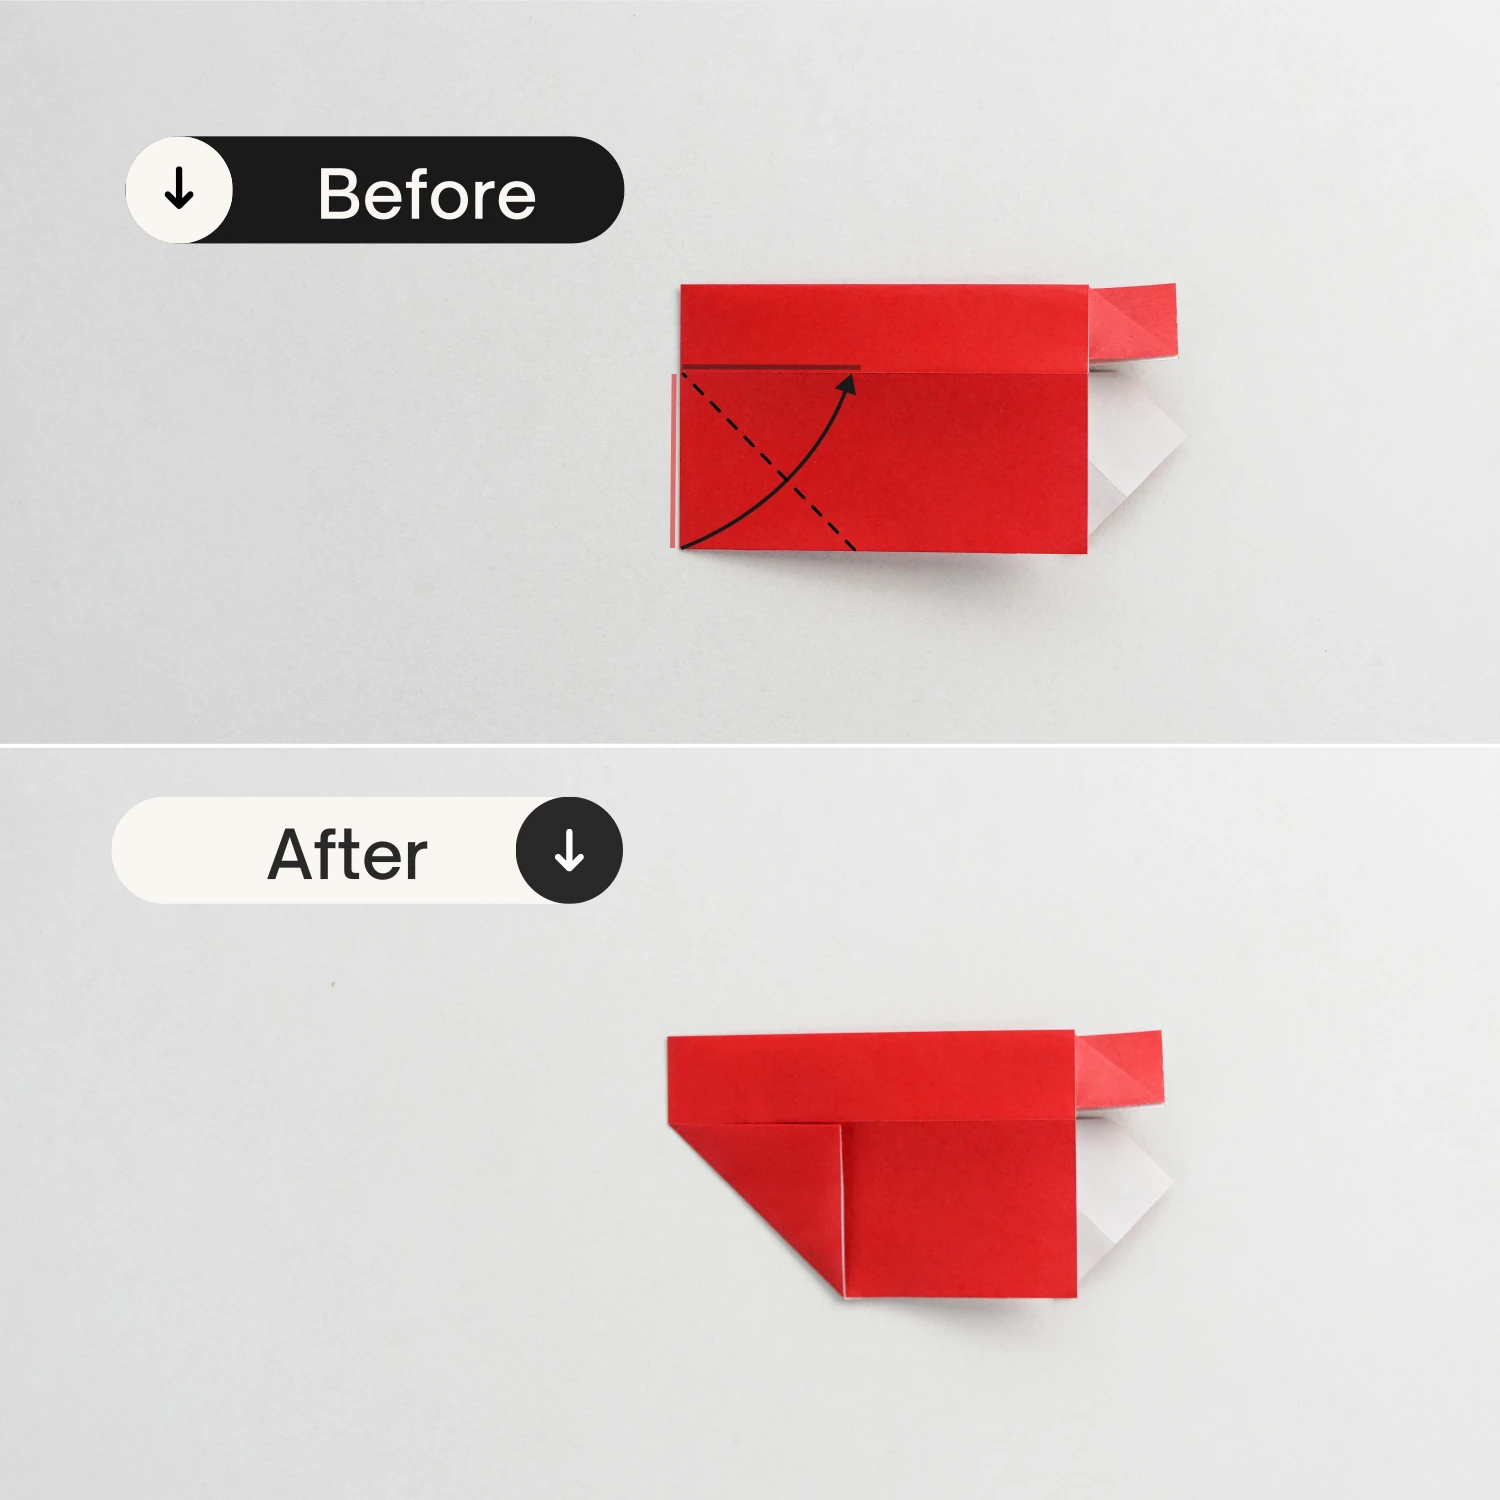
Step 4
Fold the right edge to the left along the line extending vertically from the intersection of the crease you made in the previous step and the top edge to the bottom edge, this line is shown by the dotted line in the picture.
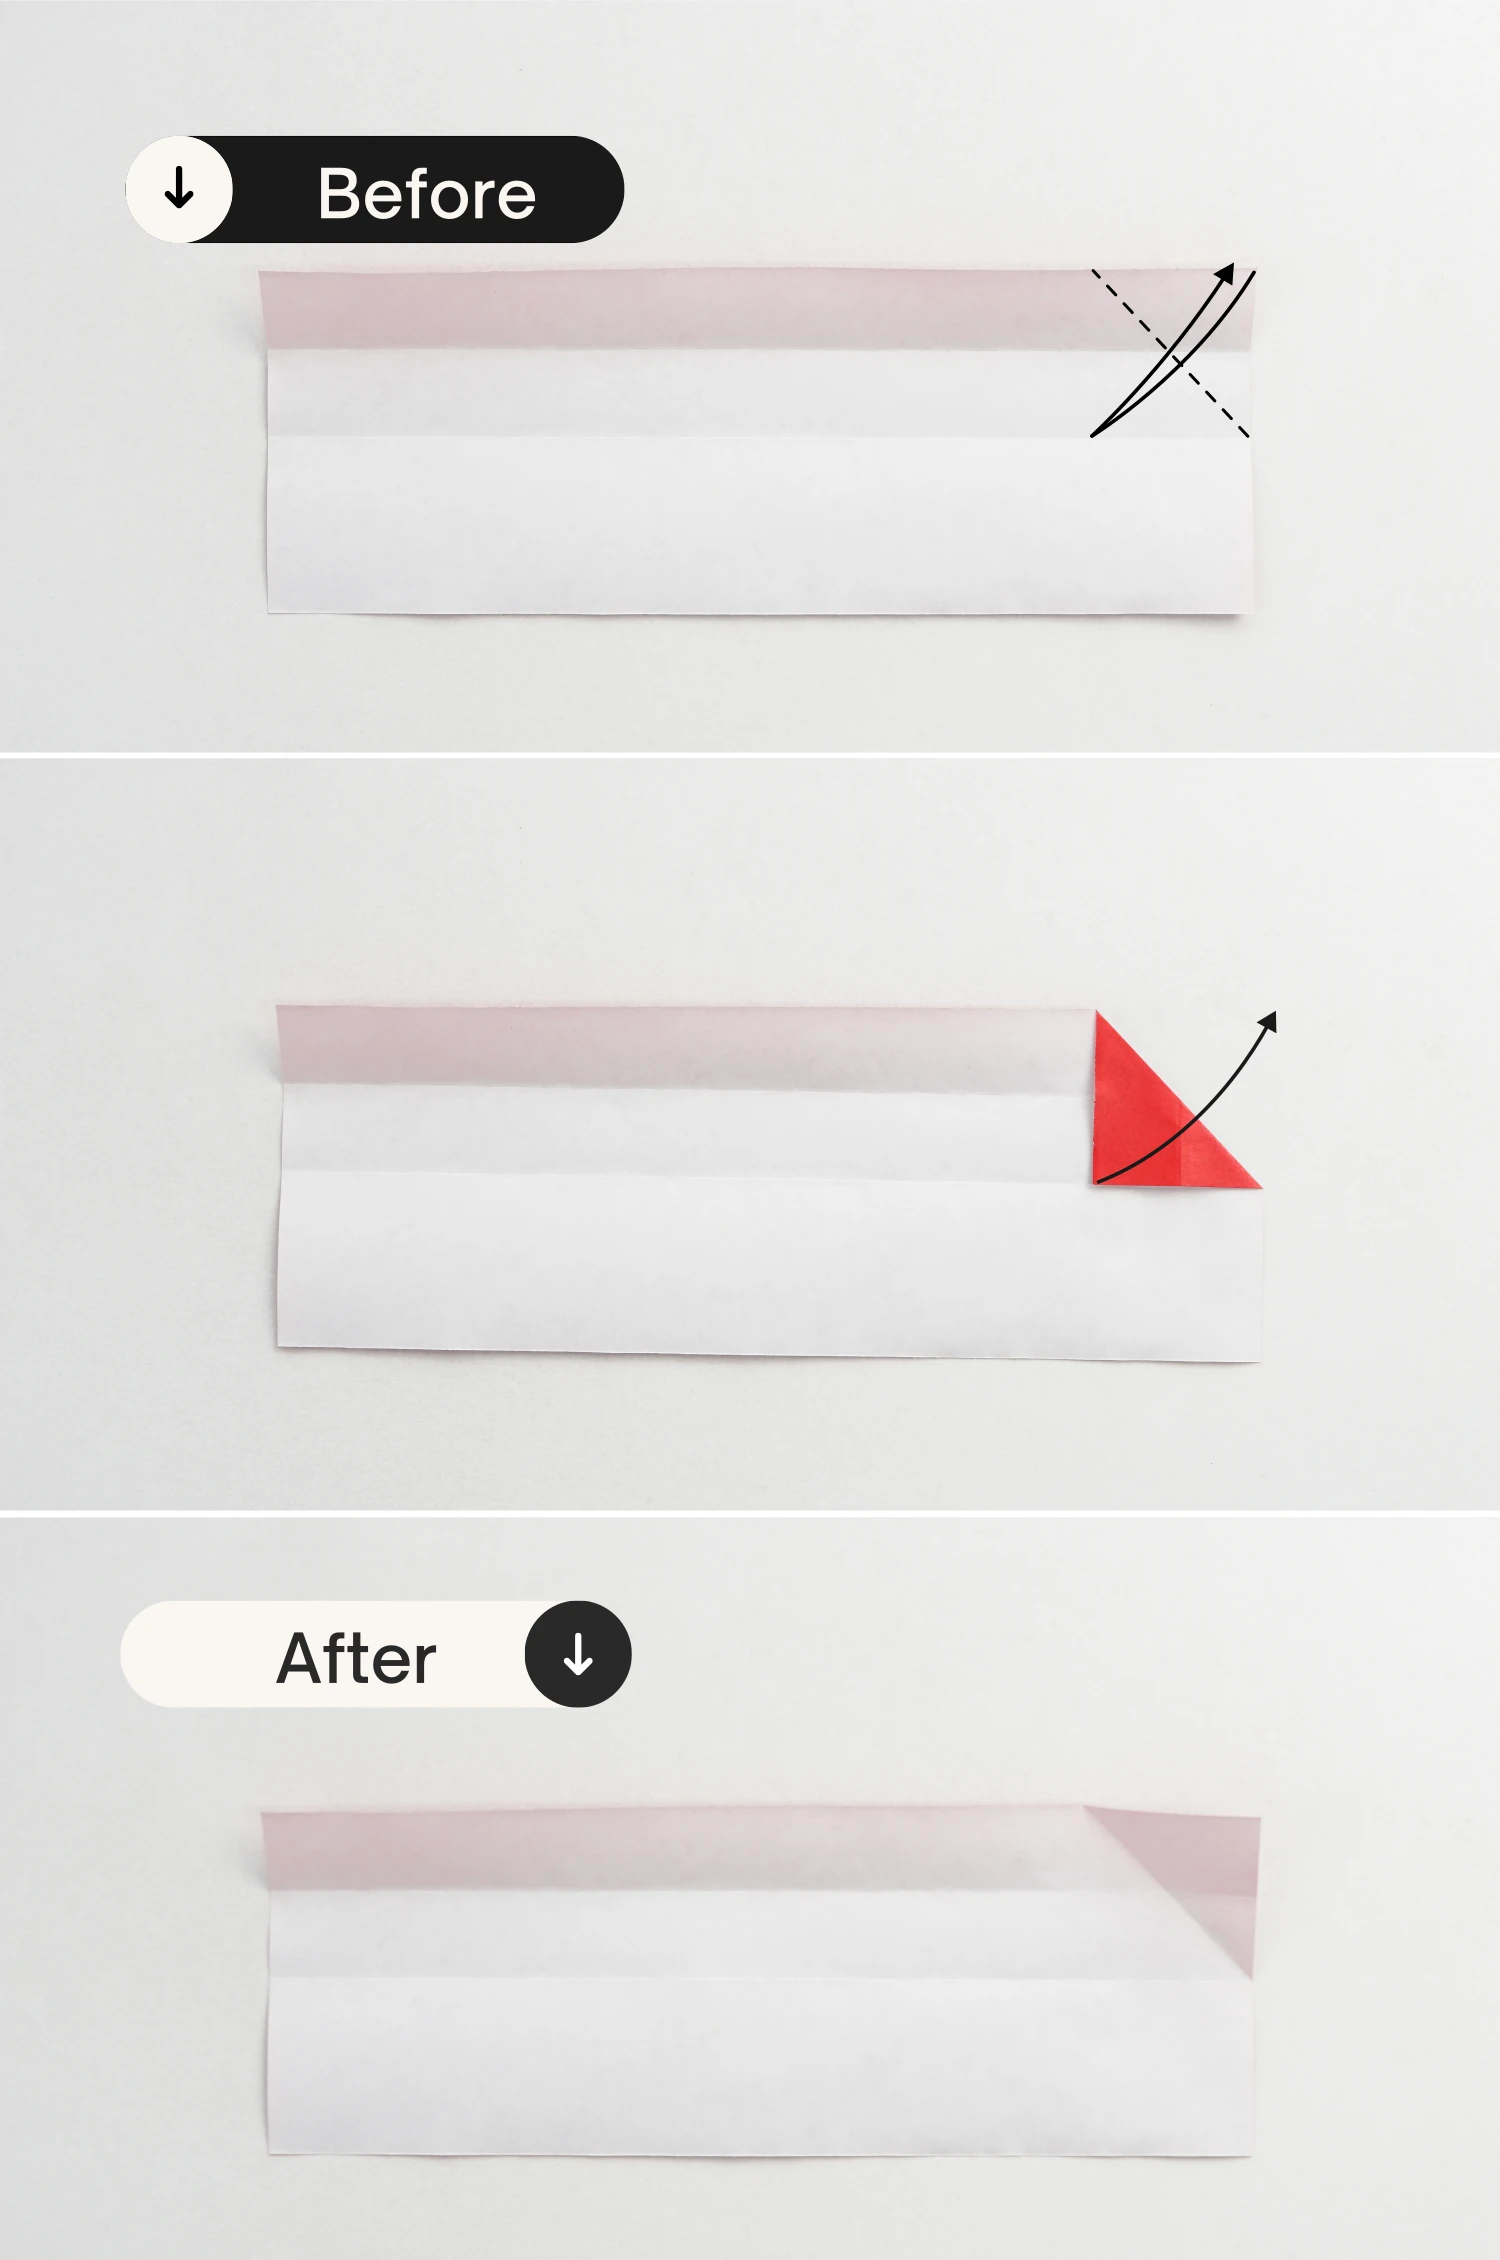
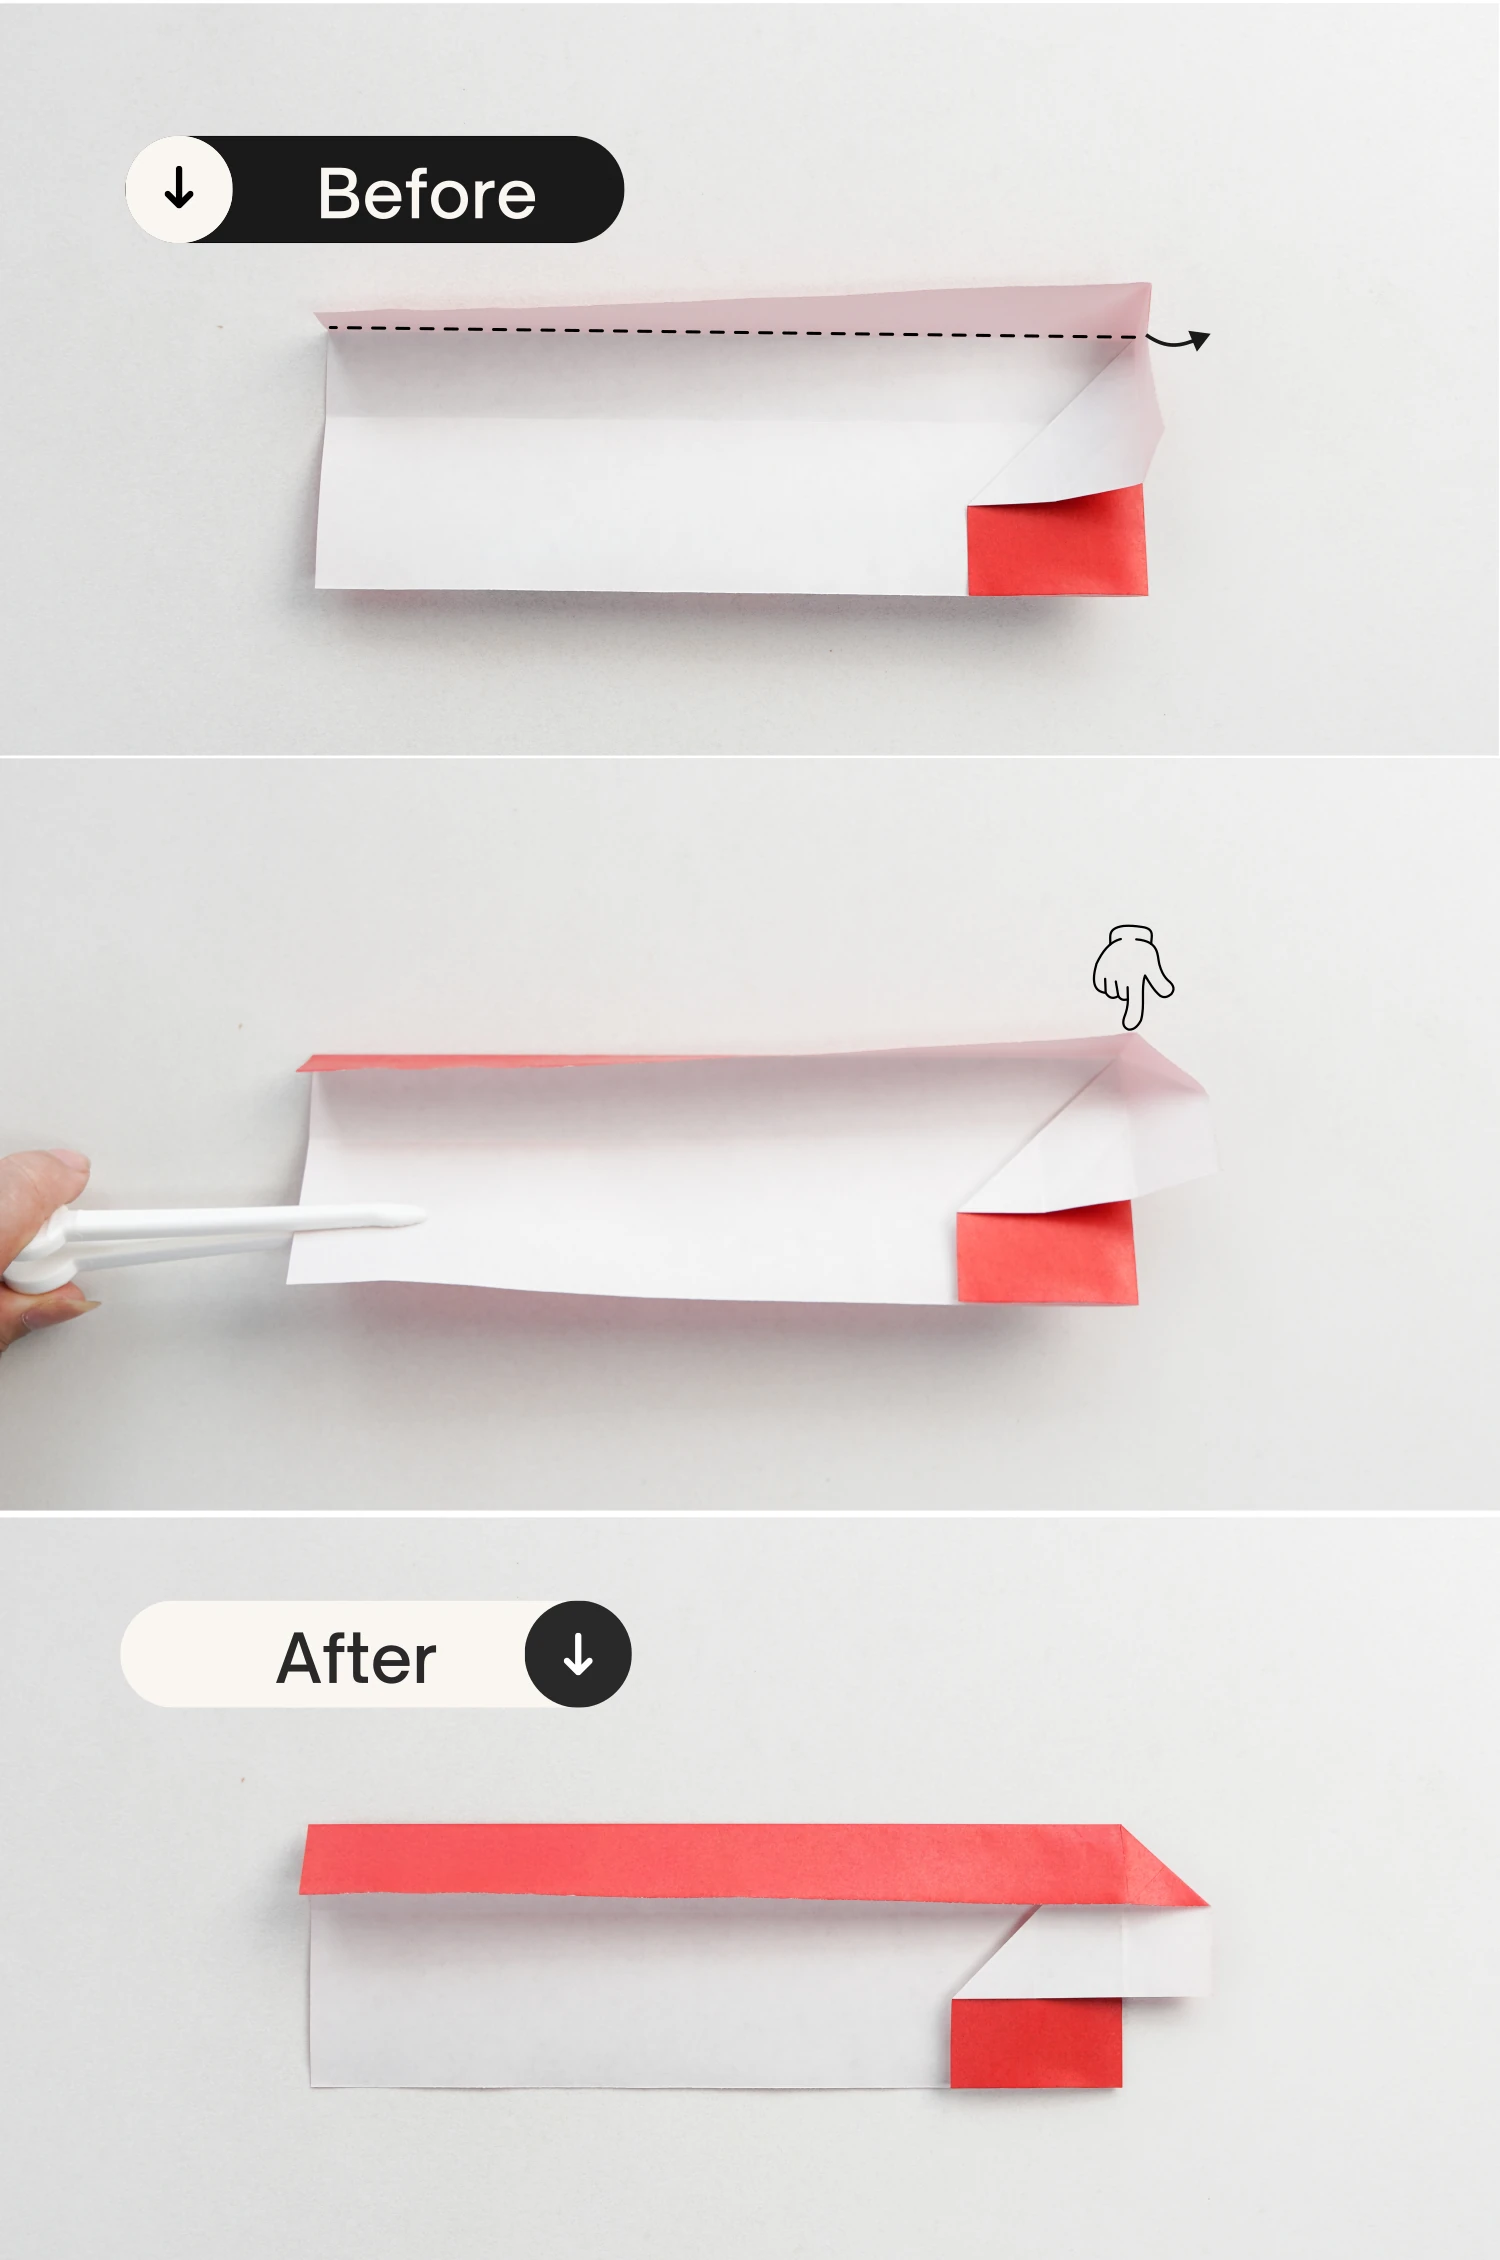
Step 5
Bring up the top edge to make it stand along the crease shown by the dotted line.
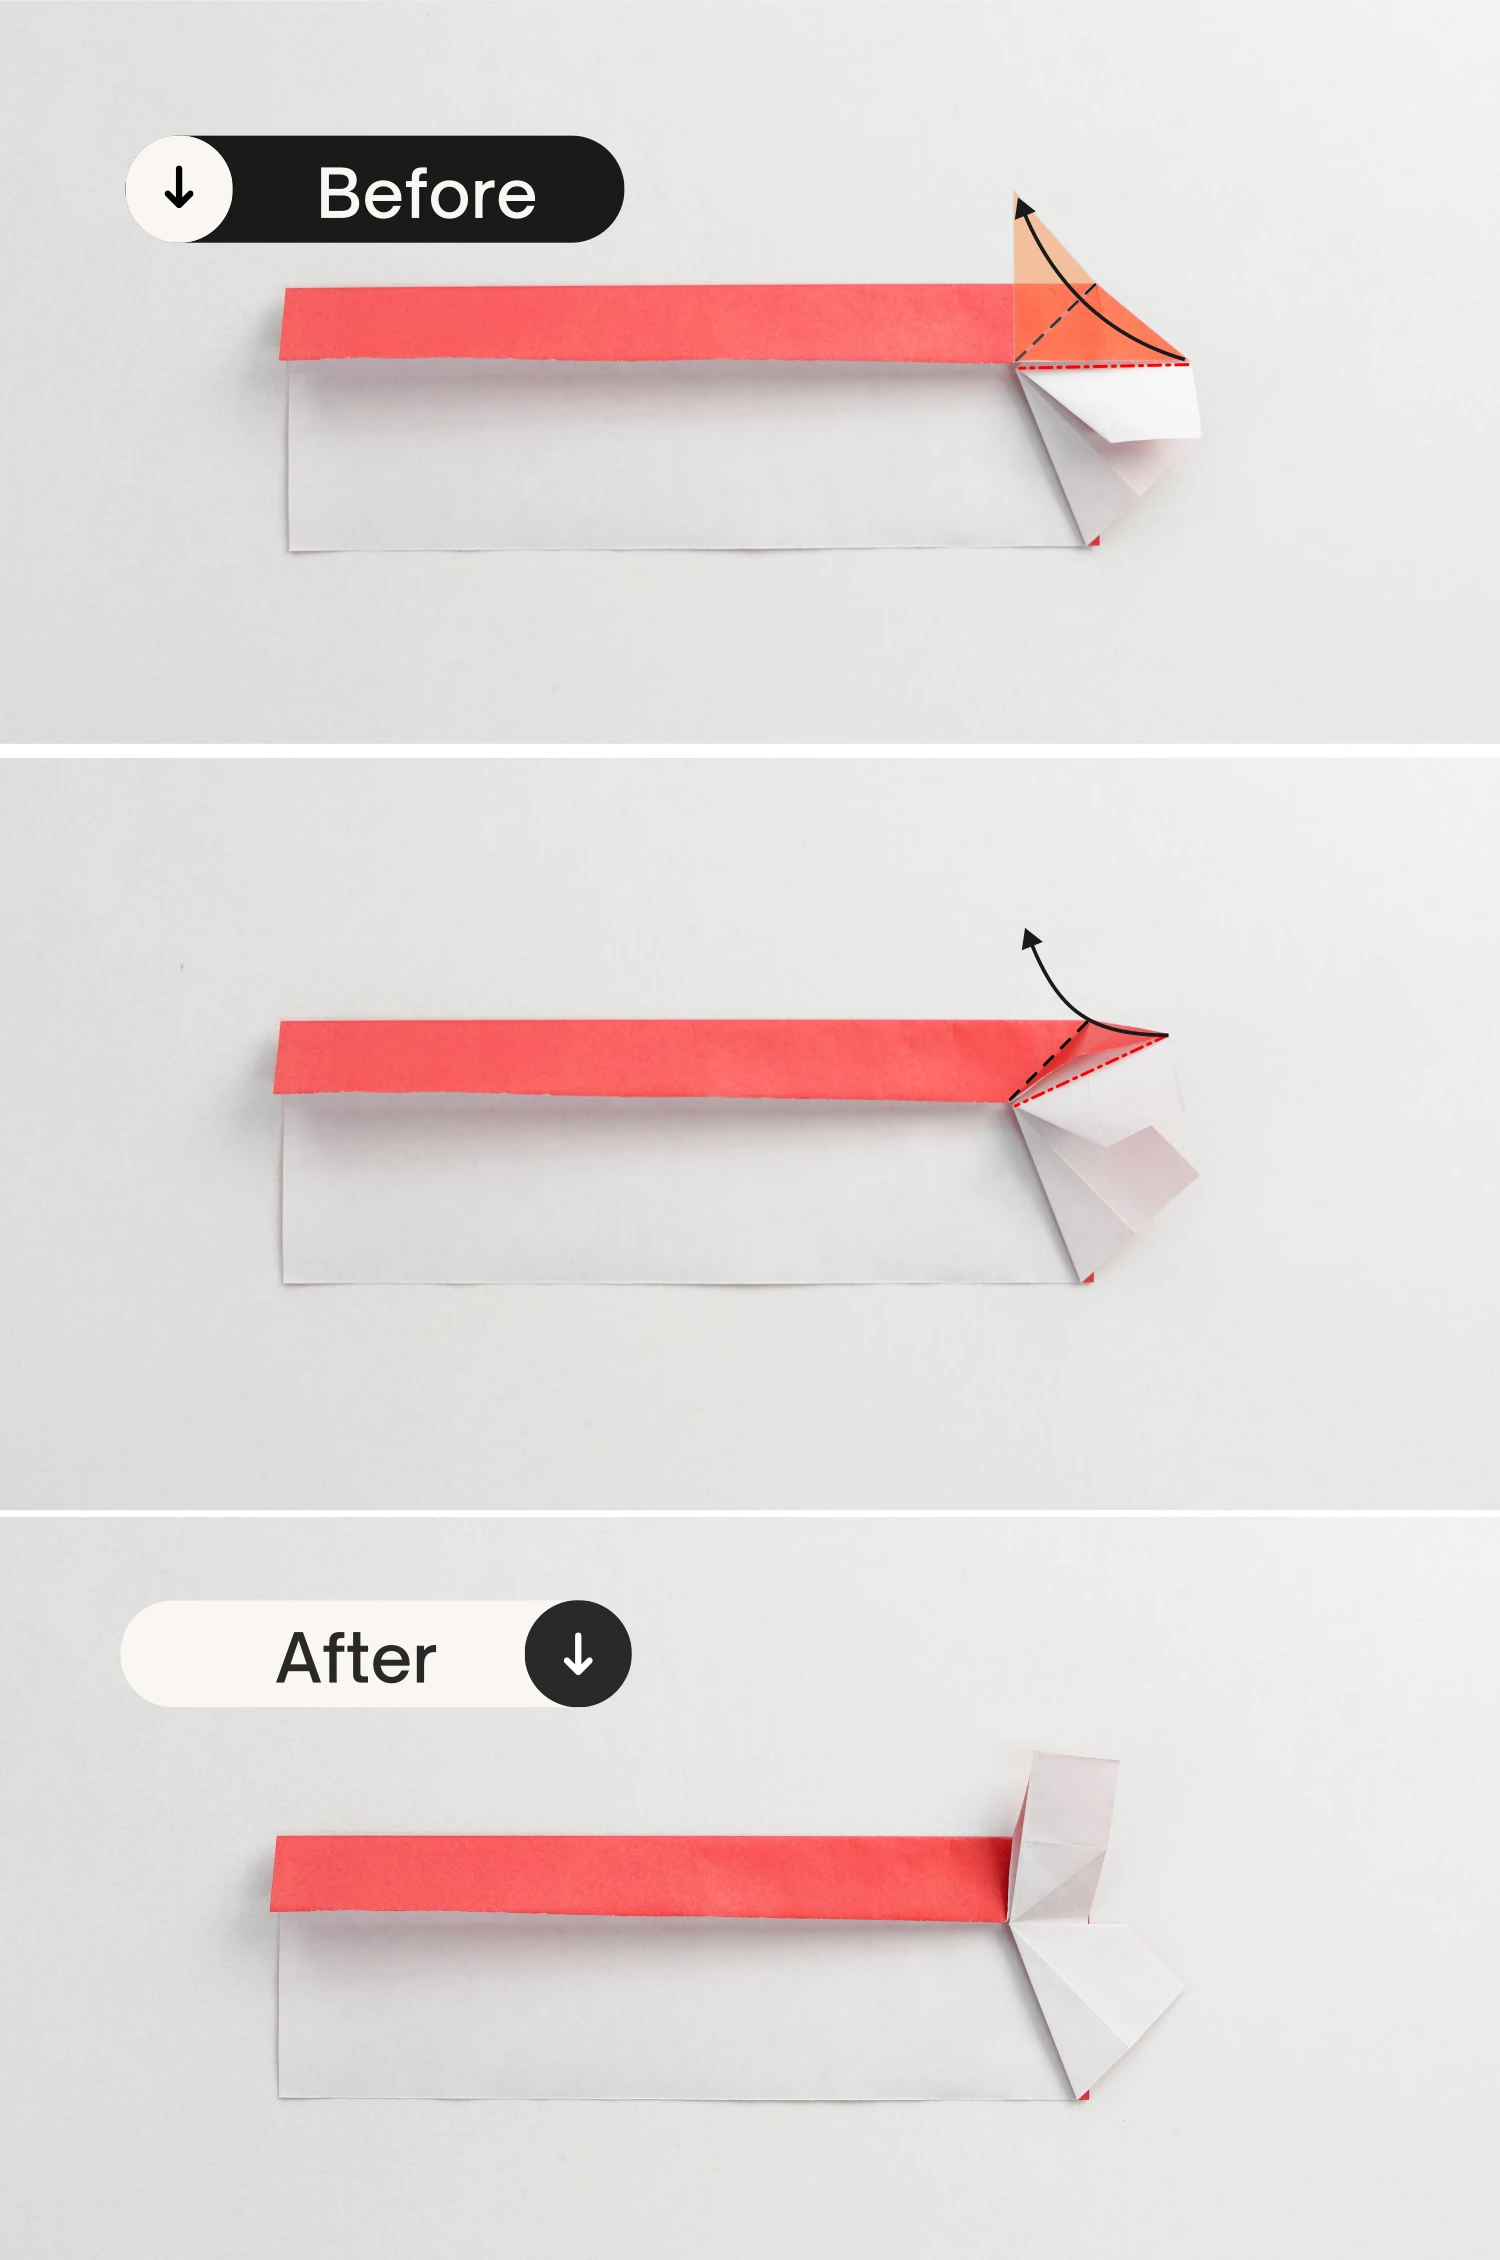
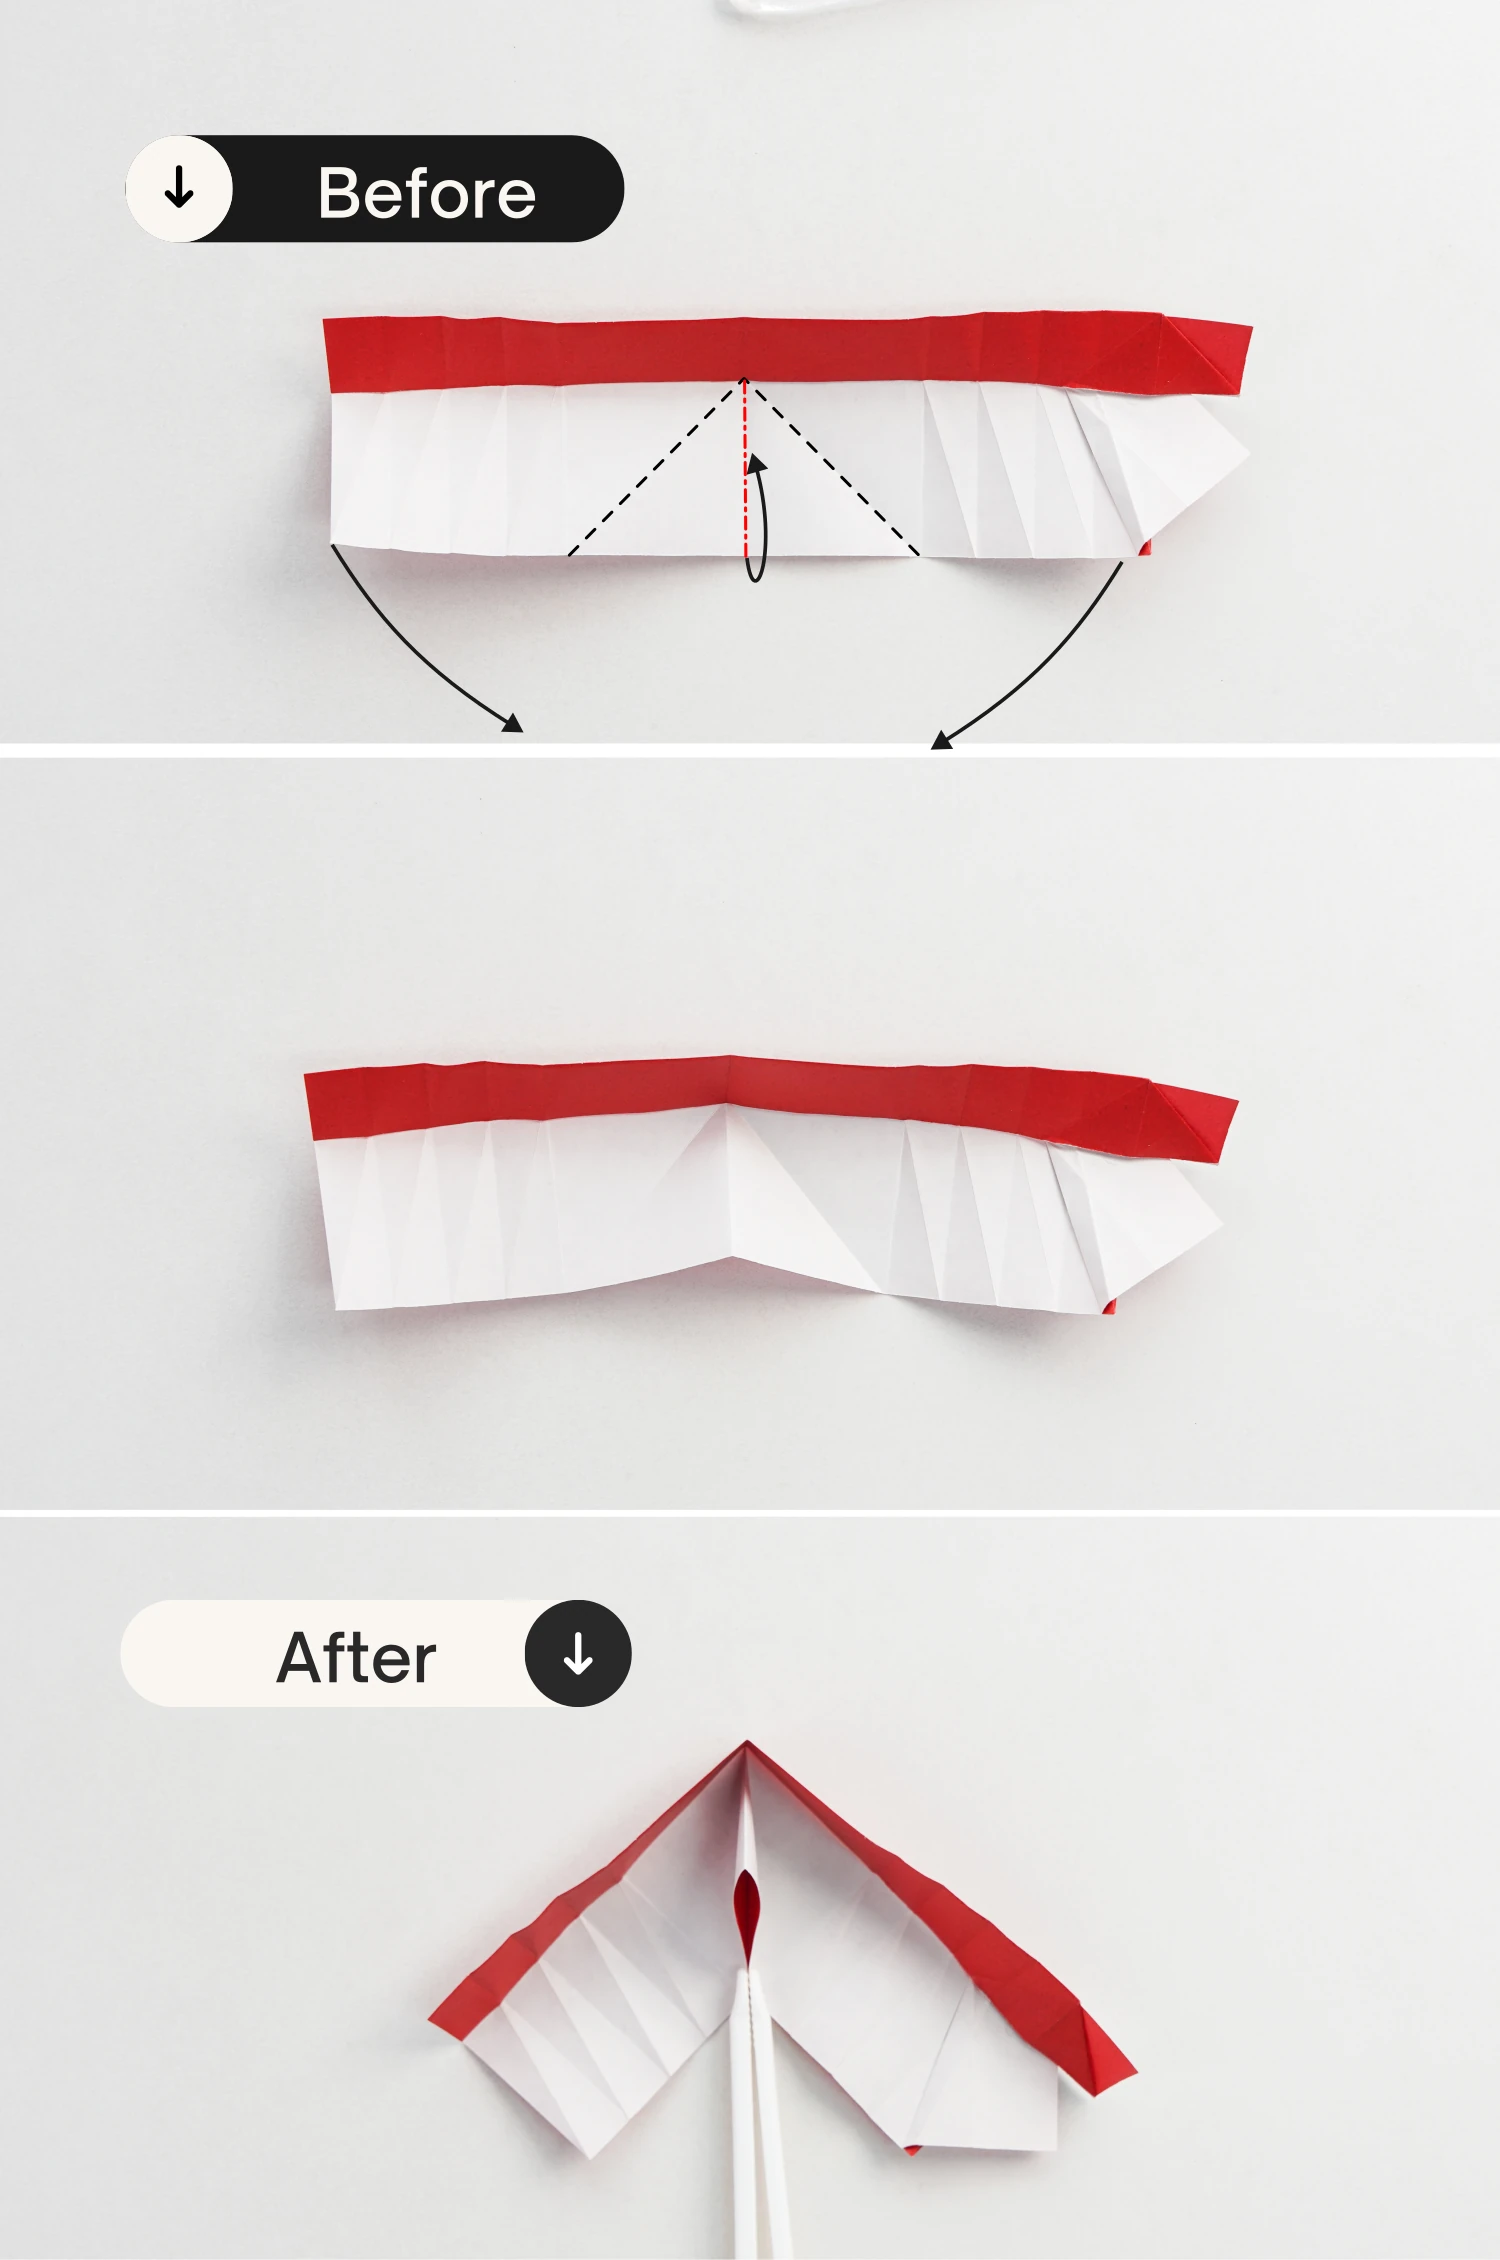
Step 6
Lift the right red layer, and take the left vertical 90-degree folded corner of the red layer, fold it down diagonally to meet the right edge.

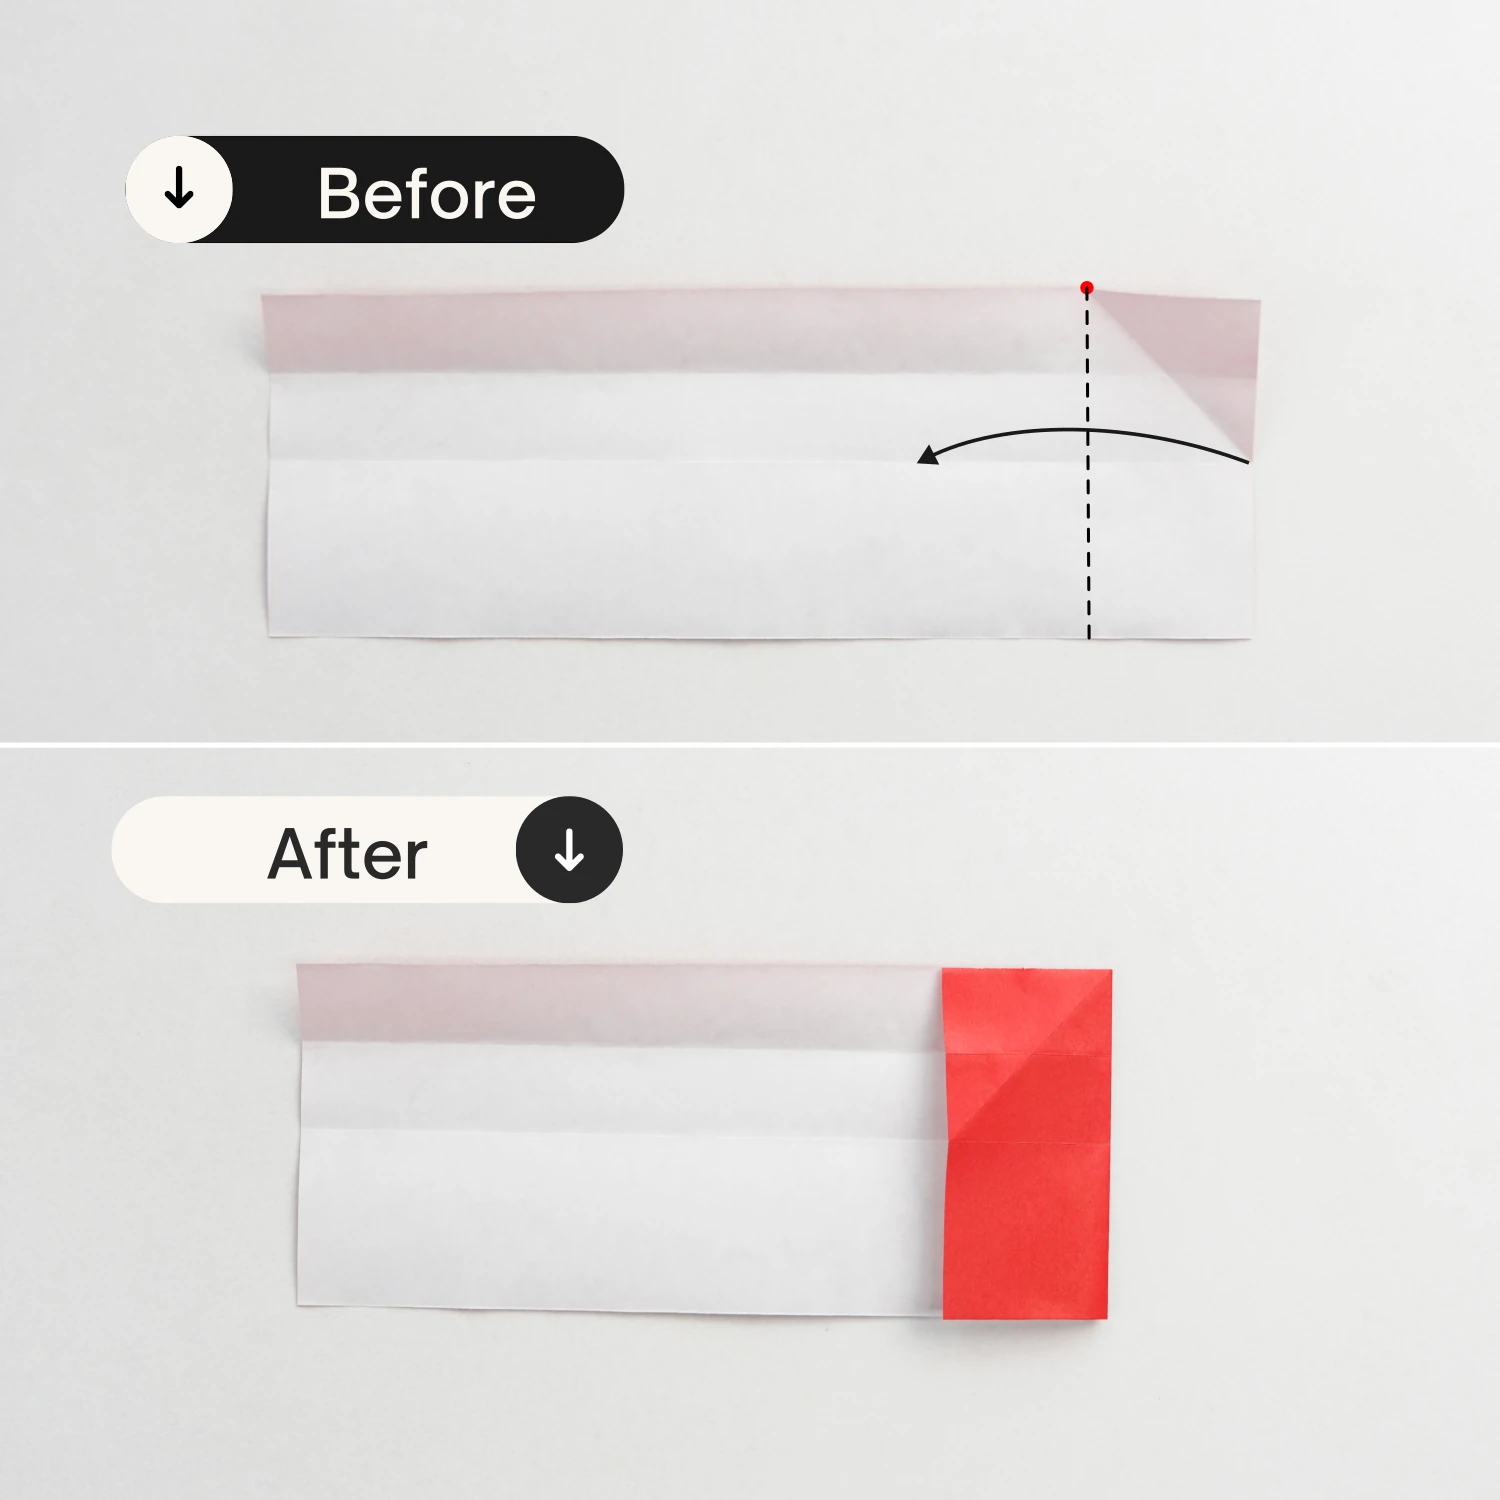
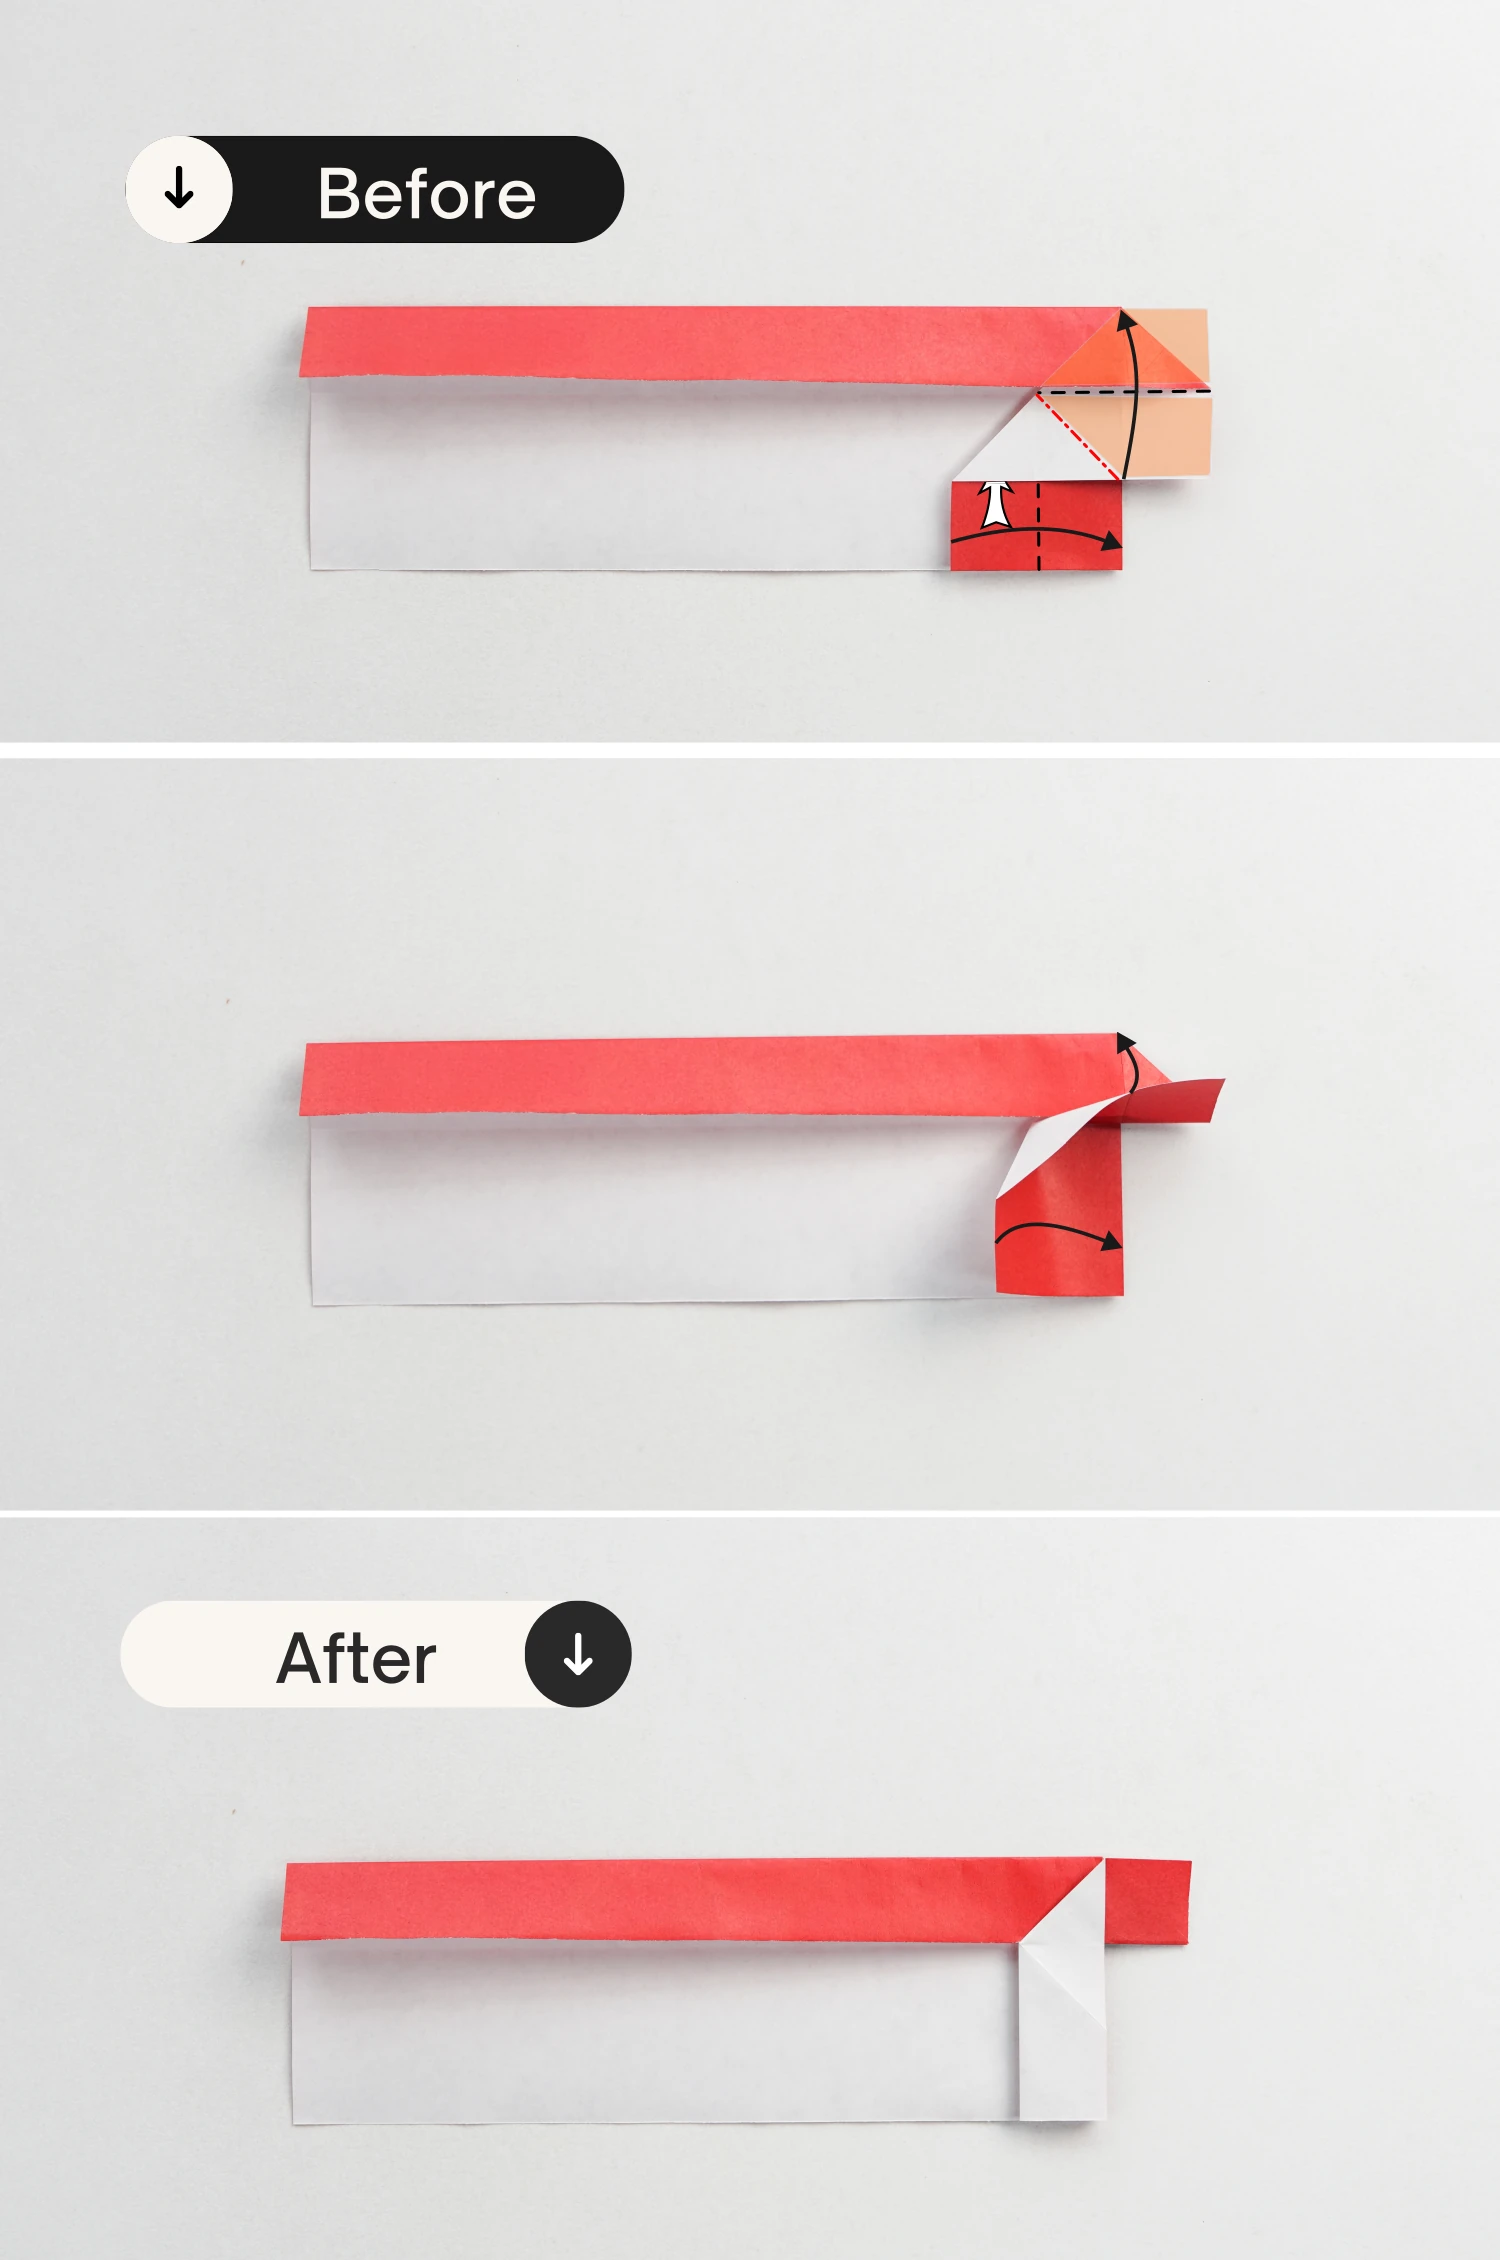
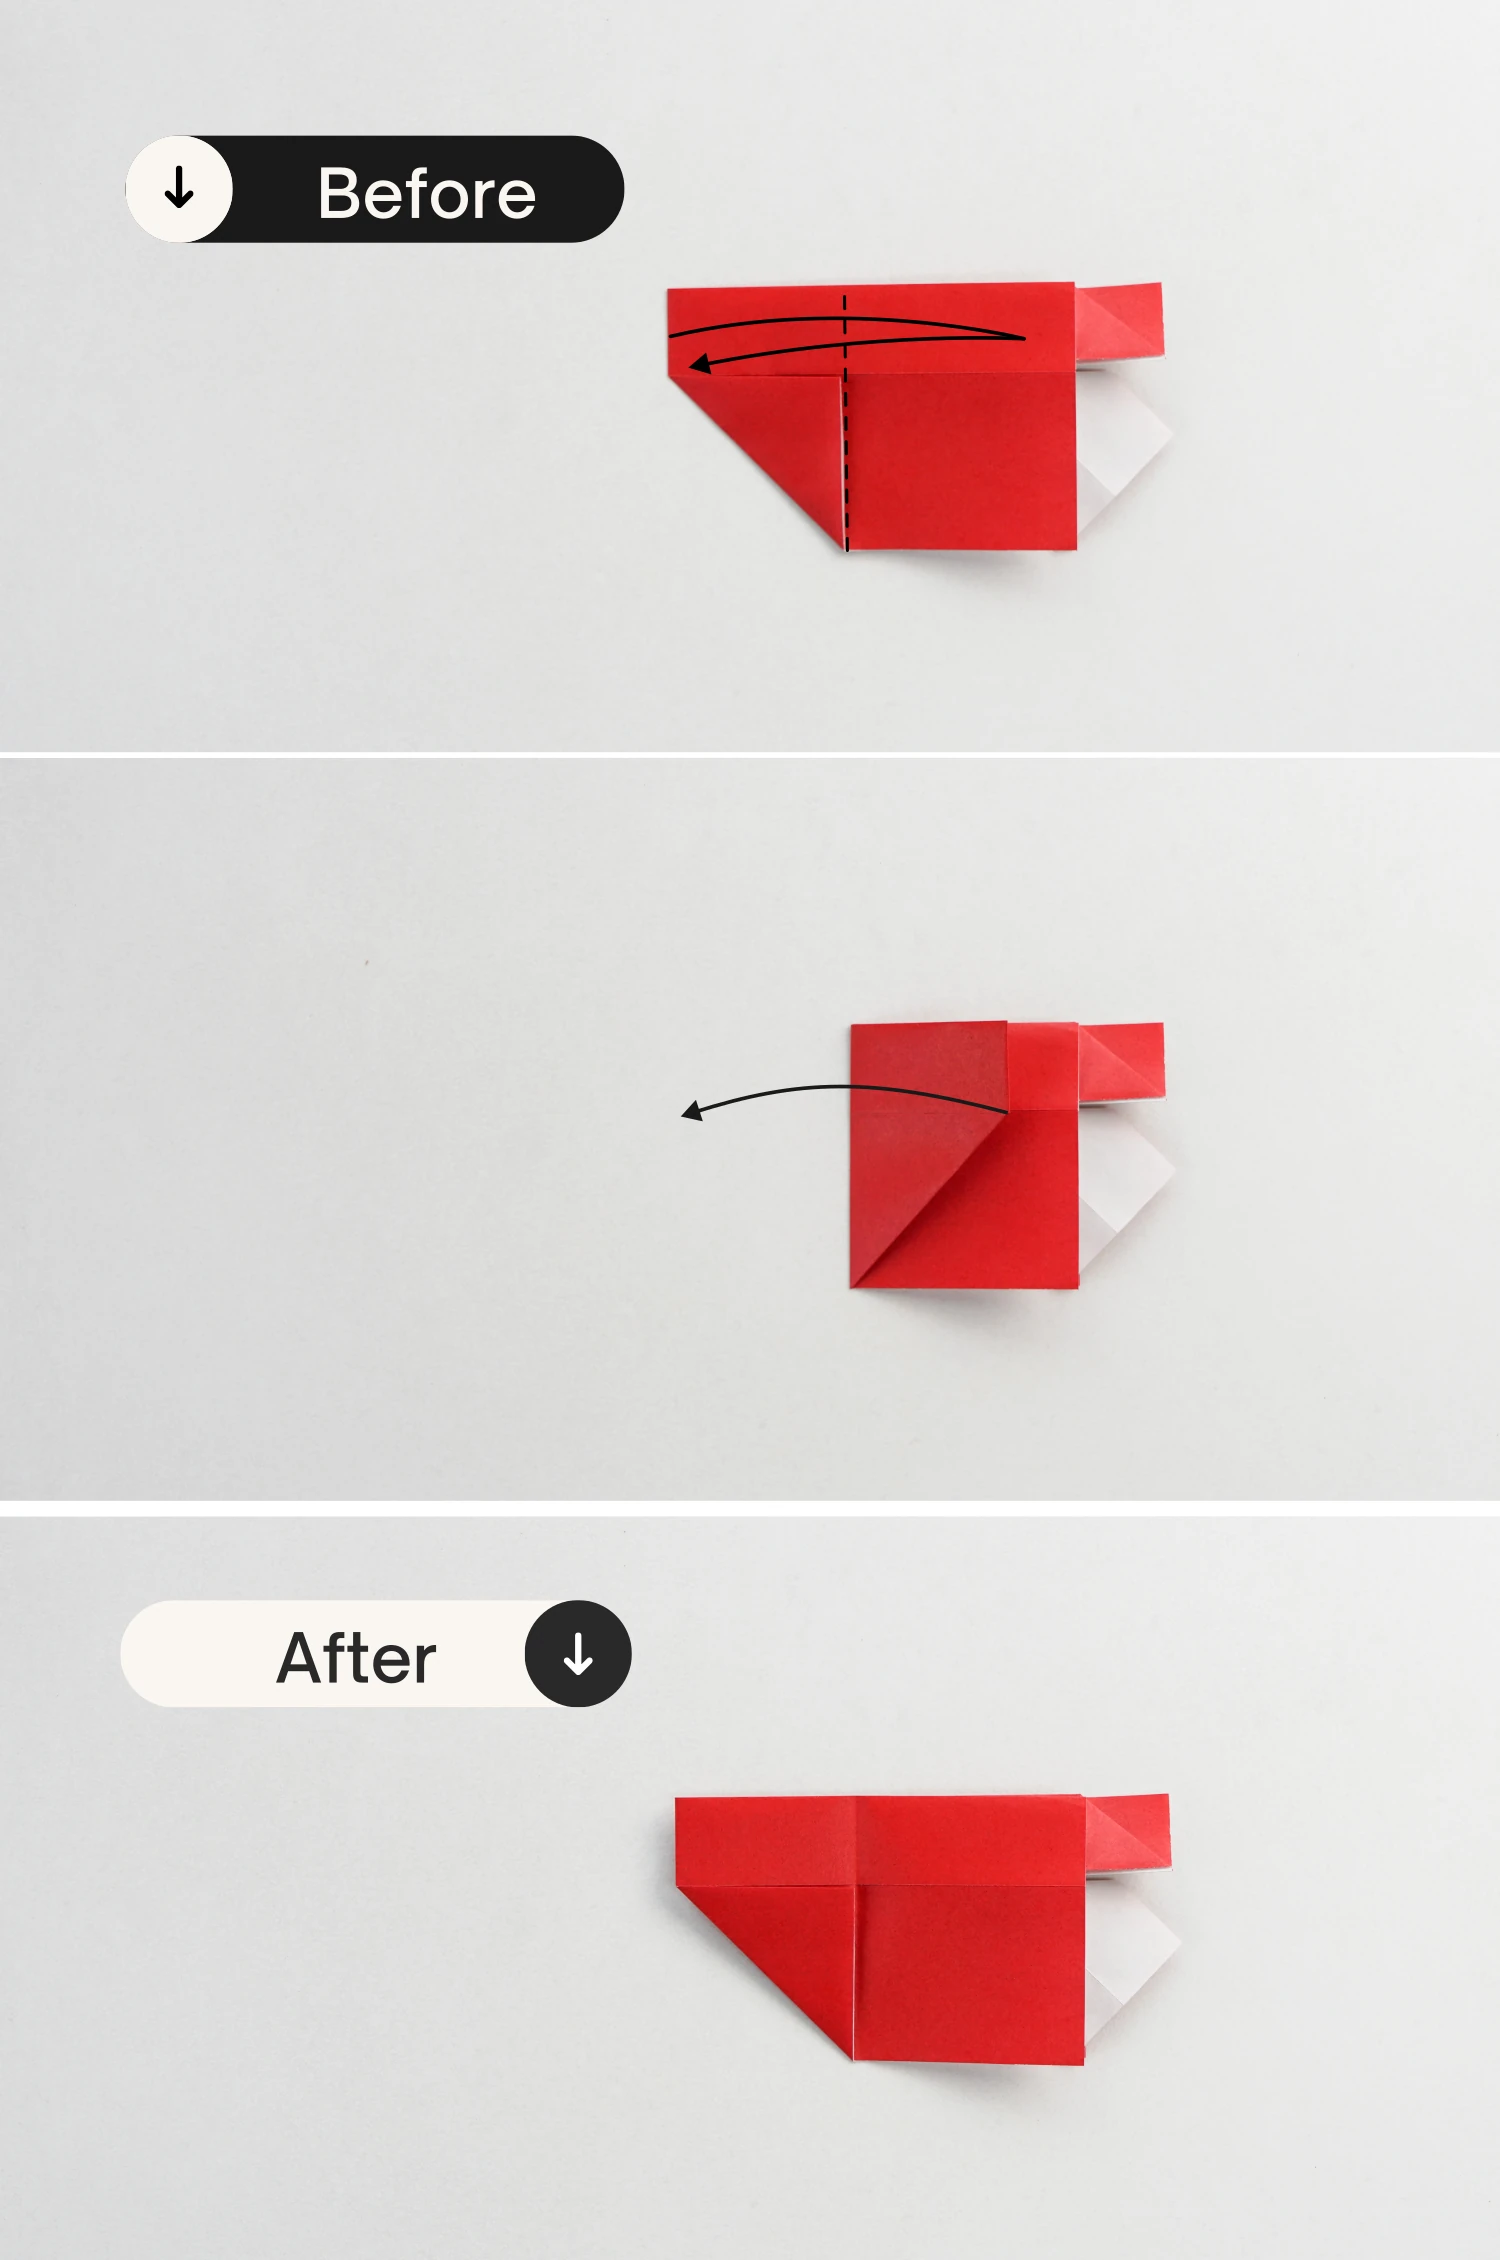
Step 7
Fold down the top standing edge, and also squash the top right corner.
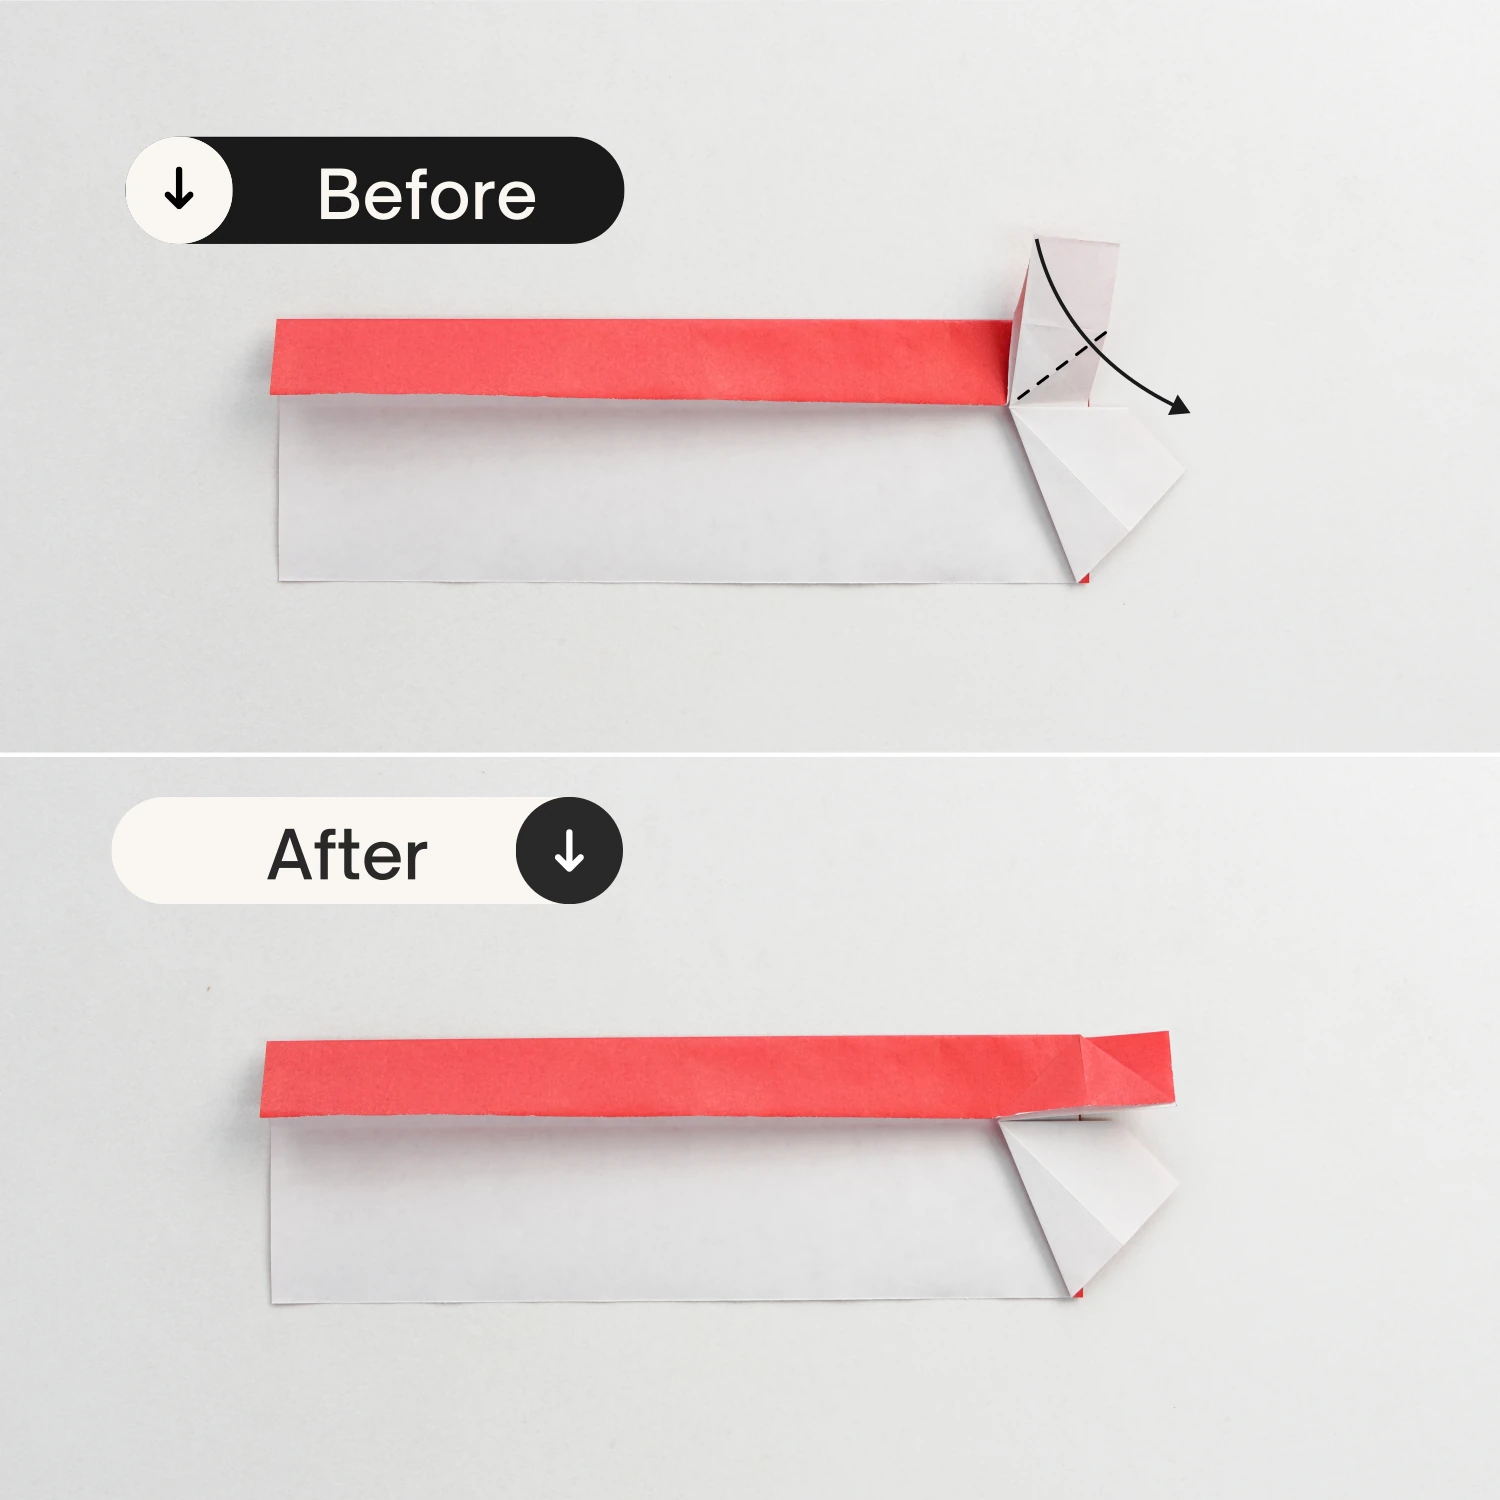
Step 8
Look at the right part, lift the white layer in the middle, fold it up, and fold the left edge of the bottom rectangle to align with its right edge simultaneously, finally flatten it to create a white vertical trapezoid.
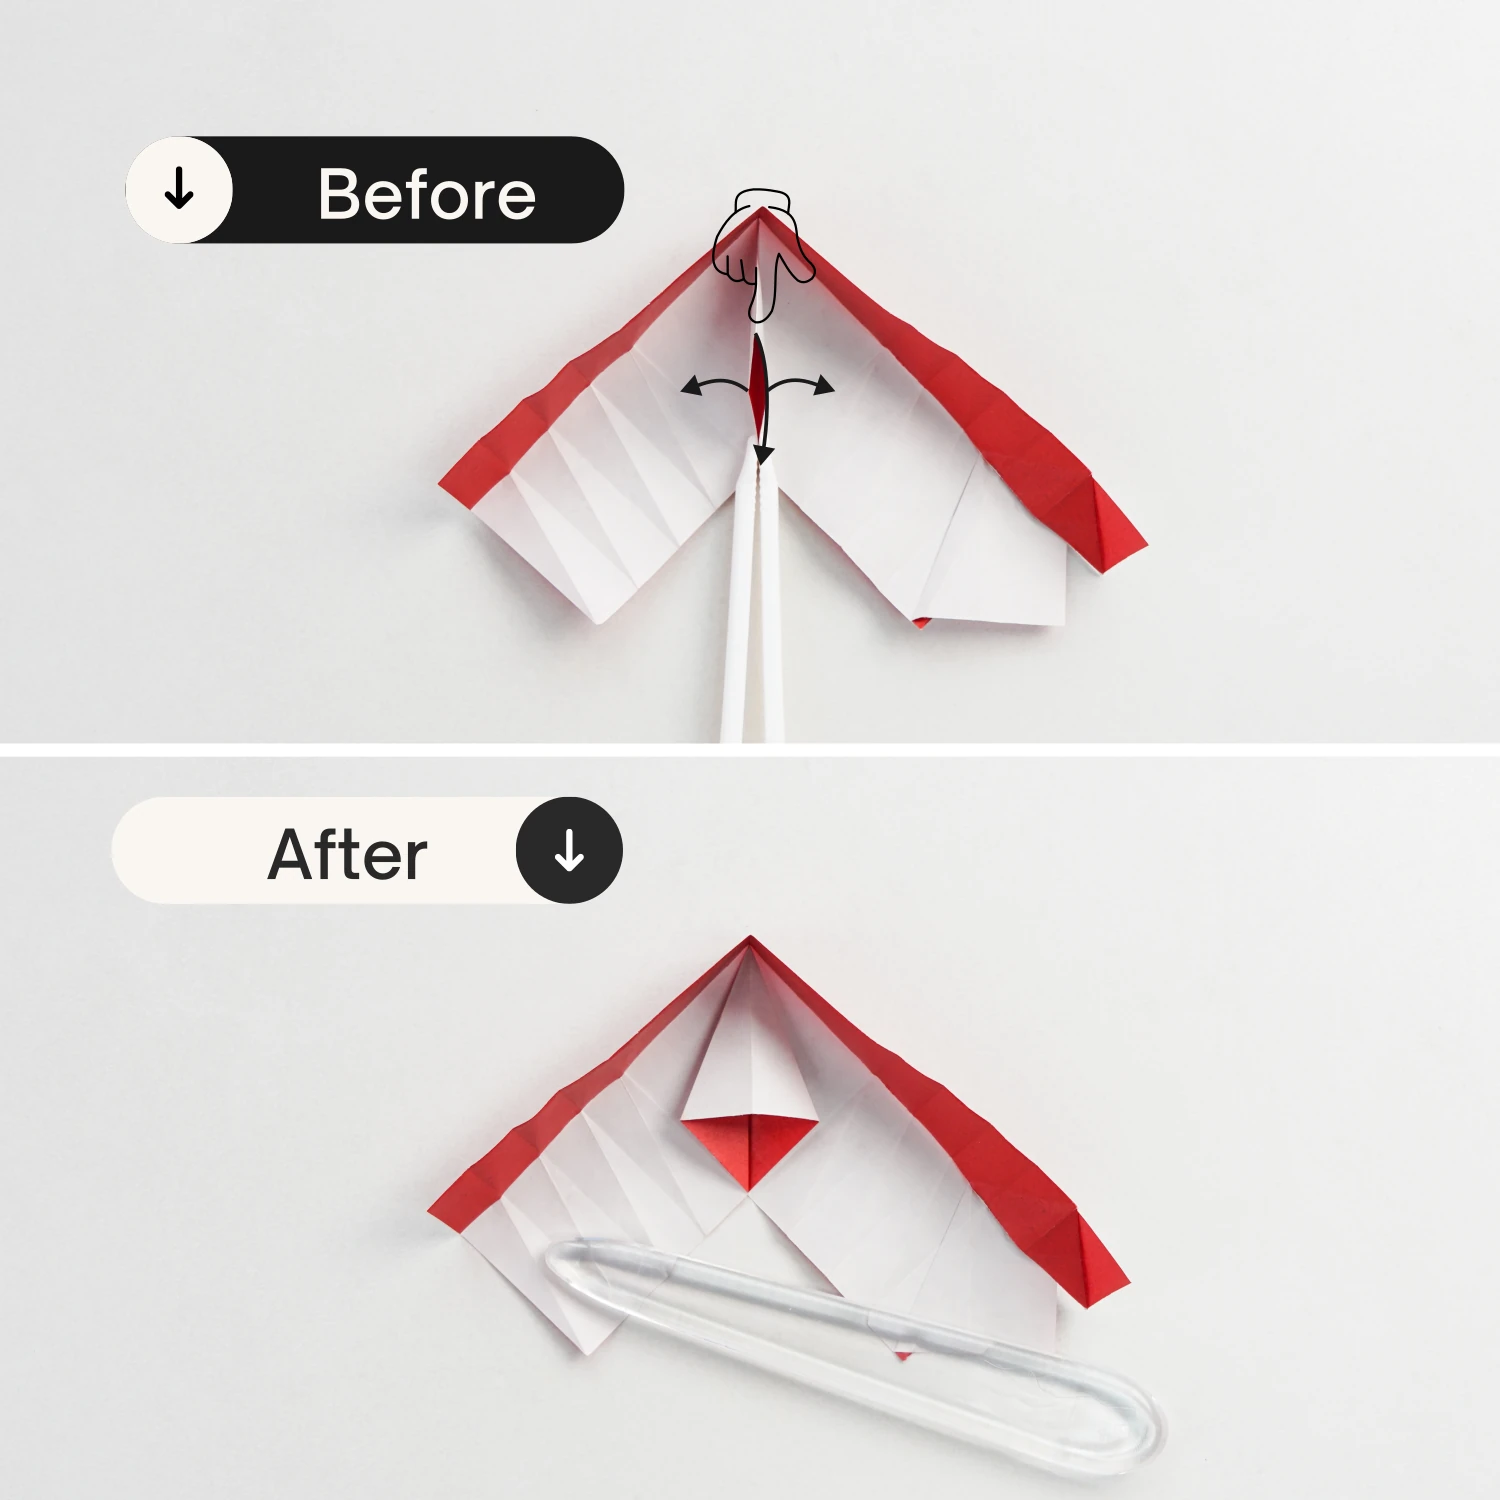
Step 9
Take the white top layer at the right part, and fold the crease shown by the black line to align with the crease shown by the red line, then flatten it.
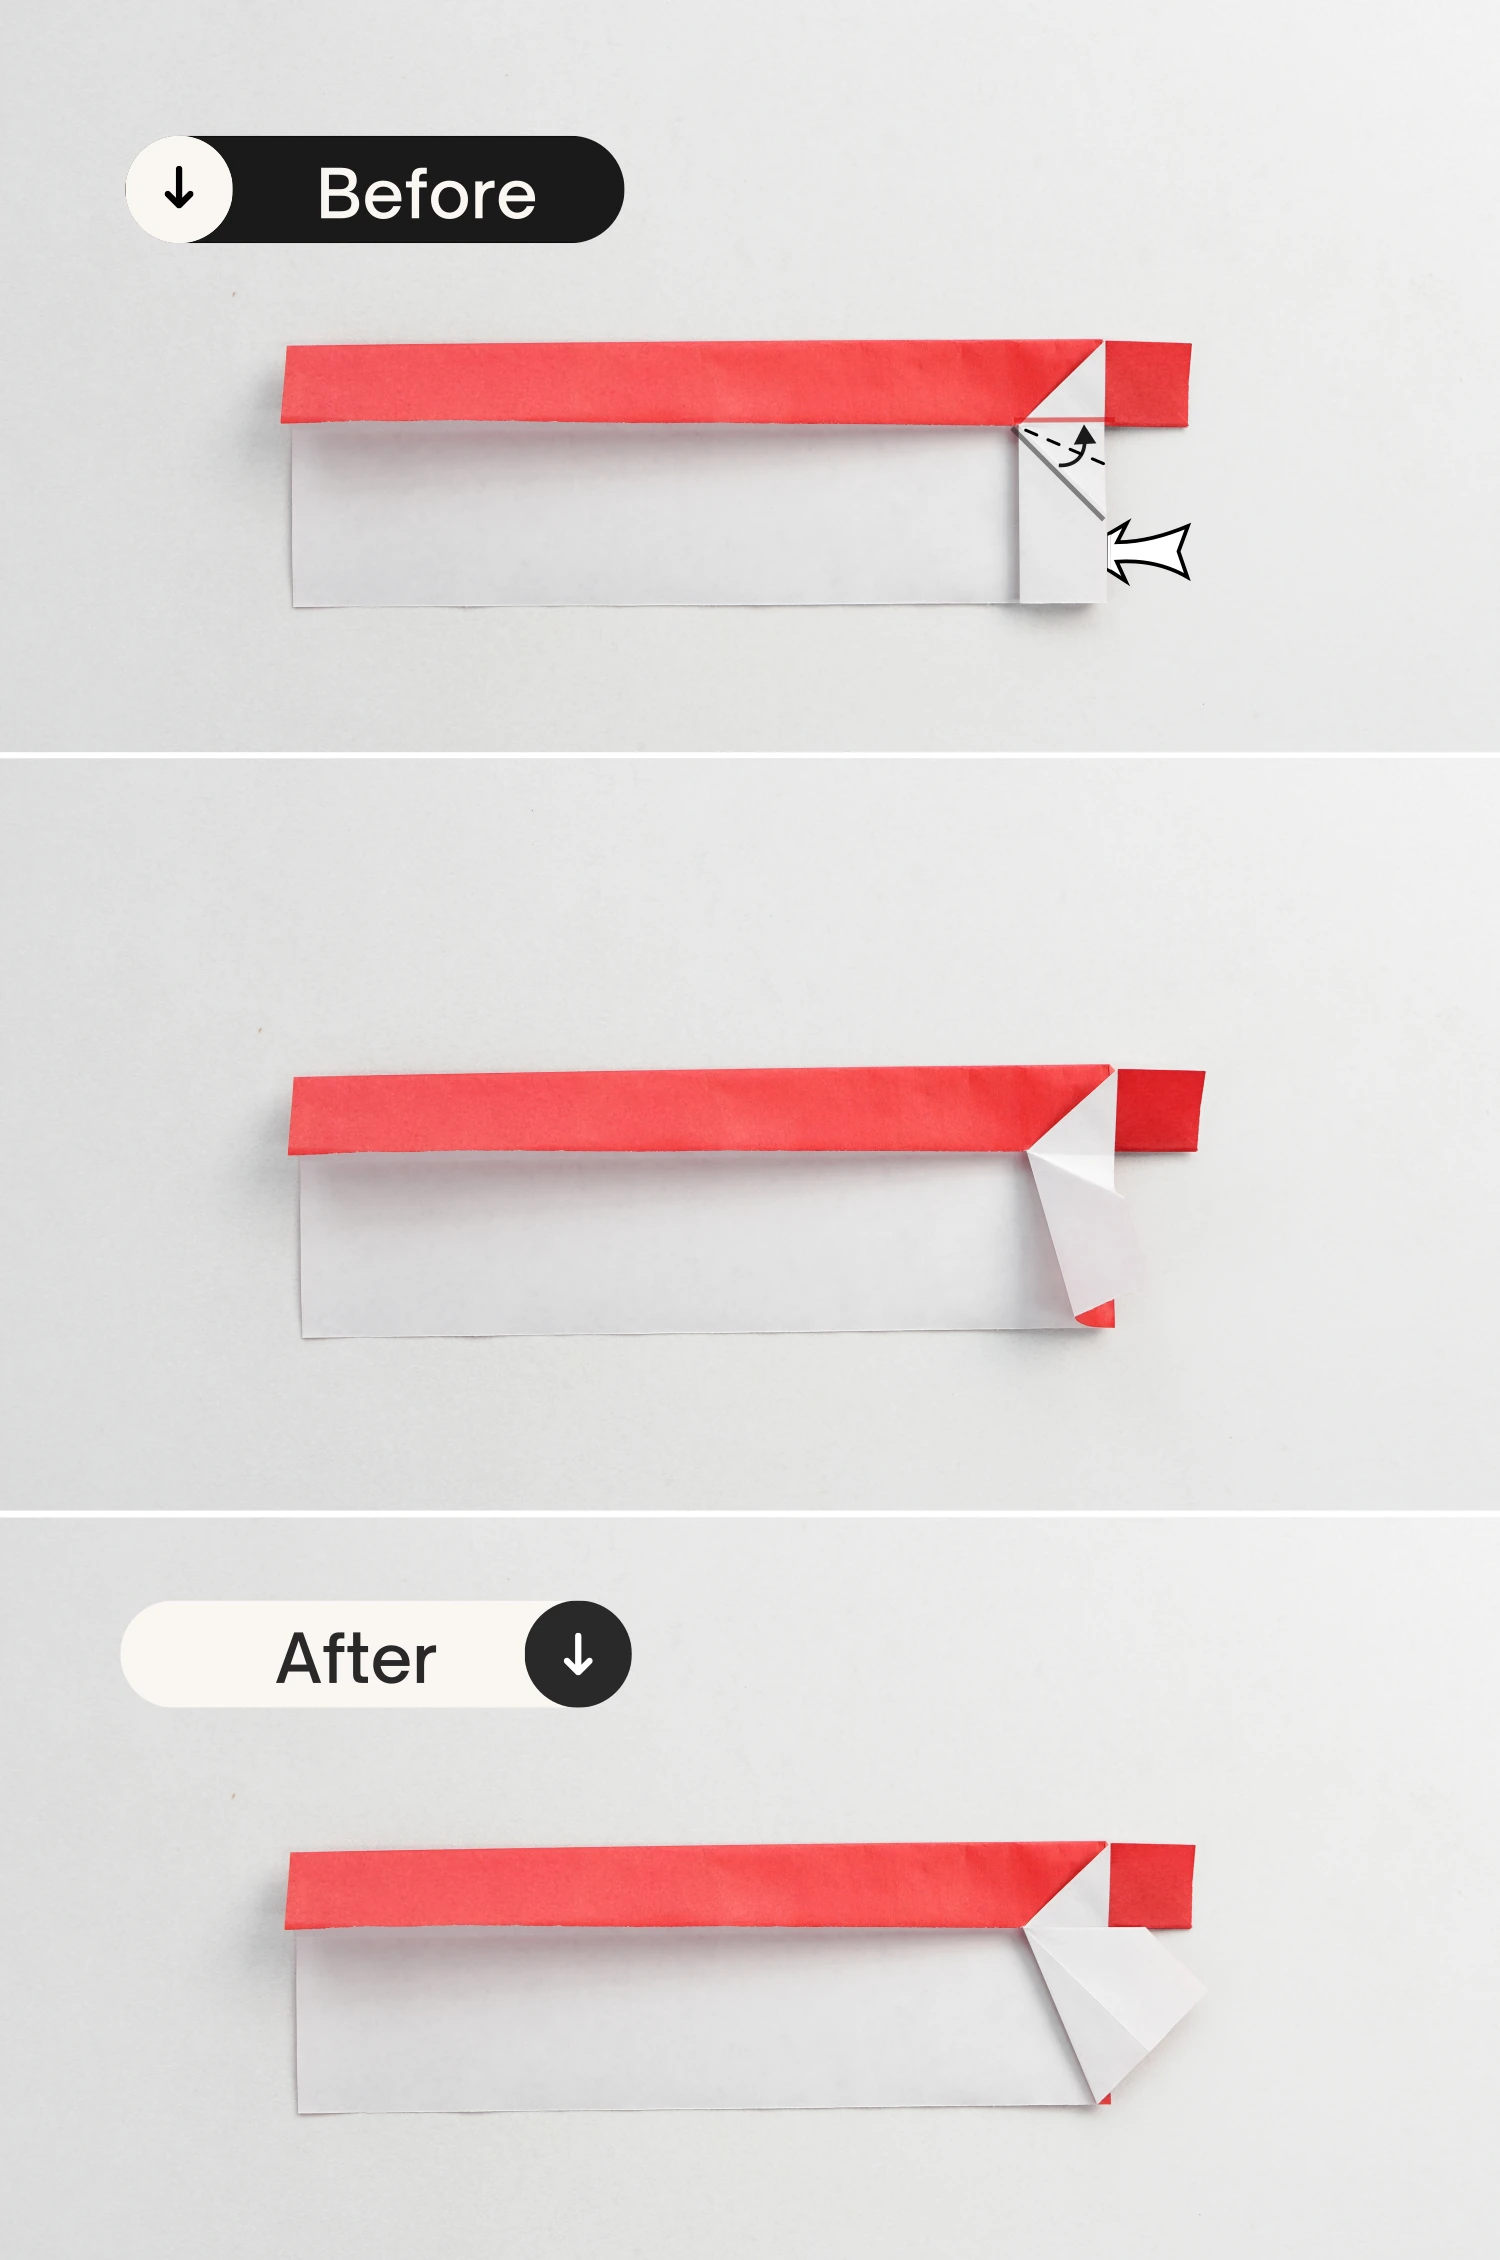
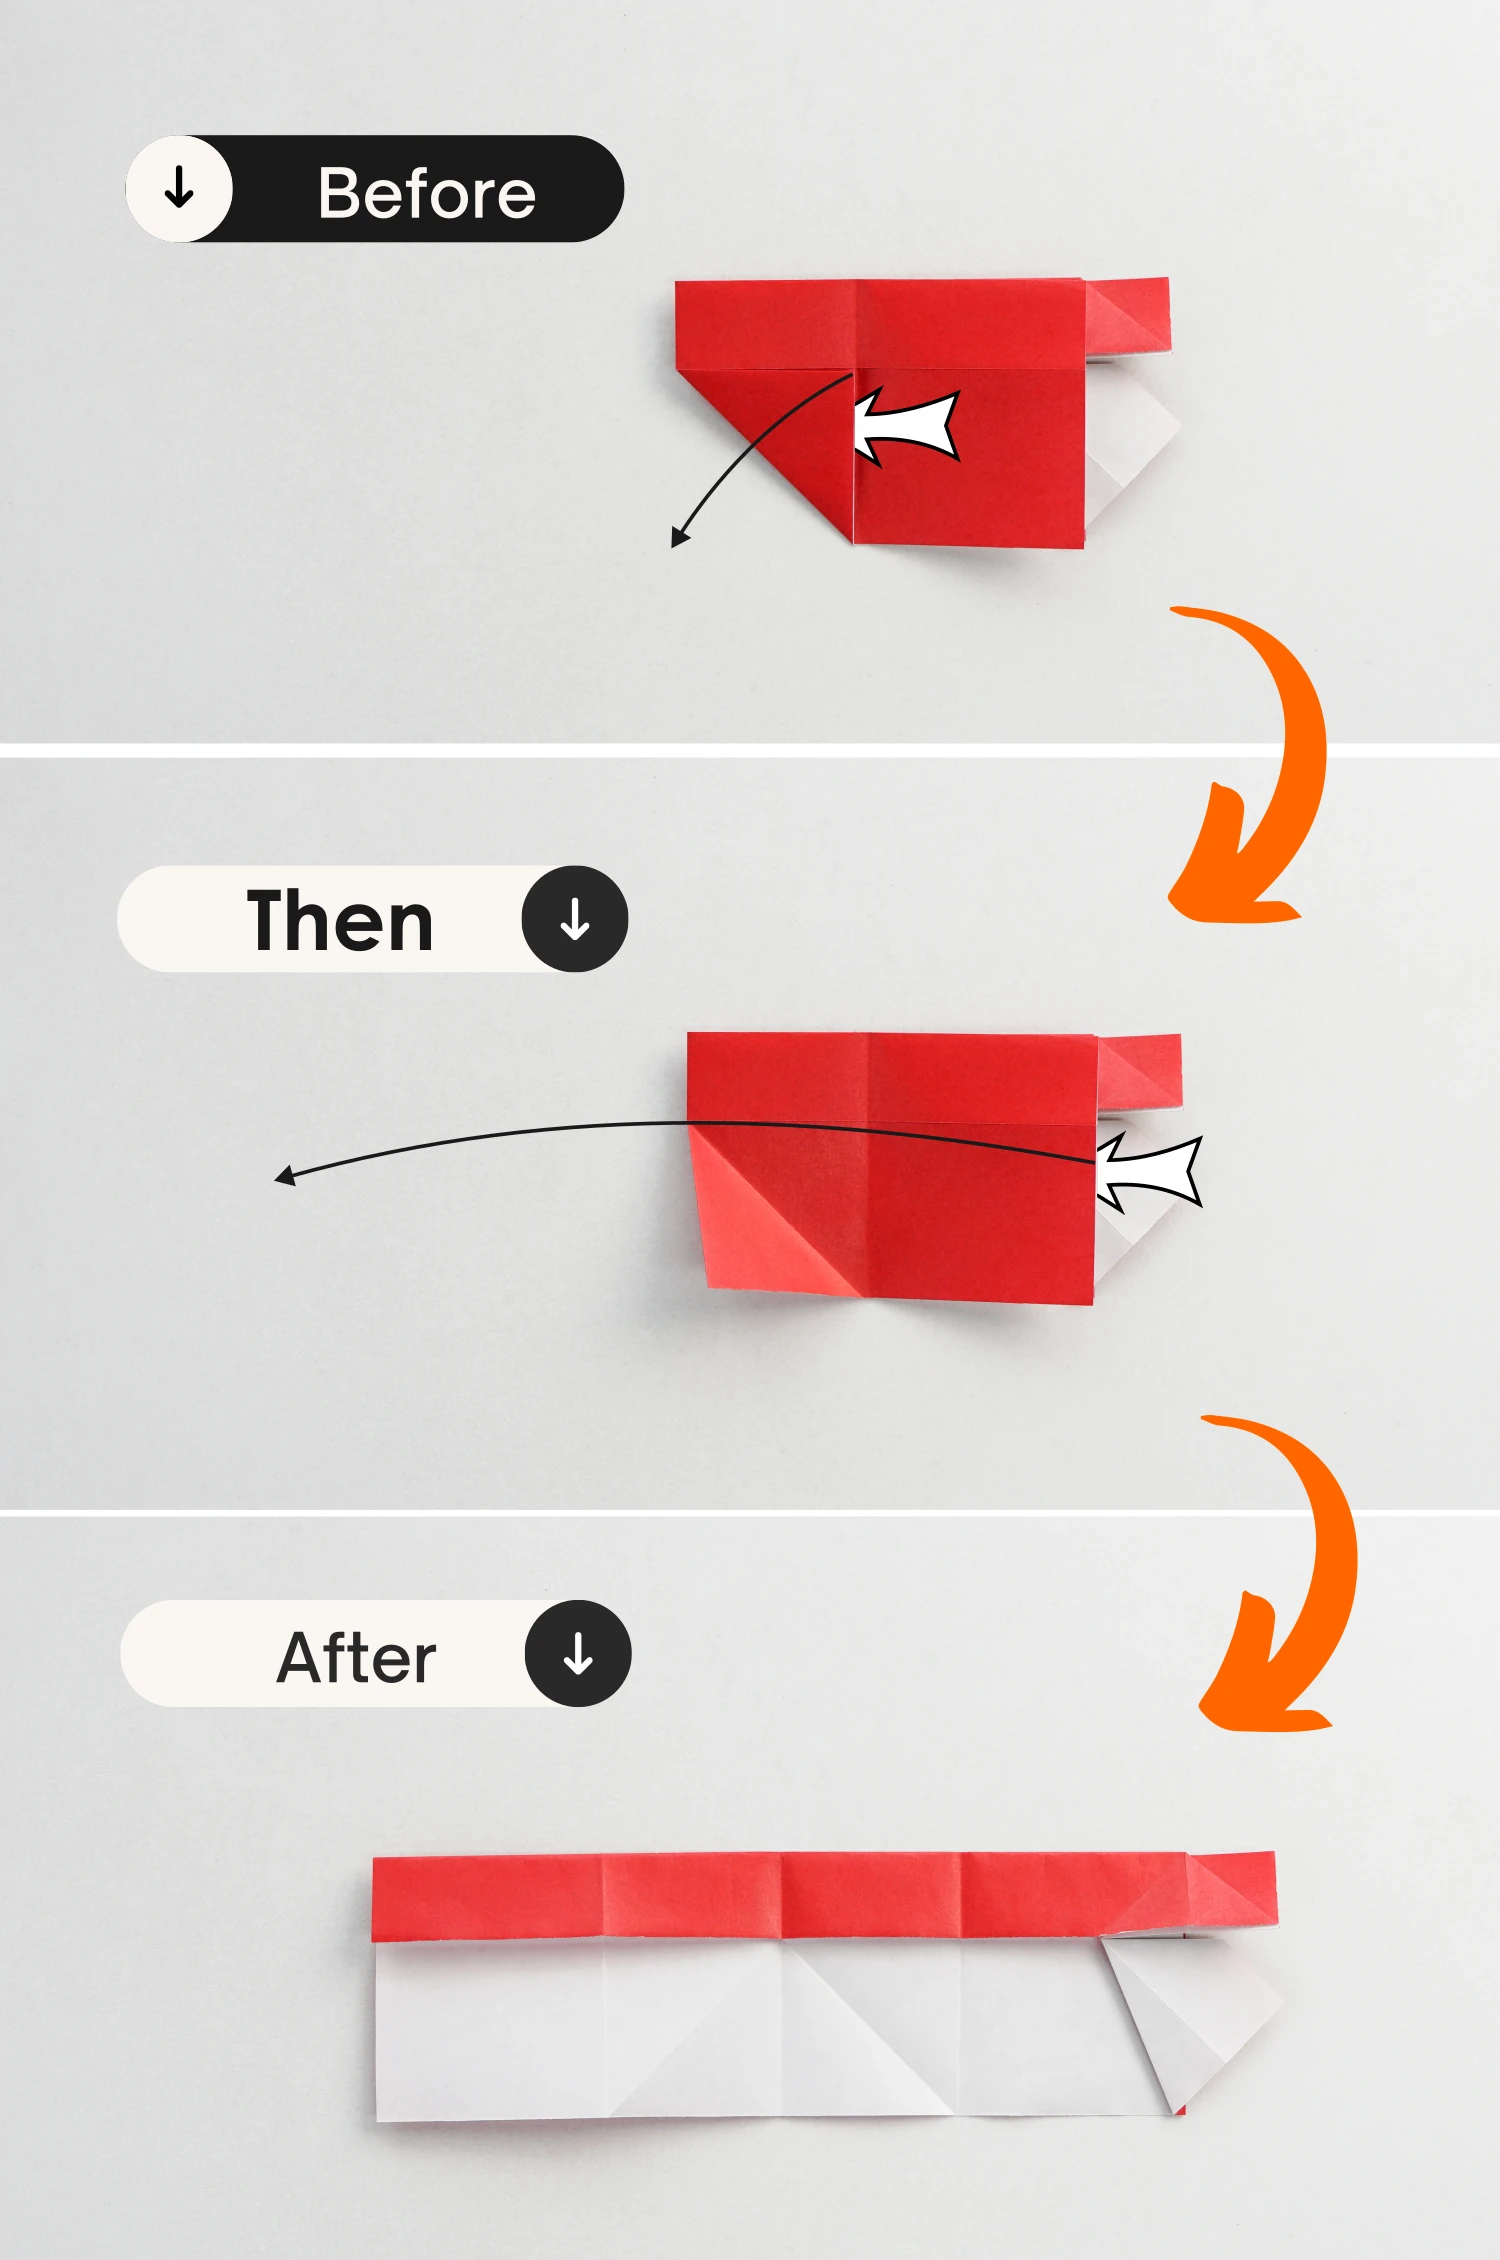
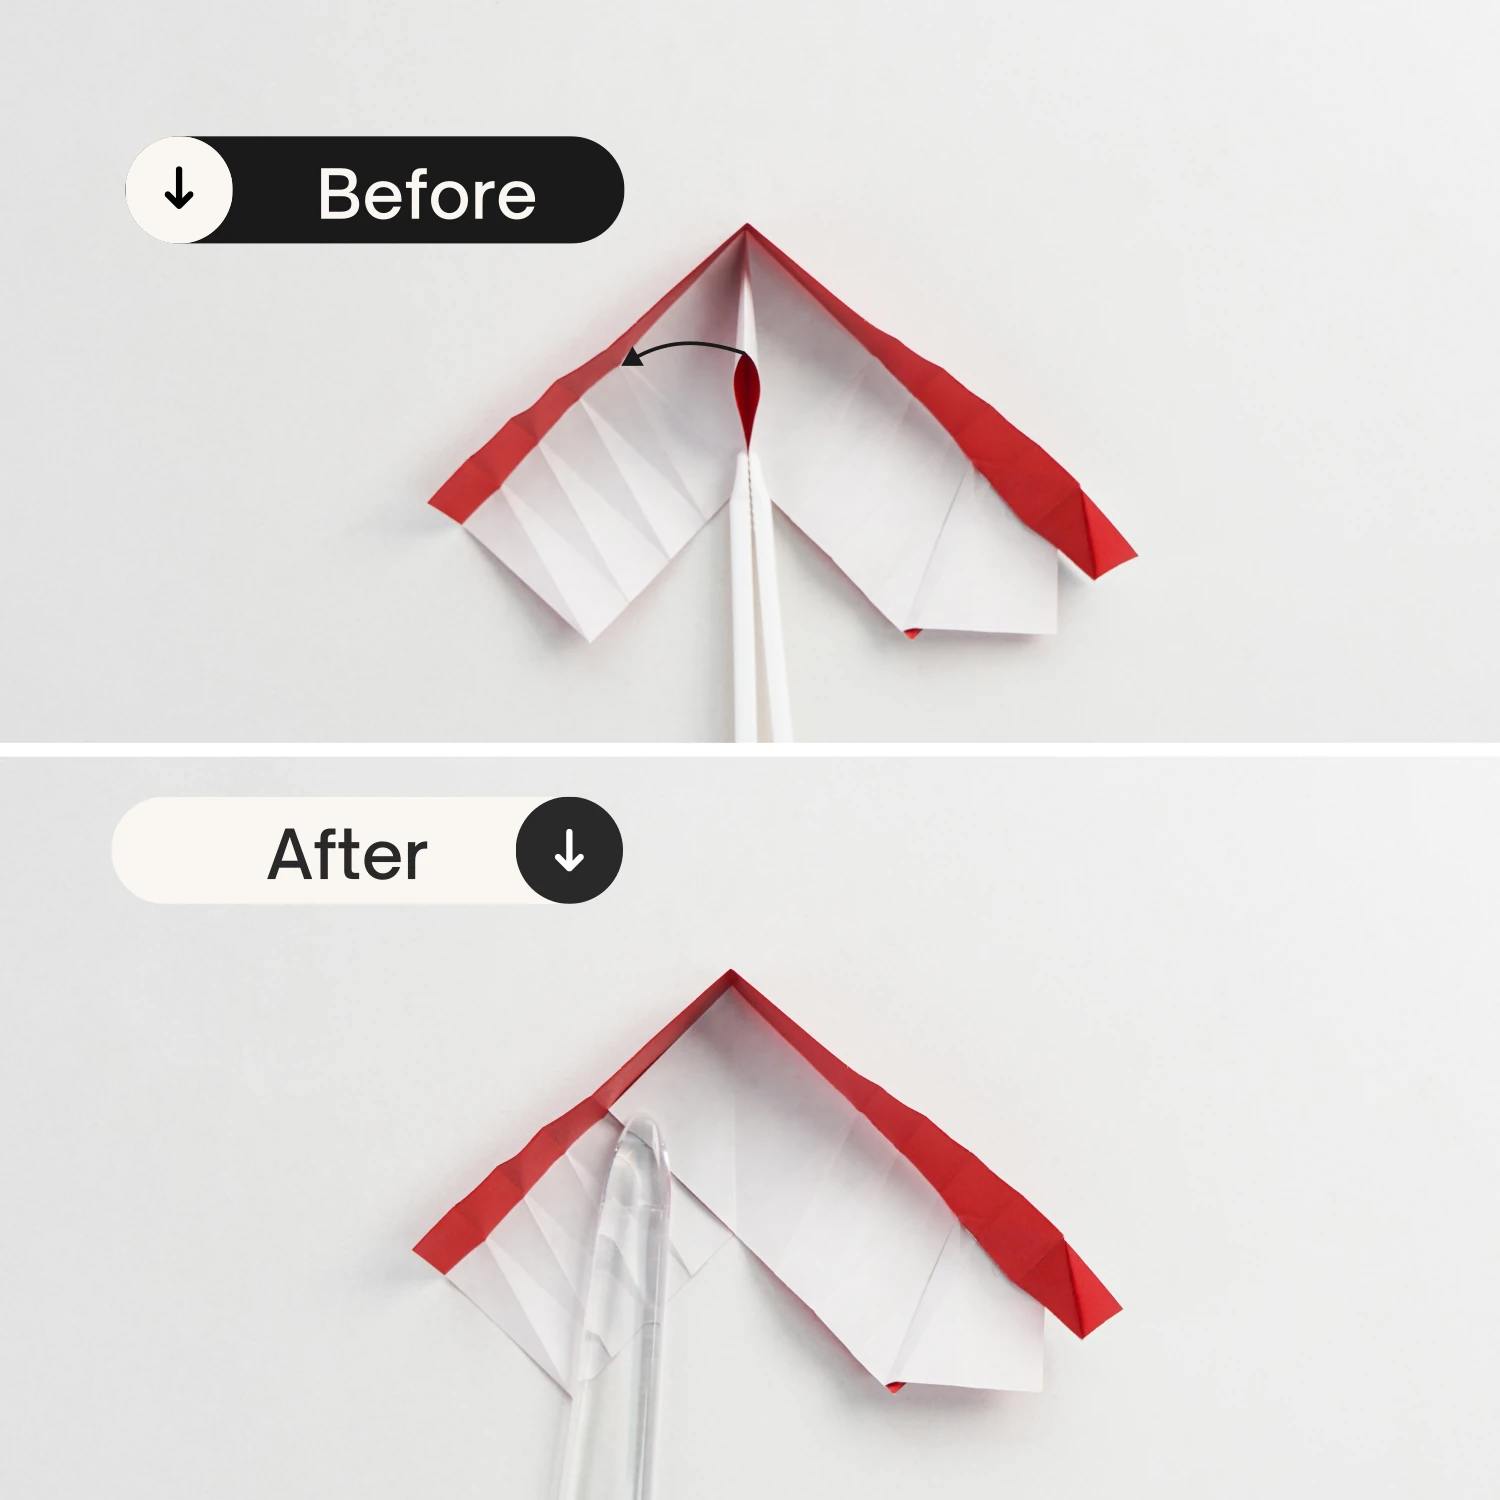
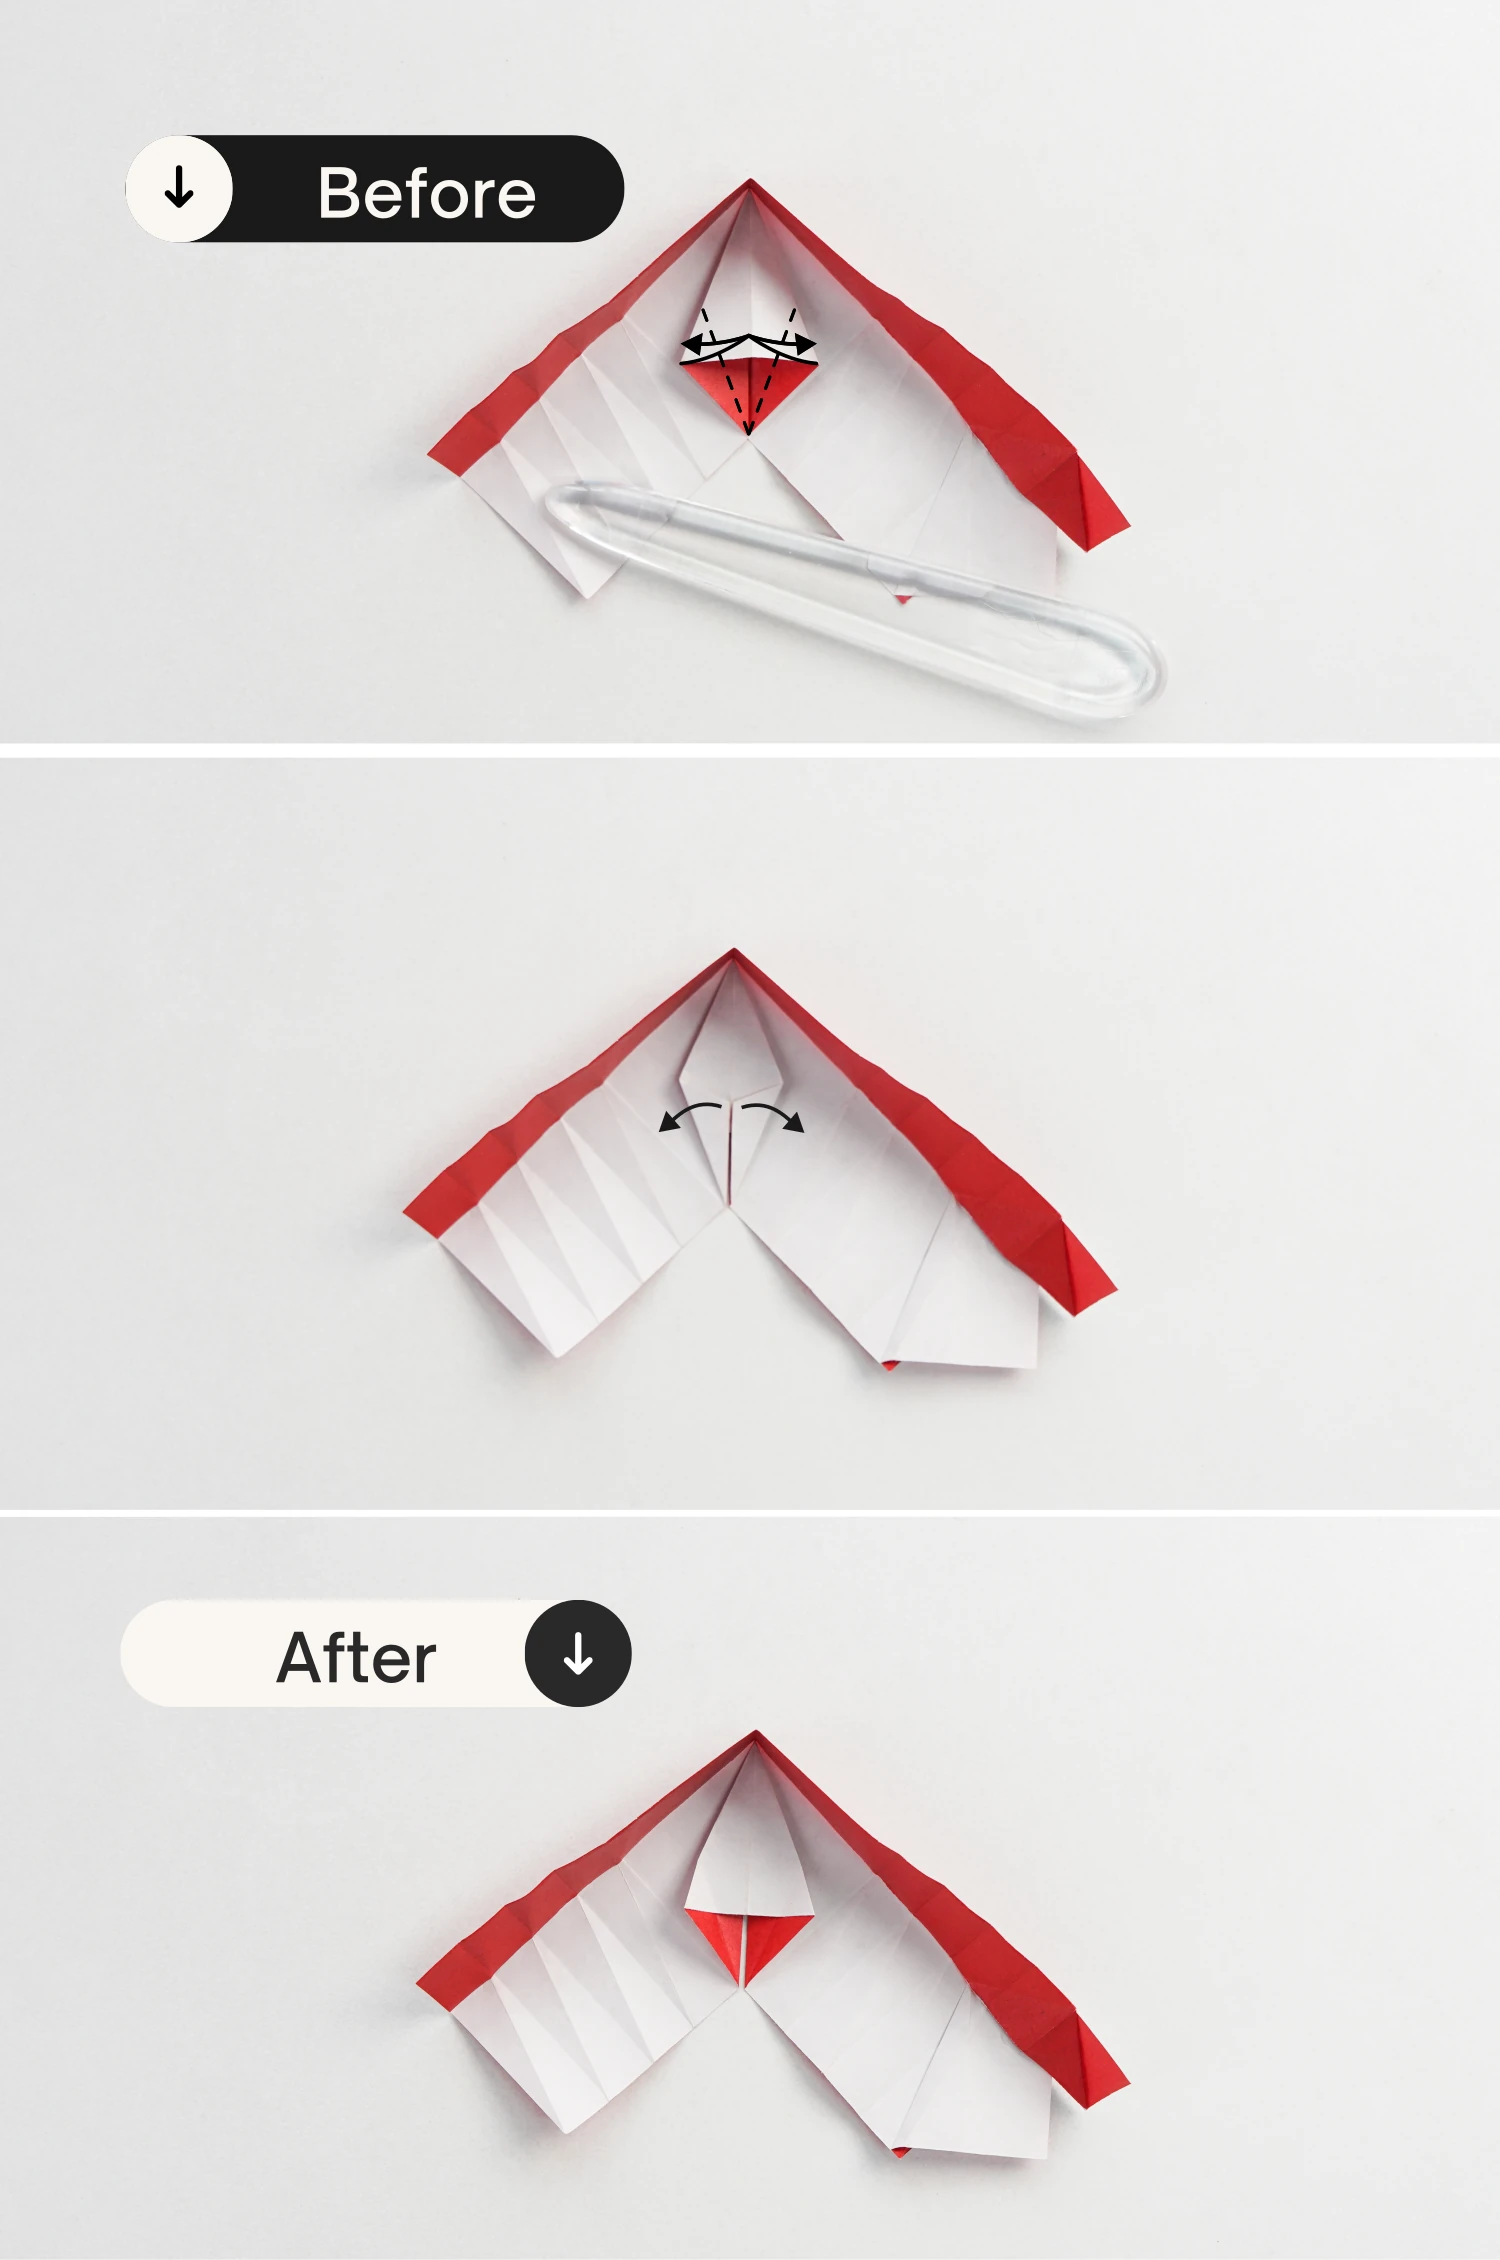
Step 10
Take the top right corner, and fold it down along the existing crease.
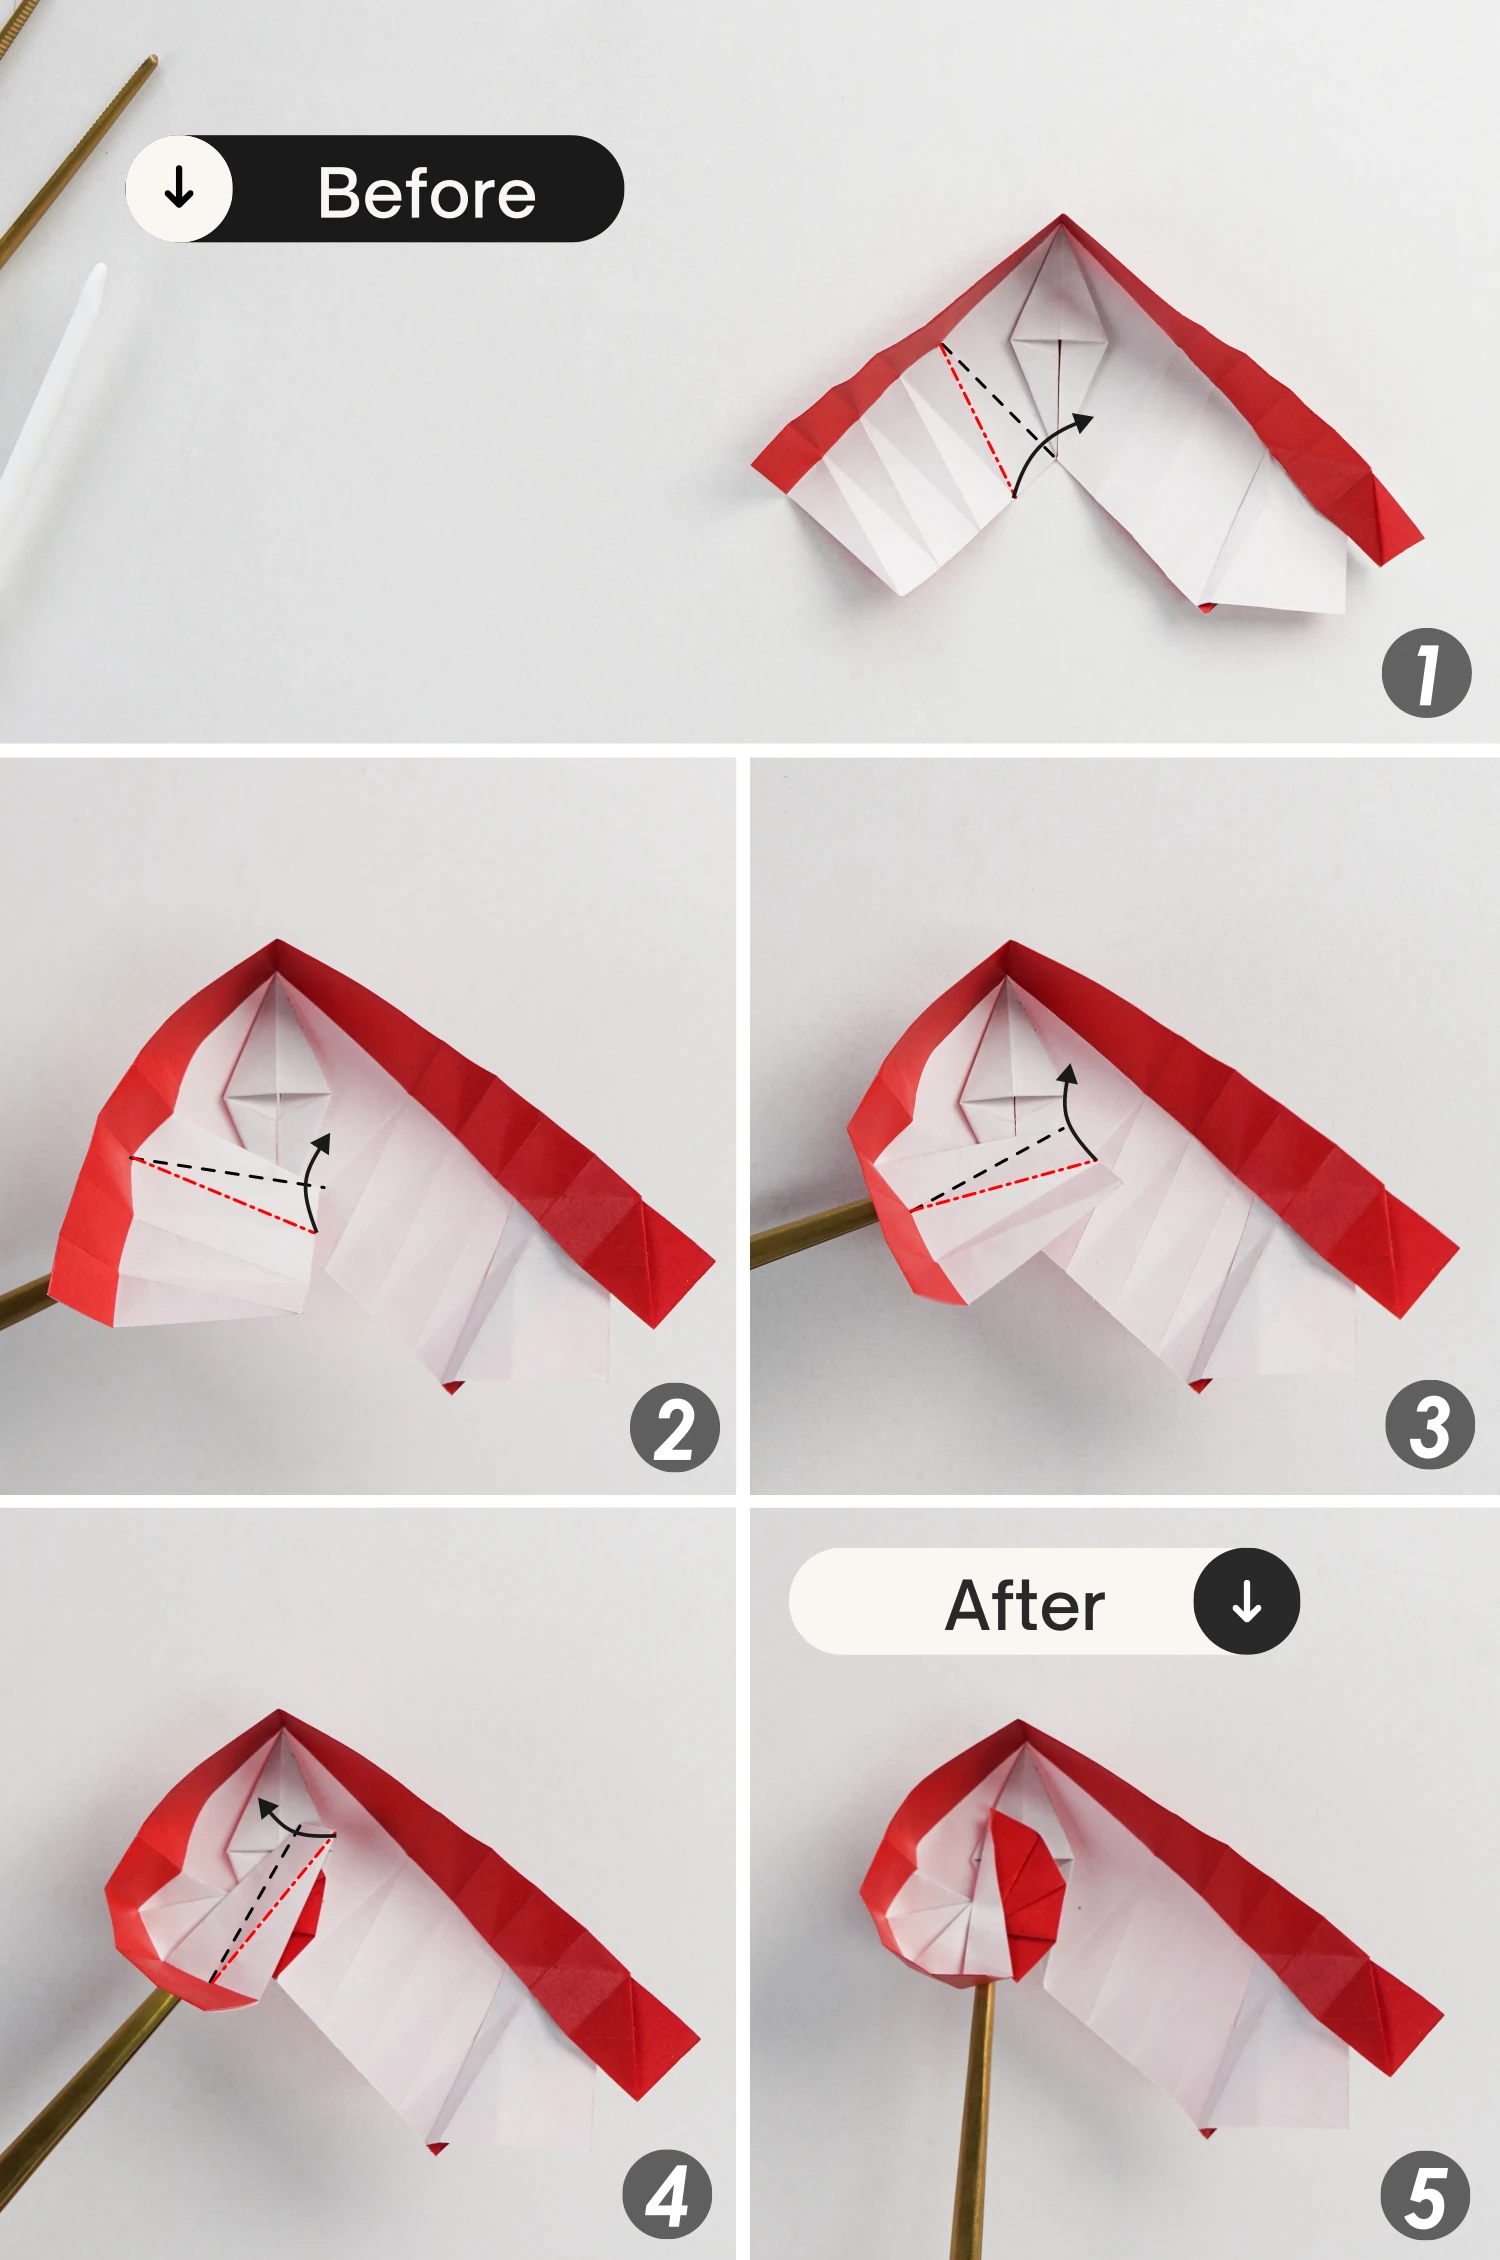
Step 11
Here I draw a back dotted line to get a small triangle at the right, now take the bottom edge of this small triangle, and fold it to the top left along its left edge(the black dotted line). You can fold its left edge in advance to achieve this step quickly.
Finally, flatten it.
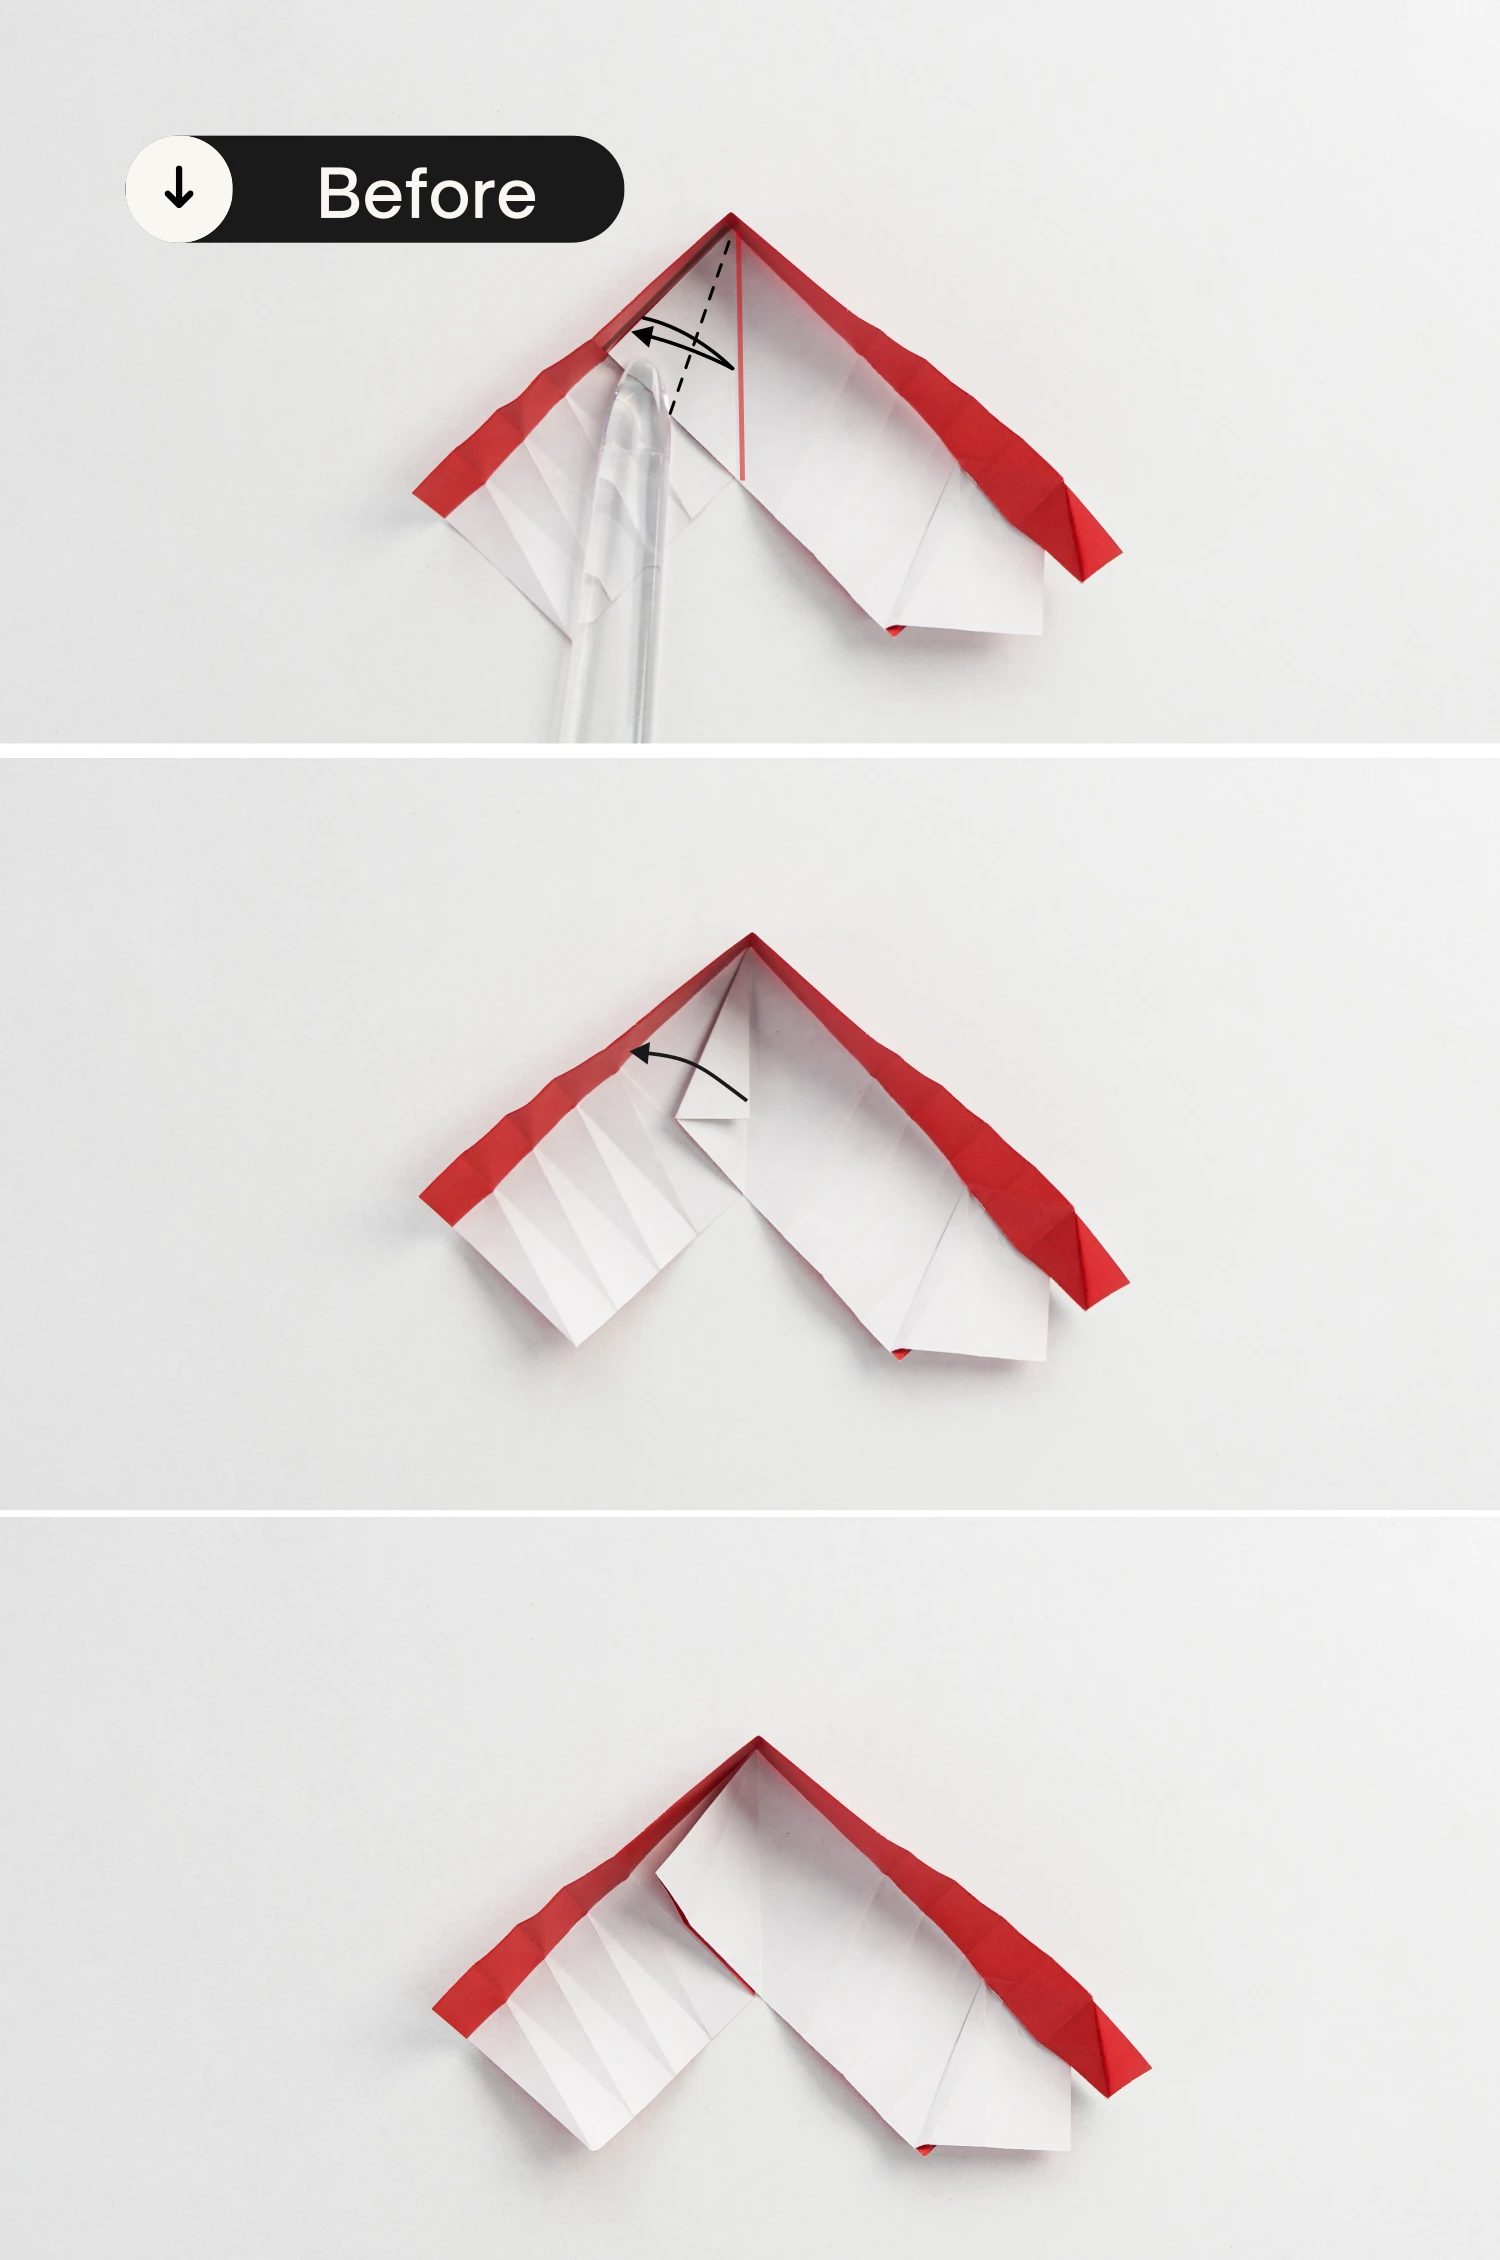
Step 12
Fold the top left corner of the folded part you made in the previous step down along the crease shown by the dotted line.
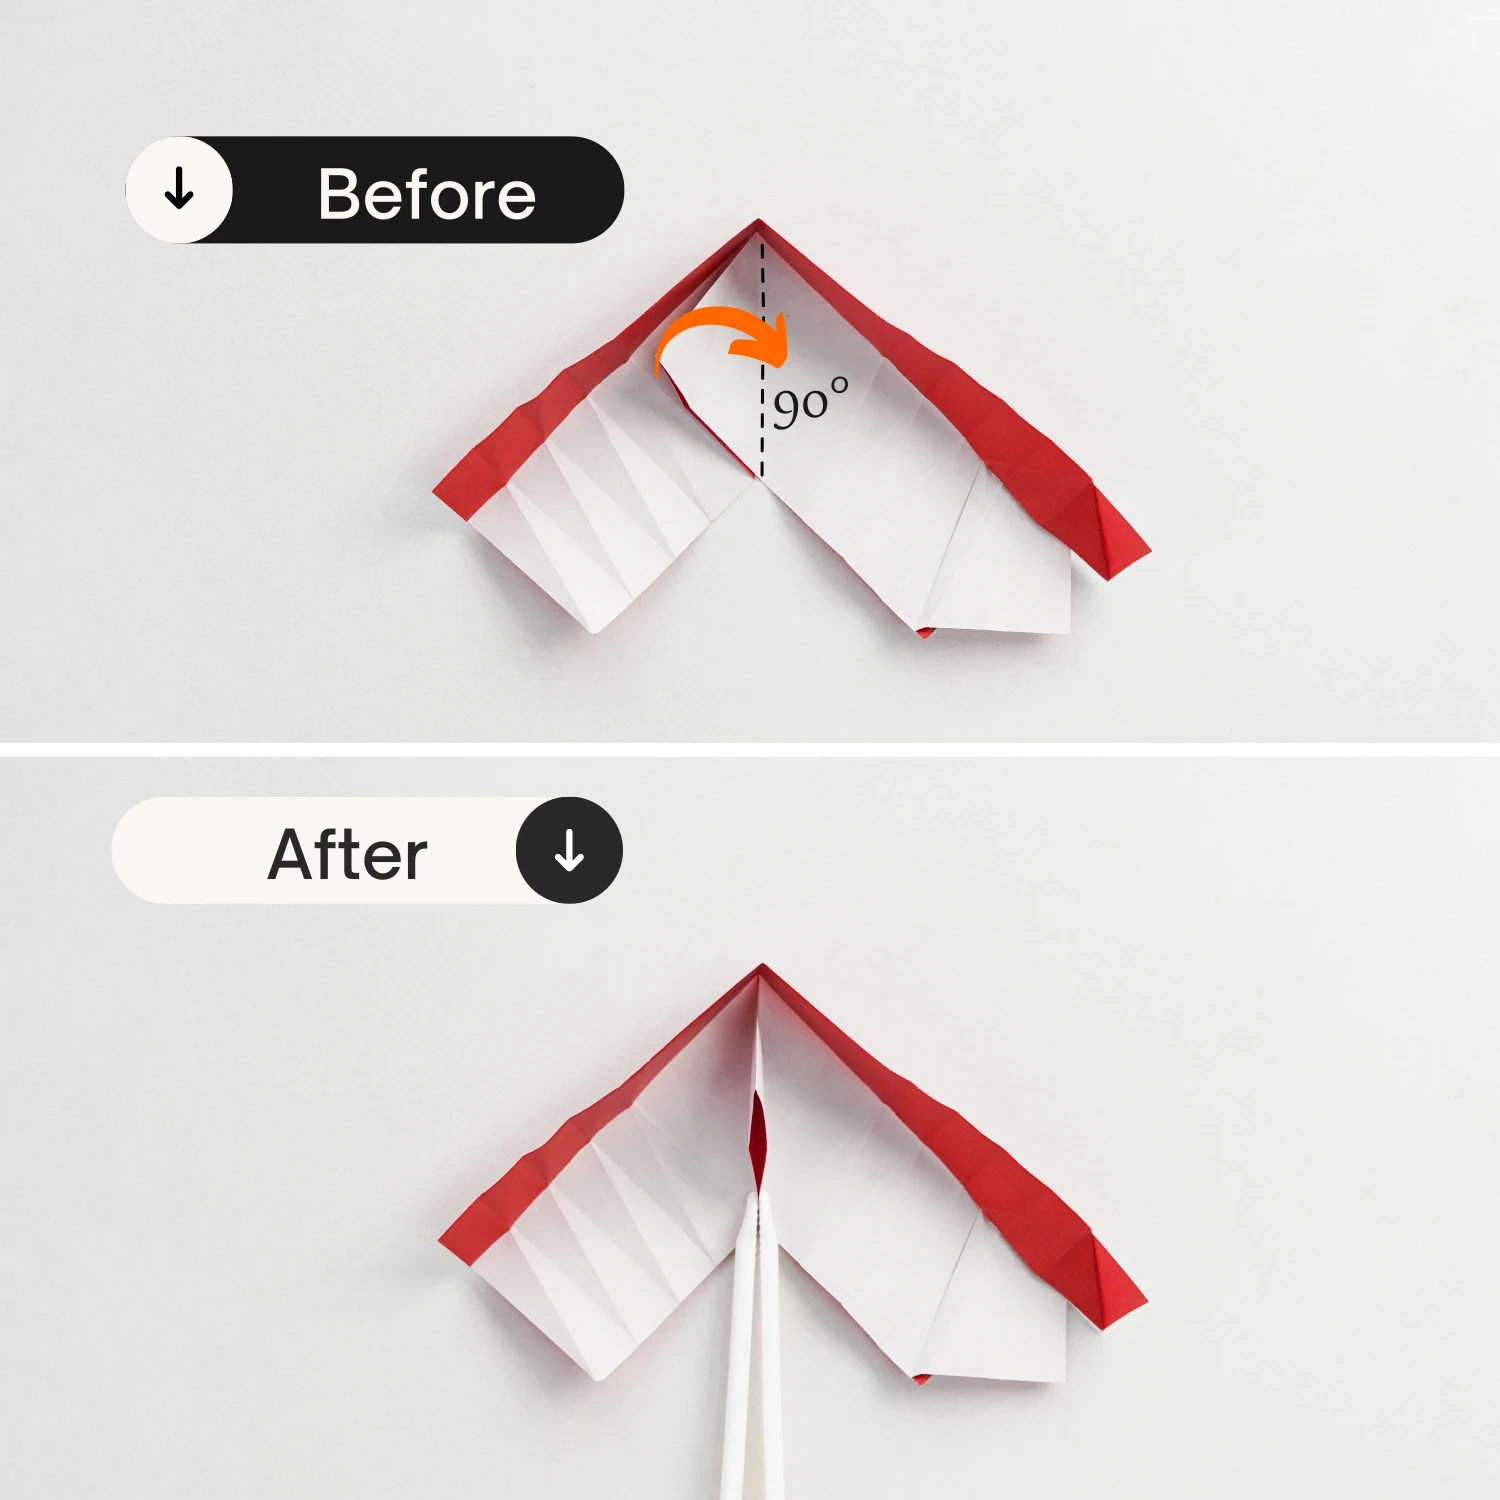
Step 13
Fold the left edge of the model to the right to align with the line vertically extend from the bottom right corner to the top edge.
Step 14
As we can see, the left edge of the model is divided into two parts by the horizontal crease. Take the lower part of the left edge, and fold it up to align with the horizontal crease, creating a triangle.
Step 15
Fold the left edge to the right along the right edge of the triangle you made in the previous step, then unfold it.
Step 16
Unfold the small triangle, then unfold the top layer, getting the shape the same as step 12.
Step 17
Fold the left edge to align with the left vertical crease, crease it well then unfold.
Fold the right edge at the bottom to align with the right vertical crease, crease it well then unfold.

Step 18
Similarly, fold the left edge to align with the crease you made in the previous step, and unfold it.
Repeat this for the right edge.

Step 19
Fold the left edge to the right side again, ensure the crease shown by the black line aligns with the crease shown by the red line, crease it well then unfold.
Repeat this for the right side, ensure the red line aligns with the black line, then unfold it.
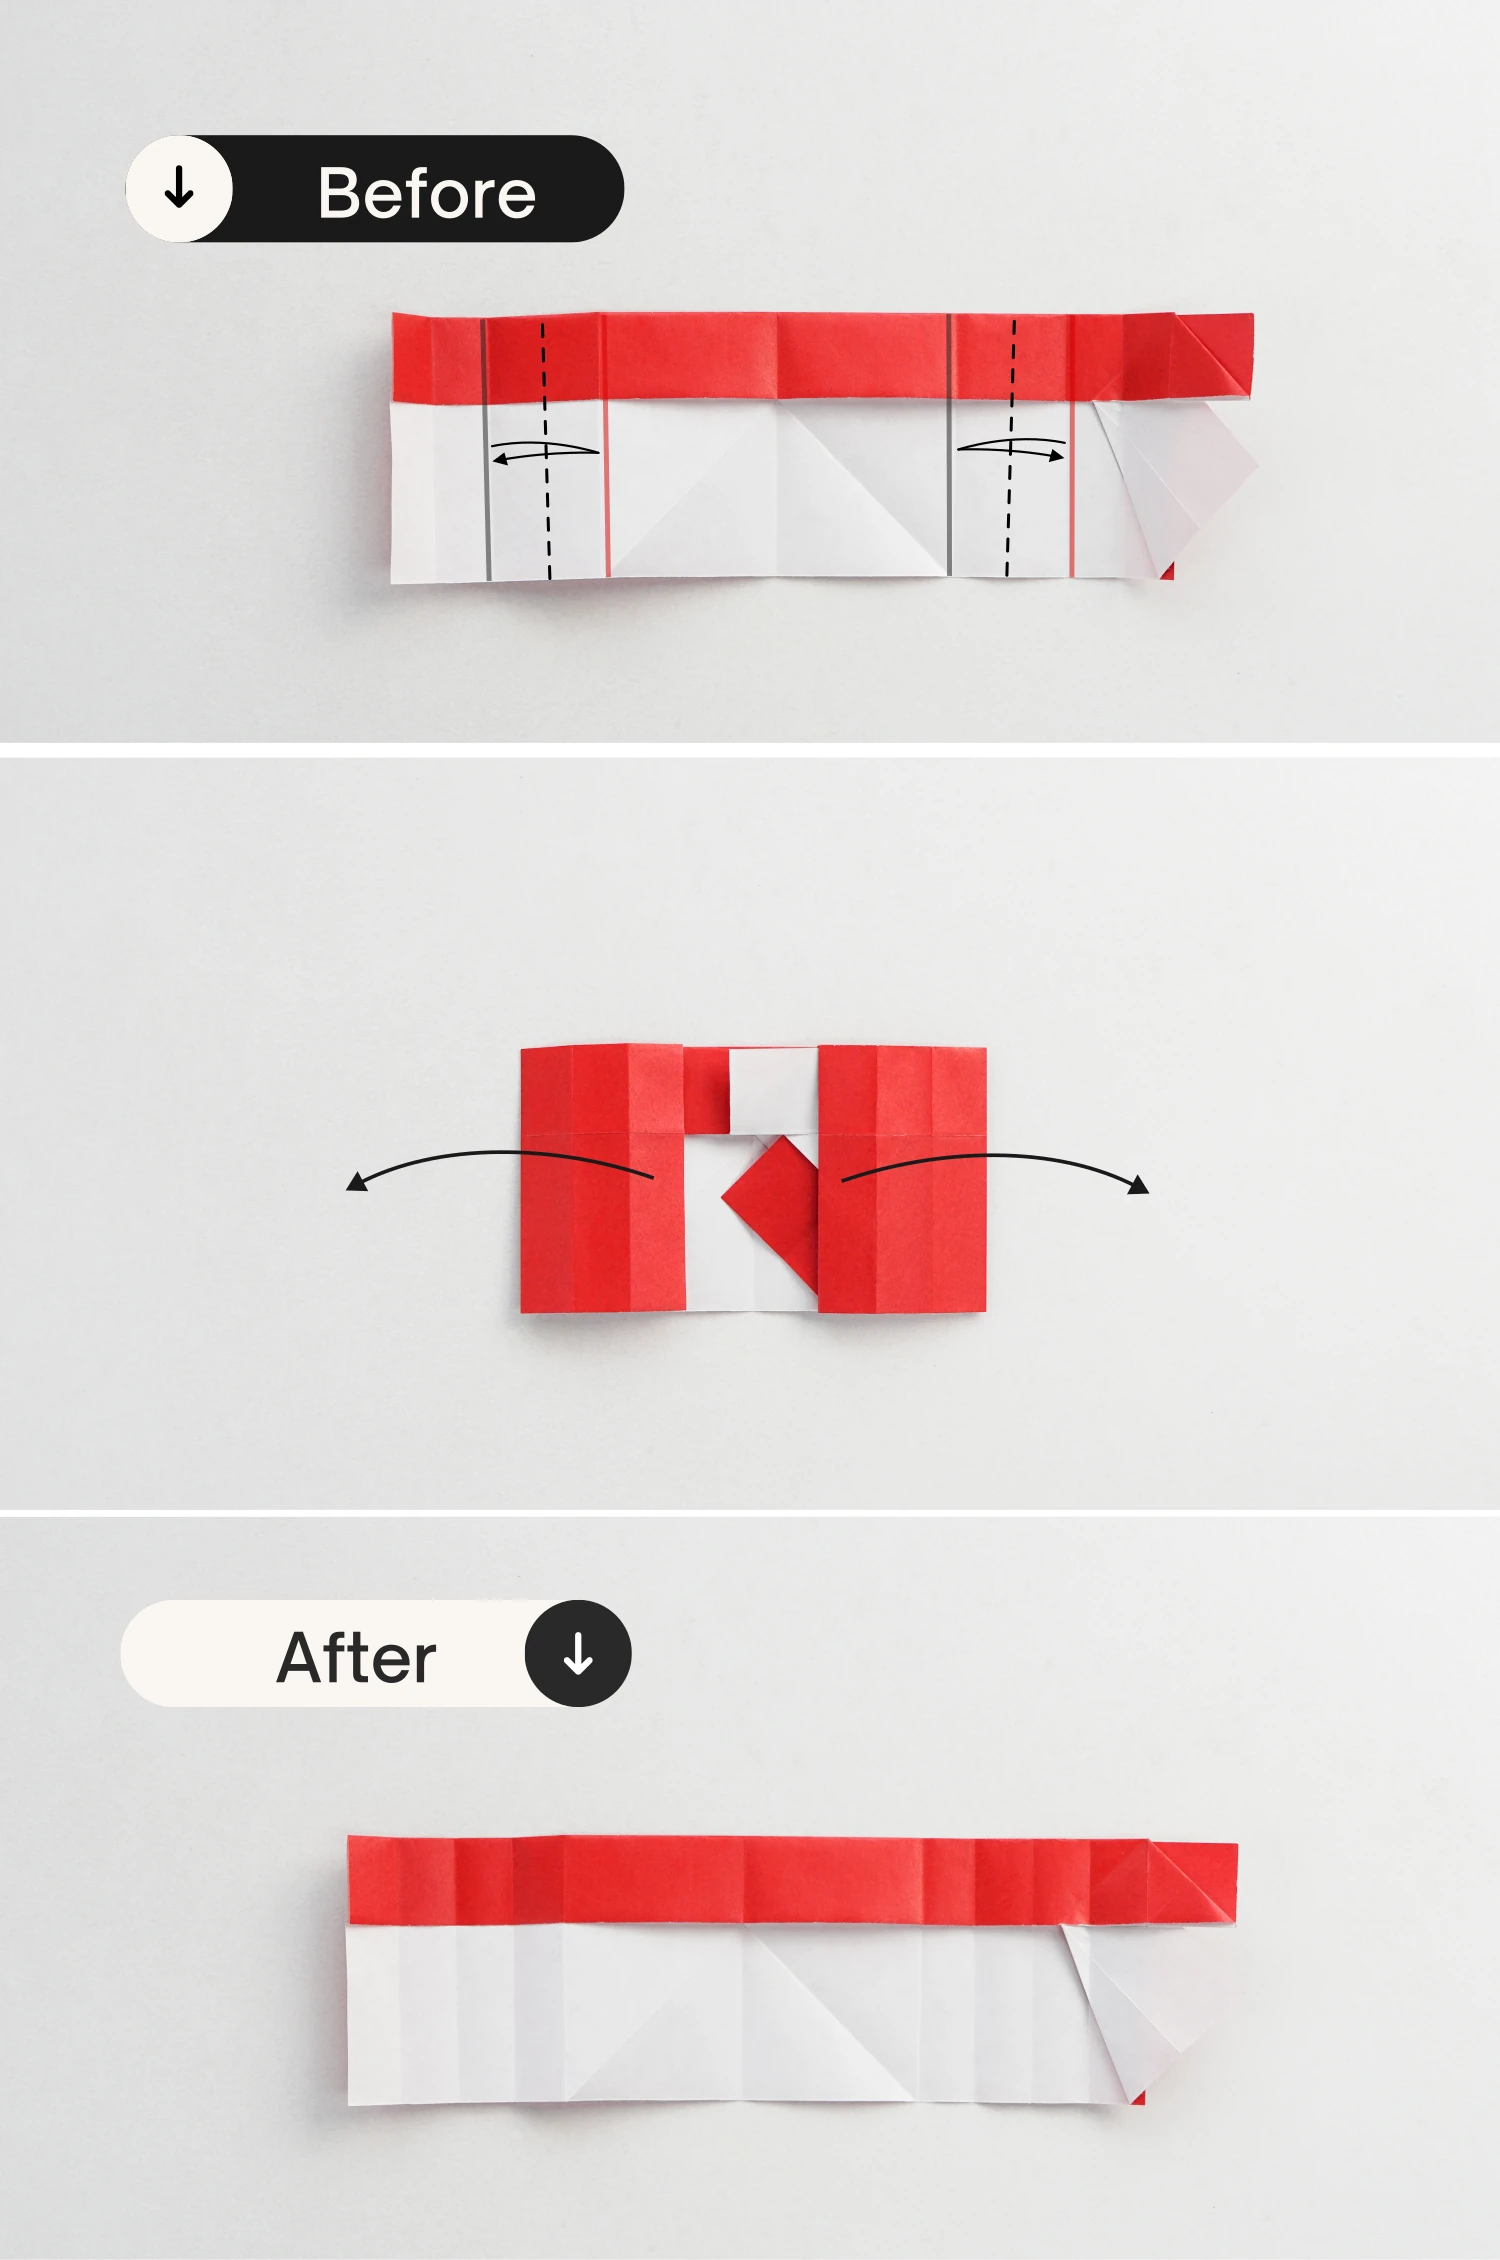
Step 20
Flip the paper over.
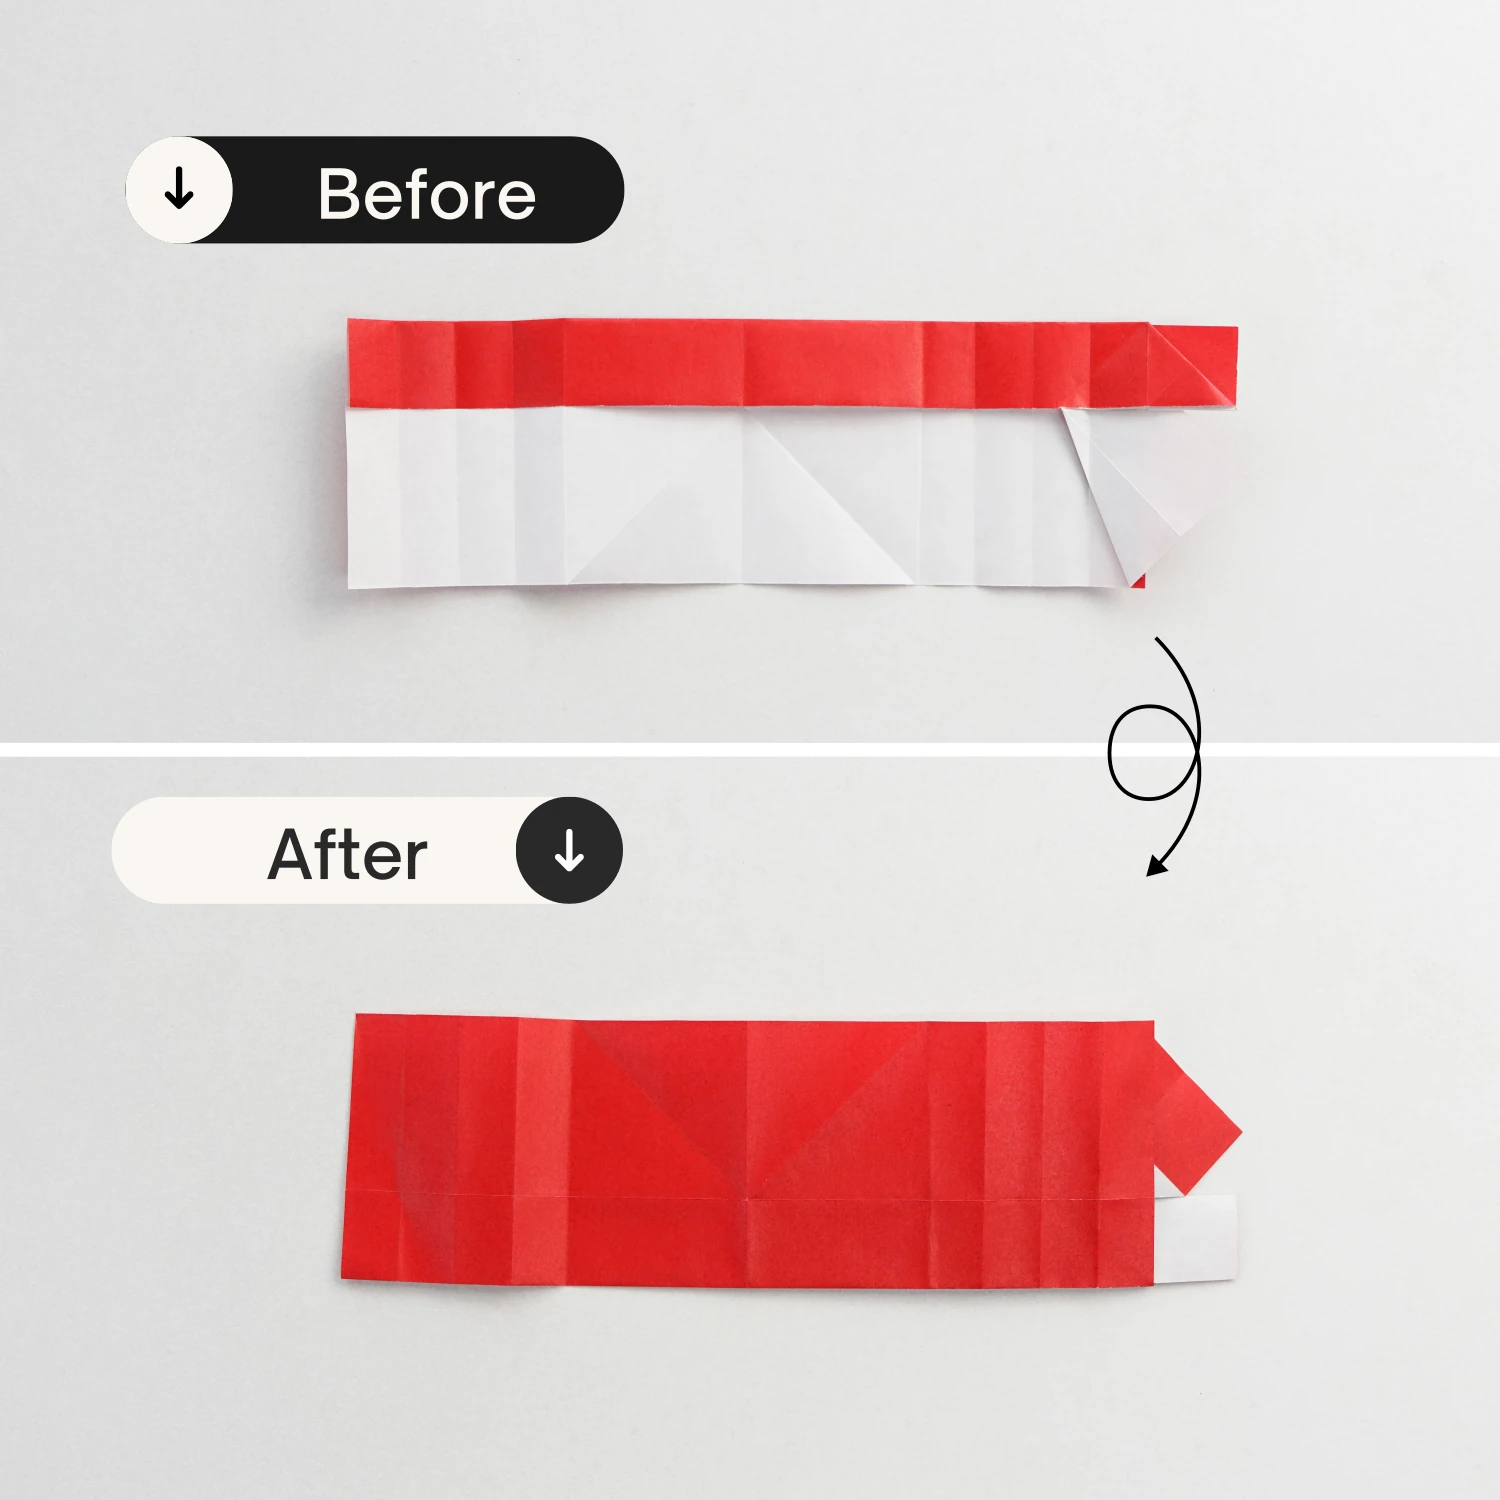
Step 21
The paper is divided into many rectangles by these creases you just made, now fold out a diagonal line from the top left to the bottom right of the top left rectangle.

Step 22
Similarly, fold out the diagonal line from the top left to the bottom right of the second, third and fourth rectangles from the left.
Fold out the diagonal line from the top right to the bottom left of the four rectangles on the right side.
These diagonal creases are very important for the forming of the heart shape, so please be patient and crease them very well.
Step 23
Flip the paper over.
Step 24
Bring up the top red part to make it stand.
Step 25
Take the left and right sides of the paper, and bend the paper downwards to form a standing triangle in the middle created by the existing creases.
Step 26
Press down the triangle to the left.
Step 27
Fold the top left edge of the triangle to align with the right edge, crease it well then unfold.
Step 28
Make the triangle stand again.
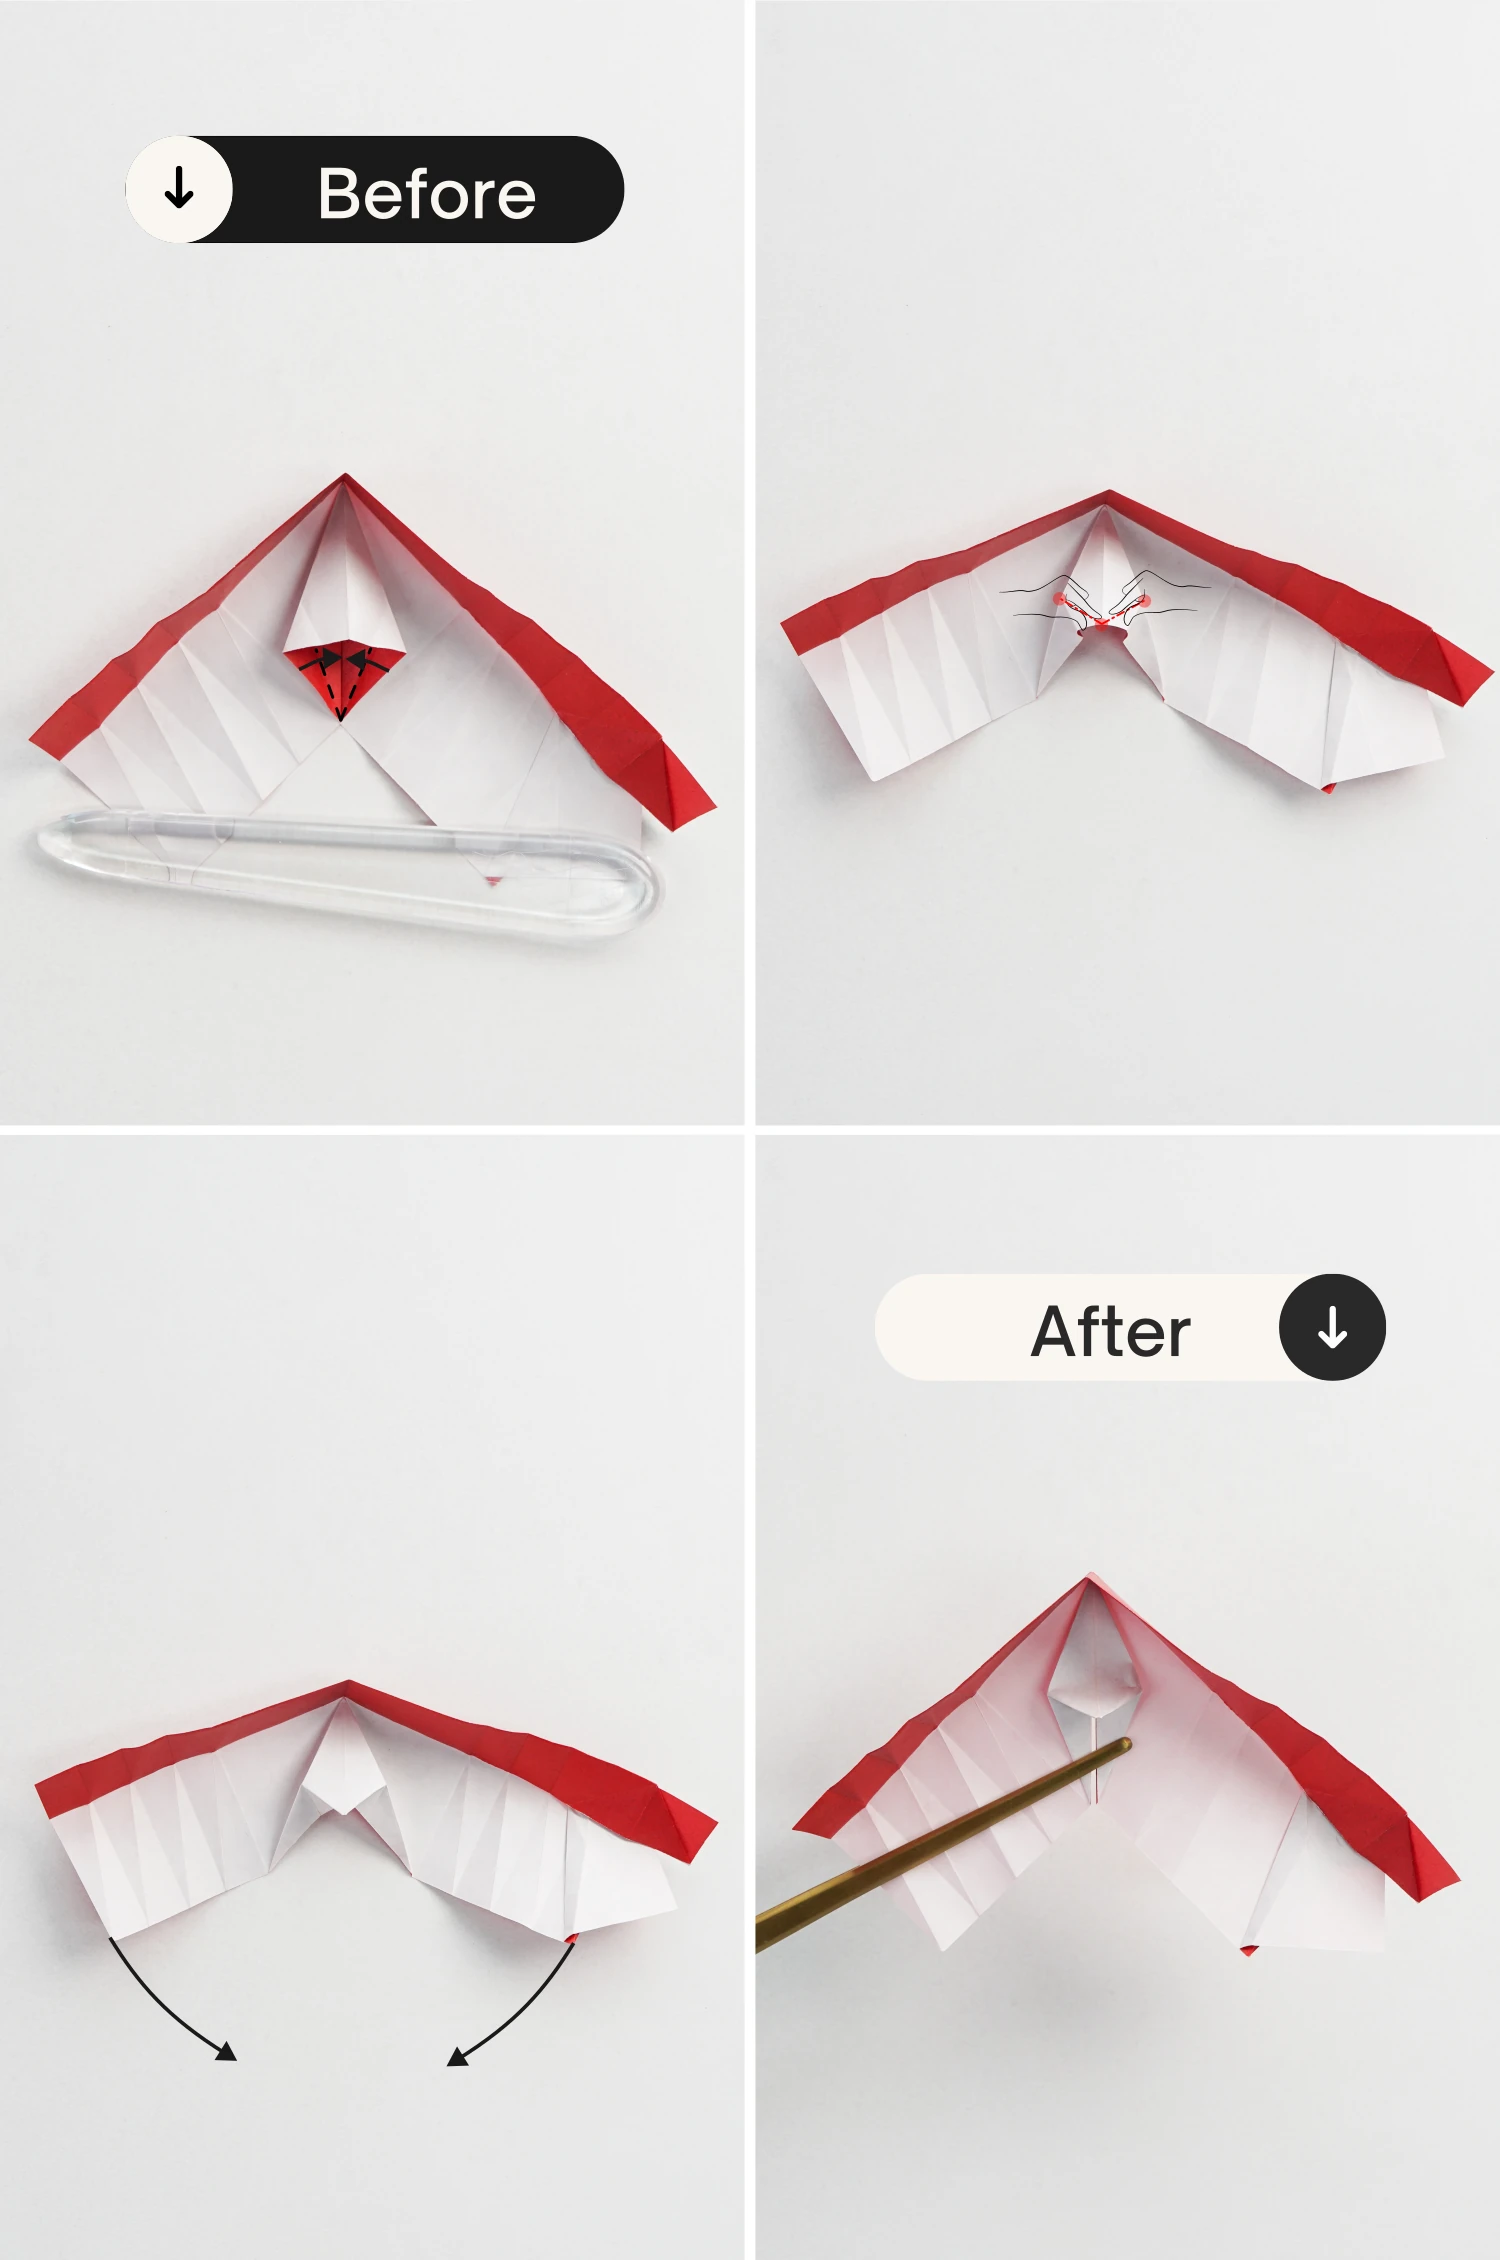
Step 29
Open this triangle and press it down along the crease you made in step 27.
Step 30
Fold the bottom left and bottom right edges of the center flap to align with its middle vertical crease, crease them well, and unfold.
Step 31
Slightly open the center corner, fold its bottom left and right edges to the center.
Pinch up the left and right sides and close the corner, getting a small corner.
Step 32
Fold the small triangle up then unfold it.

Step 33
Open the corner, and fold the small triangle backward along the crease you made in the previous step, then close the corner.
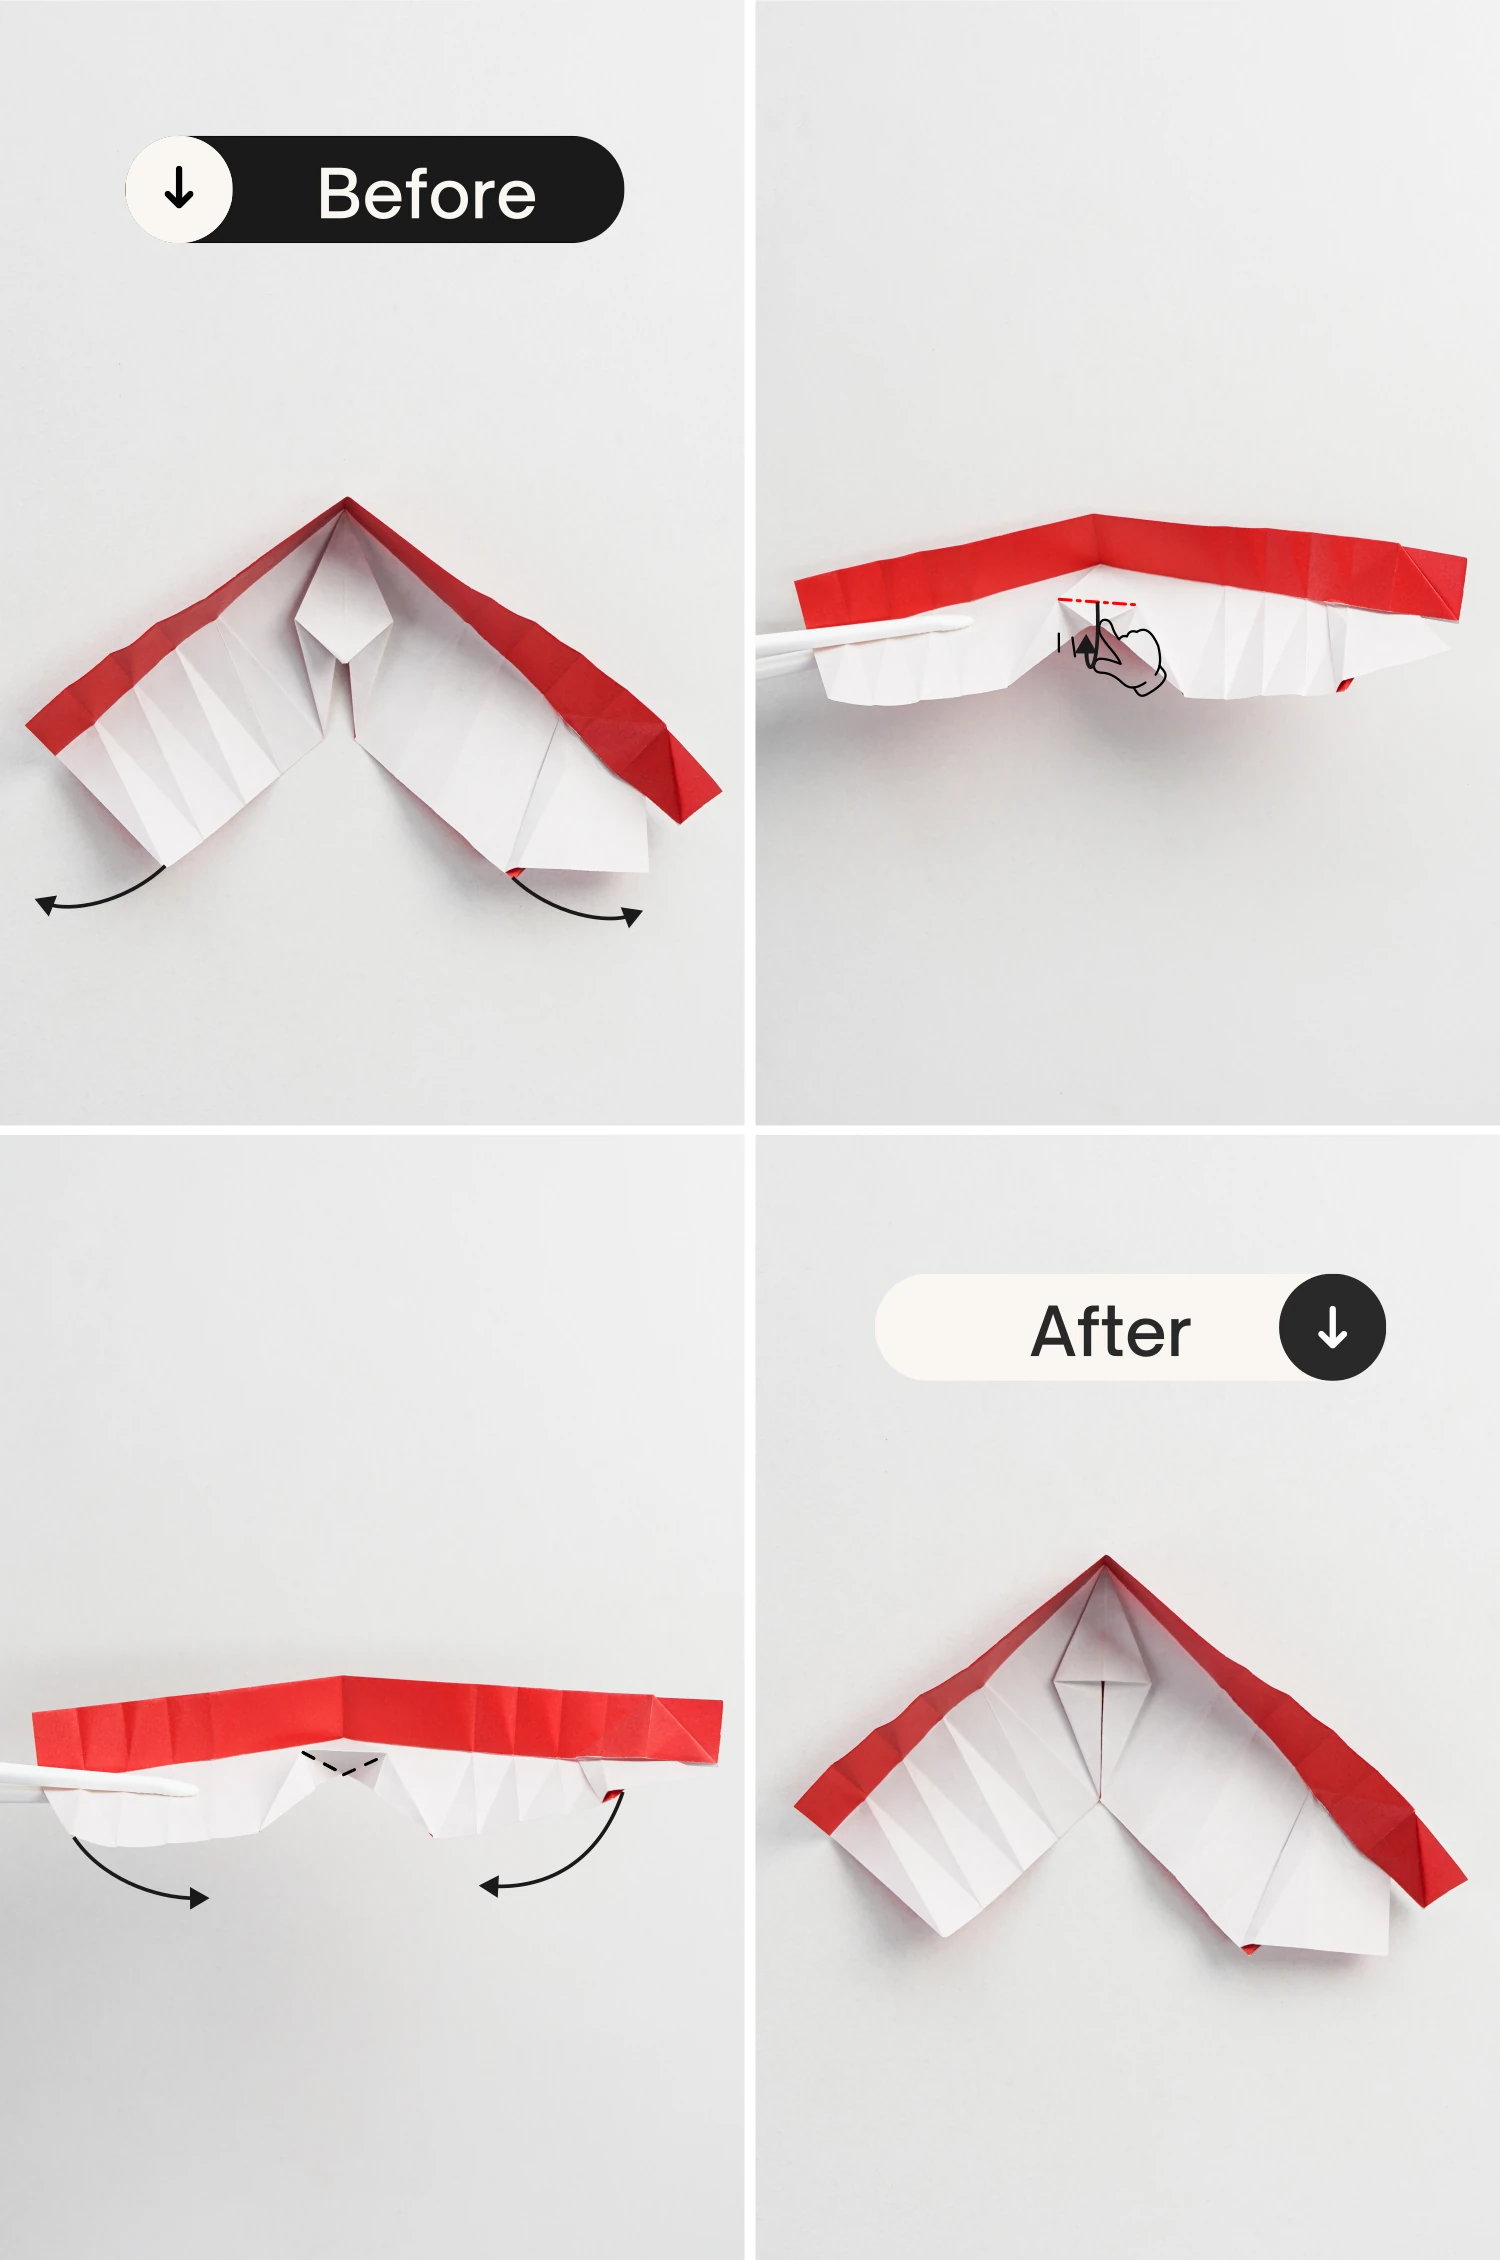
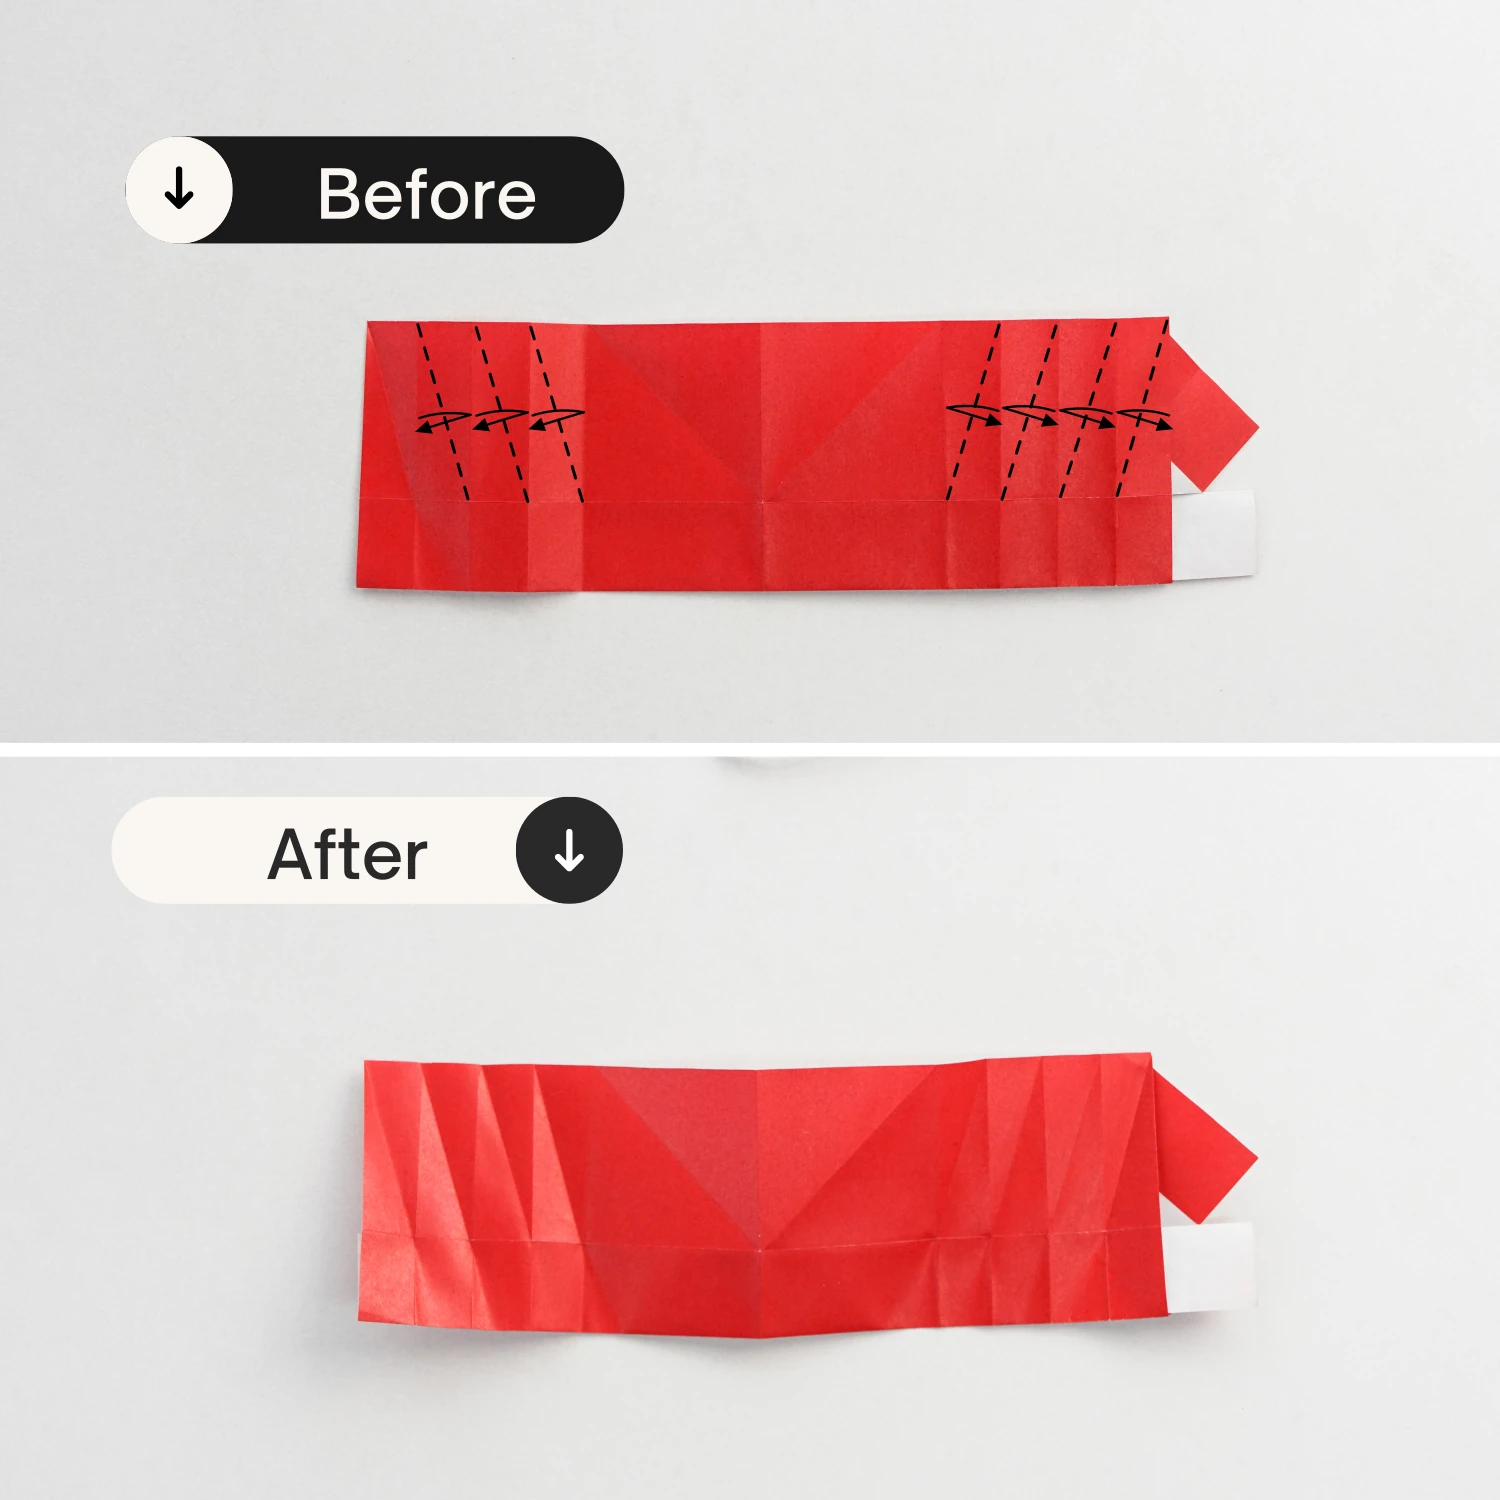
Step 34
Fold the diagonal crease shown by the red dotted line to the right along the crease shown by the black line.
Fold the remaining three diagonal creases you made at the beginning to the right in the same way.
Step 35
Fold the tips a little or just cut it and tuck it into the pocket under it. If you don’t fold or cut it, it will be stuck and hard to tuck.
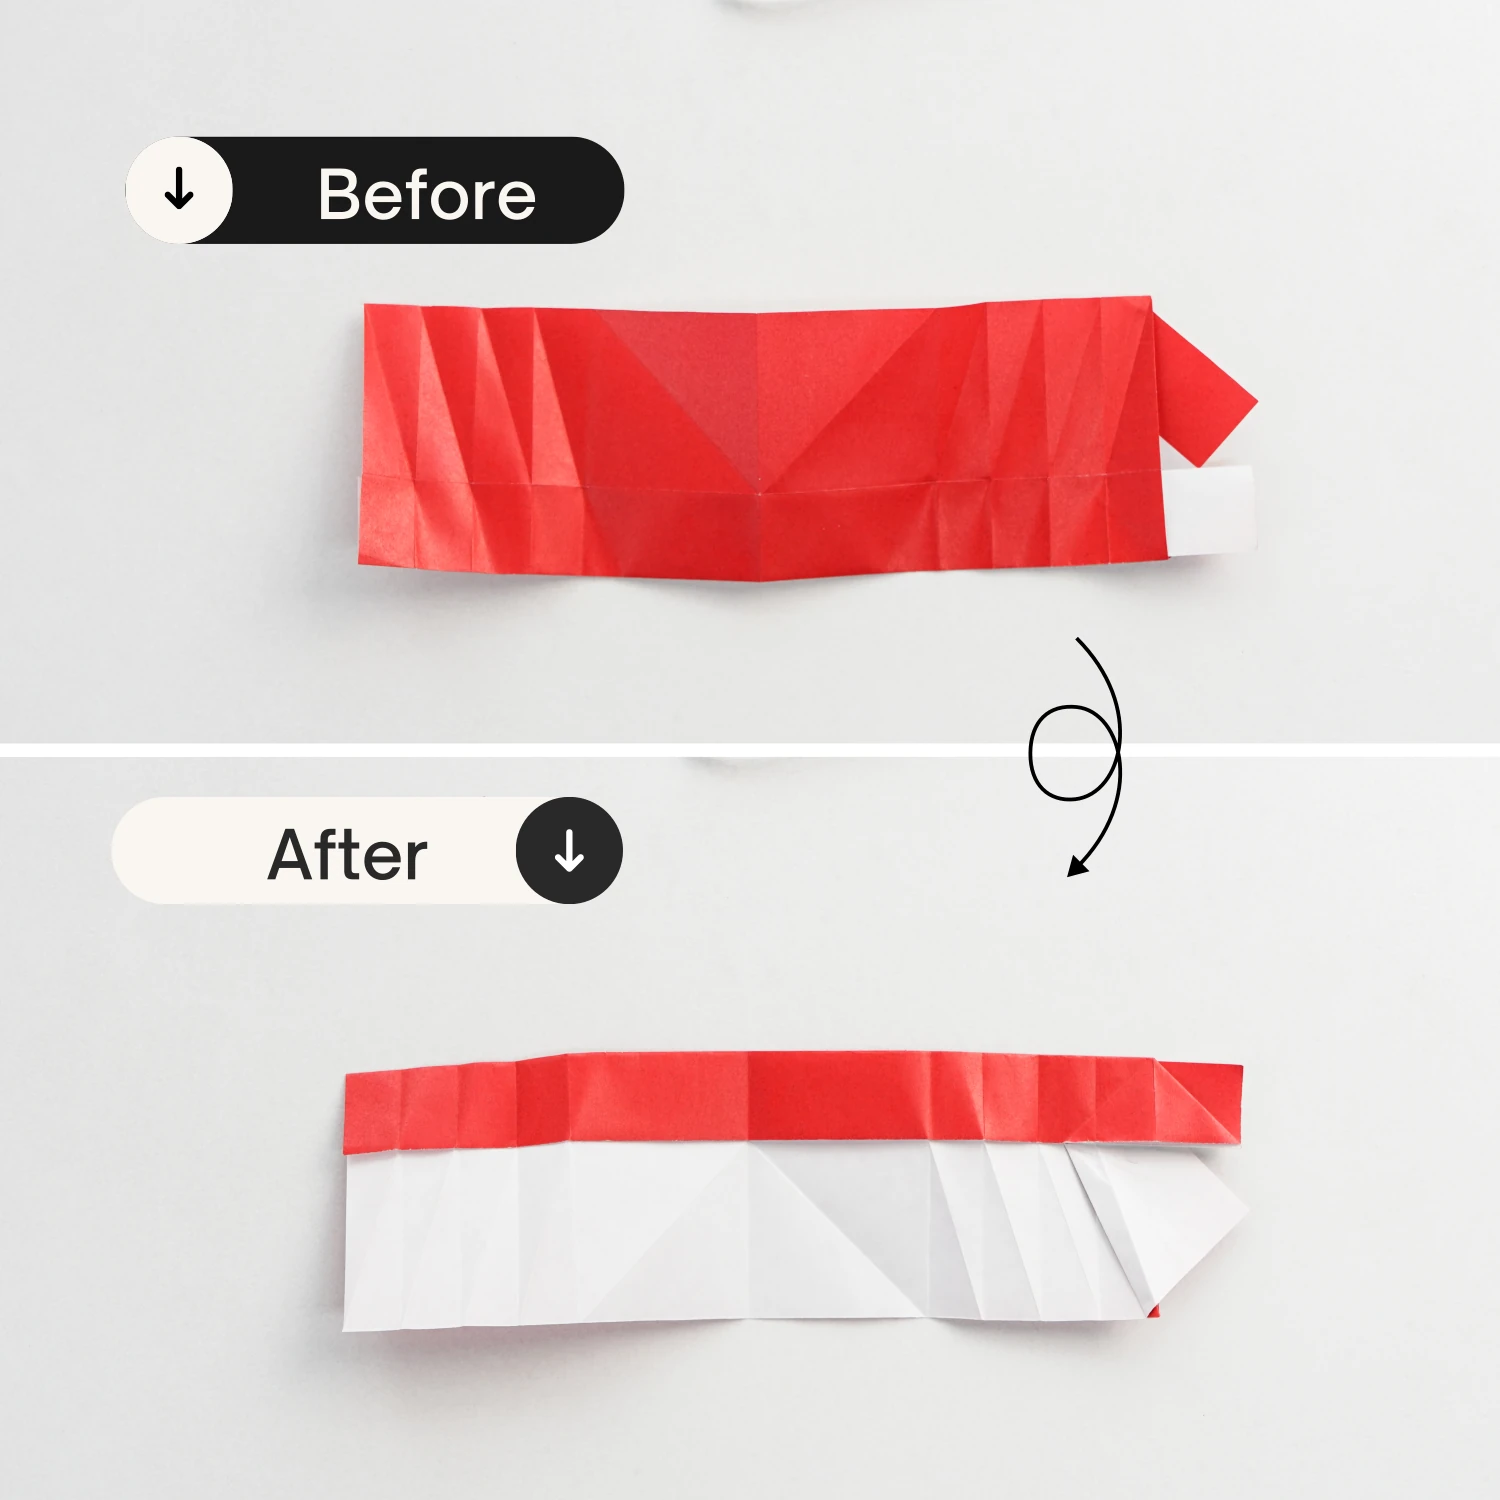
Step 36
Repeat step 34 for the right side, fold the four diagonal creases shown by the the dotted lines to the left along the creases shown by the black dotted lines in turn. You will get a shape like the fifth picture below if you do so.
Step 37
Similarly, fold the small tip a little or just cut it, then tuck it into the pocket under it, as you did in step 35.
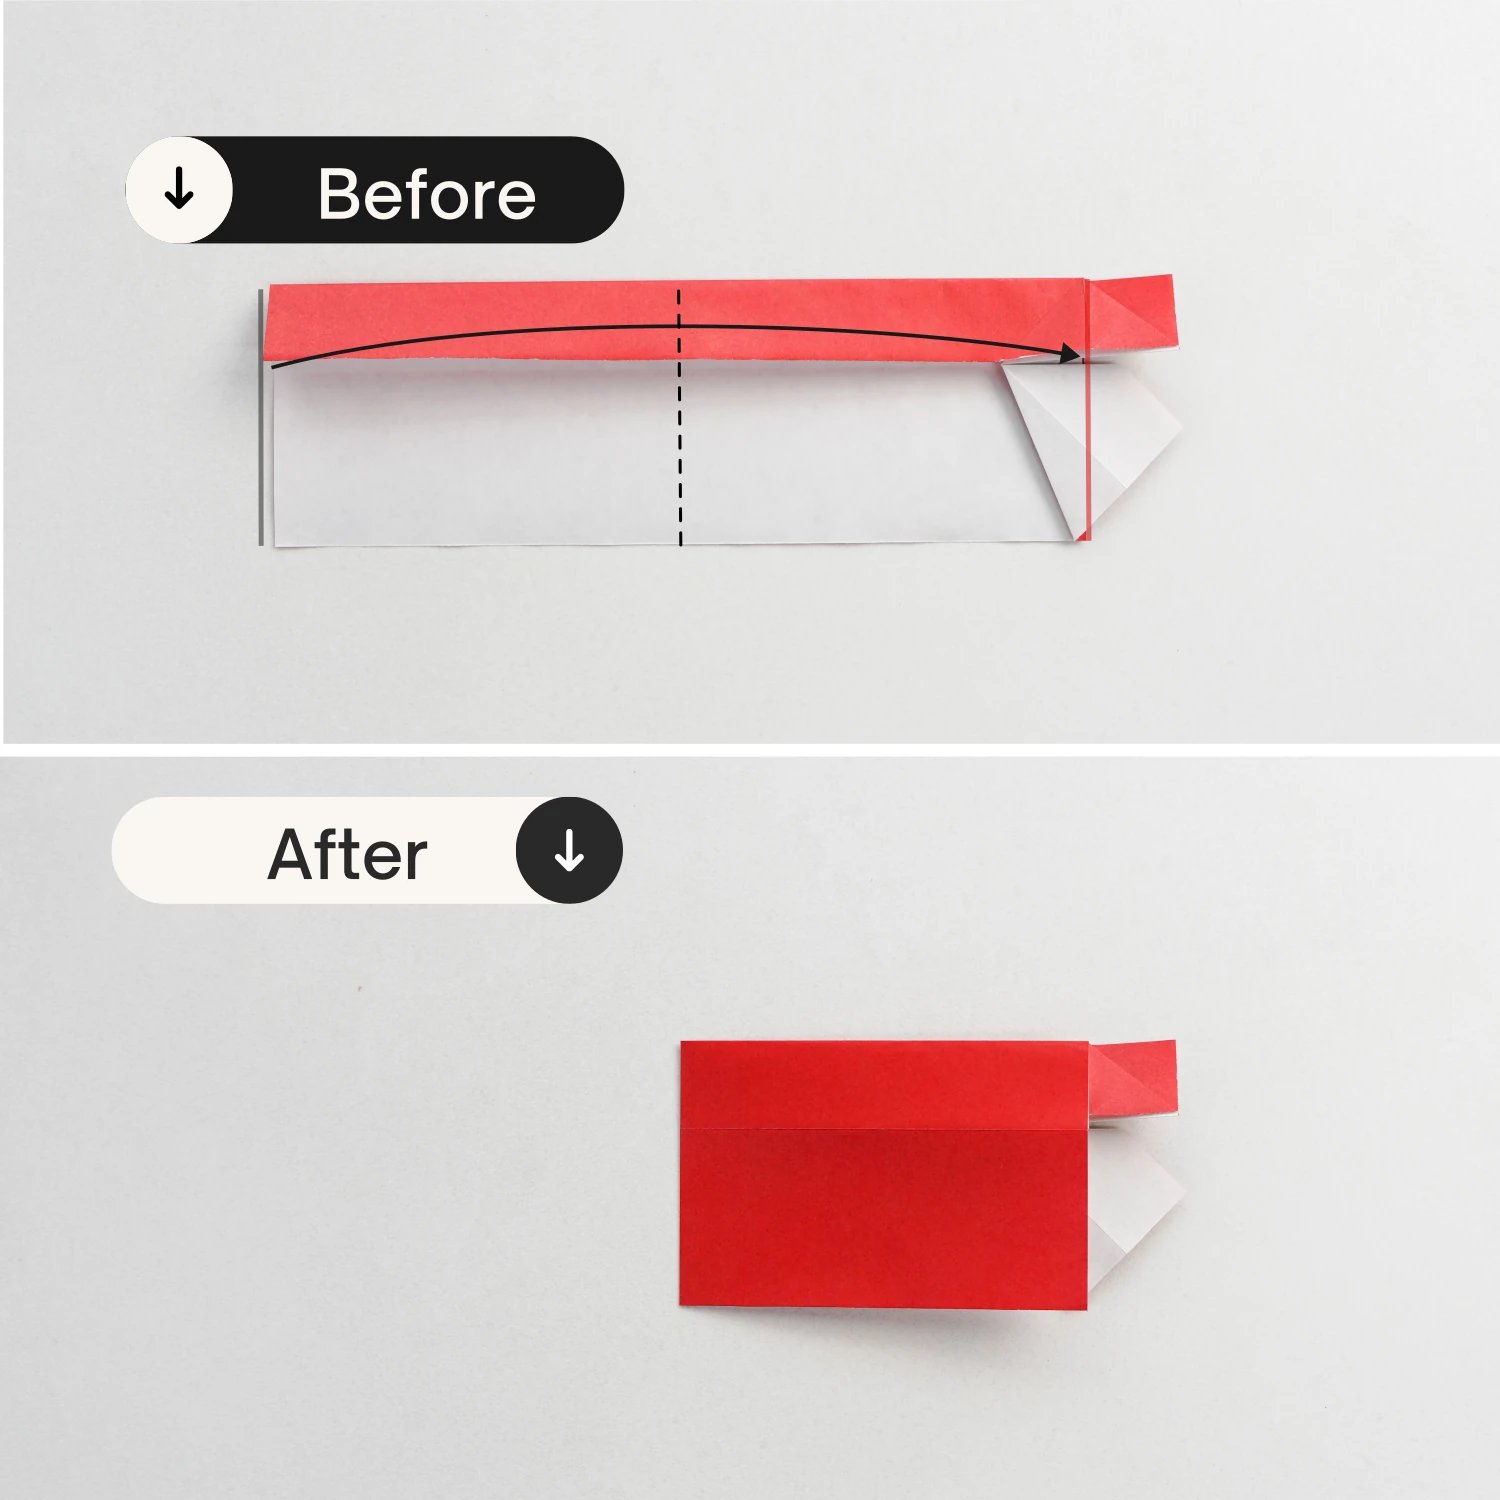
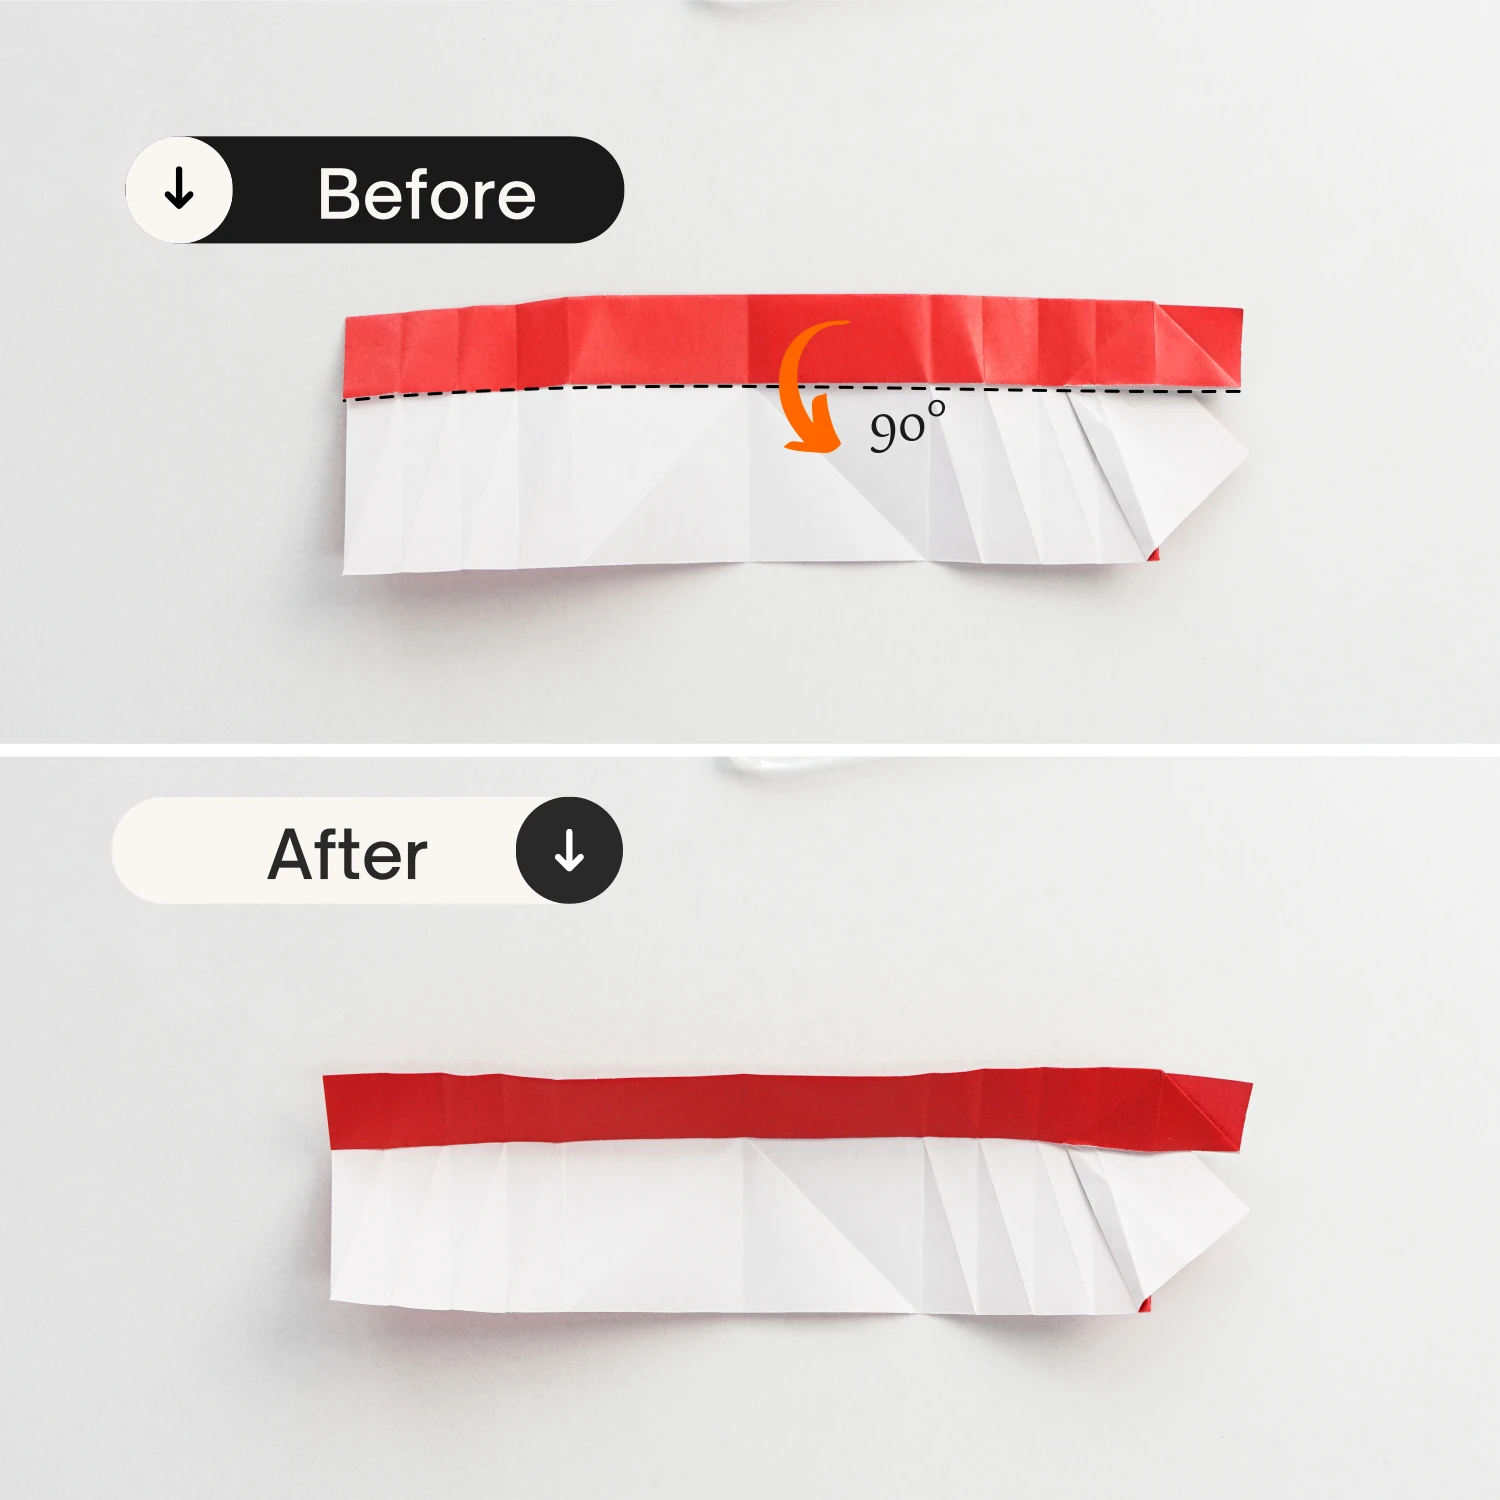
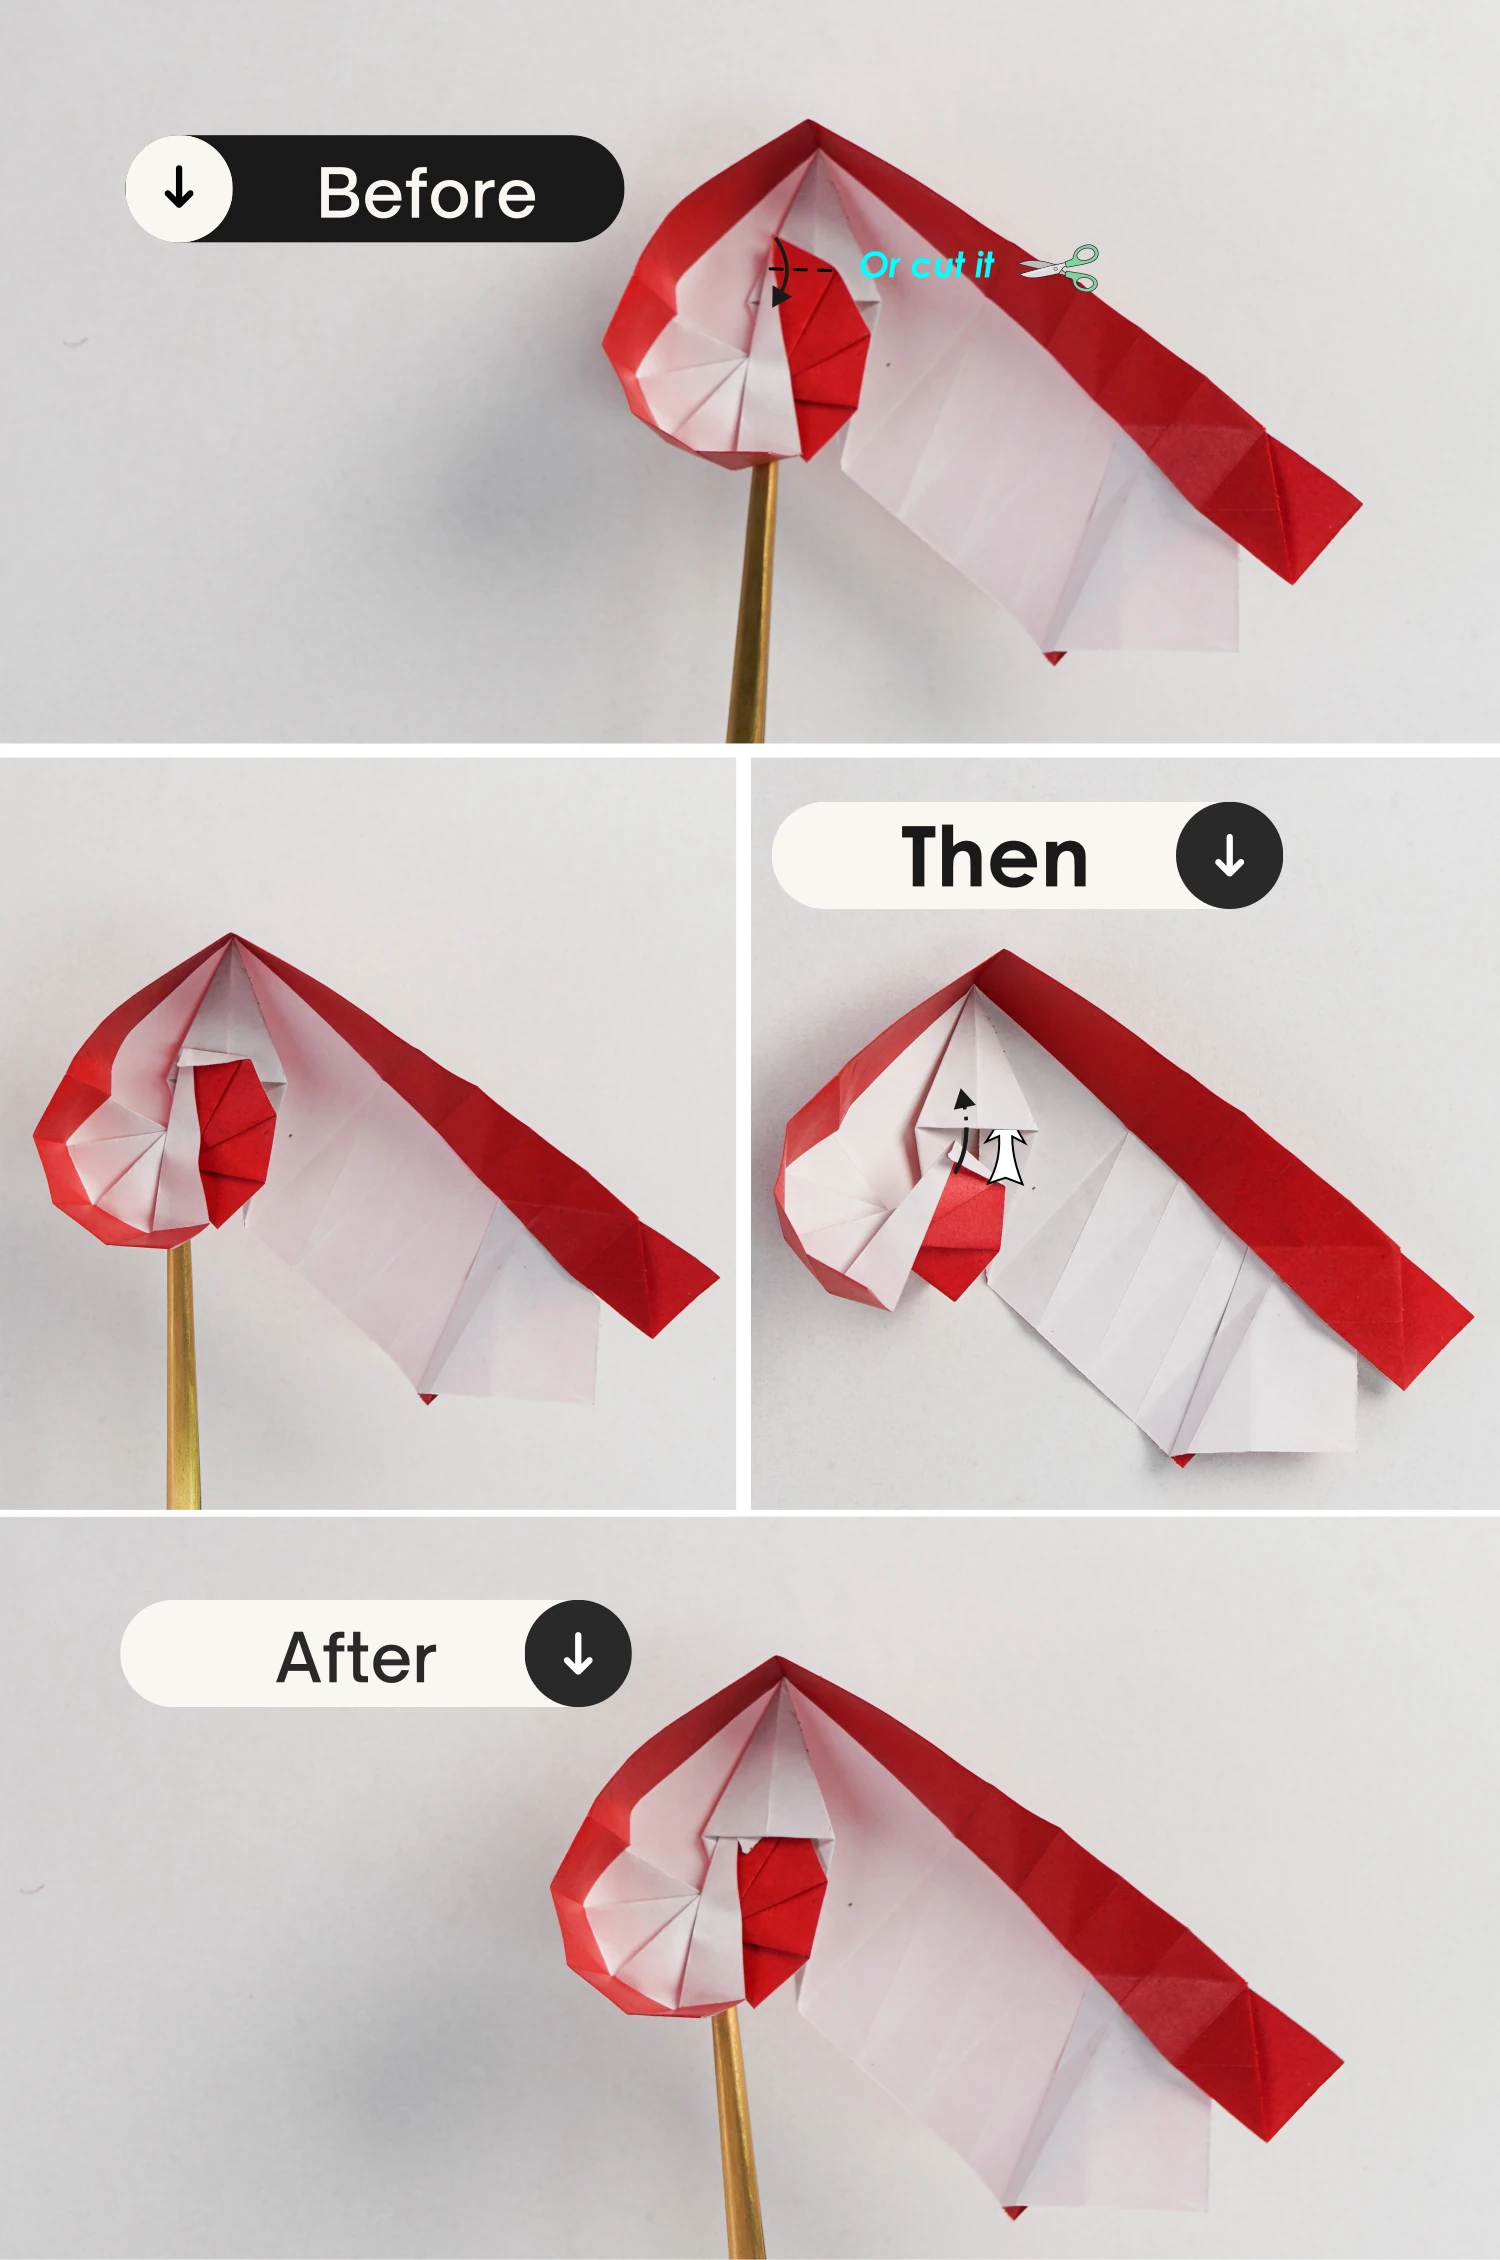
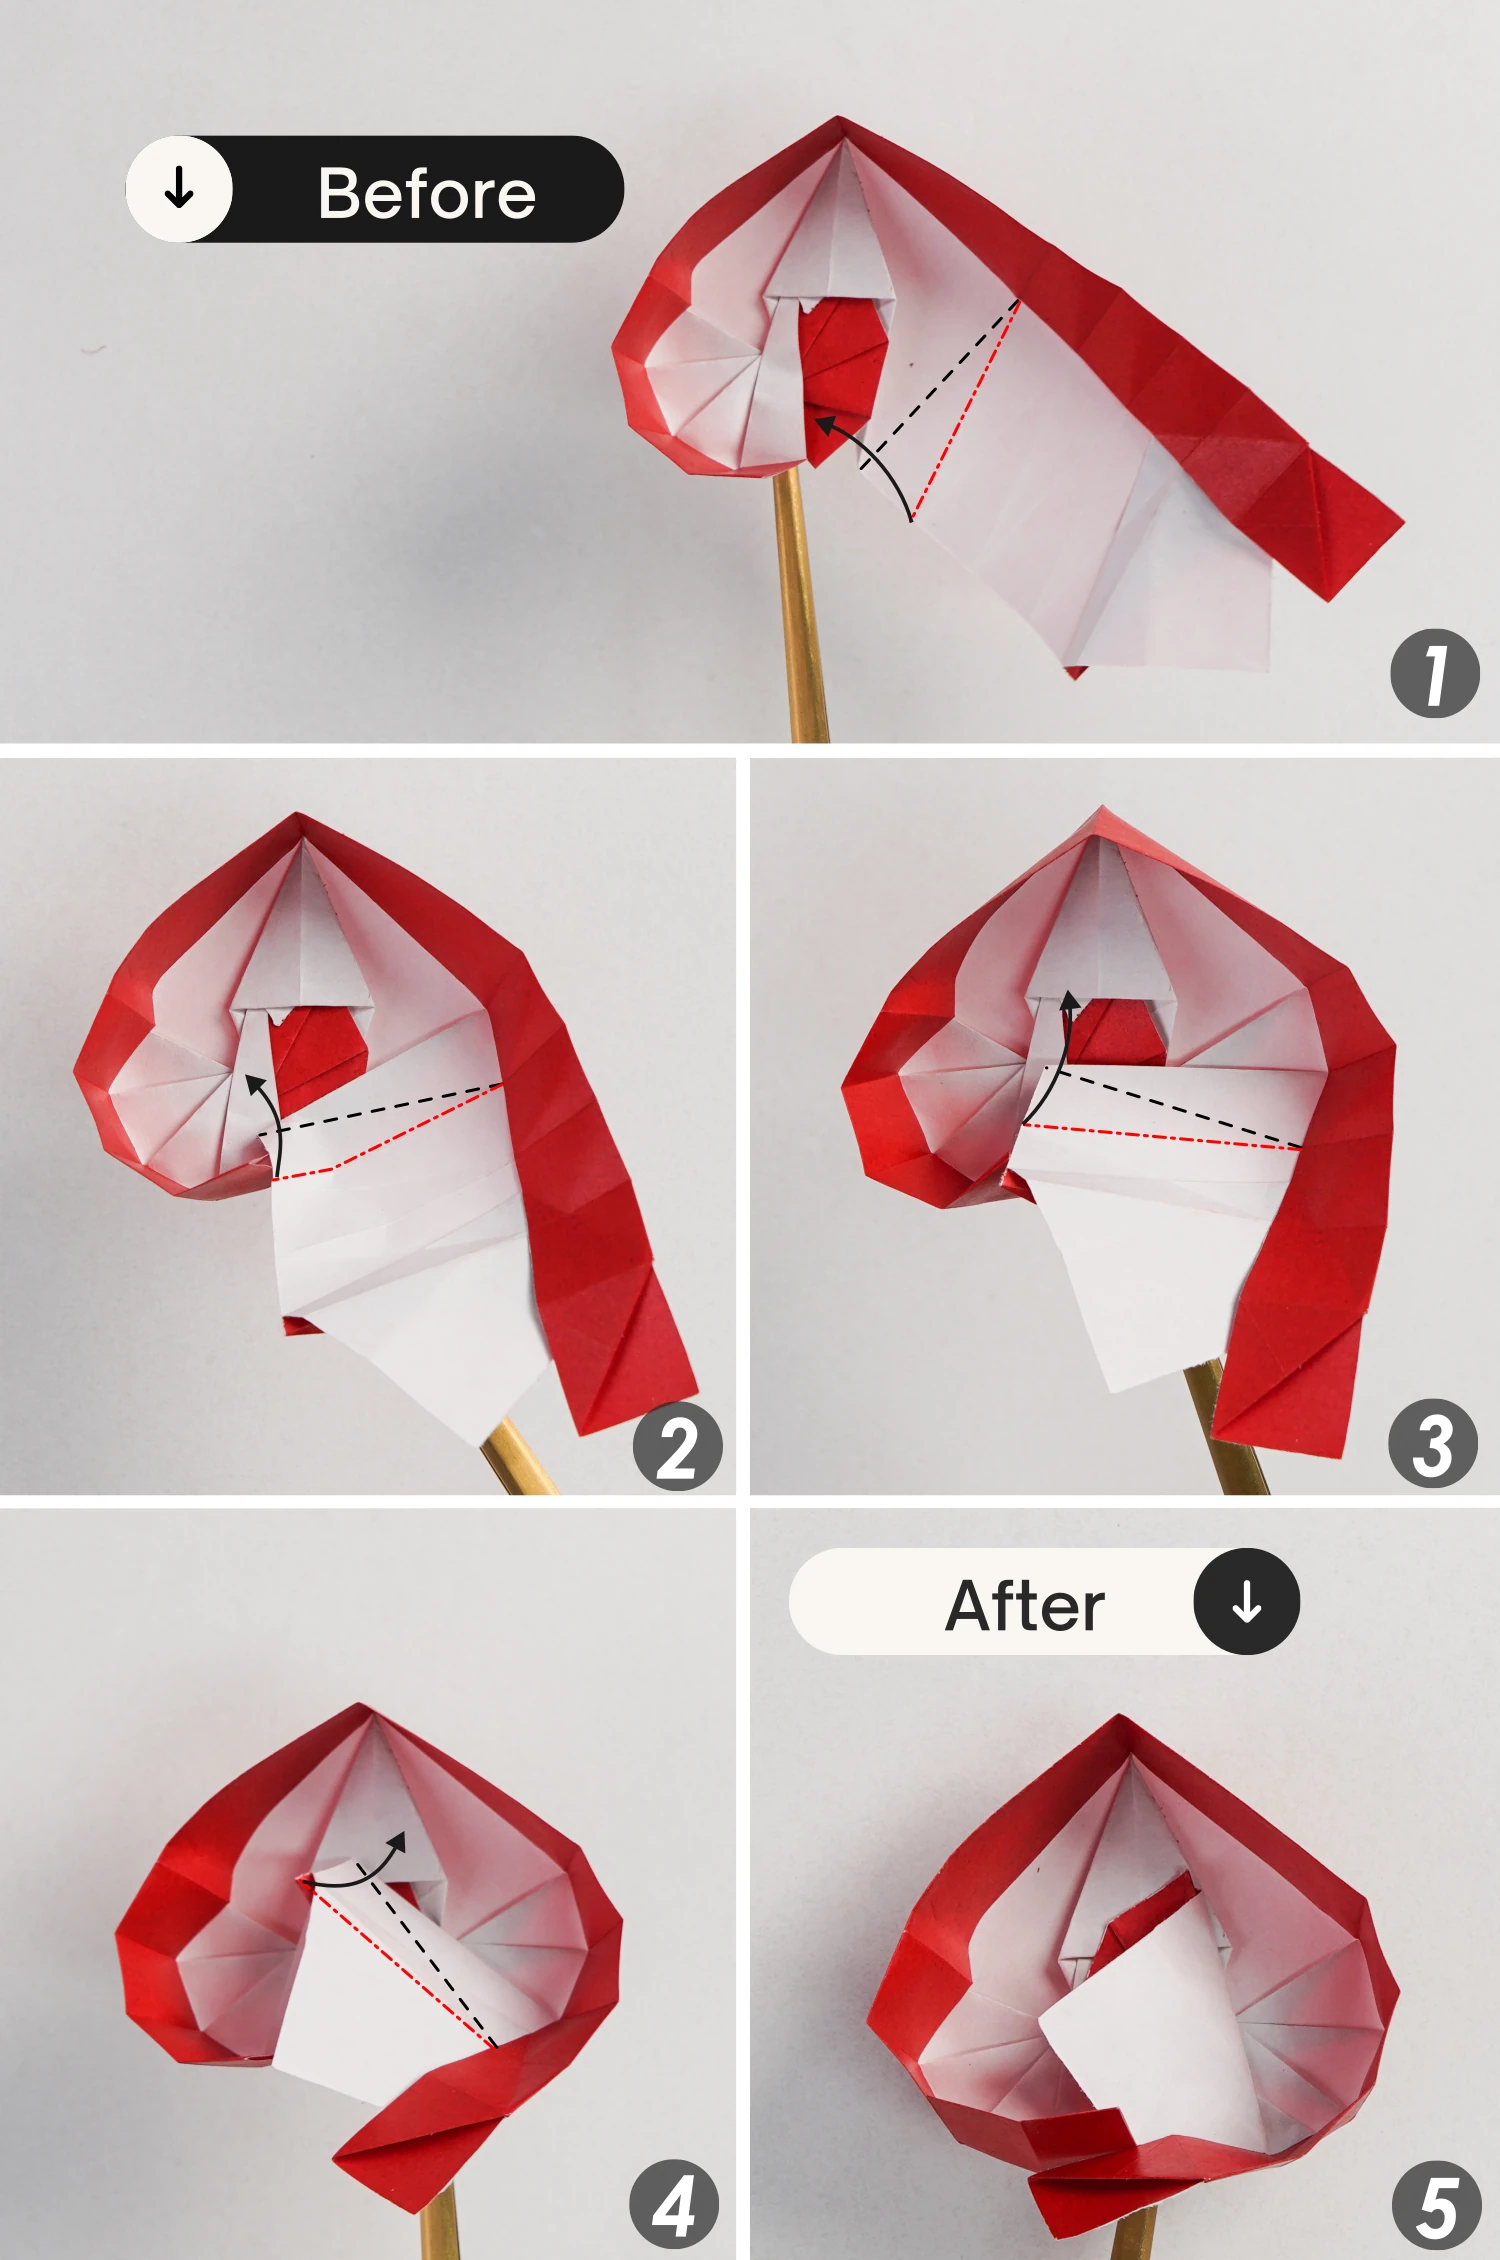
Step 38
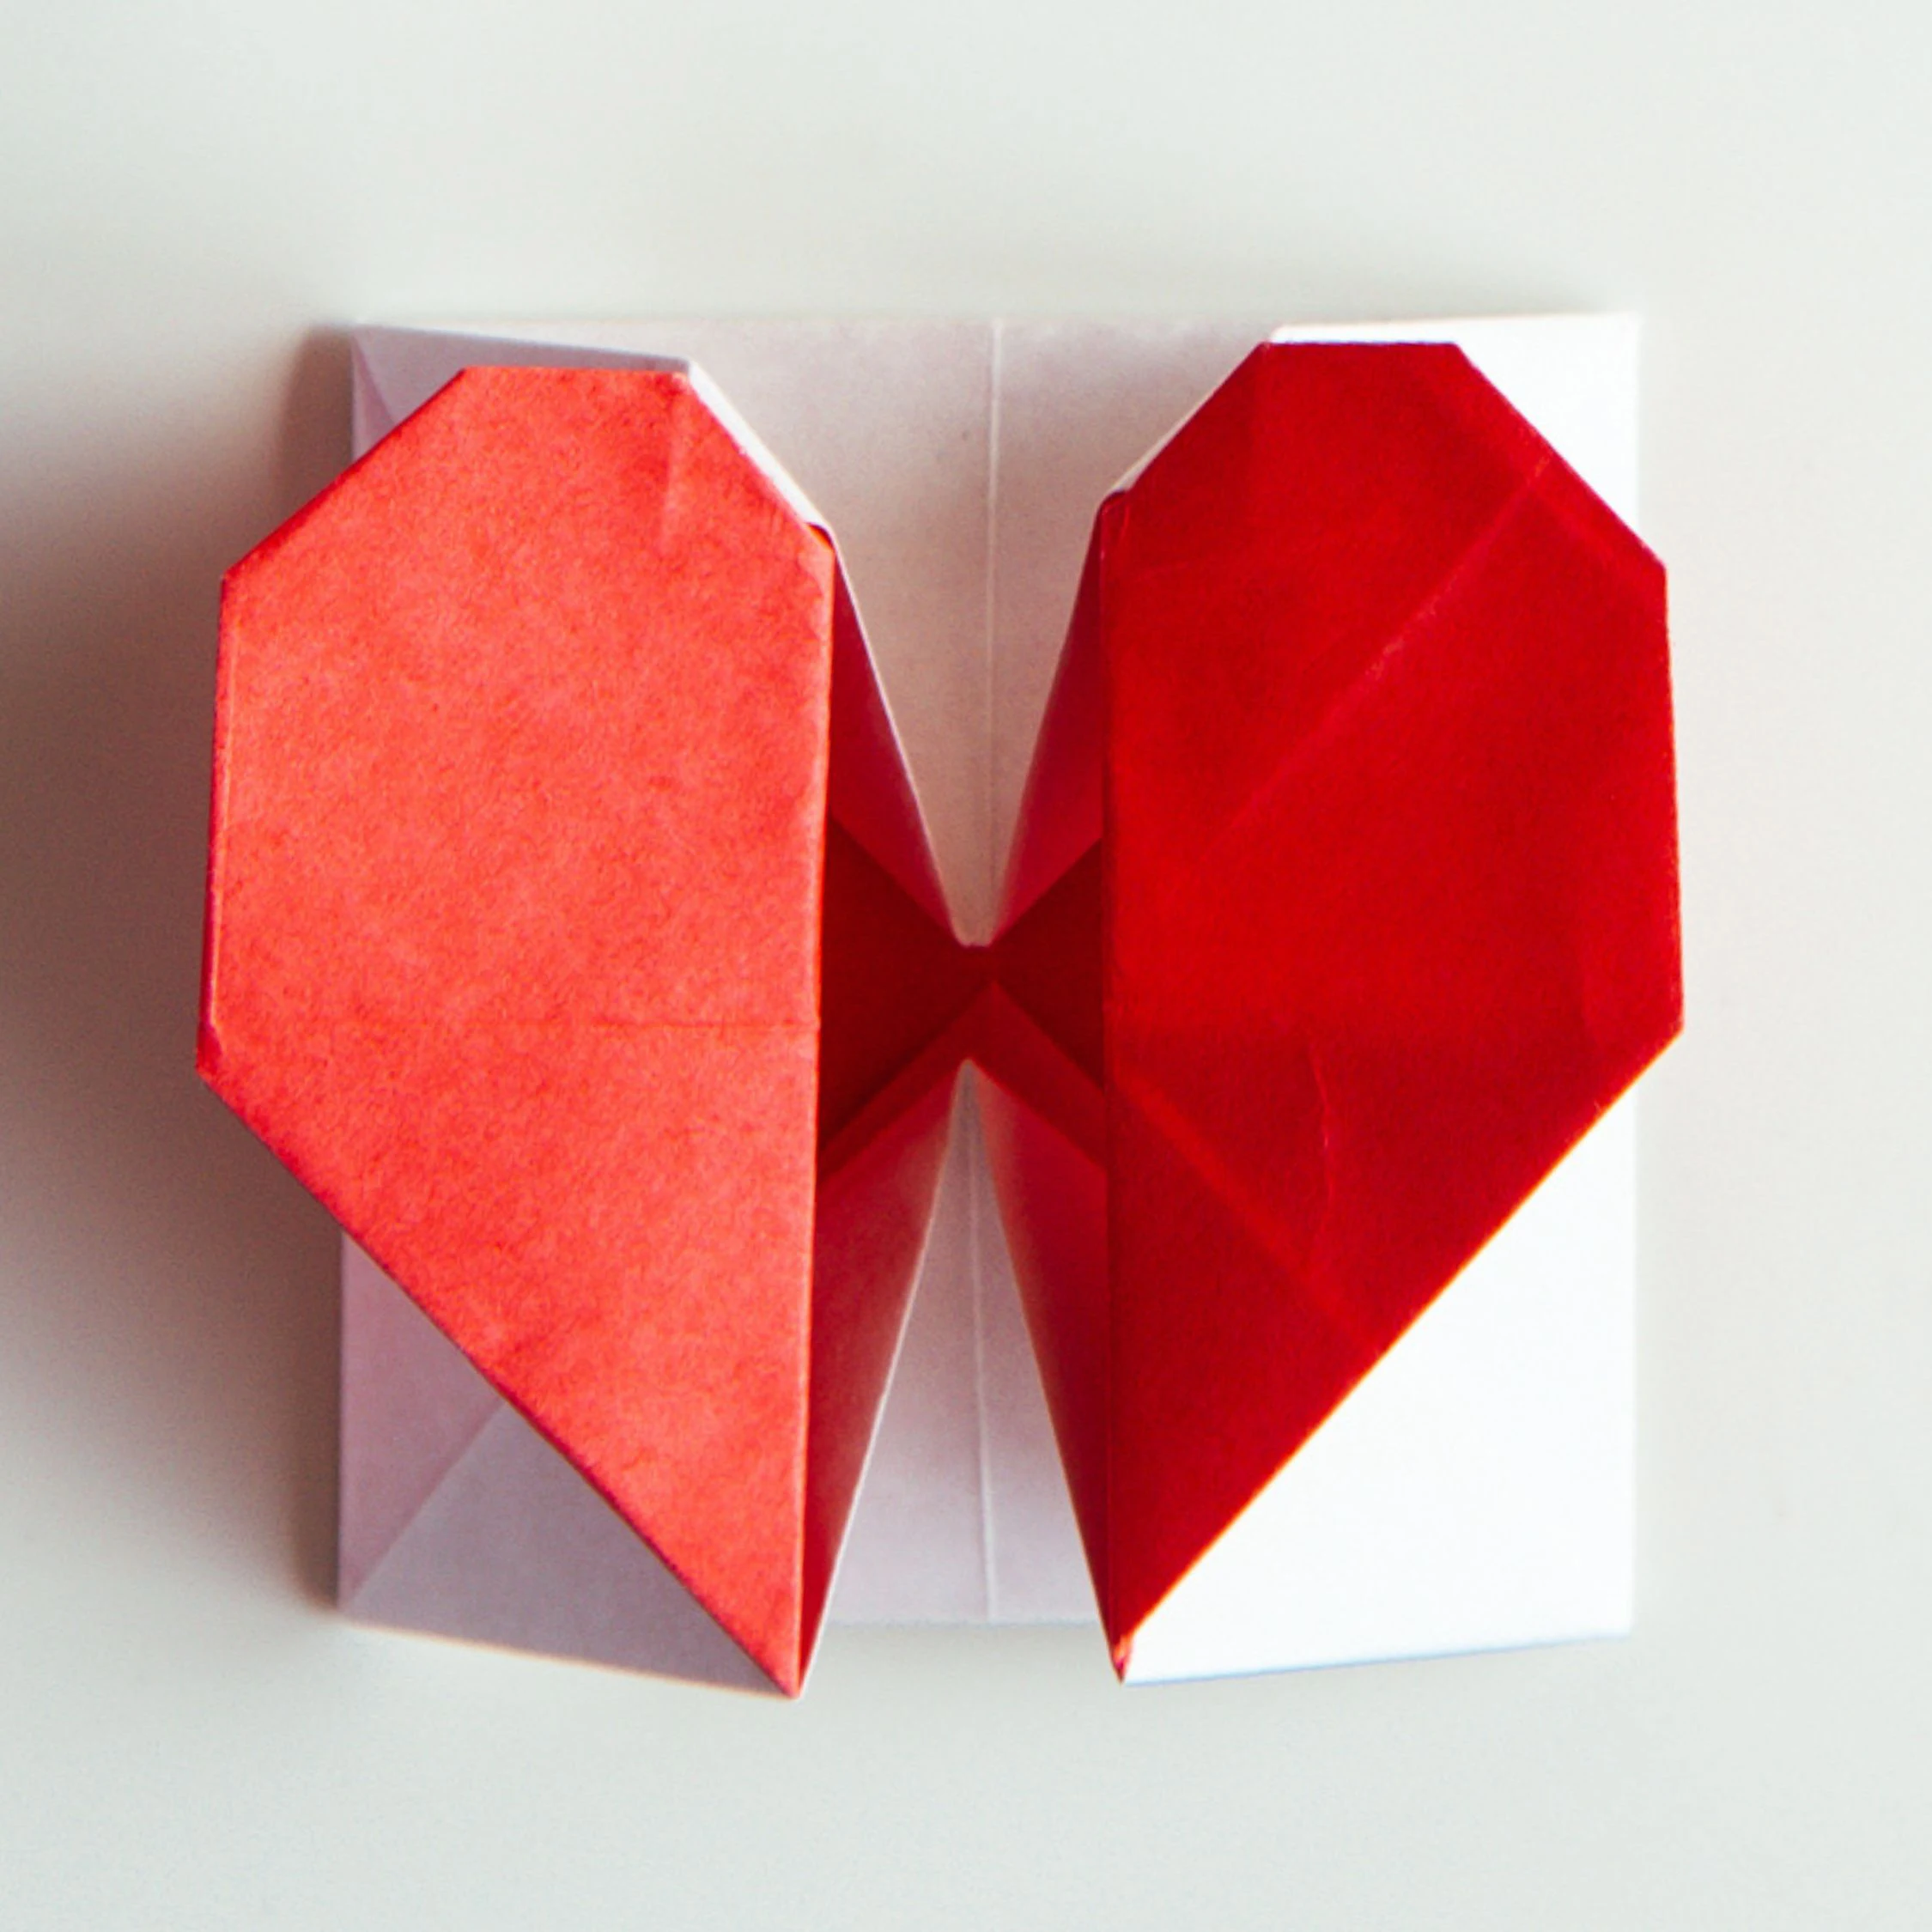
Take the top left point of the right end, and fold it down diagonally, then tuck it into the opening of the left end. You can use glue to fix them more effectively.
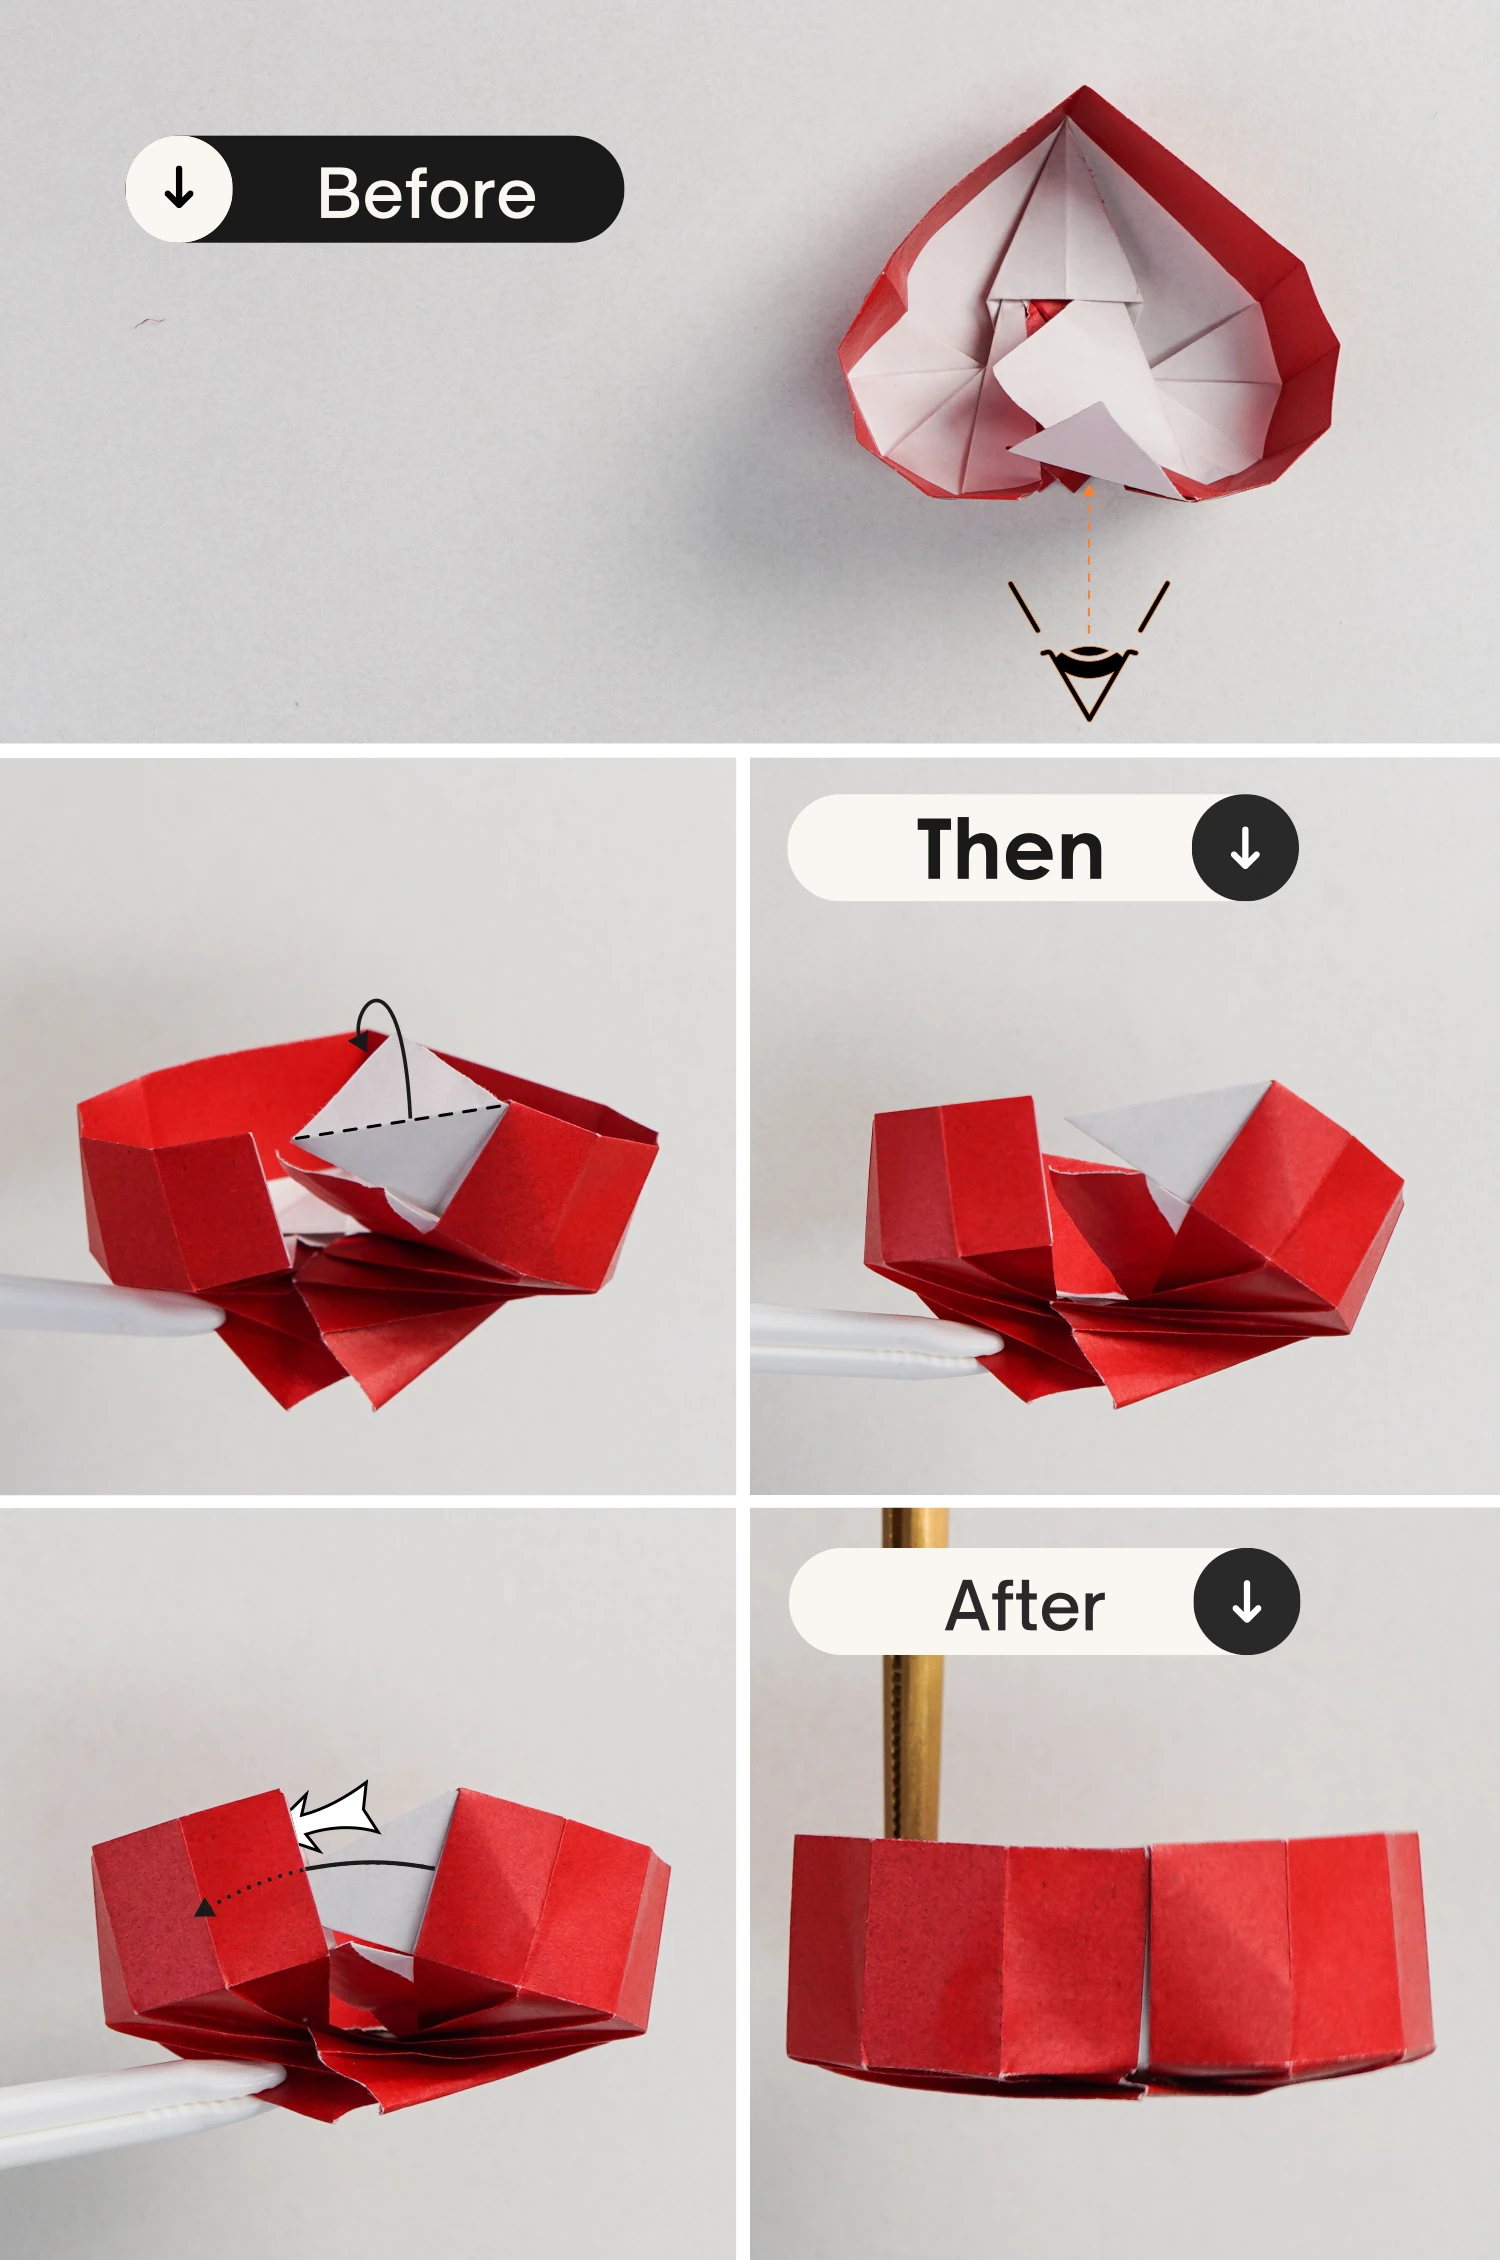
Step 39
View it from the top, and flip the model over, this is the lid of the box.
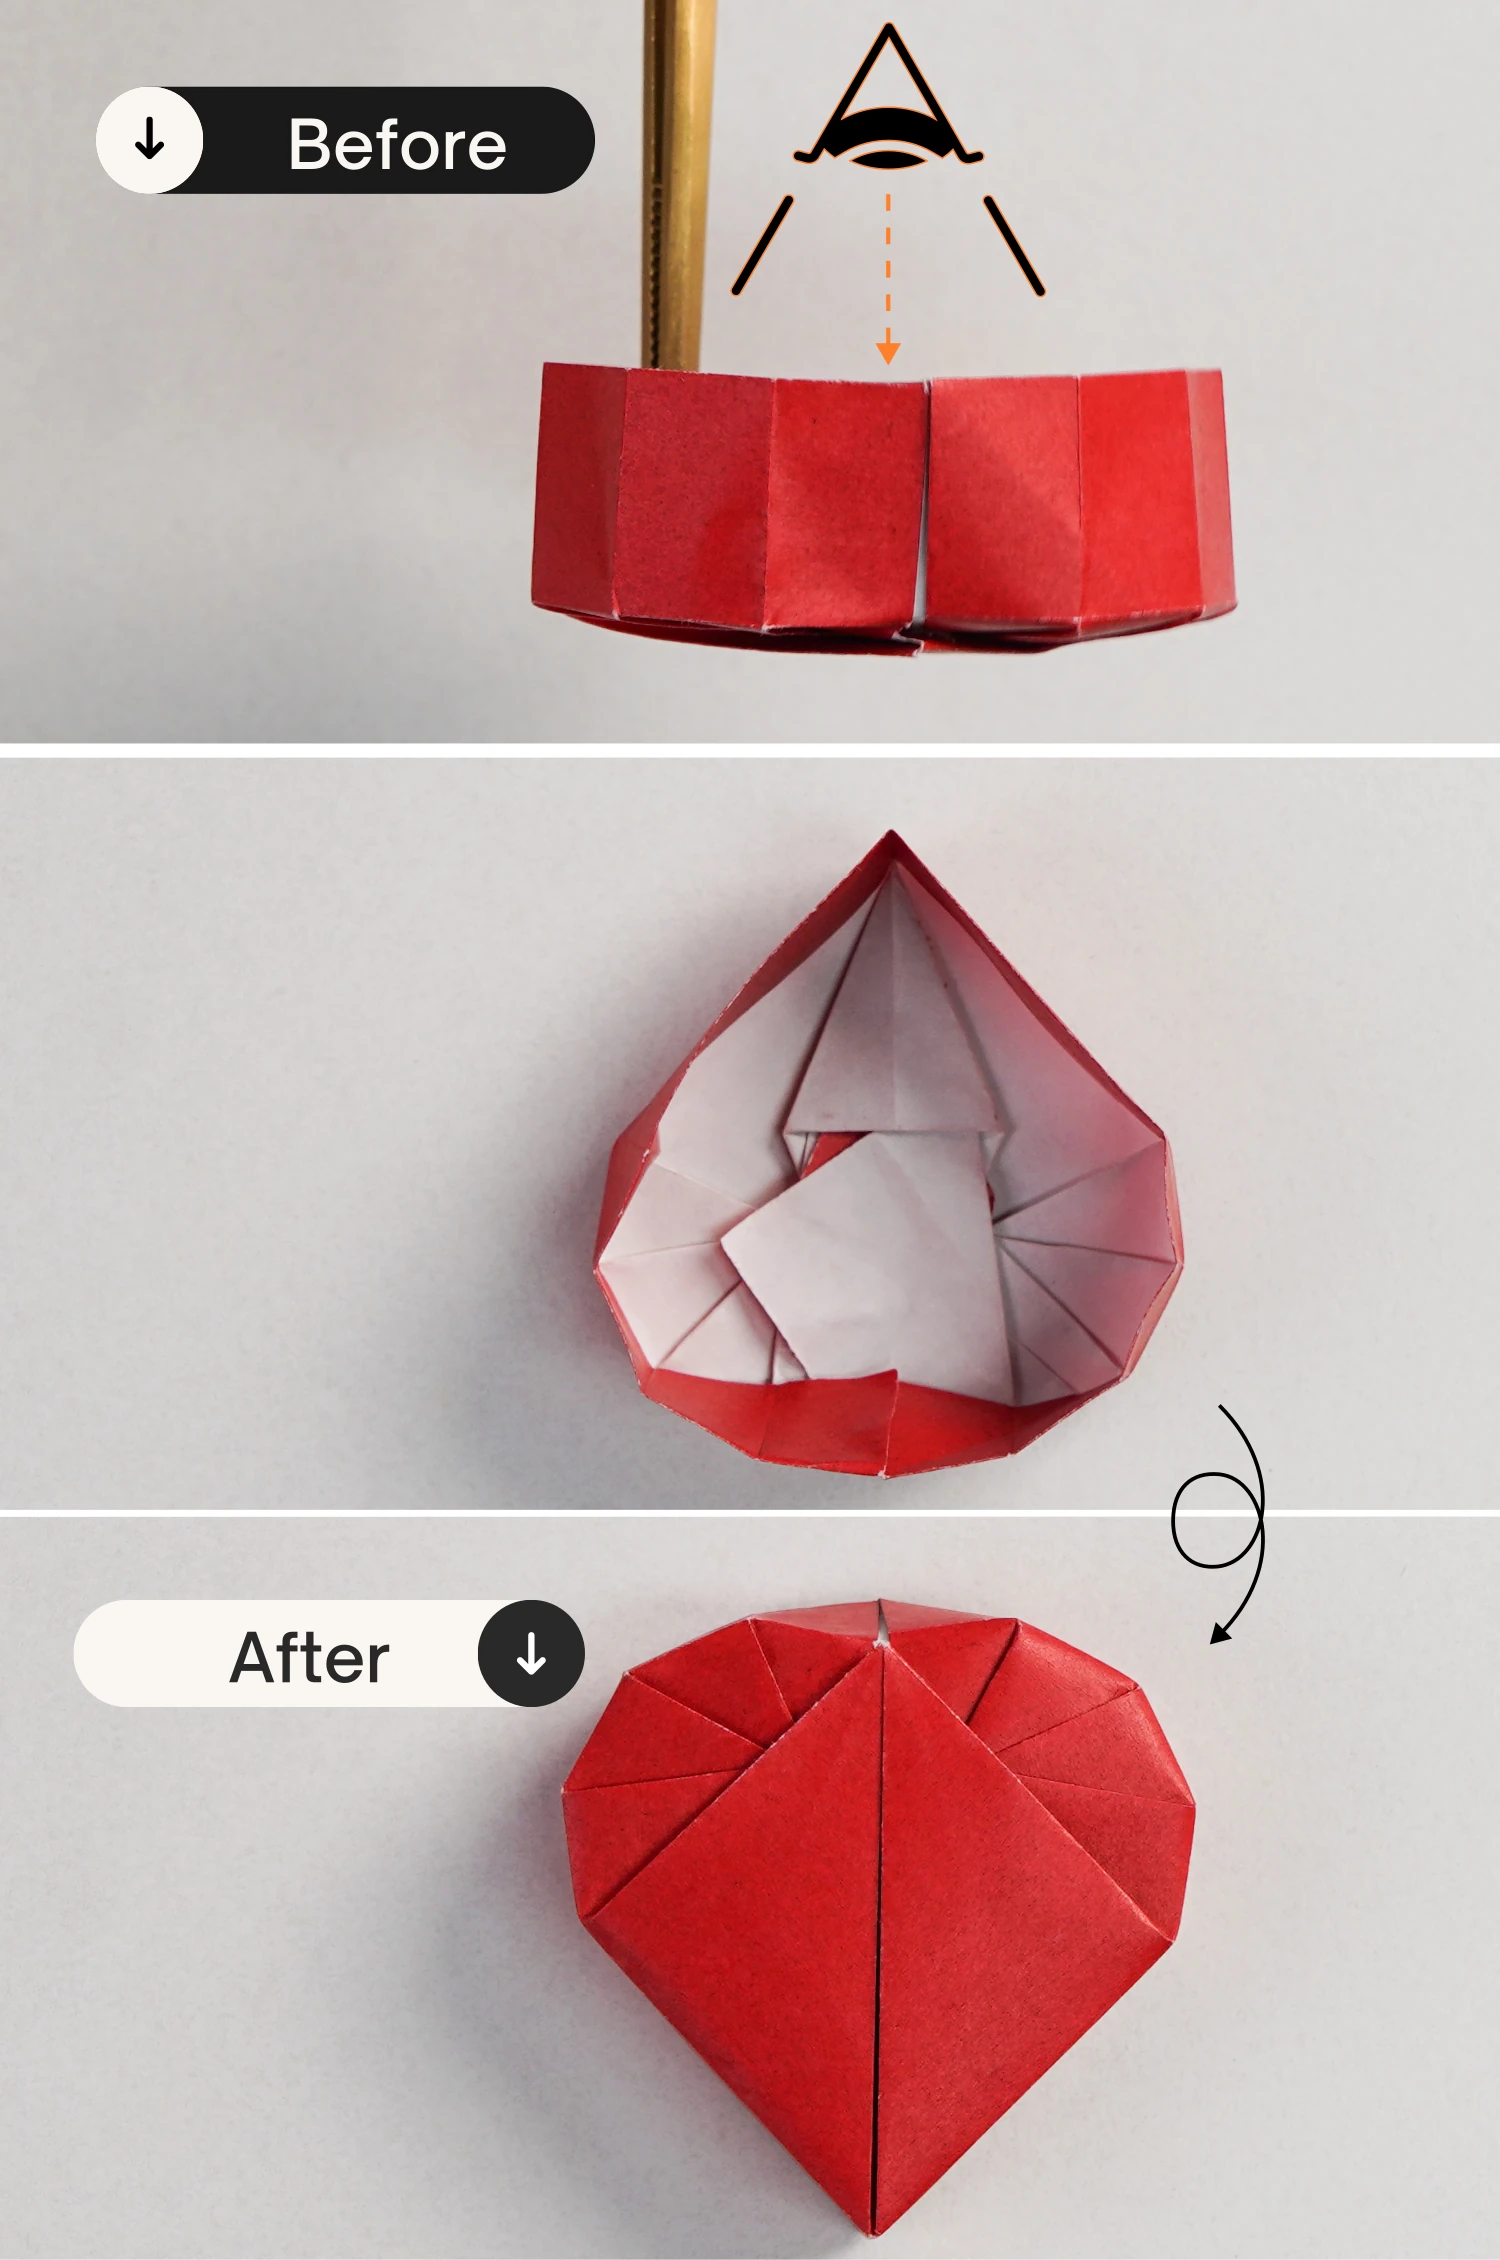
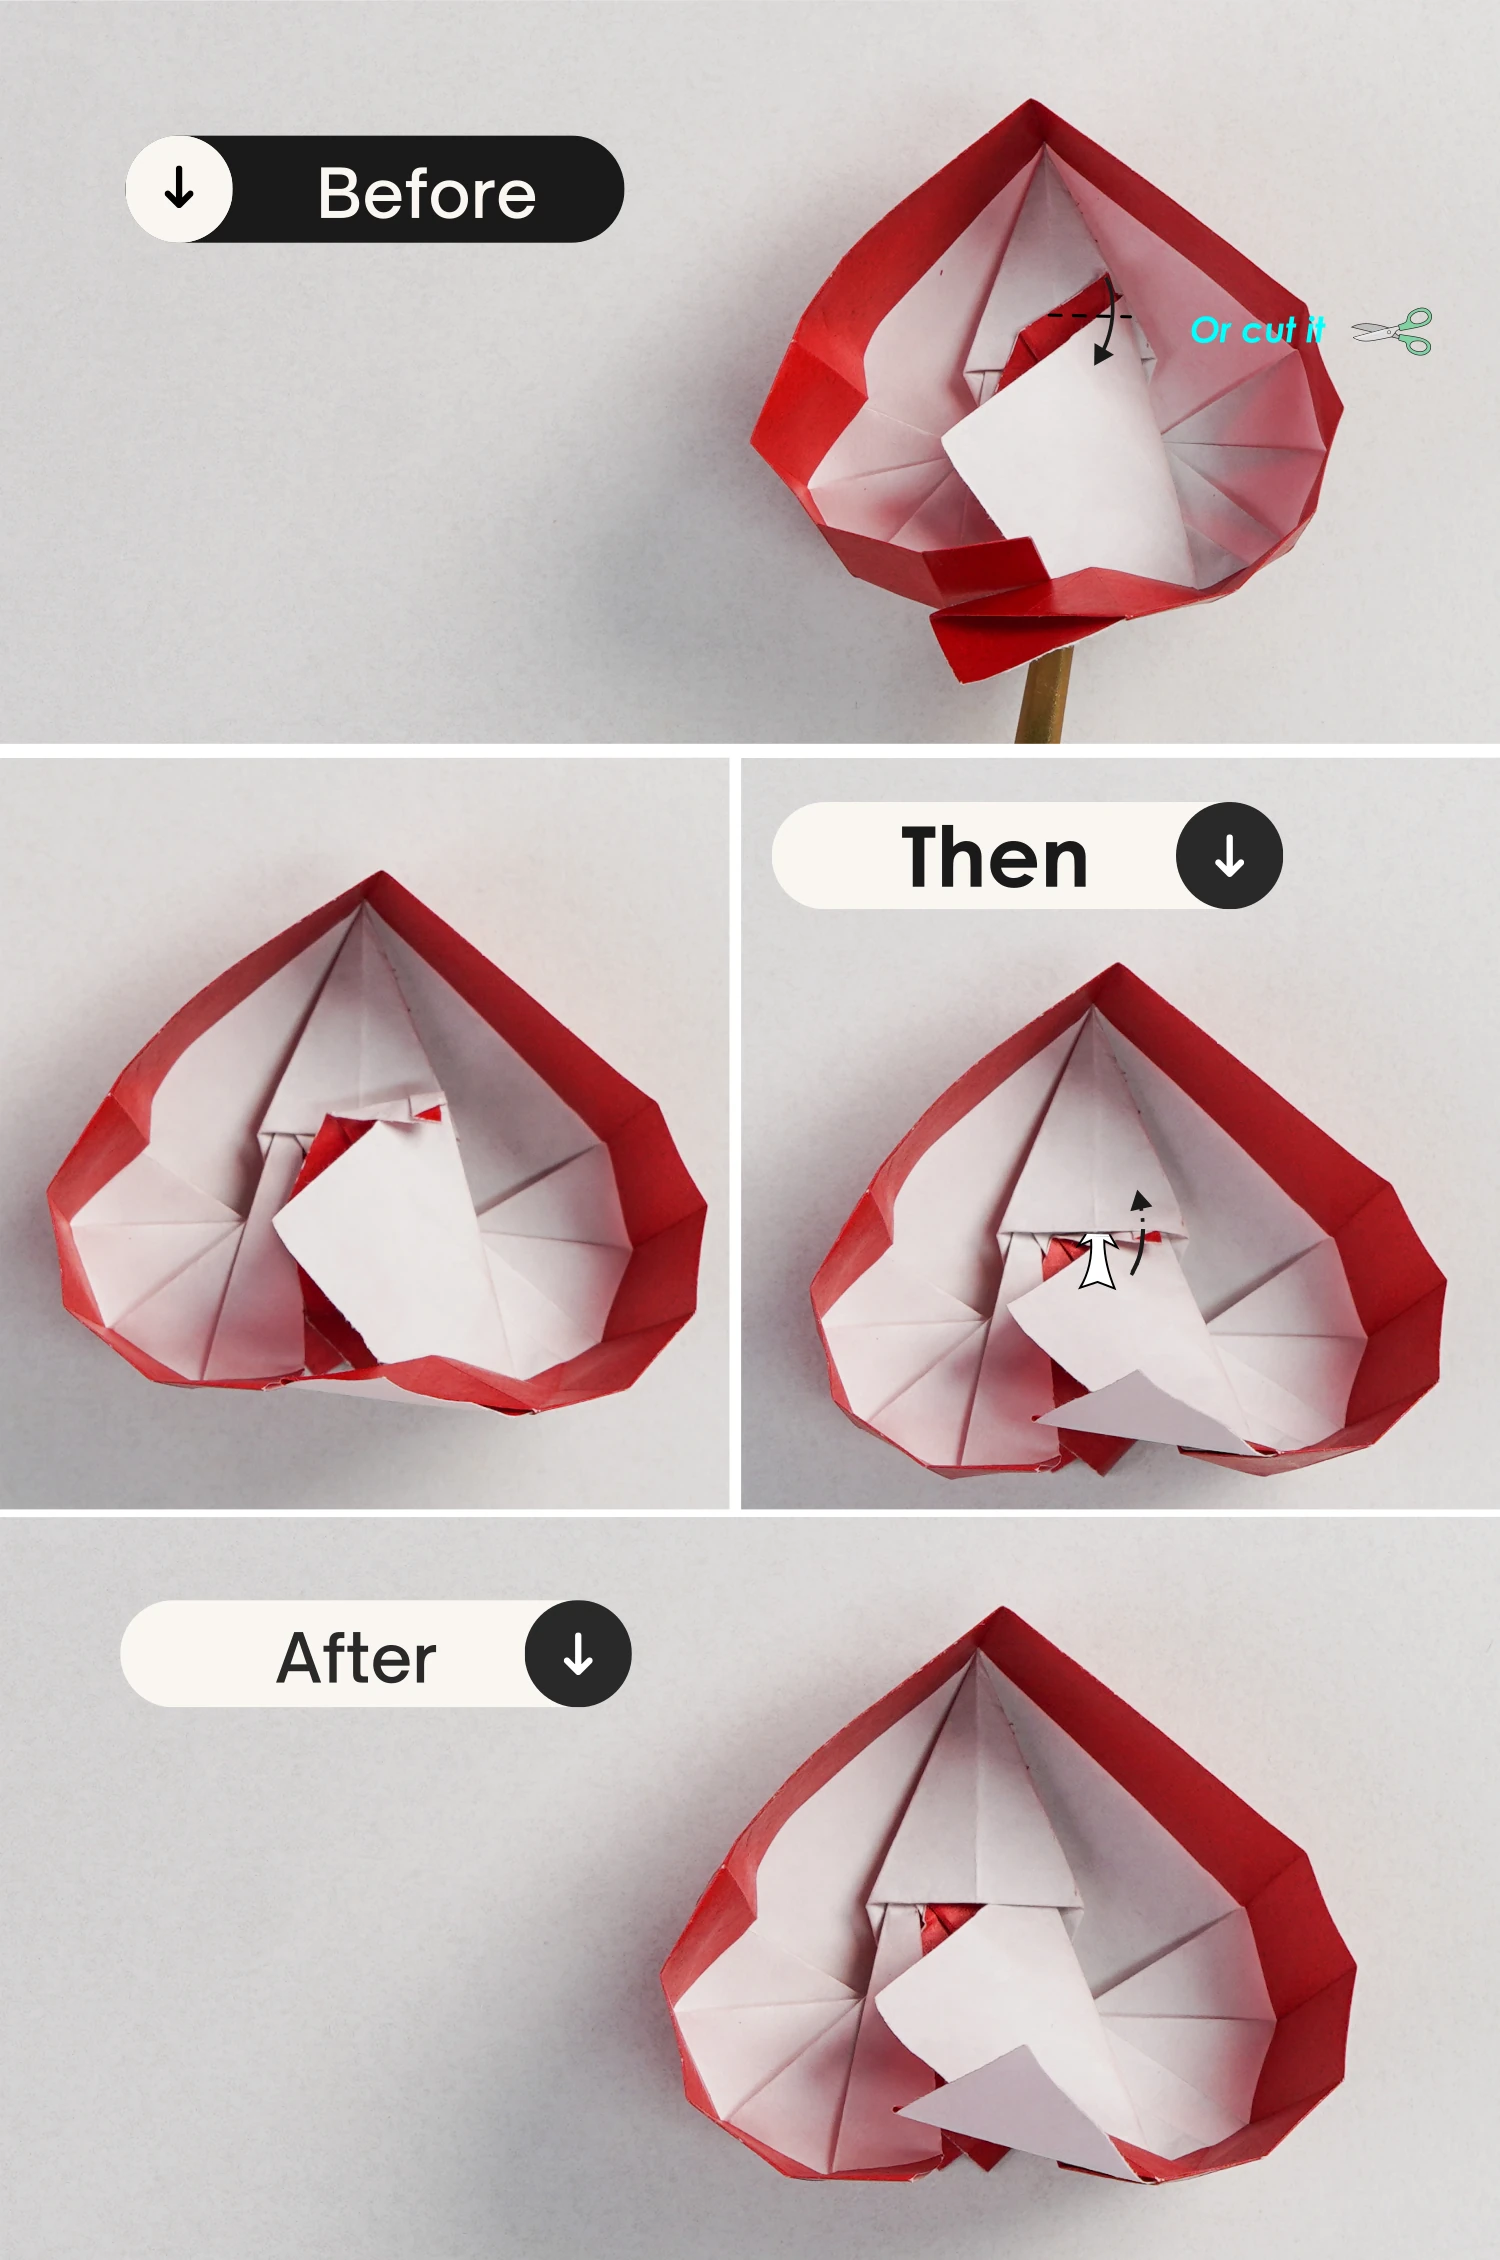
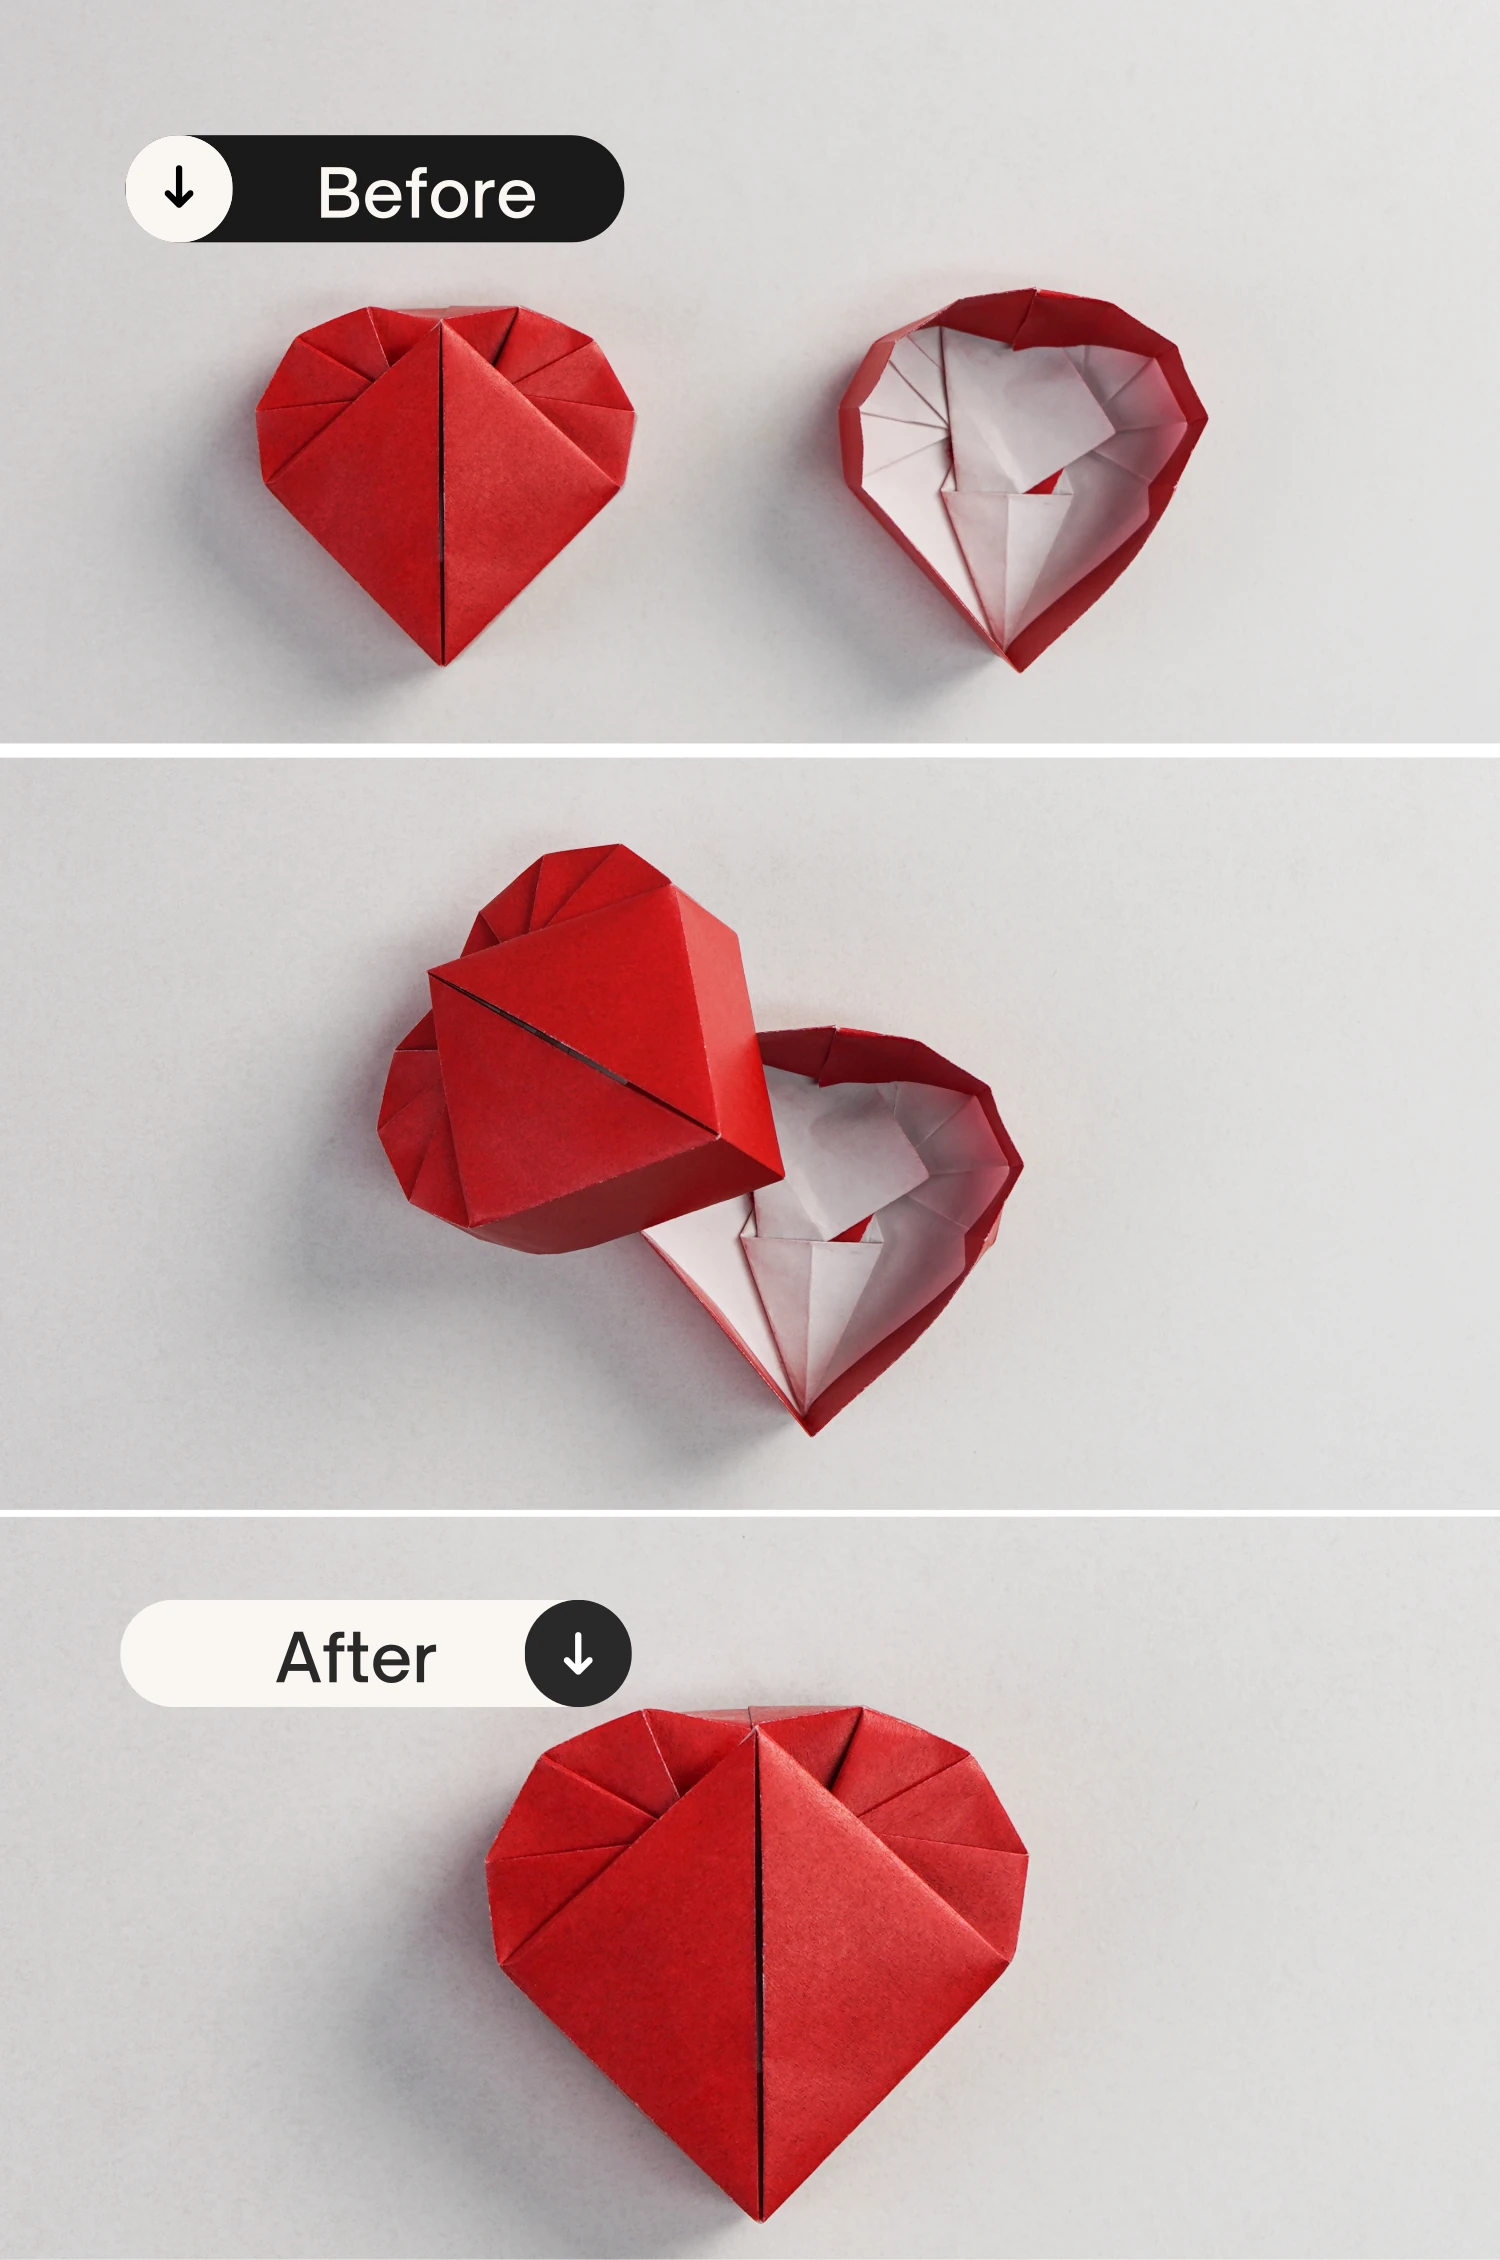
Step 40
Make the box using another smaller piece of paper in the same manner you make the lid, and get a complete heart box with a lid.
What’s Next
That’s your lovely heart box with a lid, now please check our other origami boxes, happy folding!
Other Origami Box Ideas