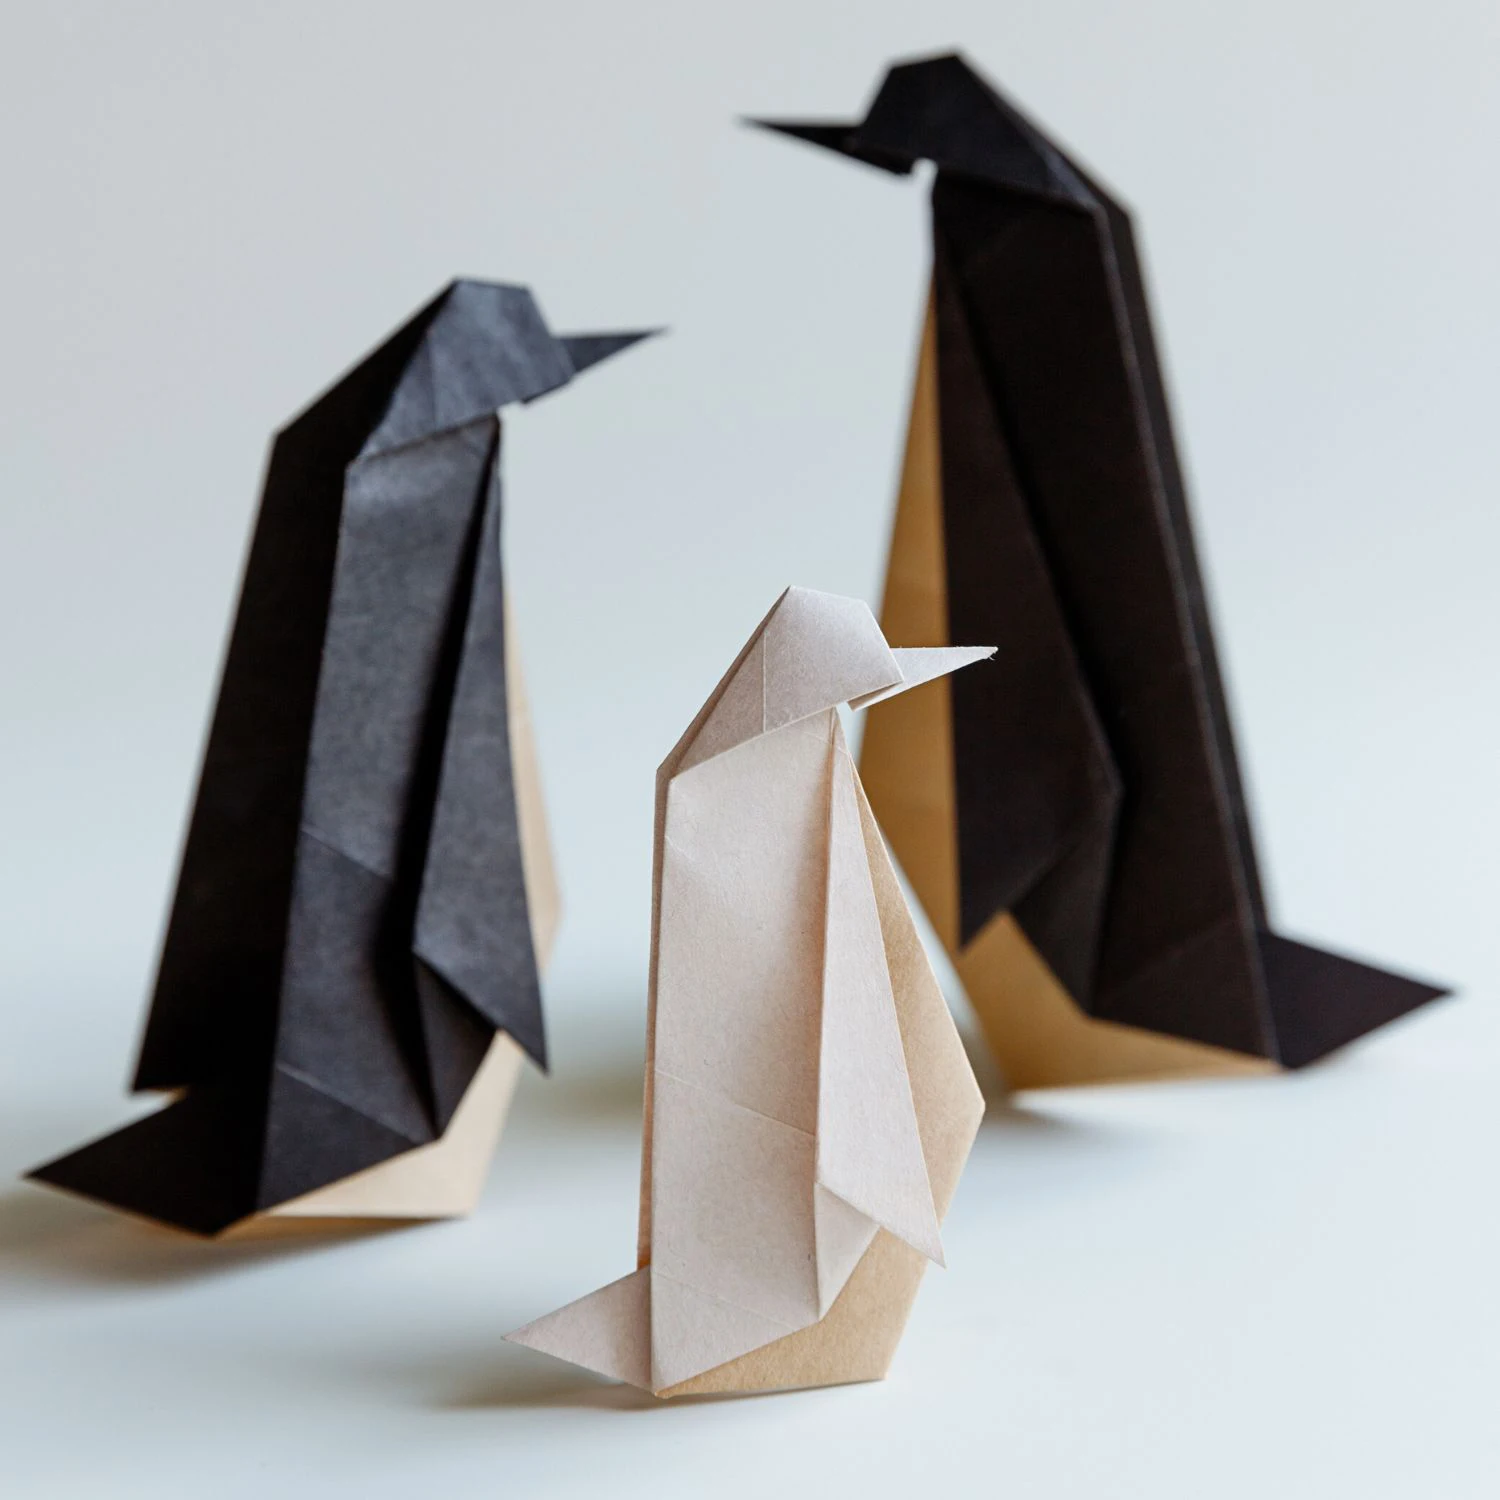
This post will guide you through the creation of a cute and unique origami goose. While origami goose and origami swan share some similarities in appearance, each has its own distinctive charm and characteristics. Our origami swan is more elegant and graceful, while this goose is more cute.
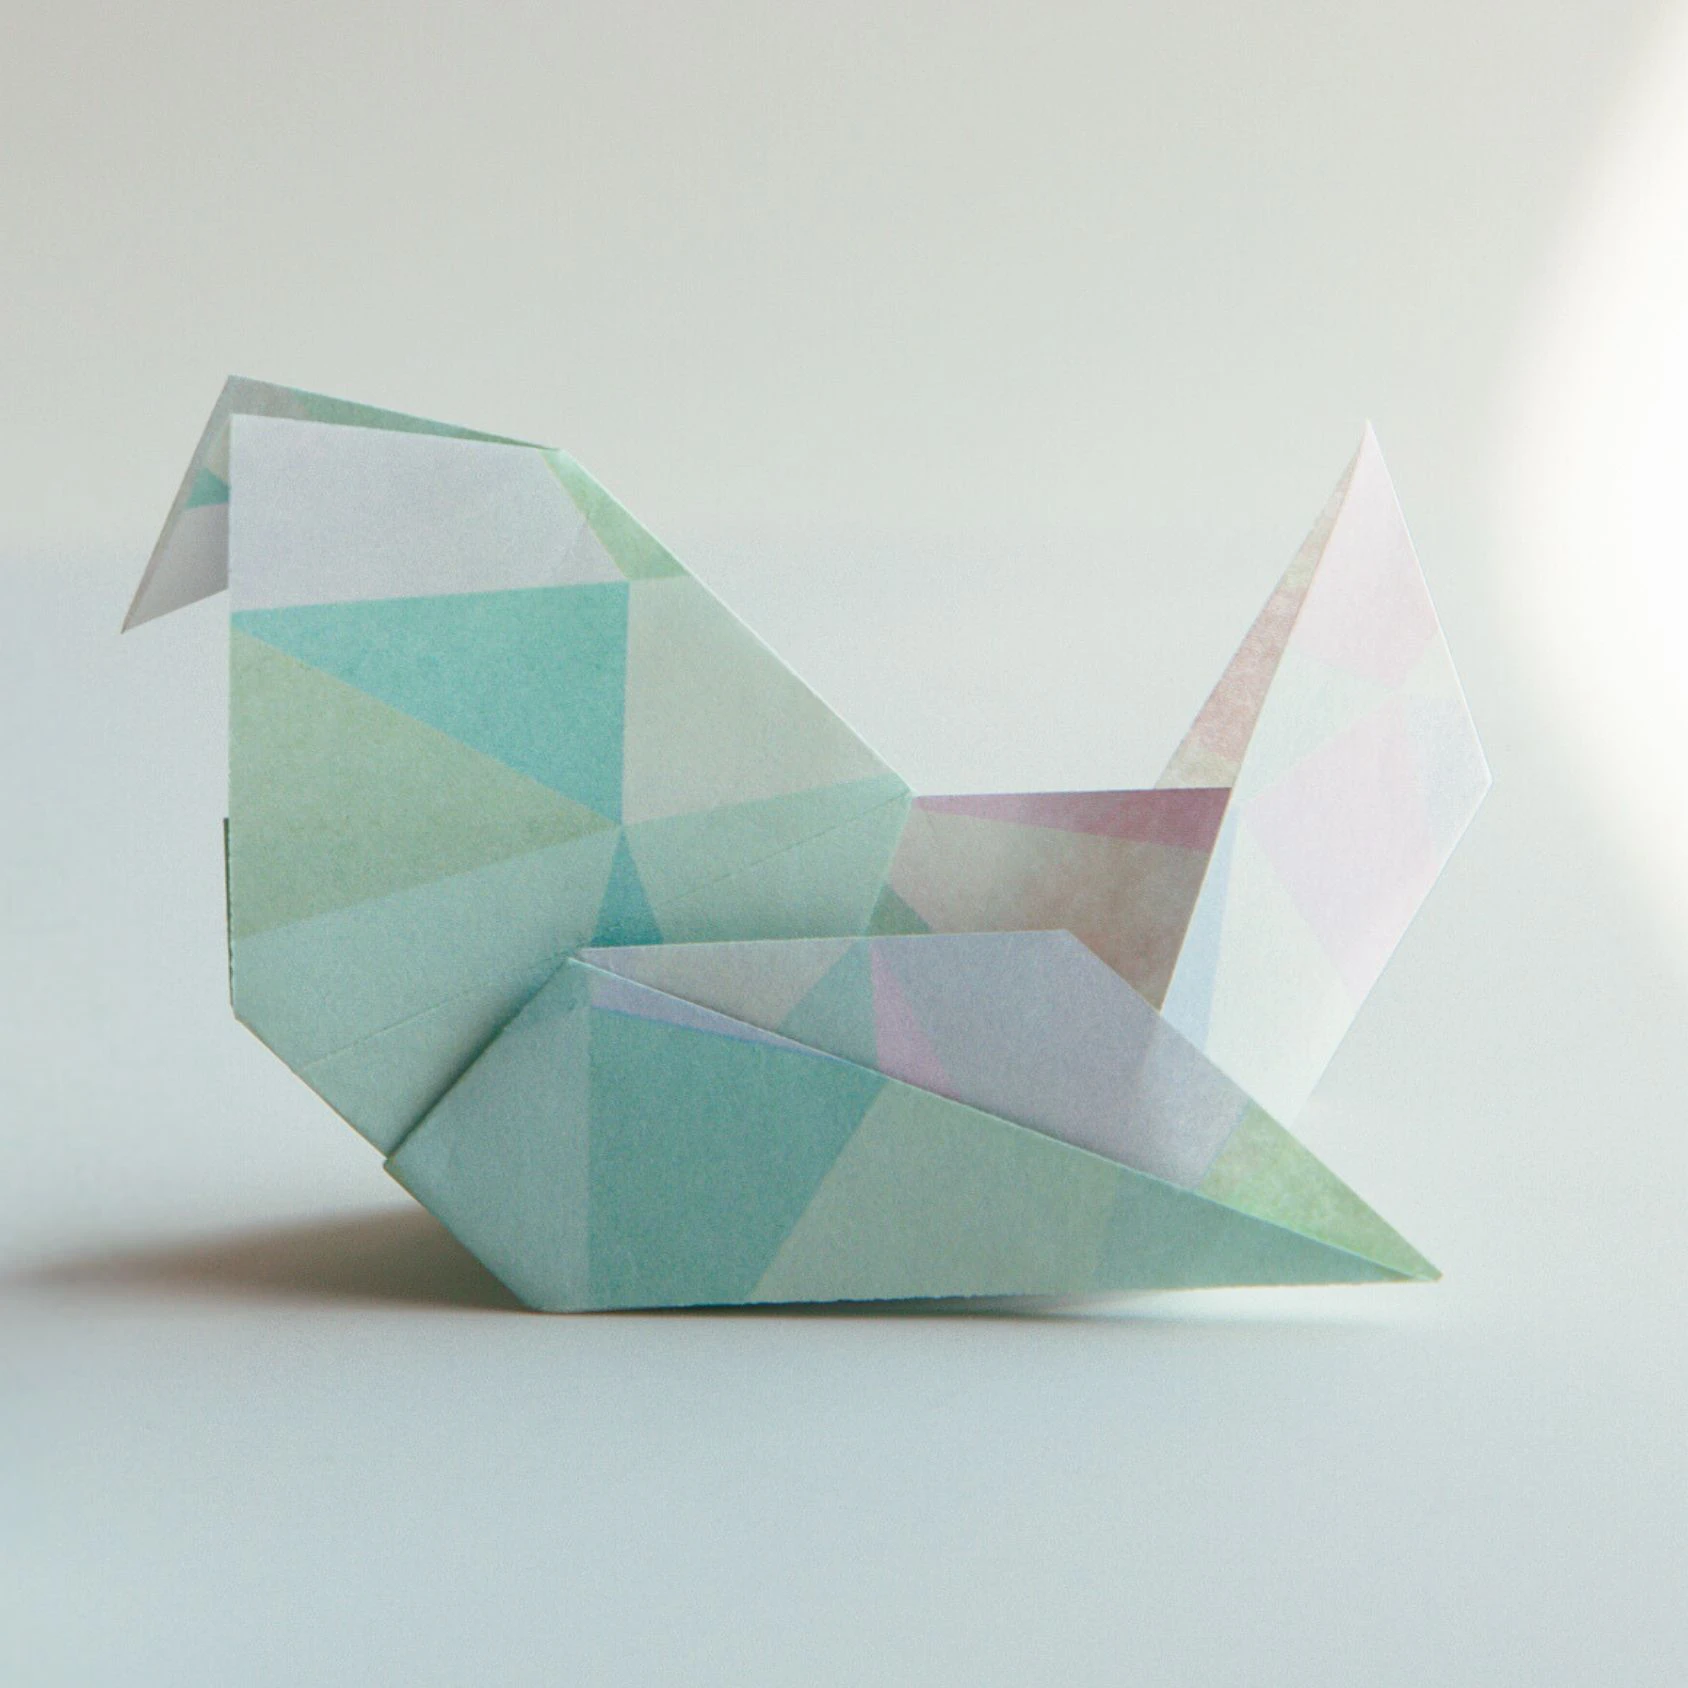
This origami goose is adorable, with its head held high as if honking, bringing a lively feeling to your creation.
In this instruction, we use a lot of Swivel Fold at the beginning, and Crimp Fold to form the beak, tail, and feet.

We provide step-by-step diagram instructions and beginner-friendly videos. Check both for quicker learning.
If you are new to origami, start here from our beginner guide to know the basics and how to read the step-by-step instructions.
- Folding time: 20 minutes
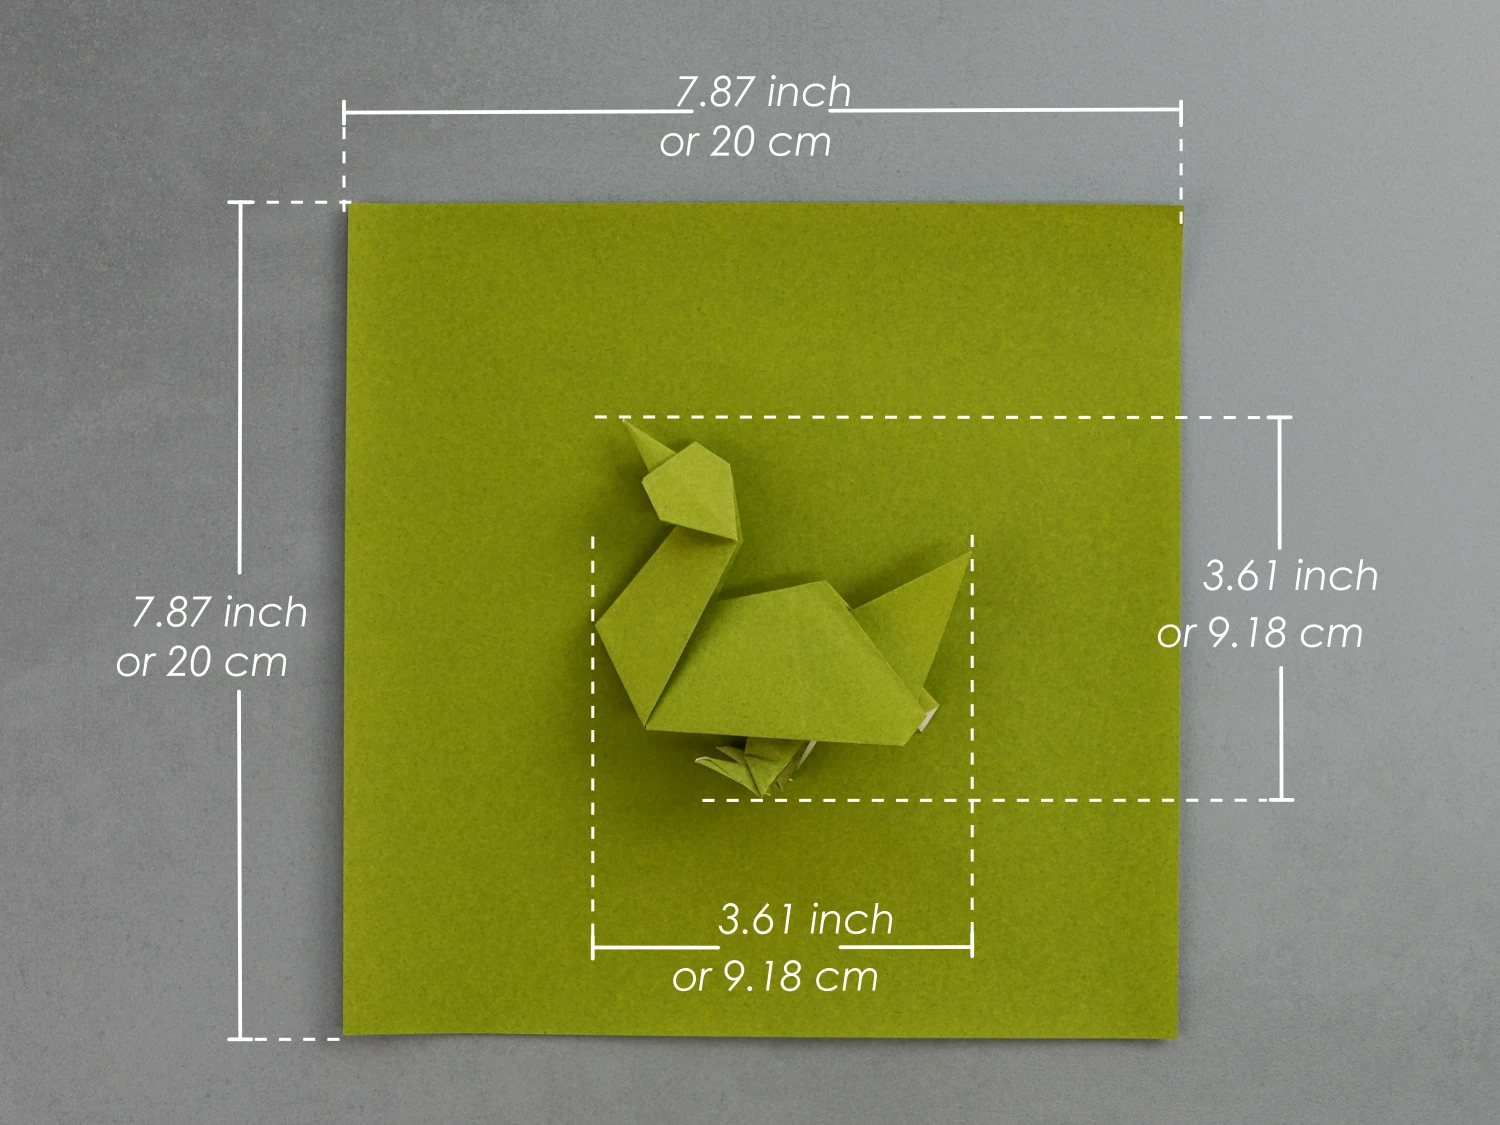
- Paper: 20×20 cm
- Difficulty: Advanced
Material
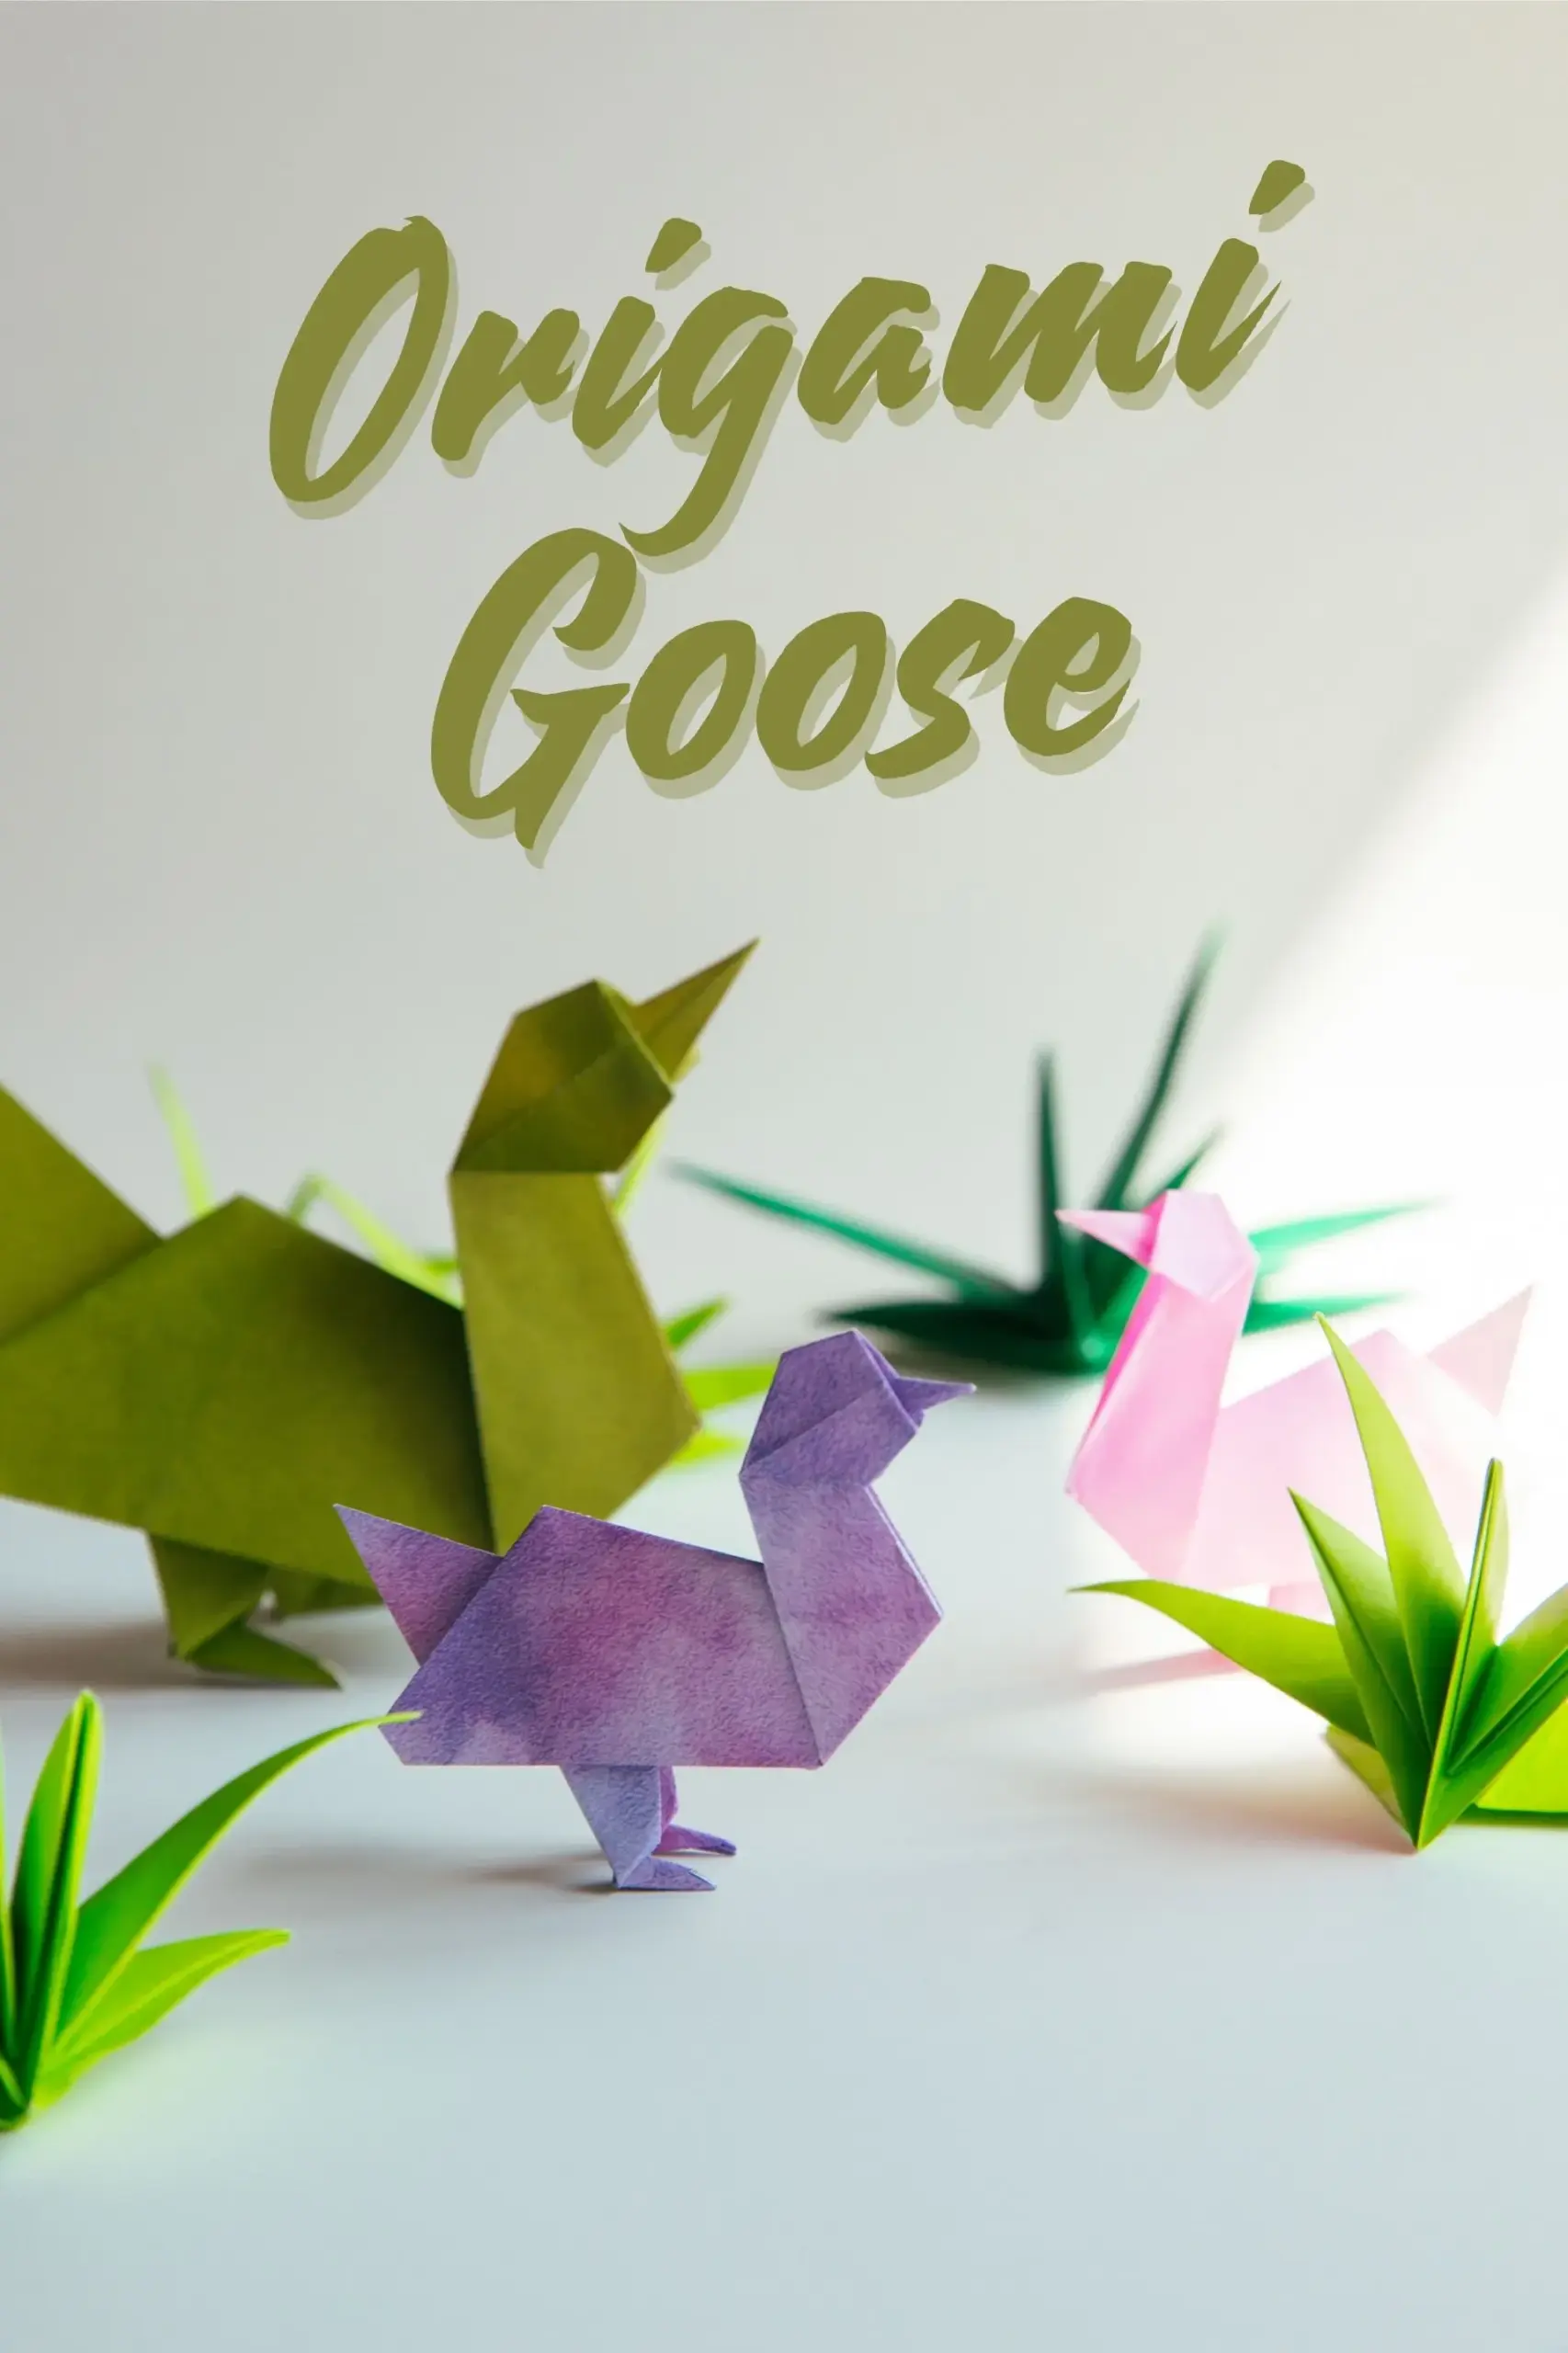
Get a piece of 20×20 cm origami square paper, with different colors on each side, to create a 9.18×9.18 cm origami hummingbird. Don’t be afraid to experiment with different colors and sizes of paper to create different geese.
Origami Goose Video
Step by Step Instructions
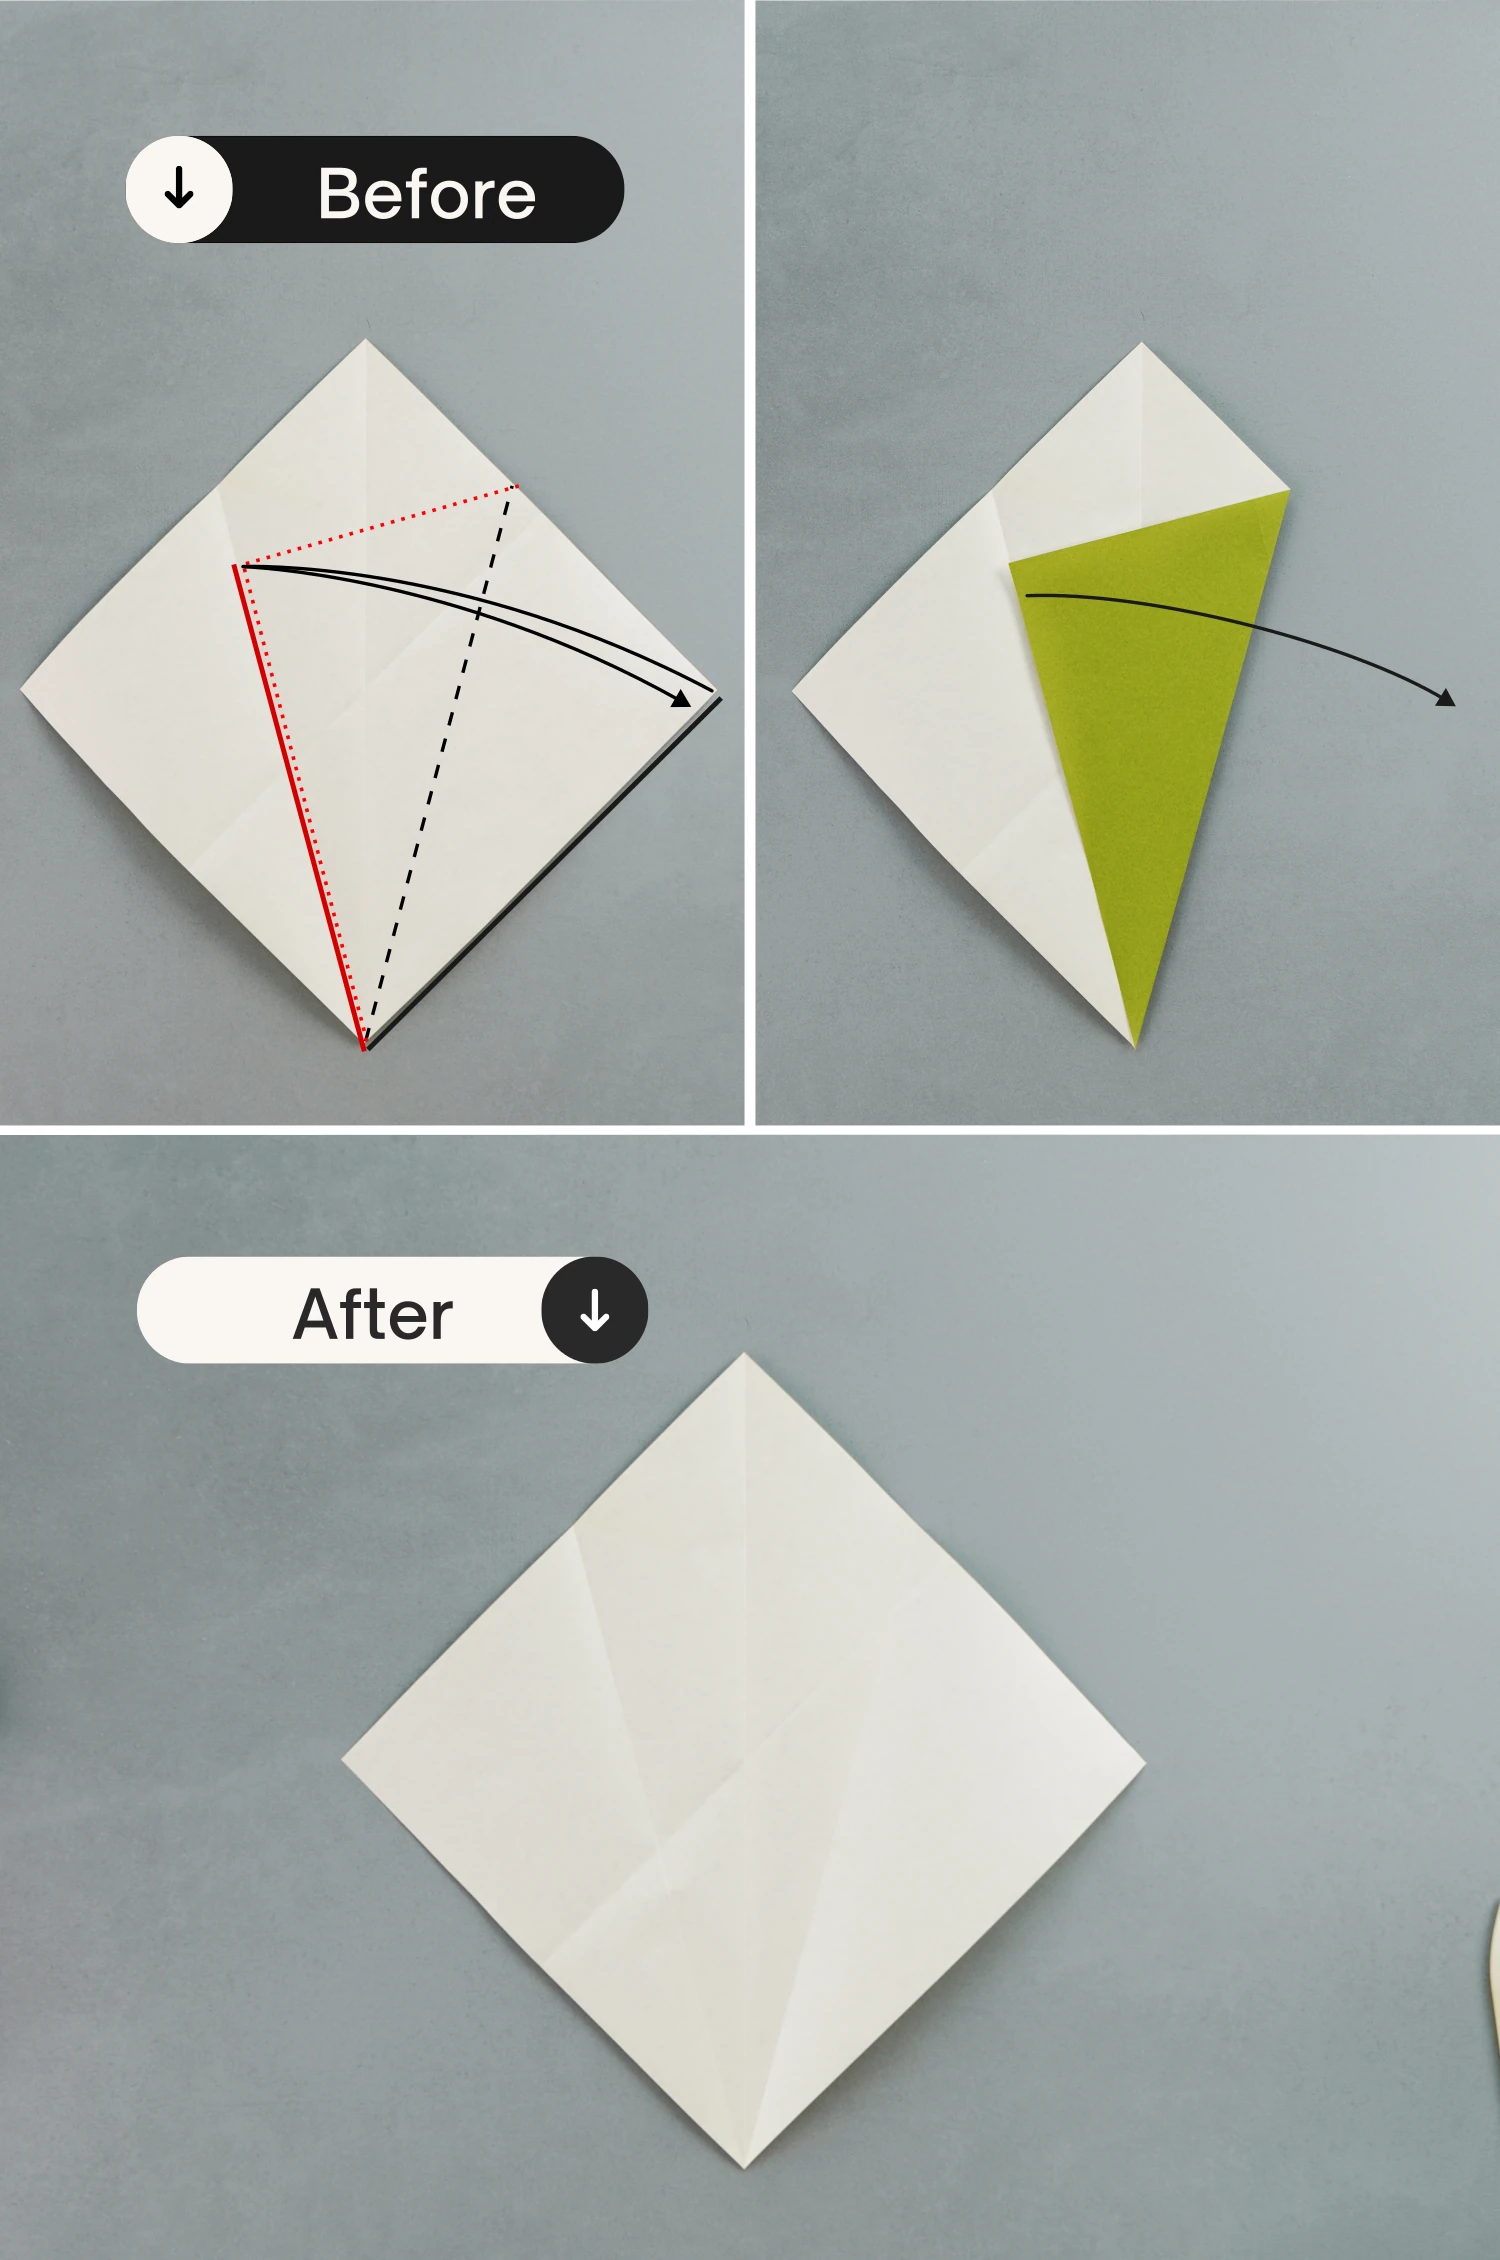
Step 1
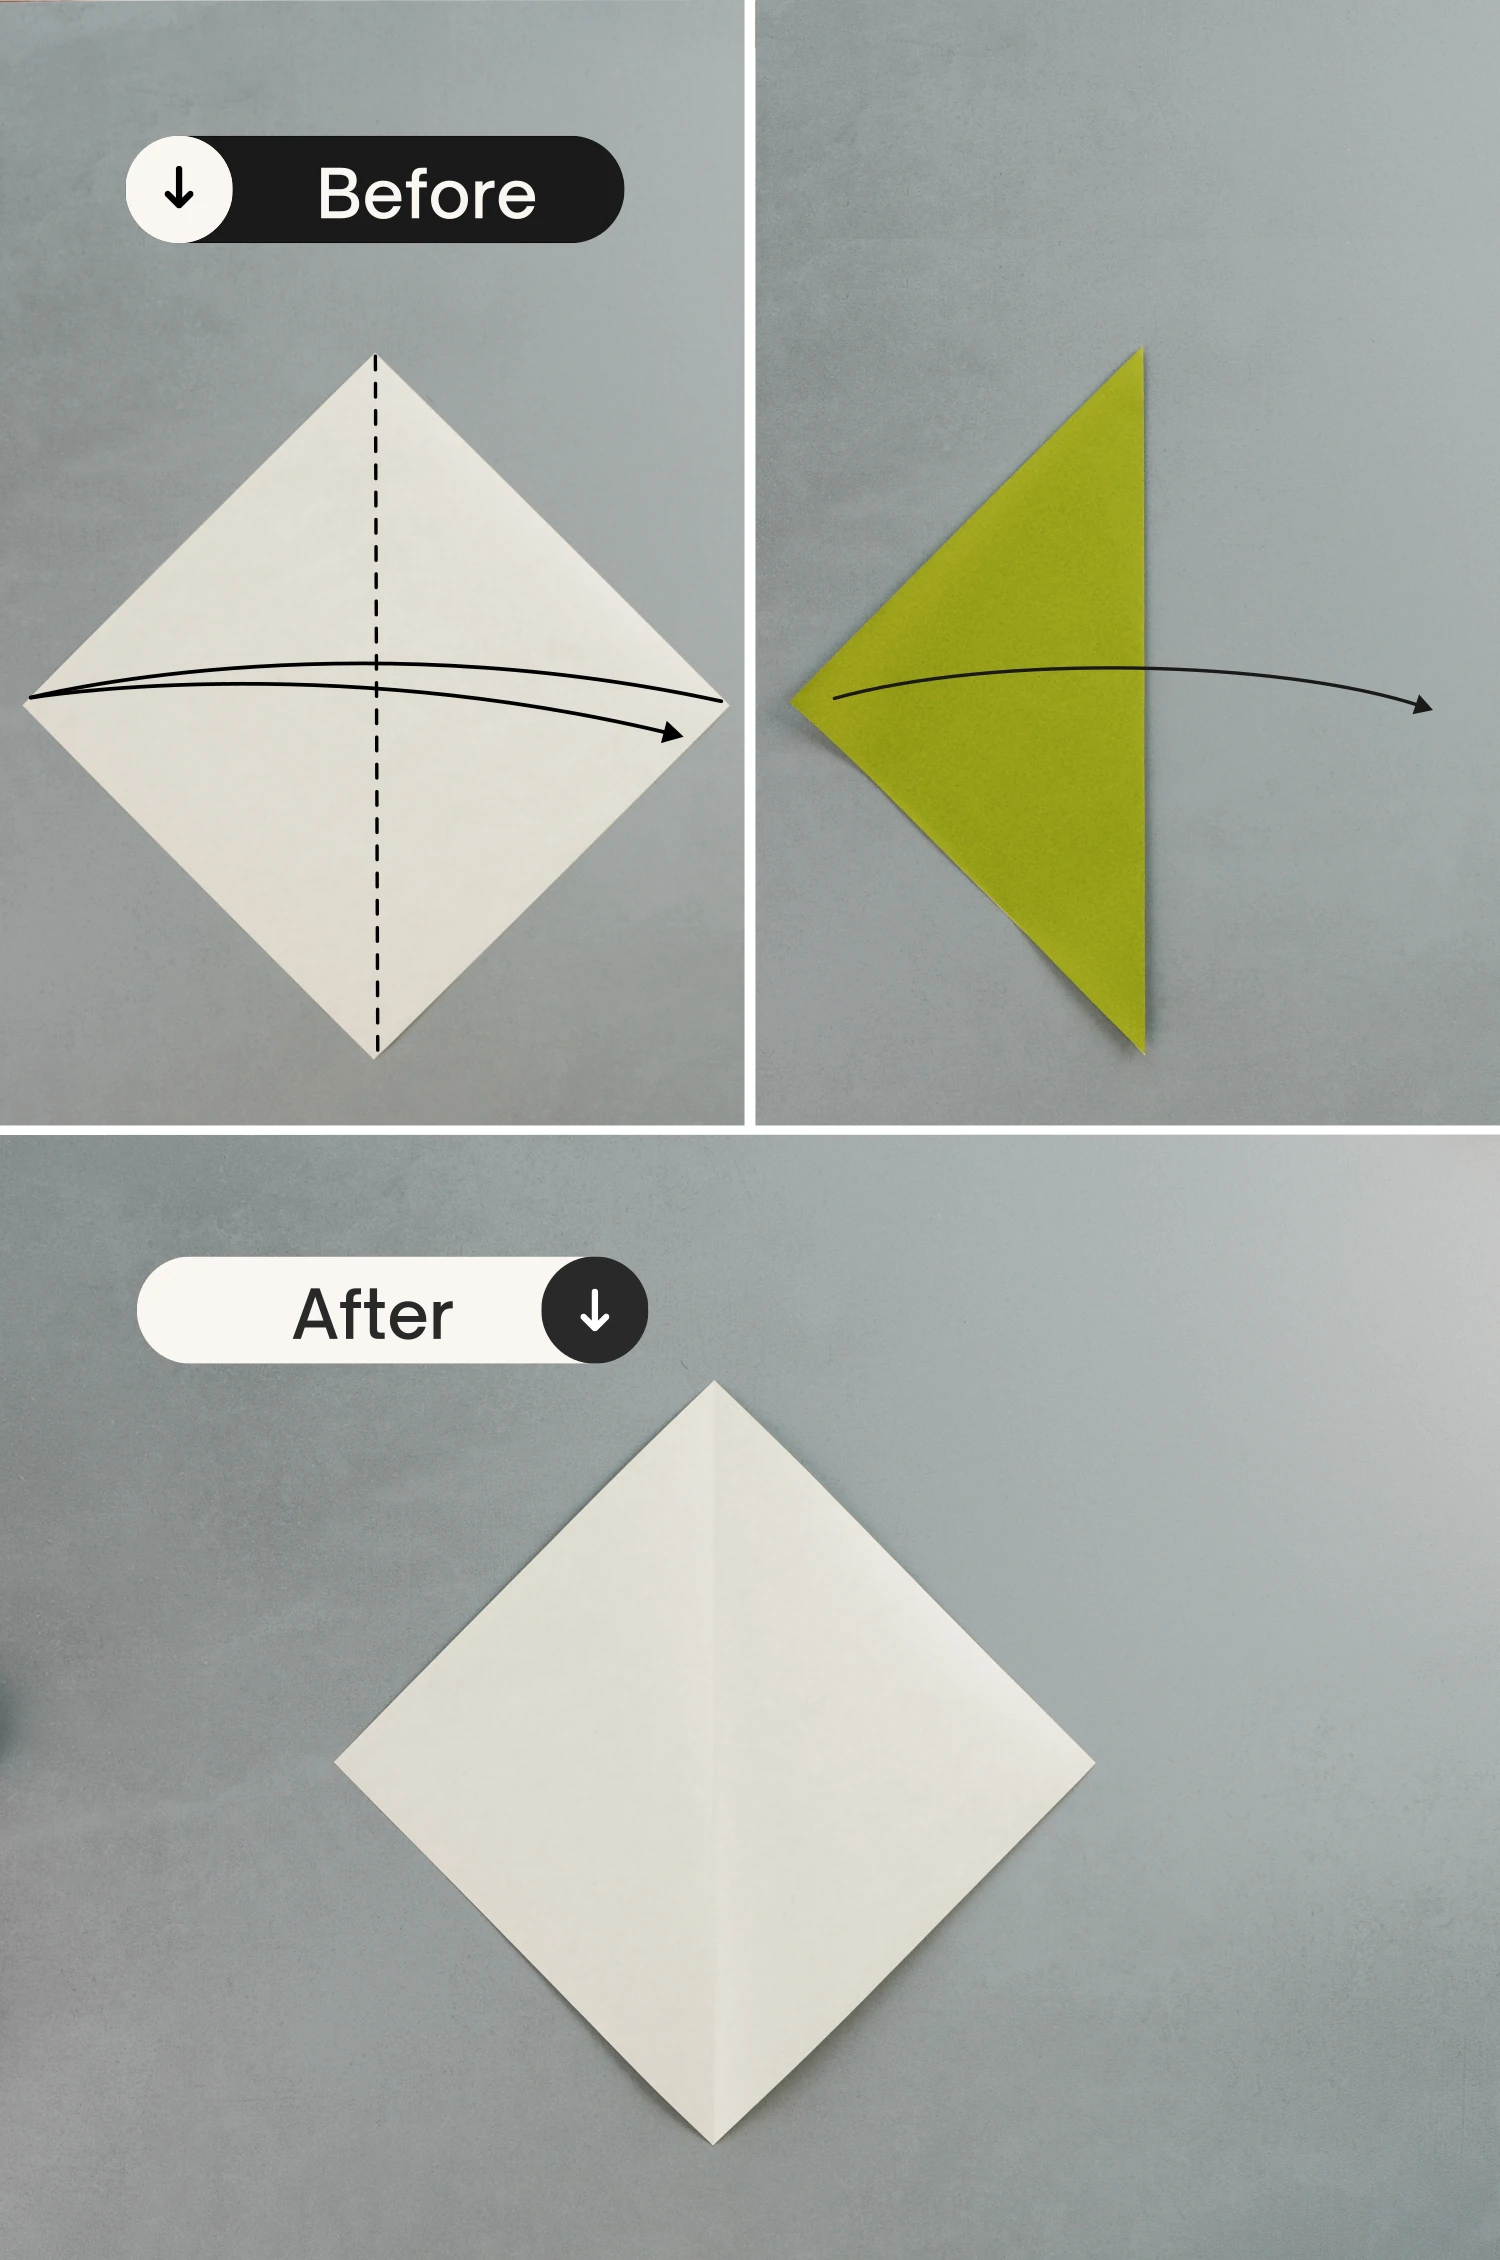
Start with the white side of the paper facing up, fold it in half vertically, leaving a crease then unfold it.
Step 2
Fold the bottom right edge to align with the top left edge, crease it well then unfold.
Step 3
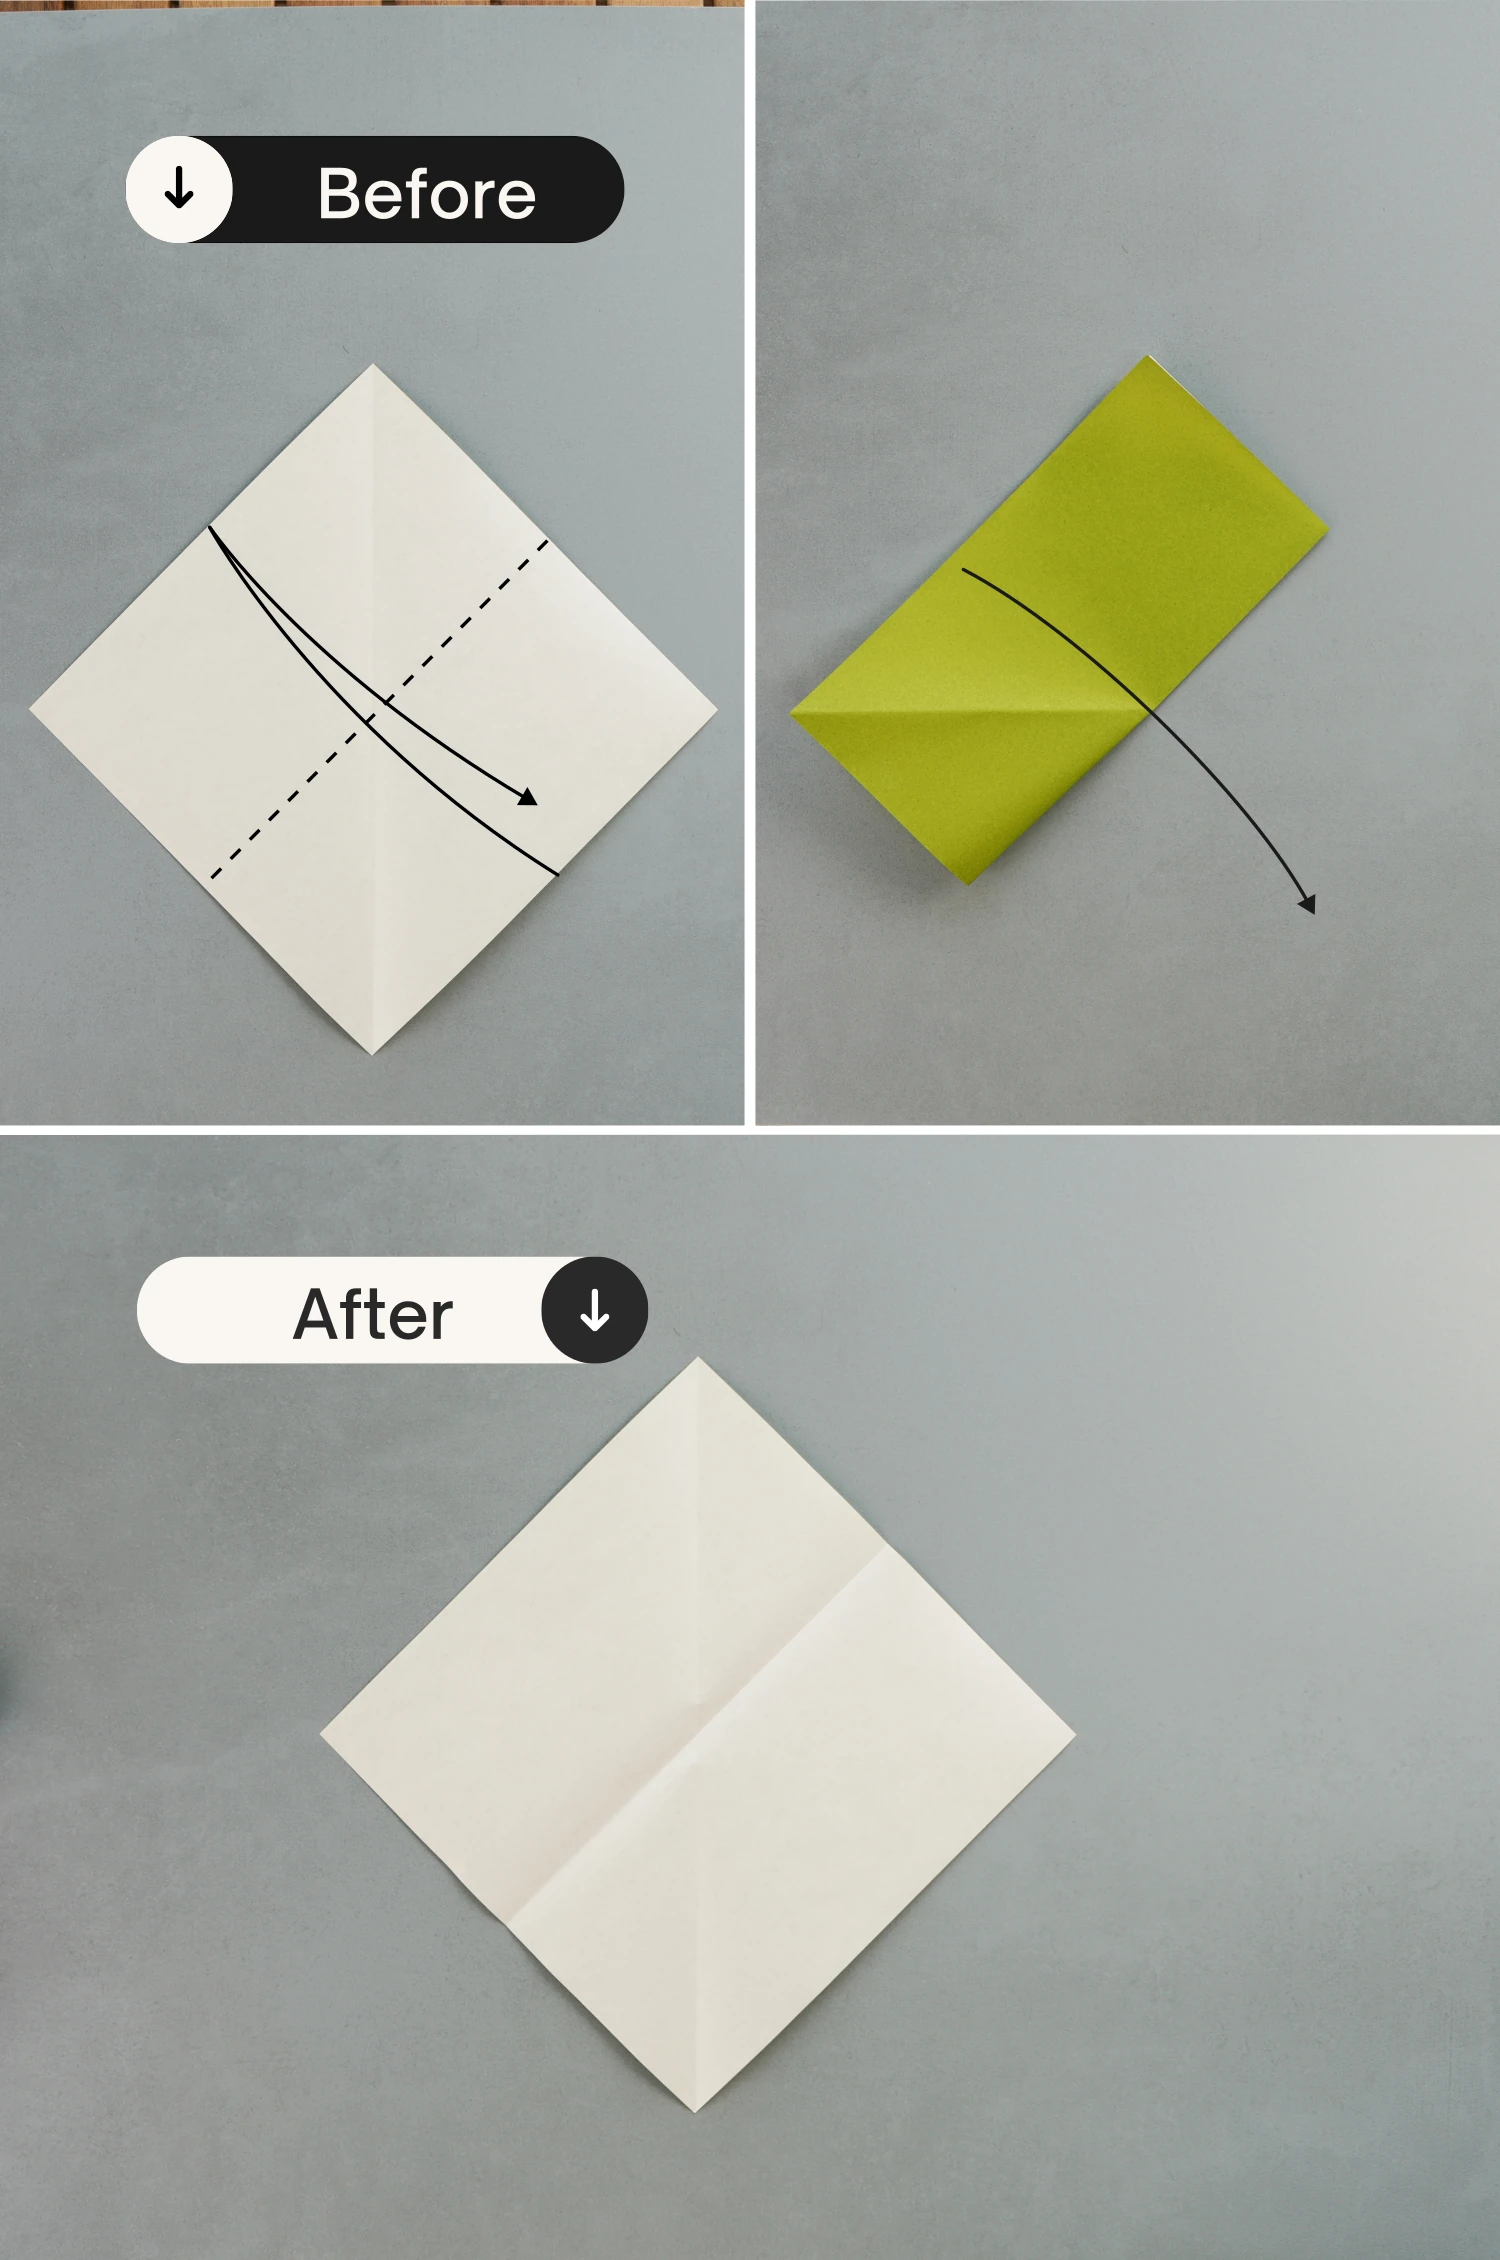
Fold the left point toward the right to meet the crease you just made, leaving a crease then unfold.
Step 4
Fold the bottom right edge to align with the crease you made in the previous step, and unfold it.
Step 5
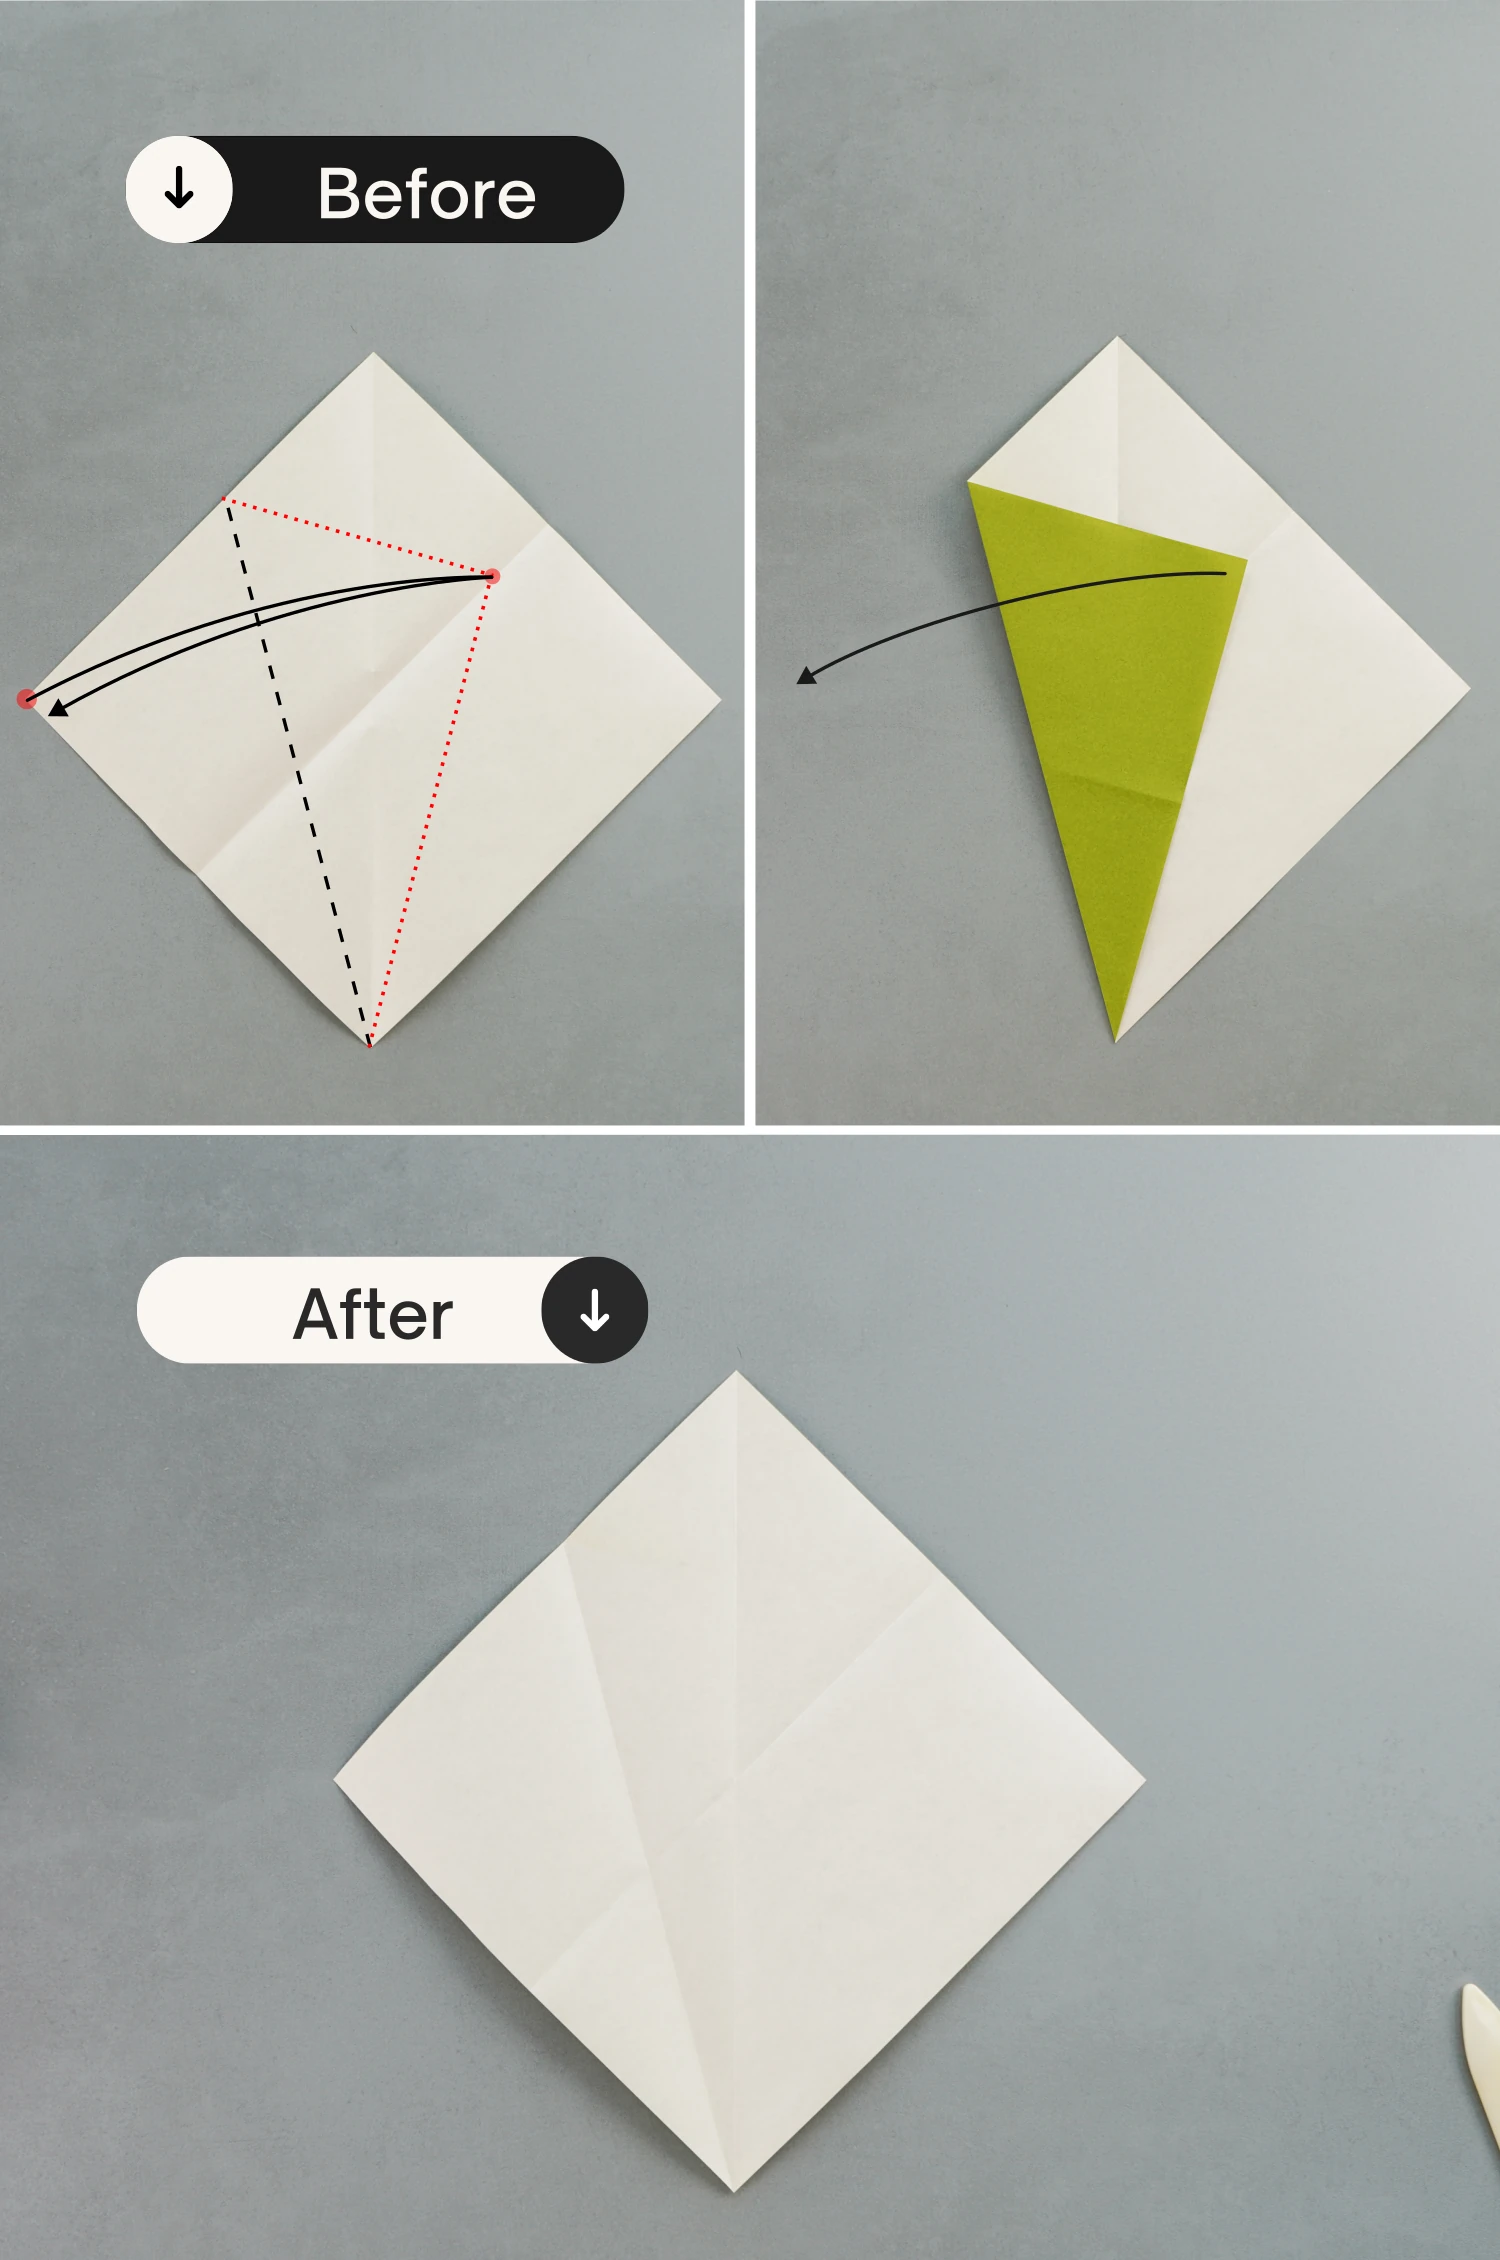
Fold the bottom left and right edges to align with the creases on the left and right you made in the last two steps separately, then flip the paper over.
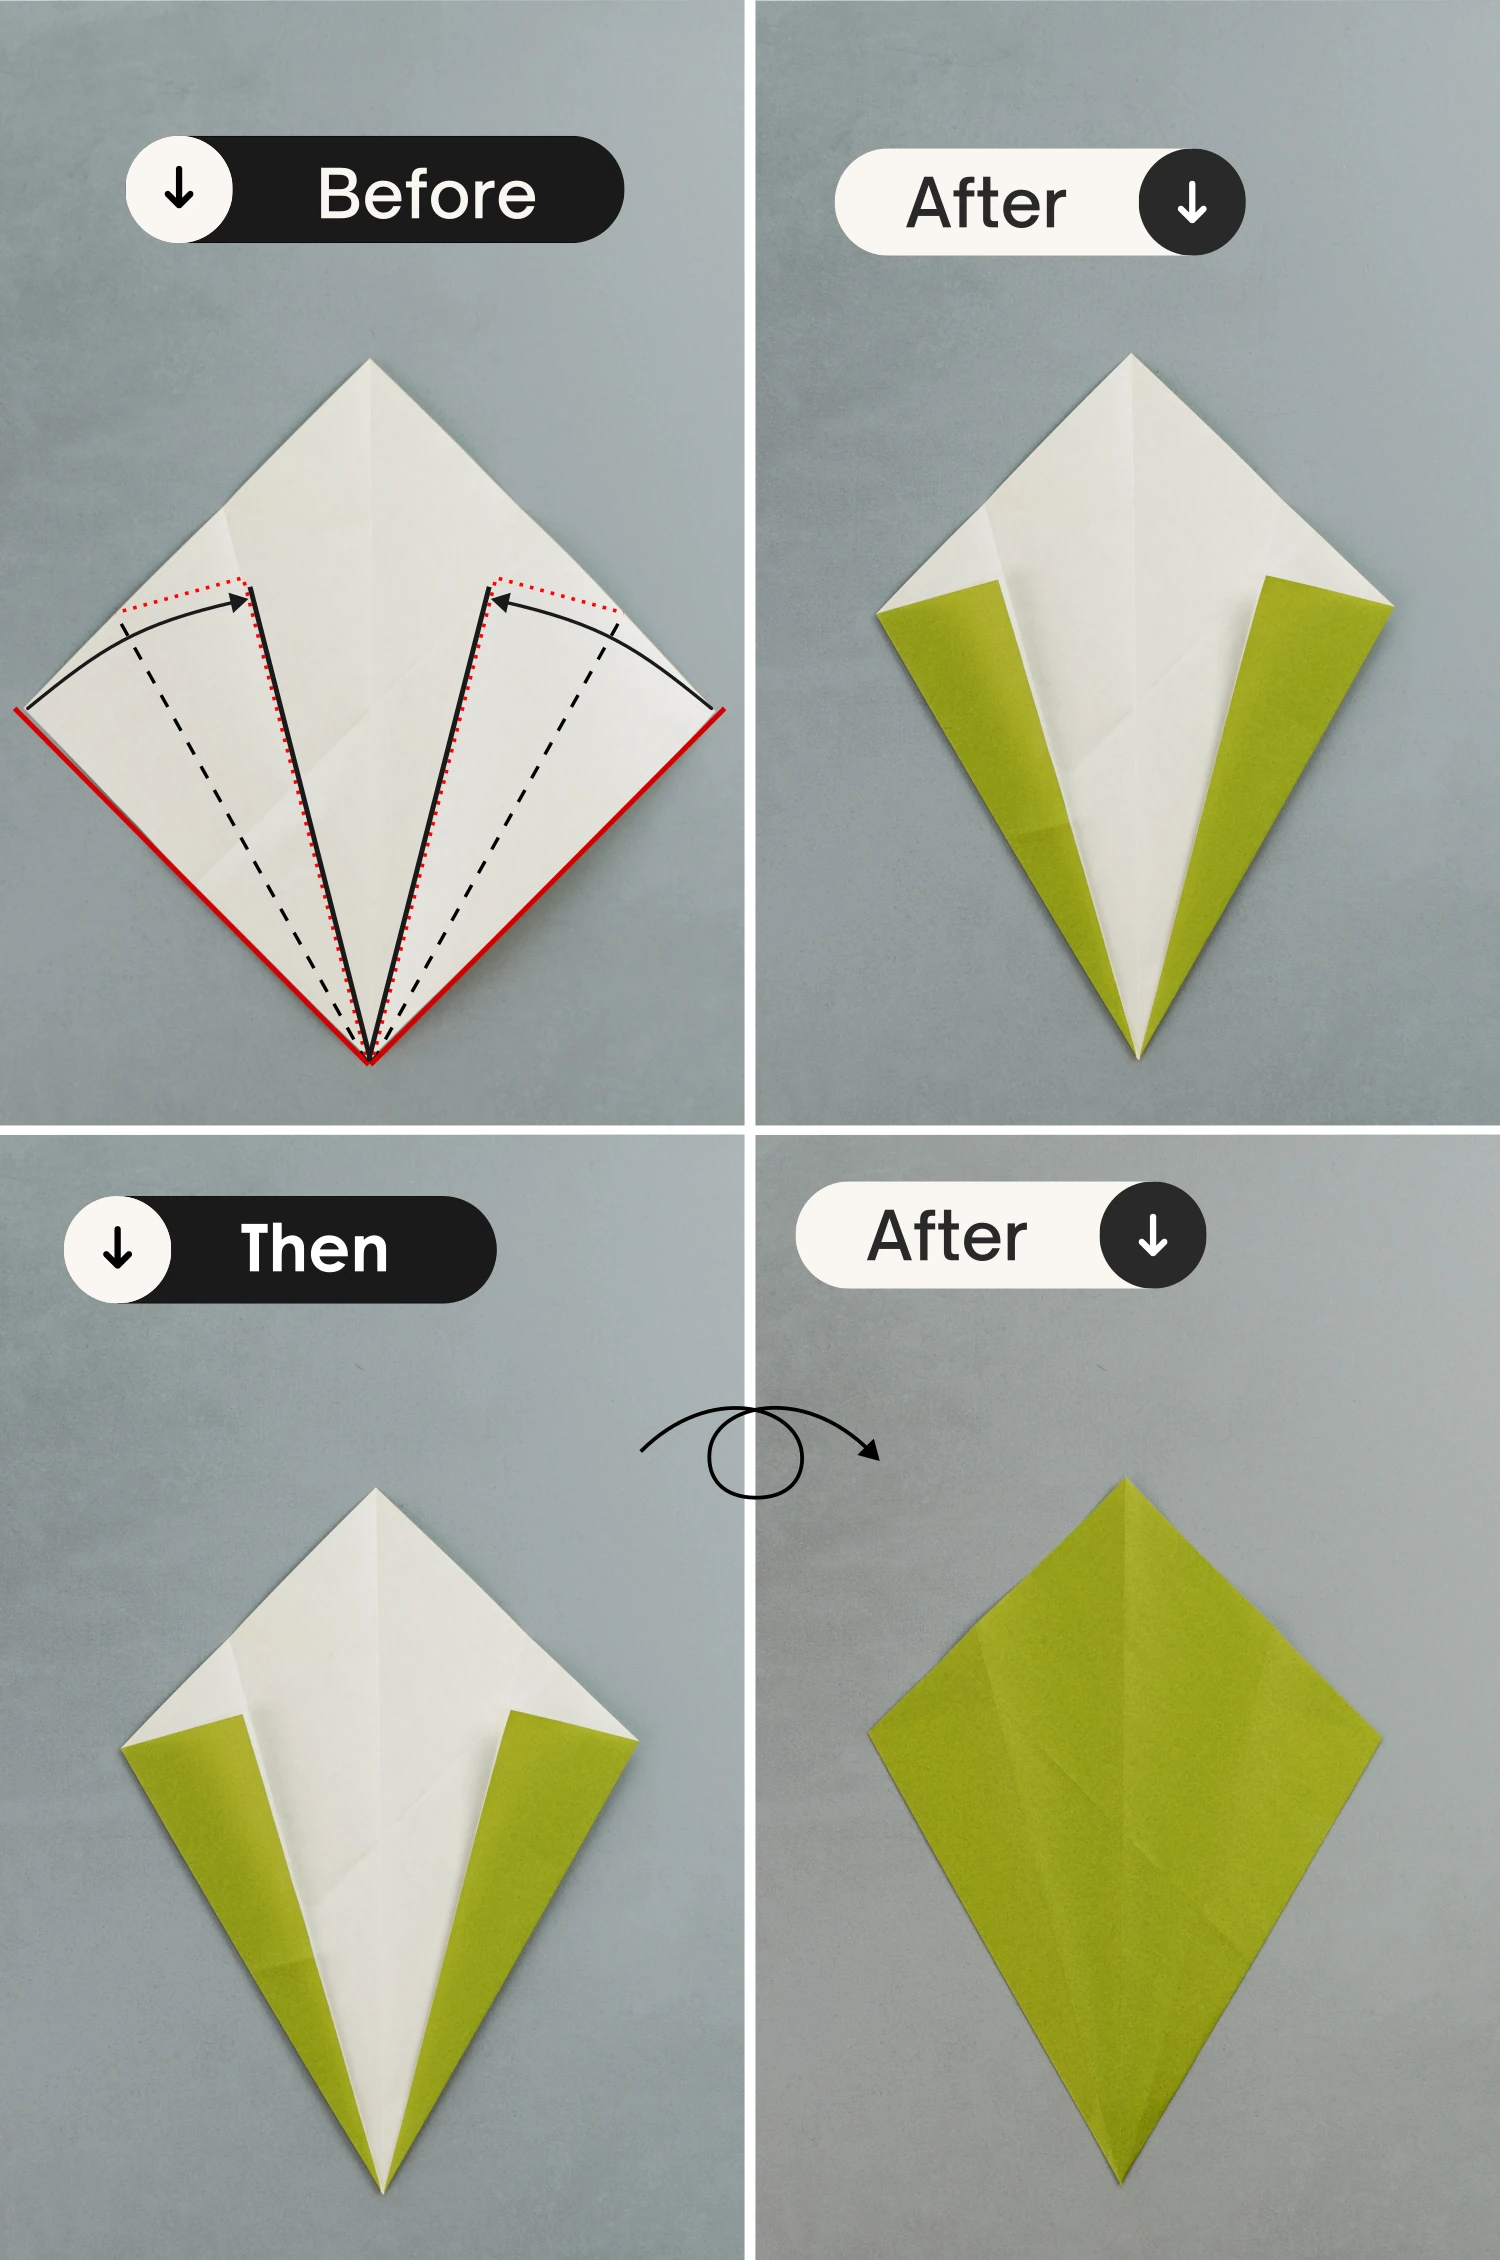
Step 6
Fold the top corner down to meet the bottom corner, then fold it back to the top along the dotted line.
Step 7
Flip the paper over vertically.
Step 8
Fold the left-colored part toward the right along the dotted line. Then take the right corner of the folded part, and fold it to the left along the crease shown by the dotted line.
Step 9
Take the bottom left corner of the part you folded in the previous step, and fold it up along the dotted line, crease it well then unfold it.
Step 10
Lift the top layer on the left side to open the flap, fold the bottom left corner again as you did in the previous step, then flatten to finish this swivel fold.
Step 11
Fold this small corner on the left to the left along the dotted line, and unfold it.
Step 12
Lift the left small corner to open the flap, and push the corner you folded in the previous step to the left again, then press the standing edge down and flatten the fold.
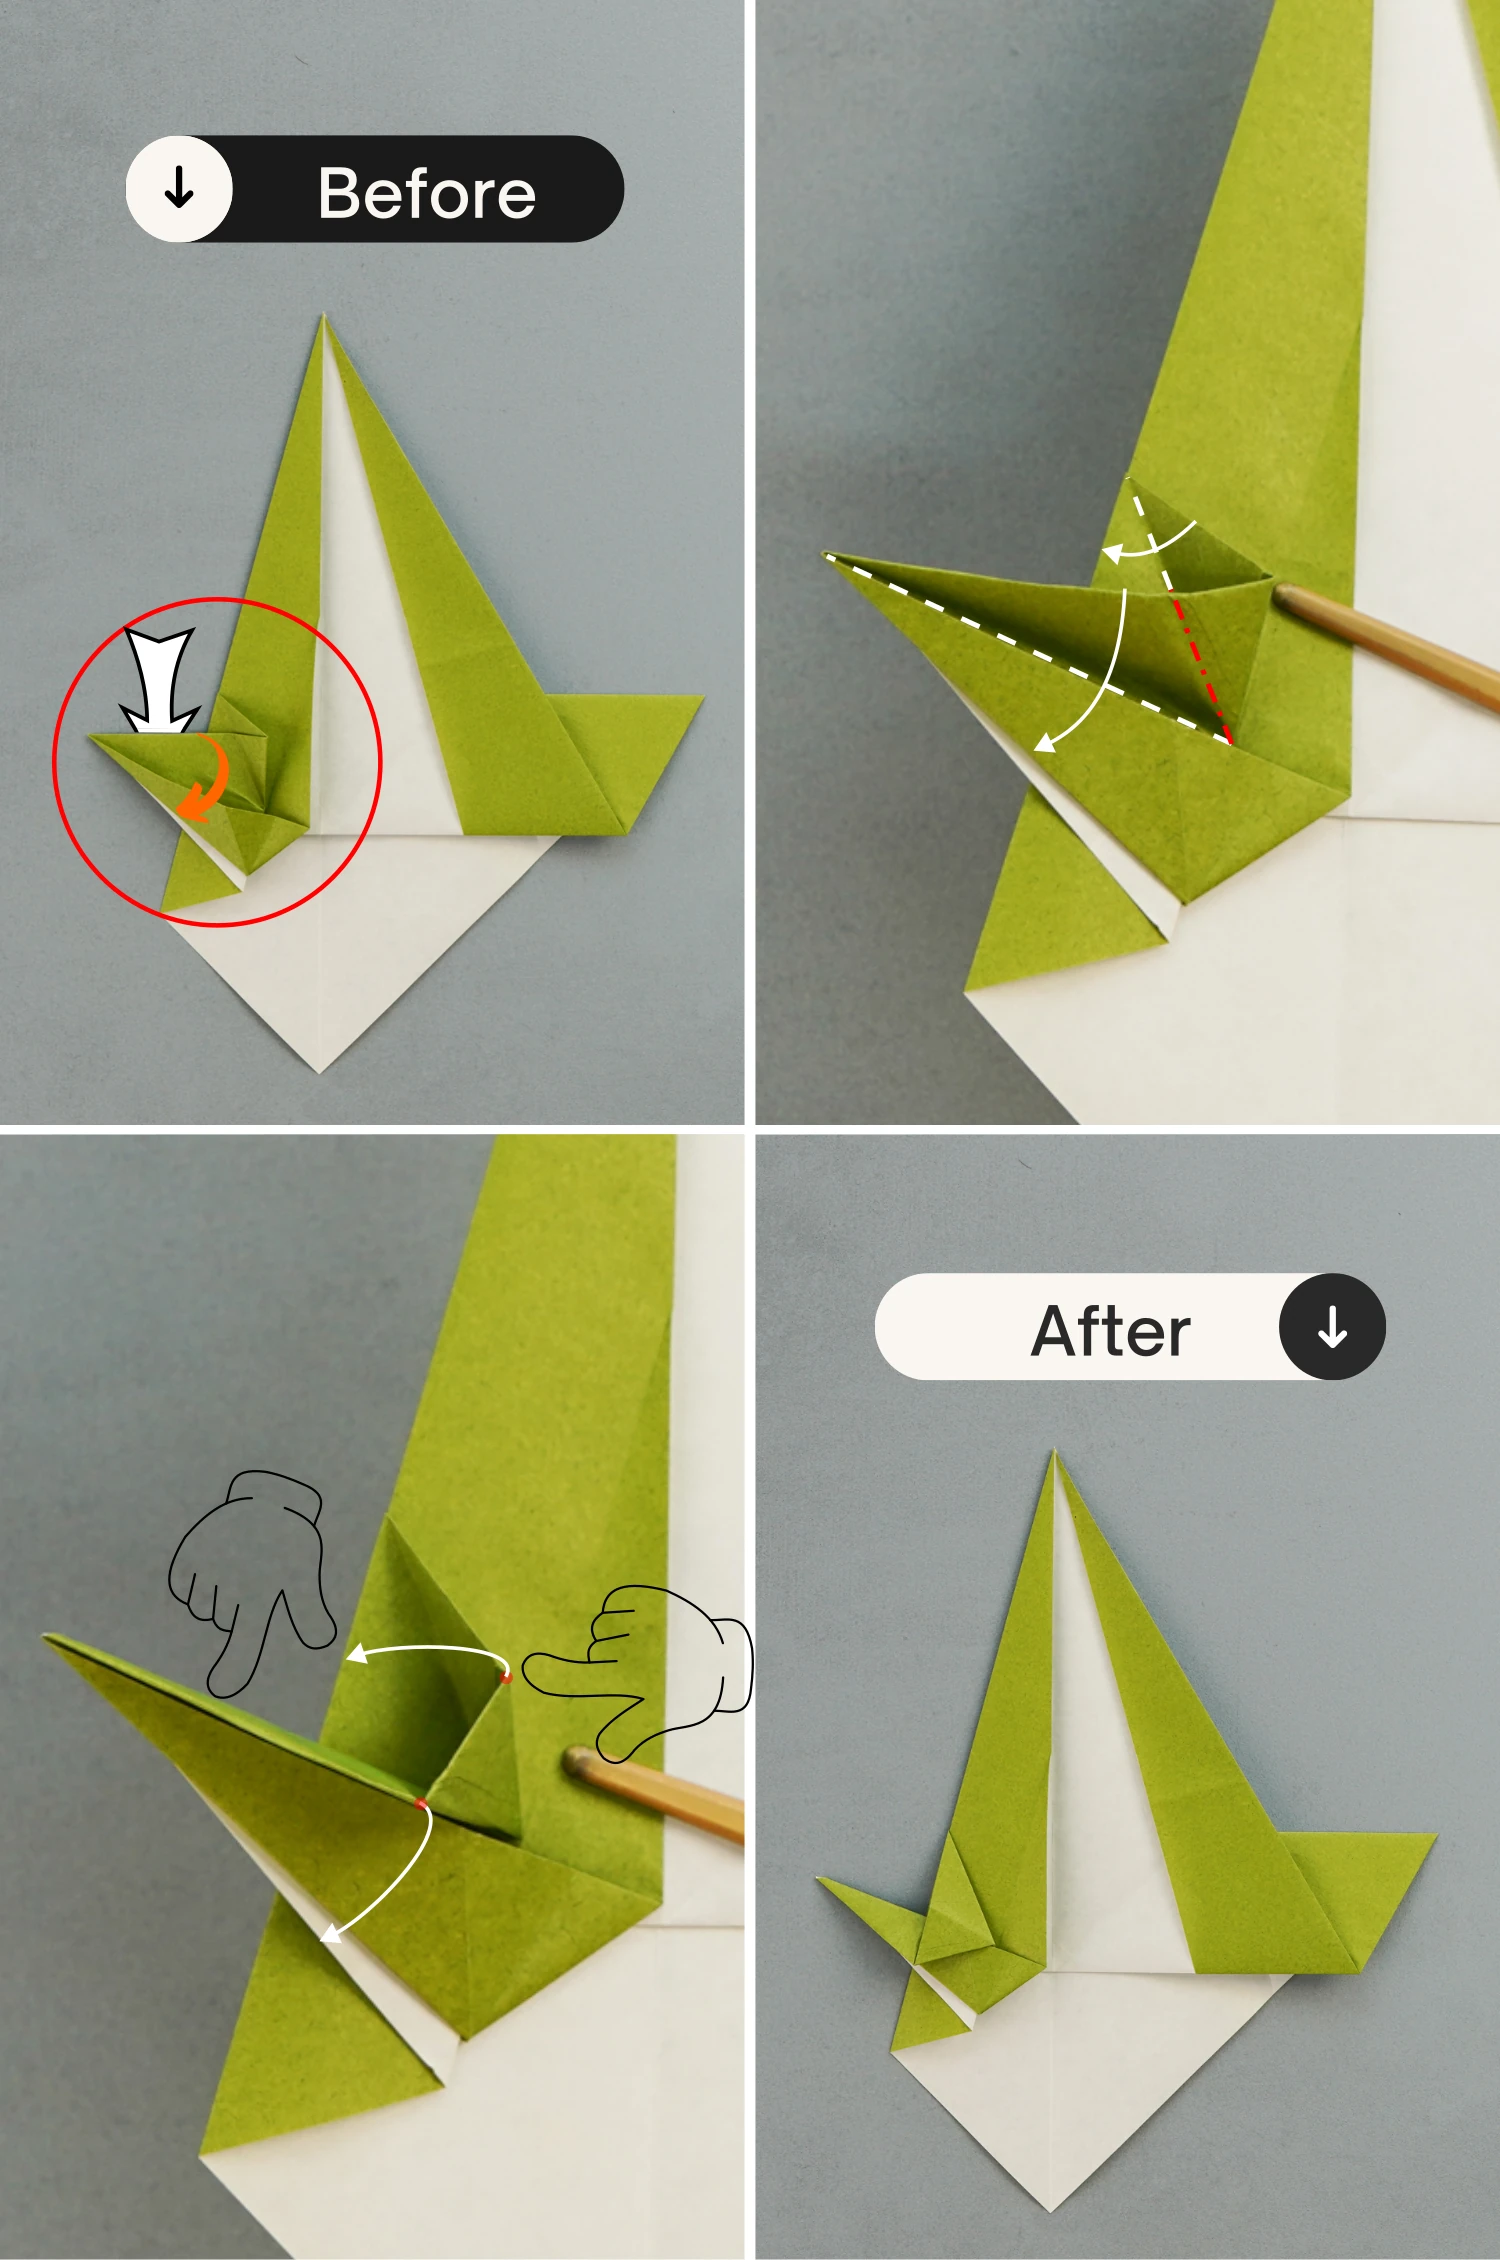
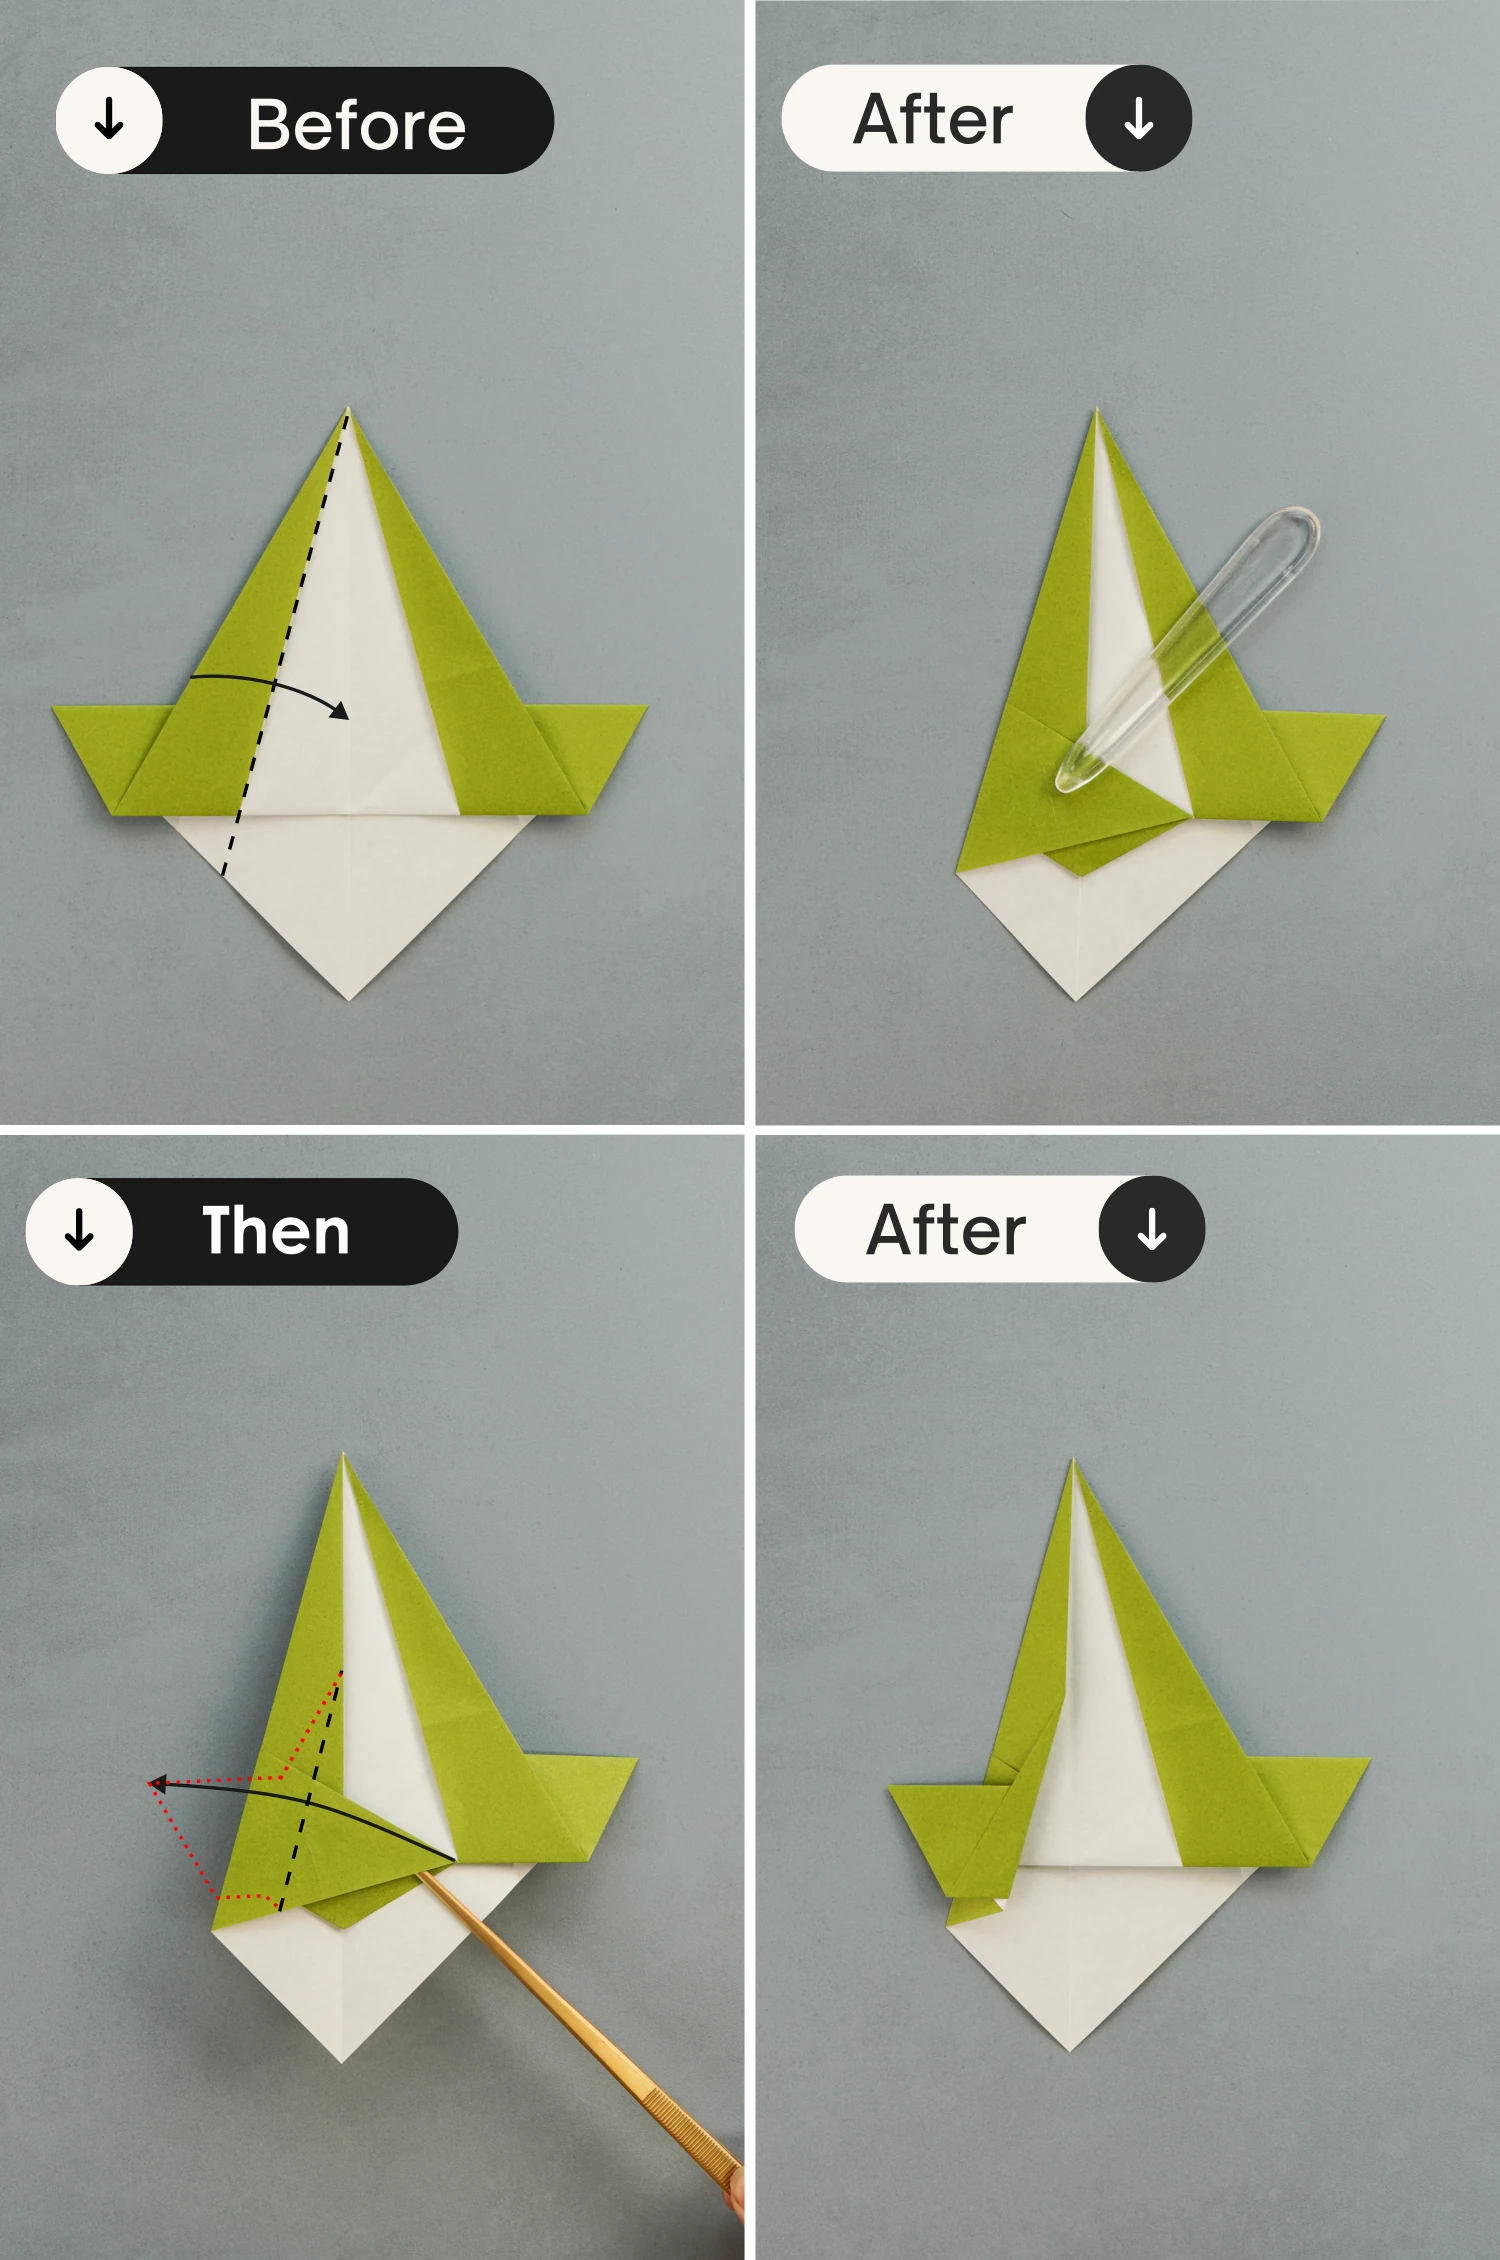
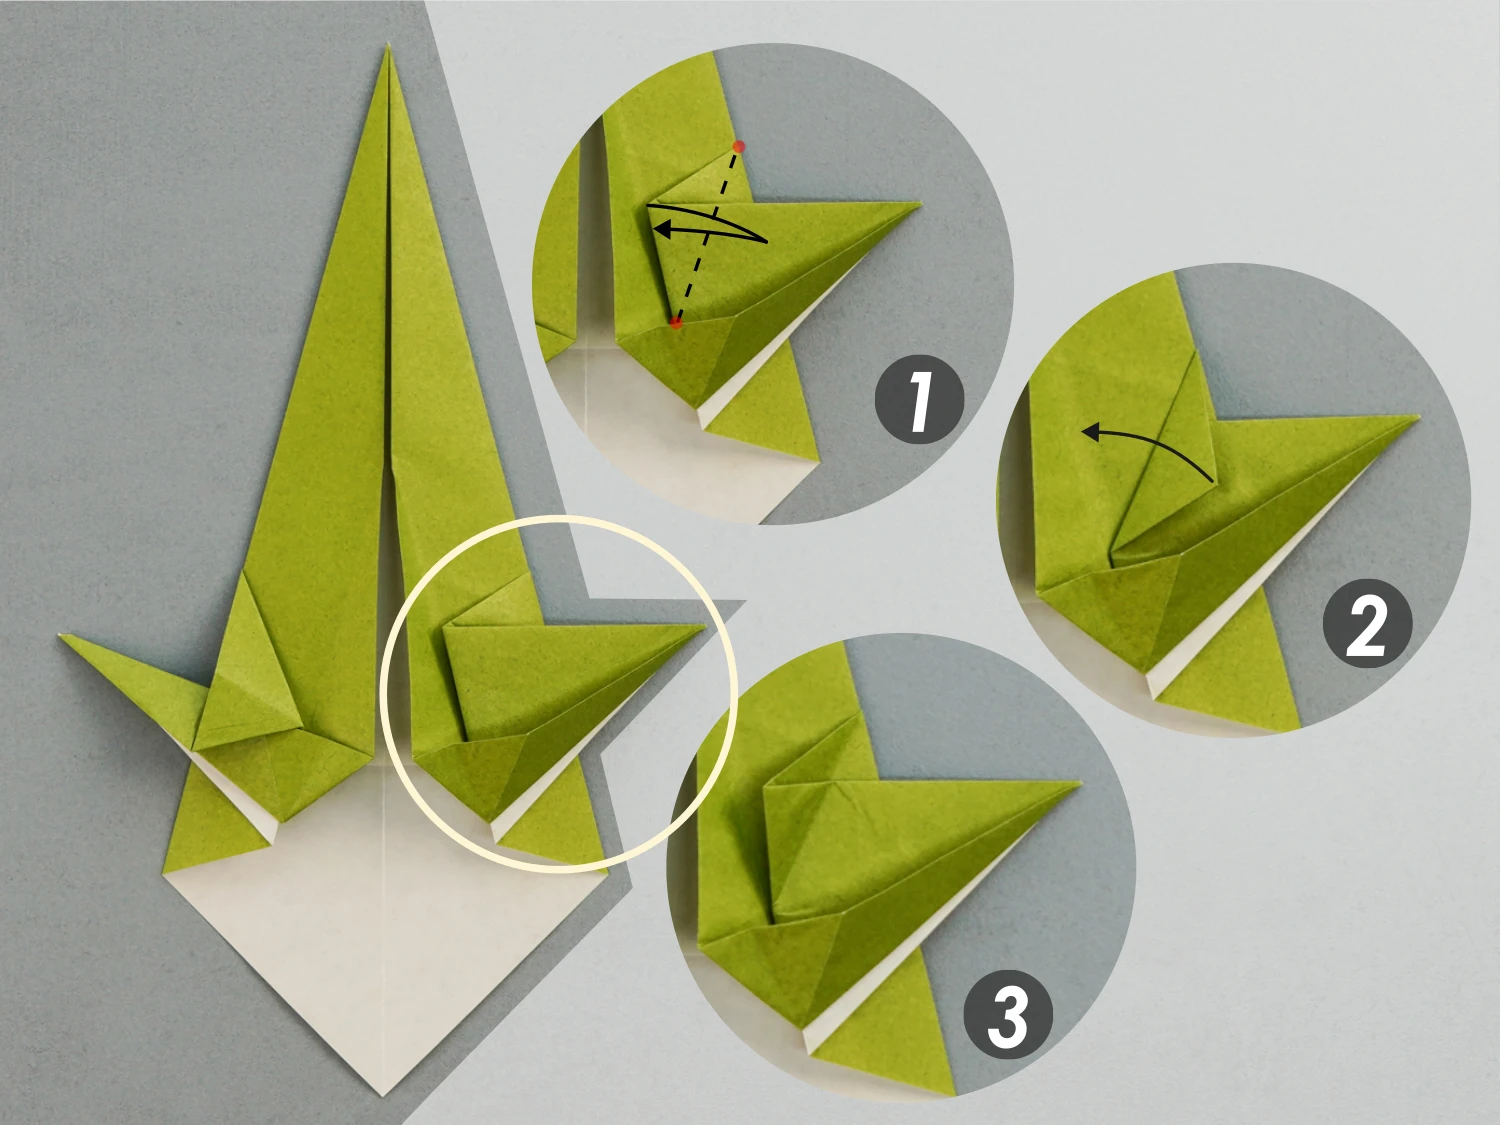
Step 13
Fold the right corner to the left along the dotted line, then fold it back to the right along the crease shown by the dotted line as the third picture shows.
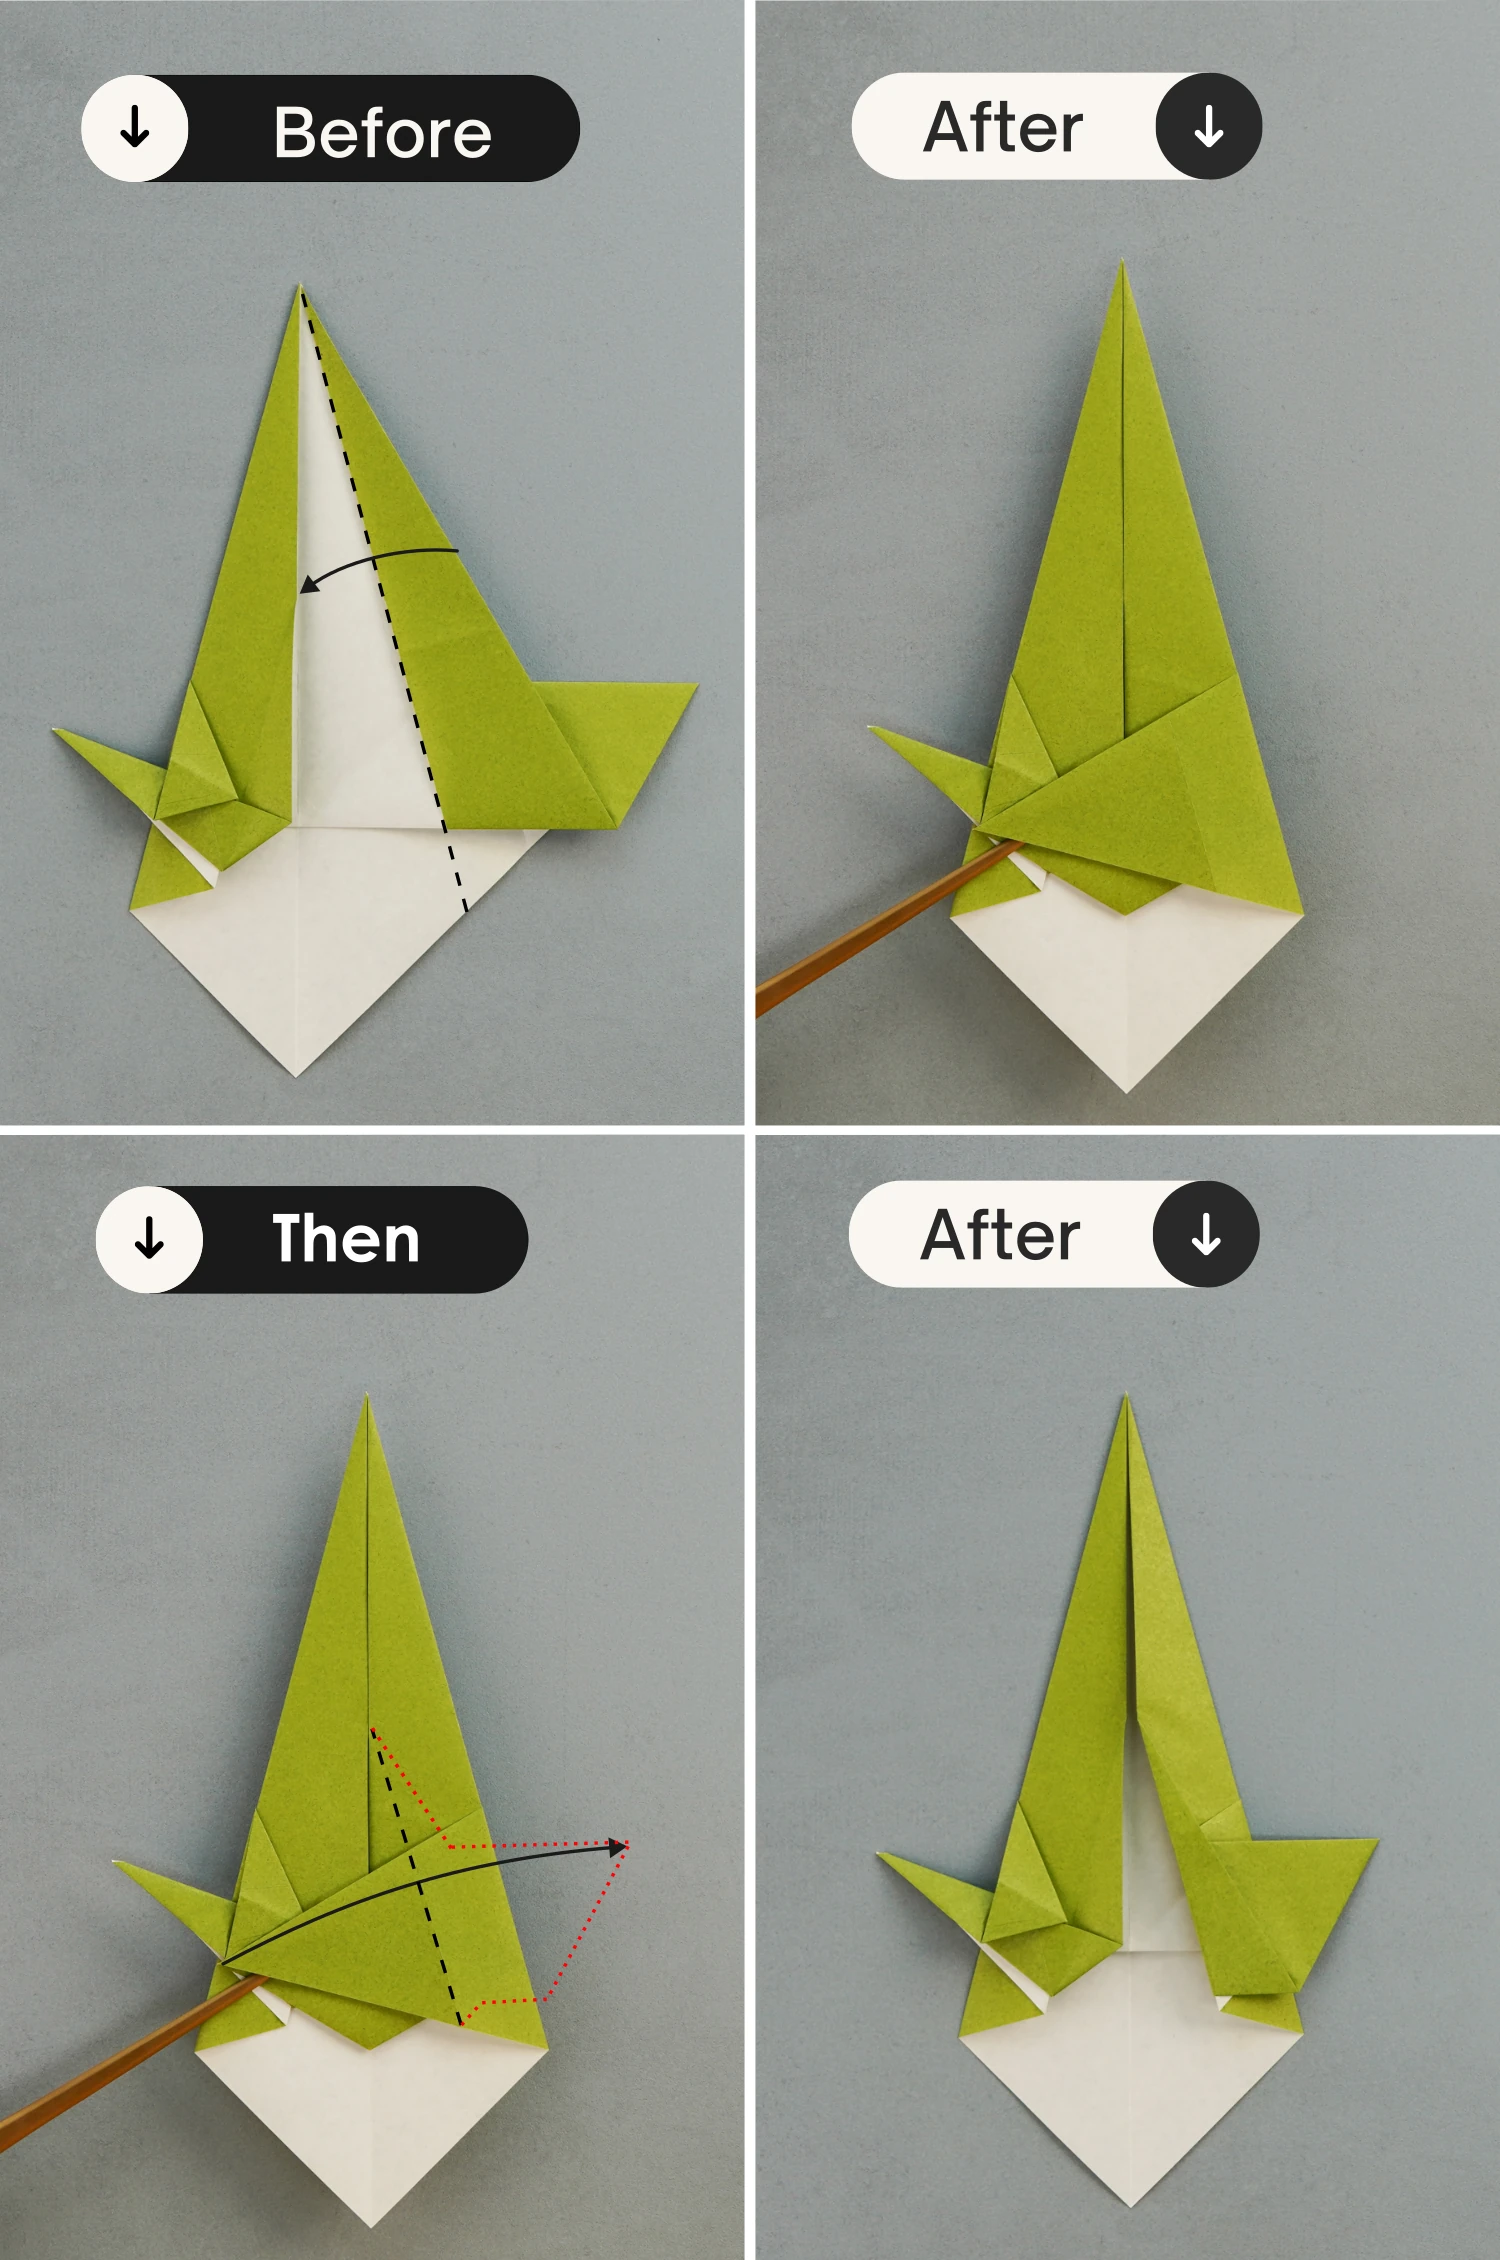
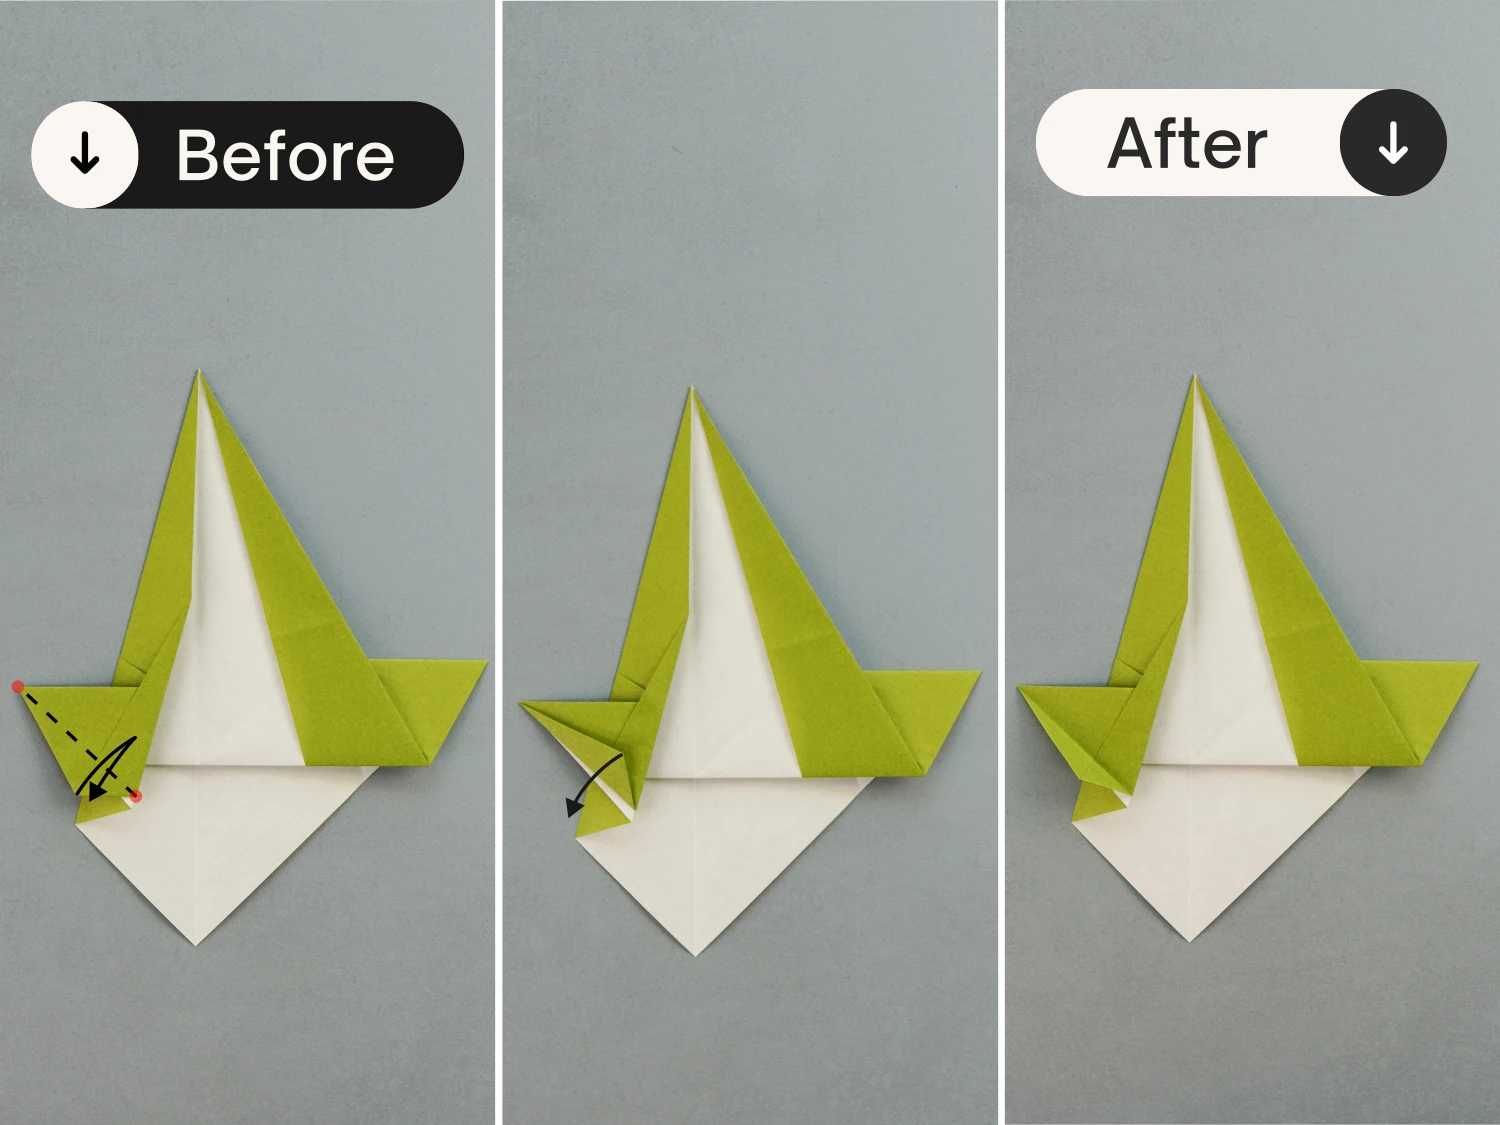
Step 14
Fold the bottom right corner of the folded part up and to the left along the dotted line, and unfold it.
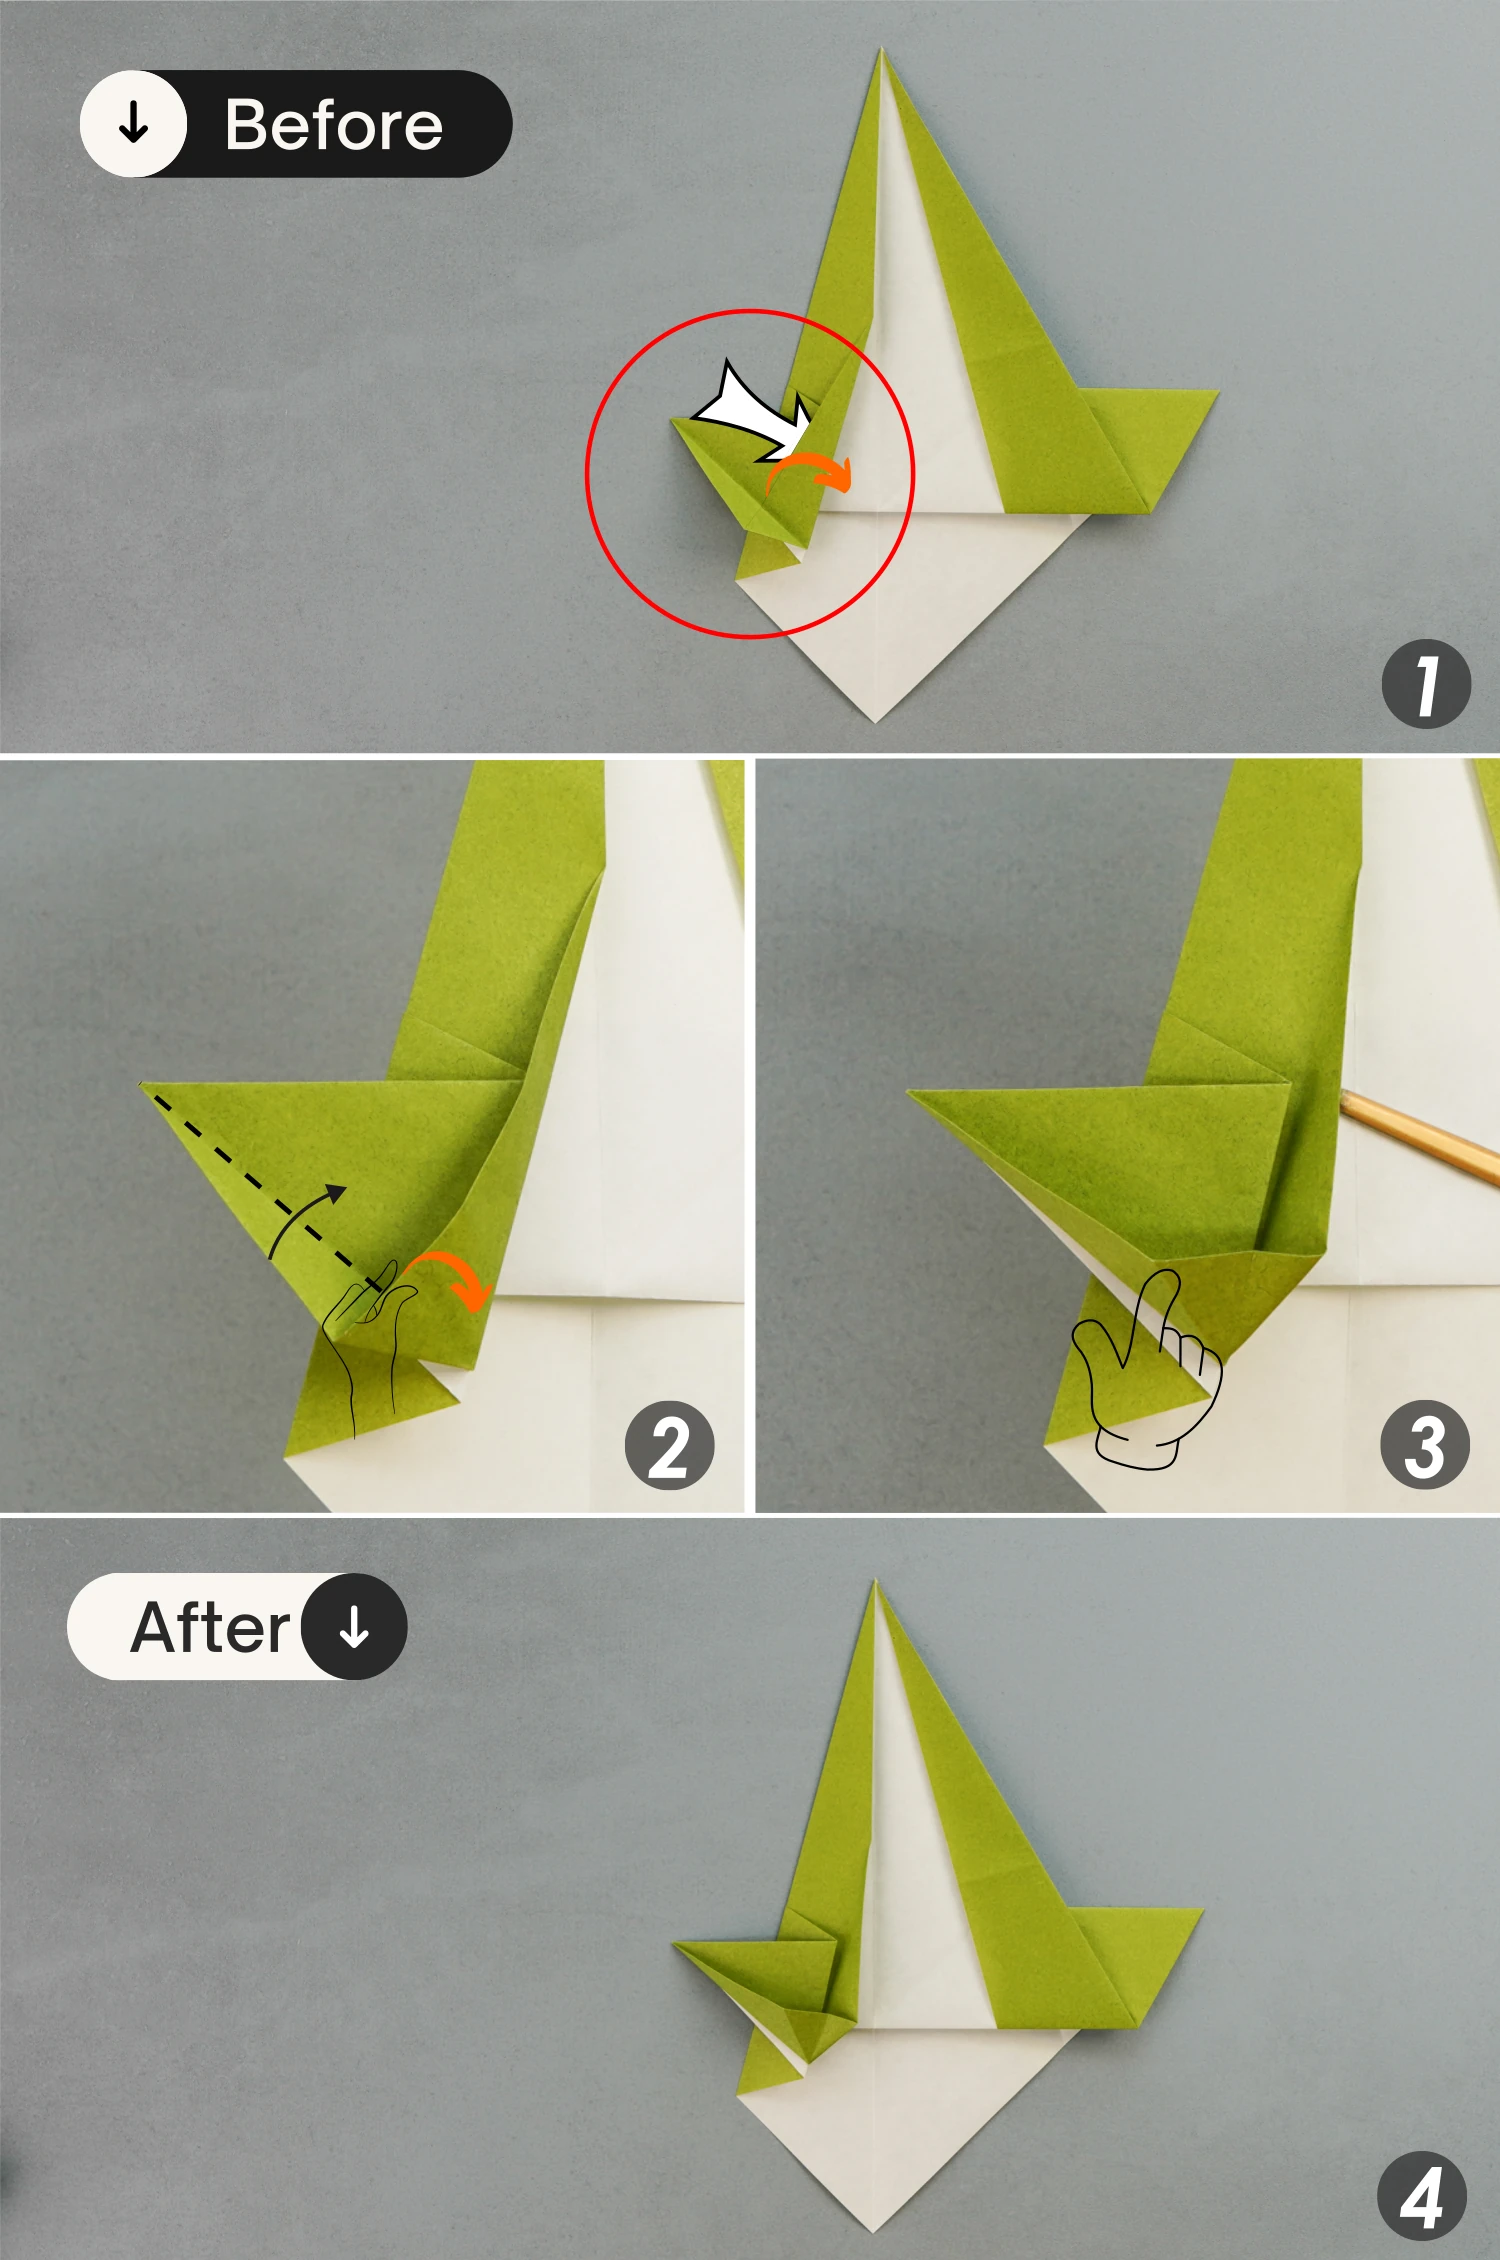
Step 15
Lift the top layer of the right part to open this flap, and fold the bottom right corner again as you did in the previous step, then flatten the fold.
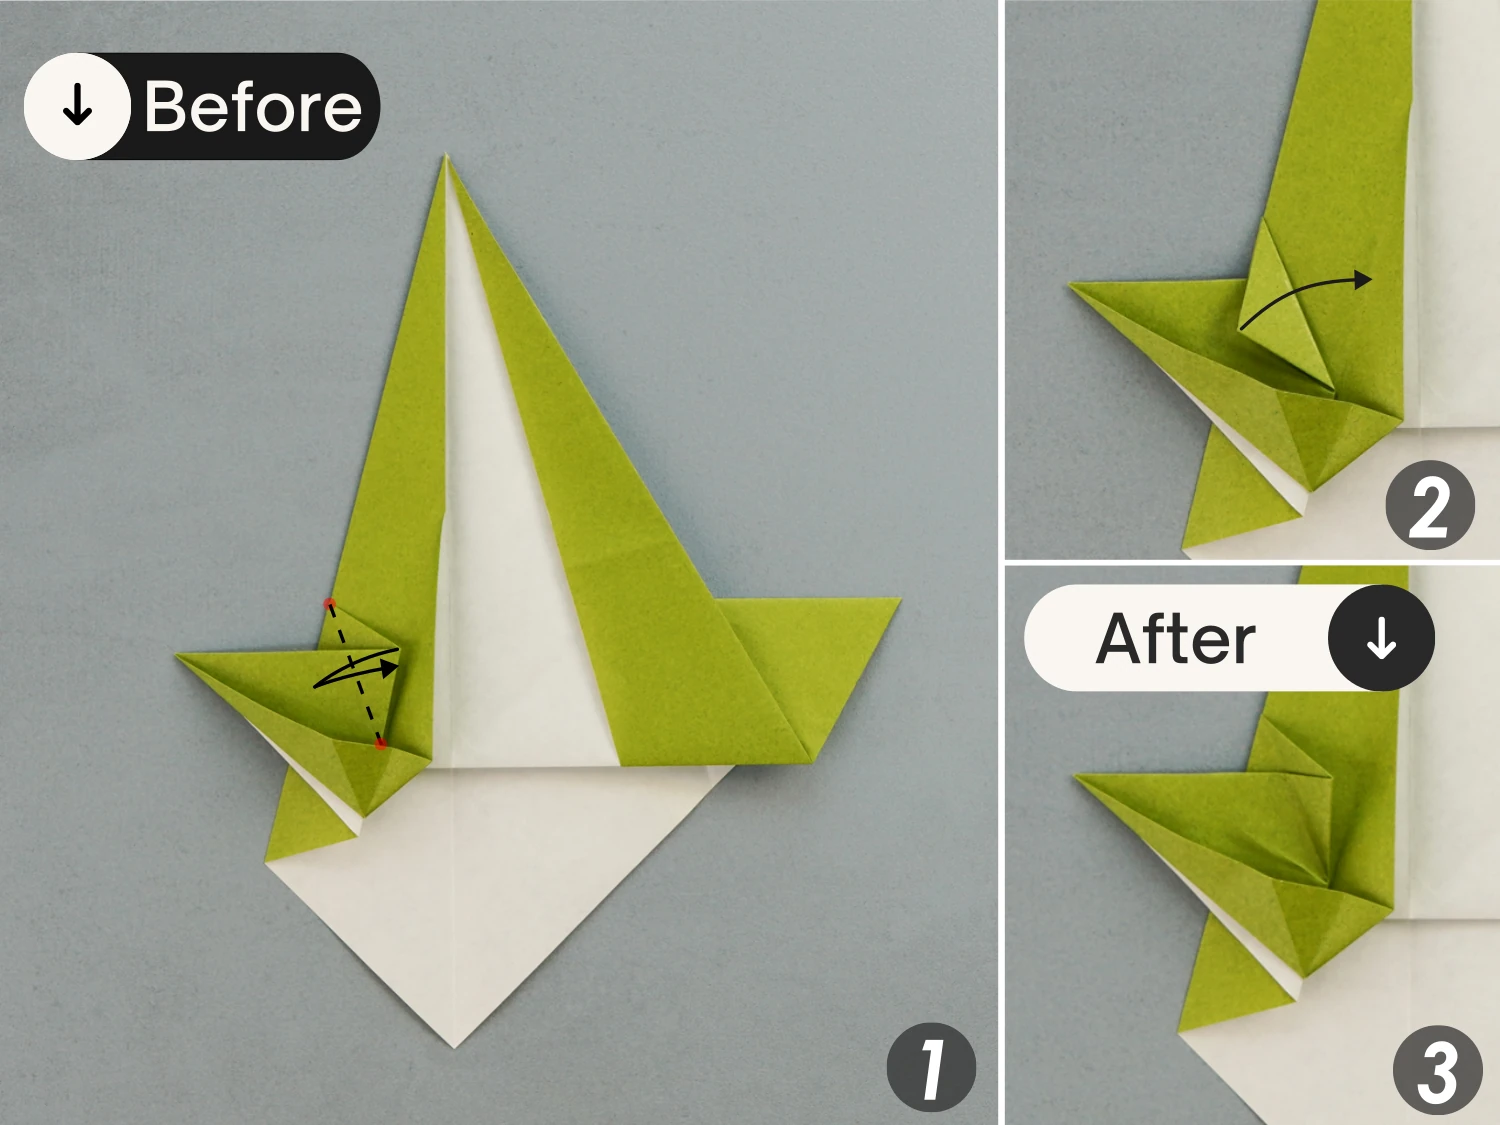
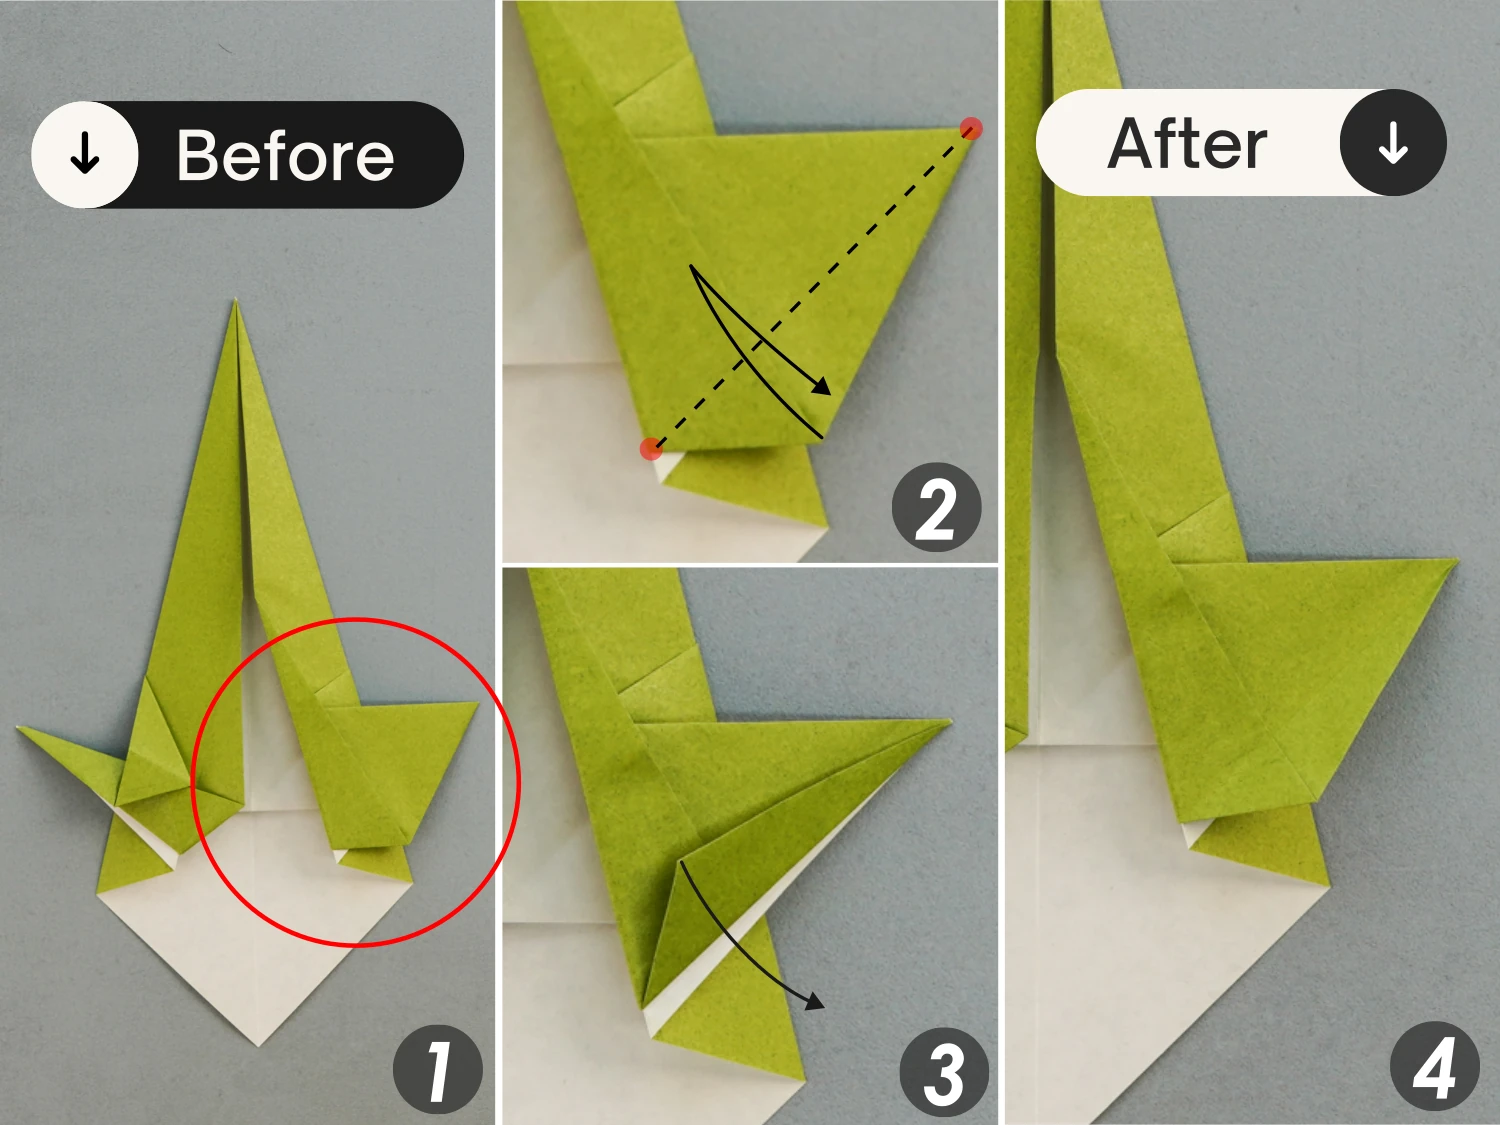
Step 16
As you did for the left side, fold this small corner to the right along the dotted line, crease it well then unfold it.
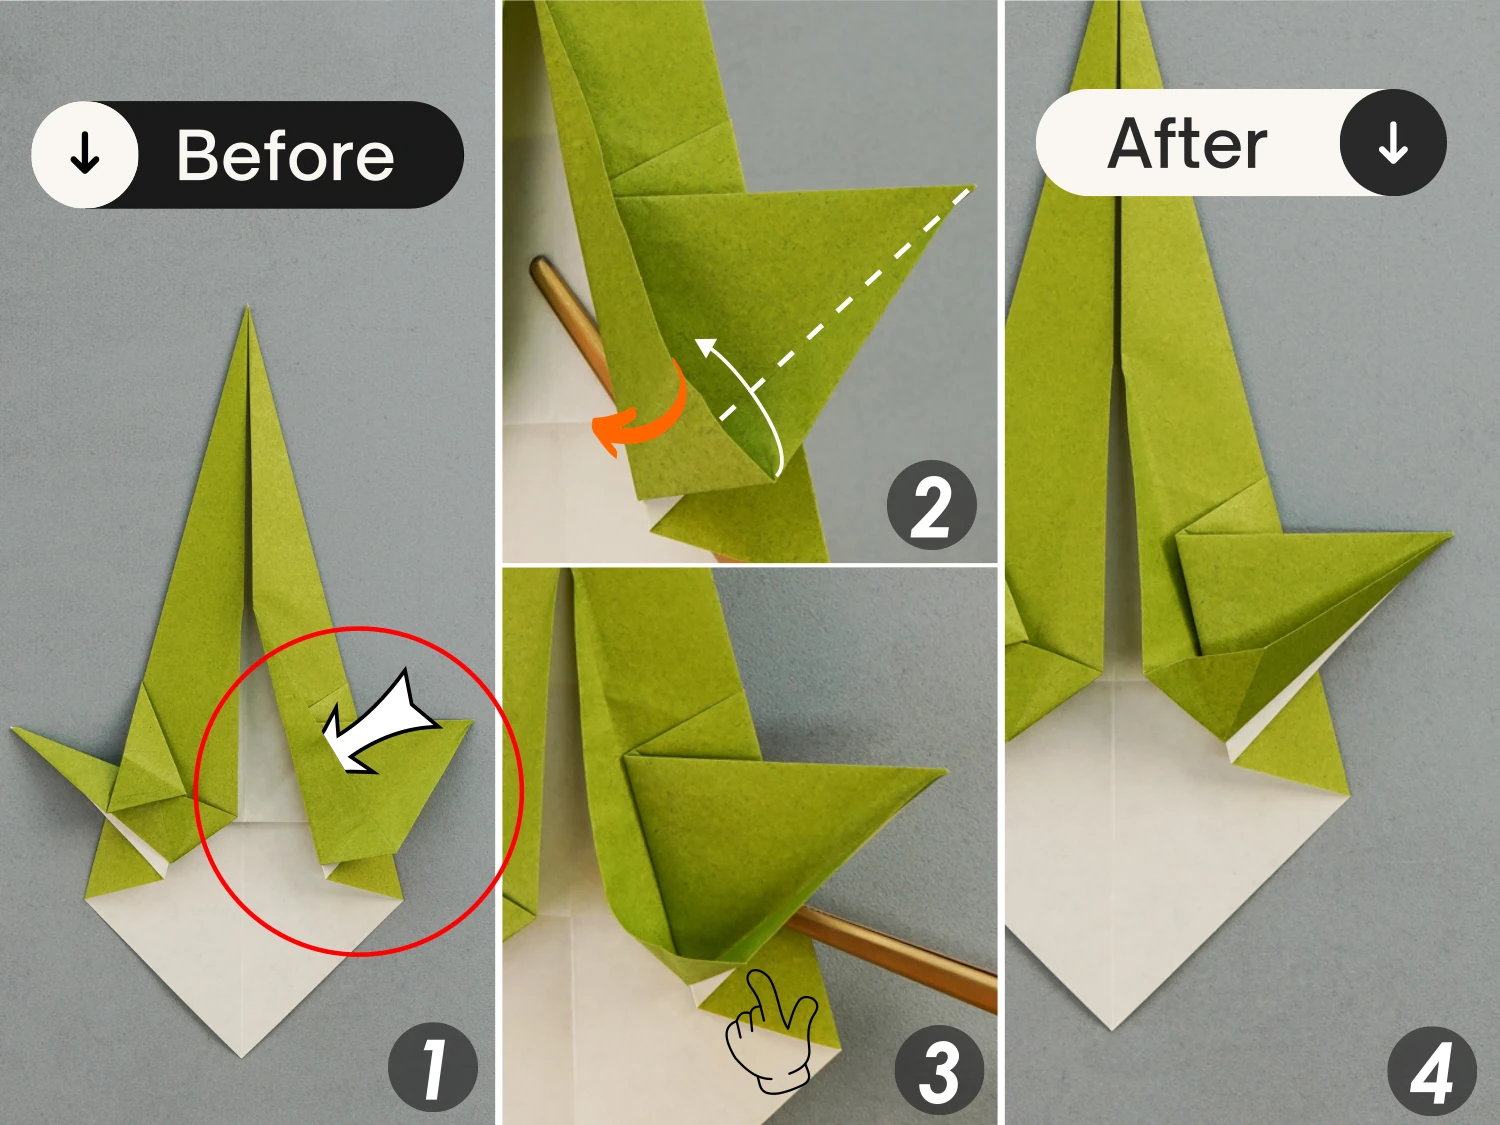
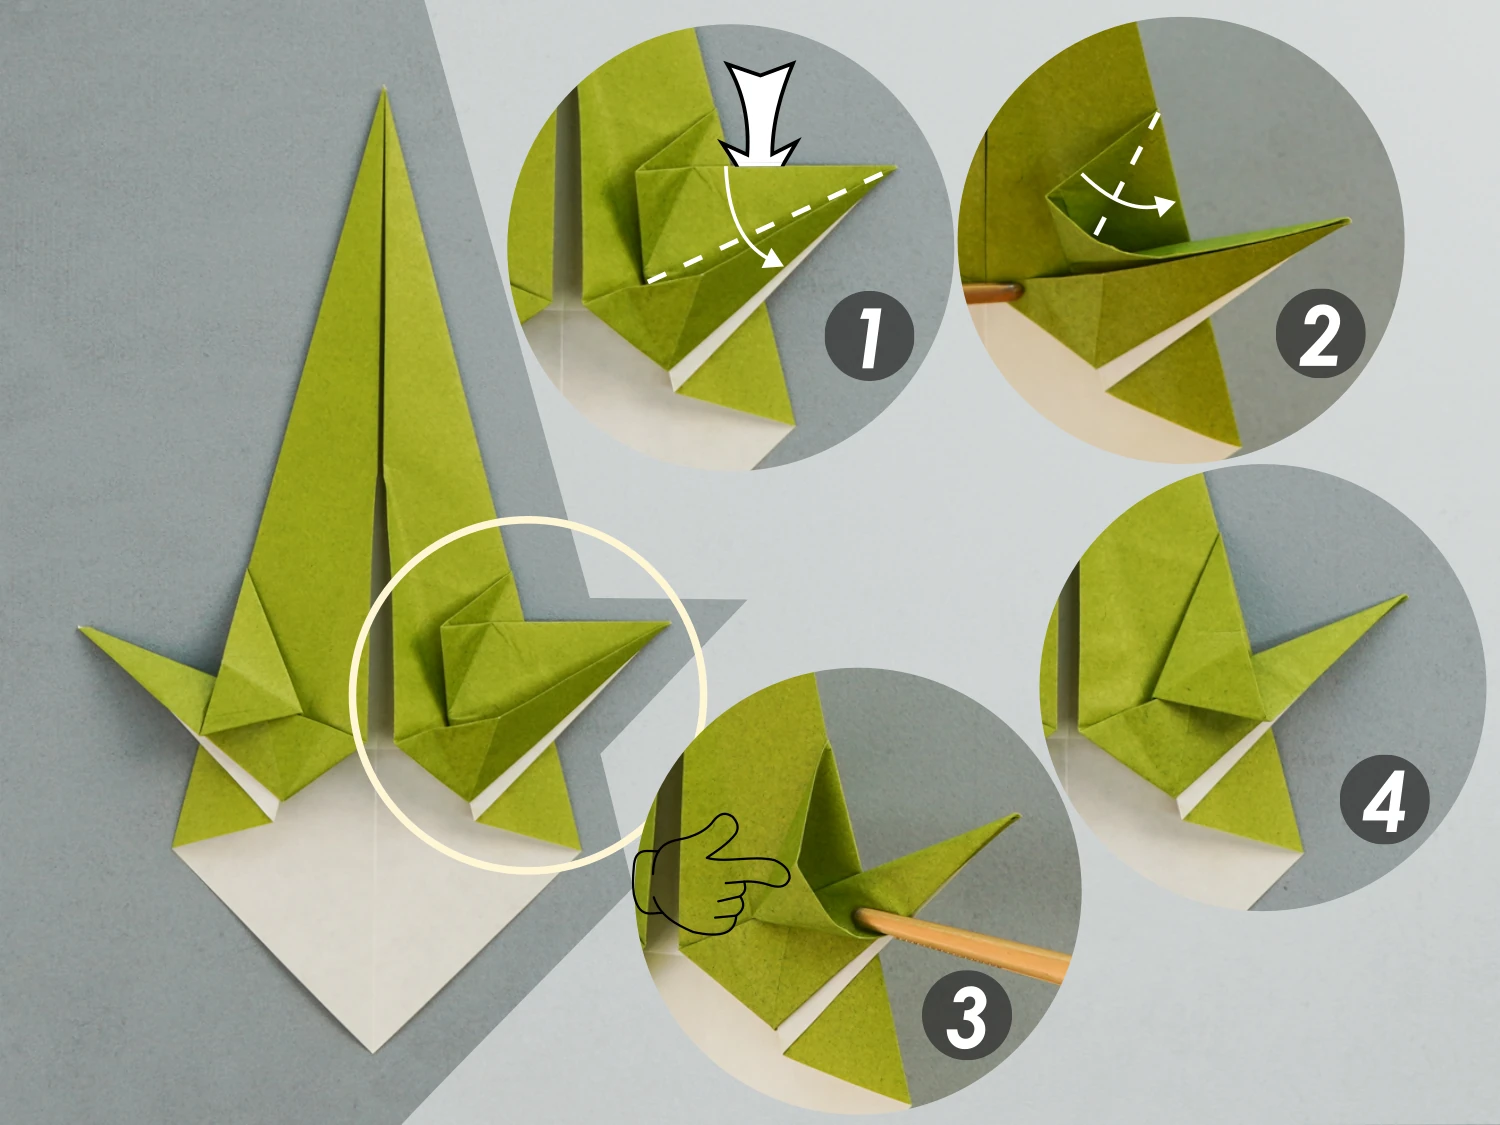
Step 17
Lift the right corner to open the flap, fold the small corner you folded in the previous step to the right again, then press the standing edge down, and finally flatten the fold.
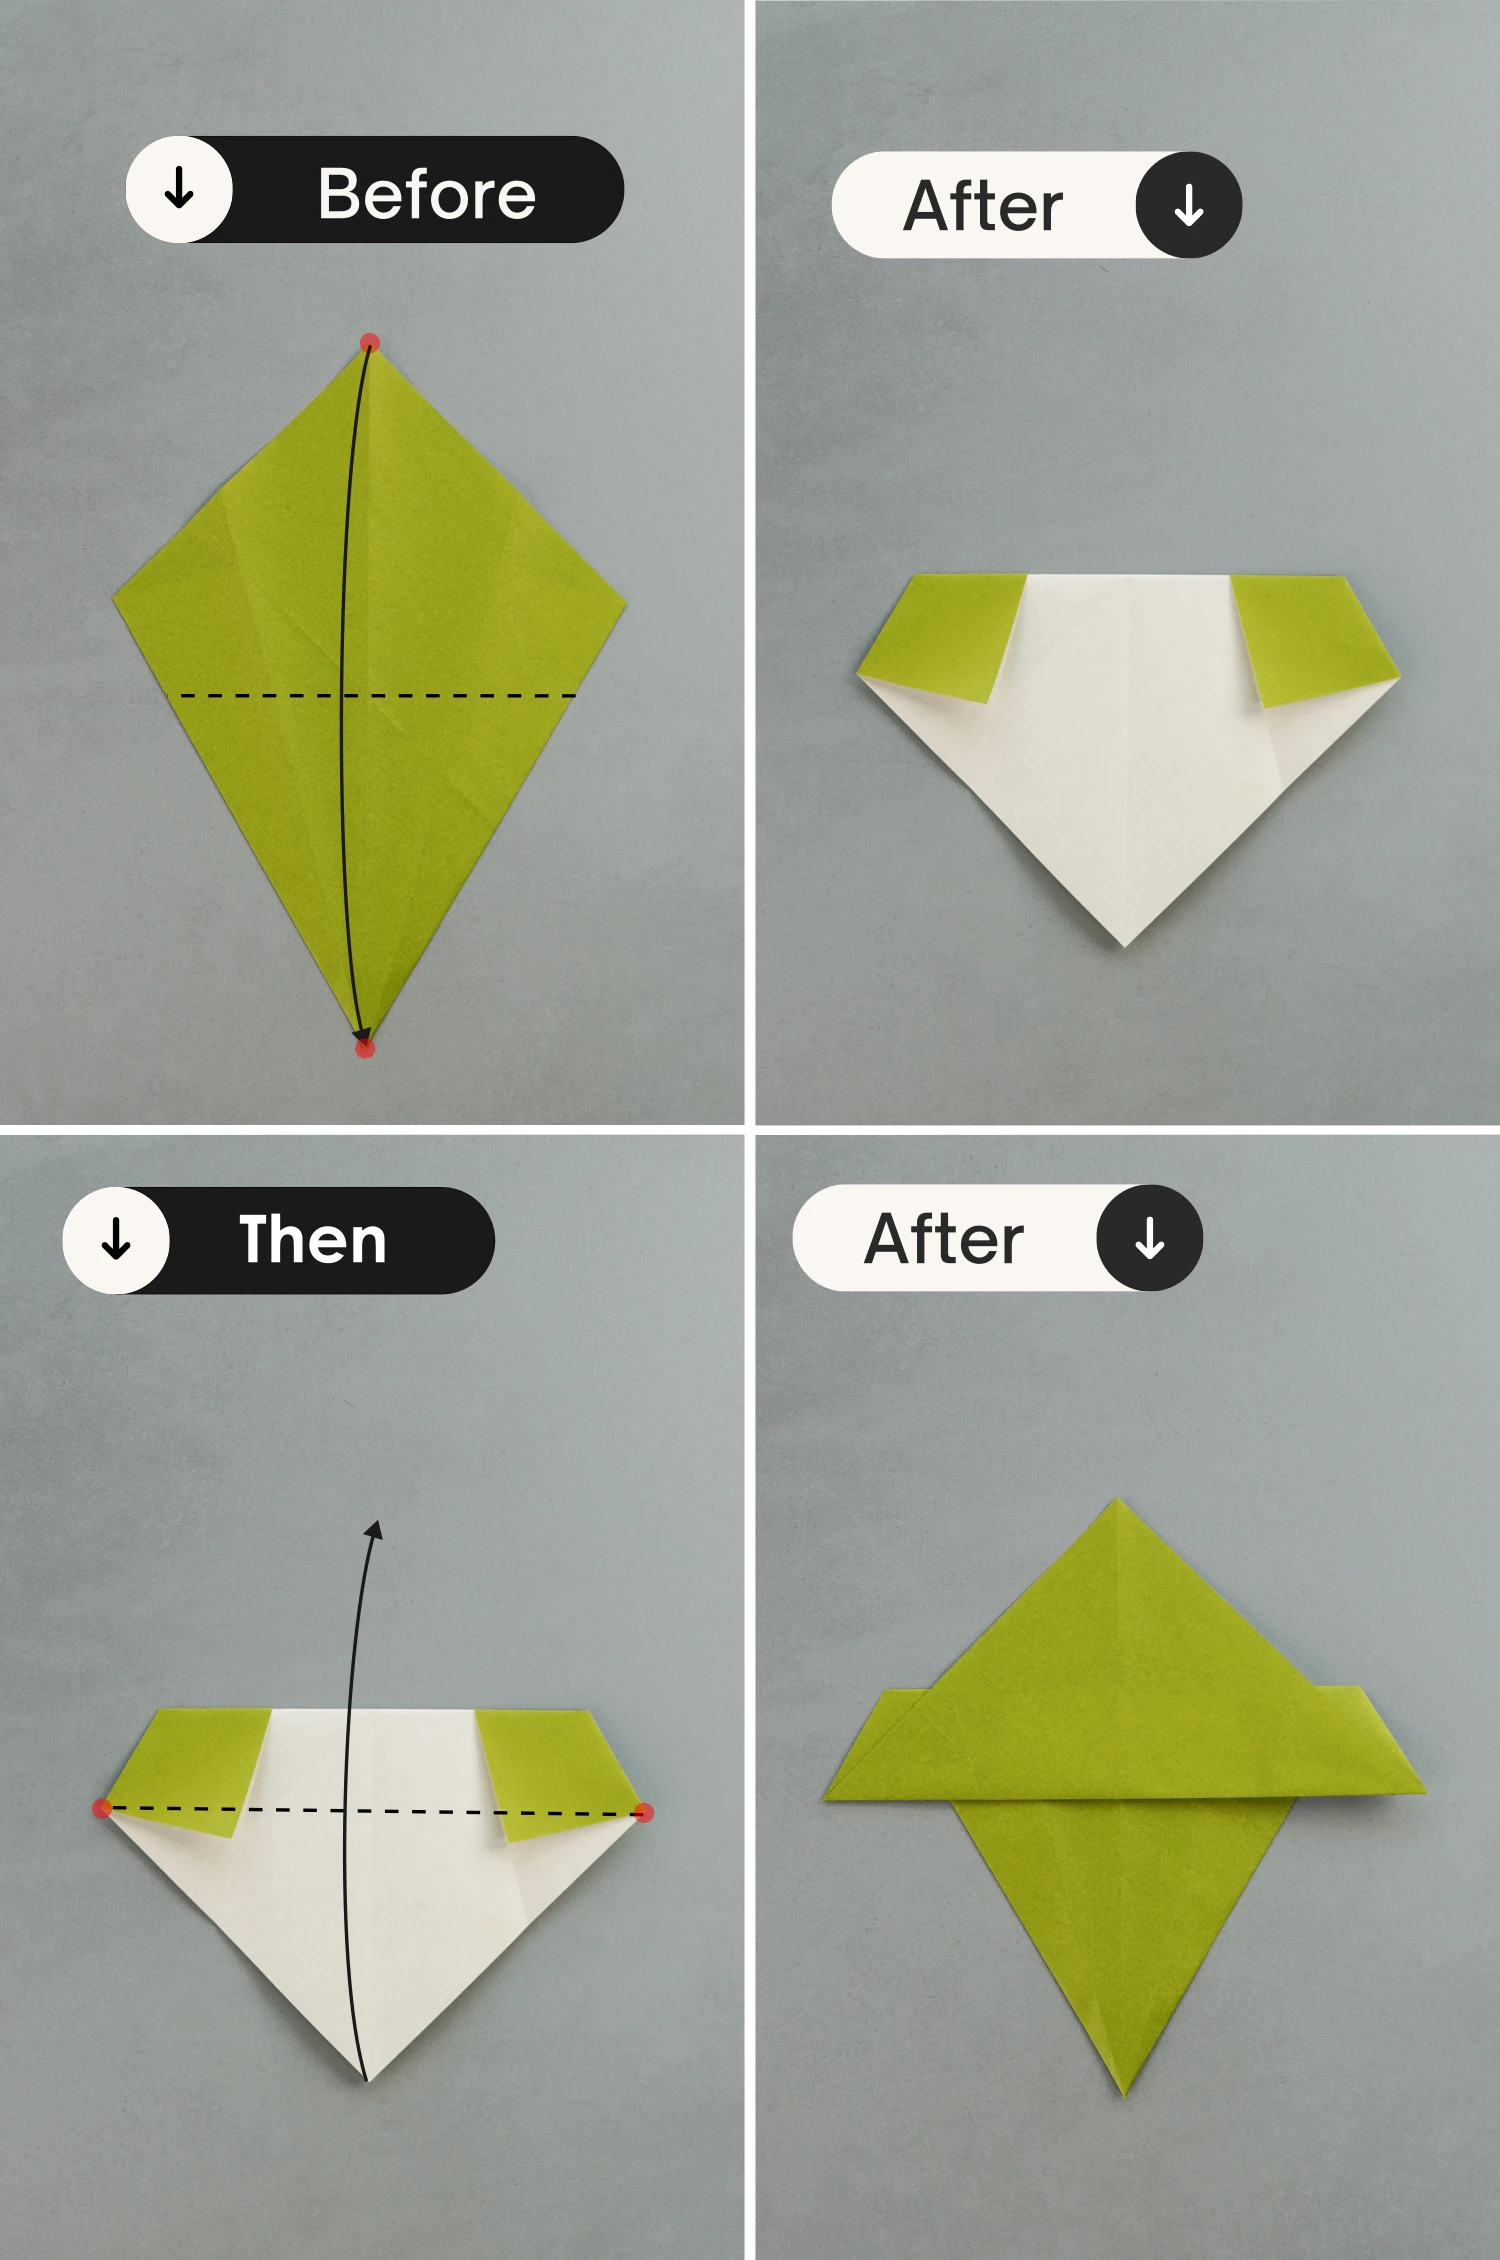
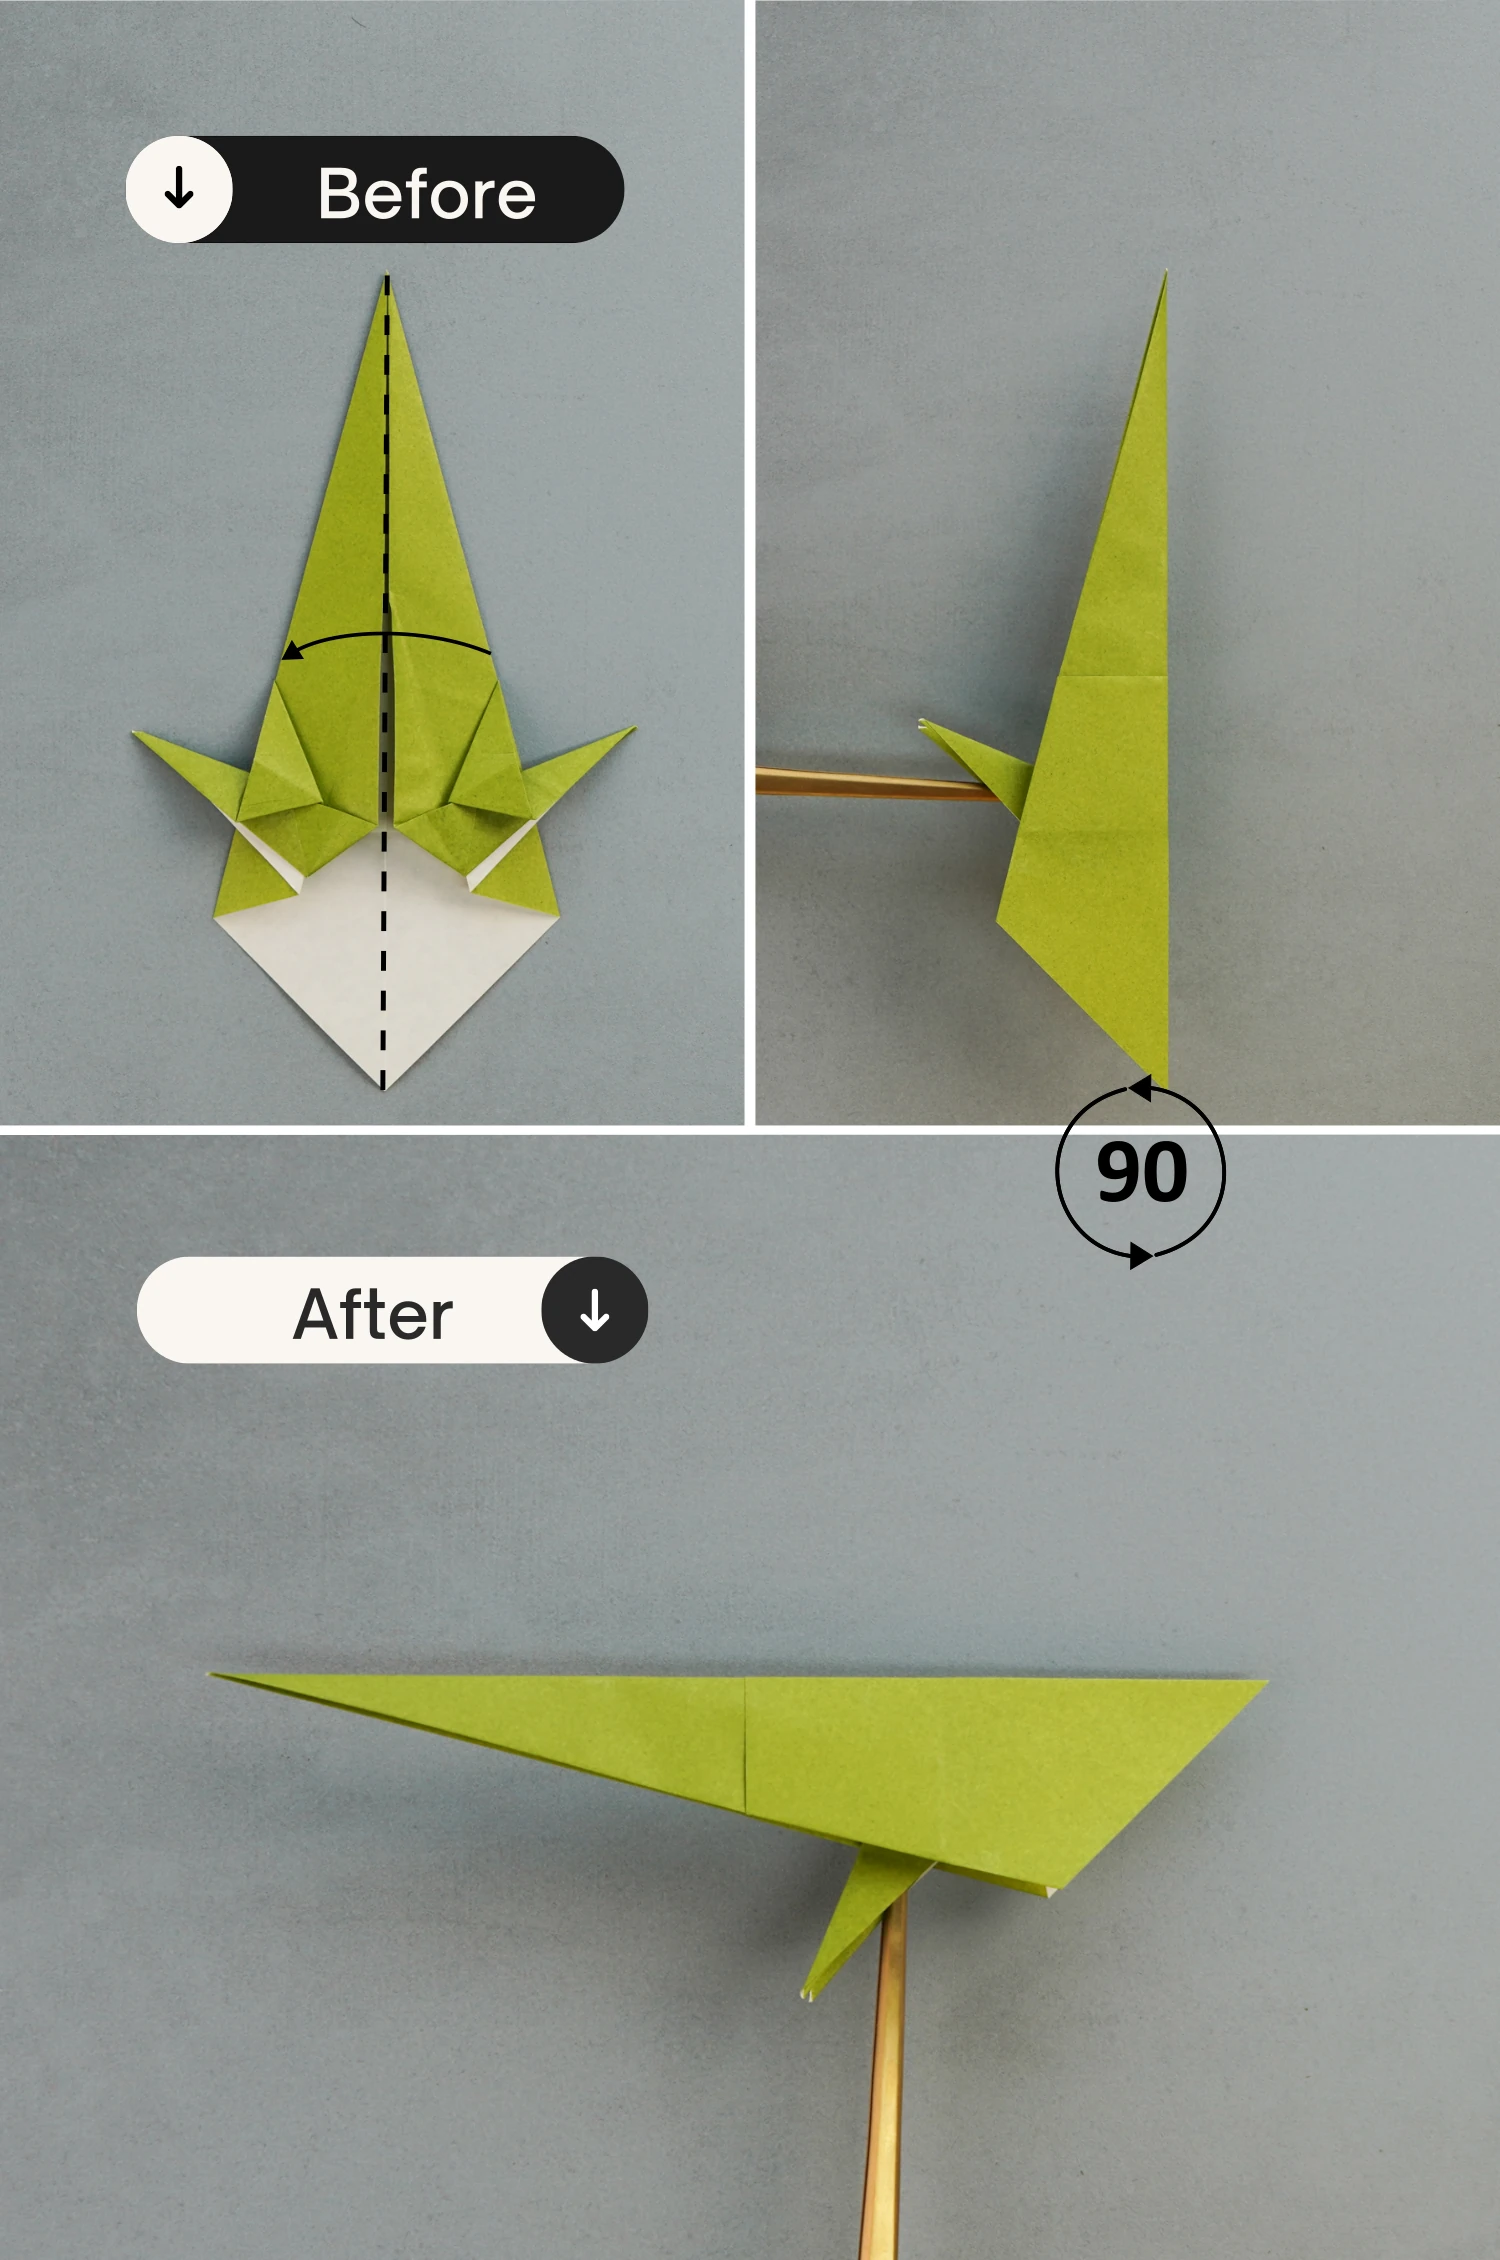
Step 18
Fold the paper in half vertically from the right to the left, and rotate it 90 degrees counterclockwise.
Step 19
Fold the left corner to the right along the black dotted line, crease it well then unfold it.
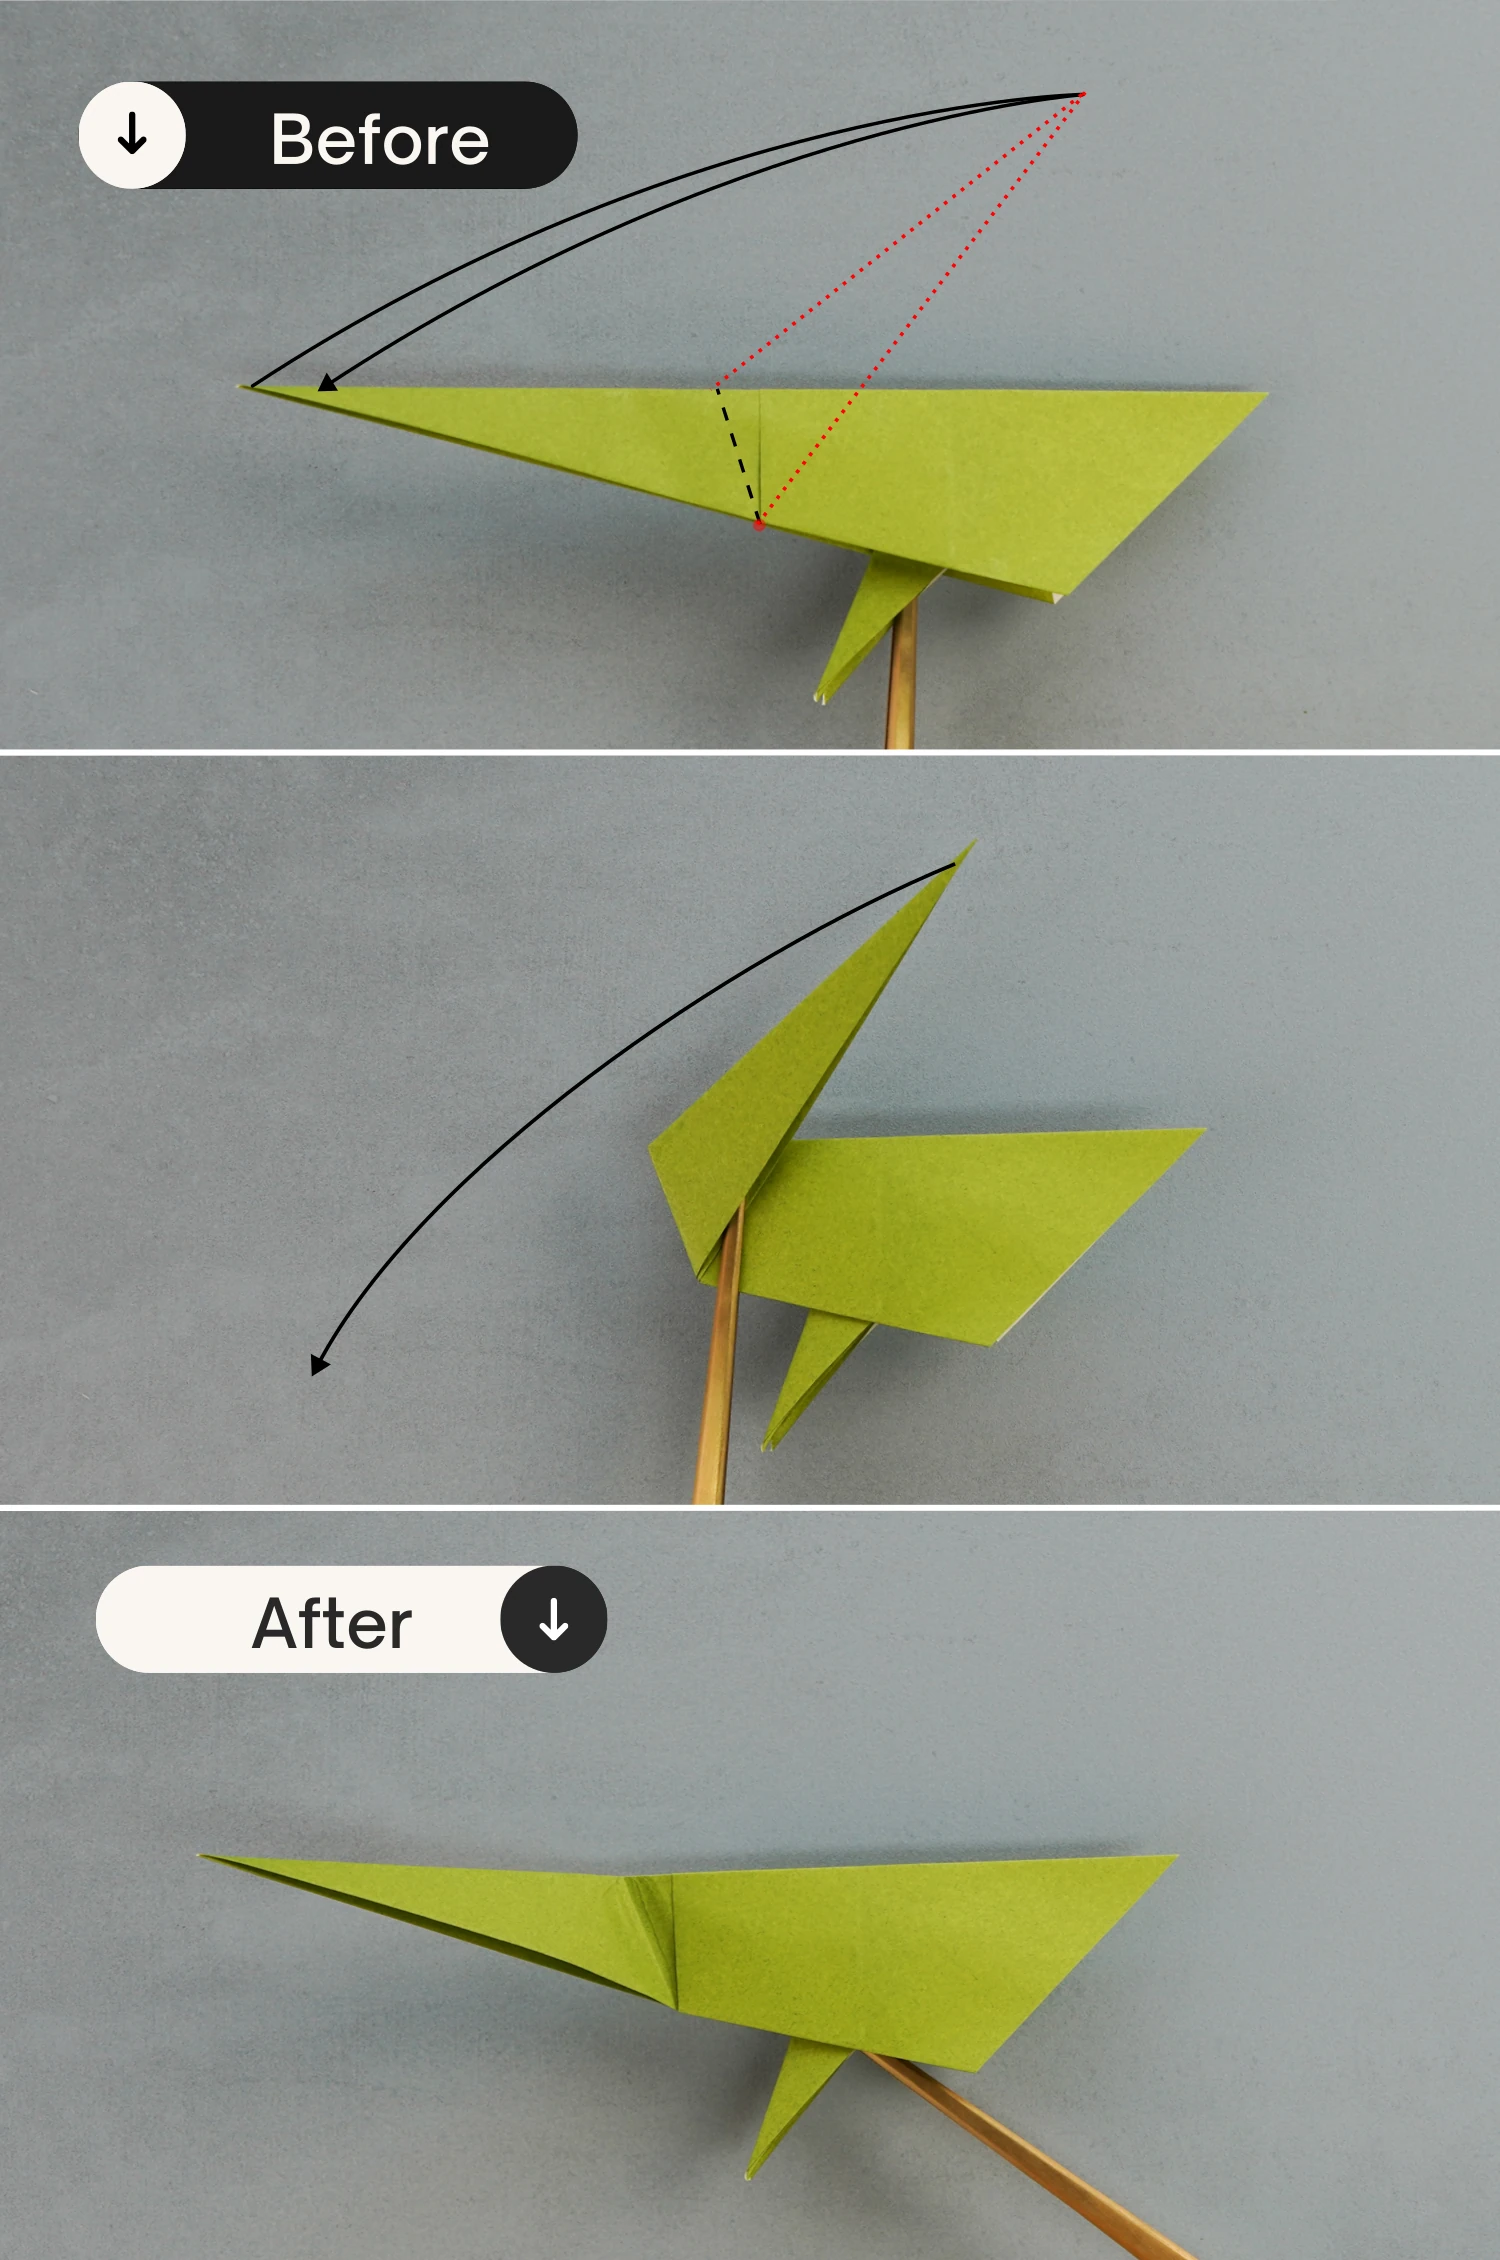
Step 20
View the paper from the top, open the left part from the bottom, bring up the left point along the creases you made in the previous step, and finally flatten the fold, turning the left-facing open corner to the right.
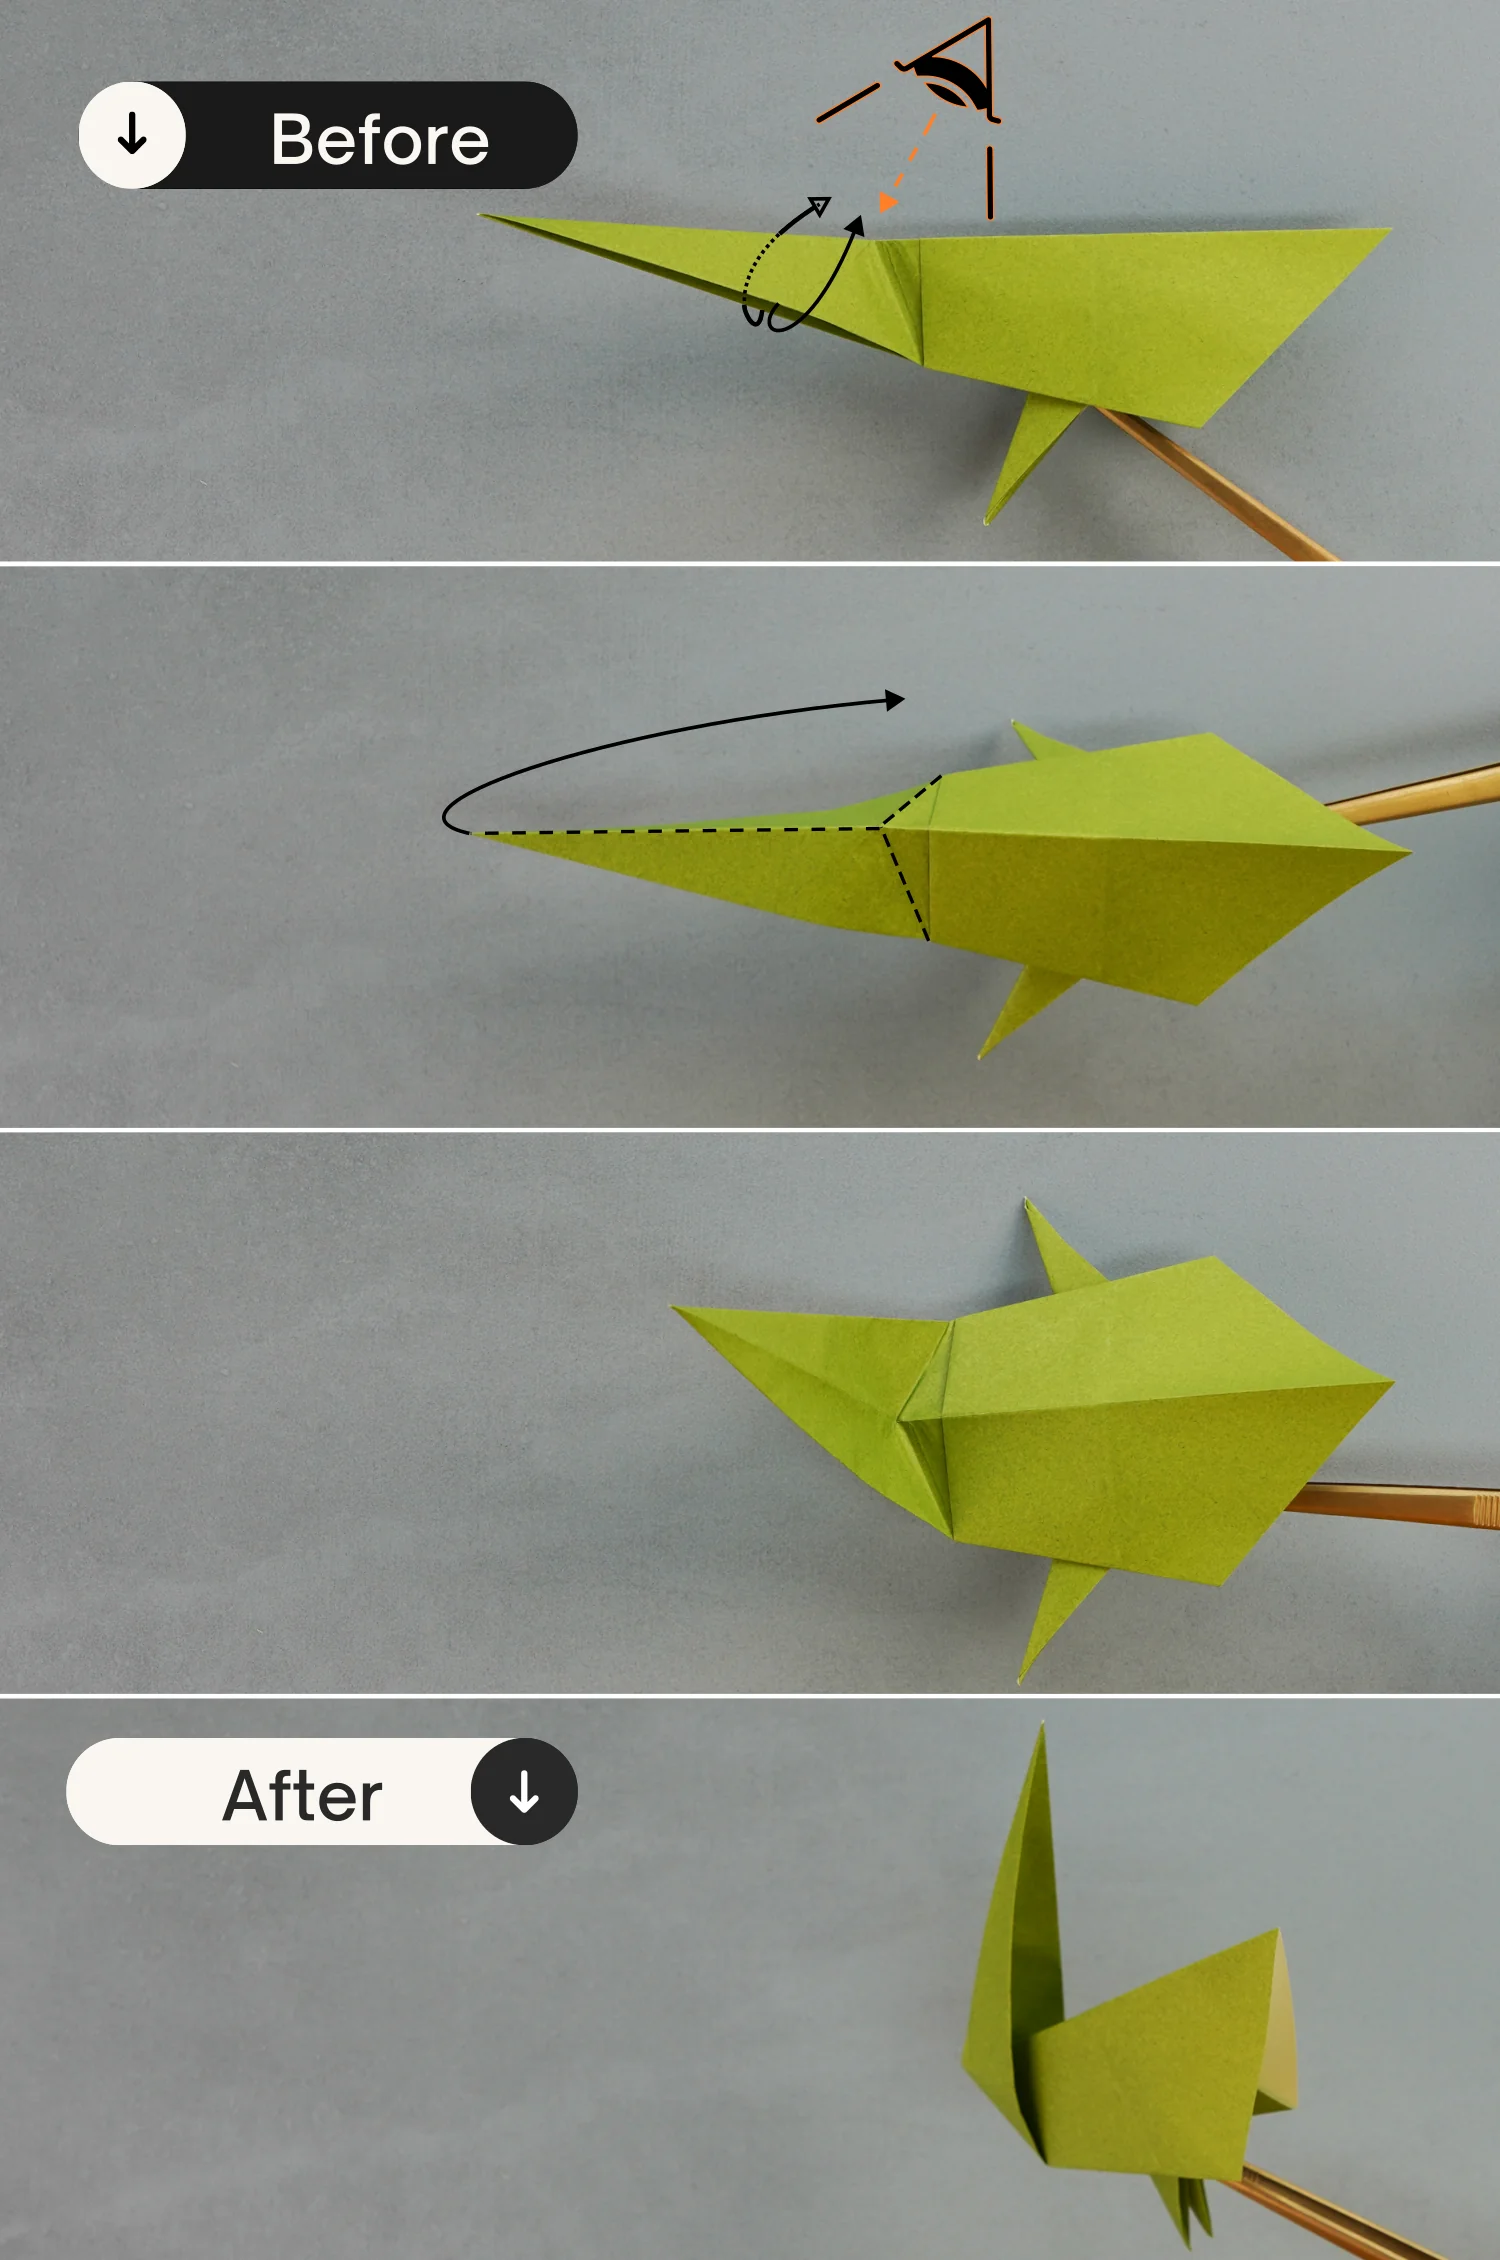
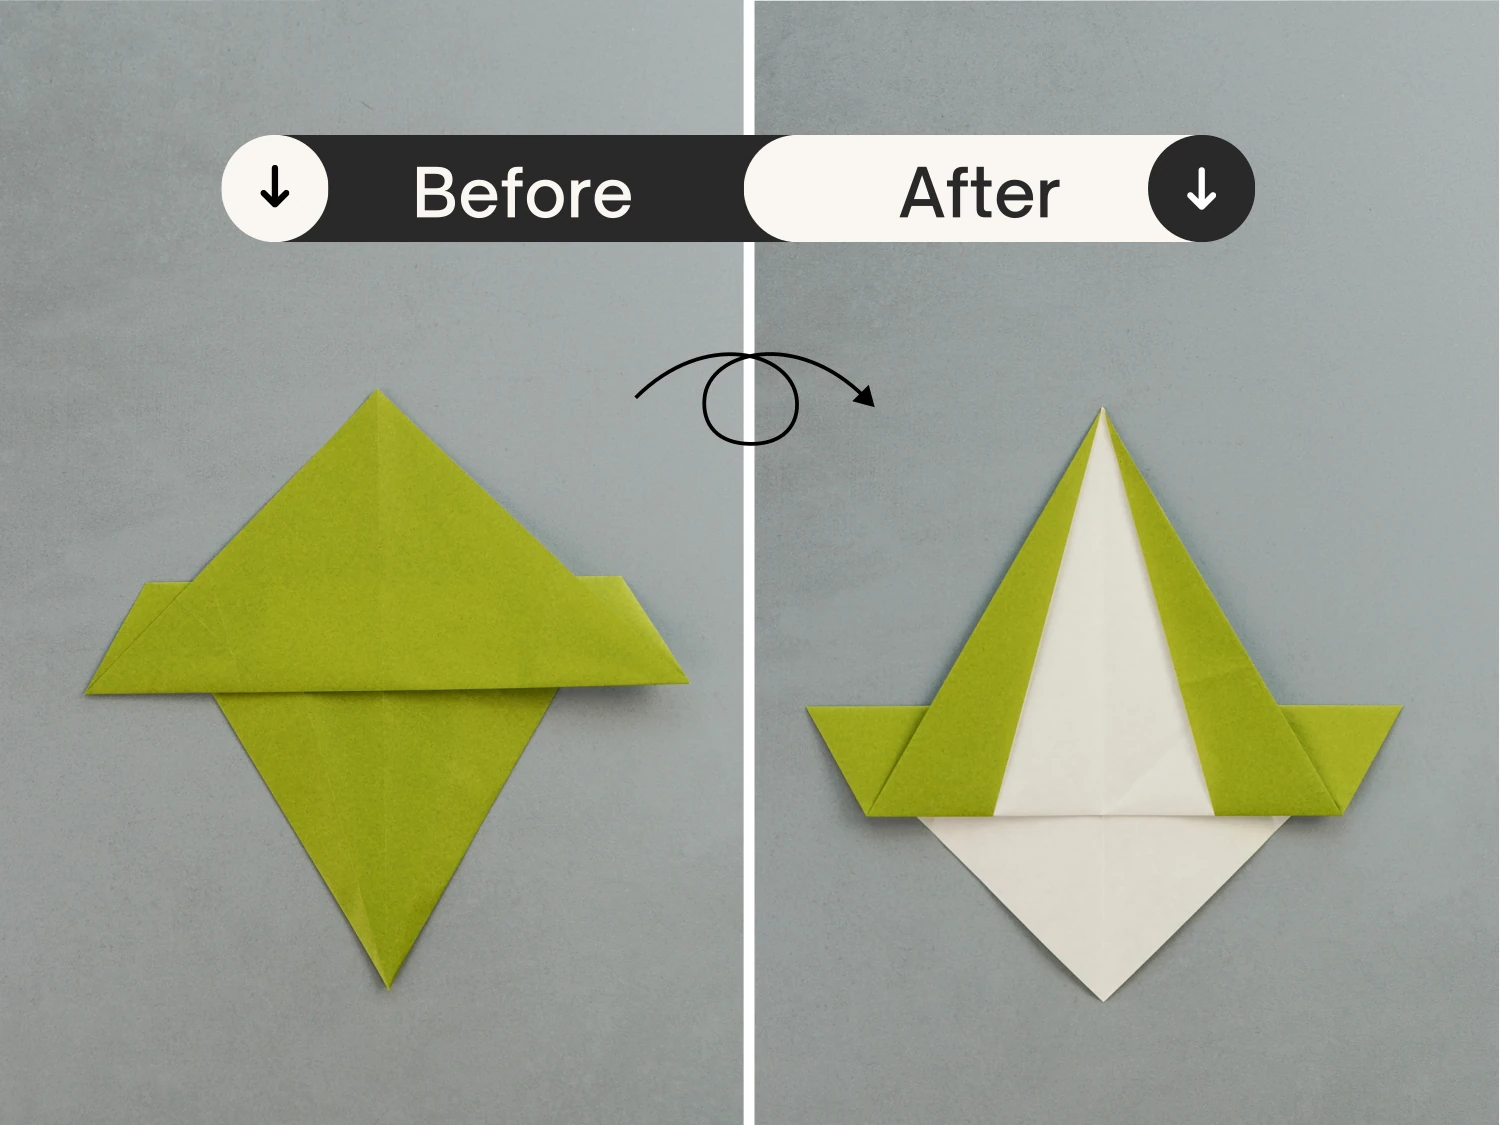
Step 21
Fold the top point the the neck down along the dotted line, and unfold it.
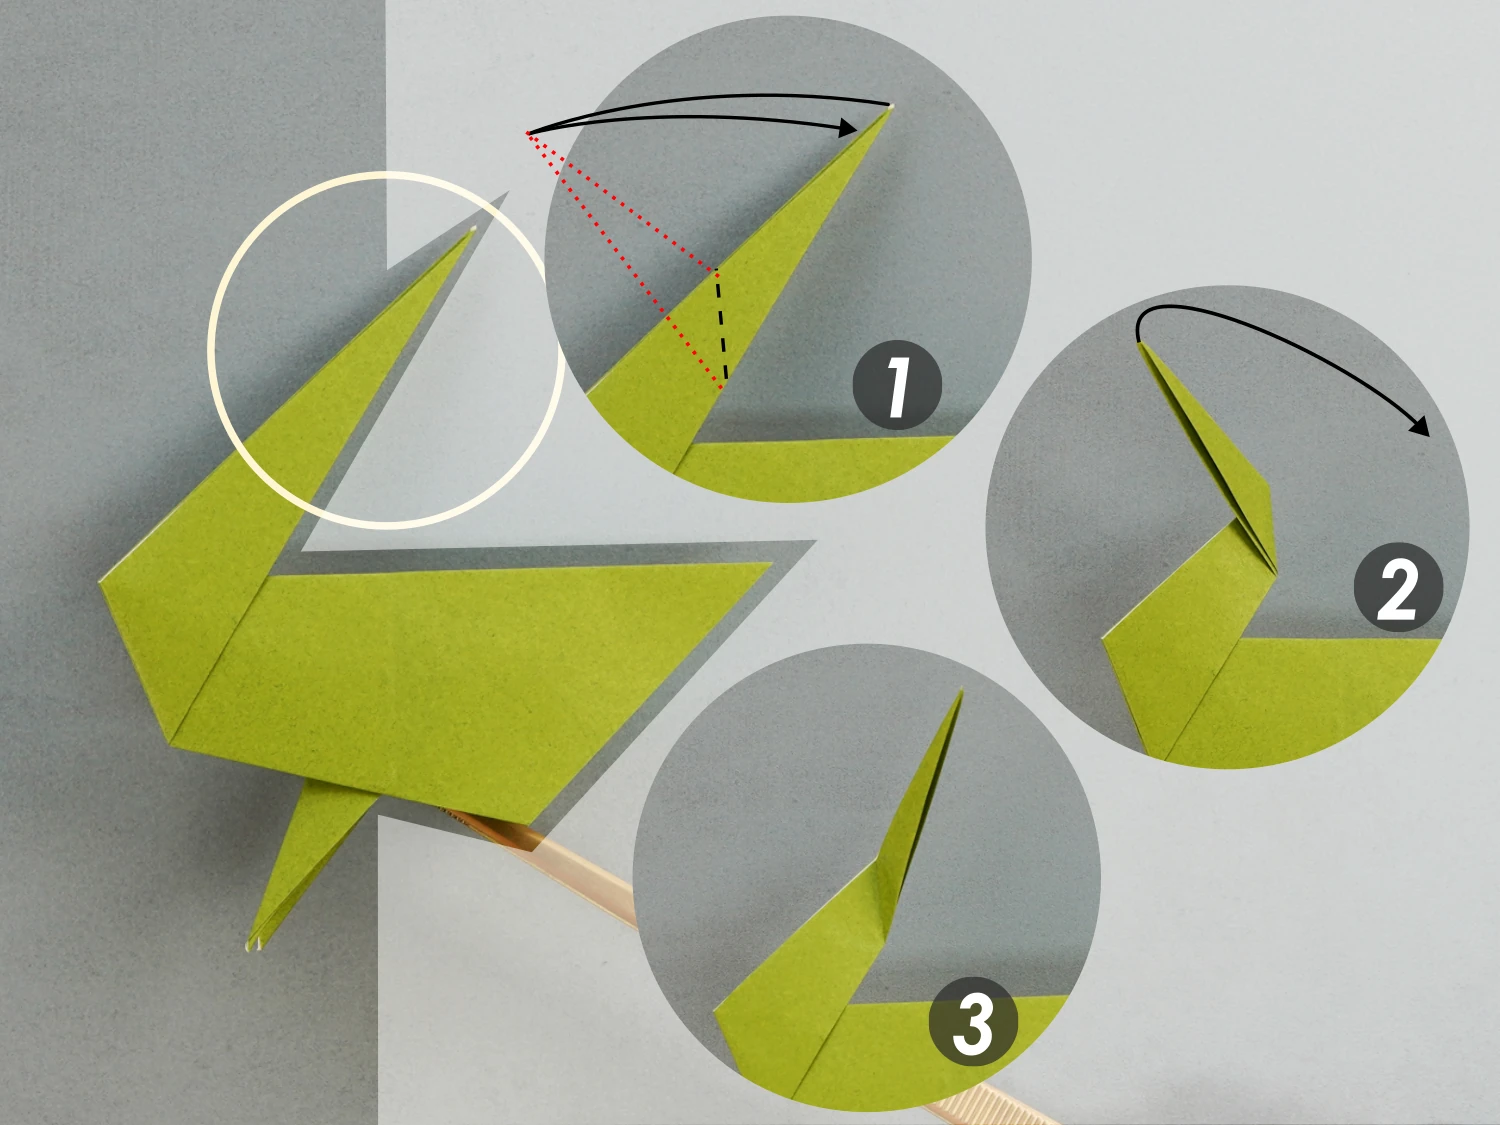
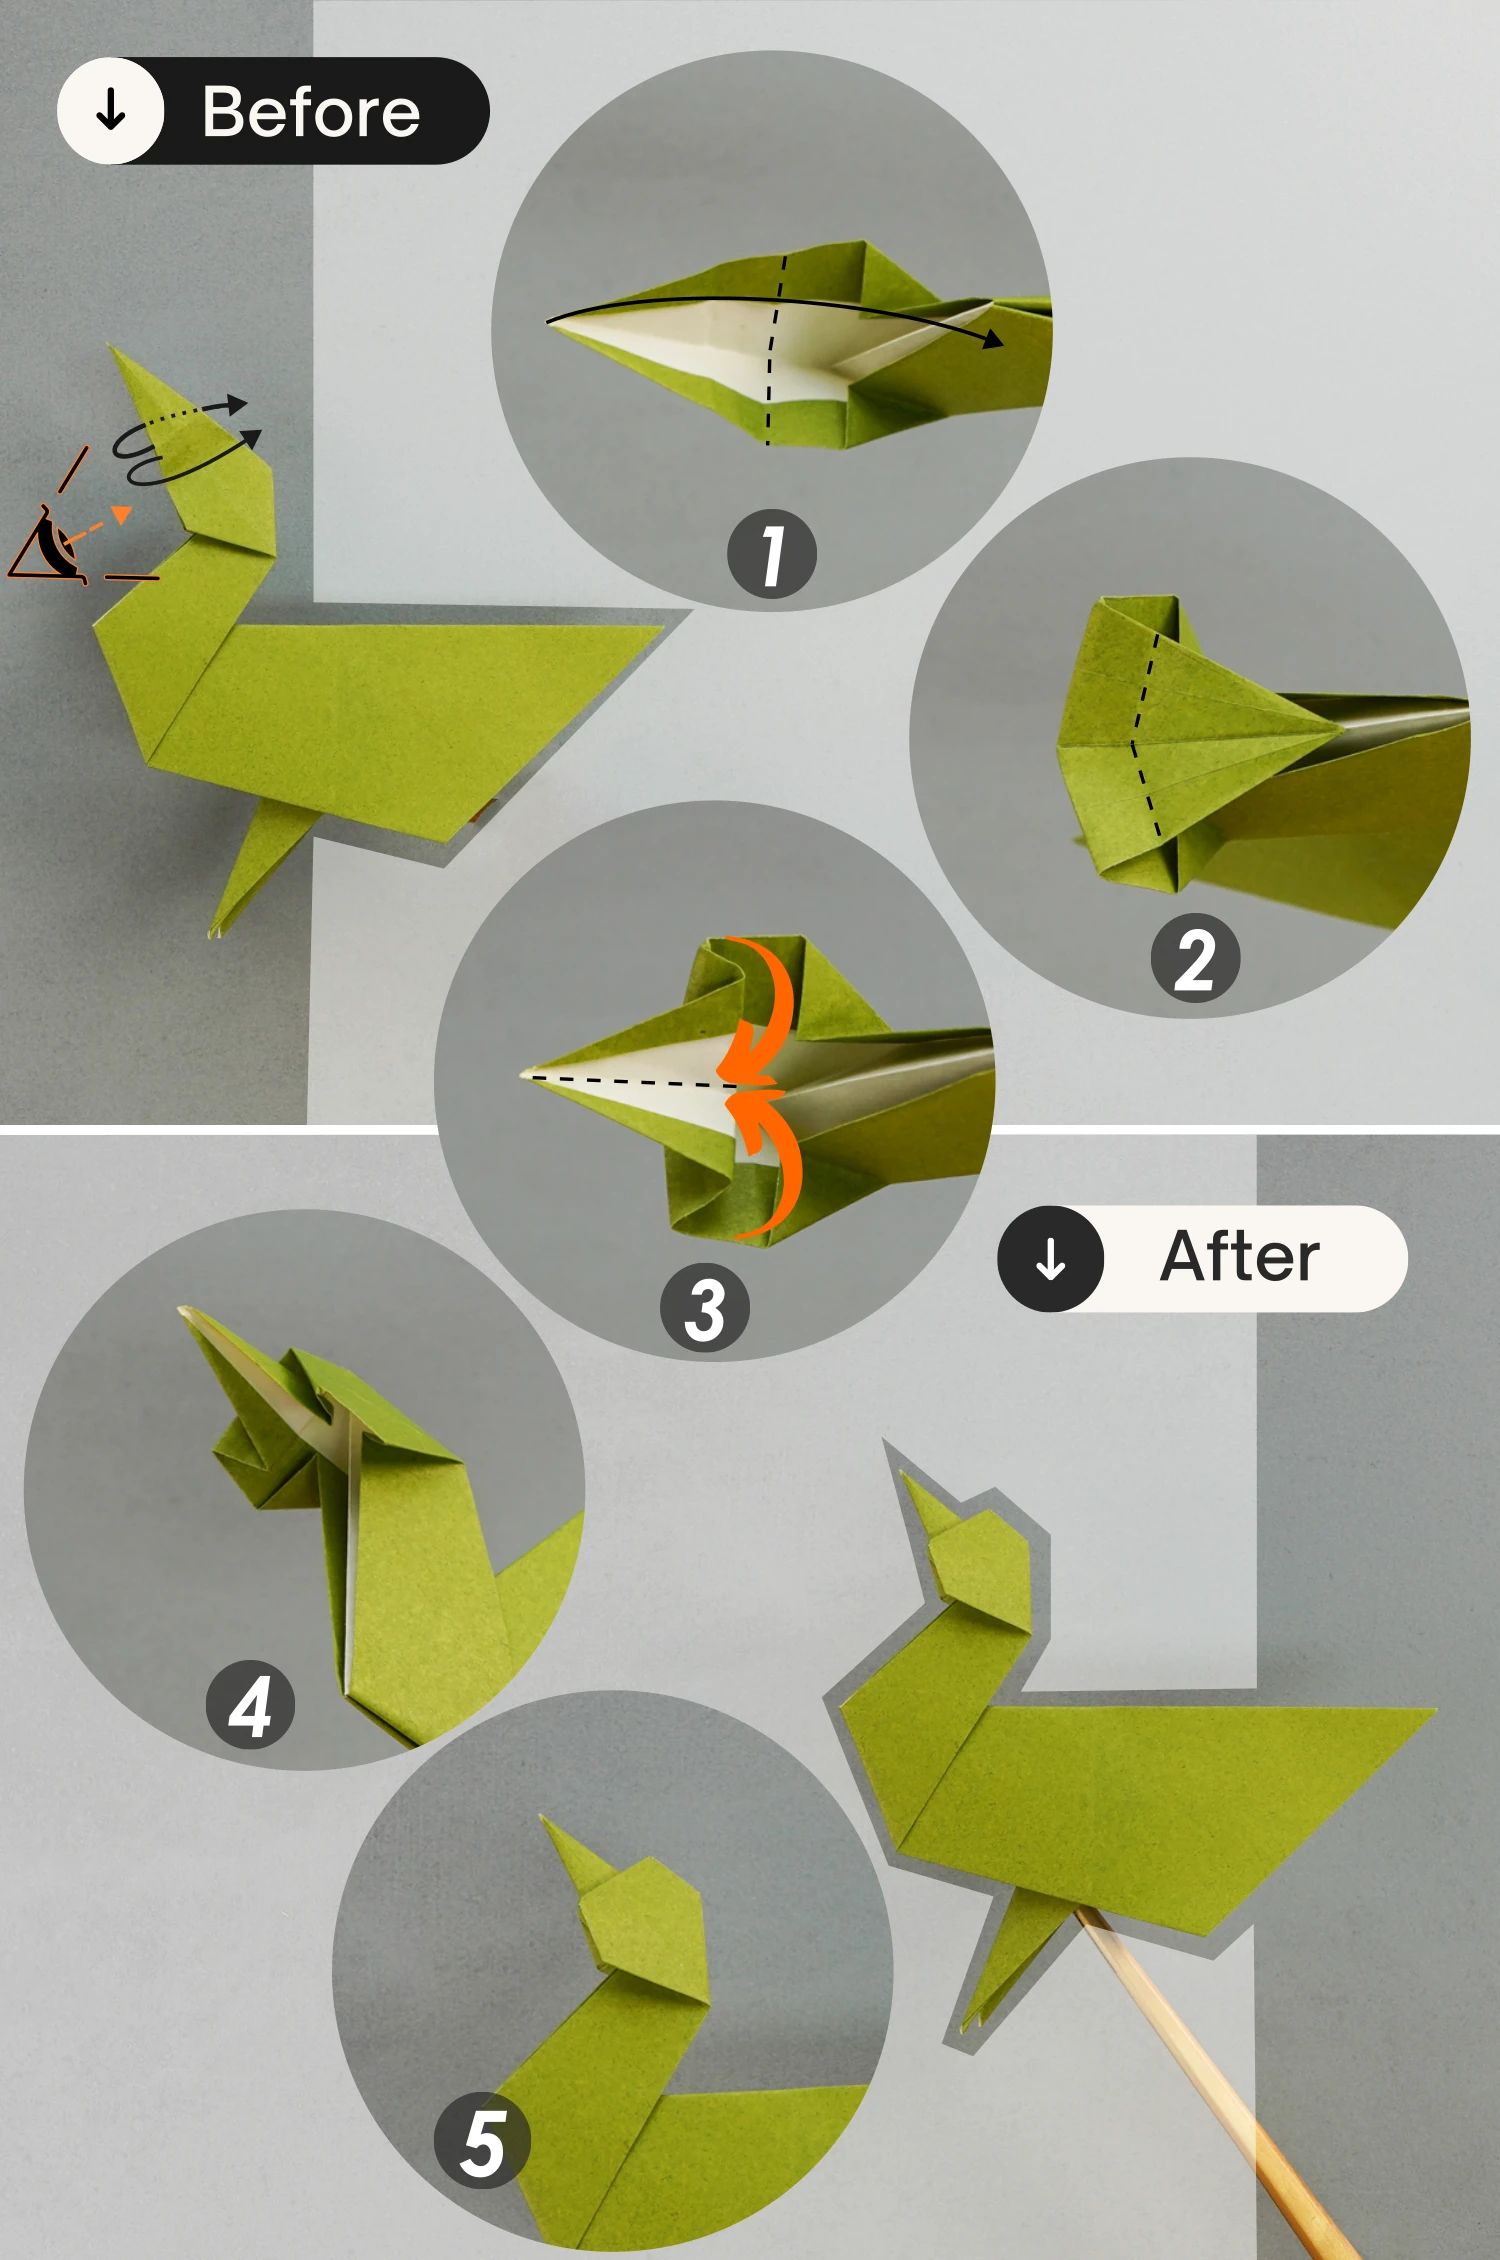
Step 22
View the neck part from the right side, open this part, and press the tip down along the creases you made in the previous step.
Next, expand the layers on the bottom of the top part as you can see in the third picture. Then view it from the bottom, close the tip part, and flatten it to form the head.
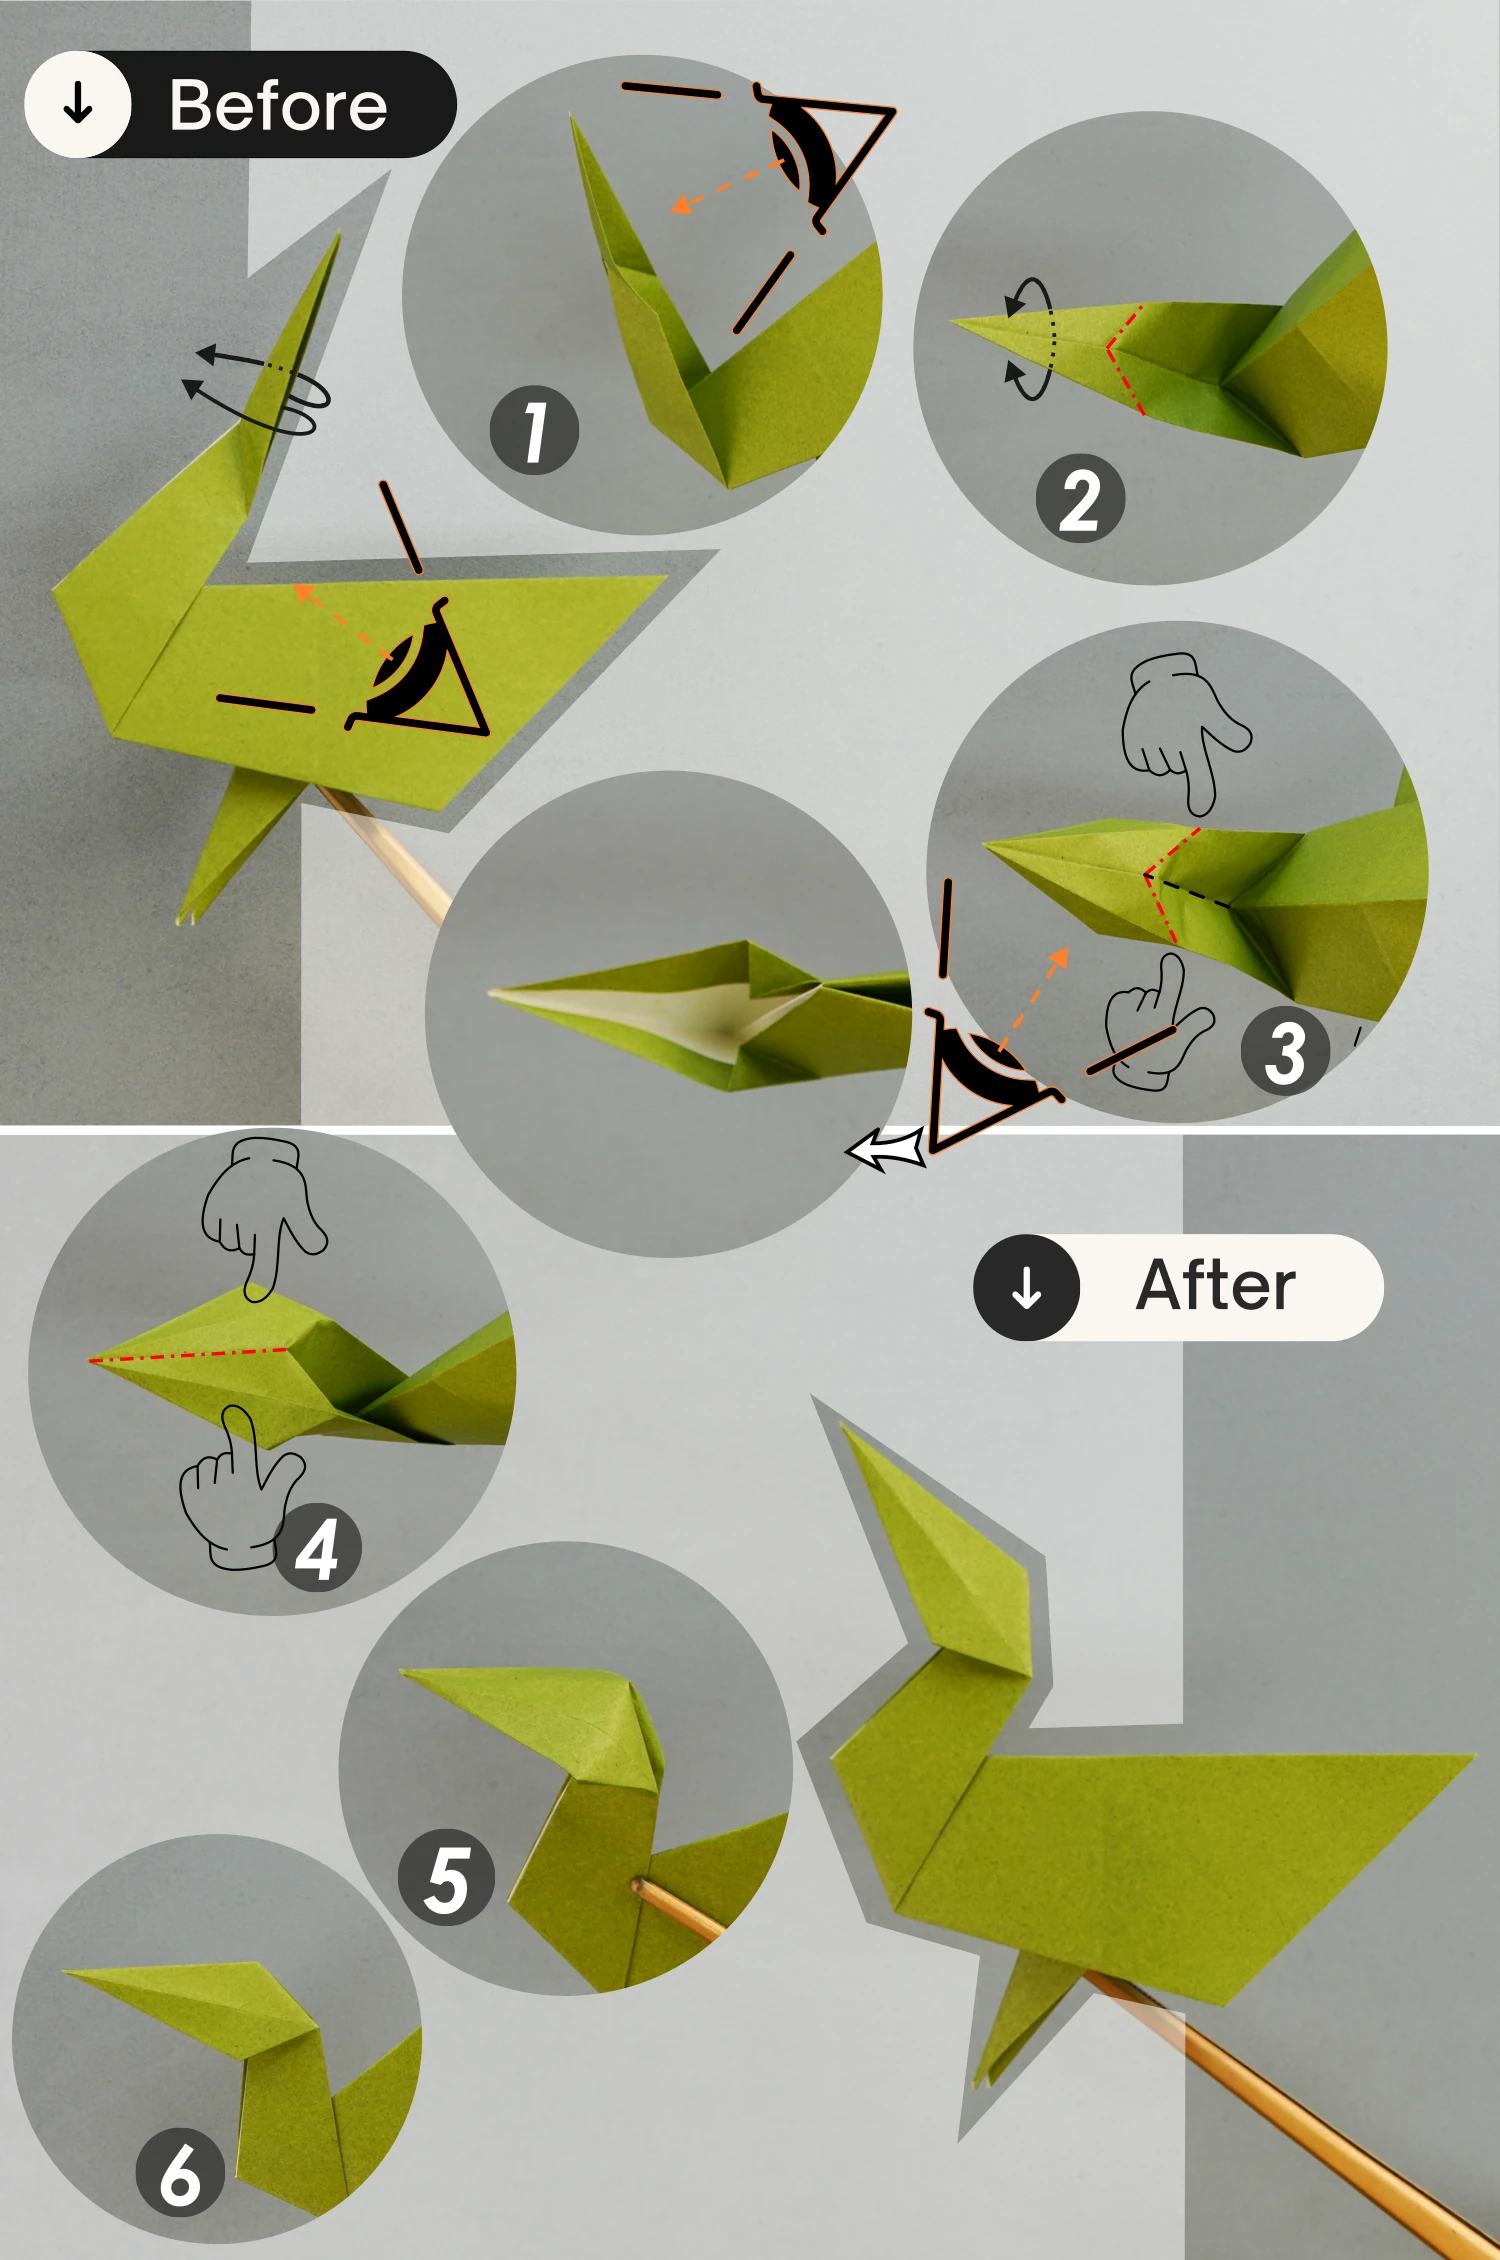
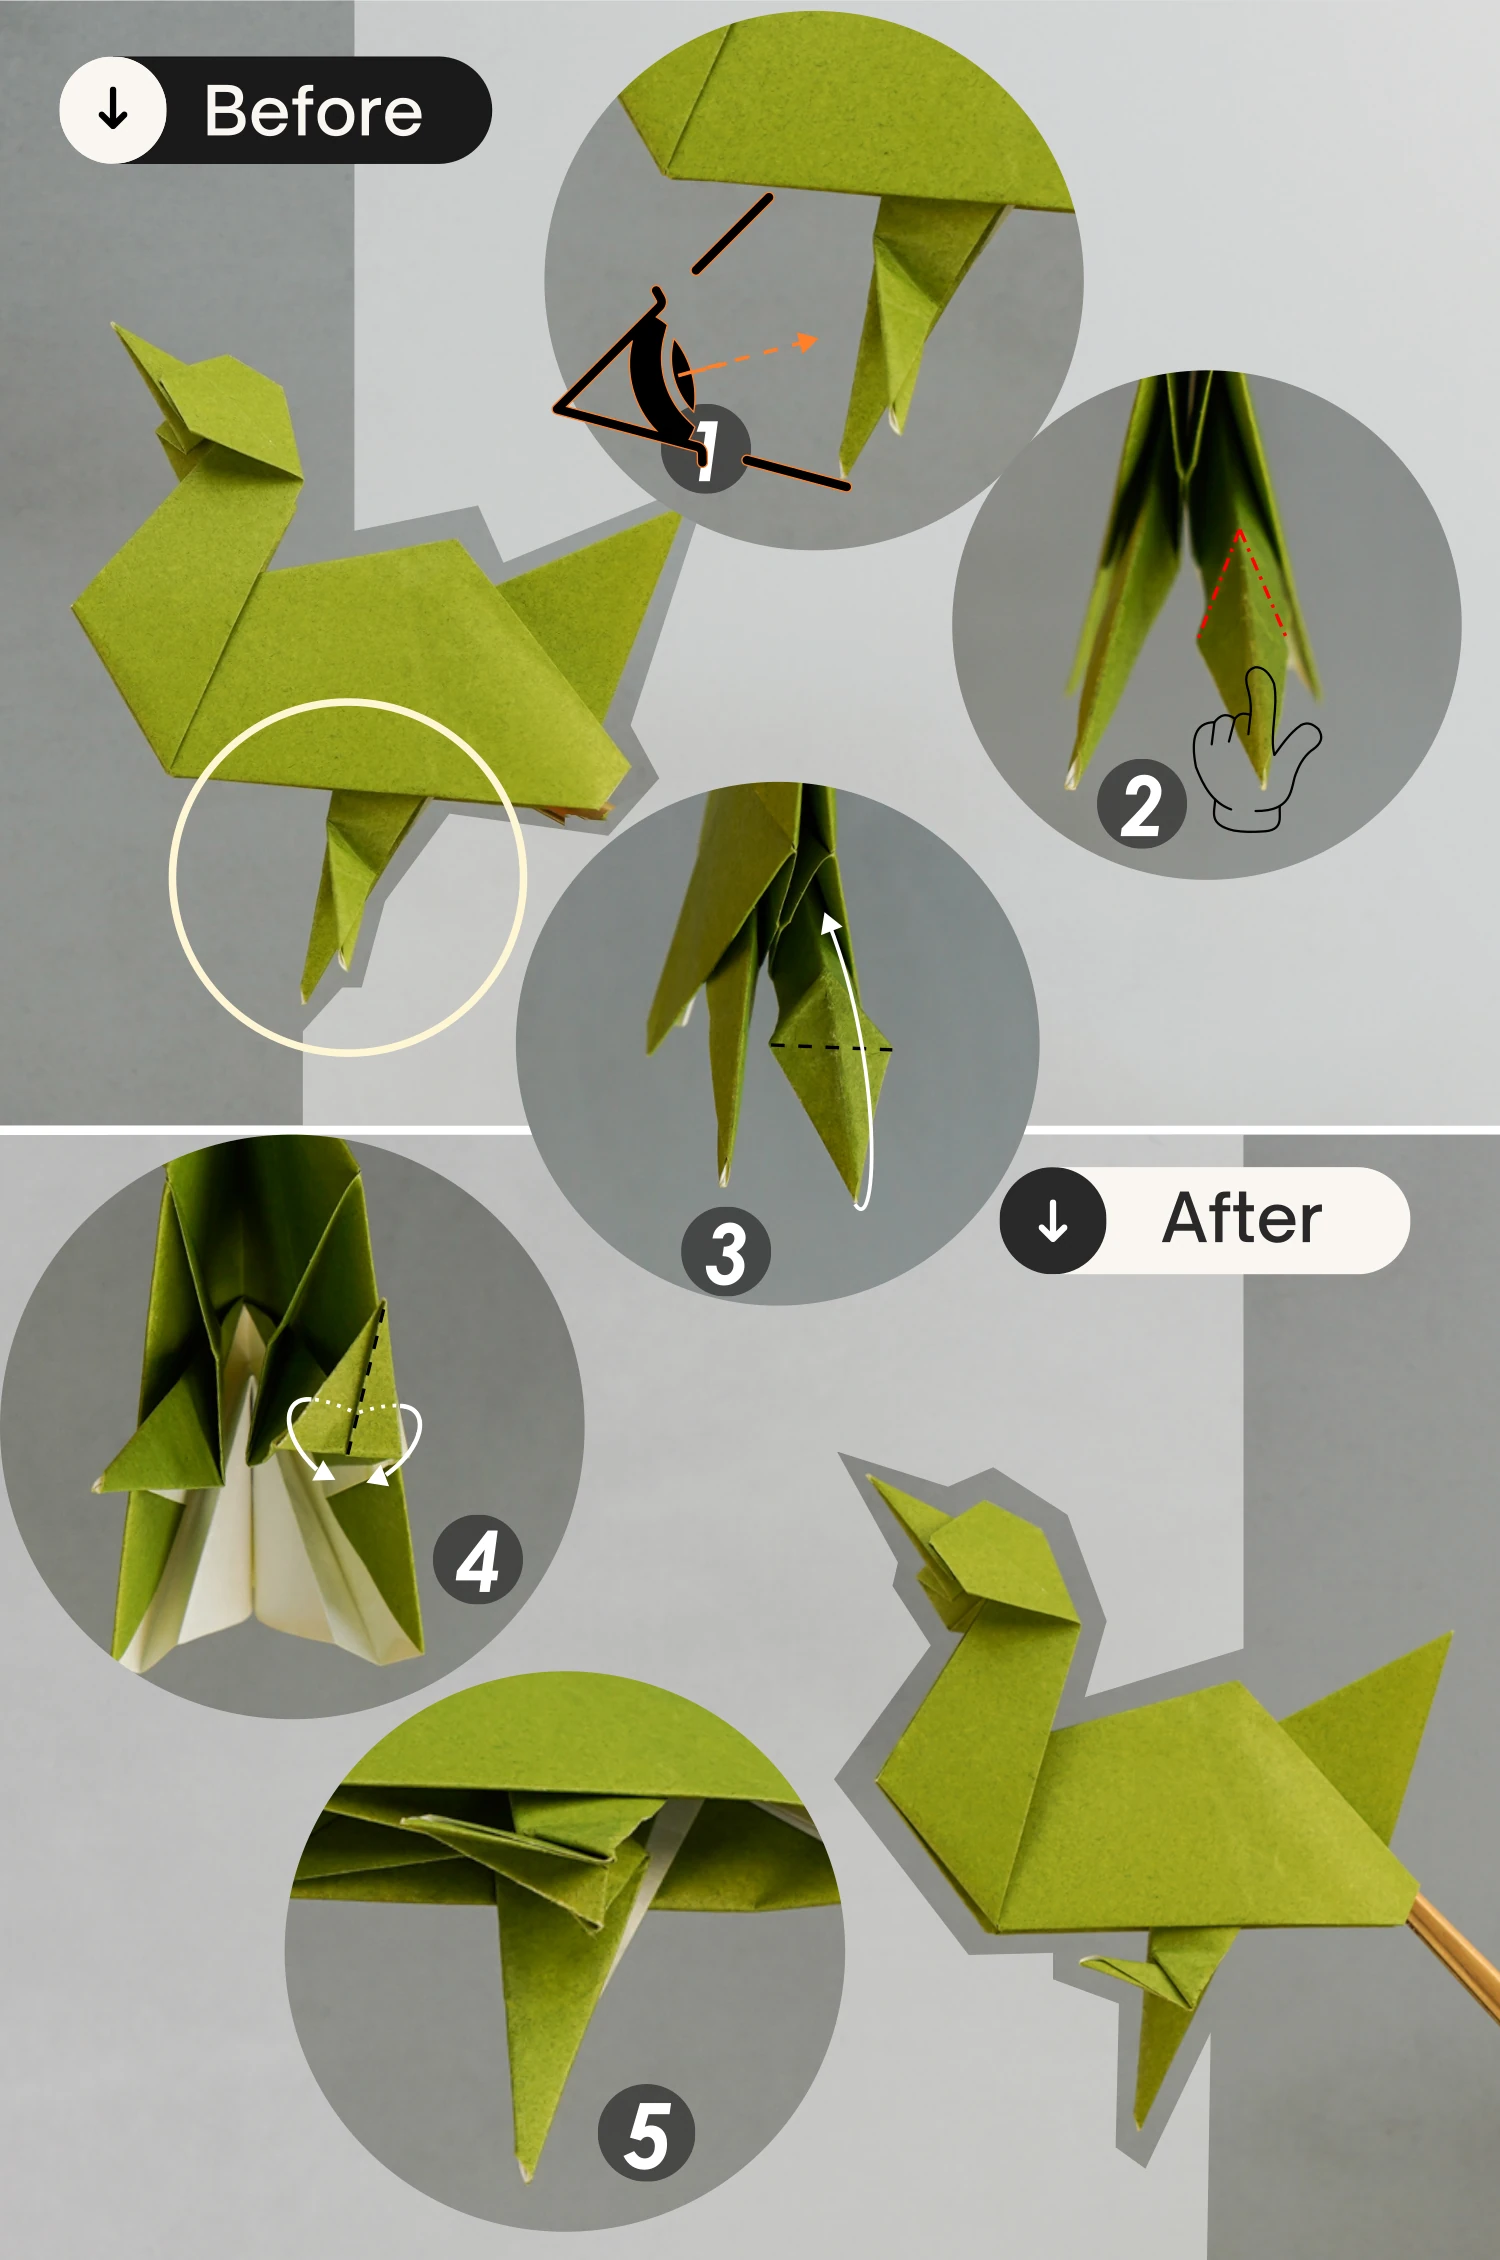
Step 23
Fold the tip of the head backward along the dotted line, creating the first creases, then fold it back to its original direction for a shorter section, creating the second crease that is parallel to the first one, next, unfold the head part to make it appear zigzag.
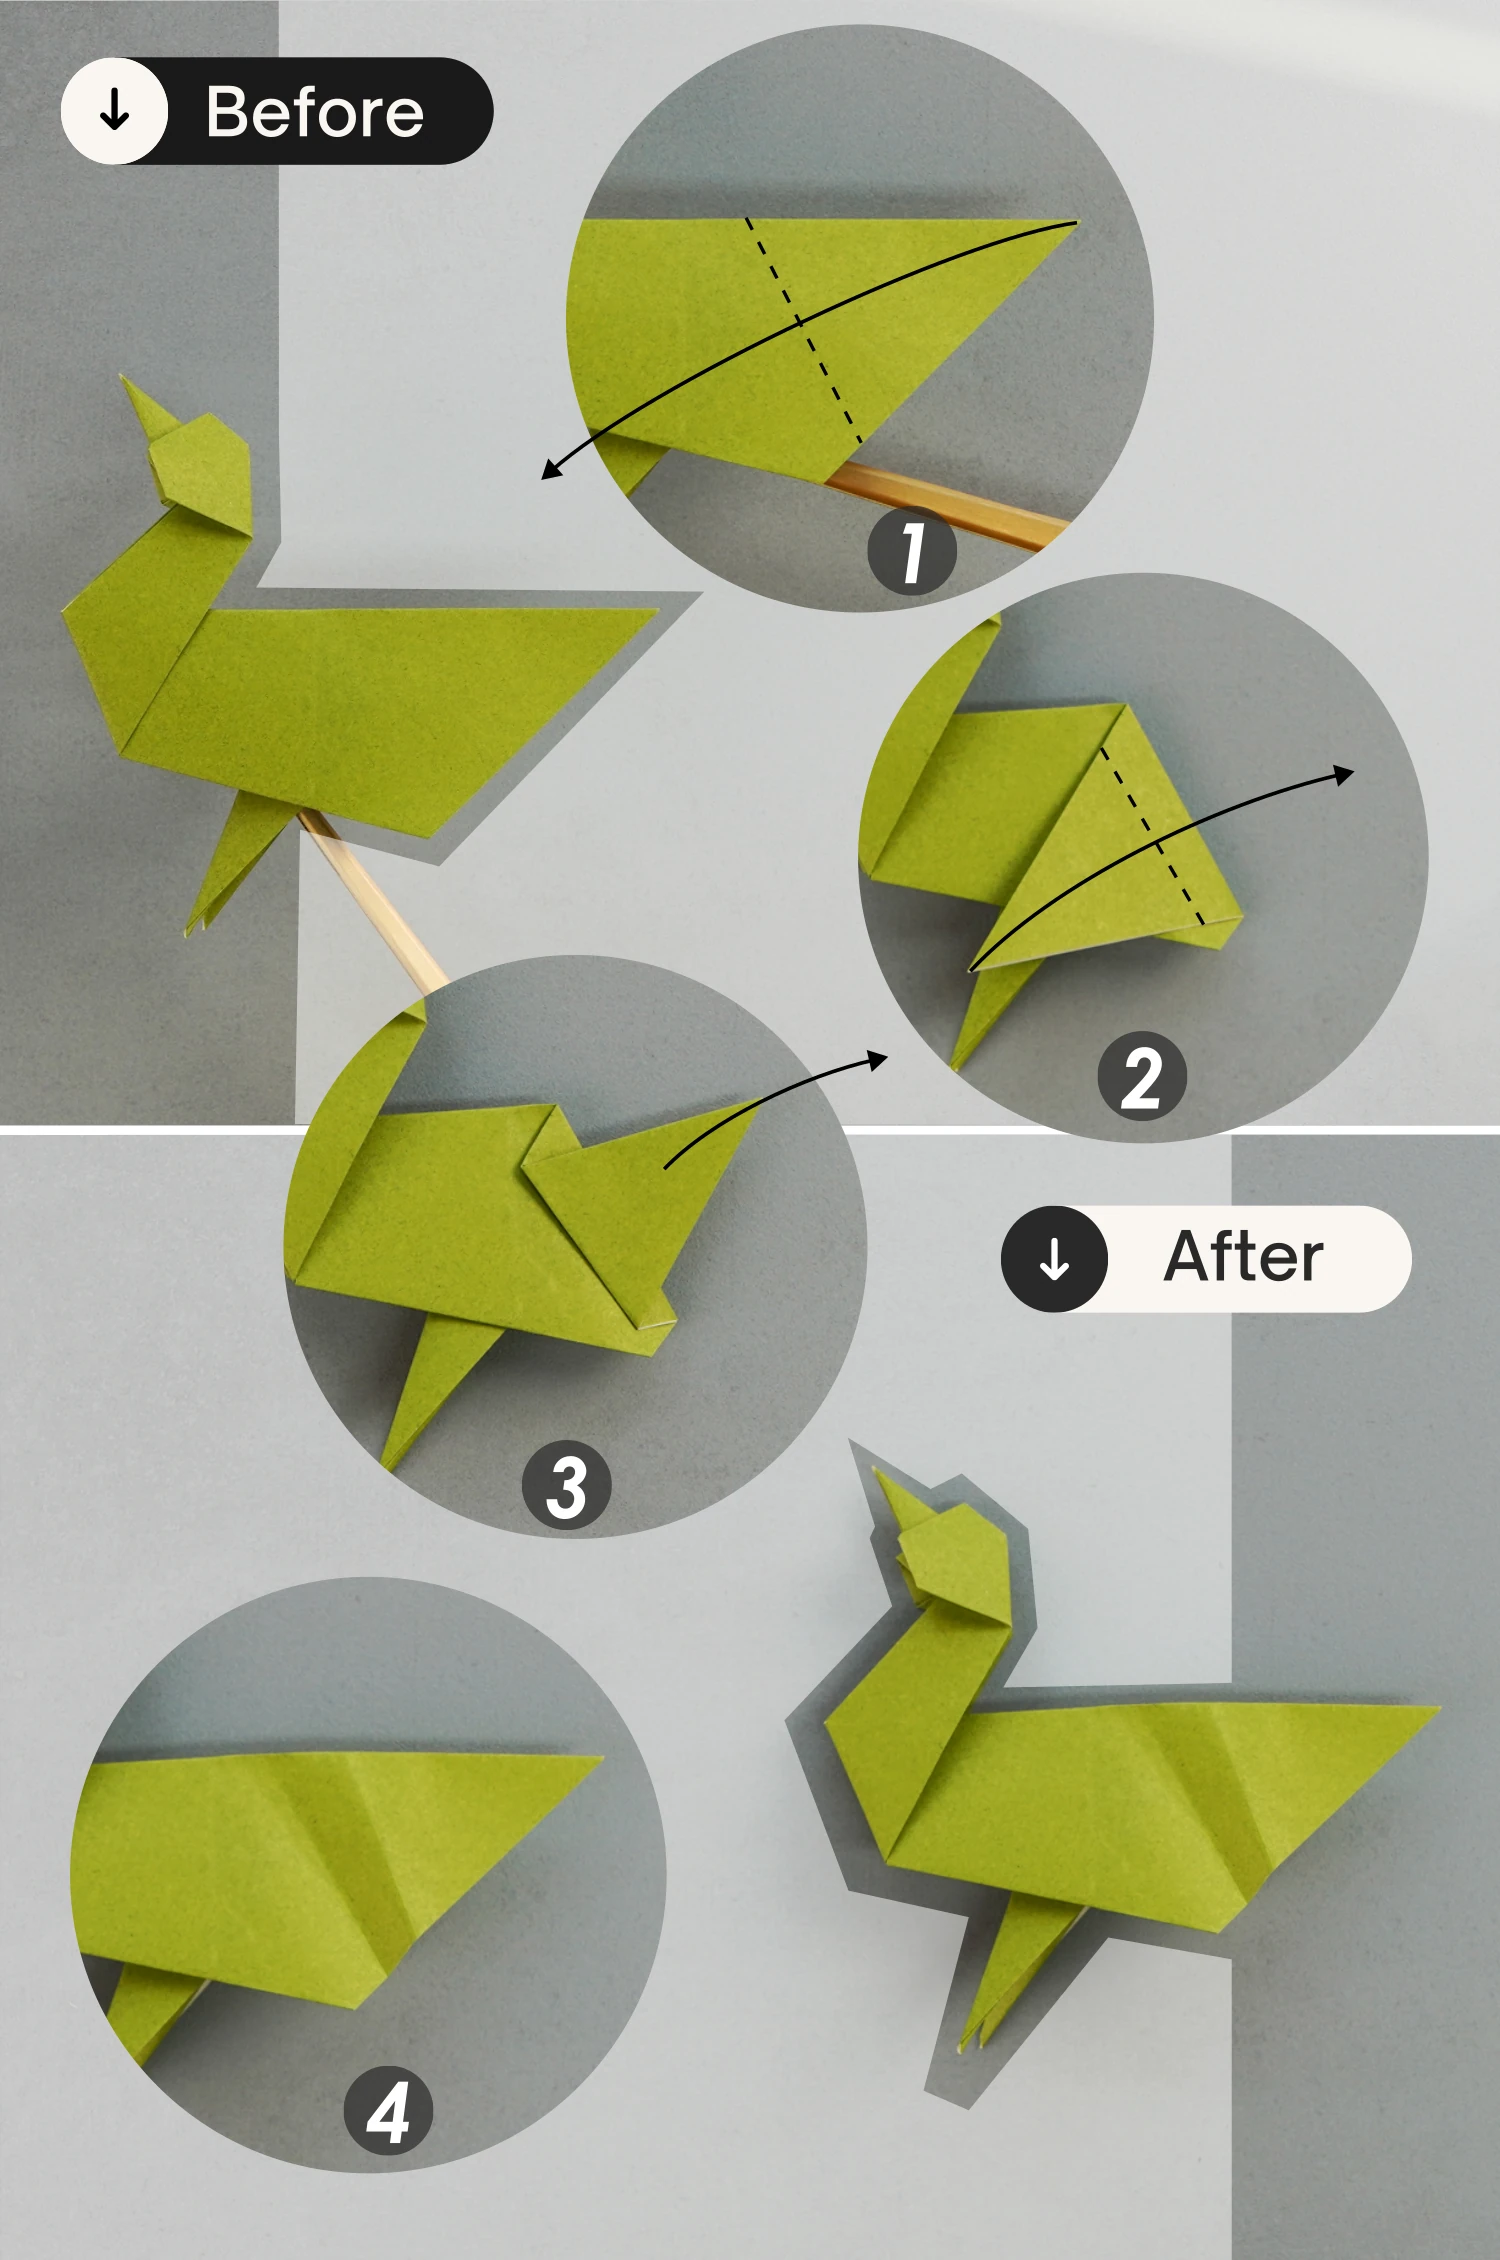
Step 24
Open the head part from the bottom and view it from the bottom, fold the tip to the right along the first crease you made in the previous step, then fold it back to the left along the second crease [pictures 1 and 2].
Finally, close the part to create the beak.
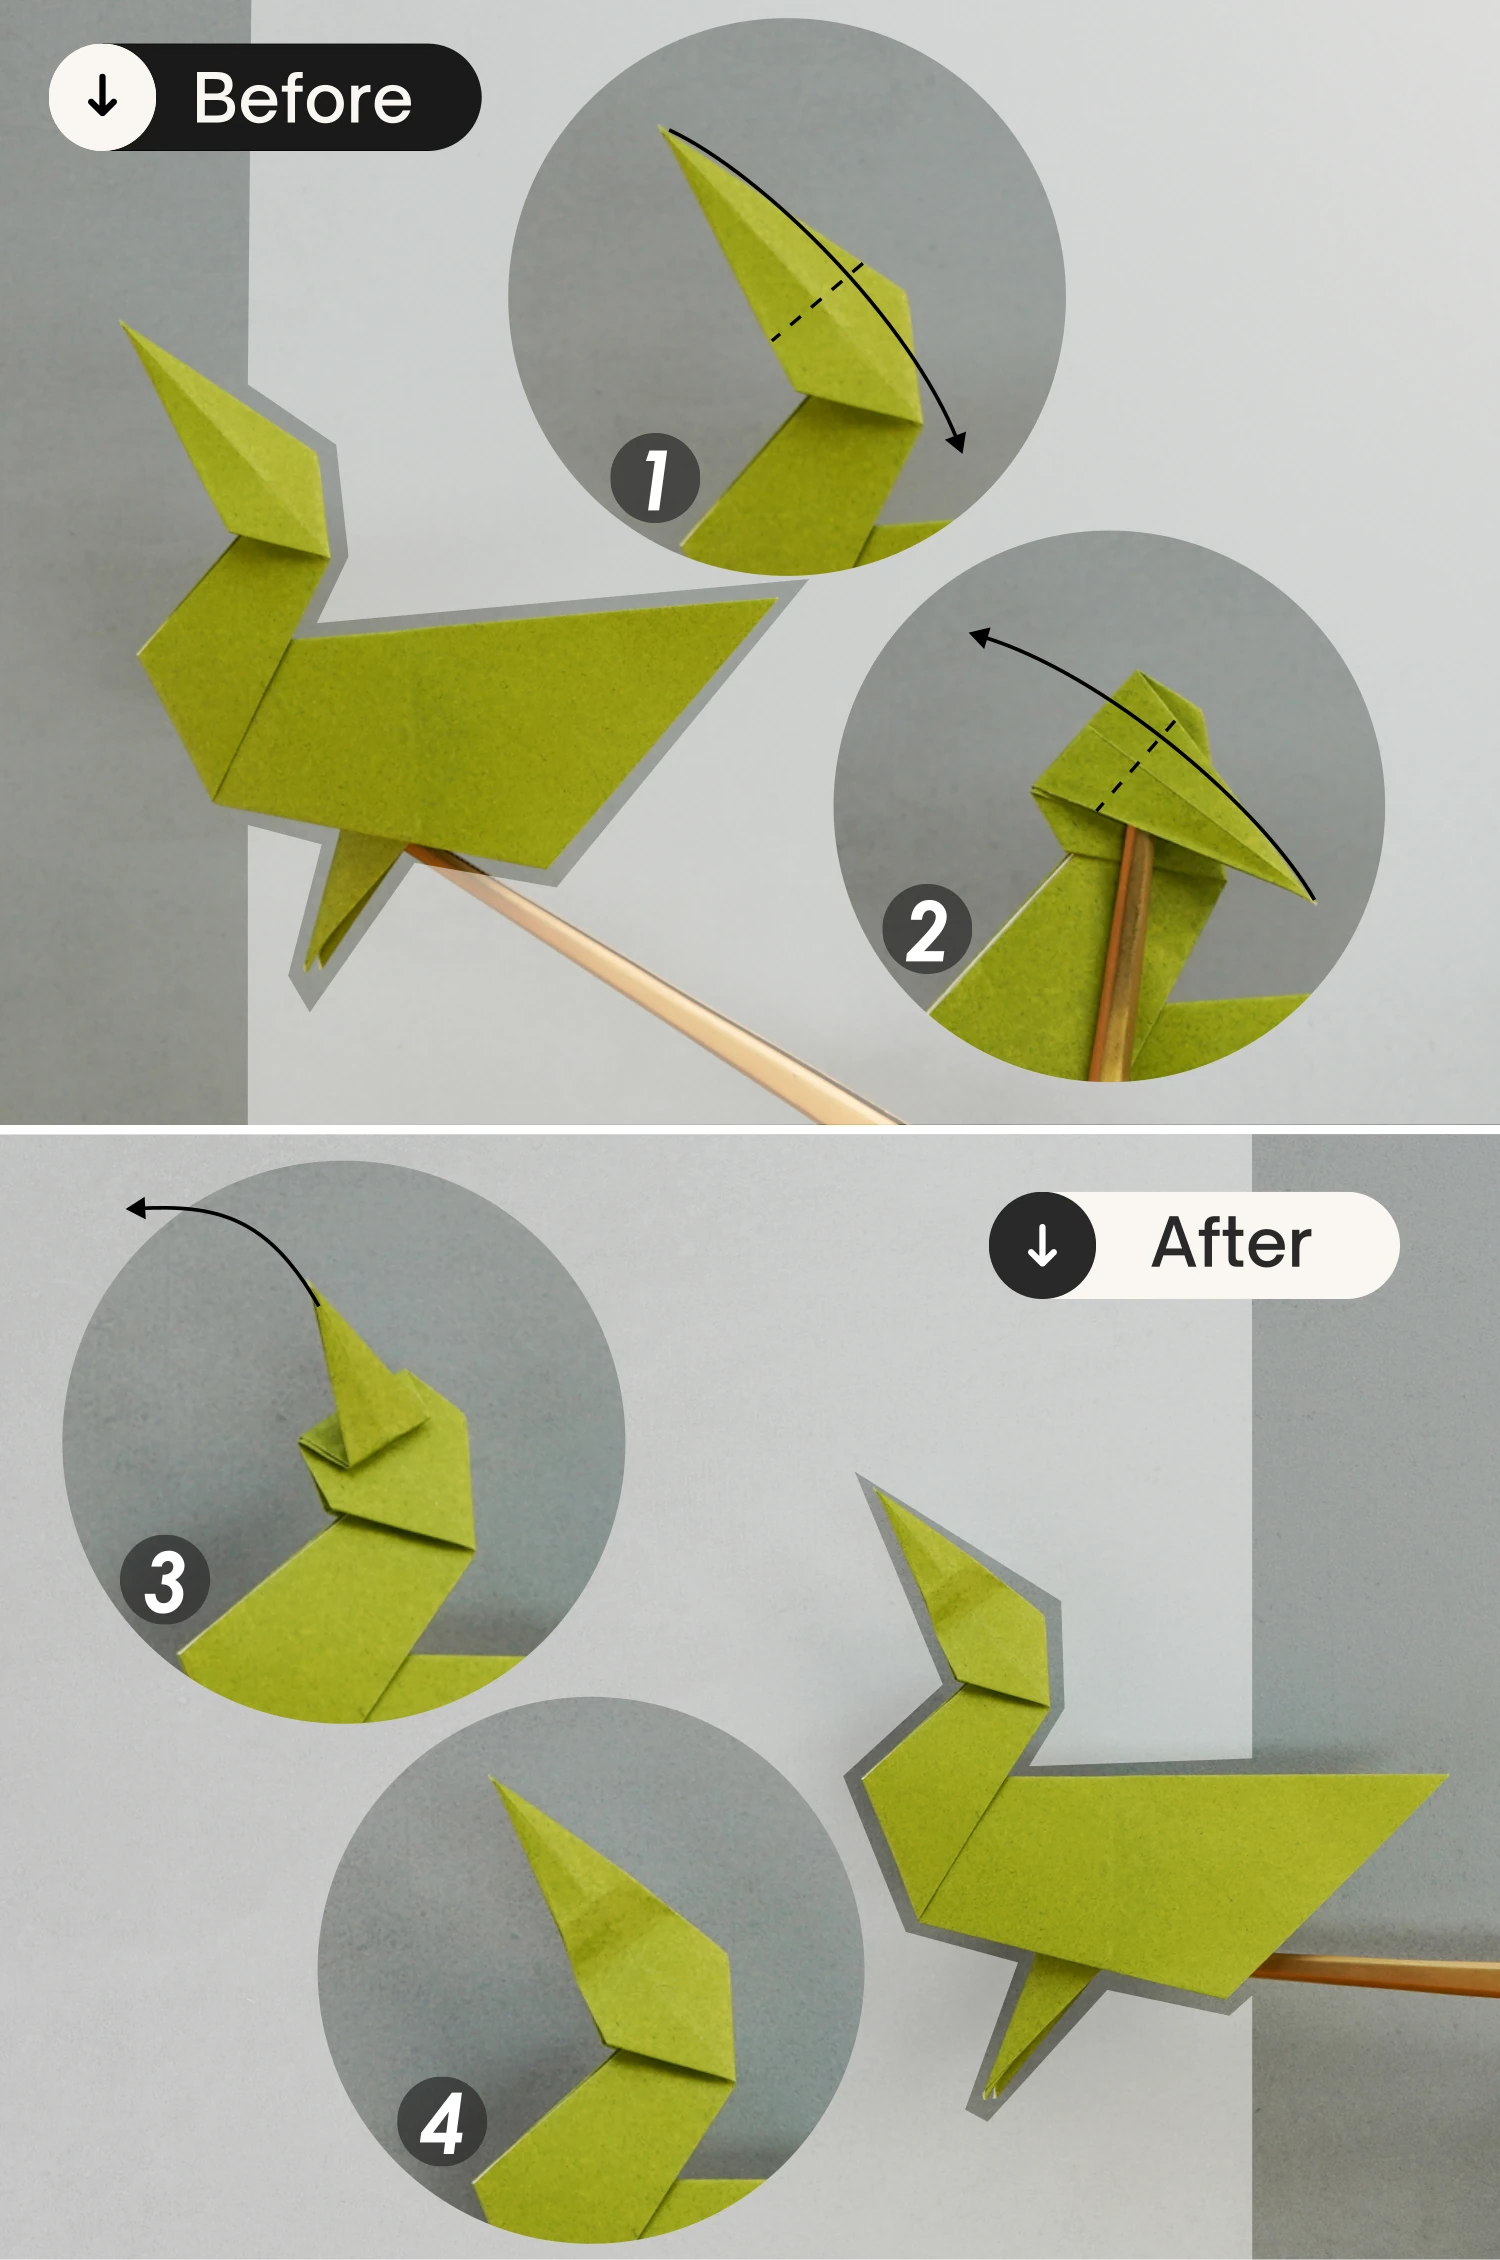
Step 25
Fold the tail part along the dotted line to create the first crease, and fold it back to the right for a shorter section to create the second crease, then unfold them.
Step 26
Open the tail part from the bottom and view it from the top, press the tip down backward along the first crease you made in the previous step, then fold it back to the top along the second crease. Finally, close this part to form a complete tail.
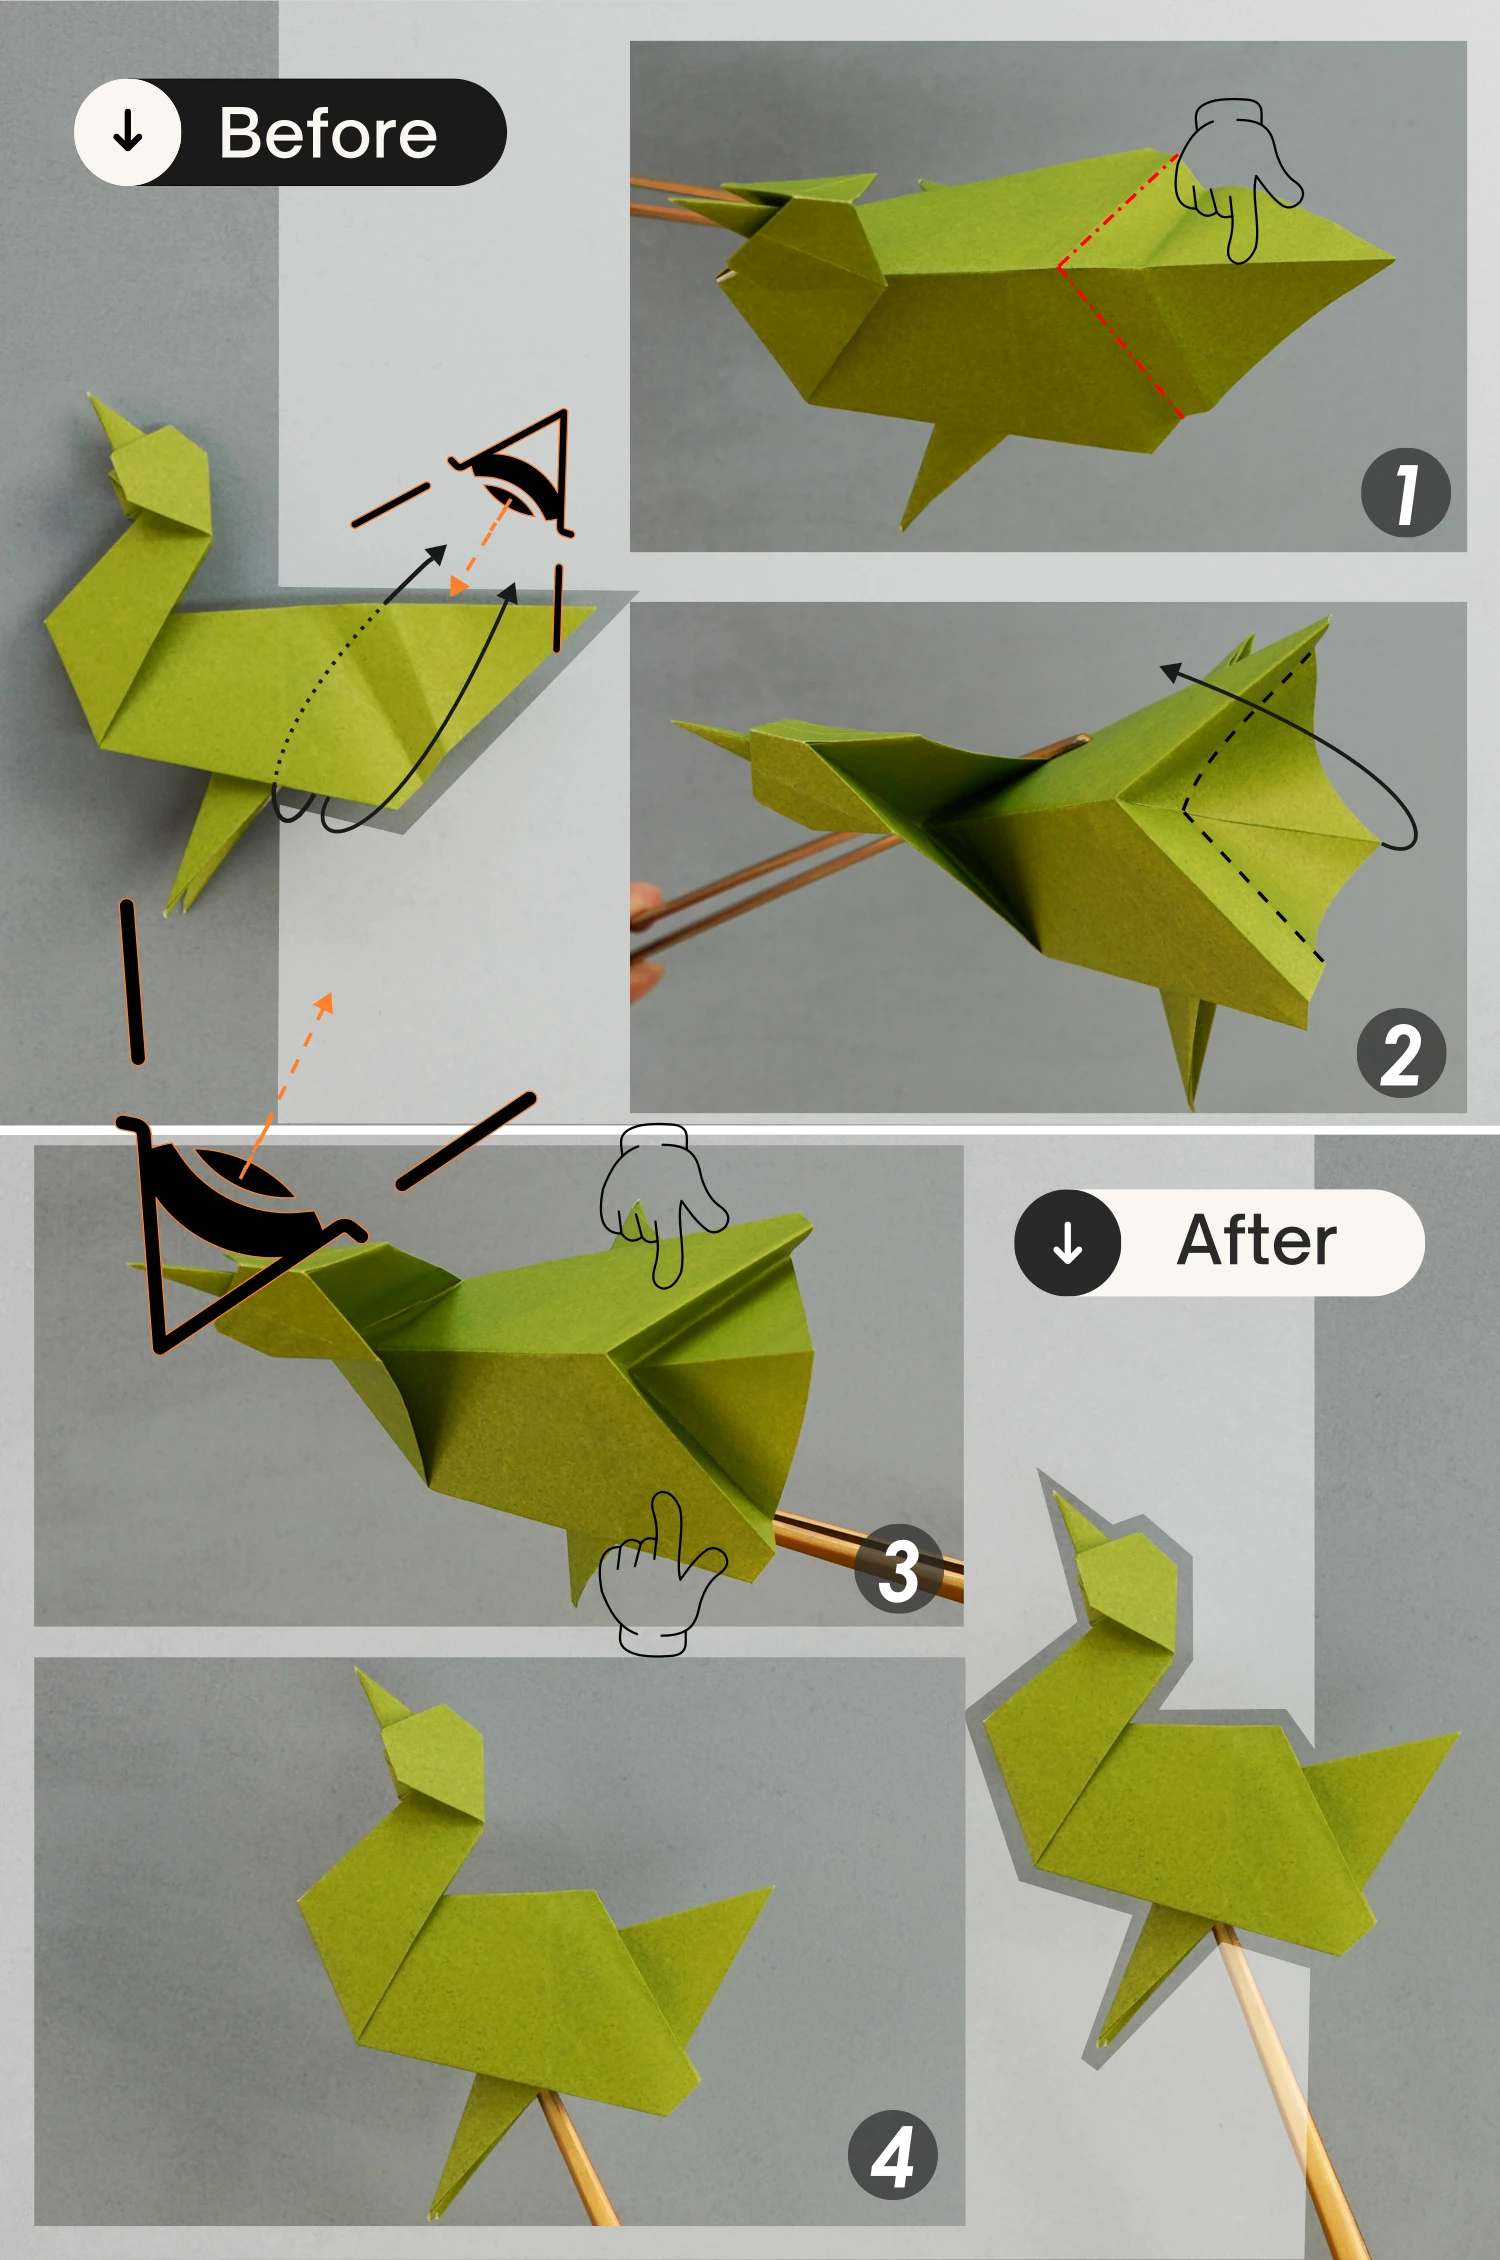
Step 27
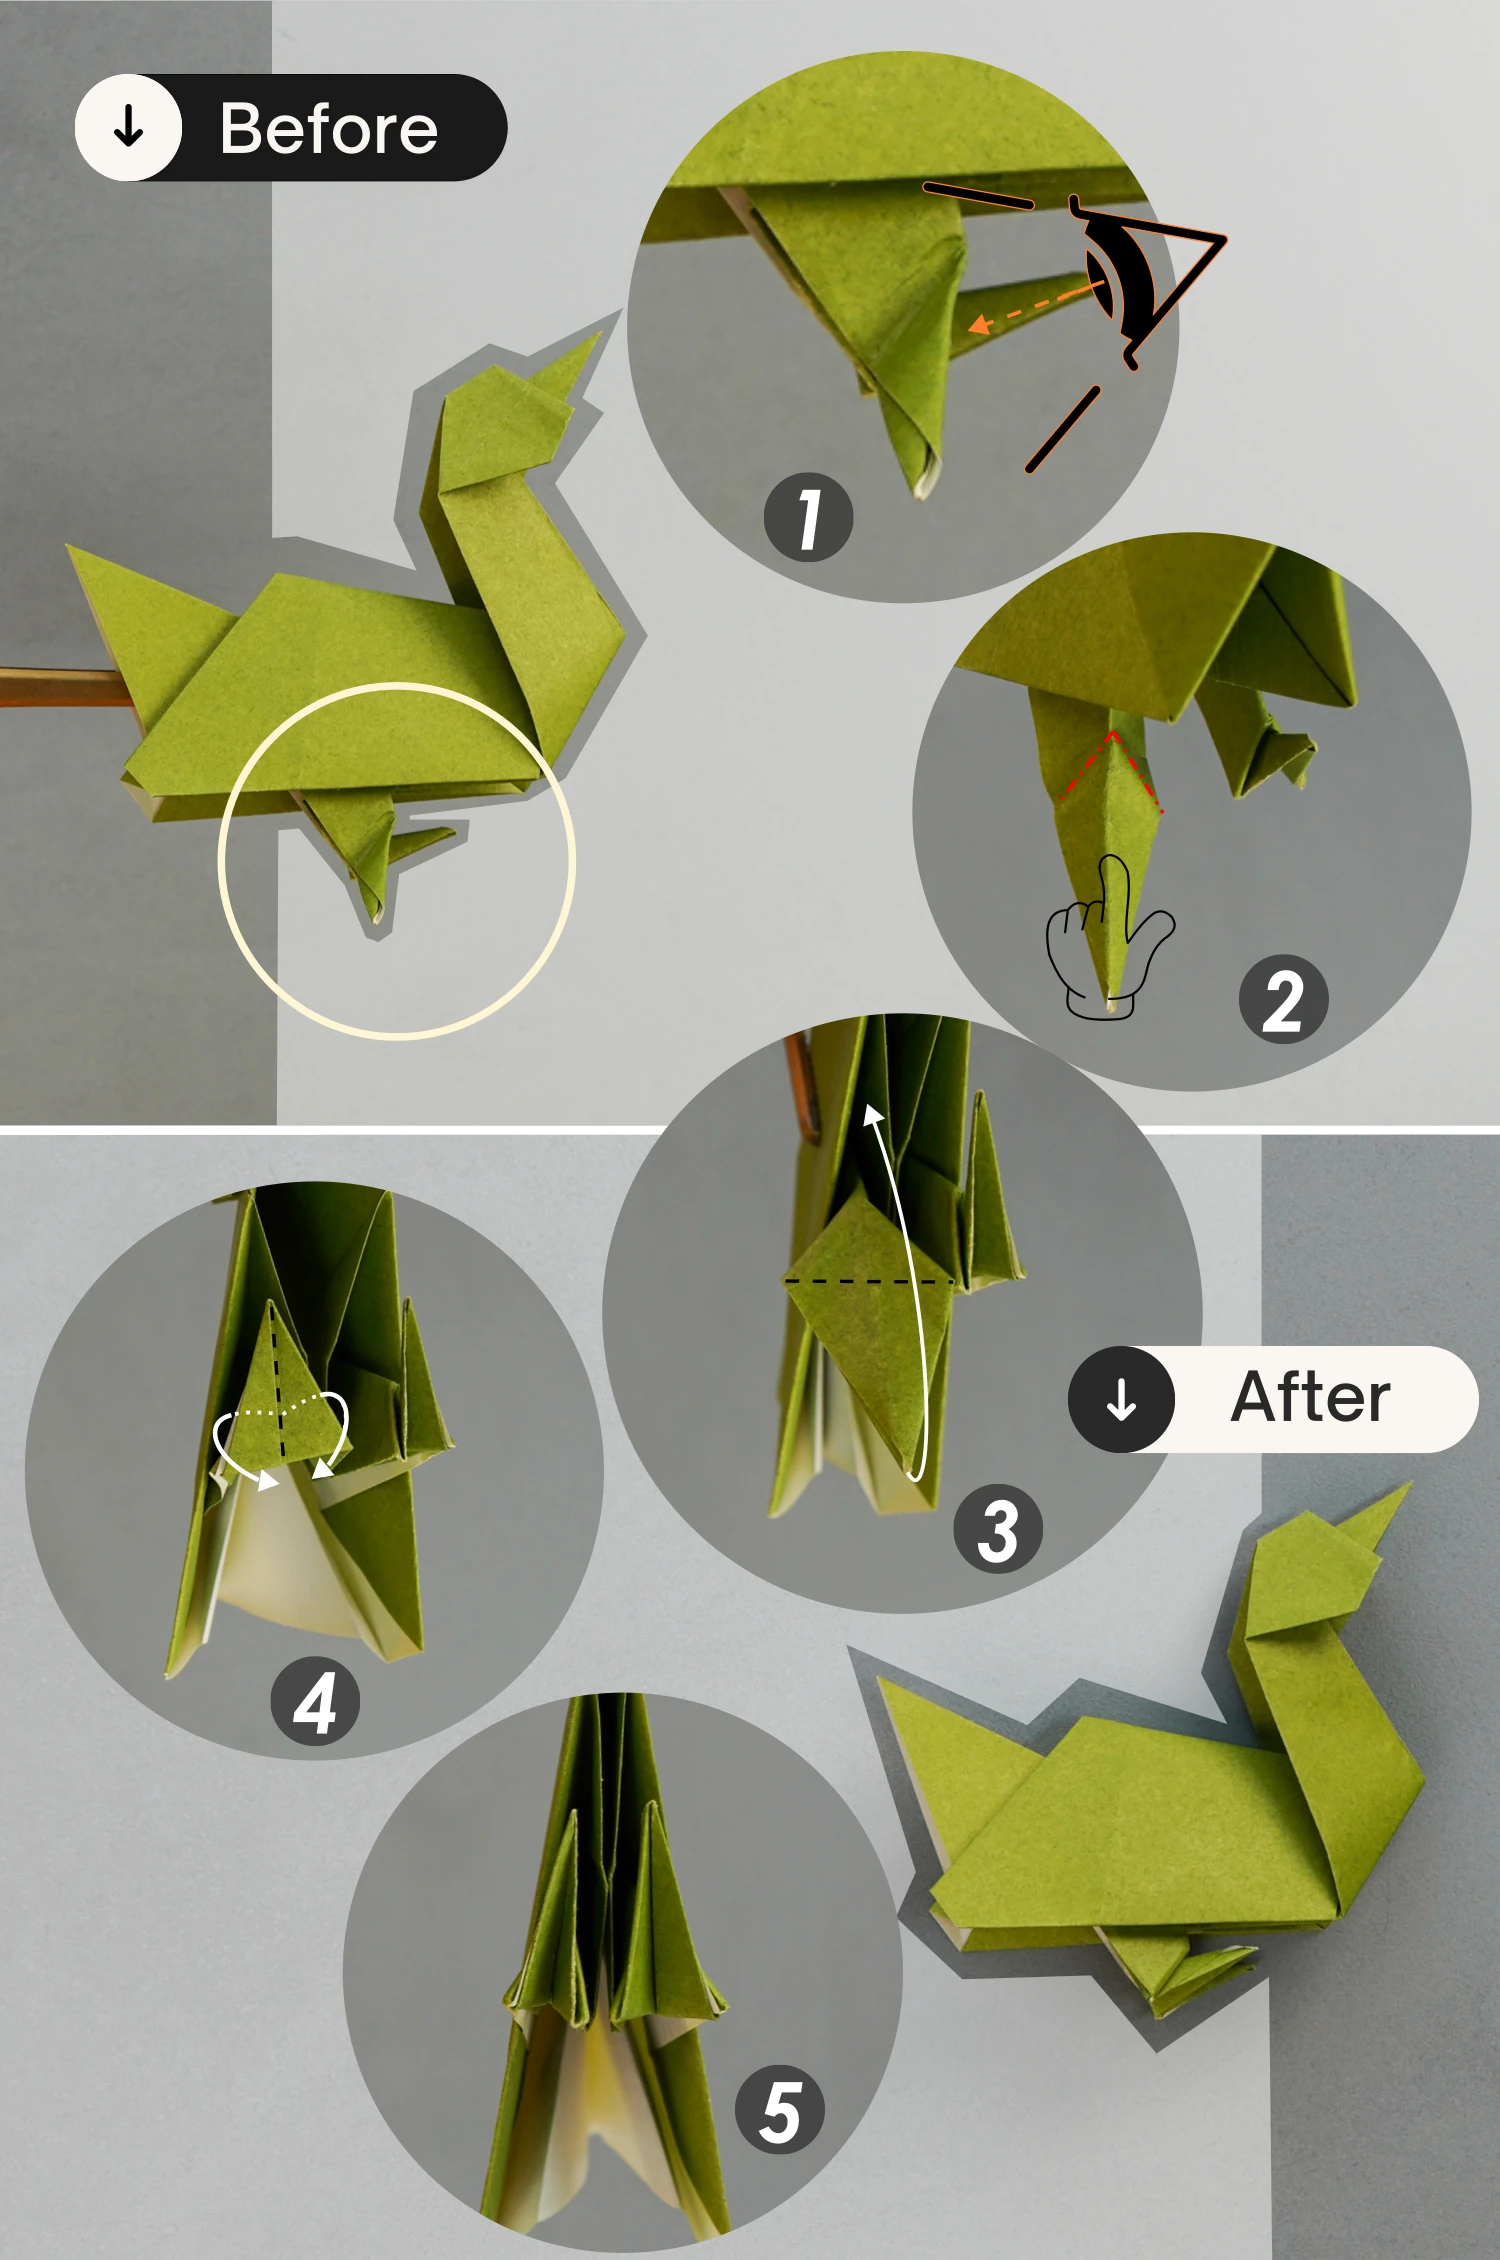
Fold the front food up, crease it well then unfold it.
Step 28
Open the front foot and view it from the left side, press it down backward along the creases you made in the previous step, then fold it back to the top side[pictures 2 and 3], and finally flatten the fold.
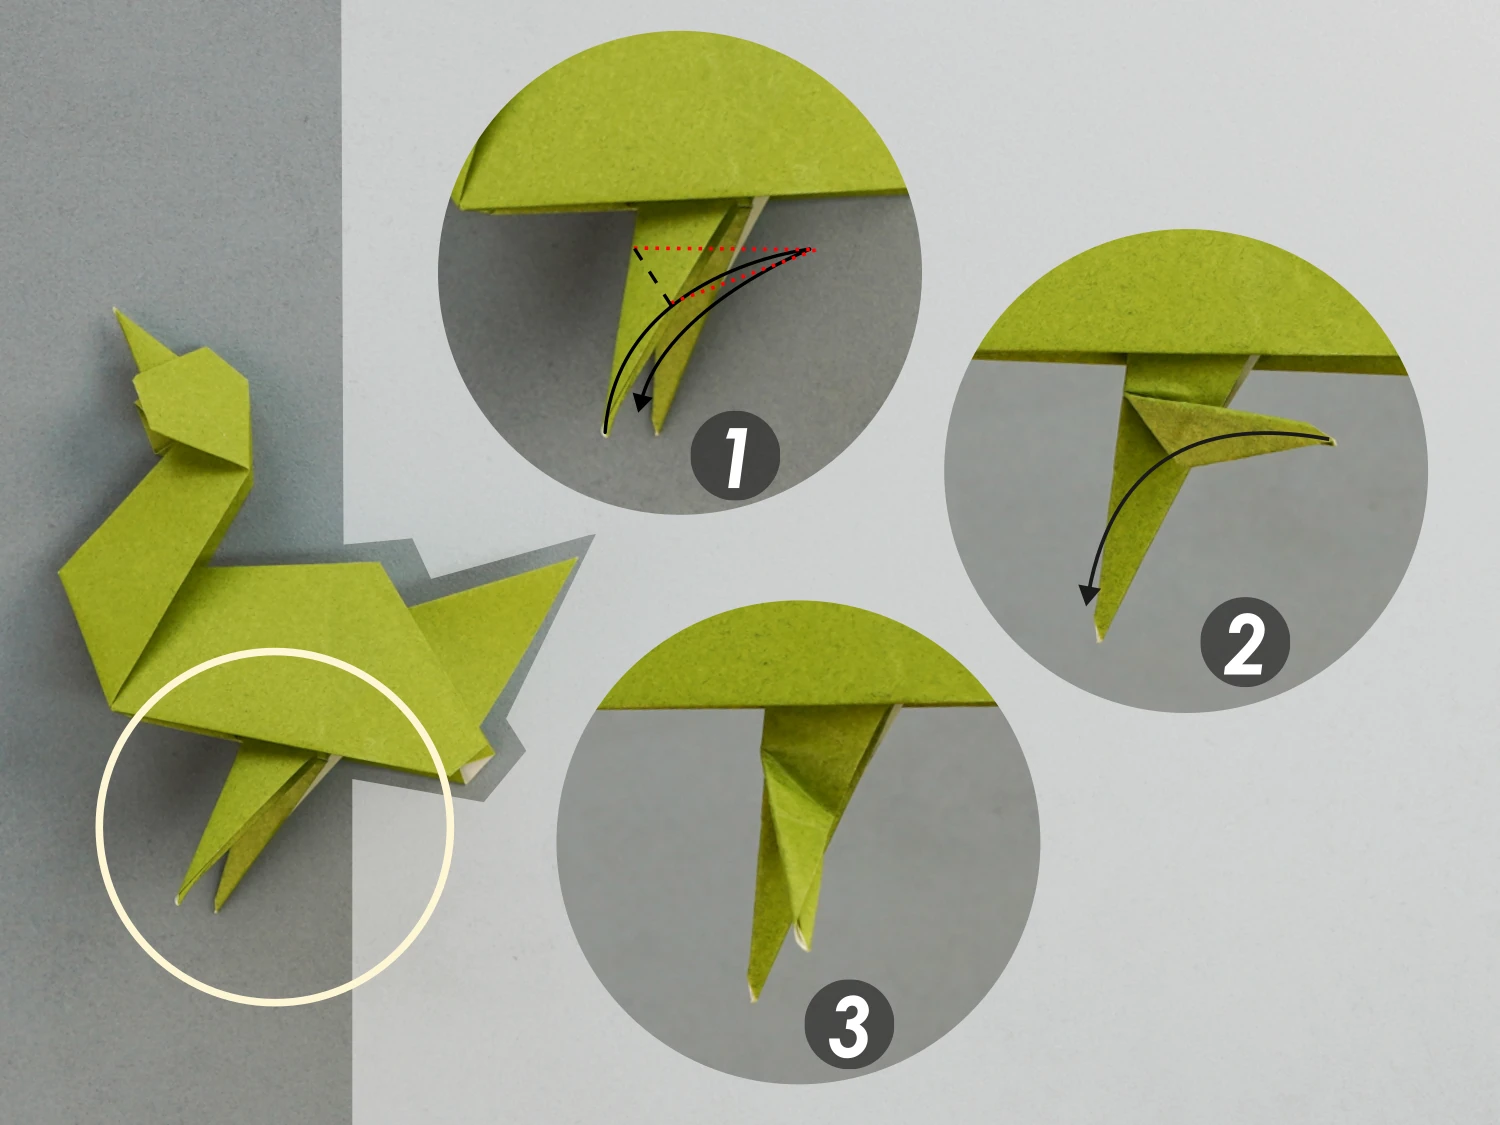
Step 29
Flip the paper over, fold the foot on this side up then unfold it.
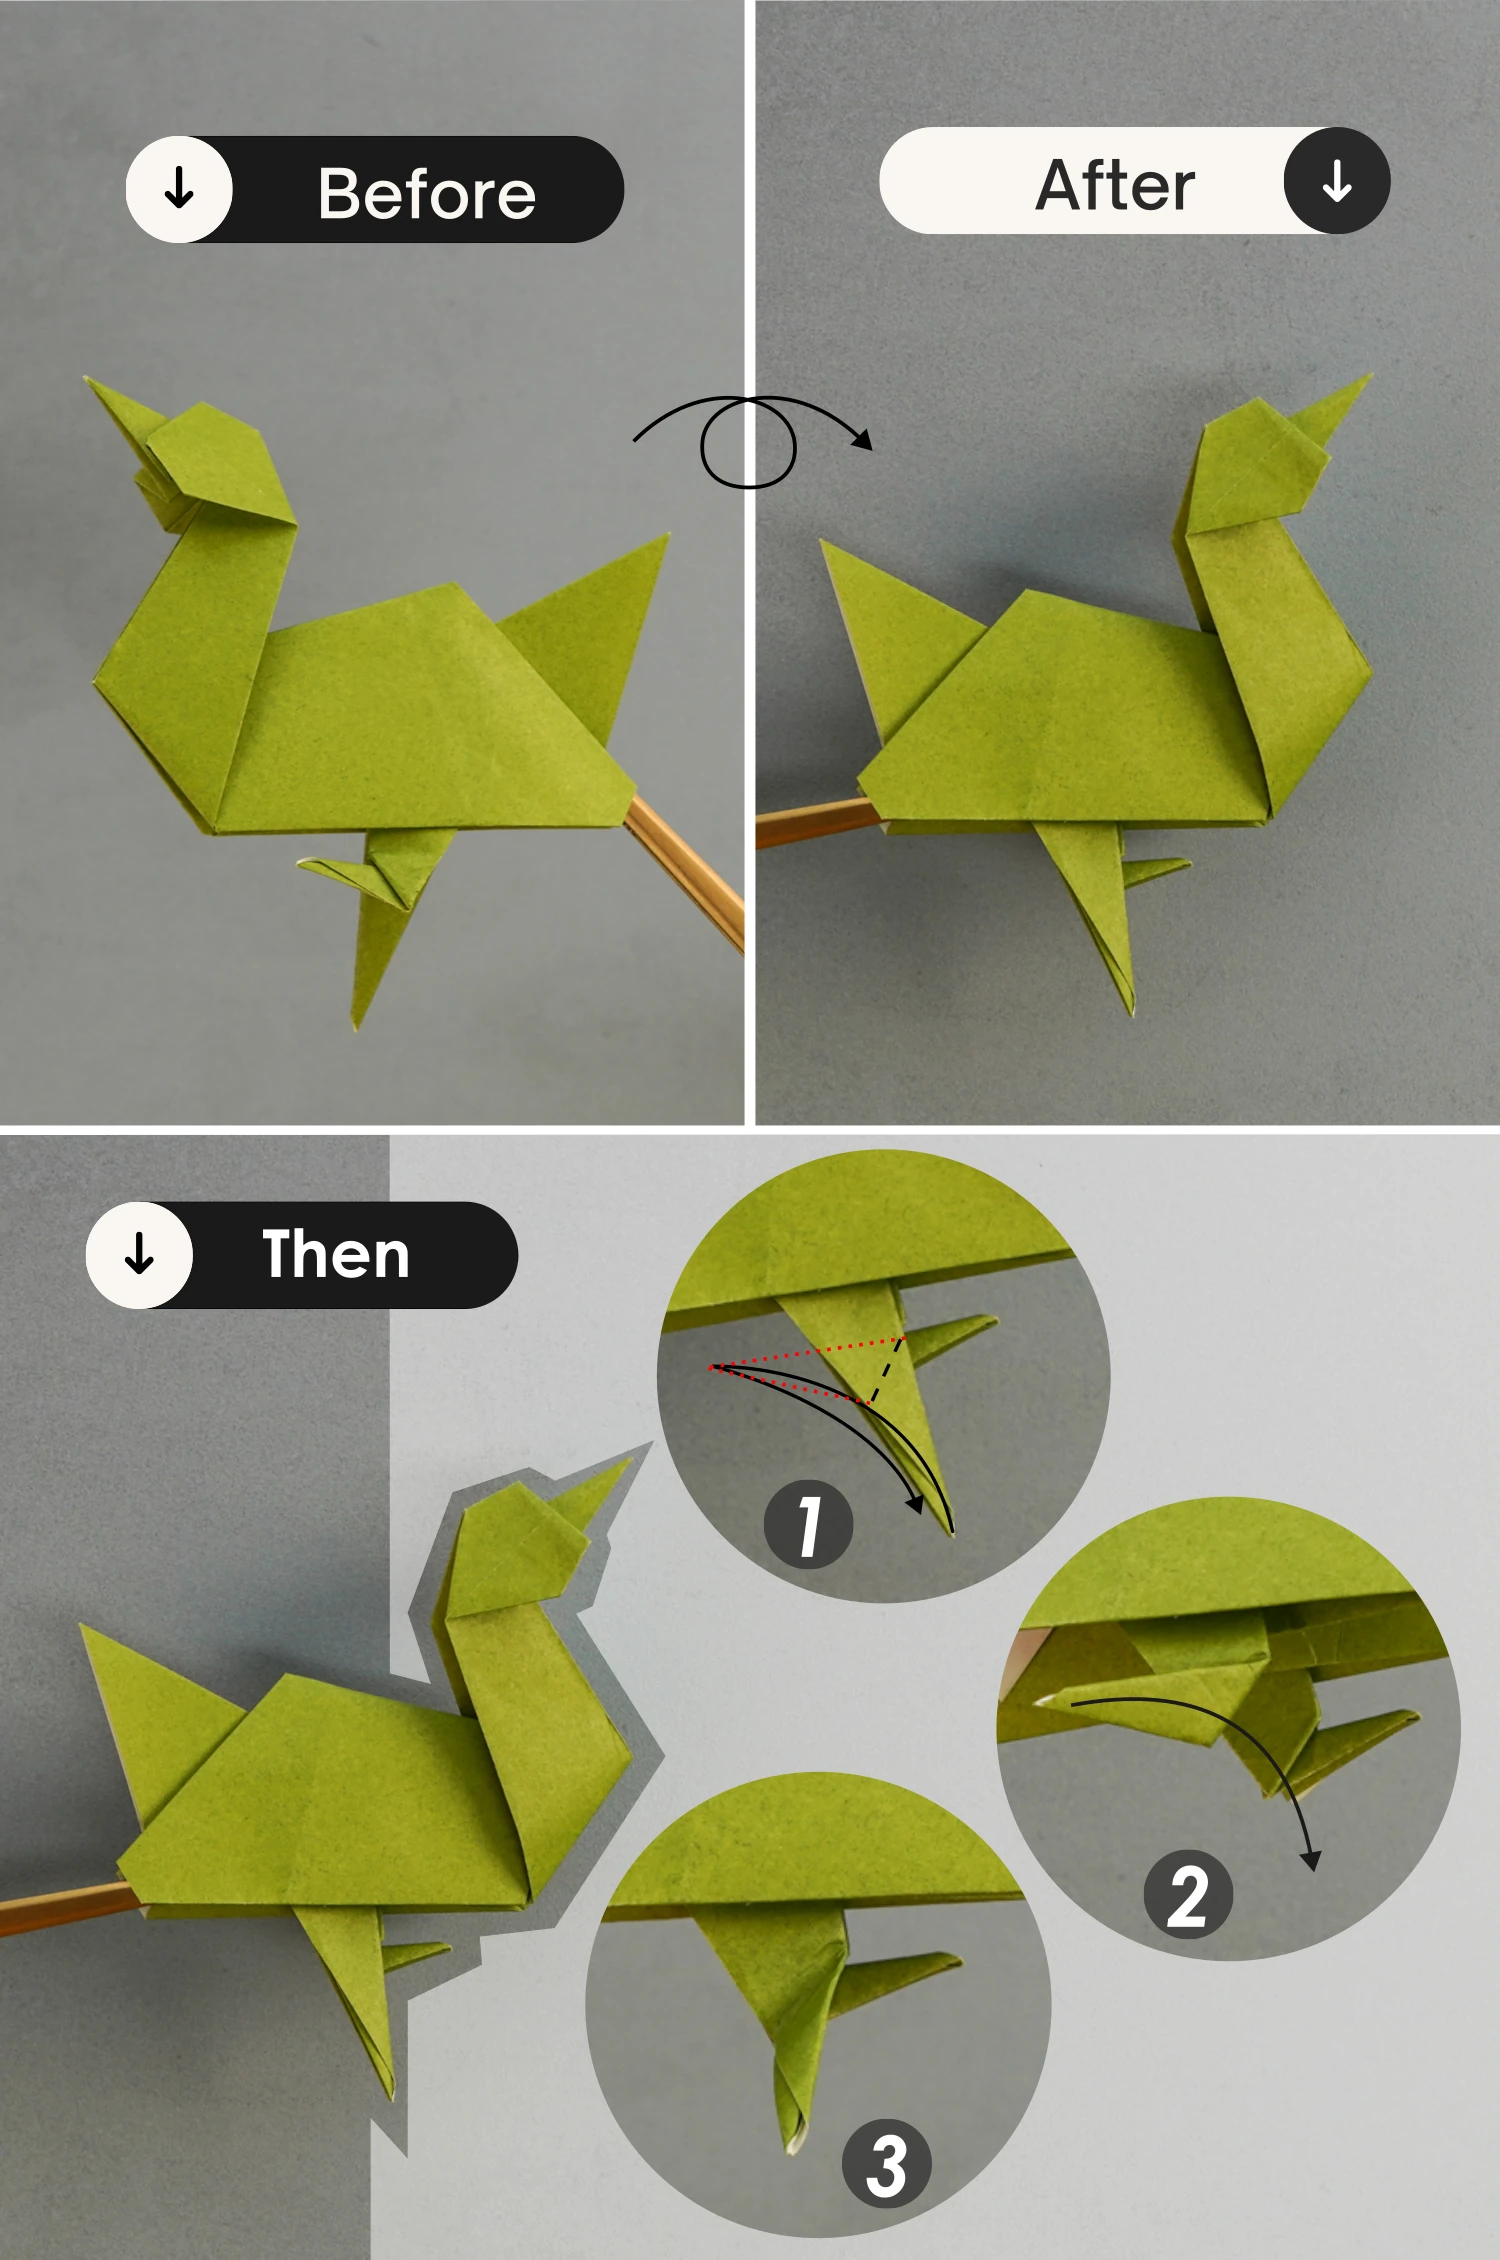
Step 30
As you did for the other foot, open it and view it from the right side, pressing the tip down backward and fold it back top the top, and finally close this flap.
What’s Next
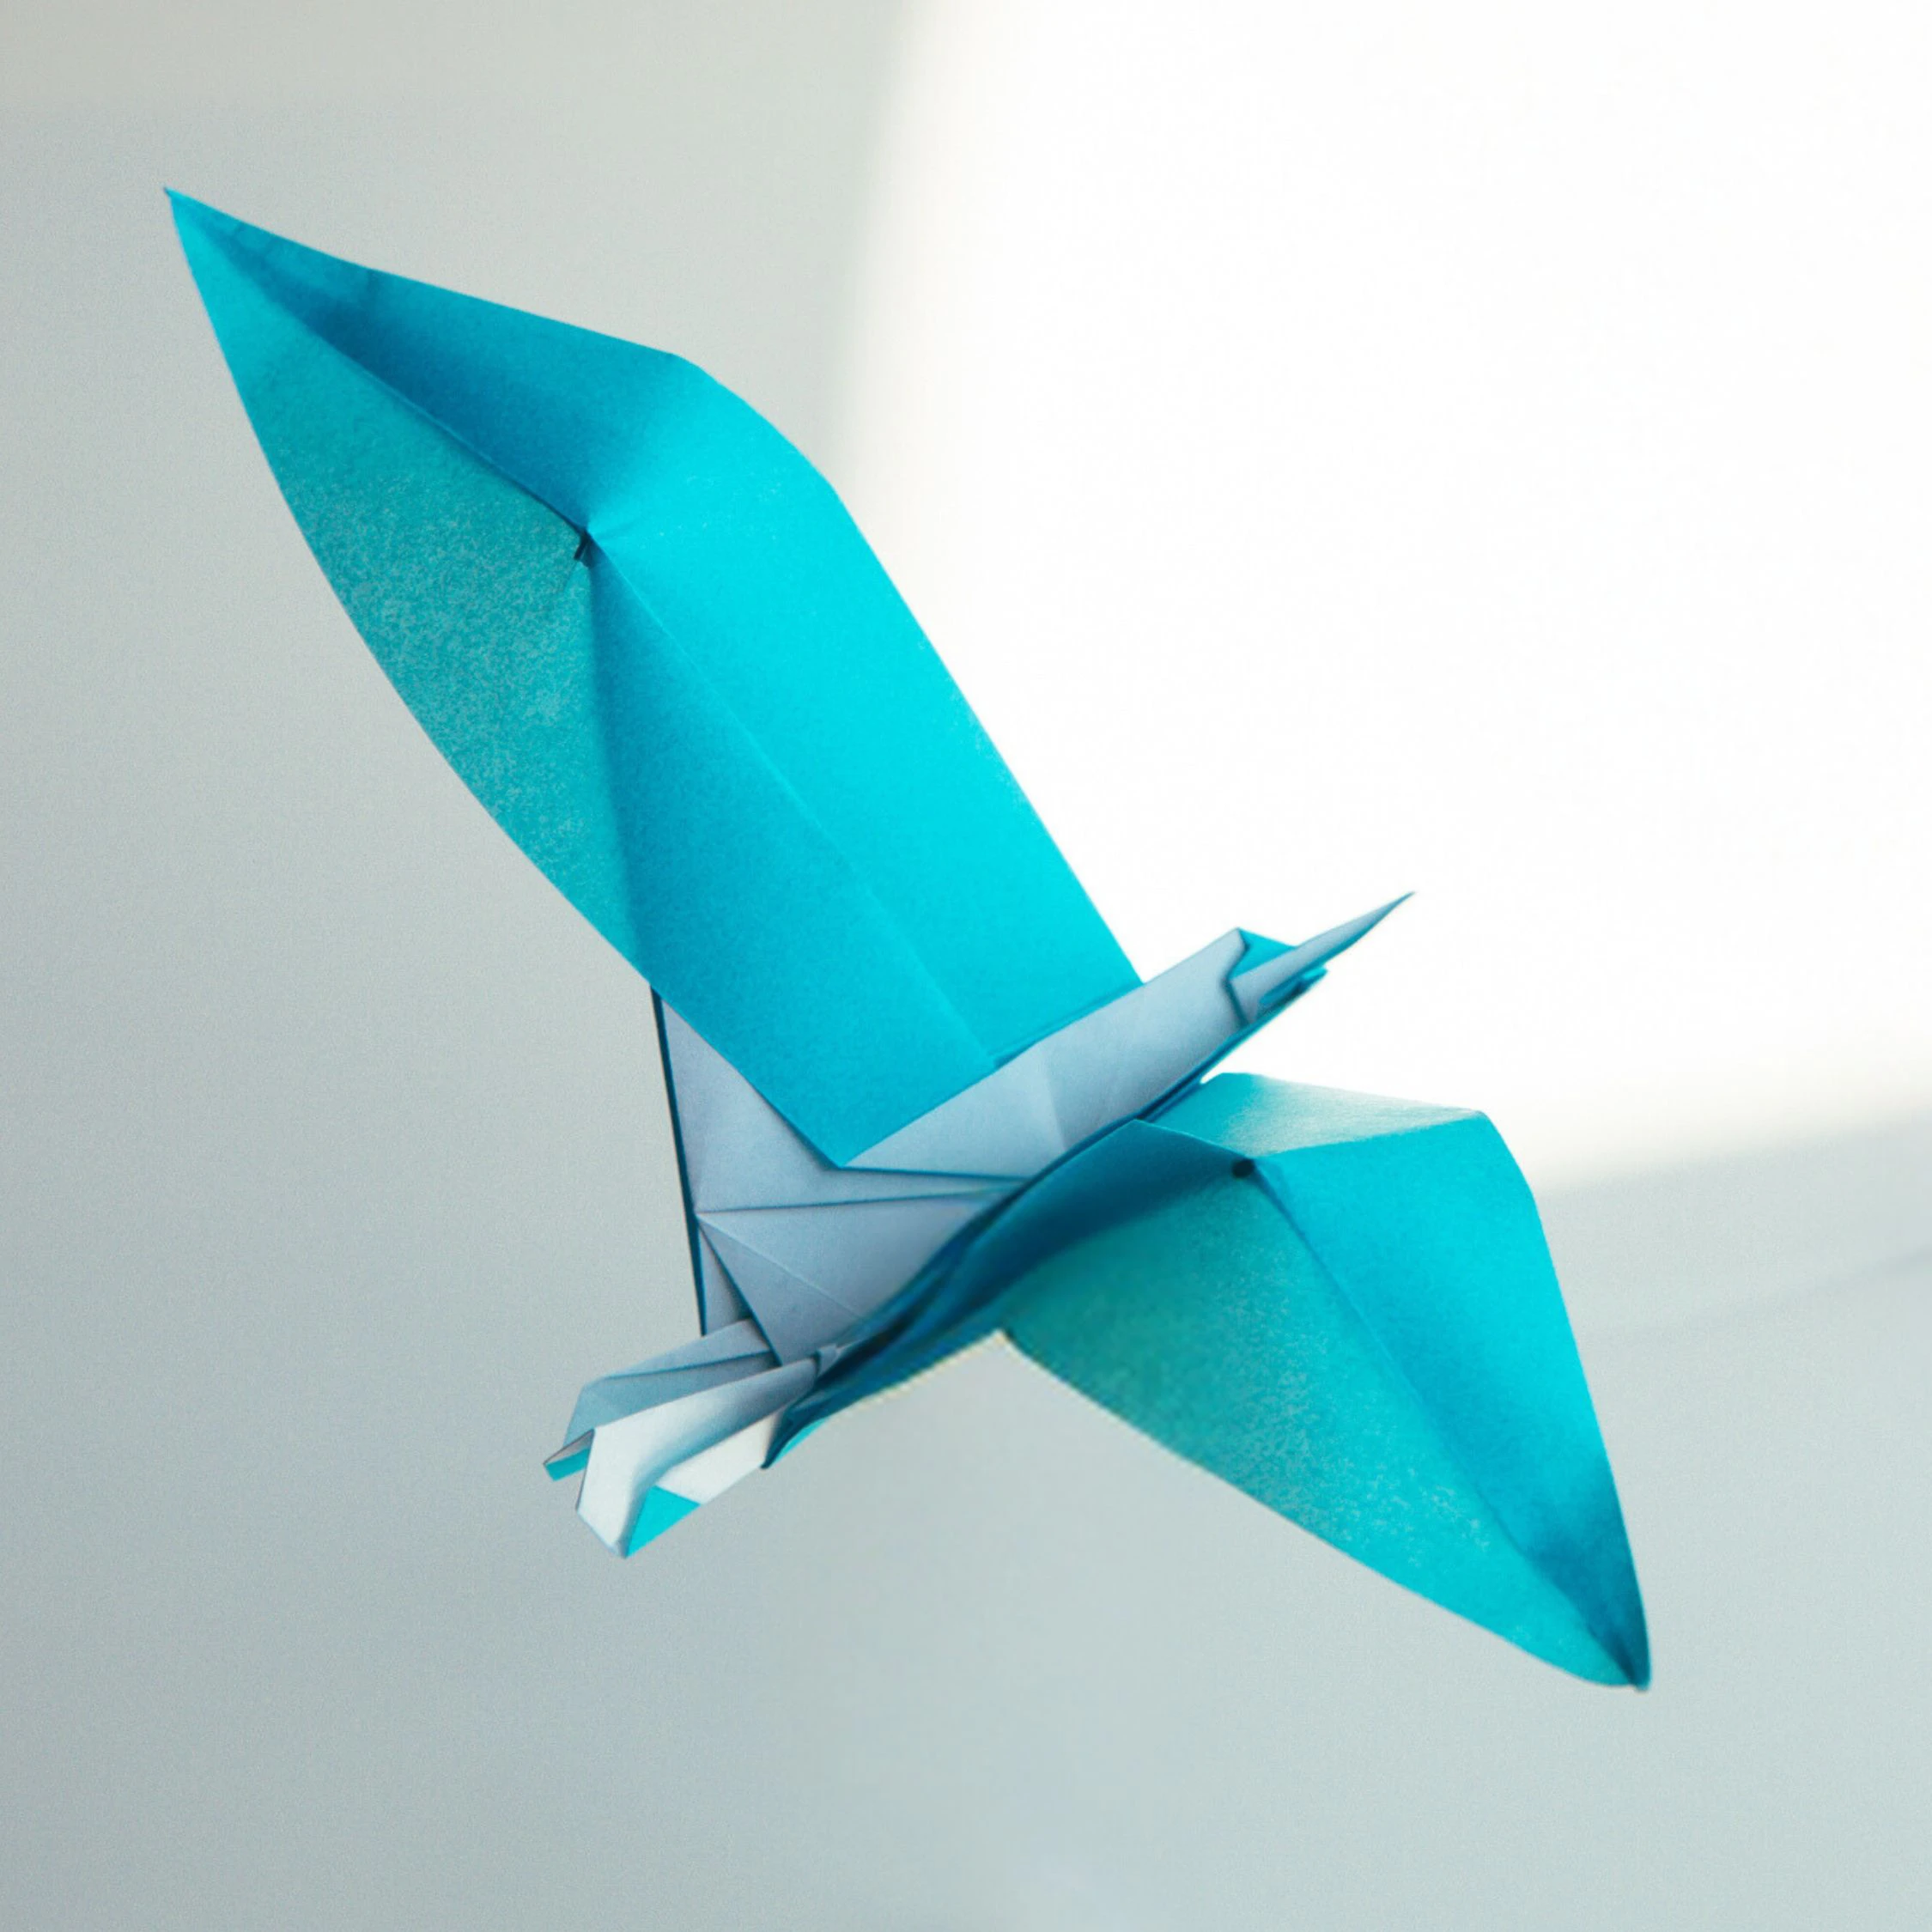
This is the final shape of an origami goose, now you can explore our other origami bird instructions. Happy folding!
Other Origami Bird Ideas