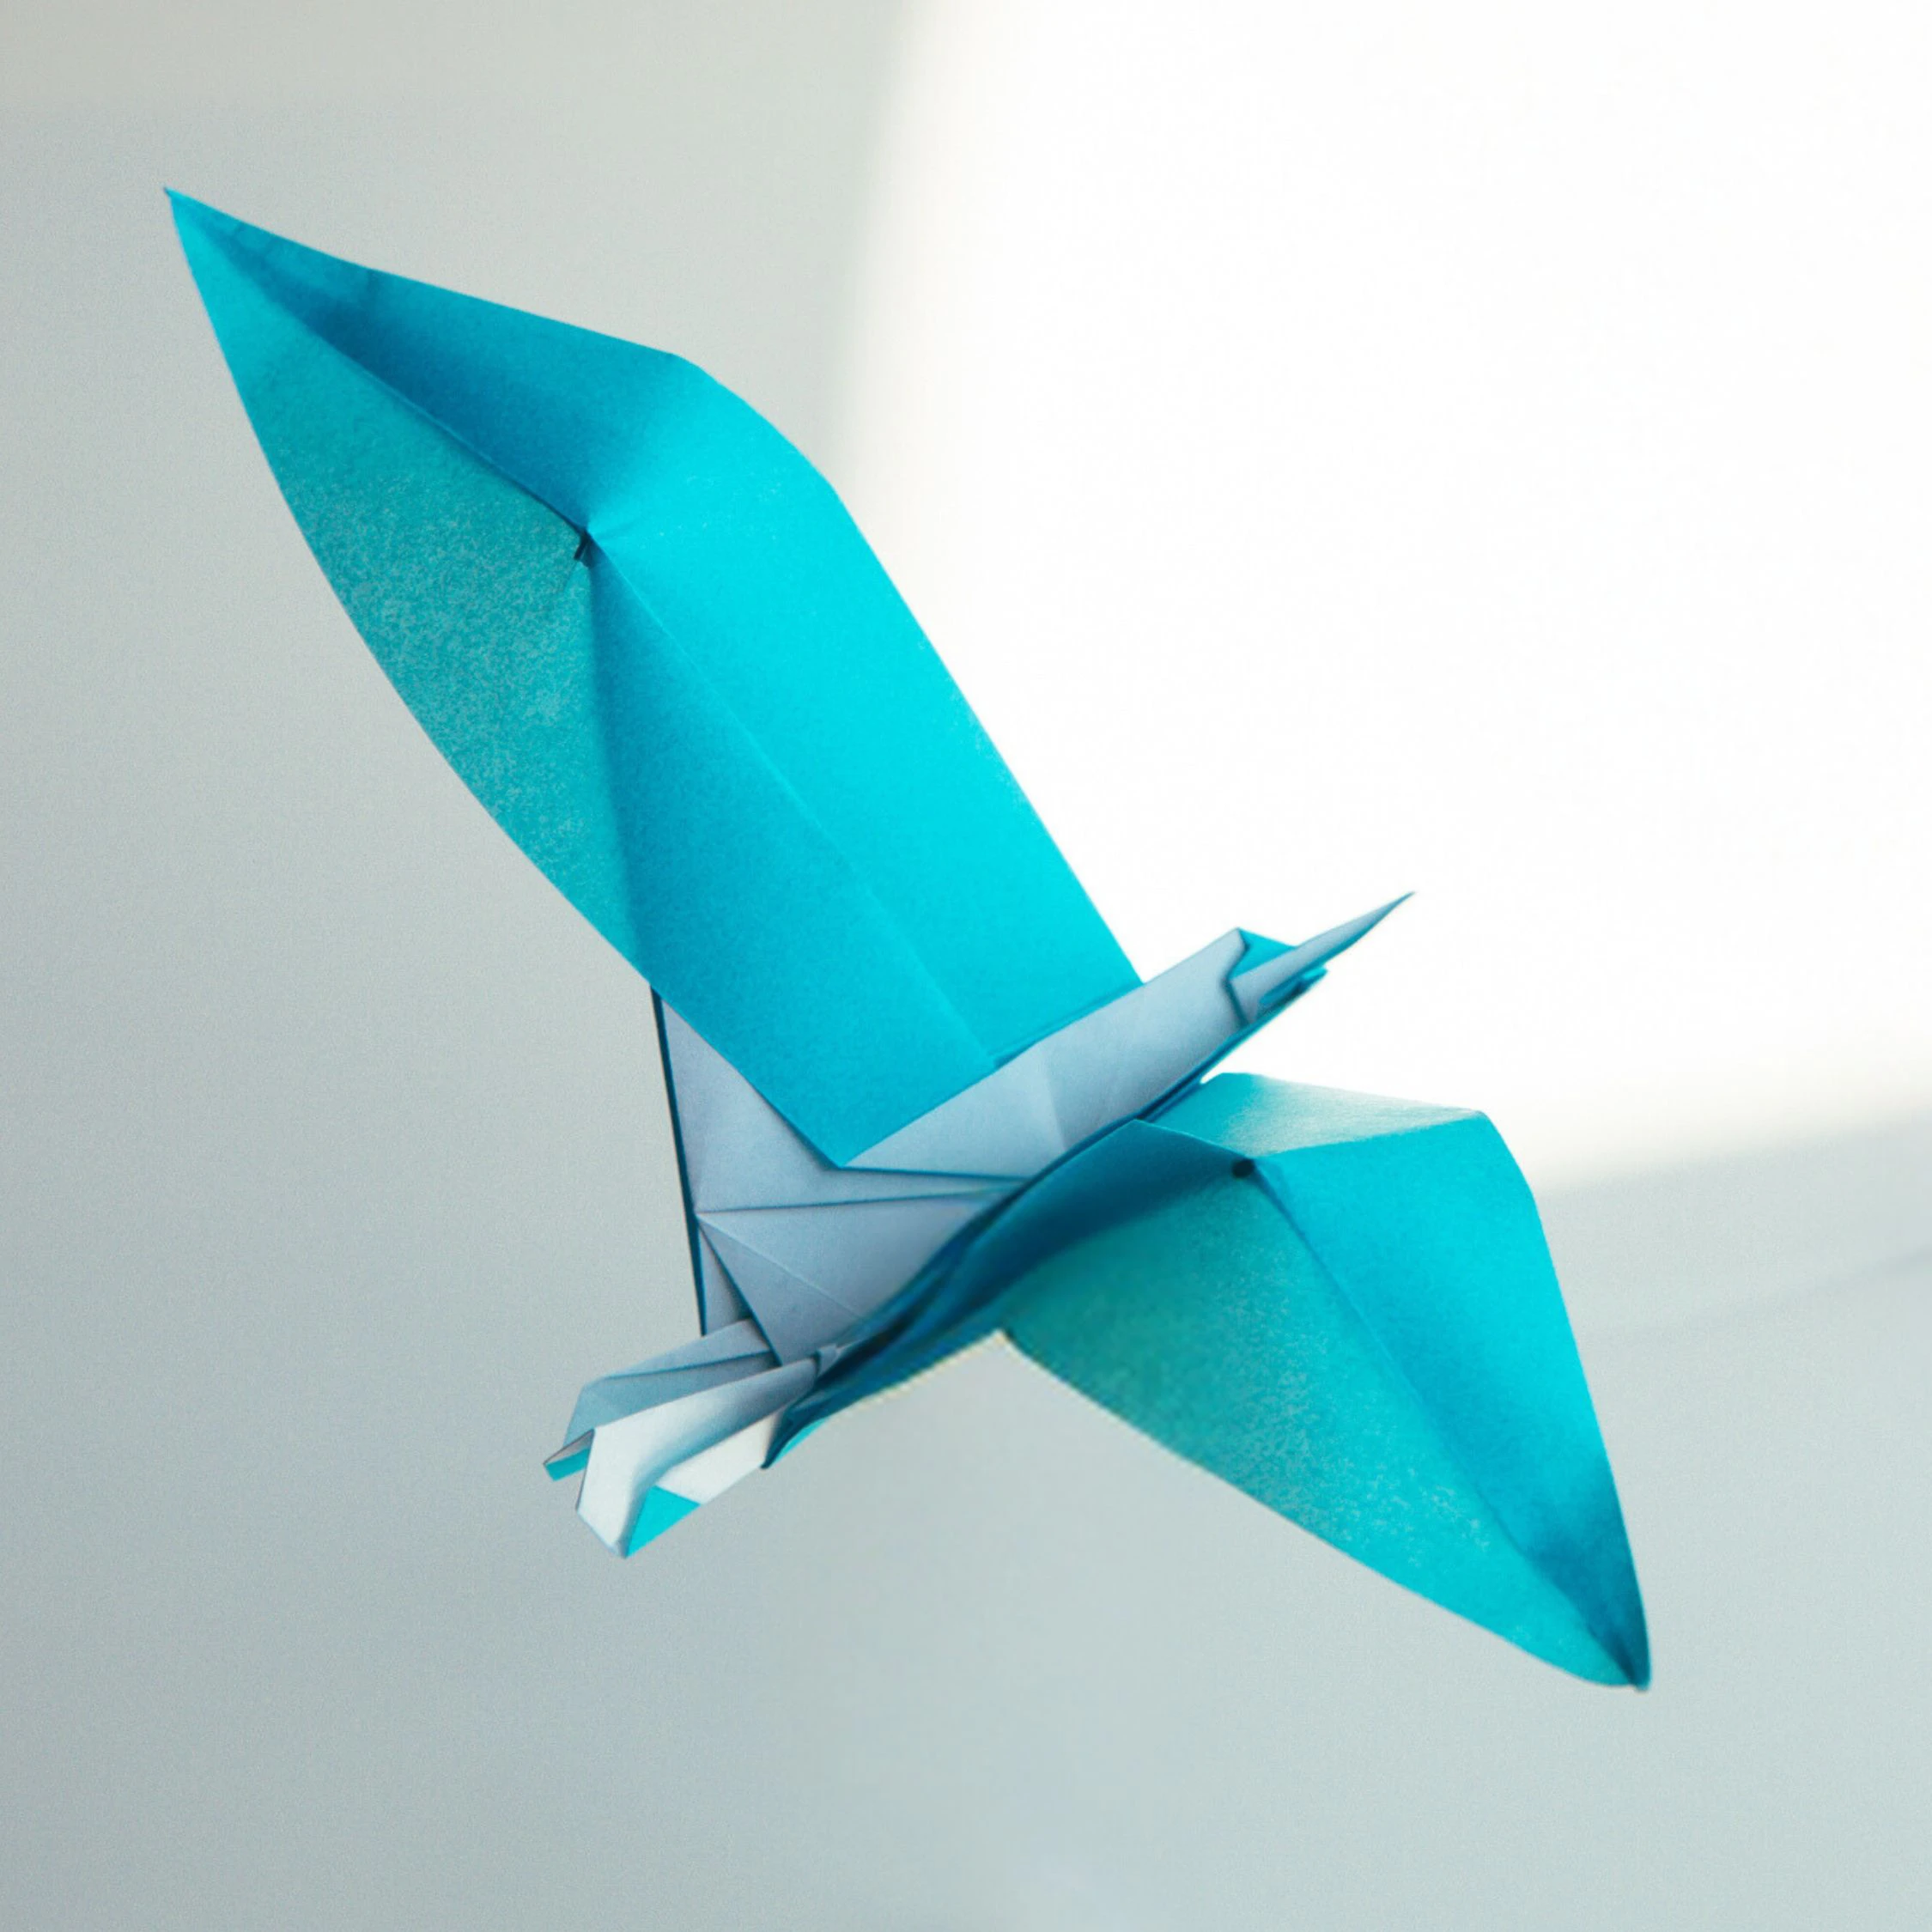
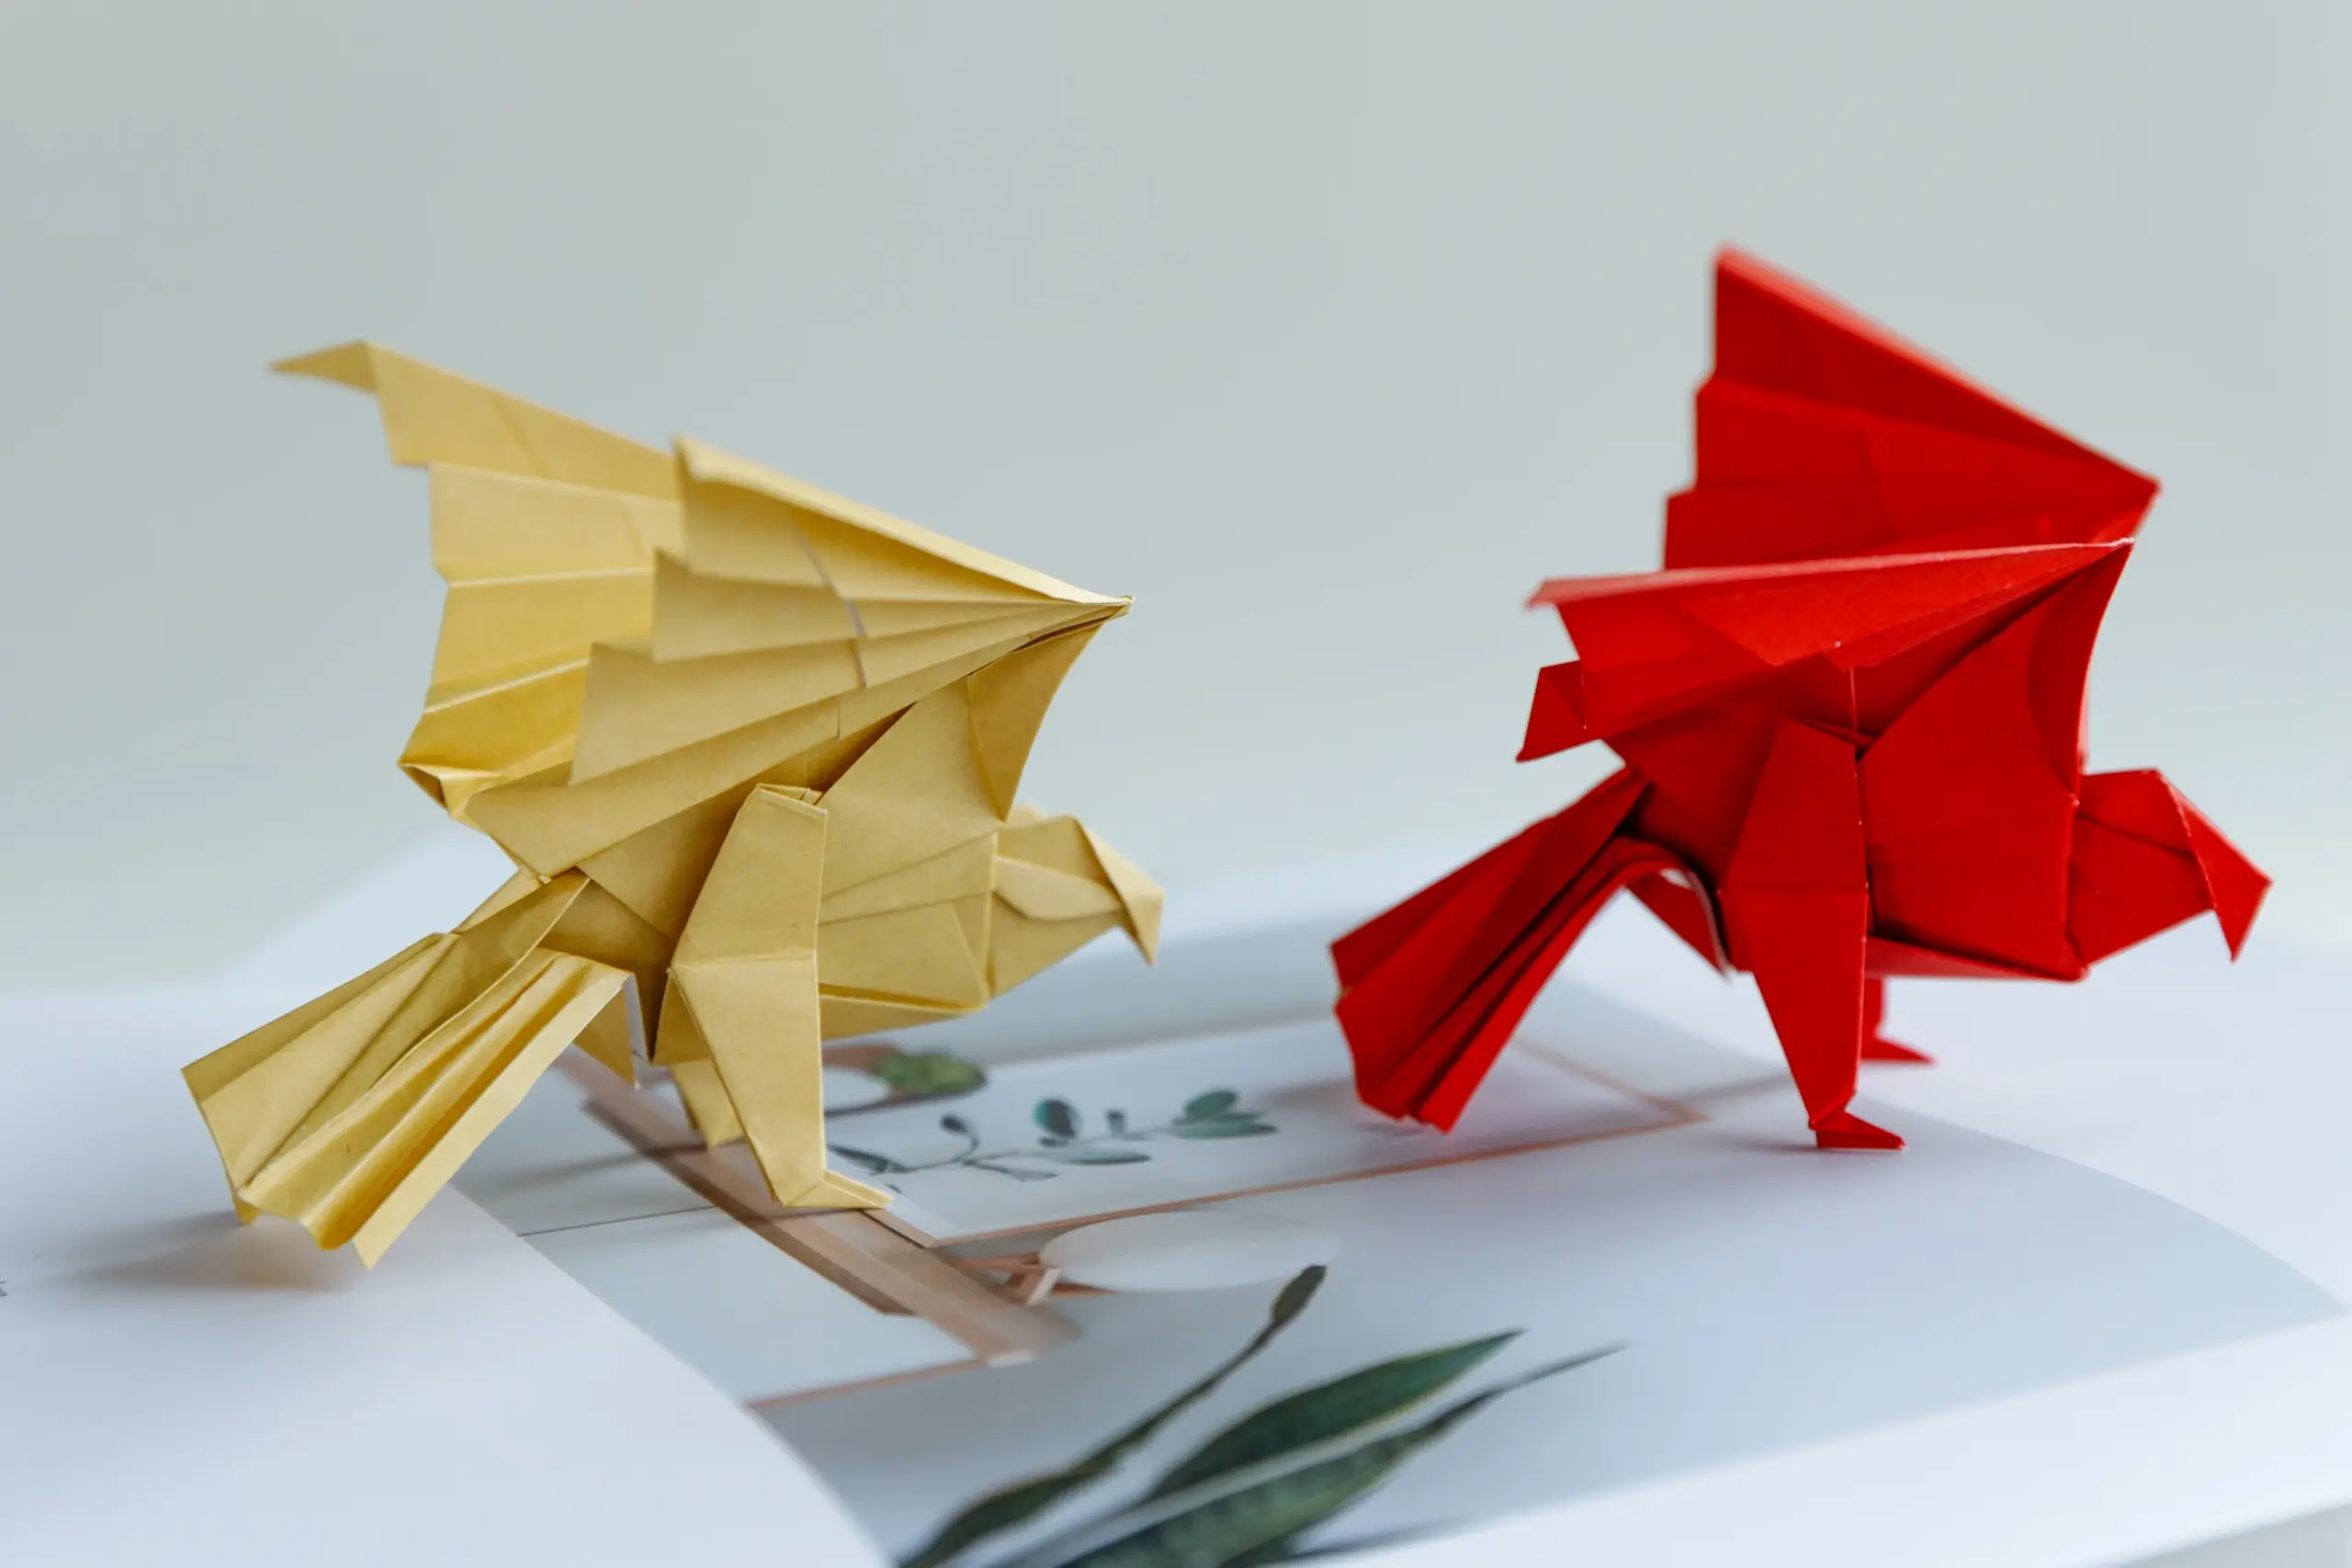
Super cool origami eagle! This post will give you a detailed instruction about how to create an origami eagle, what makes it so special and eye-catching is that it has two spread wings and looks as if it’s about to take flight! In addition, this majestic eagle, with its powerful gesture is sure to impress you.

We use Bird Base as the basis of this tutorial, while many Pleat Fold to form the tail and wings.
We provide step-by-step diagram instructions and beginner-friendly videos. Check both for quicker learning.
If you are new to origami, start here from our beginner guide to know the basics and how to read the step-by-step instructions.

- Folding time: 30 minutes
- Paper: 20×20 cm
- Difficulty: Advanced
Material
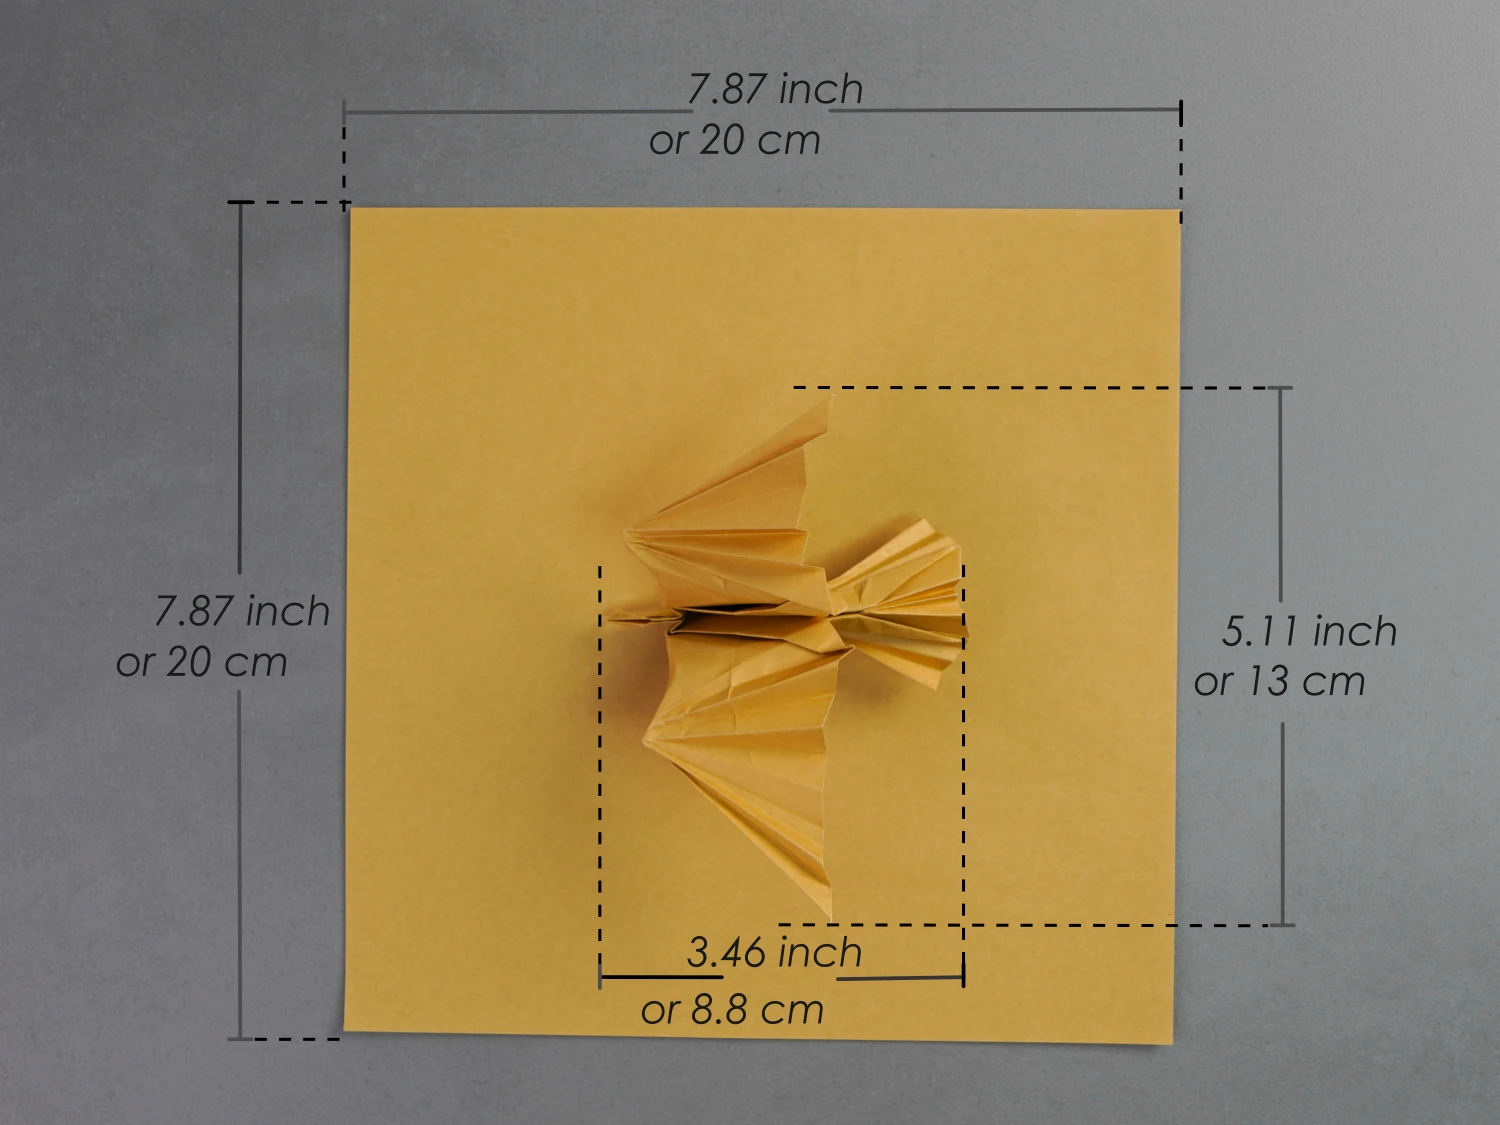
Prepare a piece of 20×20 cm origami square paper, with one yellow and one white side, to create a 13×8.8 cm origami eagle. Various sizes of square paper are practicable, but we suggest you use a slightly larger paper for there are a lot of steps.
Origami Eagle Video
Step by Step Instructions
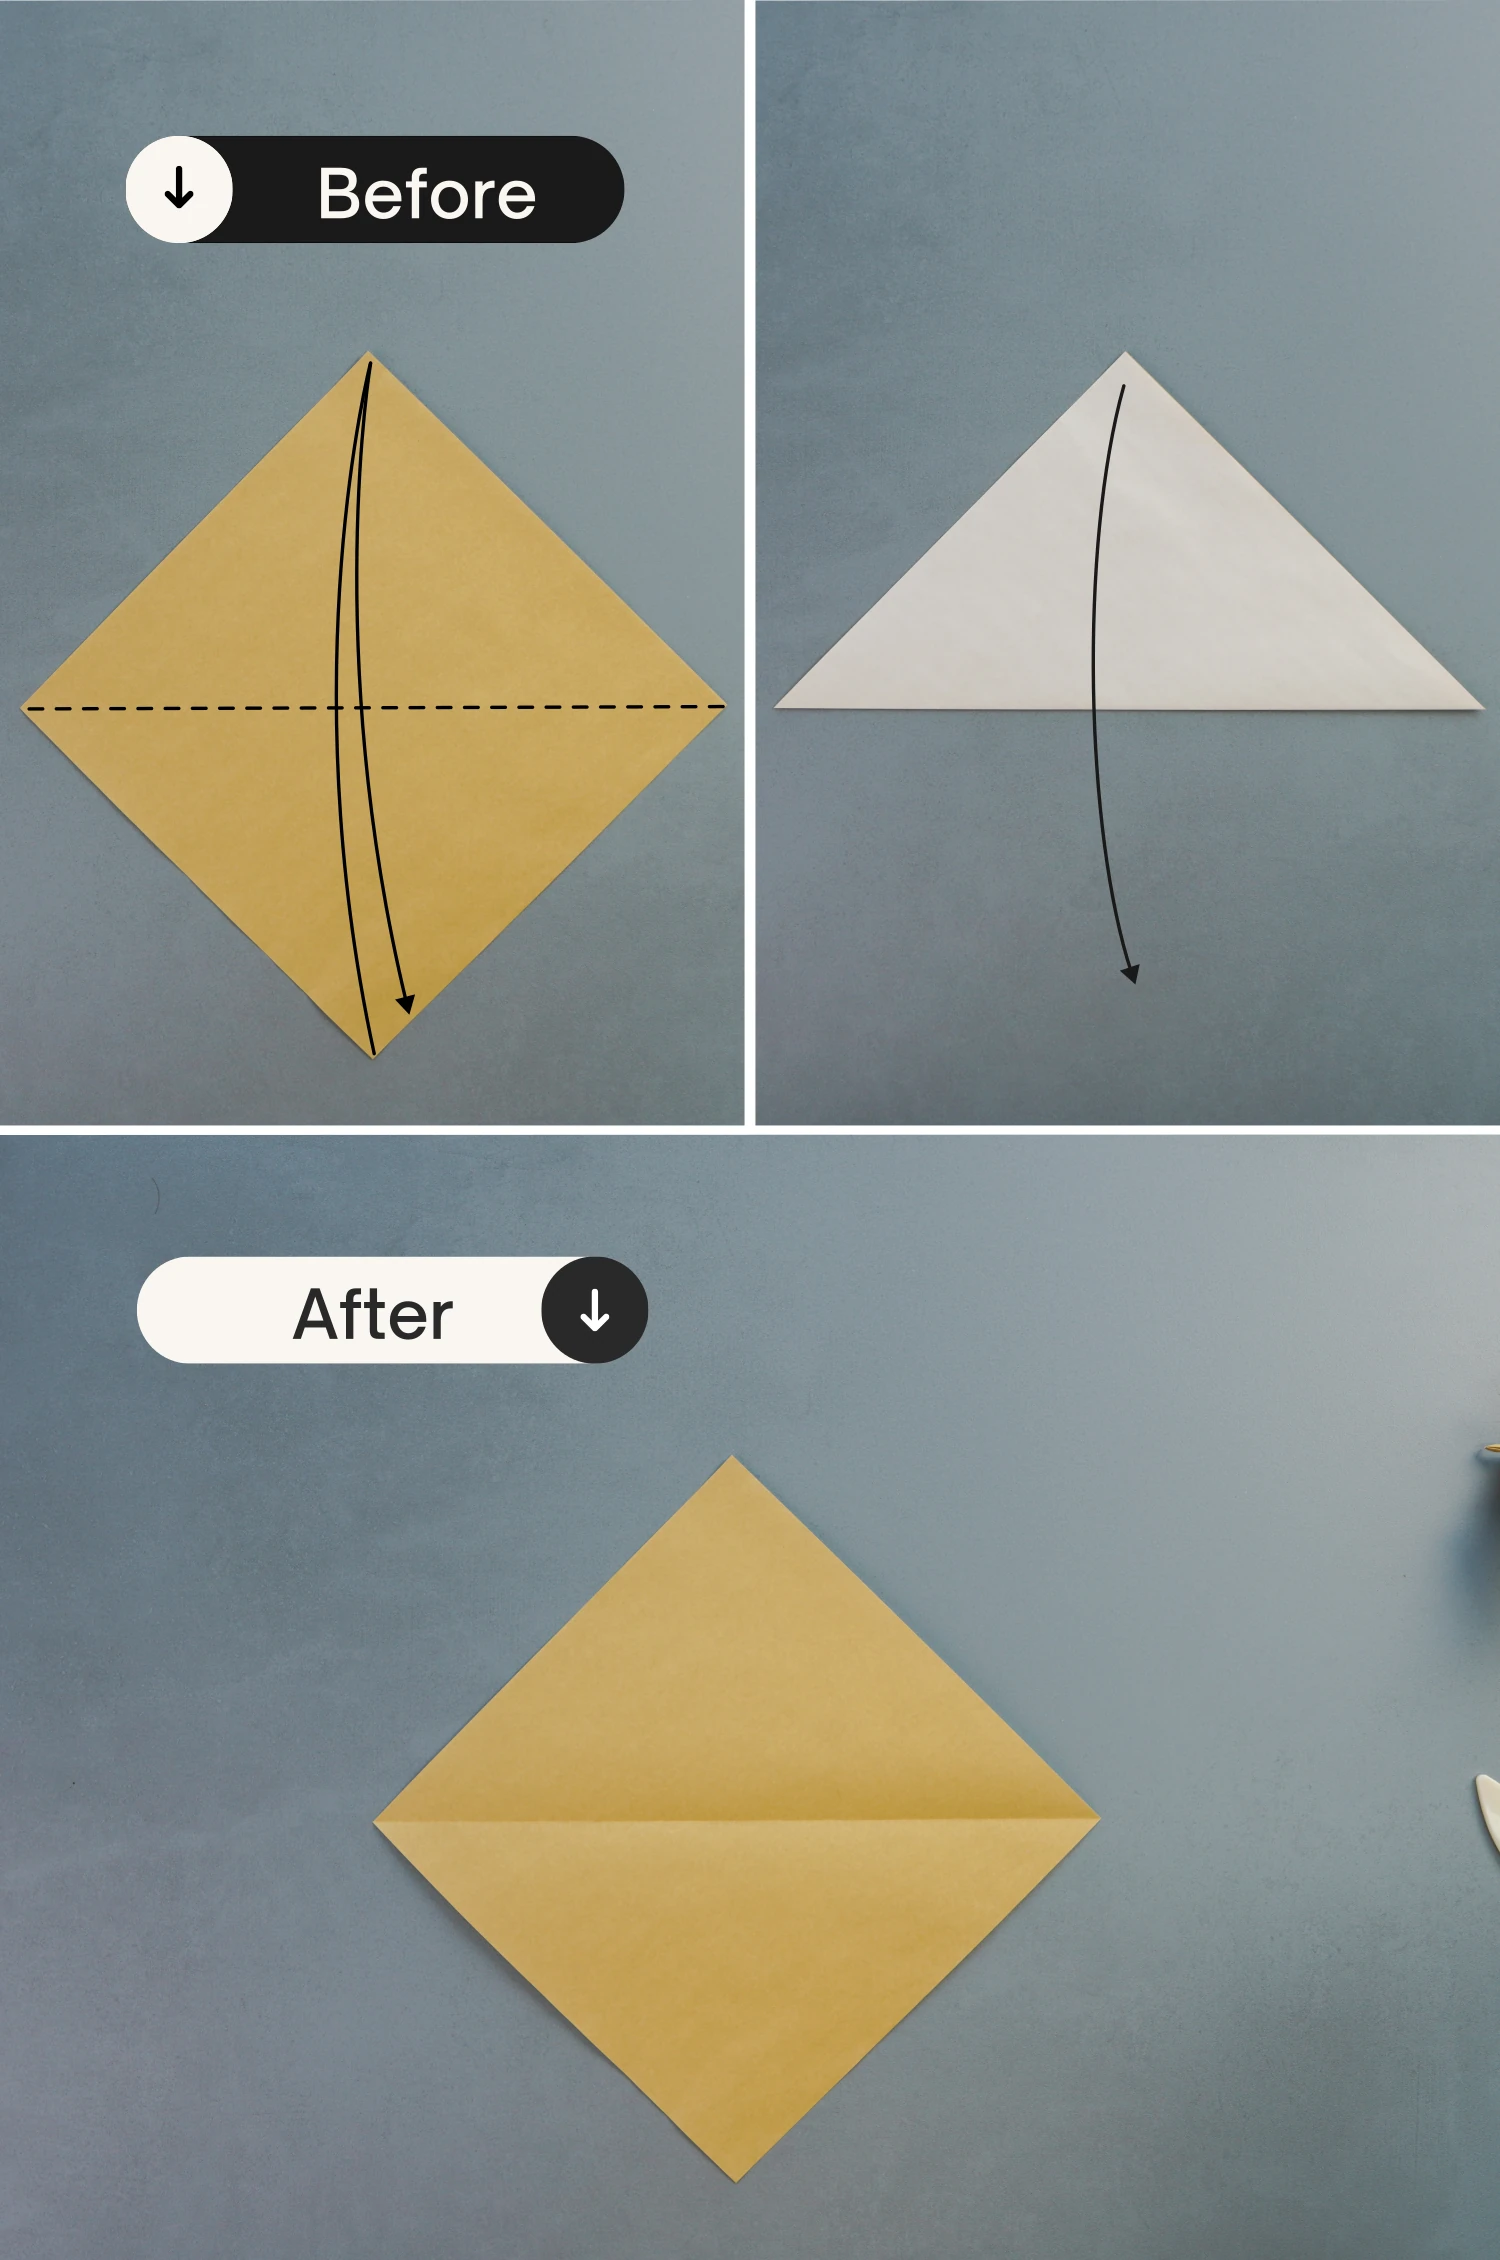
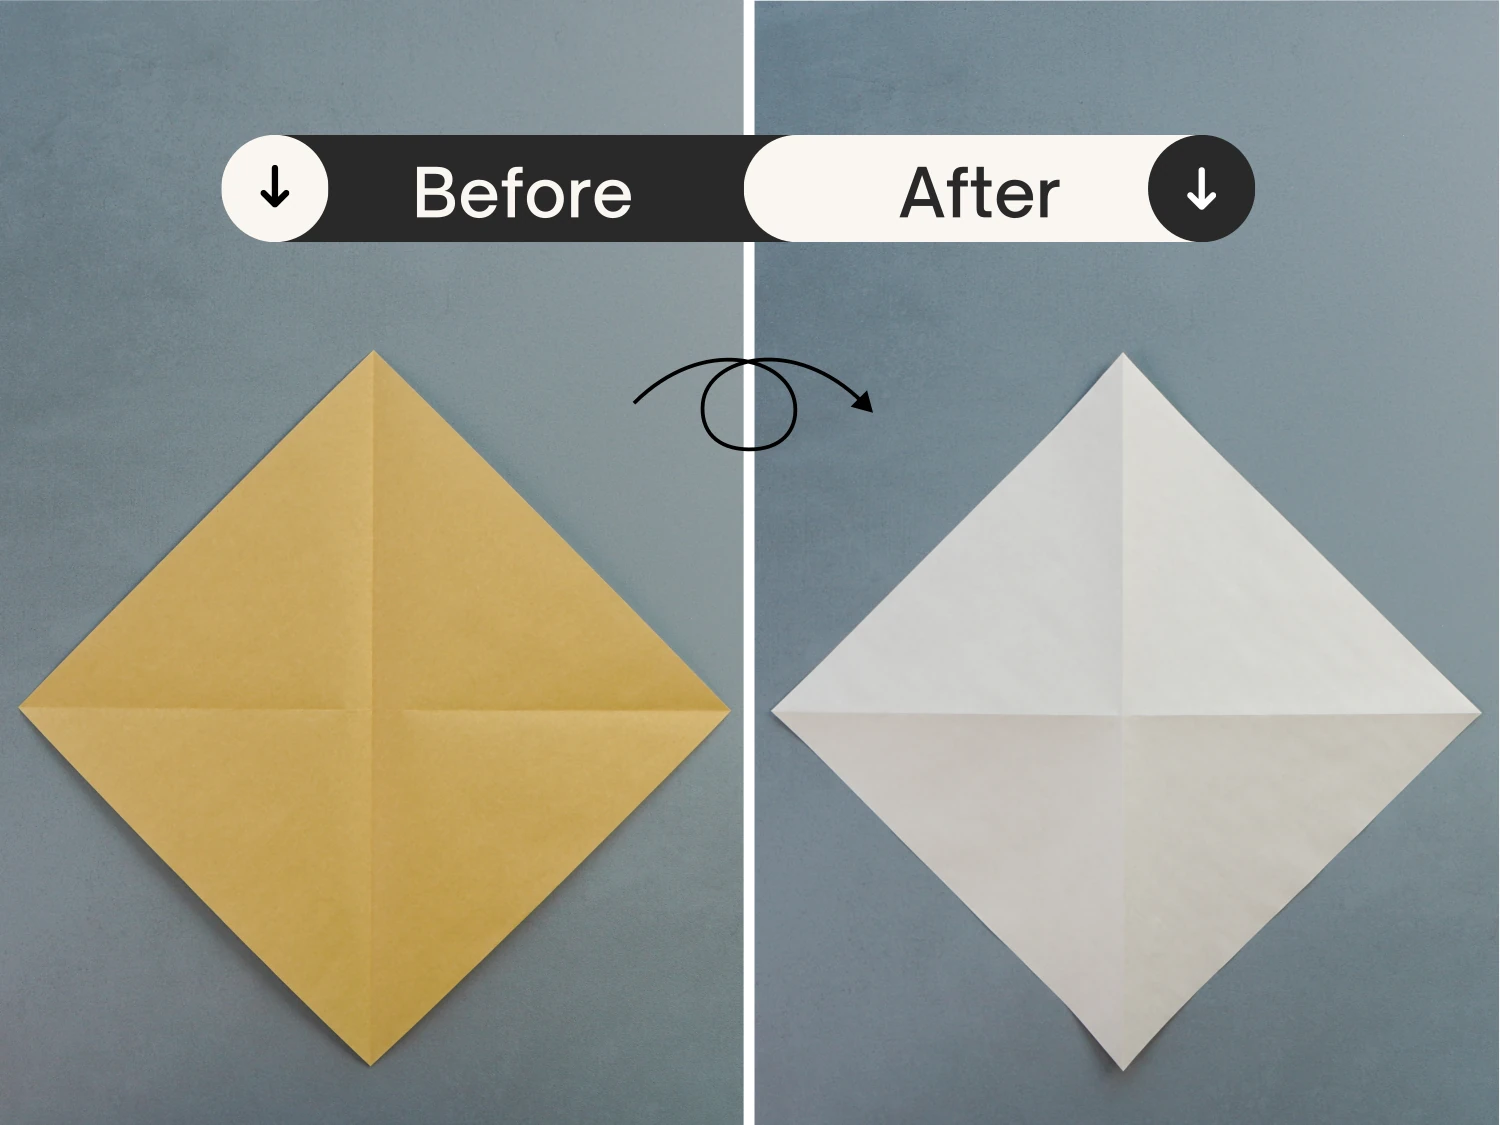
Step 1
Start with the yellow side of the paper facing up, and fold the bottom point to the top diagonally, leaving a crease then unfold it.
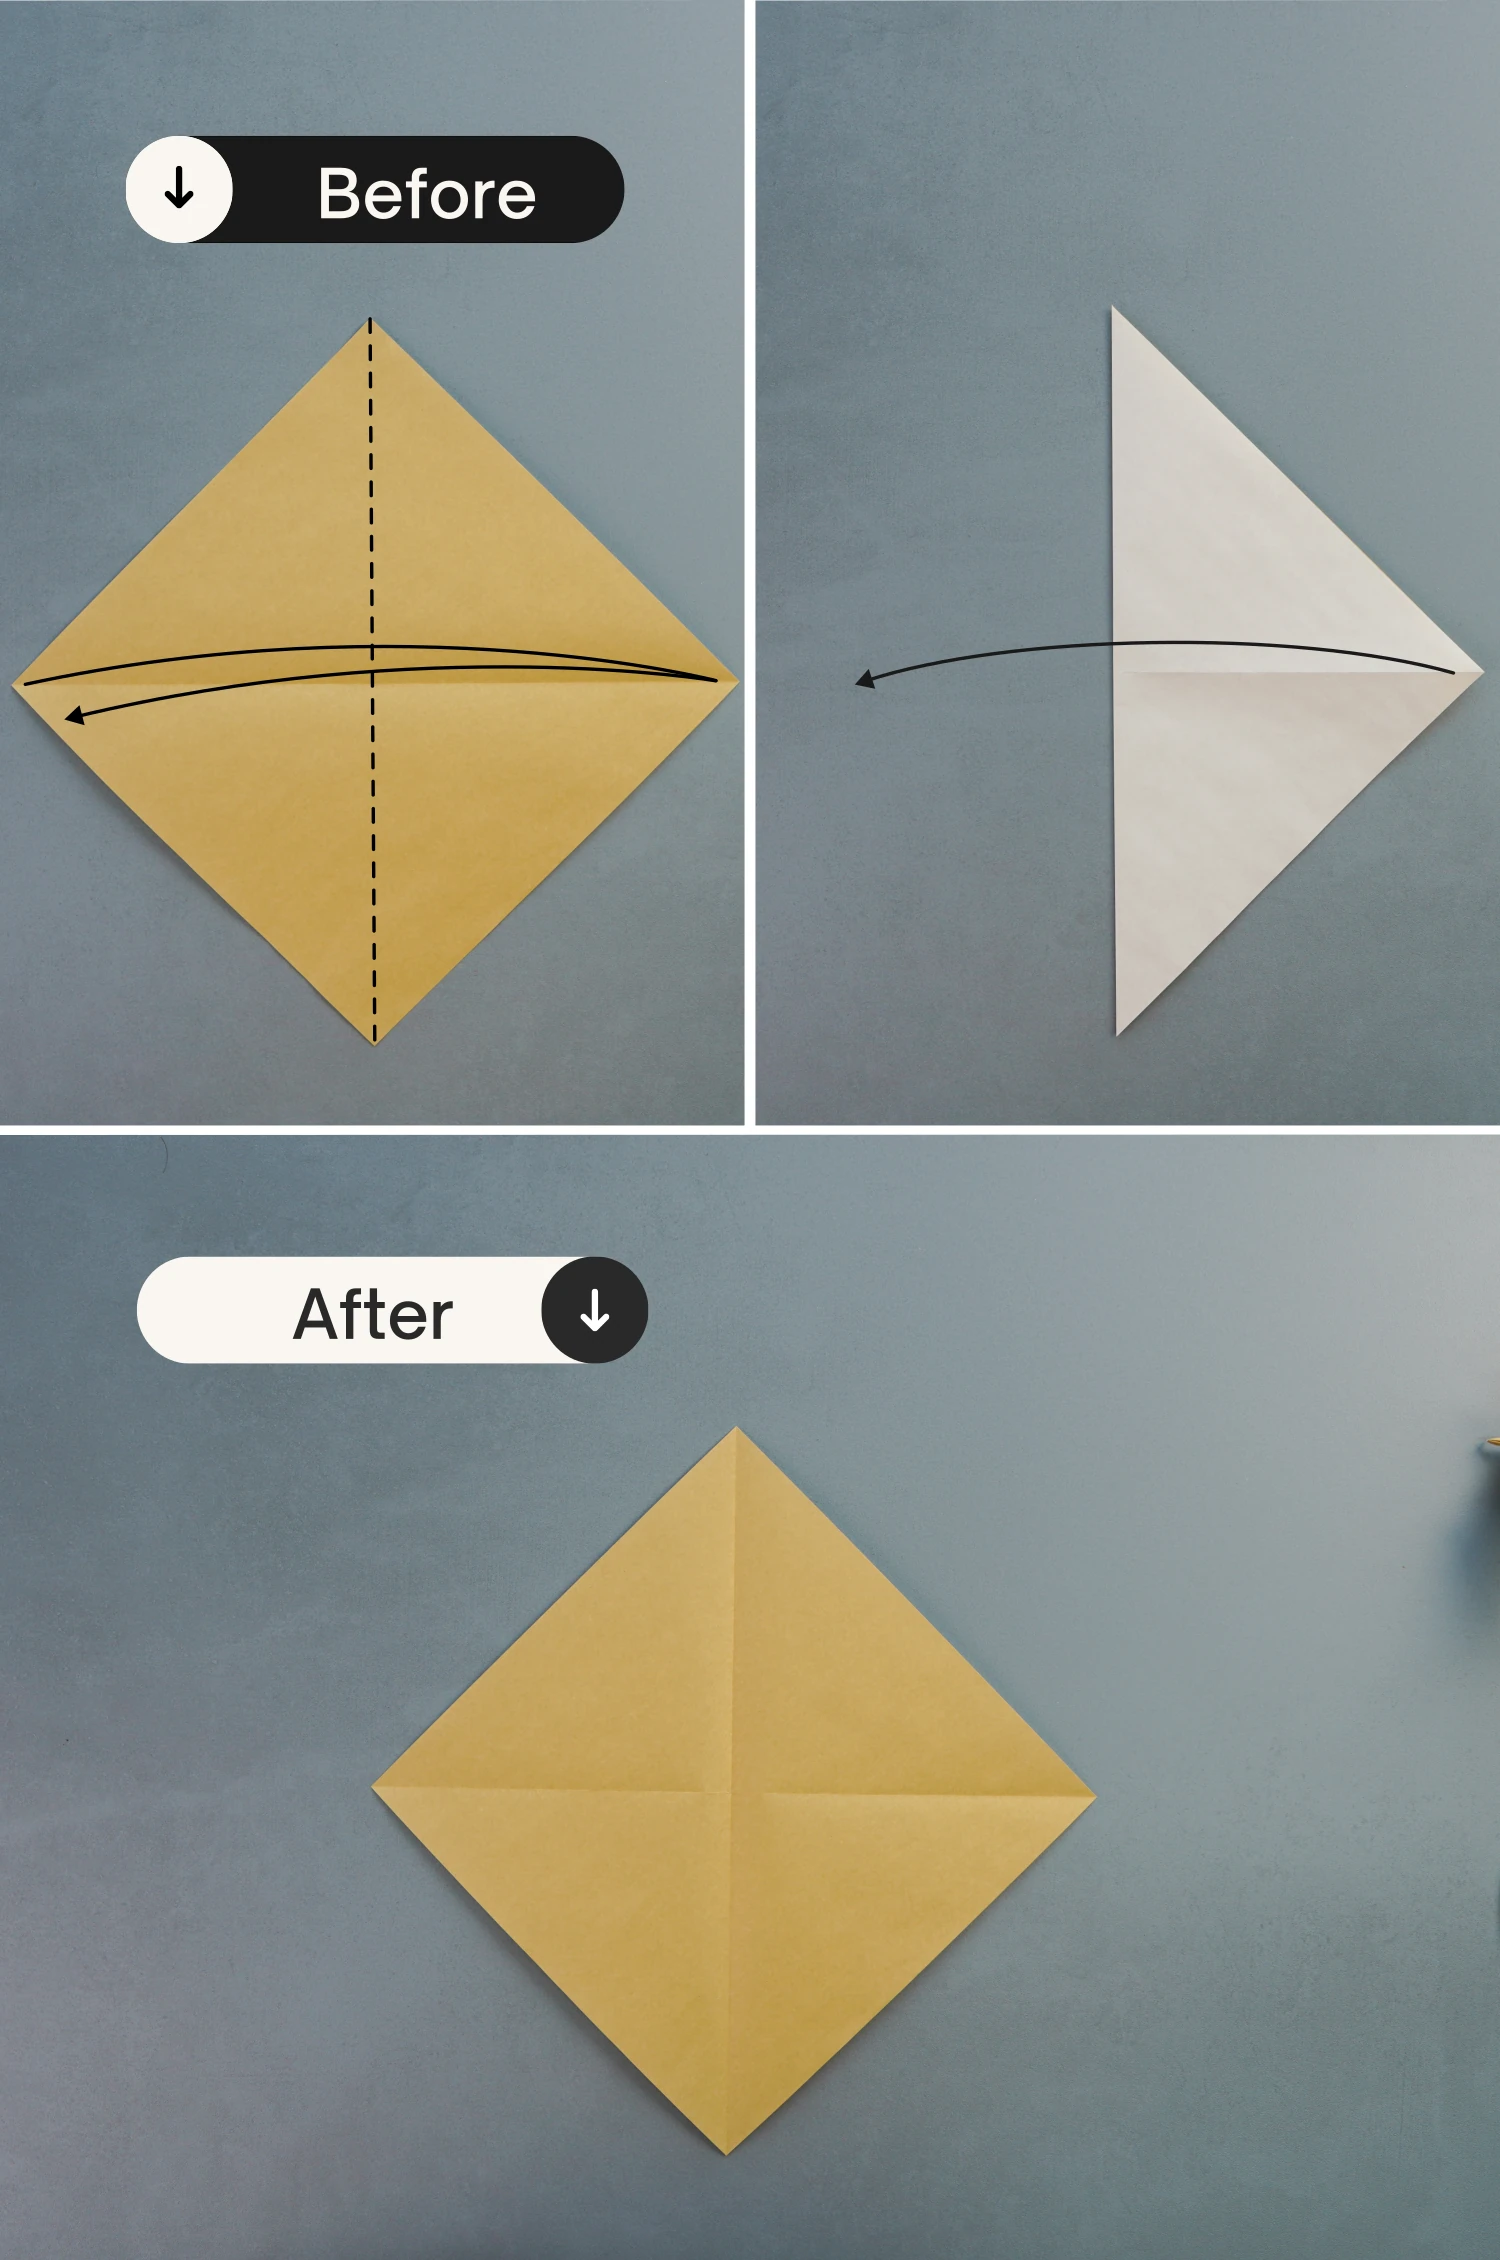
Step 2
Fold the left point to the right diagonally, crease it well then unfold.
Step 3
Flip it over.
Step 4
Fold the bottom right edge to align with the top left, crease it well then unfold.
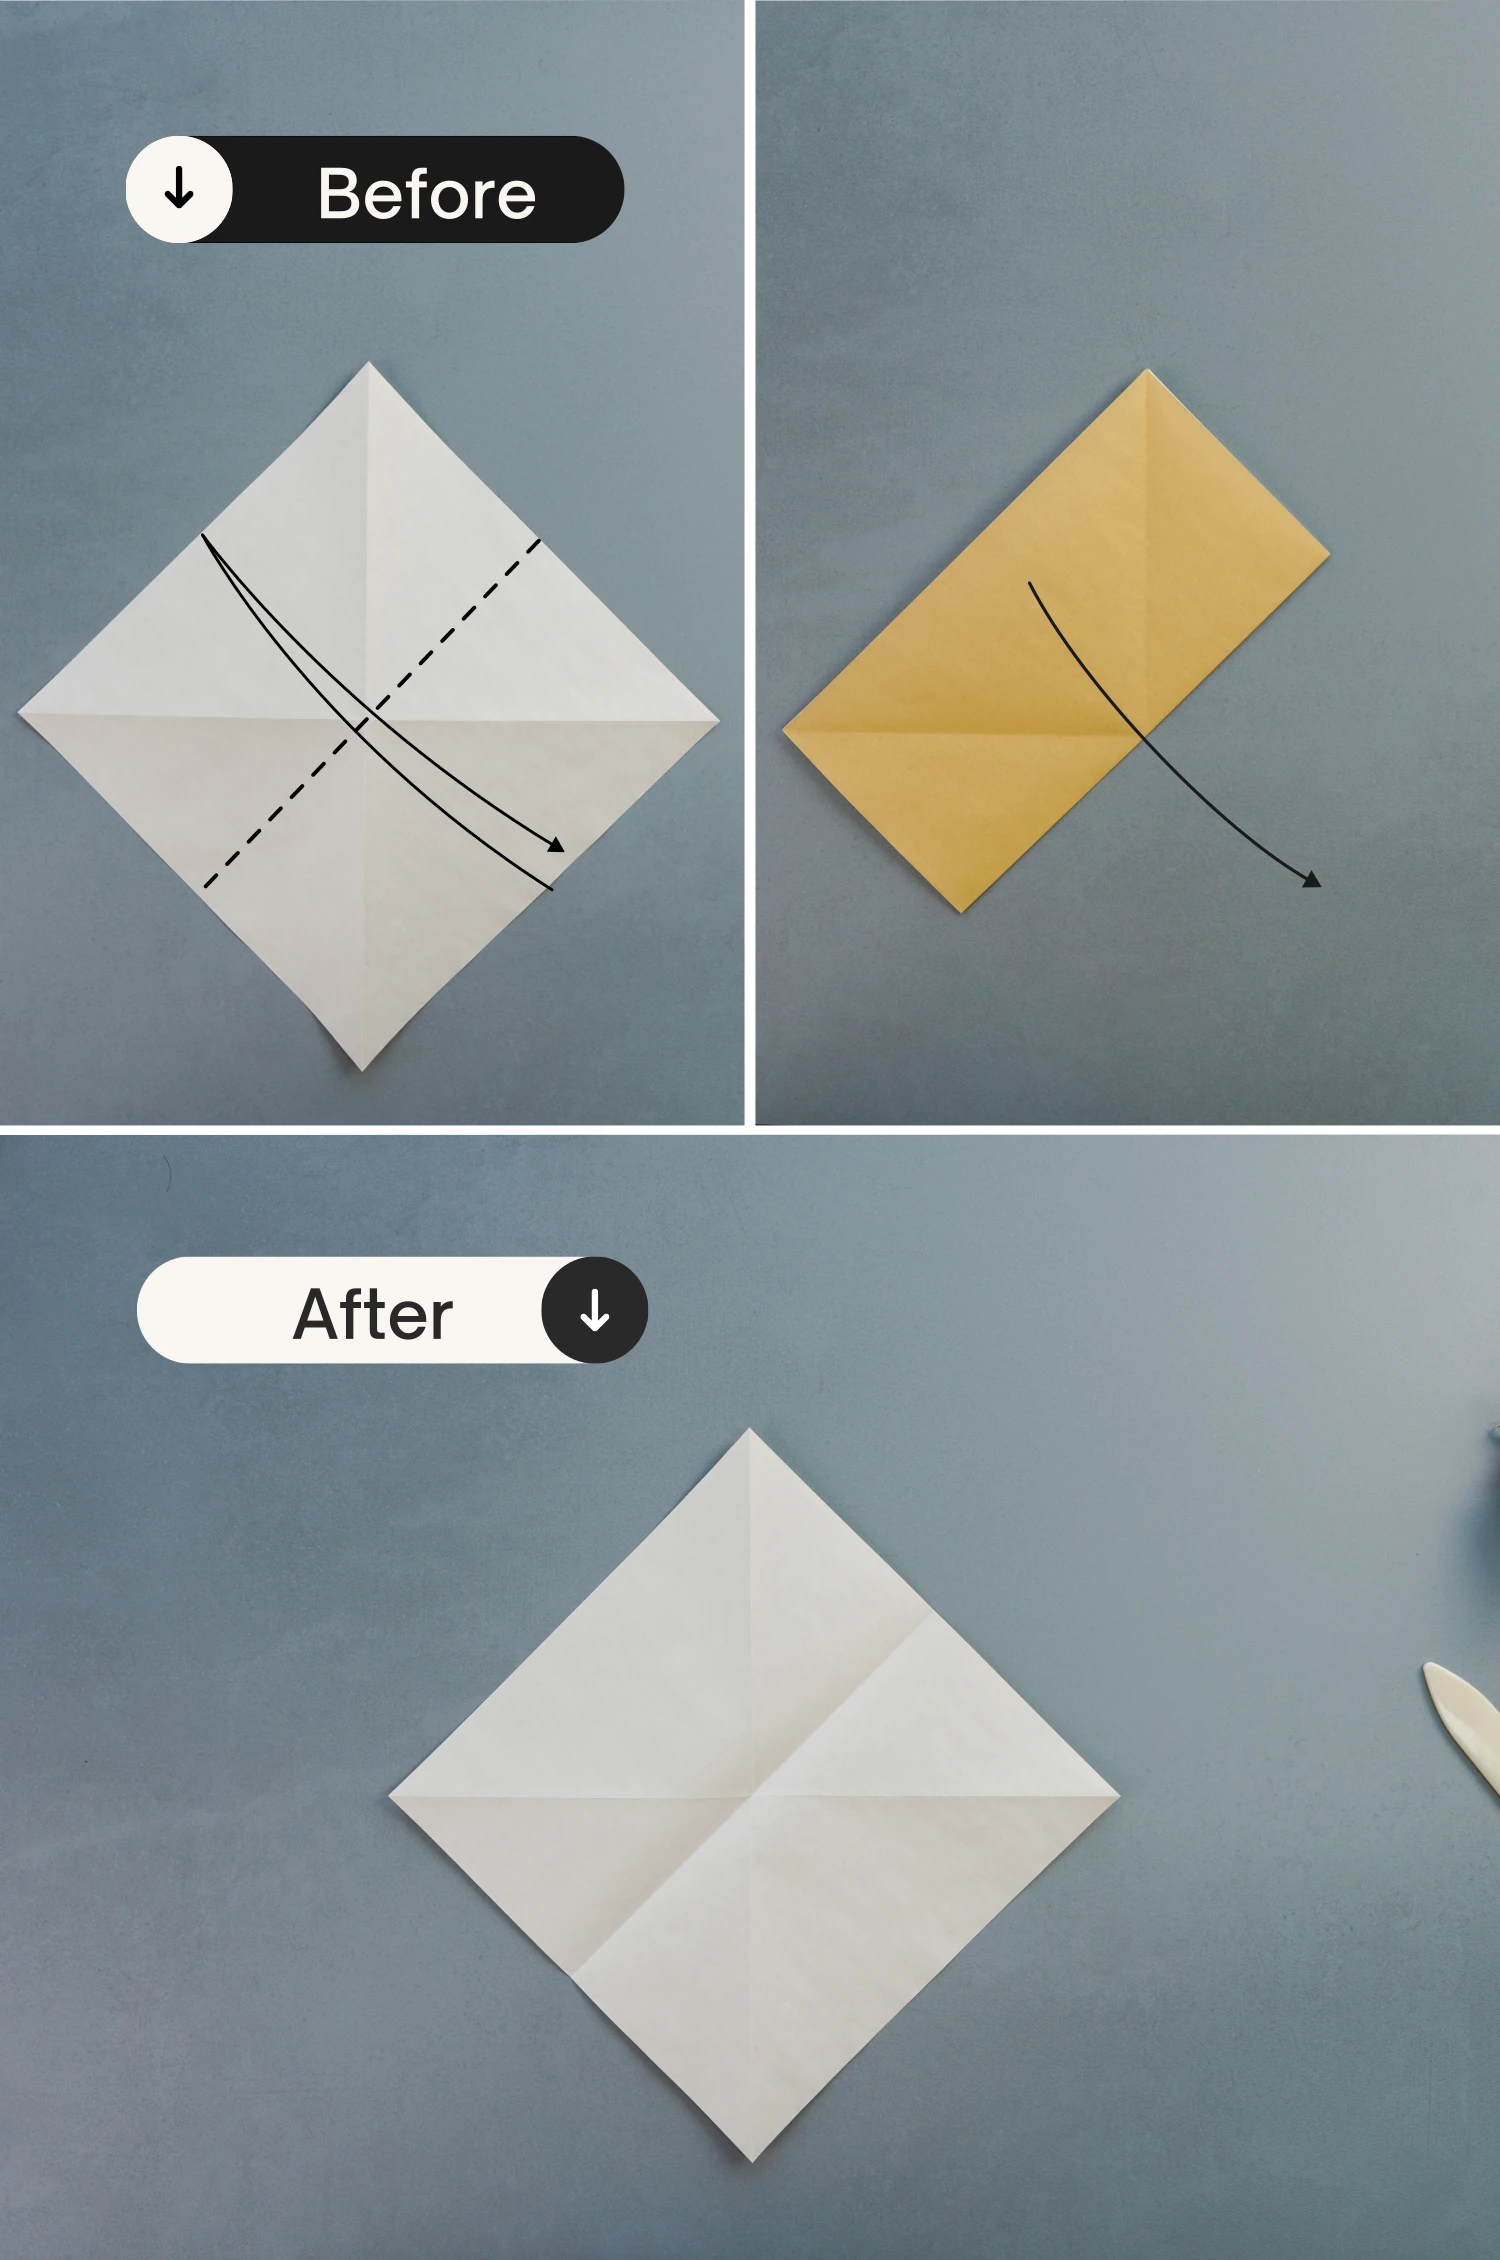
Step 5
Fold the bottom left edge to align with the top right edge, leaving a crease, and unfold.

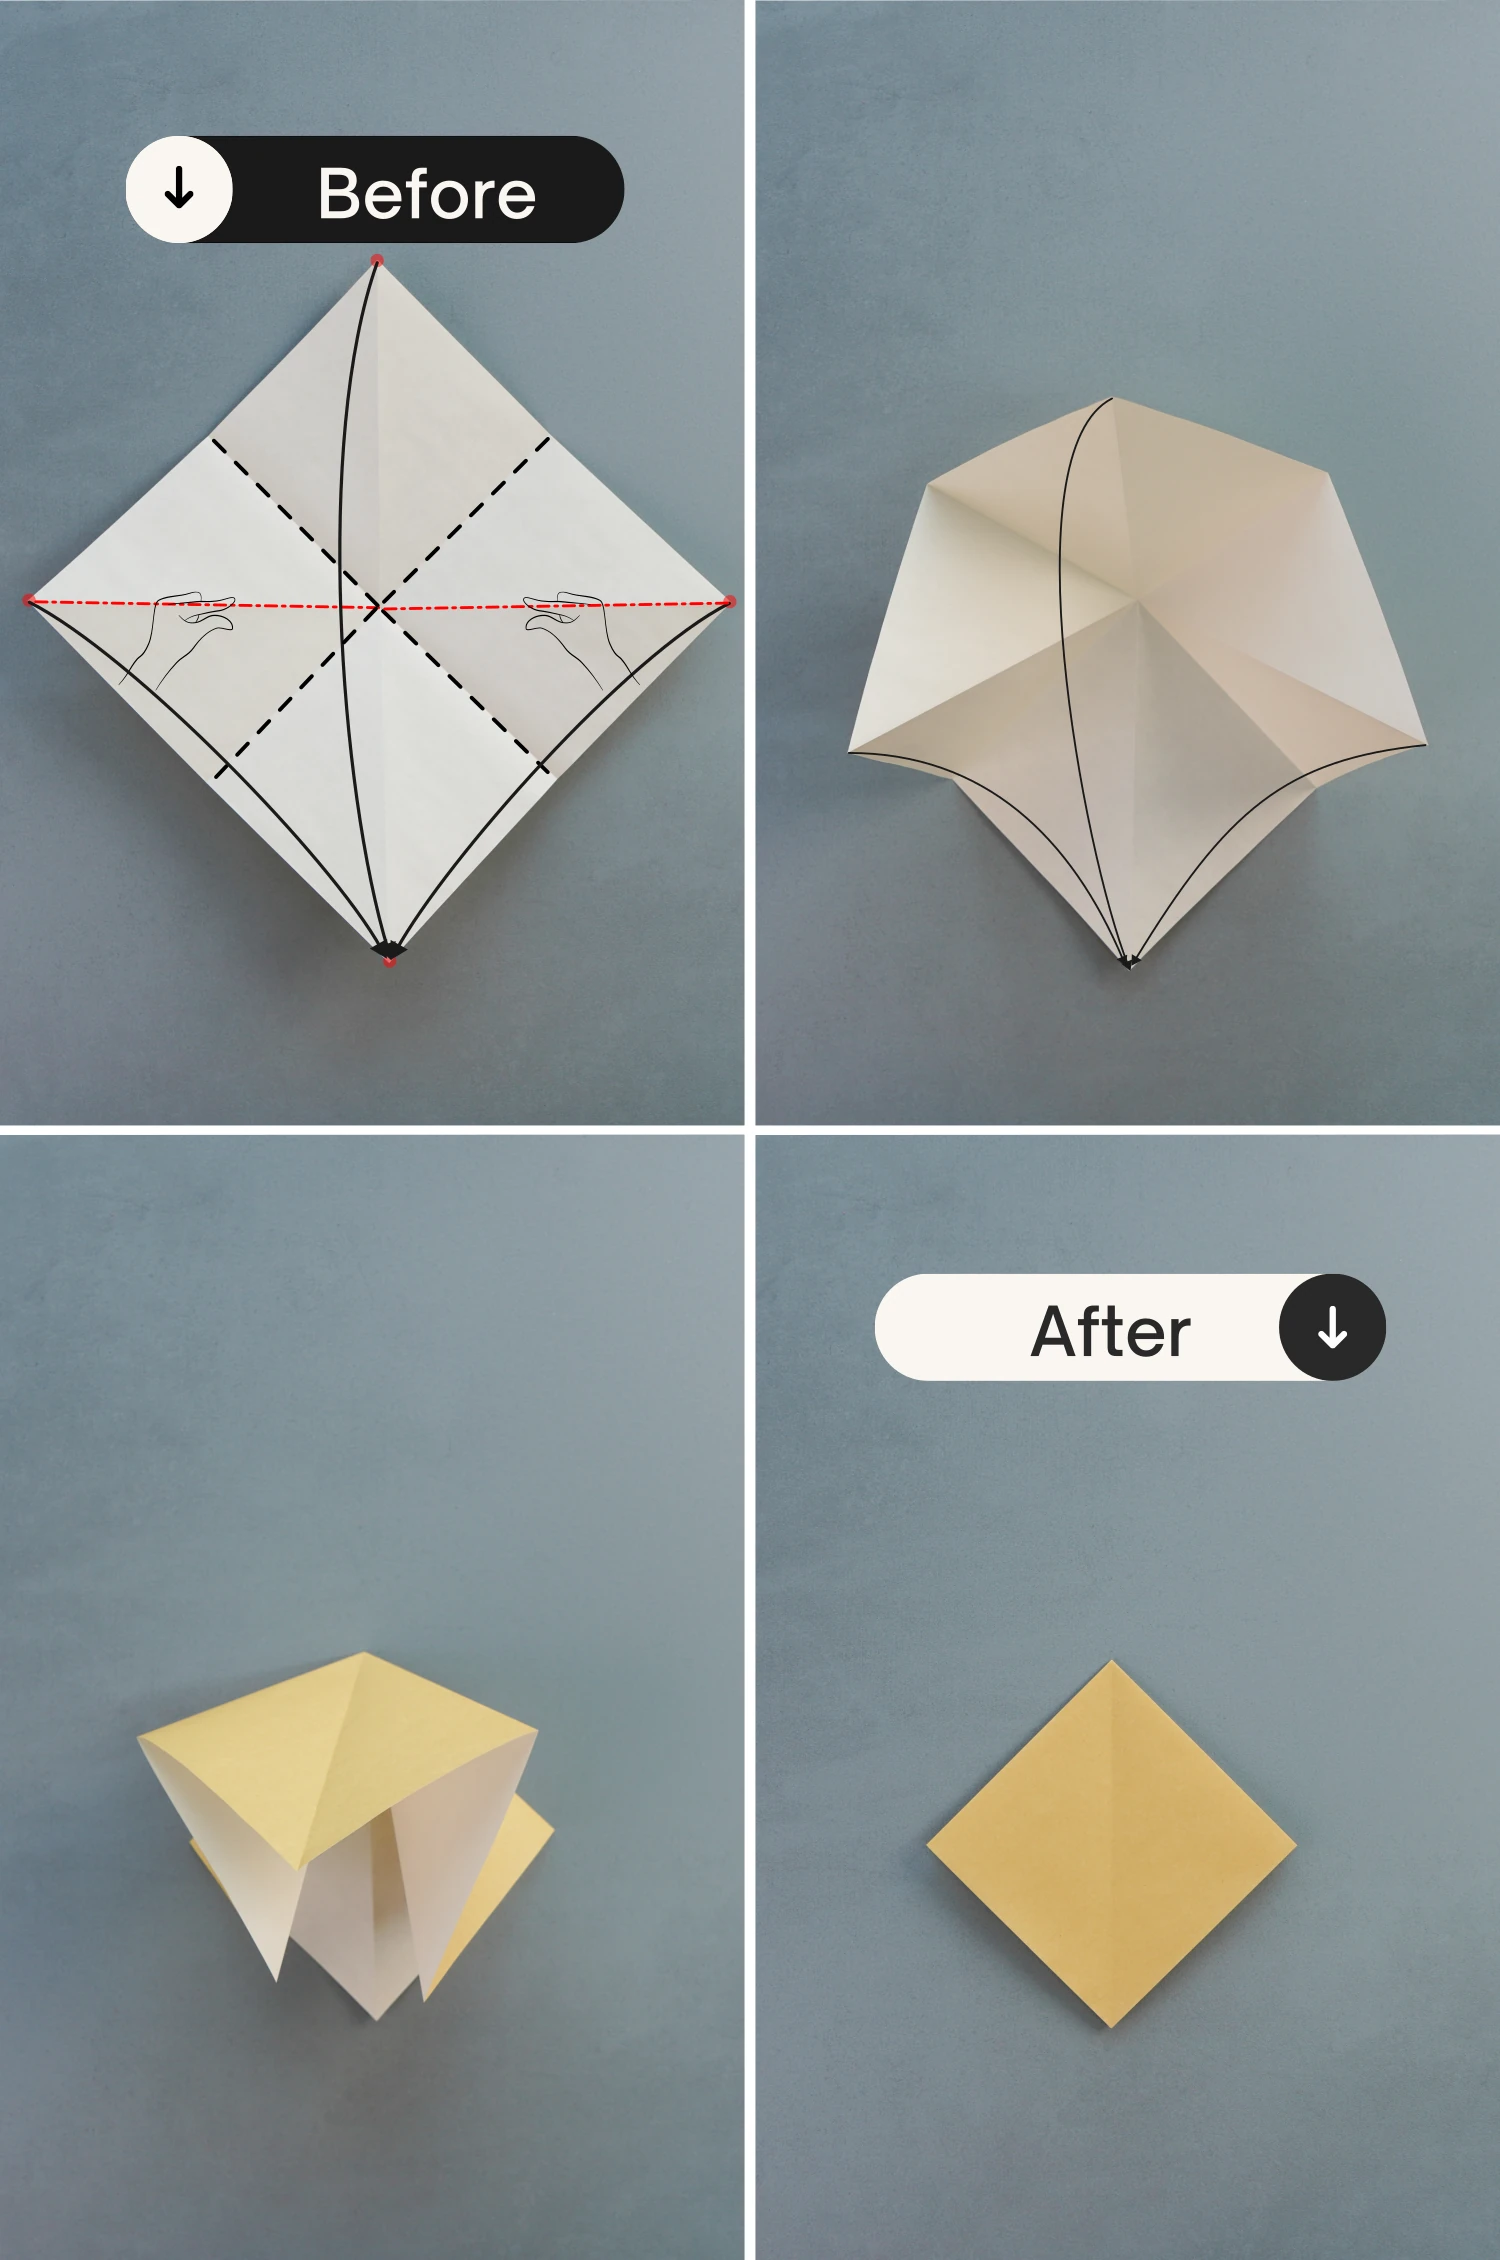
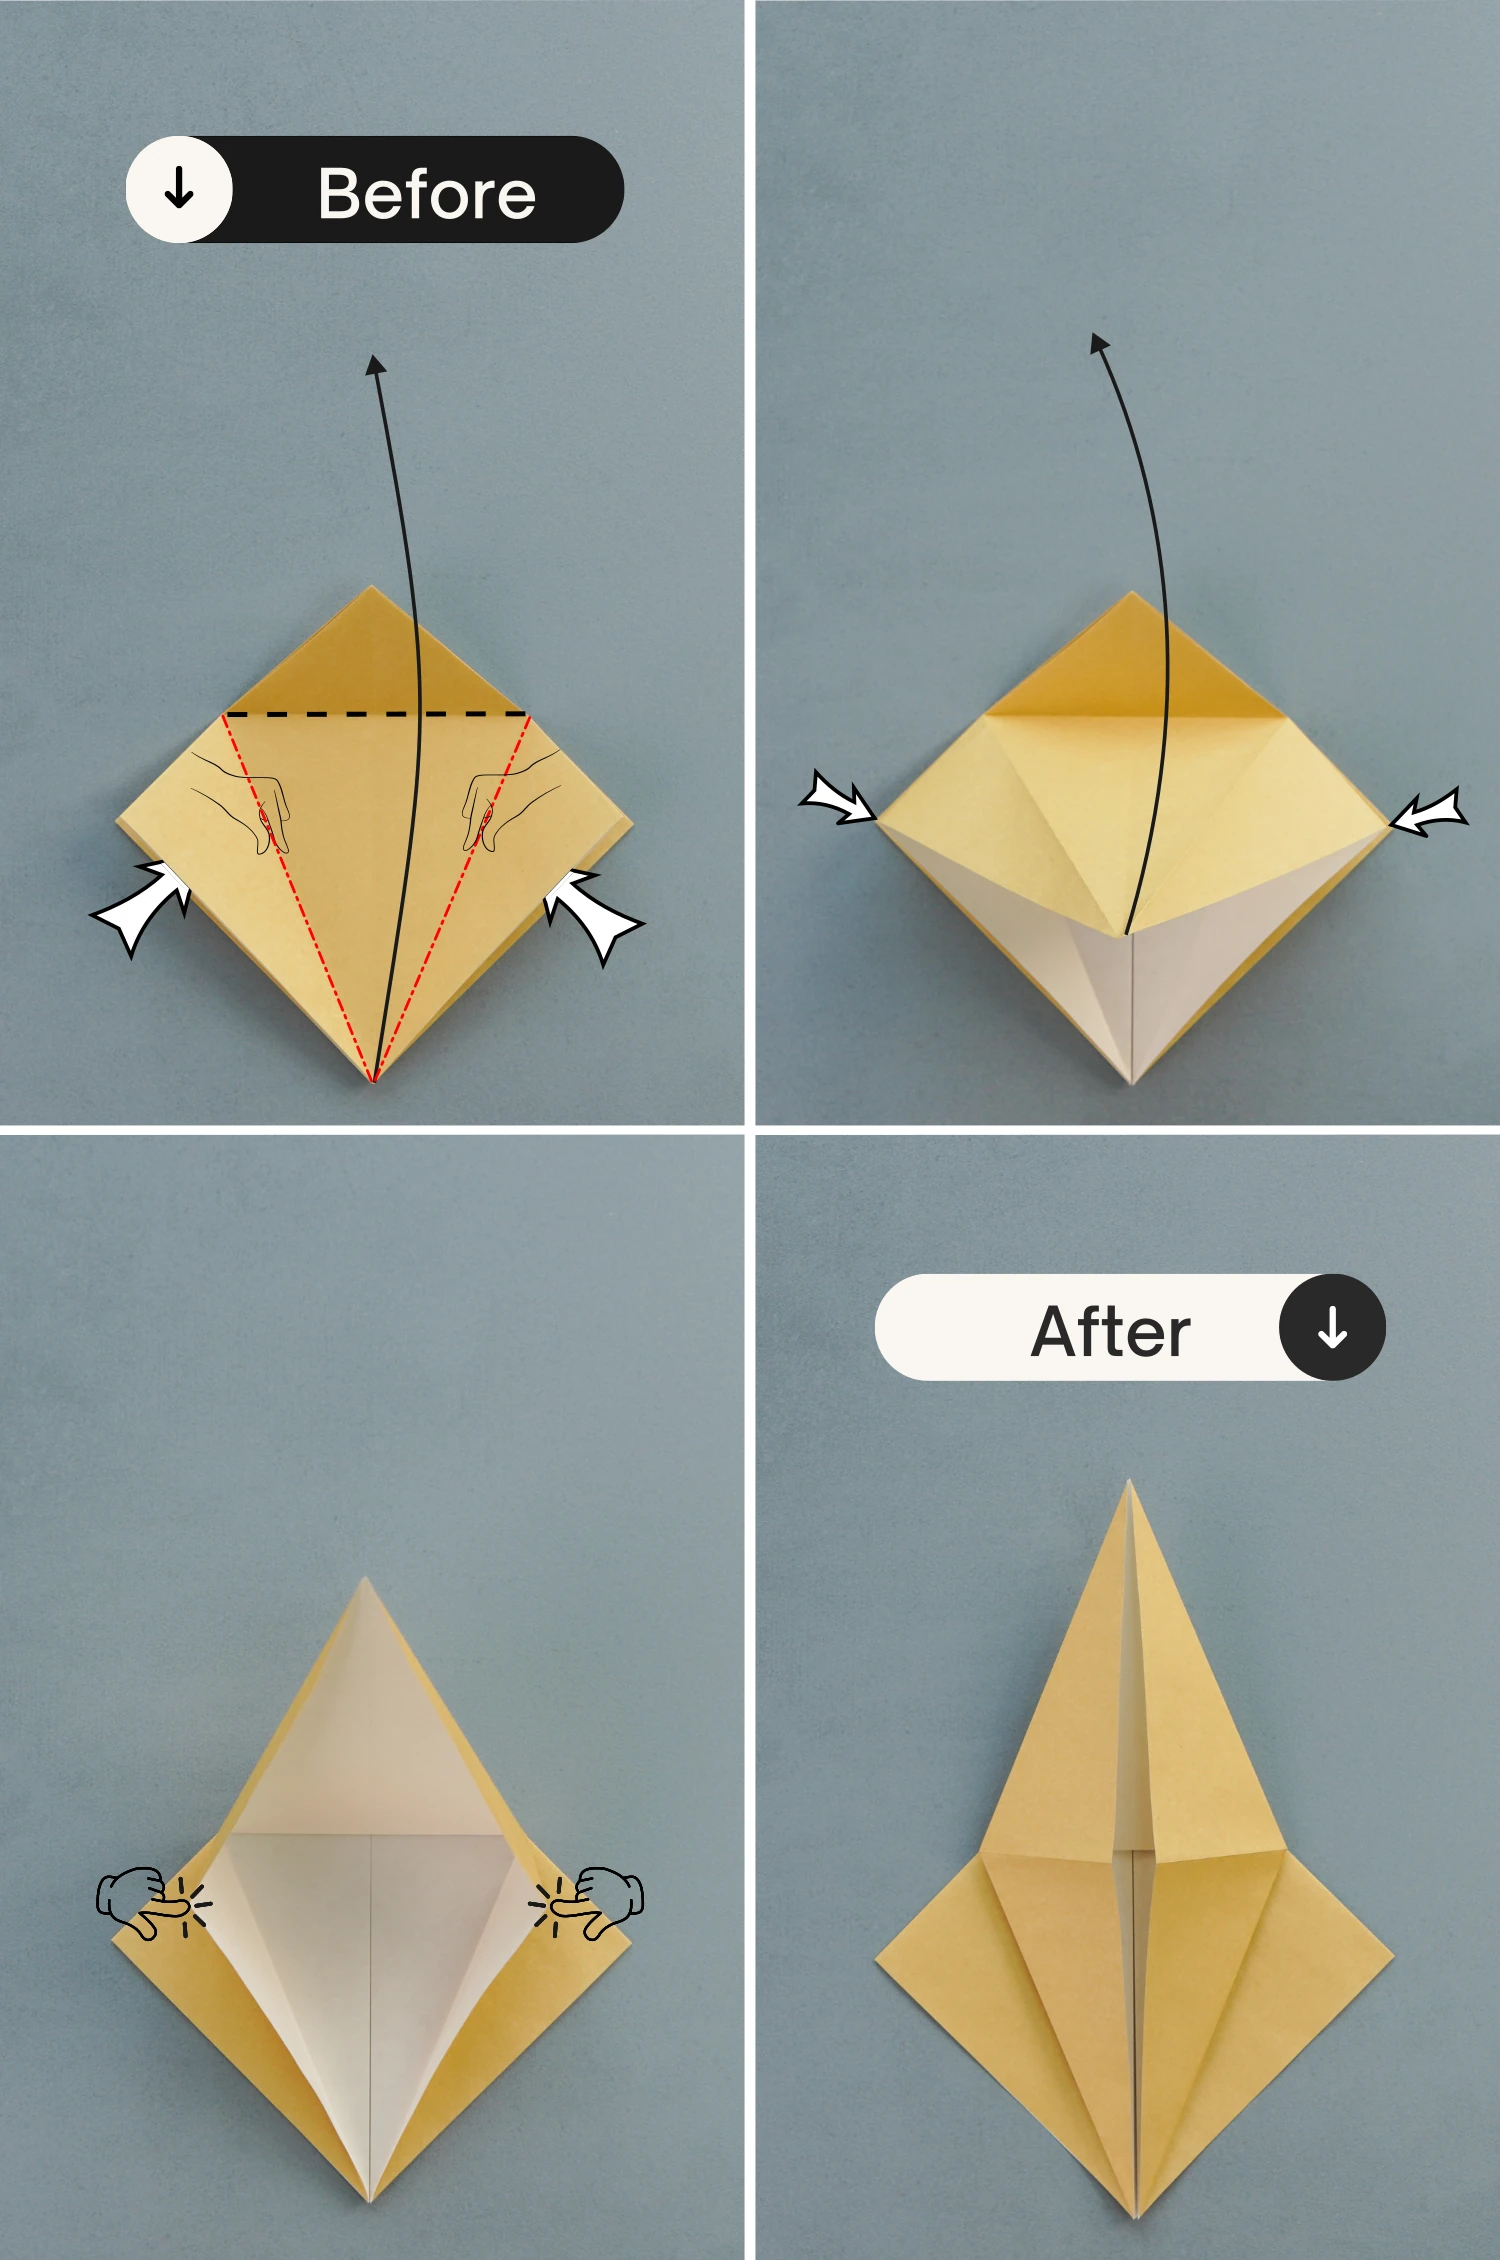
Step 6
Now, shape the left and right creases, and use both hands to press the left and right points, then push them down to meet the bottom point.
Flatten the fold along the existing creases.
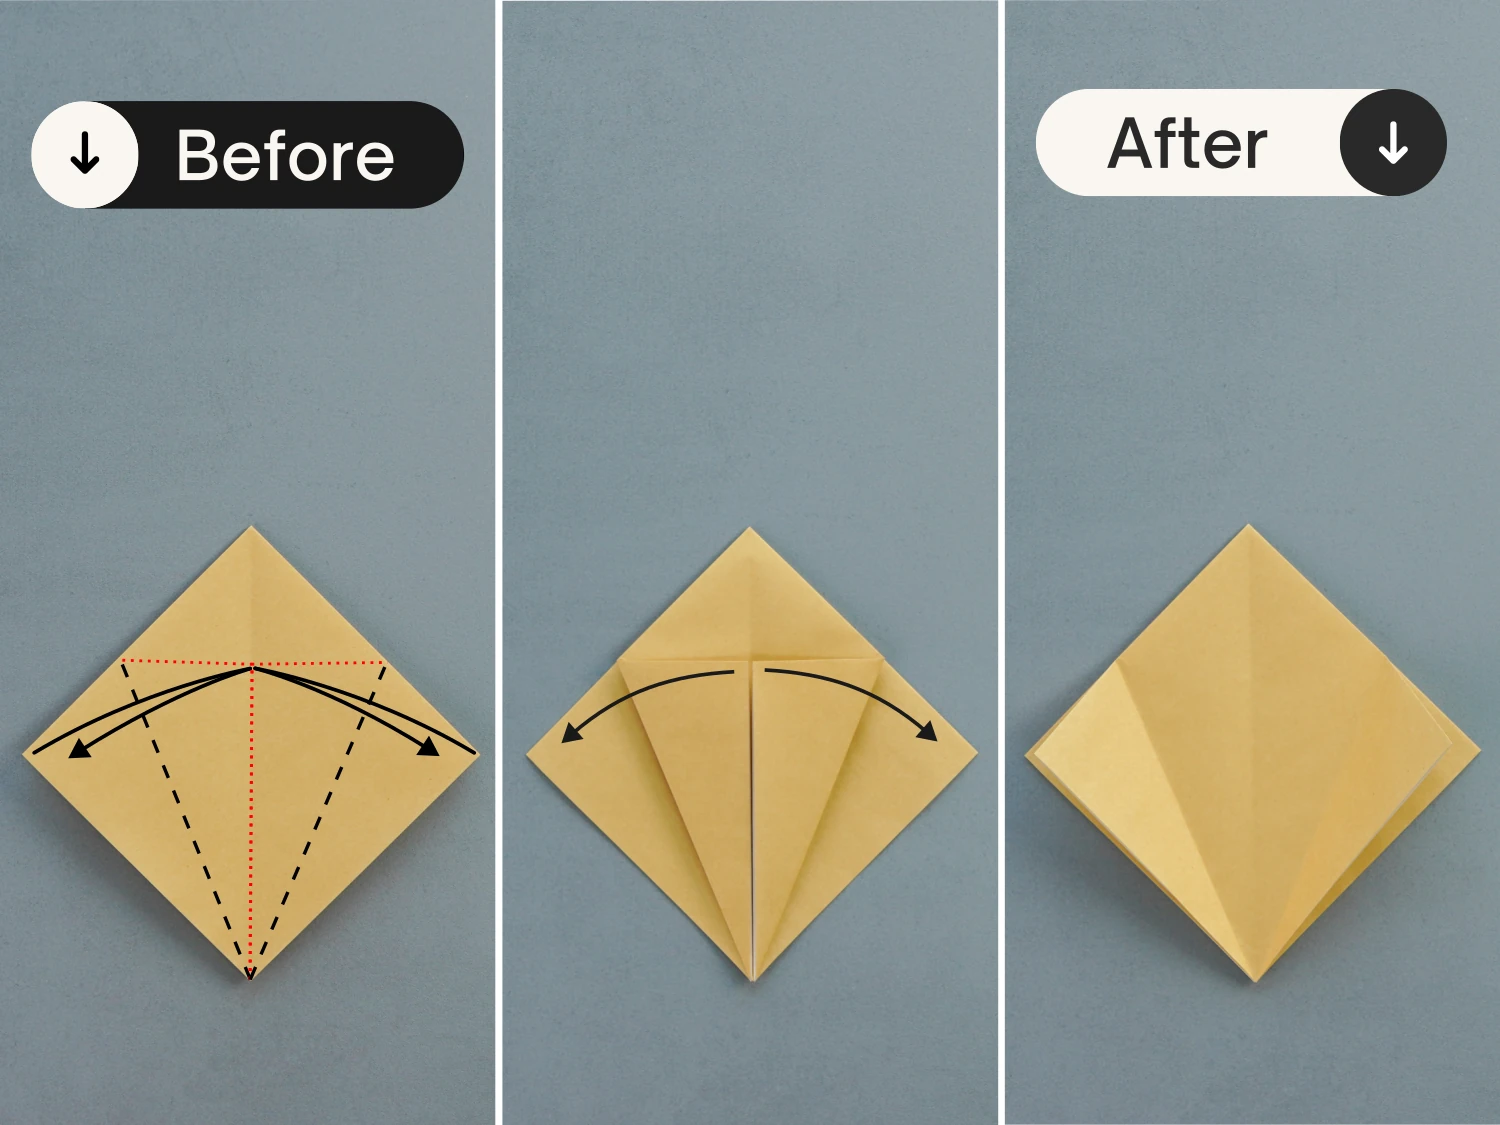
Step 7
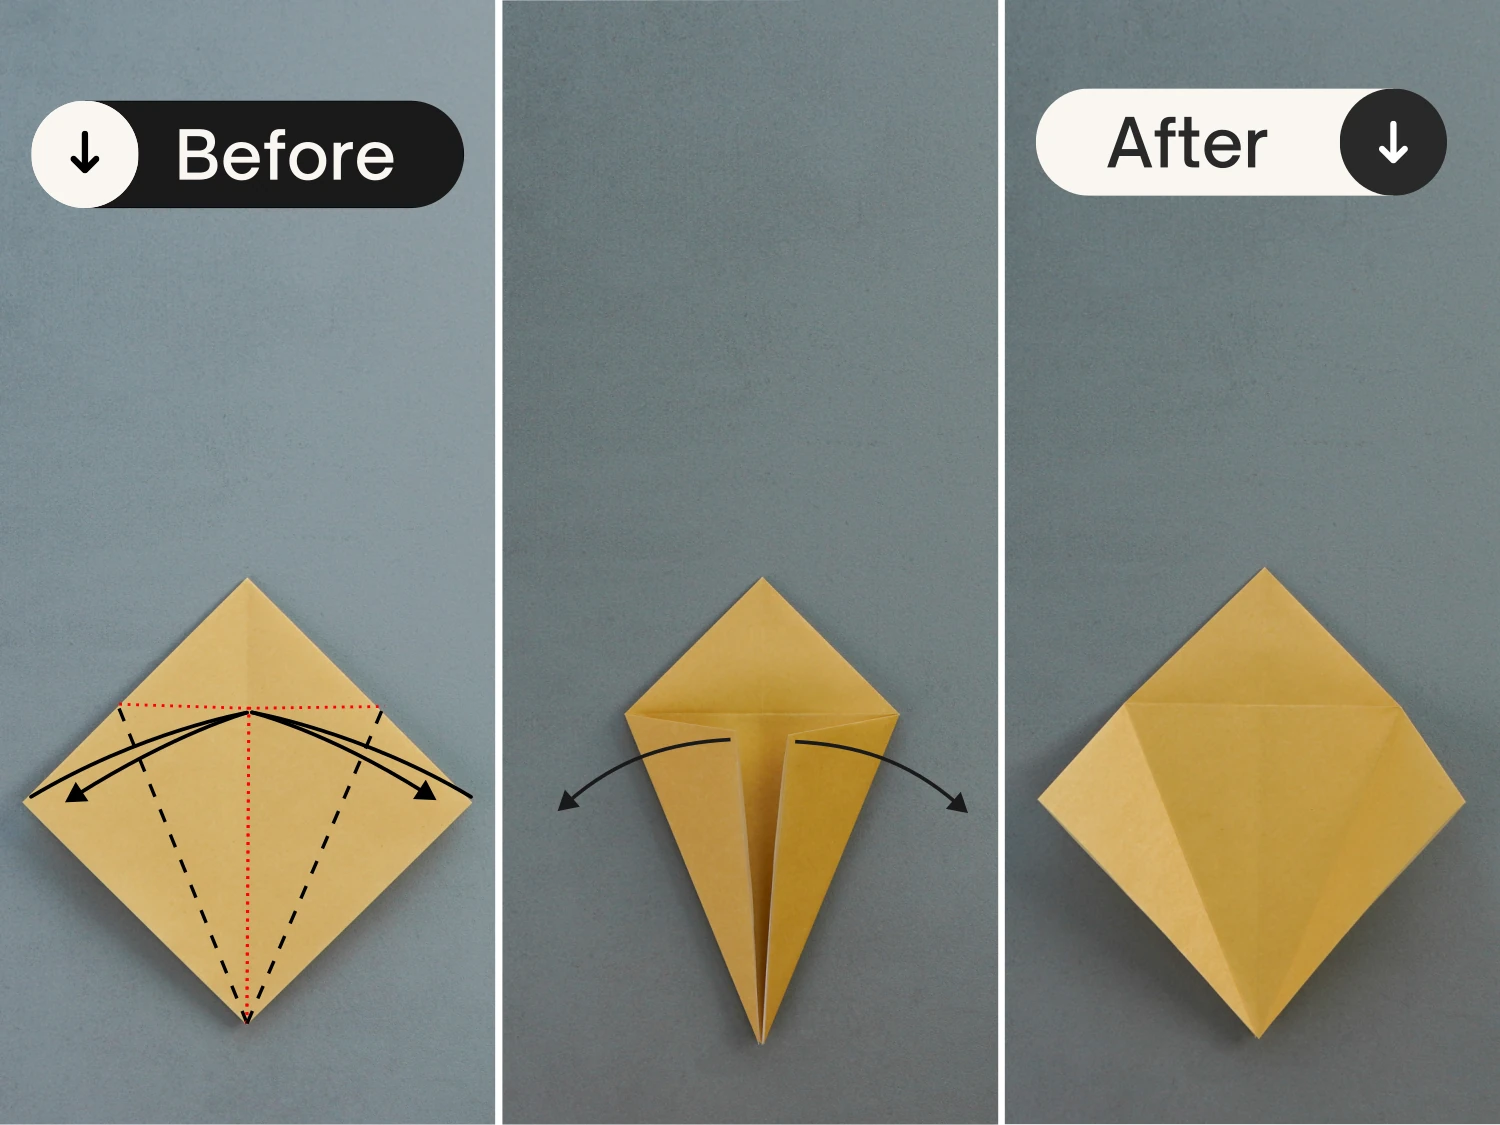
Fold the bottom left and right edges of the top layer to align with the middle vertical crease, crease them well then unfold.
Step 8
Fold the top corner down along the dotted line, and unfold it.
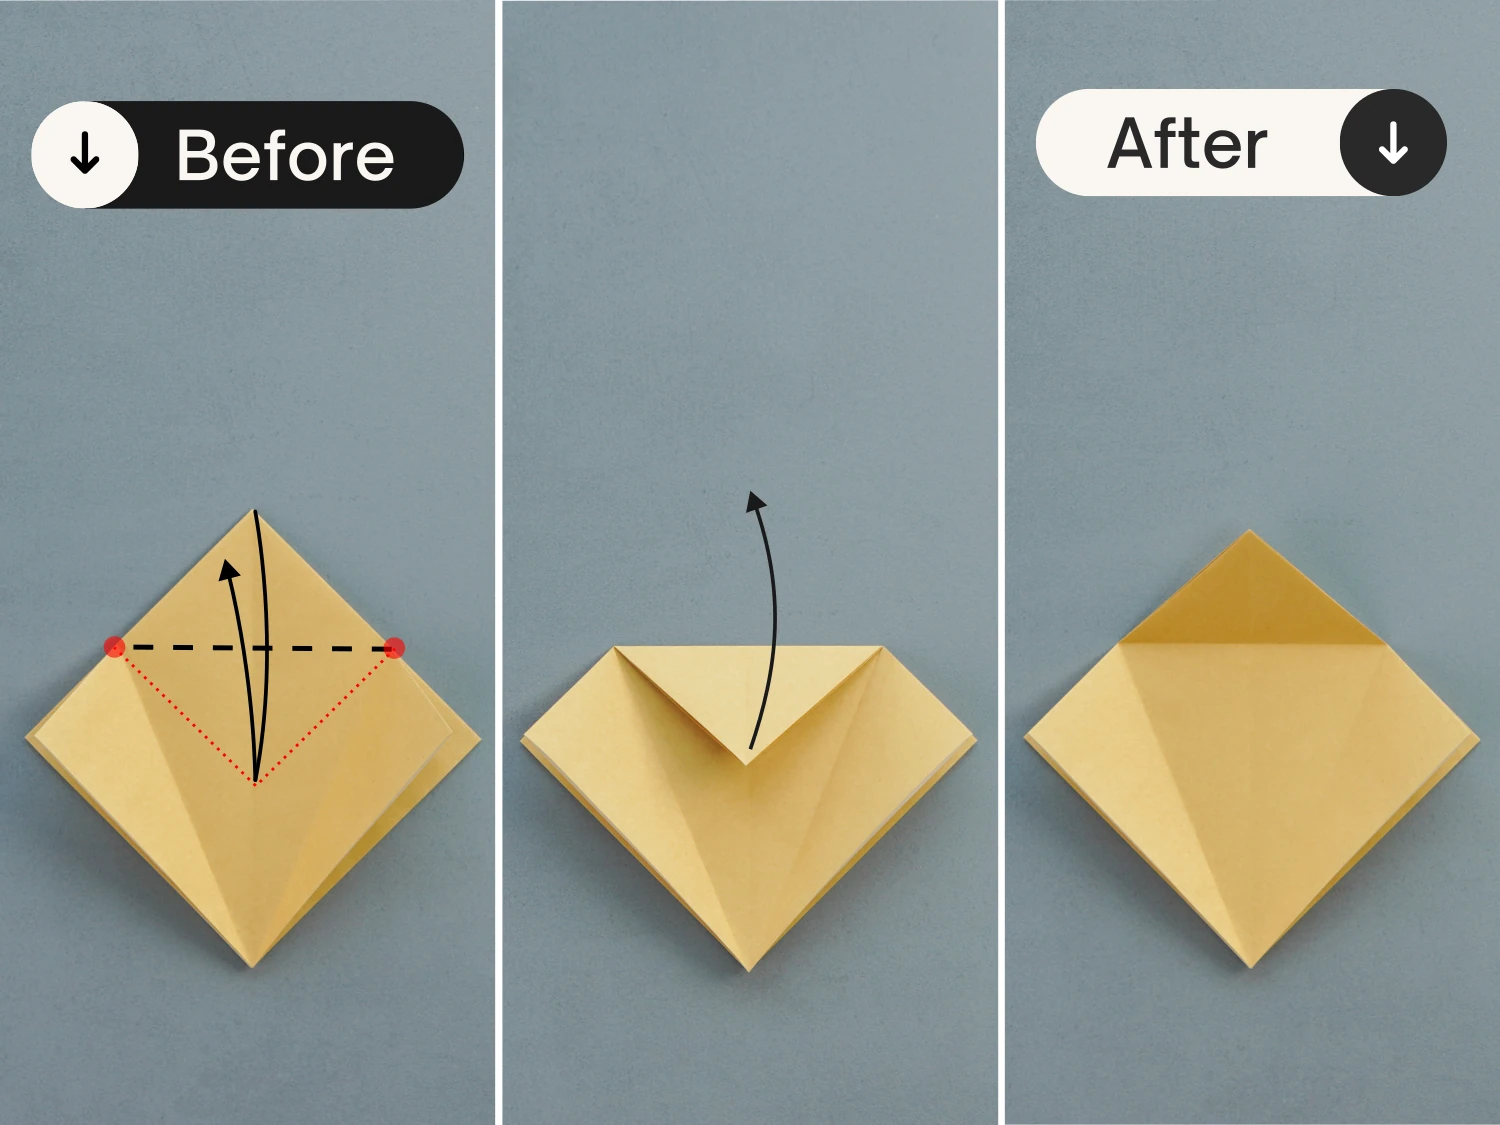
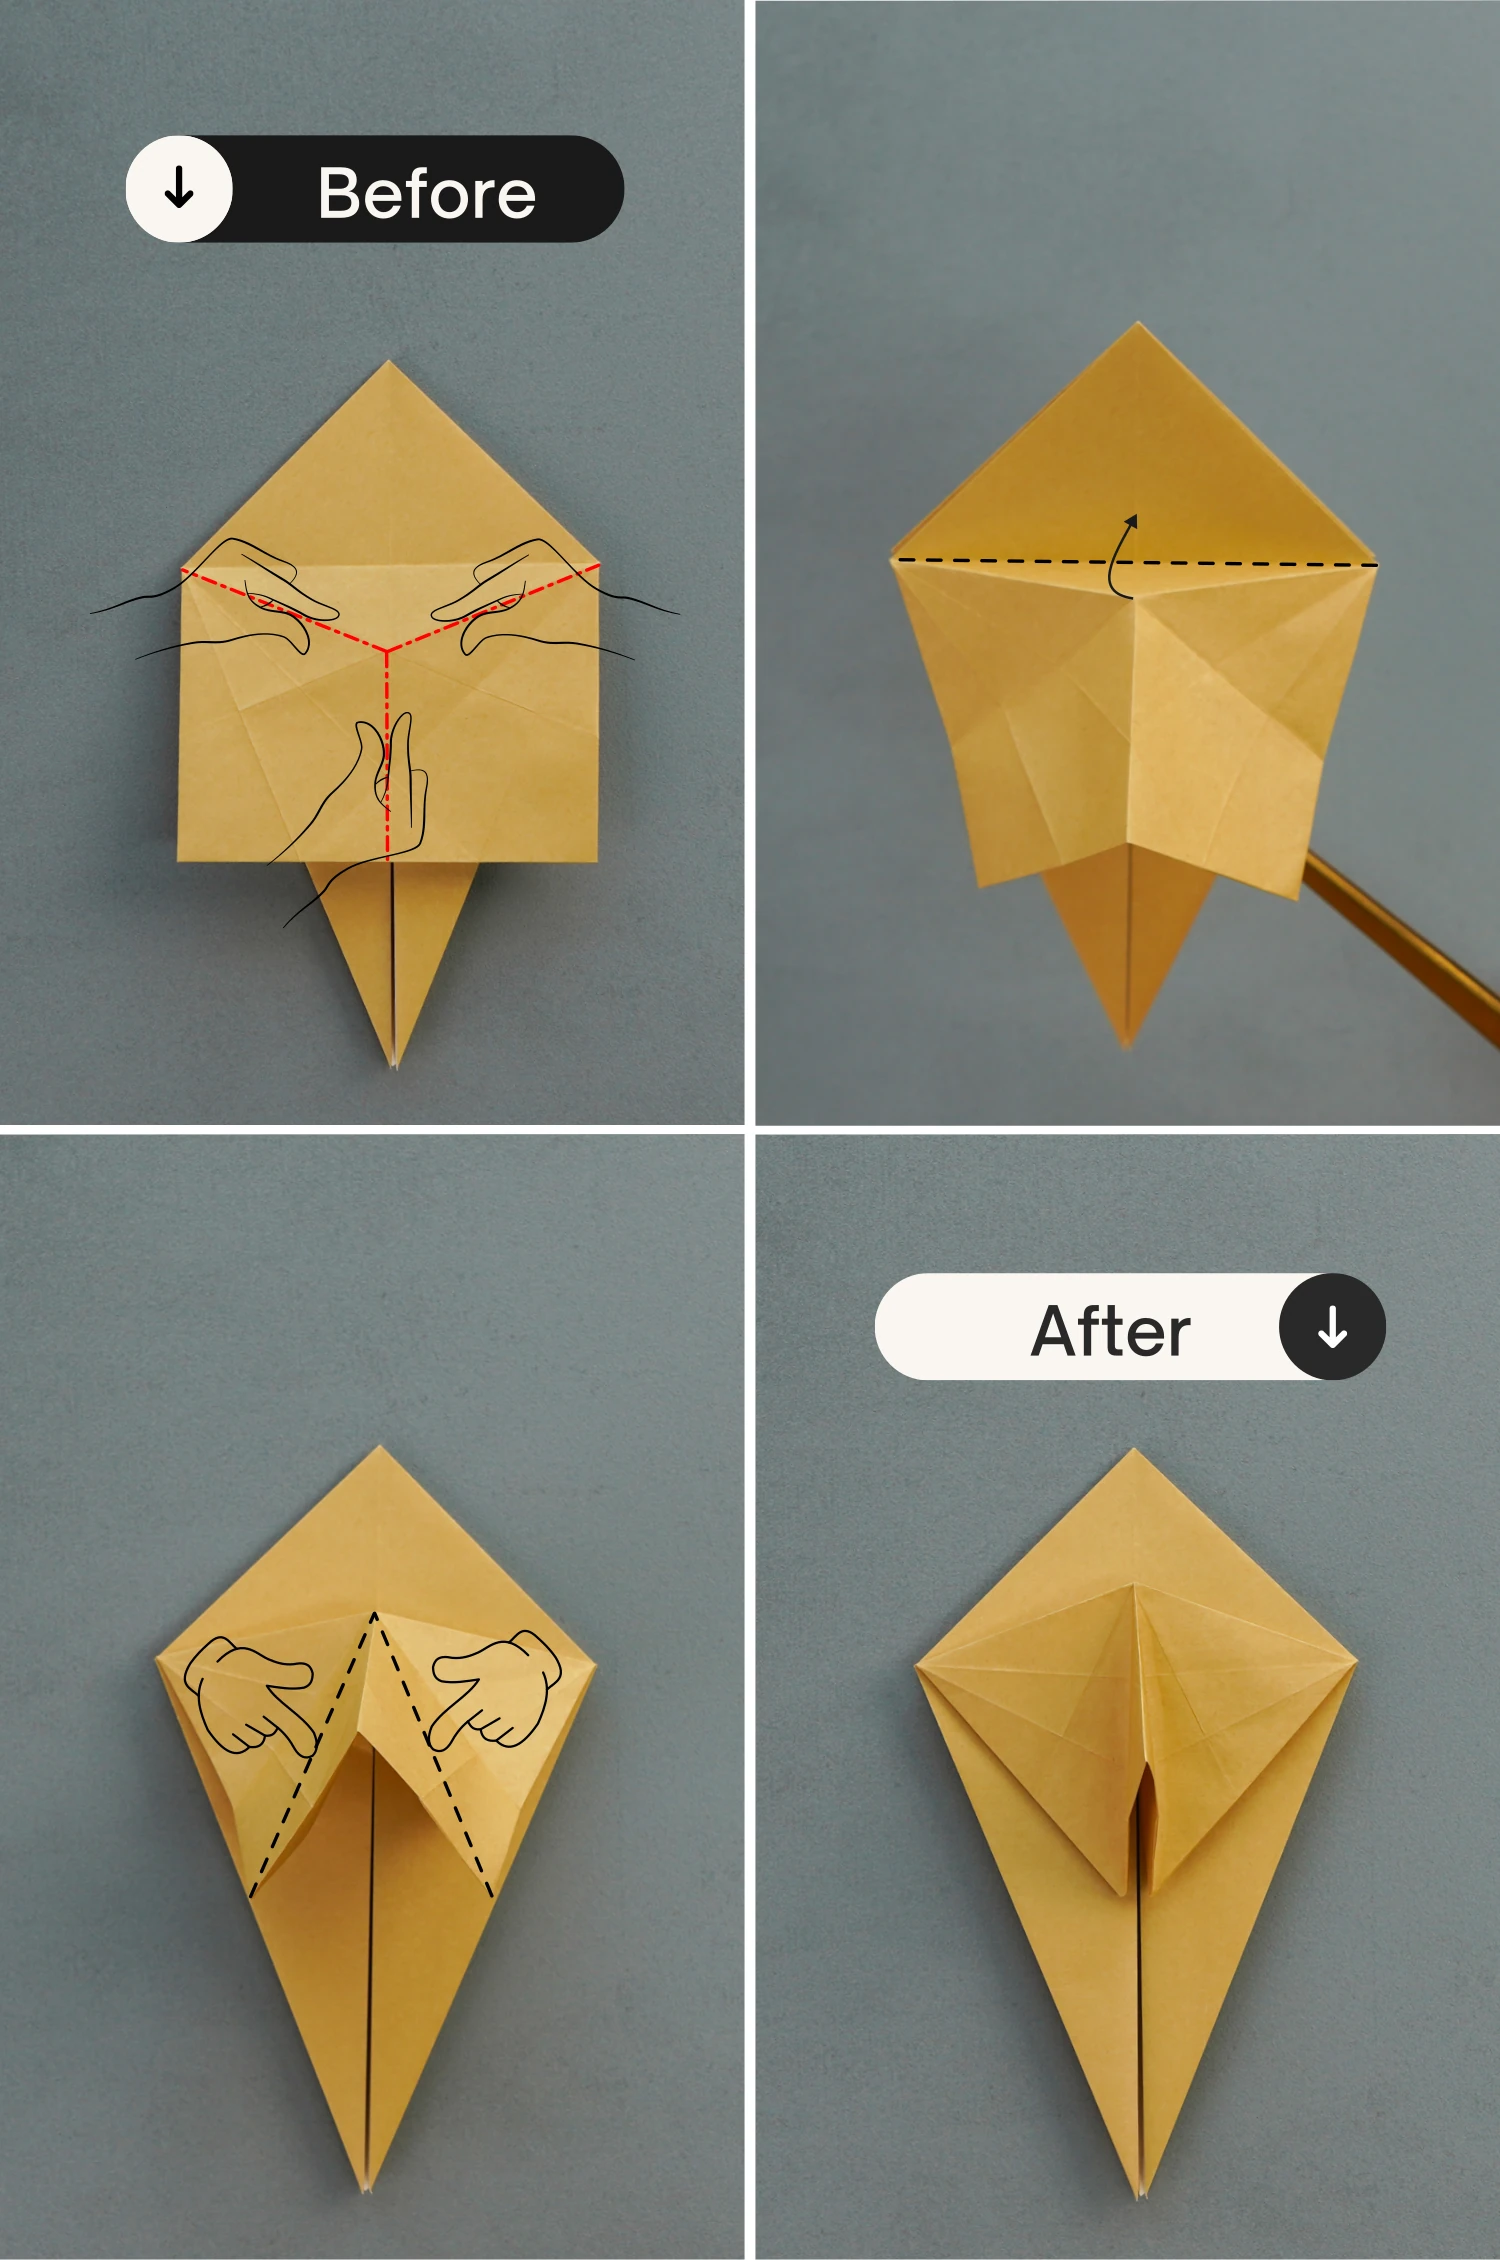
Step 9
Open the pocket based on the creases created by the previous step. Then lift up the top layer, push the left and right points to the center, and flatten the pocket.
Step 10
Fold the top triangle down.
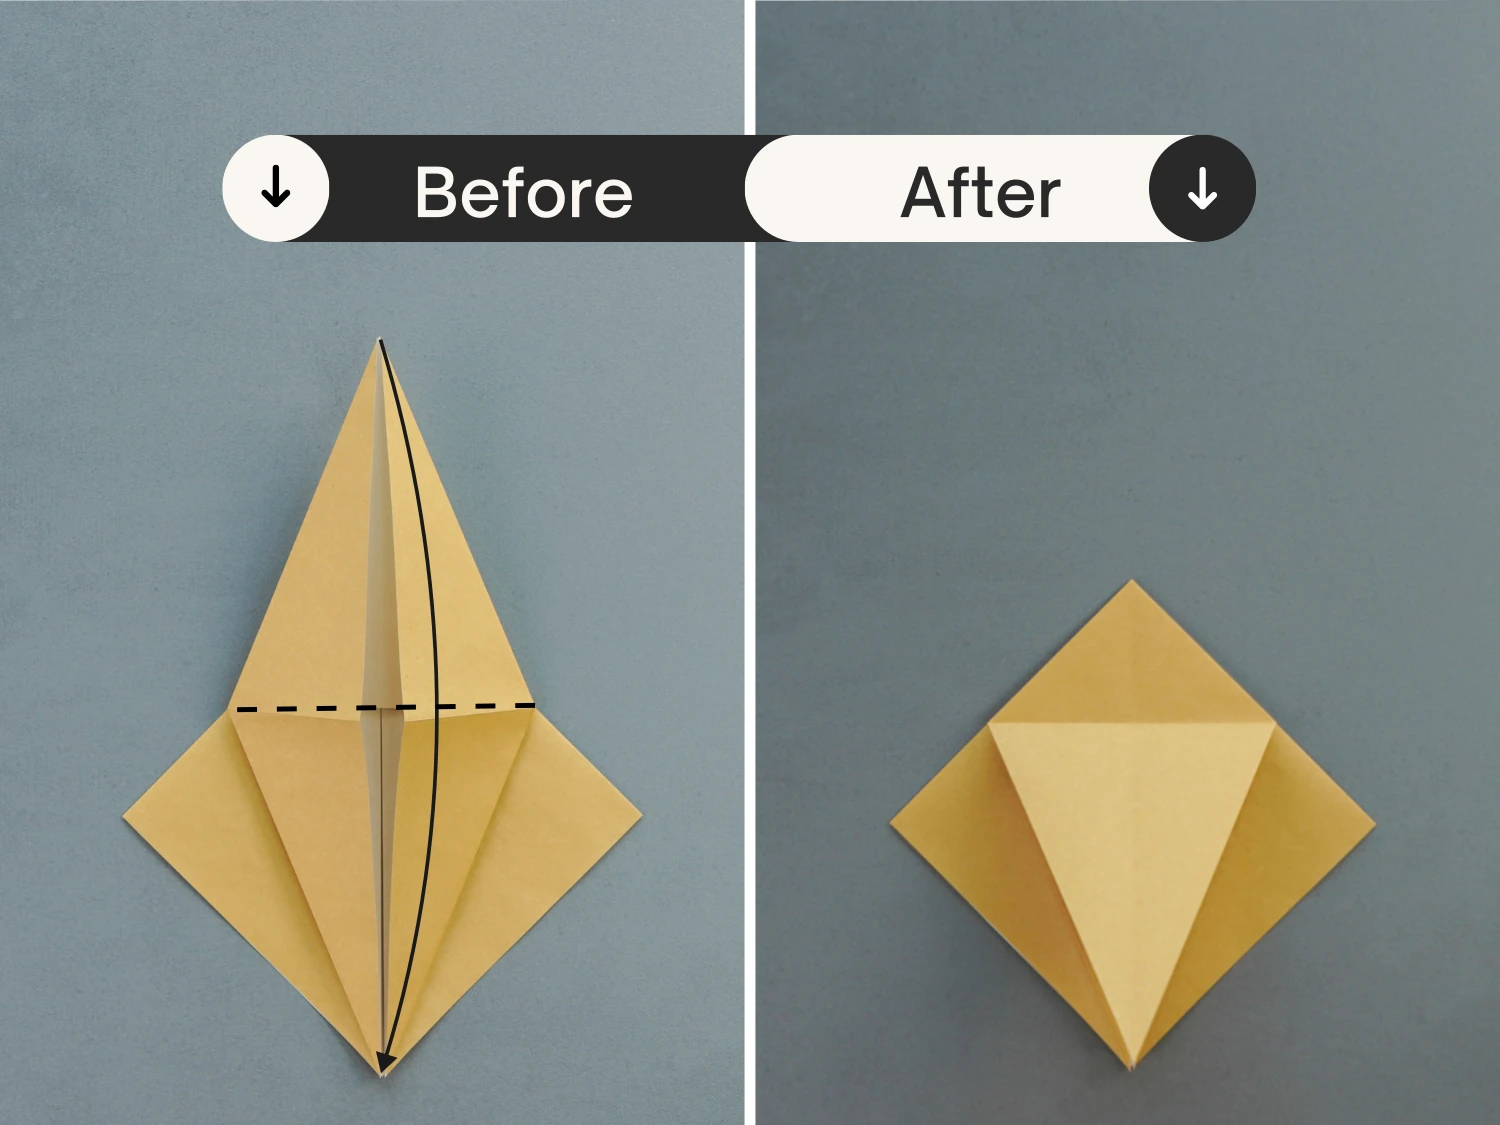
Step 11
Flip the paper over.
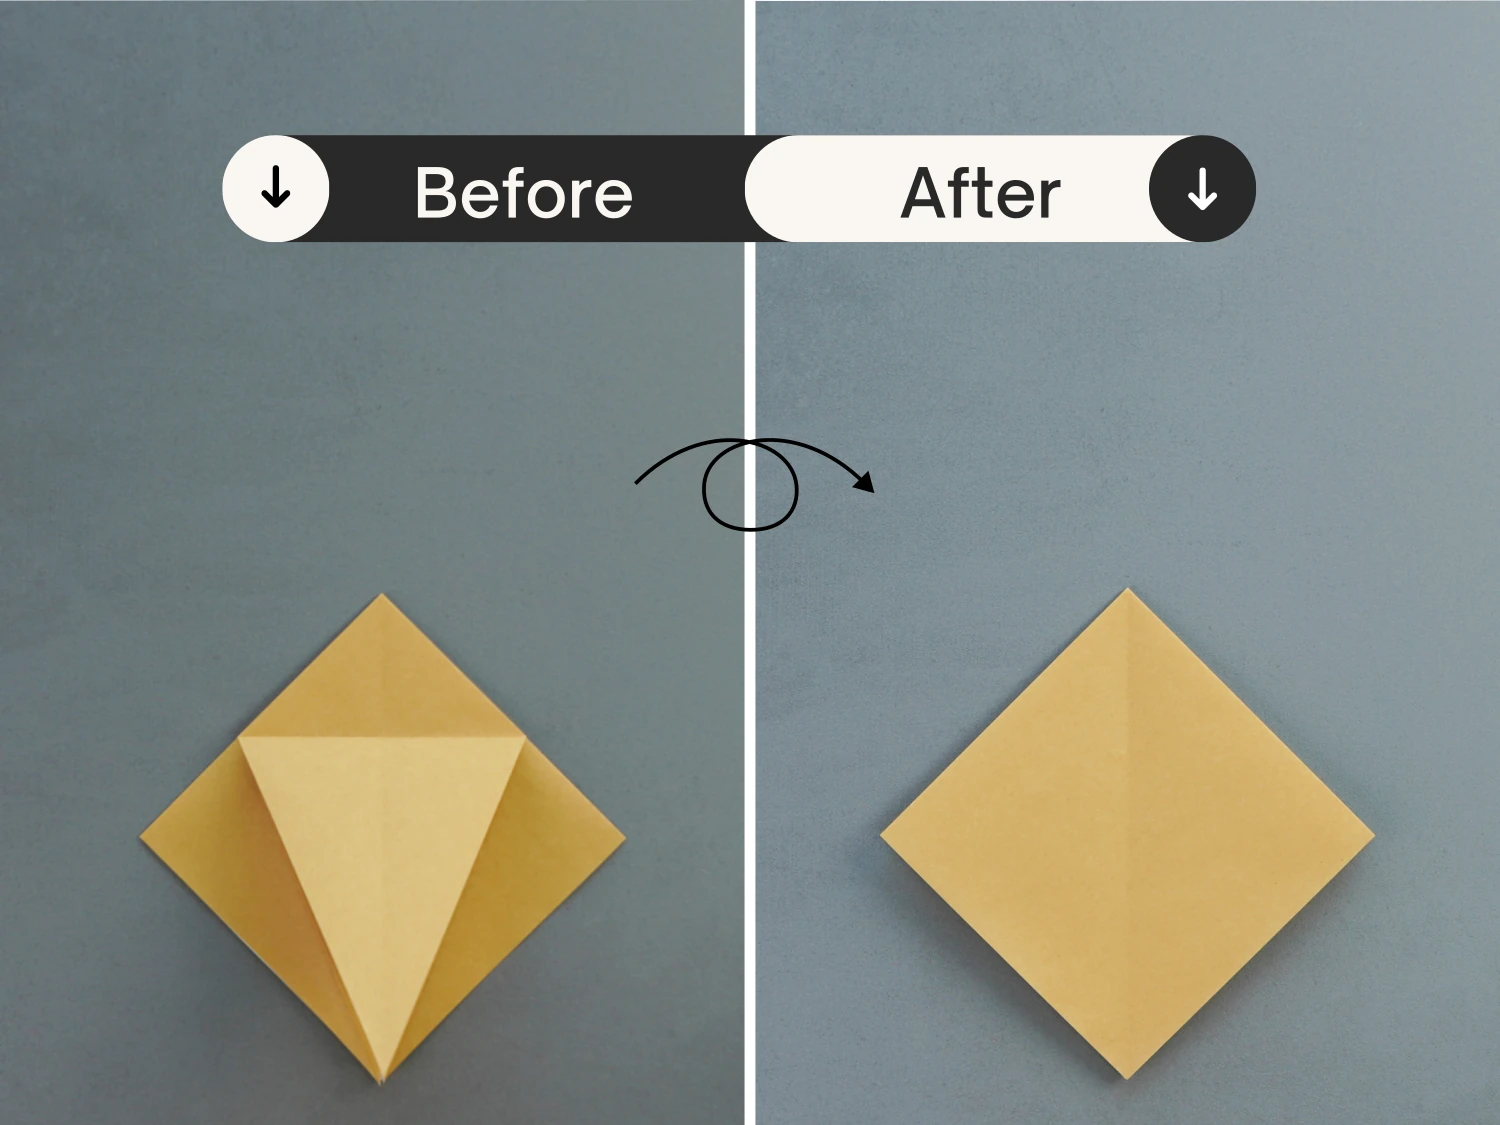
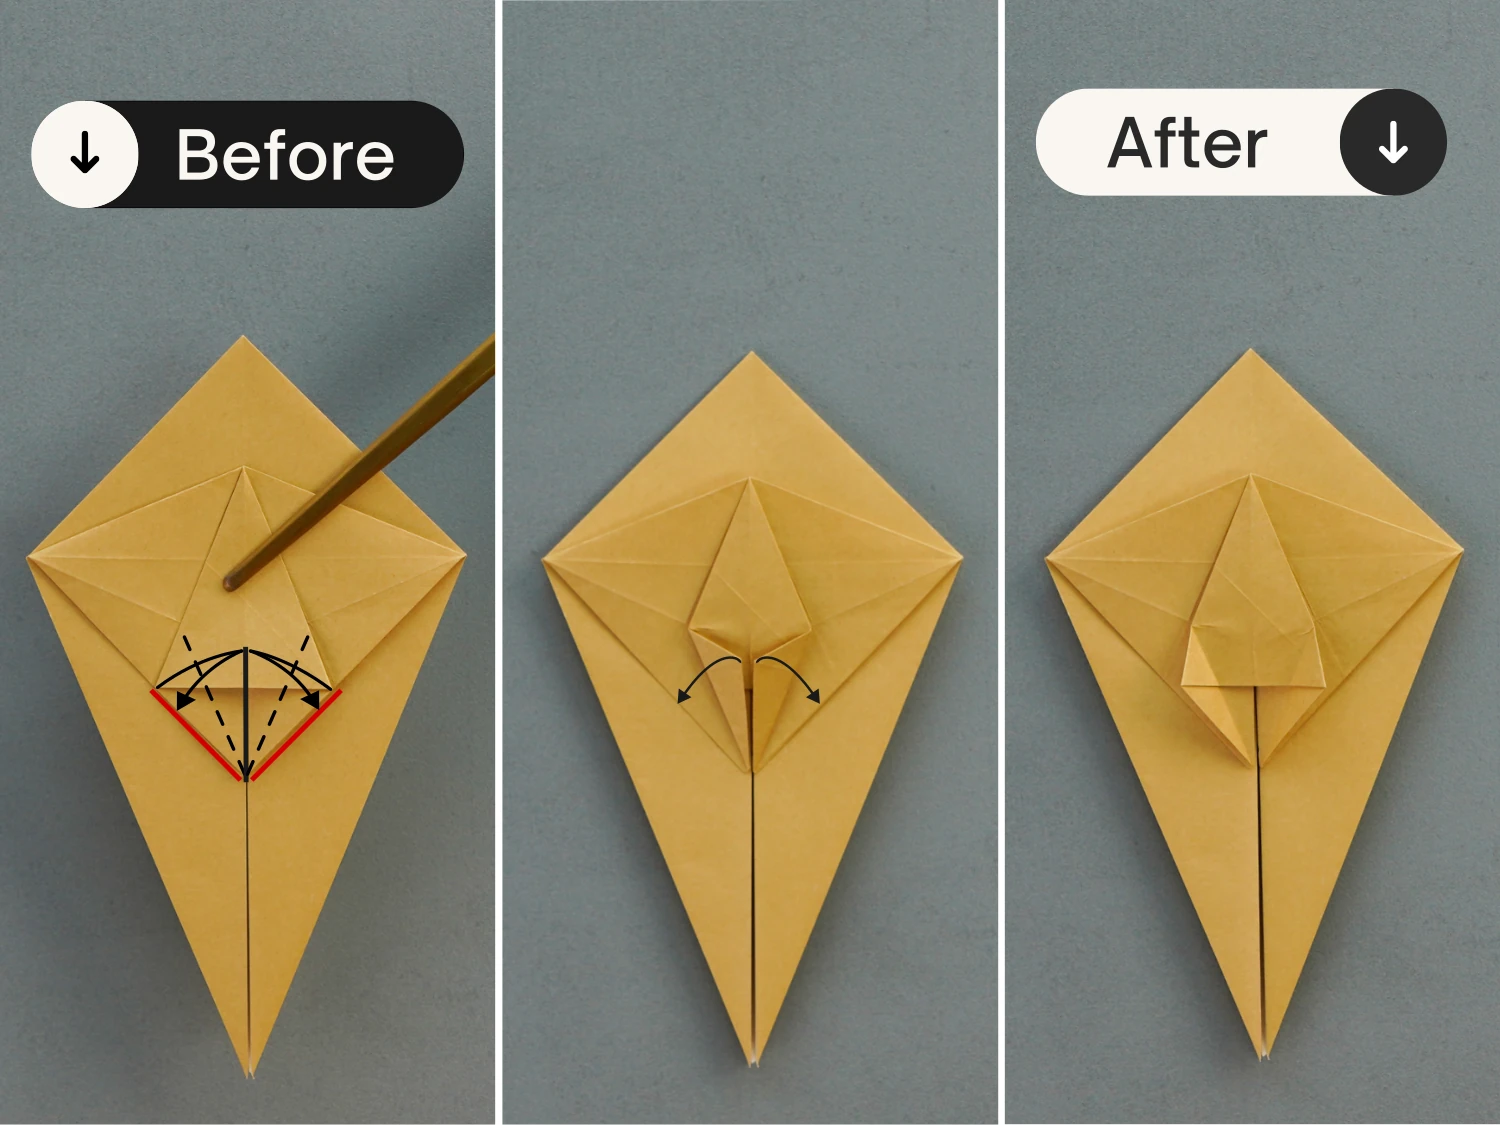
Step 12
Like before, fold the bottom left and right edges to the center, and unfold.
Step 13
As you did in step 9, open the pocket based on the crease created by the previous step. Then lift up the top layer, push the left and right points to the center, and flatten the pocket.
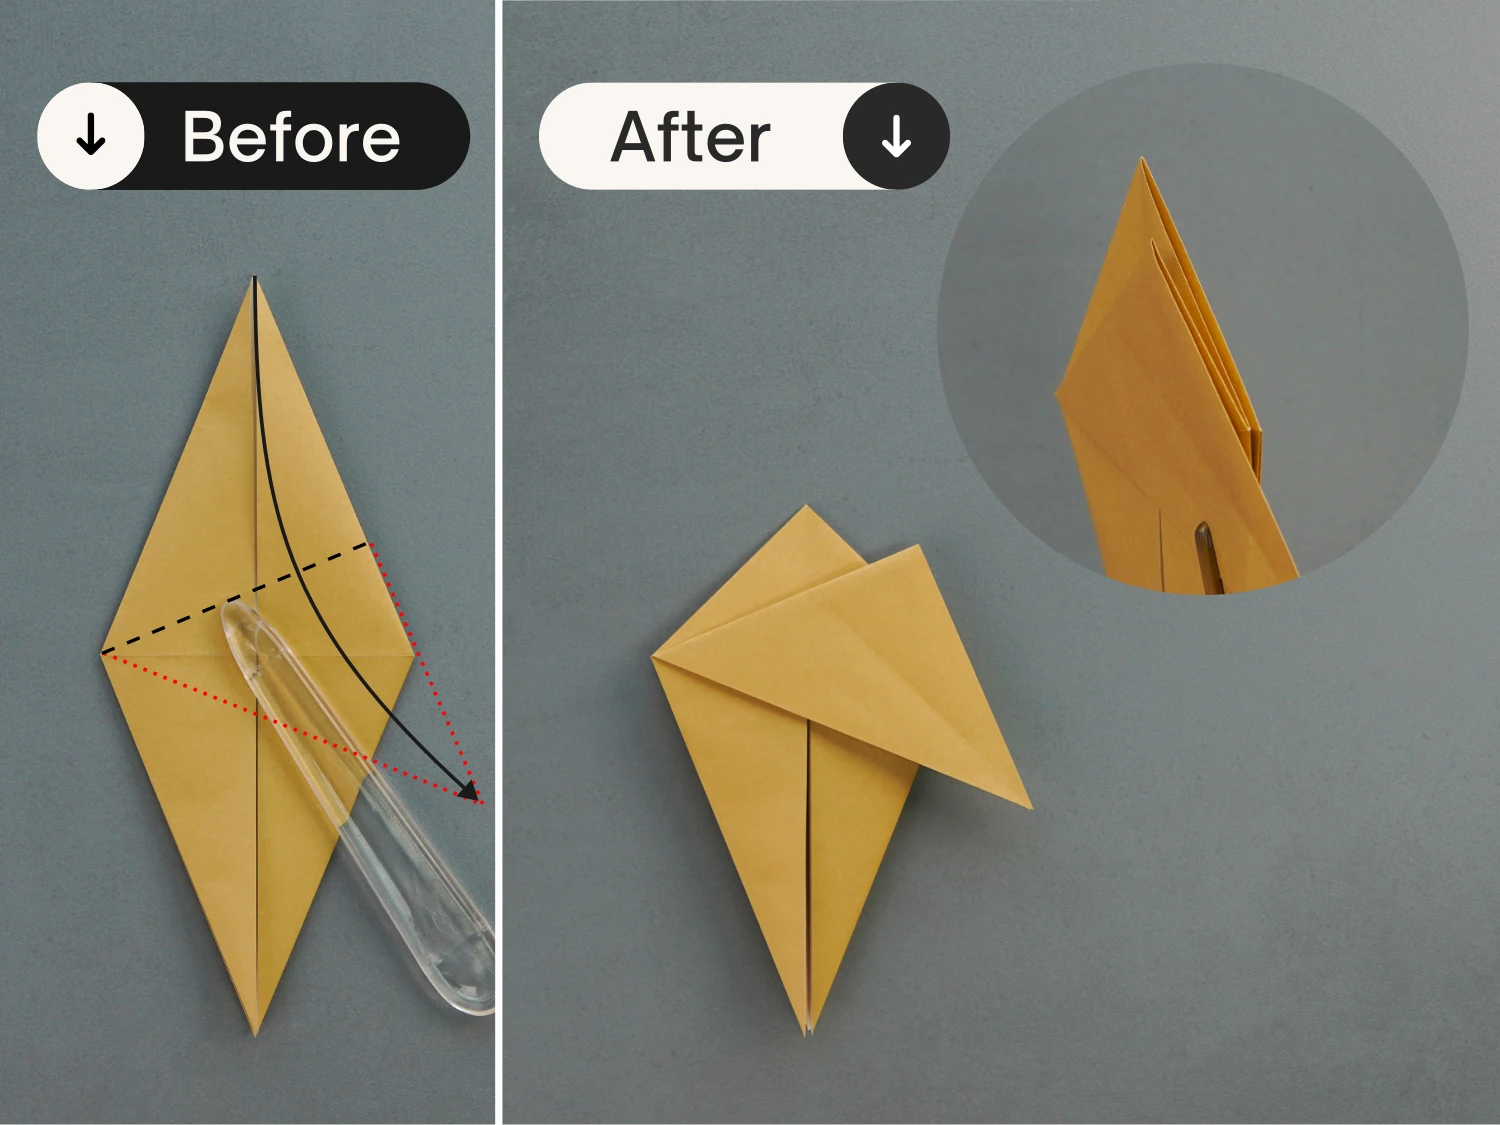
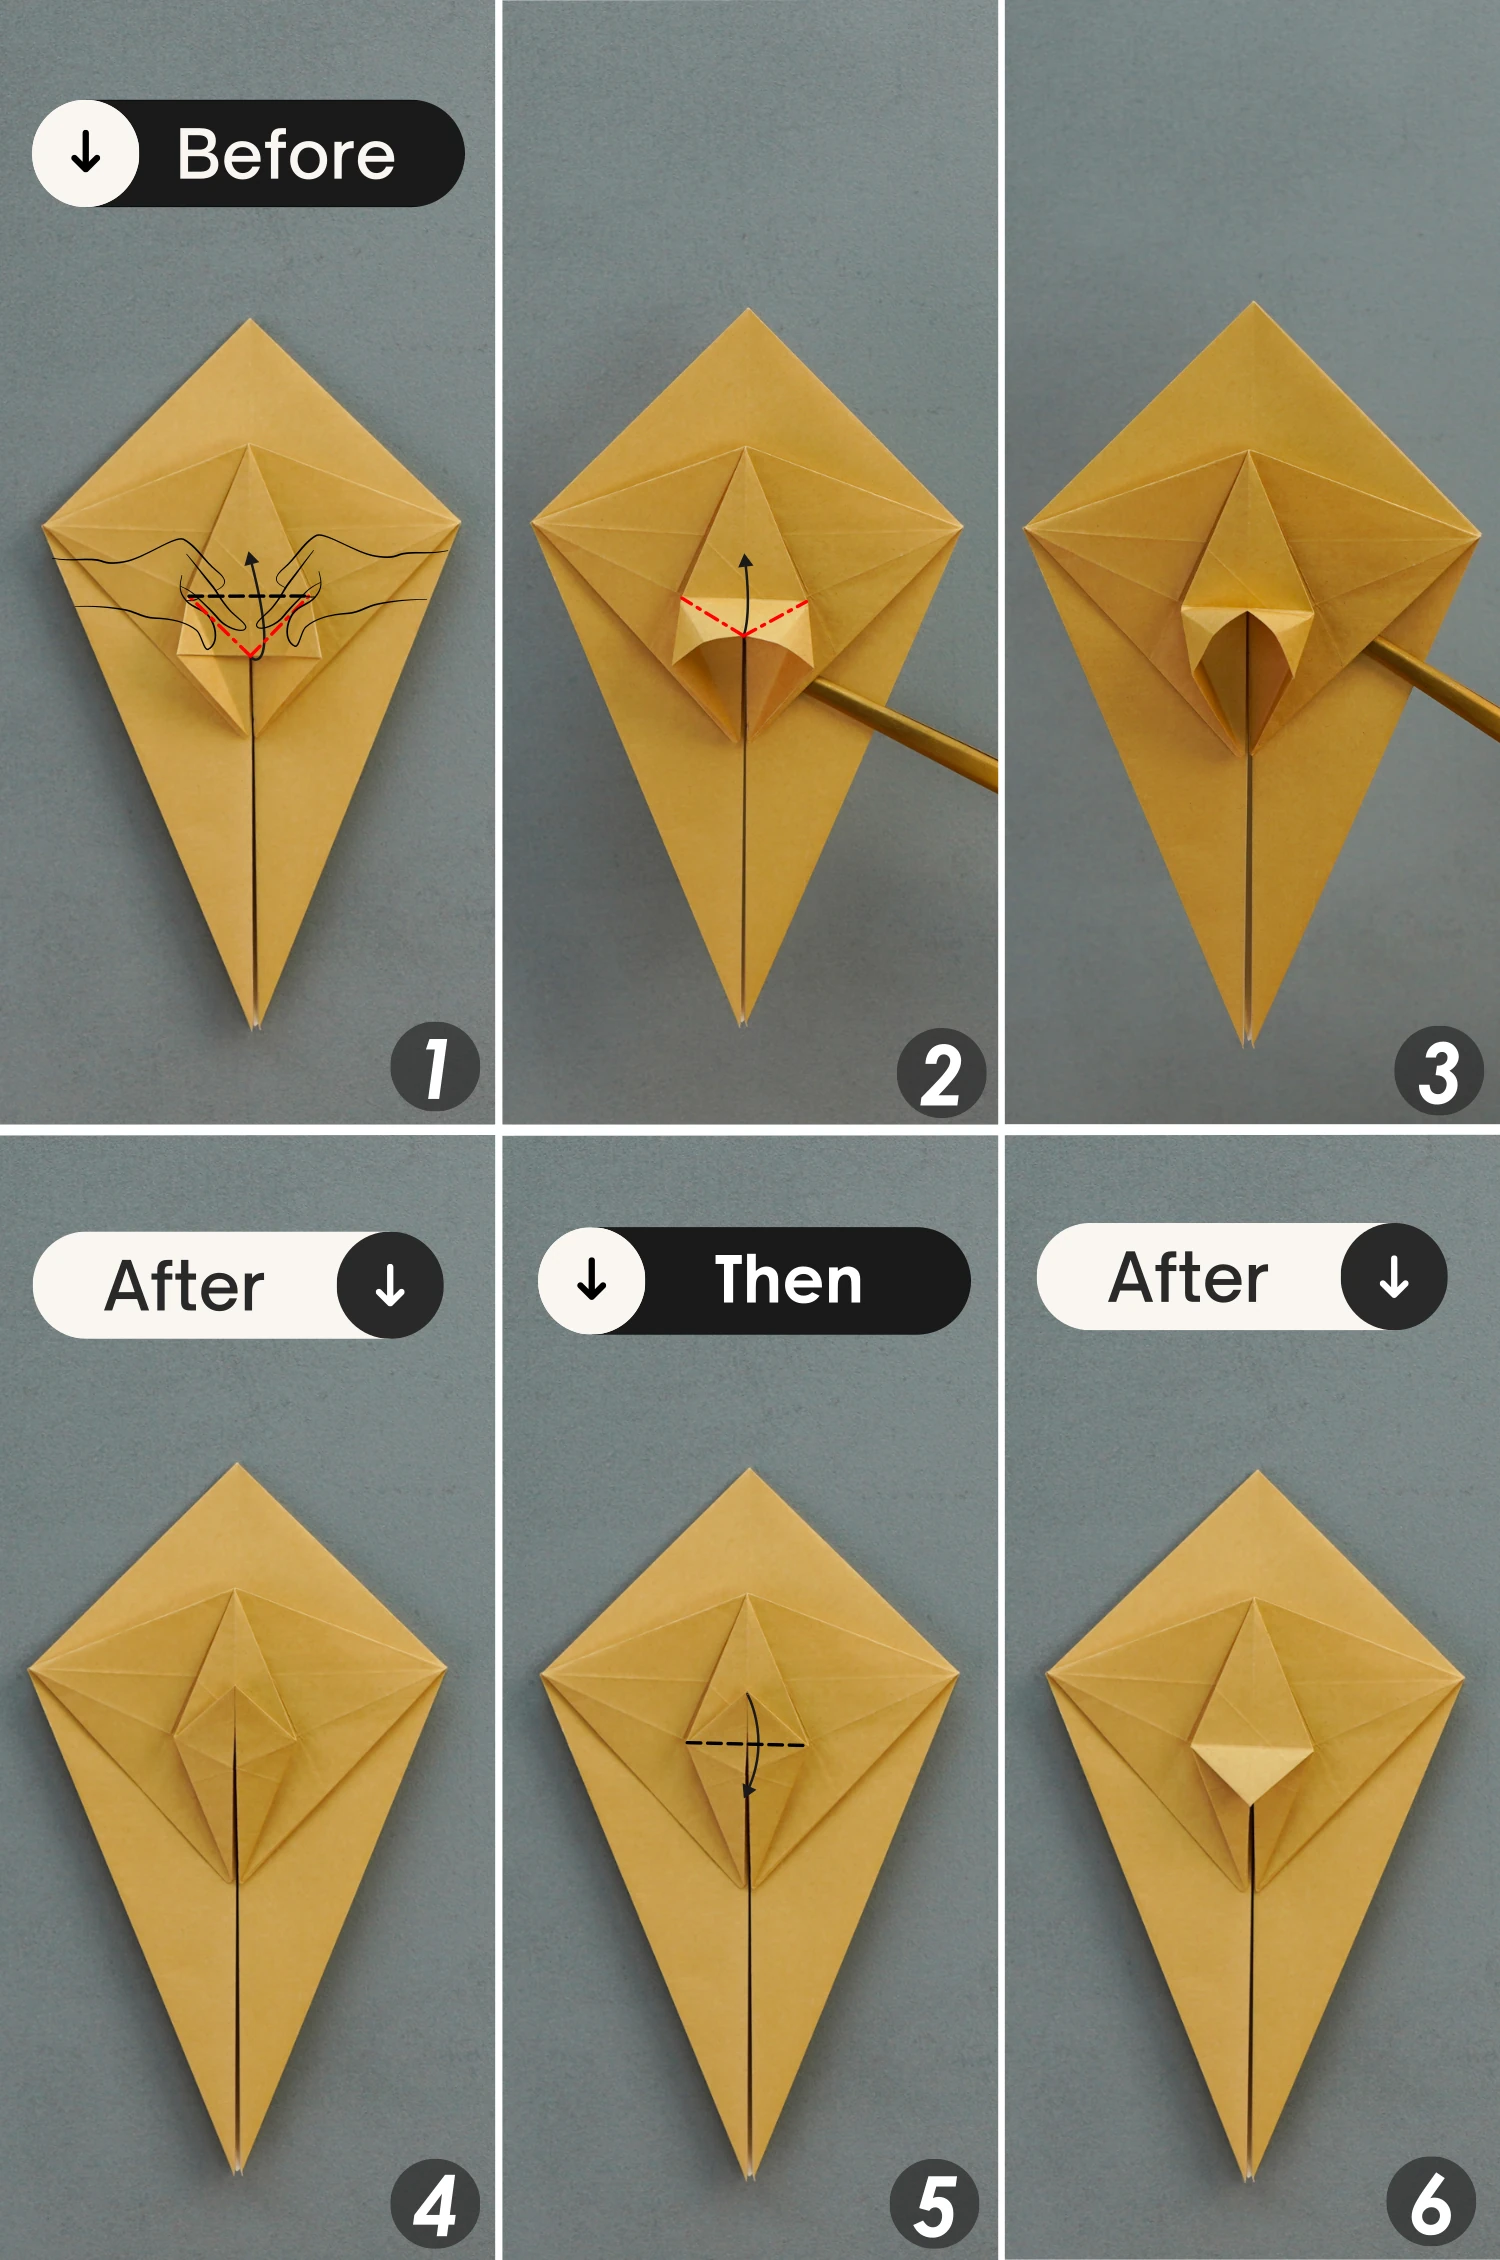
Step 14
Fold the top point down to the right along the dotted line, making the right edge of the folded part align with the right edge of the top triangle.
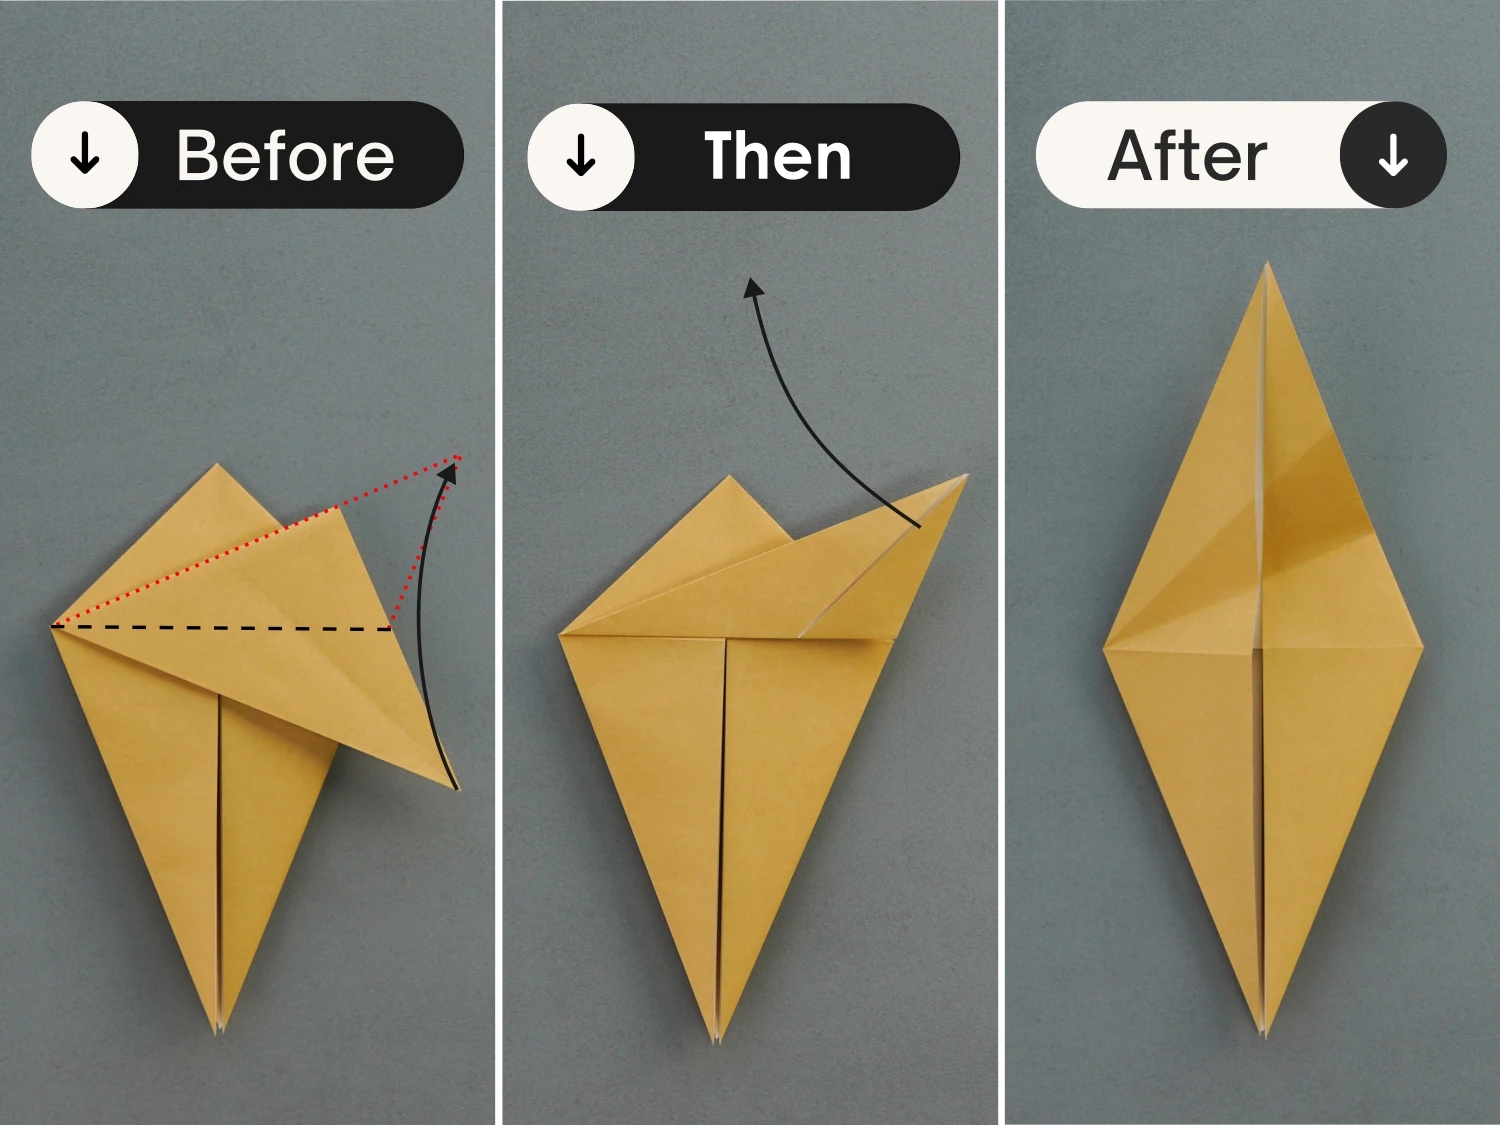
Step 15
Next, fold this point back to the top along the horizontal dotted line, crease it well then expand this layer.
Step 16
Still this point, fold it down to the left.
Step 17
Like before, fold this corner back to the top along the horizontal dotted line, then expand this layer.
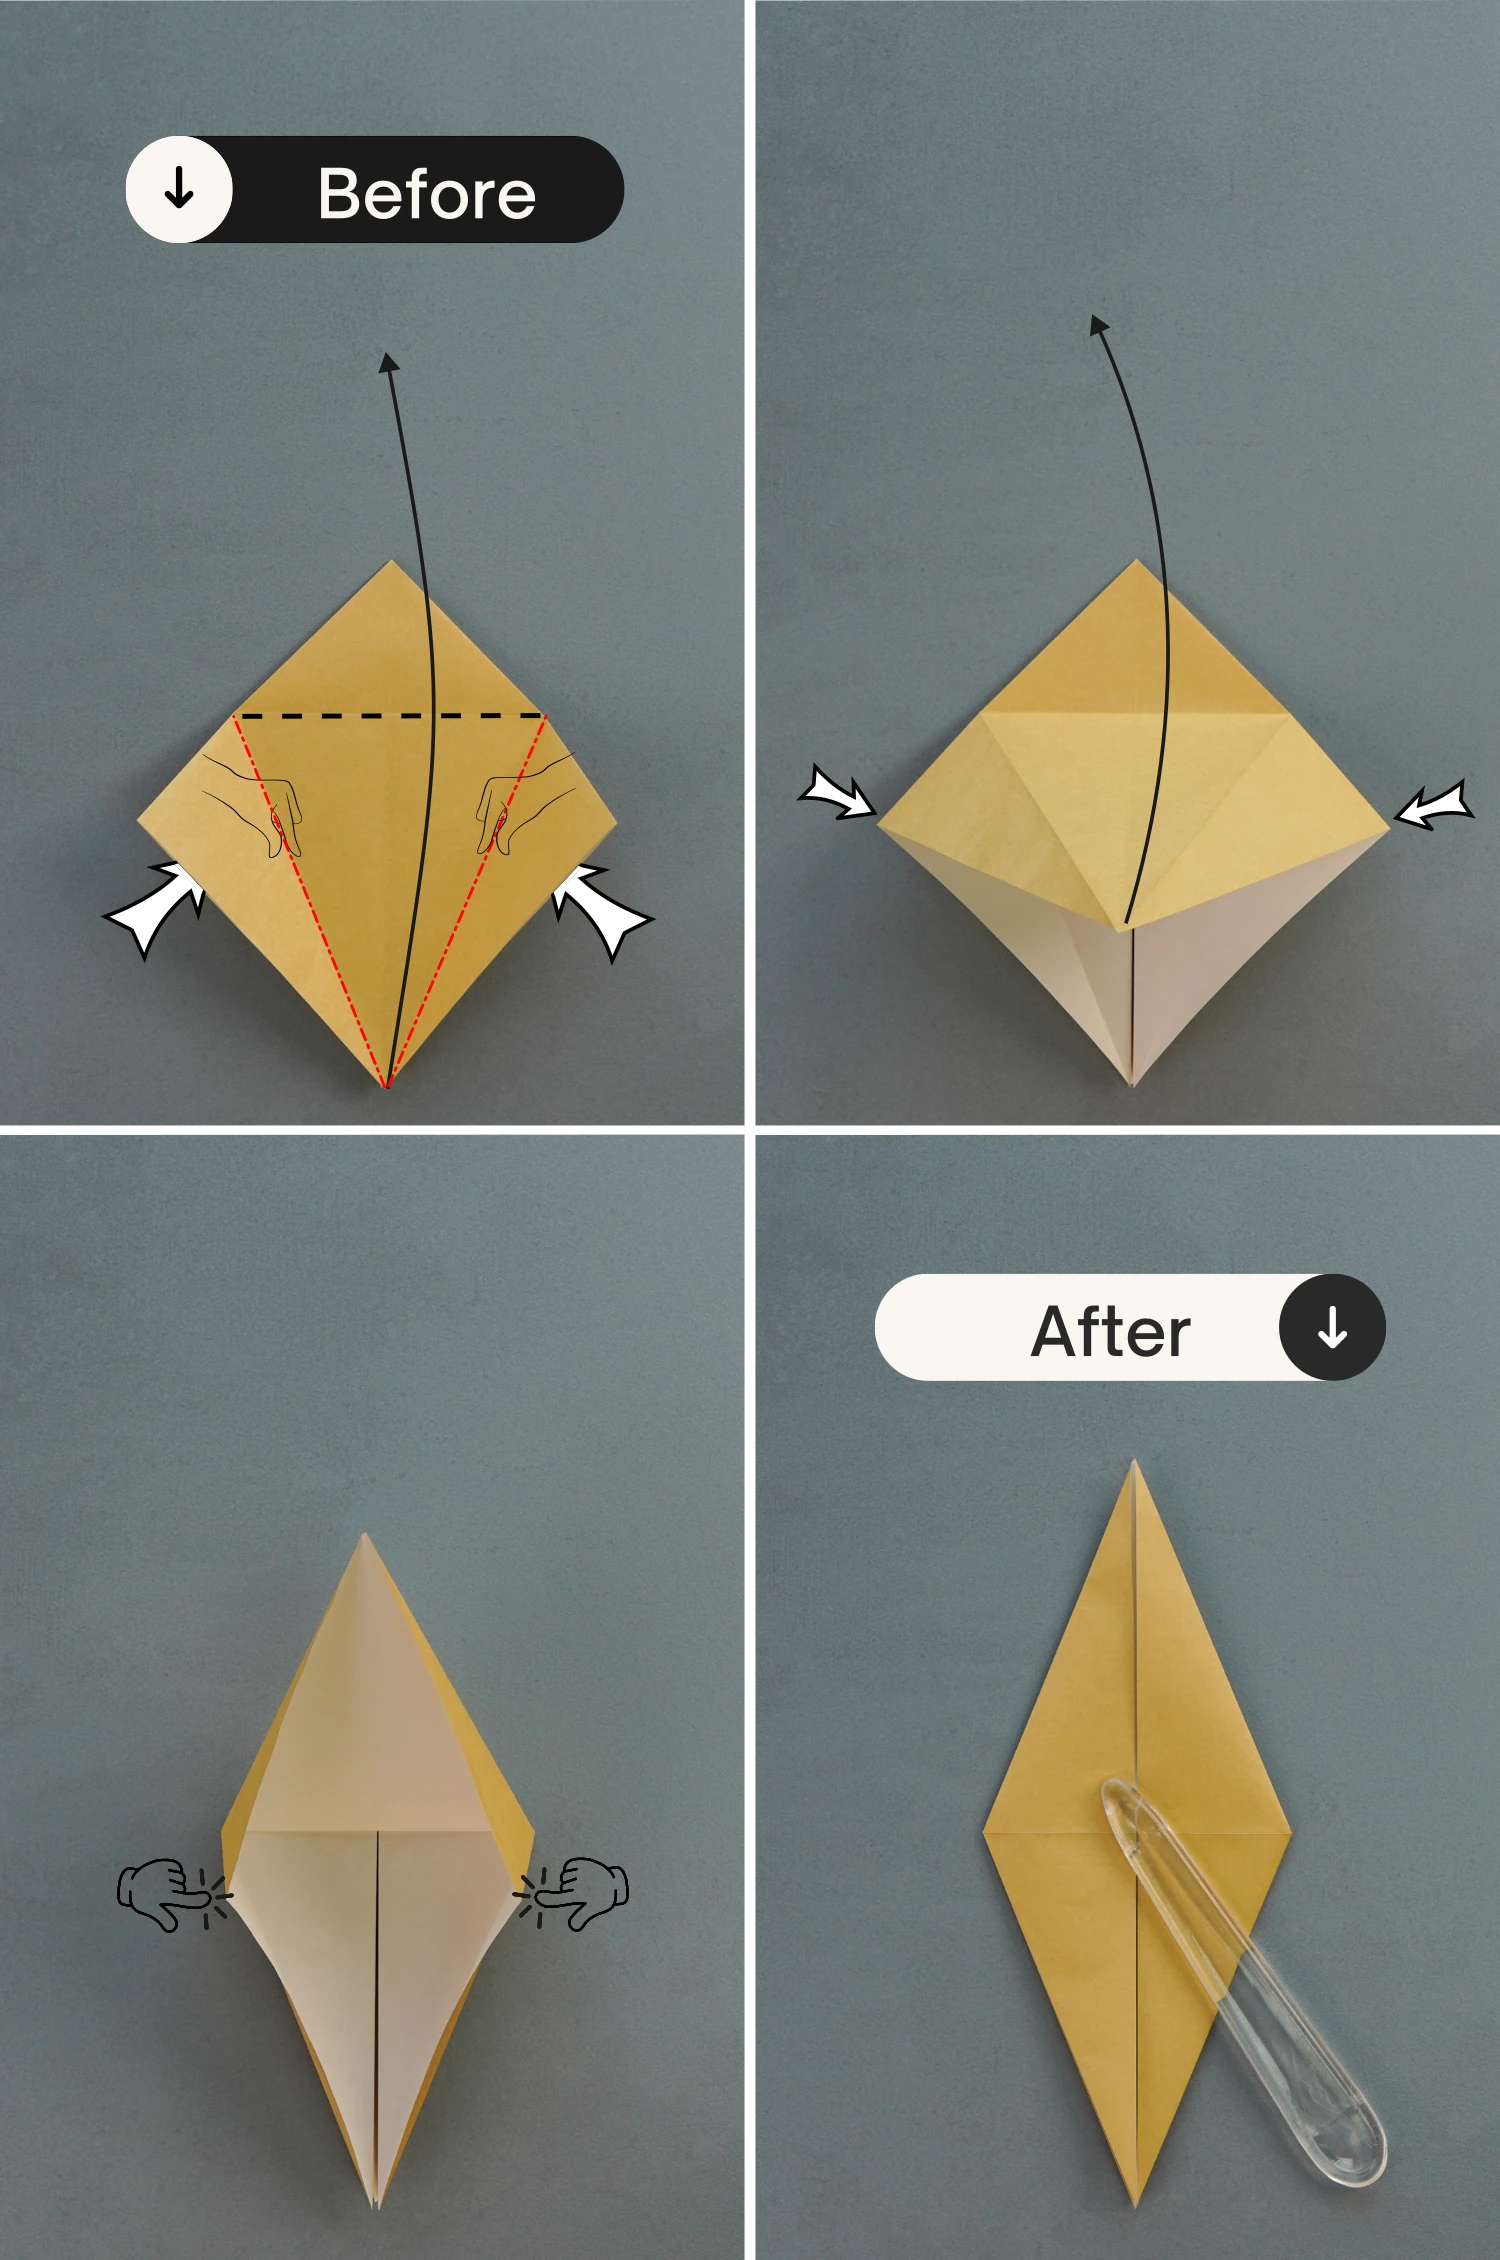
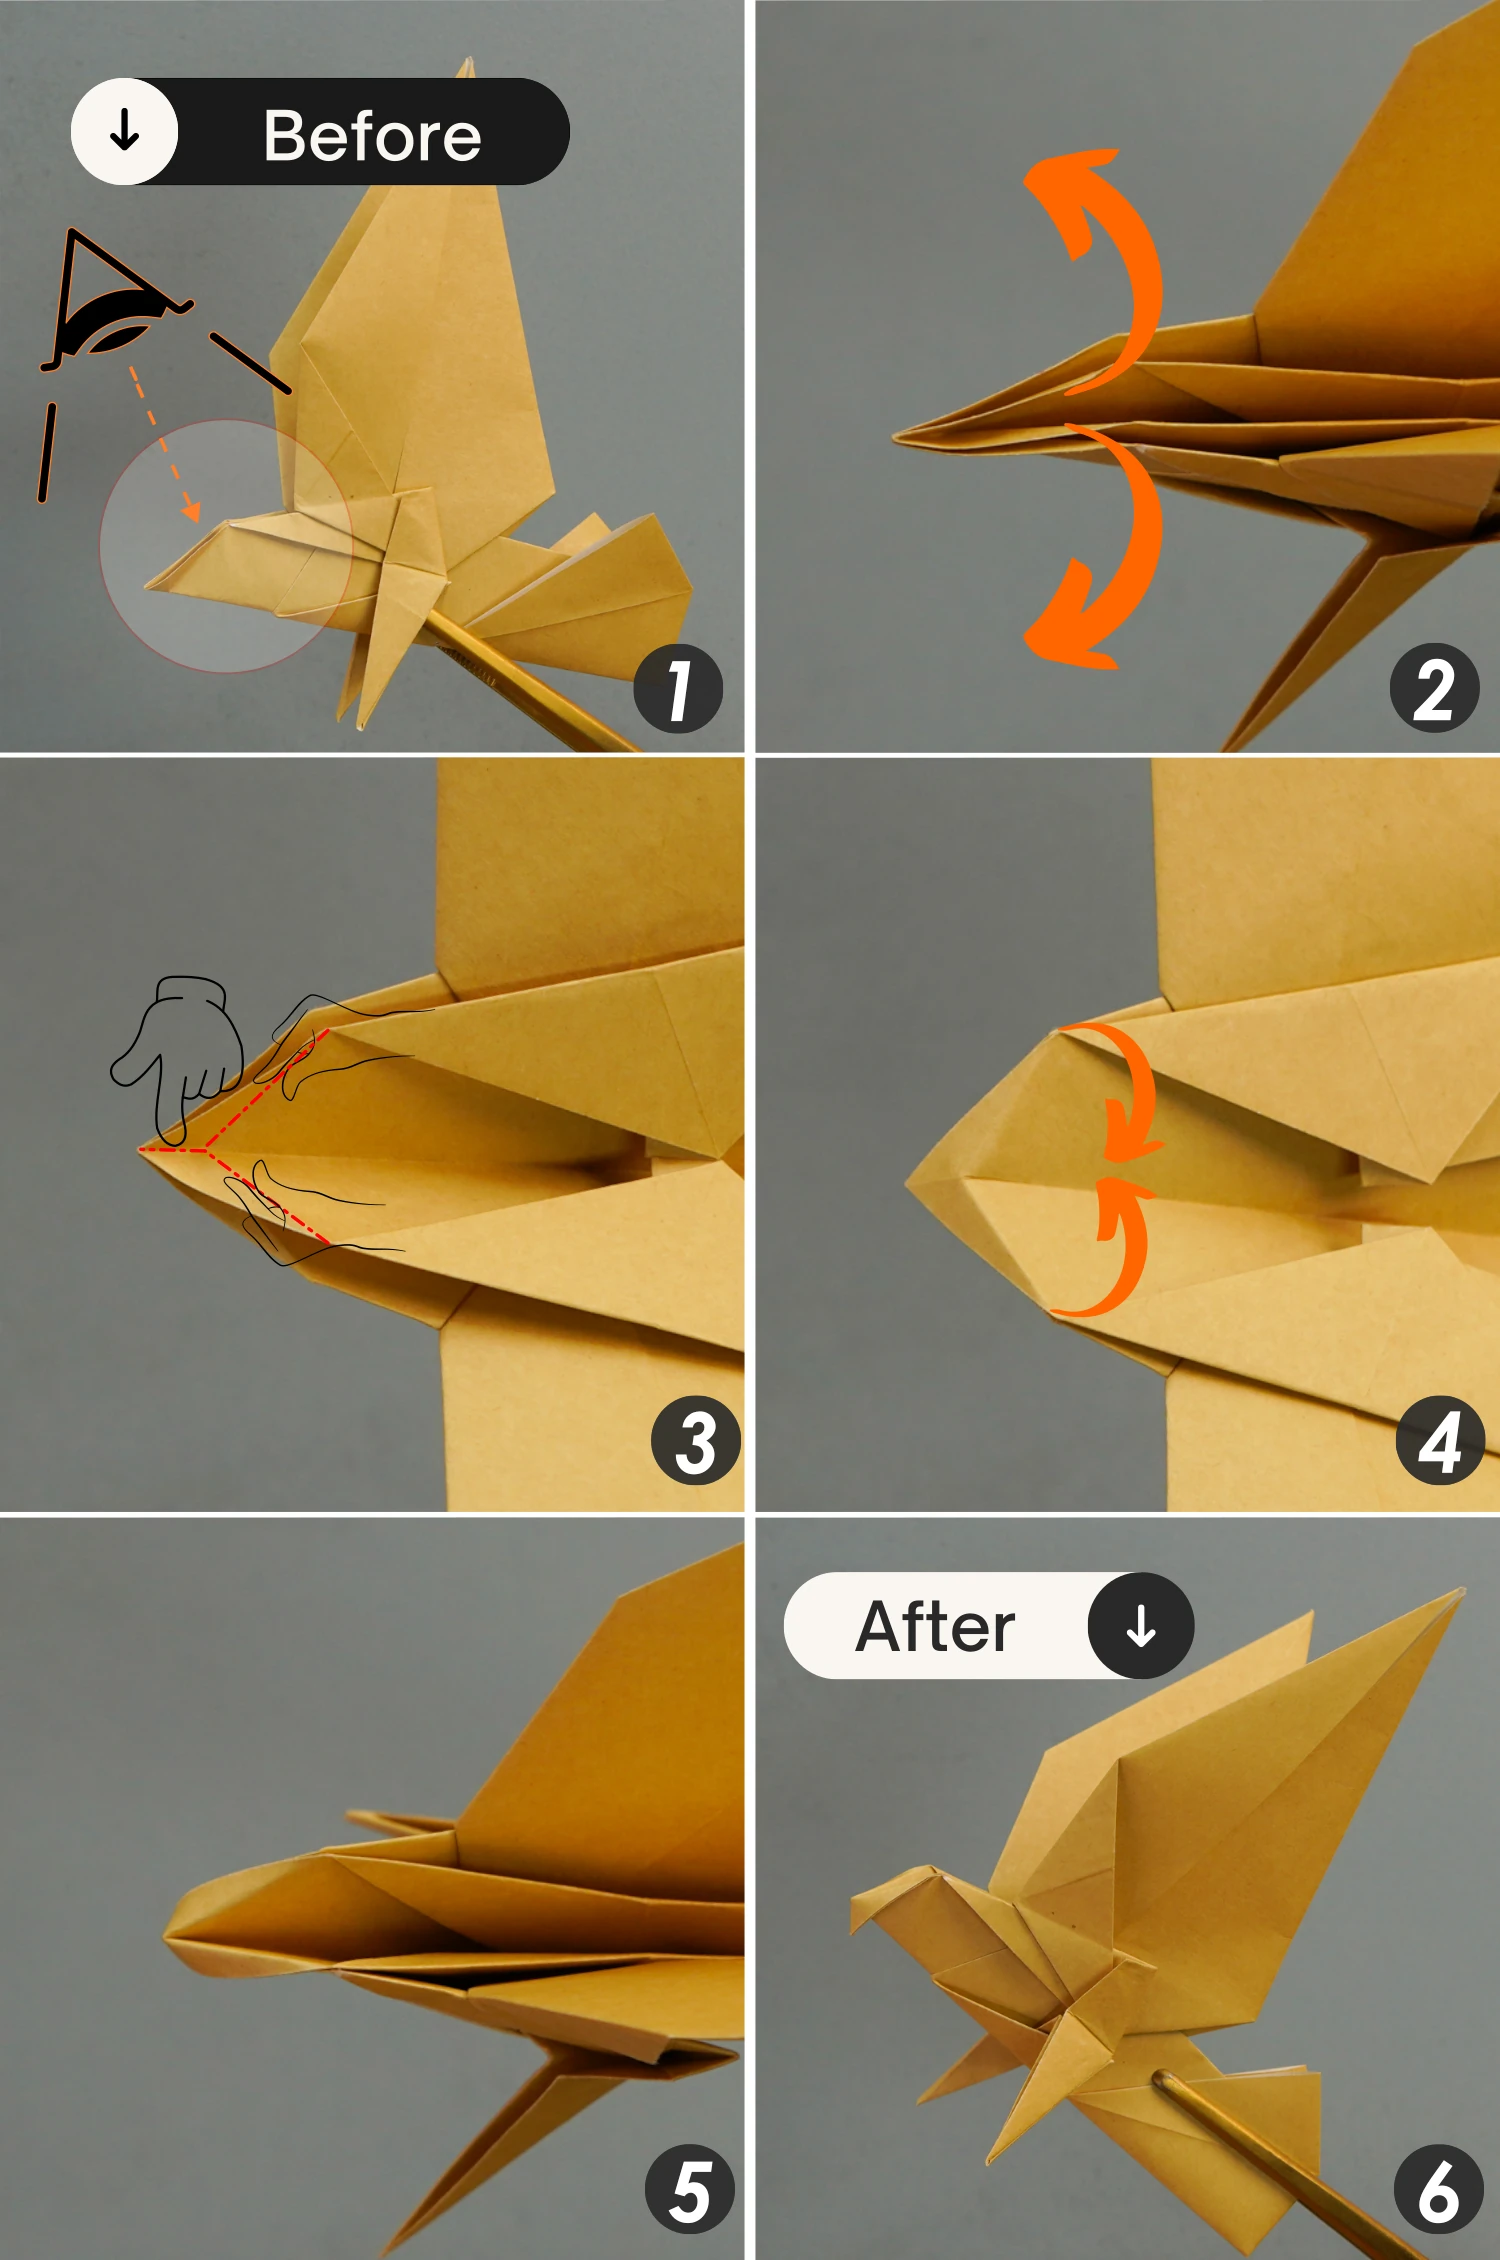
Step 18
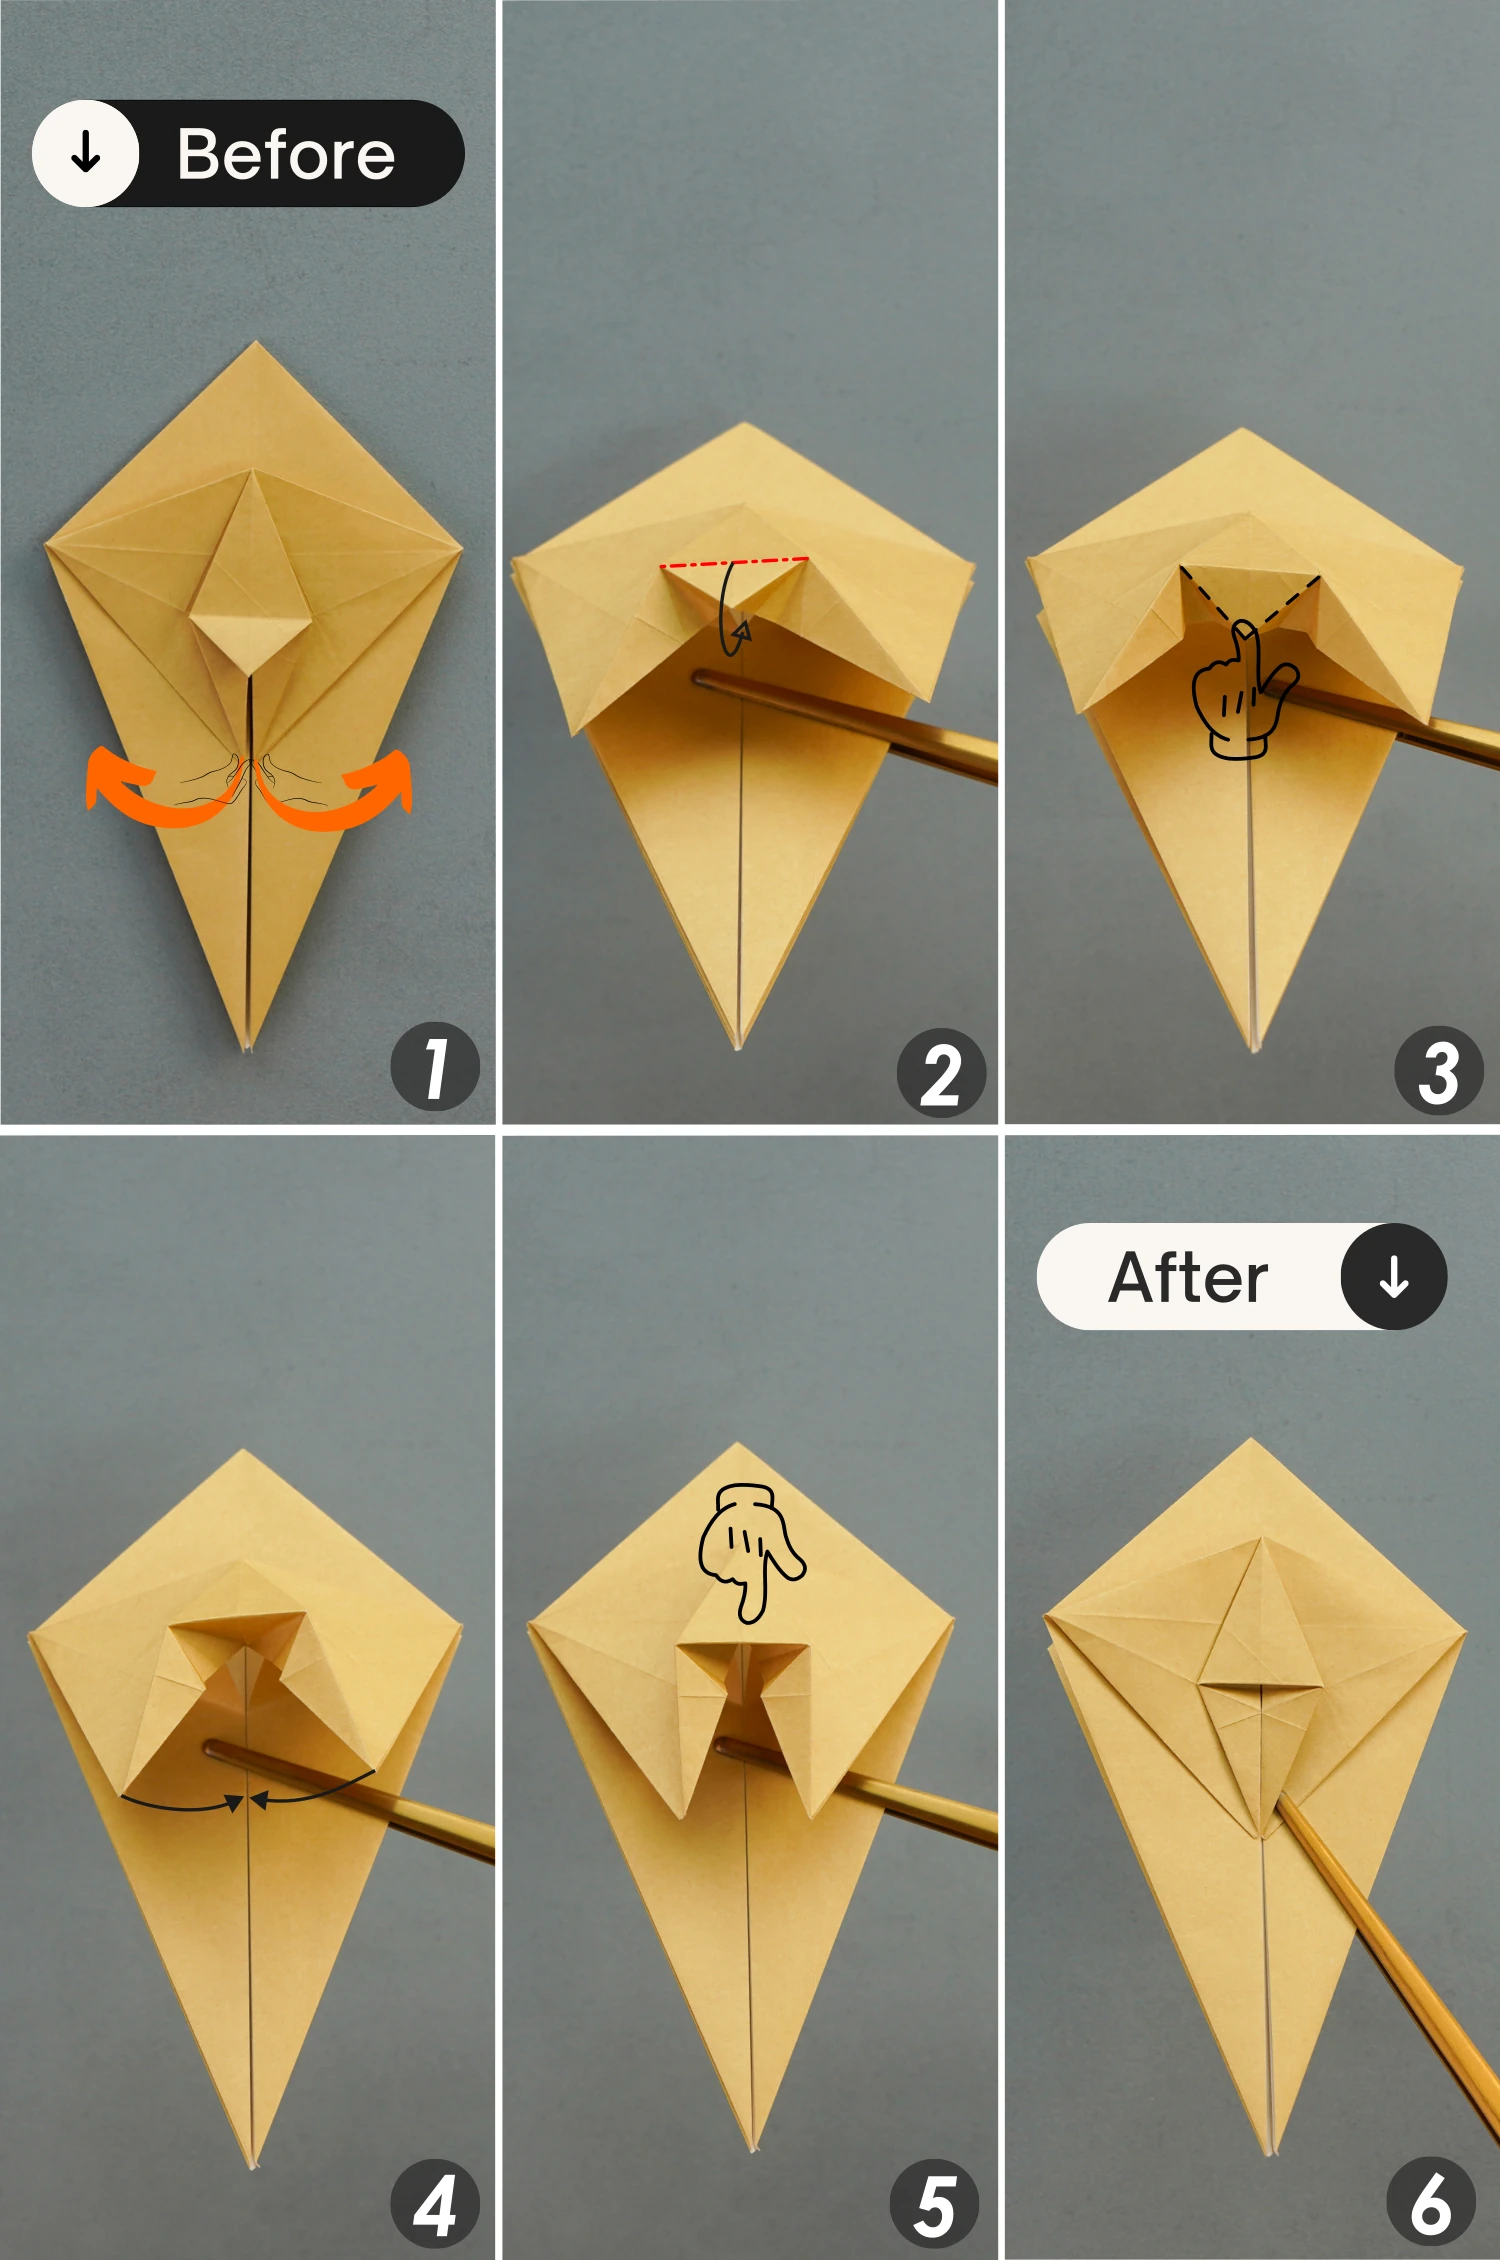
Lift the two upper layers, shape the two creases shown by the dotted lines in the first picture, and gently open this pocket. Then press the left and right sides, fold the top point to the bottom diagonally, and finally flatten the paper, as you can see in the last three pictures.
Step 19
Fold the bottom triangle up, and unfold it. Then fold this triangle backward along the crease you just made.
Step 20
Shape the three creases as the first picture shows, then you can take the bottom crease and push it to the top along the horizontal crease. Then press the left and right sides of the crease to create a standing triangle.
Step 21
Squash this standing triangle.

Step 22
Fold the bottom left and right edges of the squashed part toward the center to align with its vertical crease, crease them well then unfold.
Step 23
Now you should lift the top layer of the squashed part along the black dotted line, push the left and right corners to the center, and then flatten the fold, and you will get a shape like the fourth picture shows. Finally, fold the small top triangle down.
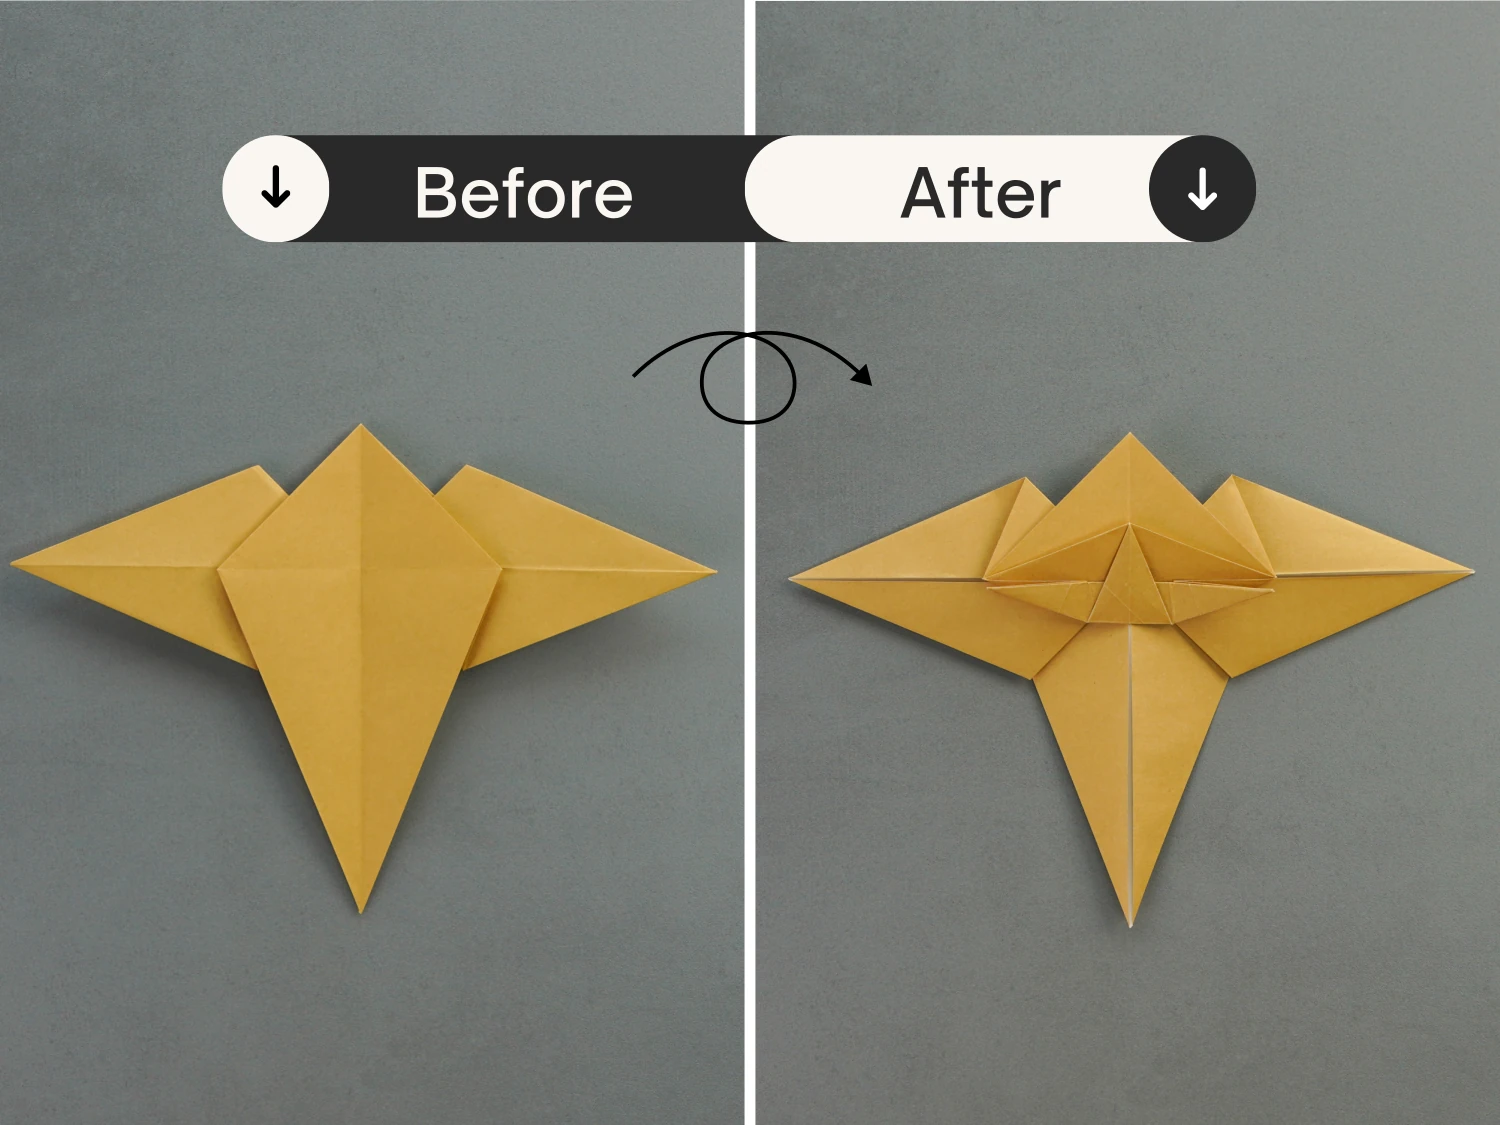
Step 24
Pull the two corners which are located in the middle of the paper apart to the left and right, then fold the small triangle backward along the existing creases, adjust it well then close it.
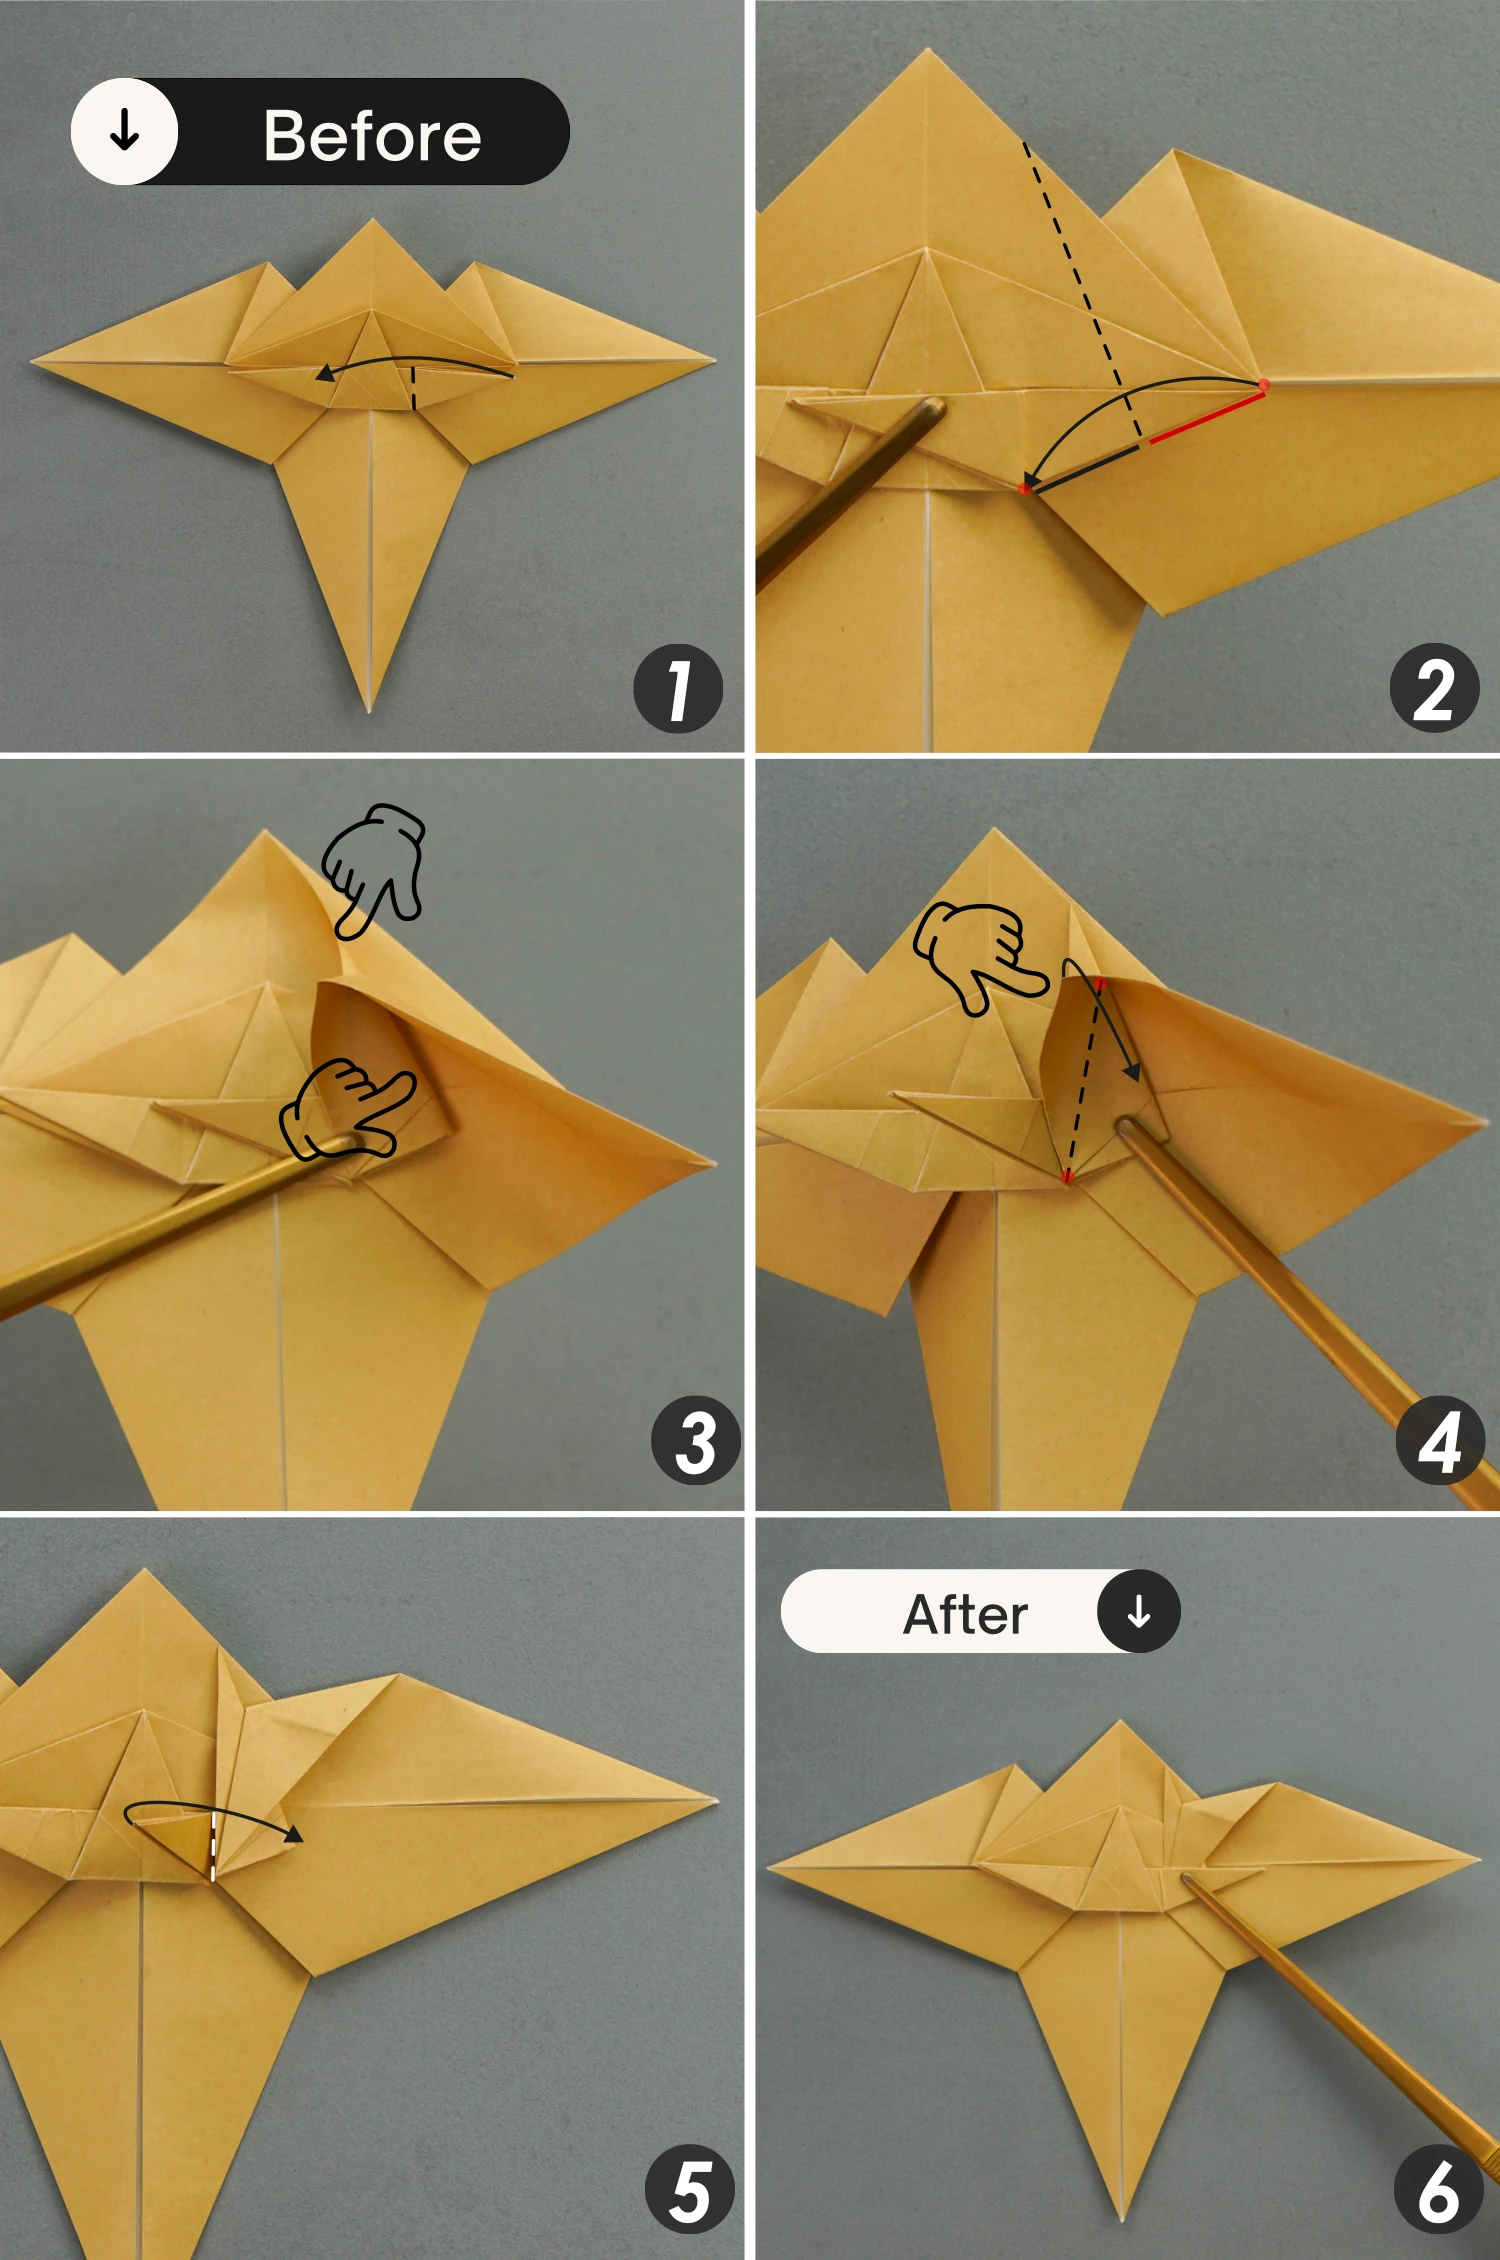
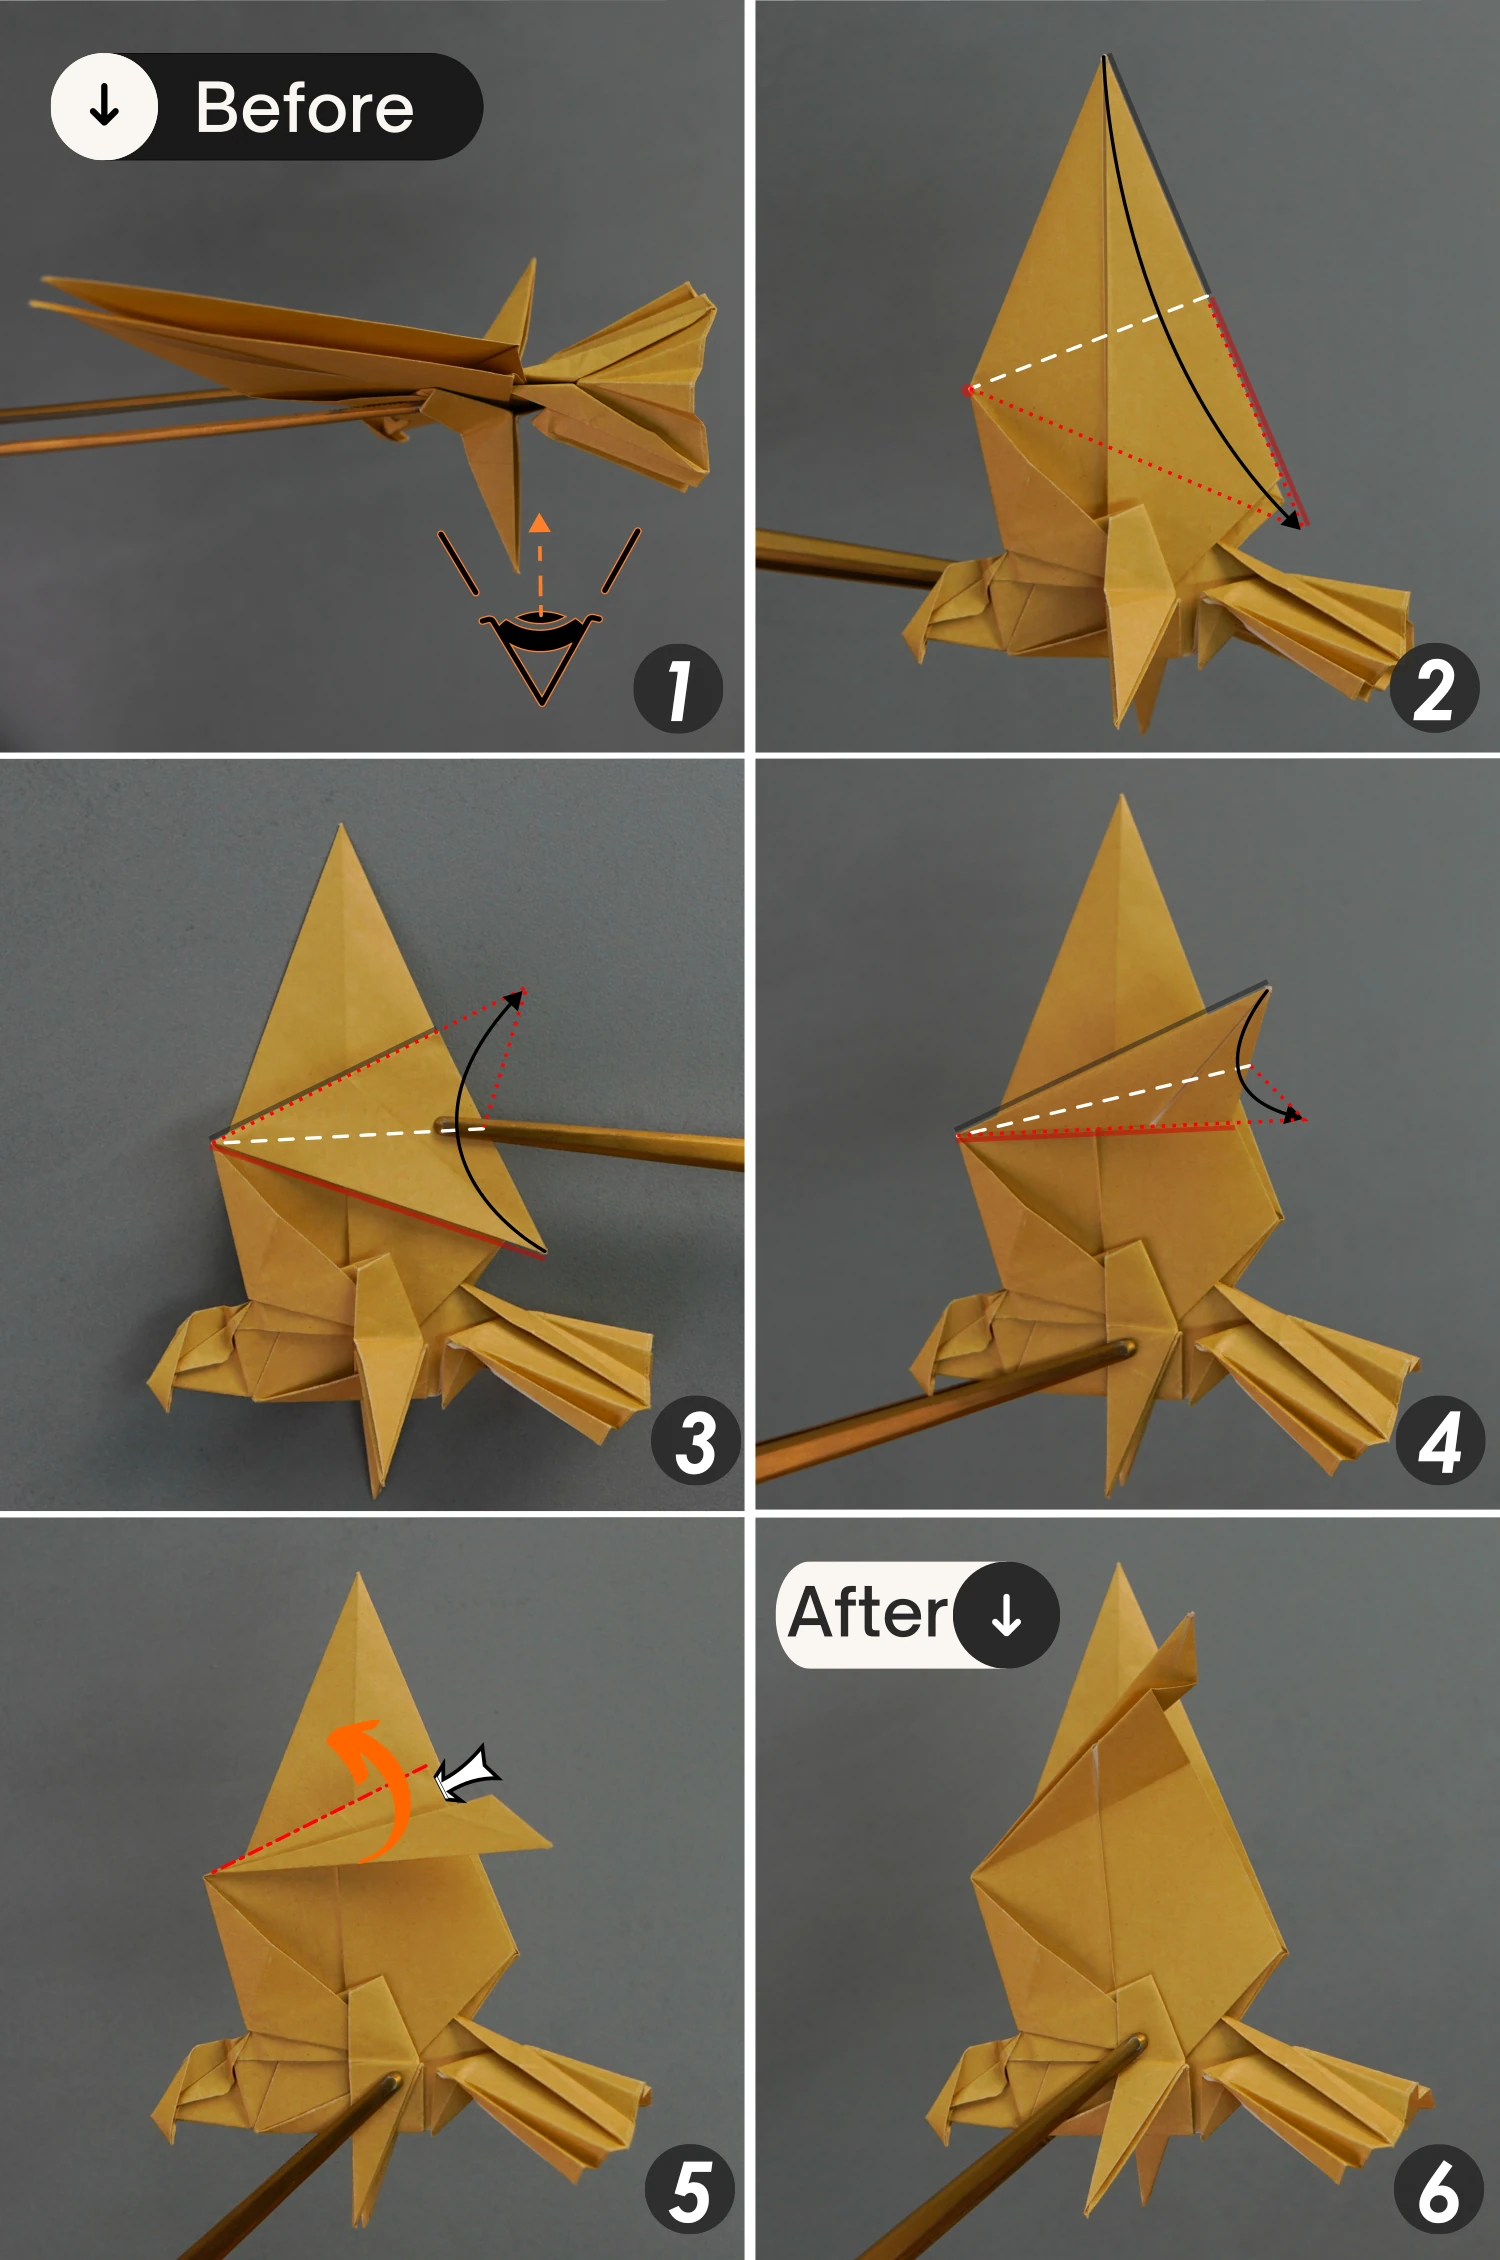
Step 25
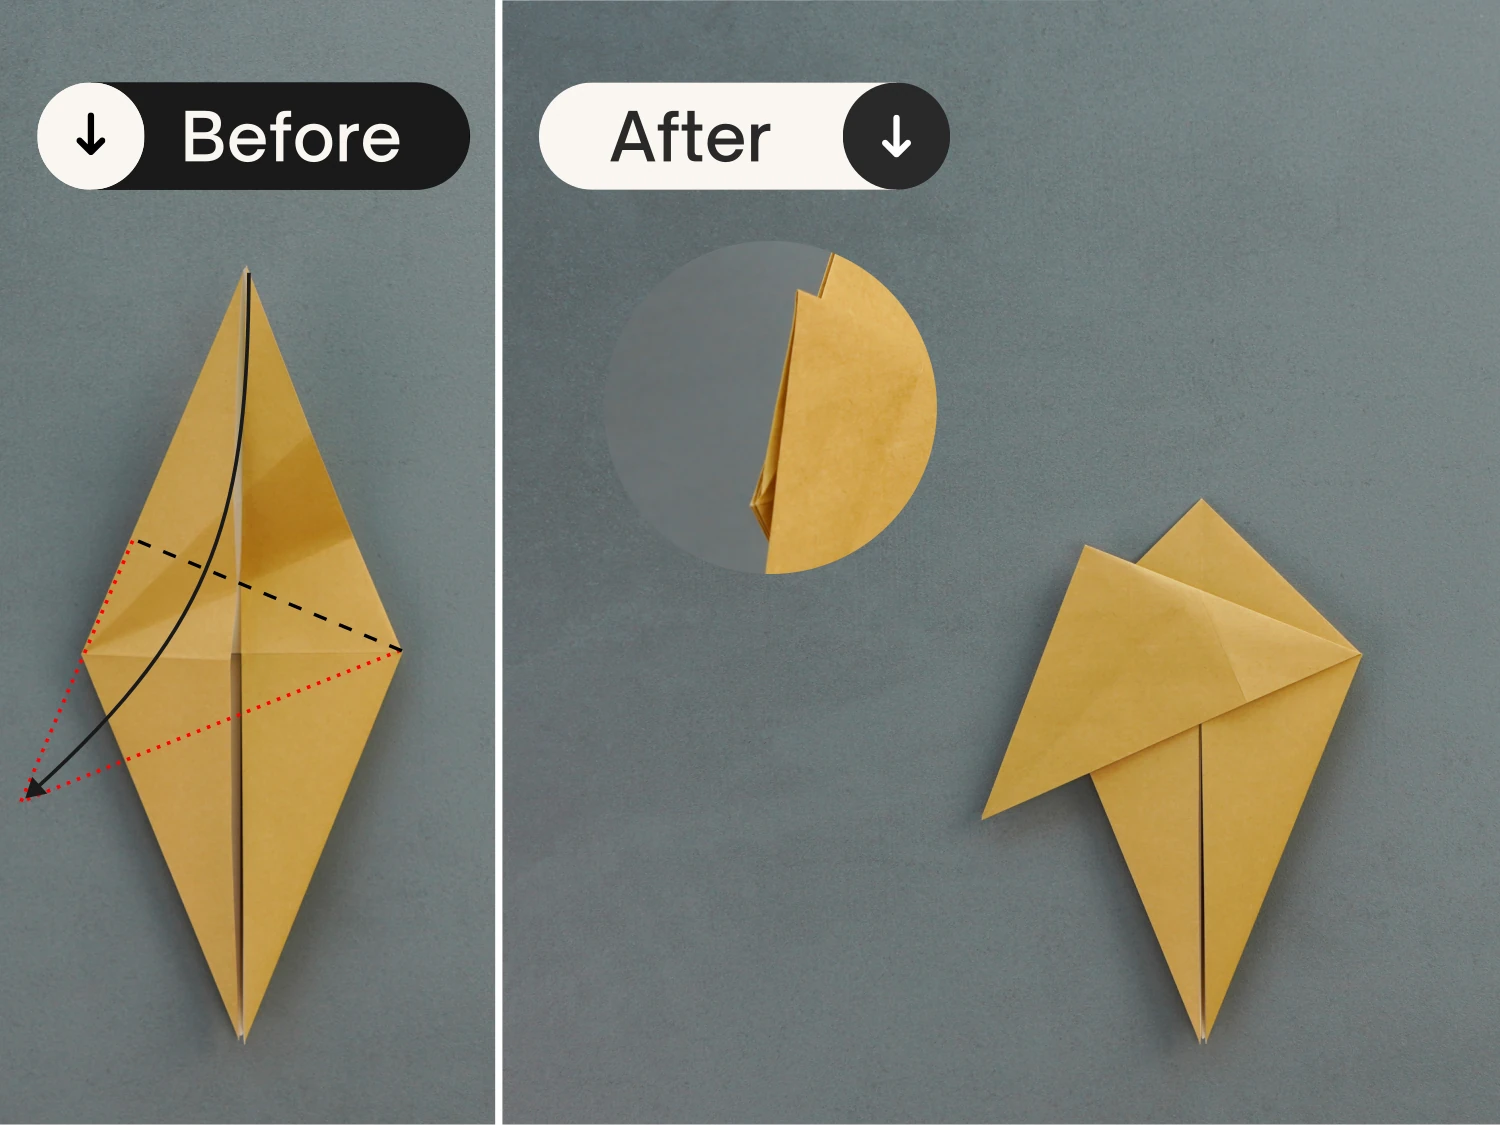
Fold the right part to the left along the middle vertical crease, then shape the crease shown by the red dotted line as the second picture shows. Next, take the bottom corner of the upper layer to the right corner of the paper, and finally flatten the fold along the existing creases.
Step 26
Repeat this for the left side. Fold the left part to the right diagonally, and shape the crease shown by the red dotted line, then take the bottom corner of the upper layer to the left corner of the paper, and finally flatten it.
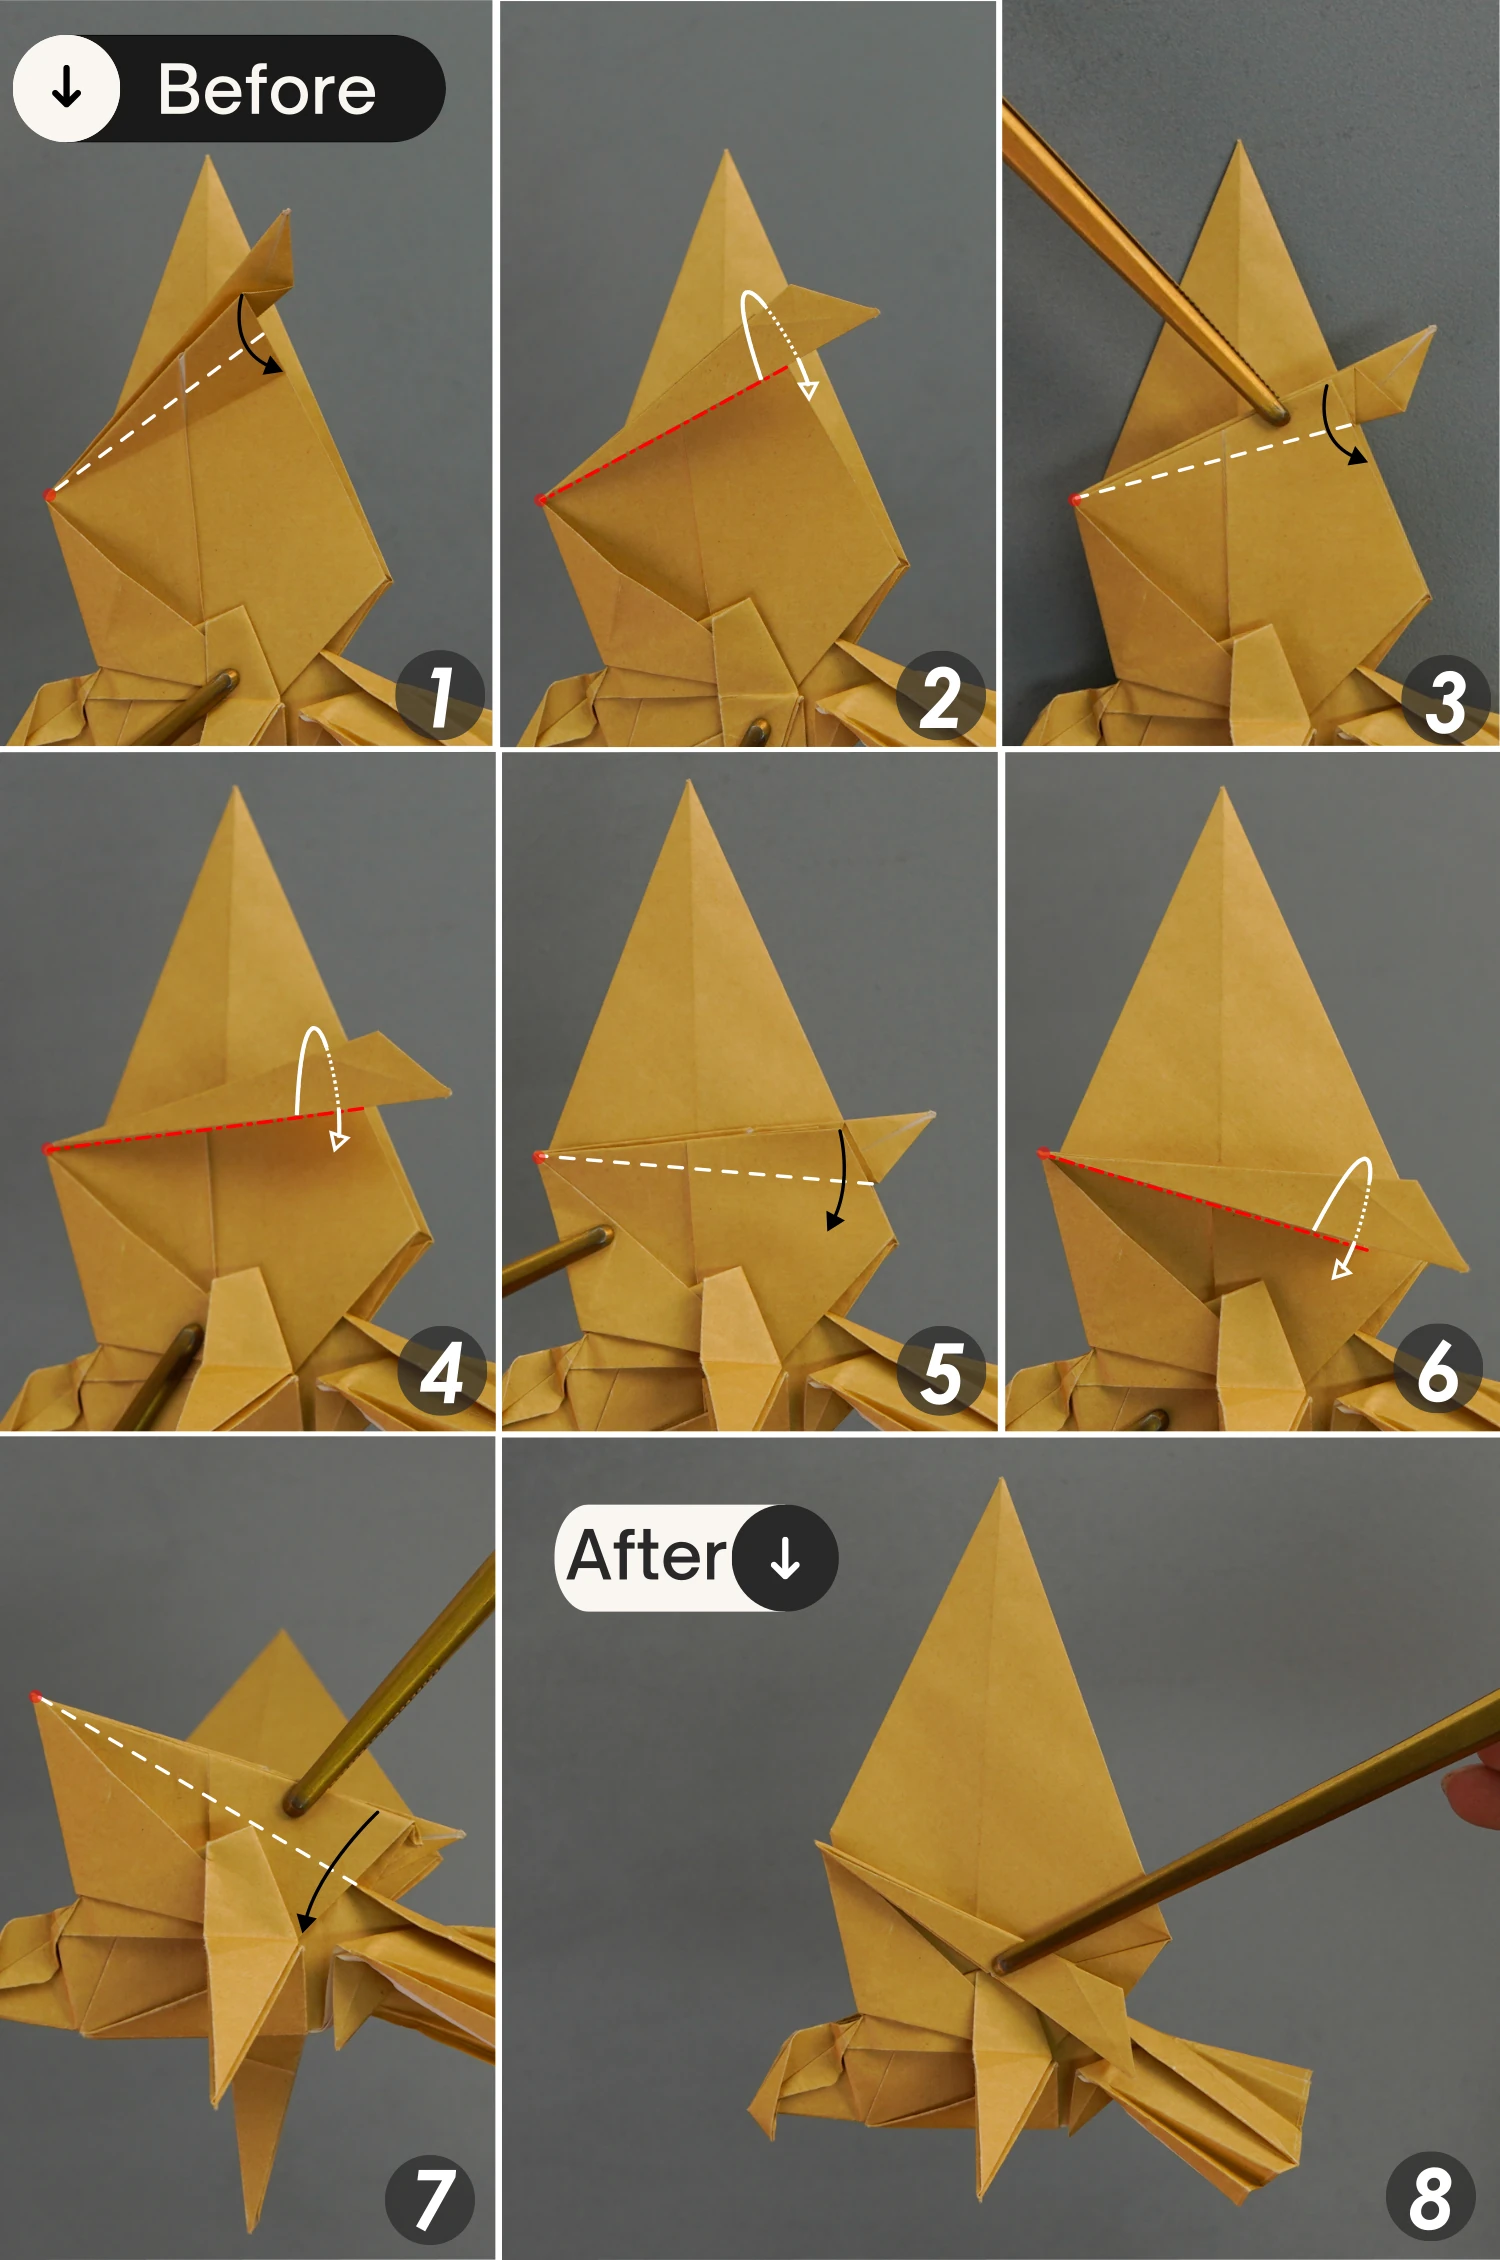
Step 27
Fold the upper corner on the right side down, fold the resulting edge upward along the existing crease, fold the right edge of the folded corner in half, and finally fold this corner back to the right corner of the paper and flatten it.
Step 28
Fold the left side in the same manner.
Fold the upper corner on the left side down, fold the resulting edge upward along the existing crease, fold the left edge of the folded corner in half, and finally fold this corner back to the left corner of the paper and flatten it.
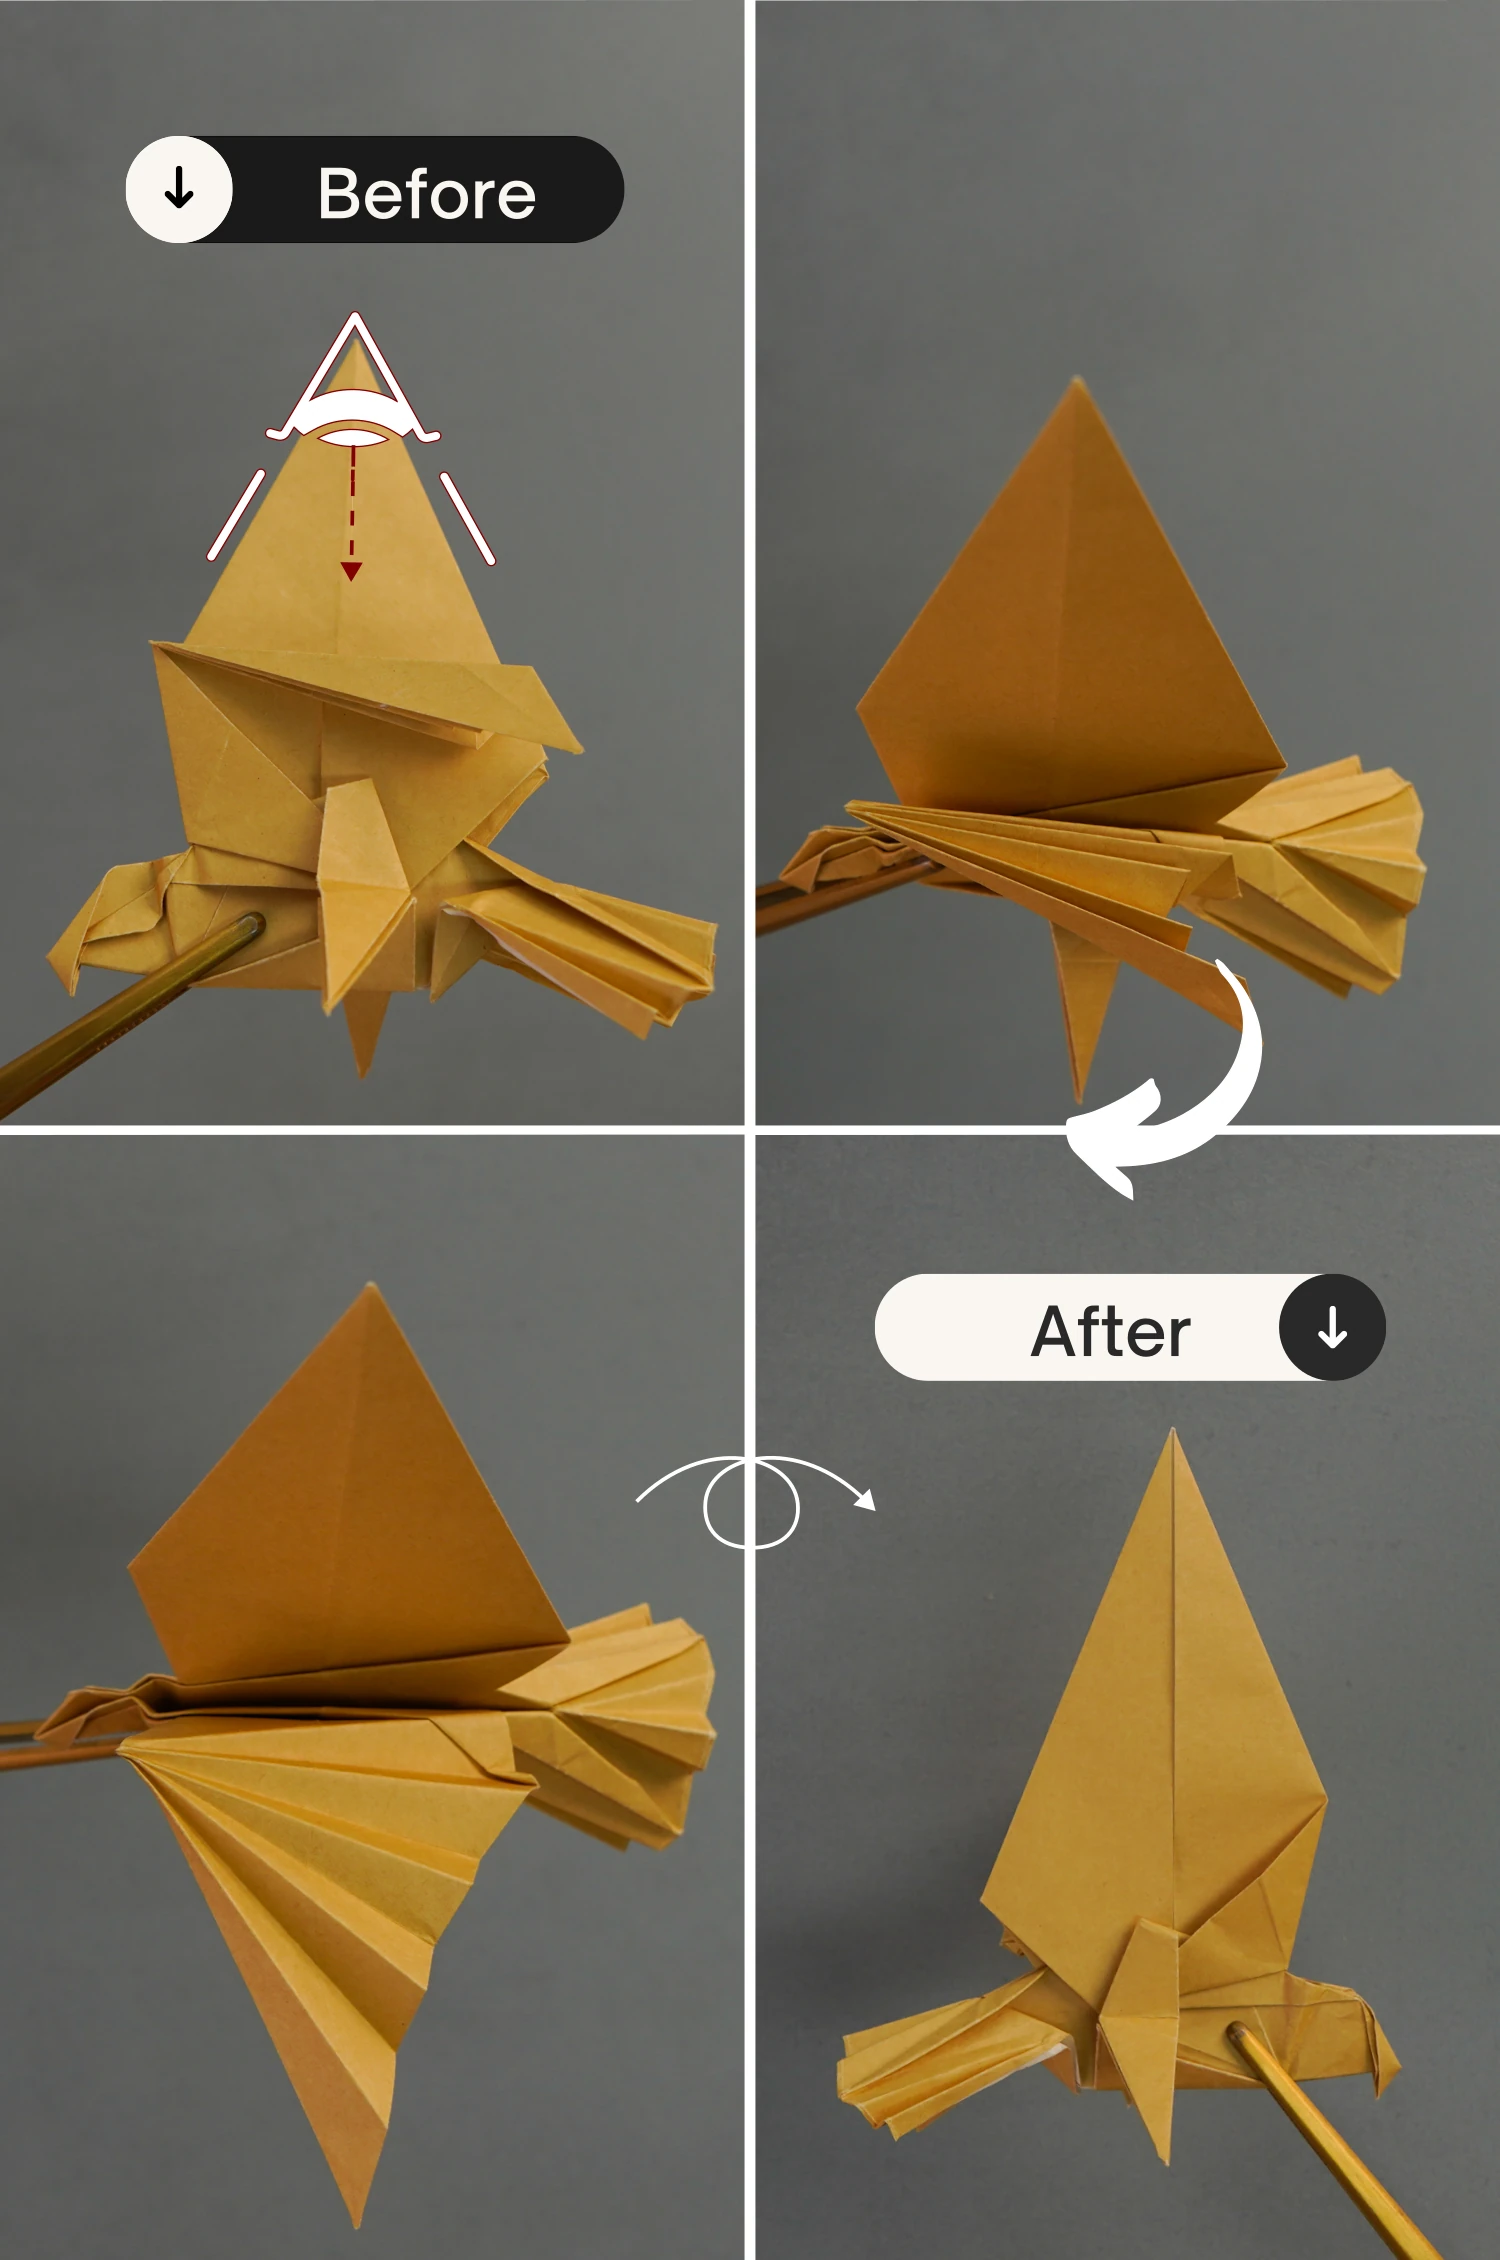
Step 29
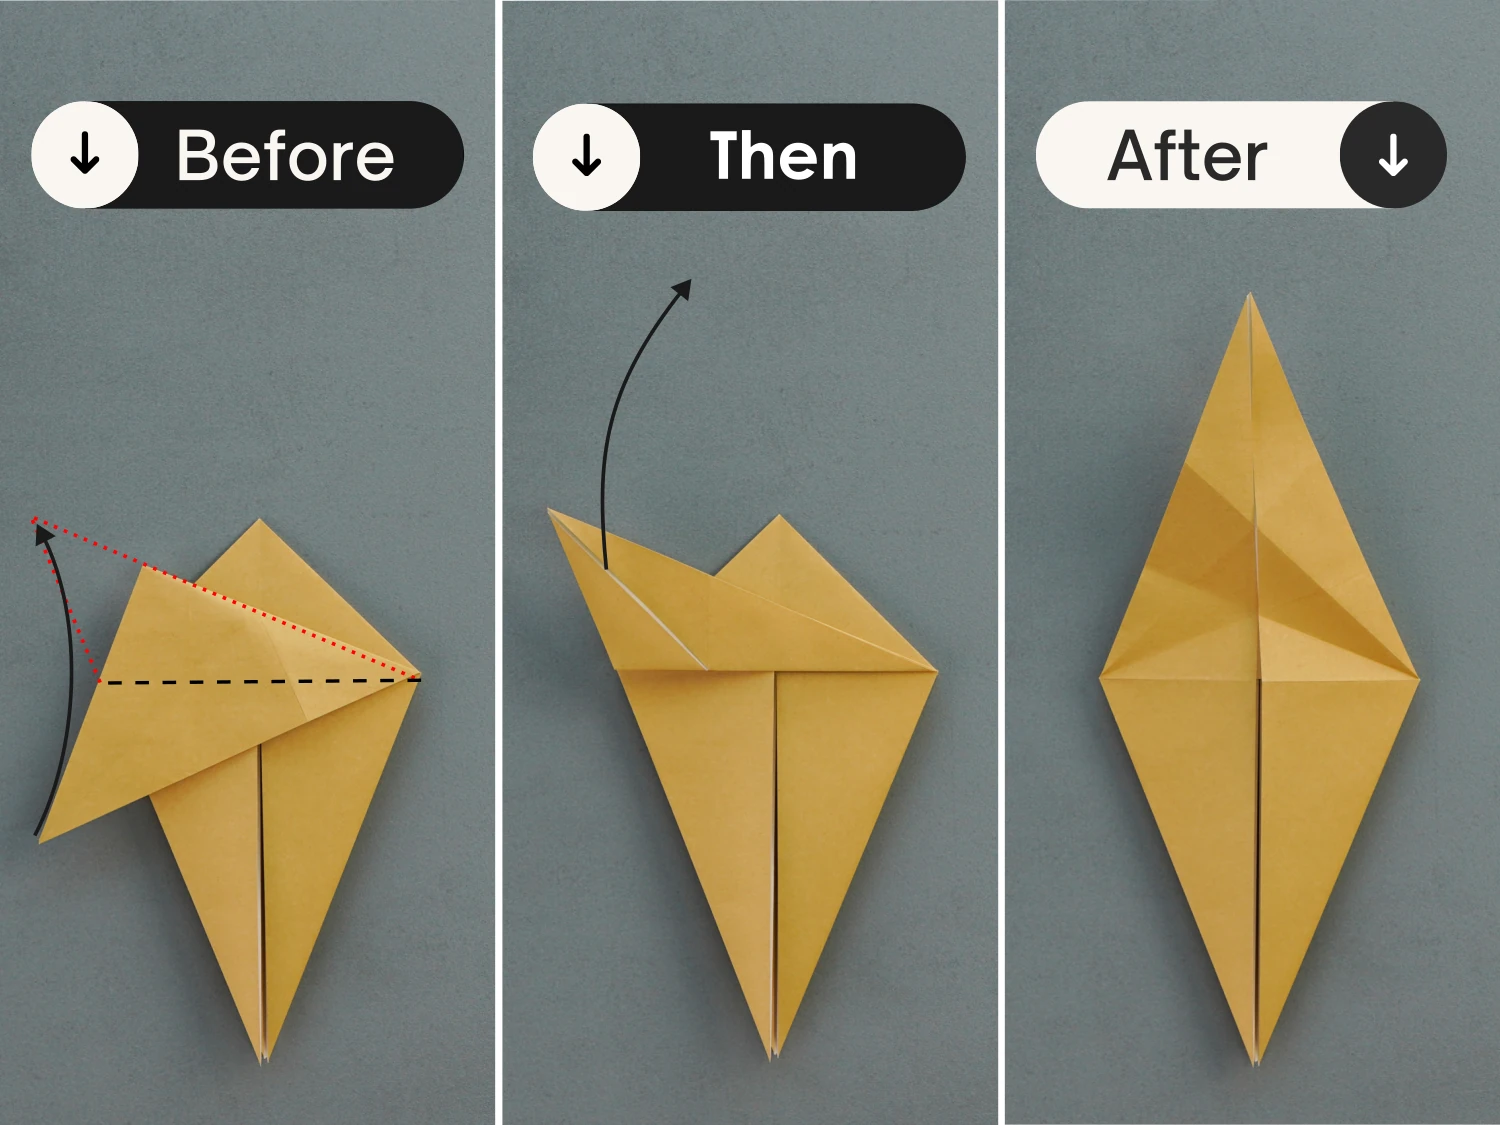
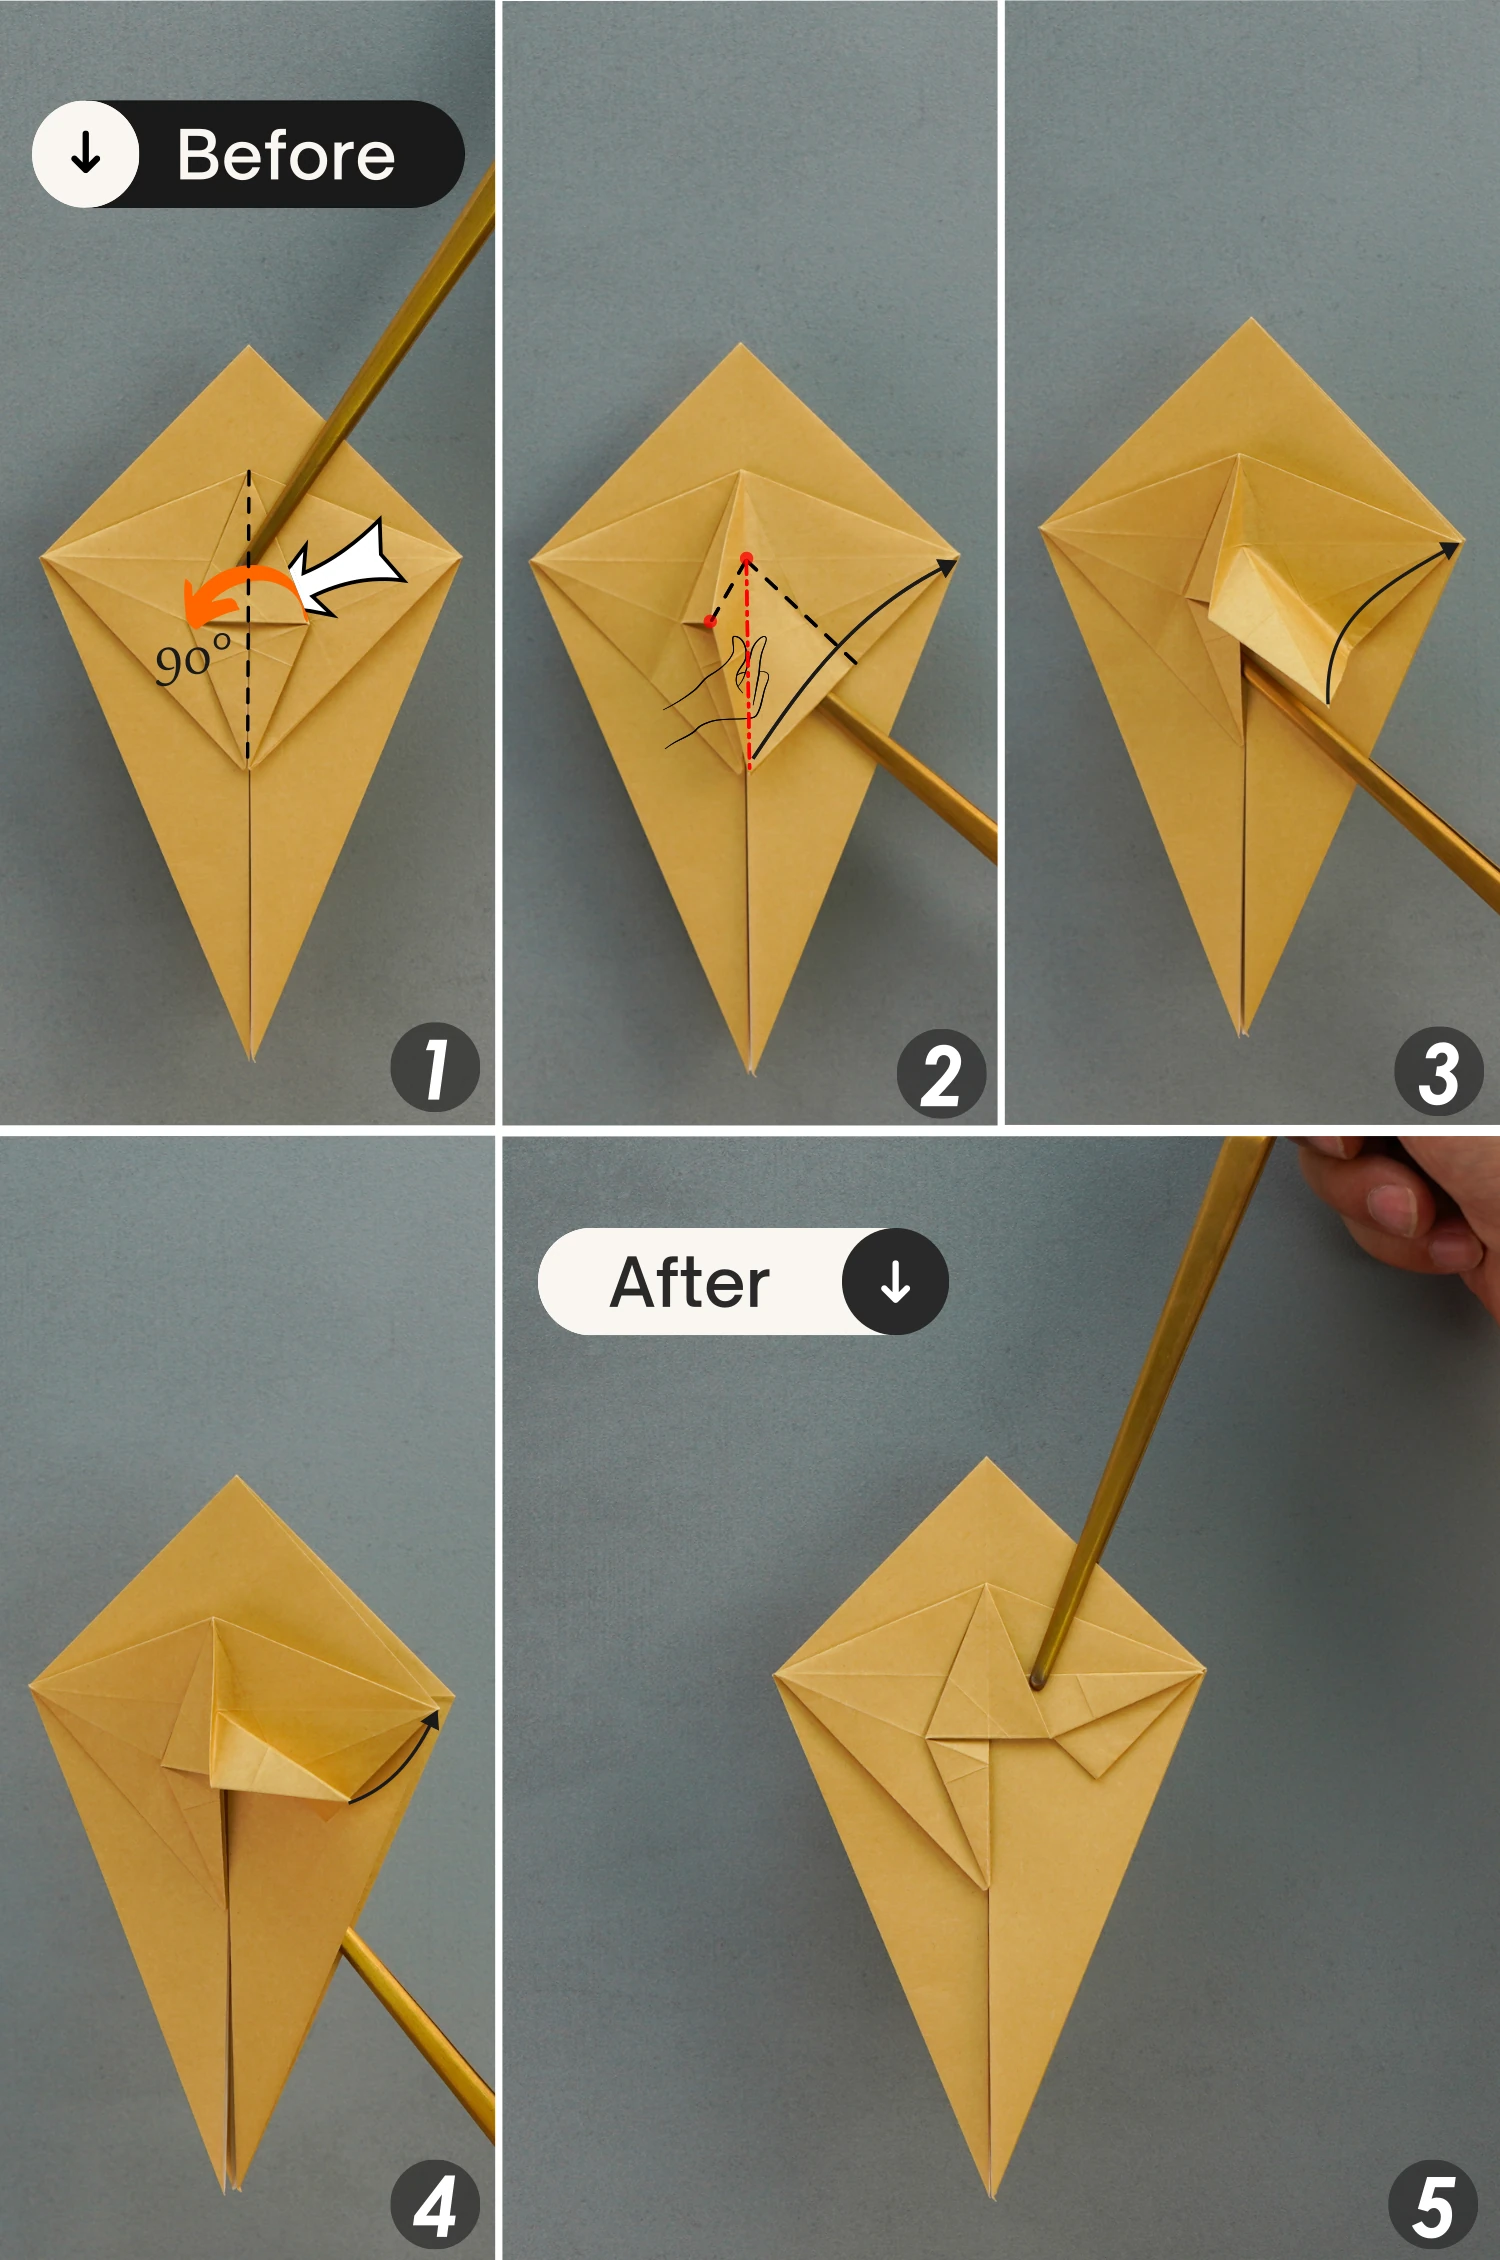
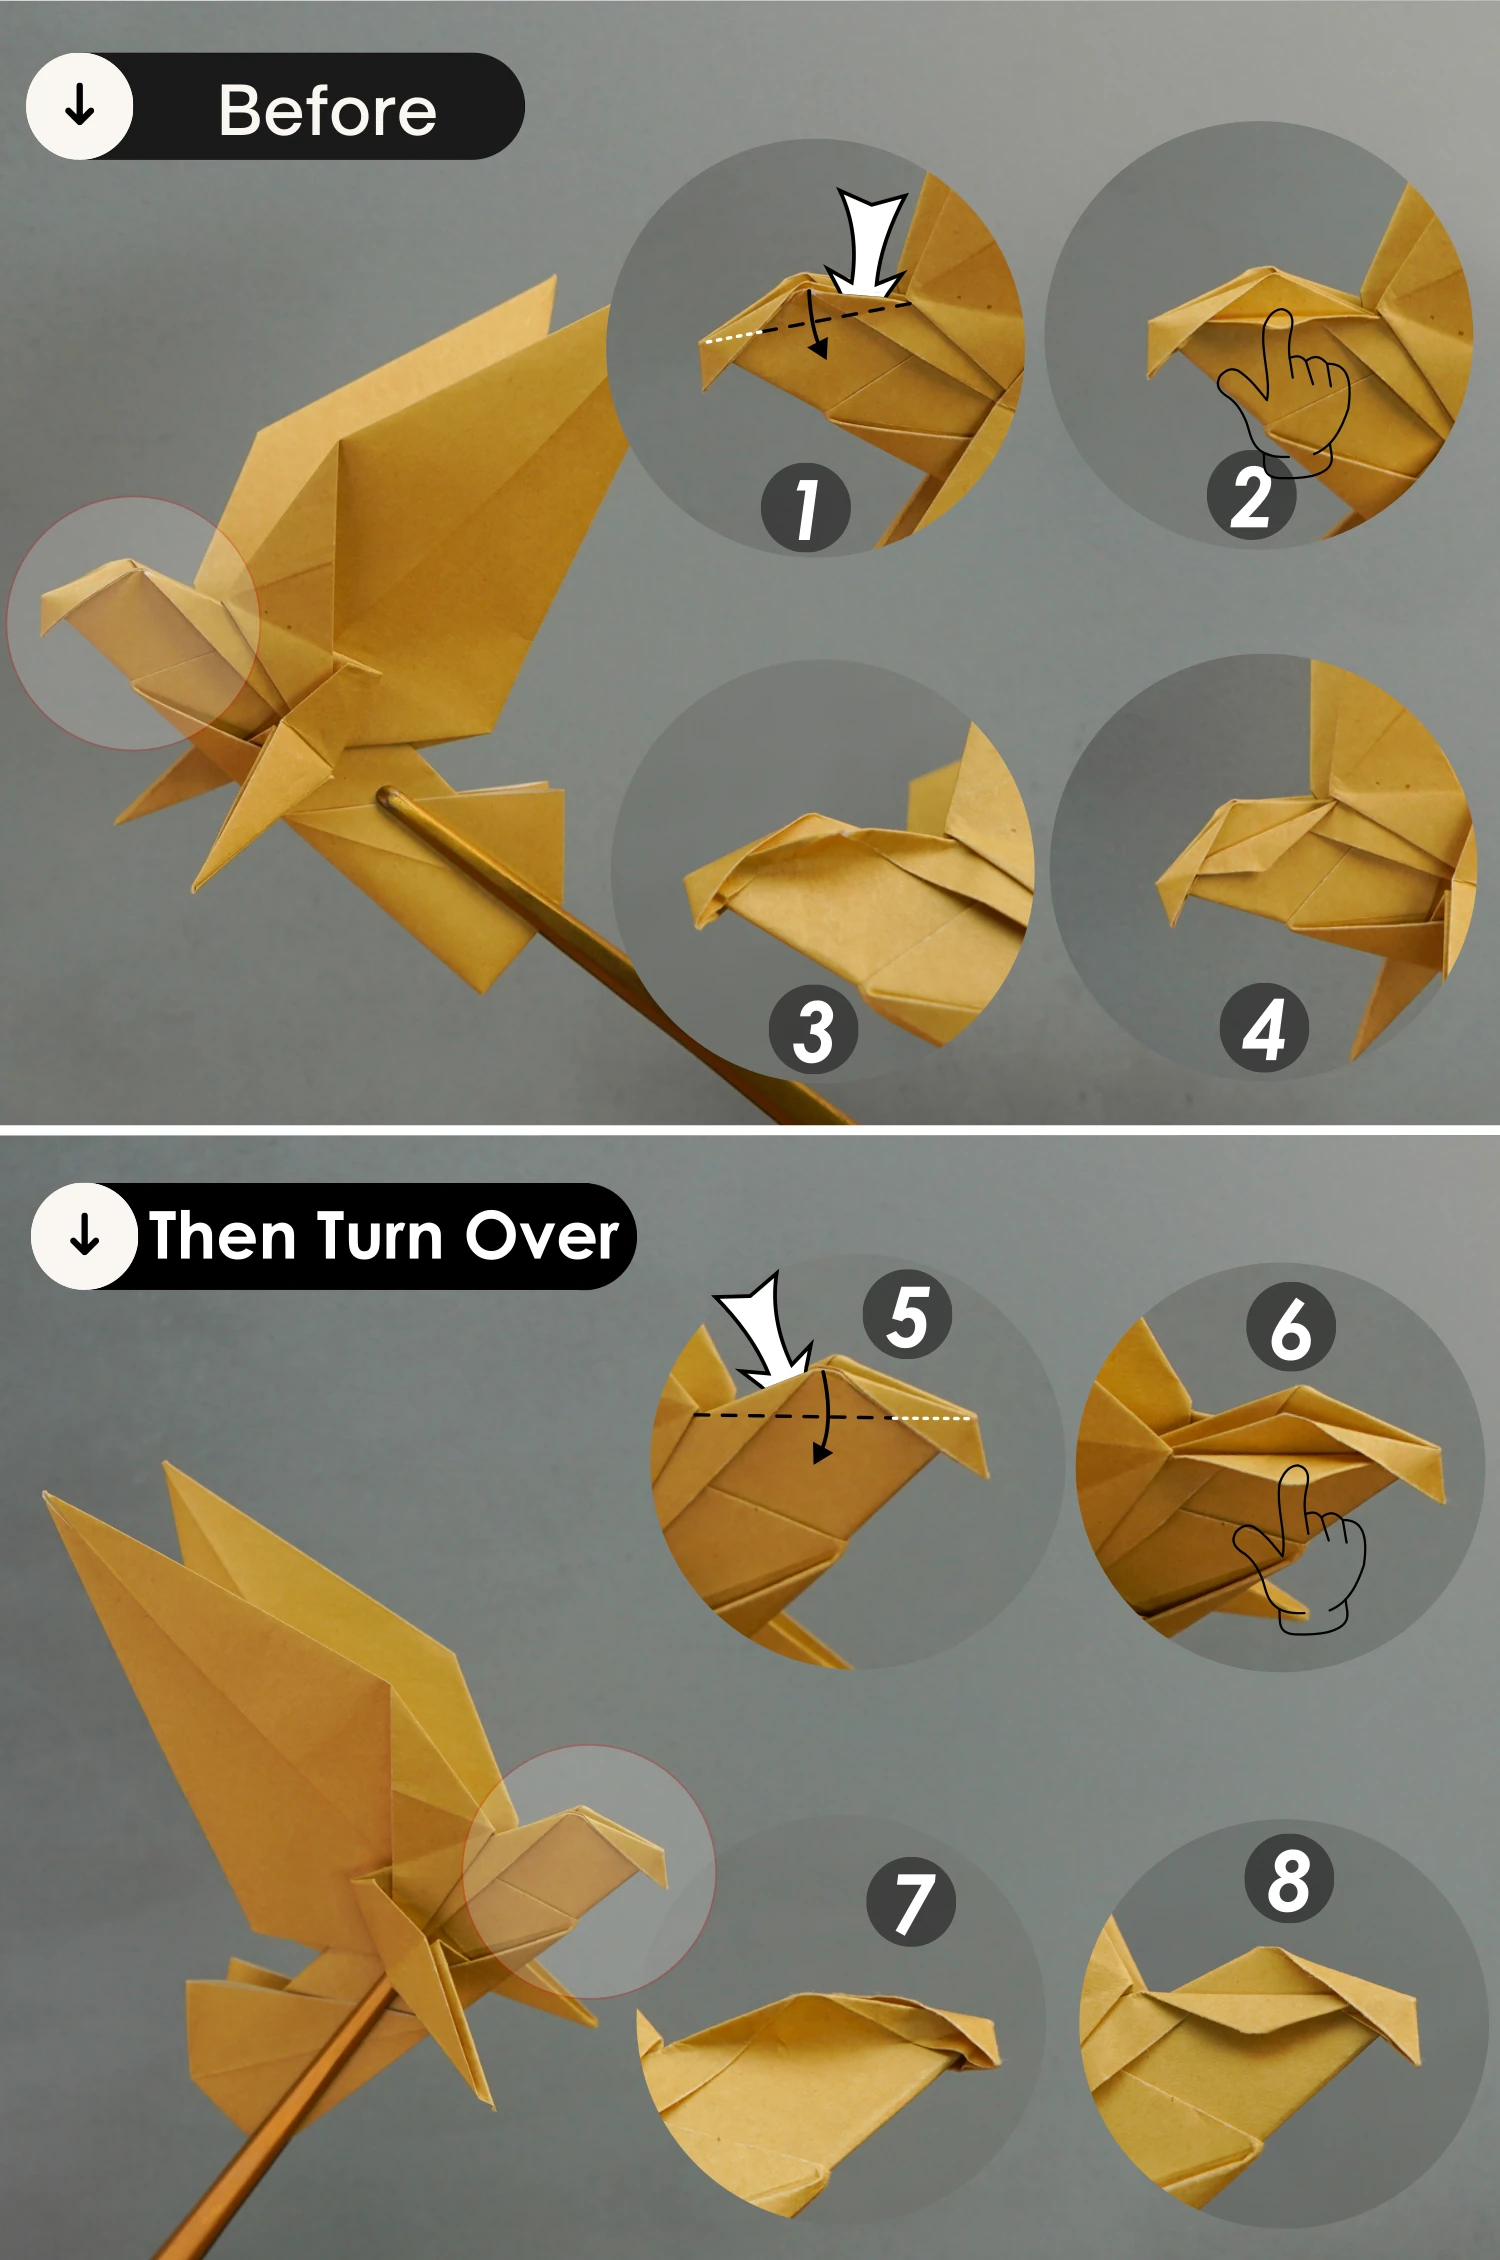
Flip the paper over vertically, and fold the right corner of the top layer to the left diagonally along the vertical crease.
Step 30
Take the top layer, shape its vertical crease, and fold it up to align with the left section of the horizontal crease, the right corner of the paper will be lifted as you do this, then press it down to meet the left corner of the paper, make sure that the standing surface will be flattened upwards. These steps will be presented in the previous four pictures.
Next, fold the left part to the right along the vertical crease.
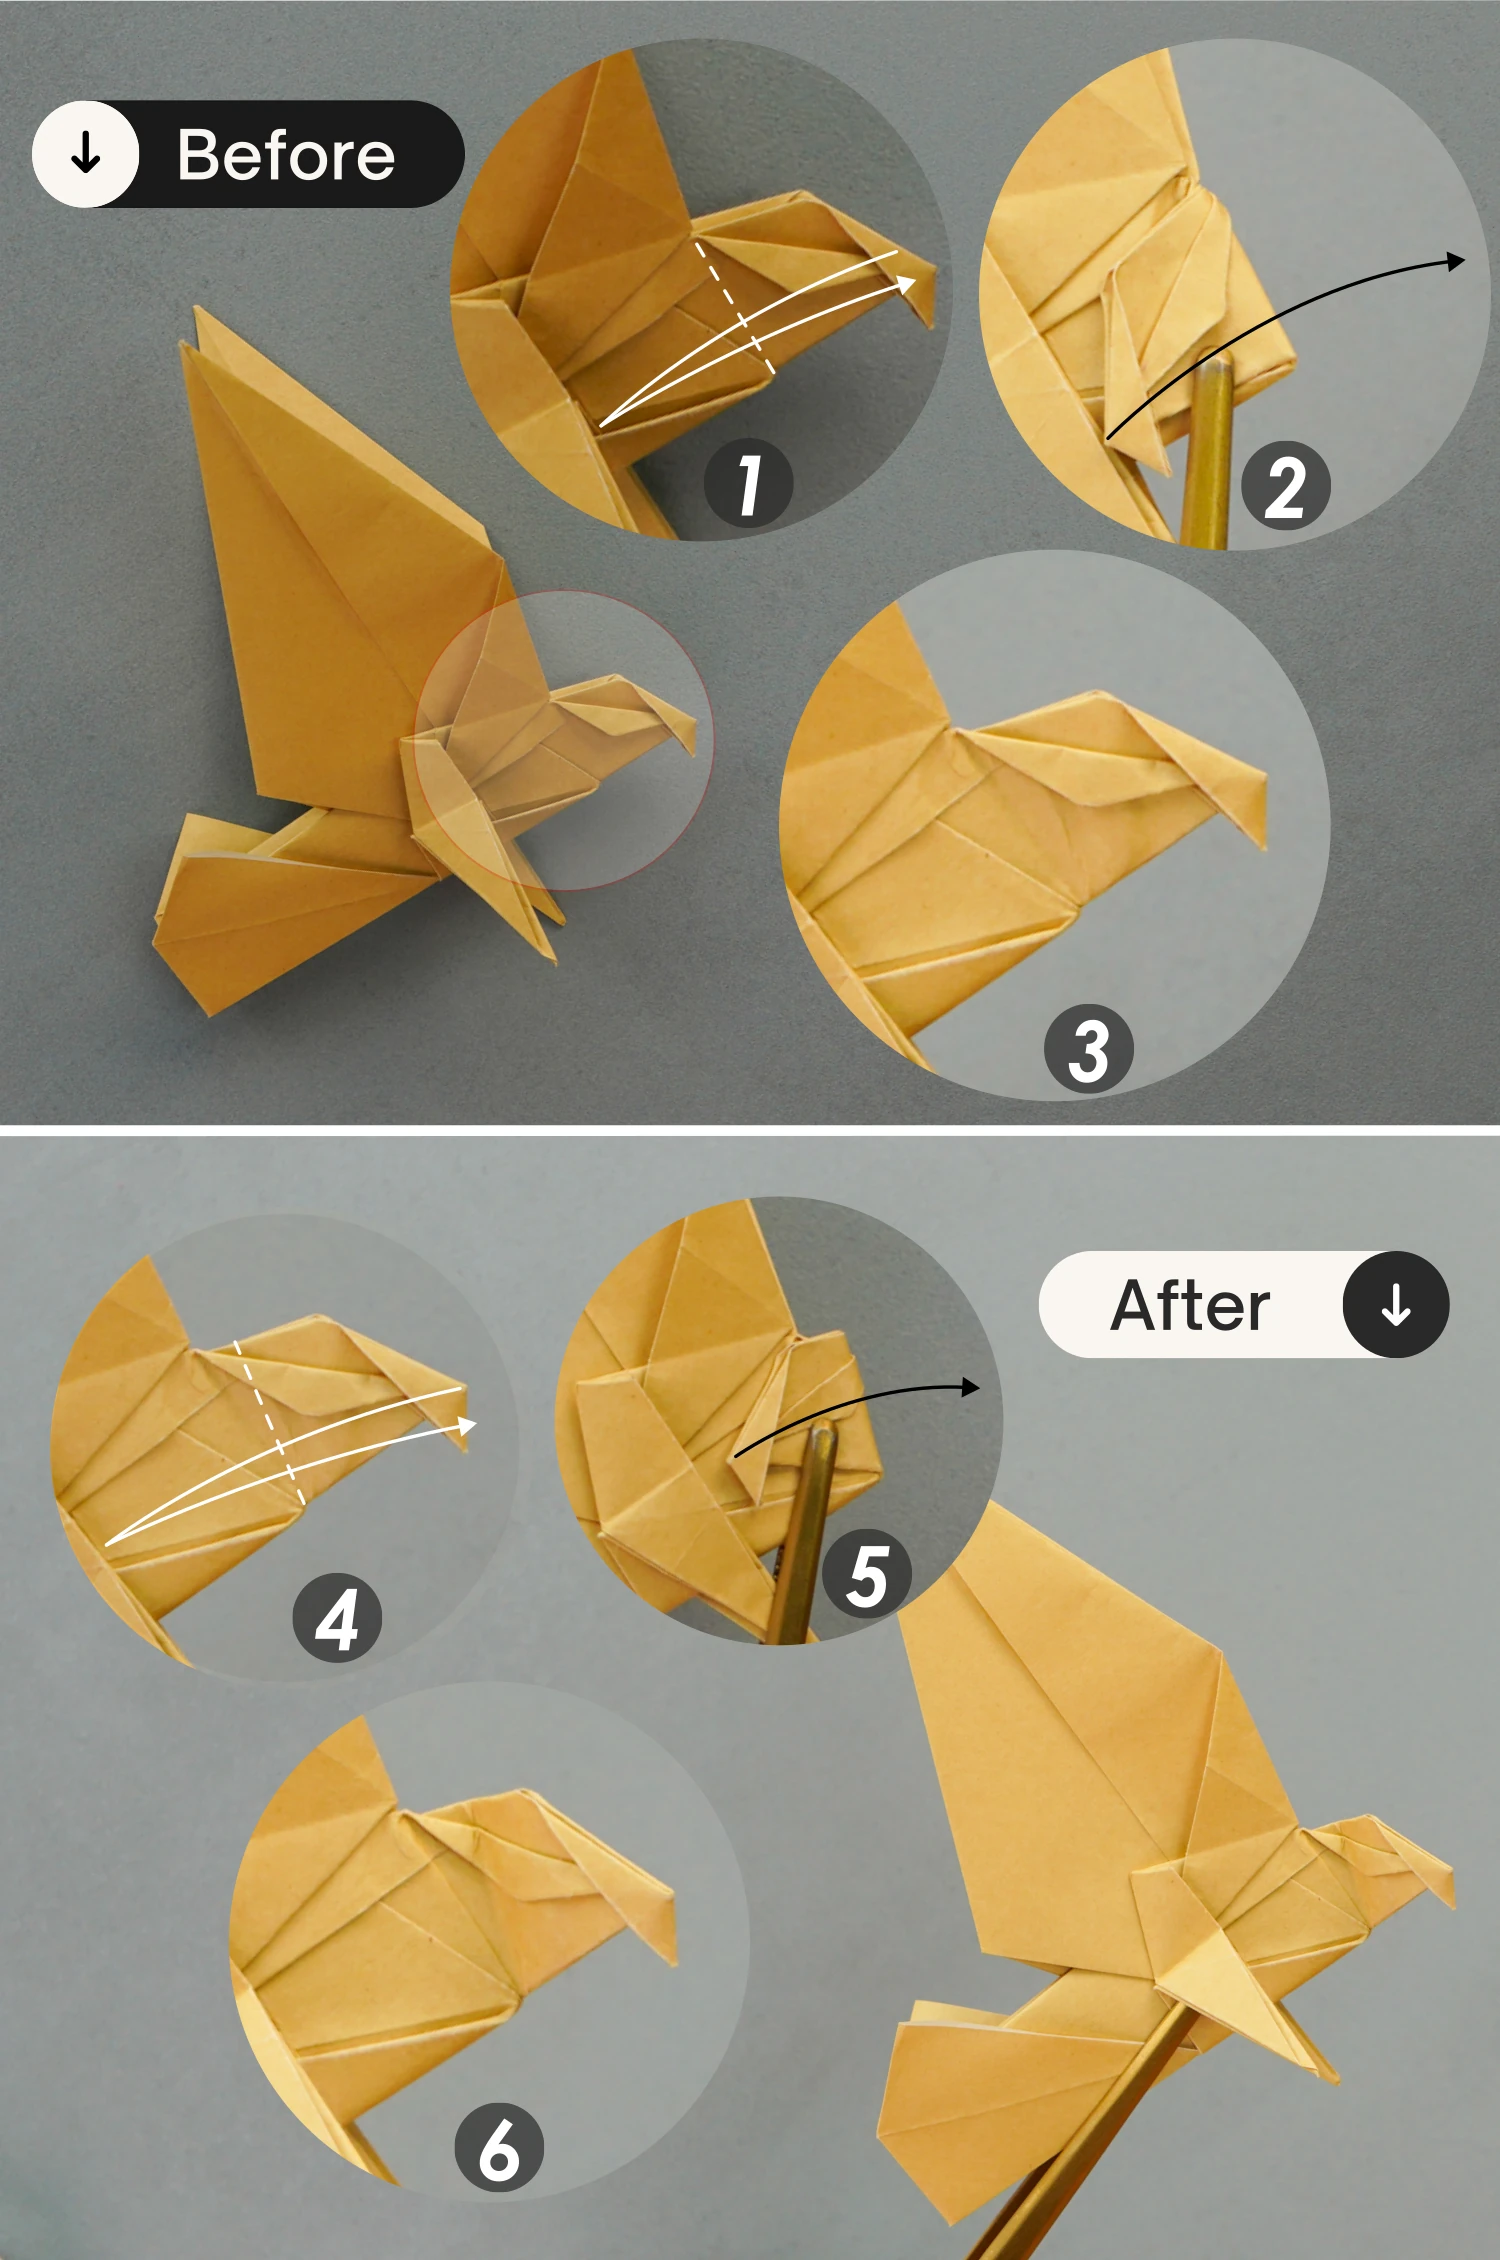
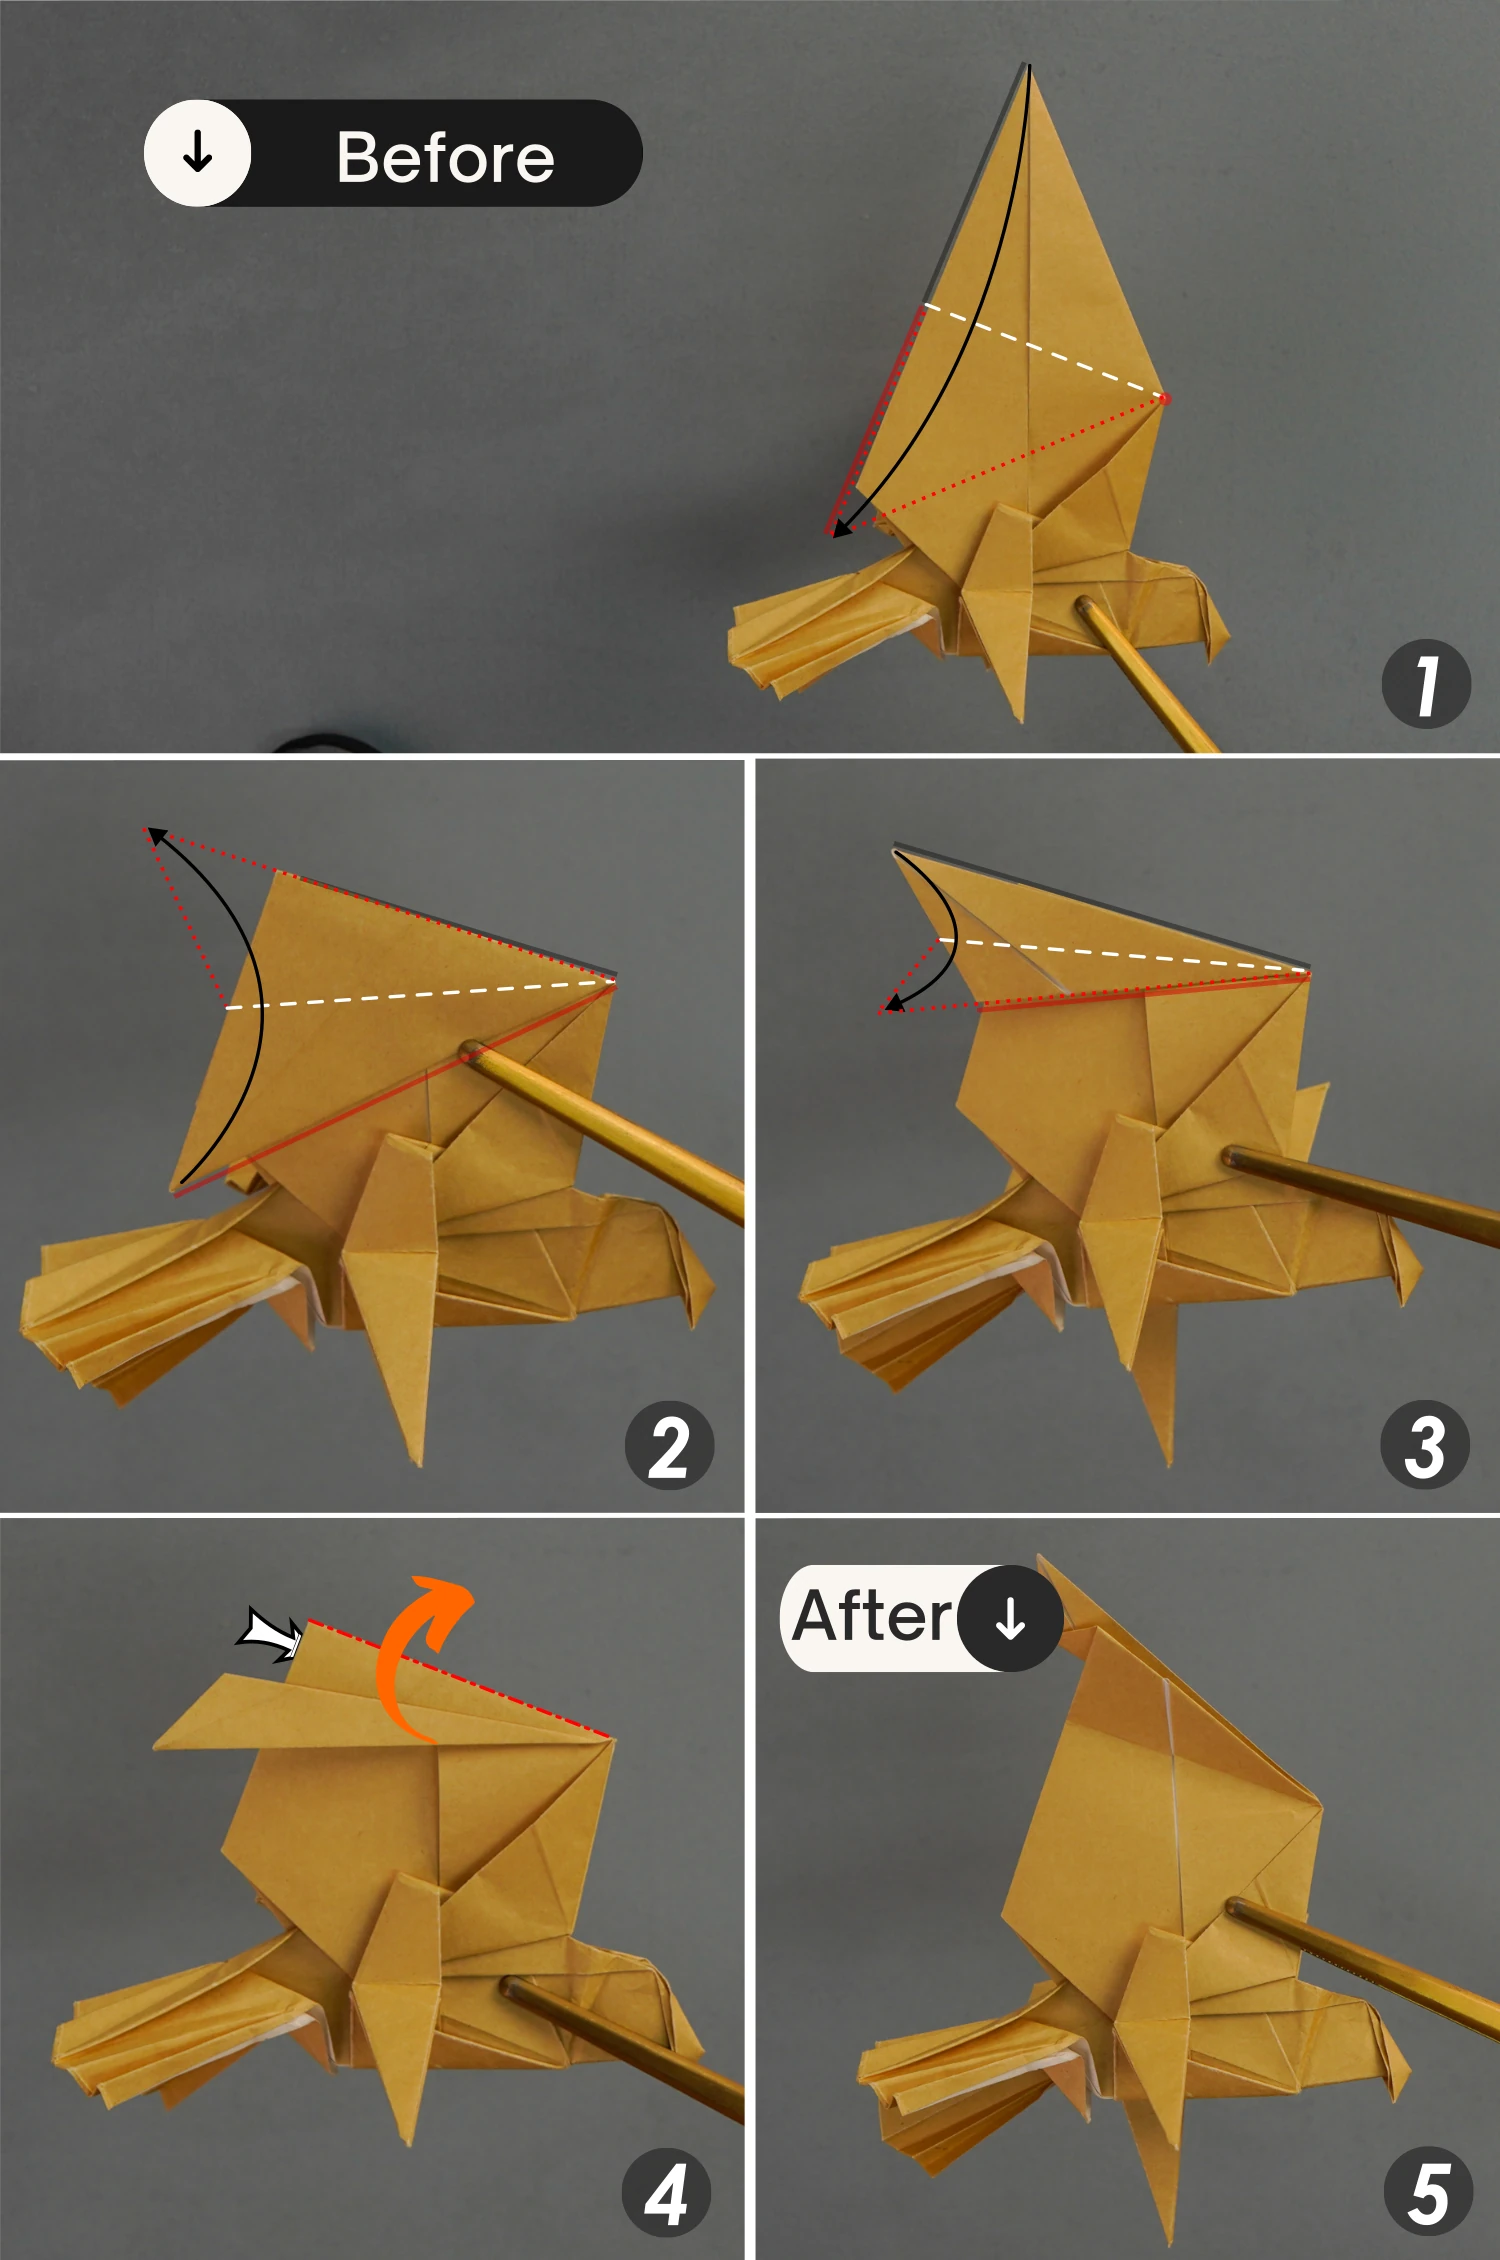
Step 31
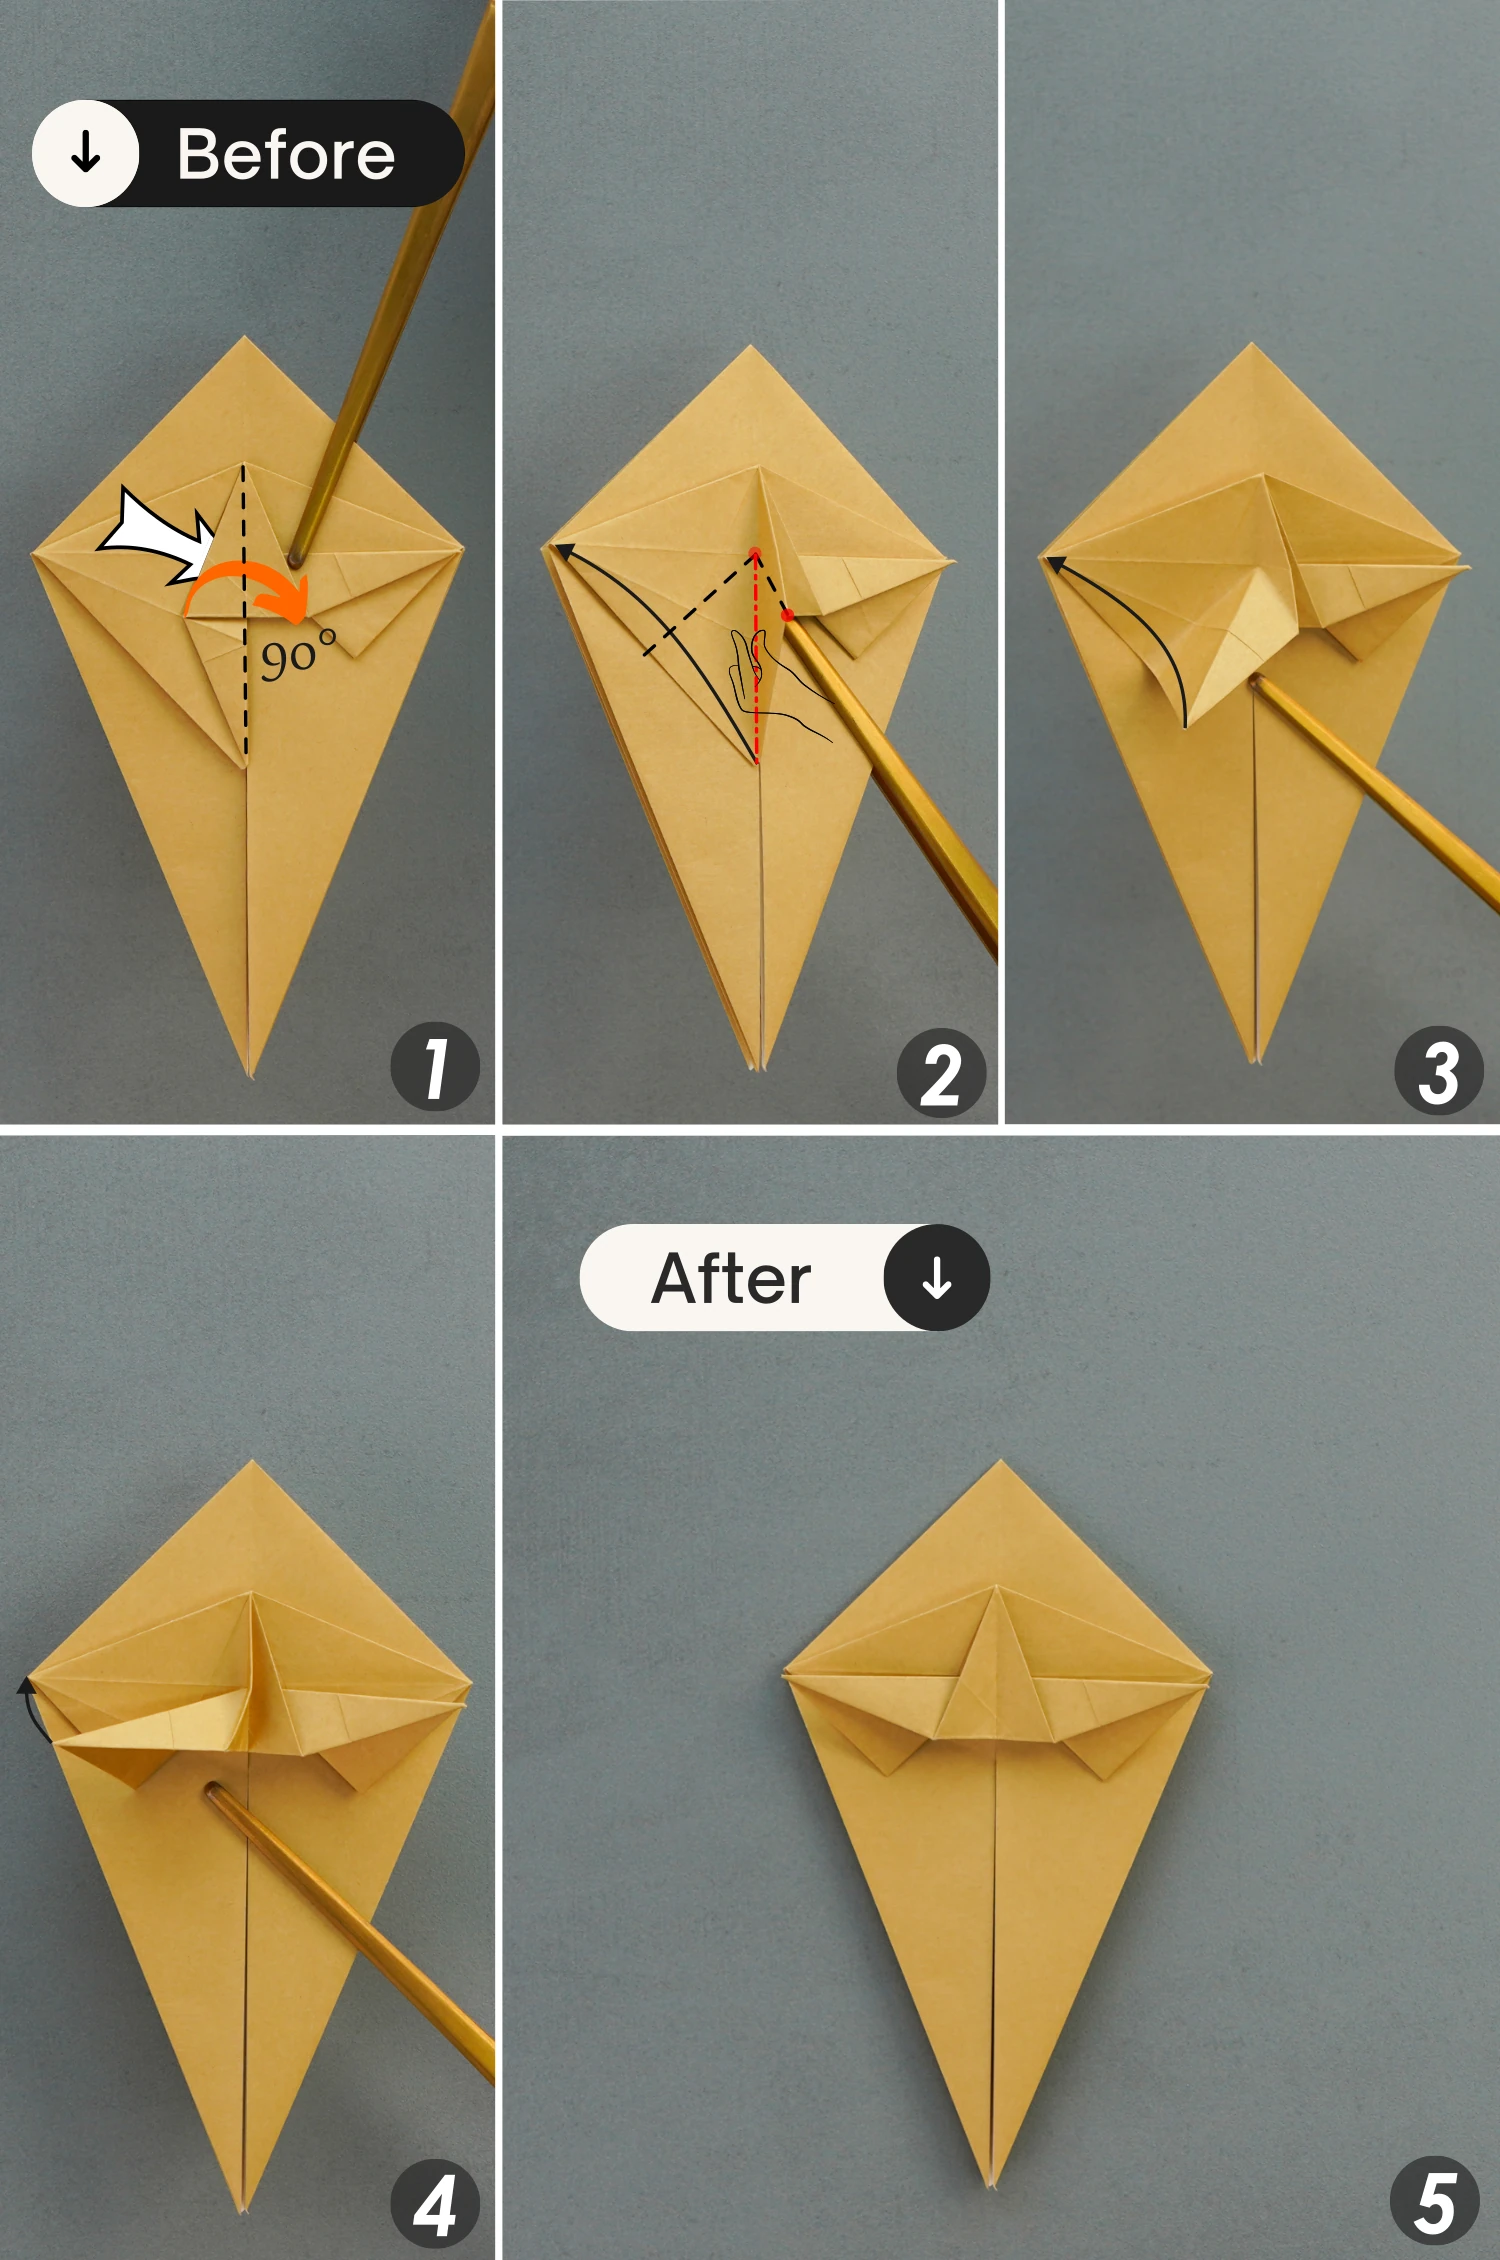
Fold the left corner of the top layer to the right diagonally along the vertical crease.
Step 32
The same to step 30, shape the bottom section of the vertical crease and fold it up to align with the right section of the horizontal crease, the left corner of the paper will be lifted as you do this, then press it down to meet the right corner of the paper, as you can see in the first four pictures.
Finally, fold the right part to the left along the vertical crease.
Step 33
Flip the paper over.
Step 34
Fold the right small corner to the left along the black dotted line as the first picture shows, then fold the right corner under the corner you just folded to the left to meet the red spot, as the second and third pictures show.
Next, squash the corner along the dotted line and fold the small corner back to the original position.
Step 35
Similarly, fold the left small corner to the right along the black dotted line as the first picture shows, then fold the left corner under the corner you just folded to the right to meet the red spot, as the second and third pictures show.
Next, squash the corner along the dotted line and fold the small corner back to the original position.

Step 36
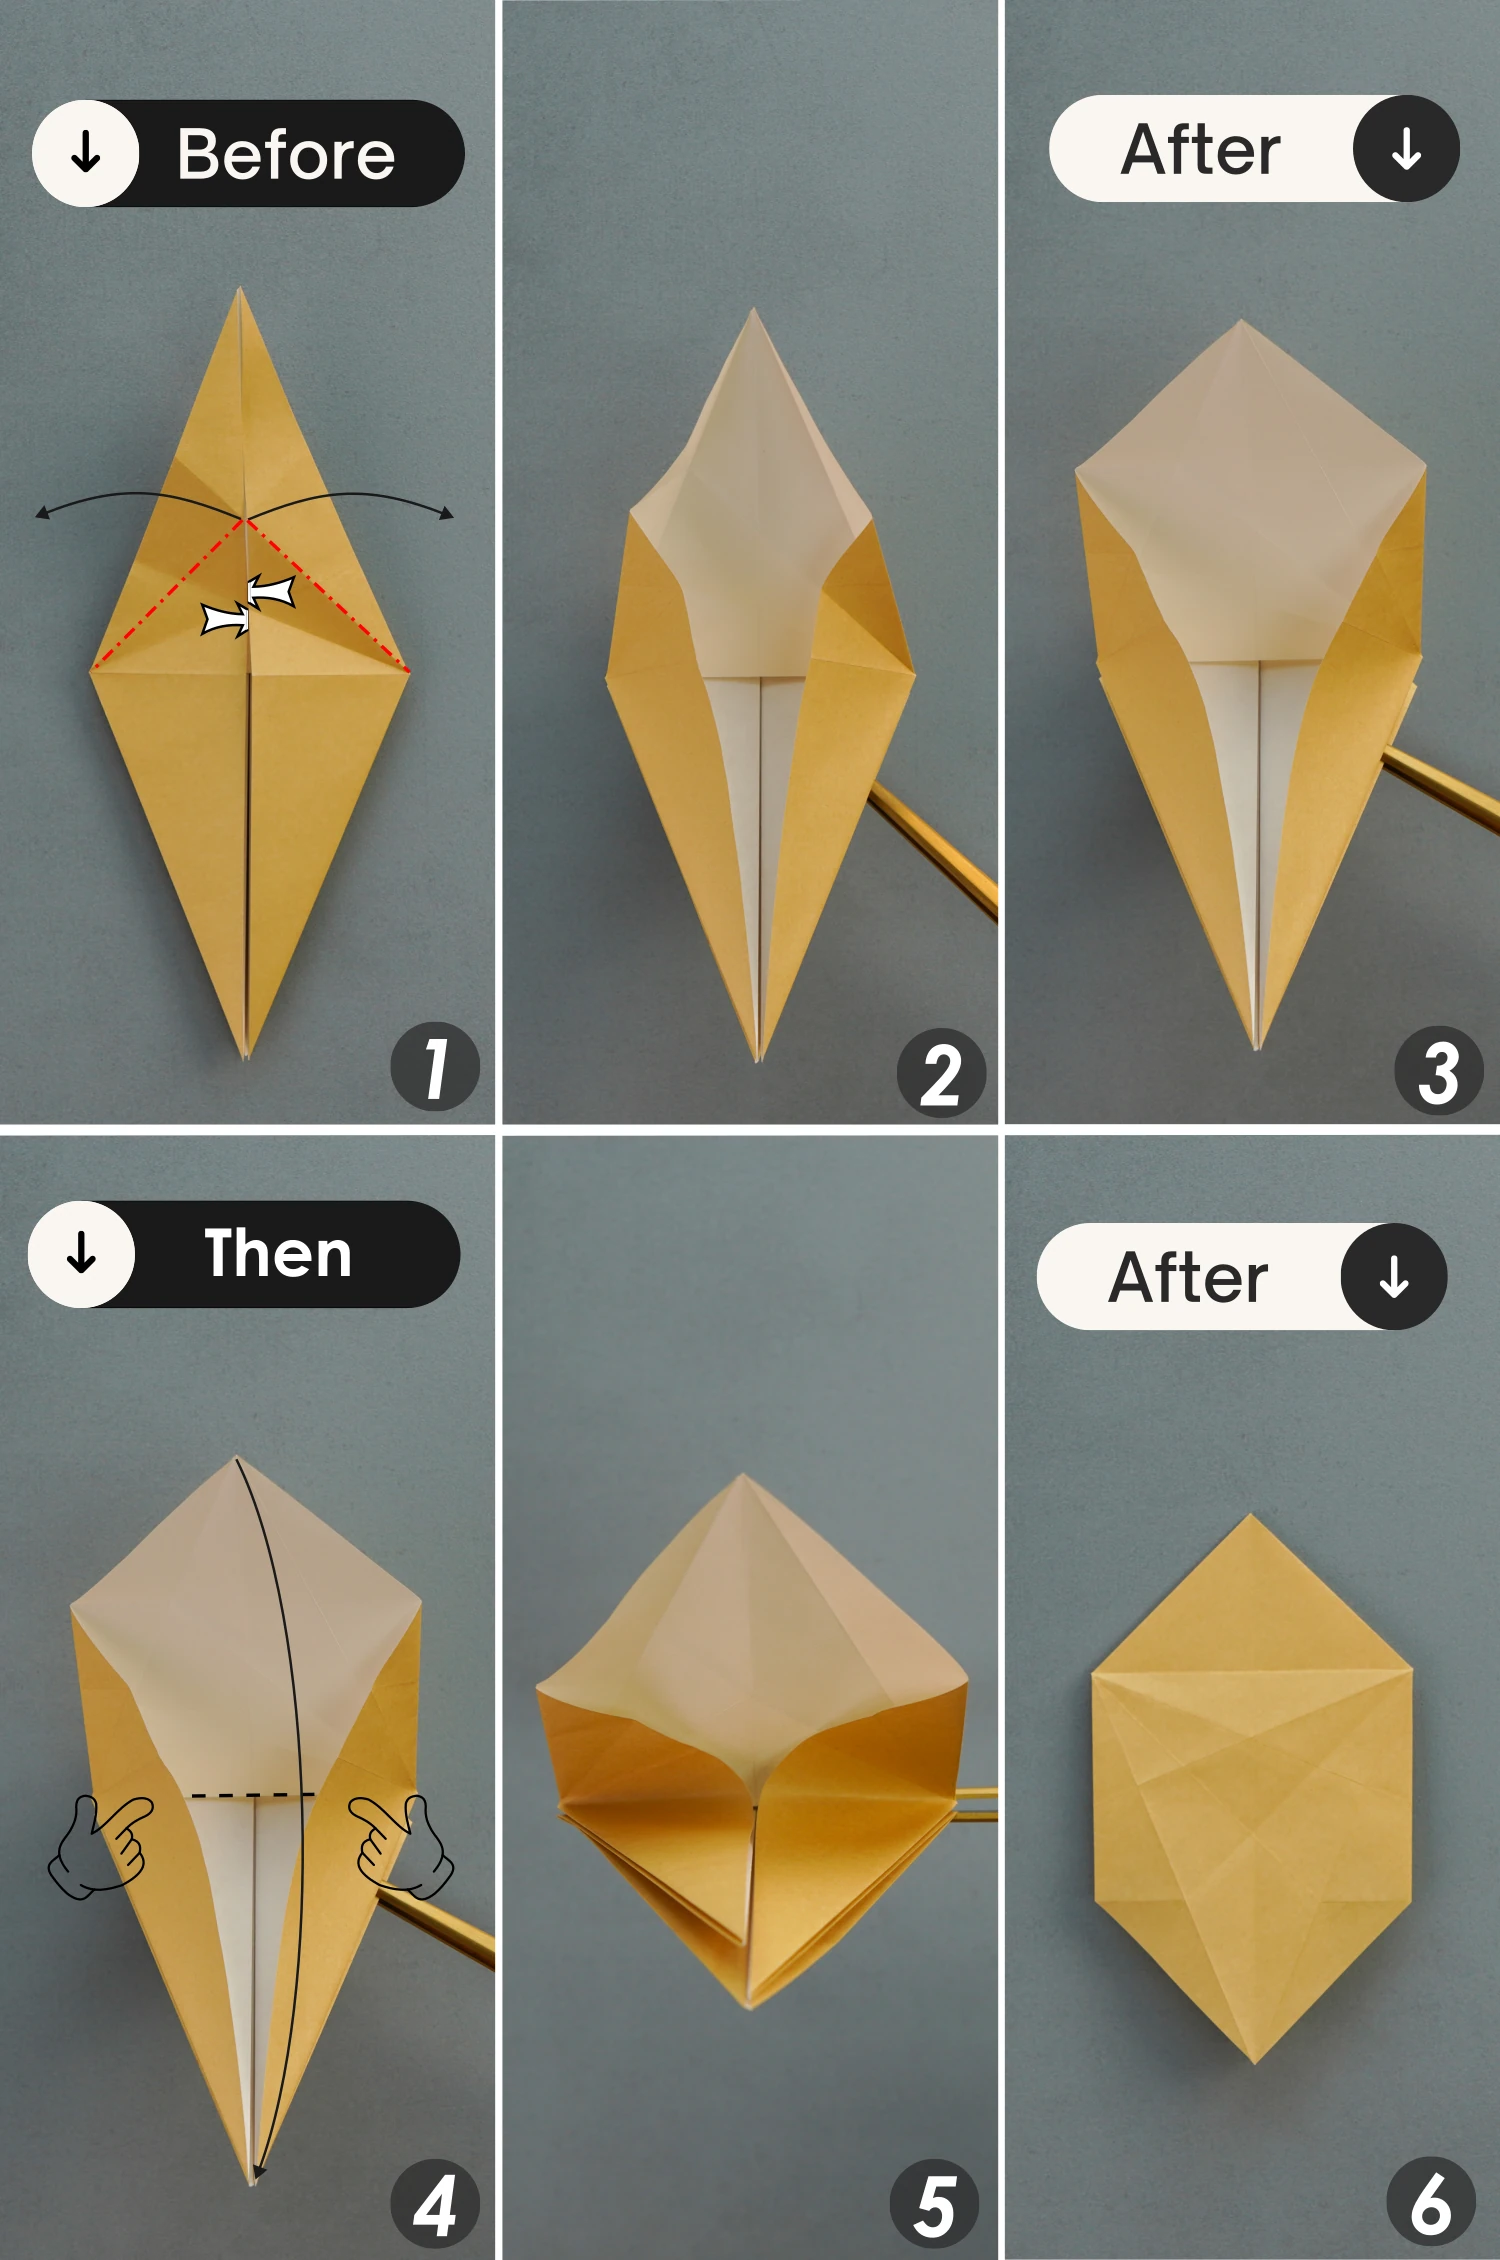
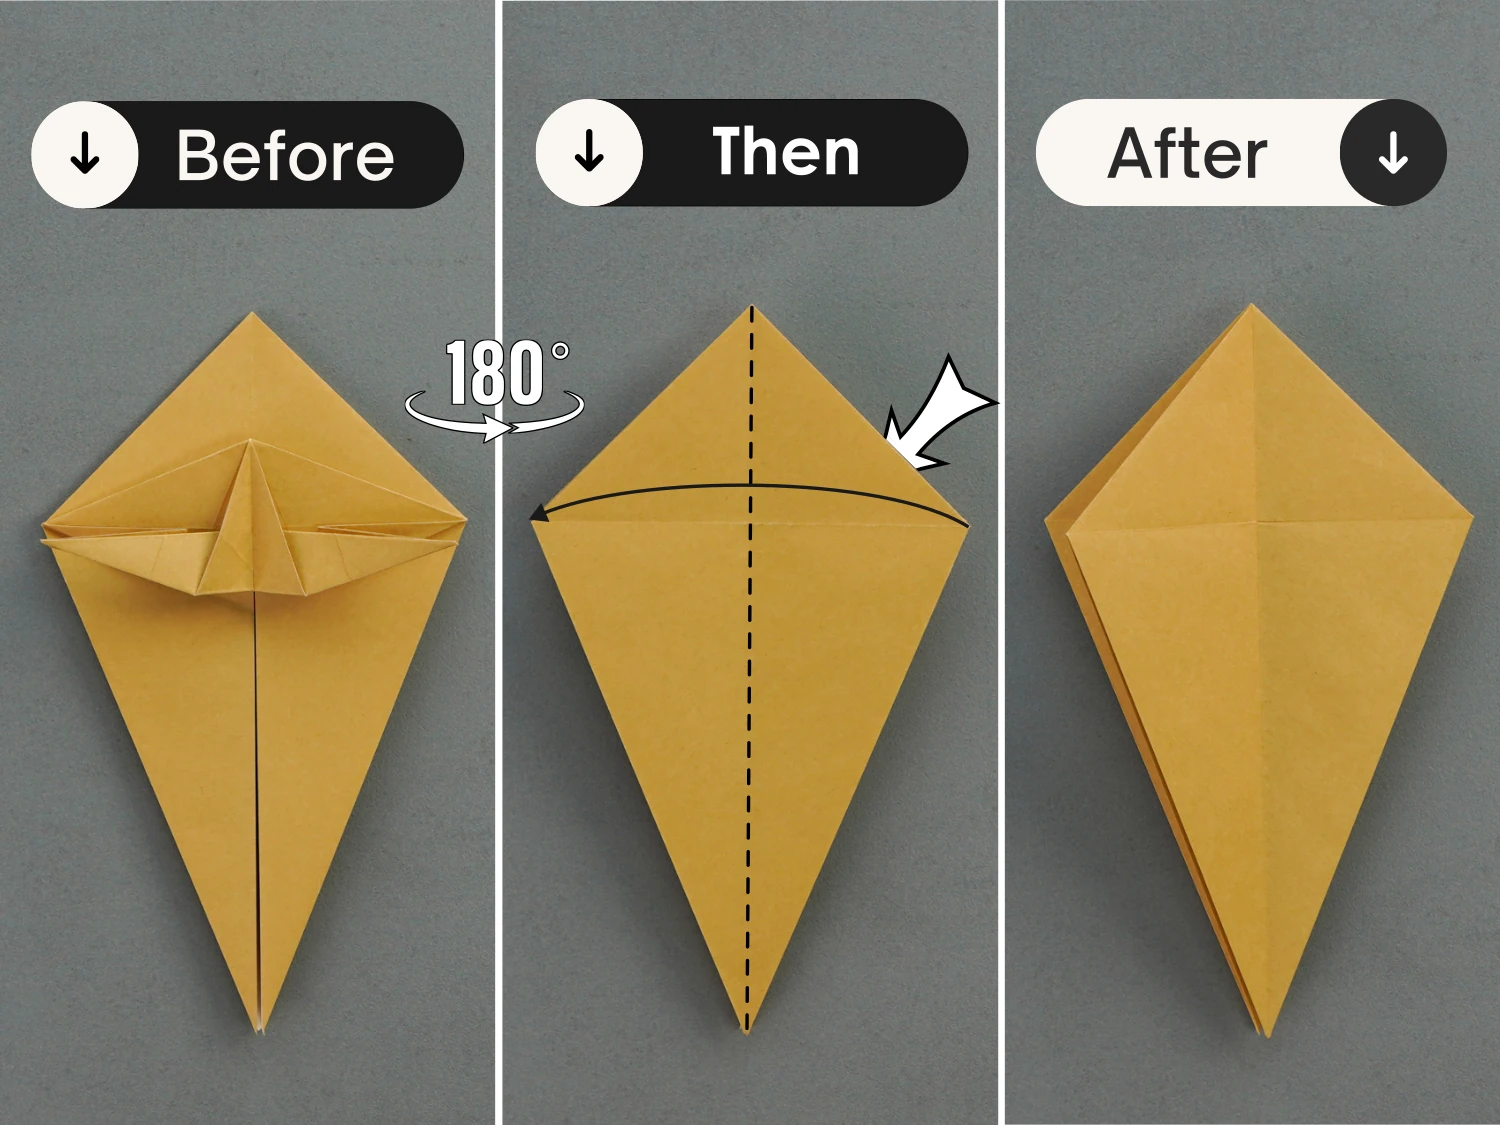
Fold the bottom point up along the dotted line to meet the middle point of the top layer, crease well then unfold.
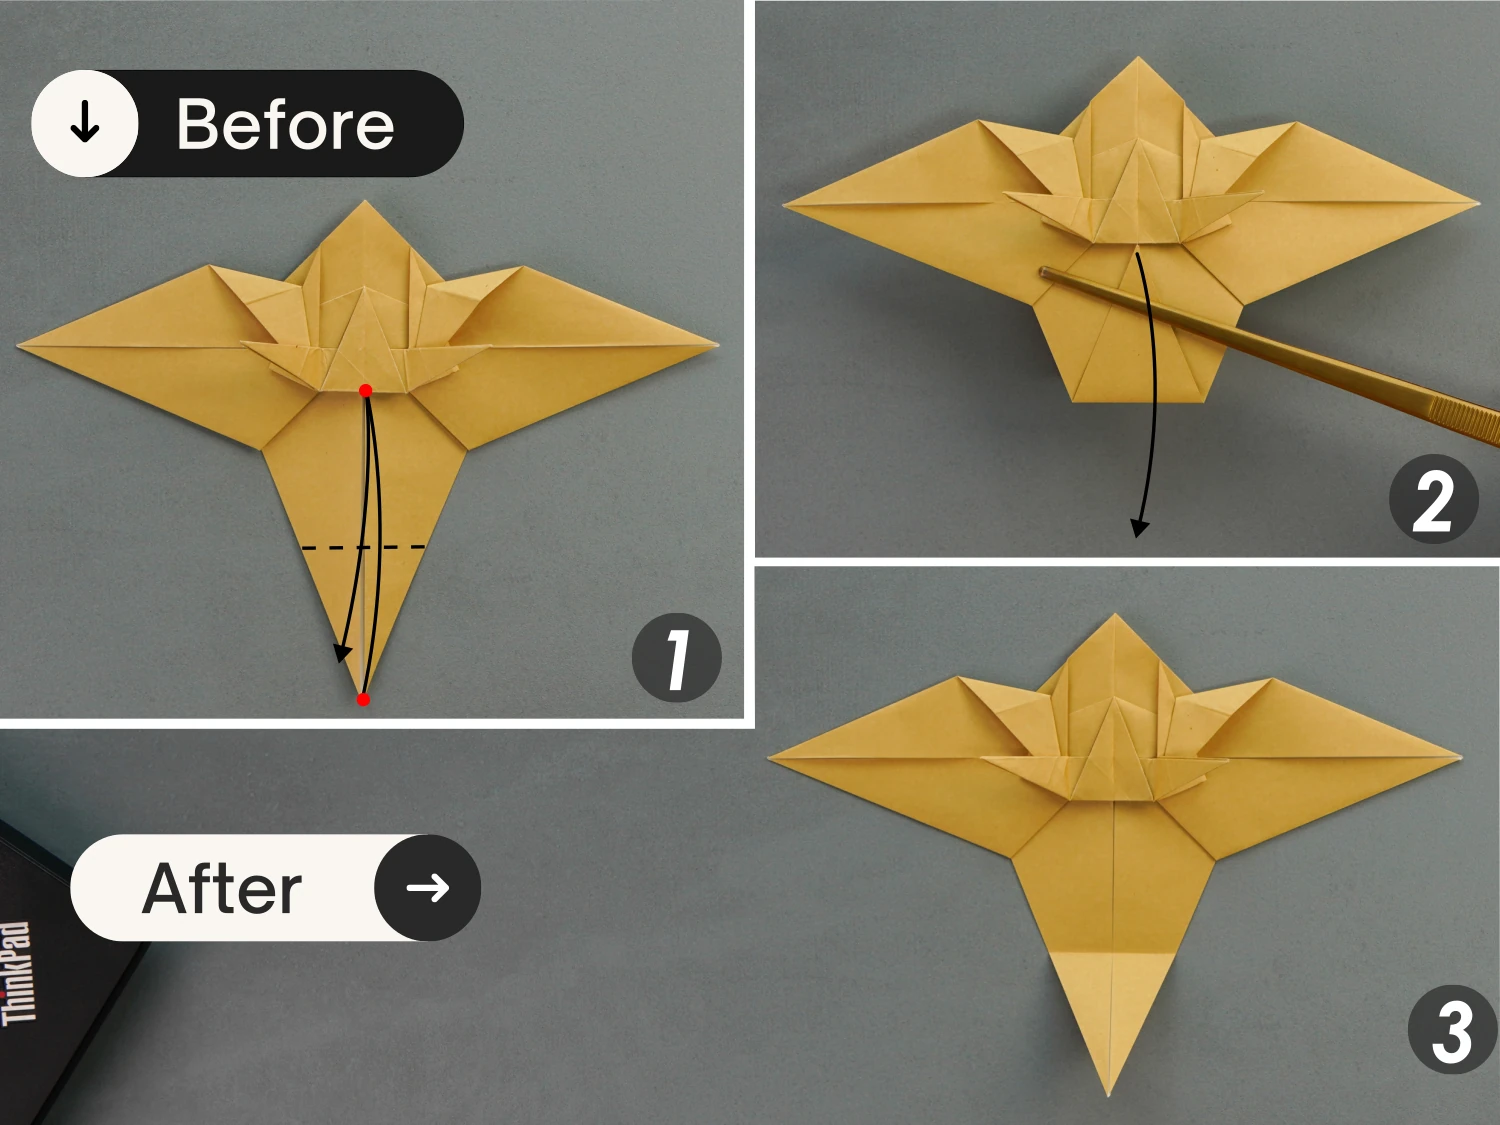
Step 37
Pull the layers to the left and right to open the bottom pocket, fold the bottom point up again along the crease you just made, and flatten the pocket.
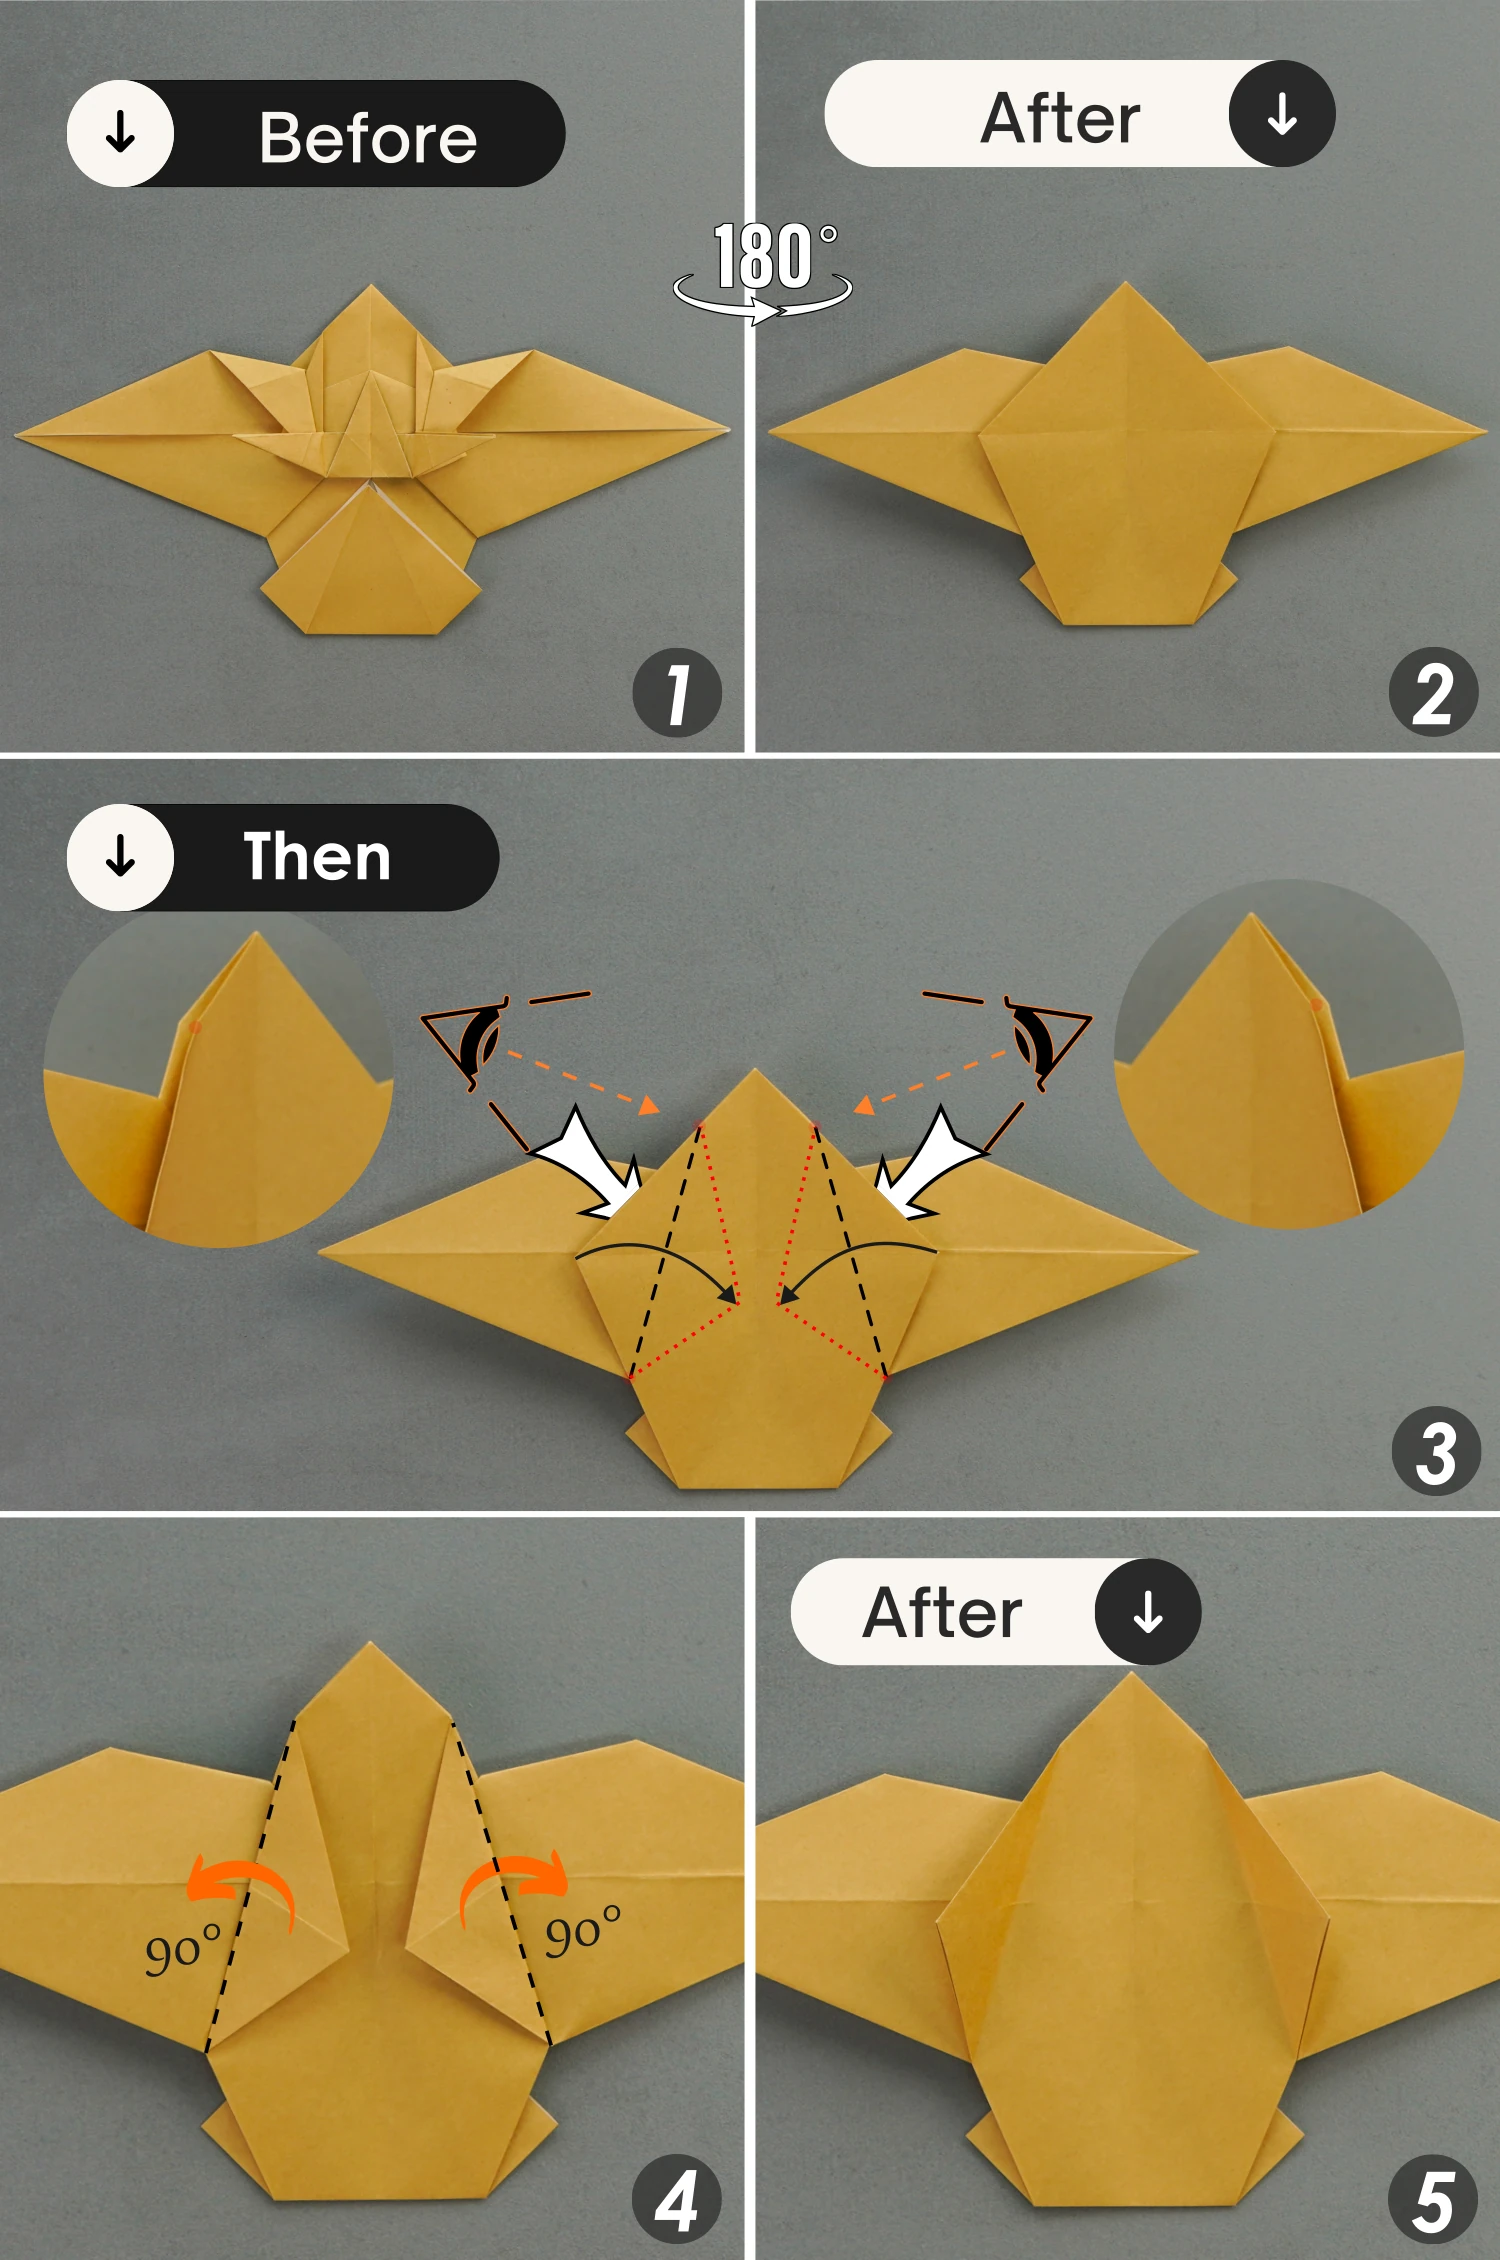
Step 38
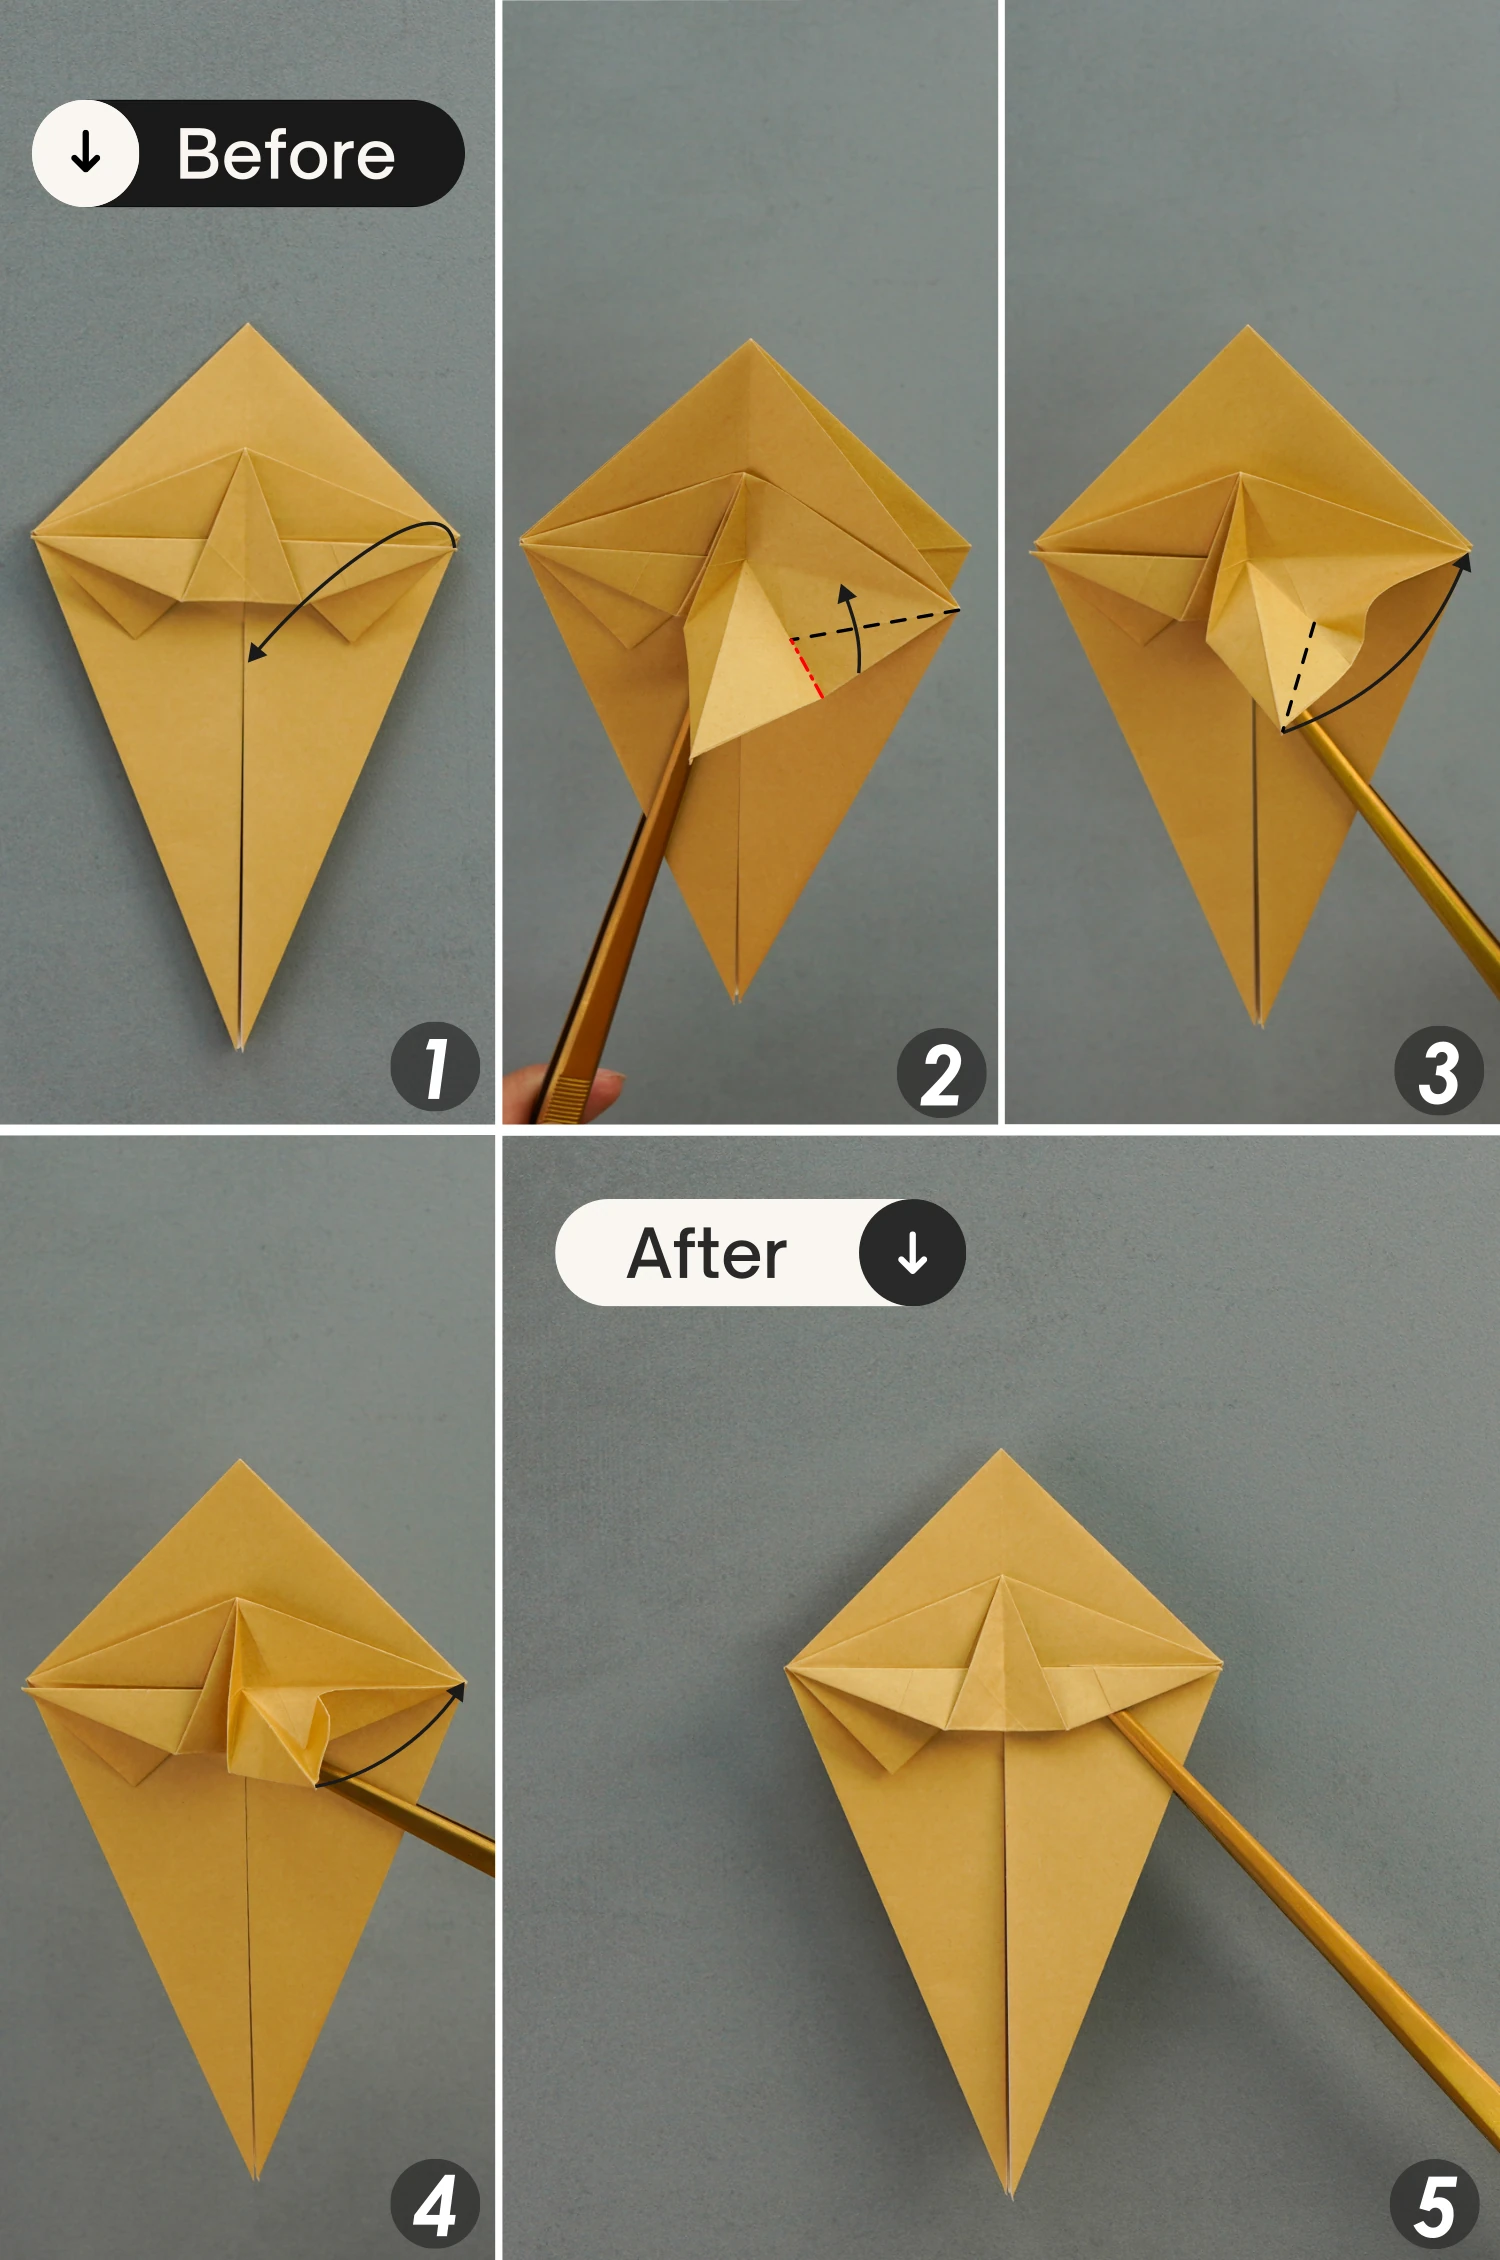
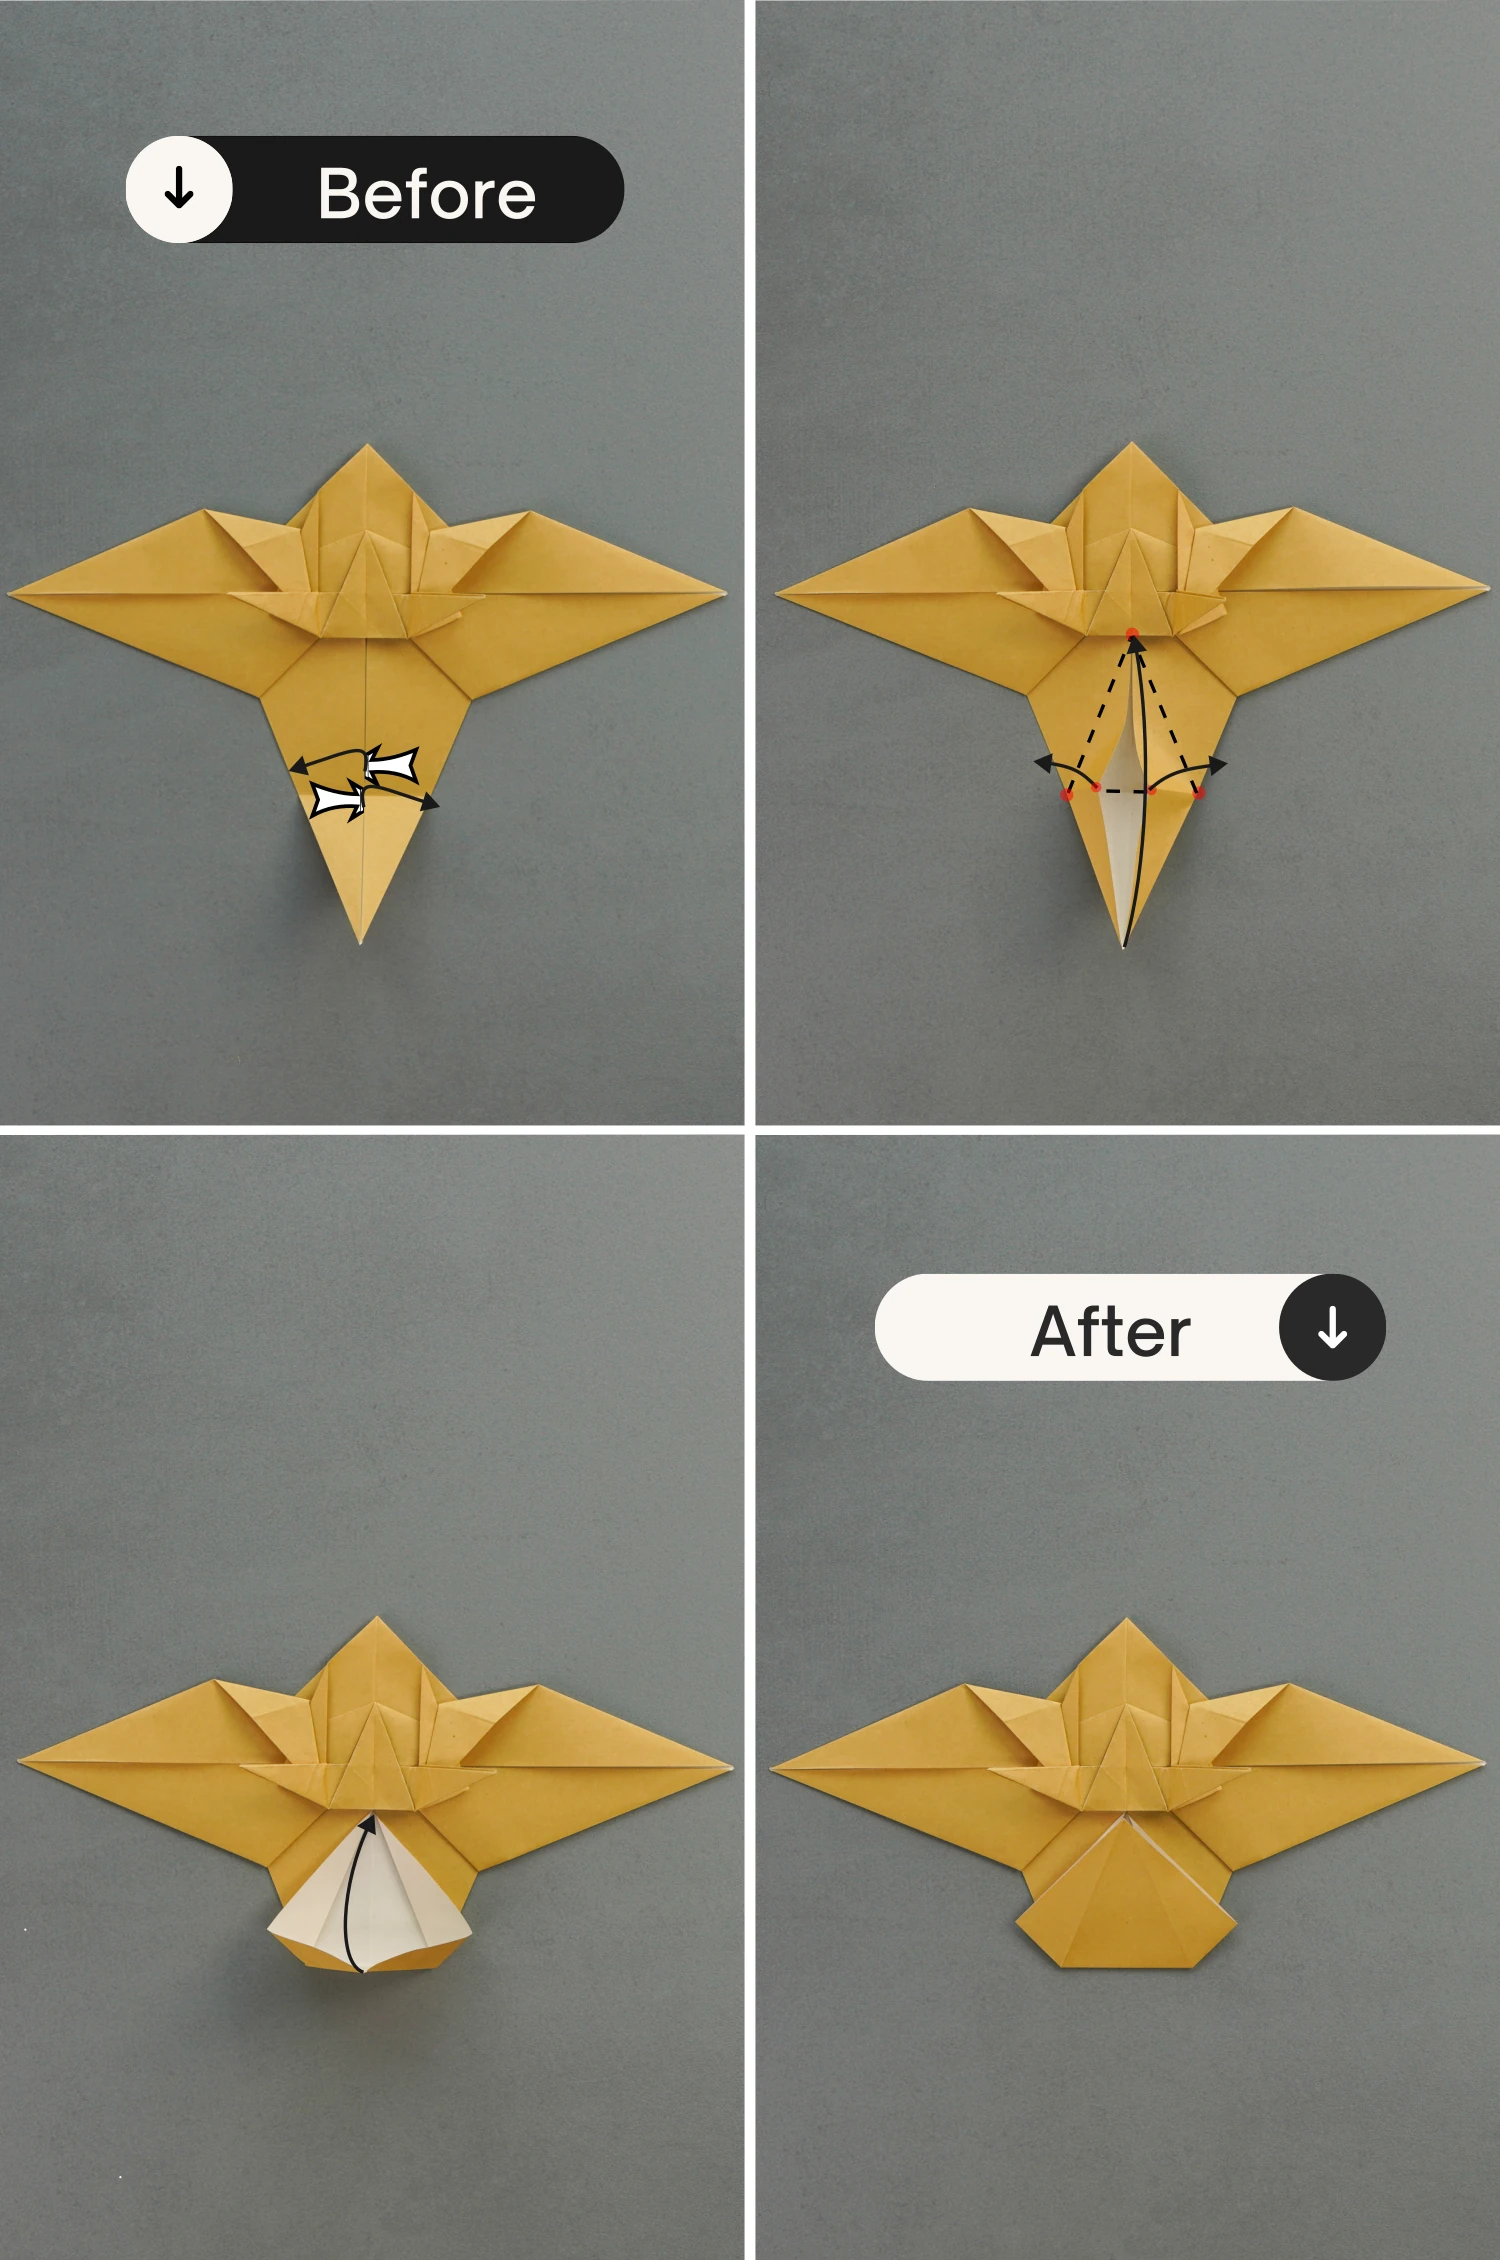
Flip the paper 180 degrees horizontally, then take the left and right corners of the top layer, and fold them to the center along the dotted lines as the third picture shows. Next, unfold them for 90 degrees to create two standing triangles.
Step 39
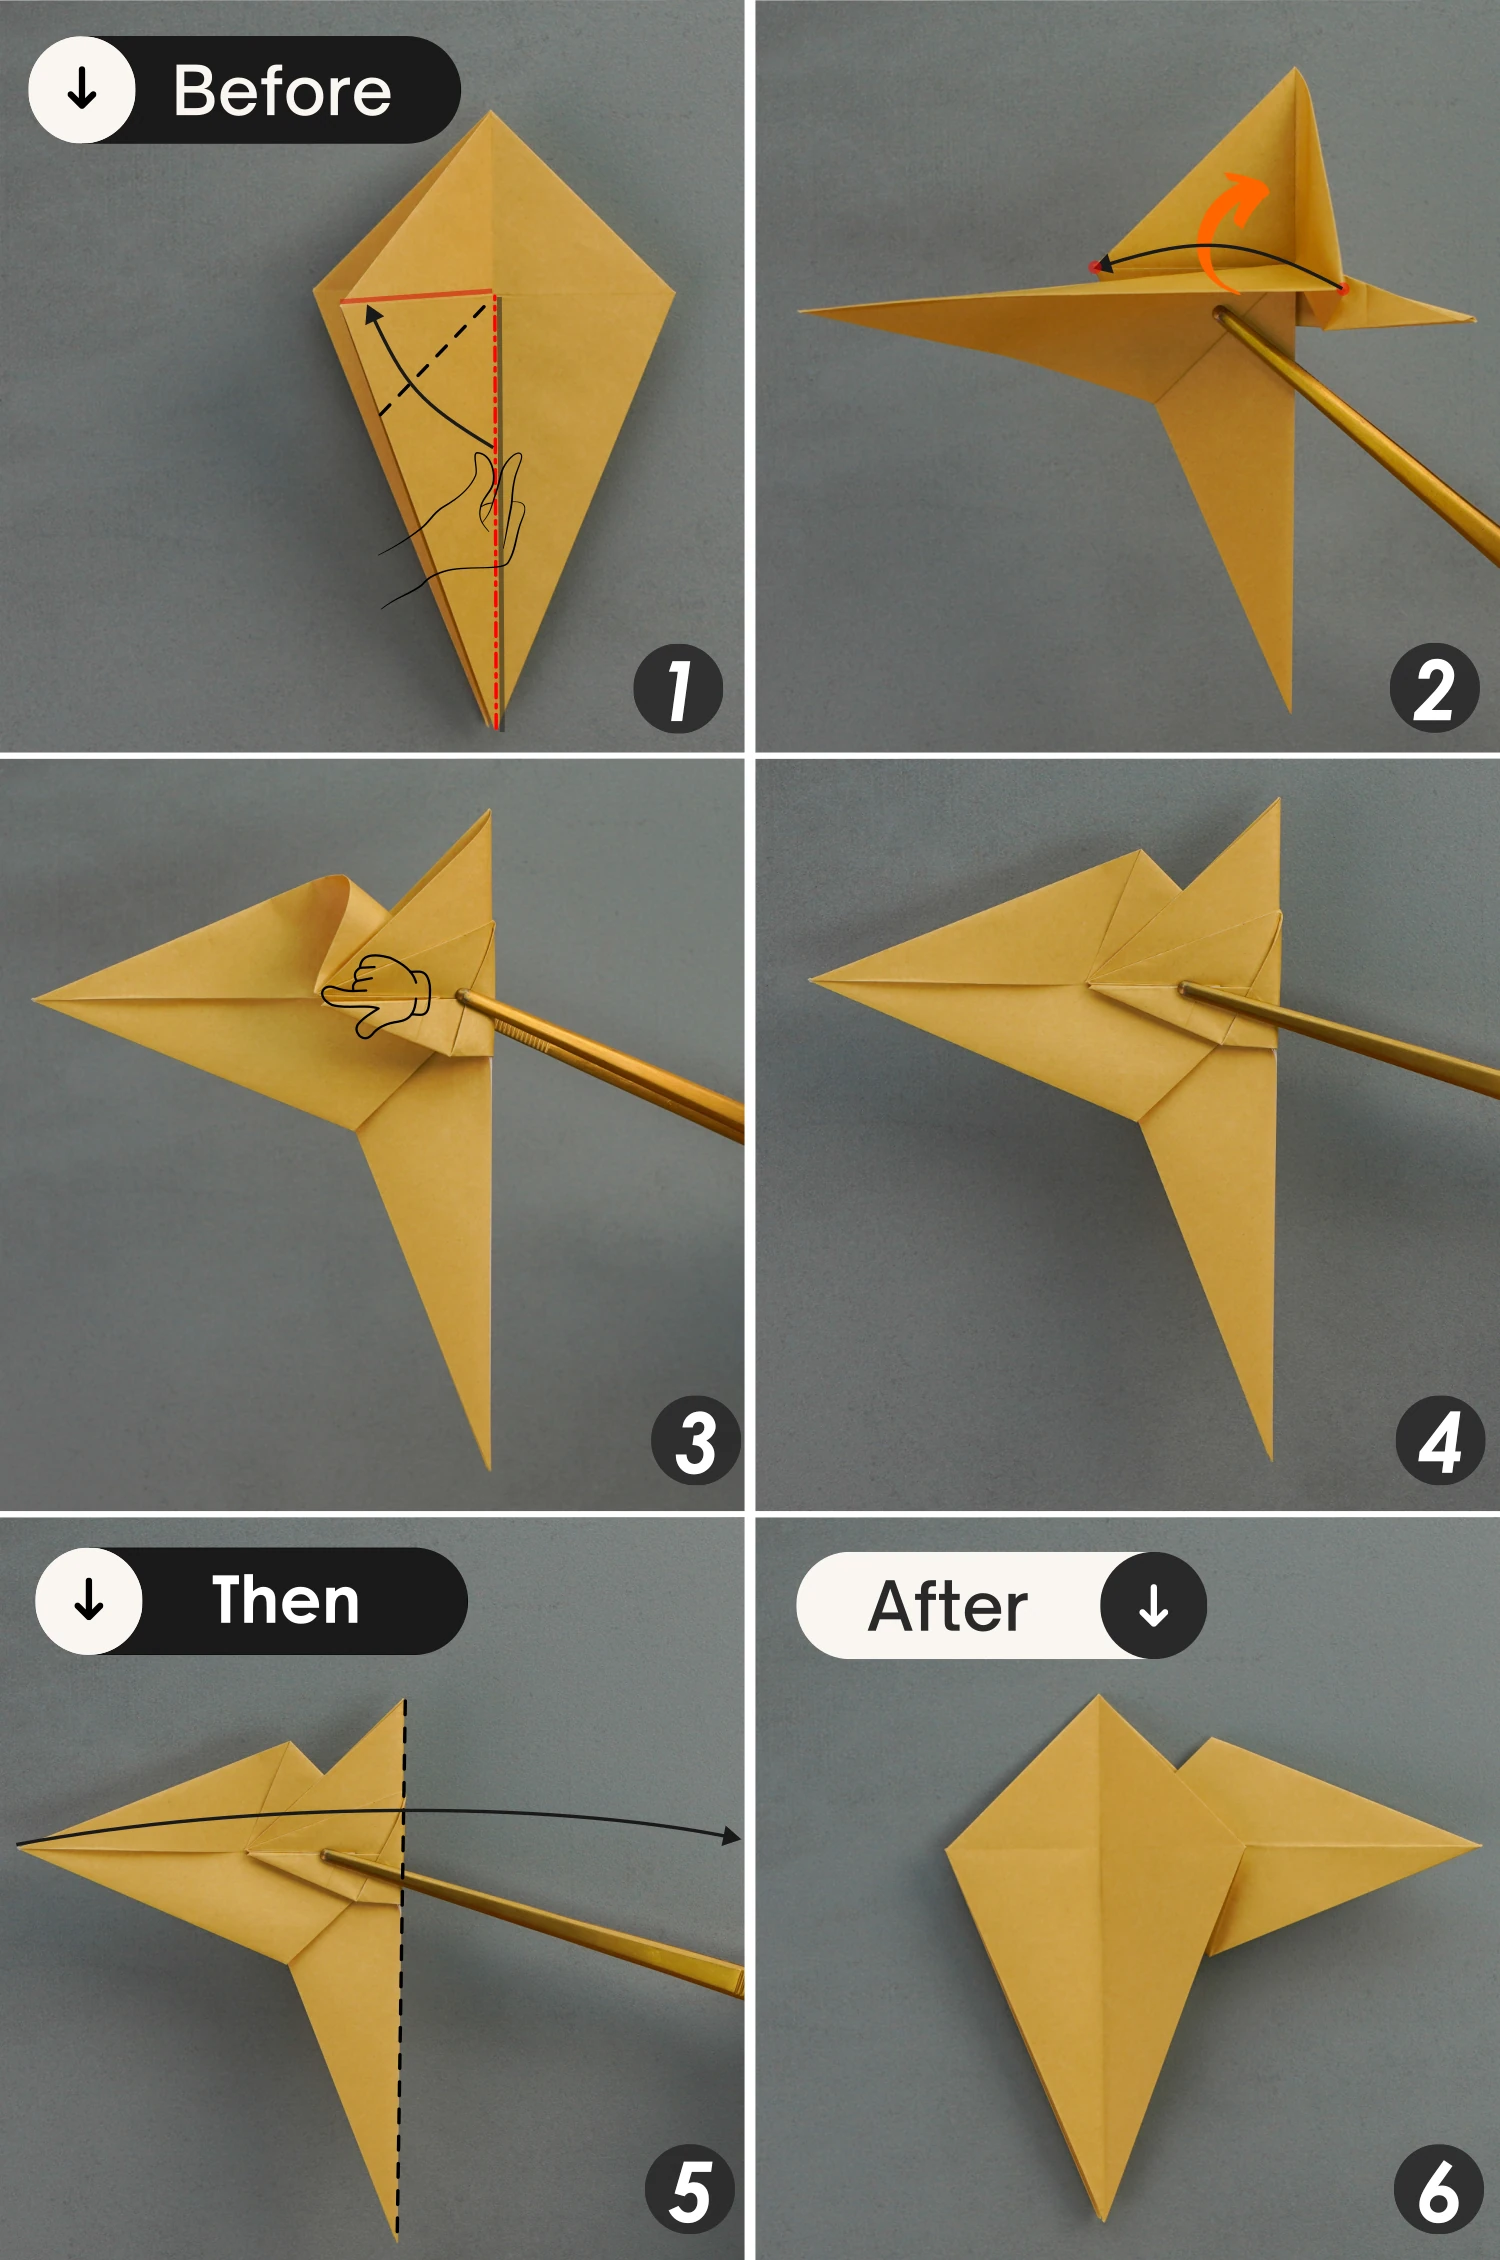
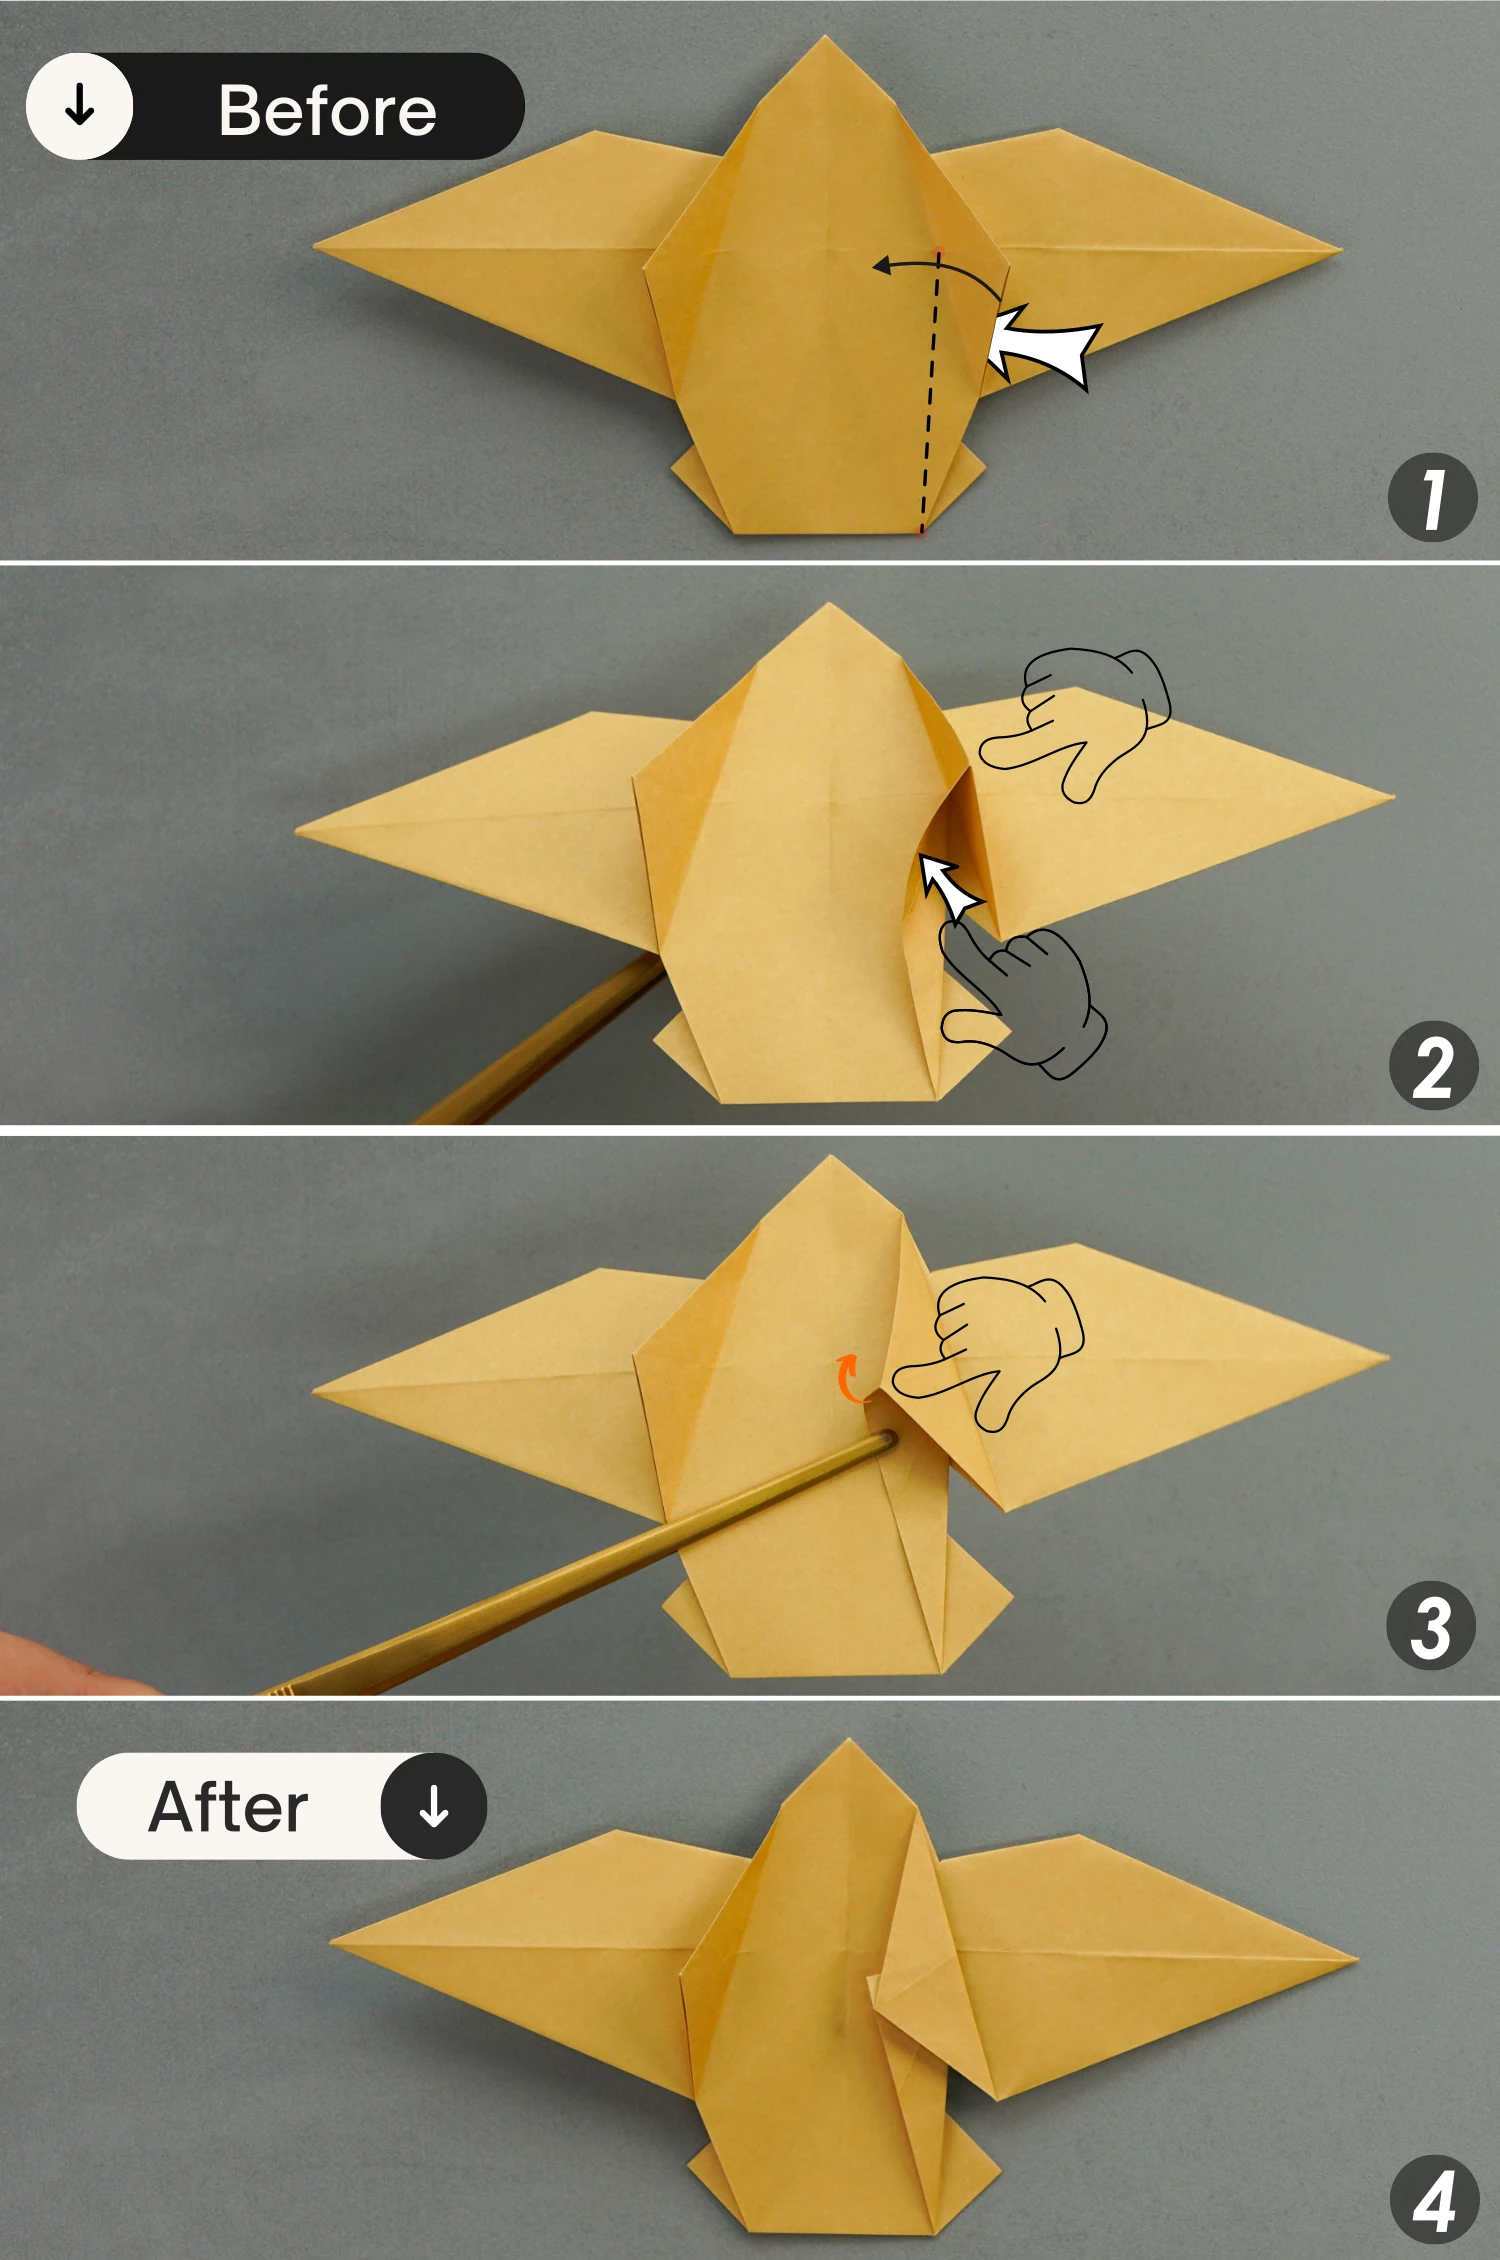
Lift the bottom right edge of the top layer and fold it toward the center along the dotted line. Next, fold the right corner to the center along the crease you made in the previous step, and flatten the pocket.
Step 40
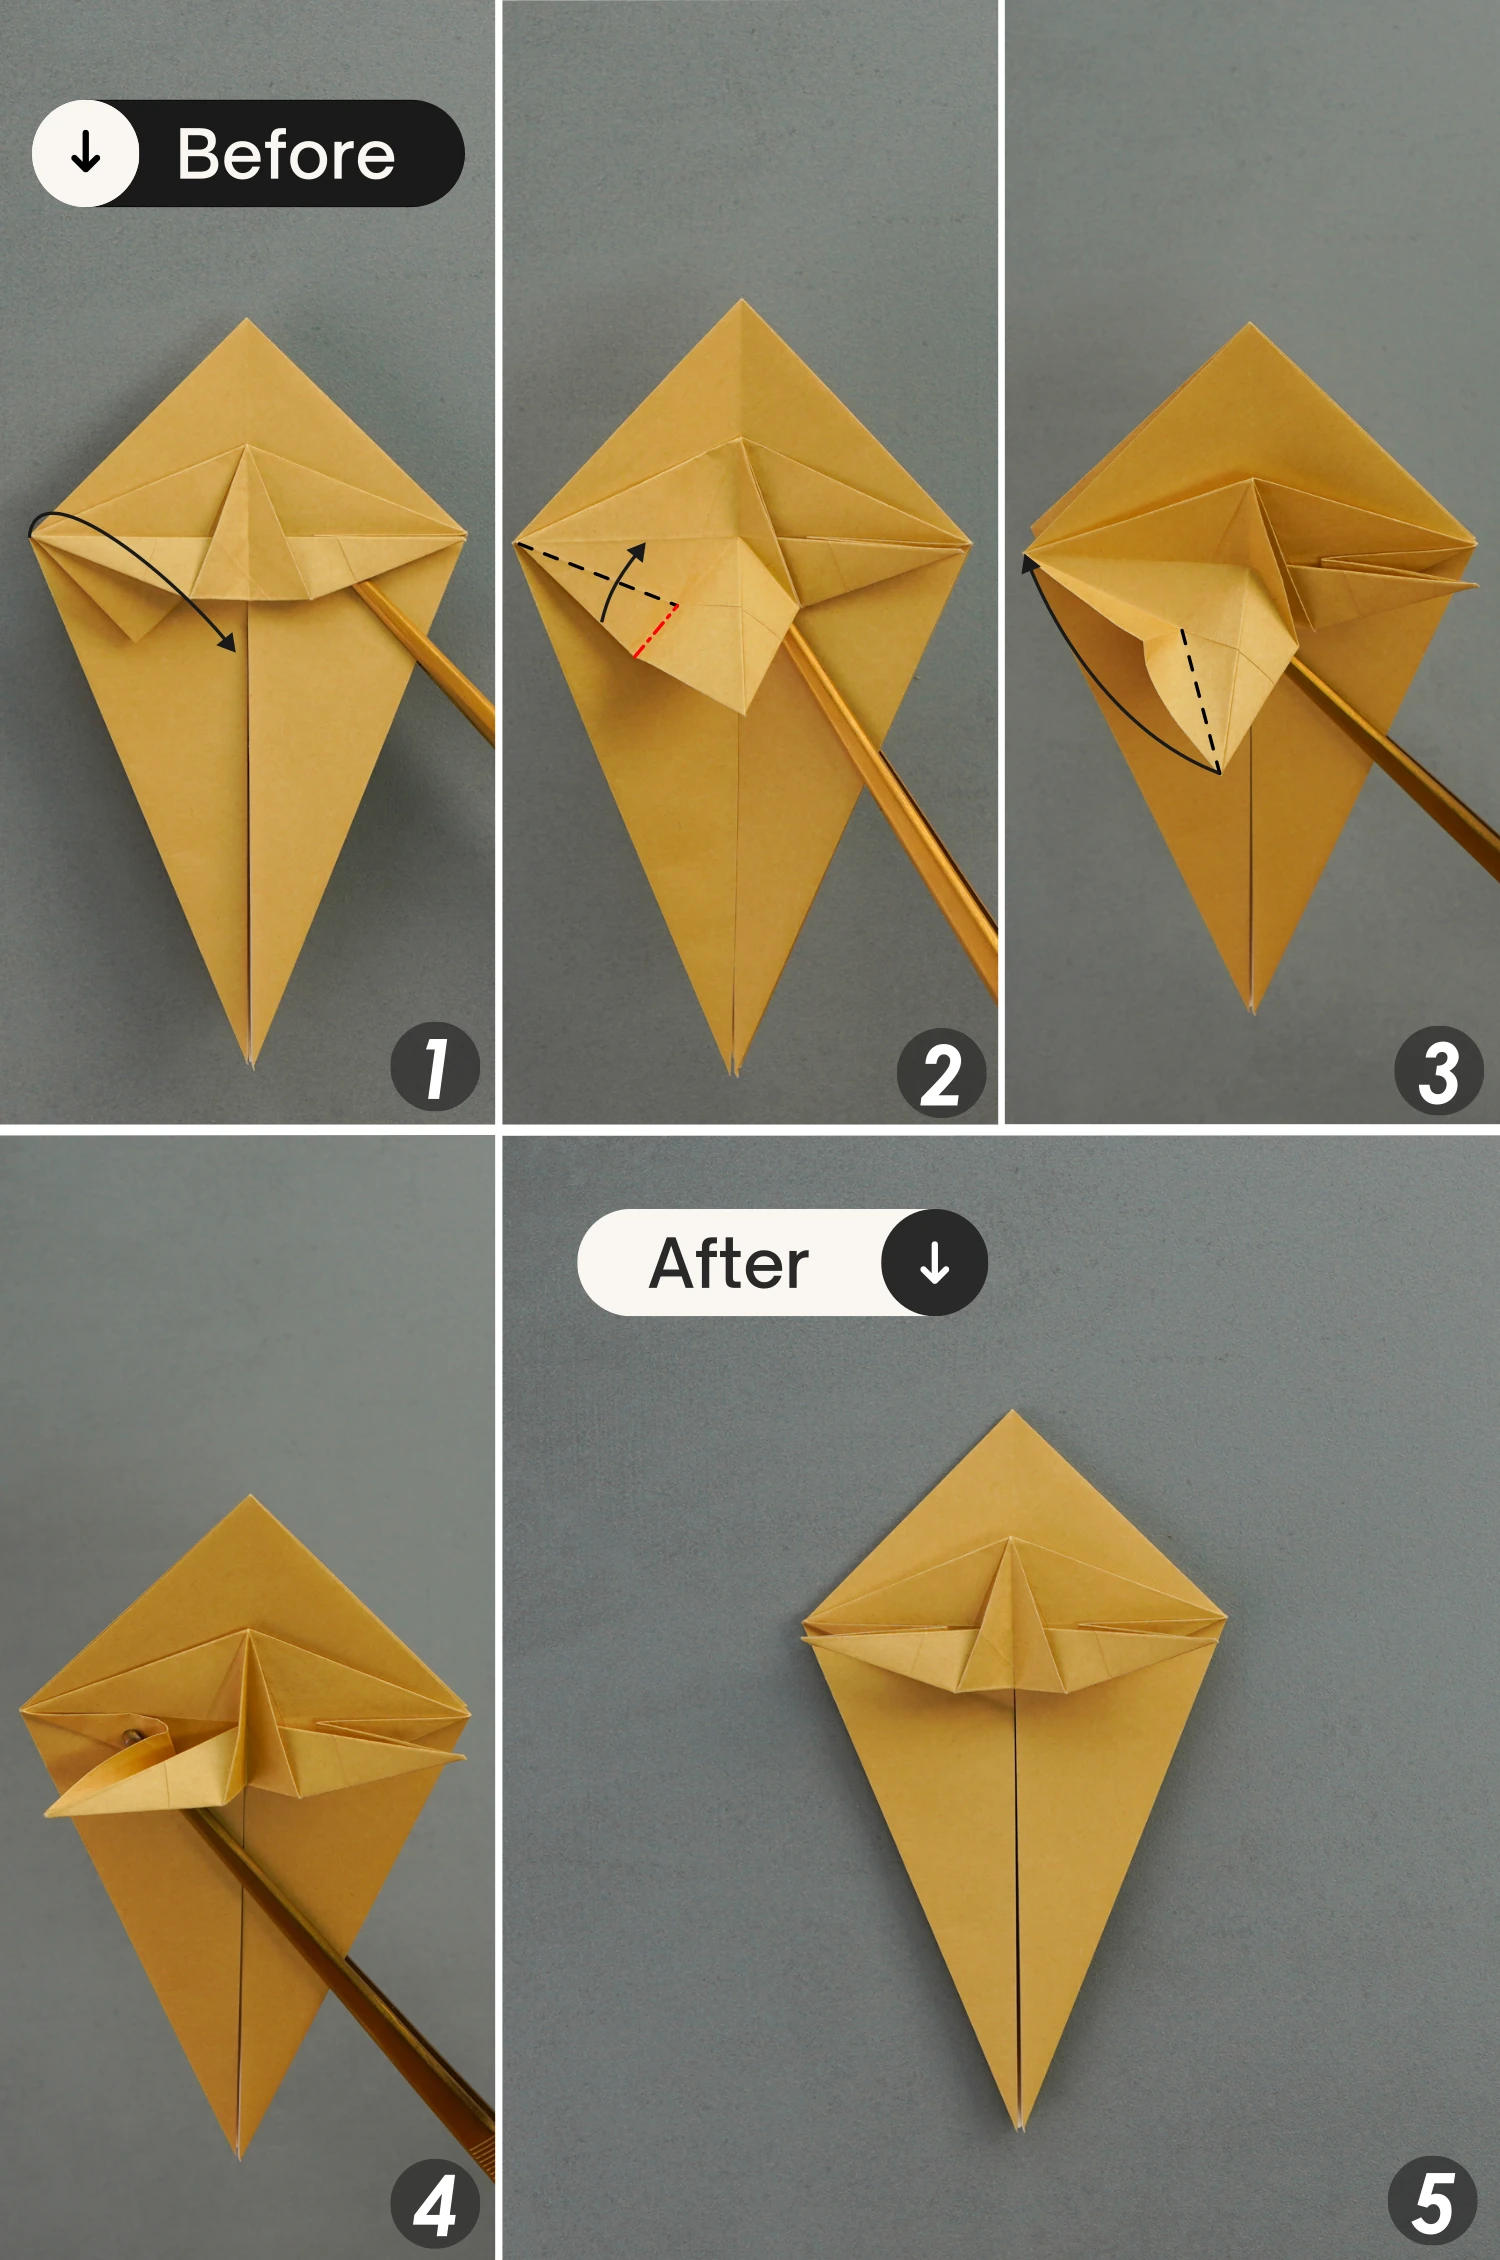
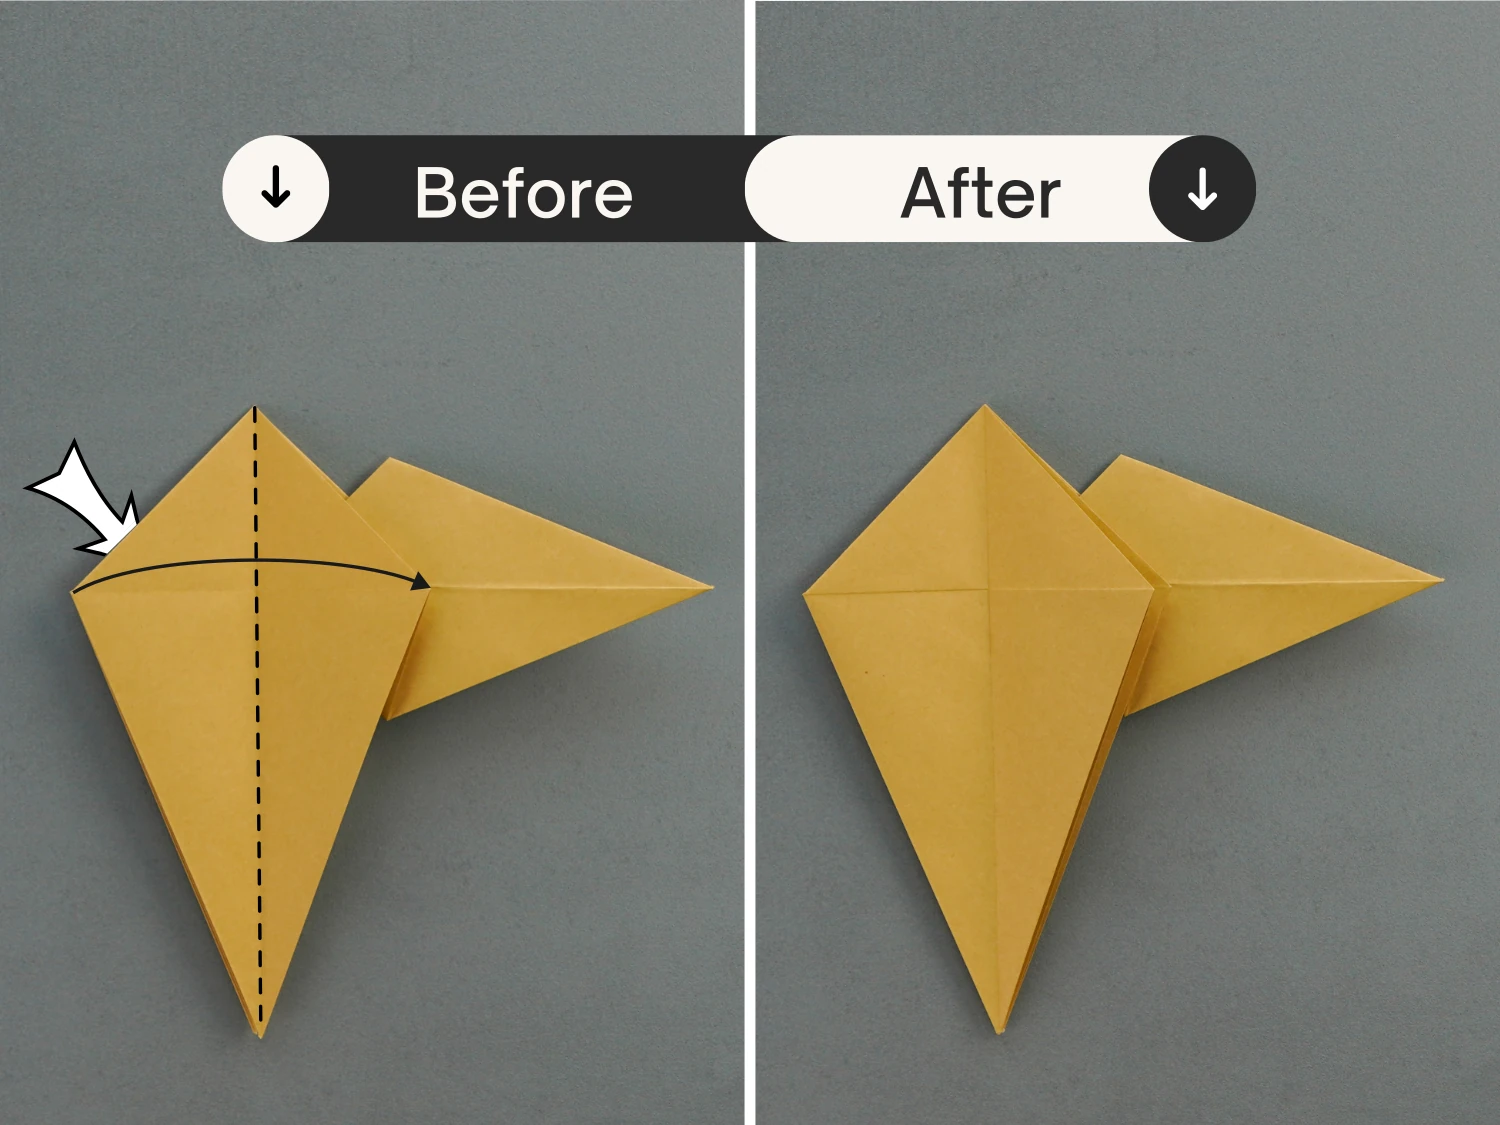
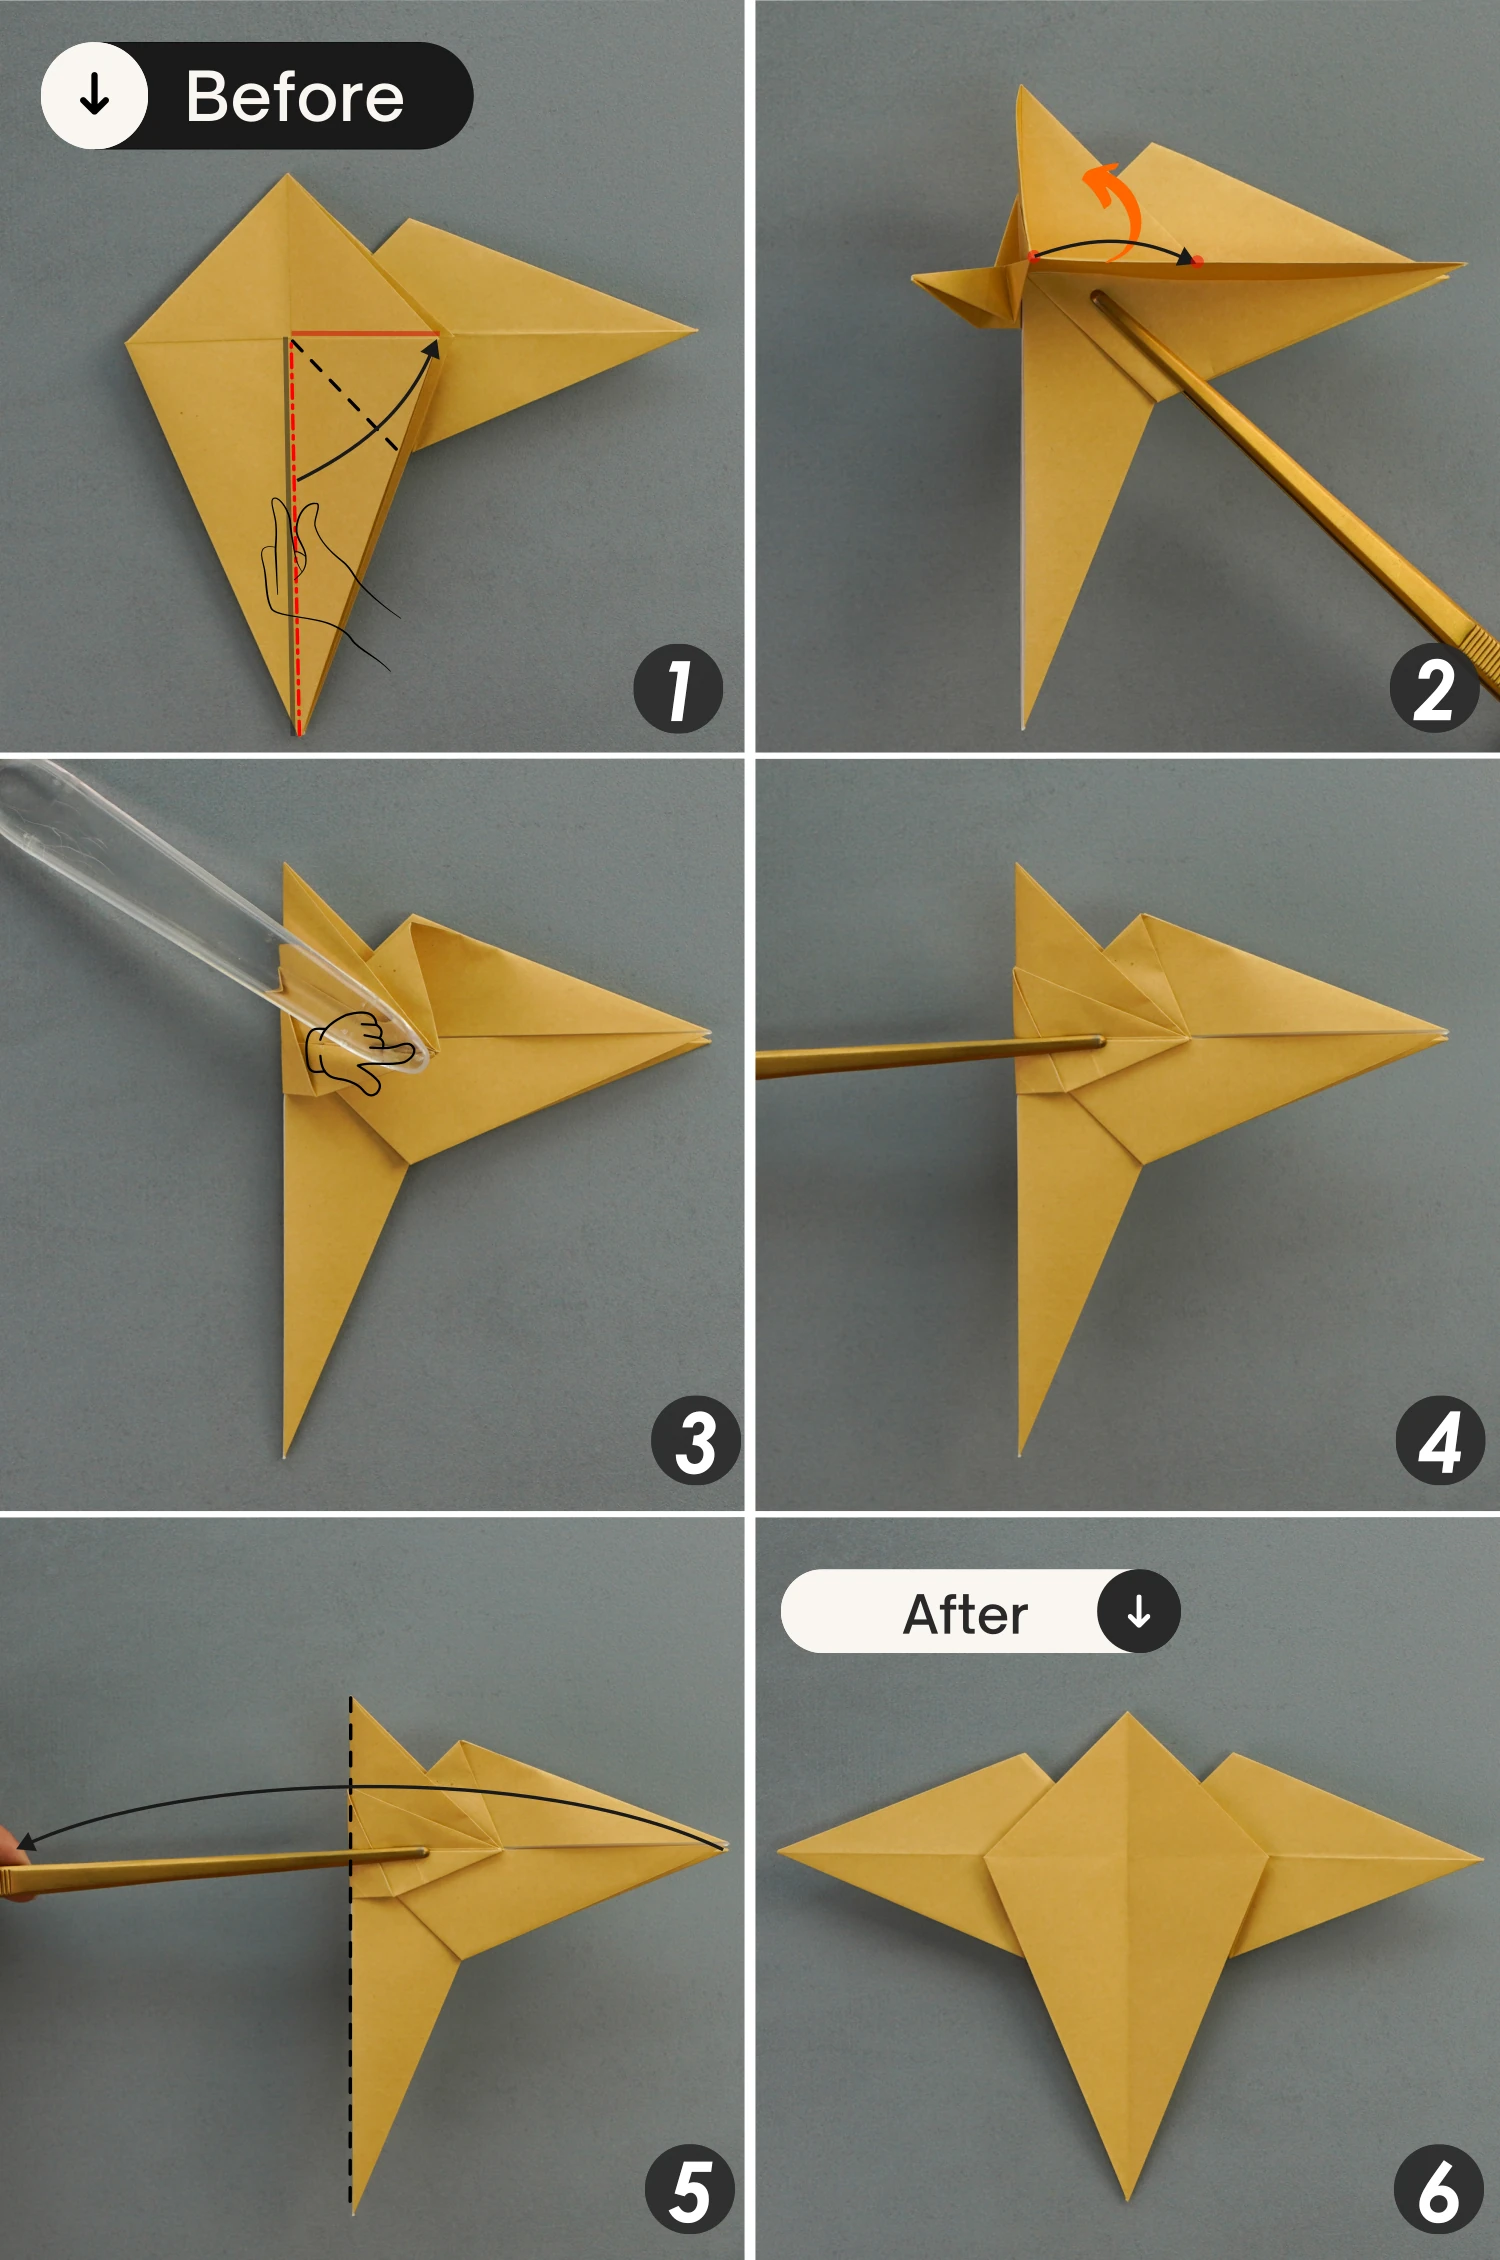
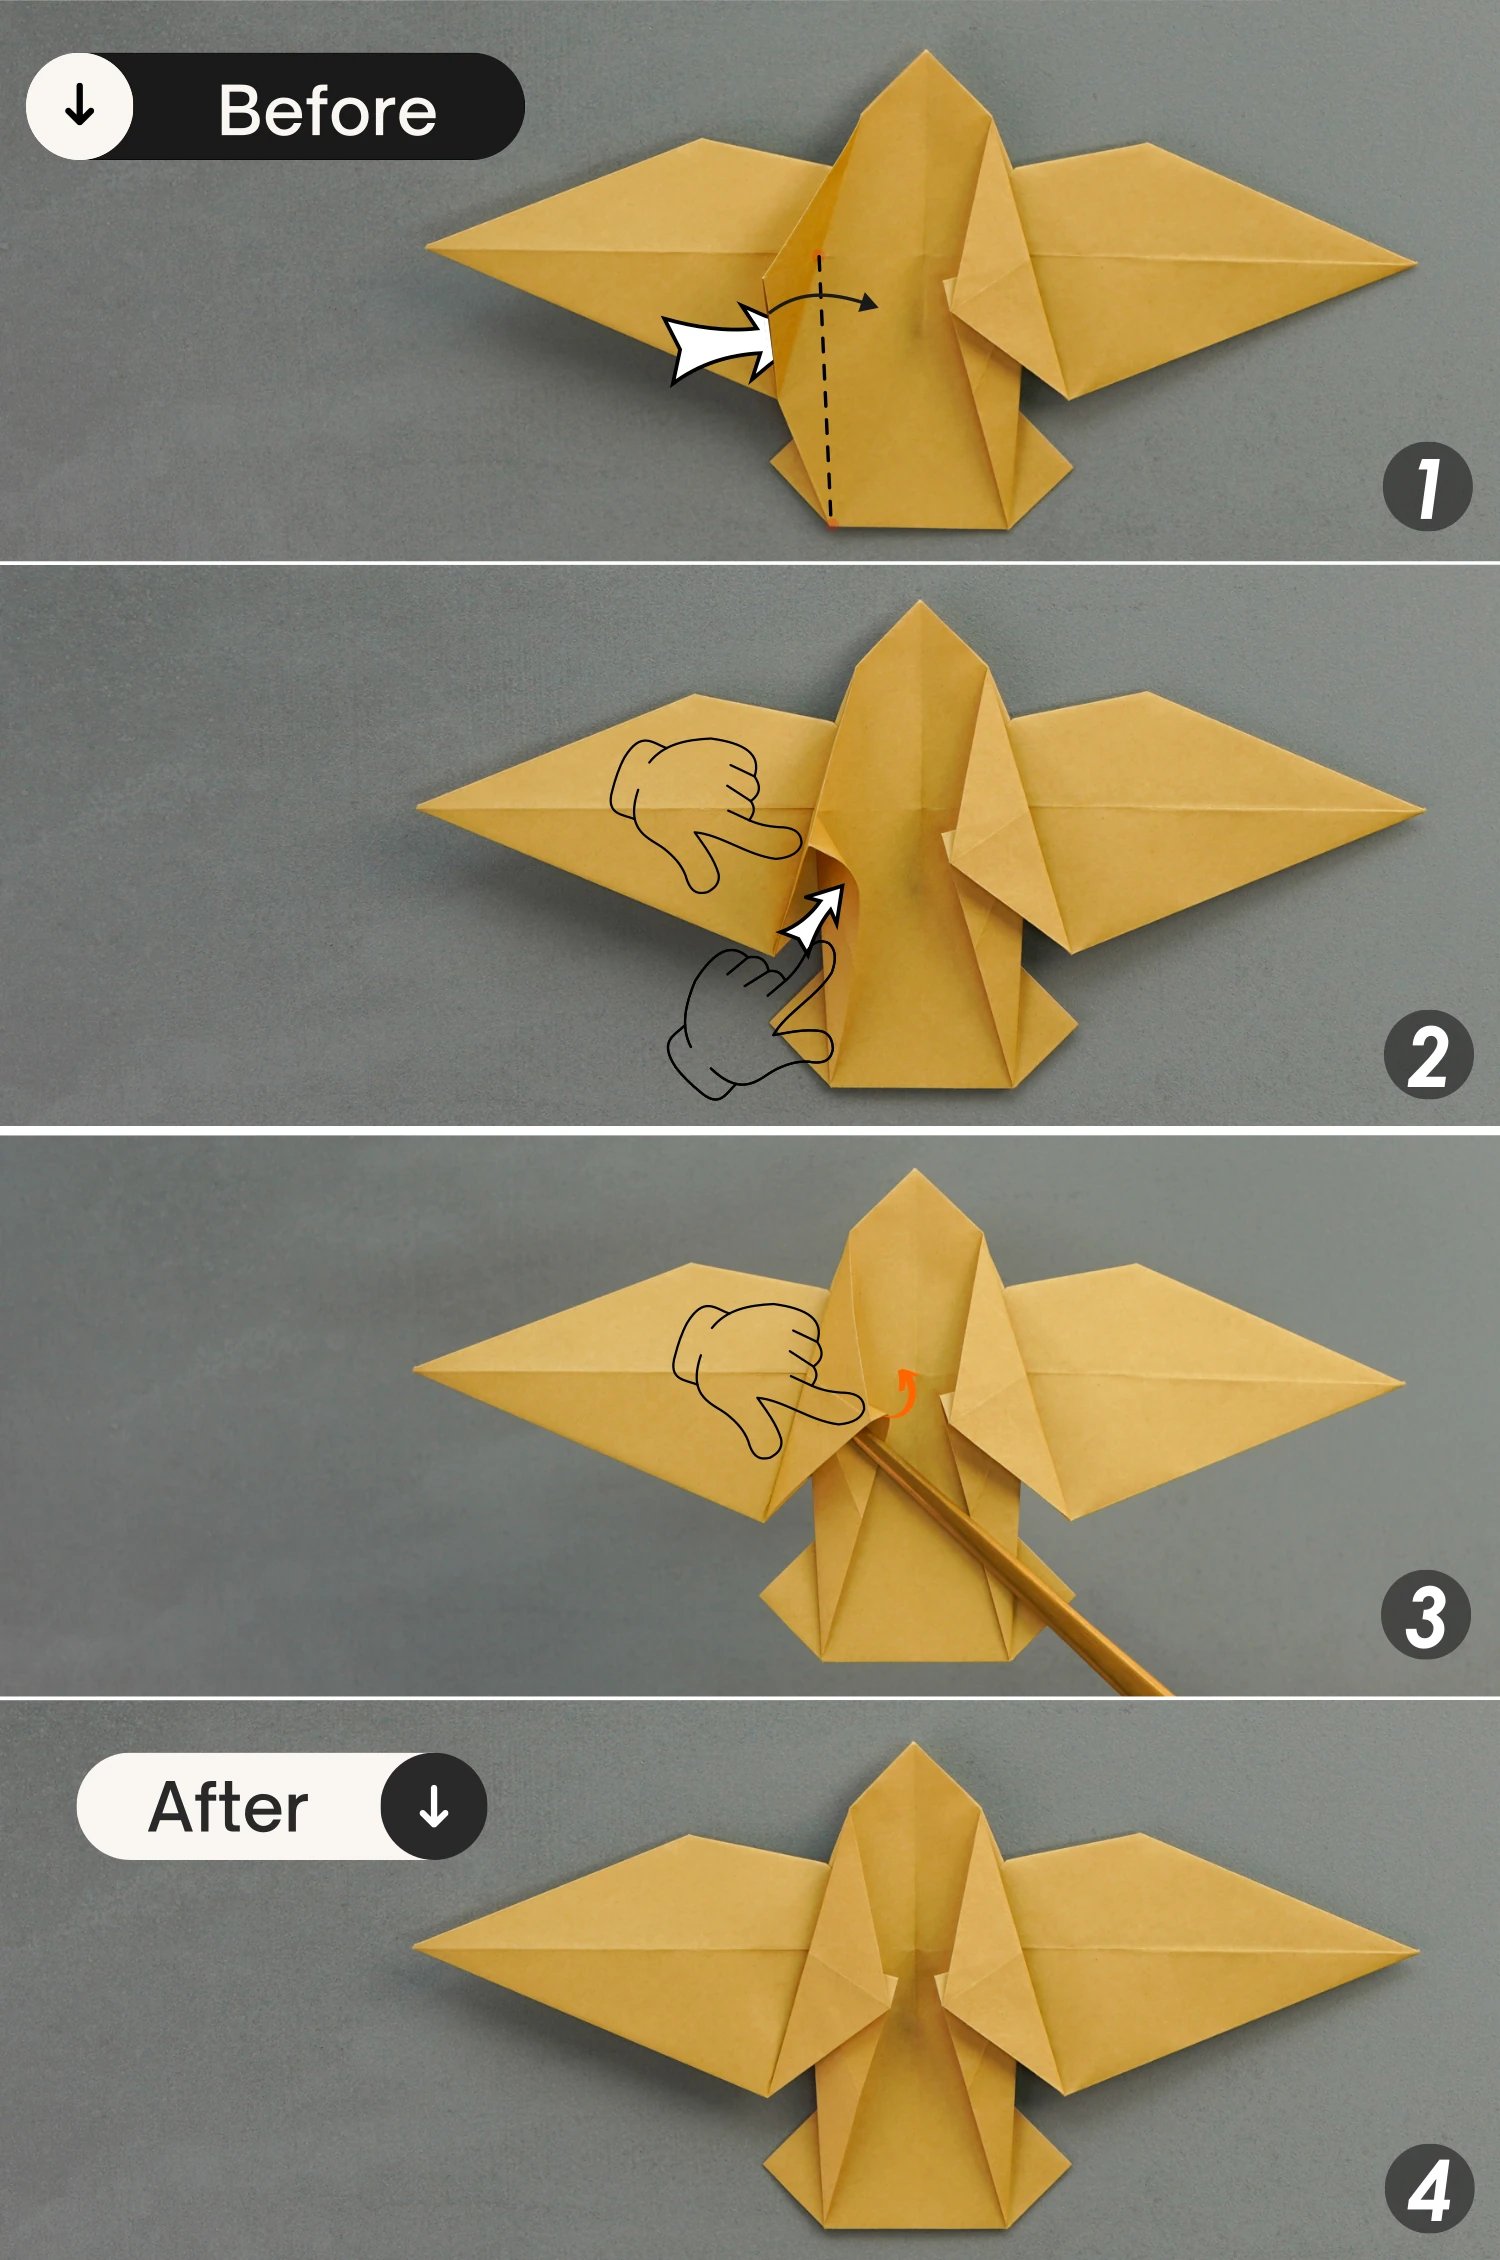
Repeat this for the left side.
Lift the bottom left edge of the top layer and fold it toward the center along the dotted line. Next, fold the left corner to the center along the crease you made in the previous step, and flatten the pocket.
Step 41
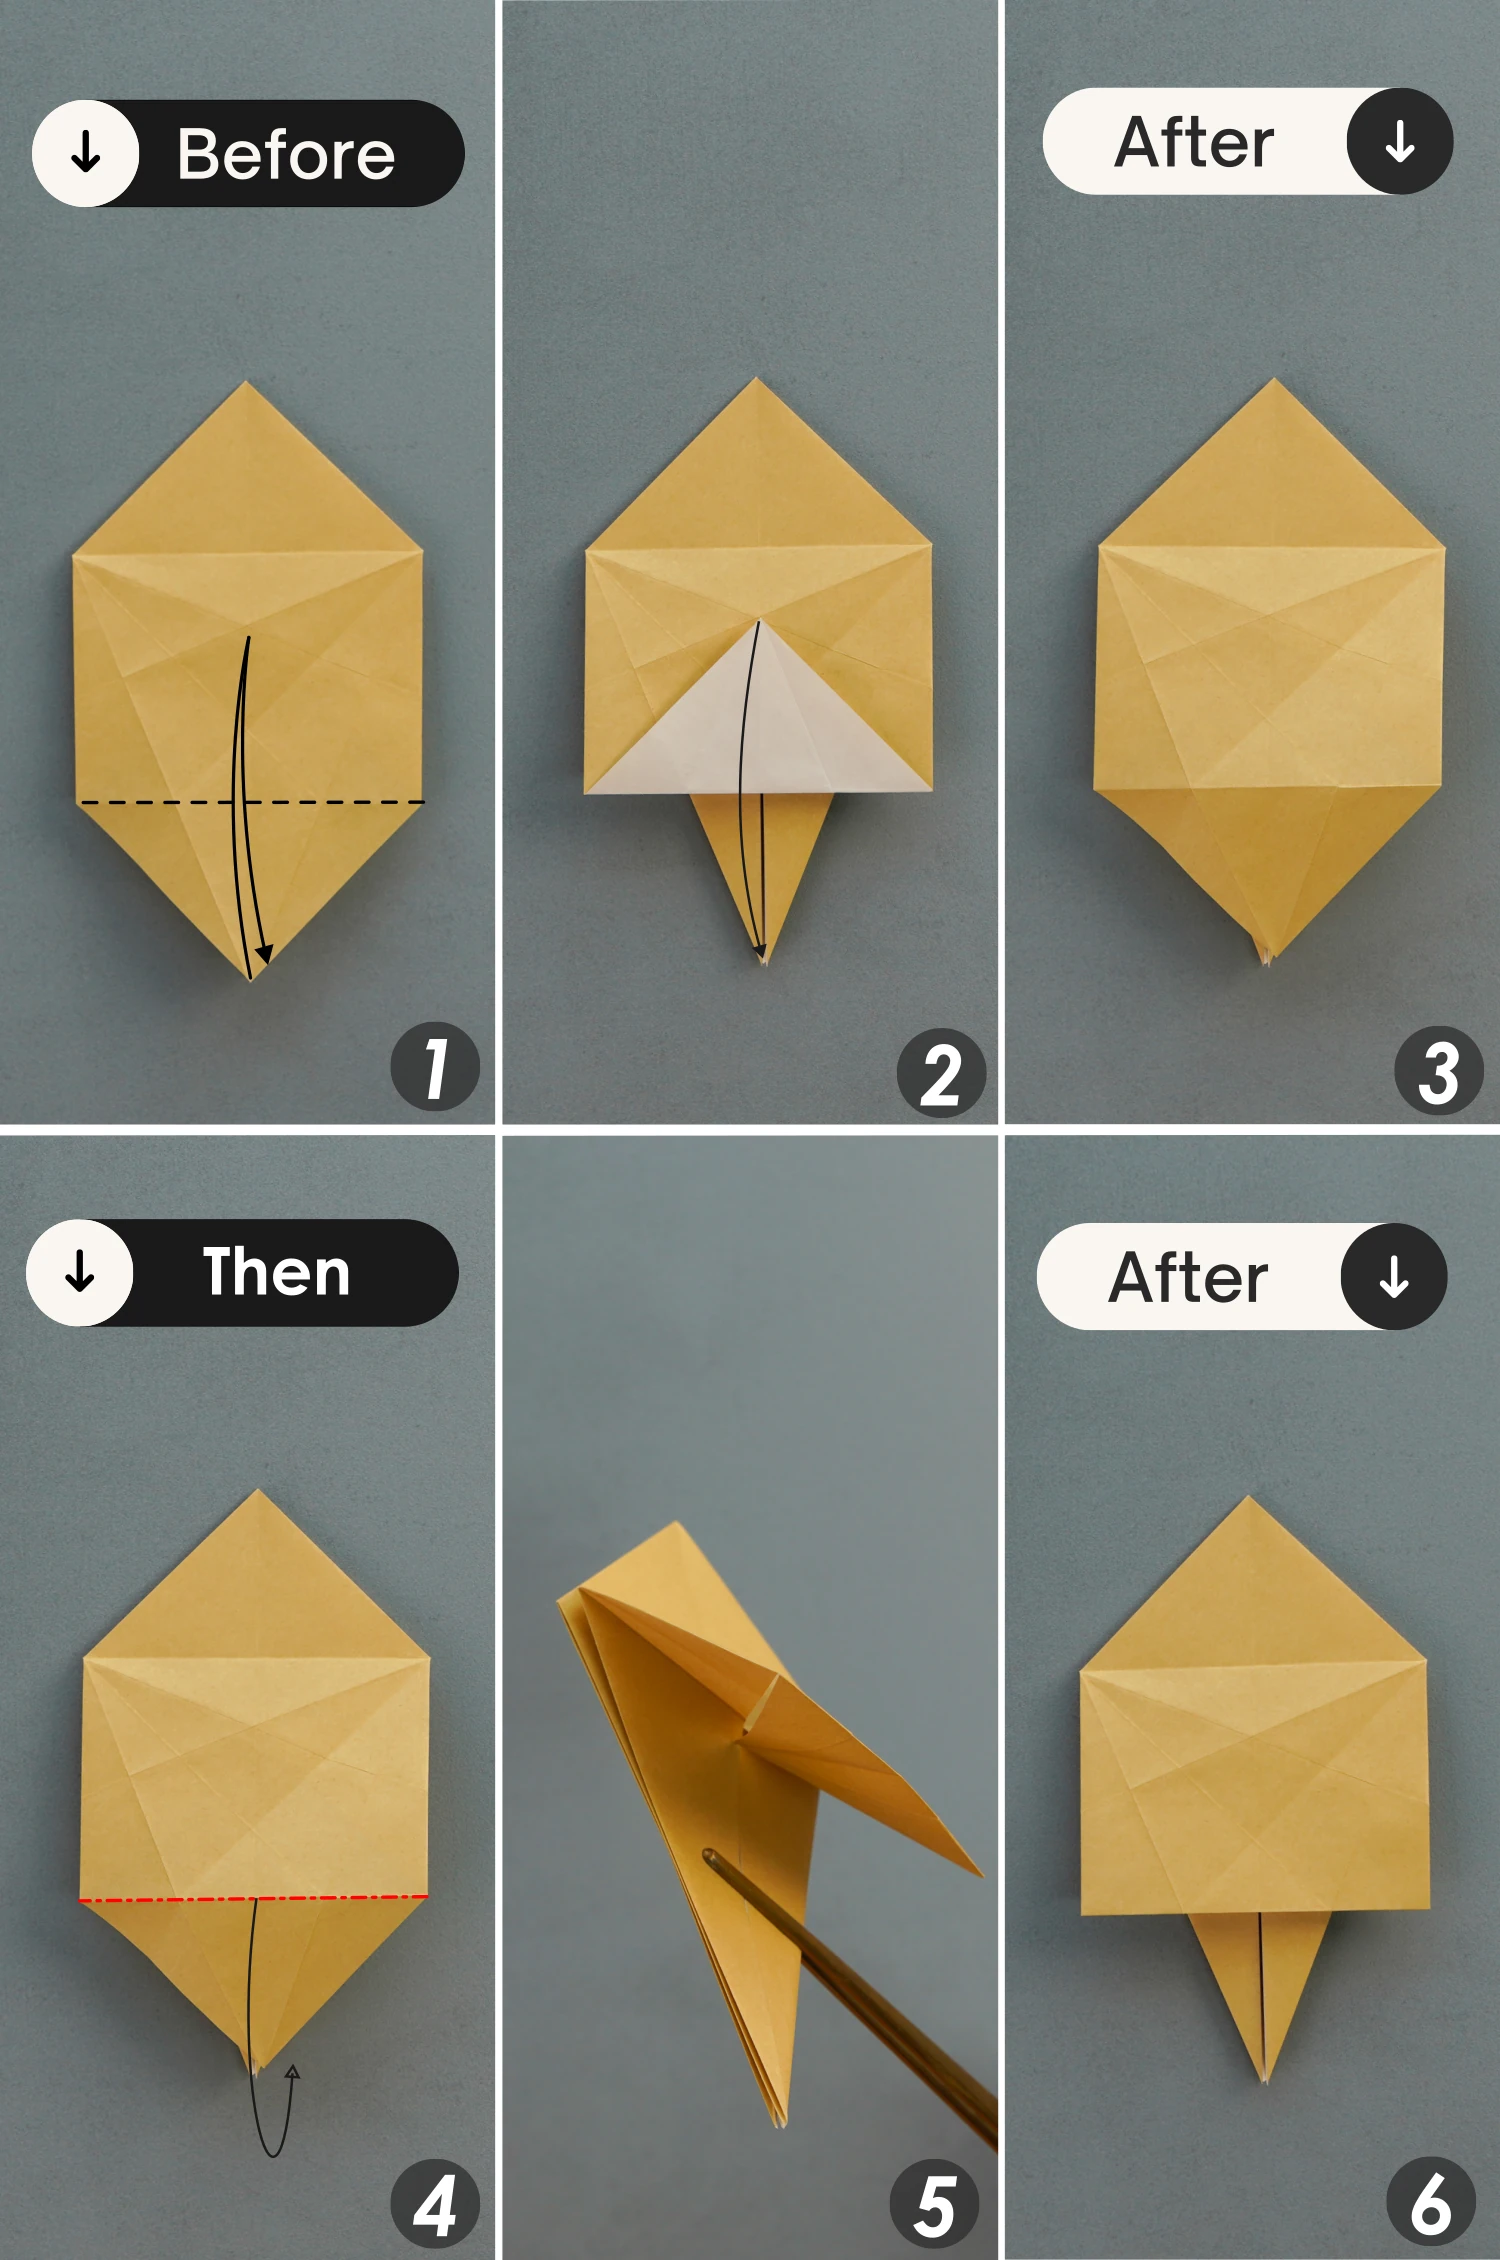
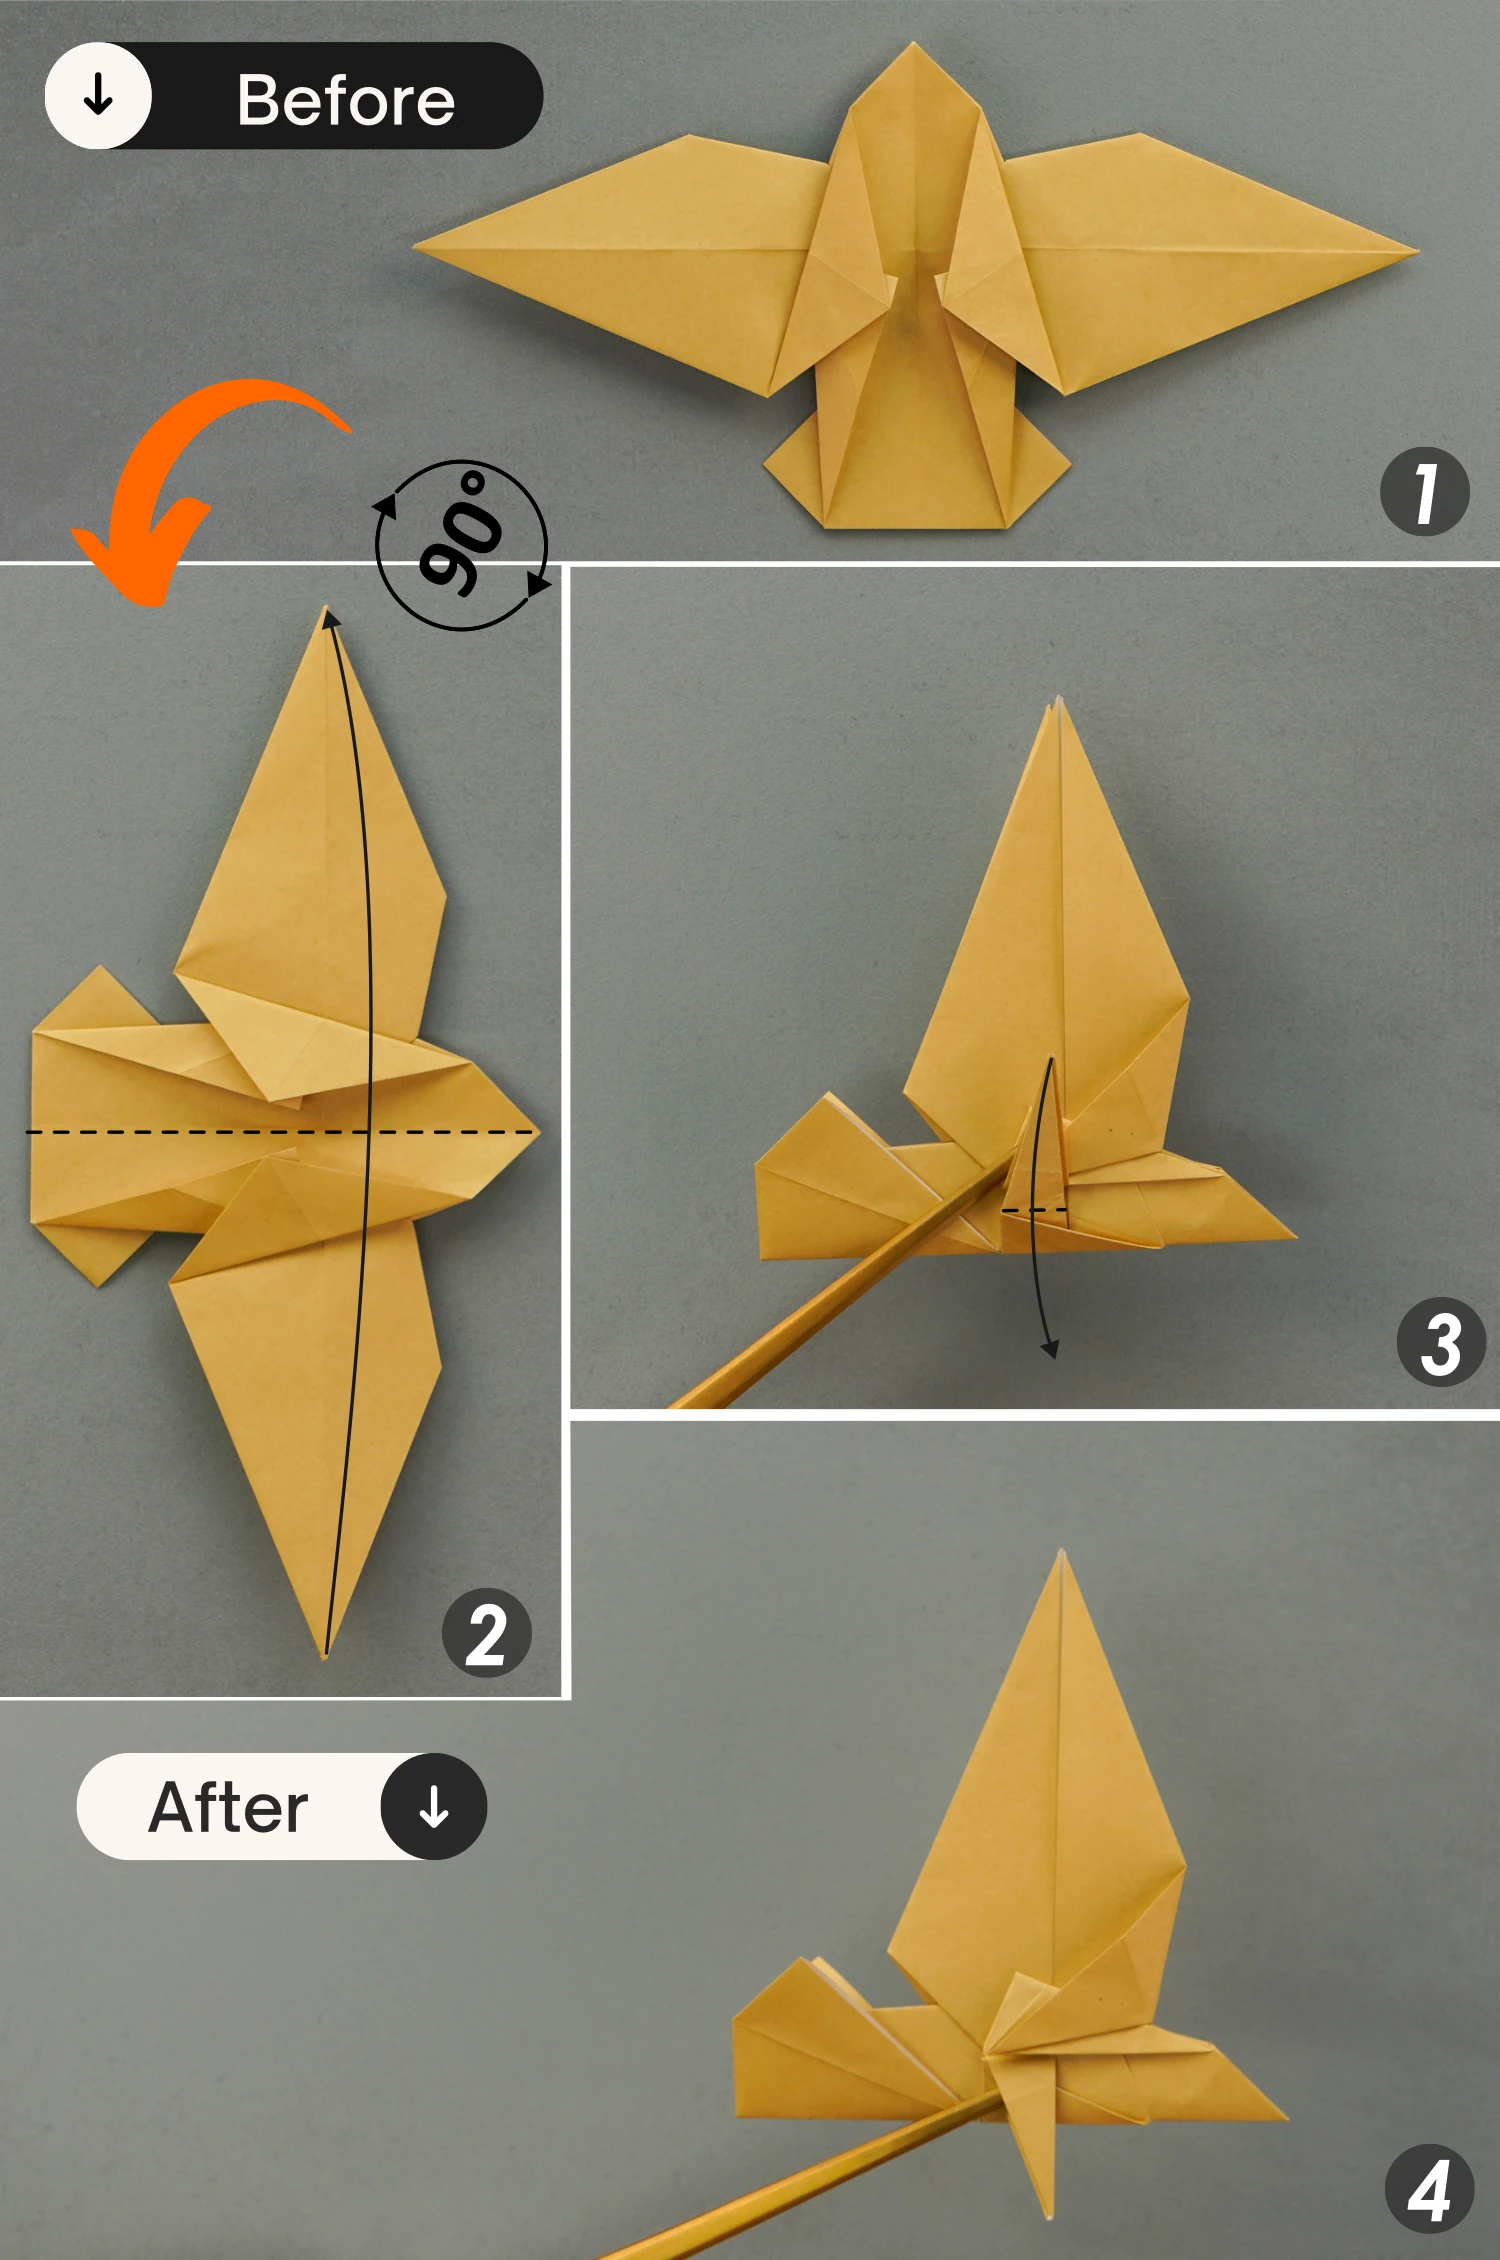
Rotate it 90 degrees, fold the paper in half horizontally from the bottom to the top, and finally fold the small corner in the middle down along the existing crease.
Step 42
Unfold the layer as the first picture shows, and open the corner you just folded down in the previous step, then fold the layer you just unfolded back to the original position, and close the corner you just expanded, making the layer tucked between the layers of the corner.
Step 43
Flip it 180 degrees horizontally, and fold the small corner down.
Step 44
Like before, unfold the layer as the first picture shows, and open the small corner you just folded down, then fold the layer back to the original position and close the small corner.
Step 45
Now focus on the left corner, fold the left point down and to the right, and unfold it.
Step 46
Open the left corner from the top, shape the creases you just made, press the left tip down, and finally close the corner to create the eagle’s beak.
Step 47
Take the top corner of its head of the upper layer, and fold it down along the dotted line.
Then turn over the paper, repeat this for this side.
These steps need to be done under the layer of the beak.
Step 48
Fold the head part to the right once, and unfold it, then fold again with a shorter length, and unfold it.
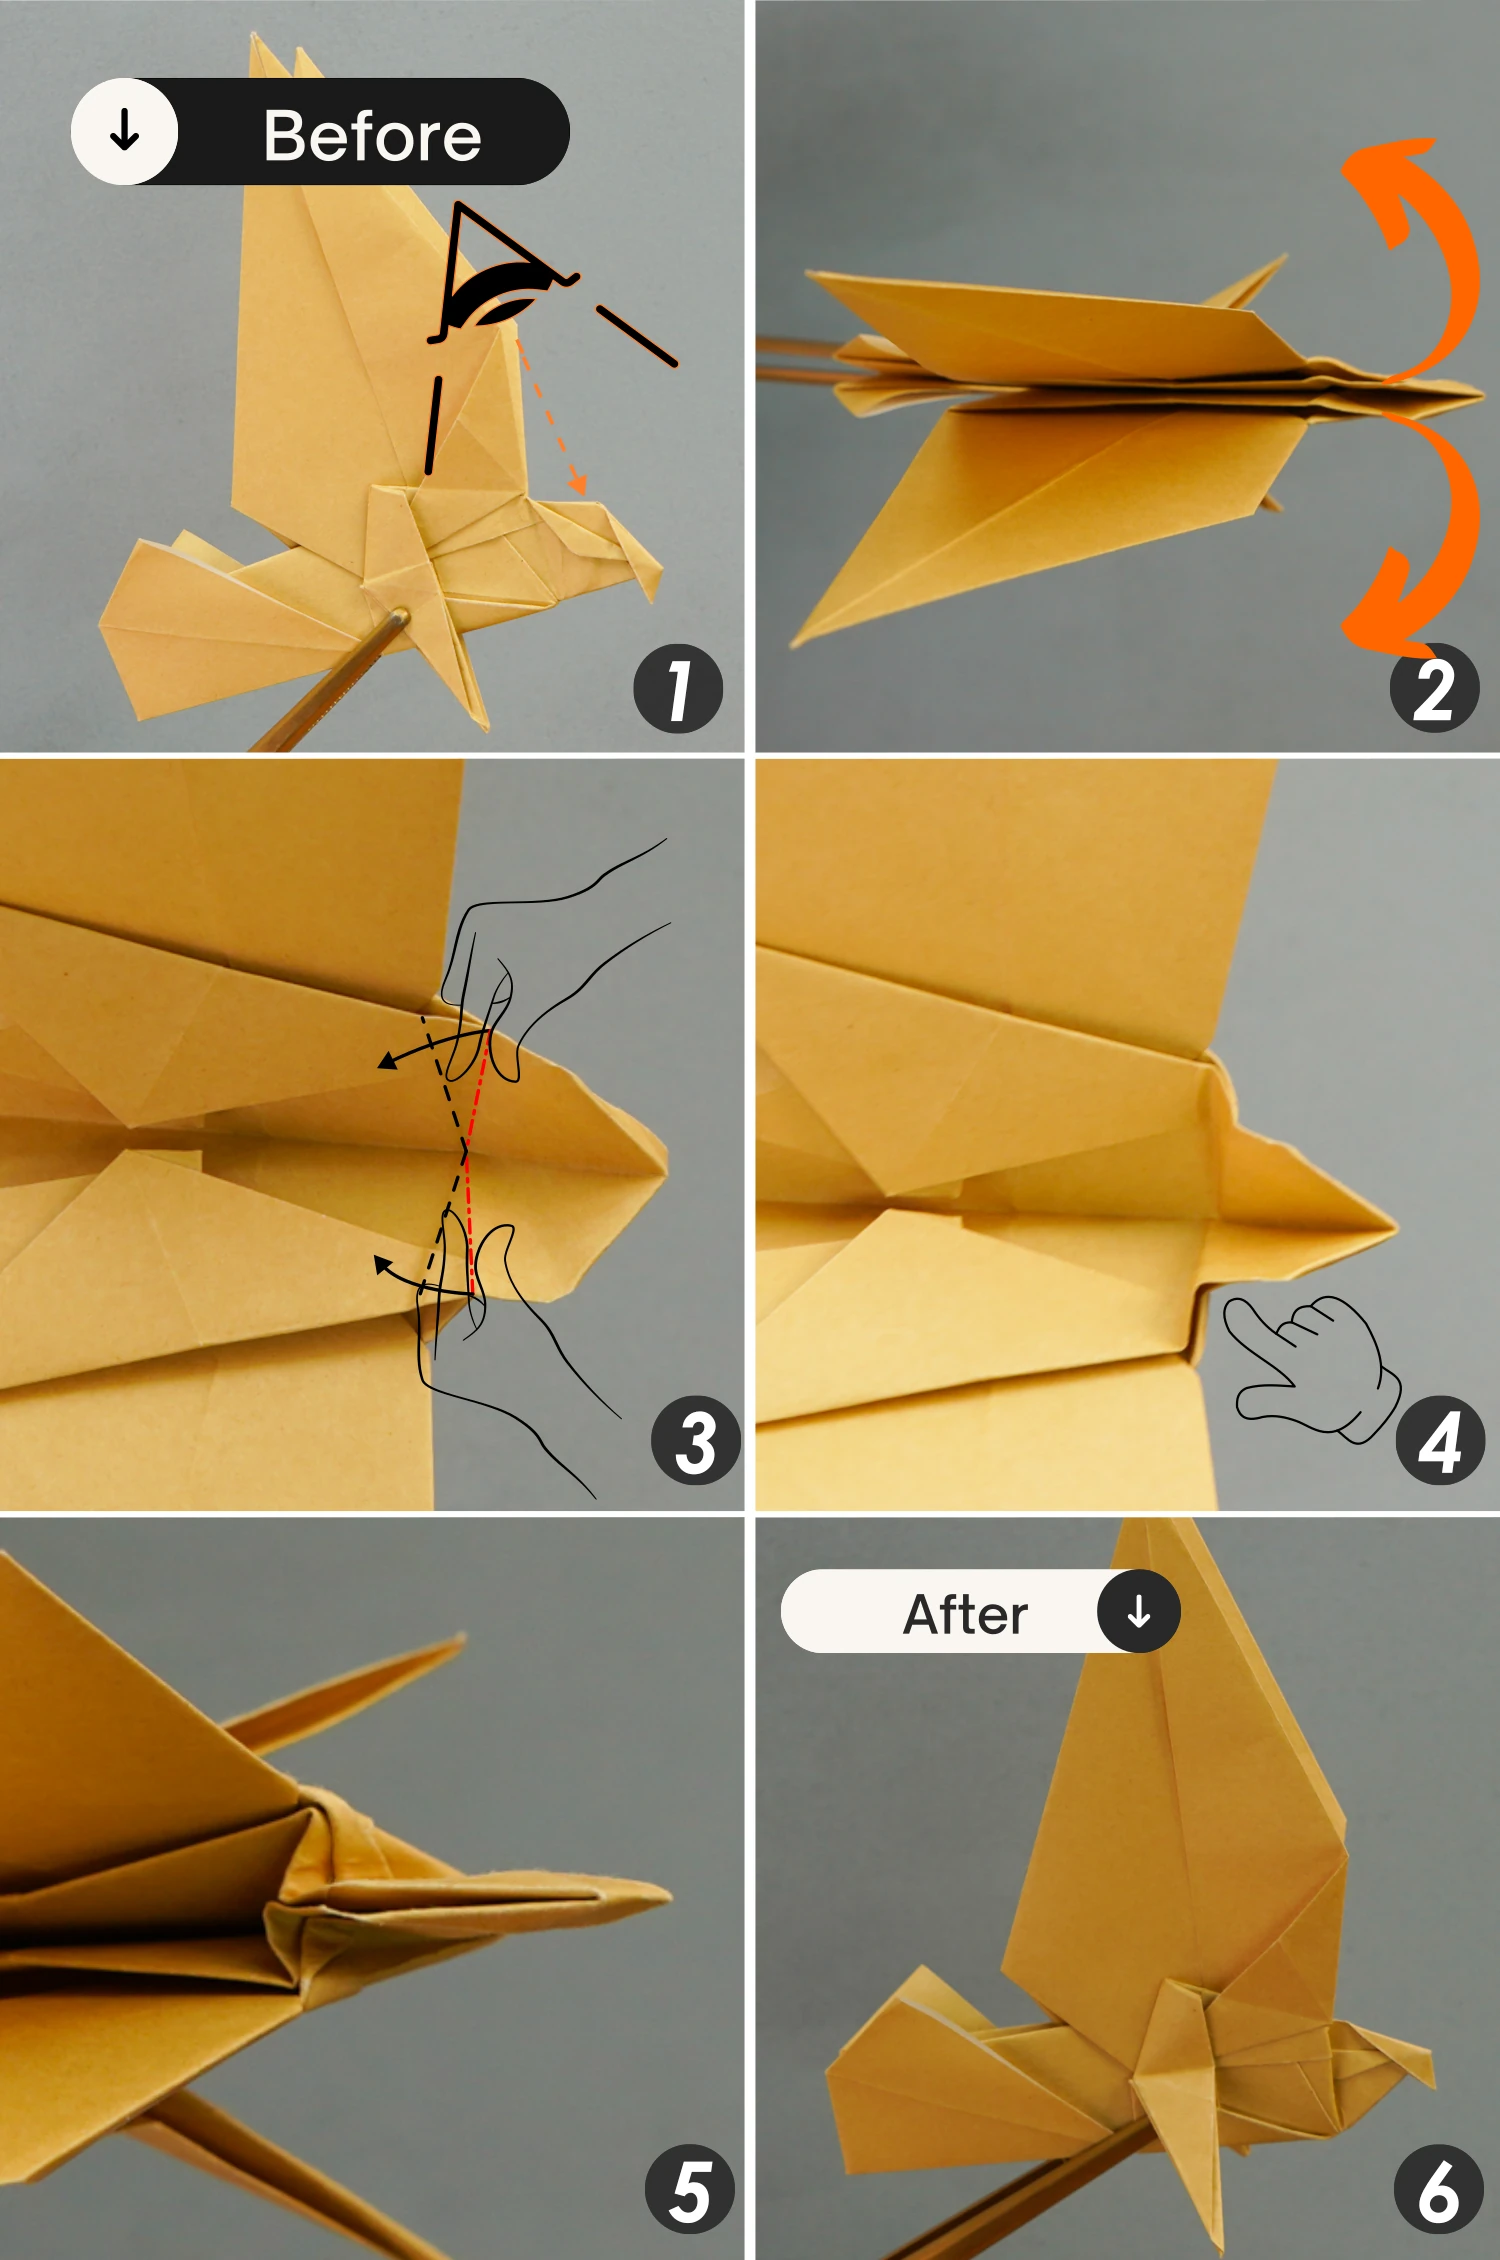
Step 49
View the head part from the top, open it, use both hands to shape the creases you just made shown by the red dotted lines, and push it to the left to align with the creases shown by the black dotted lines[third picture]. Finally, close the head part.
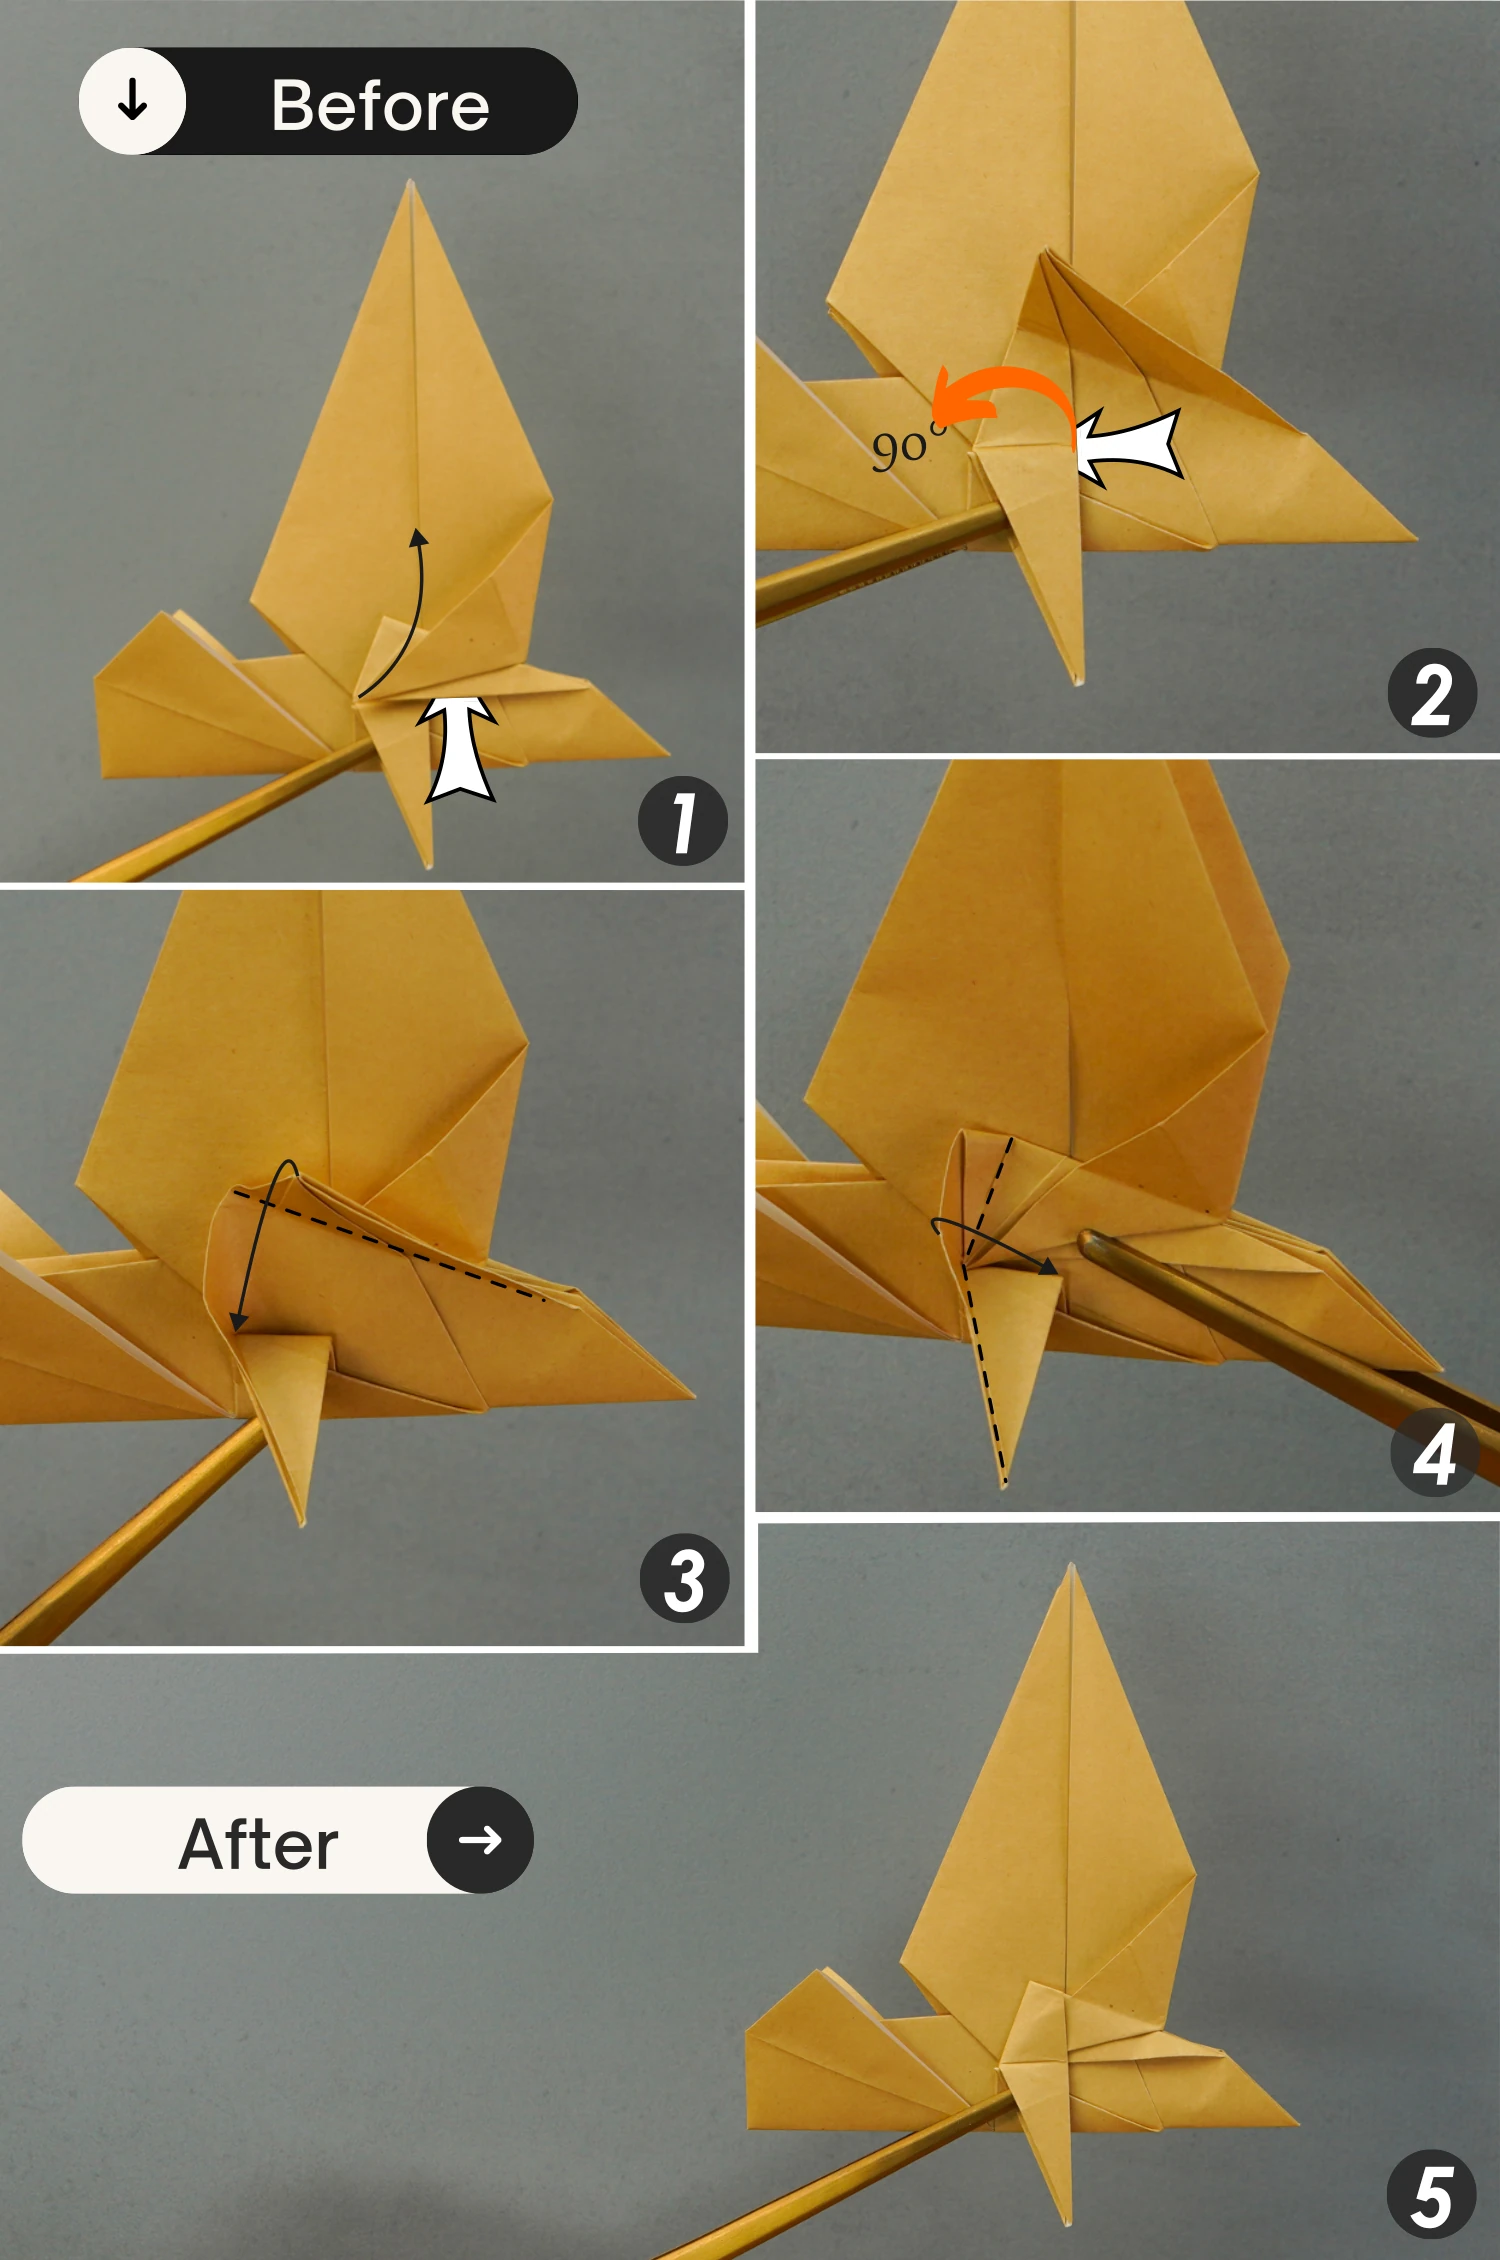
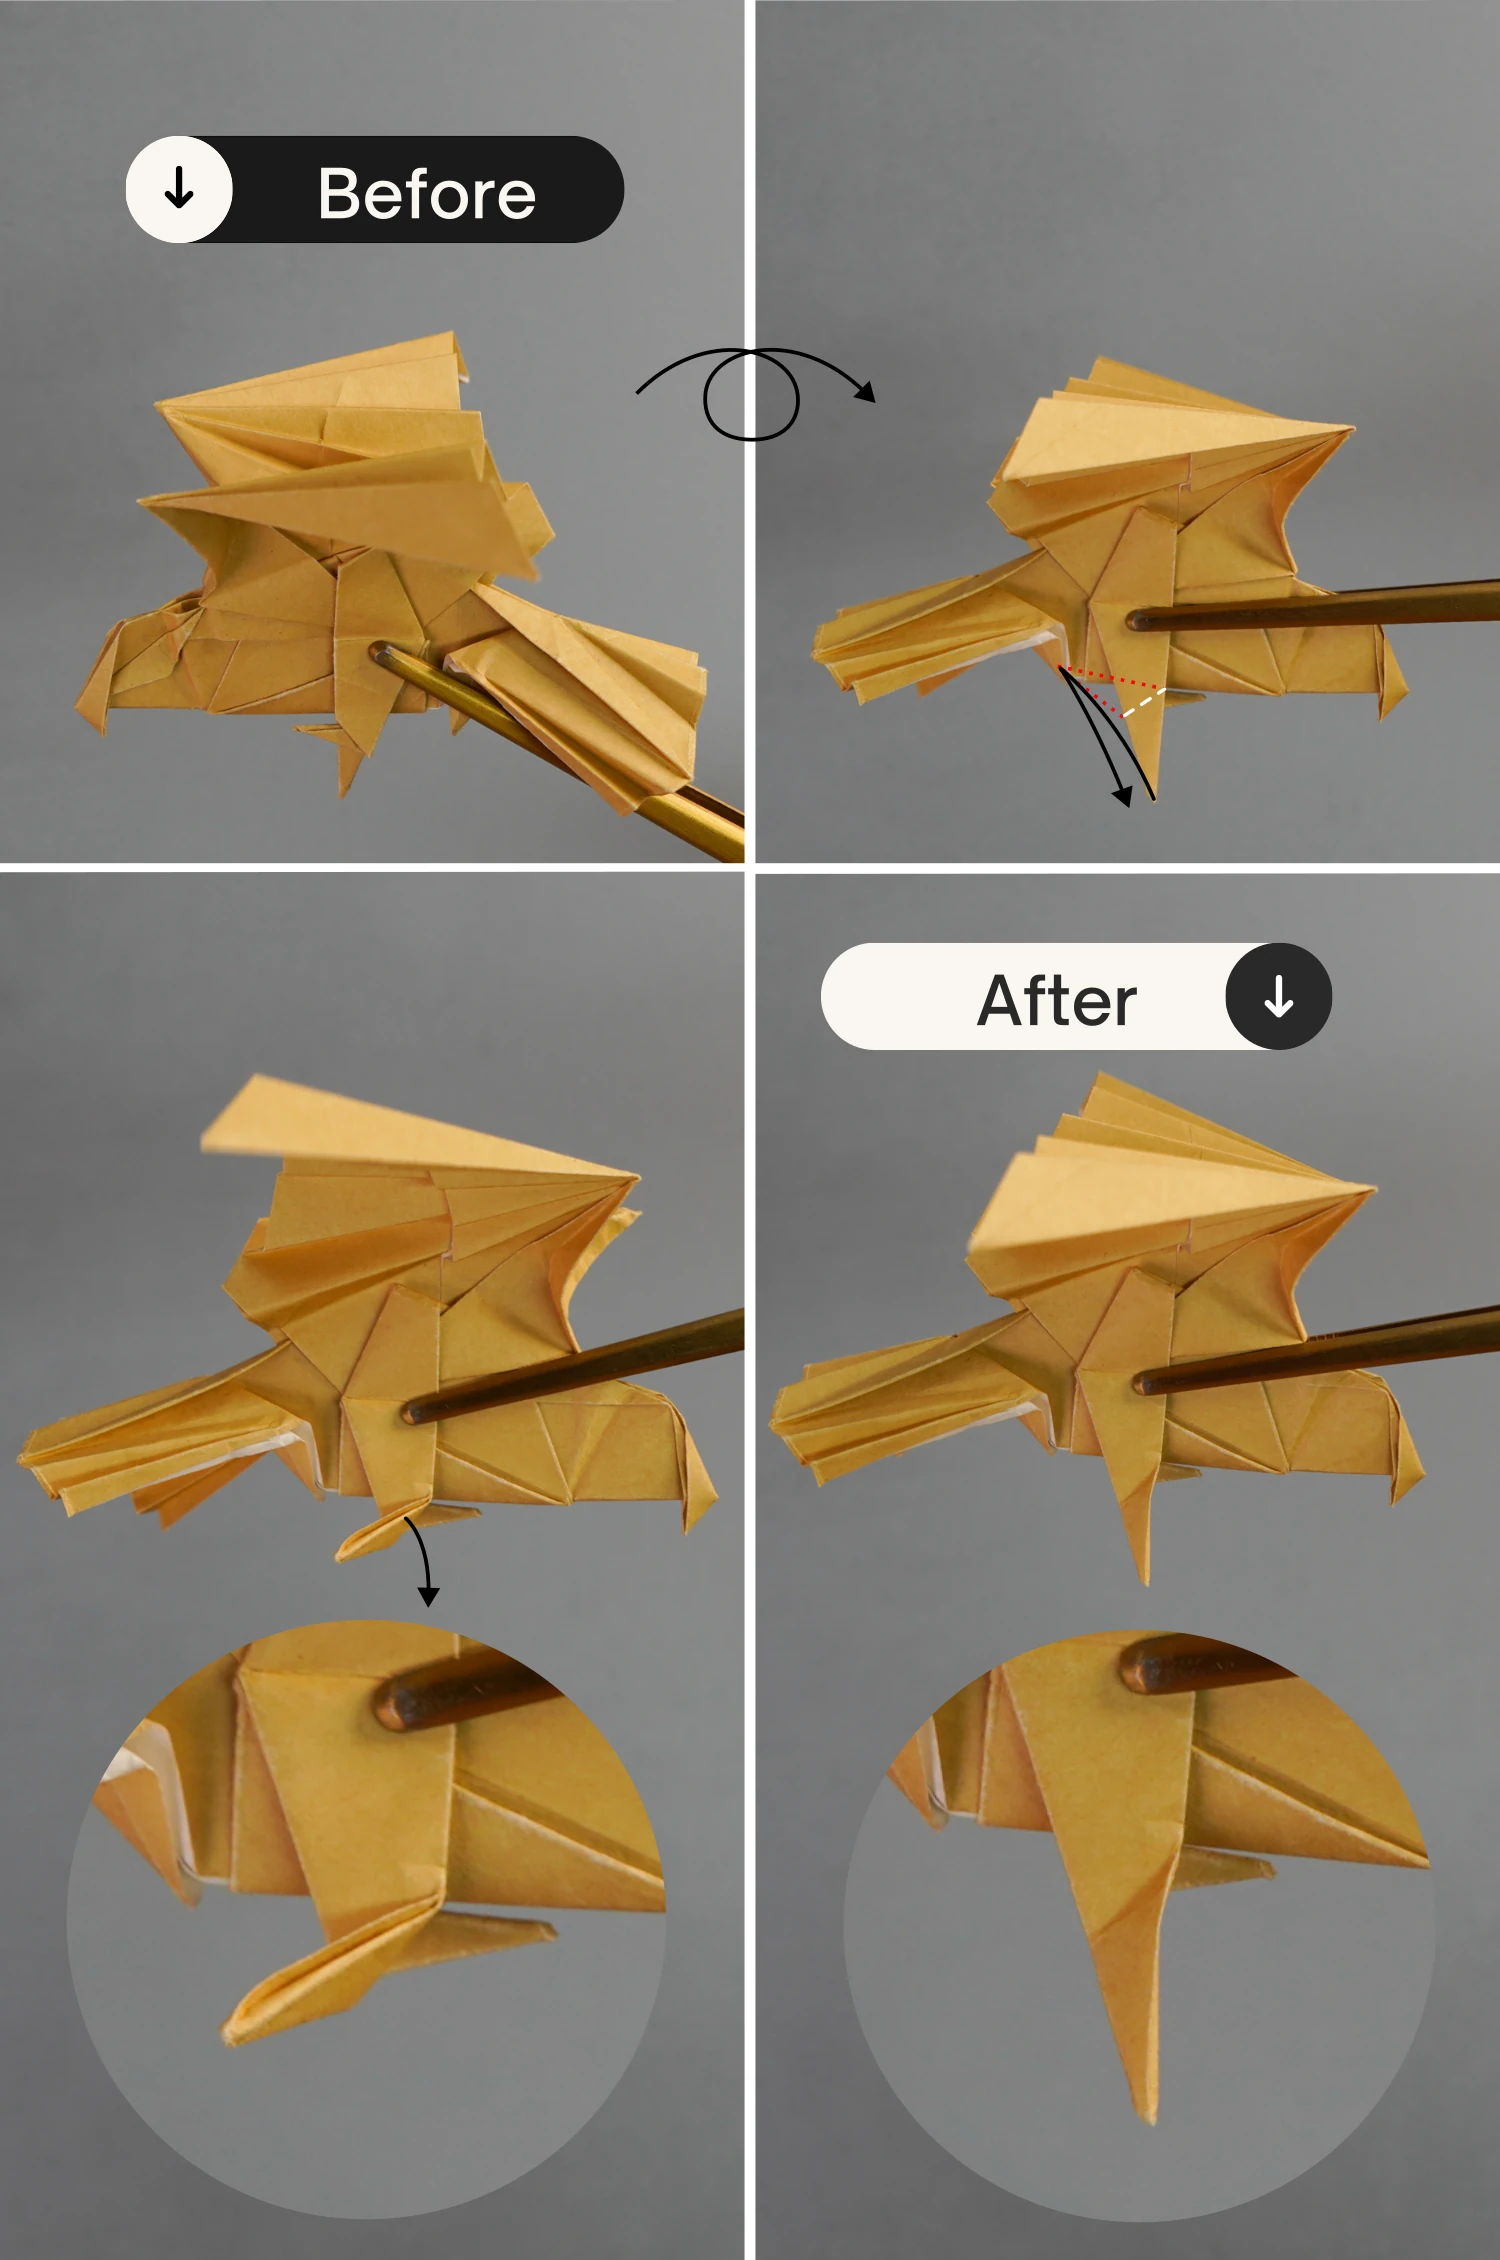
Step 50
Focus on the tail part, view it from the top, and push down the two layers between the tail toward the center.
Rotate the tail from the back to the front so that it is attached to the front of the model and flatten it well. Rotate it in the opposite direction so that it is attached to the back of the model and flatten it well again. Finally, rotate it back to the original position, and you will get a flat tail.
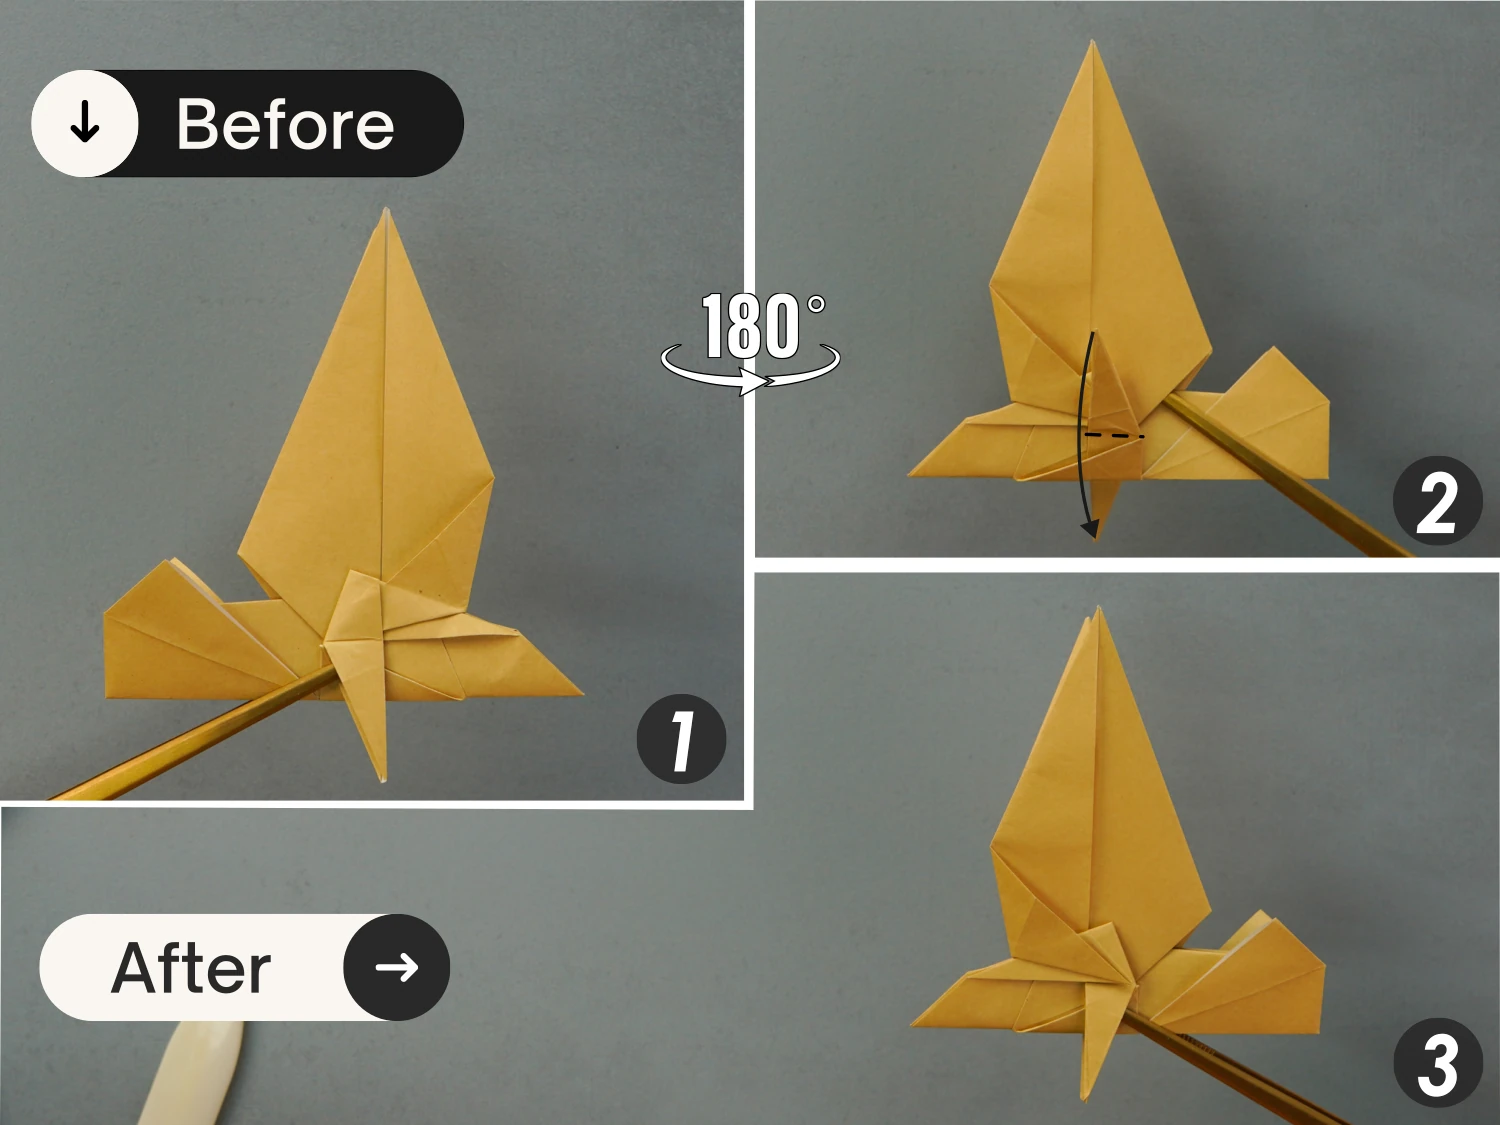
Step 51
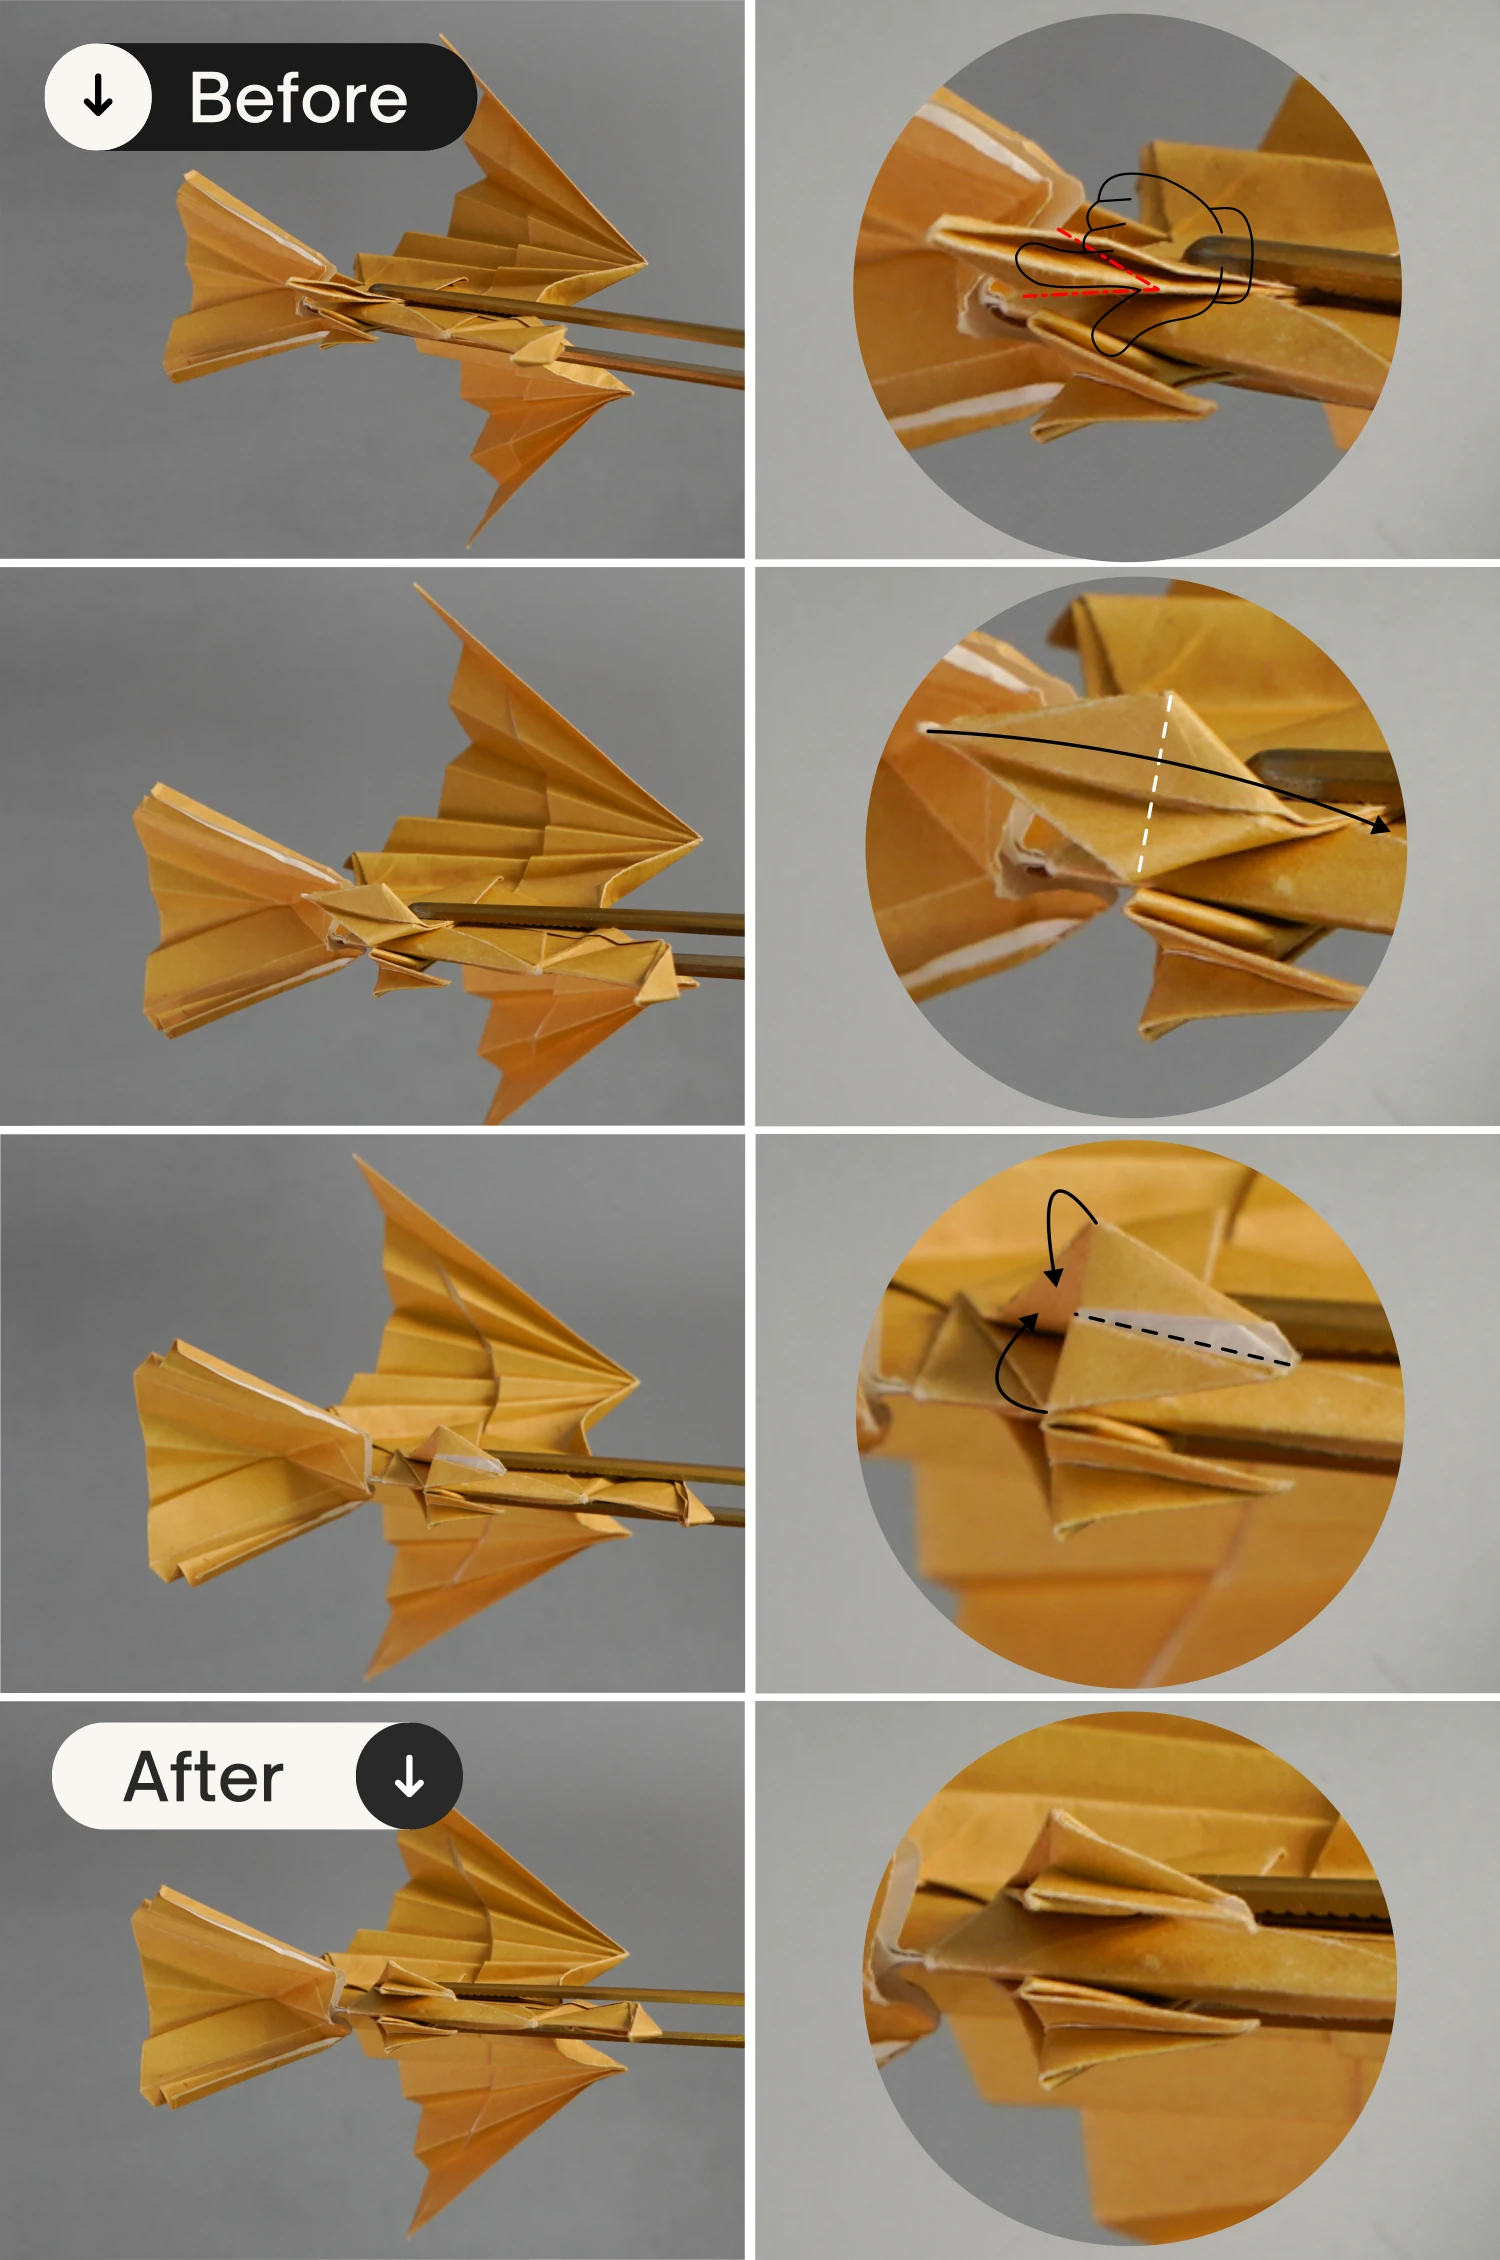
Focus on the two layers between the tail, fold the top one upwards and the bottom one downwards along the dotted lines.
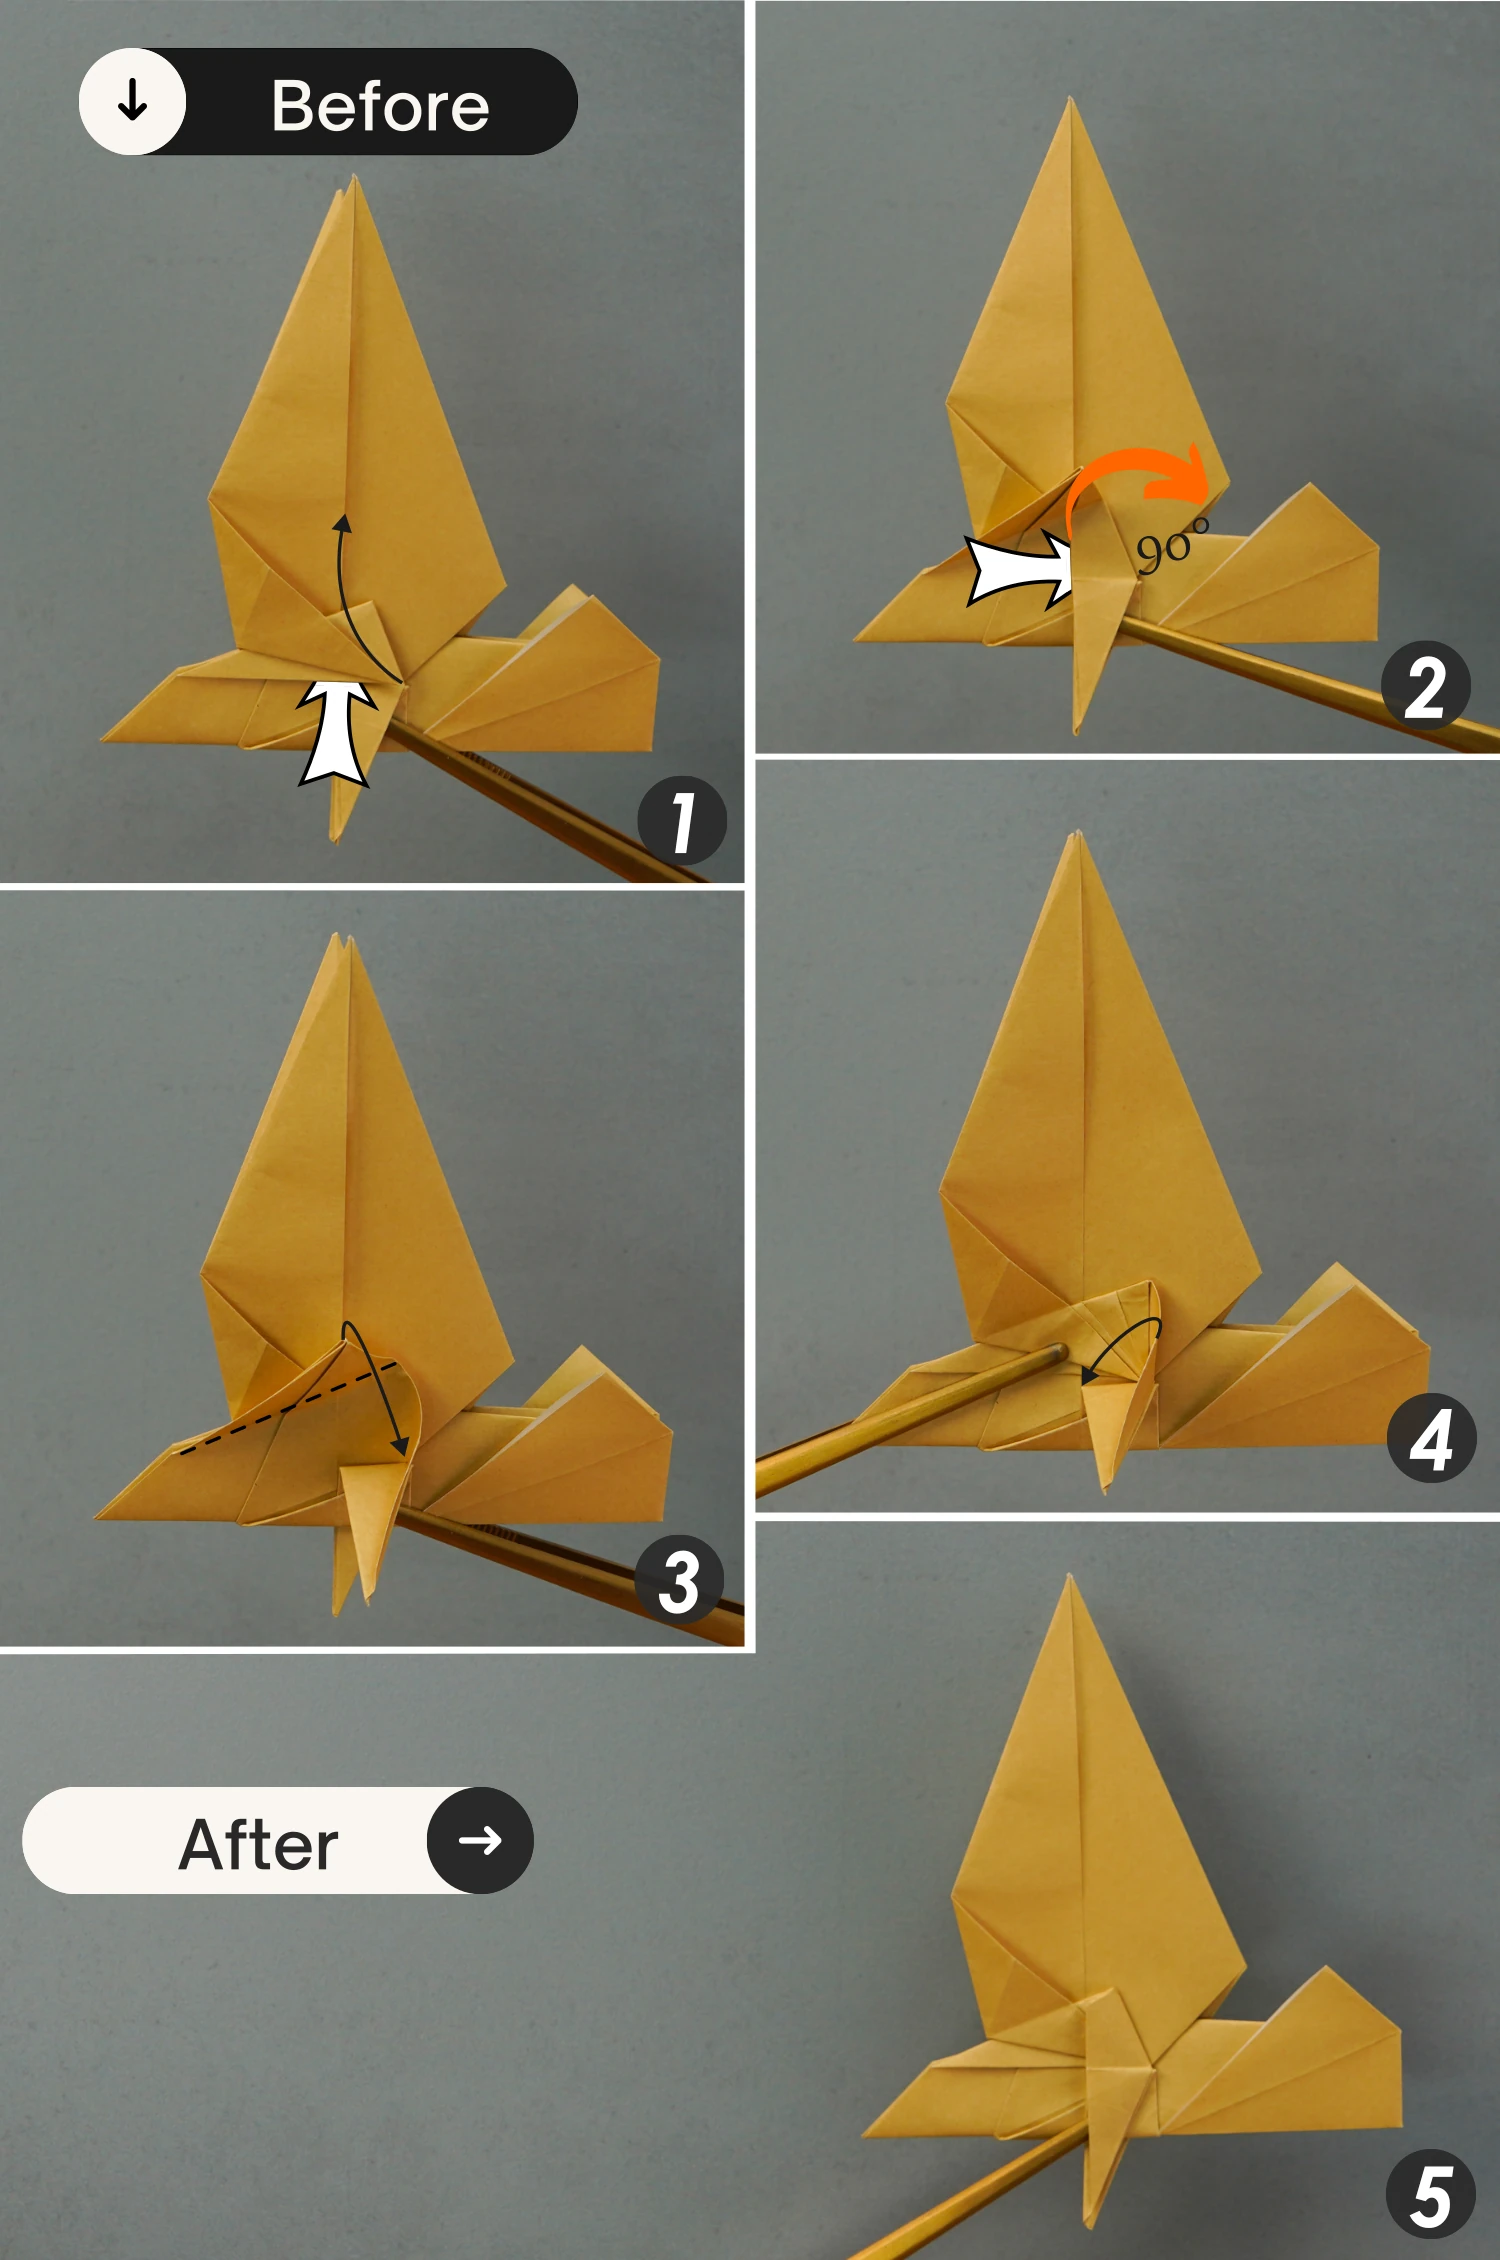
Step 52
Press the sides of the tail down, and at the same time shape a small arch on the left side of its bottom as shown in the second picture. Finally, fold the sides of the tail down so that they are together at the bottom.
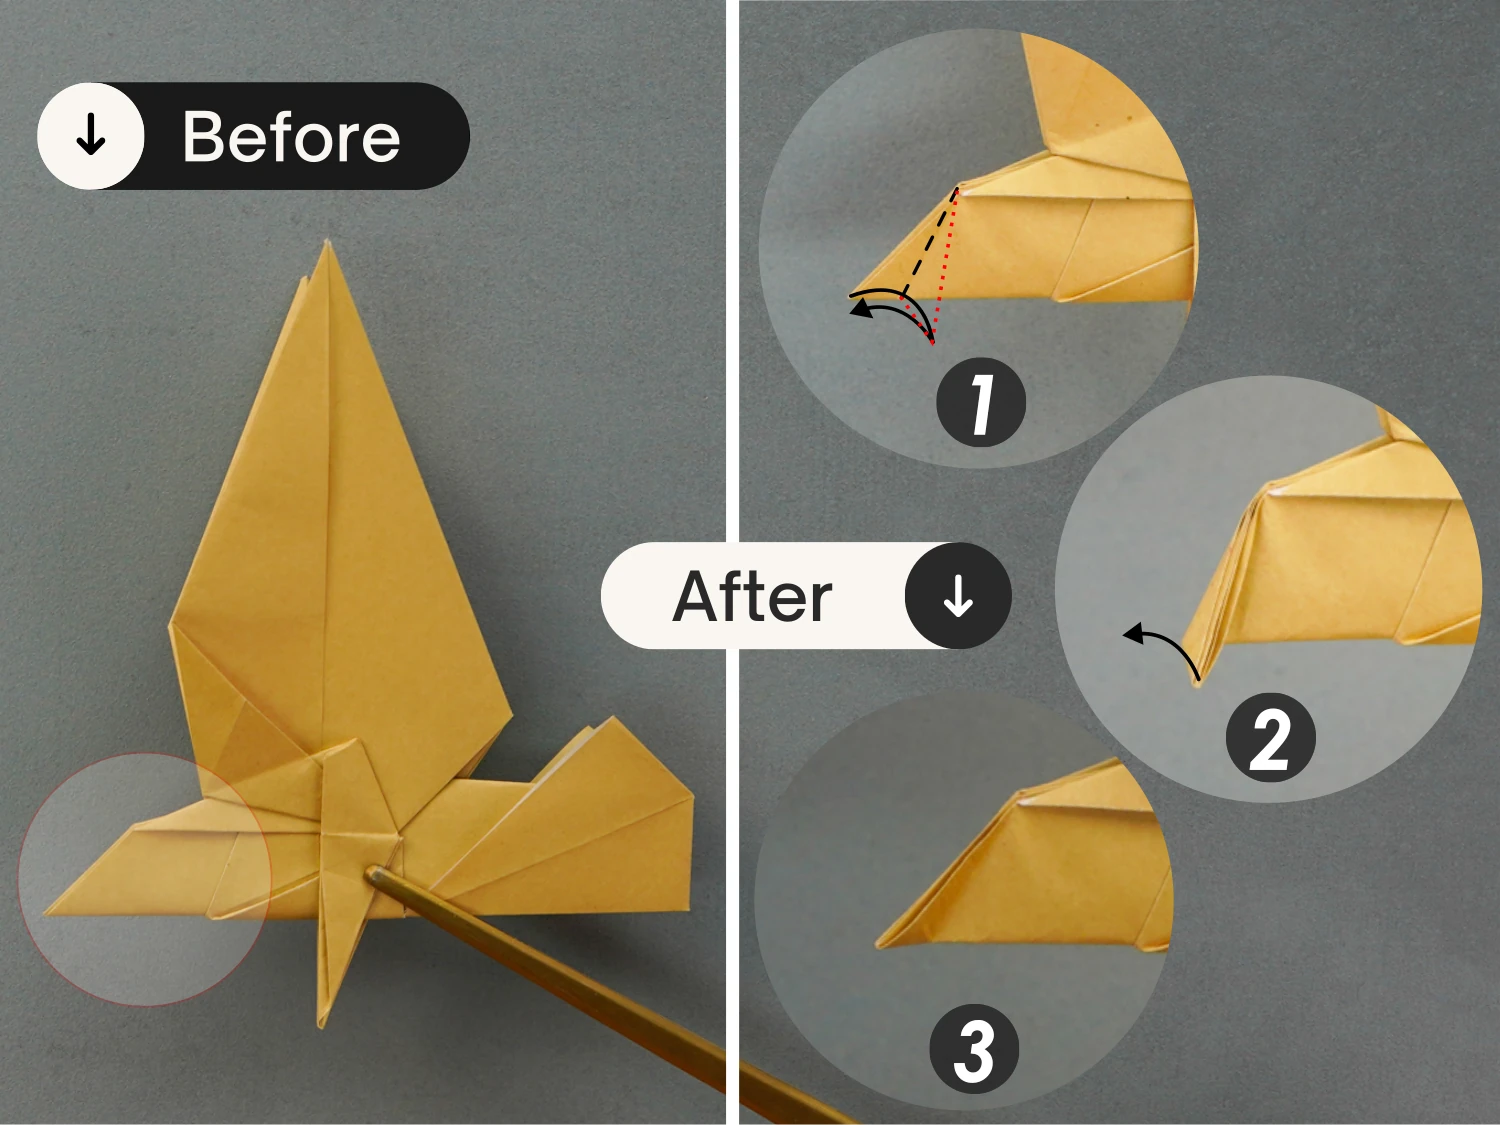
Step 53
Concentrate on the bottom side of the tail, fold one of its sides inwards a little, then outwards a little, and finally unfold it to give it a natural zigzag.
Step 54
In the same way, make the other side of the tail a natural zigzag as well.

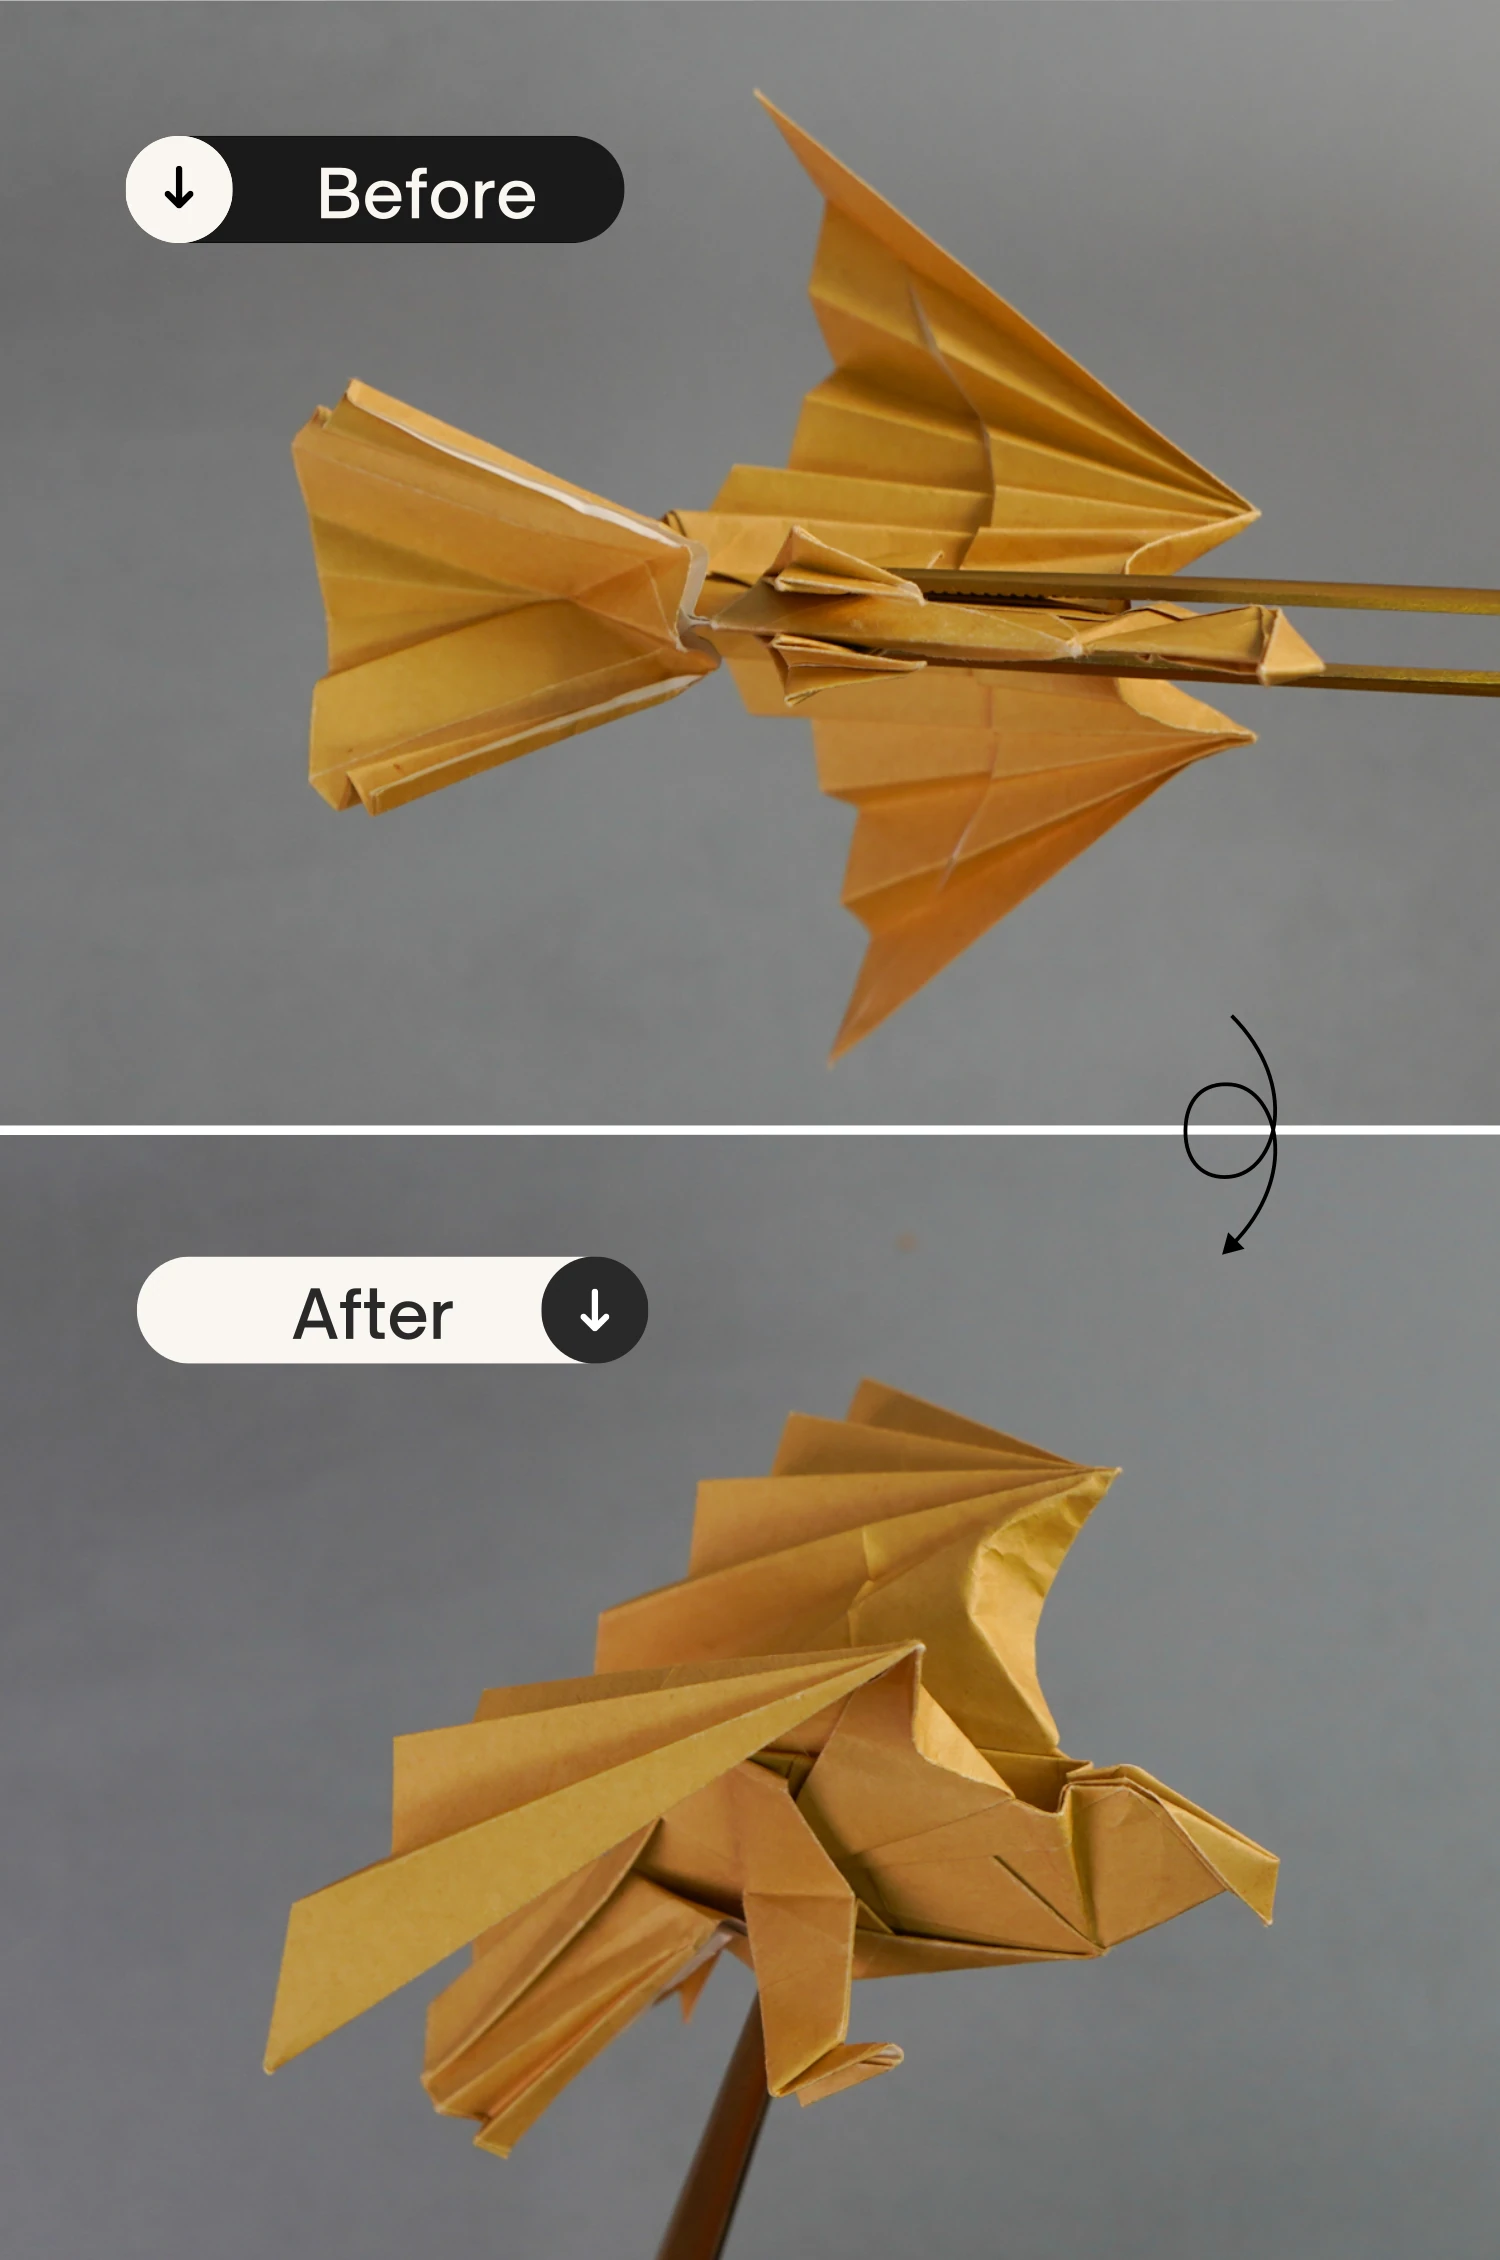
Step 55
Flip the paper over, press down both sides of the tail, making them align at the bottom.
Next, fold the top edge downward a little and then upward a little, finally expand the tail part, you will notice that the entire tail part has a natural zigzag.

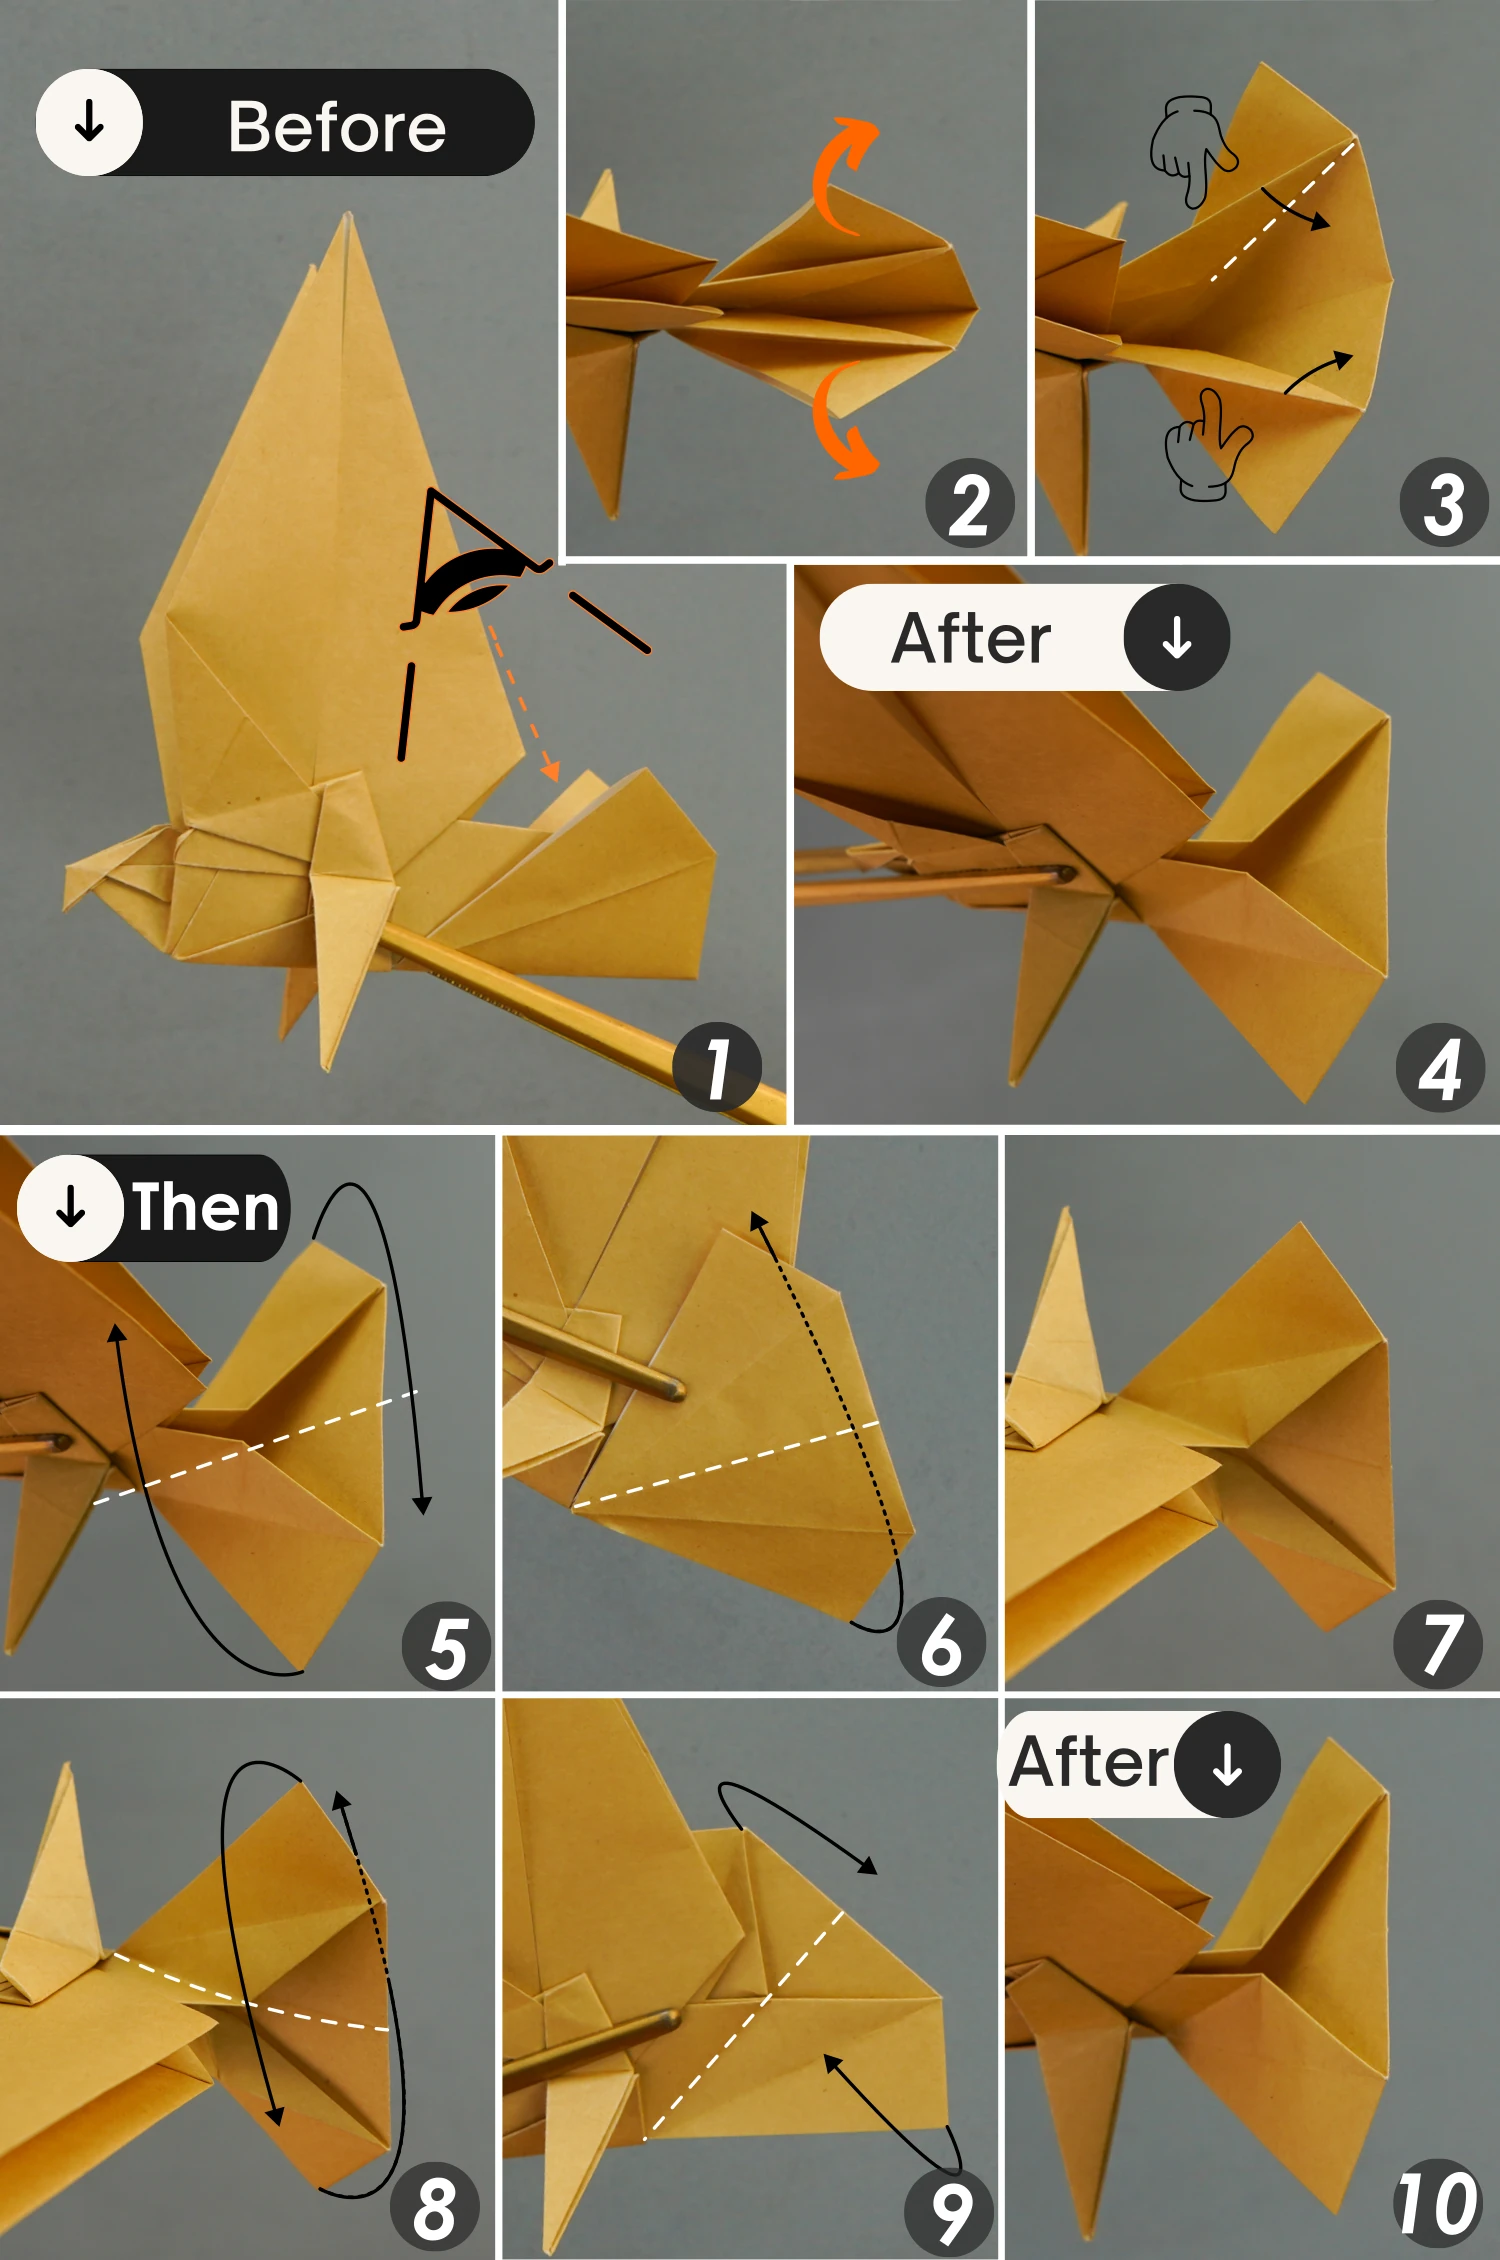
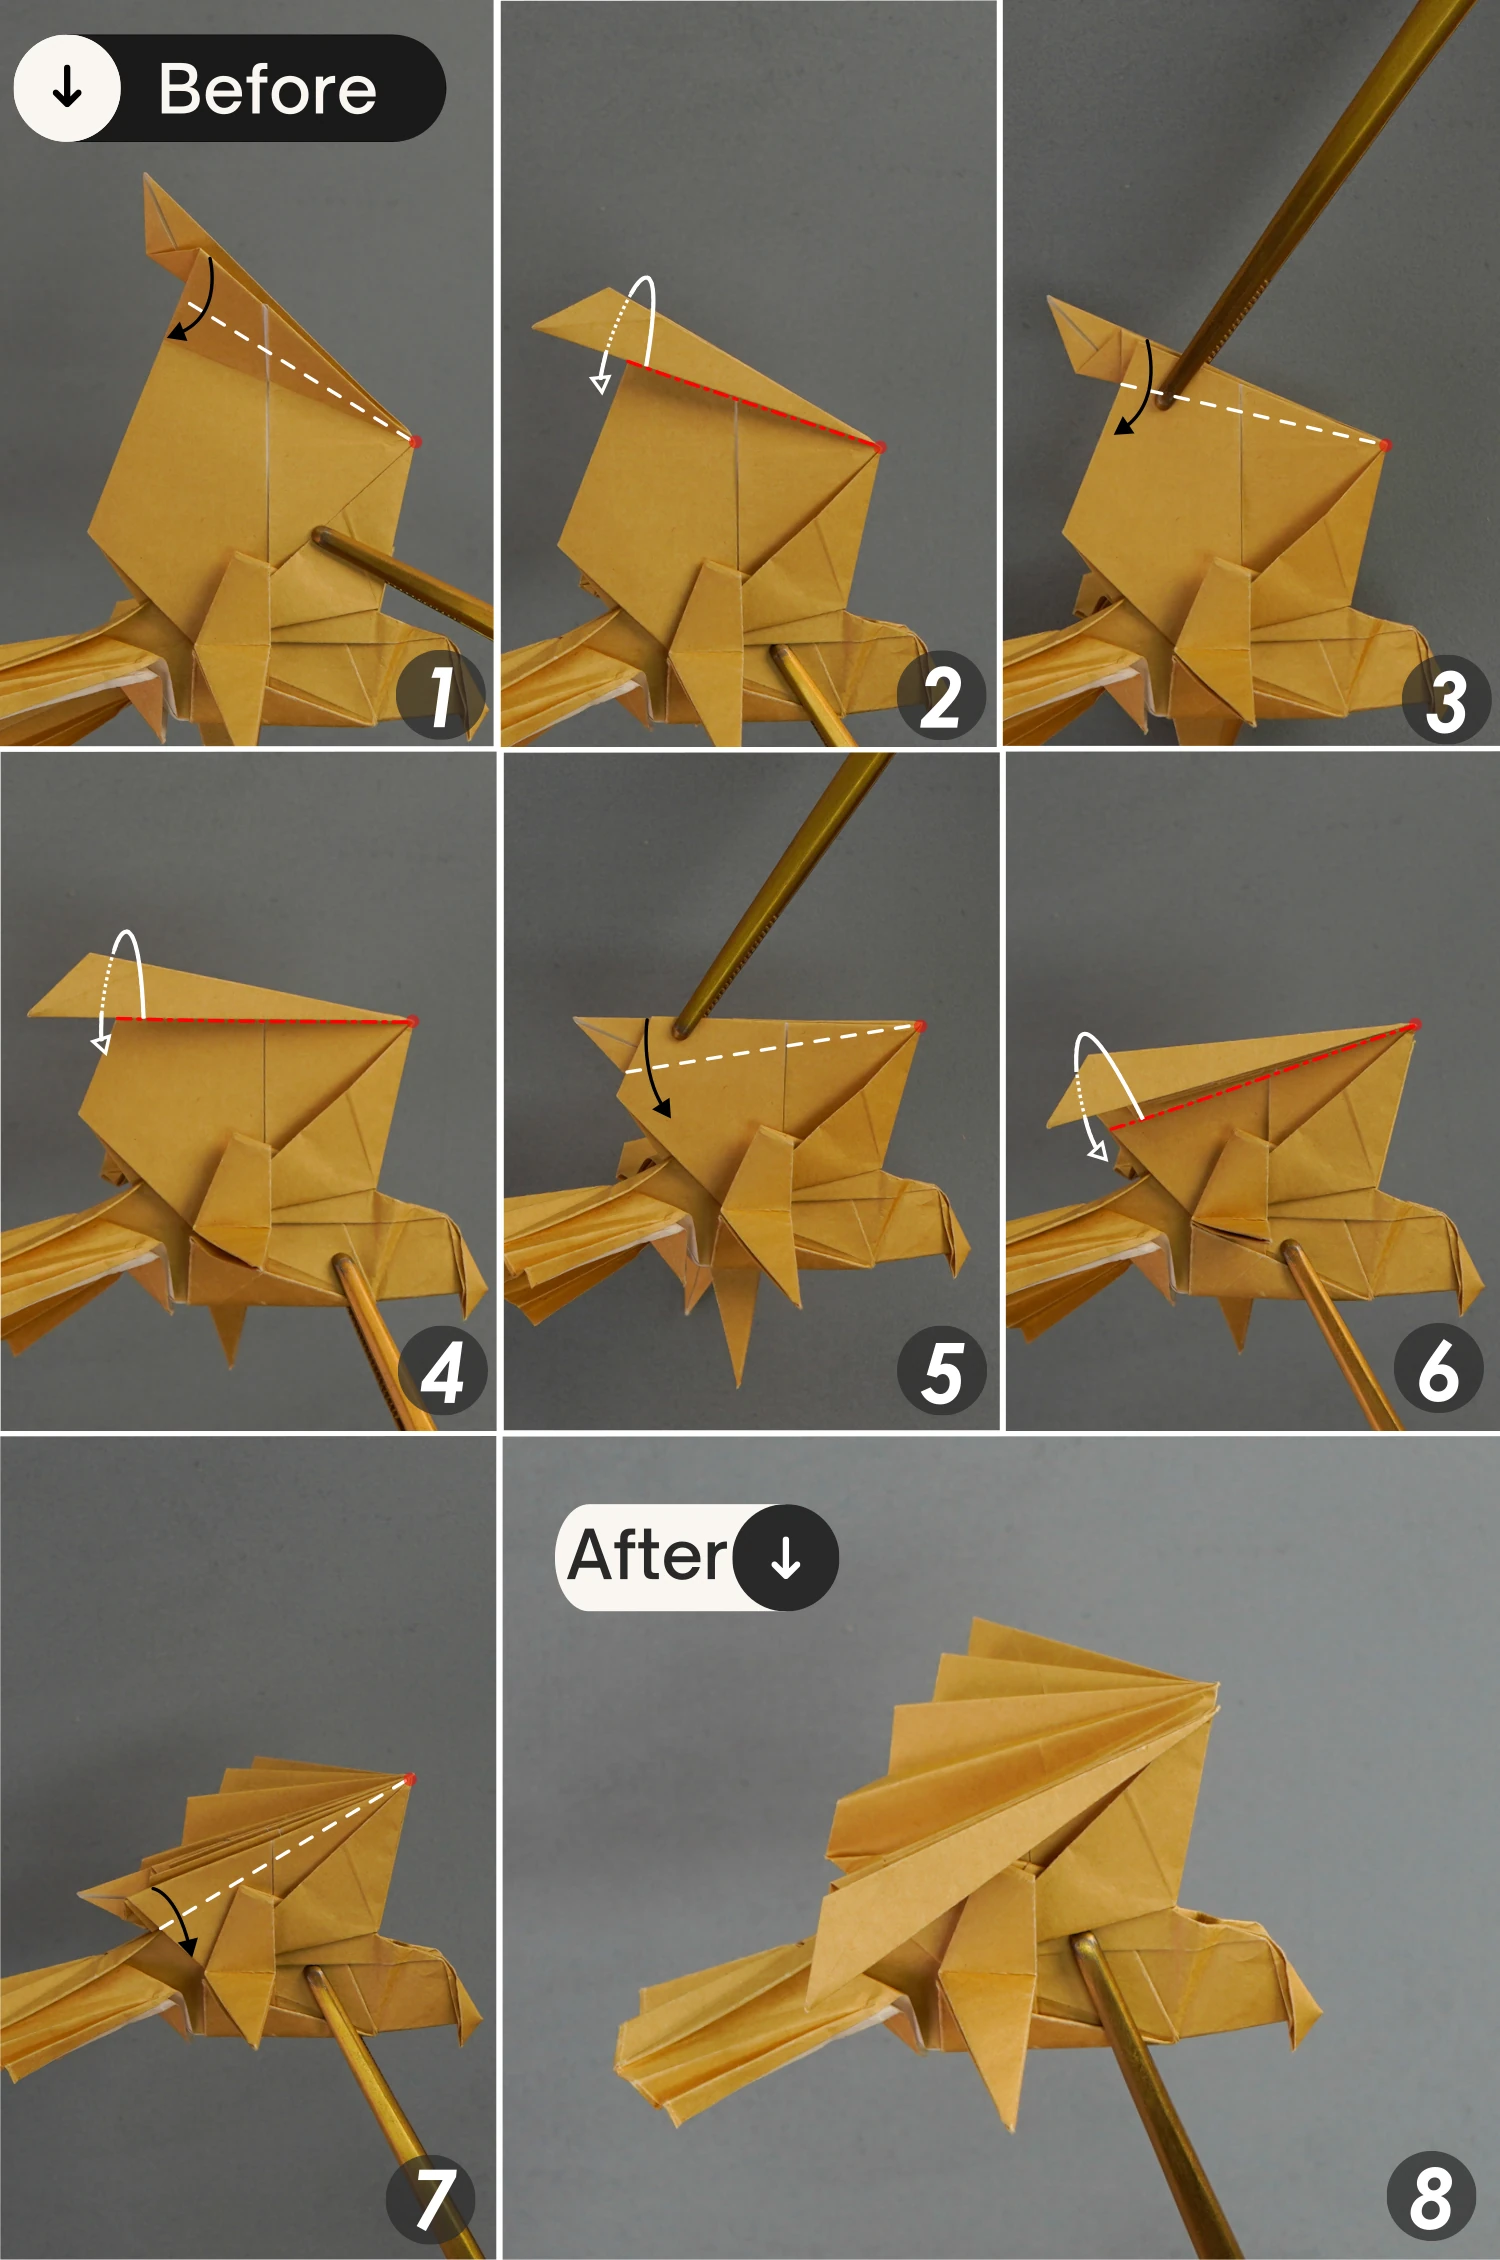
Step 56
Lay the paper flat, take the front wing and fold it down along the dotted line(picture 2), then fold it back to the top (picture 3), next fold it down again (picture 4), and finally expand this wing along the first crease shown by the red dotted line (picture 5).
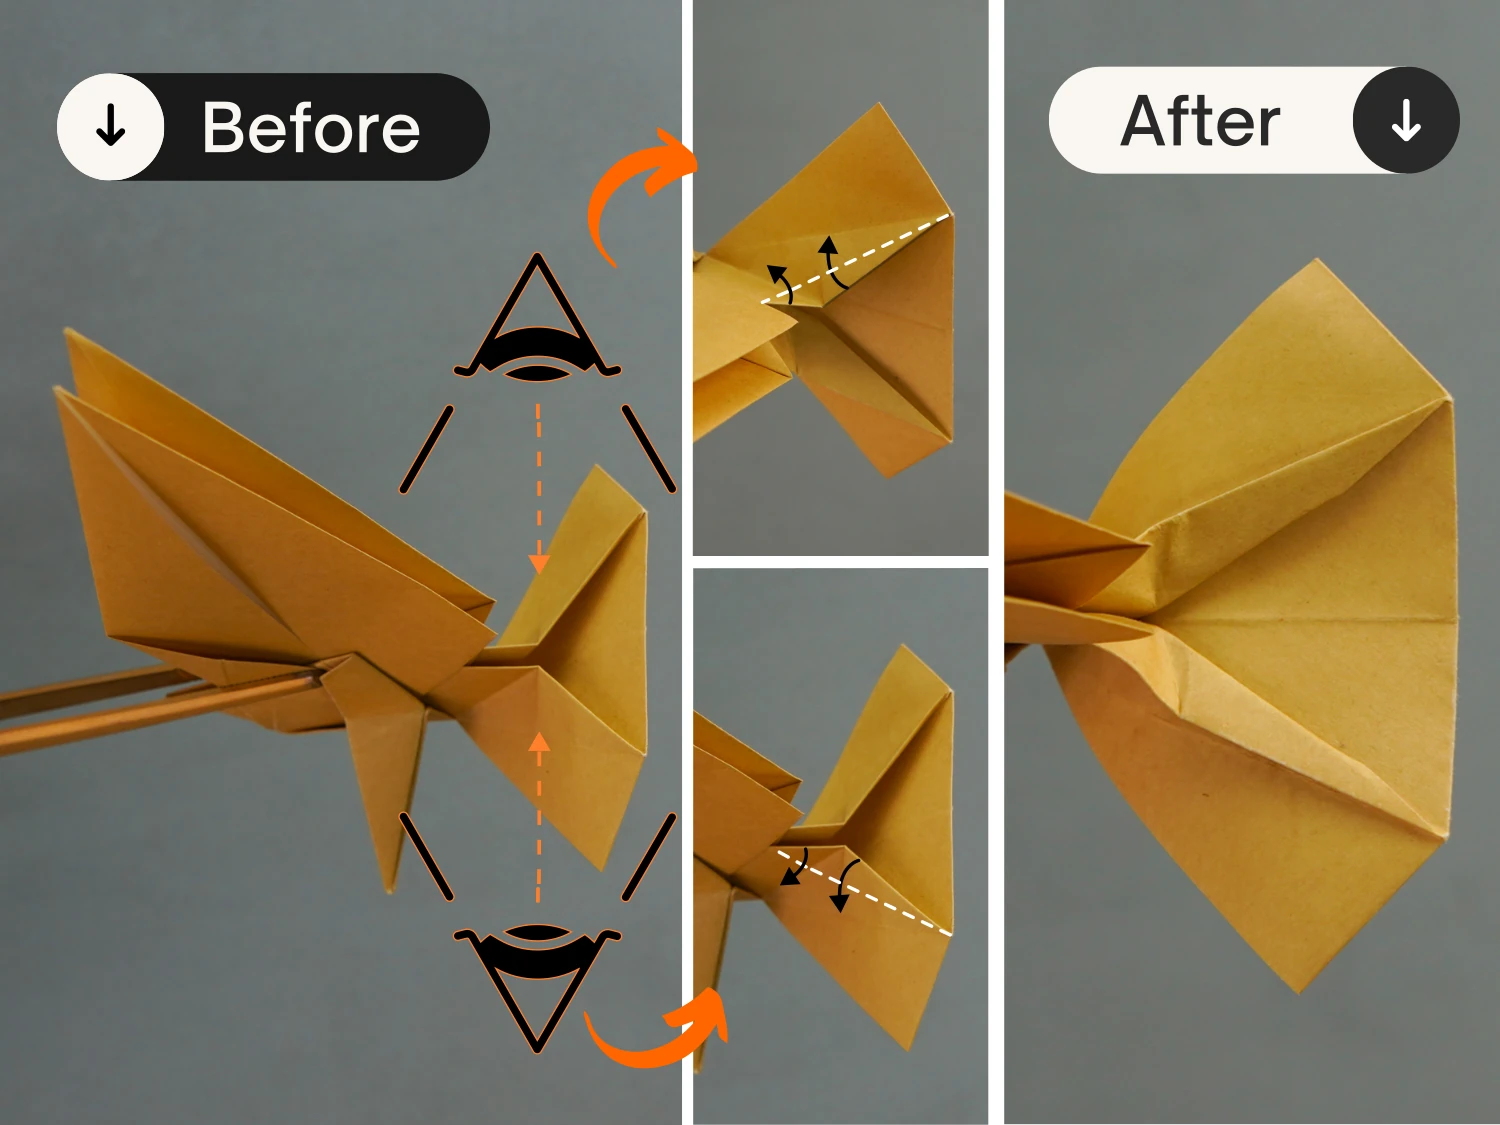
Step 57
Fold the two top left edges downward to the front along the dotted line (picture 1), then fold the folded part downward to the back along the crease shown by the red dotted line(picture 2), next fold the folded part downward to the front along the dotted line( picture 3). Then repeat this four times, one forward and one backward(pictures 4, 5, 6, 7)
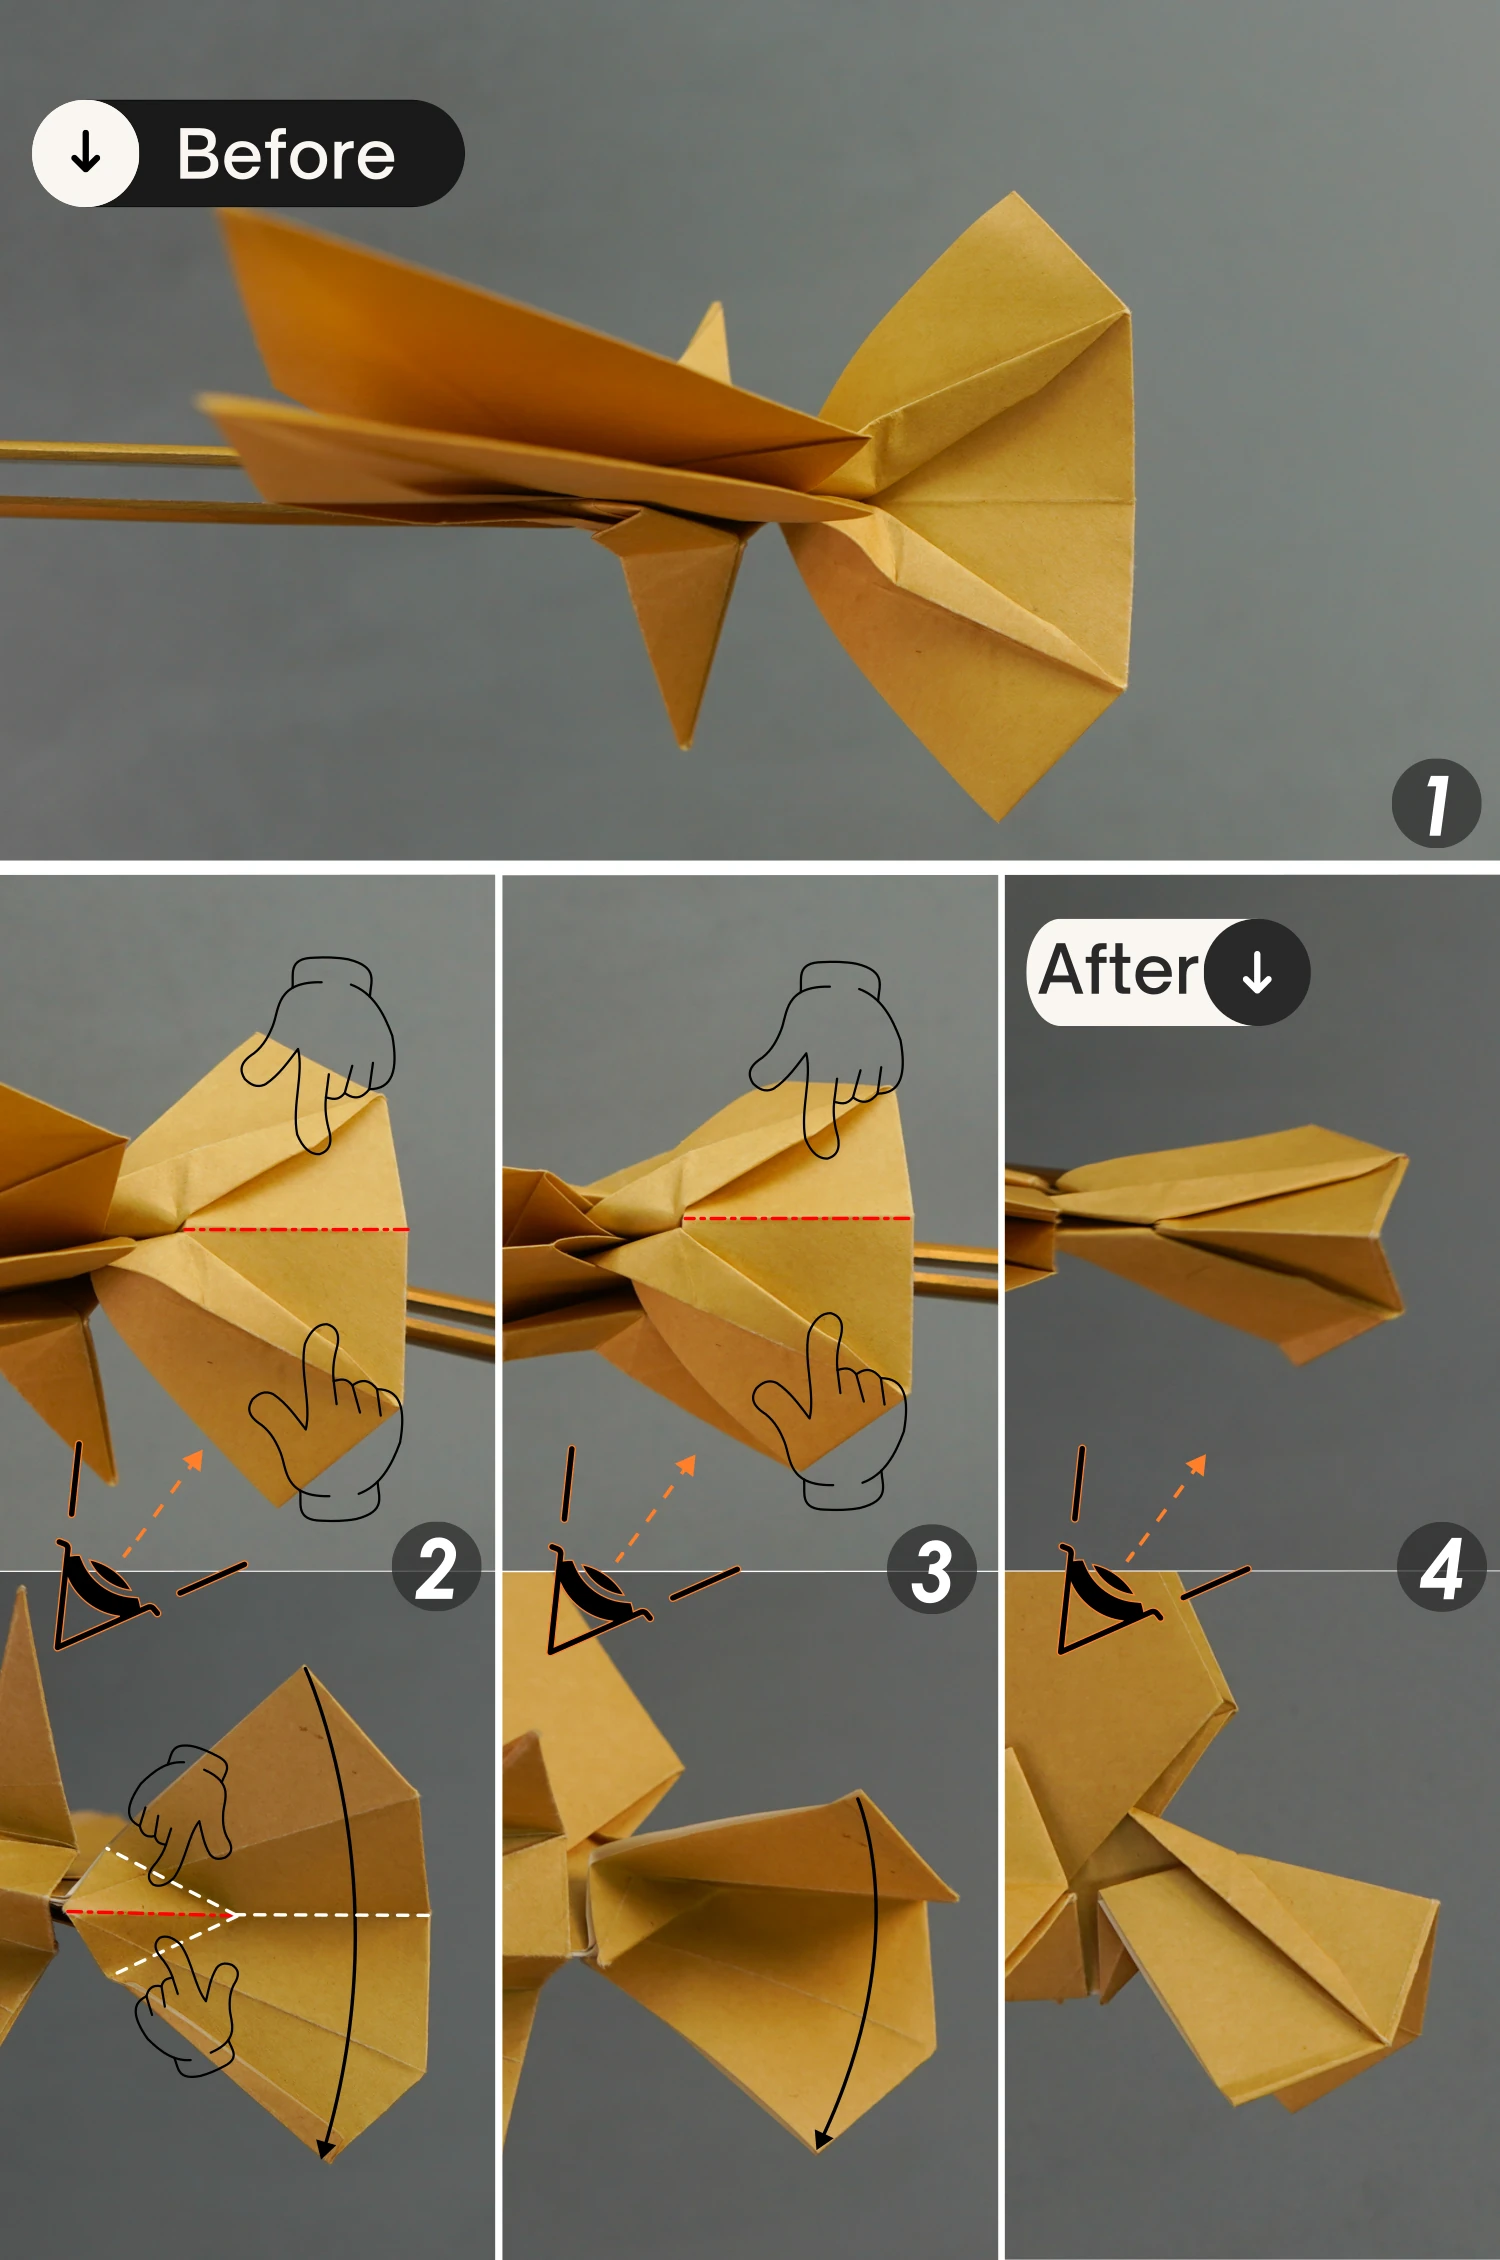
Step 58
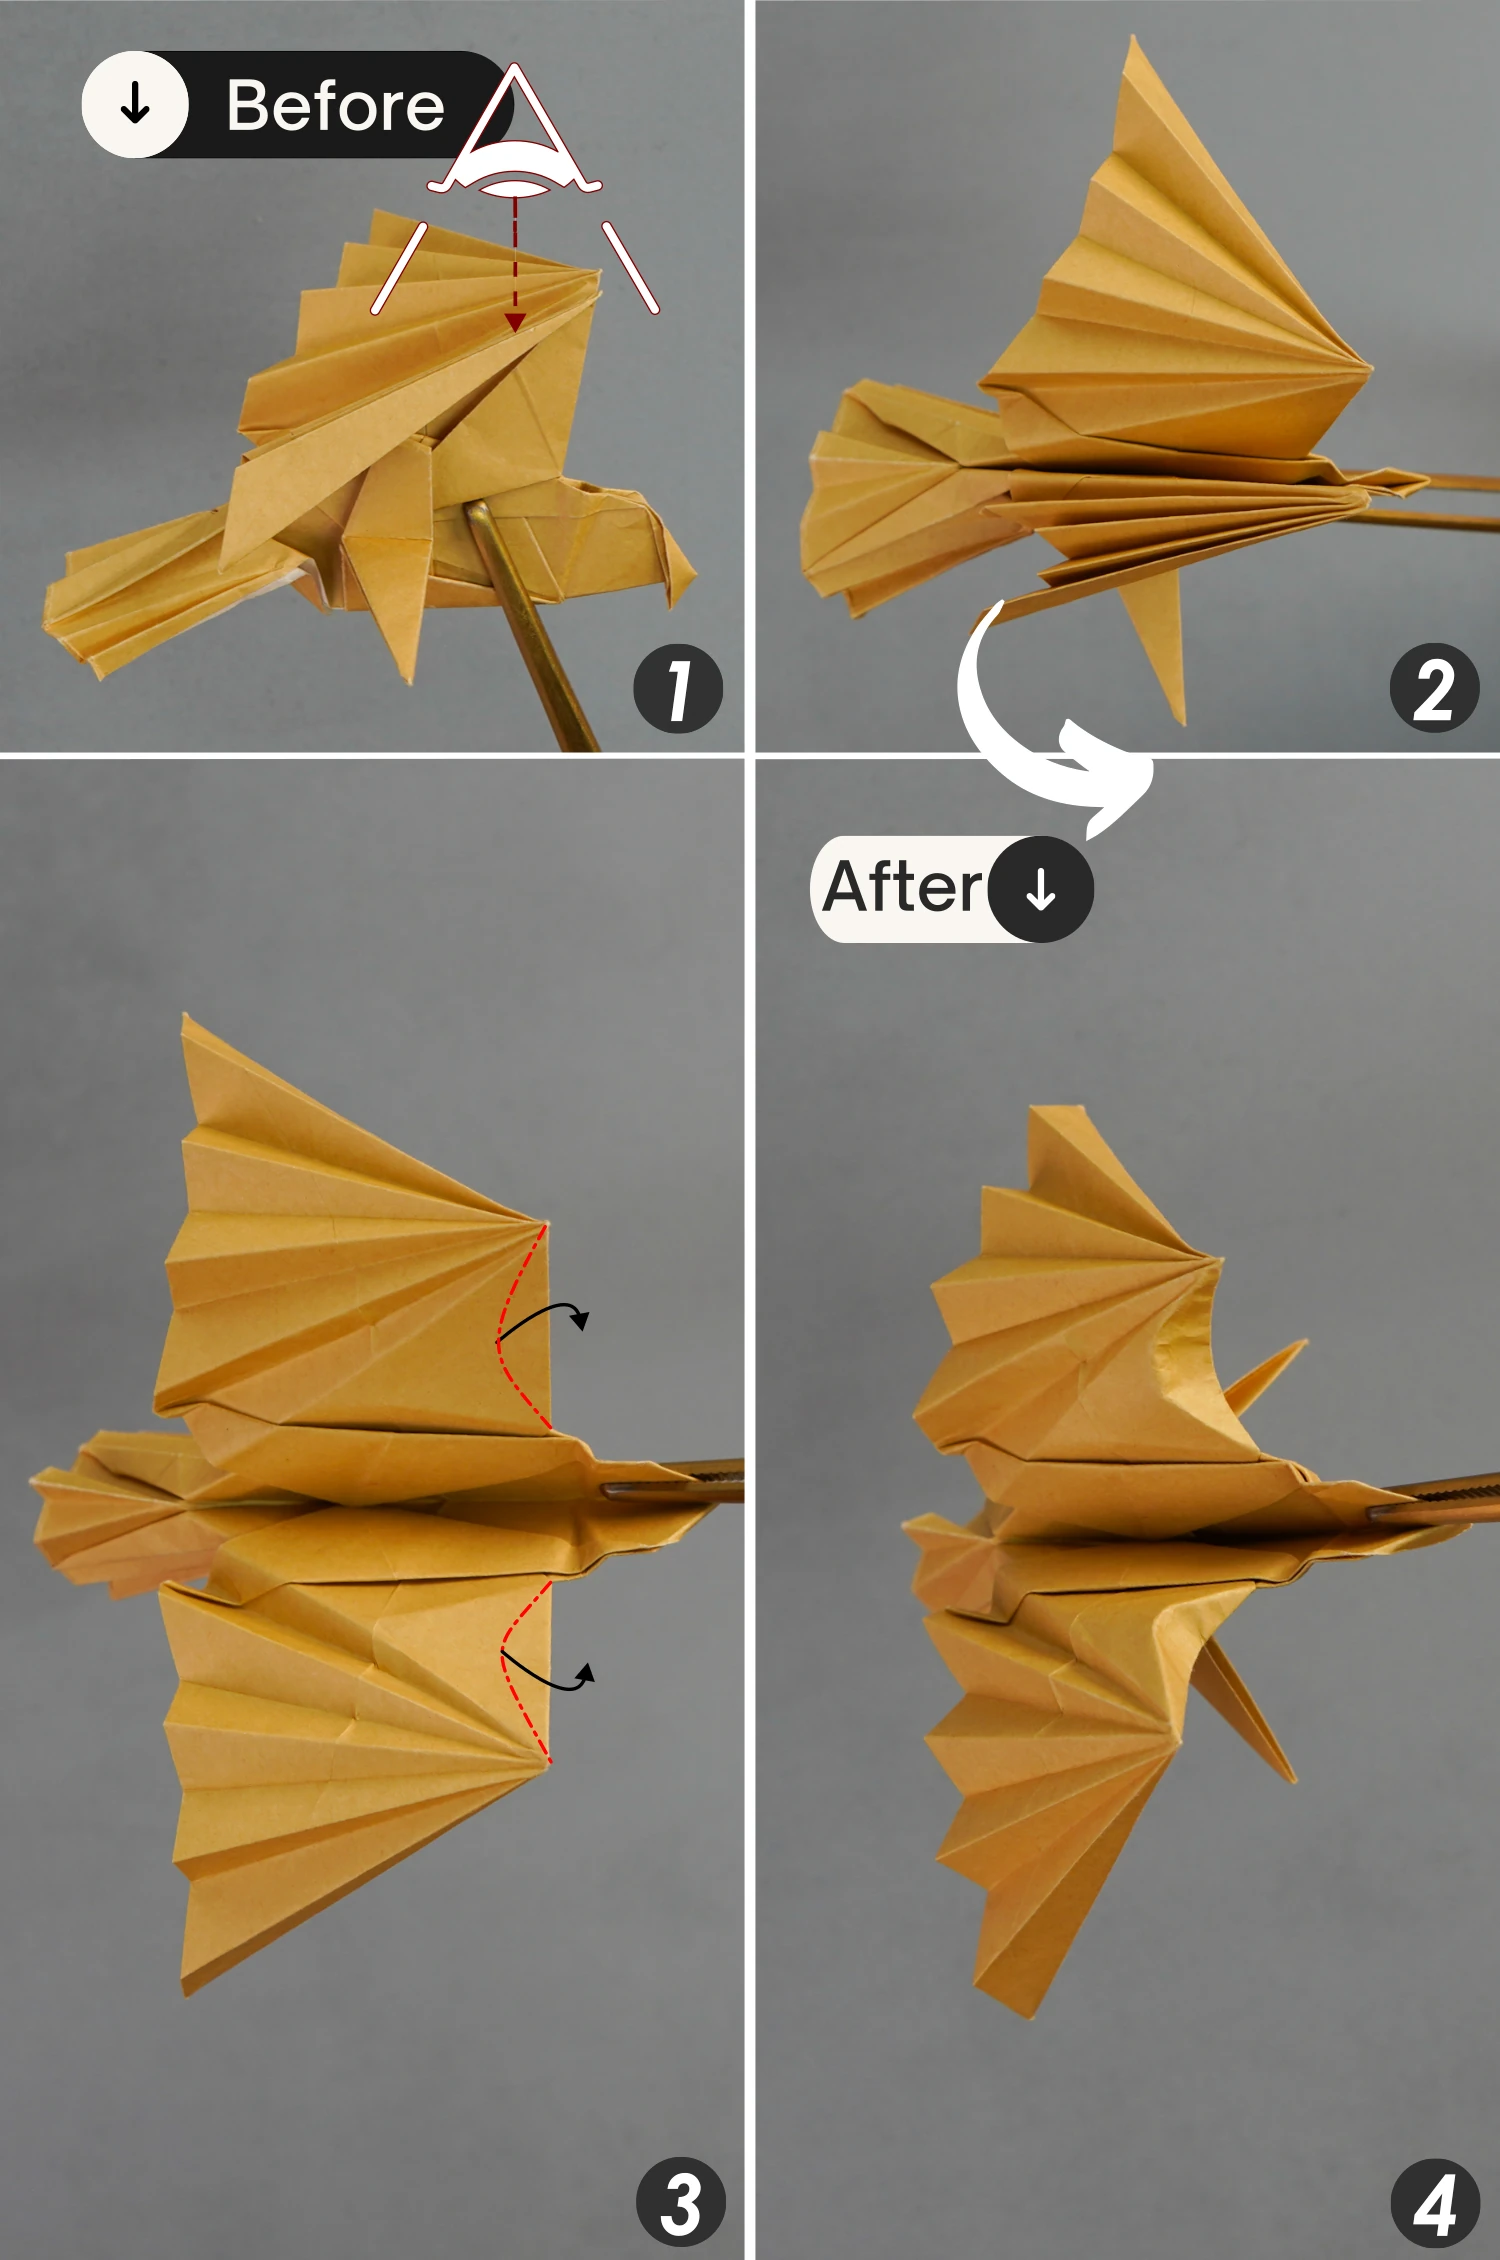
View the paper from the top, expand the folded wing horizontally, and flip the paper over.
Step 59
Take the wing and fold it down along the dotted line(picture 1), then fold it back to the top (picture 2), next fold it down again (picture 3), and finally expand this wing along the first crease shown by the red dotted line (picture 4).
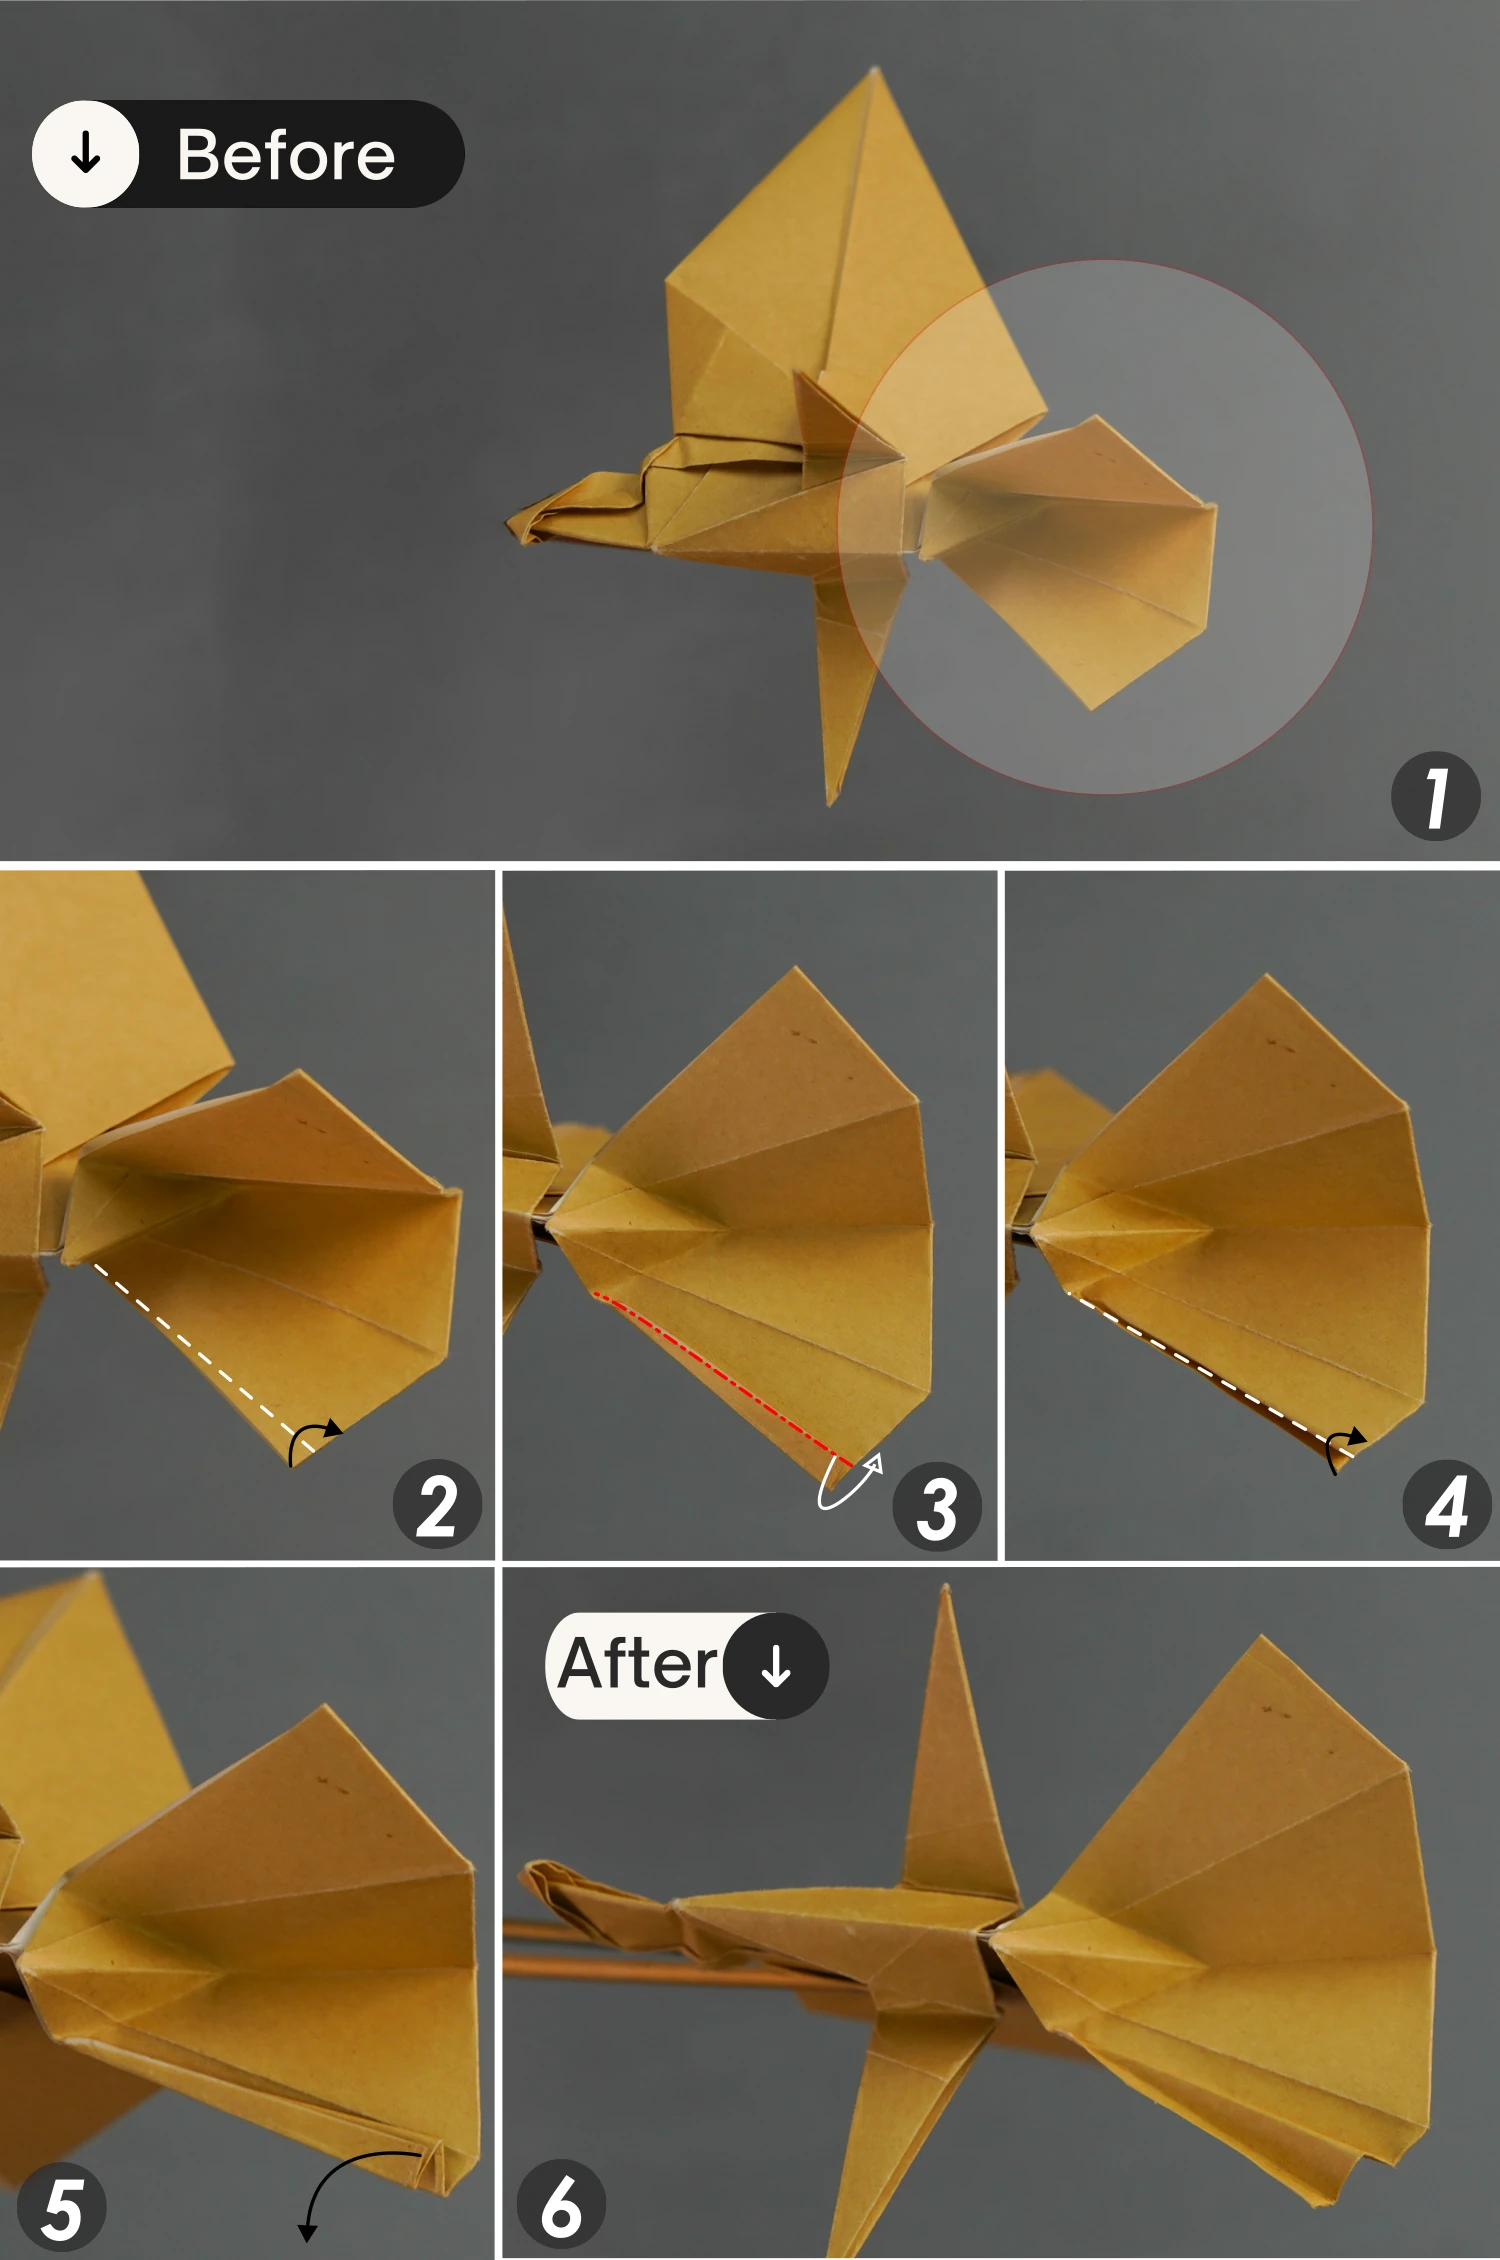
Step 60
As you did in step 57, fold the two top right edges downward to the front along the dotted line (picture 1), then fold the folded part downward to the back along the crease shown by the red dotted line(picture 2), next fold the folded part downward to the front along the dotted line( picture 3). Then repeat this four times, one forward and one backward(pictures 4, 5, 6, 7).
Step 61
Similarly, expand this wing horizontally, and push the front edges of the two wings backward a little as the last two pictures show.
Step 62
Fold the front talon up a little, crease it well then unfold.
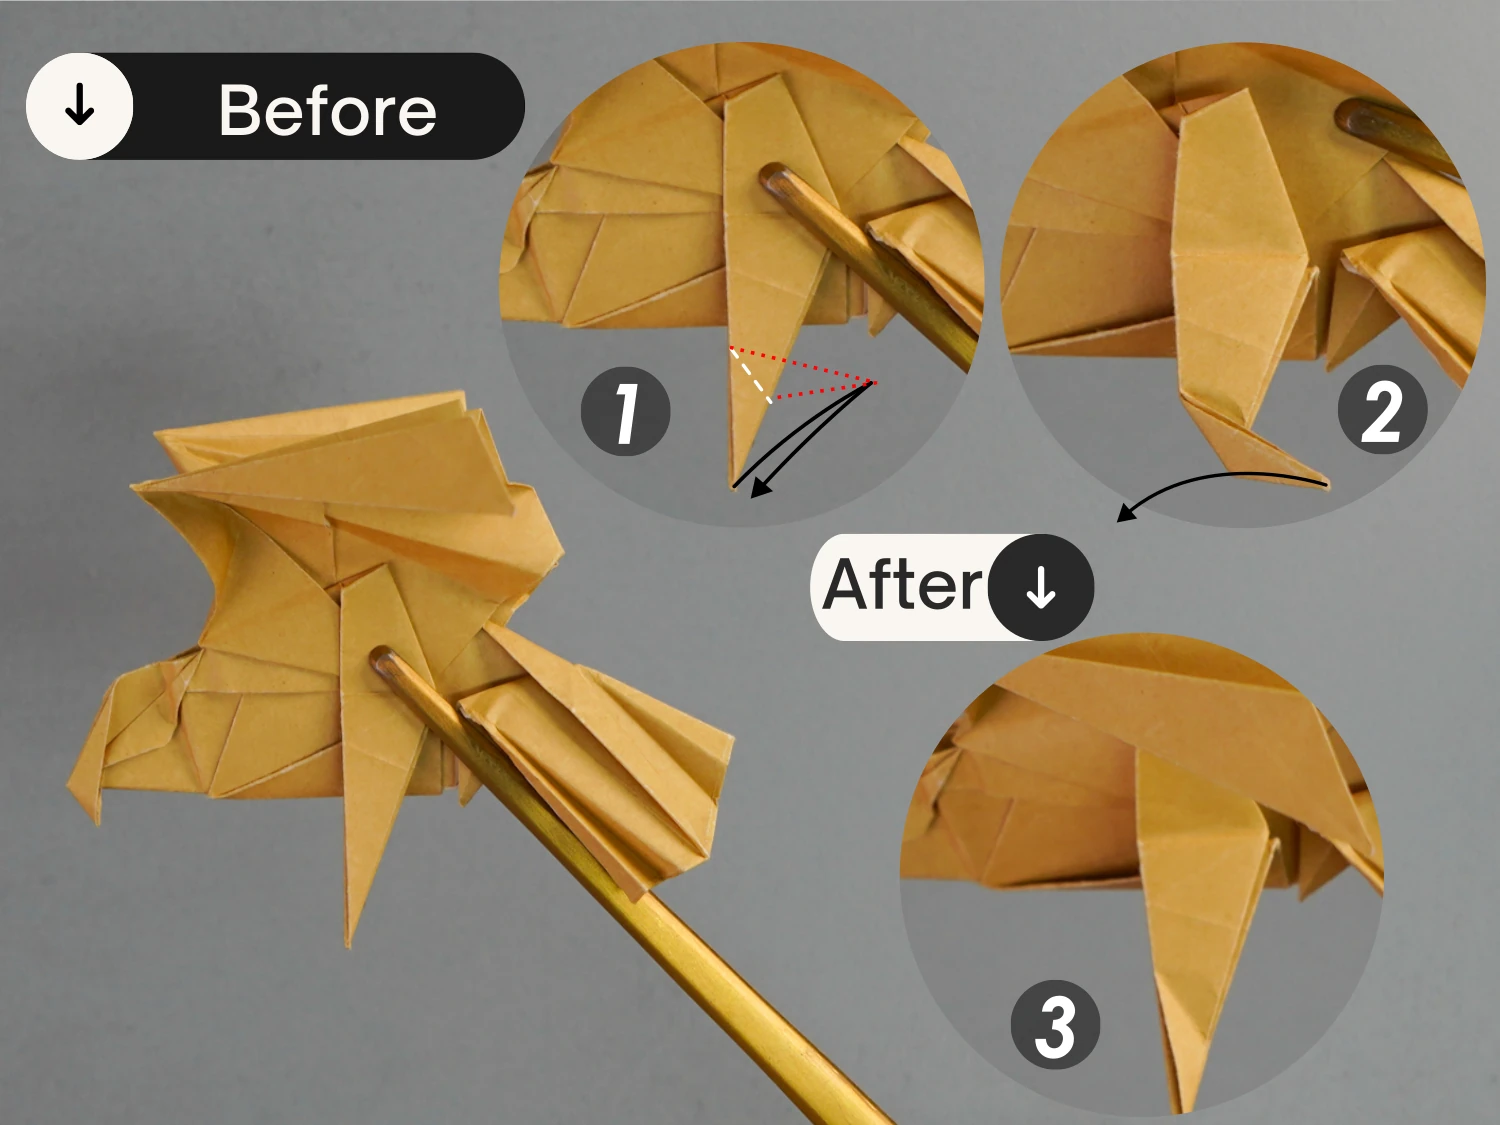
Step 63
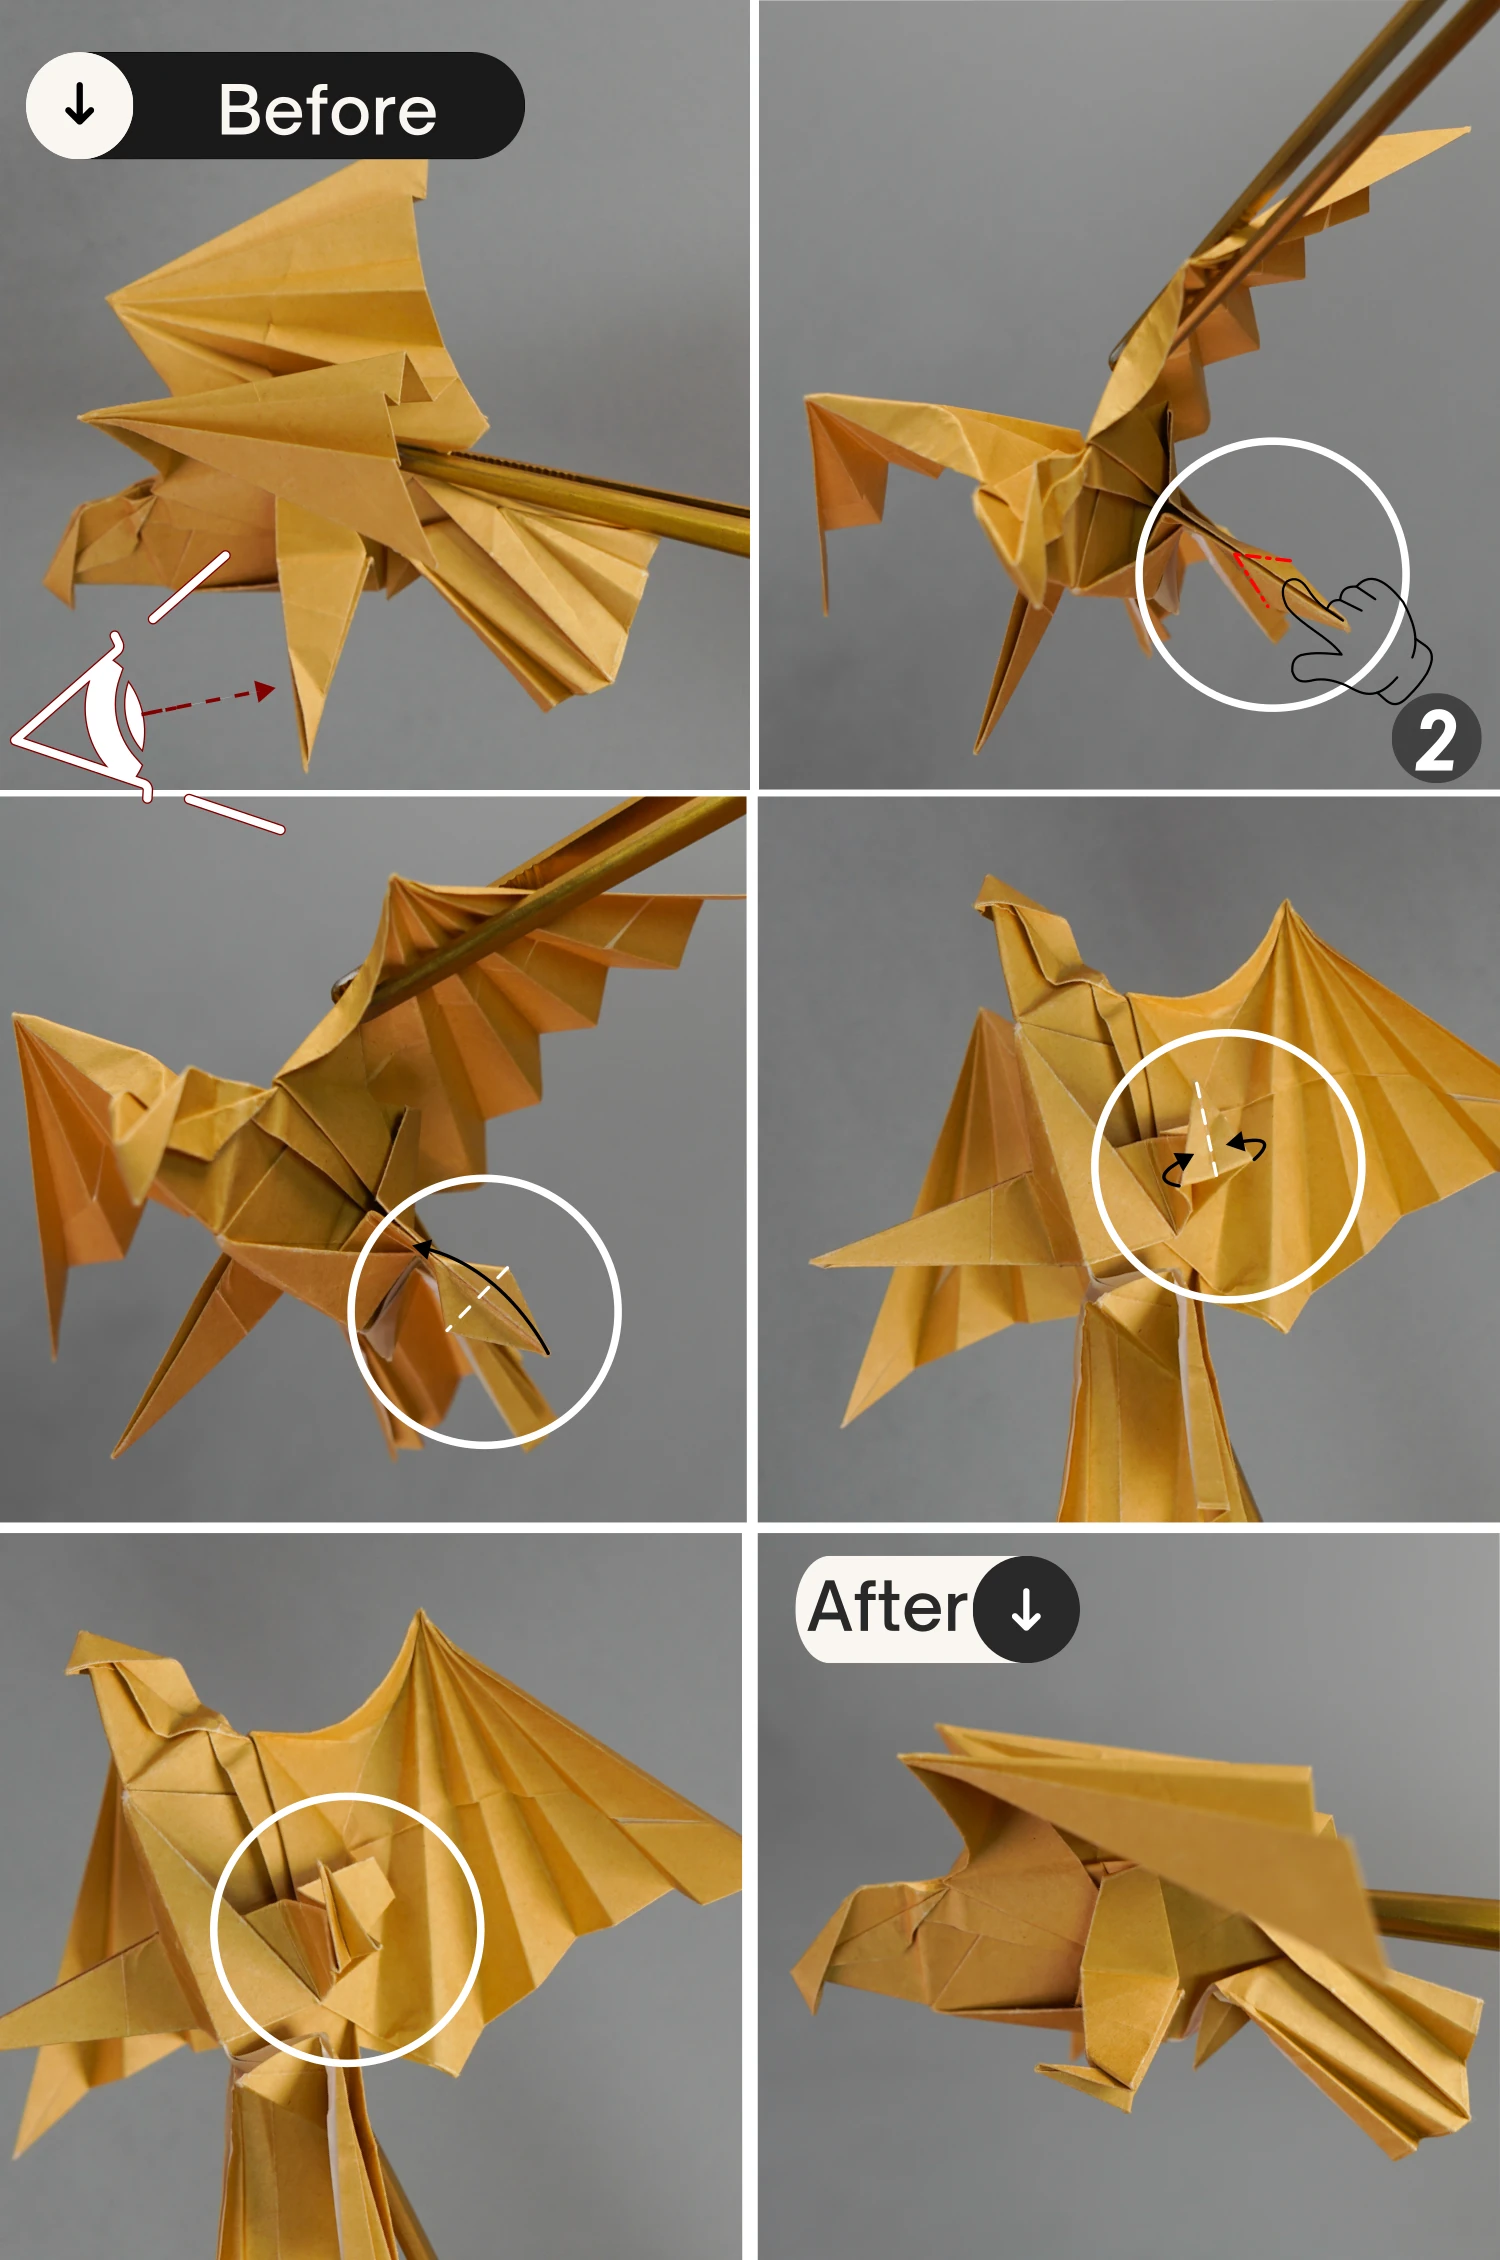
View it from the left side, open this talon from the back, press the bottom part down, fold the tip up along the dotted line as the third picture shows, and then close the corner, creating a complete talon.
Step 64
Flip the model over, and in the same way, fold the other talon up, crease it well then unfold.
Step 65
Similarly, open this talon, press down its bottom part, and fold the tip up, next close the corner to create another complete talon.
Step 66
Flip the model vertically, this is the final shape of the eagle.
What’s Next
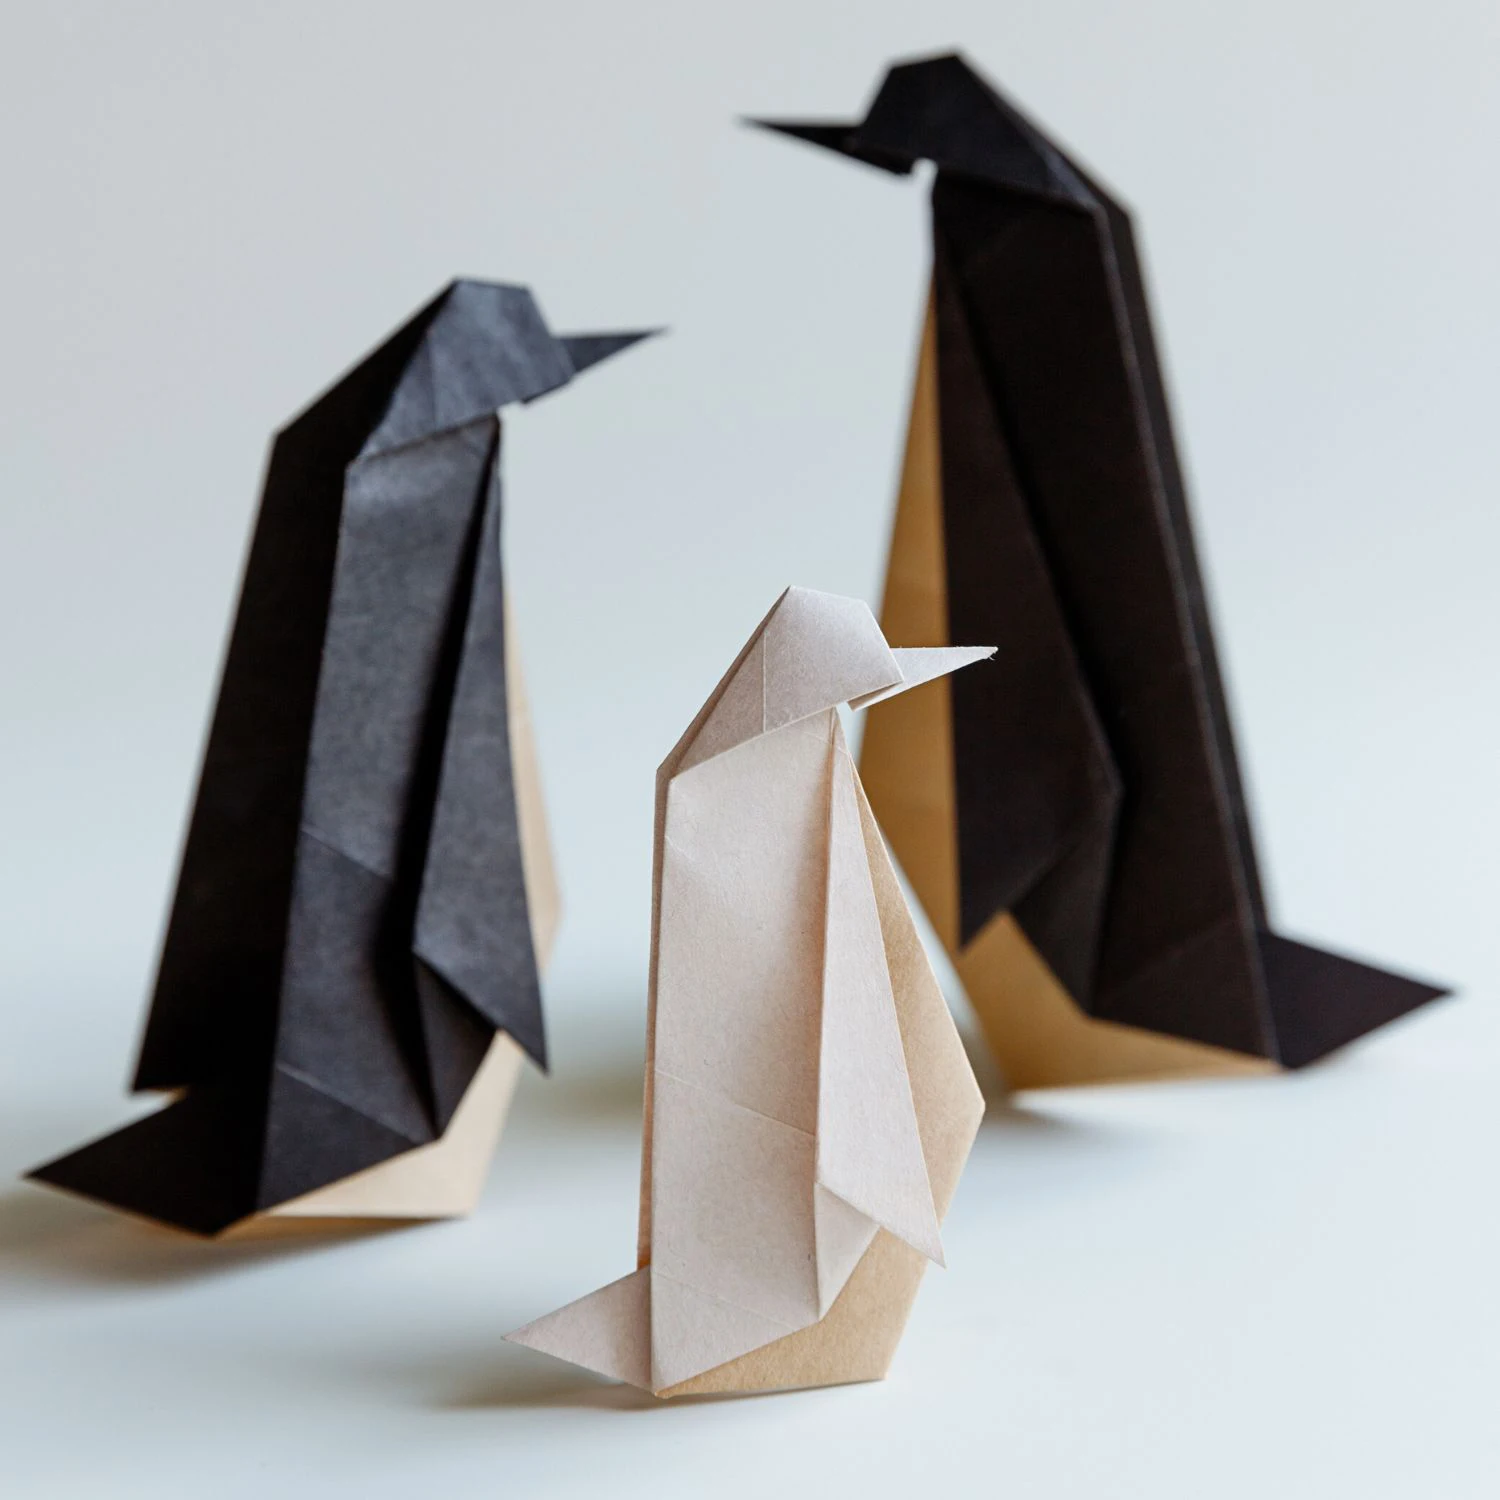
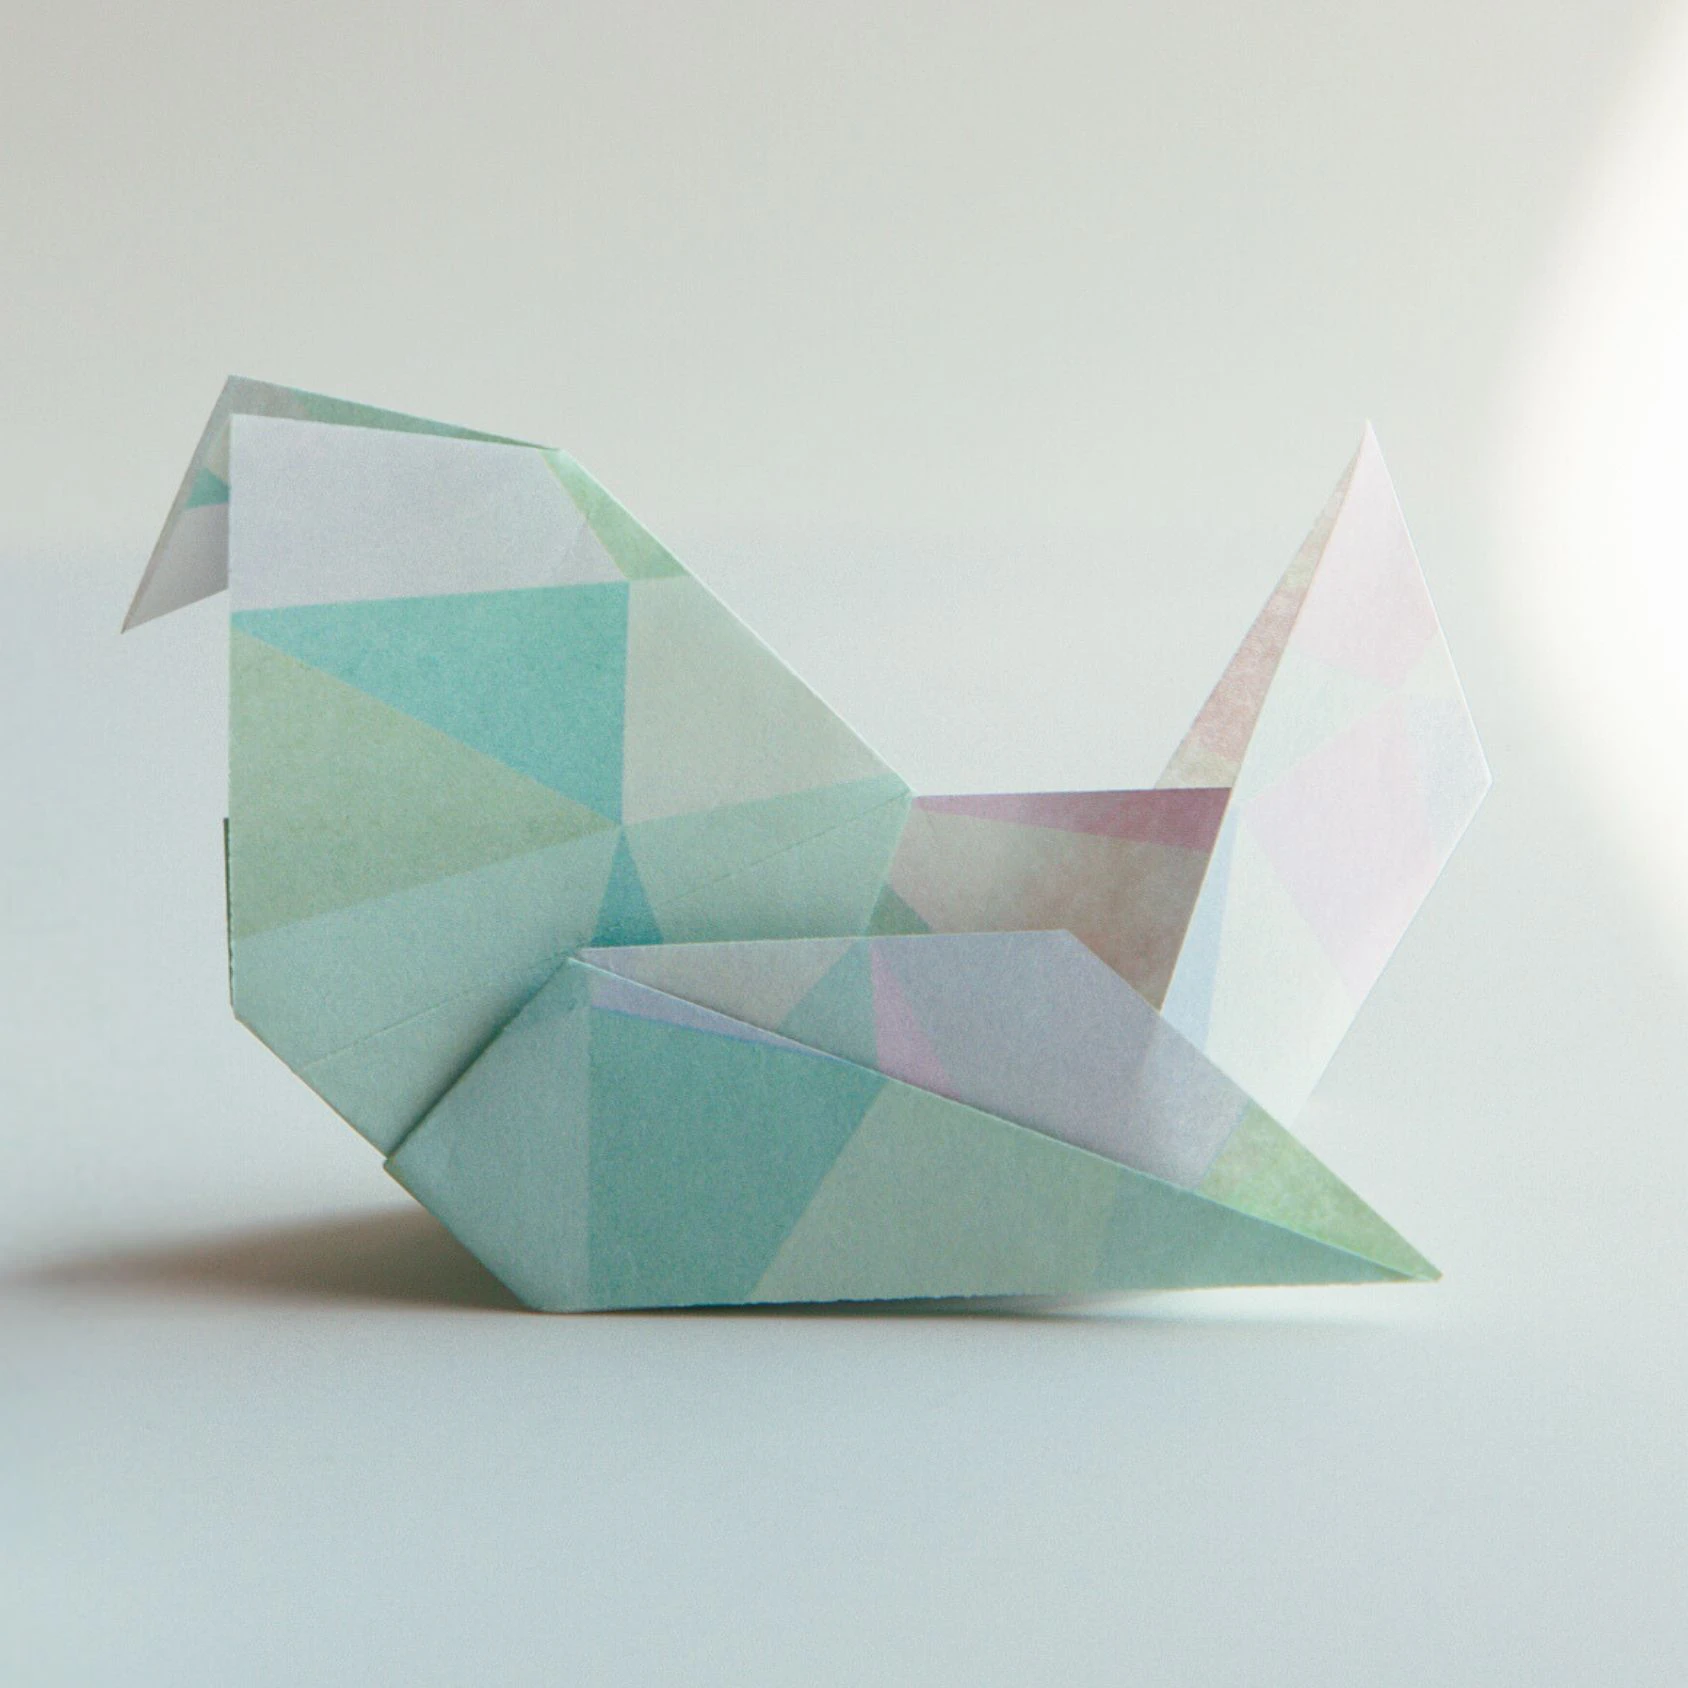
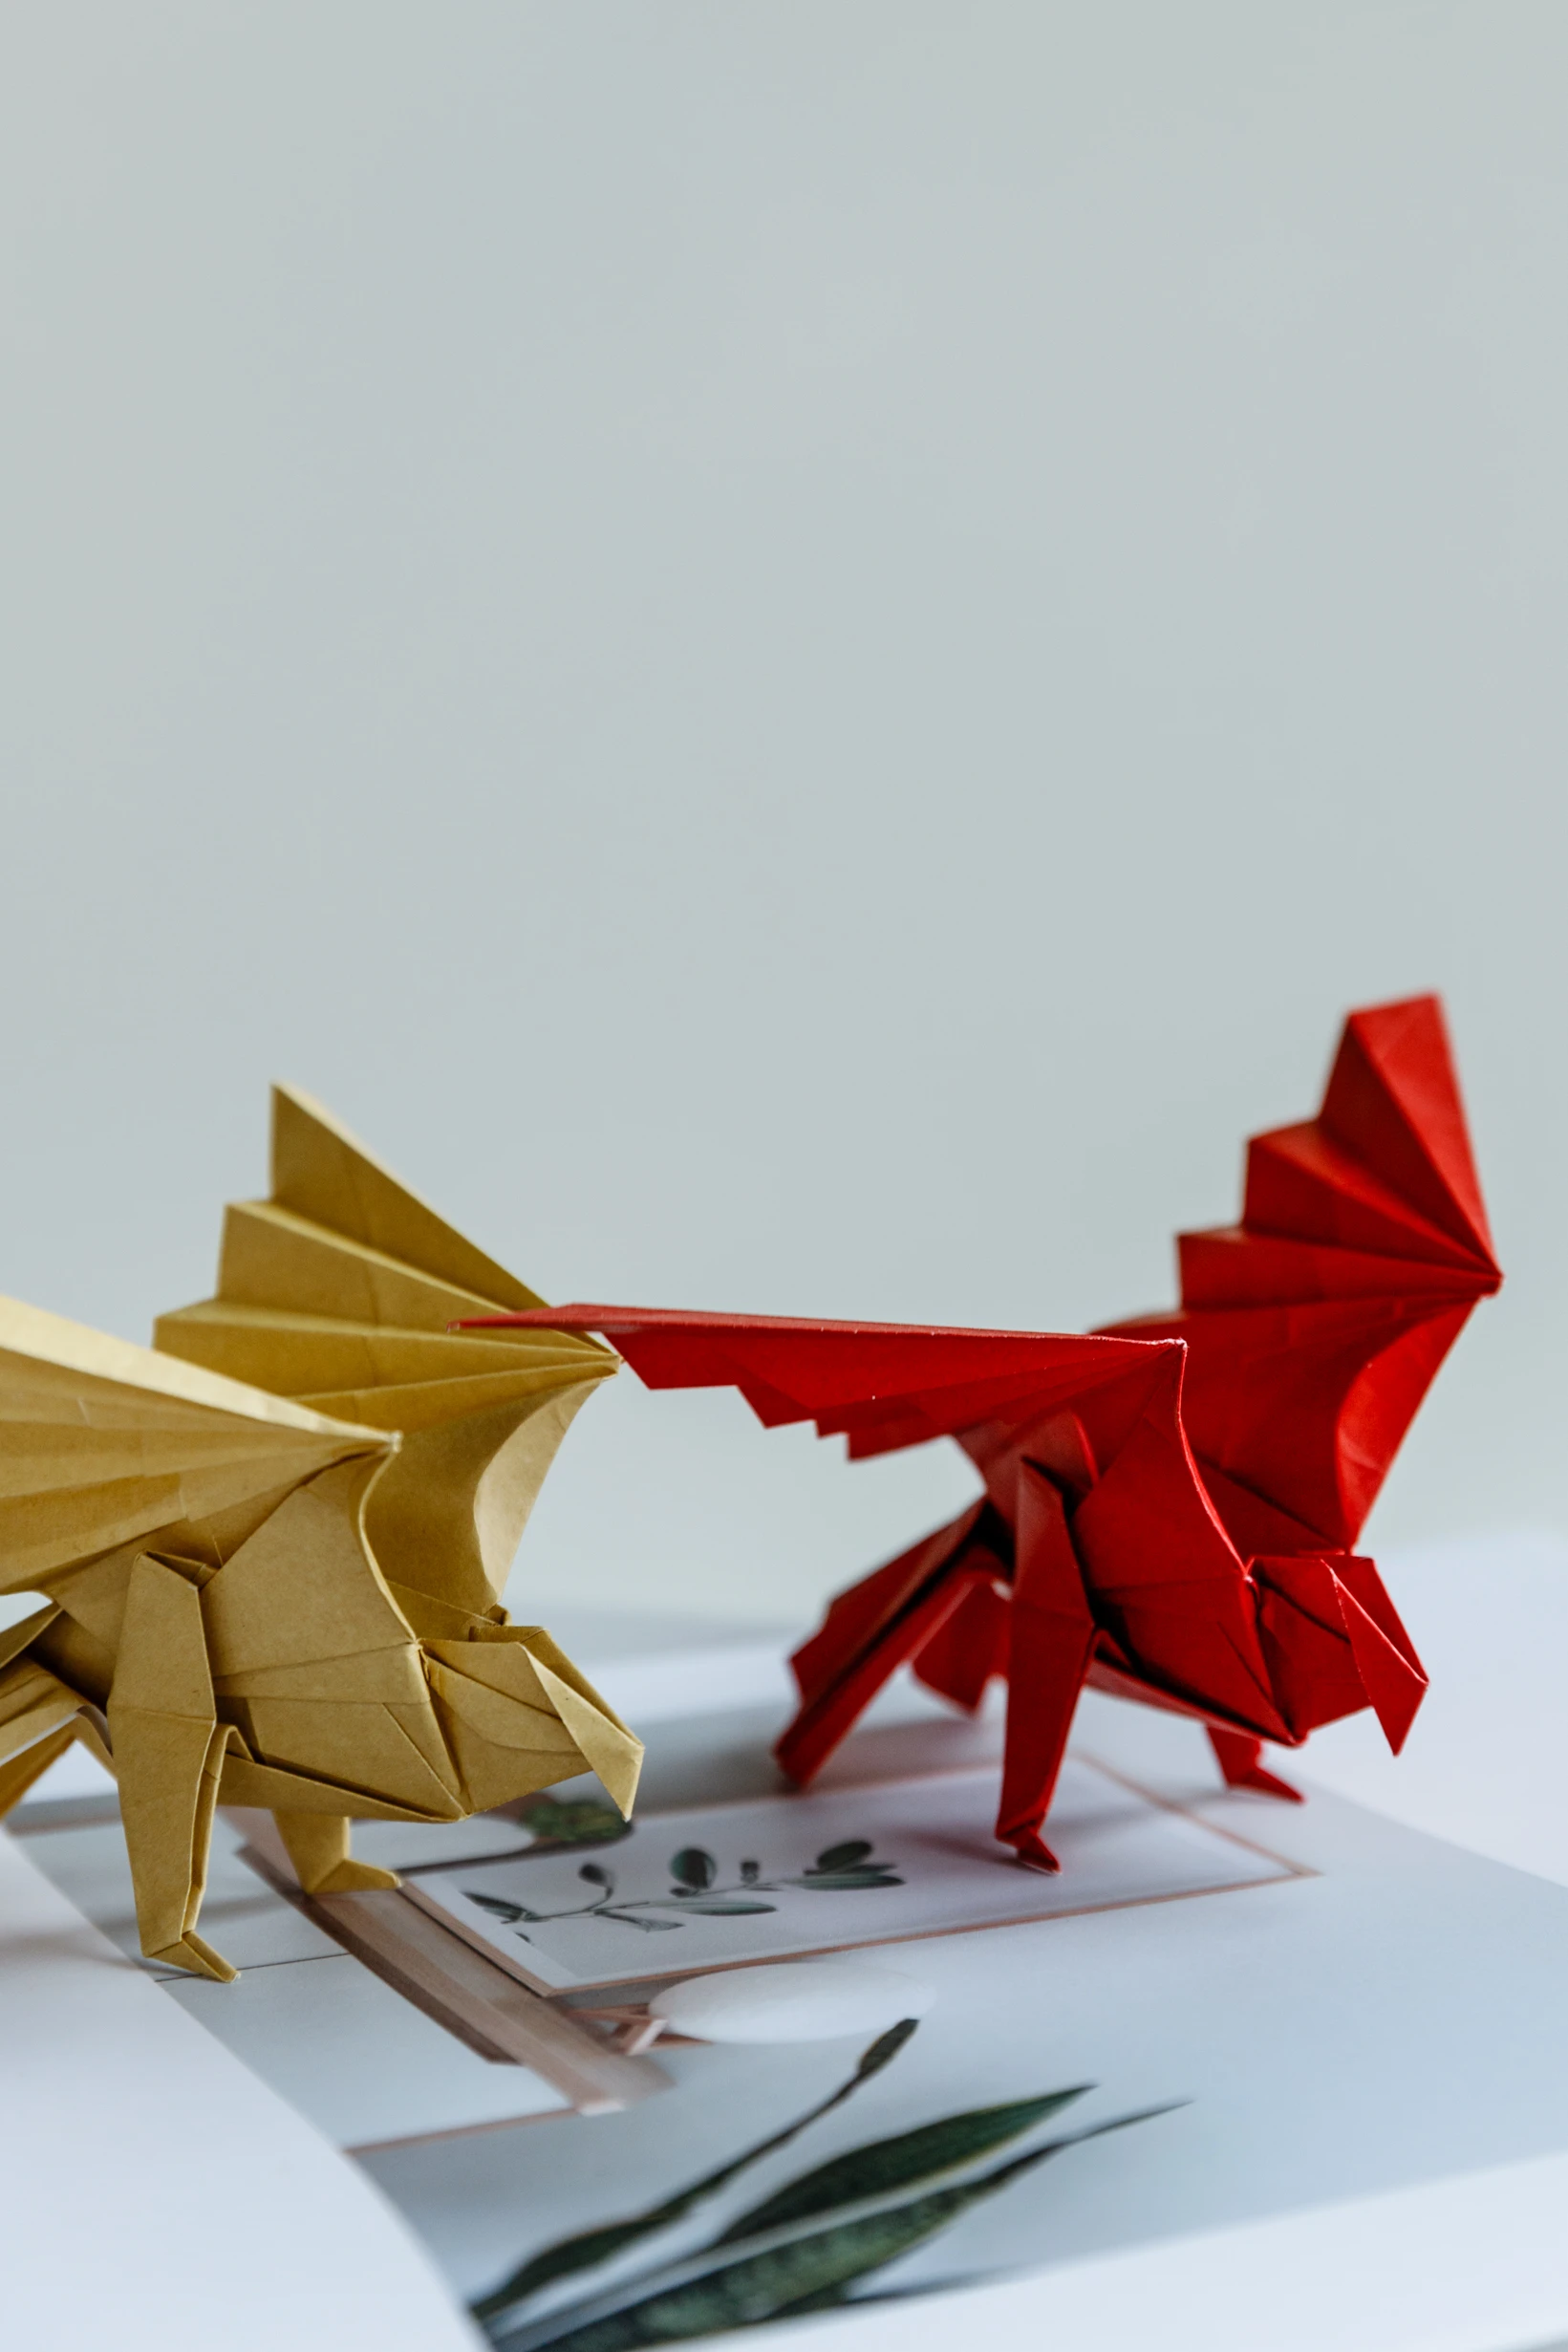
That’s your cool origami eagle, now you can explore our other origami bird instructions. Happy folding!
Other Origami Bird Ideas