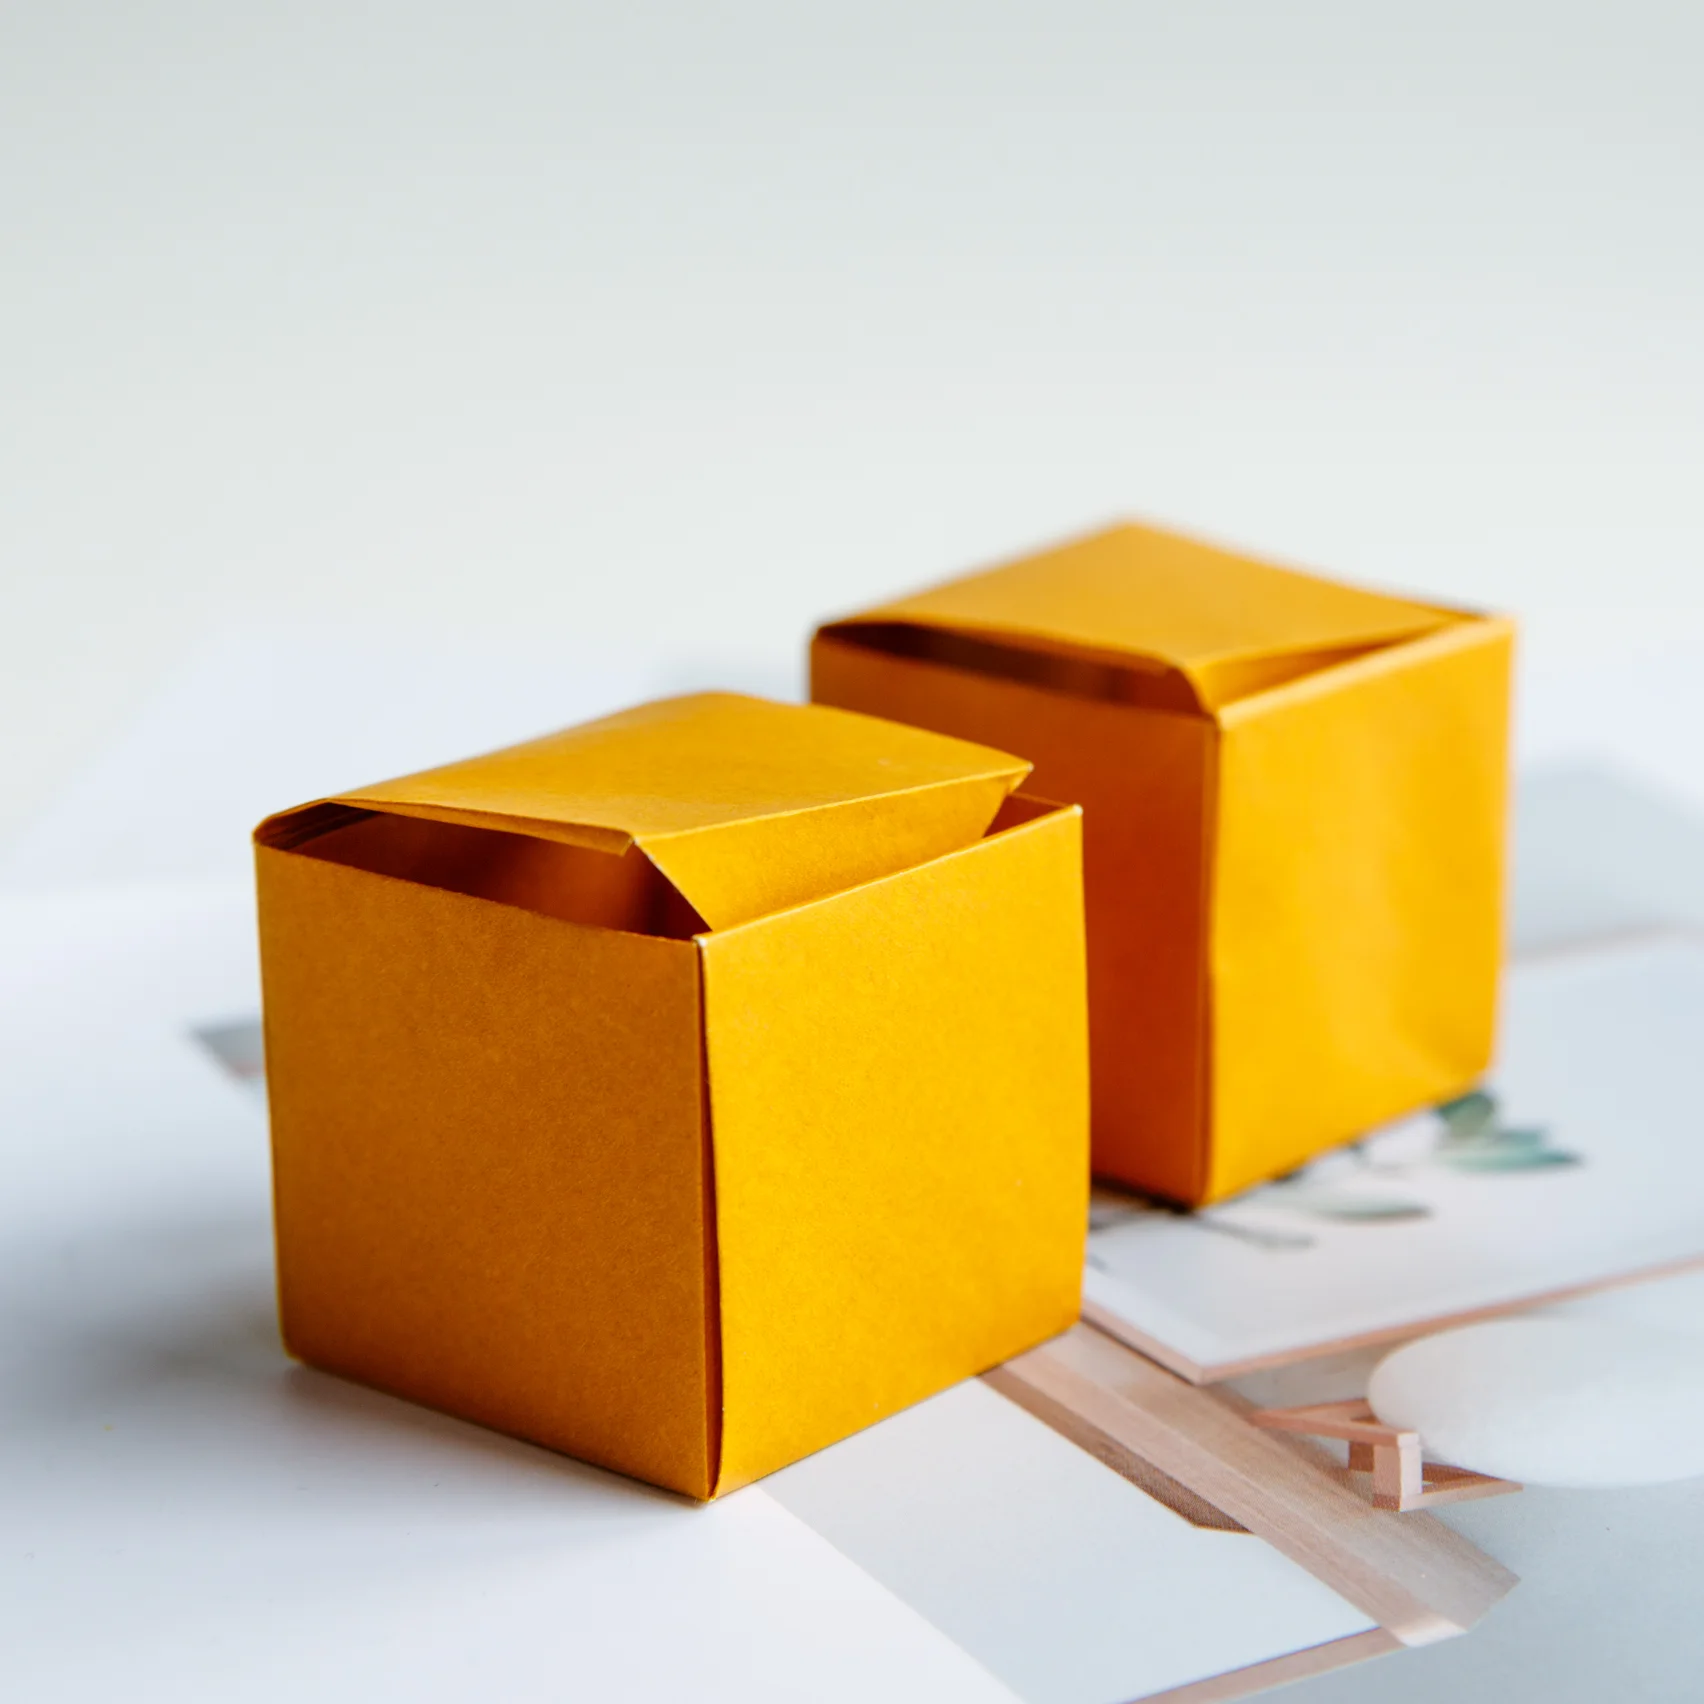
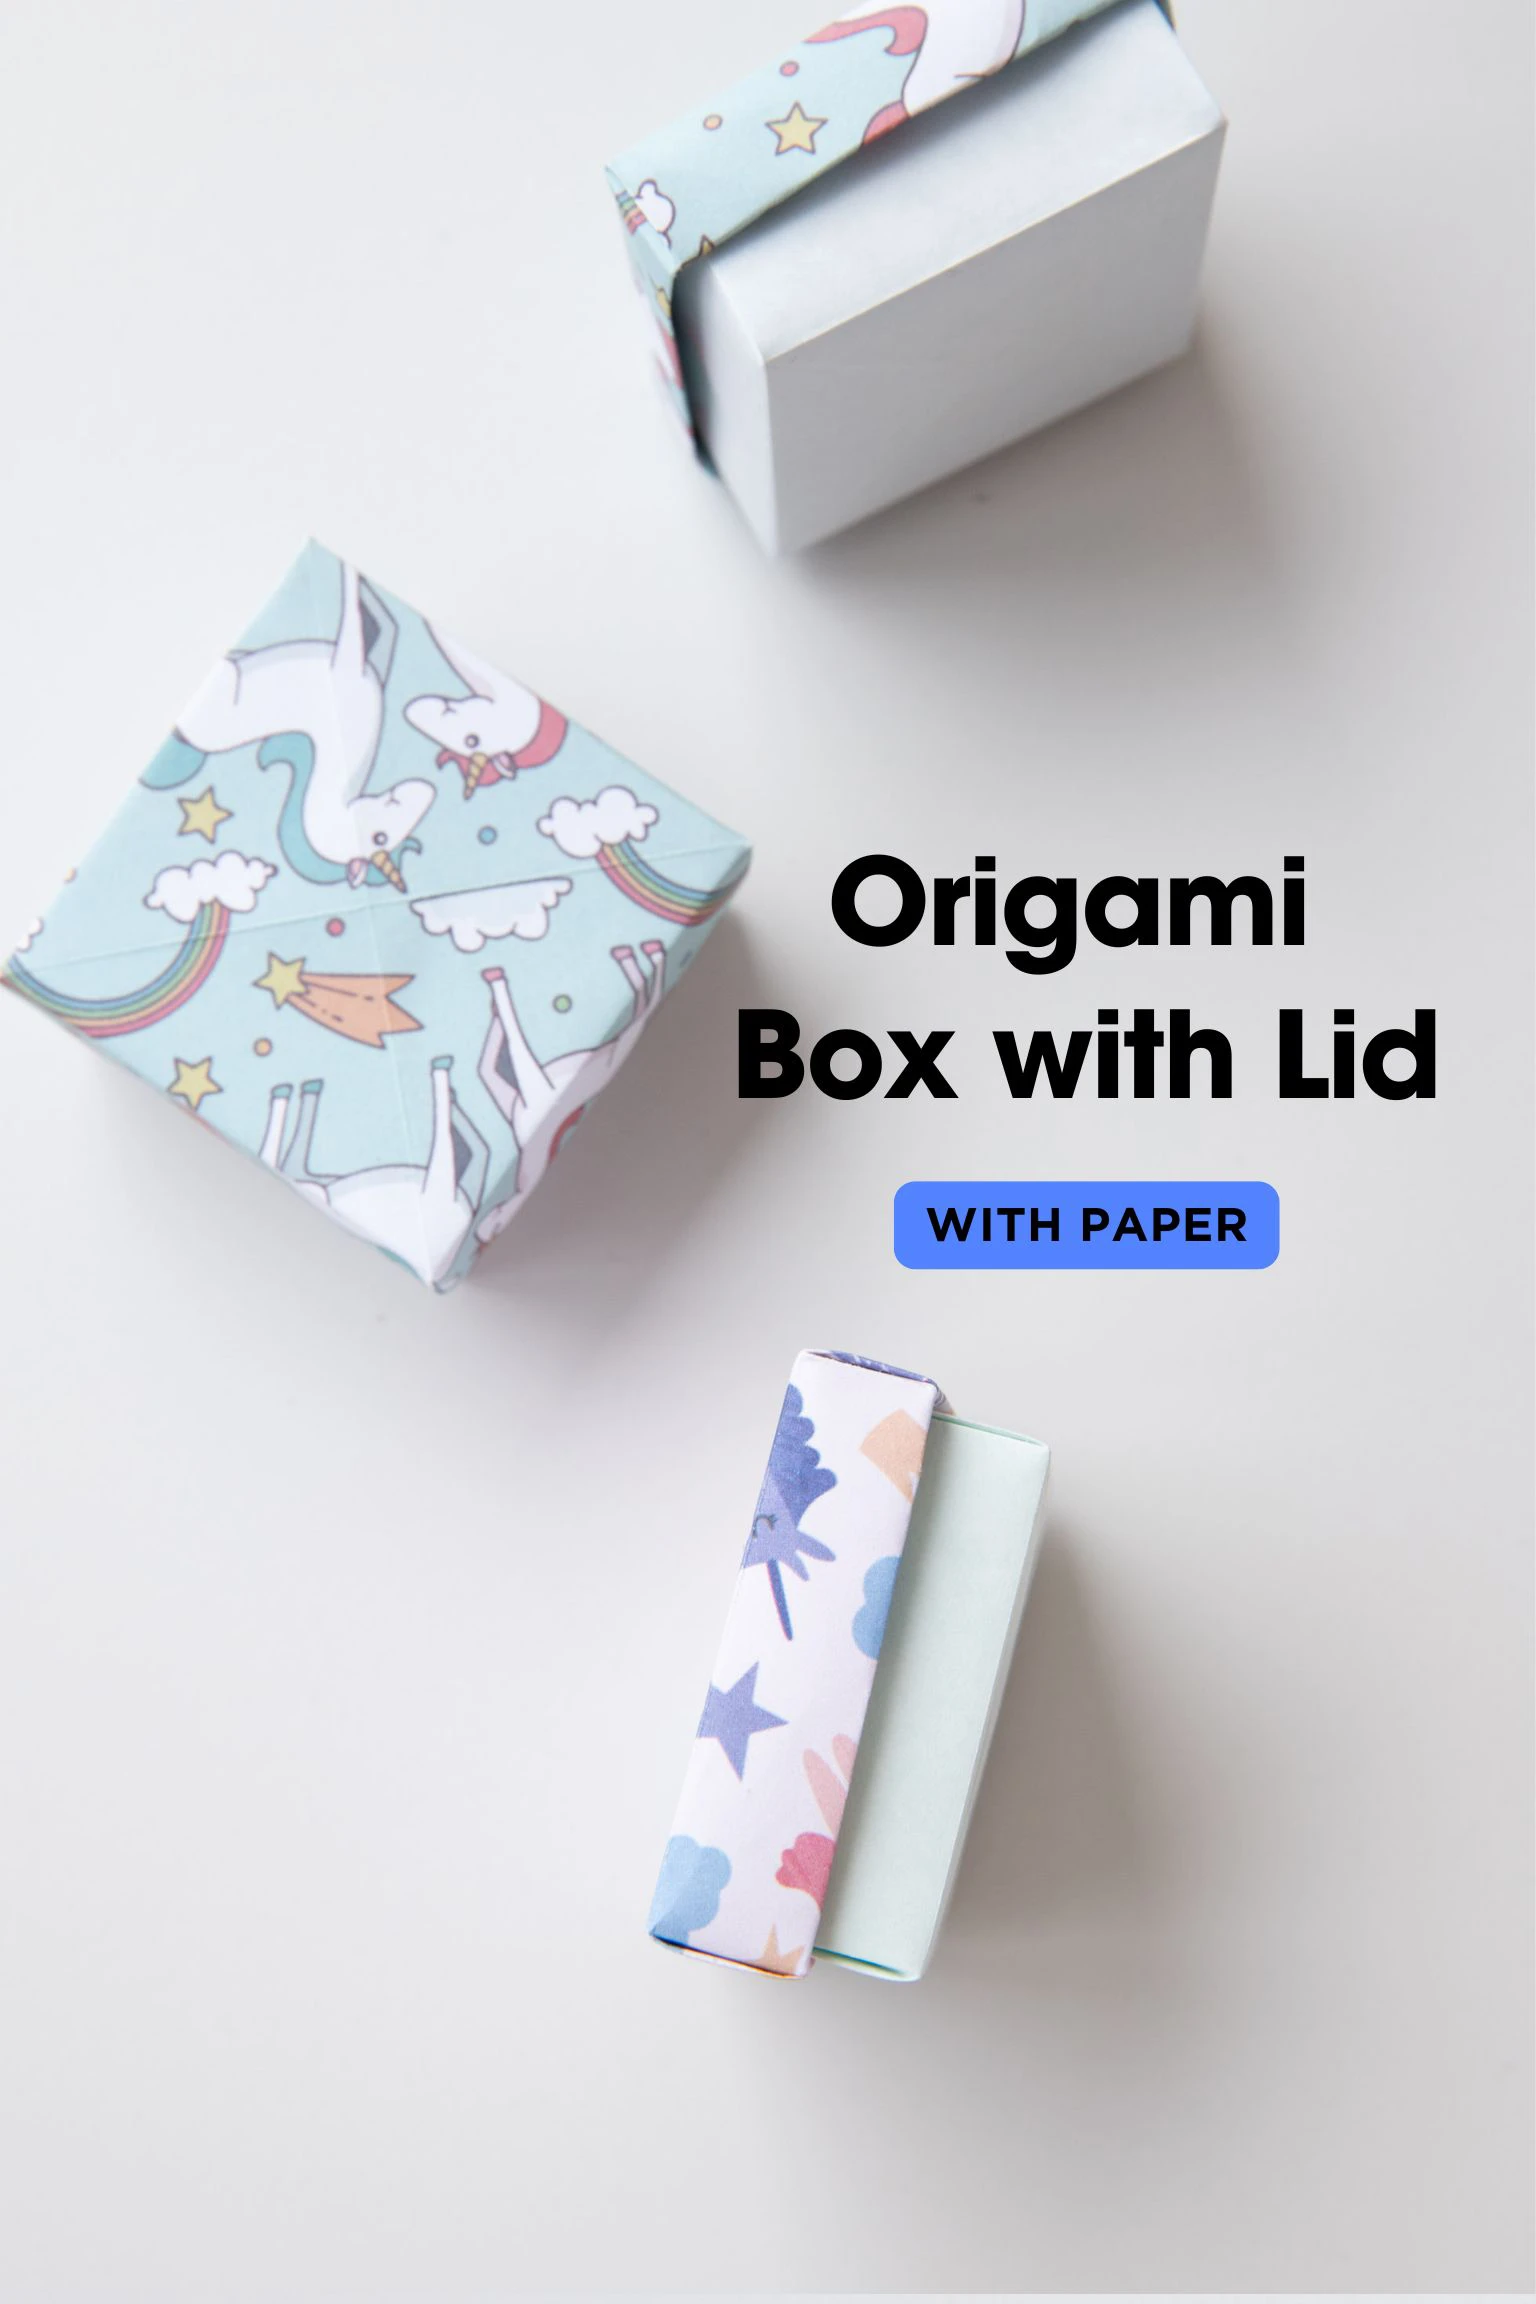
Are you searching for gift origami box with a lovely lid? In this tutorial, we will learn how to make the a Masu box with a lovely lid.
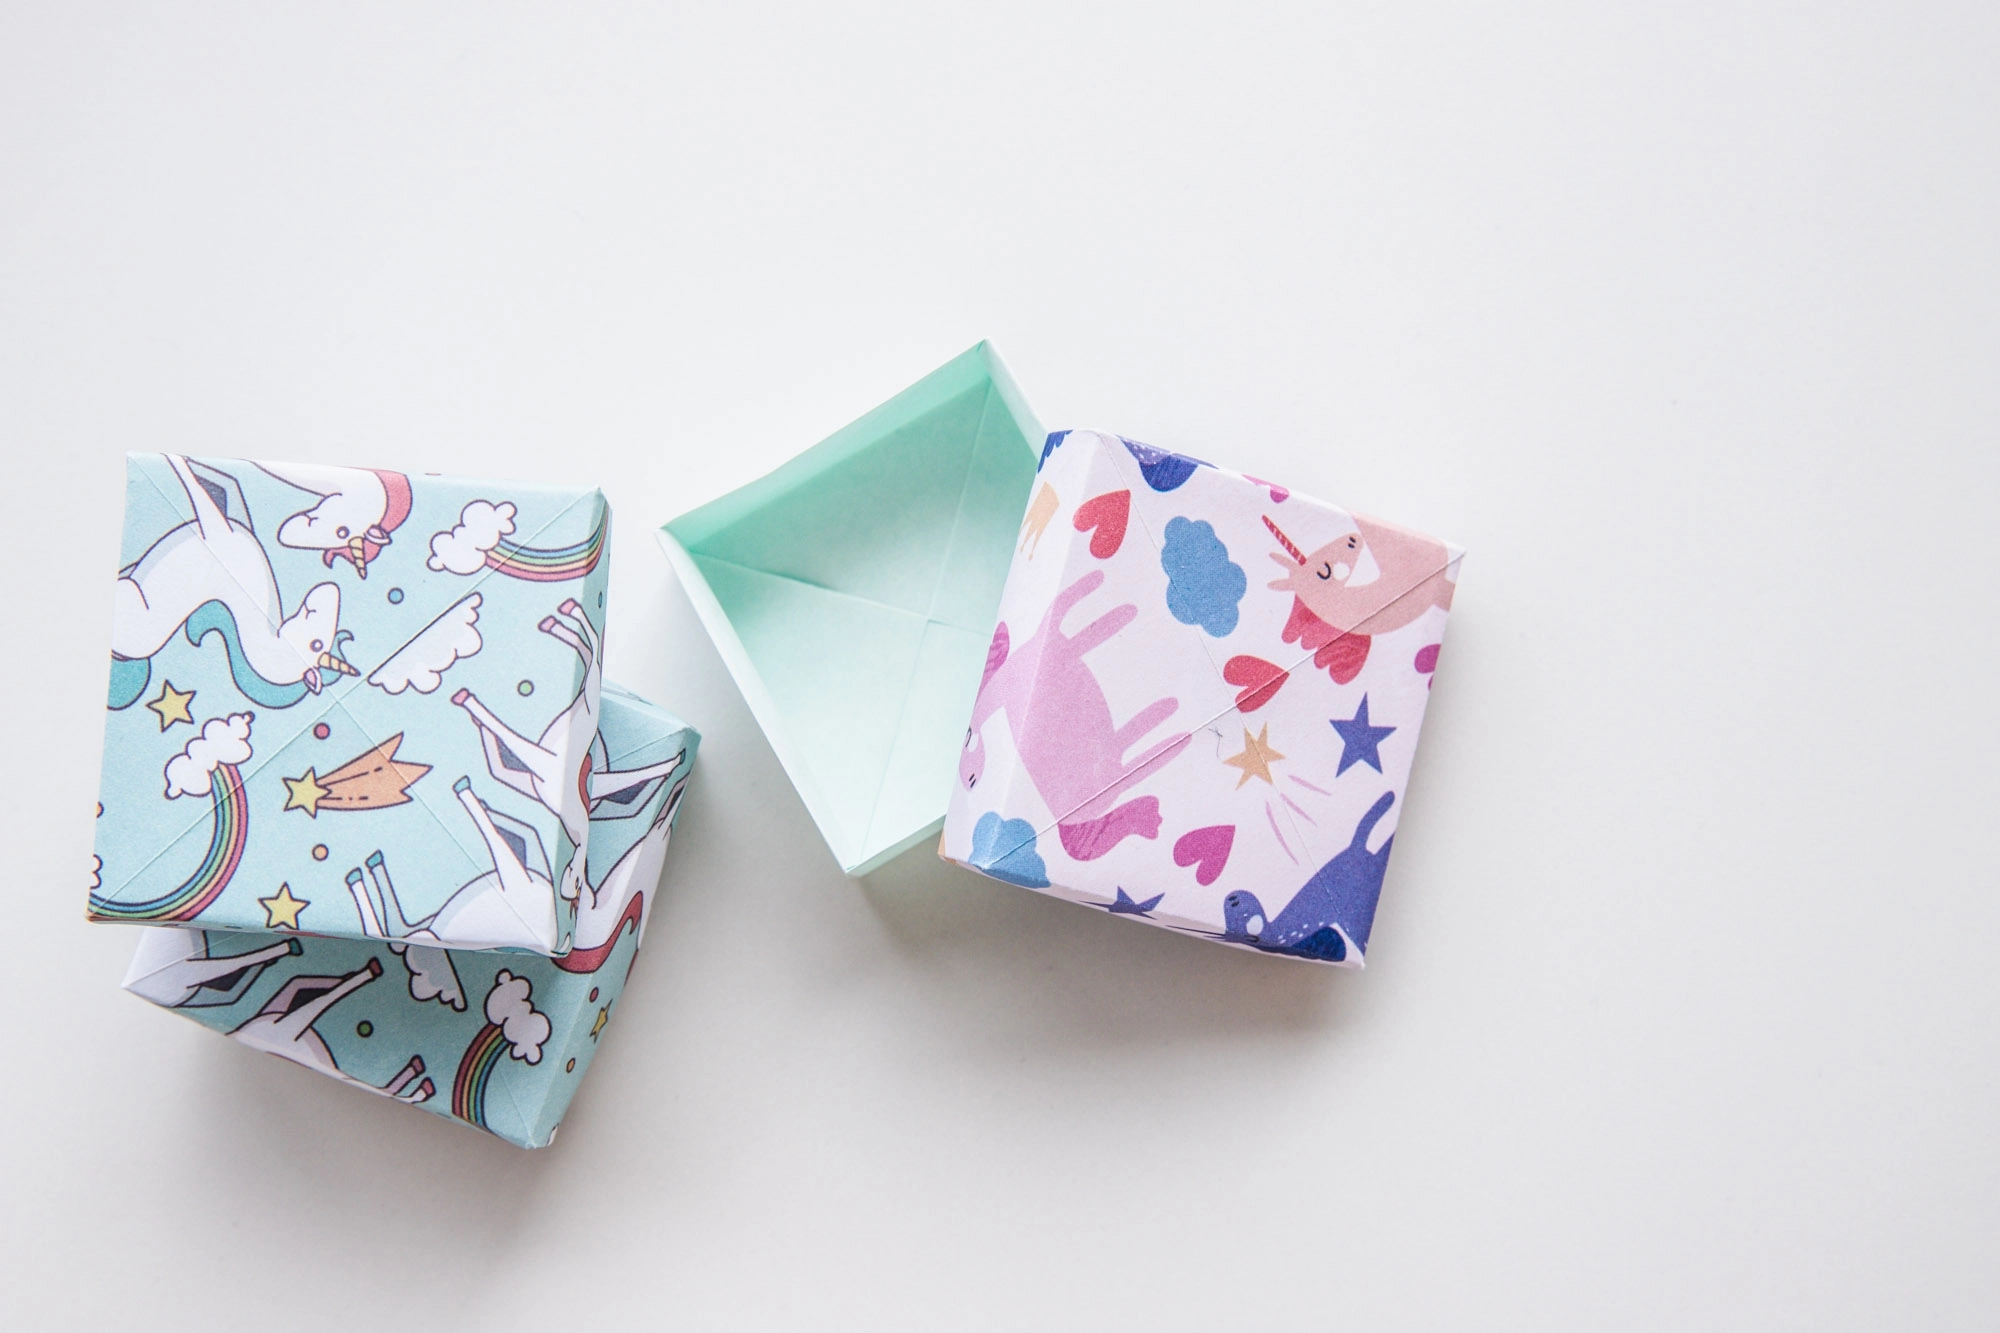
You can use this origami box as a gift box or as a container for small items. Since we will use two papers, by using different color combination, you can have a cute box or cool box depending on the color and patterns.
We have another cute origami box with a flour leaf clover lid. Don’t forget to check our origami box idea collection if you are still searching for inspirations.

If you are new to origami, start here from our beginner guide to know the basics and how to read the step-by-step instructions.
- Folding time: 15 minutes
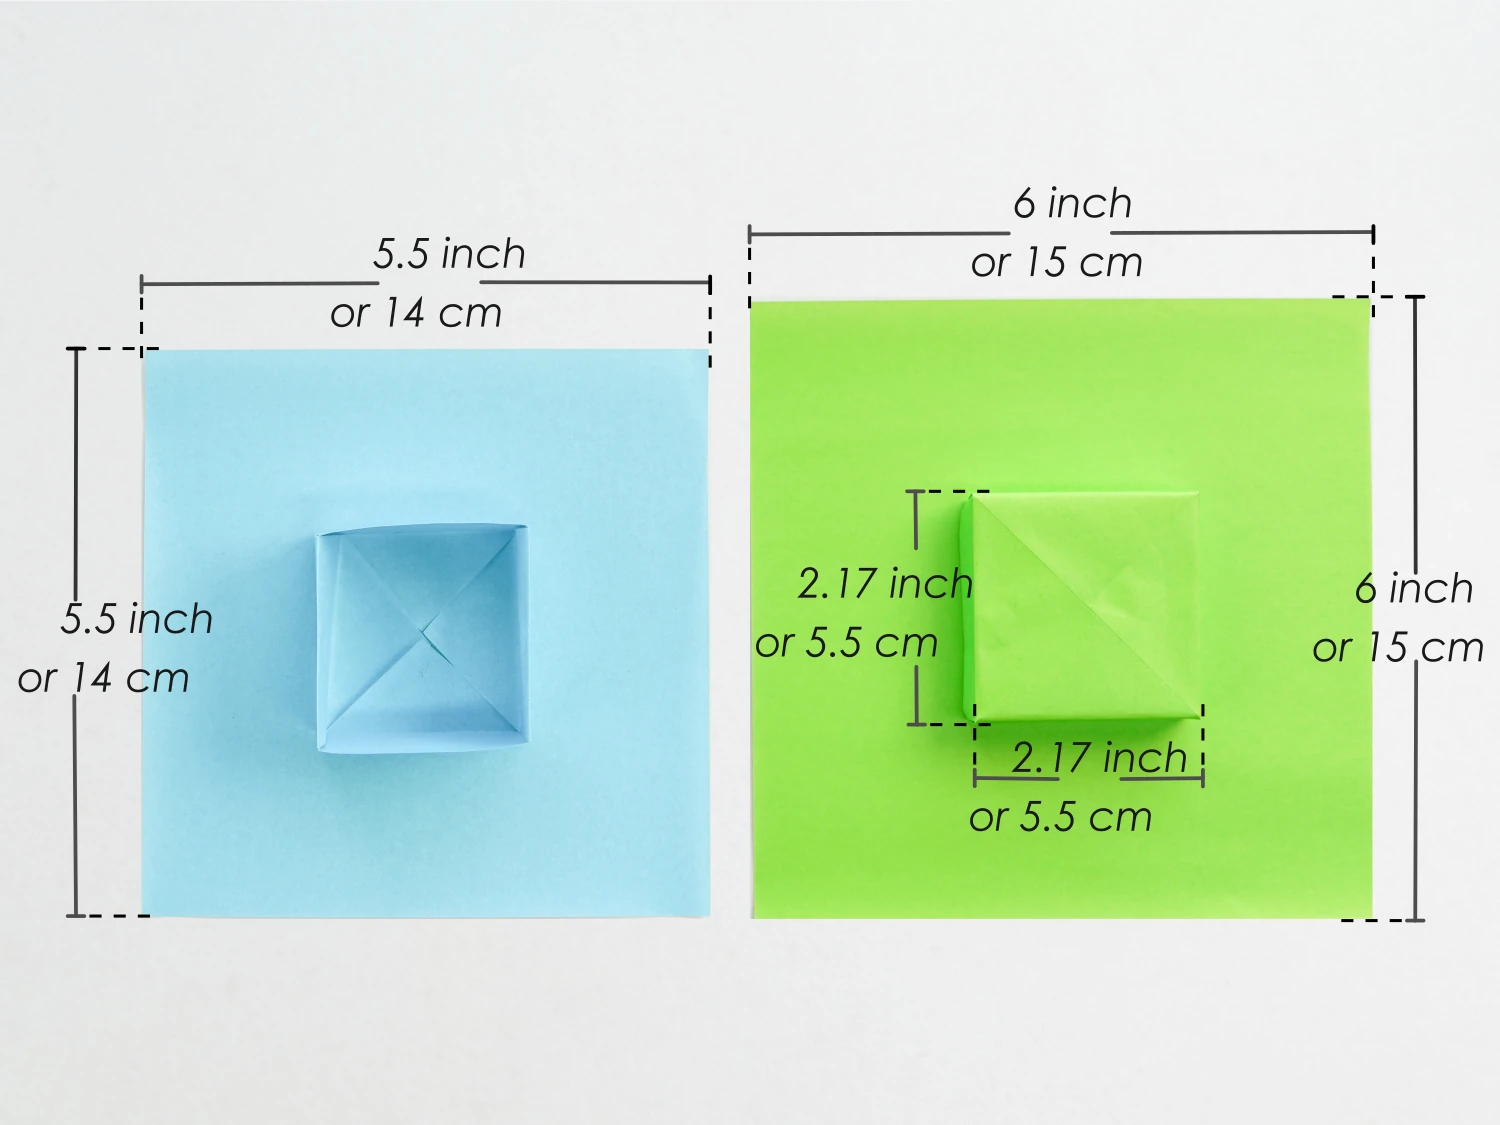
- Paper: 15×15 cm / 1 for the lid, 14×14 cm / 1 for the box
- Difficulty: Middle
Material
Get a 15×15 cm origami square paper, with different colors on each side to get a 5.5 x5.5 cm lid, you also need another piece of 14×14 cm square paper for a box.
Origami Box With Lid Video
Step by Step Instructions
Step 1
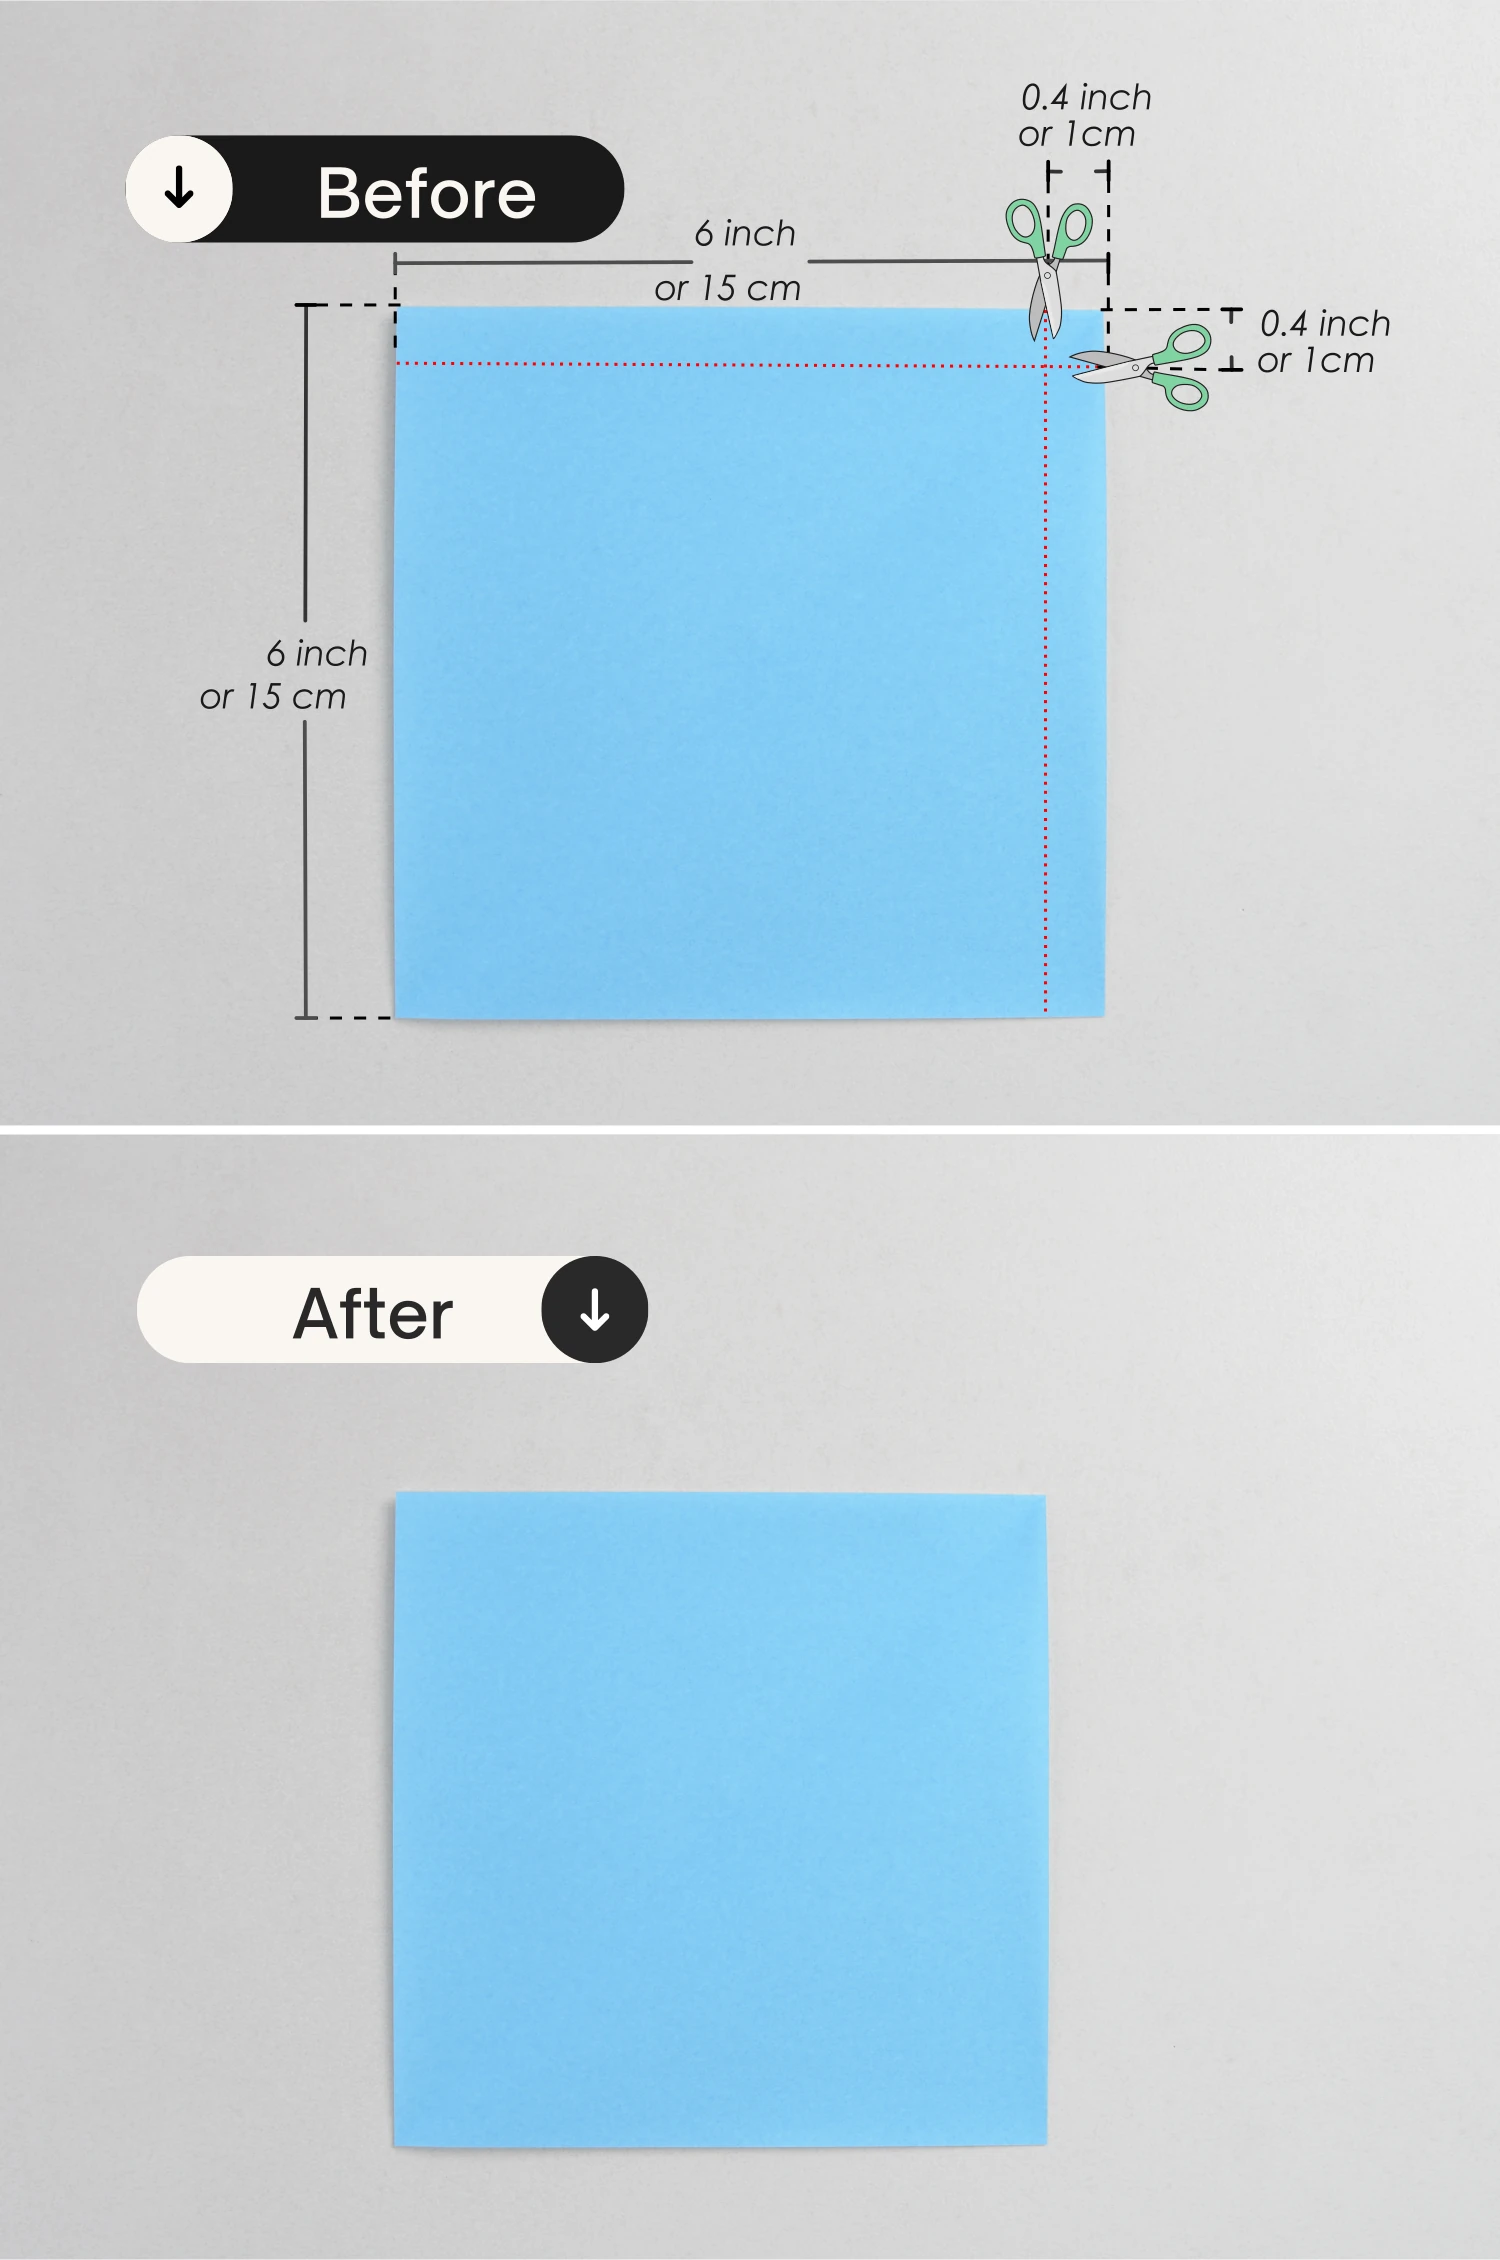
To get a 14×14 cm square paper, take out a 15×15 cm square paper, and cut 1 cm for the two neighboring edges.
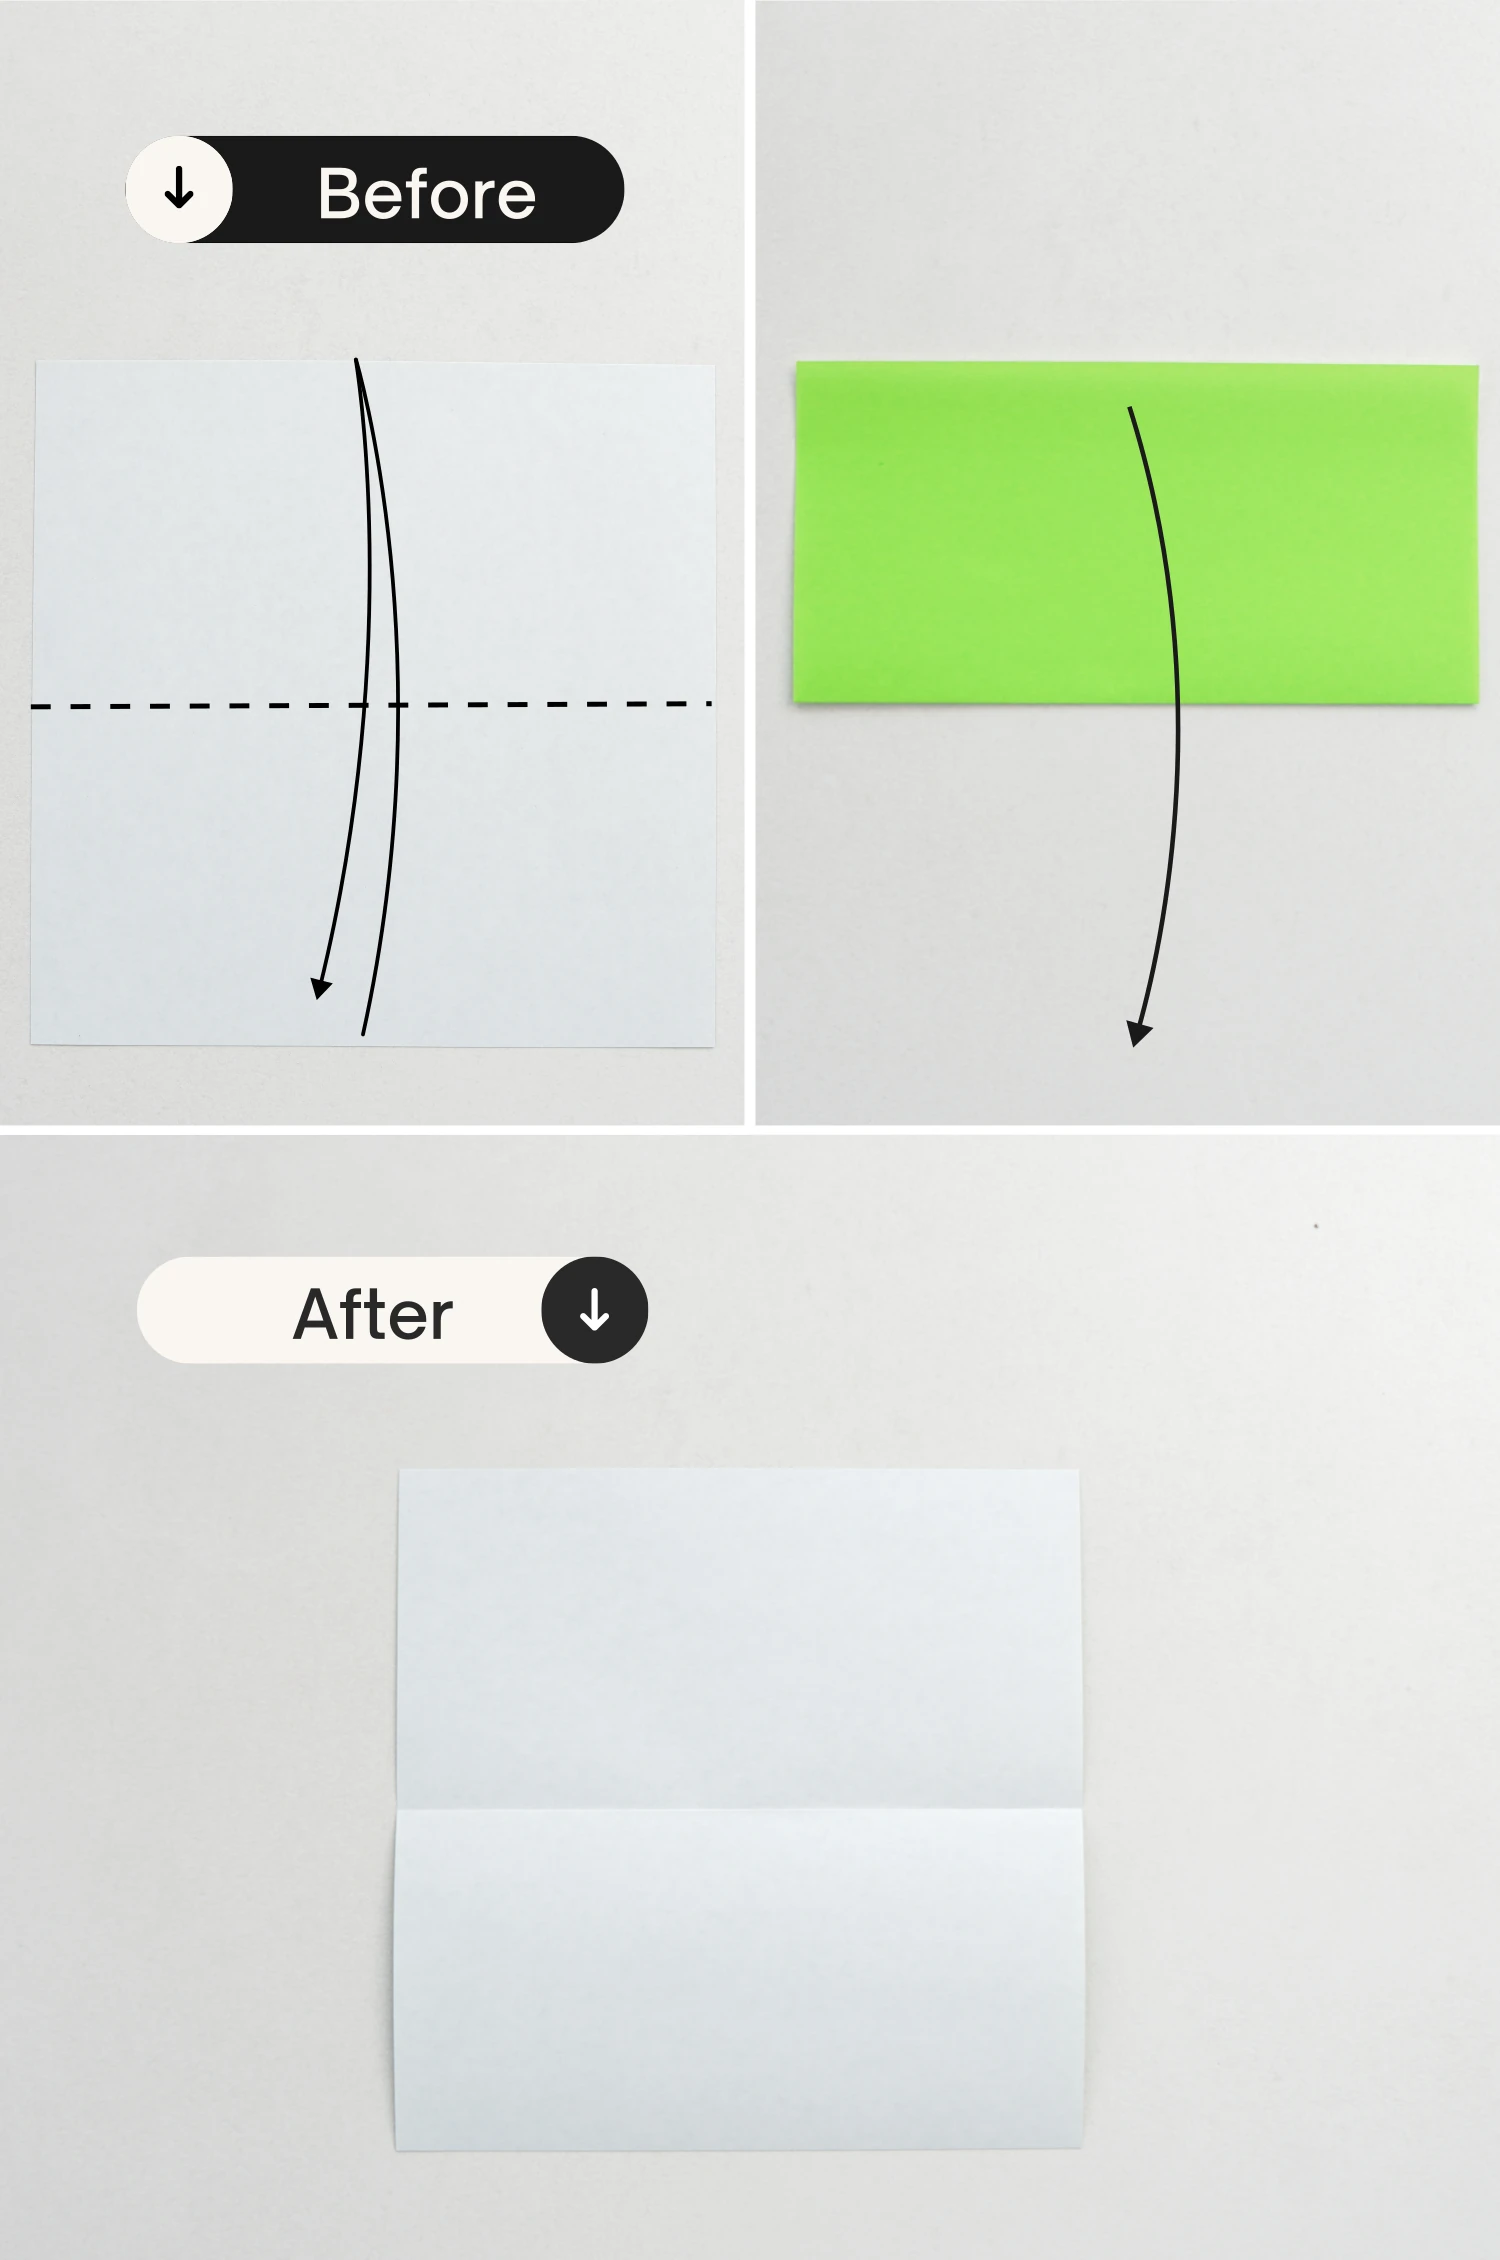
Step 2
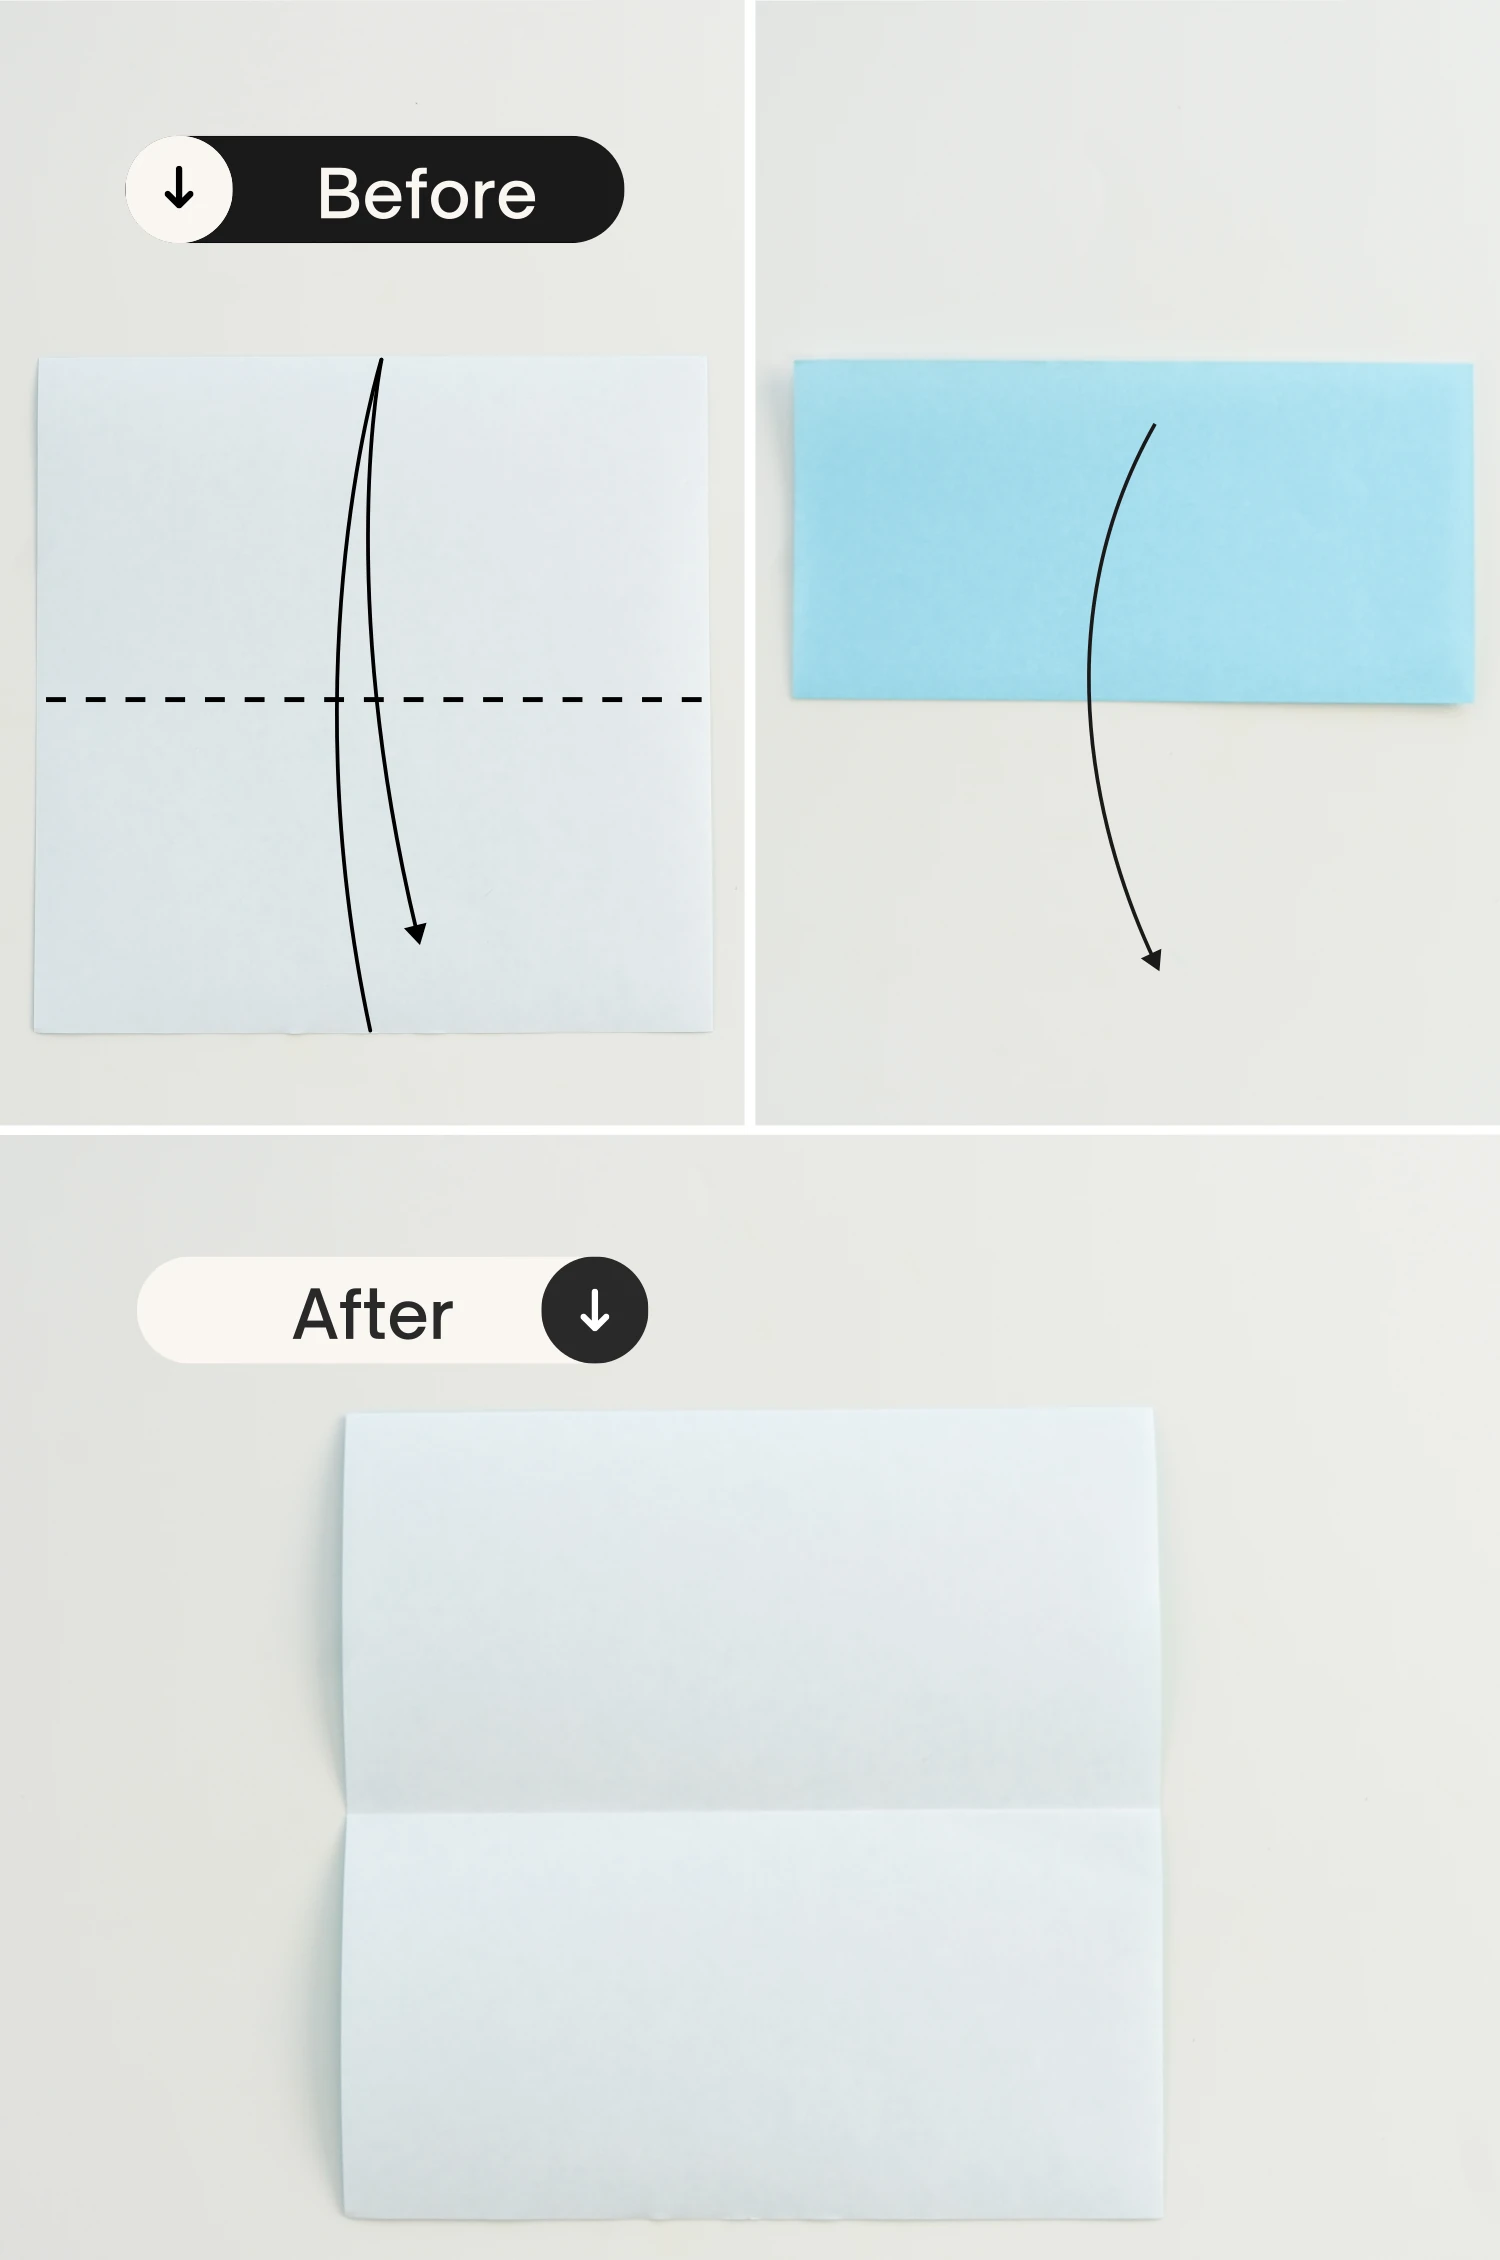
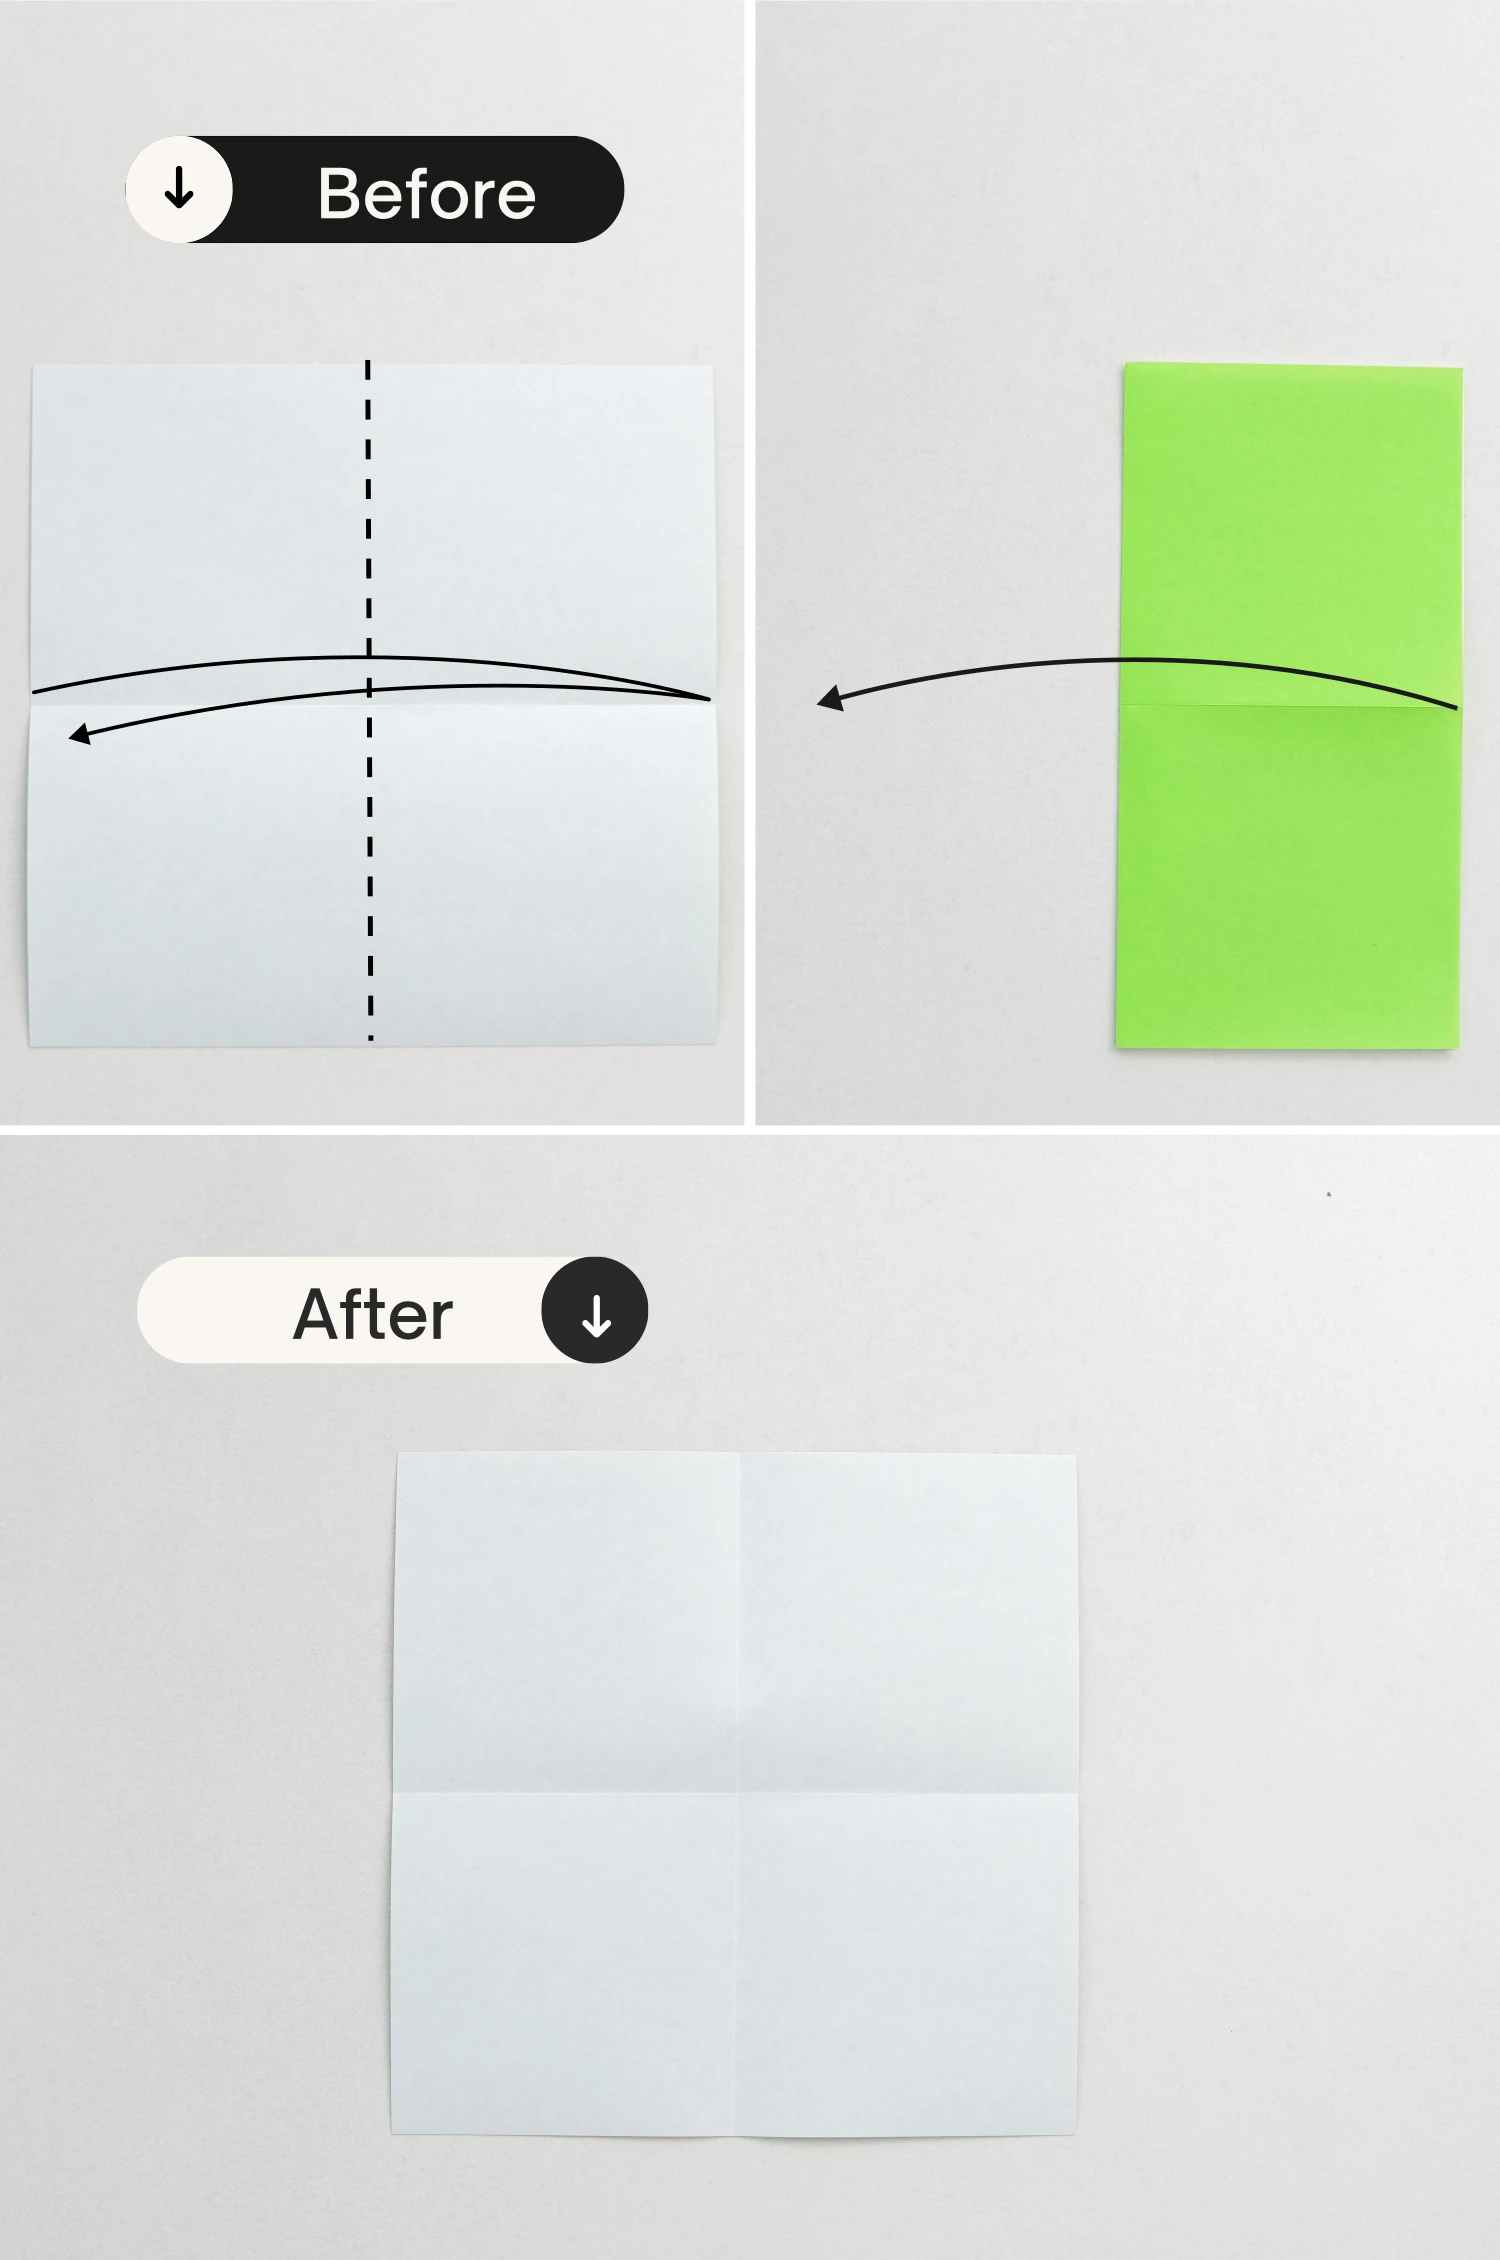
Then start with the white side of the paper facing up, and fold it in half horizontally, crease it well then unfold it.
Step 3
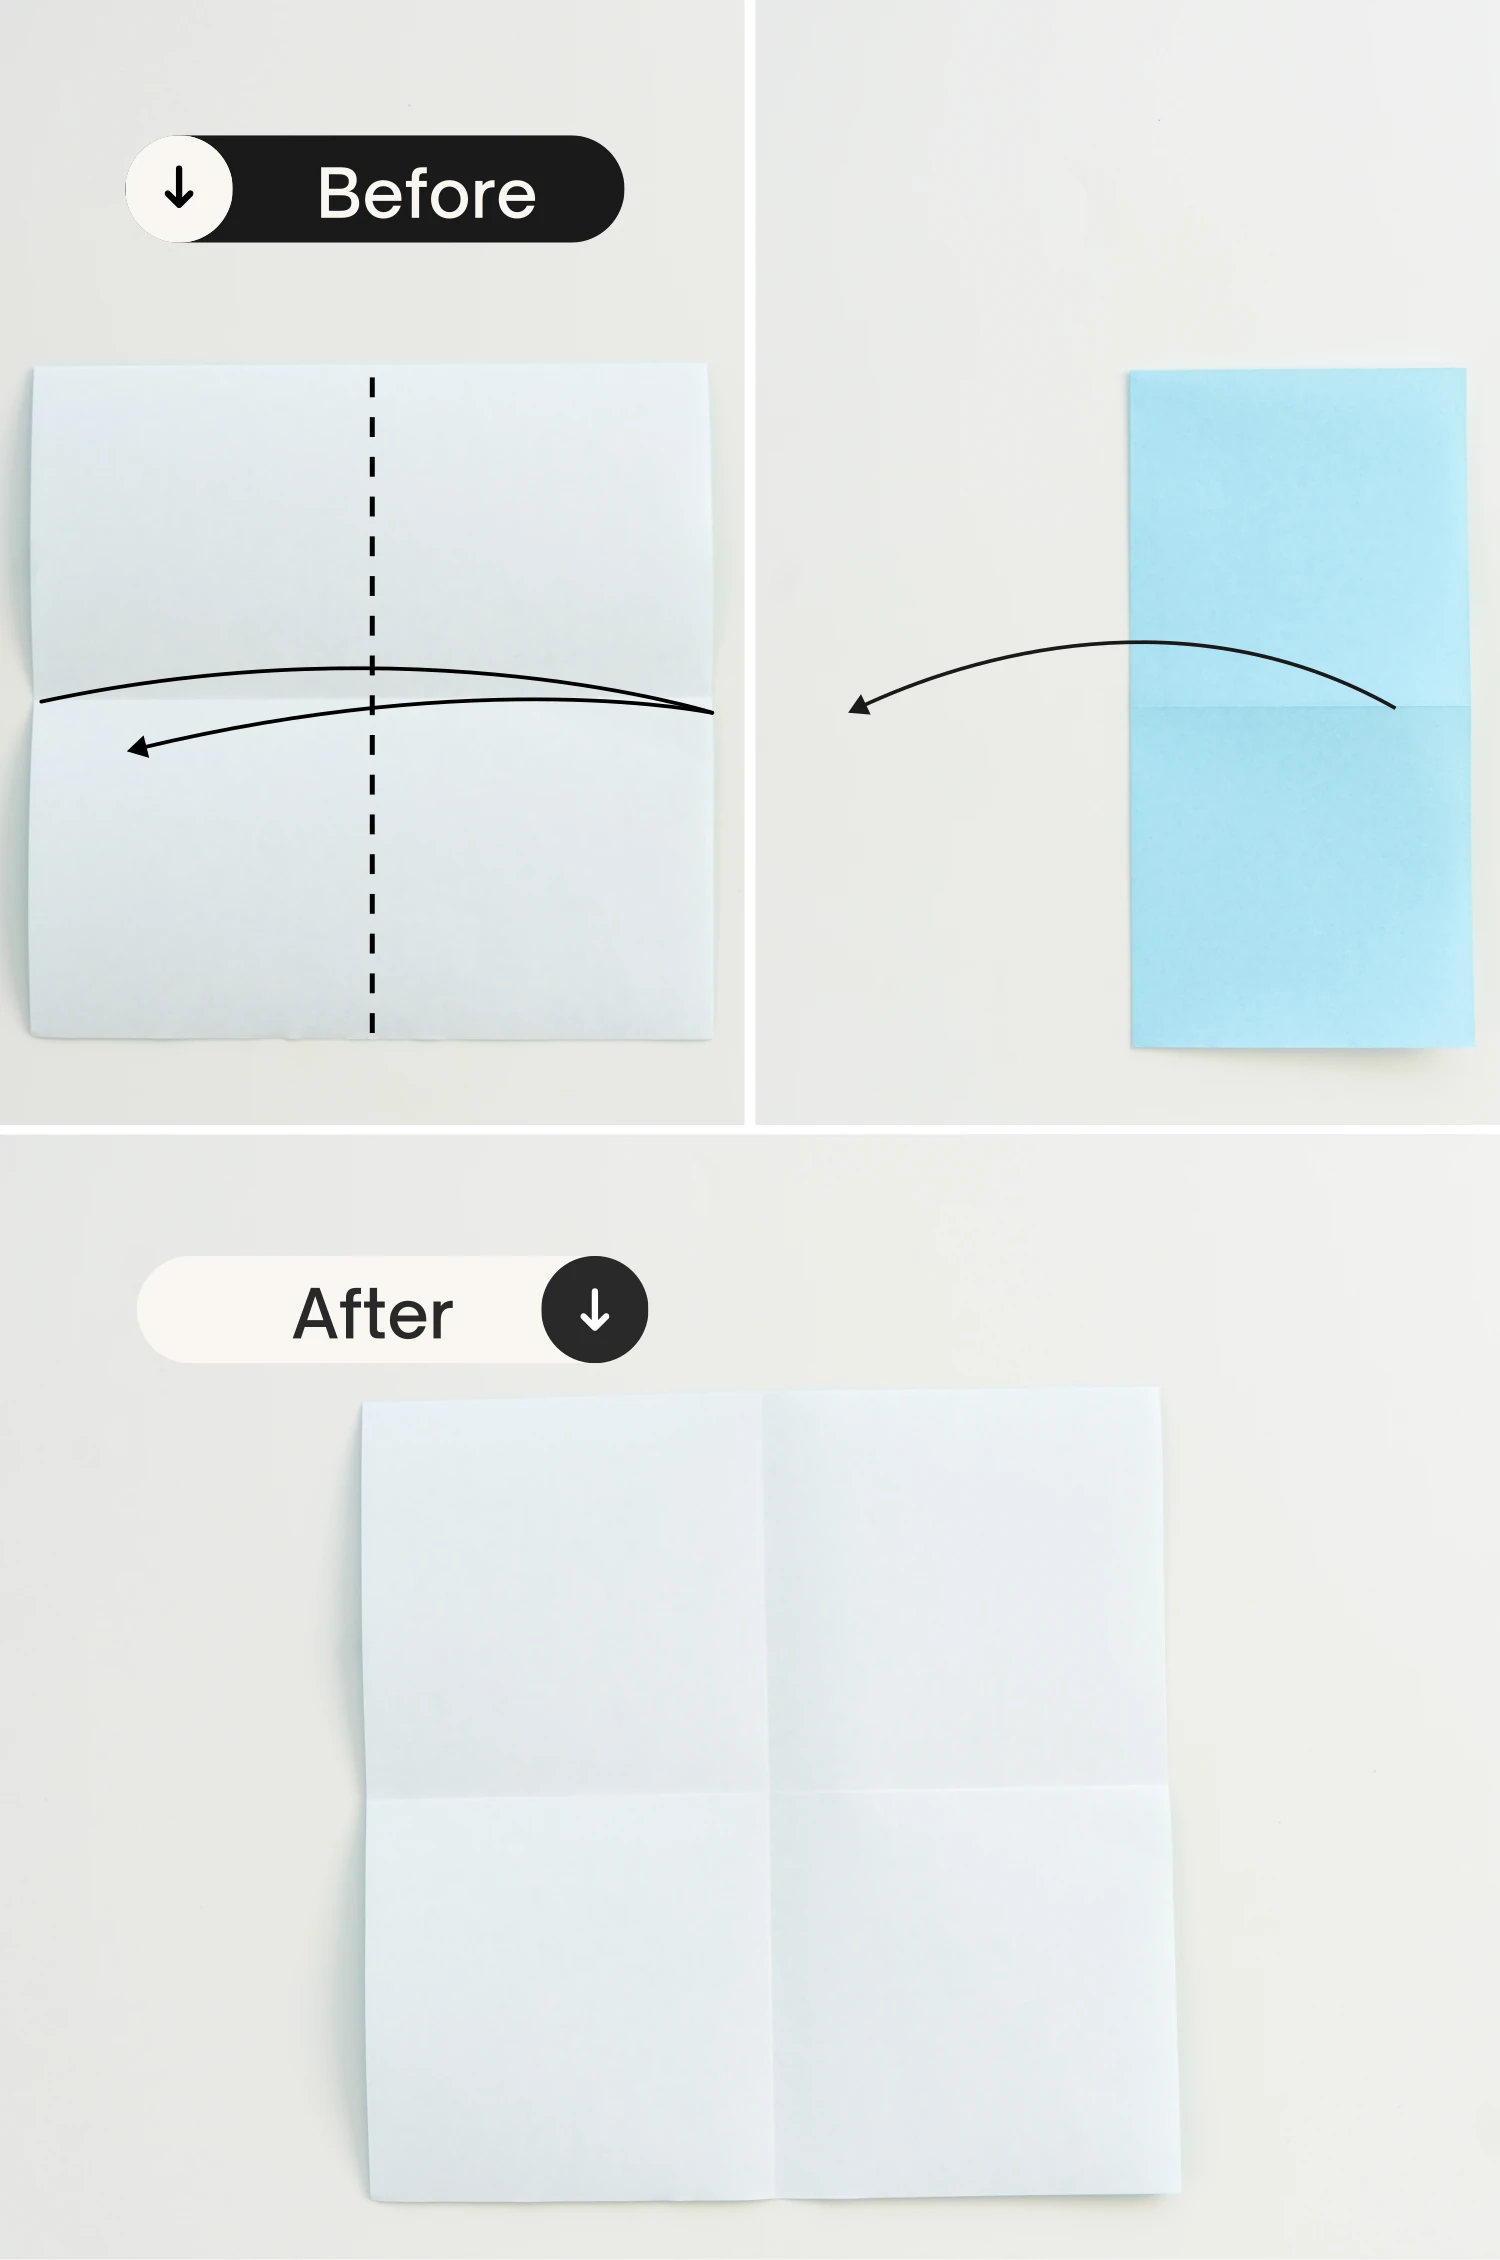
Fold it in half vertically, crease it well, and unfold it, getting an intersection point formed by these two creases.
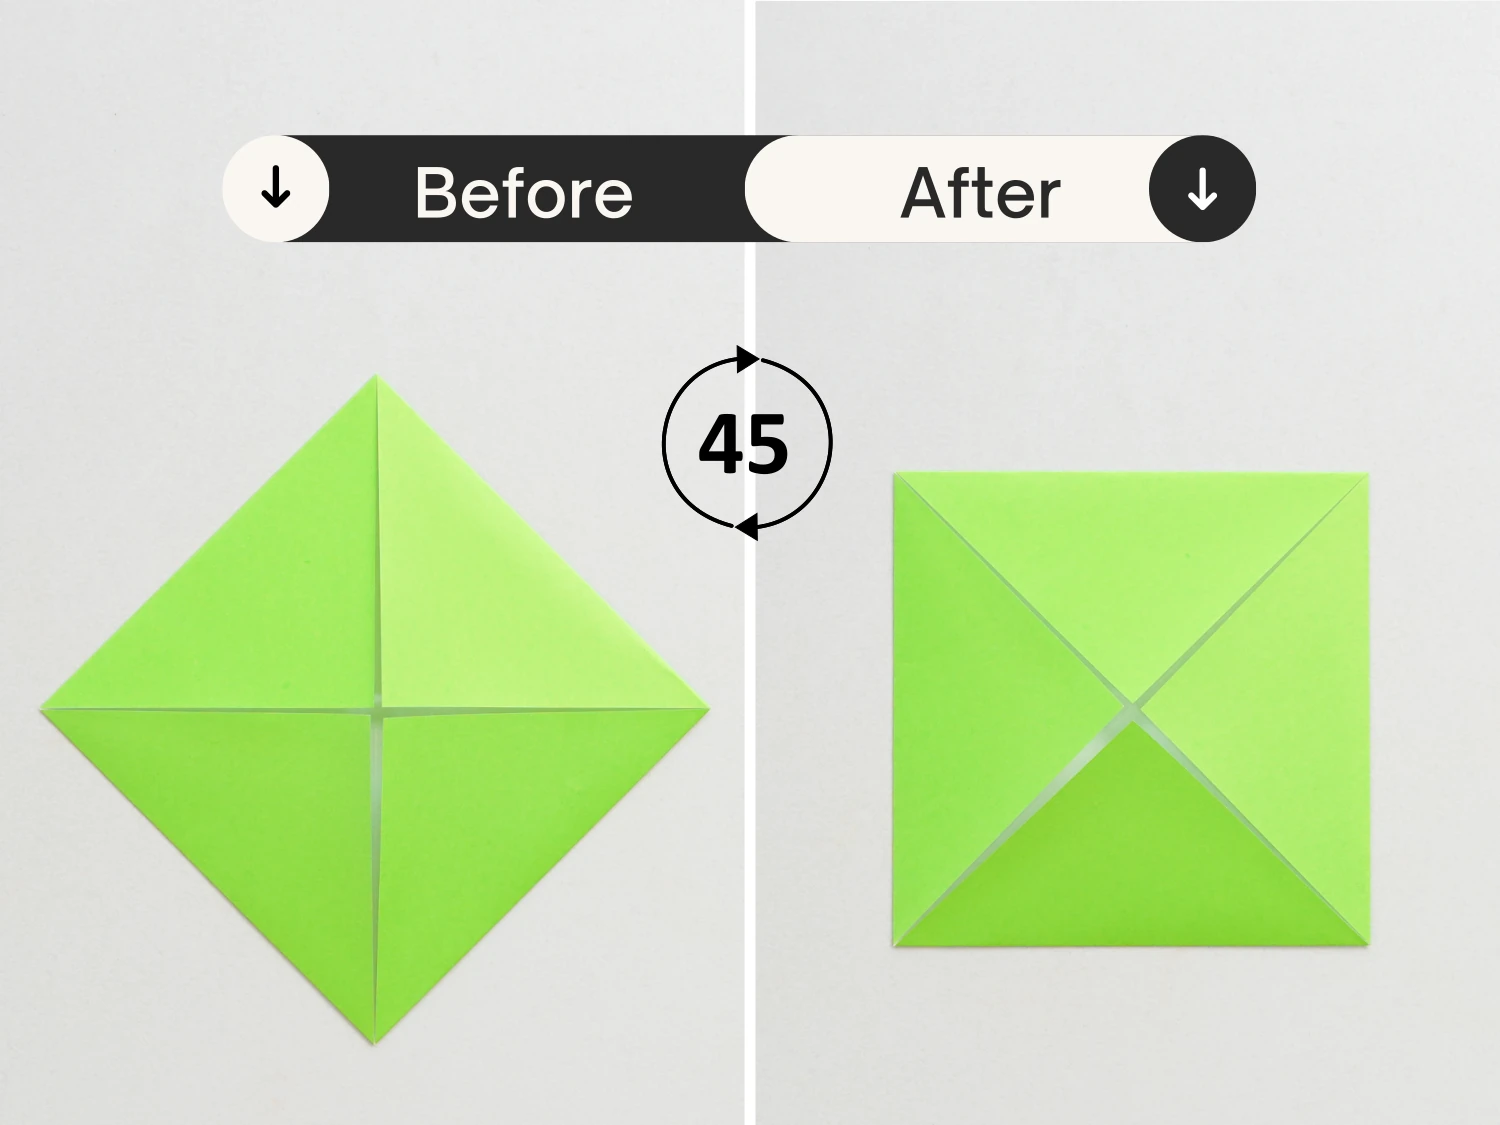
Step 4
Fold the four points to the intersection point.
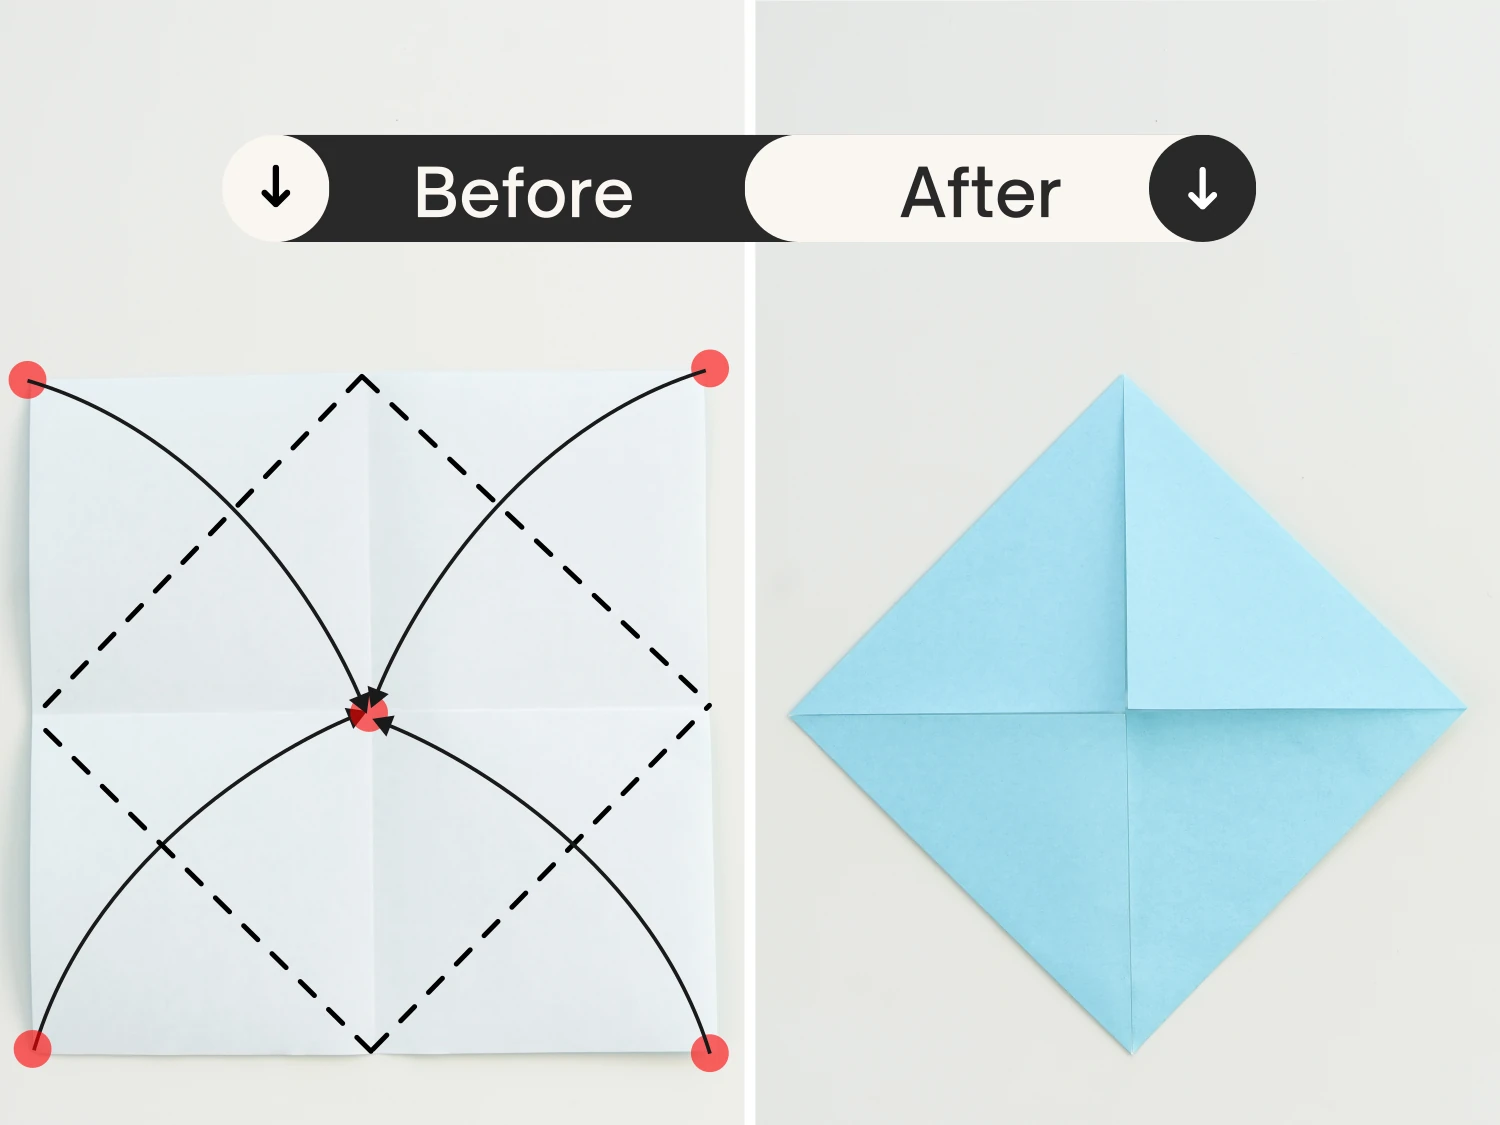
Step 5
Rotate it for 45 degrees clockwise.
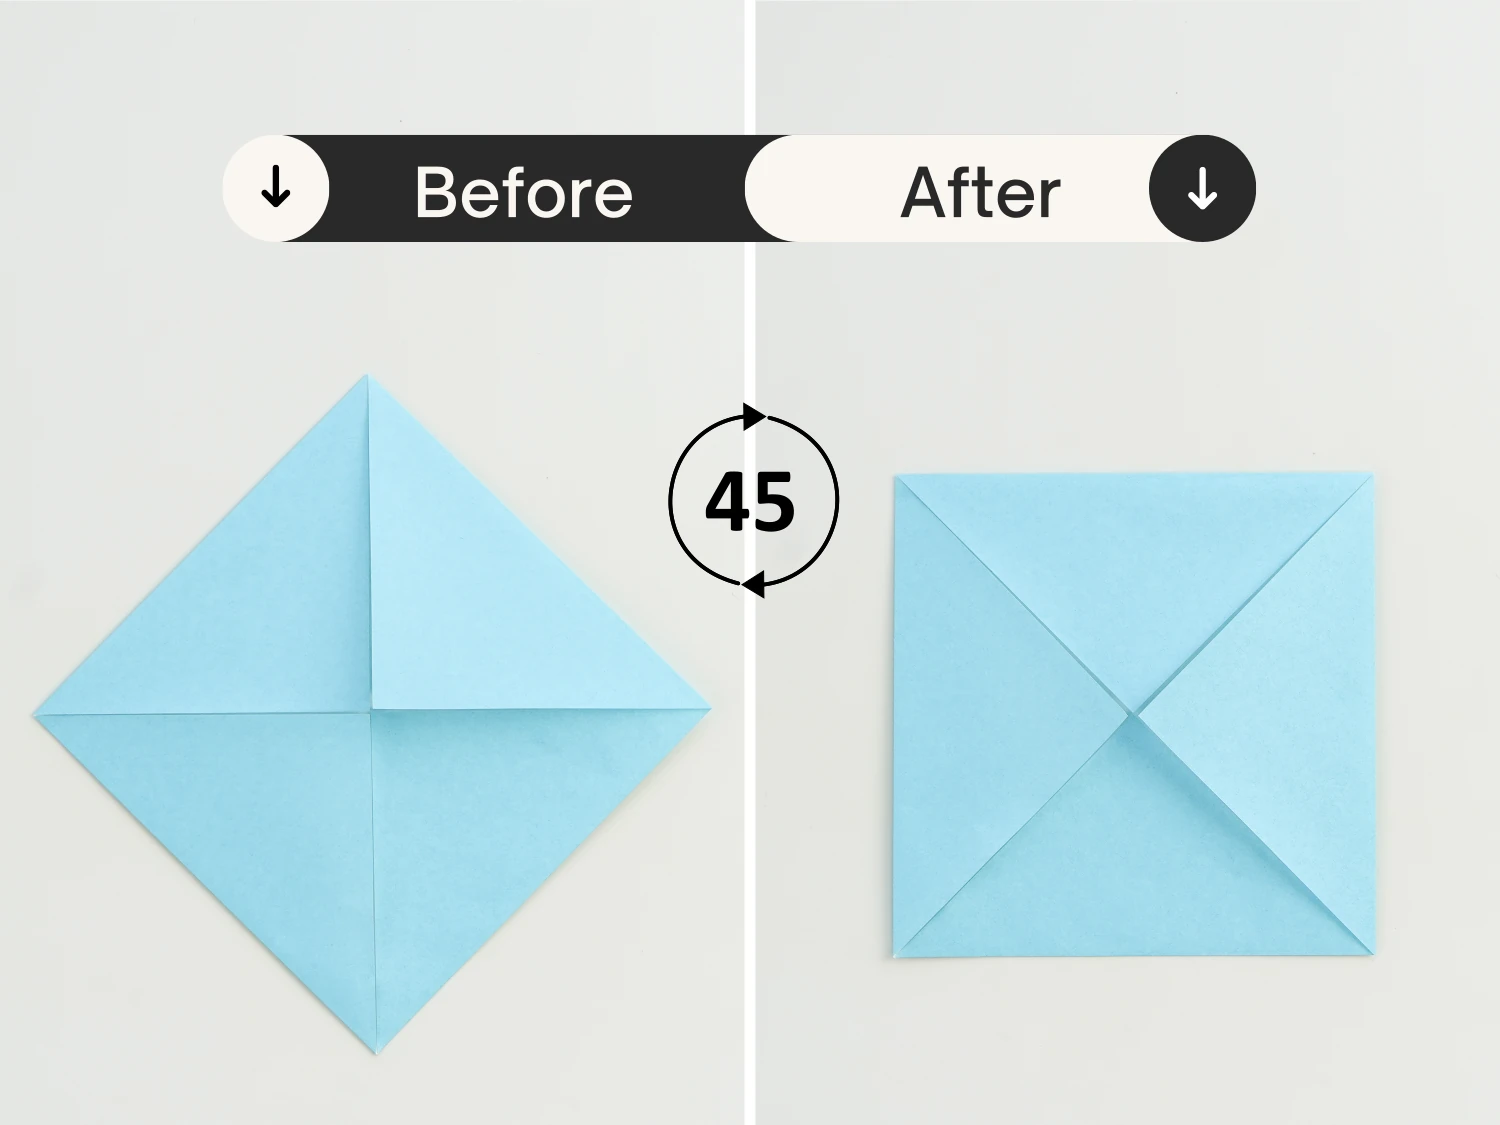
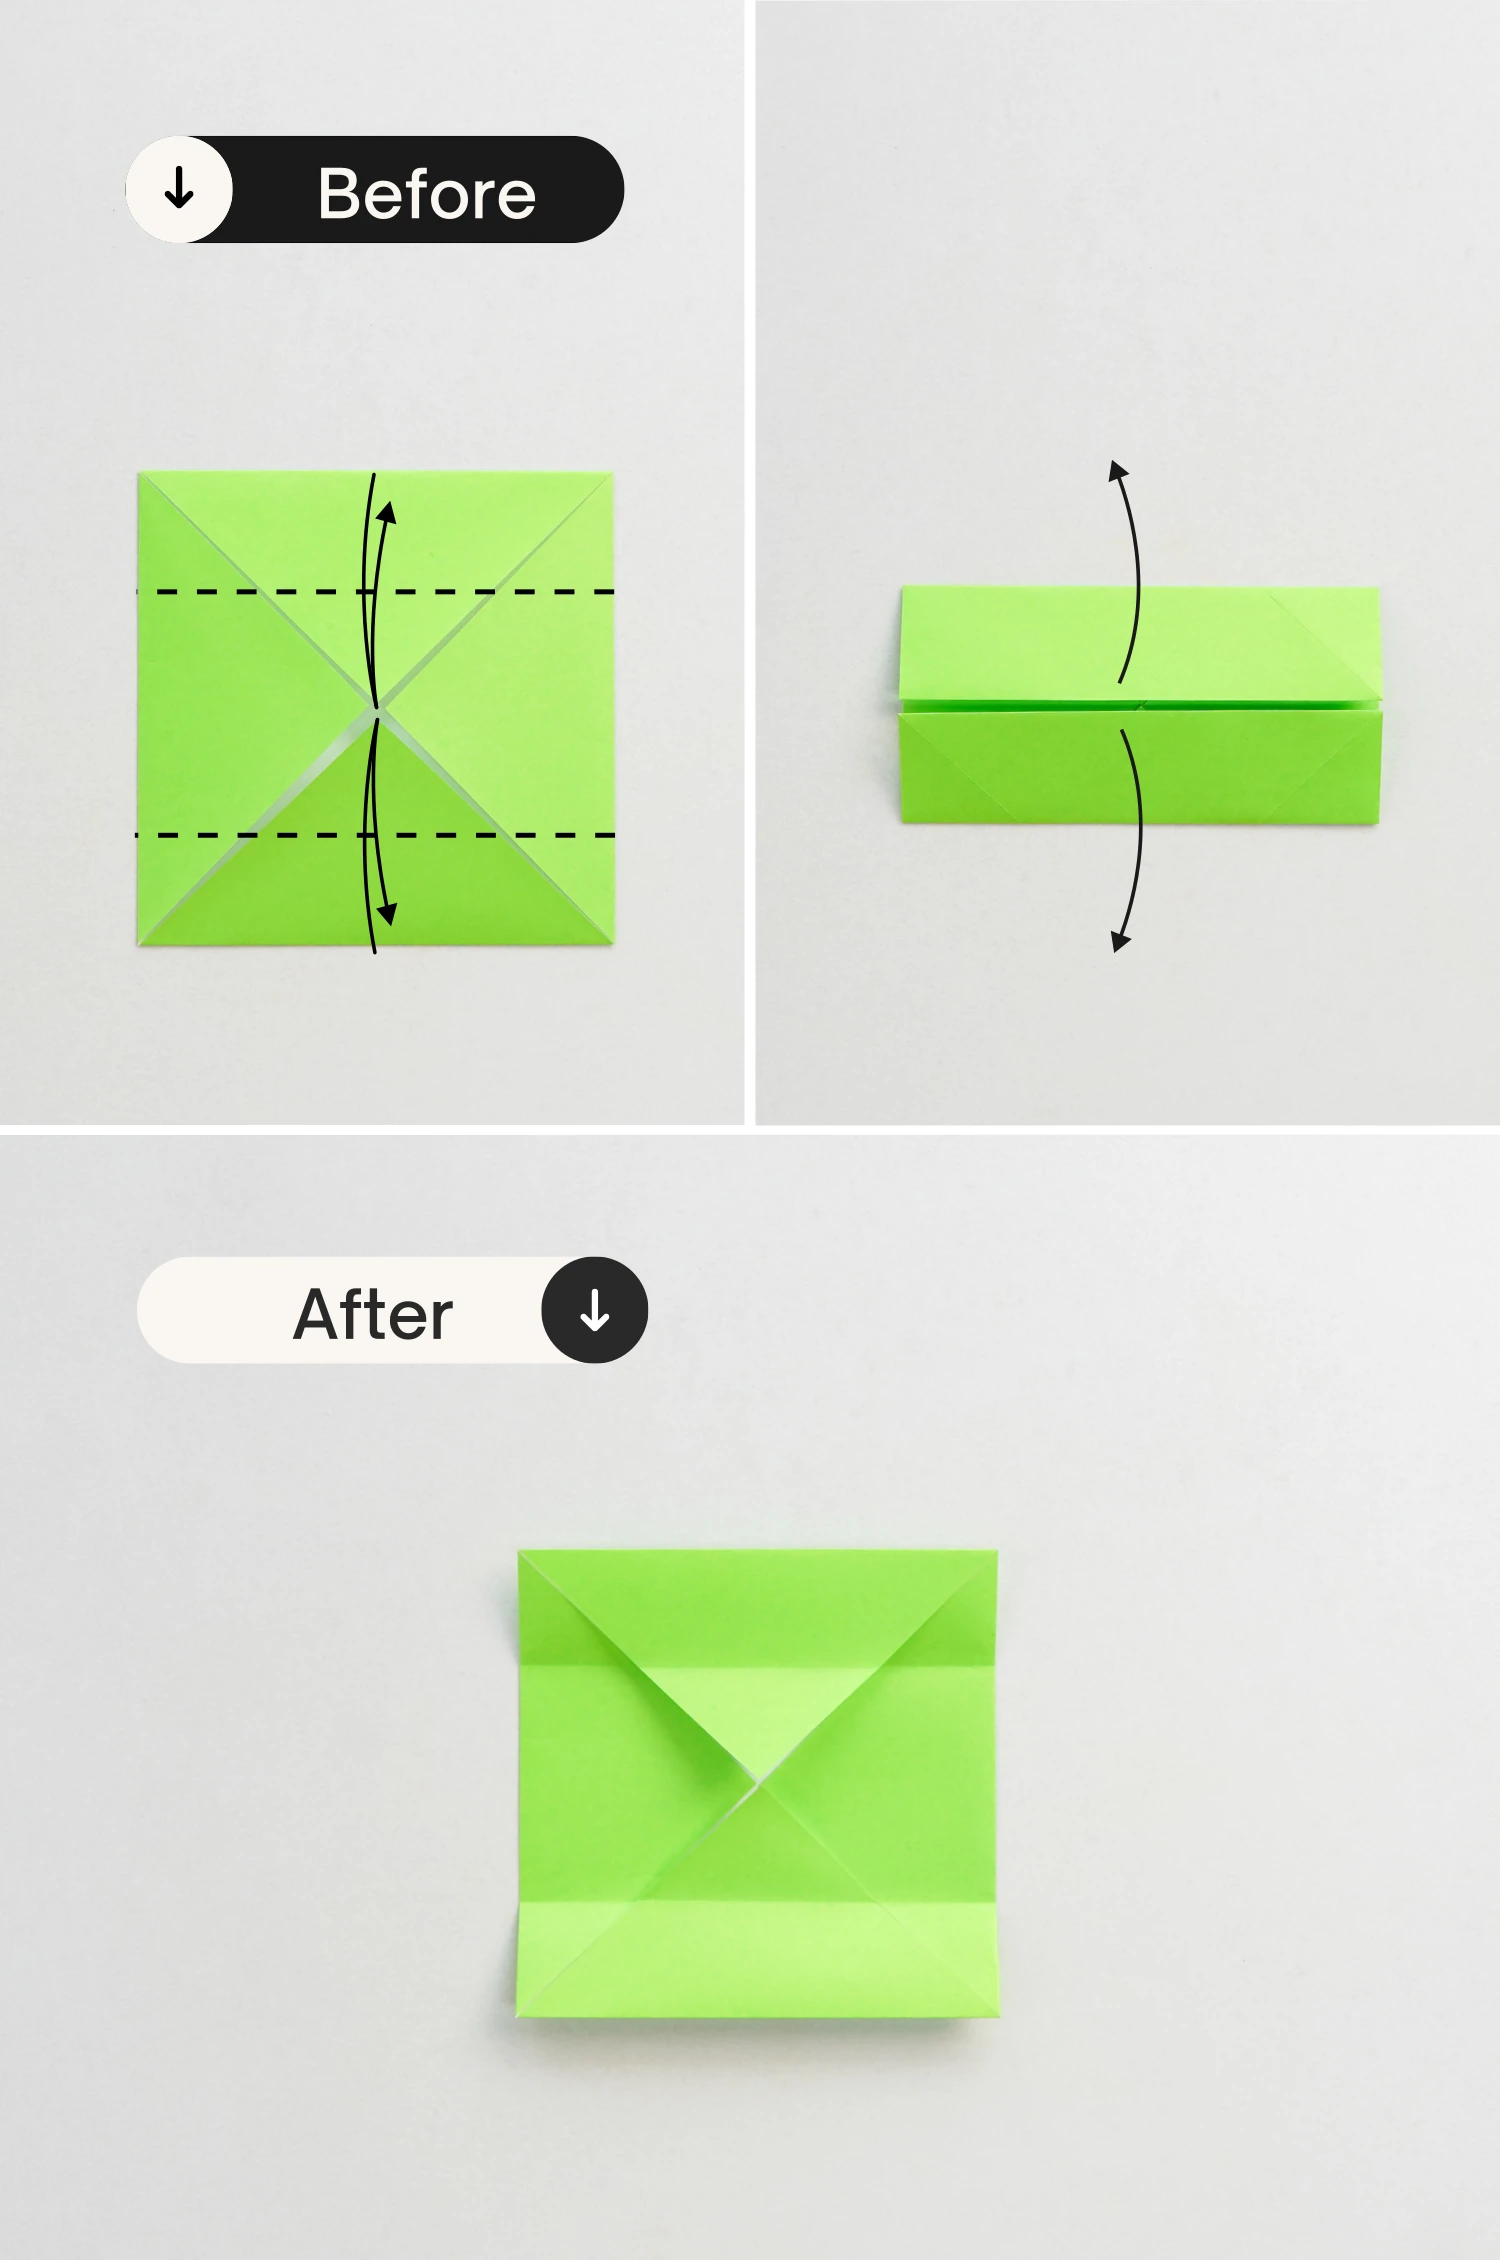
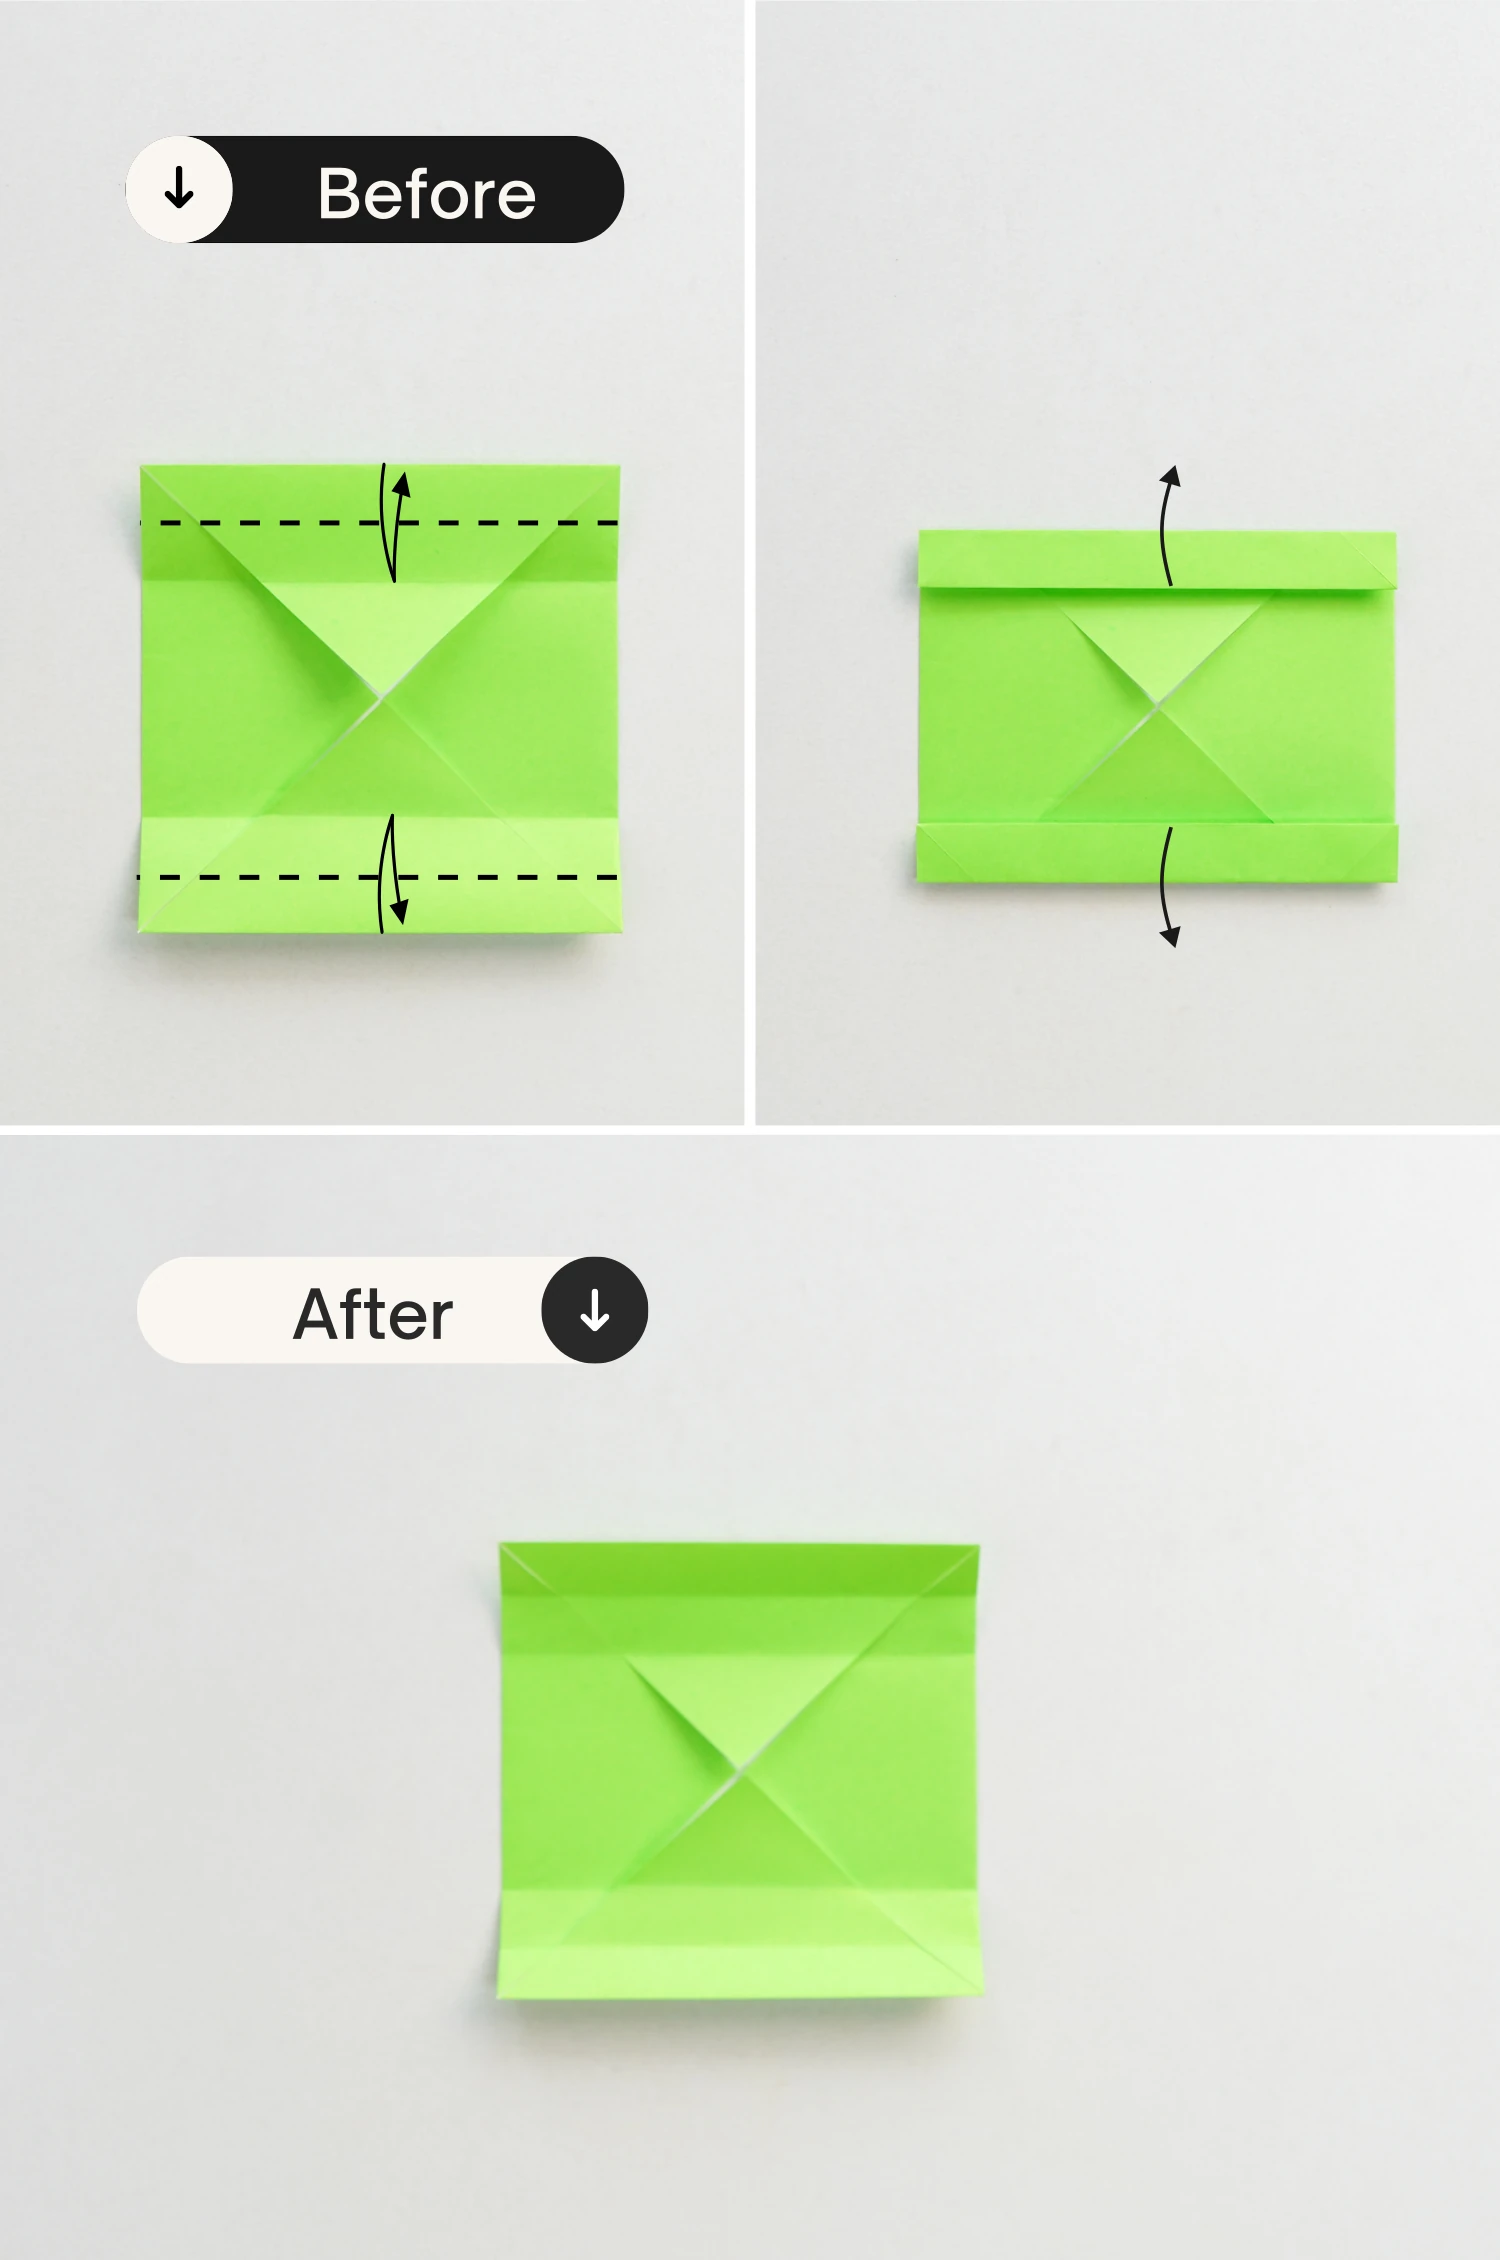
Step 6
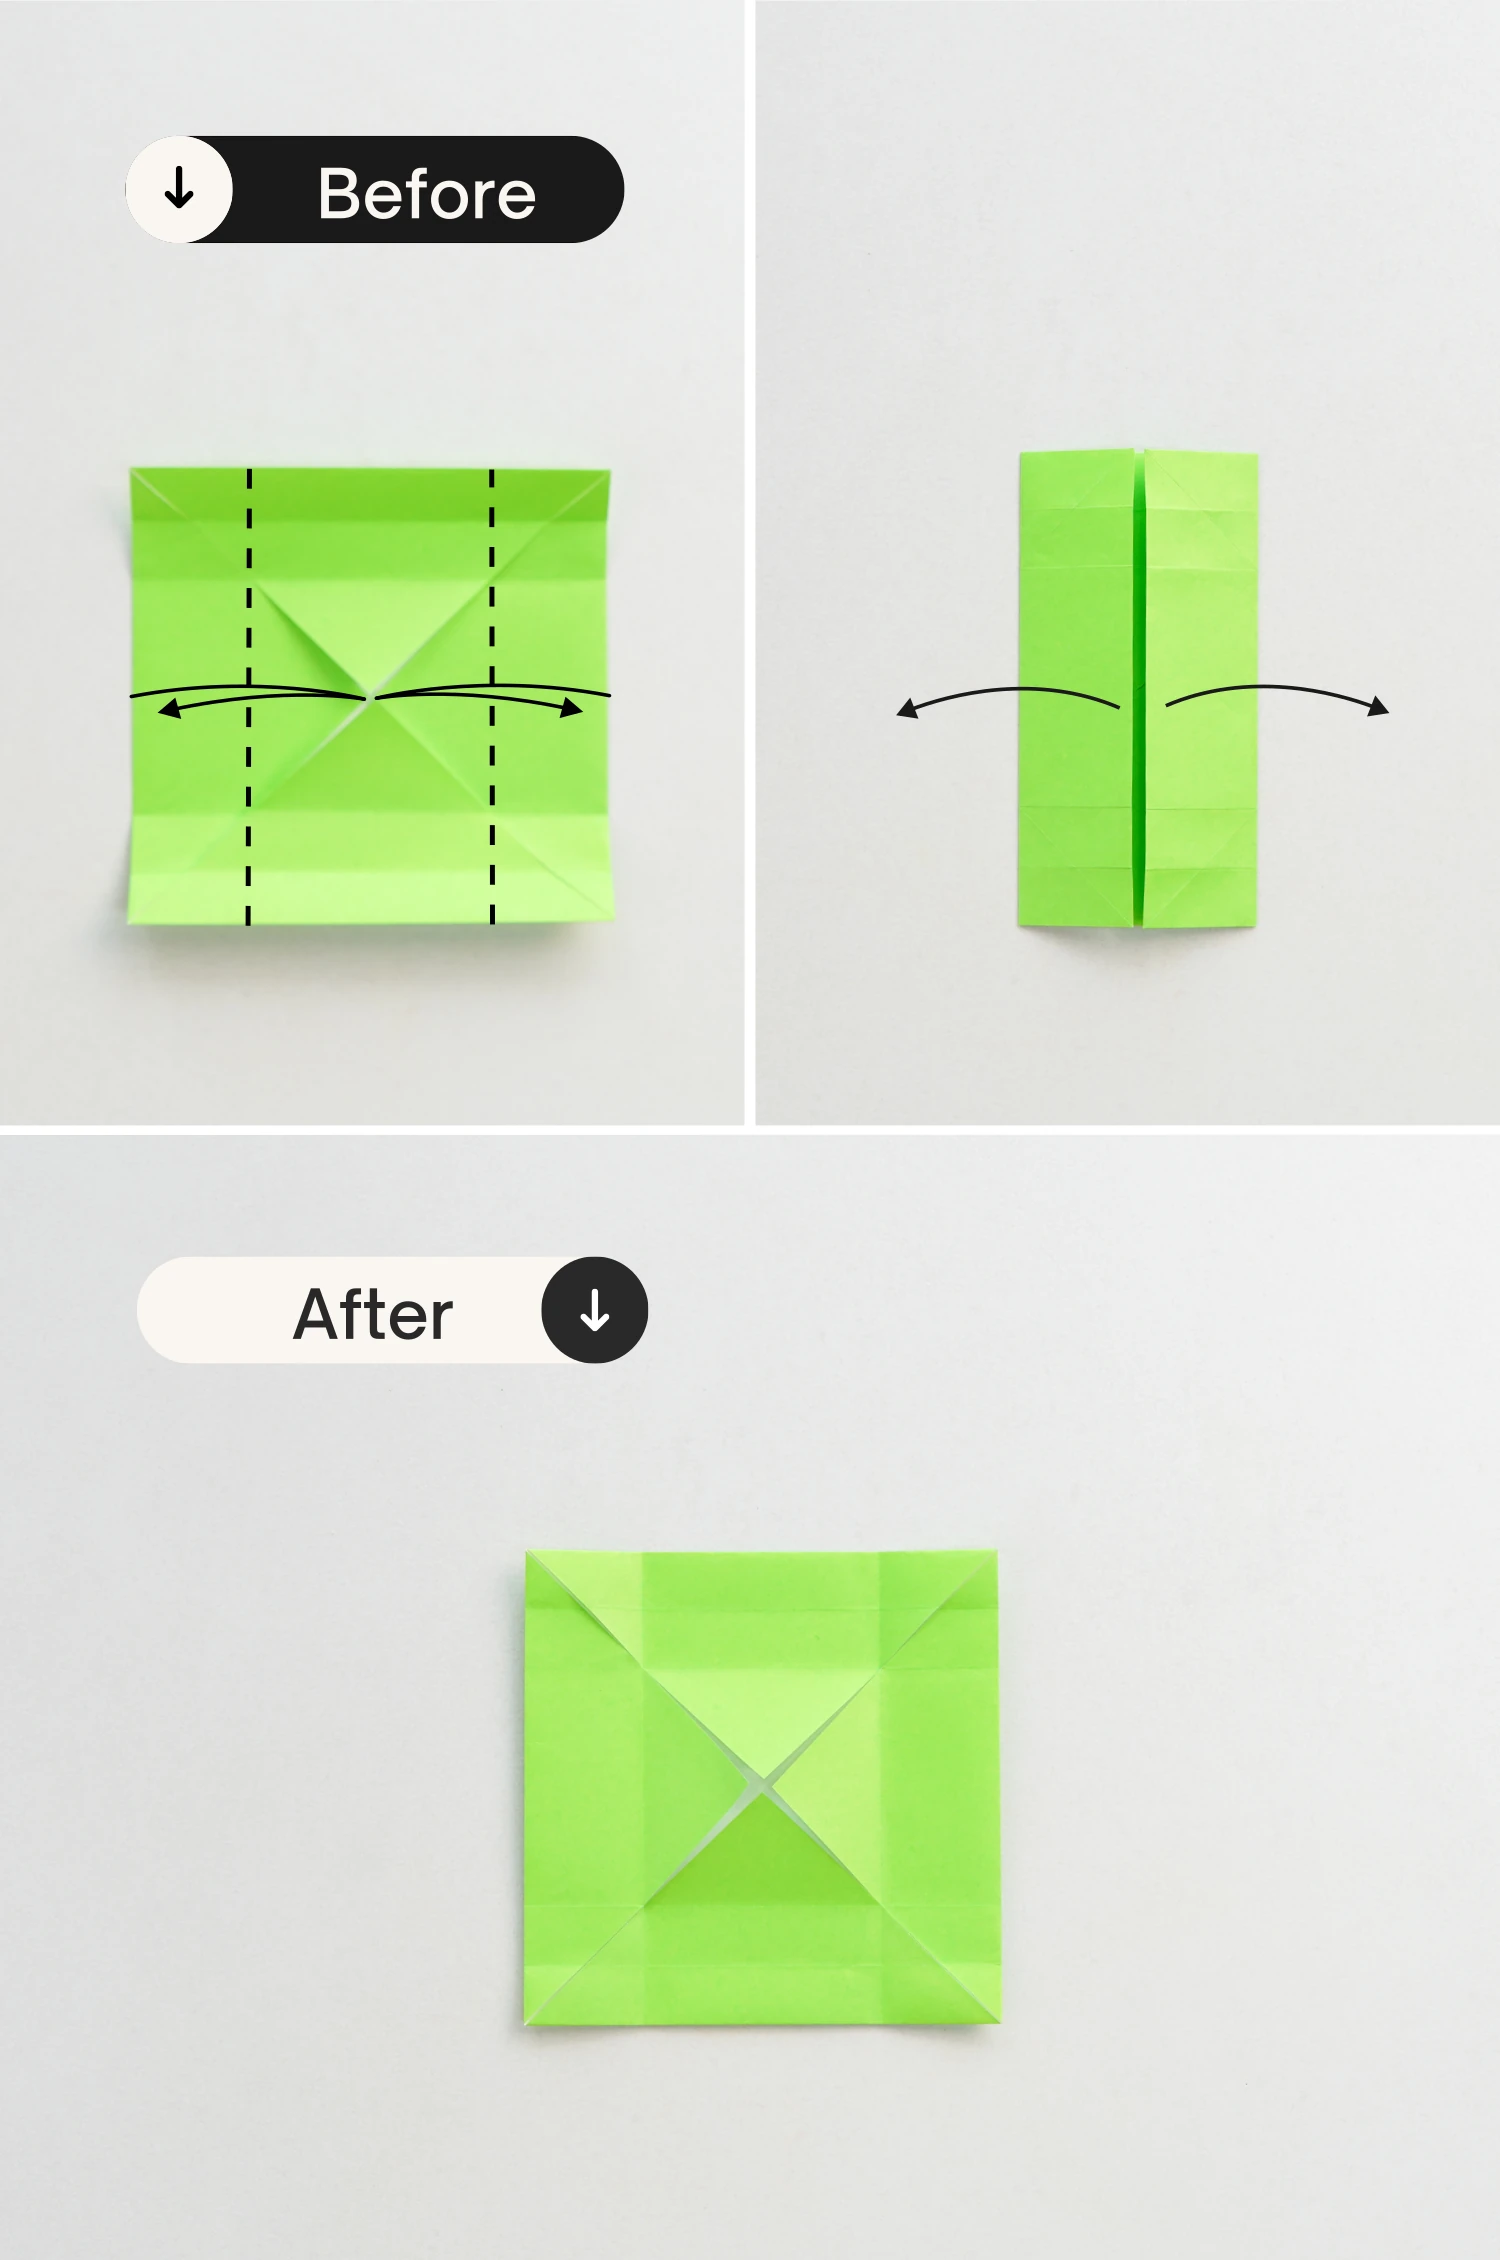
Fold the top and bottom edges to the center point horizontally, crease them well, and then unfold.
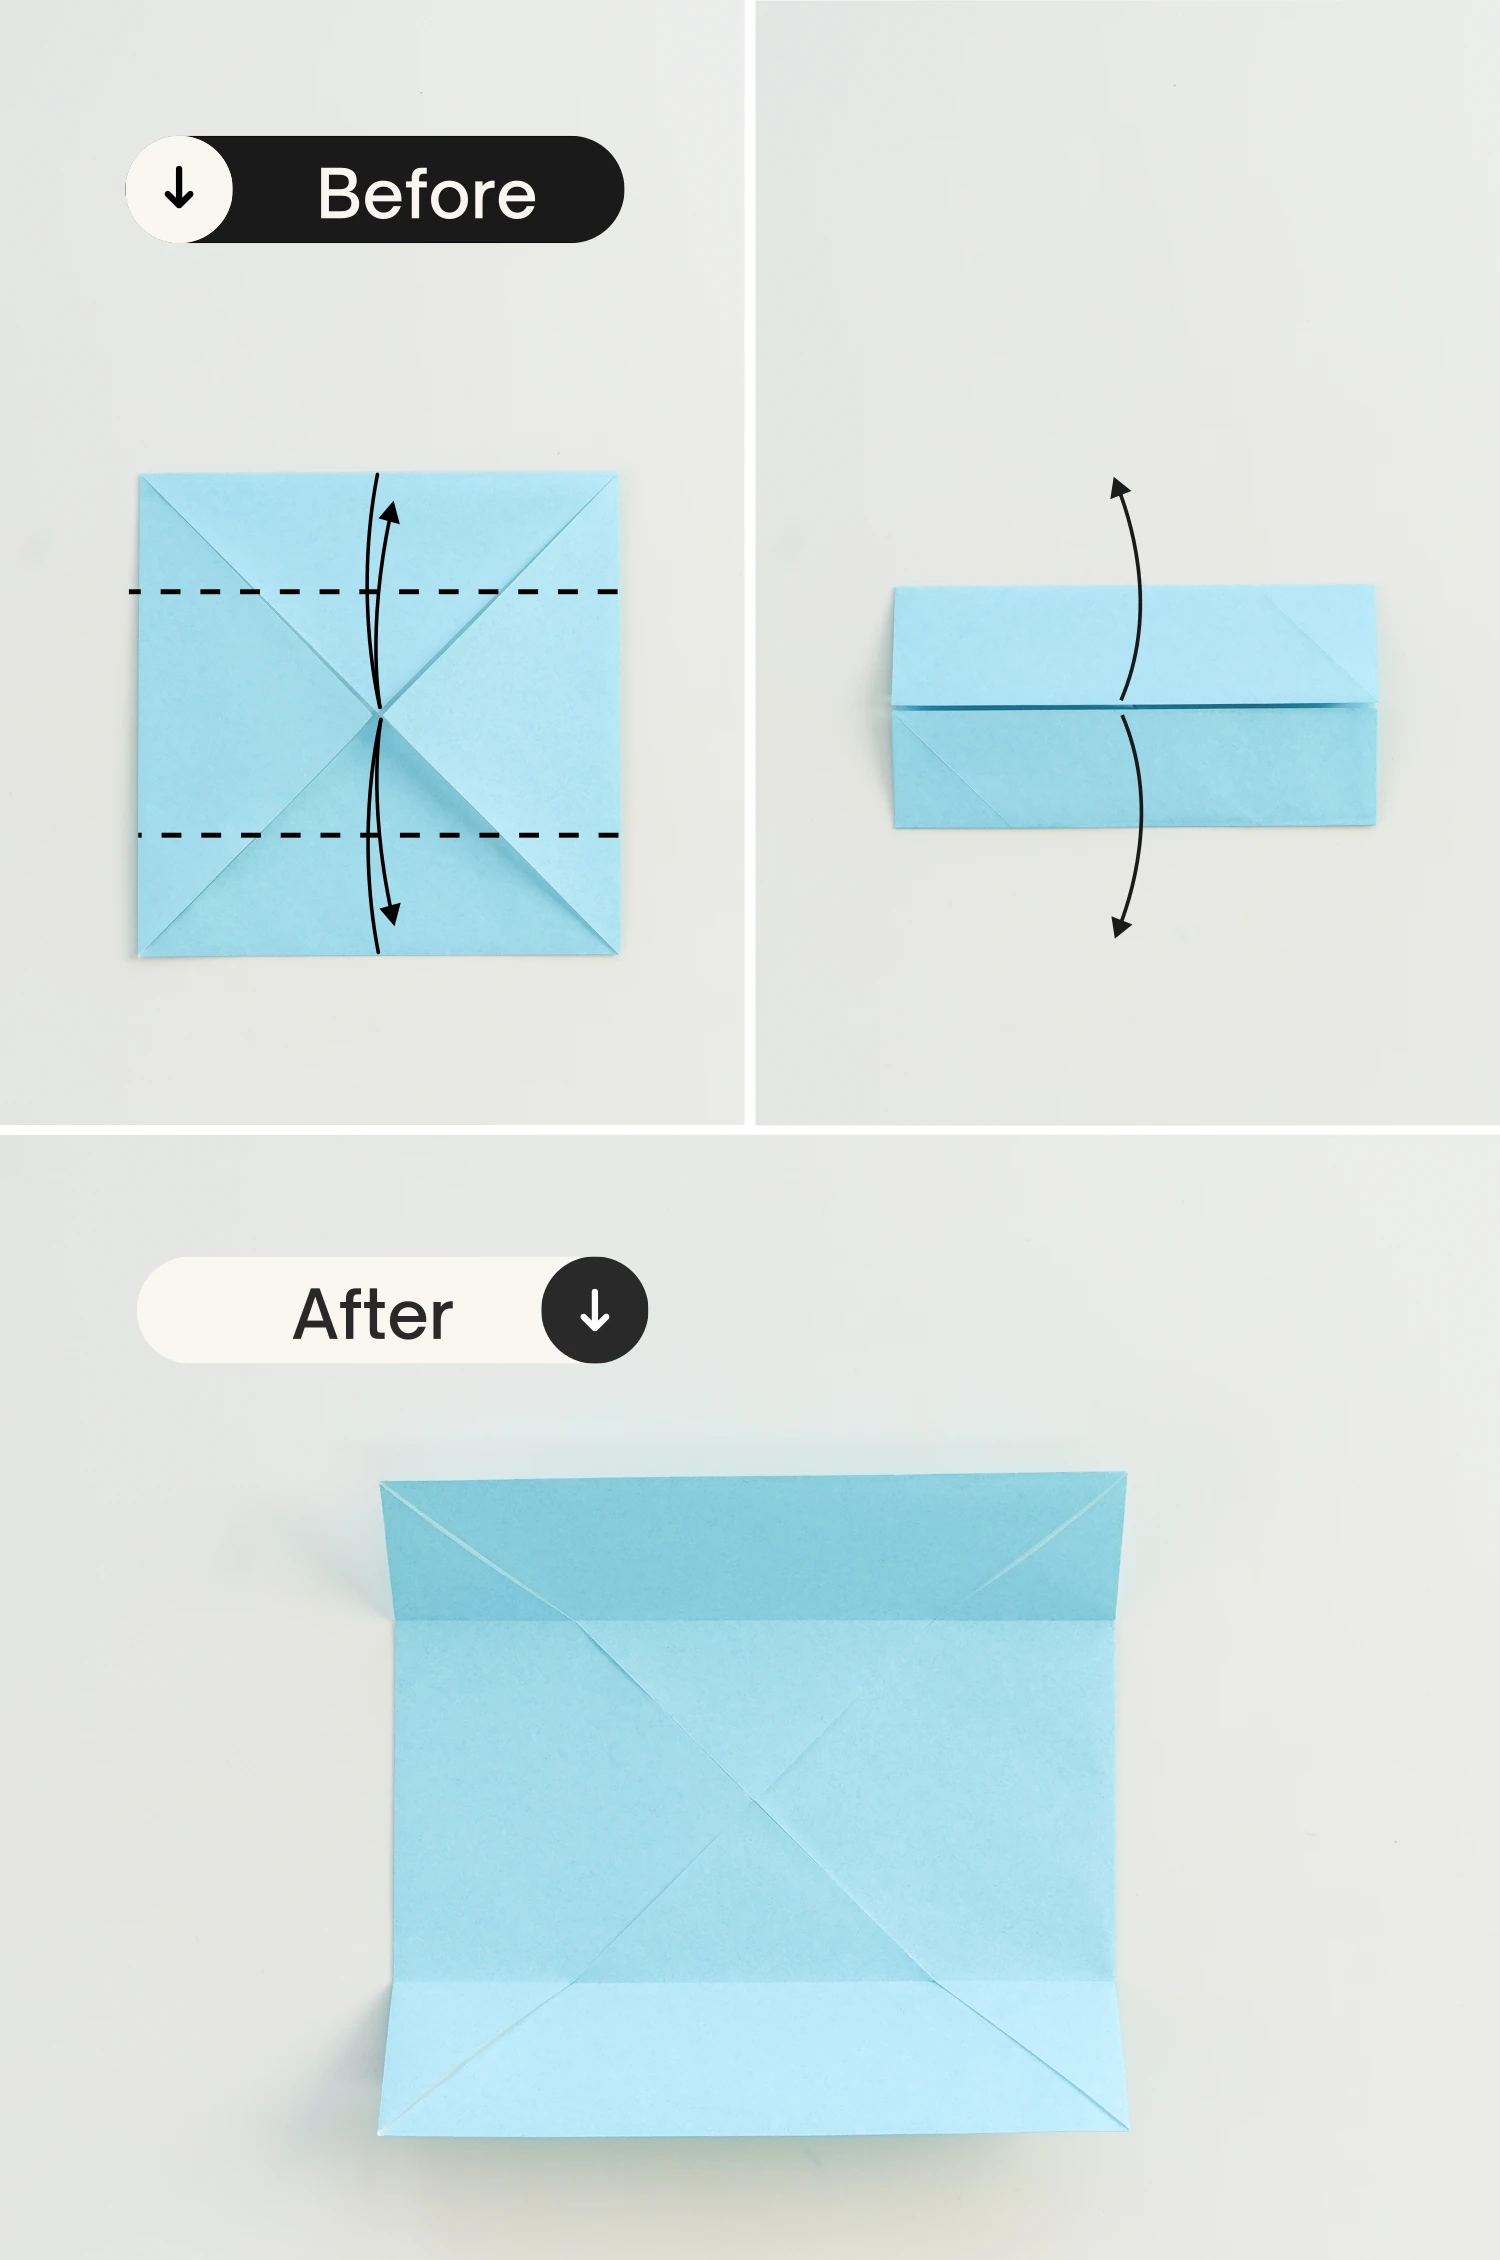
Step 7
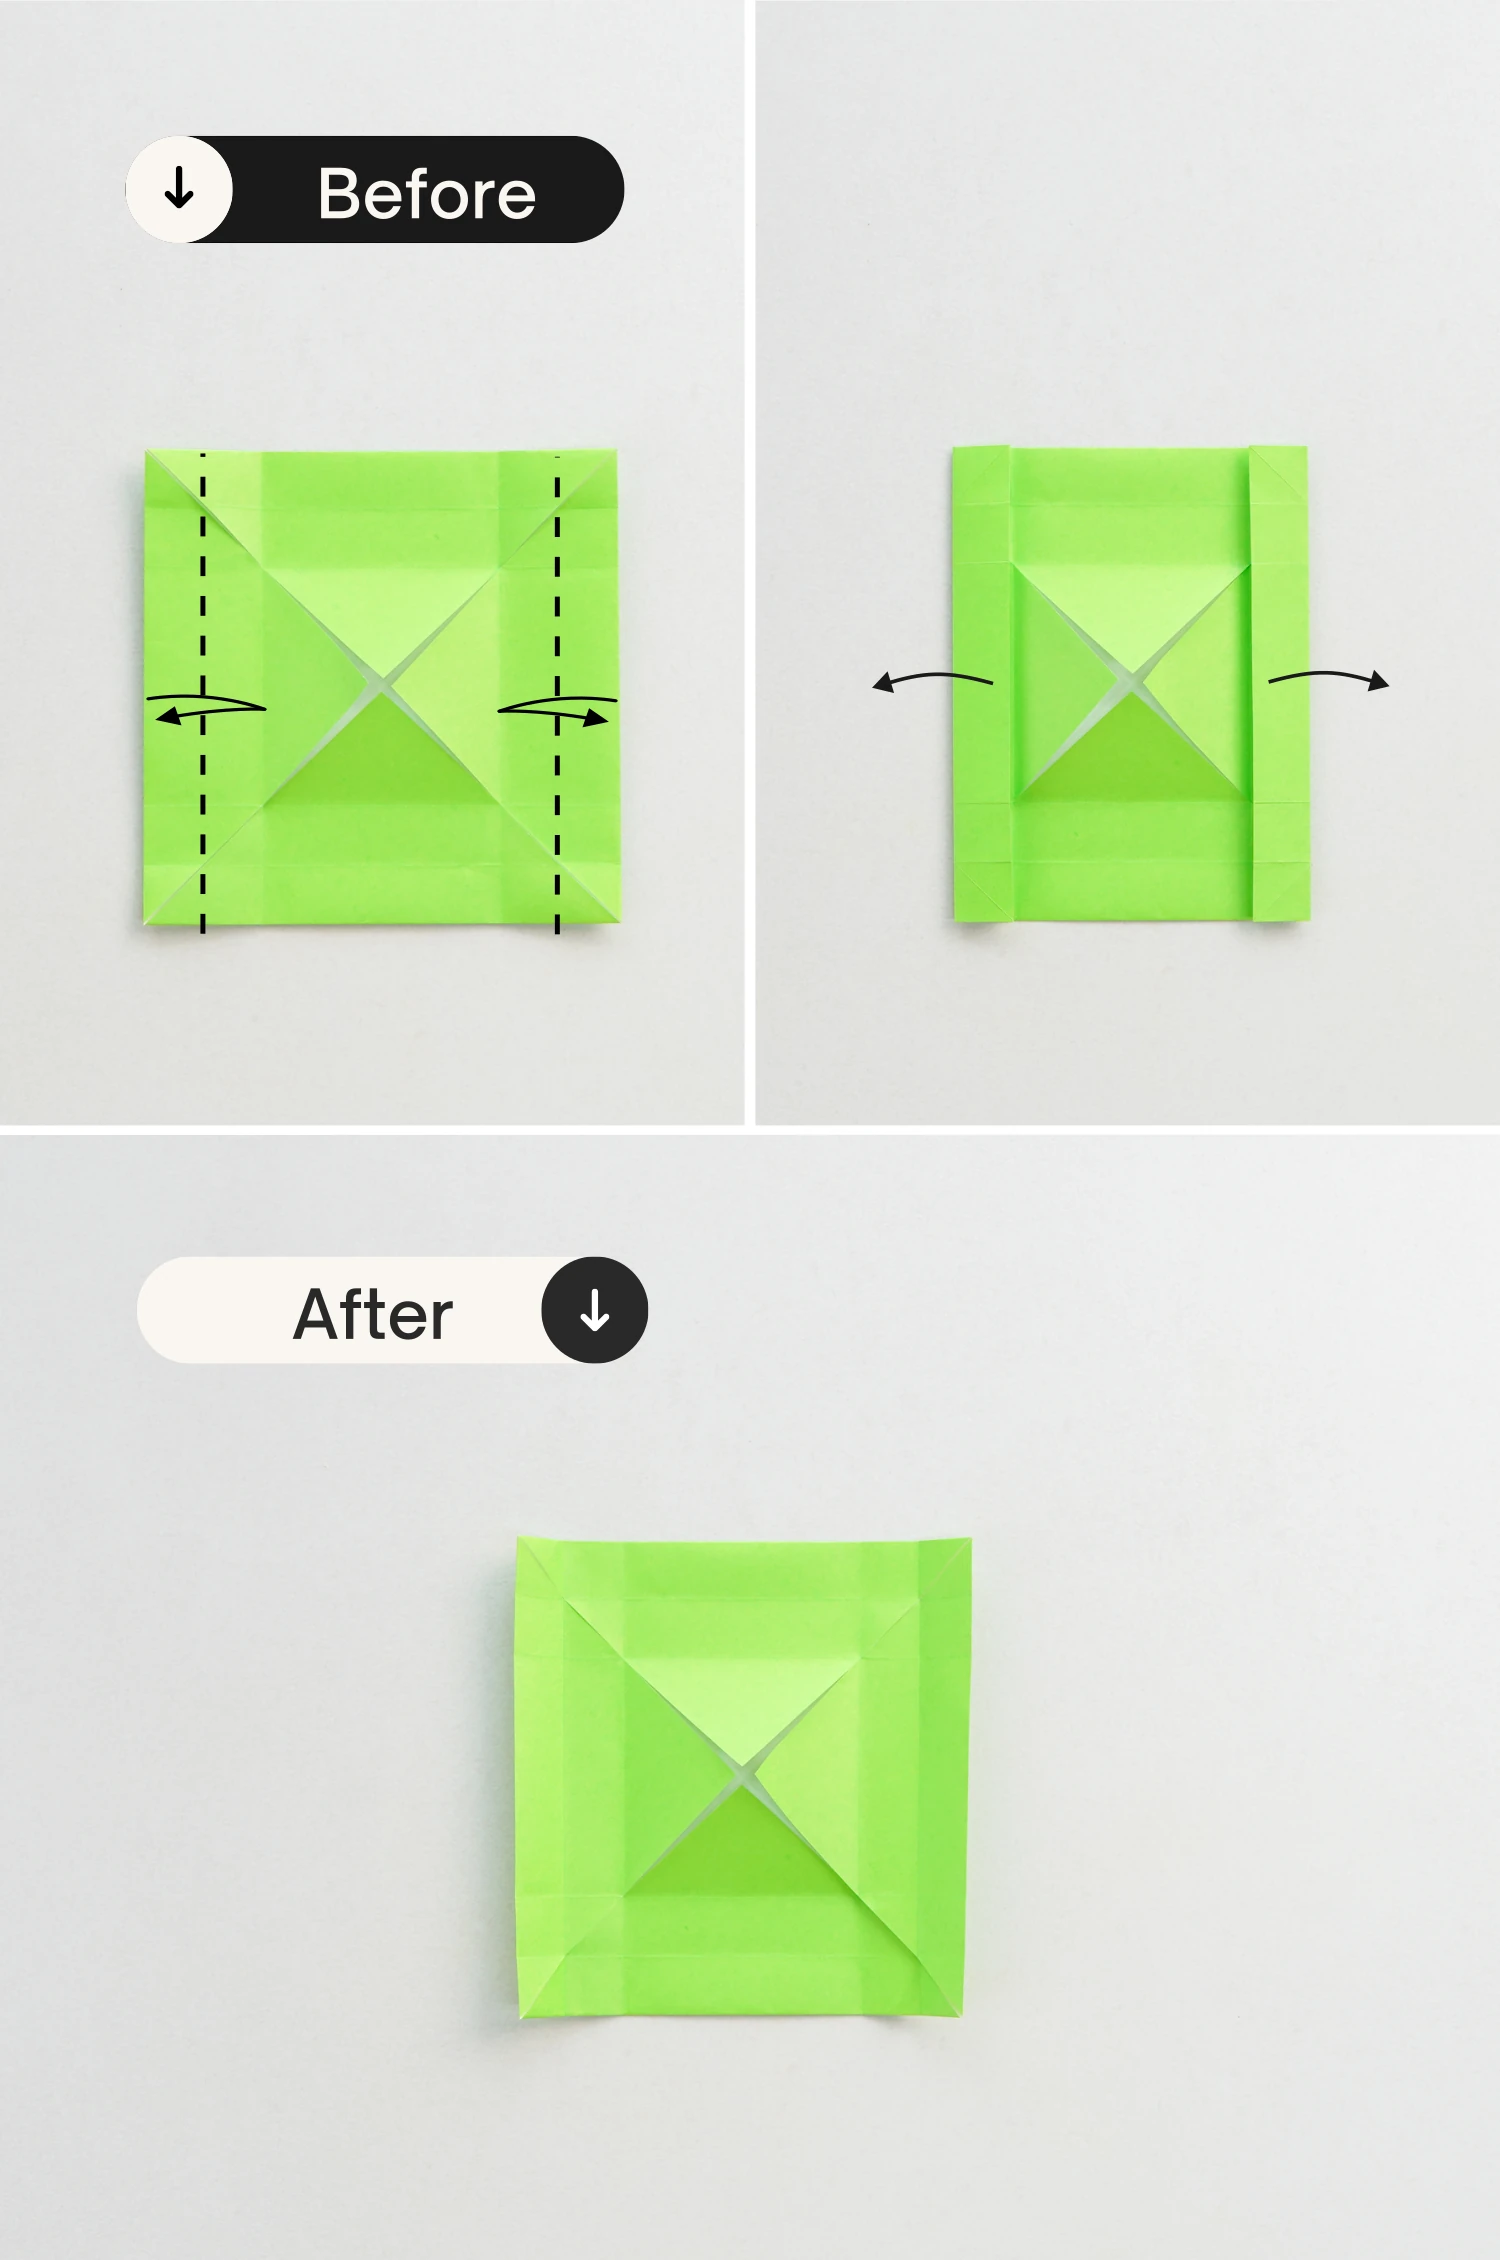
Repeat this for the left and right edges.

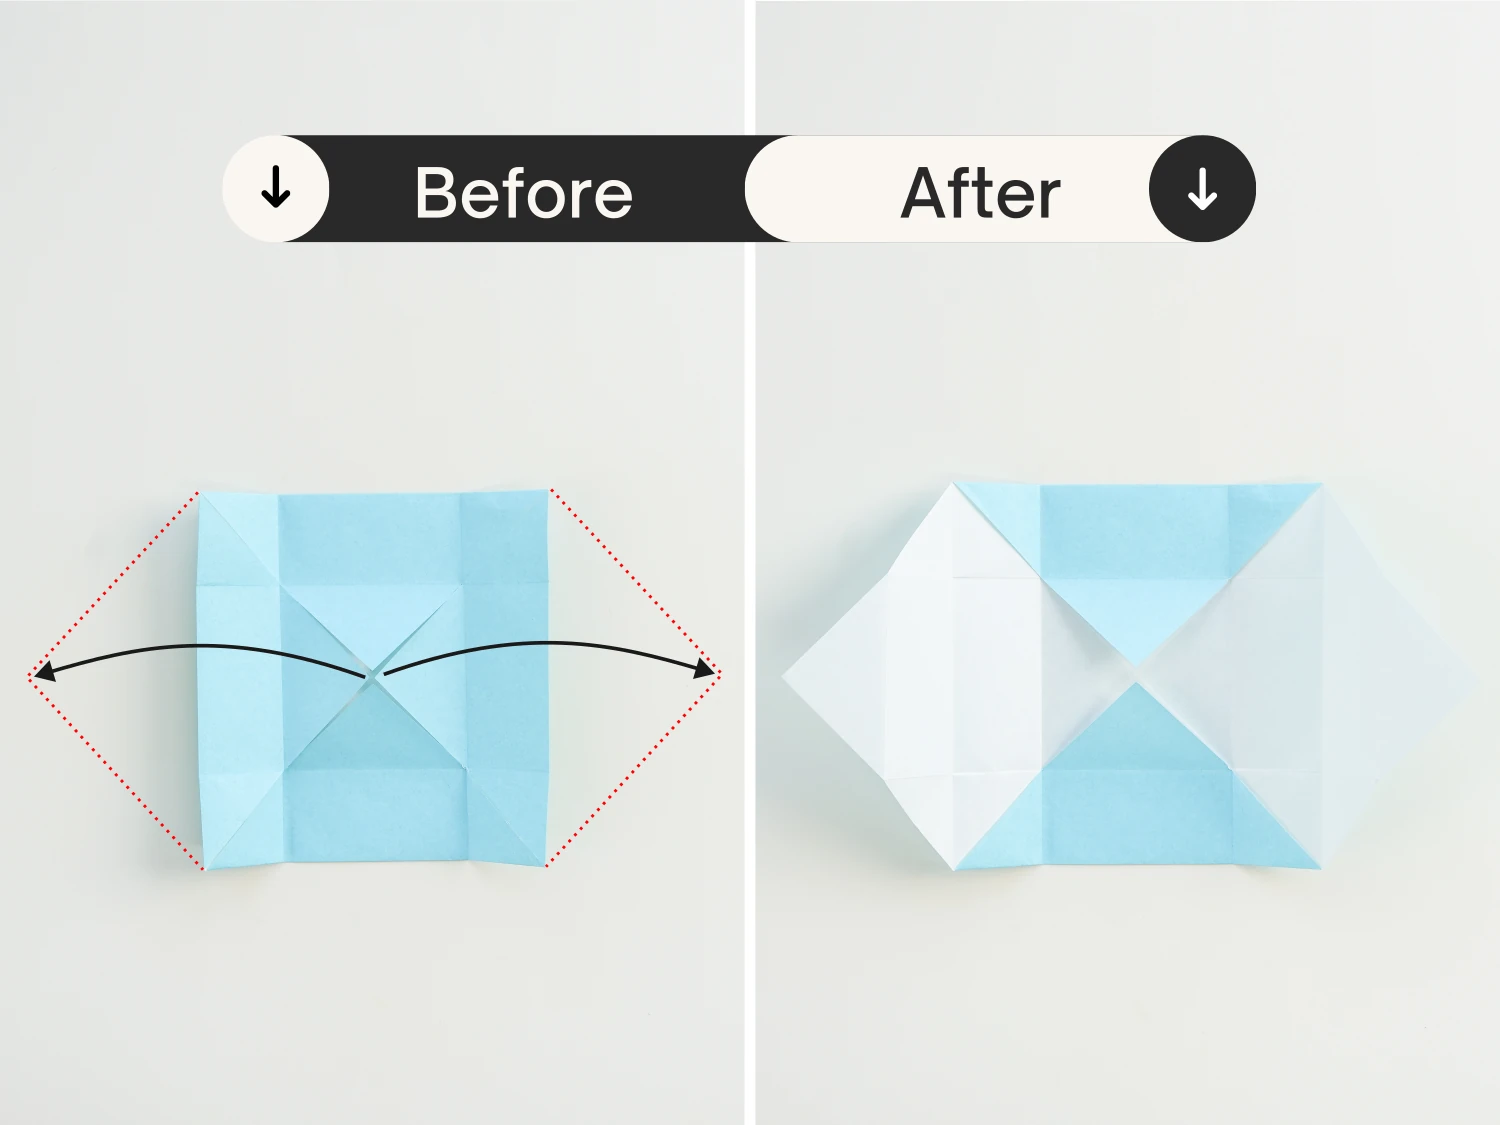
Step 8
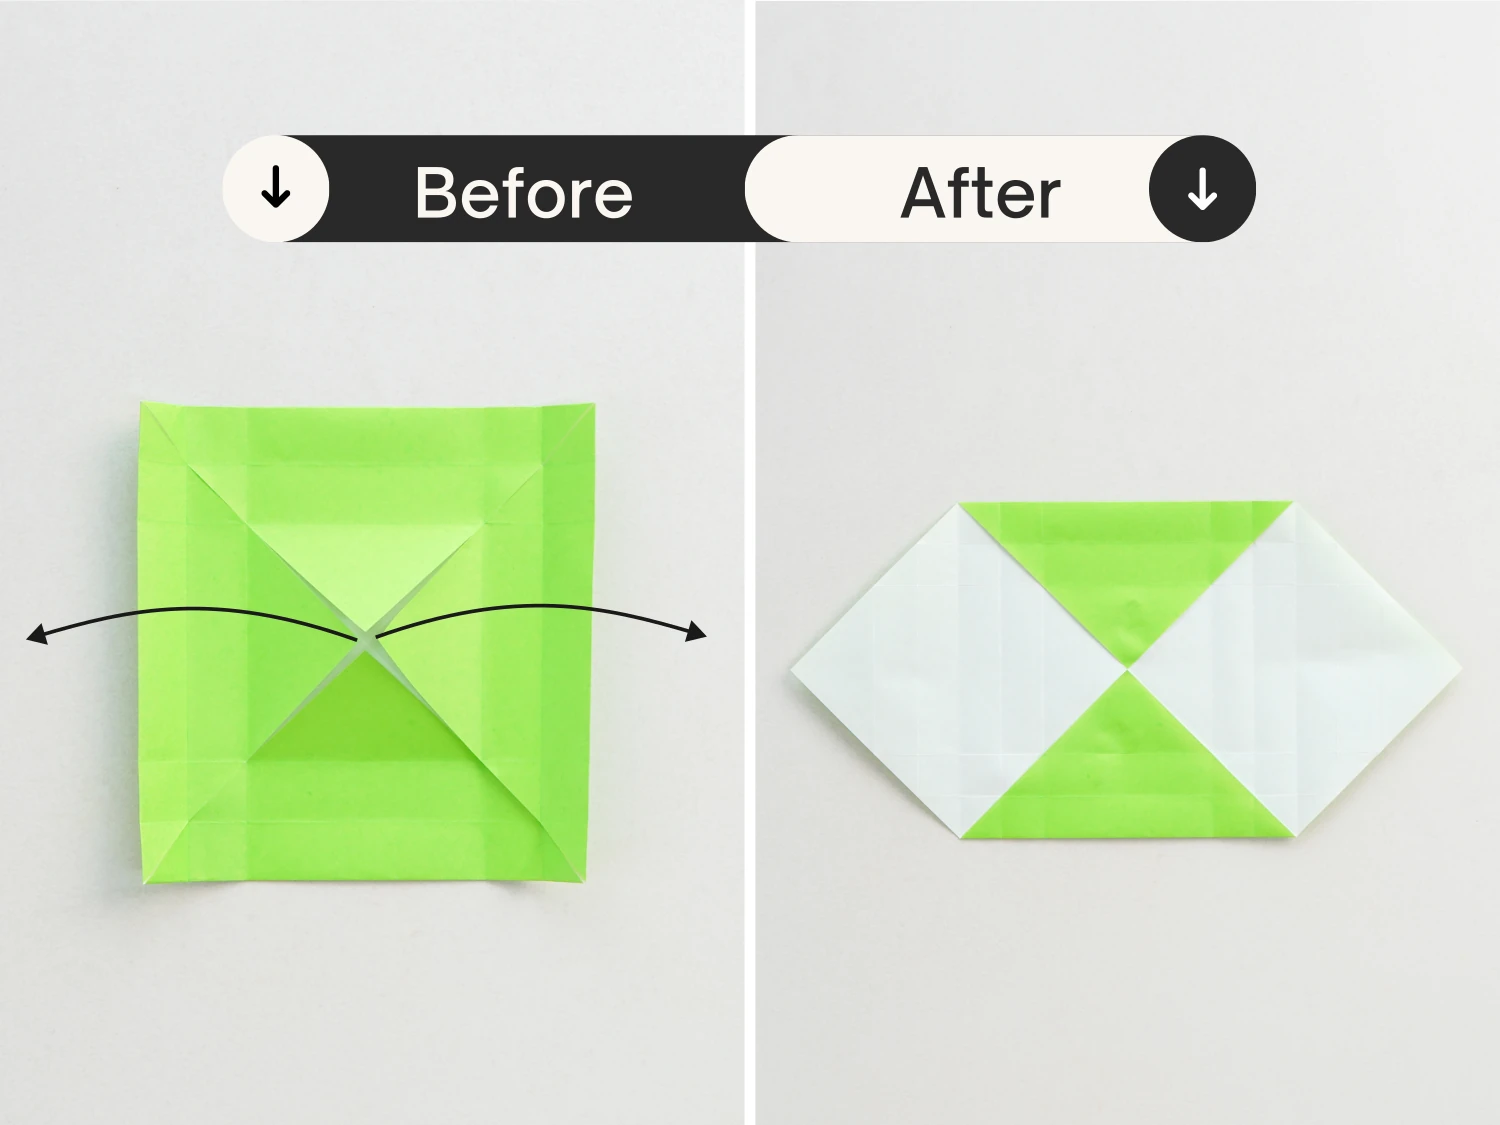
Unfold the left and right triangles.
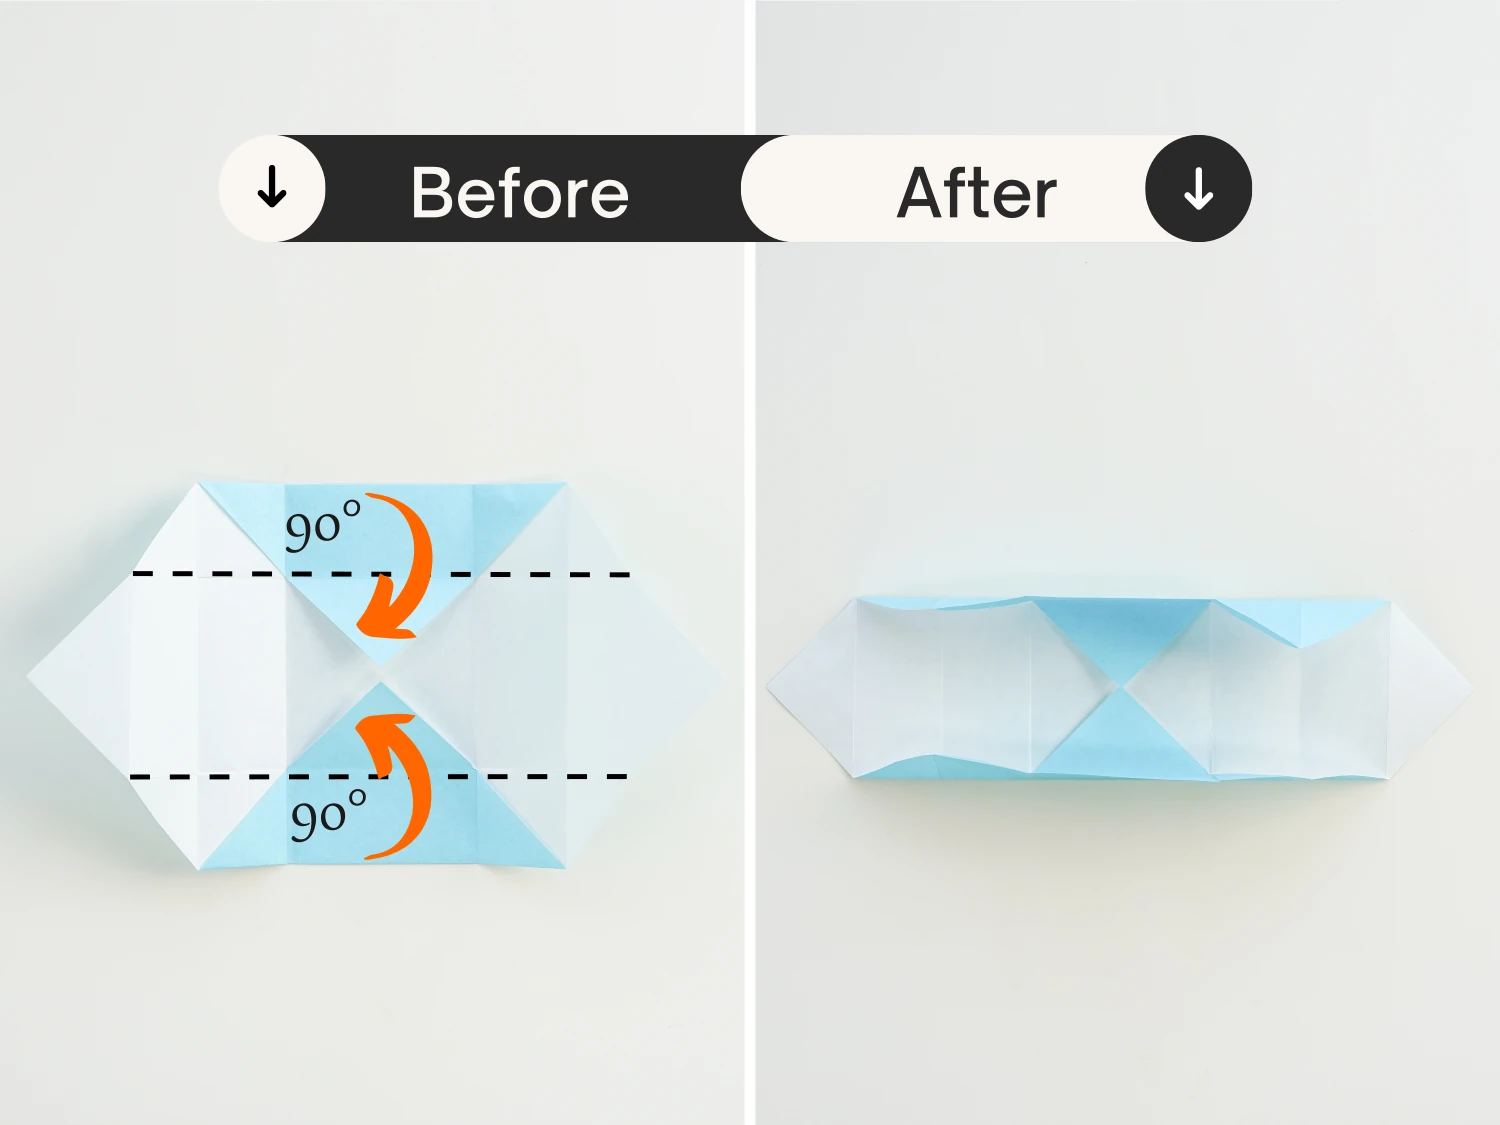
Step 9
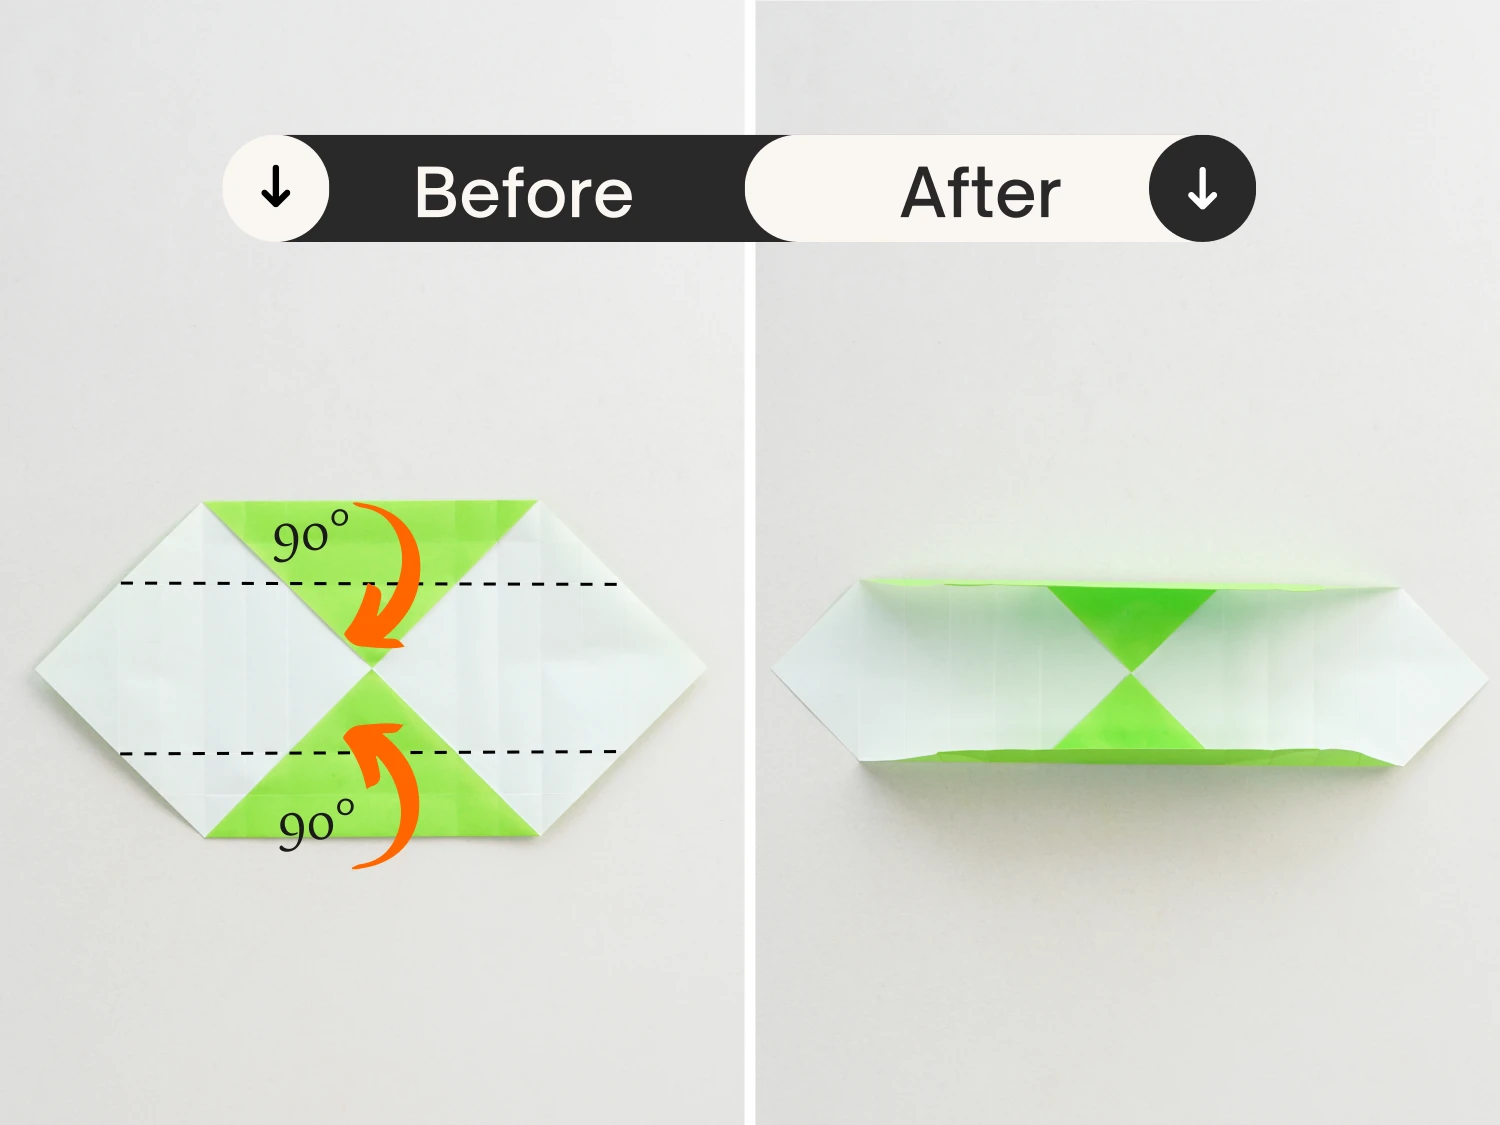
Bring up the top and bottom edges for 90 degrees along the creases shown by the dotted lines.
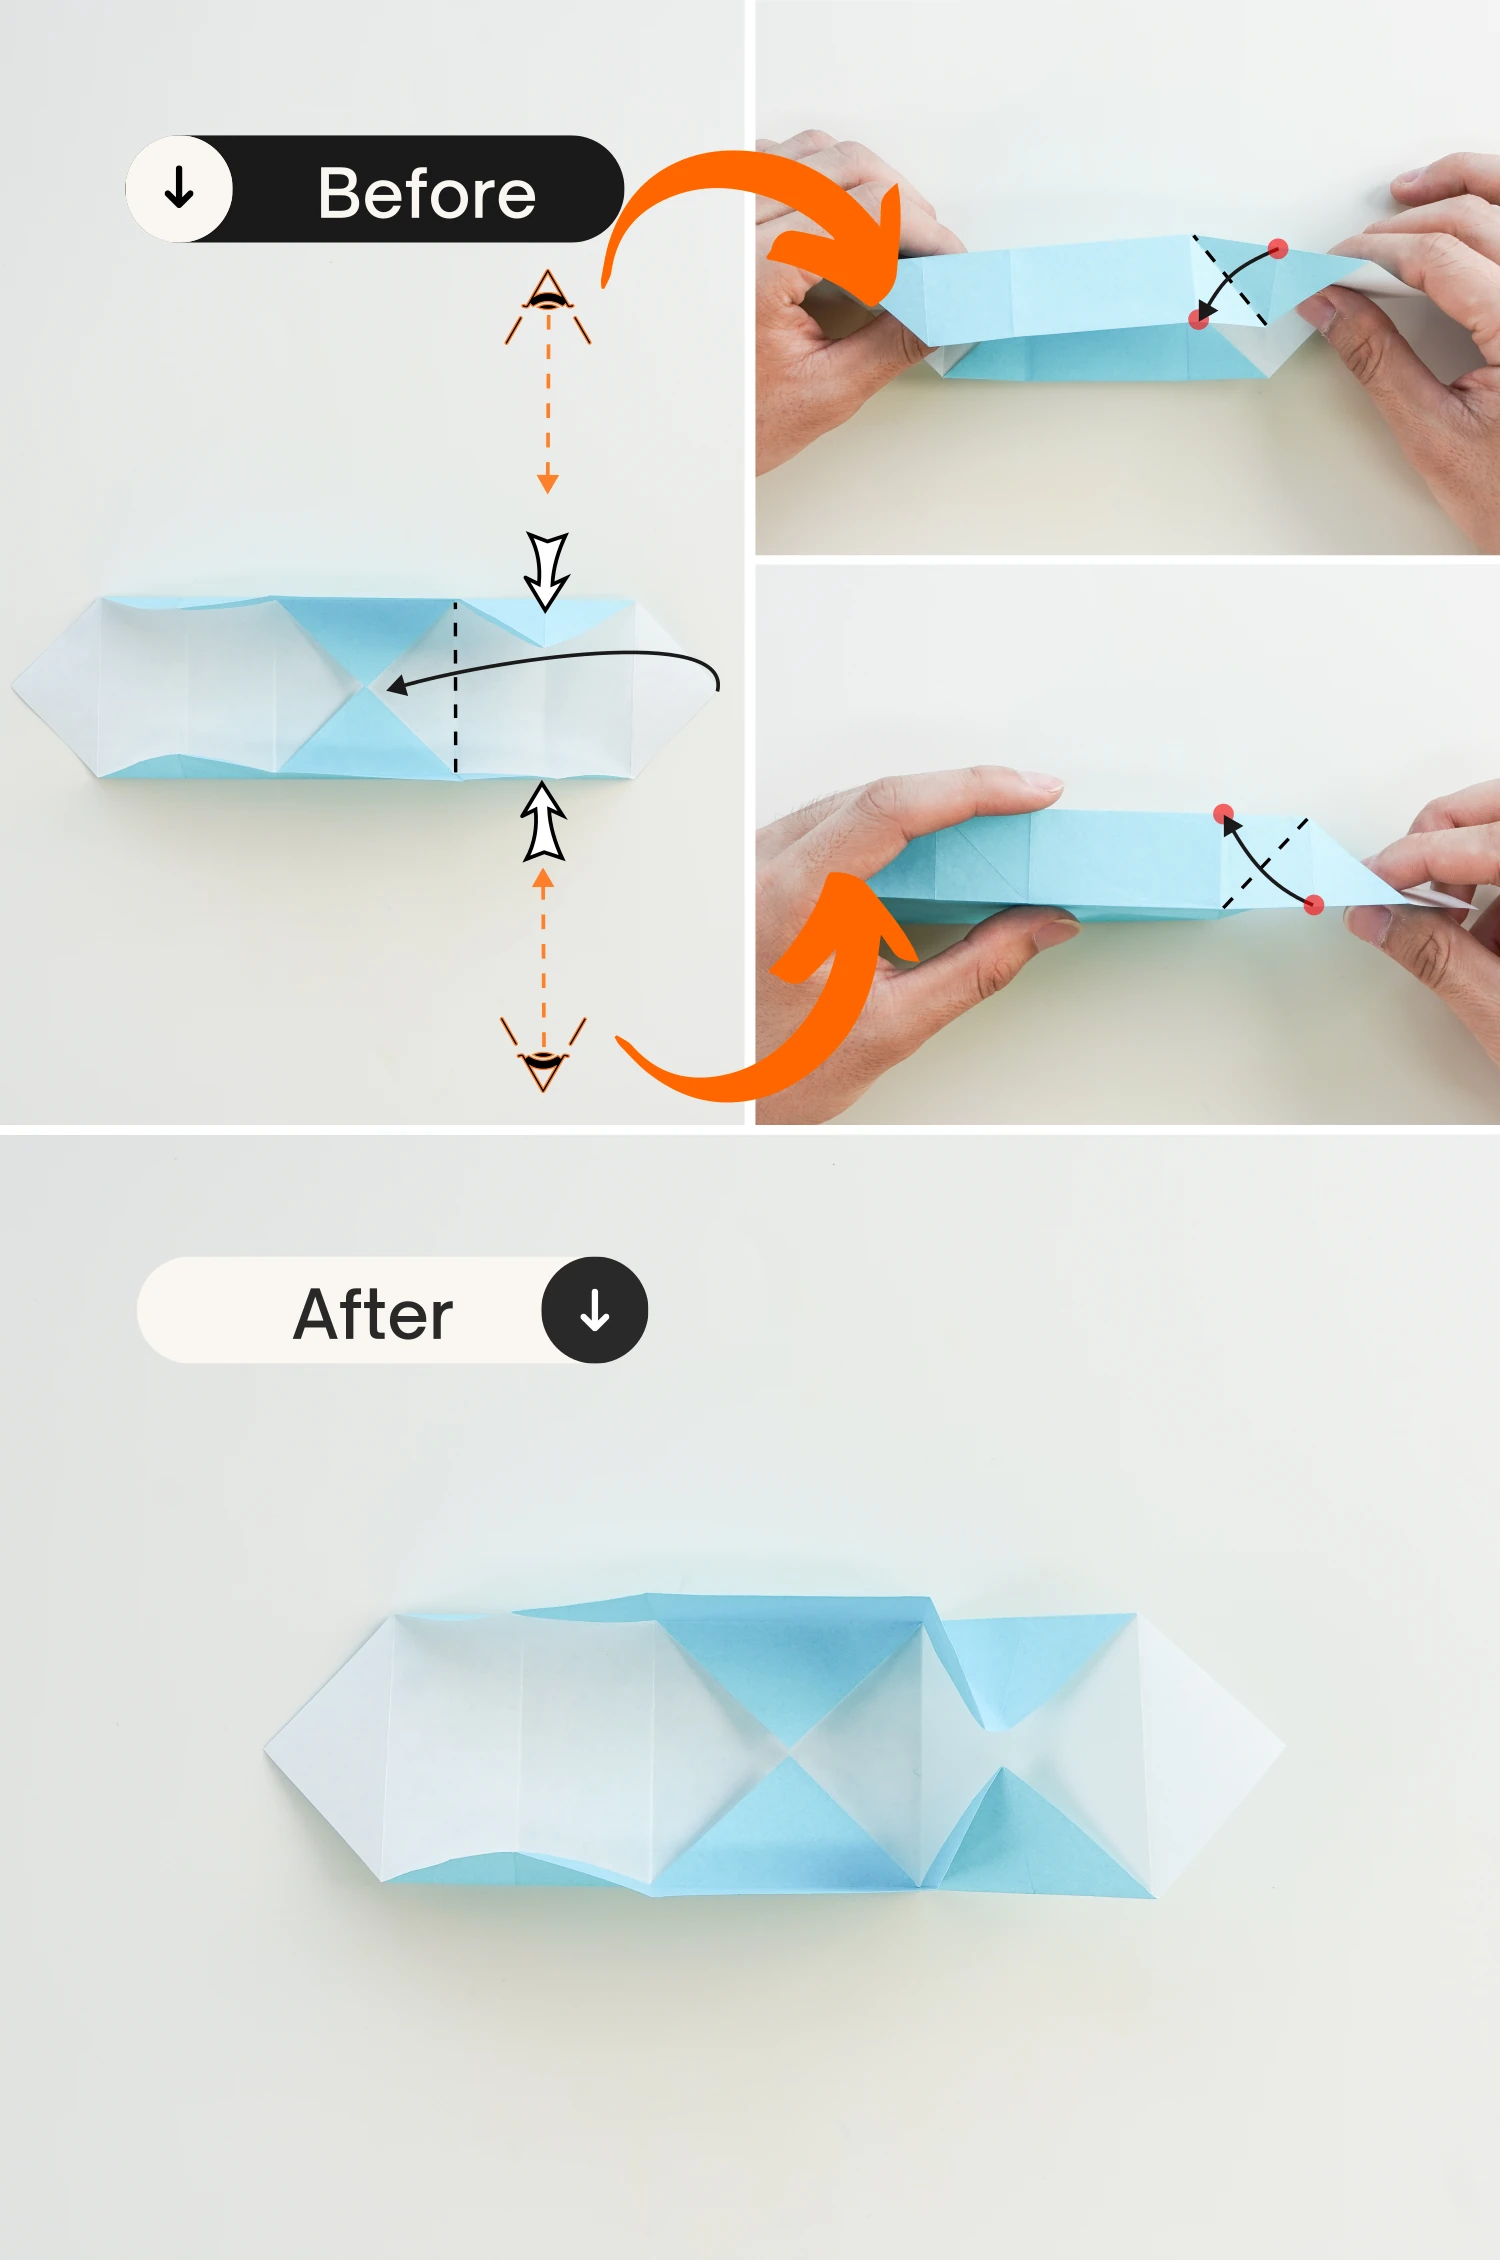
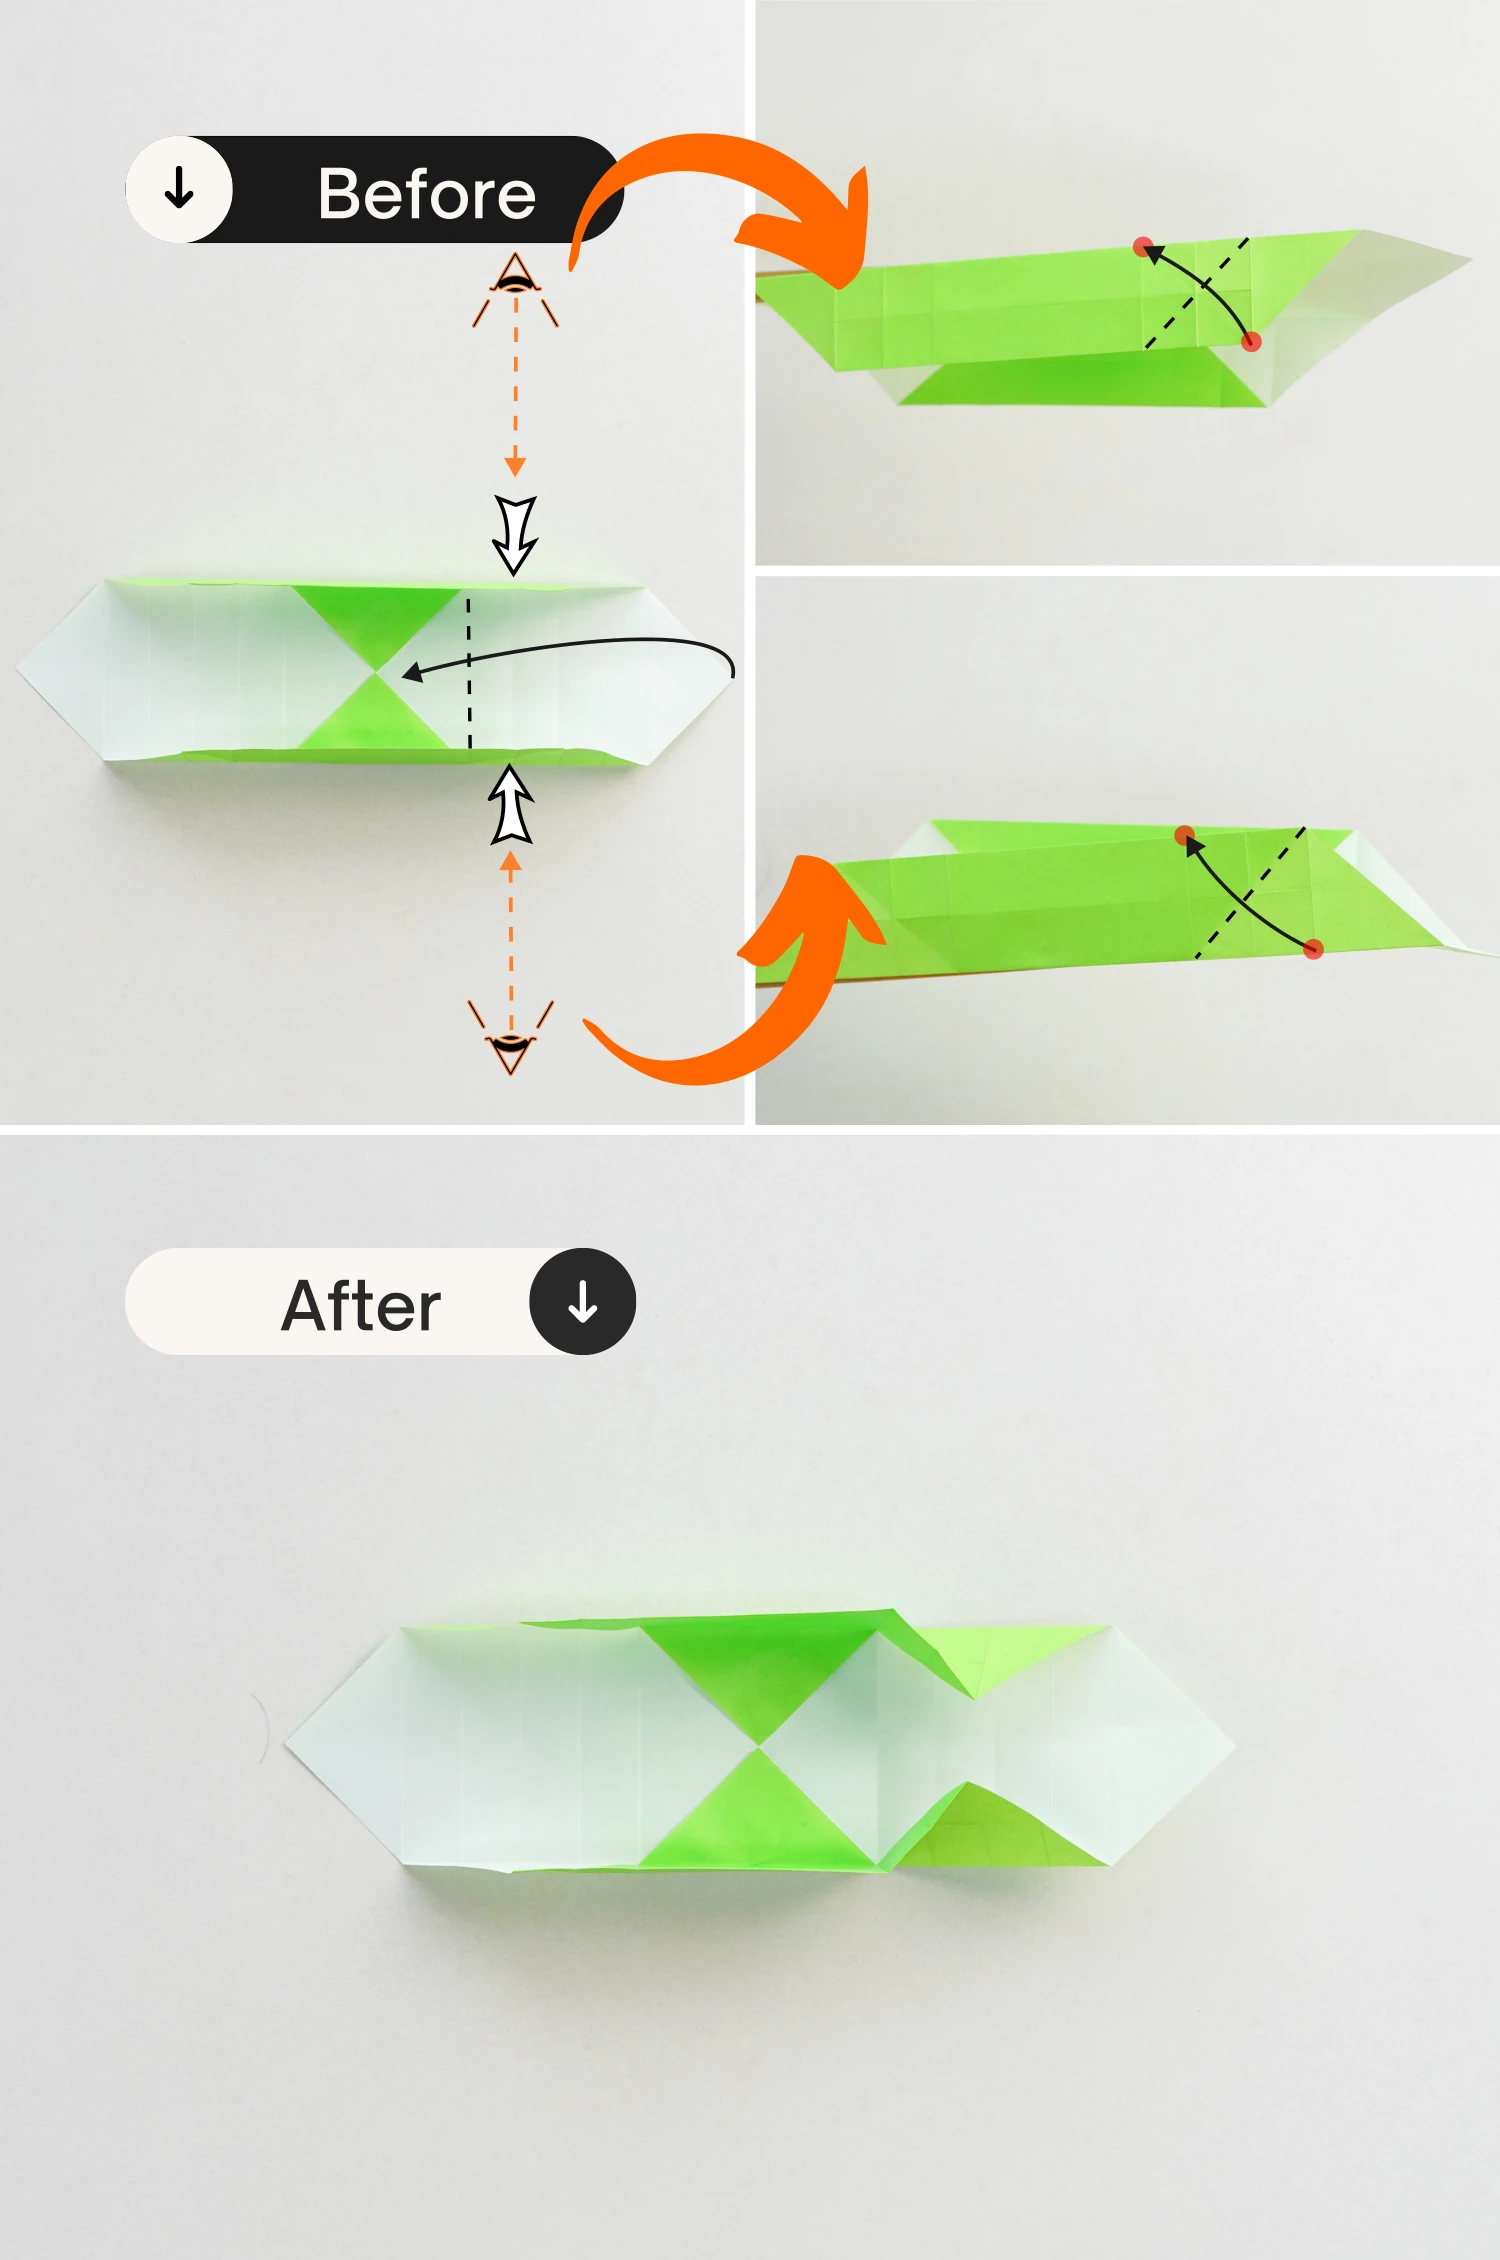
Step 10
Lift the right part up along the crease shown by the dotted line, and push the top and bottom sides of the lifted part to the center simultaneously, the creases you will need are already made, making the two red points meet on each side.
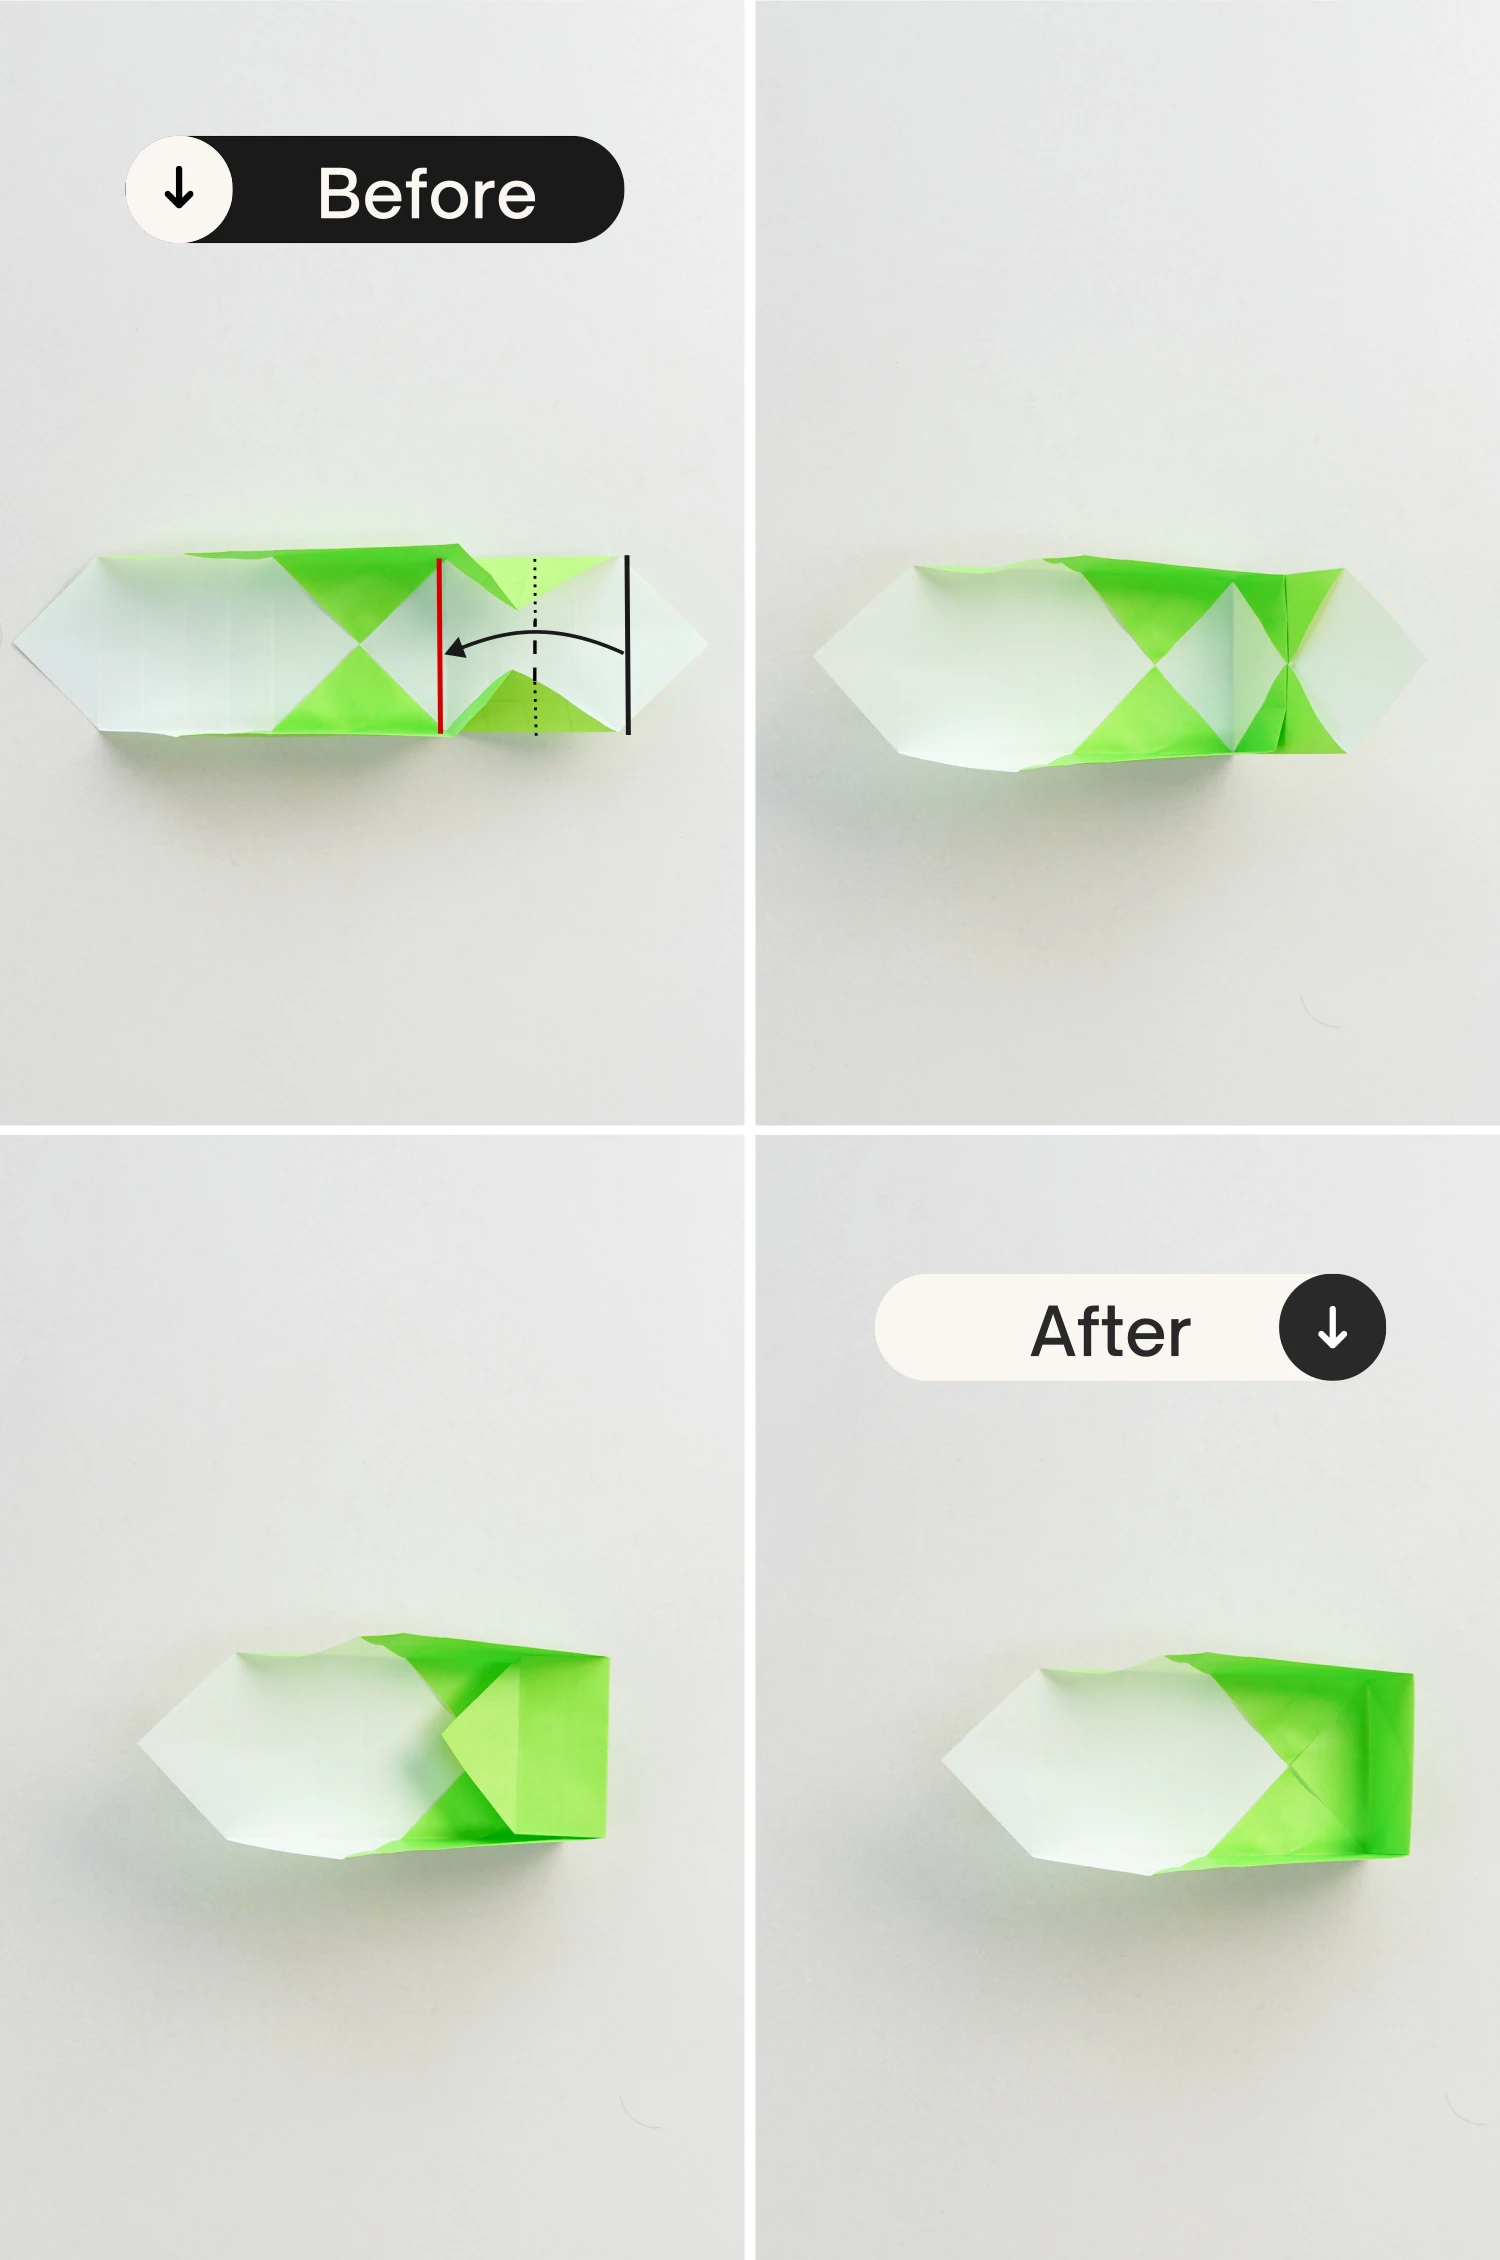
Step 11
Fold the right part of the paper down along the crease shown by the dotted line, making the black line meet the red line. Fold the top triangle to fit into the white part of the bottom of the box, one wall of the box will be made as you do this.

Step 12
Similarly, lift the left corner slightly along the dotted line, and bring the two red points together on both sides.
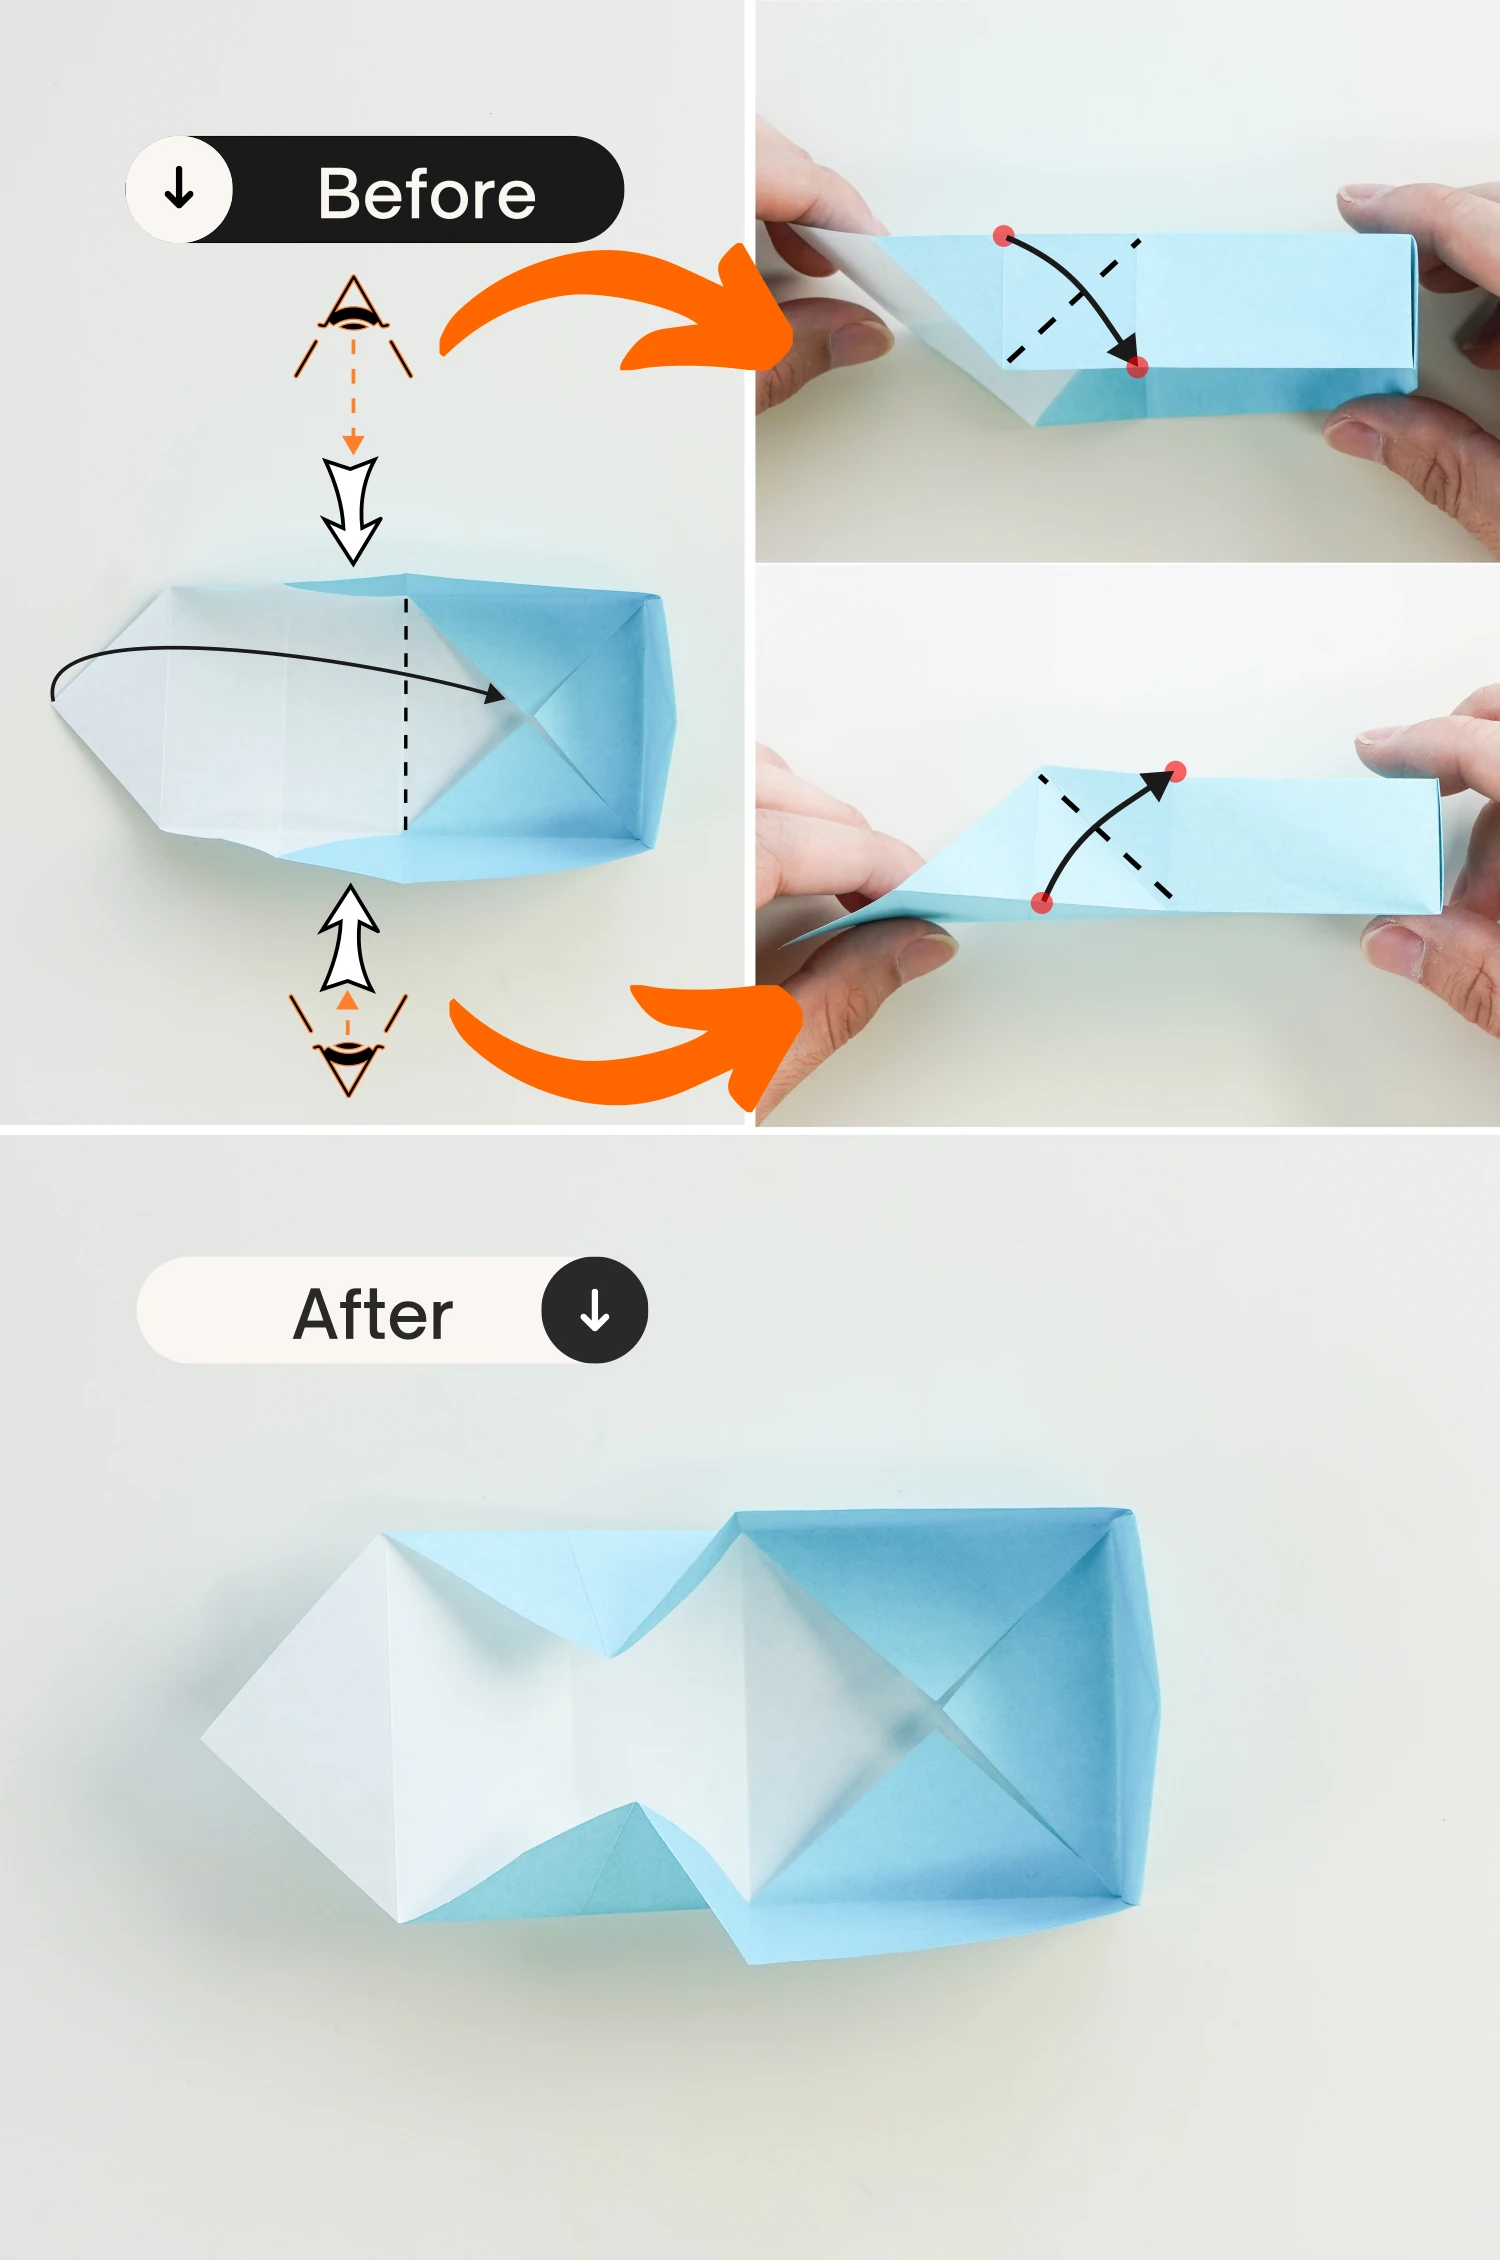
Step 13
Finally, fold the left part down making the crease shown by the black line to meet the red line, and place the left triangle to fit into the white part of the bottom of the box, just as you did in step 11. Now the box part is done.

Step 14
Take out the bigger piece of paper, start with the white side of the paper facing up, fold it in half horizontally, crease it well then unfold.
Step 15
Fold it in half vertically, crease it well then unfold, getting an intersection formed by these two creases.
Step 16
Fold the four points to the intersection point diagonally.

Step 17
Rotate it 45 degrees clockwise.
Step 18
Fold the top and bottom edges to the center horizontally, crease them well, and unfold them.
Step 19
Fold the top and bottom edges toward the center to align with the creases you made in the previous step, crease them well then unfold.
Step 20
Fold the left and right edges to the center as you did in step 18, crease them well, and unfold them.
Step 21
Then fold the left and right edges to align with the creases you made in the previous step, crease them well, and unfold them.
Step 22
Unfold the left and right triangles.
Step 23
Bring up the top and bottom edges along the creases shown by the dotted lines to make them stand.
Step 24
Bring up the right part of the paper along the crease shown by the dotted line, and fold the top and bottom sides of the right part along the dotted lines on each side, making the two red points together.
Step 25
Fold the right part down, making the bottom edge of the right triangle shown by the black line align with the crease shown by the red line, then place the triangle fit into the white part of the bottom, now you get a wall of the lid.
Step 26
Repeat steps 11 to 12 for the left part.

Step 27
Fold the front and behind walls down inward along the existing crease.
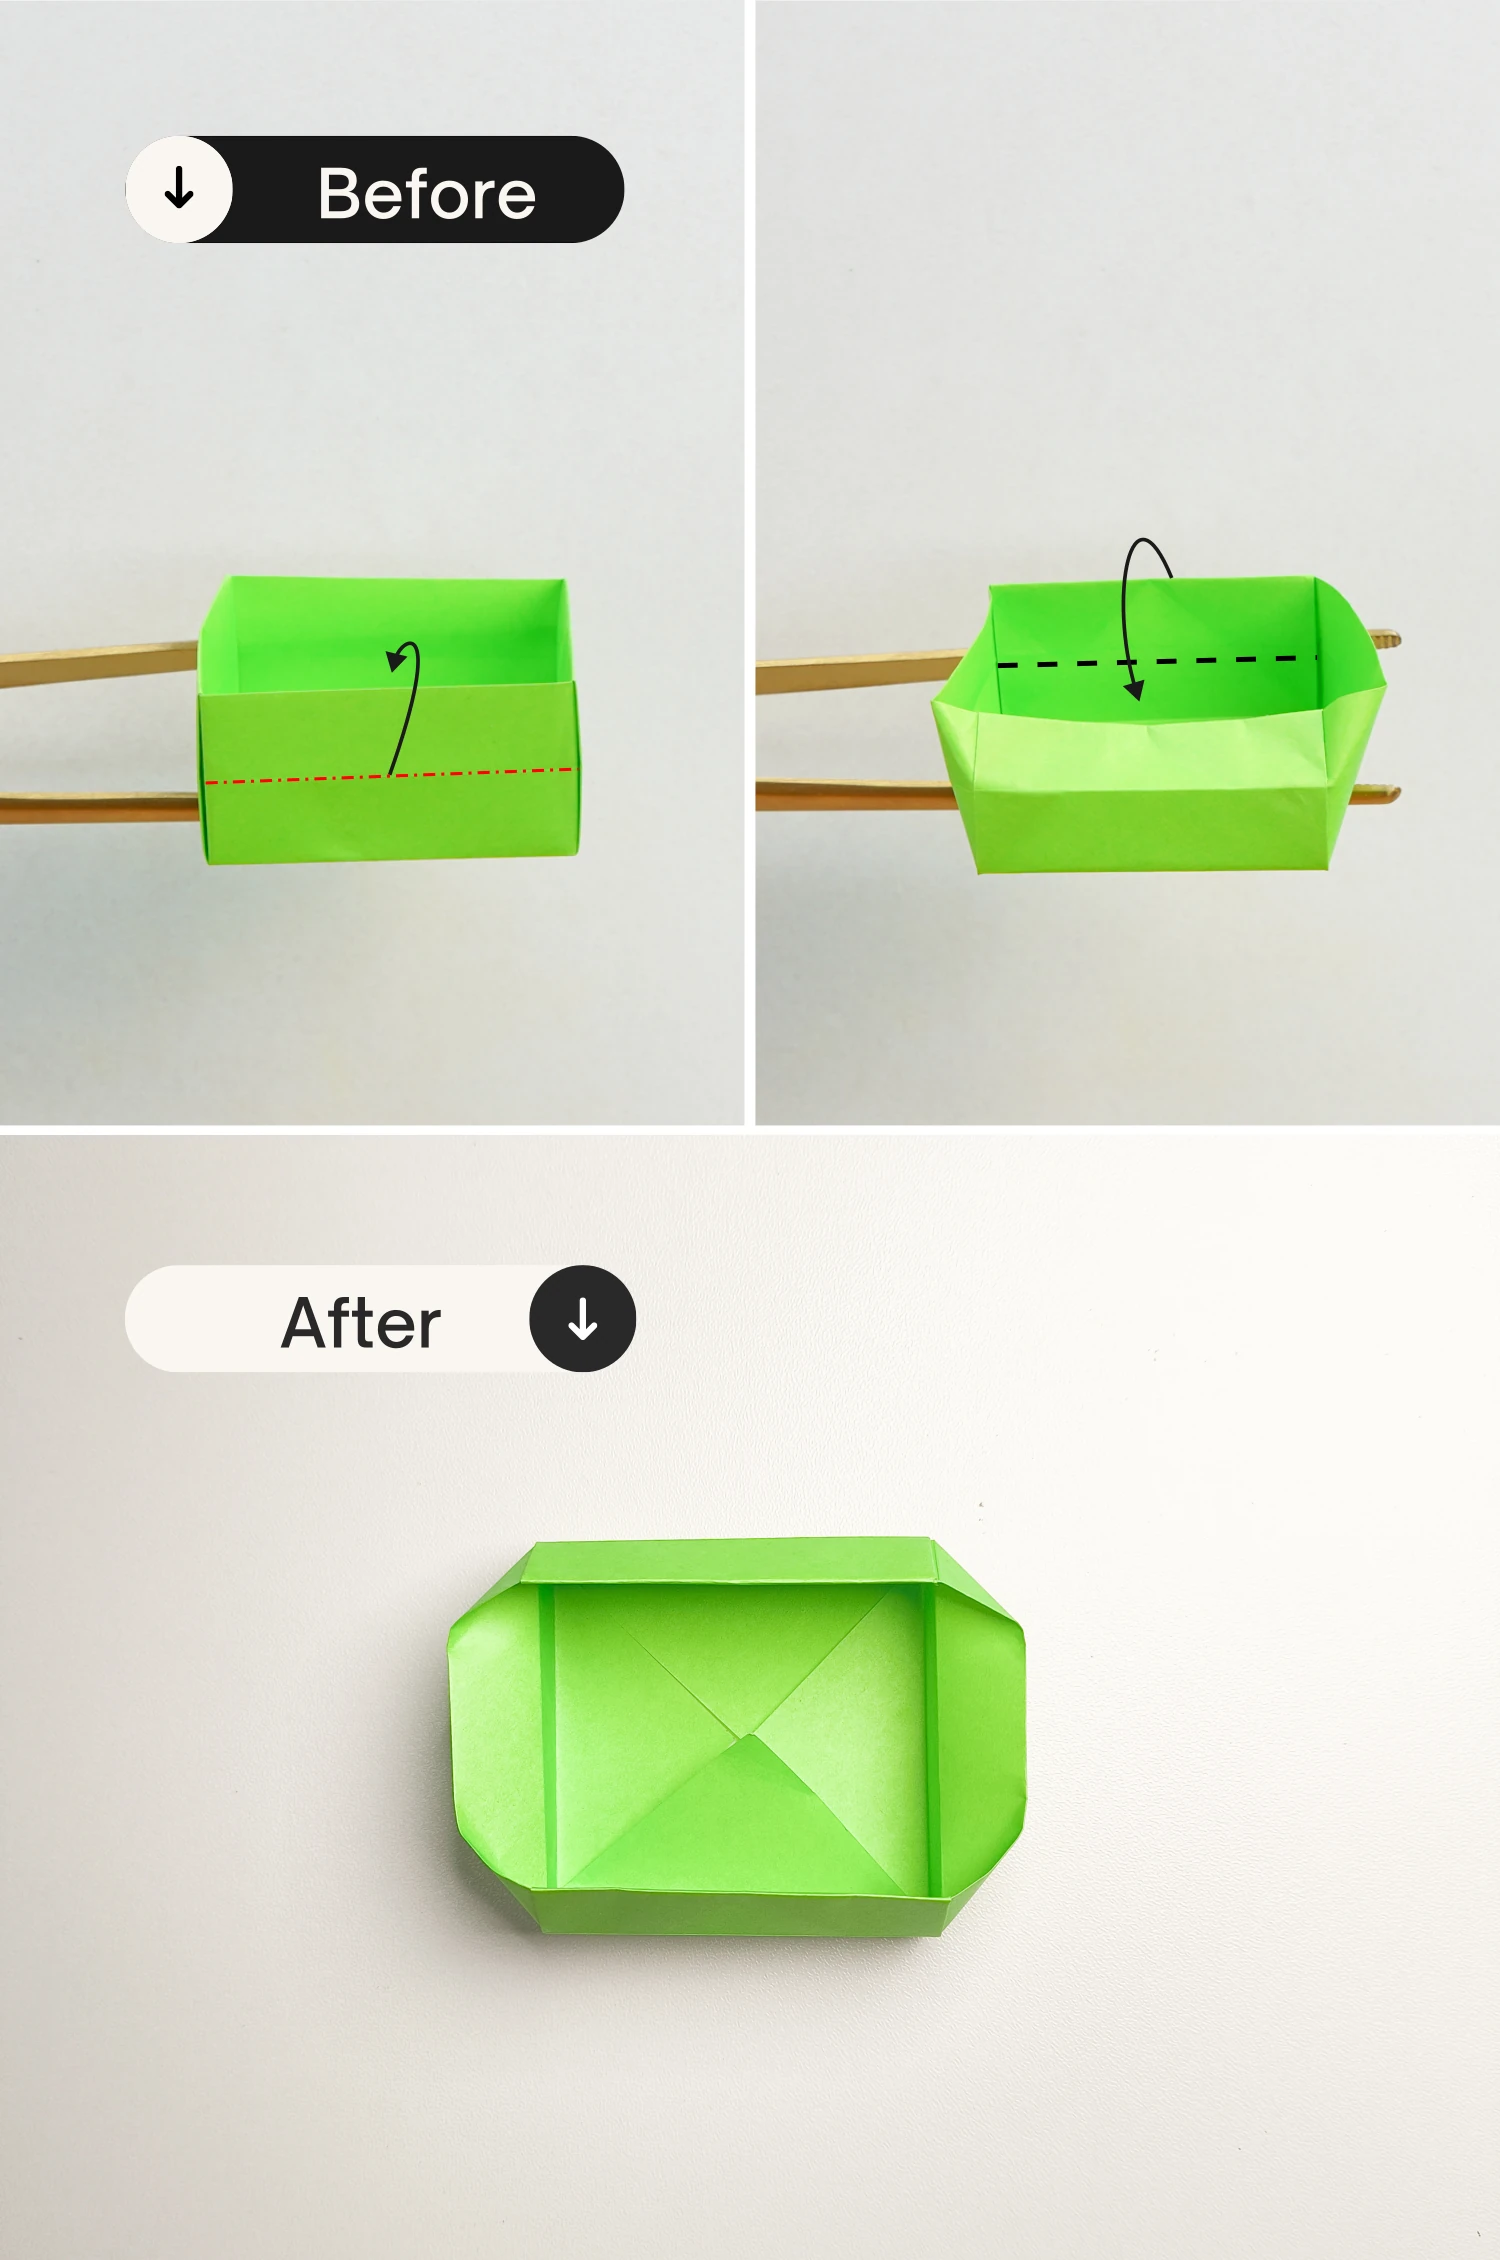
Step 28
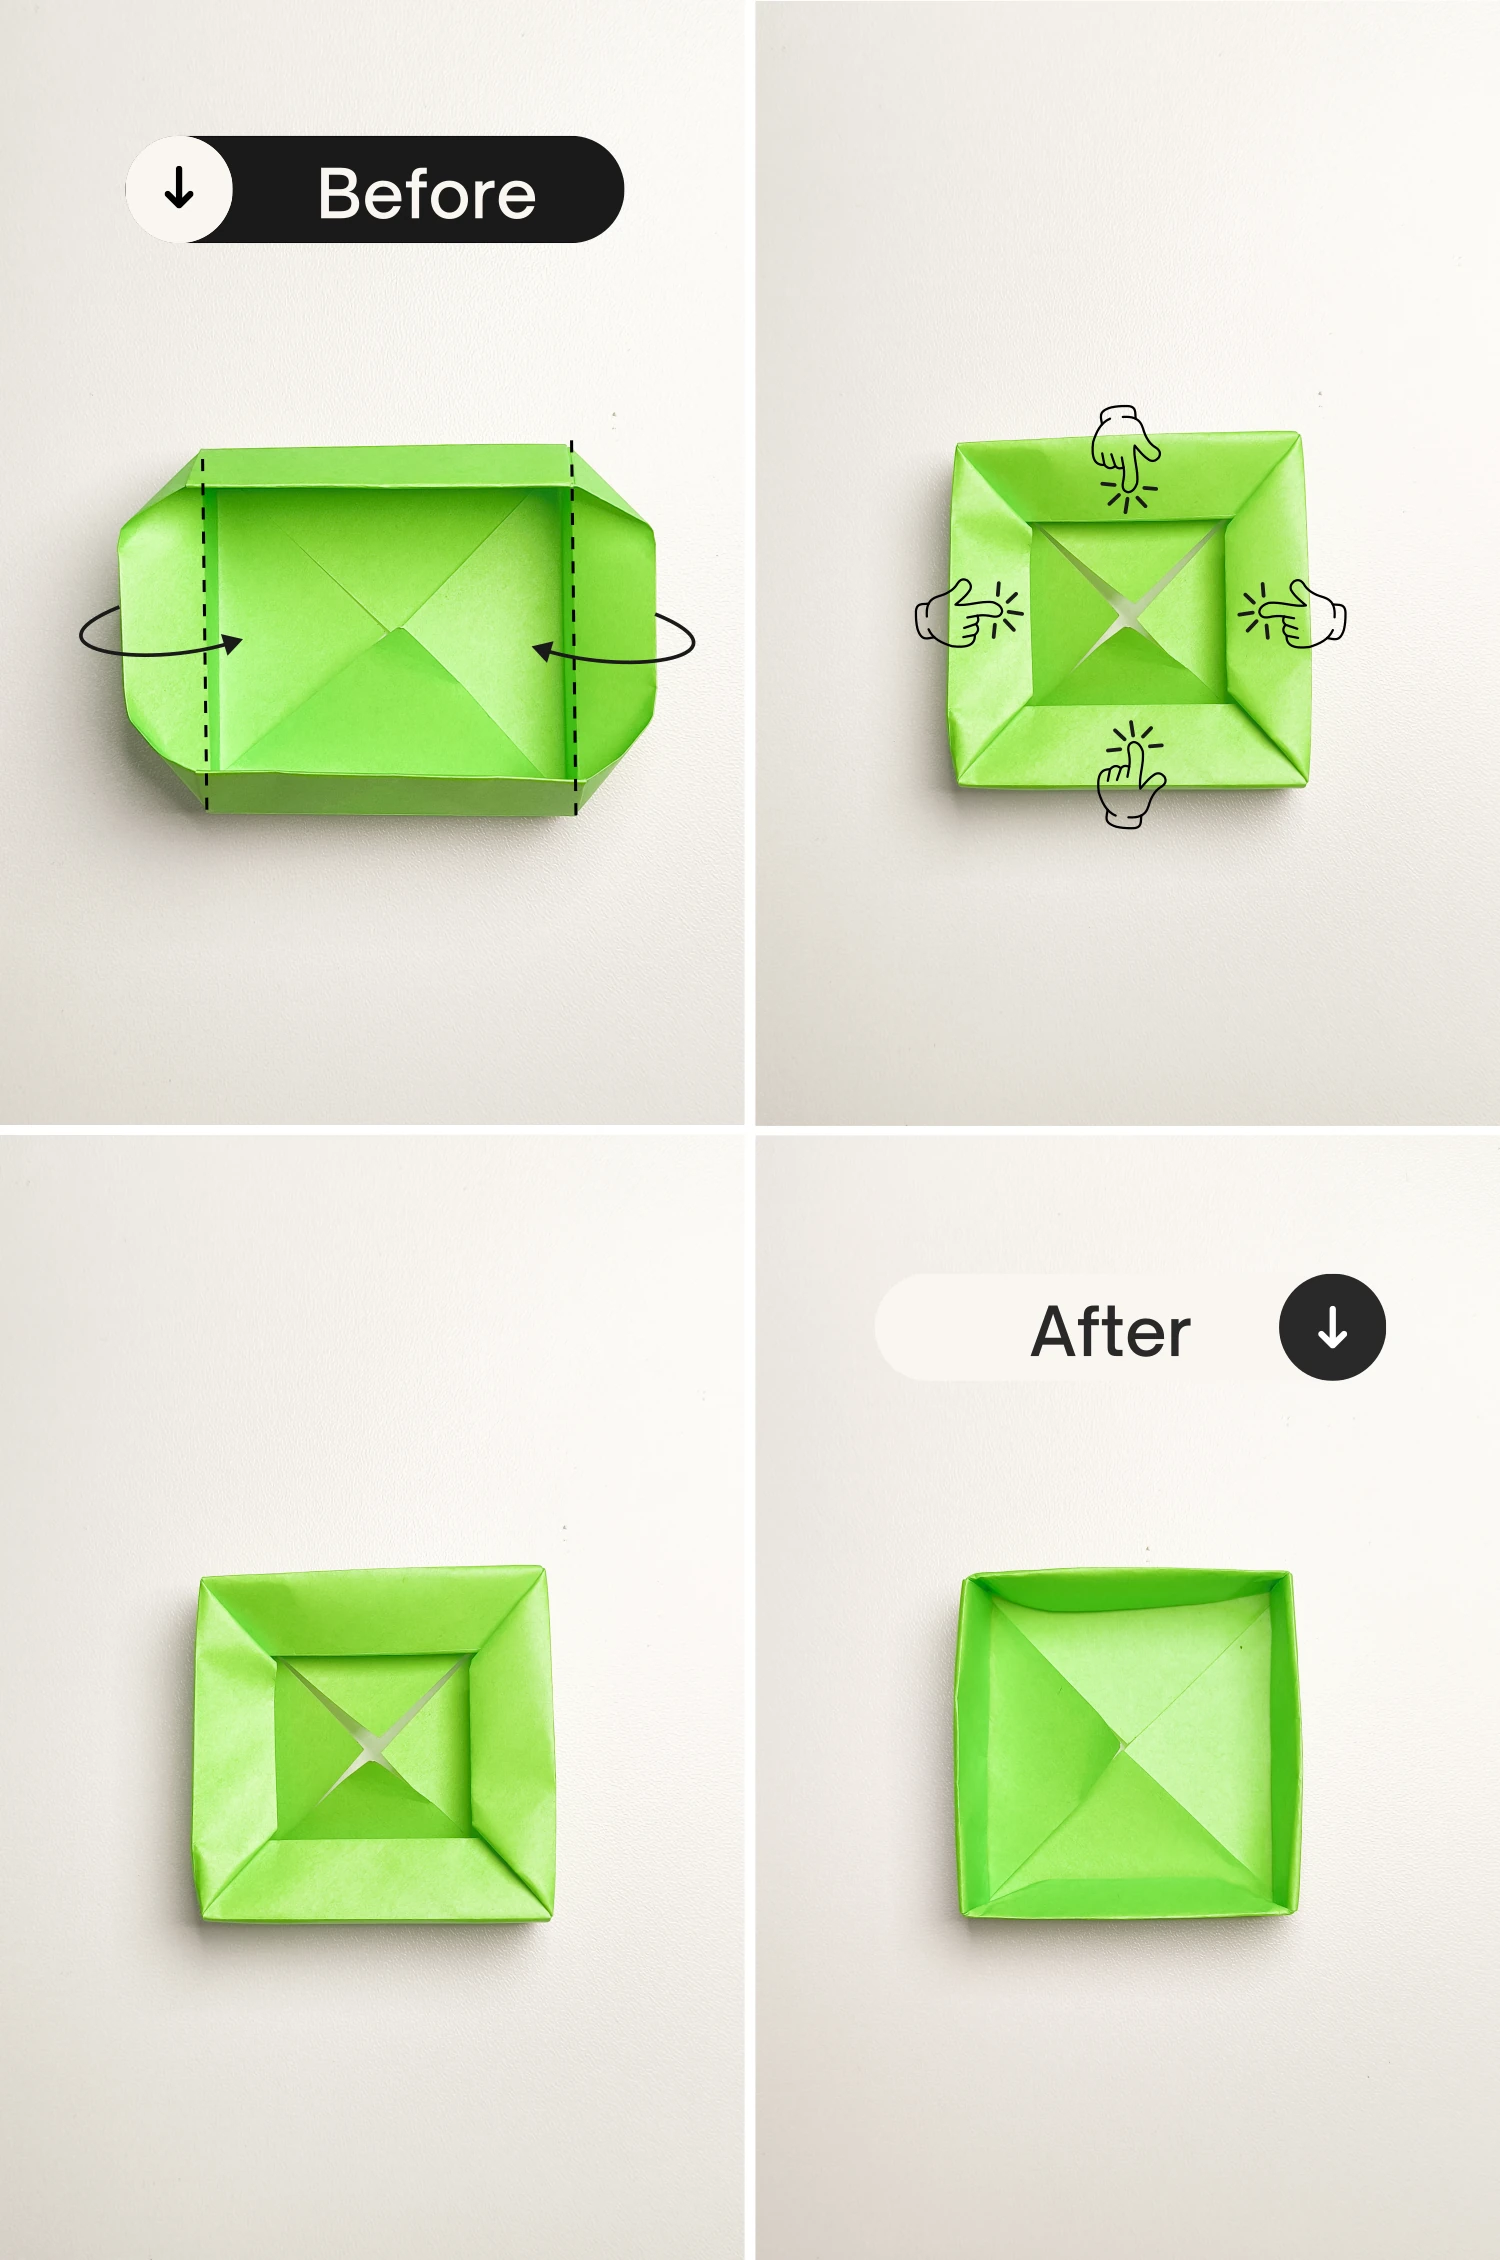
Similarly, fold the left and right walls inward along the existing creases. Adjust it to get the final shape of a lid, this may take time, so please be patient.
Step 29
Flip the lid over.
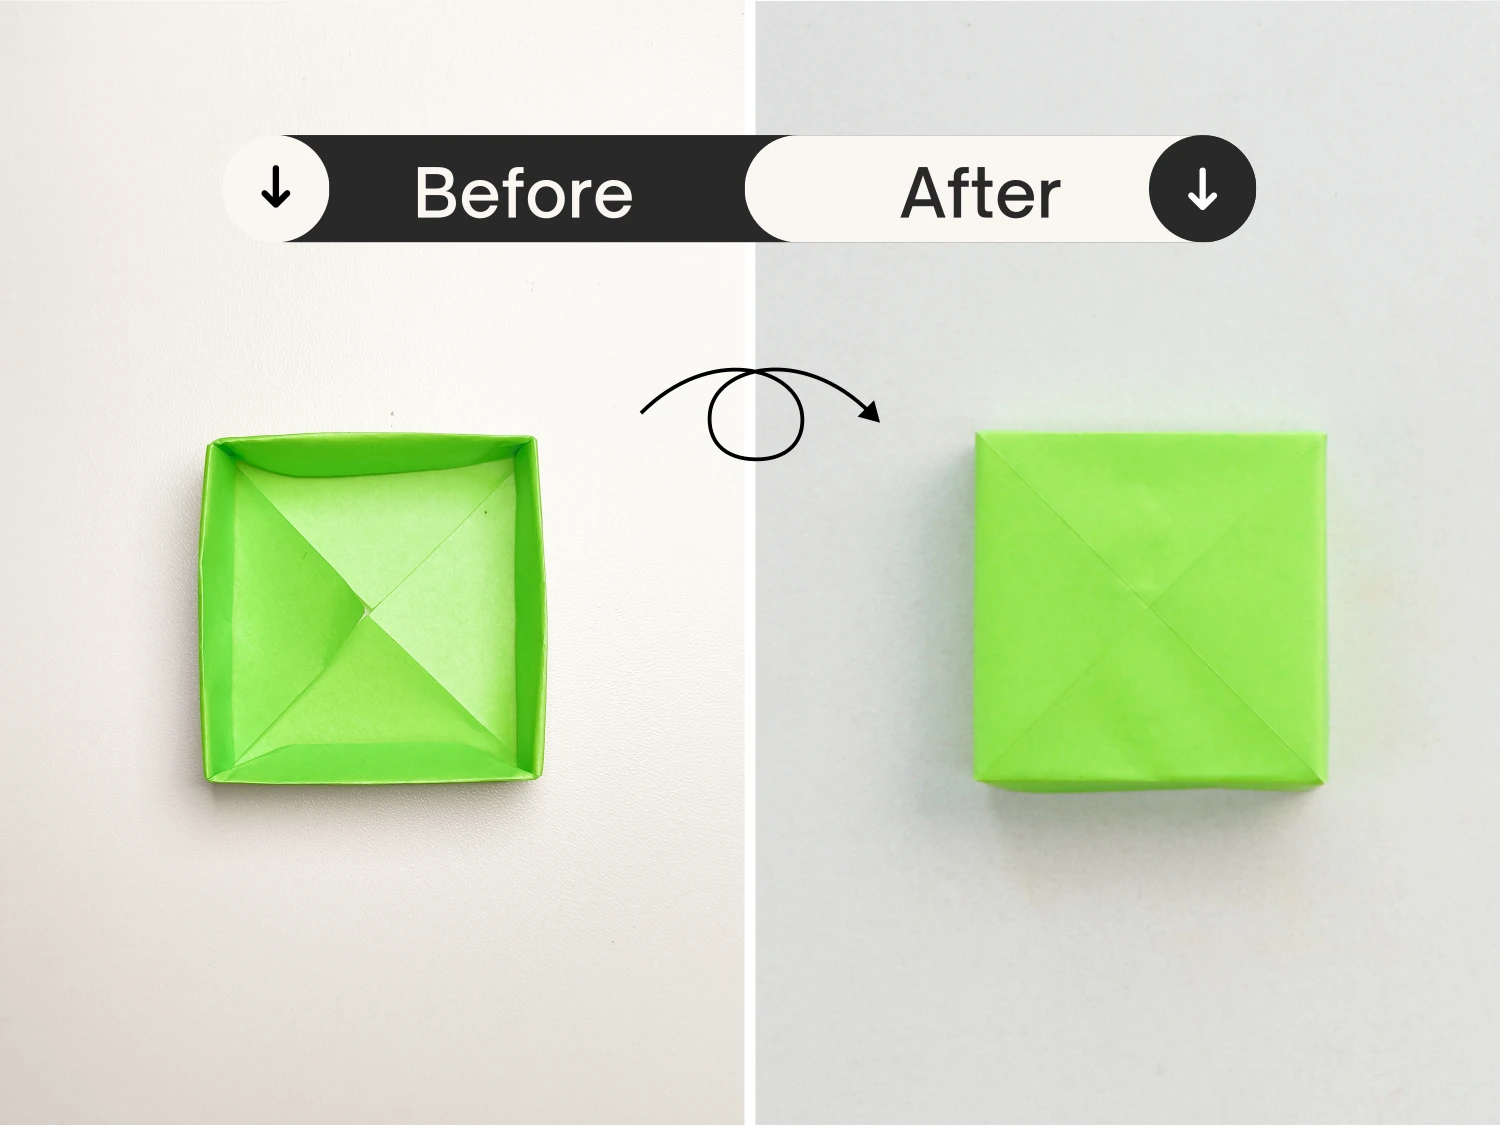
Step 30
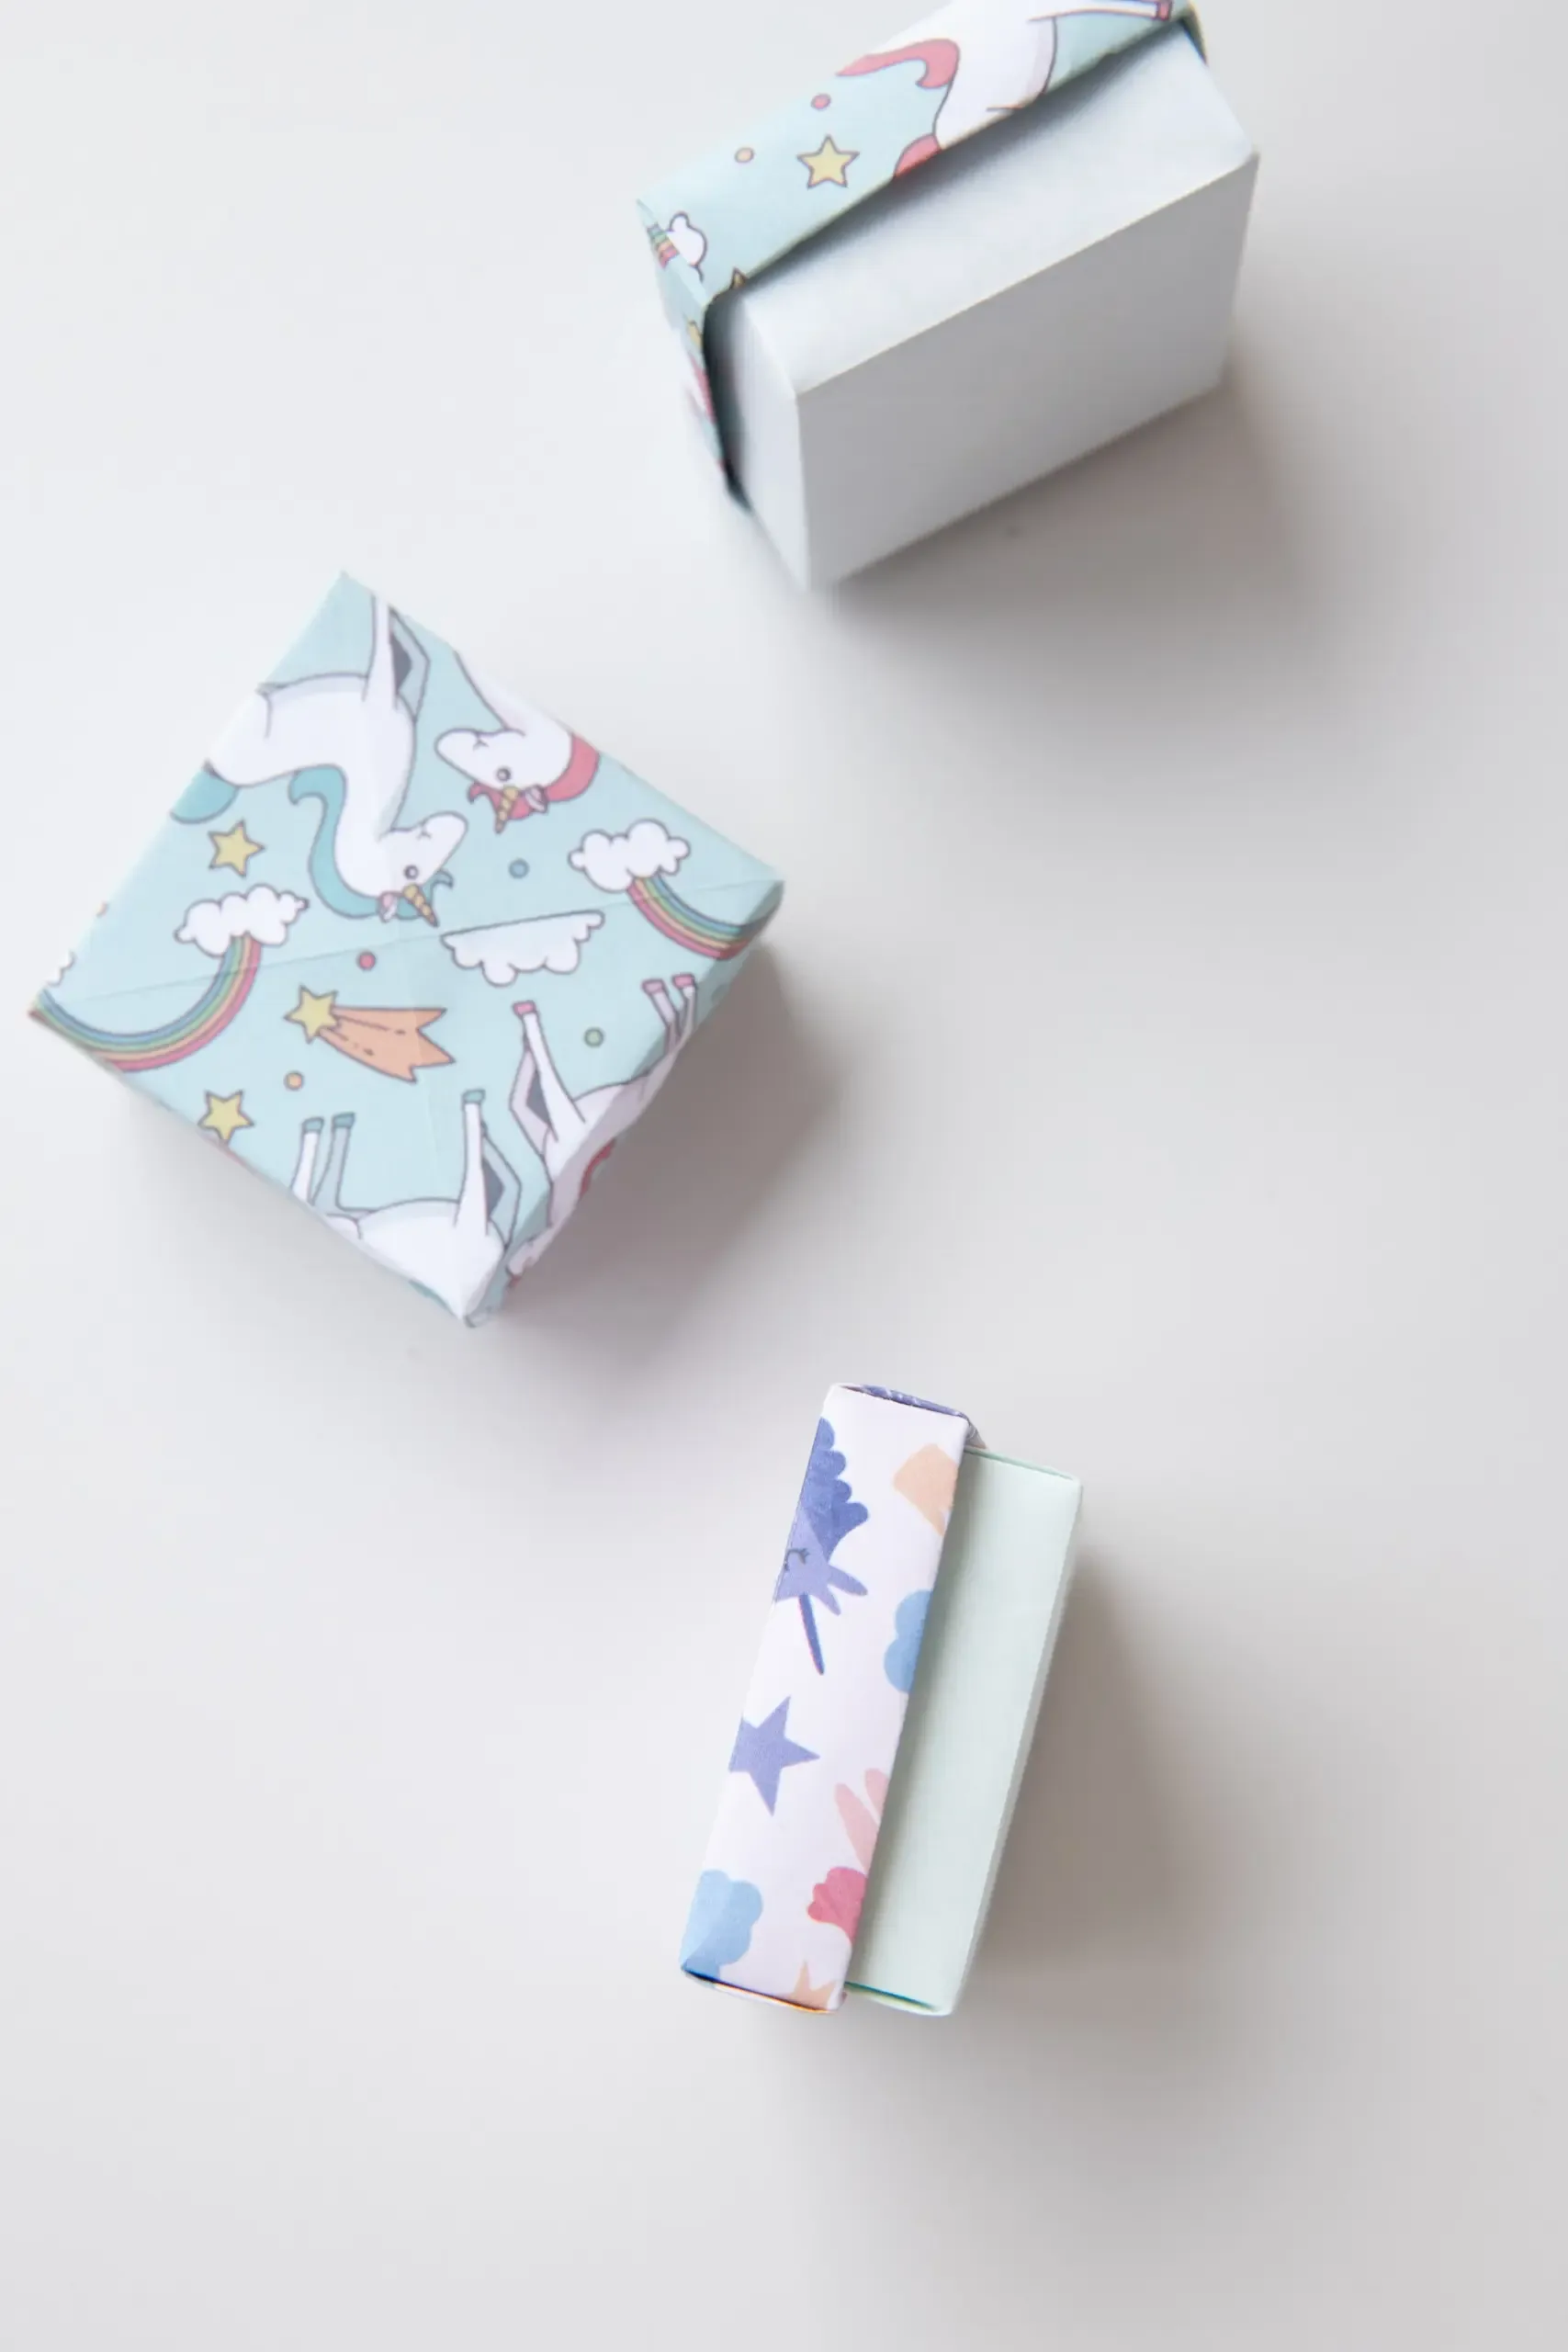
Try to close the box by putting the lid over the box, and it will hold its shape very well. You can use it to store some small items, like candies or pins.
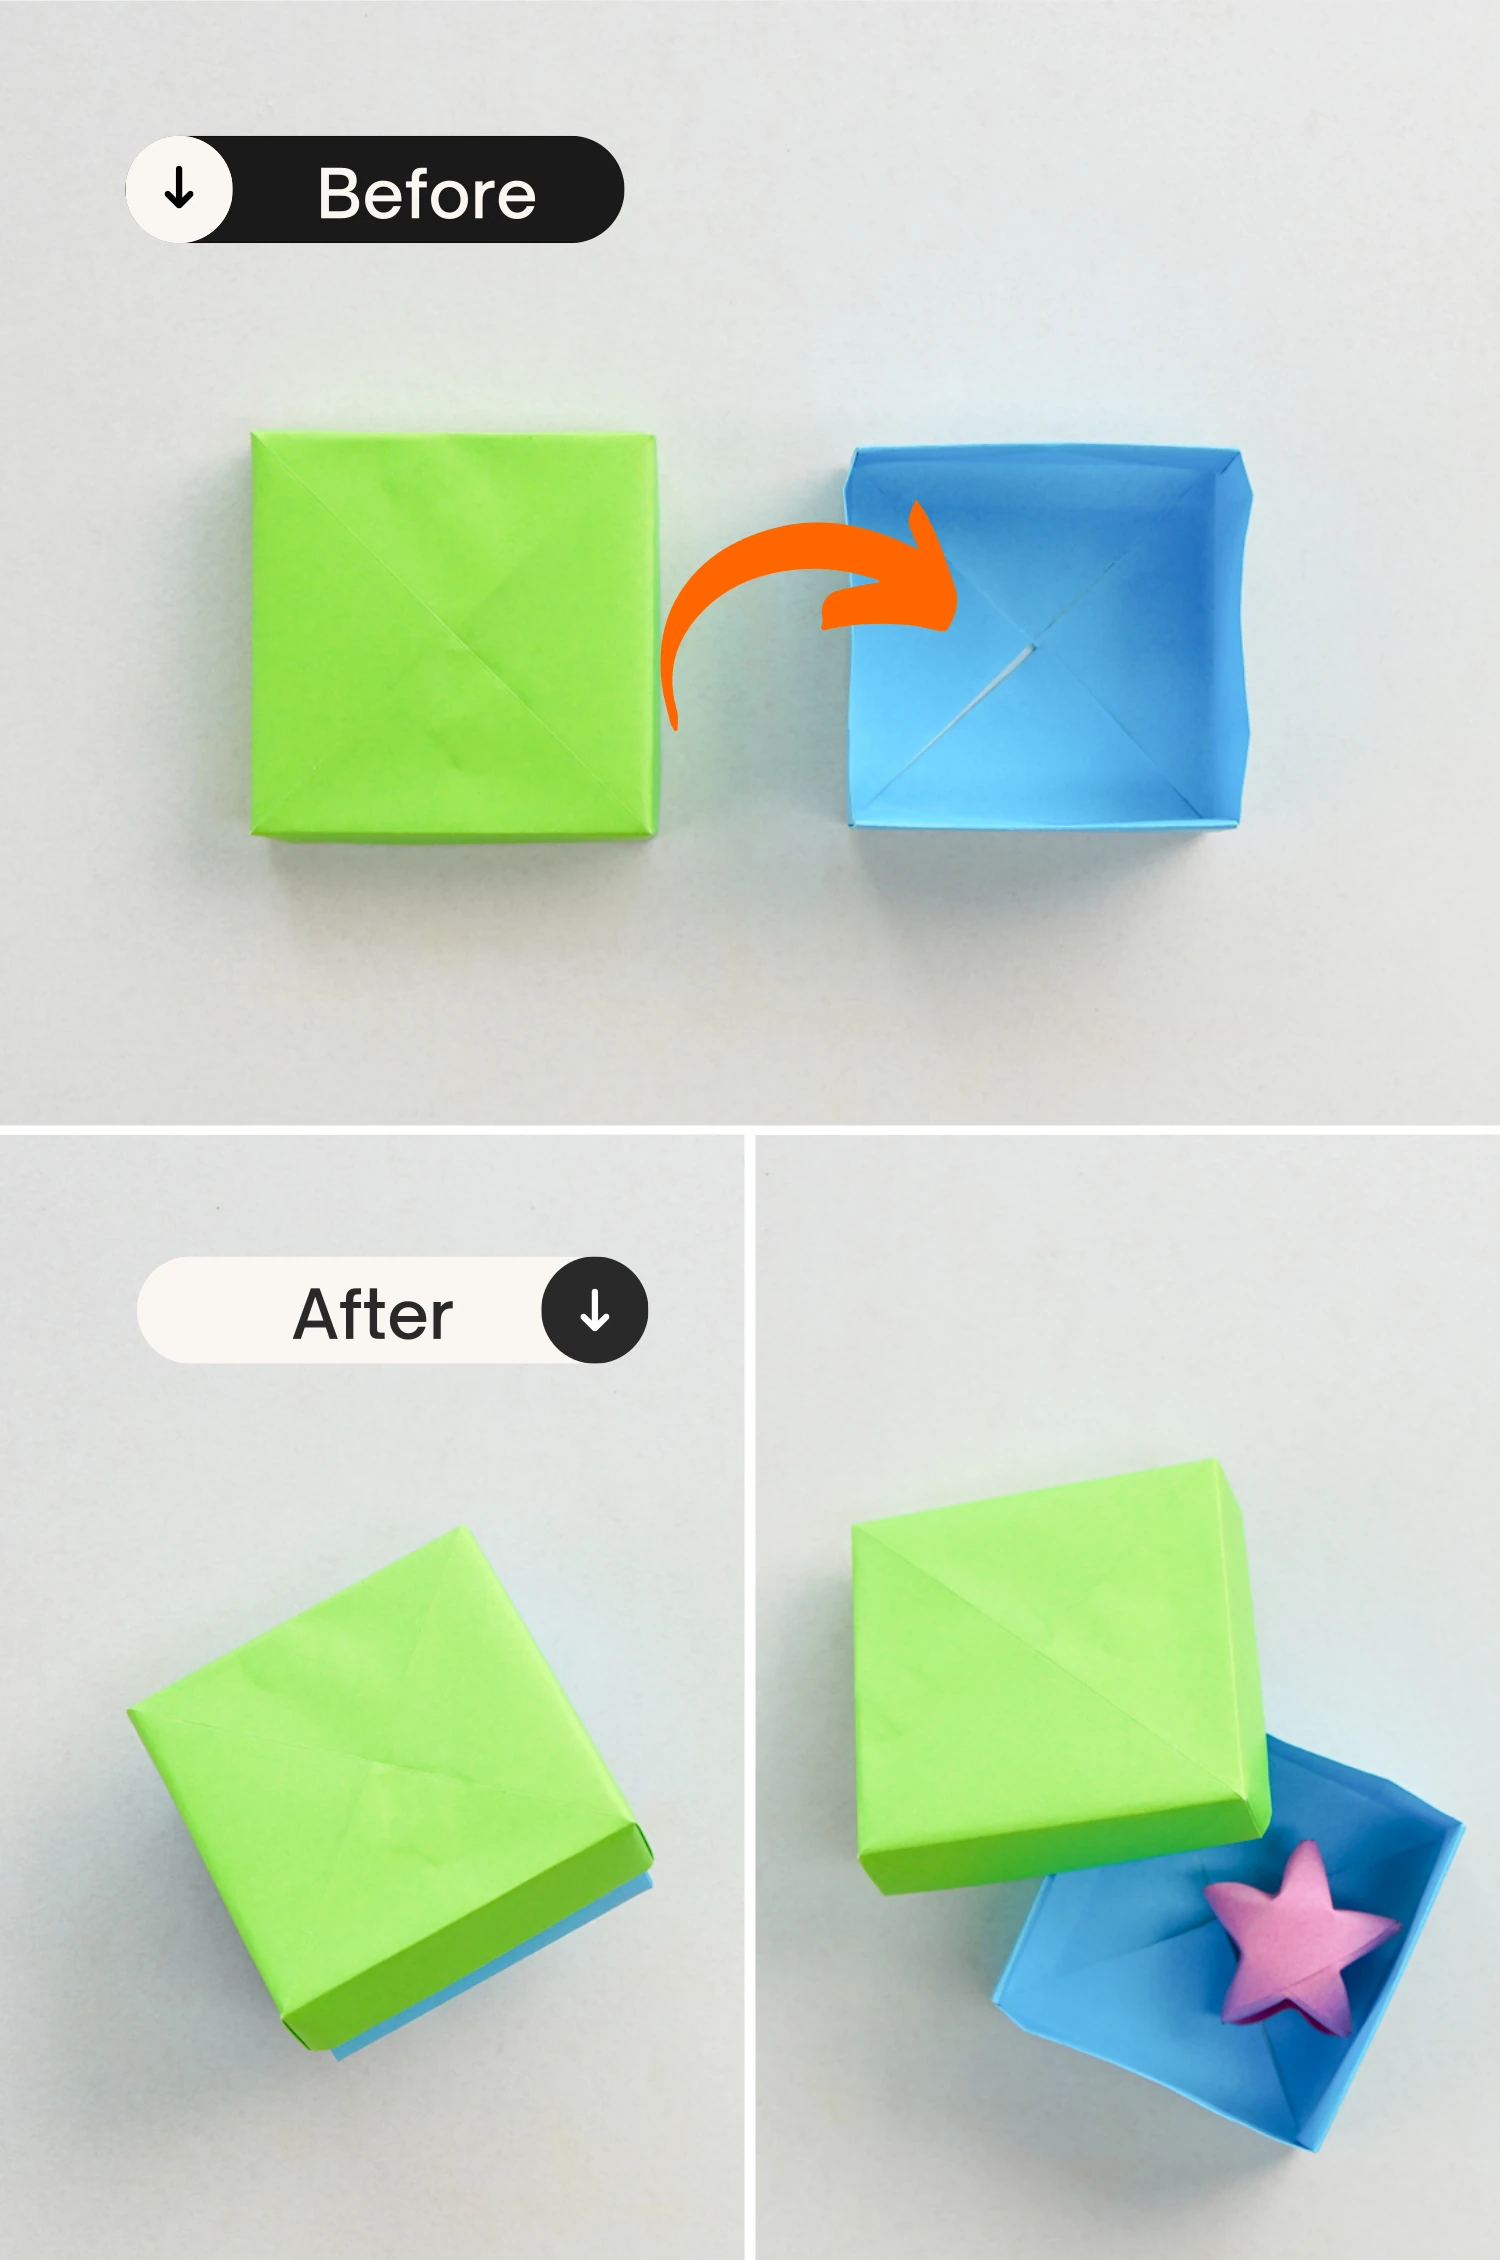
What’s Next
This box is perfect for presents or storage, and you can use a large sheet of paper for a large box to organize some big items. Of course, colorful paper is also available! Now please check our other origami box ideas. Enjoy folding!
Other Origami Box Ideas