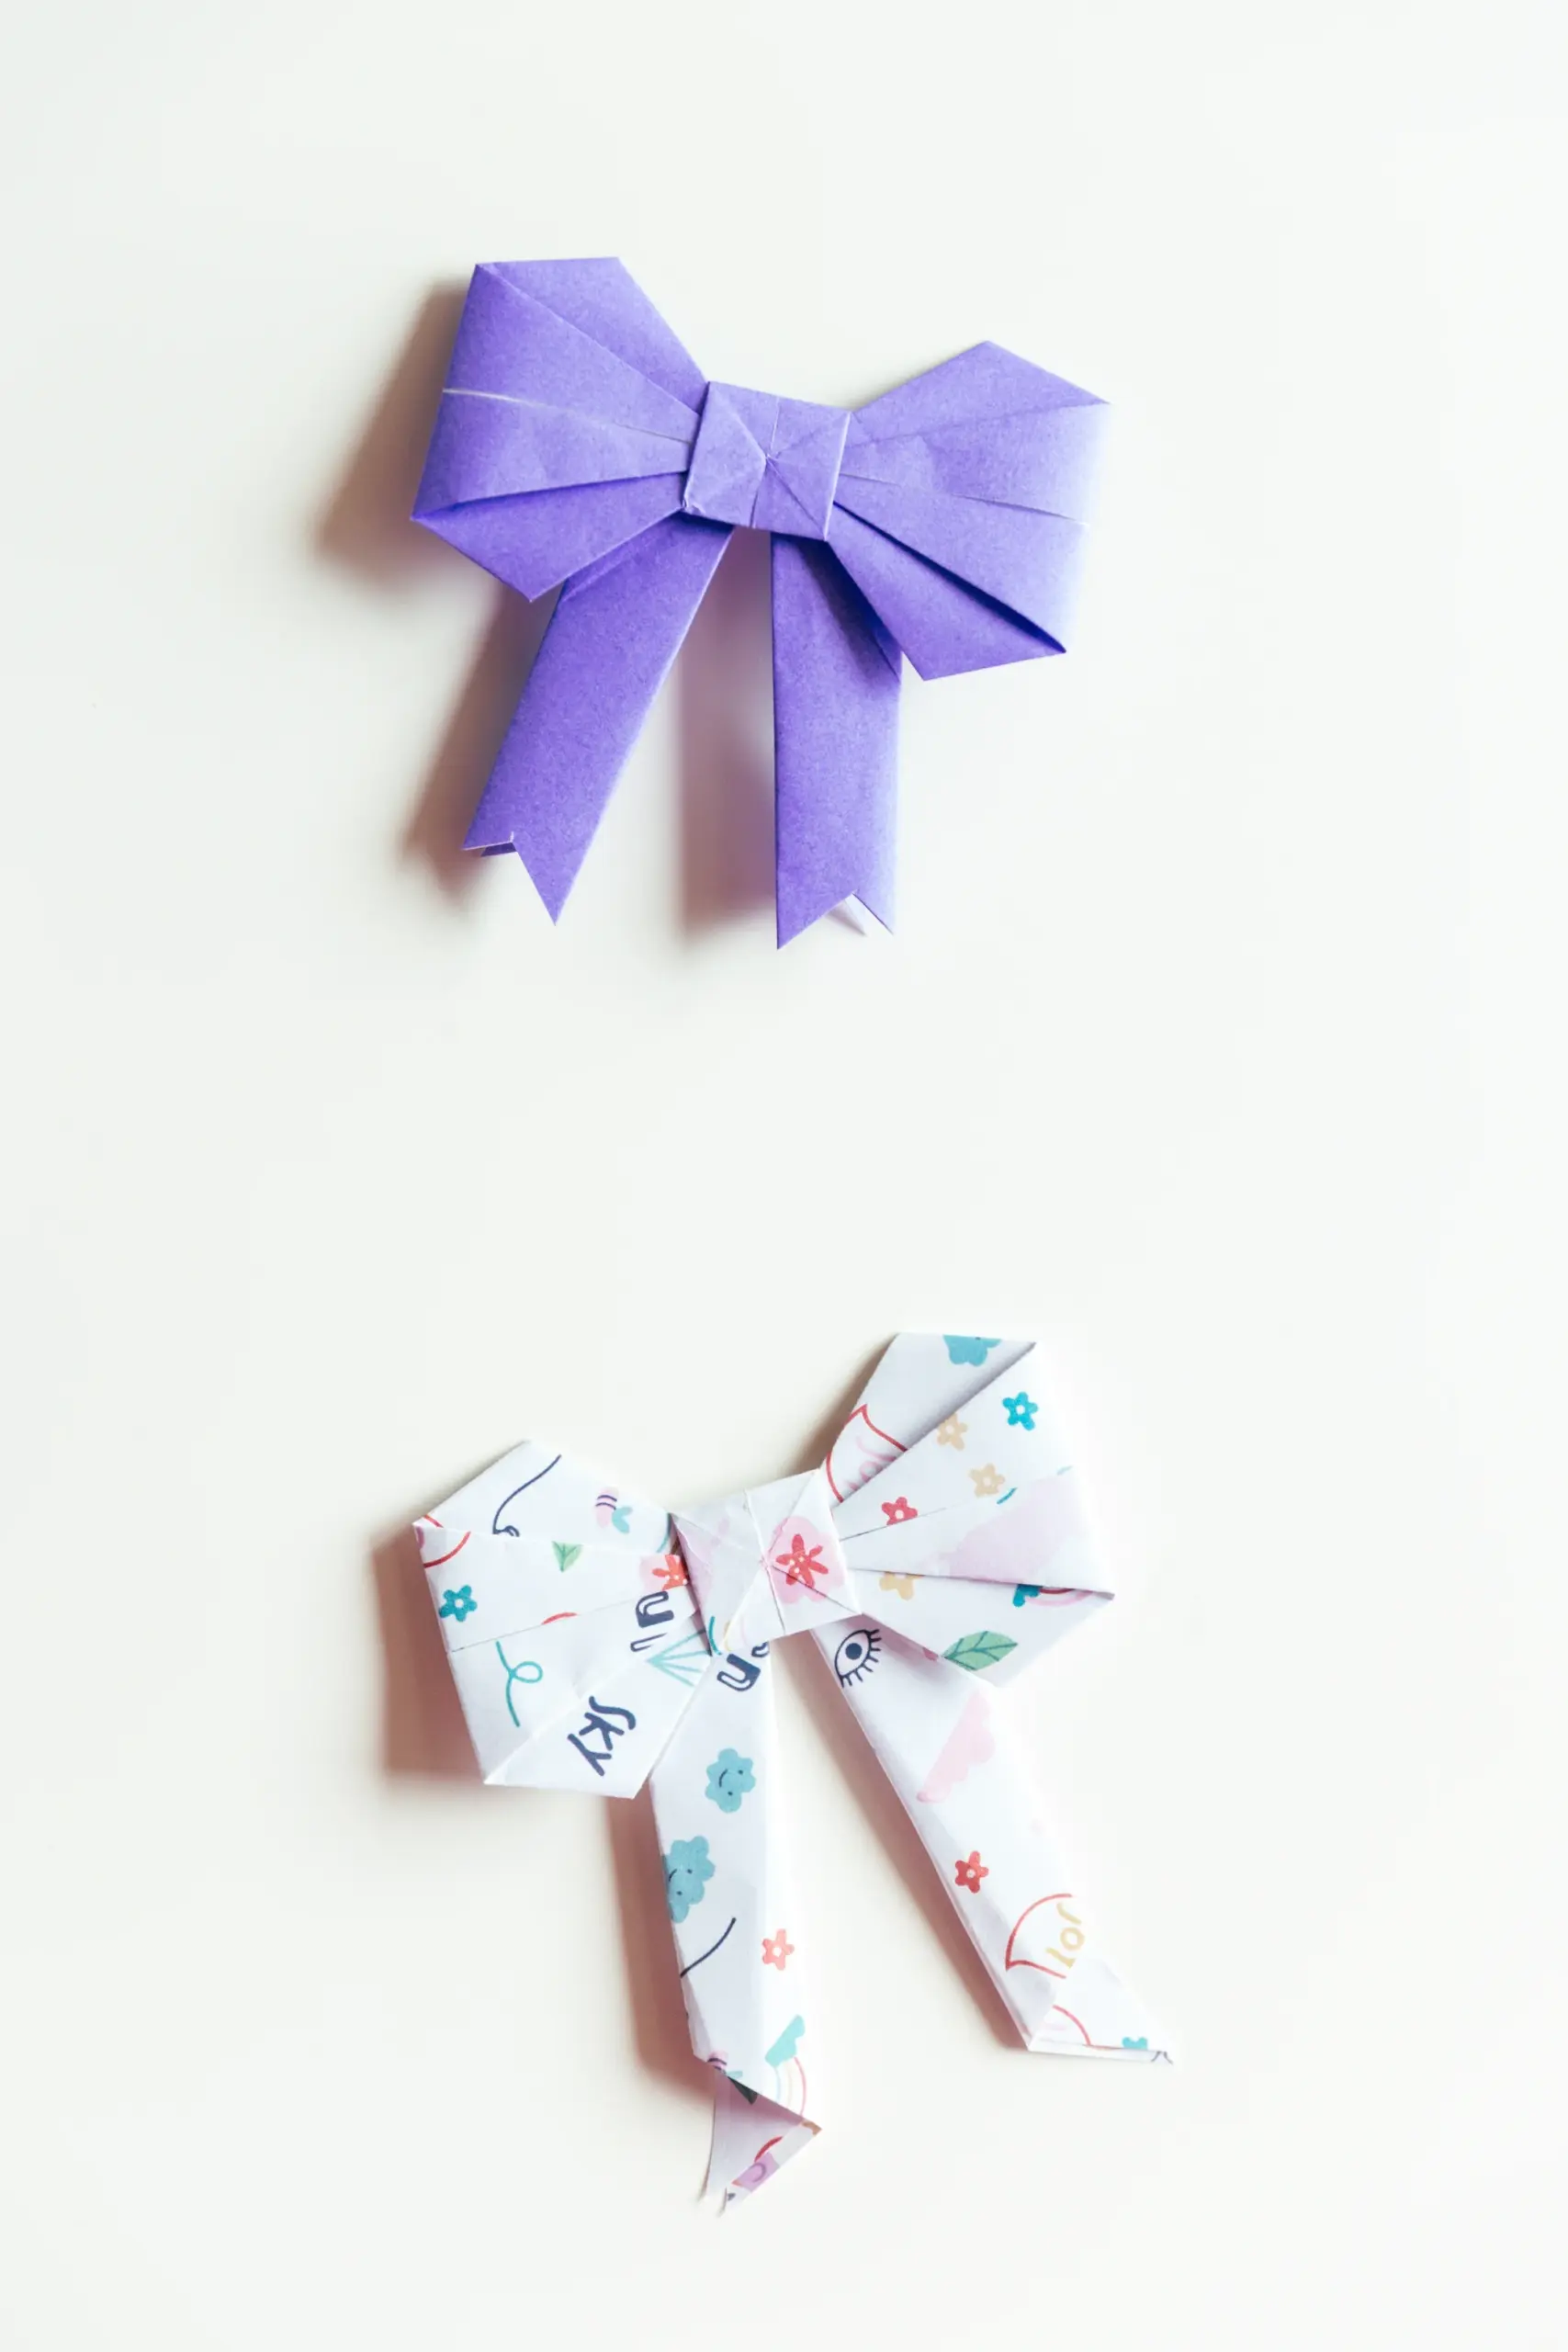
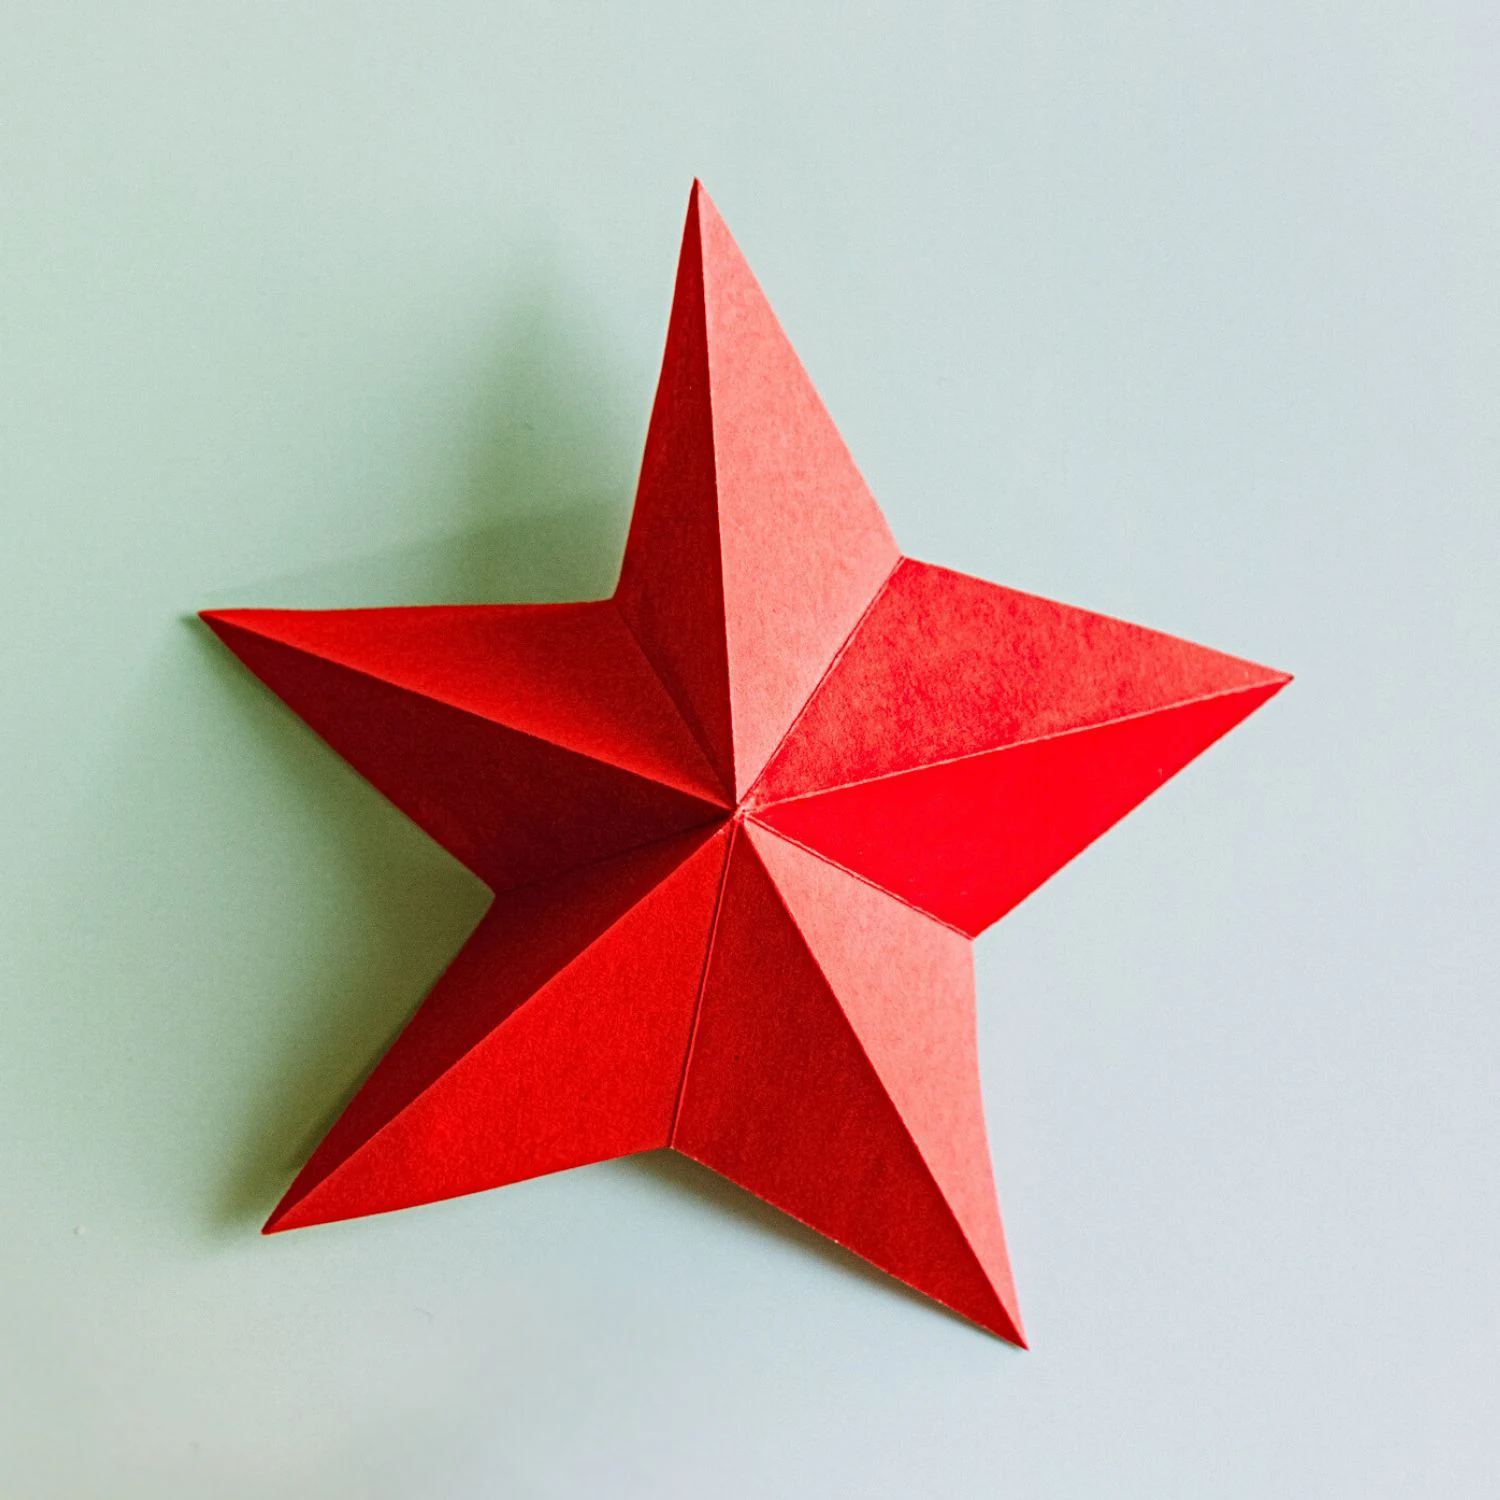
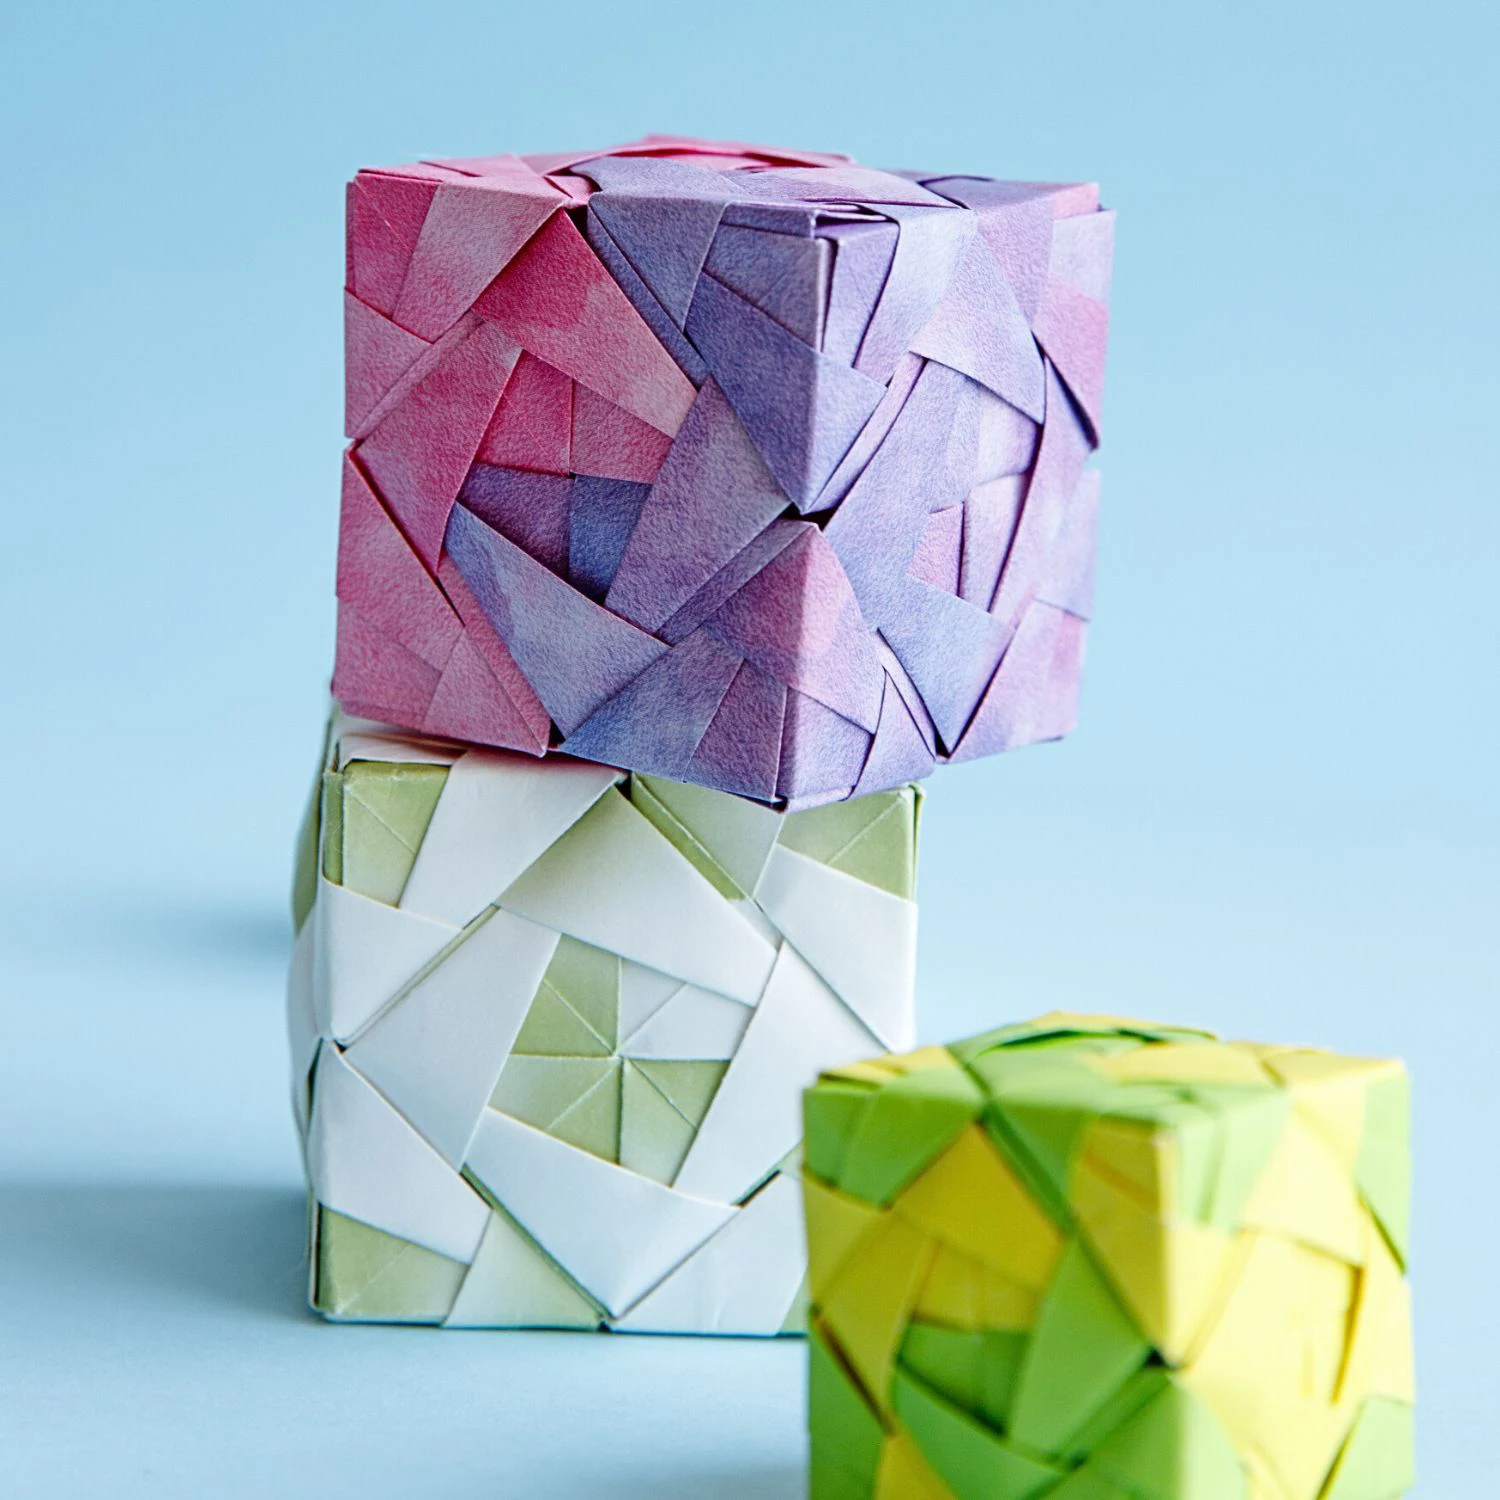
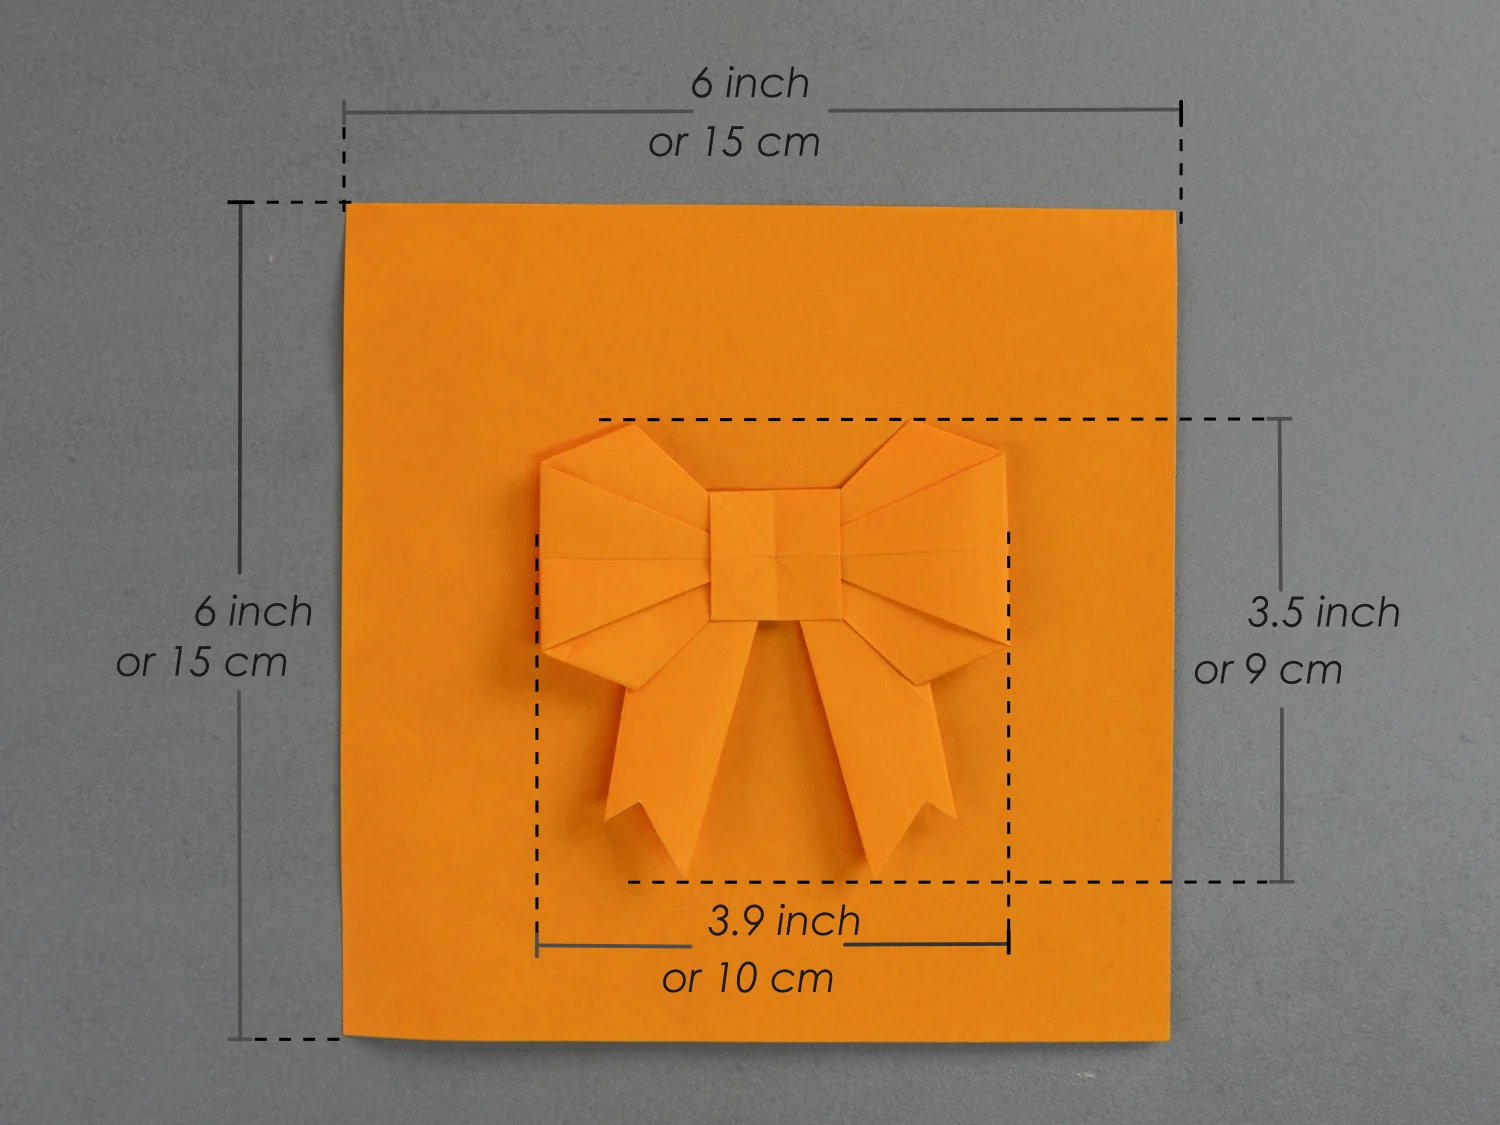
Adorable and not too complex origami bow. It is based on an Open Sink Fold, no glue is required, but you will need a pair of scissors. It is a small bow that you can use to decorate your handmade gift box or card, adding thoughtfulness to your gift. You can also hang them on your Christmas tree or windows, which would also be a fantastic idea. In a word, whatever you decide to do with this lovely bow, you’re sure to love it.

If you are new to origami, start here from our beginner guide to know the basics and how to read the step-by-step instructions.
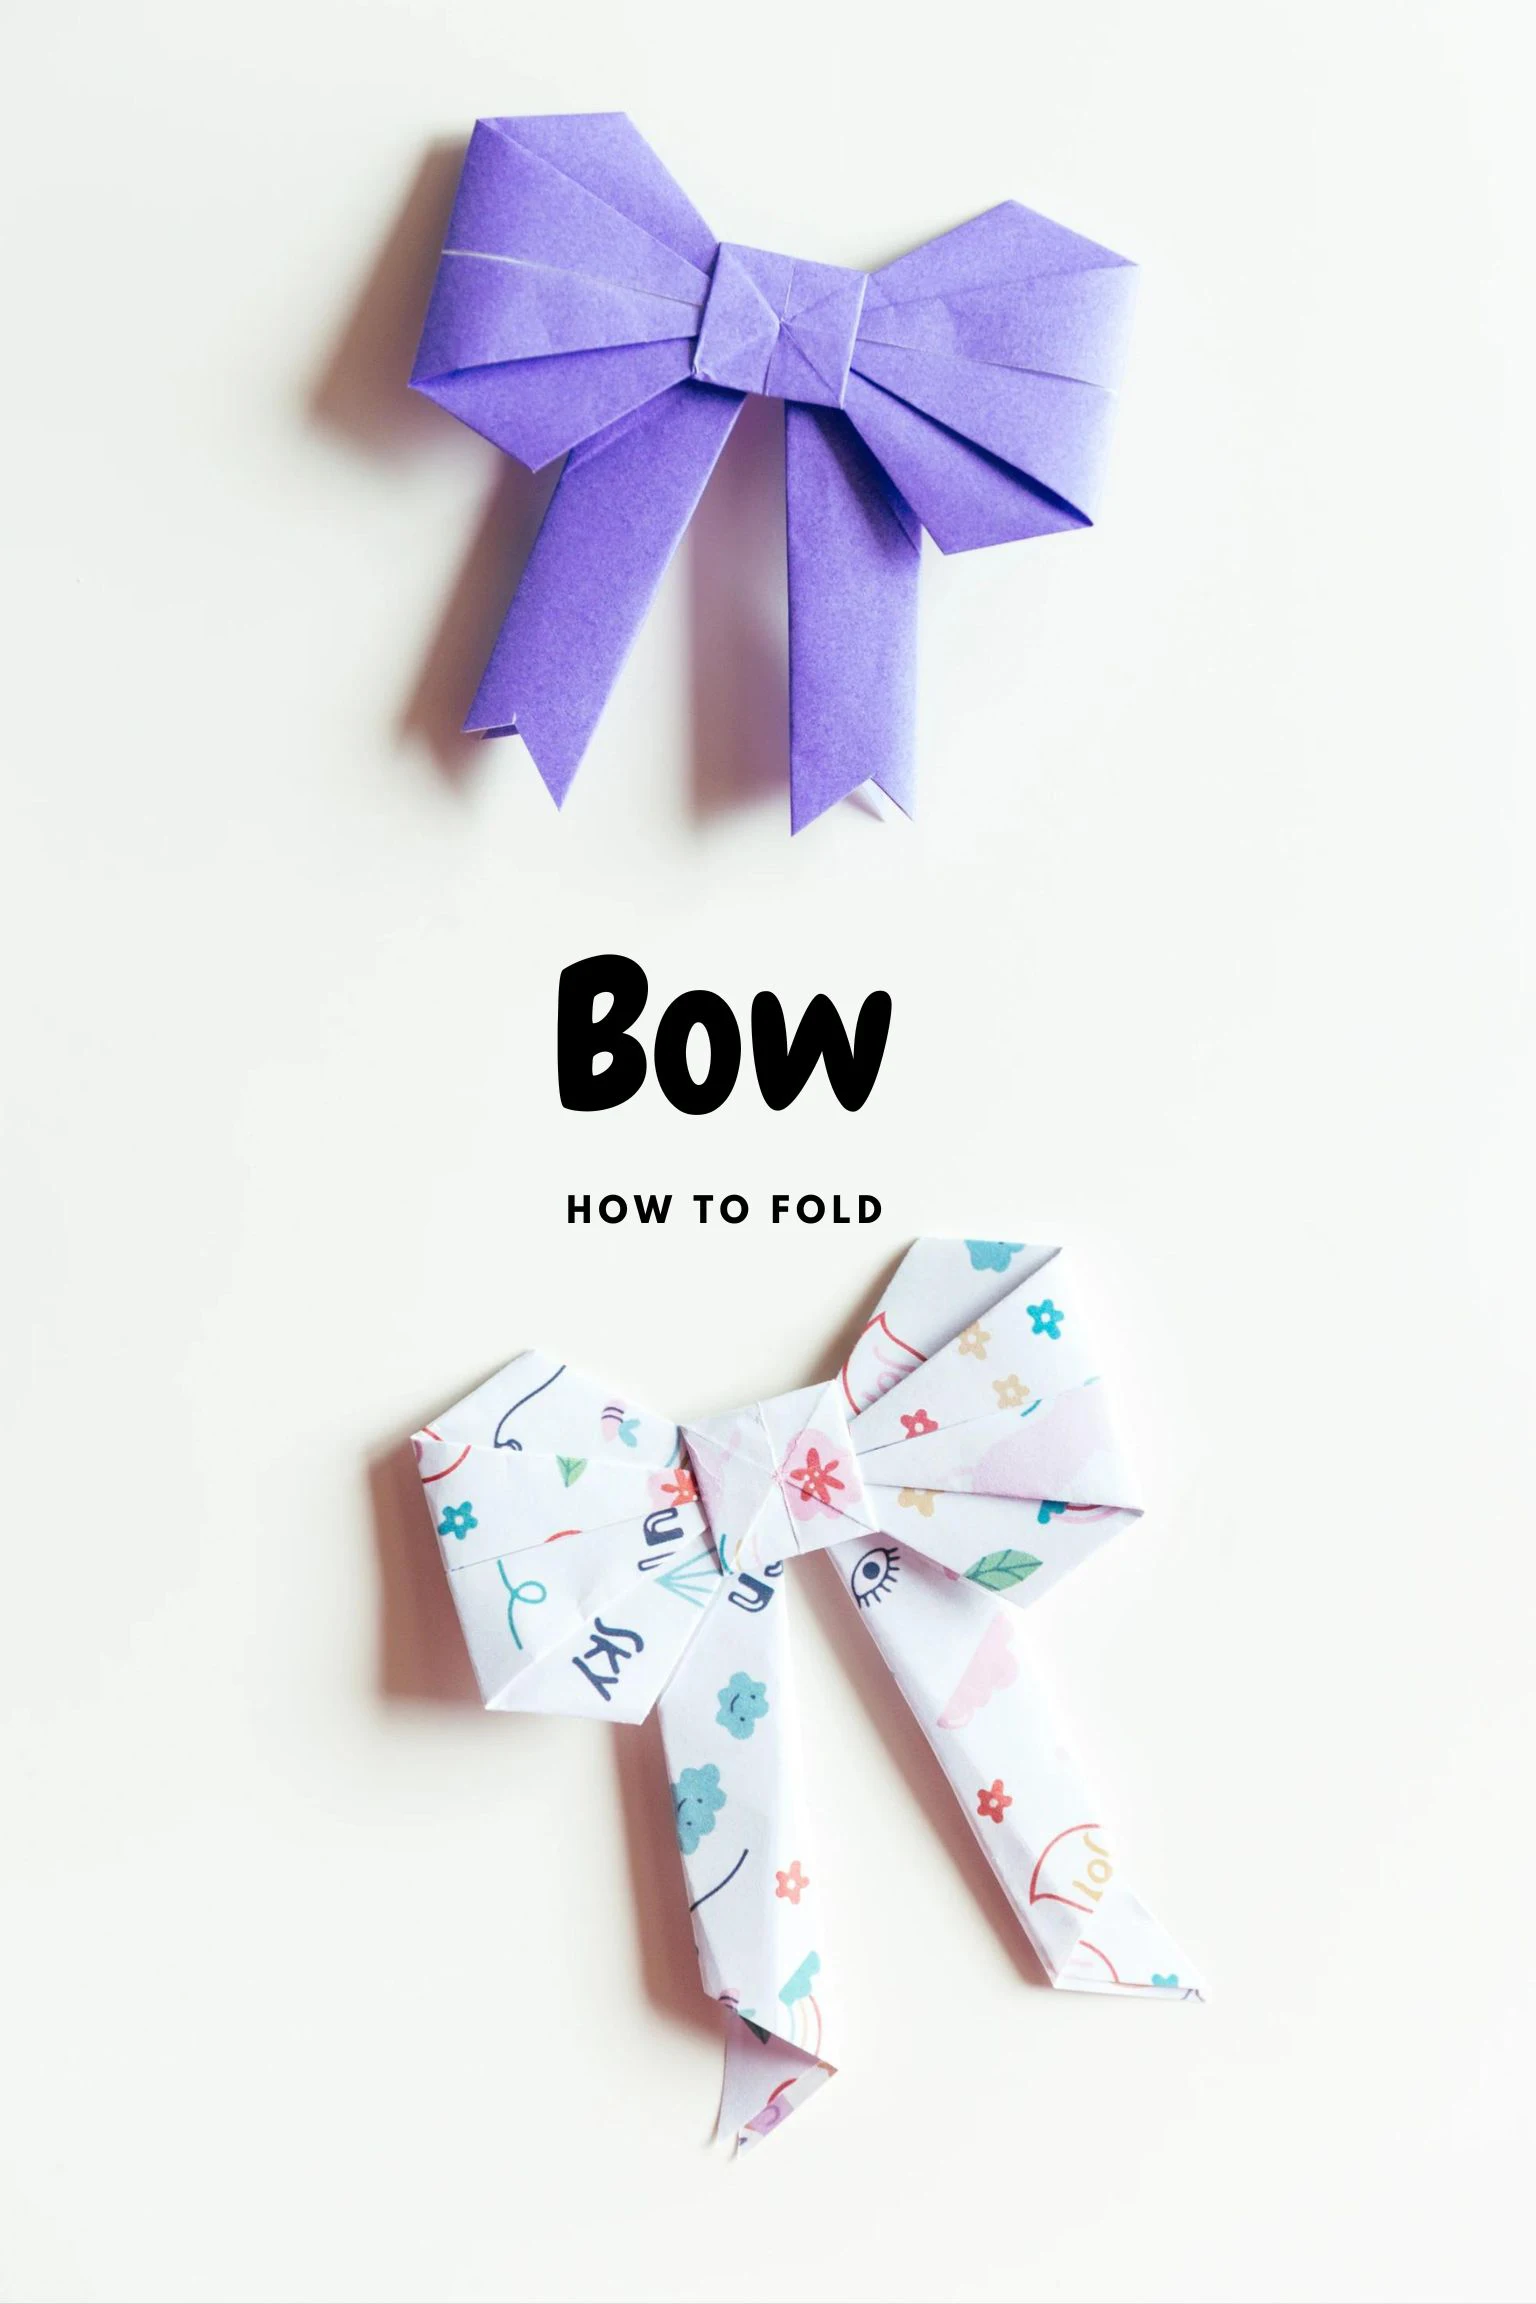
- Folding time: 15 minutes
- Paper: 15×15 cm
- Difficulty: Middle
Material
Prepare a piece of 15×15 cm origami square paper, with different colors on each side, to create a 9×10 cm origami bow. Experiment with different colors and patterns, making your product more unique.
Step by Step Instructions
Step 1
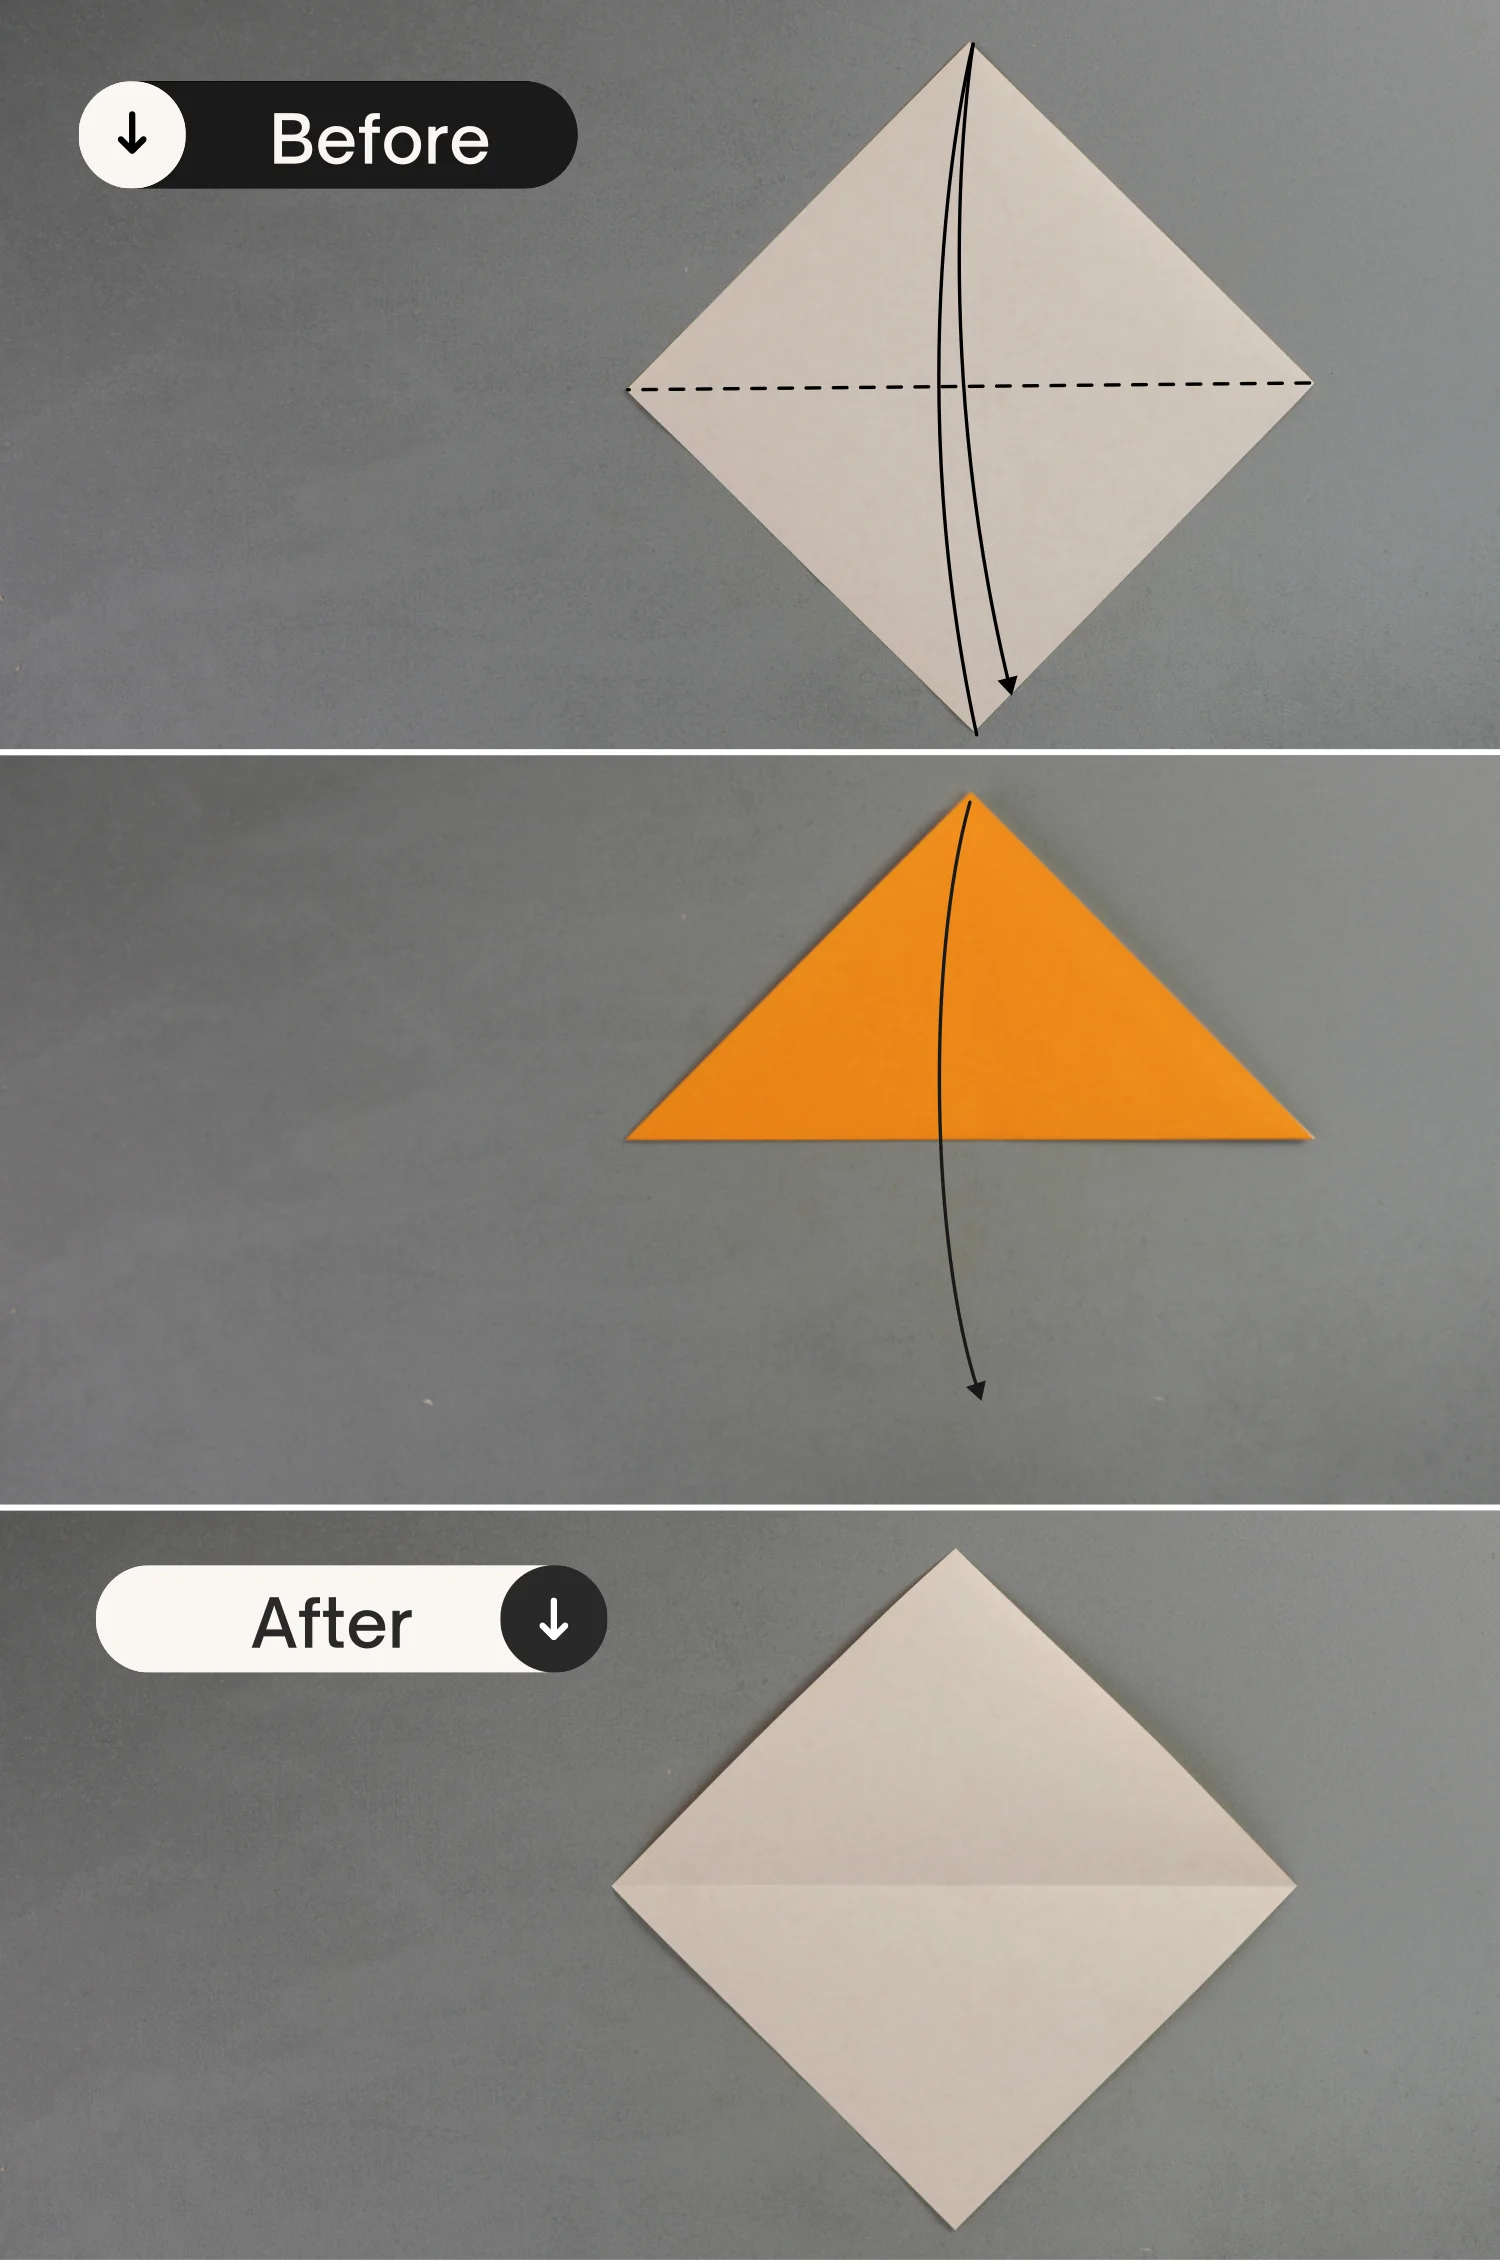
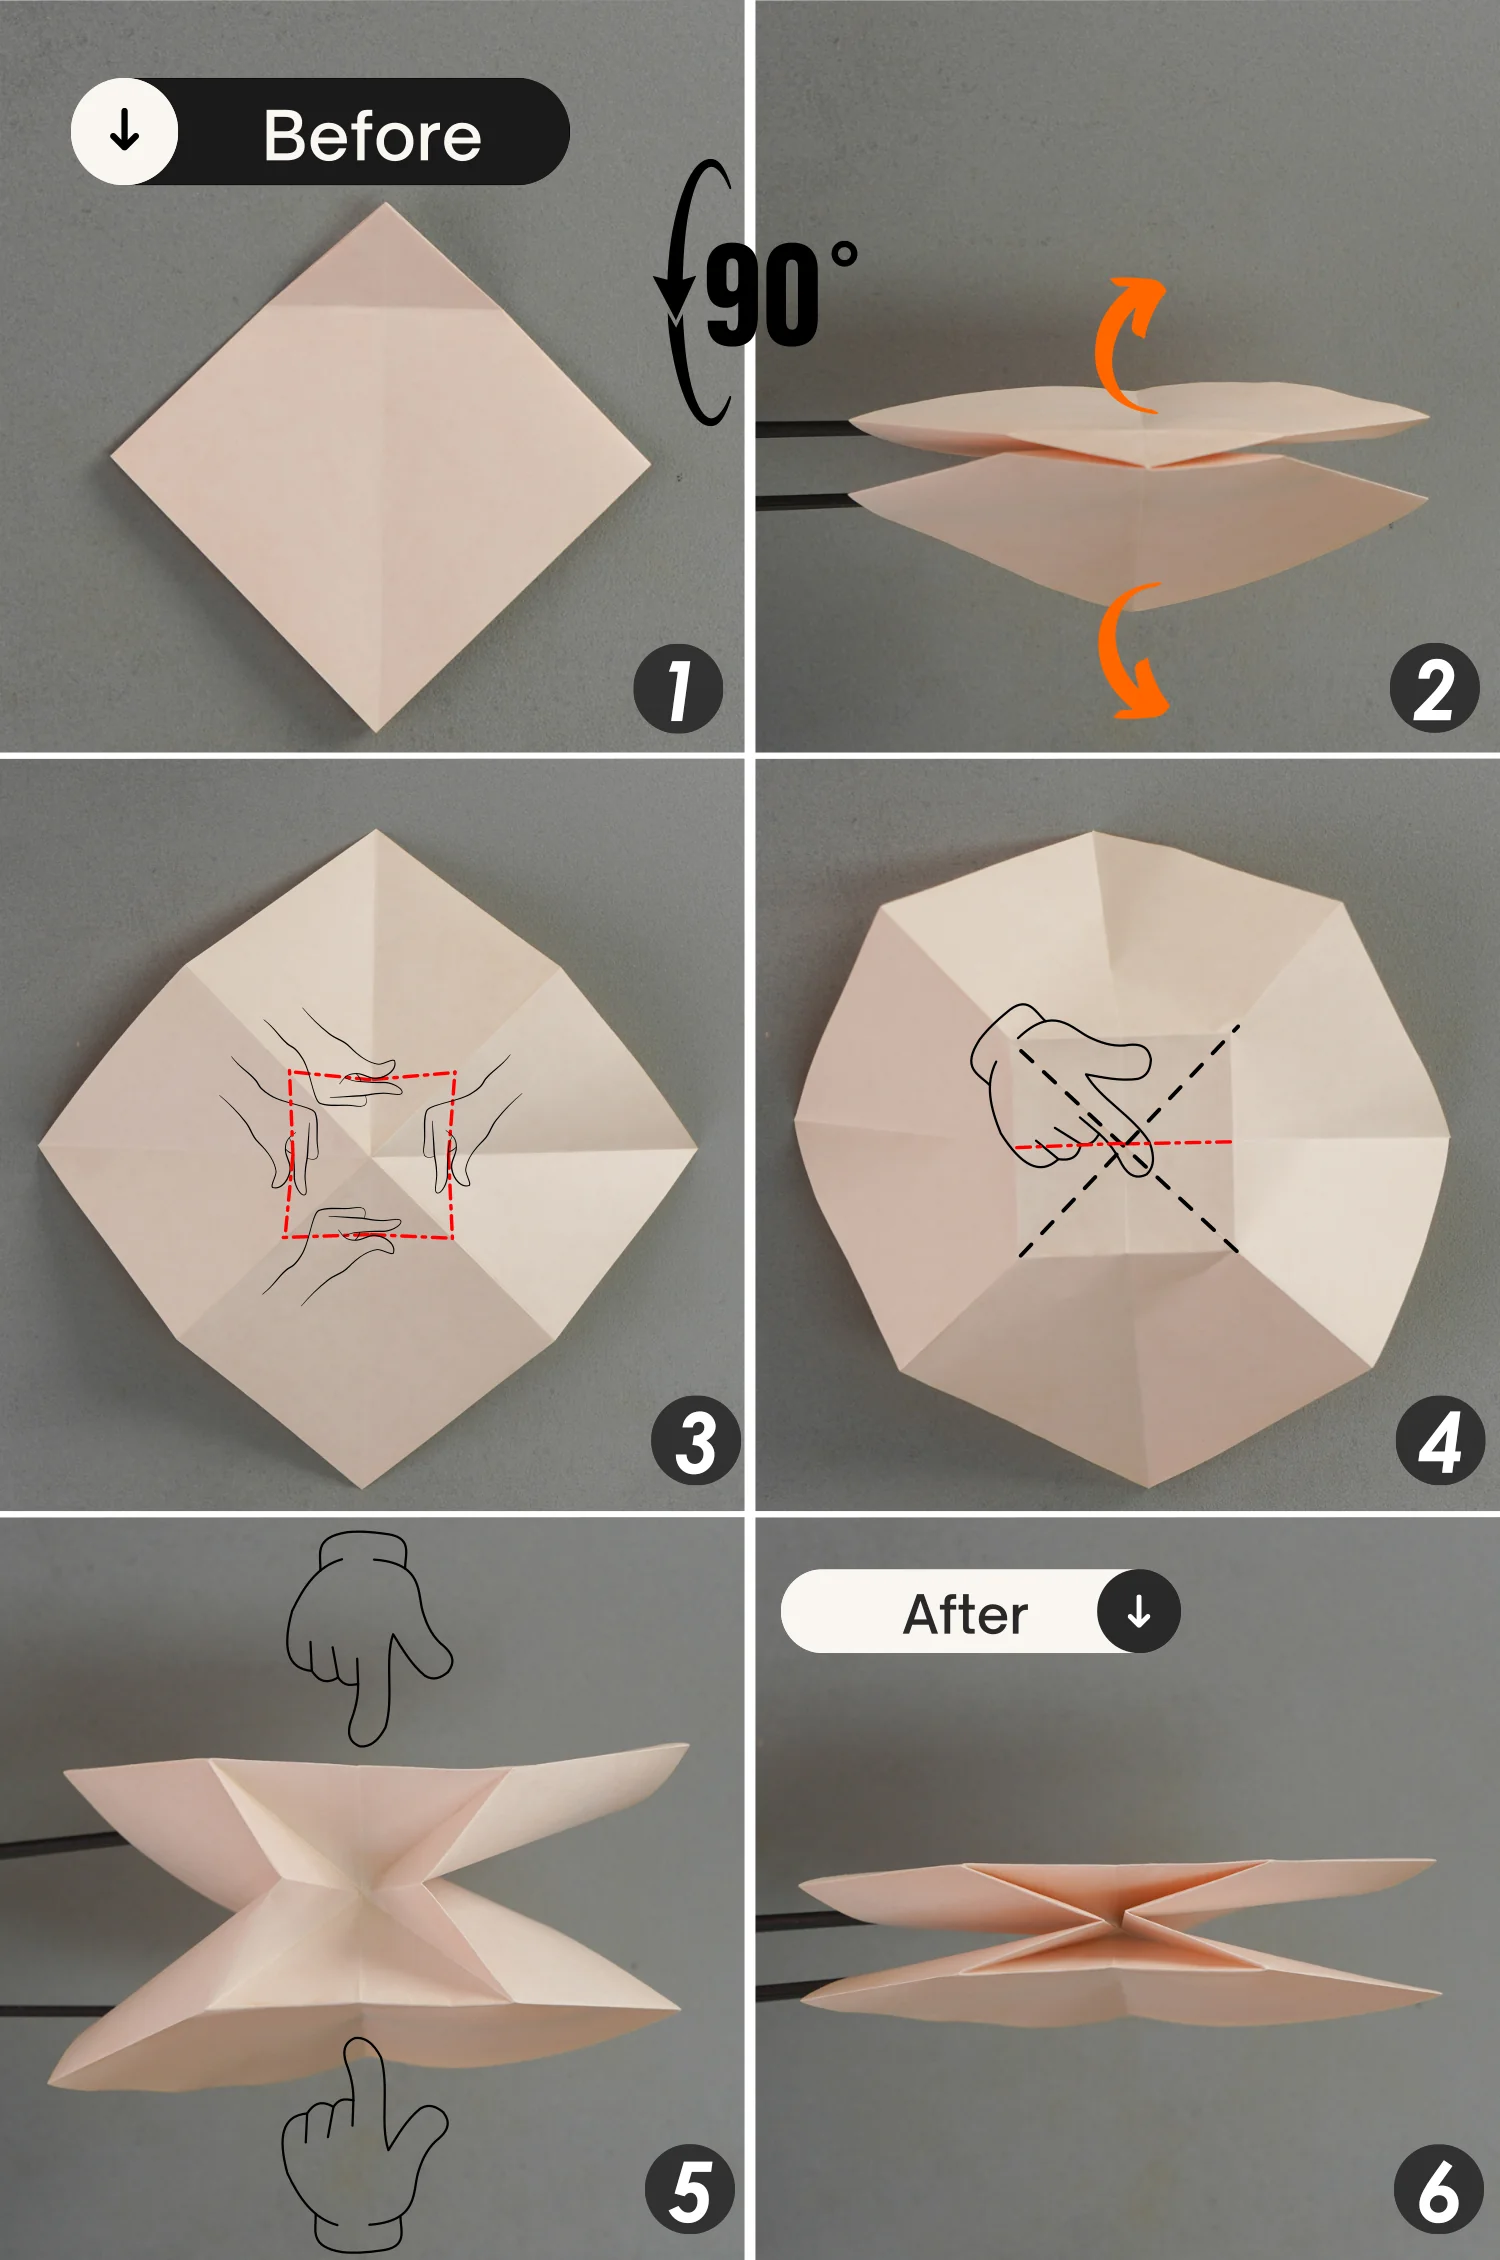
Place the paper with the desired display color side down to begin folding, fold it in half horizontally, and unfold it.
Step 2
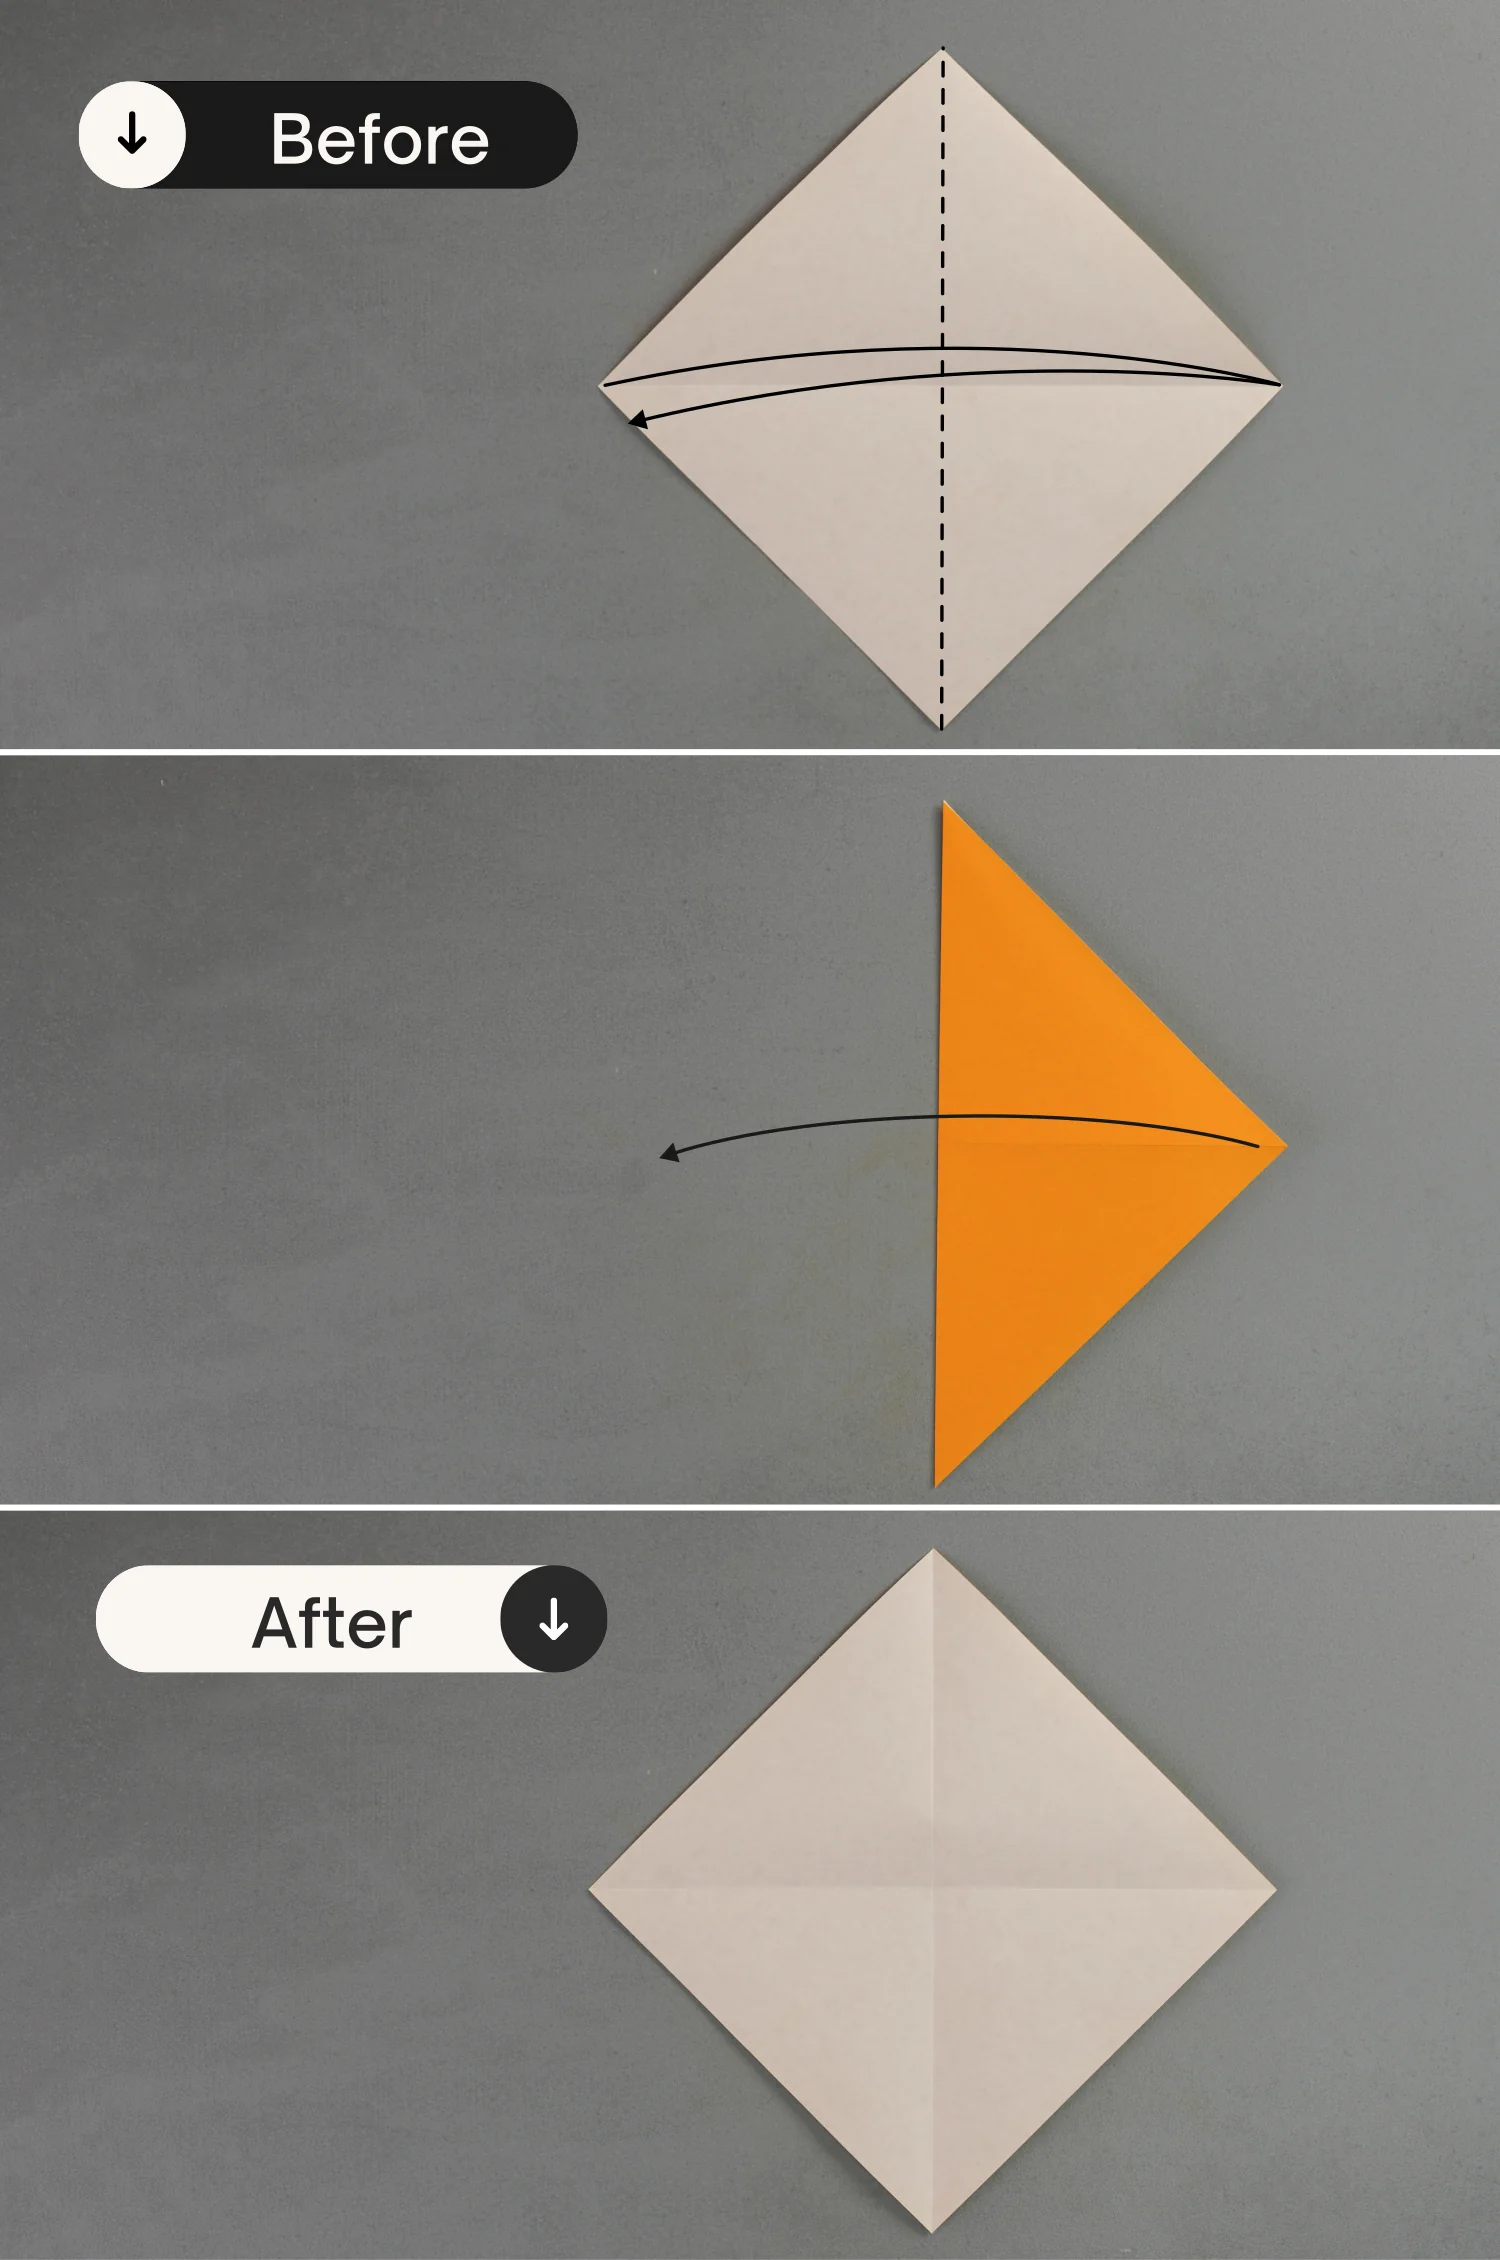
Fold it in half vertically, and unfold it.
Step 3
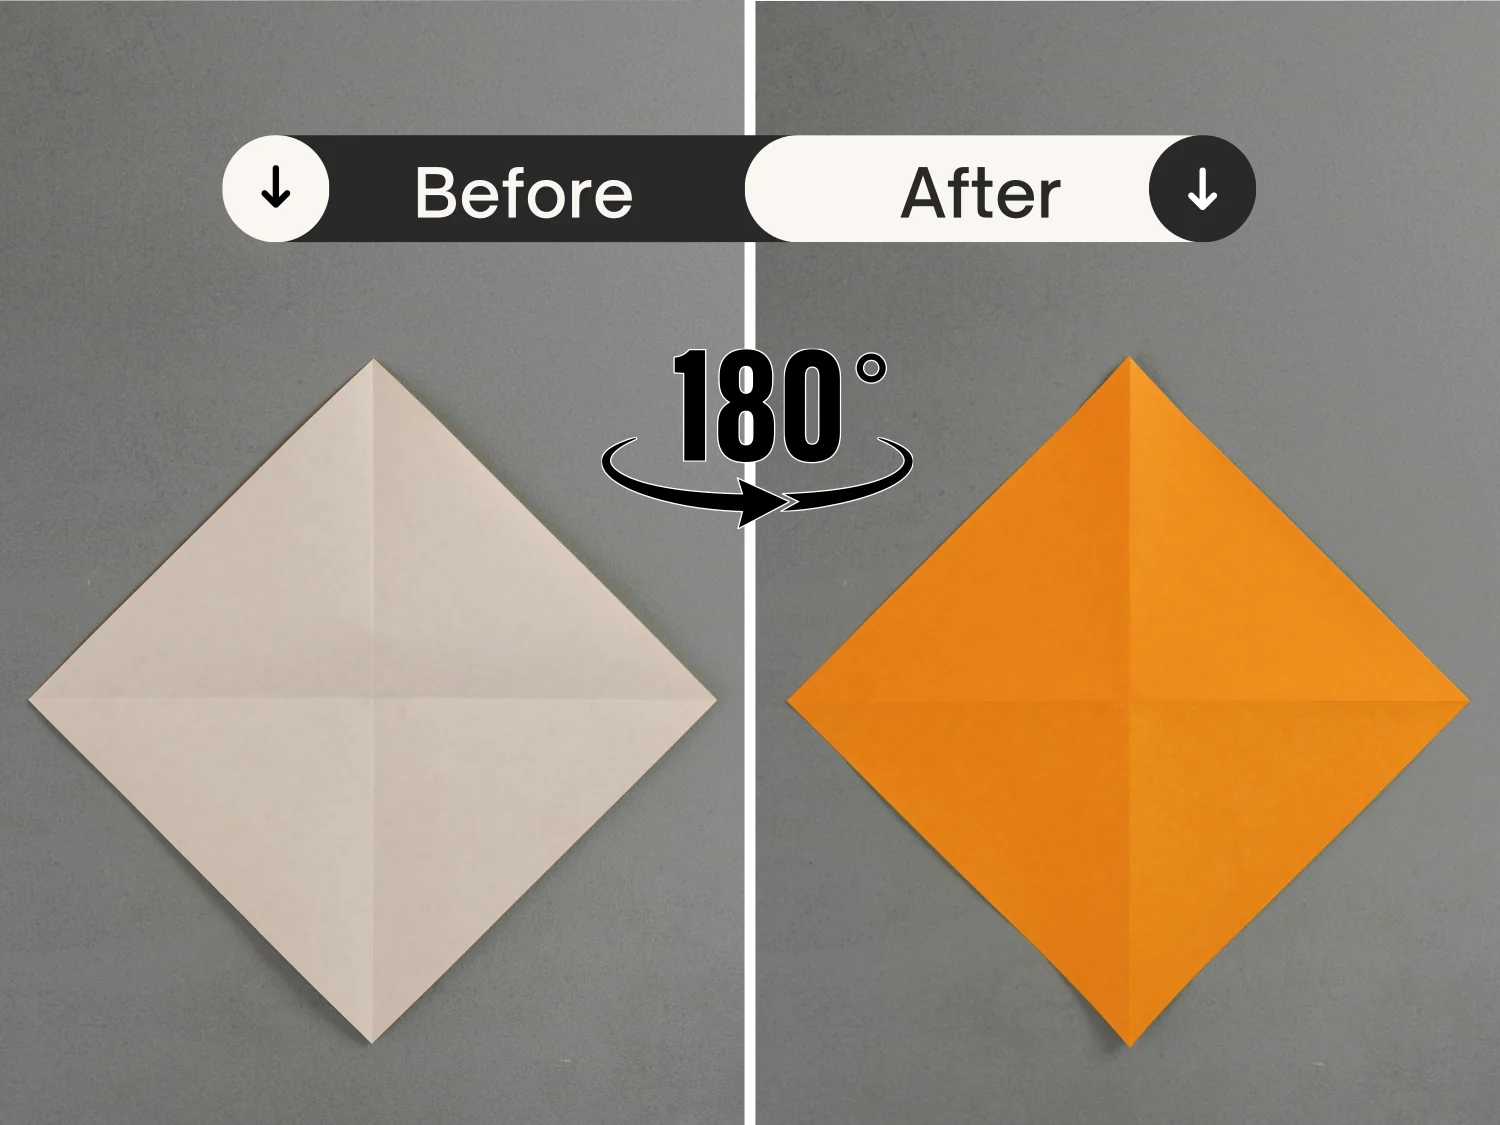
Flip the paper over from the left to the right.
Step 4
Fold the bottom right edge to align with the top left edge, crease it well, and unfold it.
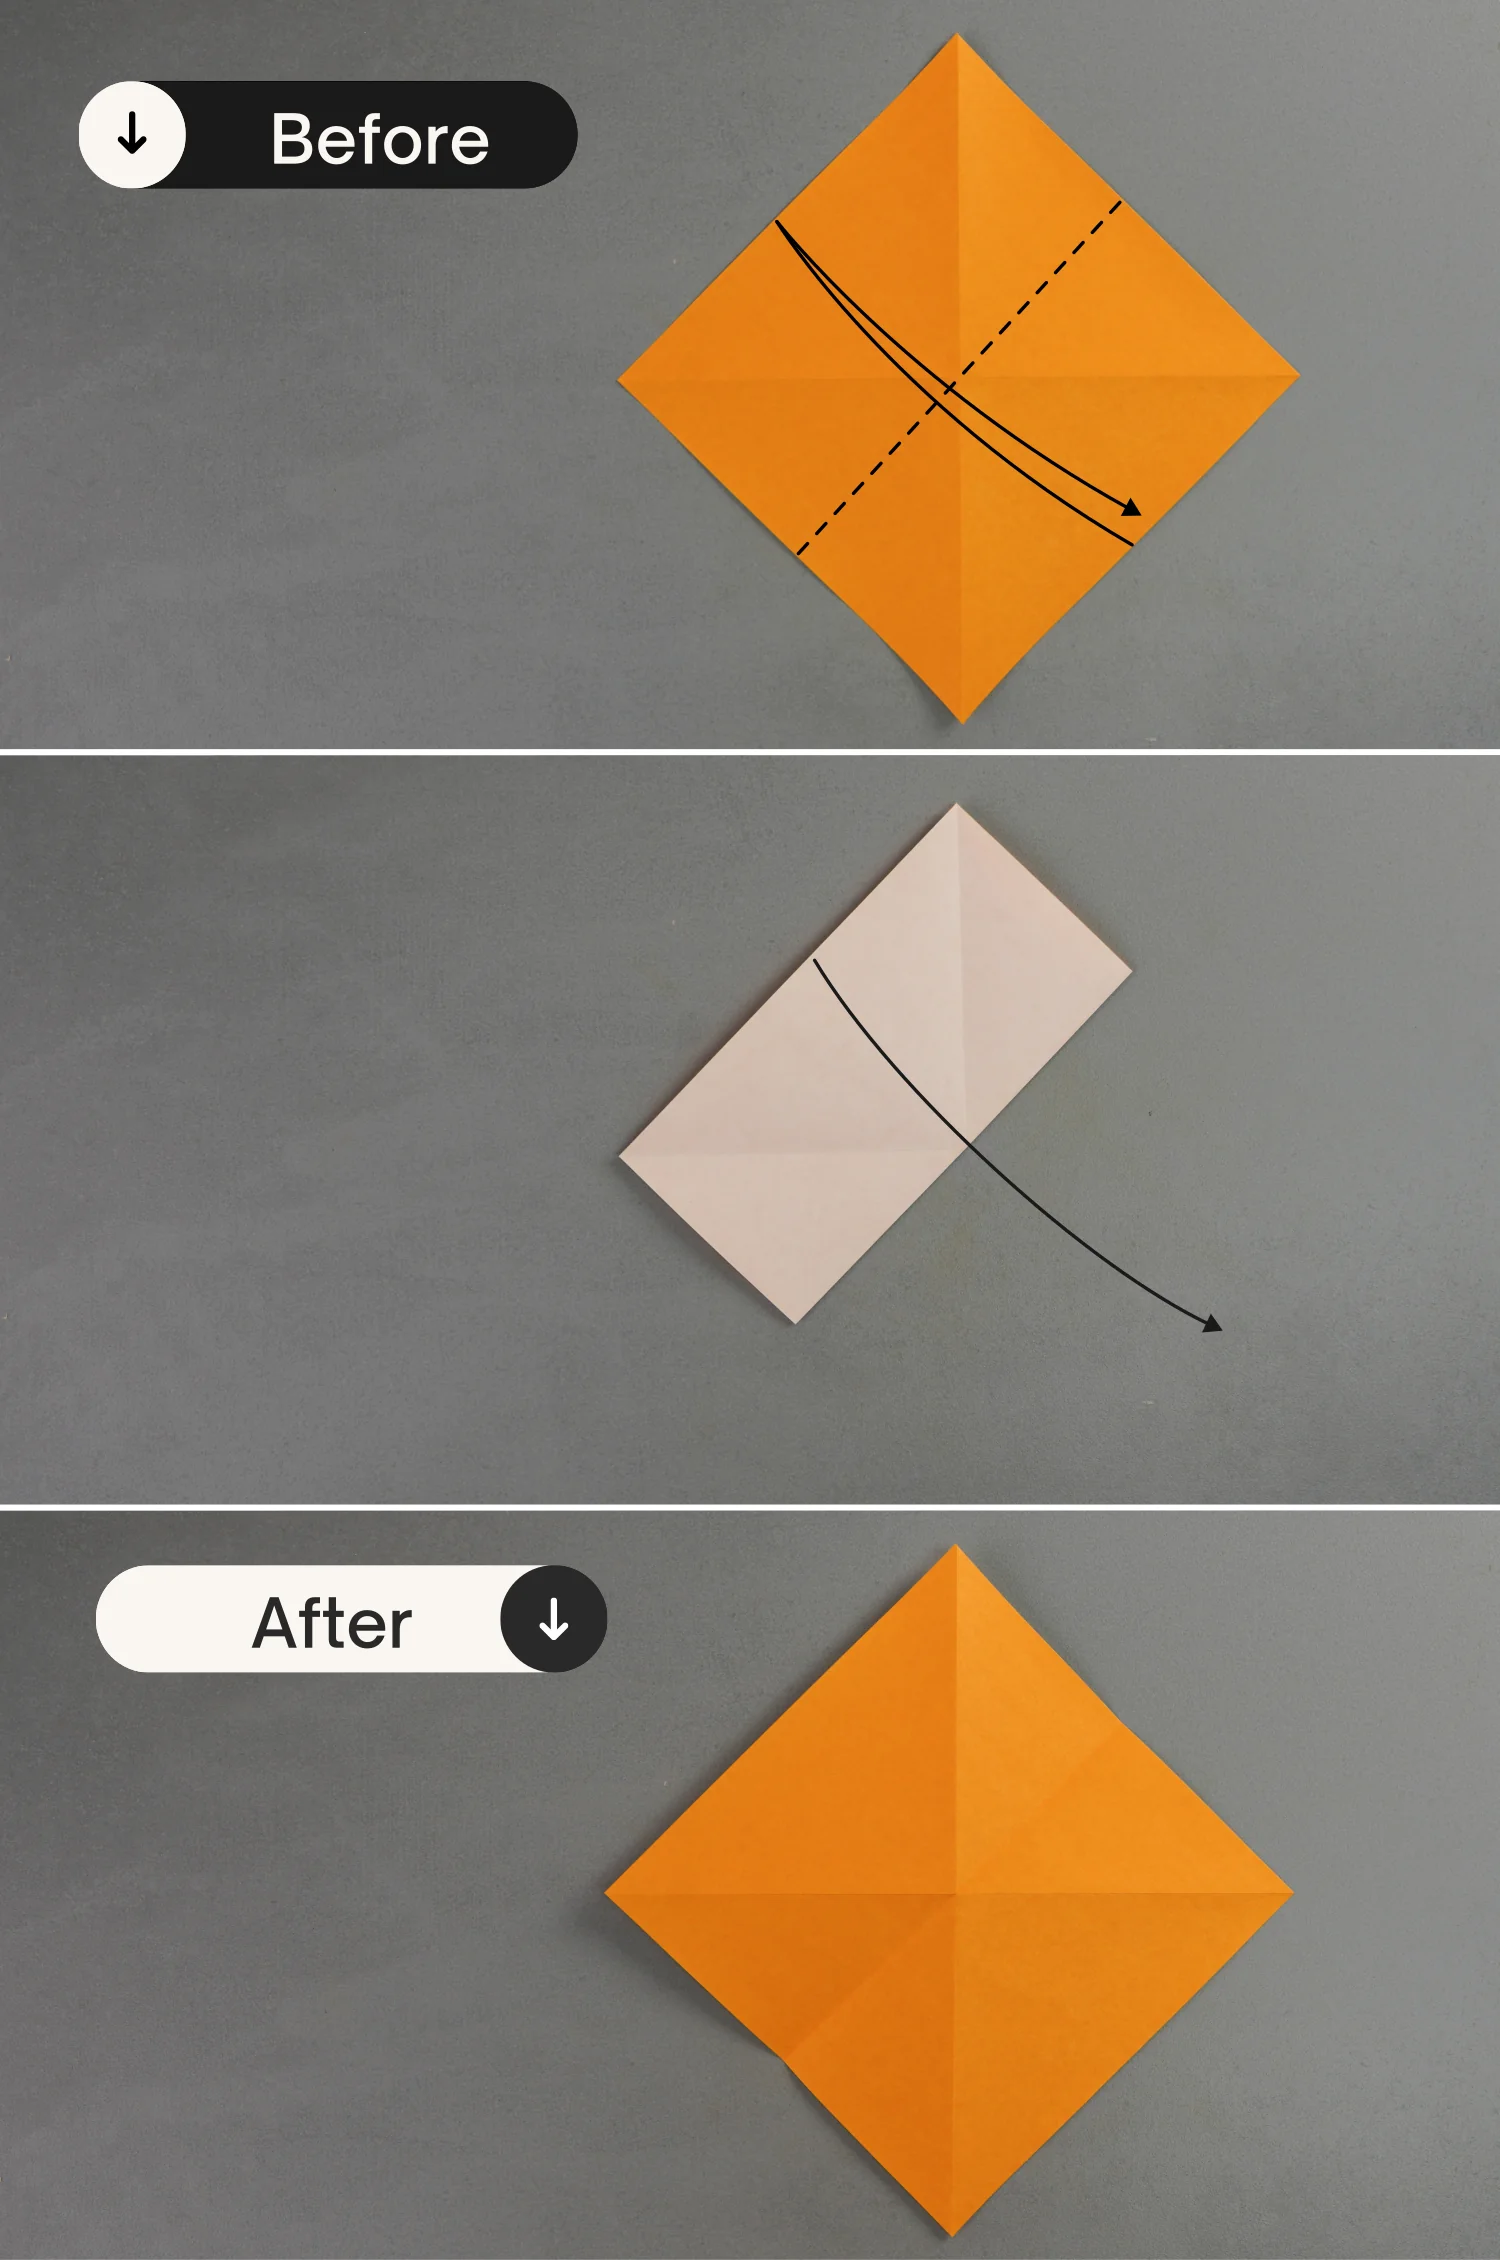
Step 5
Fold the bottom left edge to align with the top right edge, and unfold it.
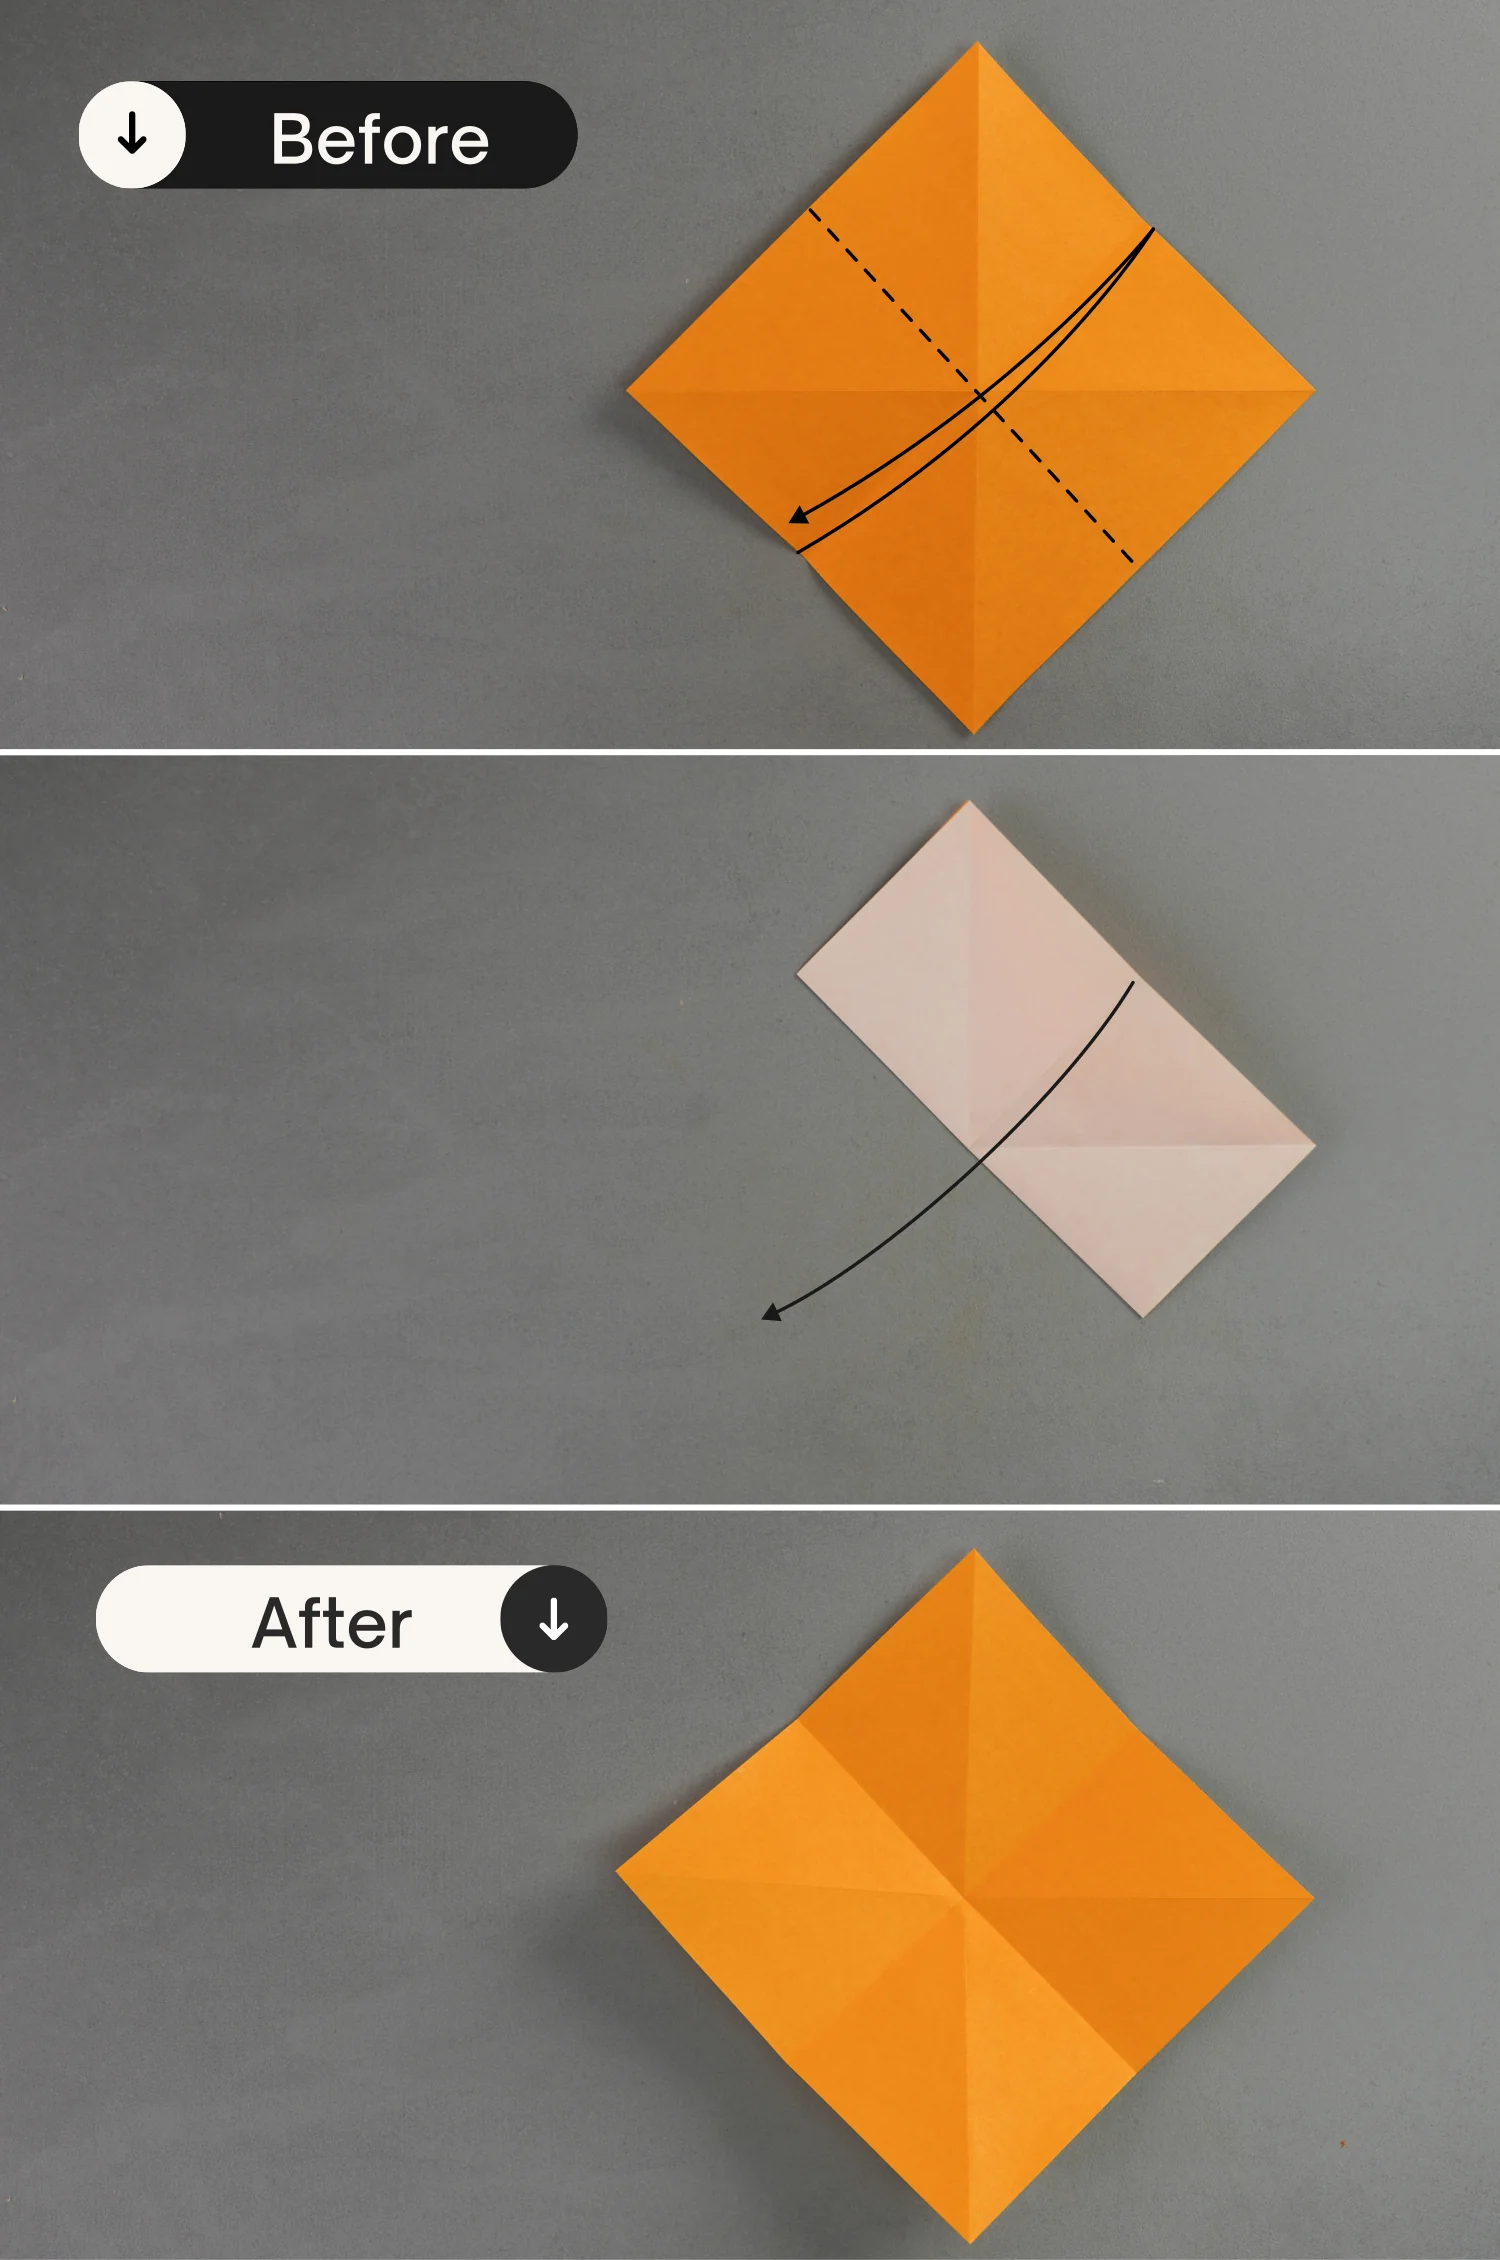
Step 6
Shape the left and right creases, and push the left, right, and top points to meet the bottom point, then flatten it to get a small square.
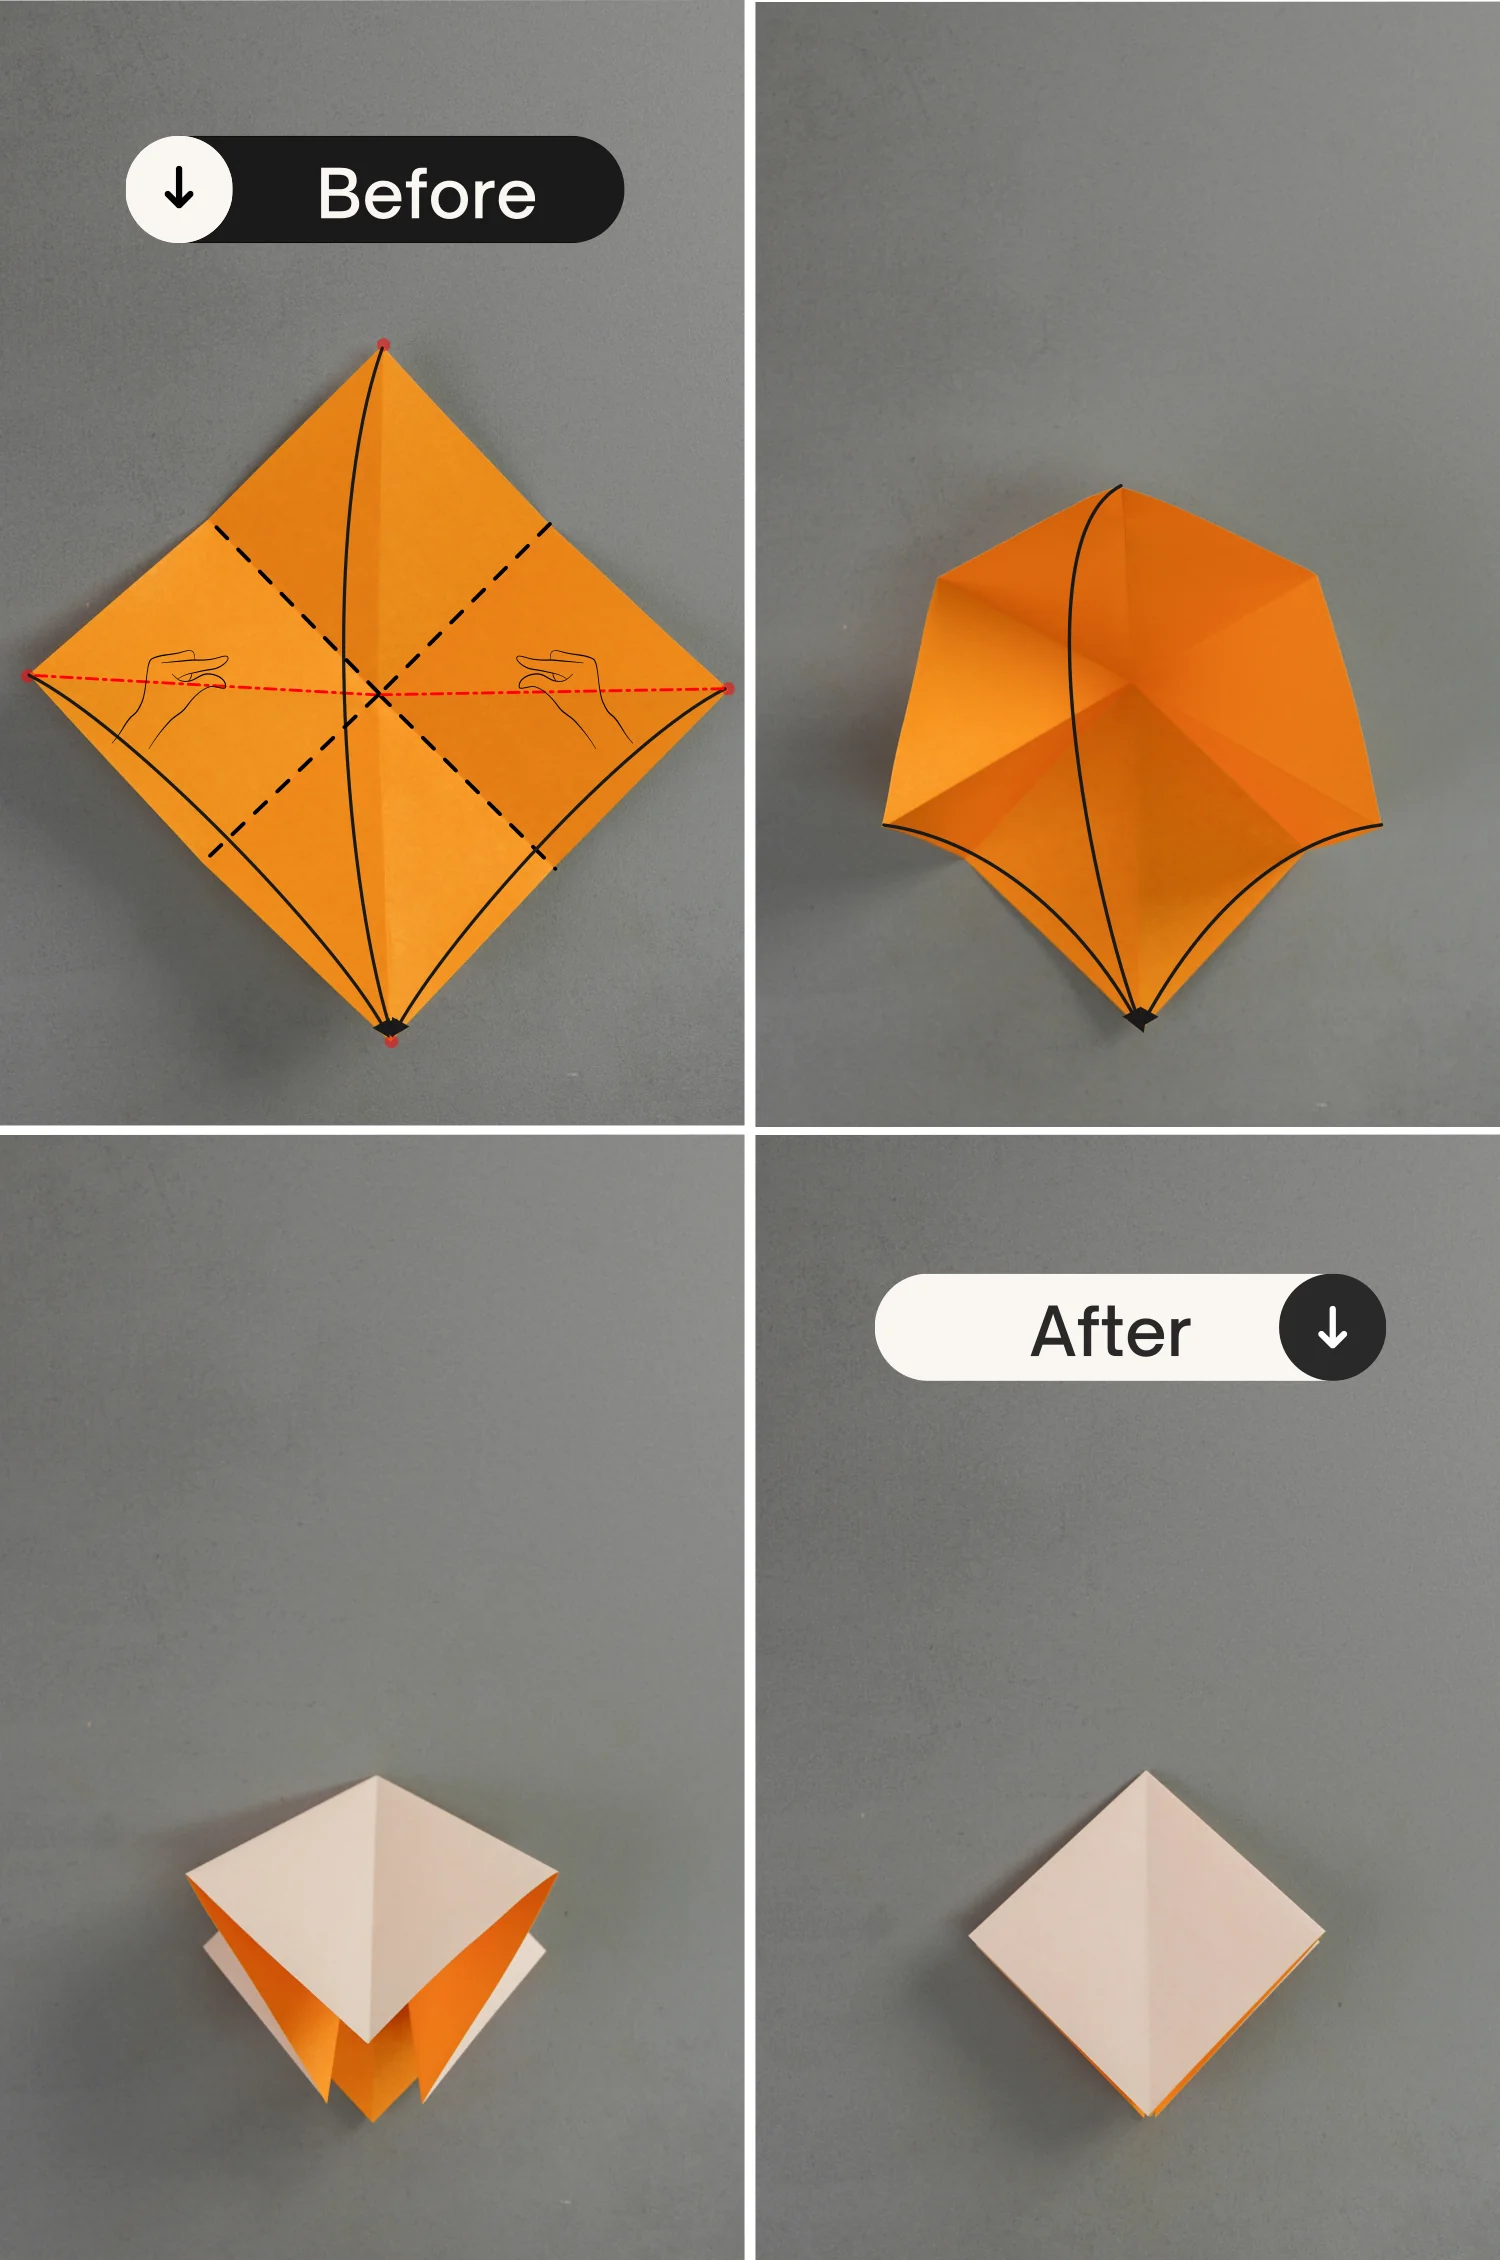
Step 7
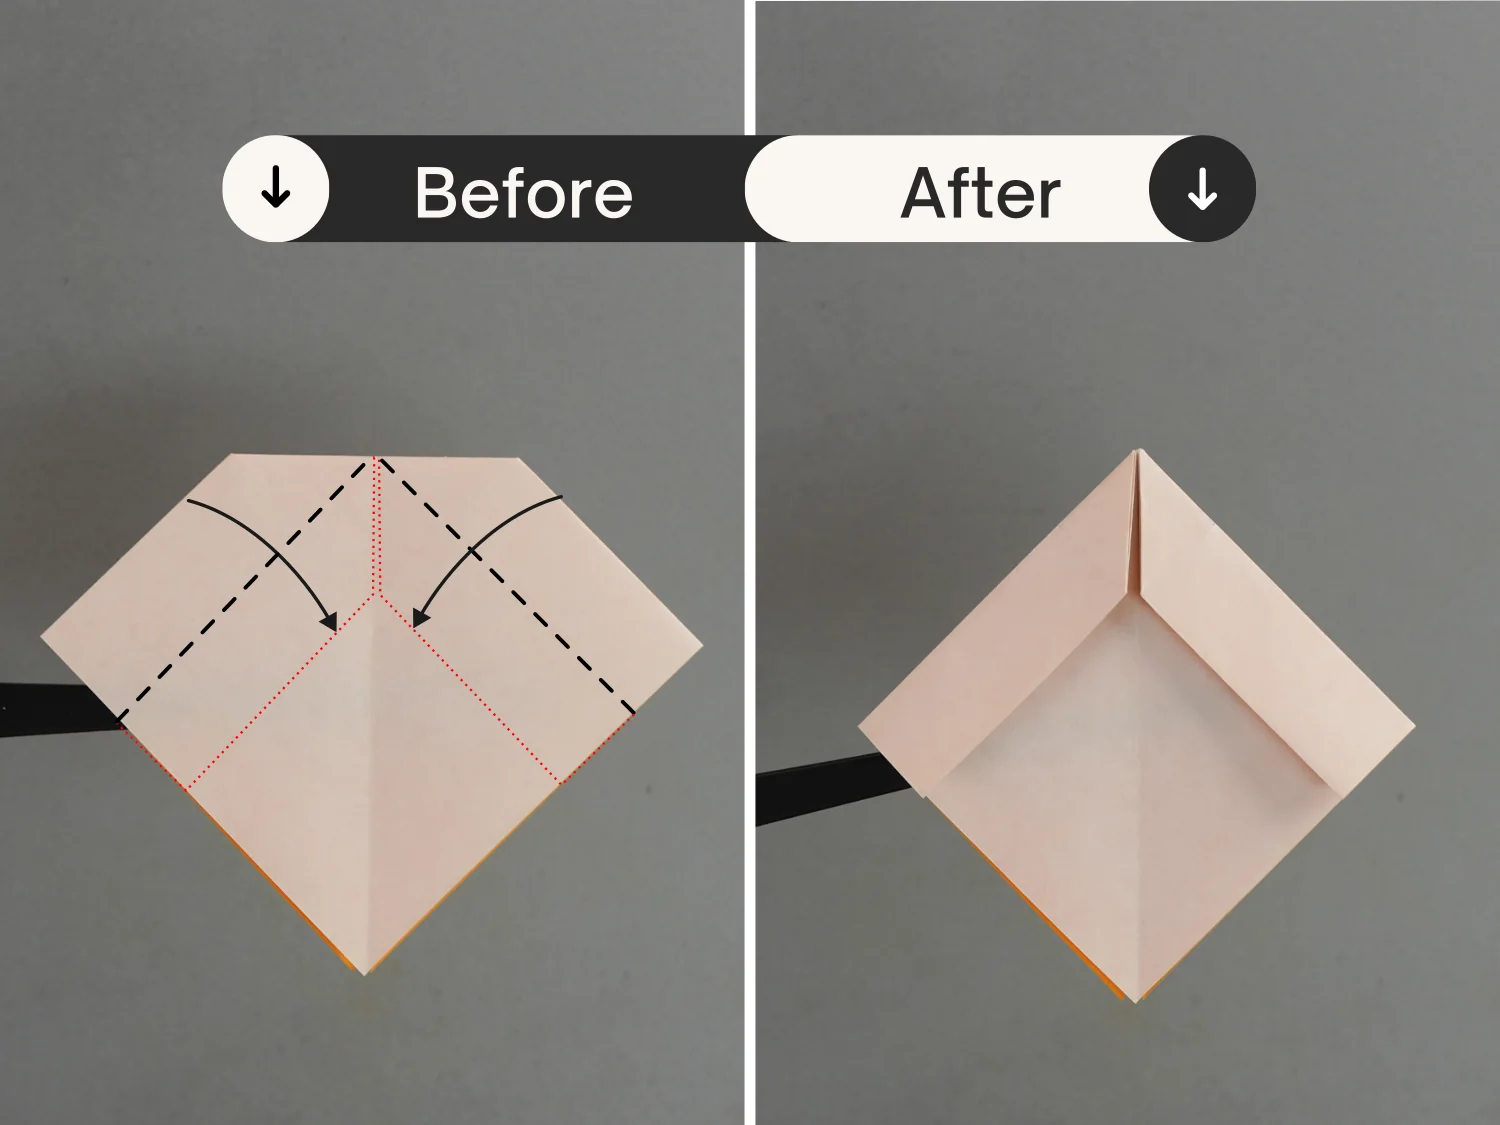
Fold the top of the paper along with the black dotted line. Fold this well and then unfold it.
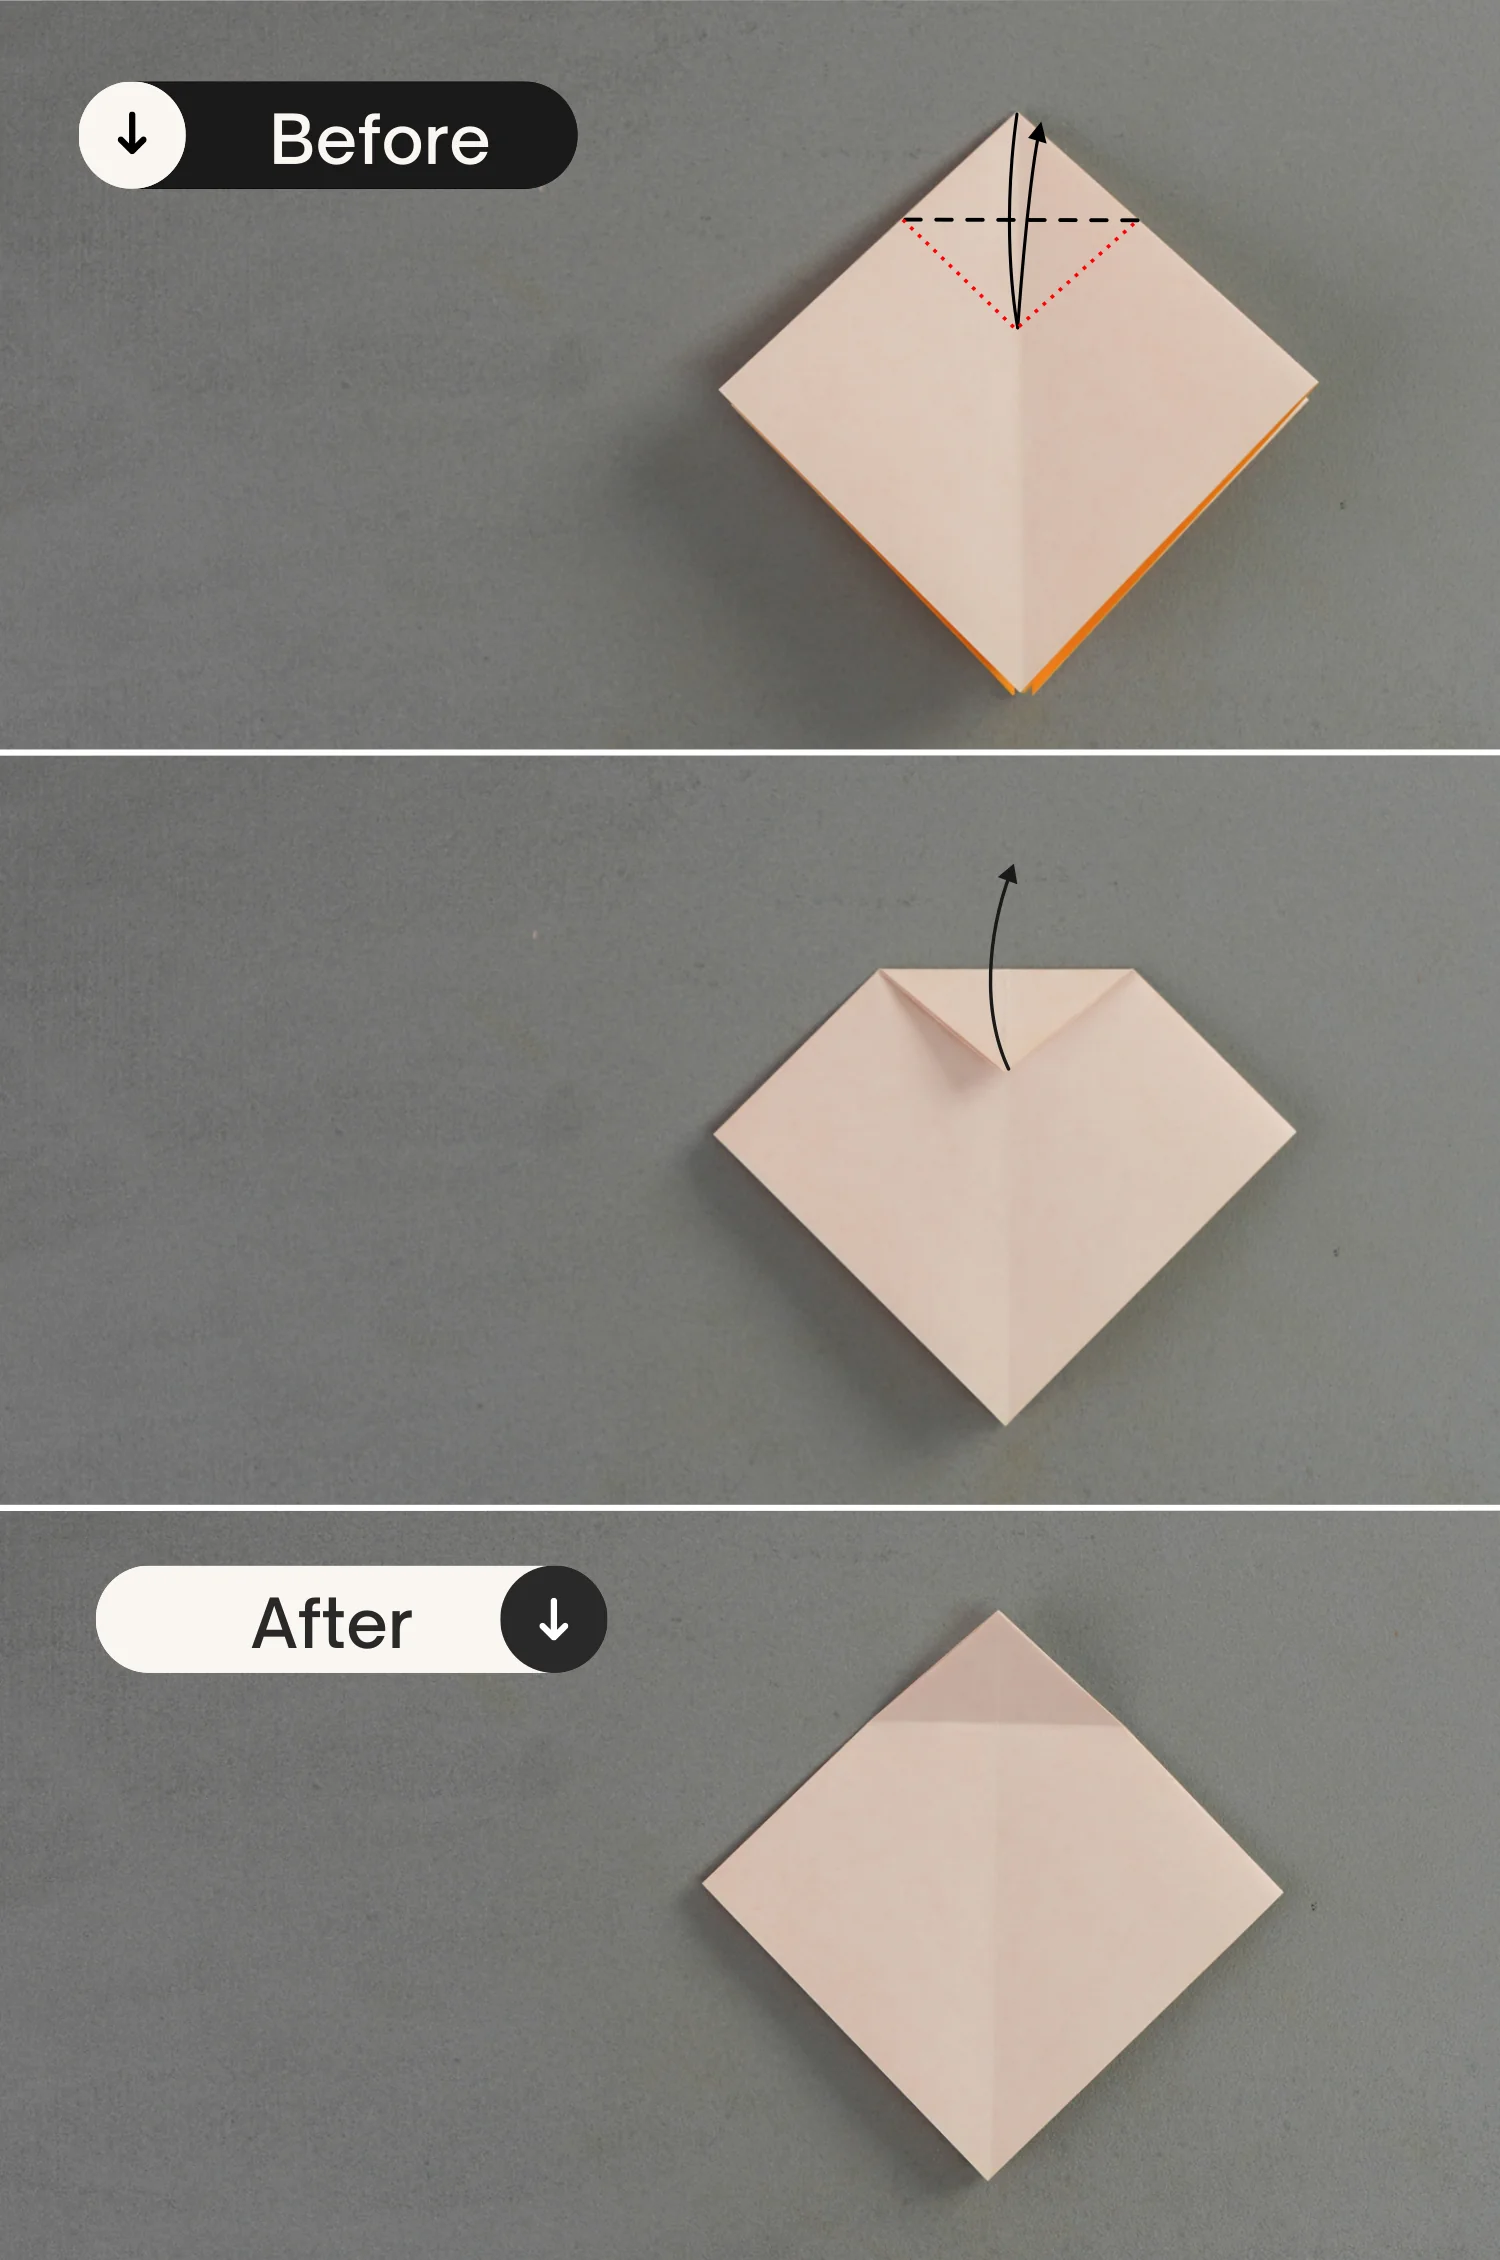
Step 8
Open the paper from the bottom, you will find a square formed by creases in the center, use your fingers to press the four creases and transfer them into mountain folds.
Inside the square, there are two diagonal creases. Press down the center of the square and at the same time sharpen those diagonal creases to valley folds. Finally, fold the paper completely flat.
Step 9
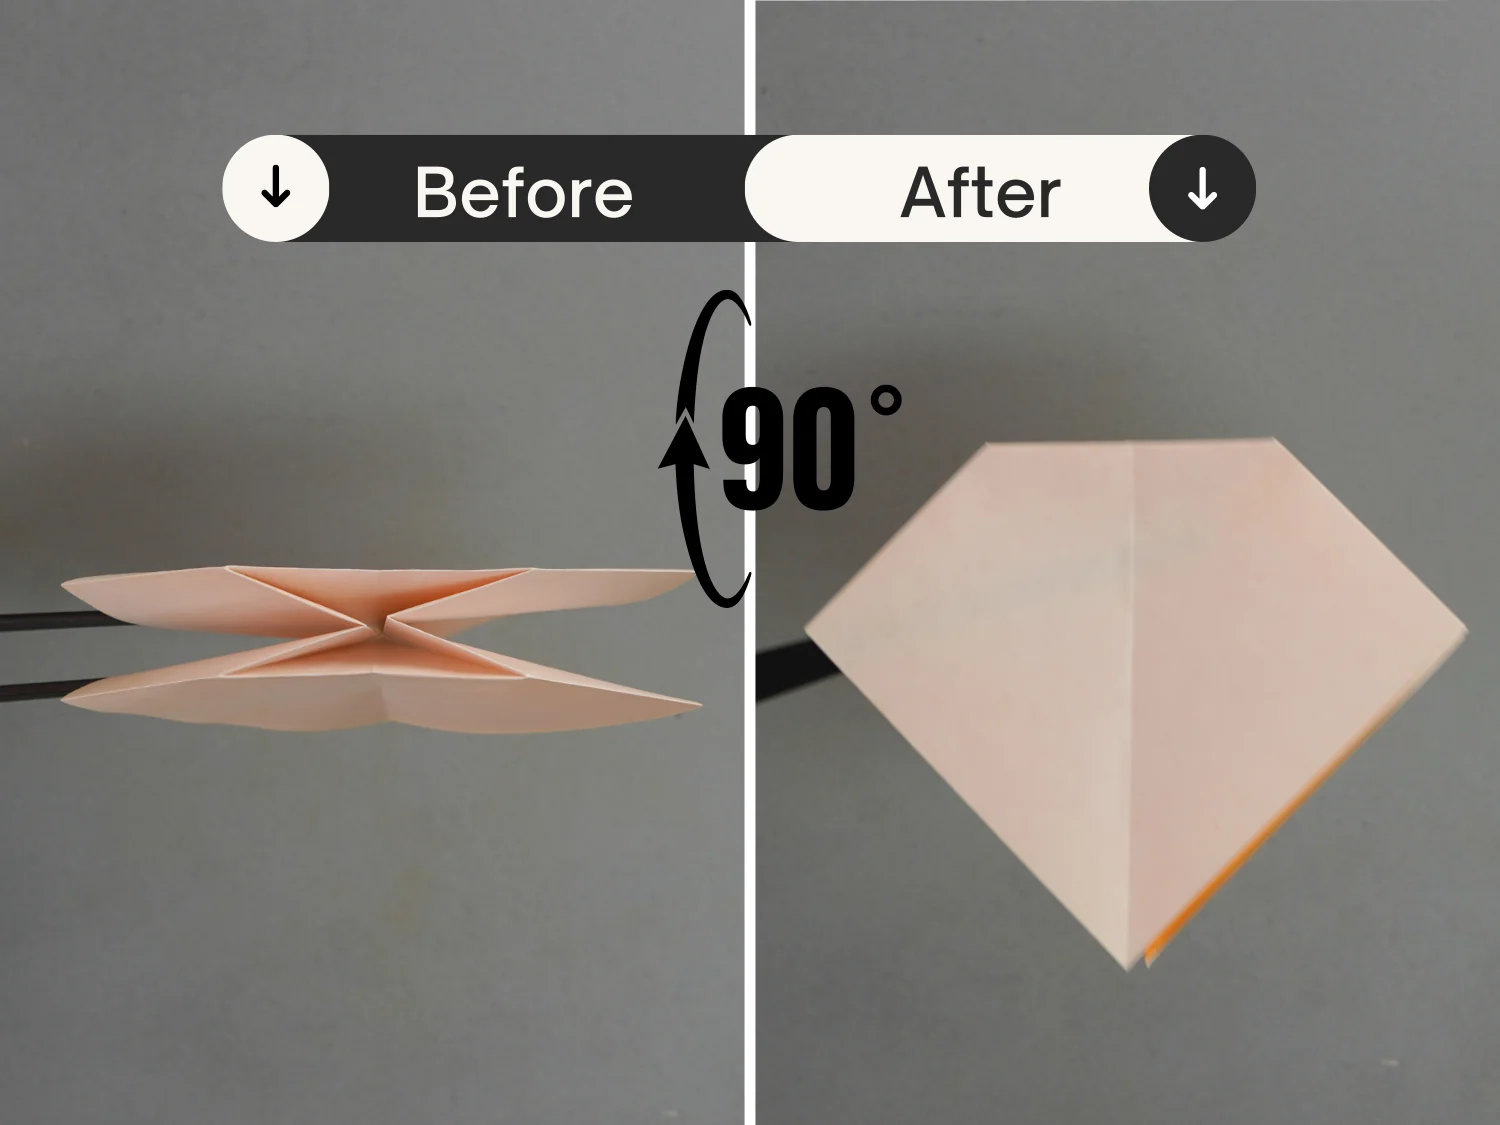
Rotate it 90 degrees from the back to the front to lay it flat.
Step 10
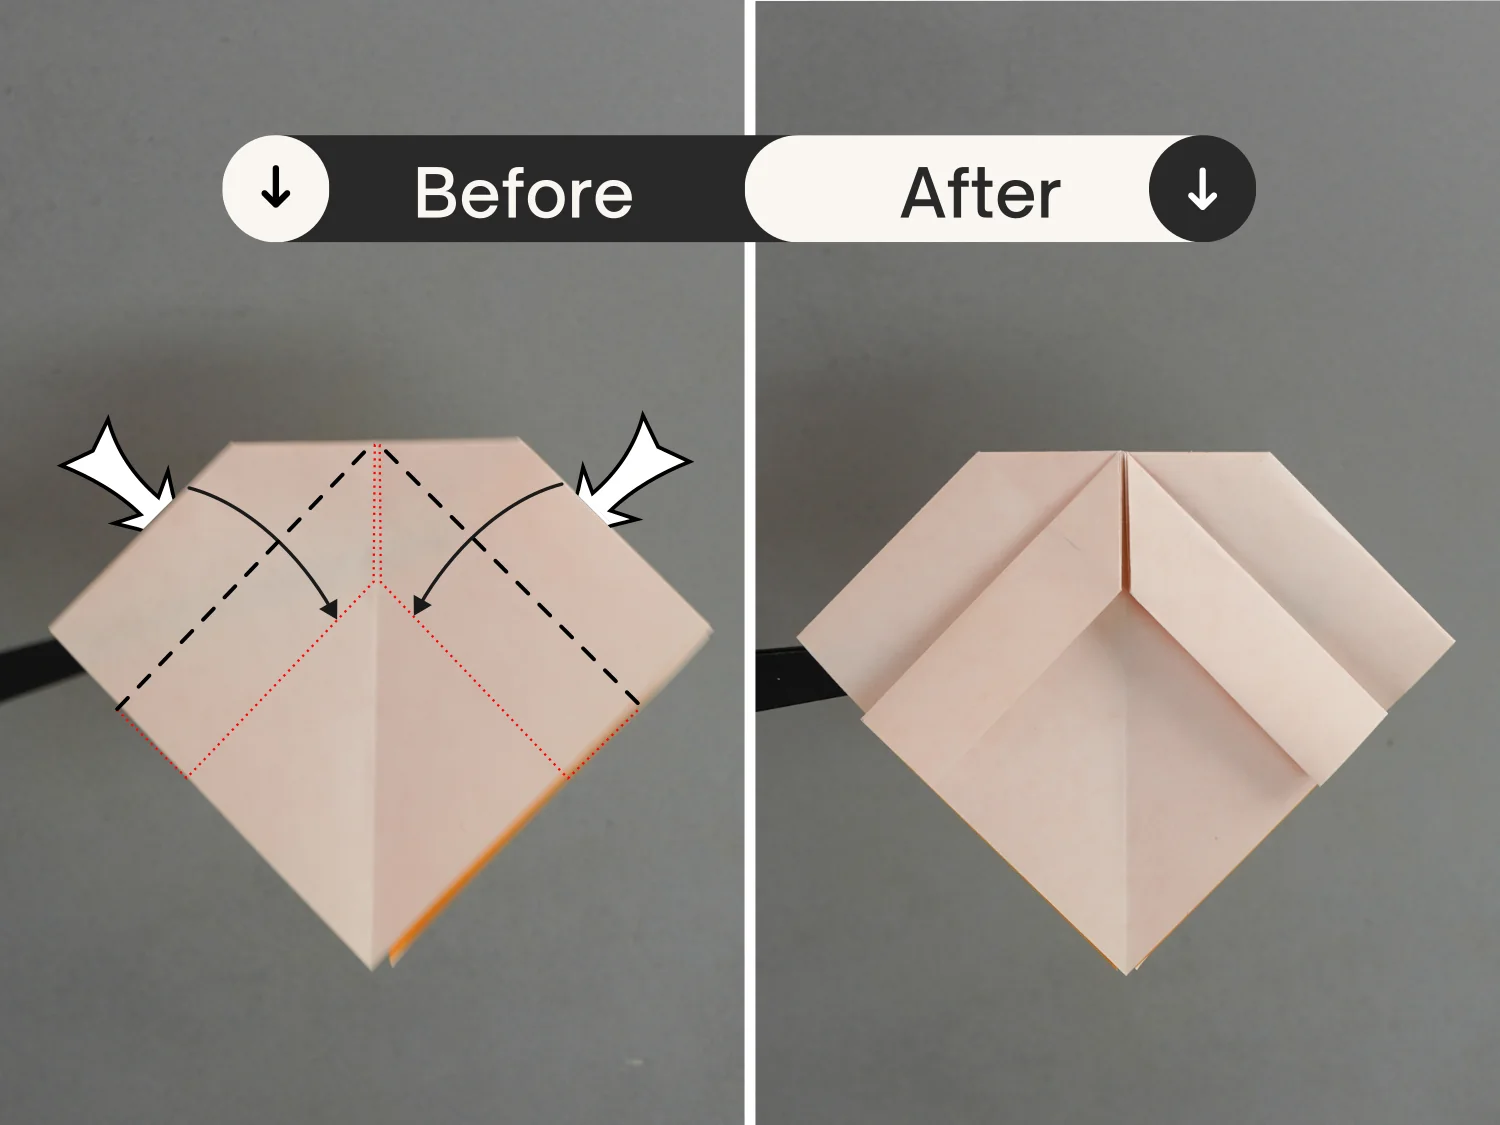
Fold down the left and right sections of the top edge to align with the middle vertical crease.
Step 11
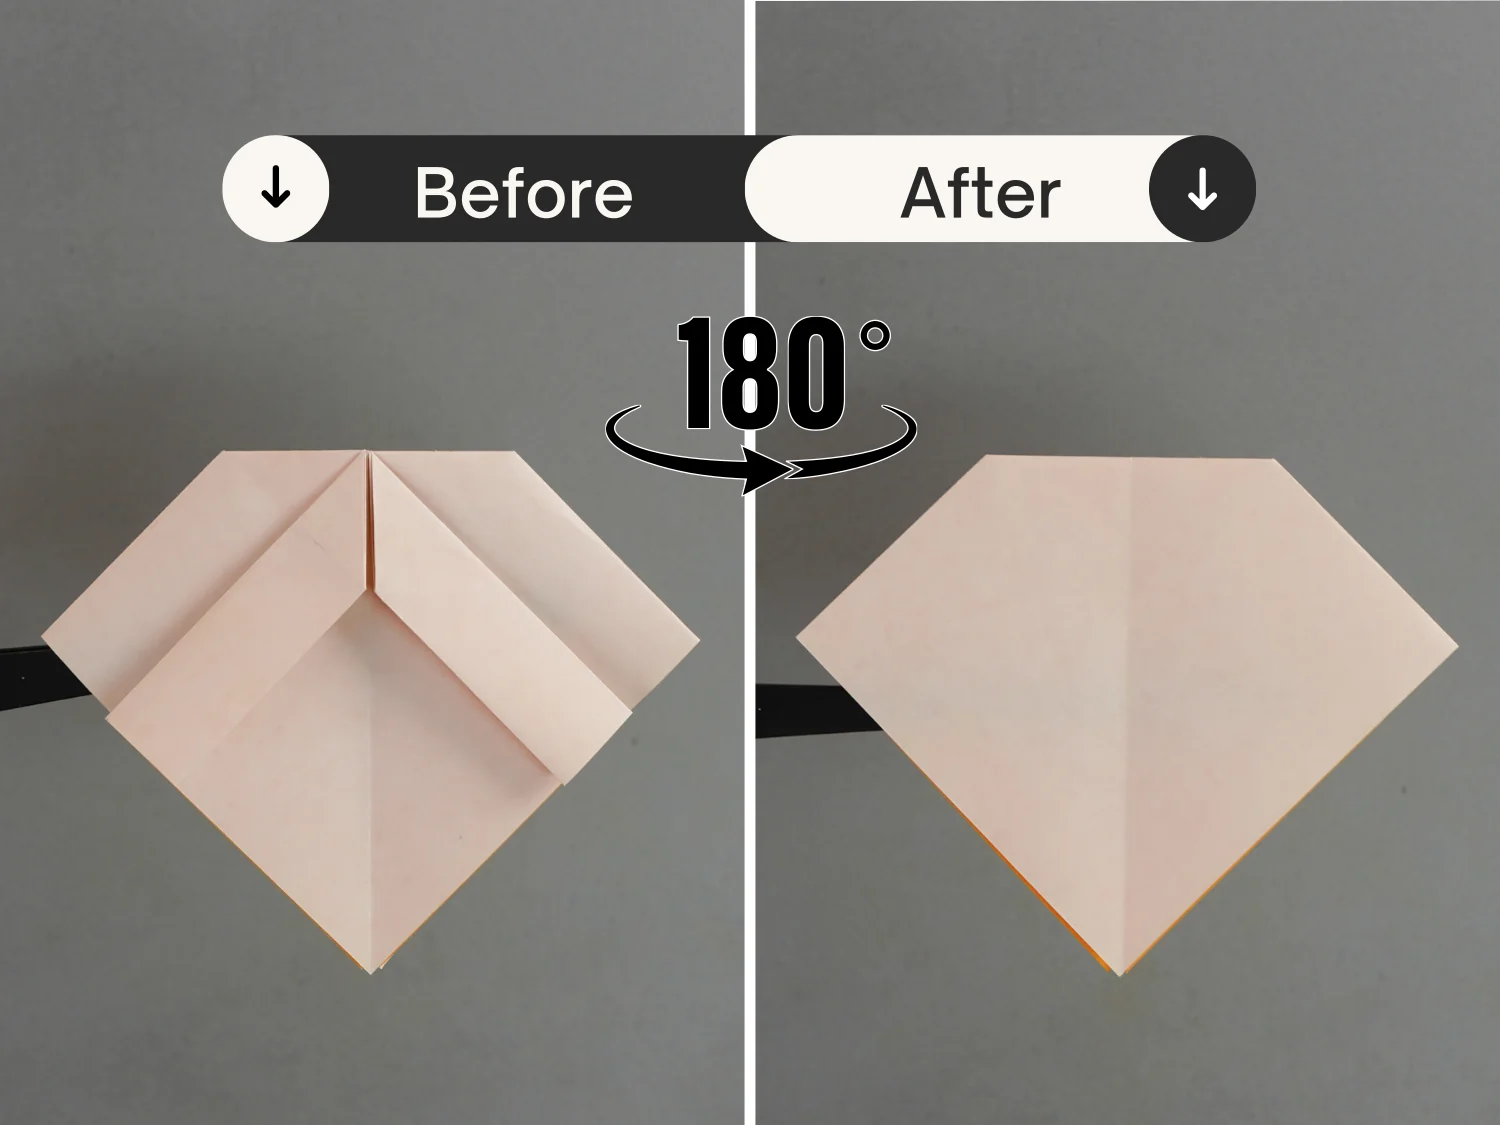
Rotate it 180 degrees from the left to the right to flip it over.
Step 12
Repeat step 10.
Step 13
Rotate it 90 degrees from the back to the front to make the bottom face up, then unfold this paper as shown in the third picture.
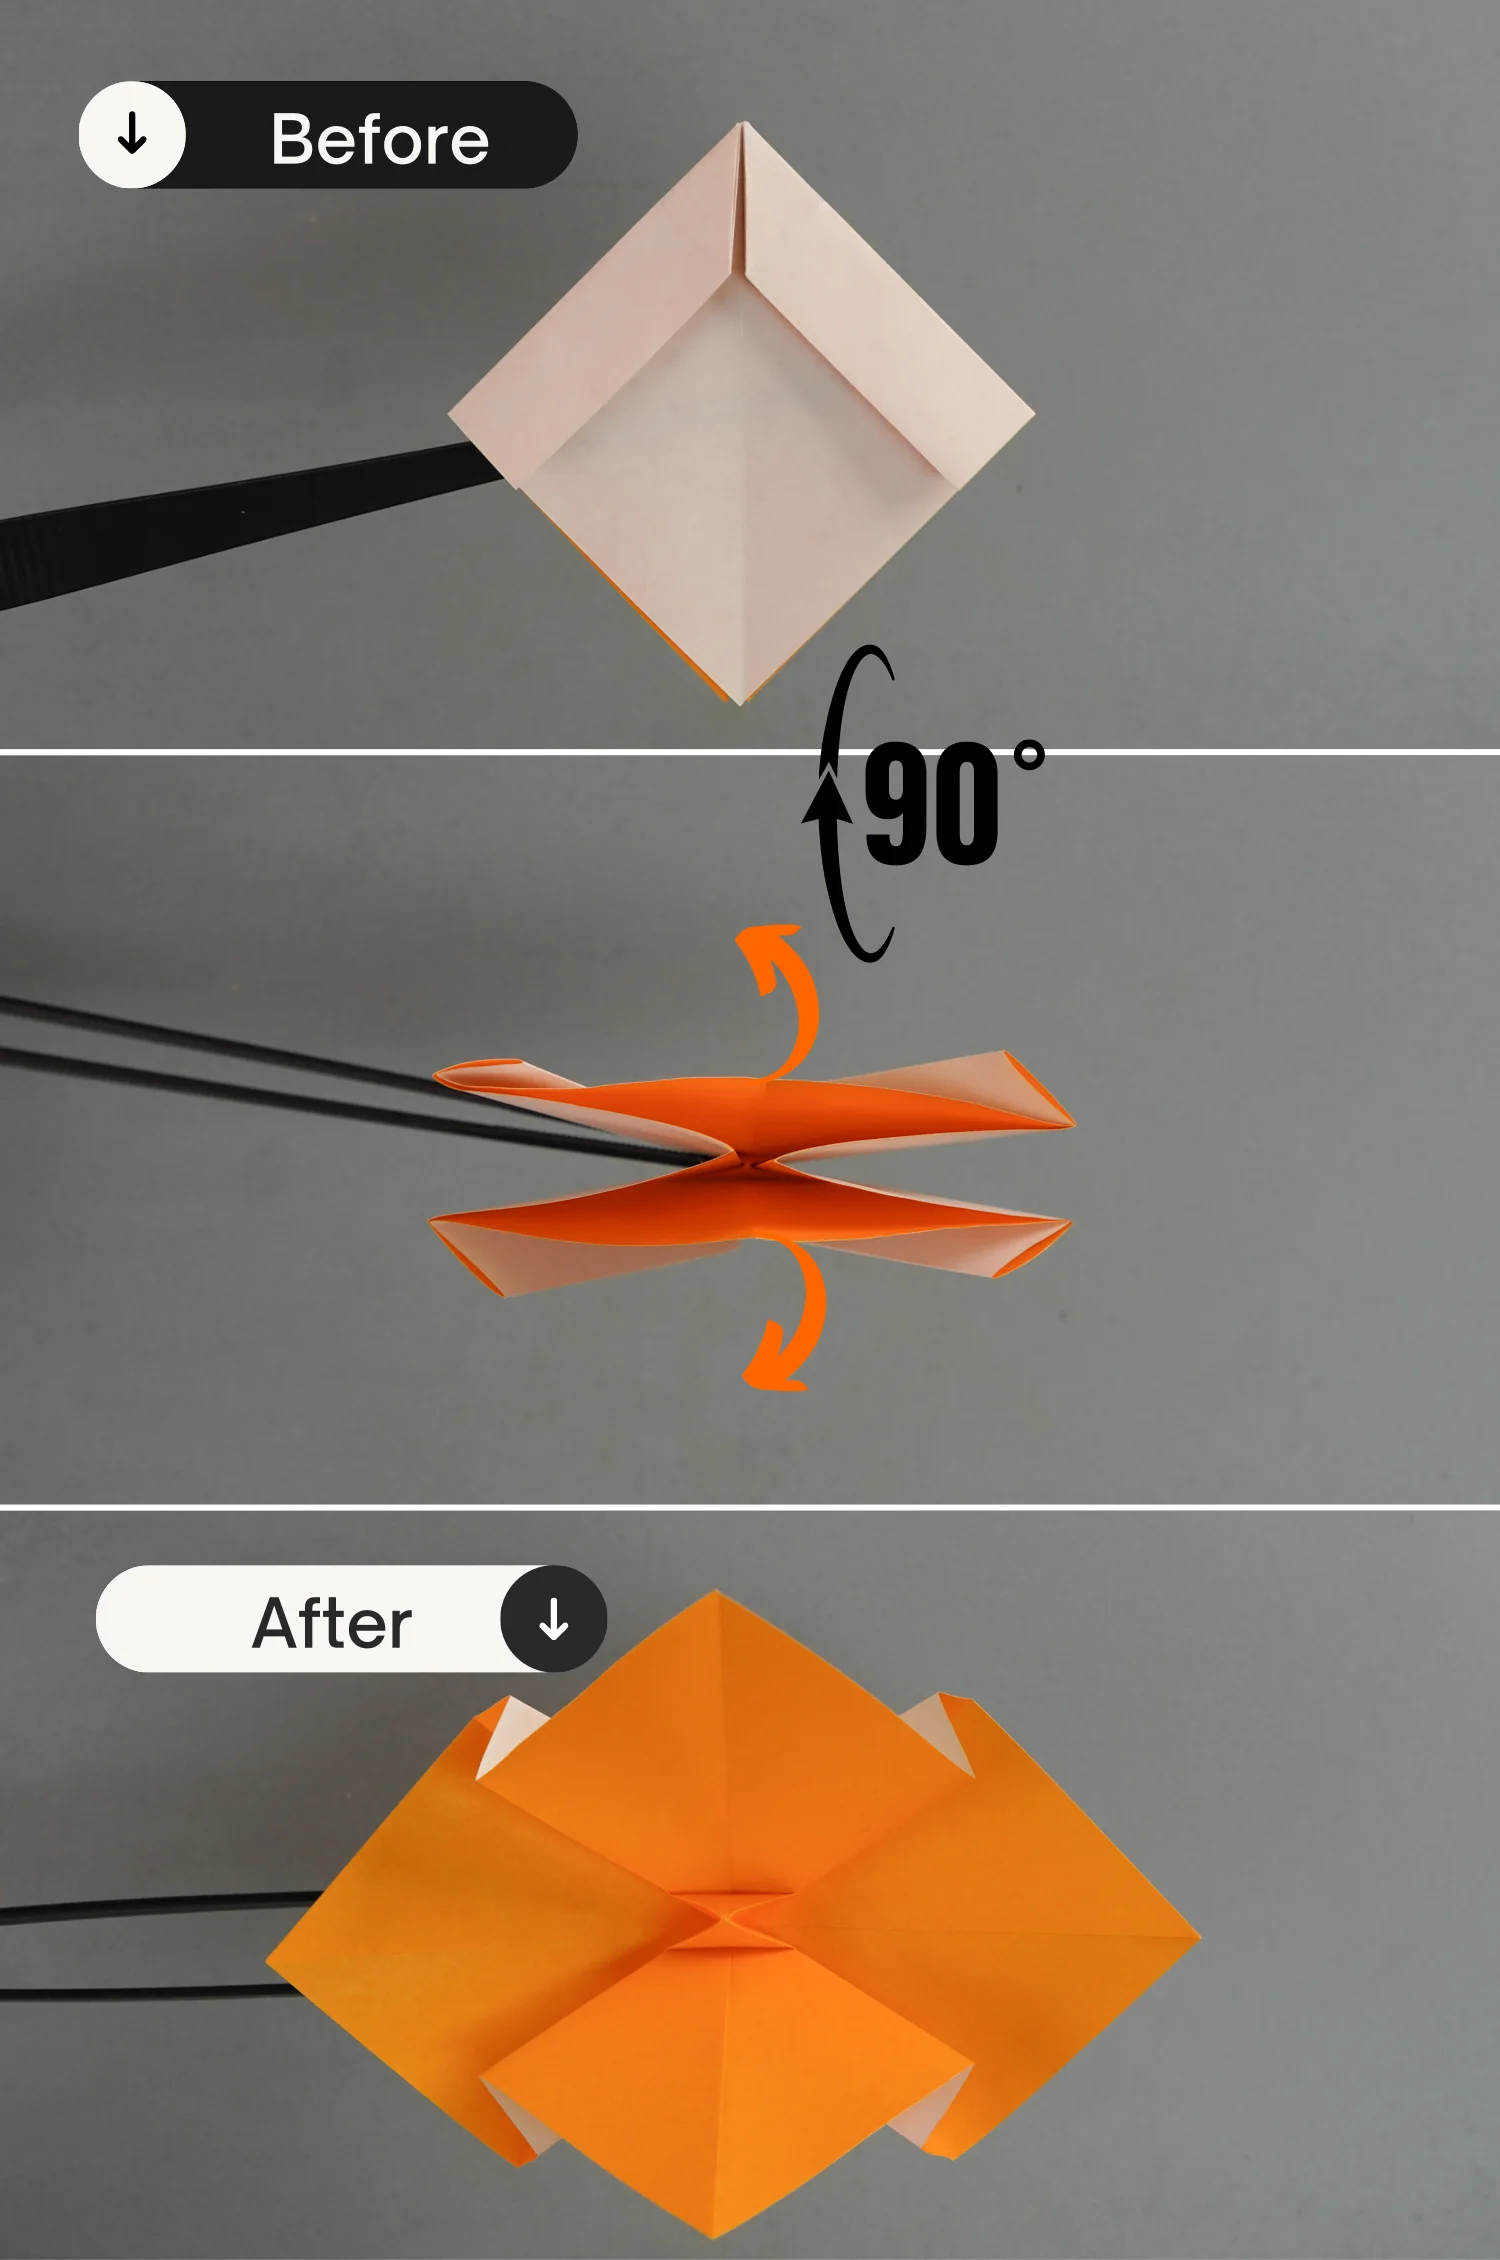
Step 14
Pull the top and bottom layers toward both sides, pressing down the center part to create a small square.
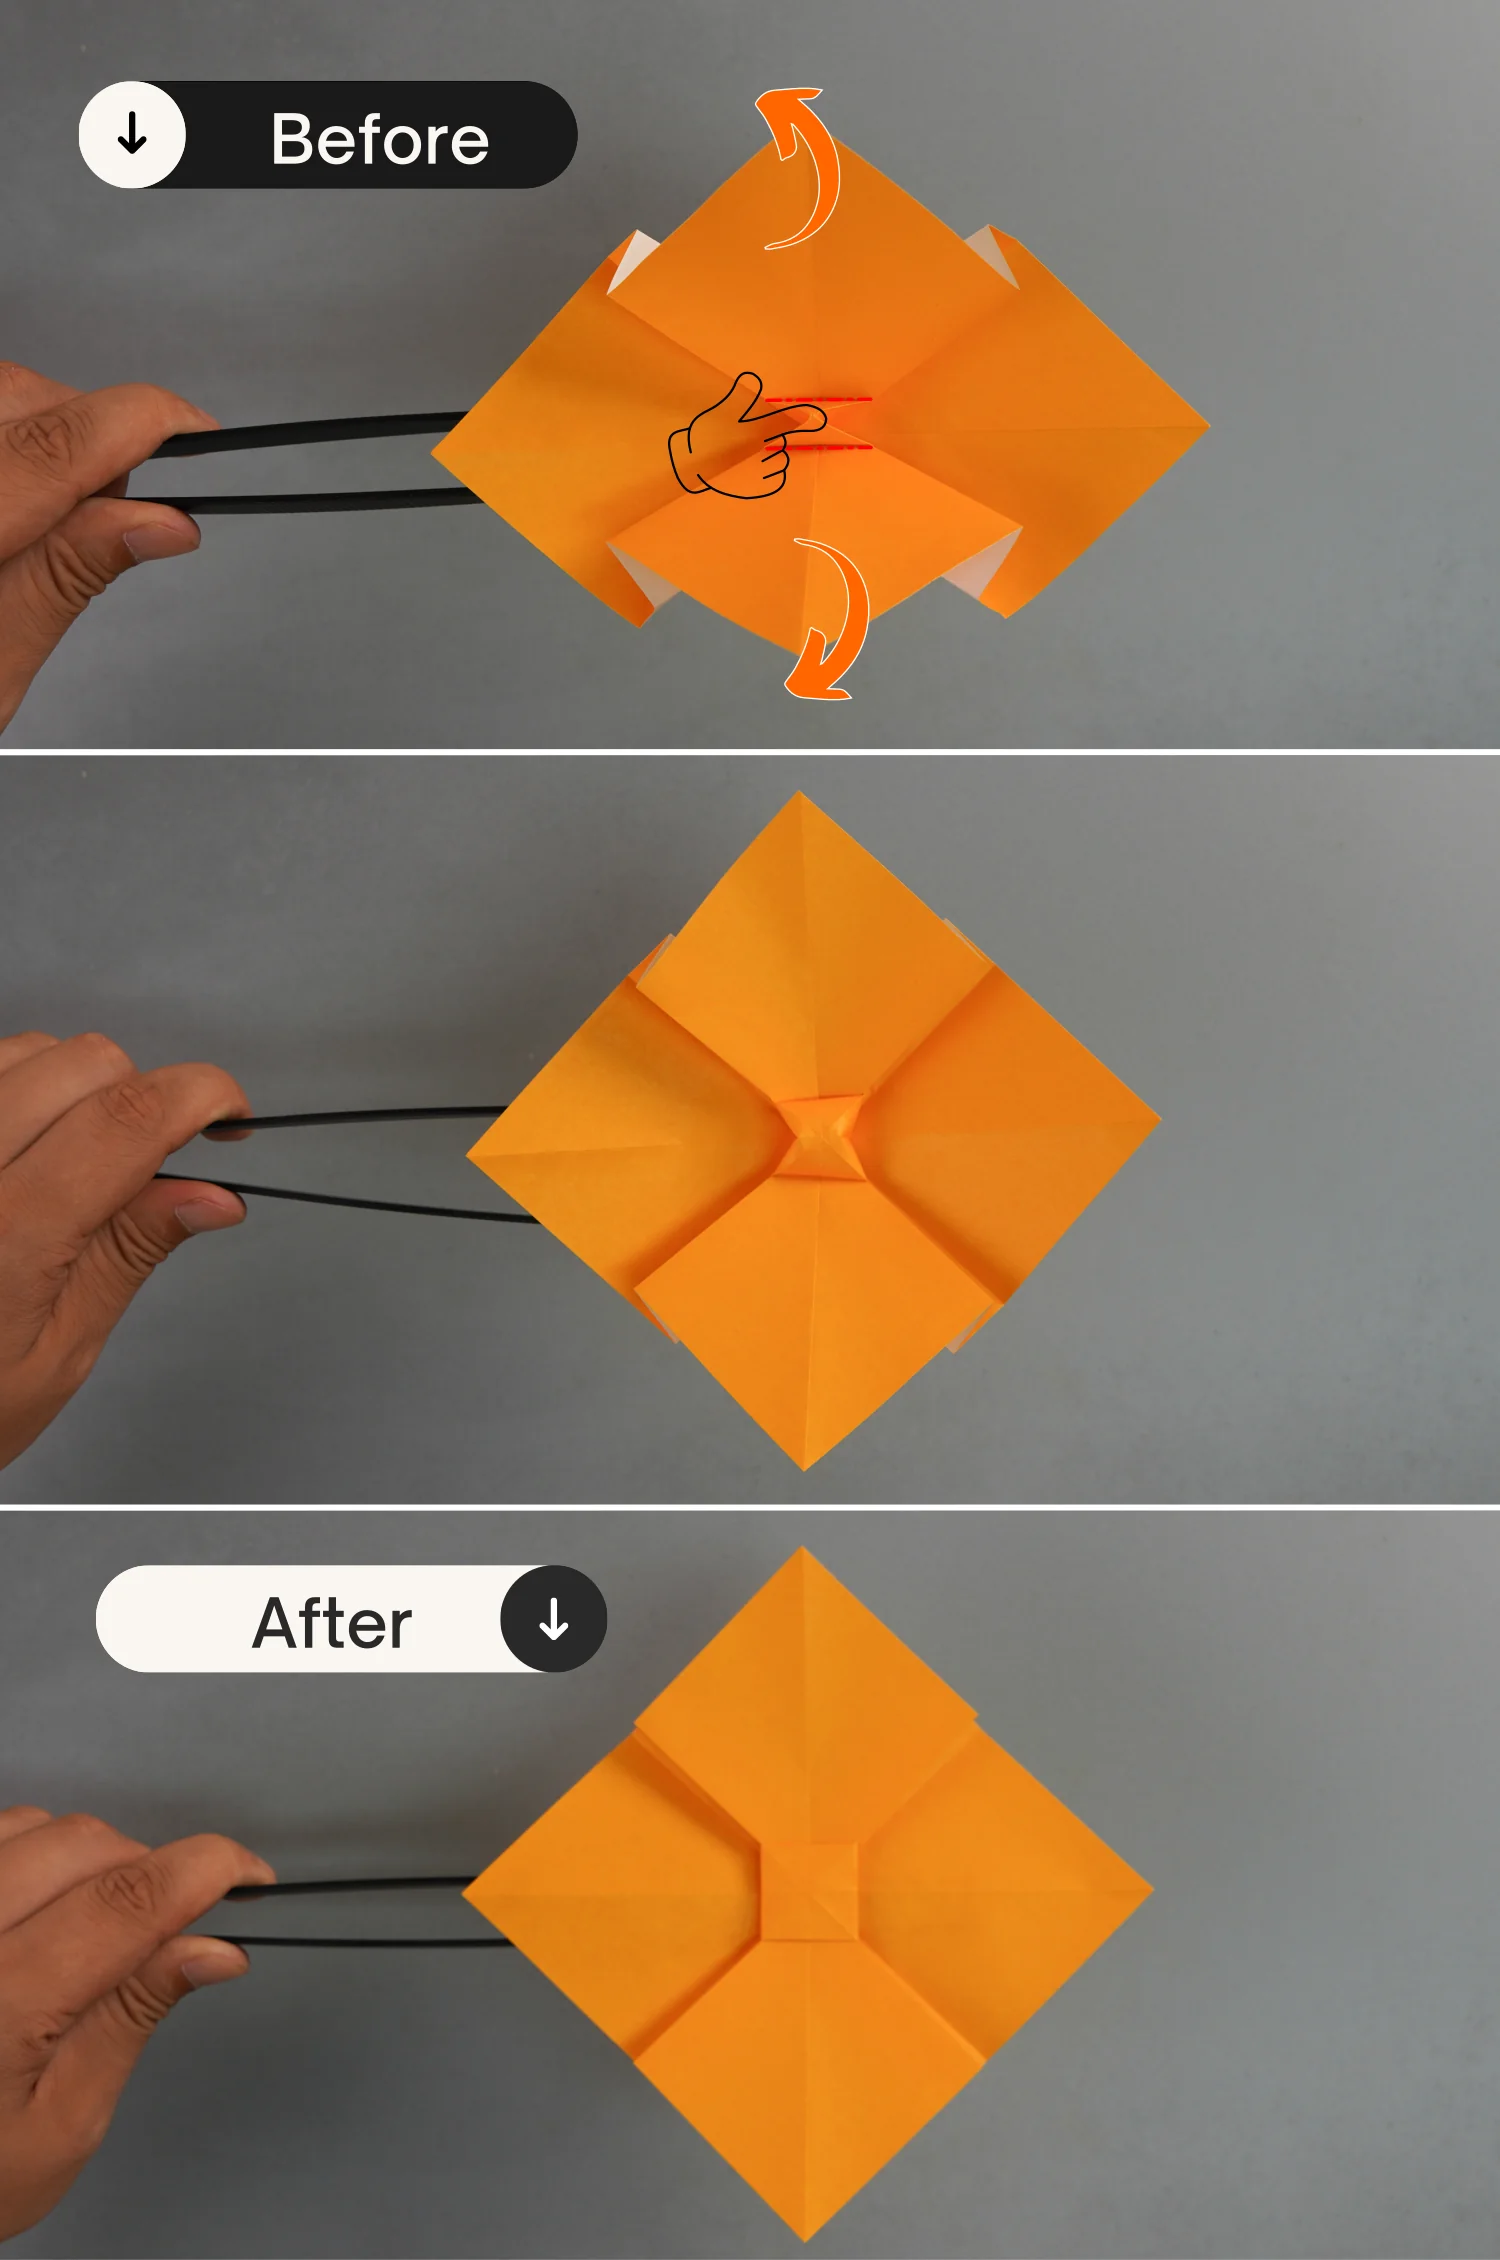
Step 15
Rotate the paper 180 degrees from the left to the right to flip it over.
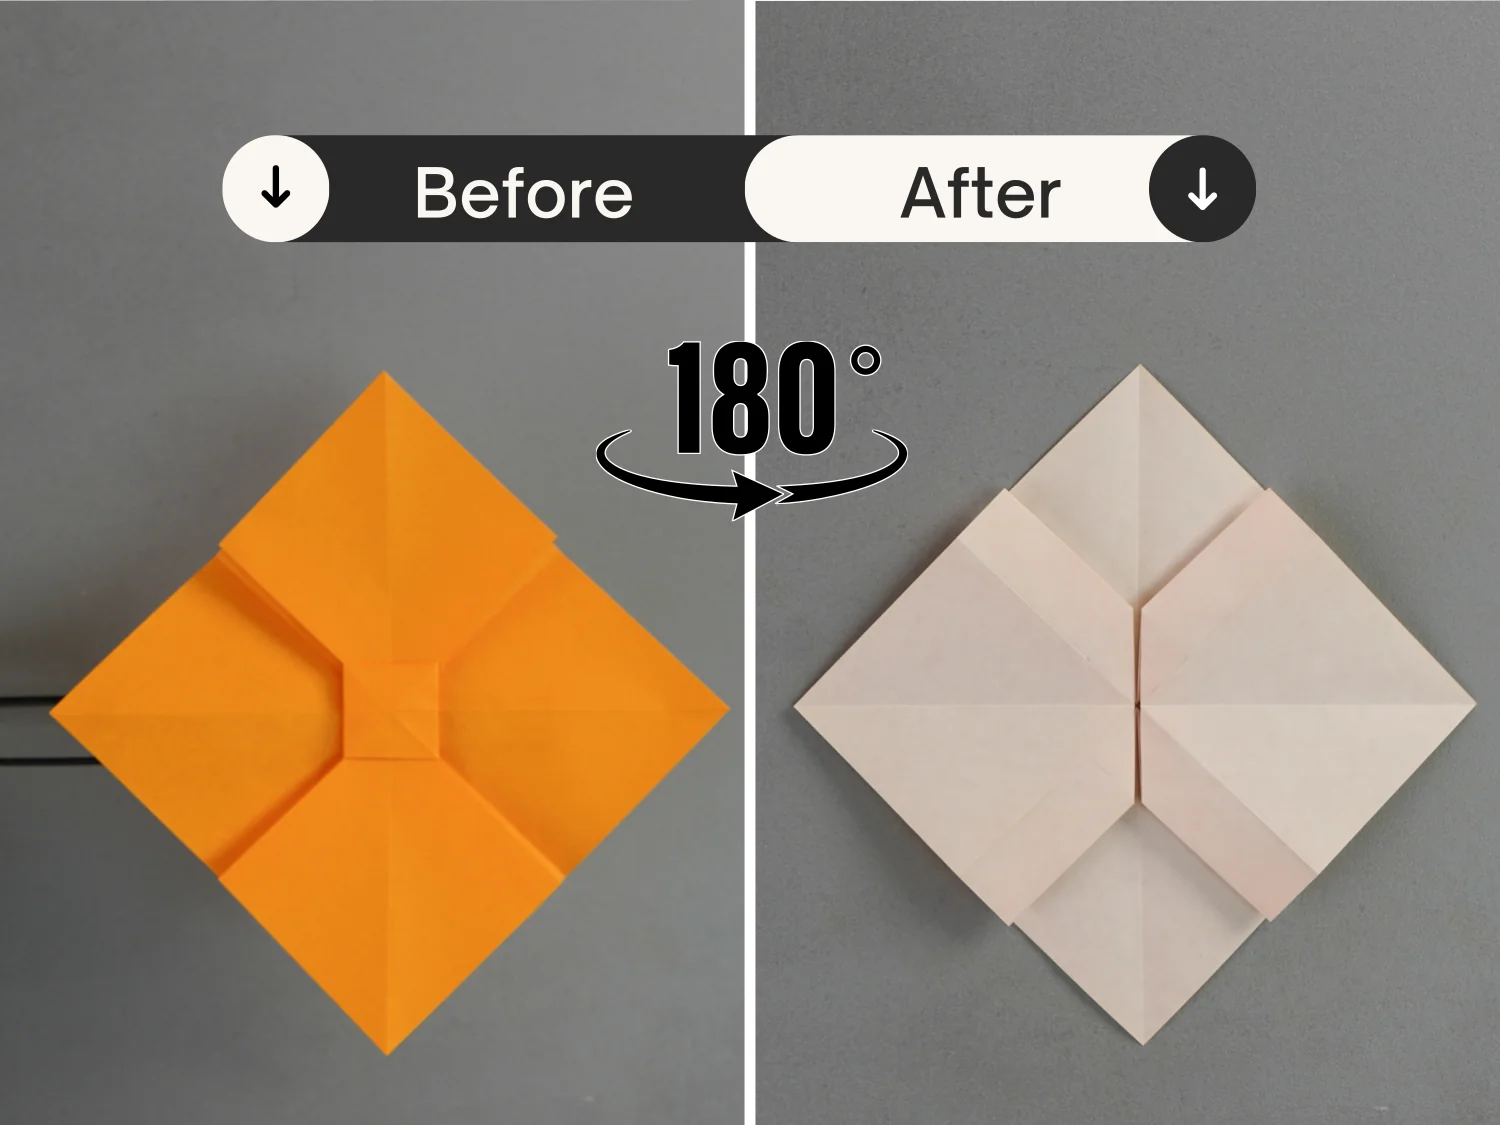
Step 16
Lift these four layers along the creases indicated by the black dotted lines to make them stand.
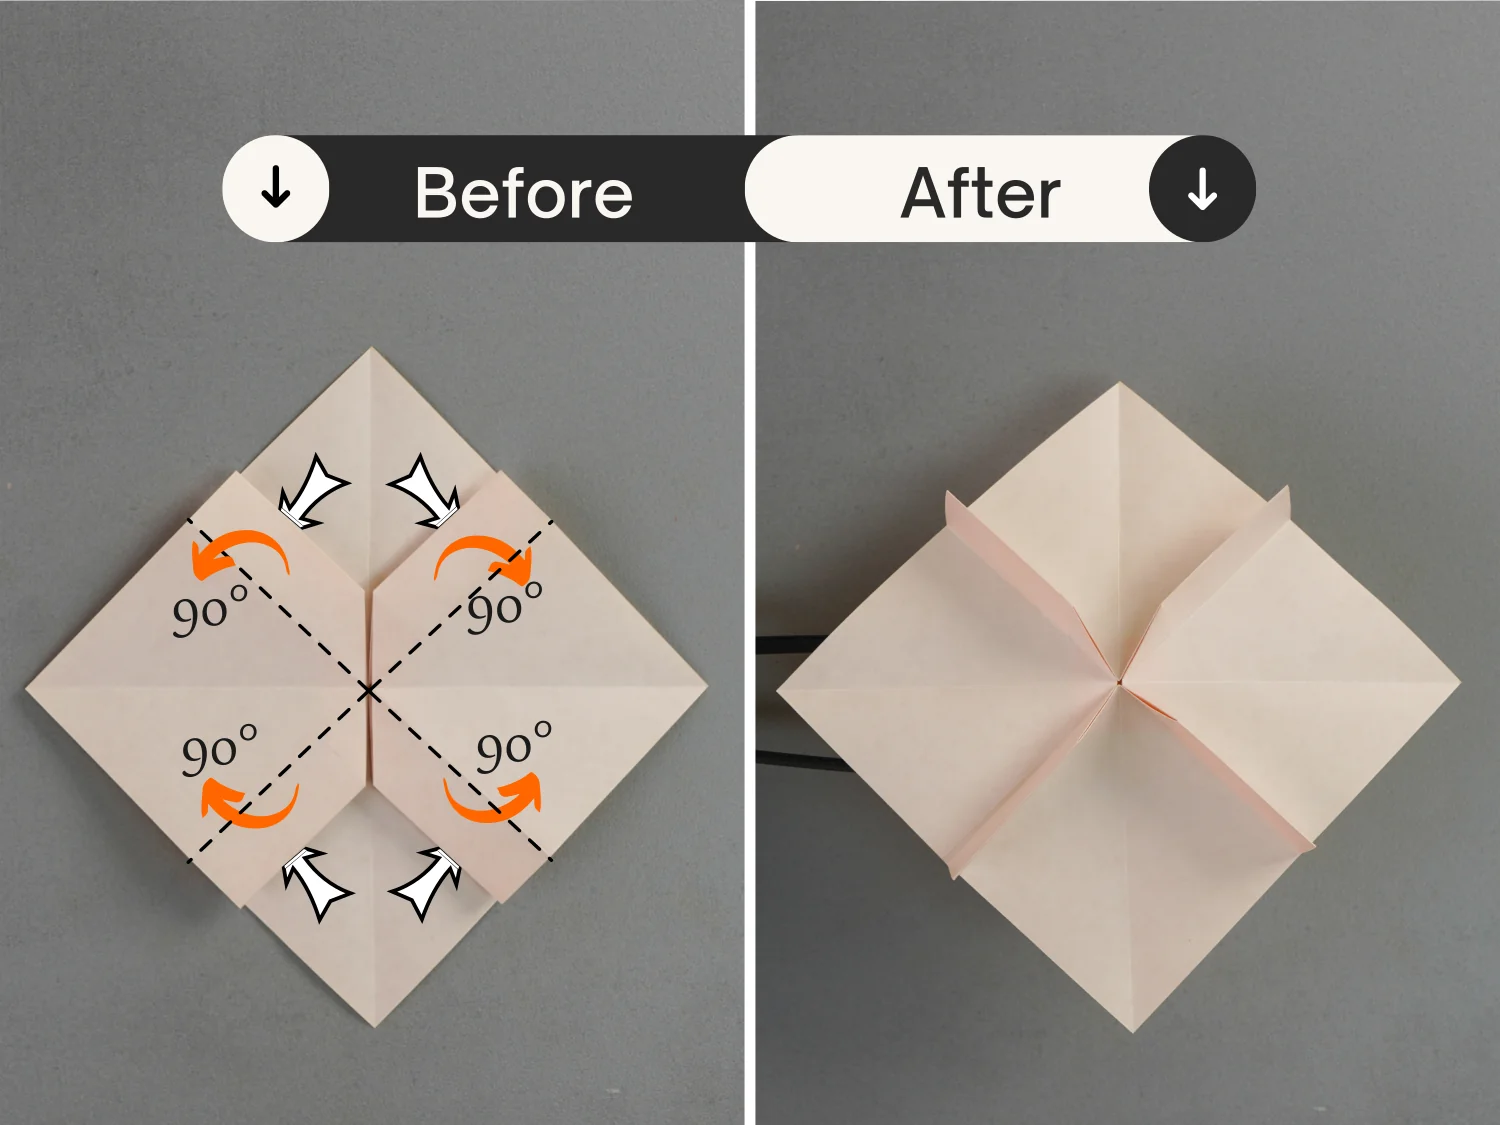
Step 17
Cut these four standing layers along their top edges.
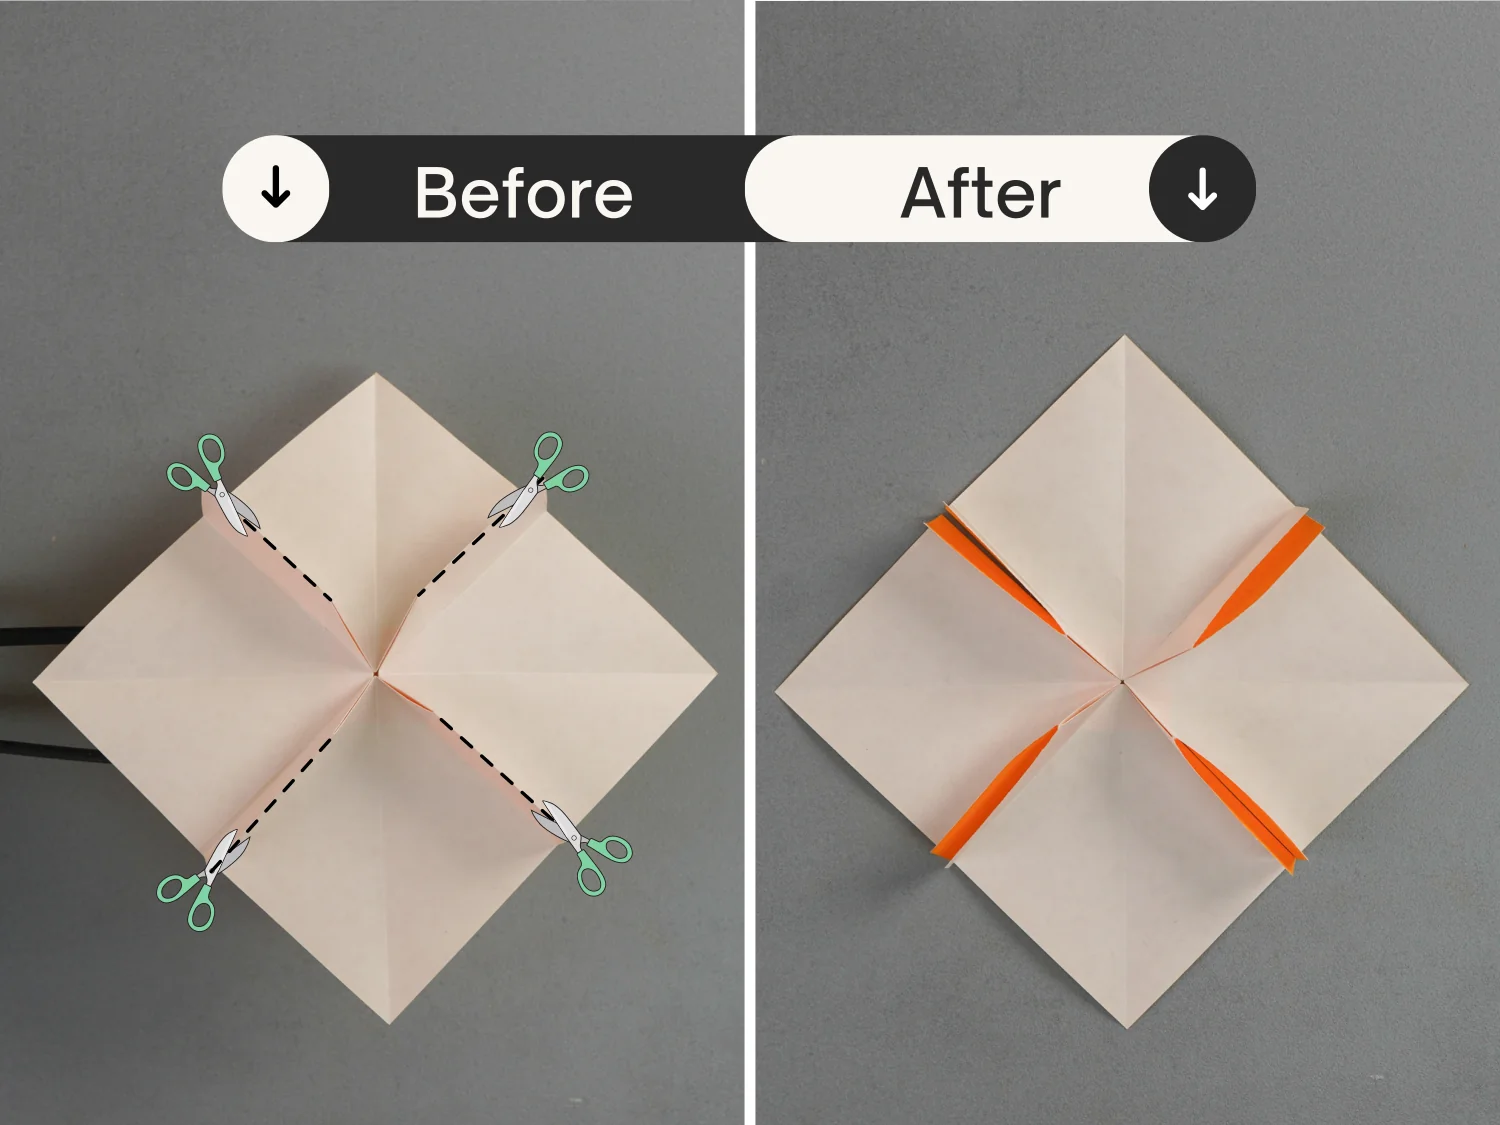
Step 18
Press down the top two layers upward, and the bottom two layers downward.
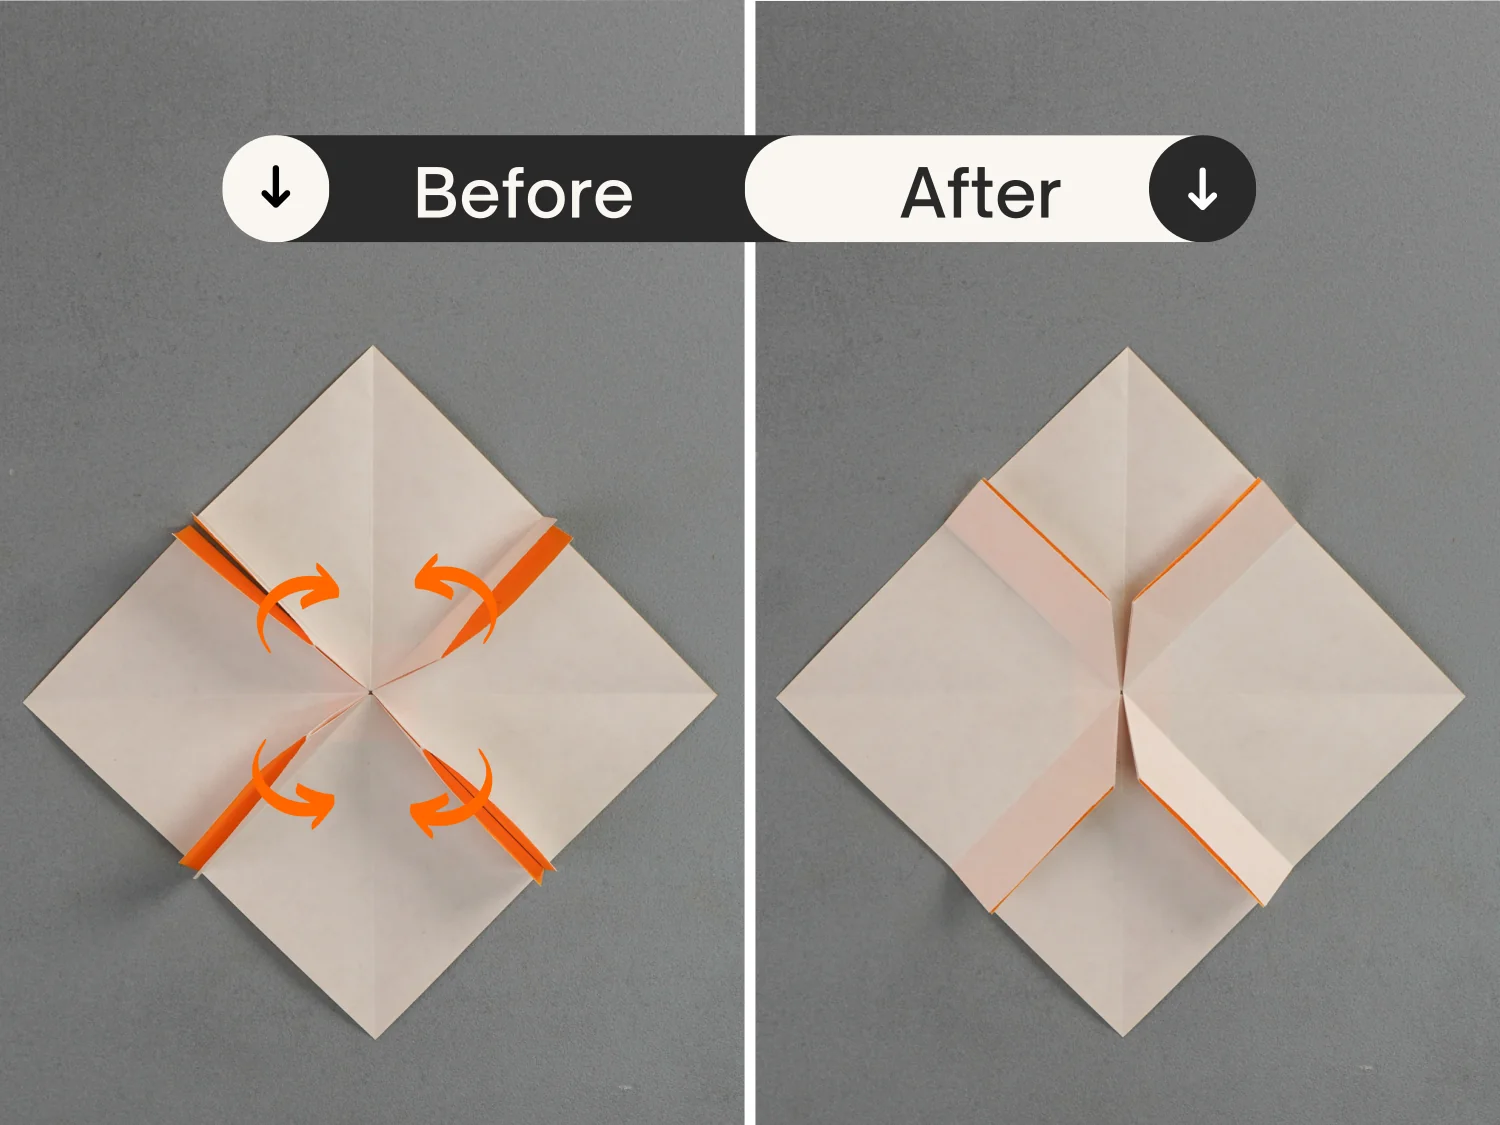
Step 19
Fold the right point of this paper to meet the left point.
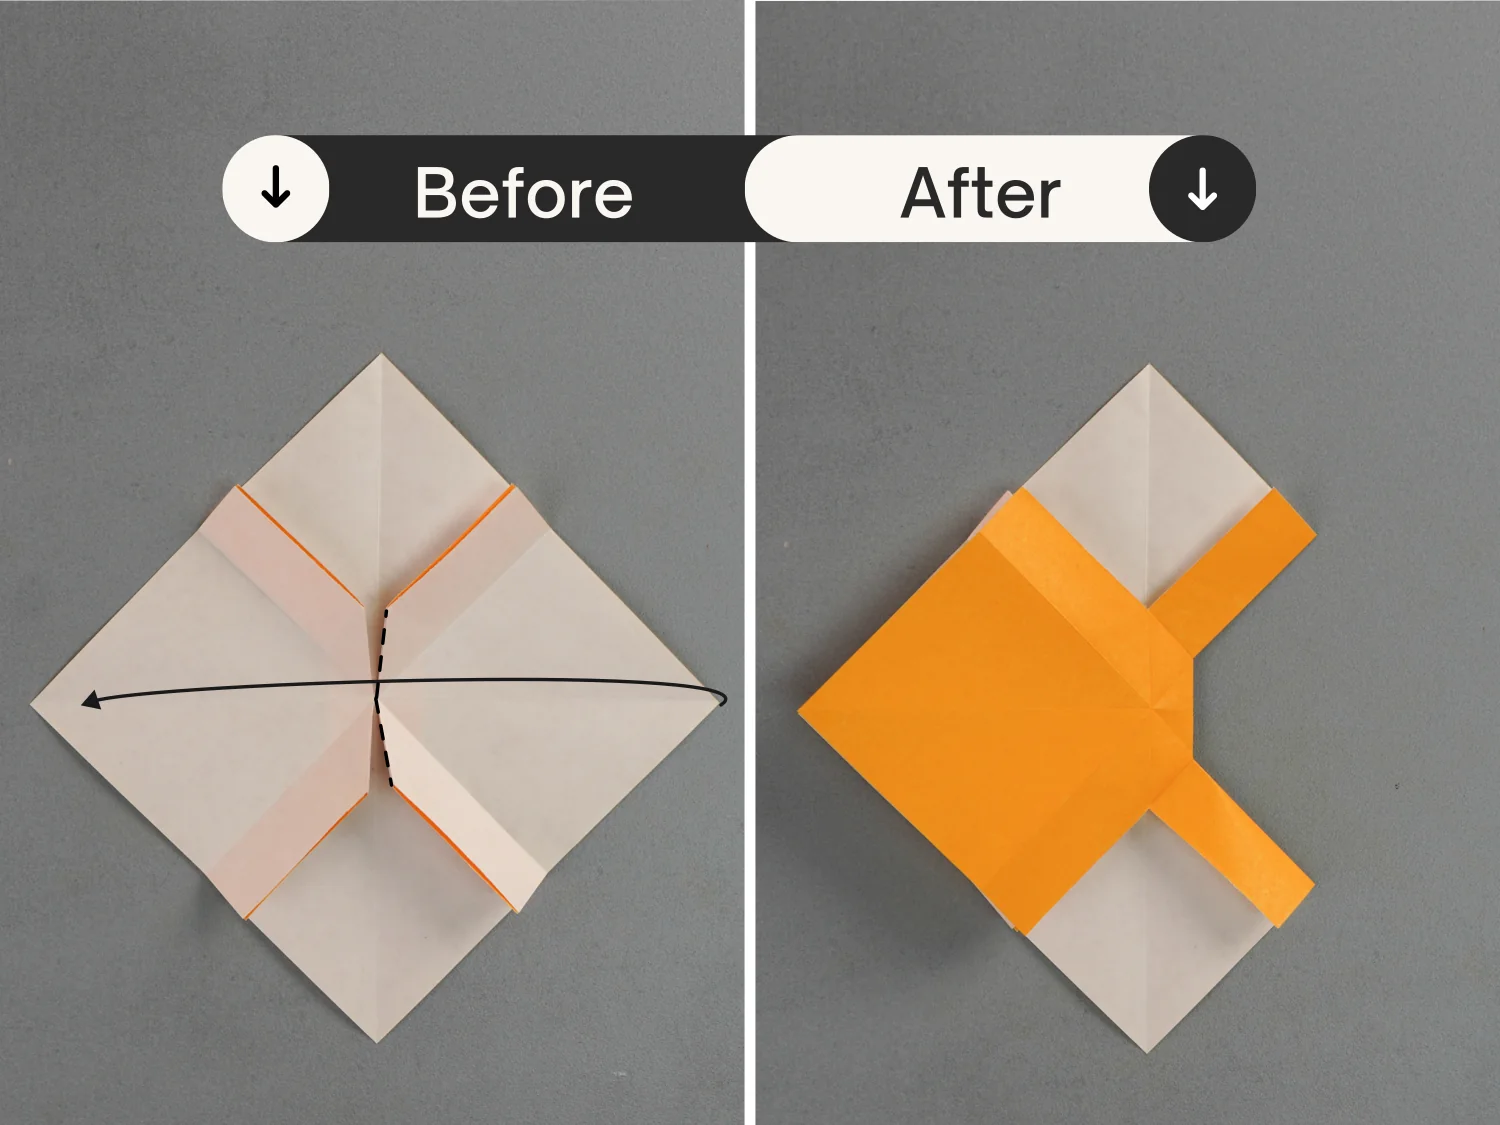
Step 20
Rotate it 90 degrees counterclockwise.
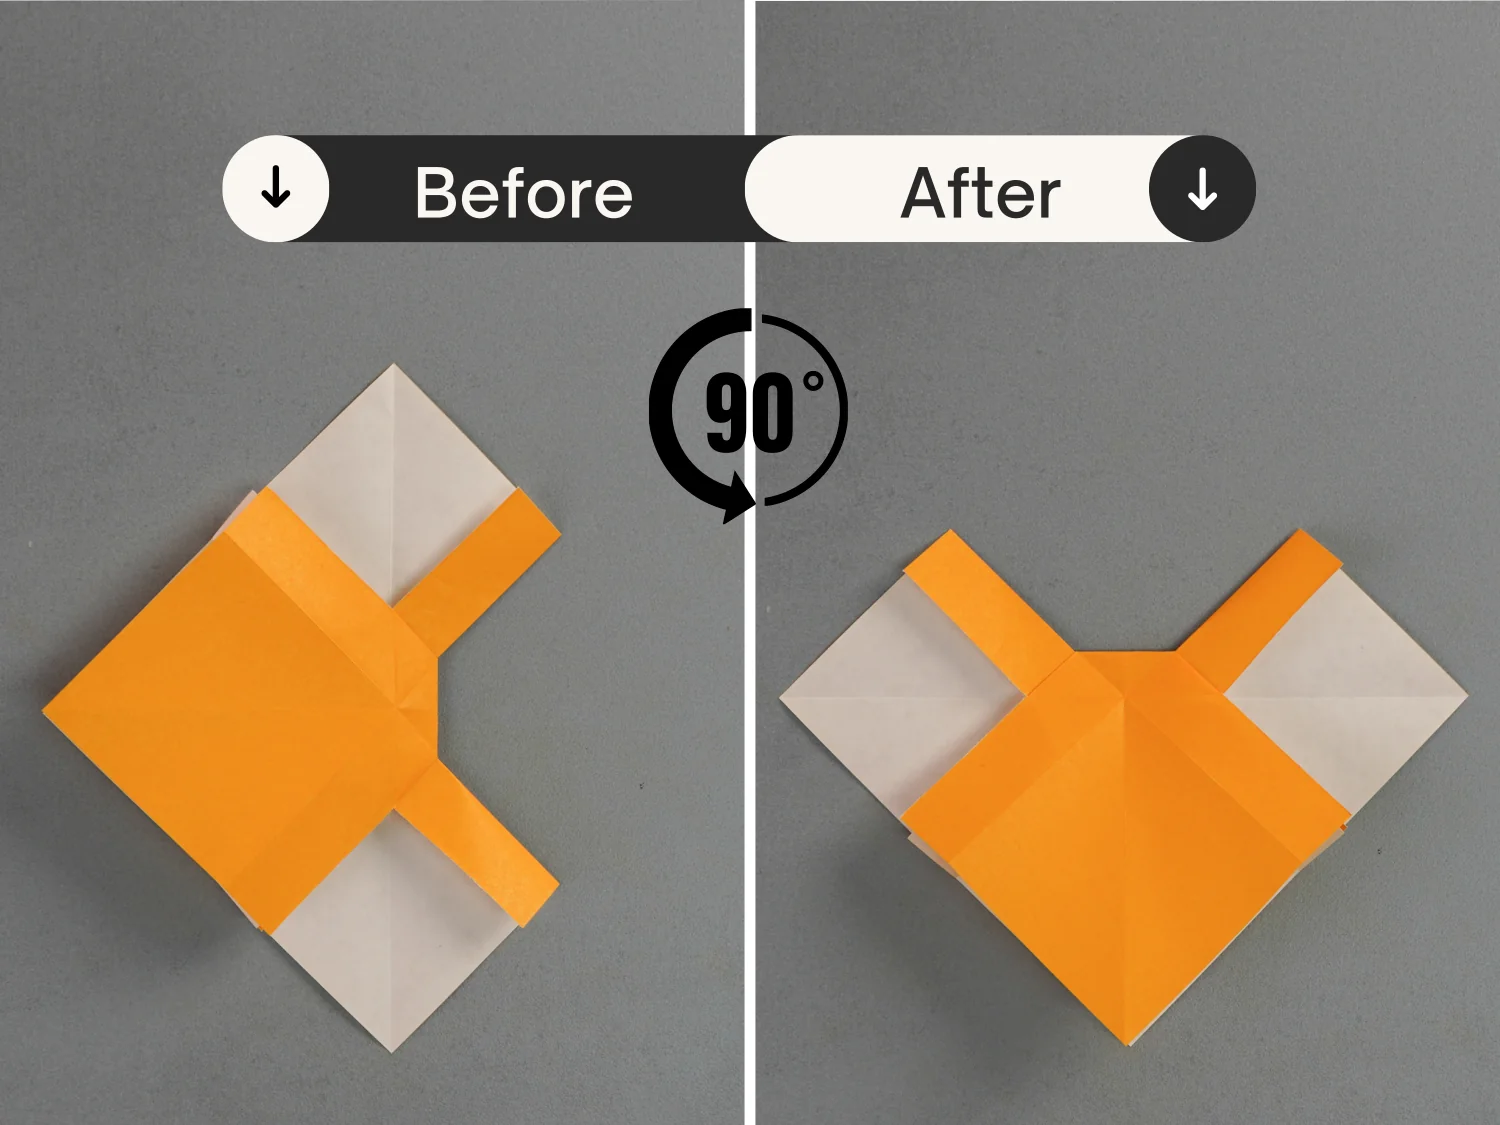
Step 21
Fold down the top left and right edges indicated by the red lines to align with the horizontal crease indicated by the black lines.
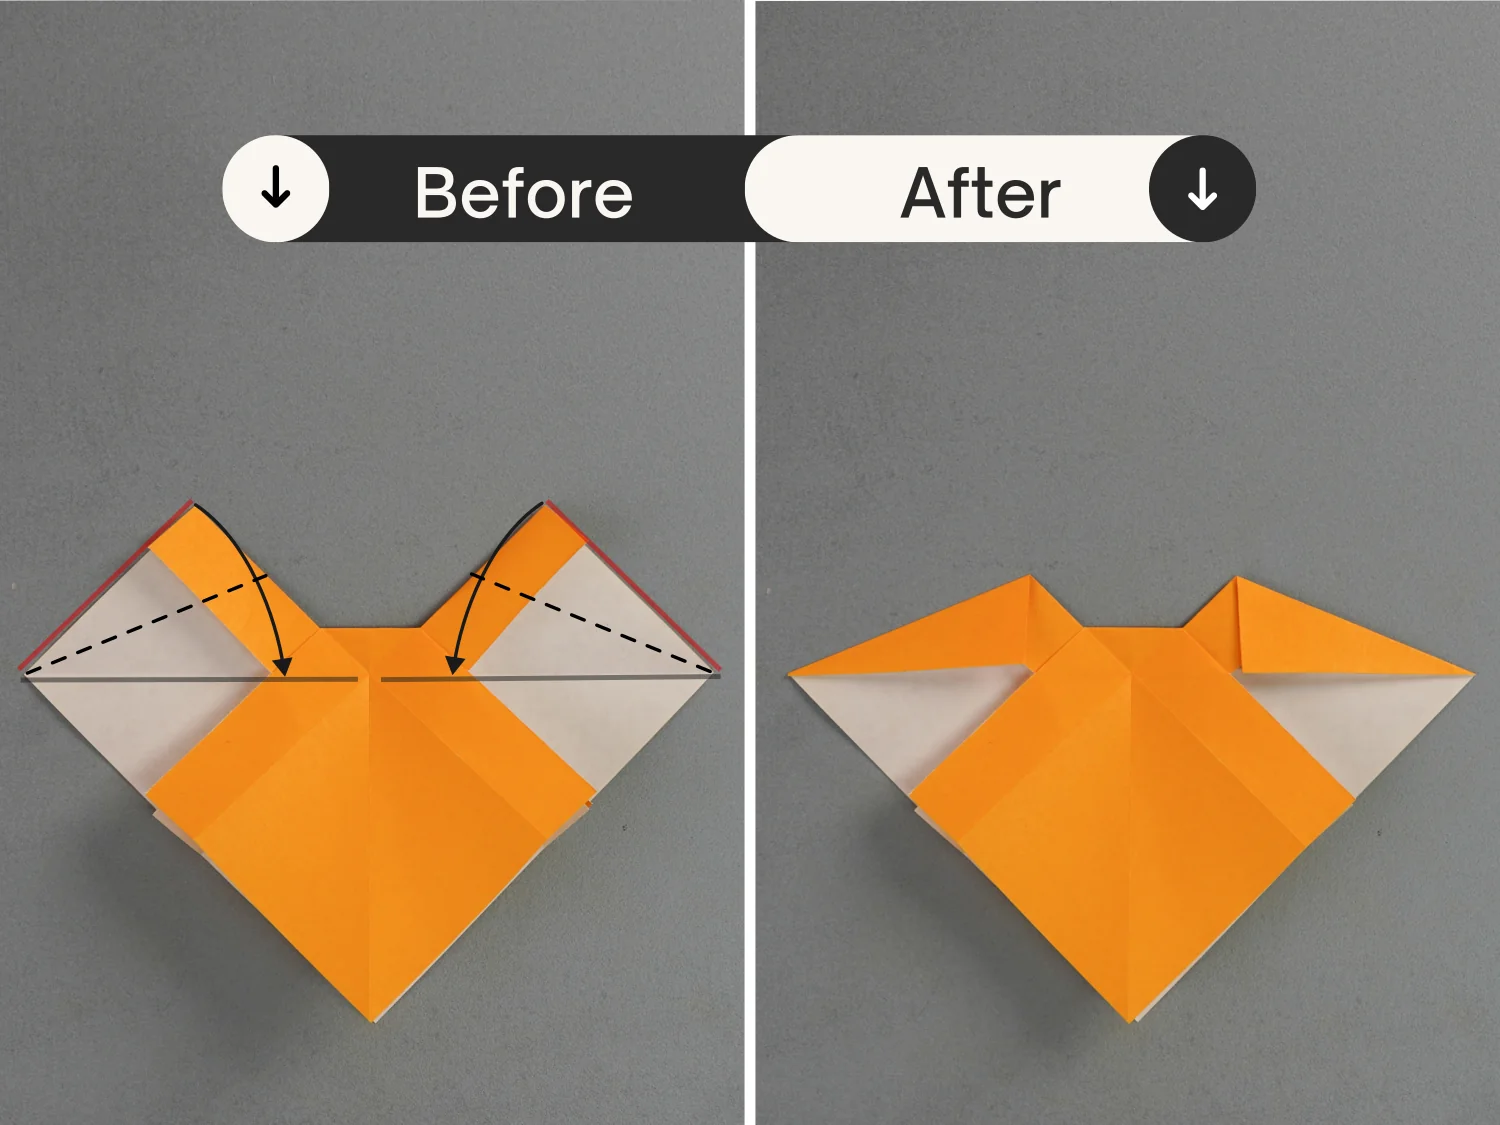
Step 22
Fold up the two bottom layers along the horizontal crease indicated by the dotted line.
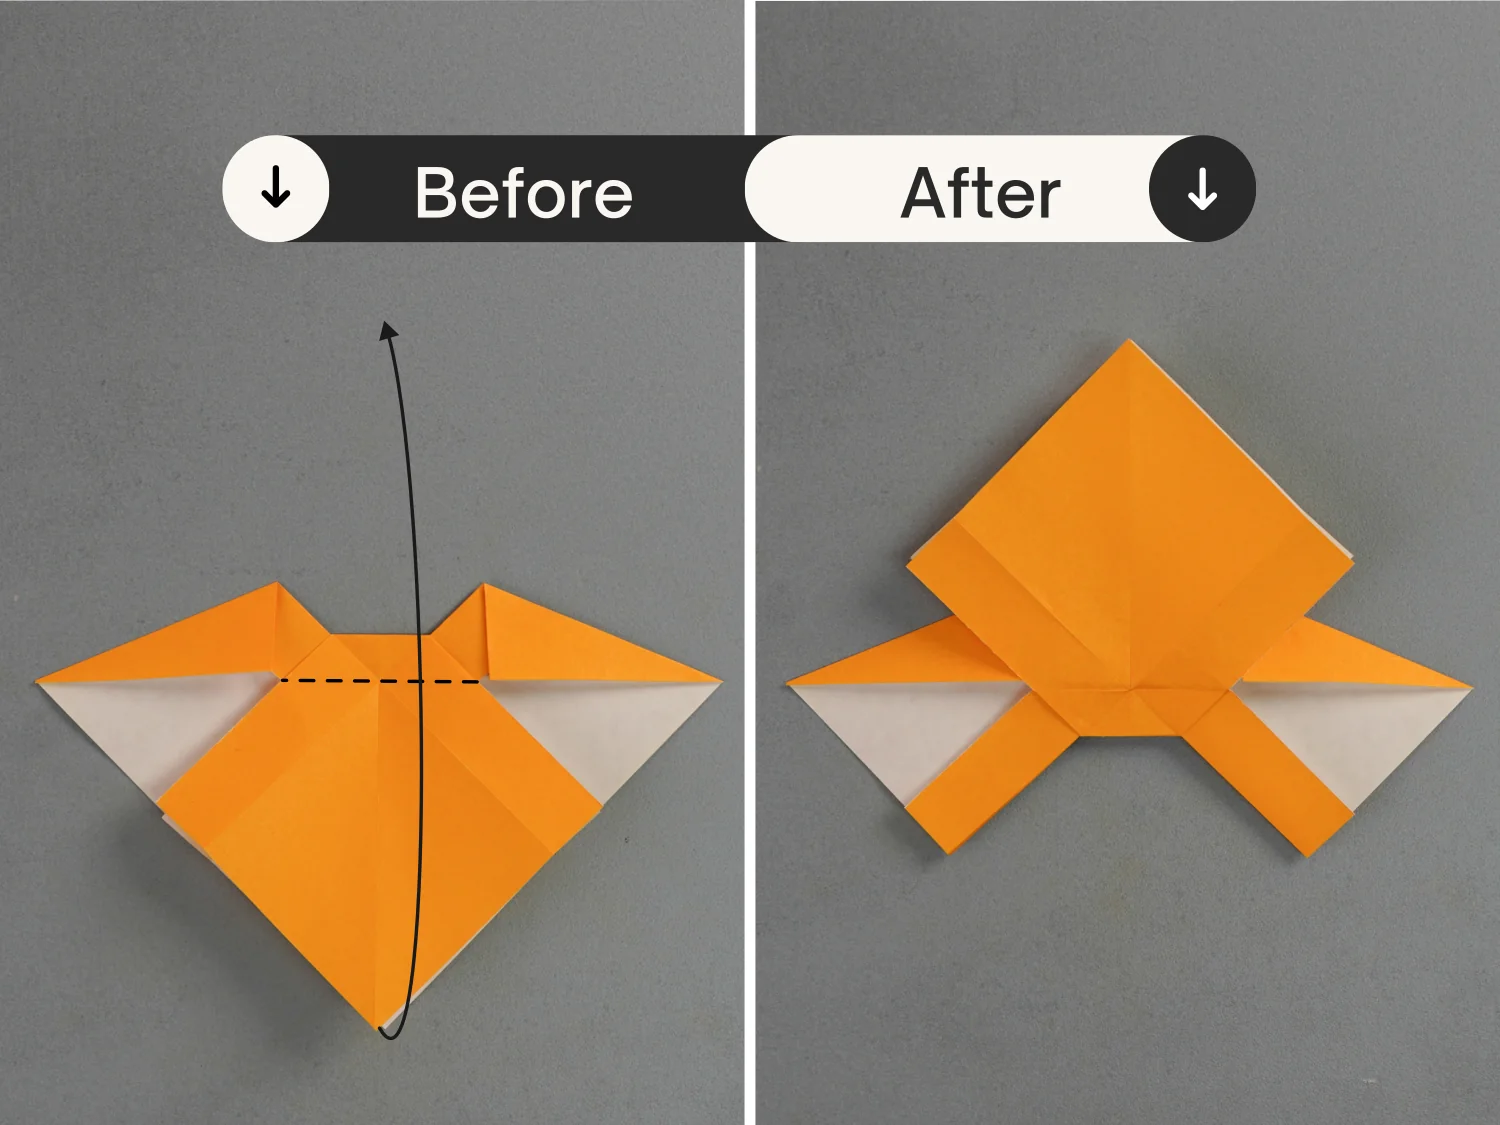
Step 23
Similarly, fold the bottom left and right edges indicated by the red lines to align with the horizontal crease.
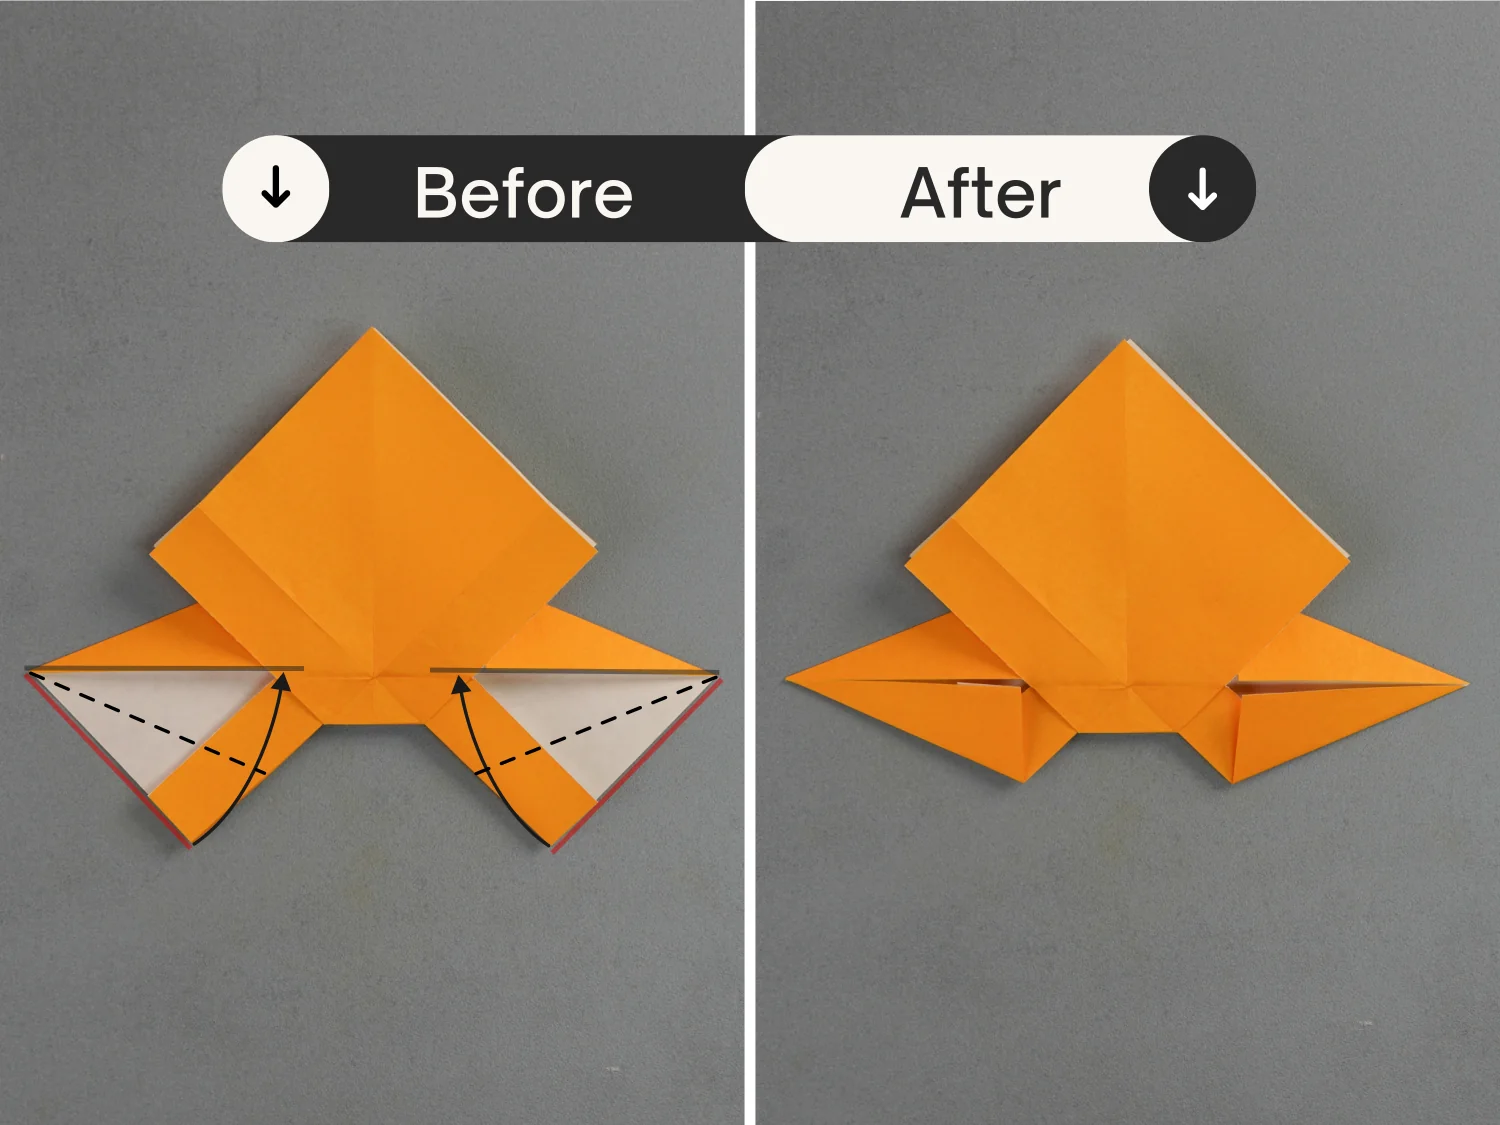
Step 24
Fold the top two layers down along the horizontal crease.
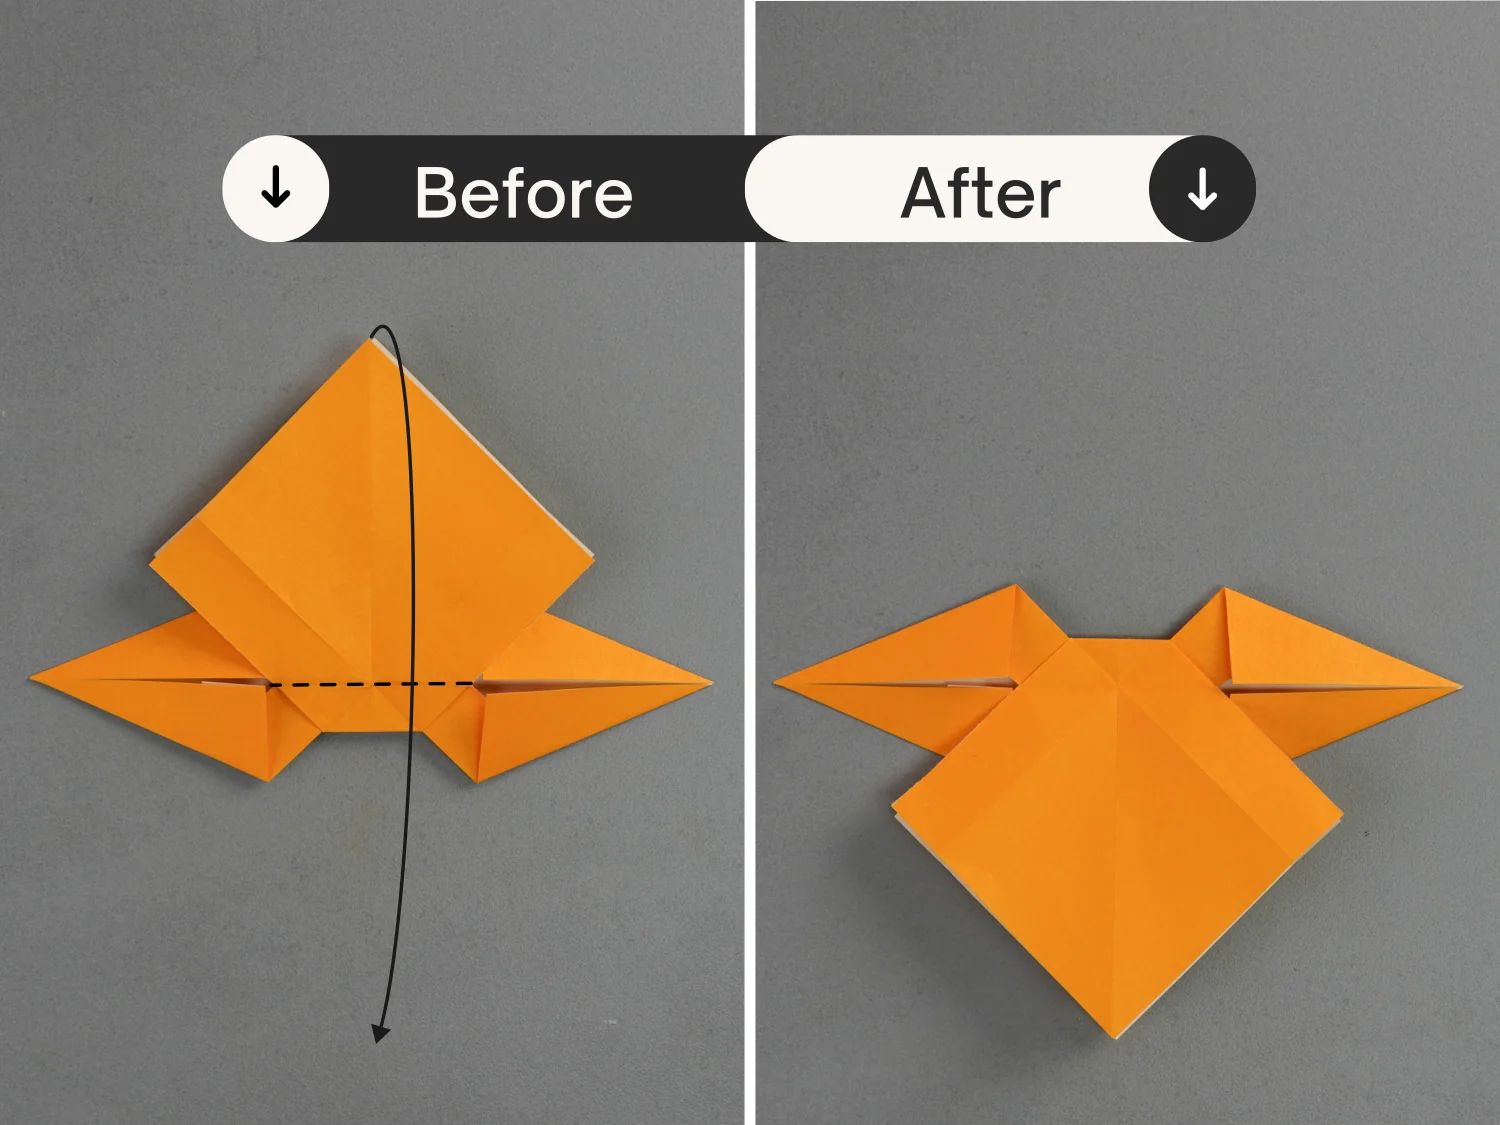
Step 25
Cut the top layers at the bottom along its vertical crease shown by the dotted line.
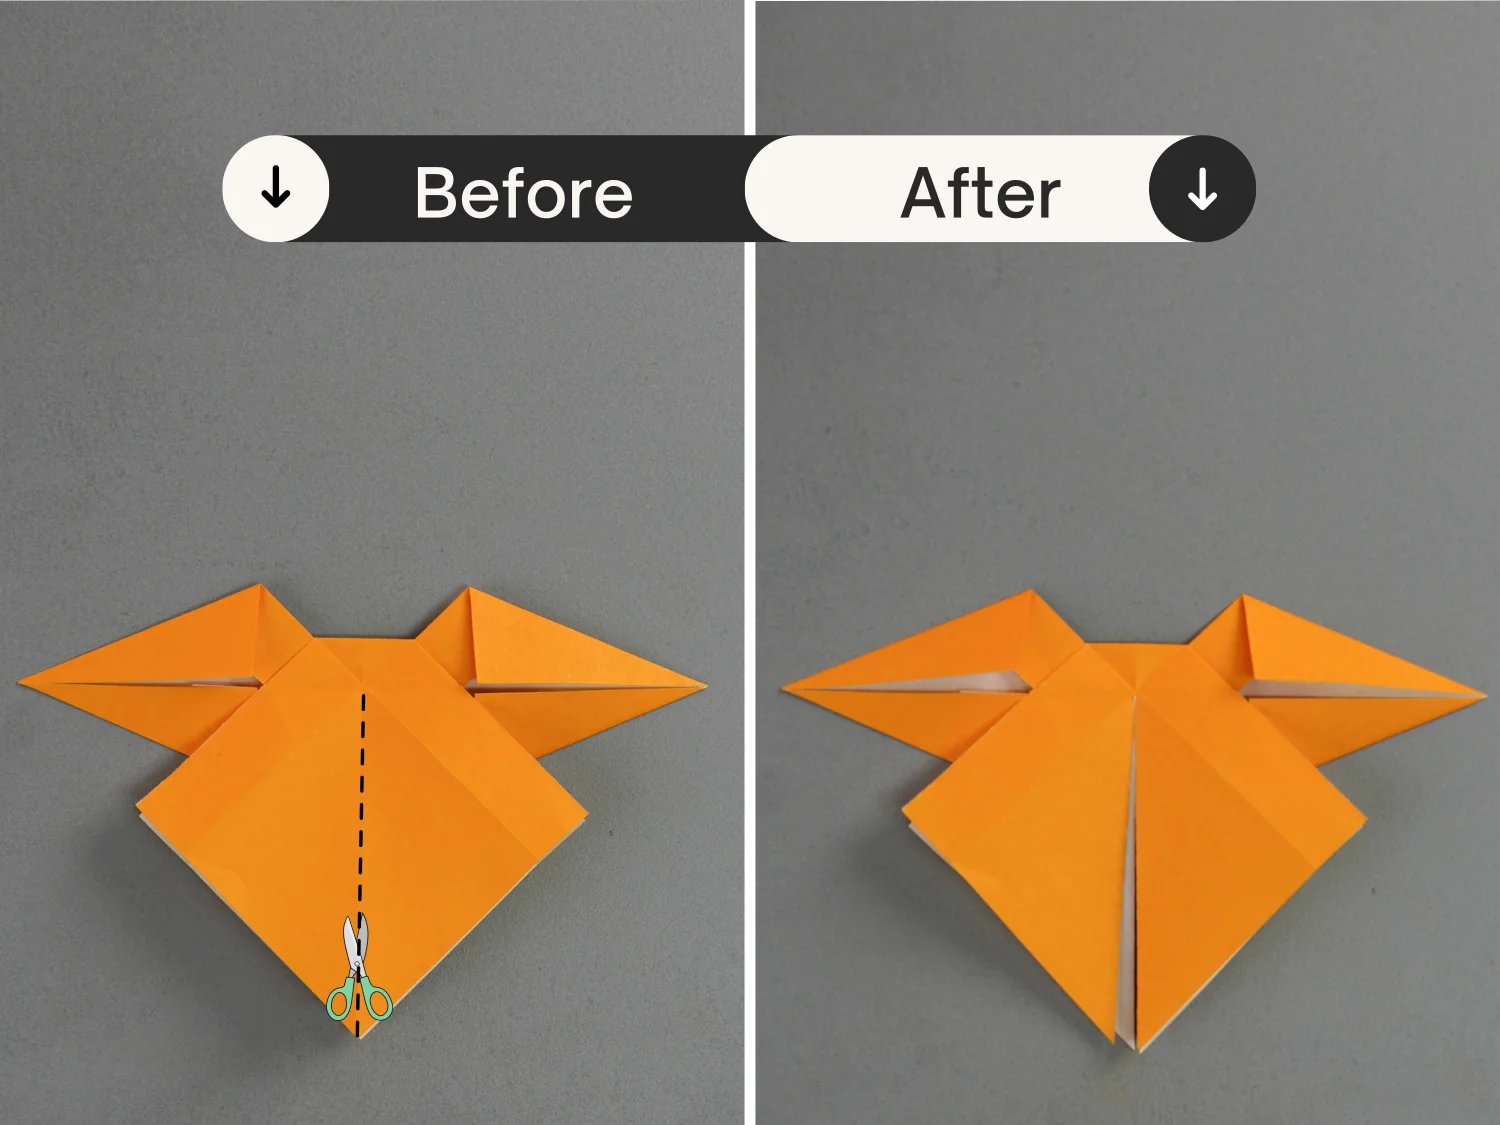
Step 26
Fold the left and right points of these two layers to meet its middle vertical line along the dotted lines.
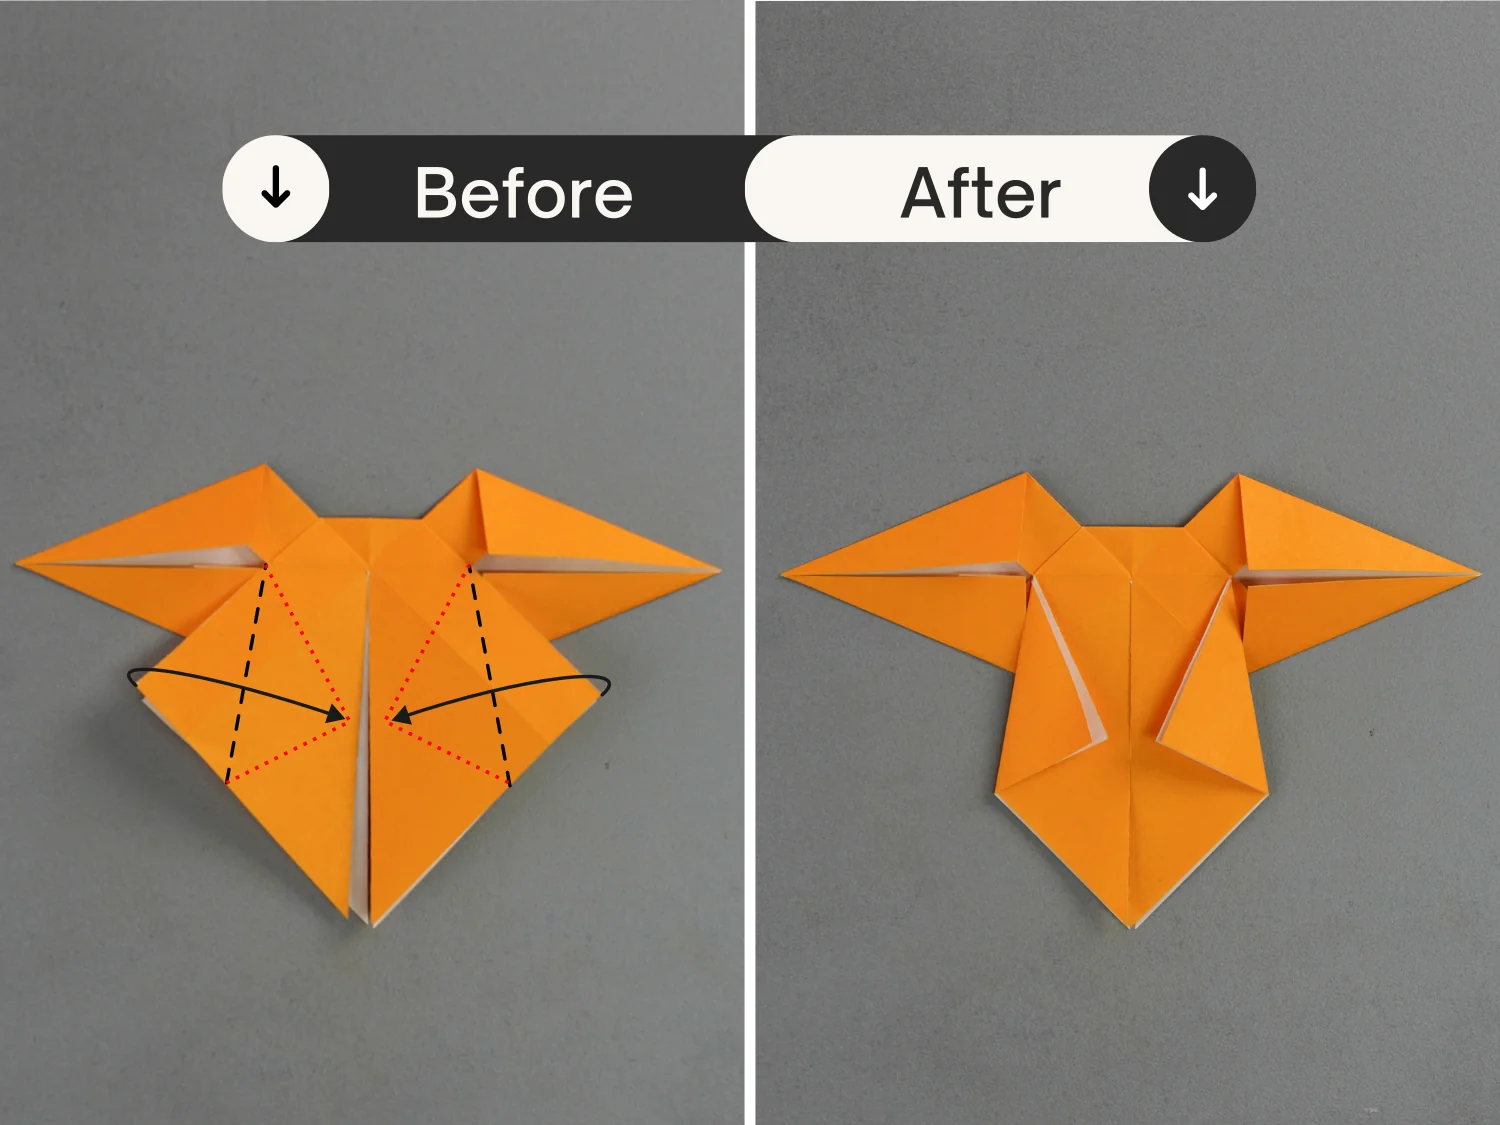
Step 27
Fold the two edges of the center toward the sides along the black dotted lines.
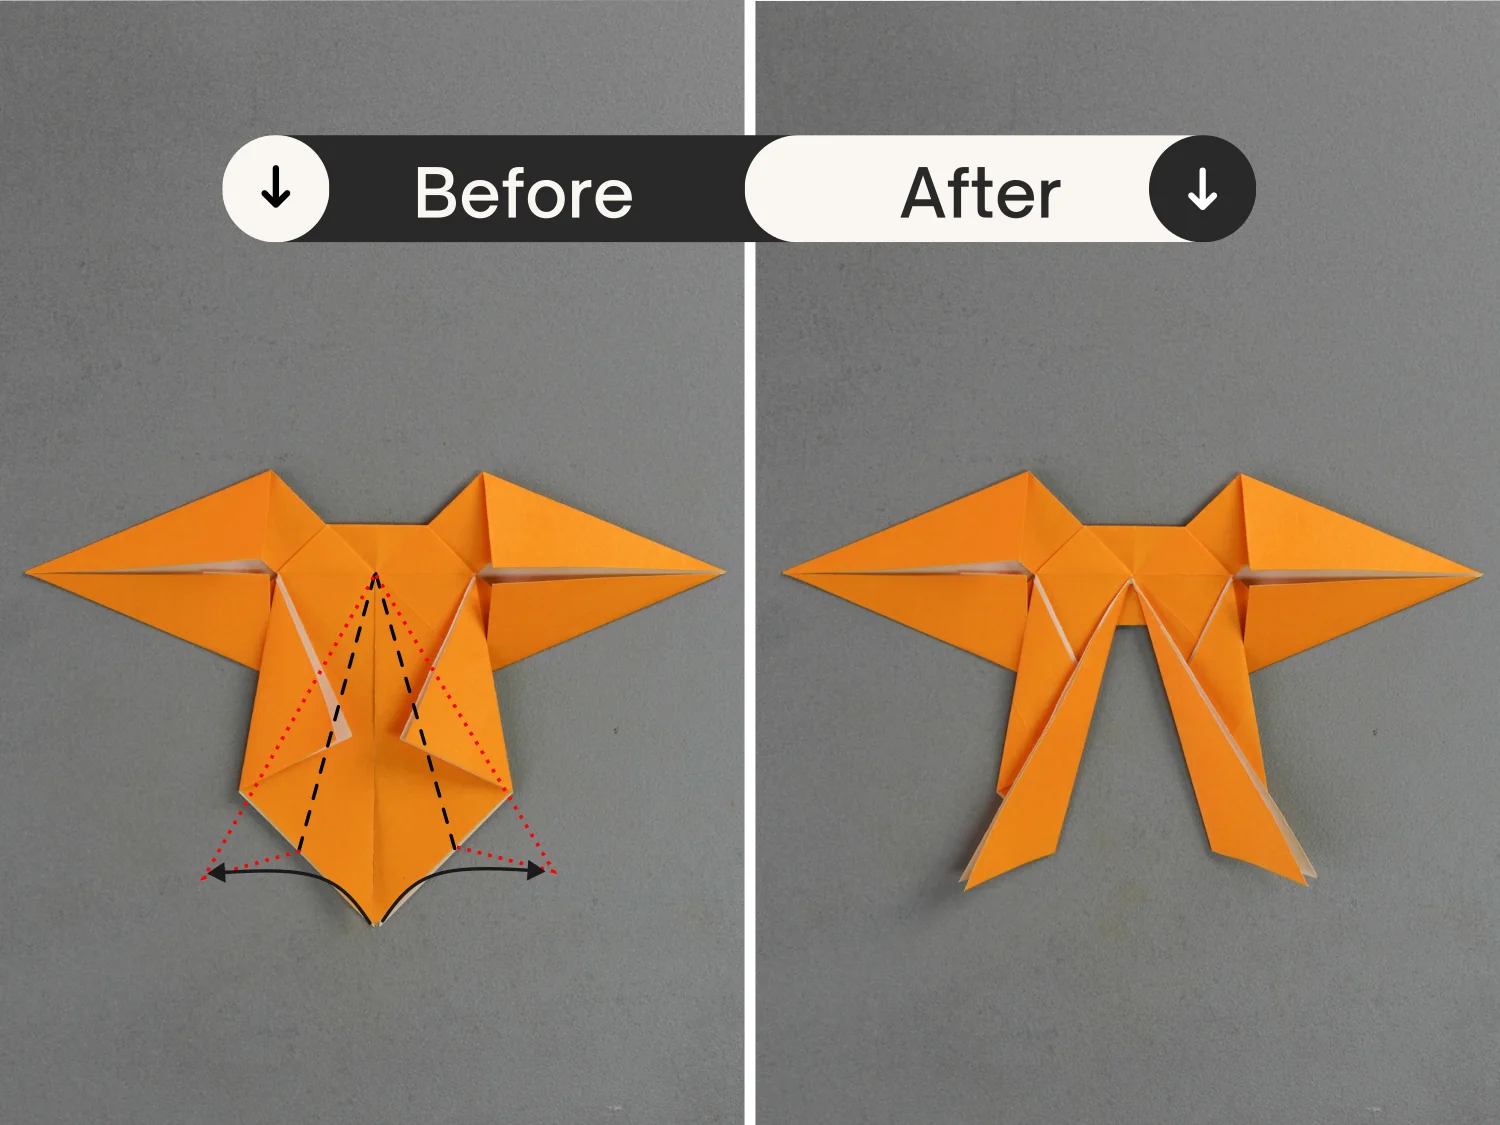
Step 28
Rotate it 180 degrees to turn over the paper.
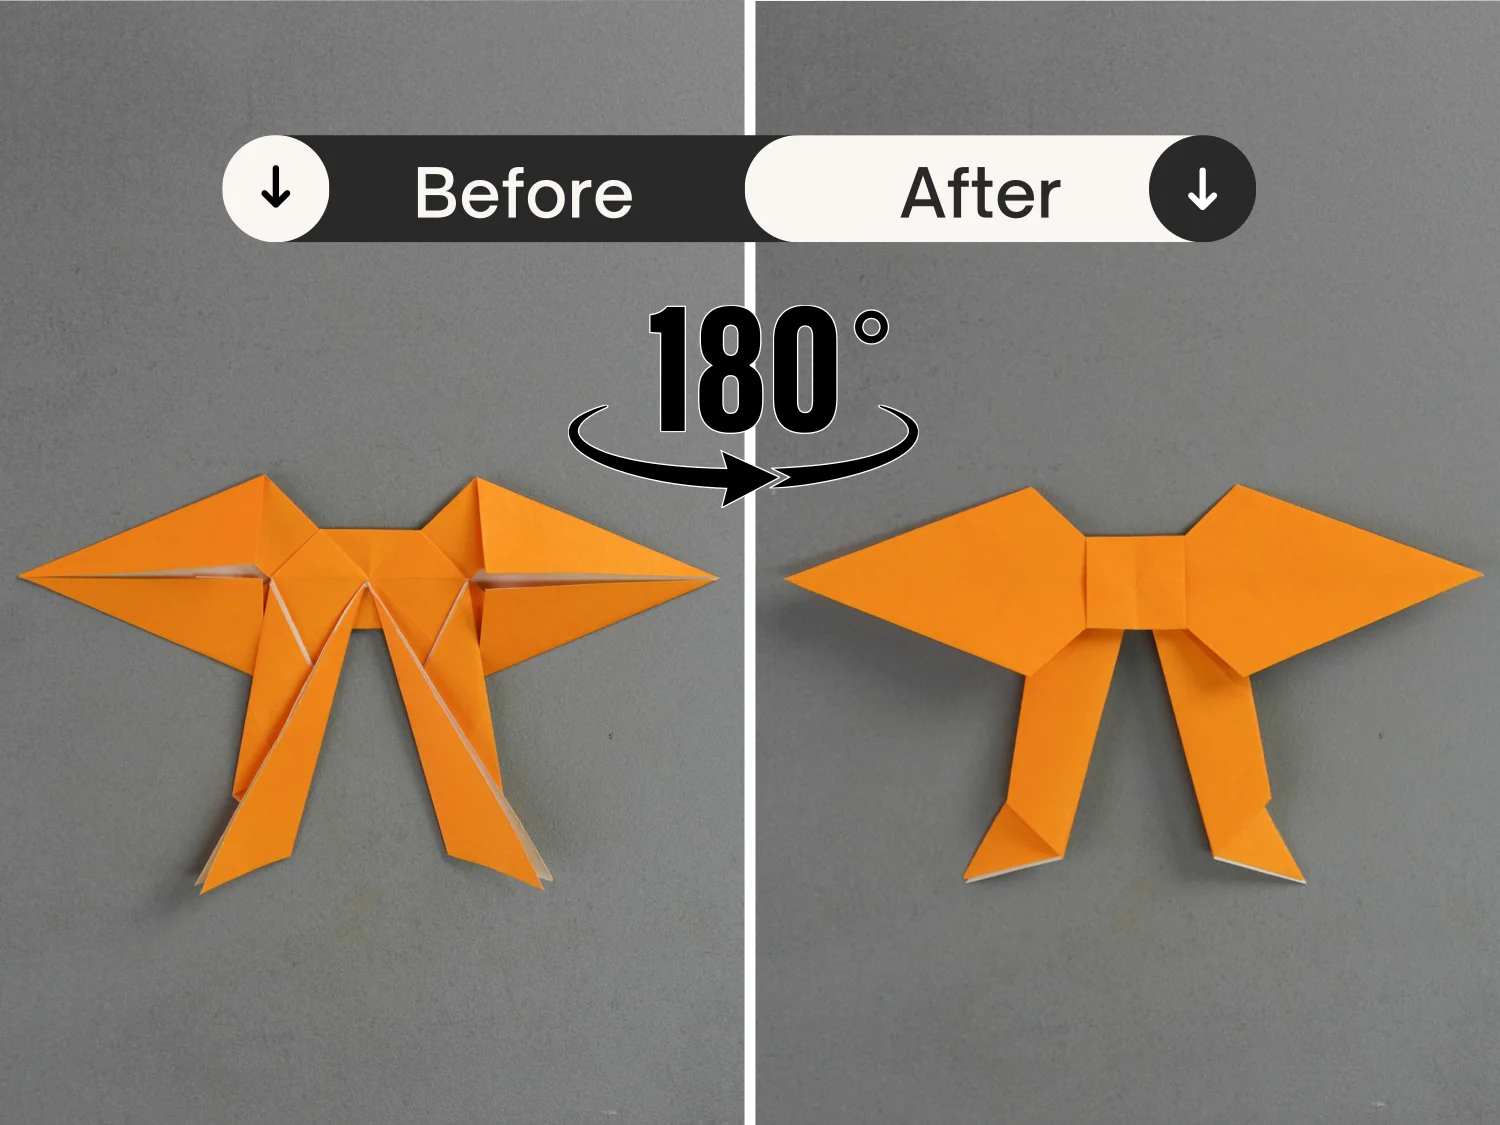
Step 29
Fold the left and right points of the top part to the center point, and unfold them.
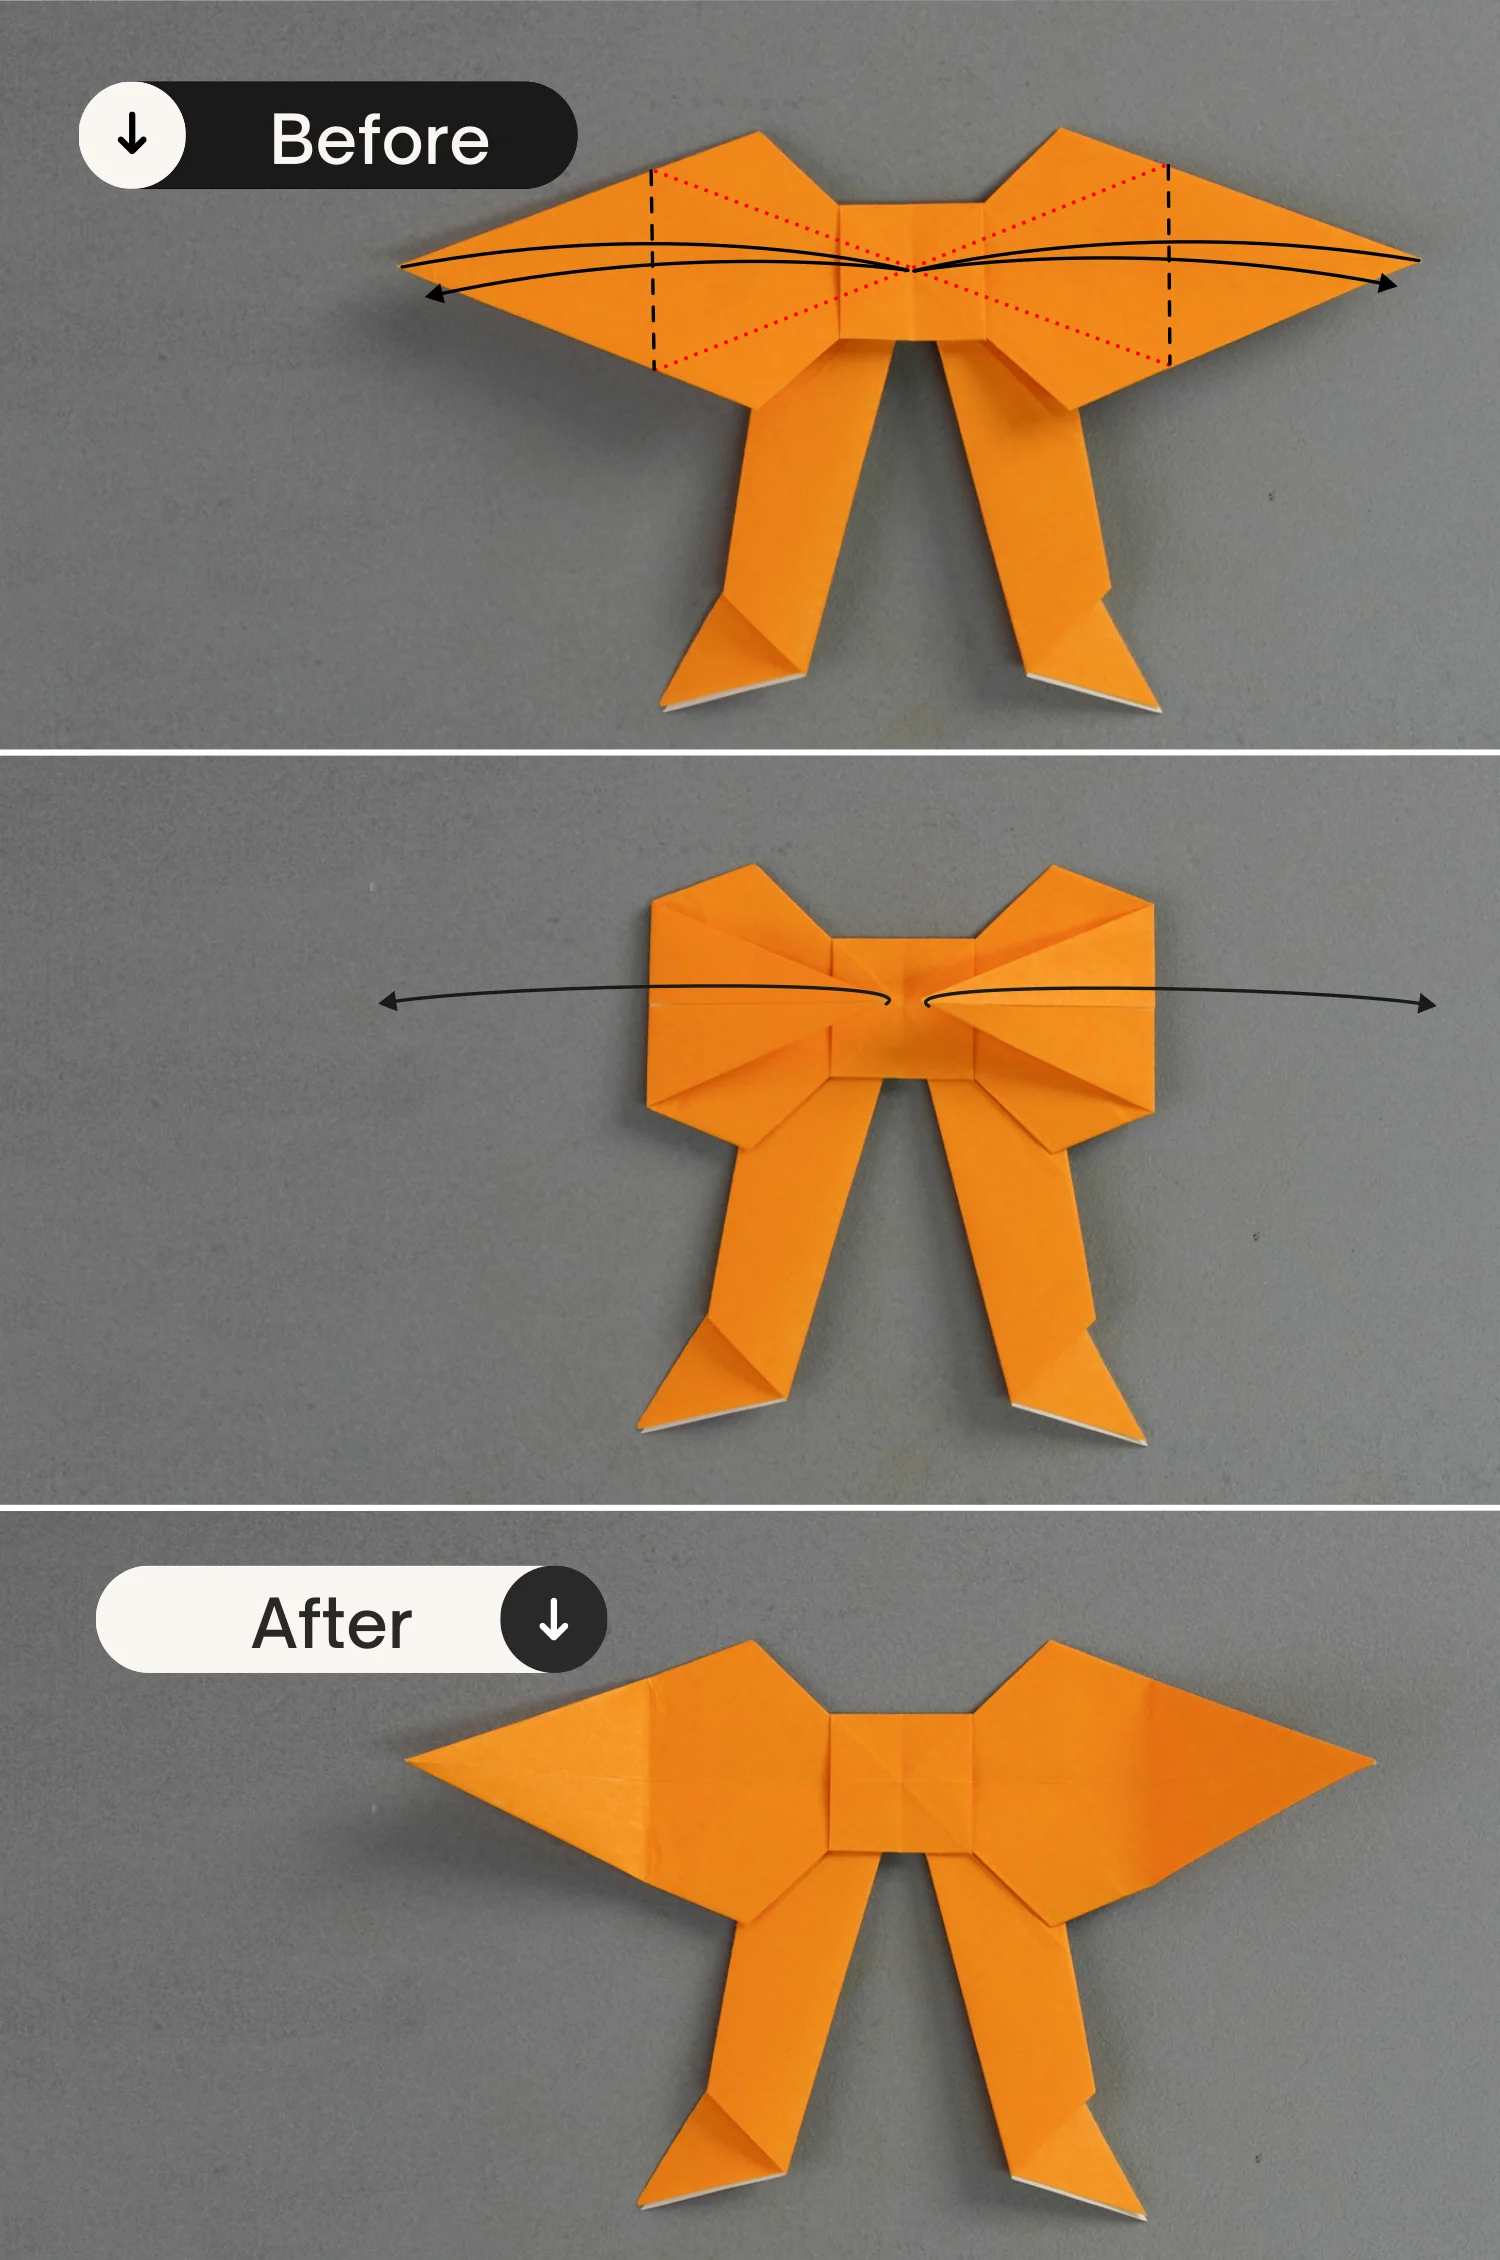
Step 30
Fold these two points again and tuck them under the middle square.
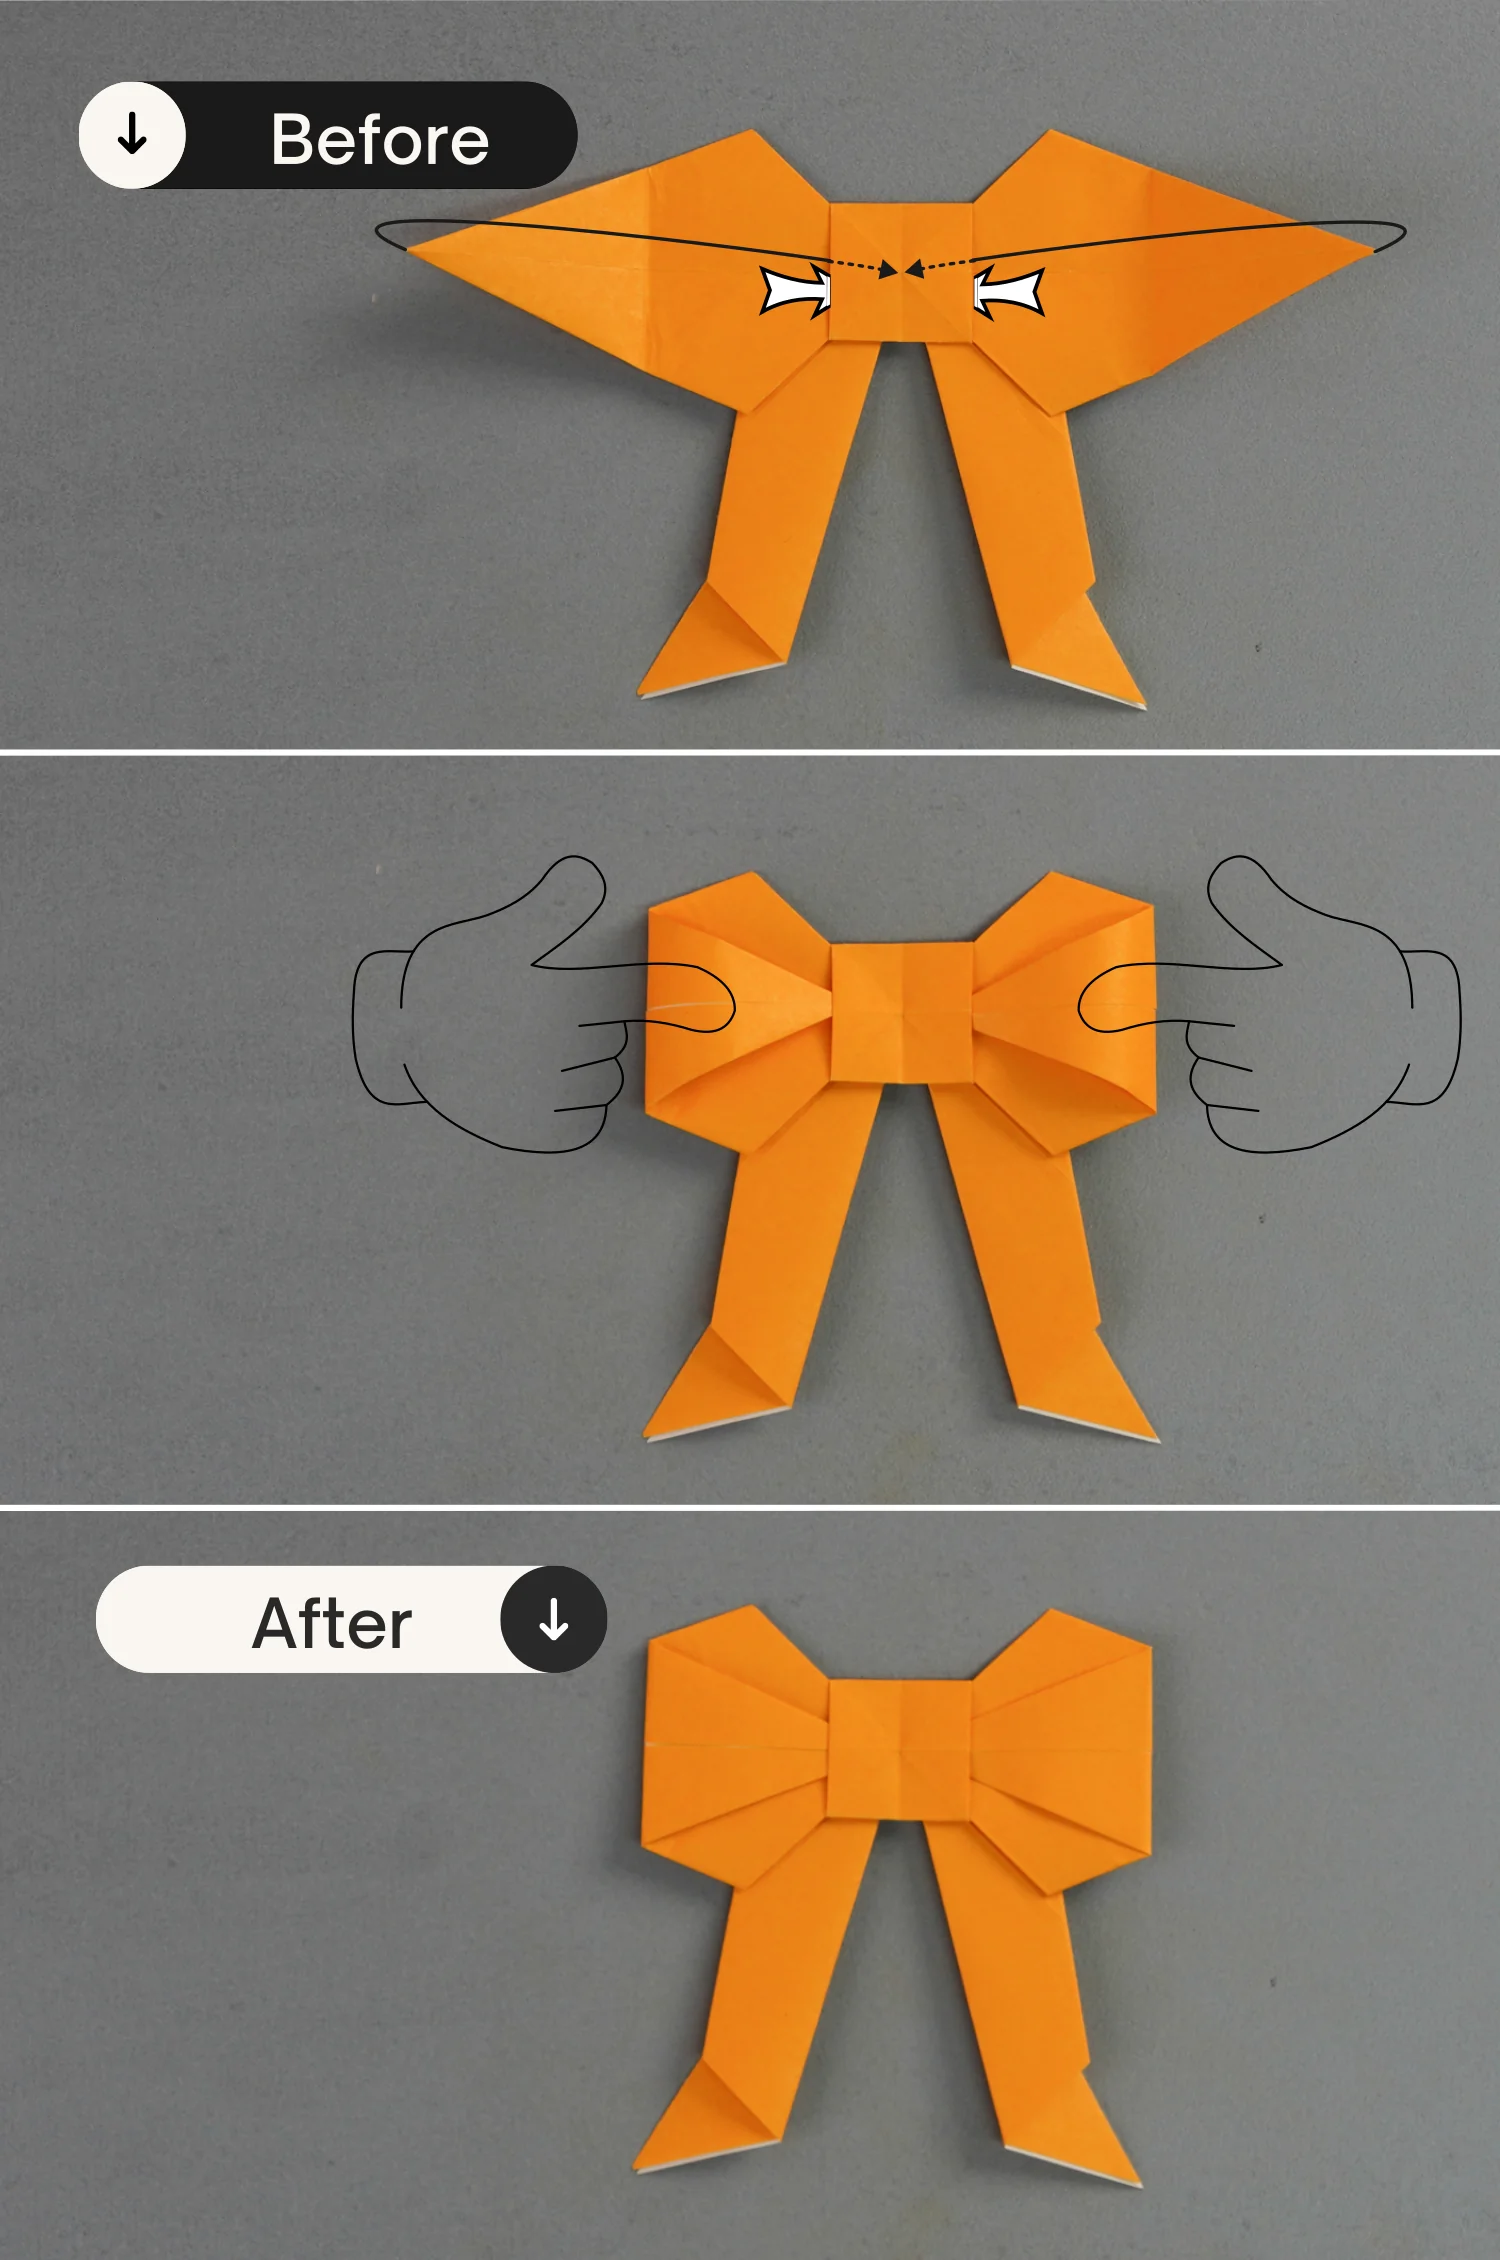
Step 31
Cut the bottom two layers along the black dotted lines.
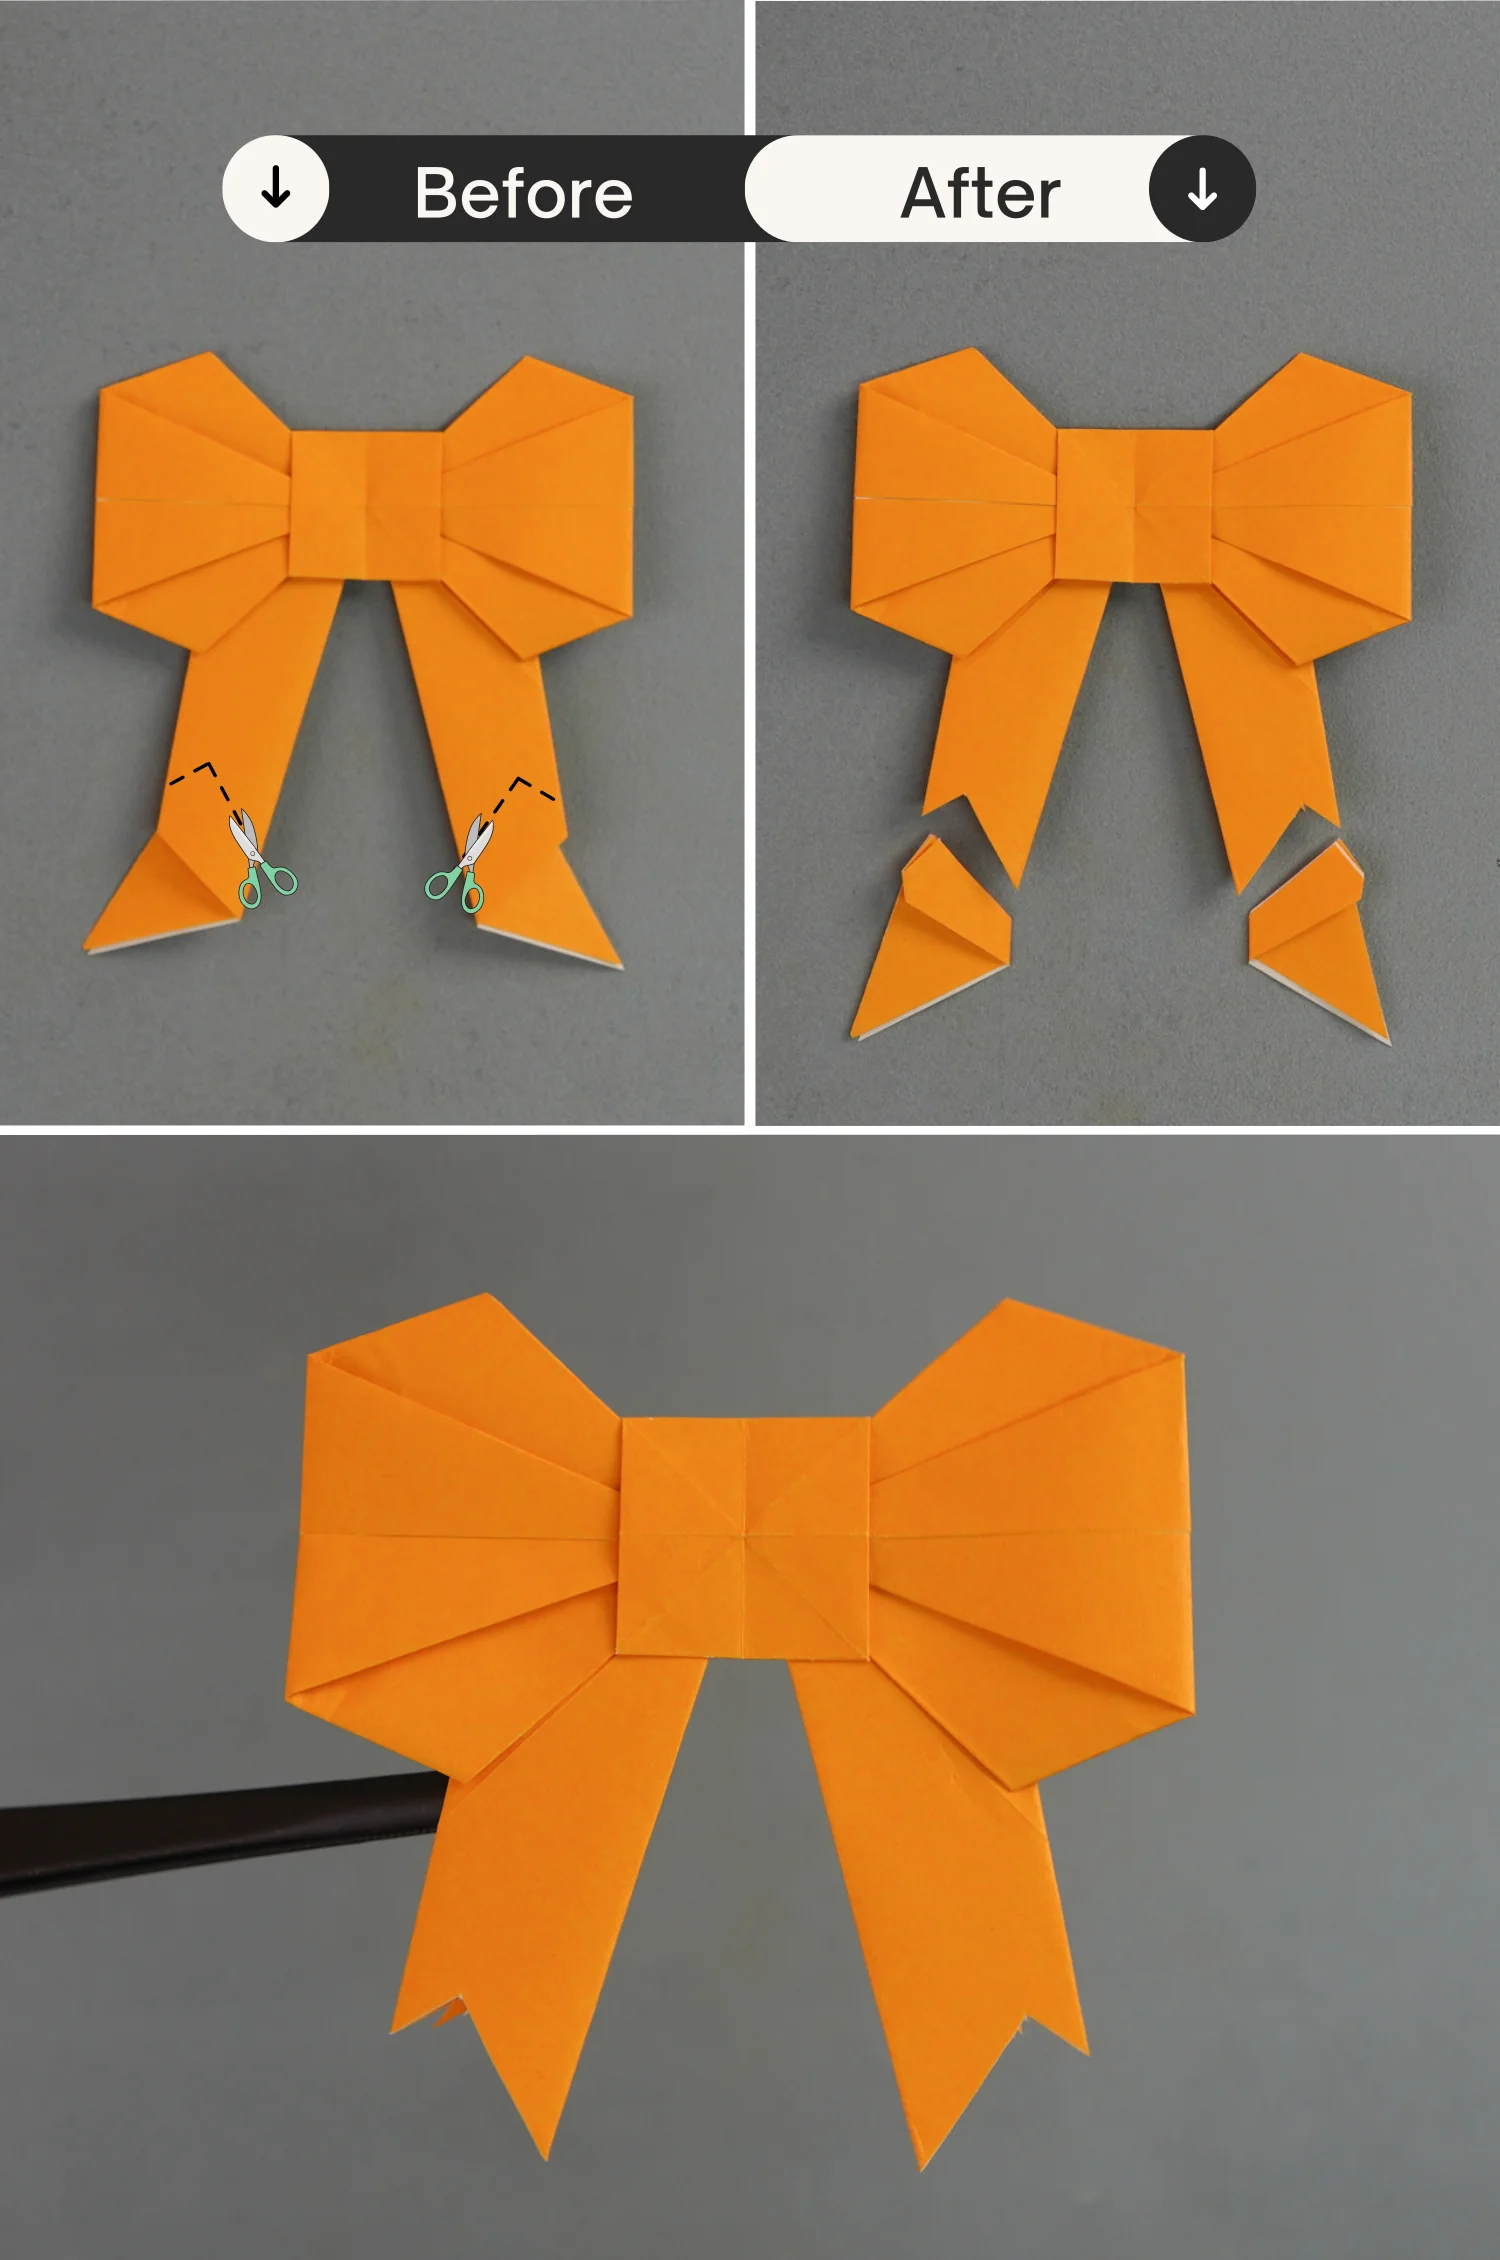
What’s Next
That’s your lovely origami bow, it is adorable. Now you can explore our other origami for decoration instructions. Happy folding!
Other Origami Decoration Ideas
