How to Make an Easy Origami Bee
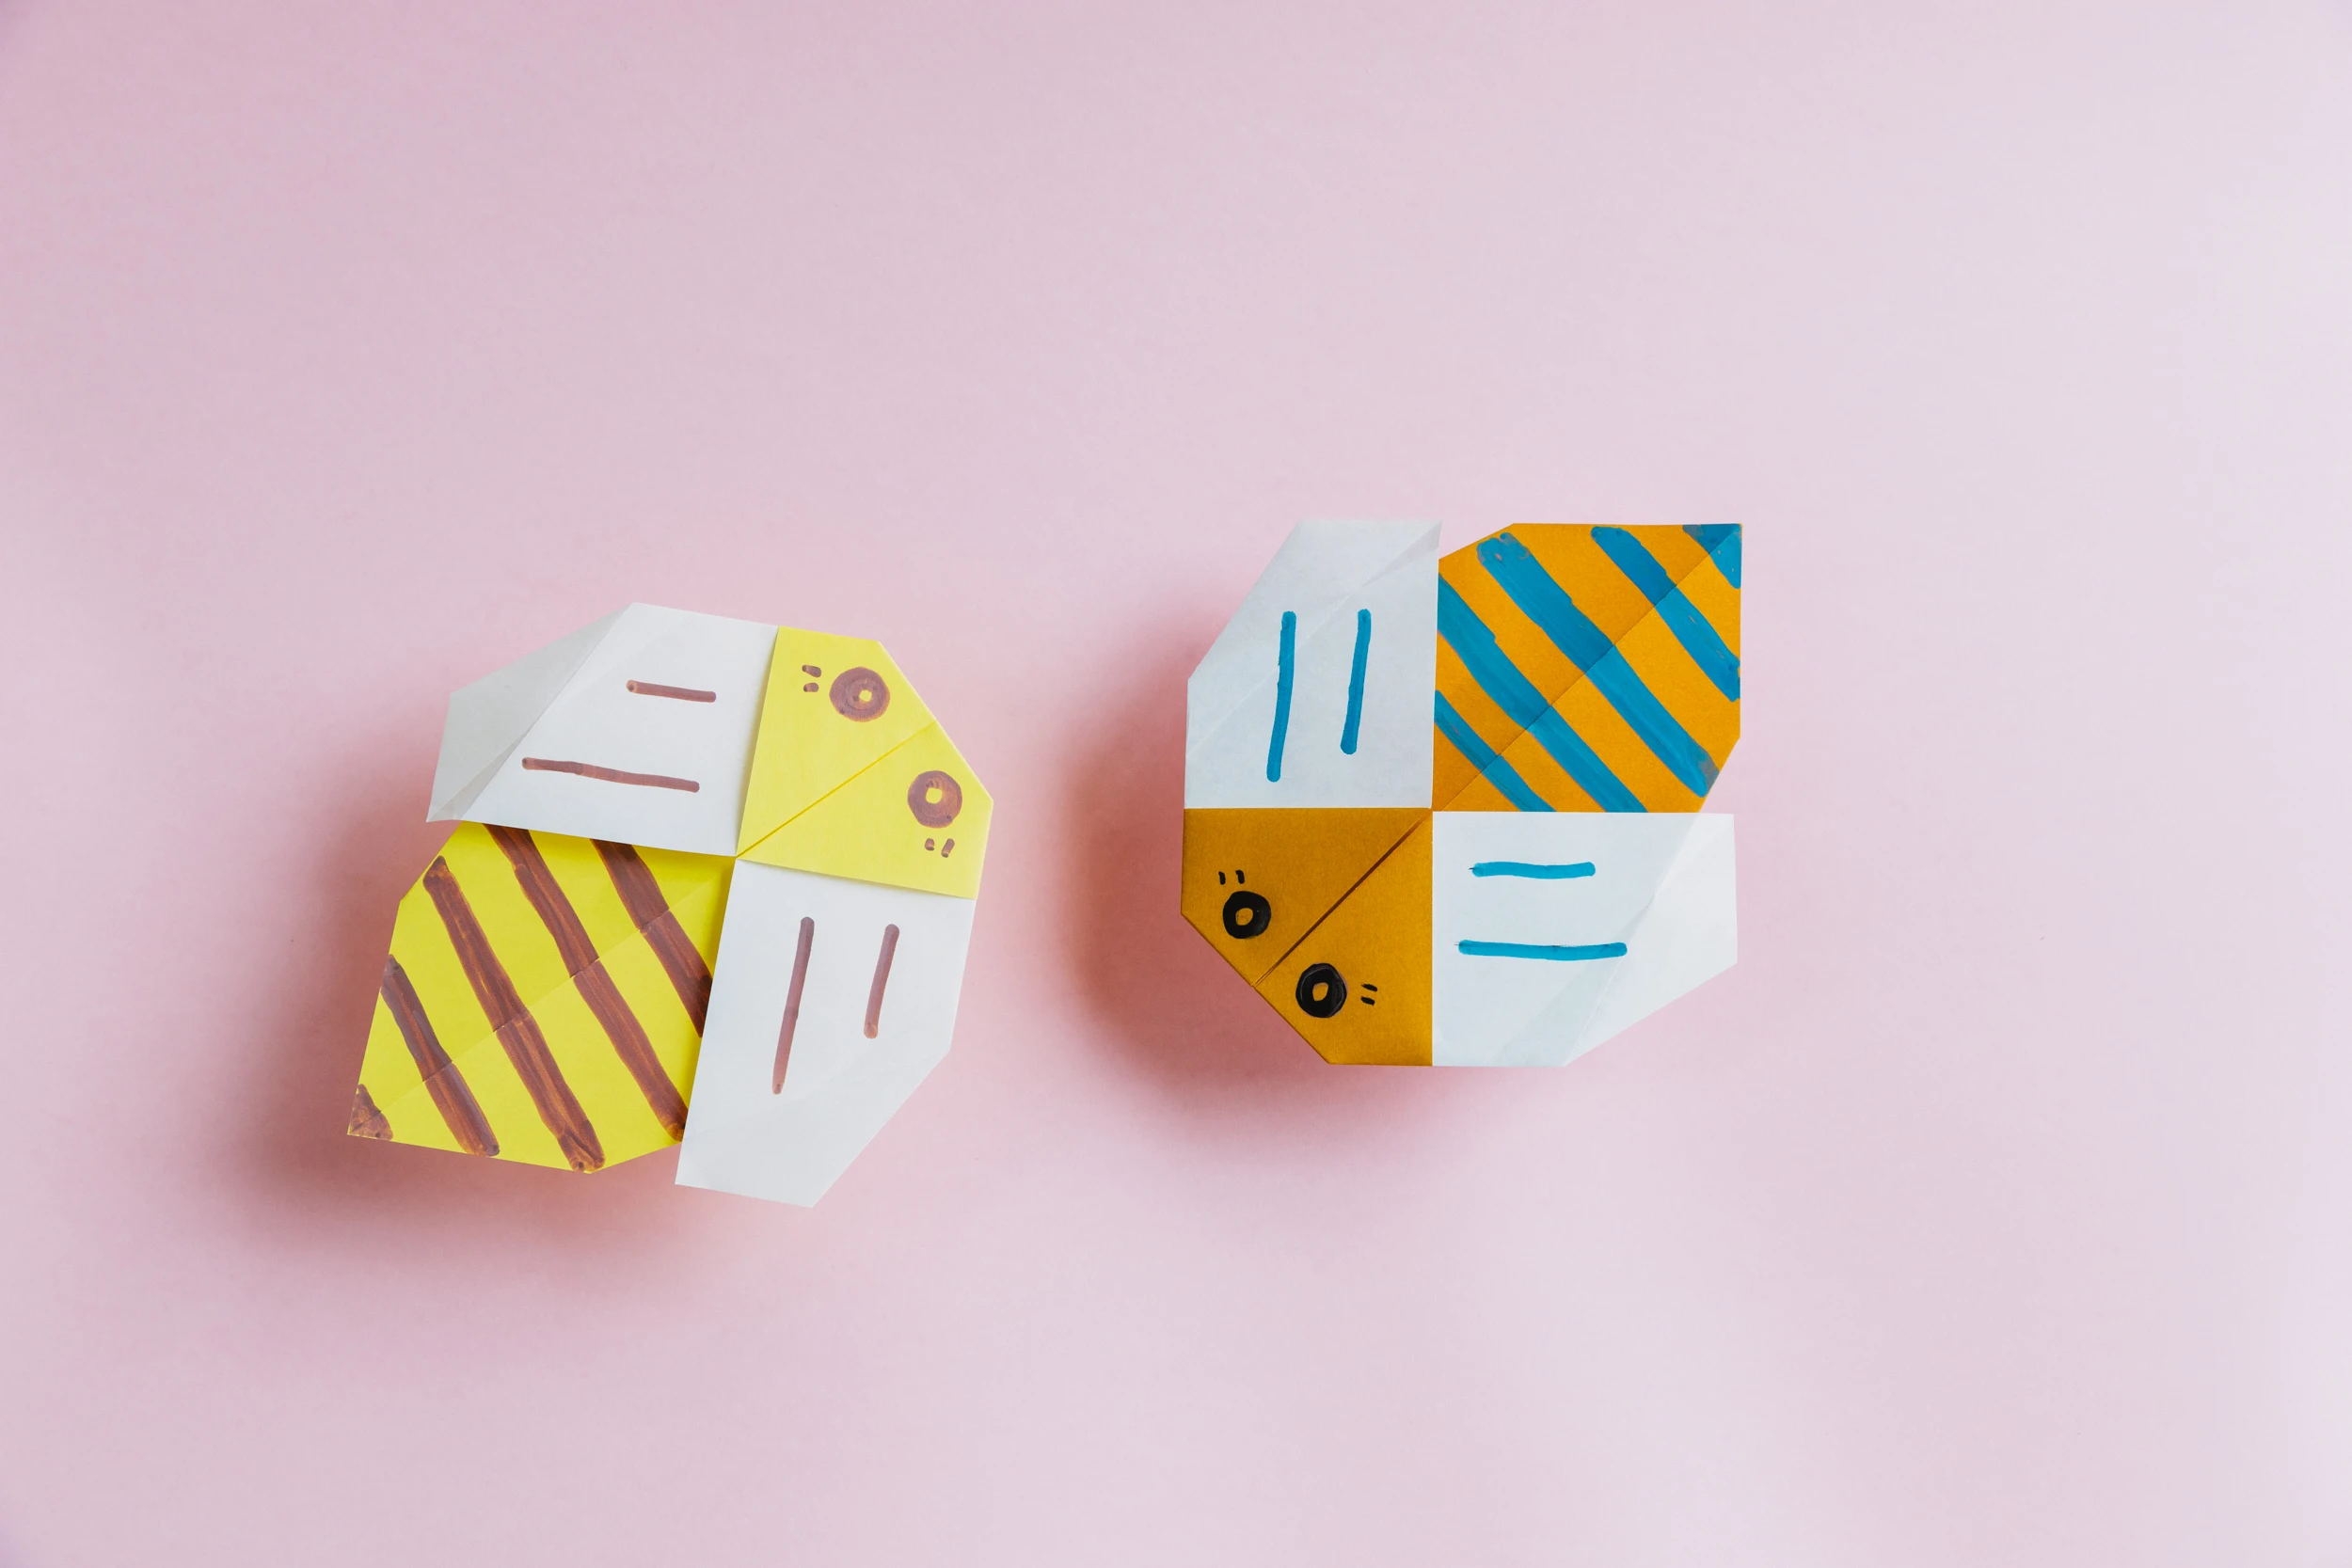
I am really fond of this chubby origami bee, it’s so adorable. It’s also very easy to make, all you need is a piece of paper. This makes it very suitable for little kids to learn.
We provide step-by-step diagram instructions and beginner-friendly videos. Check both for quicker learning.
If you are new to origami, start here from our beginner guide to know the basics and how to read the step-by-step instructions.
- Folding time: 5 minutes
- Paper: 15×15 cm
- Difficulty: Easy, Beginner friendly
Material
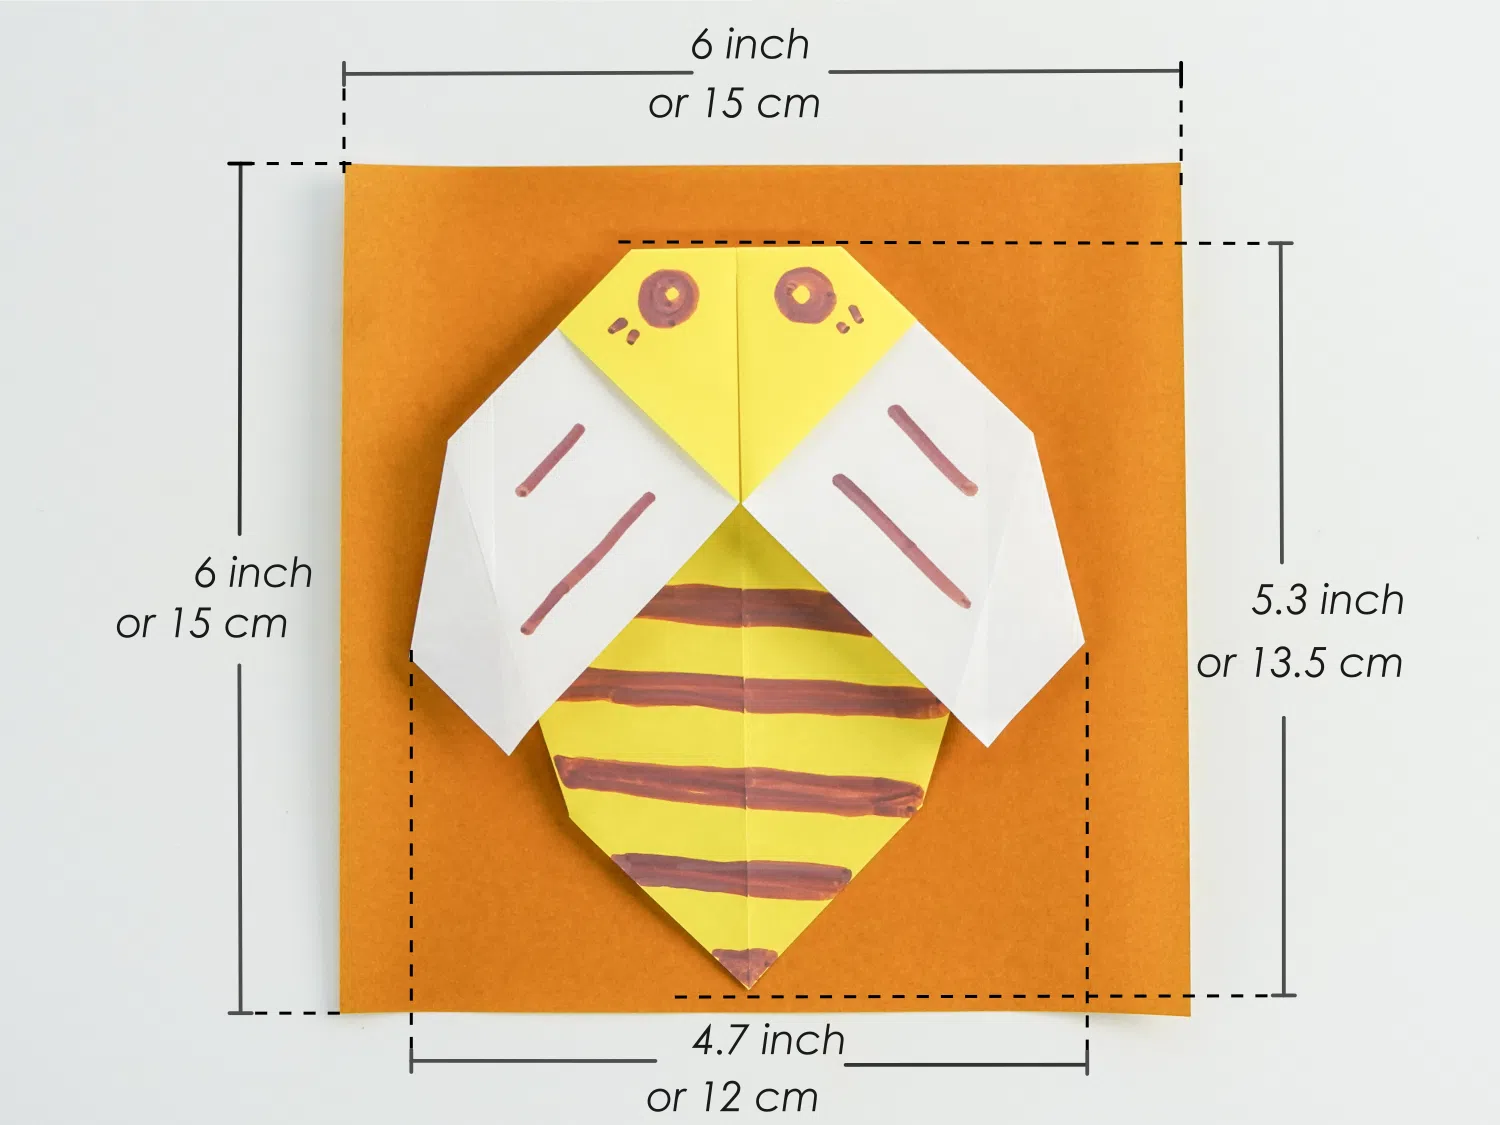
Get a 15*15 cm origami paper, with one yellow and one white side, you can get a 13.5✖️12cm origami bee.
Easy Origami Bee Video
You can refer to the video and follow along to finish or follow our step-by-step picture tutorial.
Step by Step Instructions
Step 1
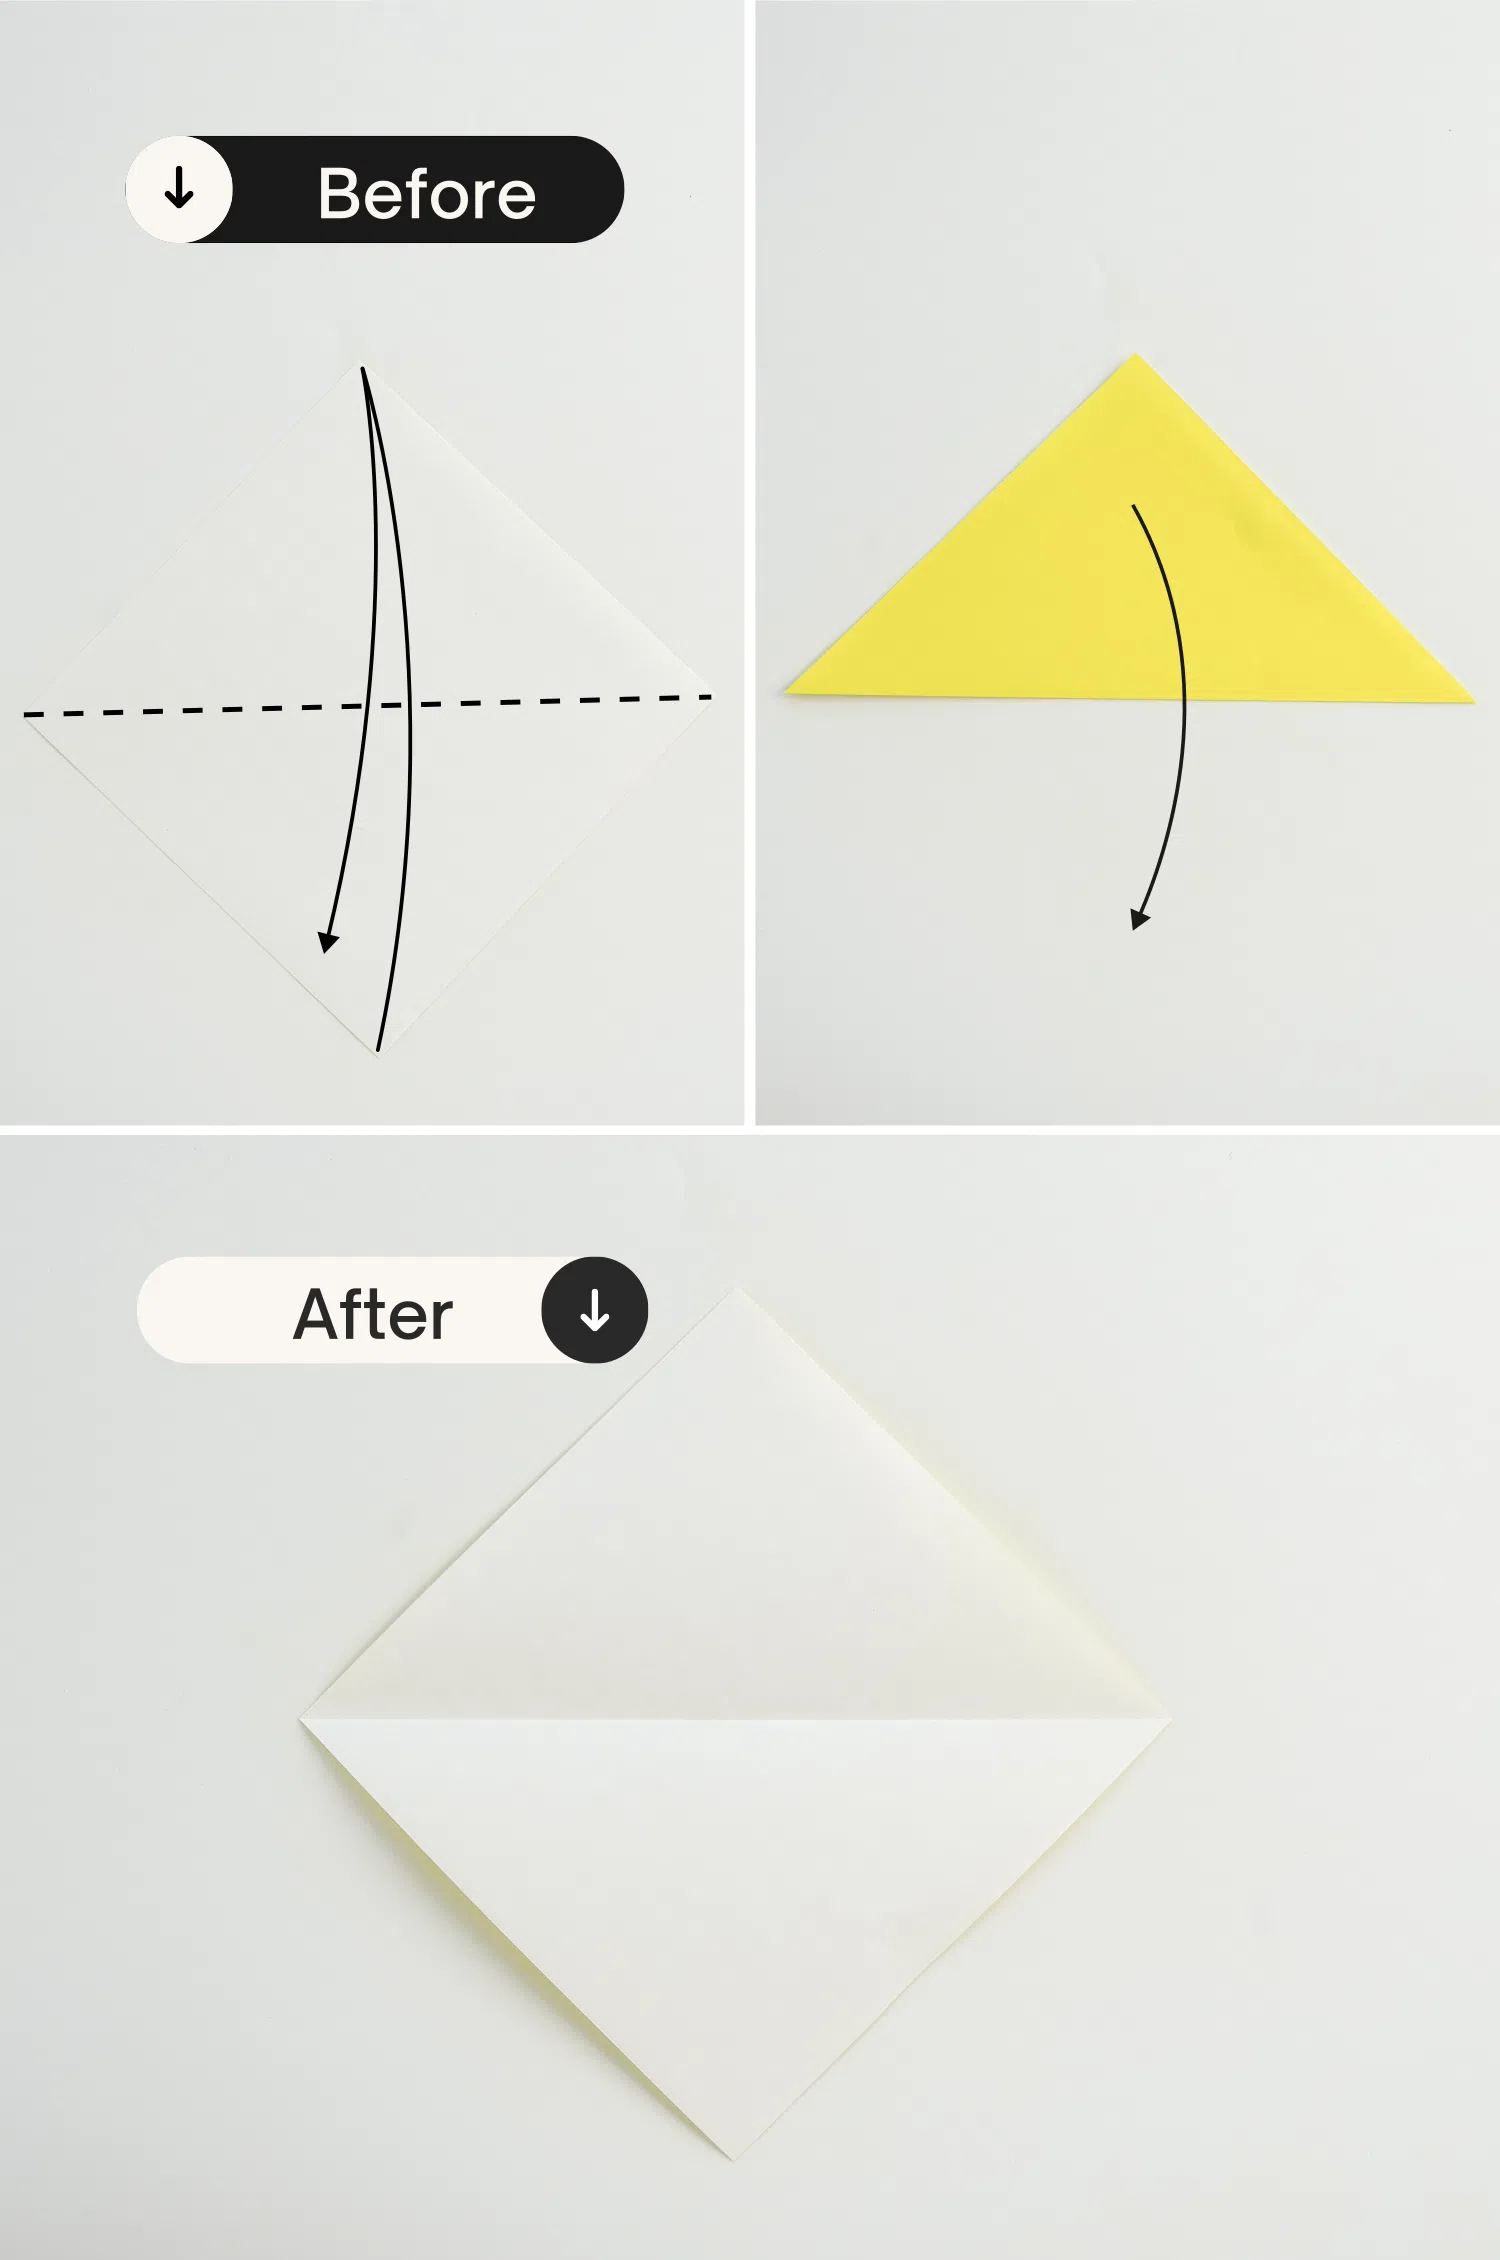
Start with the white side of the paper facing up and fold it in half diagonally, crease it well then unfold it.
Step 2
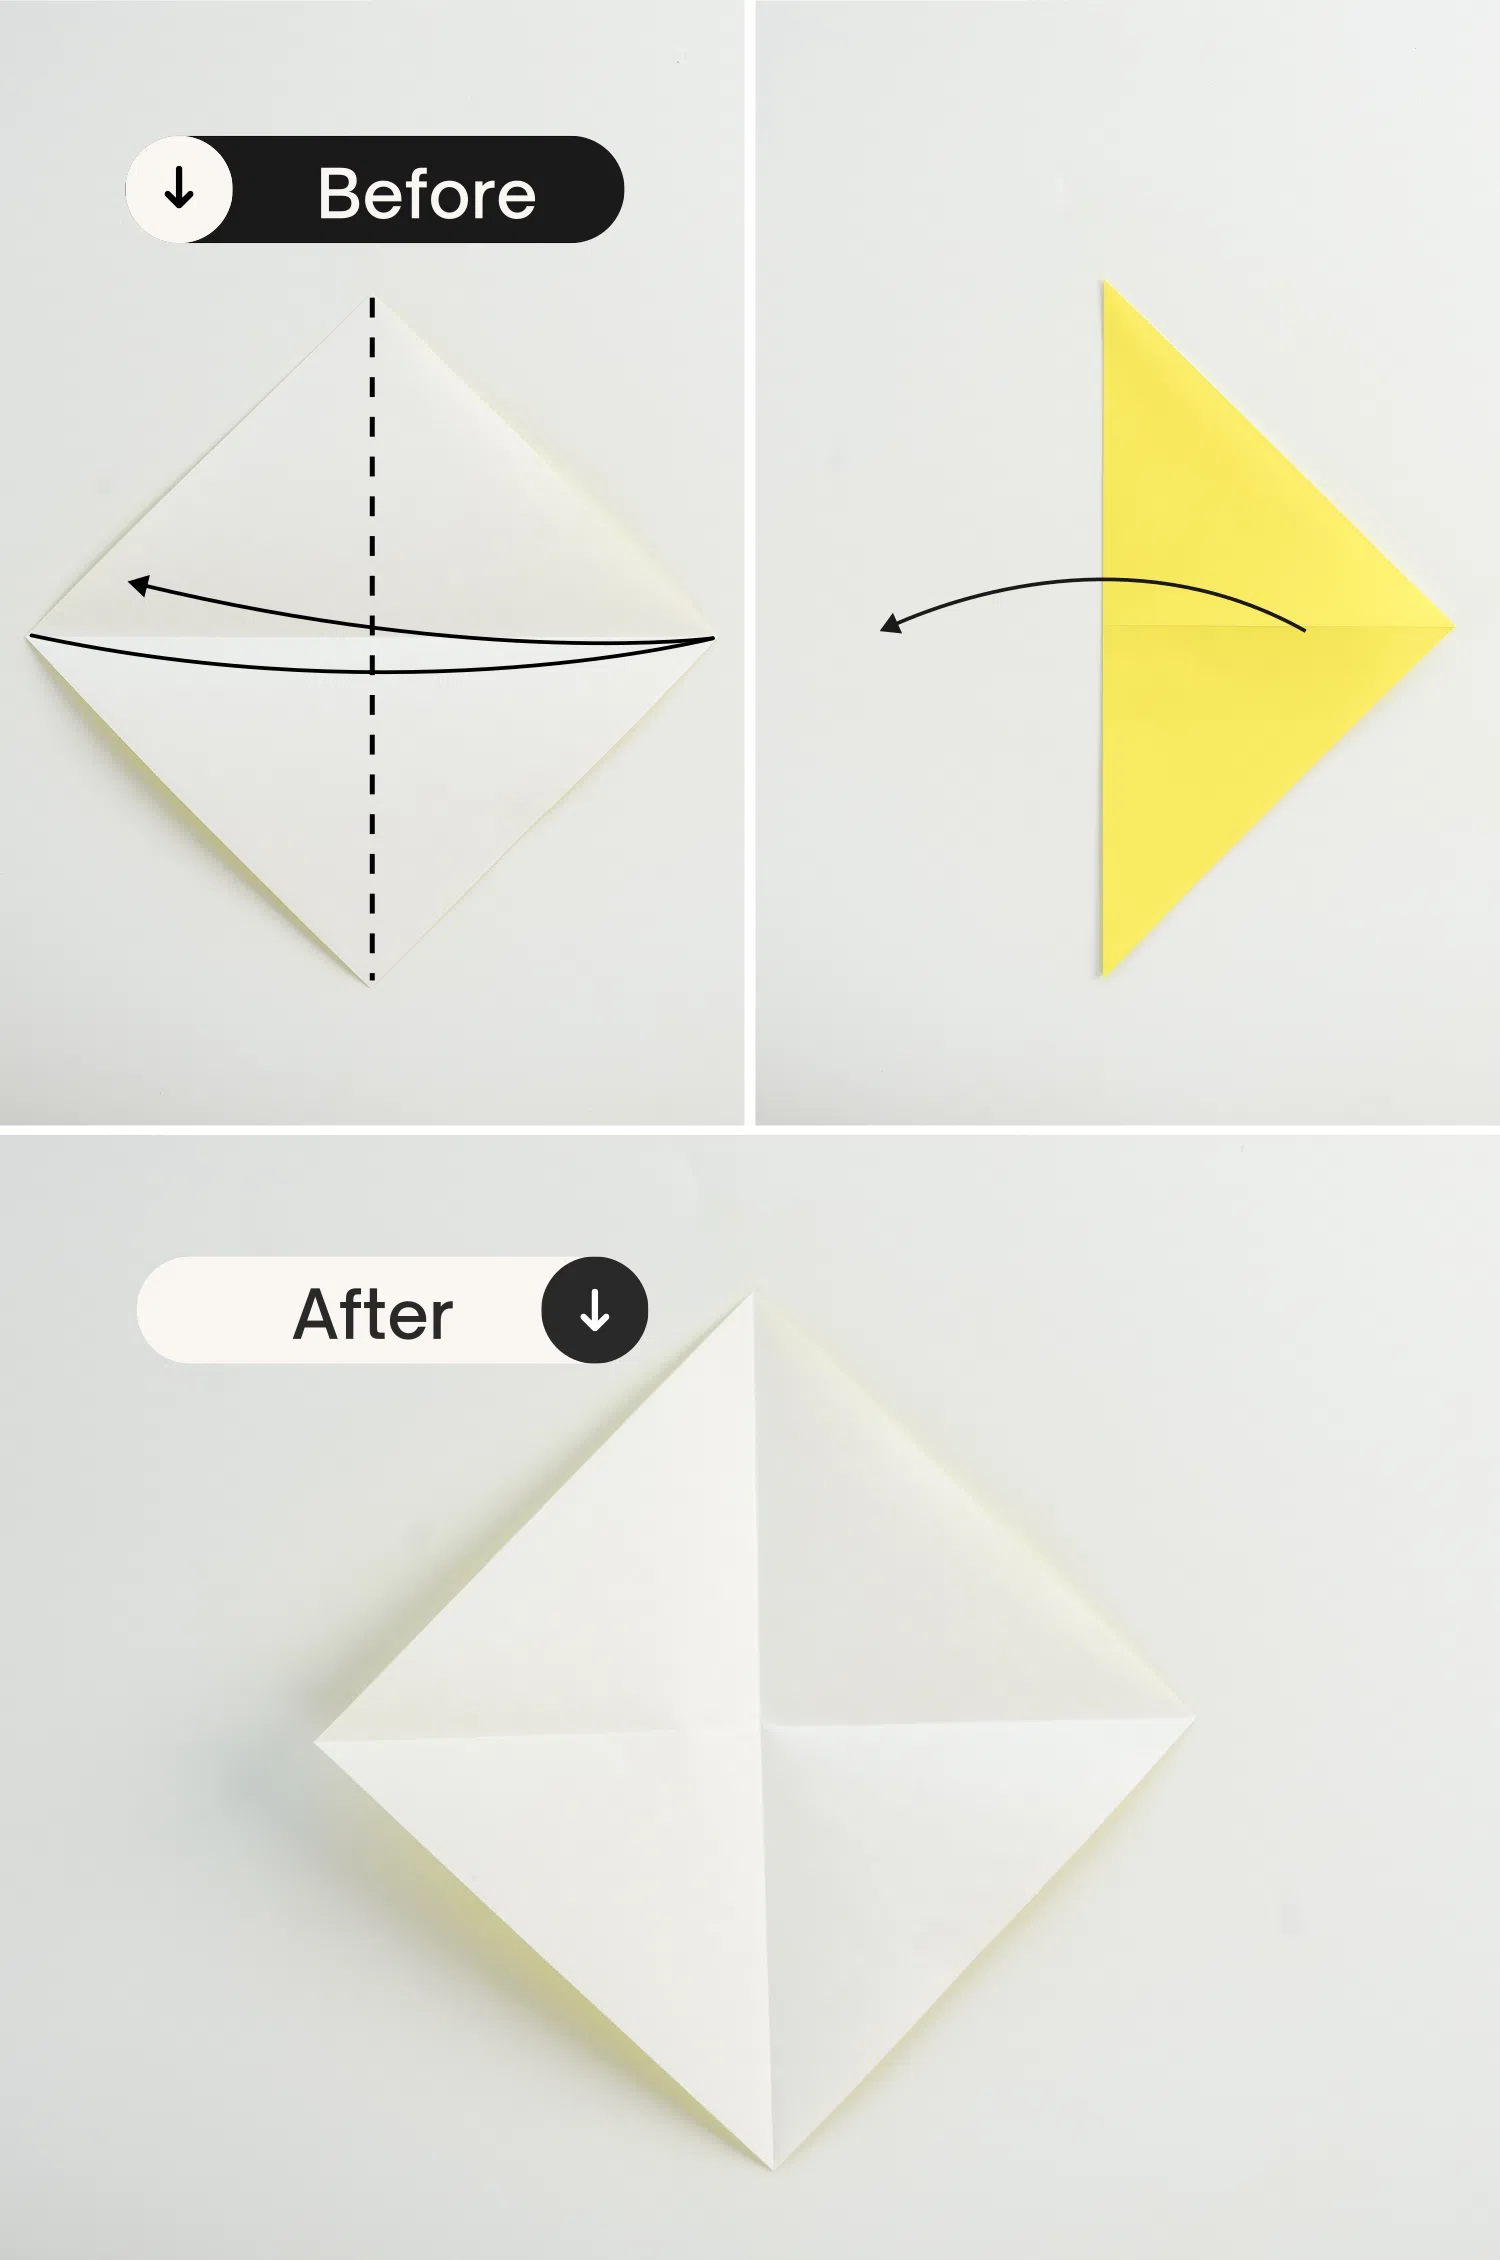
Take the left point, fold it to the right point diagonally, crease it well then unfold it, getting an intersection point in the center of the paper formed by these two creases.
Step 3
Fold the top point down diagonally, make sure to over the intersection point.
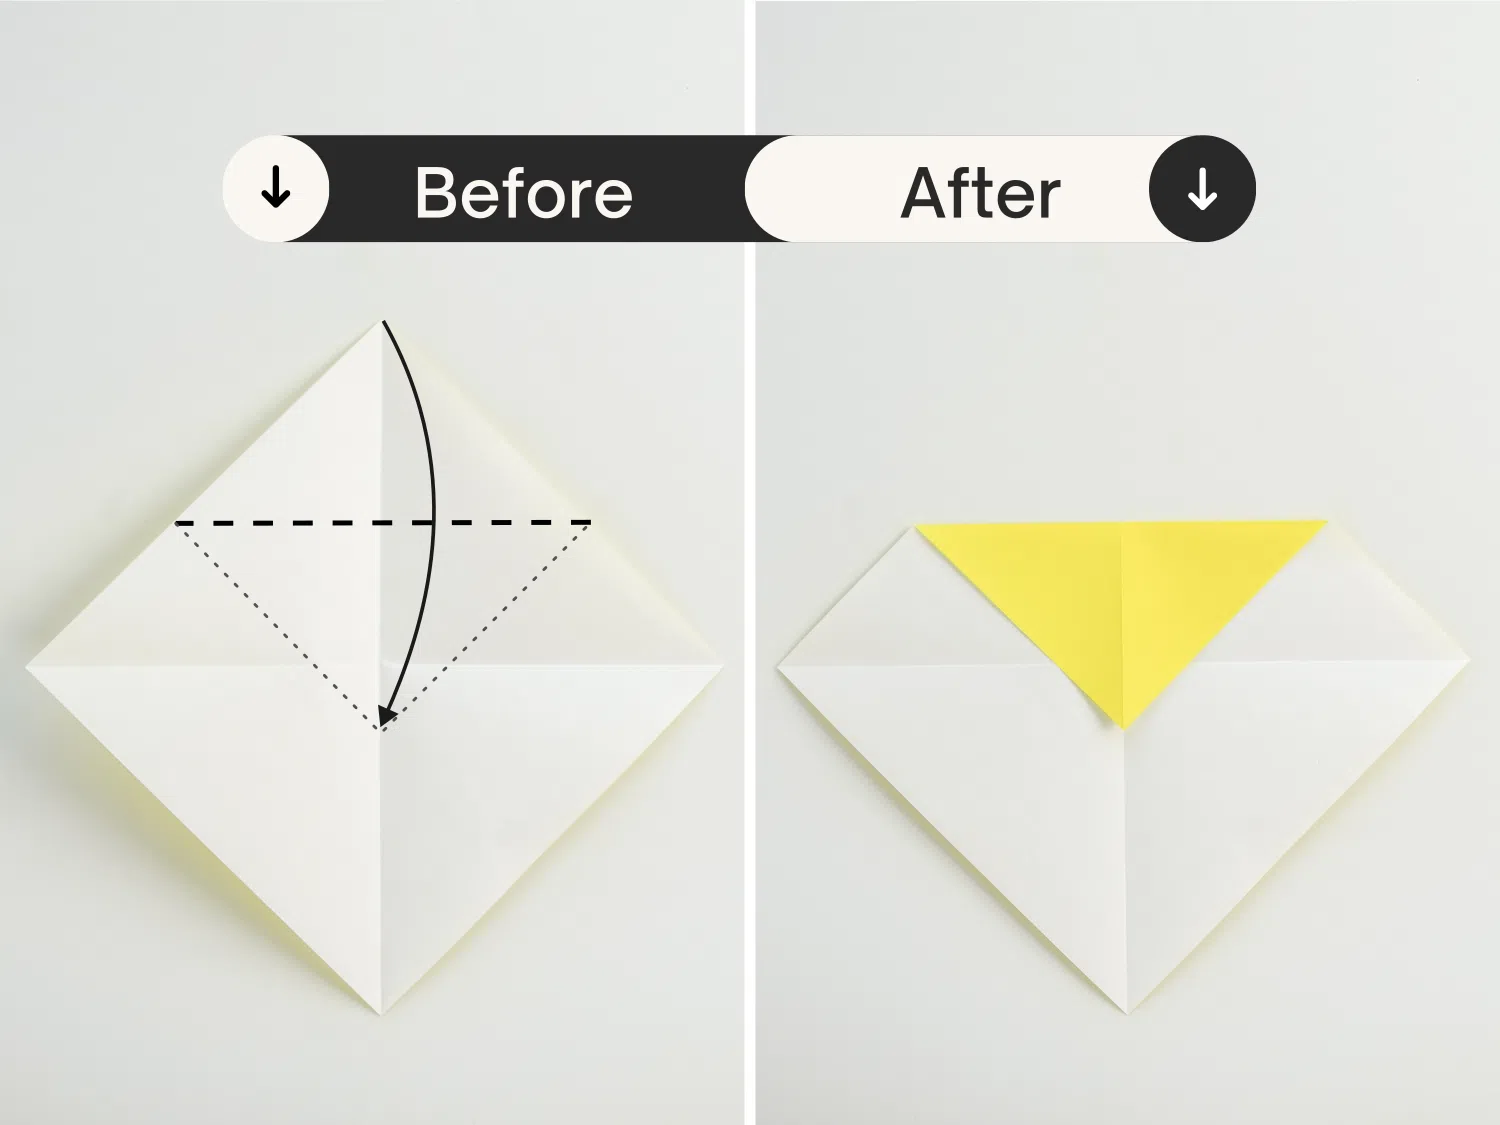
Step 4
Flip the paper over, getting a diamond shape.
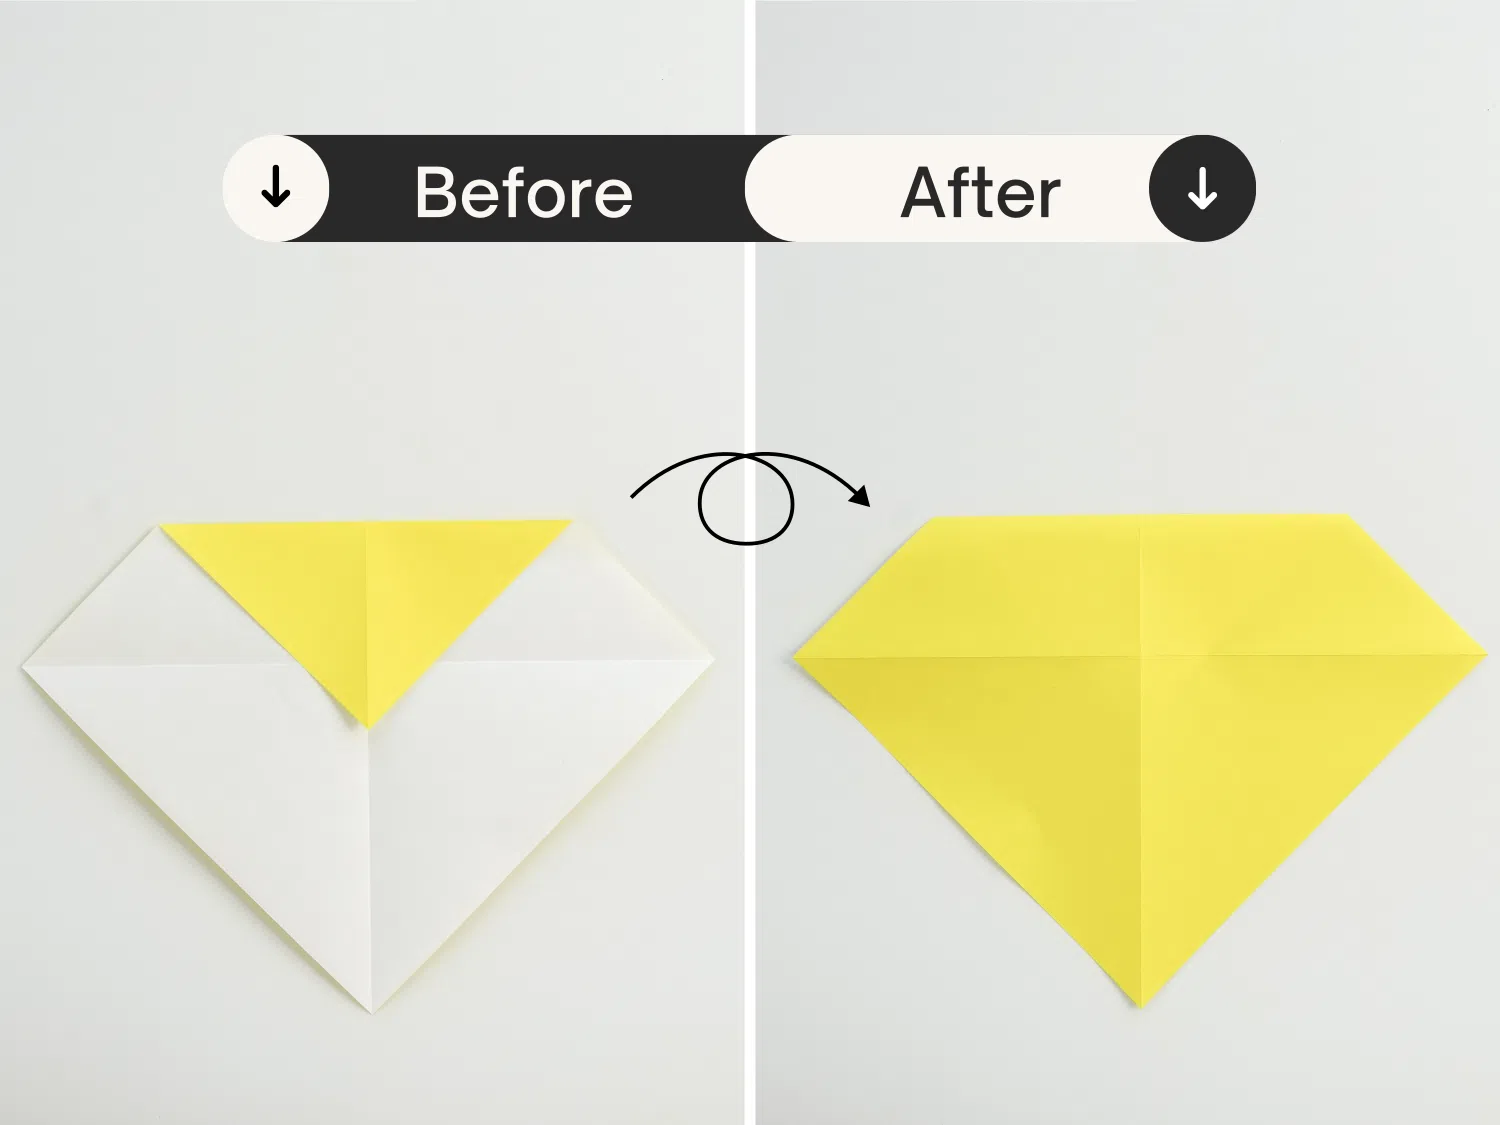
Step 5
This diamond is divided into two equal parts by the vertical crease.
Fold the top edge of the right part down along the dotted line to meet the middle crease.
Repeat this for the left side, getting a square.
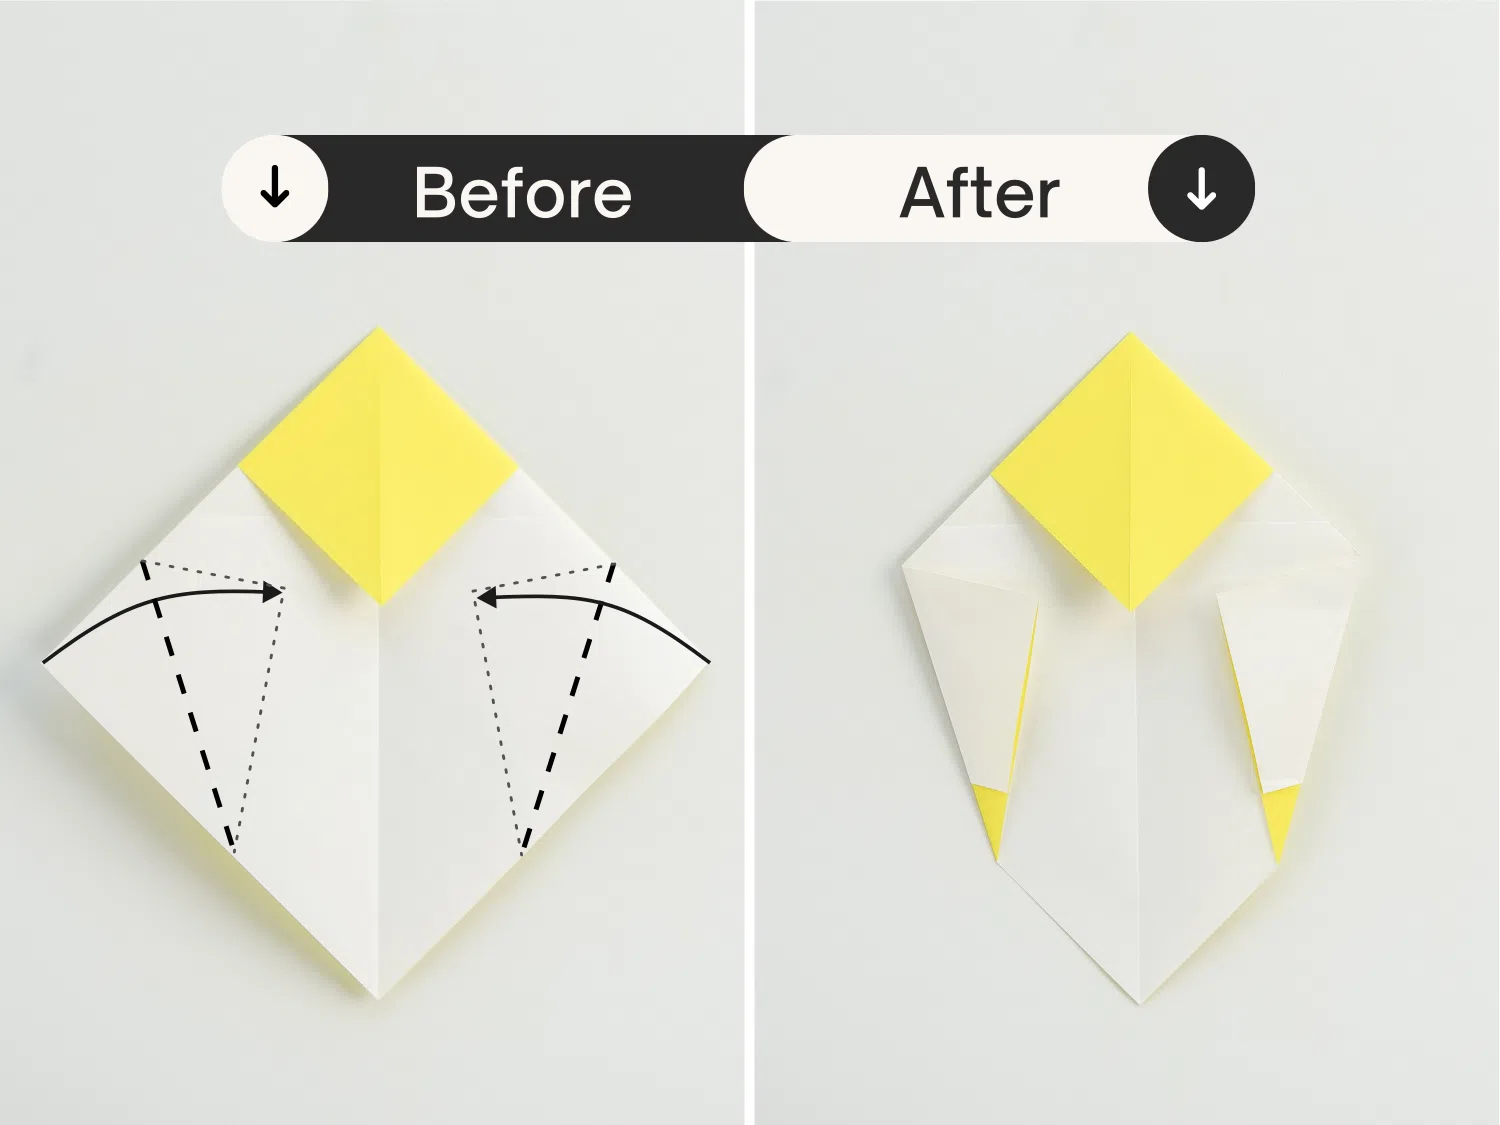
Step 6
Flip the paper over again.
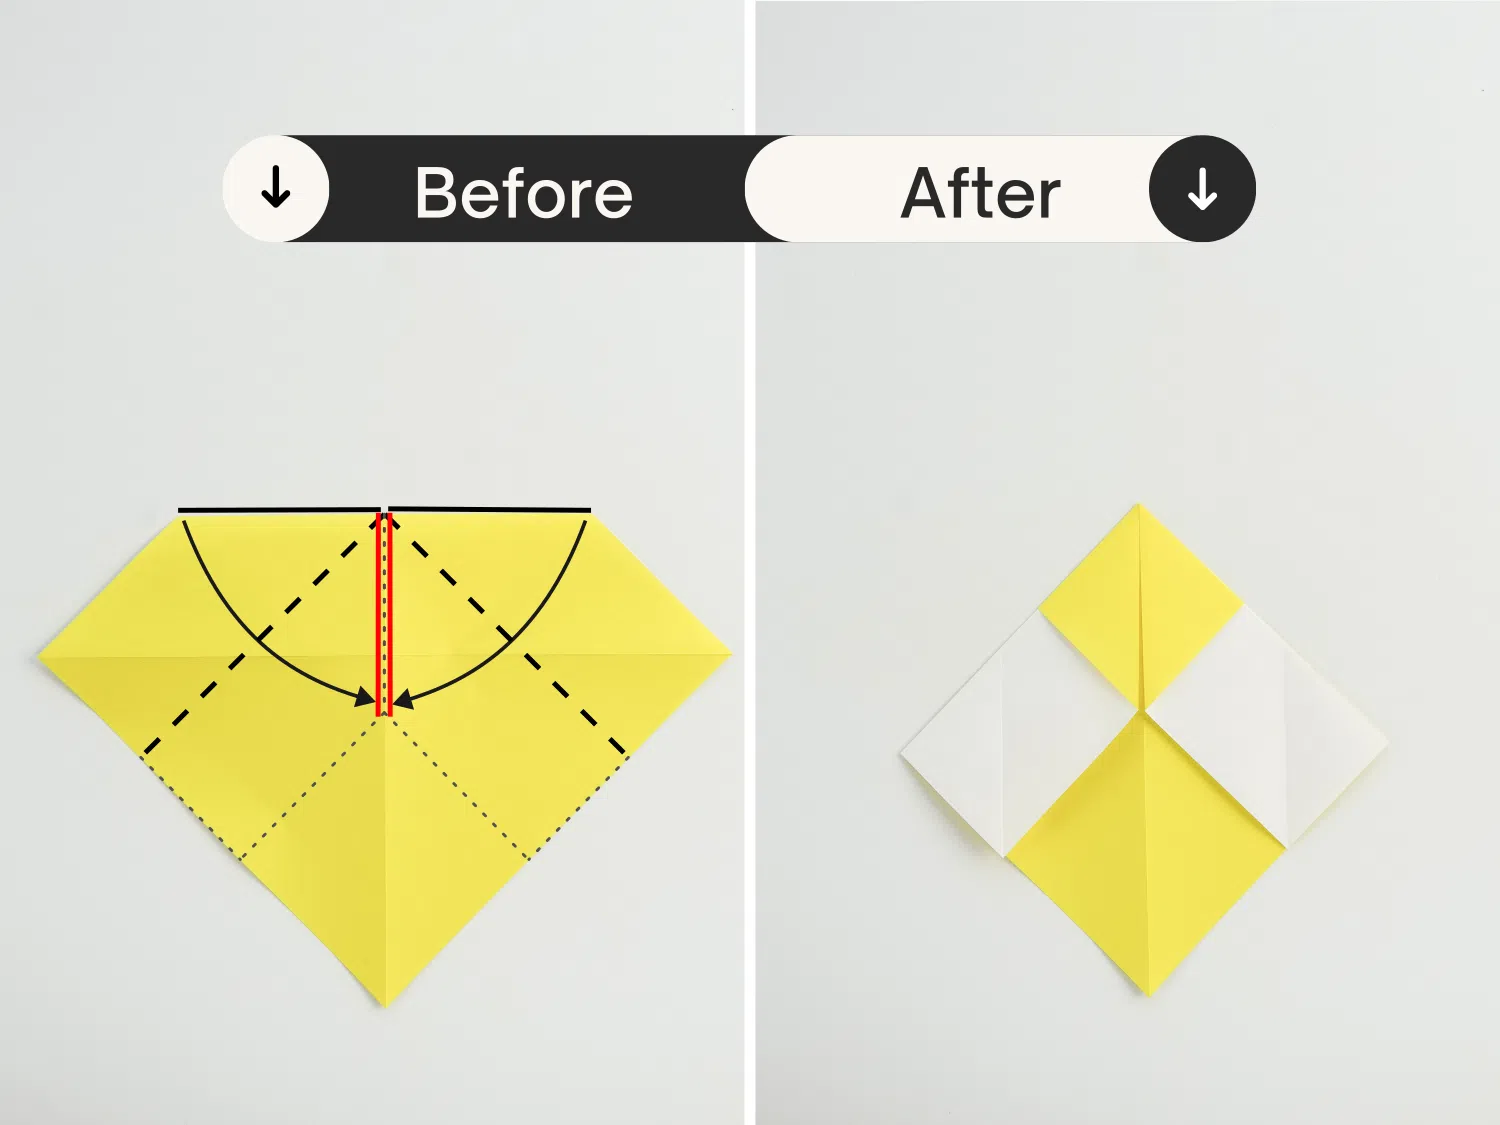
Step 7
Fold the right point to the left along the thick dotted line.
Repeat this for the left point.
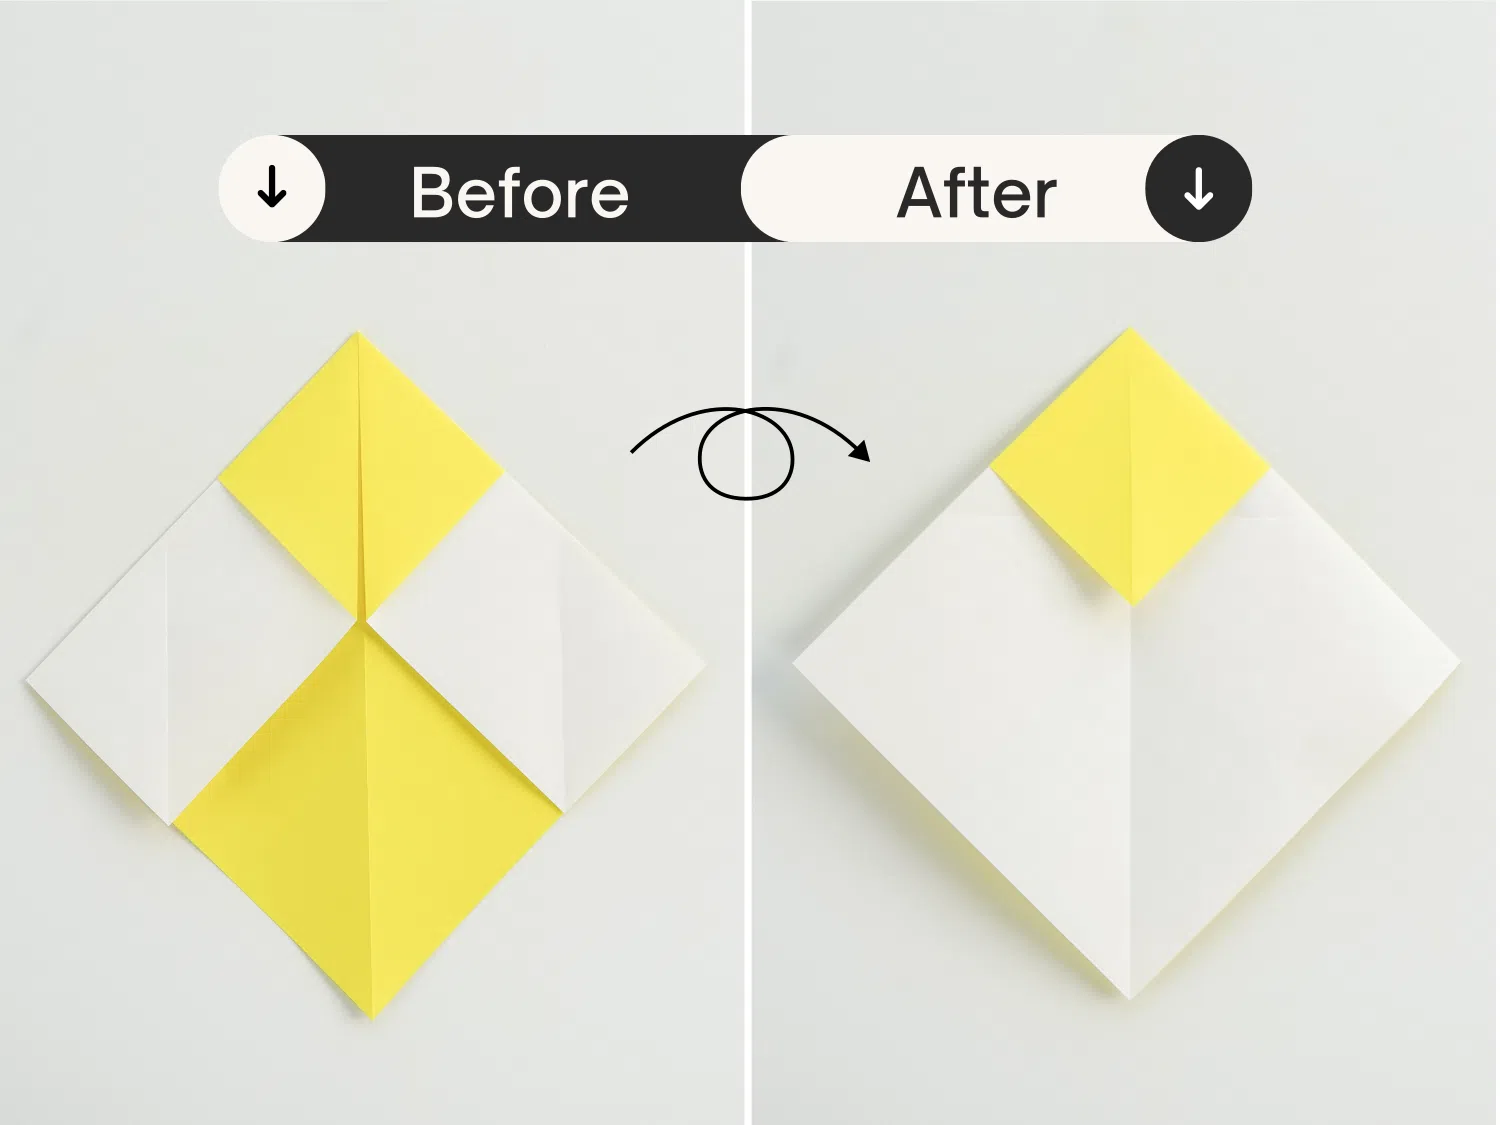
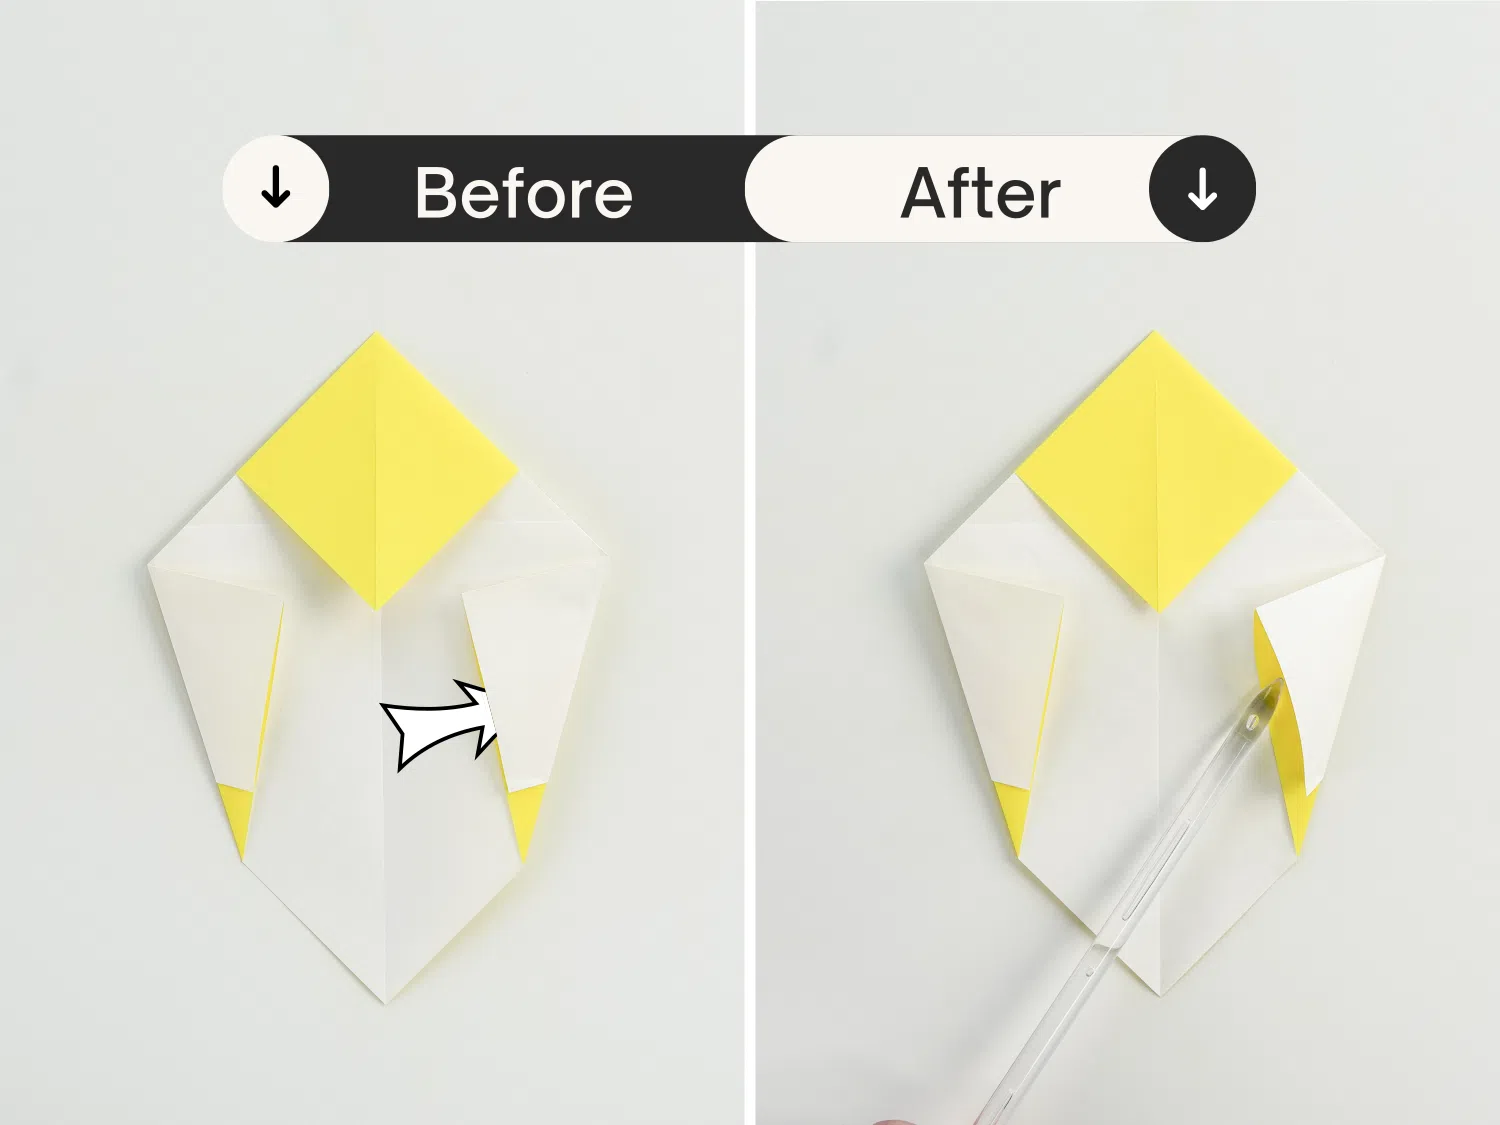
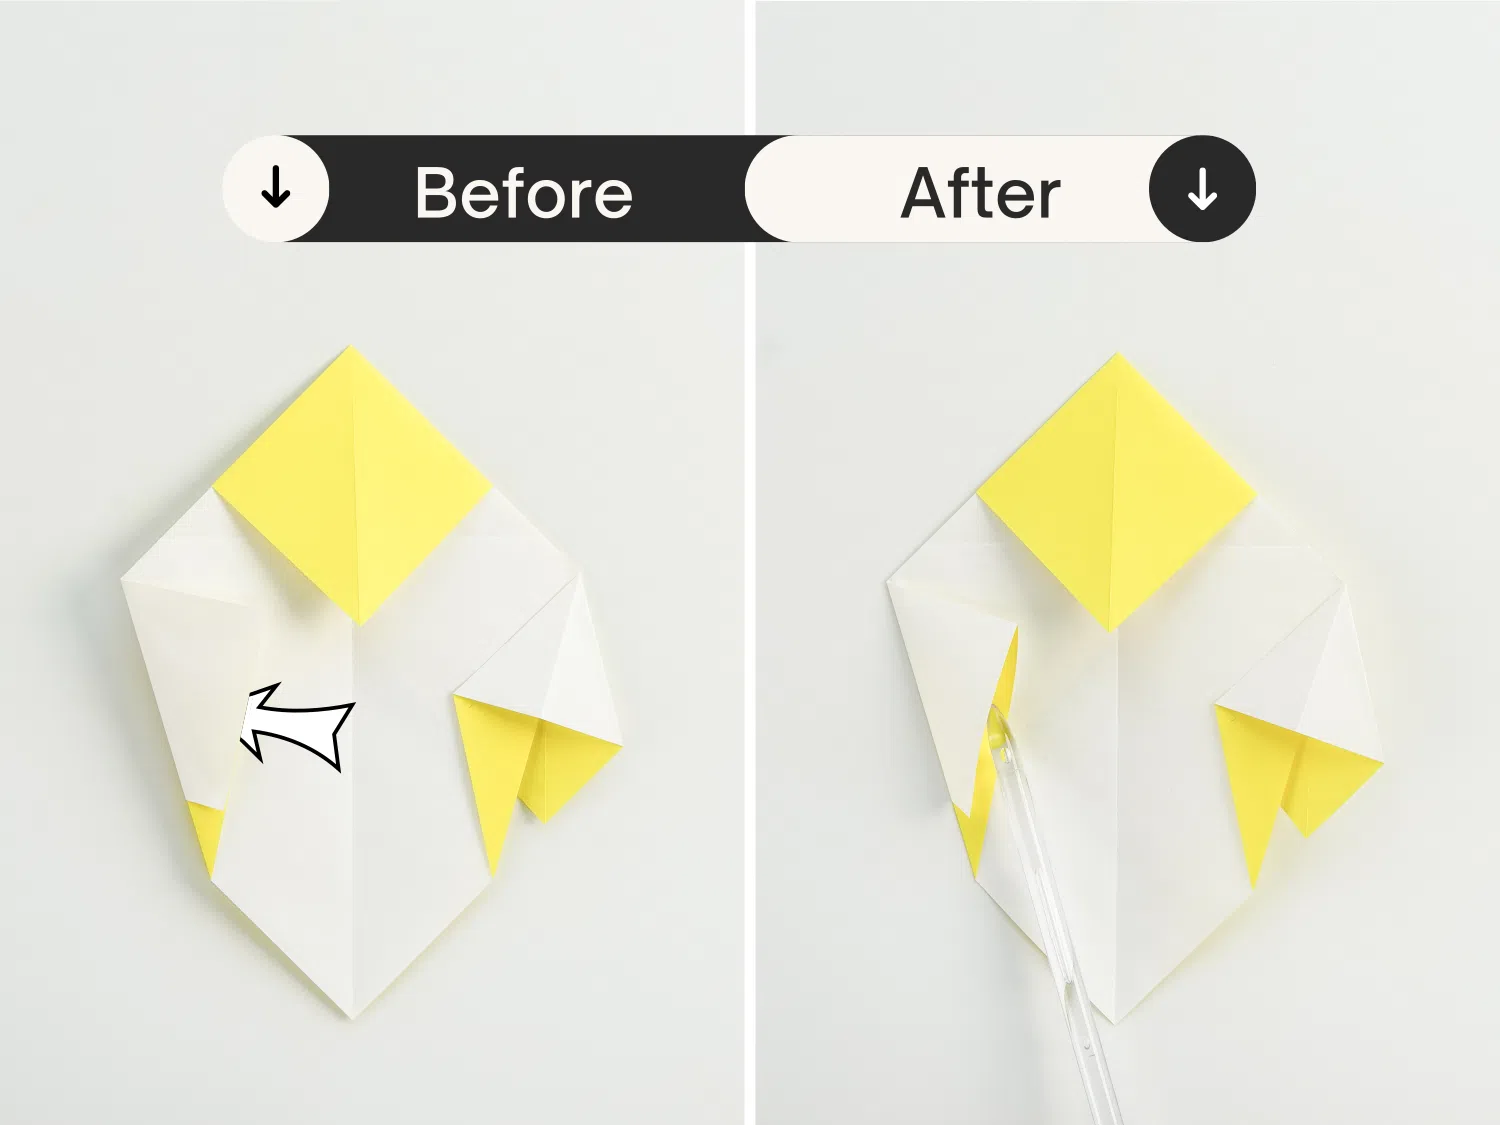
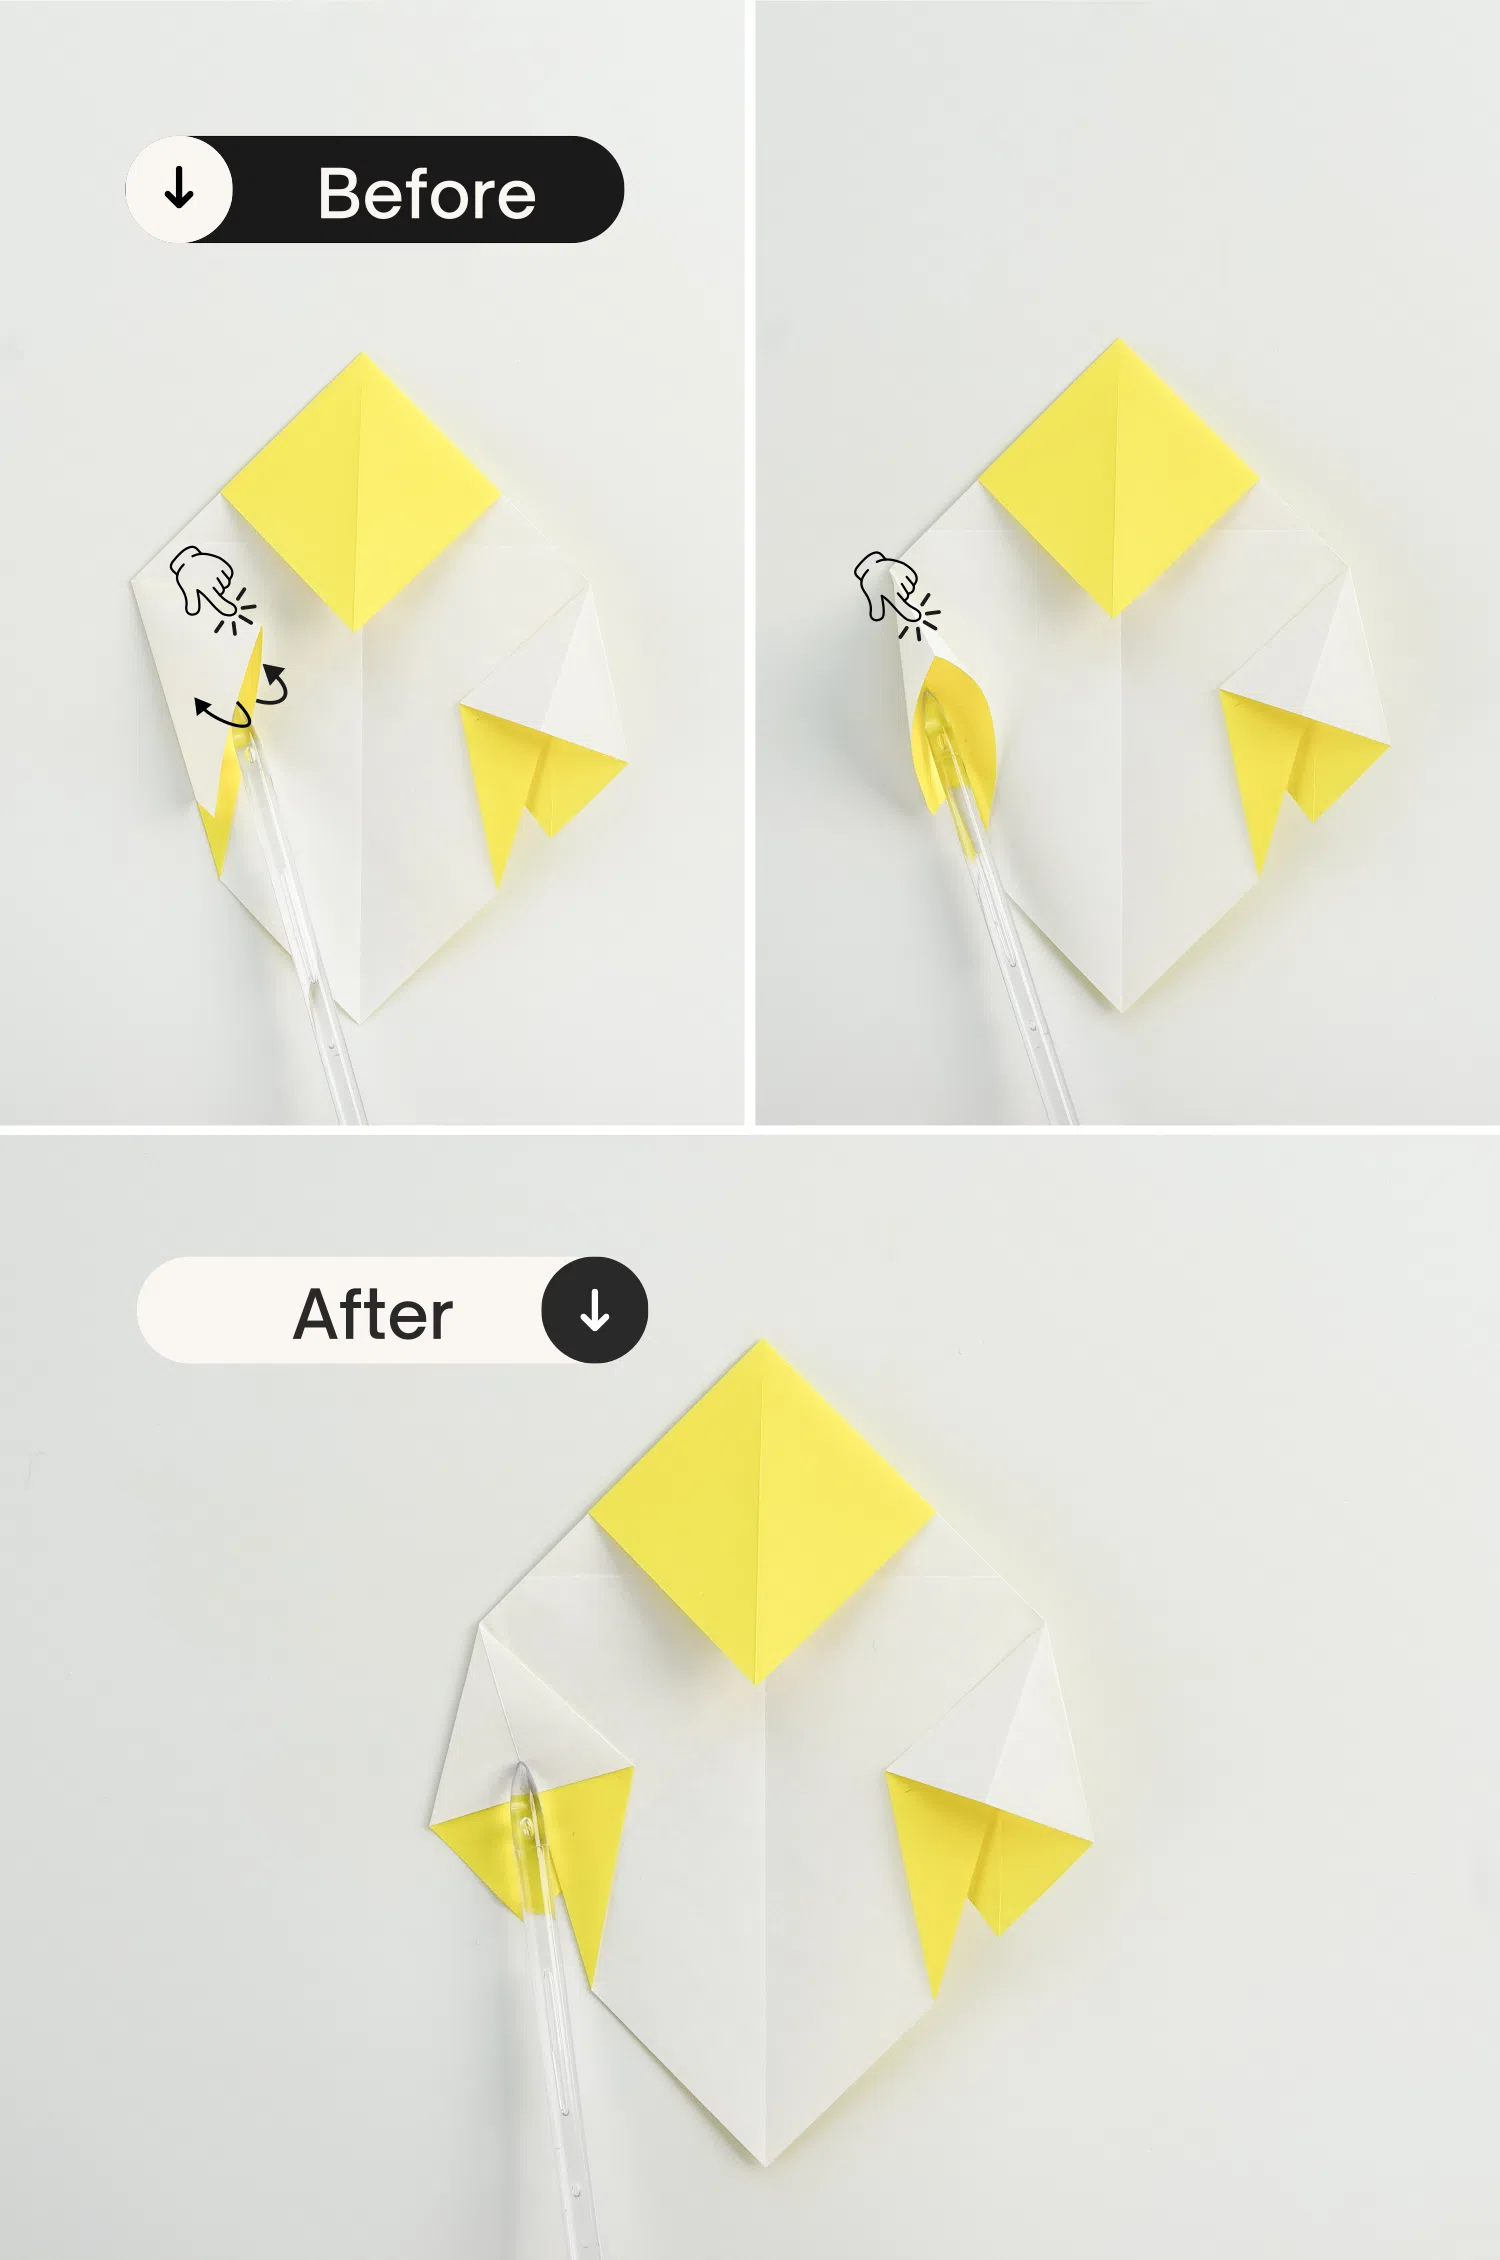
Step 8
Use your fingers or any other tool to open this right corner.
Step 9
Press down the crease above and flatten the corner.
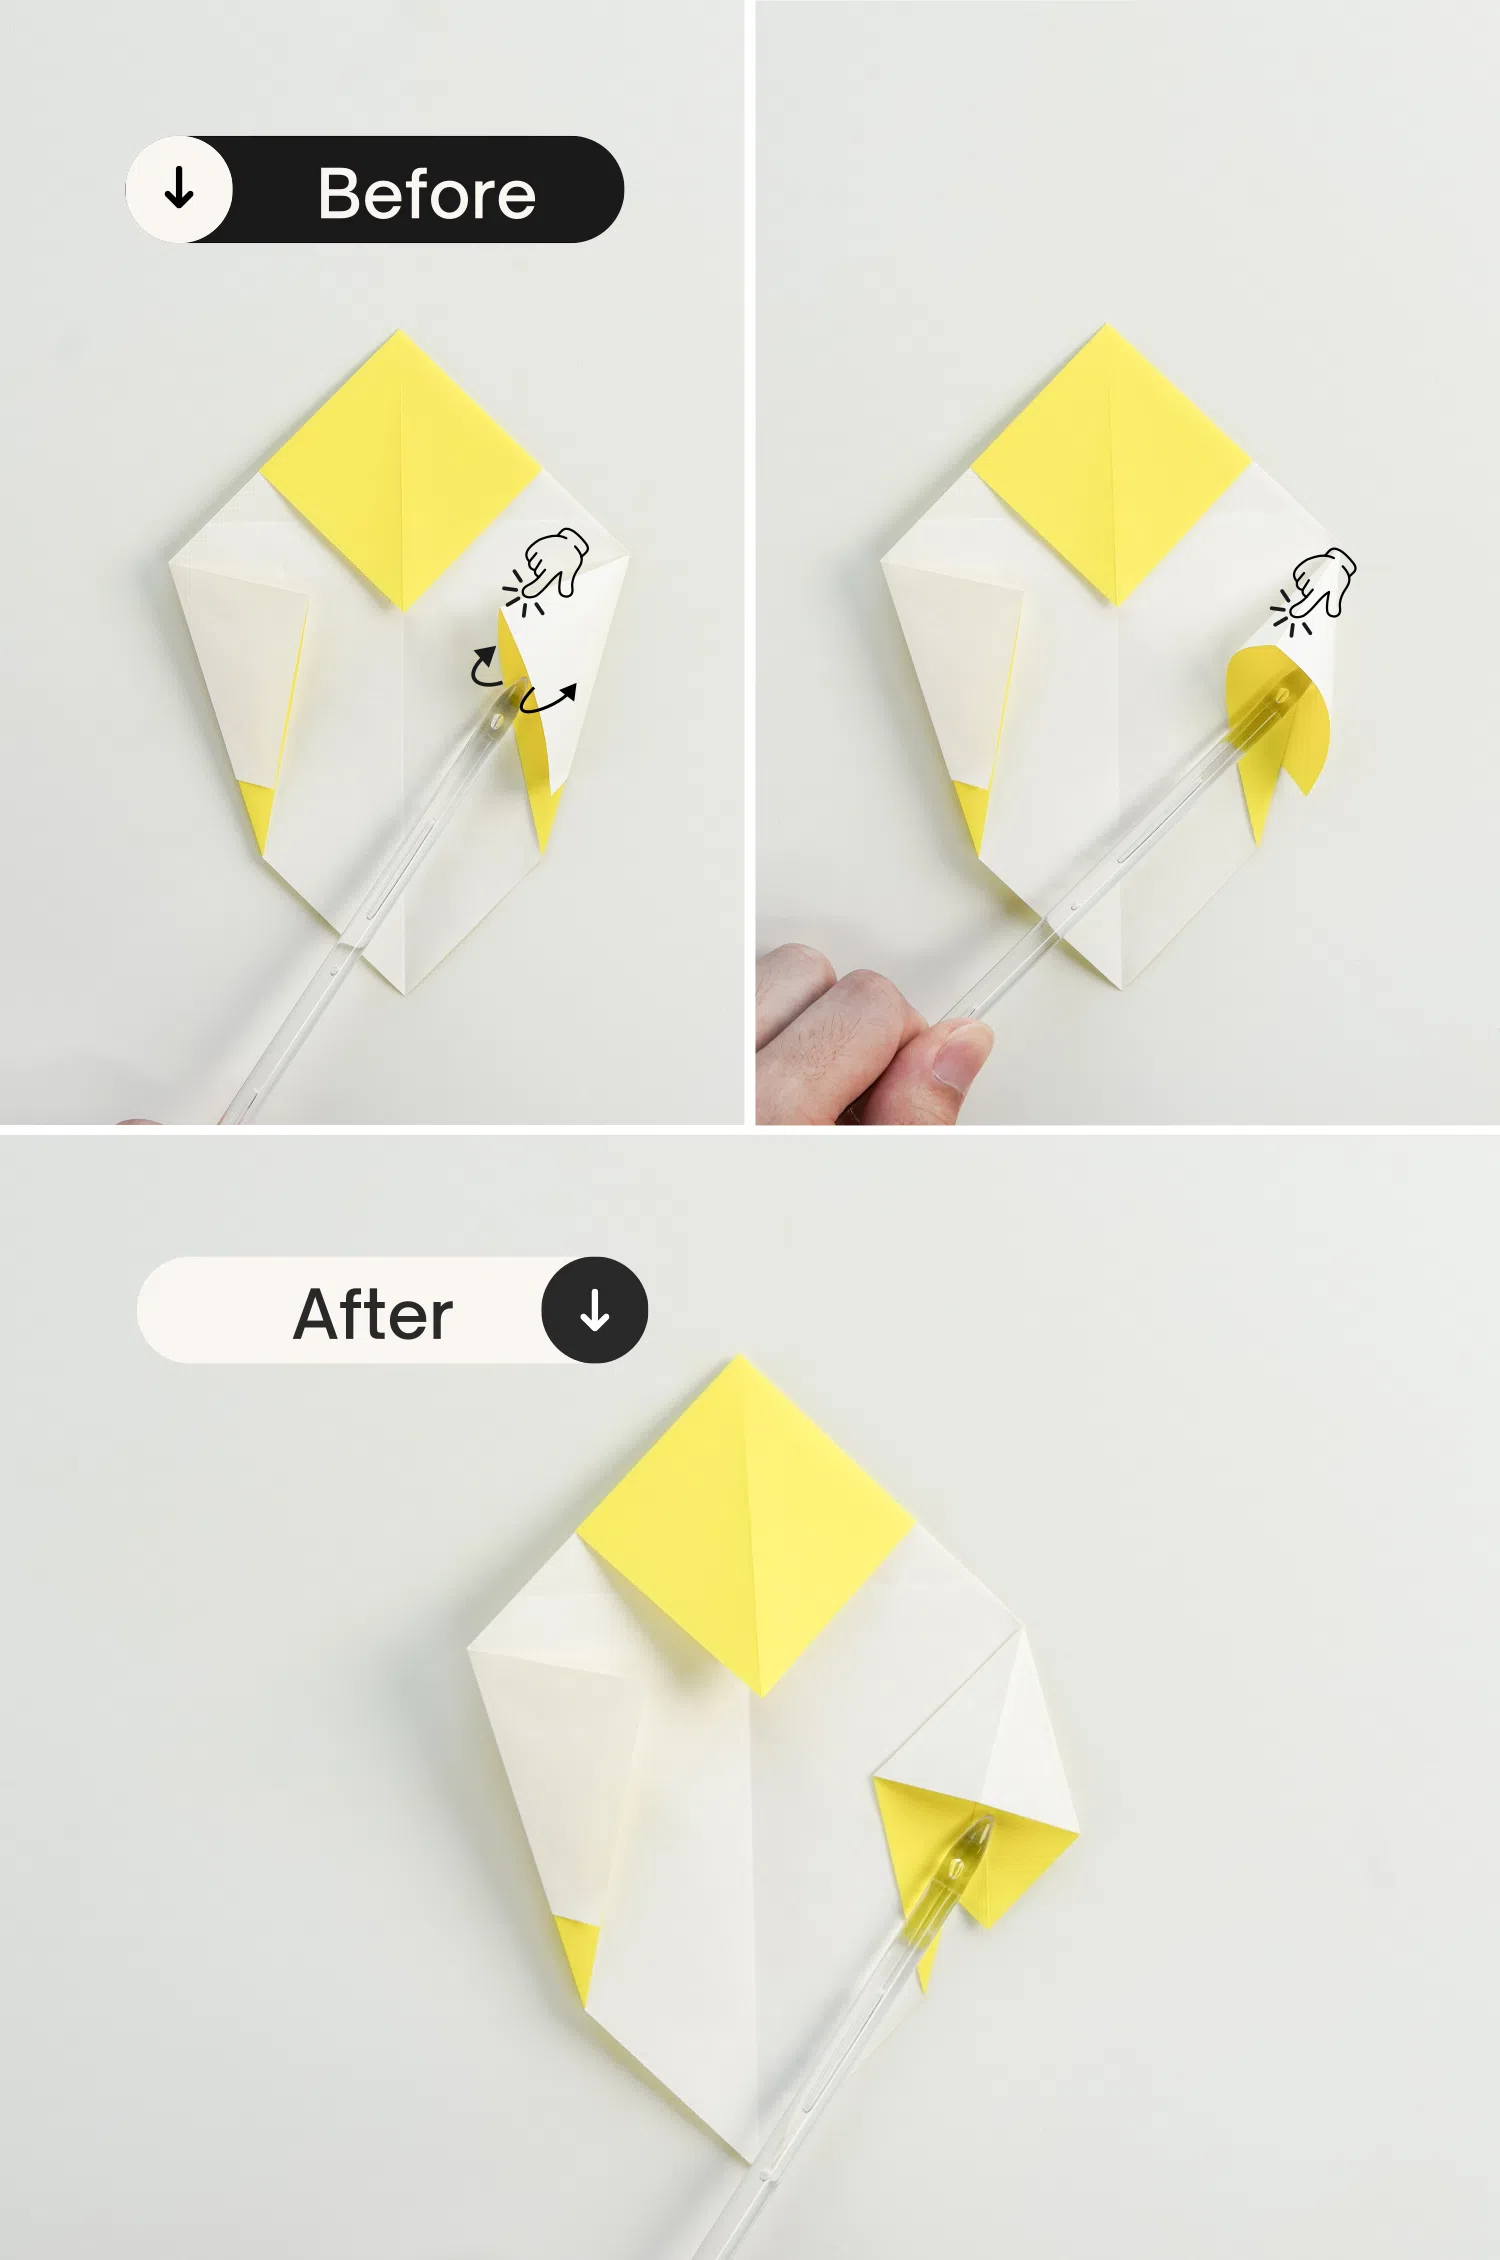
Step 10
Similarly, open the left corner.
Step 11
Then flatten it.
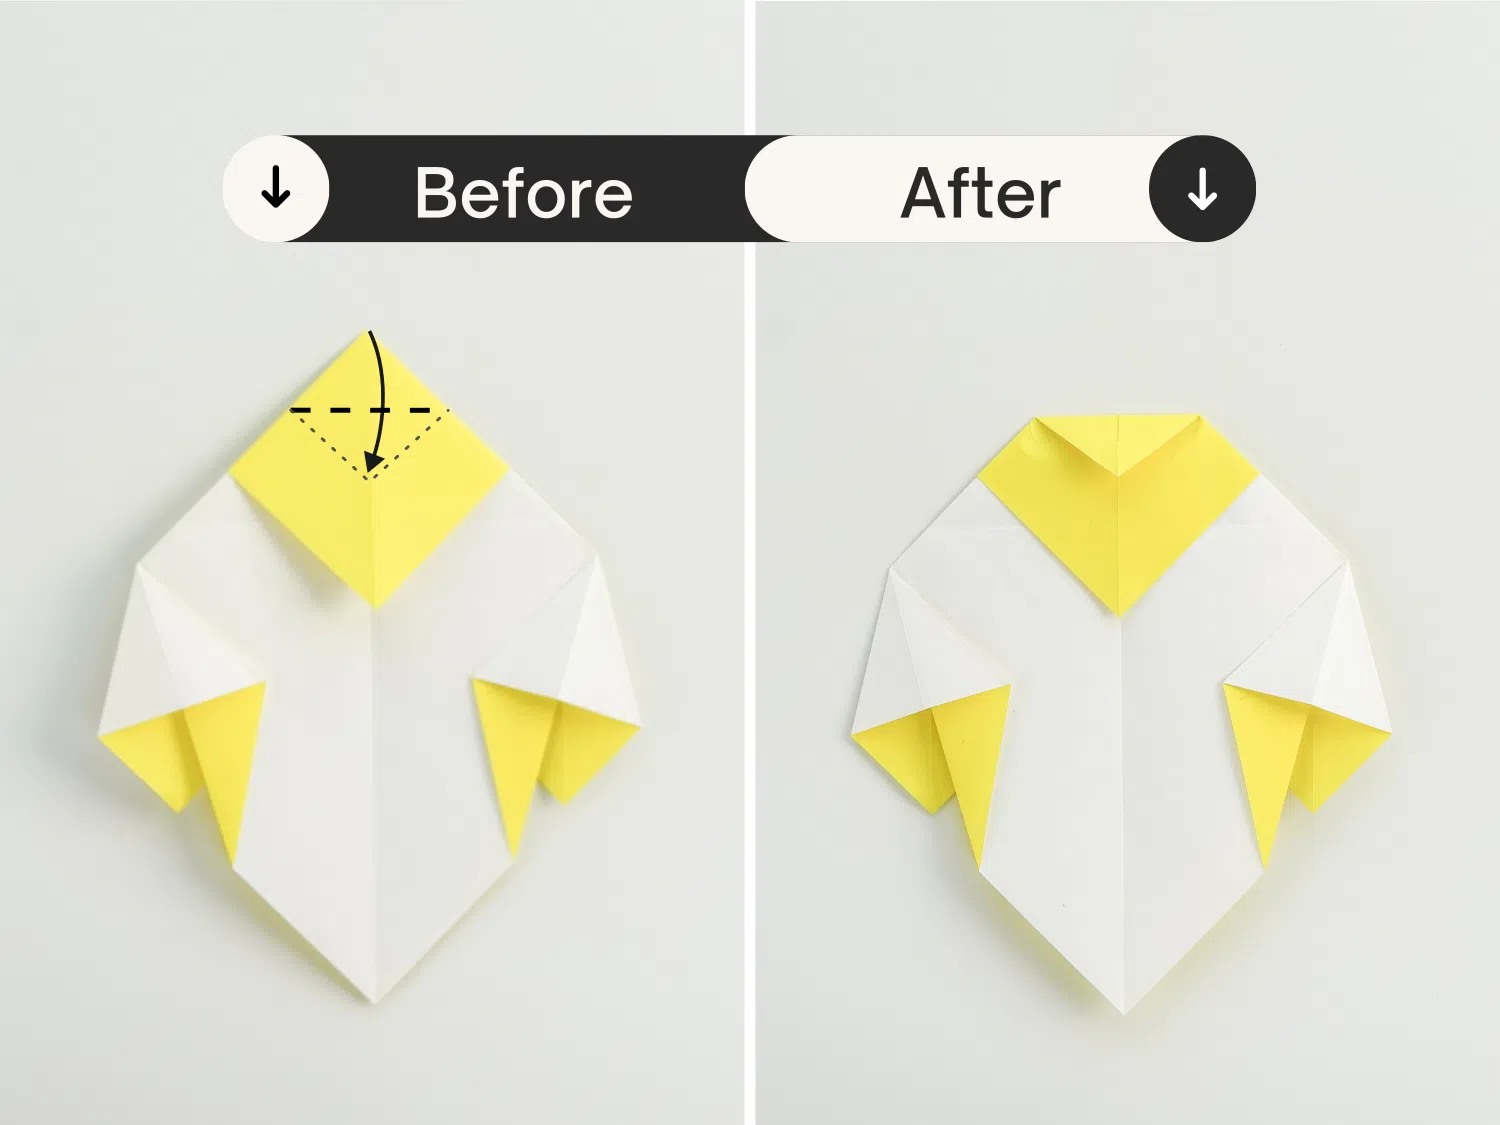
Step 12
Fold the top point down a little.
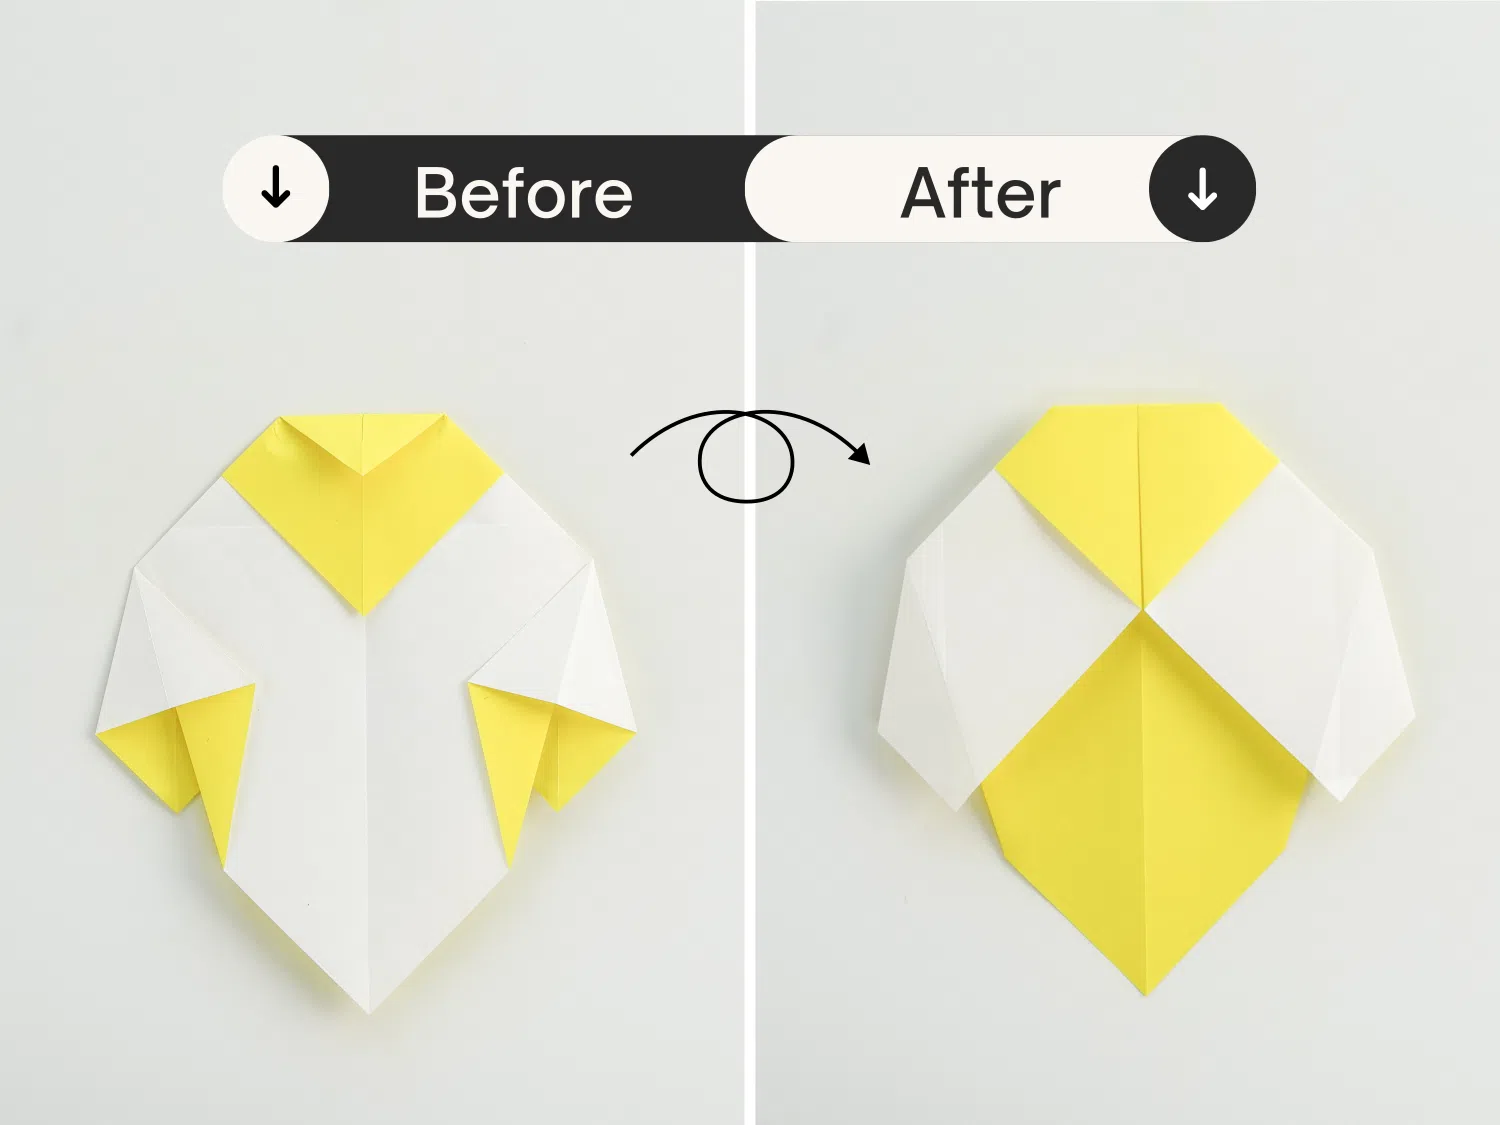
Step 13
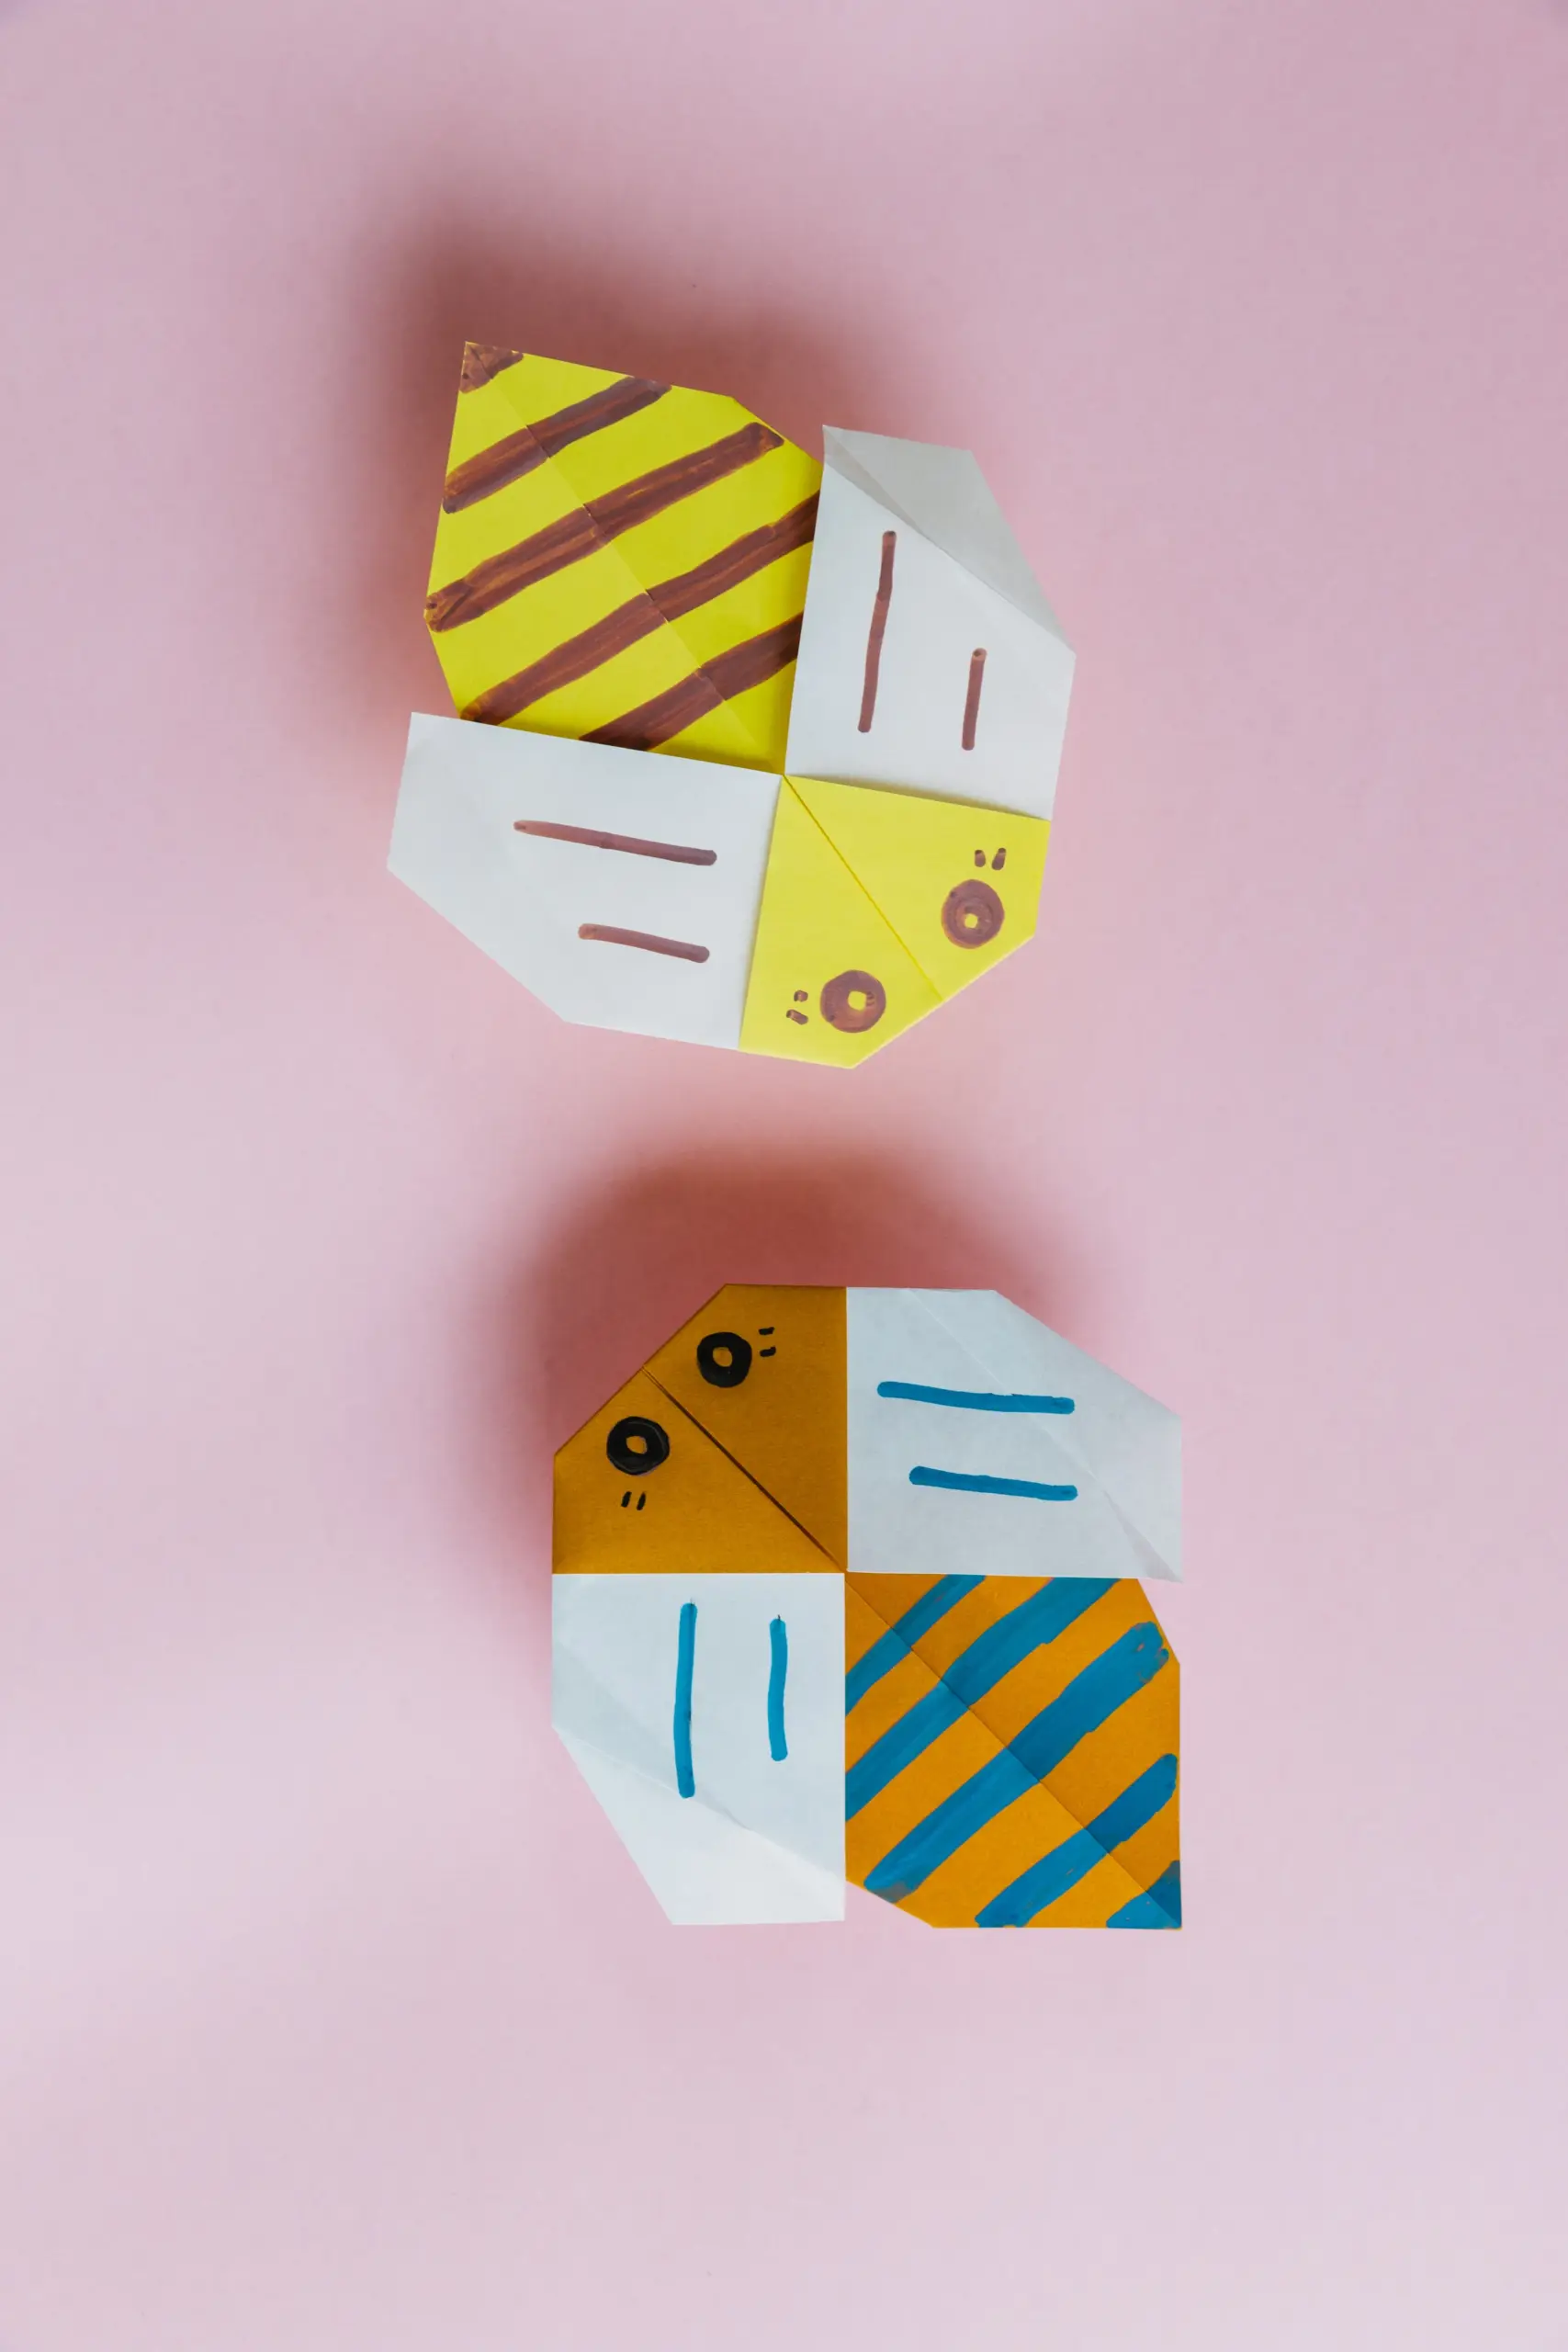
Flip the paper over, that’s it! super cute origami bee!
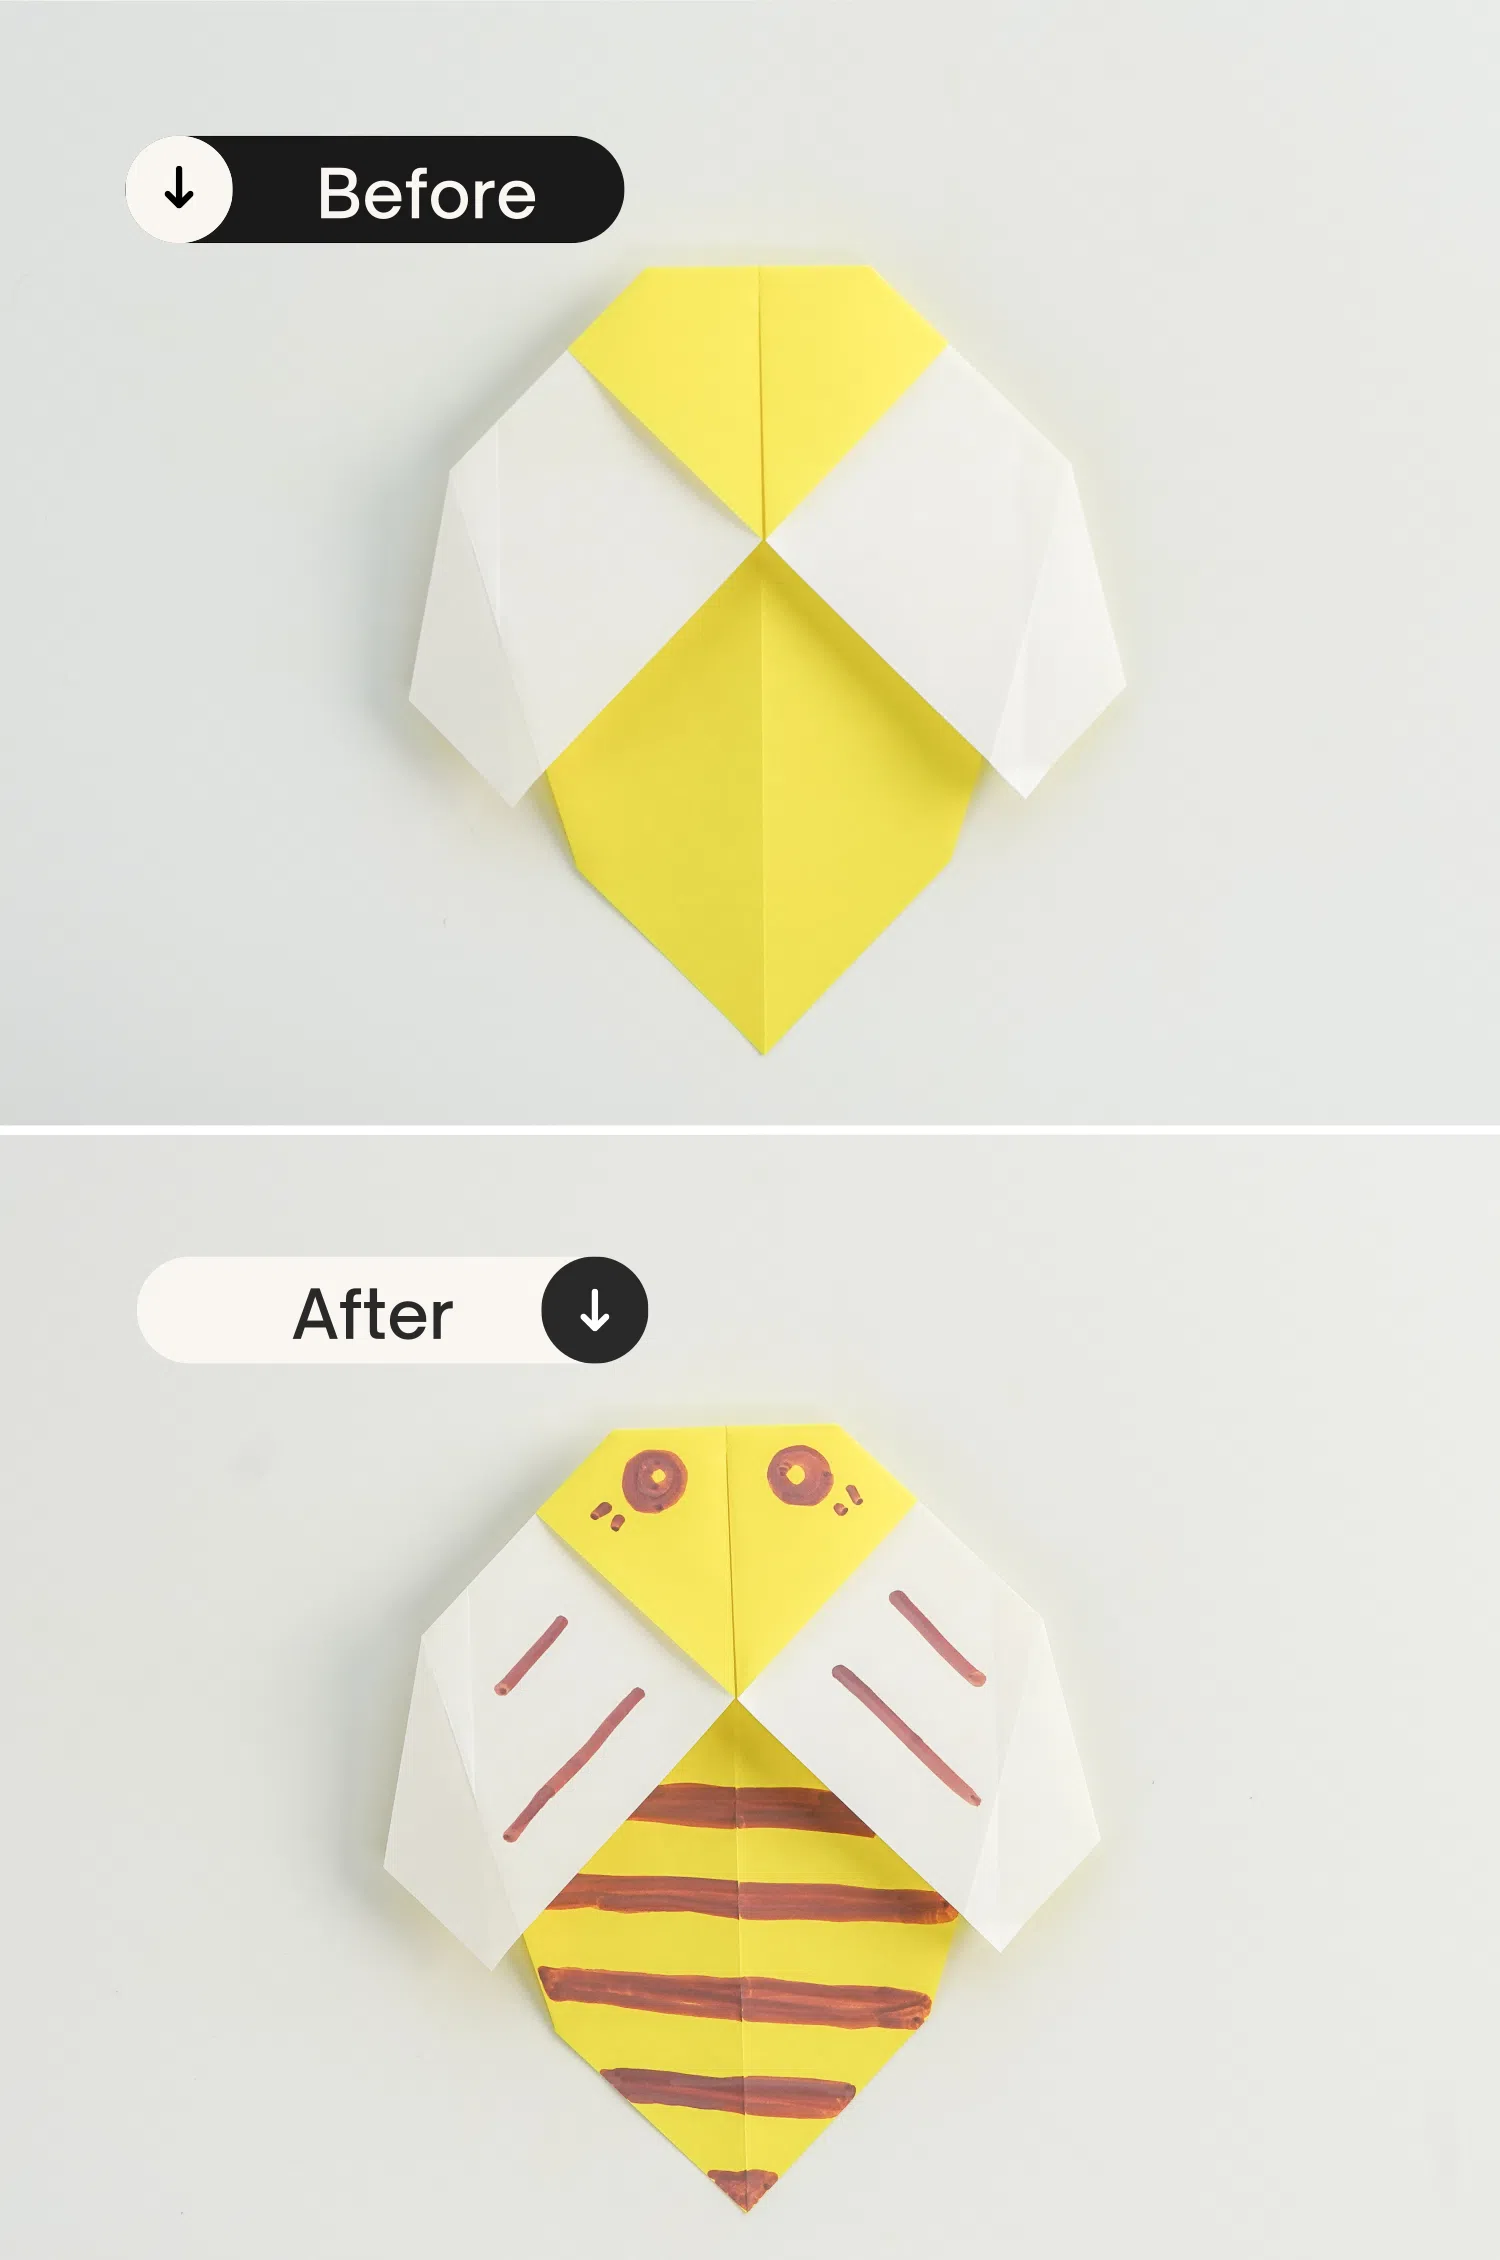
Step 14
You can draw the eyes, patterns, and wings for the bee like I did, or you can be creative.
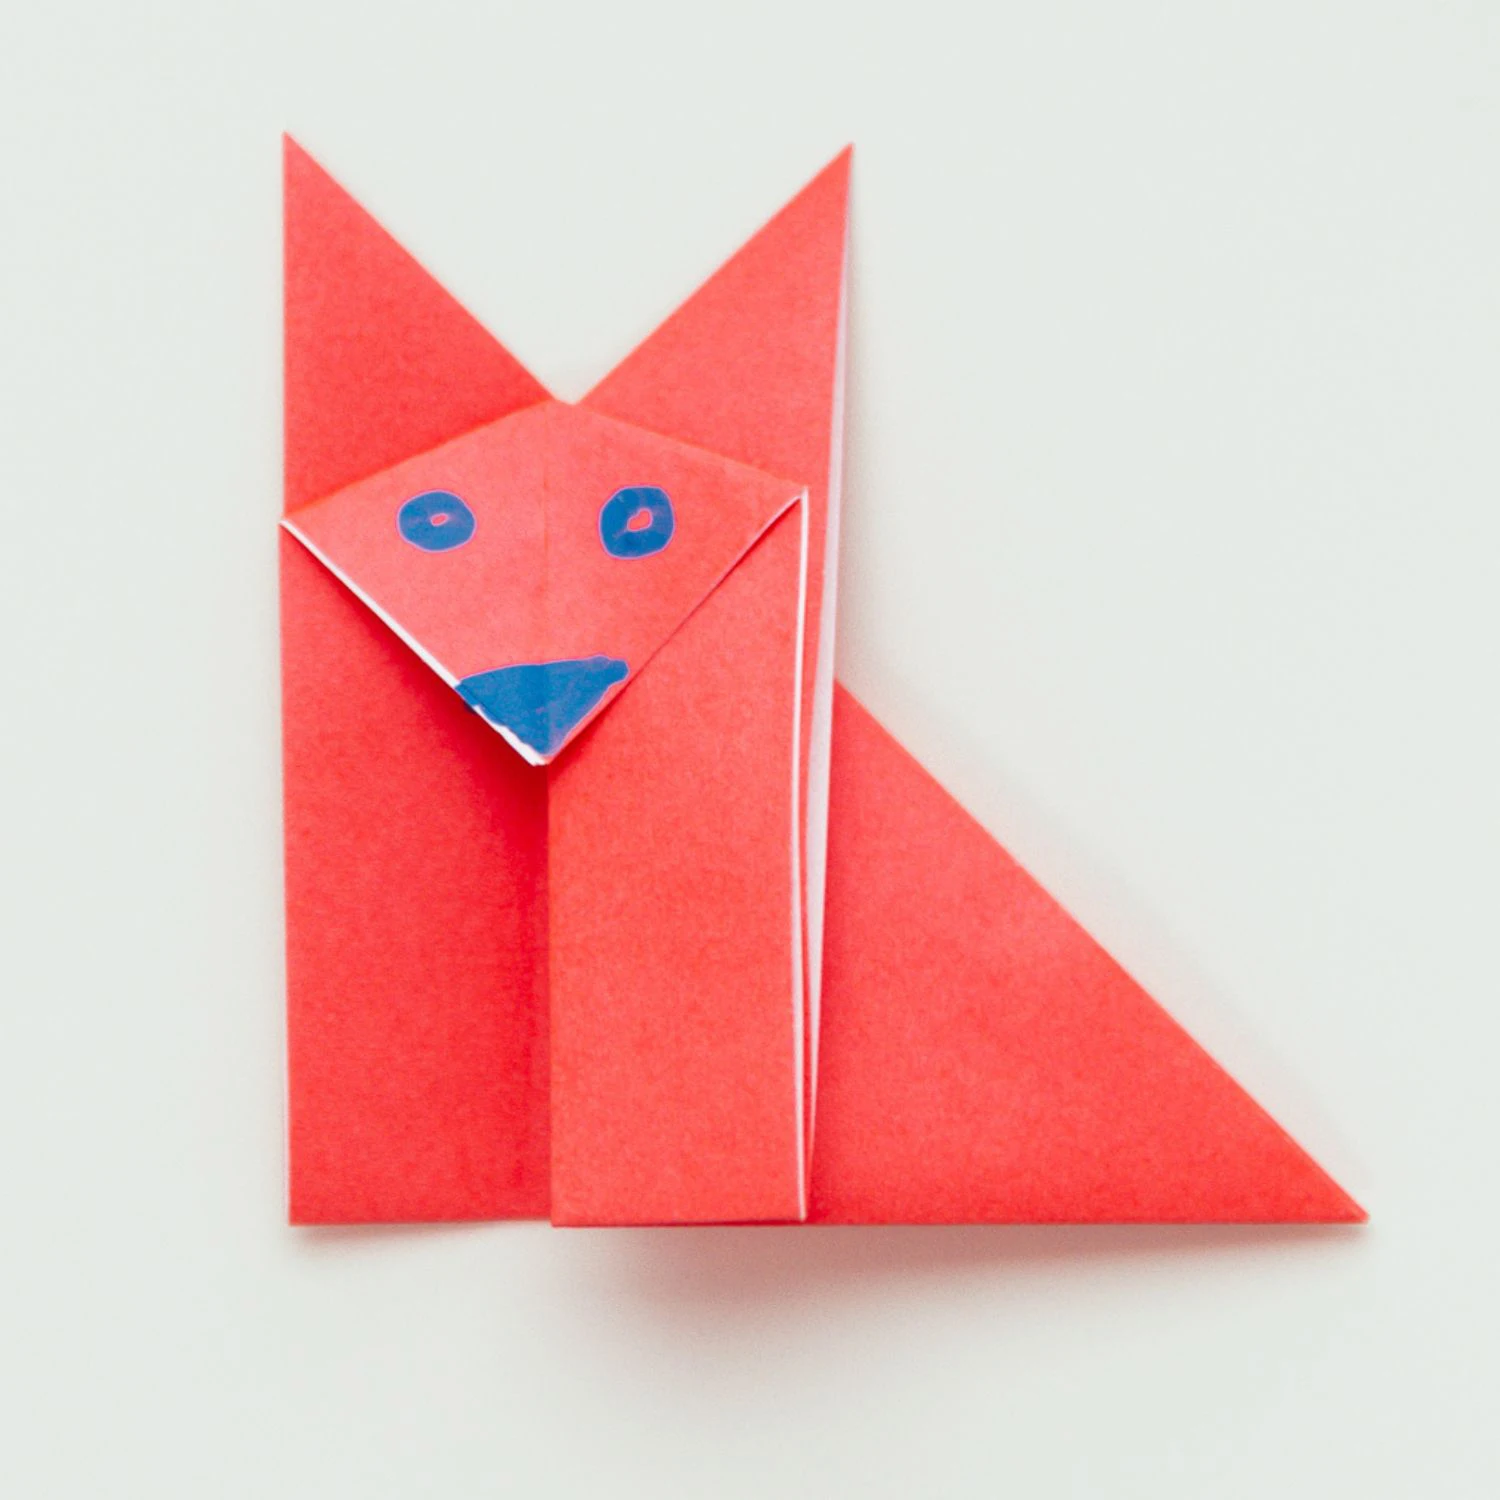
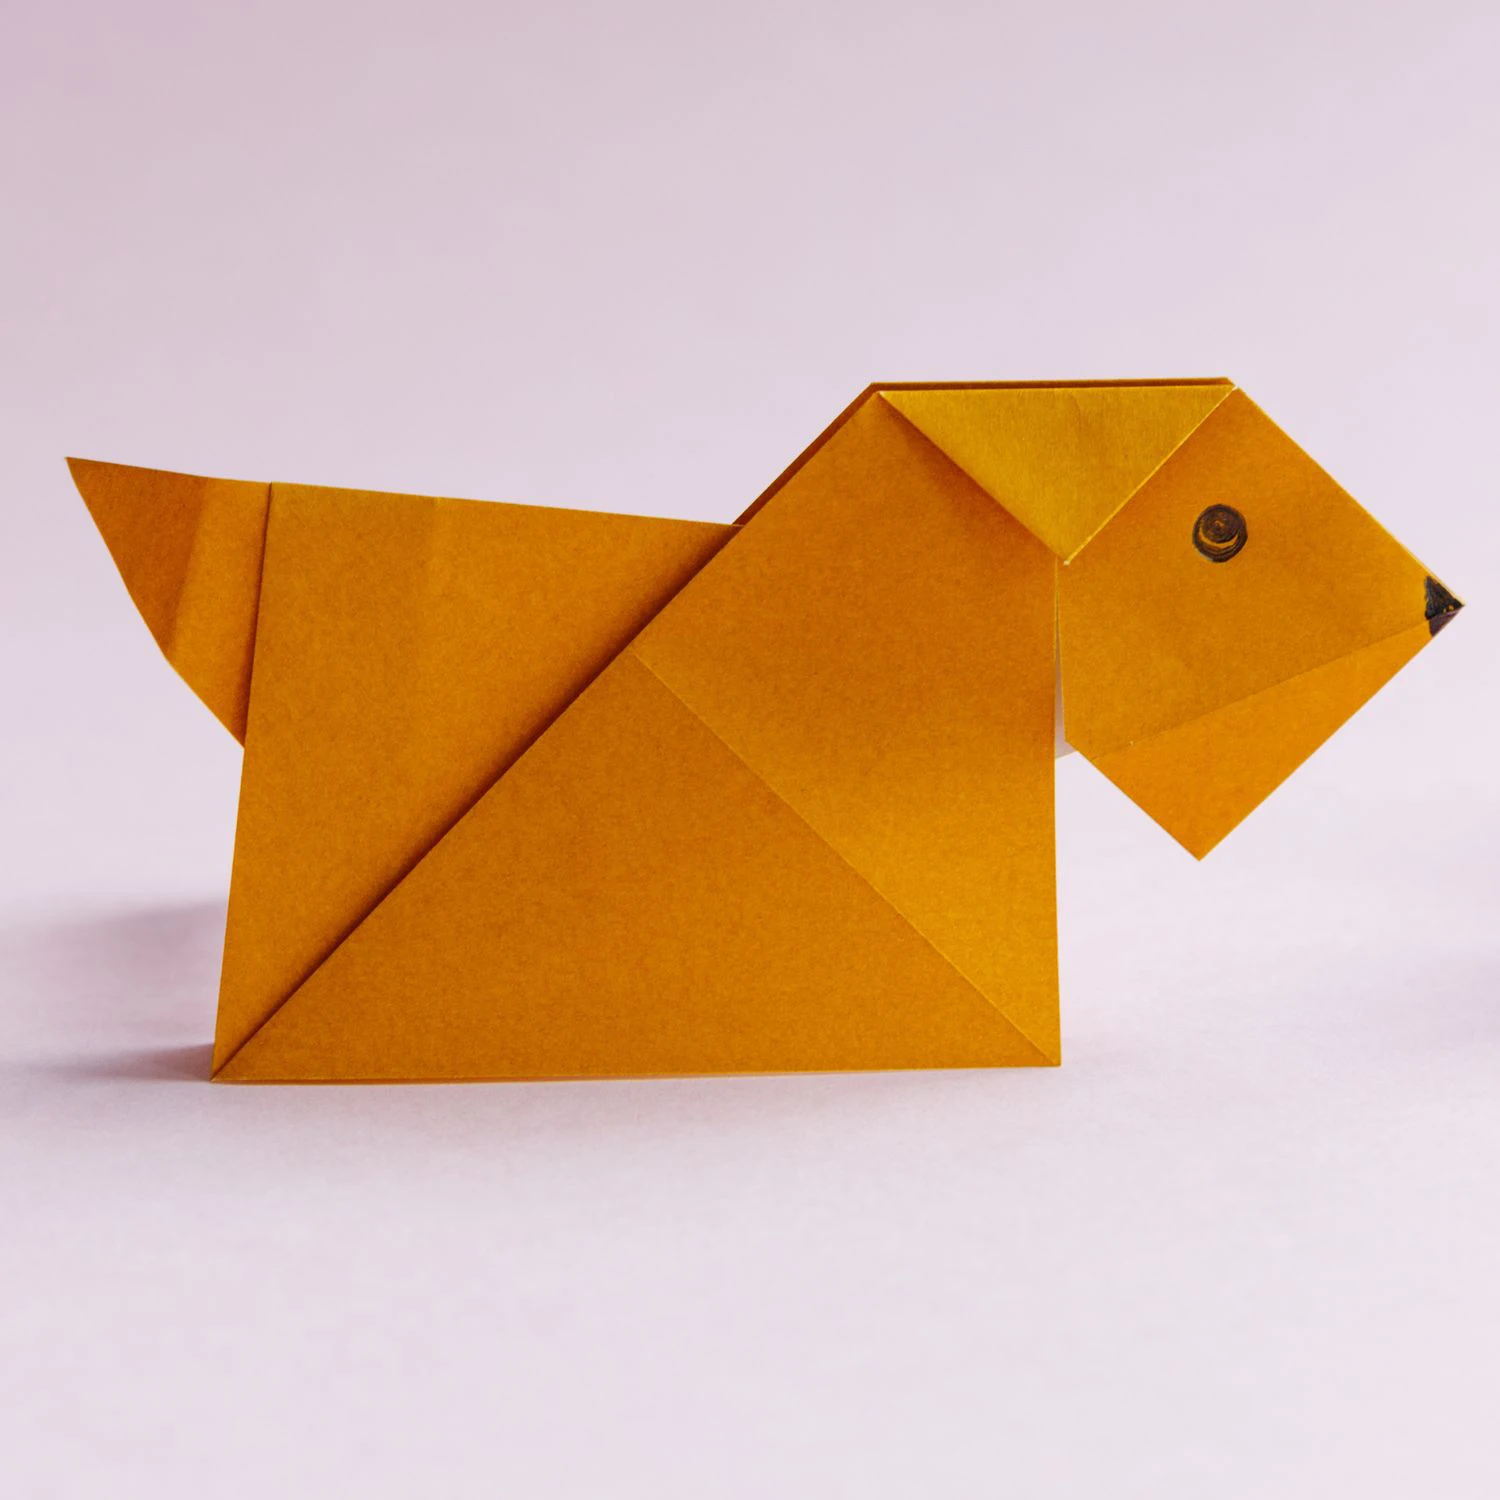
Other Origami Animal Ideas


Want more origami ideas or more instructions? Remember to subscribe our Newsletters. We will send the newest inspiration to your box.