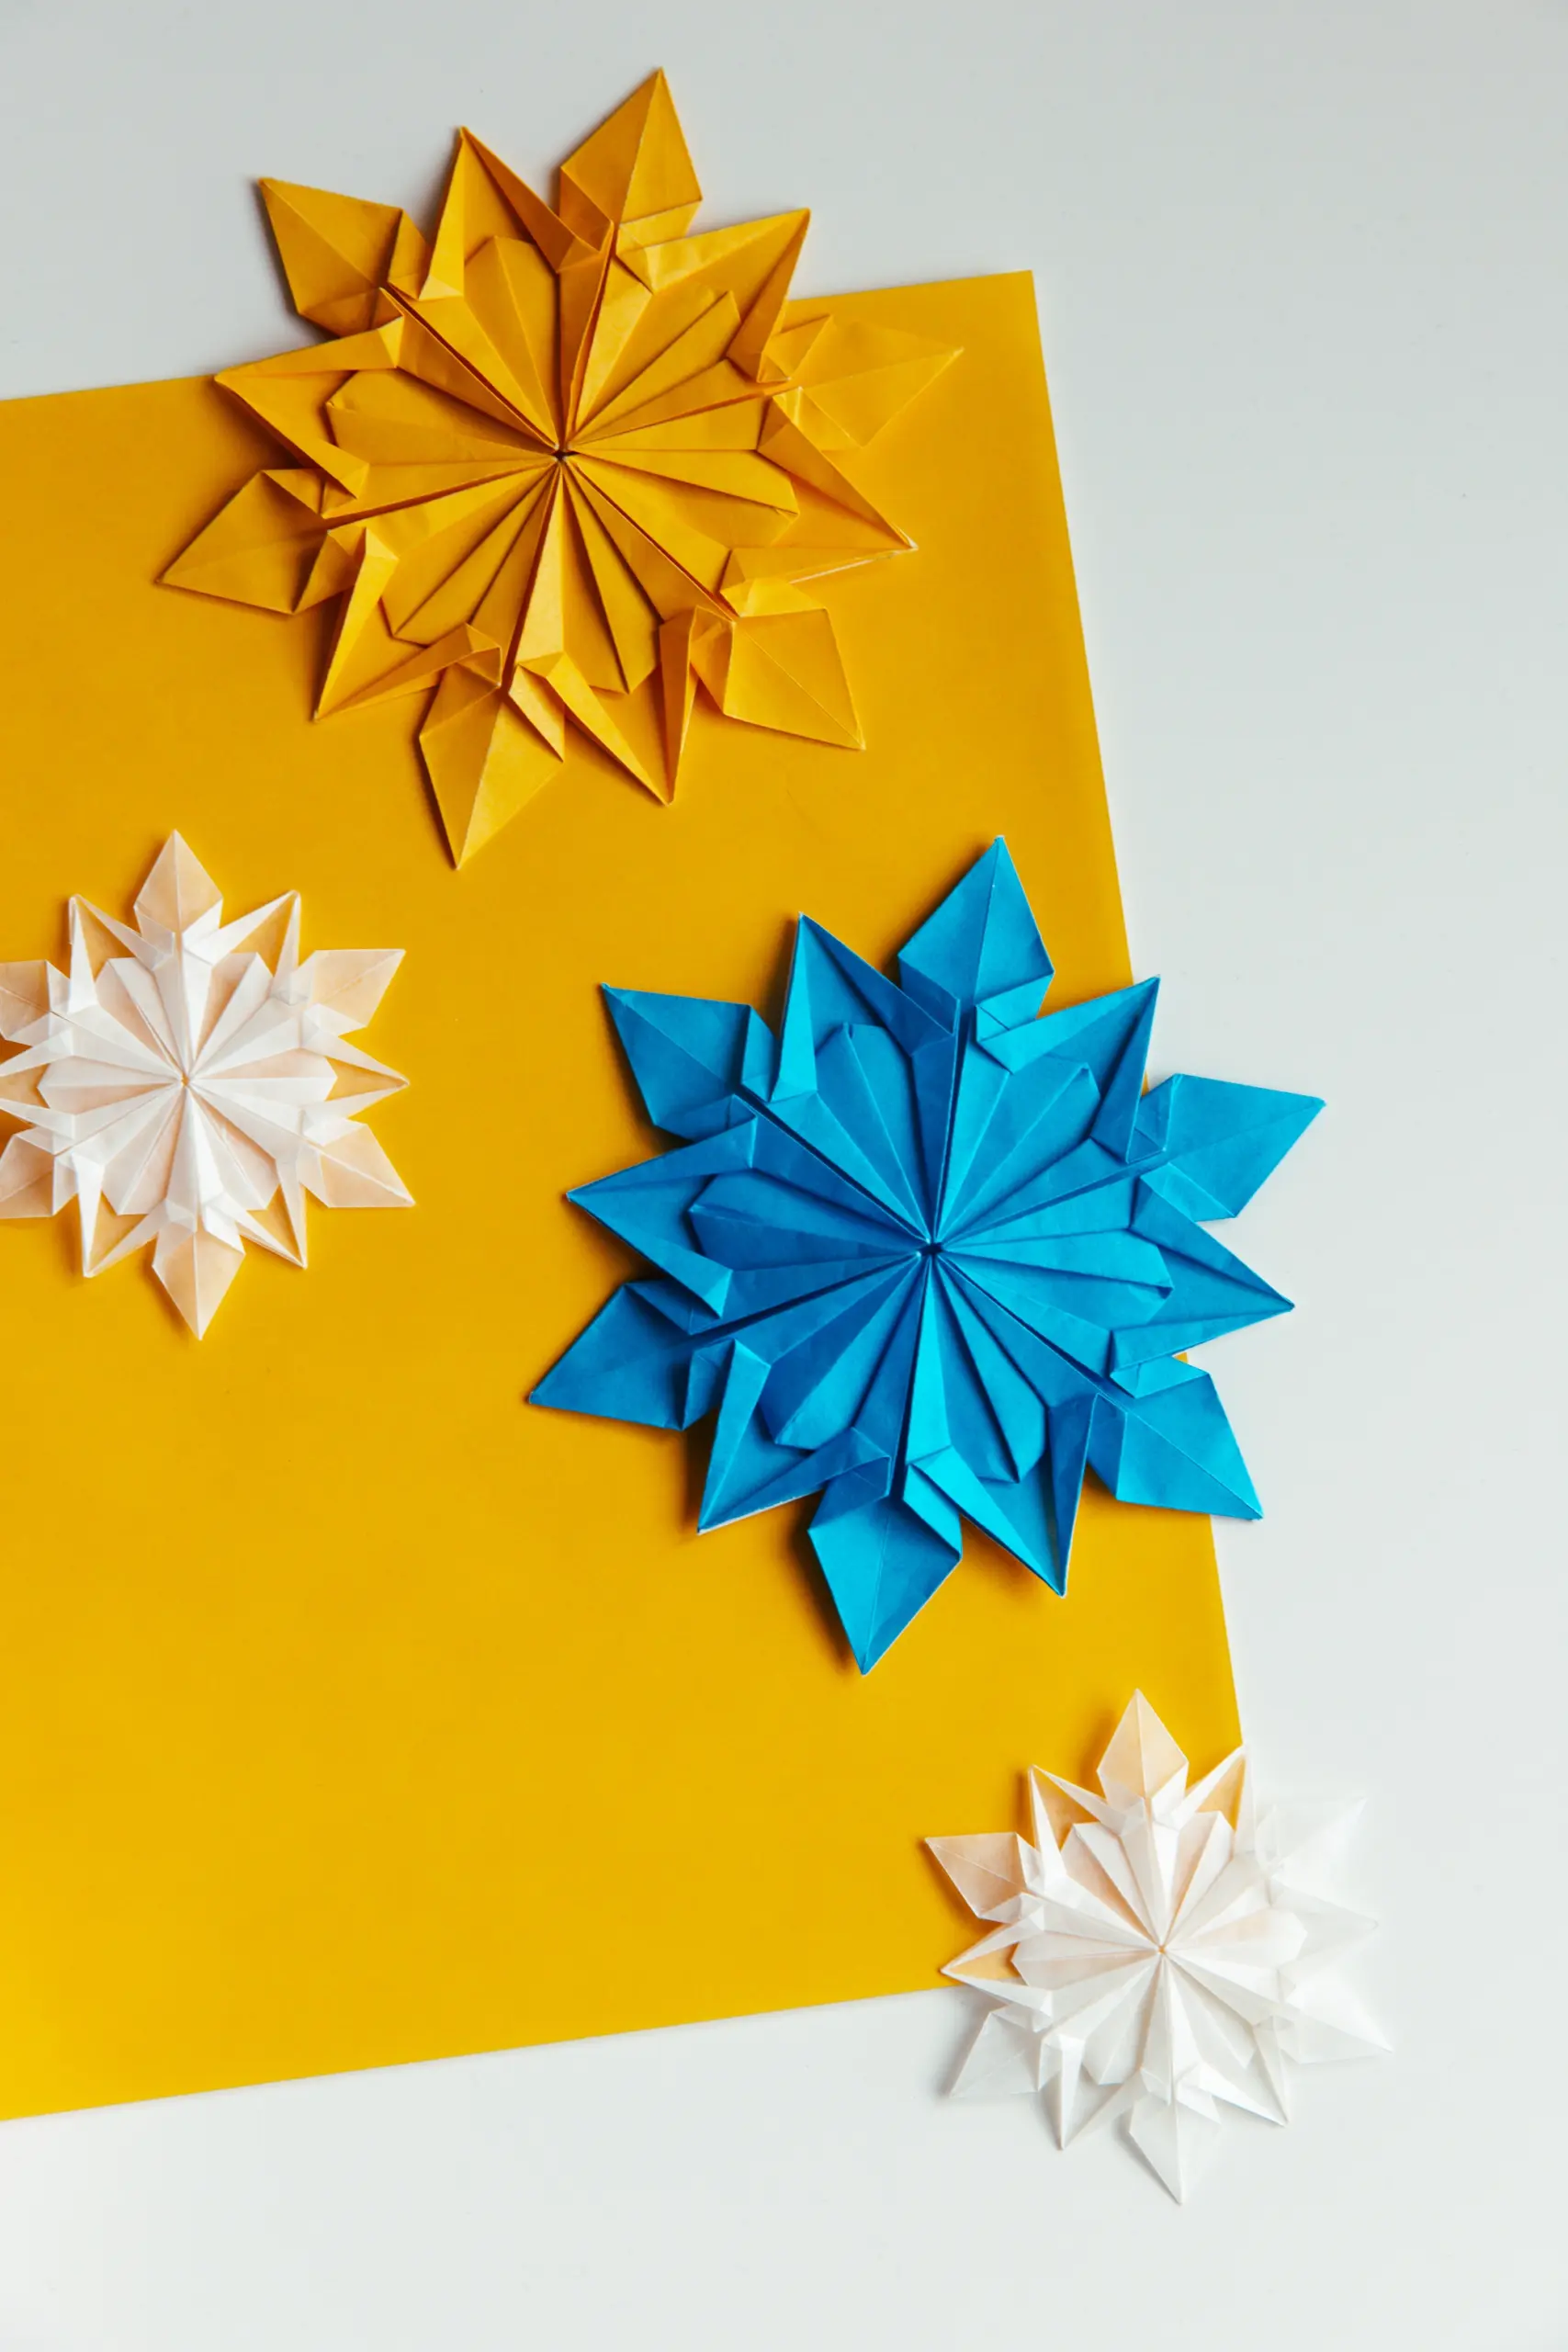
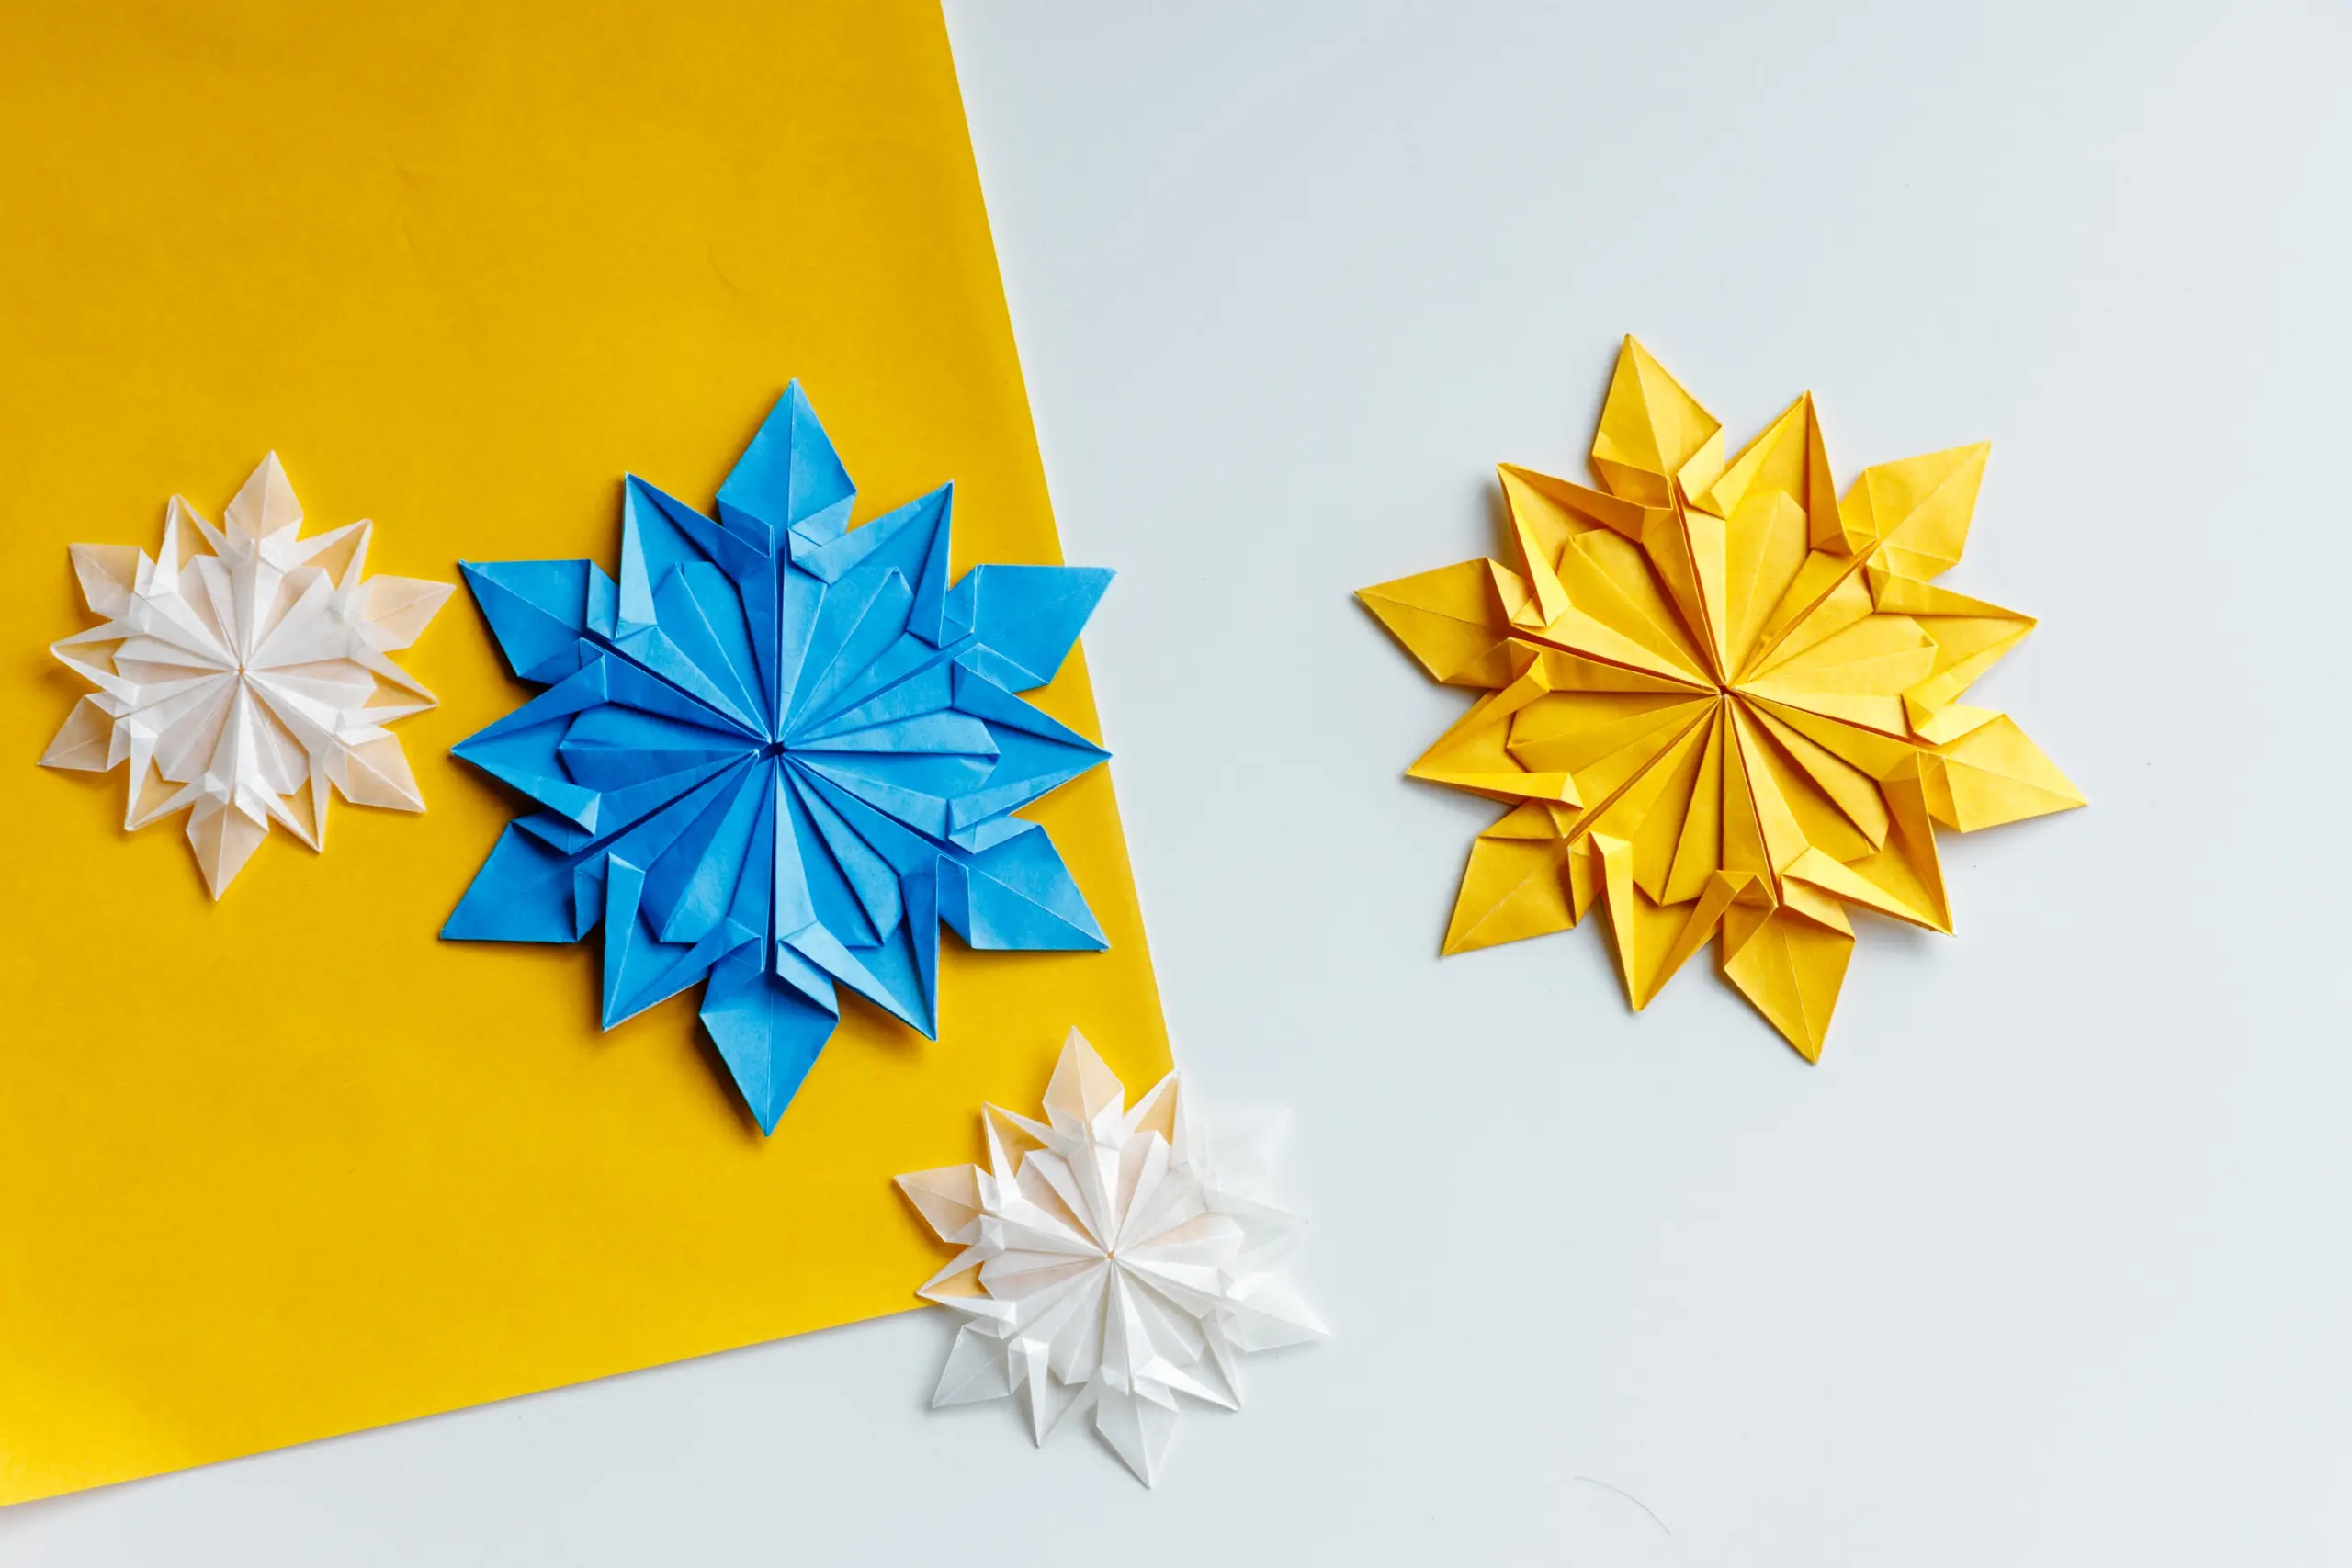
When we see a snowflake made of paper, we may always feel that it is “paper cutting”, so how about an origami snowflake? With only a piece of square paper, you can make a super exquisite, unique, and perfectly symmetrical origami snowflake with our easy-to-follow instructions.
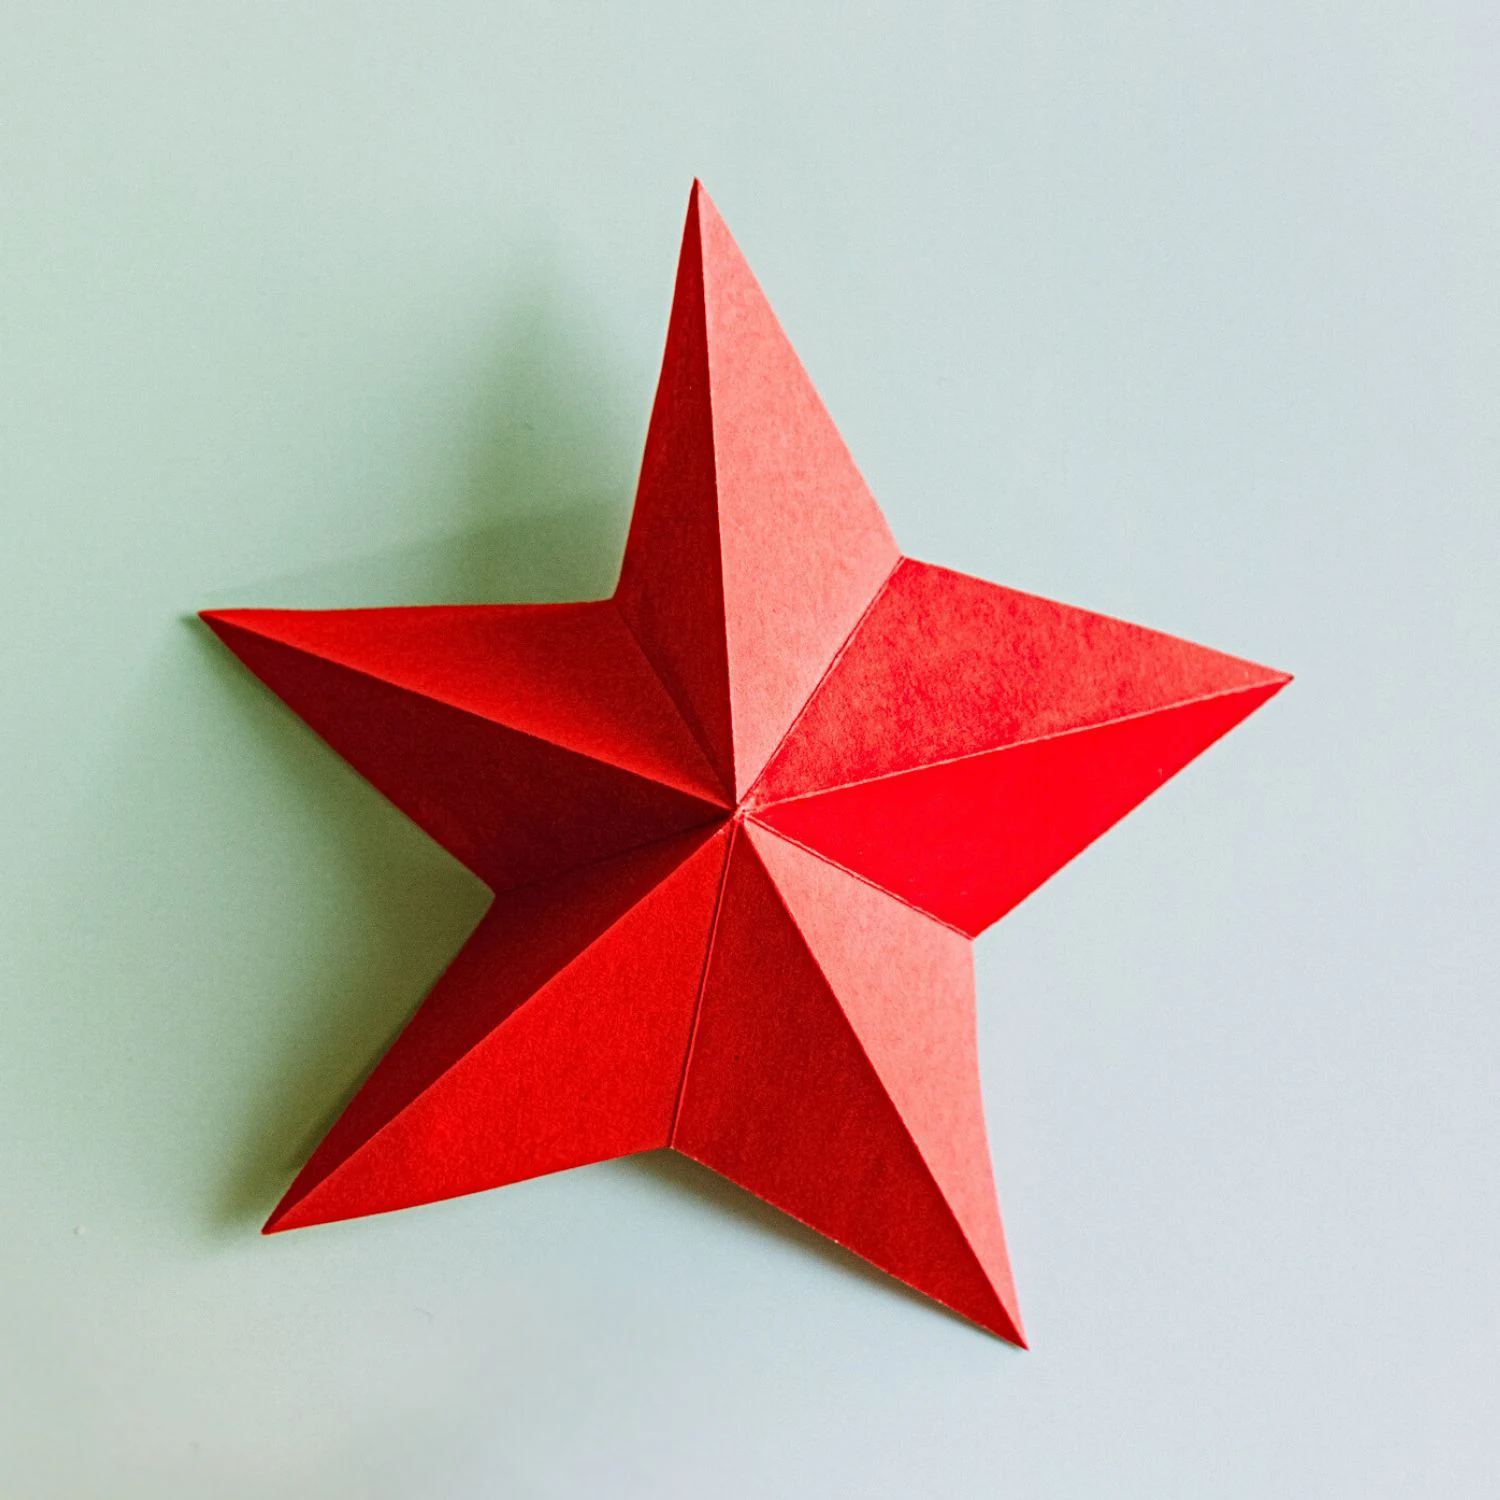
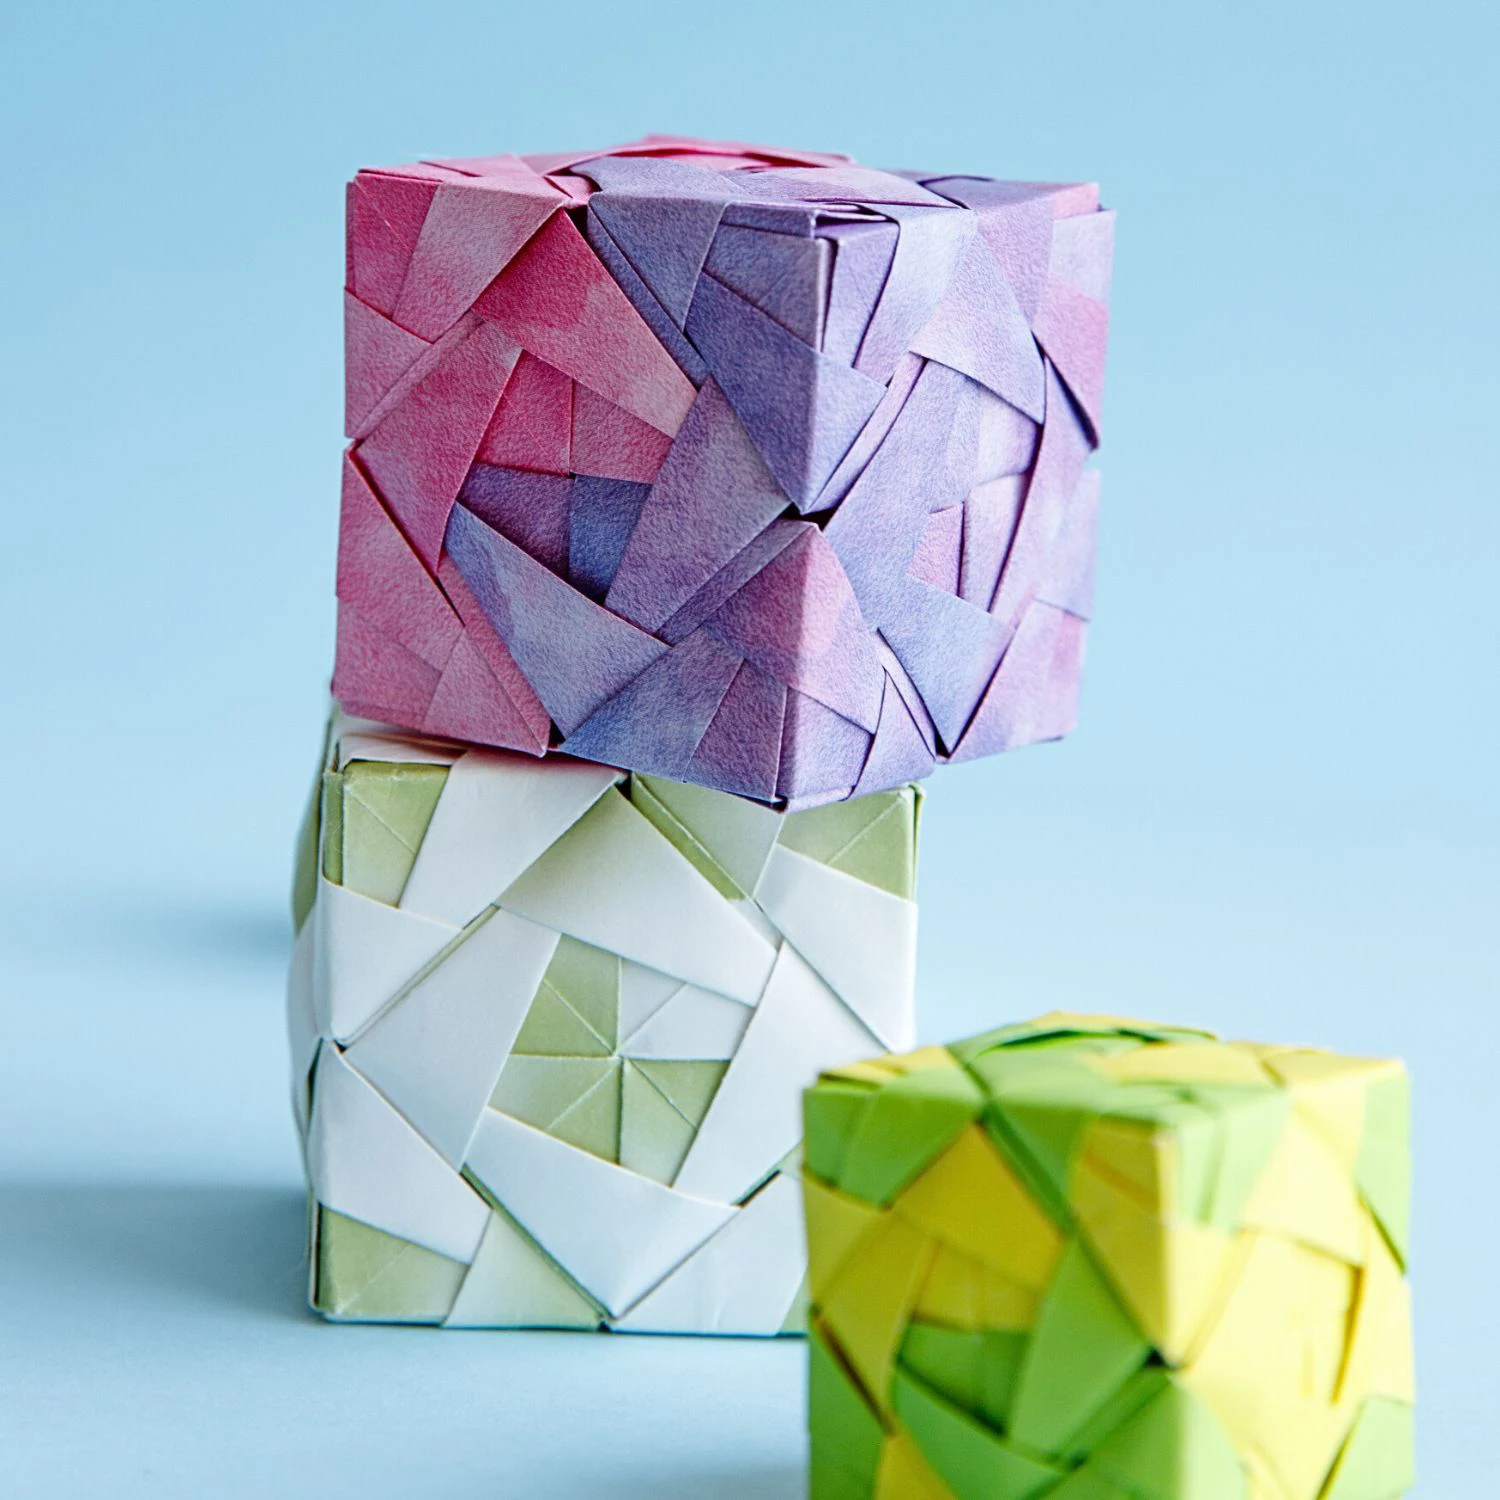
As the best representation of winter, it can decorate your room or Christmas tree when the festival comes. You can also stick it on the greeting cards, or decorate your gift box would be a great idea.
In the instructions, we use many Squash Fold and Bird Base, you can check to make the process smoother.
We provide step-by-step diagram instructions and beginner-friendly videos. Check both for quicker learning.
If you are new to origami, start here from our beginner guide to know the basics and how to read the step-by-step instructions.
- Folding time: 20 minutes
- Paper: 24×24 cm
- Difficulty: Advanced
Material
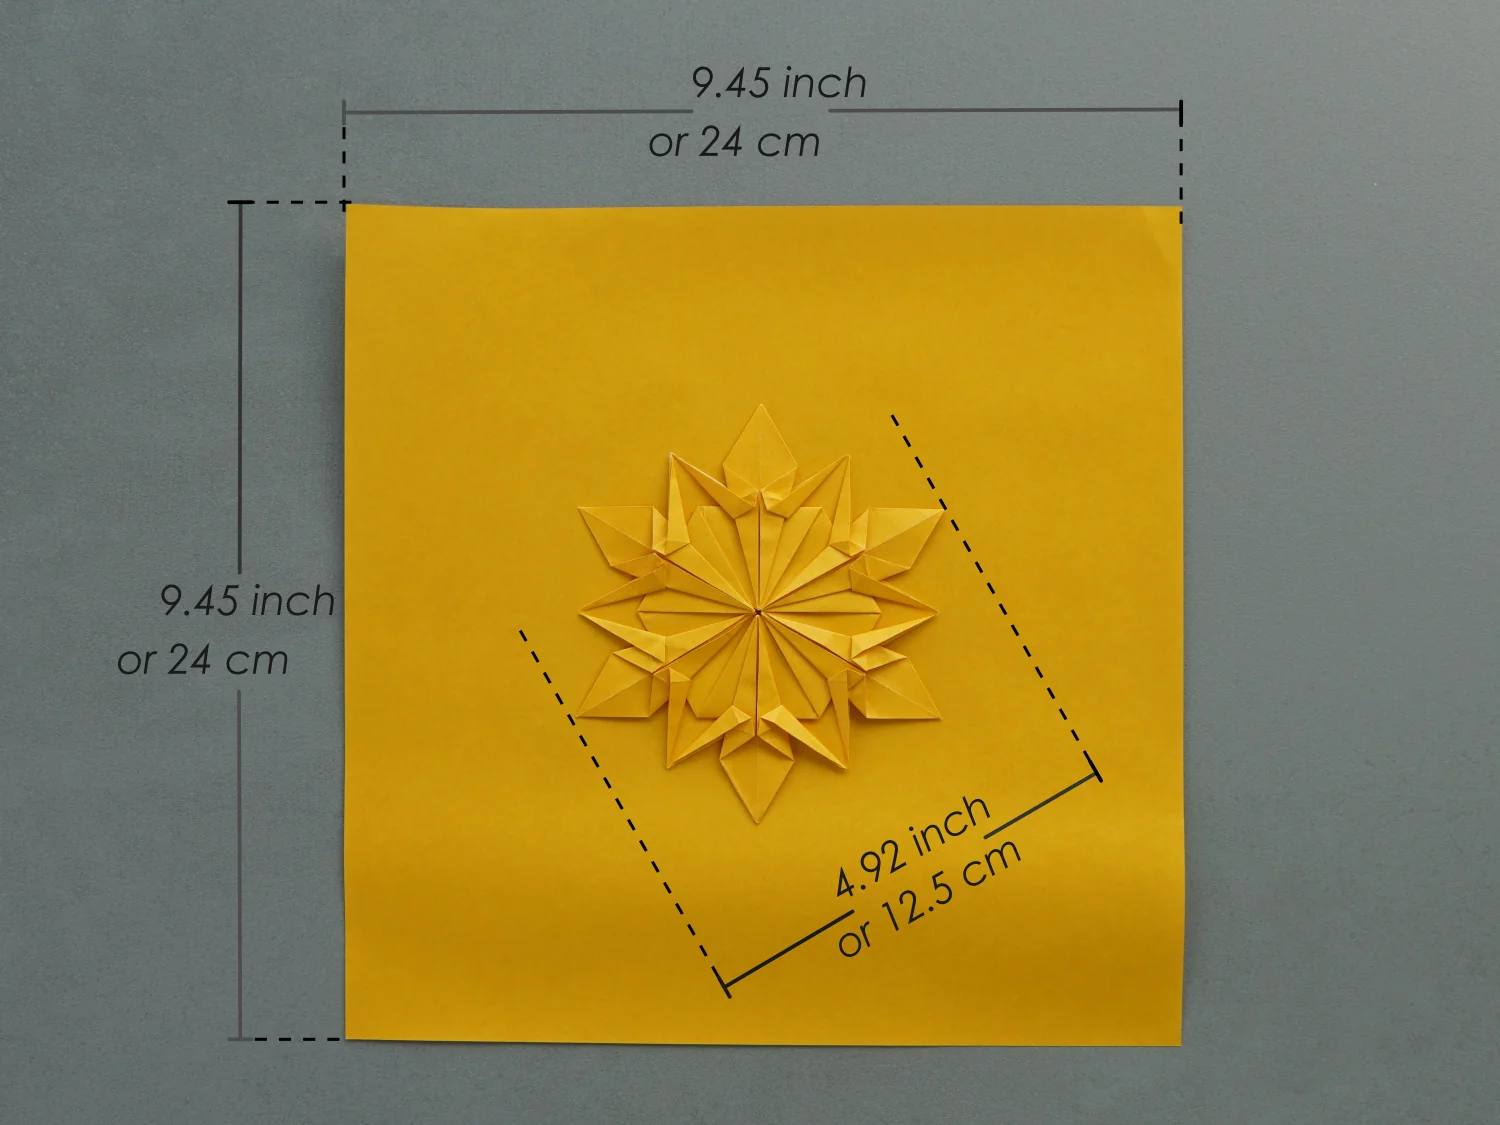
Prepare a piece of 24×24 cm origami square paper, with different colors on each side, to create a 12.5×12.5 cm snowflake.
Origami Snowflake Video
Step by Step Instructions
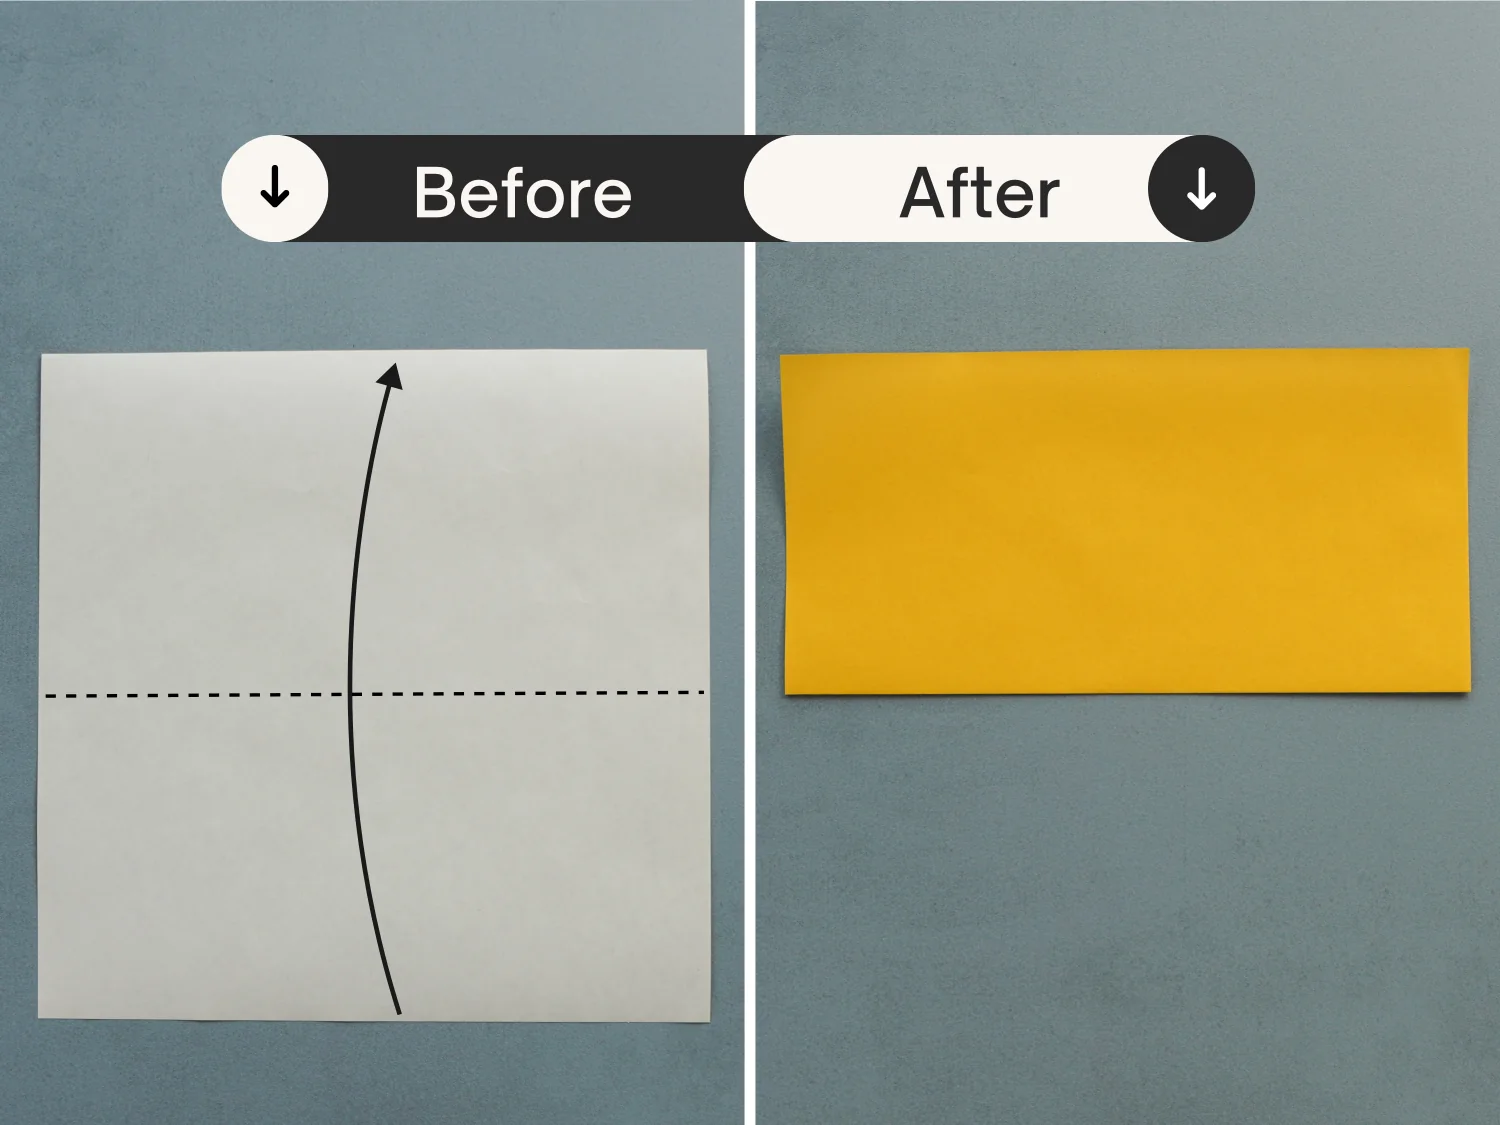
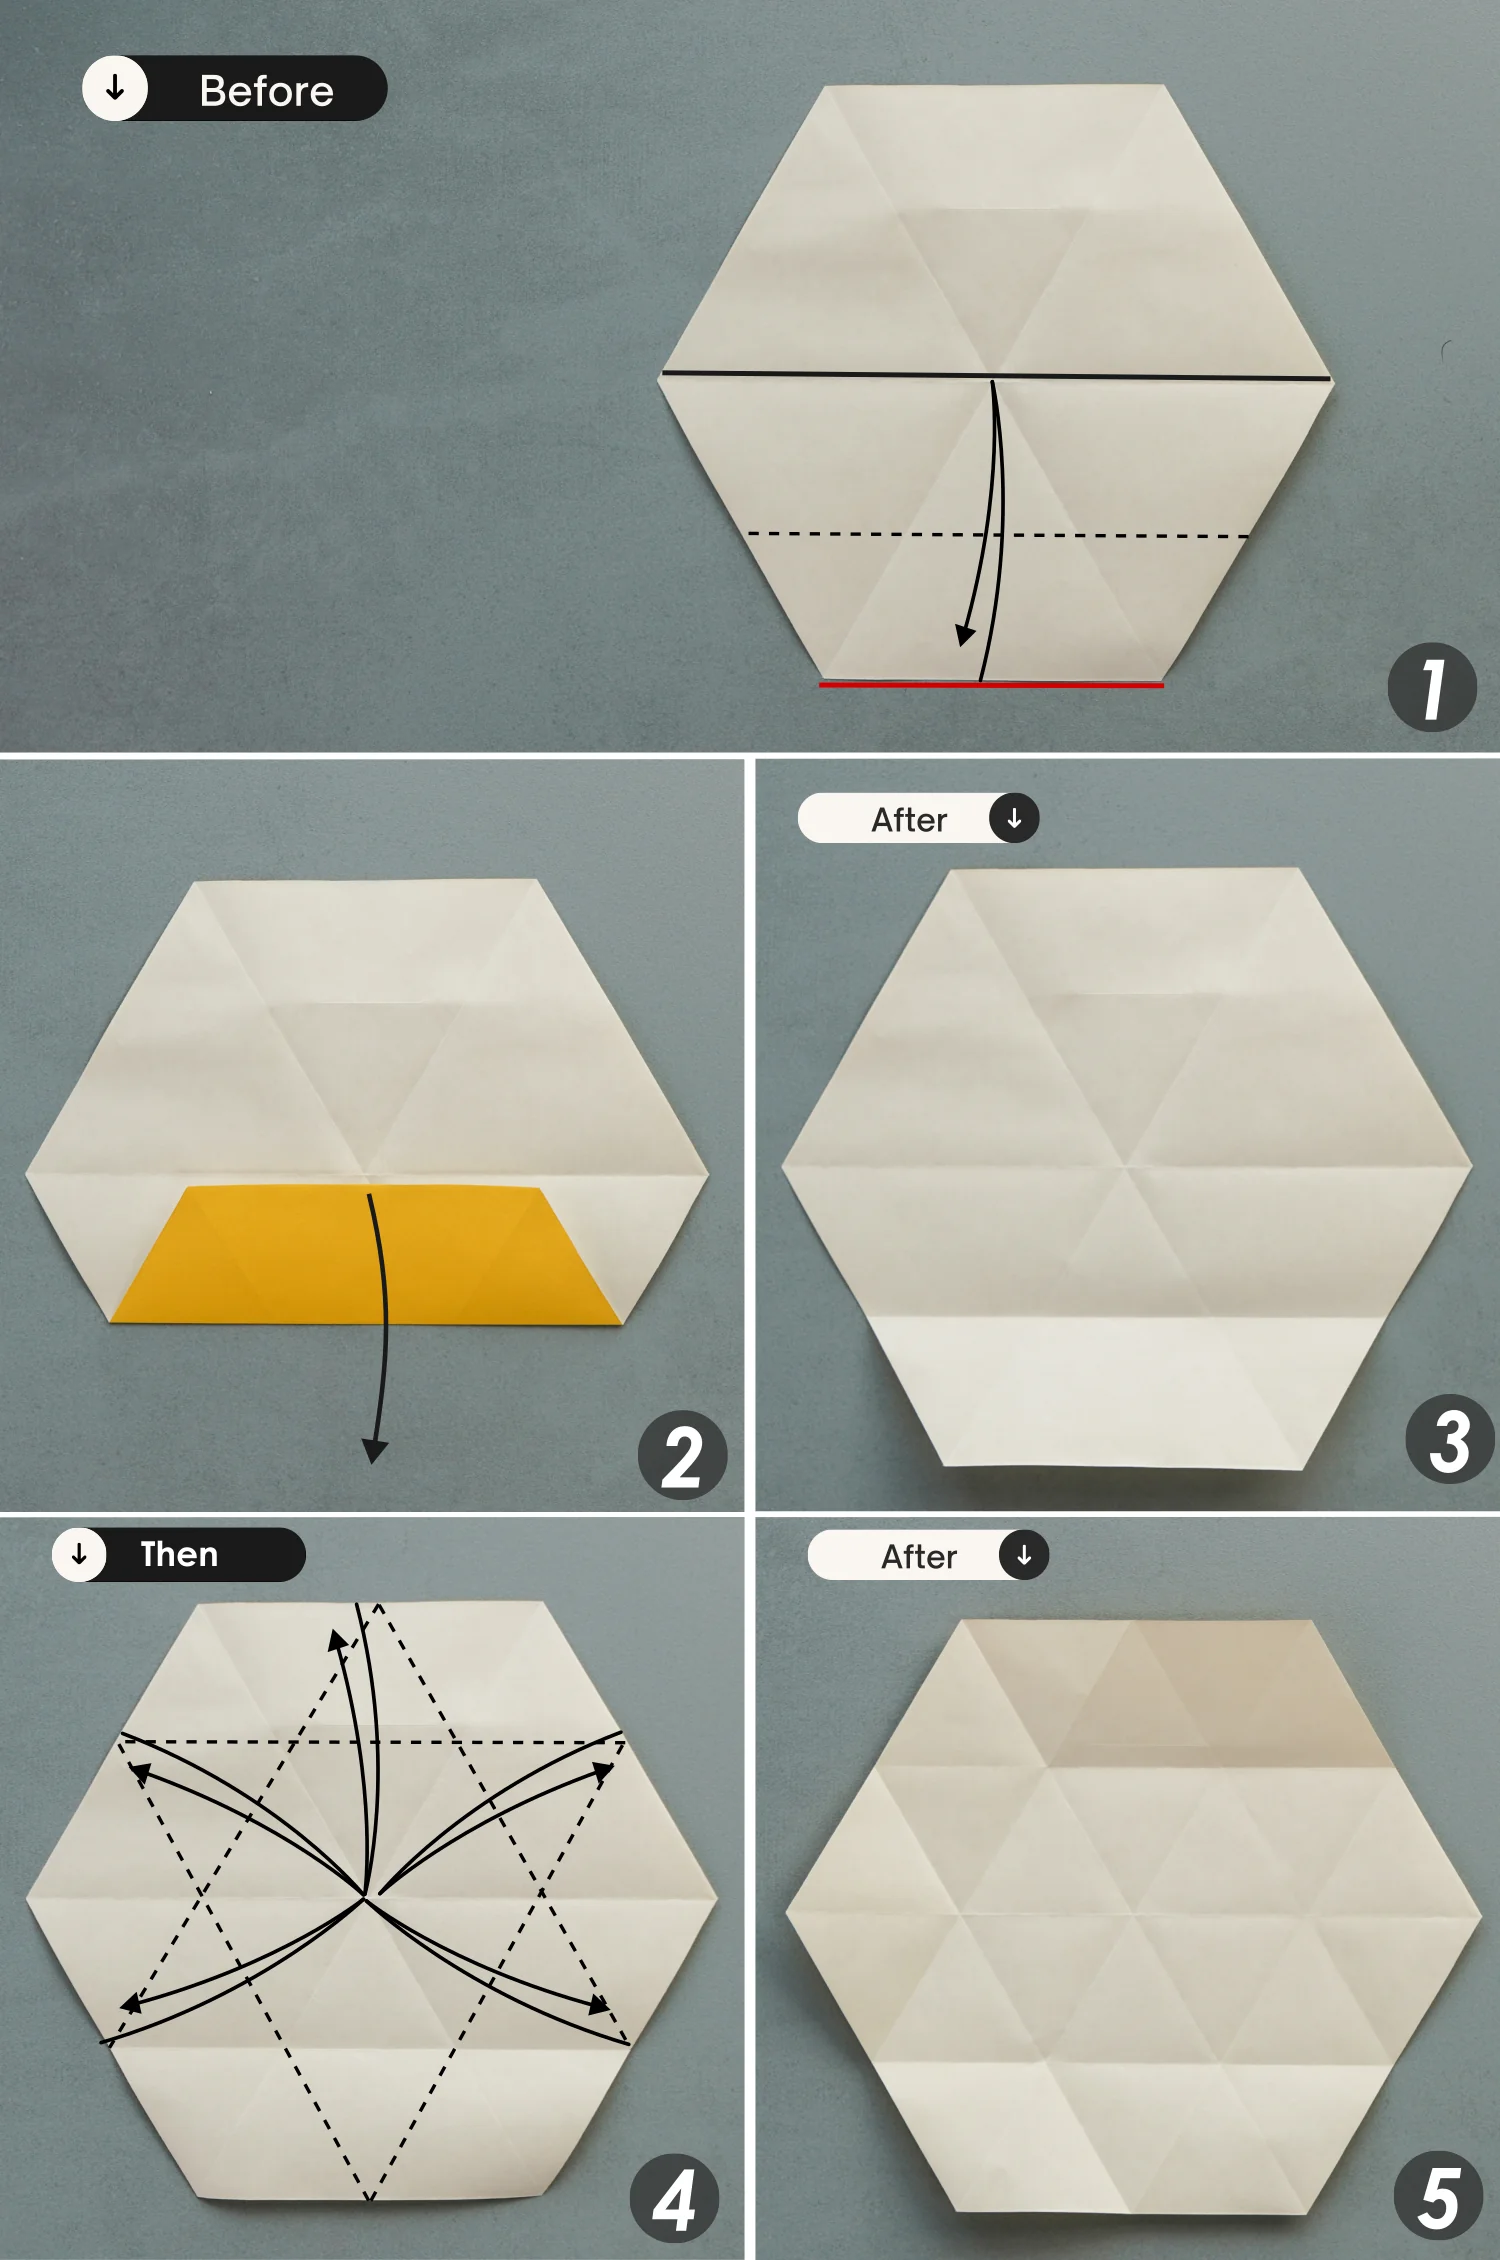
Step 1
Start with the white side of the paper facing up, and fold the bottom edge to the top.
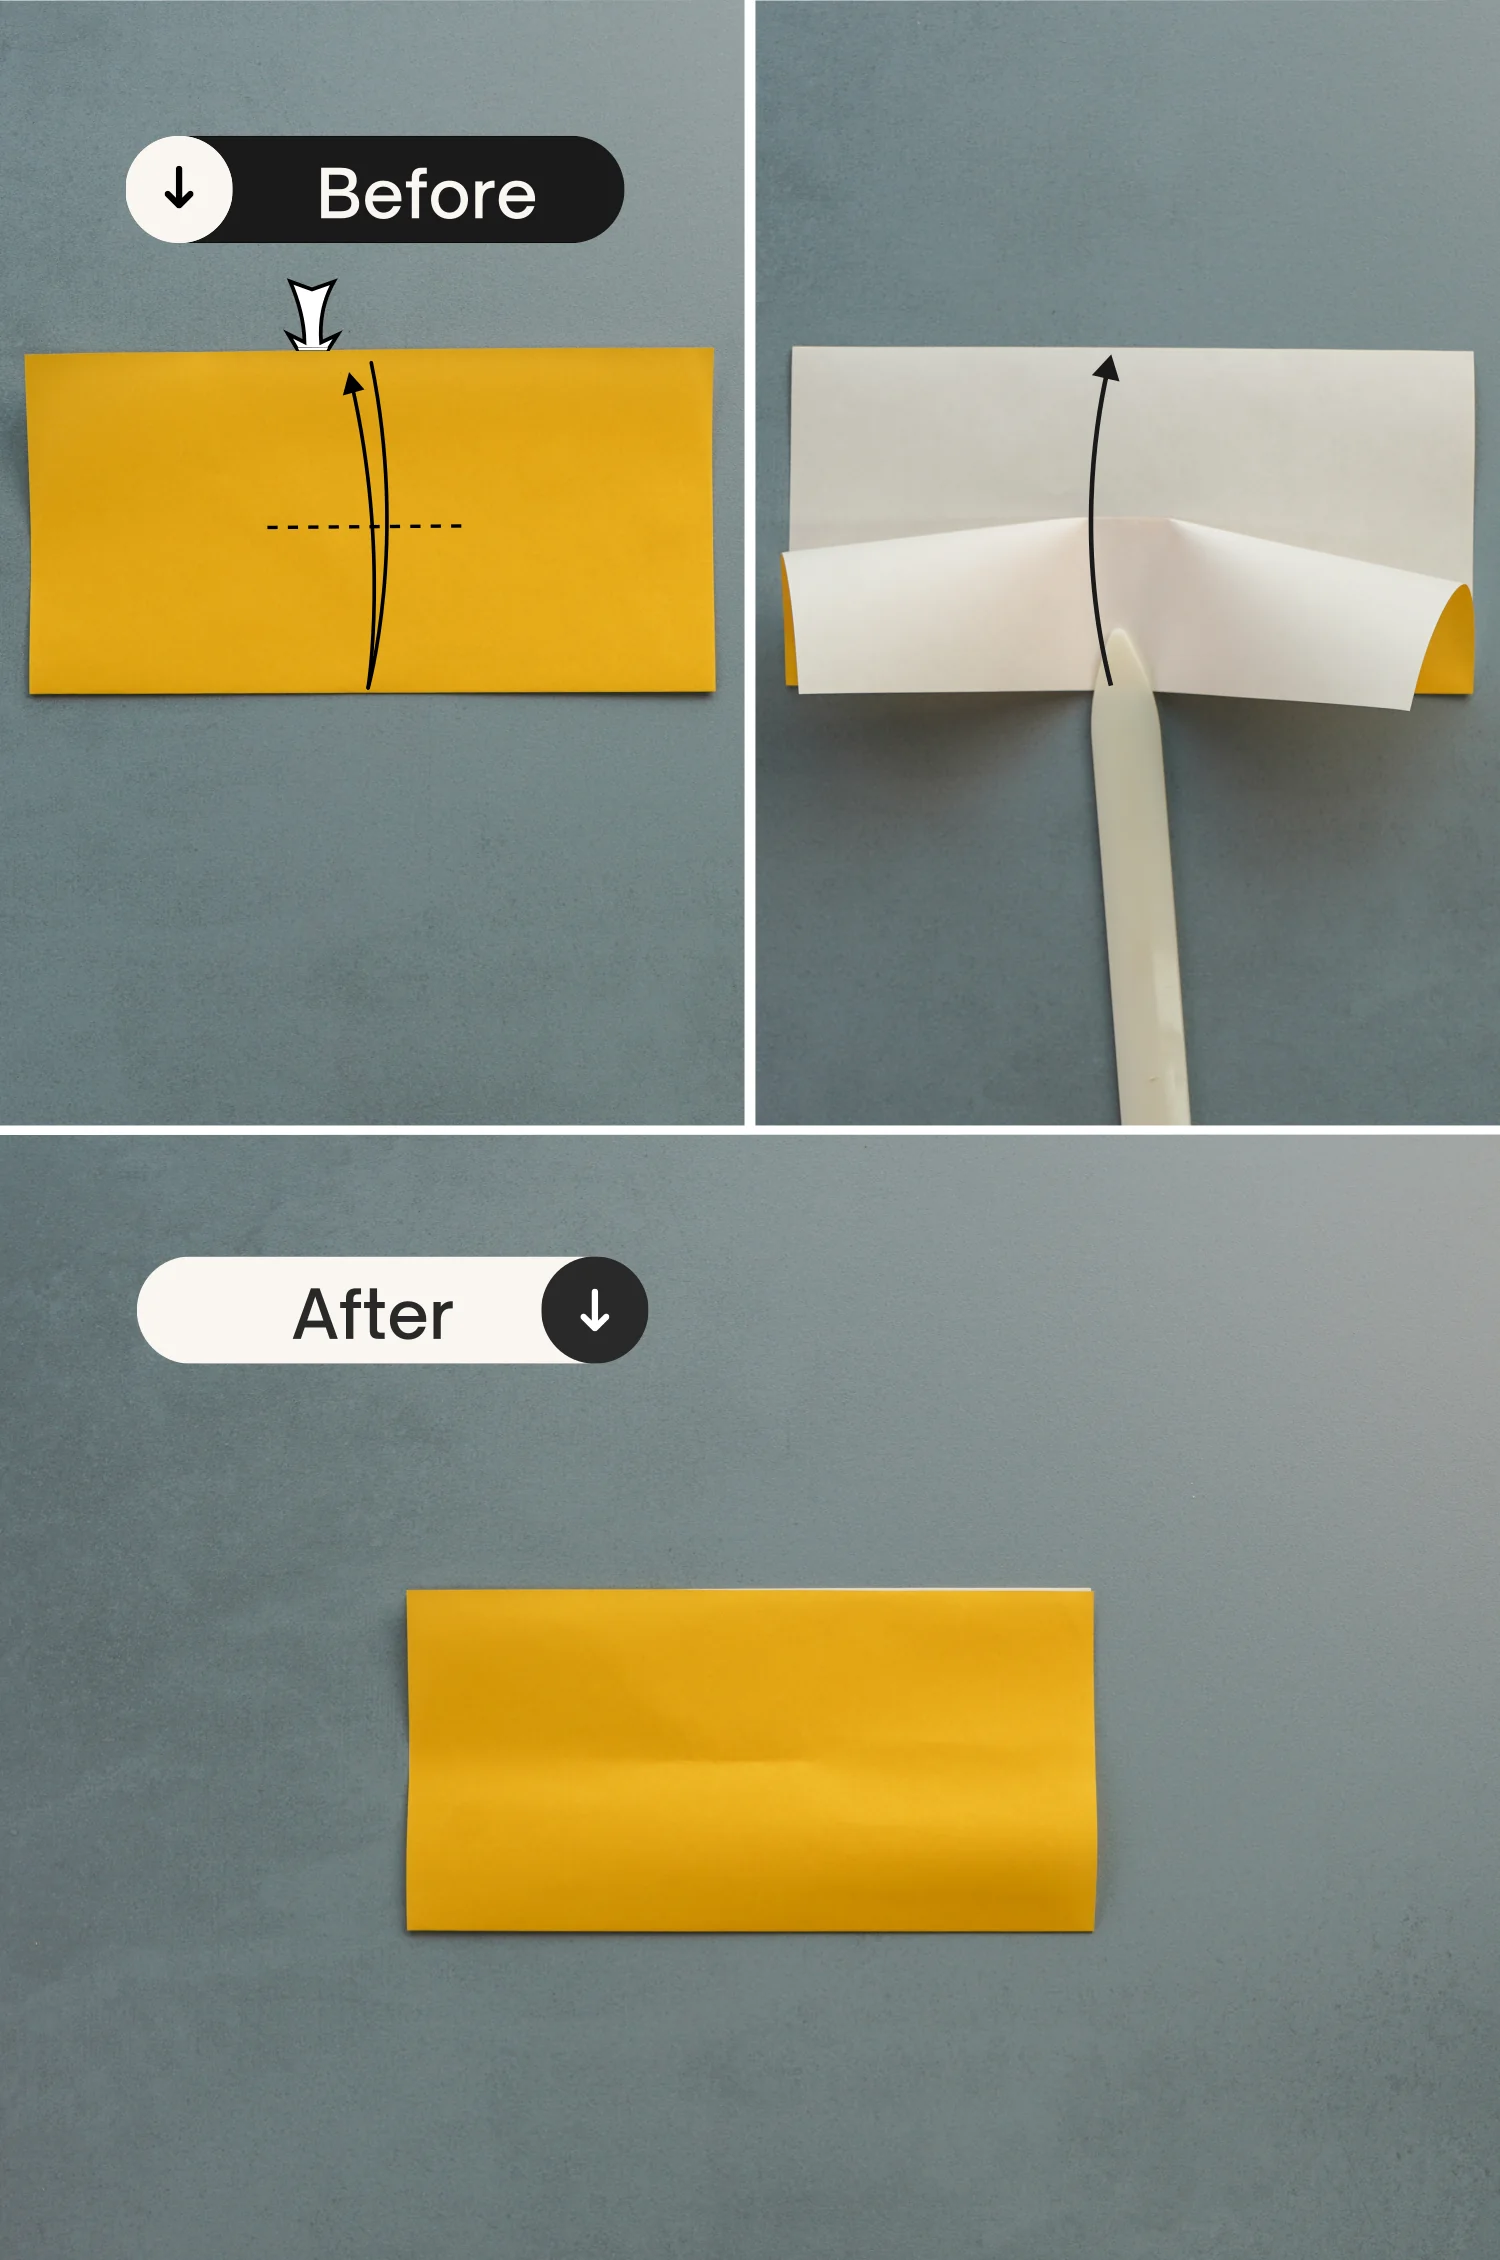
Step 2
Take the top edge of the top layer, and fold it to the bottom, only mark the middle part of the new crease, then unfold it.
Step 3
Fold the top right corner of the top layer along the dotted line to the red dot located on the crease made in the previous step.
Repeat this for the top left corner. Then flip it over.
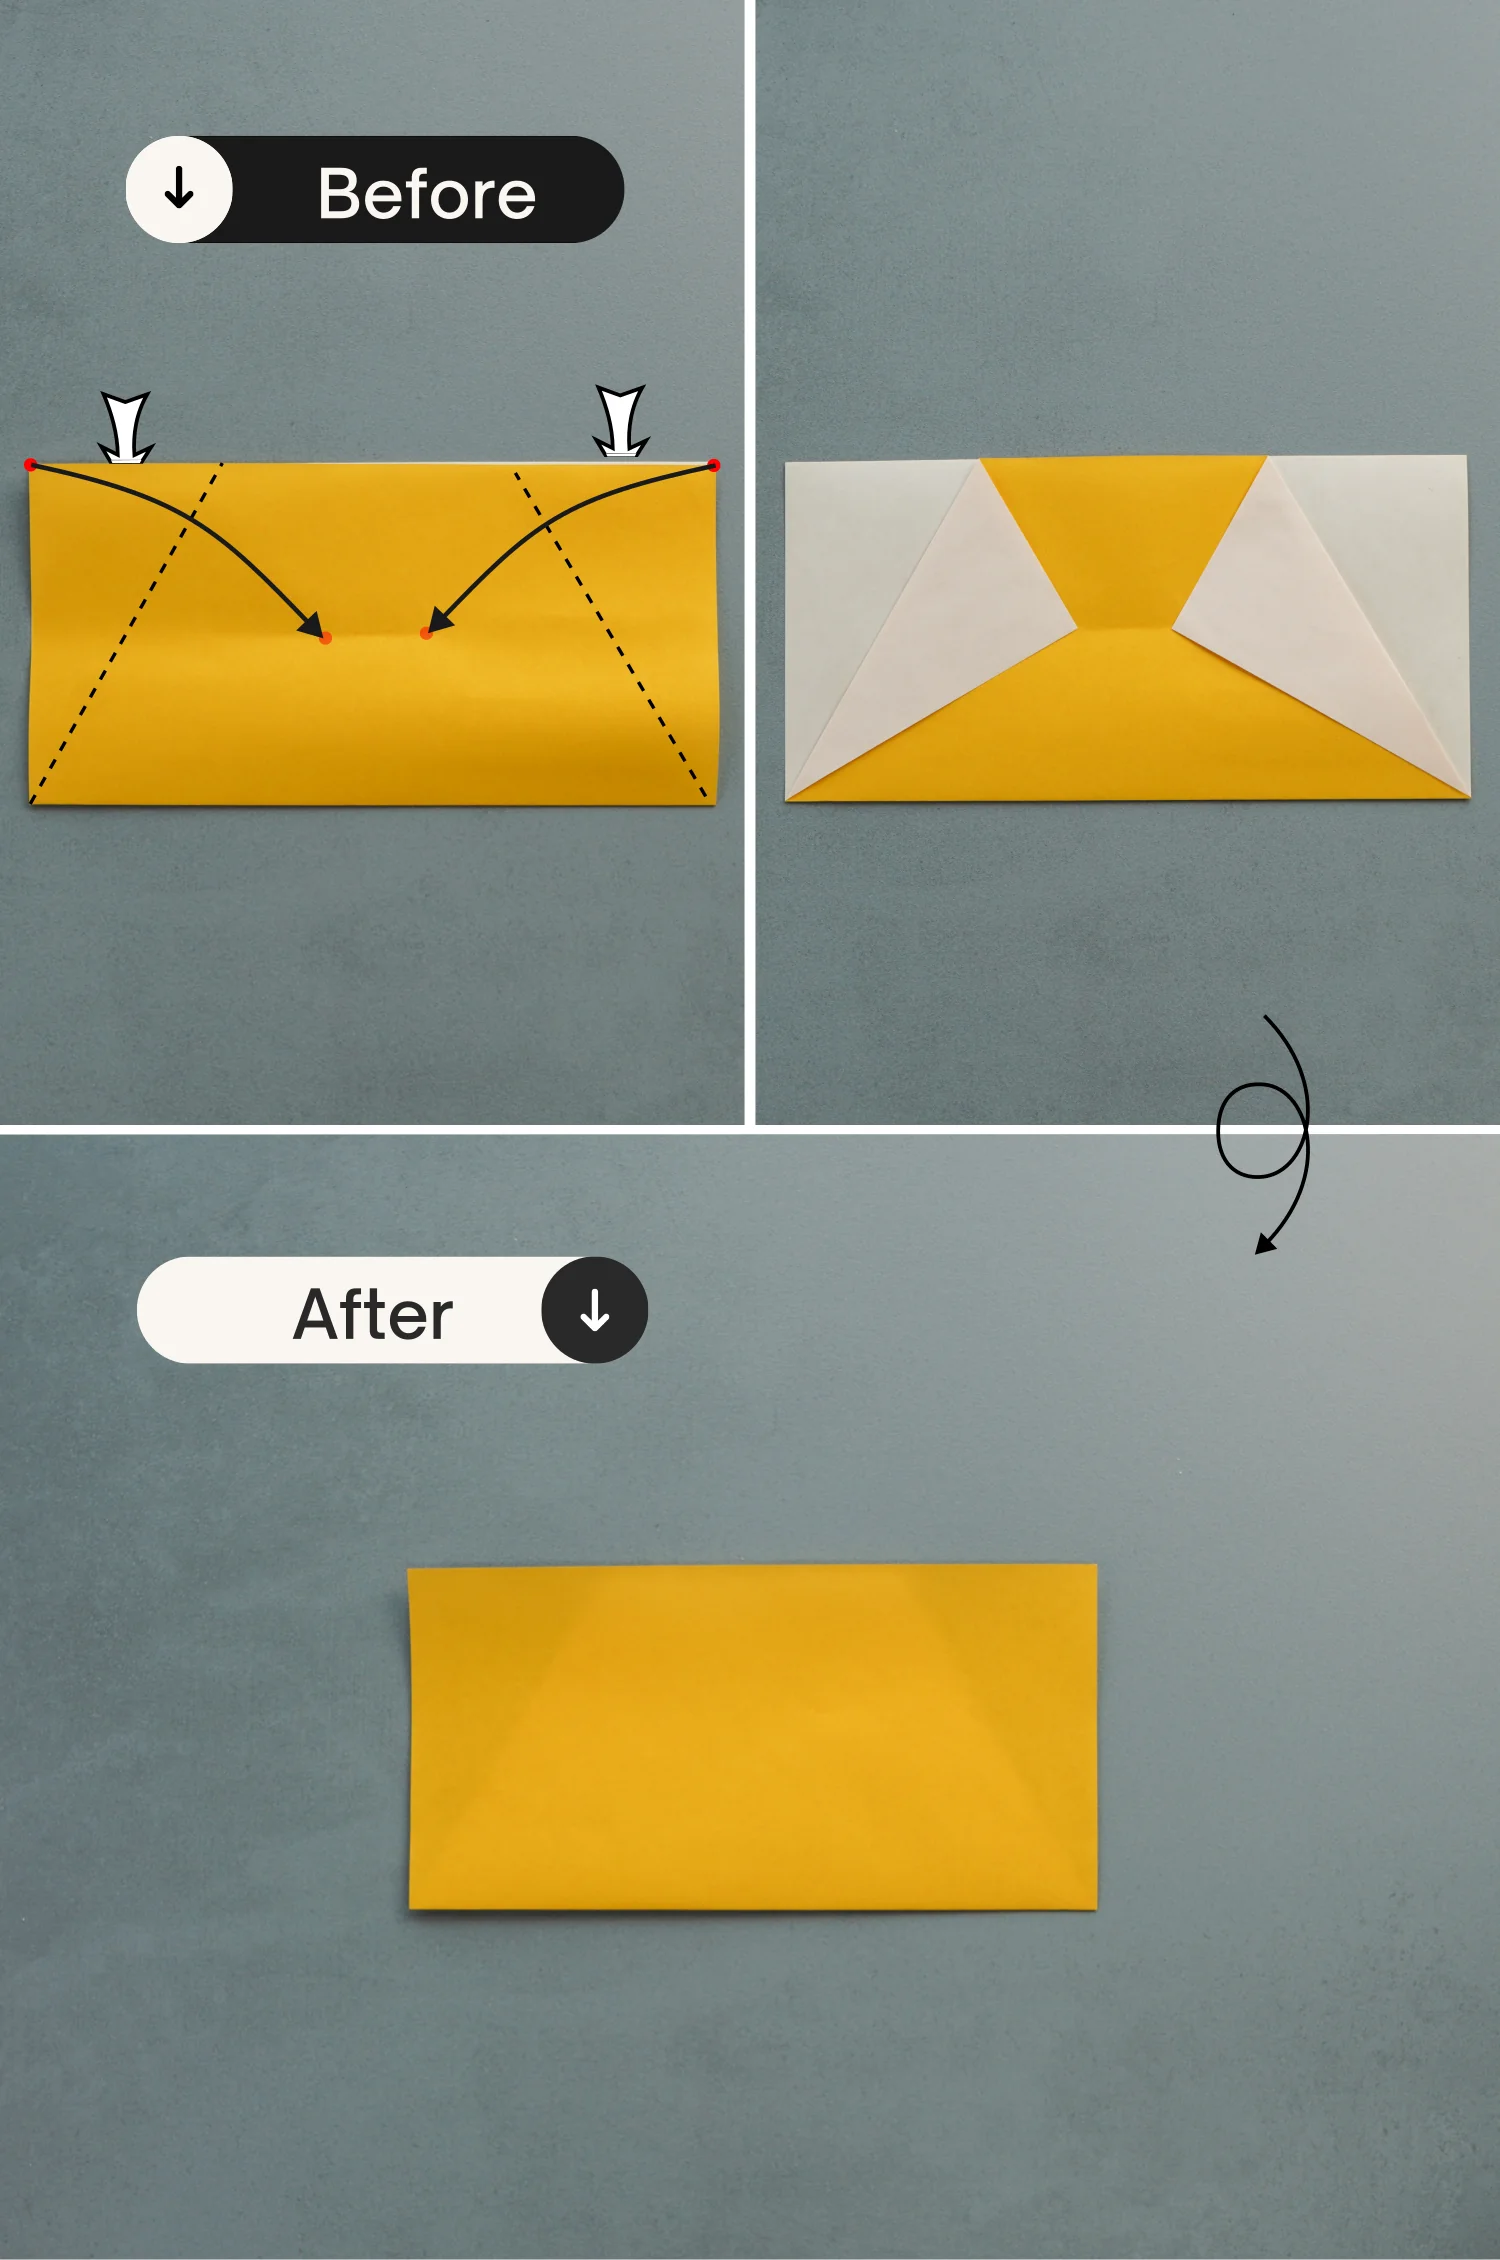
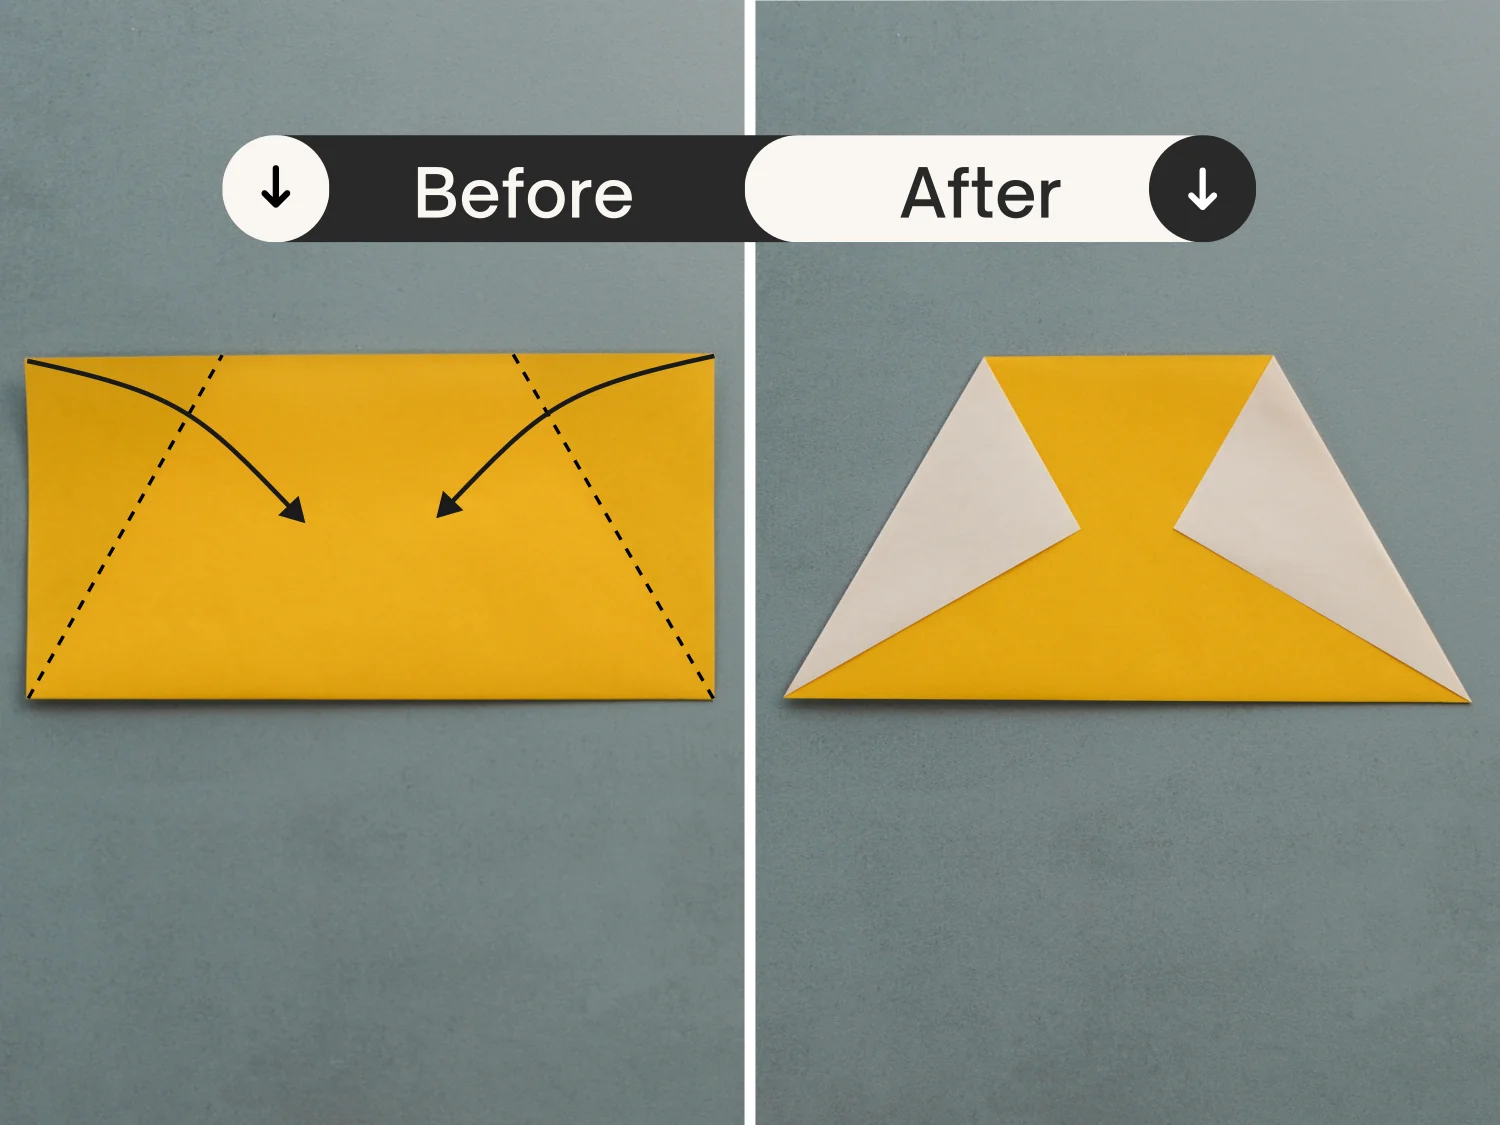
Step 4
Like before, fold the top left and right corners along the dotted lines, to overlap with the bottom layer.
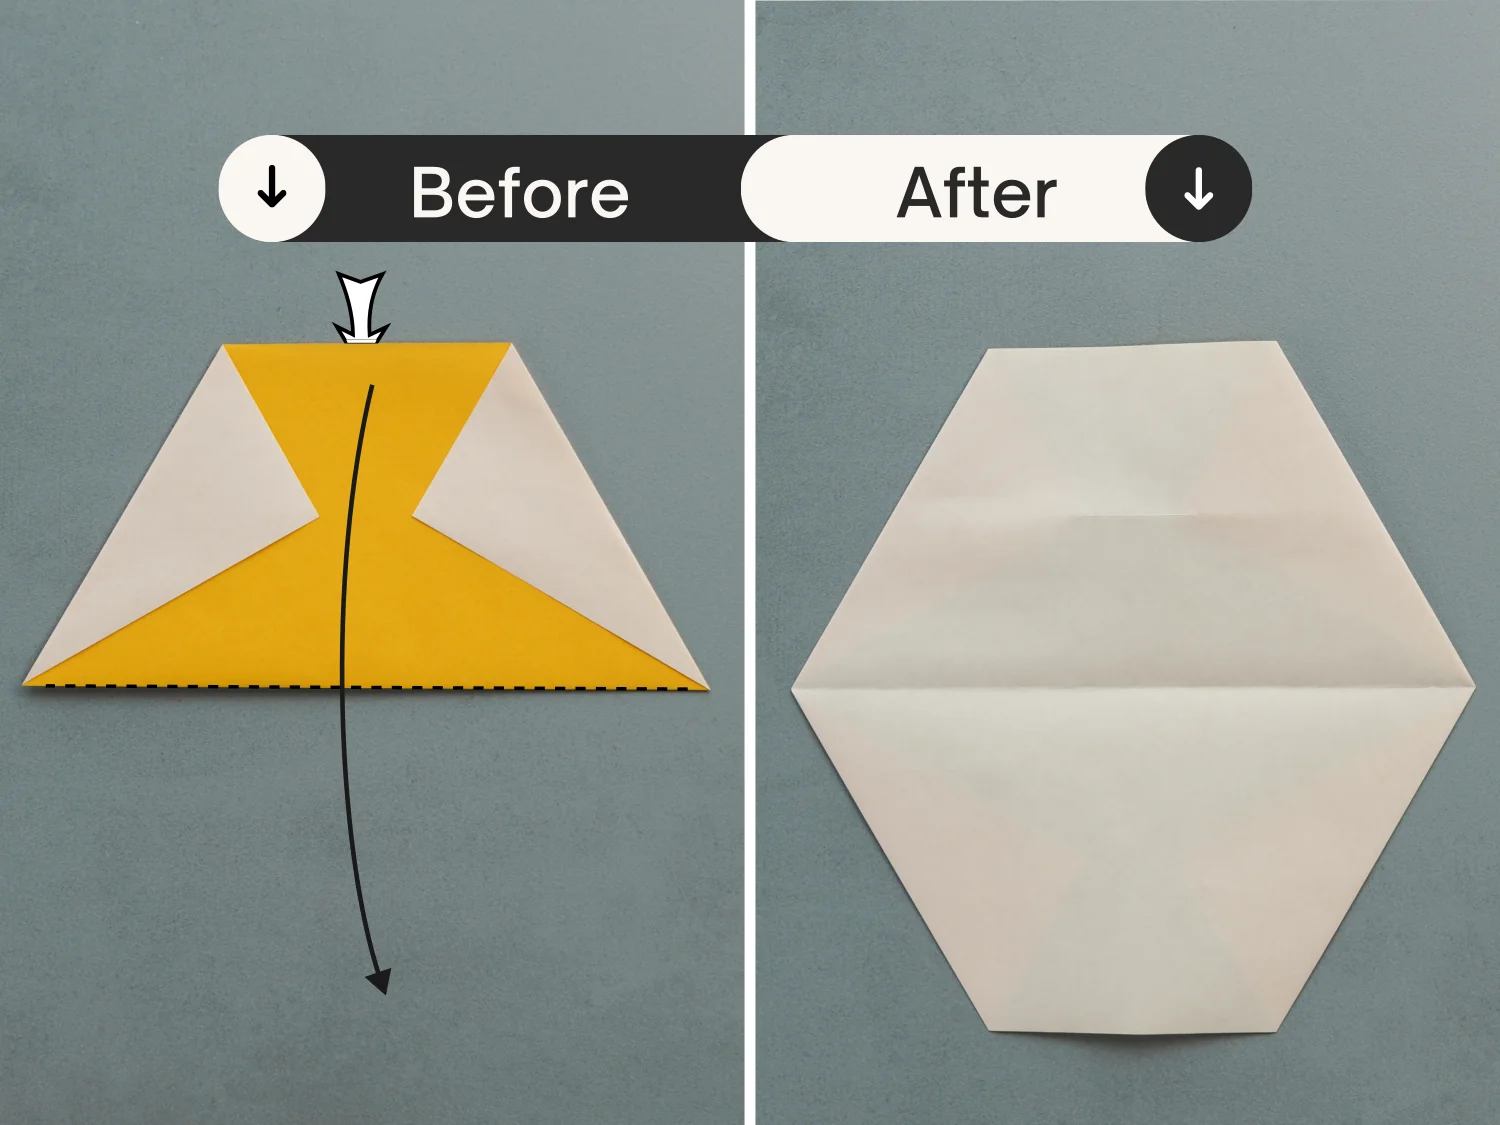
Step 5
Lift the top layer, then fold in down.
Step 6
Take the bottom right edge, fold it to align with the top left edge, leaving a crease then unfold it.
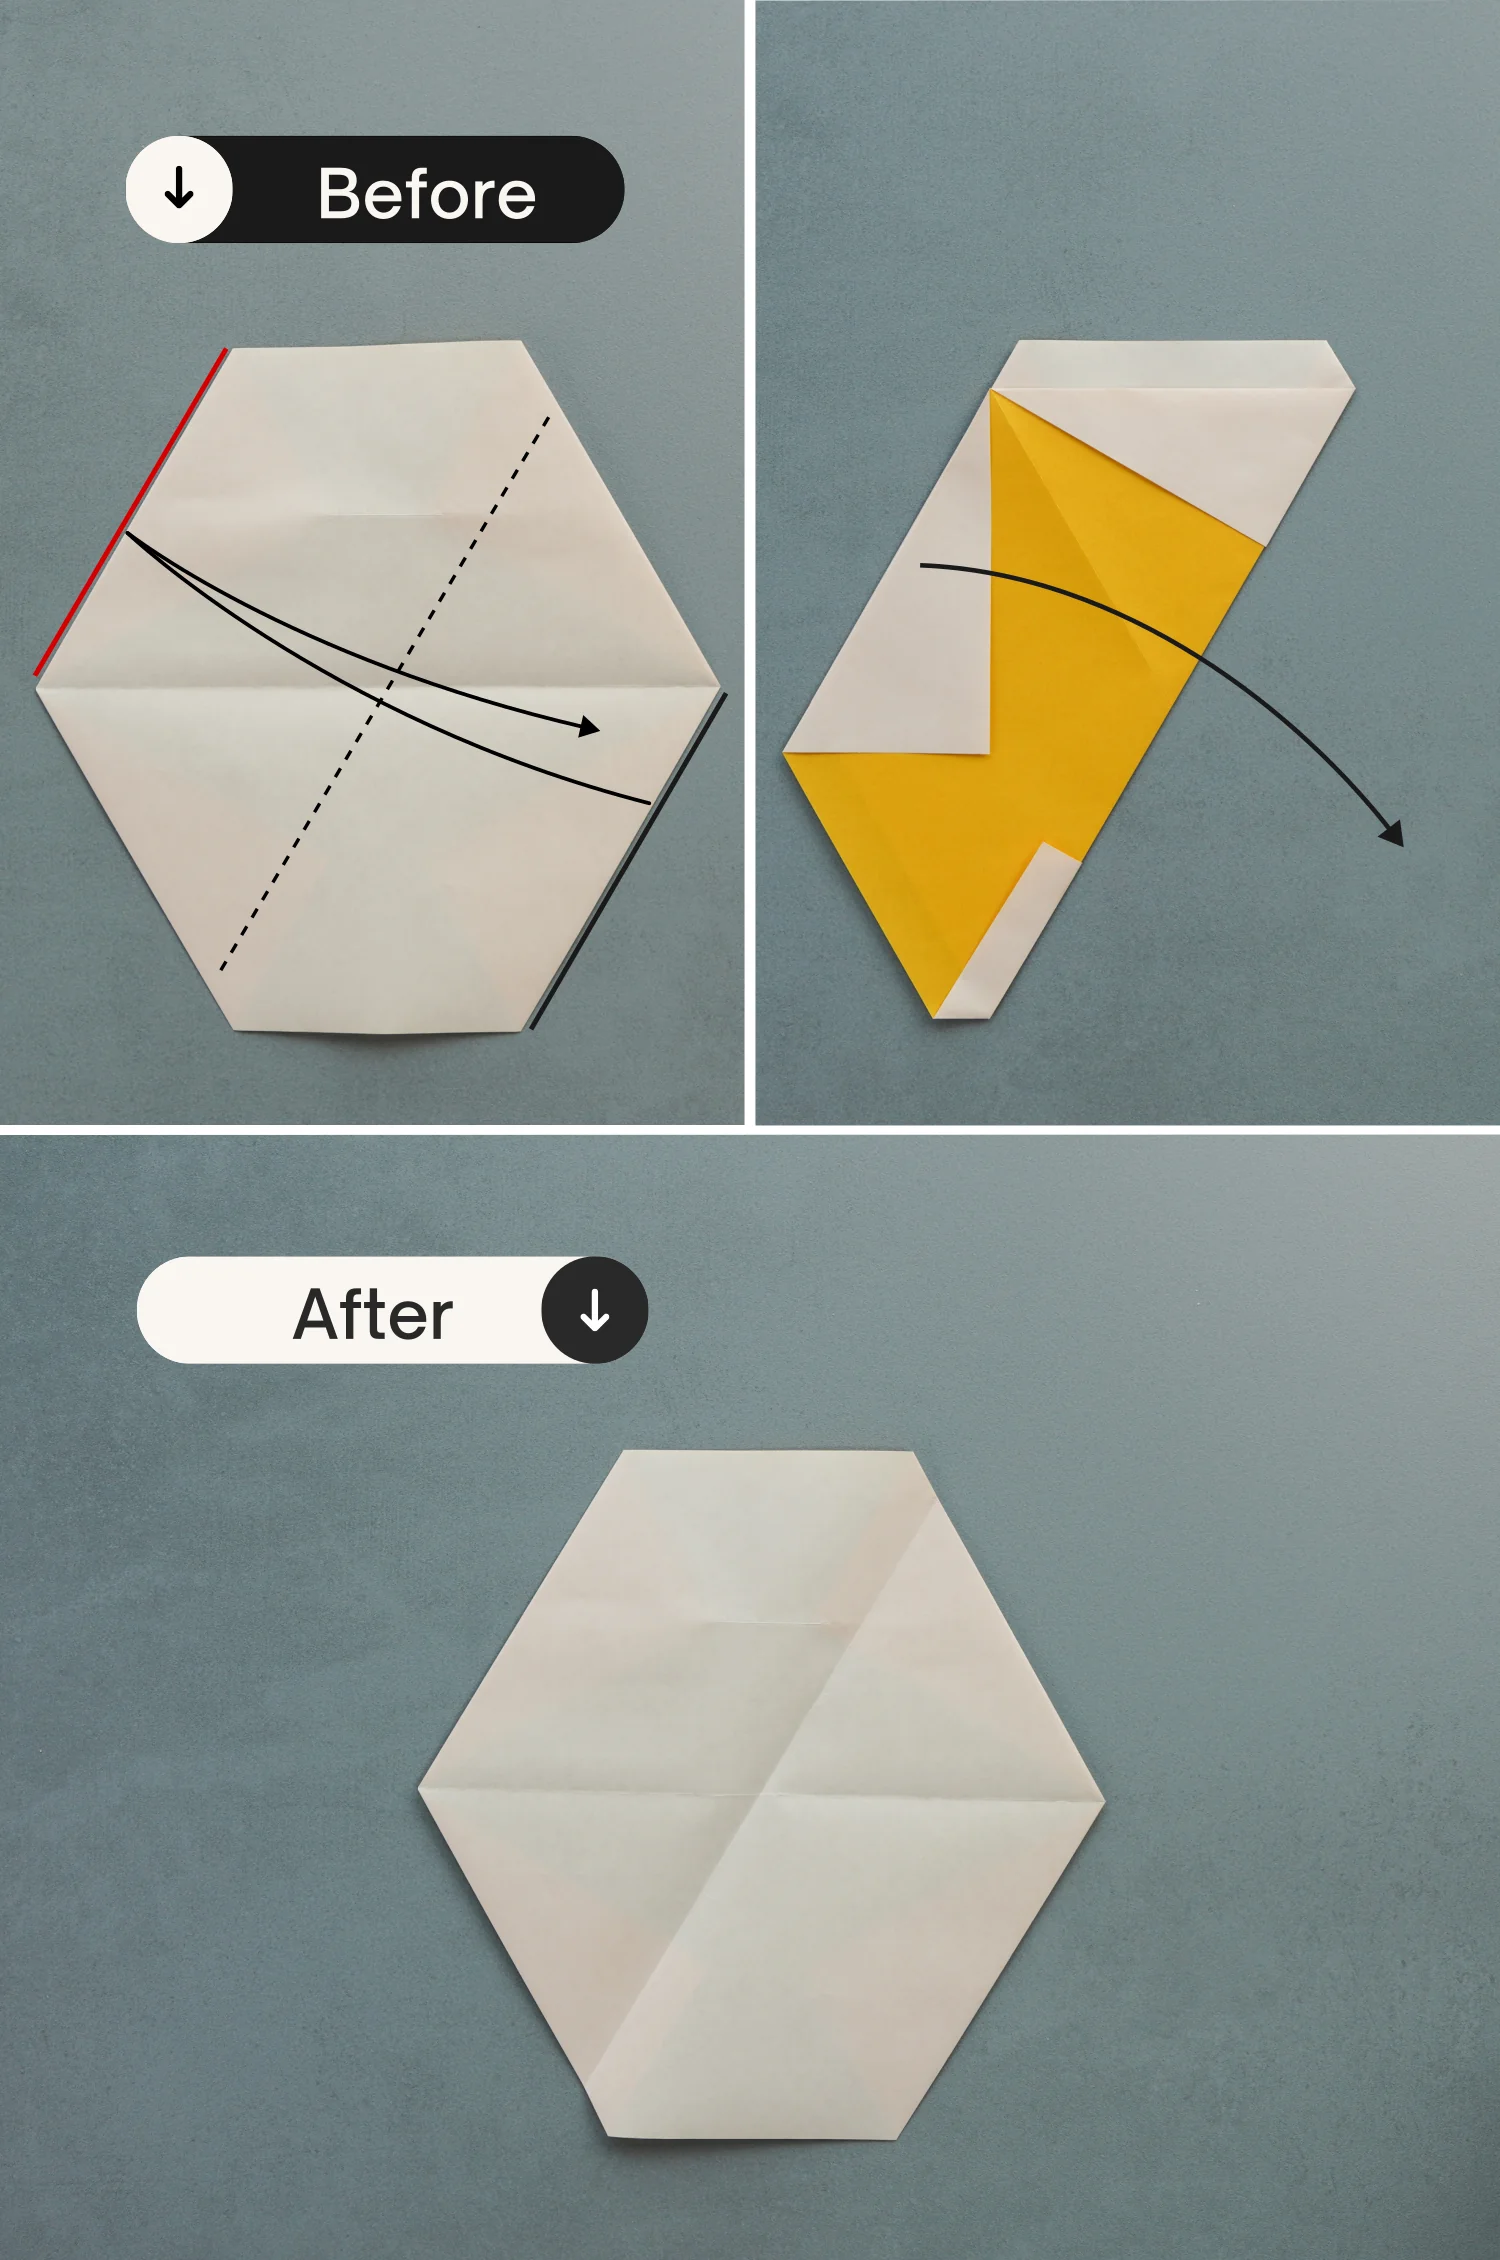
Step 7
Fold the top right edge to align with the bottom left edge, crease it well then unfold.
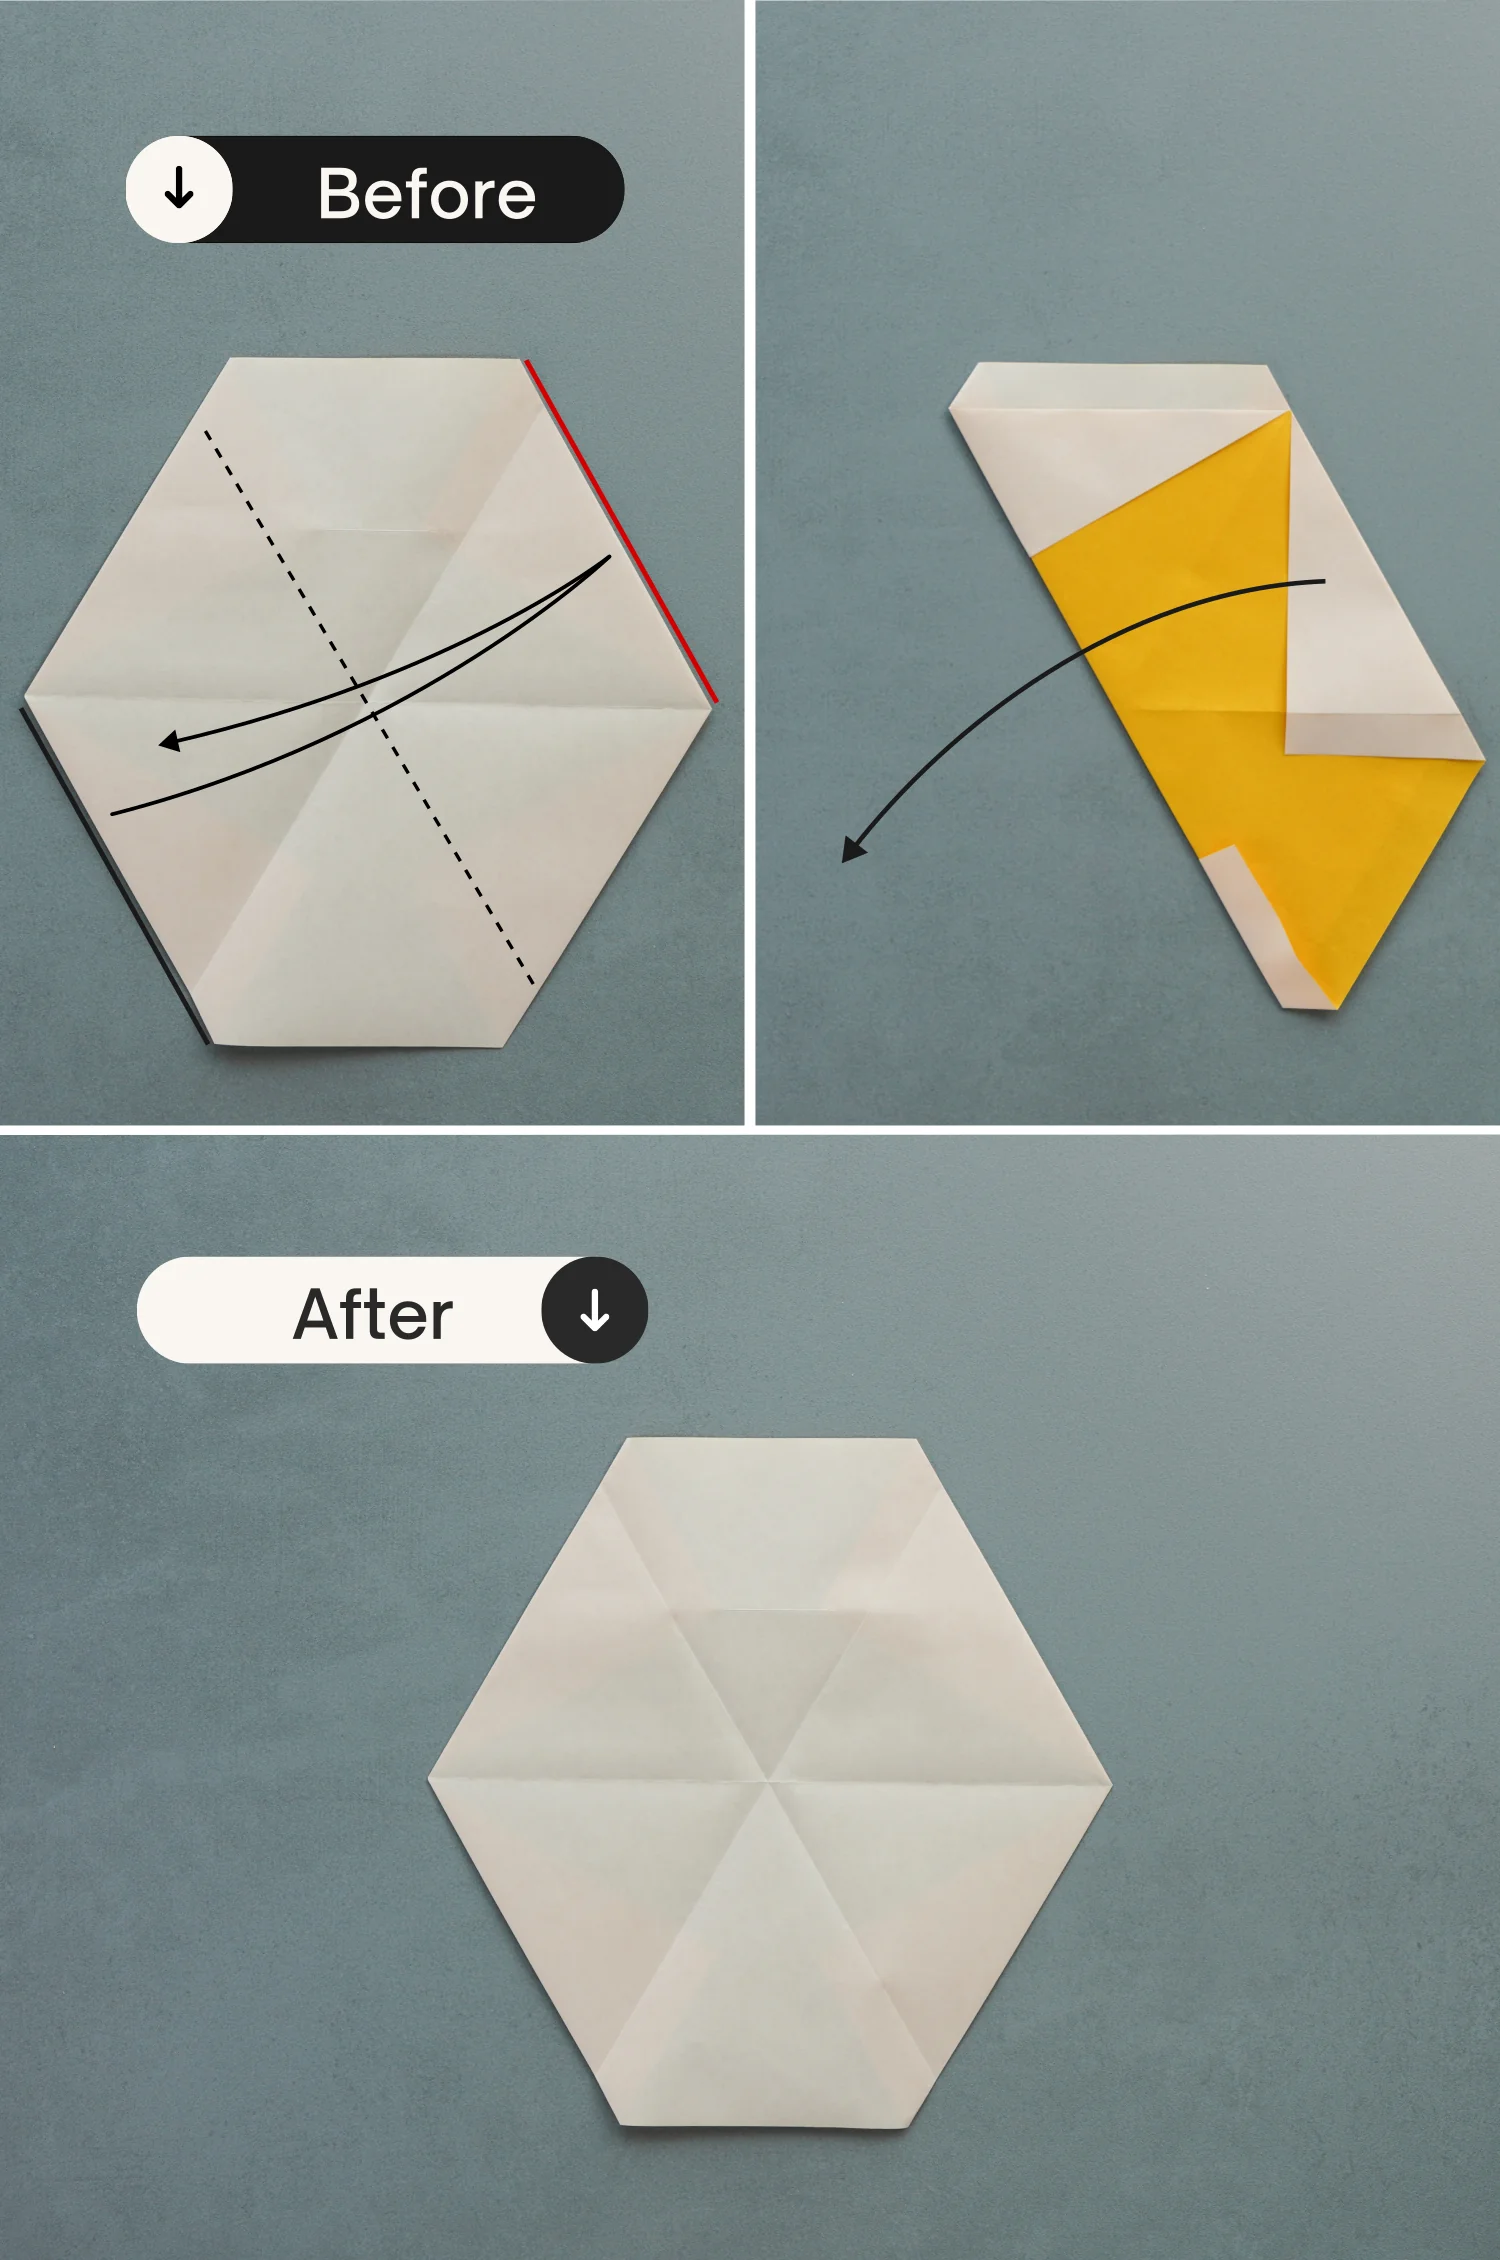
Step 8
Repeat this for the top right edge, fold it to align with the crease you made in the previous step, and unfold it.
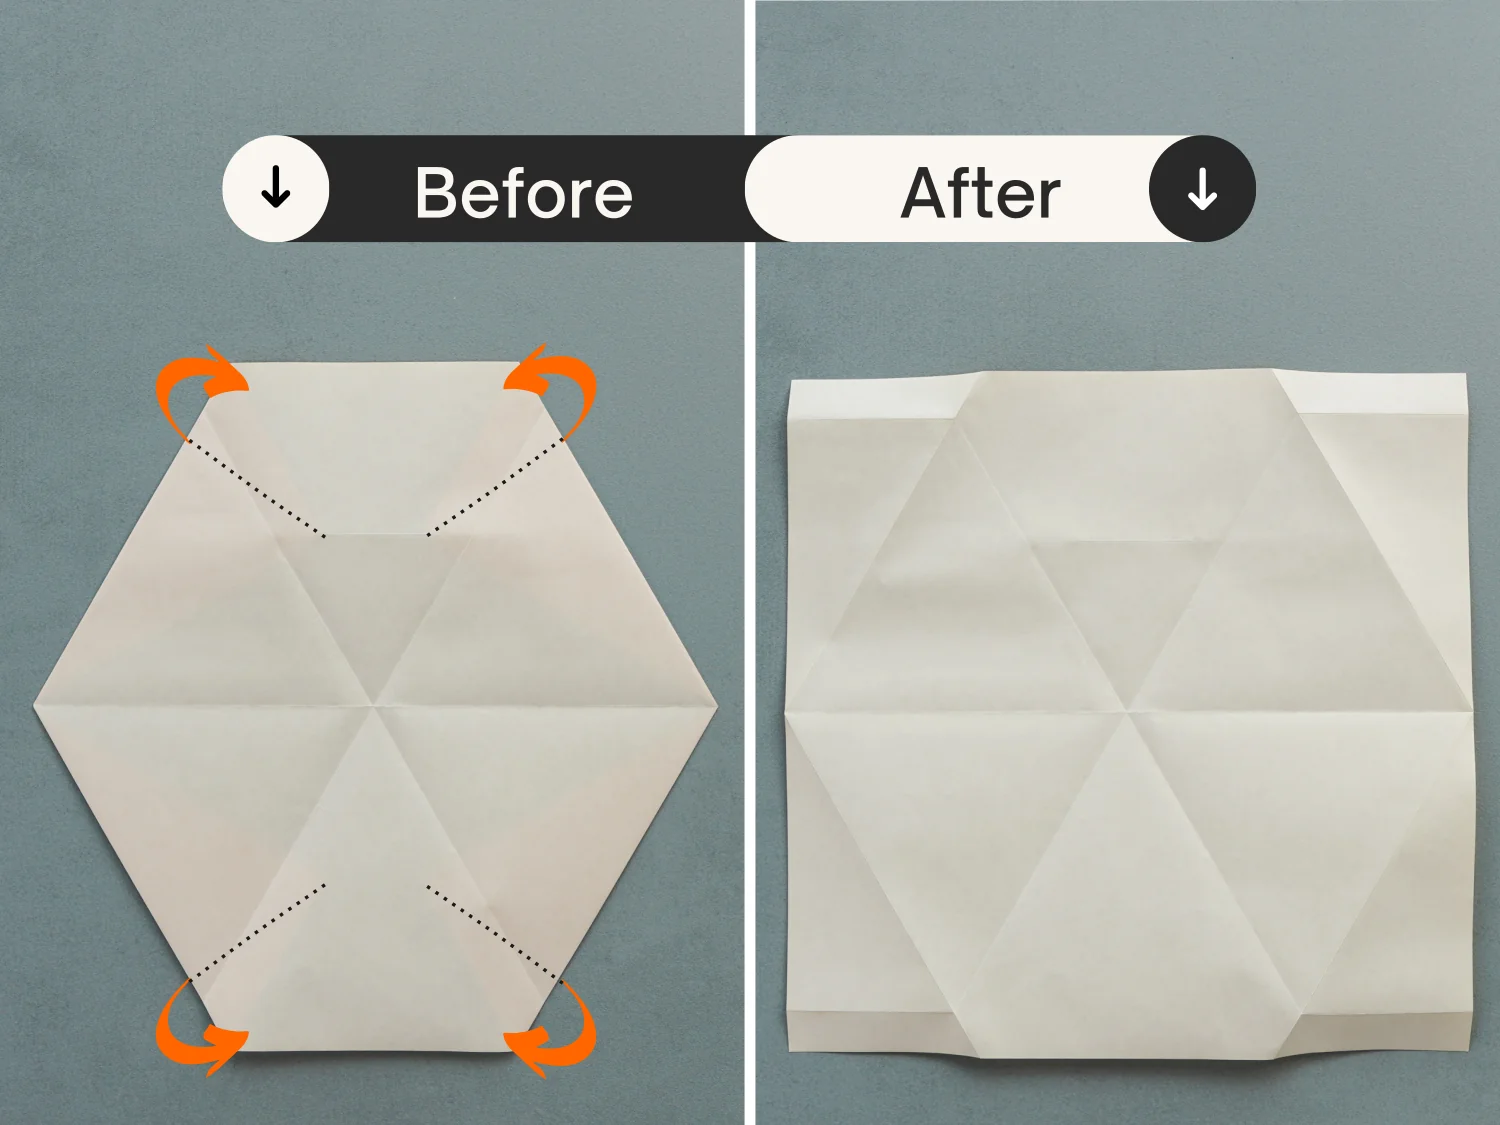
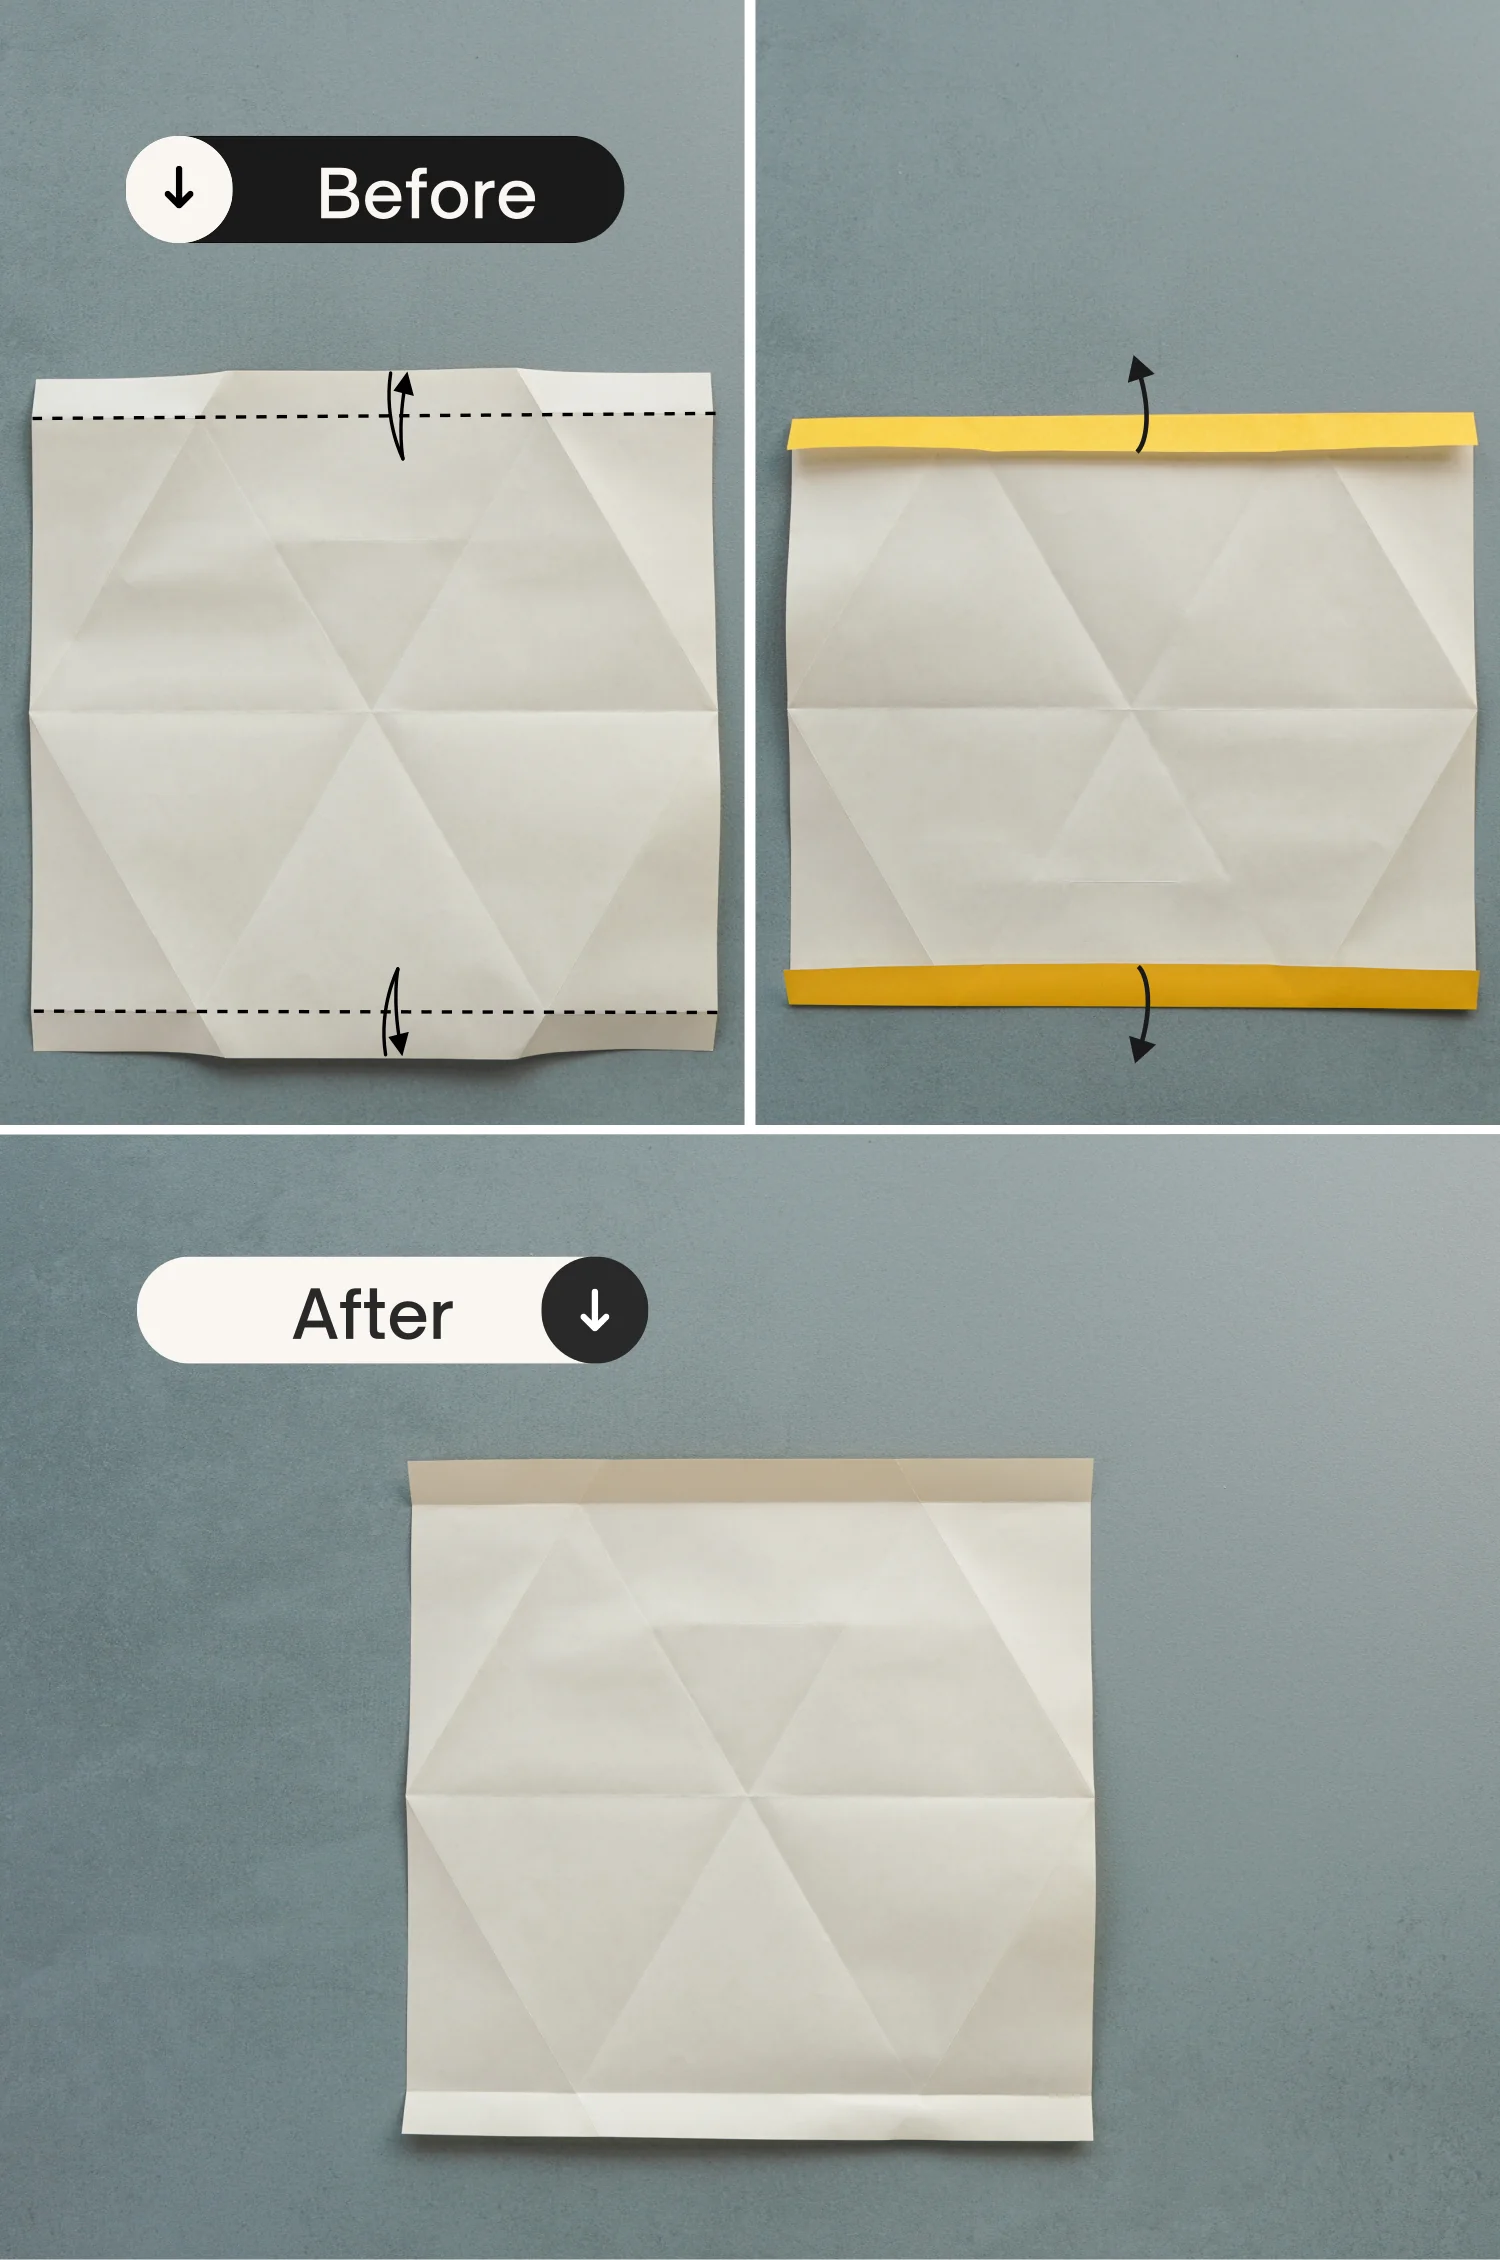
Step 9
Fold the top and bottom edges toward the center along the existing creases on the left and right on both edges. Crease them well then unfold.
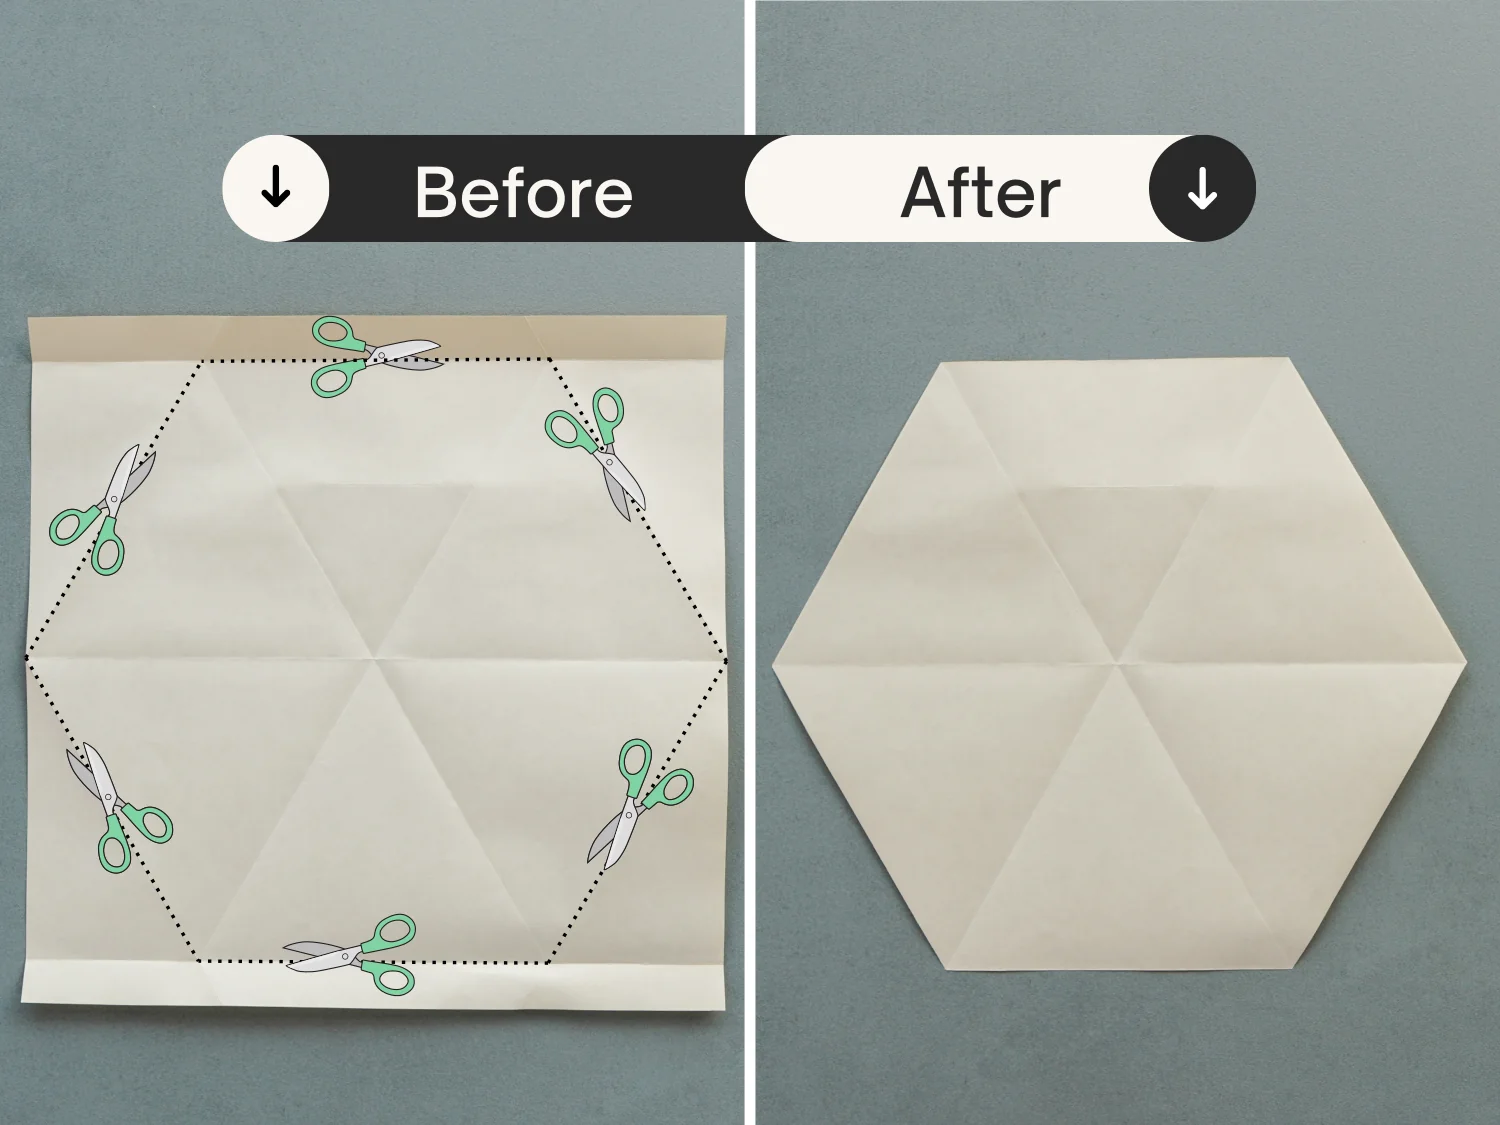
Step 10
Cut the paper along the dotted lines as the picture shows, getting a regular hexagon.
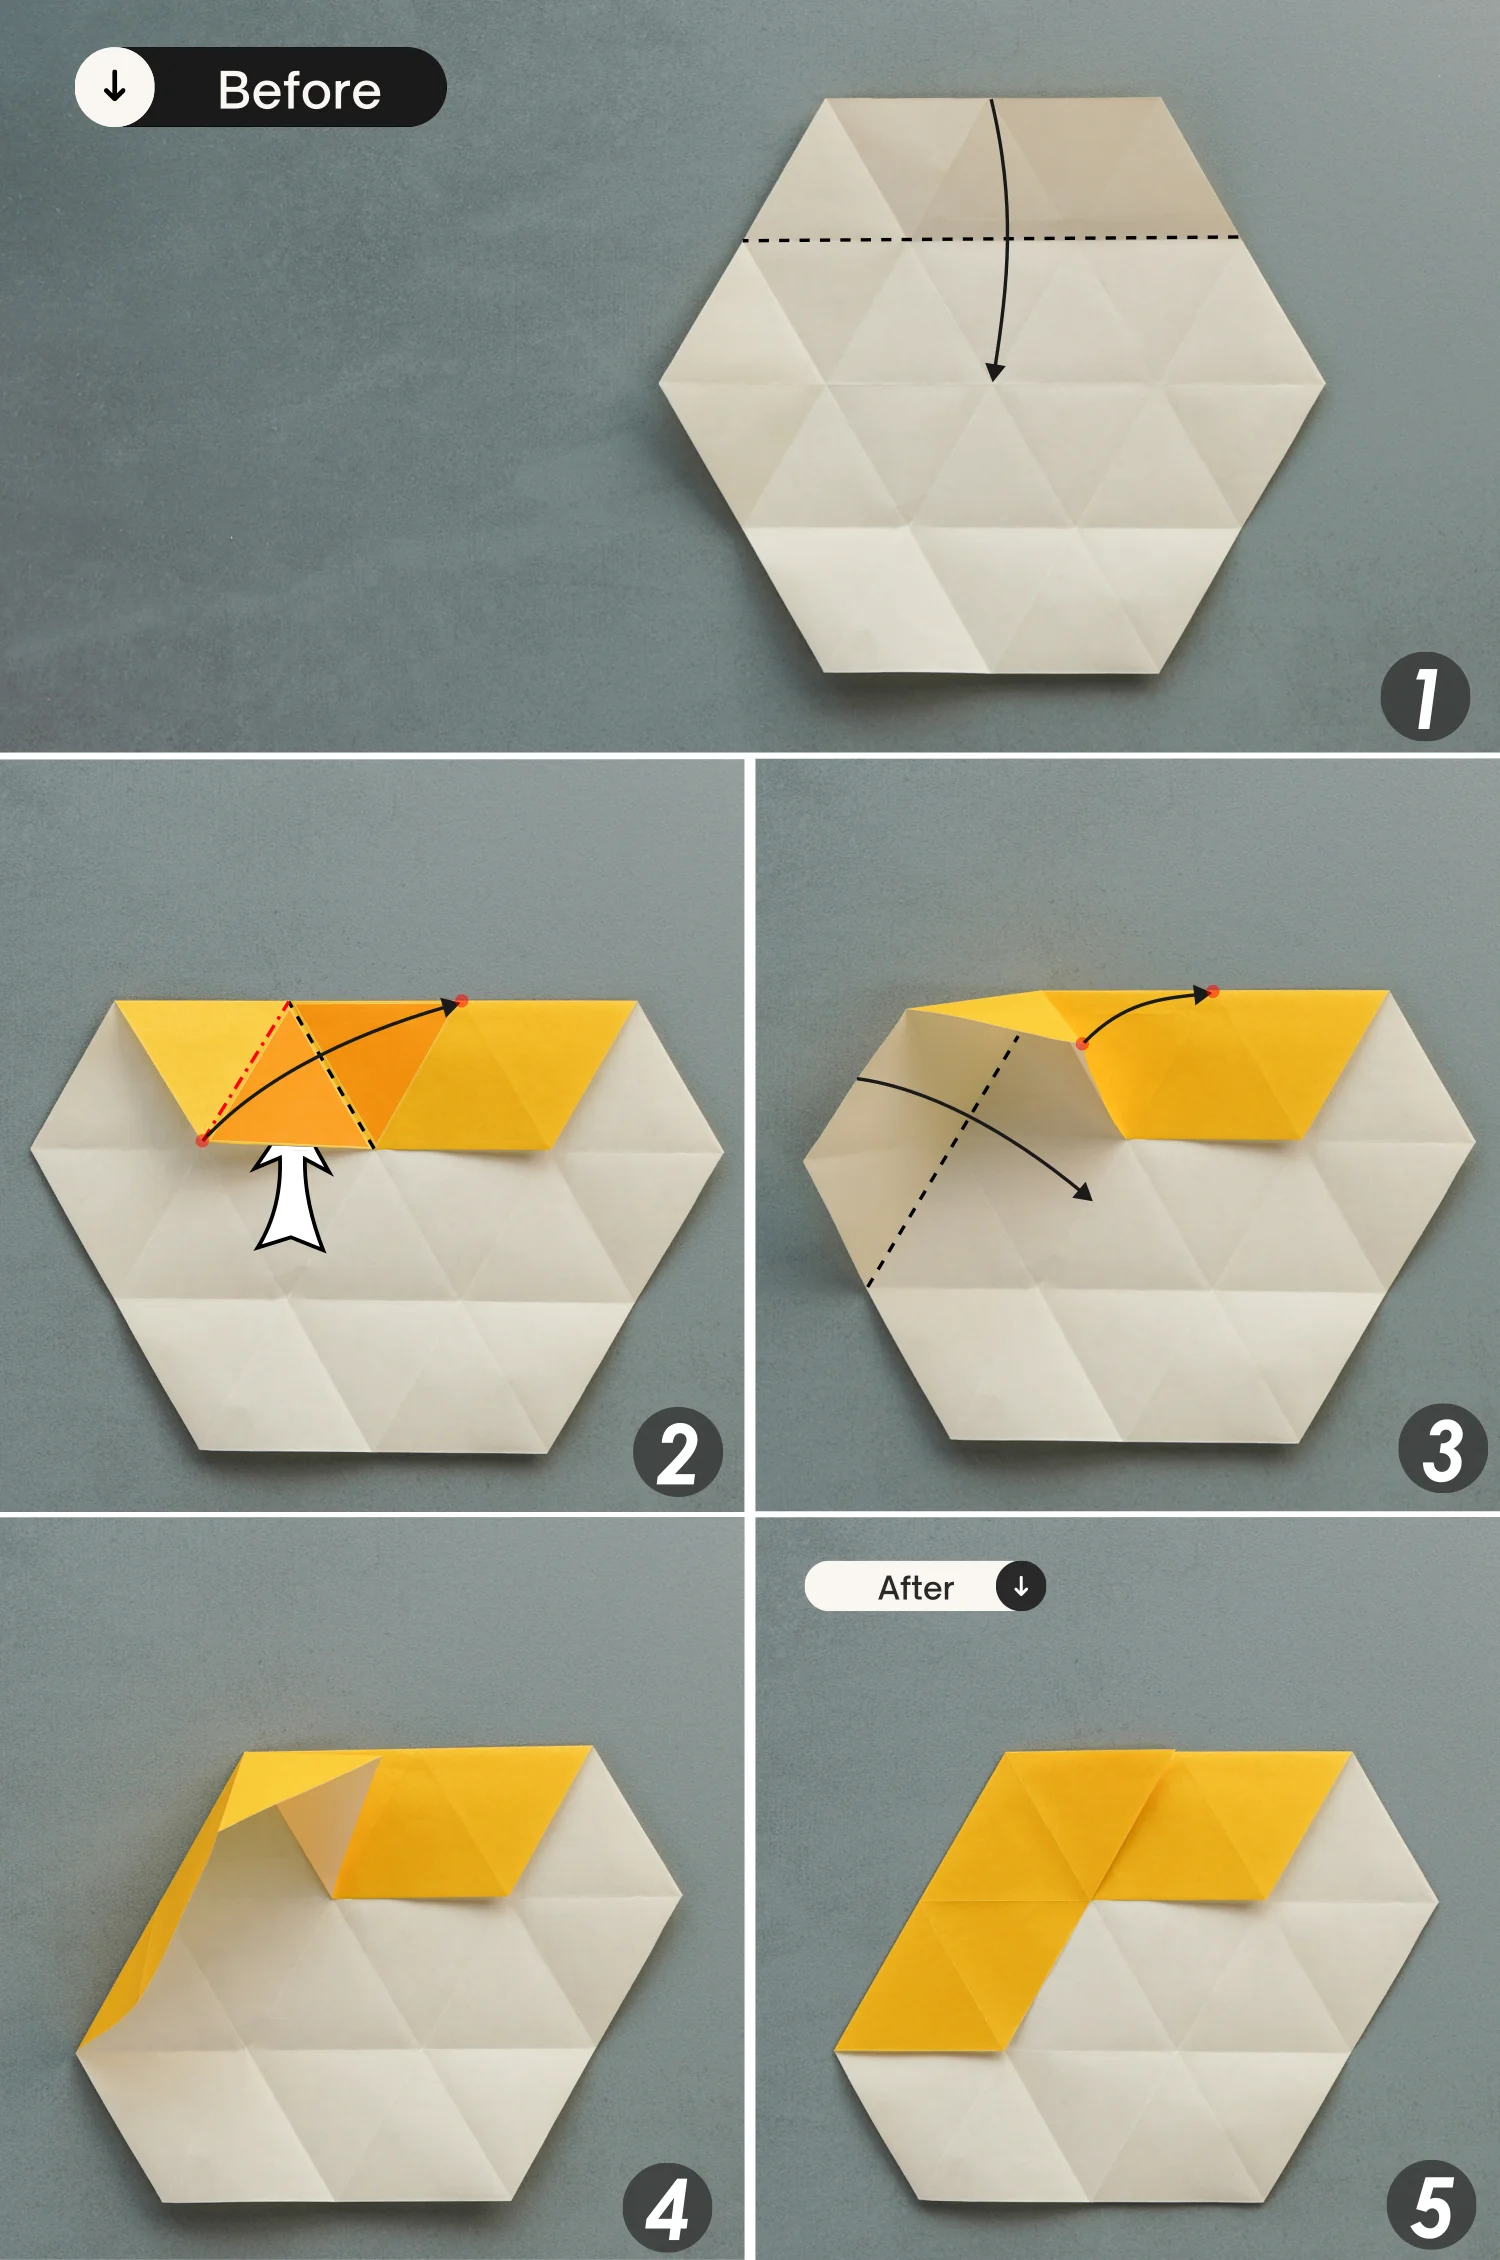
Step 11
Fold the bottom edge to align with the middle horizontal crease, crease well then unfold it.
Repeat this for the other remaining five edges.
Step 12
Fold the top edge down again along the dotted line, take the bottom point of the yellow part, and fold it to the second point of the top edge shown by the red spot.
Finally, fold the left edge to the right along the dotted line to flatten the fold. All the required creases are already here.
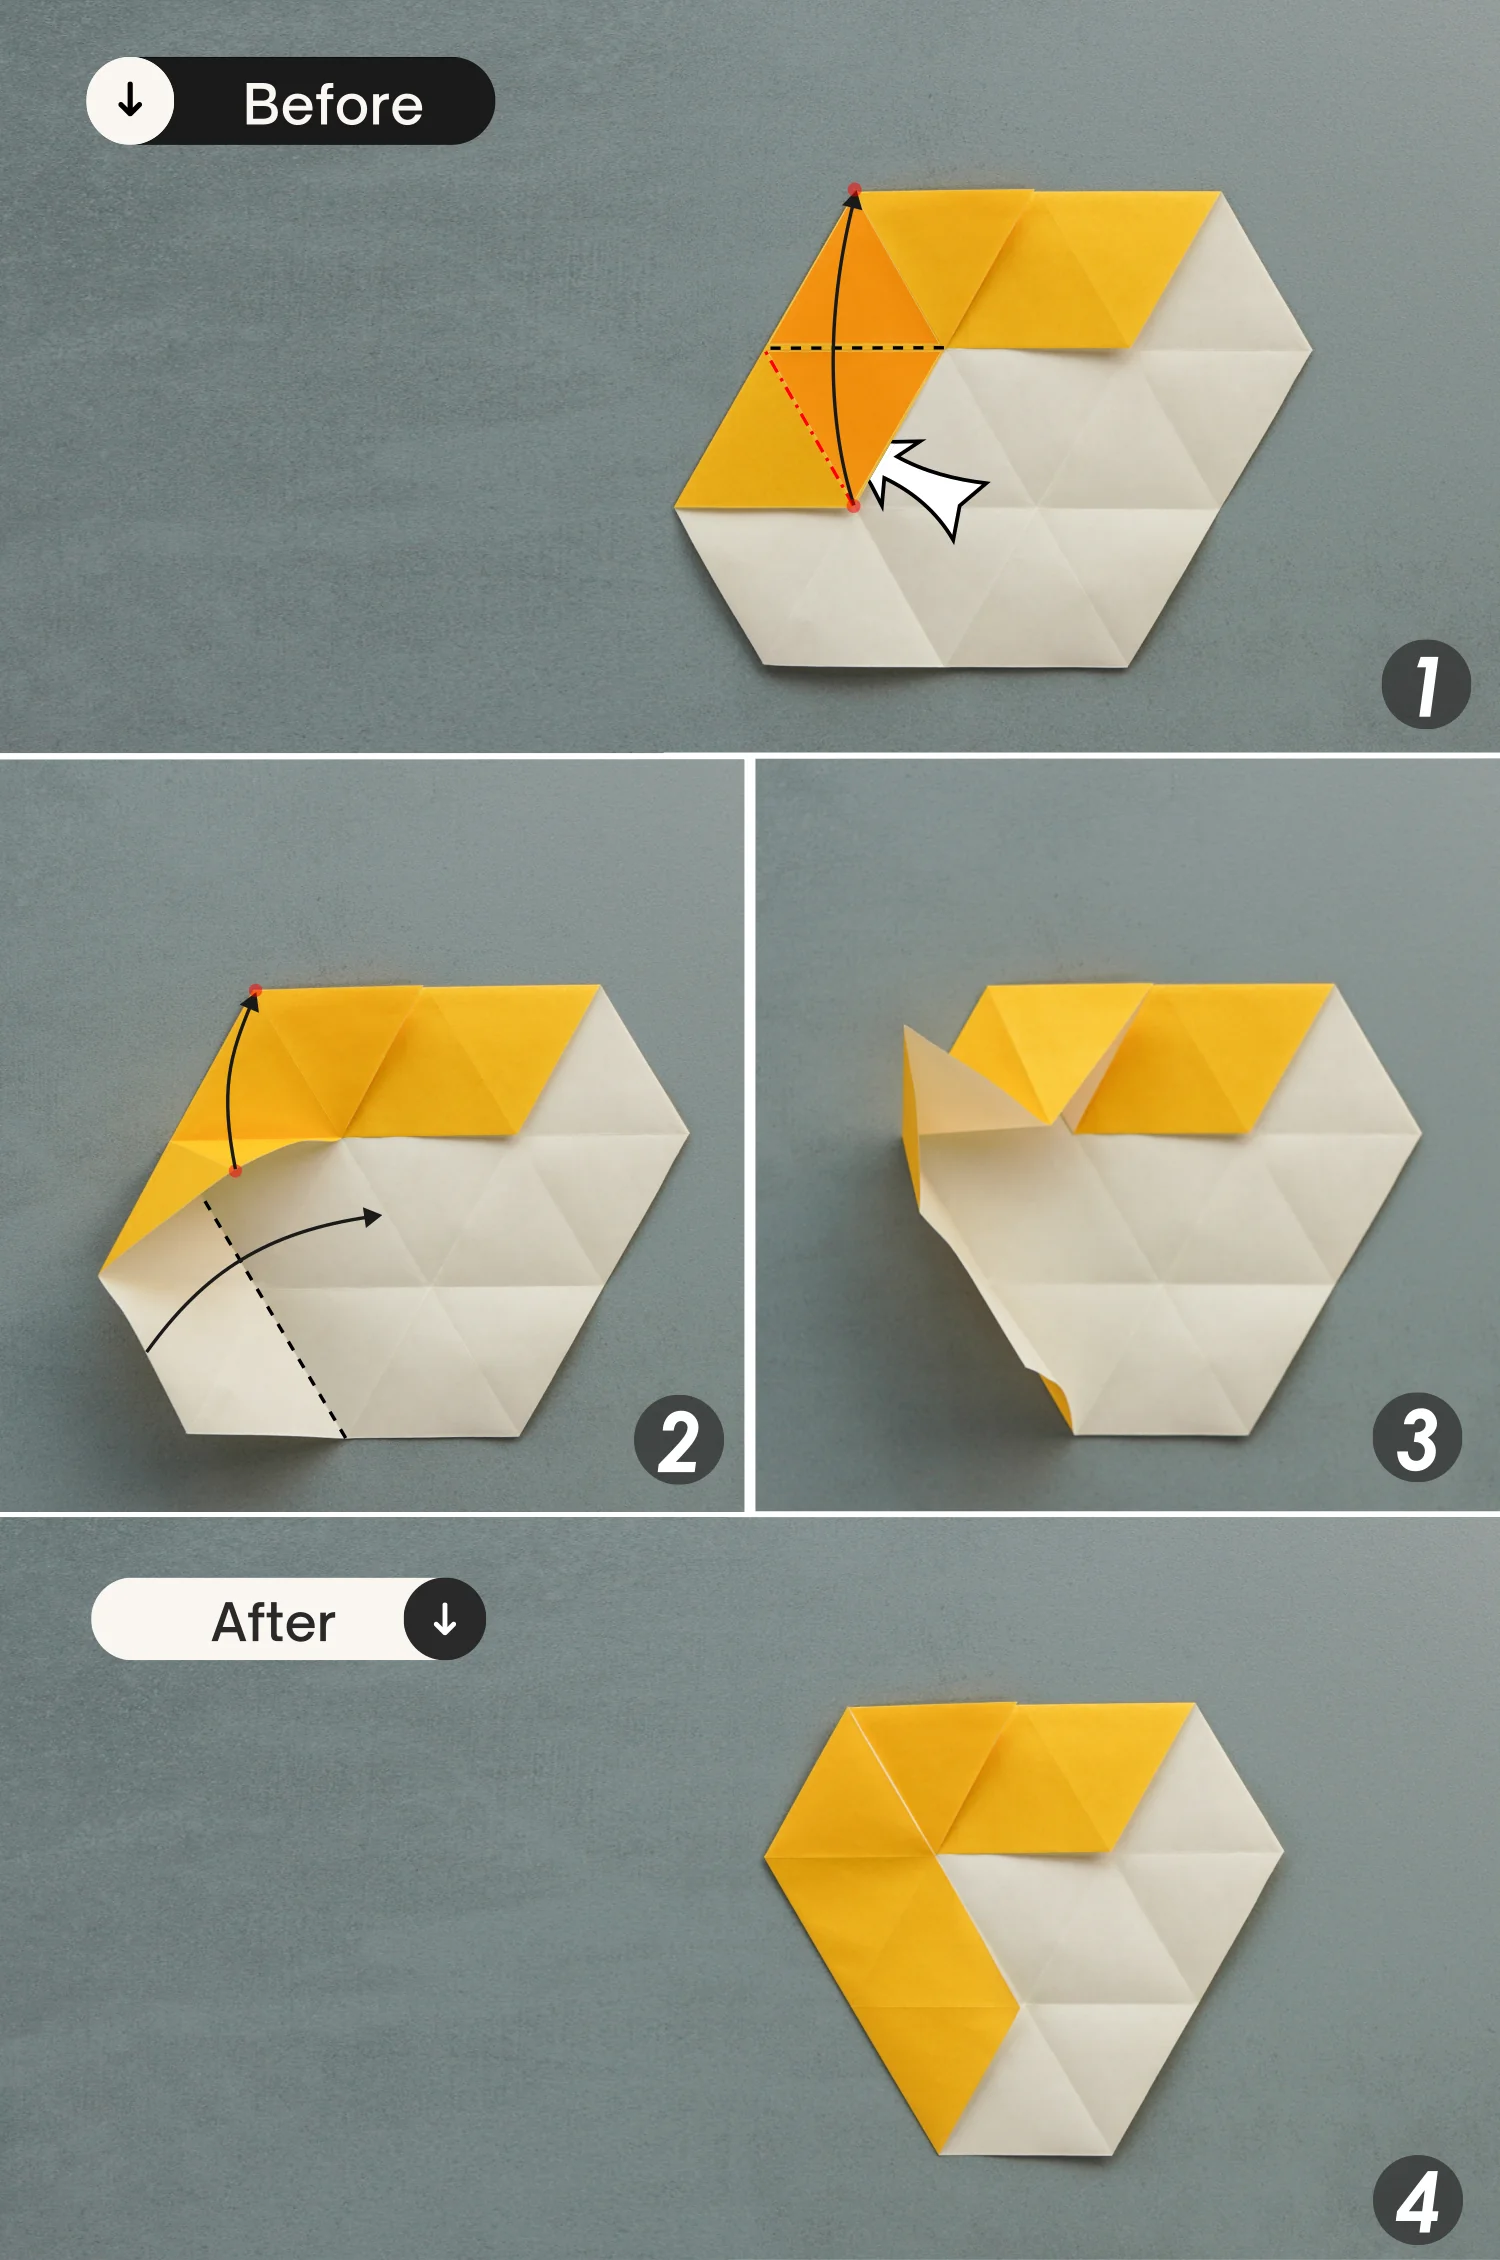
Step 13
Similarly, fold the bottom right point of the left layer to the top left point, then fold the bottom left edge to the right to flatten the fold.
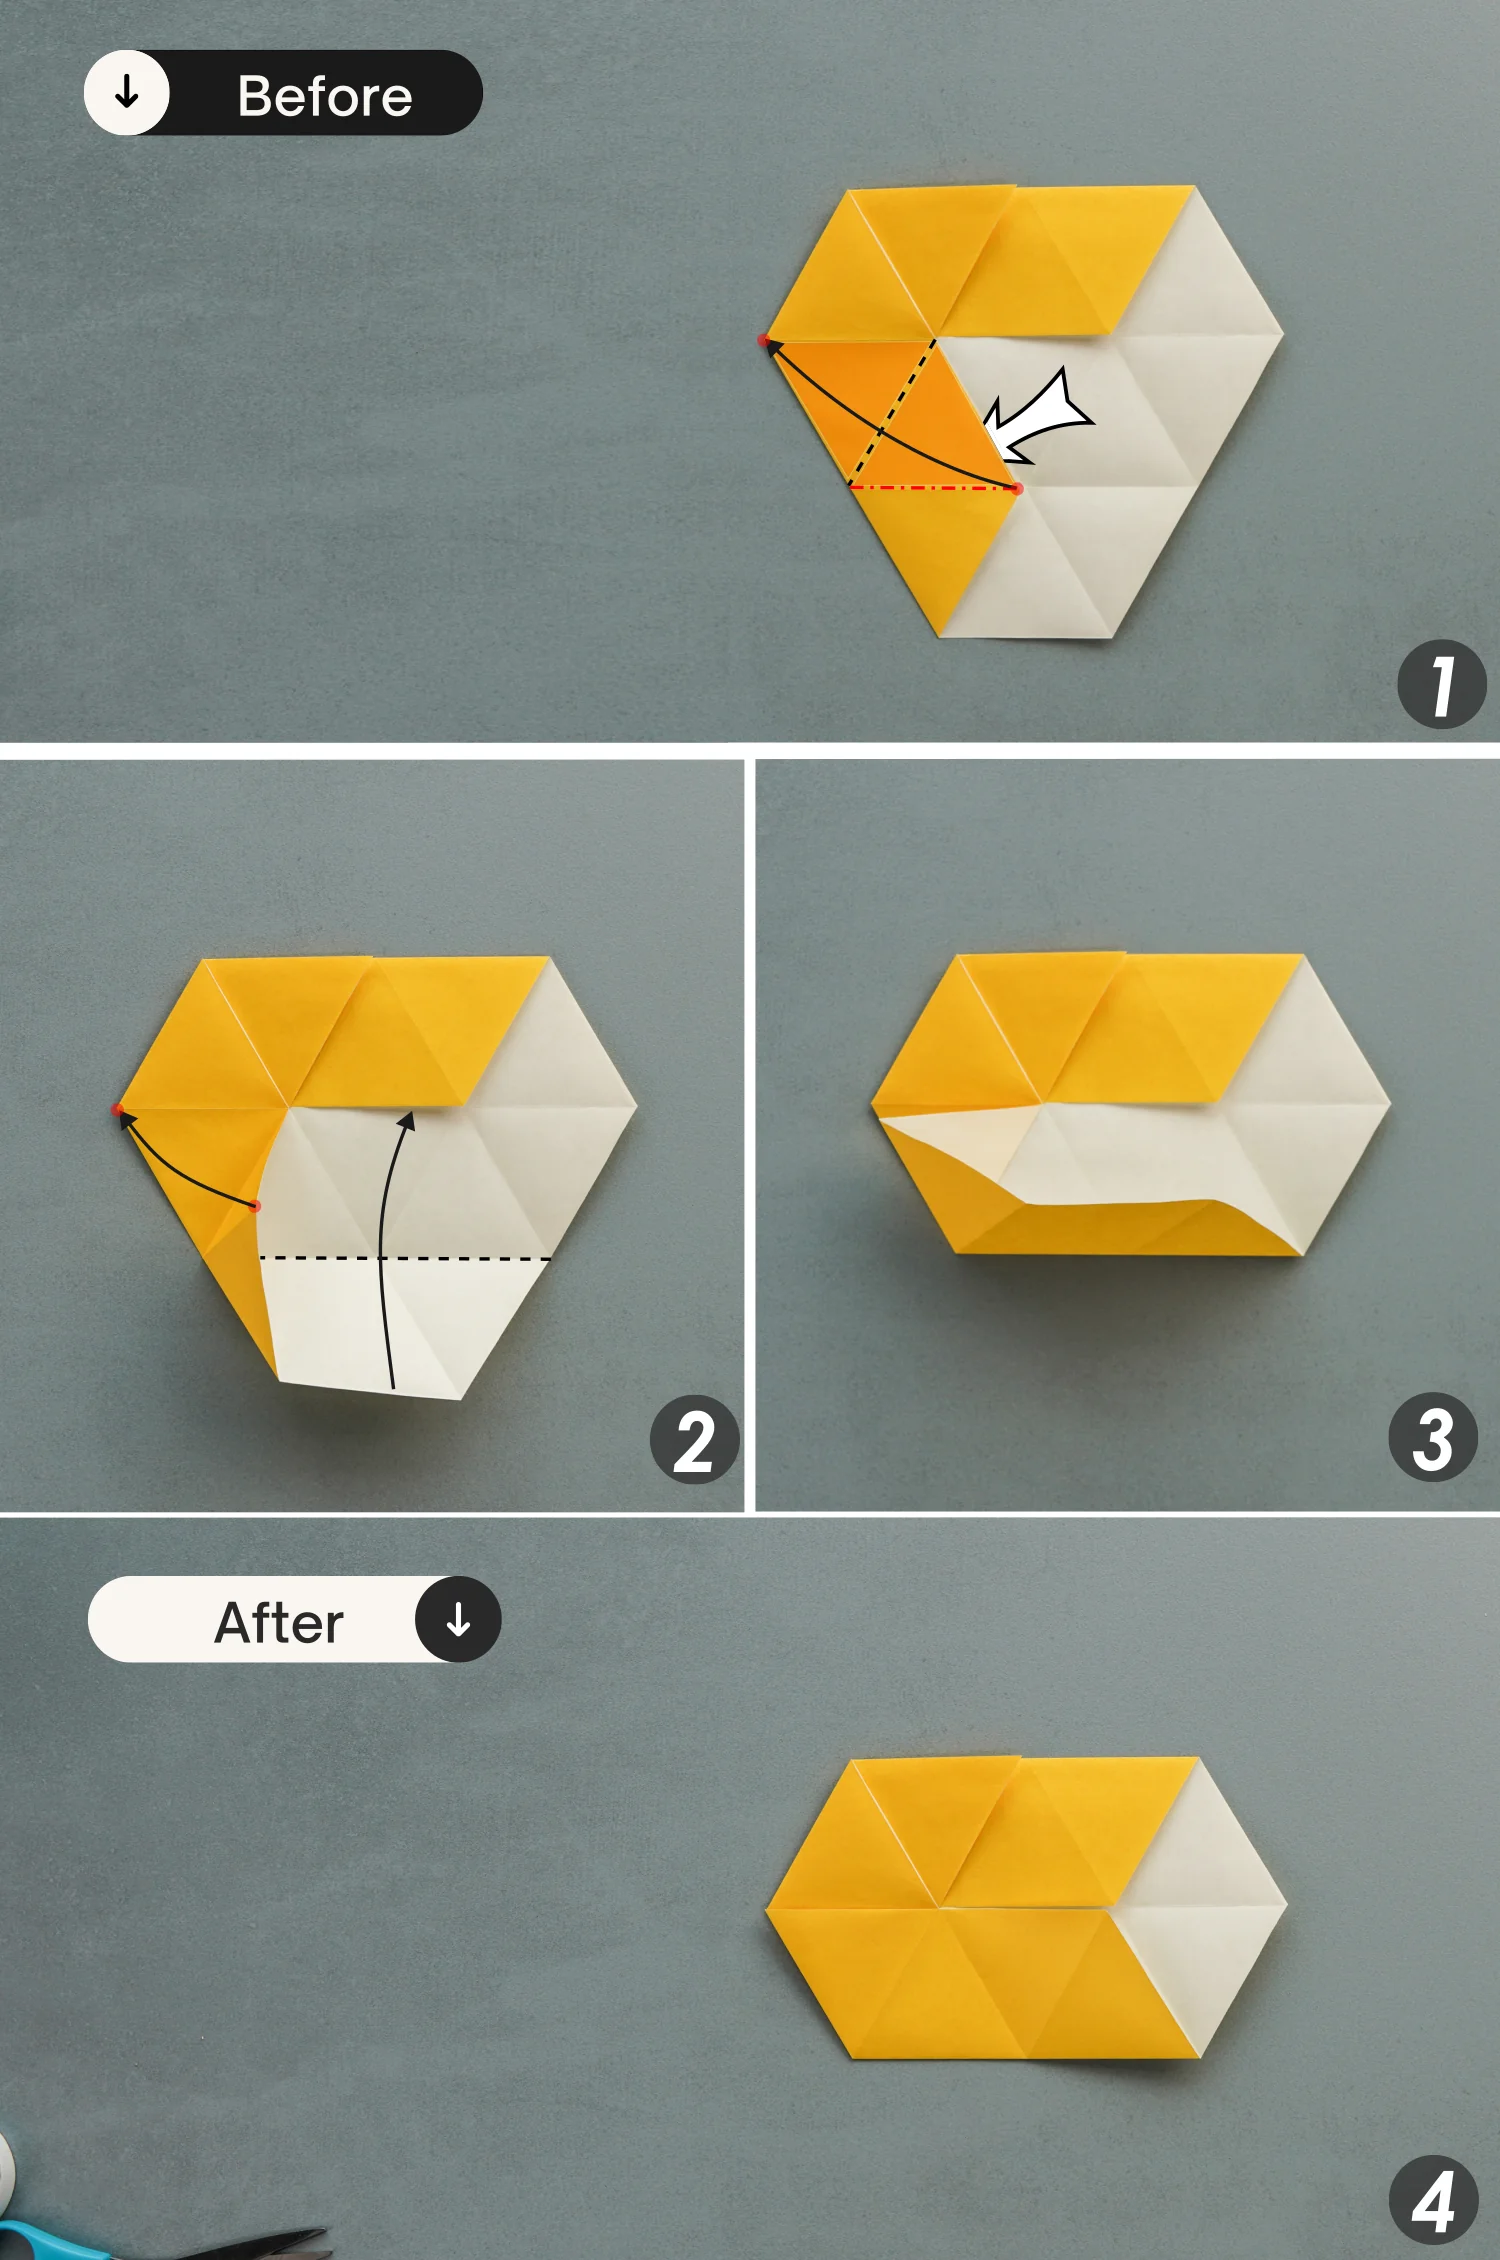
Step 14
Fold the bottom right point of the left layer to its top left point, then fold the bottom edge up to flatten the fold.
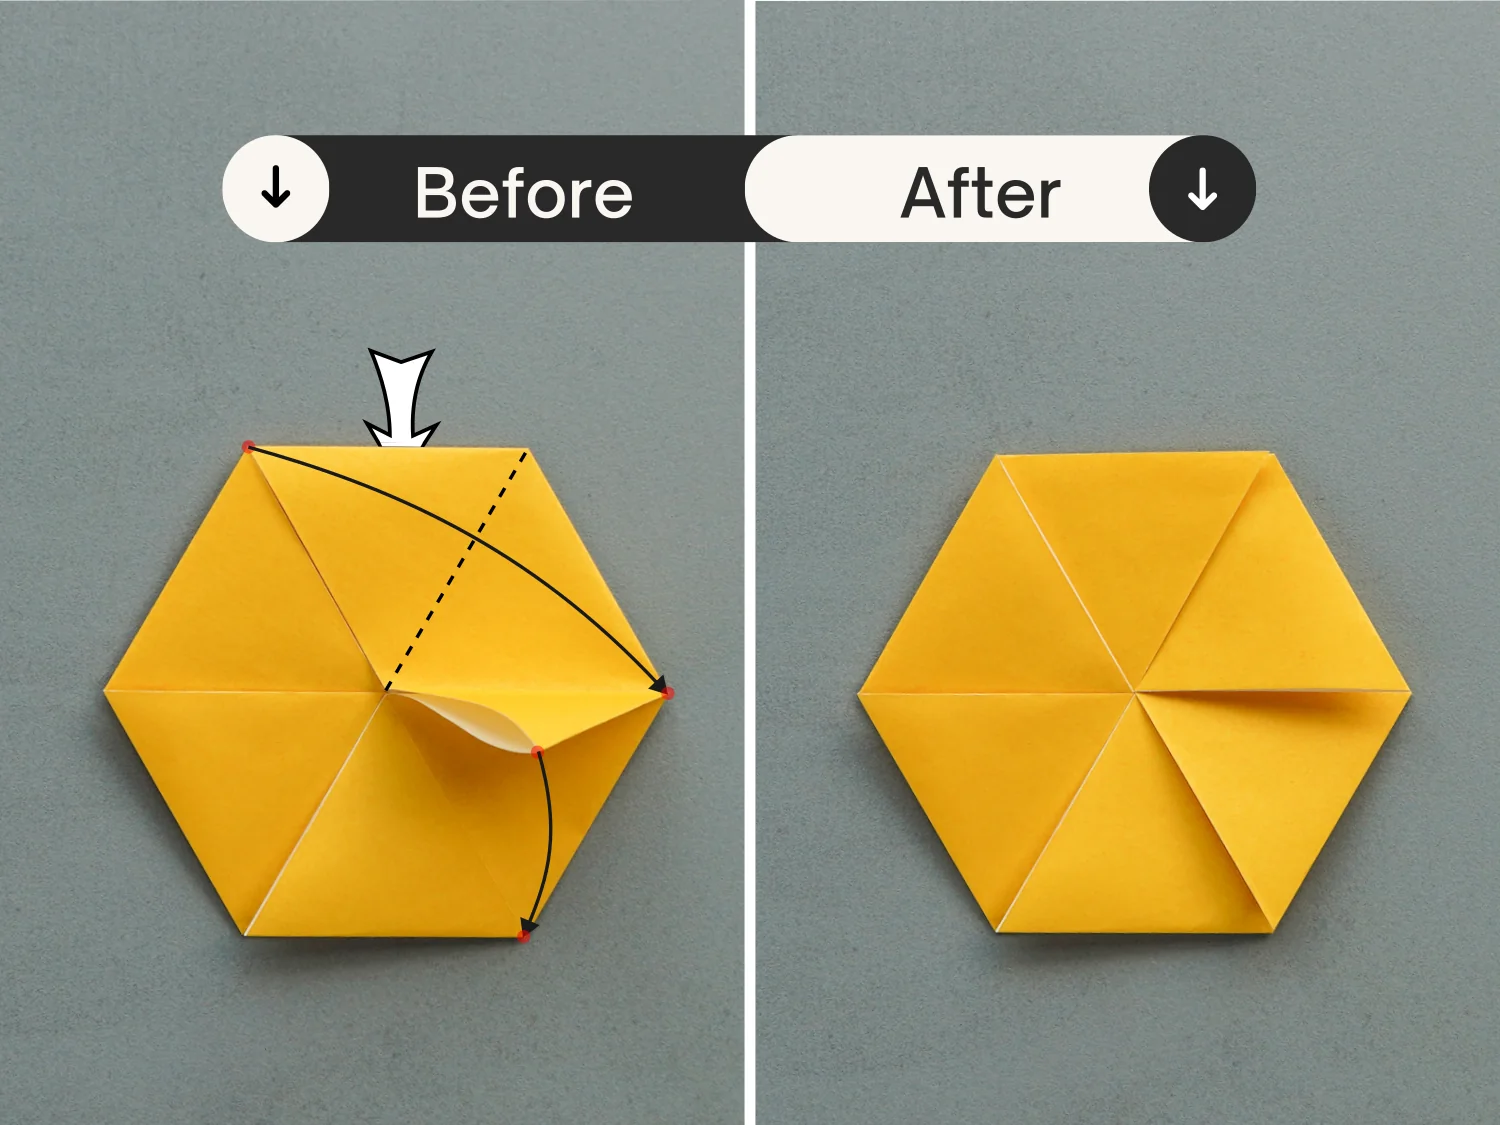
Step 15
Lift the top two layers, and fold the two points on the middle right to the top left point and bottom left point respectively.
While lifting the right point of the model, and pushing the top right and bottom right points to the center of the model, finally sharpen the right point to create a standing corner.

Step 16
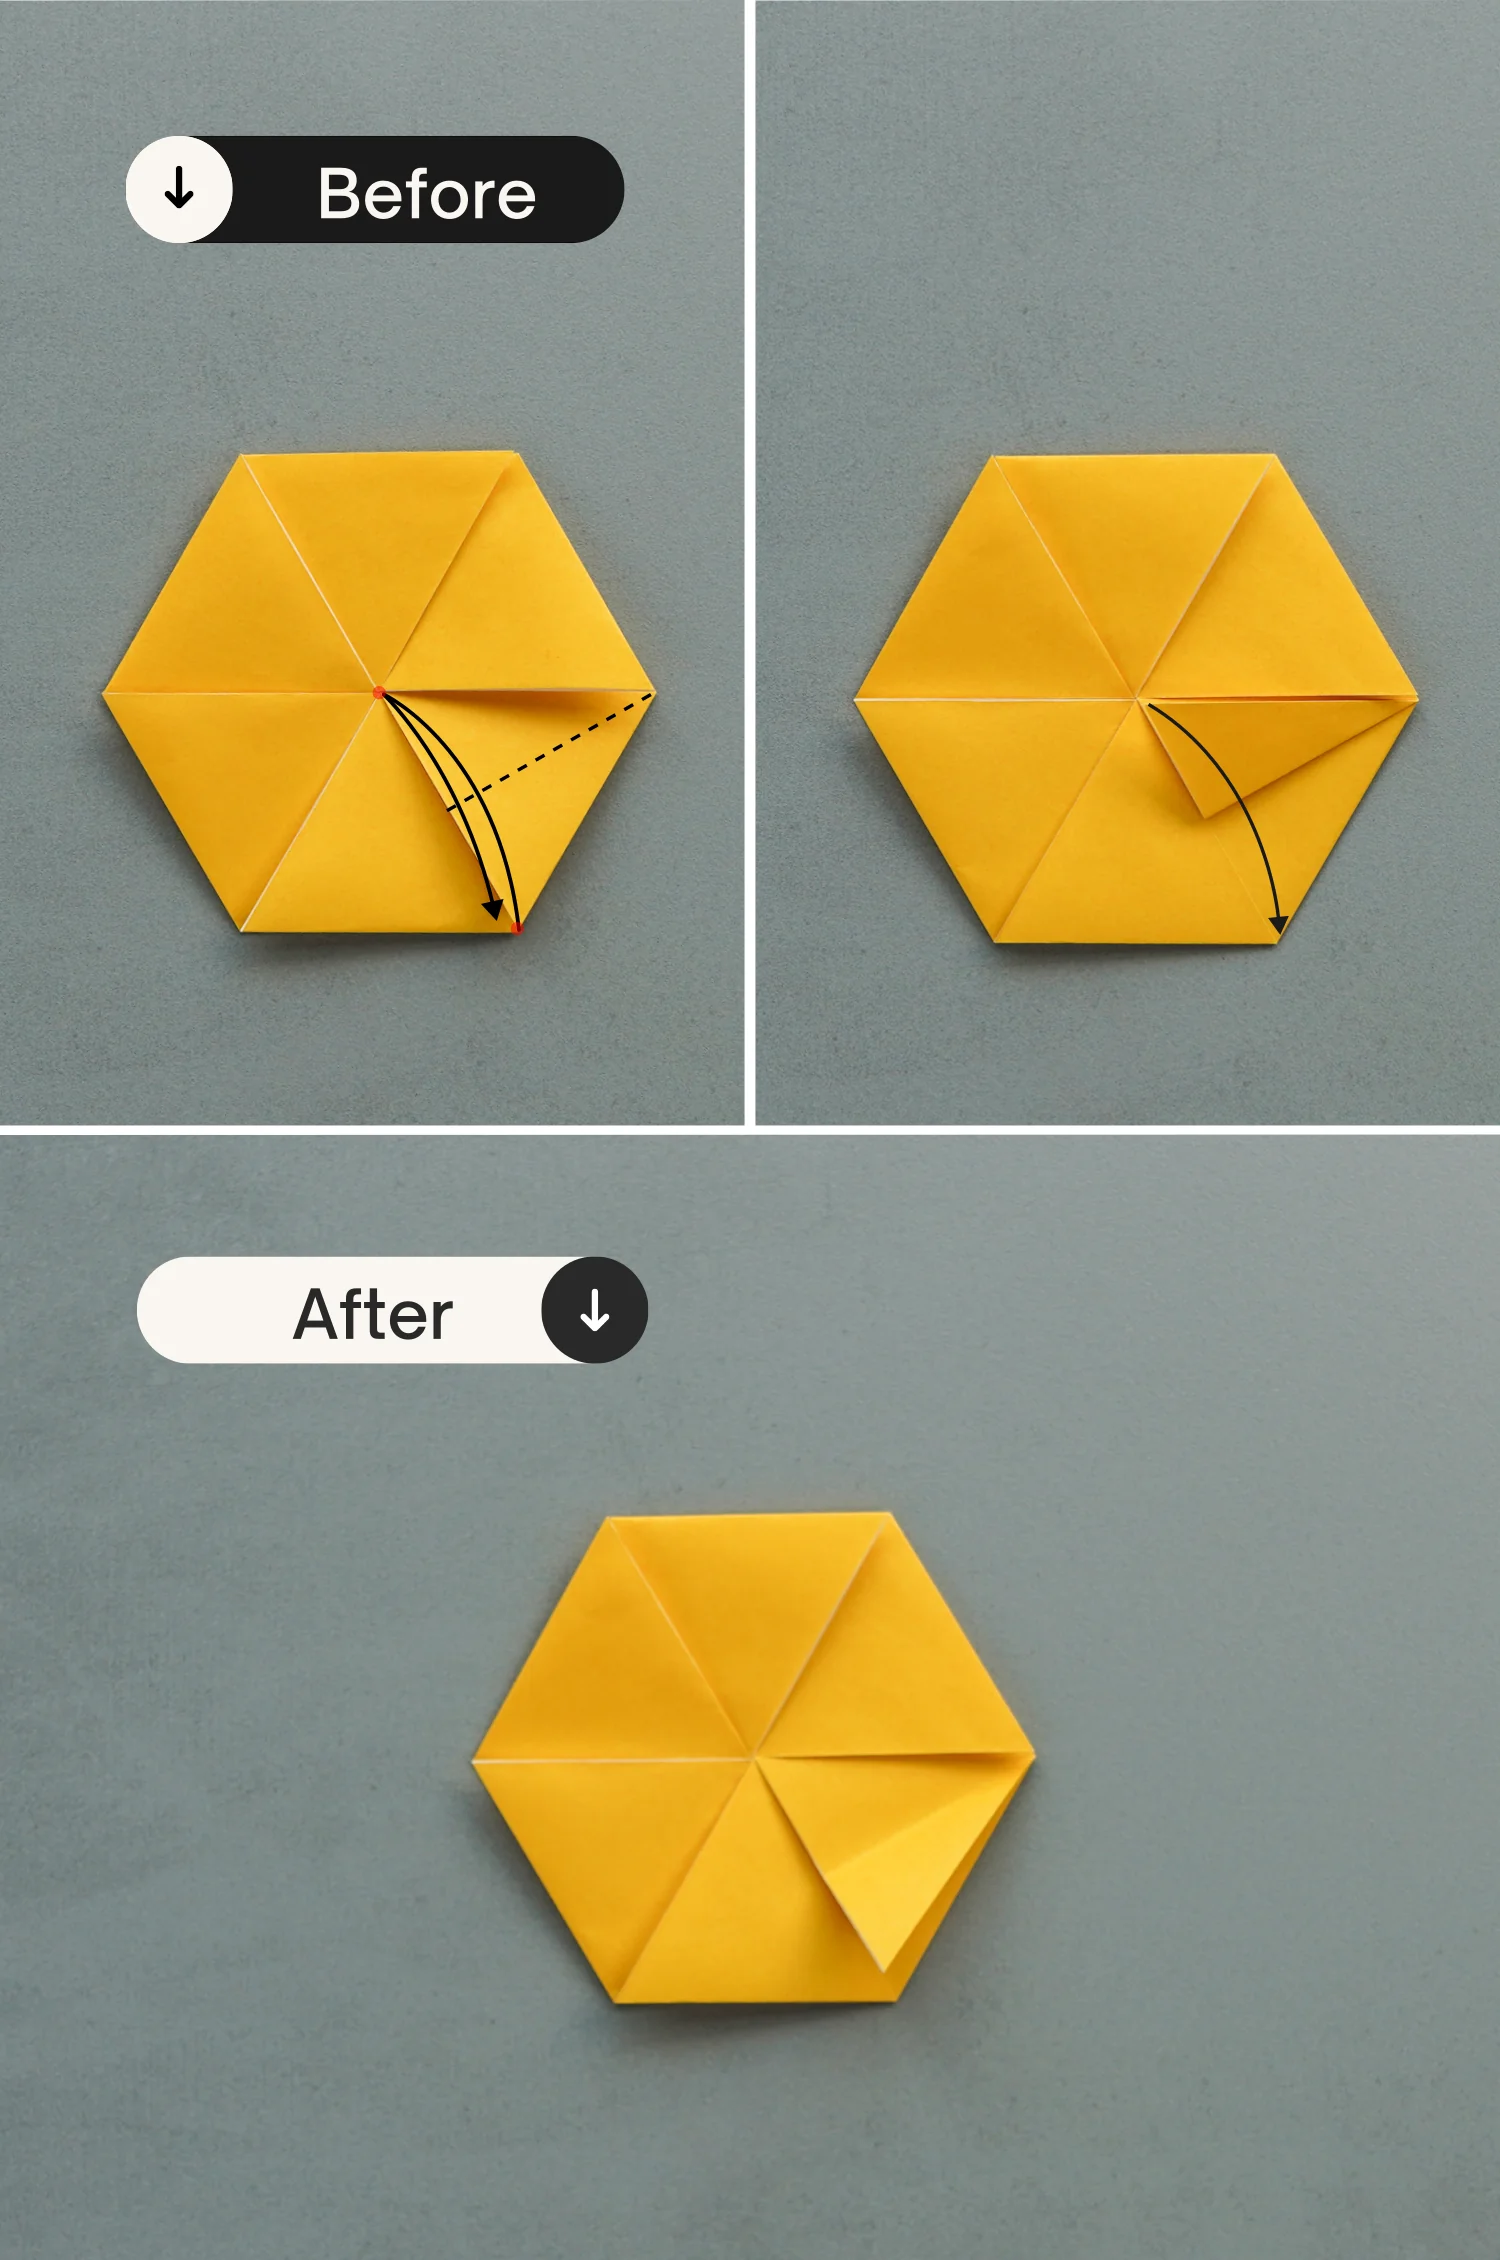
Press this standing corner down, and fold the top left corner of the top layer down to the right along the dotted line,
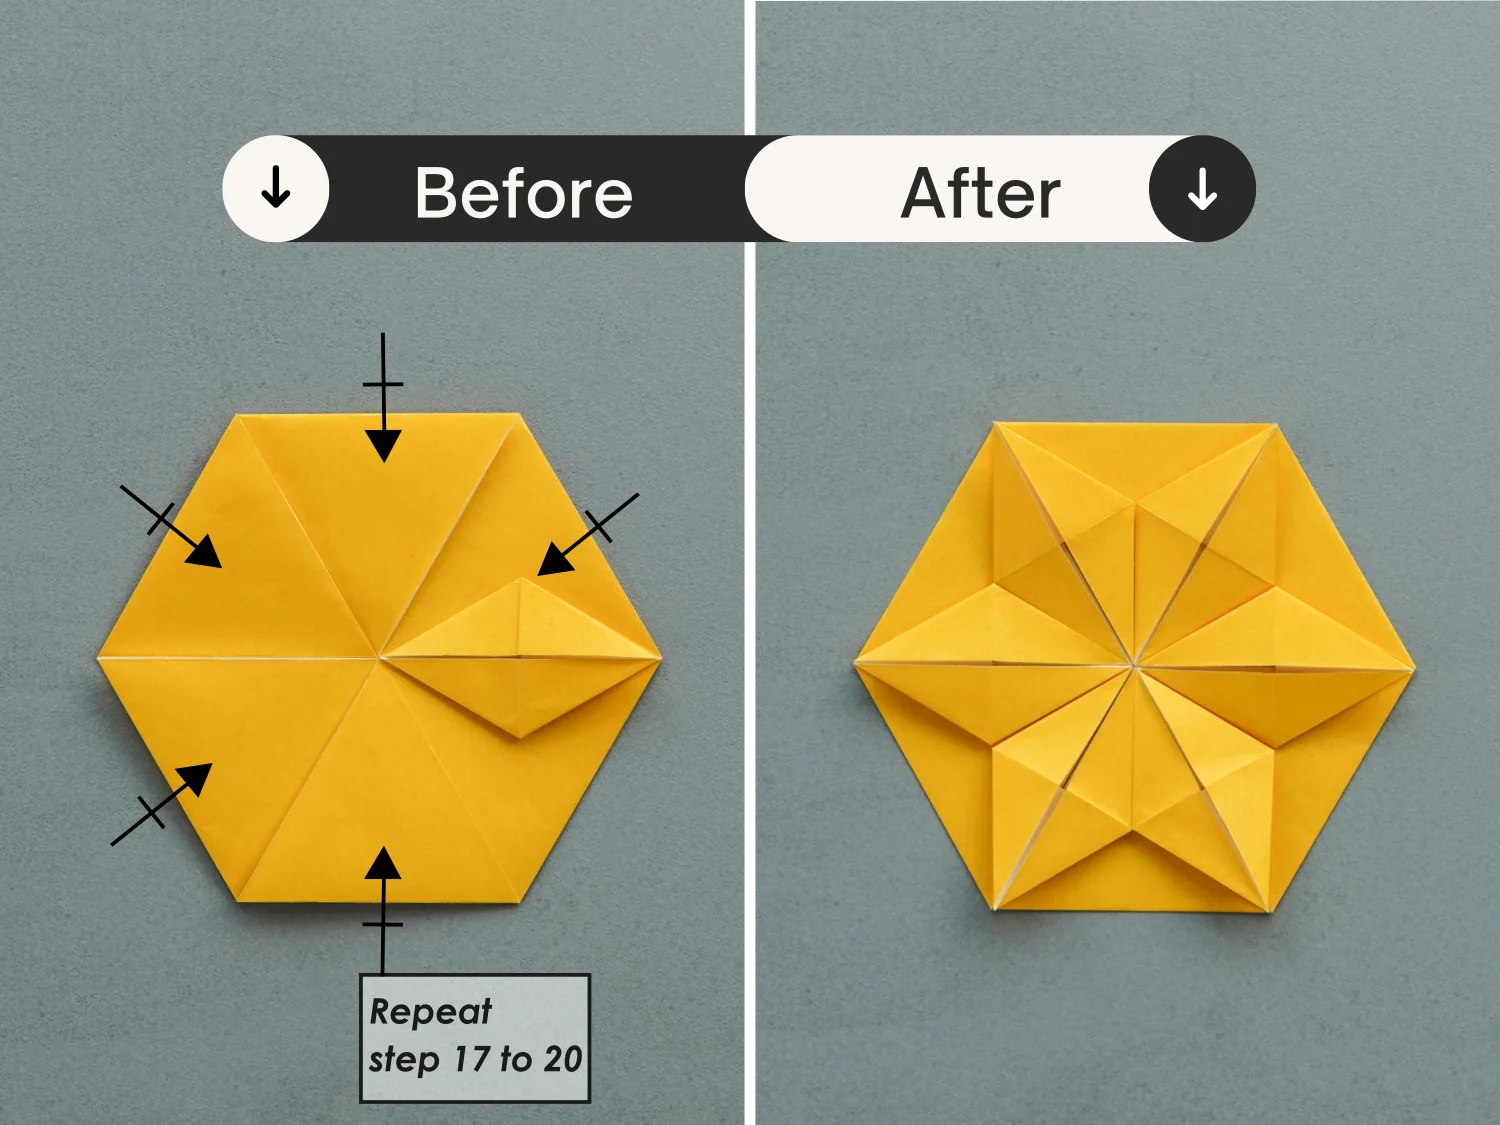
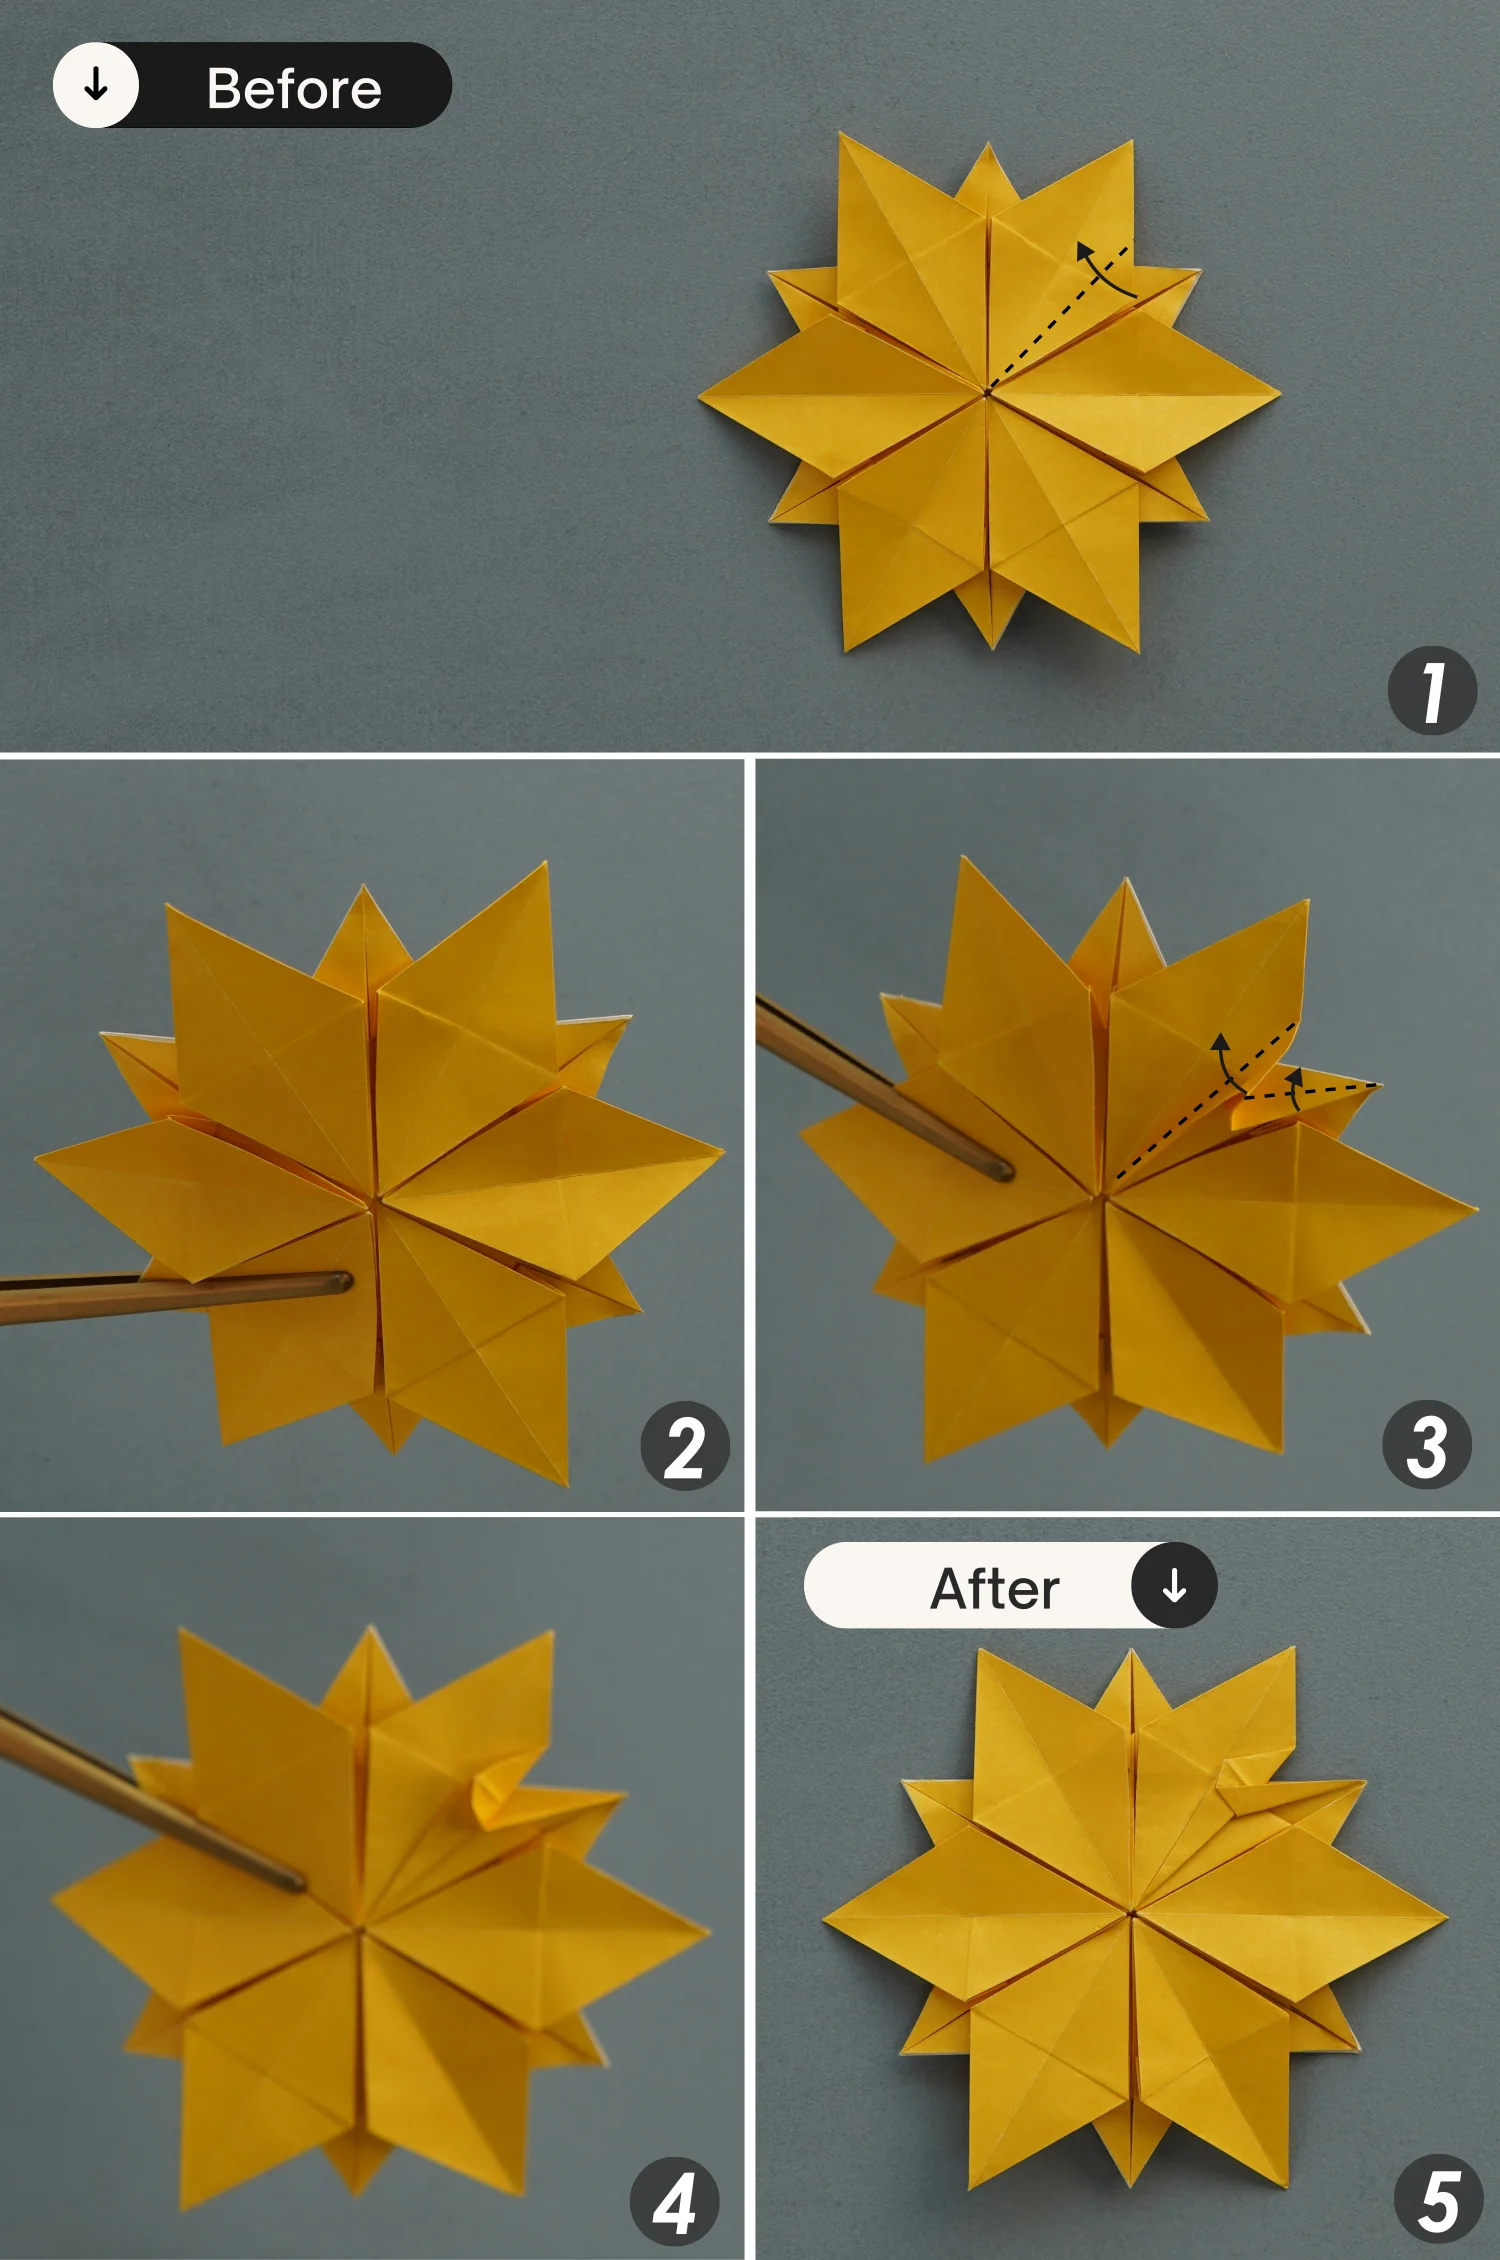
Step 17
Take the bottom right corner of the top layer, fold it to the center point diagonally, crease it well then unfold.
Step 18
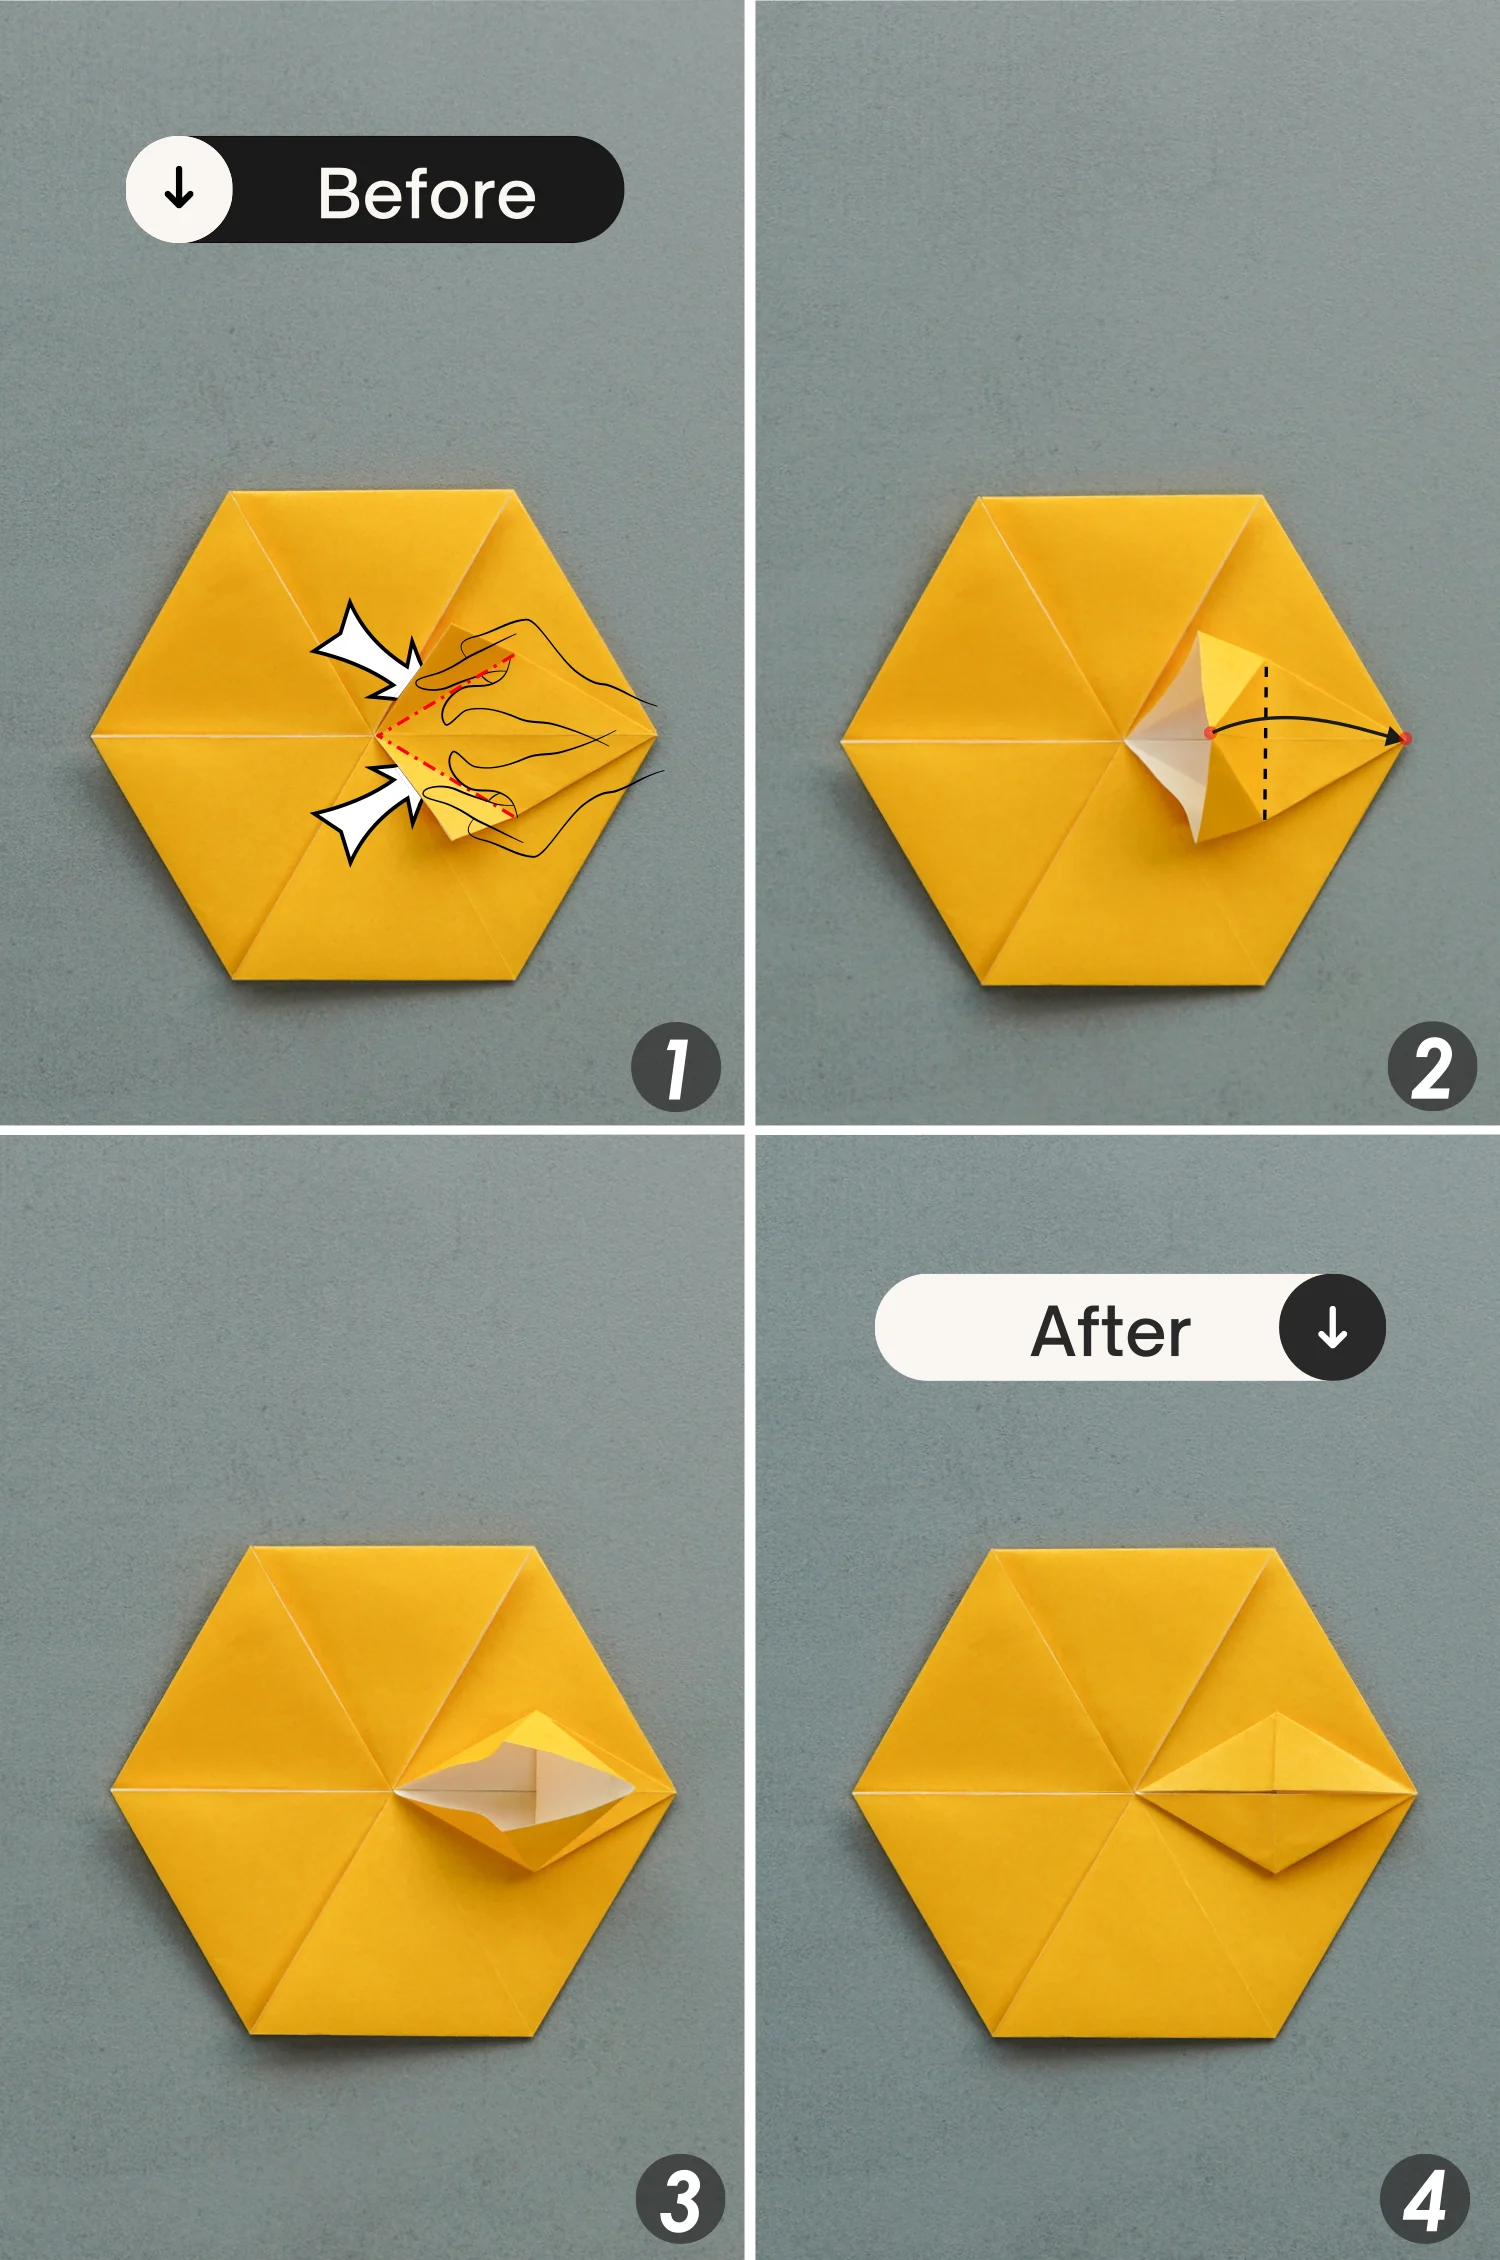
Lift the corner you pressed down in step 16, and slightly open it, squash it along the creases you made in the previous step.

Step 19
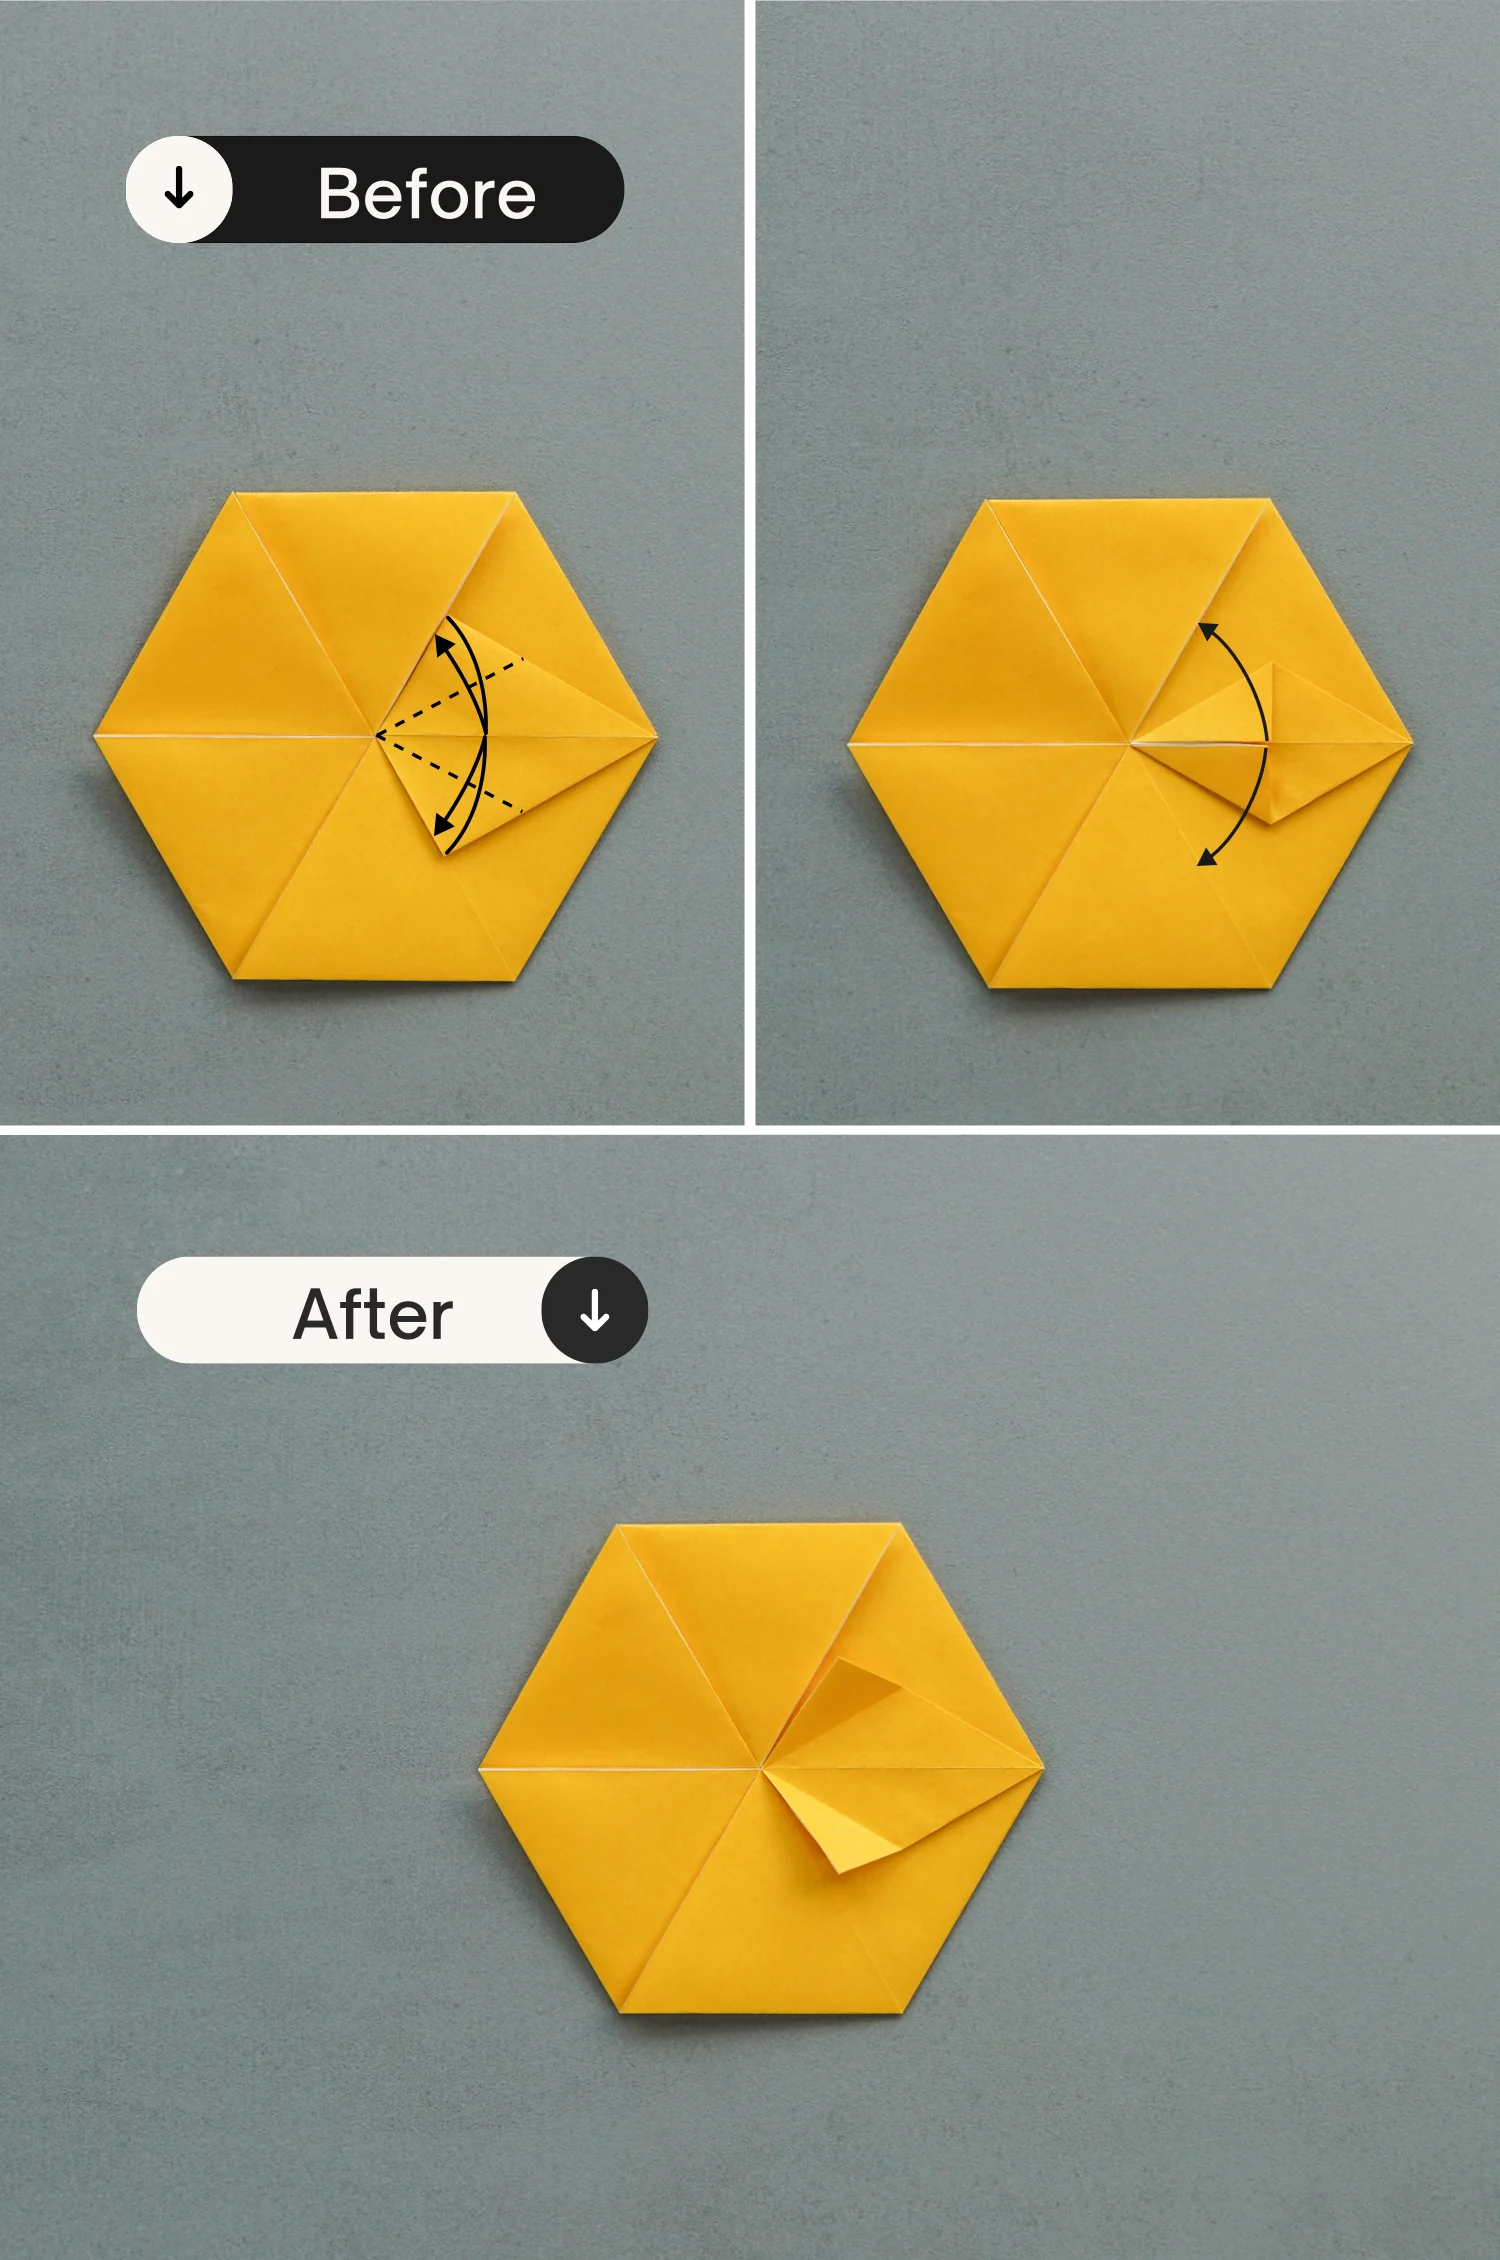
Look at the flap you made in the previous step, fold its top left and bottom left to align with its middle crease, leaving two creases, and unfold them.
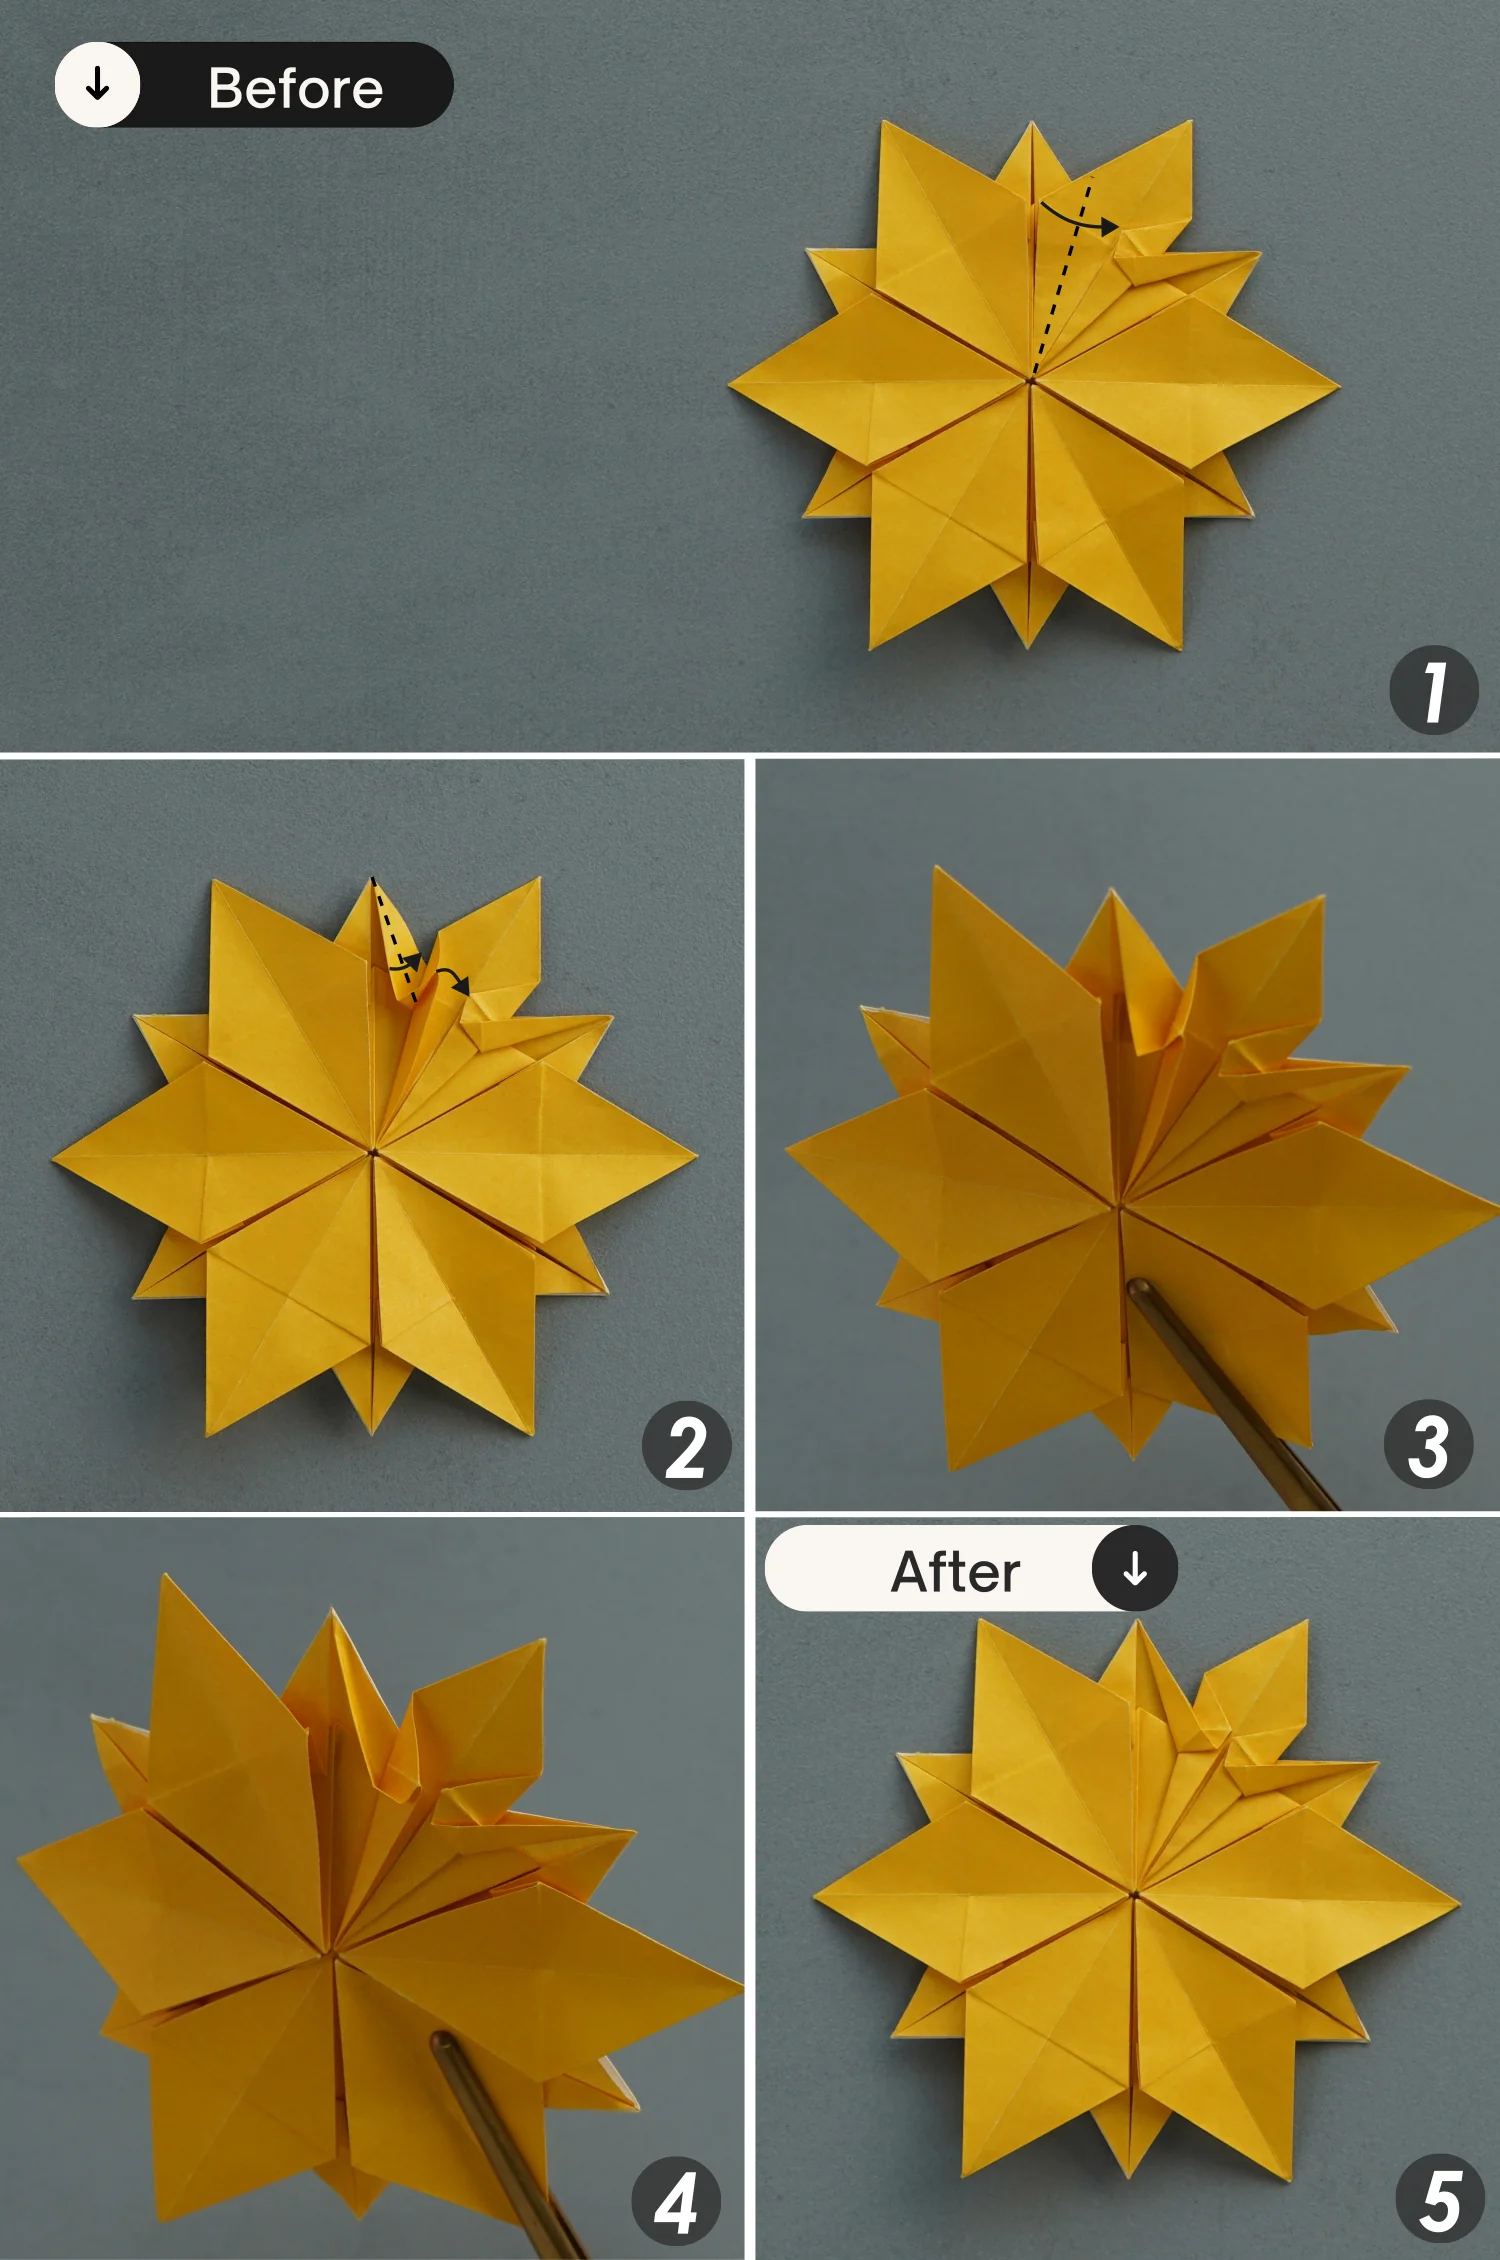
Step 20
Still the same flap, shape these two creases you just made, and lift its left point, fold it to the right point along the dotted line, while pushing its top and bottom points to the center to flatten the fold.
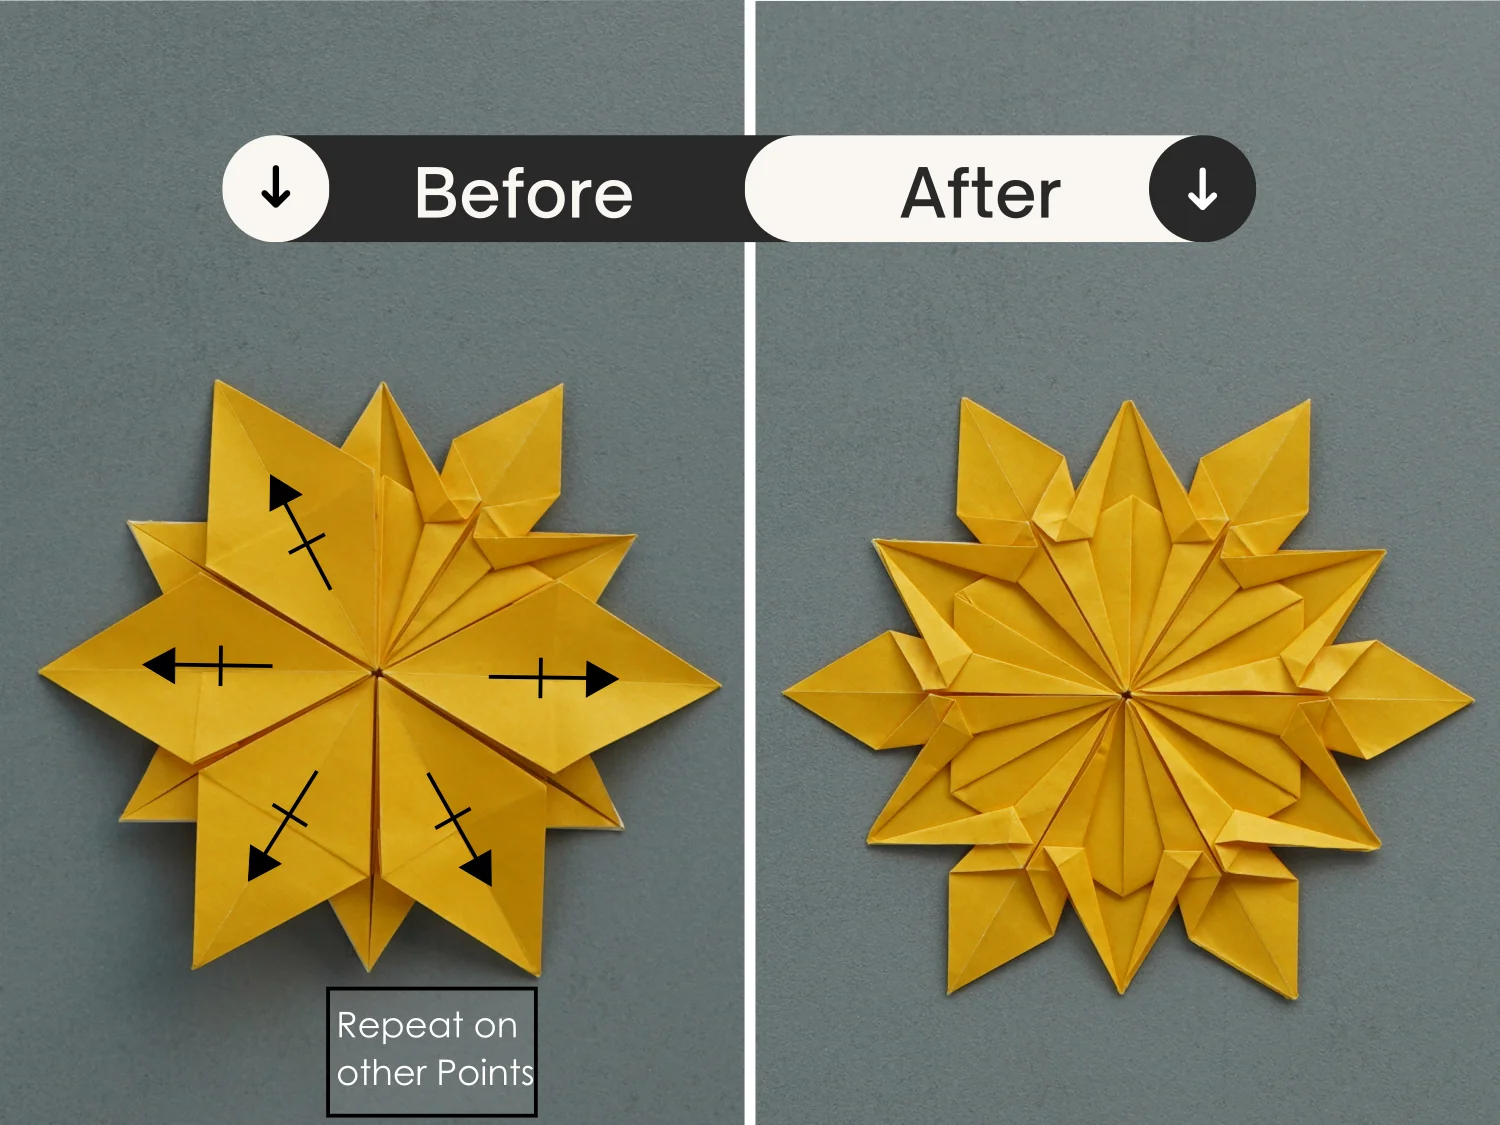
Step 21
Repeat steps 17 to 20 for the other remaining five flaps.
Step 22
Flip the paper over.
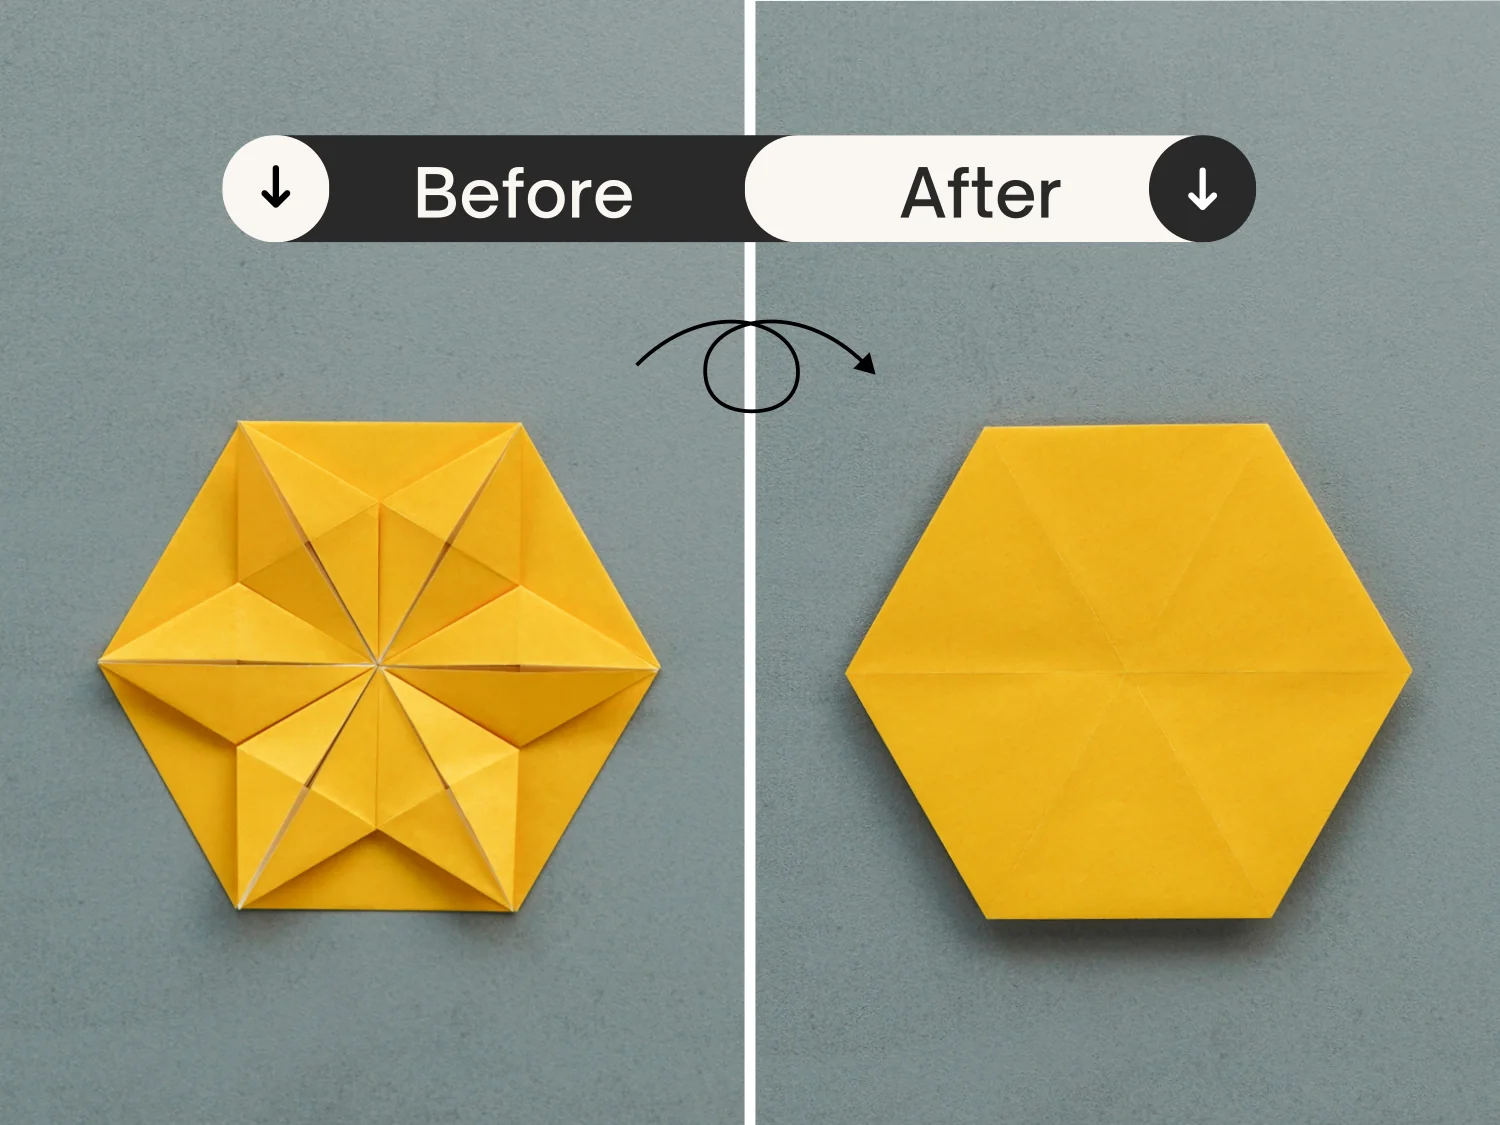
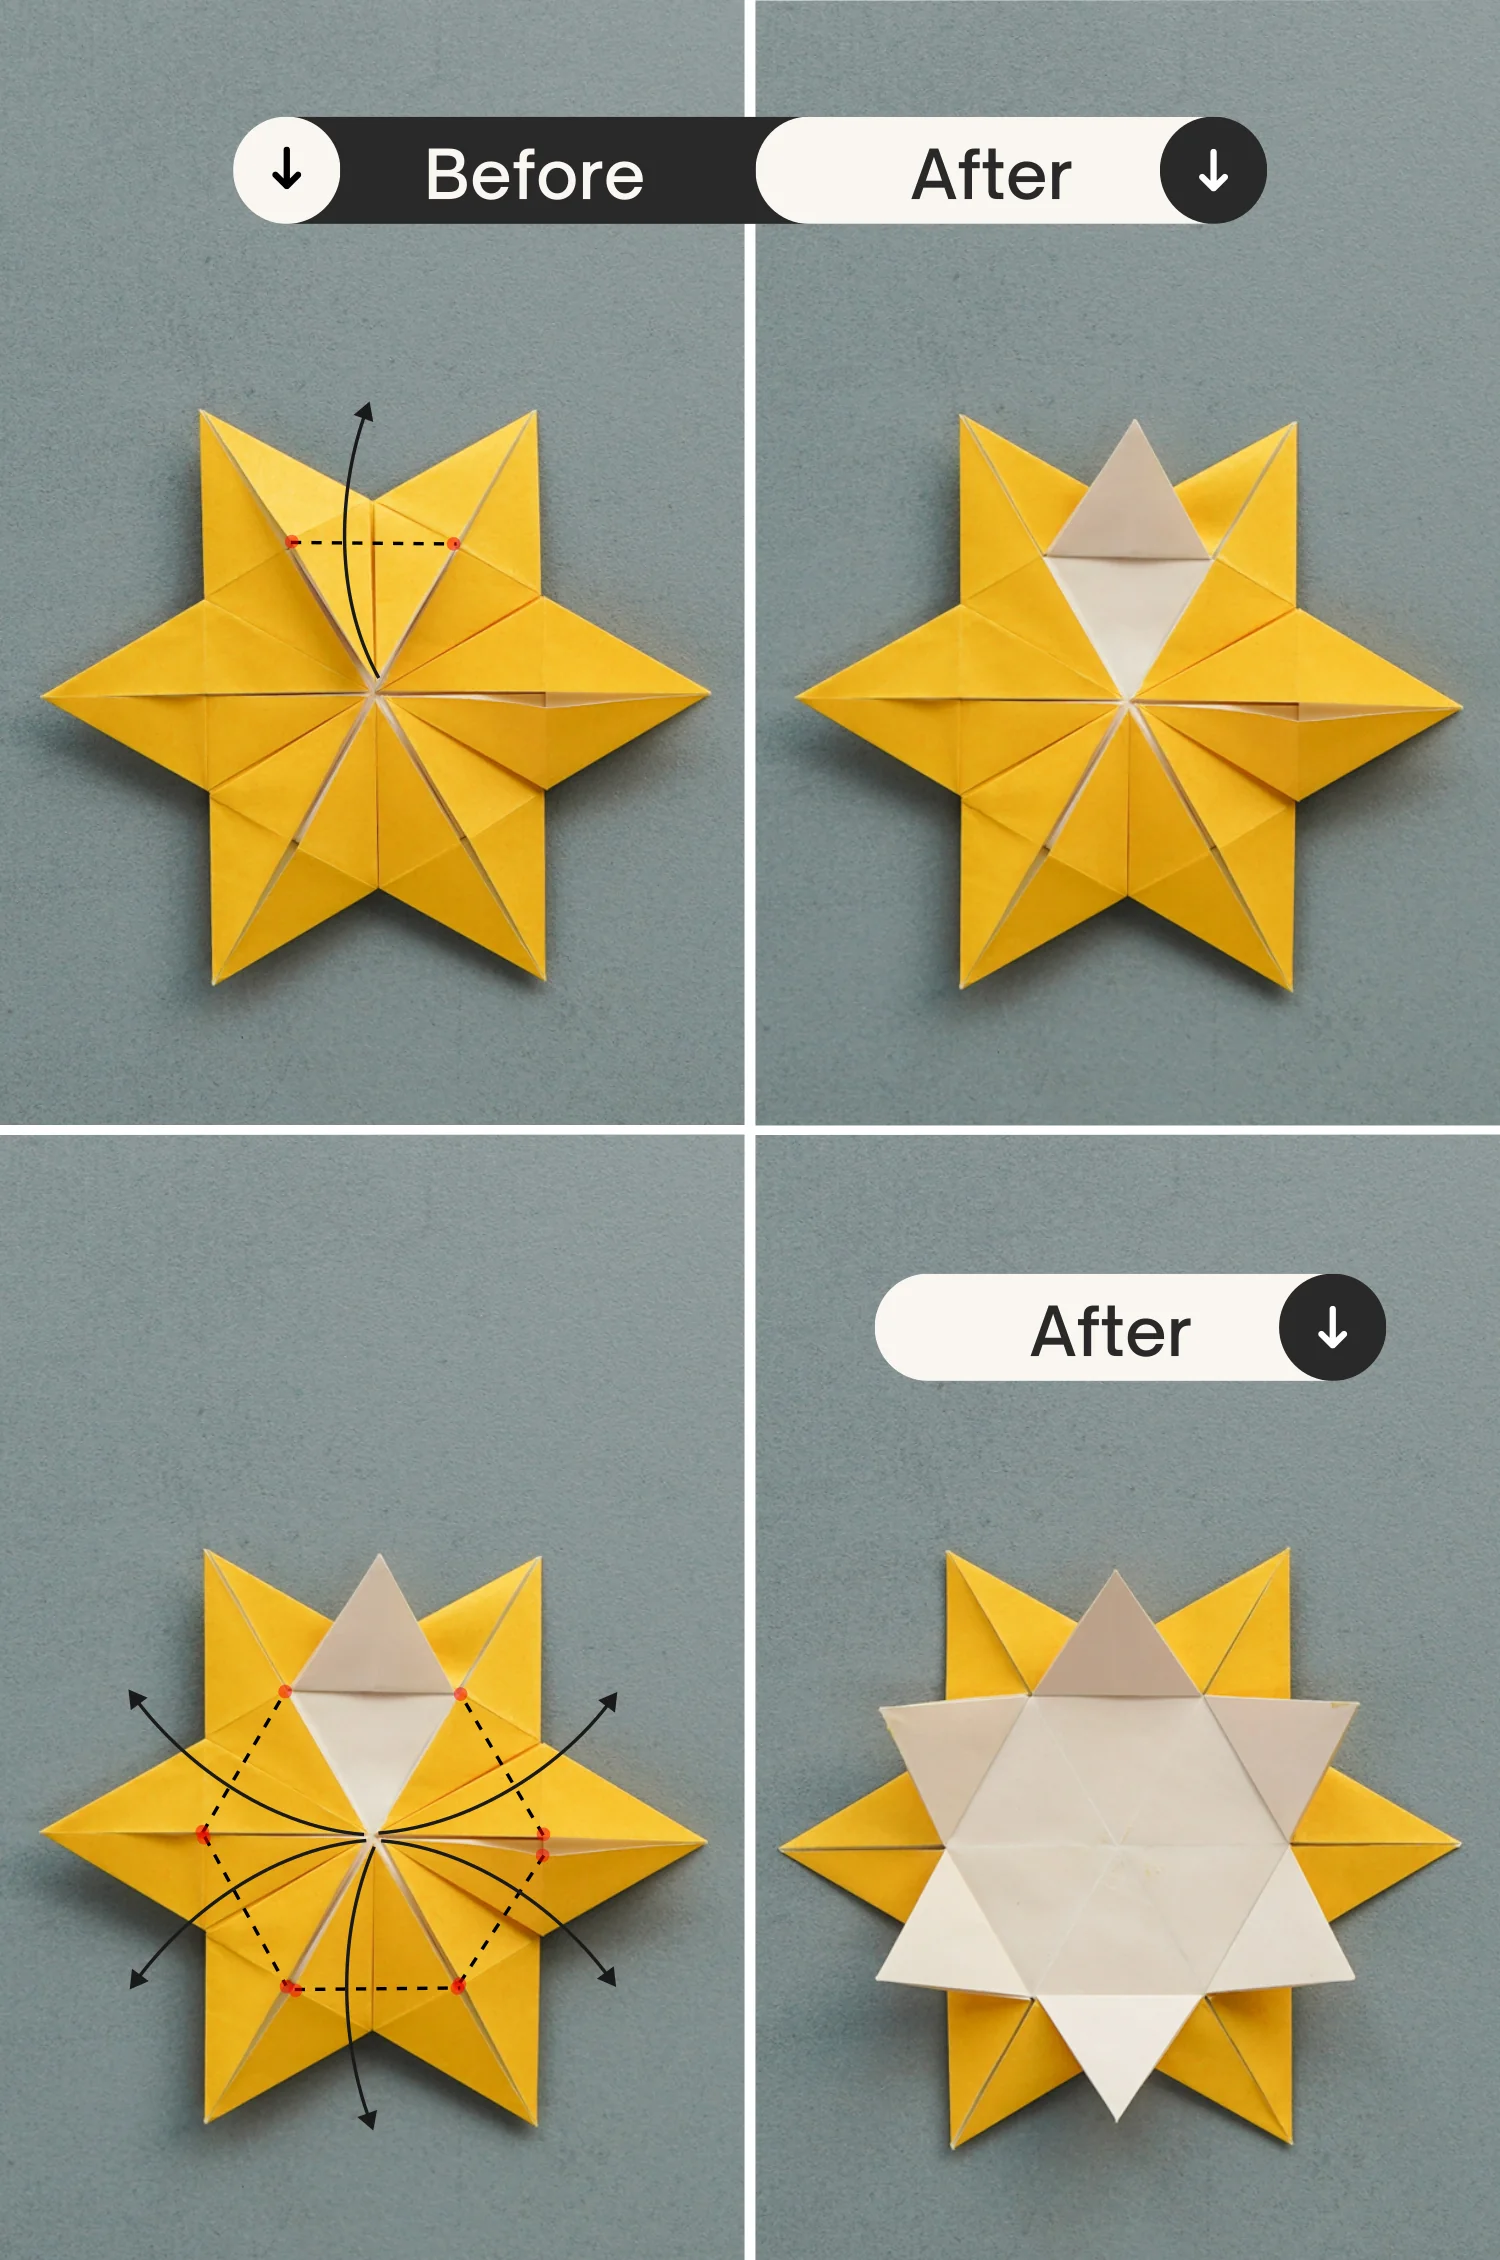
Step 23
Fold the six points to the center point [the top layer only], to reveal the six corners underneath.
Step 24
Flip it over.
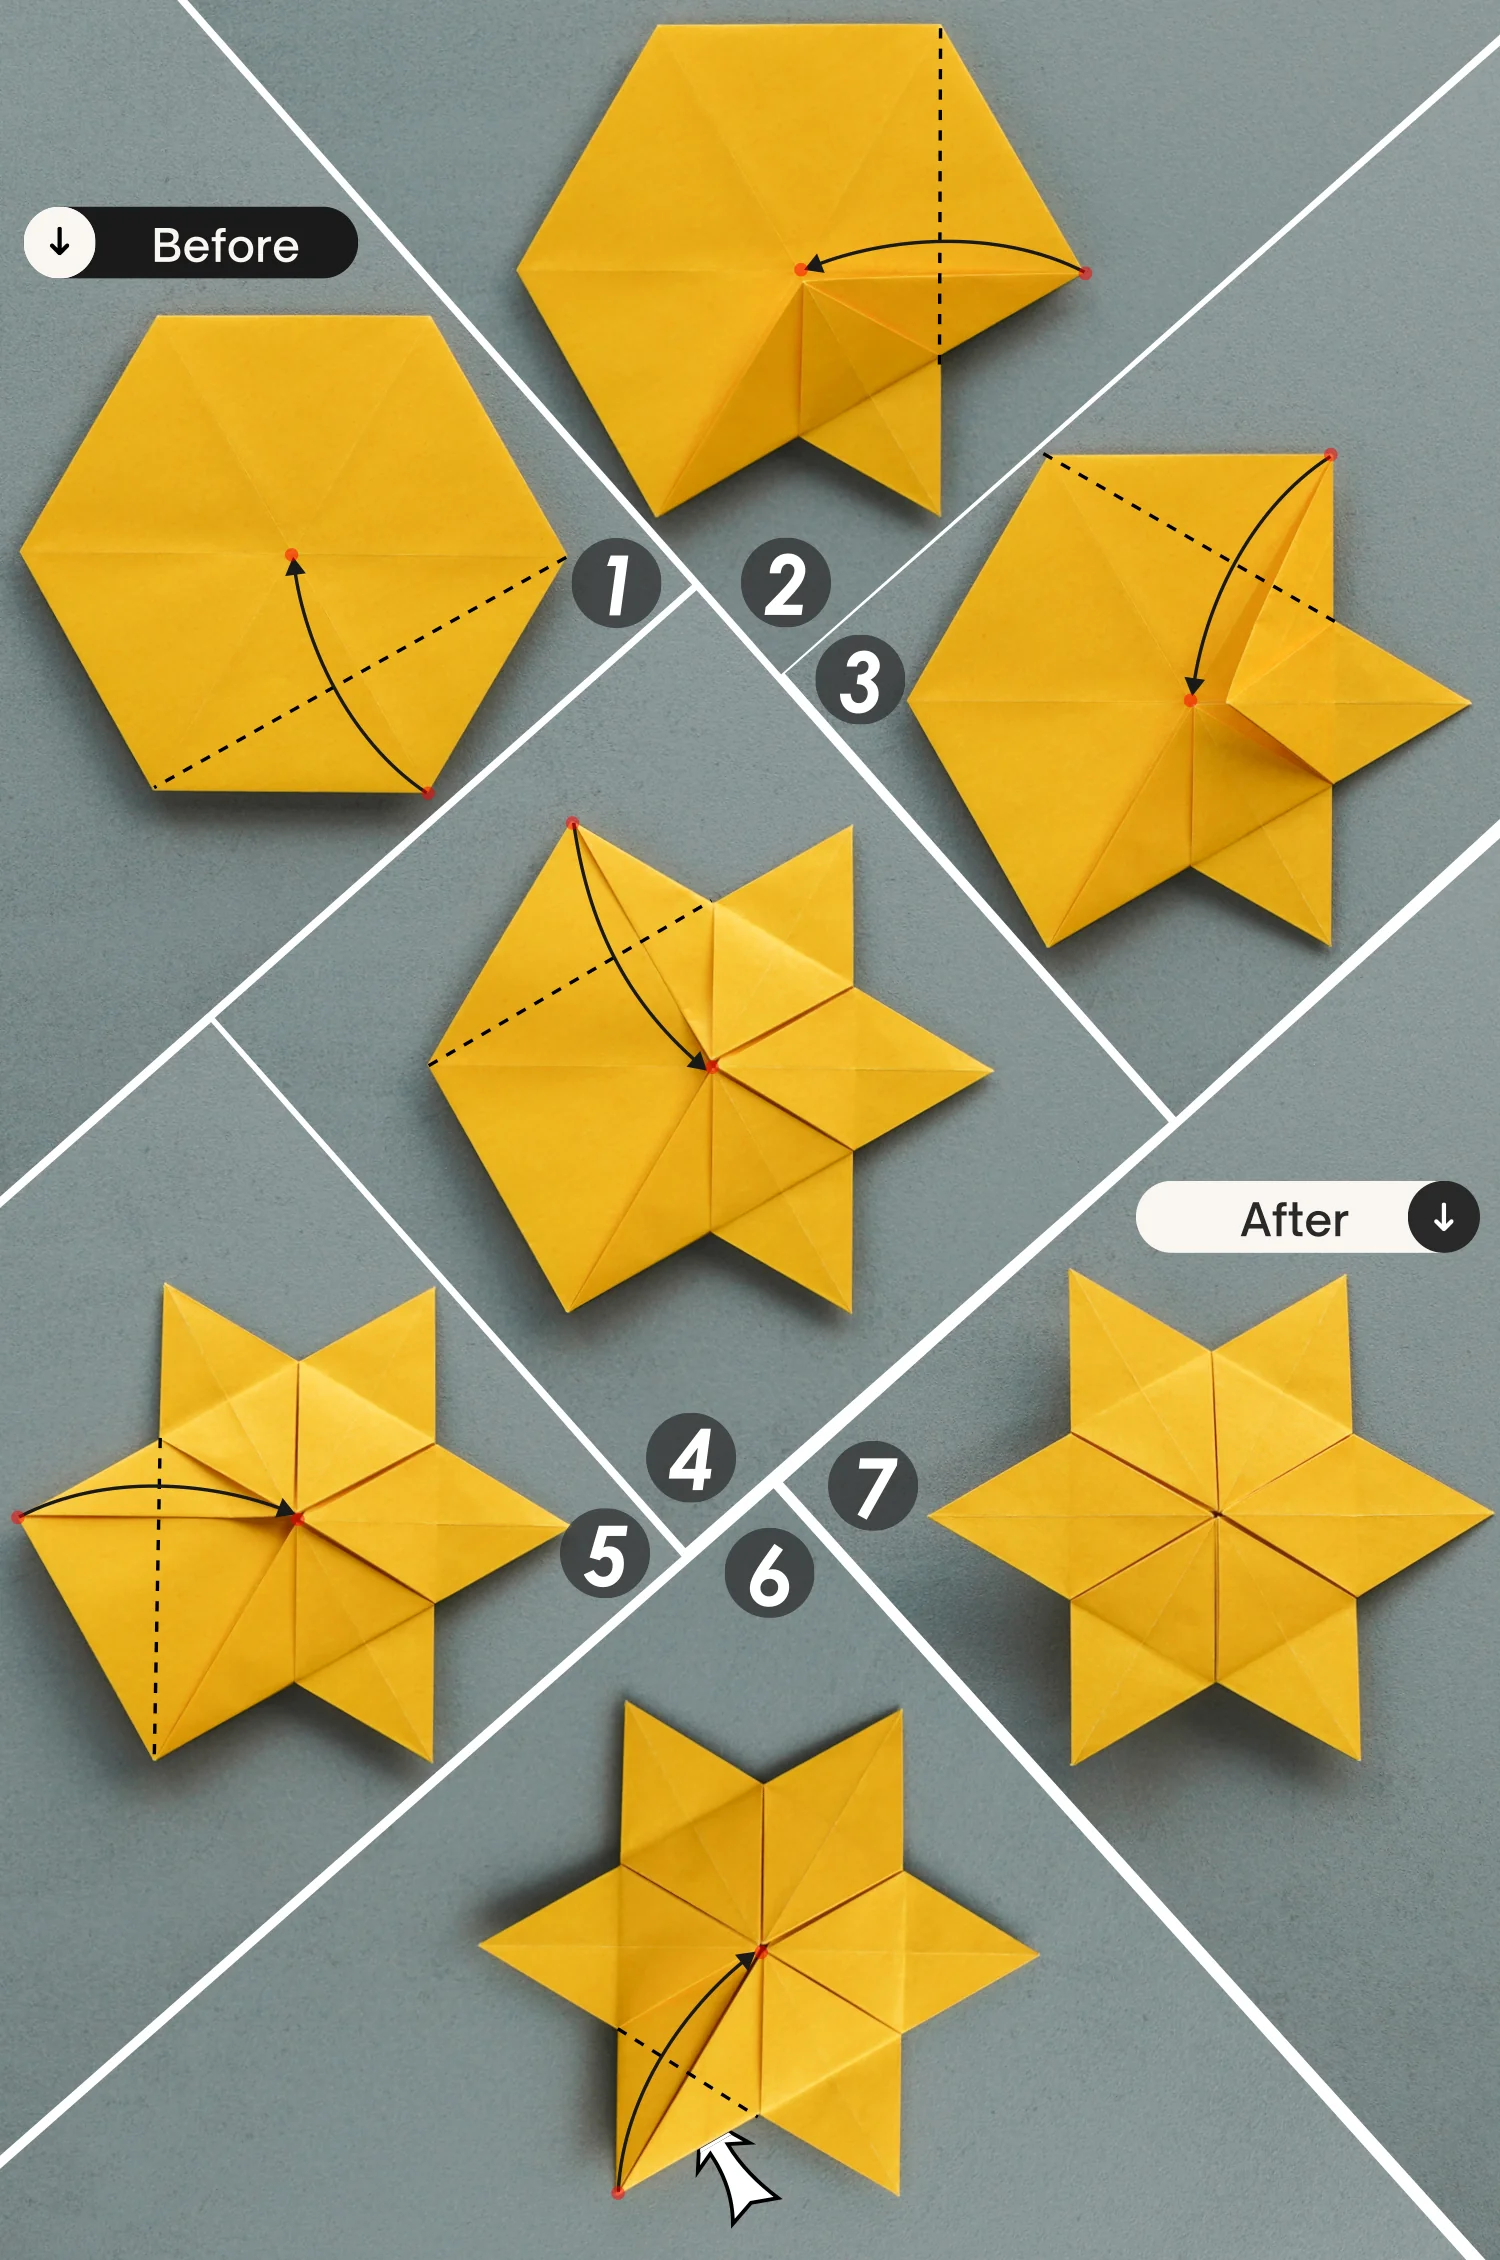
Step 25
Fold the six corners at the center outward diagonally along the dotted lines.
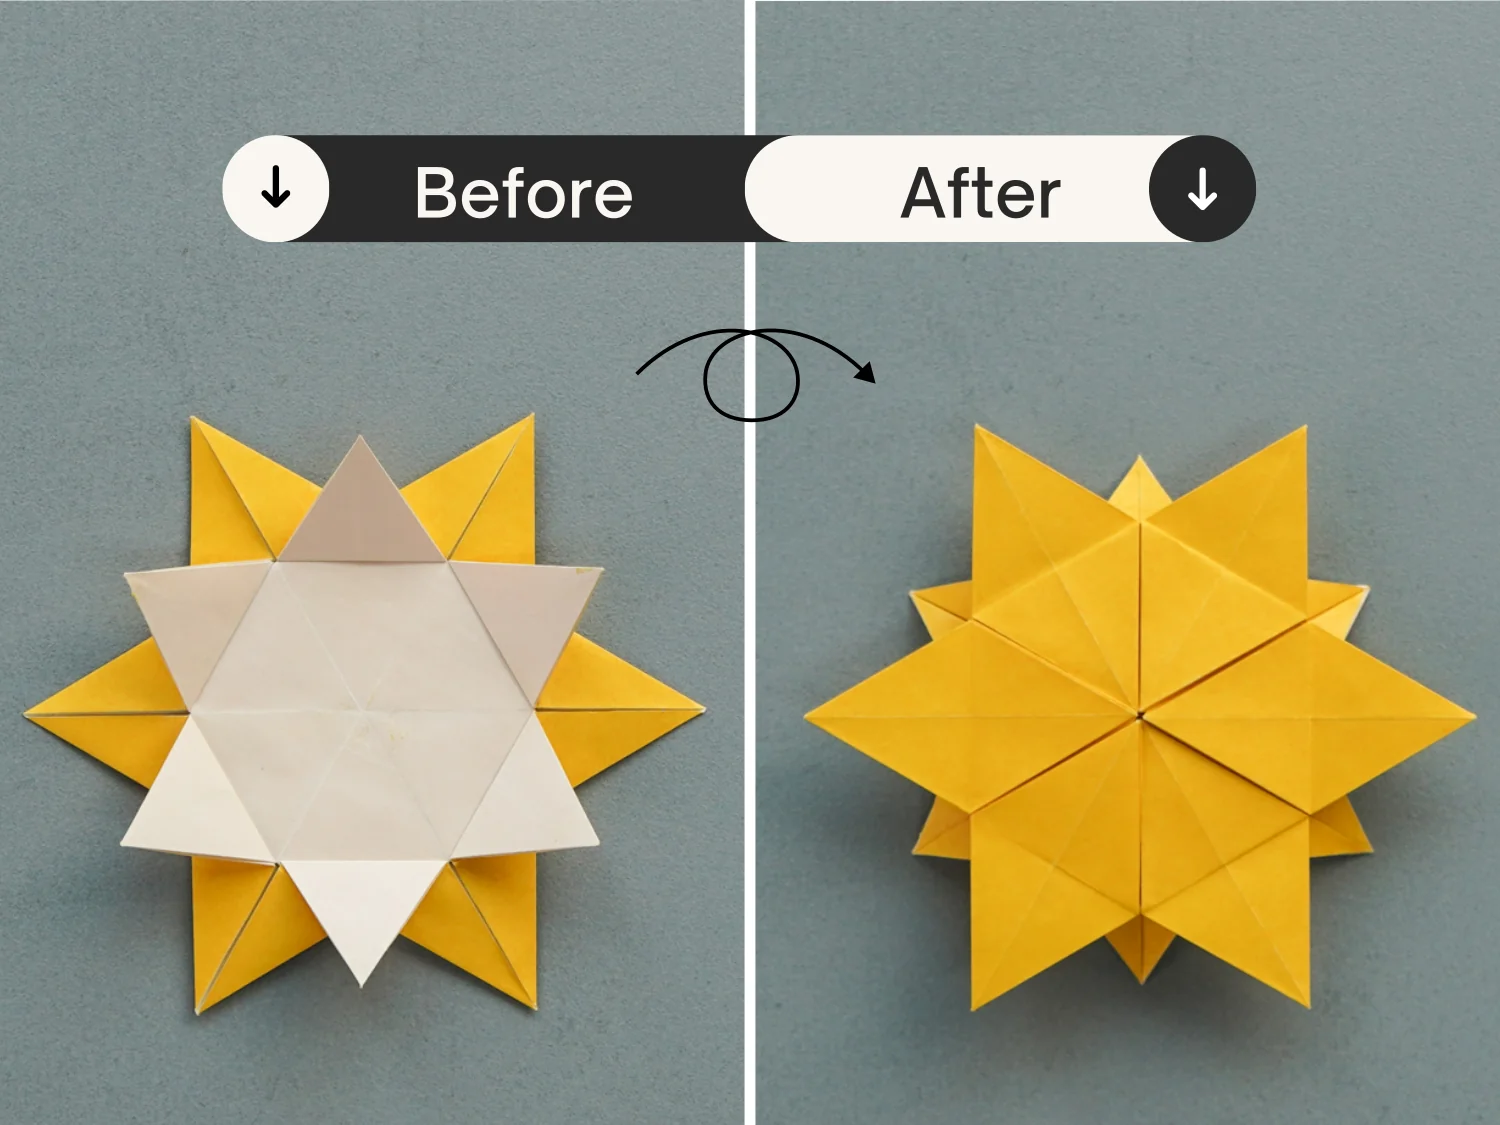
Step 26
Flip the paper over.
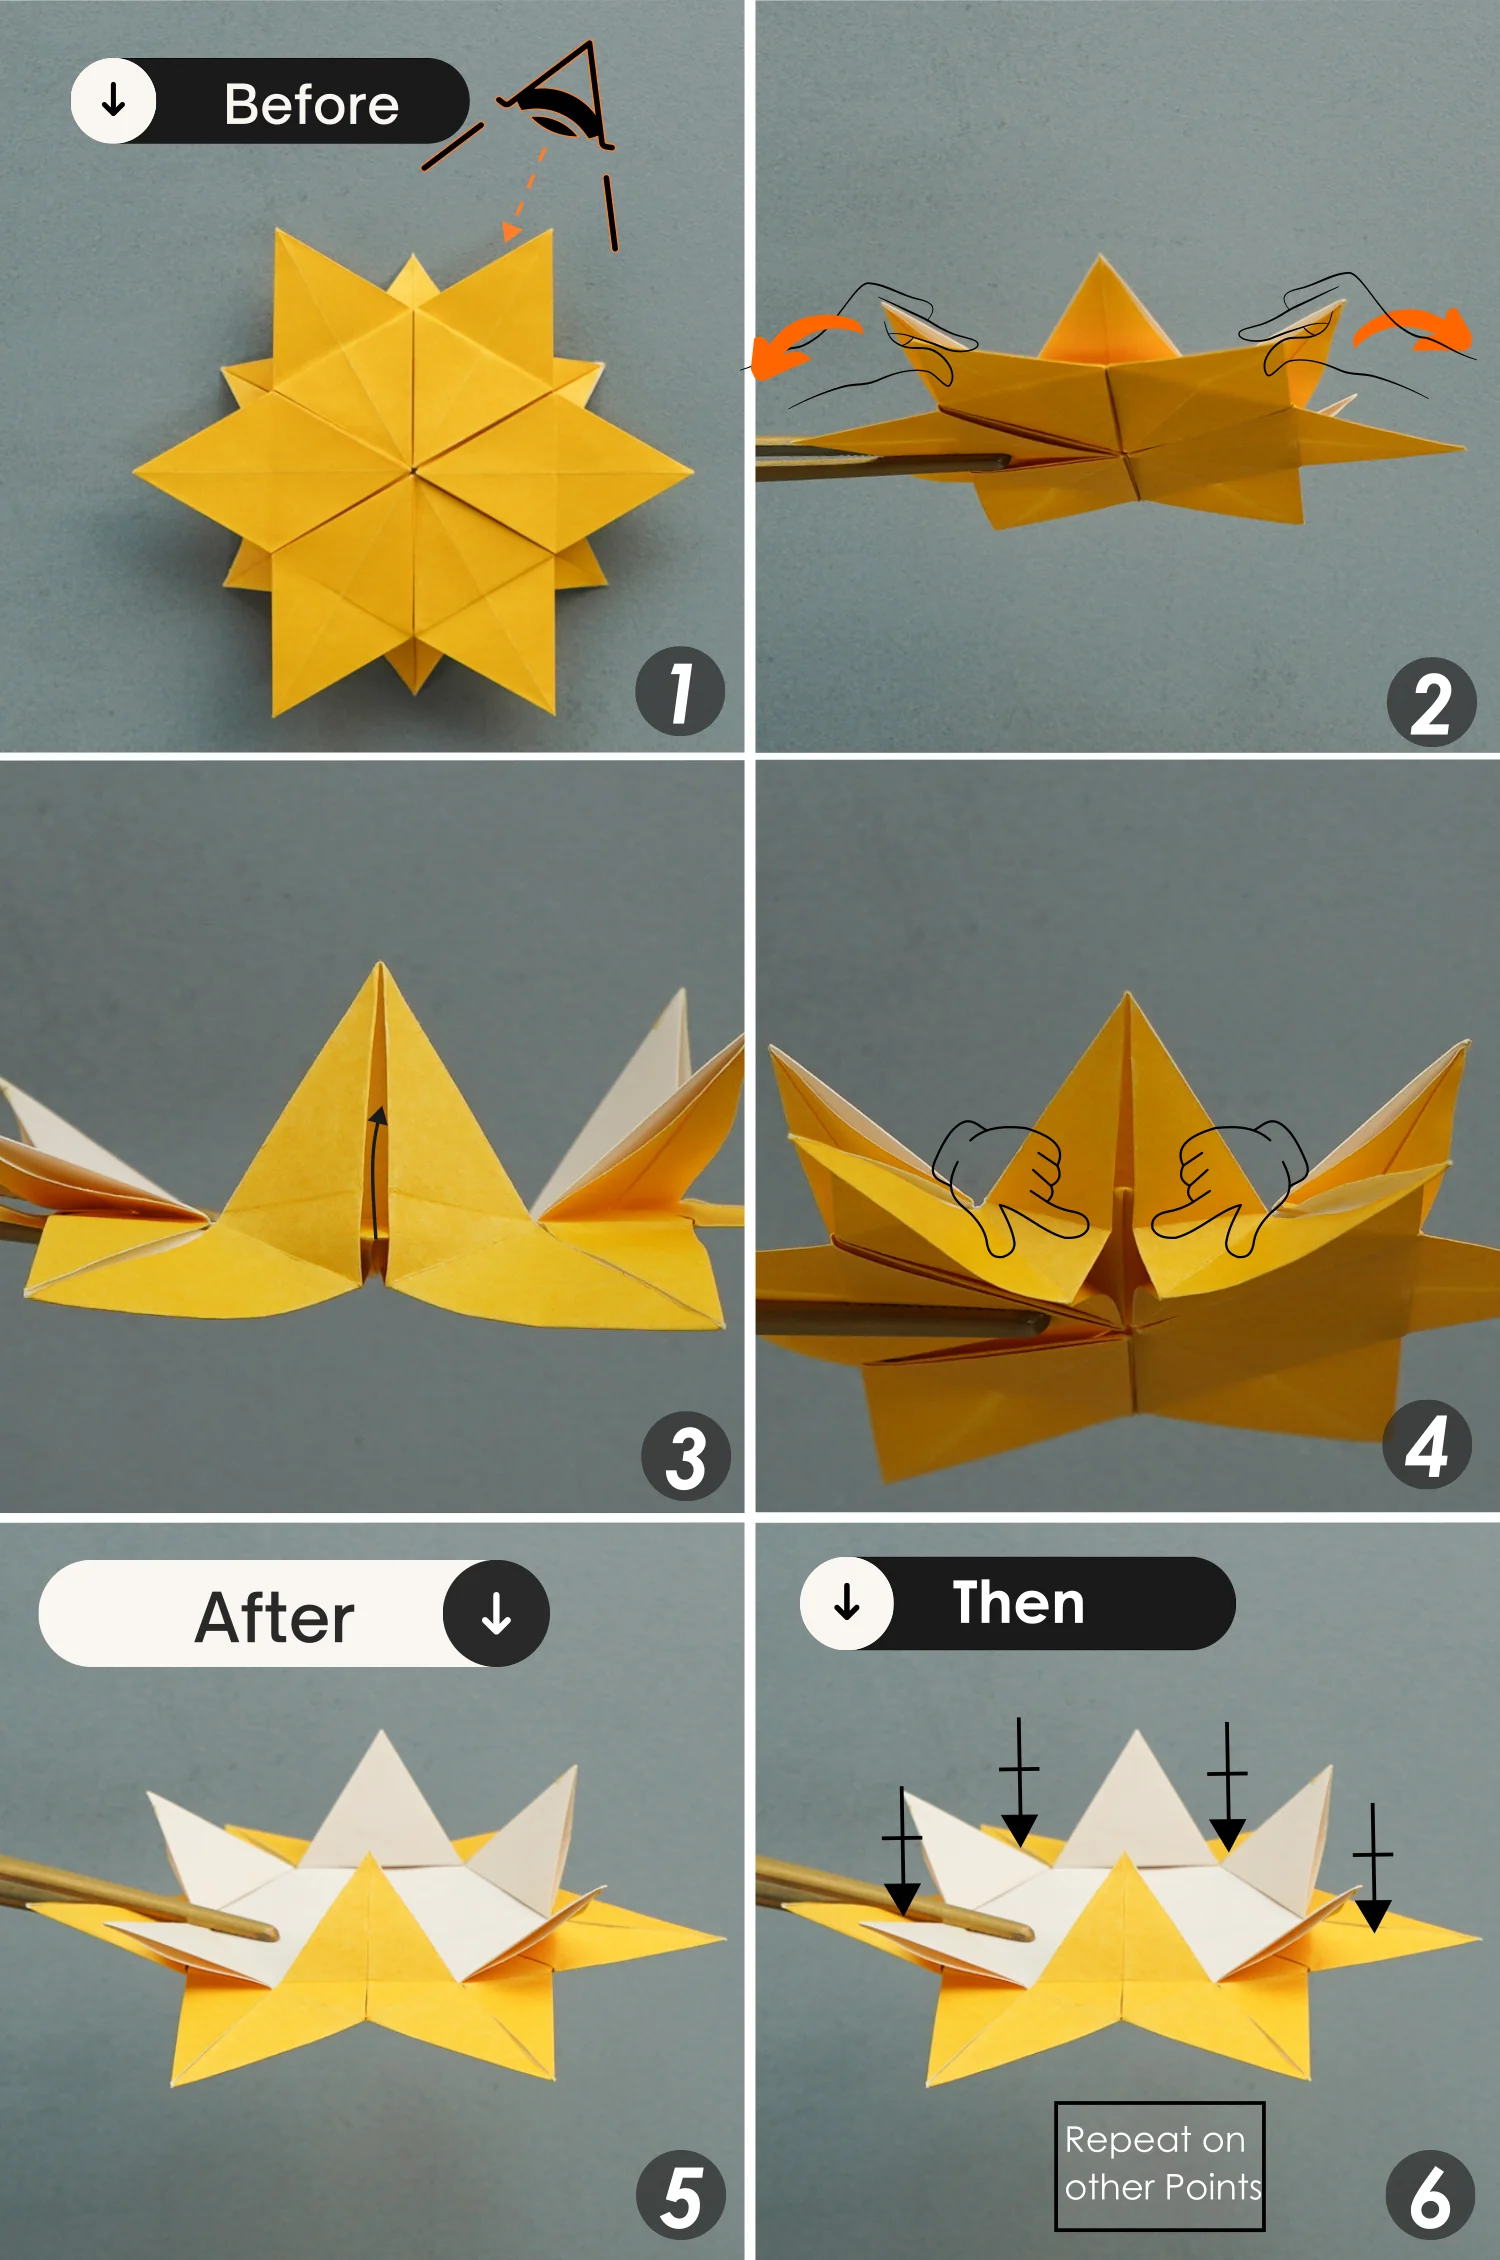
Step 27
View it from the top right, making sure the colored side is facing down, and use both hands to pull the two bottom adjacent flaps to both sides, you will see here a small corner between the two flaps as you pull them.
Next, you should tuck this small corner between the smaller flaps between and under the two flaps you pull.
Repeat this for the other five points. In this way, the six tilted flaps will be flattened.
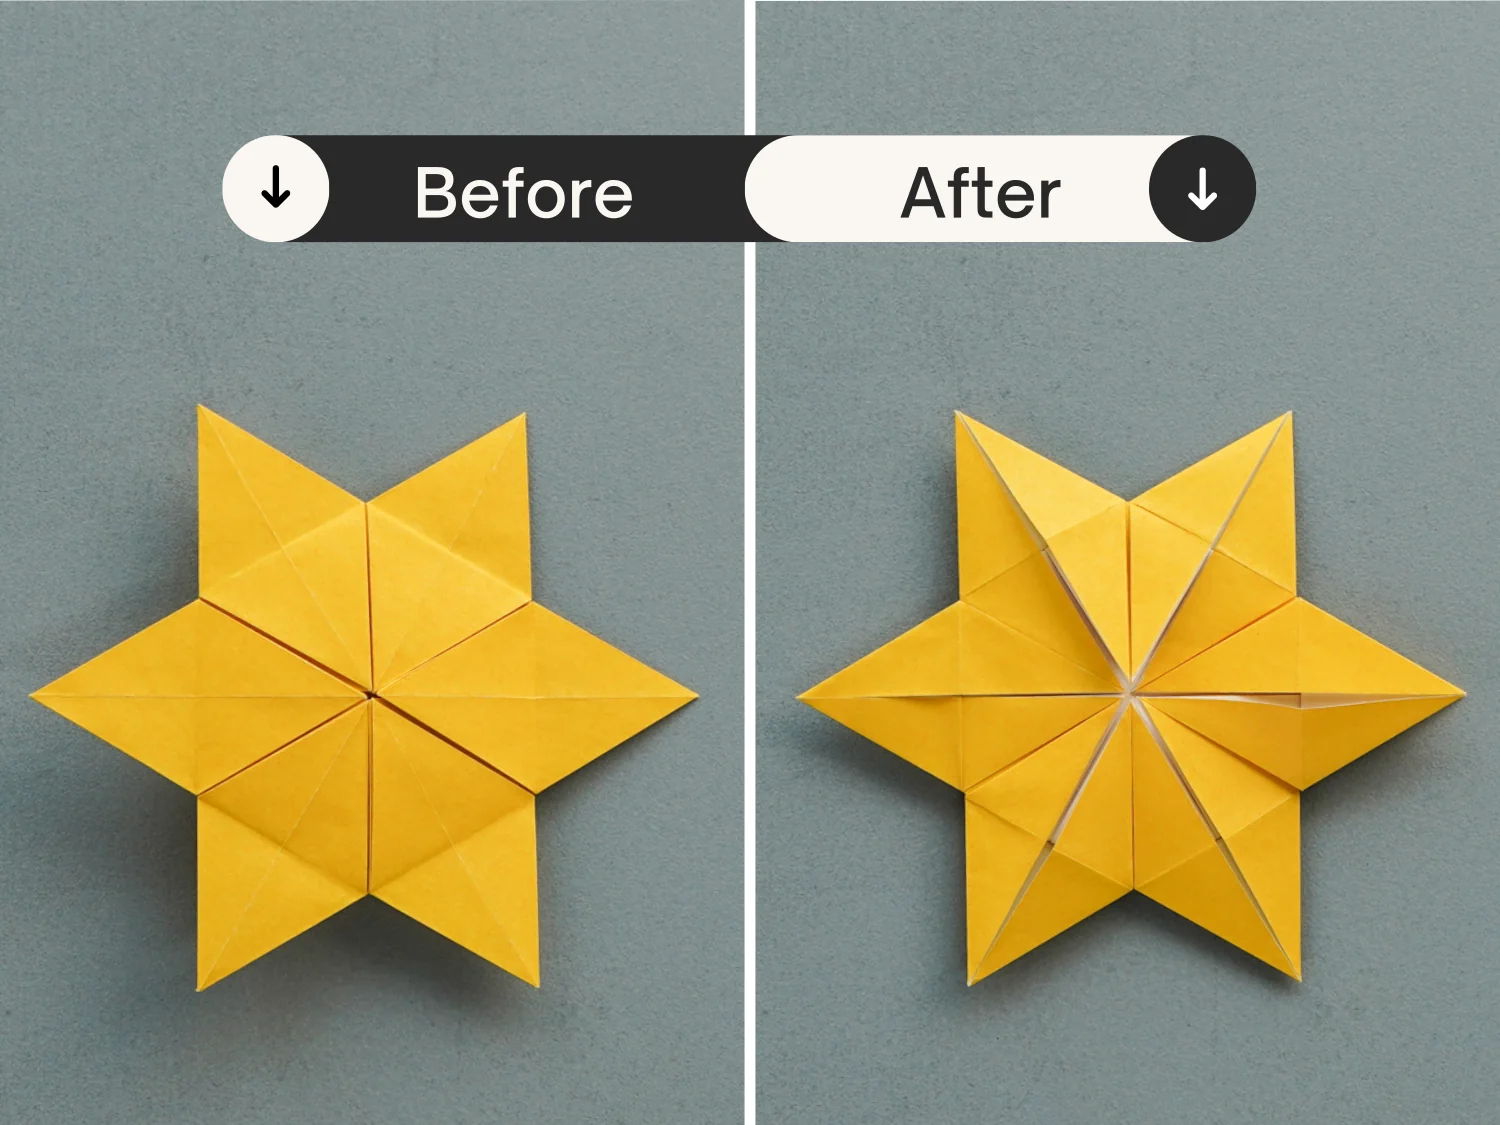
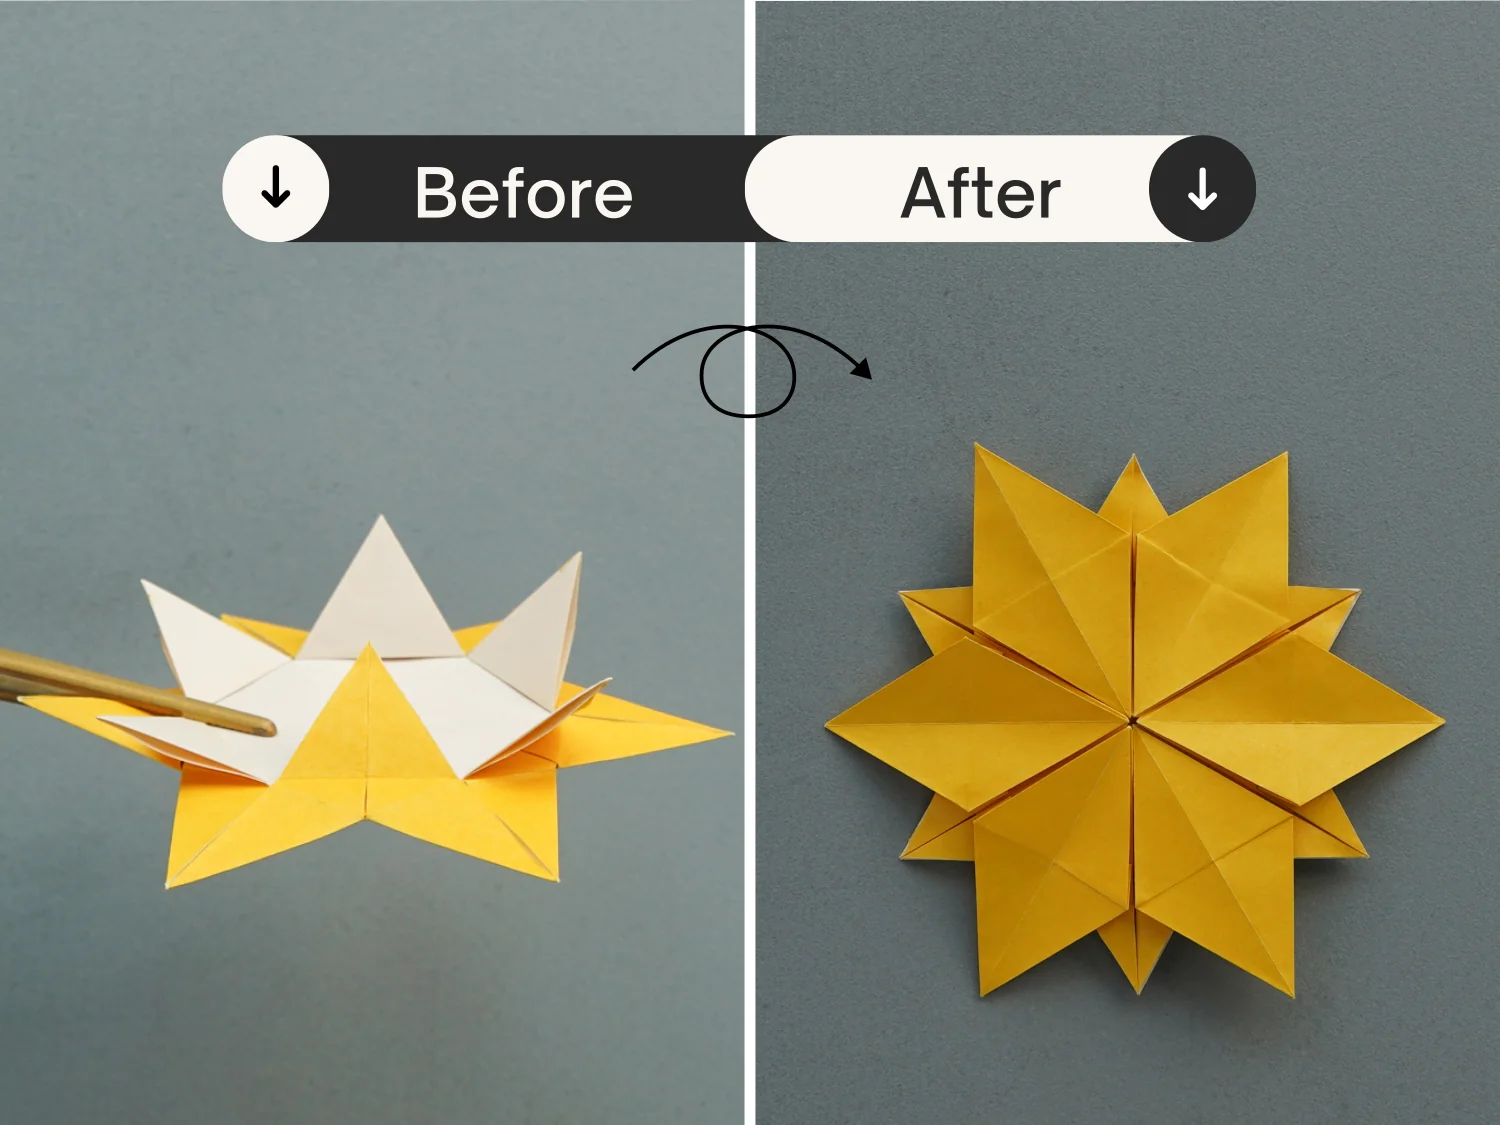
Step 28
Flip the model over.
Step 29
Choose one of the six top flaps, like the top right one, and fold its bottom right edge to align with its middle crease.
As the third picture shows, there is a layer connecting this flap and the smaller flap next to it, then fold this layer to align with the edge of the smaller flap to flatten the fold.
Step 30
Then fold the bottom left edge to align with its middle crease, and there is a layer that connects this flap and the smaller flap next to it, fold it to align with the edge of the smaller flap as well.
Step 31
Repeat steps 29 to 30 for the other remaining flaps, and create a complete snowflake.
What’s Next
Congratulations! You have made this origami snowflake successfully, since you did this, I believe you may fold any other origami without effort. Next, you can explore our other origami tutorials for Christmas and decoration. Happy folding!
Other Origami Christmas and Decoration Ideas