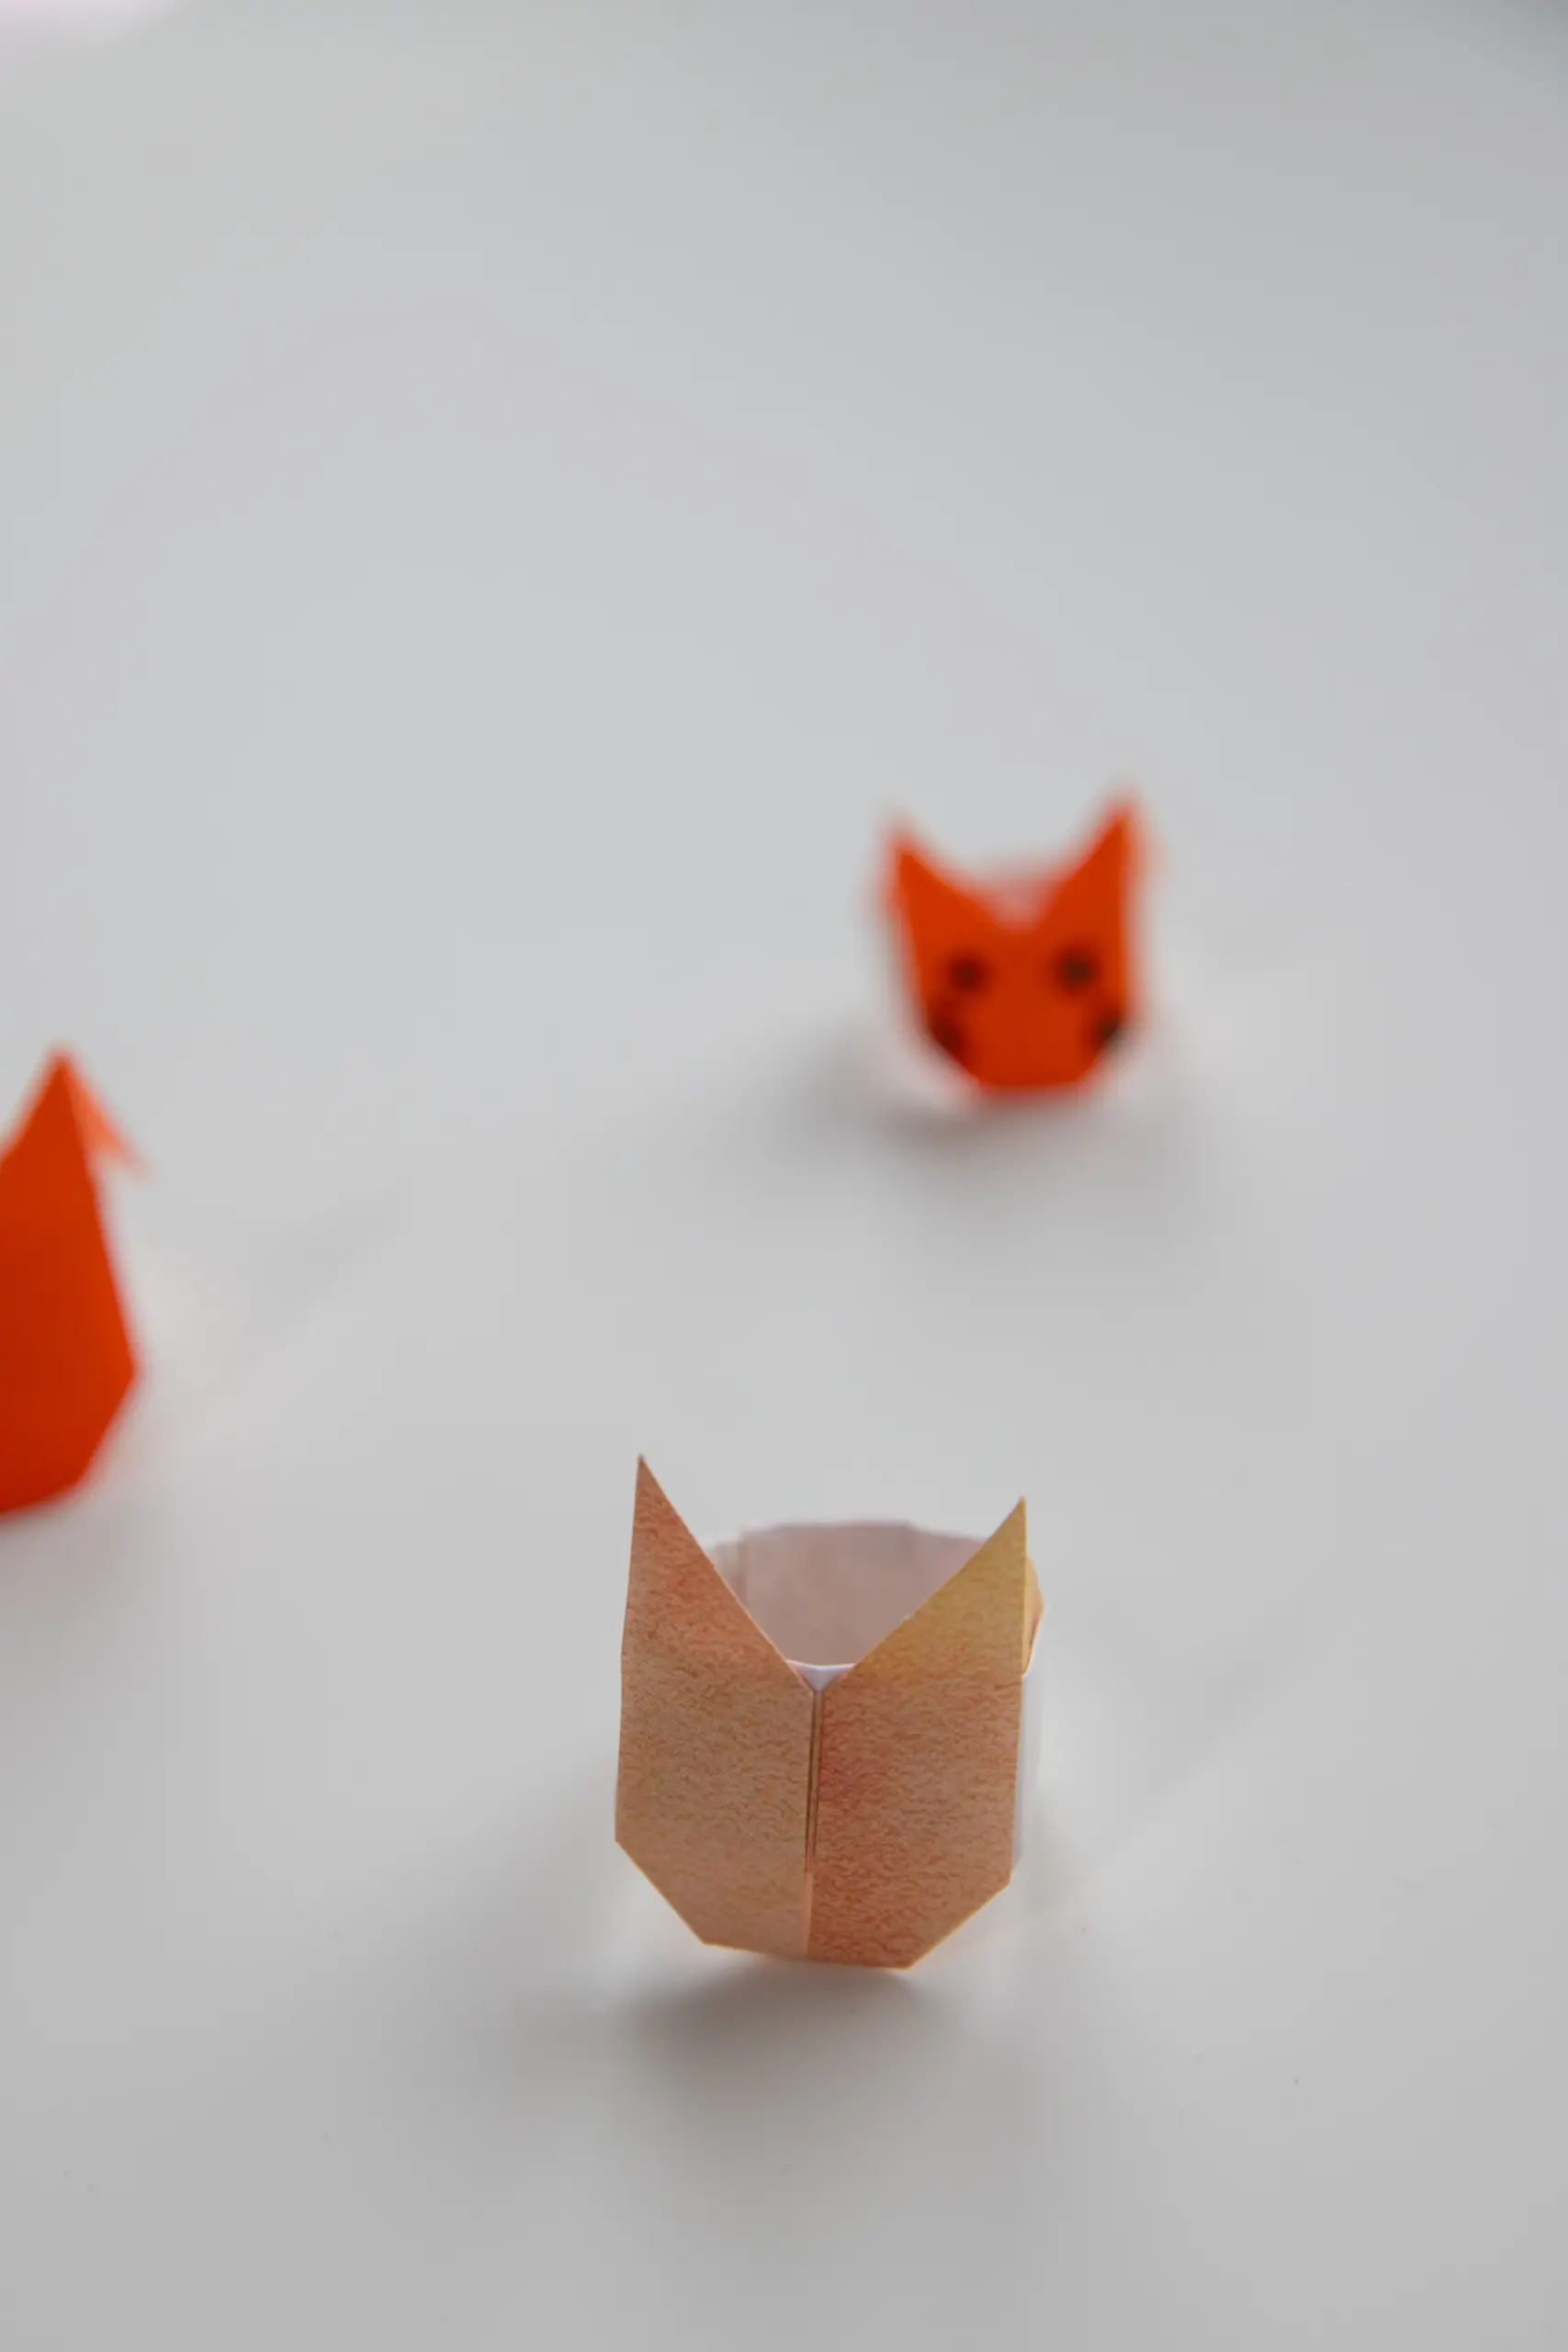
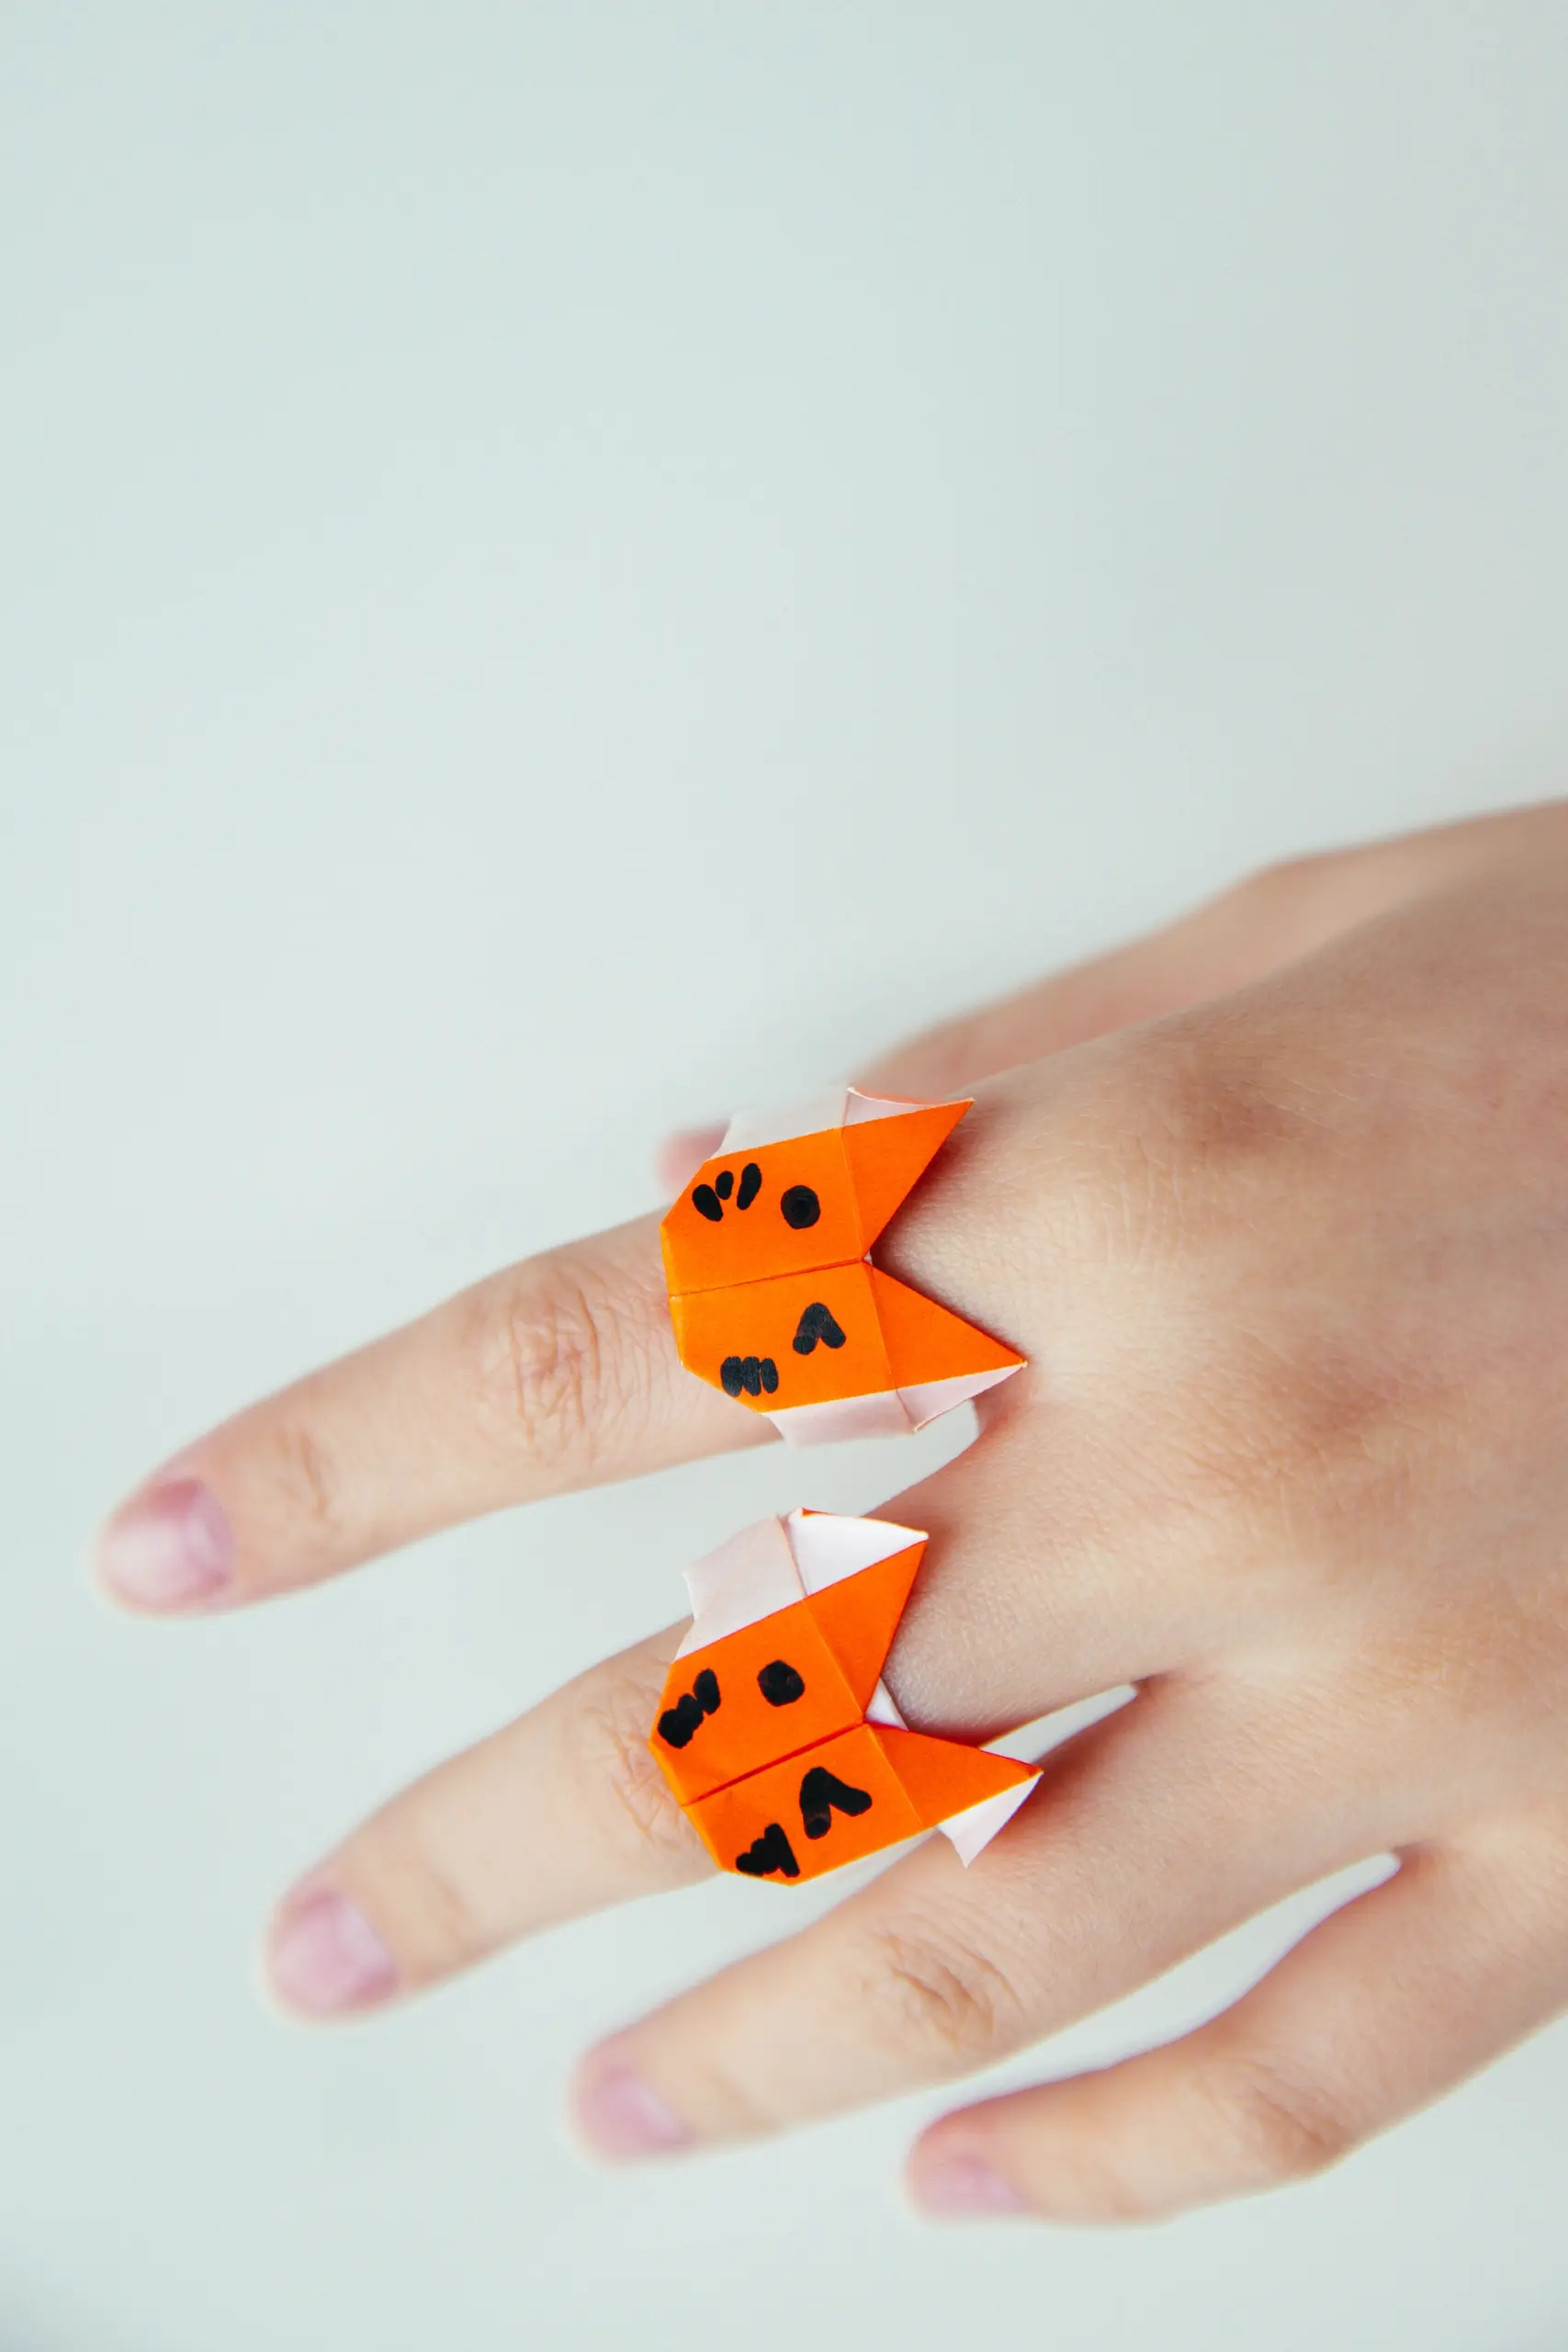
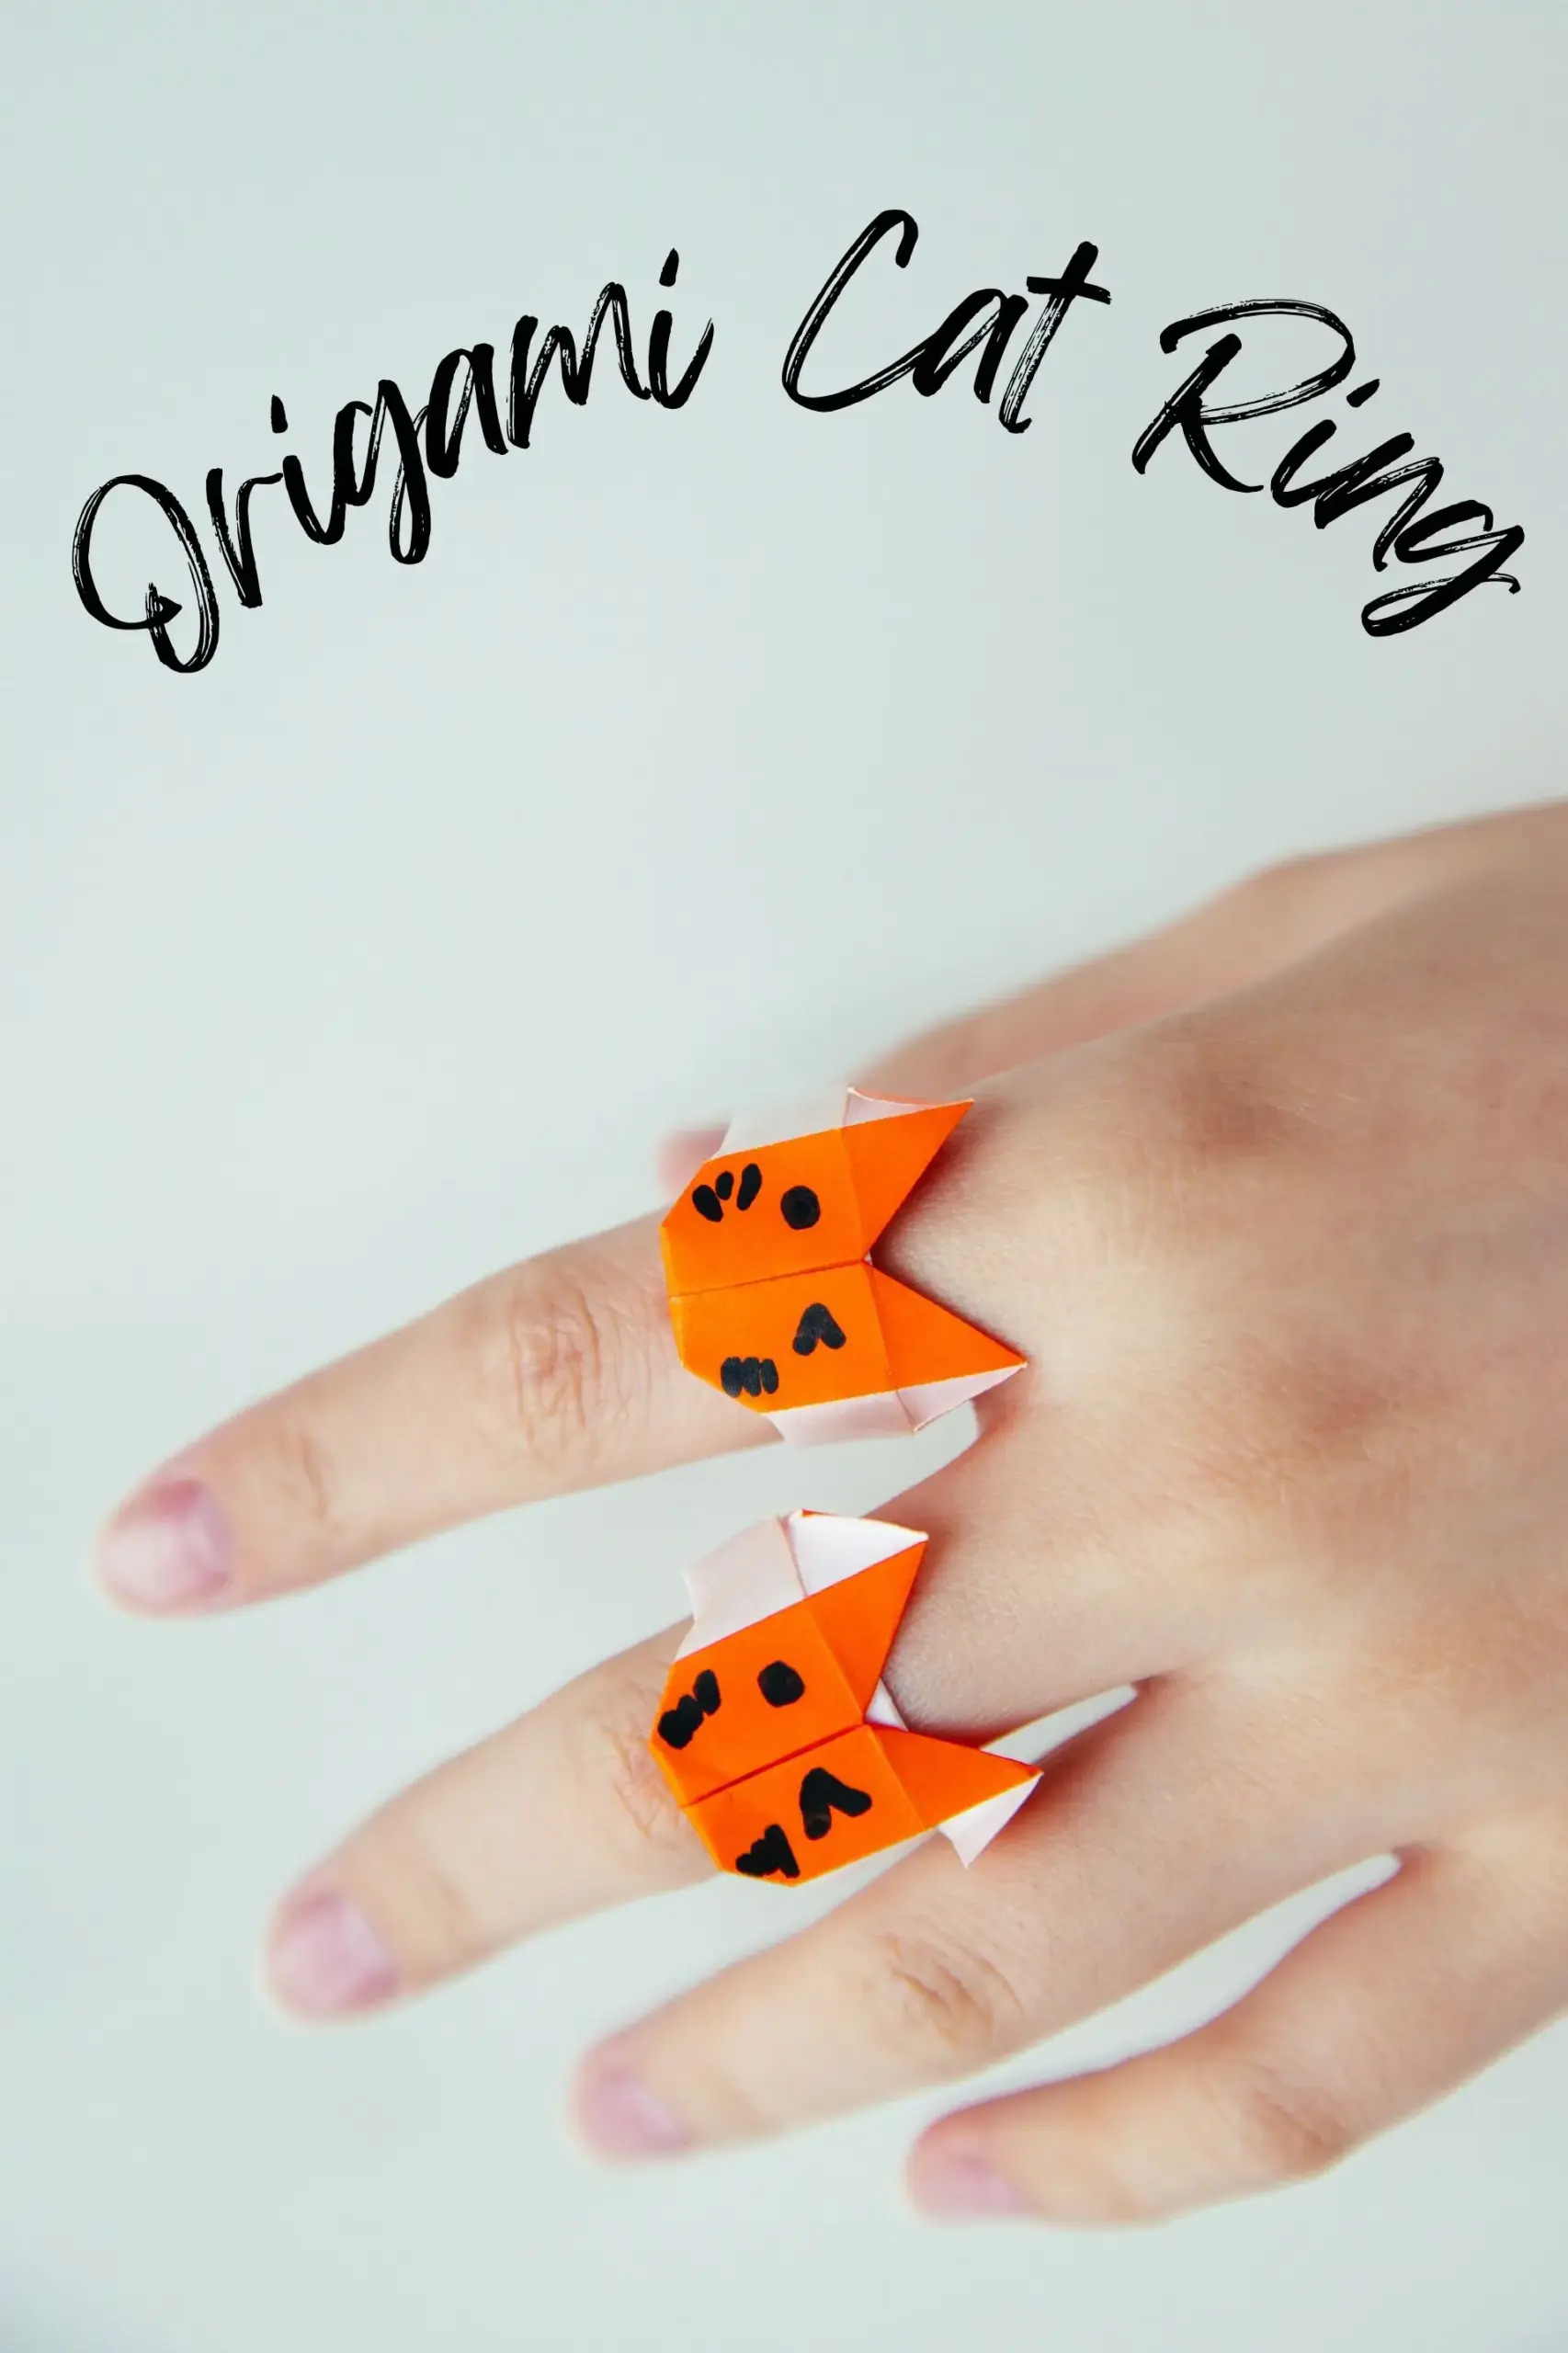
For those who love cats and cute small items, this adorable origami cat ring will surely catch your eye. With just a few simple steps, even beginners can successfully make this. Let’s create it together!
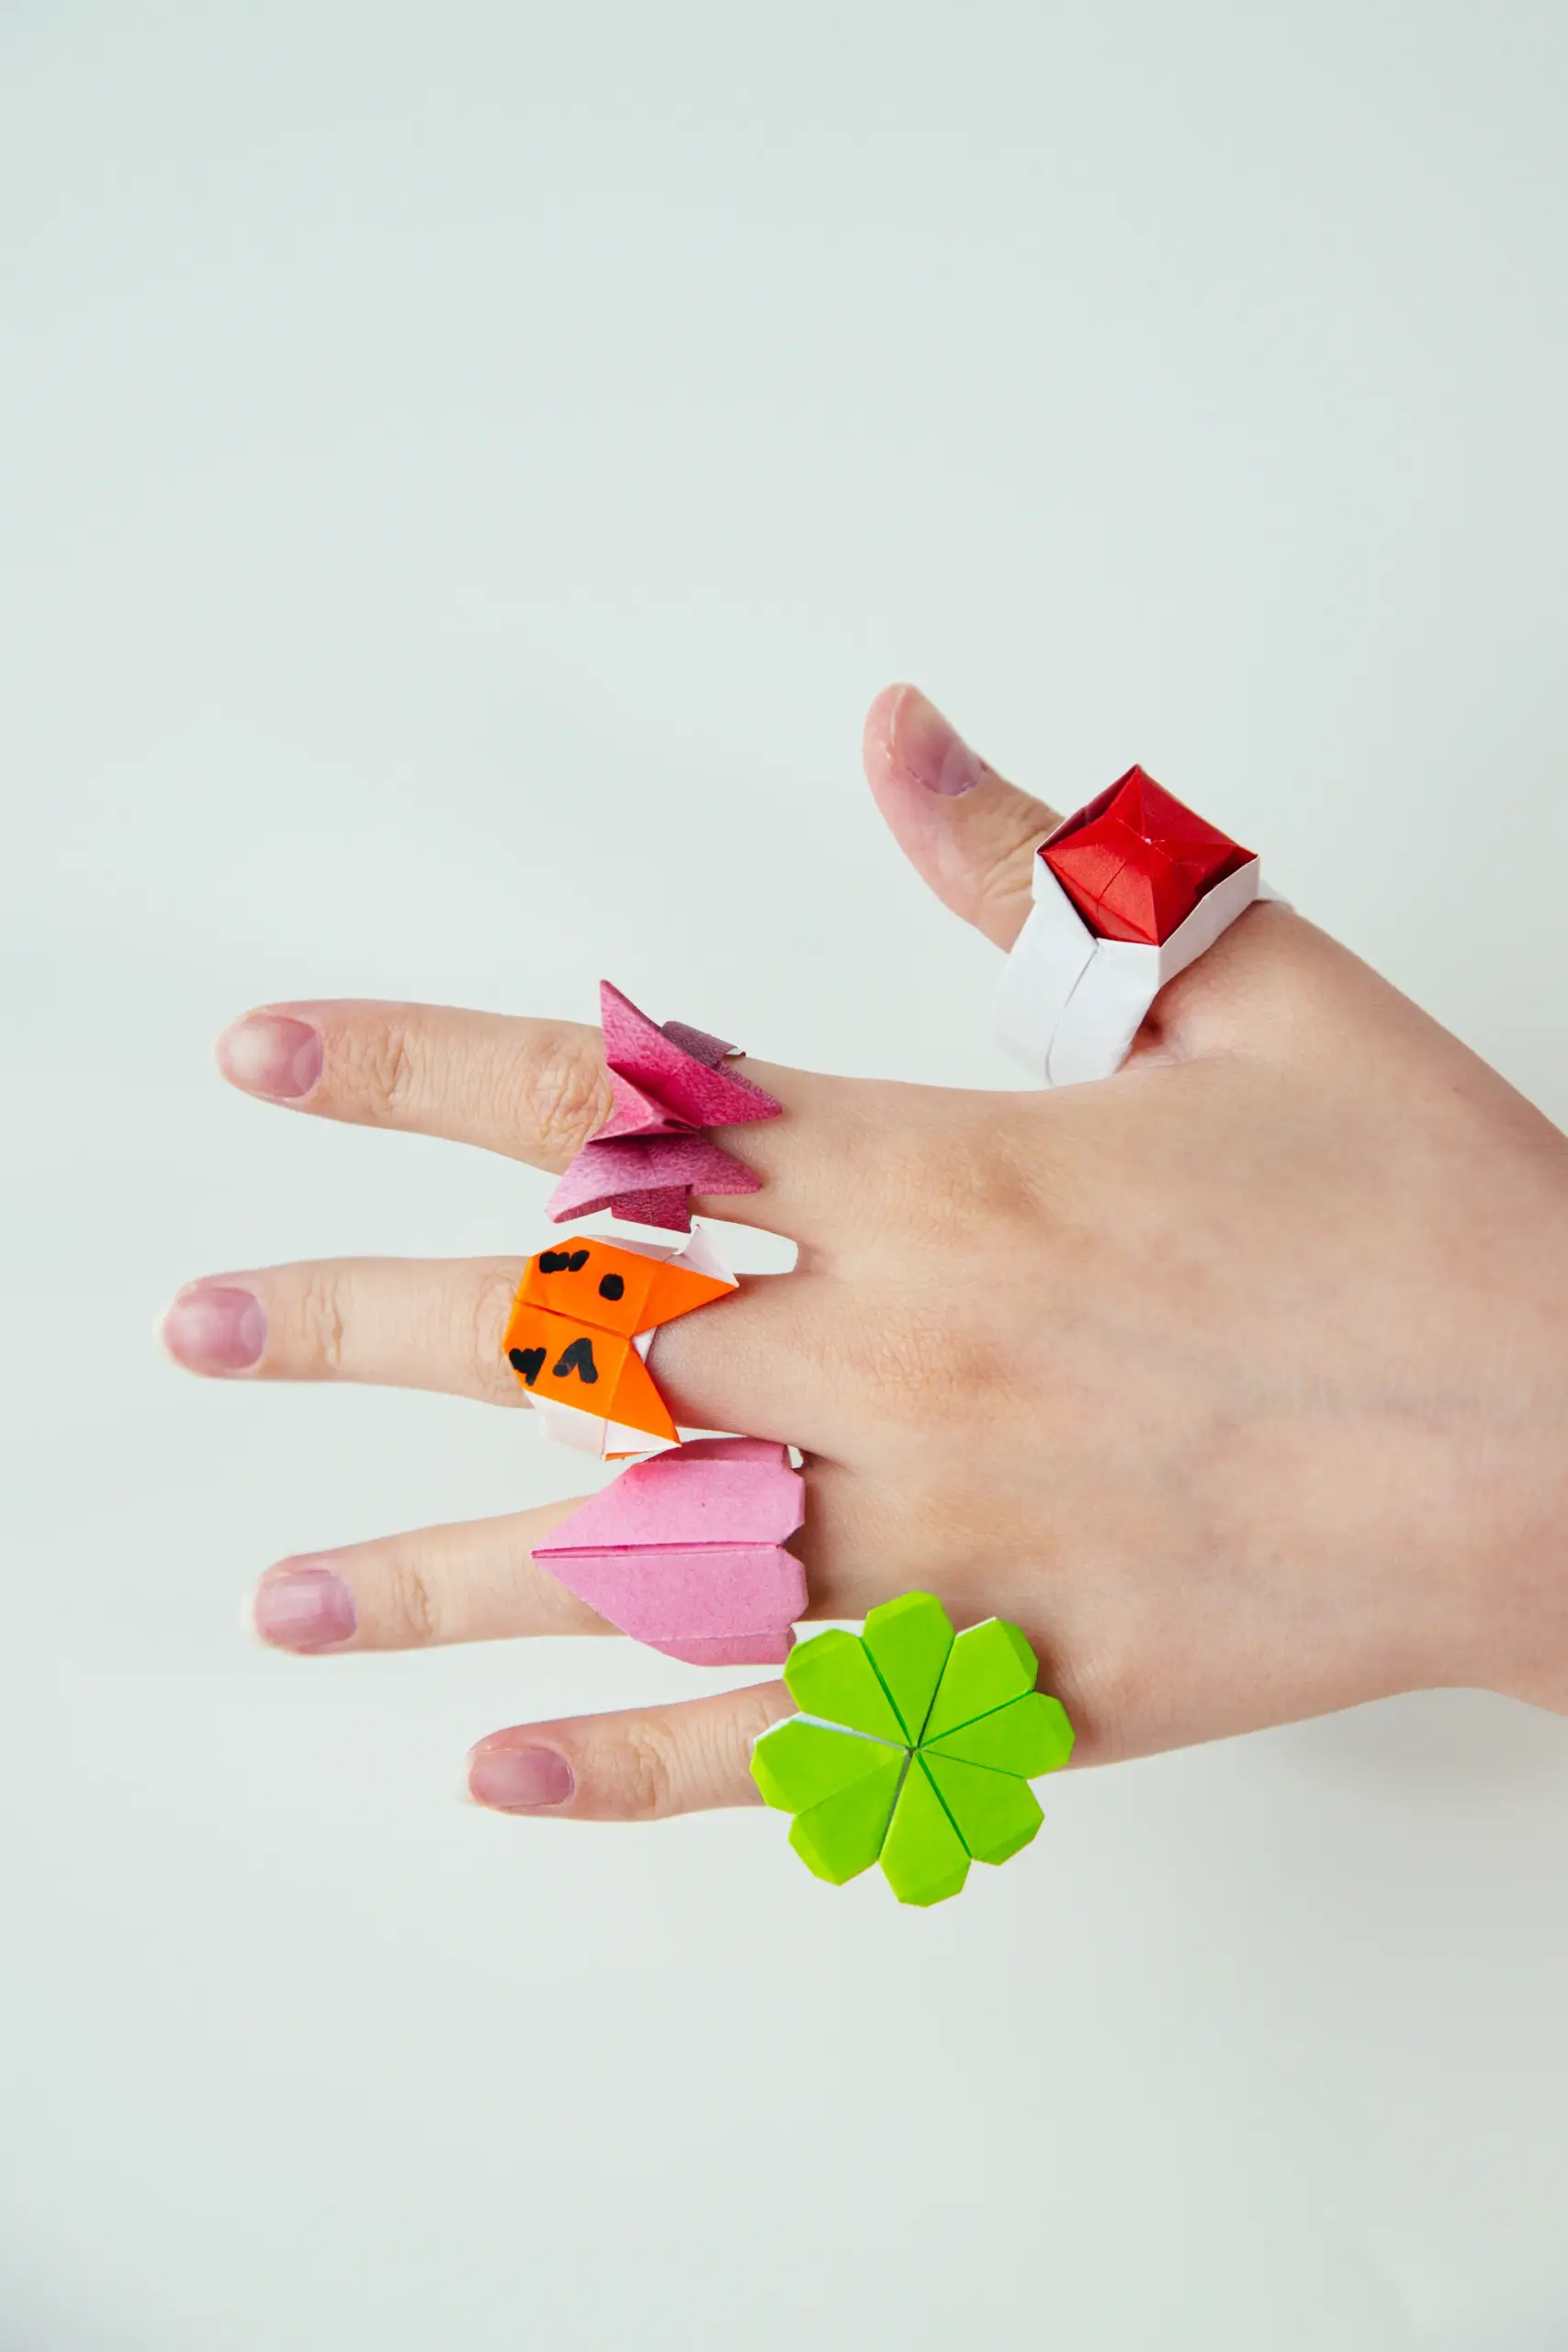
Origami ring is a creative and practical decoration. We have a collection of different shape and styles of origami rings.
- Lovely Stone Origami Ring- You can choose different color to change the color of your stone. Either a emerald, sapphire or a ruby. It’s your choice.
- Origami Butterfly Ring – Butterfly ring is finished with one piece of paper. It has a super cut and lovely butterfly over the basic ring.
- Origami Cat Ring – If you want something cute, try our origami cat ring. Folded by only one piece of paper.
- Origami Heart Ring– Origami heart ring is the most caring and lovely idea if you prefer to give it as a gift.
If you are new to origami, start here from our beginner guide to know the basics and how to read the step-by-step instructions.
- Folding time: 10 minutes
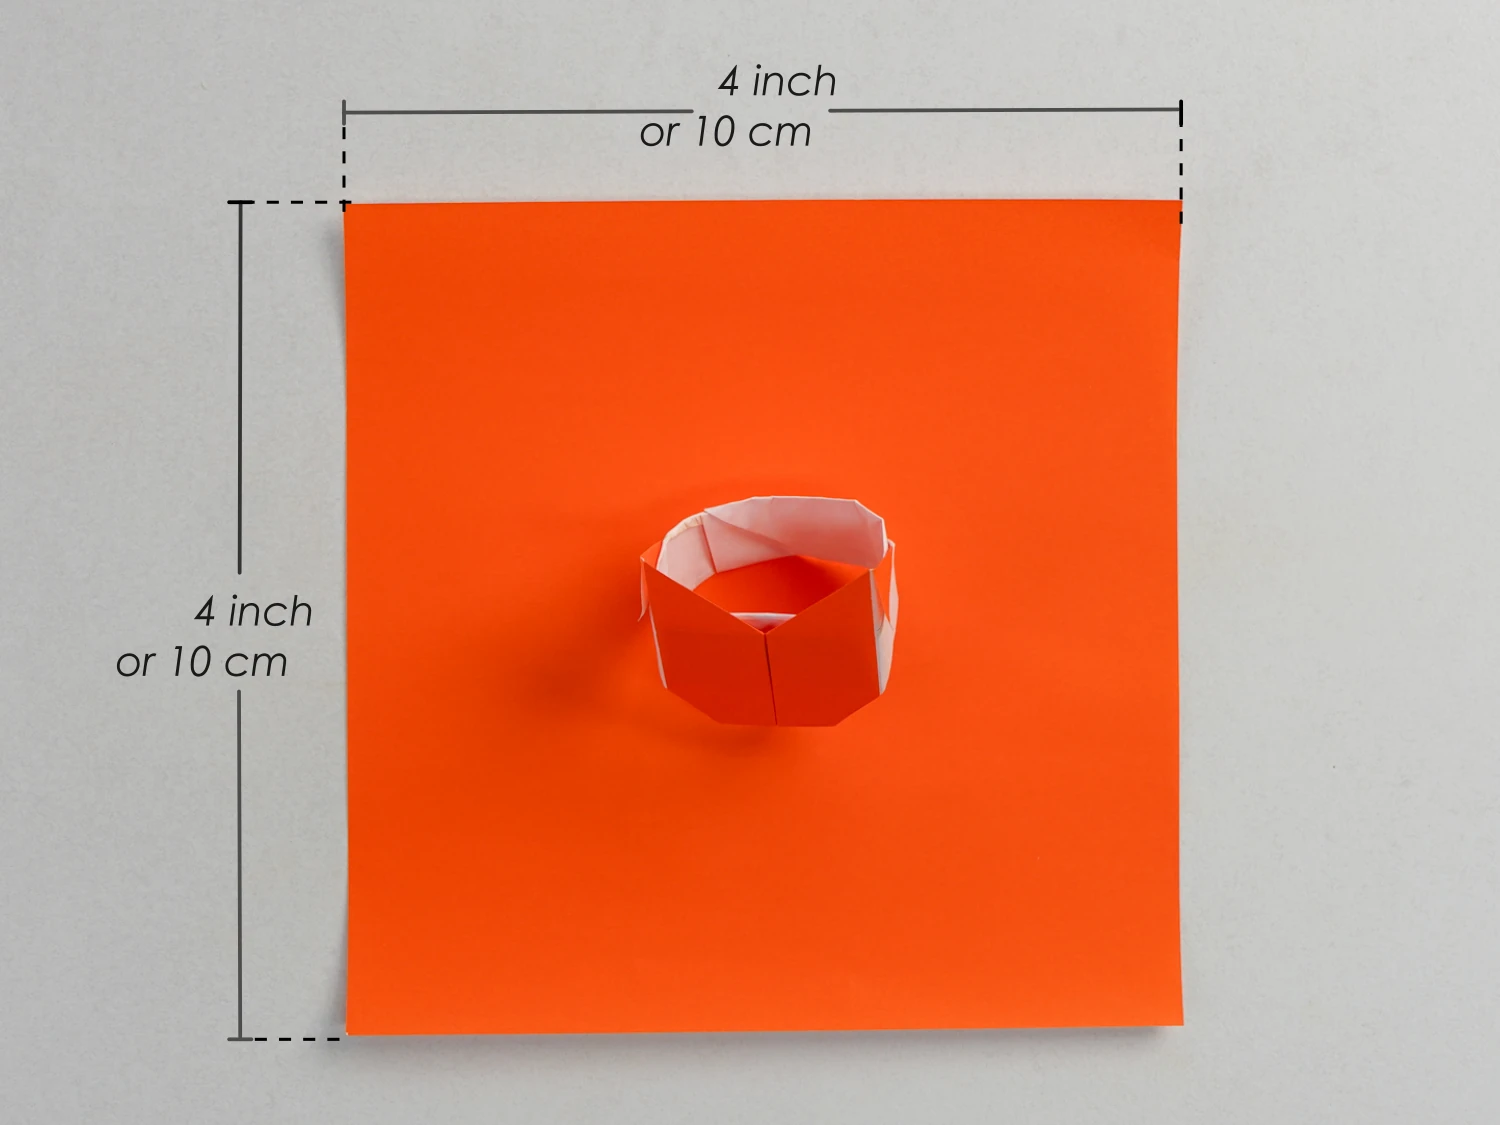
- Paper: 10×10 cm
- Difficulty: Easy, Beginner friendly
Material
Get a 10*10 cm origami paper, with different colors on each side, to create a lovely cat ring. You can use different sizes of square paper to create a larger or smaller ring.
Easy Origami Cat Ring Video
Step by Step Instructions
Step 1
Start with the white side of the paper facing up, fold it in half horizontally three times, and crease well then unfold it.
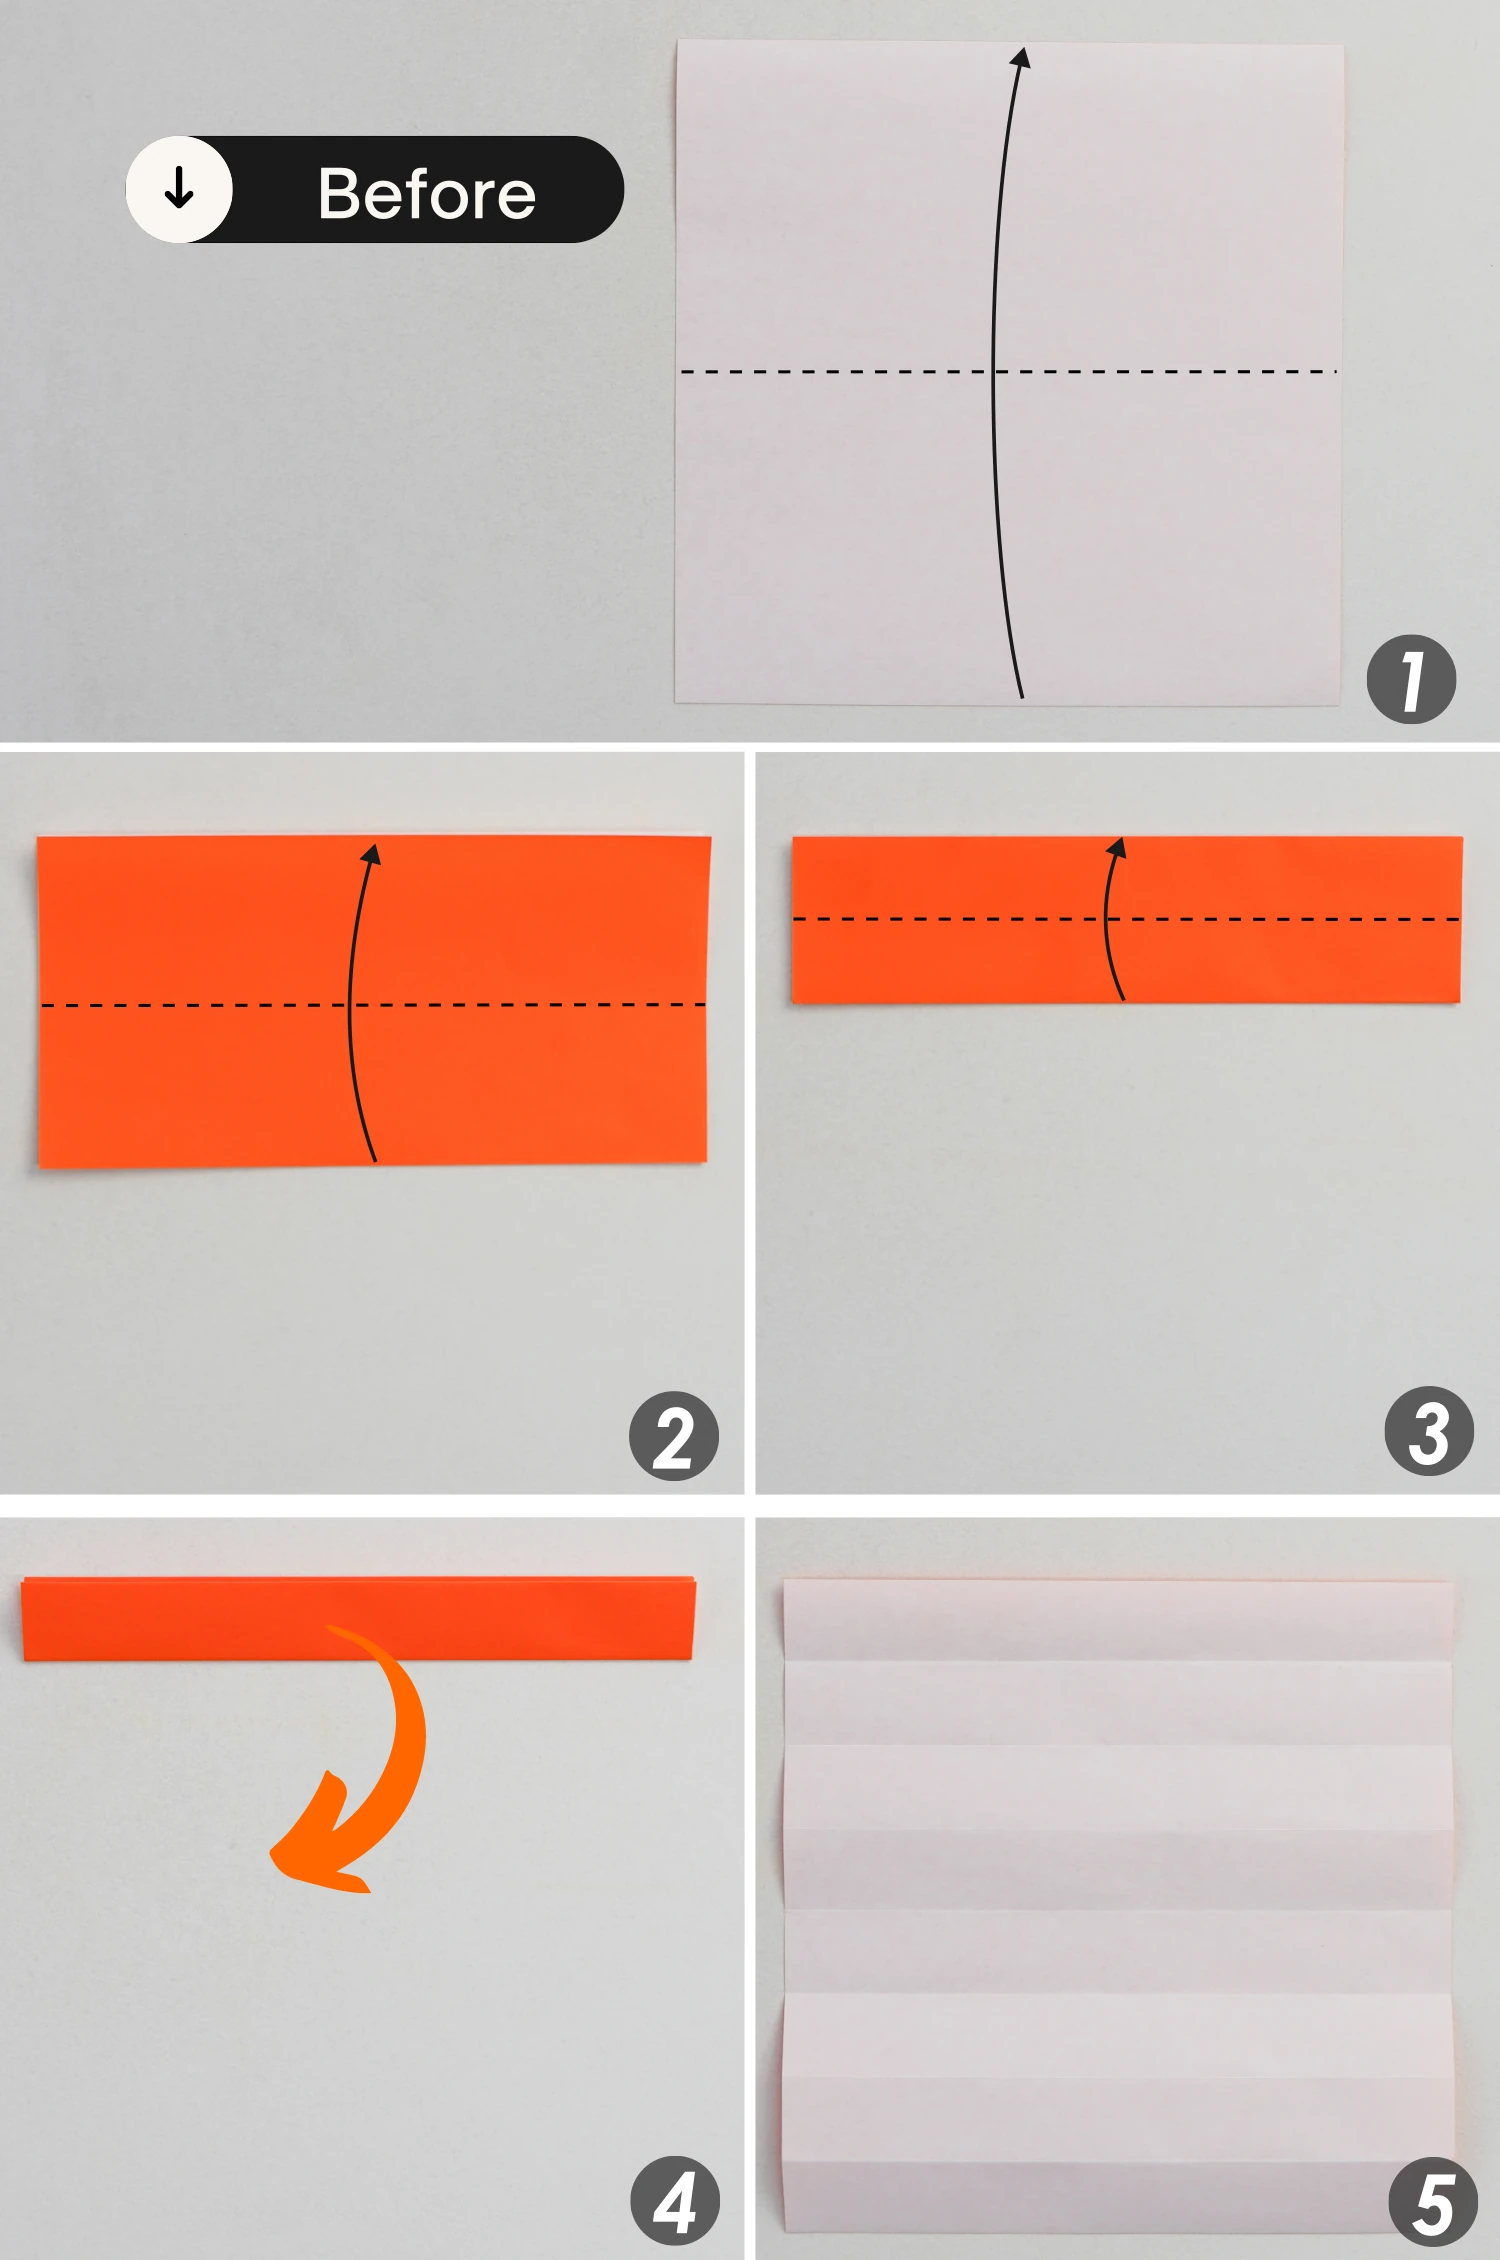
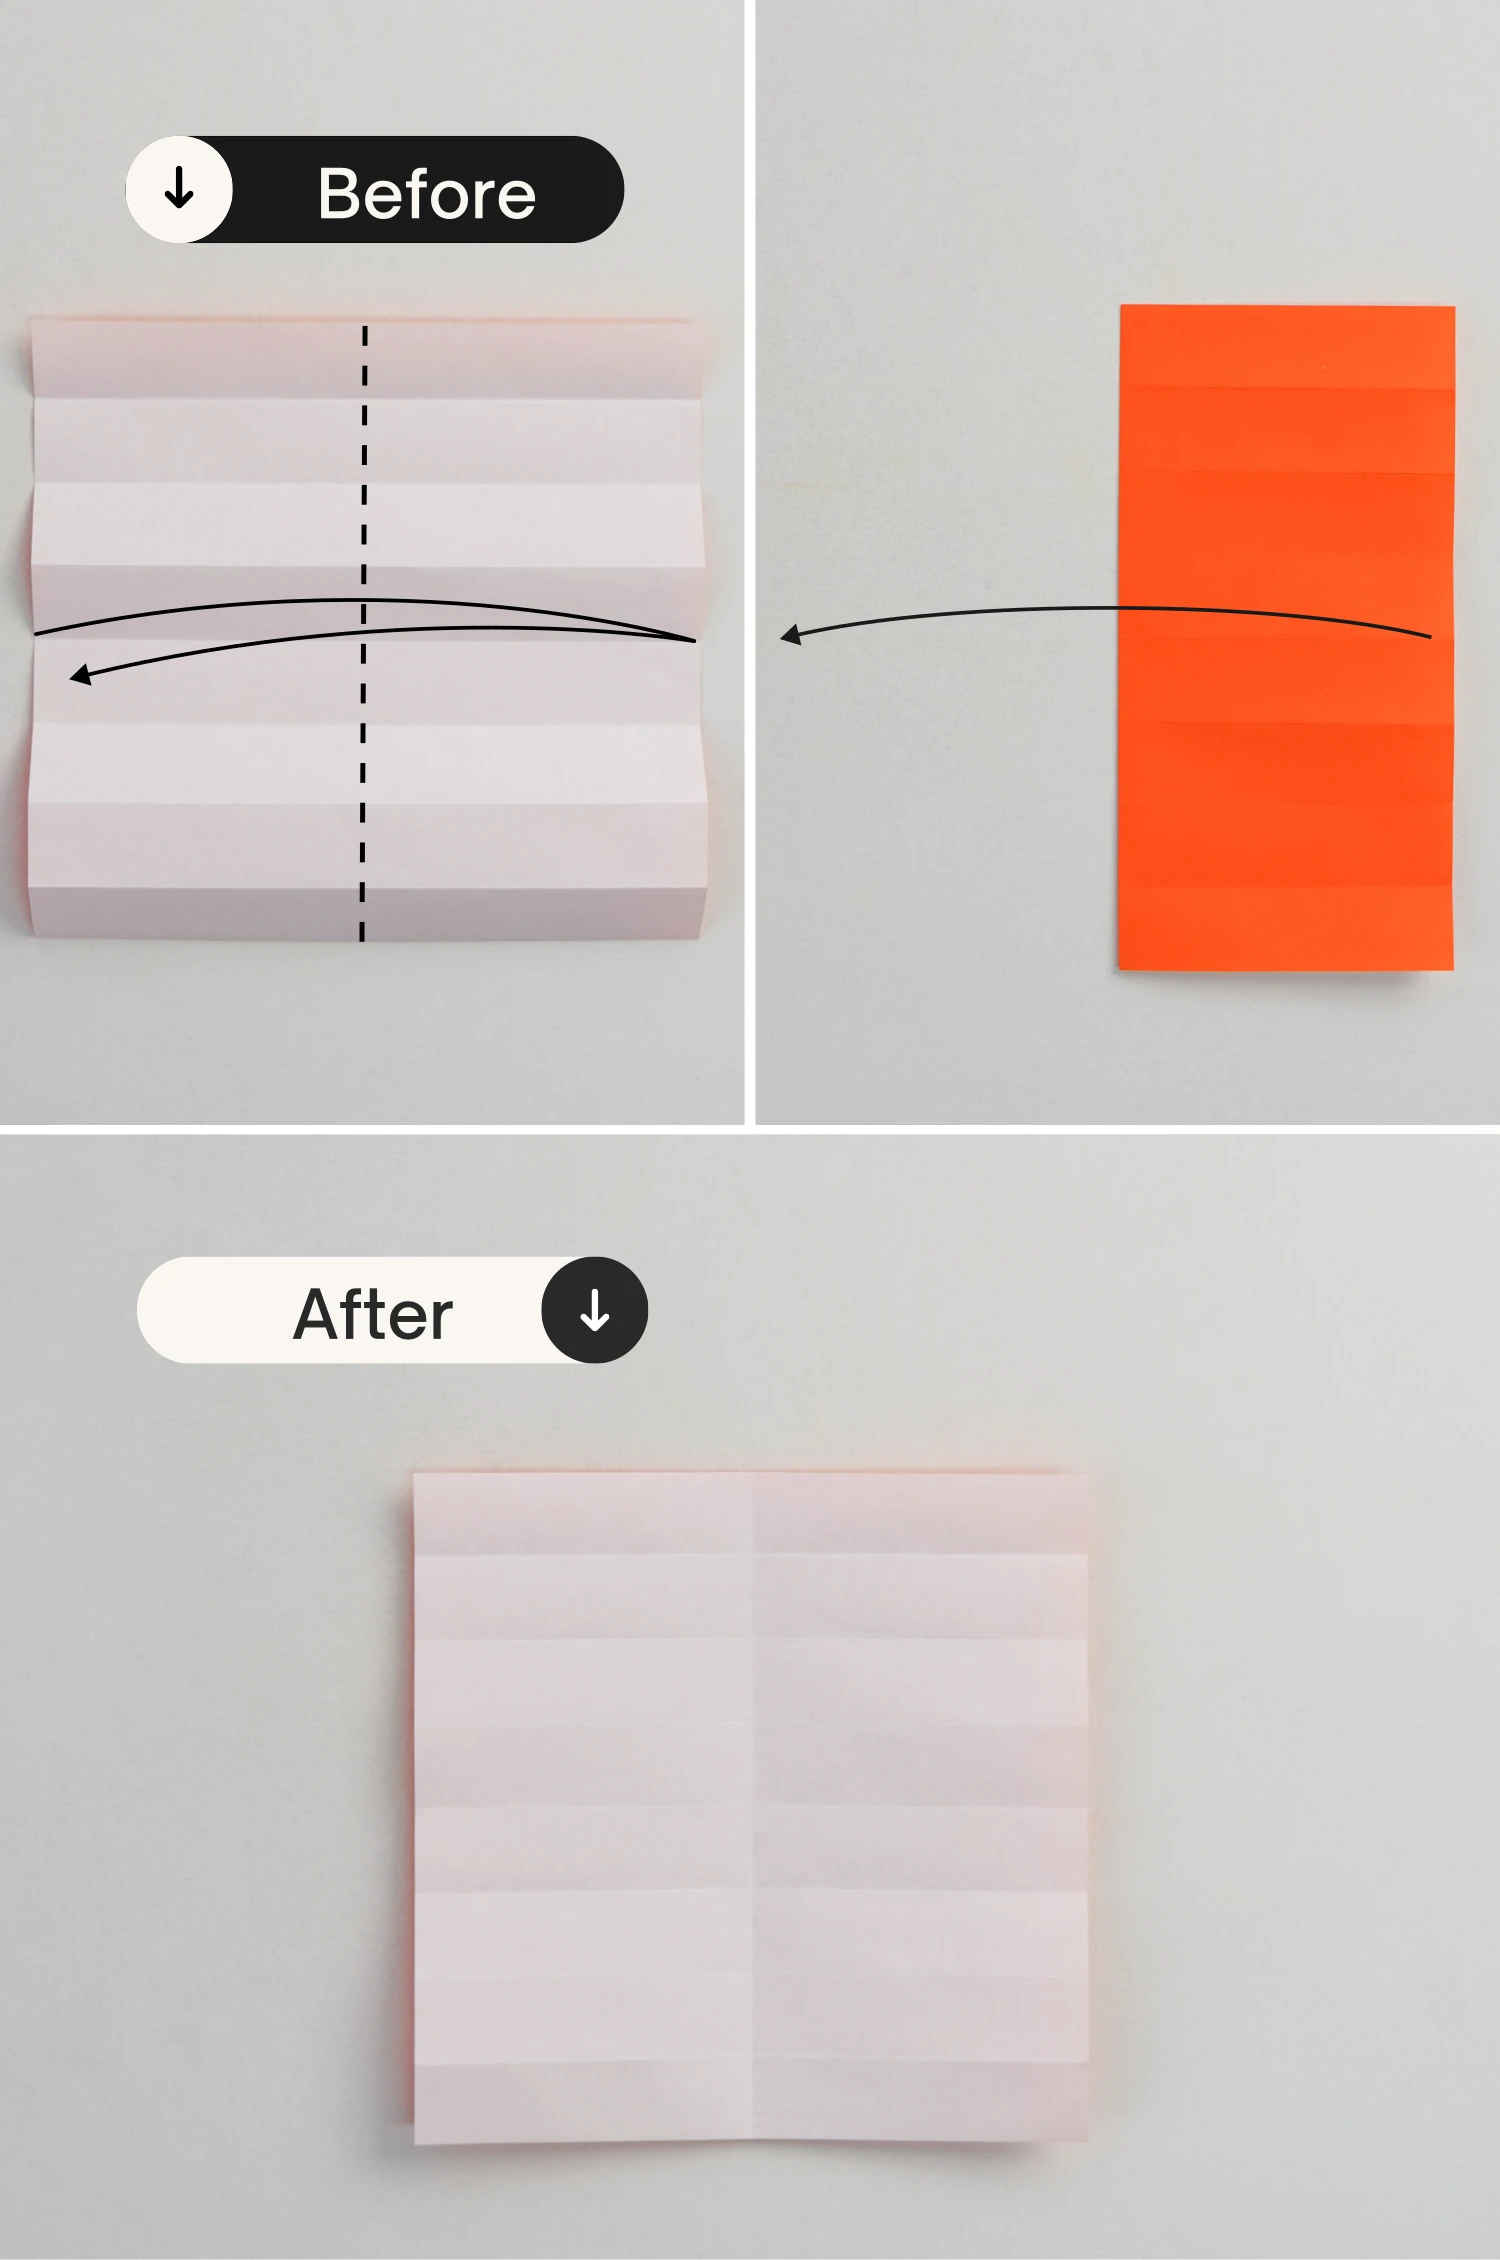
Step 2
Then fold it in half vertically, crease it well then unfold.
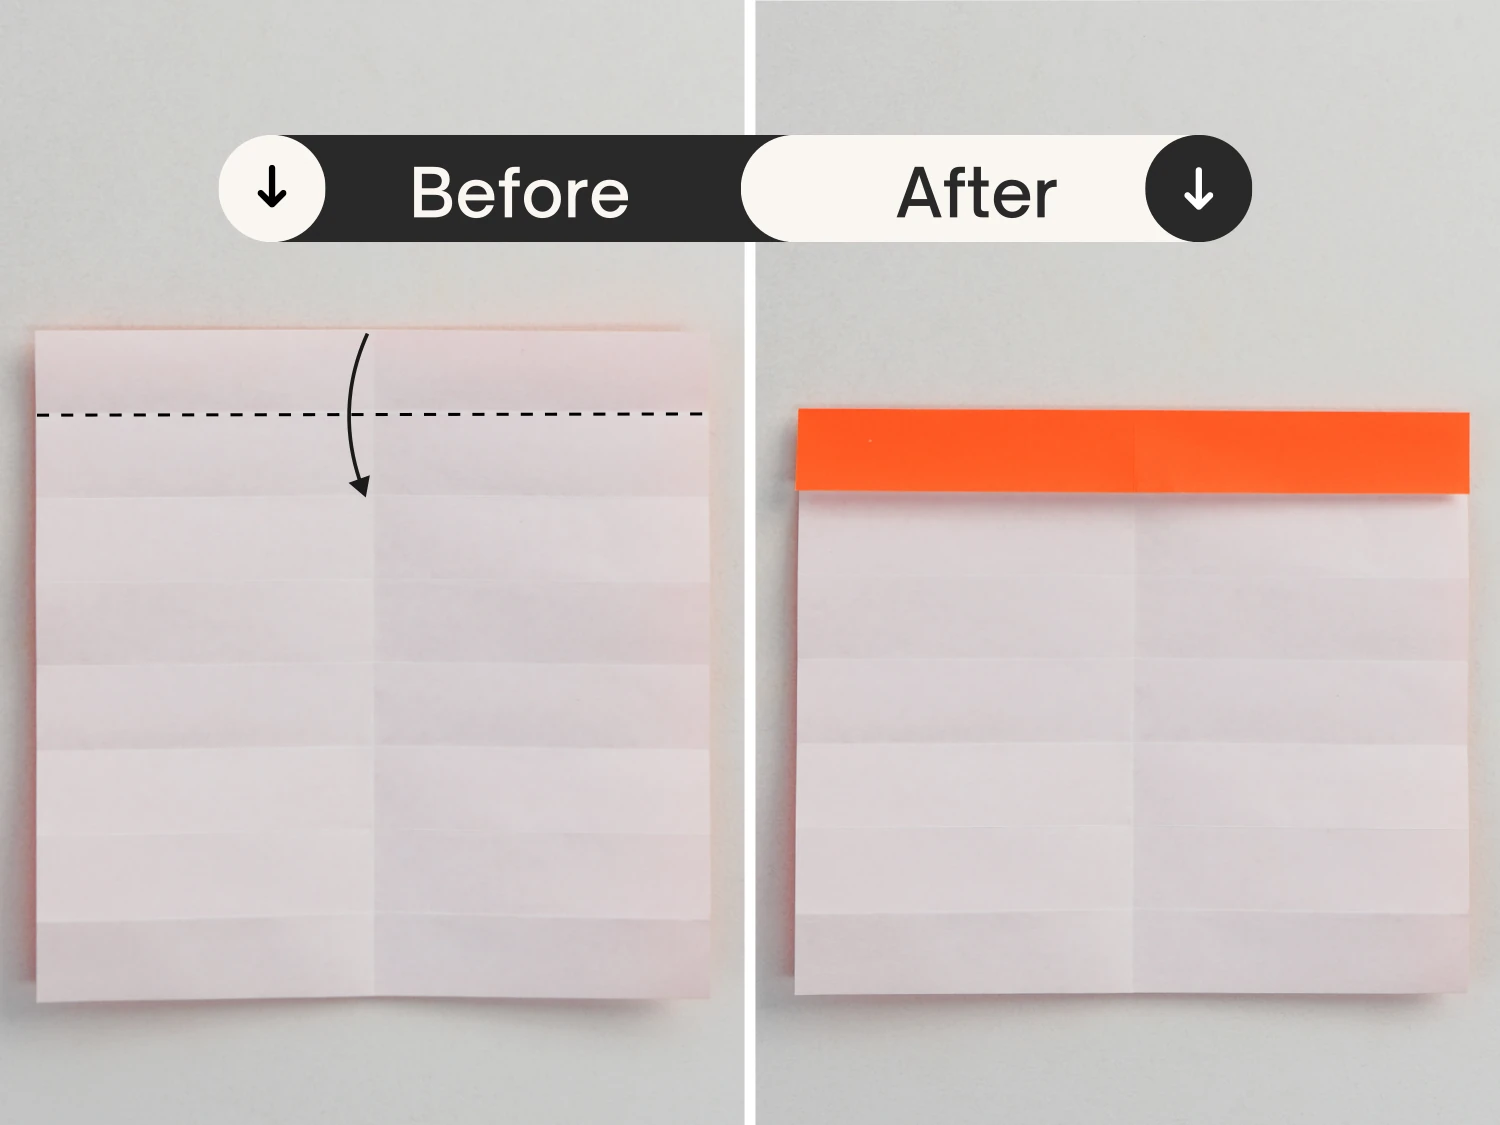
Step 3
Fold the top edge down along the first horizontal crease.
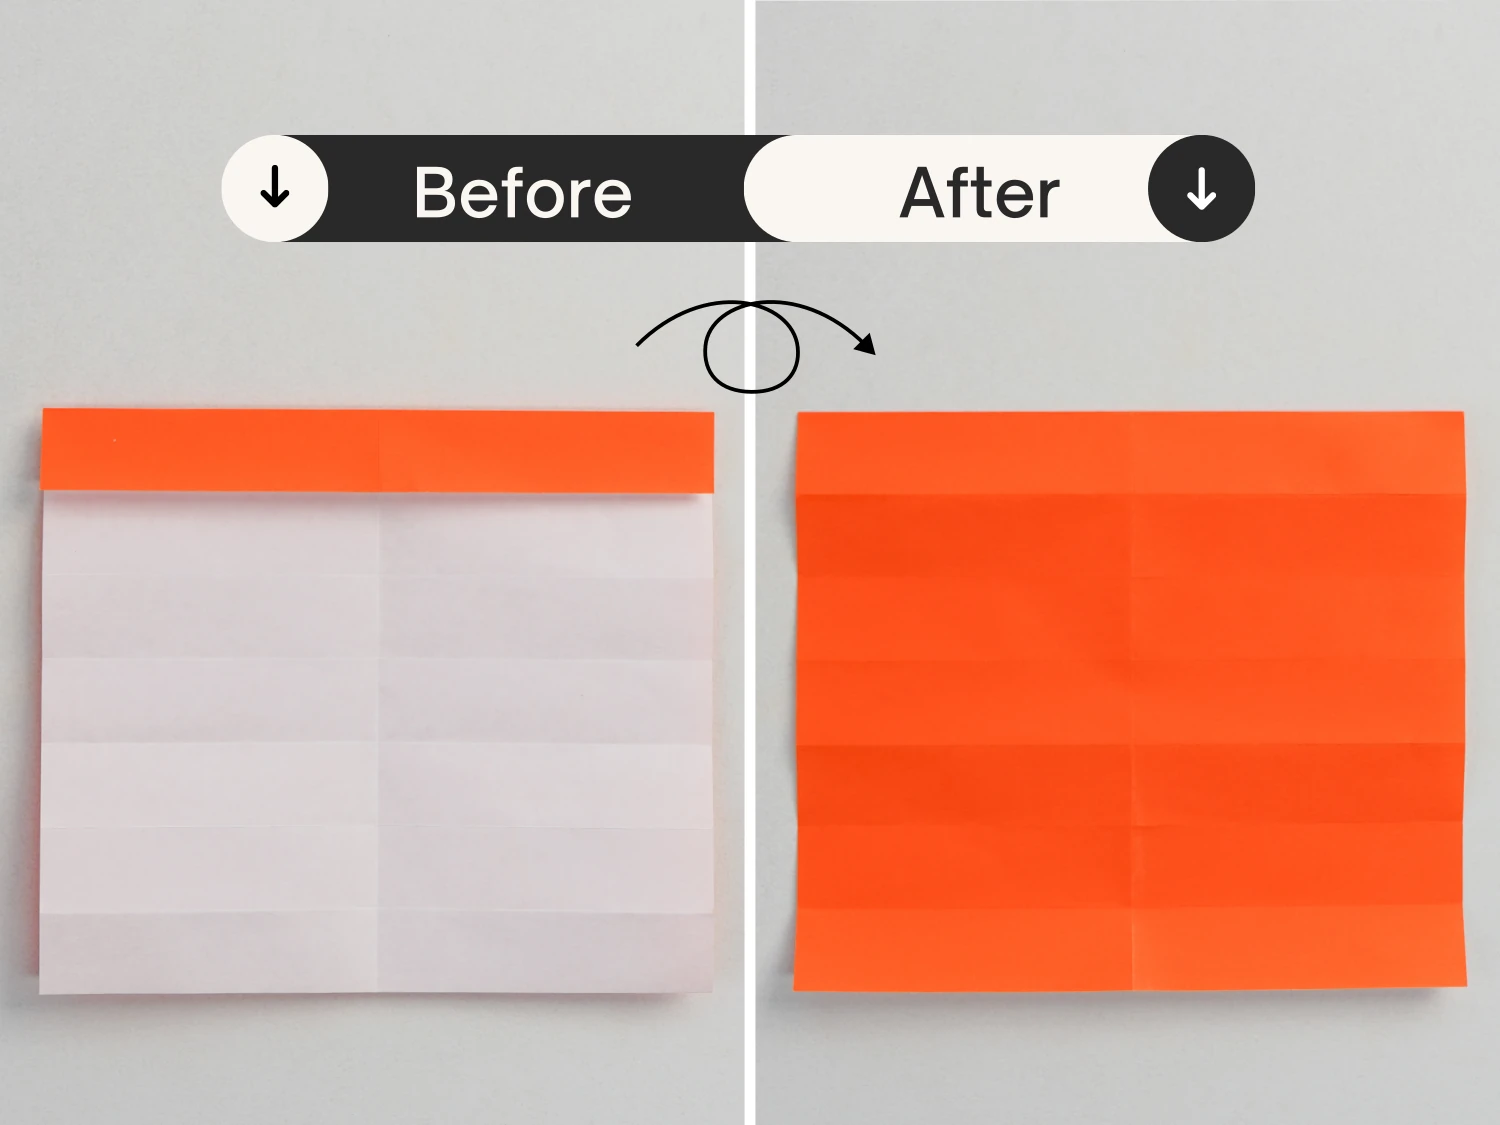
Step 4
Flip it over.
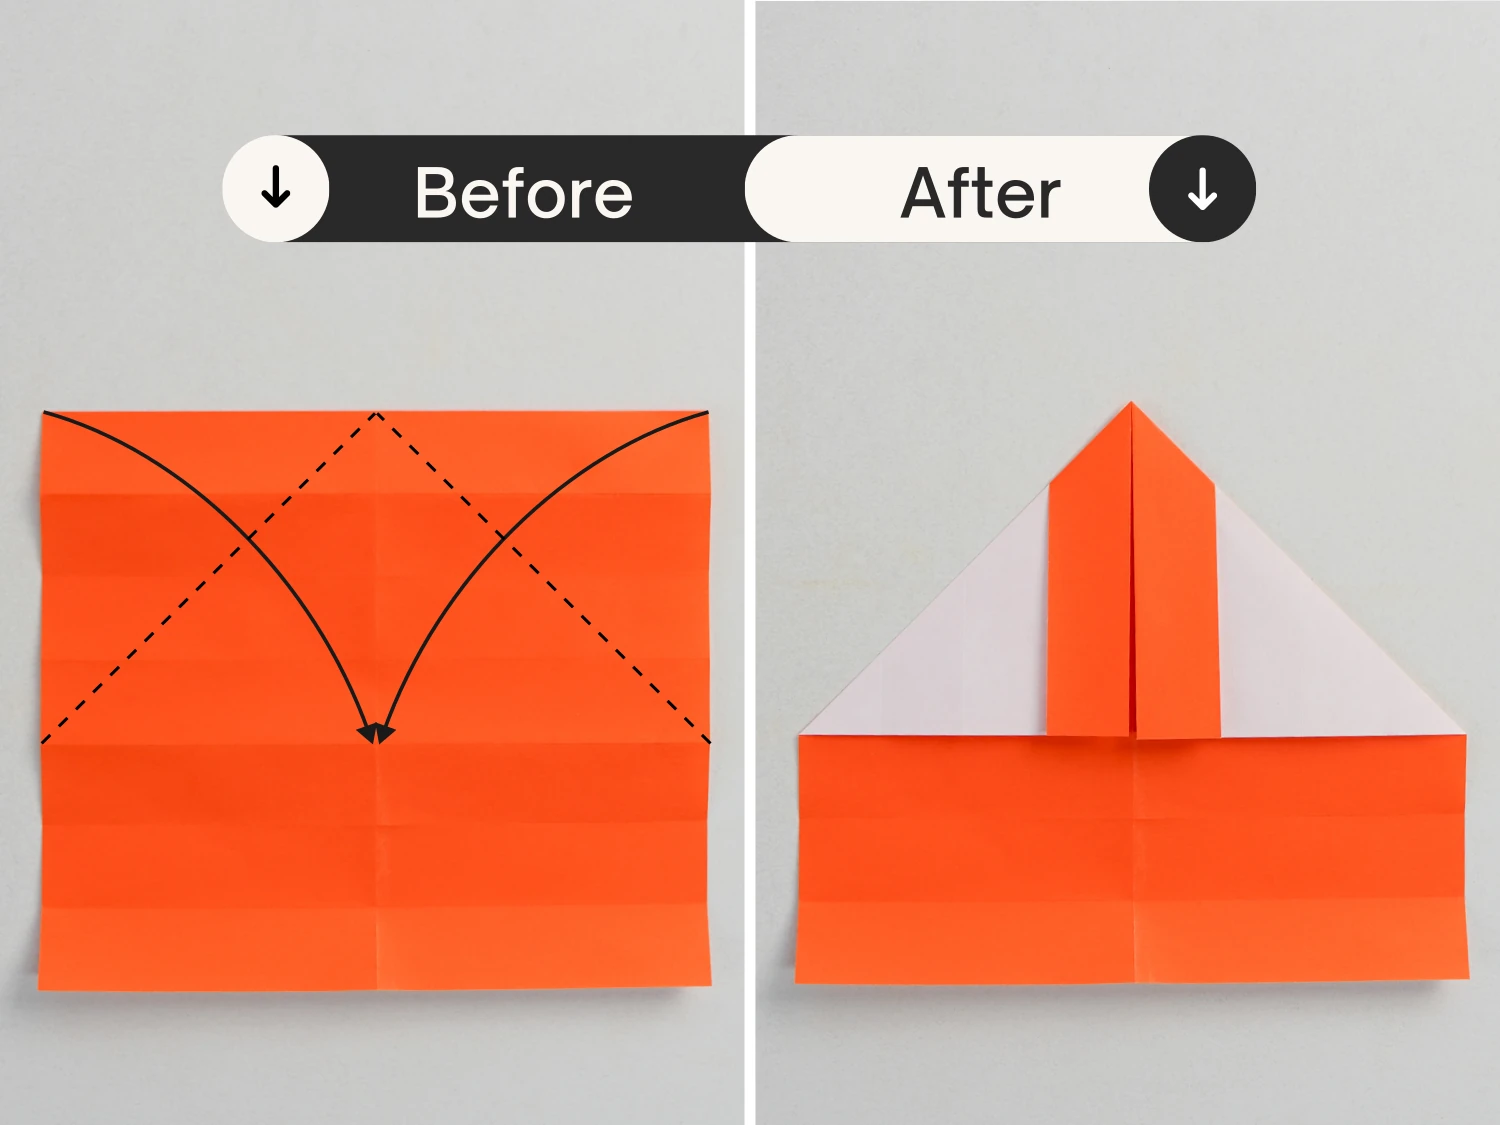
Step 5
Fold both the top left and top right edges down to align with the vertical crease.
Step 6
Flip it over again.
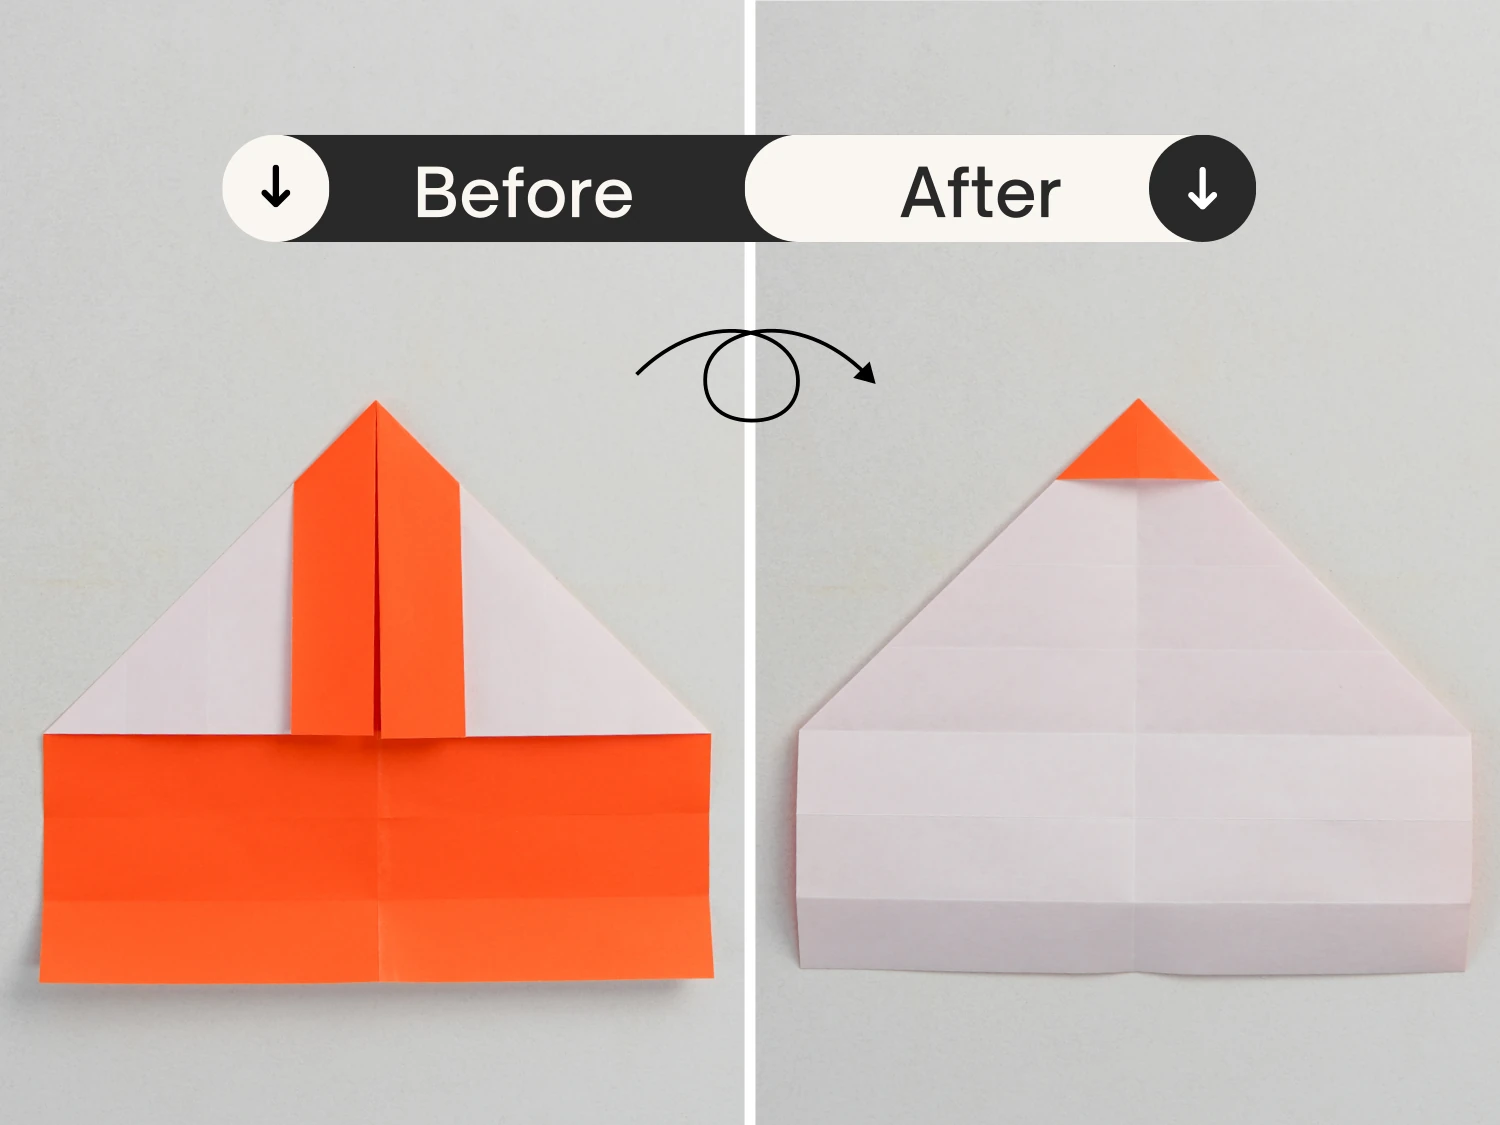
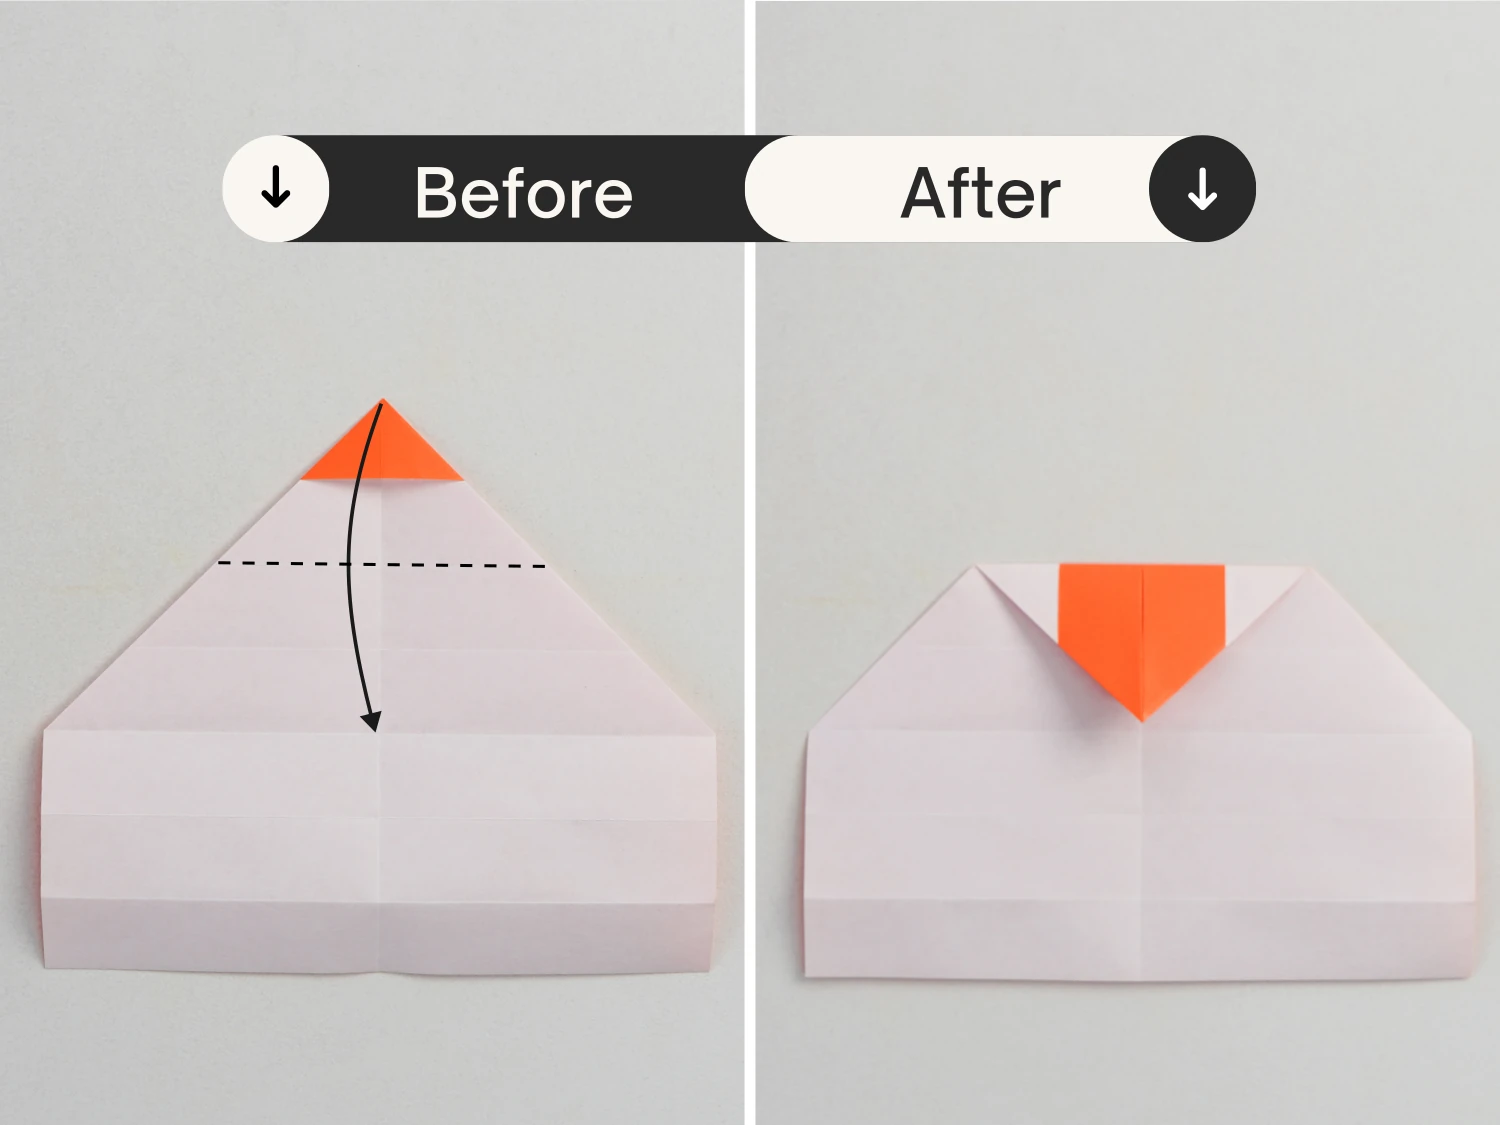
Step 7
Fold the top corner down along the crease shown by the dotted line.
Step 8
Flip the paper over.
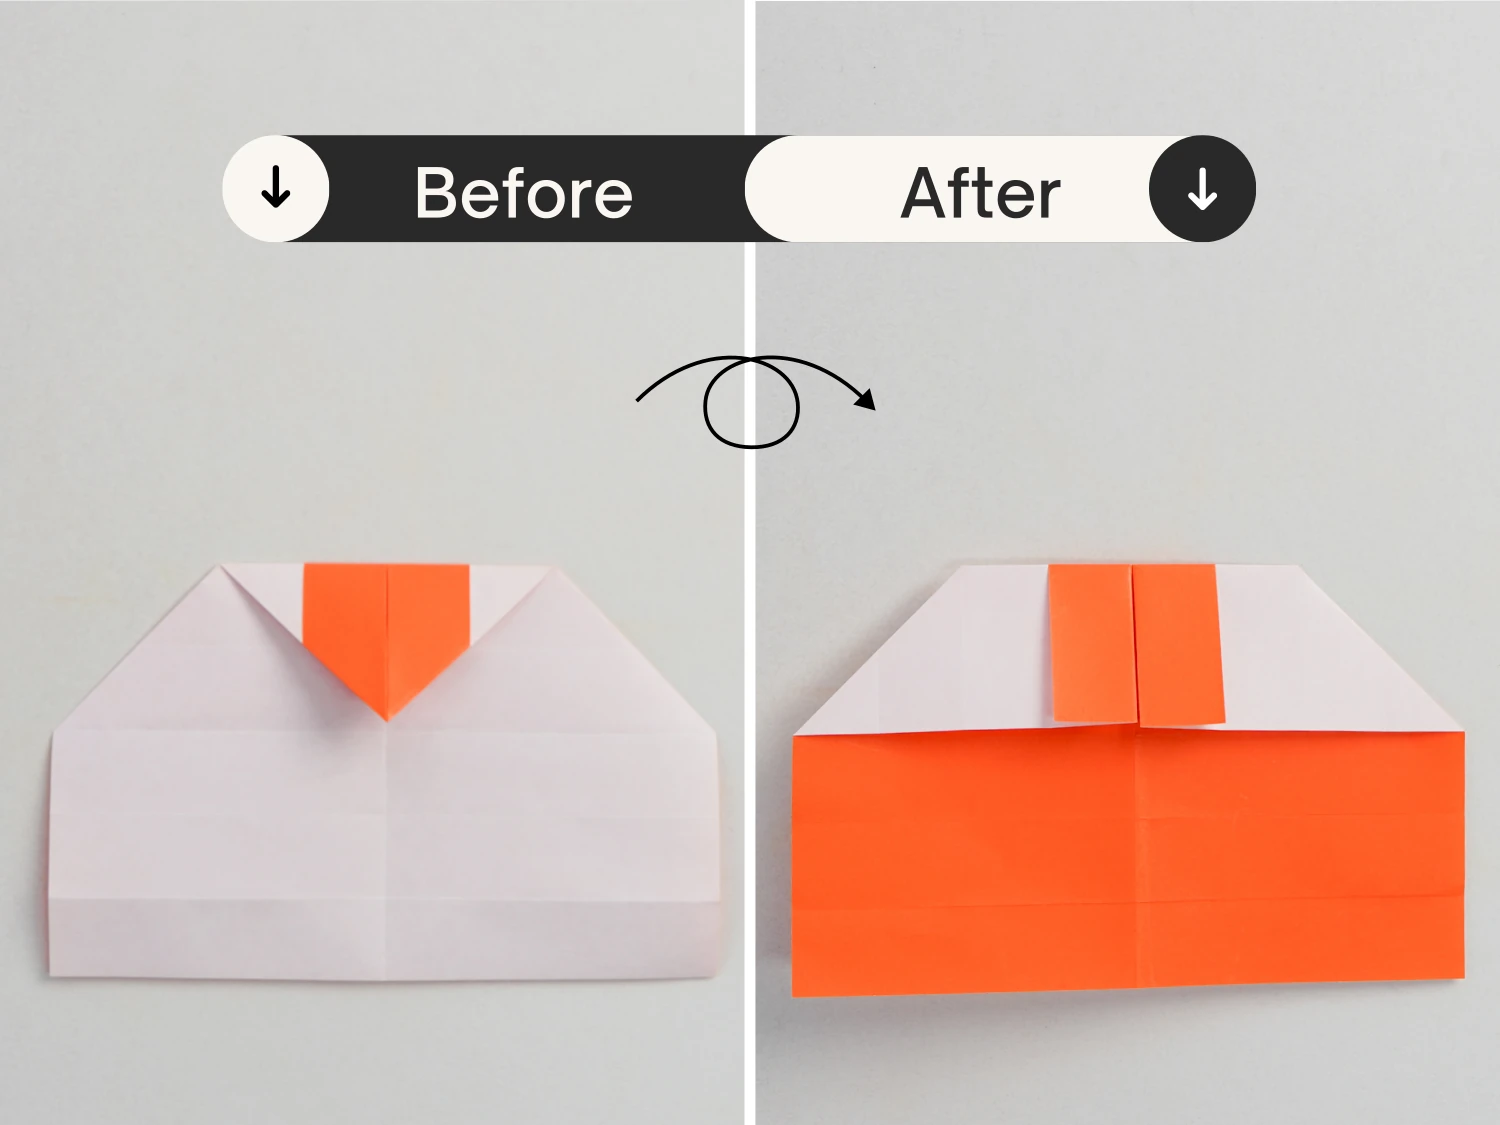
Step 9
Lift the top right layer, open the corner then squash it.
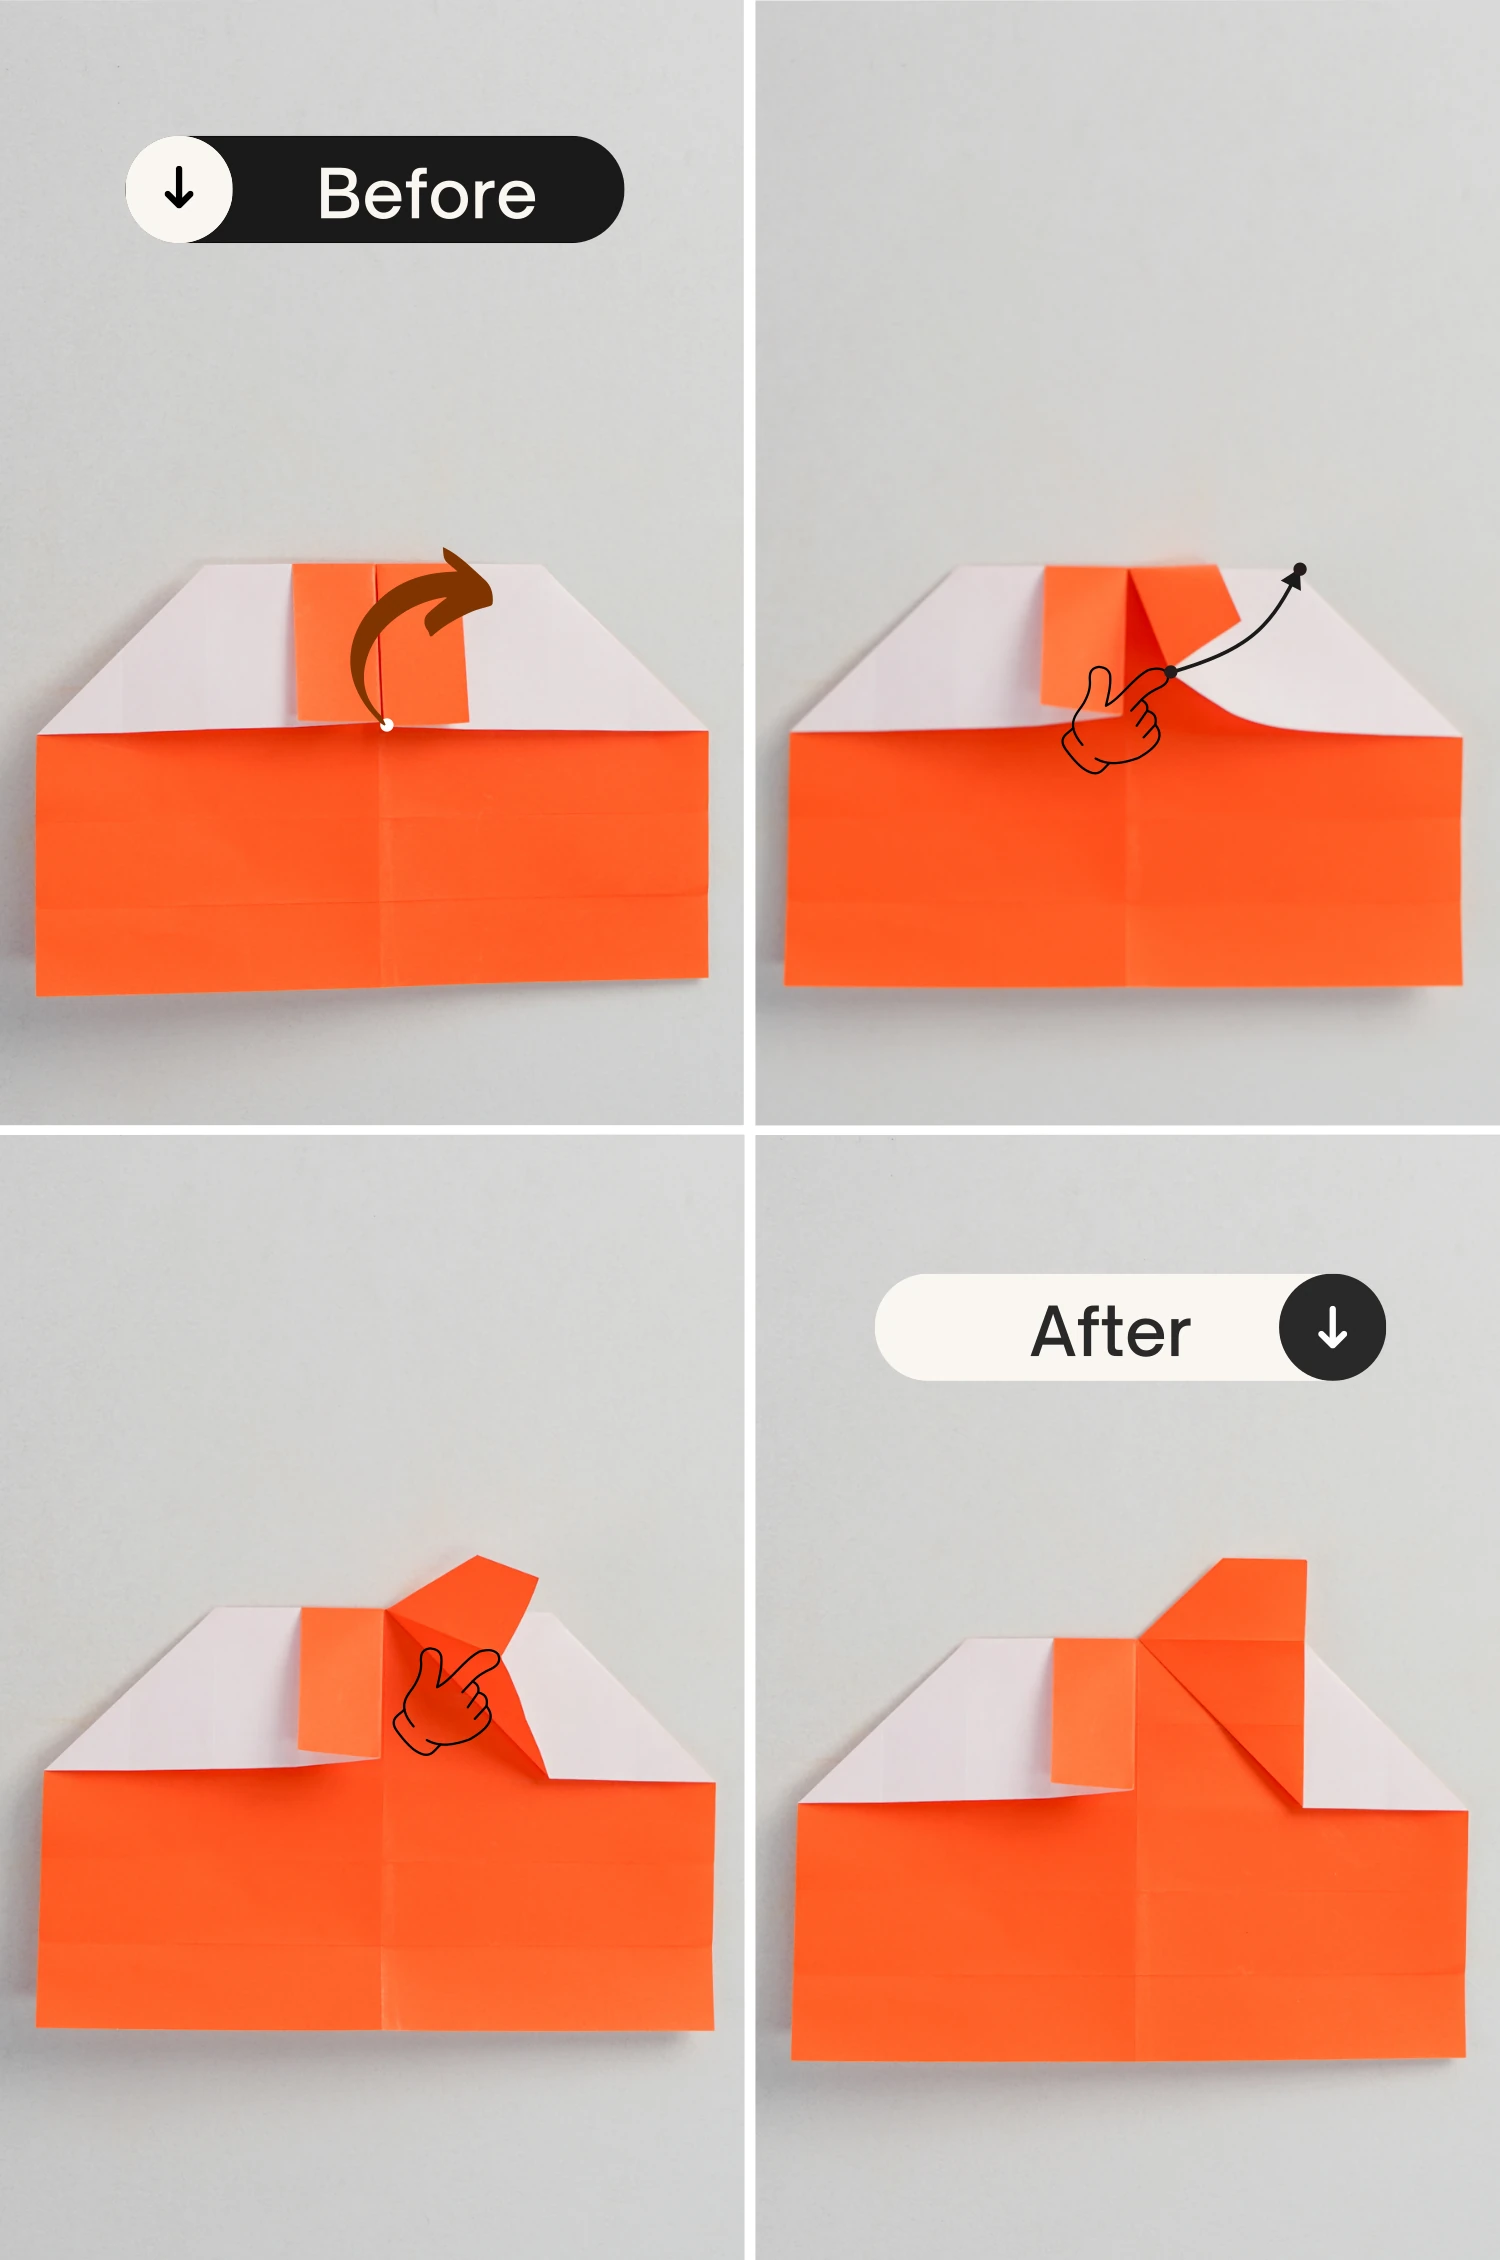
Step 10
Repeat this for the top left layer.
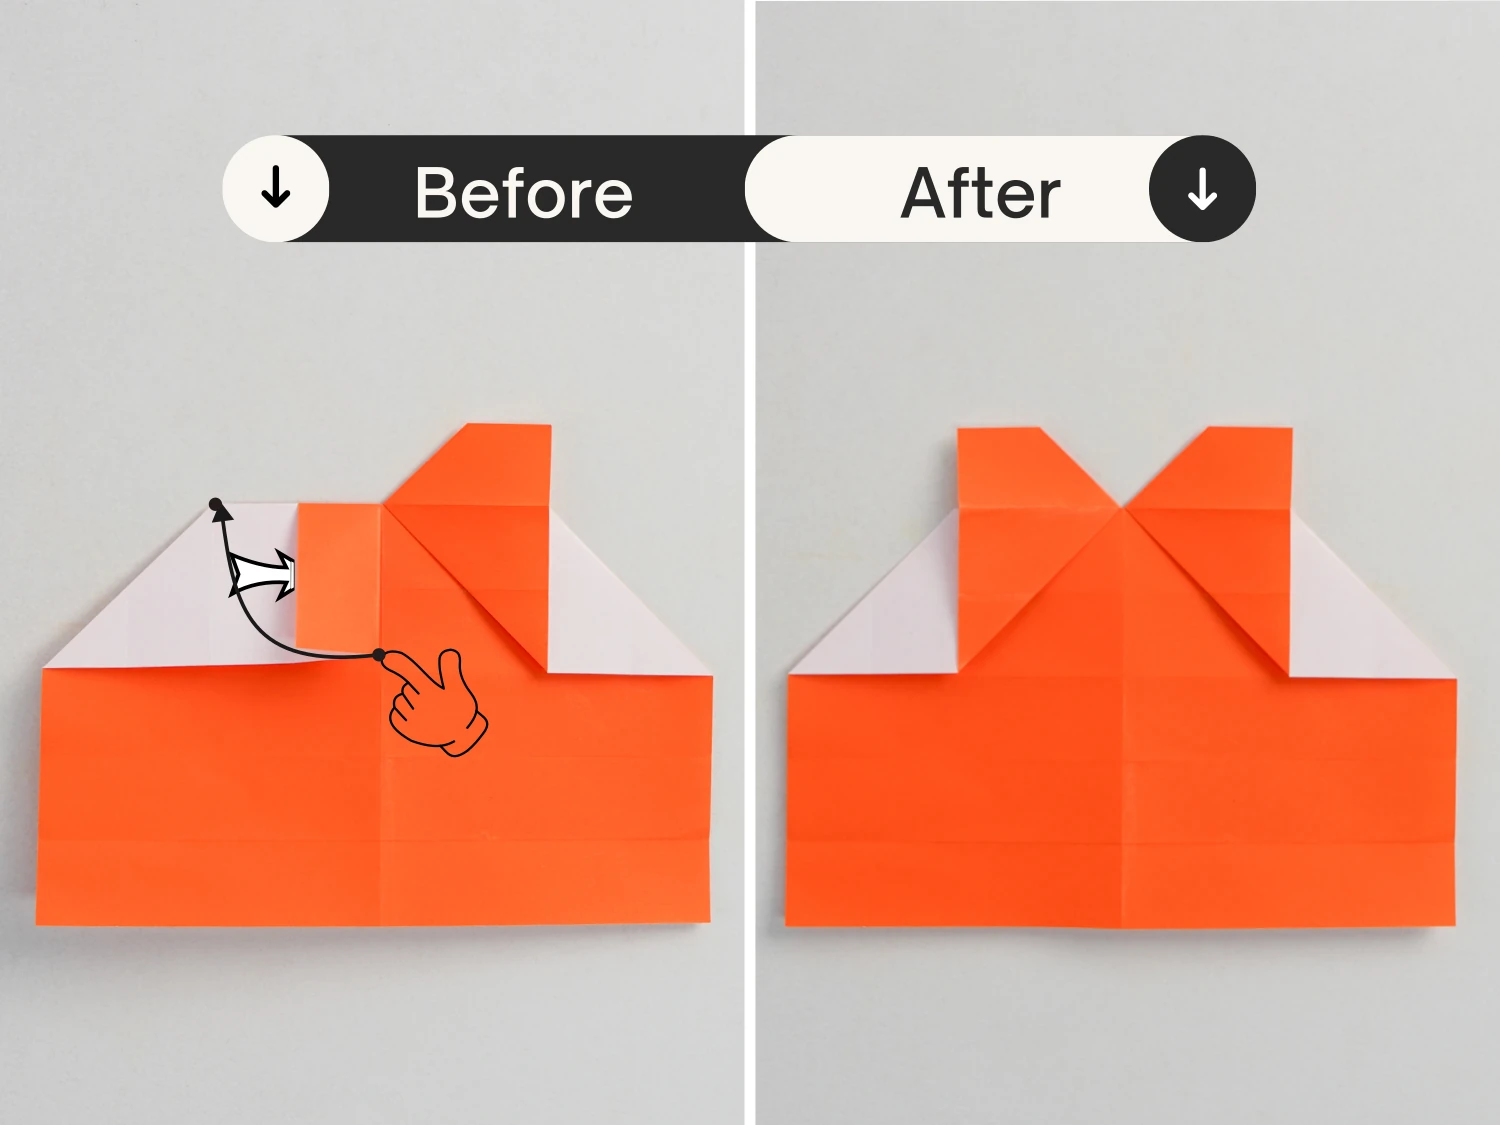
Step 11
Flip the model over.
Step 12
Fold the top left and right corners down diagonally.
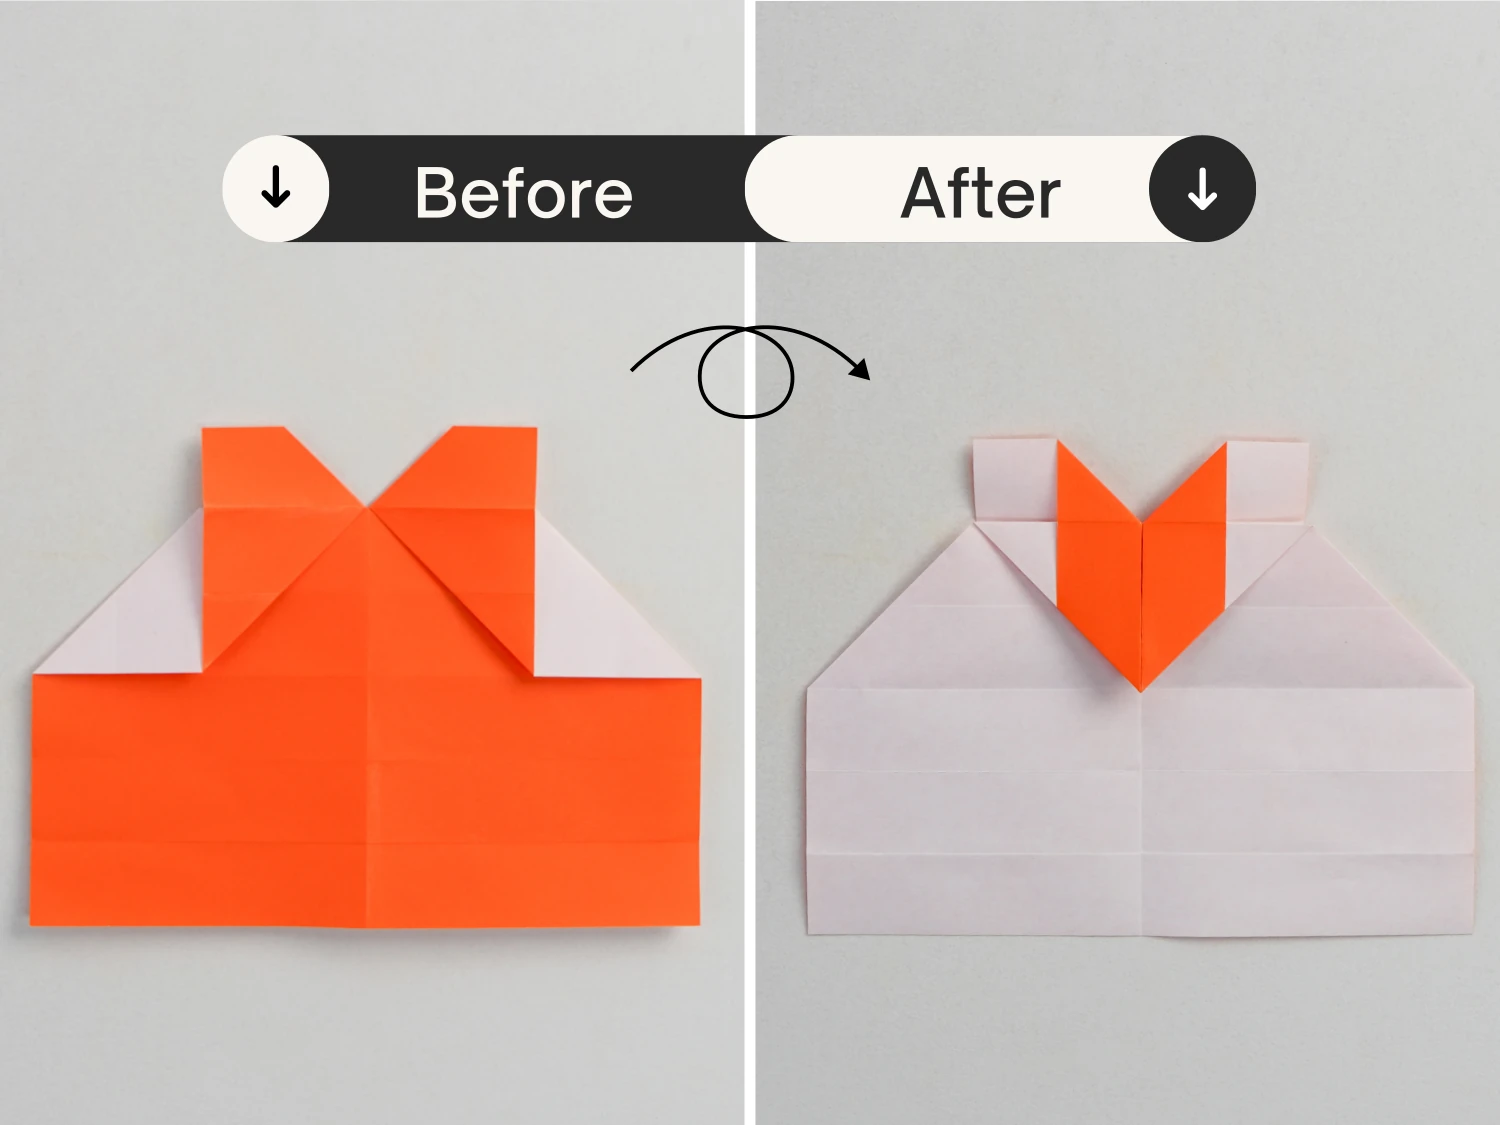
Step 13
Flip the model over again.
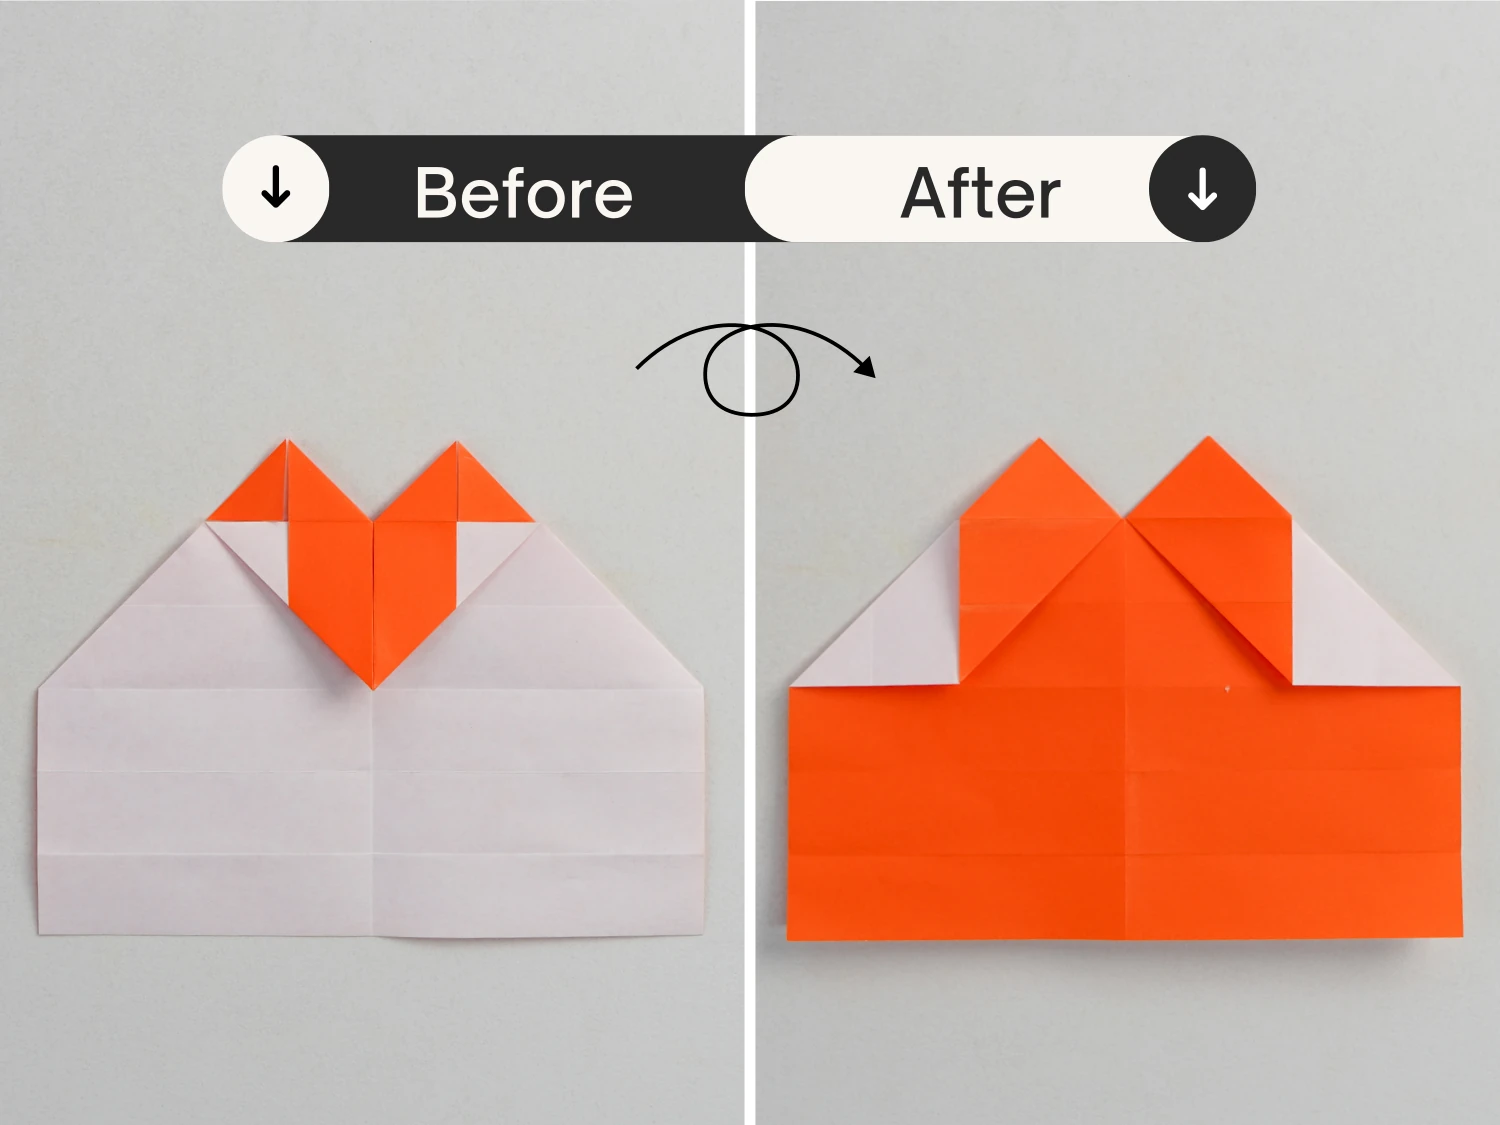
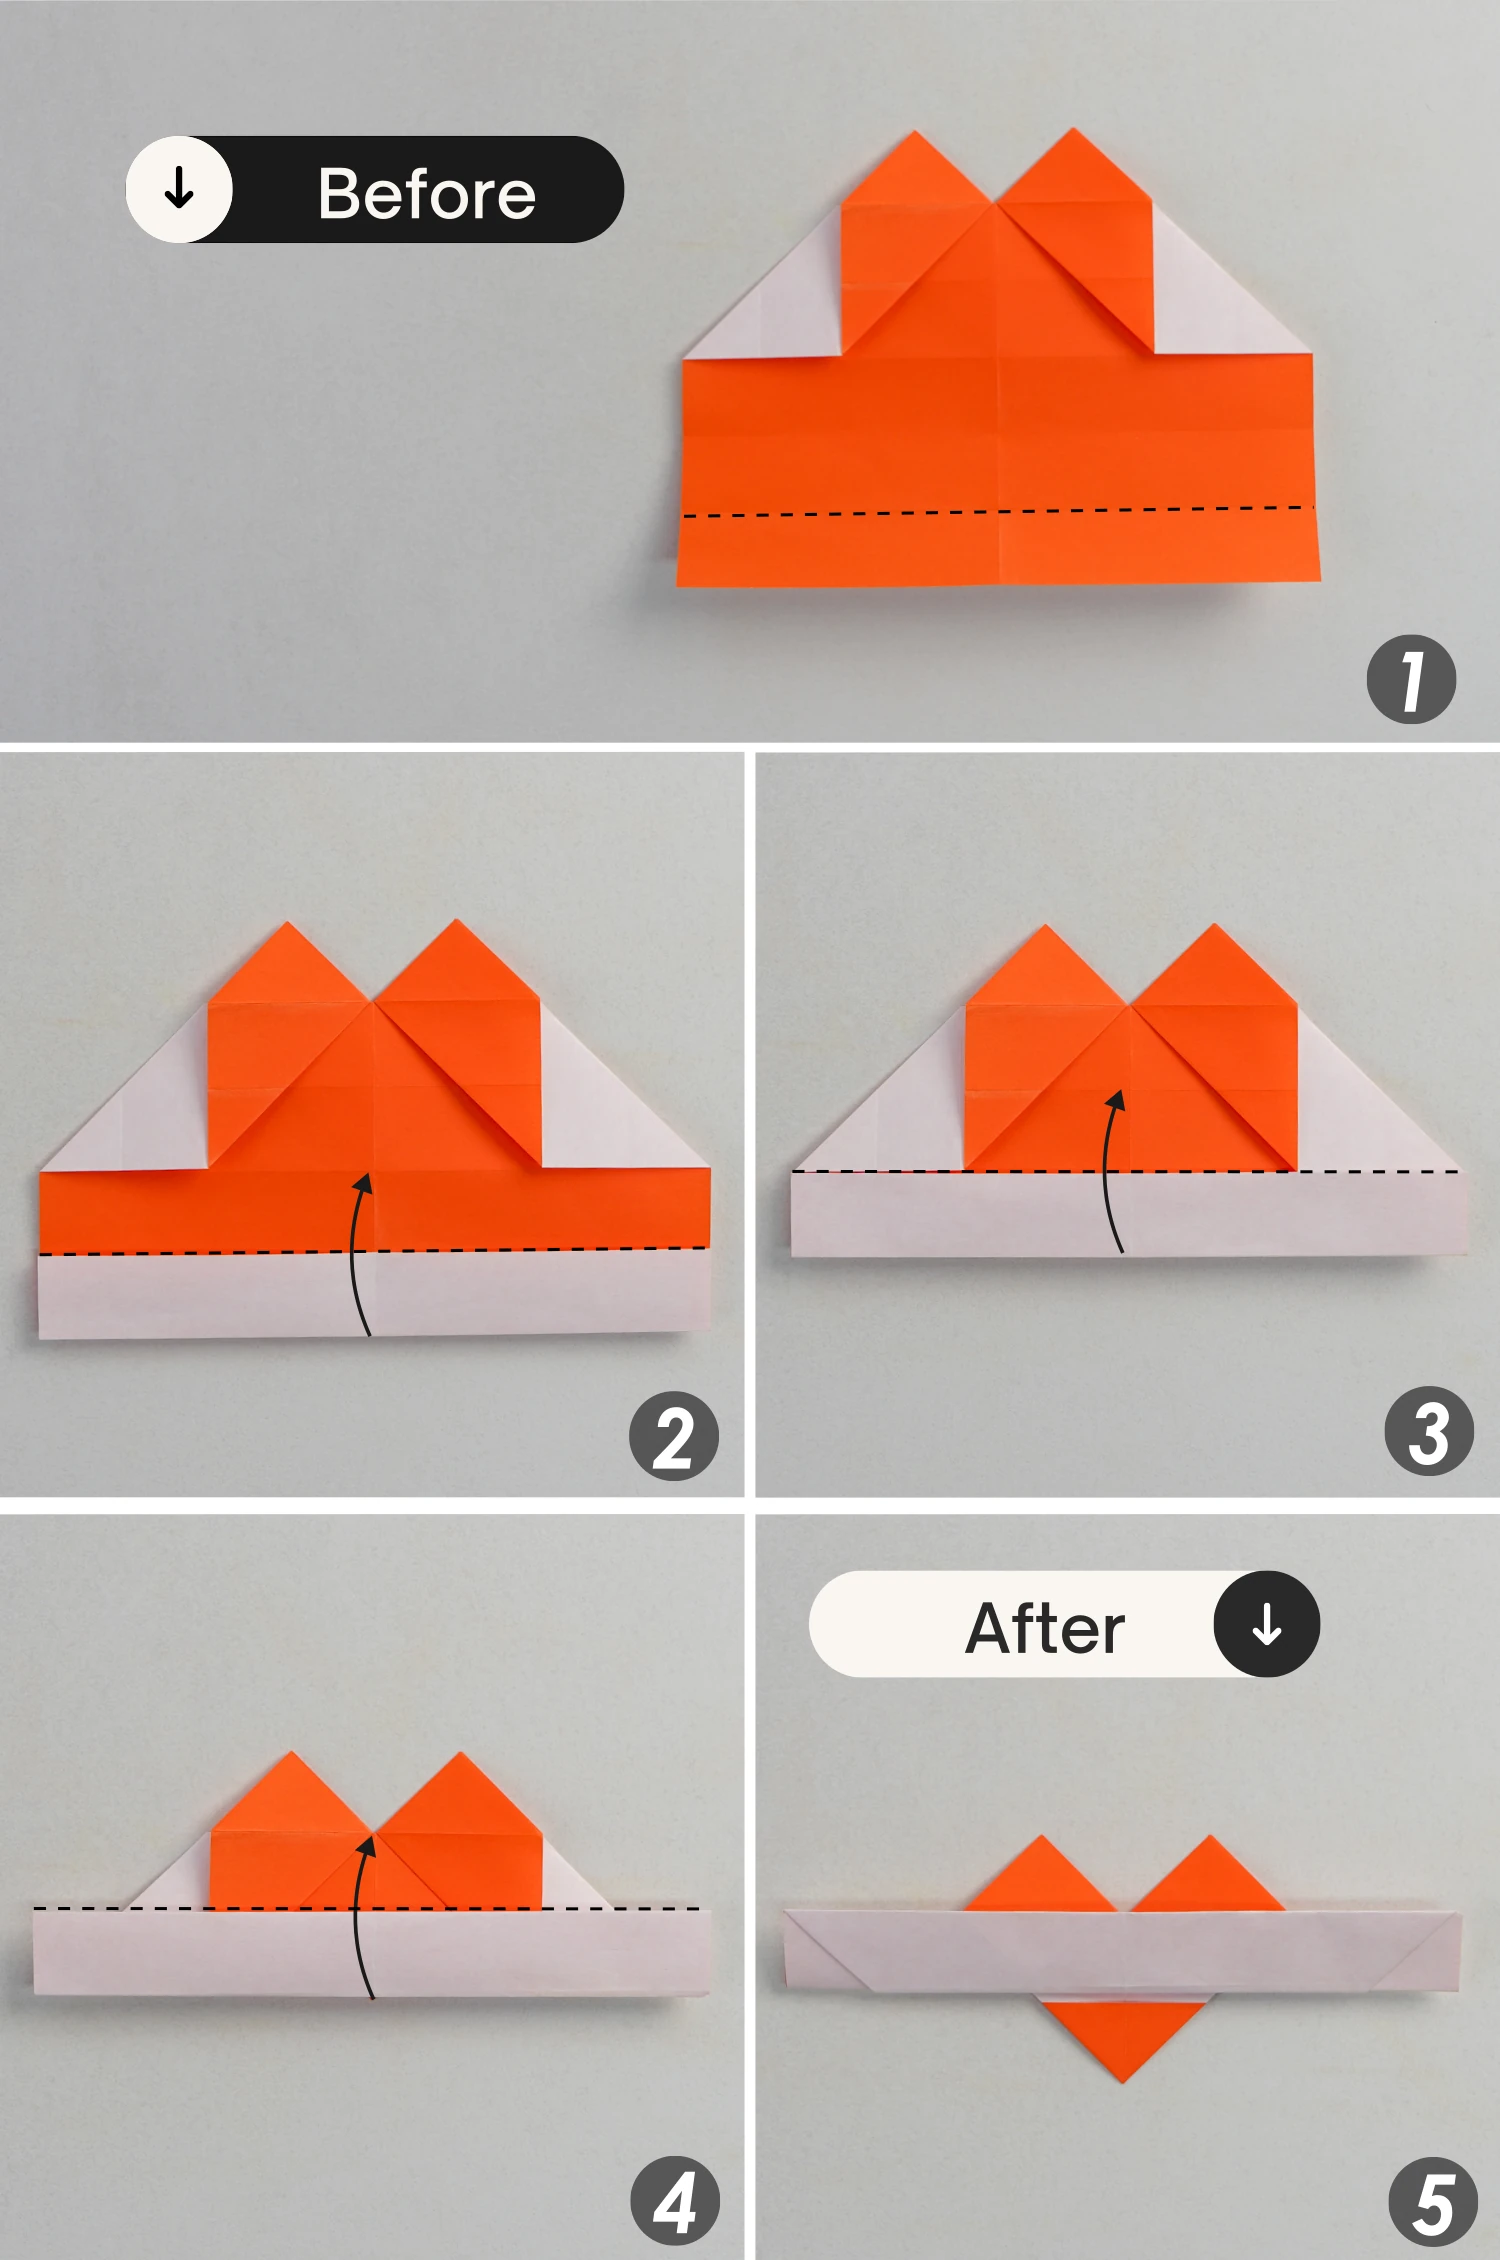
Step 14
Fold the bottom edge up along the existing creases four times, getting the ring band.
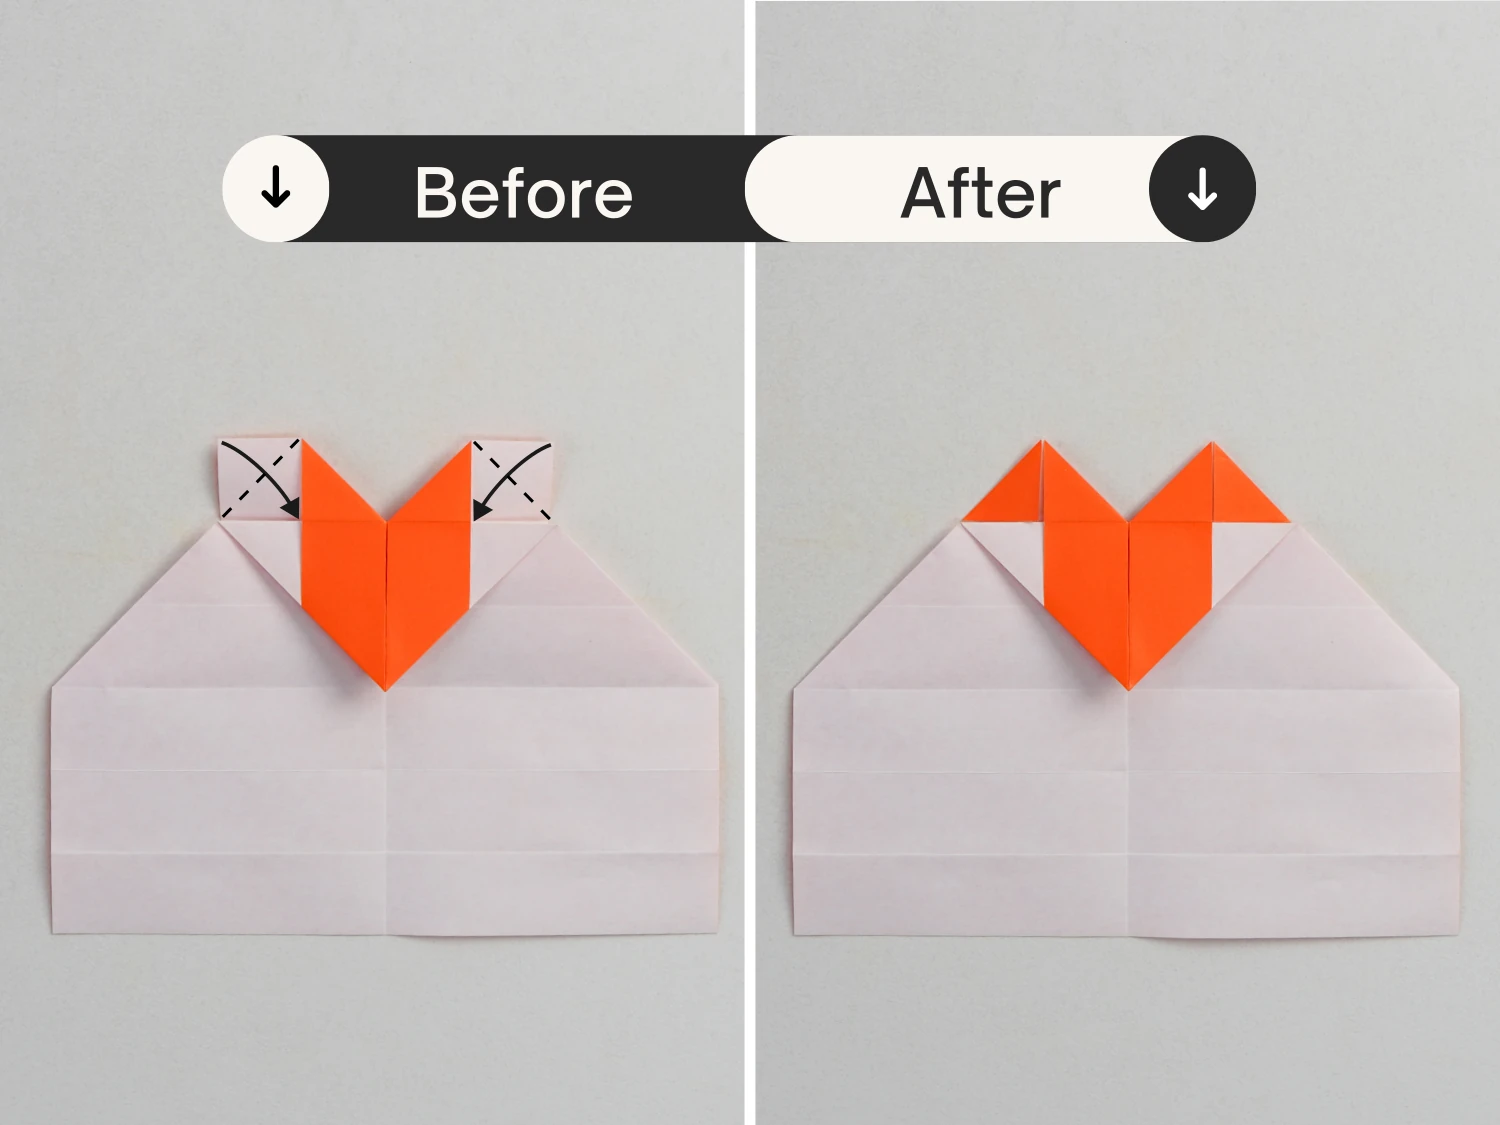
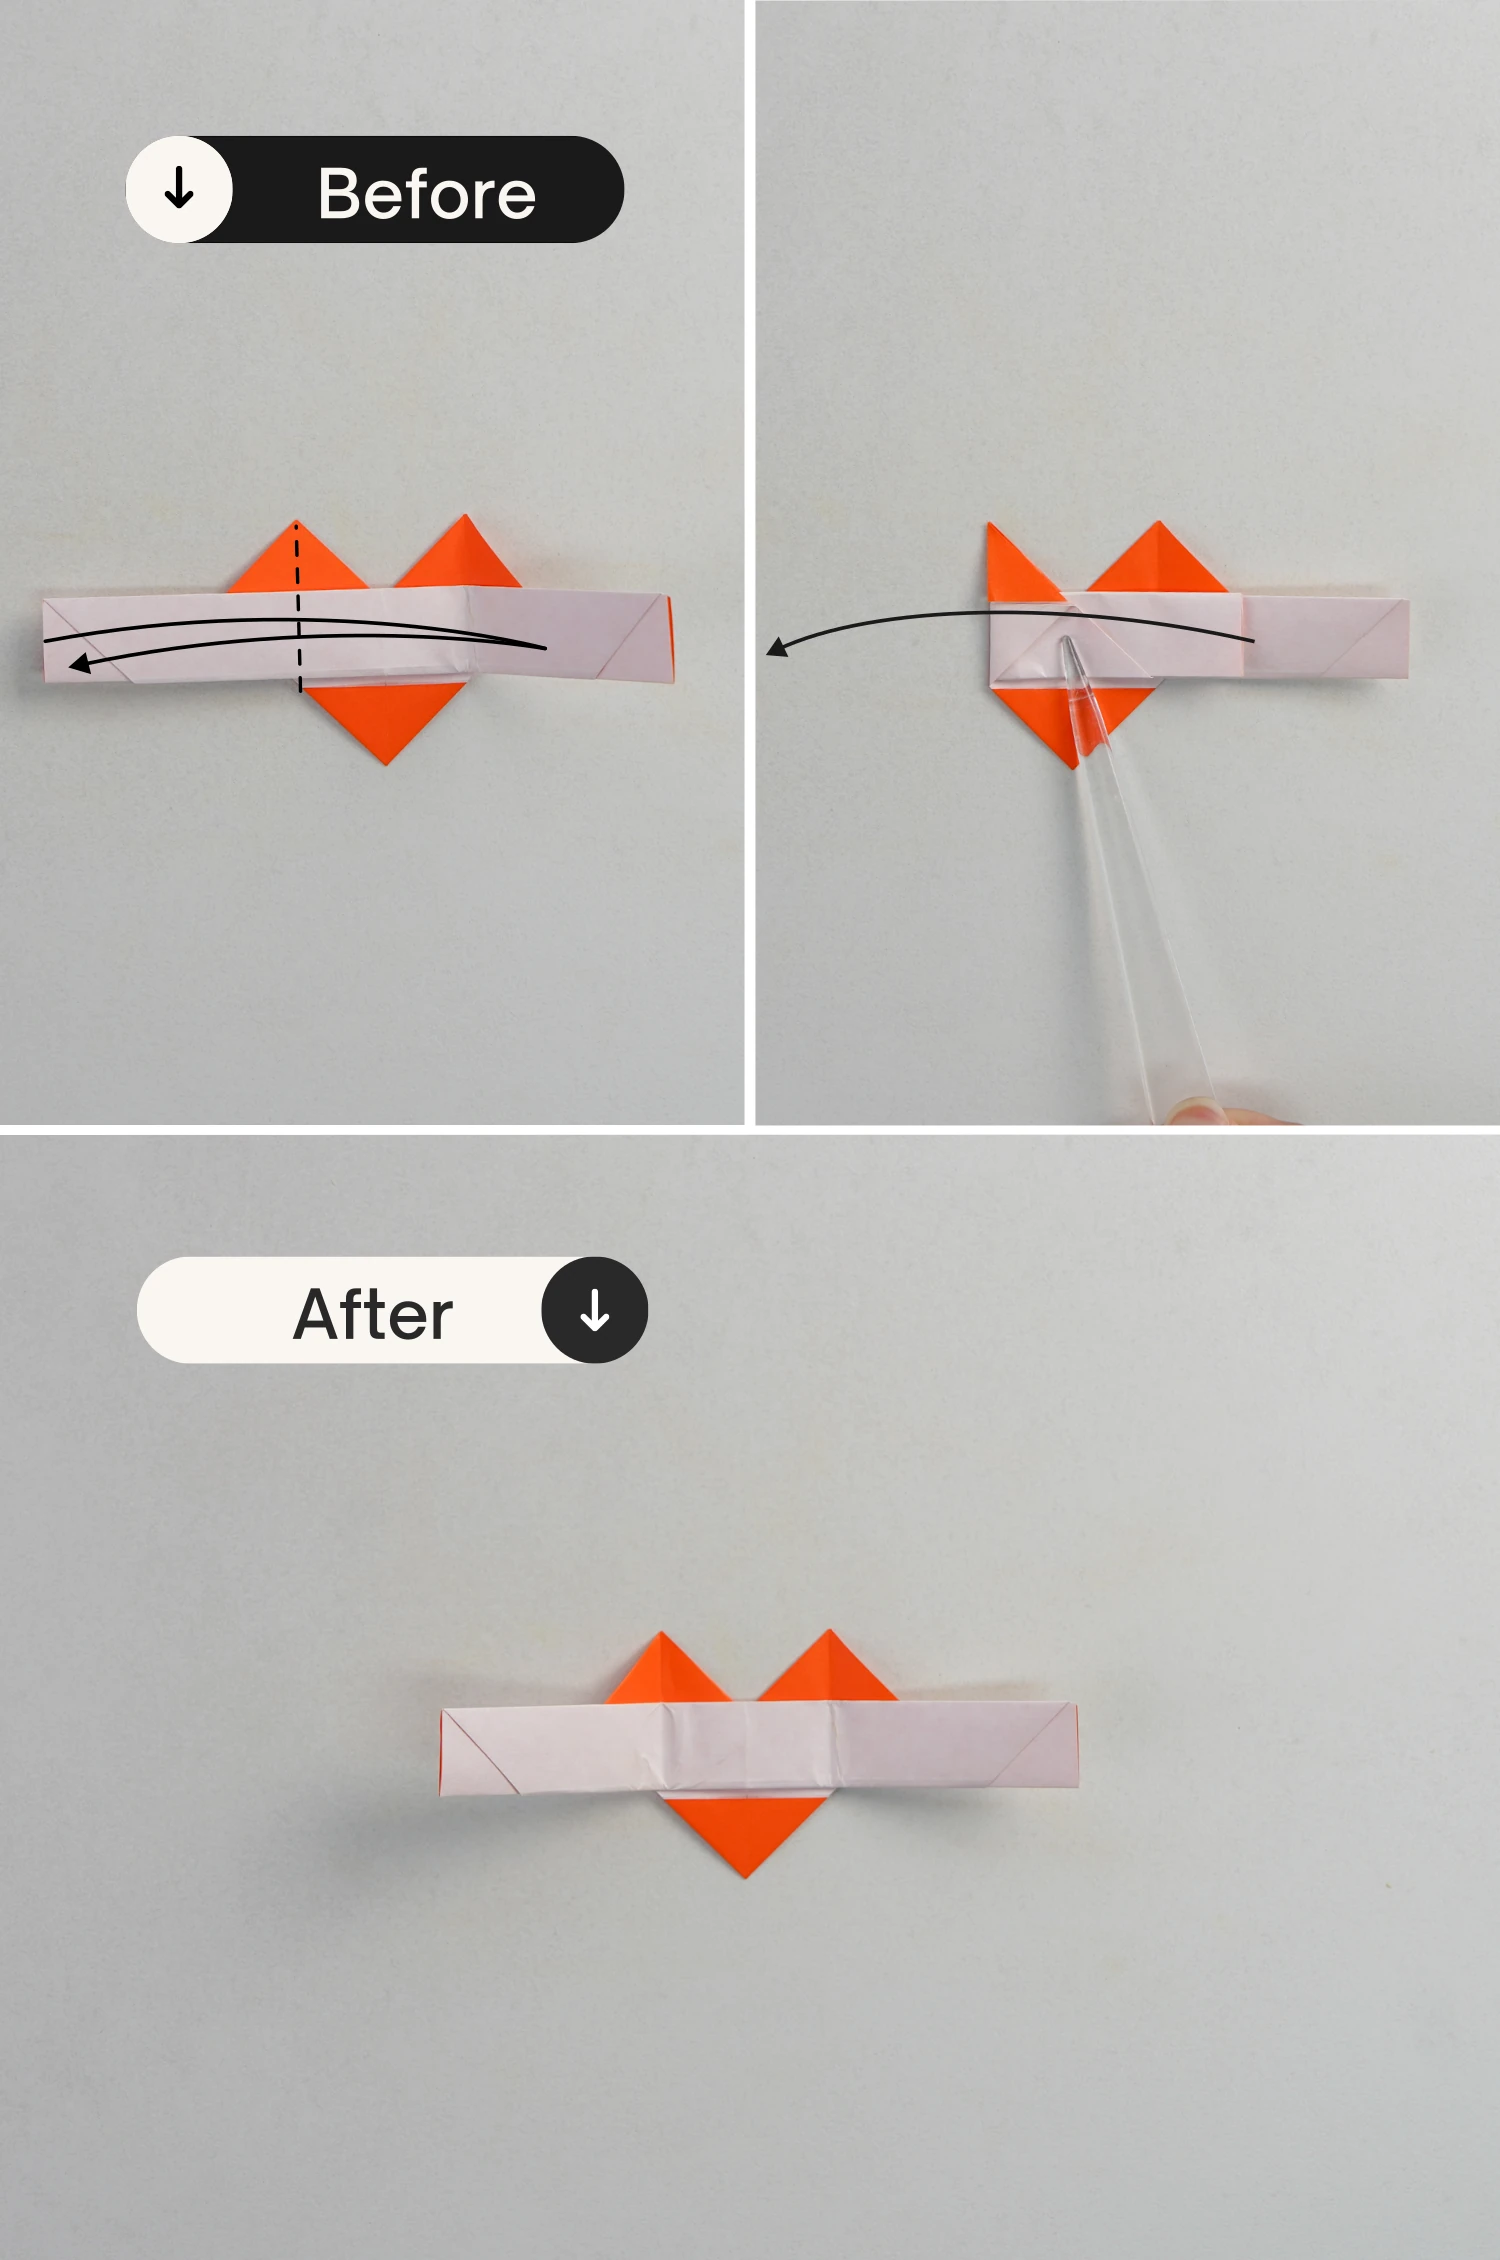
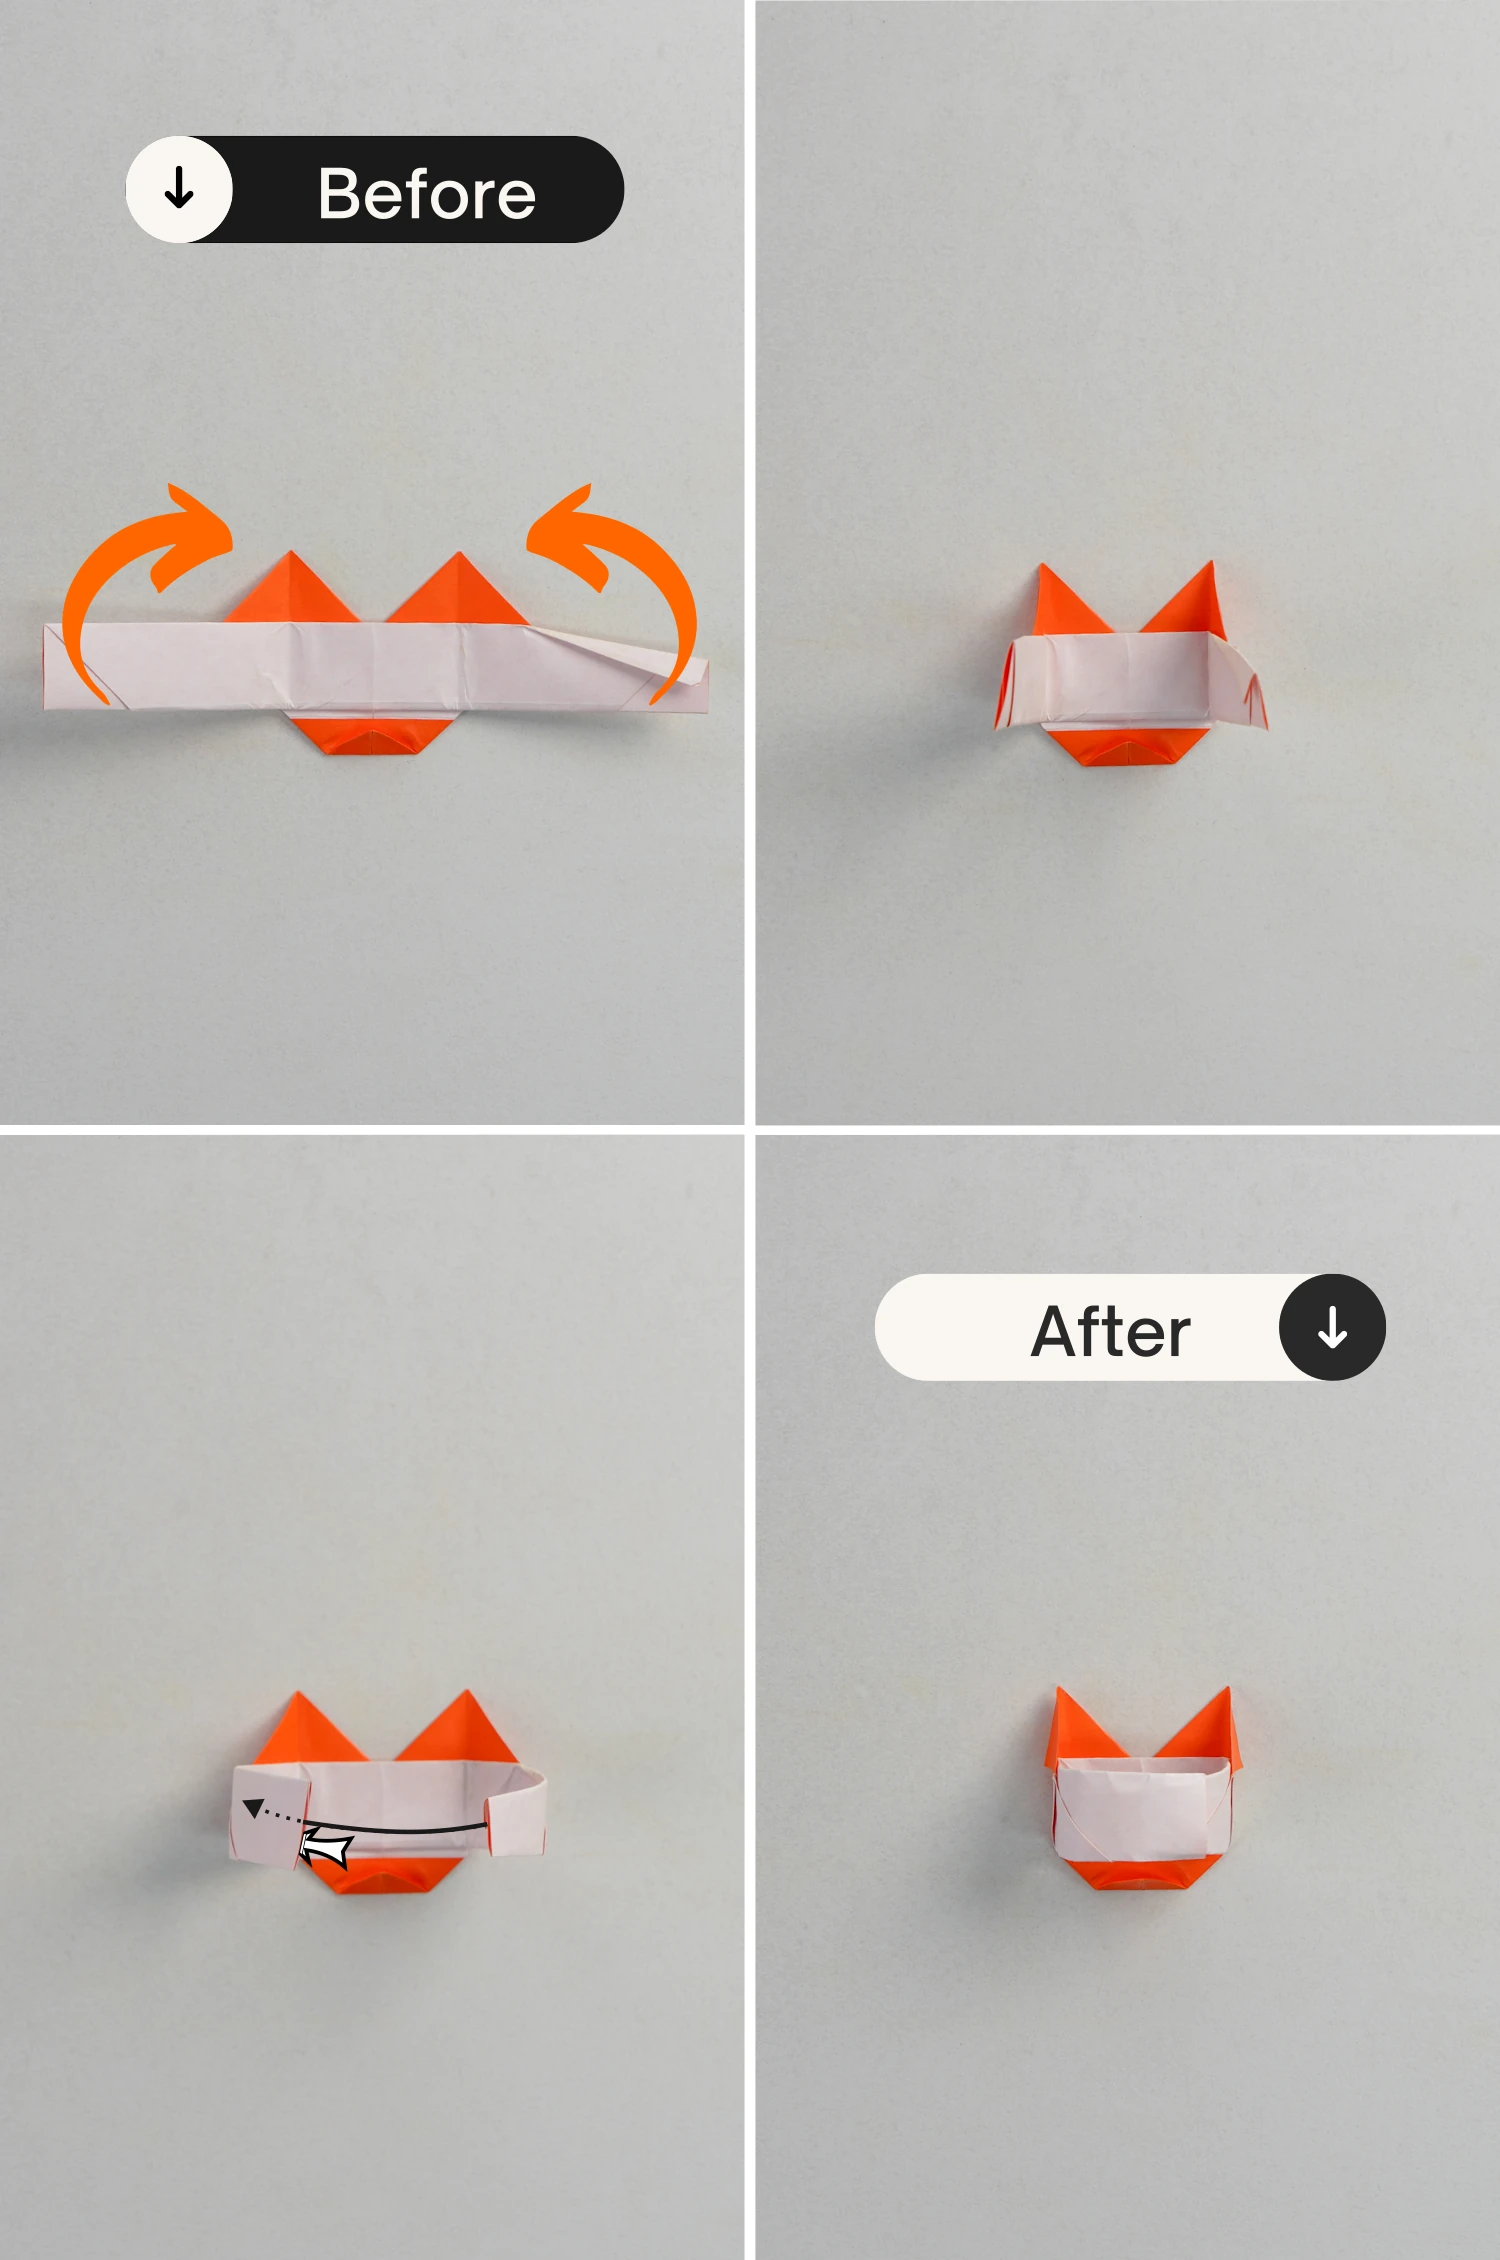
Step 15
Fold the right edge to the left along the line vertically extending from the top right corner to the bottom, crease it well then unfold.

Step 16
Repeat this for the left edge, fold it to the right along the line vertically extending from the top left corner to the bottom.
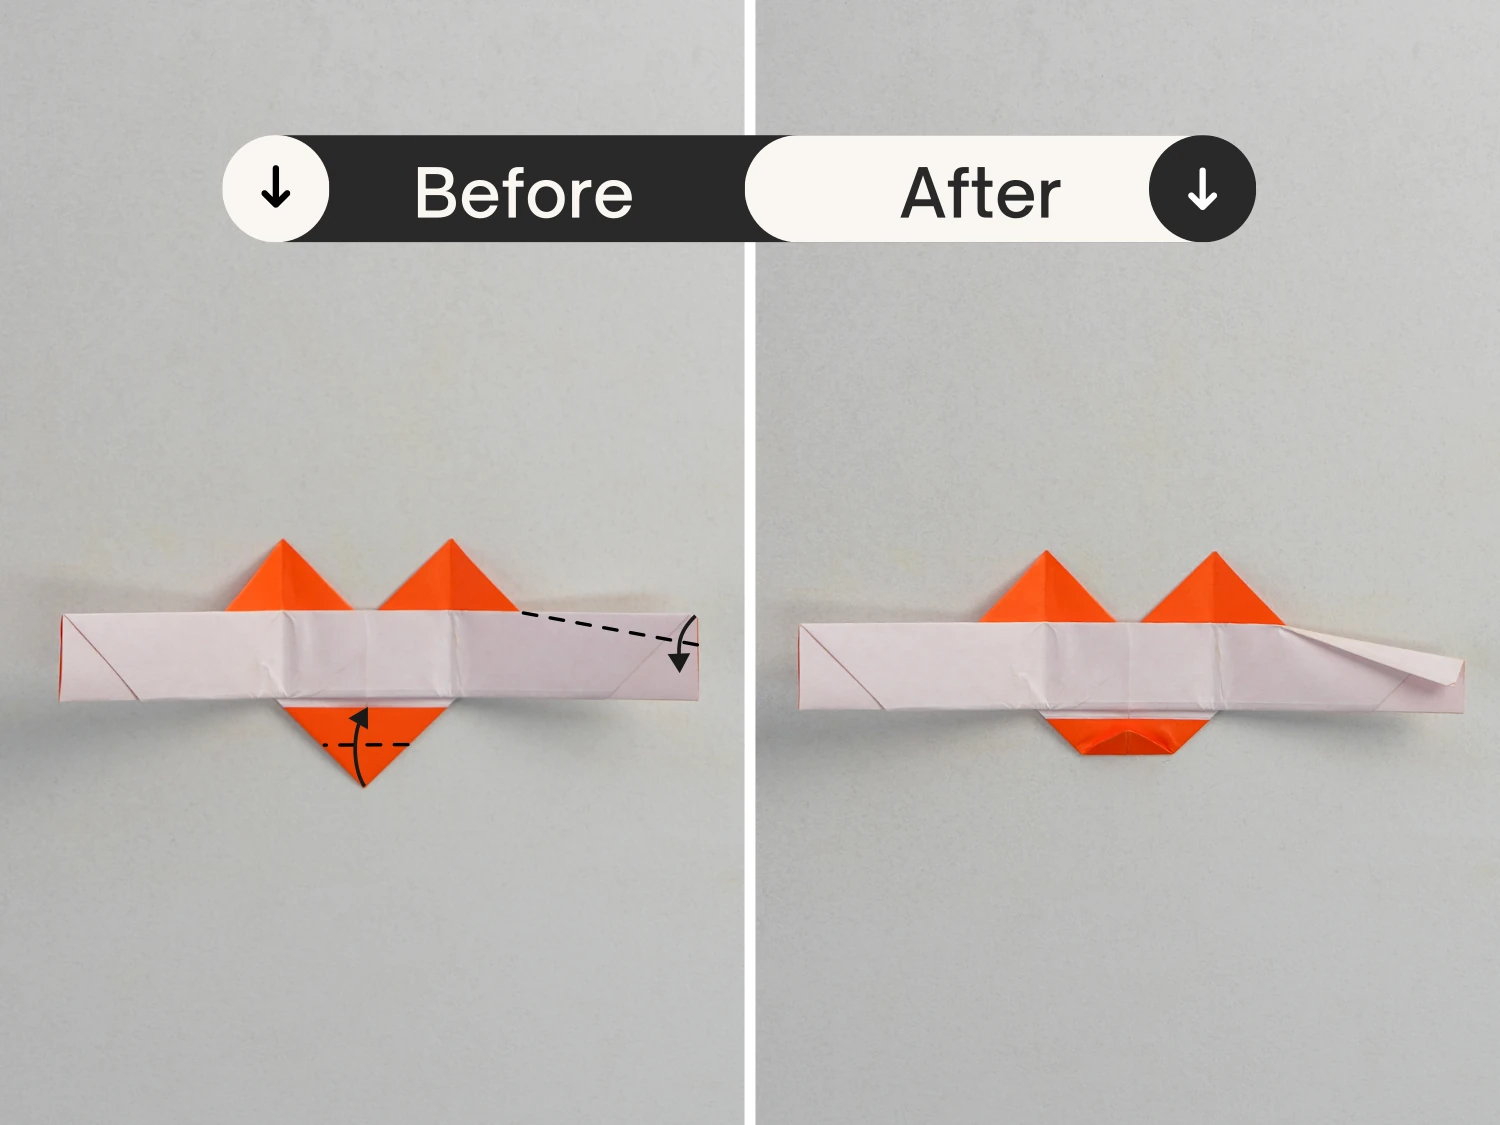
Step 17
Fold the top edge of the right ring band down a little to sharpen the ring band on this side for easy insertion in the final step.
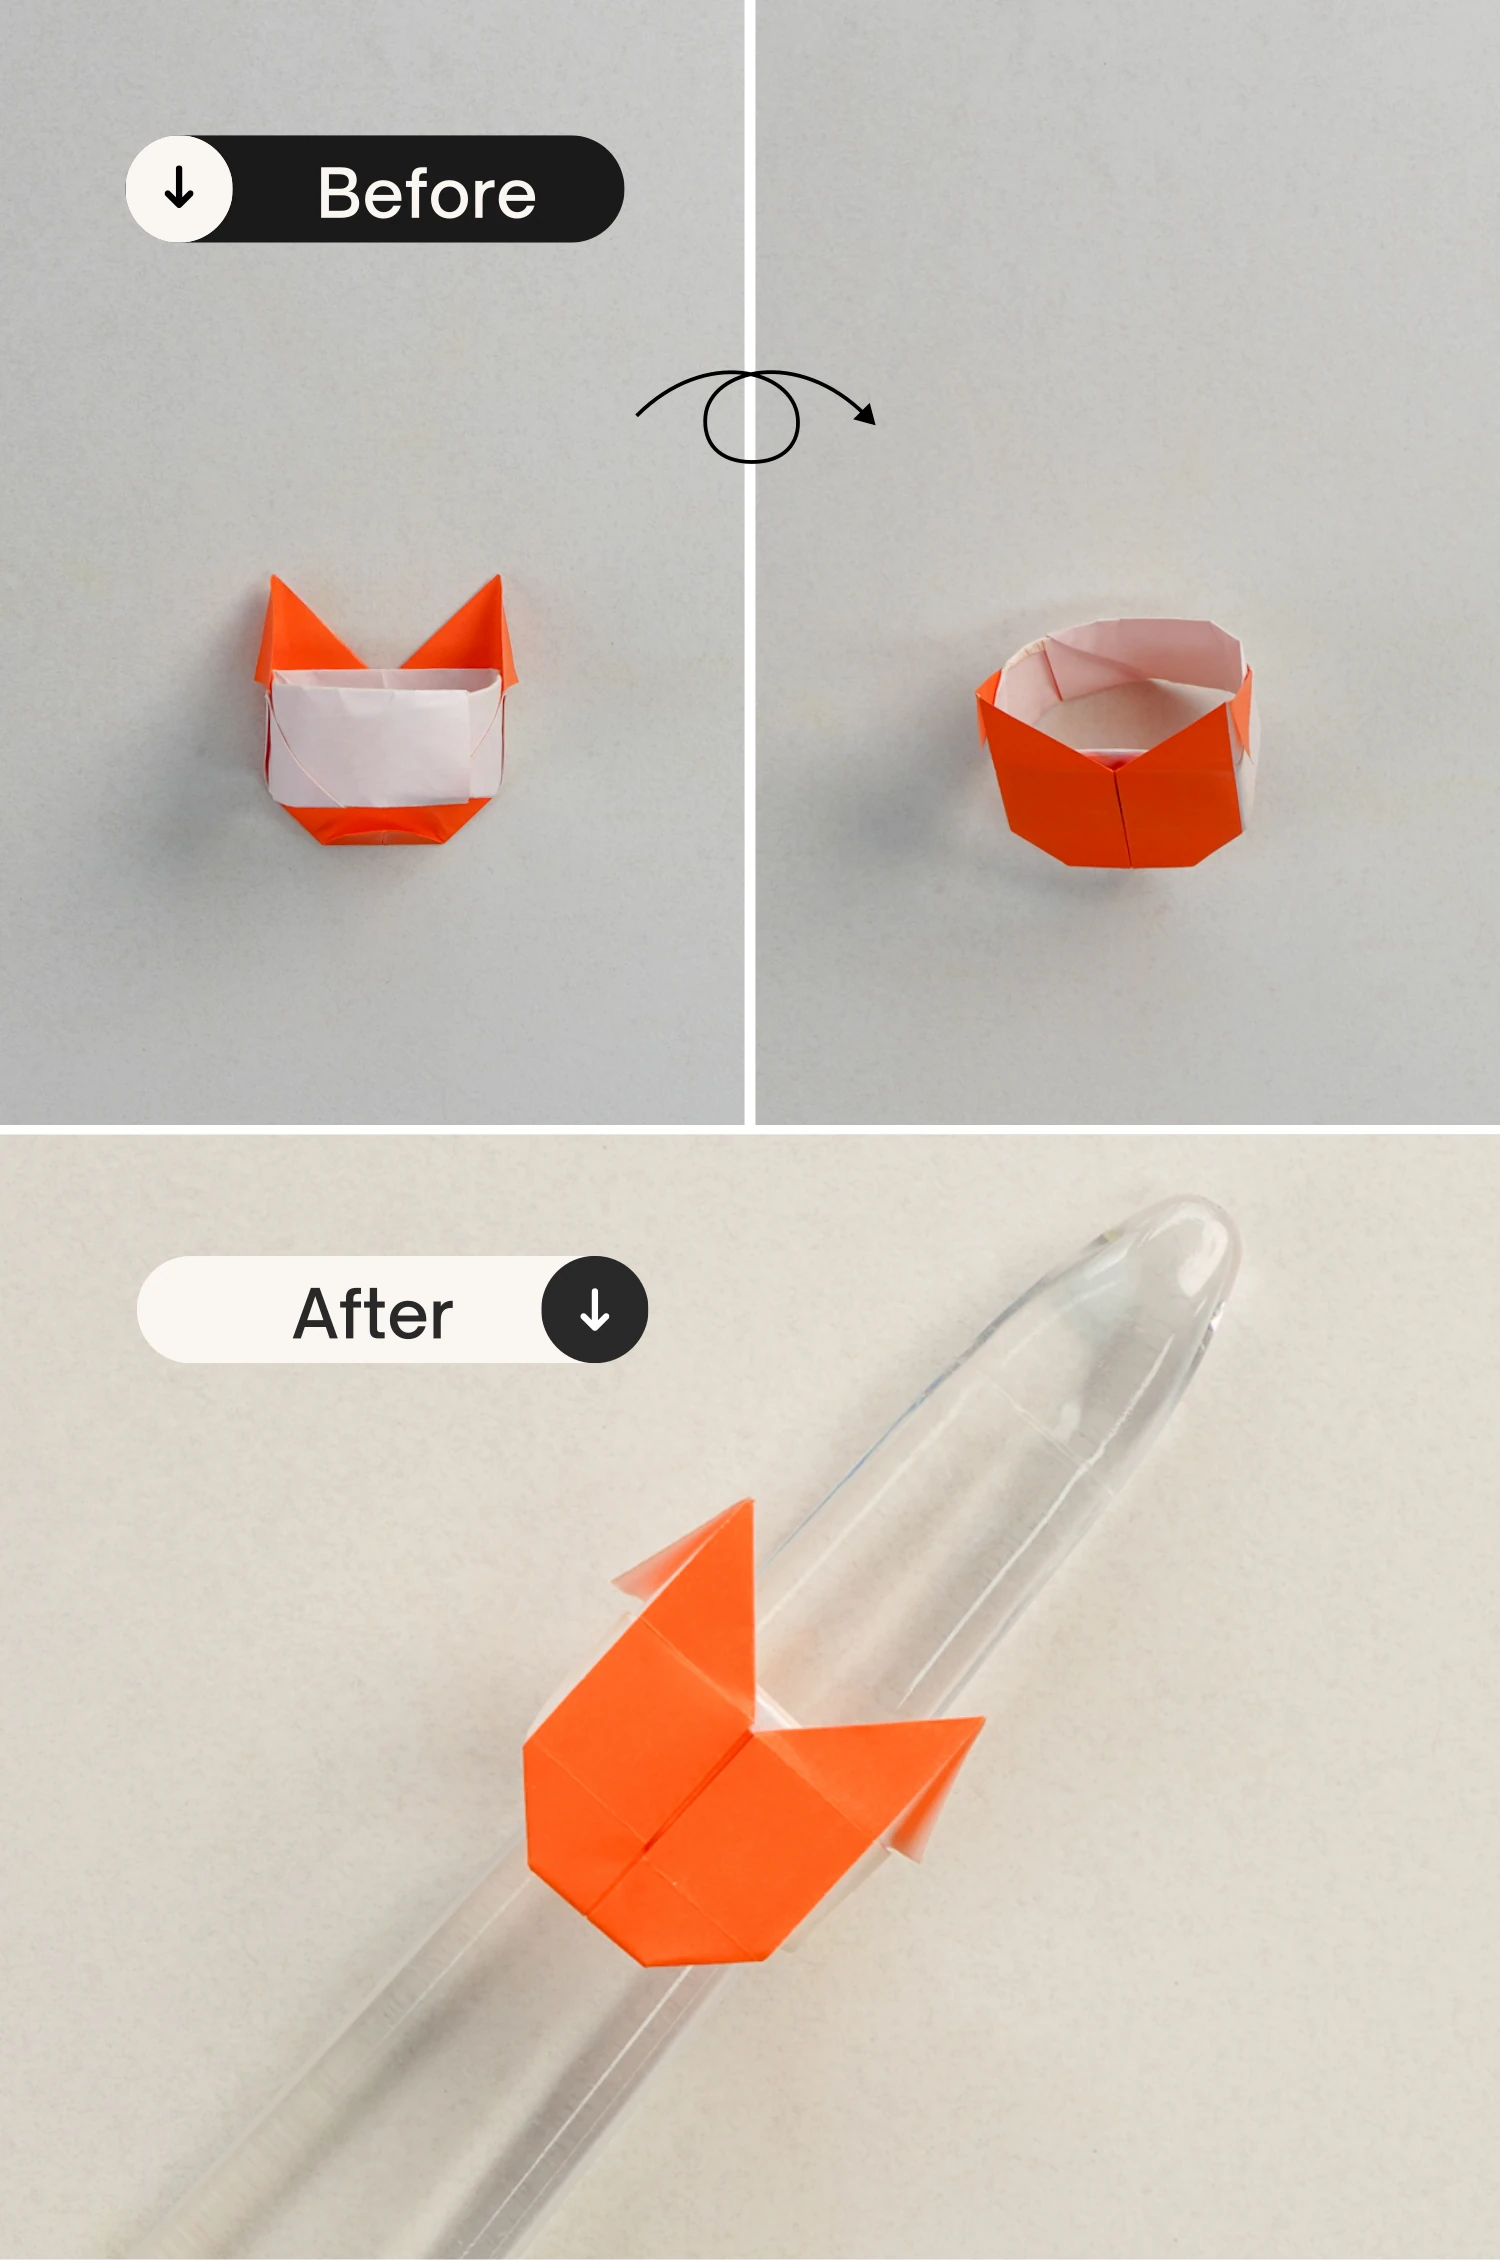
Step 18
Bring up the ring bands on each side, and insert the right band into the opening of the left end. You can customize the size by yourself.
Step 19
Flip it over, this is the final shape of a cat ring.
What’s Next
Now you fold this super cute cat ring successfully, next, check our other easy origami ideas, enjoy folding!
Other easy origami ideas