Super easy origami lightning, it only takes 7 steps to finish, and you can use it as a book marker. If you use a piece of harder paper to make it, try to throw it out and compete with your friends to see whose lightning can fly farther.

We provide step-by-step diagram instructions and beginner-friendly videos. Check both for quicker learning.
If you are new to origami, start here from our beginner guide to know the basics and how to read the step-by-step instructions.
- Folding time: 5 minutes
- Paper: 15×15 cm
- Difficulty: Easy, Beginner friendly
Material
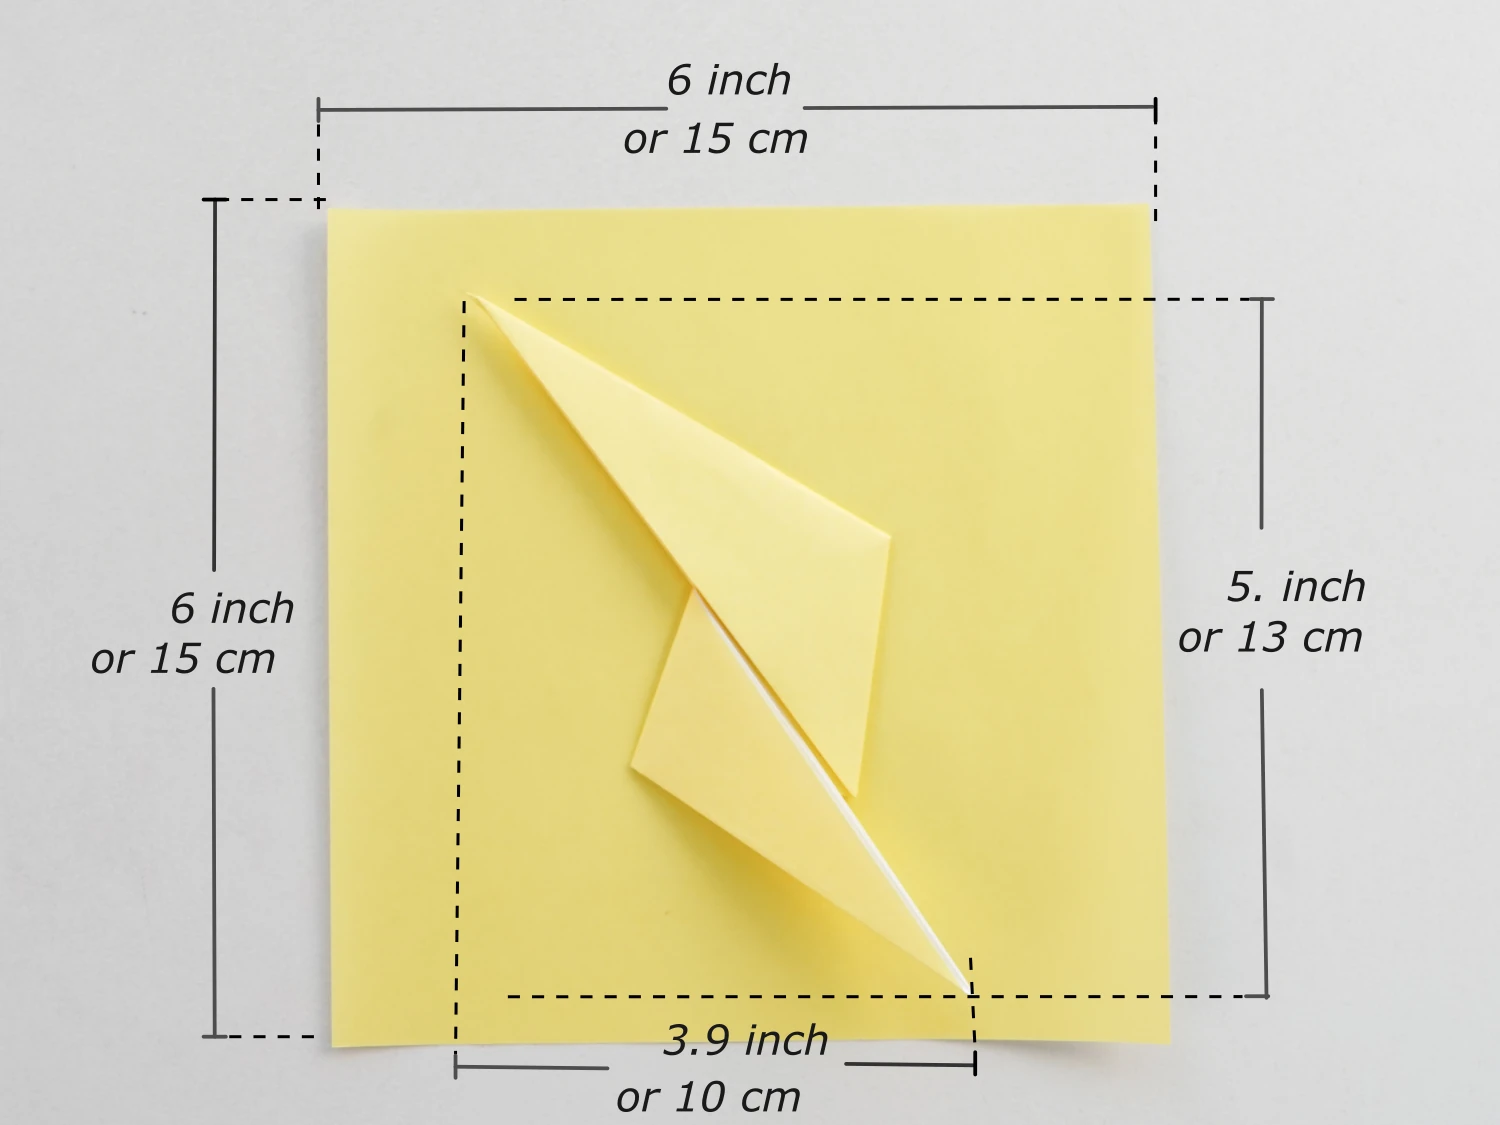
Get a 15*15 cm origami paper, with different colors on each side, and you will get a 13*10 cm lightning. Other sizes of square paper will be also available.
Easy Origami Lightning Video
Step by Step Instructions
Step 1
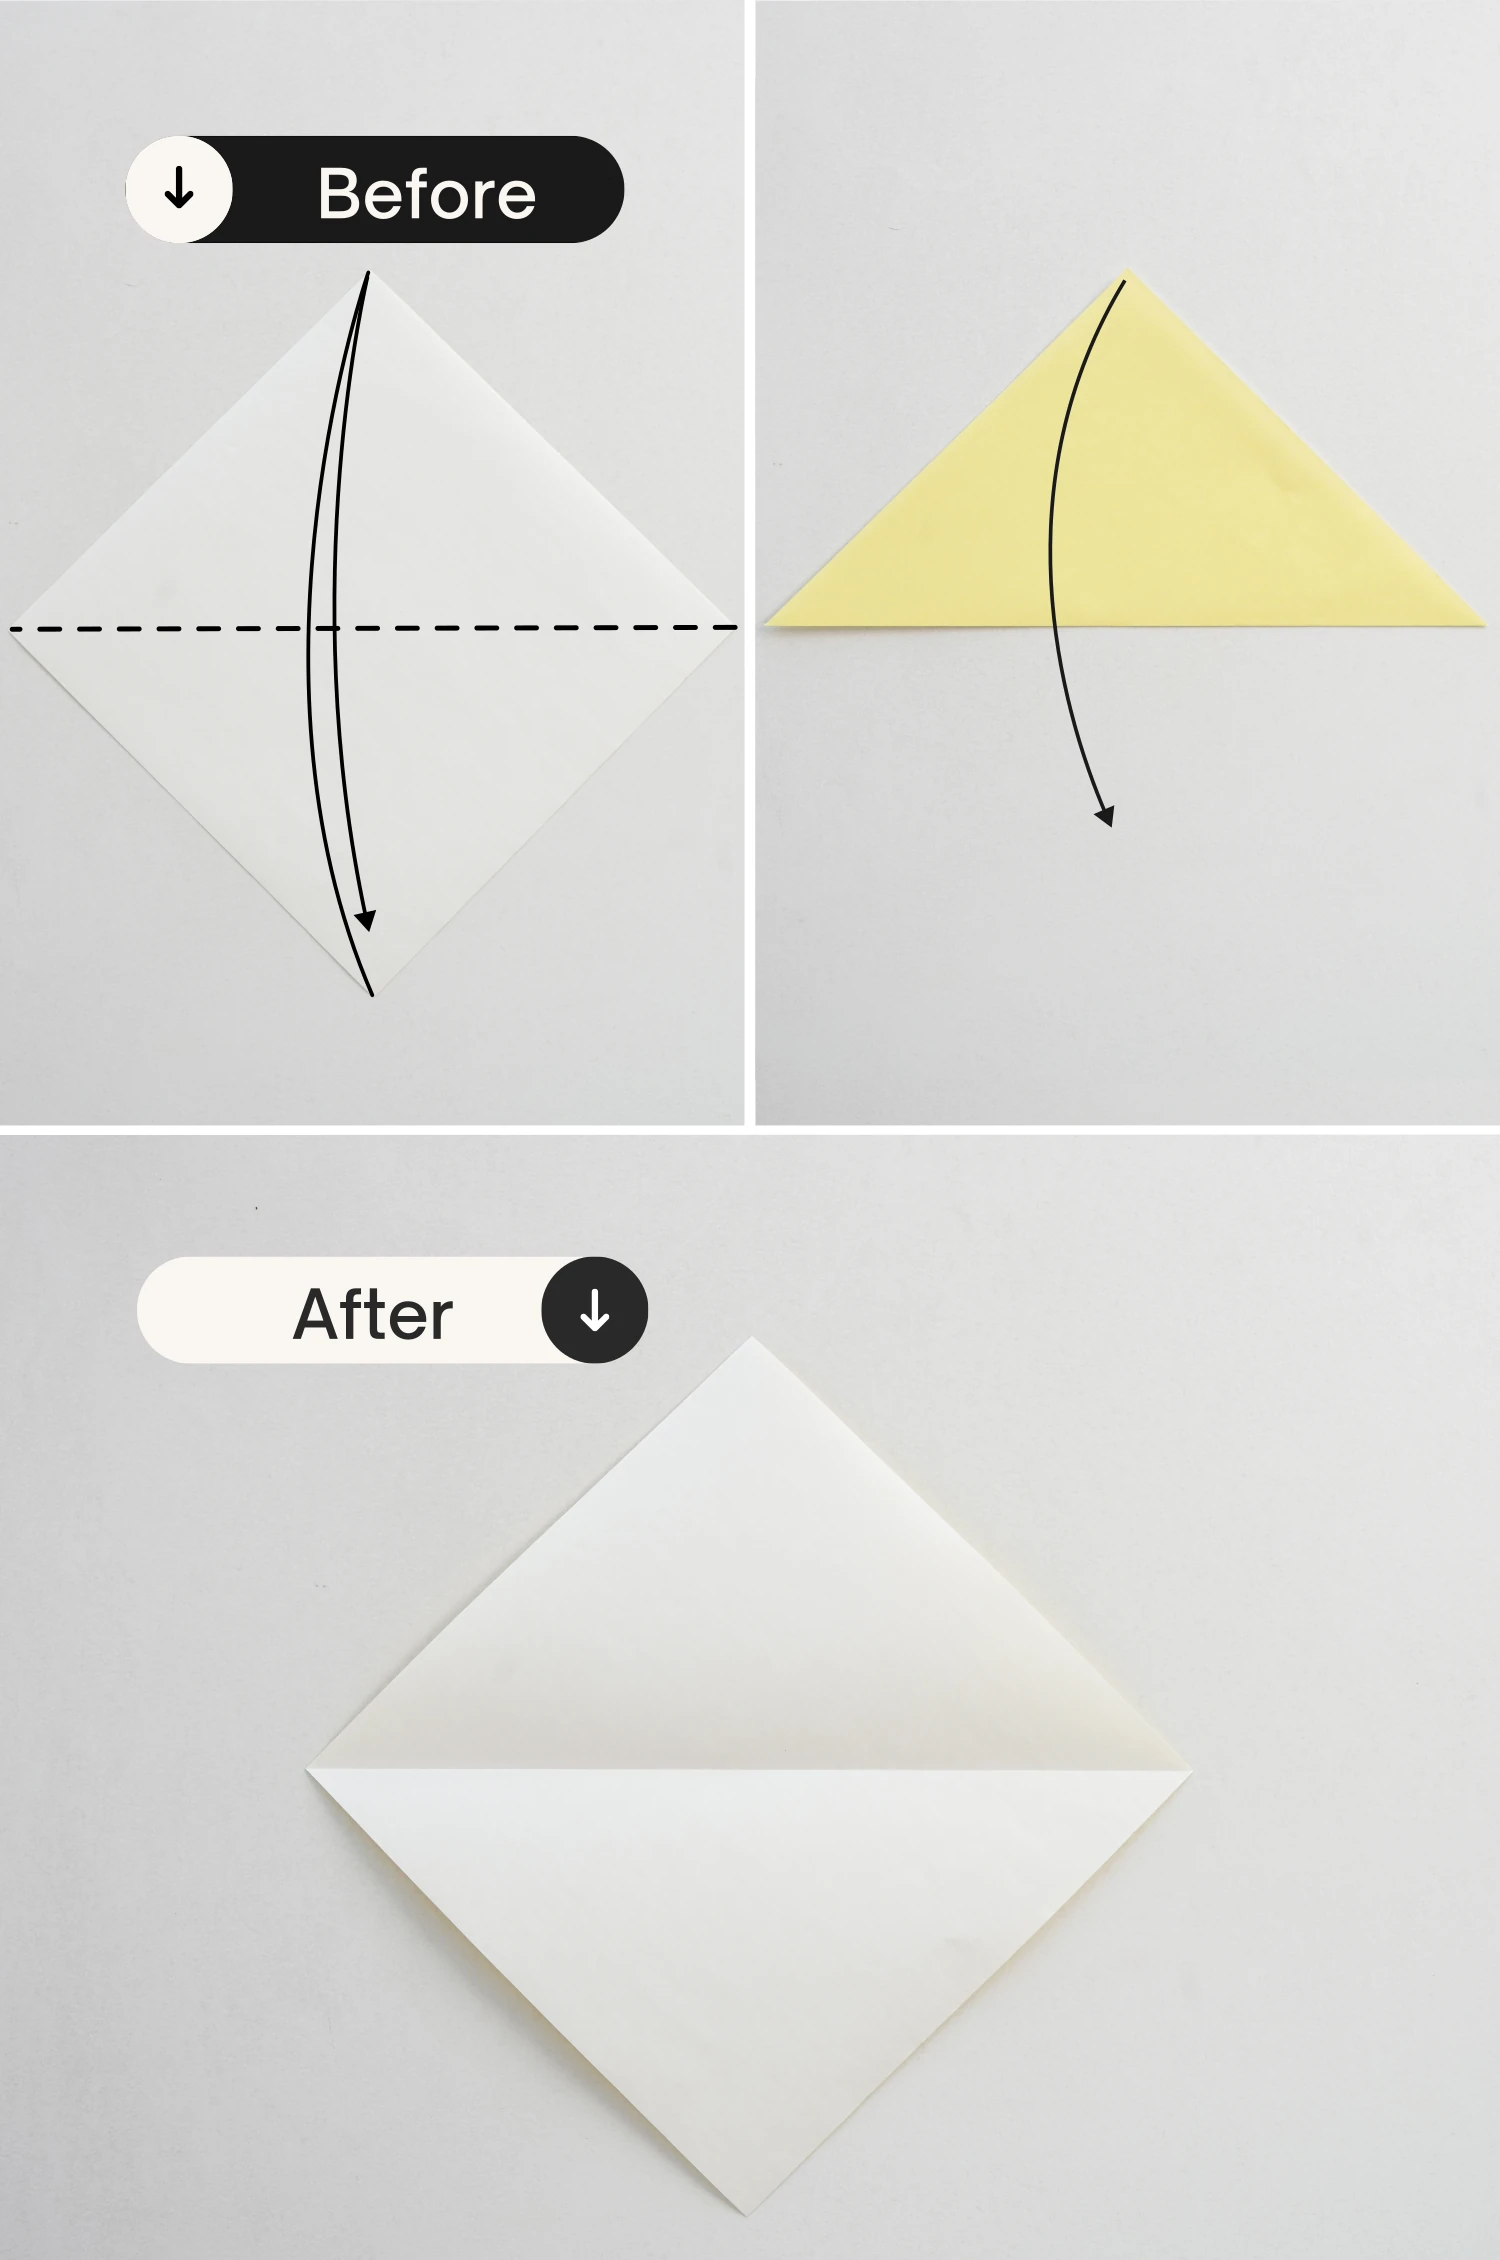
Start with the white side of the paper facing up, and fold it in half diagonally, crease it well then unfold.
Step 2
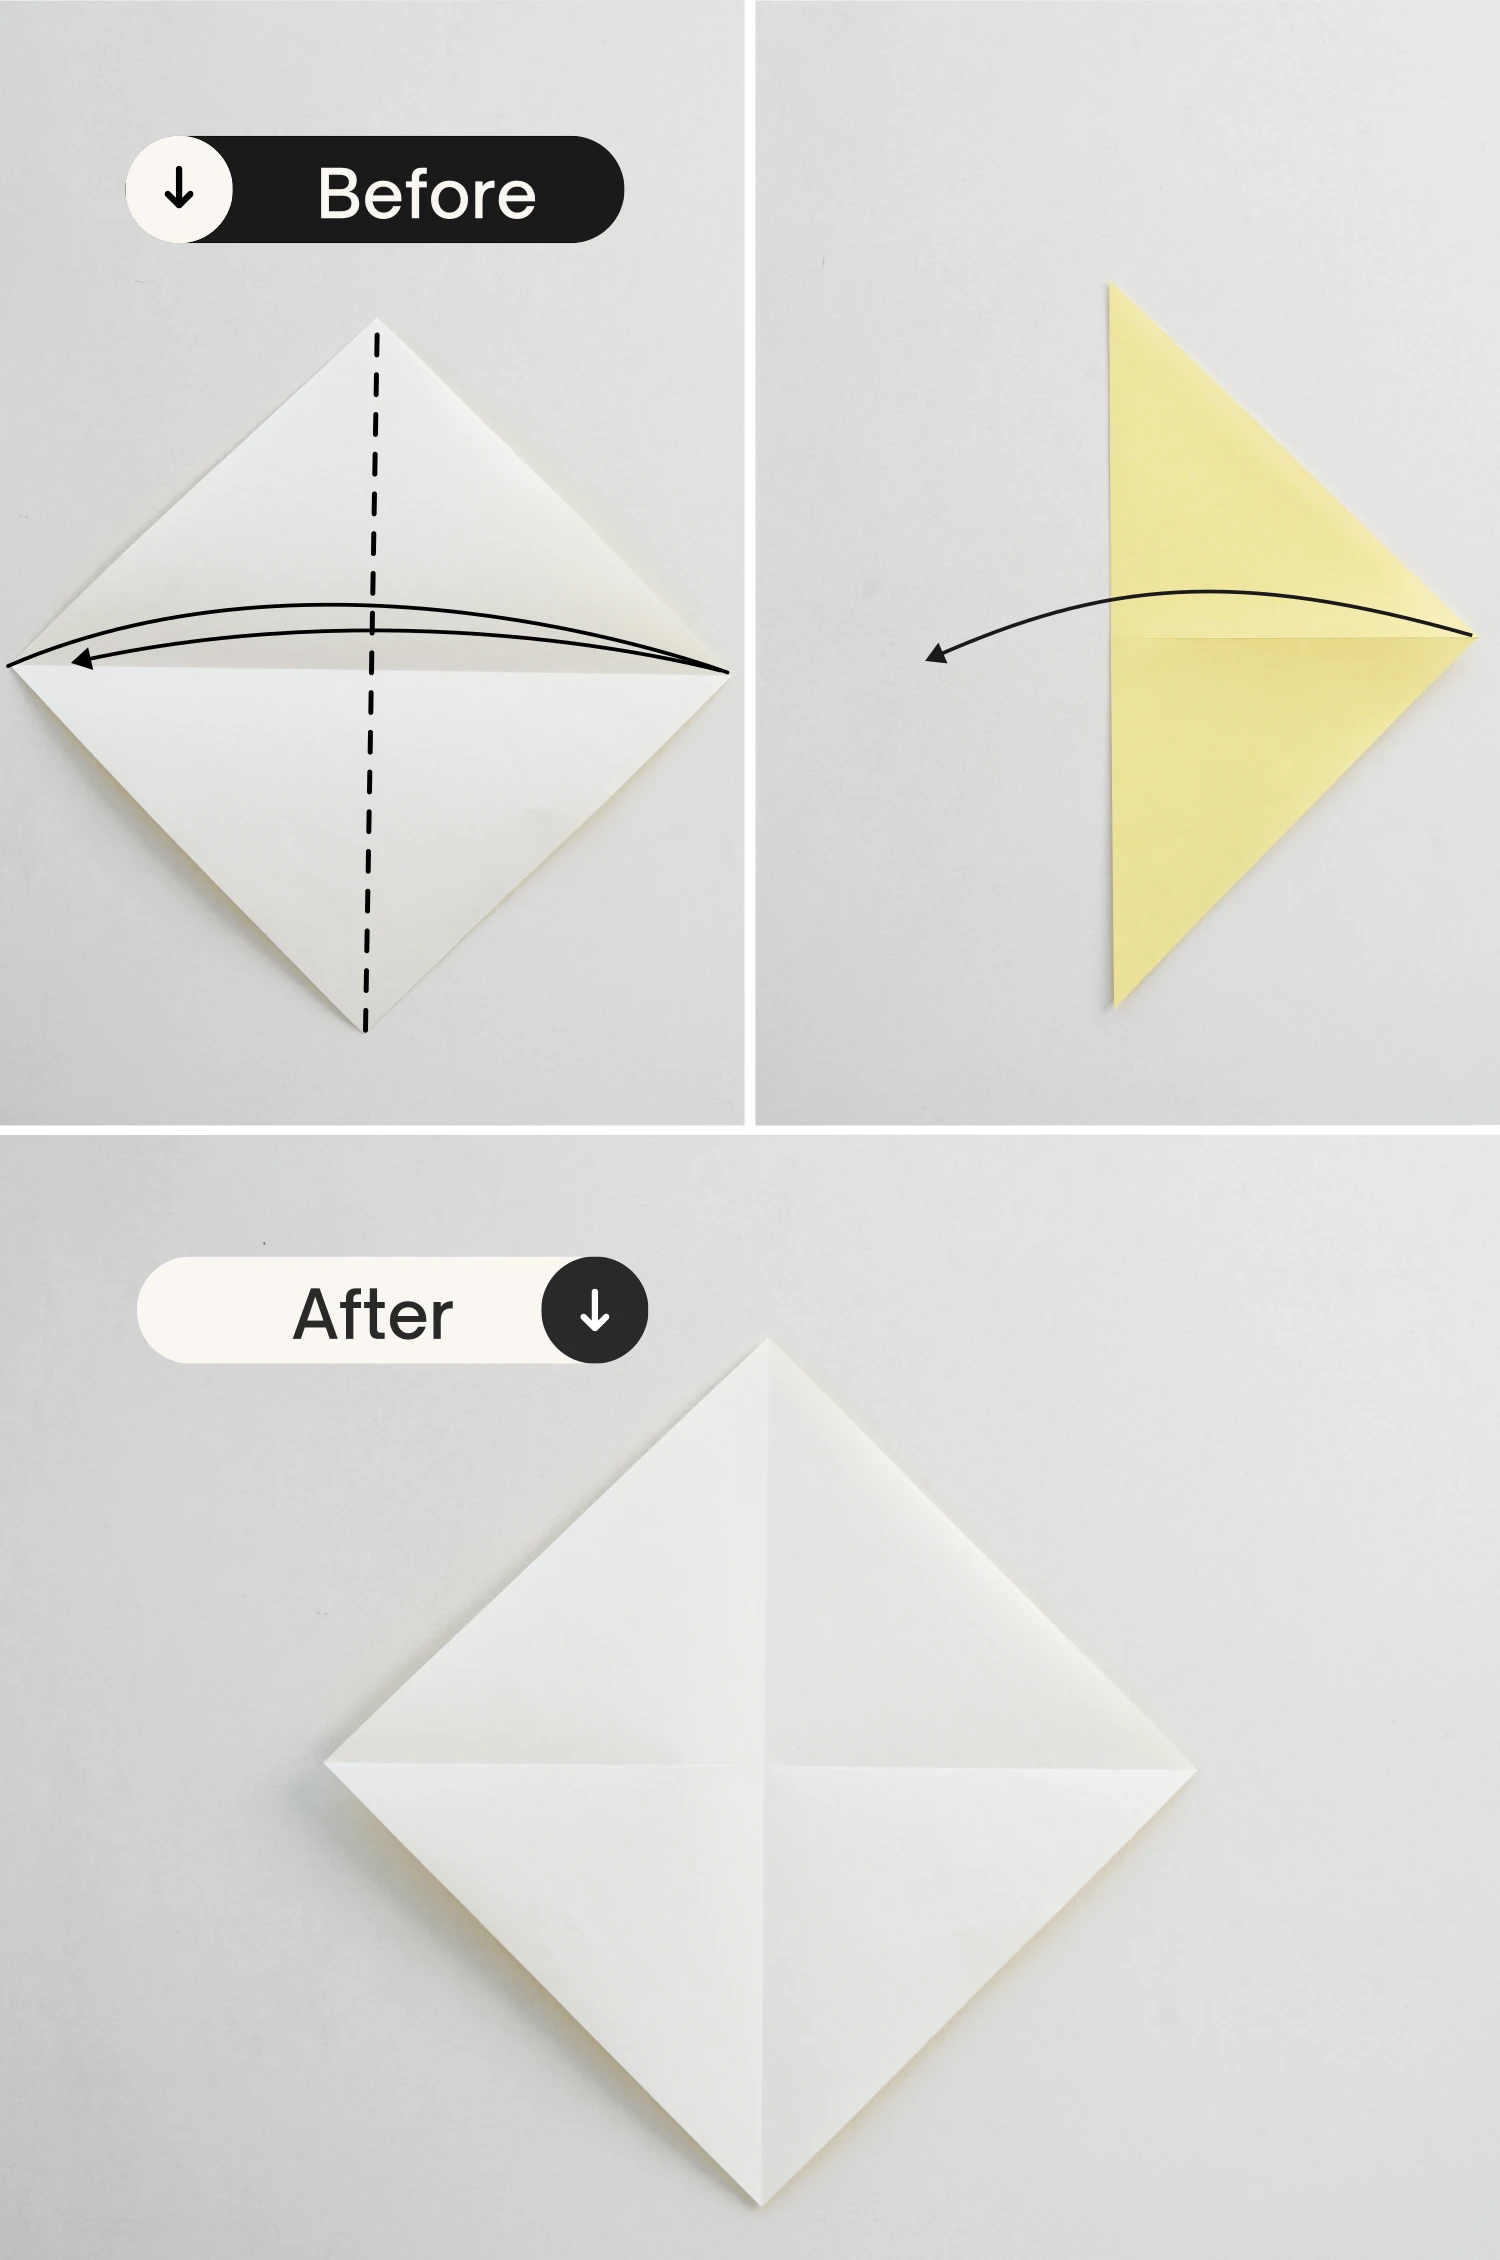
Fold it in half diagonally from right to left, crease it well then unfold it.
Step 3
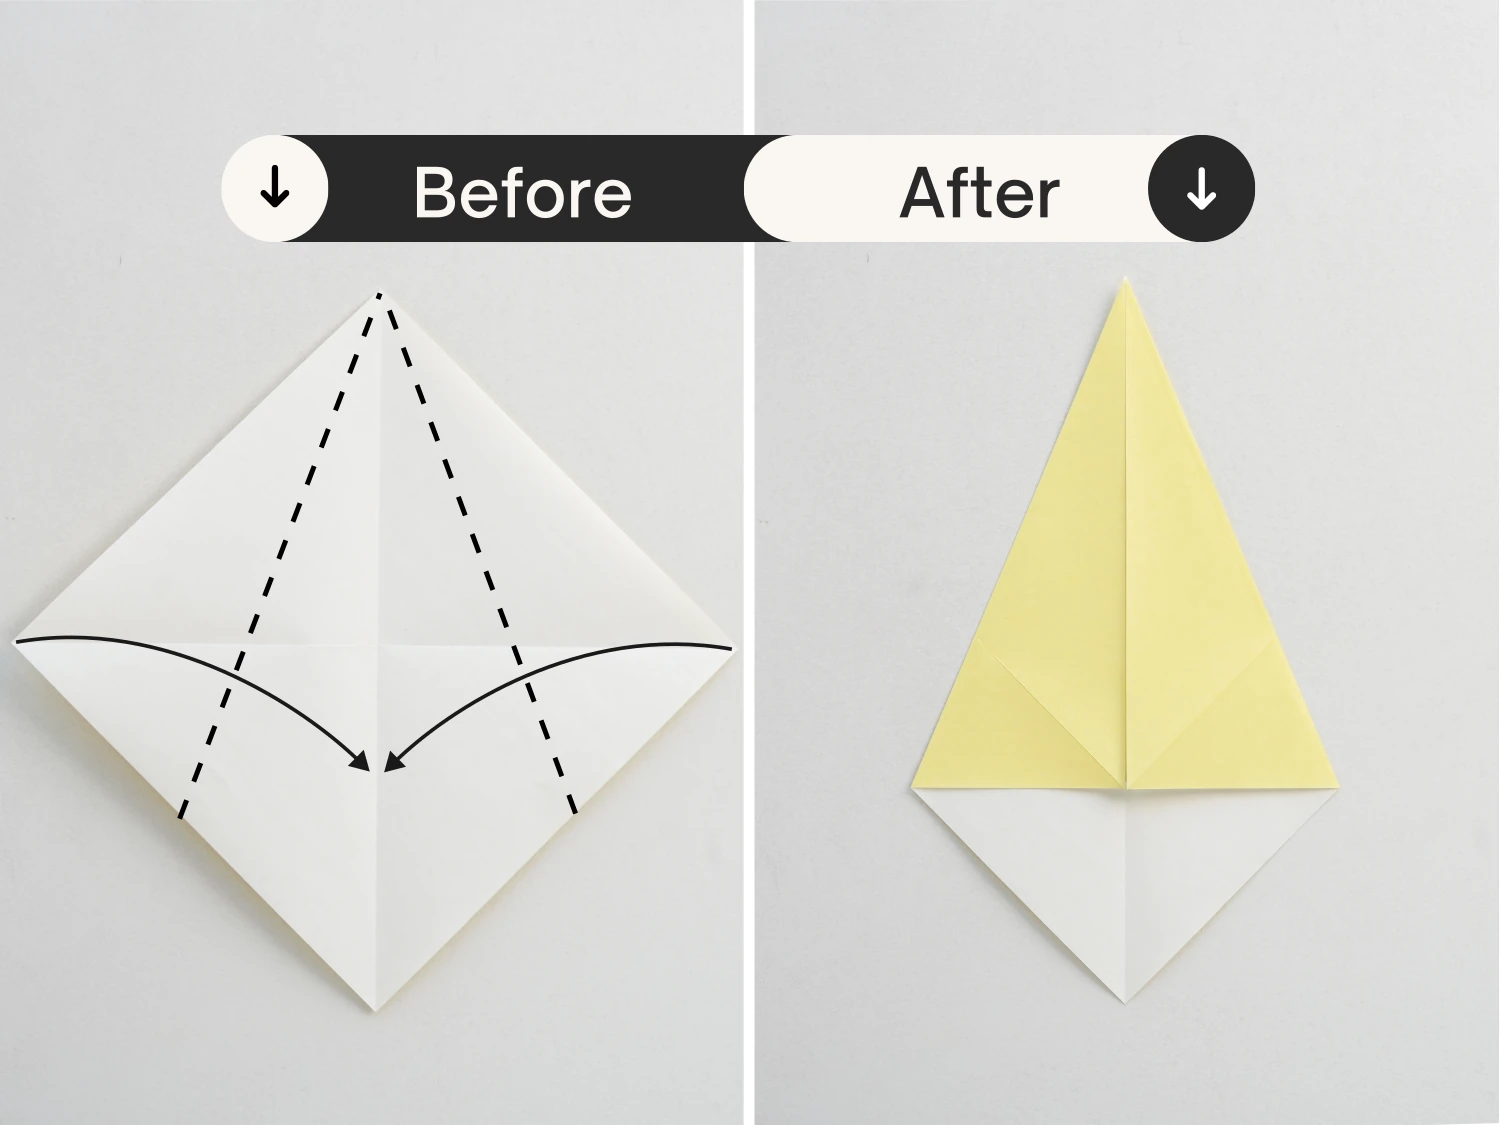
Fold the top left and right edges to meet the middle vertical crease.
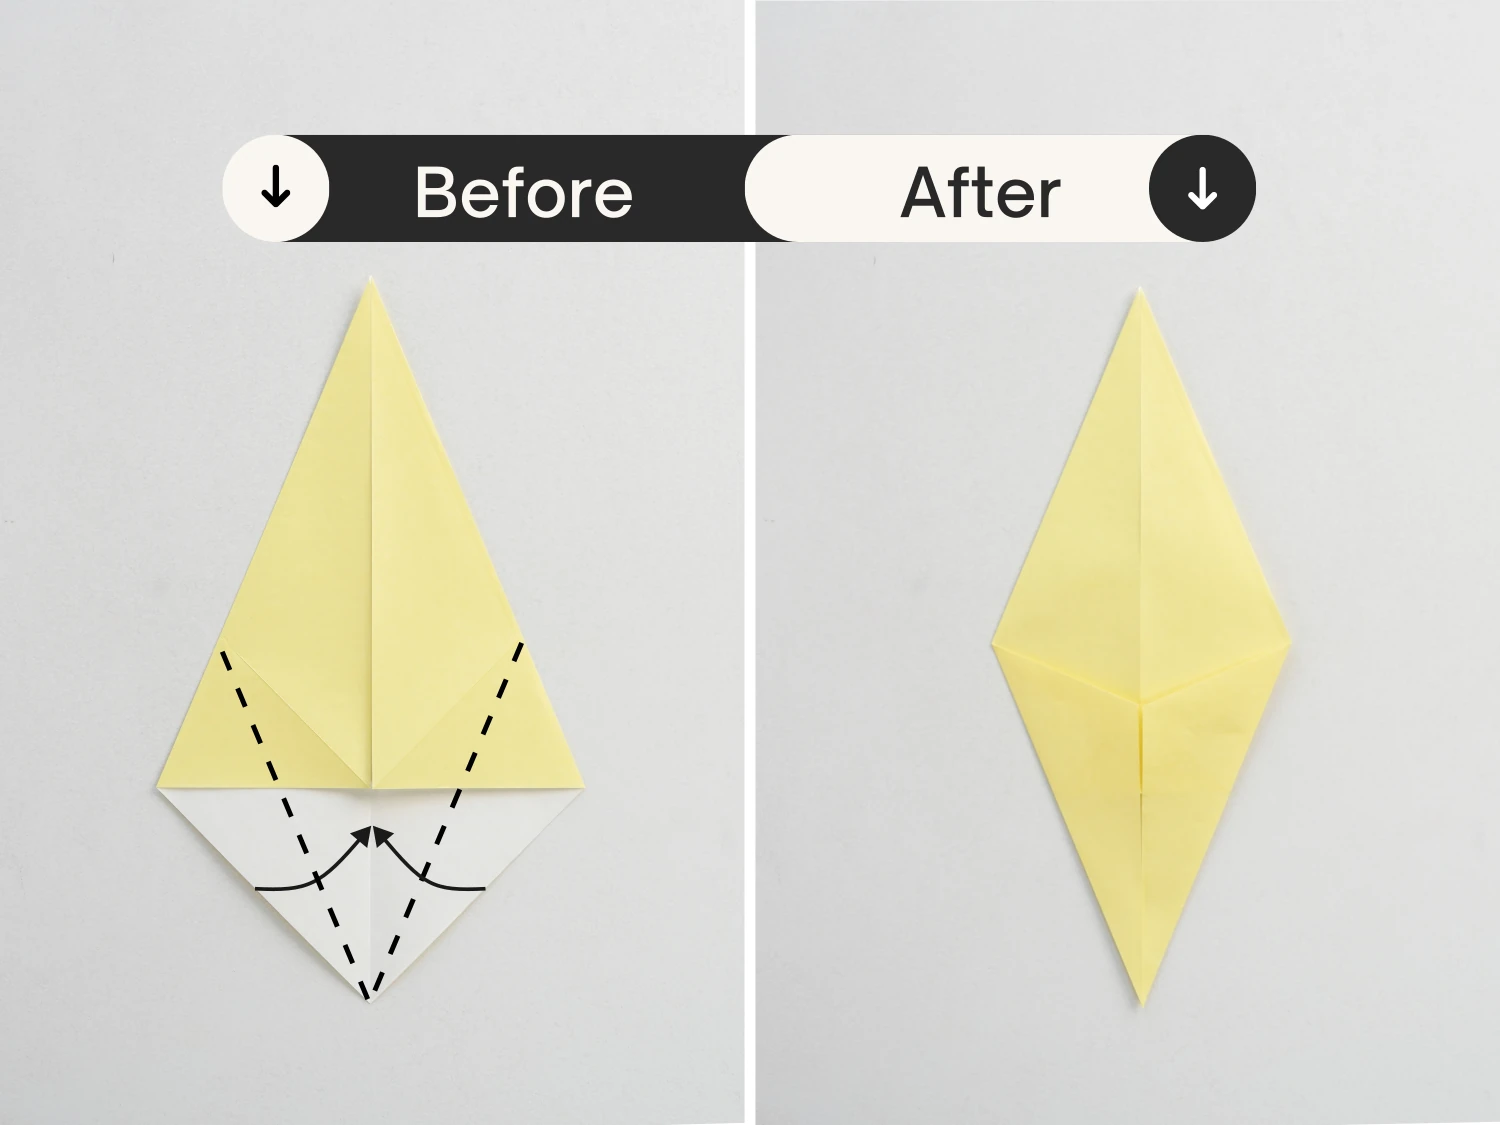
Step 4
Similarly, fold the bottom left and right edges to meet the vertical crease.
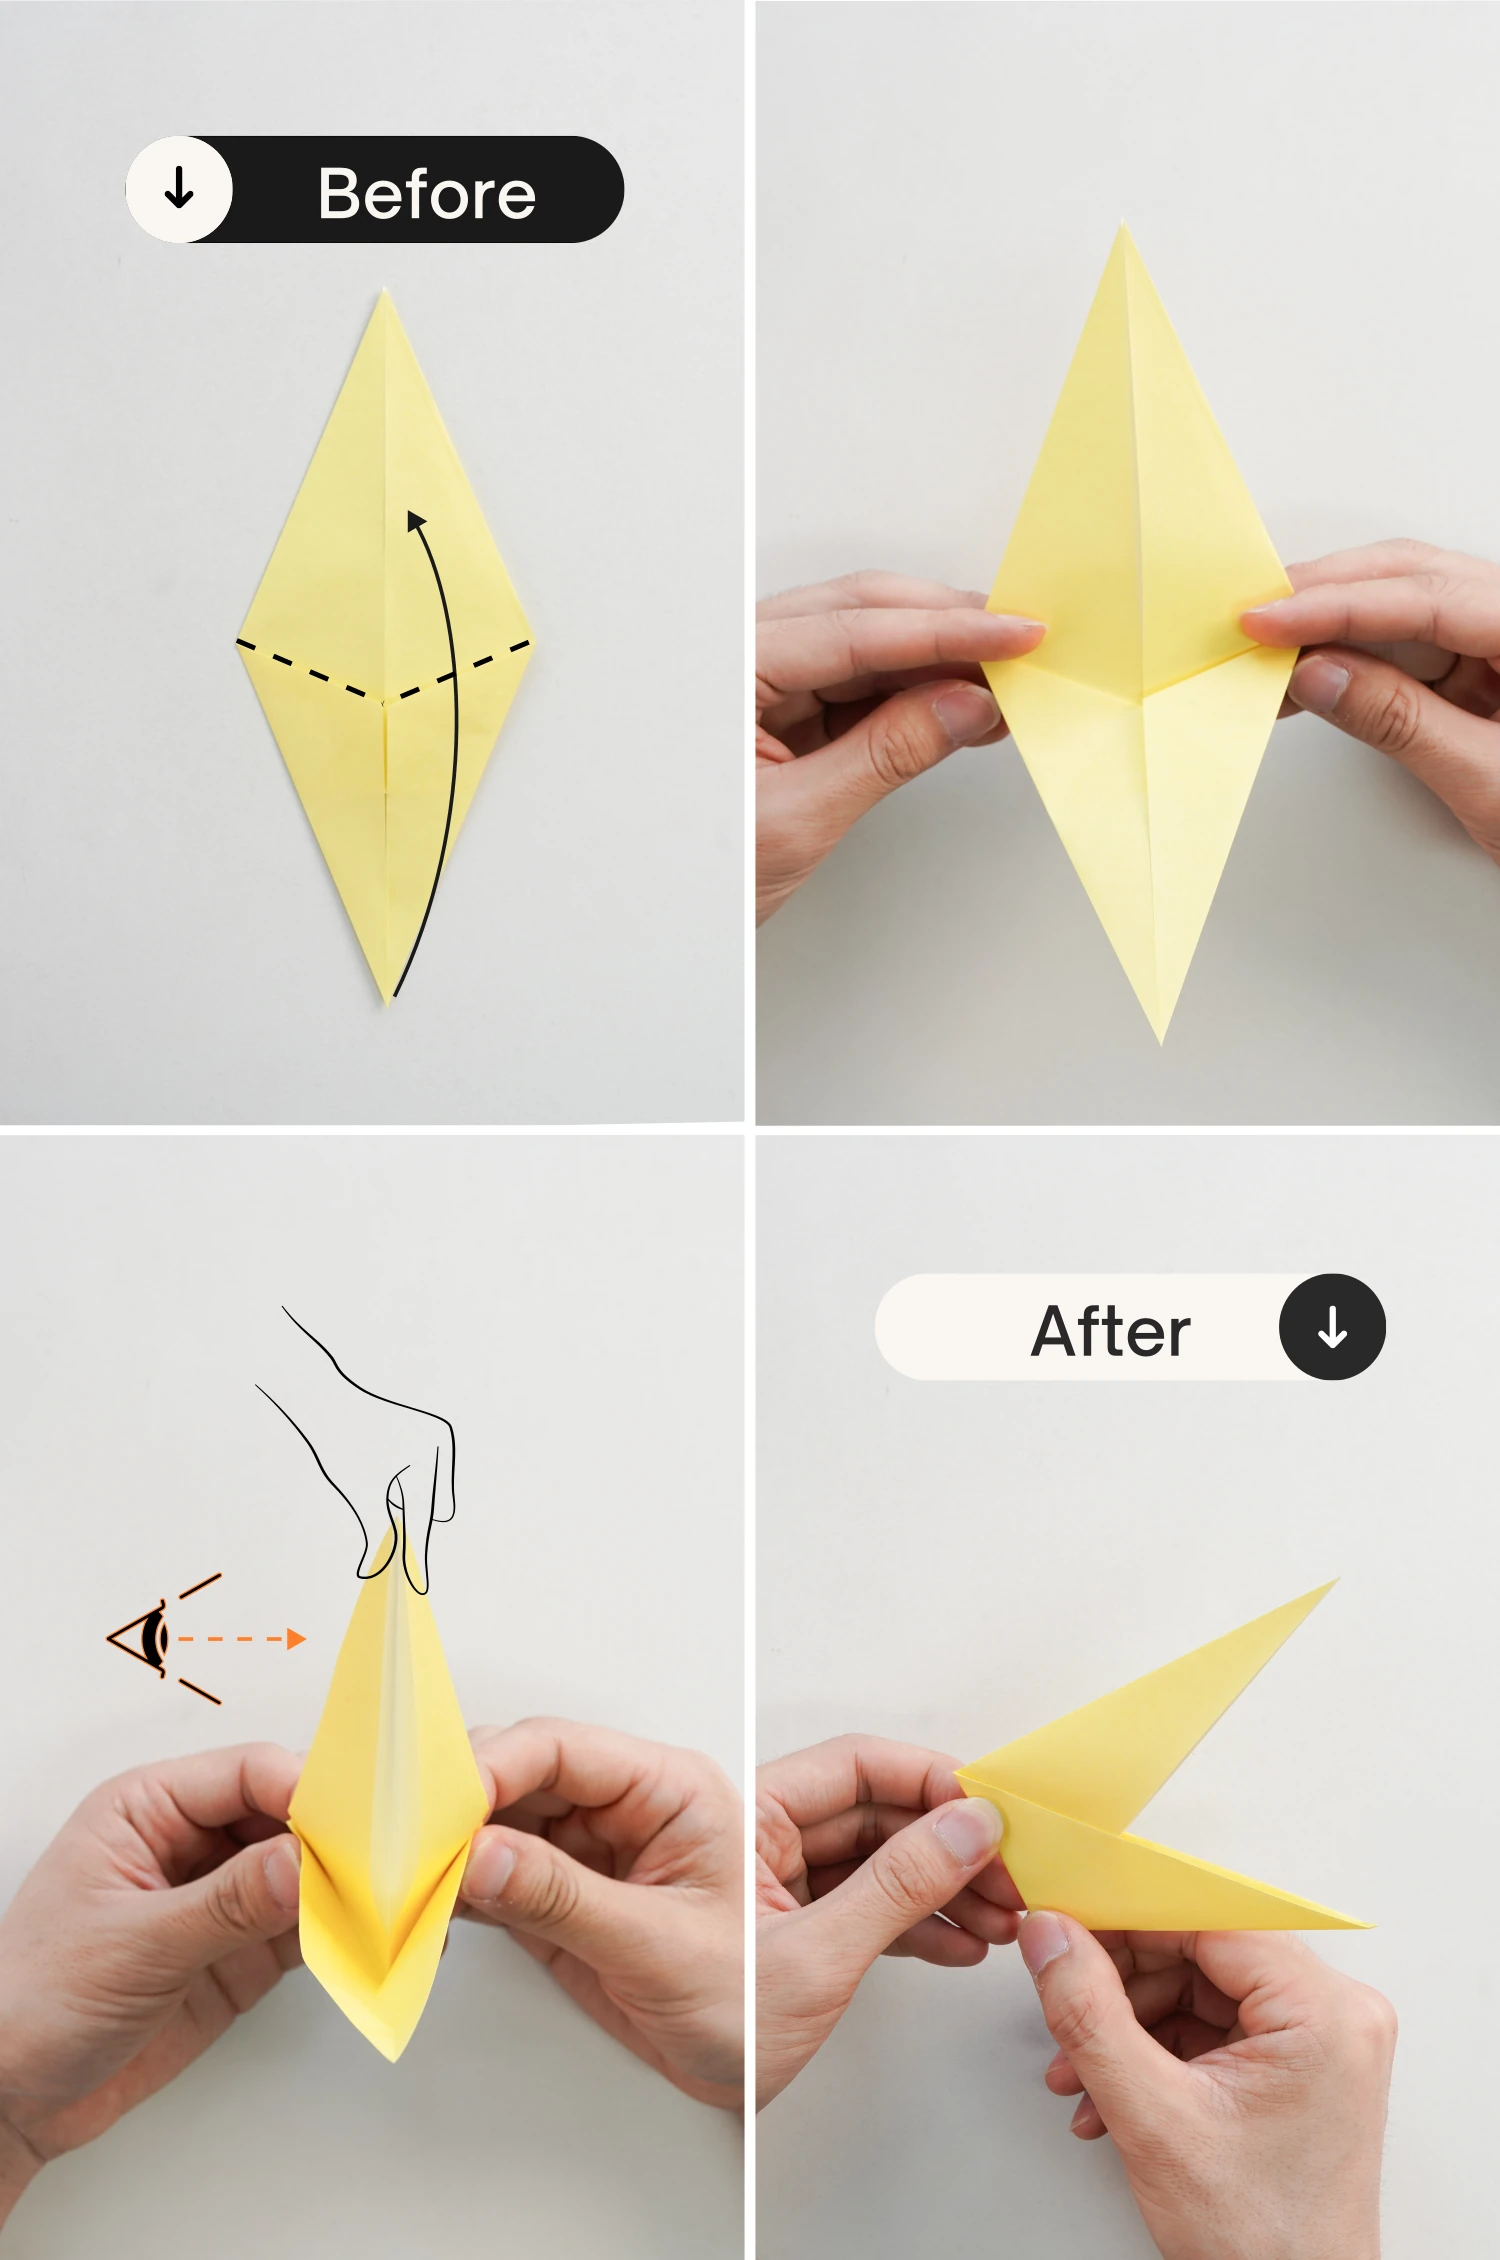
Step 5
Fold the bottom corner up along the dotted line, and fold the top part in half along the middle vertical crease backward at the same time, finally flatten it.
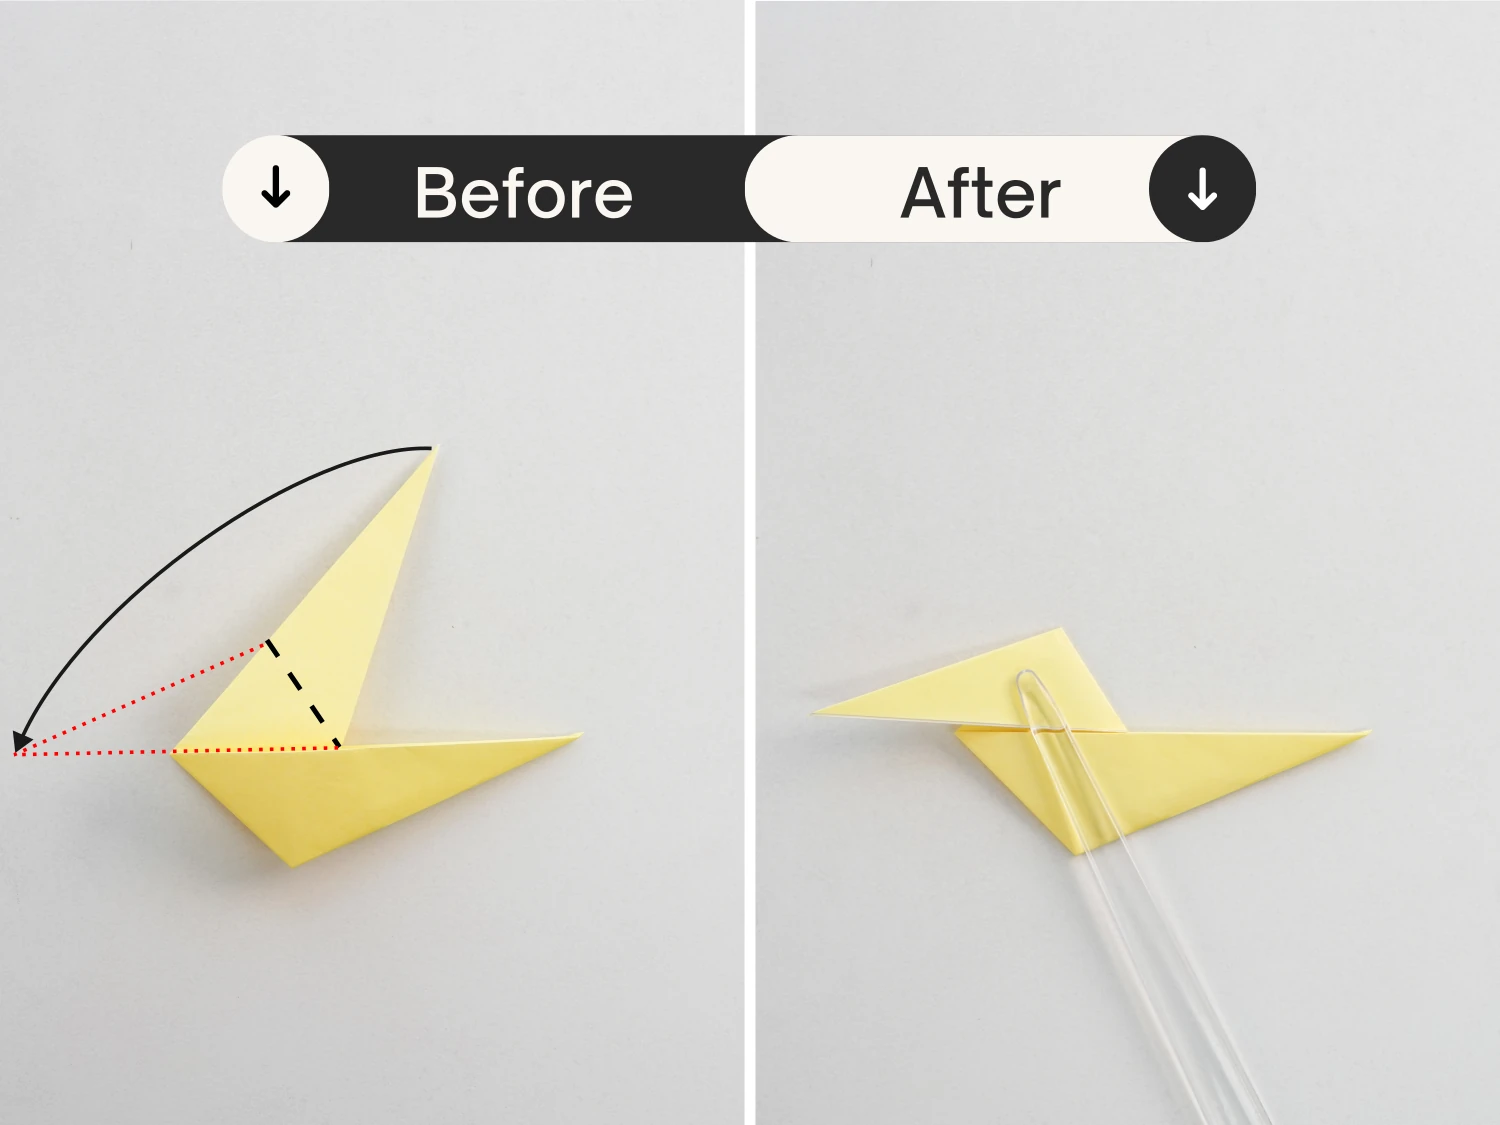
Step 6
Fold the top right corner to the left along the dotted line, making sure that the bottom edge of the triangle formed after folding aligns the top edge of the bottom triangle.
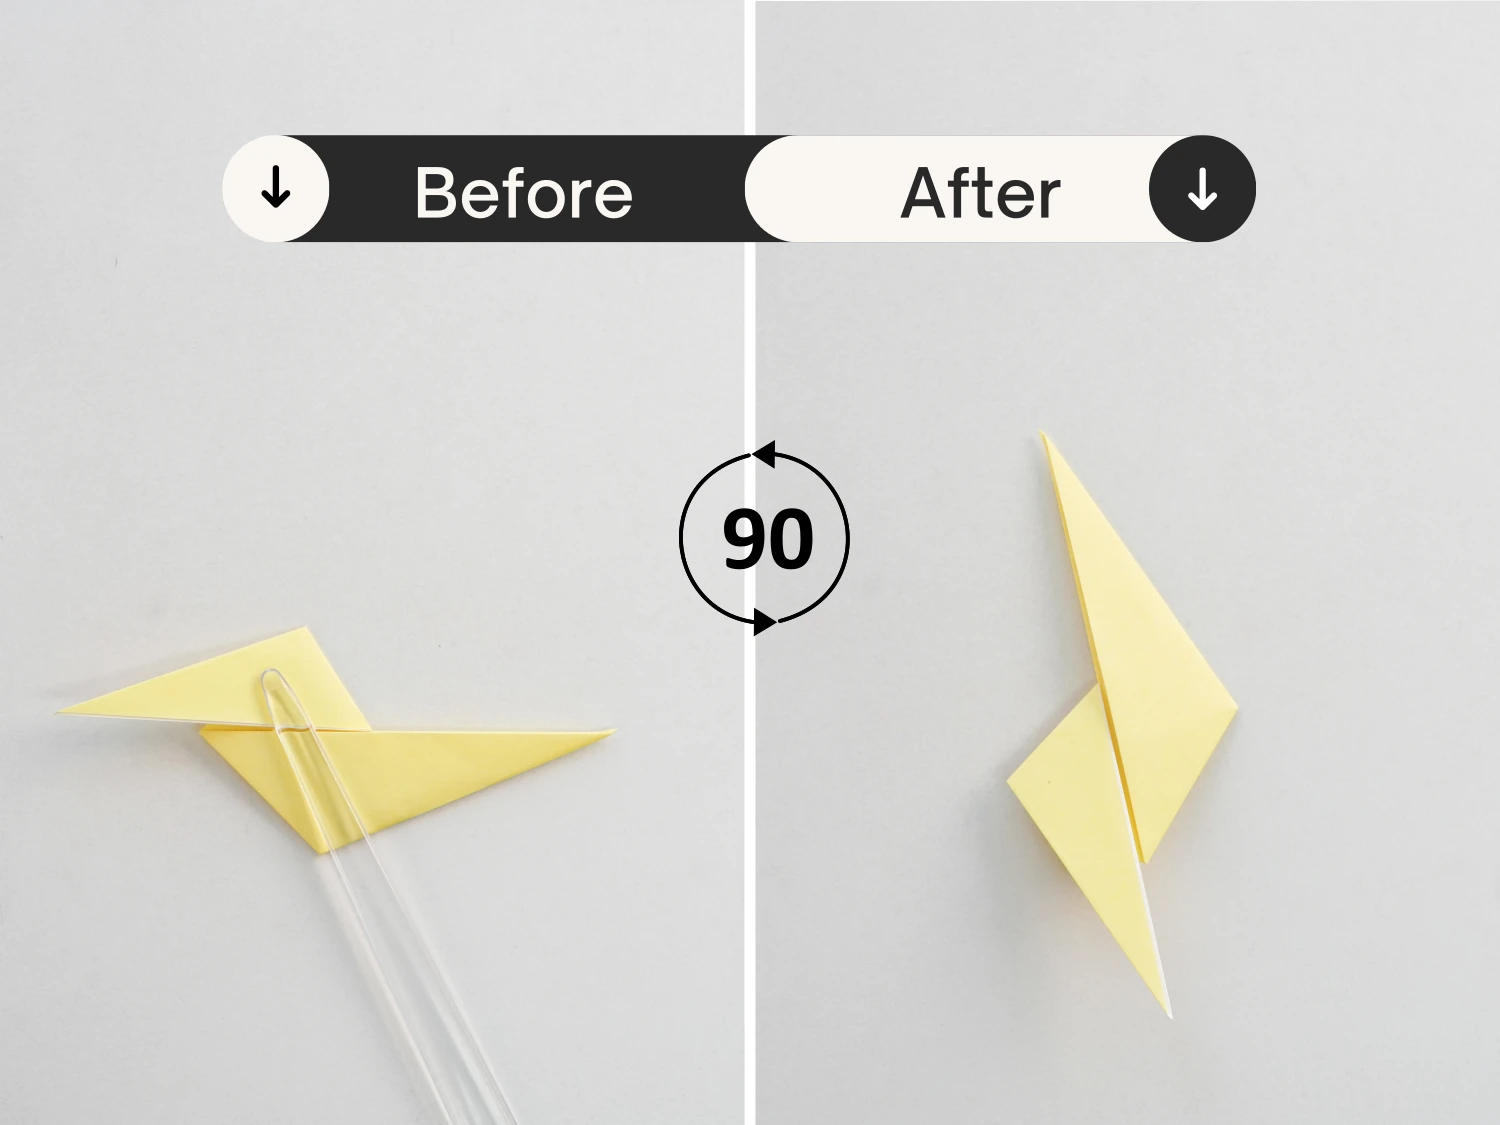
Step 7
Rotate it 90 degrees counterclockwise, and this easy origami lightning is done.
What’s Next
Now you can explore our other easy origami, they are all interesting and lovely.
Other easy animal face ideas