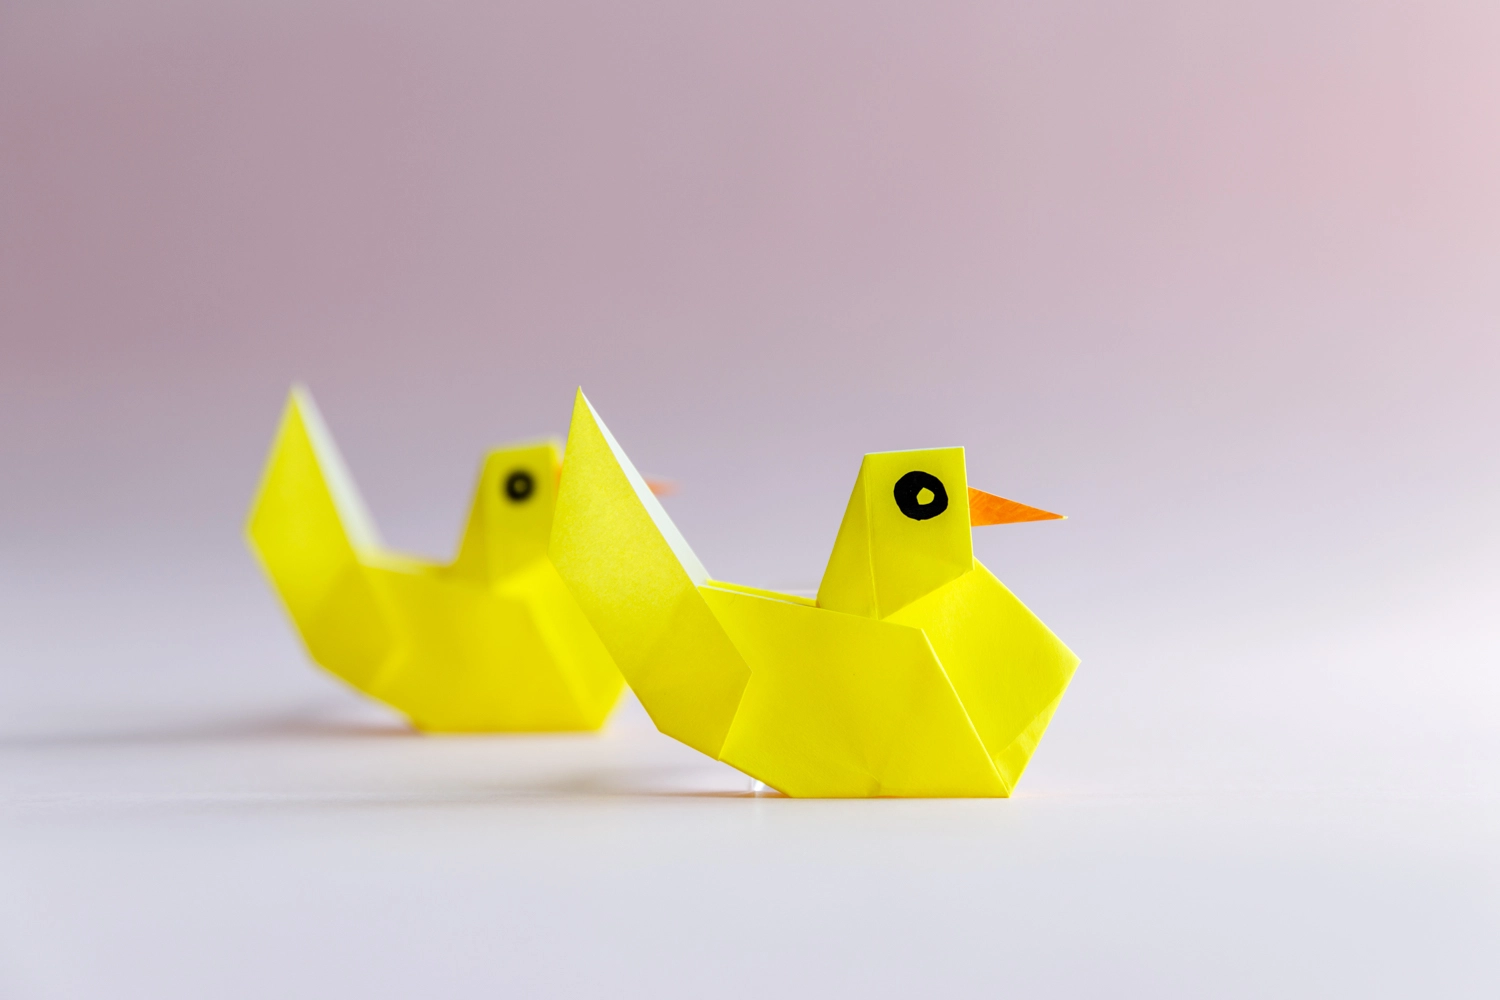
How to Fold an Origami Duck
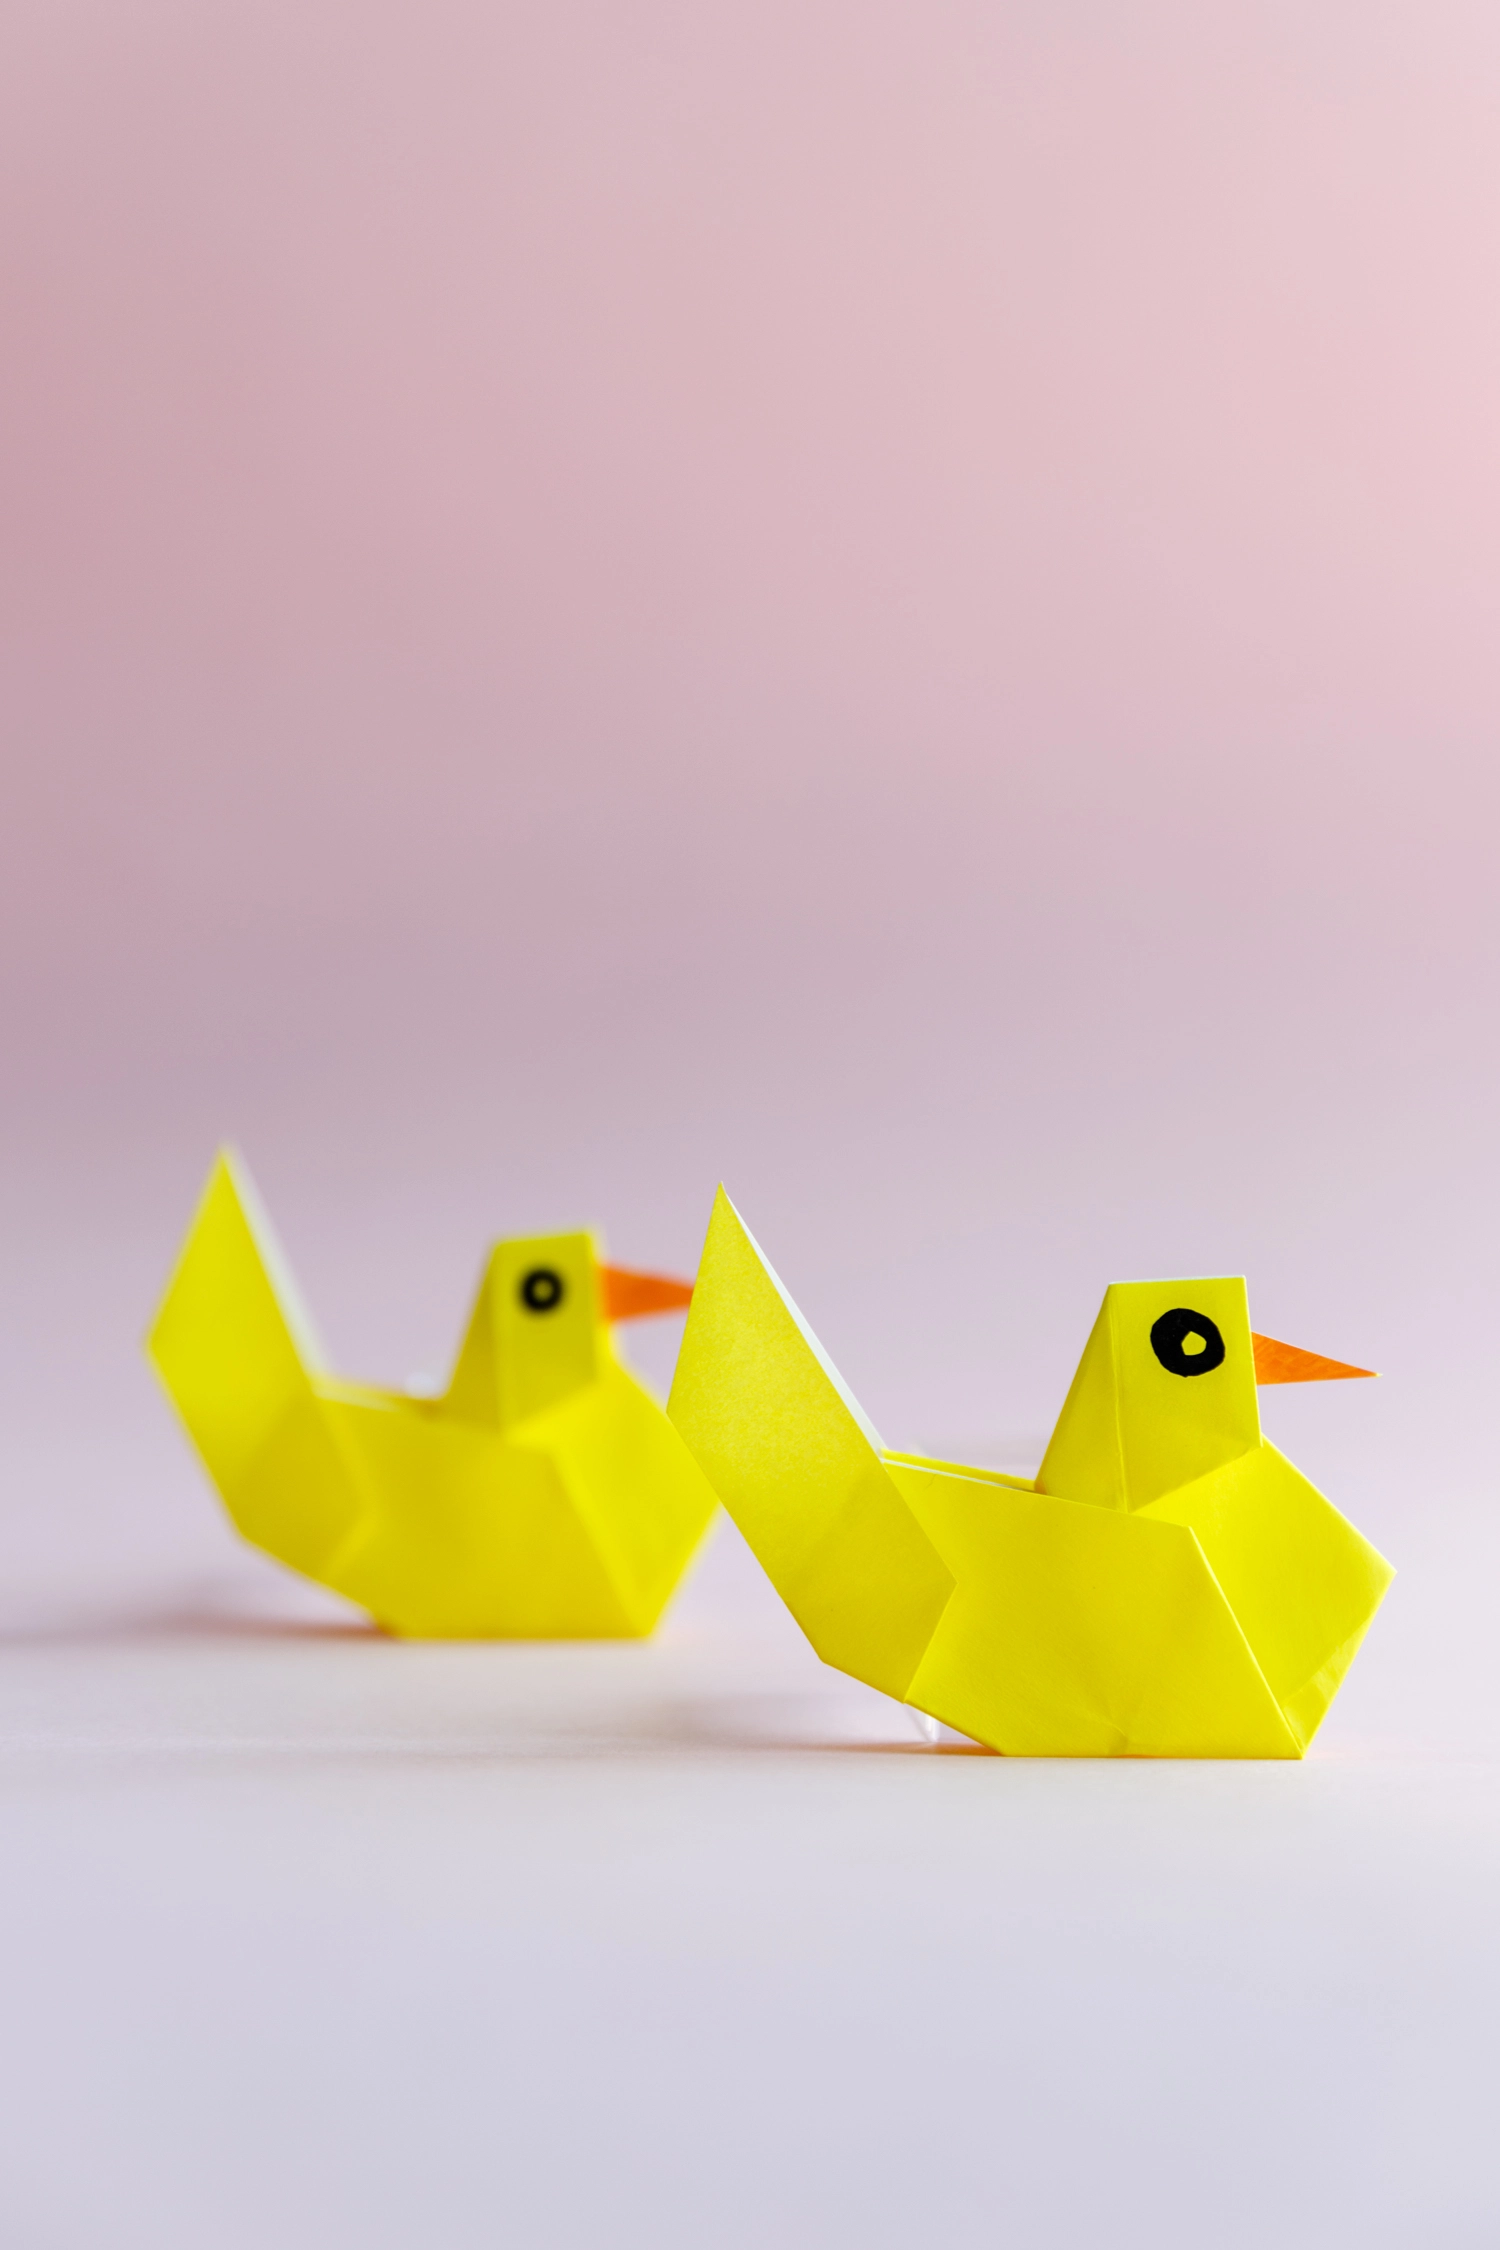
Yellow duck is always popular among children. You can transfer a piece of water to a lovely and cute origami duck with several steps. Drawing large eyes and color the mouth makes the origami duck more realistic. Let’s get started.
We provide step-by-step diagram instructions and beginner-friendly videos. Check both for quicker learning.
If you are new to origami, start here from our beginner guide to know the basics and how to read the step-by-step instructions.
- Folding time: 5 minutes
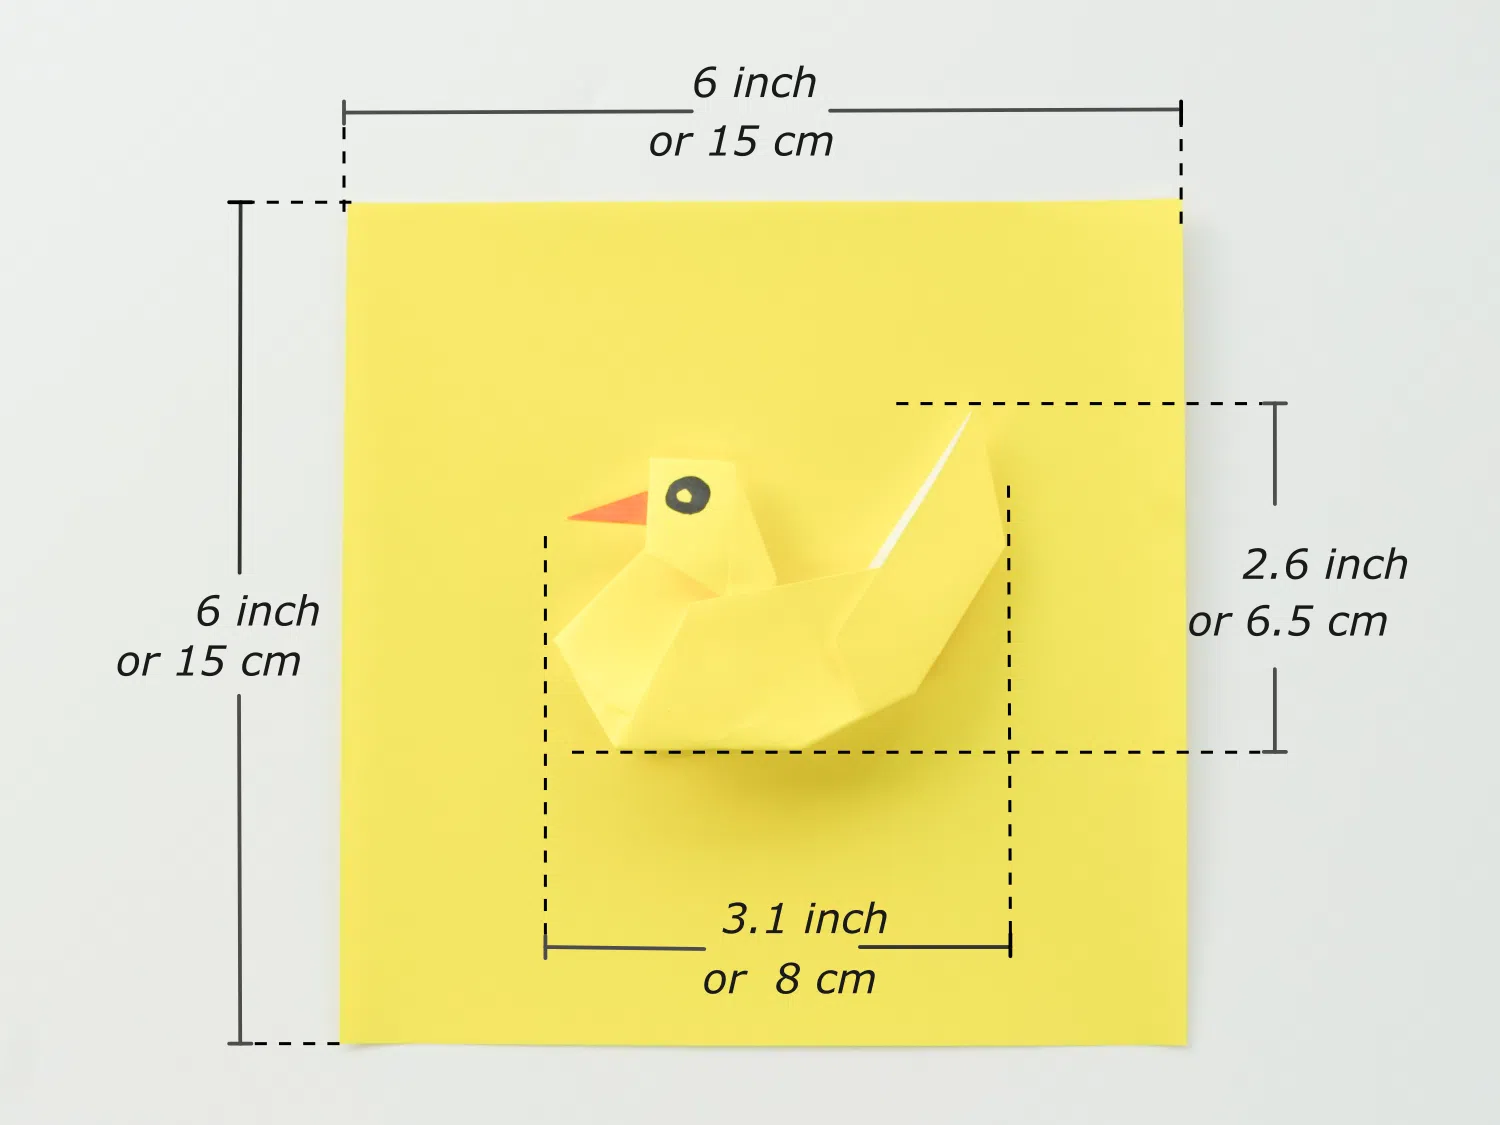
- Paper: 15×15 cm
- Difficulty: Easy, Beginner friendly
Material
Here I use a 15*15 cm origami square paper, with one yellow and one white side, and I got a 6.5*8 cm little cute duck. You can select different sizes of square origami paper.
Easy Origami Duck Video
Step by Step
Step 1
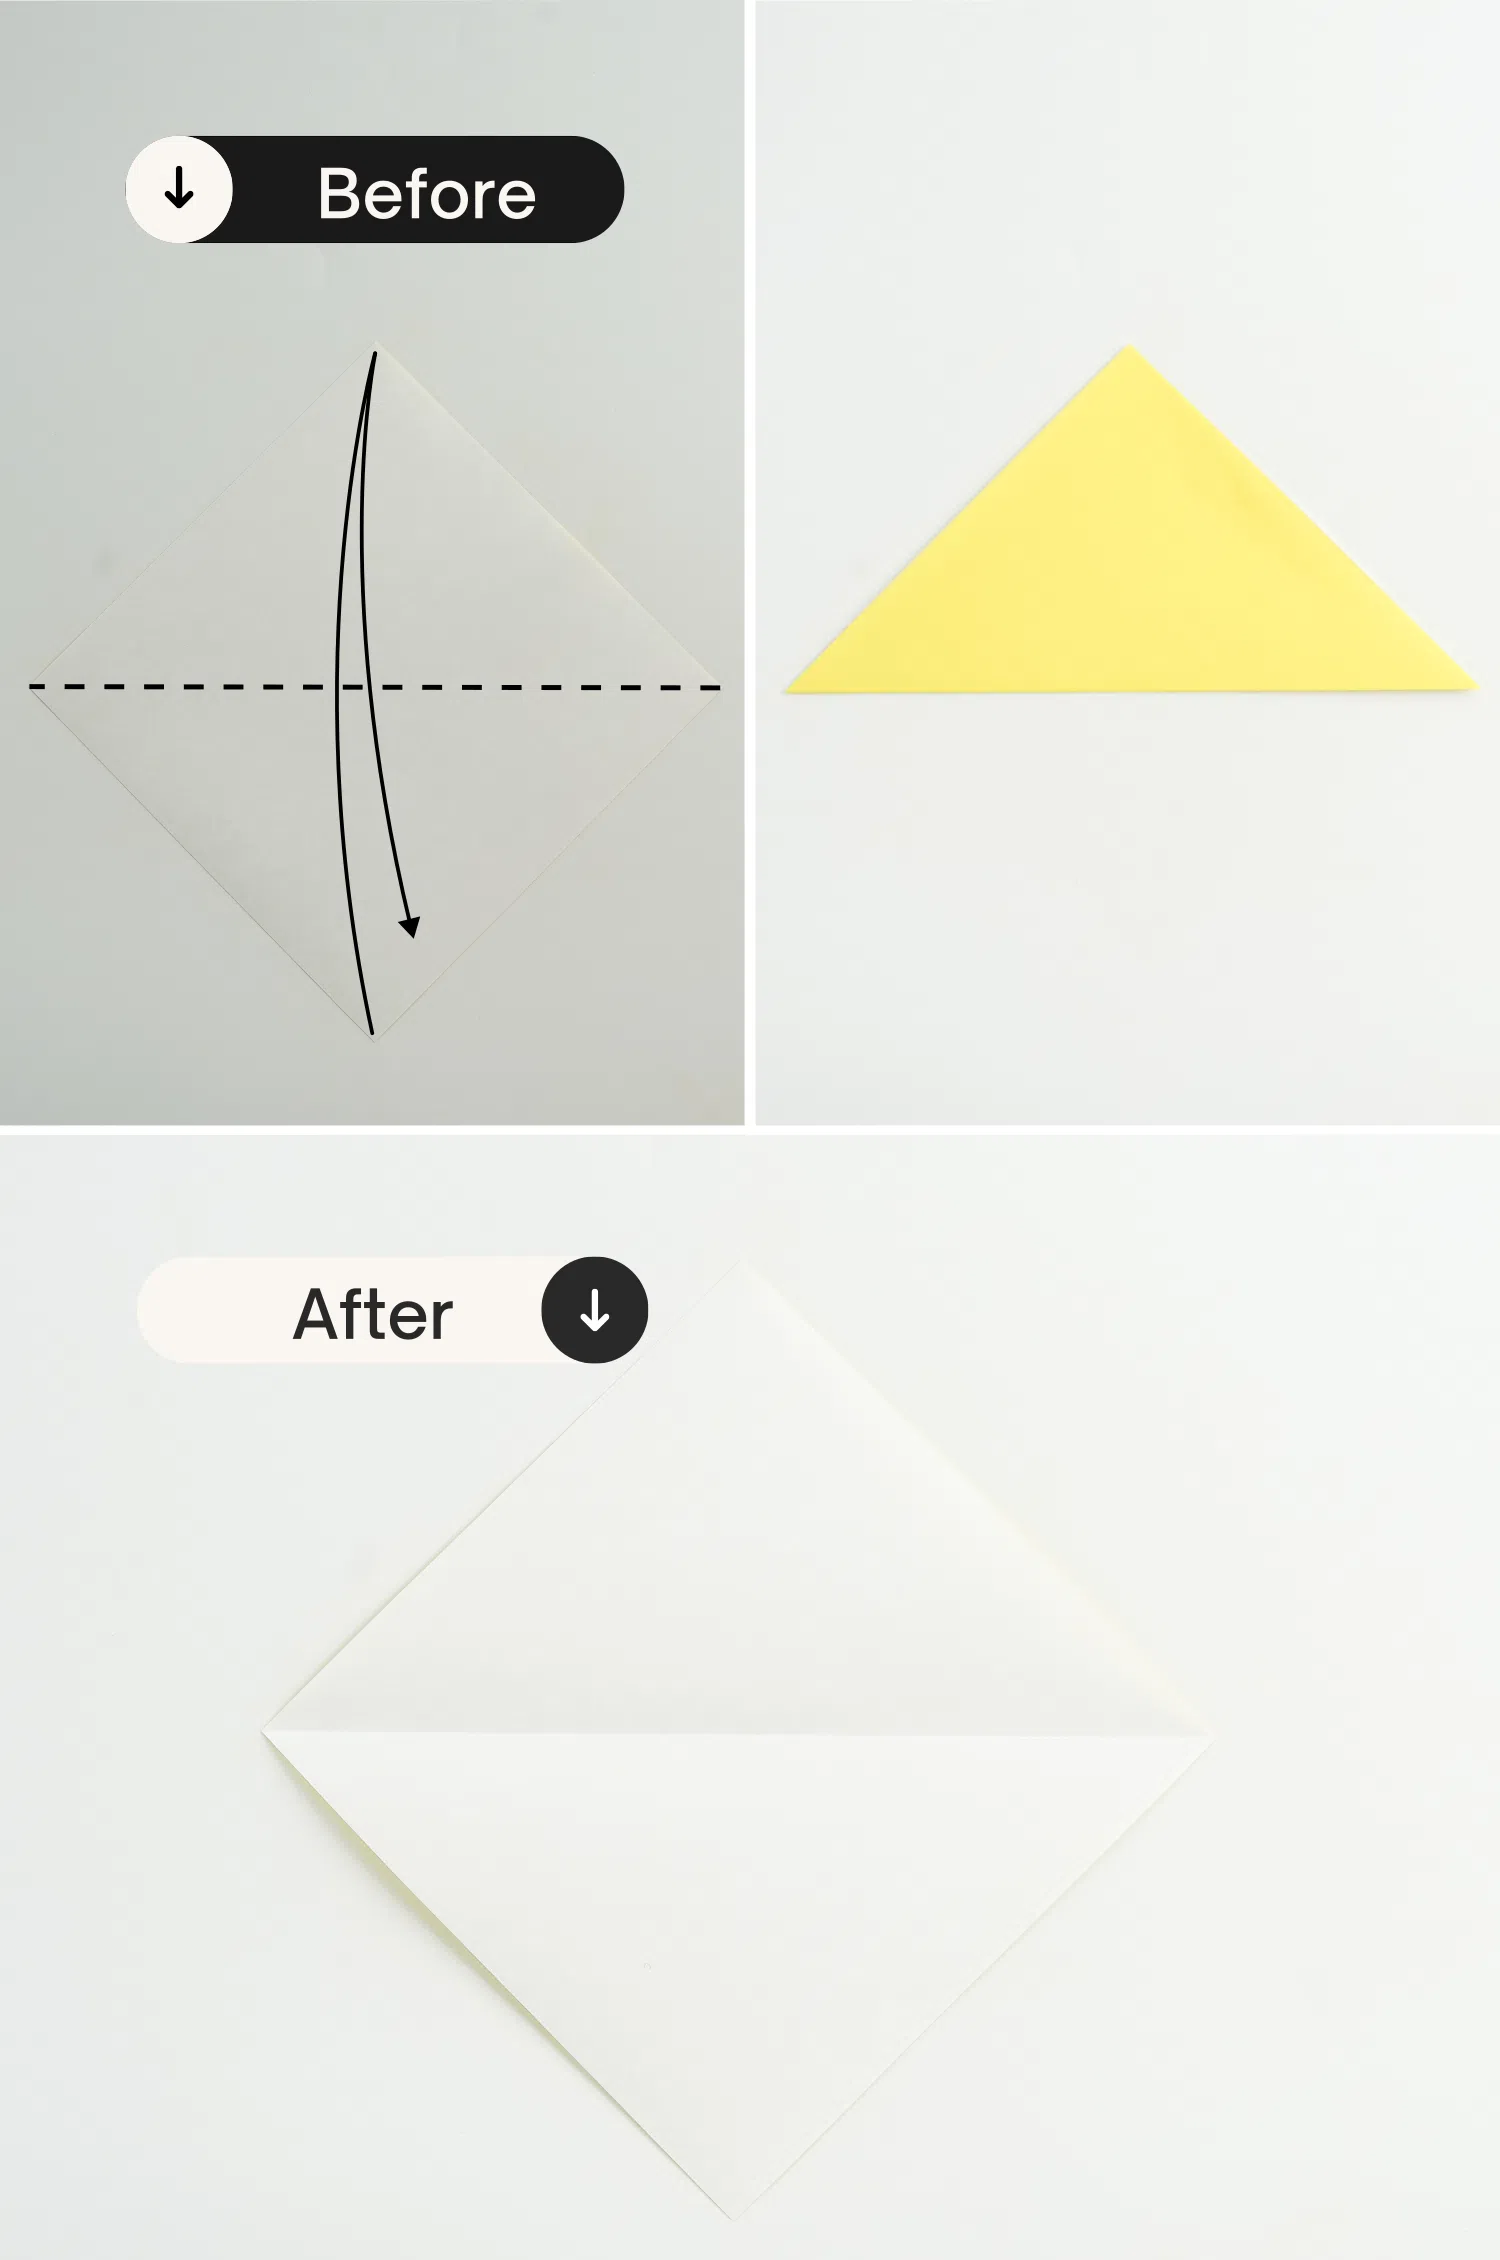
Start with the white side of the paper facing up and fold it in half diagonally, crease it well and unfold it.
Step 2
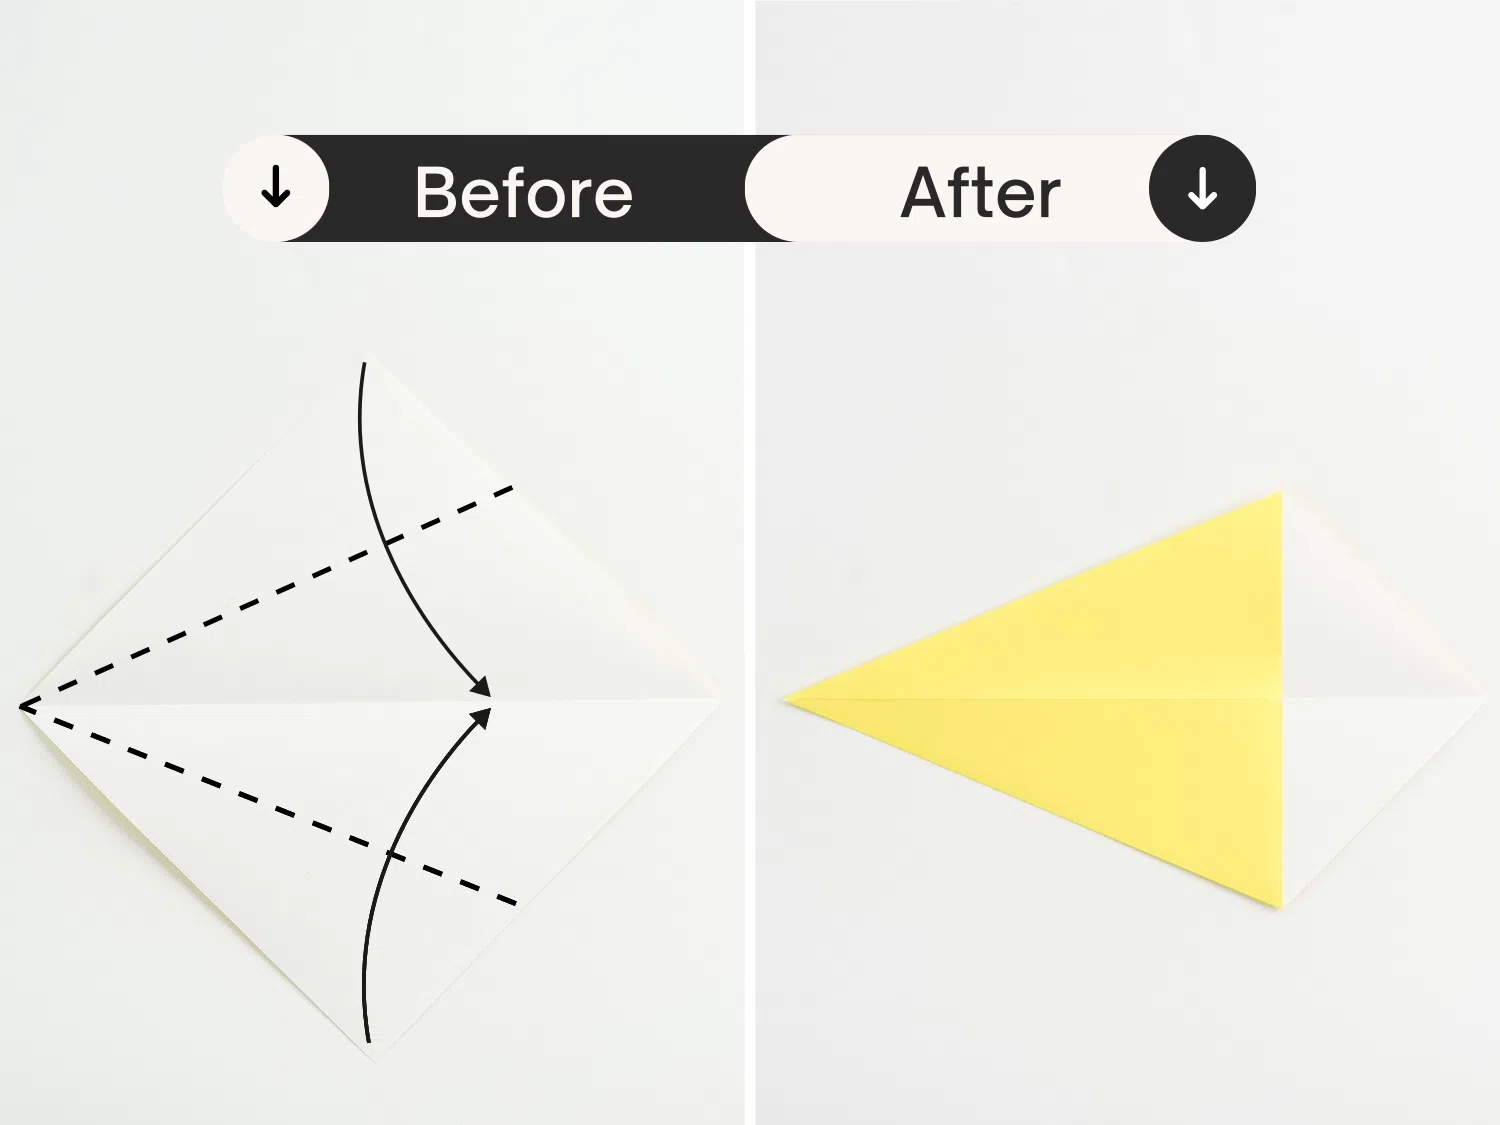
Fold the top point to the central crease along the dotted line.
Repeat this for the bottom point.
Step 3
Fold the left corner to the right corner diagonally.

Step 4
Then fold it back to the left a little.
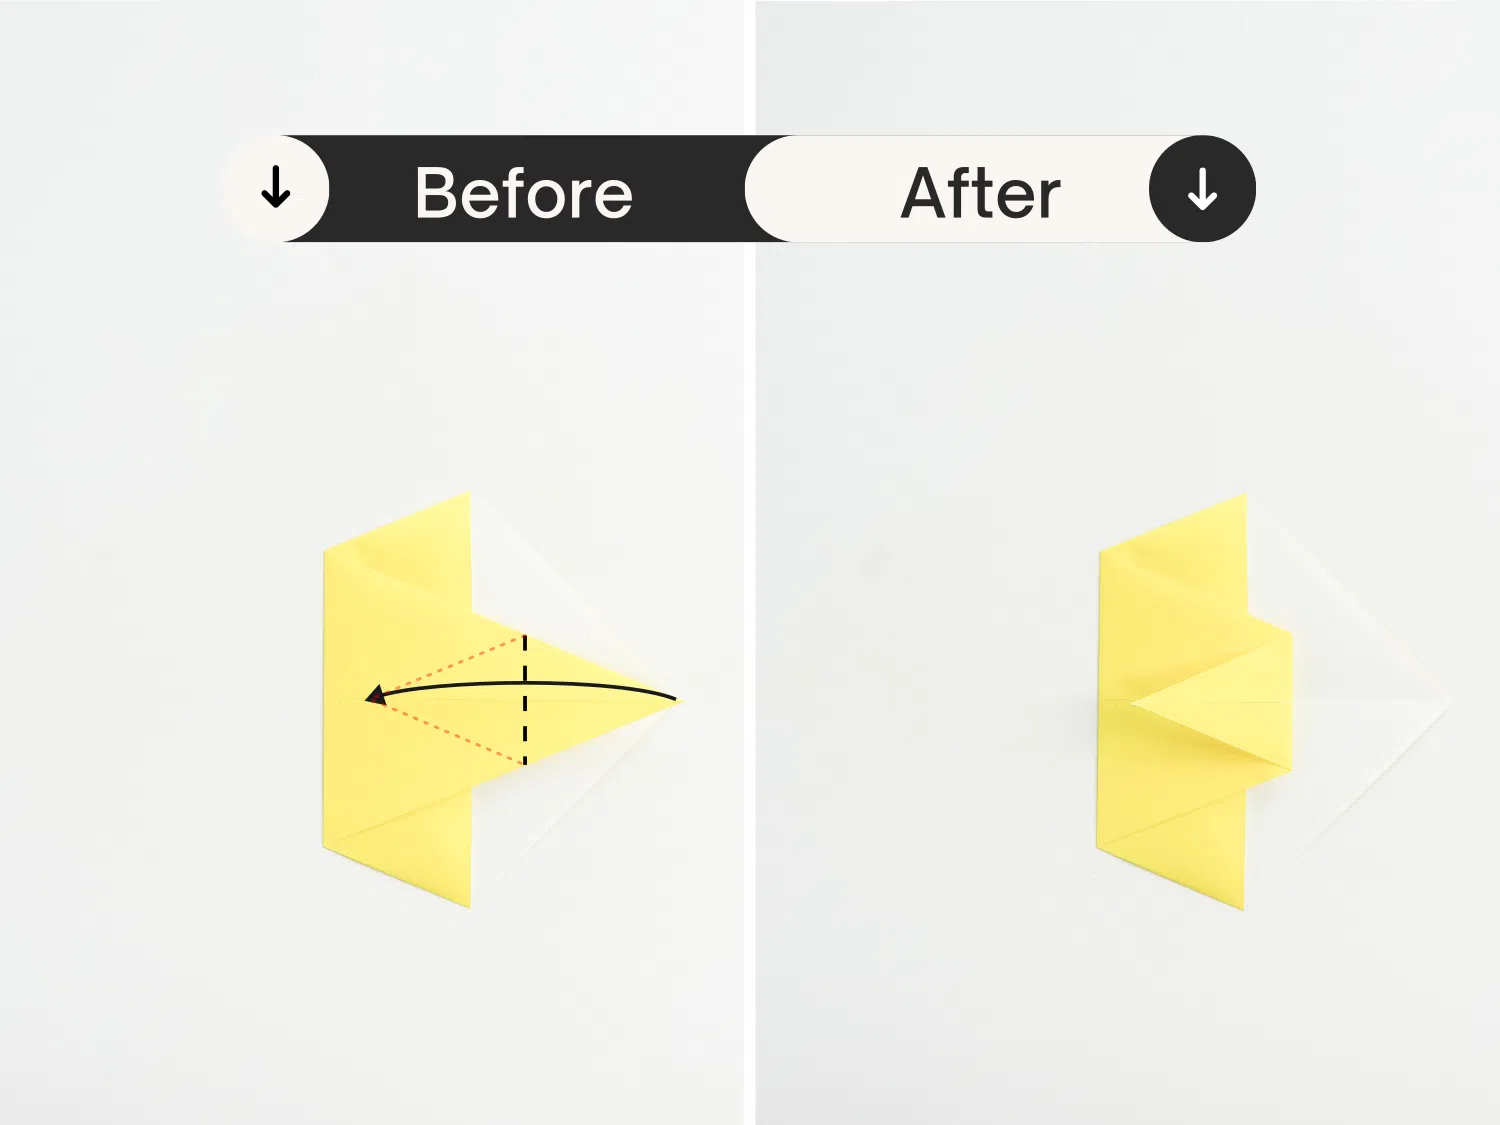
Step 5
Fold the right yellow edge to the left along the edge below.
Step 6
Flip the paper over.
Step 7
Fold the paper in half diagonally.
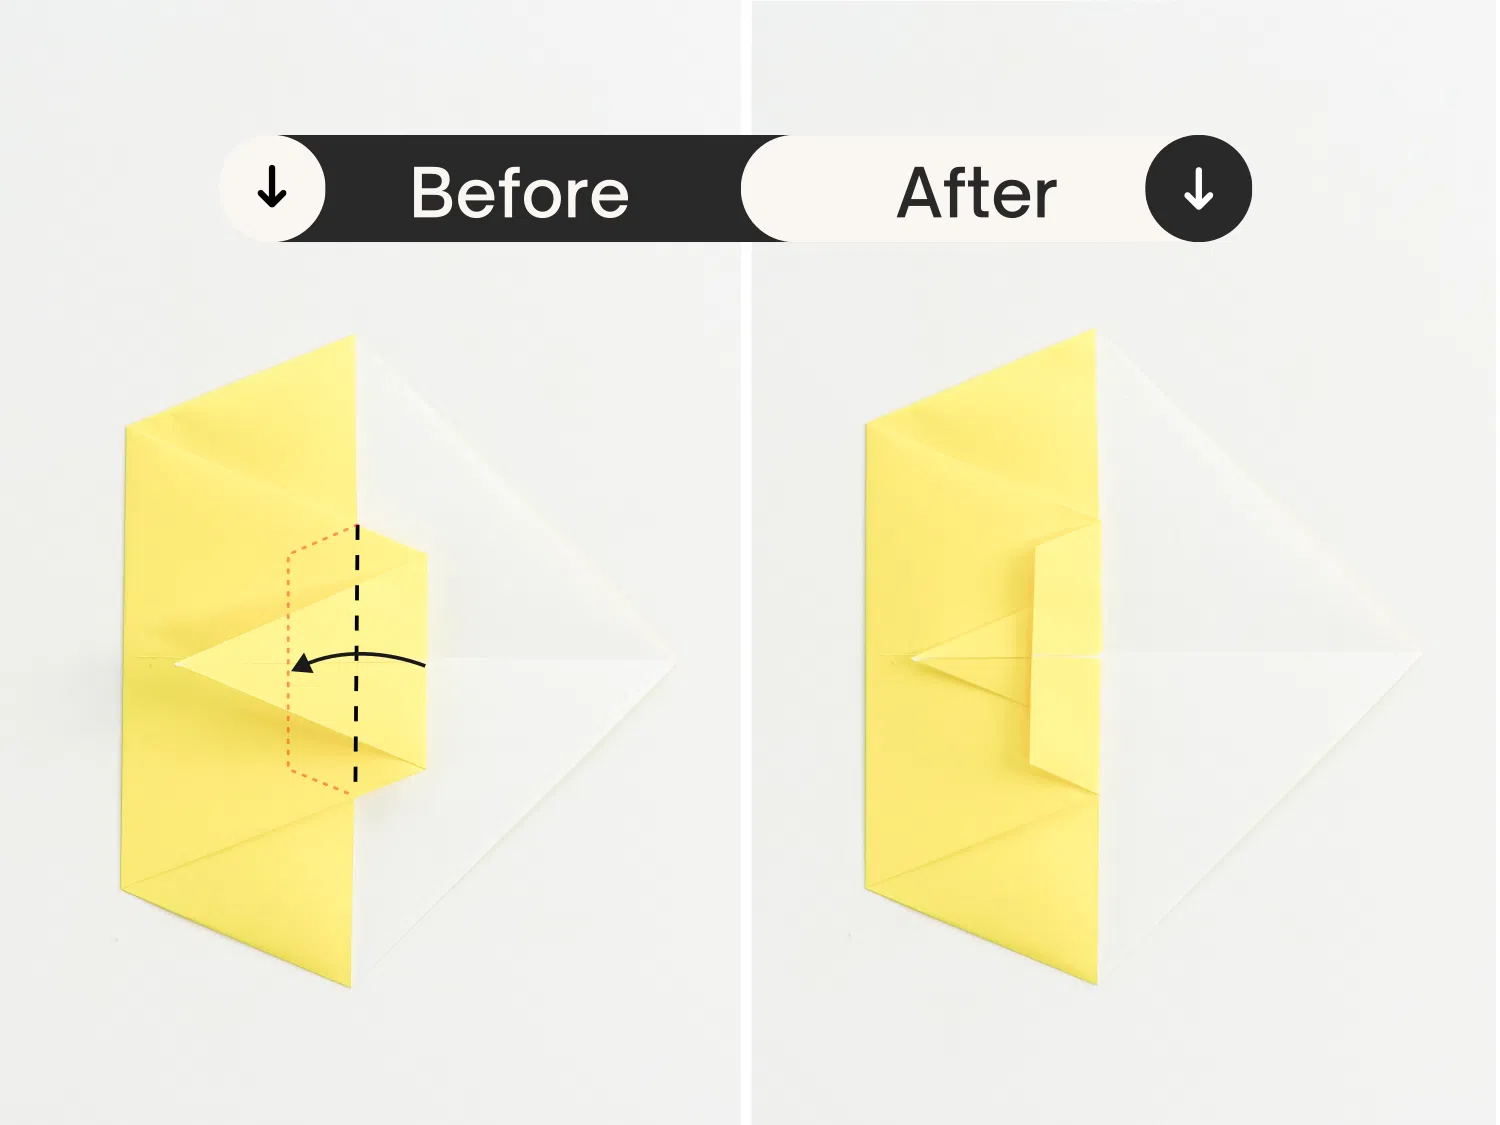
Step 8
Pinch the above layer, lift it a little then flatten it.
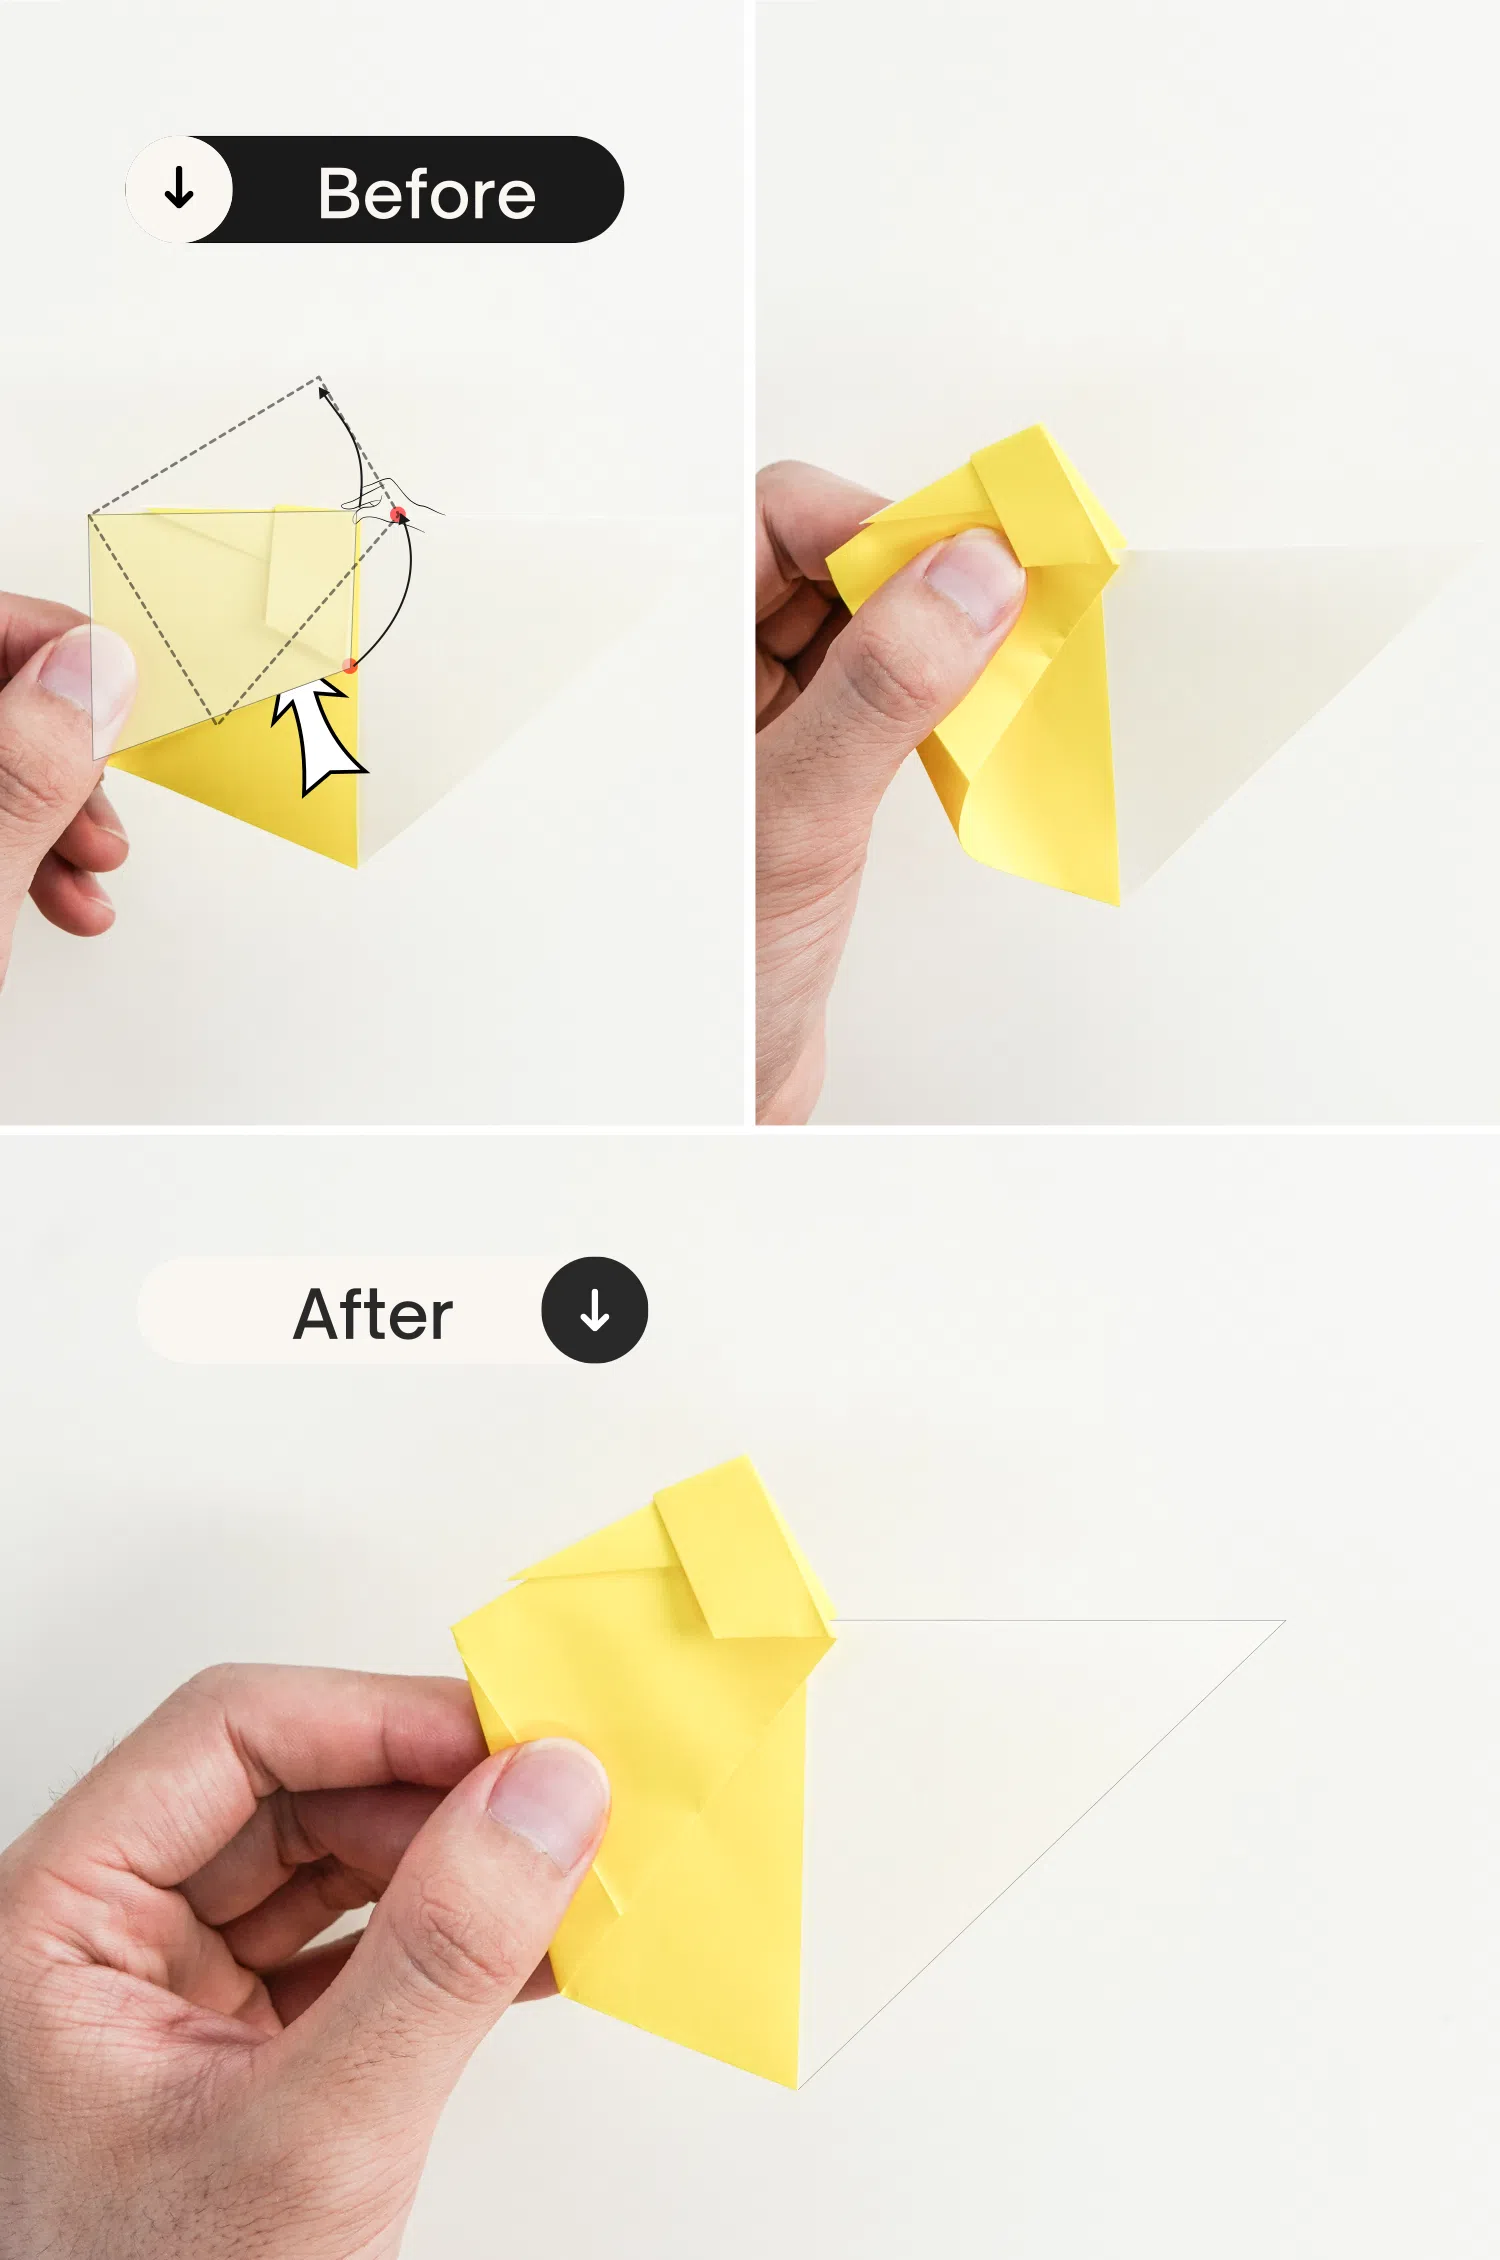
Step 9
Similarly, pinch the little corner on the top, lift it a little more, and then flatten it.
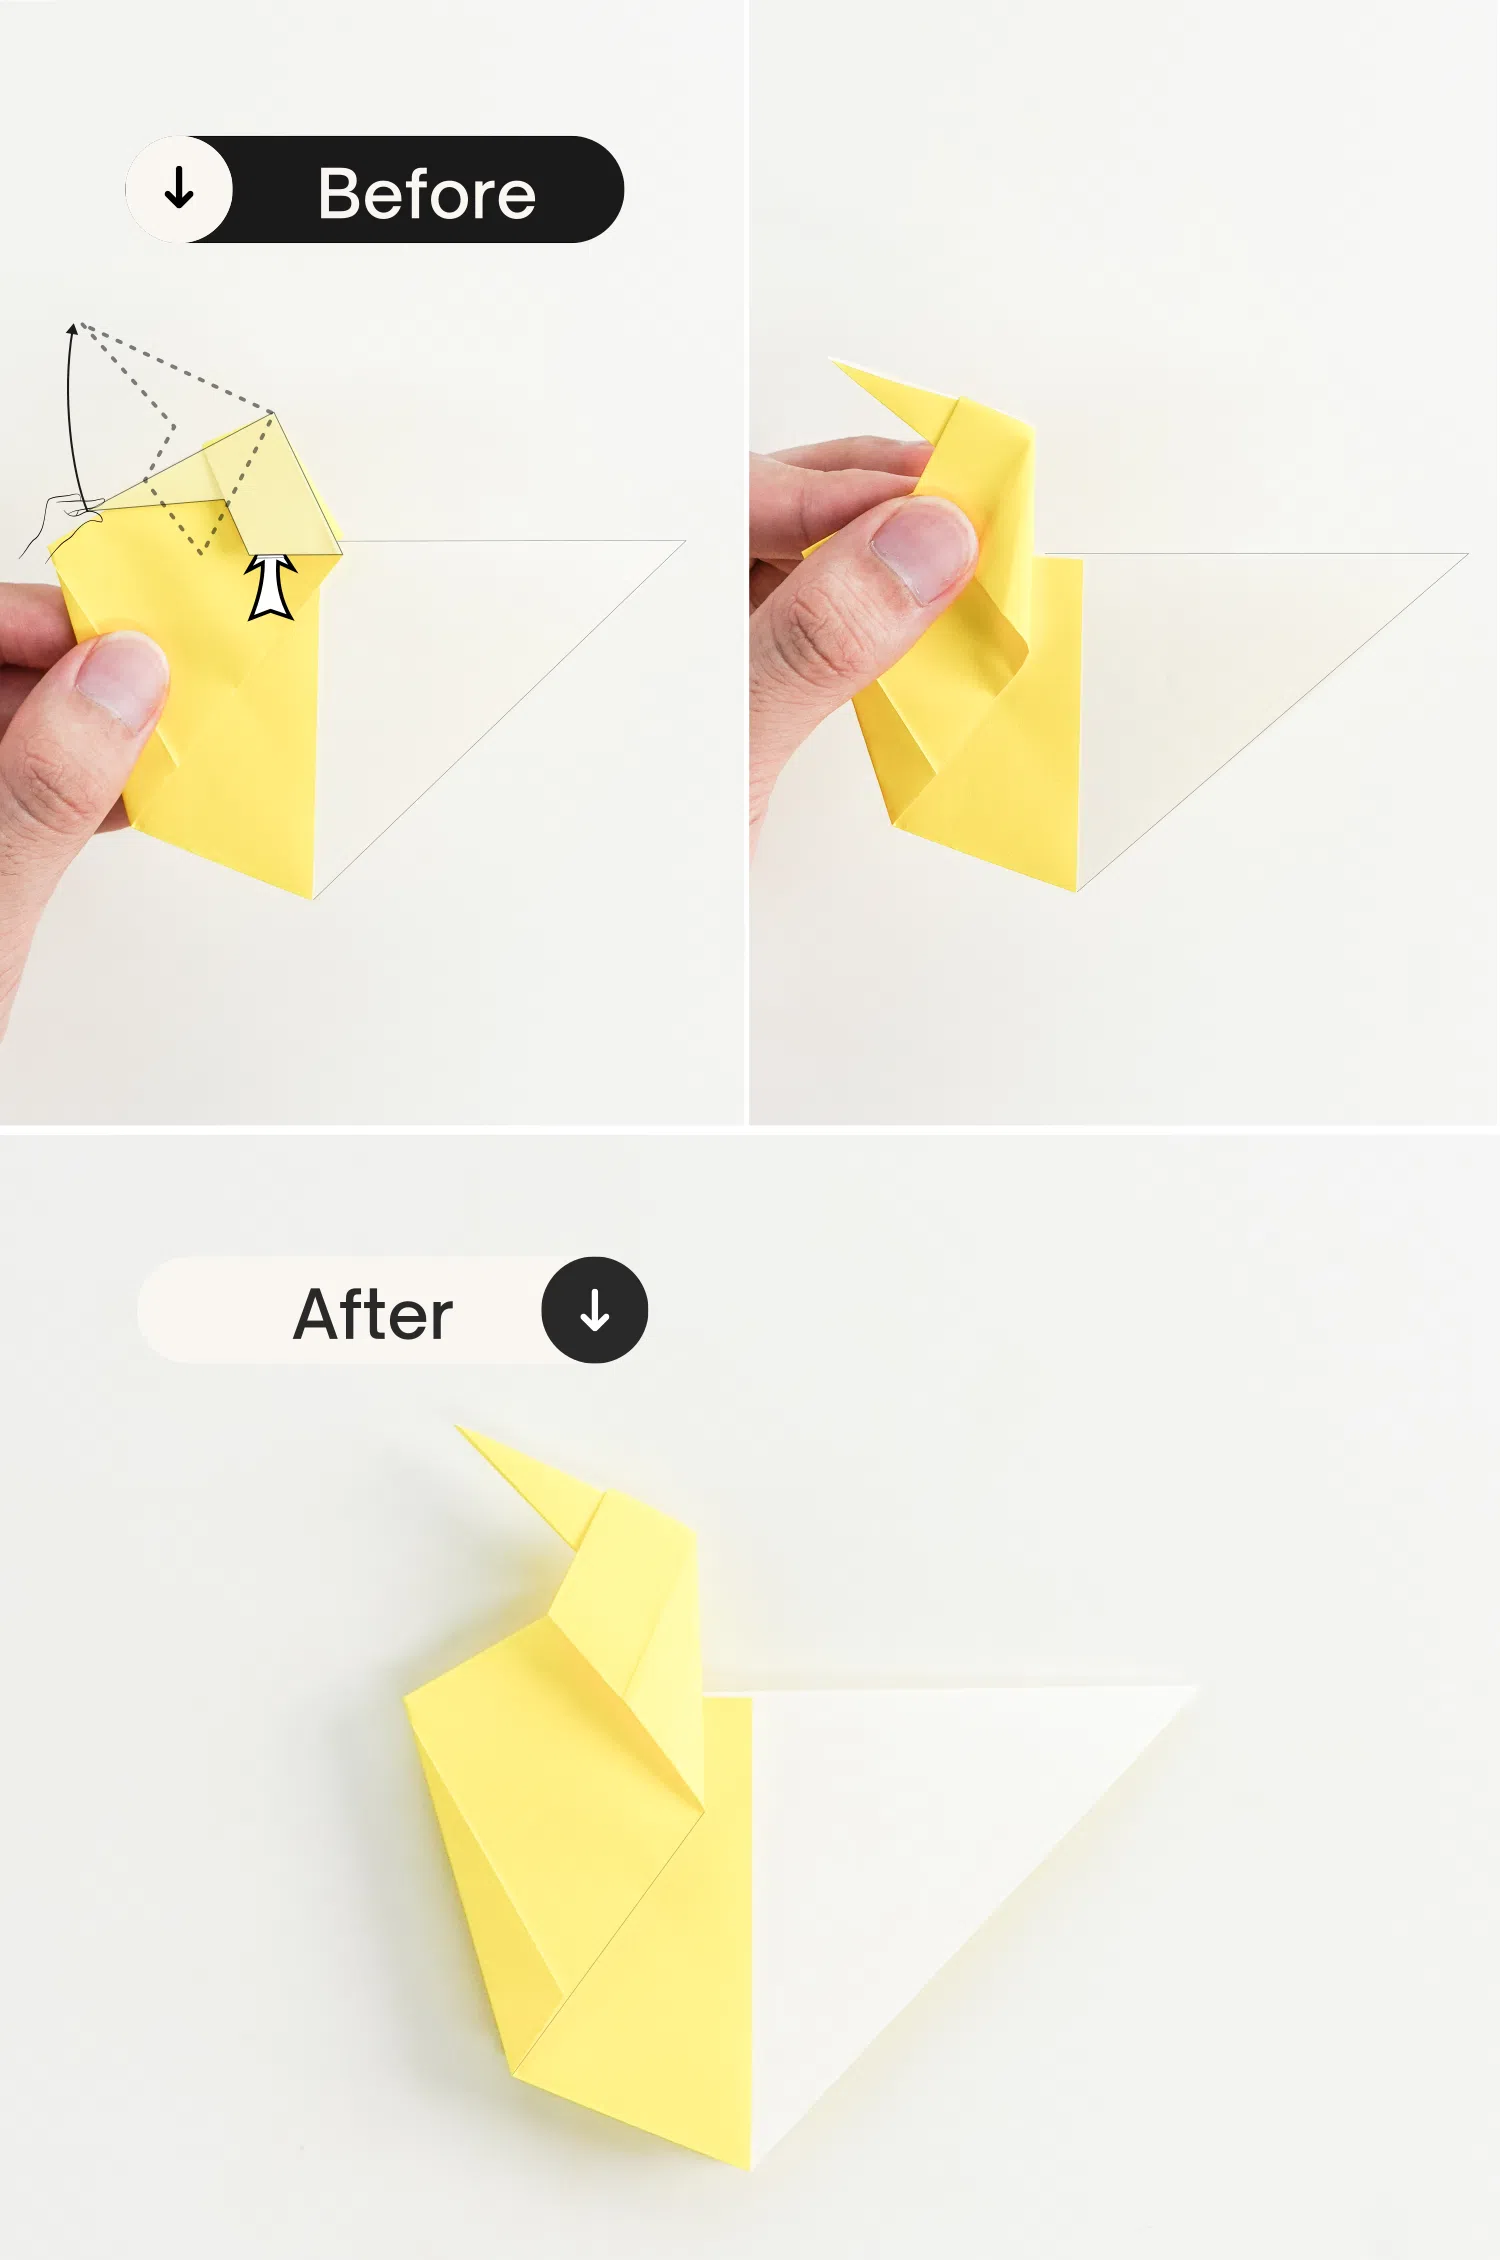
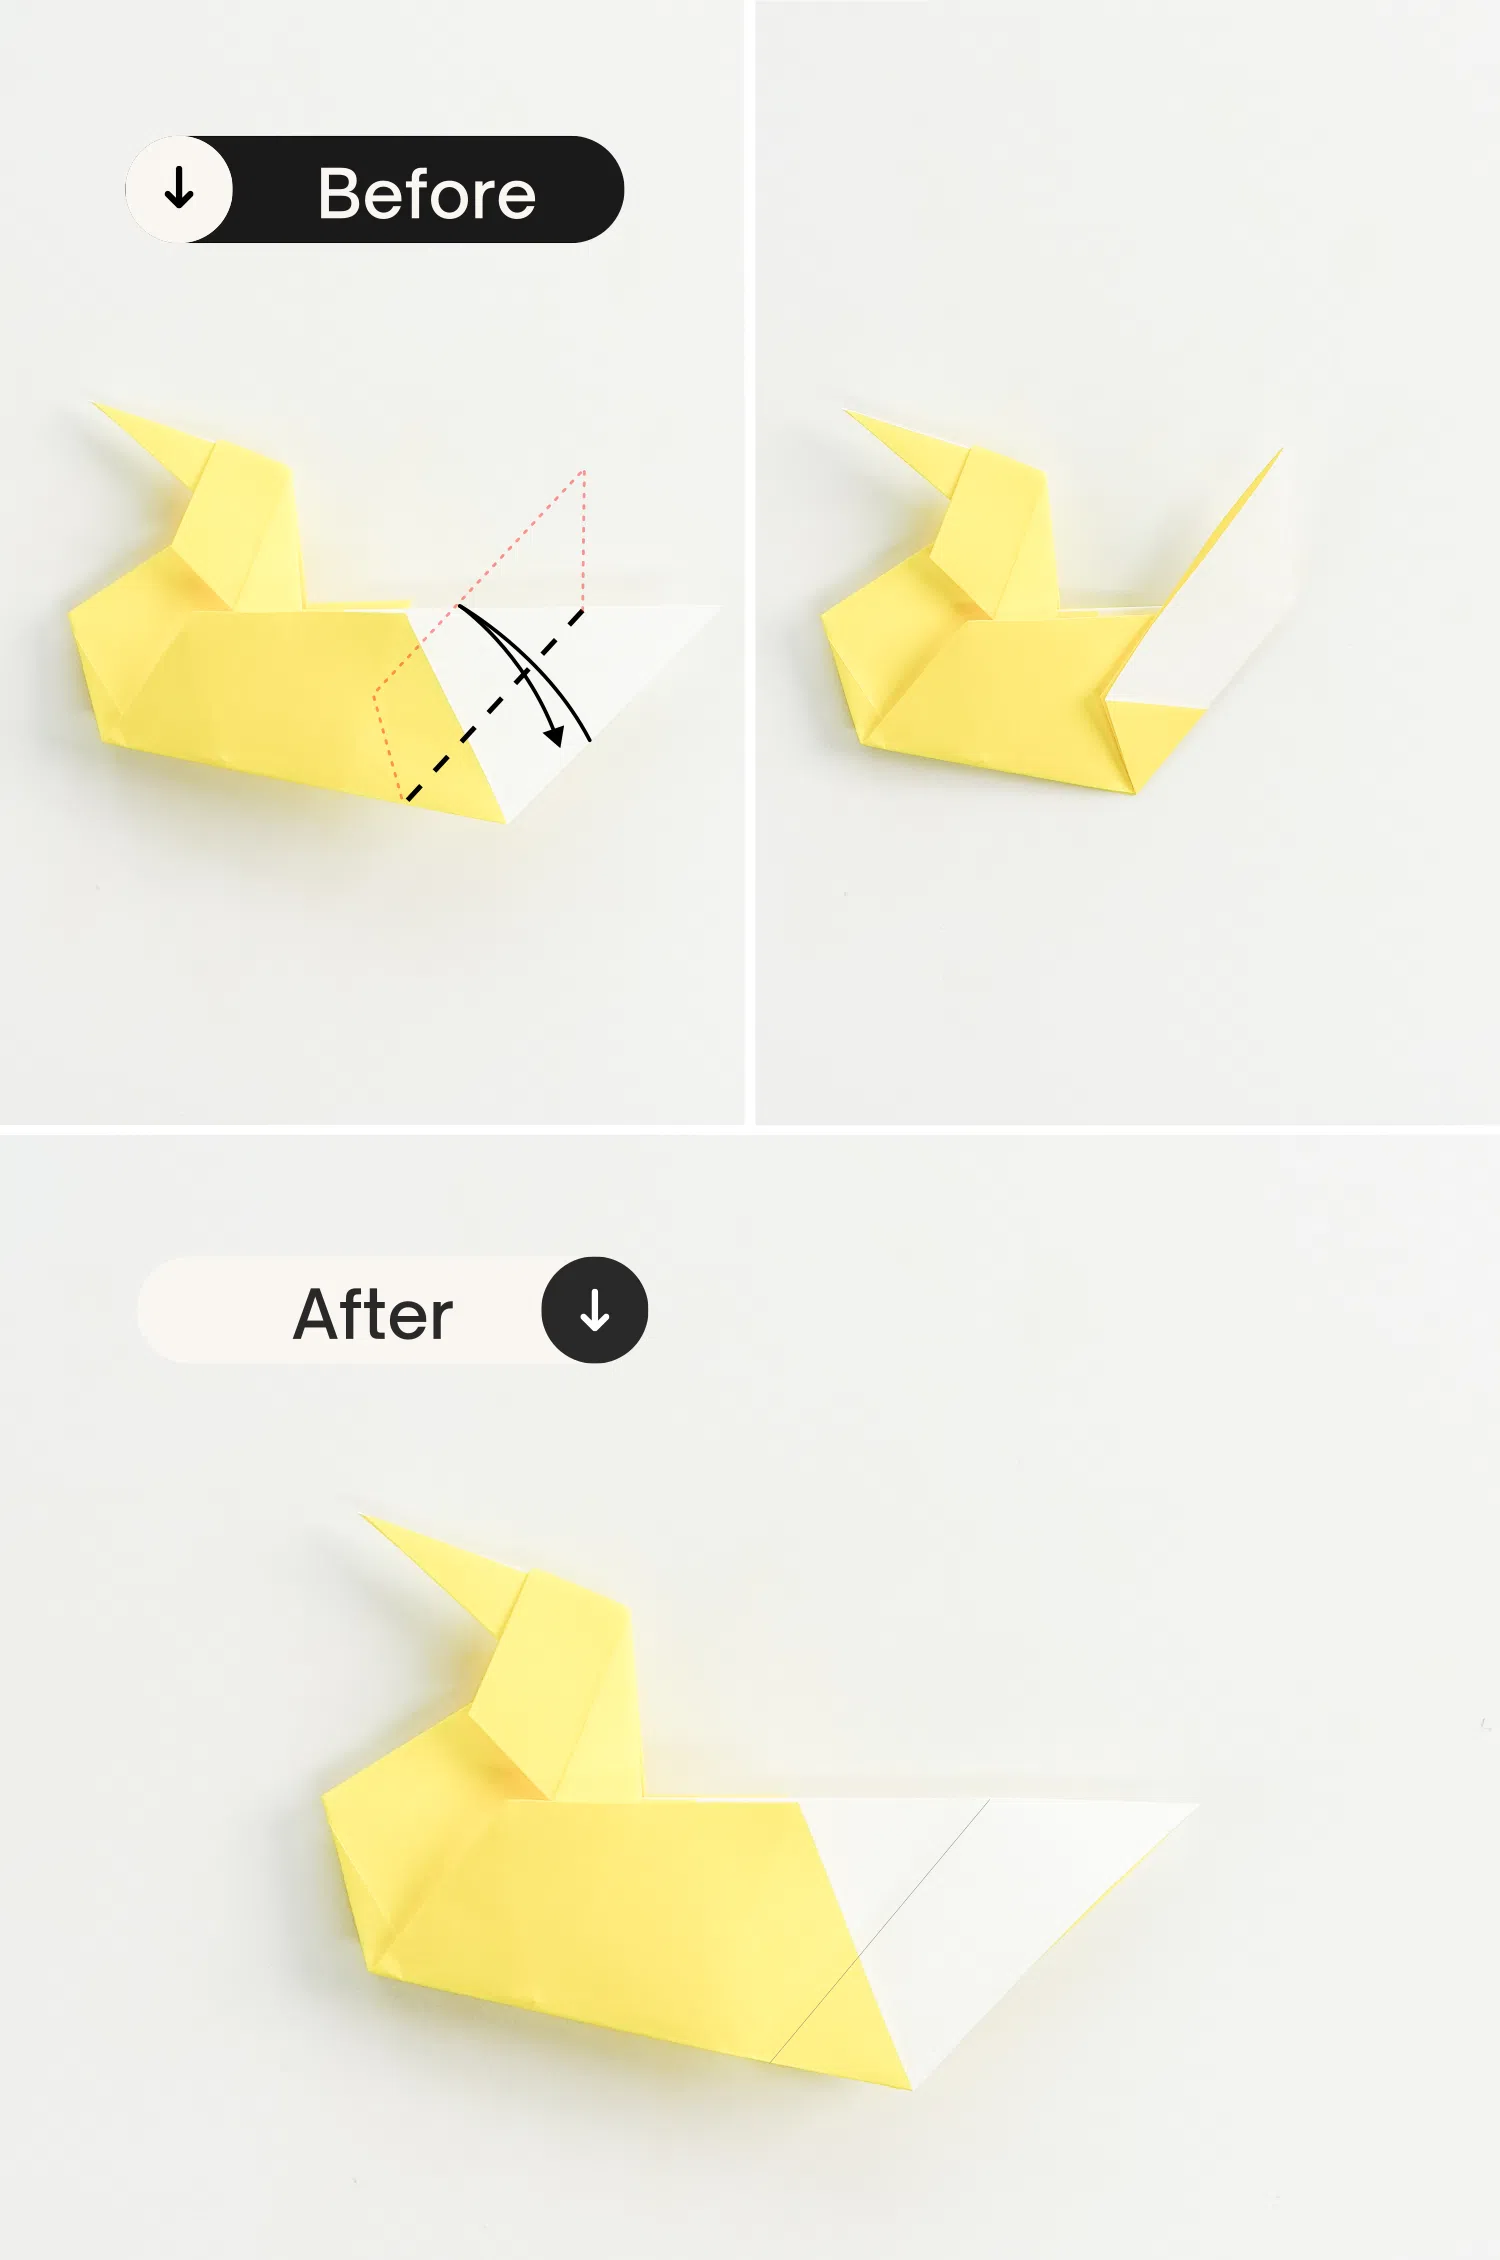
Step 10
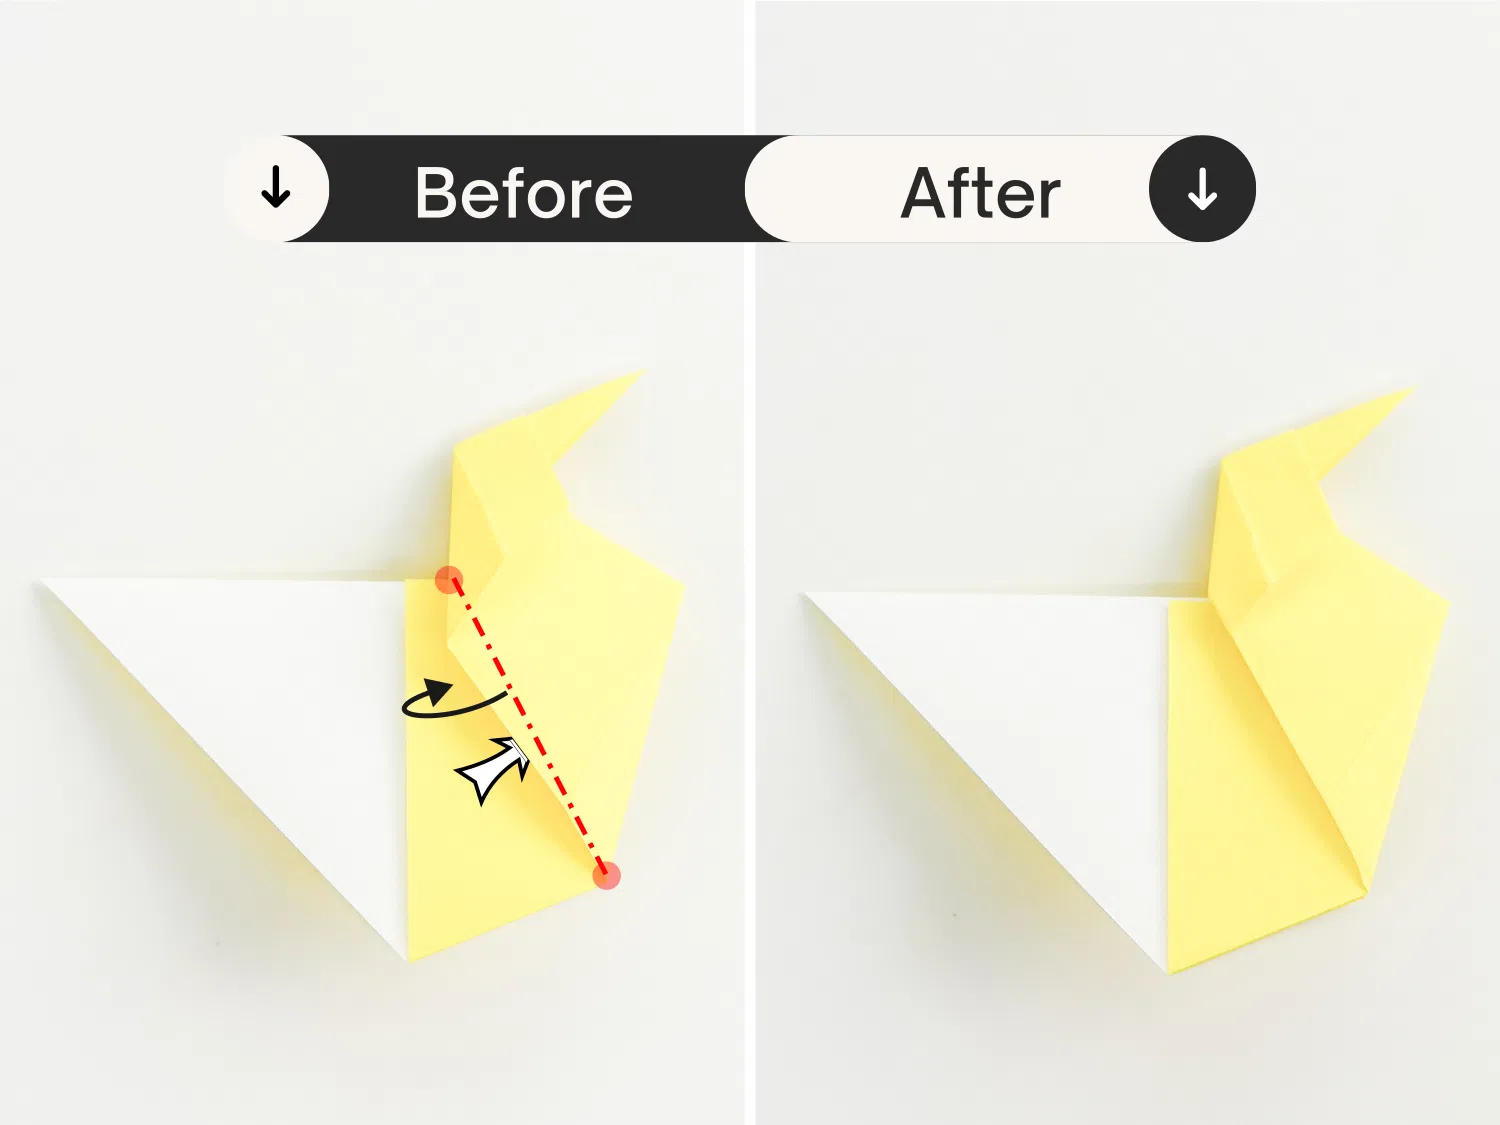
Fold the corner backward along the red dotted line.
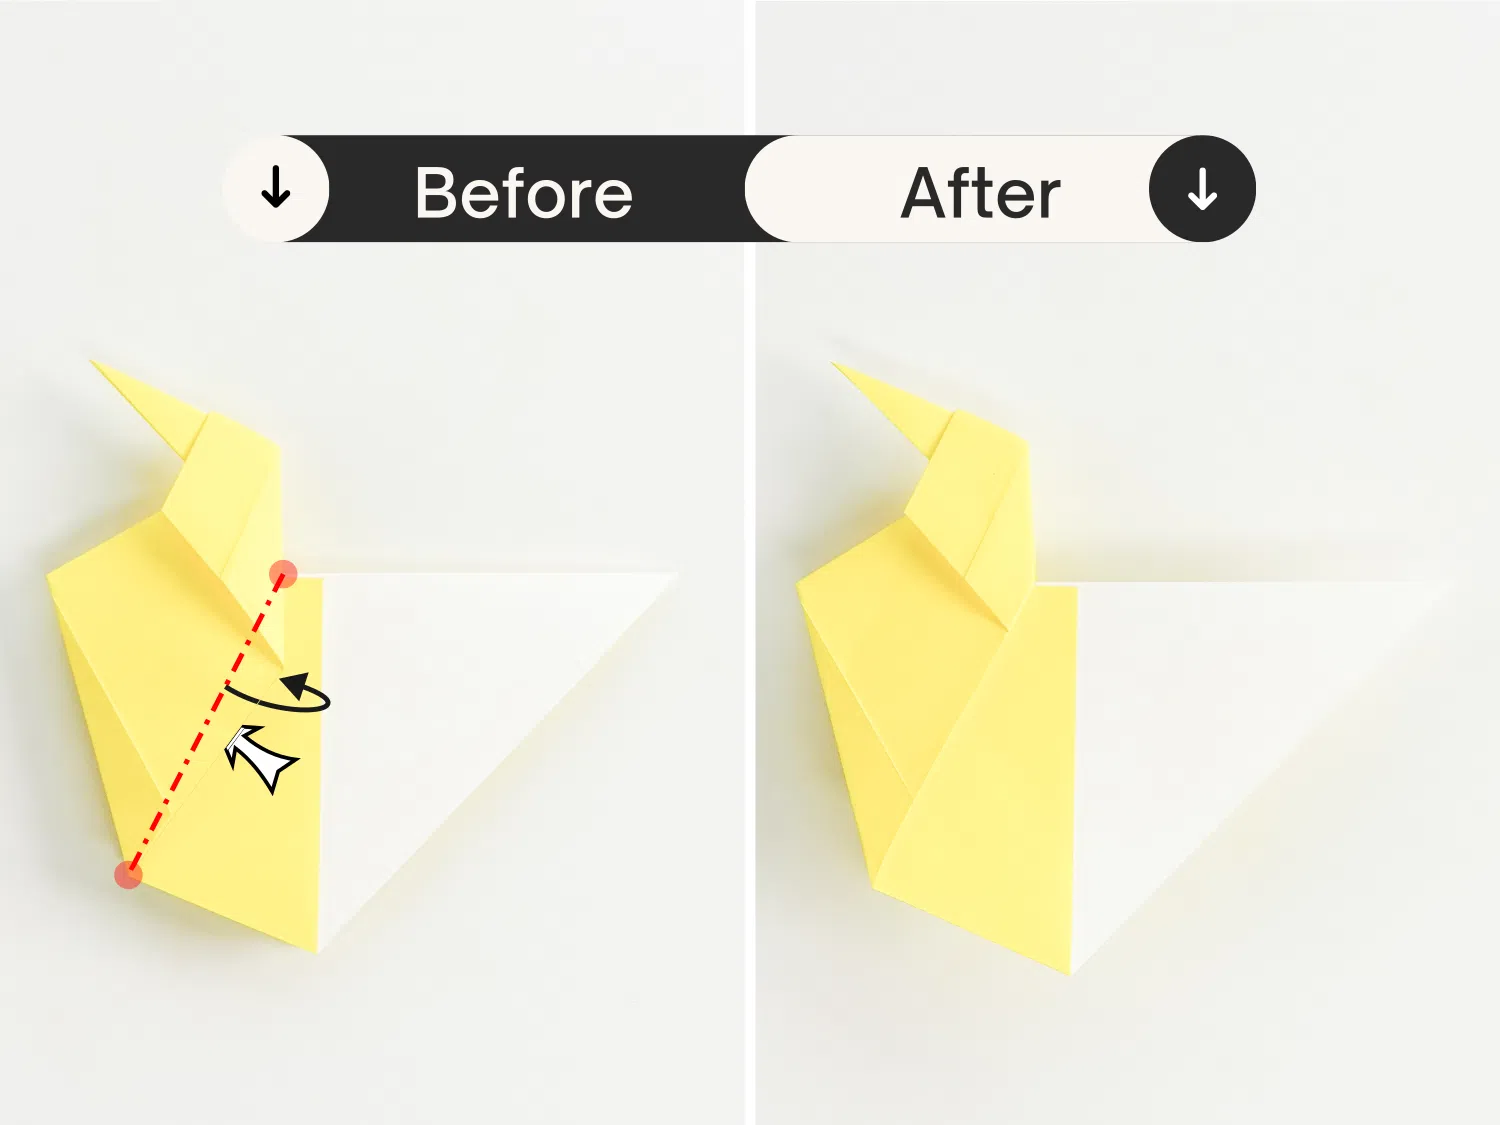
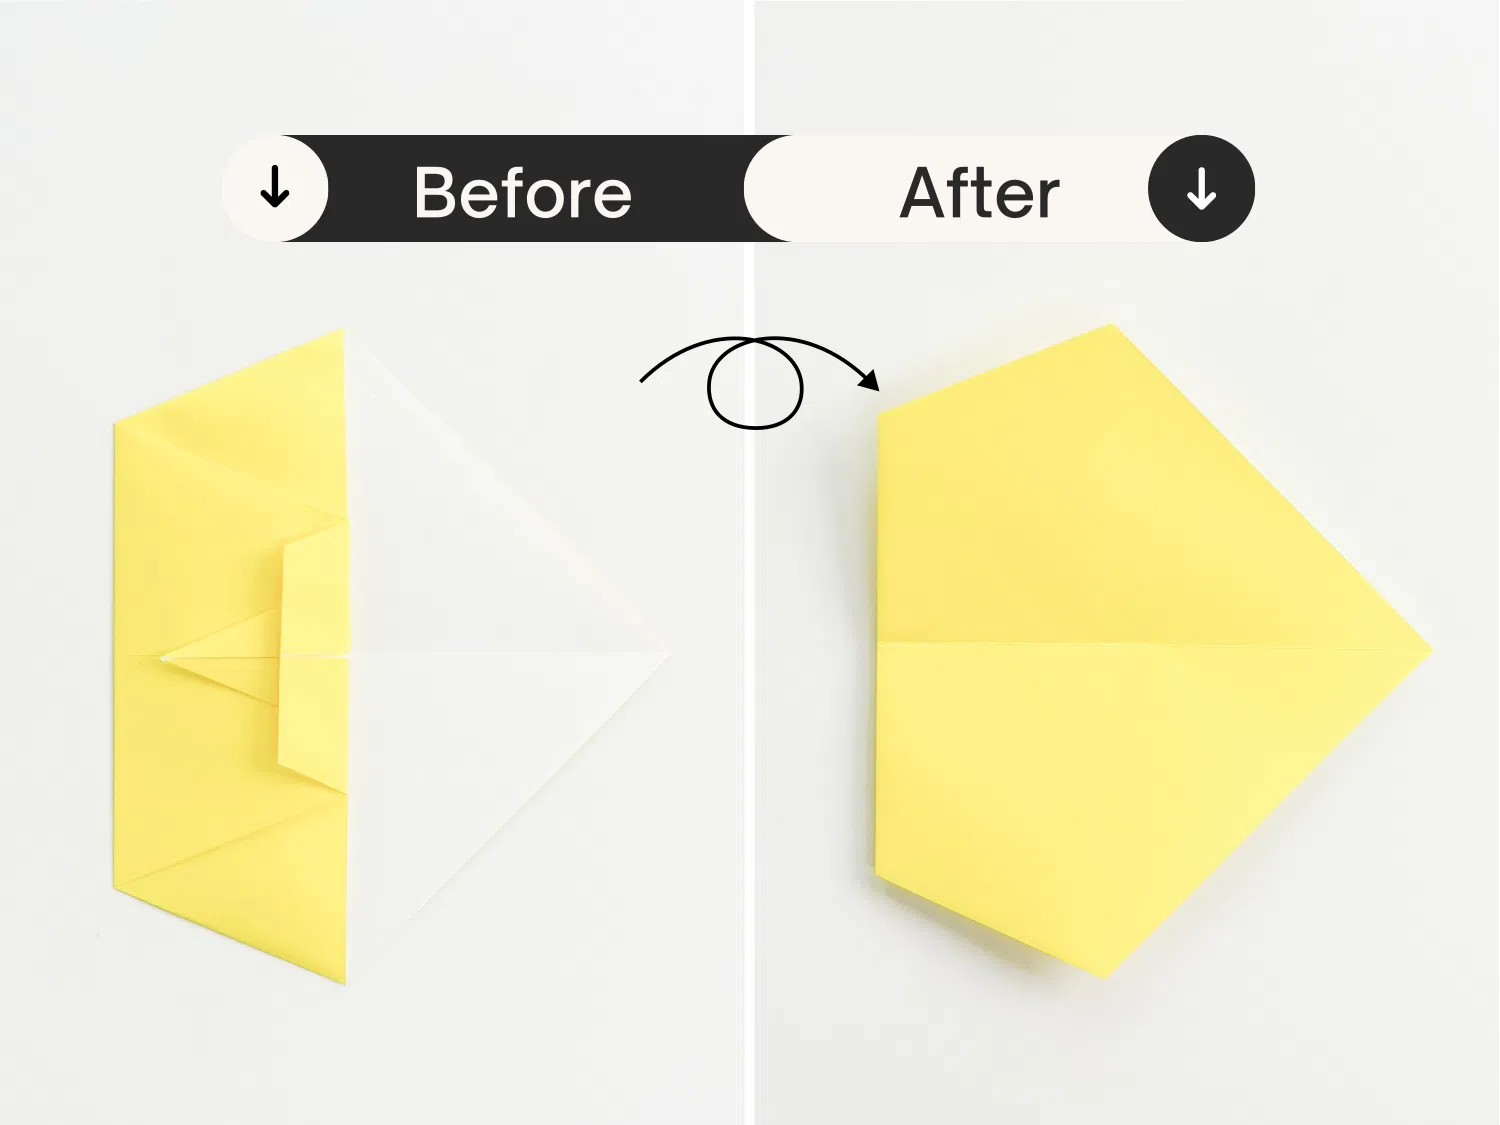
Step 11
Flip it over.
Step 12
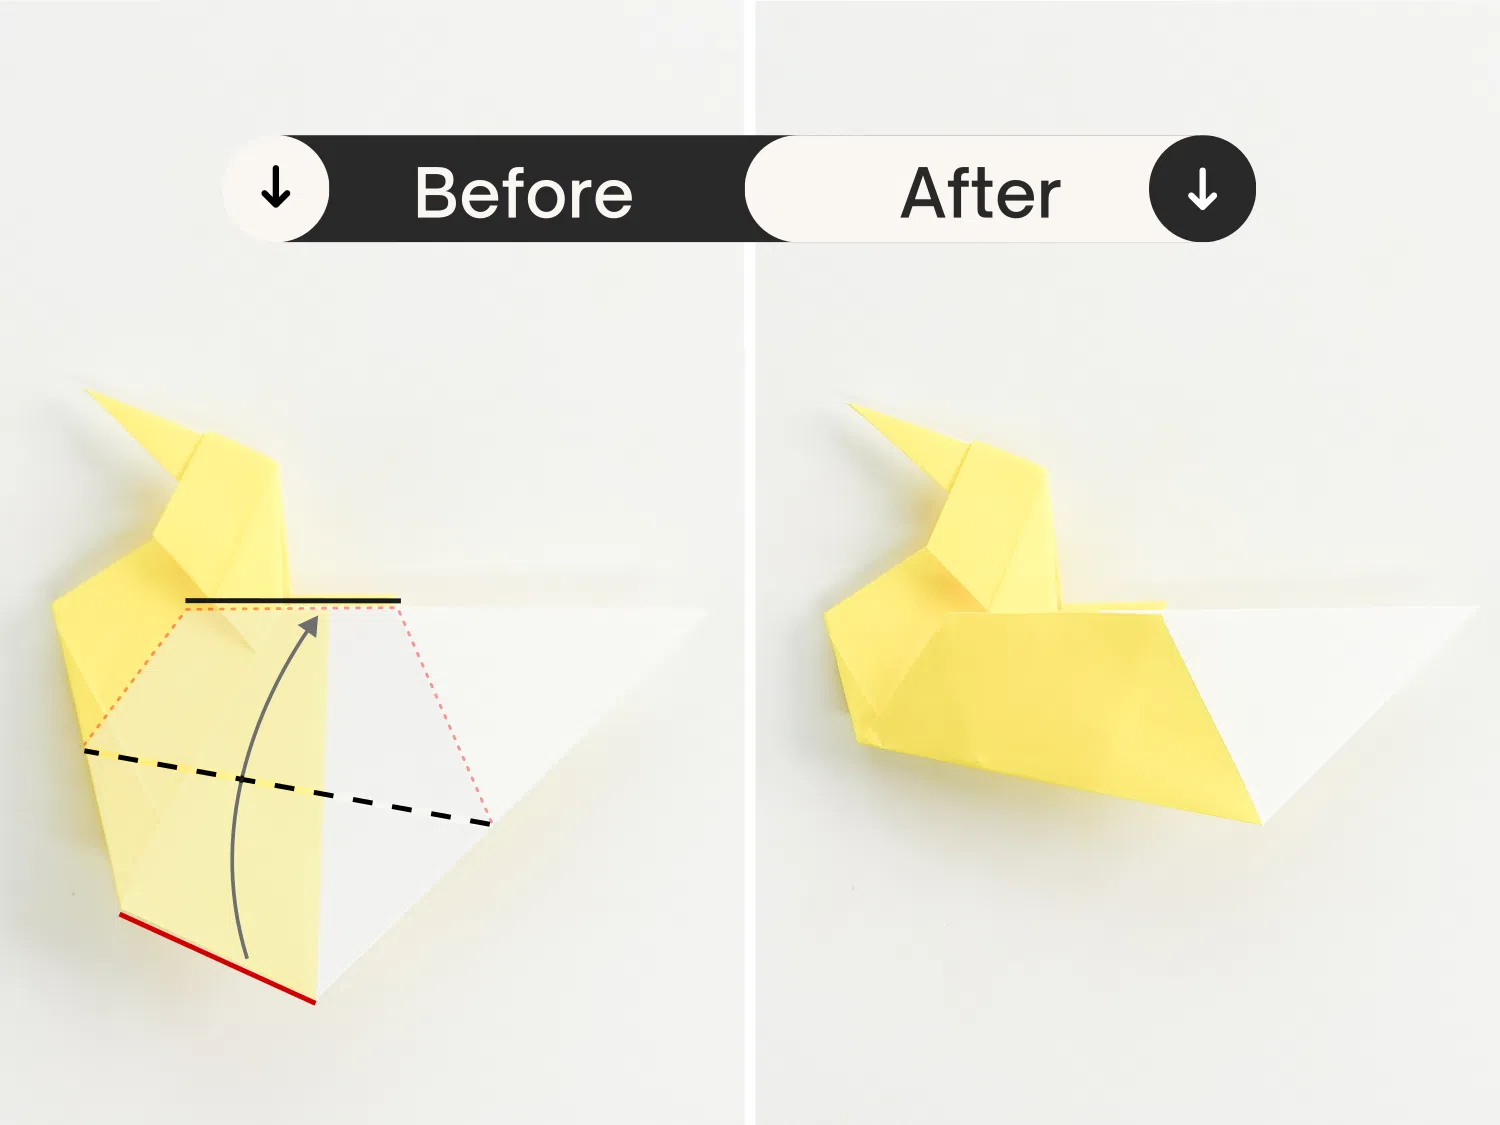
Fold this corner backward a little along the red dotted line.
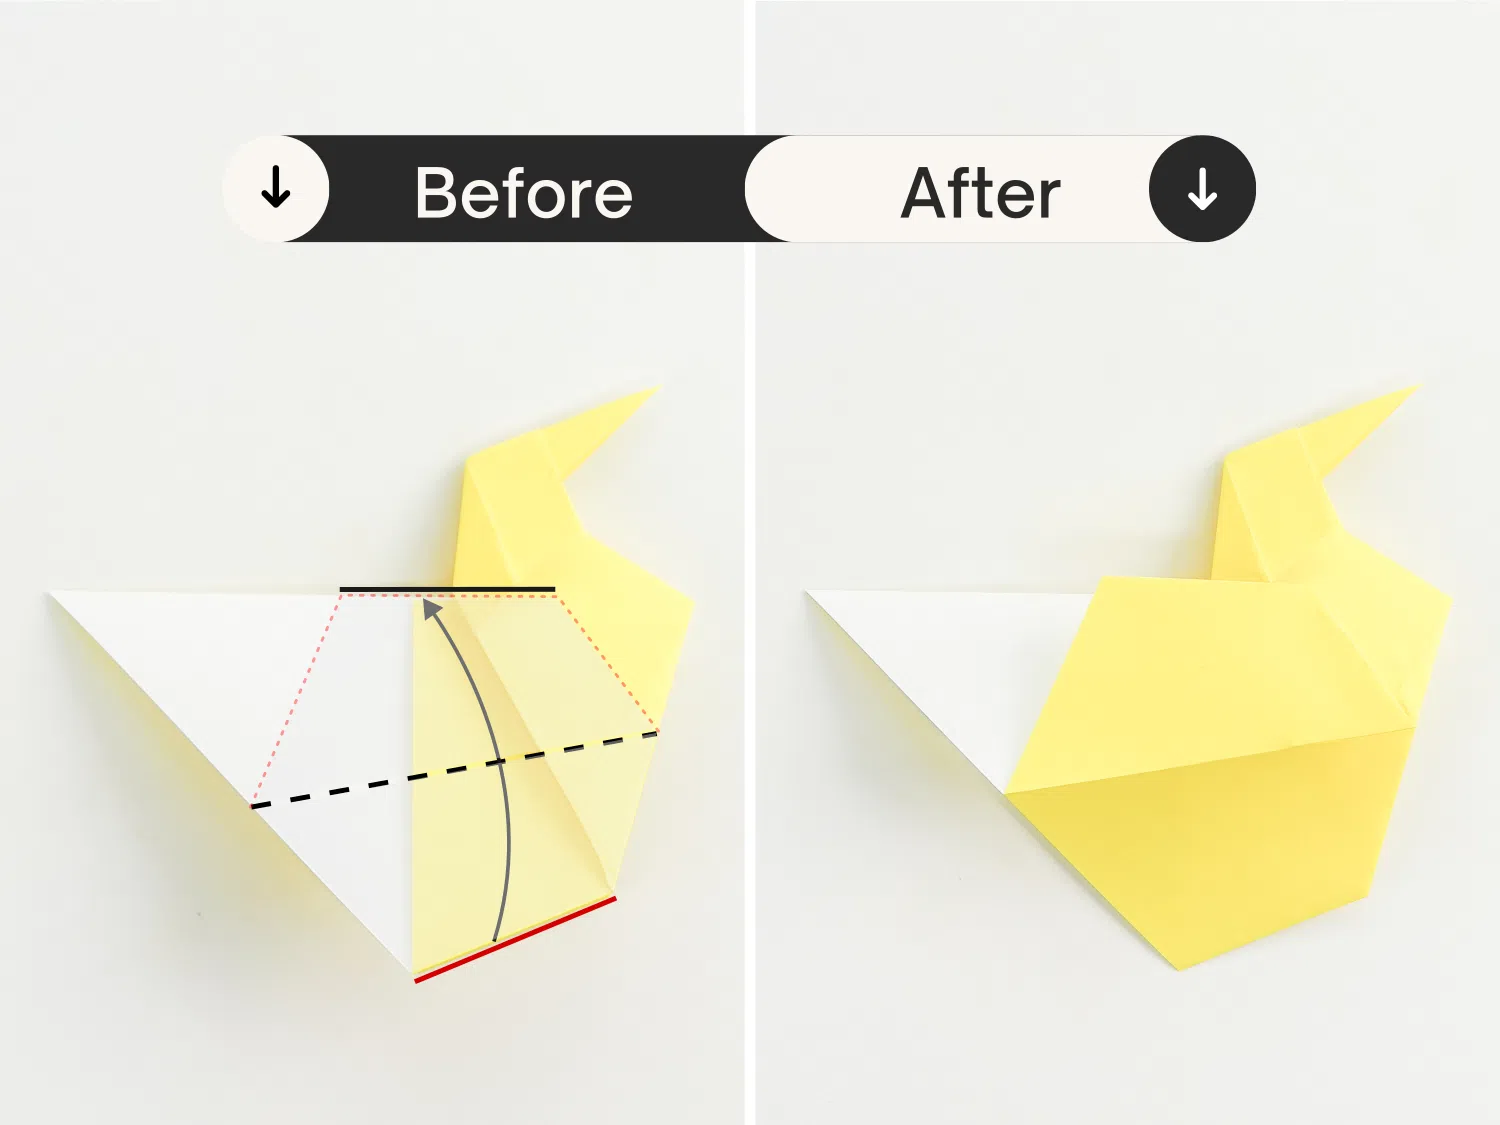
Step 13
Take the bottom edge of the top layer, fold it up from the backside, and make sure to meet the top edge of the duck’s back.
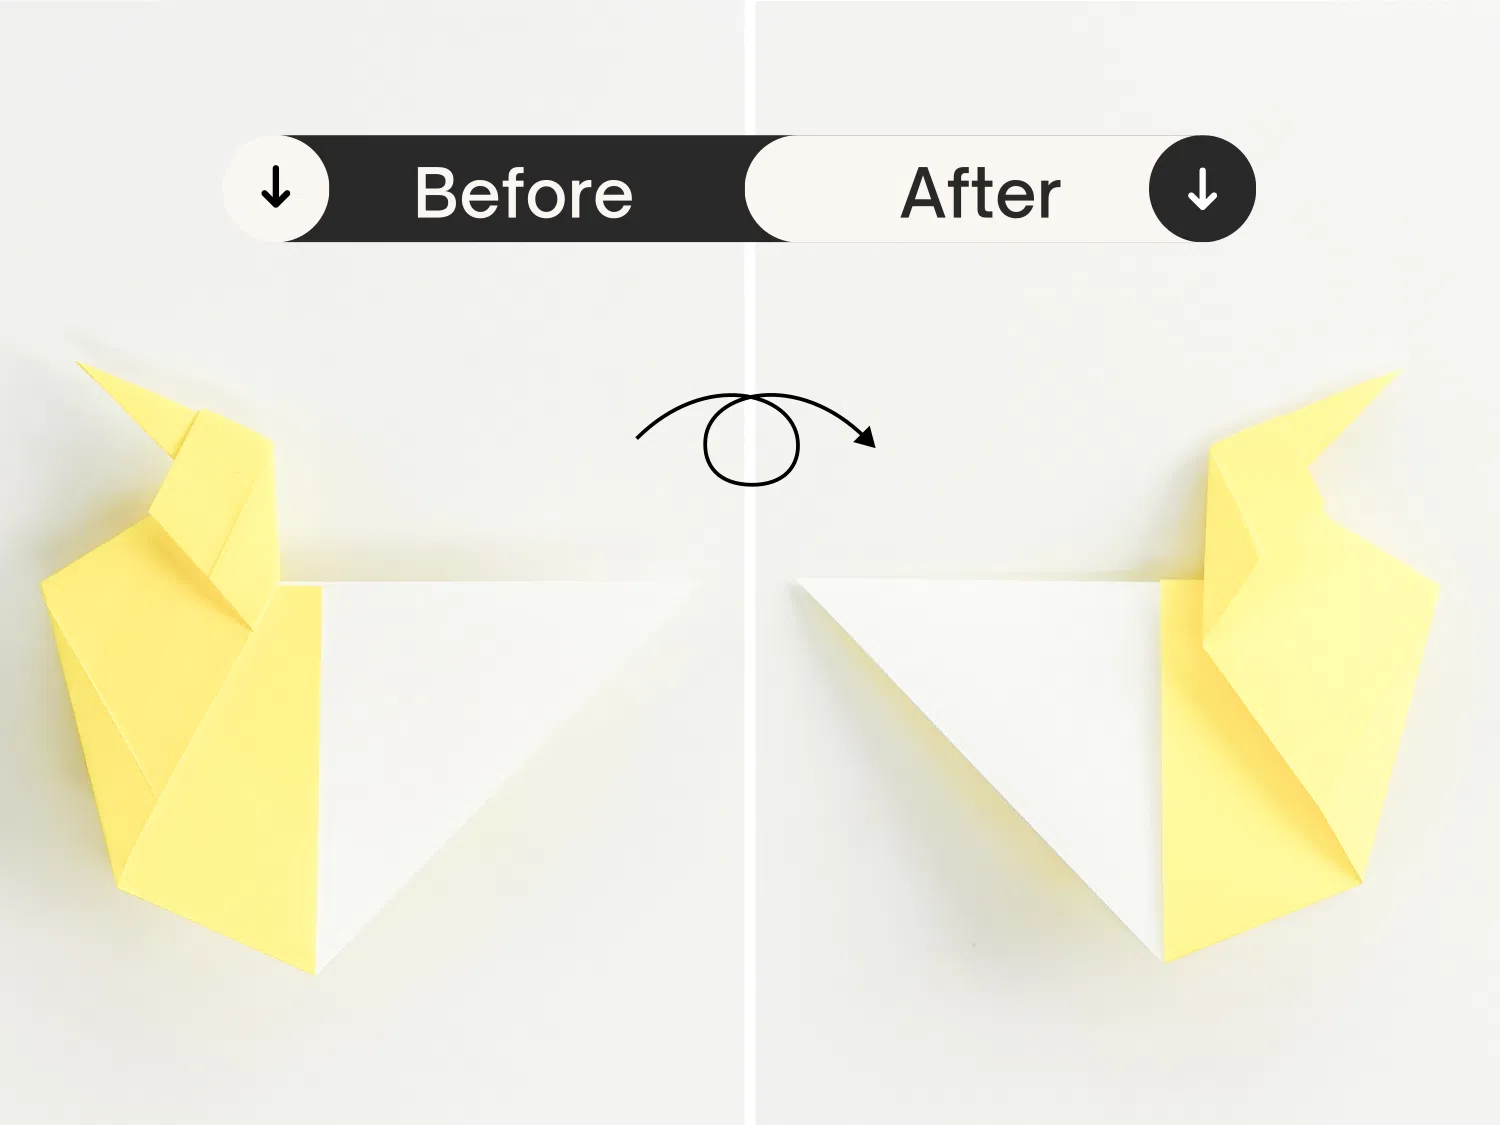
Step 14
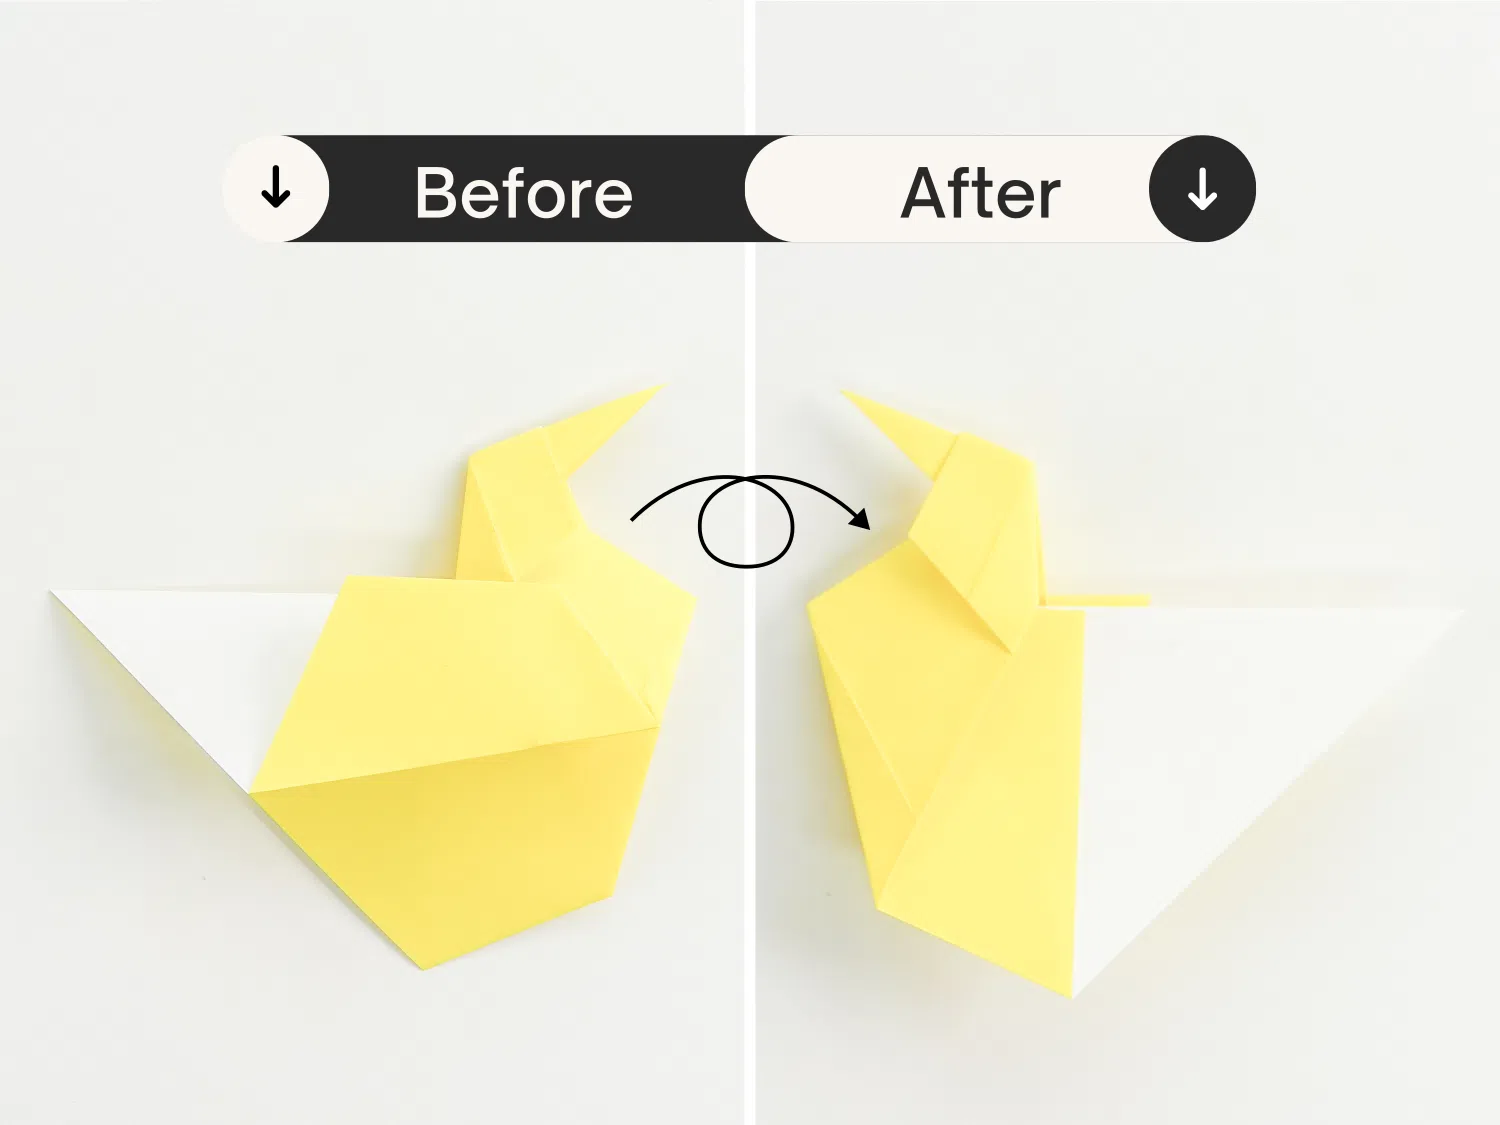
Flip the paper over again.
Step 15
In the same way, fold the bottom edge up as in step 13.
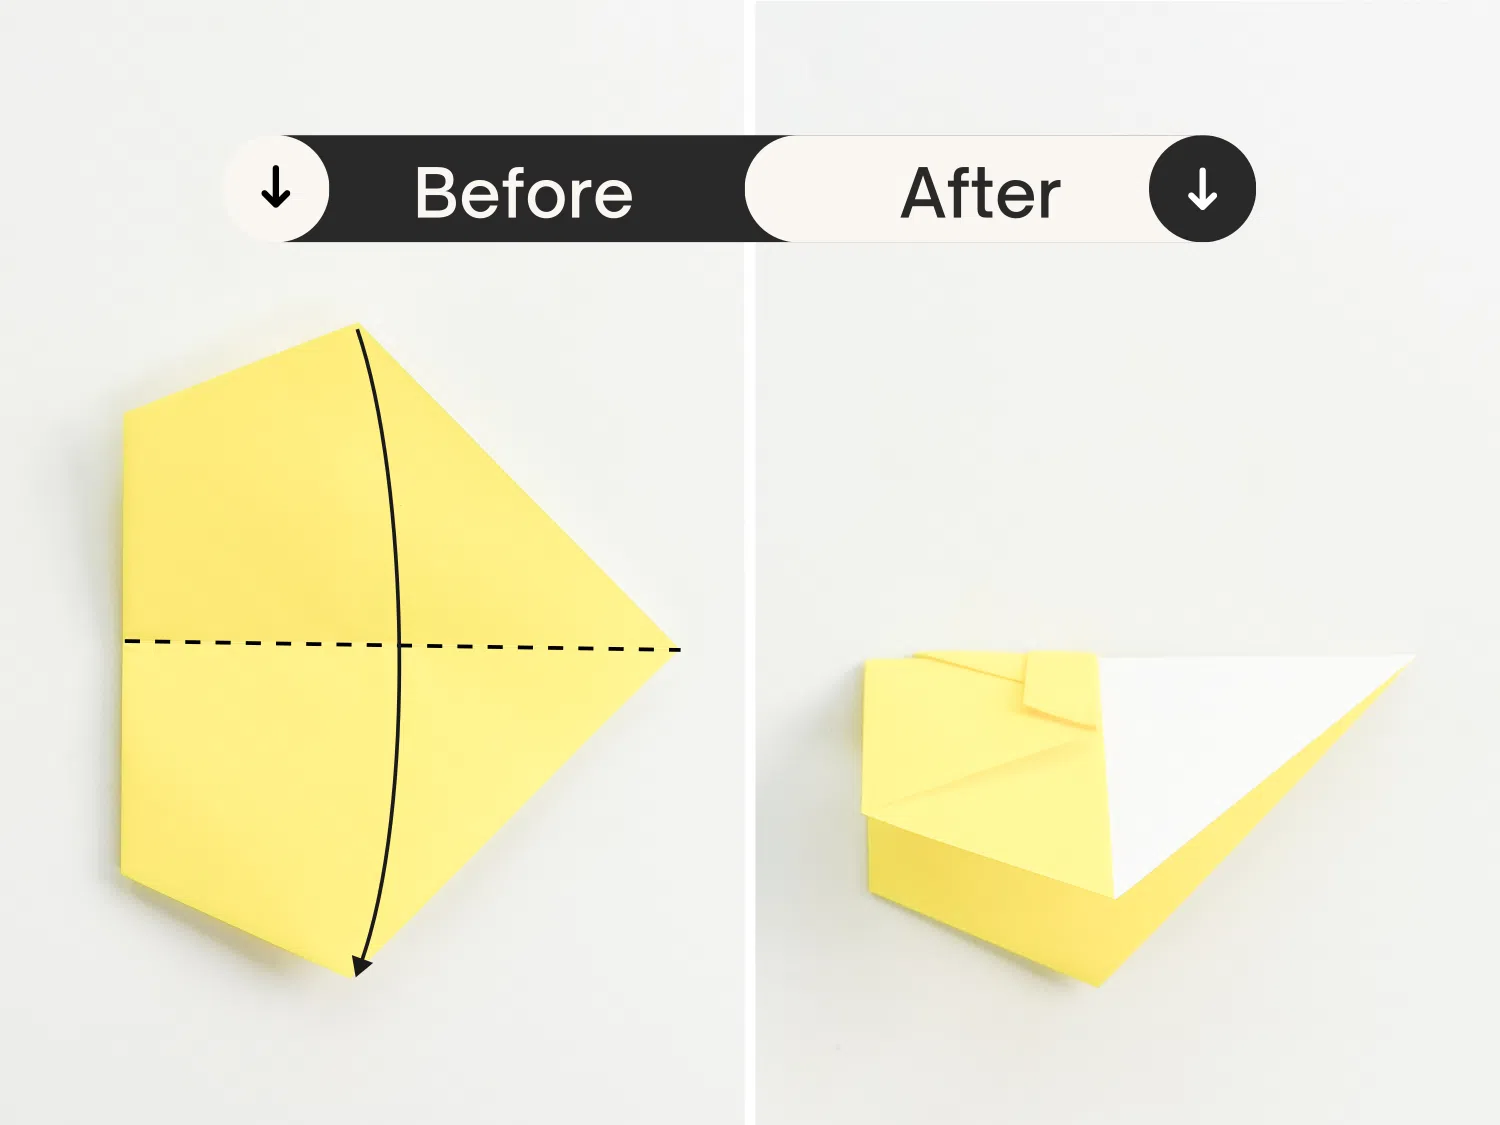
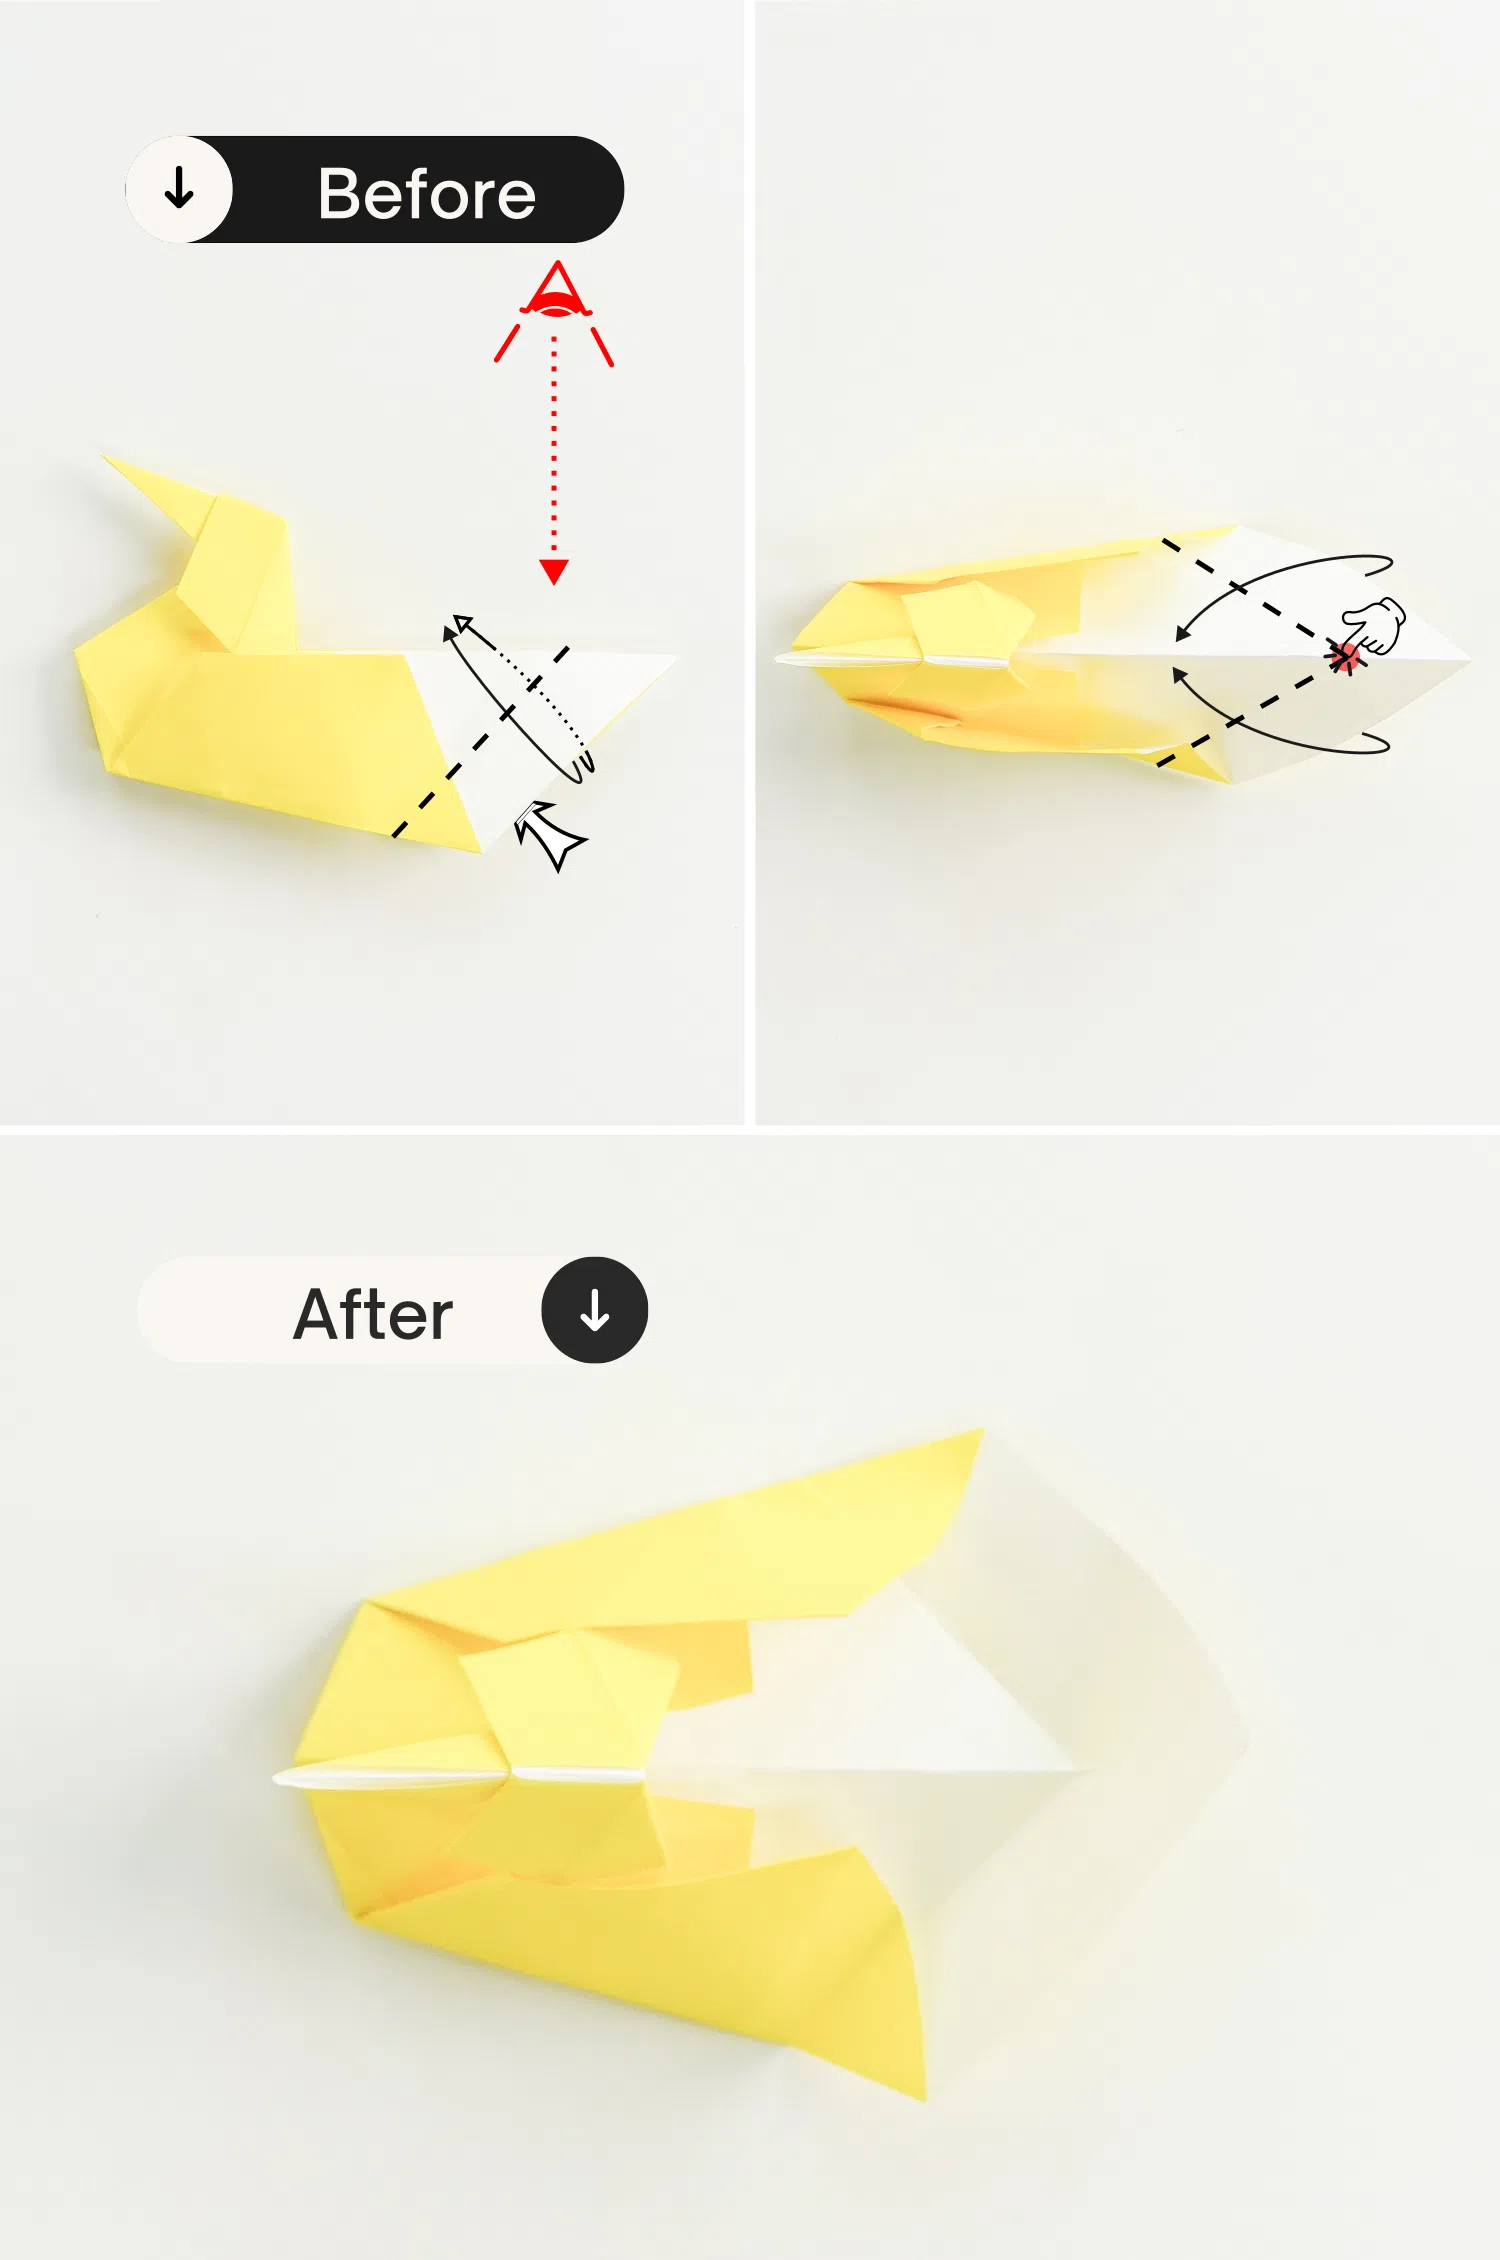
Step 16
Fold the duck’s tail up along the black dotted line, crease it well then unfold it.
Step 17
Open the paper from the bottom, and press down the intersection point of these two creases, while turning both sides of the tail up.
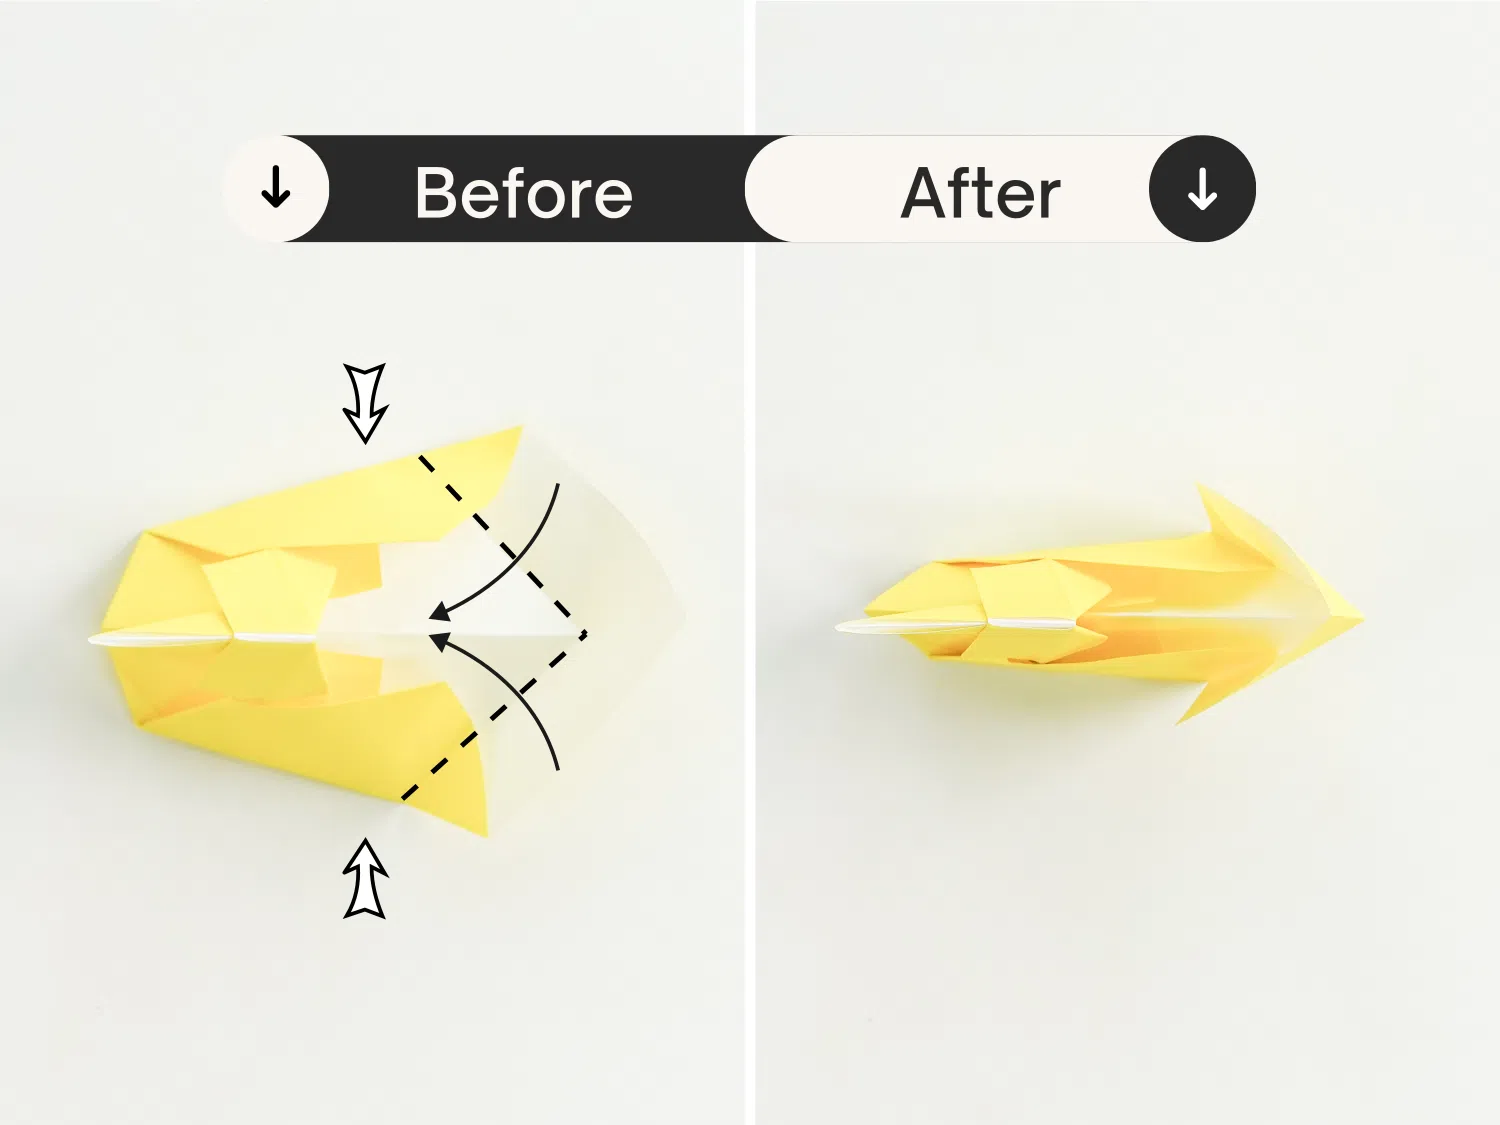
Step 18
Close the paper and flatten the tail.
Step 19
Lay the duck down, it will be made soon.
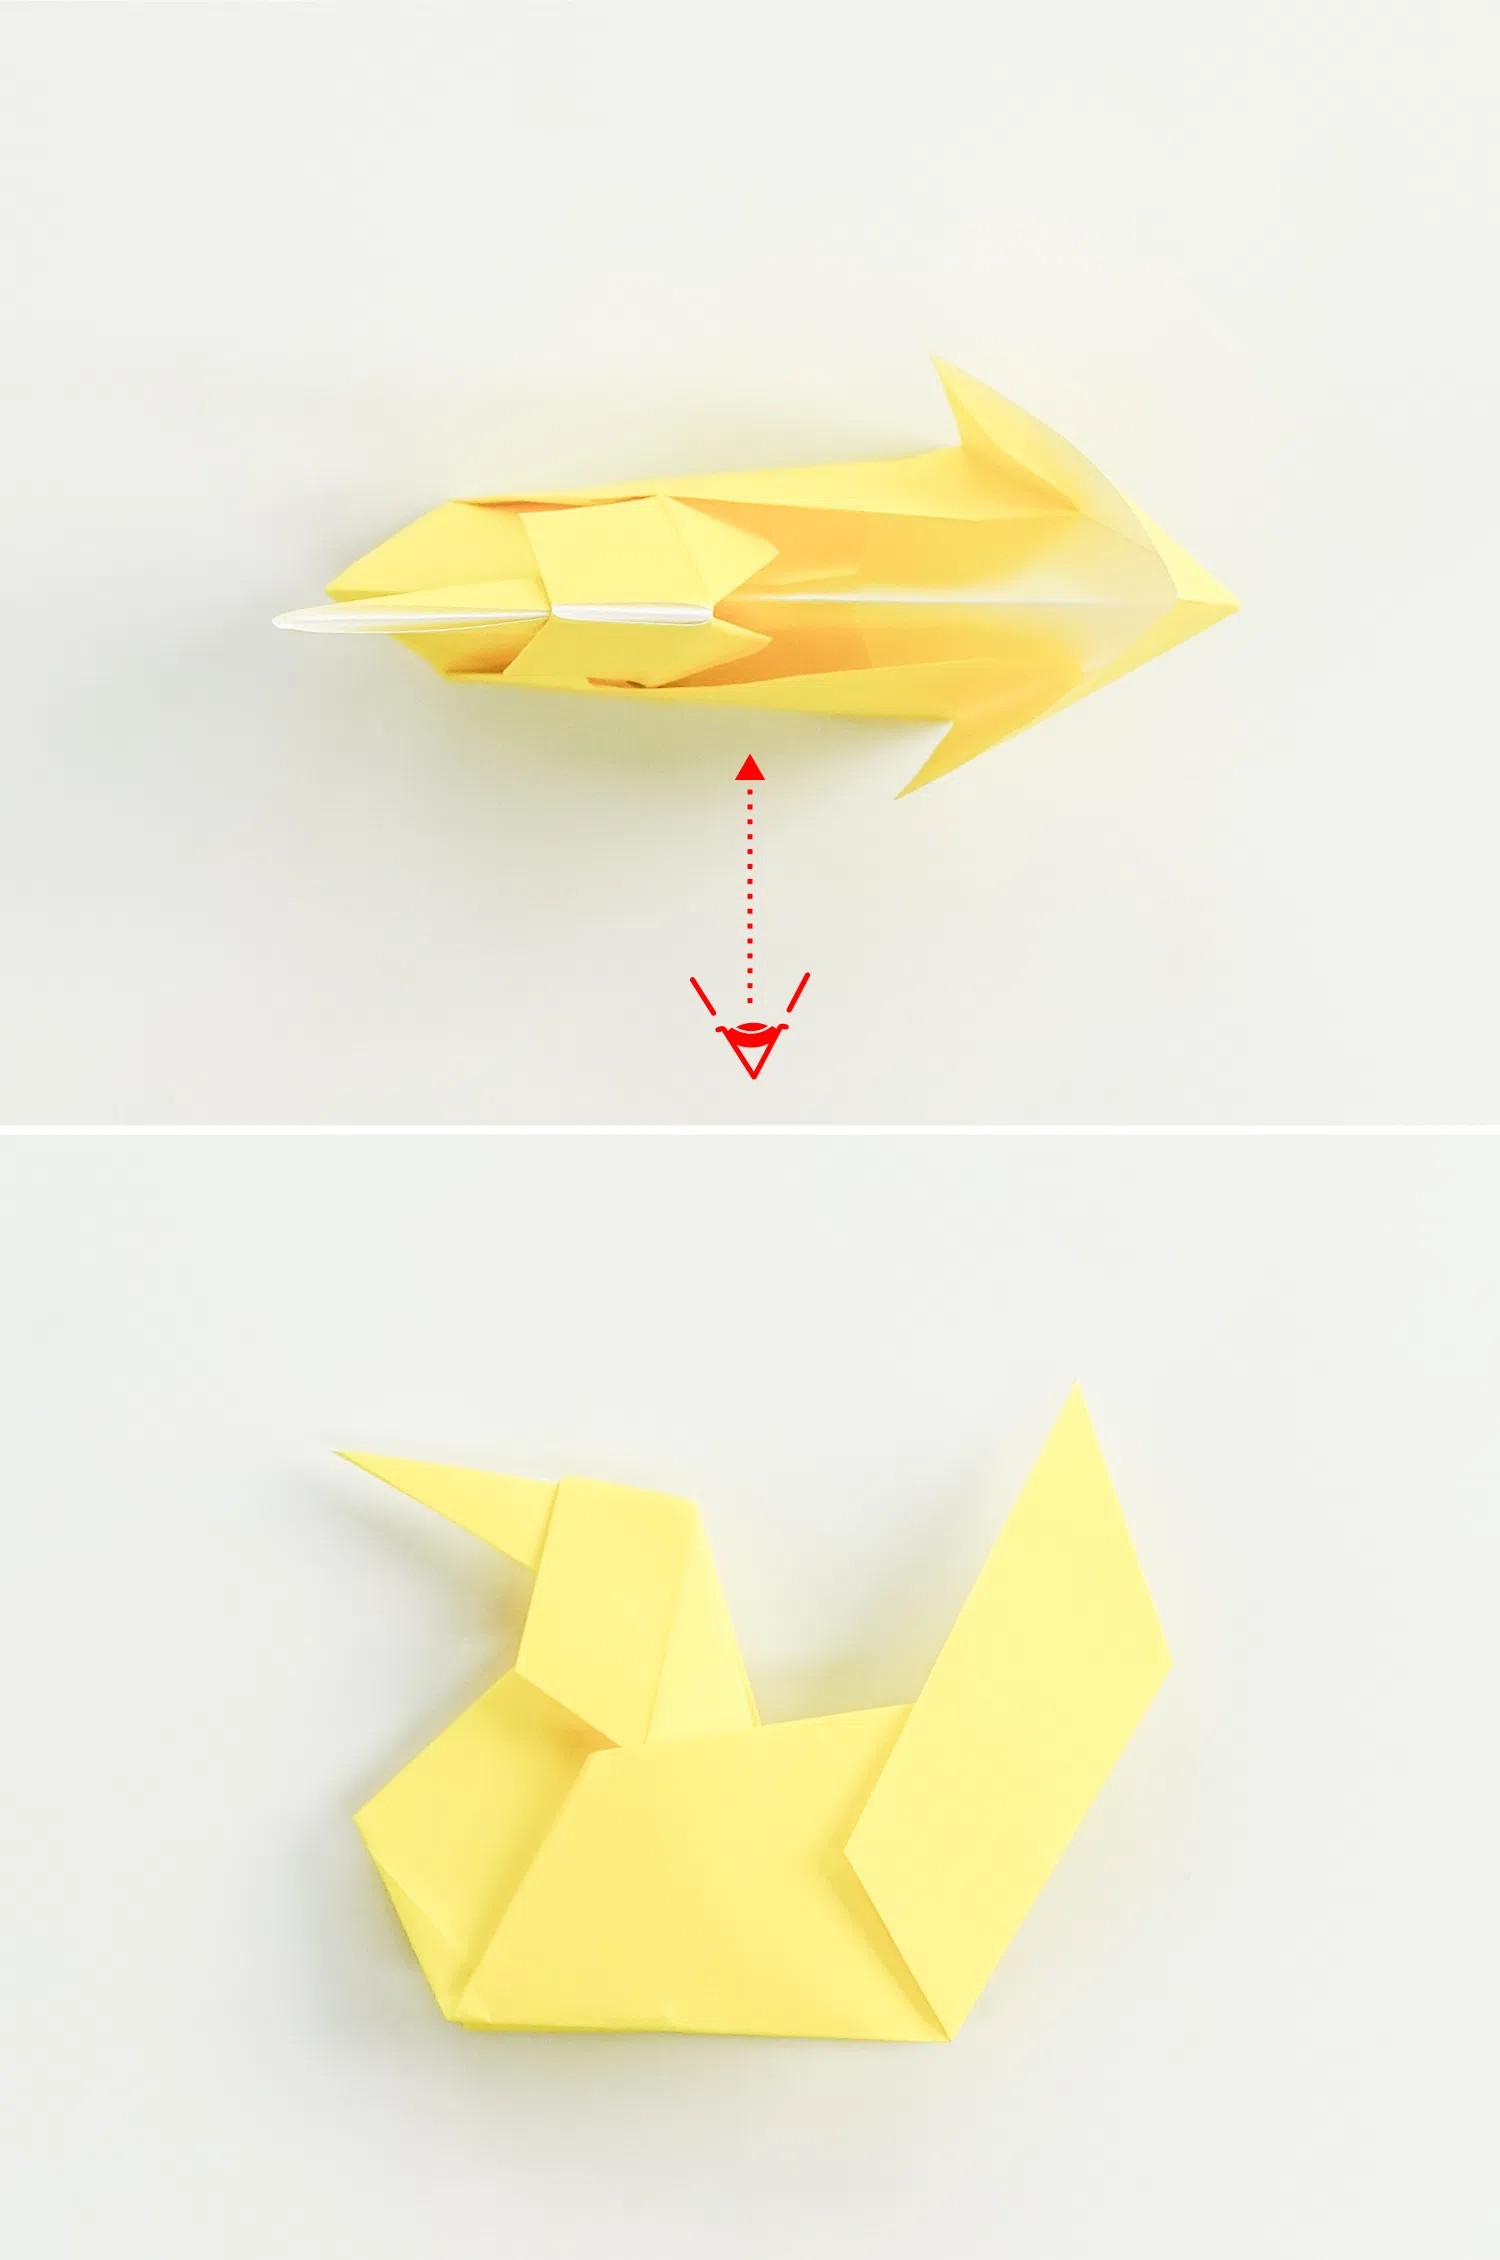
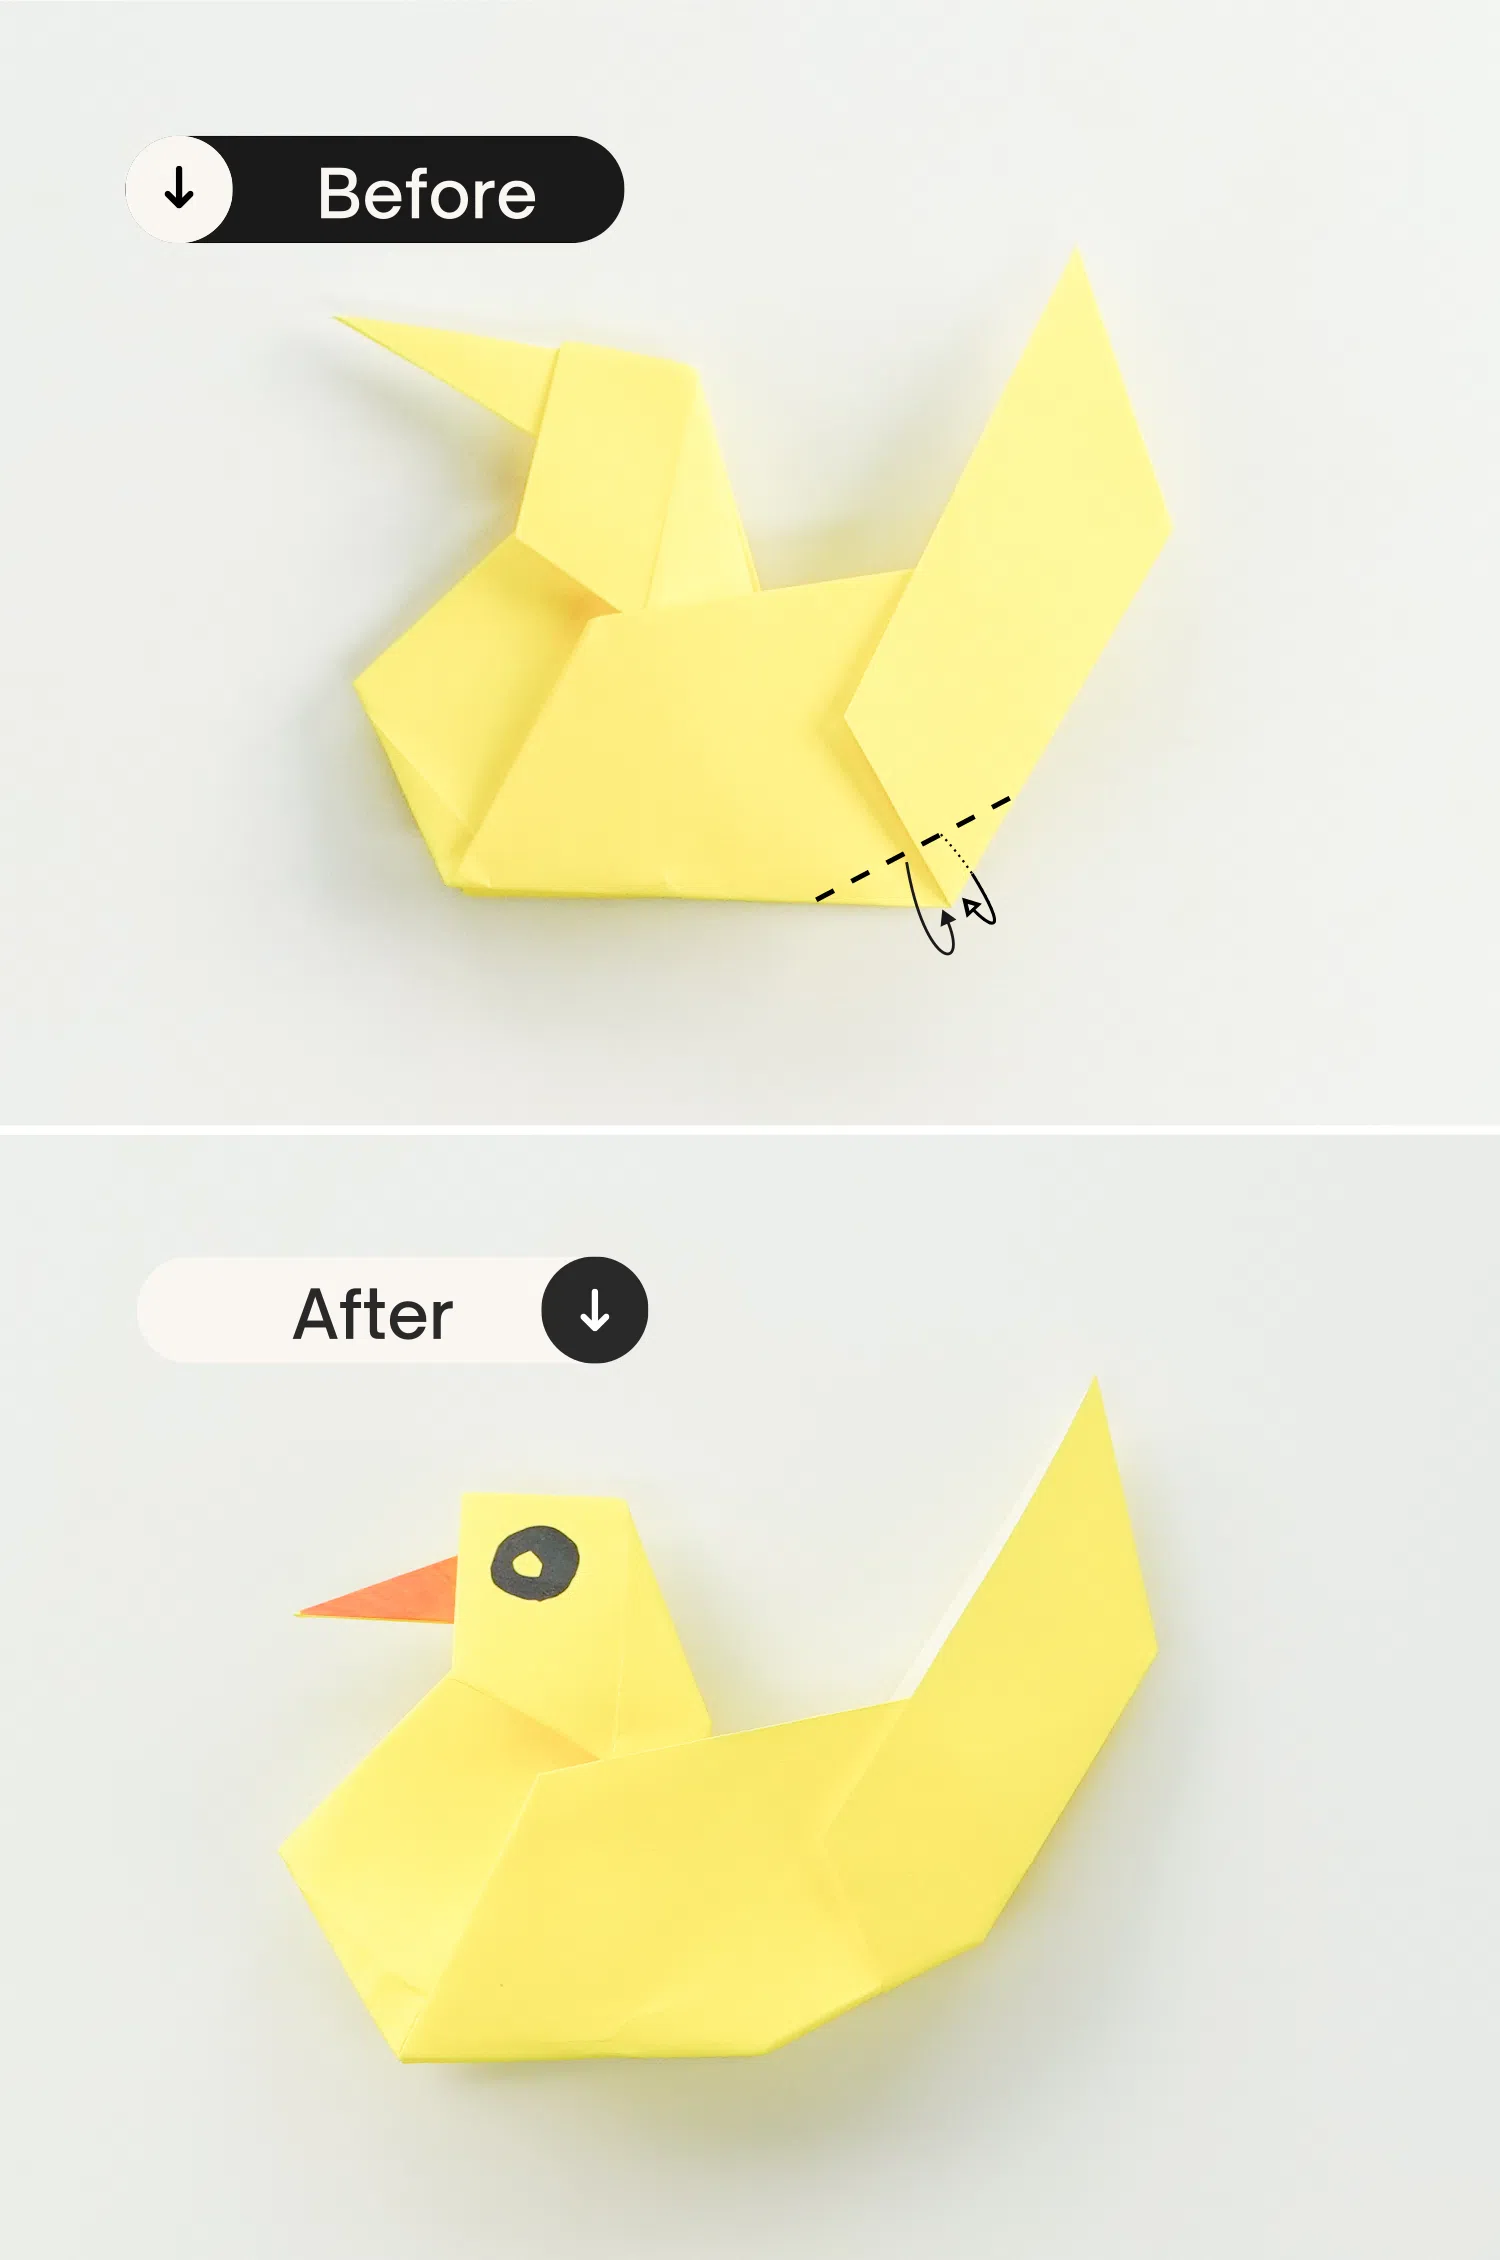
Step 20
Fold both below and above corners inward slightly, now draw eyes for your cute little duck, and color for its mouth.
What’s Next
Now you have finished this lovely origami duck. Move on to check more lovely and easy animal ideas like origami crab which share a similar living environment with this origami yellow duck.