Origami Rabbit Ear Fold
Rabbit Ear Fold: This describes a common folding technique that creates a flap that looks like an “ears” with a corner and three layers.
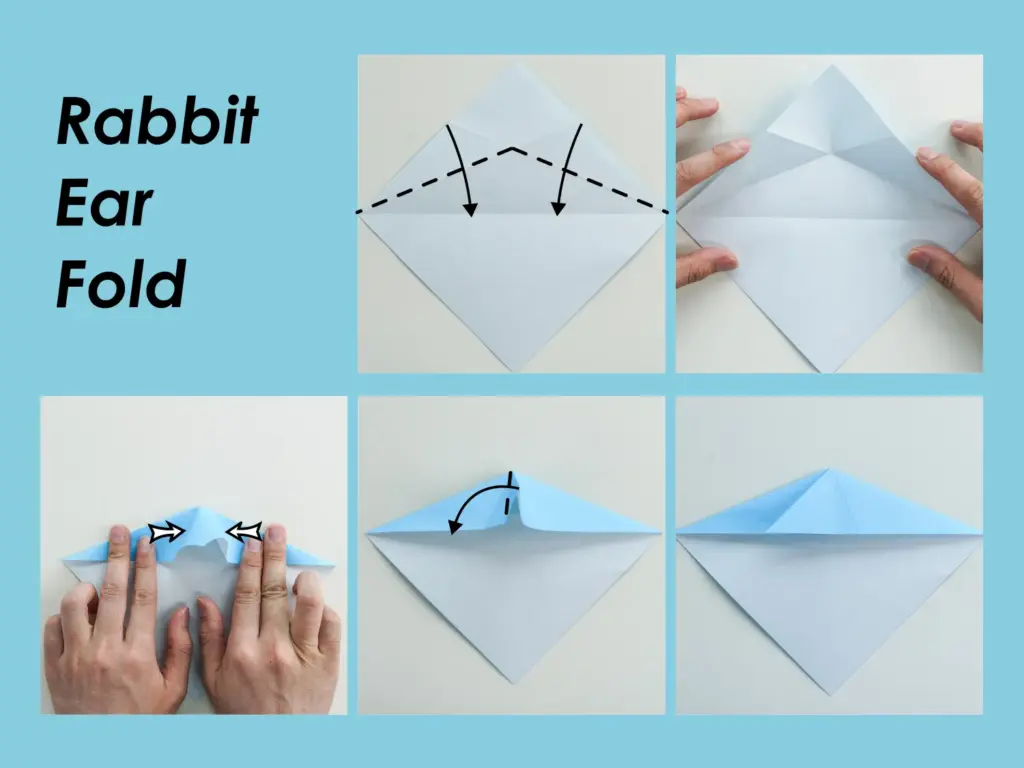
How to make a rabbit ear fold
Start with square paper positioned like a diamond. Fold in half and then unfold.
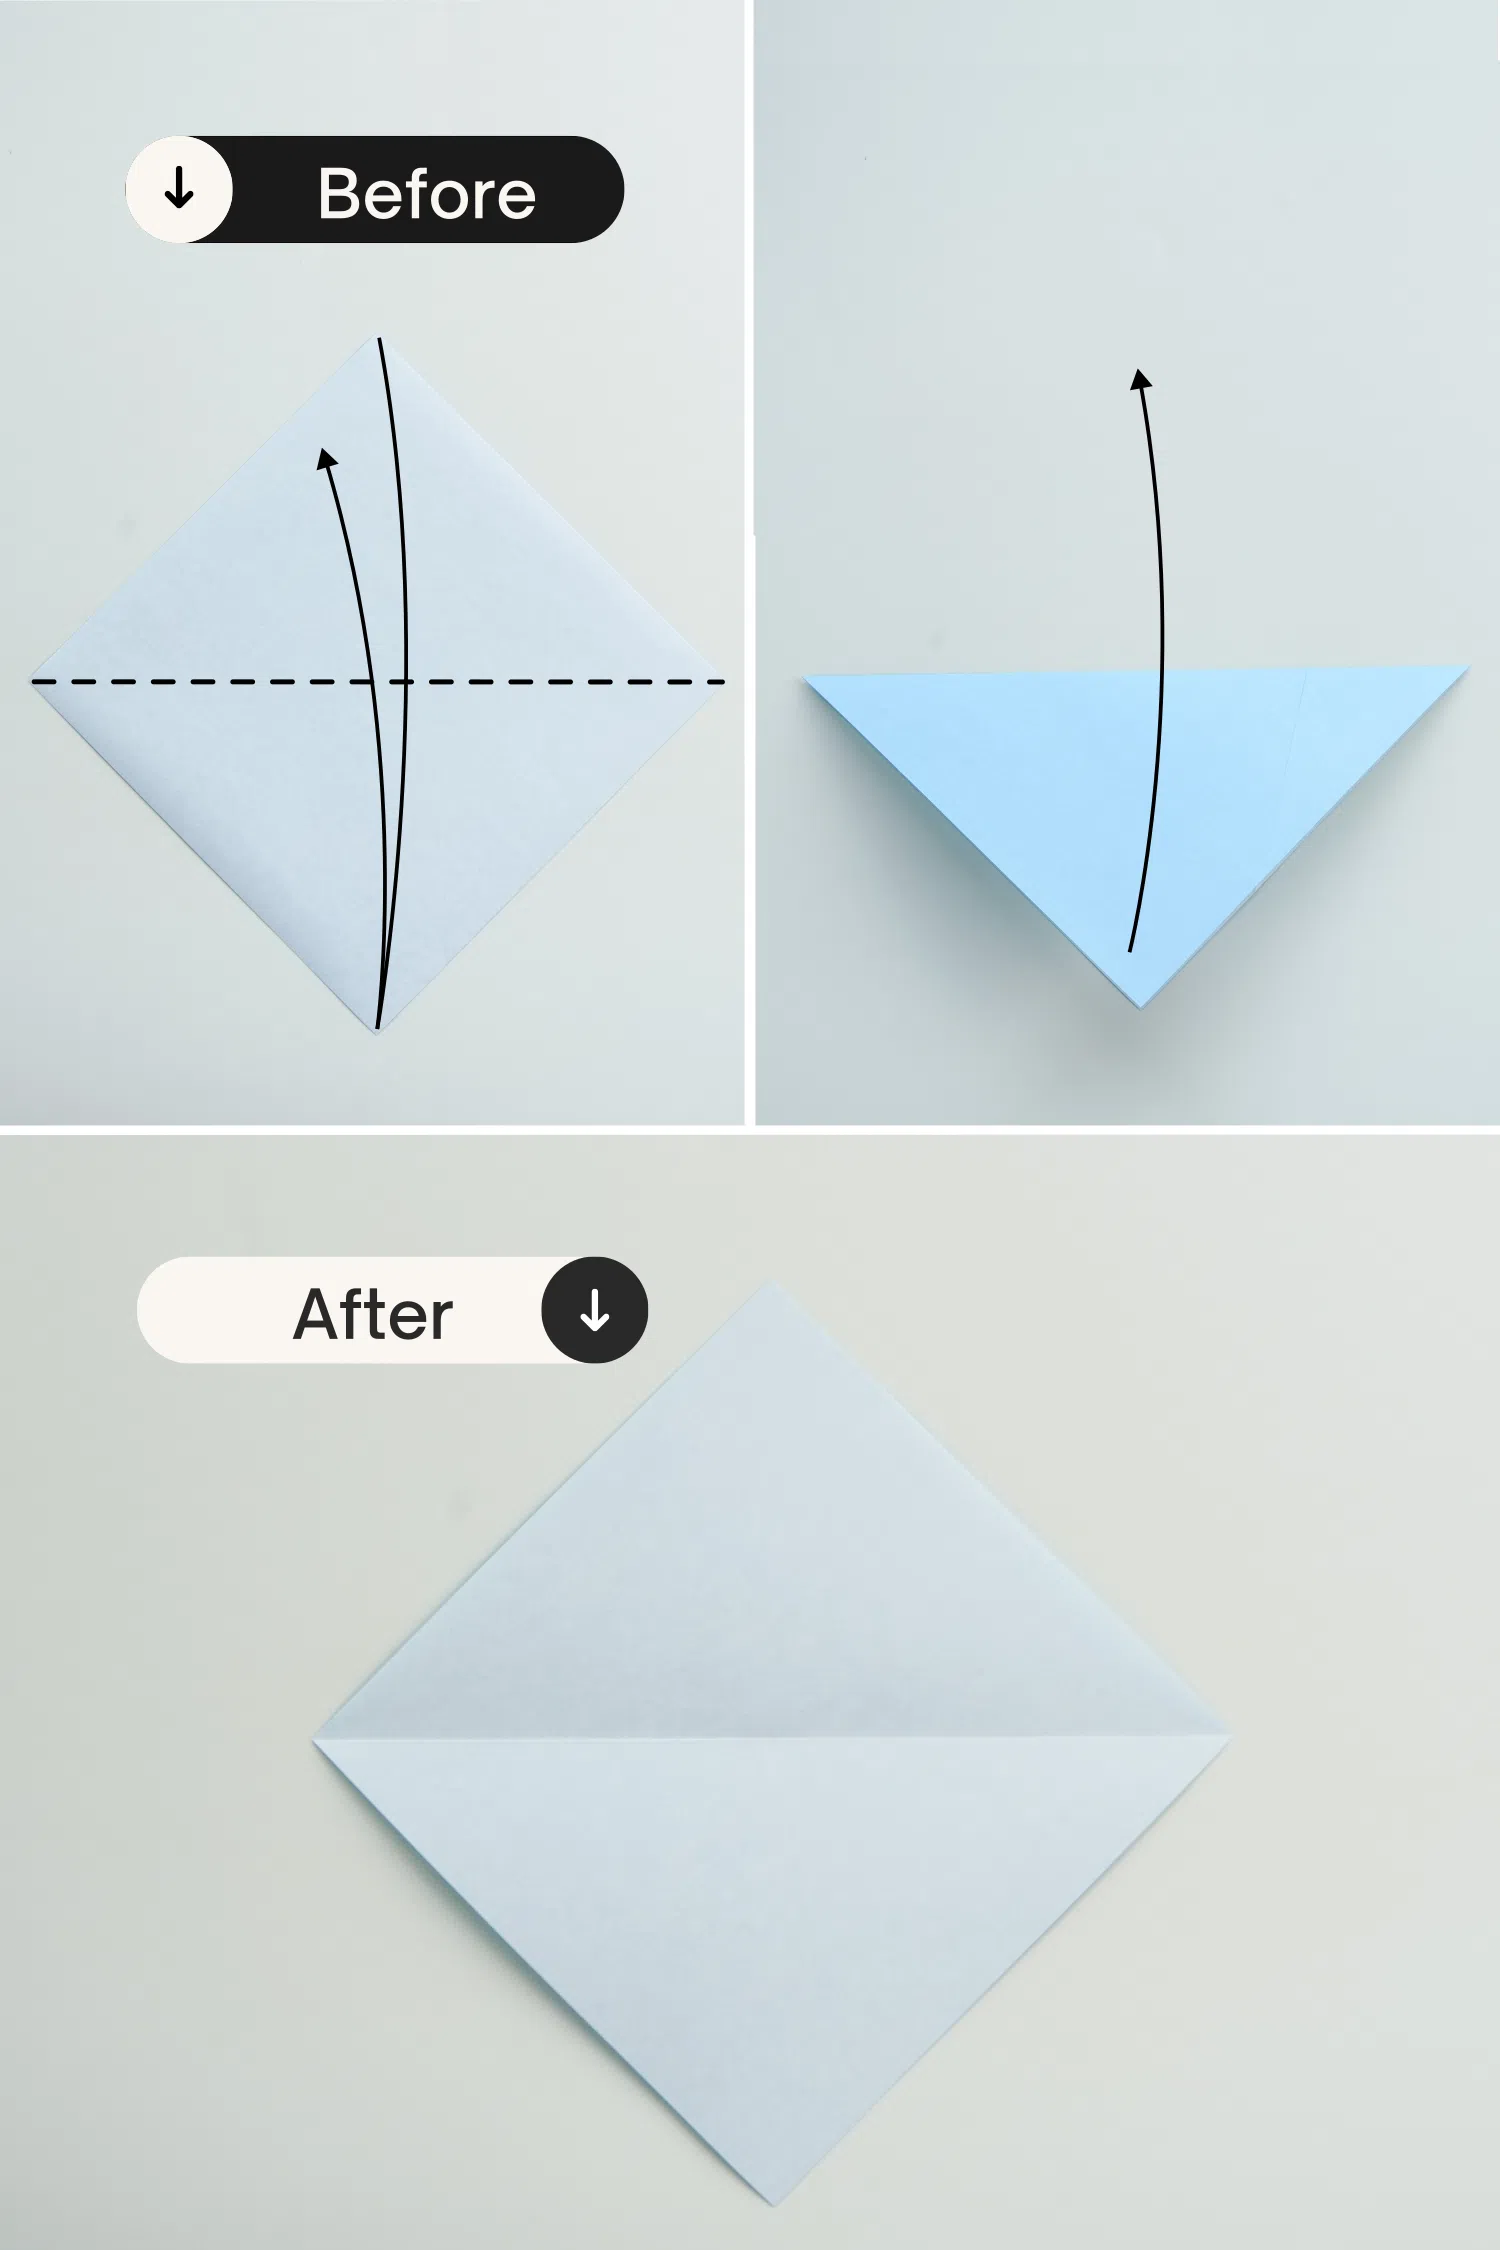
How to make a rabbit ear fold
Fold the top point down to make the right edges meet the center crease. And then unfold.

How to make a rabbit ear fold
Repeat the left part.
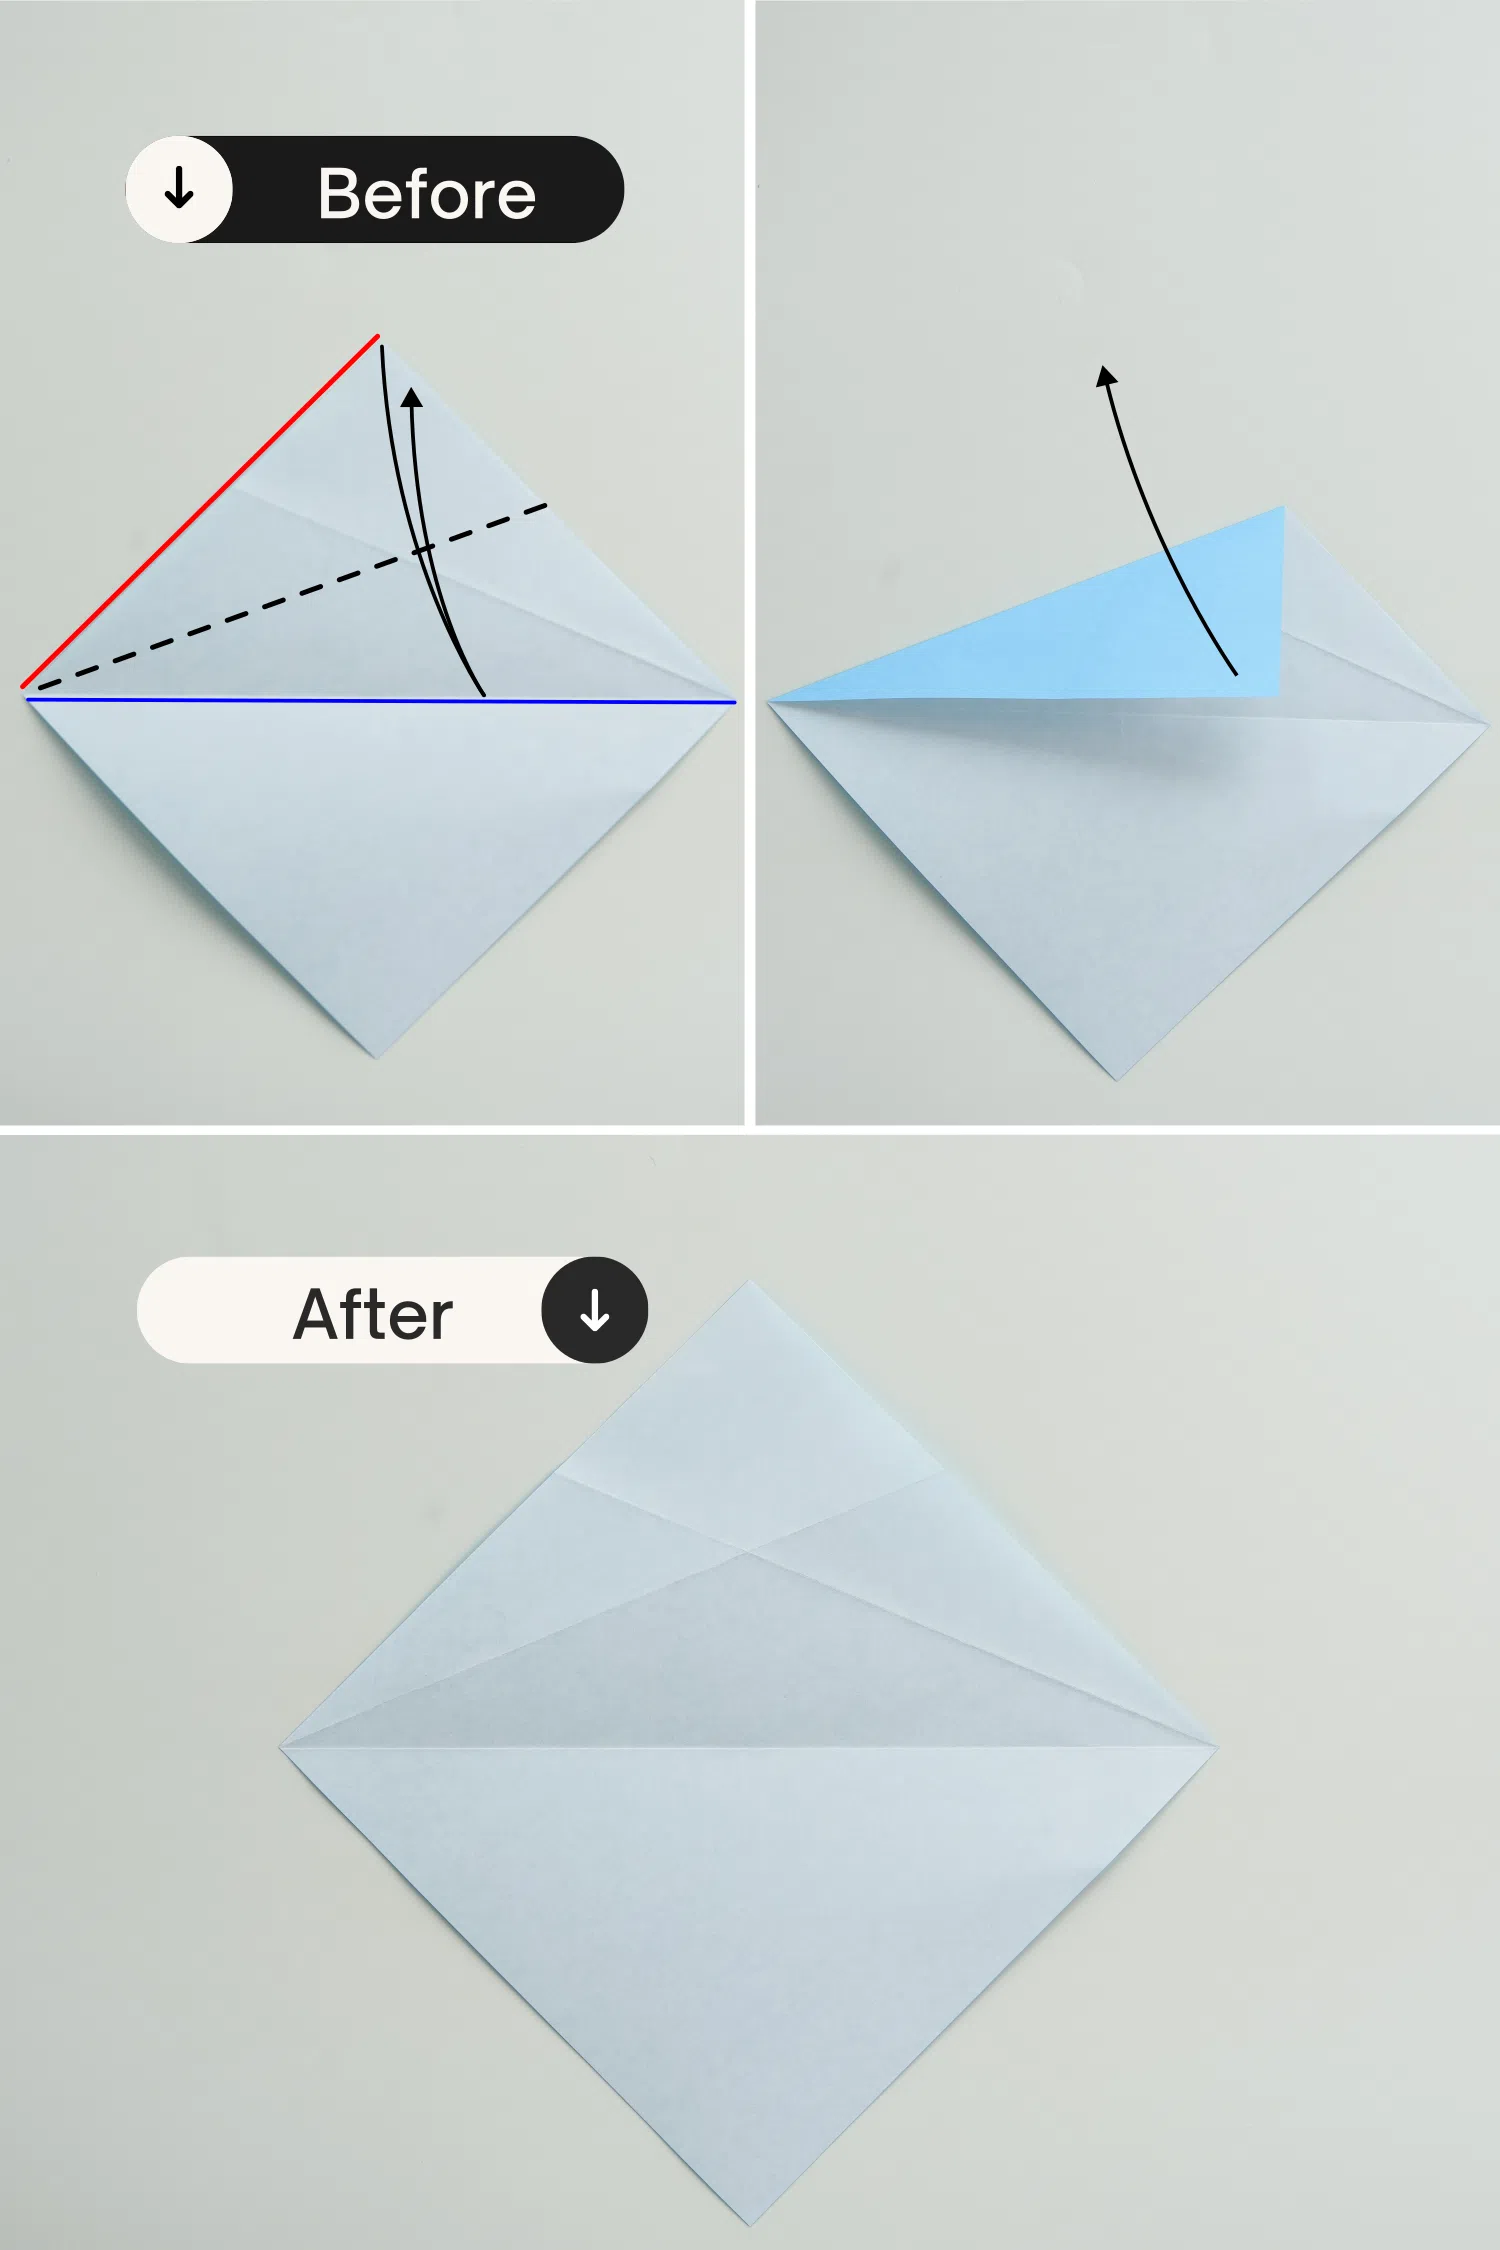
How to make a rabbit ear fold
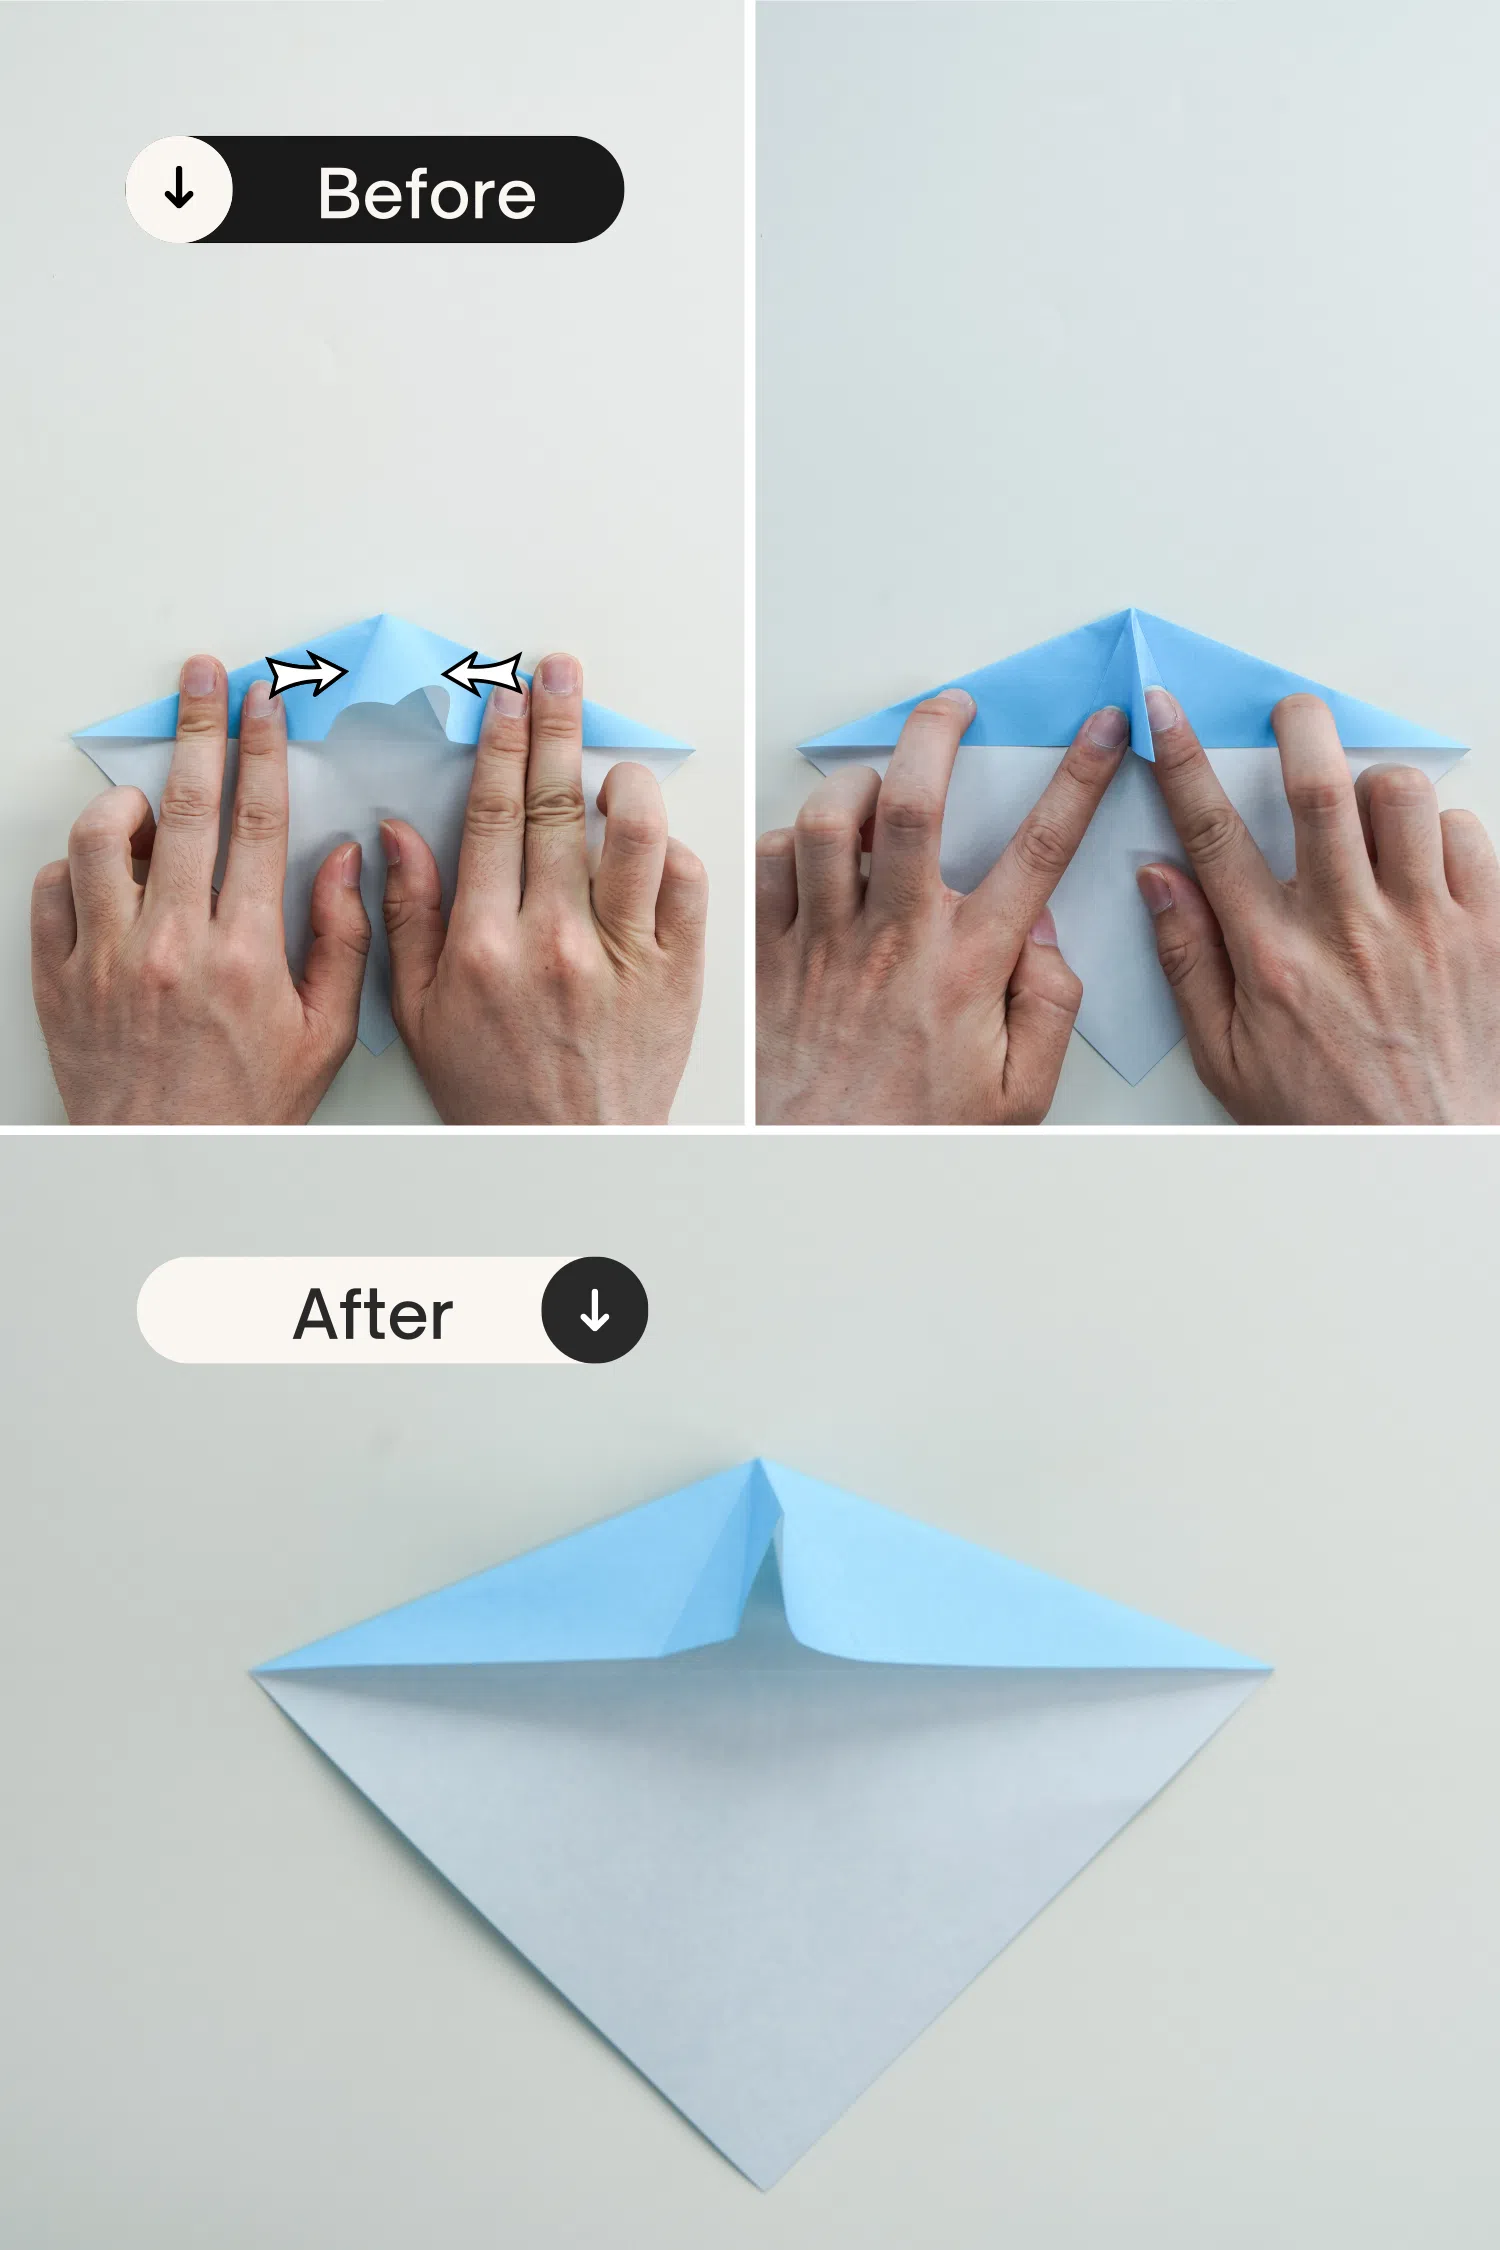
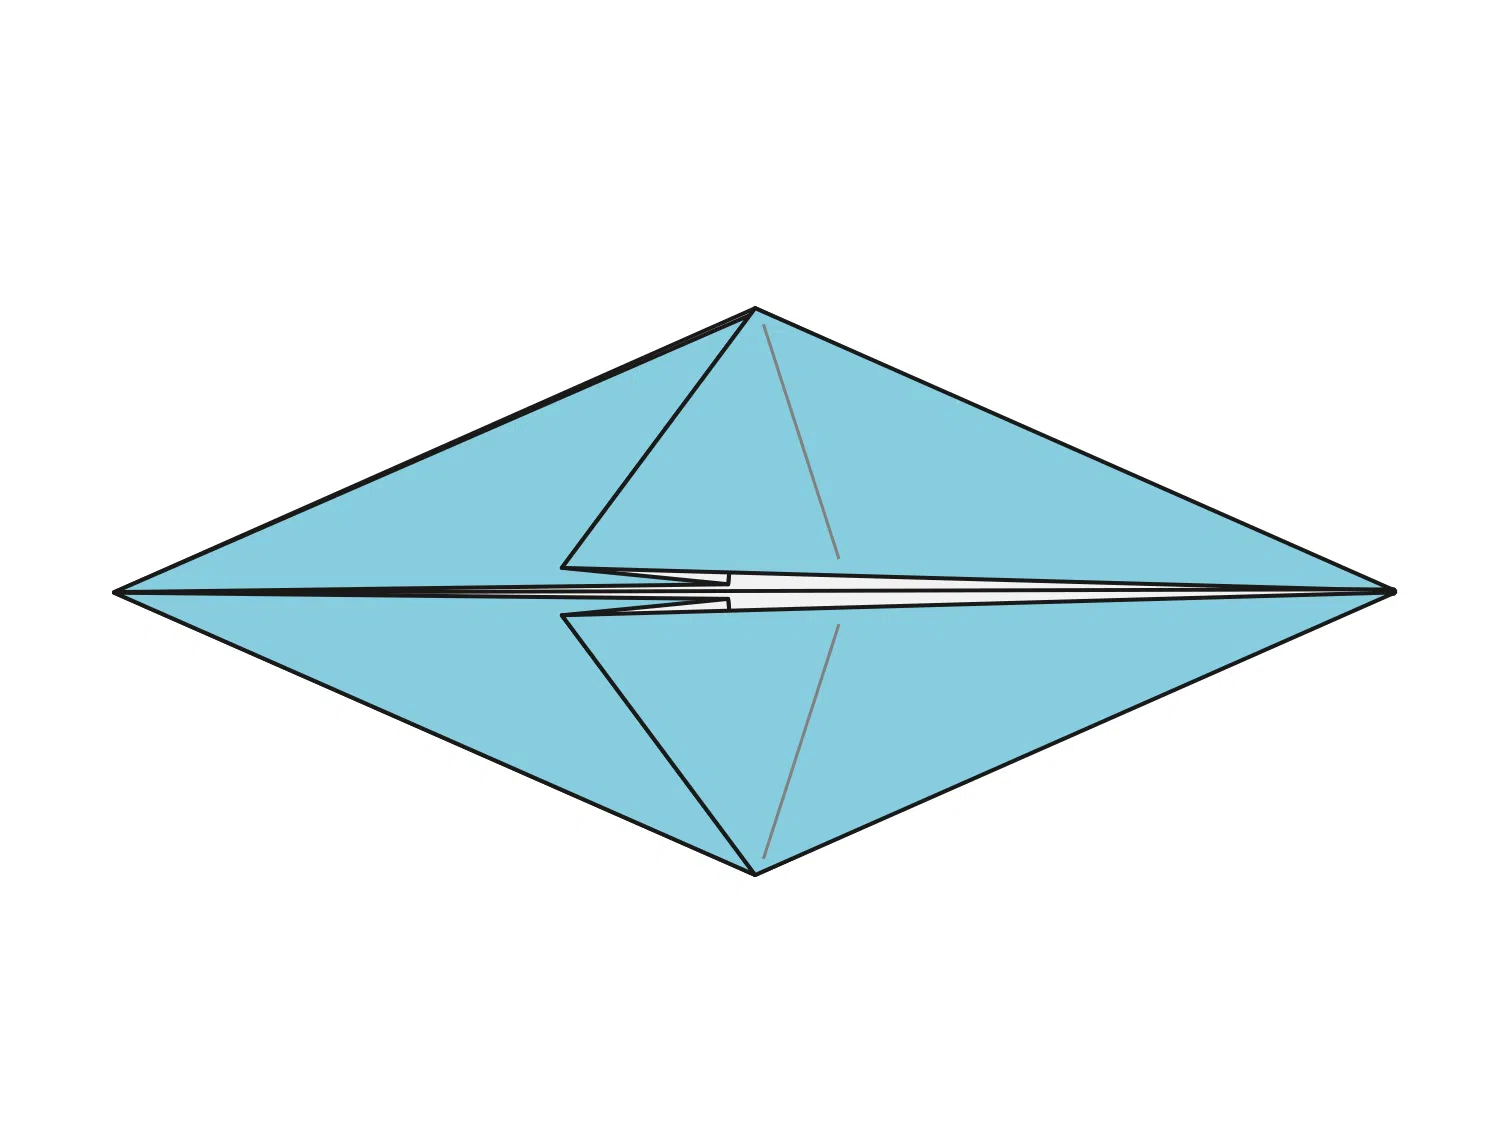
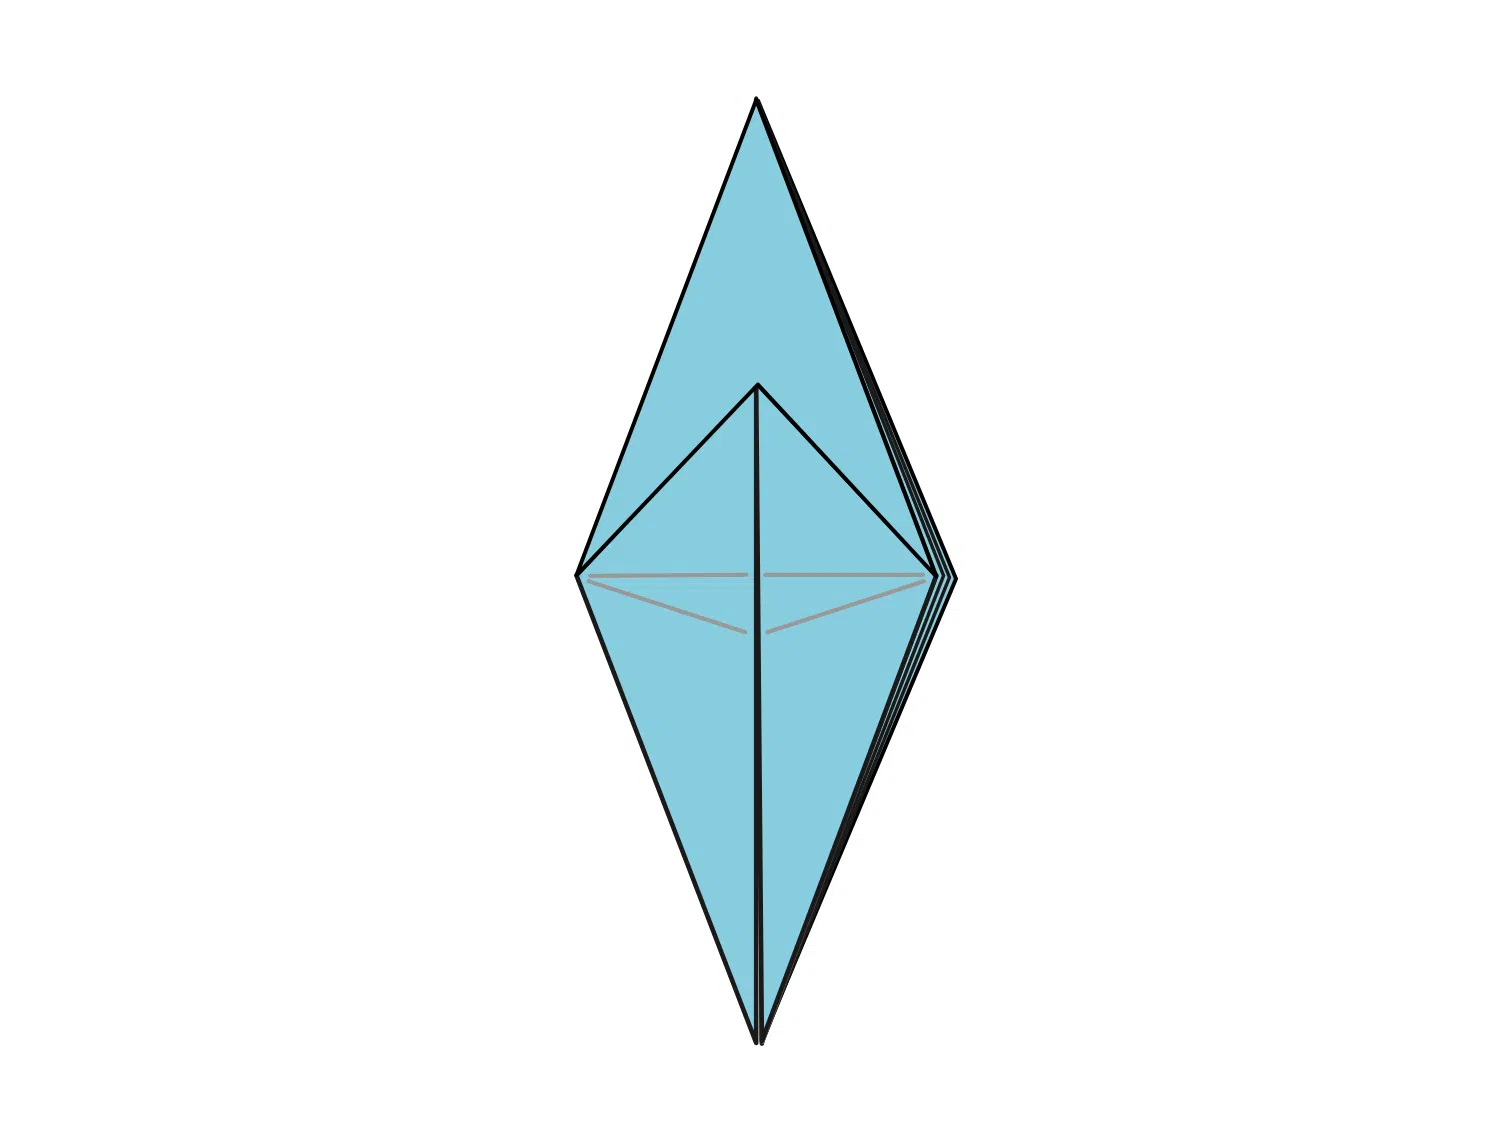
Based on the previous step, two creases will form an X in the center, with a split flap at the top.
Here comes the rabbit ear fold! Bring the square’s bottom right and left corners down to meet the central crease created in the first step.
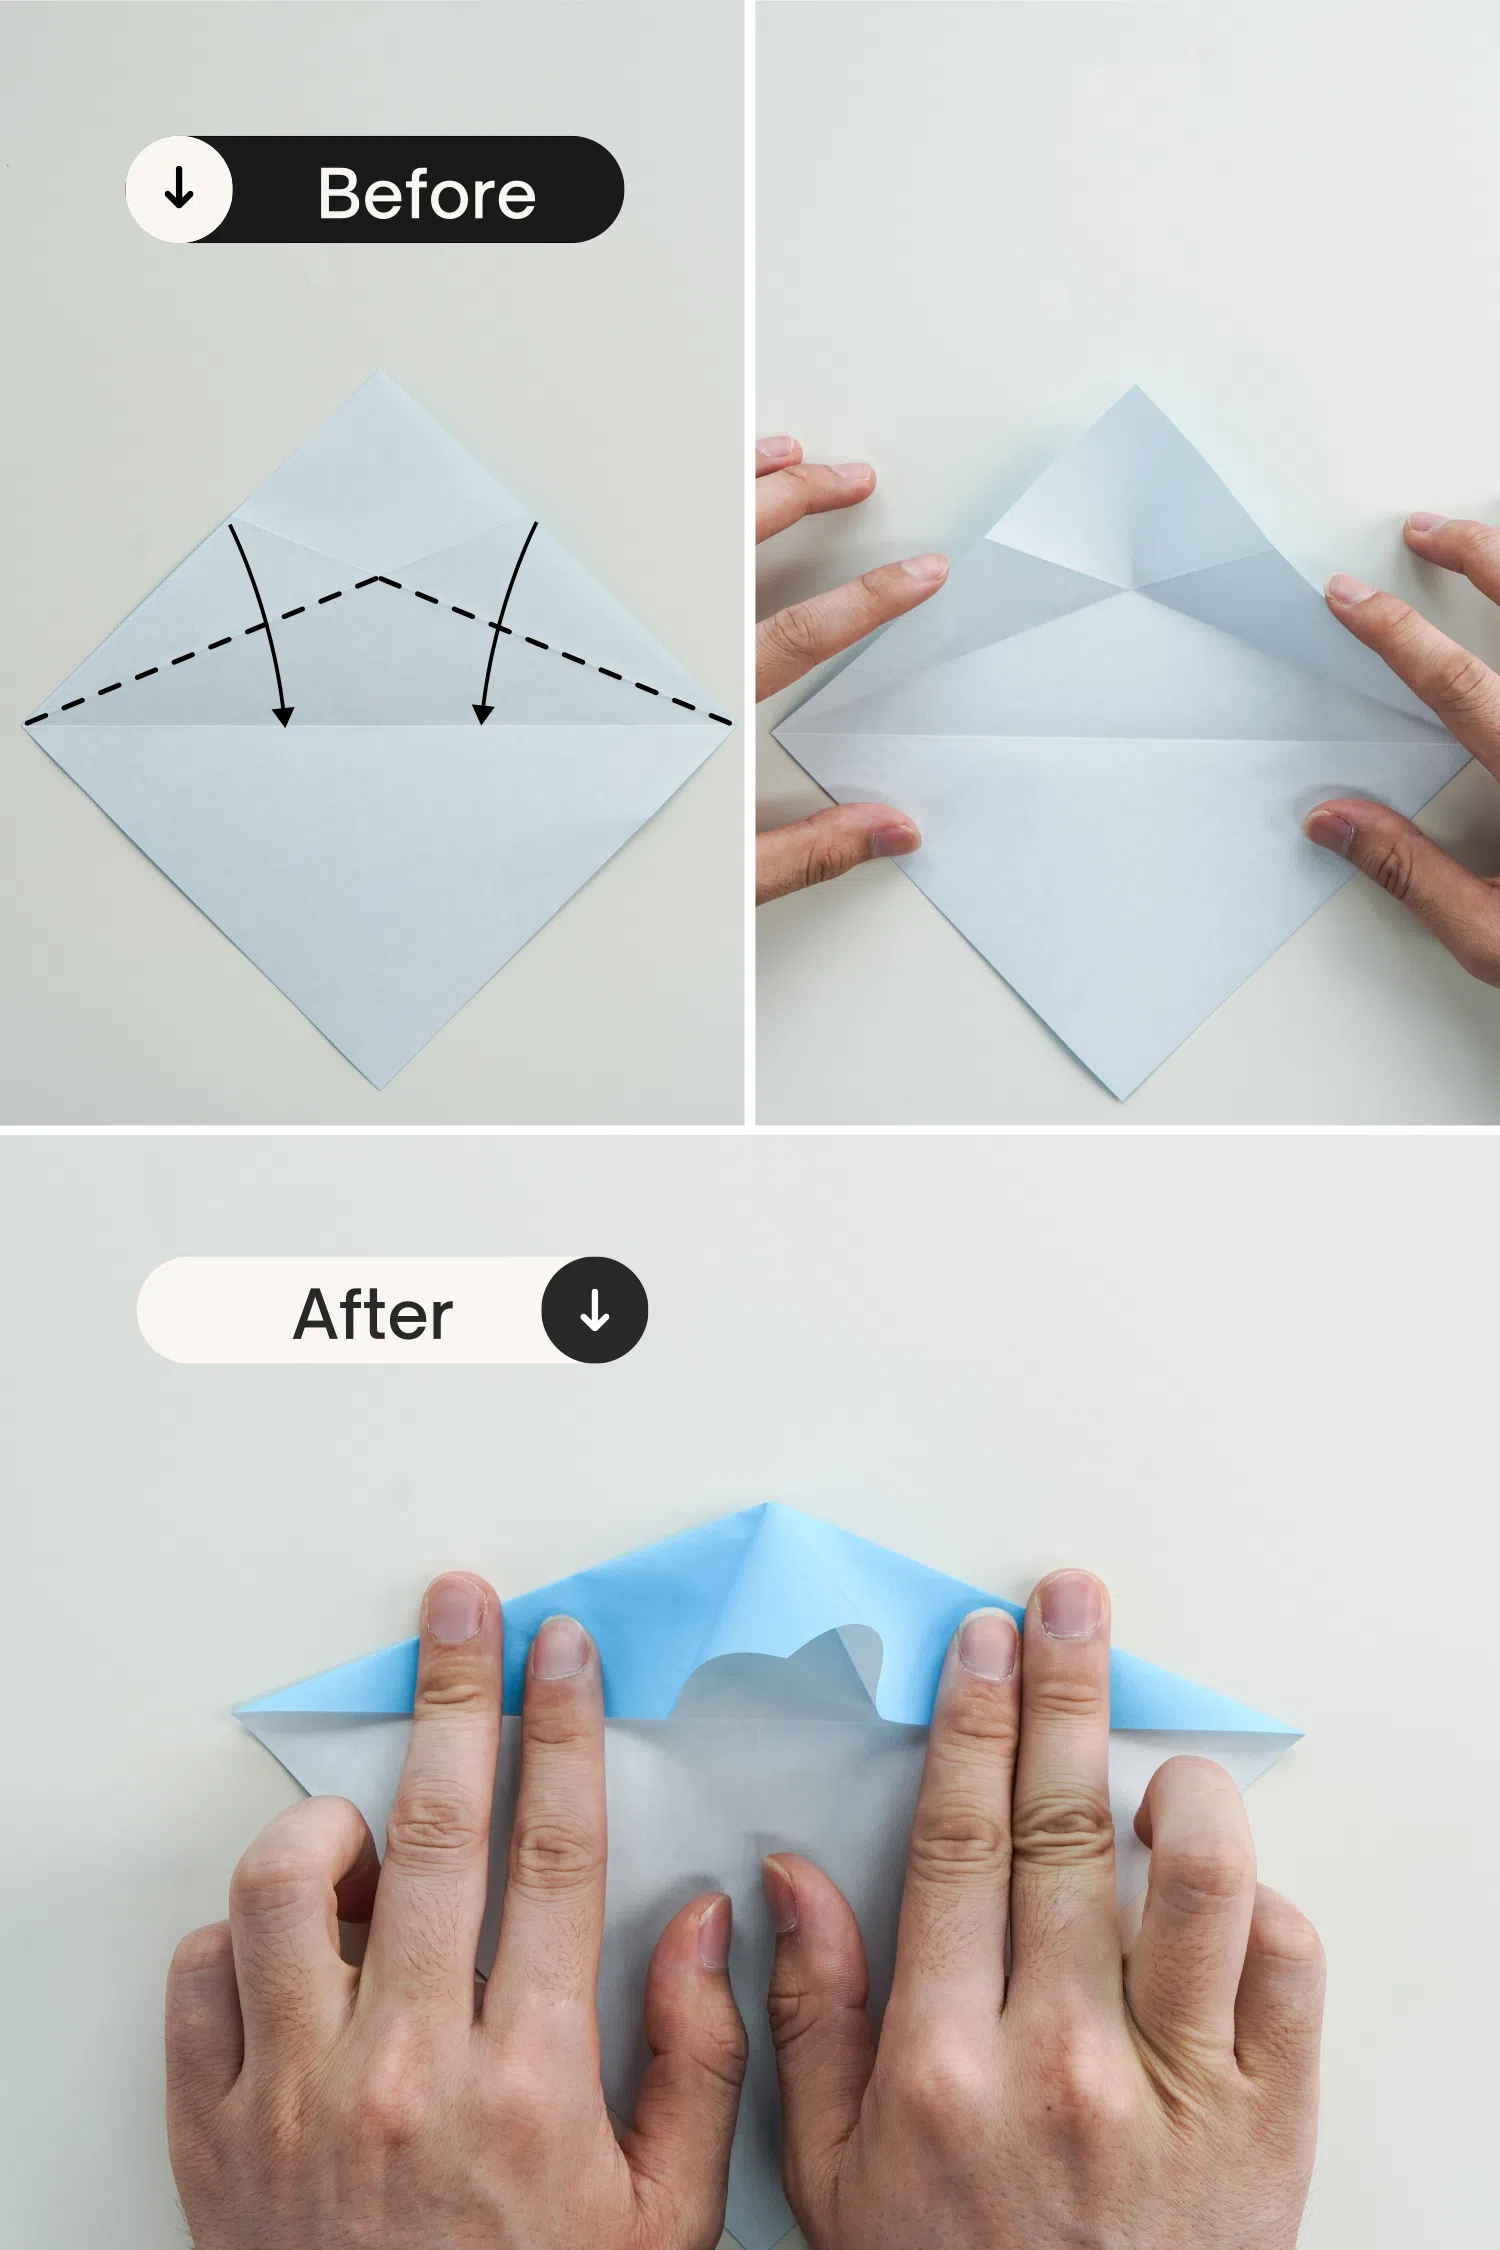
How to make a rabbit ear fold
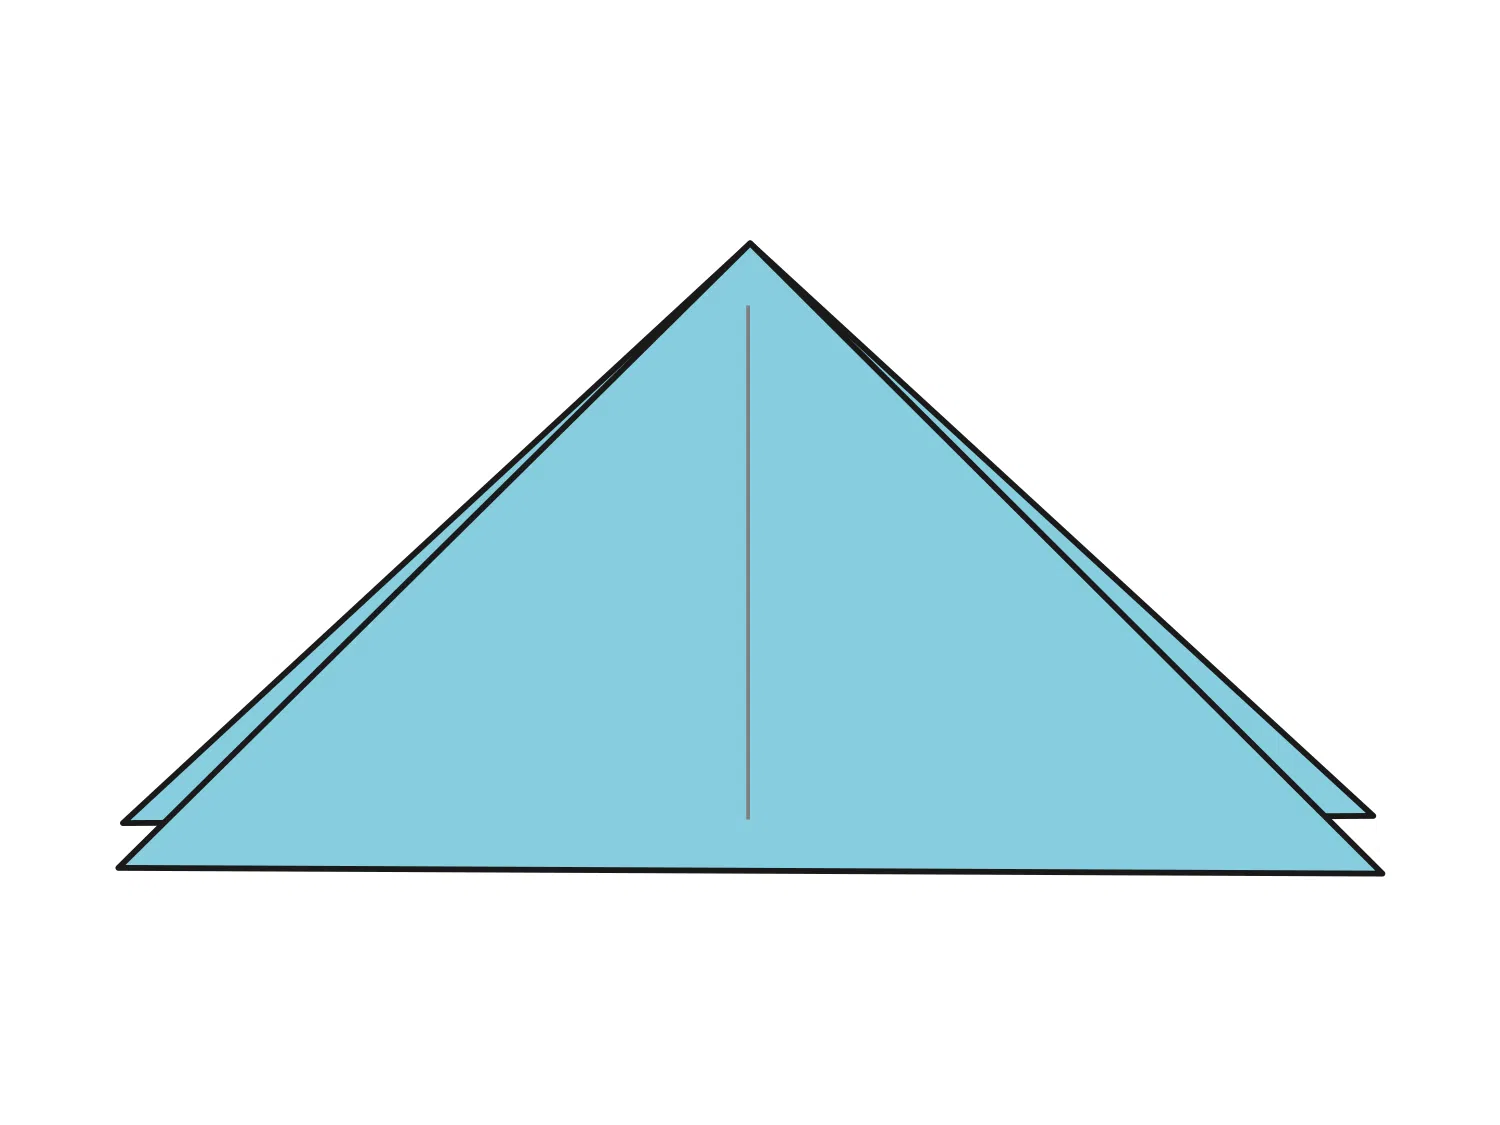
This will create a triangle flap at the top.
How to make a rabbit ear fold
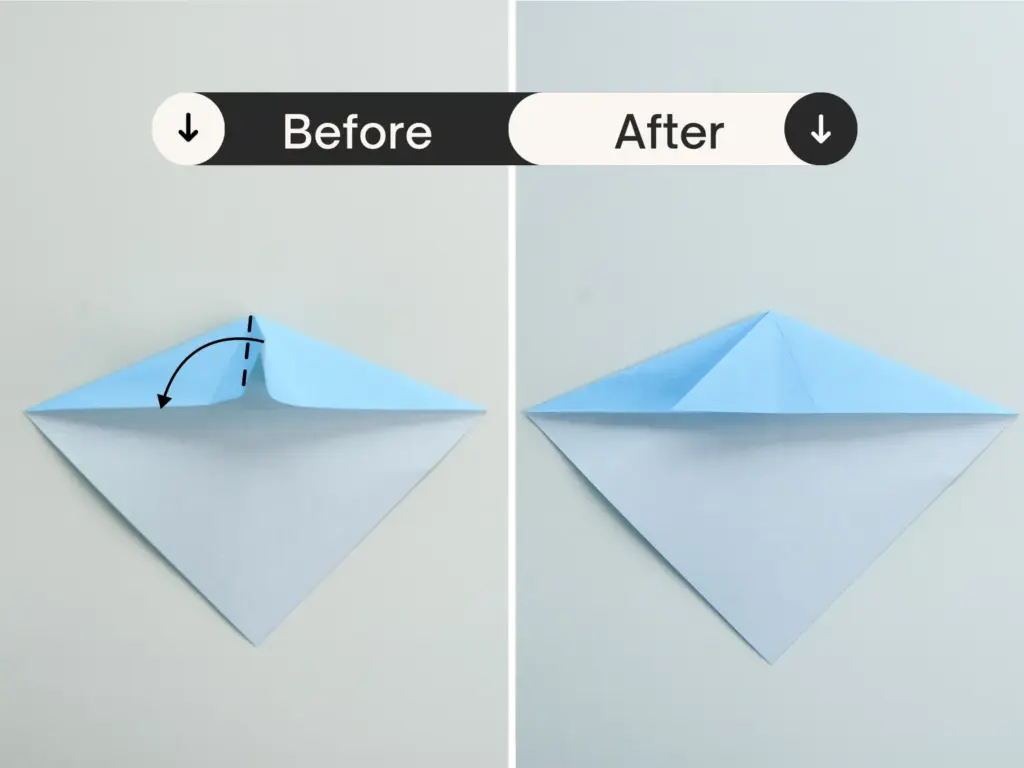
Flat the top triangle flap to one side (left or right) along the center crease. That’s a rabbit ear fold.
Other Origami basic fold and bases

Want more origami ideas or more instructions? Remember to subscribe our Newsletters. We will send the newest inspiration to your box.