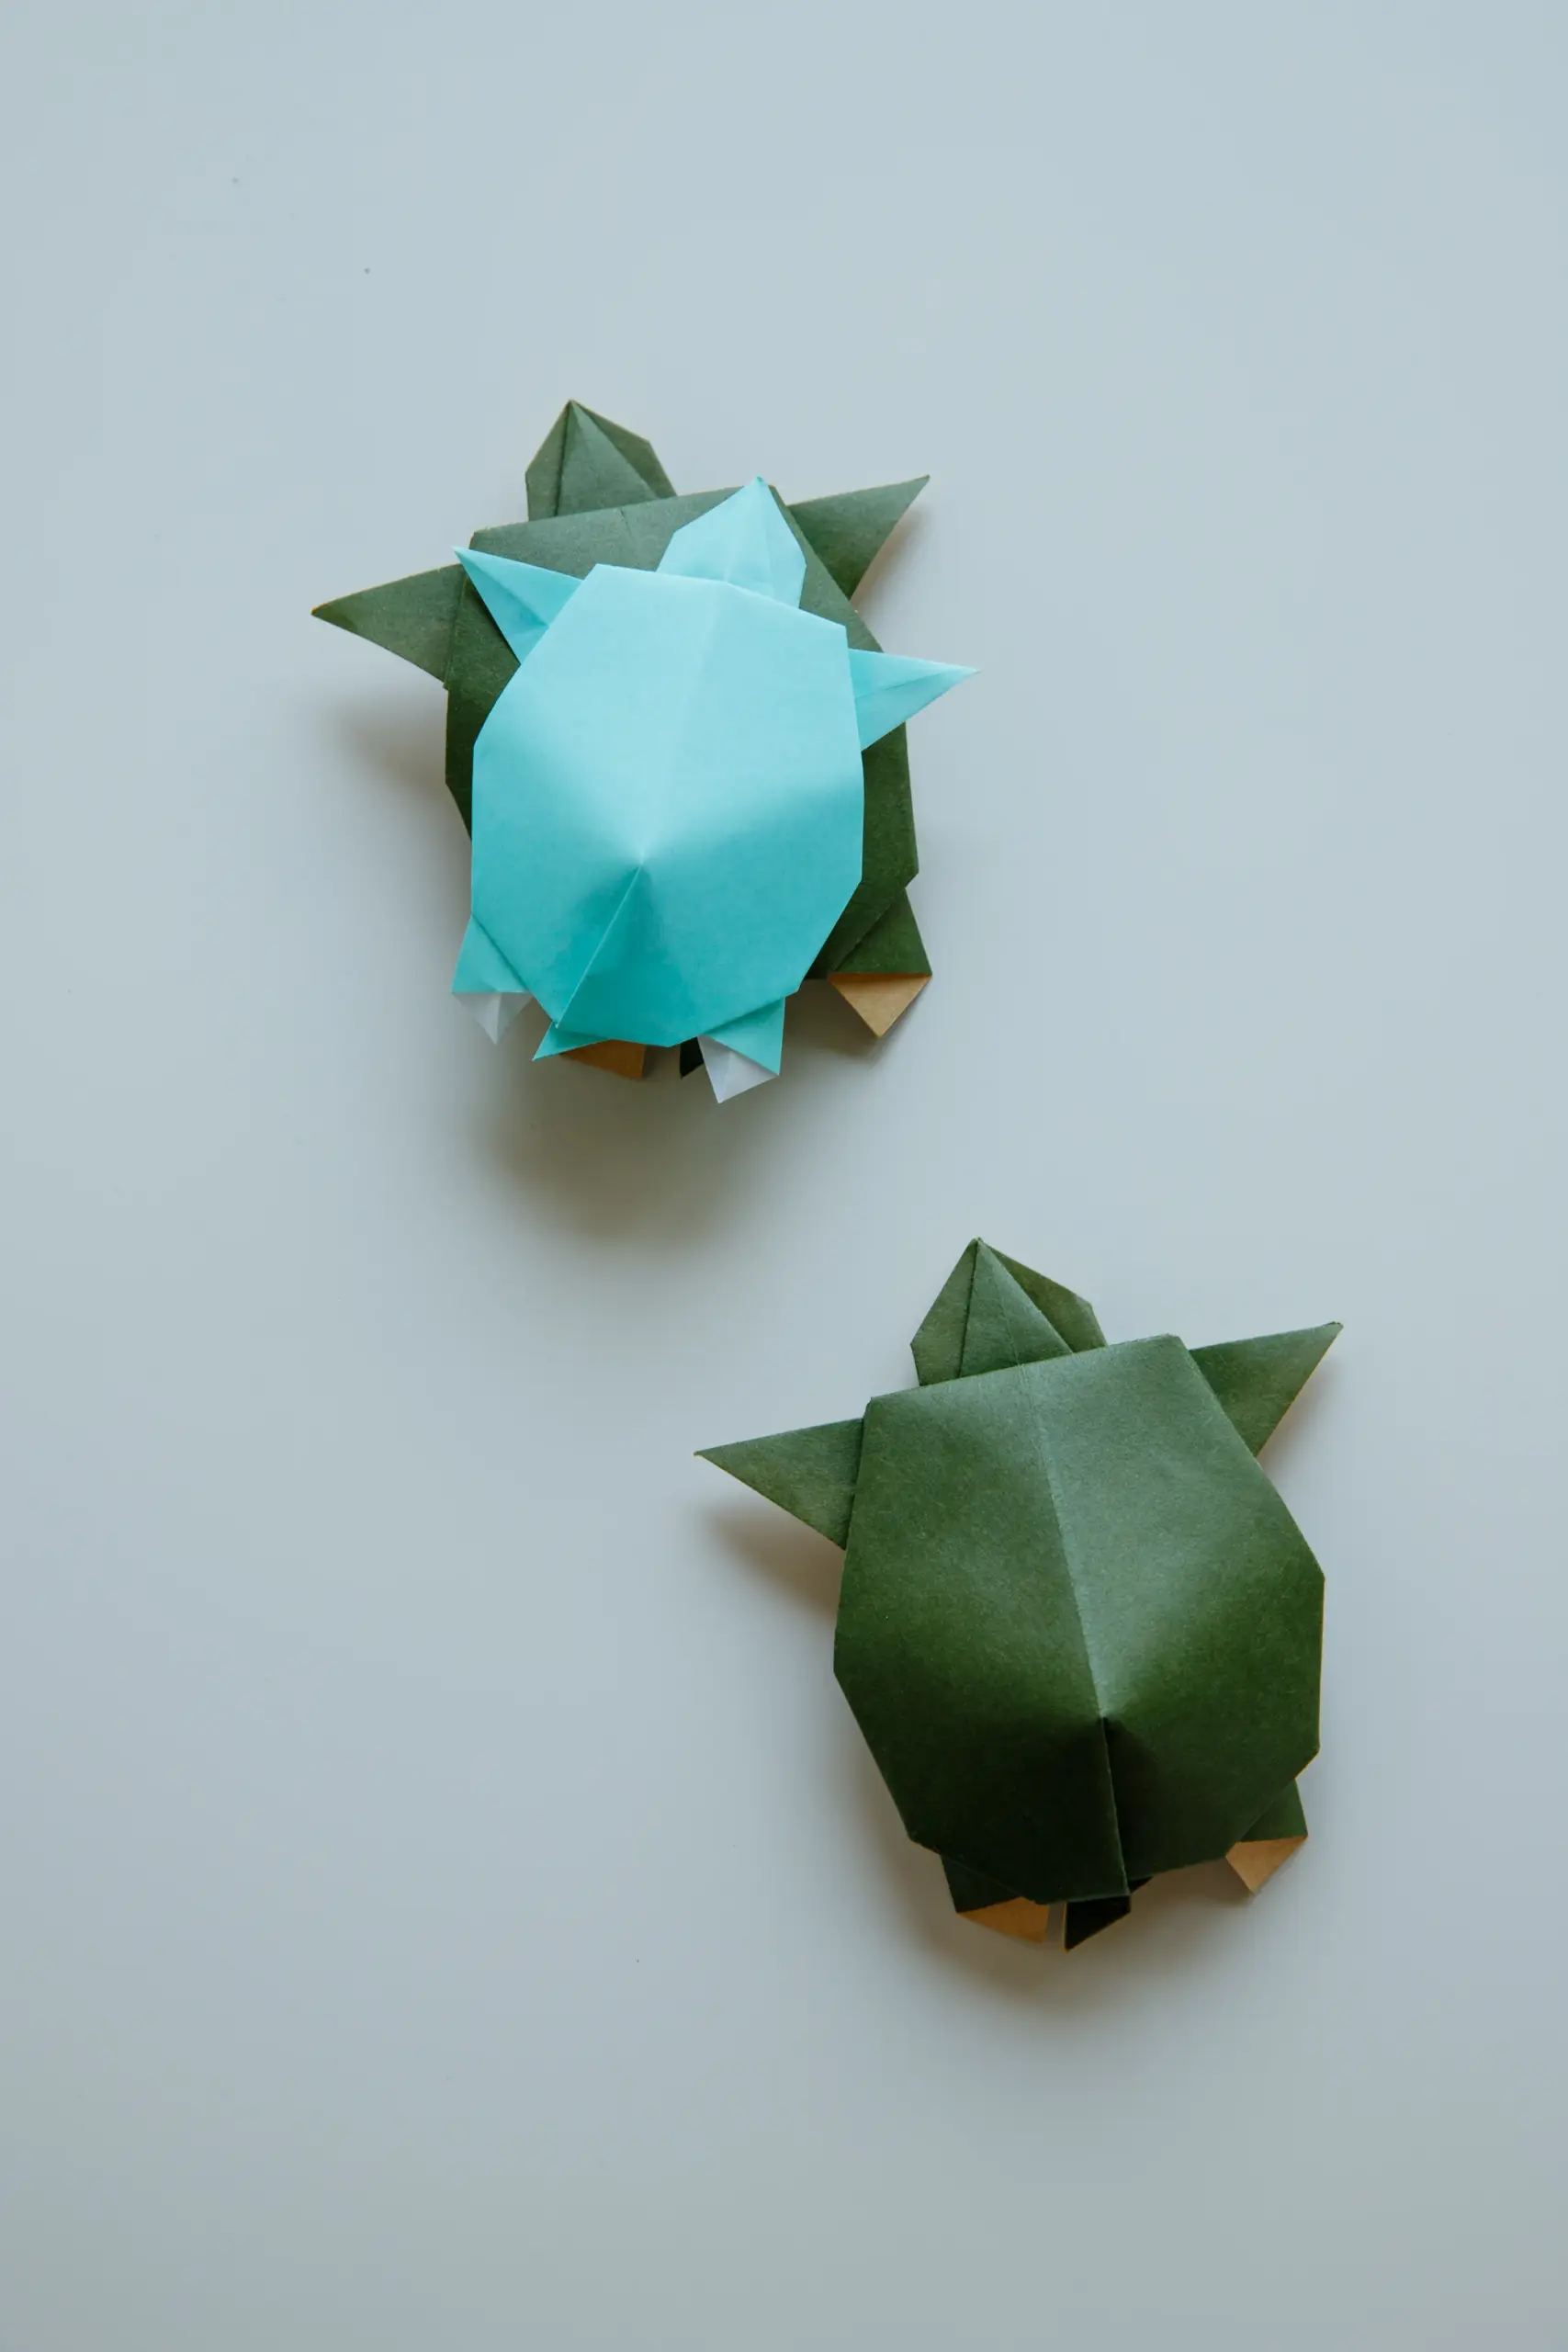
If you are an animal lover, this detailed guide will help you master the art of folding your very own lovely and delightful turtle. Create a turtle family by making turtles of various sizes and dimensions, bringing a touch of nature and artistry to your house or office.
Looking for a greater challenge? You can also try folding an origami sea turtle, which requires some intricate folding skill and more patience, and will offer a unique final product.

If you are new to origami, start here from our beginner guide to know the basics and how to read the step-by-step instructions.
- Folding time: 15 minutes
- Paper: 15×15 cm
- Difficulty: Middle
Material
Prepare a piece of 15×15 cm origami square paper, with different colors on each side, and you will get a 10×9.5 cm turtle. The color and pattern can be chosen based on your preference.

Origami Turtle Video
Step by Step Instructions
Step 1
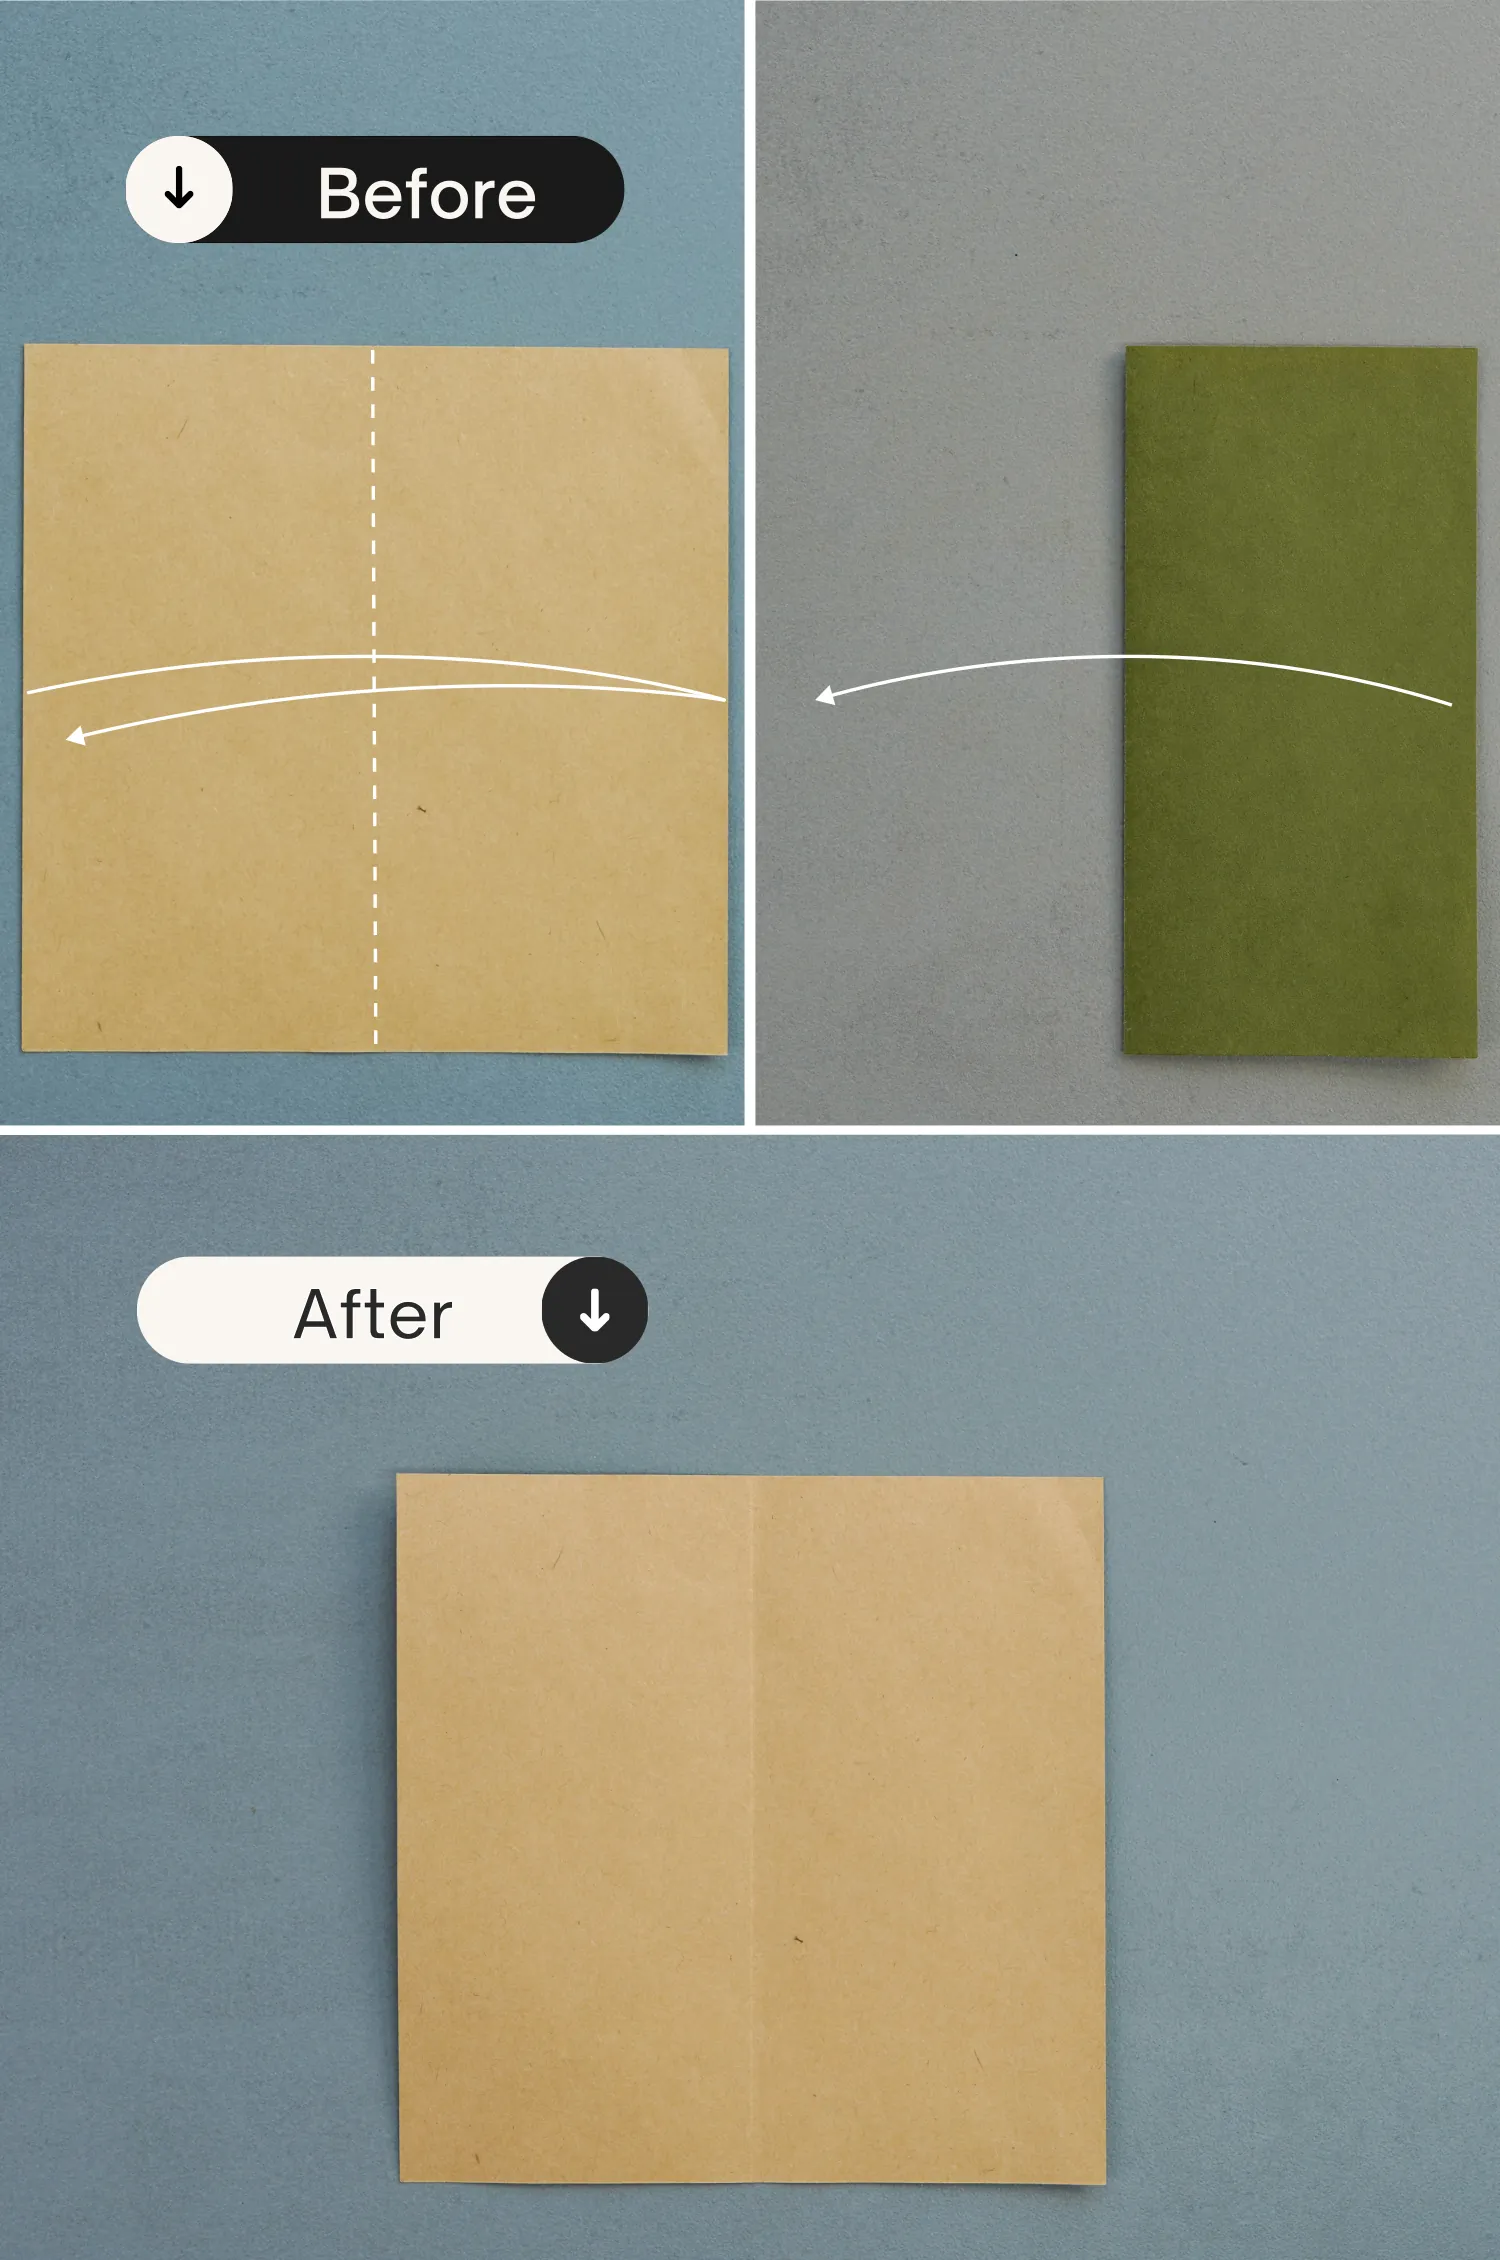
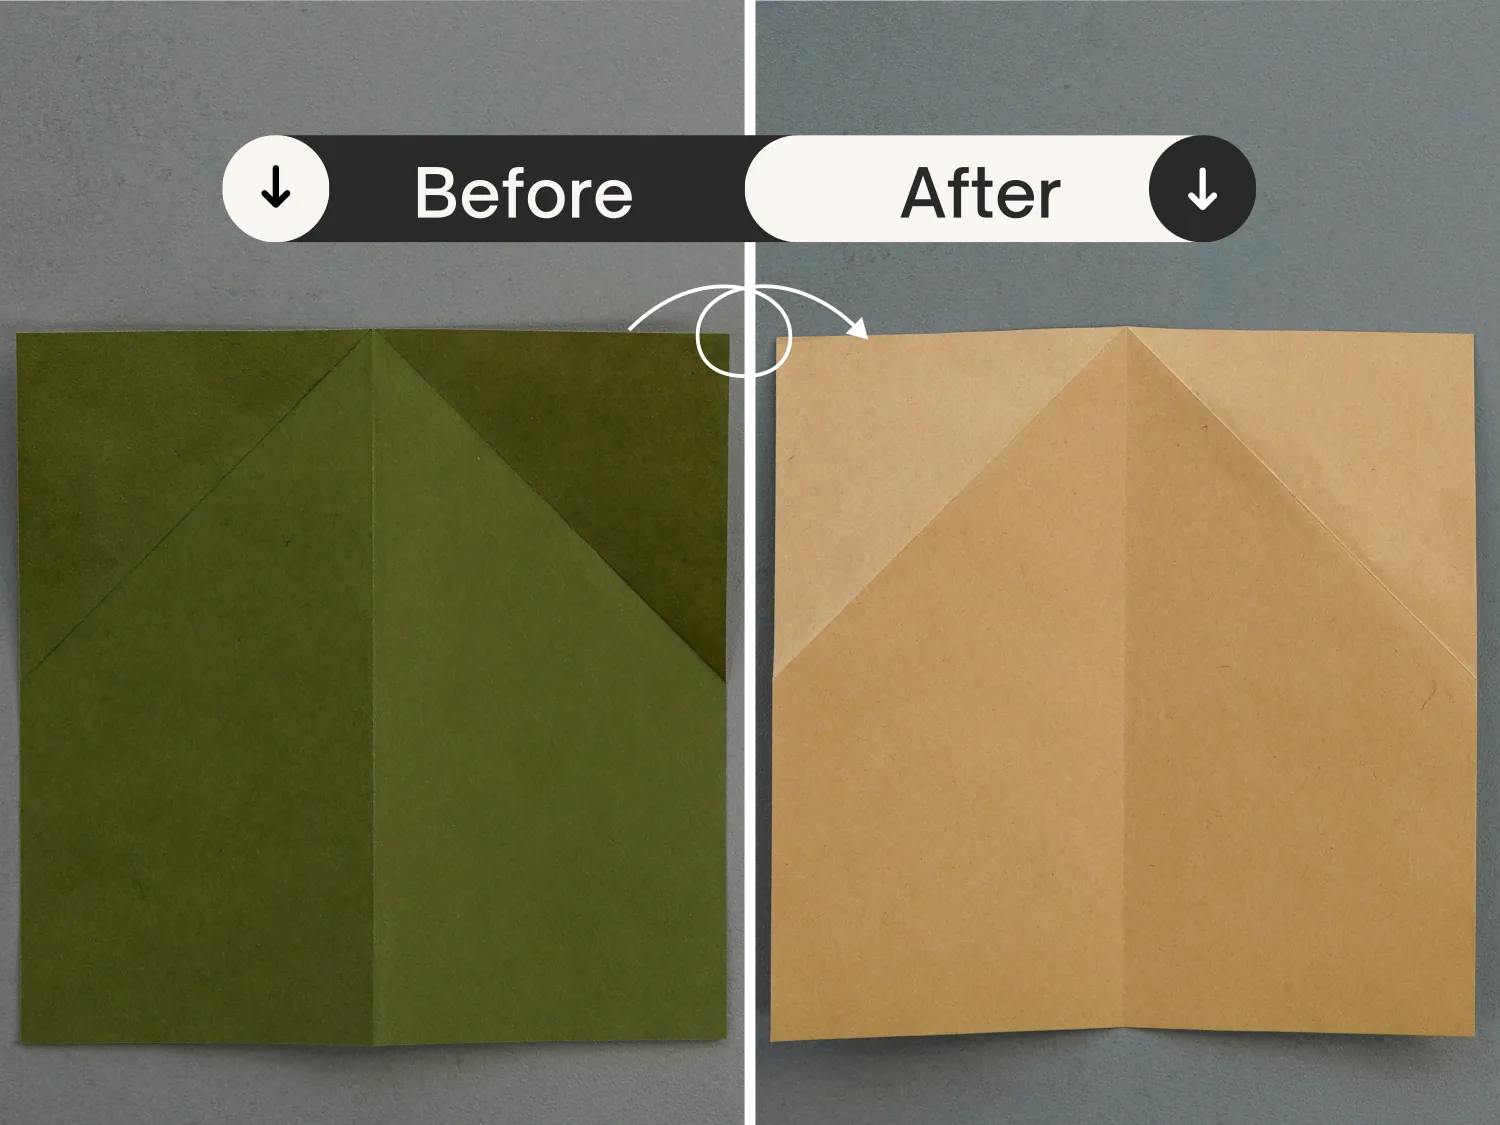
Start with the color of the turtle’s interior of the paper facing up, the desired display color side downward. Fold it in half vertically, crease it well then unfold.
Step 2
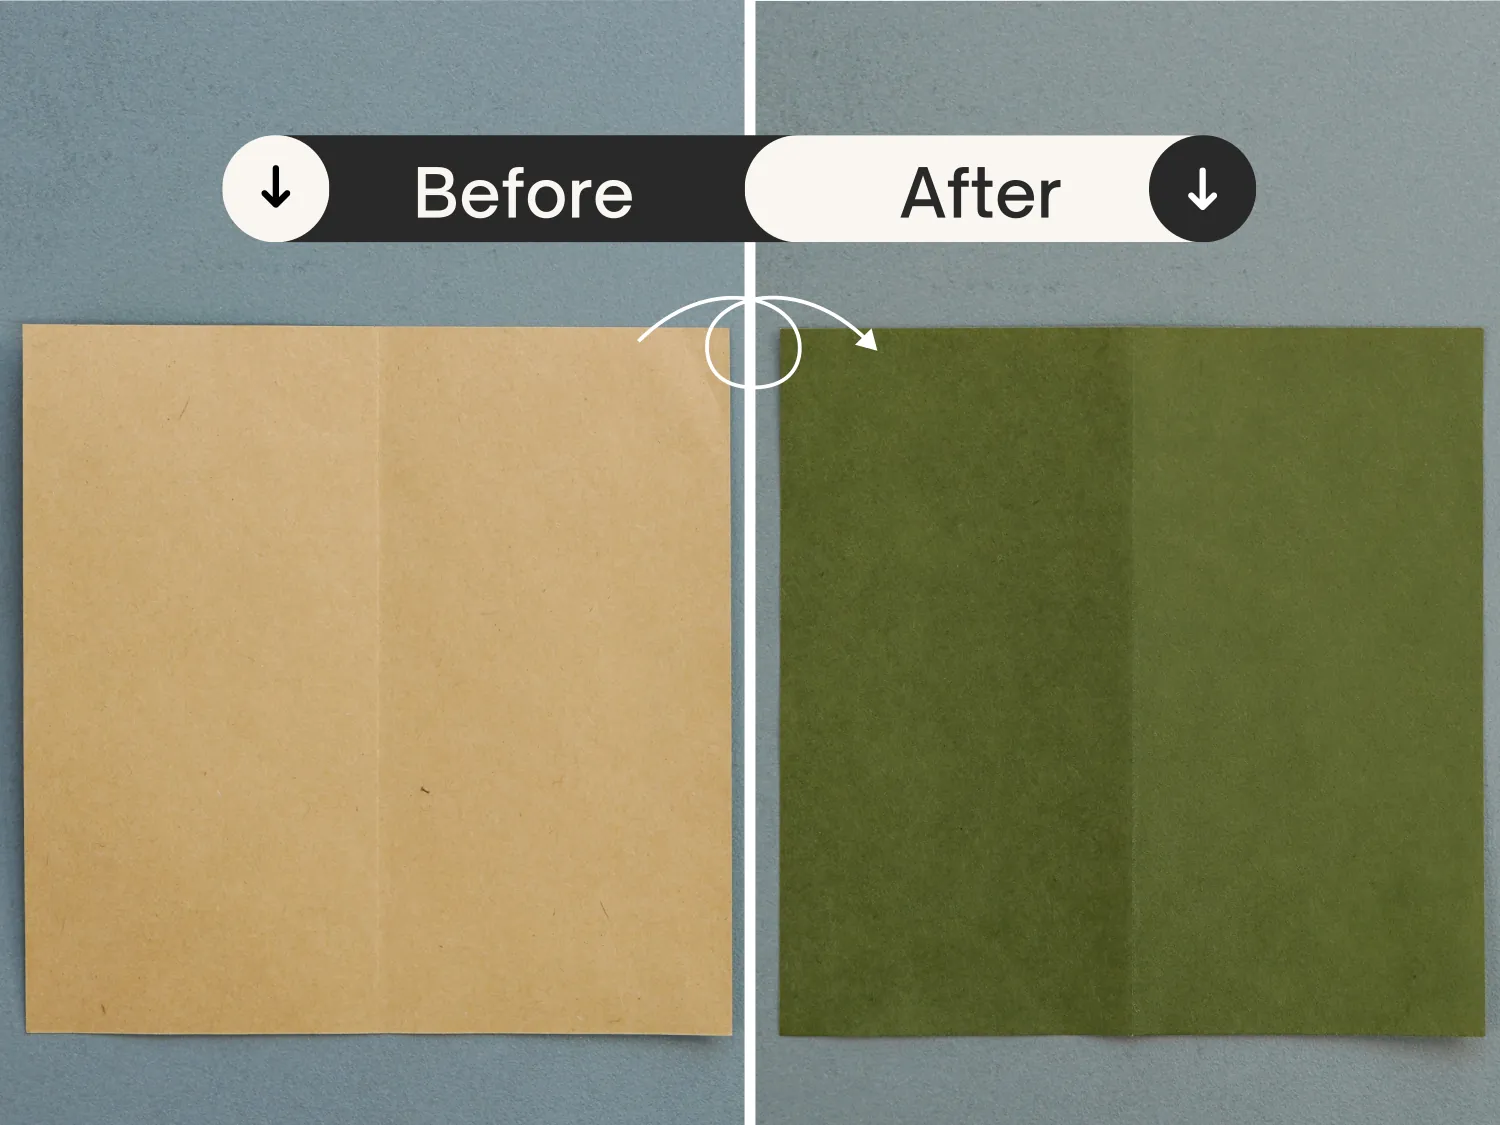
Flip the paper over.
Step 3
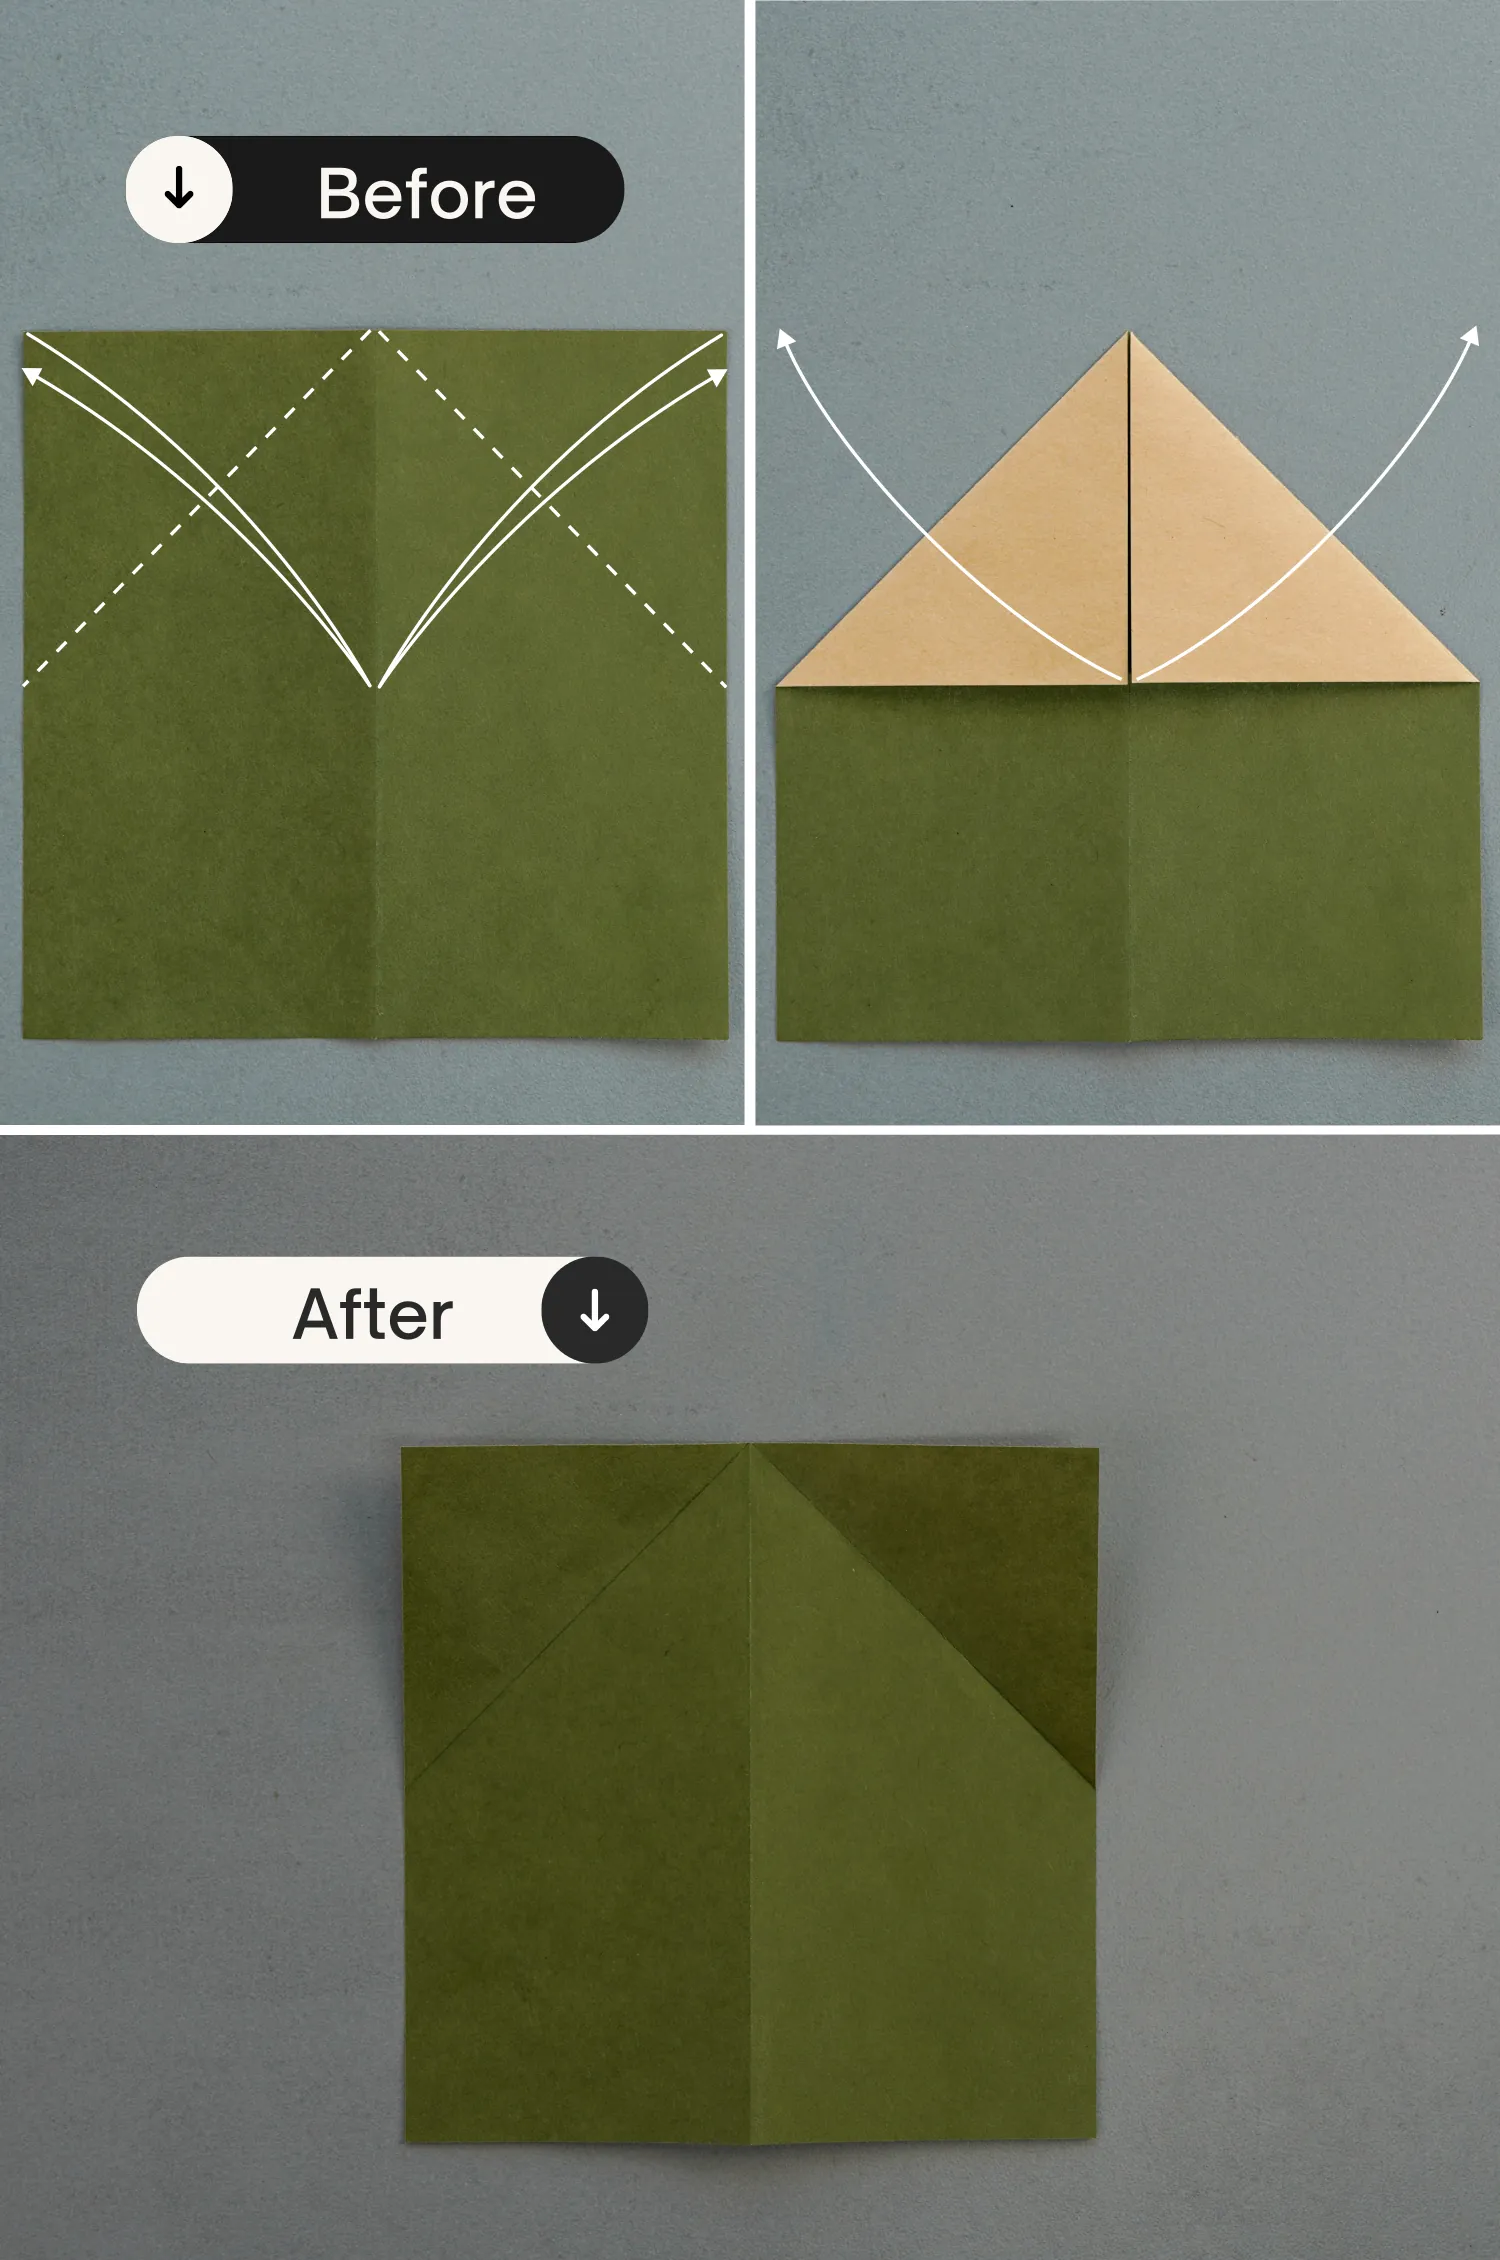
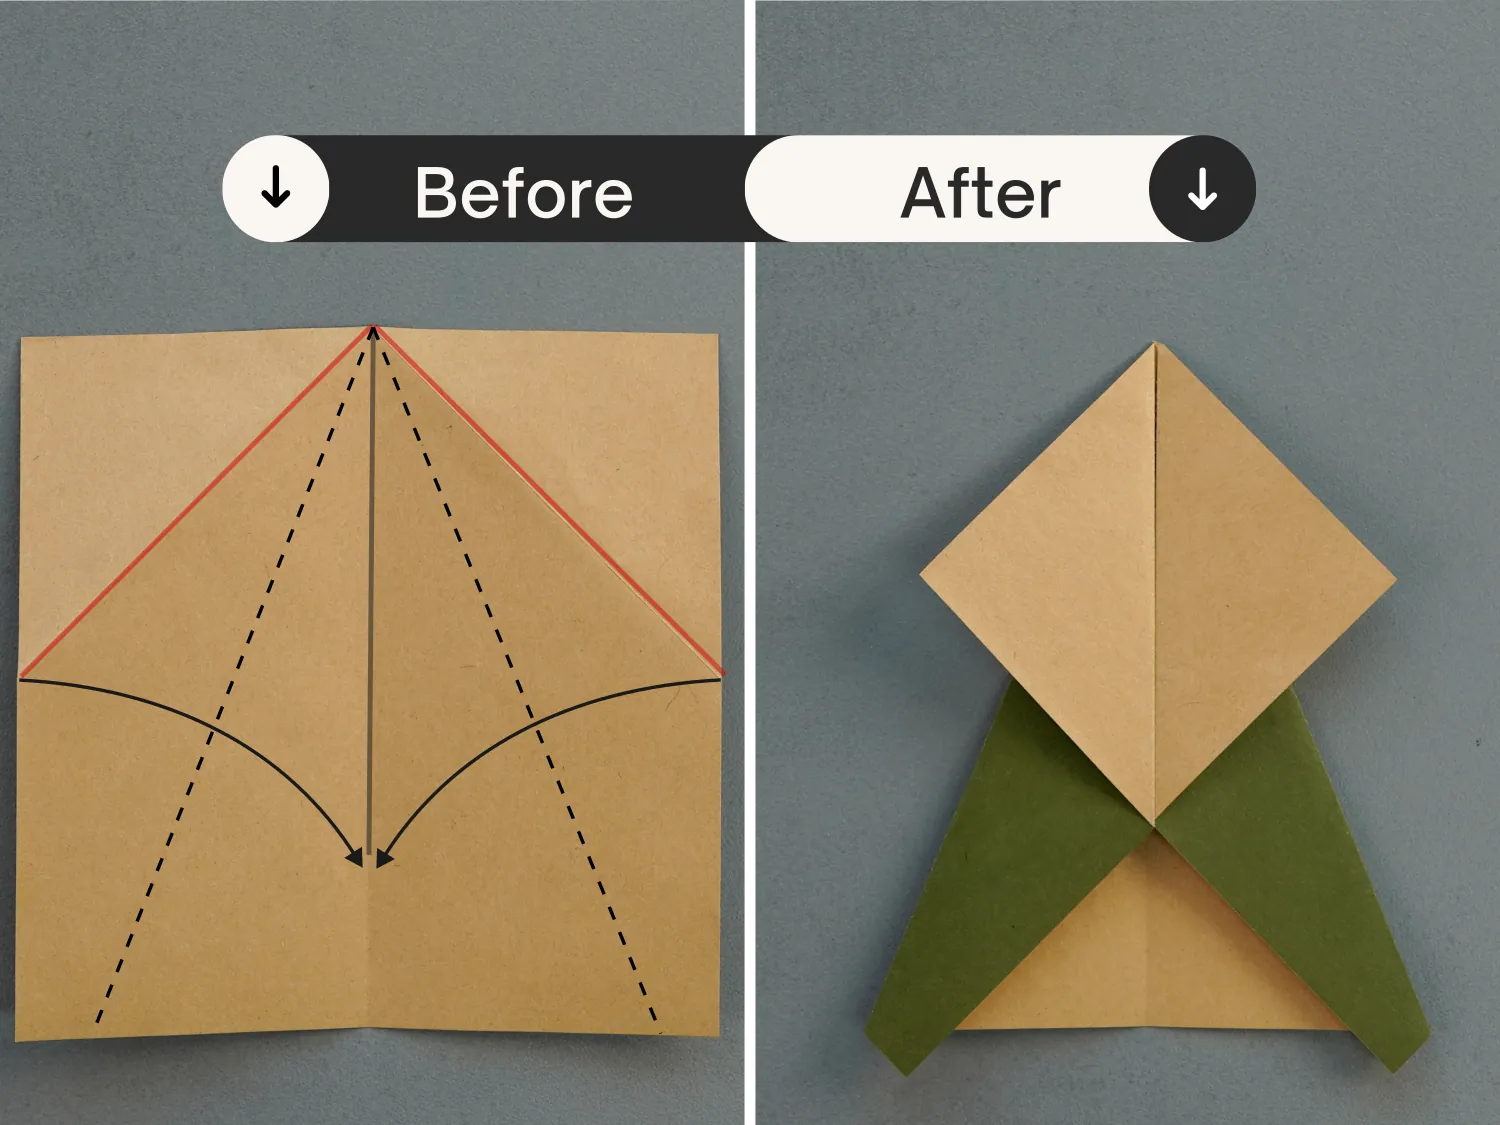
Fold the top left and right points diagonally to meet the middle horizontal crease, and unfold them.
Step 4
Turn over the paper.
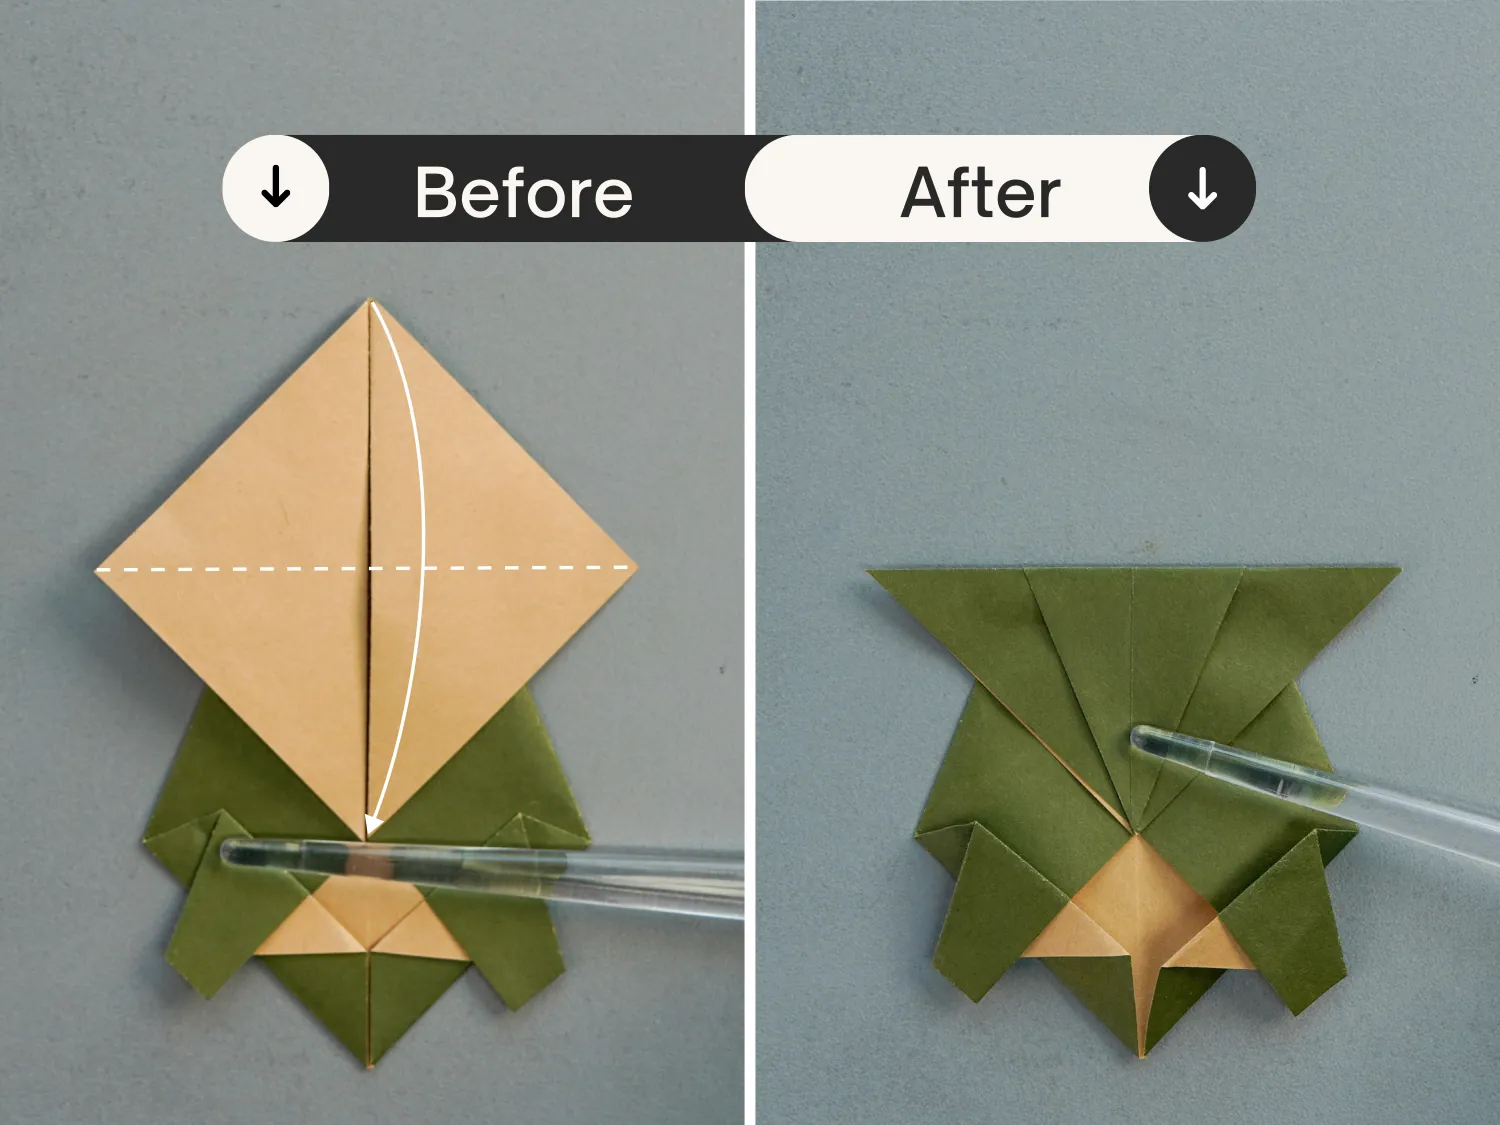
Step 5
Take the creases you just made, and fold them to align with the middle horizontal crease.
Step 6
Fold the bottom left and right edges to align with the horizontal crease.
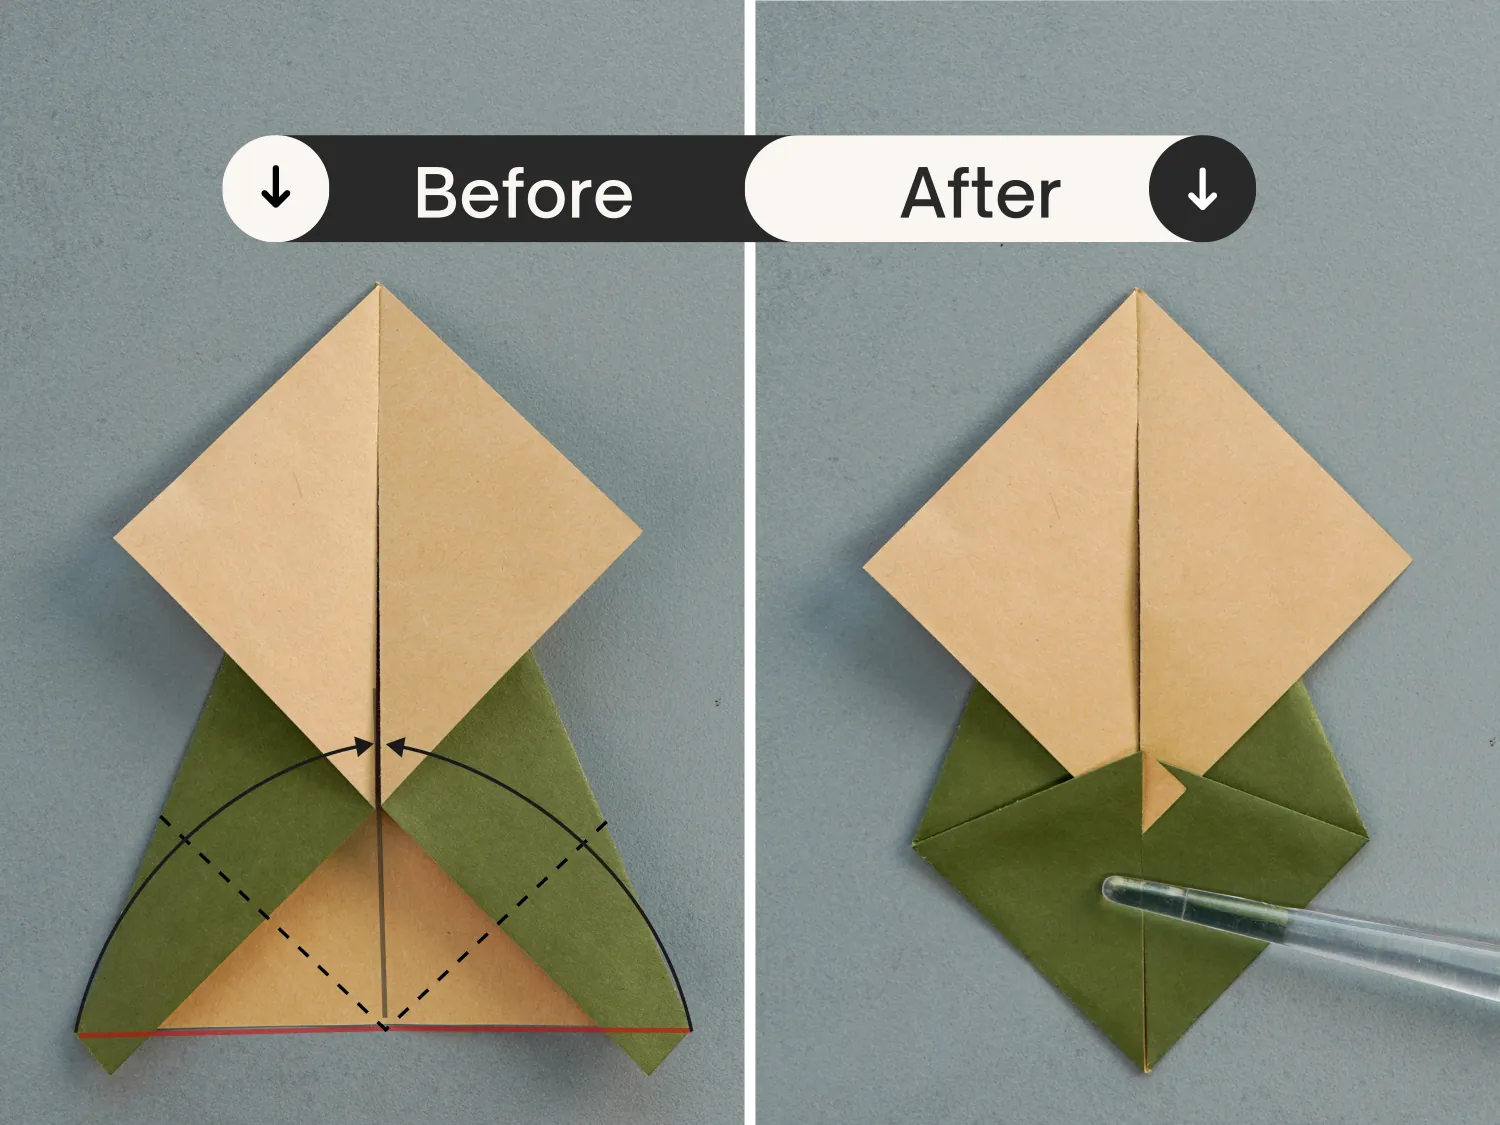
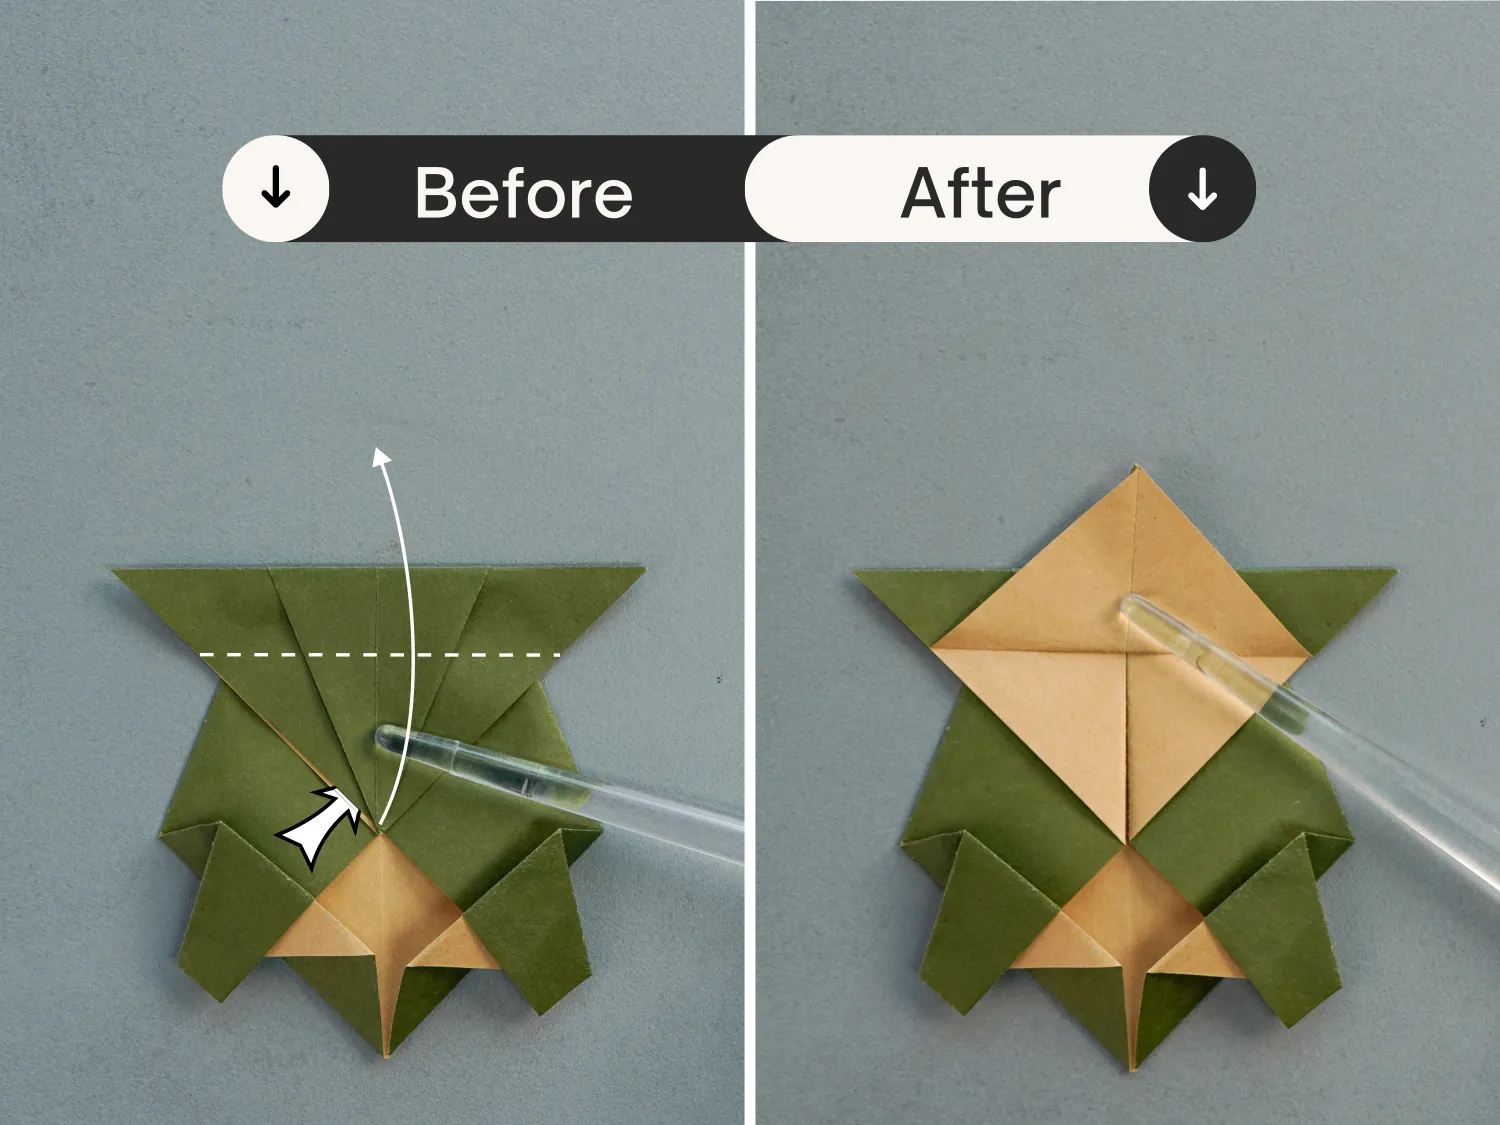
Step 7
Fold down the two corners you folded up in the previous step along the dotted lines.
Step 8
Fold the top point down diagonally.
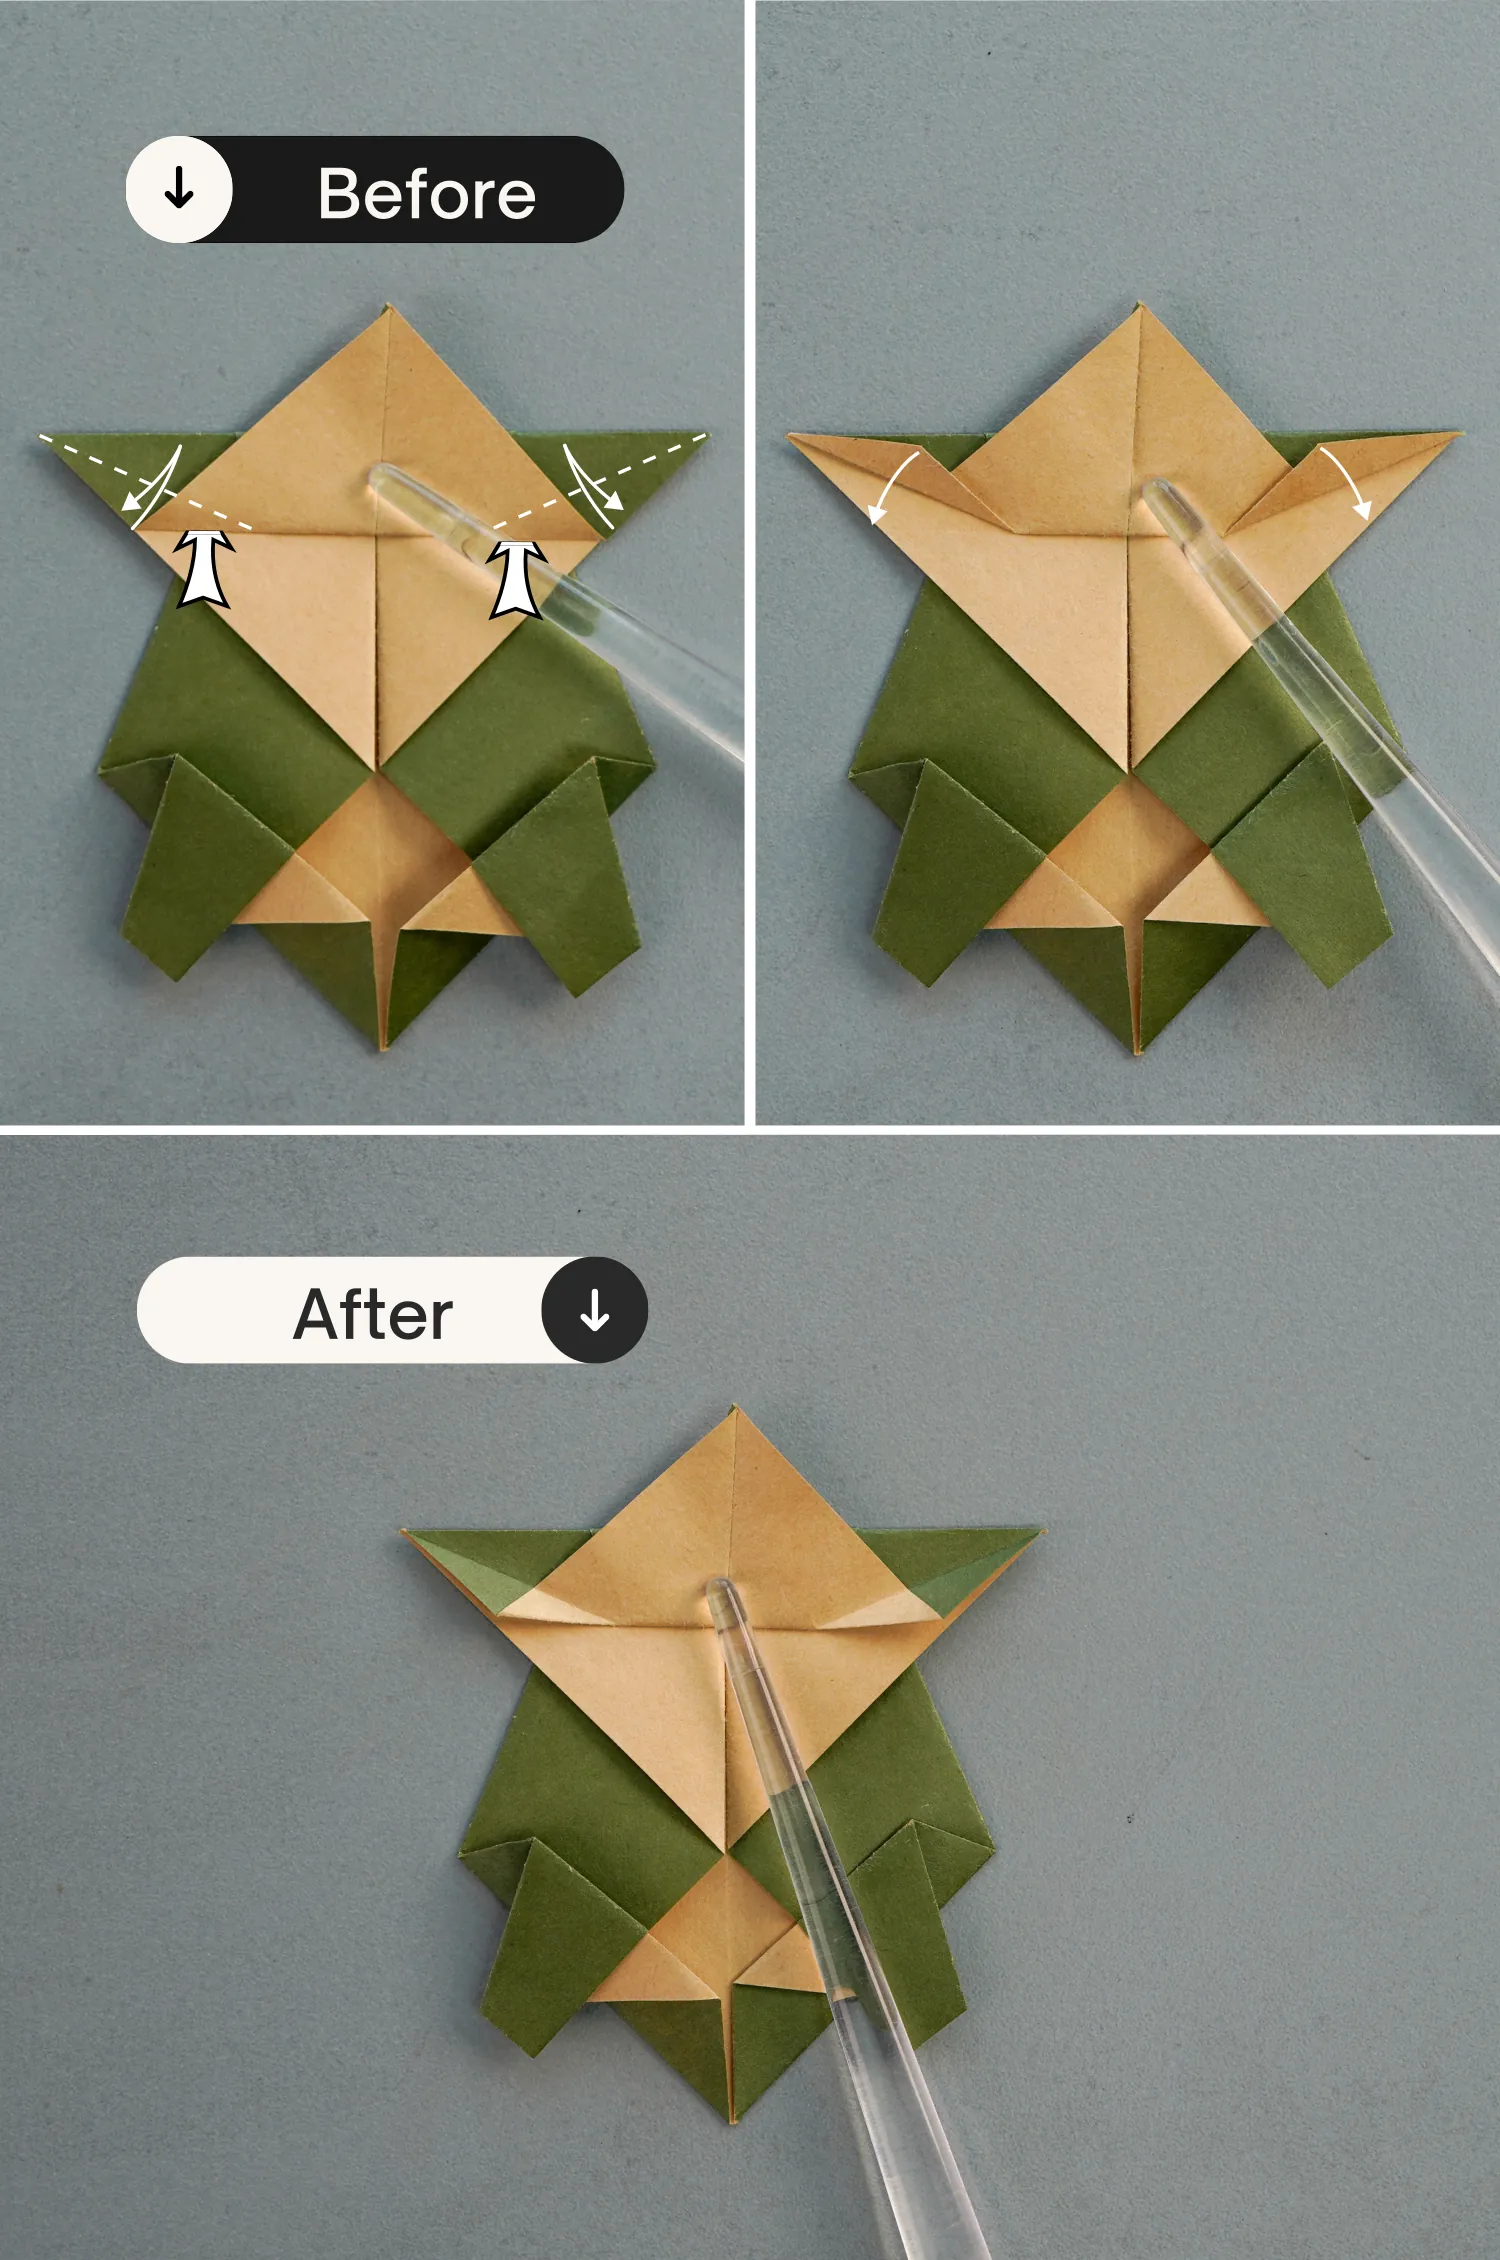
Step 9
Then fold it back to the top along the dotted line.
Step 10
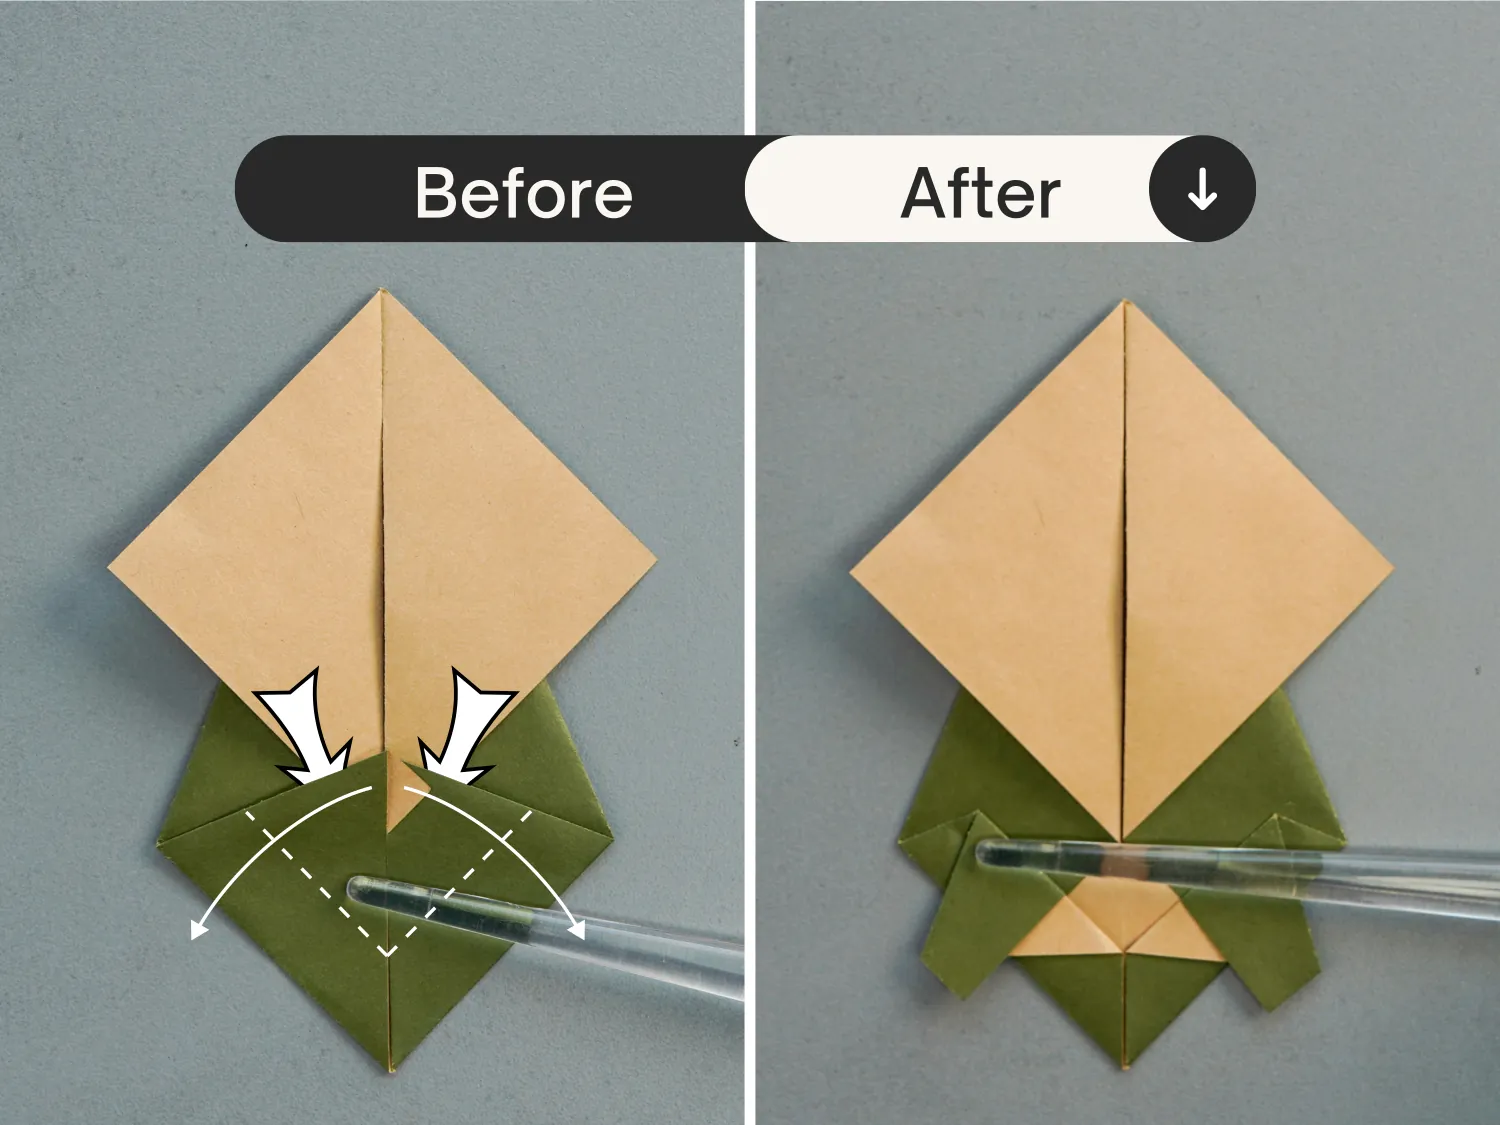
Fold up the bottom left and right corners of the top triangle along the dotted lines, crease them well then unfold.
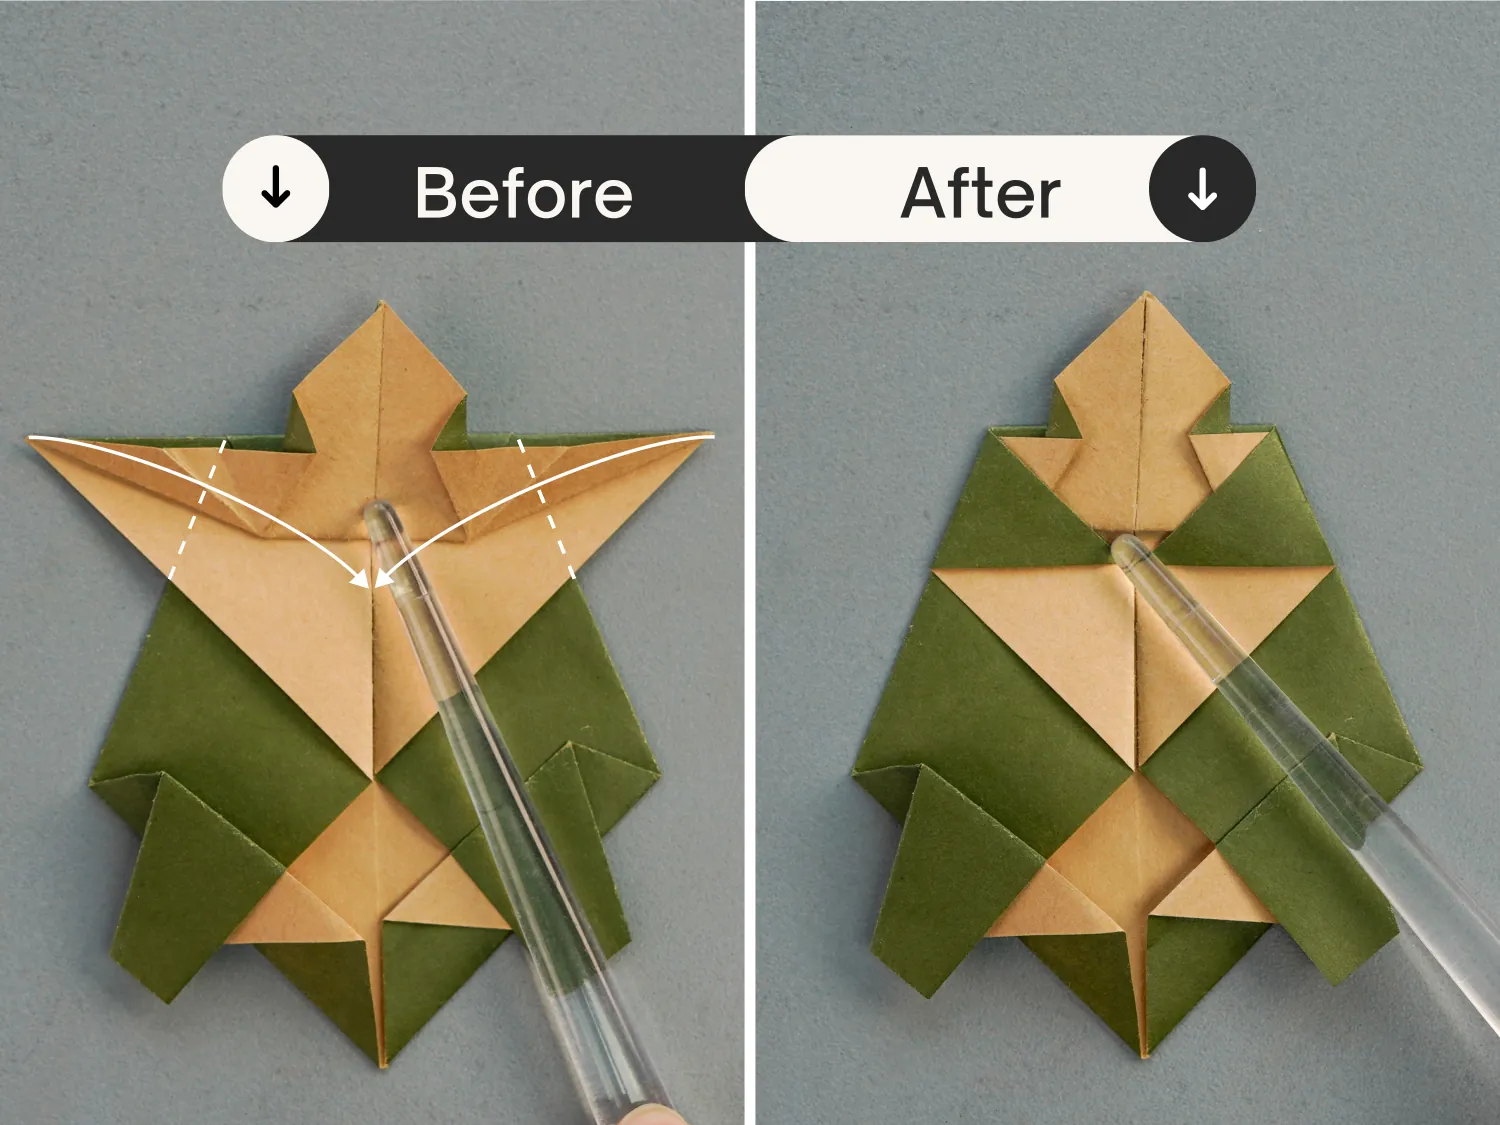
Step 11
Open the bottom right corner of the top triangle, take the right point of this paper as the base, and fold the bottom right corner up, then flatten the fold along the dotted lines.
Repeat this for the bottom left corner, open it, take the left corner of the paper as the base, then fold it up and flatten the fold along the dotted lines.
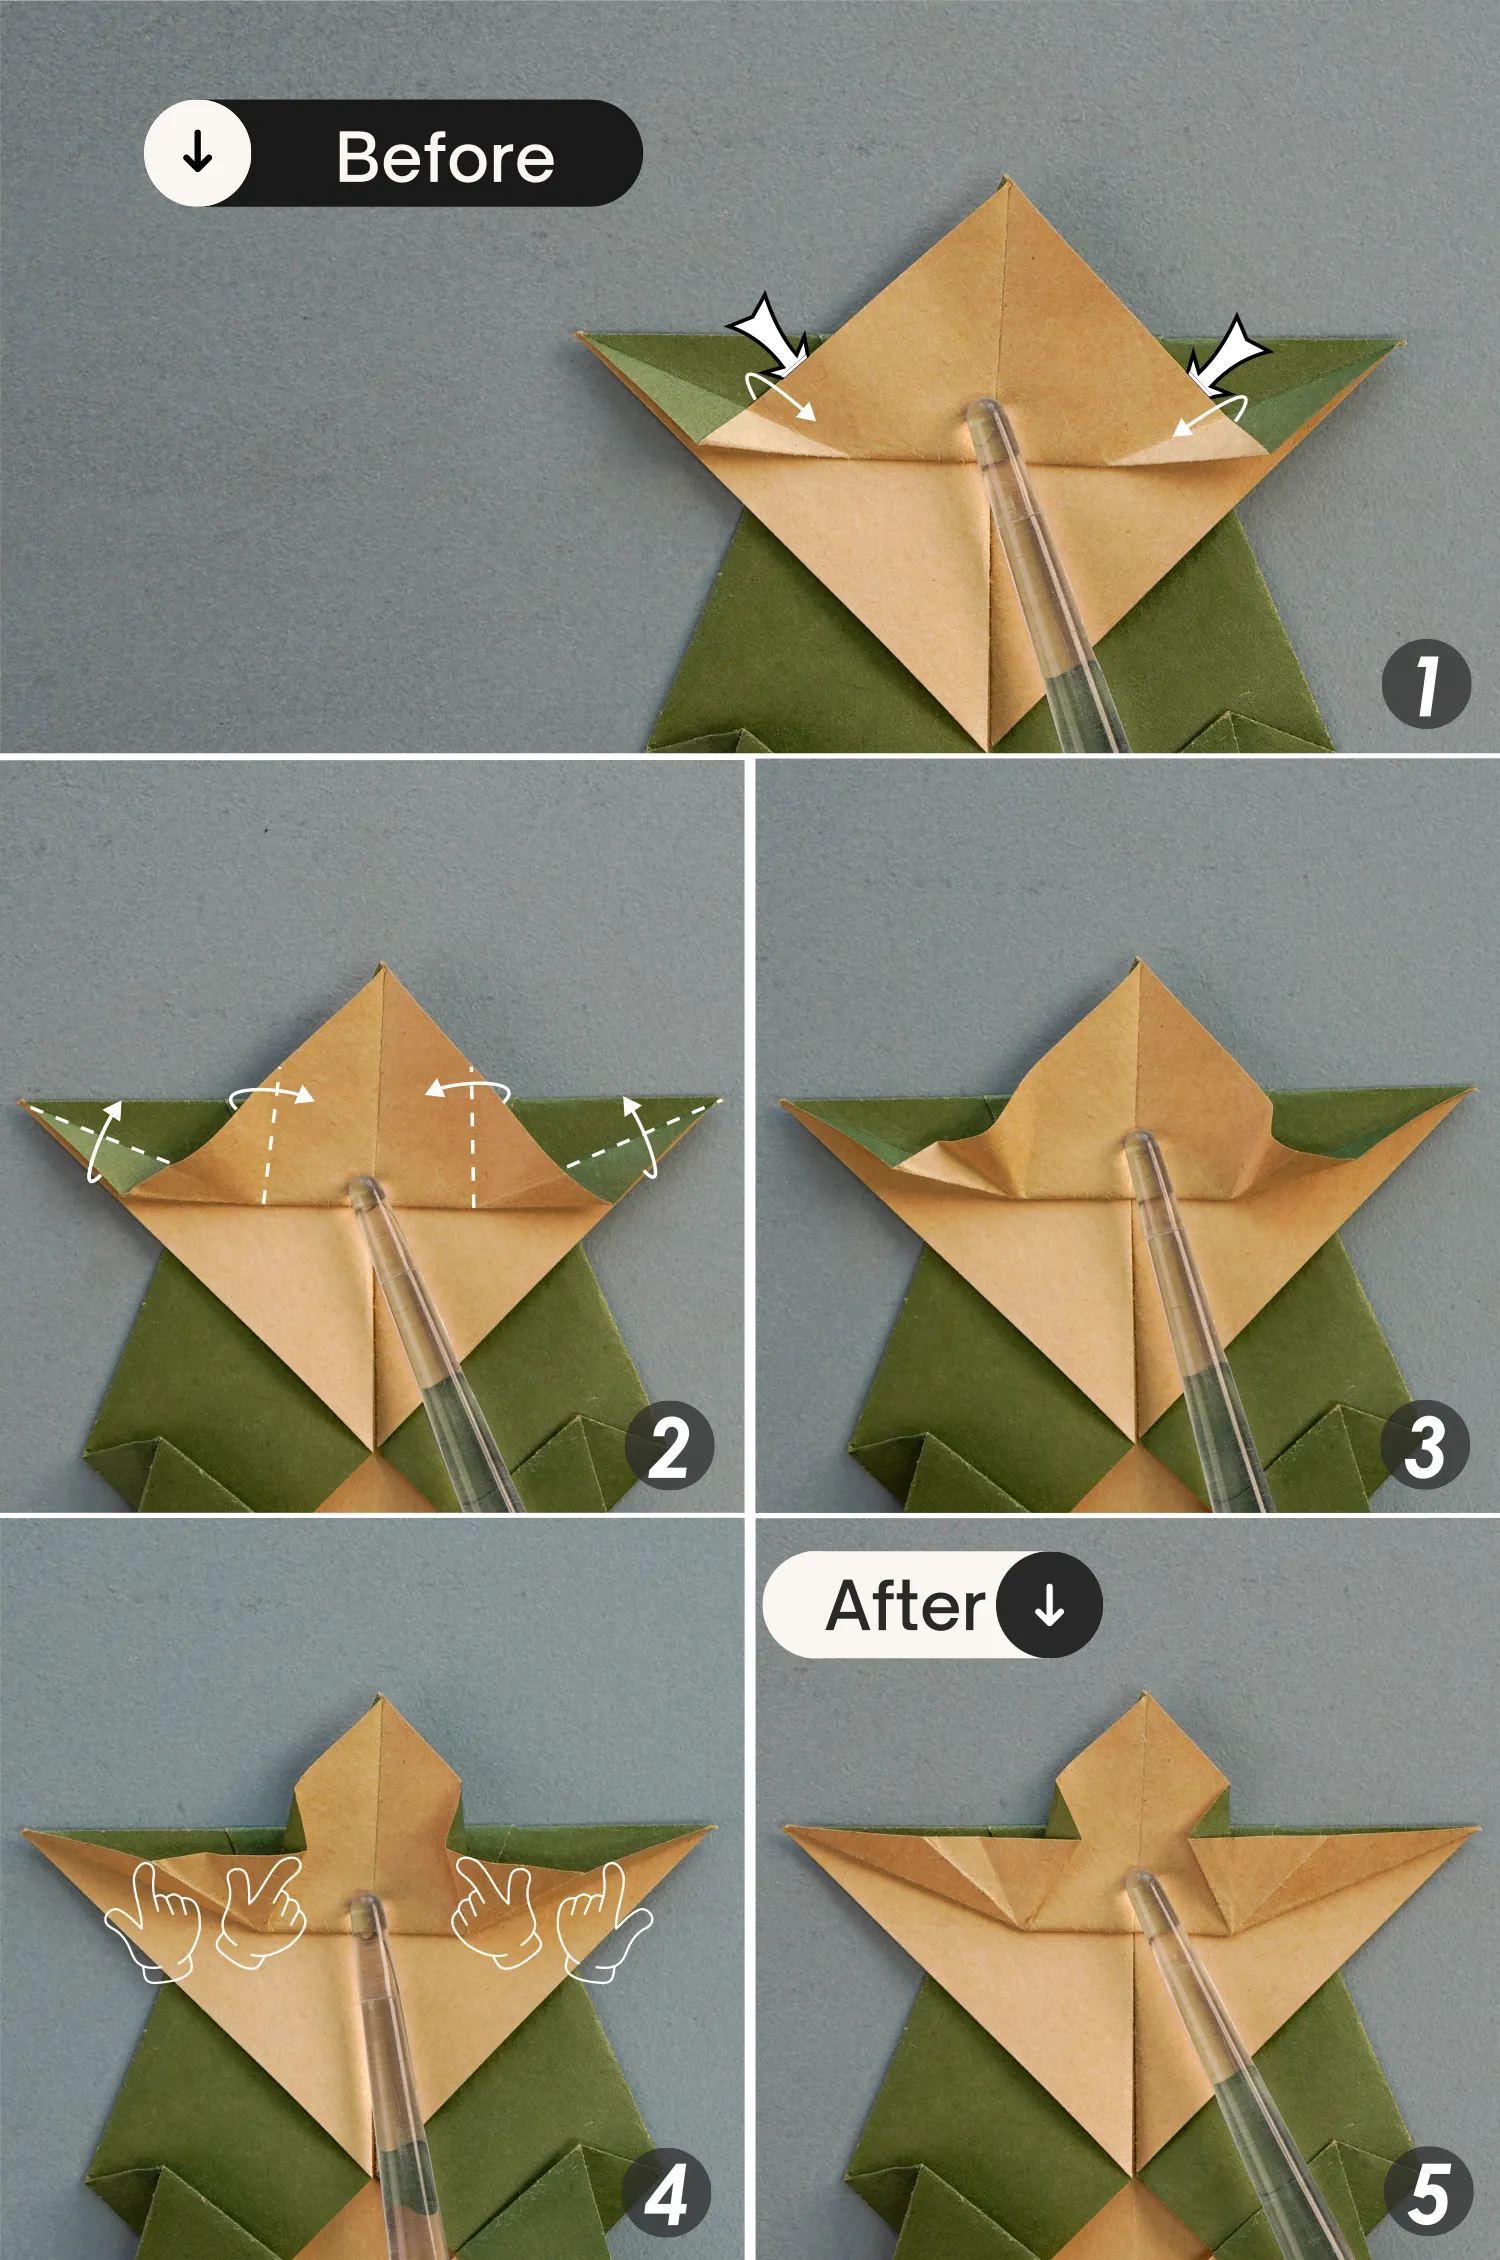
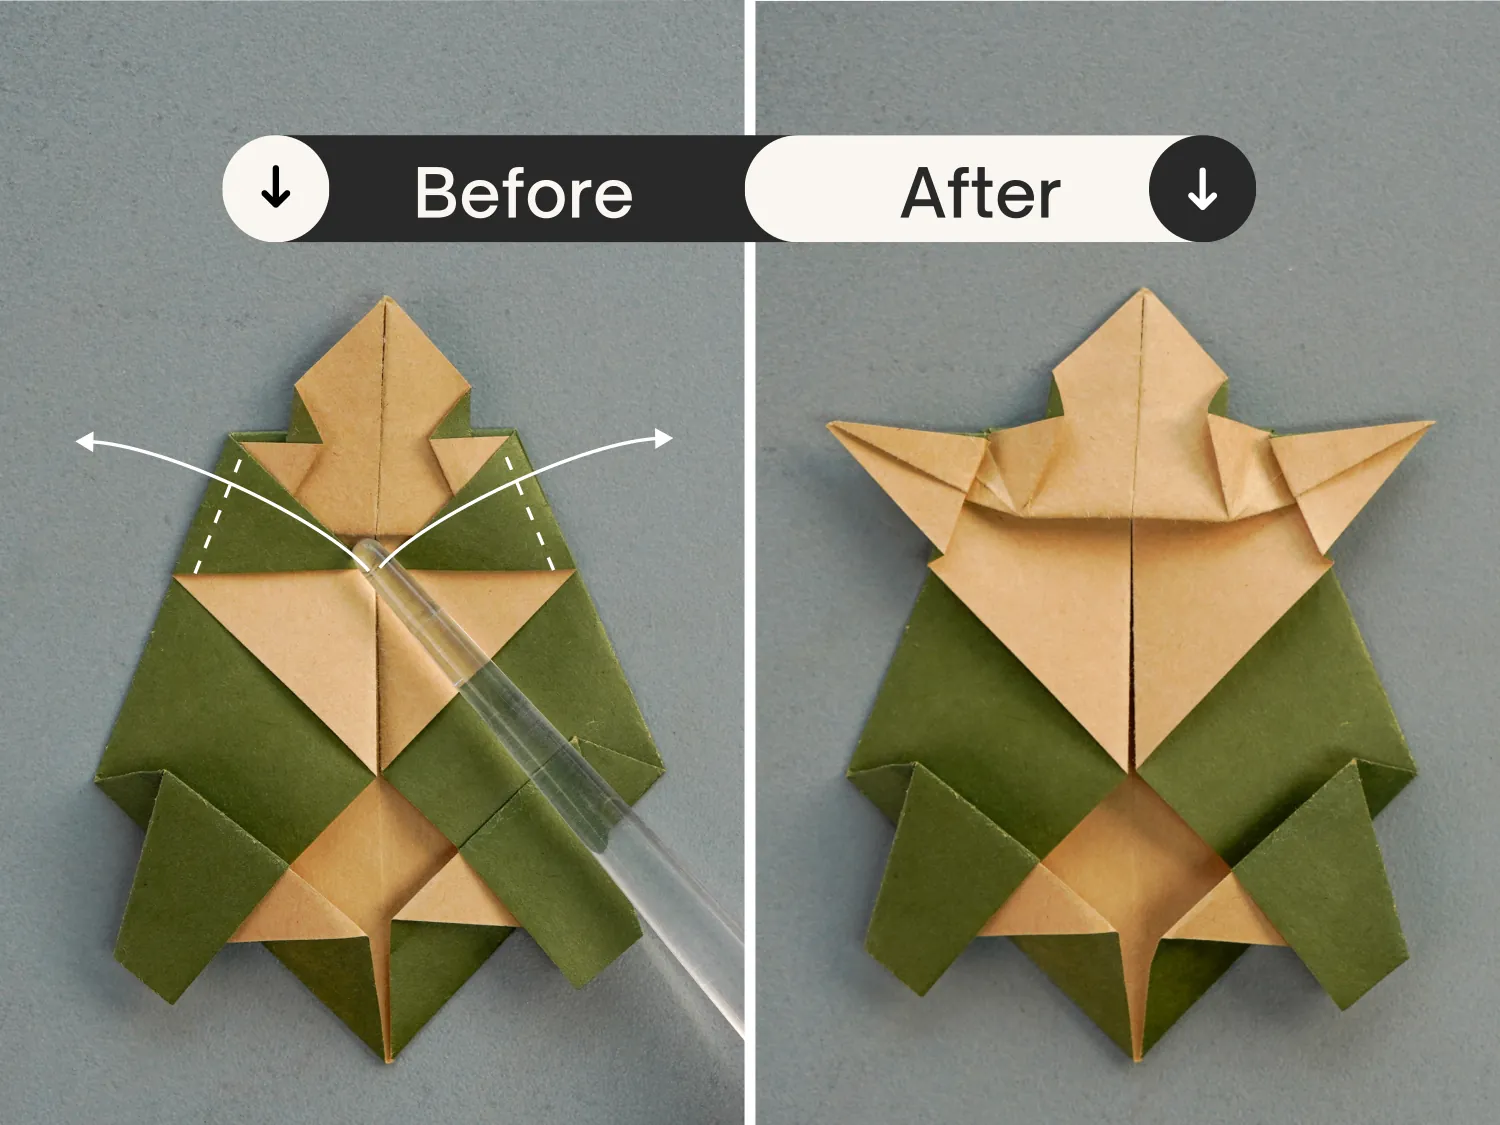
Step 12
Fold the right and left corner of this paper toward the center along the dotted lines.
Step 13
Then fold these two corners back to their original direction along the dotted lines, creating two front flippers.
Step 14
Shape the bottom crease shown by the red dotted line, and slightly lift it. Ensure the middle of the paper is concave.
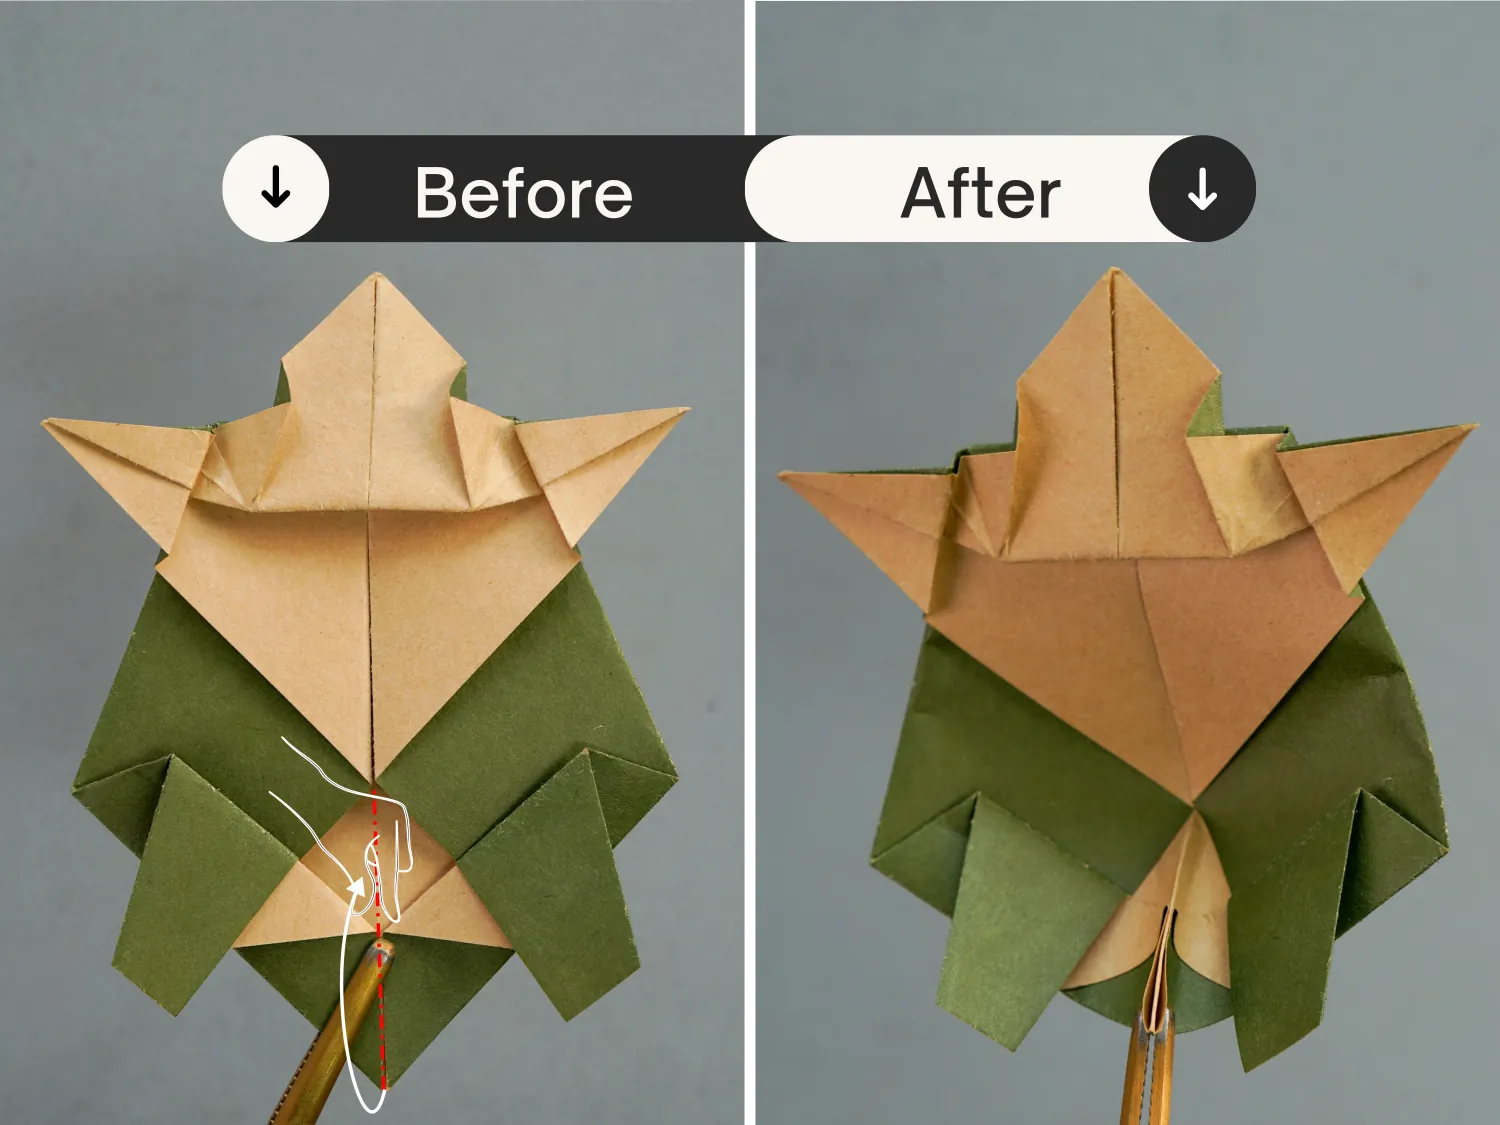
Step 15
Press down the lifted part to the right, to get a cute tail if you flip the paper over, as the small round picture shows.
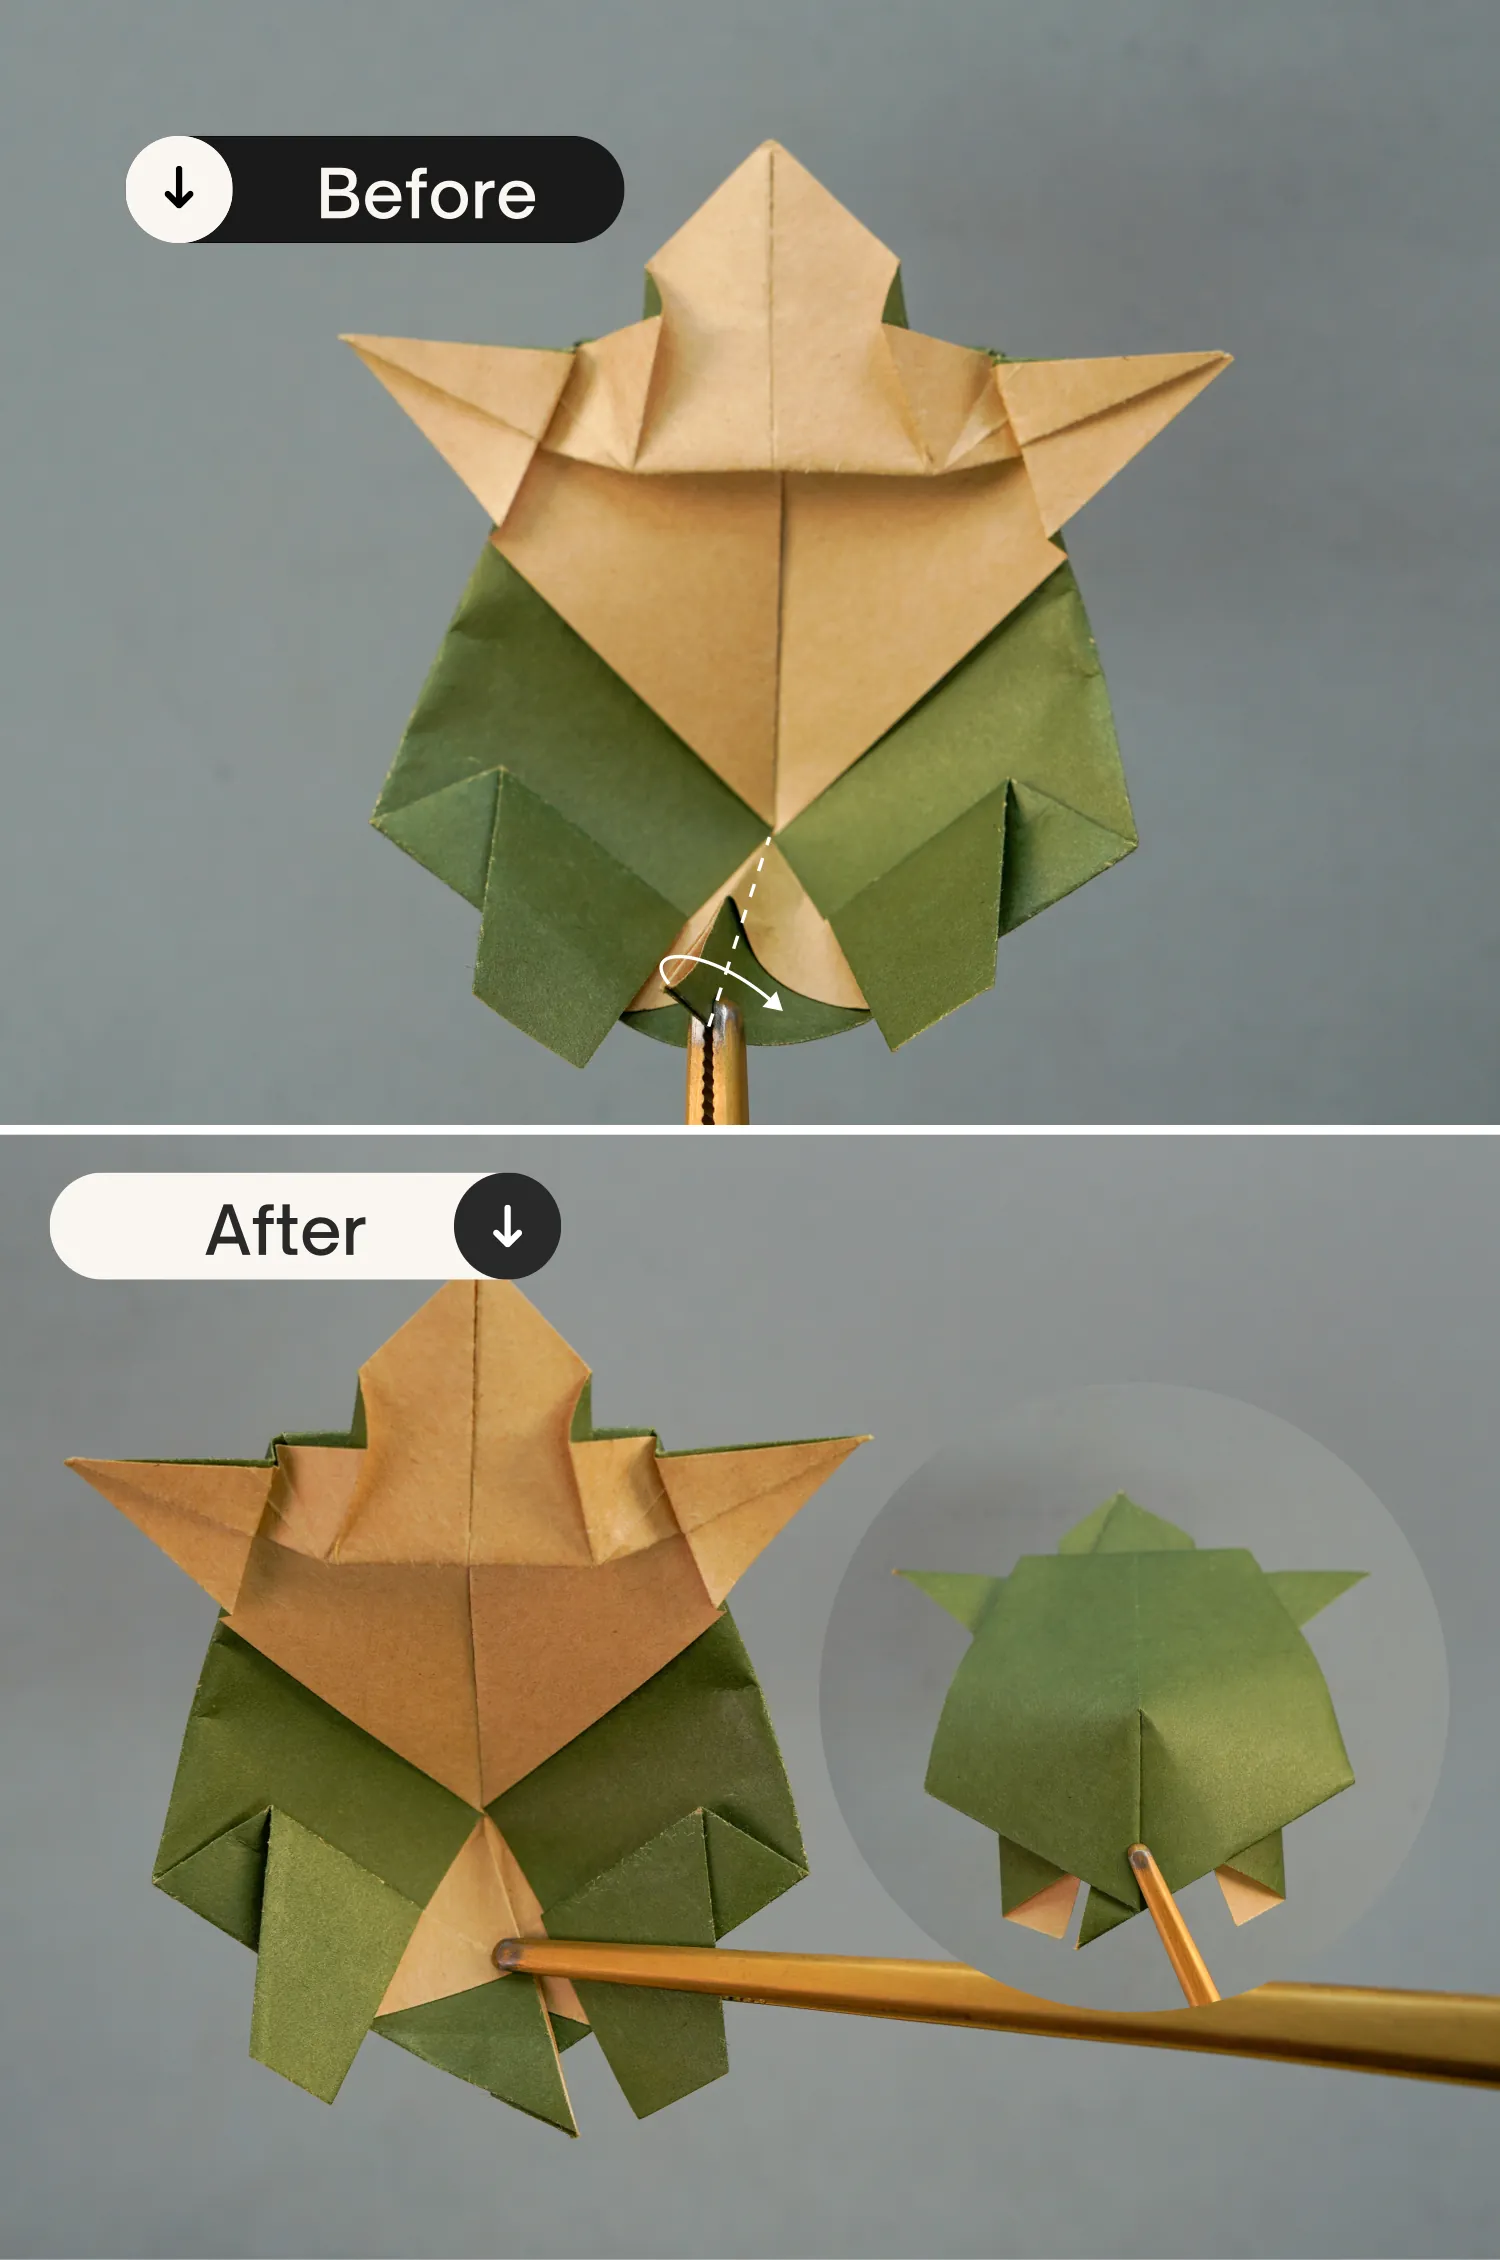
Step 16
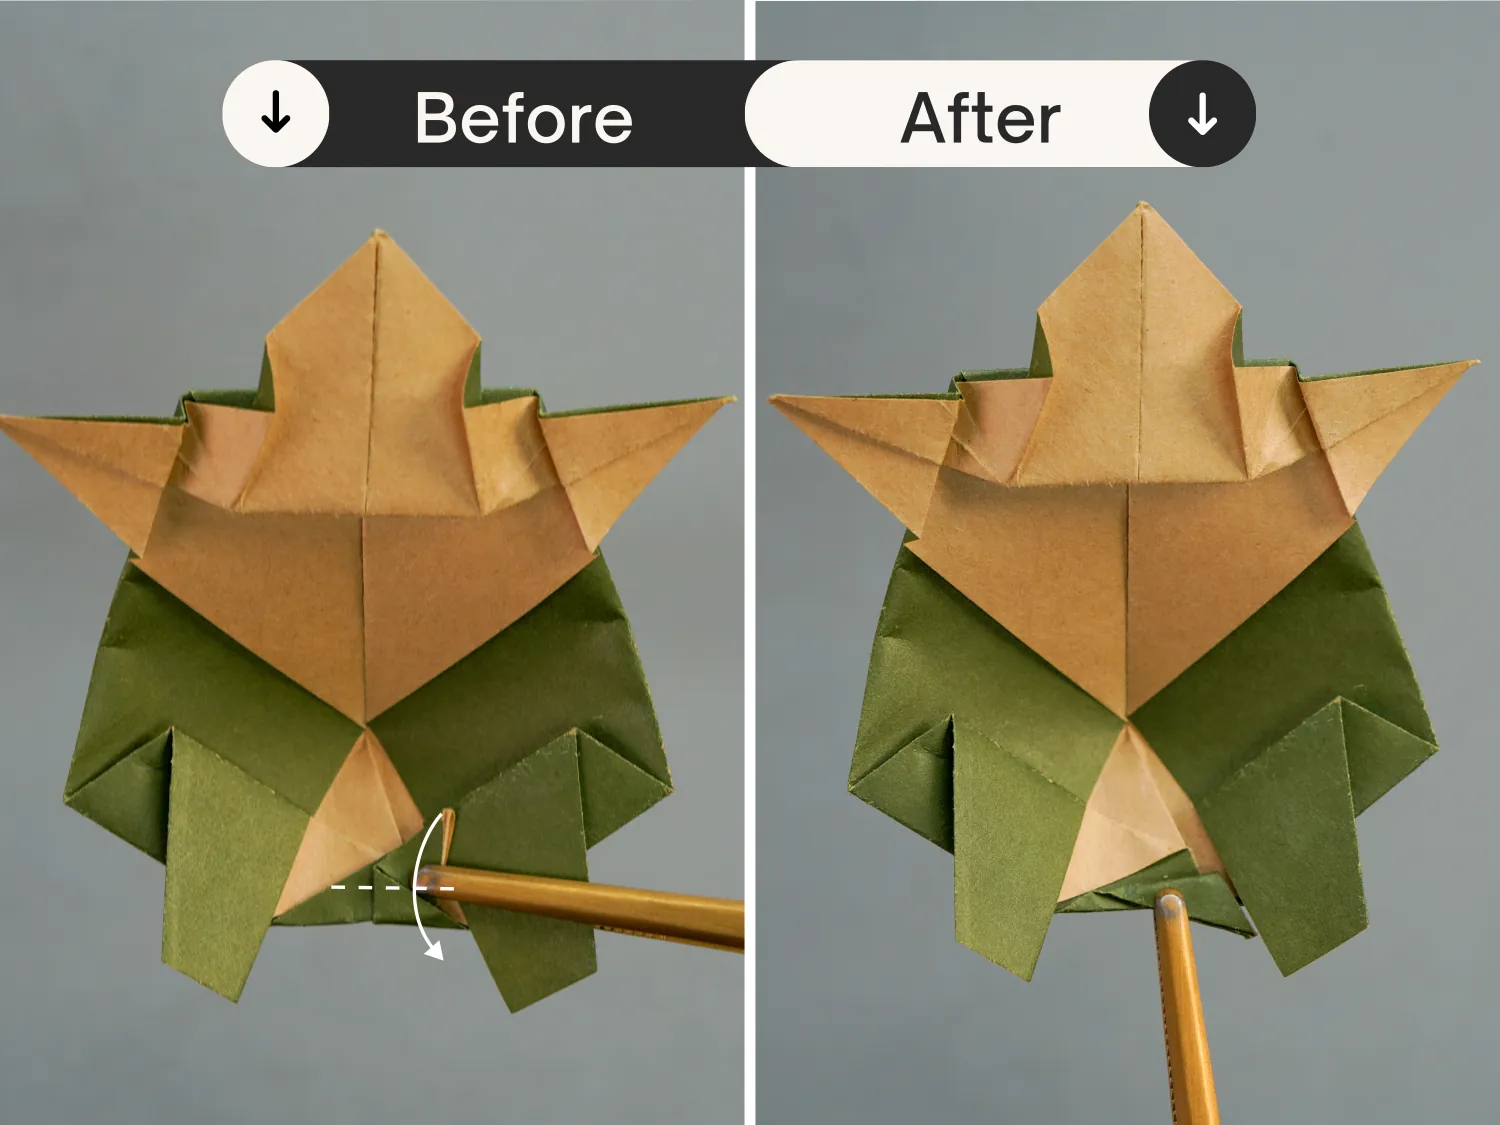
Next, fold this little tail up along the dotted line.

Step 17
Then fold down the top tip of the tail along the dotted line.
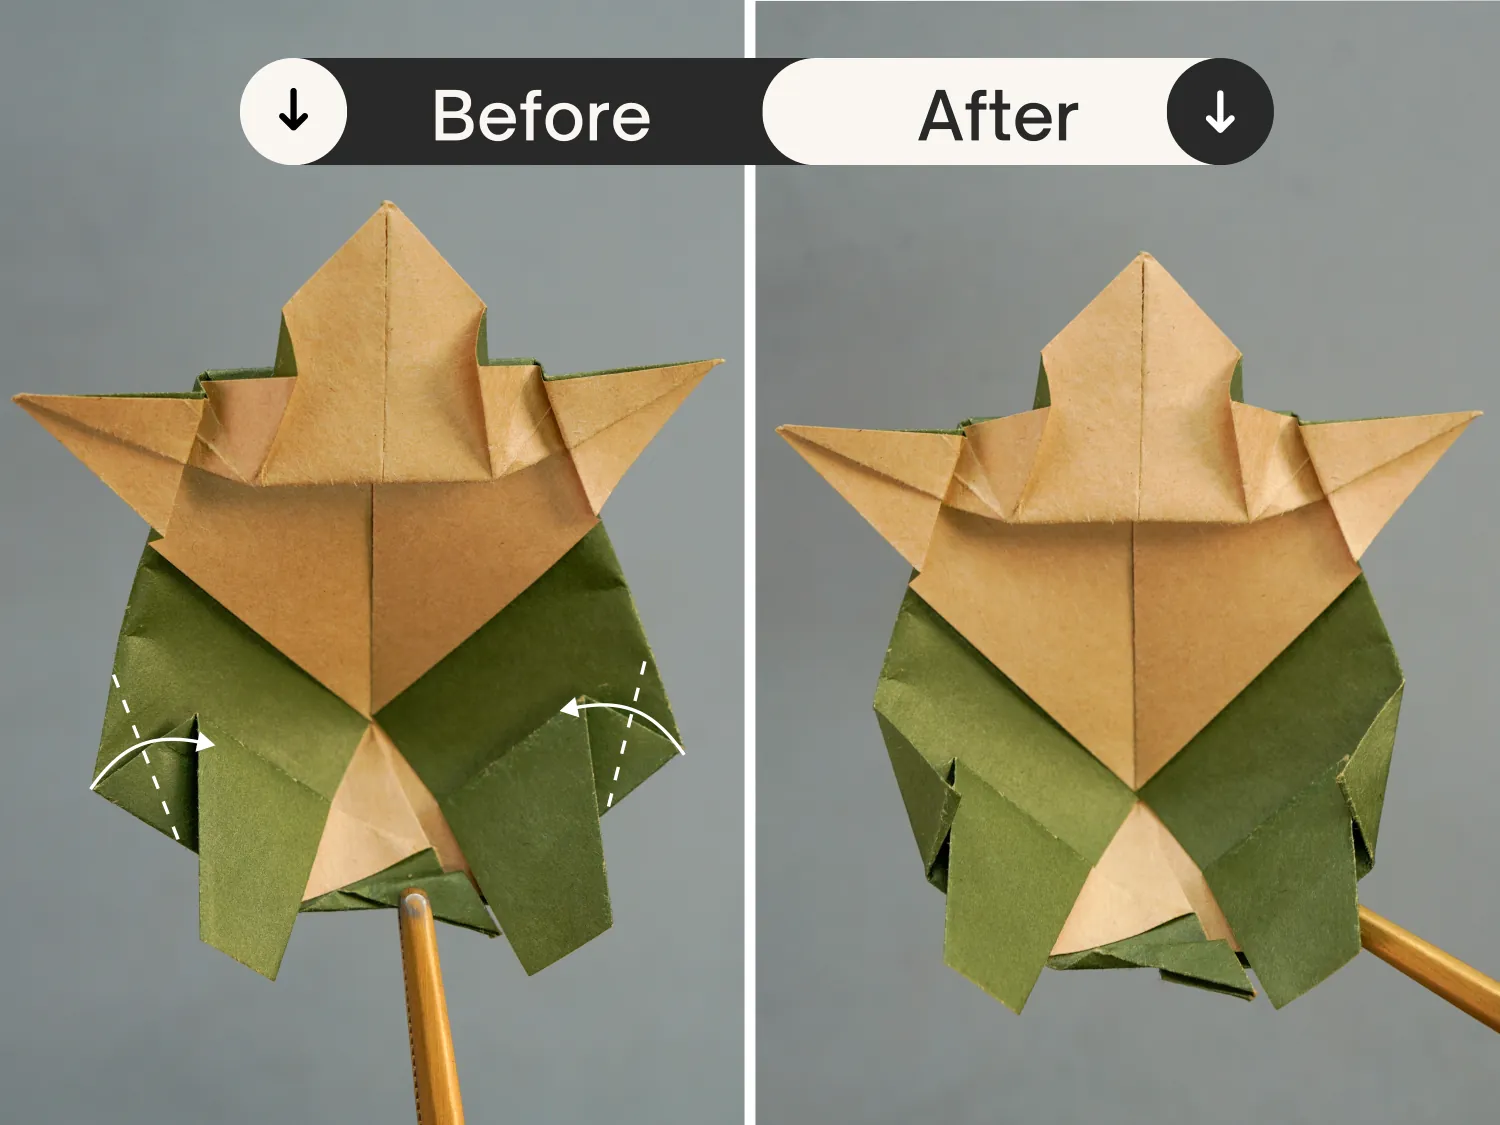
Step 18
Fold the bottom left and right corners of the body part toward the center a little.
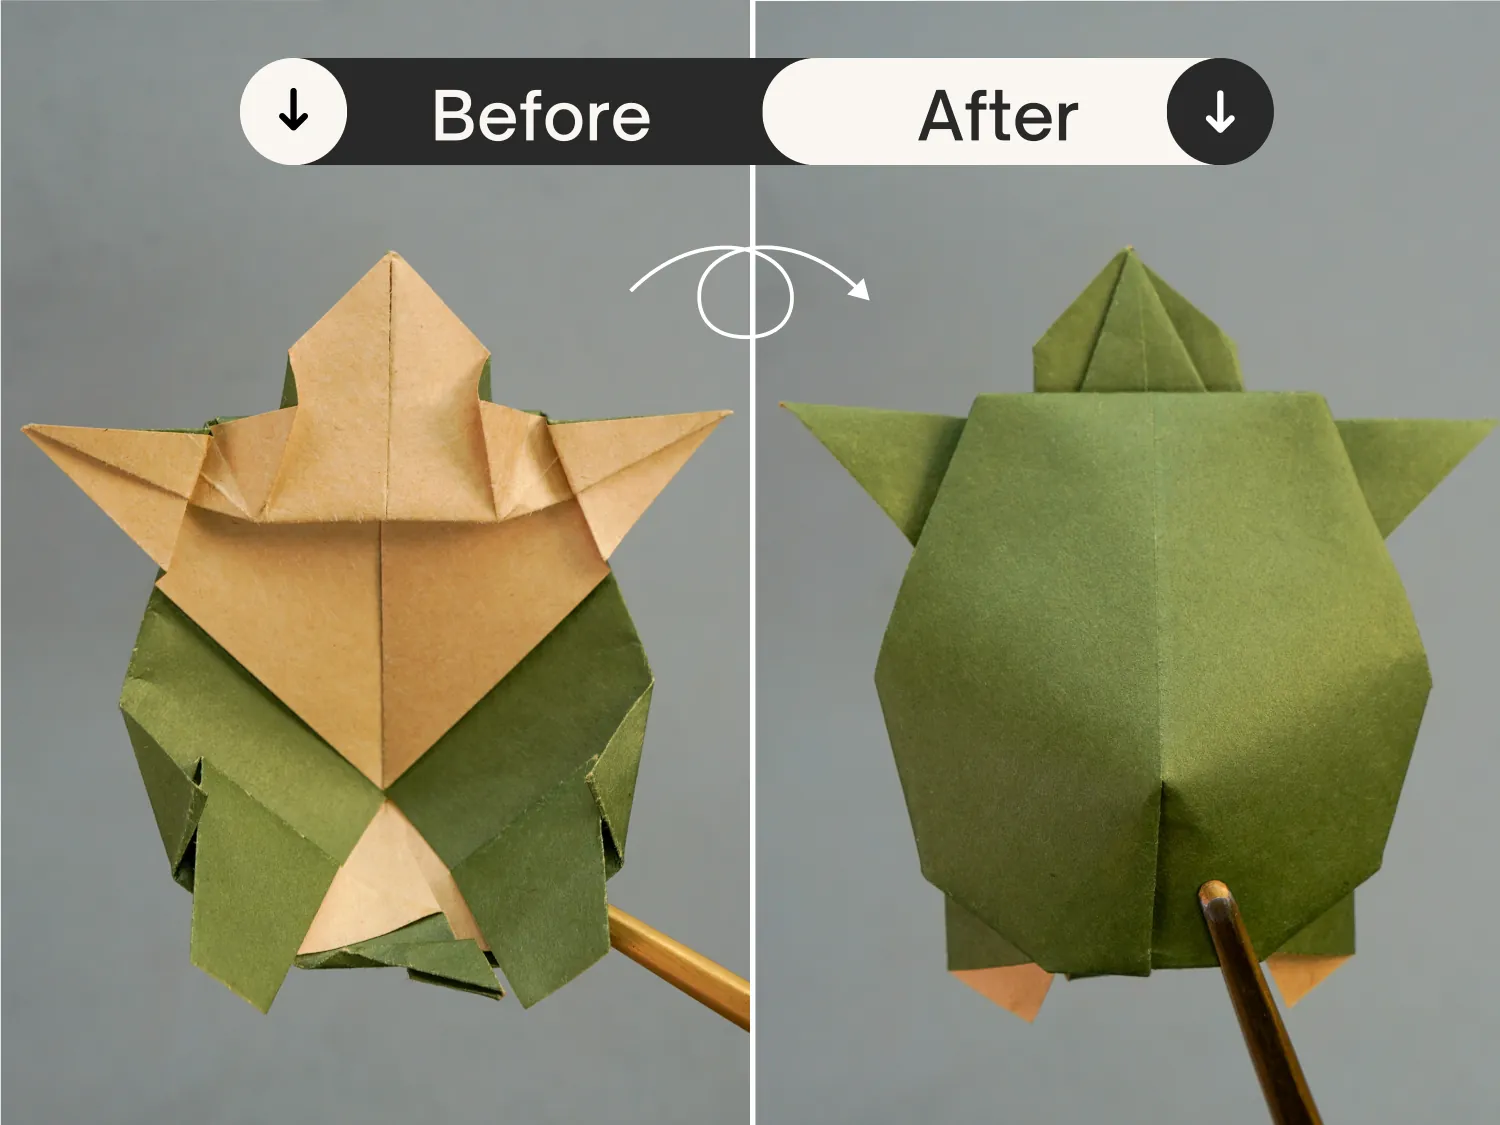
Step 19
Flip the paper over, this is the final shape of an origami turtle.
What’s Next
That’s your lovely origami turtle. We also offer a variety of other easy origami animal instructions. Feel free to explore them, and enjoy folding!
Other Easy Origami Animal Ideas