How to Make an Origami Star Box
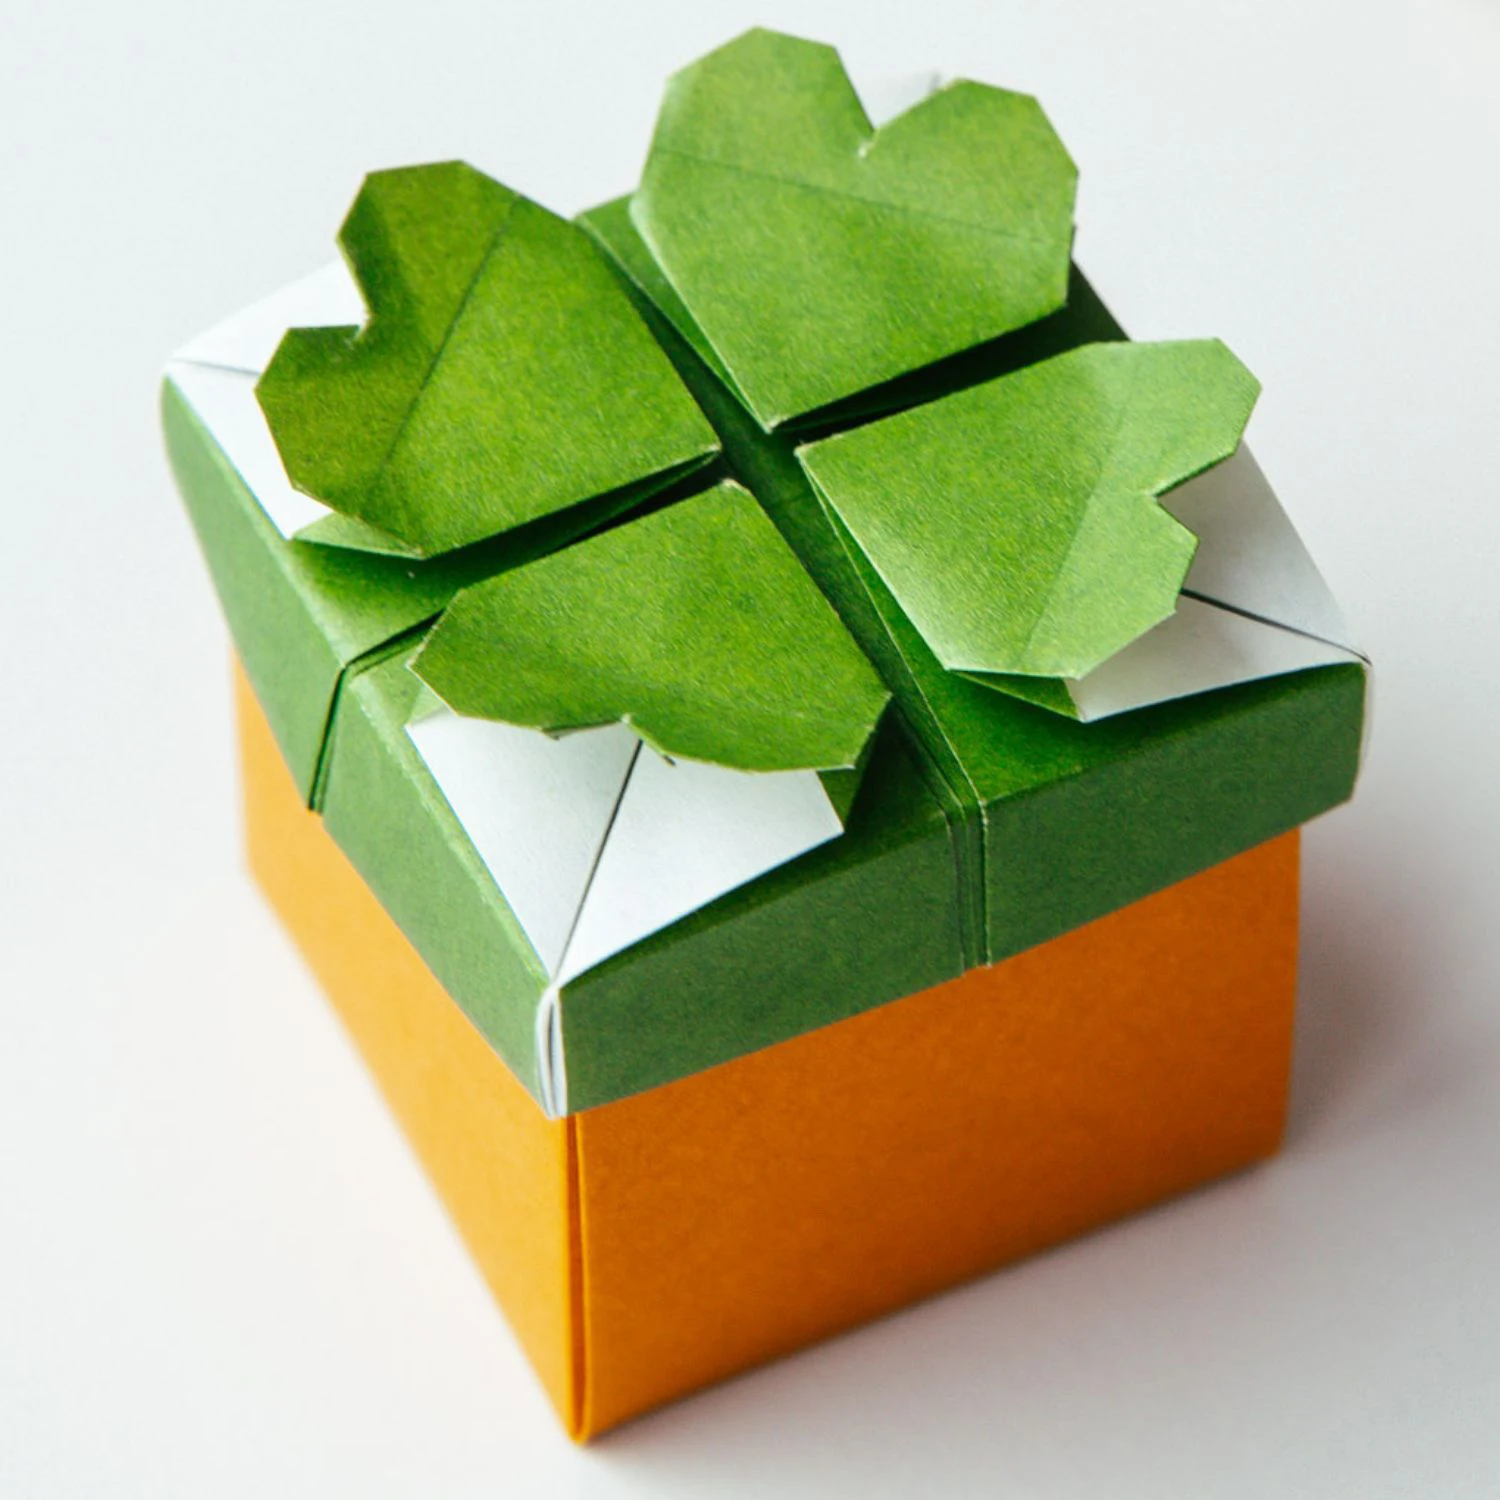
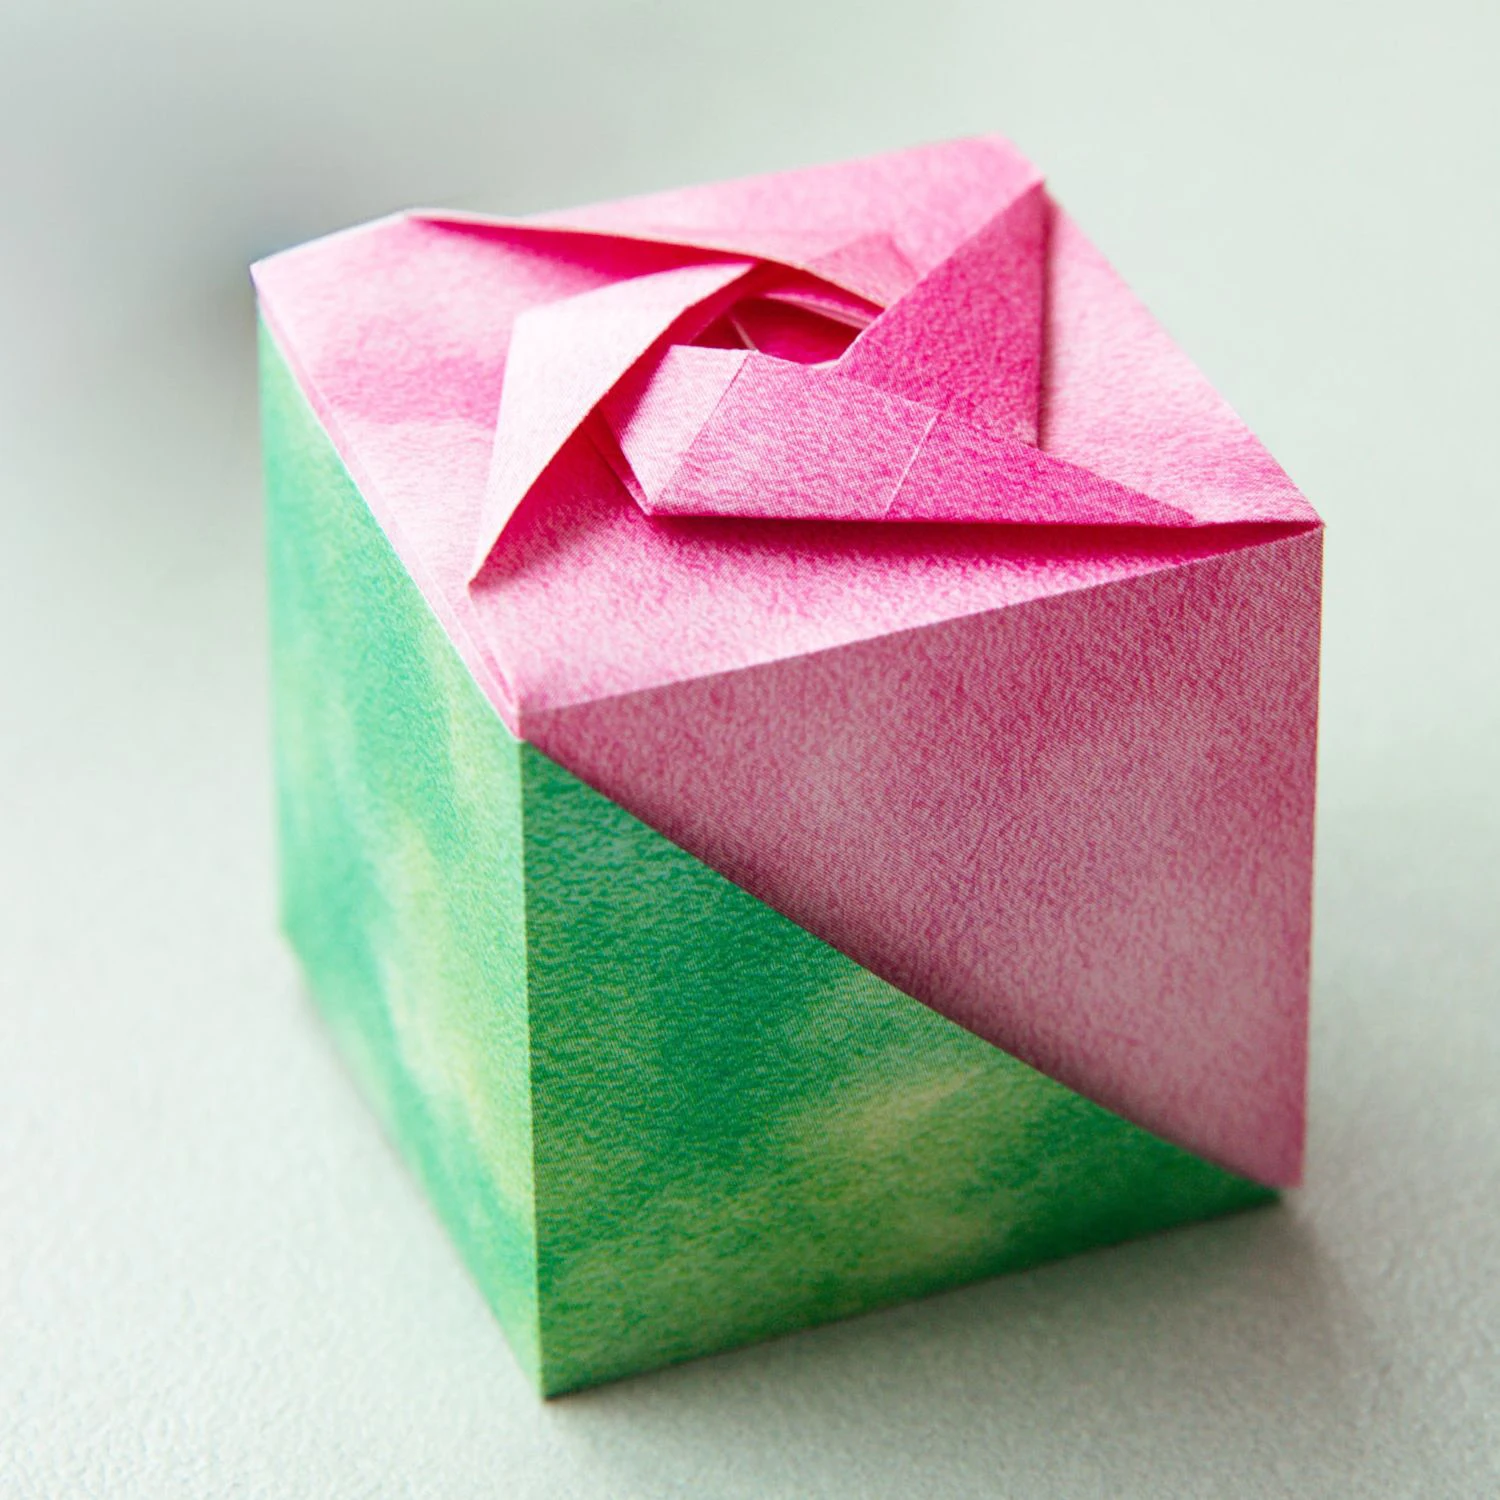
Very creative and unique origami star-shaped box, place several of these adorable and practical storage boxes on your desk to neatly store your pins, hair clips, and more. In addition, this box is also a great choice for serving some chips at a party.

We provide step-by-step diagram instructions and beginner-friendly videos. Check both for quicker learning.
If you are new to origami, start here from our beginner guide to know the basics and how to read the step-by-step instructions.
- Folding time: 10 minutes
- Paper: 15×15 cm
- Difficulty: Easy
Material
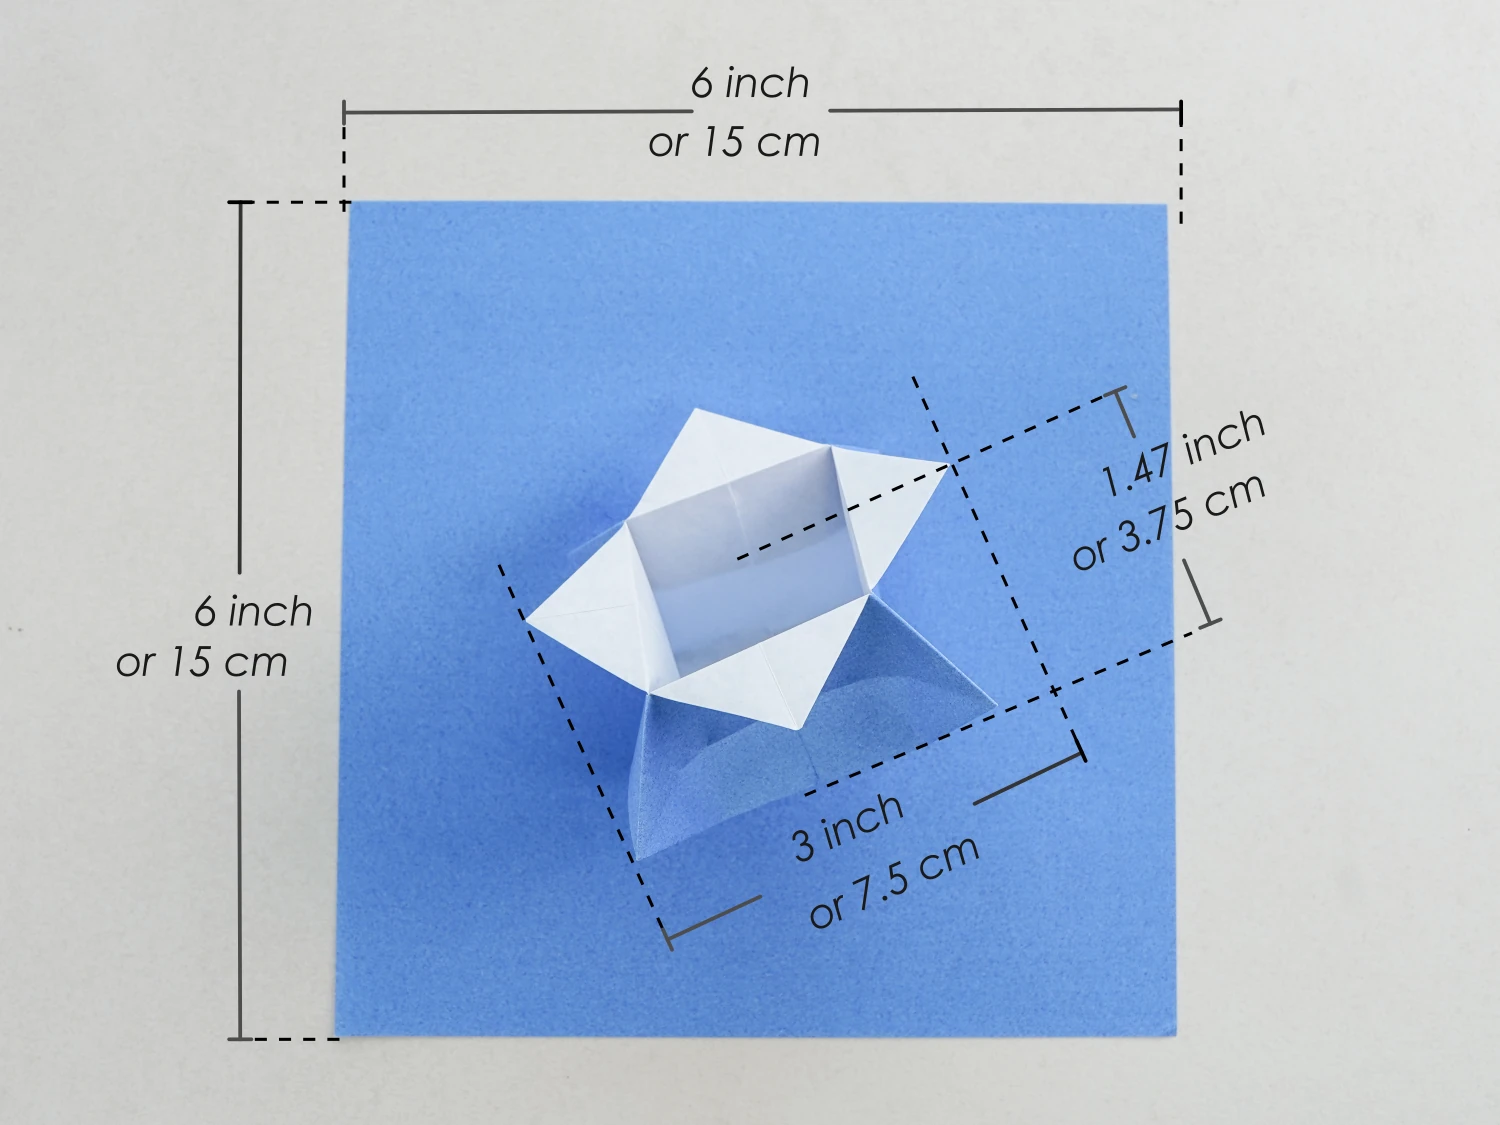
Prepare a 15×15 cm origami square paper, with different colors on each side, to create a 3.75×7.5 cm star box. Different boxes can be made using various colors and sizes of square paper.
Origami Star Box Video
Step by Step Instructions
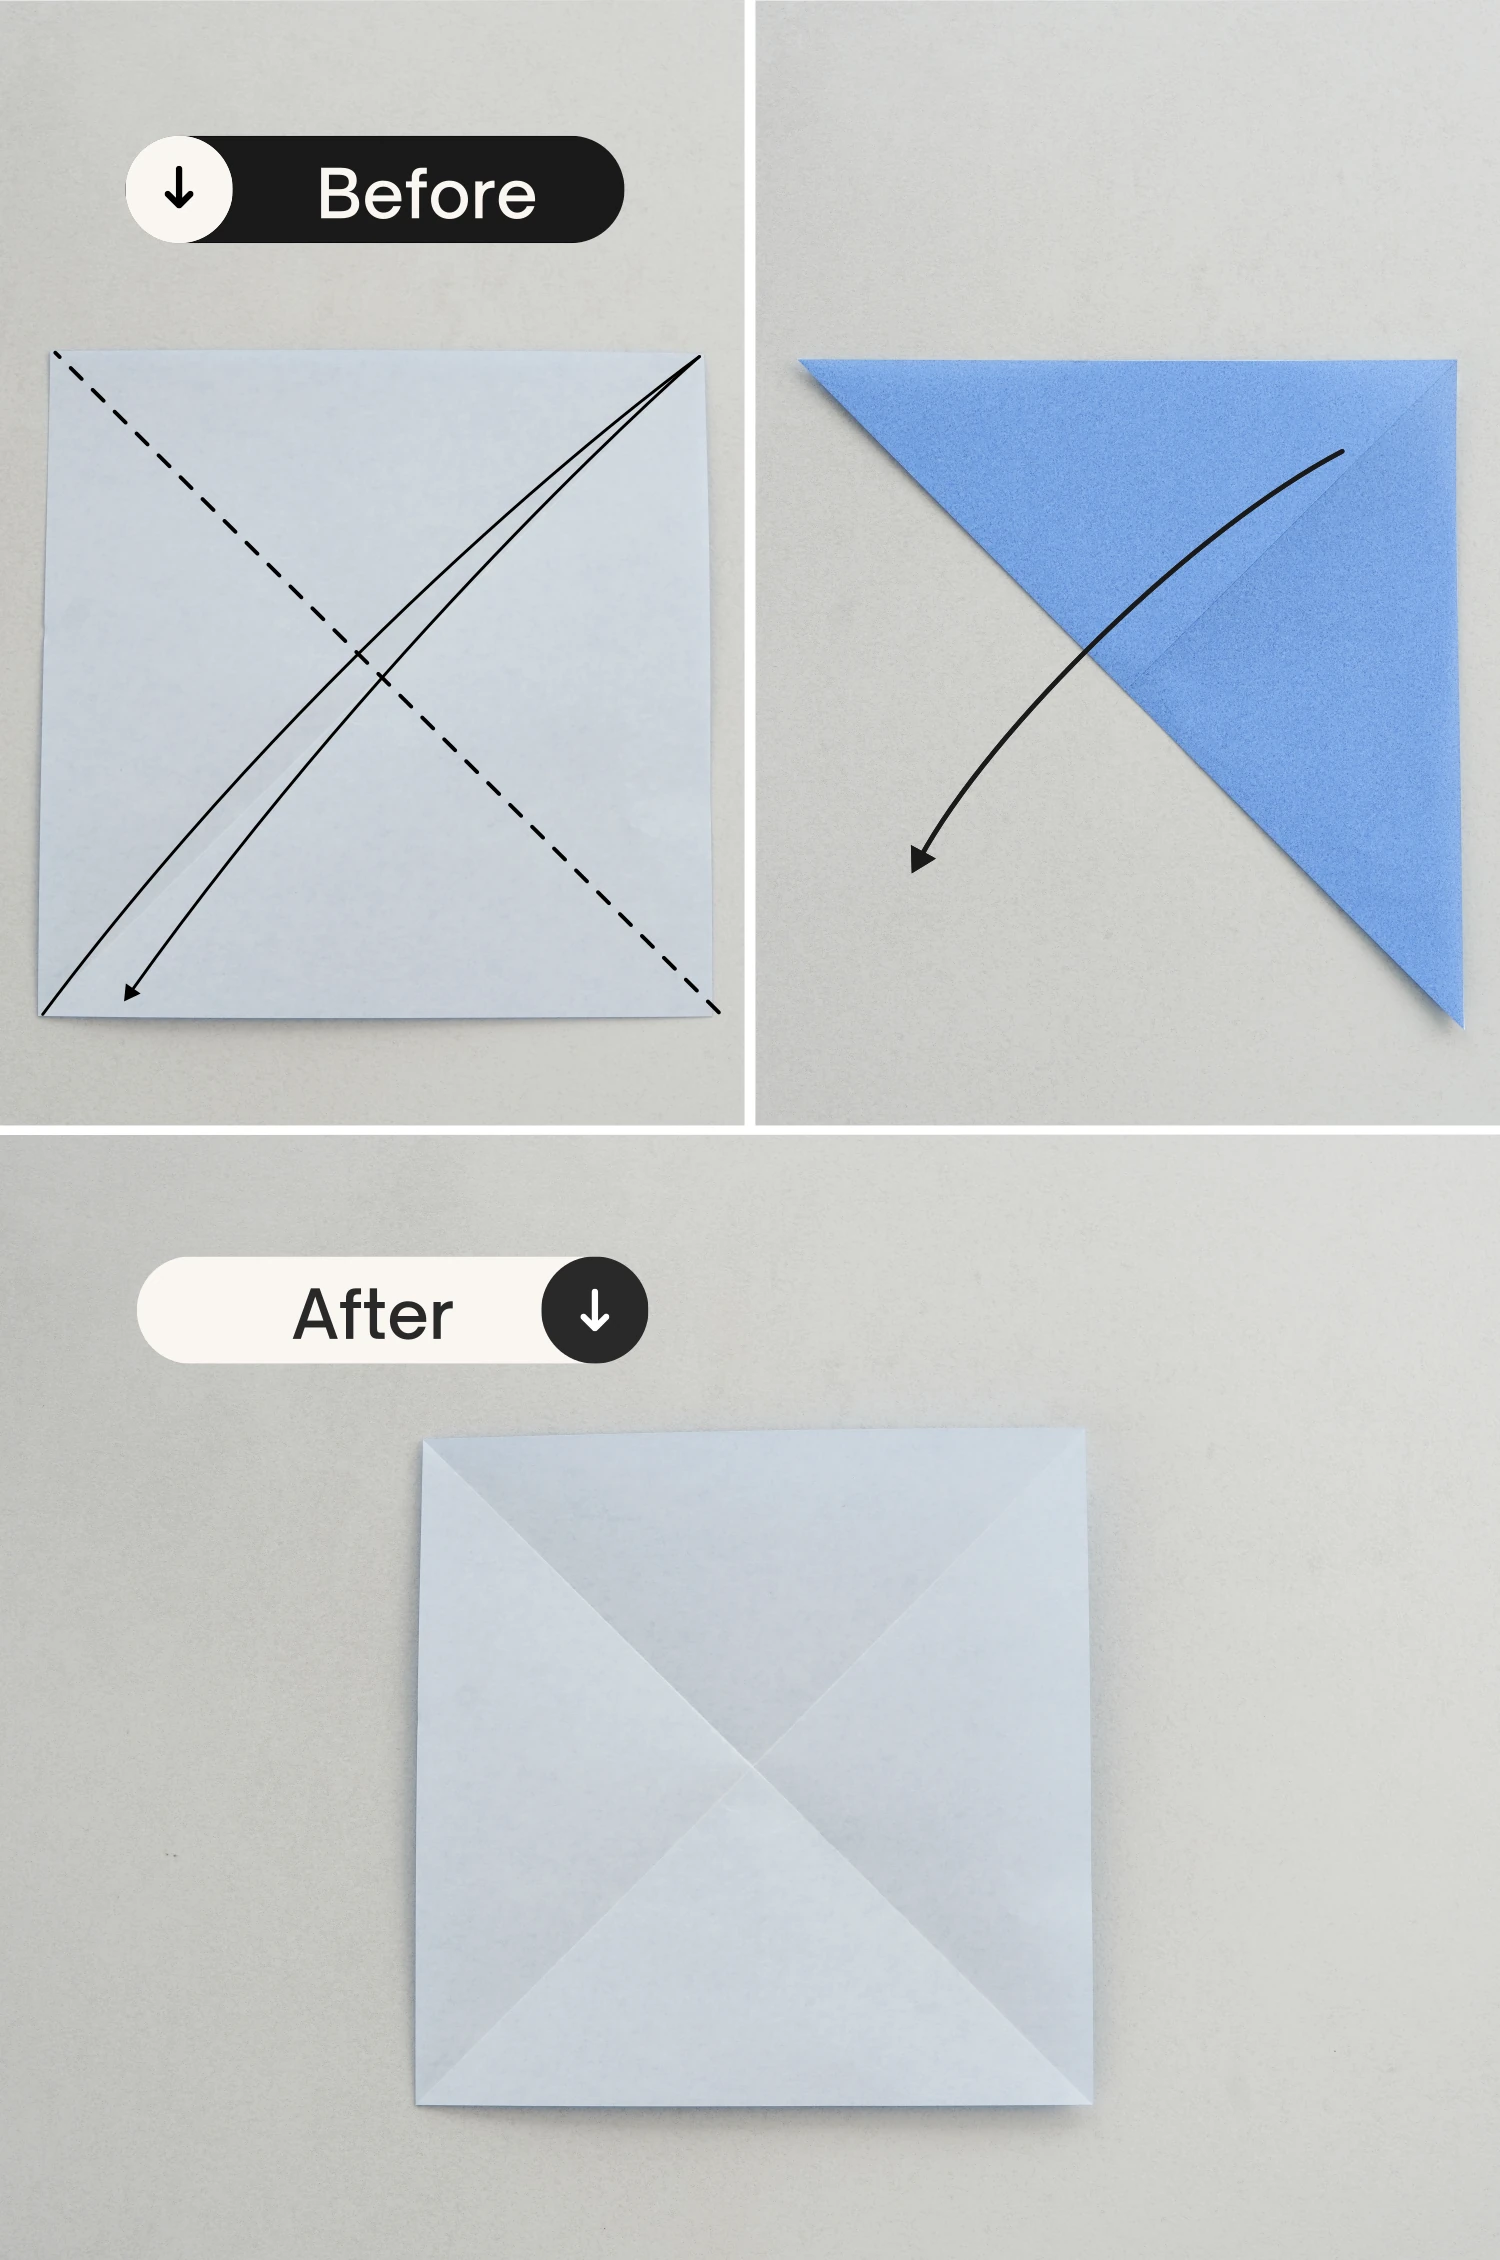
Step 1
Start with the white side of the paper facing up. Fold in half diagonally crease it well then unfold.

Step 2
Fold it in half diagonally from the opposite direction, crease it well then unfold it.
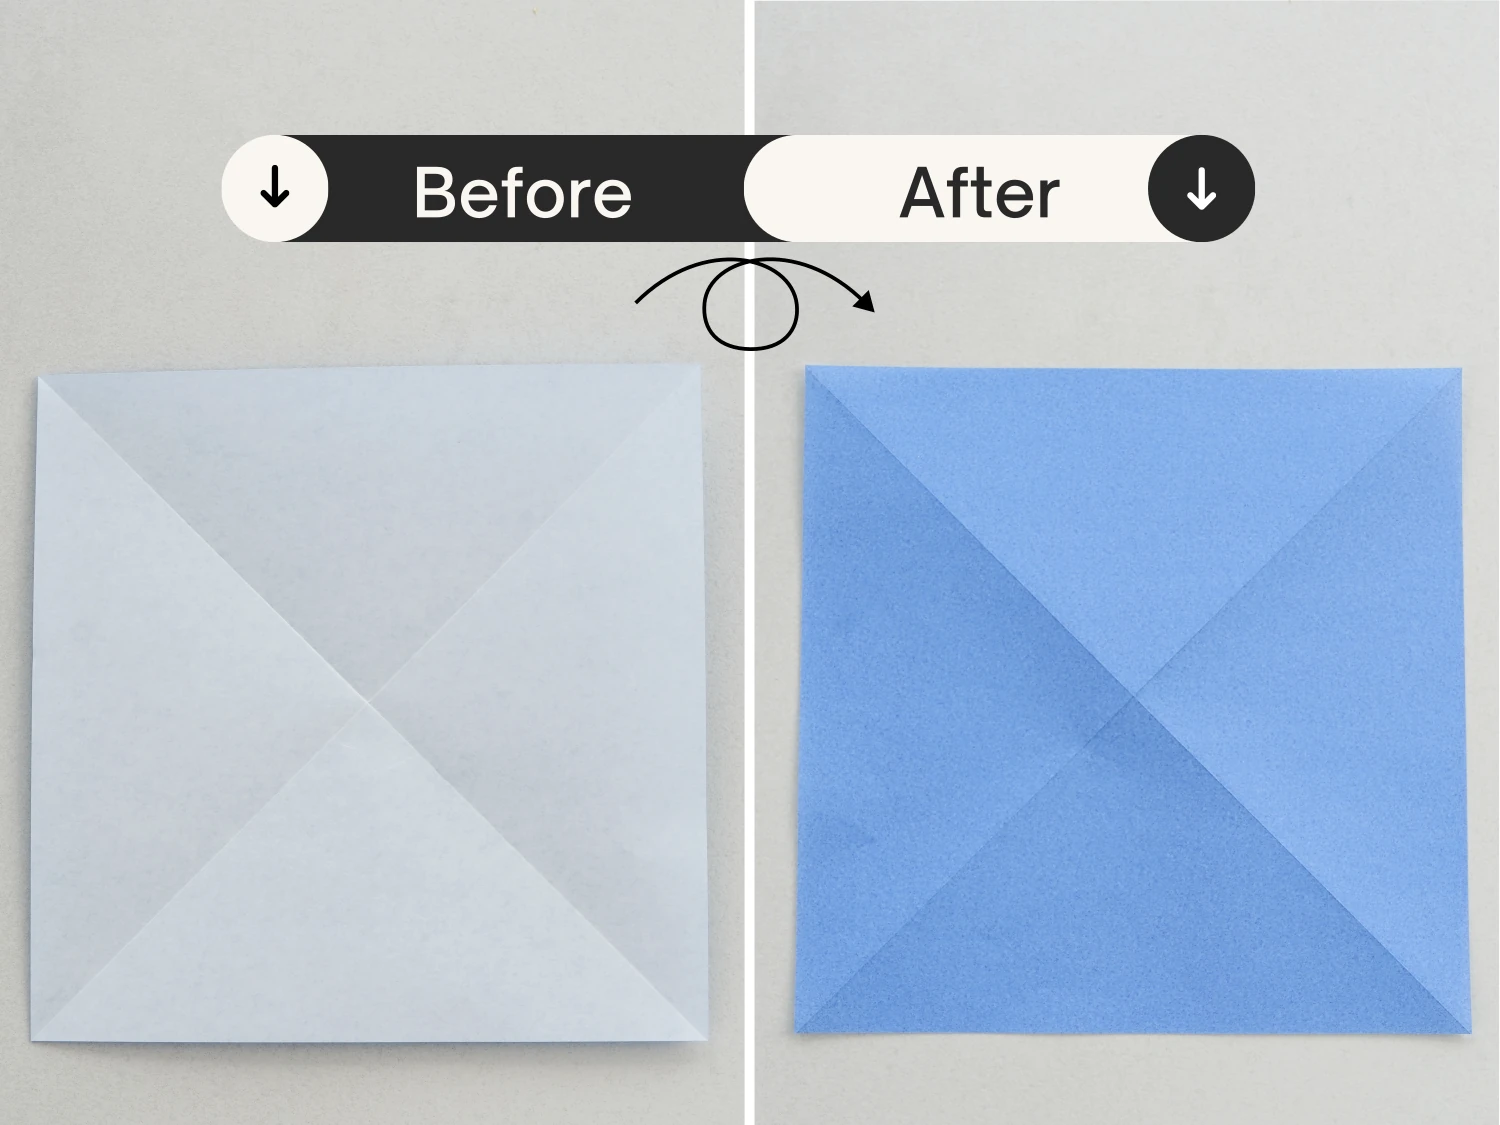
Step 3
Flip it over.
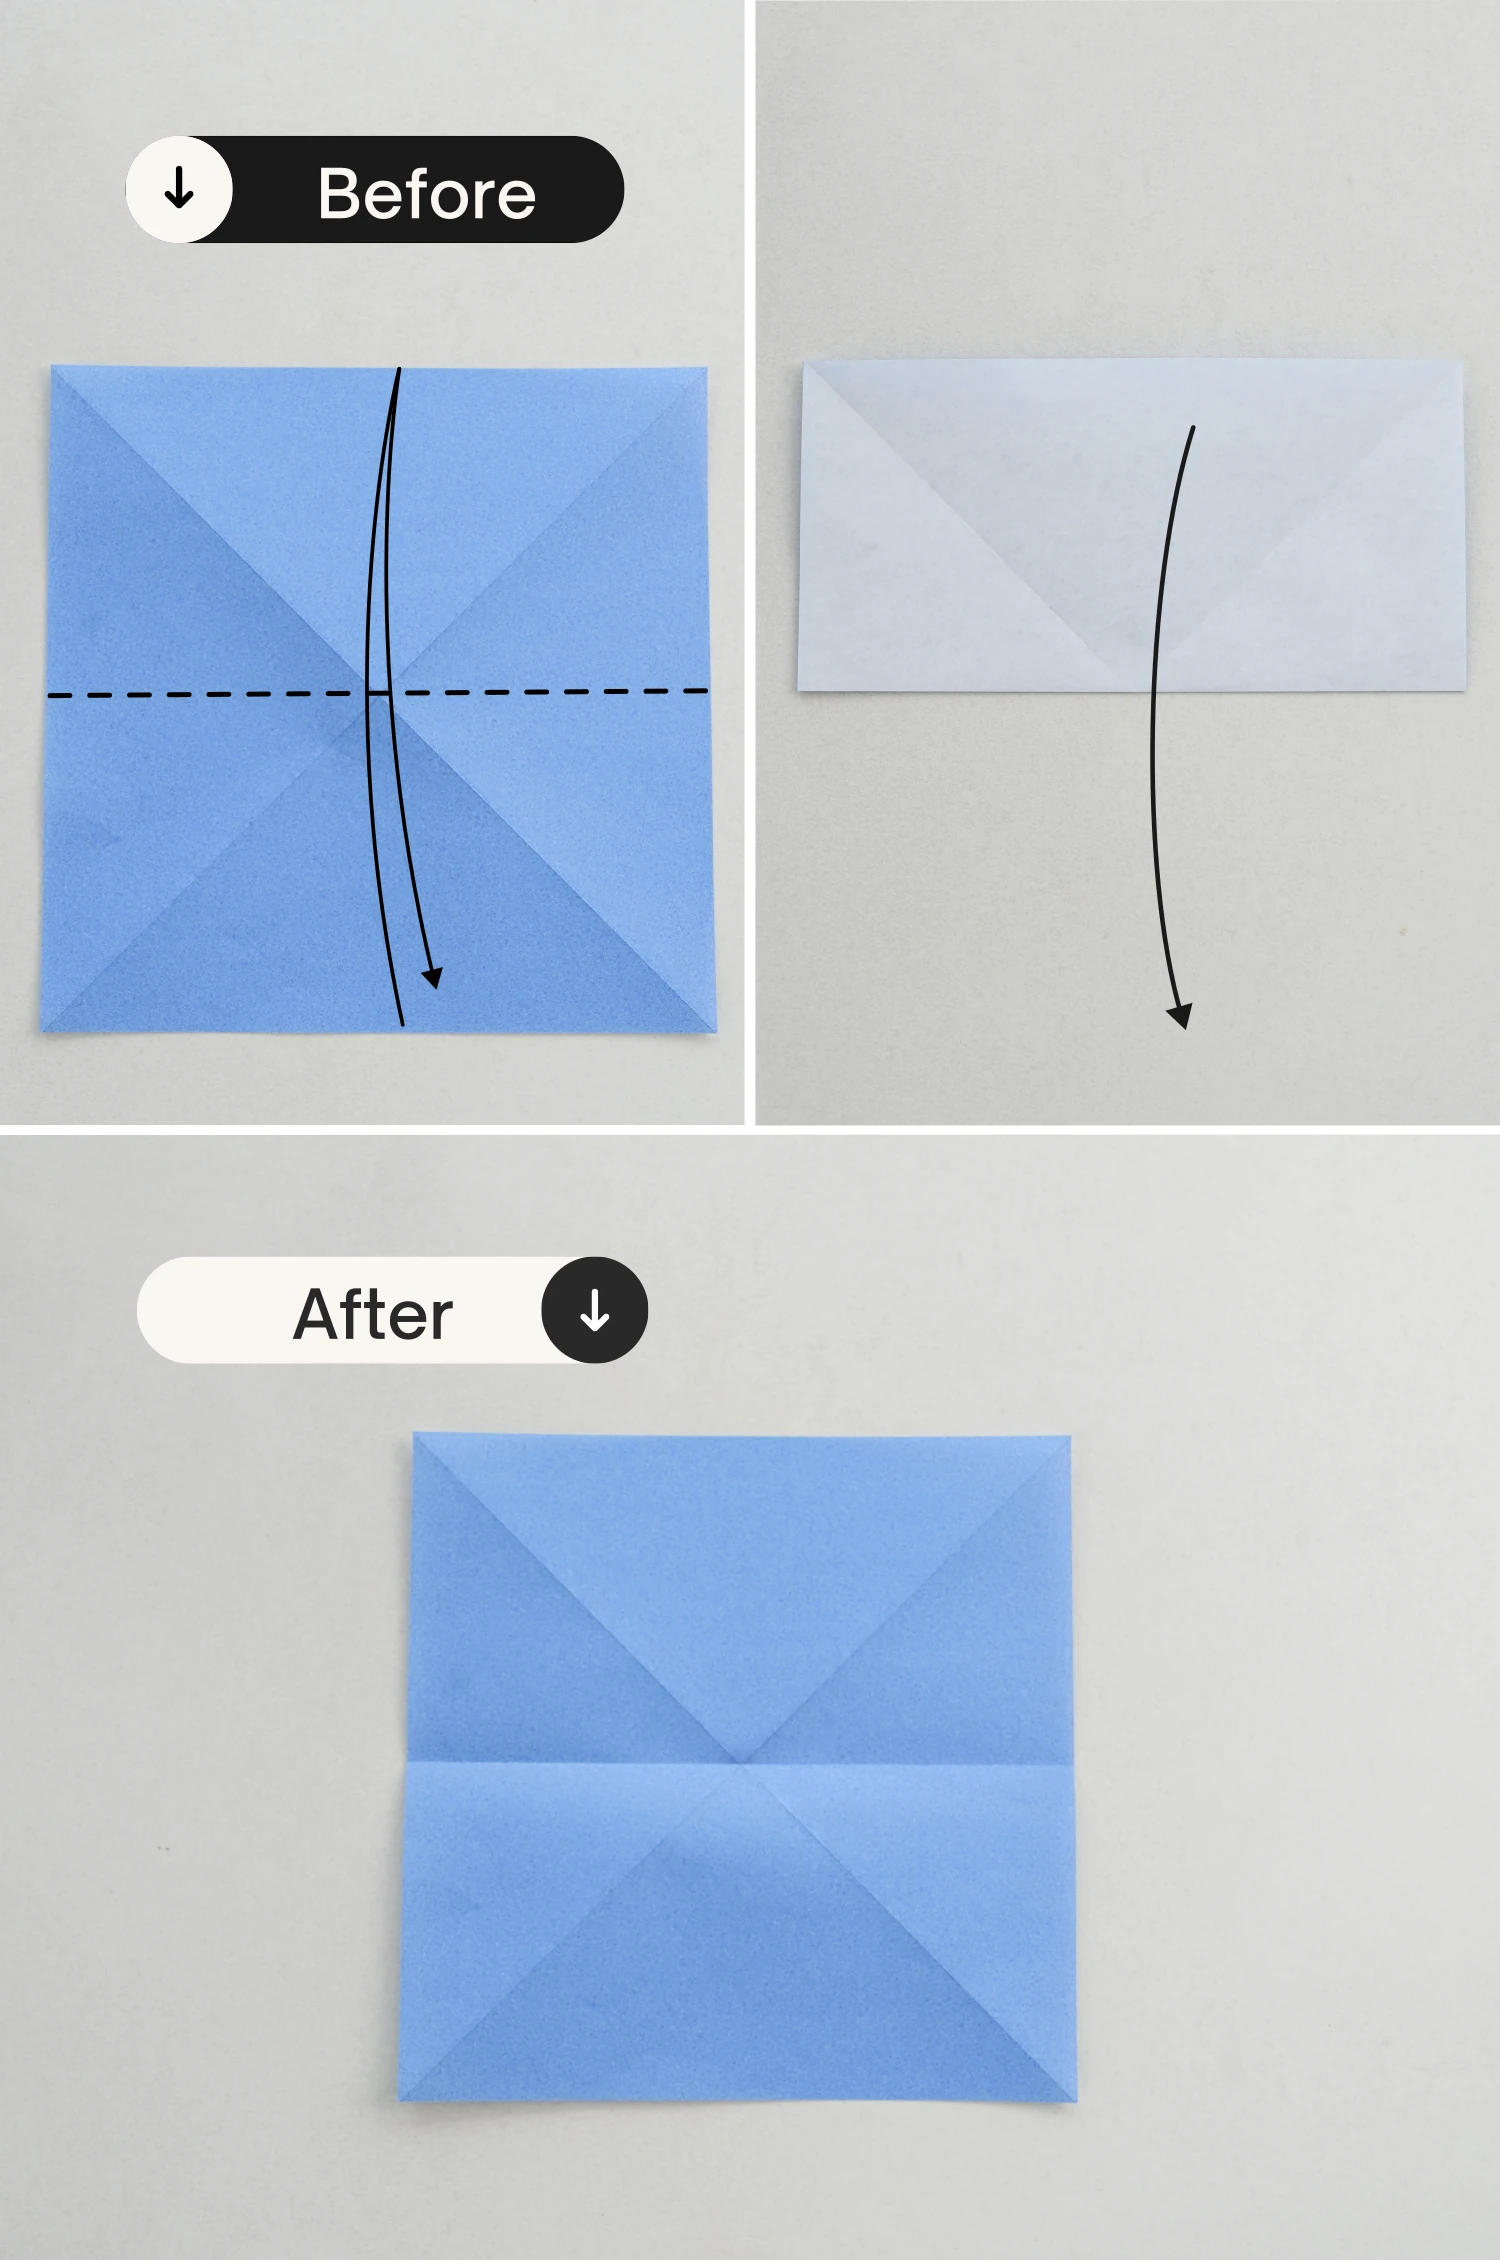
Step 4
Fold it in half horizontally, then unfold it.
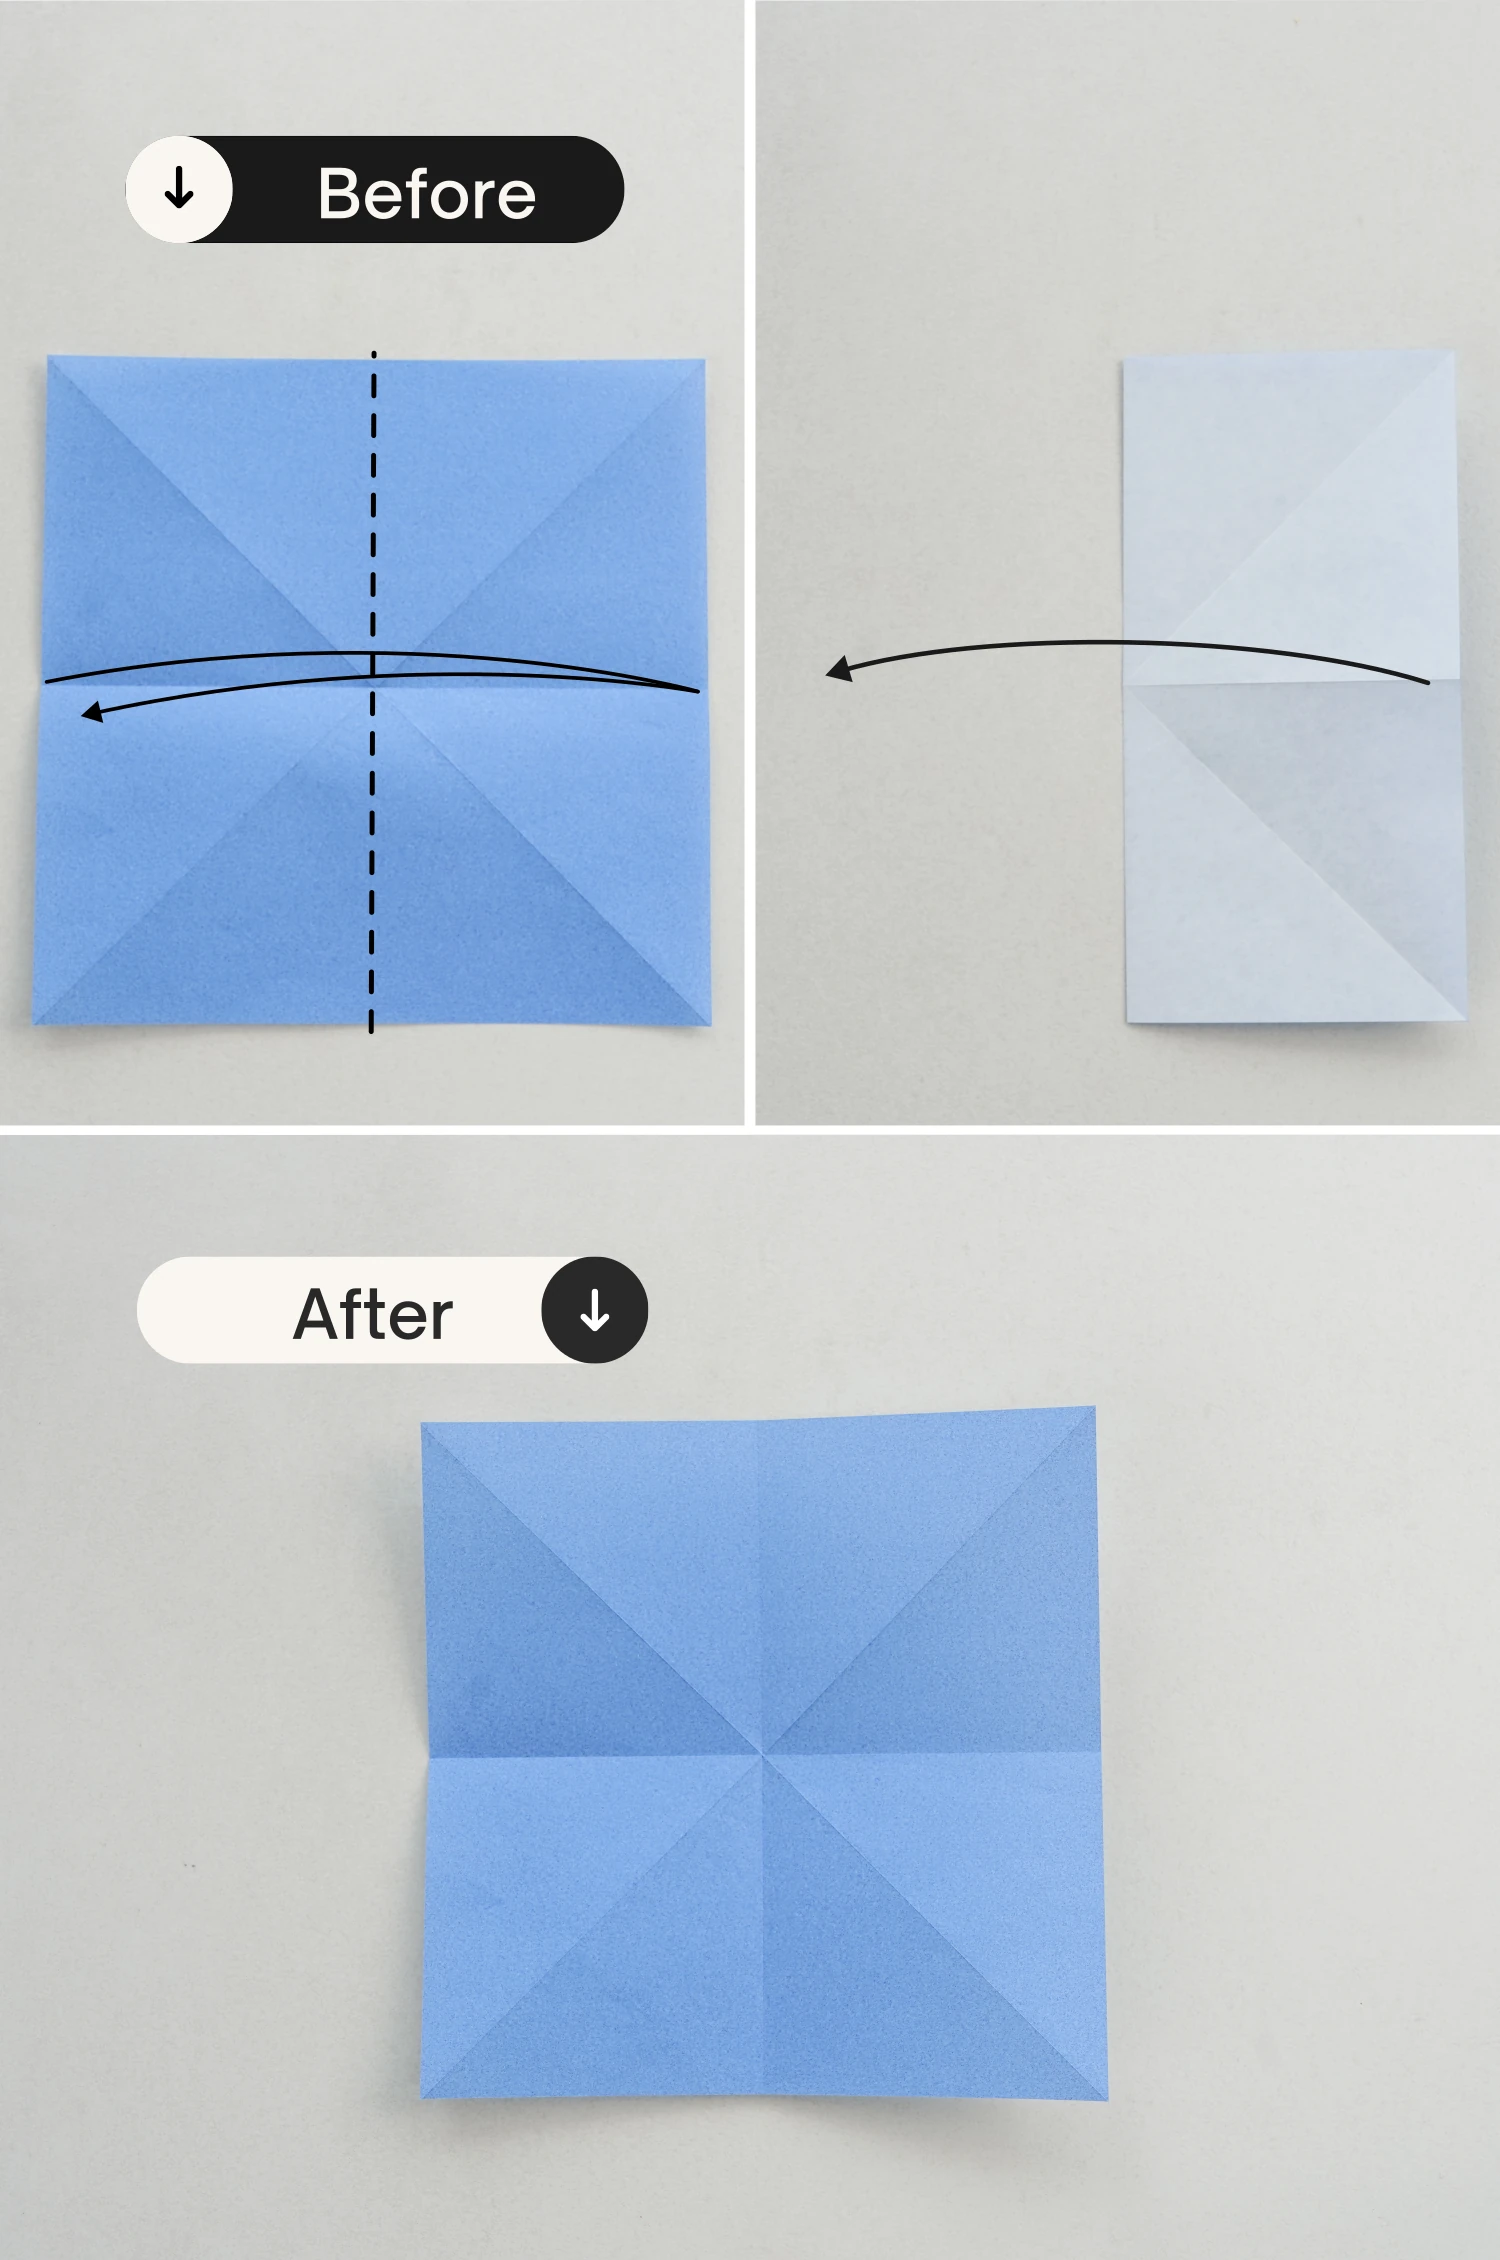
Step 5
Fold it in half vertically, crease it well then unfold.
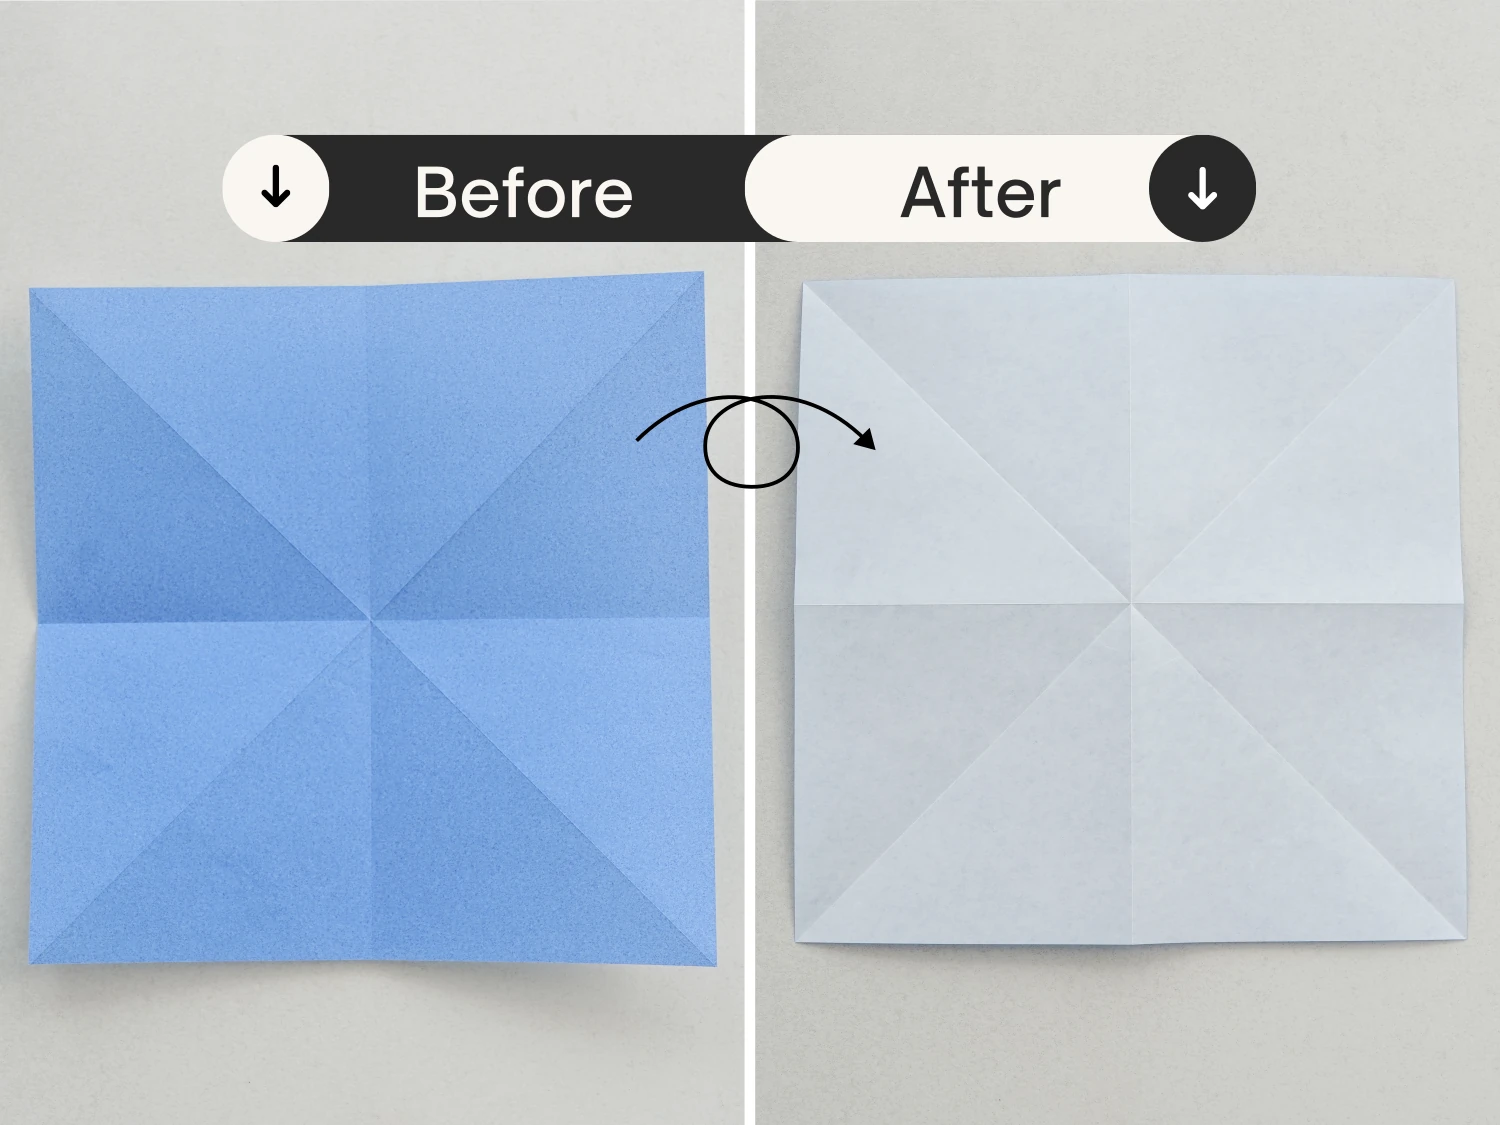
Step 6
Flip it over to make the white side face up.
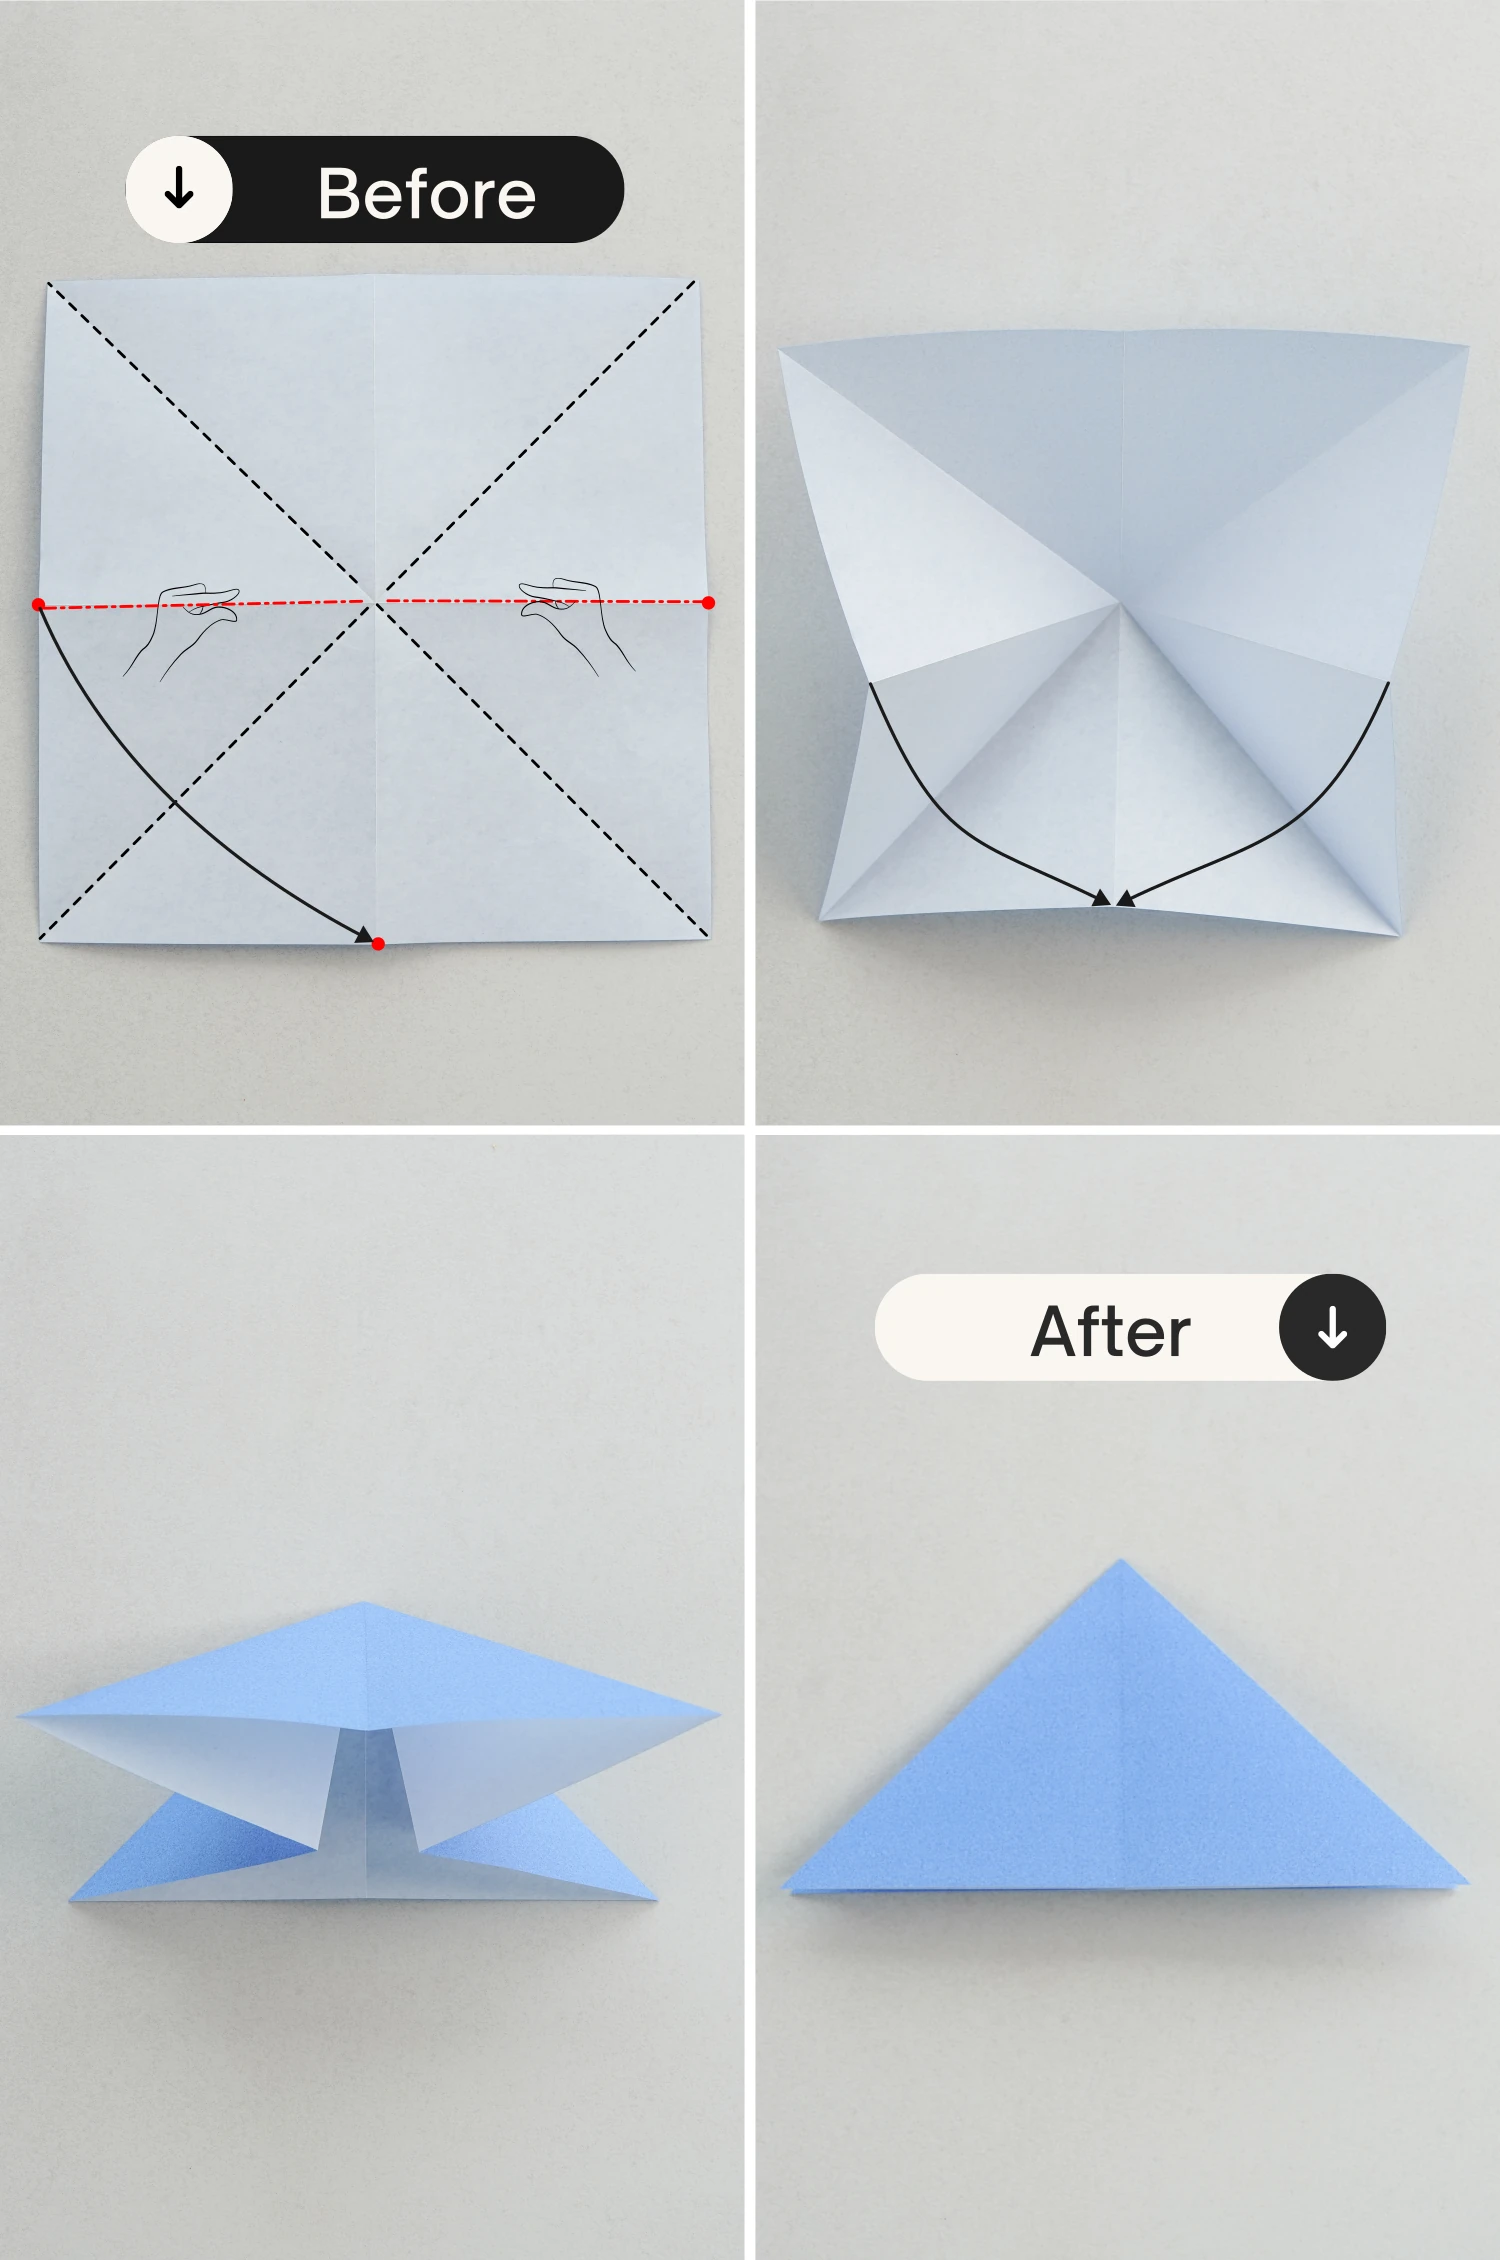
Step 7
Now, we are going to make a water bomb base.
Use both hands to press the two center points on the right and left edges. Then push it down to make the center points of the three edges meet the center point of the bottom edge.
Finally, flatten it to form a triangle.
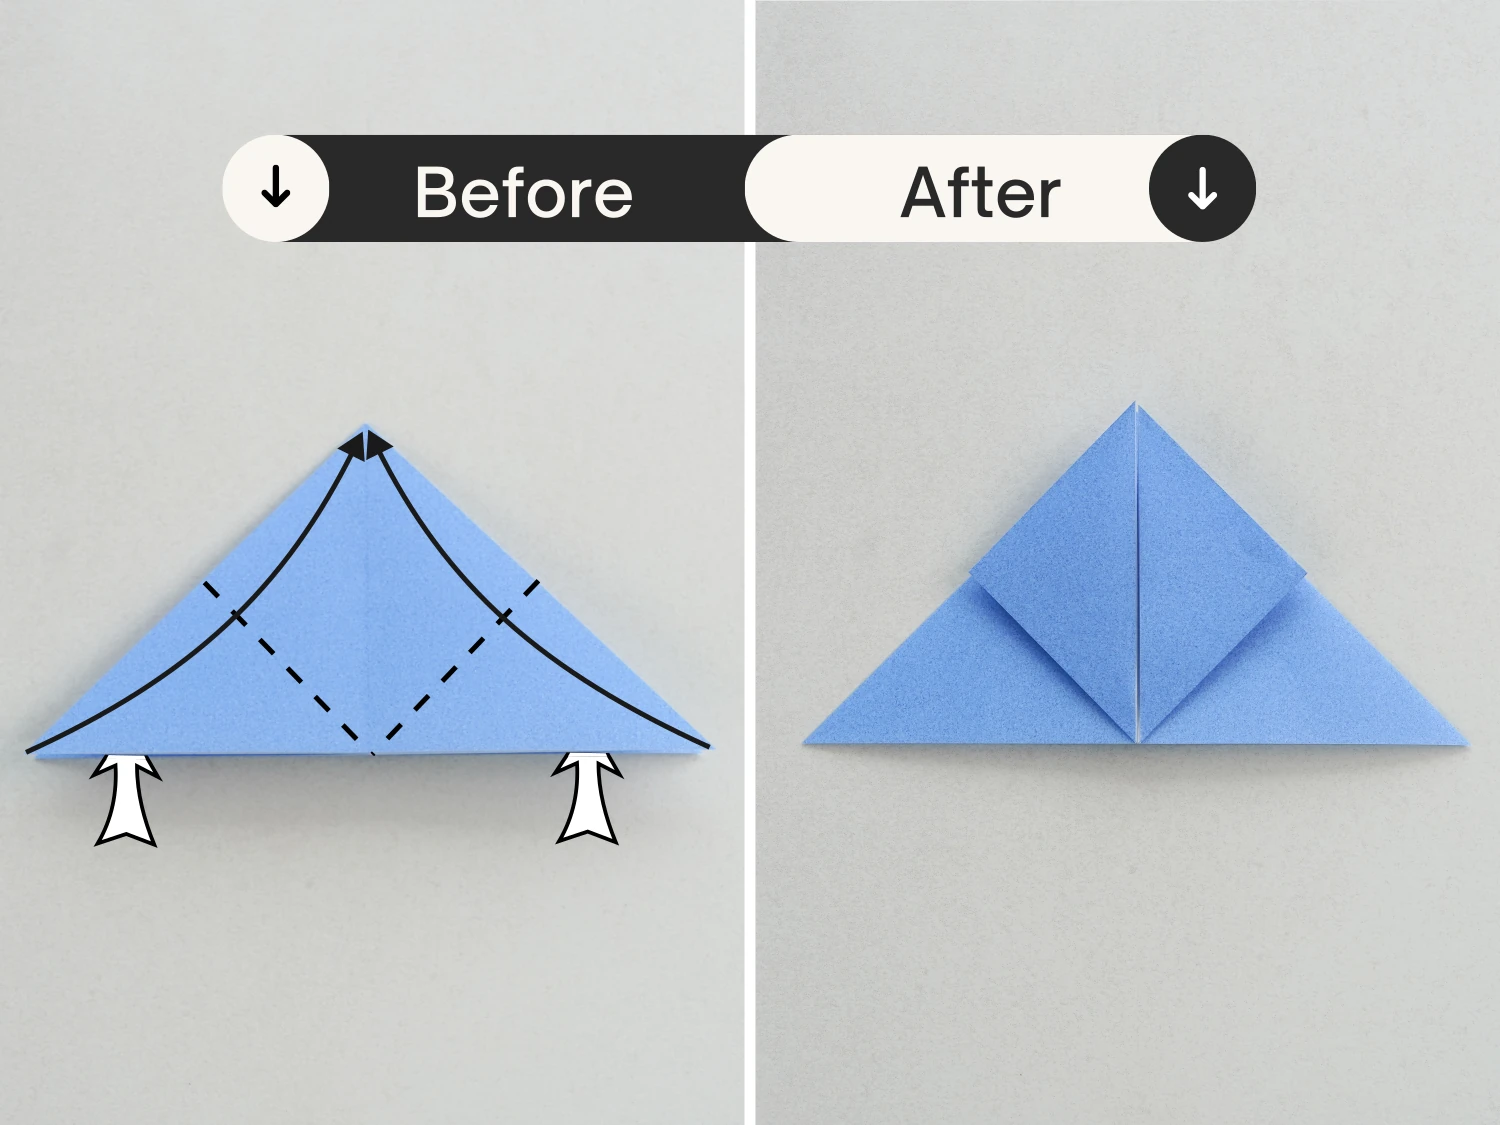
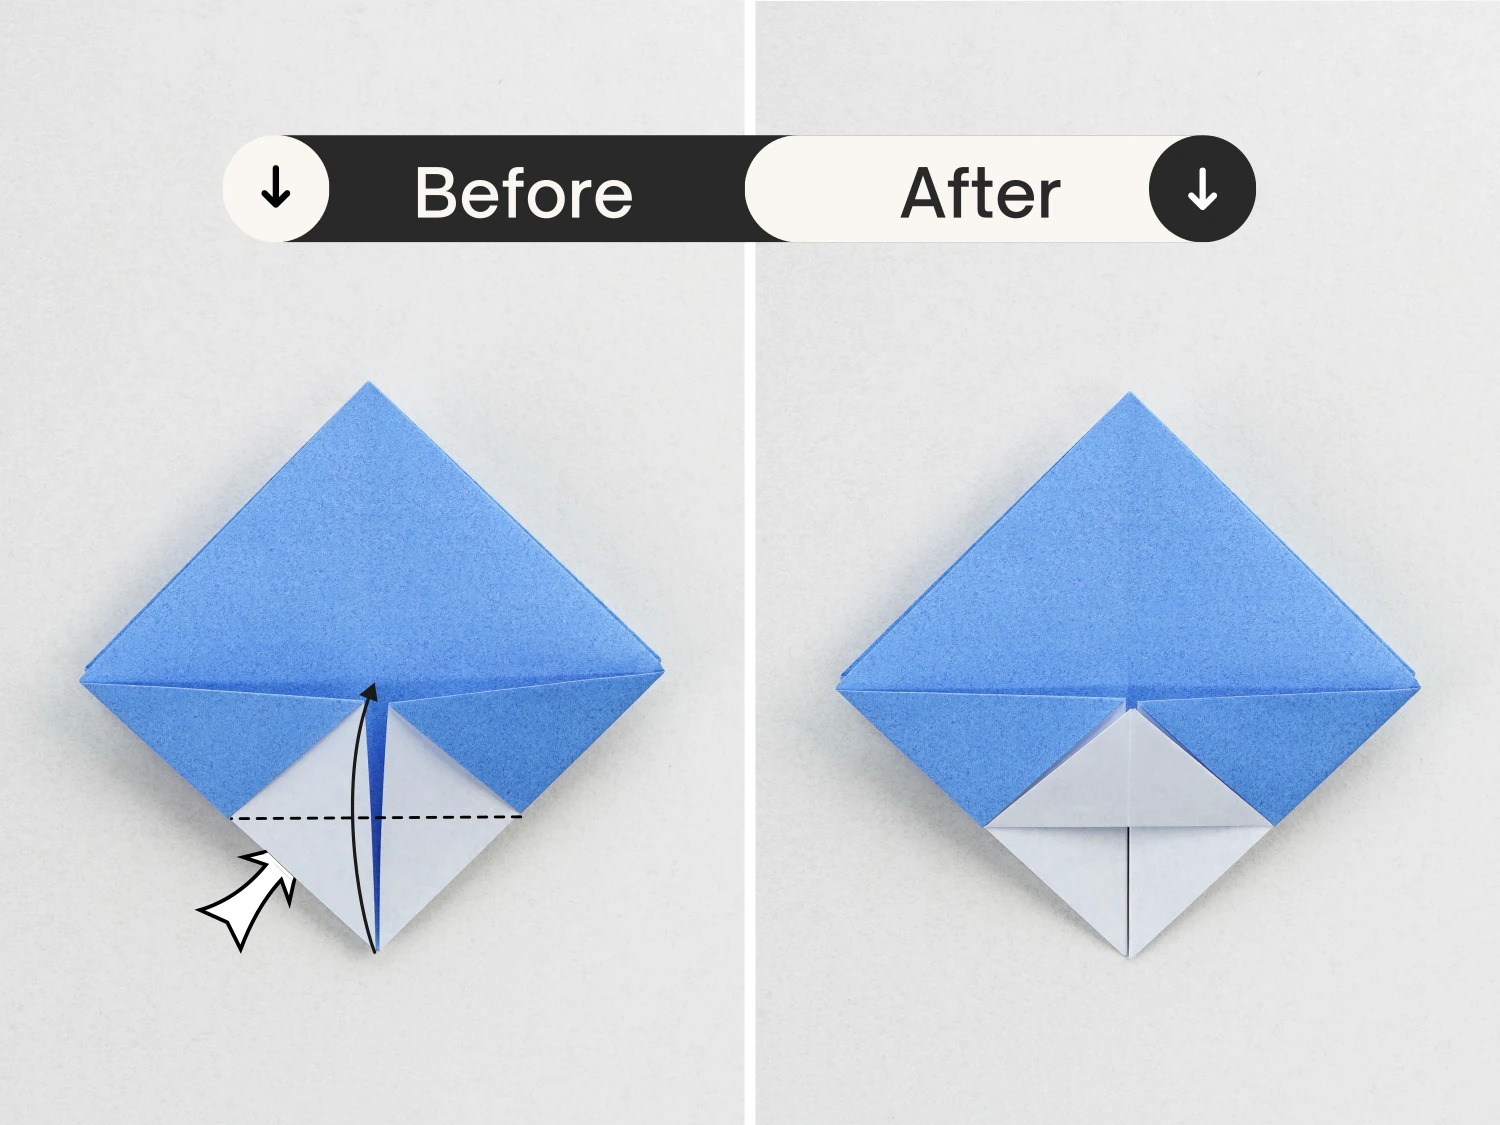
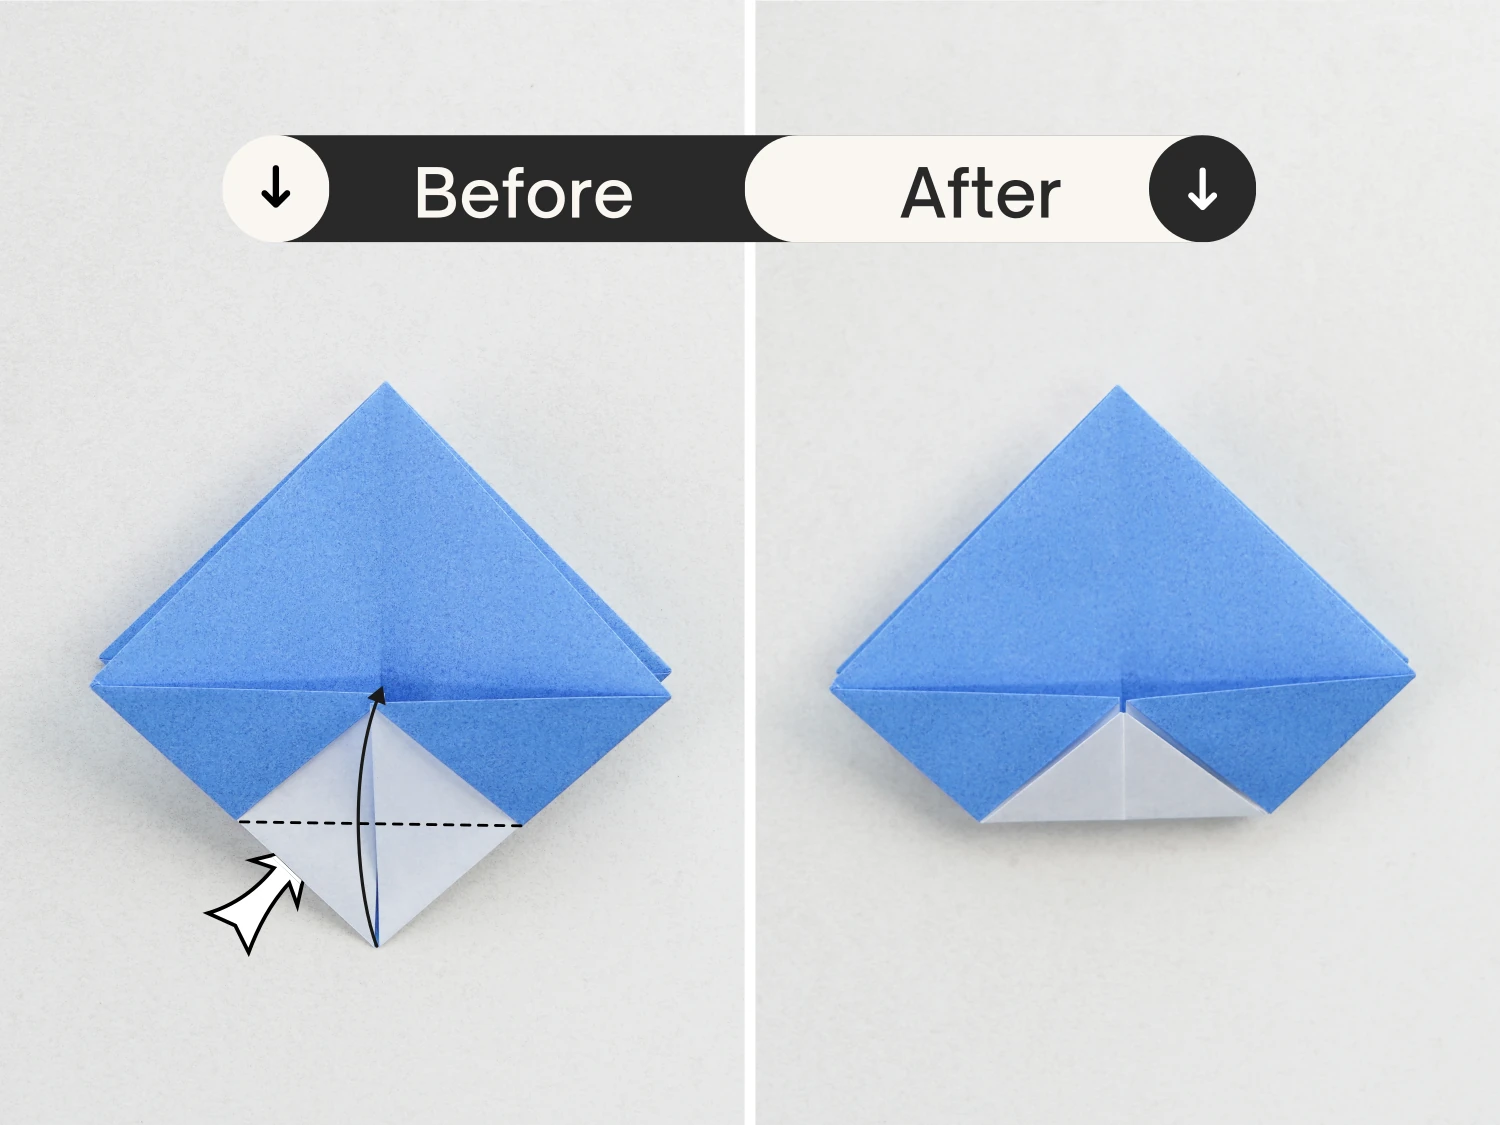
Step 8
Fold the left and right corners of the top layer up to meet the top corner.
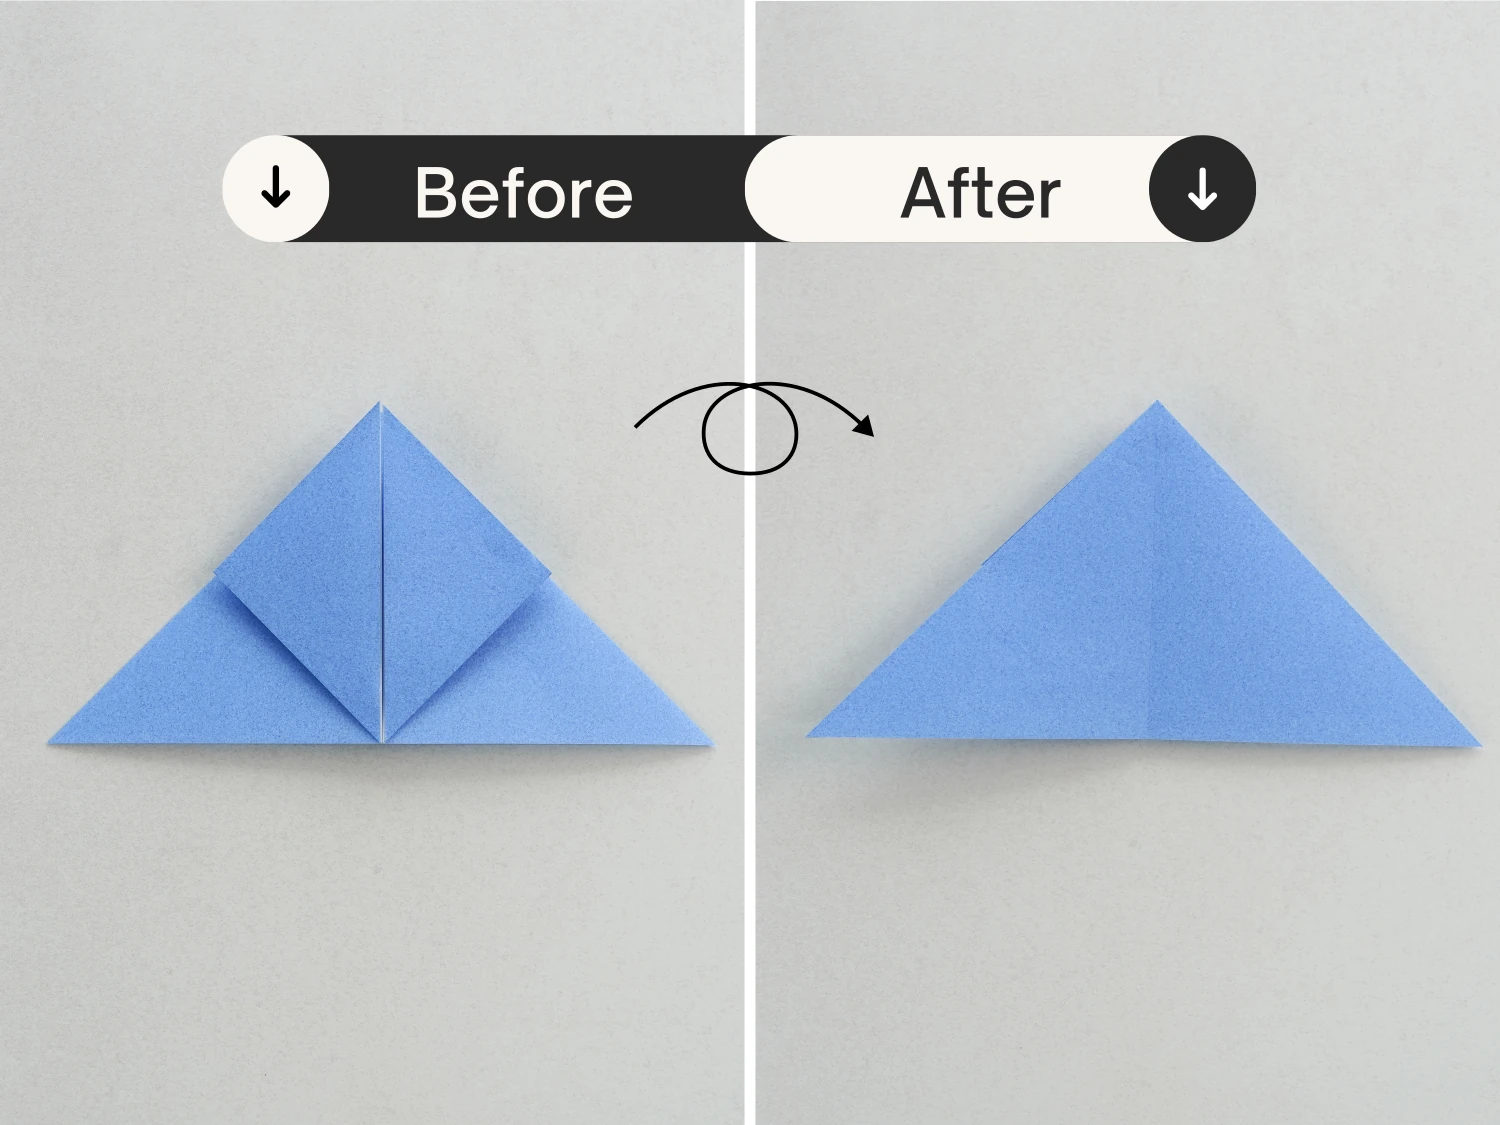
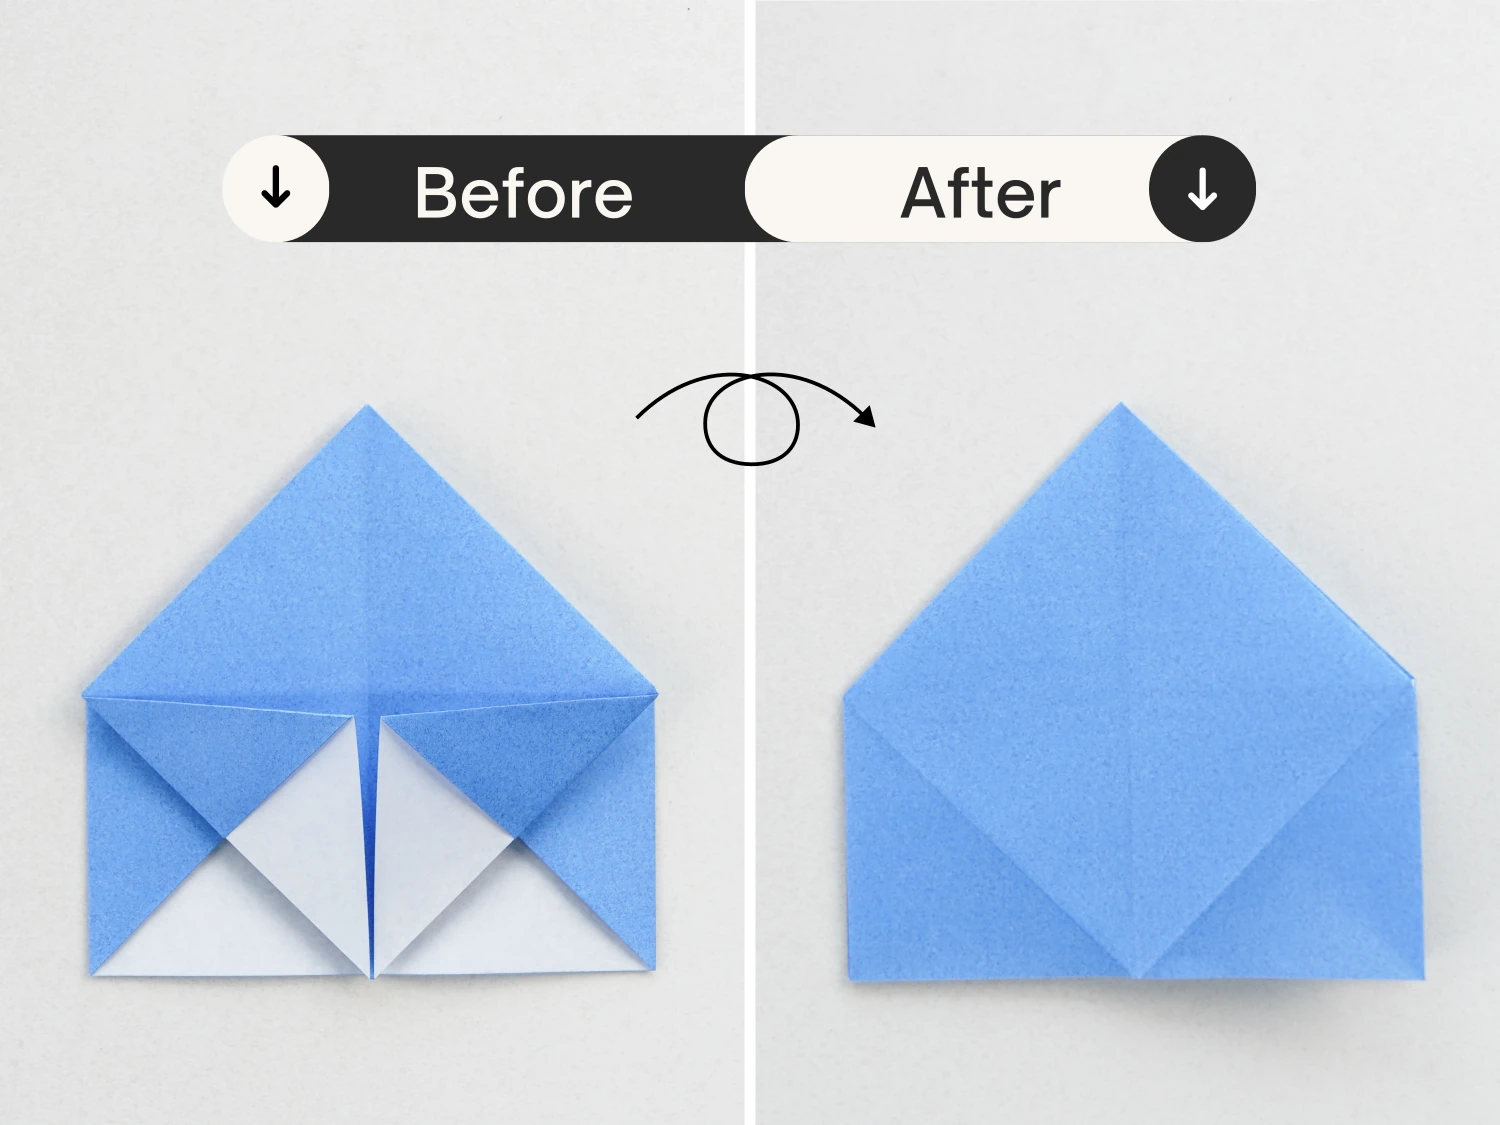
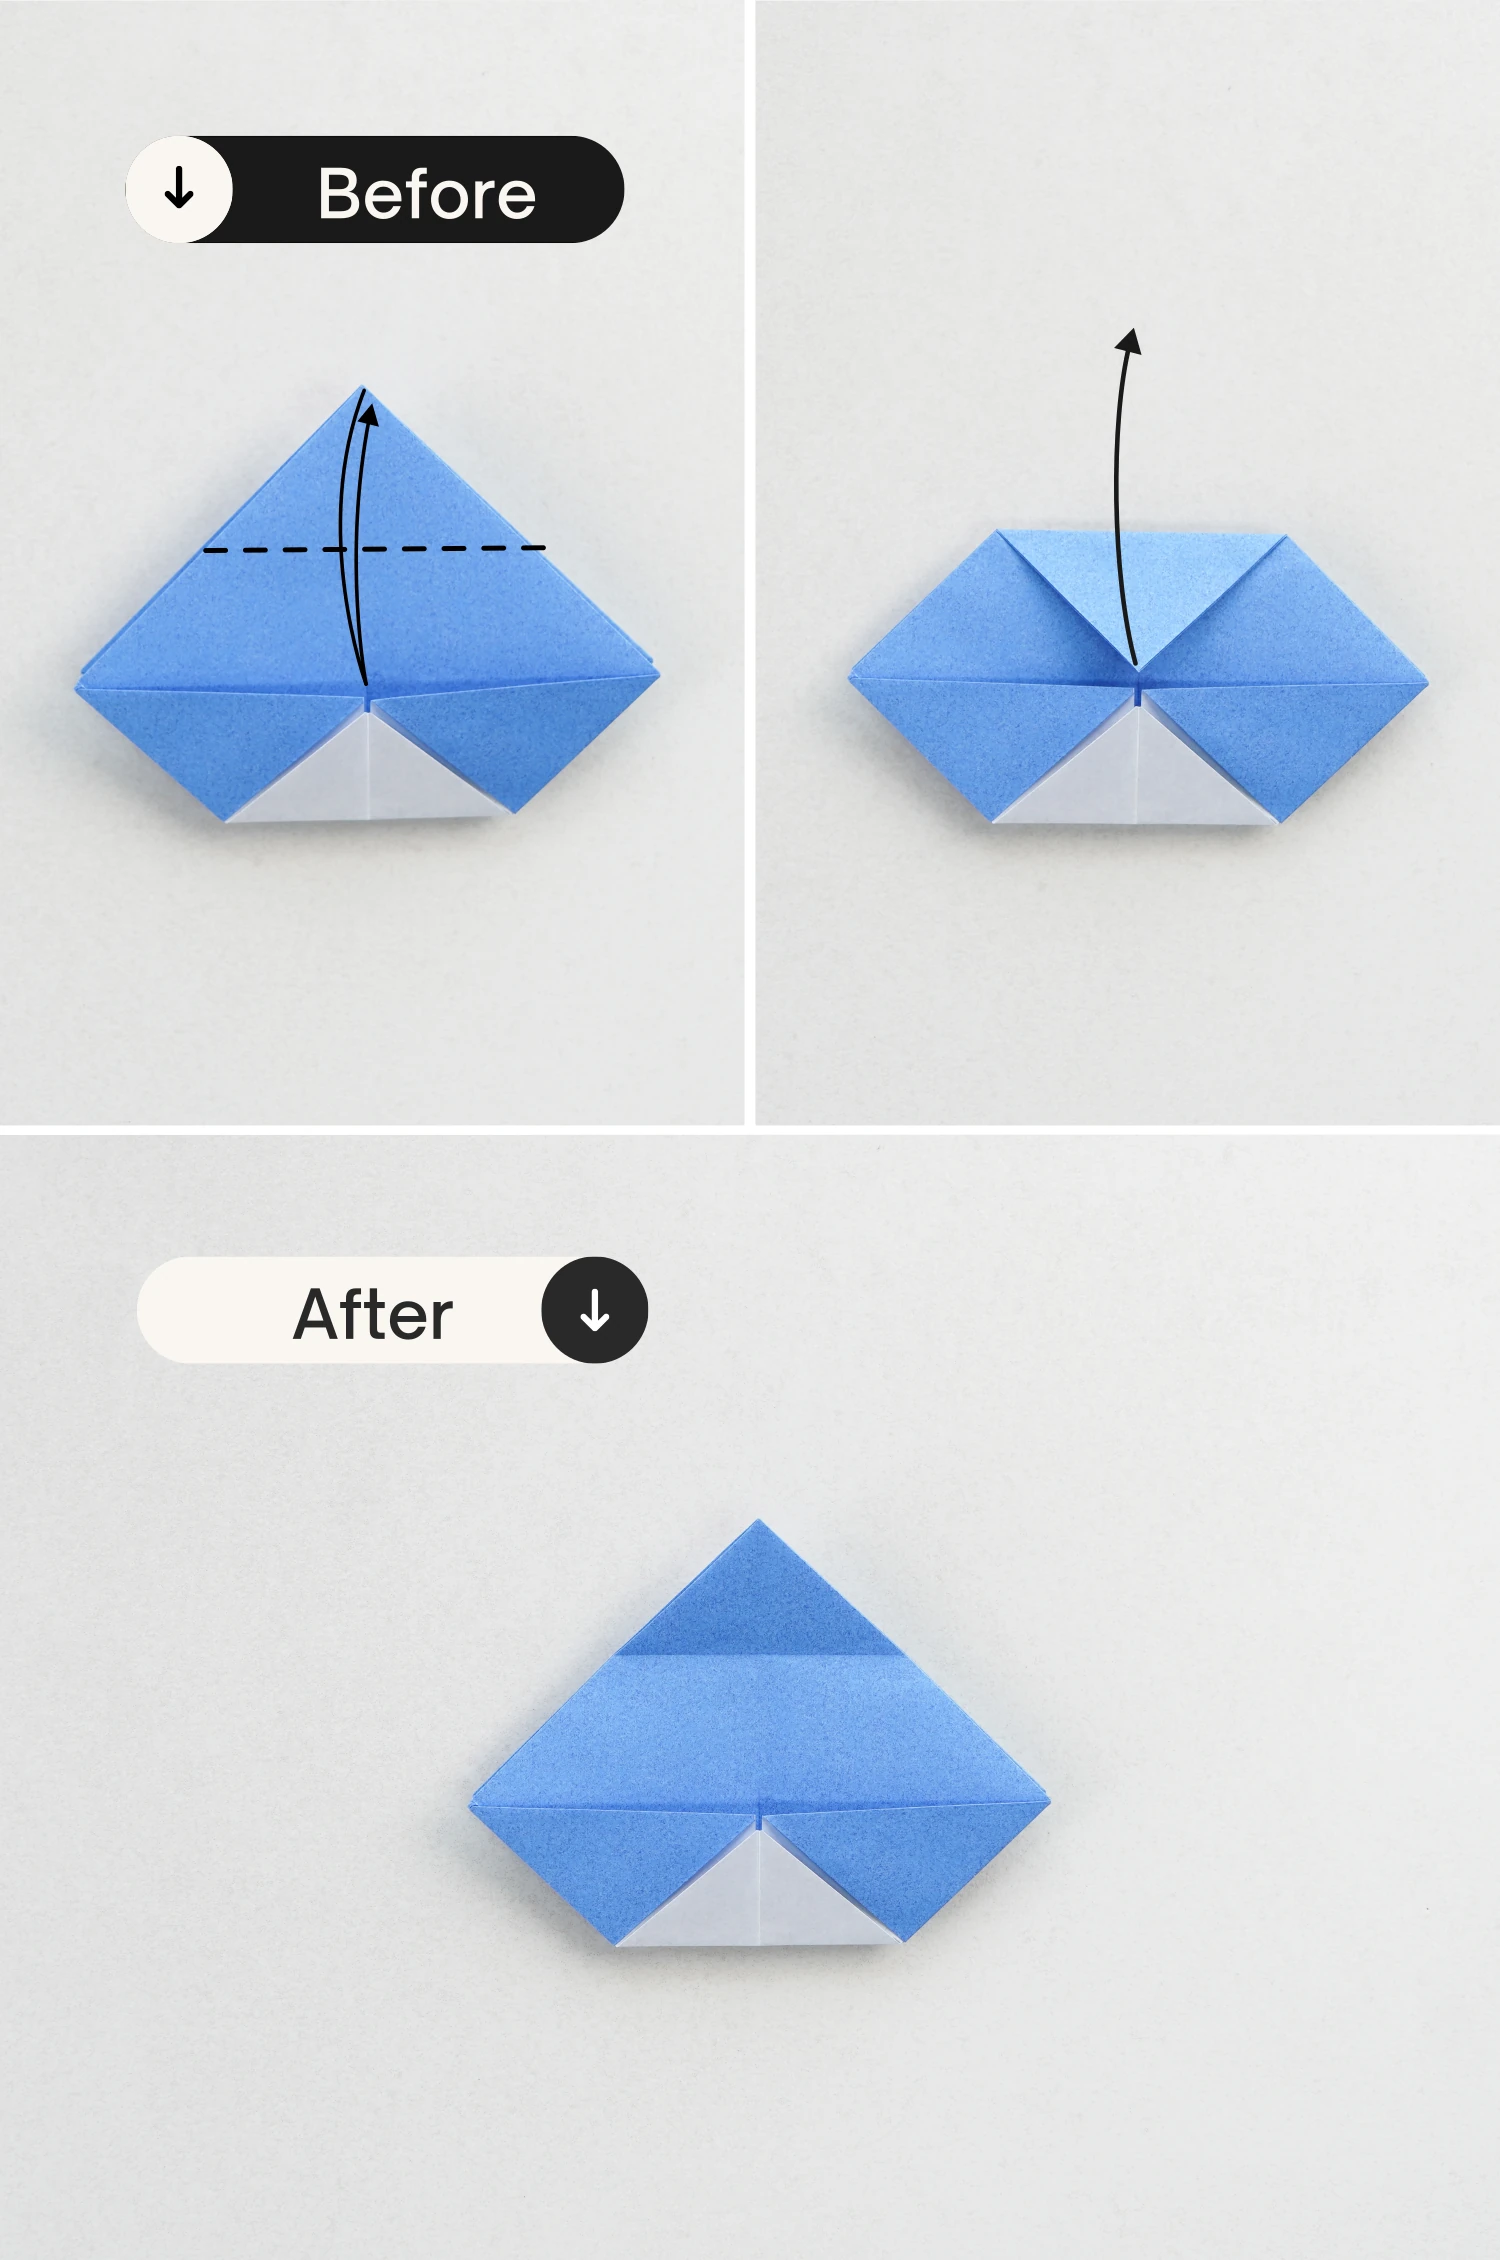
Step 9
Flip the paper over.
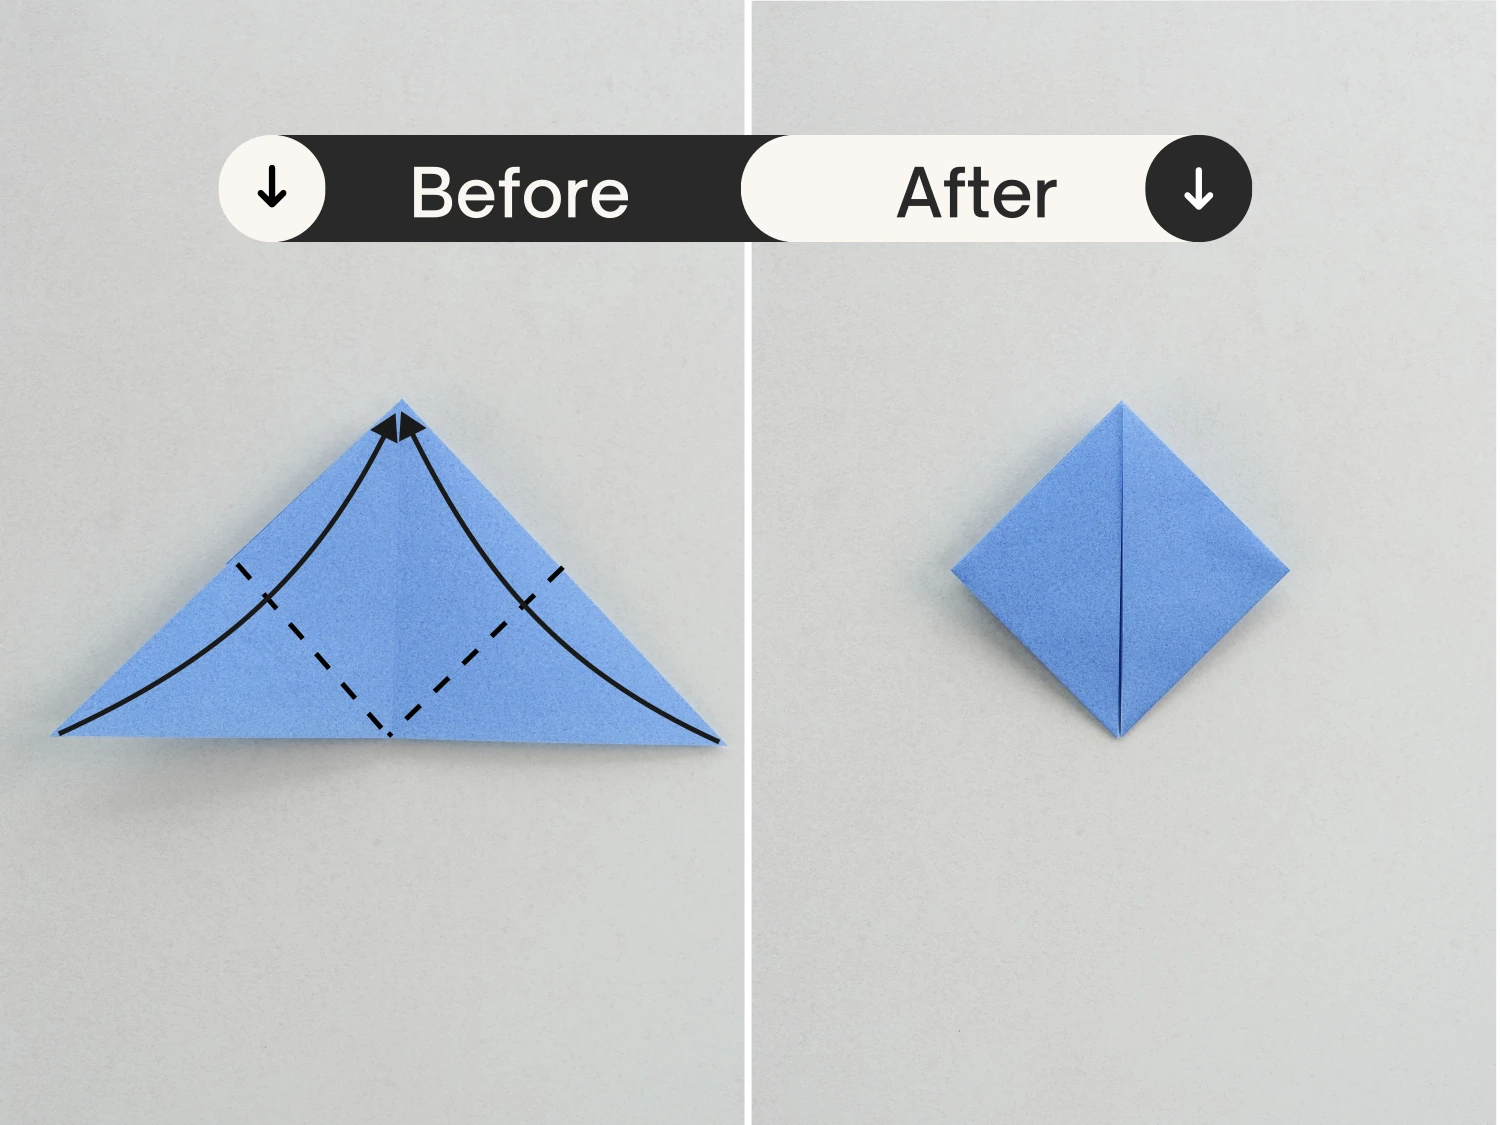
Step 10
Repeat step 8, fold the left and right corners up to meet the top corner.
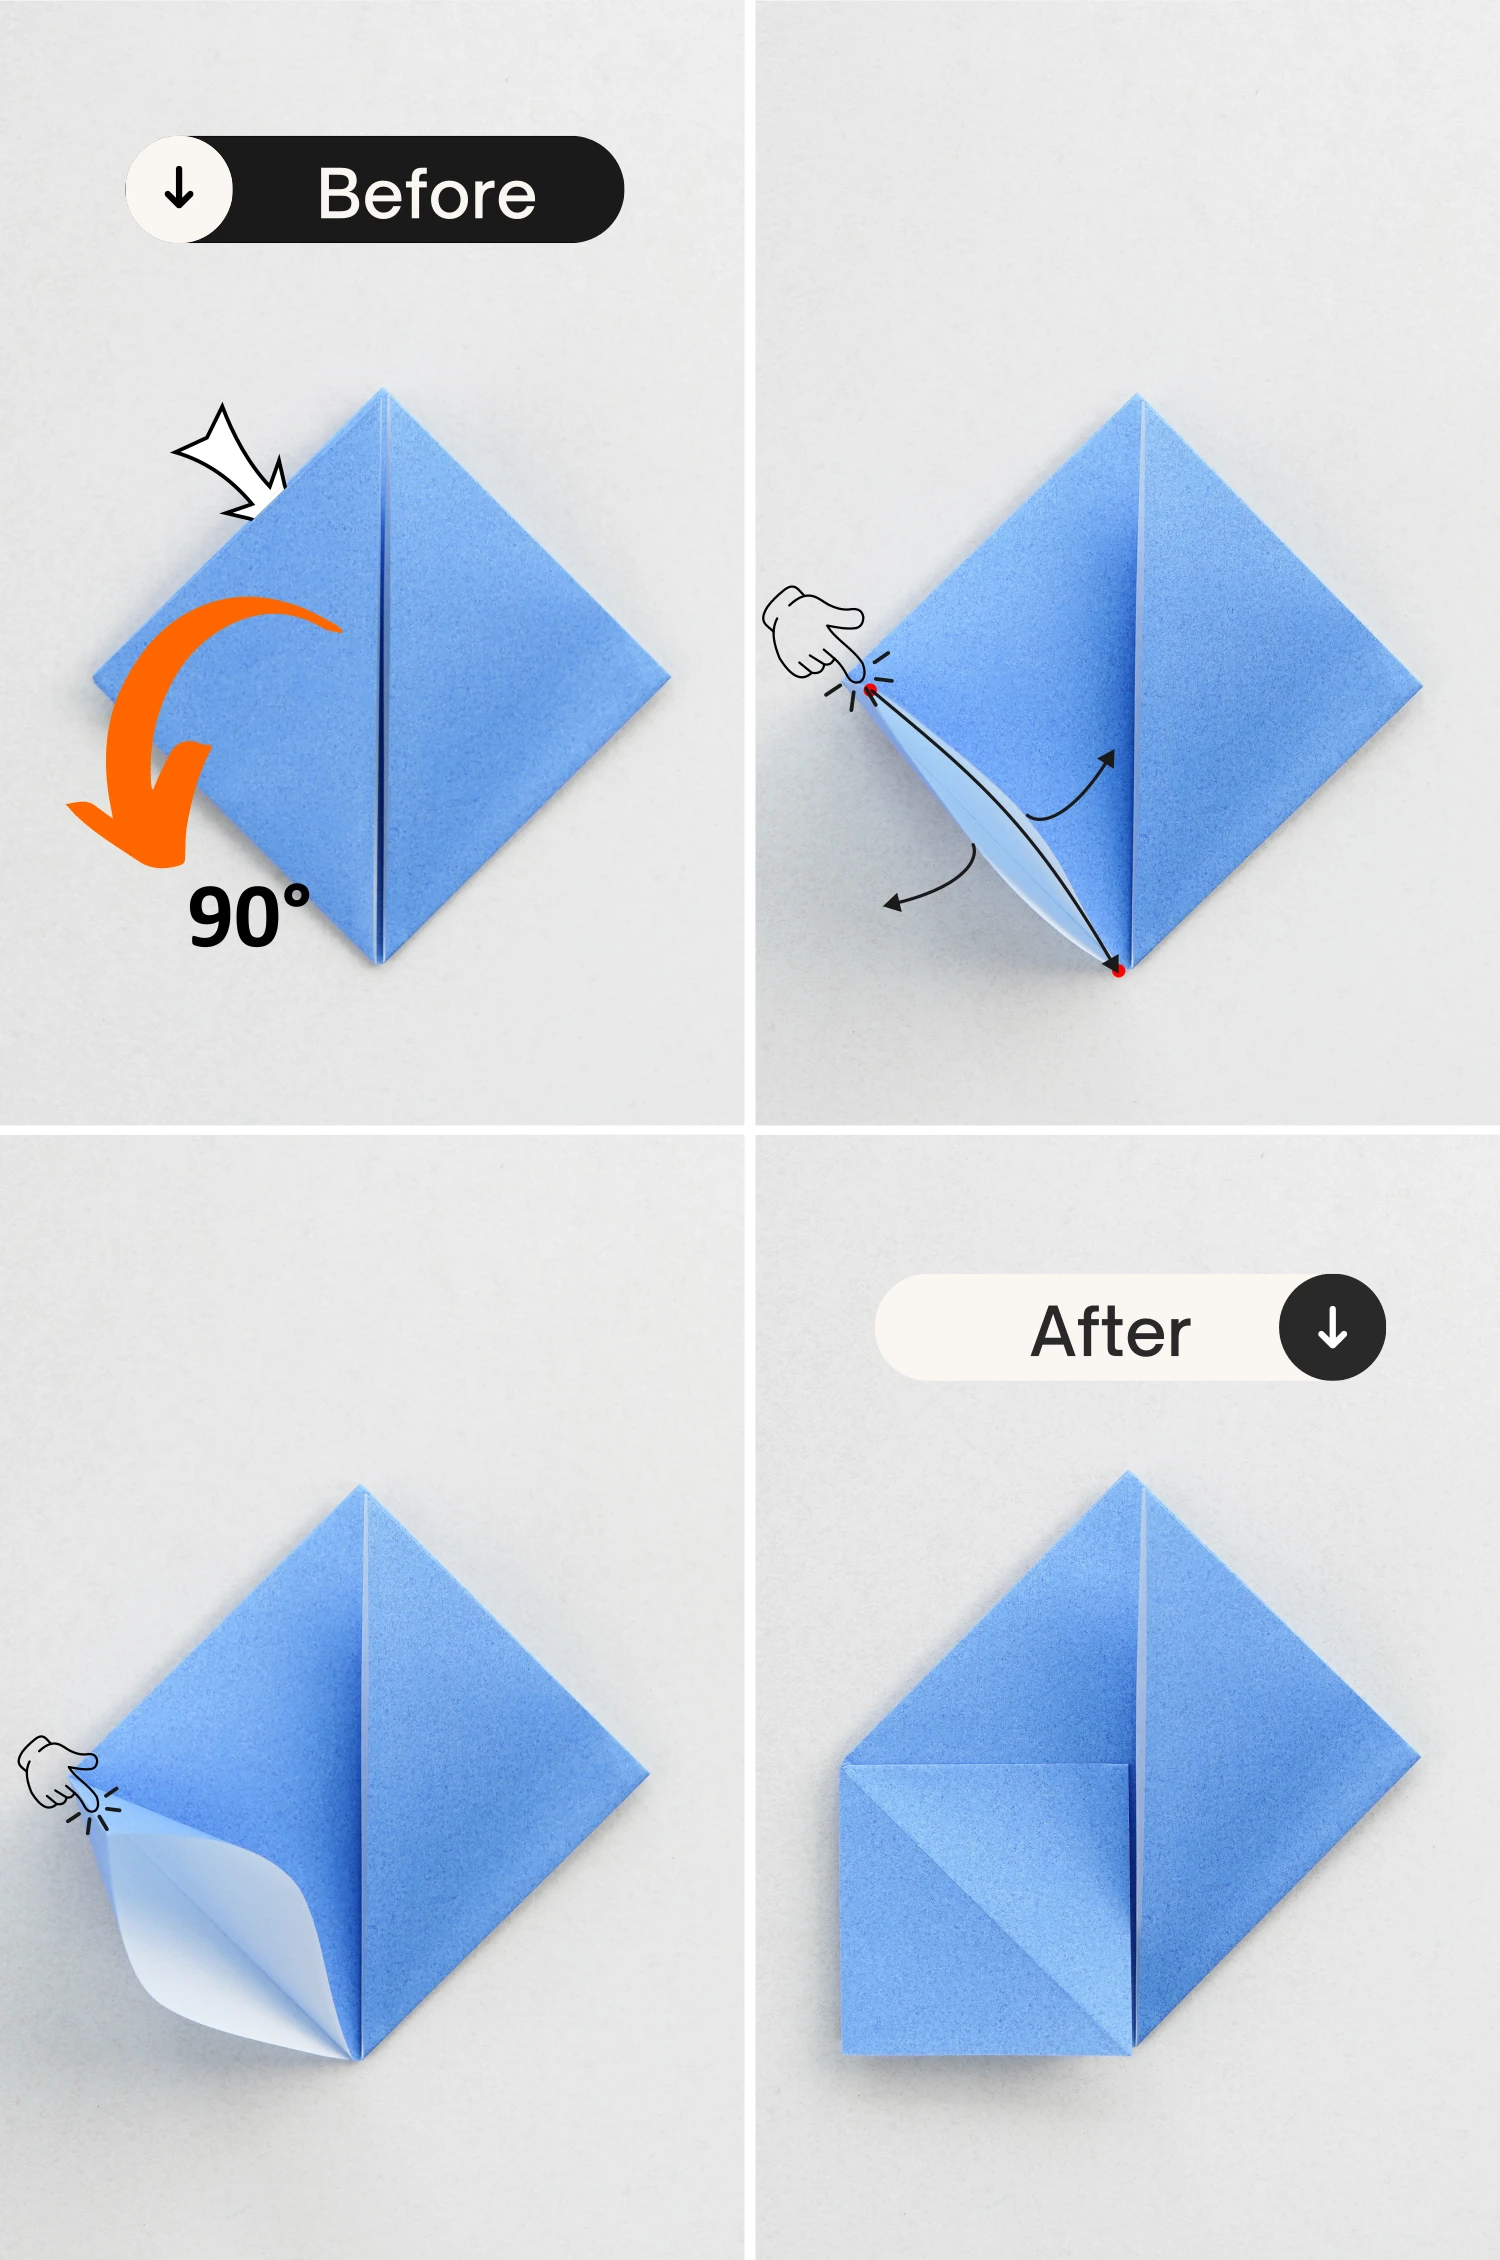
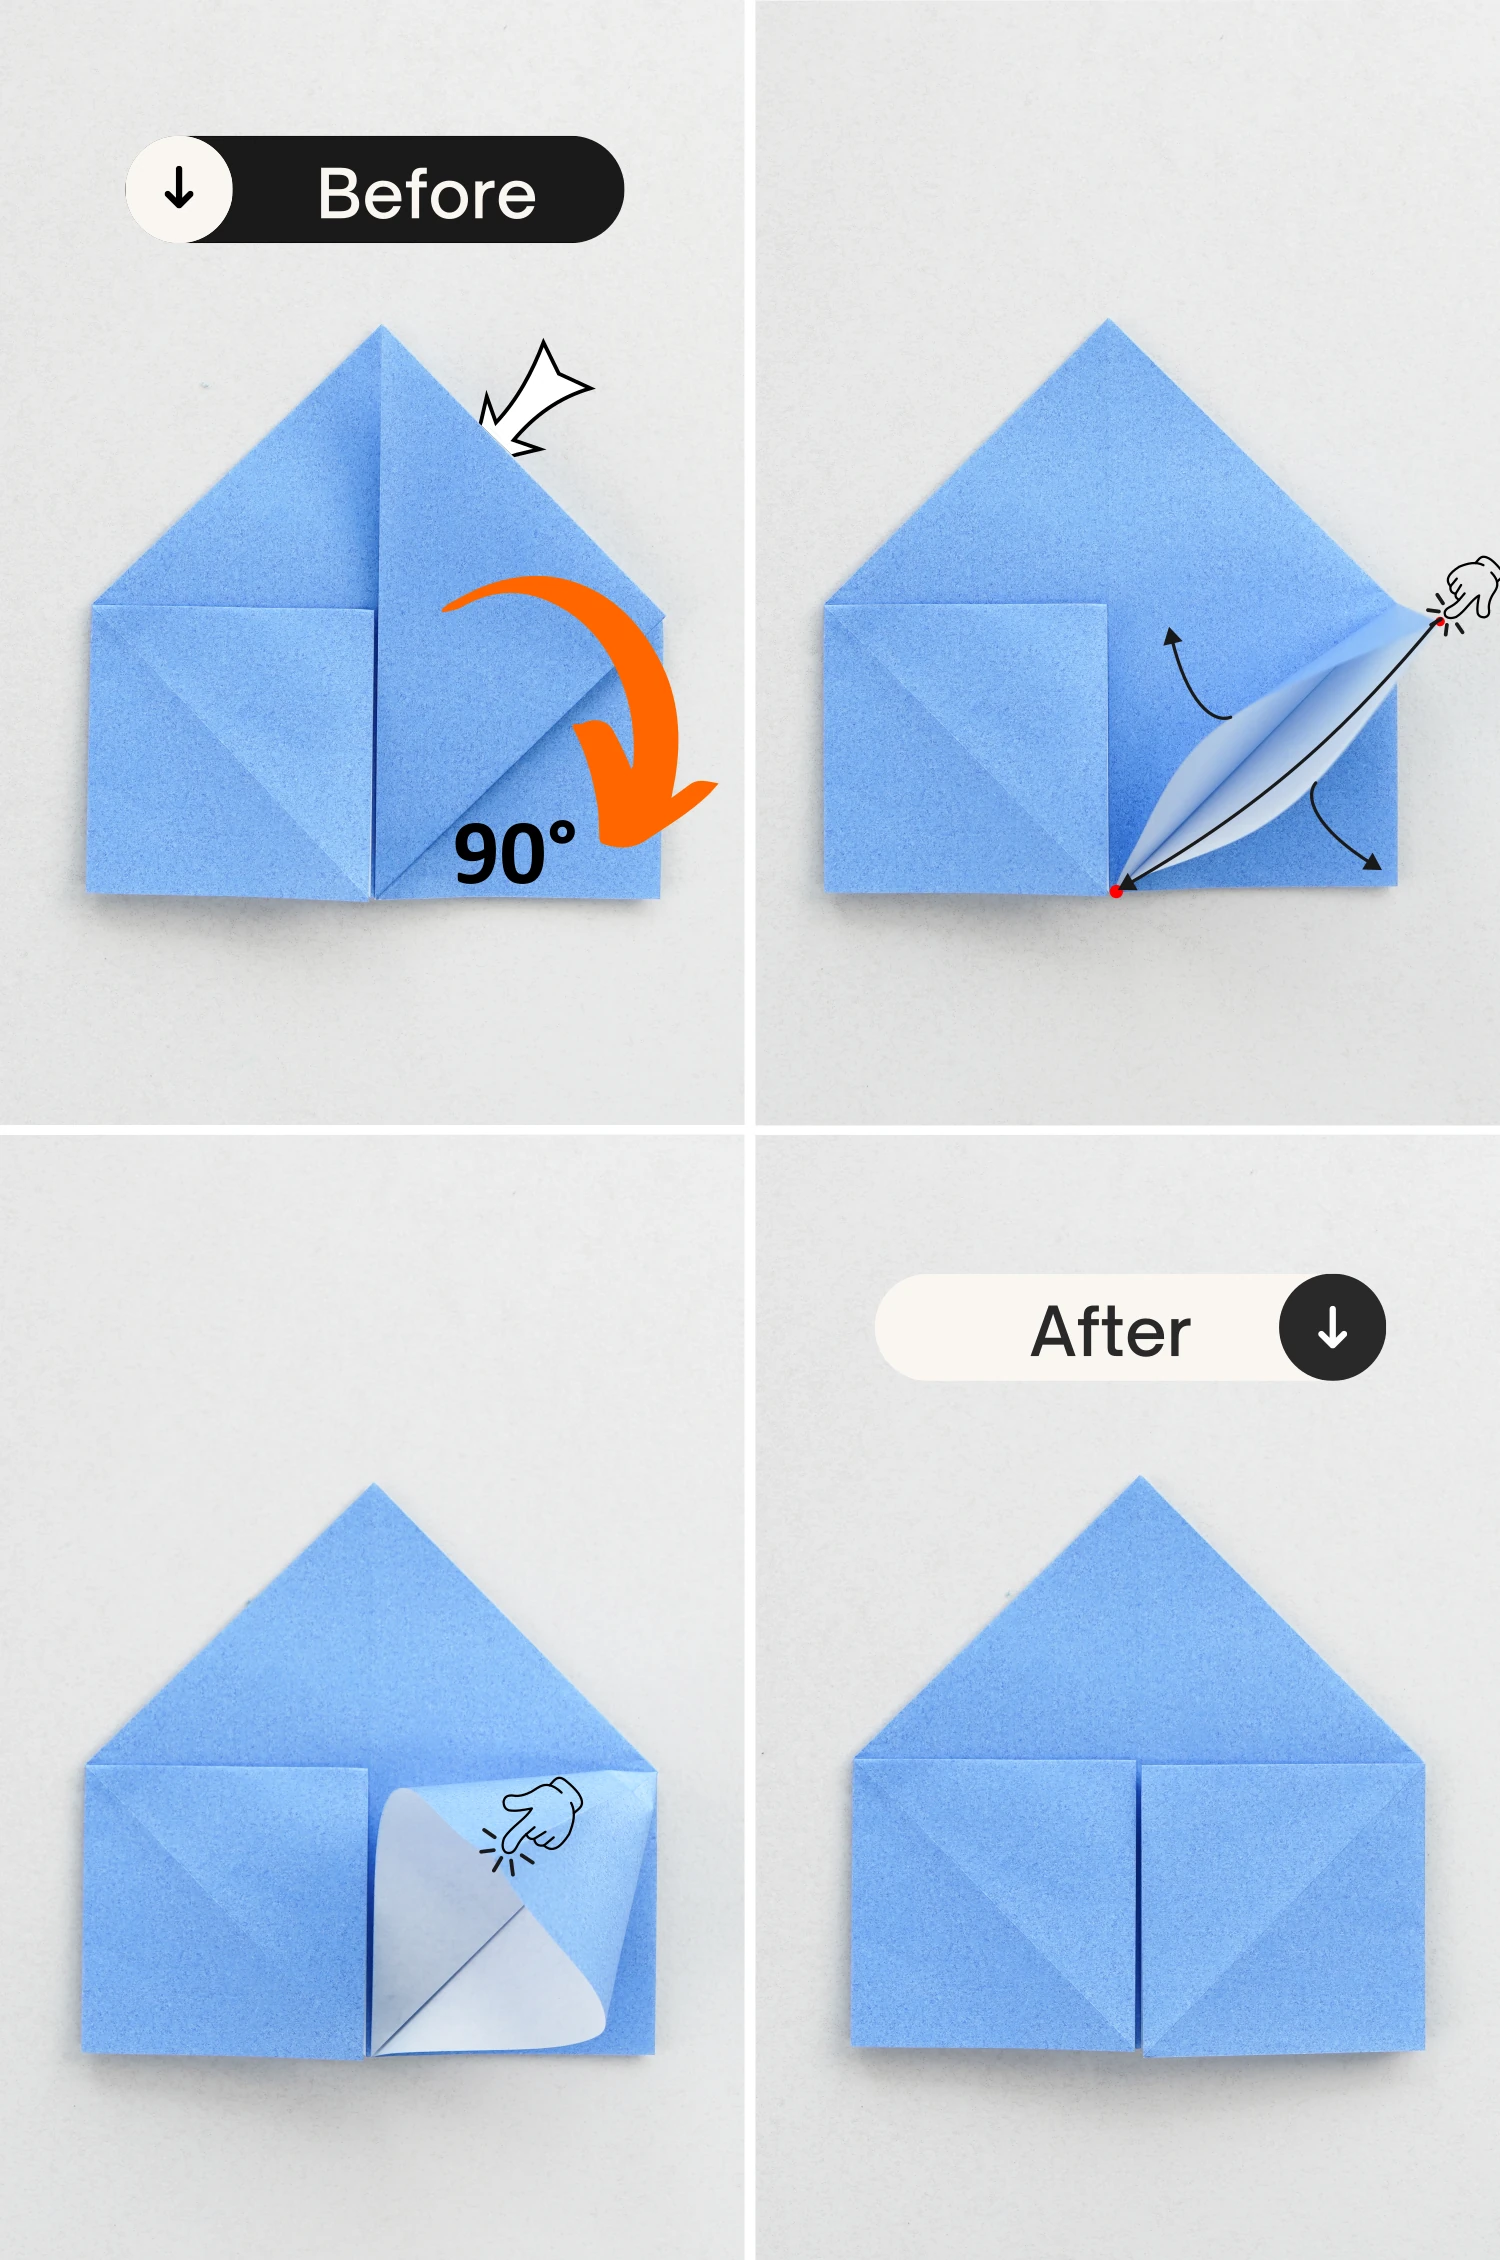
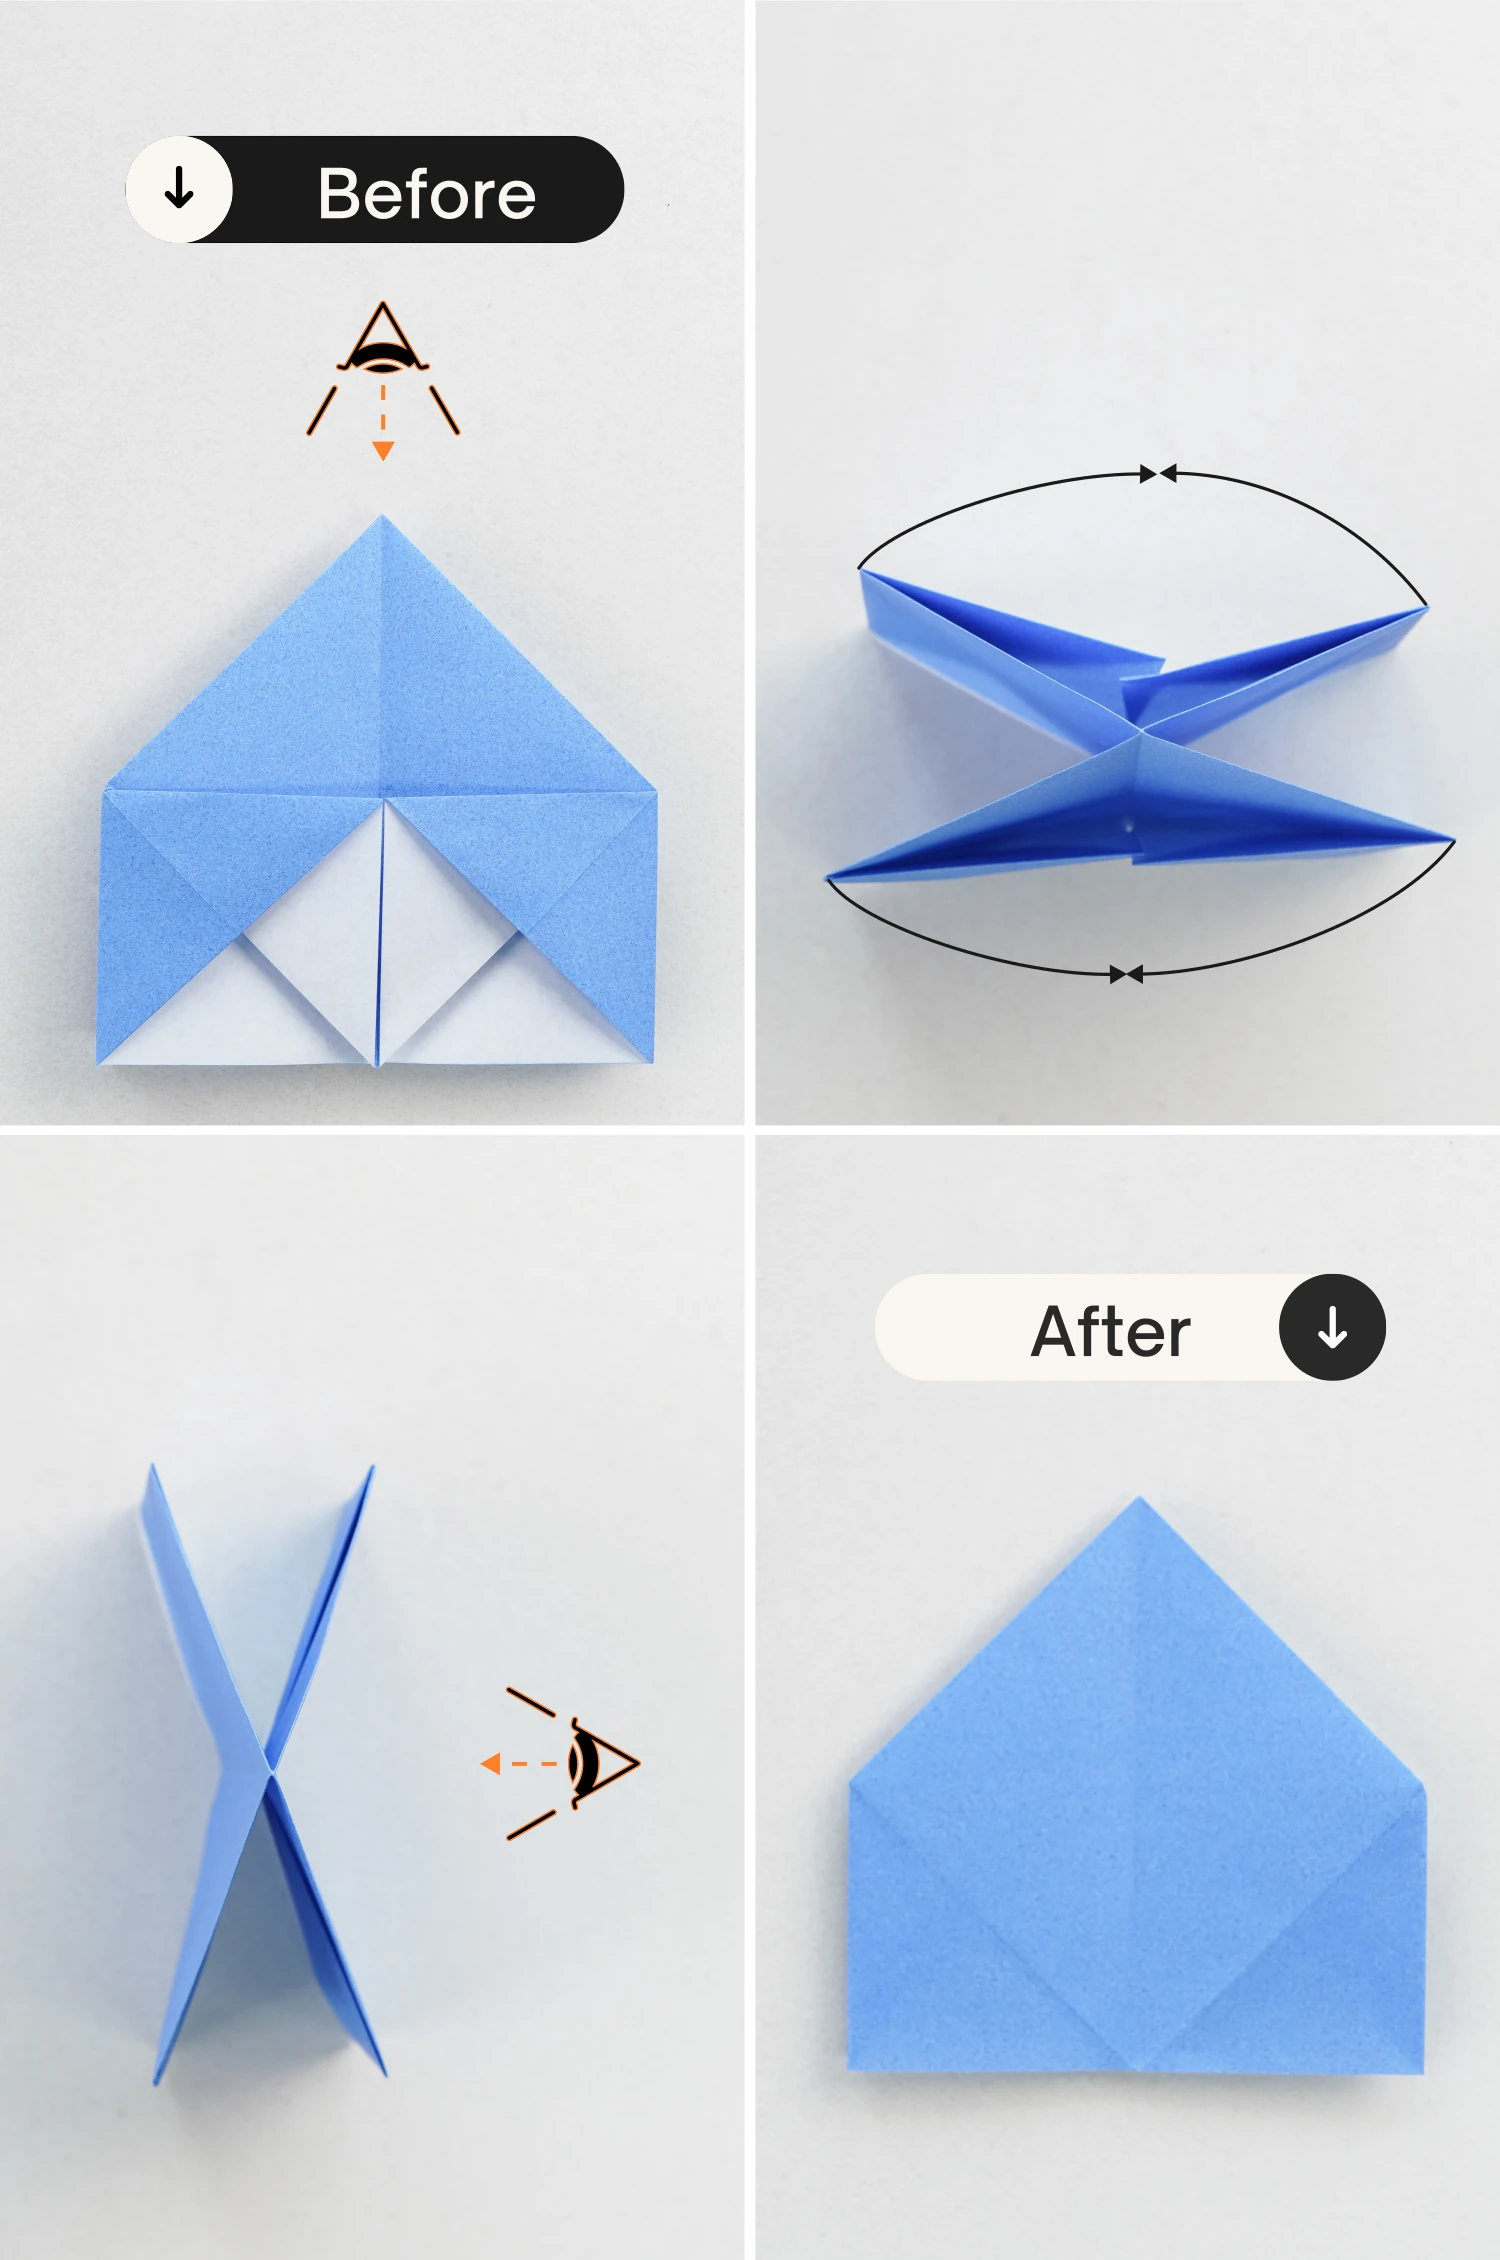
Step 11
Lift the left triangle, slightly open it, and flatten it vertically from the top corner of the triangle, creating a square. You will need to do this four times.
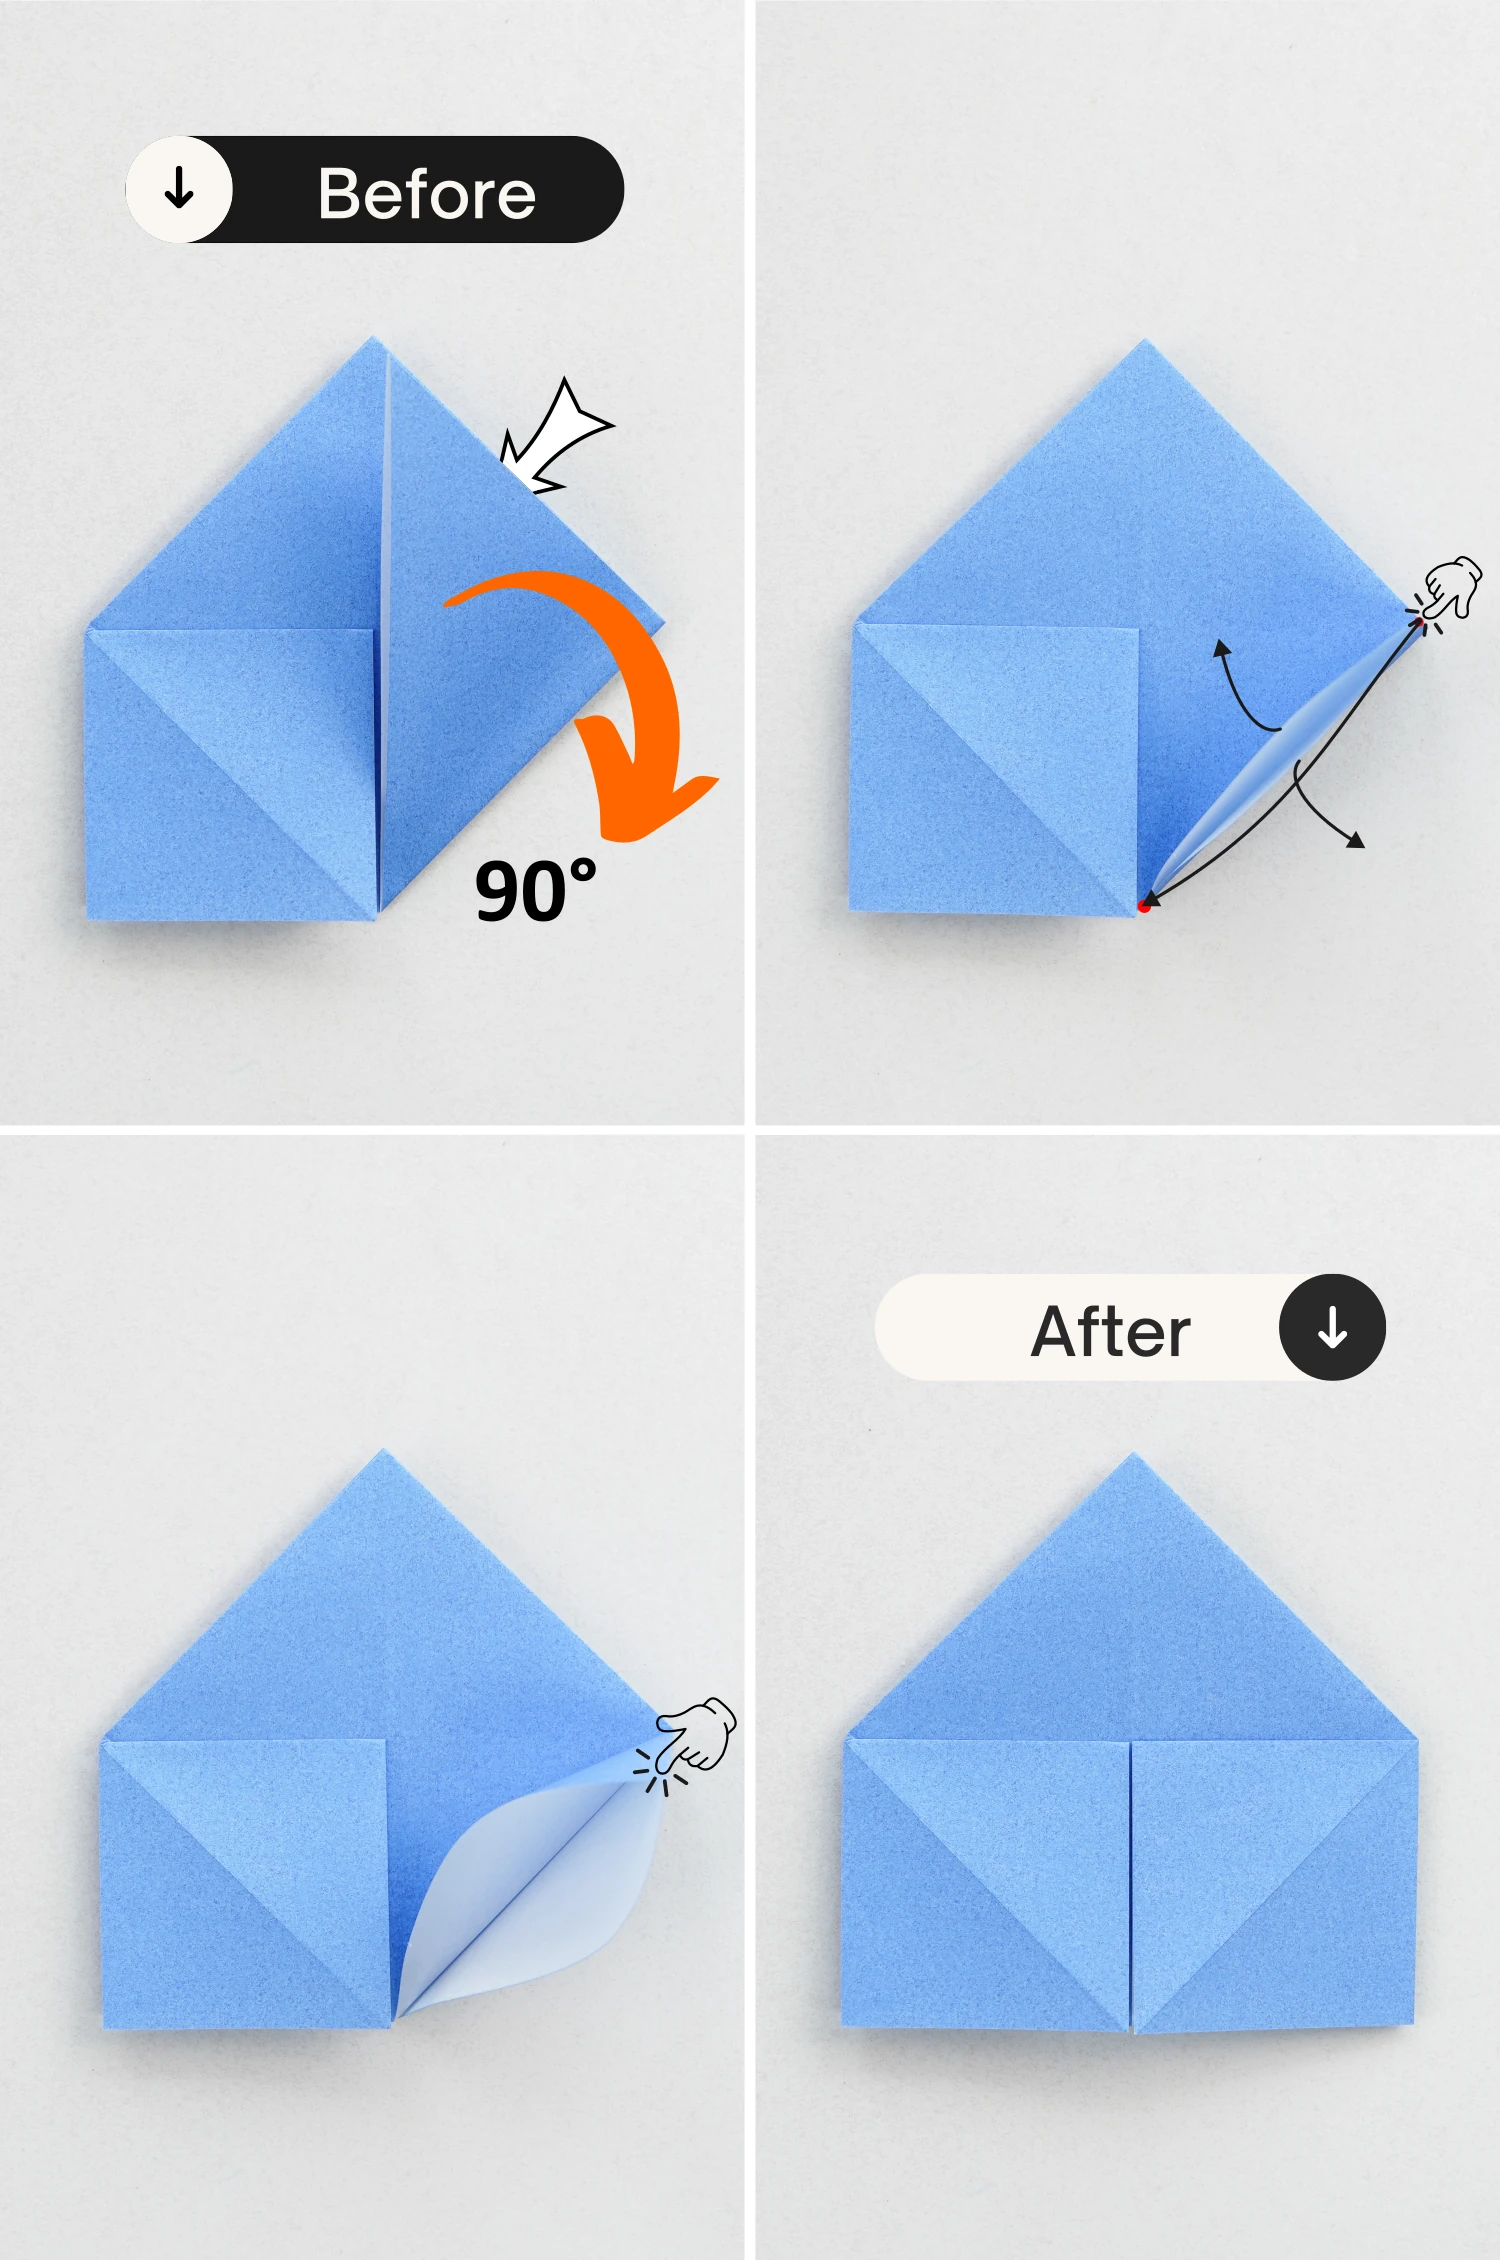
Step 12
Repeat this for the right side.
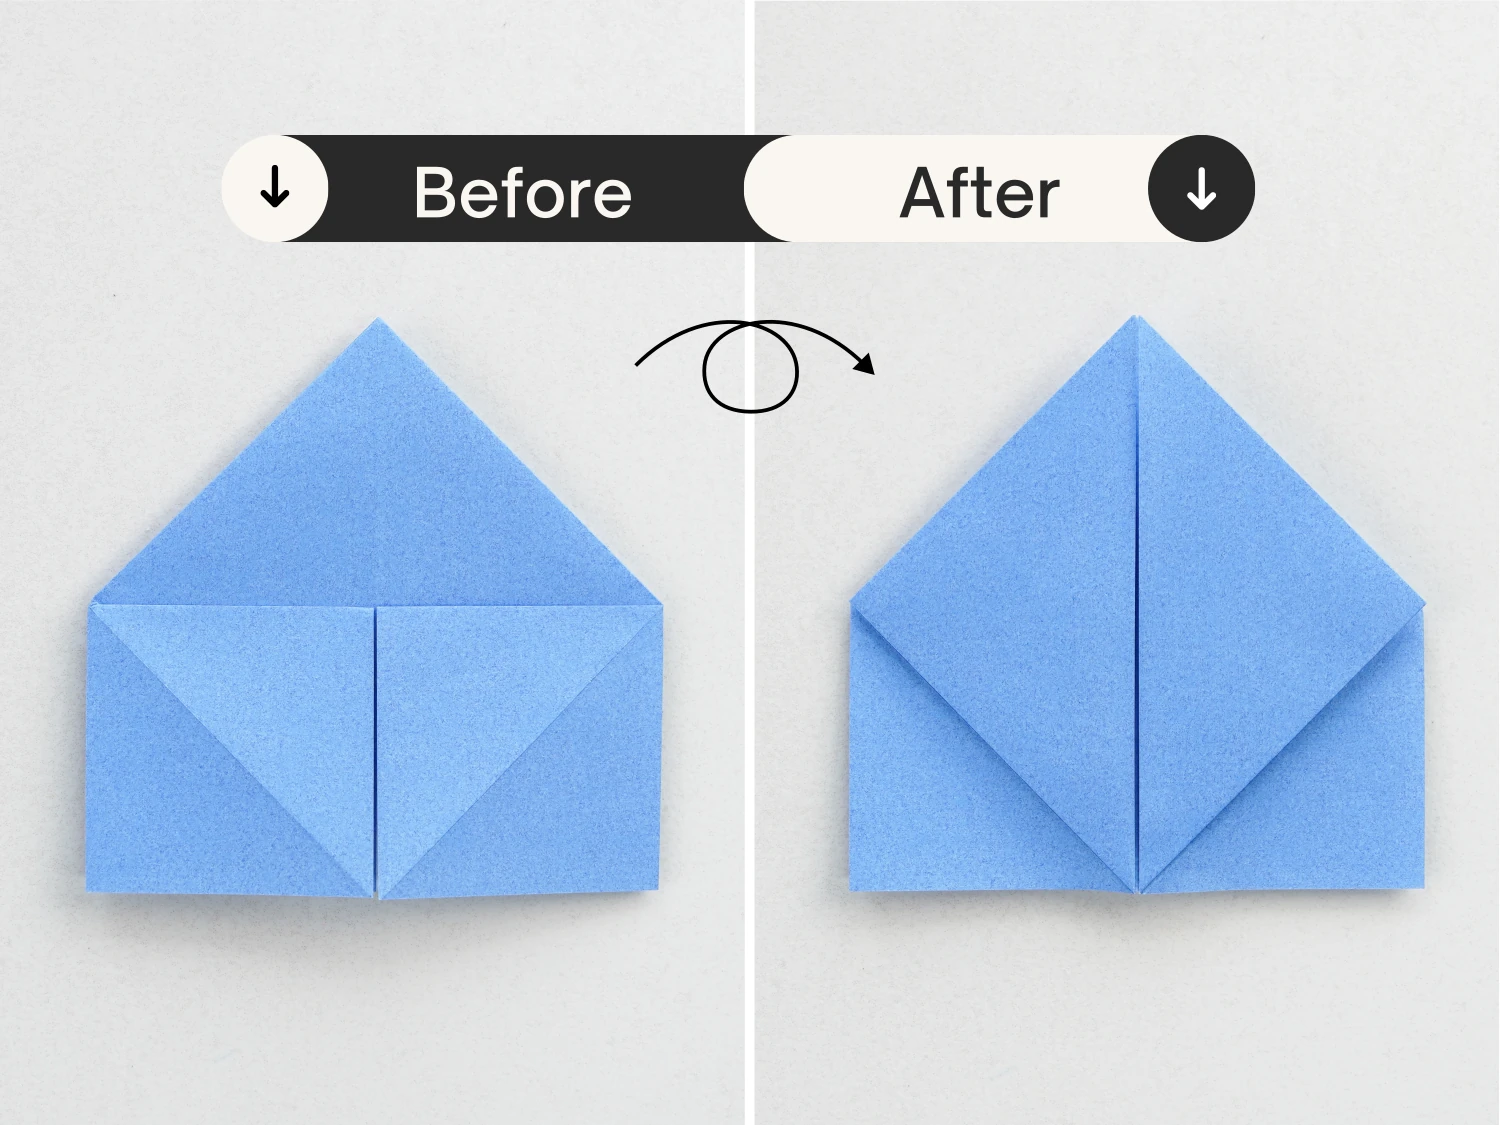
Step 13
Flip it over.
Step 14
Repeat step 11.
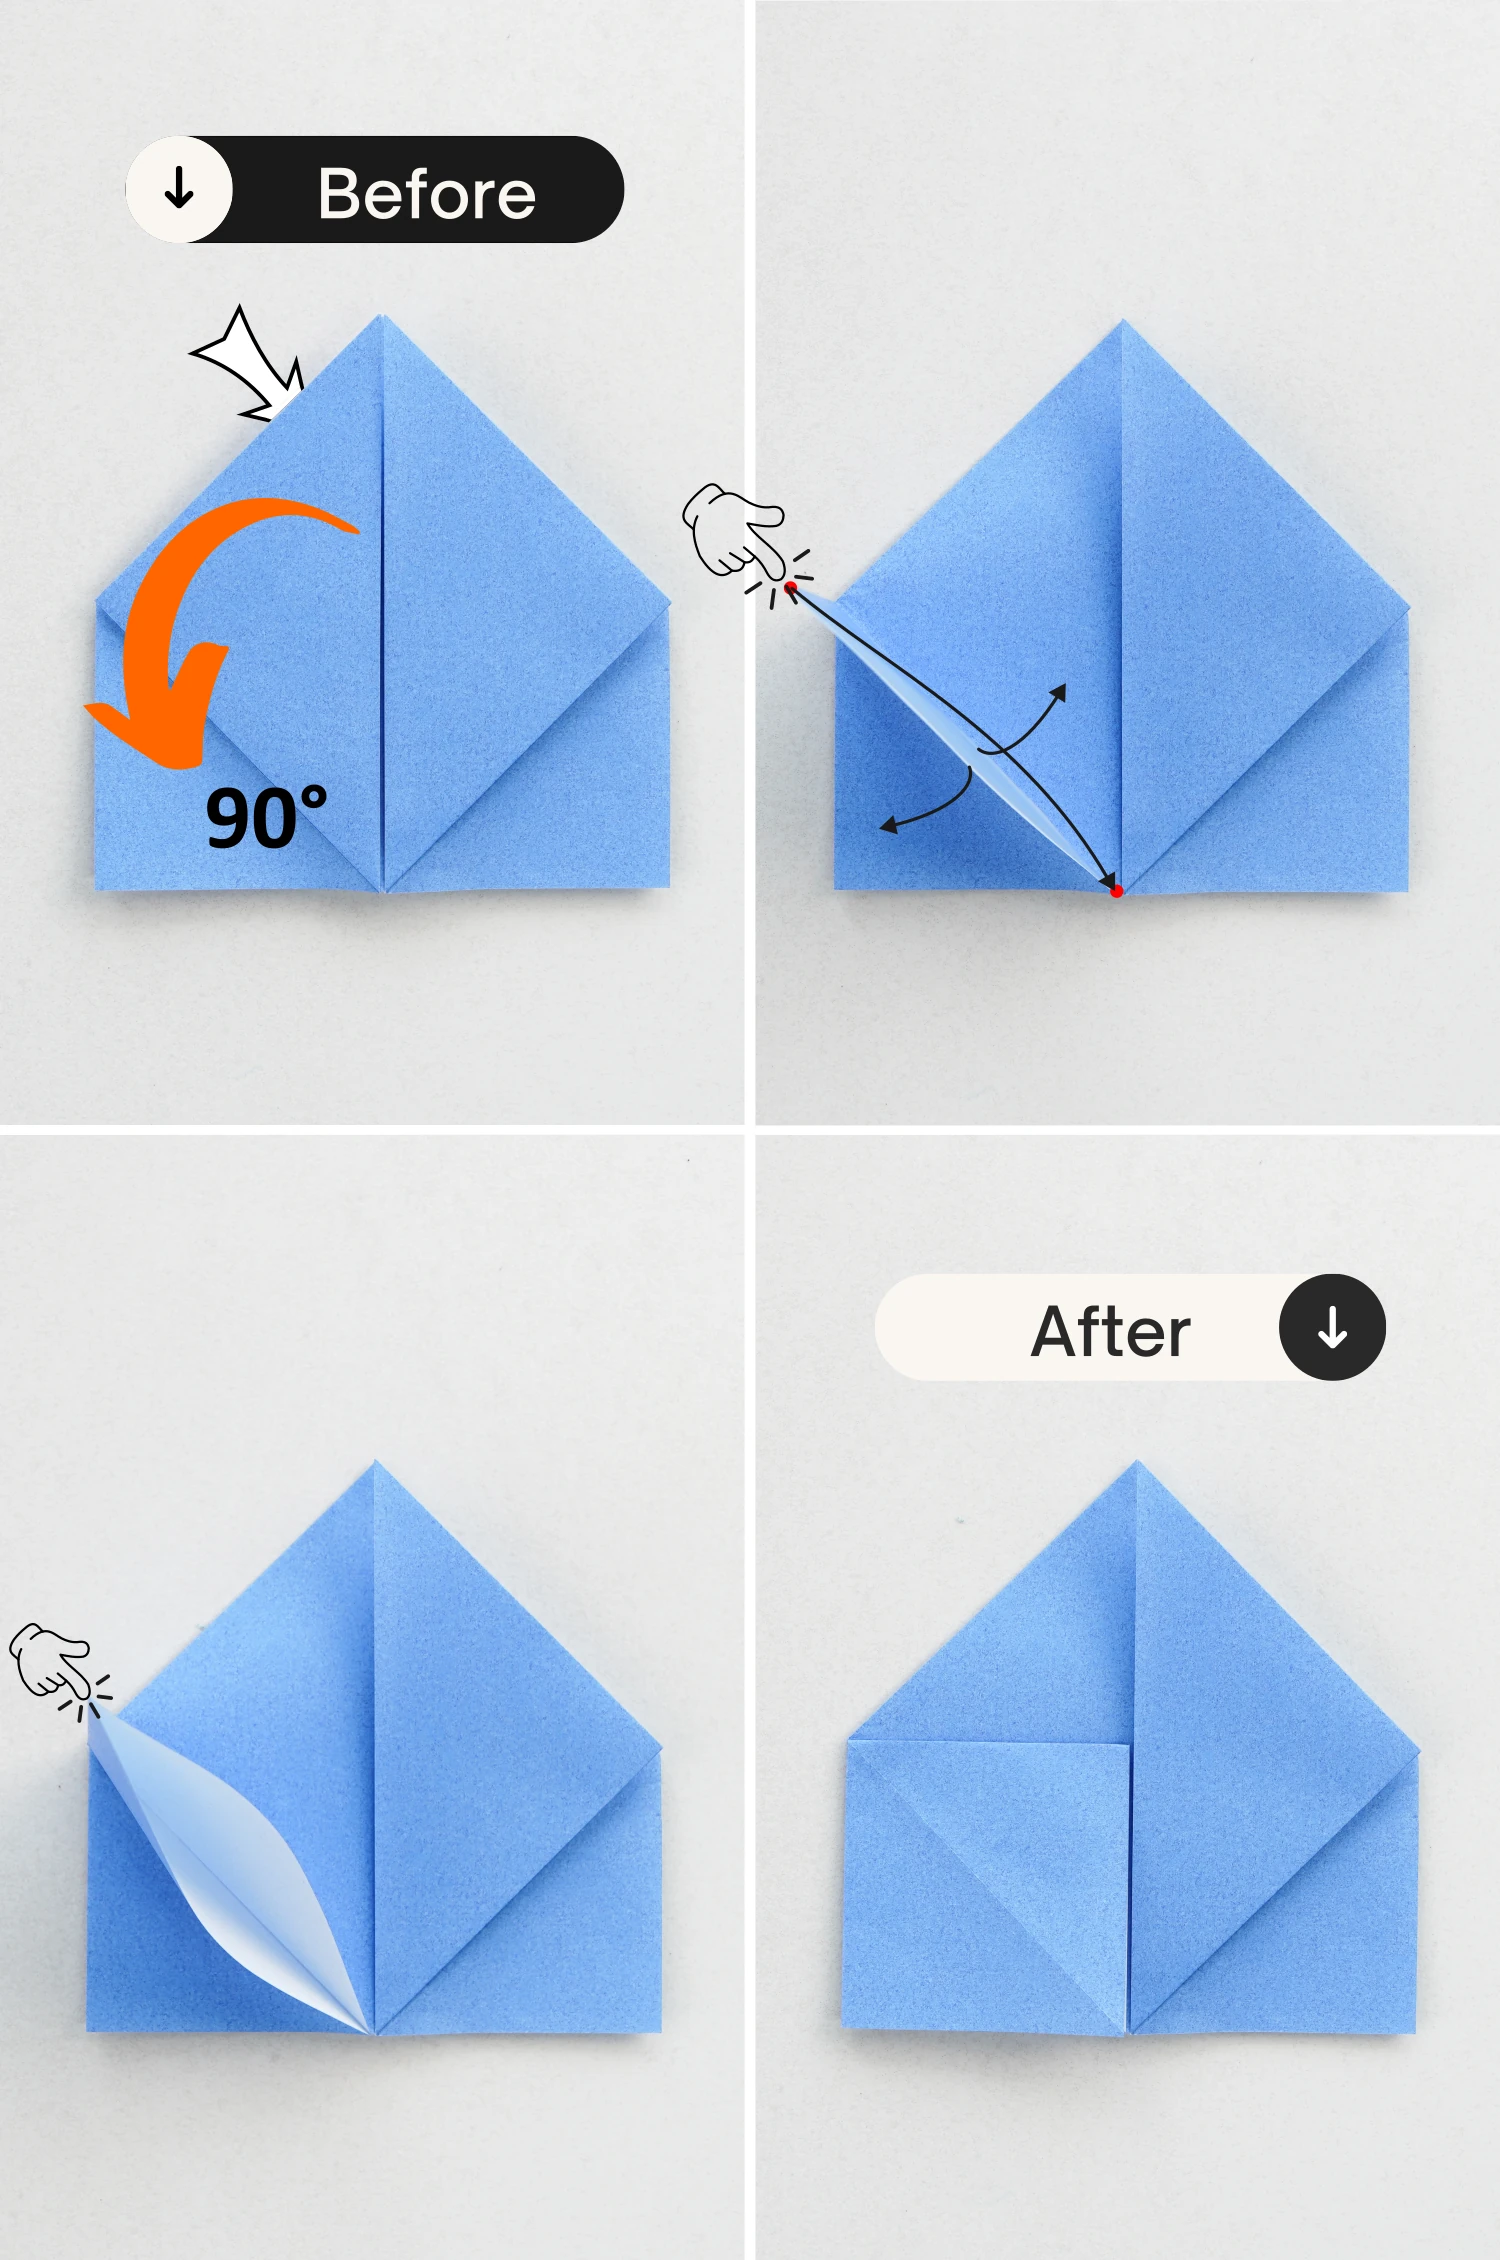
Step 15
Repeat for the right triangle.
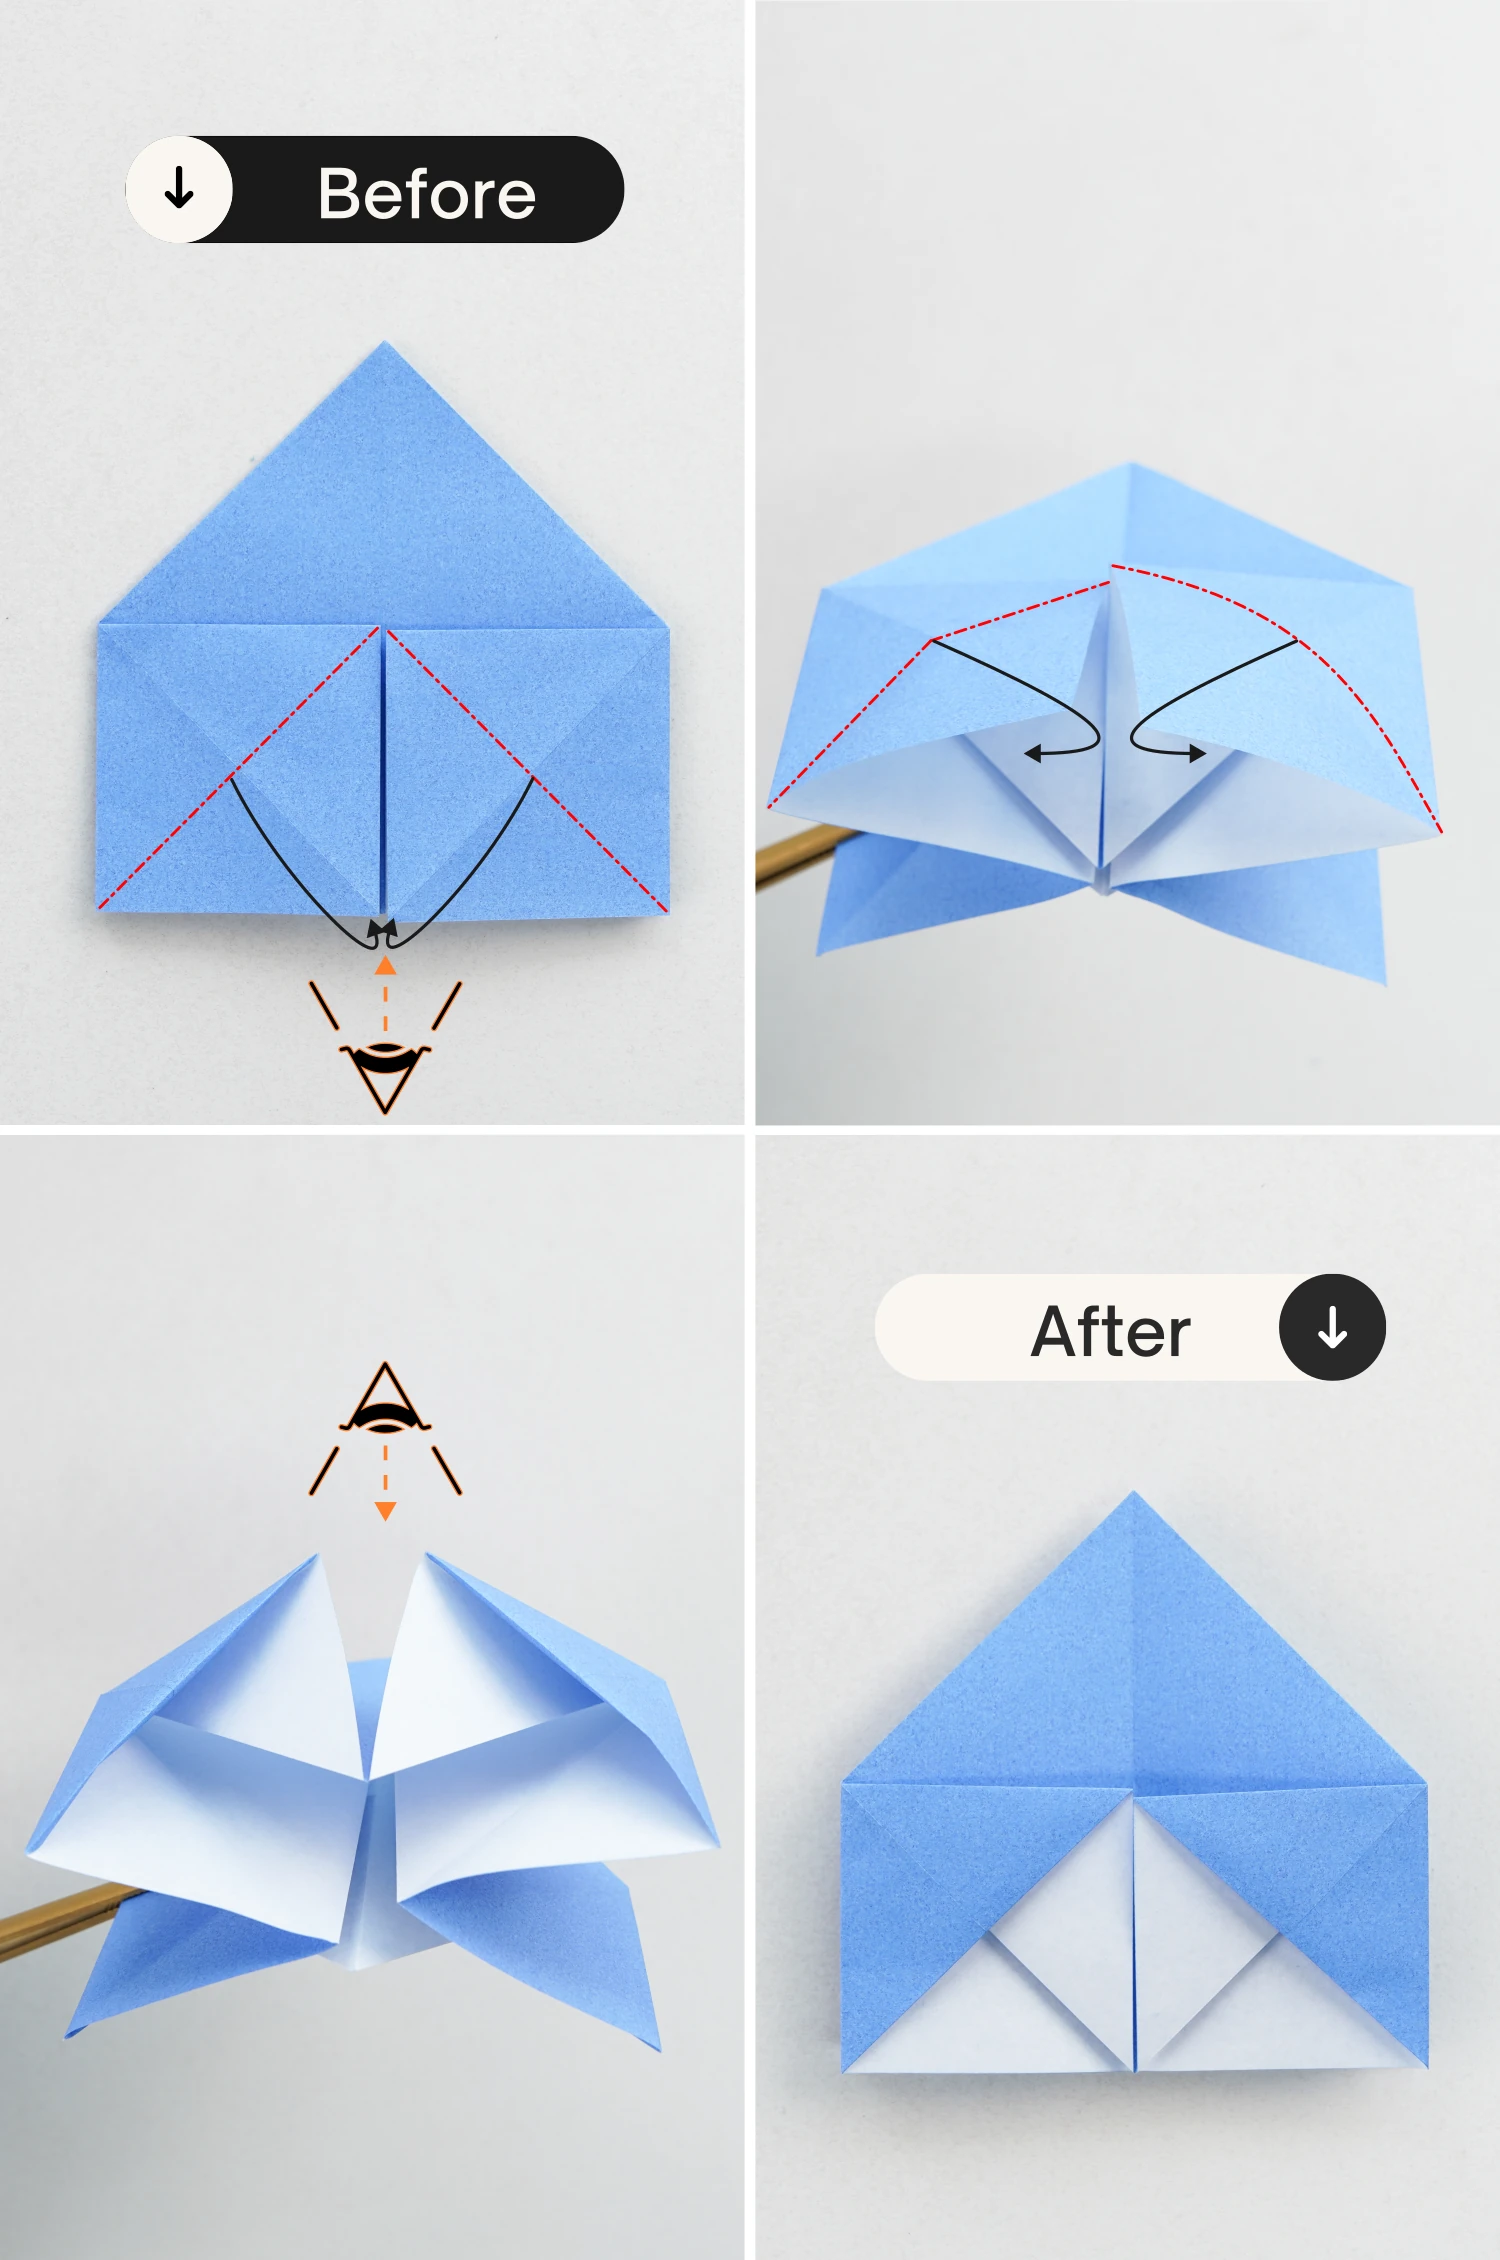
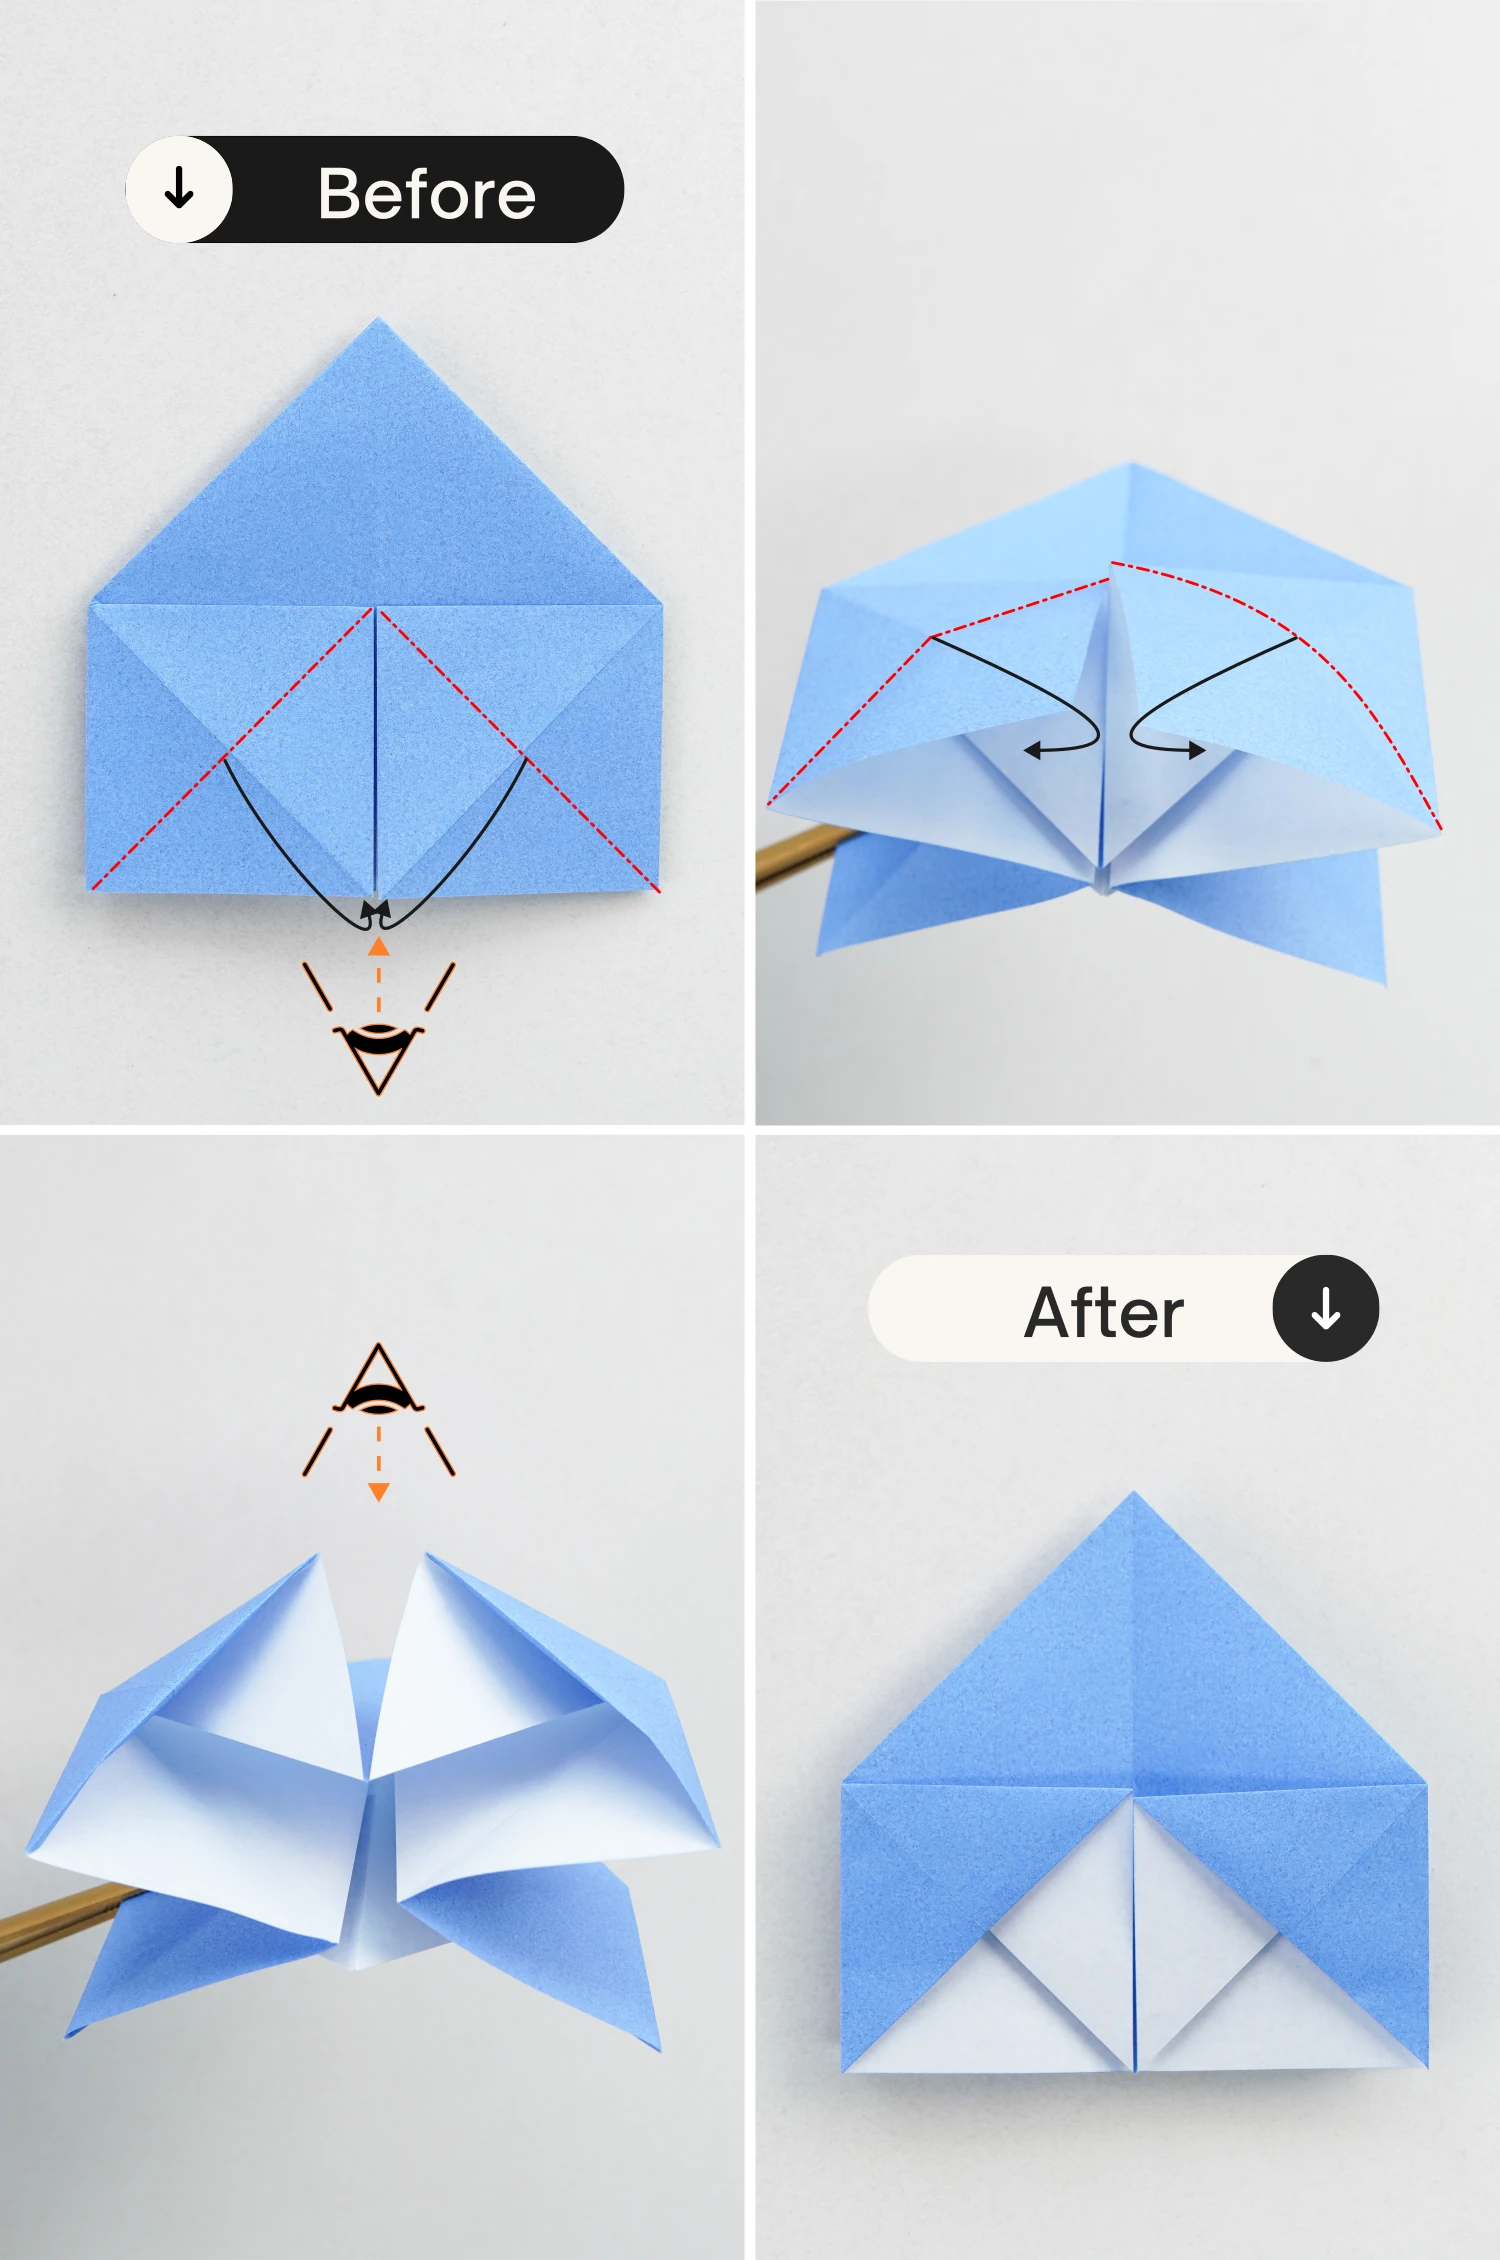
Step 16
Switch the viewpoint, and look up from the bottom.
Fold the left and right squares in half diagonally inward.
Step 17
Flip it over.
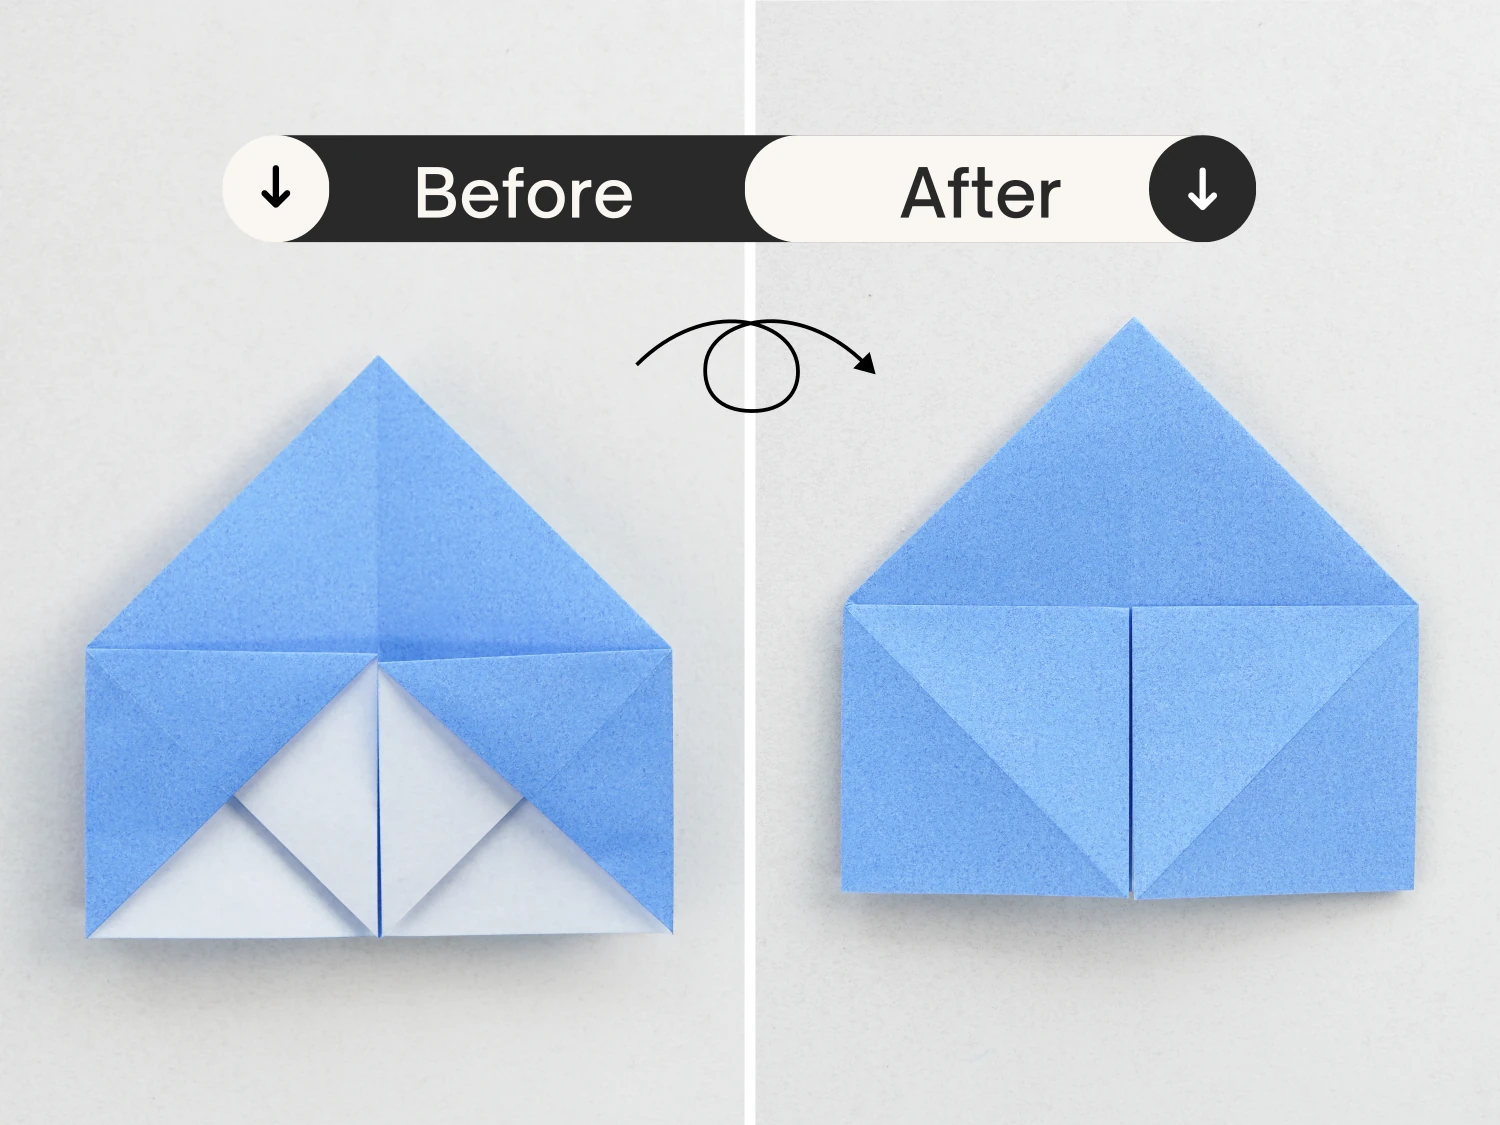
Step 18
Repeating step 16, fold the two squares in half diagonally inward.
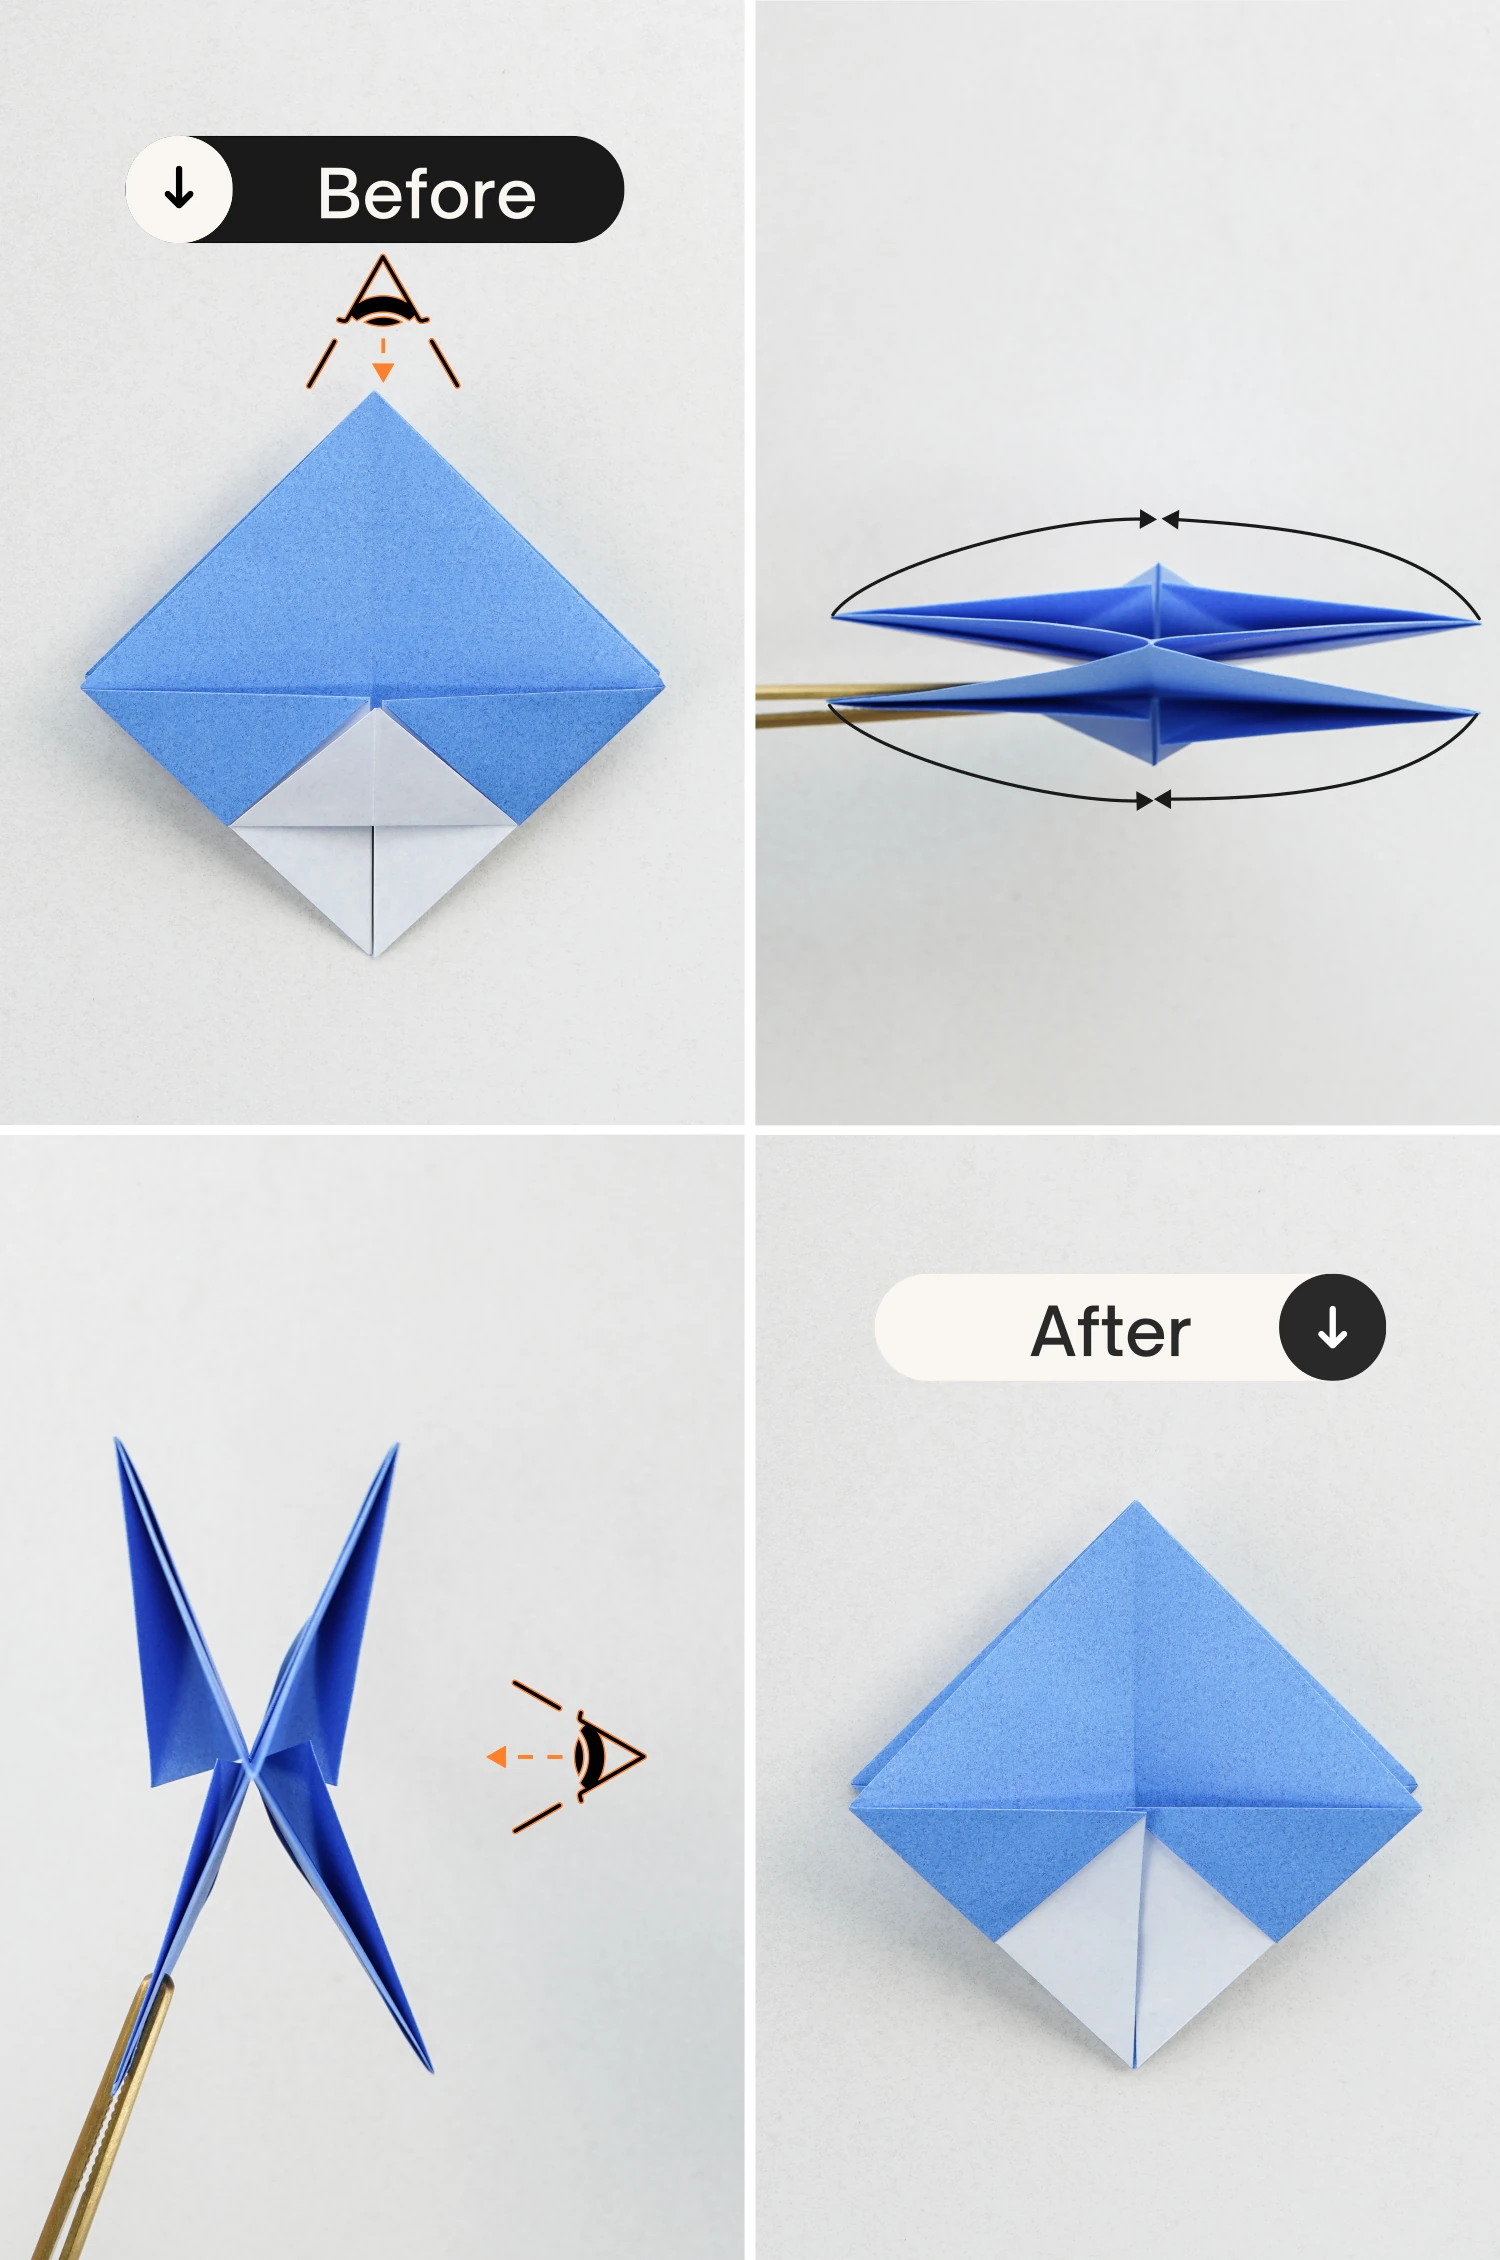
Step 19
Look down from the top, open it from the left and right sides, and fold the two upper flaps together to the top, and the lower two together to the bottom. Finally lay it flat.
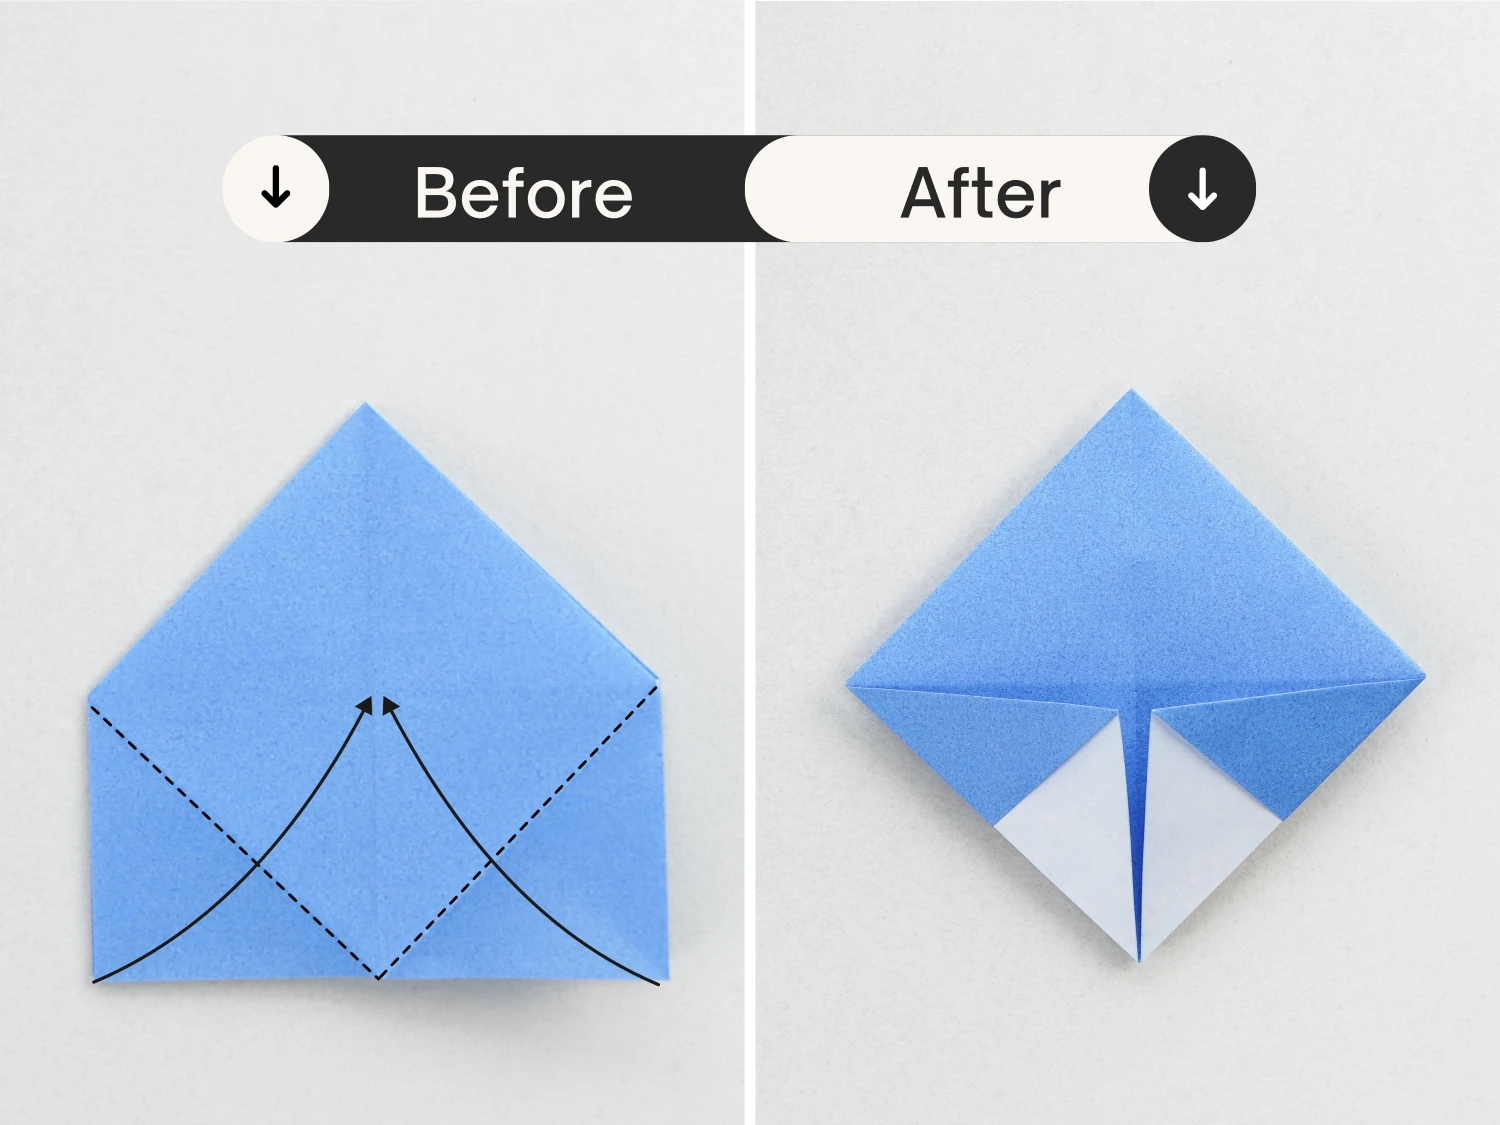
Step 20
Fold the bottom left and right corners to the vertical crease diagonally.

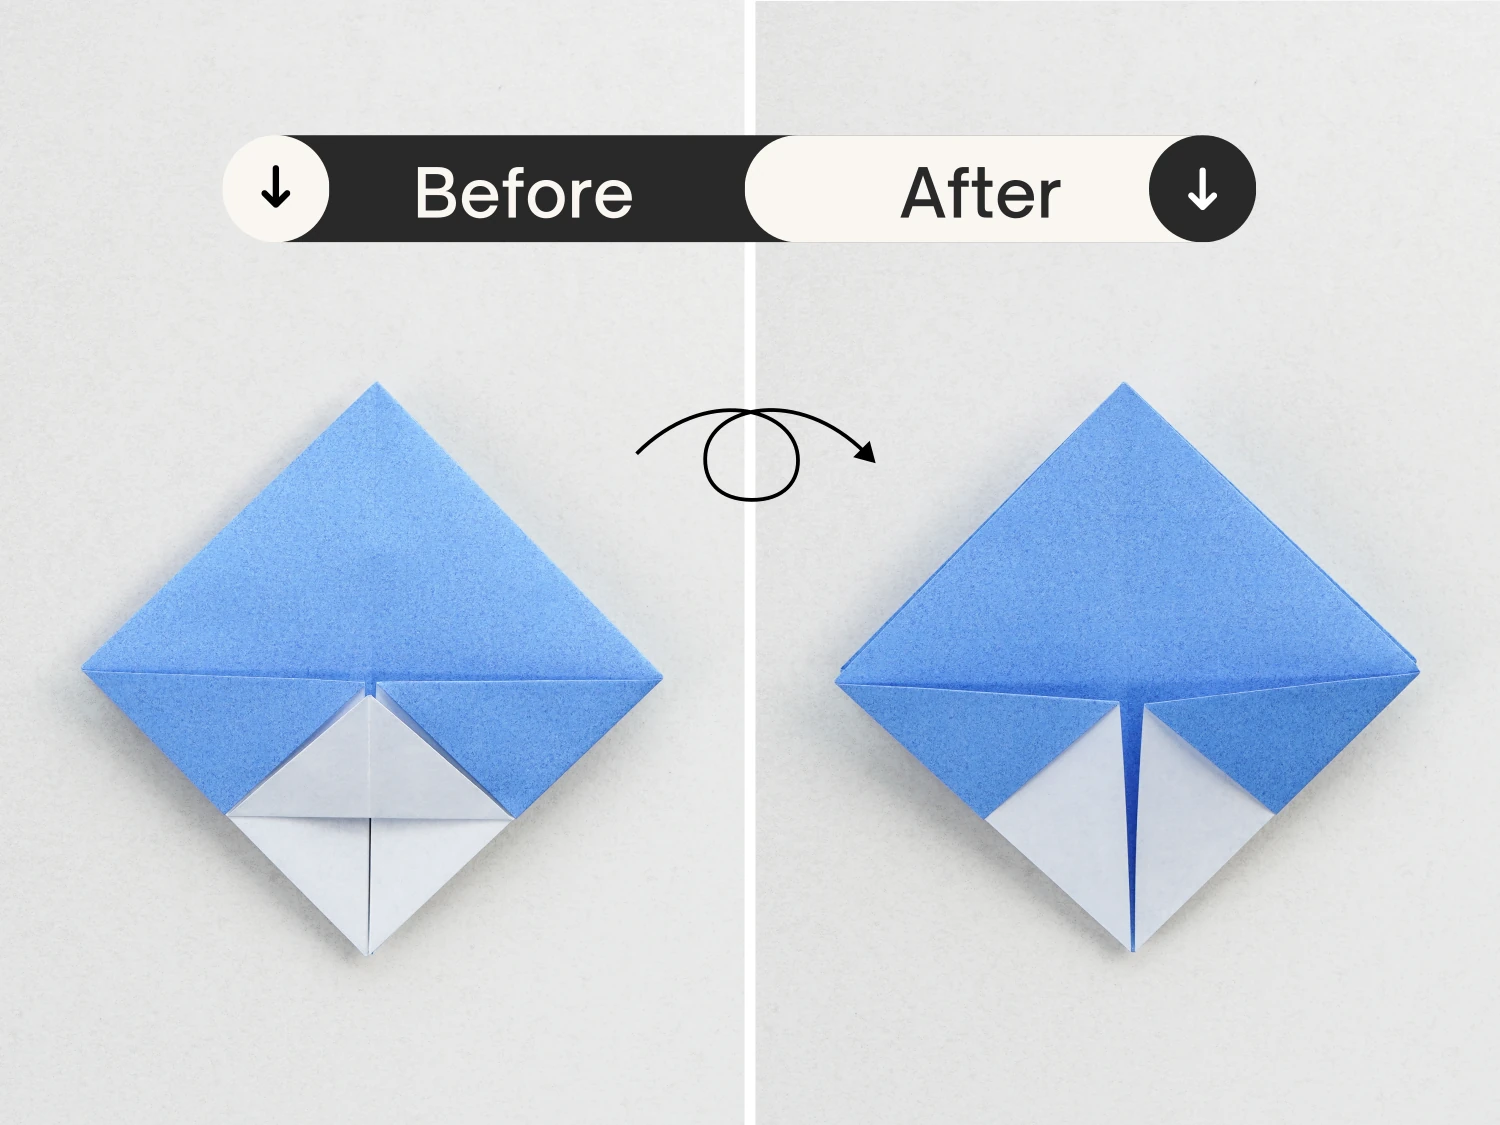
Step 21
Flip the paper over.
Step 22
Similarly, fold the bottom left and right corners to the vertical crease.
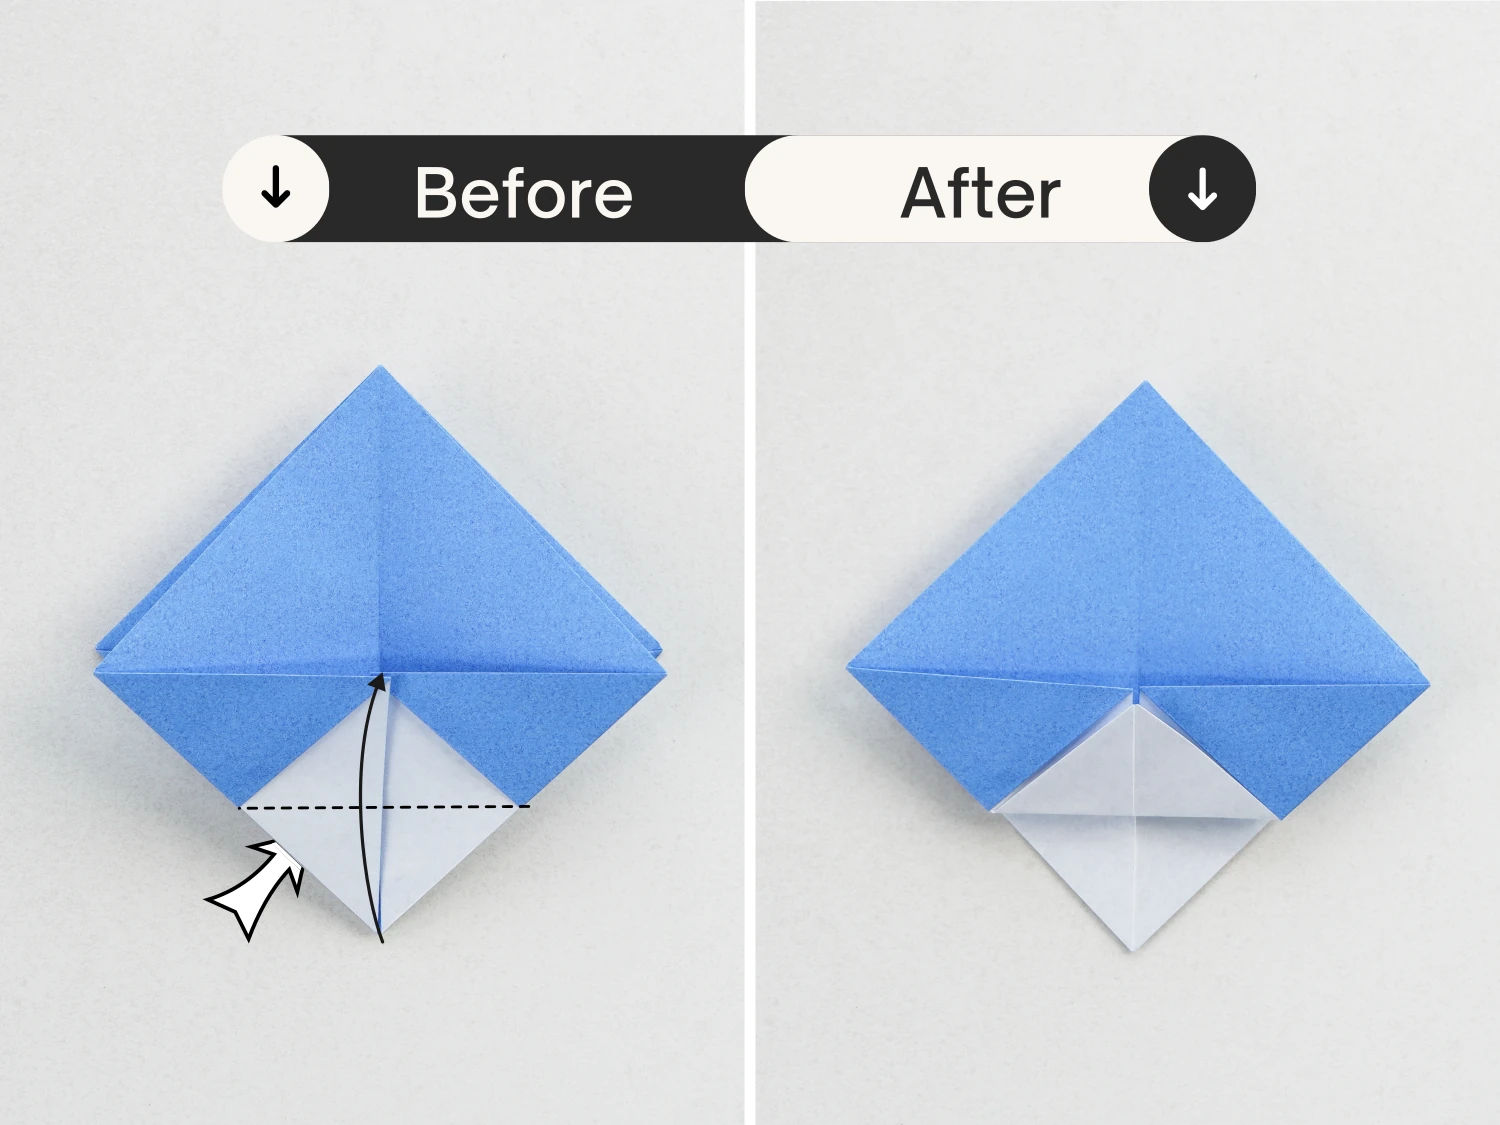
Step 23
Fold the bottom corner of the top layer up to meet the middle point of the horizontal crease.

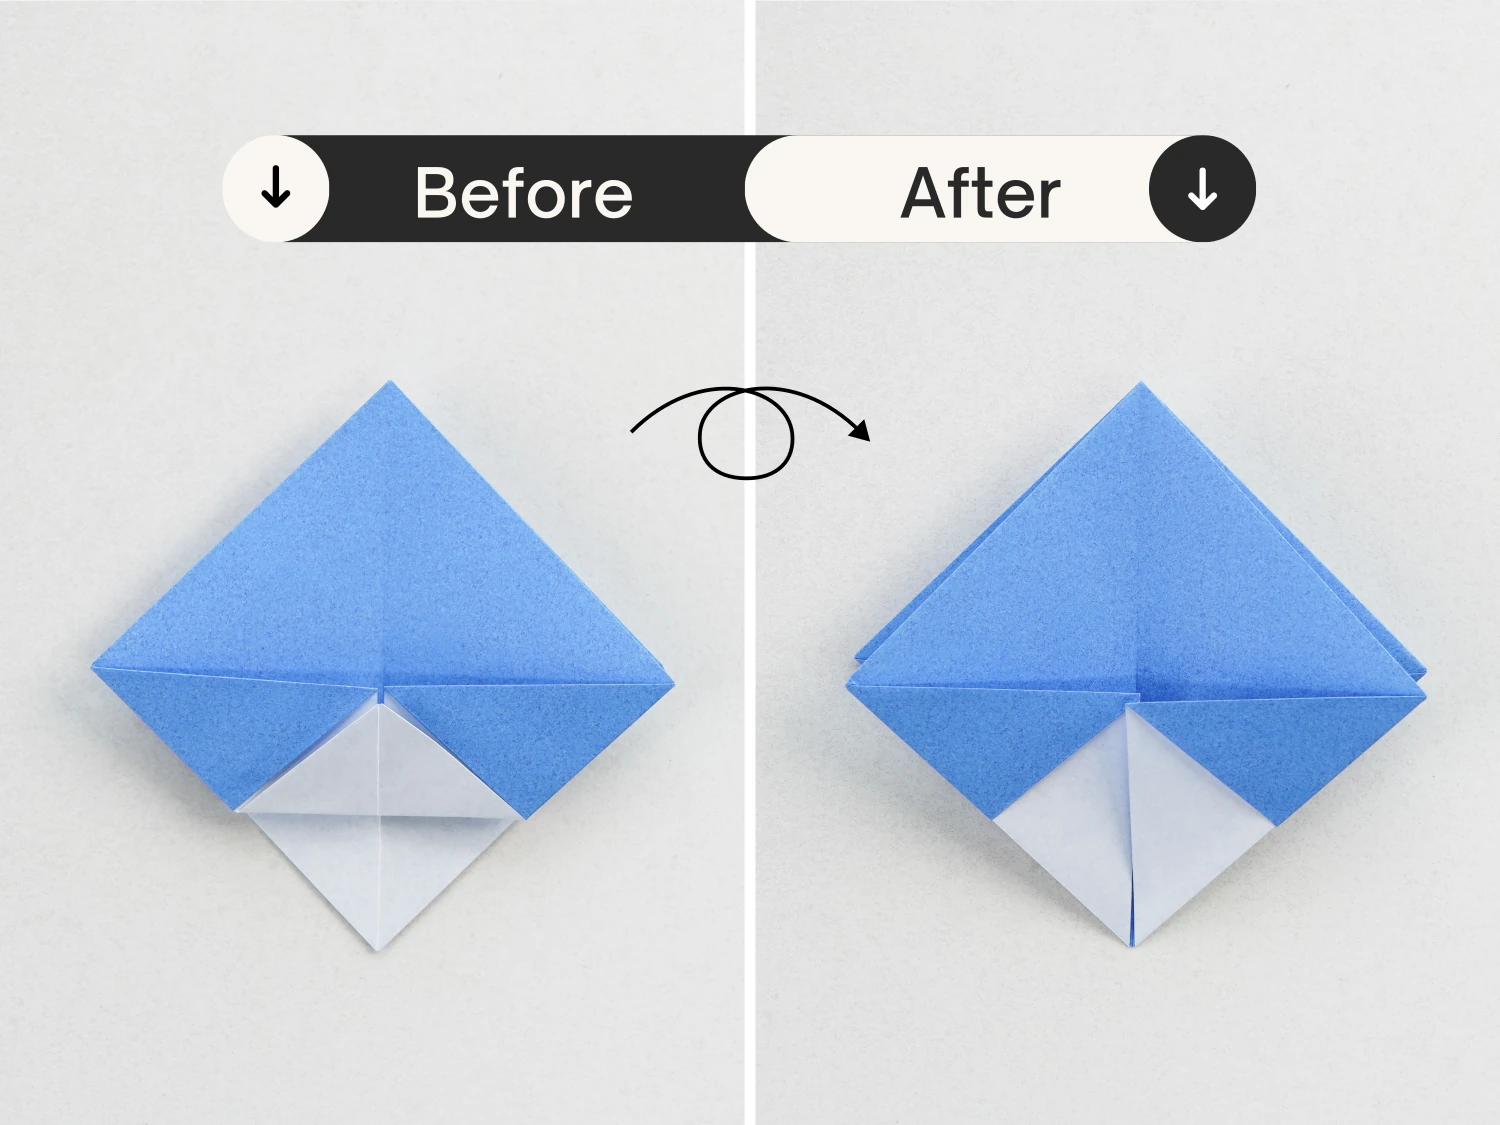
Step 24
Flip it over again.
Step 25
Repeat step 23.
Step 26
Repeat step 19, look down from the top, and open it from the left and right sides, fold the two flaps above to the top together and the below two to the bottom. Finally lay it flat.
Step 27
Fold the bottom corner of the top layer up diagonally to meet the horizontal crease.
Step 28
Flip it over.
Step 29
Fold the bottom corner up diagonally.
Step 30
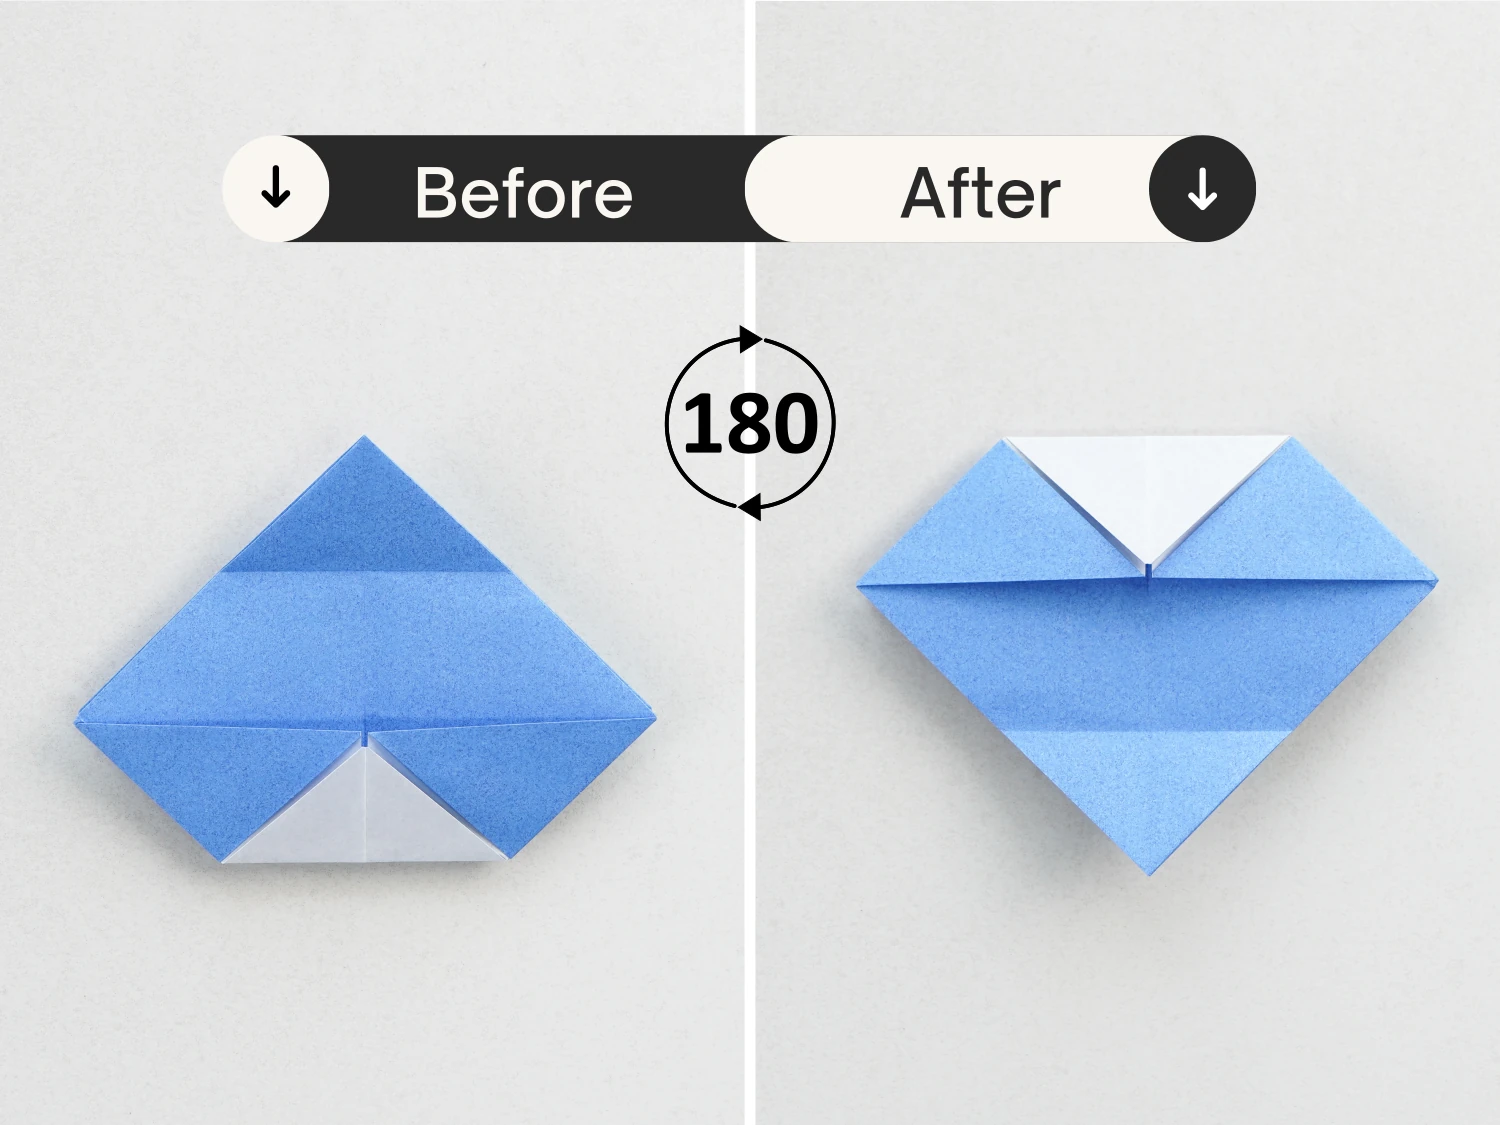
Fold the top corner down diagonally, then unfold it.
Step 31
Rotate it 180 degrees clockwise, to look like a diamond.
Step 32
Look down from the top, and push your finger through the hole at the top to hold it open.
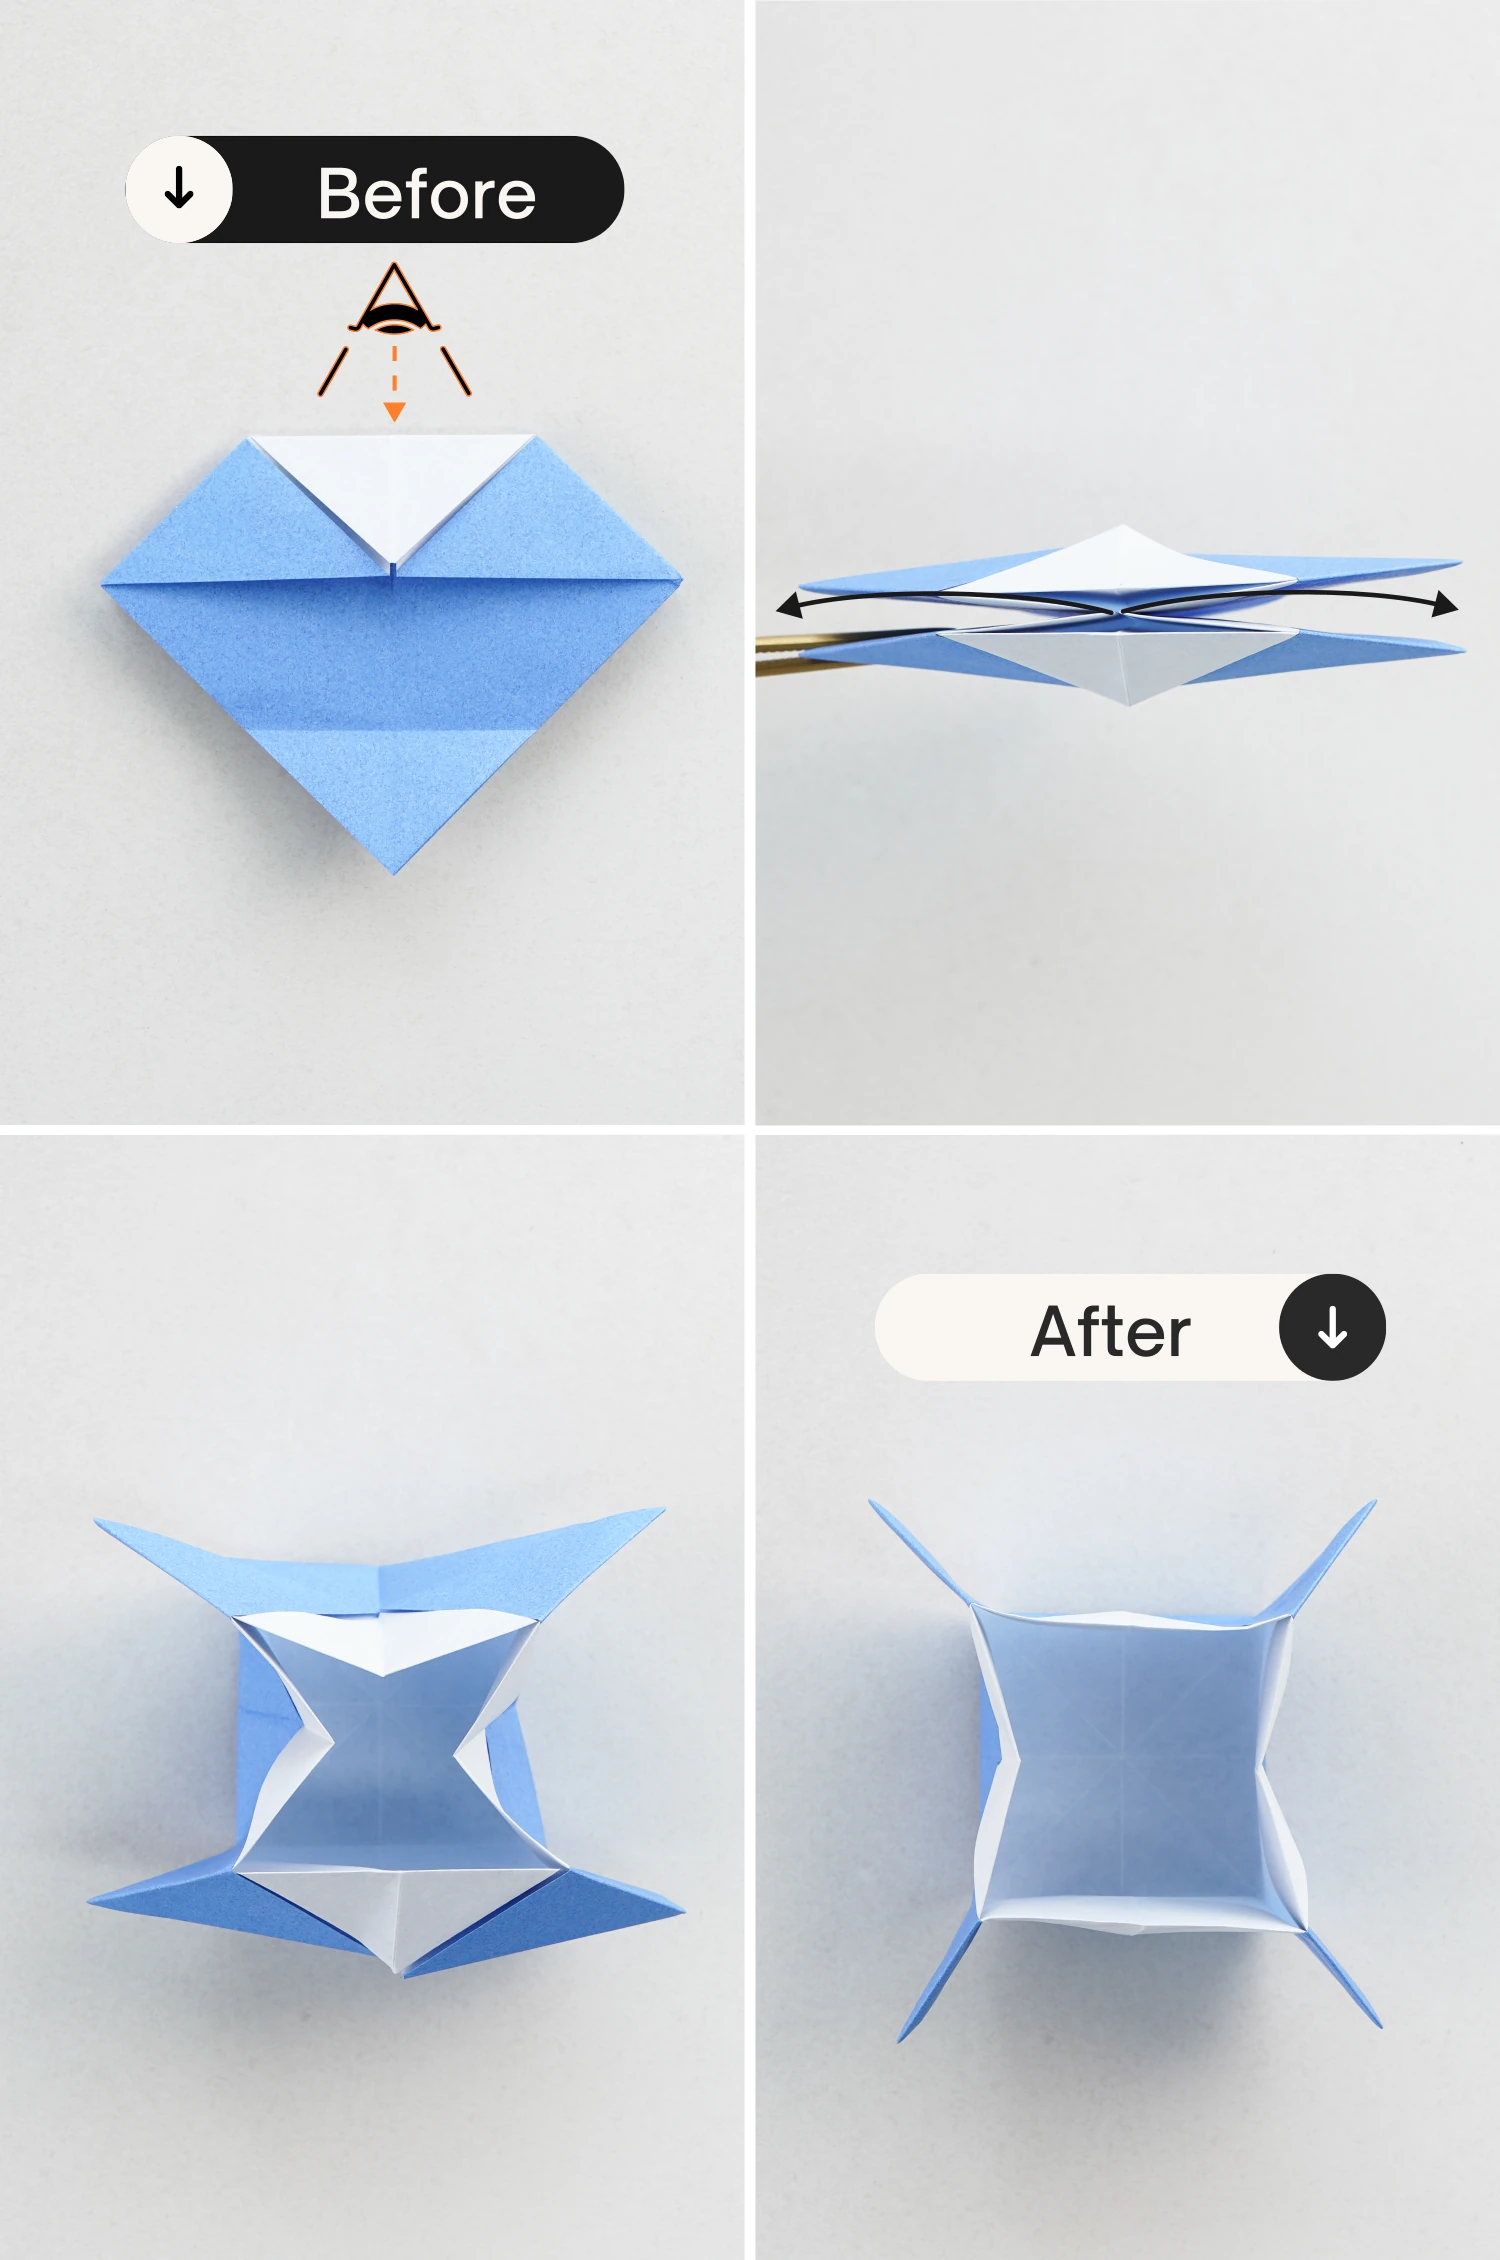
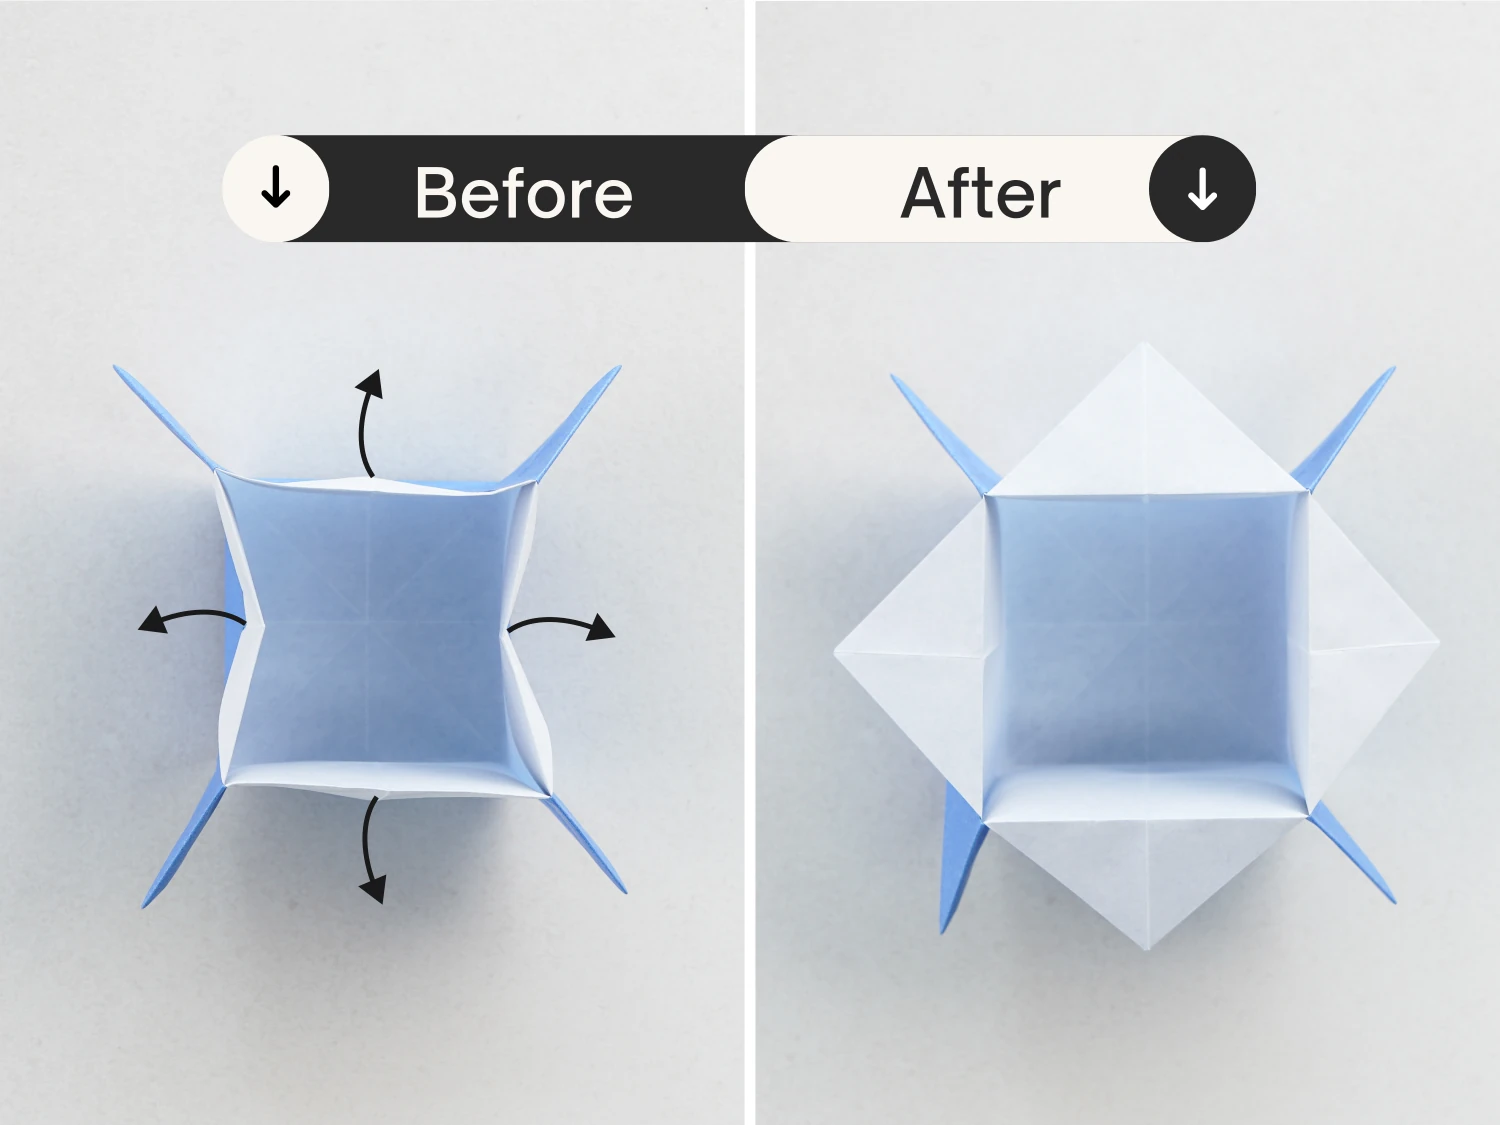
Step 33
Unfolding the triangles on all four sides so that they are parallel to the opening also makes the box look cuter.
What’s Next
Now that we have completed this cute star box, if you’re interested in exploring other origami boxes, here are some ideas you won’t want to miss.
Other Origami Box Ideas