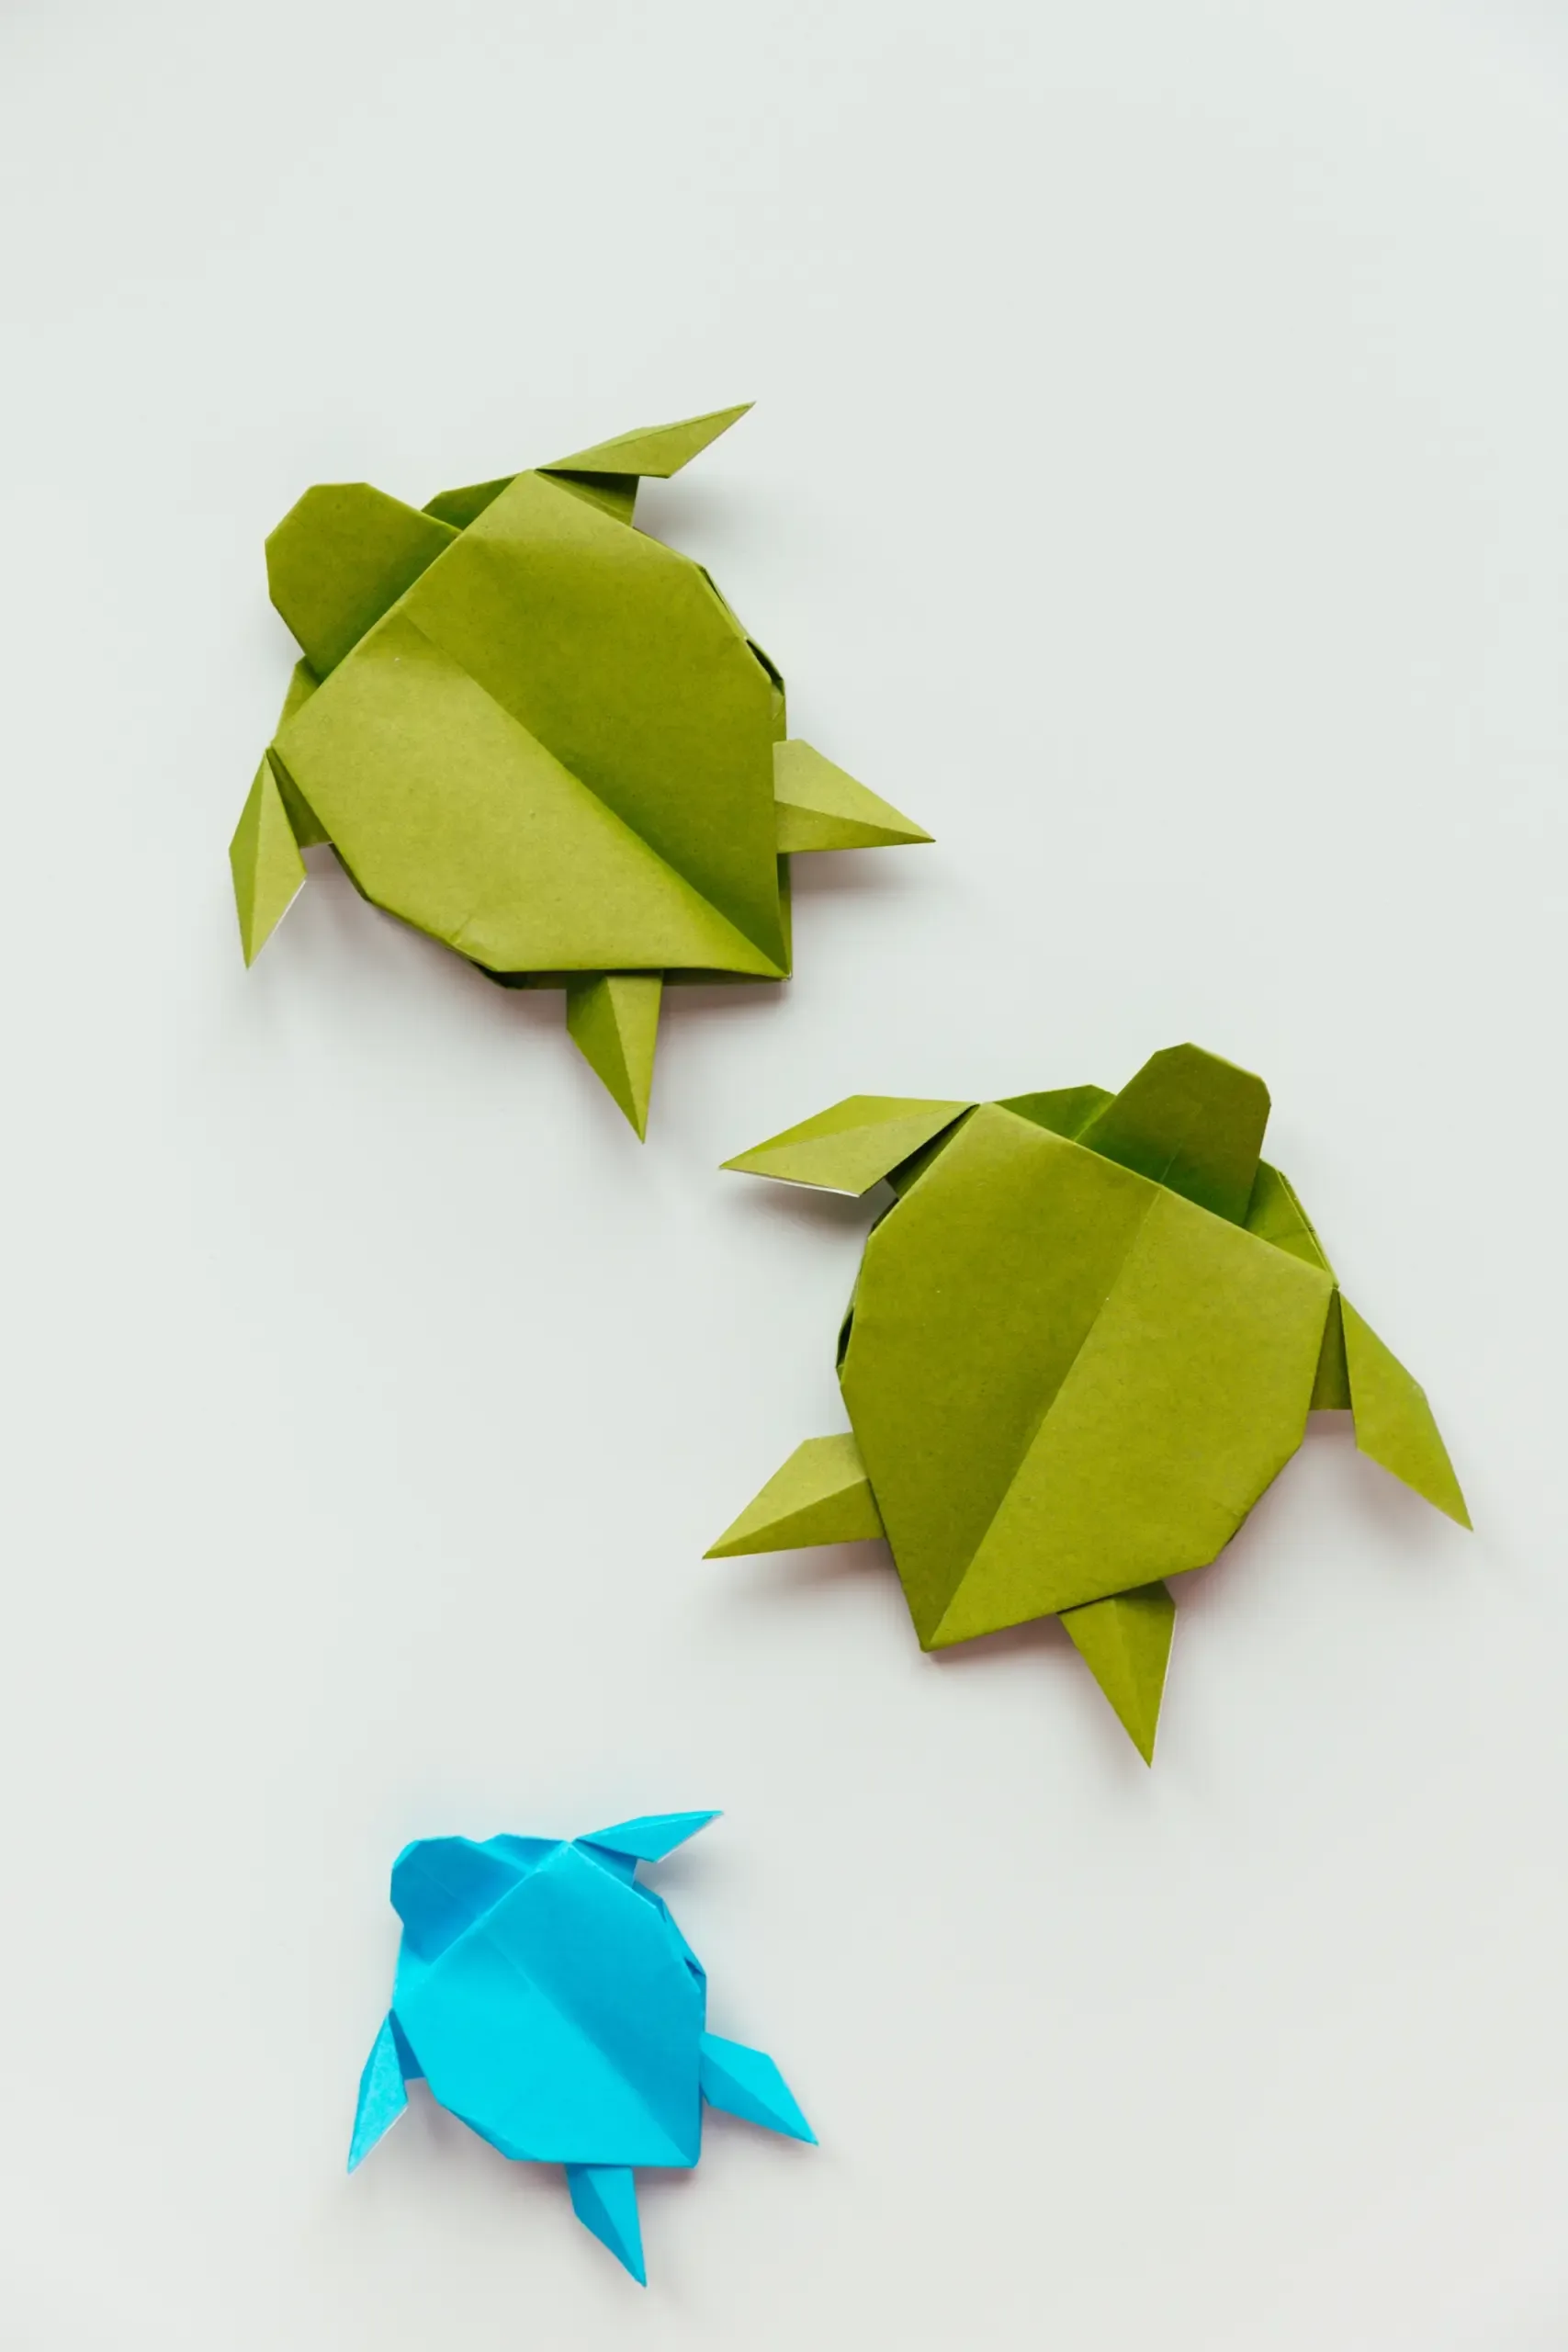
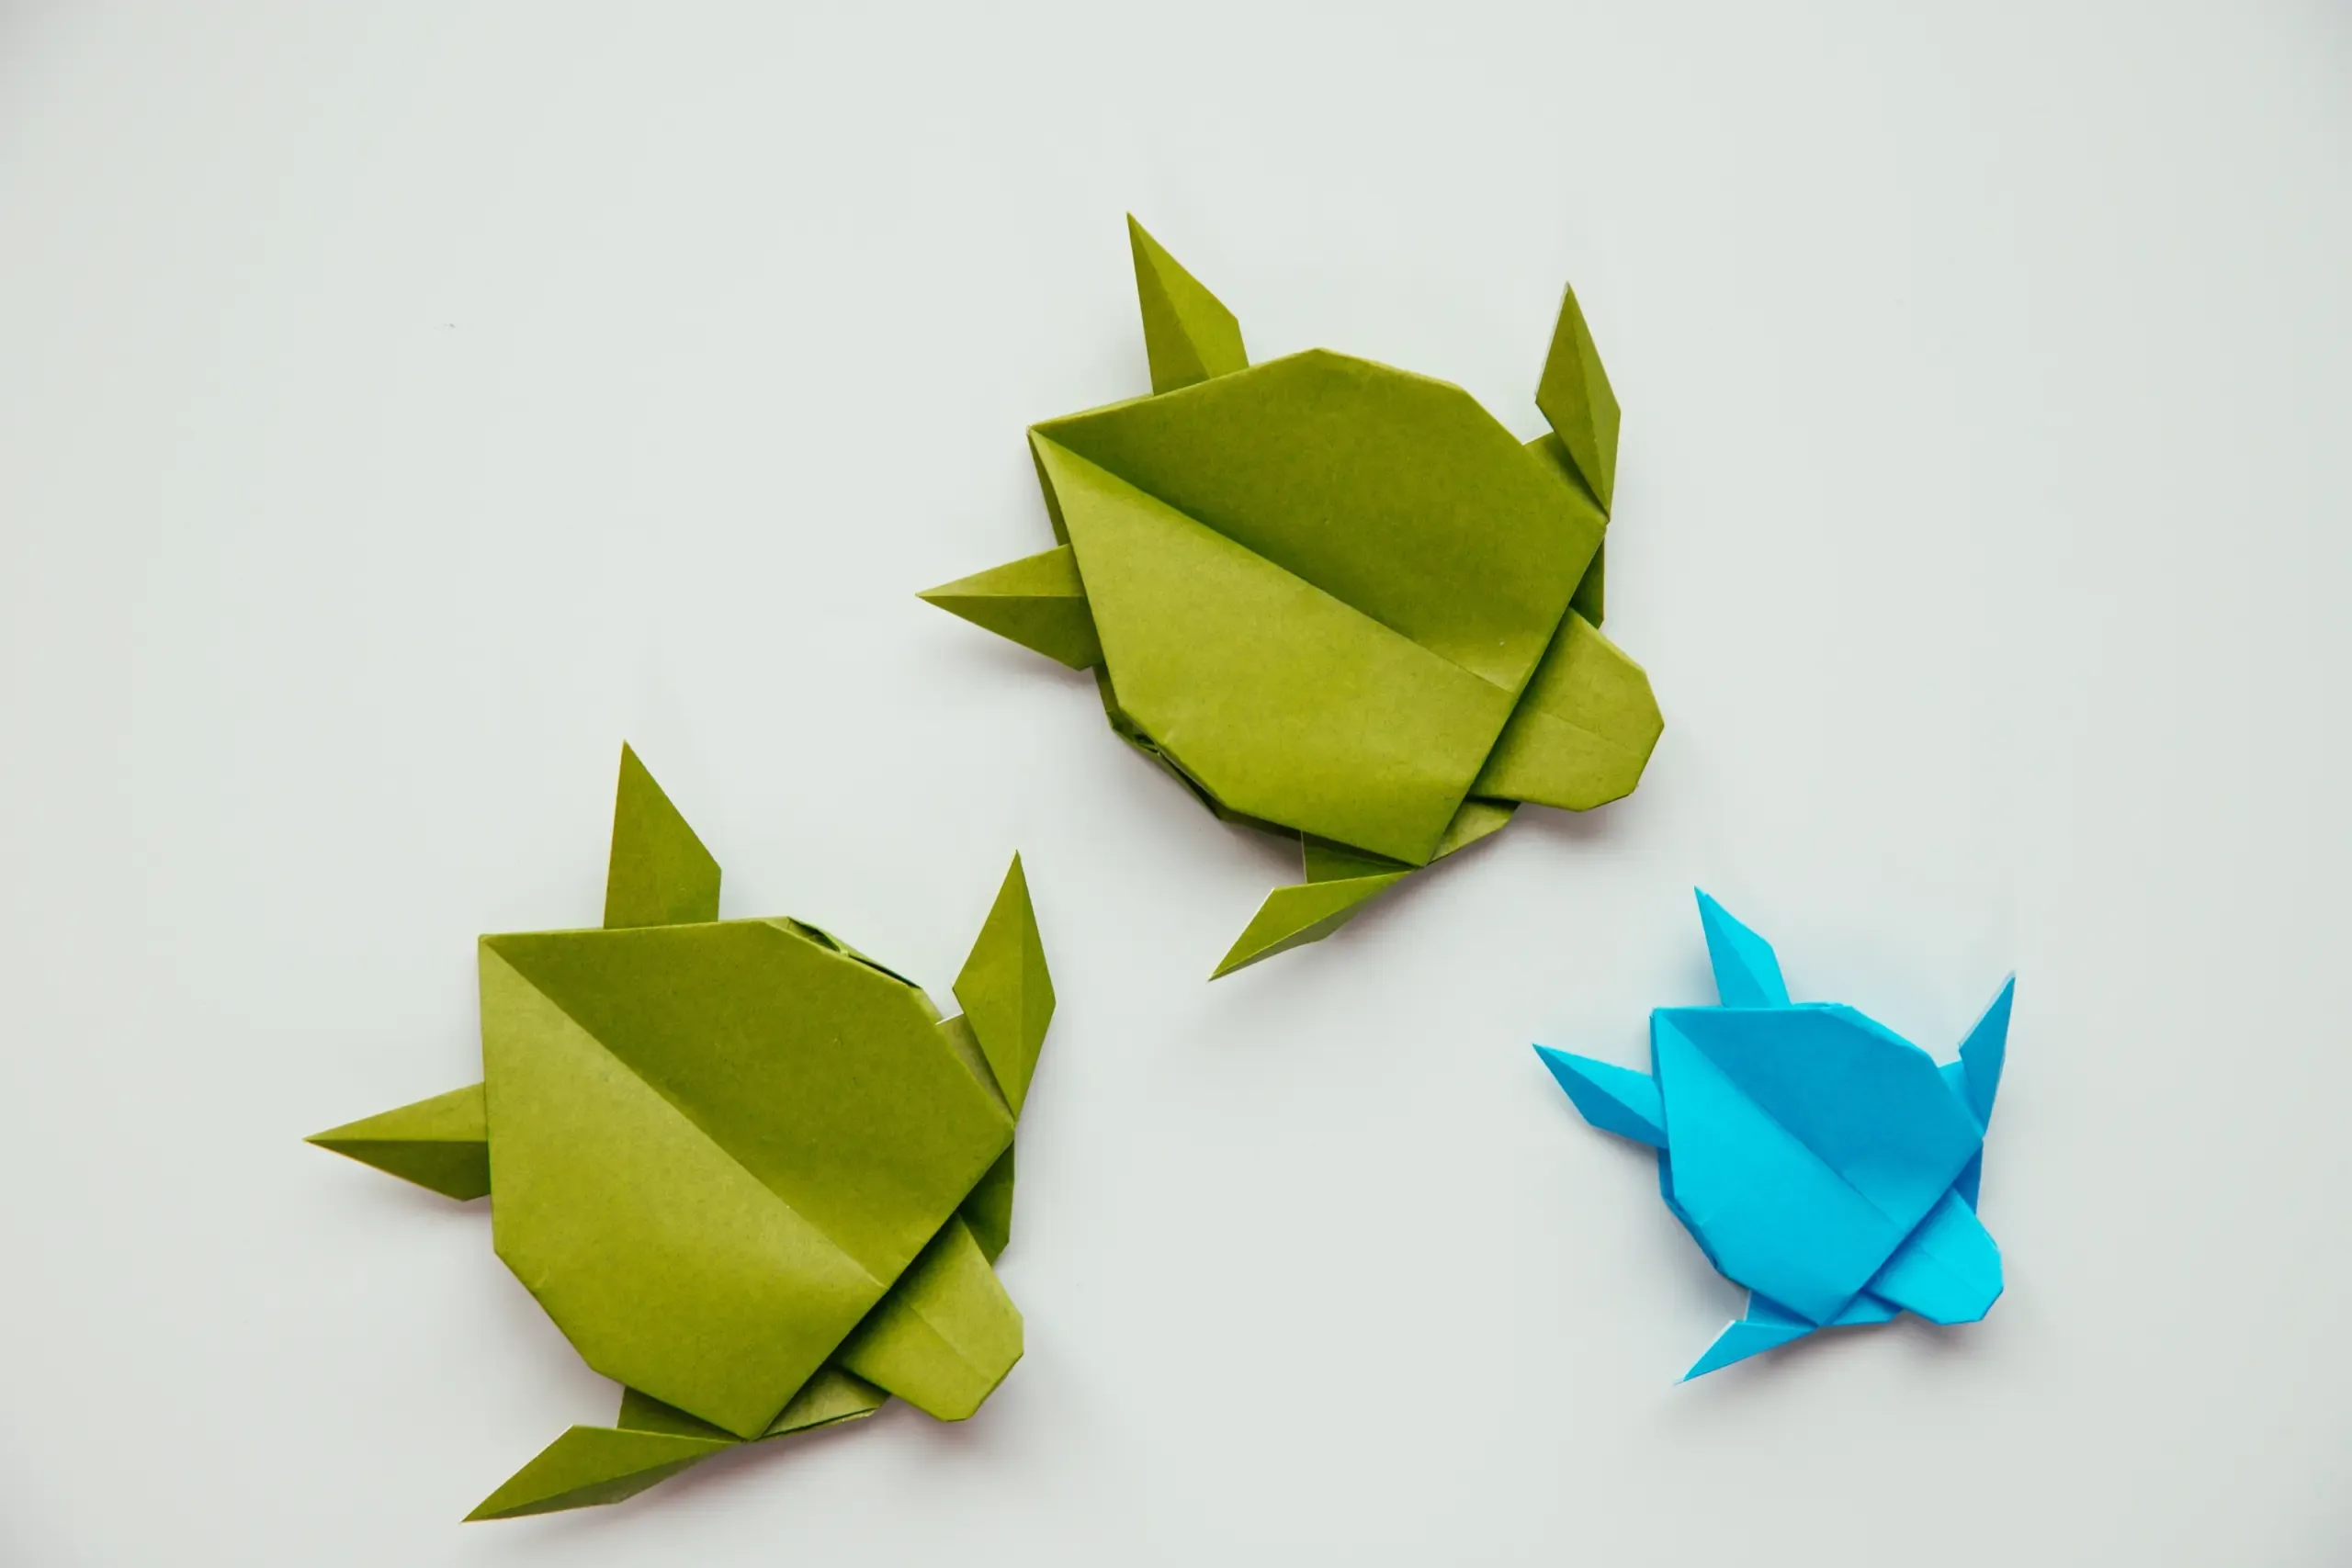
If you love to fold some sea creatures, how about making a lovely sea turtle? This is an advanced 3D origami turtle. You can use different sizes of the paper to make a lovely origami sea turtle family. Let’s learn how to turn a piece of paper into a lovely sea turtle.
If you are new to origami, start here from our beginner guide to know the basics and how to read the step-by-step instructions. In this tutorial, we will use two basic folds – Water Bomb Base and several Swivel Folds.
- Folding time: 20 minutes
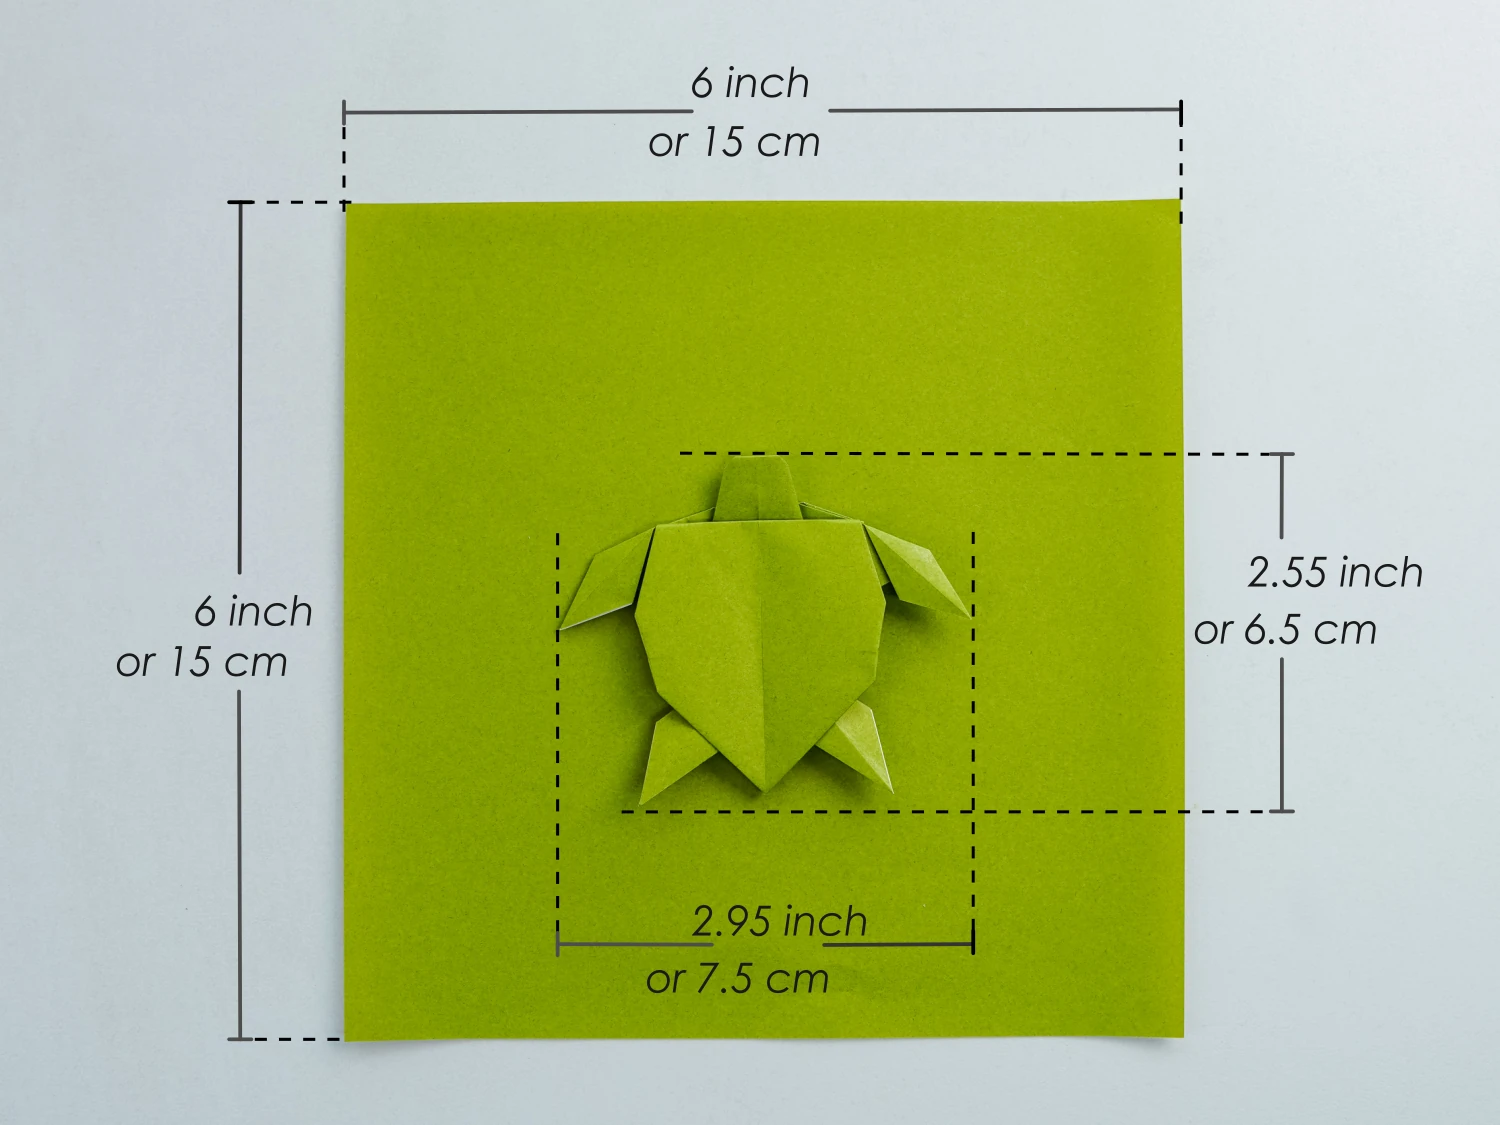
- Paper: 15×15 cm
- Difficulty: Middle
Material
Prepare a 15×15 cm origami square paper, with different colors on each side, to create a 6.5×7.5 cm turtle. Different turtles can be made using various colors and sizes of square paper.
Origami Sea Turtle Video
Step by Step Instructions
Step 1
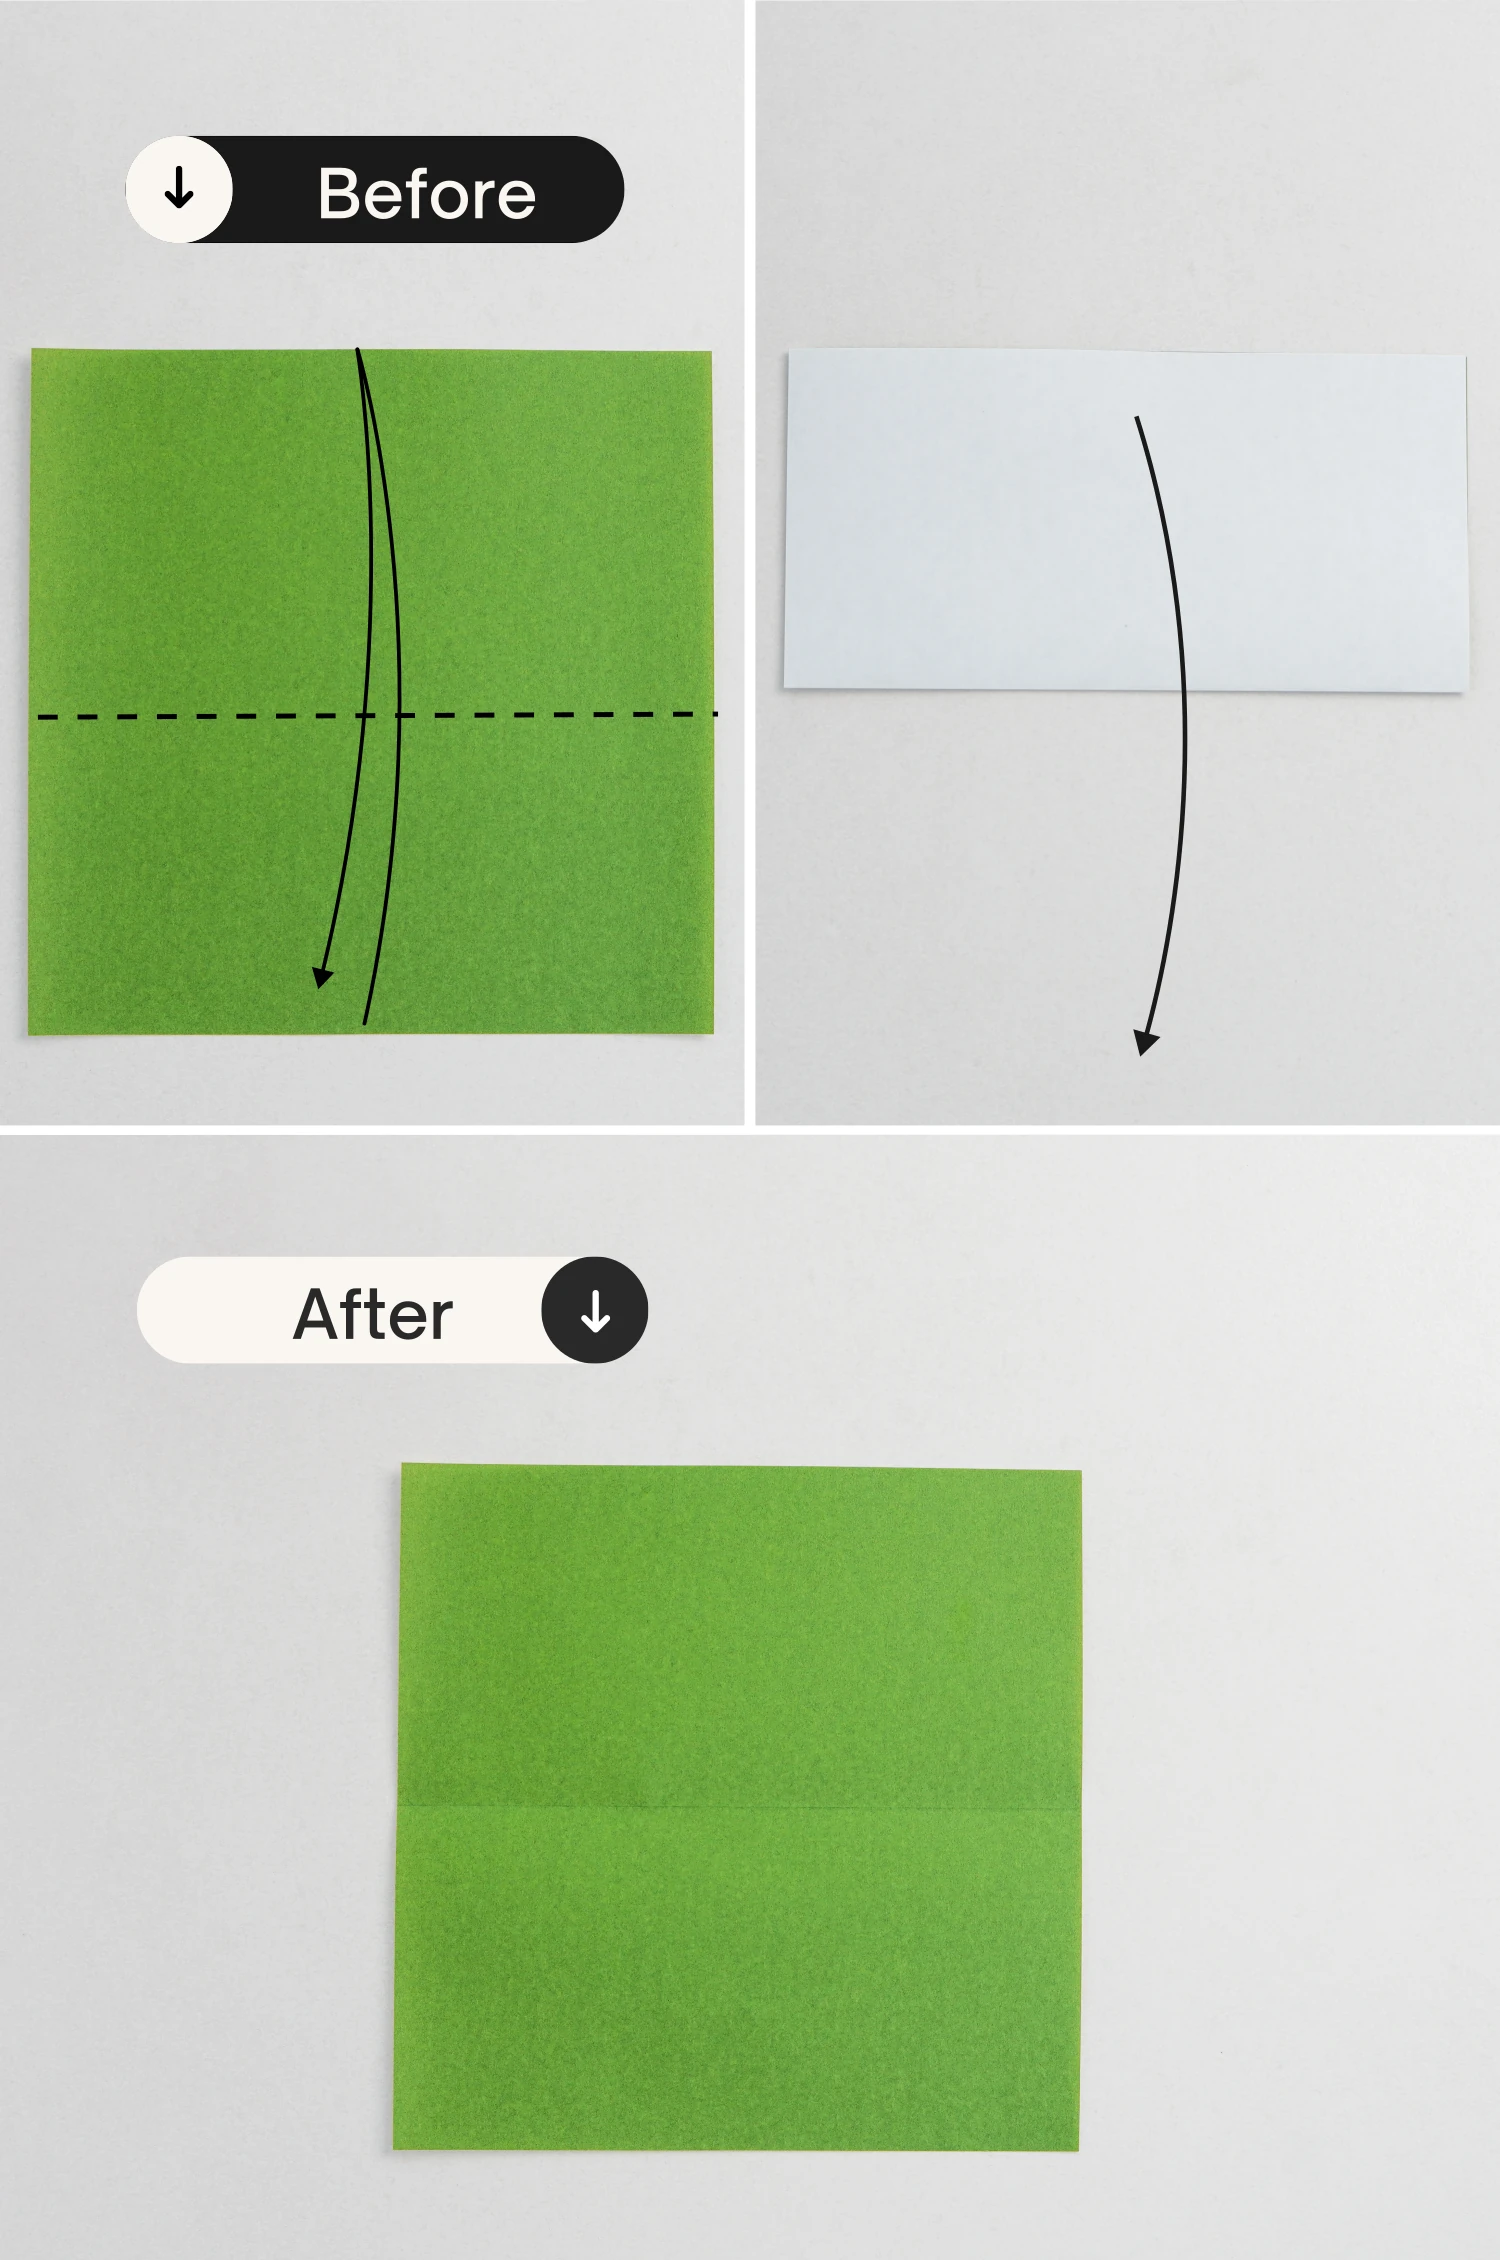
Start with the green side of the paper facing up. Fold it in half horizontally, crease it well then unfold it.
Step 2
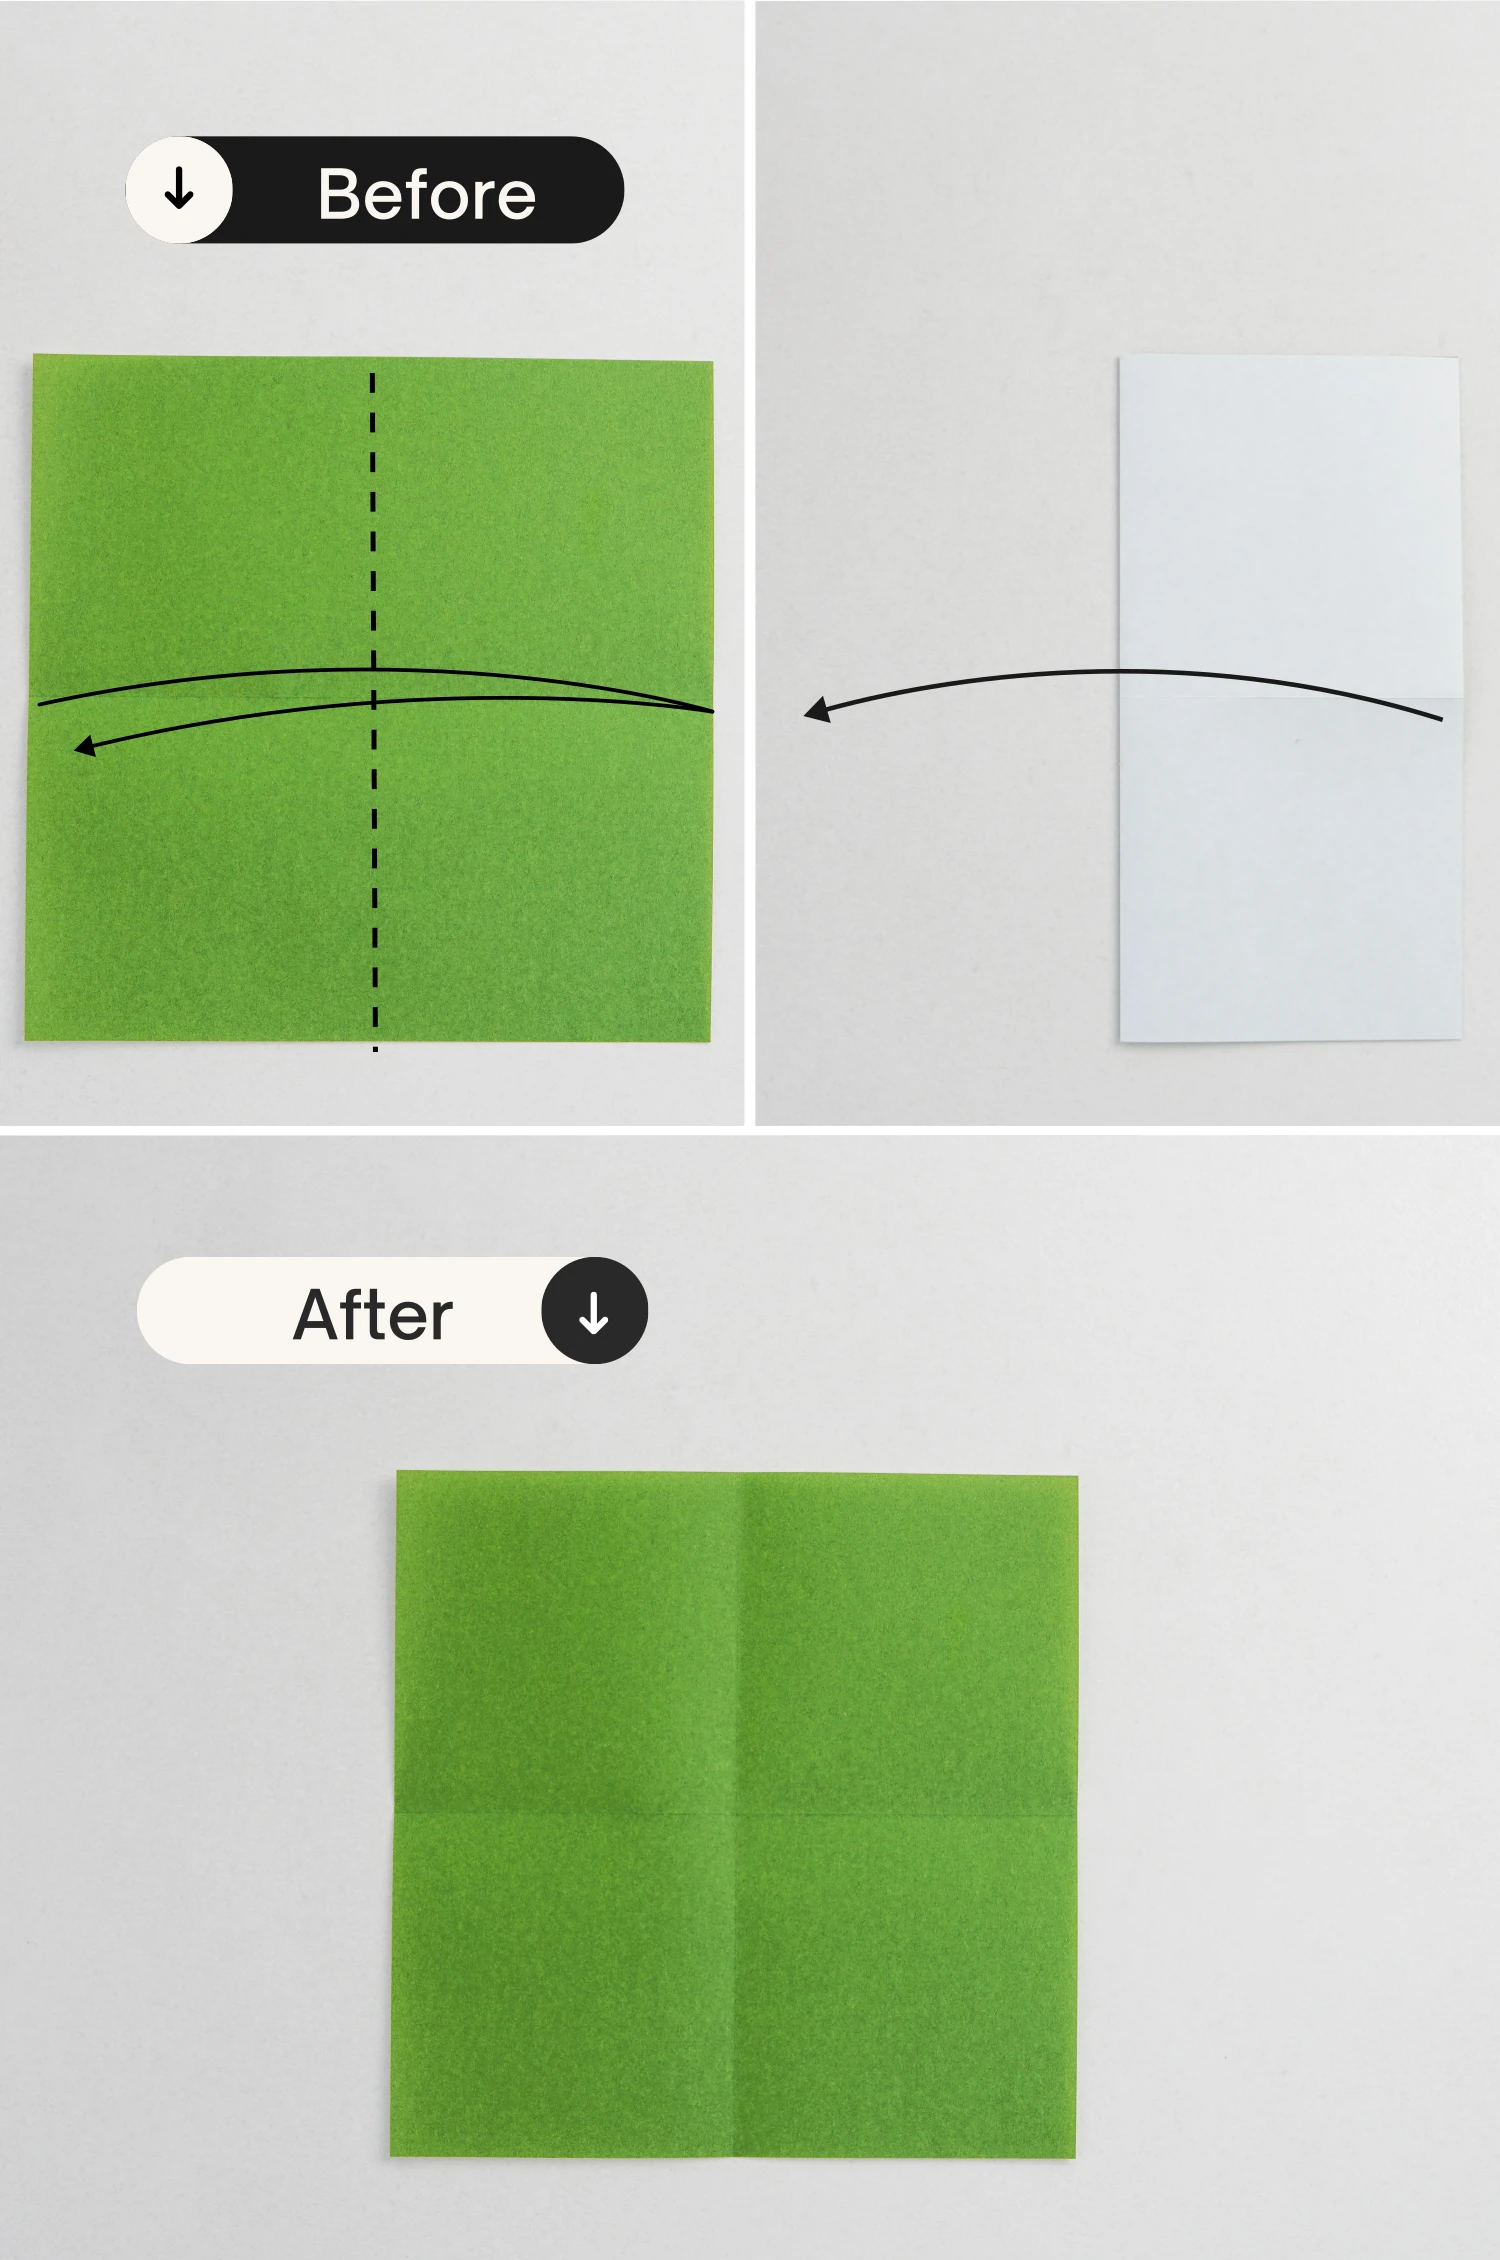
Fold it in half vertically, crease it well then unfold it.
Step 3
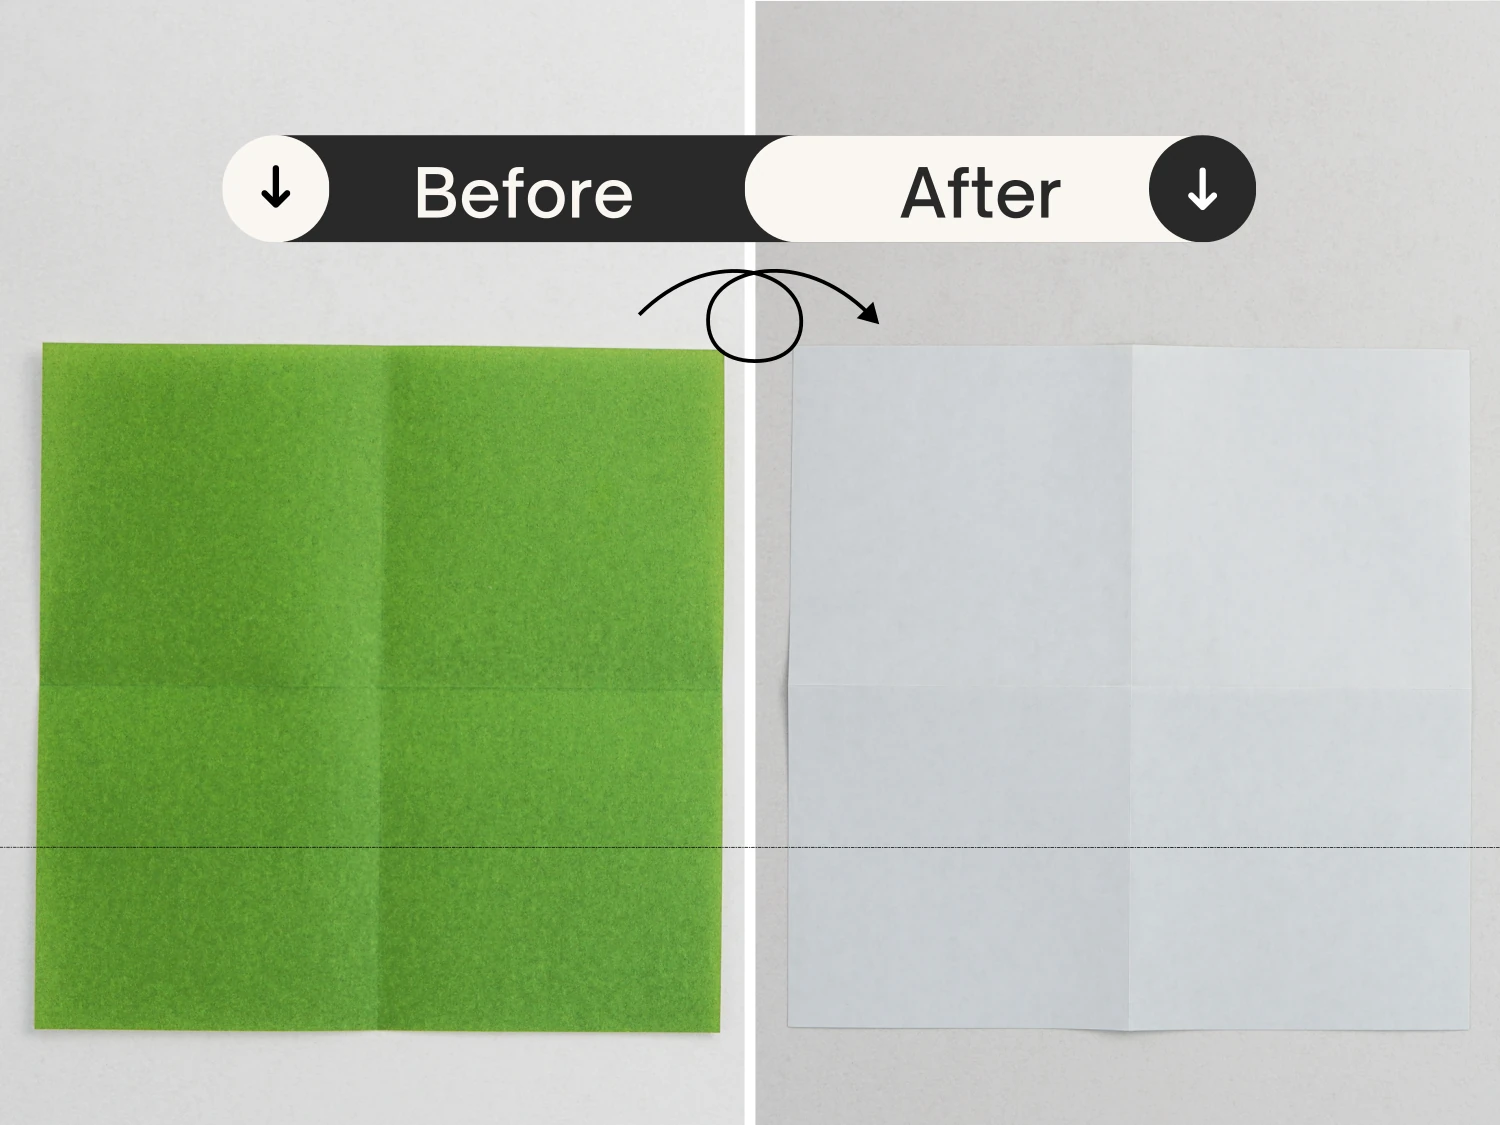
Flip it over.
Step 4
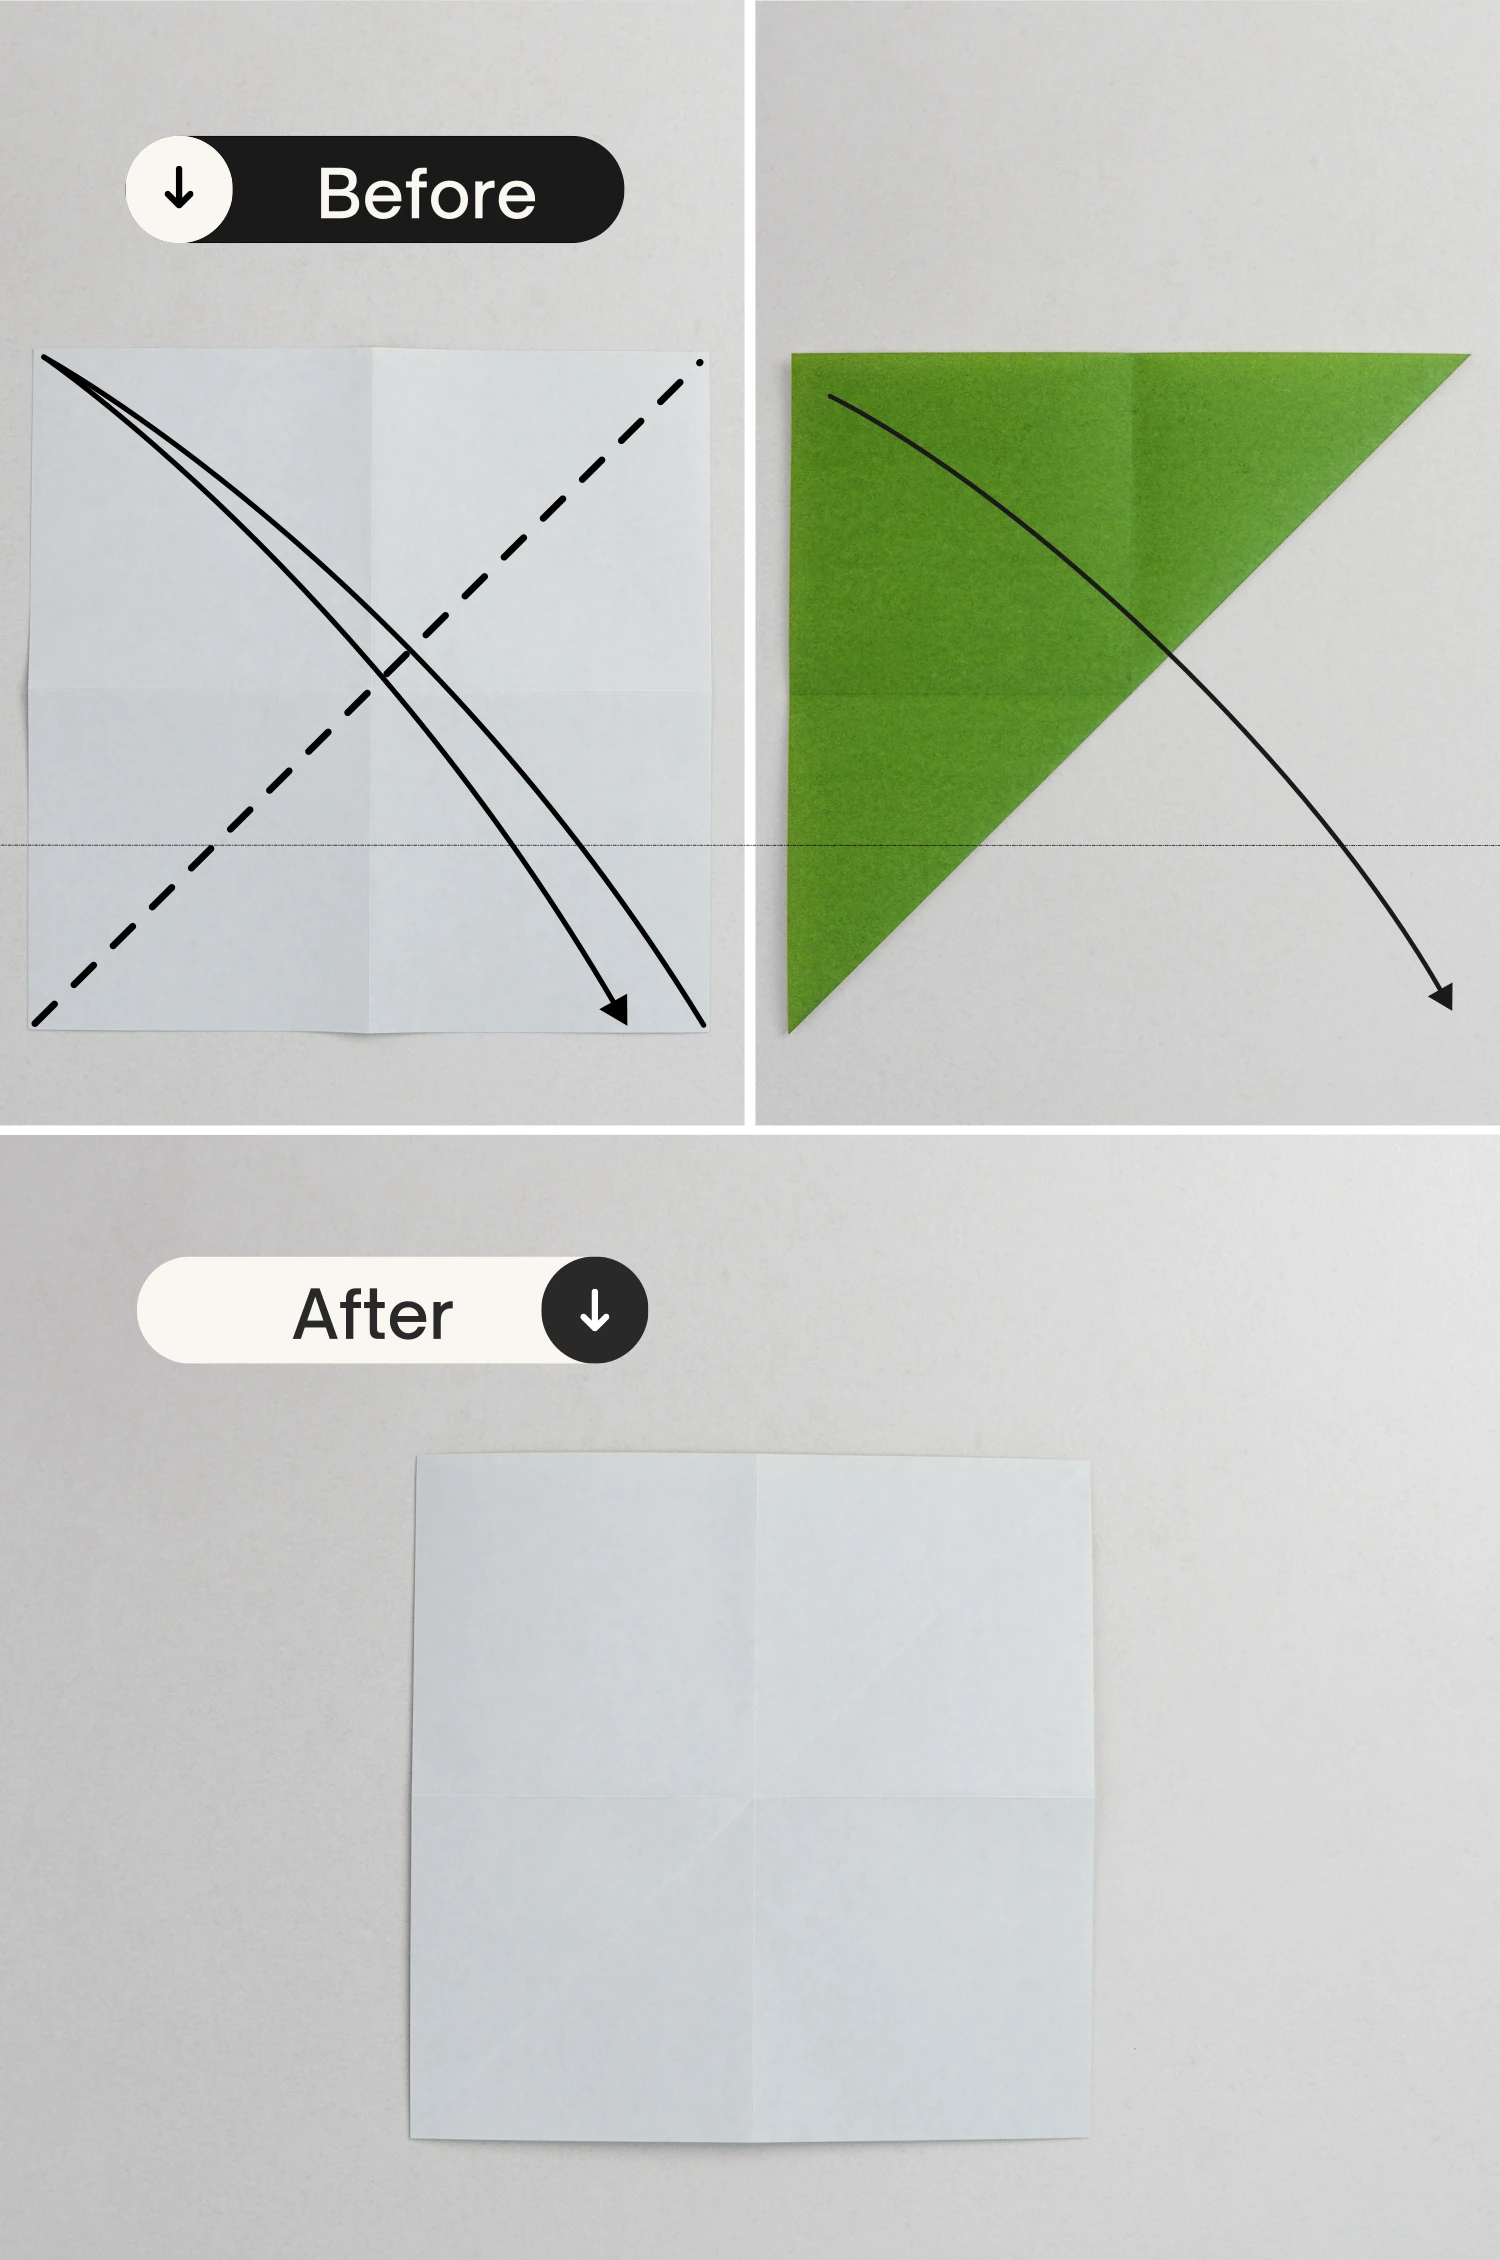
Fold it in half diagonally, getting a crease, and unfold it.
Step 5
Fold it in half diagonally from the other side, crease it well then unfold.
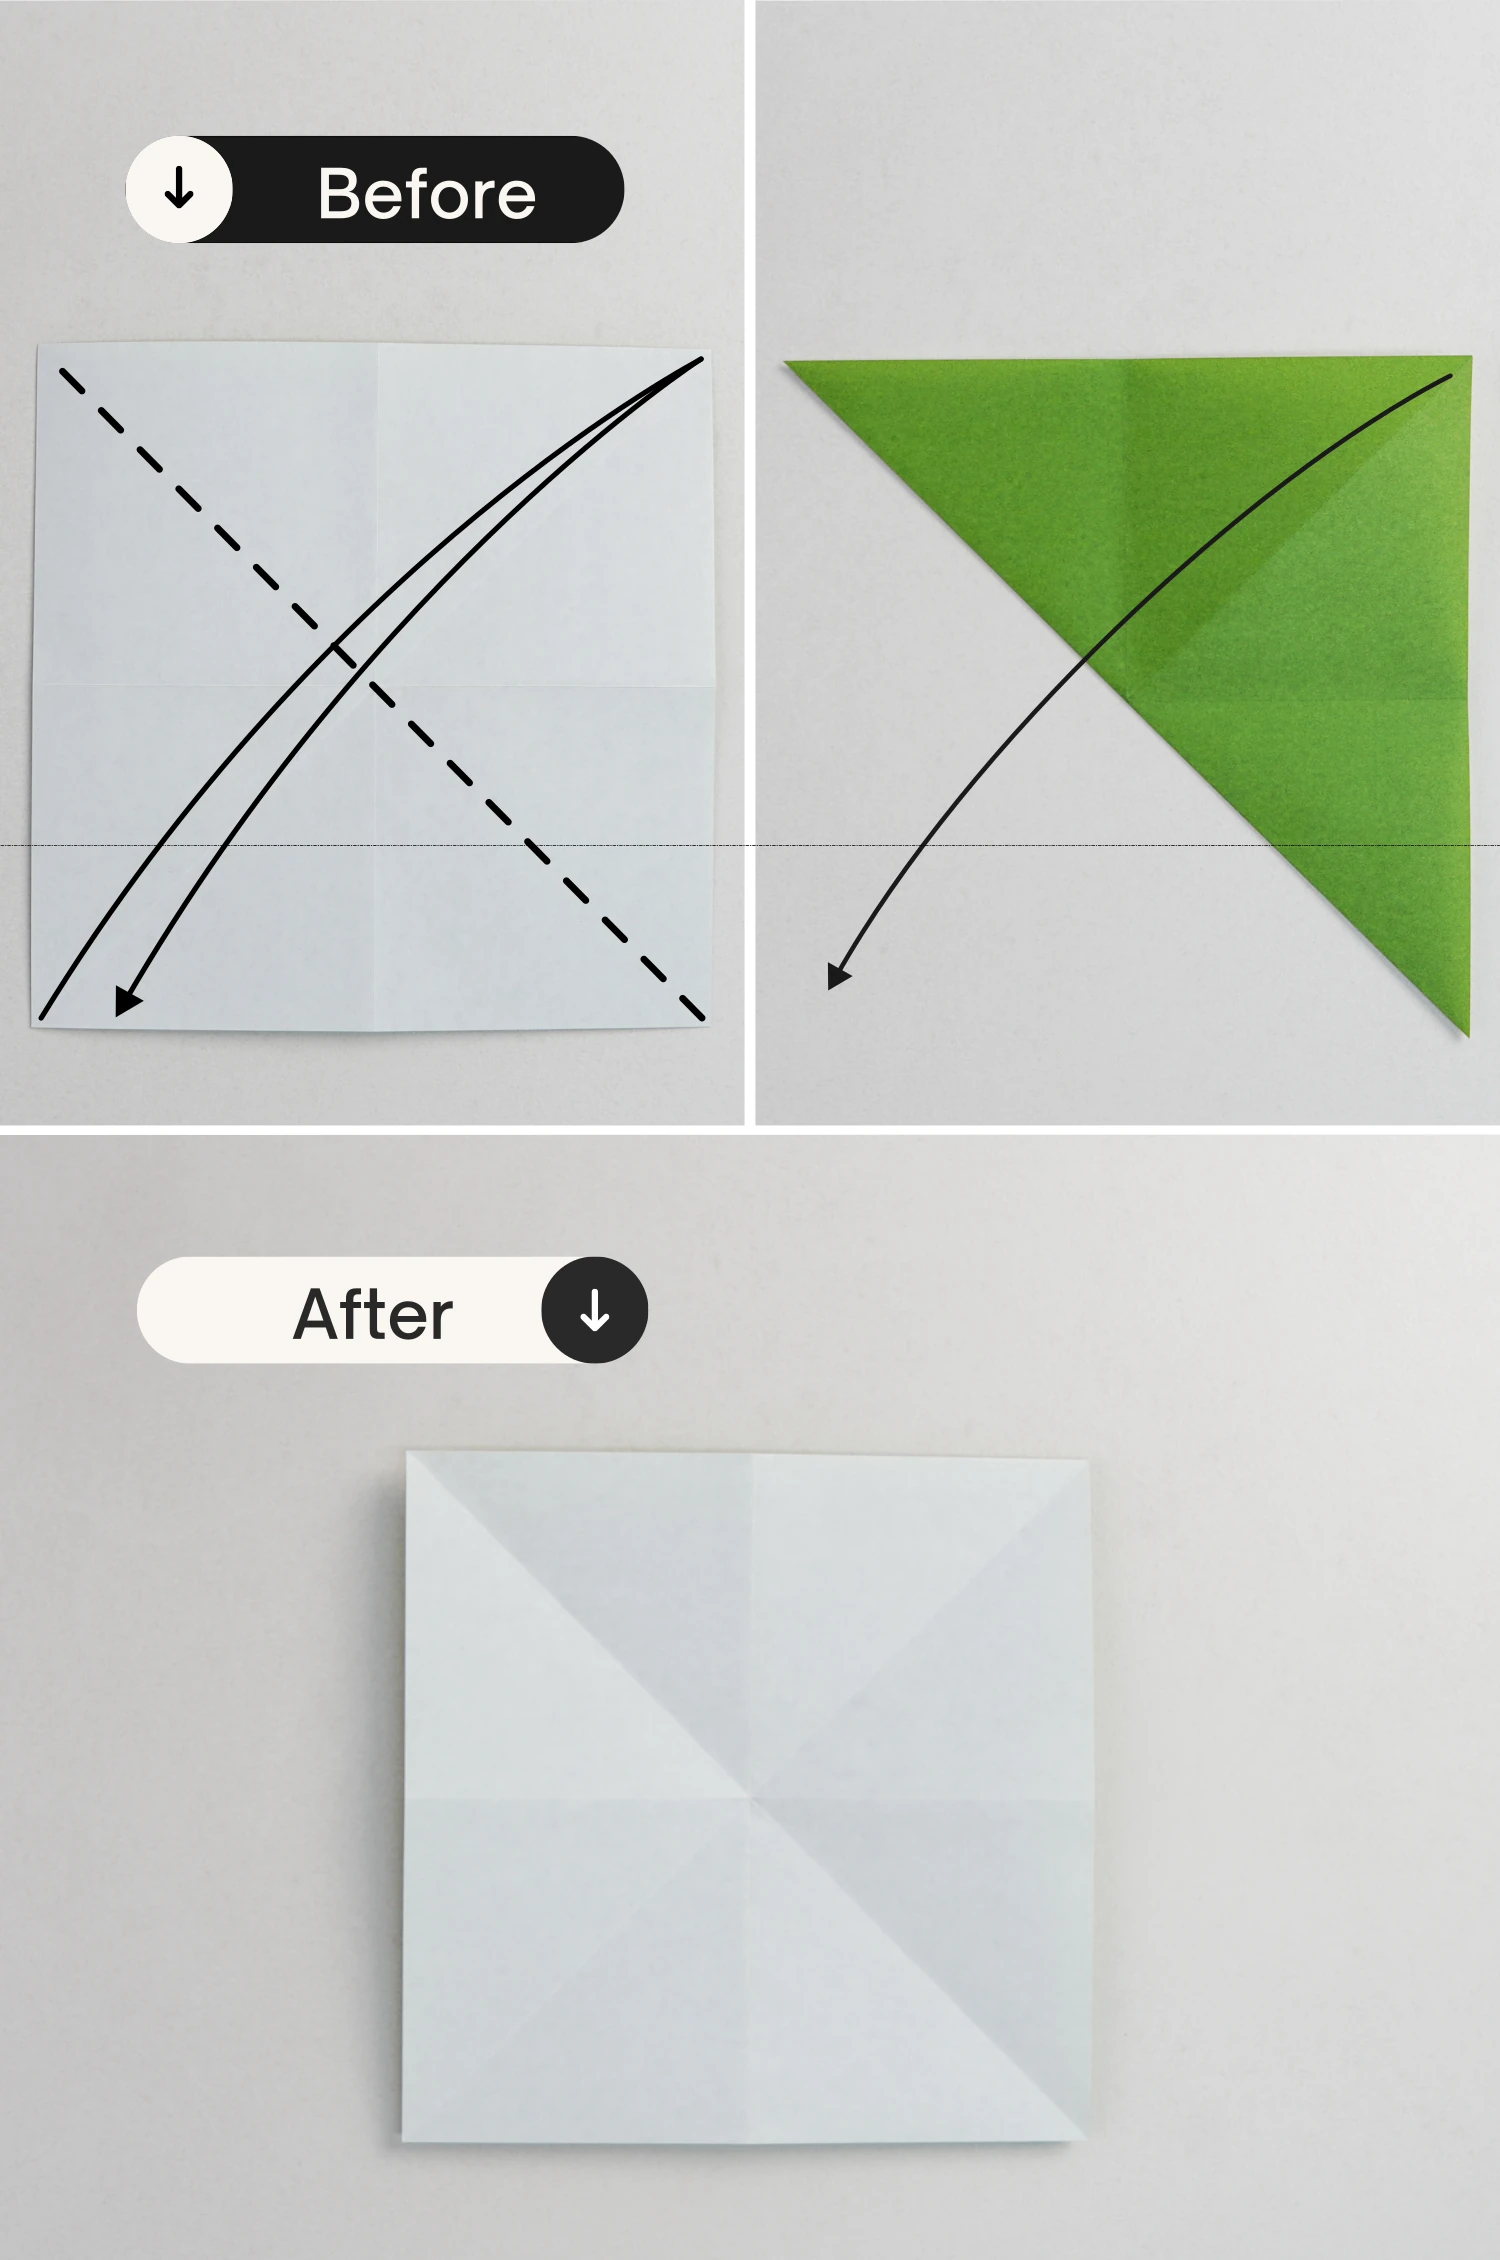
Step 6
Now, use both hands to press the two middle points on the right and left edges. Then push it down to make the two middle points meet the center point of the bottom edge.
Flatten the fold to get a triangle.
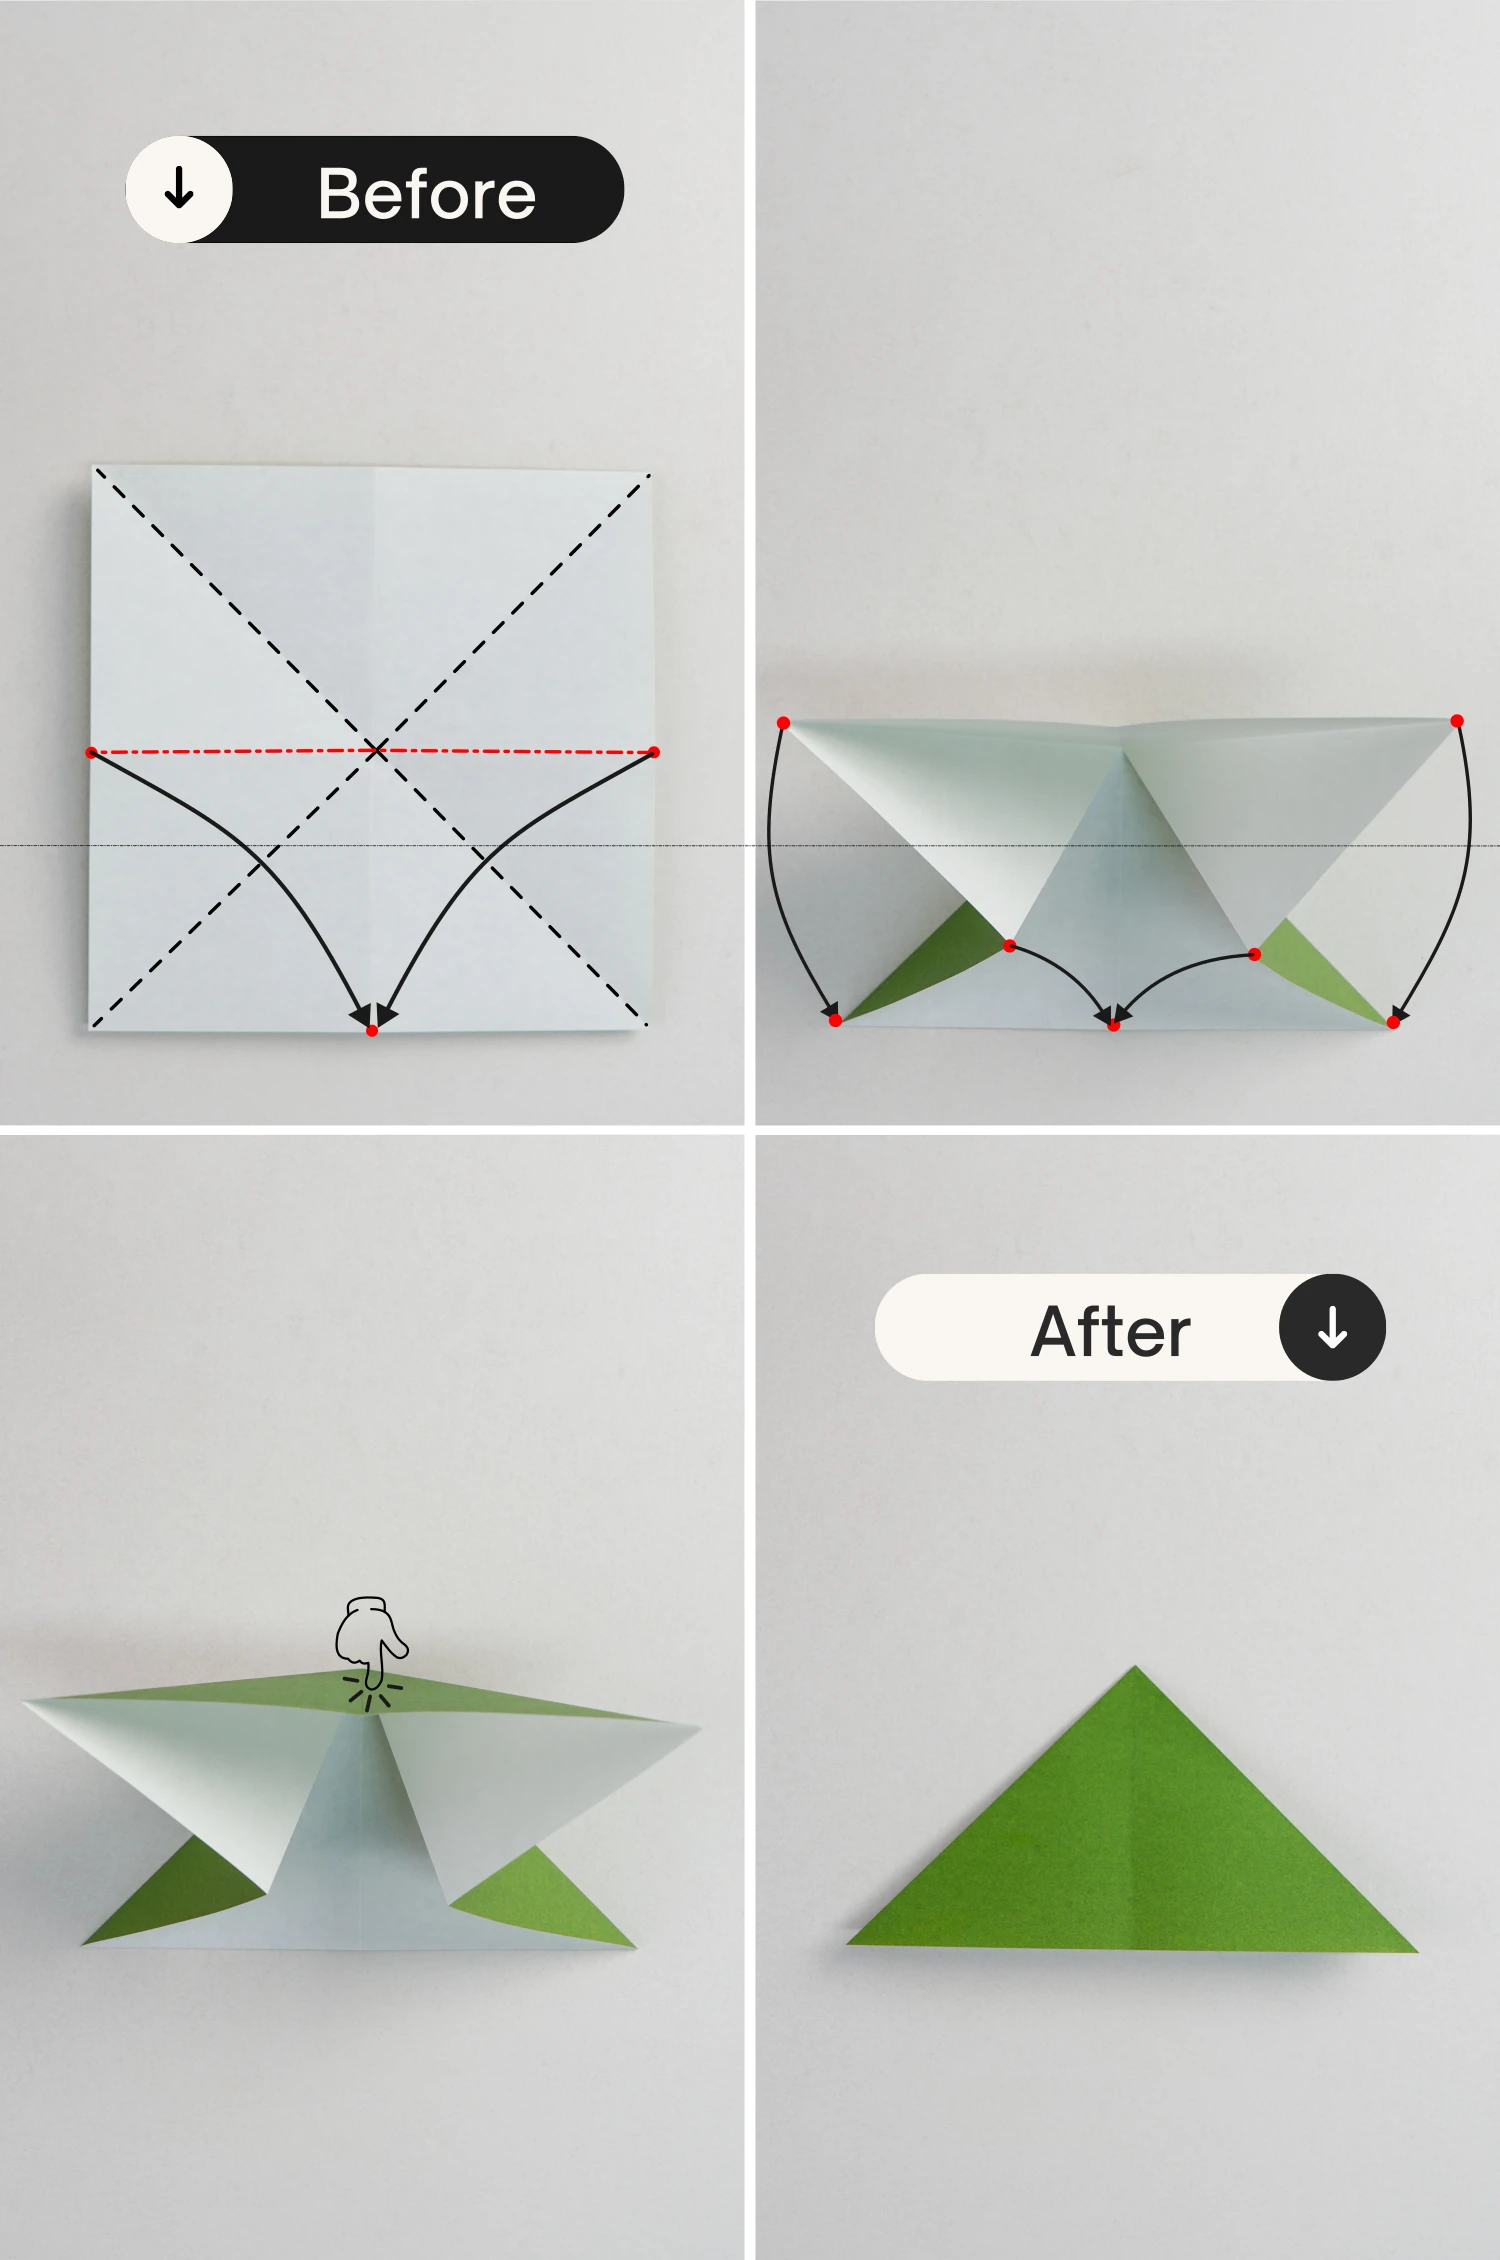
Step 7
Fold the right edge to the left along the black dotted line, ensure that the right edge meets the middle point of the bottom edge, and the right corner goes over the bottom edge. Crease it well then unfold it.
Repeat this for the left edge.
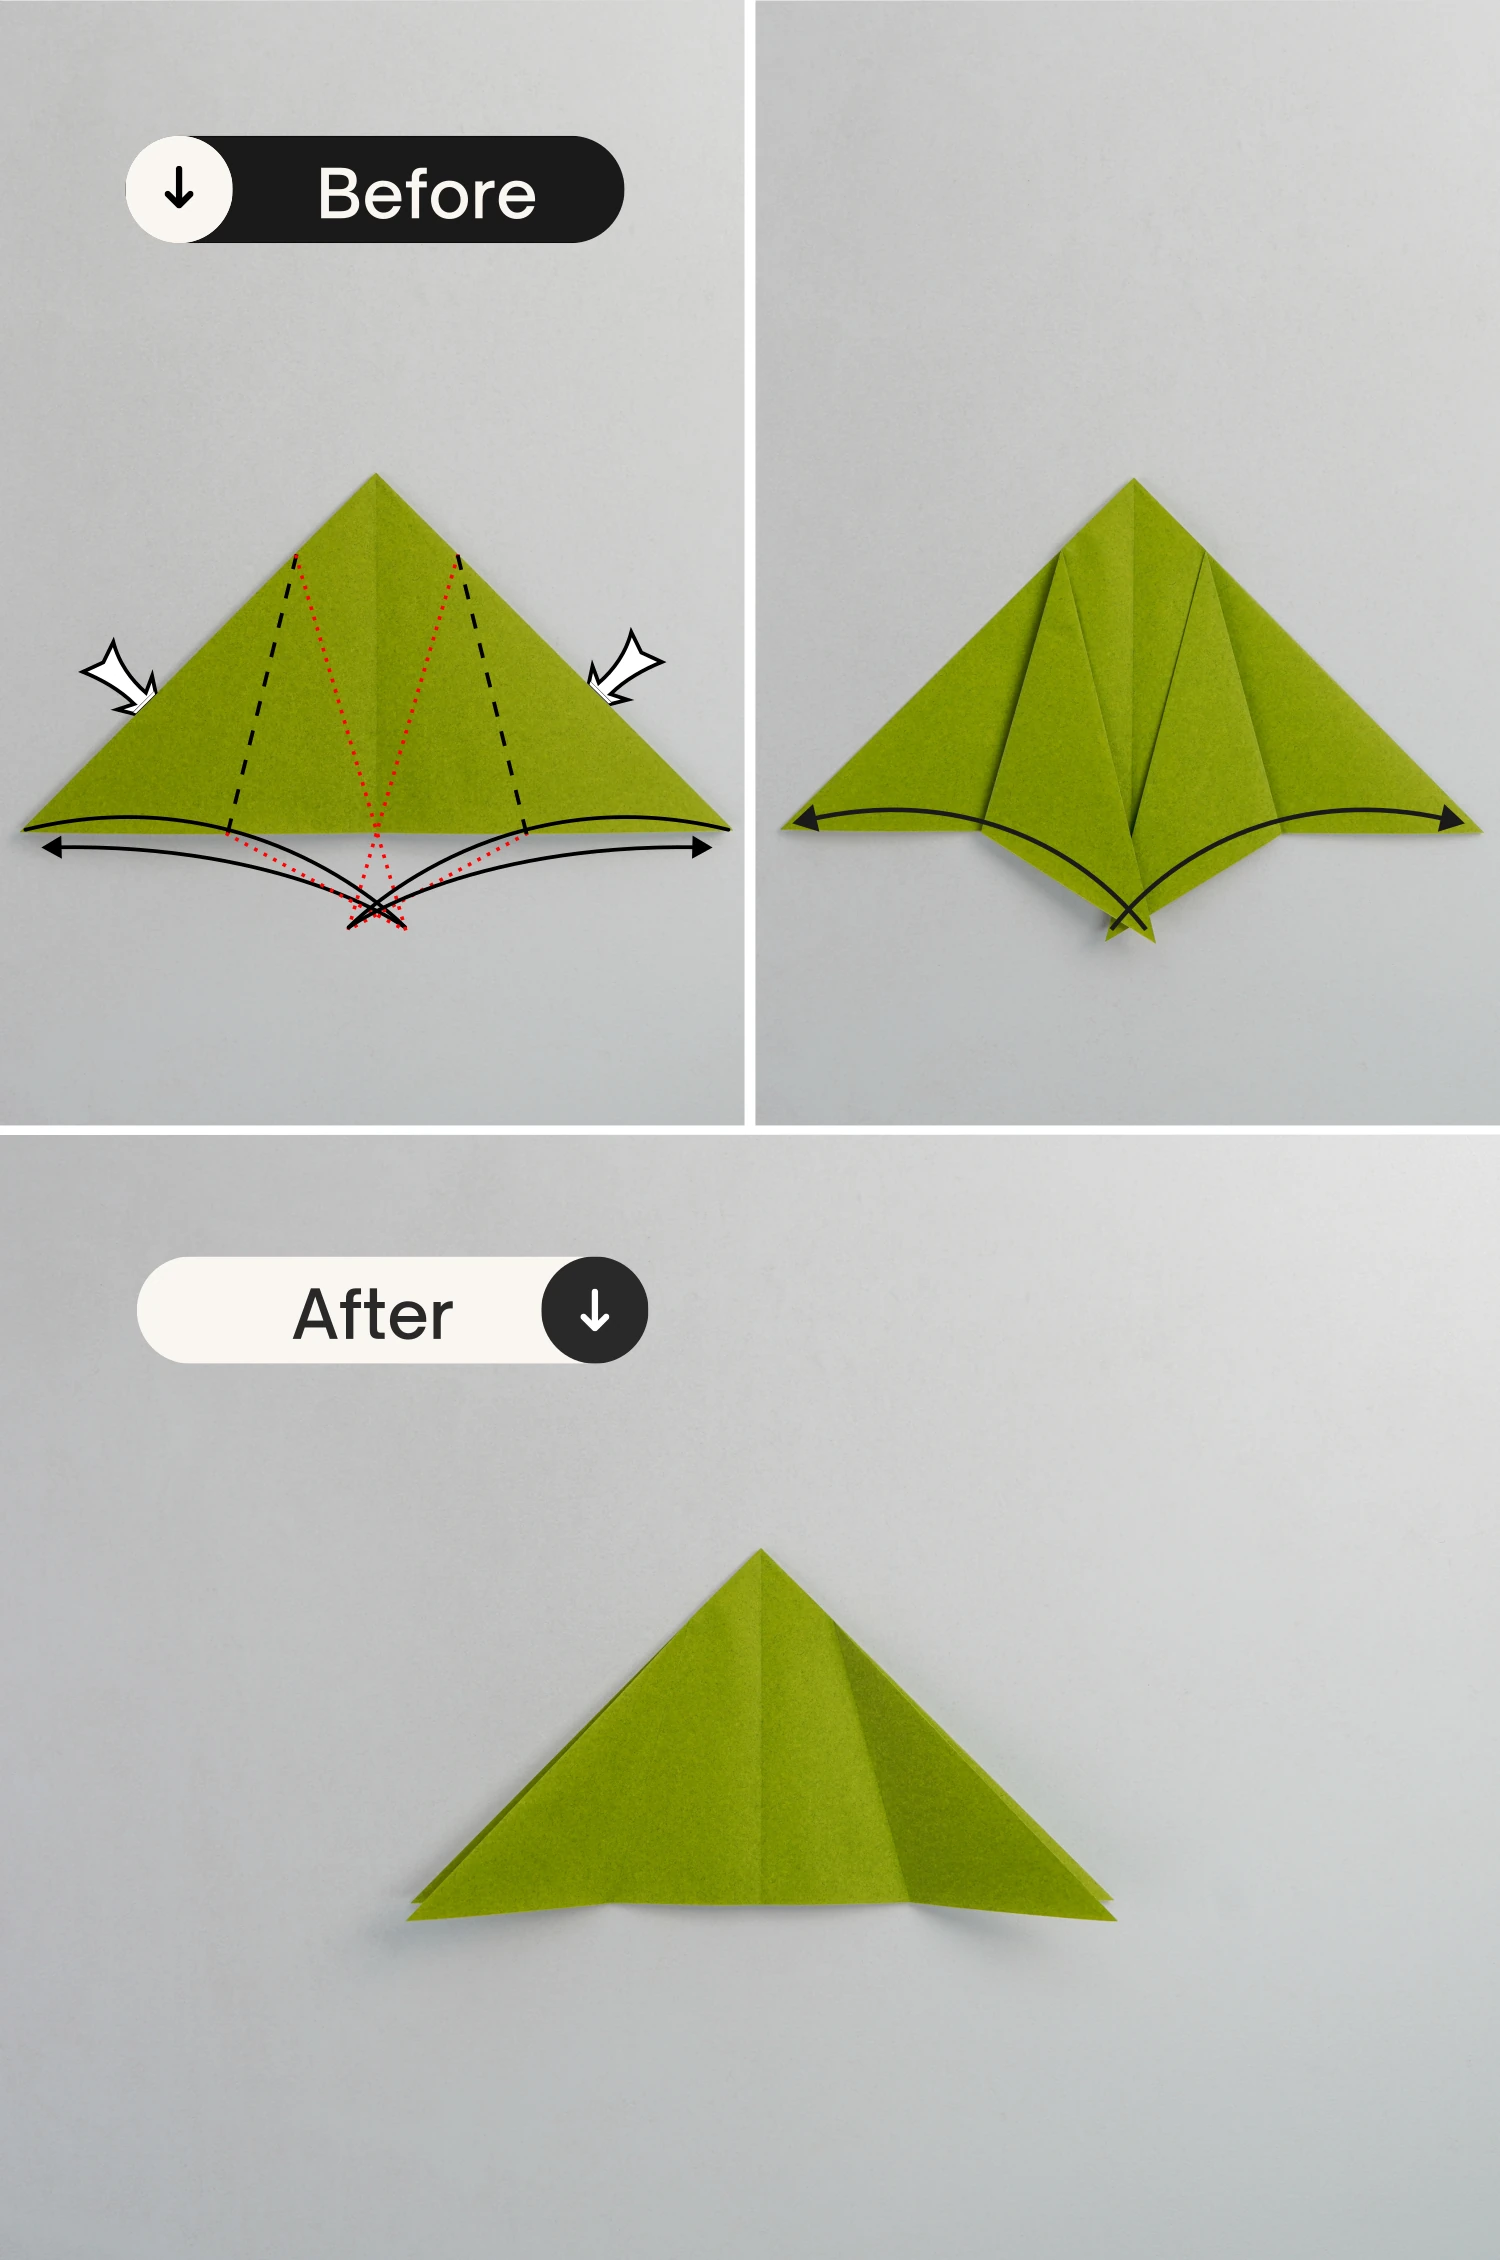
Step 8
Fold the left and right corners of the top layer up to the top point diagonally, crease them well, and unfold them.
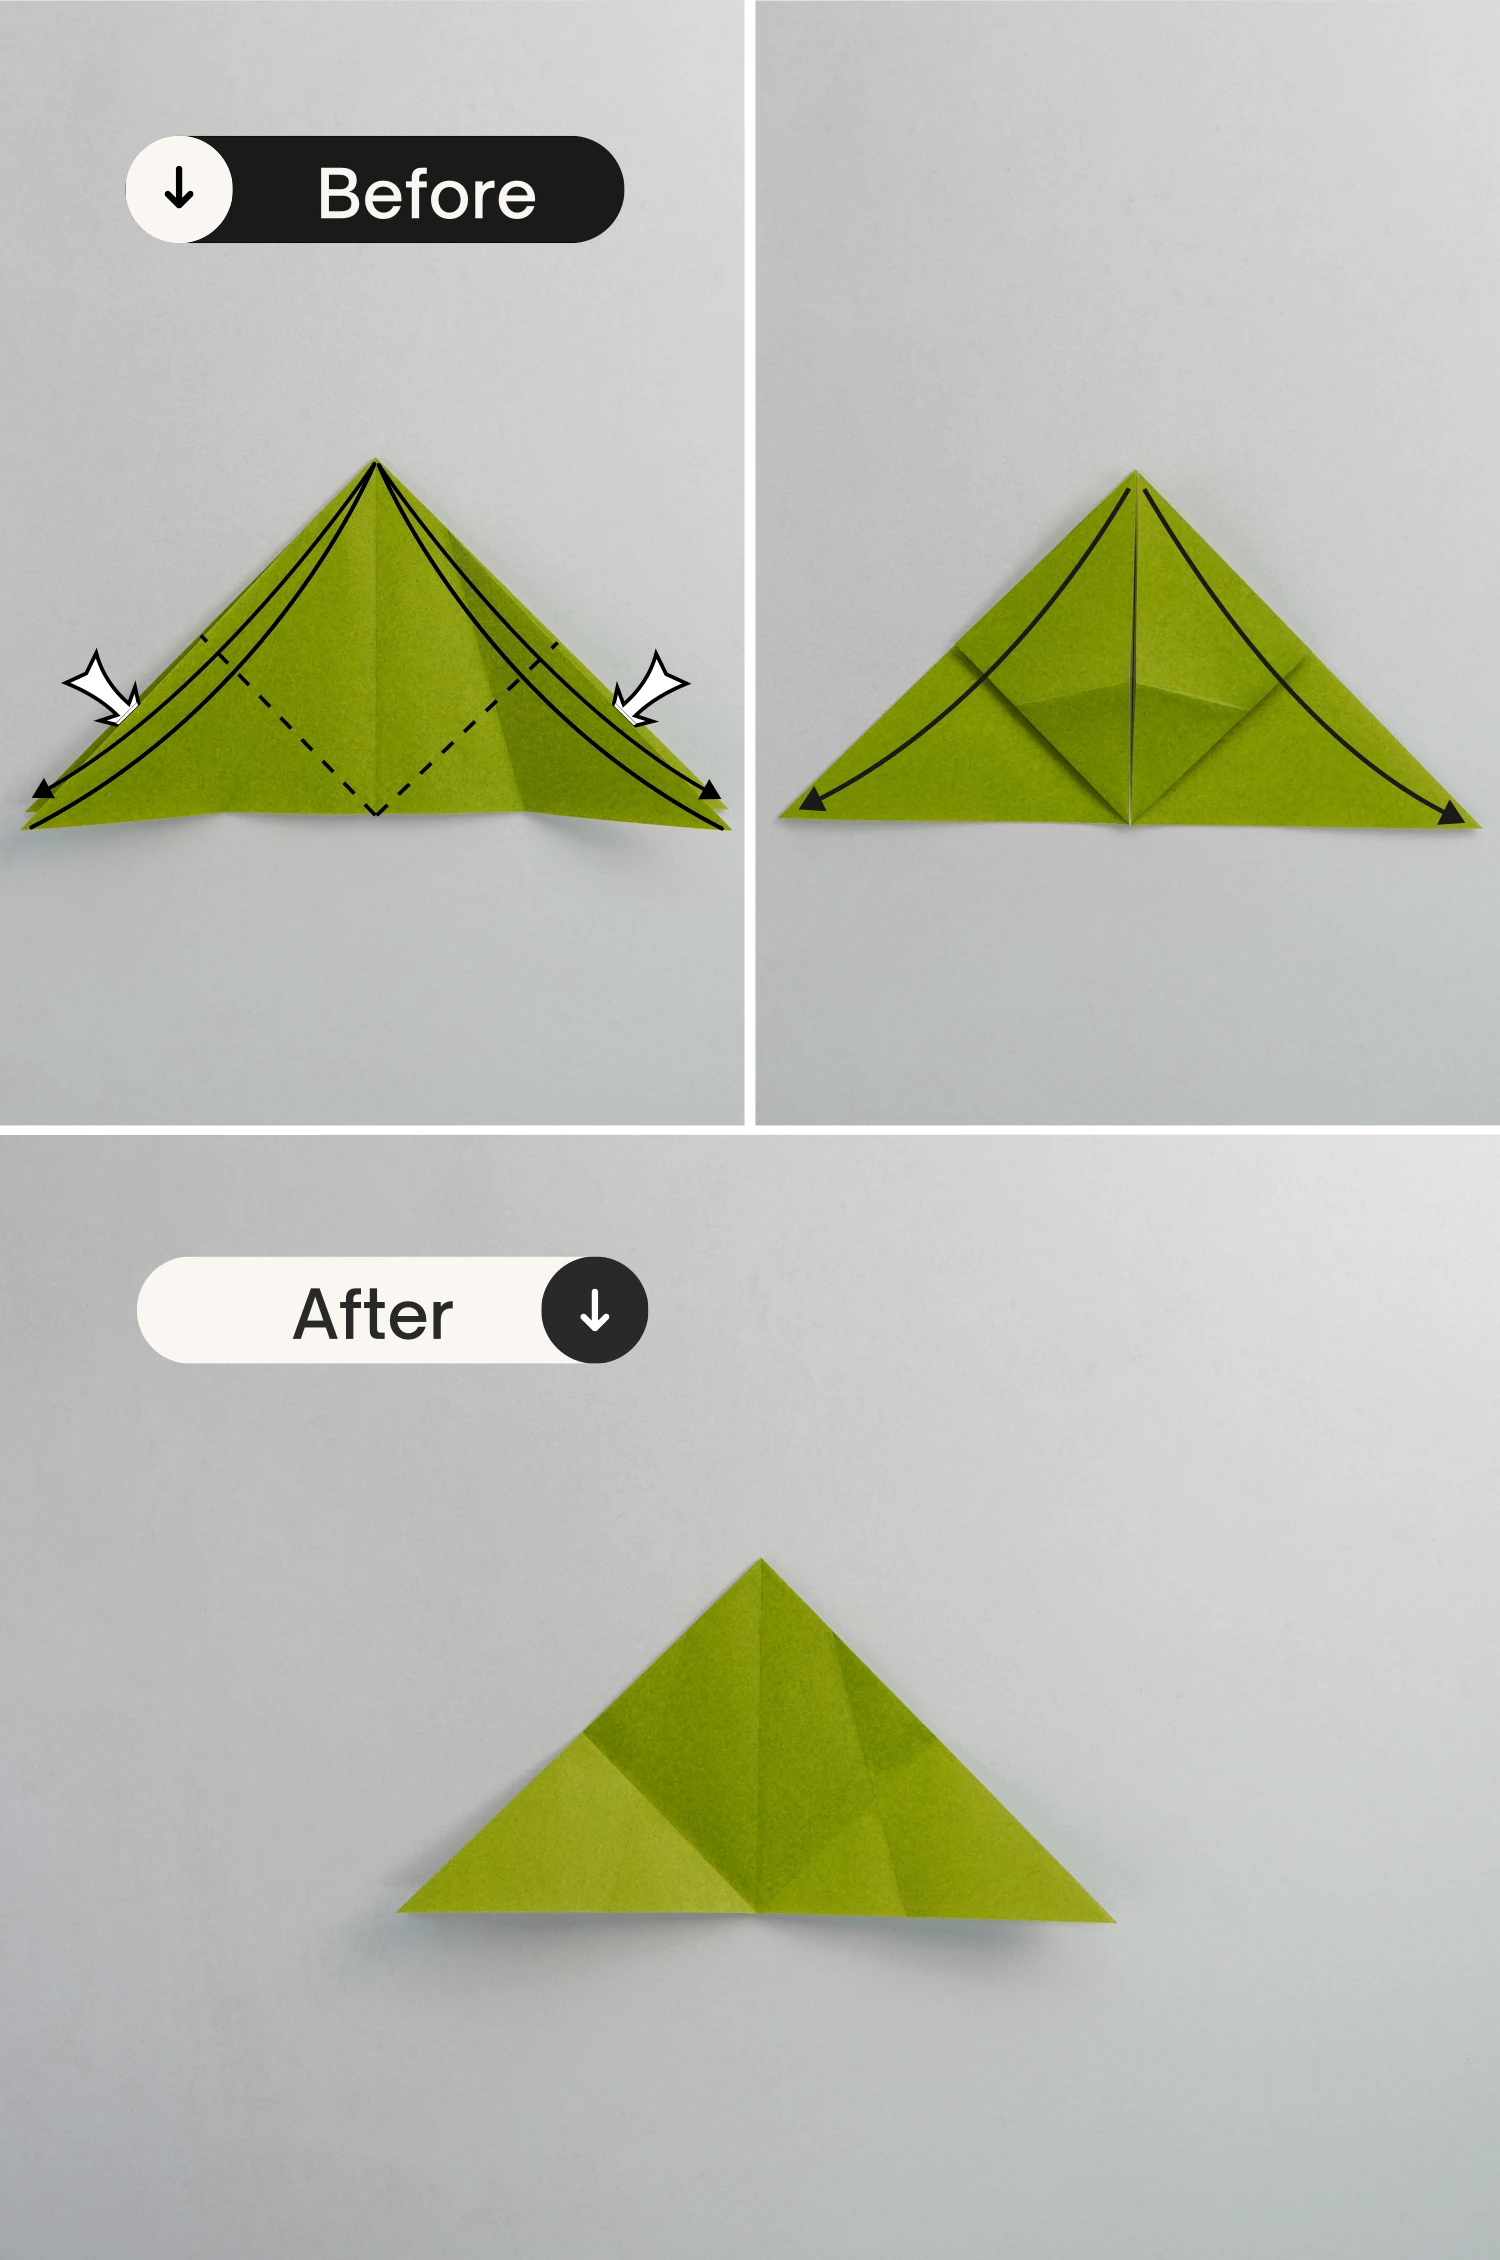
Step 9
Bring up the right edge and the right part of the bottom edge along the line connecting the right corner and the intersection point formed by the two creases you just made. (this line is shown by the dotted line in the picture)
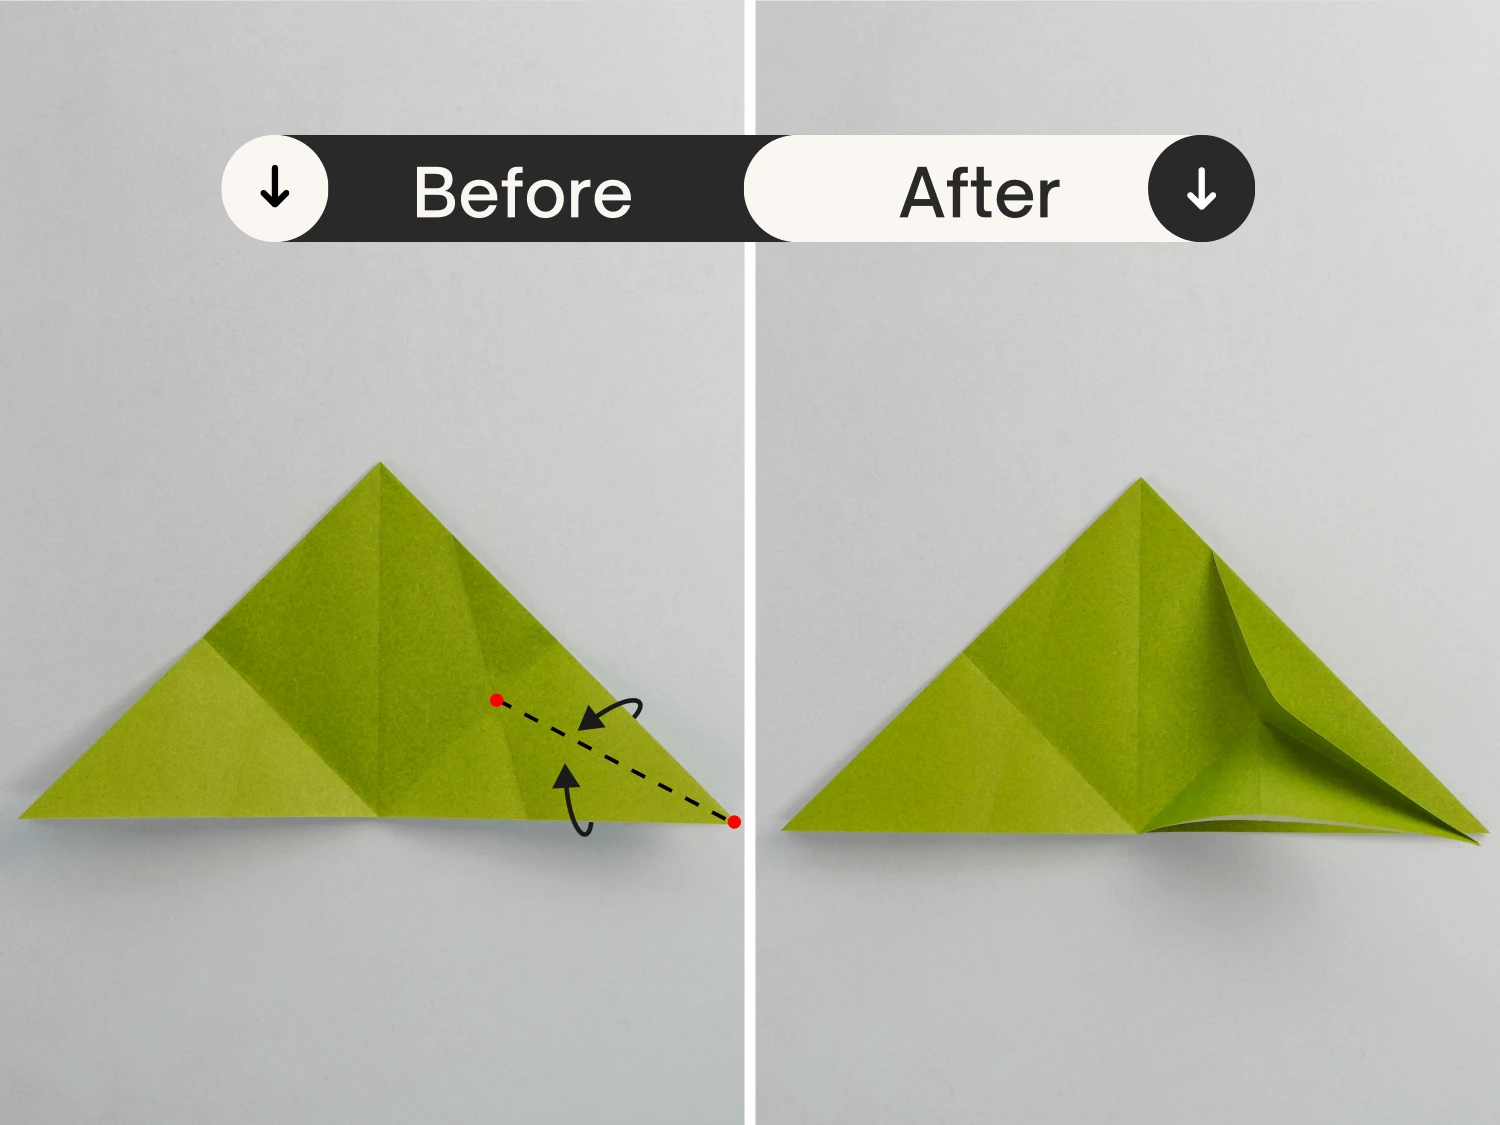
Step 10
Press down the middle part of the right edge, shape the right corner, and then fold it up to the top point, ensuring the bottom right edge aligns with the vertical crease.
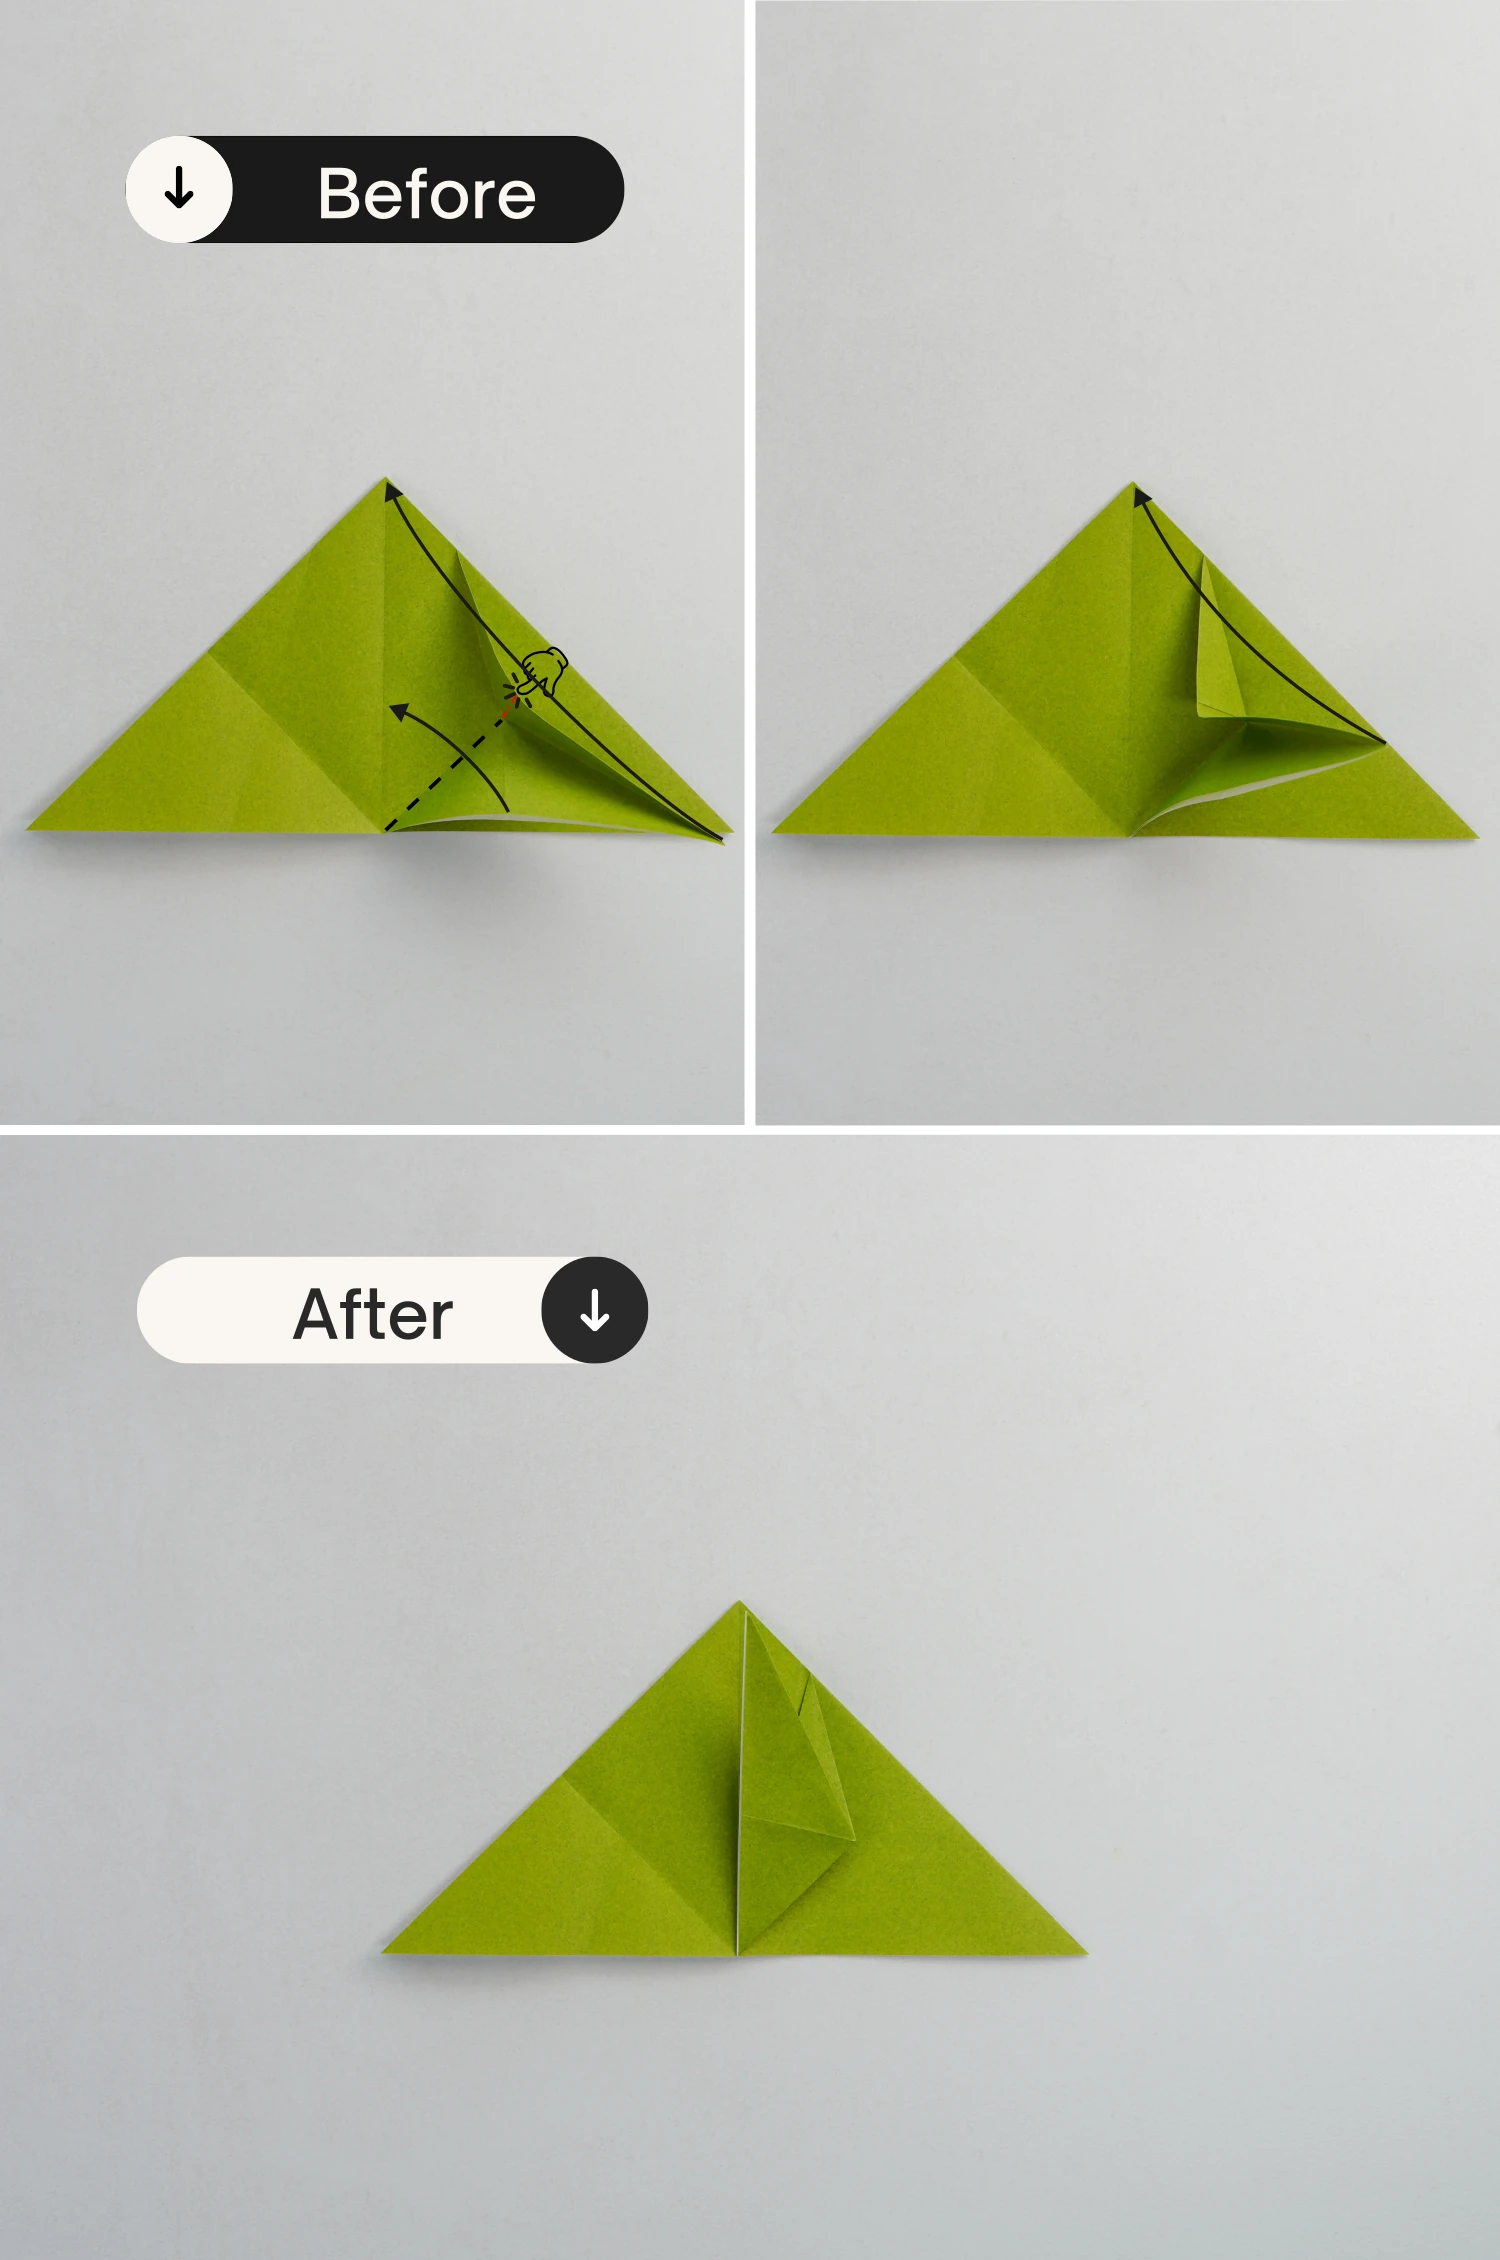
Step 11
Repeat steps 9 to 10 for the left side.
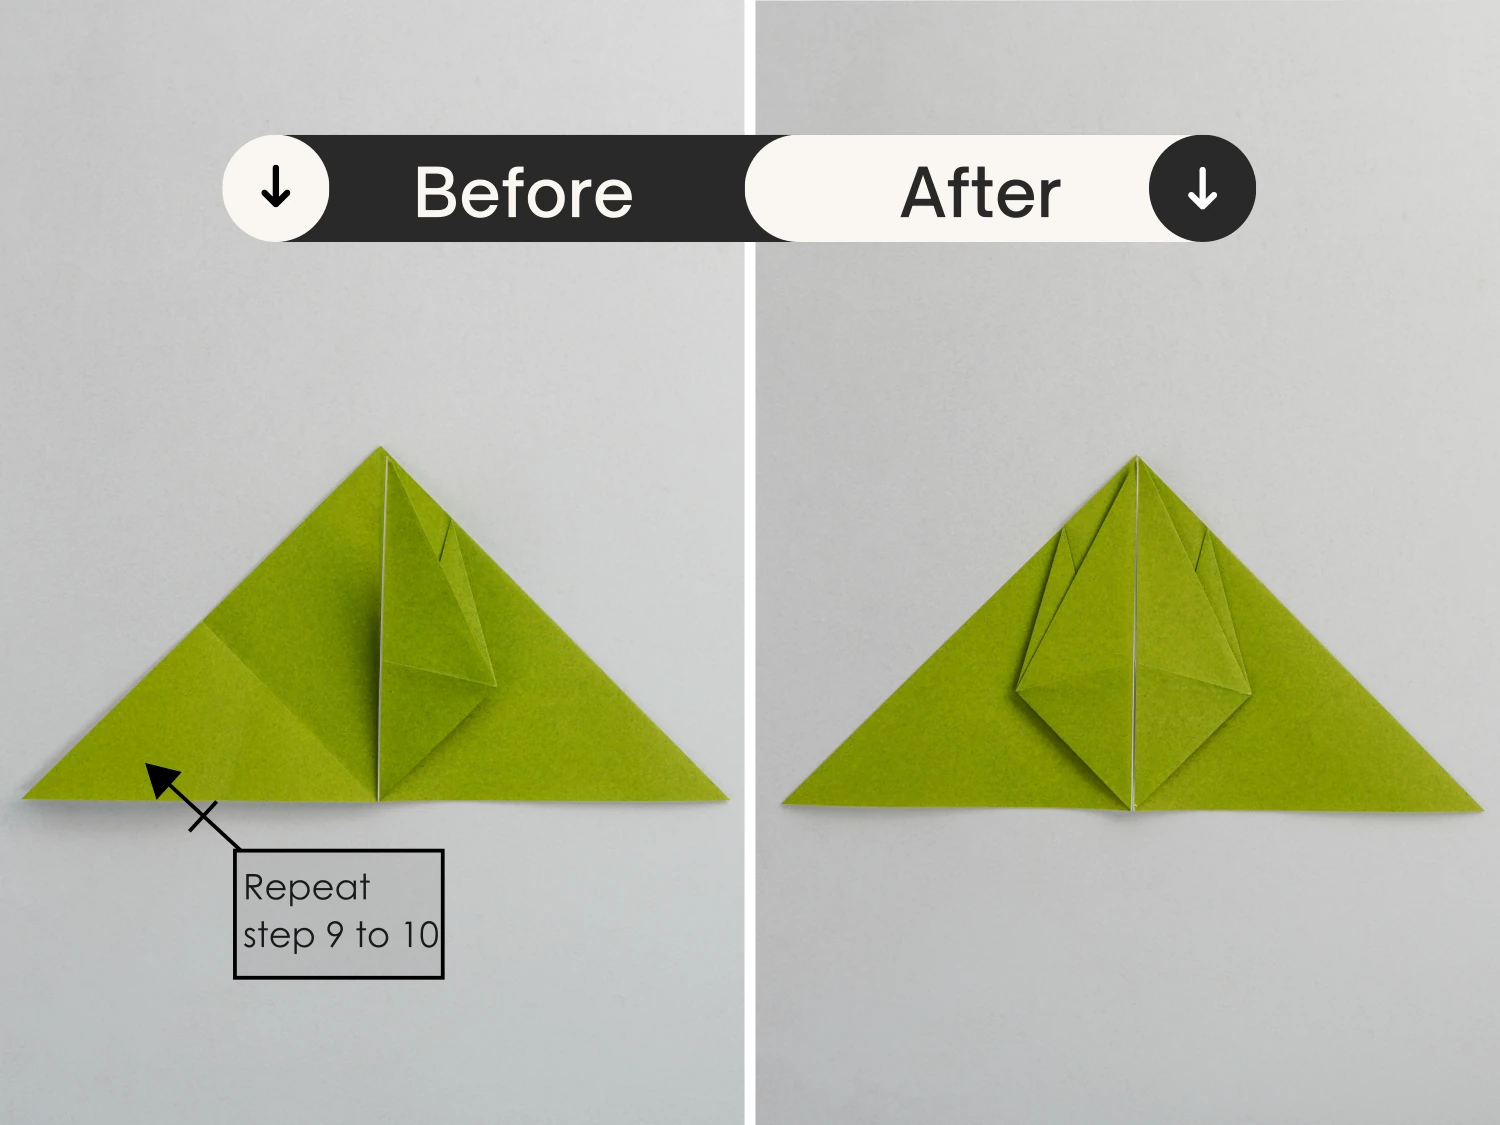
Step 12
Flip the paper over.
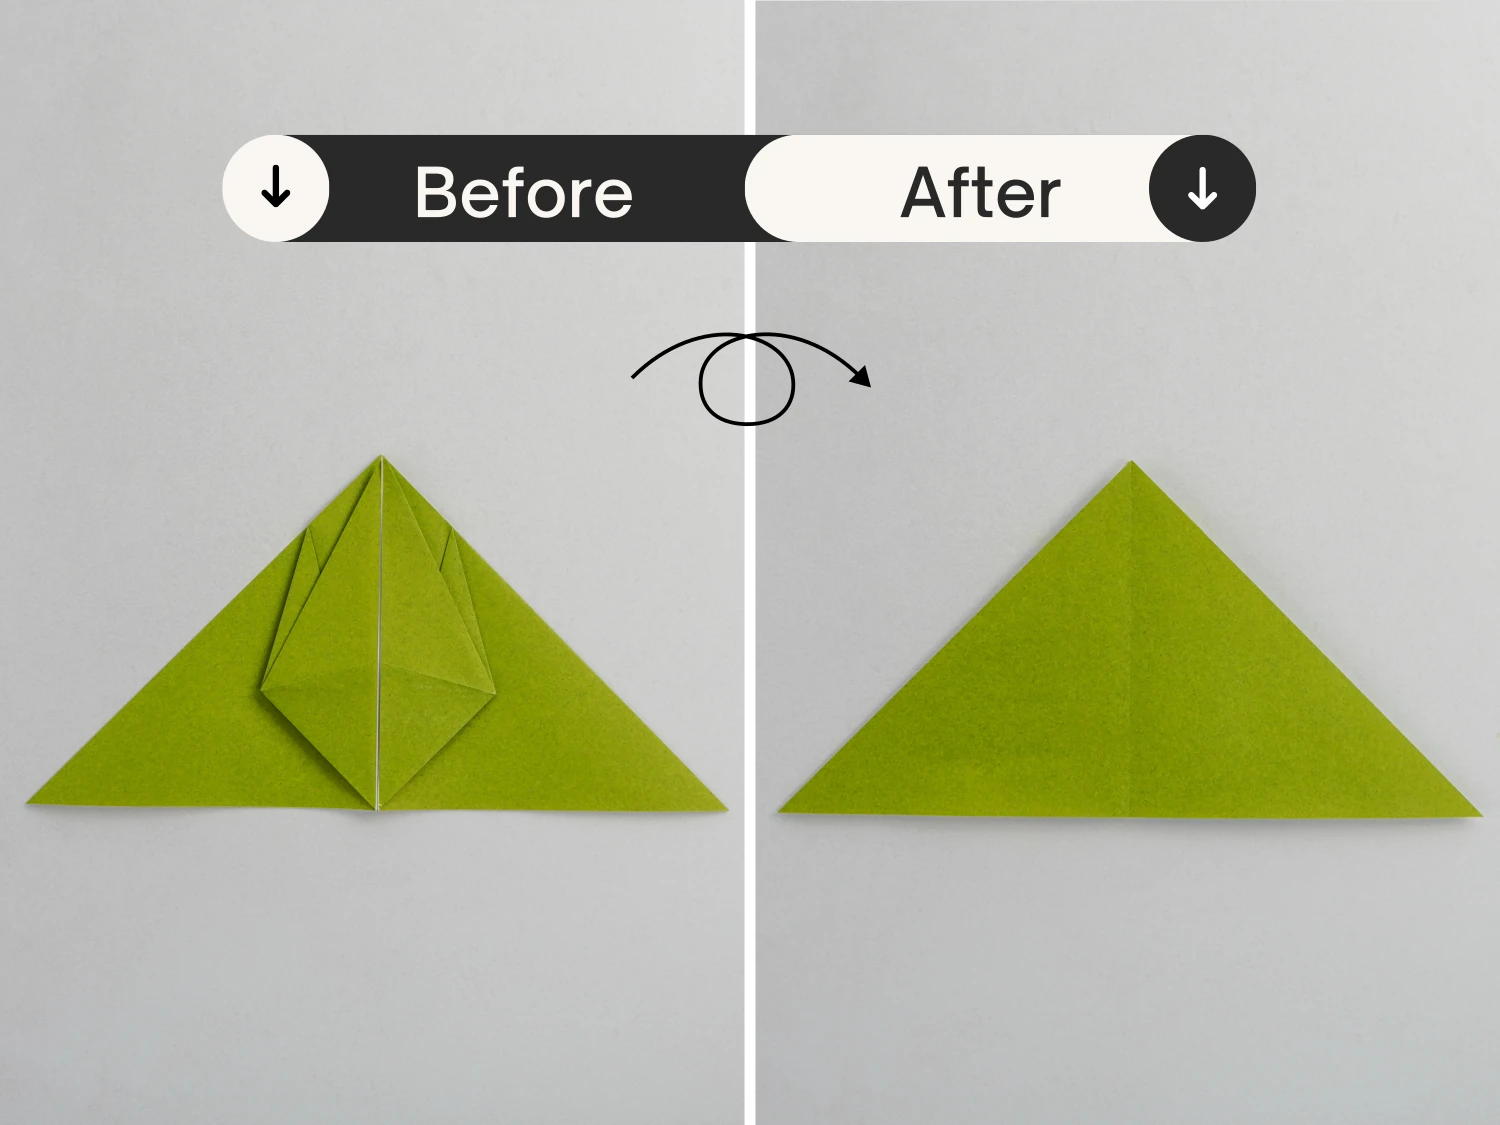
Step 13
Repeat steps 7 to 10 for this side.
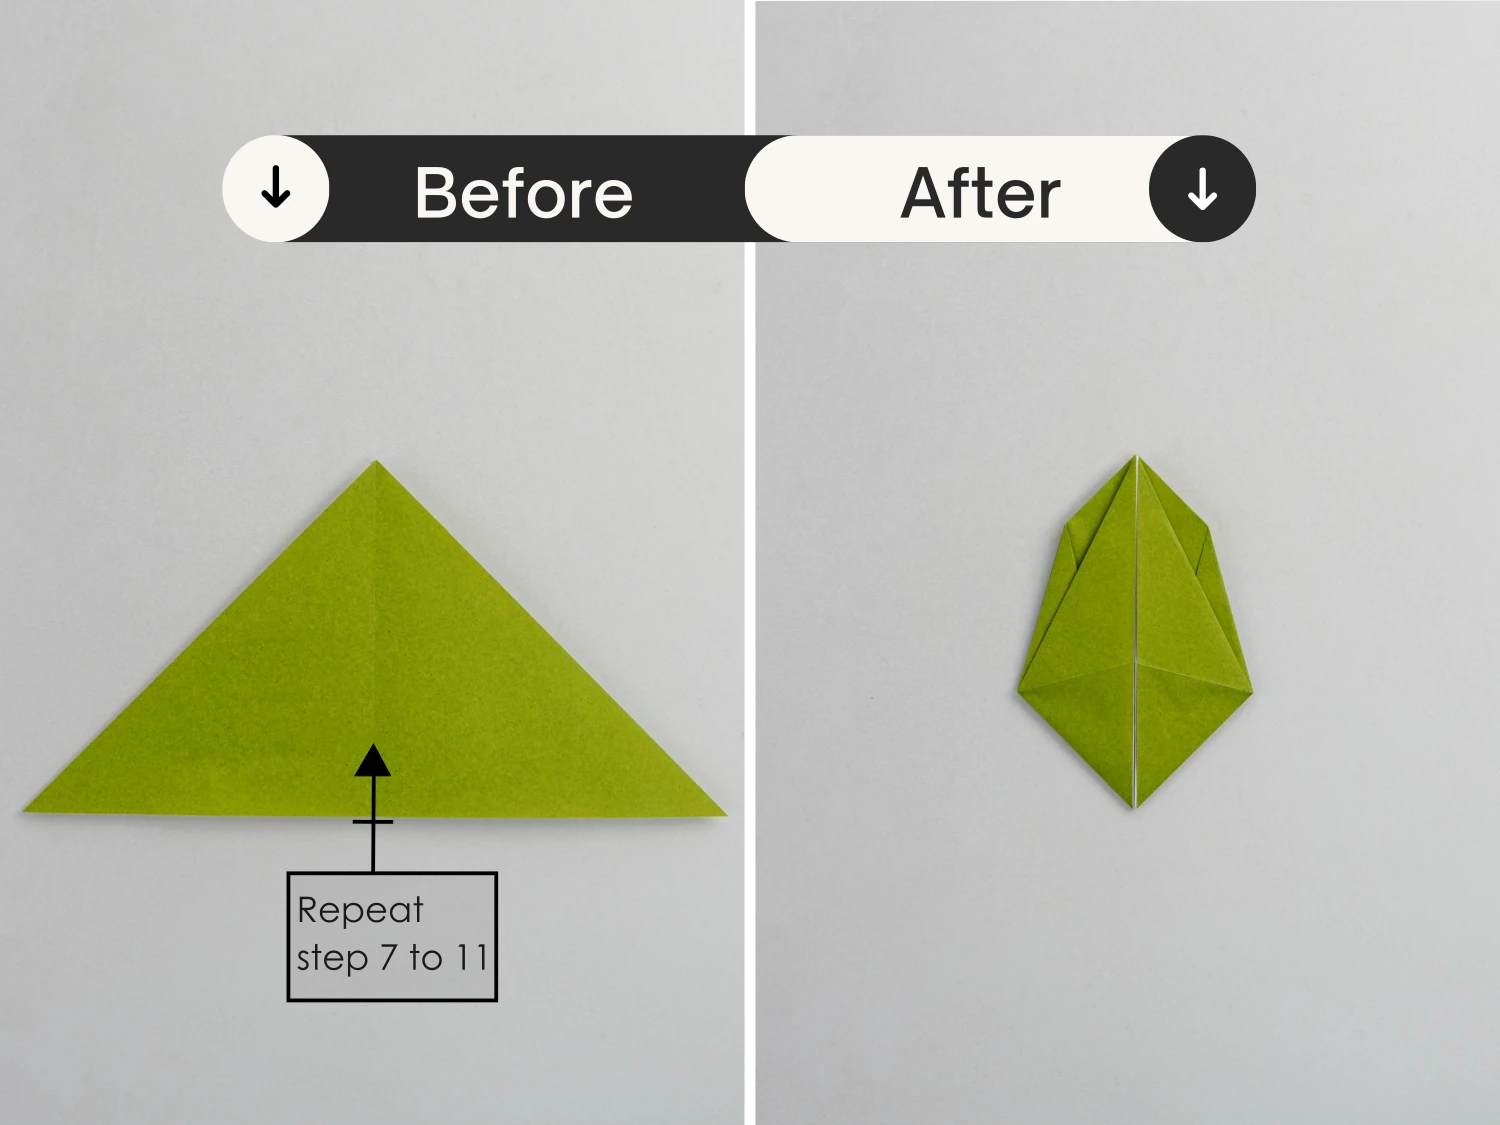
Step 14
Take the top right corner, and fold it down along the dotted line.
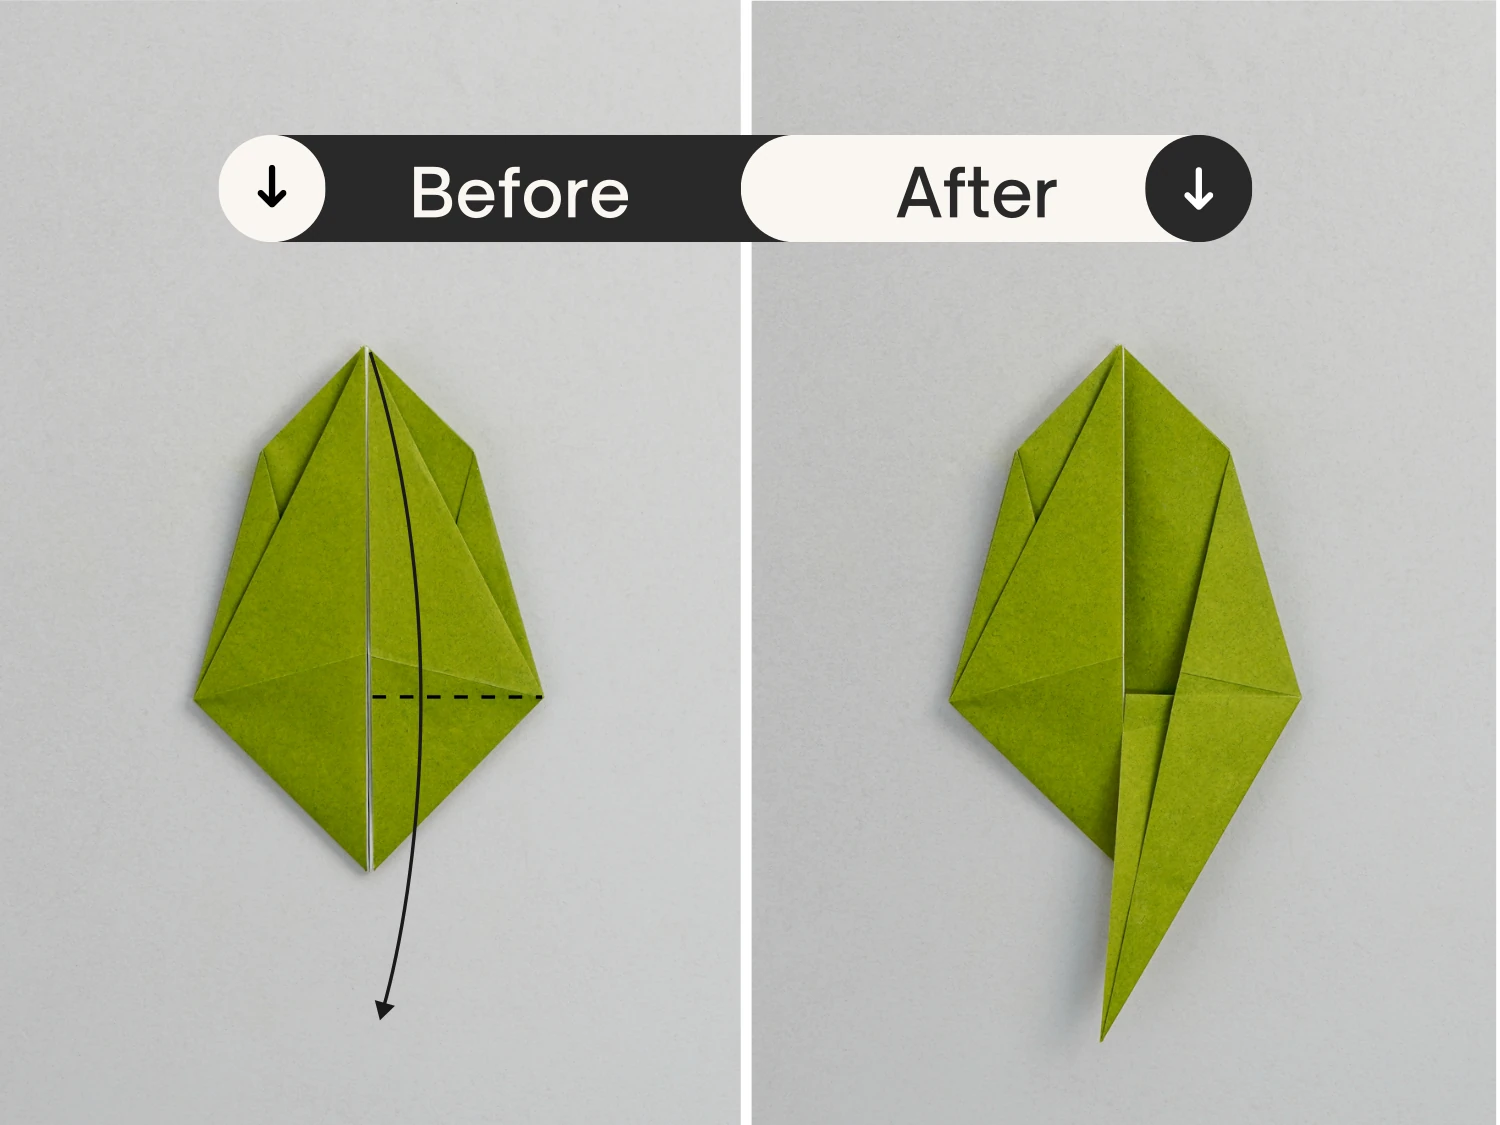
Step 15
Flip the model over.
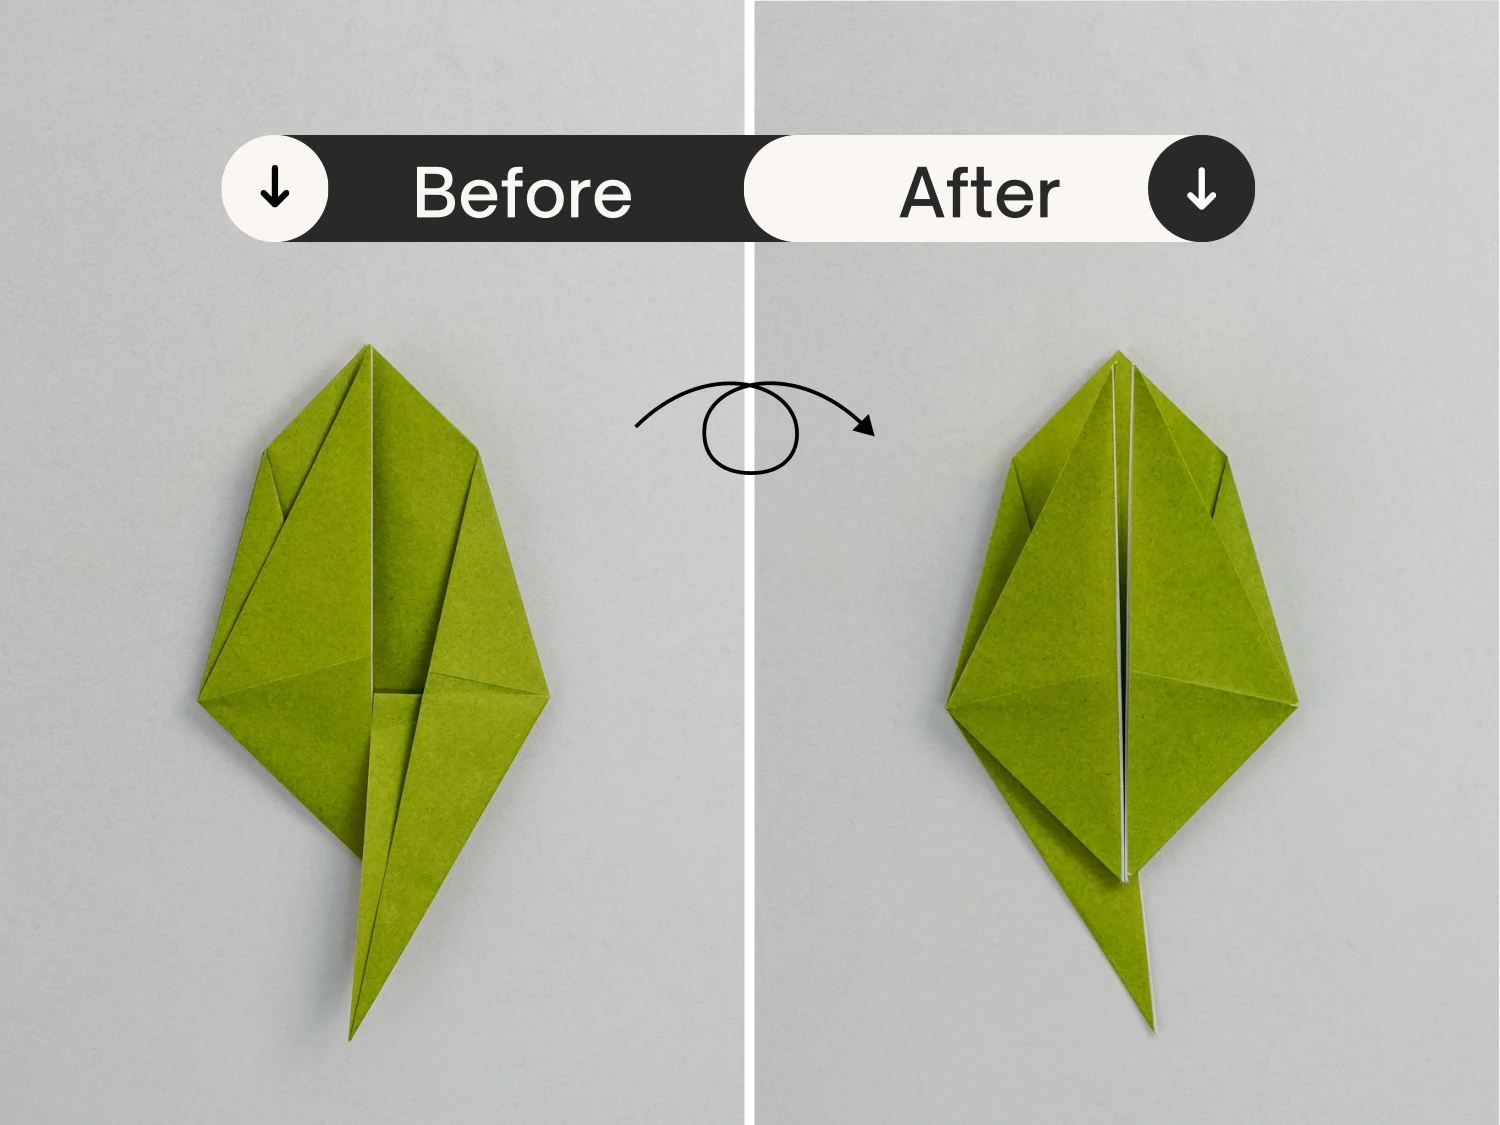
Step 16
Similarly, fold the top left corner down along the dotted line.
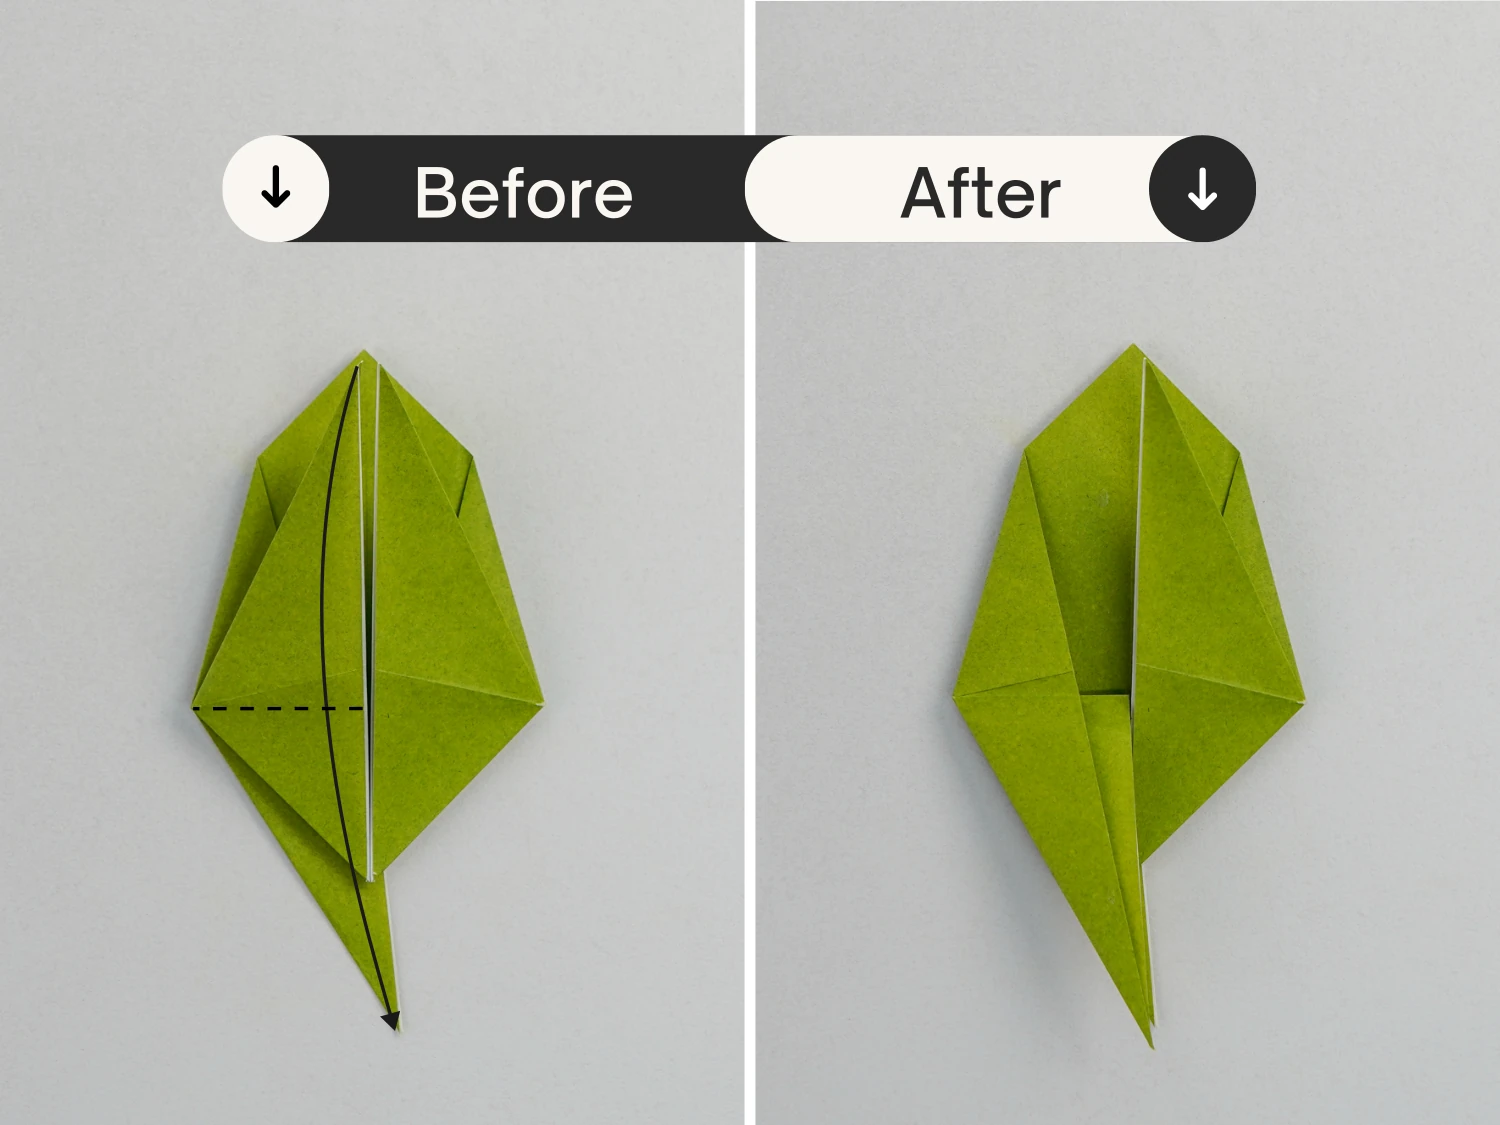
Step 17
Now take the bottom left edge, and fold it up to align with the horizontal line connecting the left and right points.
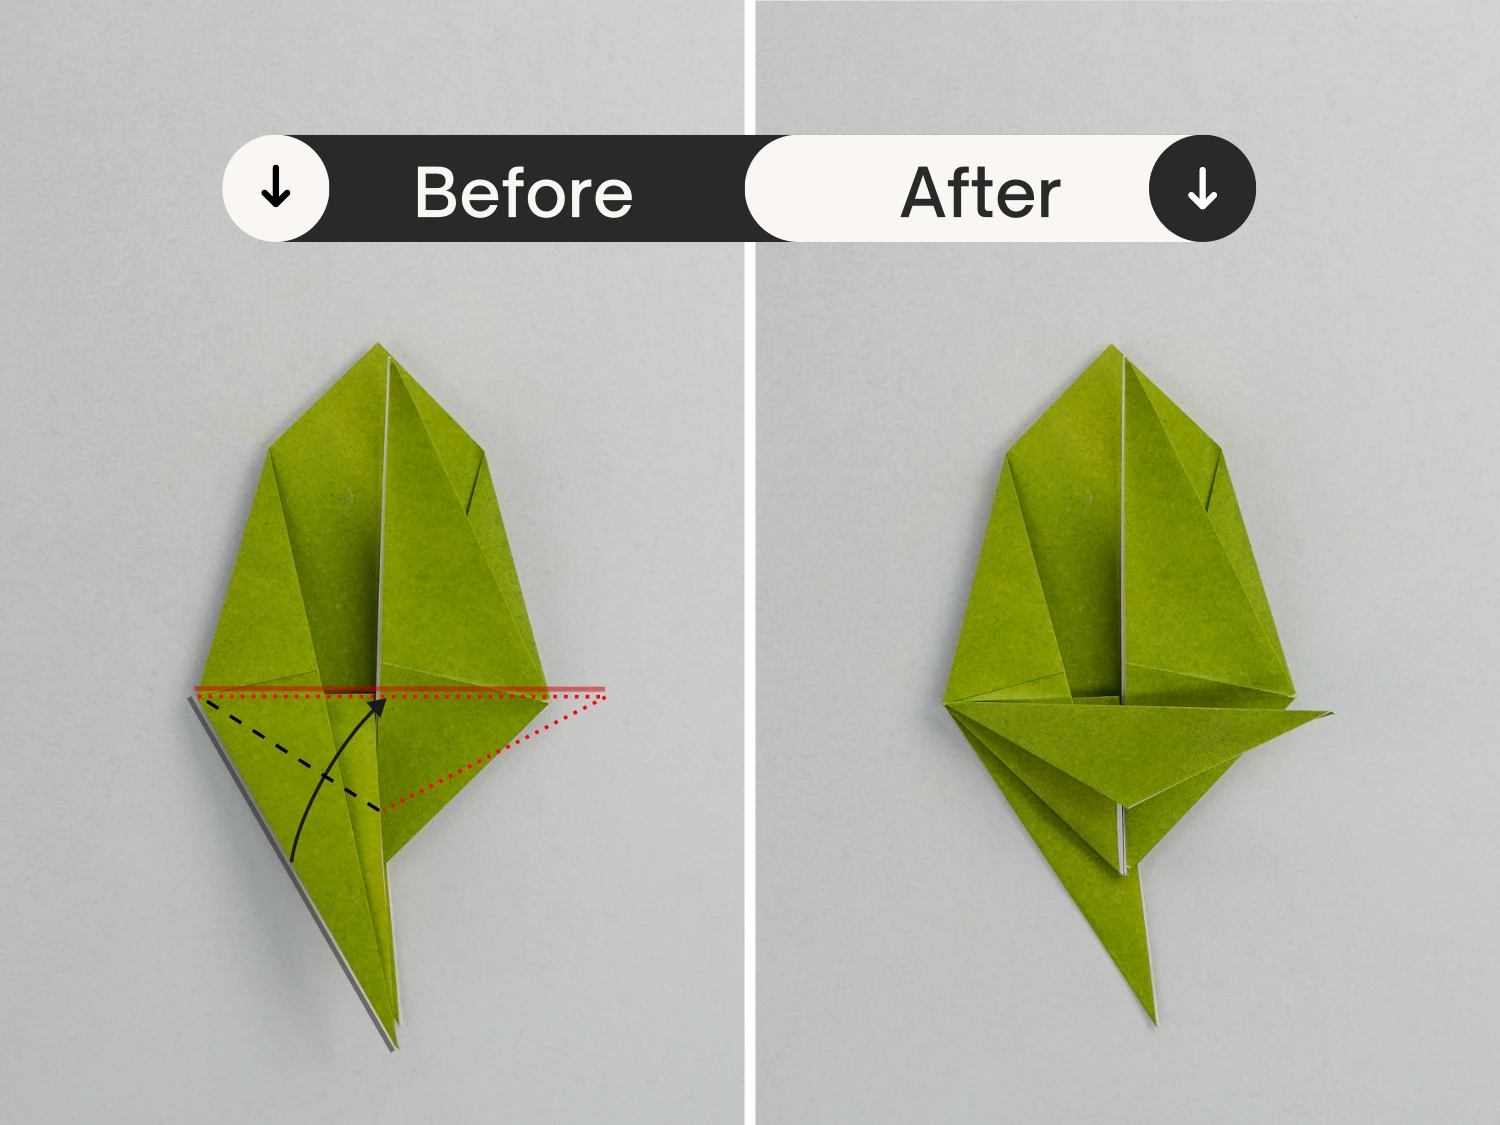
Step 18
Take the corner you made in the previous step, and fold it to the left along the dotted line.
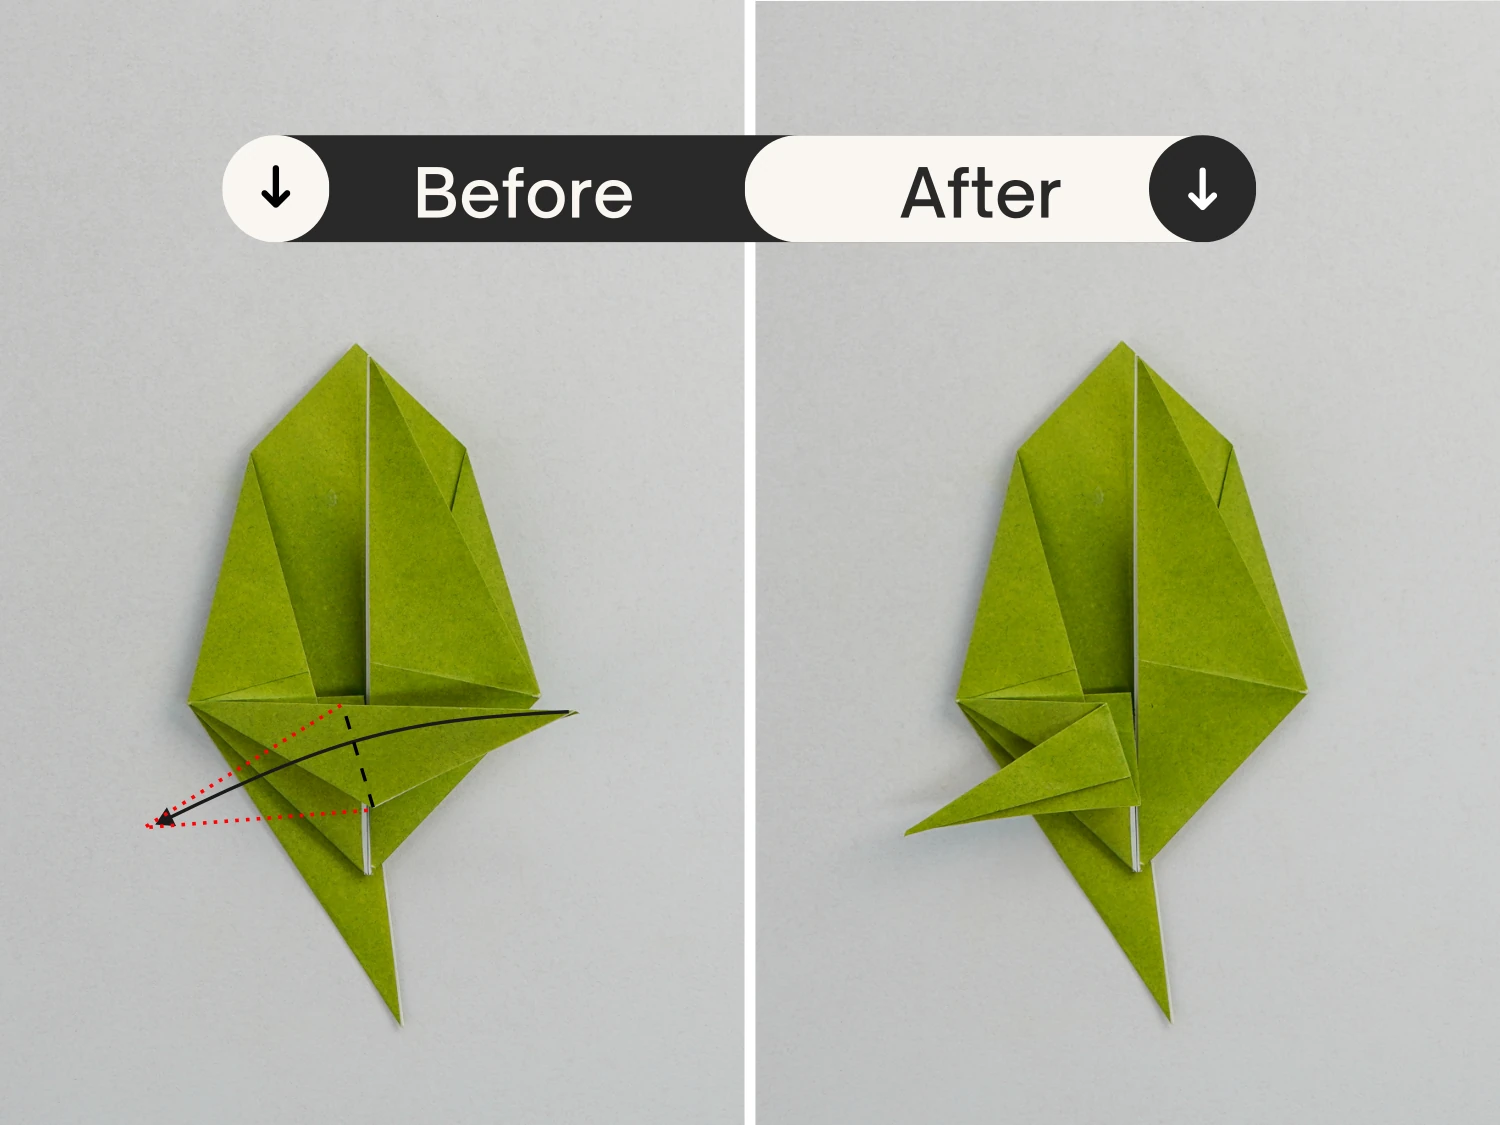
Step 19
Still the same corner, fold it down, then lift it to make it stand.
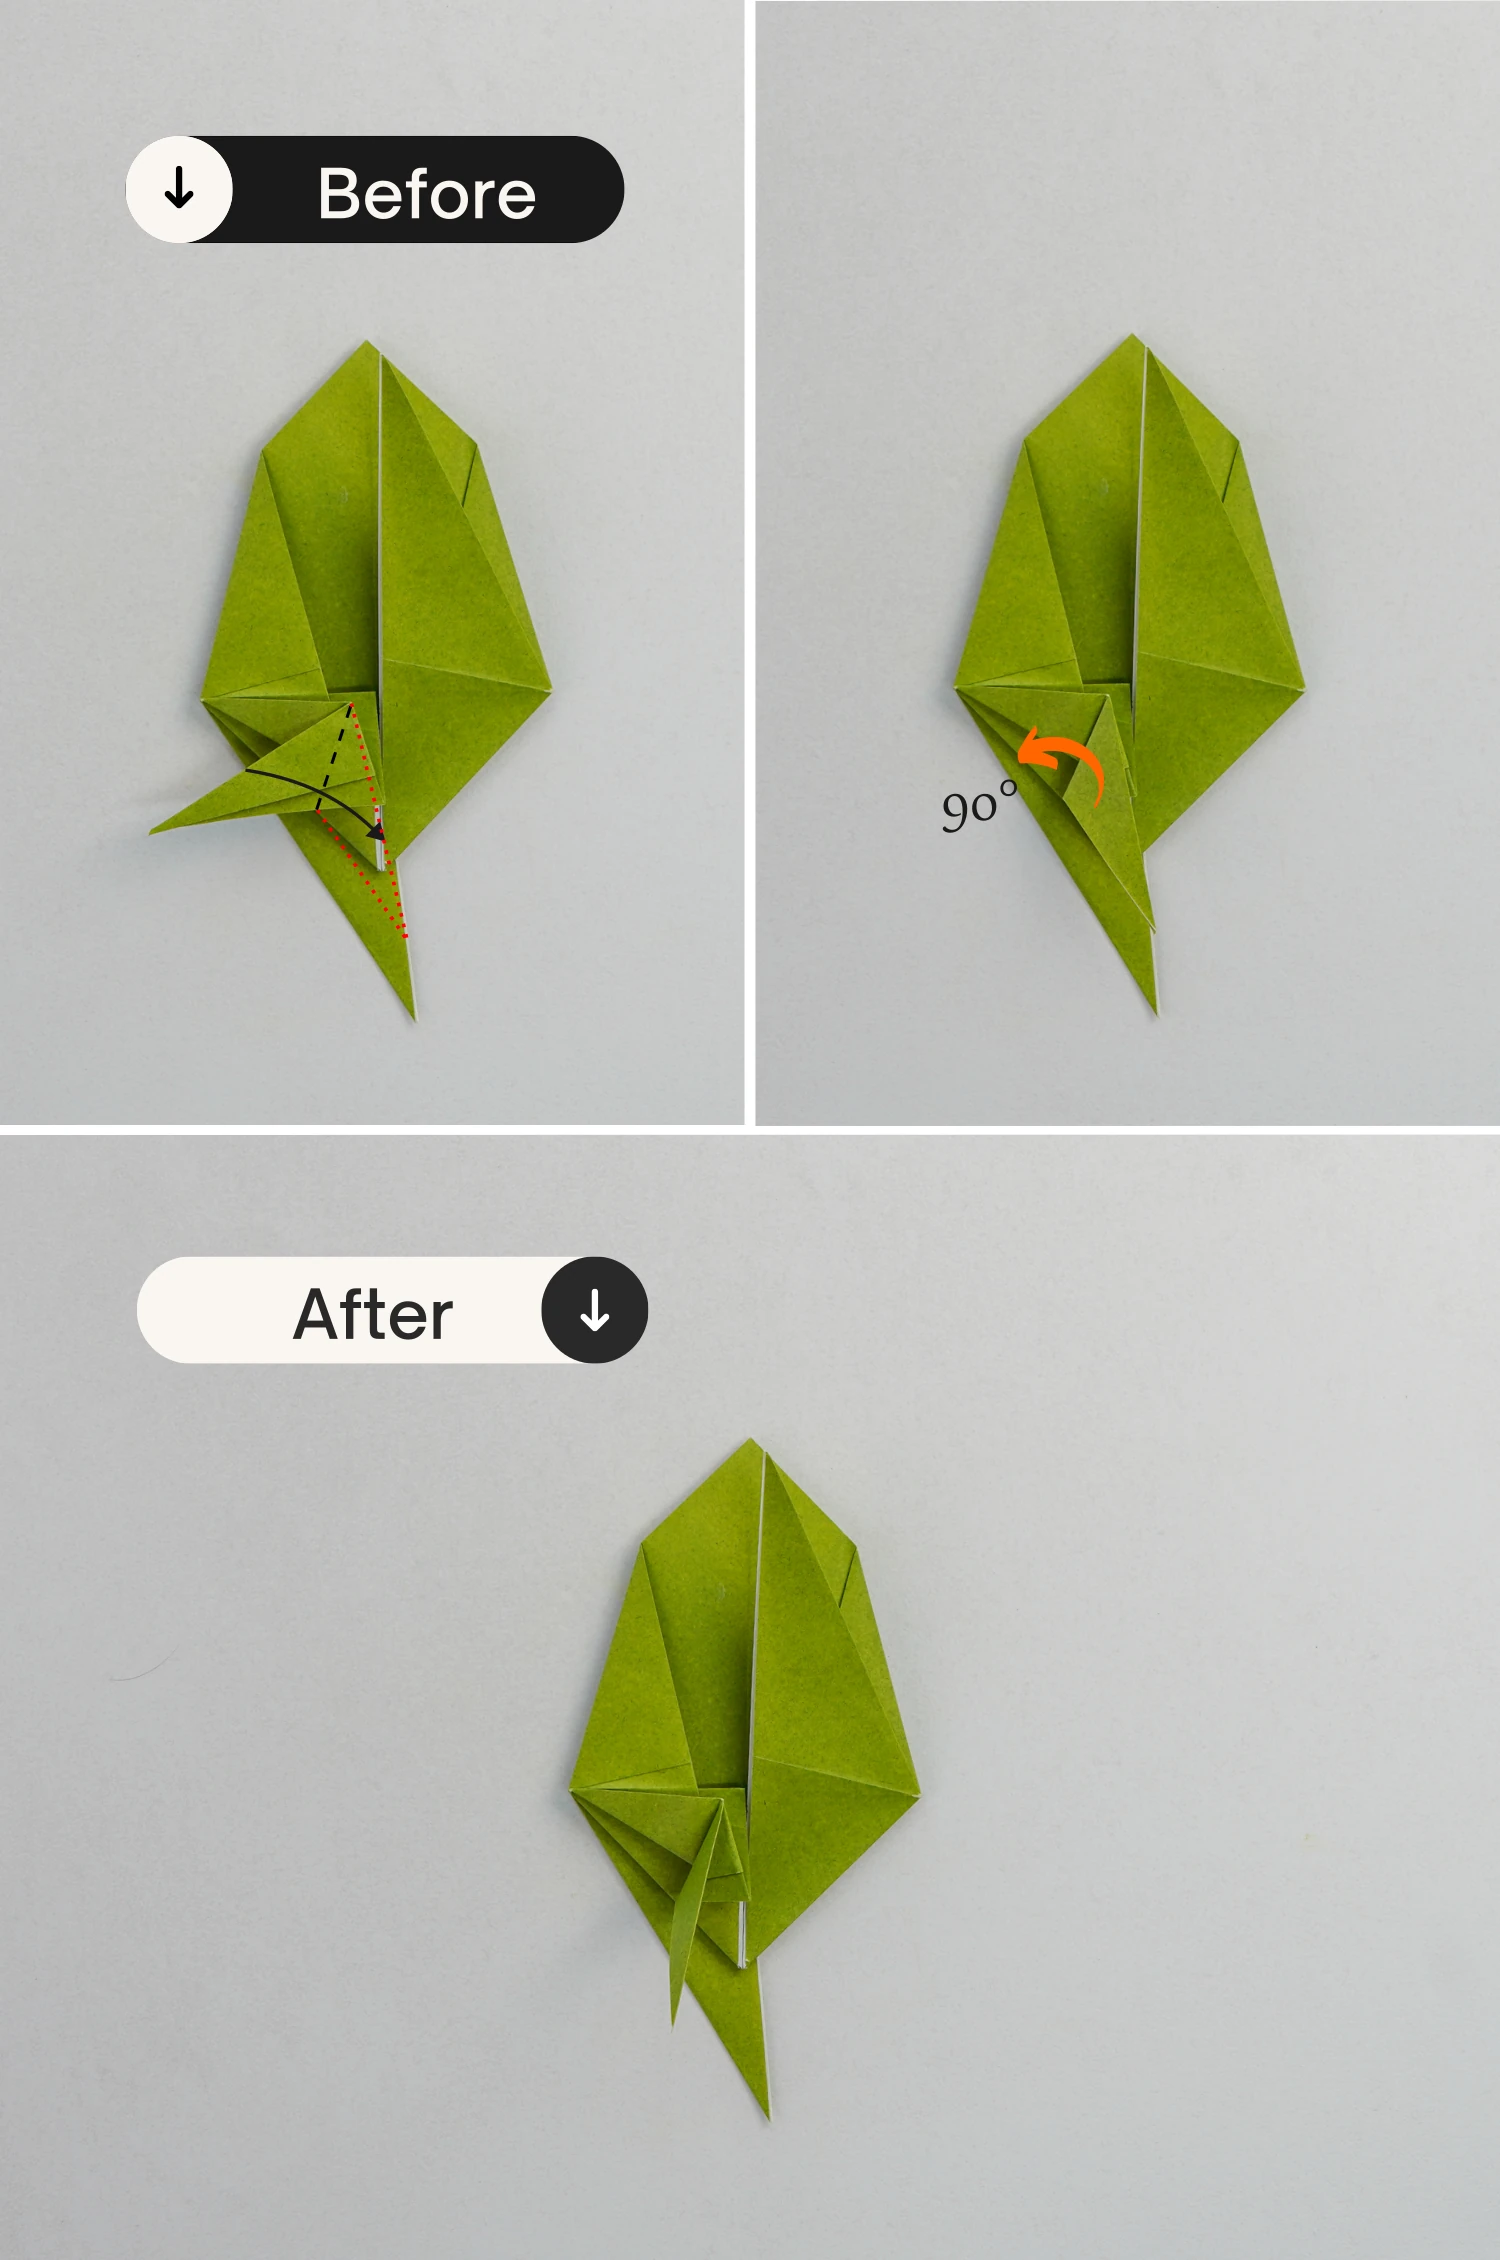
Step 20
View it from the bottom left to see this flap.
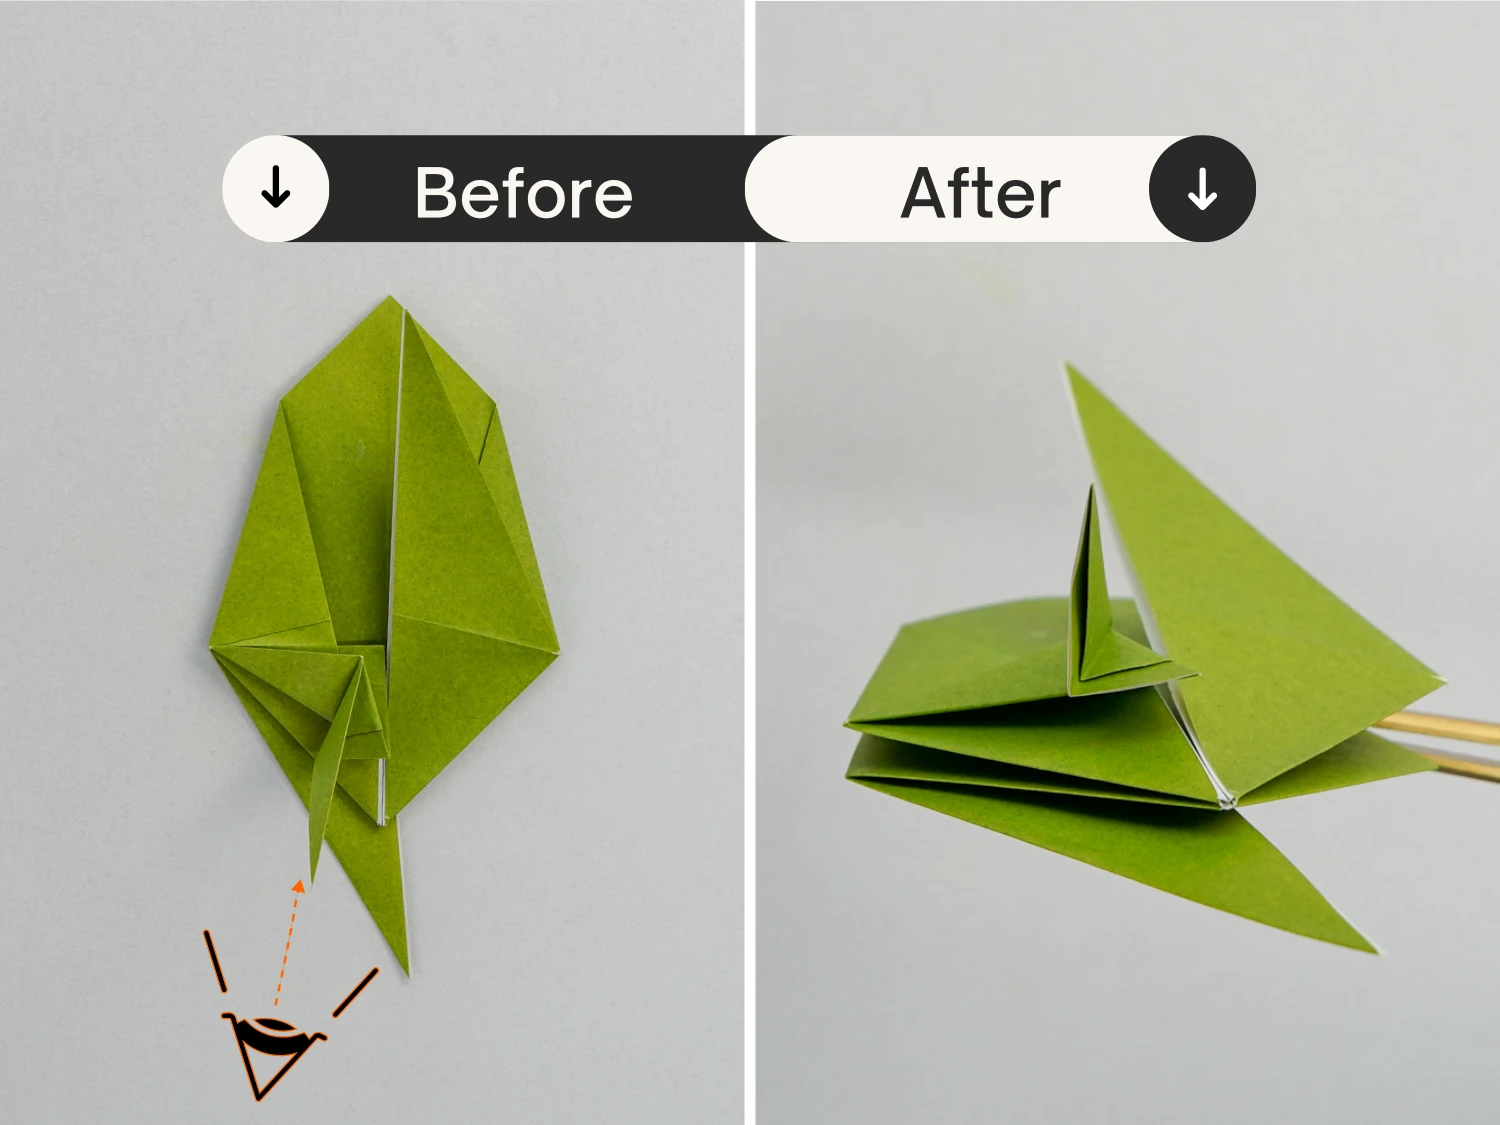
Step 21
Press the flap from its top to open it, then flatten it.
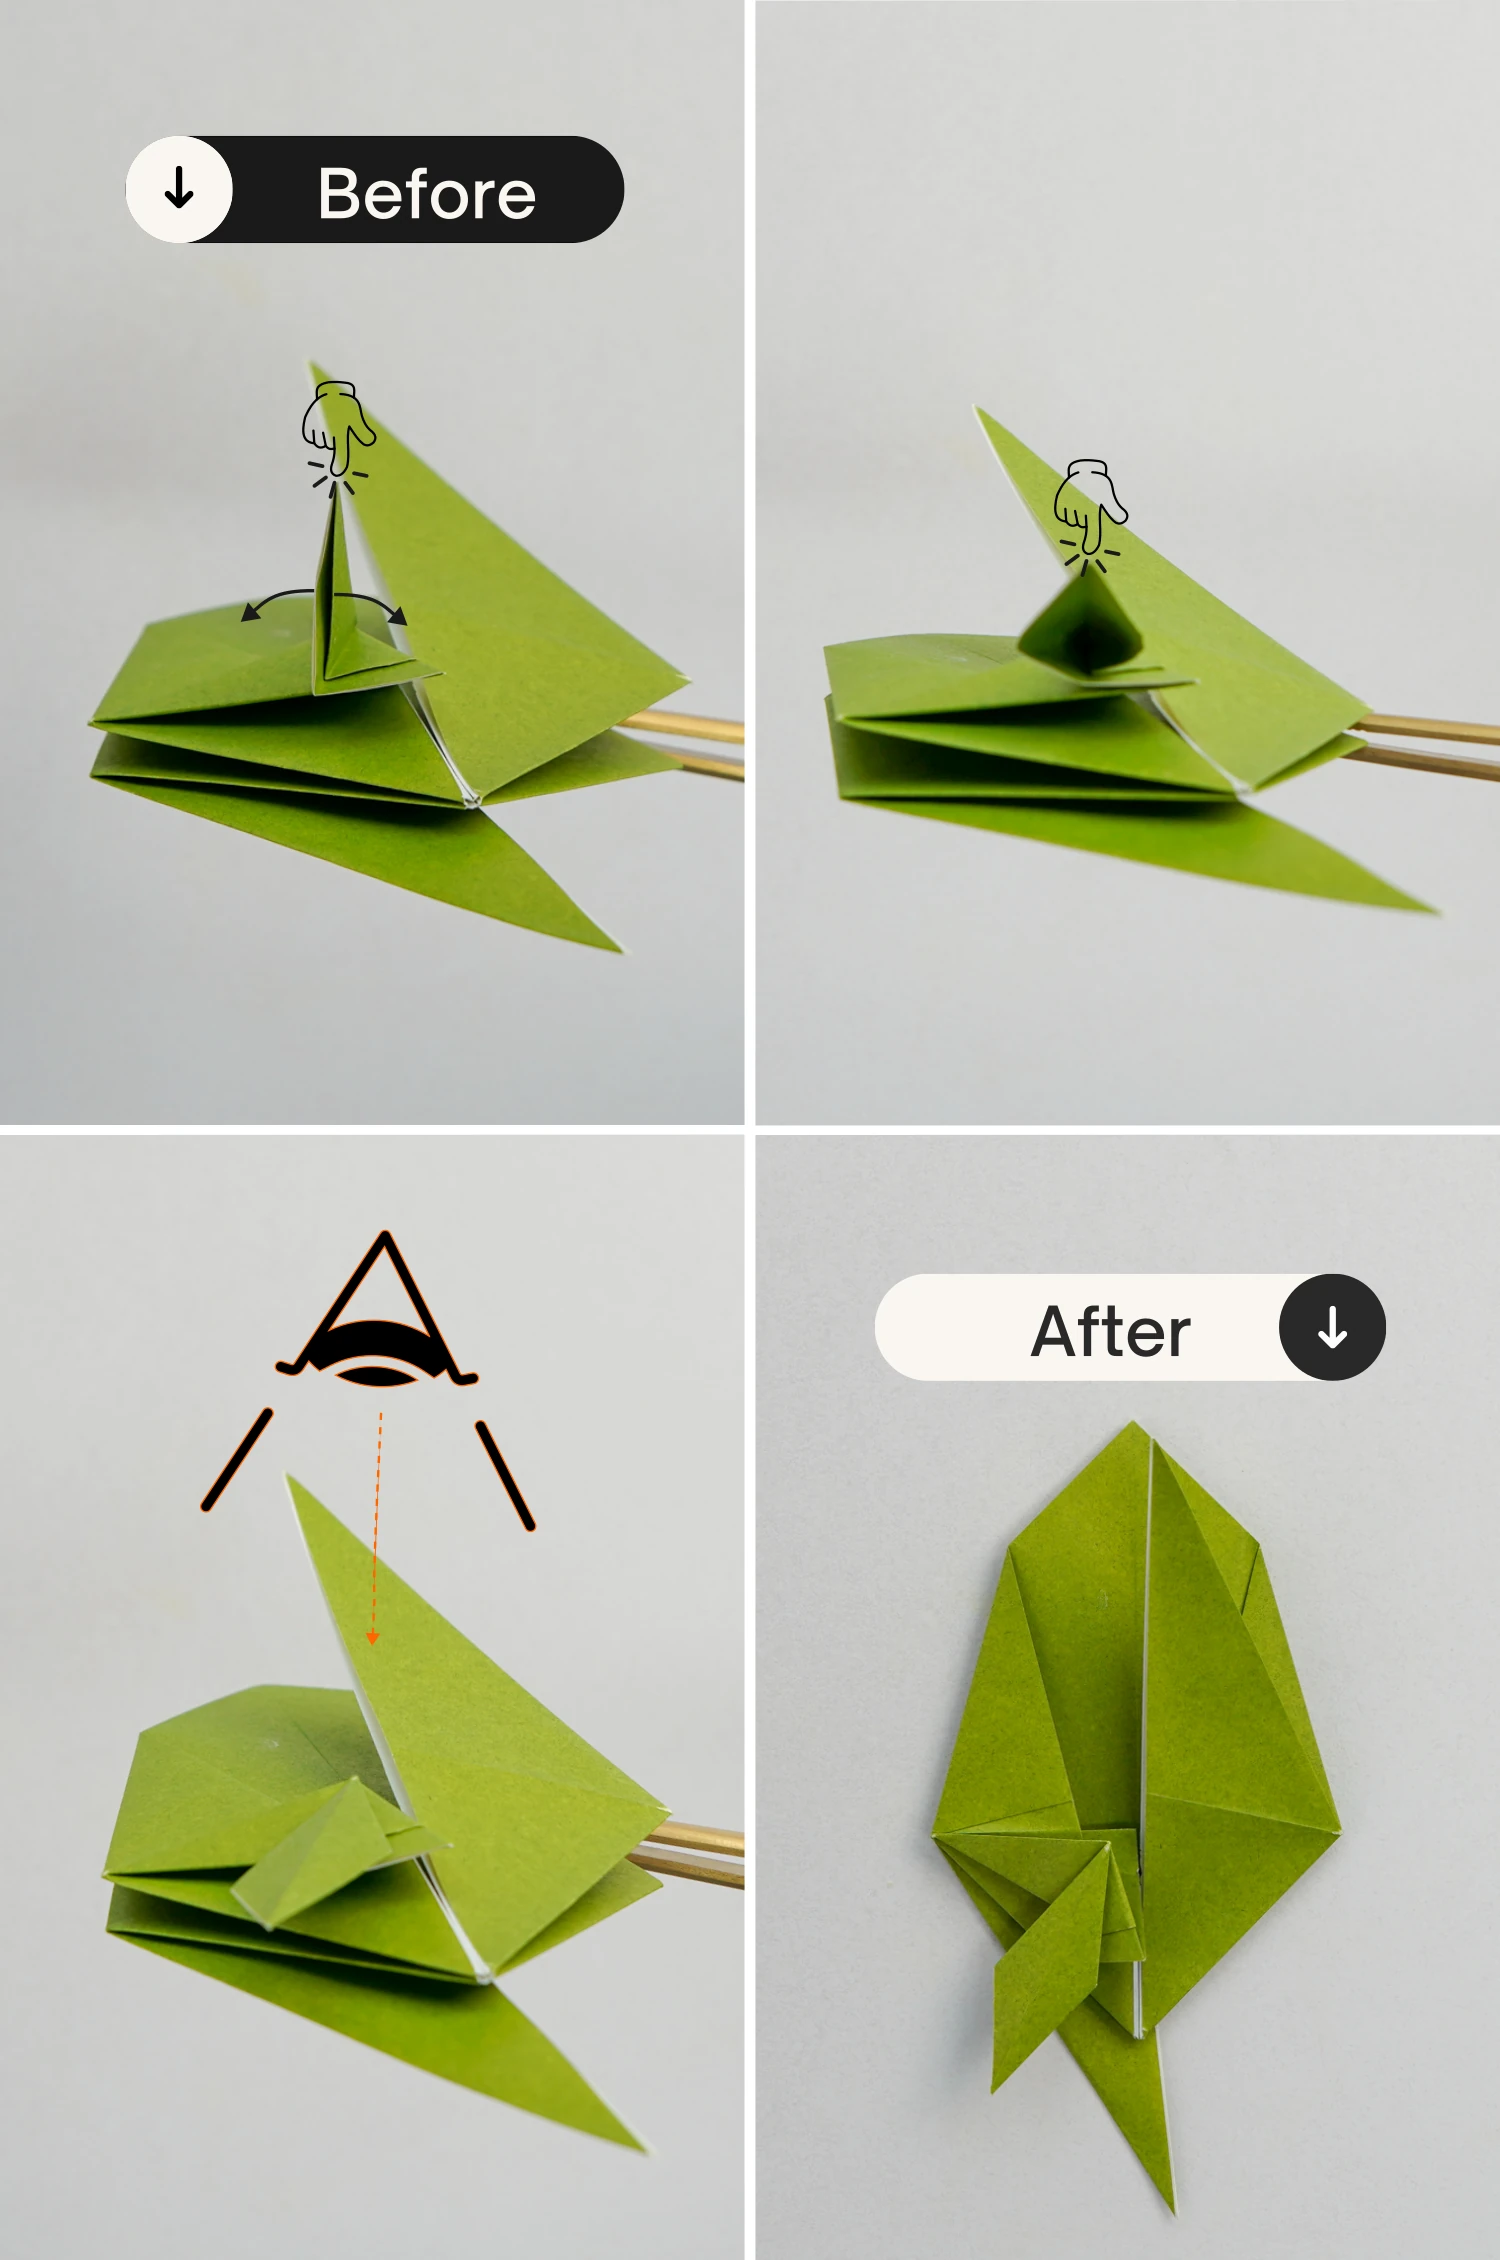
Step 22
Flip the model over.
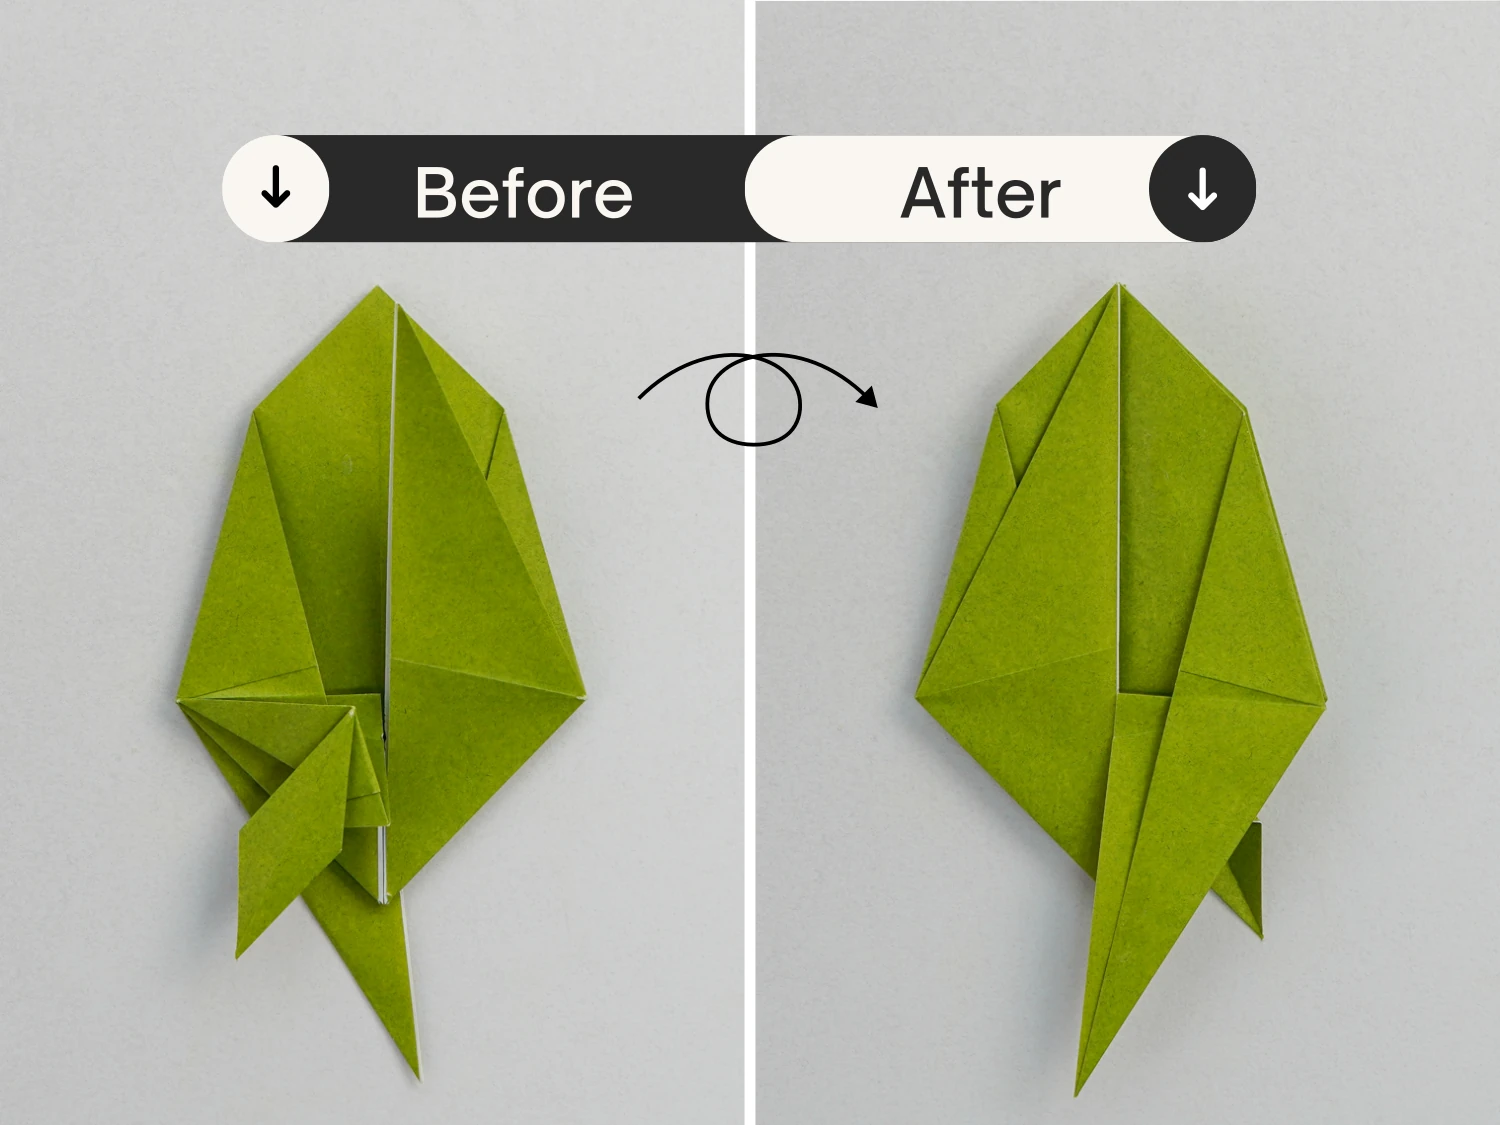
Step 23
In the same manner as you did in step 17, fold the bottom right edge up to align with the horizontal line connecting the left and right points.
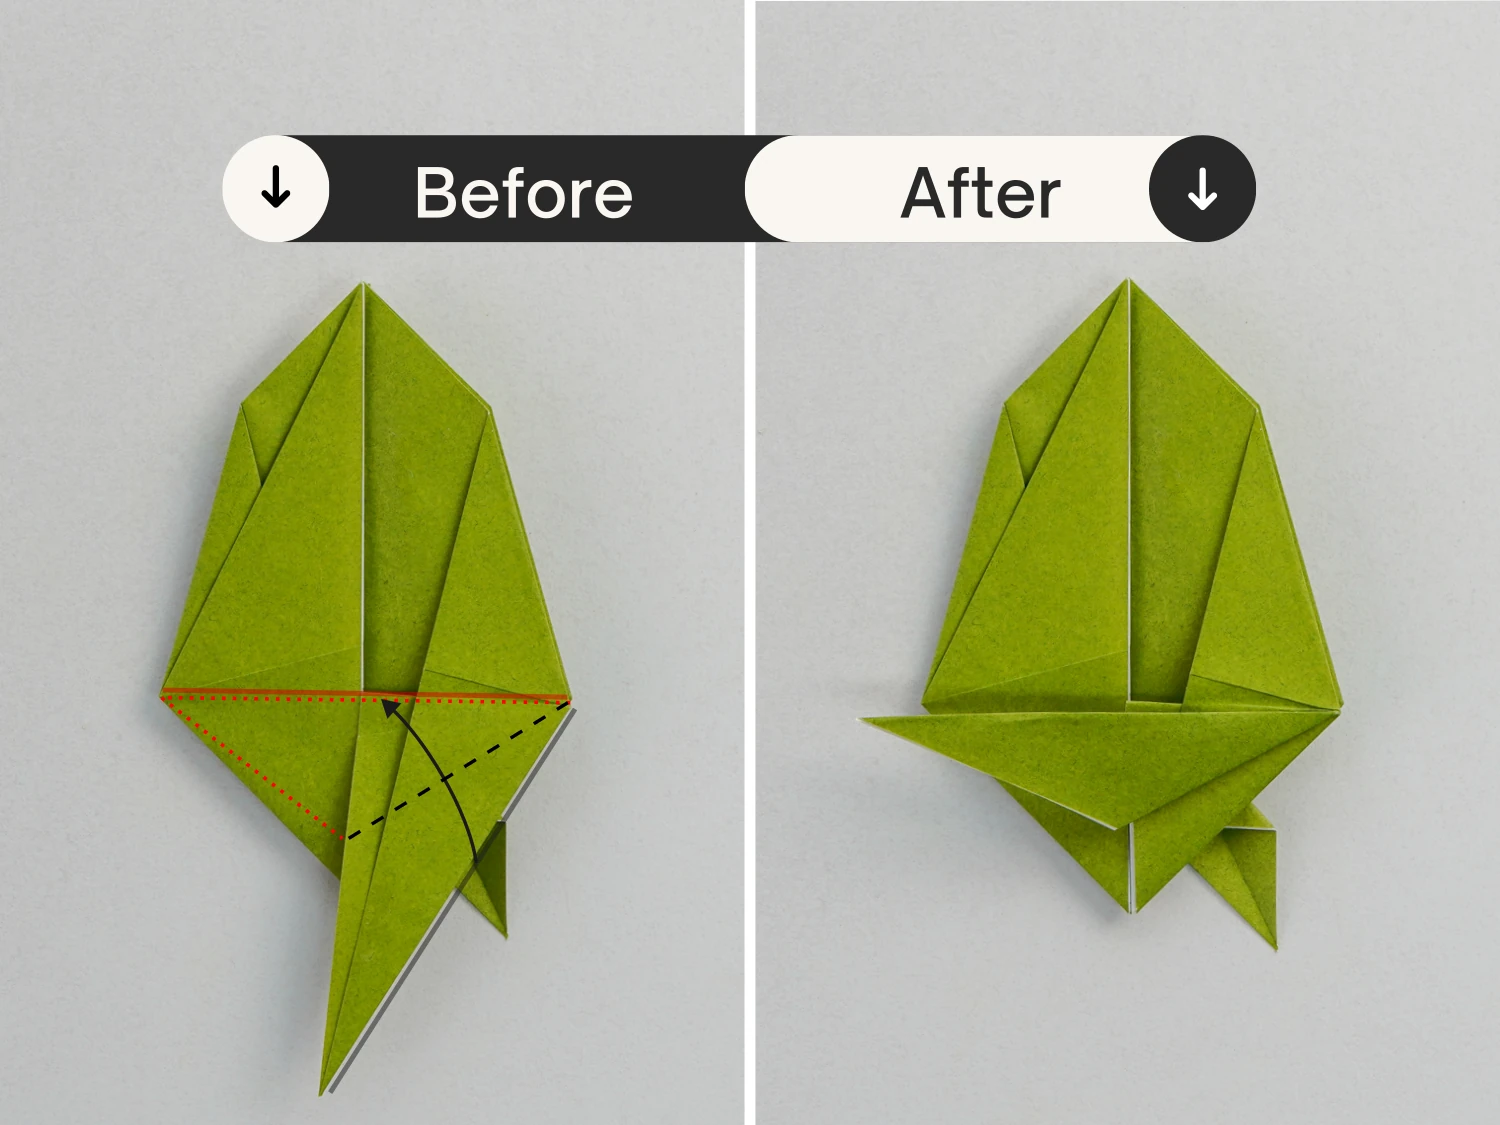
Step 24
Then fold the corner you made in the previous step to the right along the dotted line.
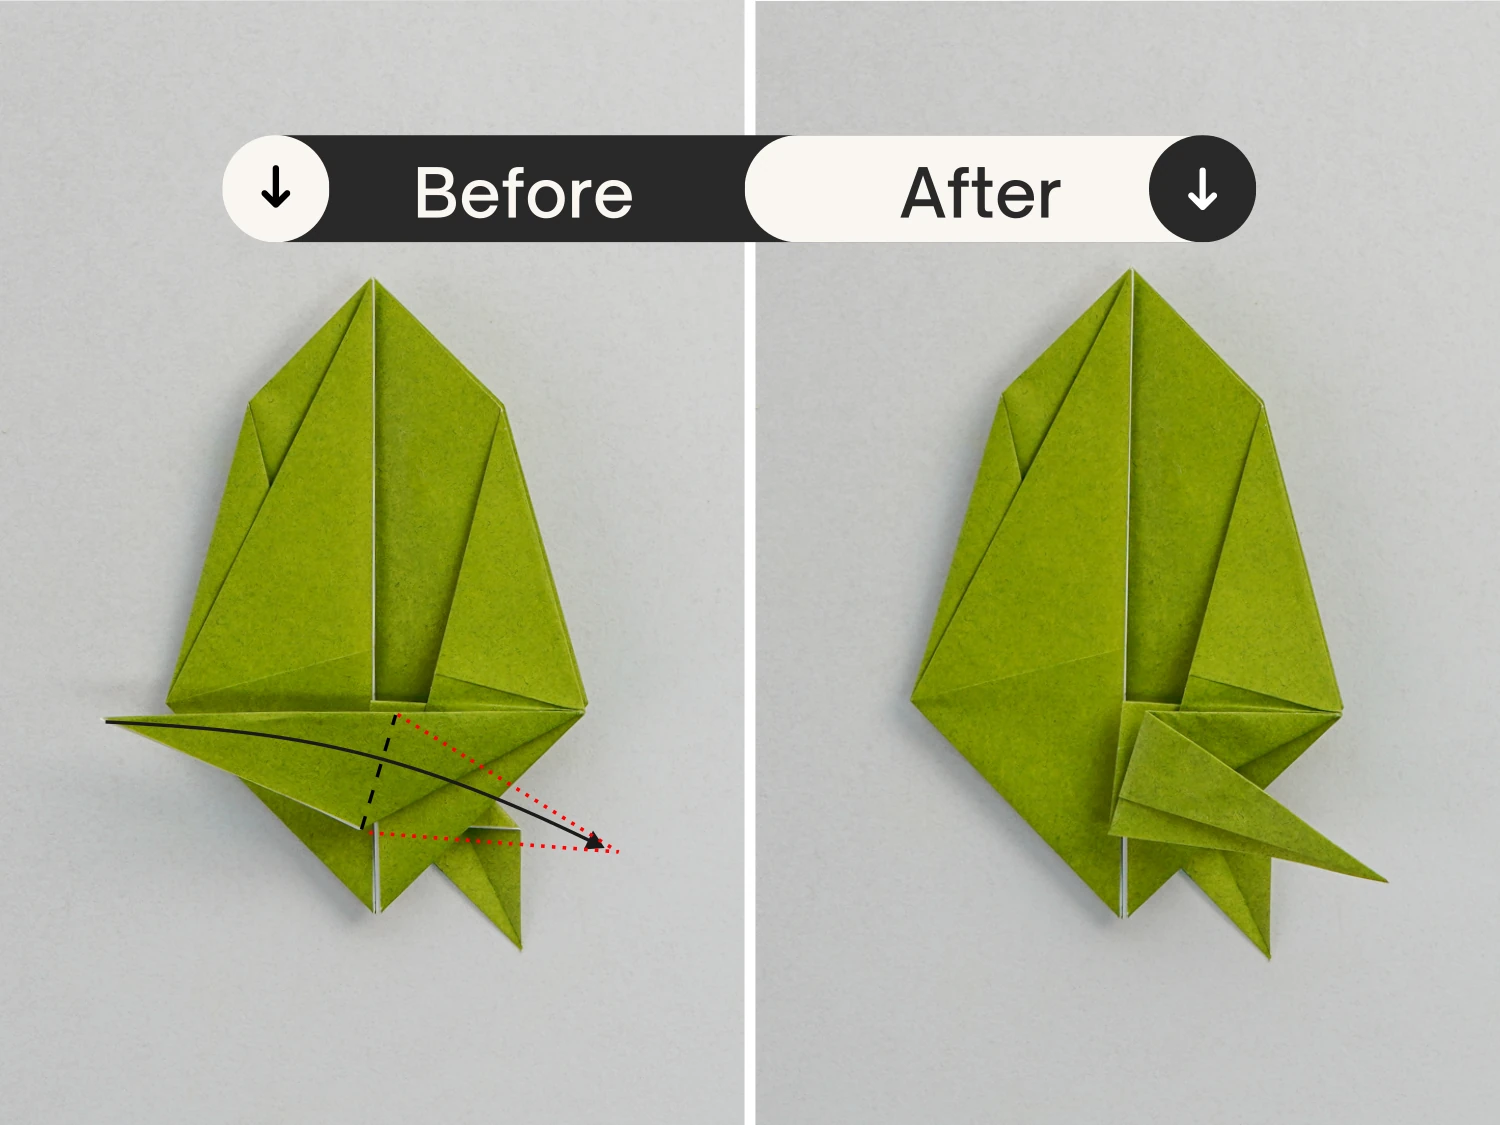
Step 25
Still this same corner, fold it down along the dotted line, then lift it to make it stand.
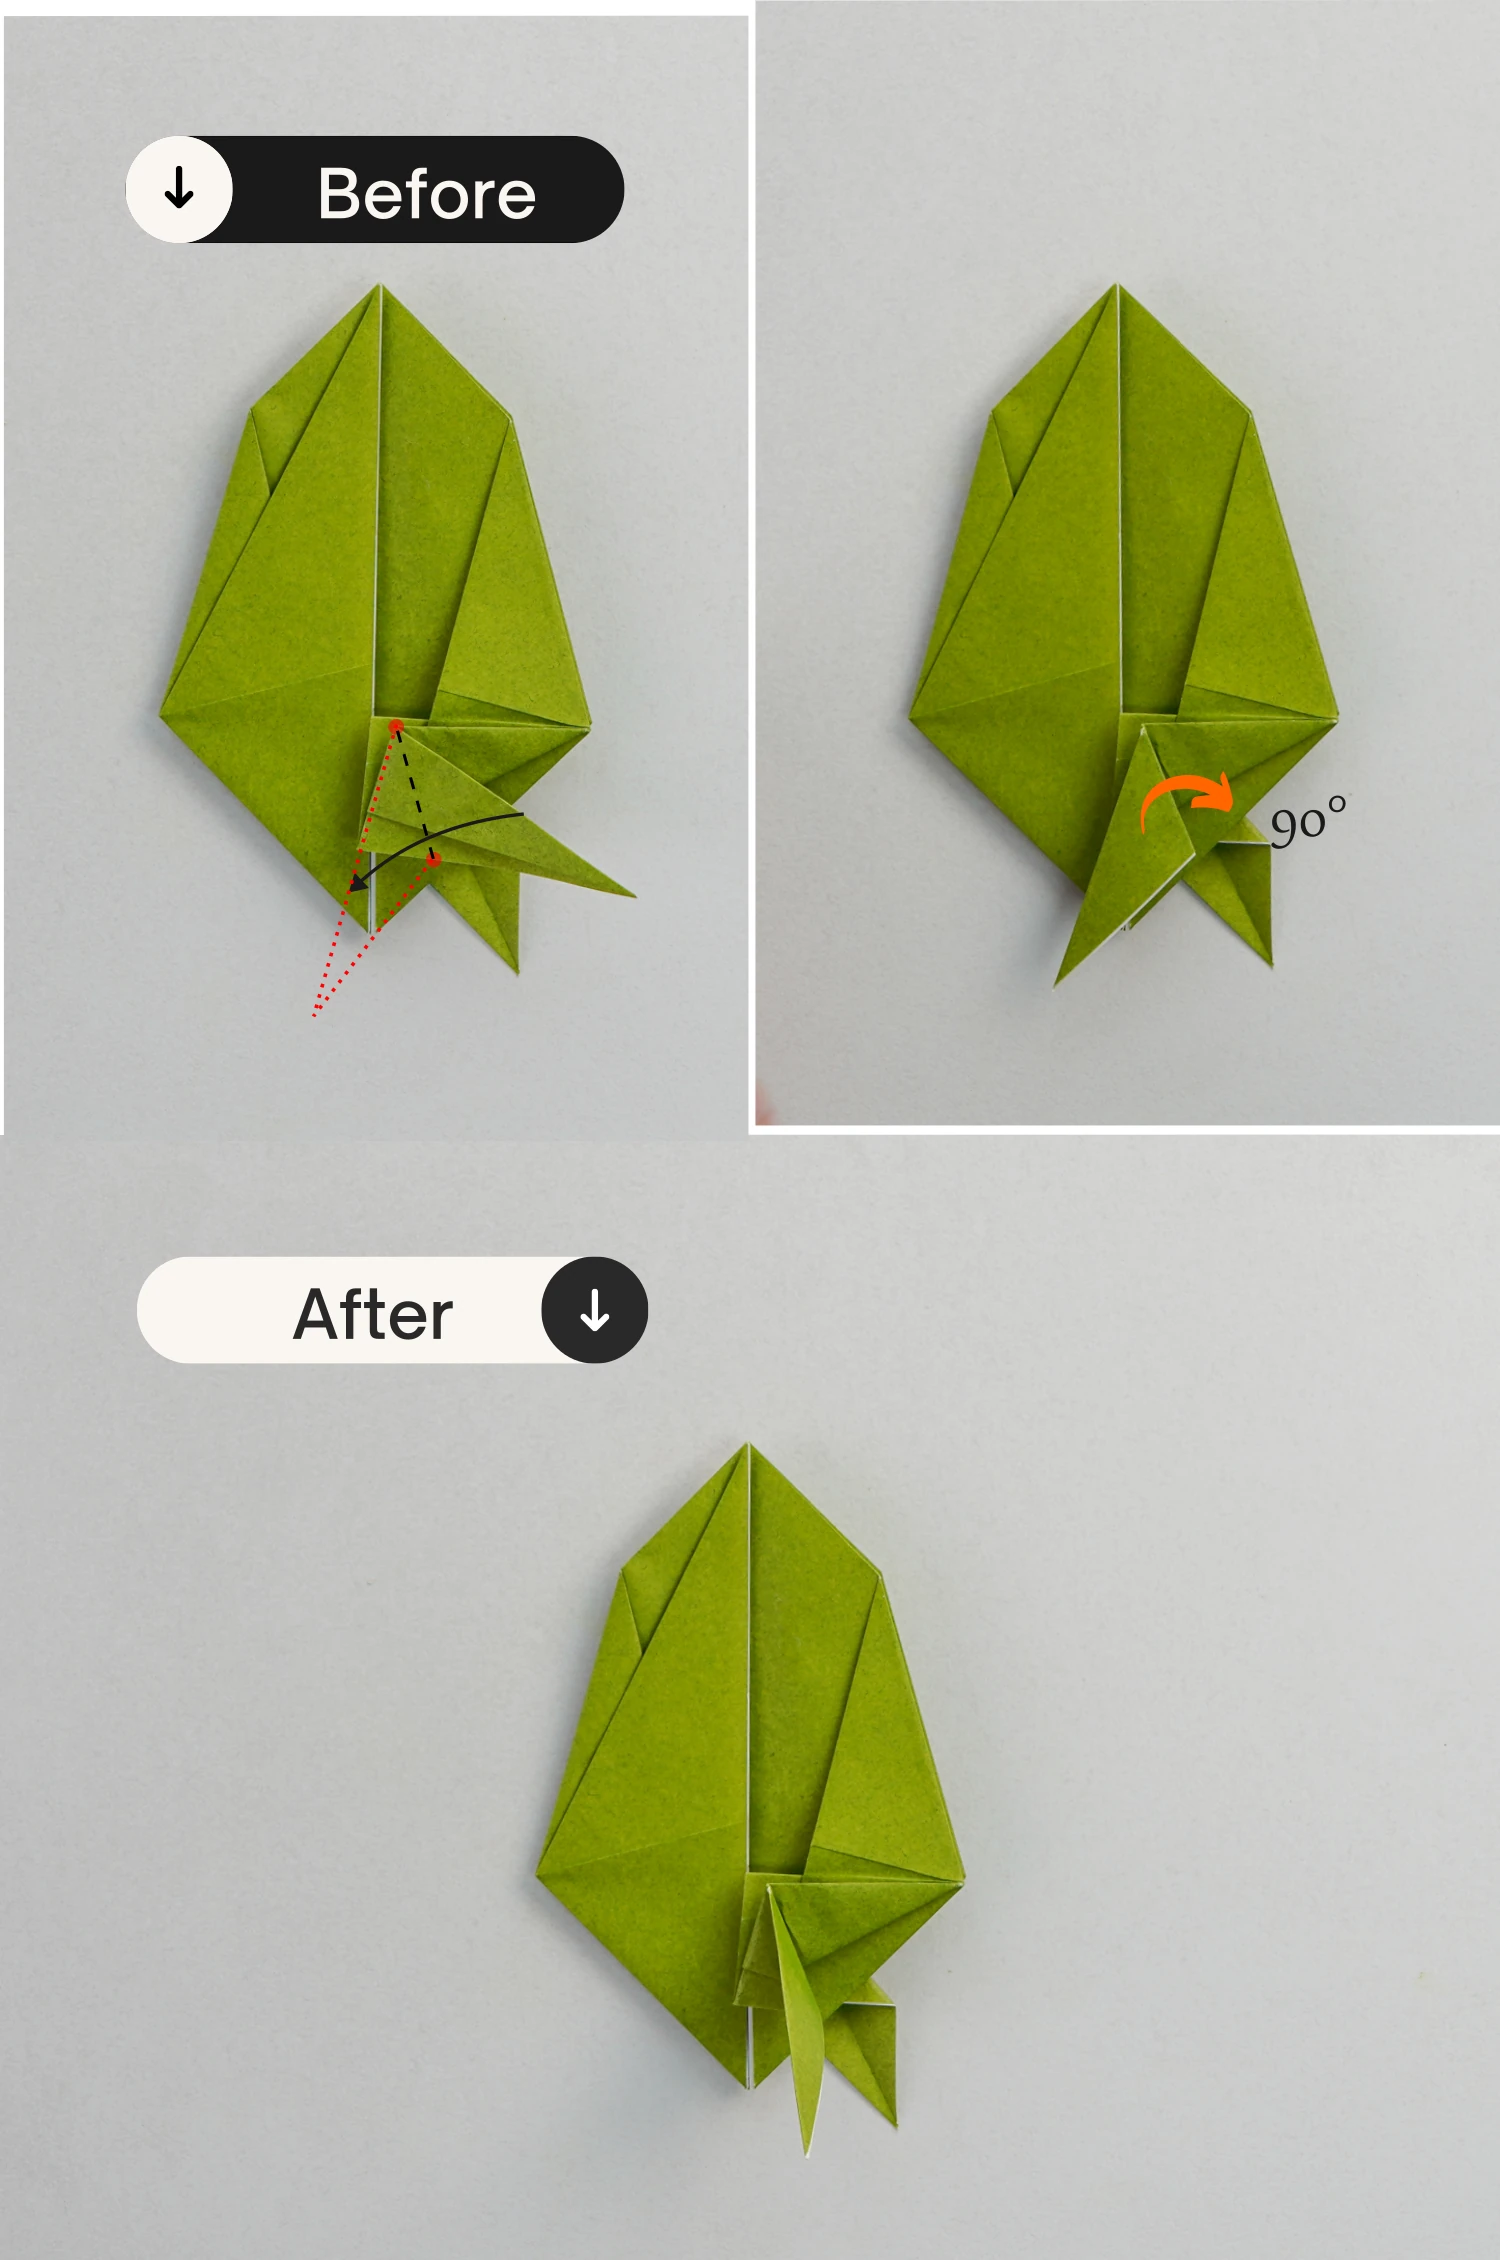
Step 26
View it from the bottom right.
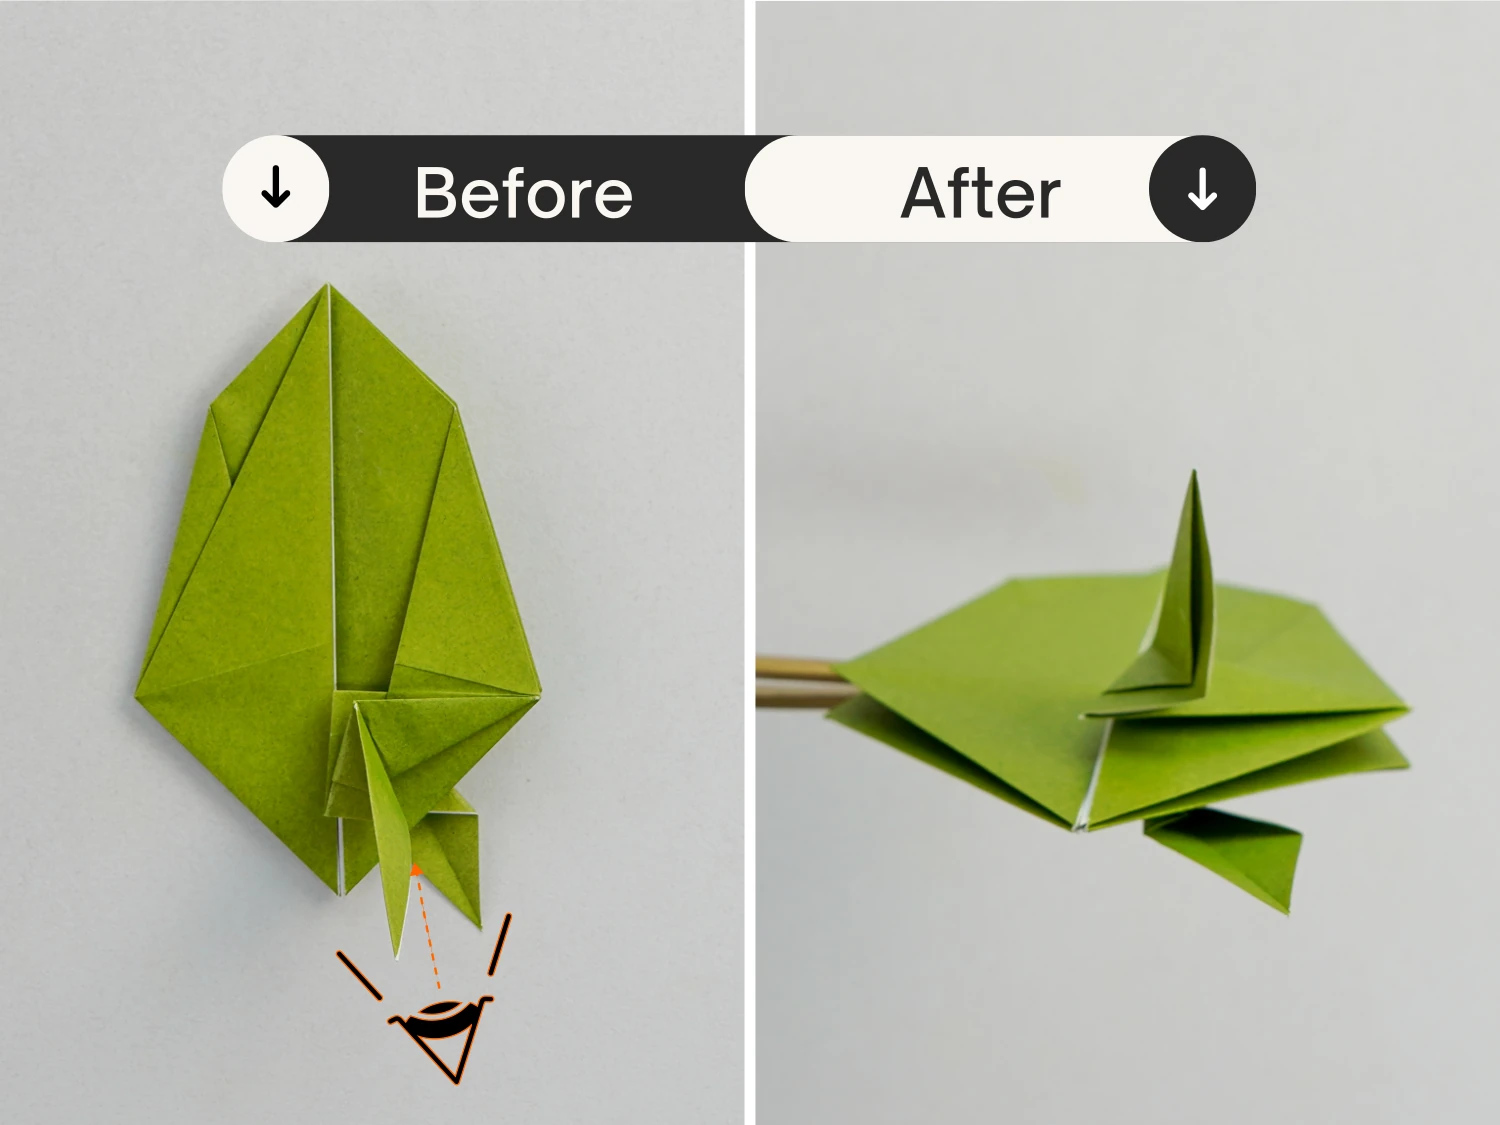
Step 27
Press the top point of this flap to open it, then flatten it, as you did in step 21.
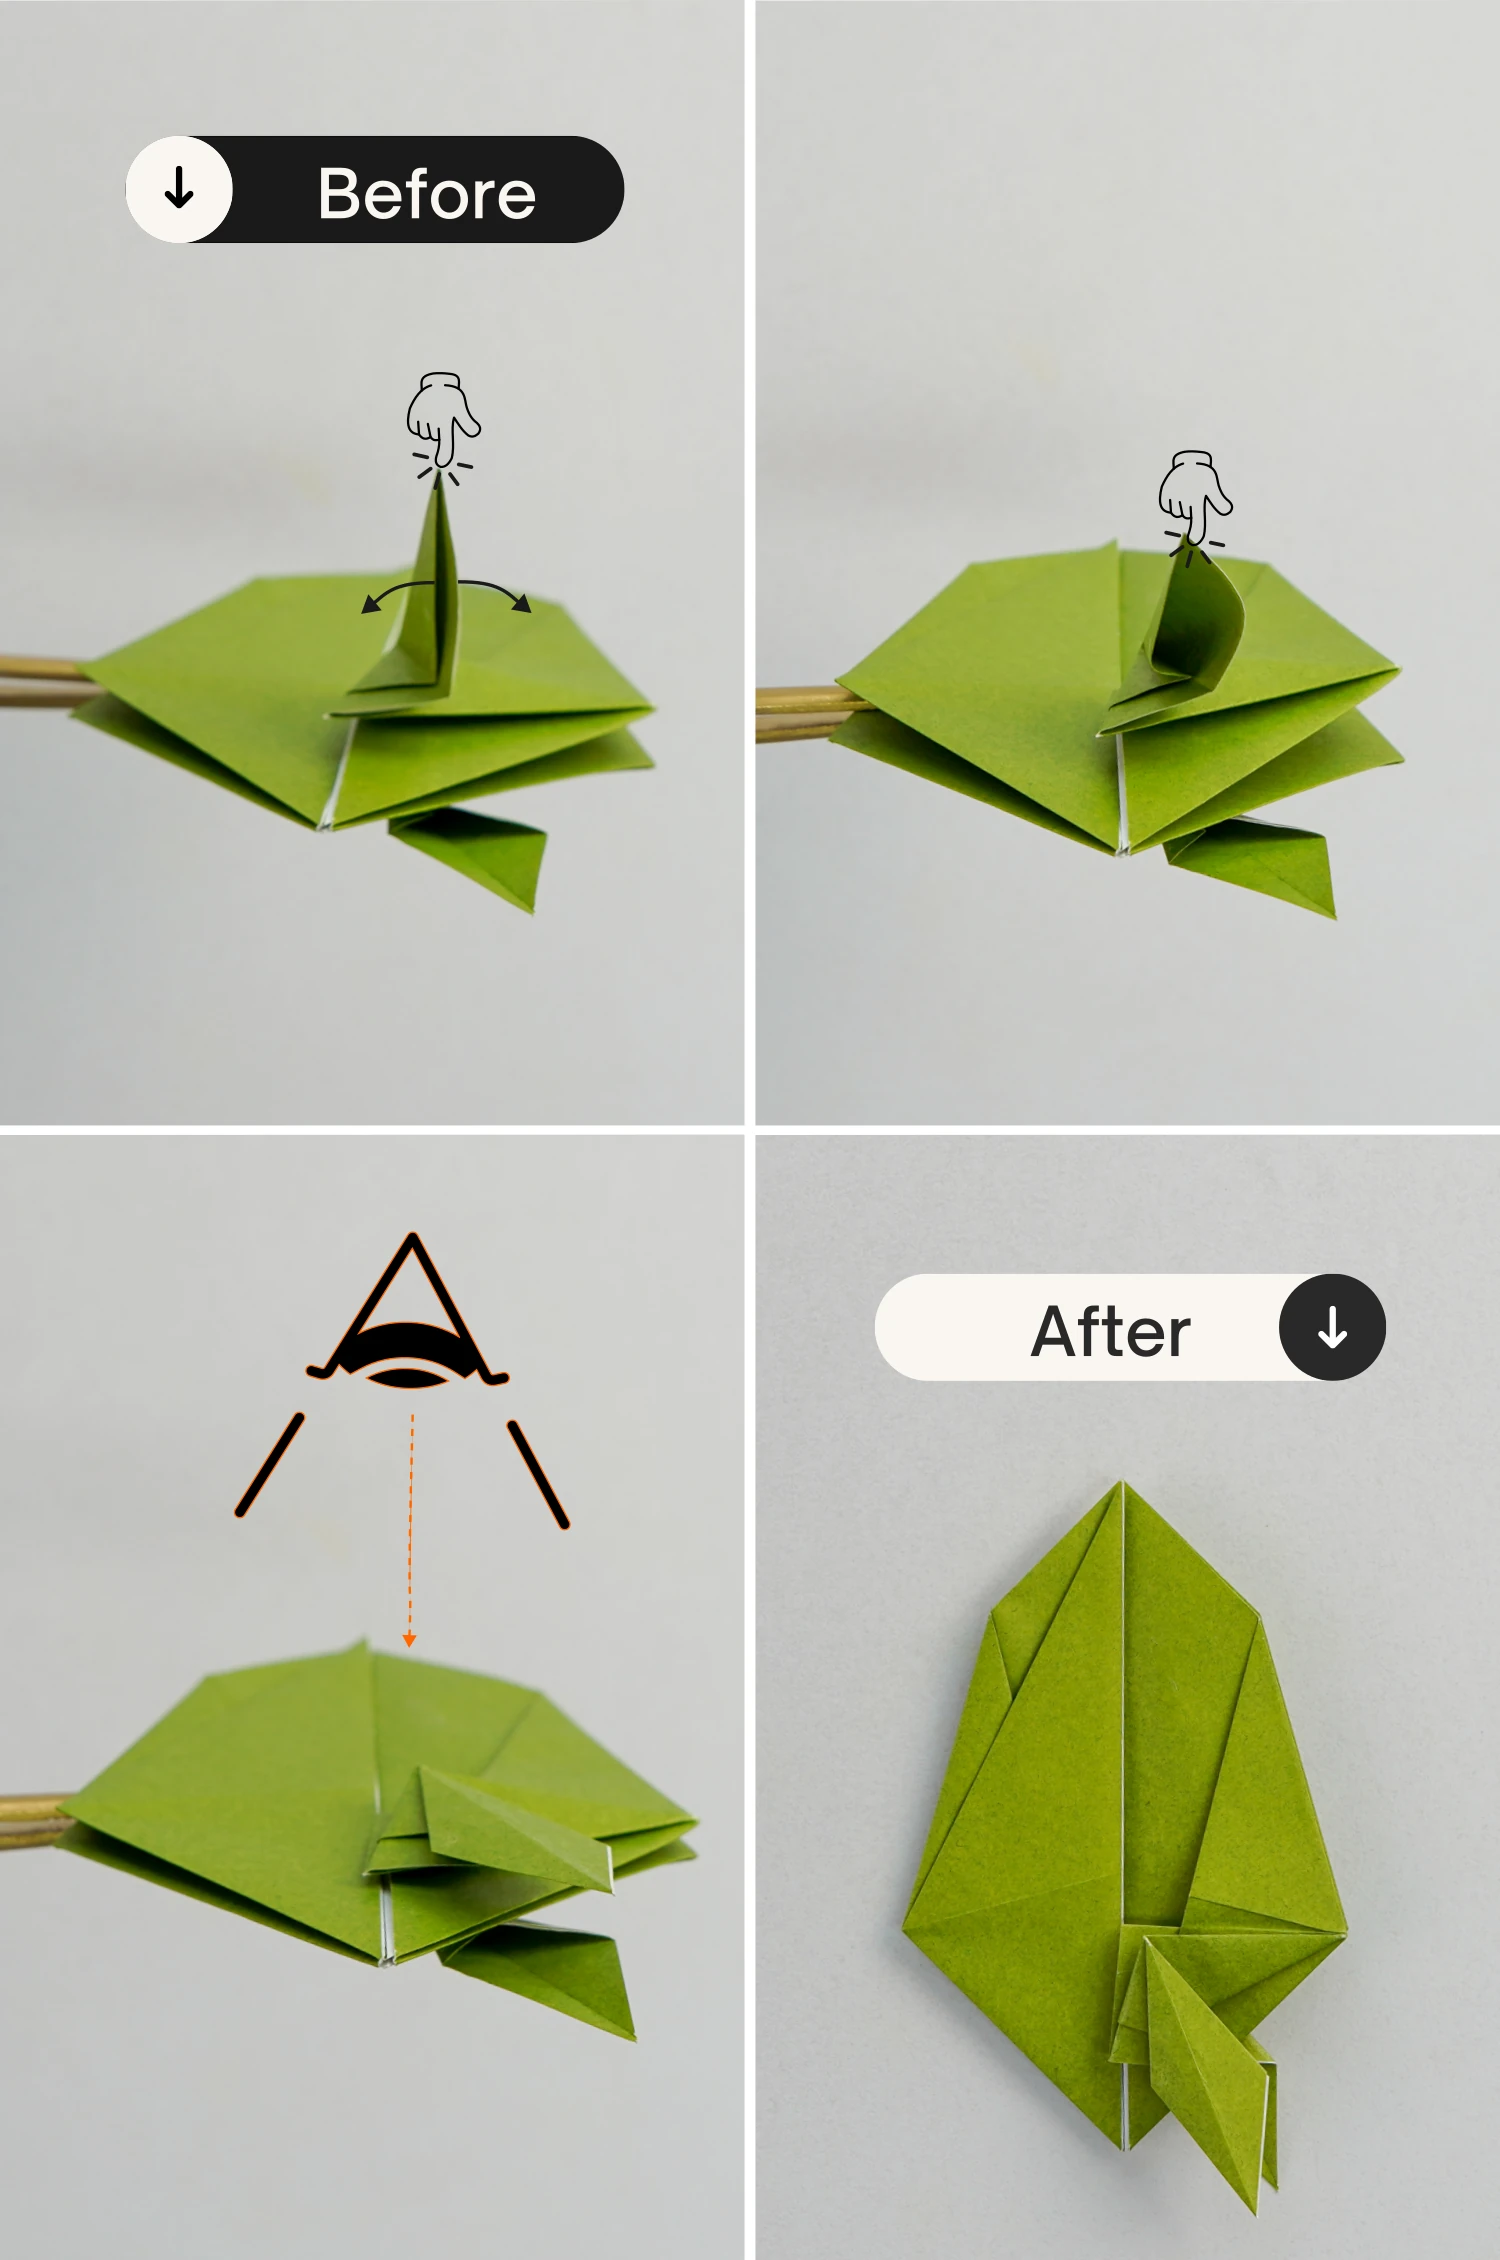
Step 28
Now take the left flap, and fold it down to the left along the dotted line.
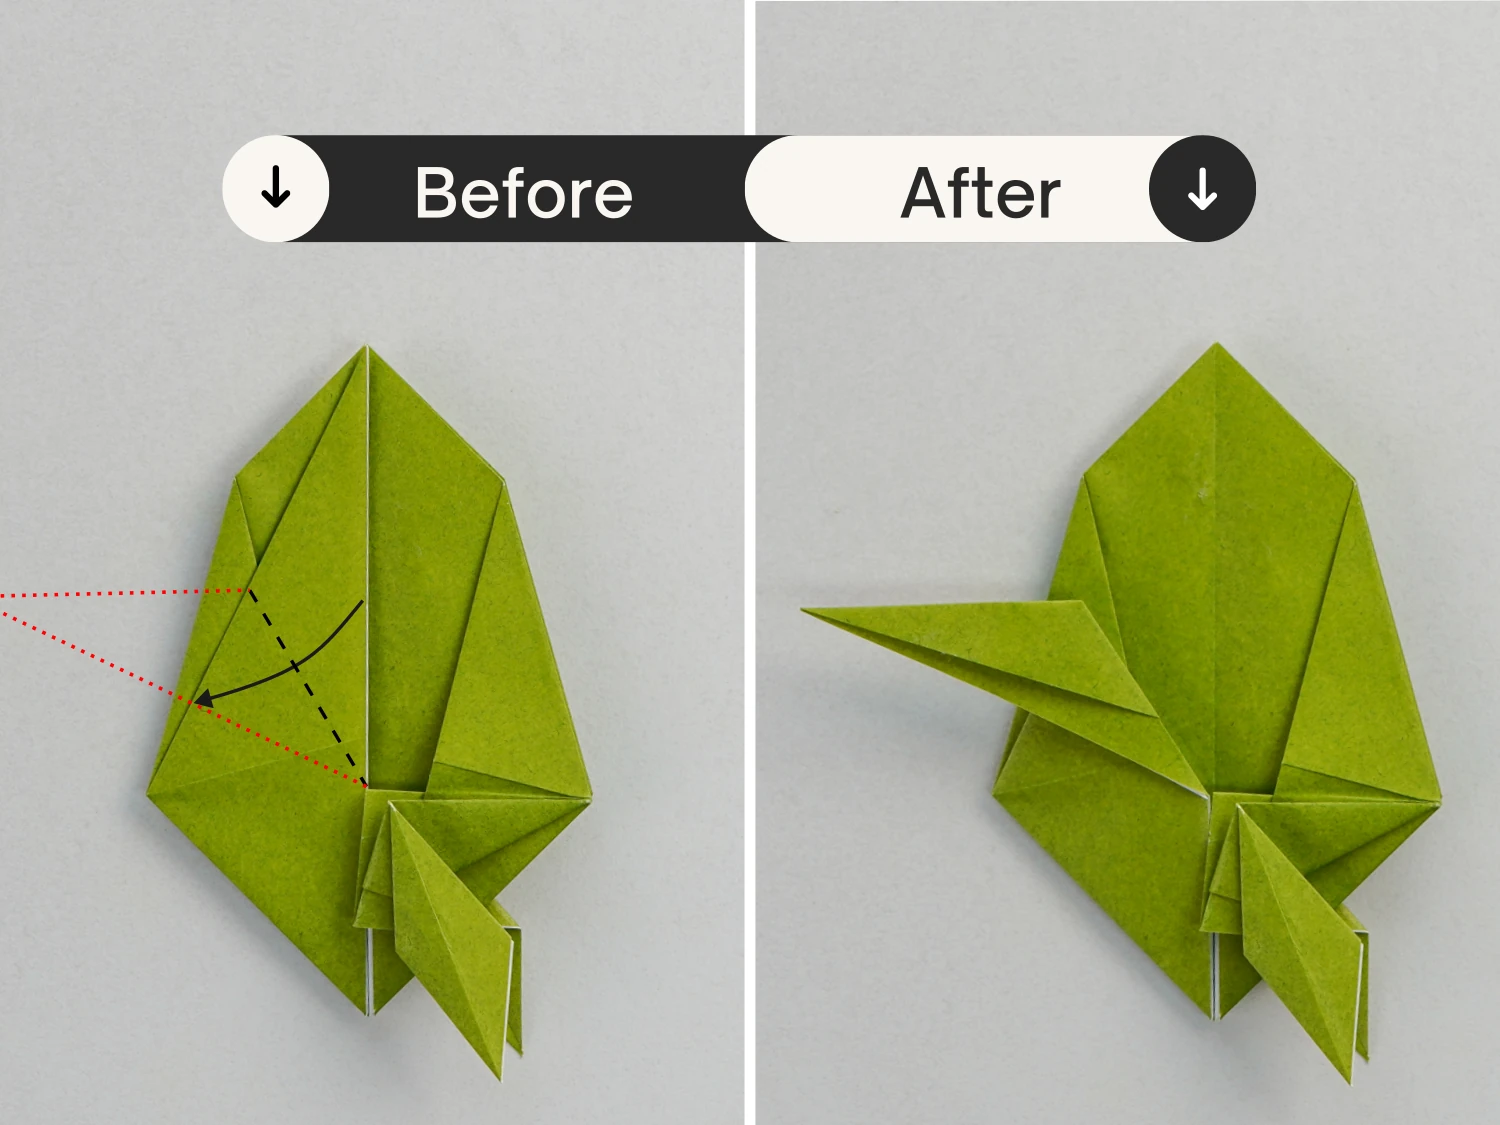
Step 29
Flip the paper over.
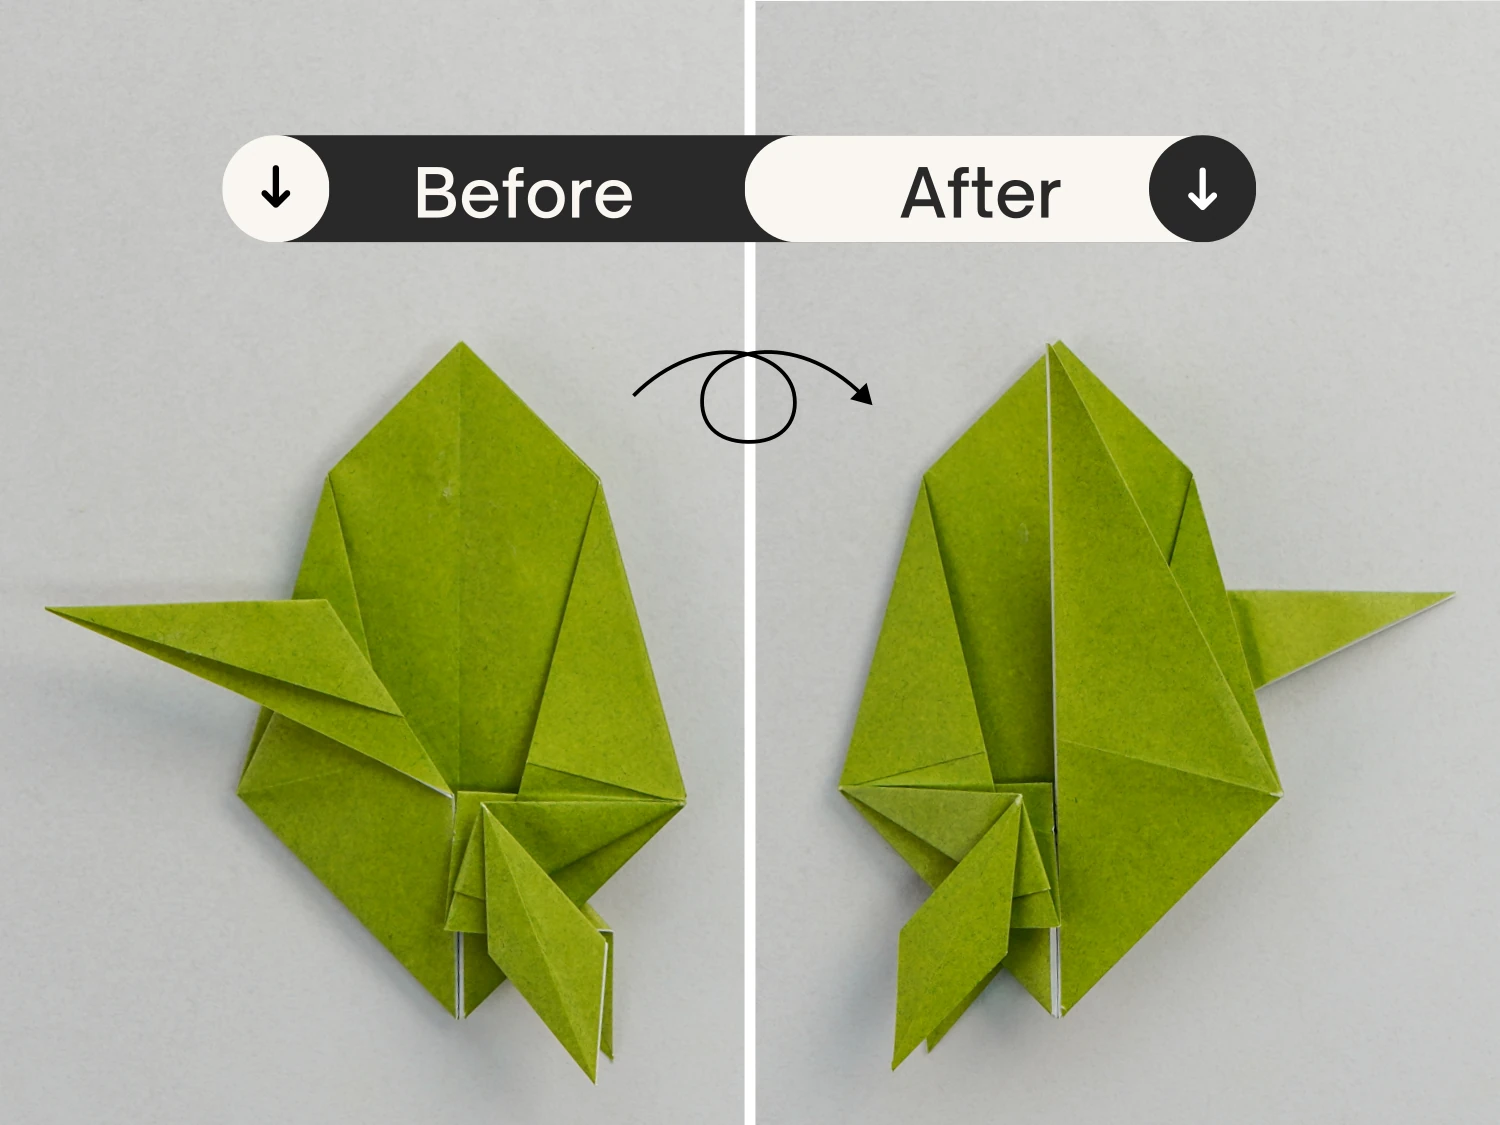
Step 30
In the same manner, fold the right flap down to the right along the dotted line, ensuring to overlaps with the flap you made in step 28.
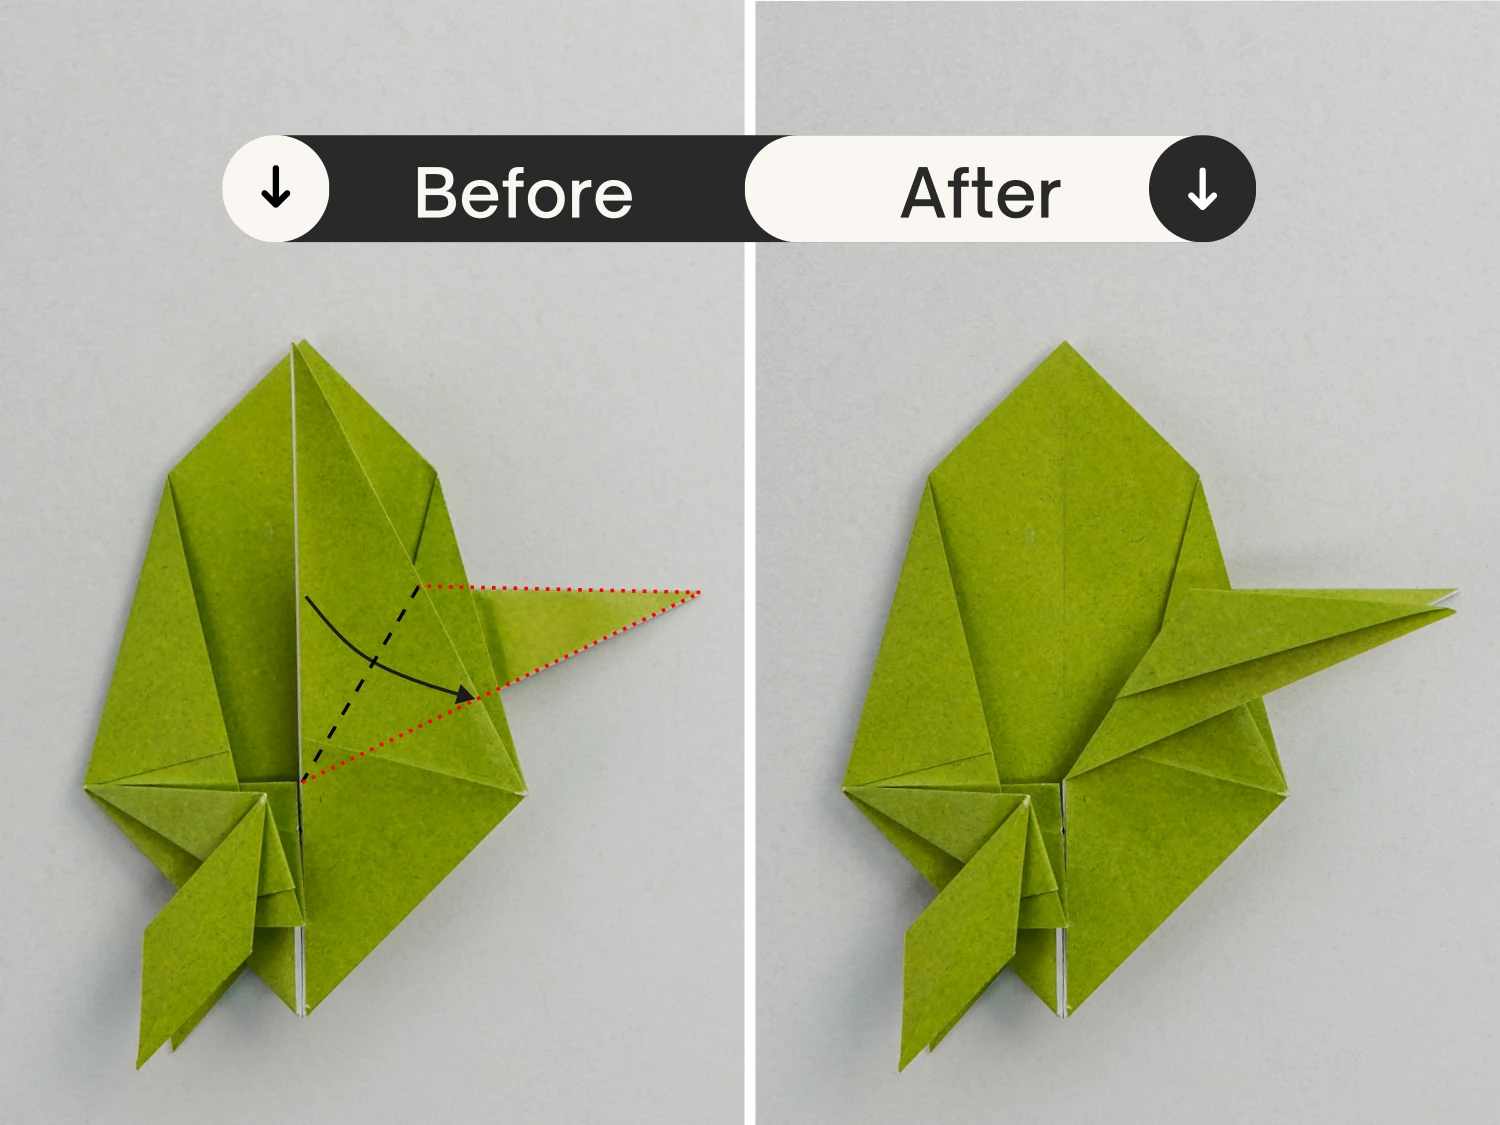
Step 31
View it from the top, and make the top two flaps together at the top, and the bottom two flaps together at the bottom, this will change the model from opening on the left and right to opening on the top and bottom. Then lay it flat.
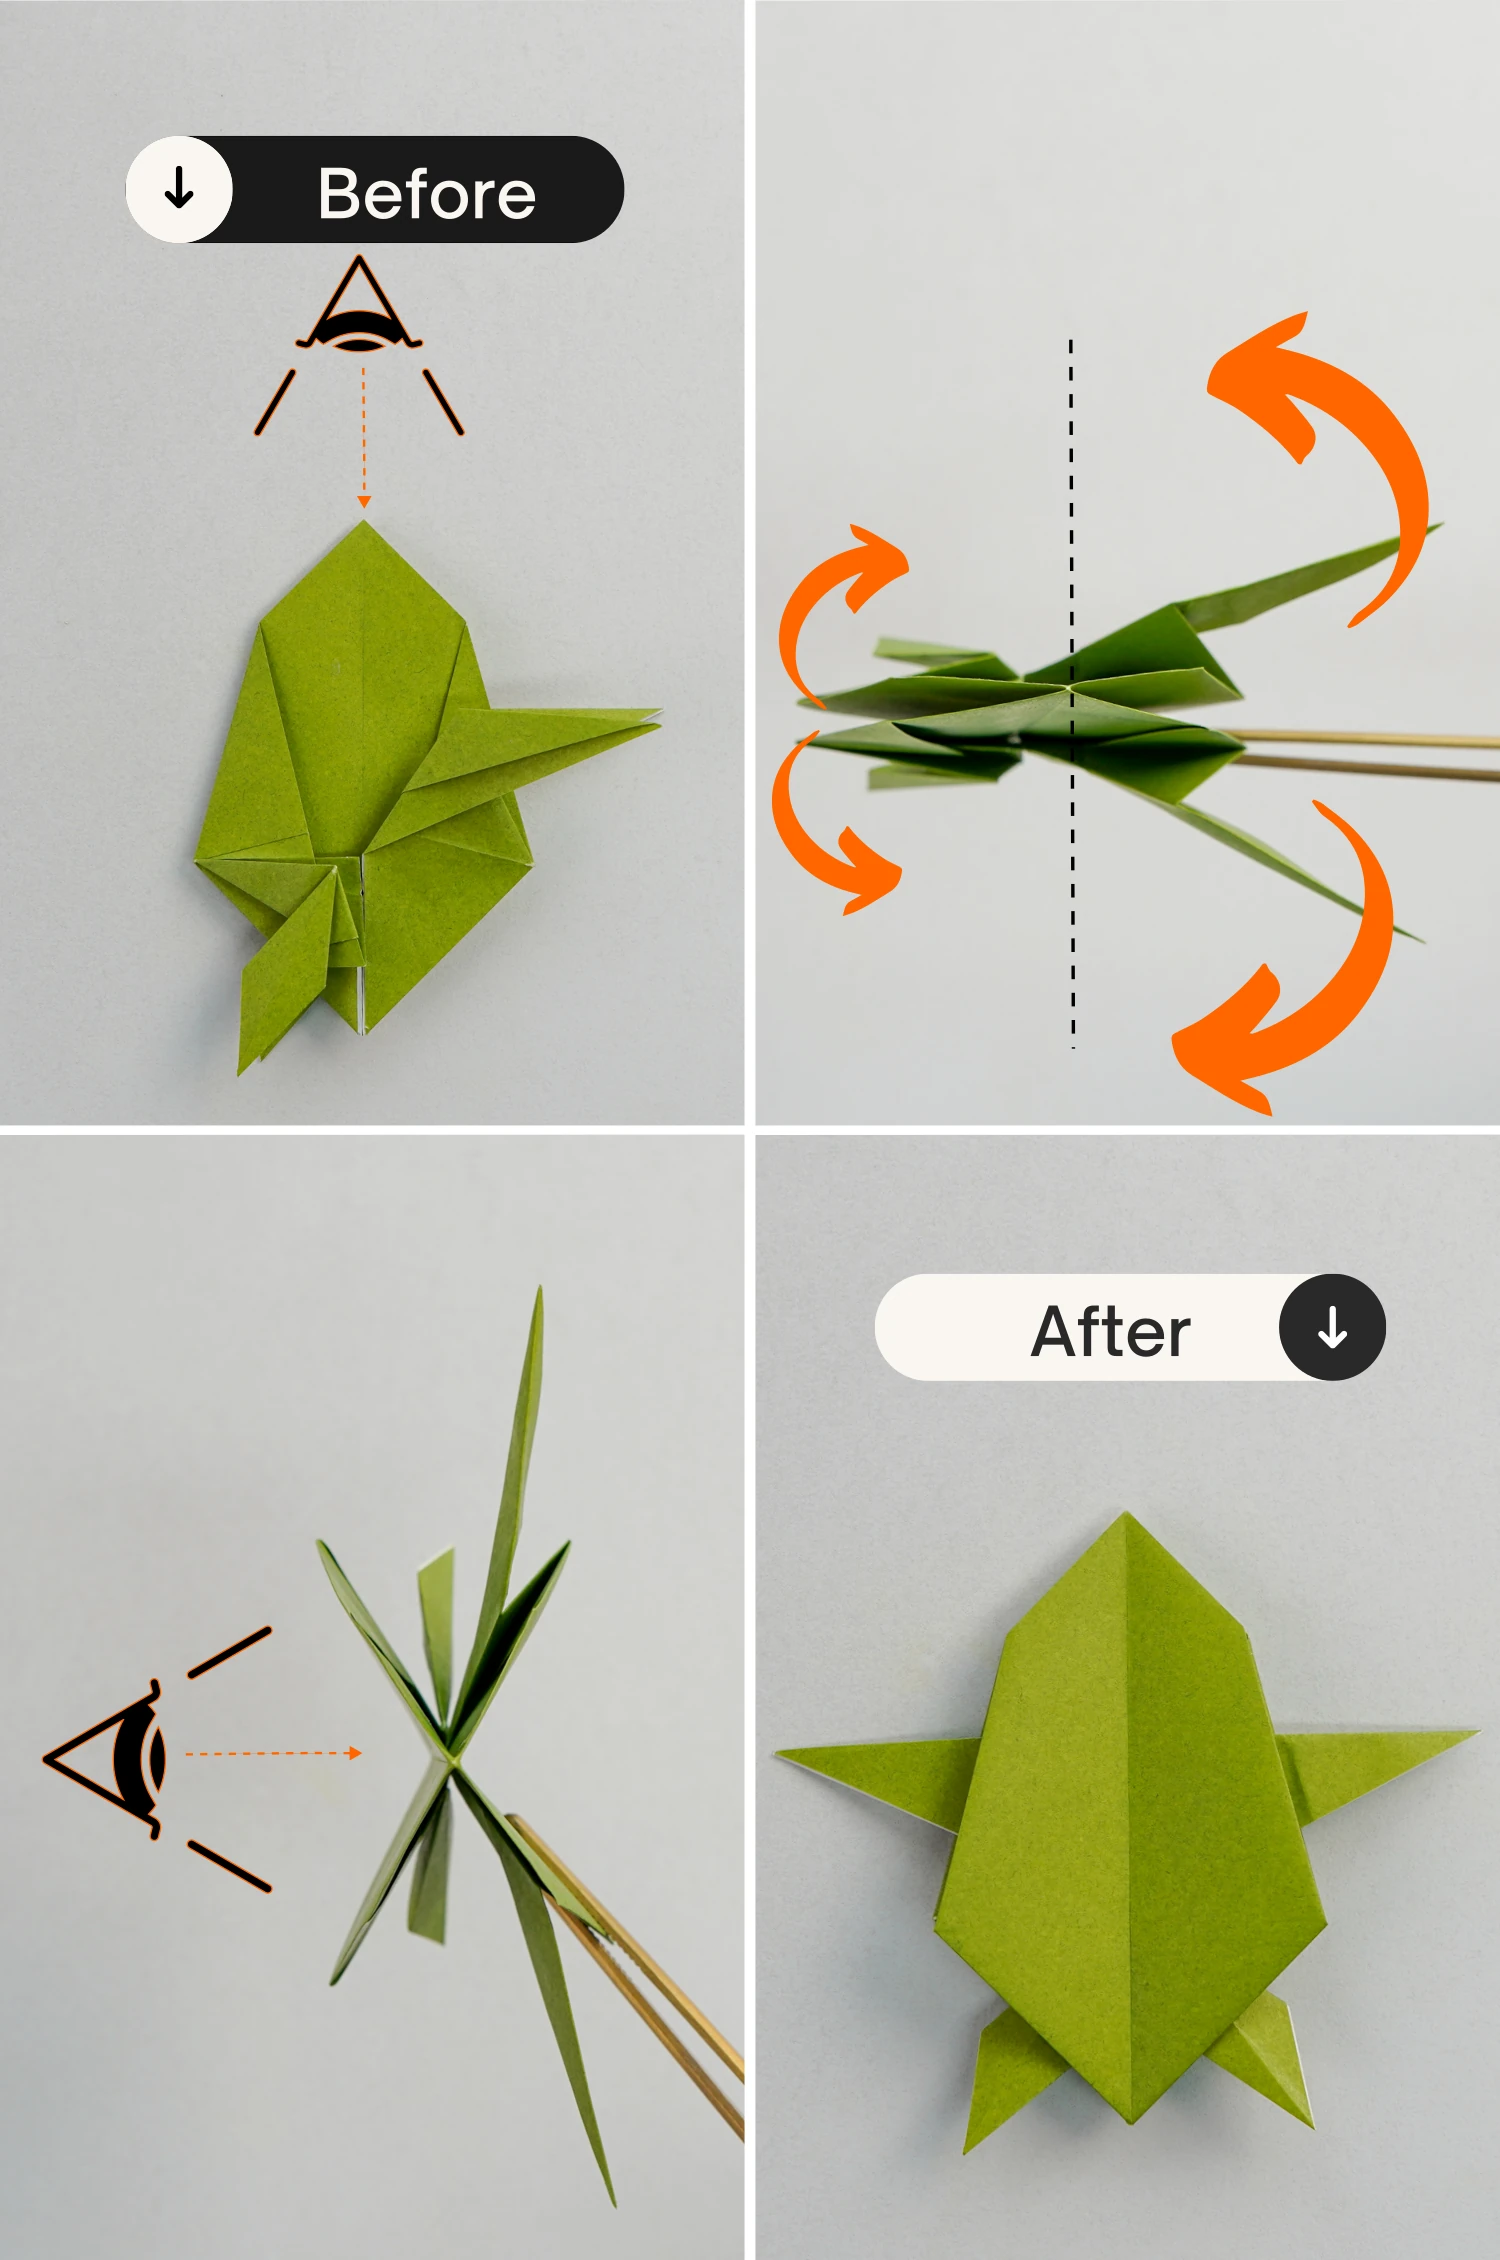
Step 32
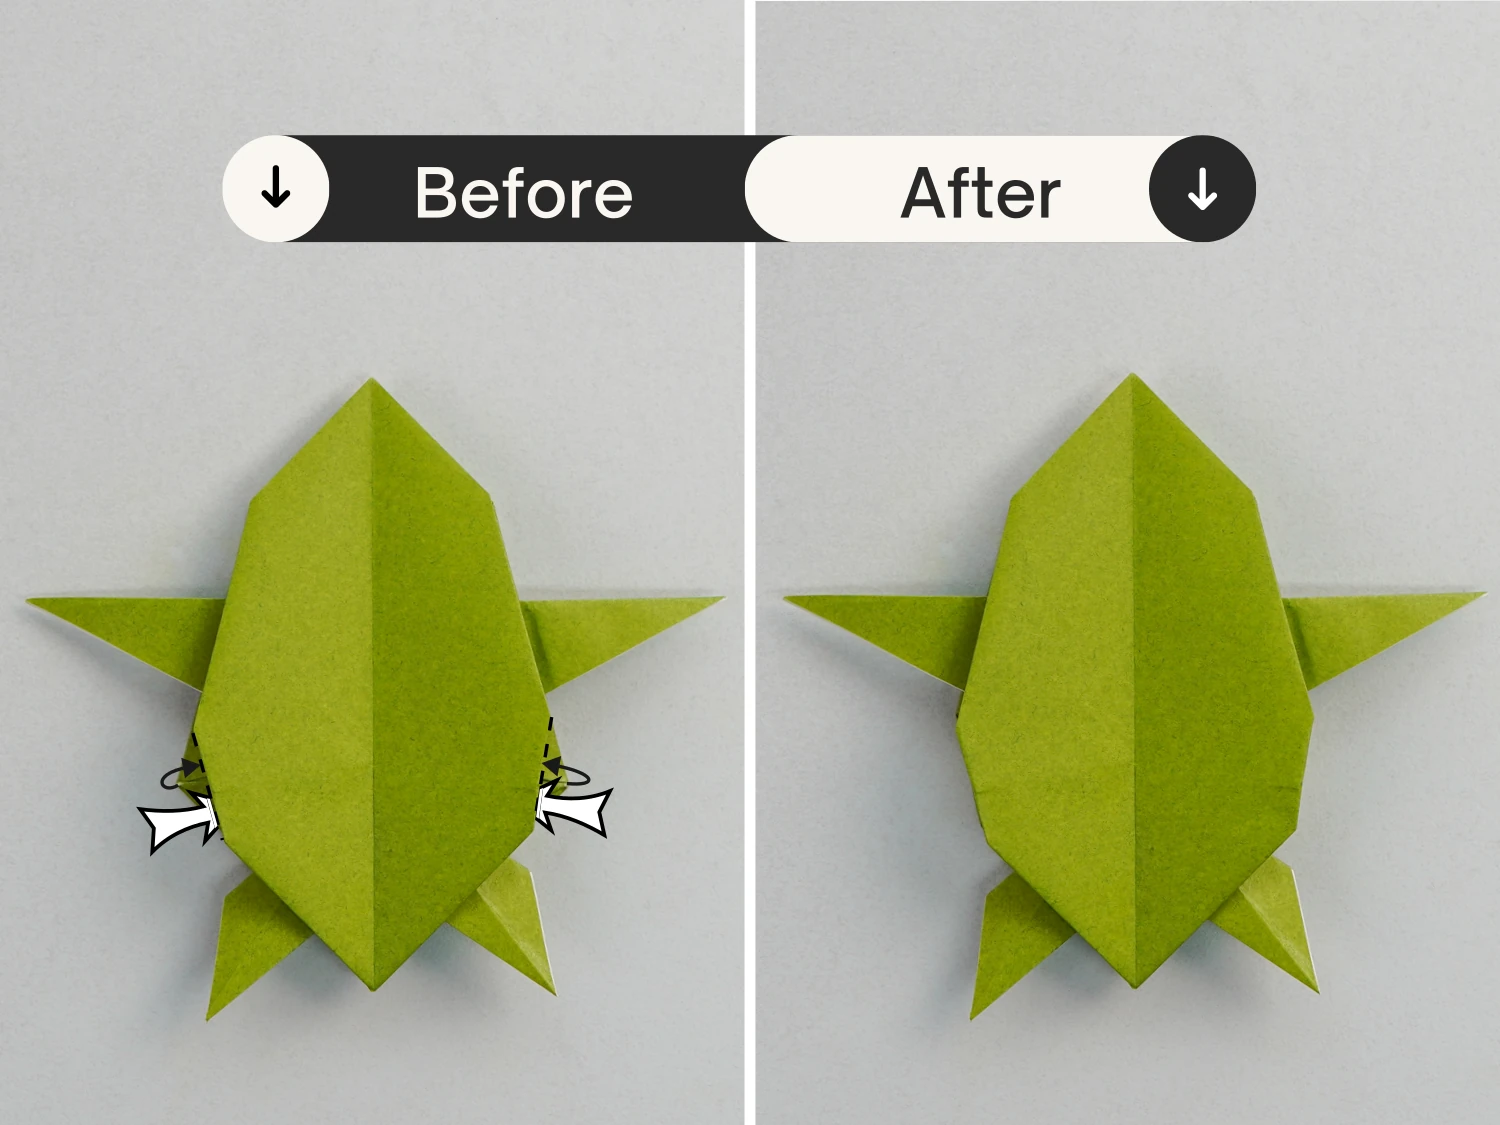
Fold the bottom left and right corners of the turtle’s body a little backward.
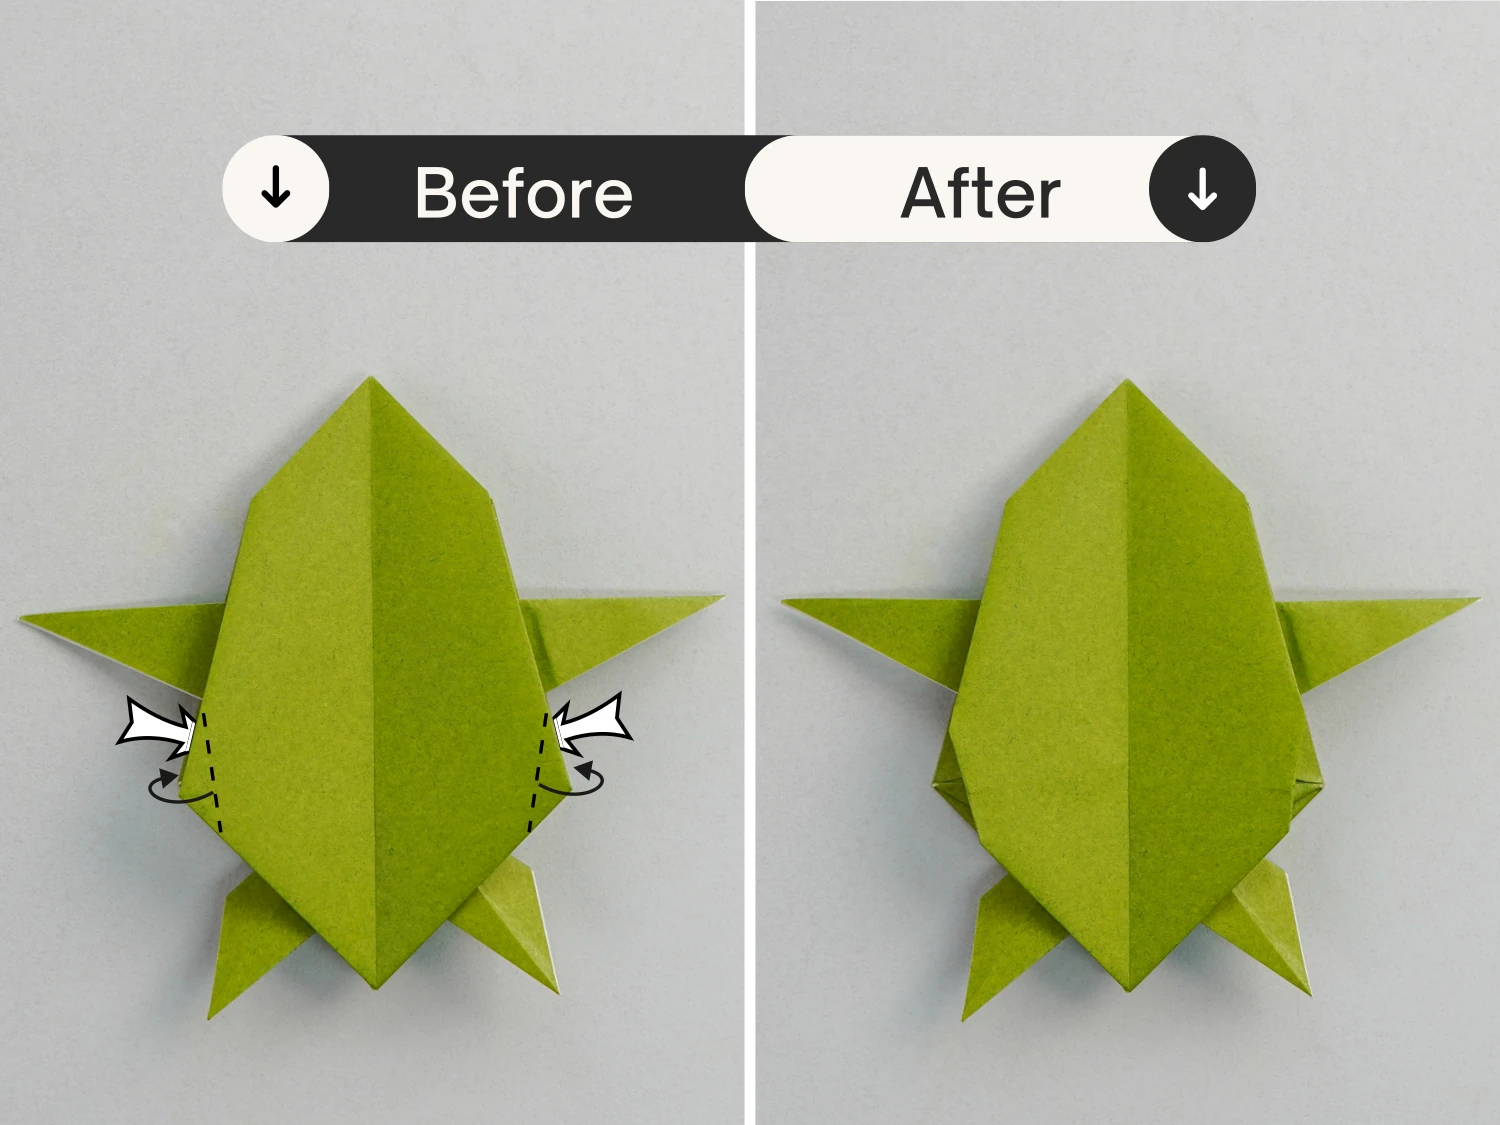
Step 33
The corresponding two points on the bottom layer should folded in the same way.
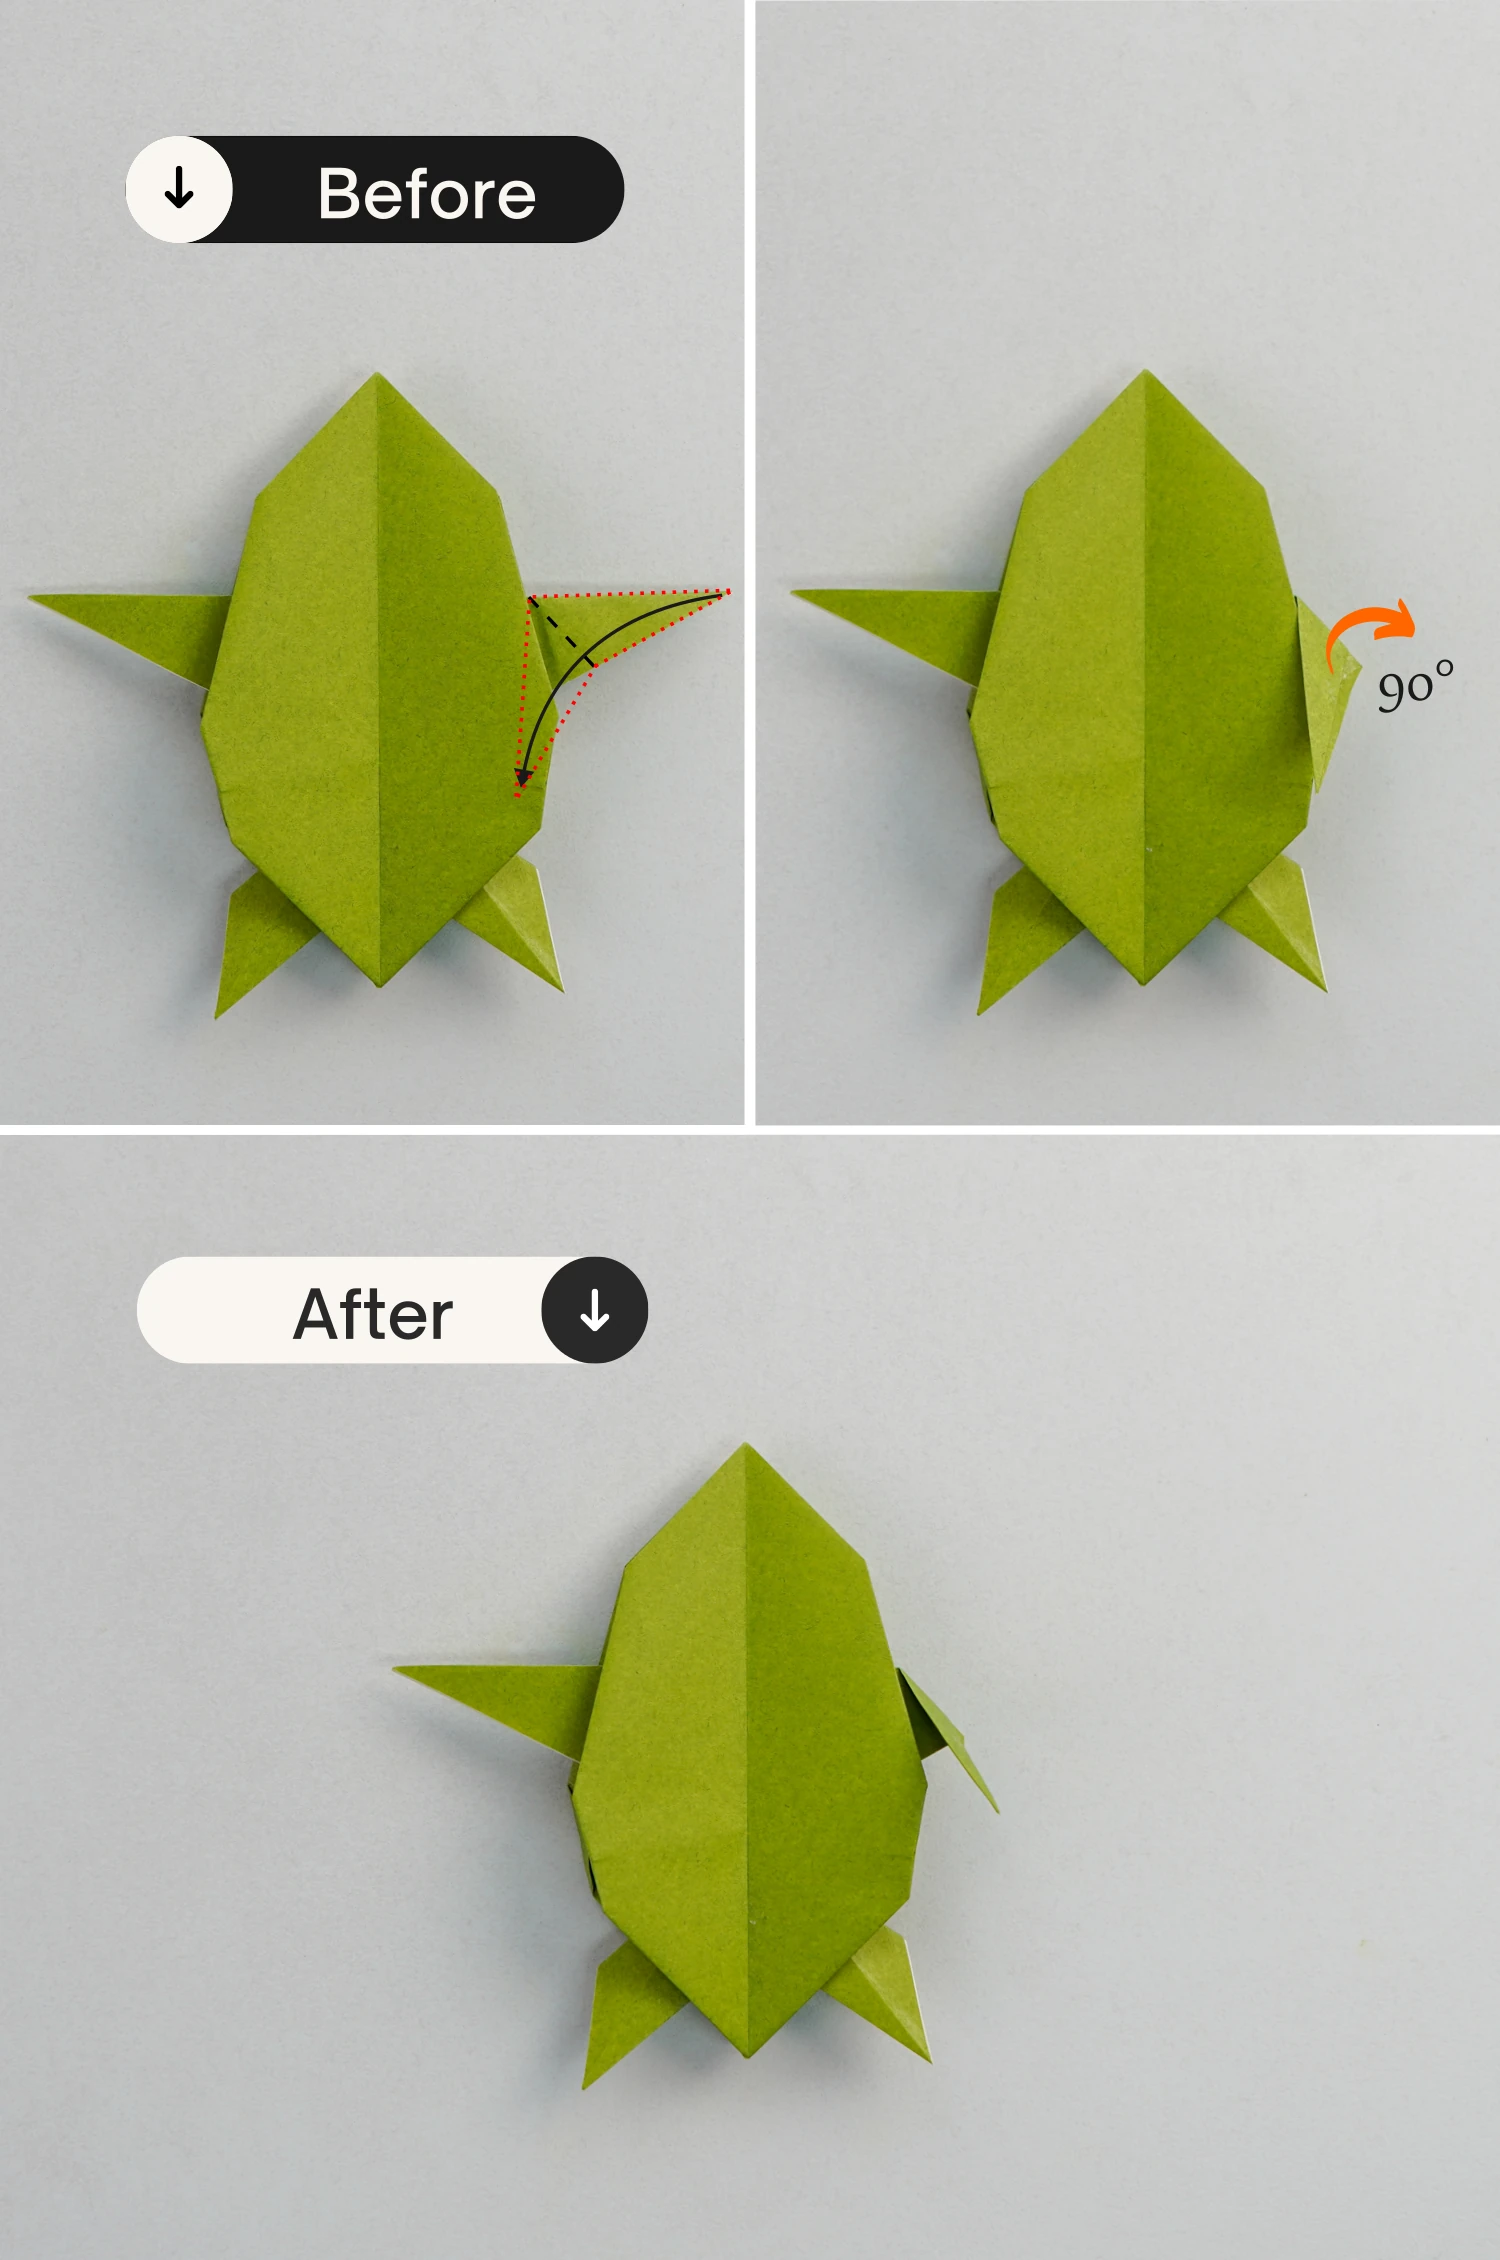
Step 34
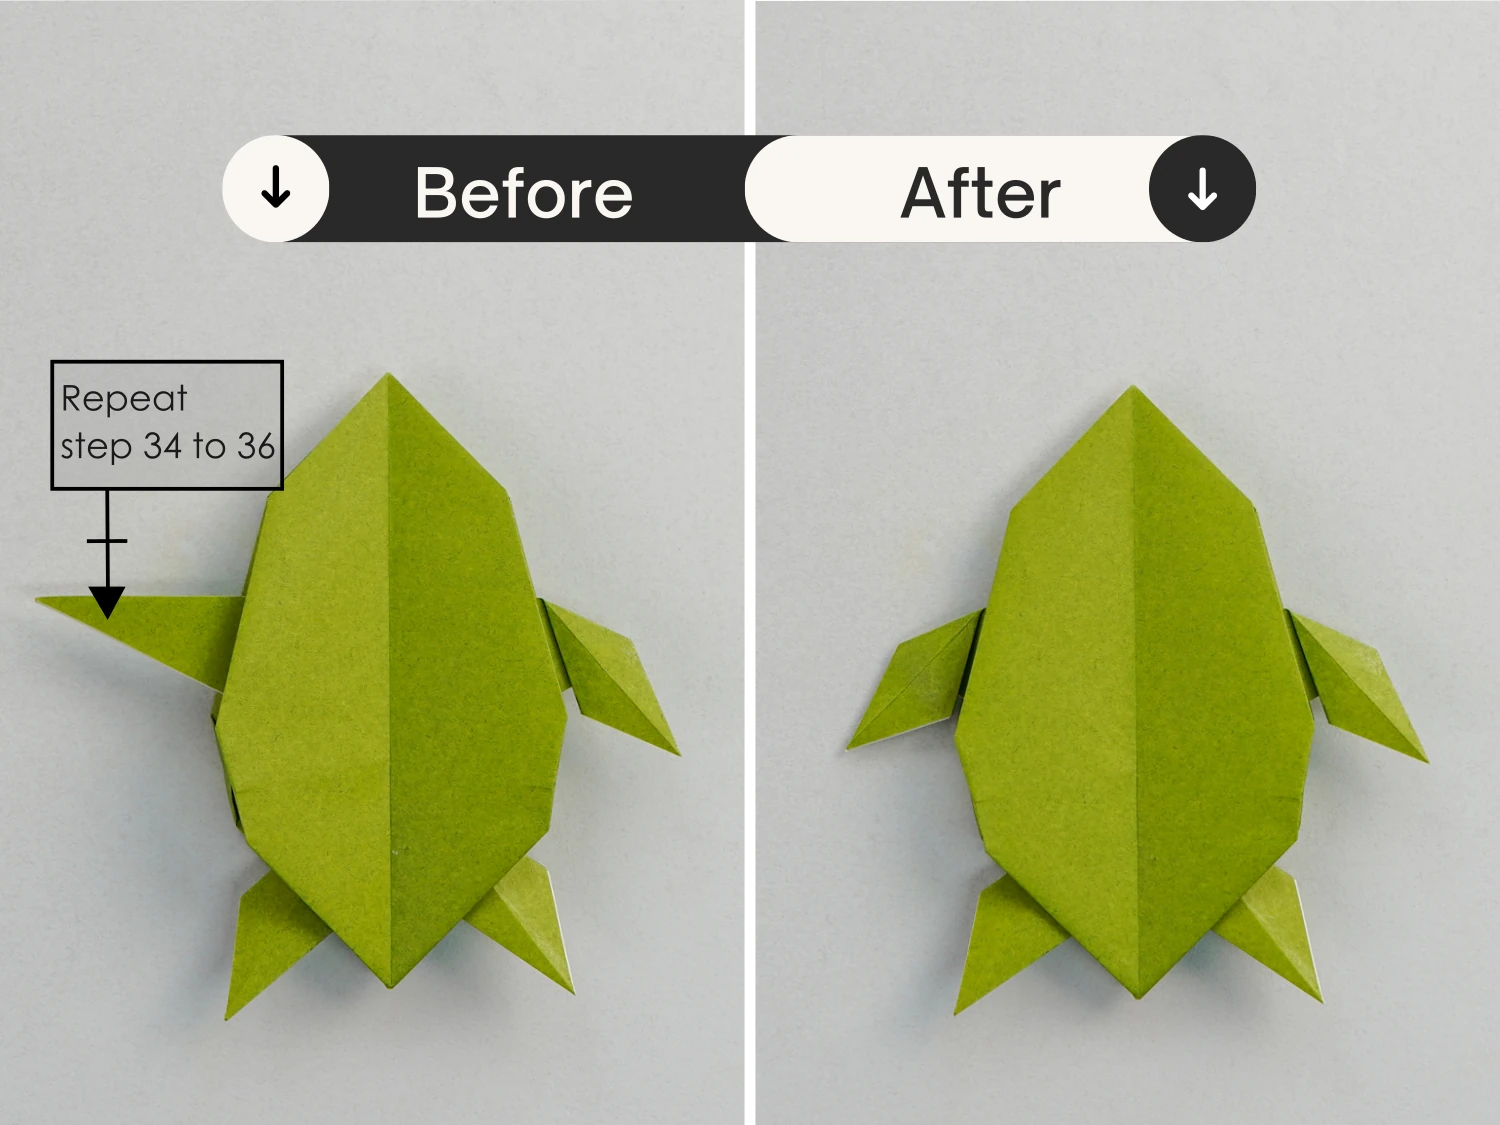
Fold the right flipper down along the dotted line, then lift it 90 degrees.
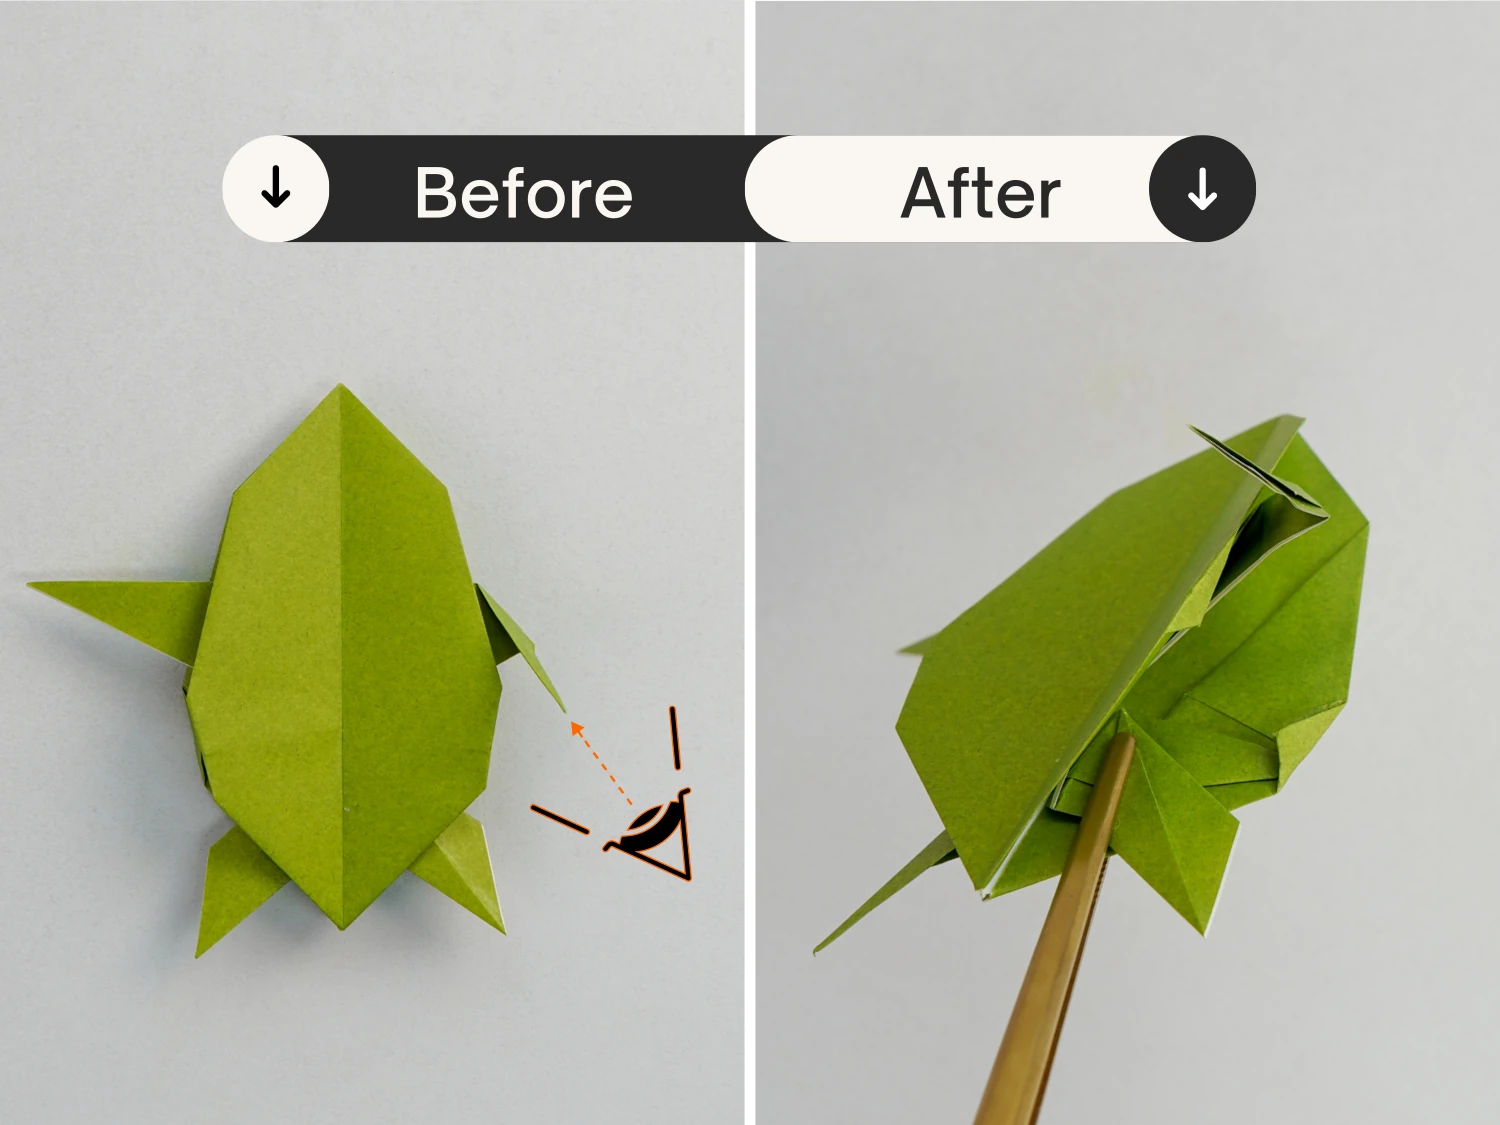
Step 35
View it from the right opening.
Step 36
Press the flap you made in step 34, that is the turtle’s right flipper, then open and flatten it.
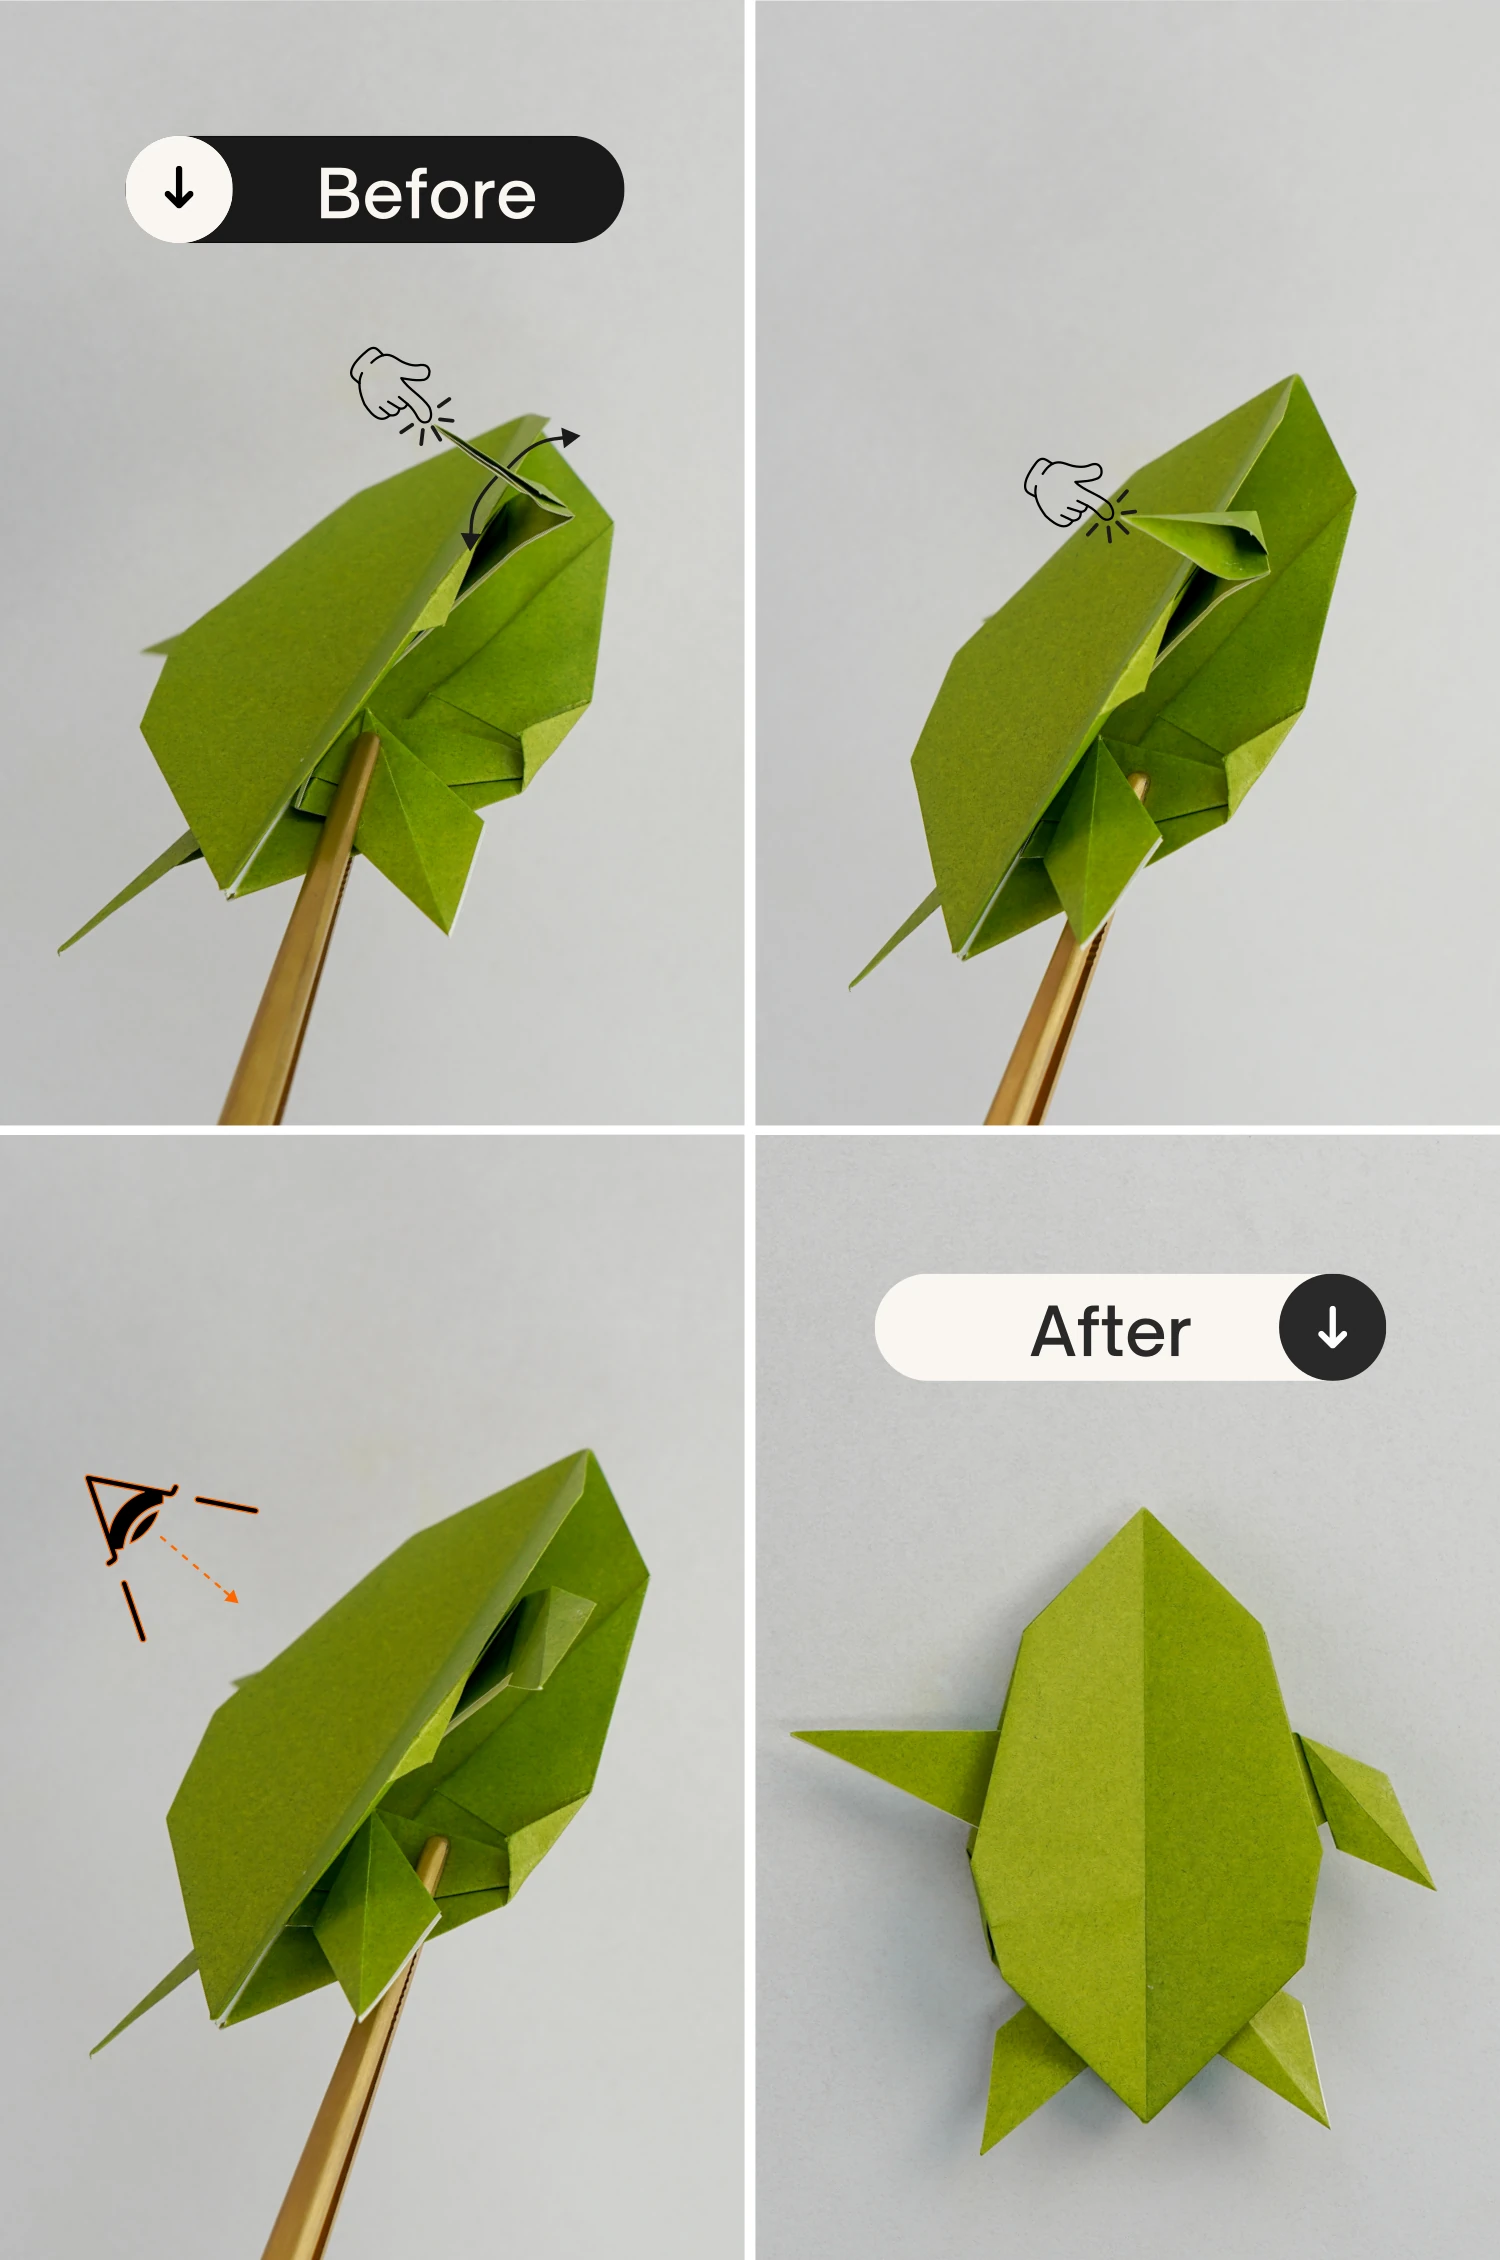
Step 37
Repeat steps 34 to 36 for its left flipper.
Step 38
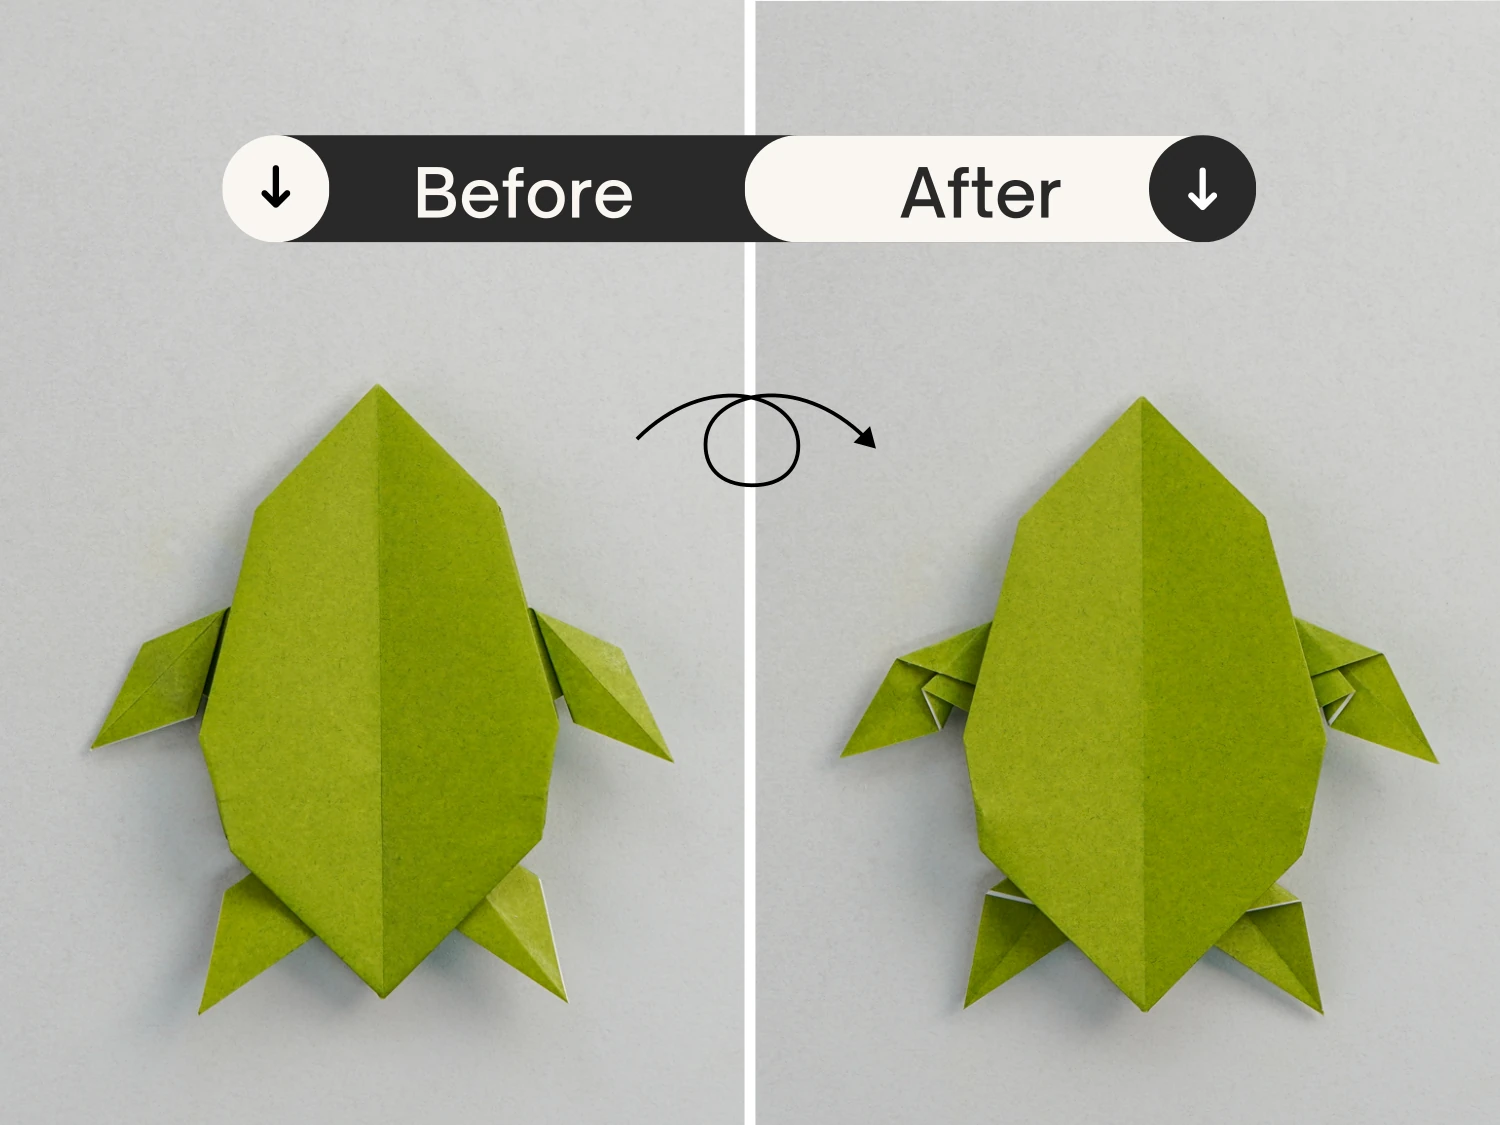
Turn over the model.
Step 39
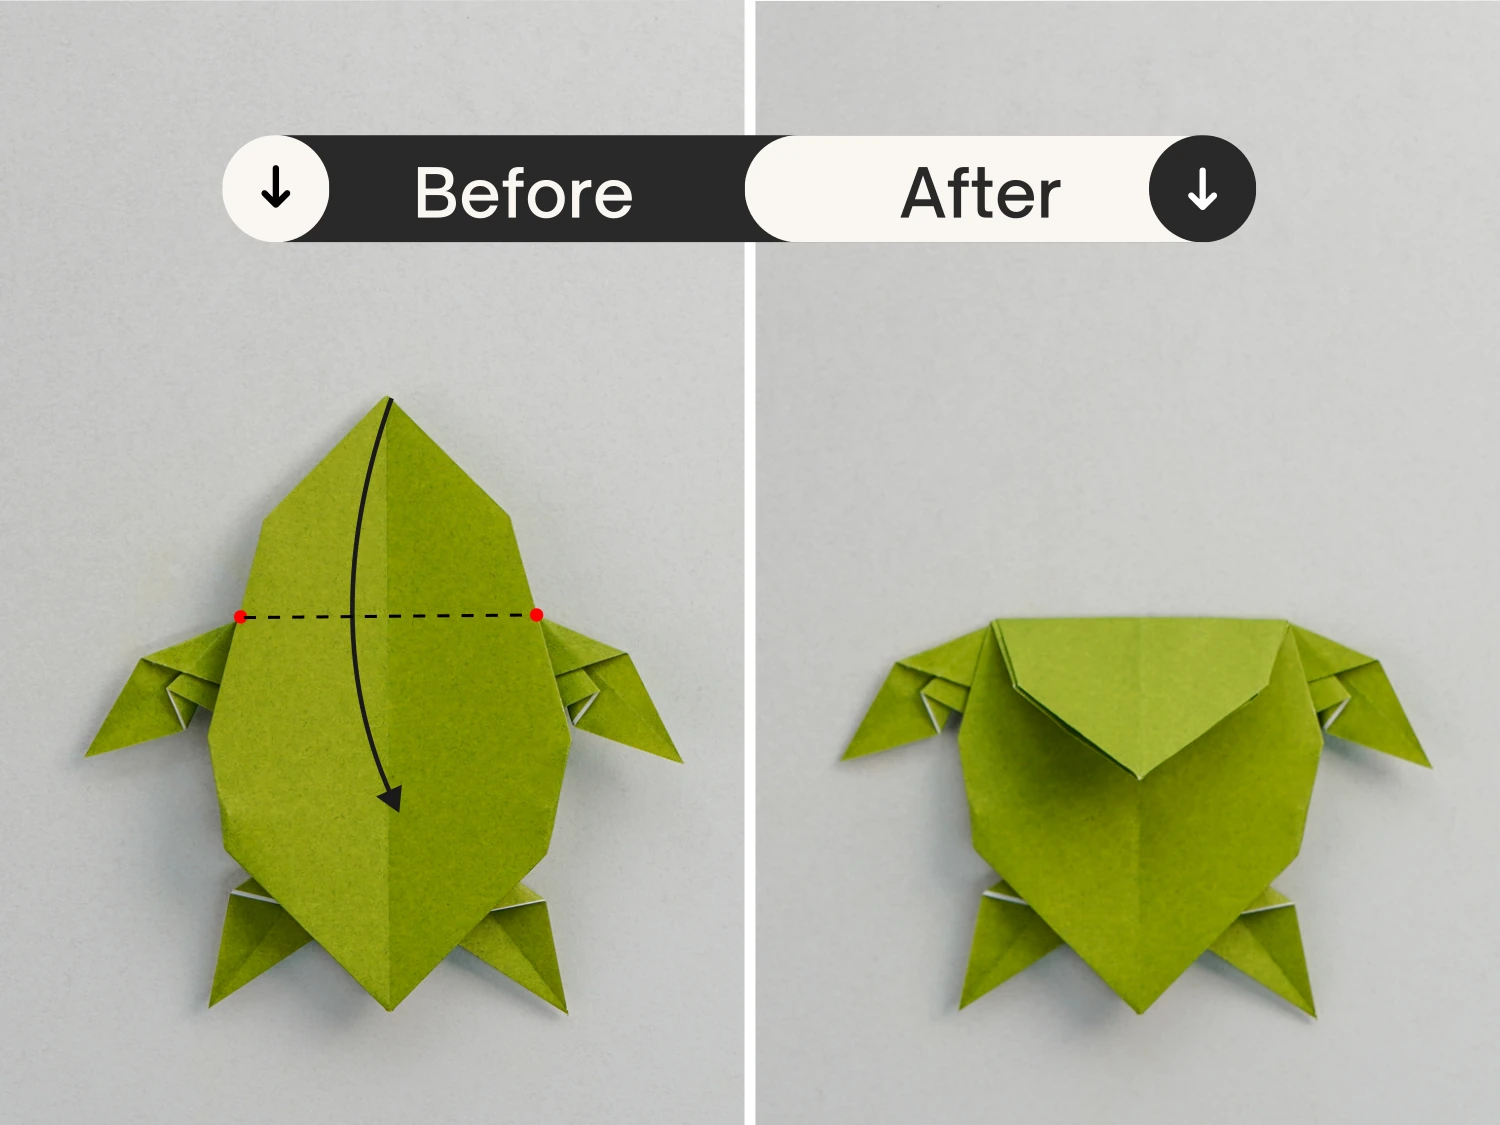
Fold the top point down along the dotted line.
Step 40
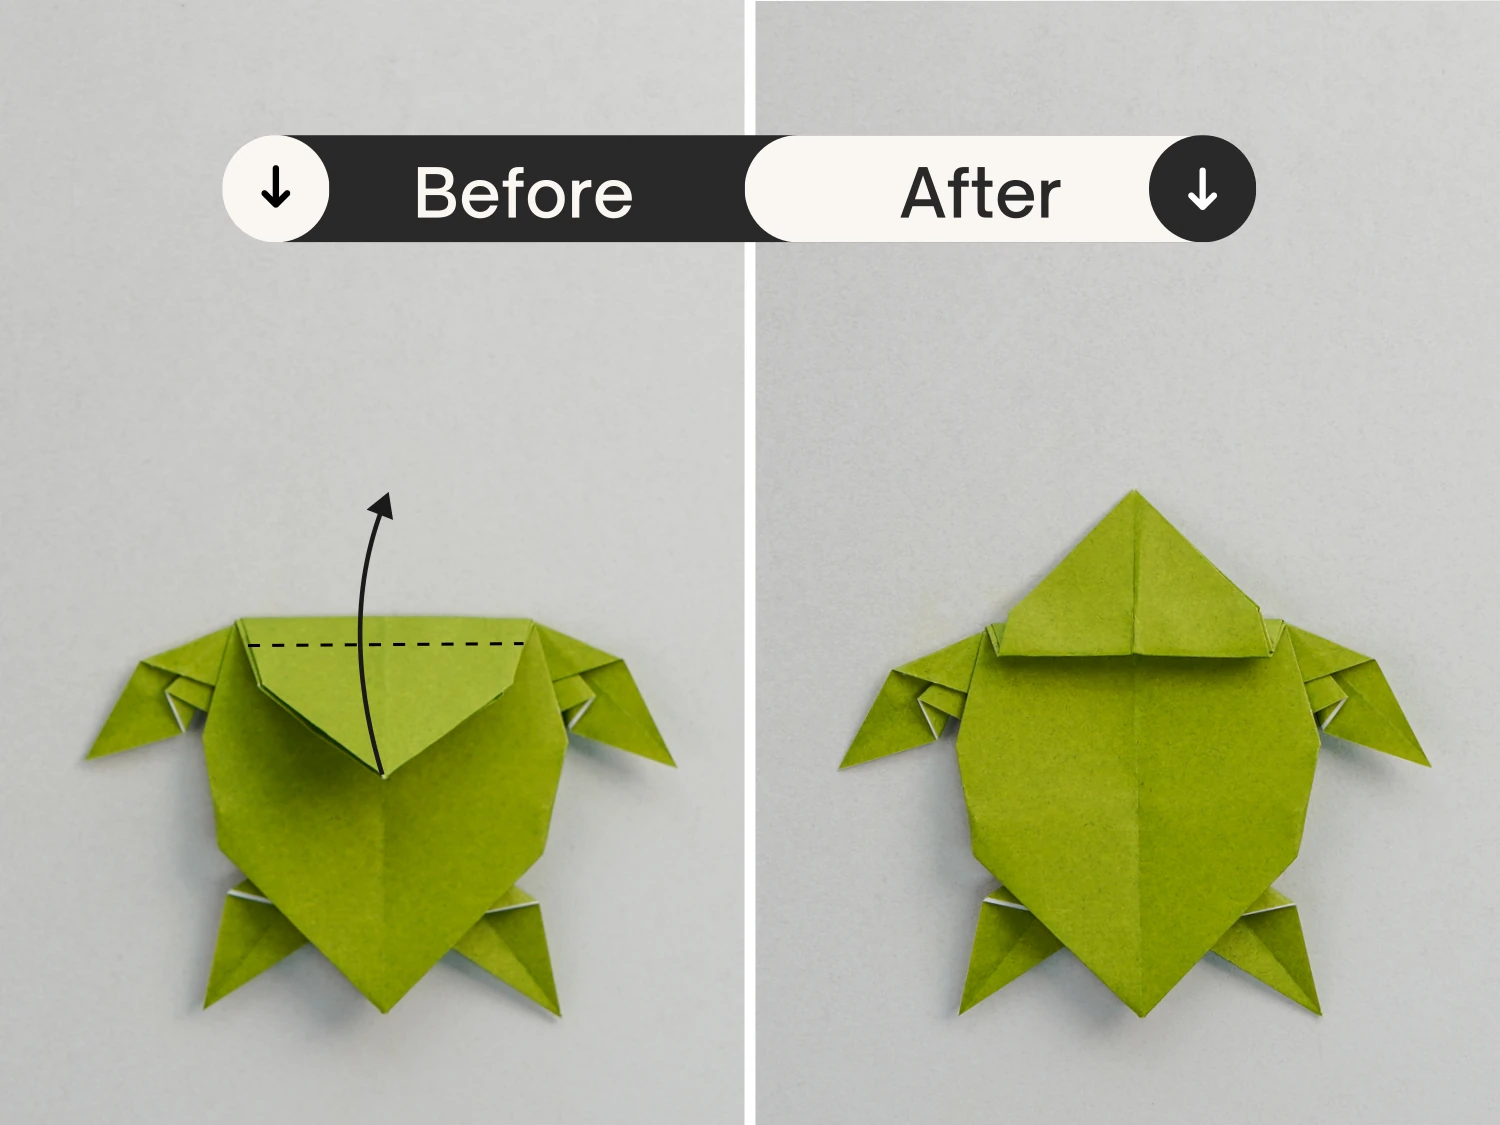
Then fold it up along the dotted line.
Step 41
Open the bottom right corner of the top part, then push this corner, and flatten it.
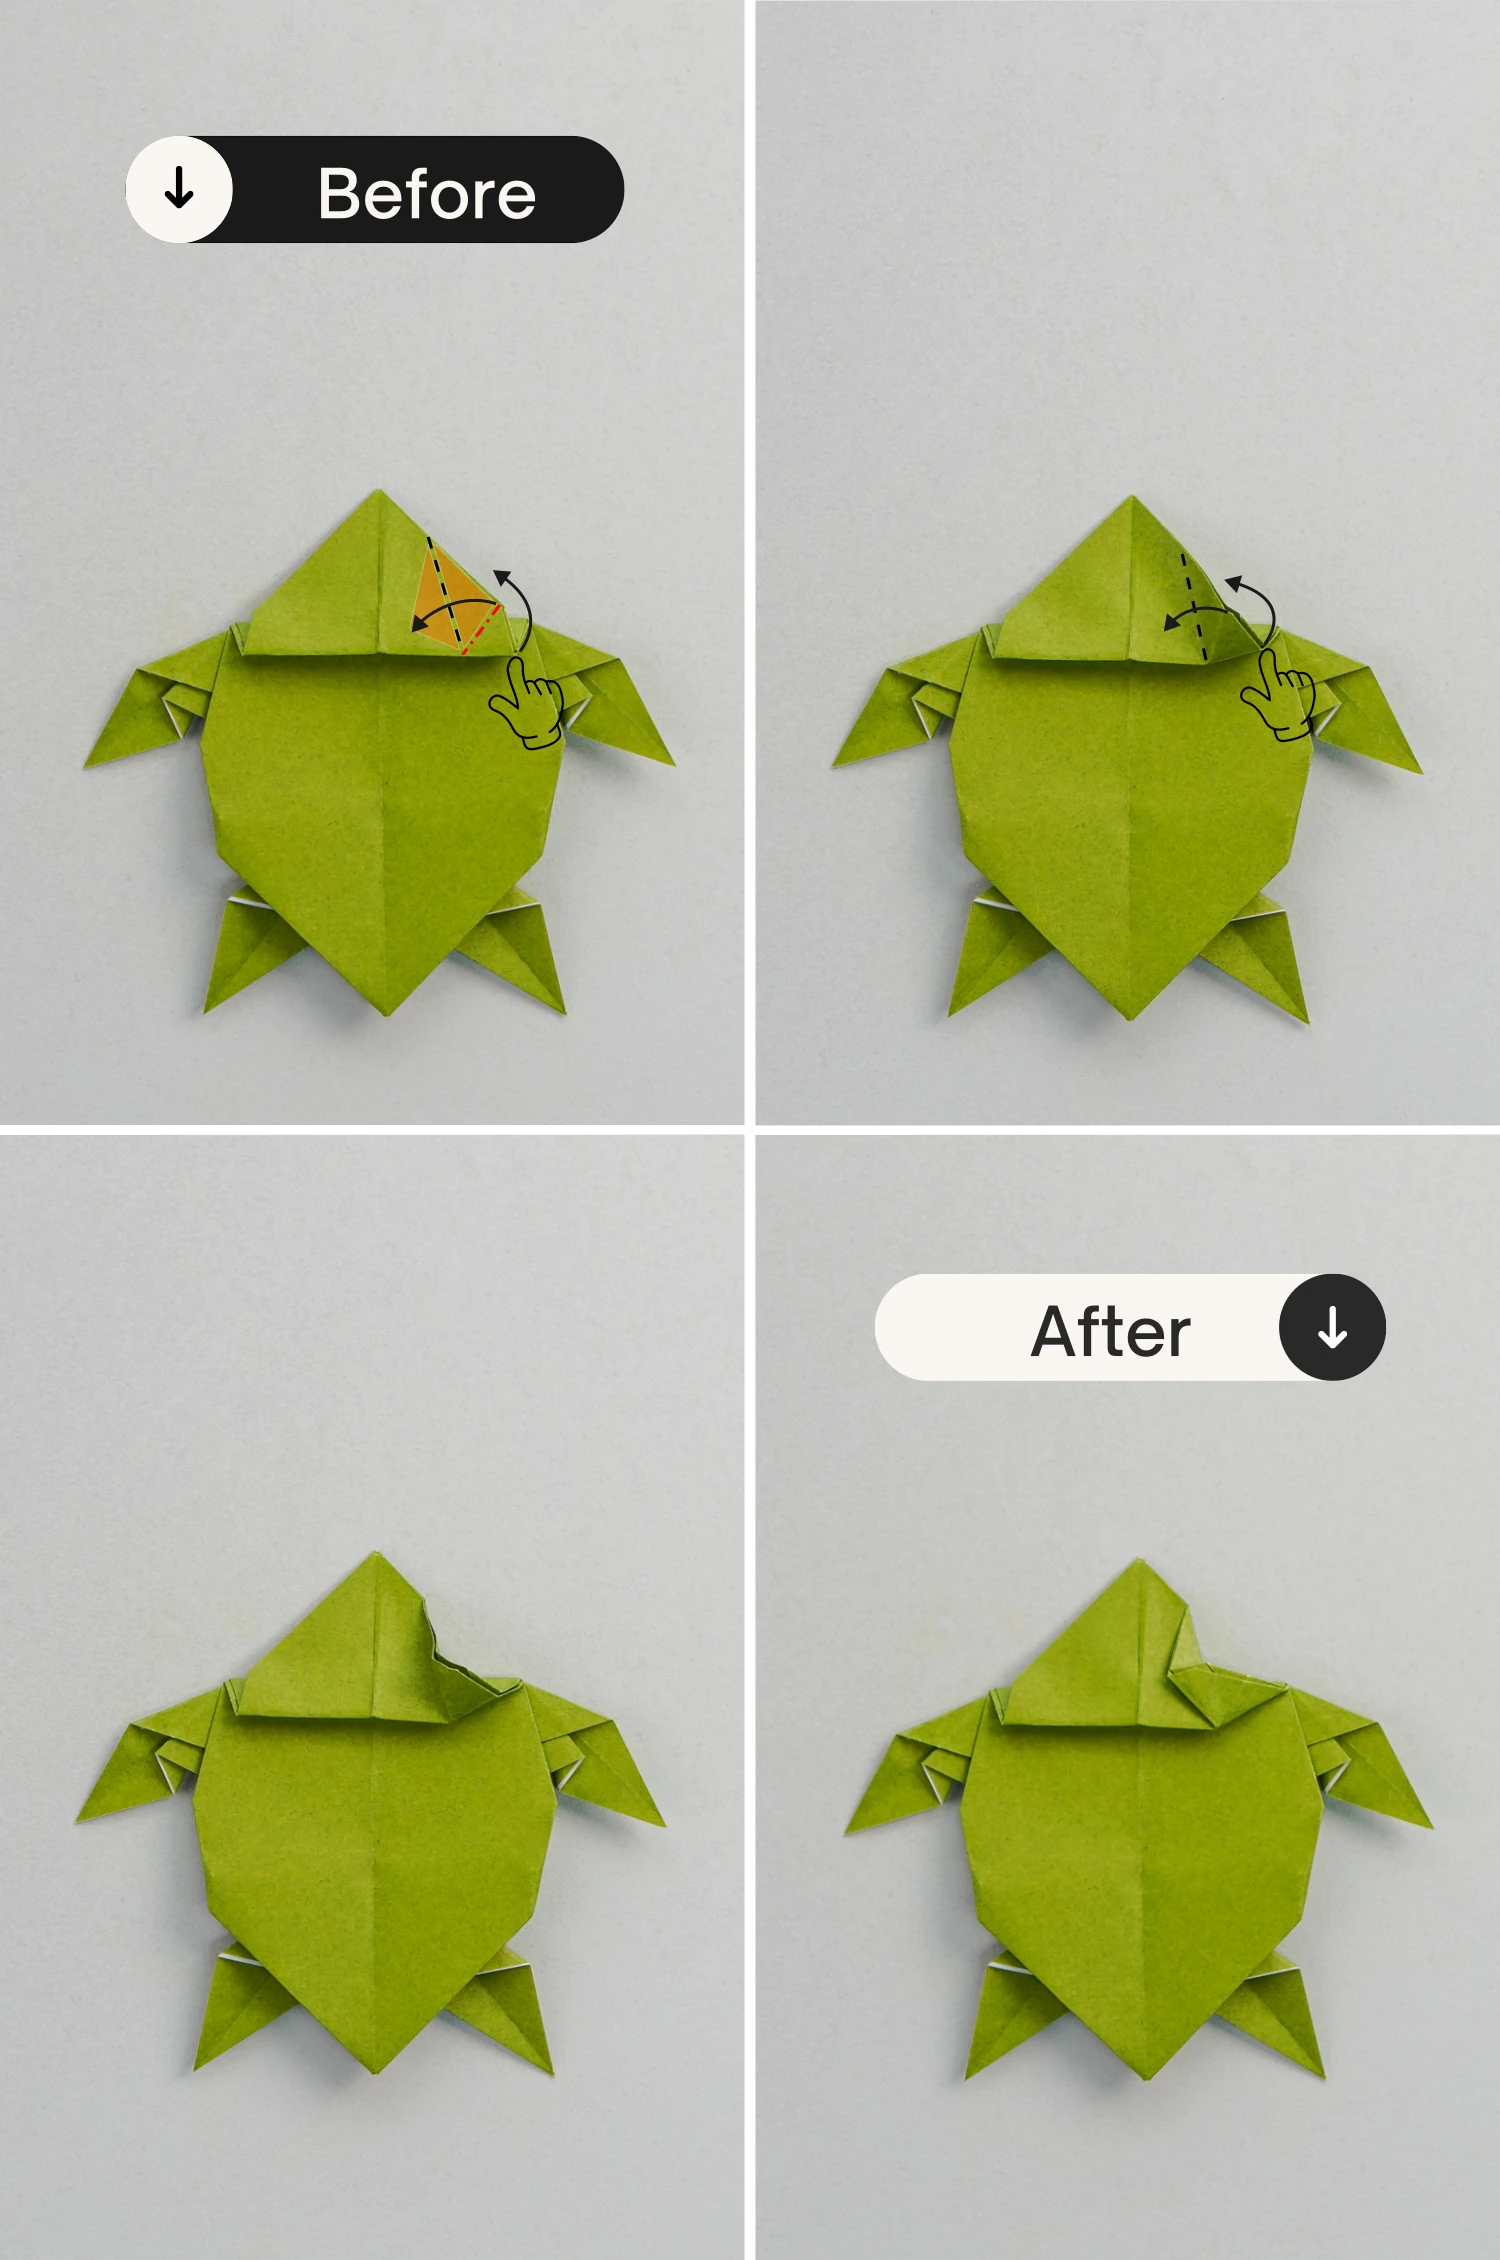
Step 42
Repeat this for the bottom left corner.
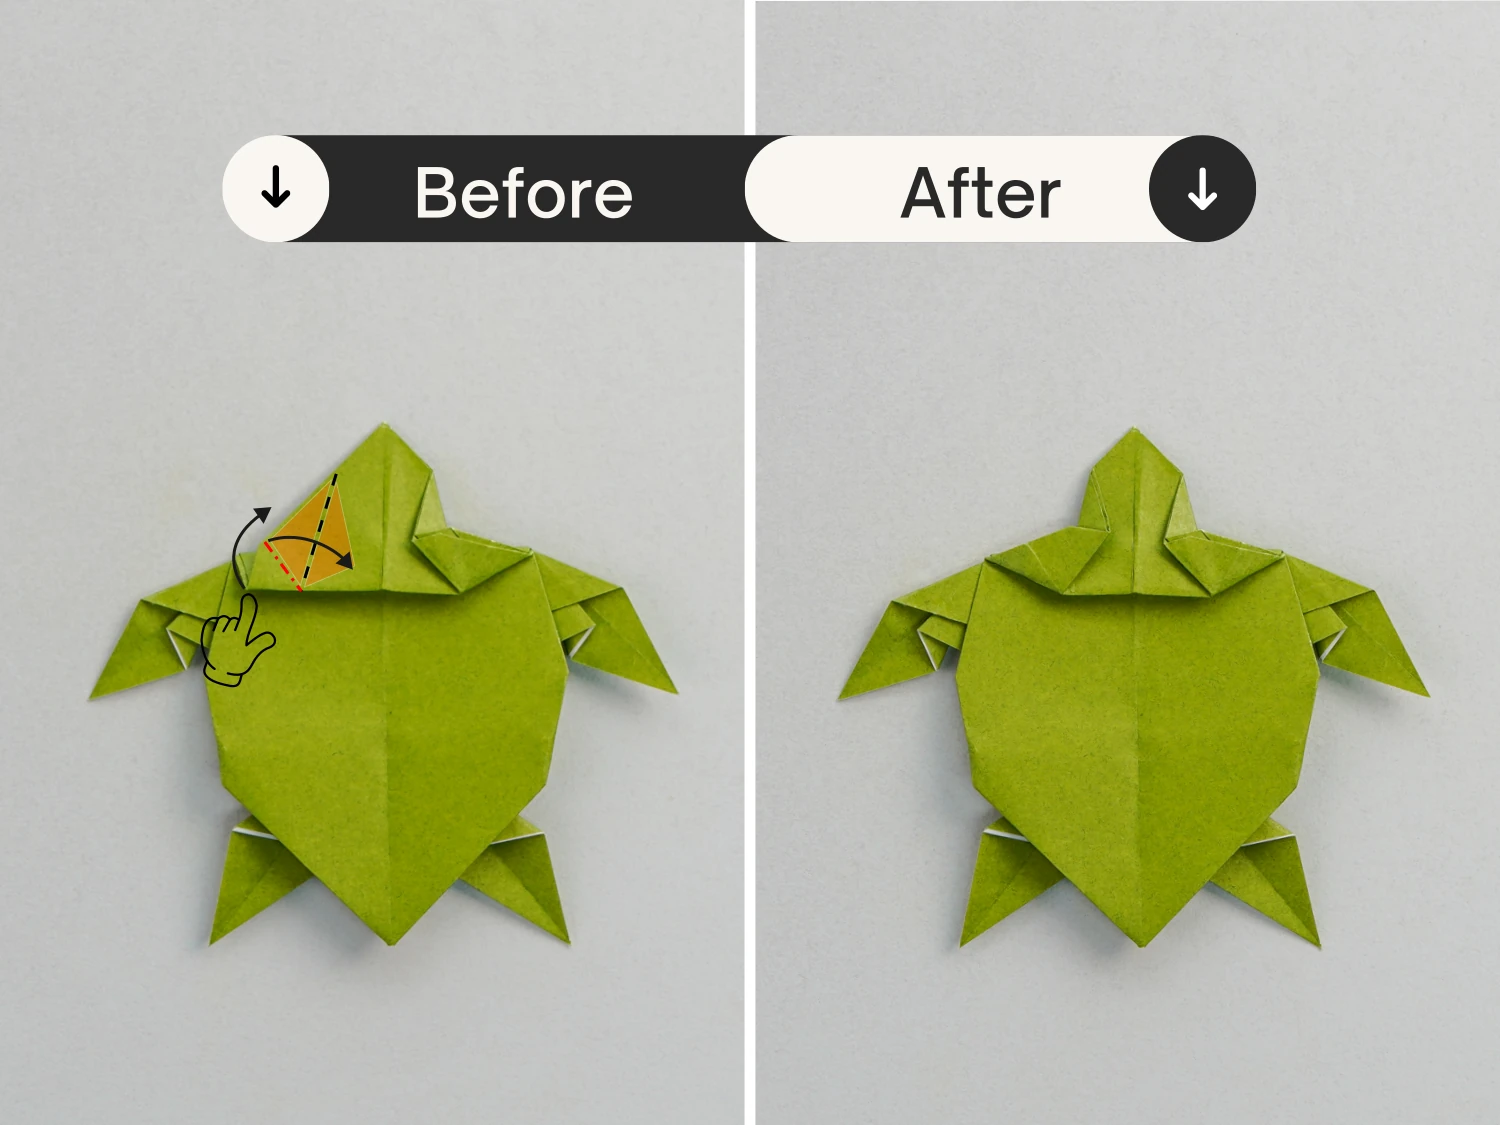
Step 43
Fold the top point down a little to form the turtle’s head.
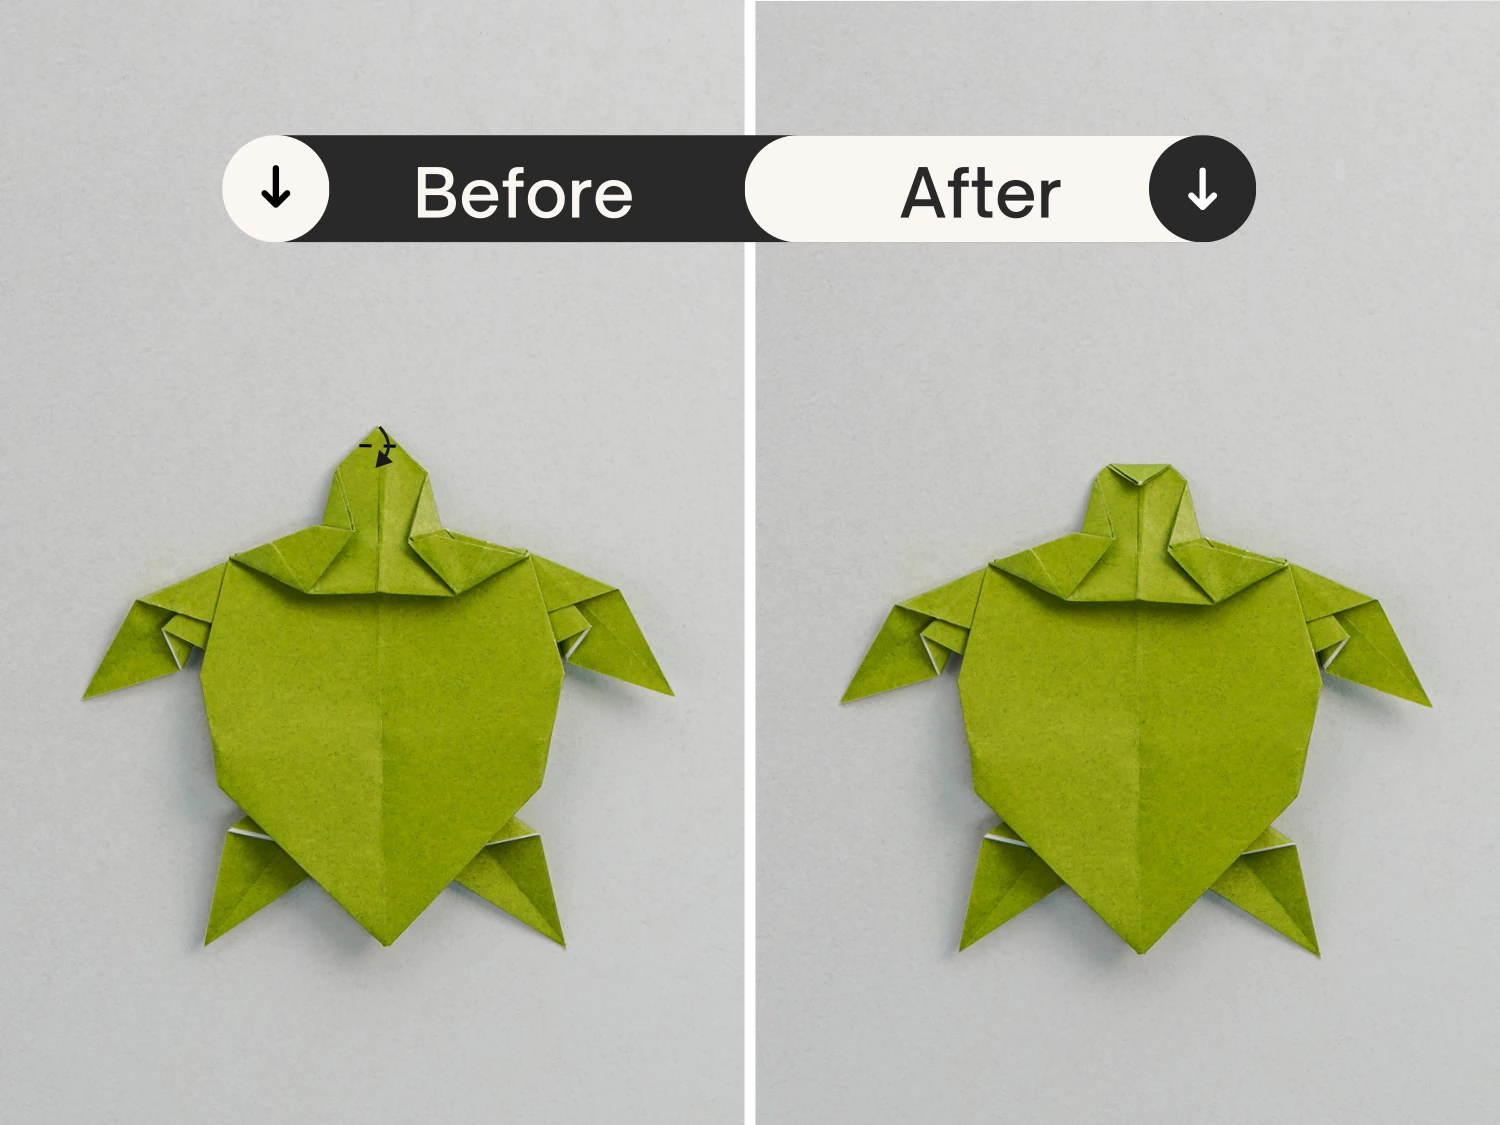
Step 44
Flip the model over, this is the final shape of the origami turtle.
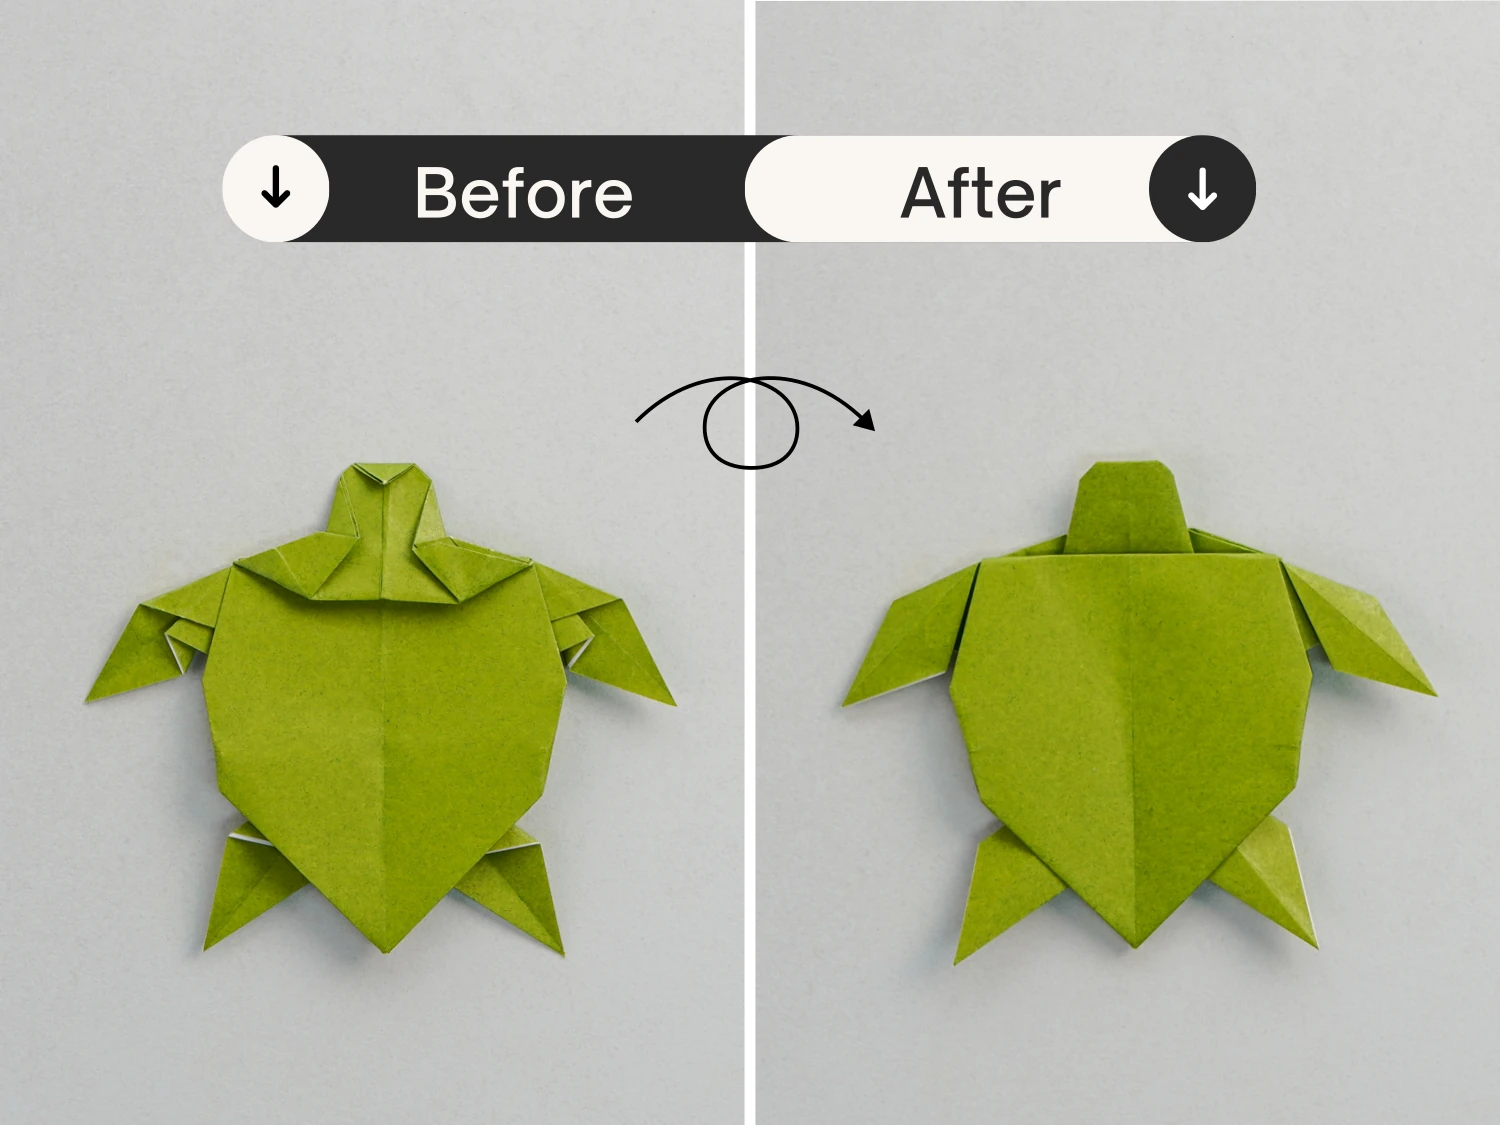
What’s Next
Now you finished this middle origami turtle. It has so many details and you’re sure to revel in this delightful process. Now you can move on to more origami animals, they are all very interesting, hope you will like them. Enjoy folding!
Other Origami Animal Ideas
