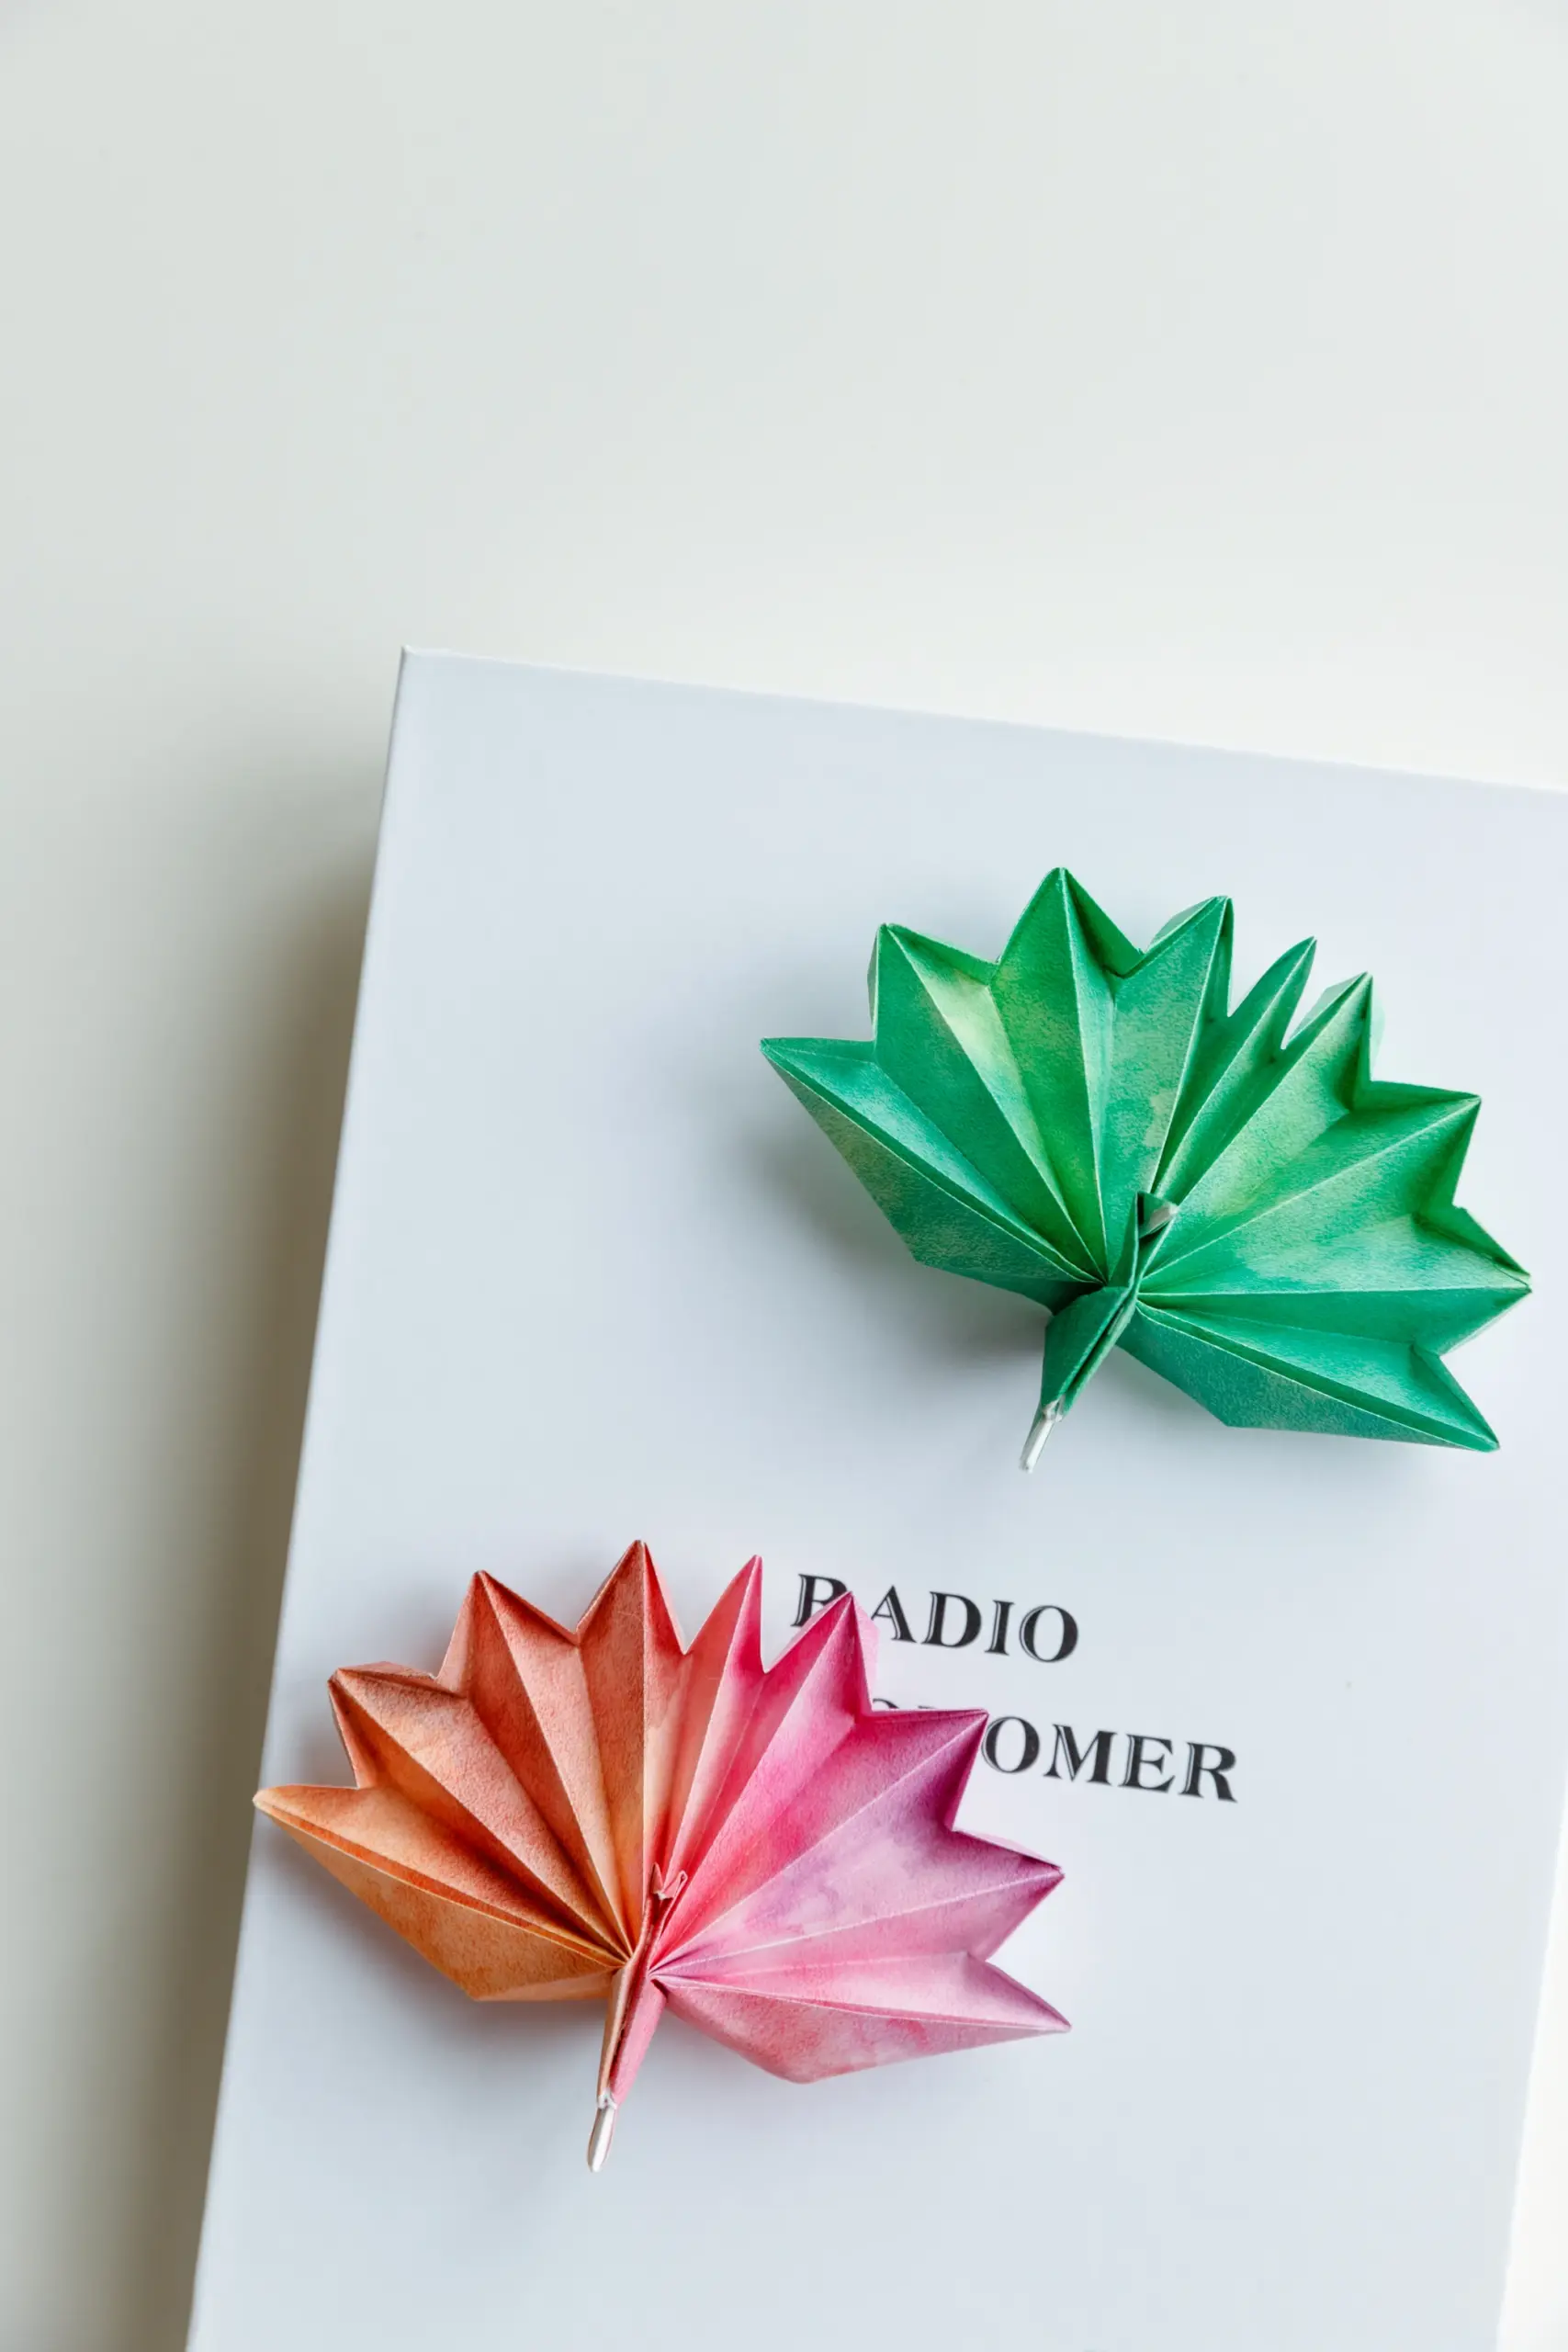
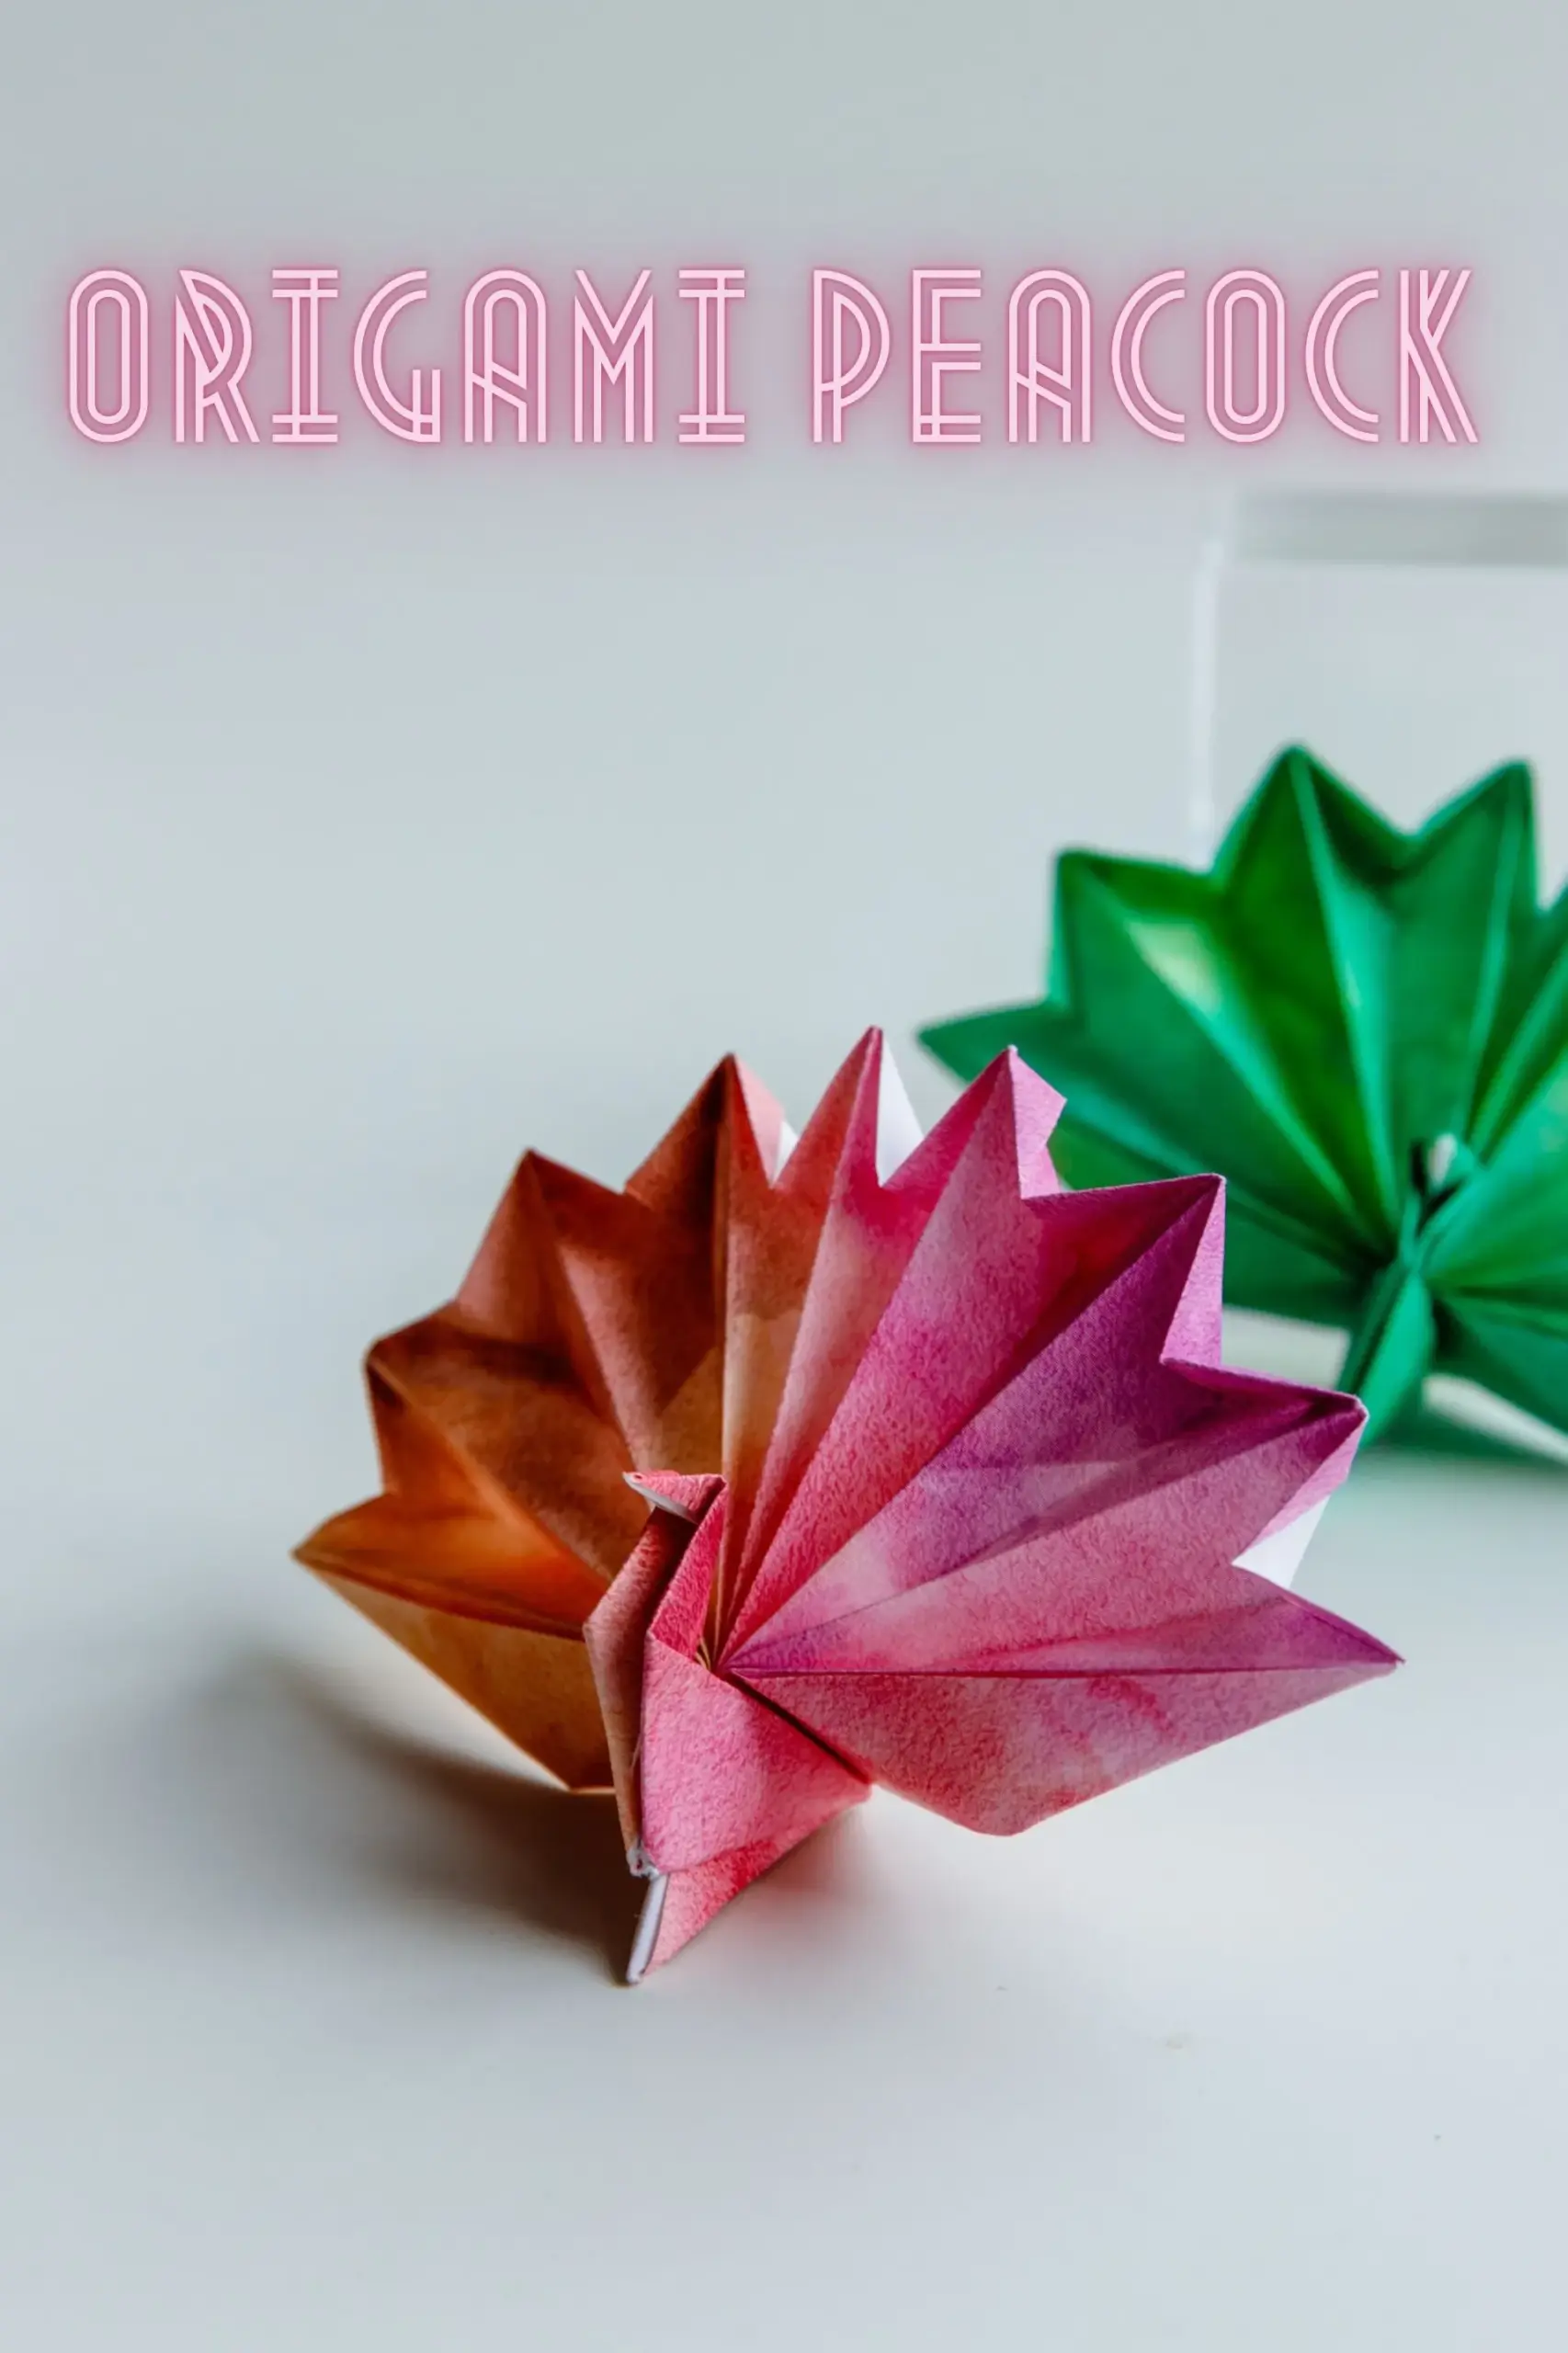
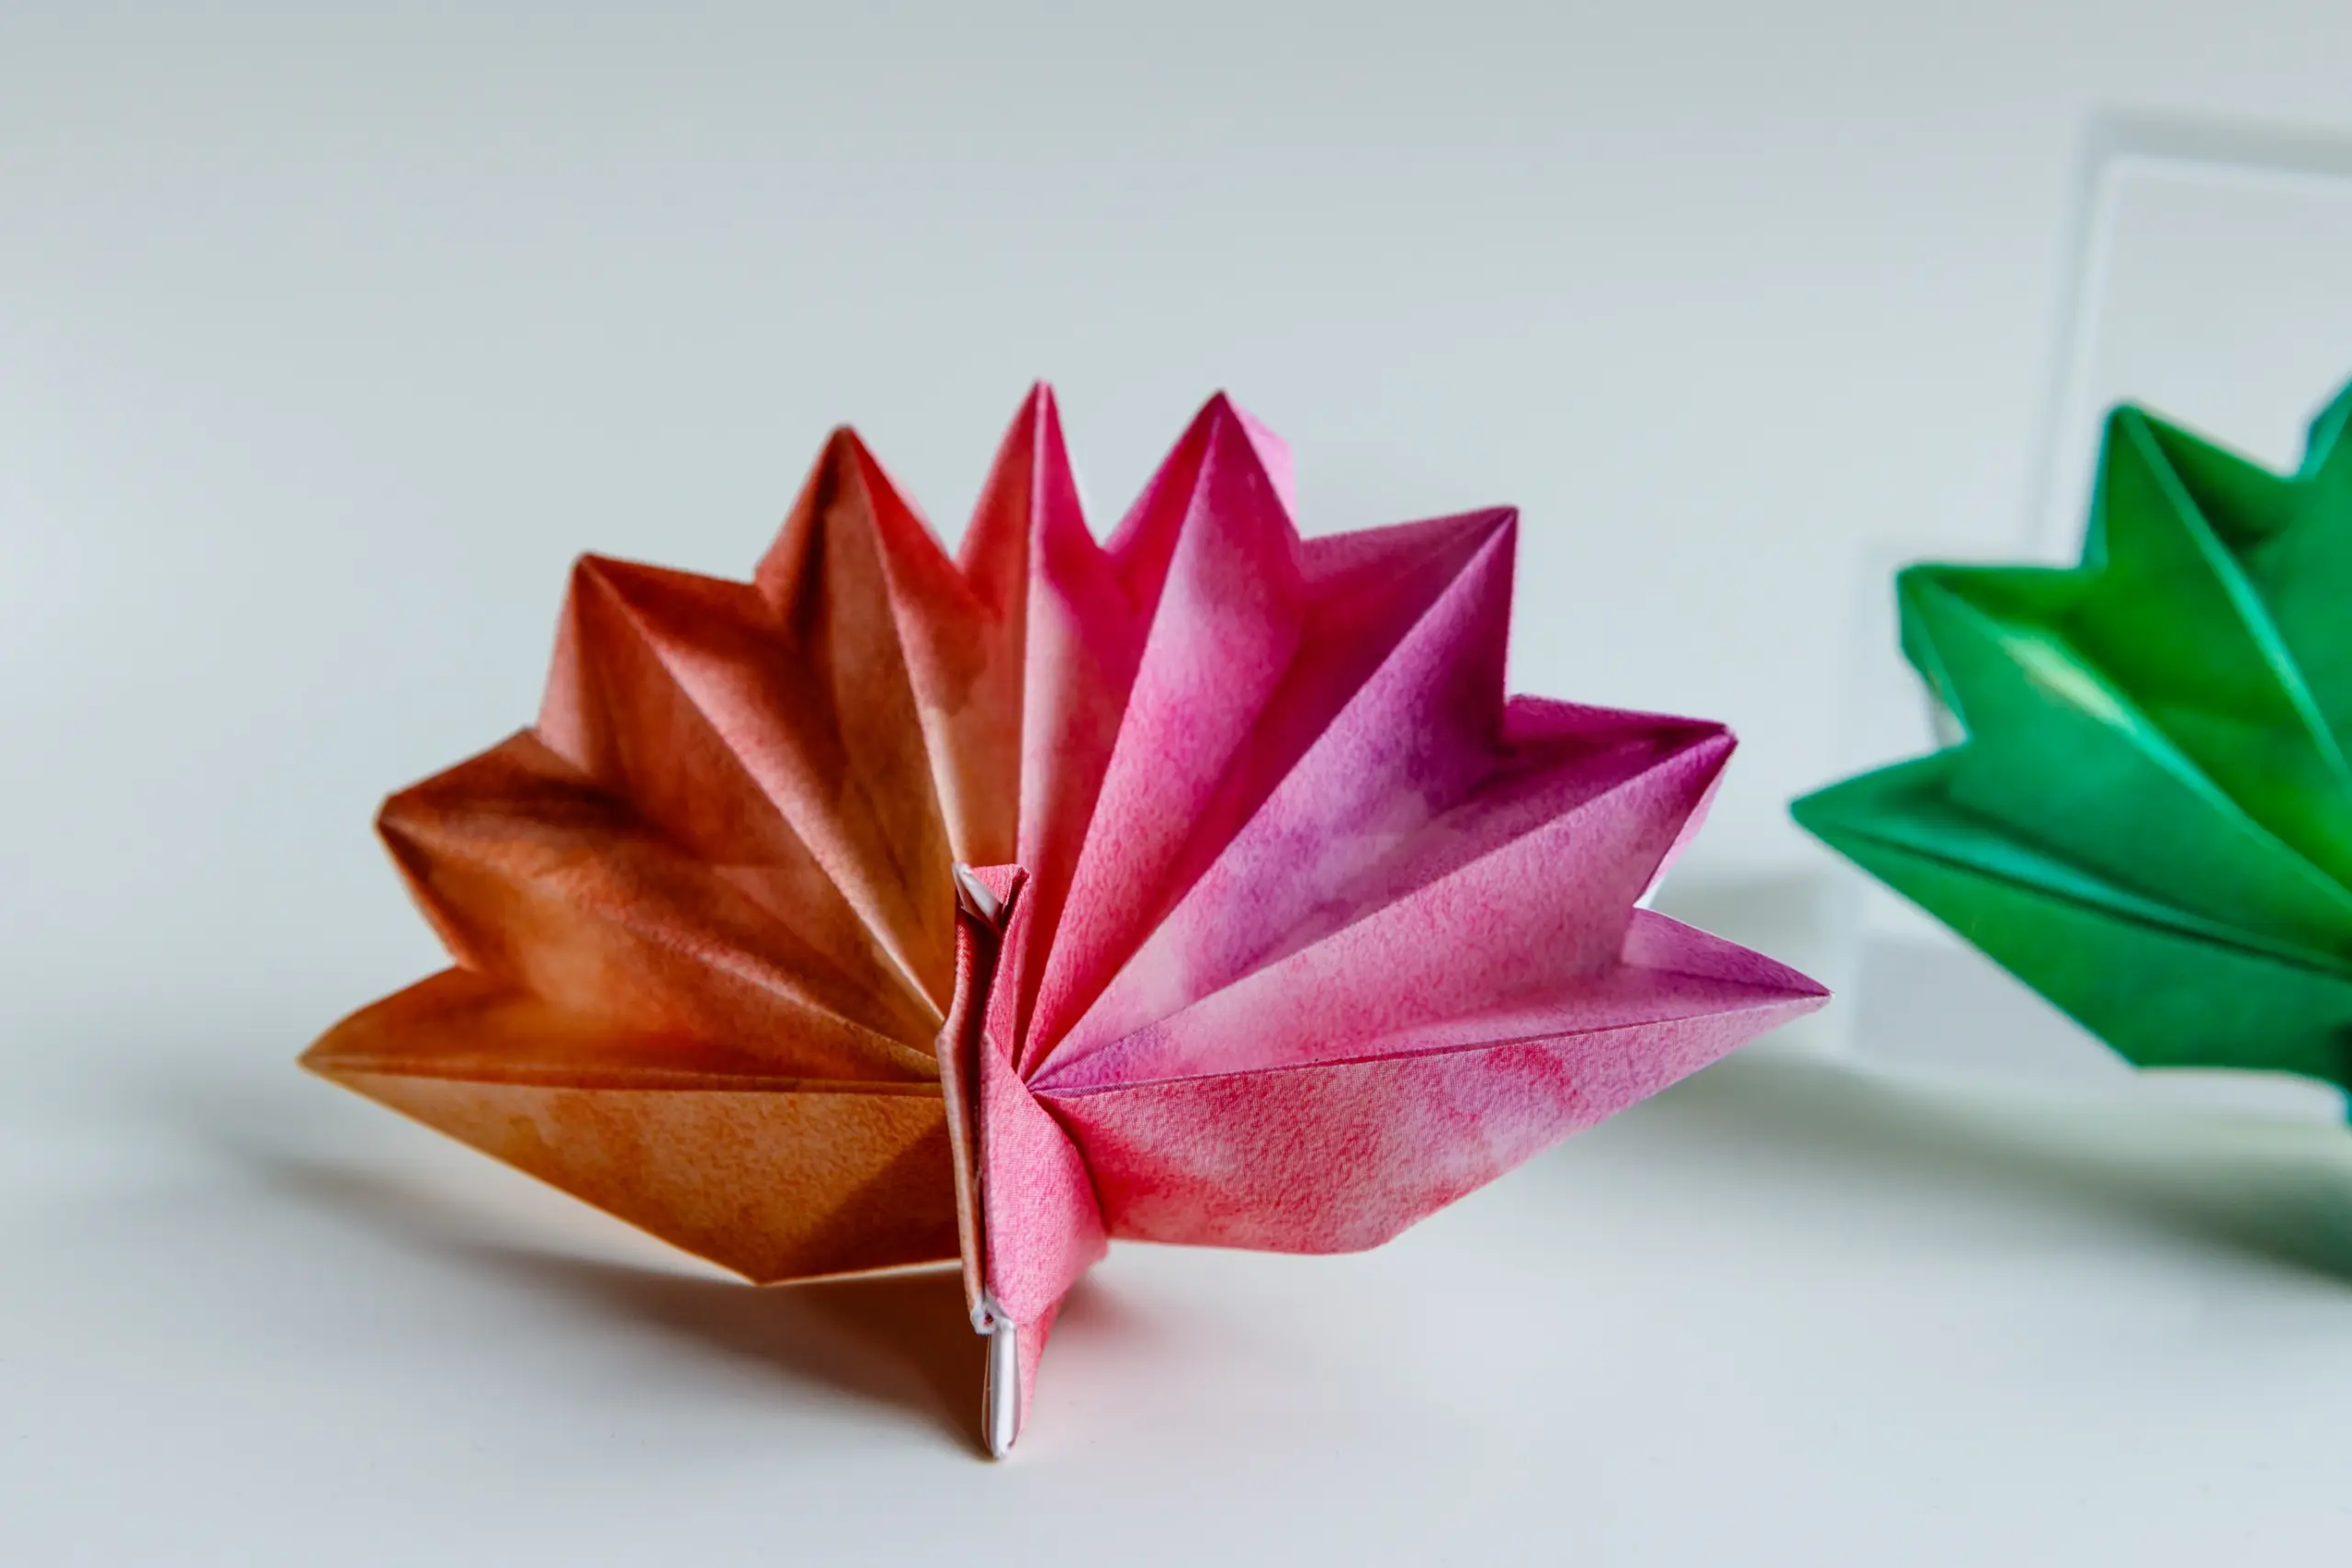
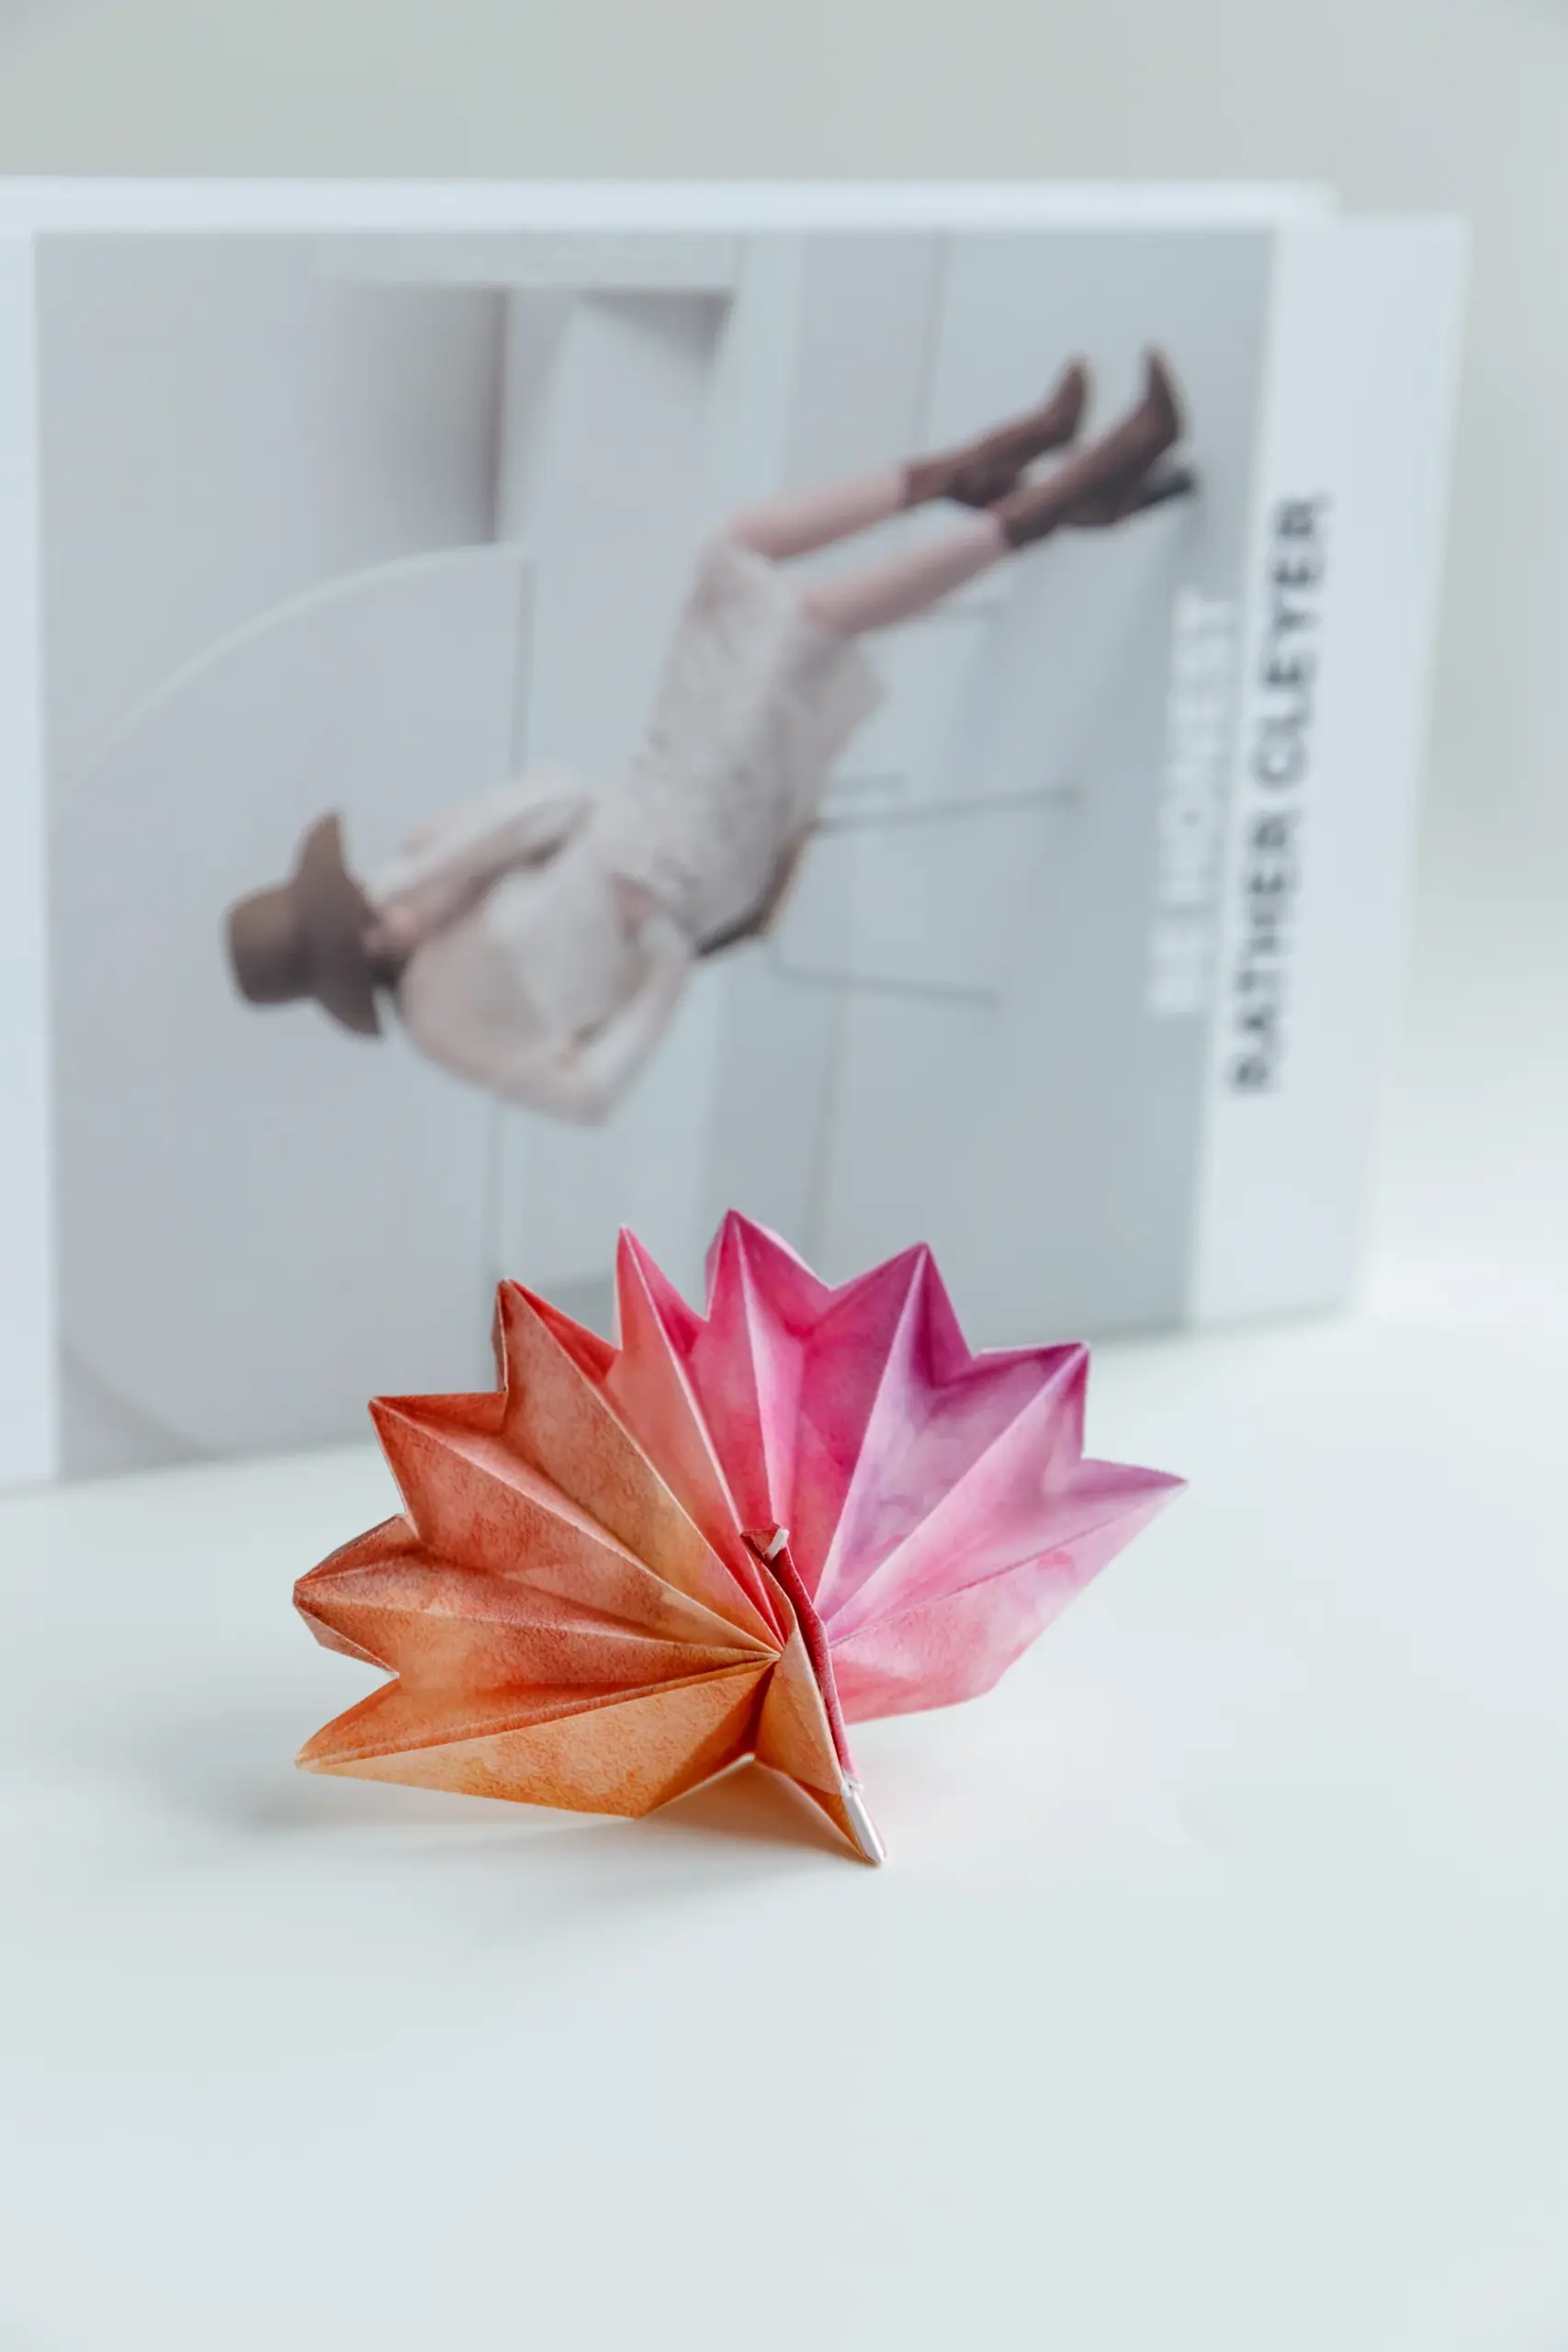
The peacock, with its magnificent plumage and elegant posture, has become one of the most fascinating creatures in the world. Today, with our detailed instructions, you can create an exquisite origami peacock with spreading feathers with only a piece of square paper. Whether you are a beginner or an experienced origami enthusiast, this will truly bring you a lot of fun.
In this instruction, we use a lot of Squash Fold to form the peacock’s tail feathers.
We provide step-by-step diagram instructions and beginner-friendly videos. Check both for quicker learning.
If you are new to origami, start here from our beginner guide to know the basics and how to read the step-by-step instructions.
- Folding time: 15 minutes
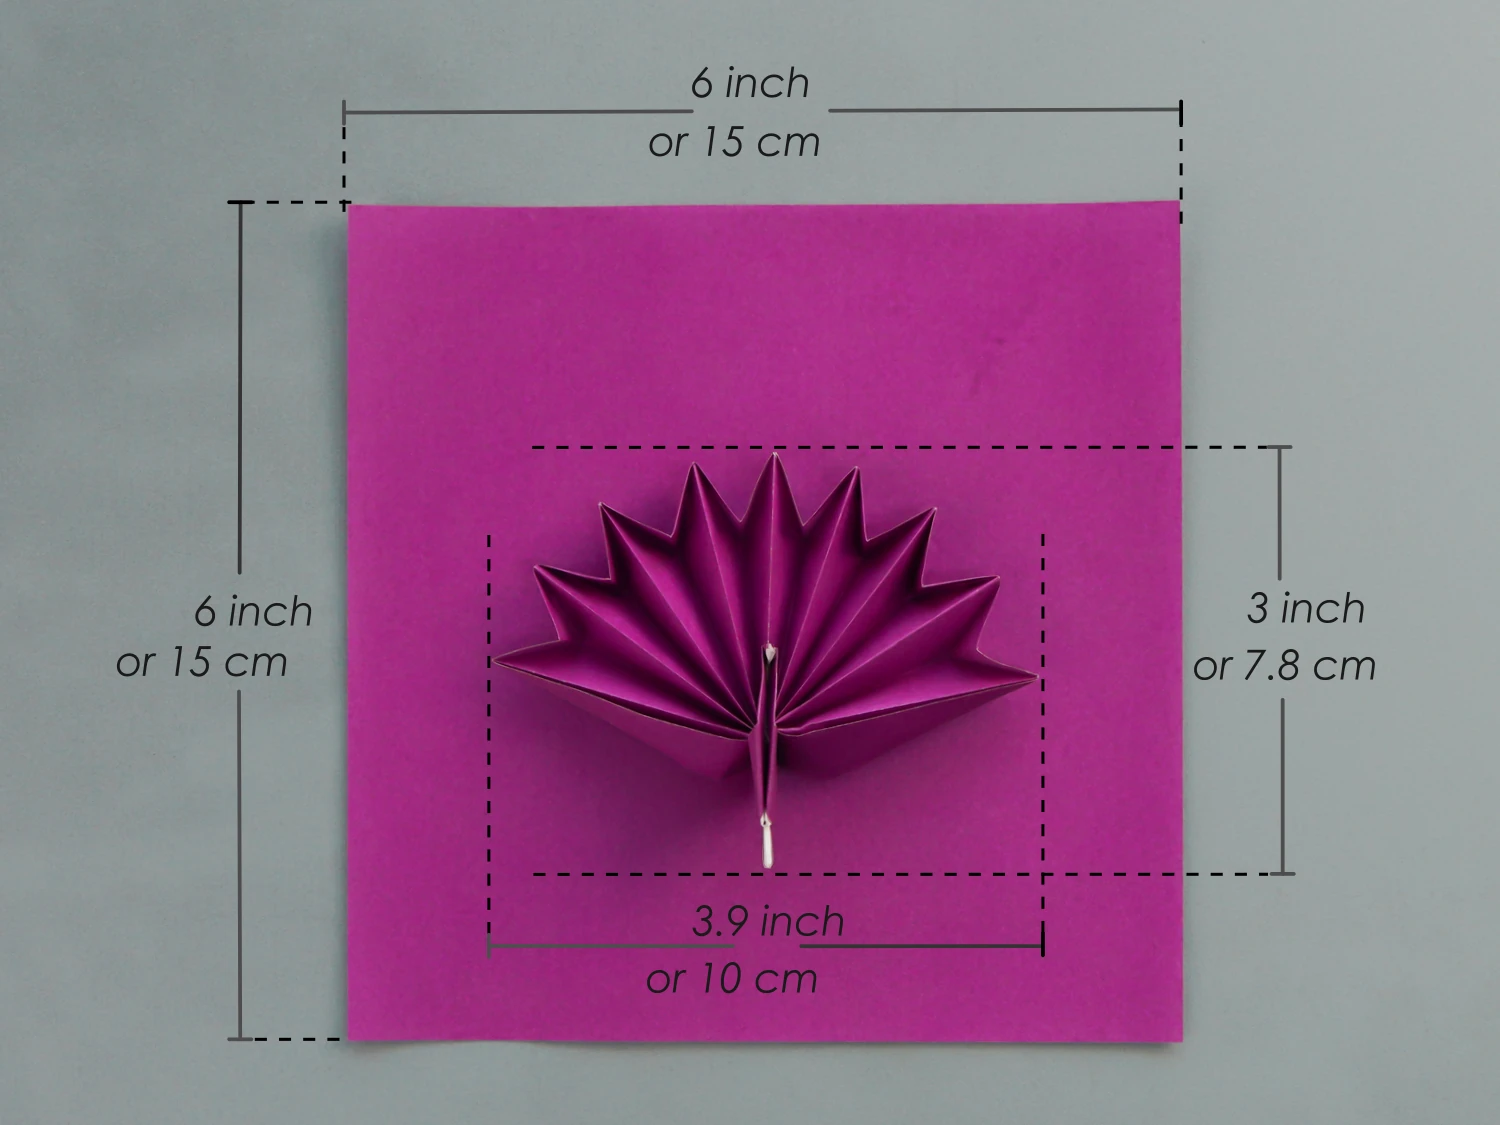
- Paper: 15×15 cm
- Difficulty: Middle
Material
Get a 15×15 cm origami square paper with different colors on each side, and you will get a 7.8×10 cm peacock. Since the real peacock is so magnificent, we suggest using patterned or glitter paper to enhance your origami creation.
Origami Peacock Video
Step by Step Instructions
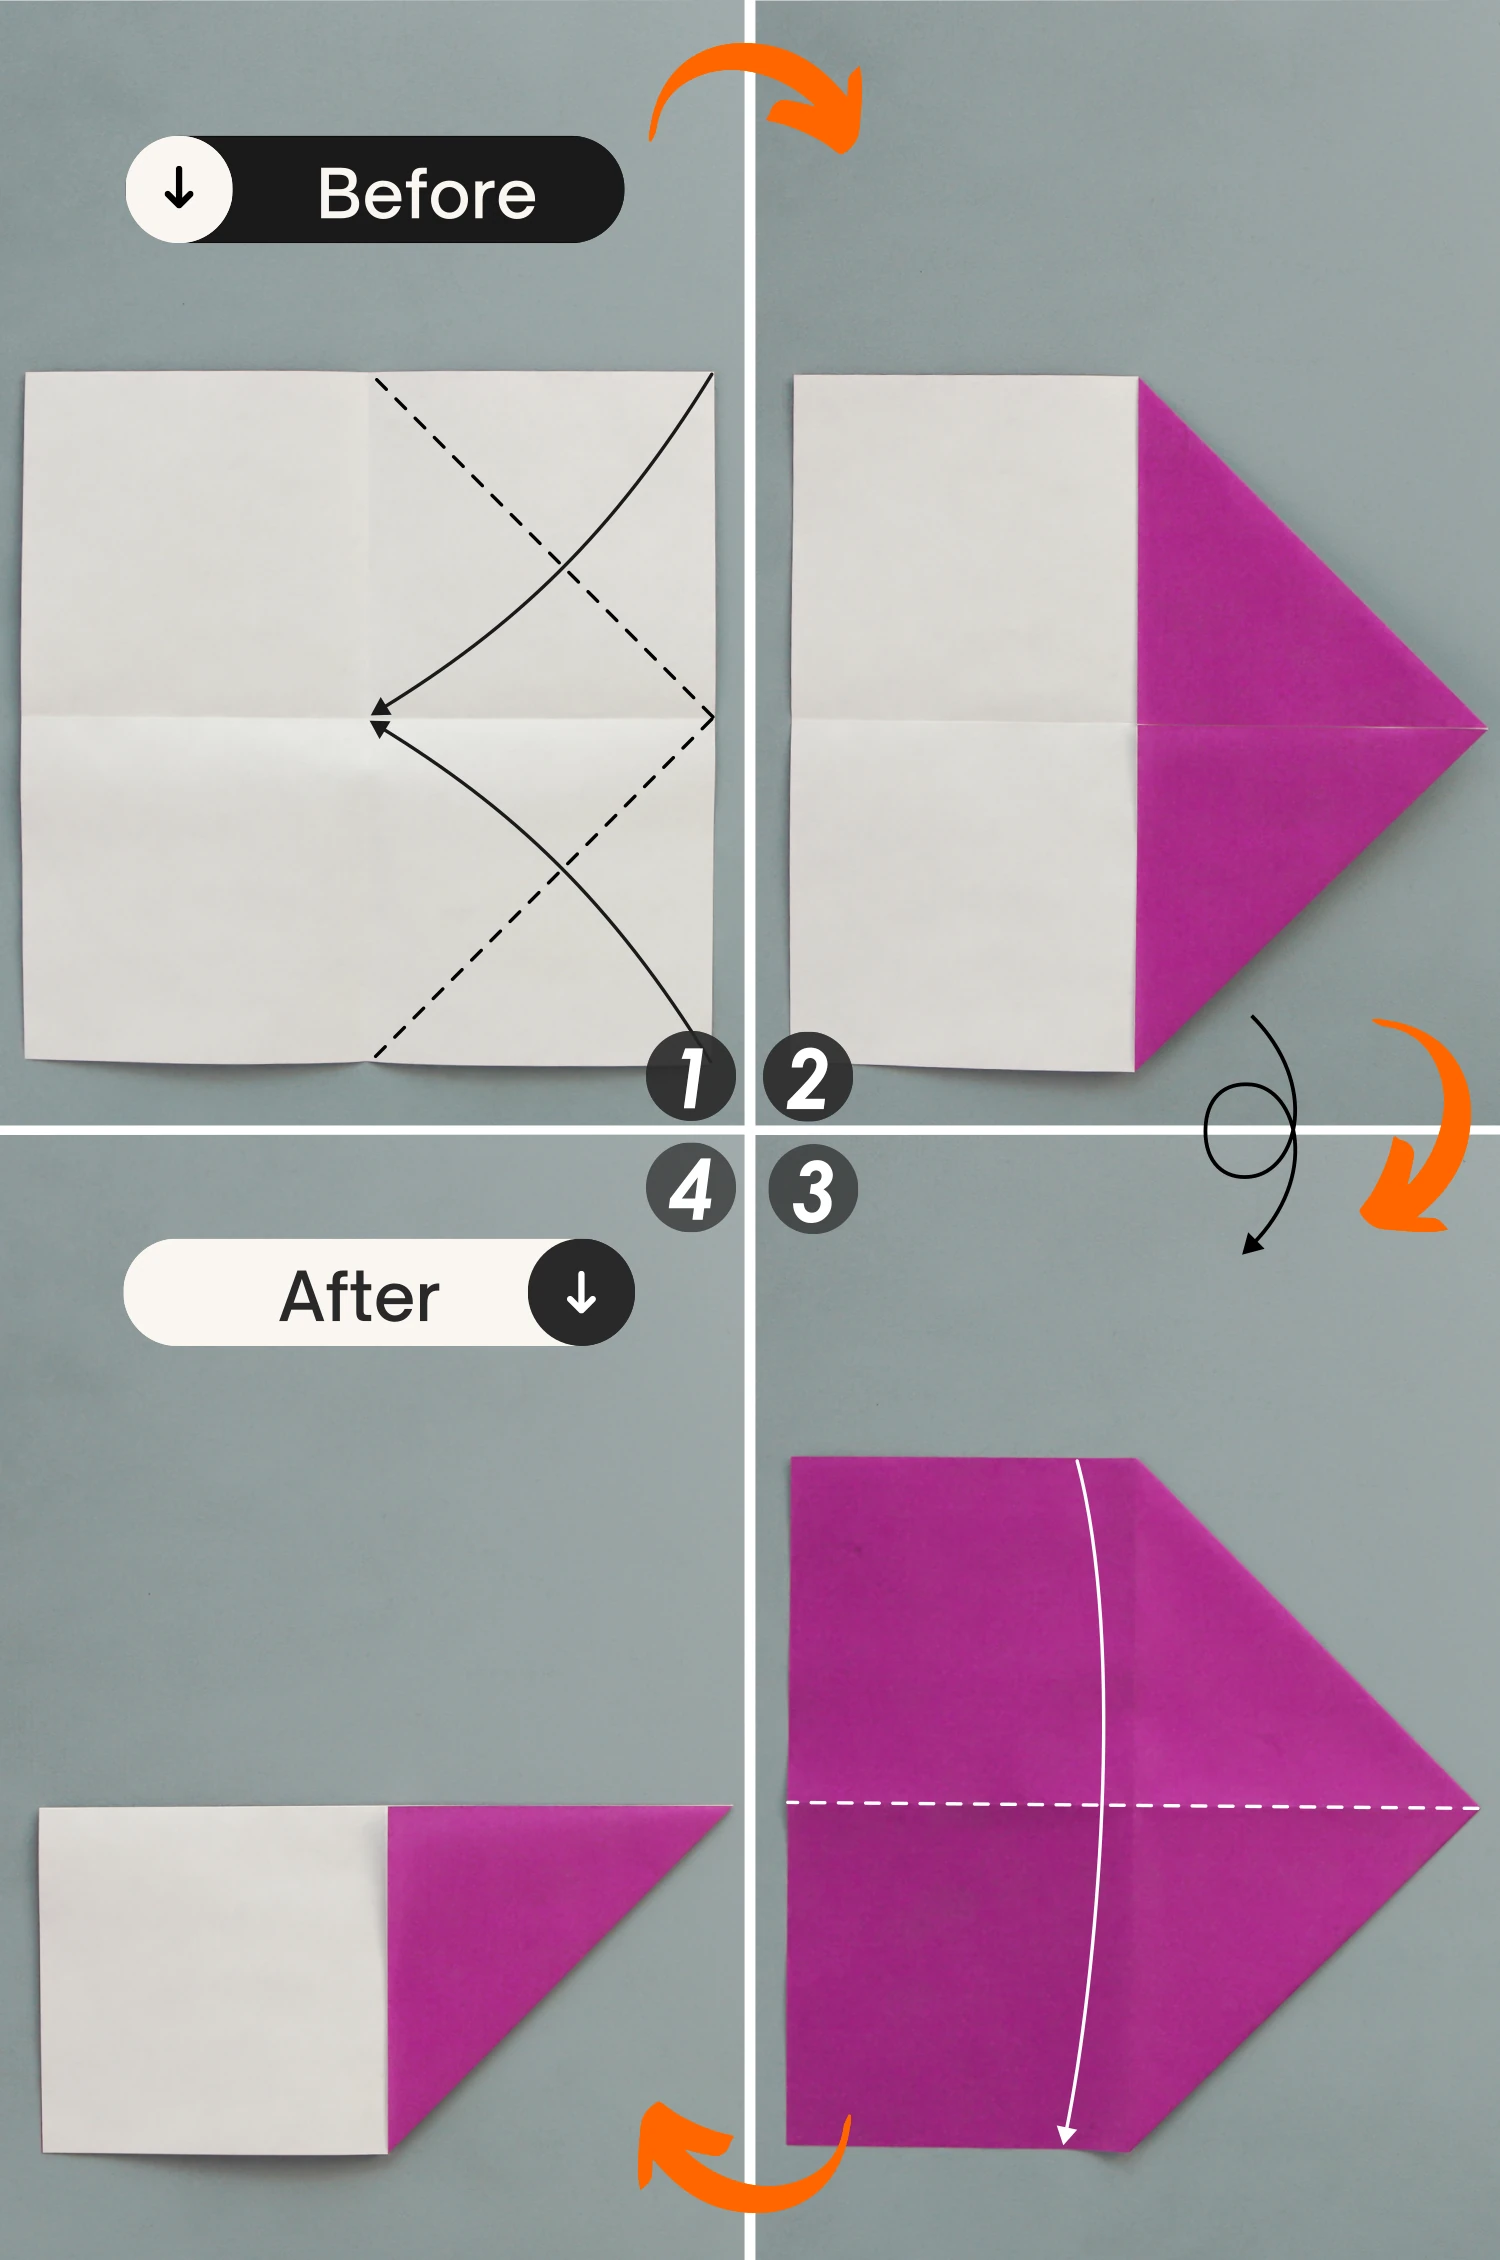
Step 1
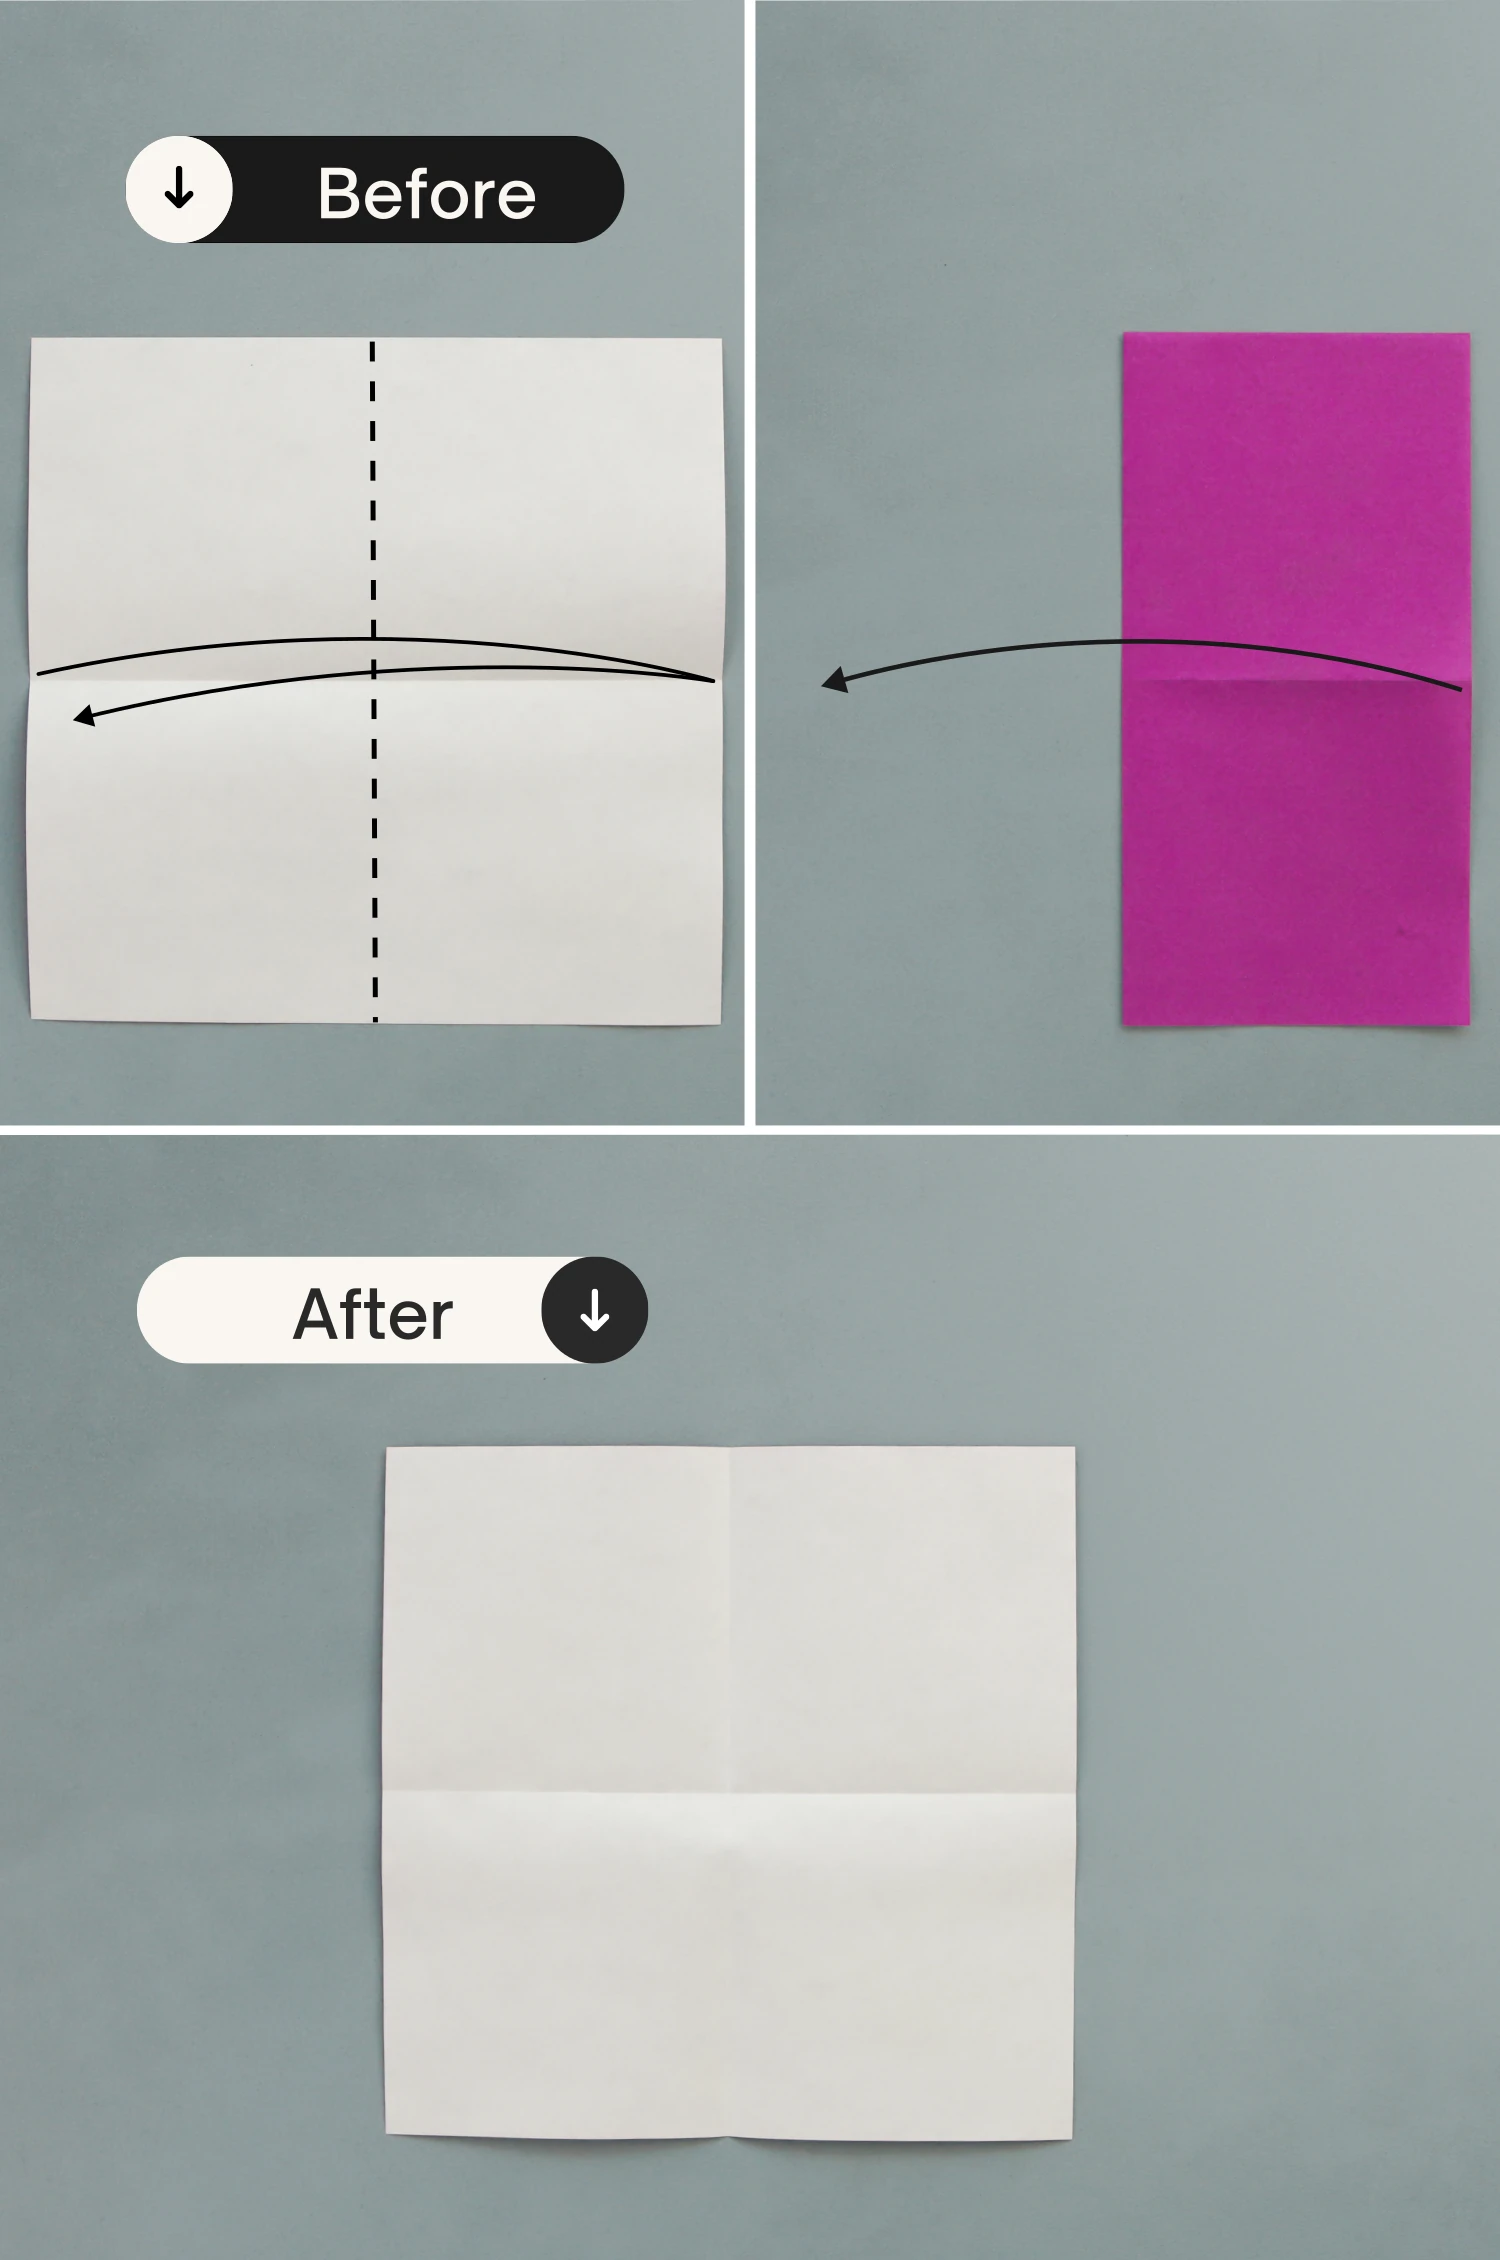
Start with the white side of the paper facing up, fold it in half horizontally, crease it well then unfold.

Step 2
Fold it in half vertically, and unfold it.
Step 3
Fold the top and bottom right points to meet the center intersection point formed by the two creases you just made. Then flip the paper over vertically, and fold the top edge to the bottom.
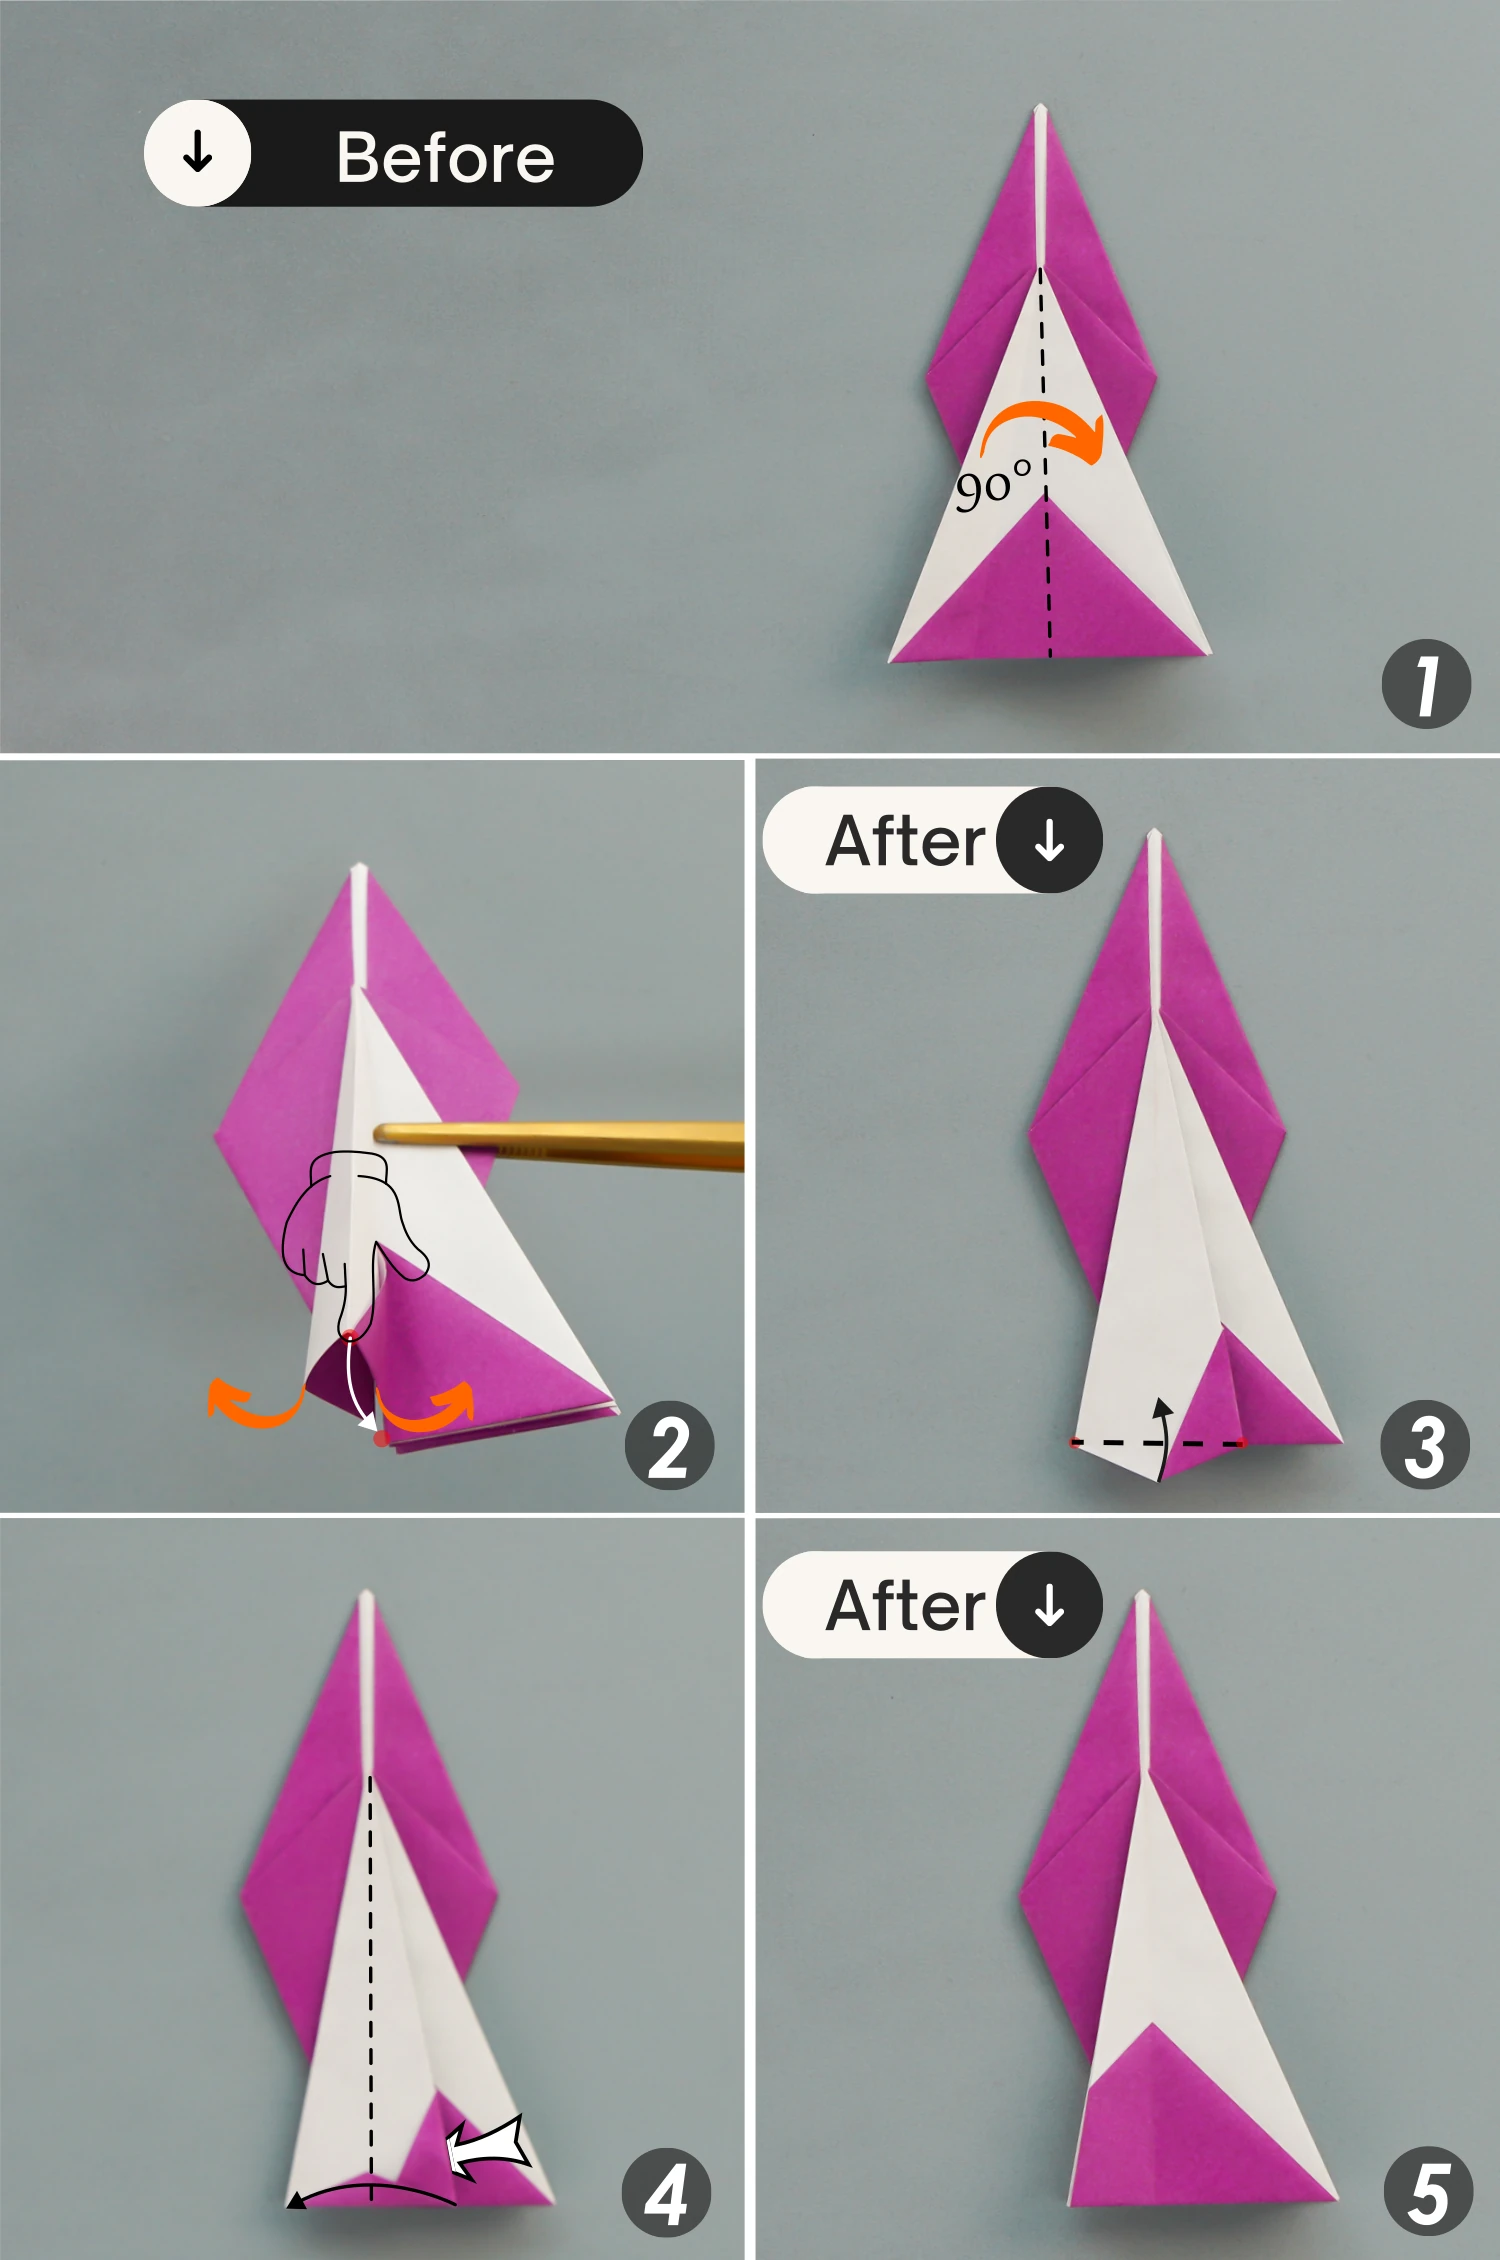
Step 4
Fold the top right corner to the bottom right corner diagonally, leaving a crease then unfold it.
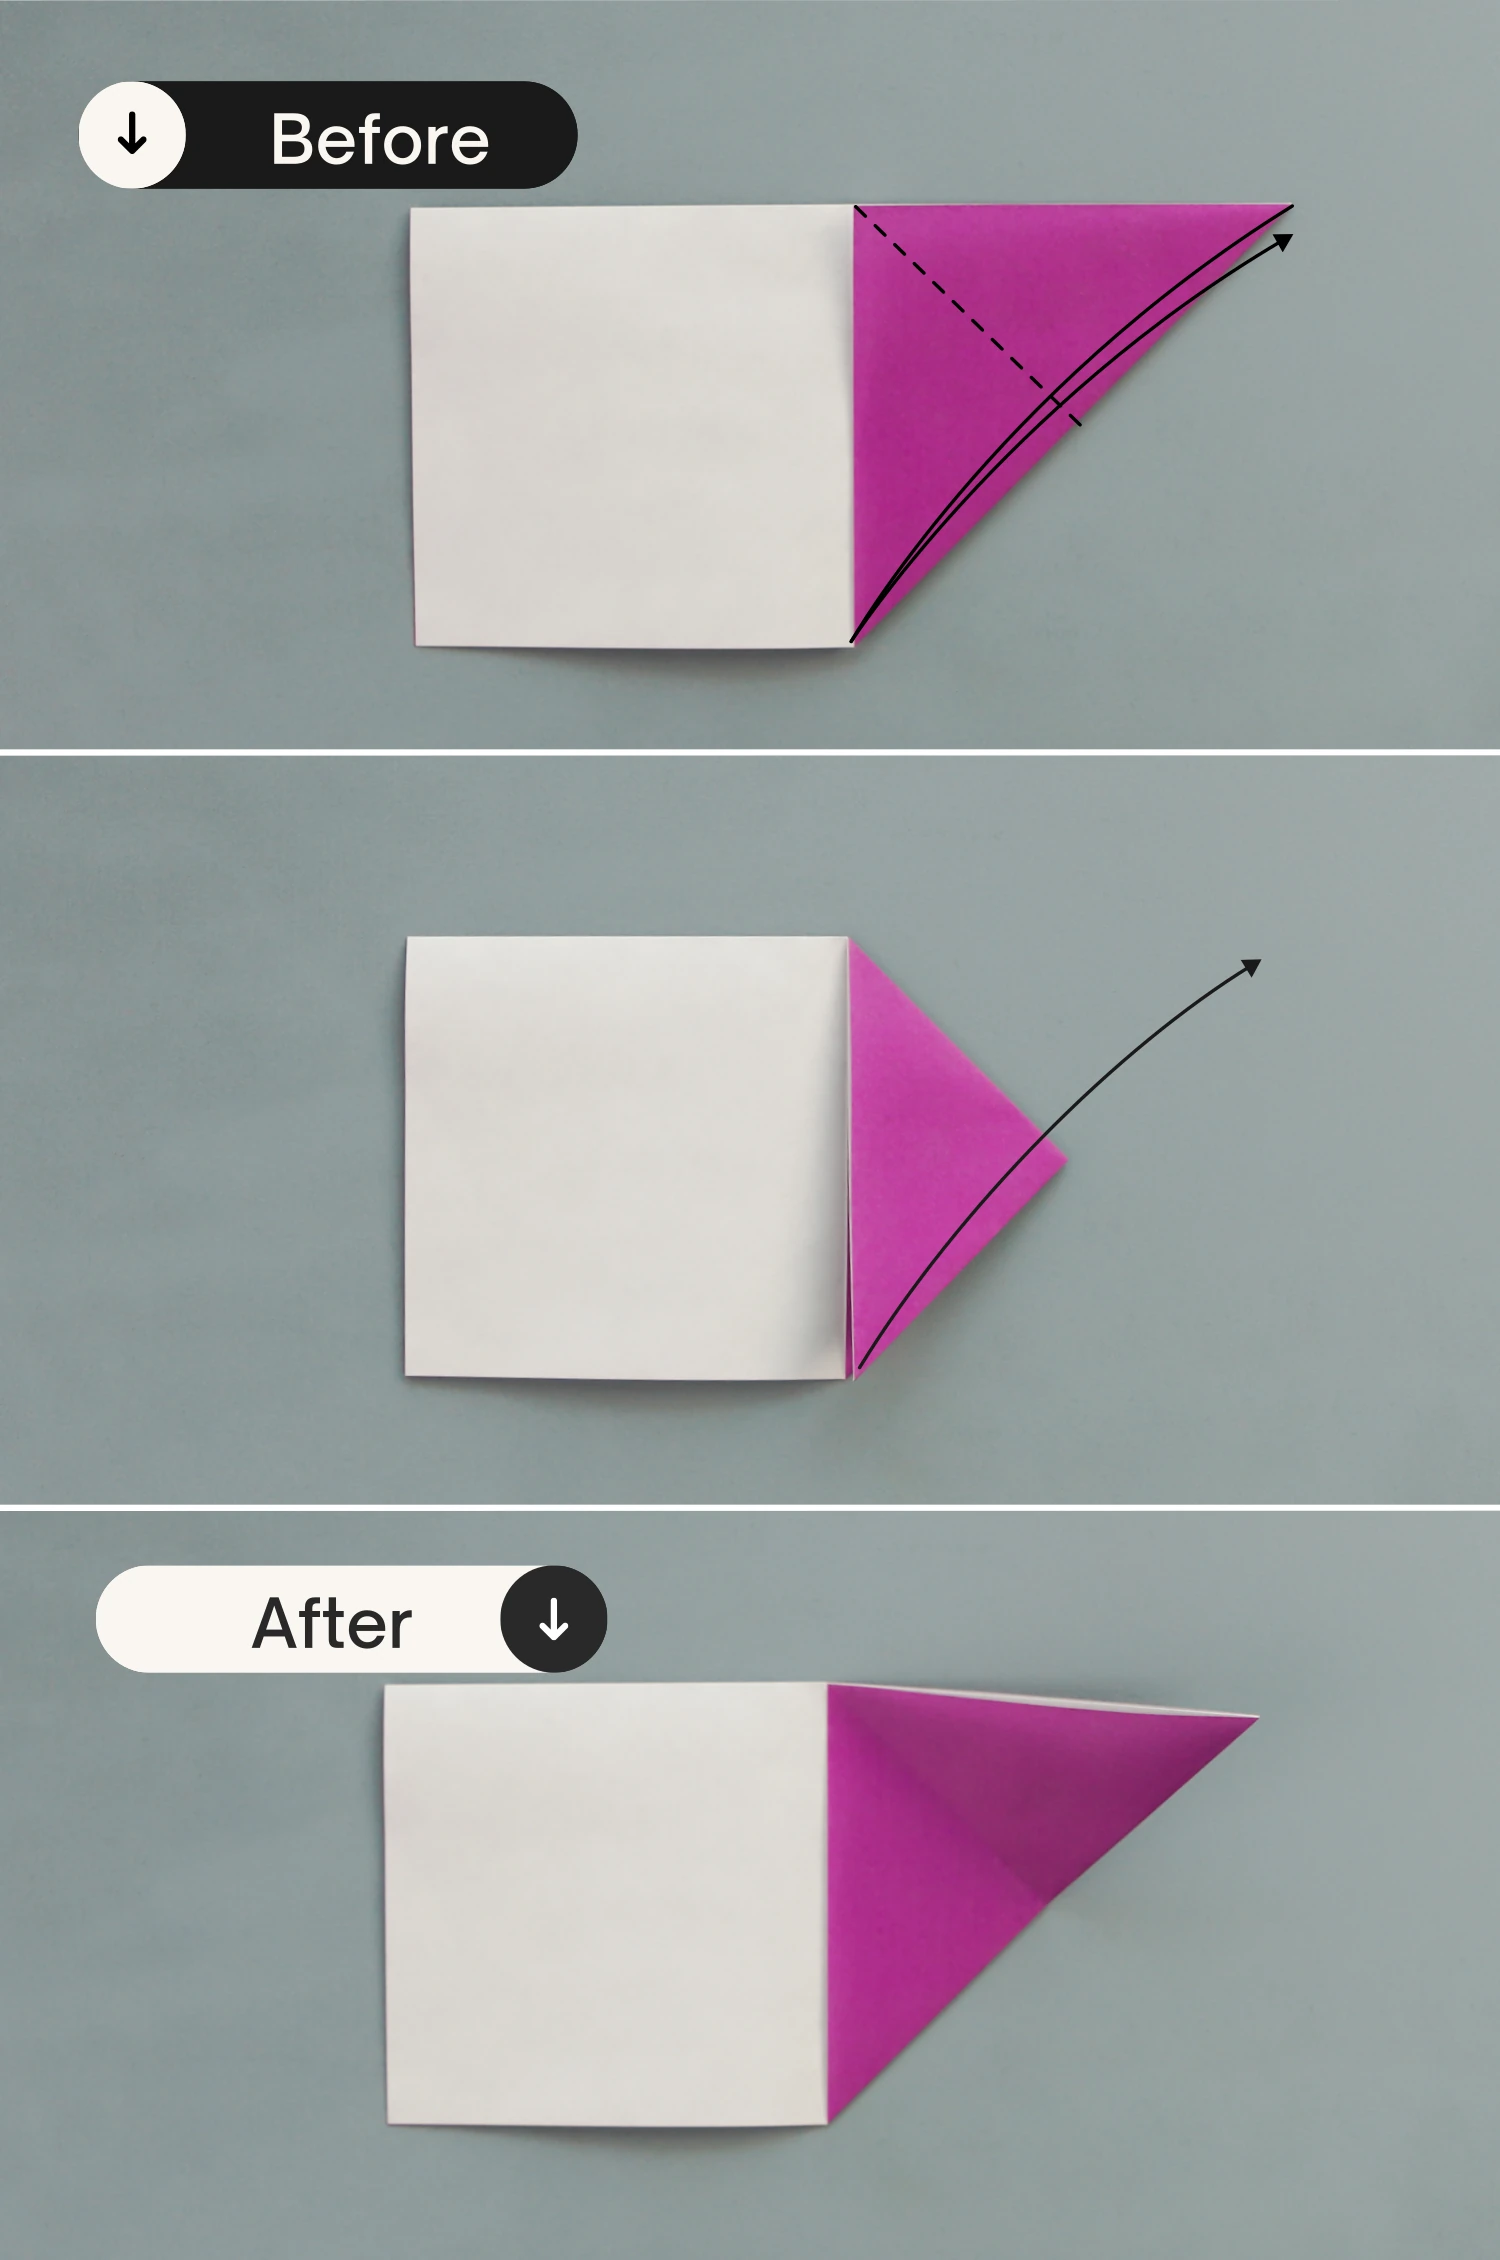
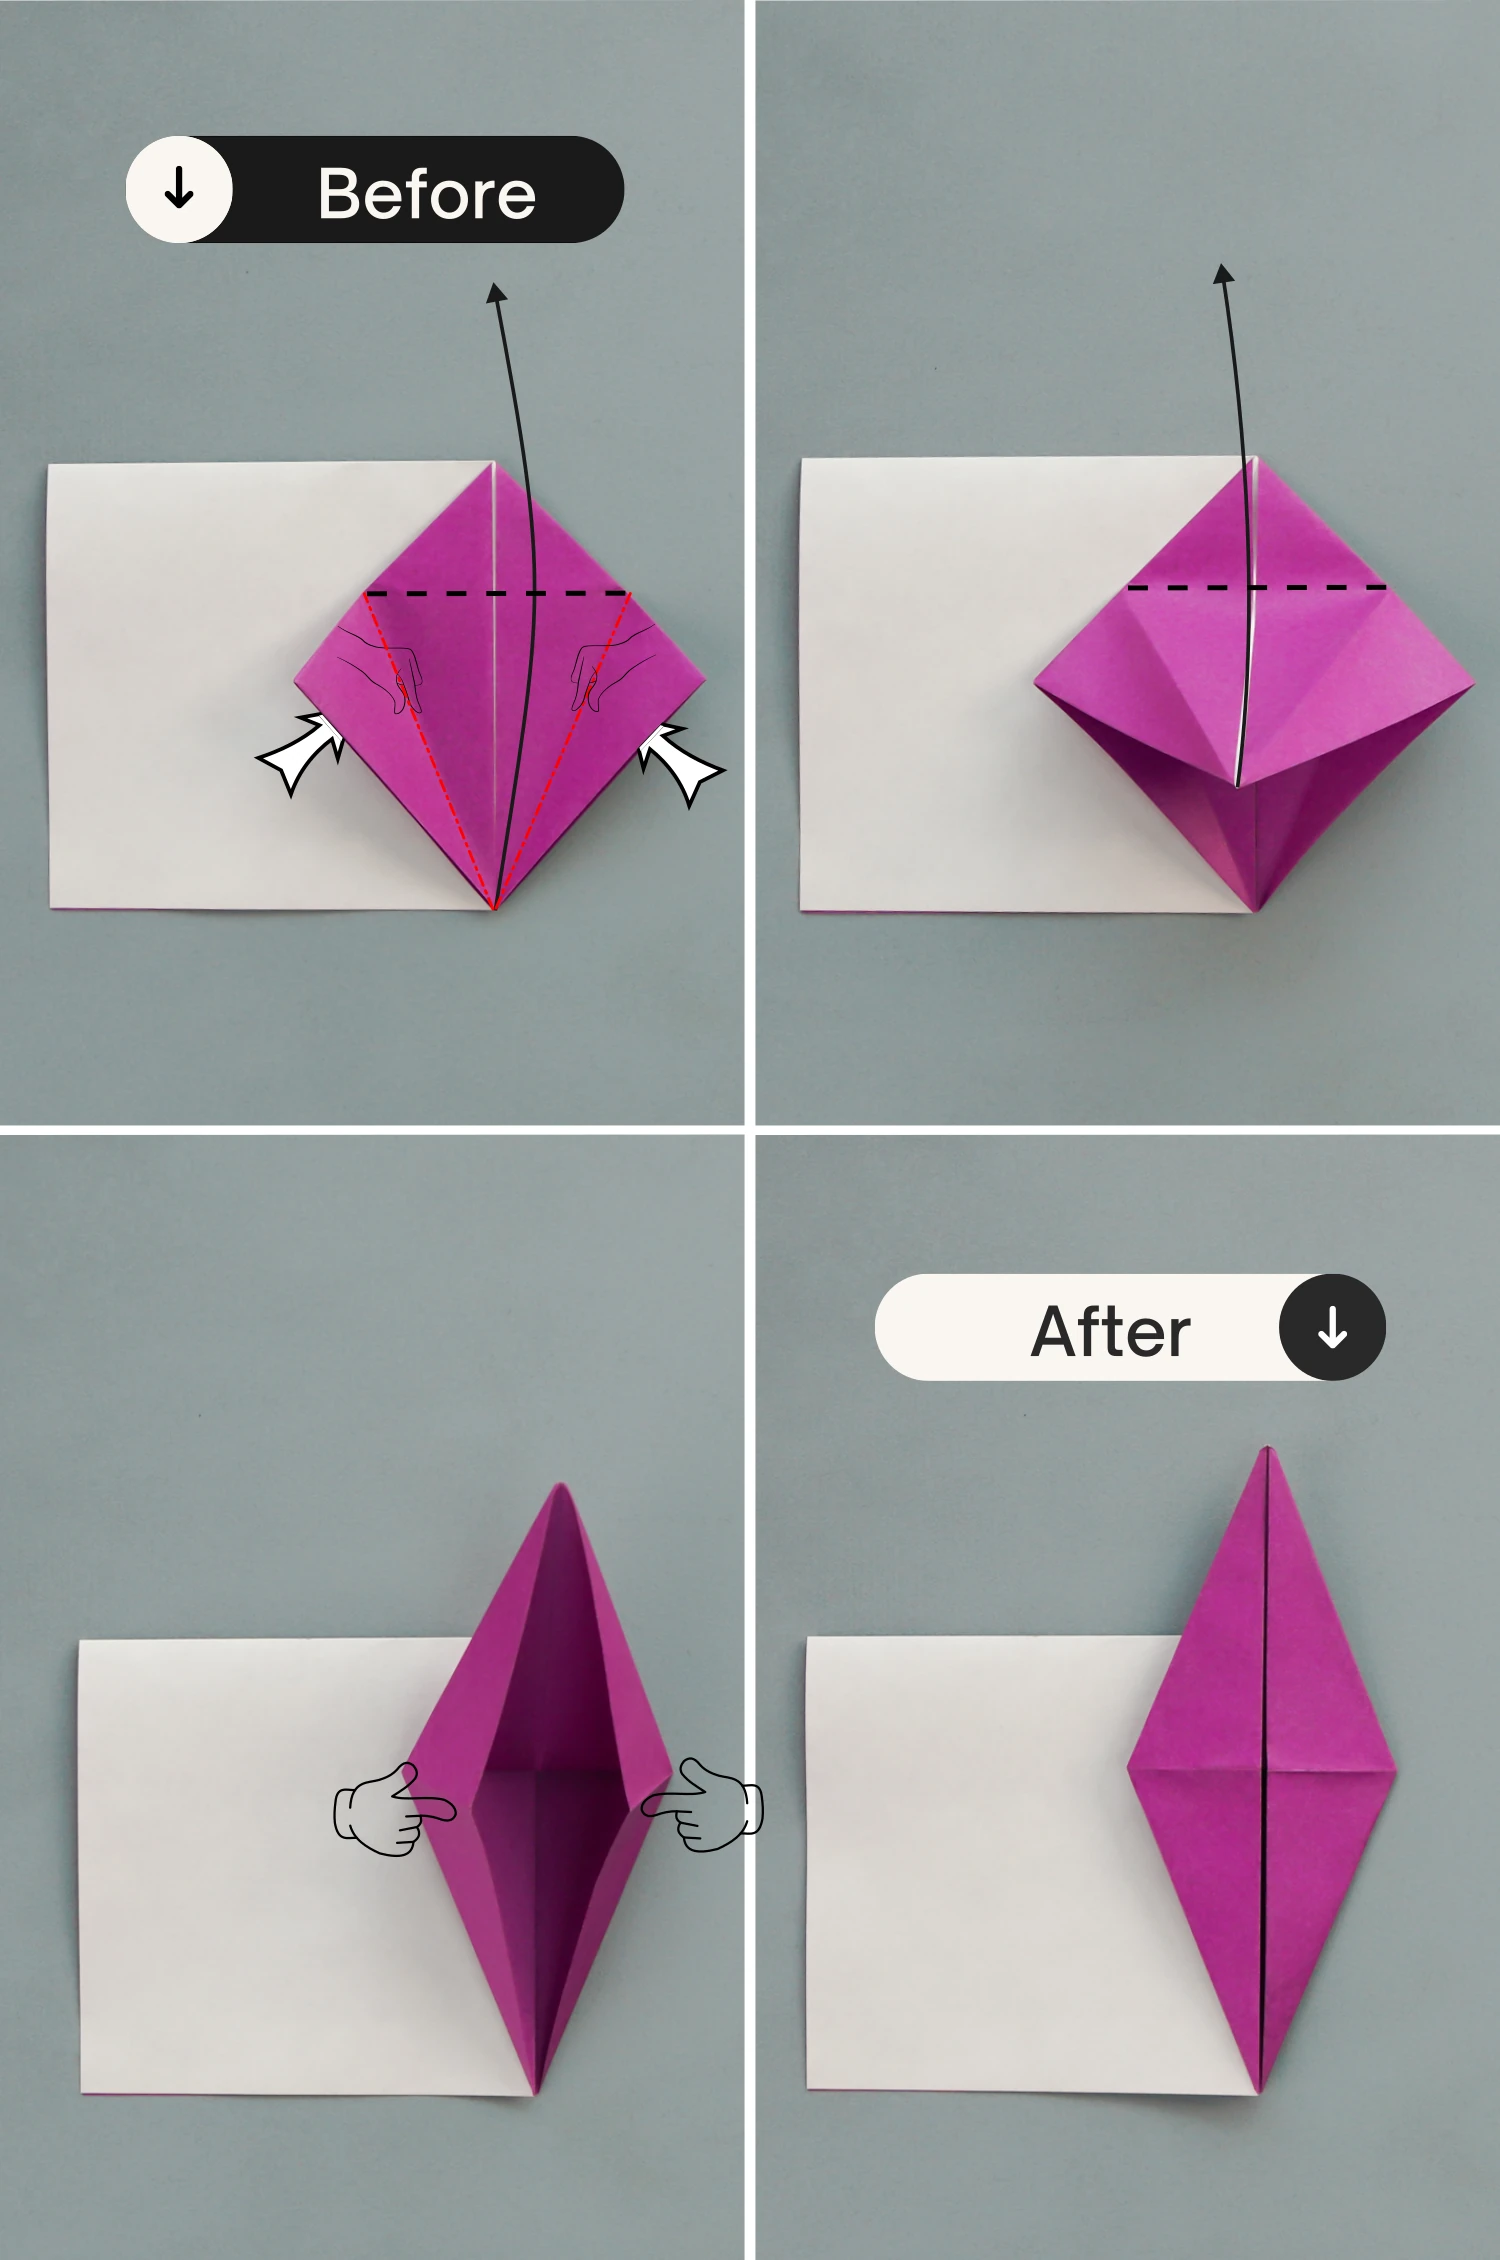
Step 5
Lift the right triangle, open and then squash it along the creases you just made.
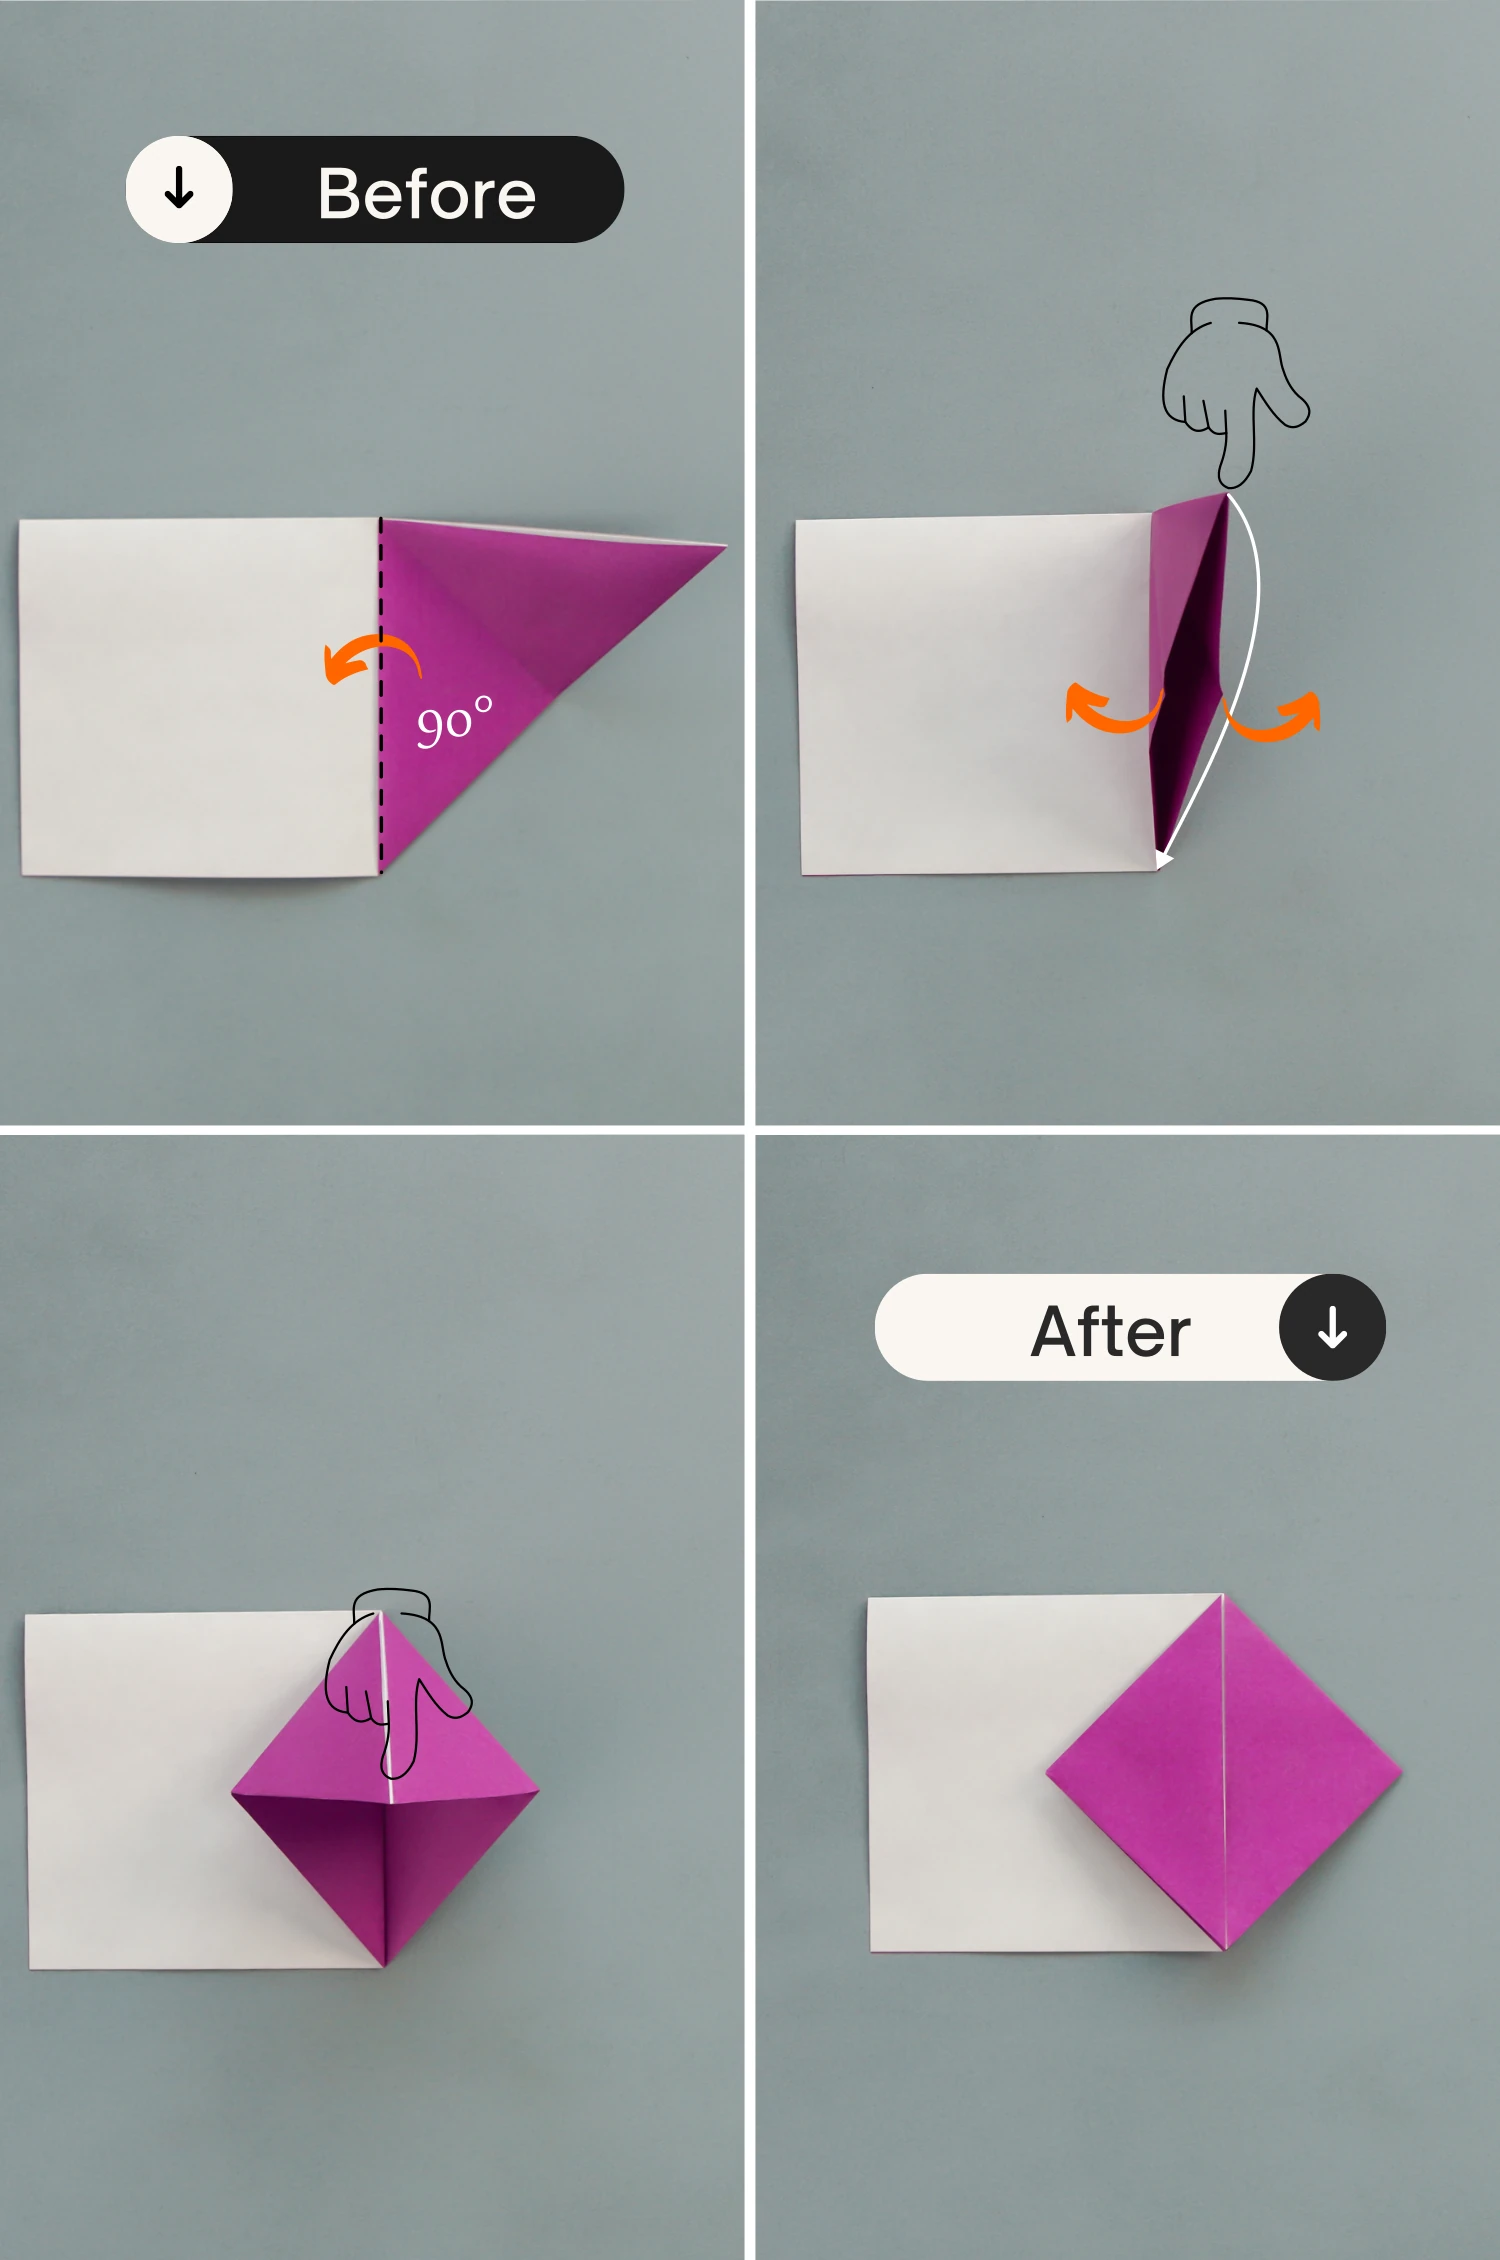
Step 6
Fold the bottom left and right edges of the right square to align with its middle vertical line, crease them very well then unfold them.
Step 7
Shape the two creases you just made and lift the top layer of the square, then fold the bottom point to the top along the dotted line, while pushing the left and right corners to the center. Finally, flatten the fold.
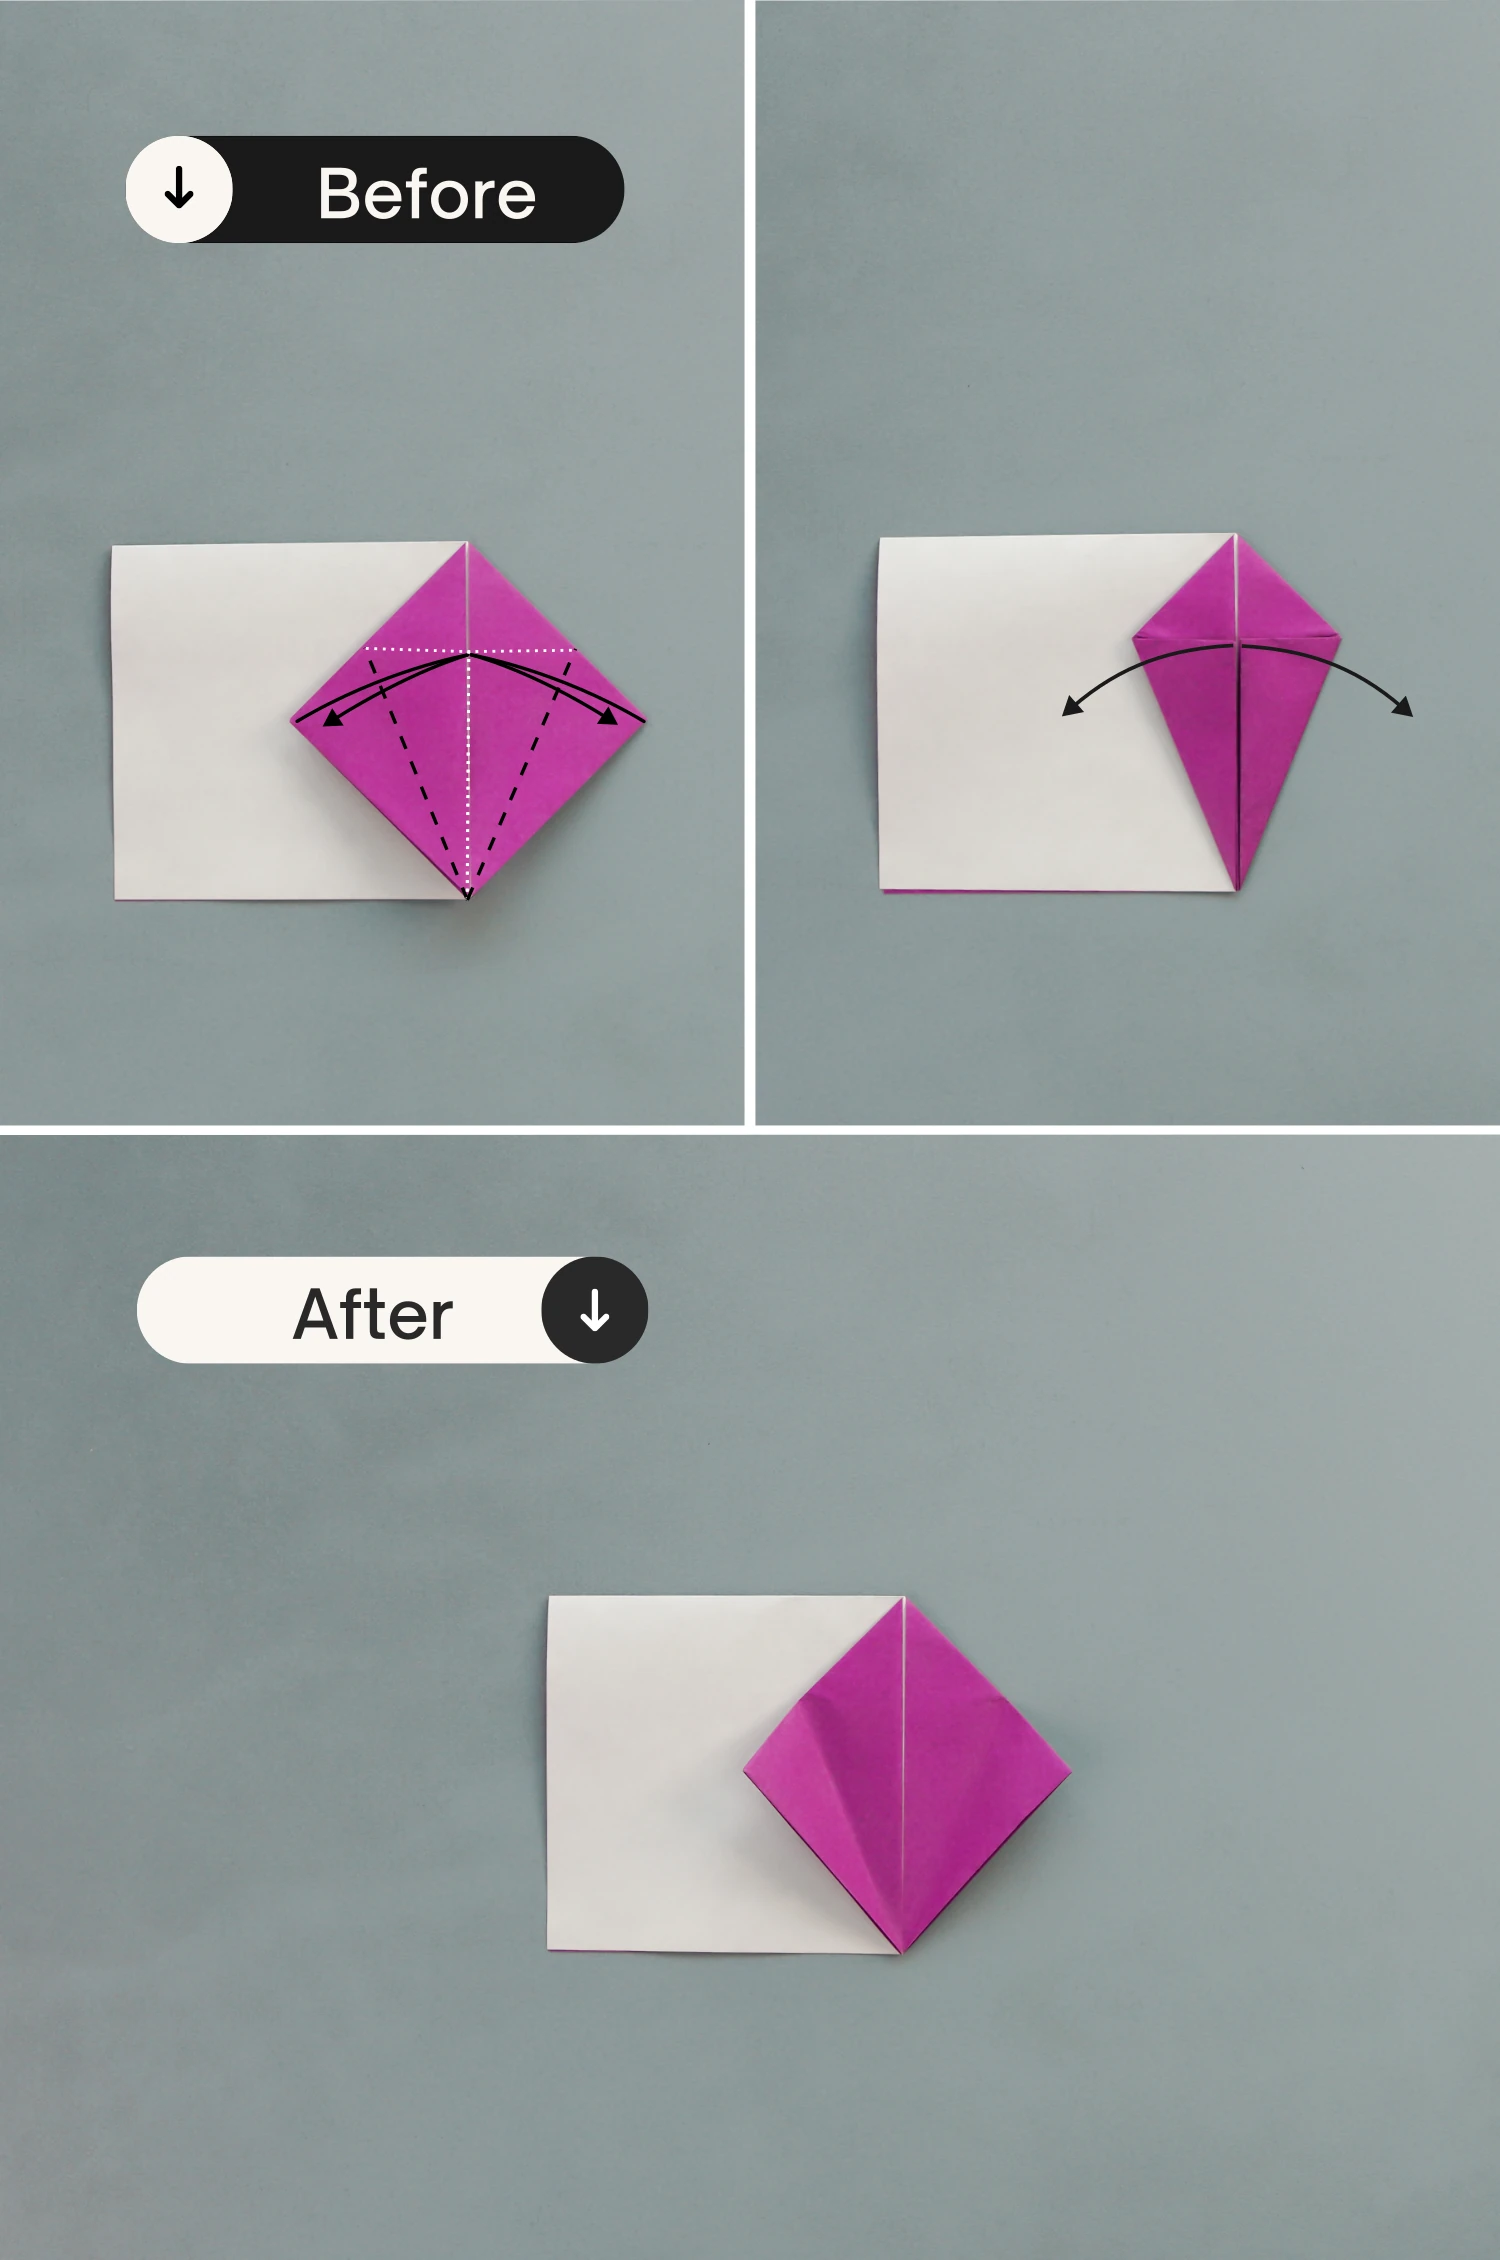
Step 8
Flip it over horizontally.
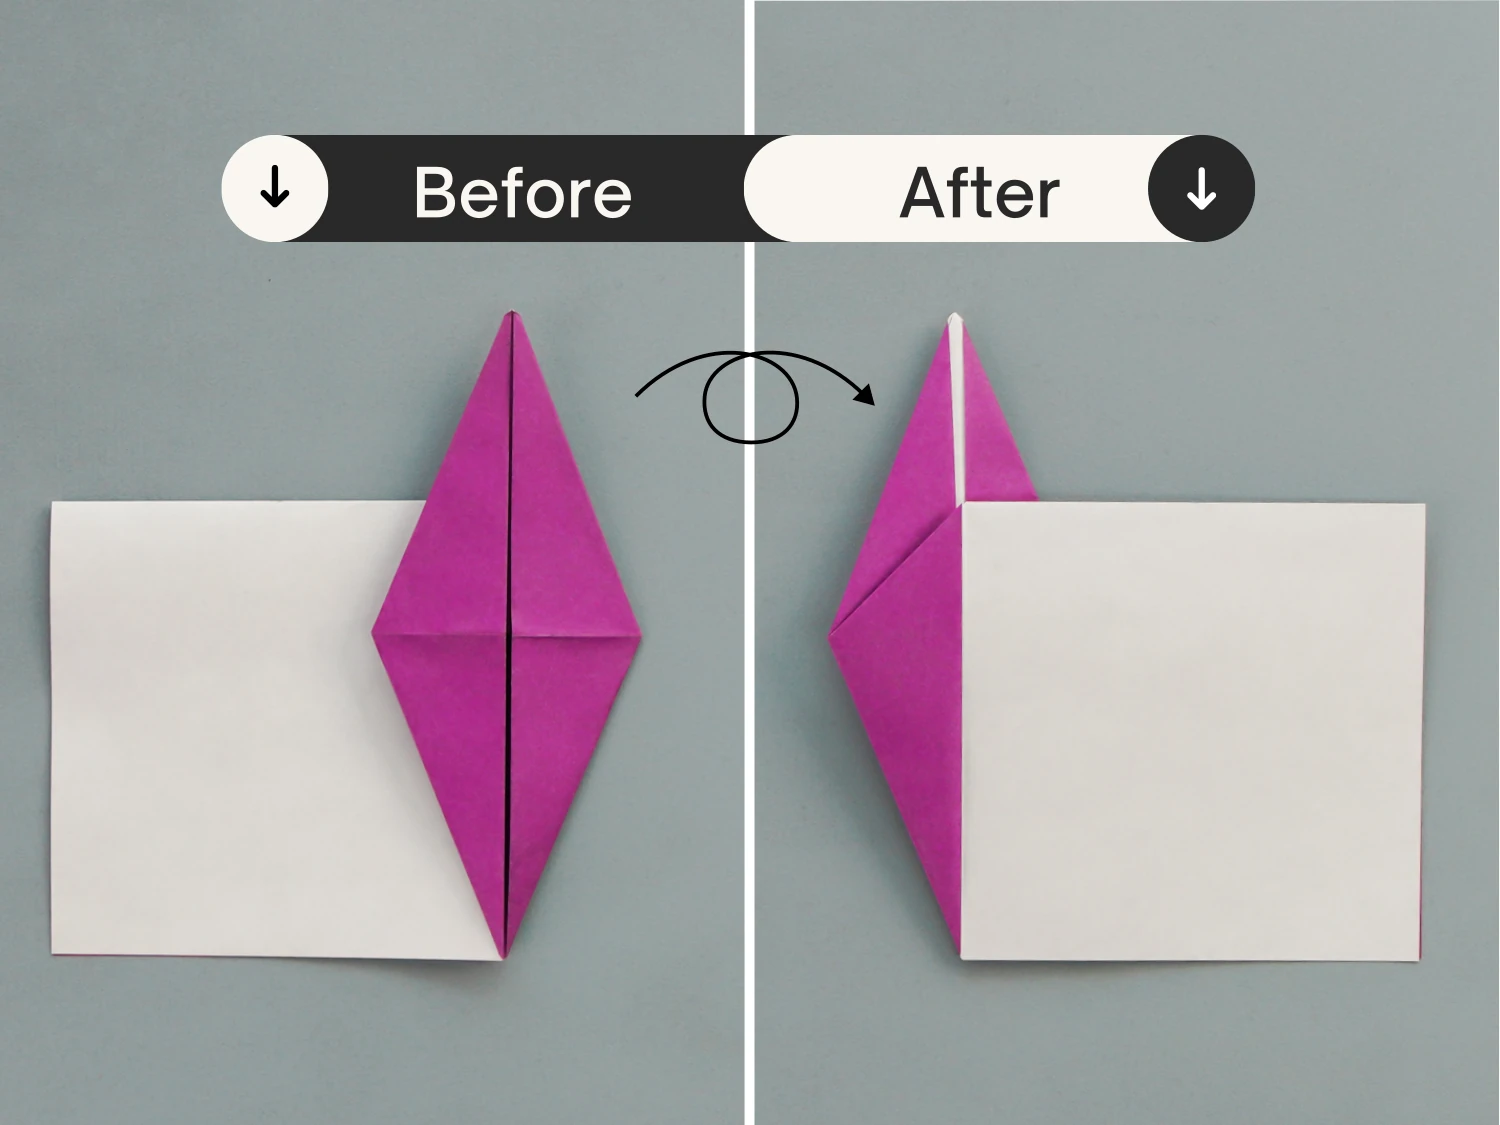
Step 9
Bring up the right square, open and squash it to form a triangle.
Step 10
Fold the left and right edges of the triangle to align with its middle vertical crease, crease well then unfold them.
Step 11
Lift the right part of the triangle along its middle crease, then open and squash this pocket. Next, fold the bottom point up along the dotted line as the last two pictures show.
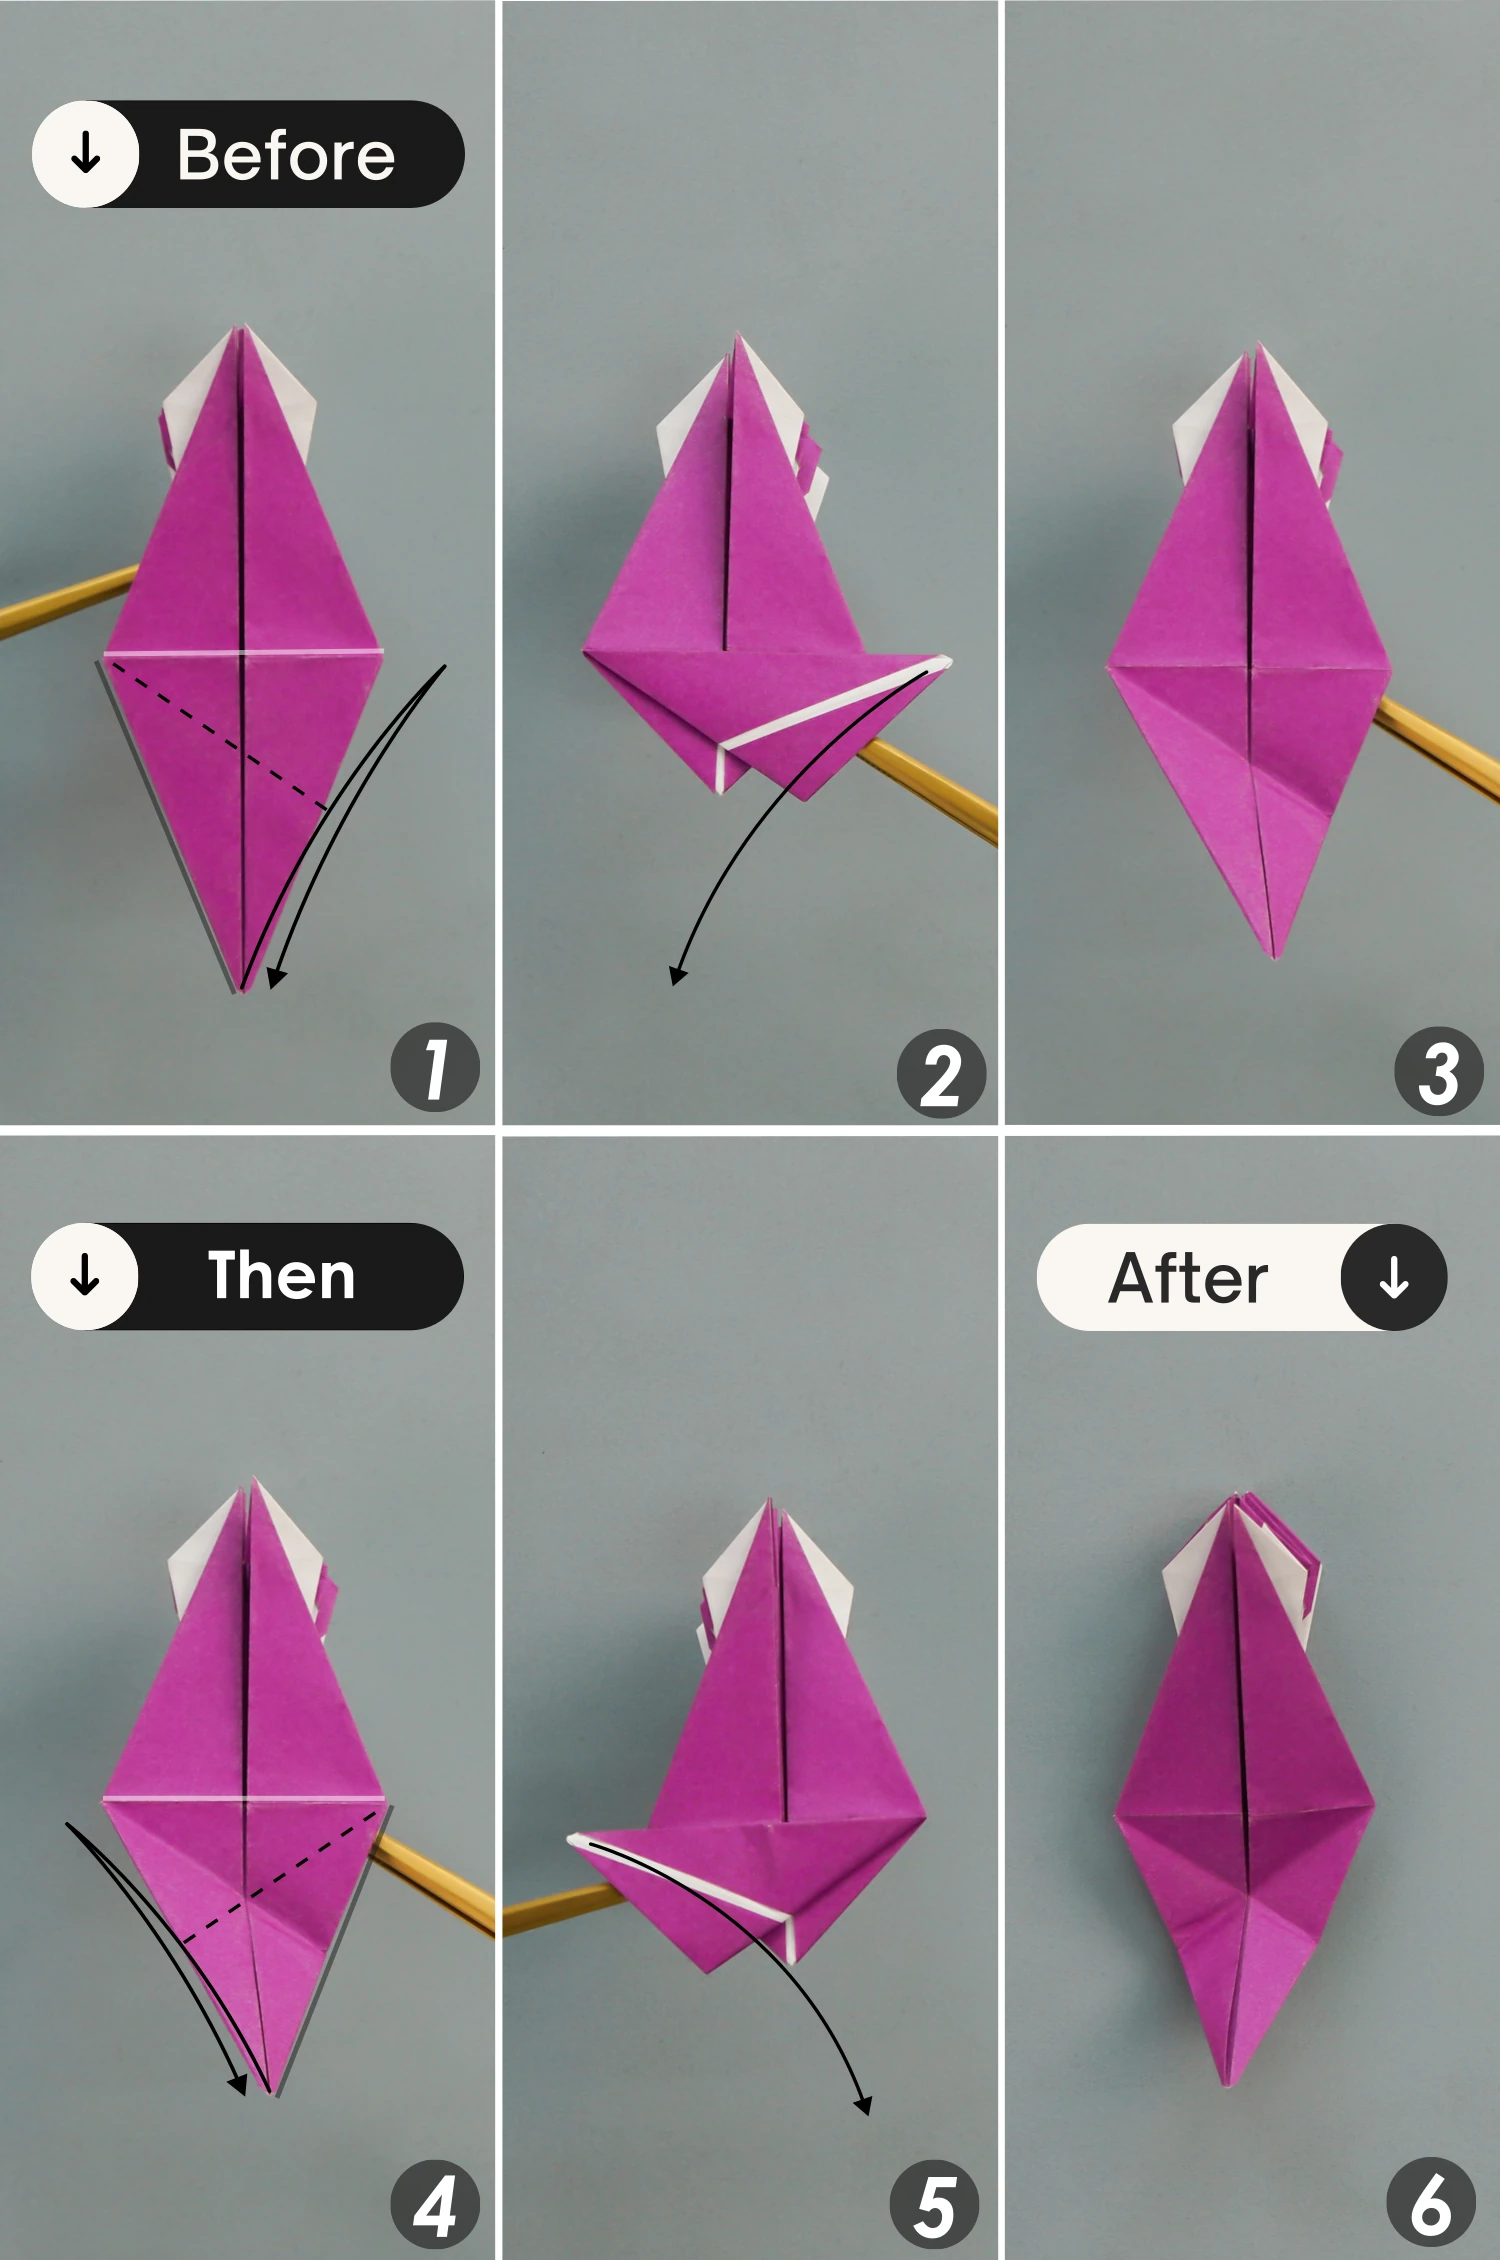
Step 12
Take the left edge of the upper triangle, and fold it to the right along its middle vertical crease.
Step 13
Like before, lift the left edge, open and squash this pocket, then fold the bottom point up along the dotted line.
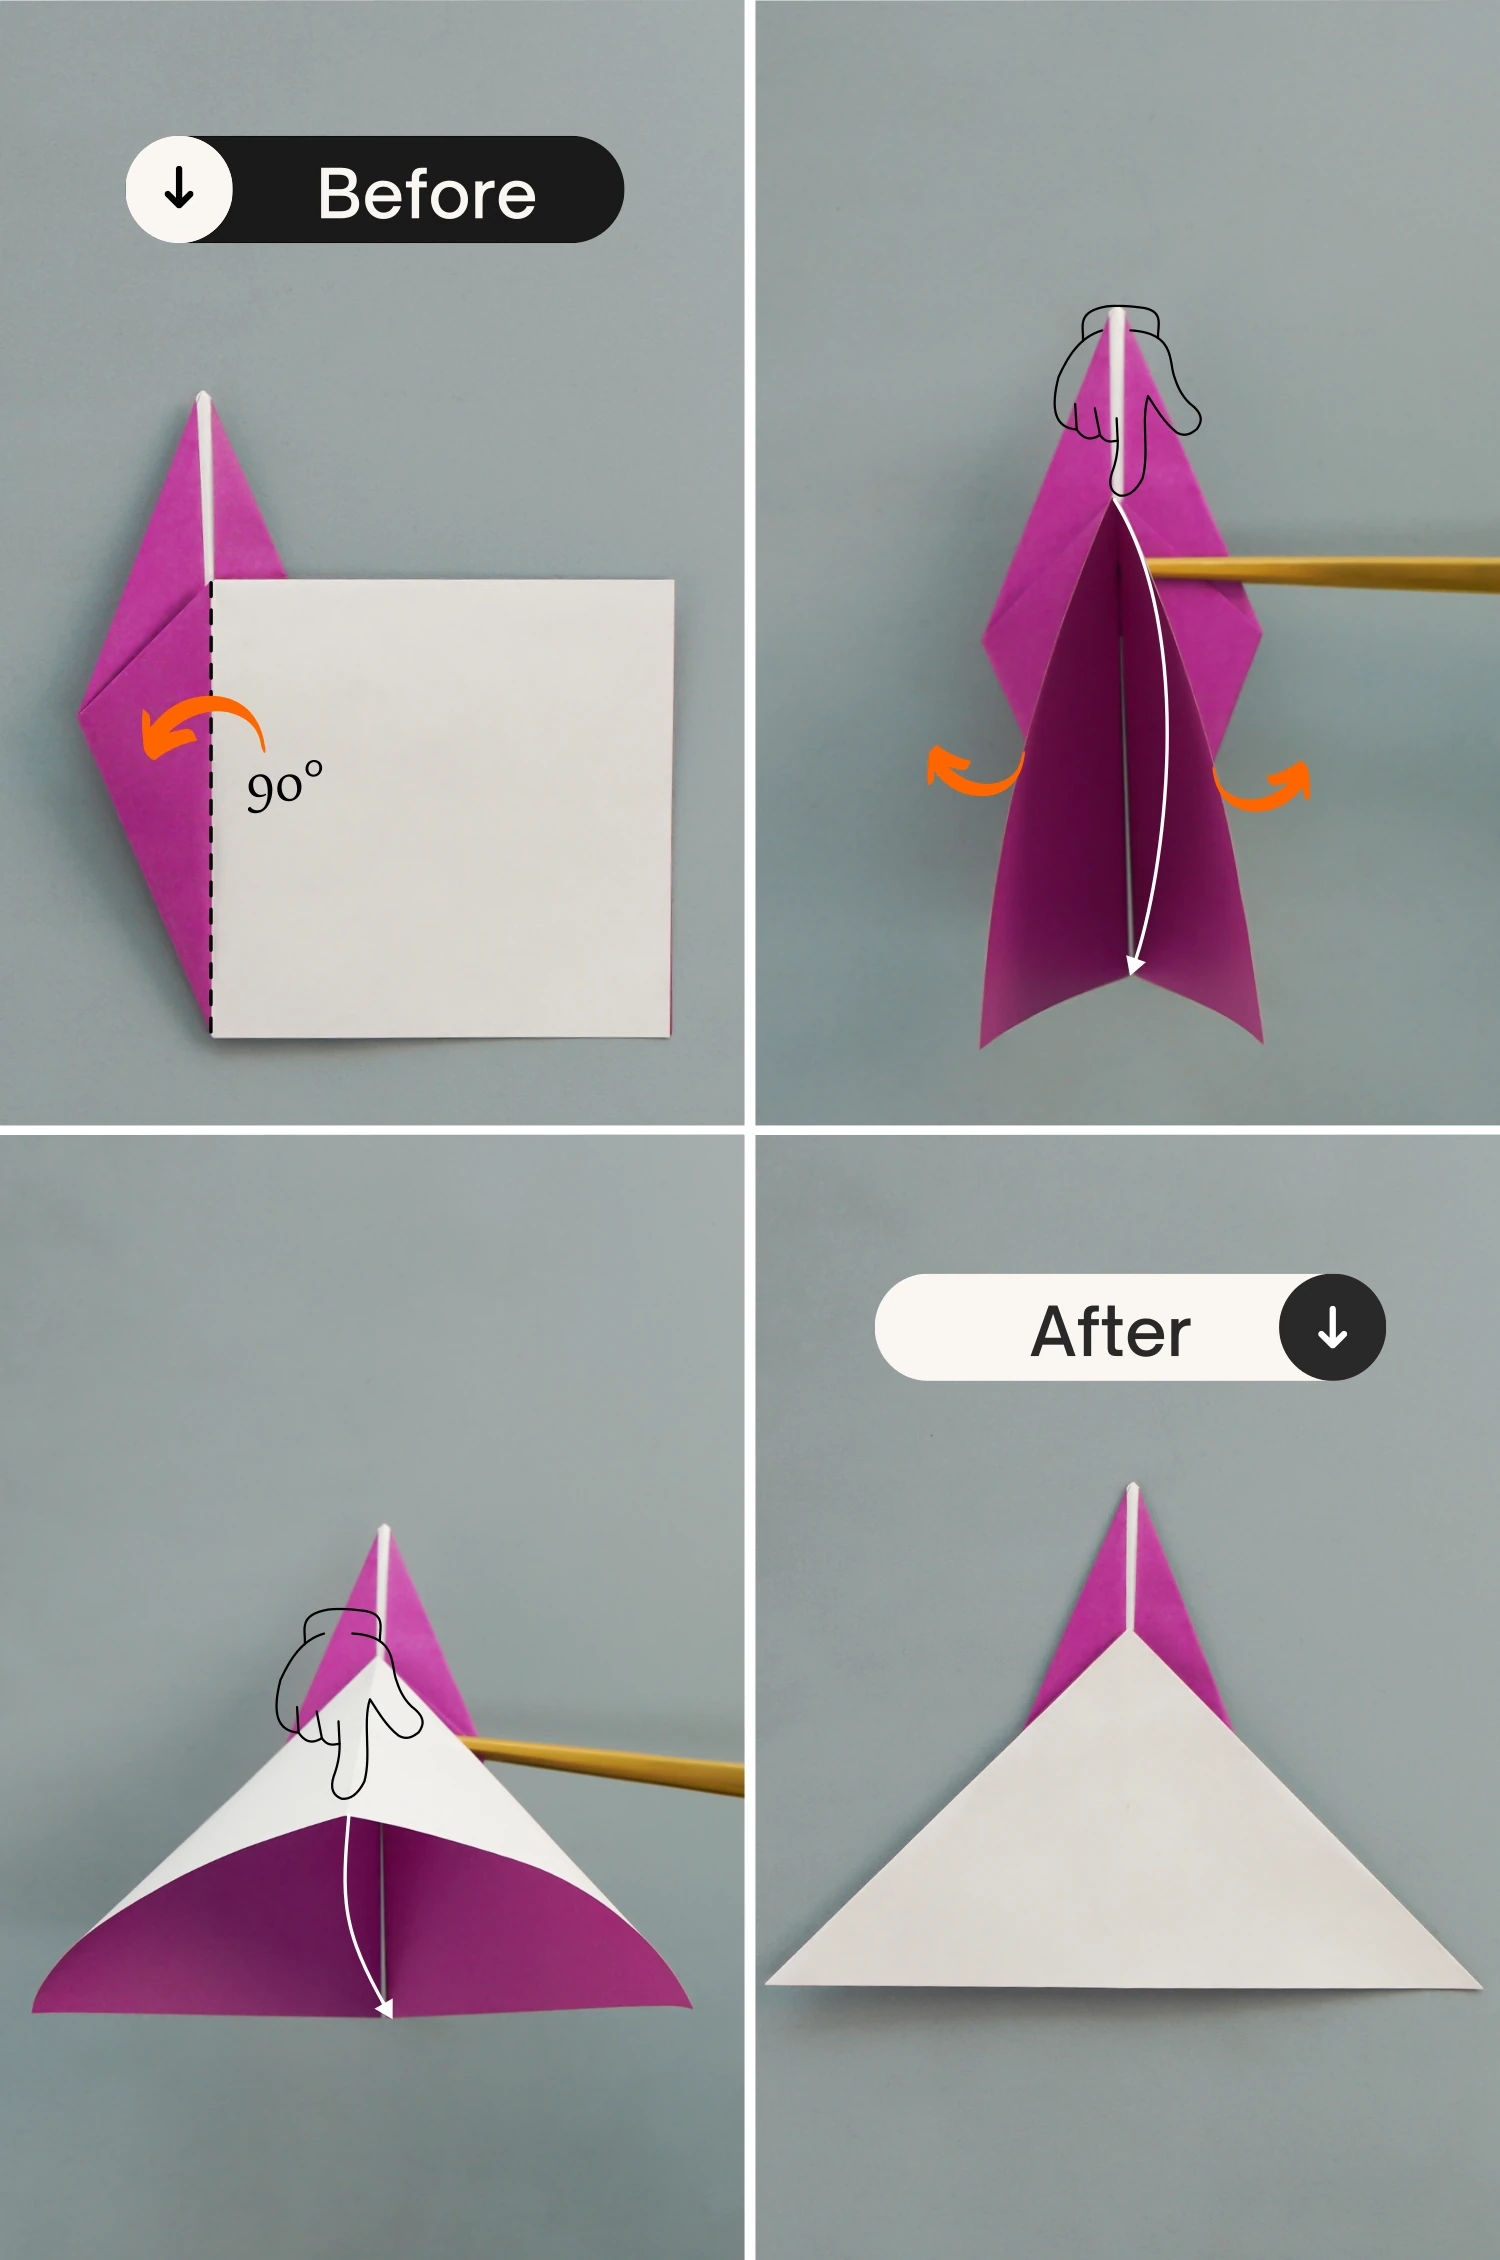
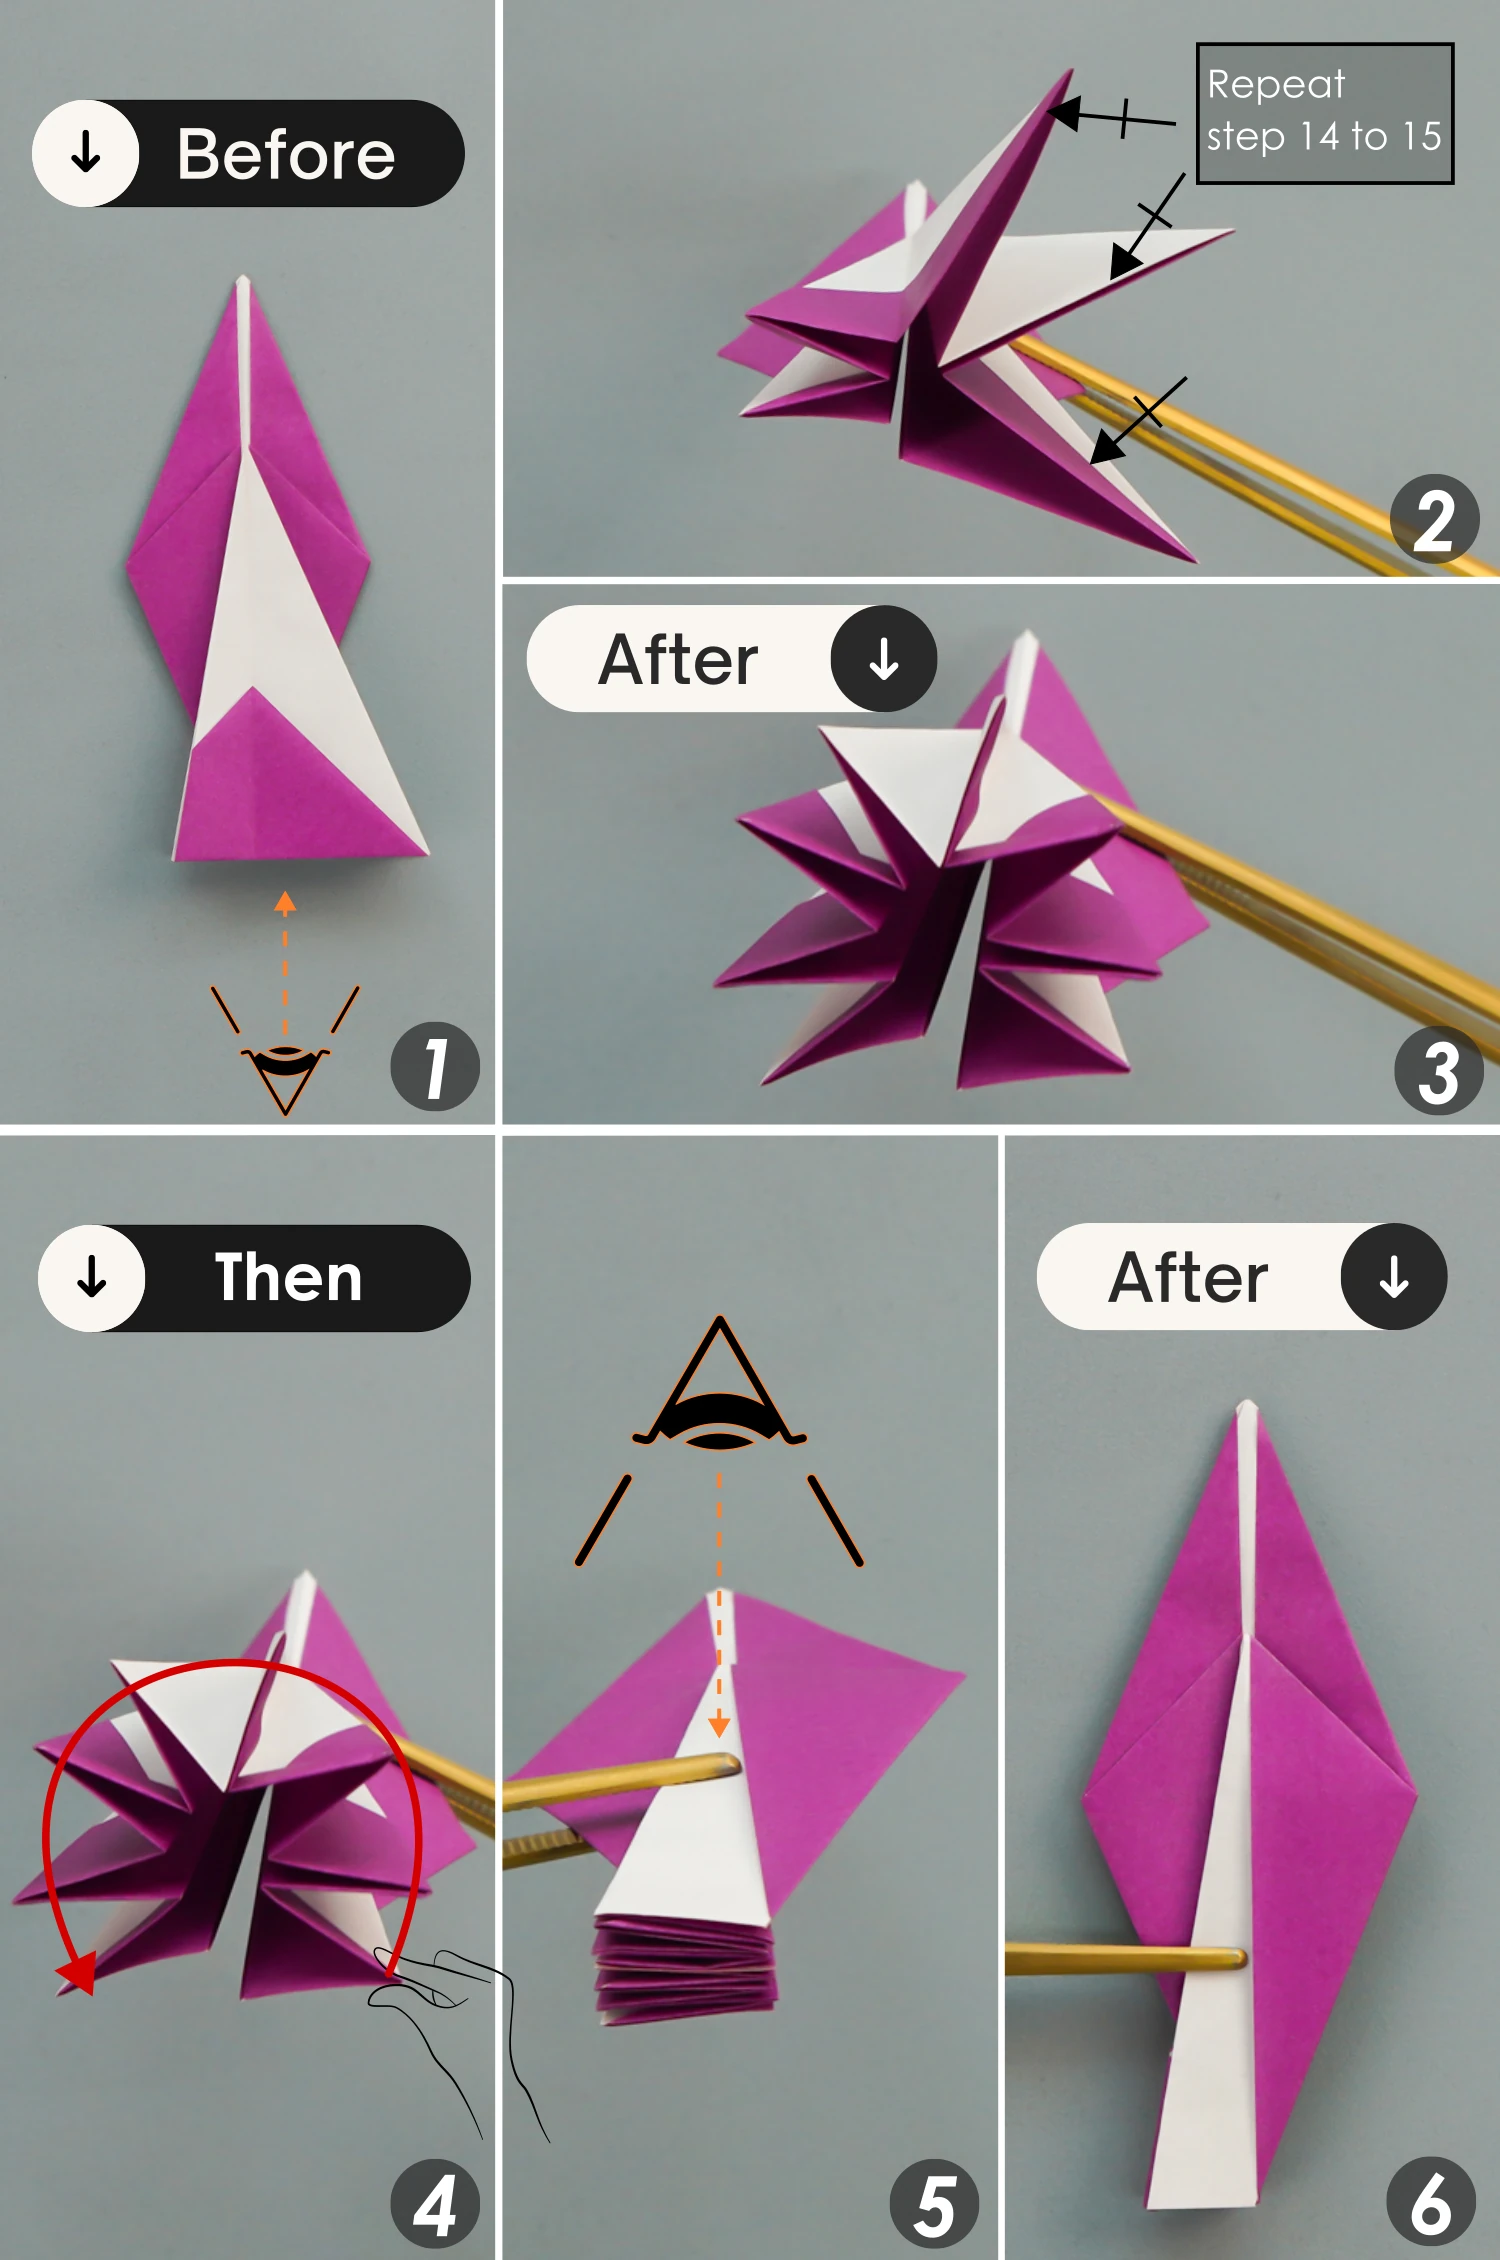
Step 14
Fold the left edge of the upper triangle to align with its middle vertical crease, crease it well then unfold.
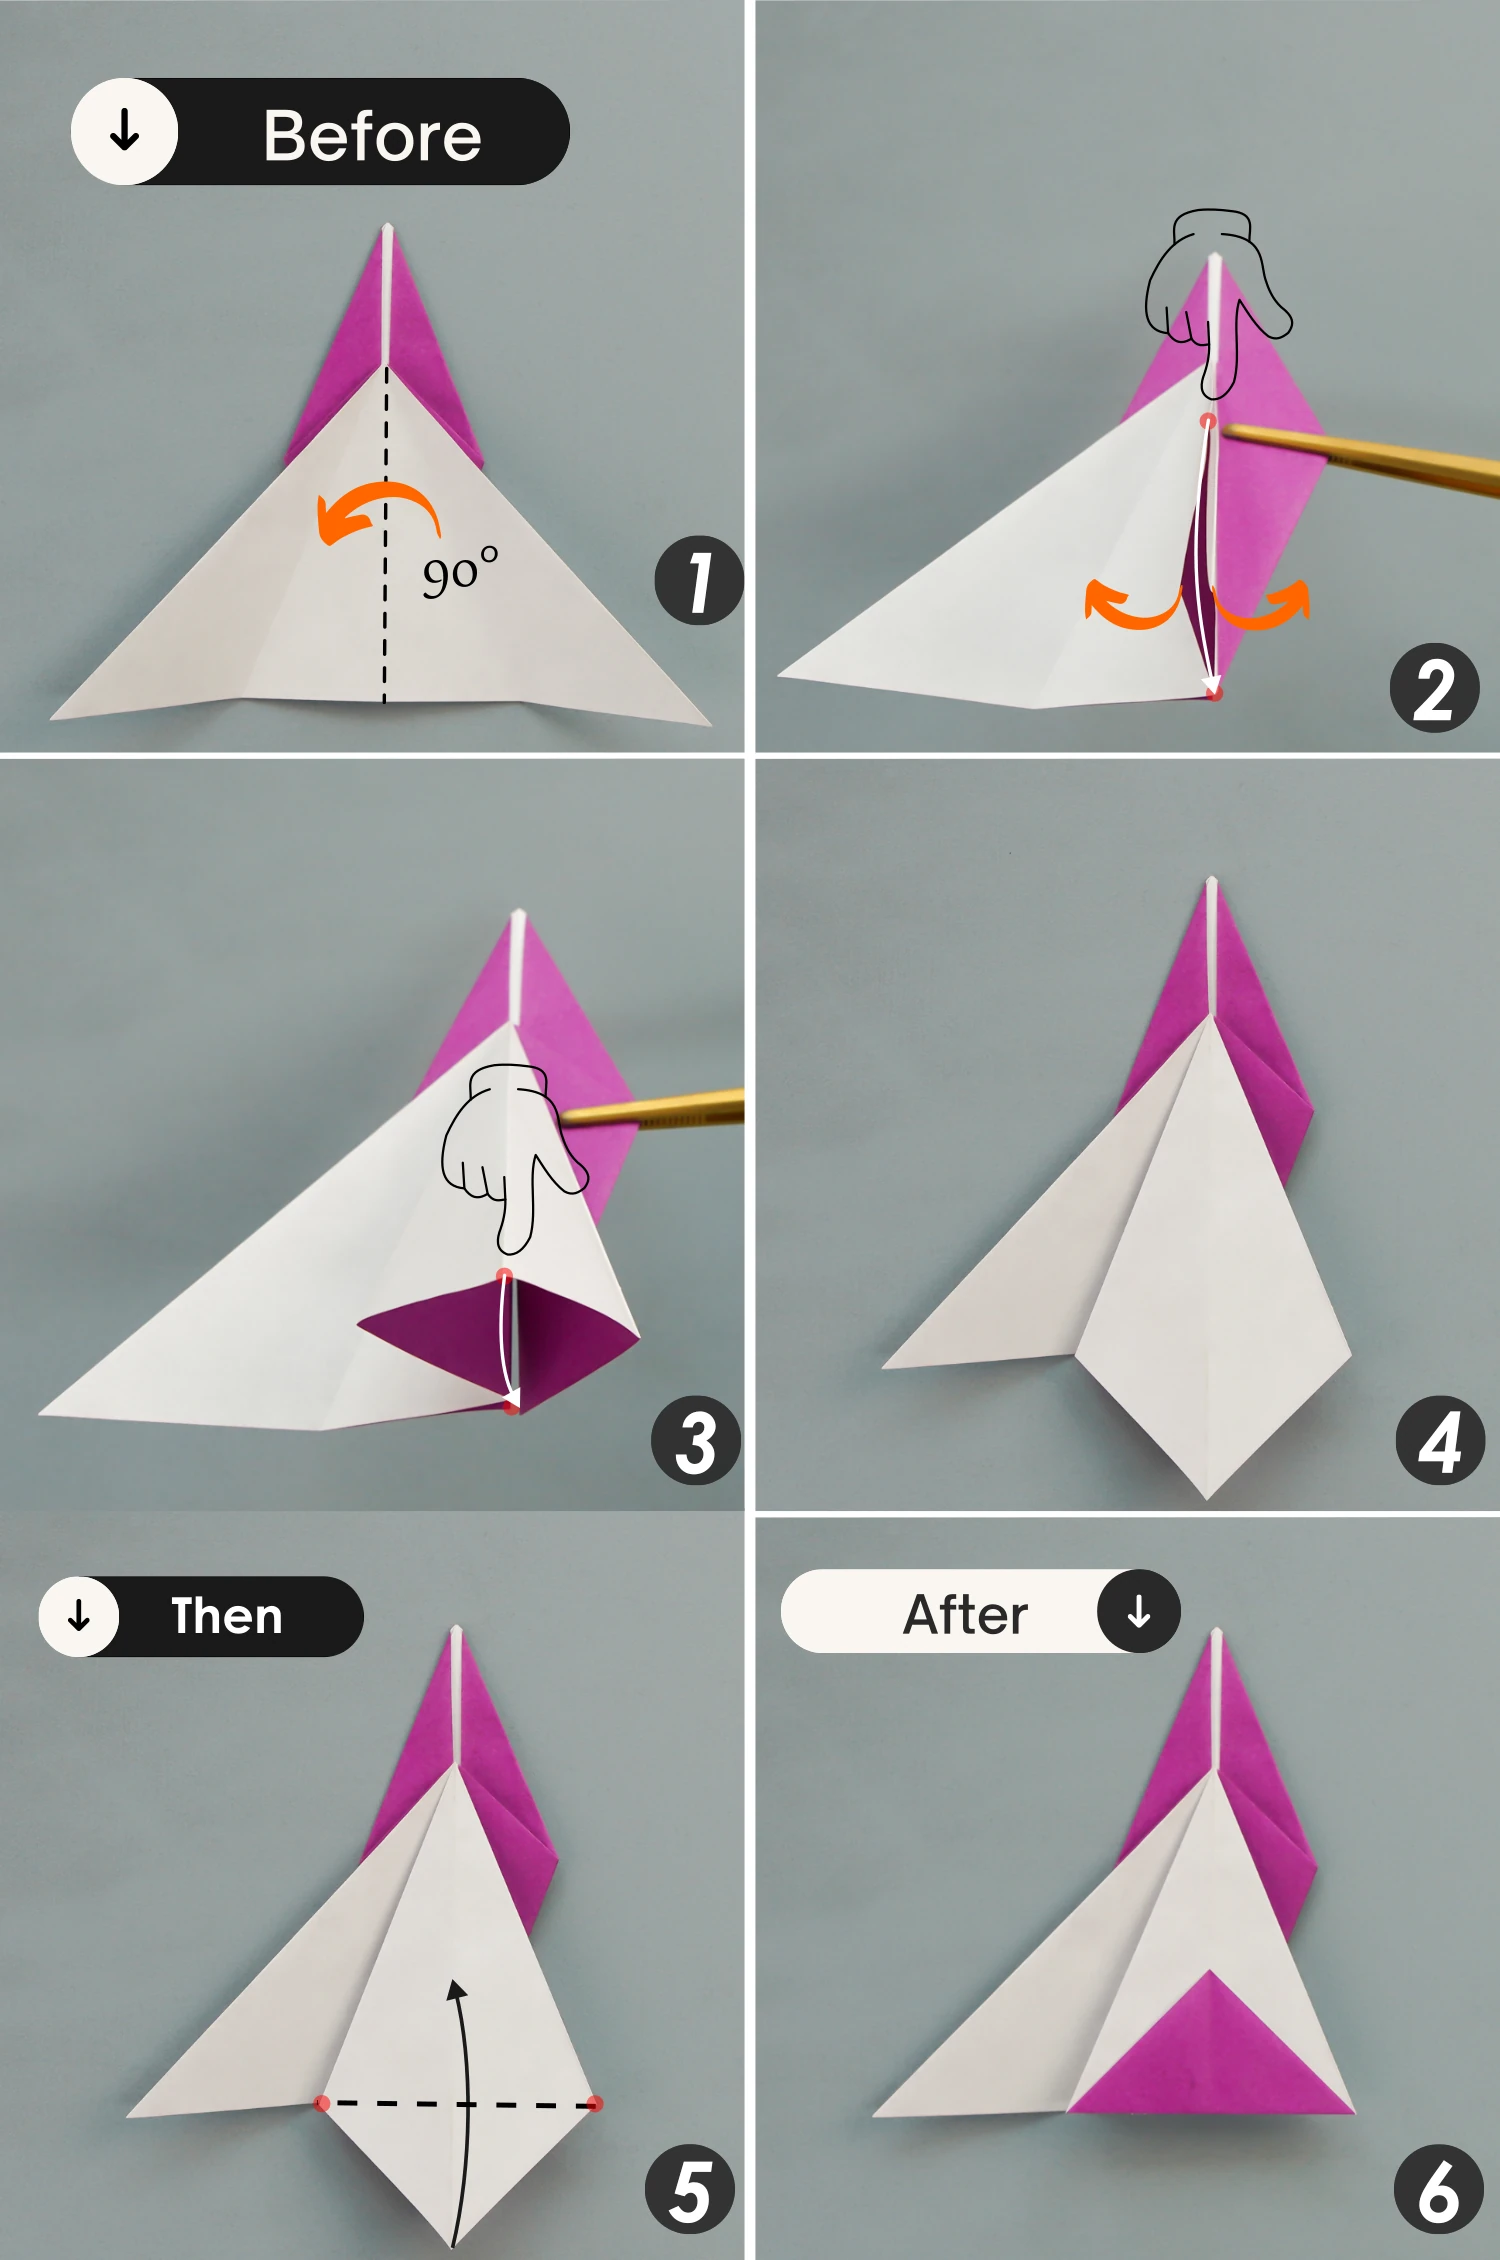
Step 15
Lift the left edge of the upper triangle along its middle vertical crease, then open and squash this pocket along the creases you made in the previous step. Next, fold the bottom point of the folded part up along the dotted line as the third picture shows. Finally, fold the right edge to the left as we can see in the last two pictures.
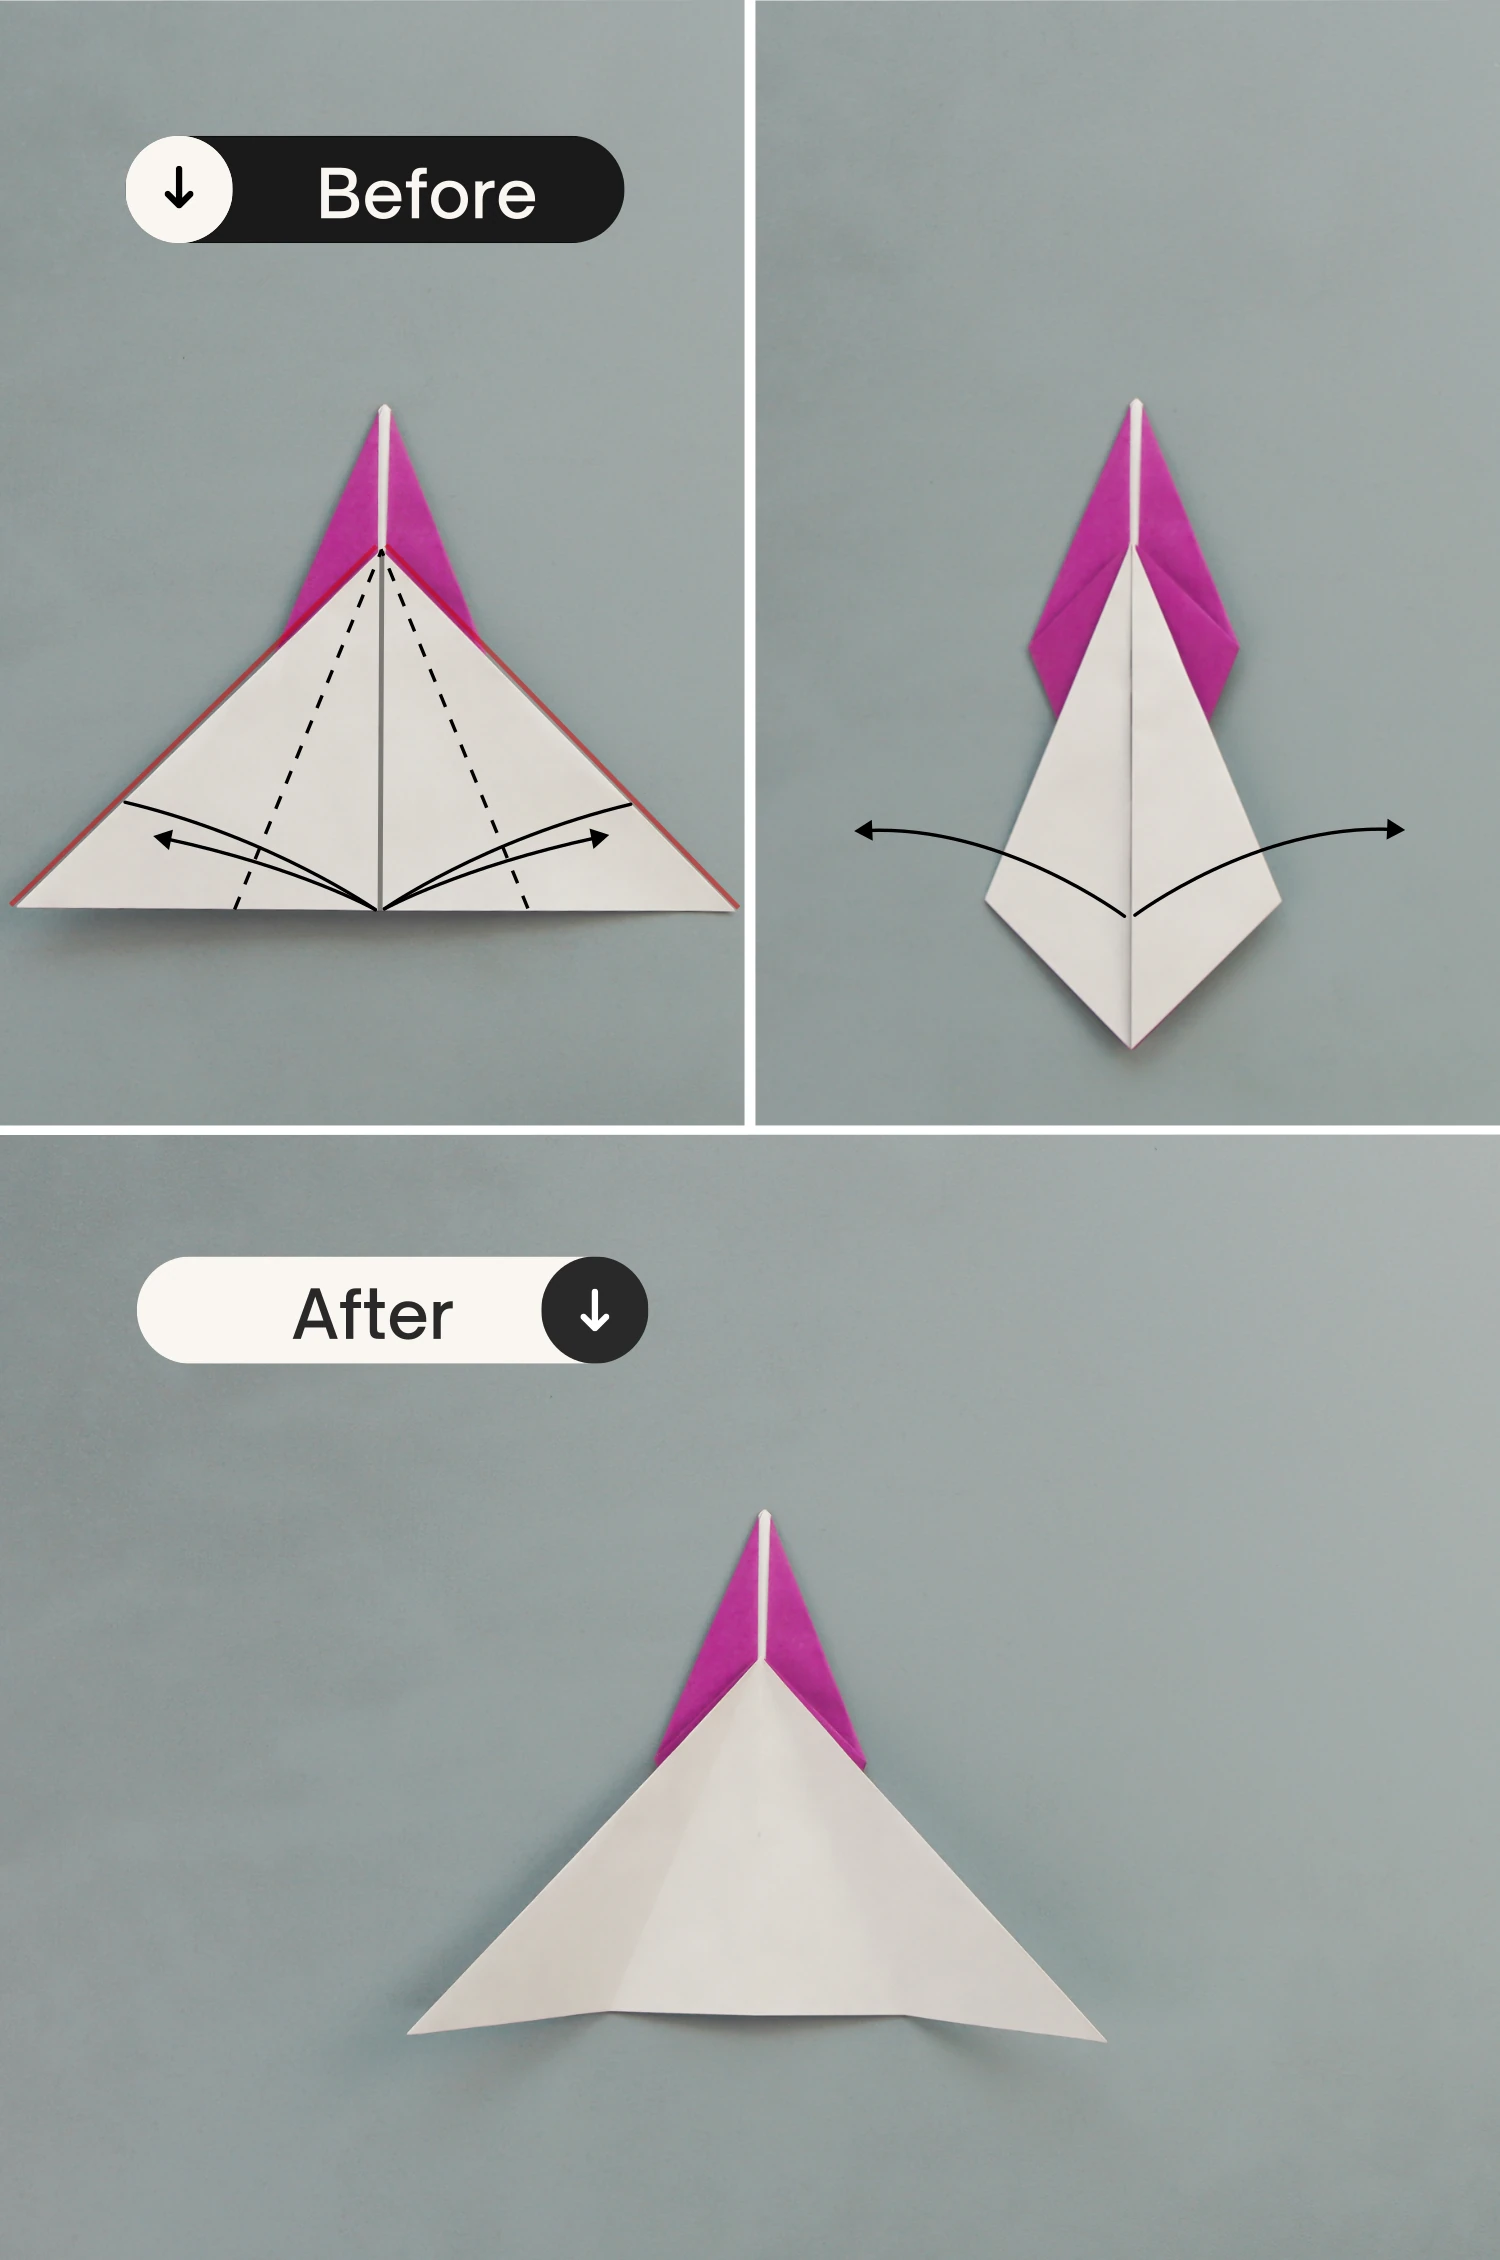
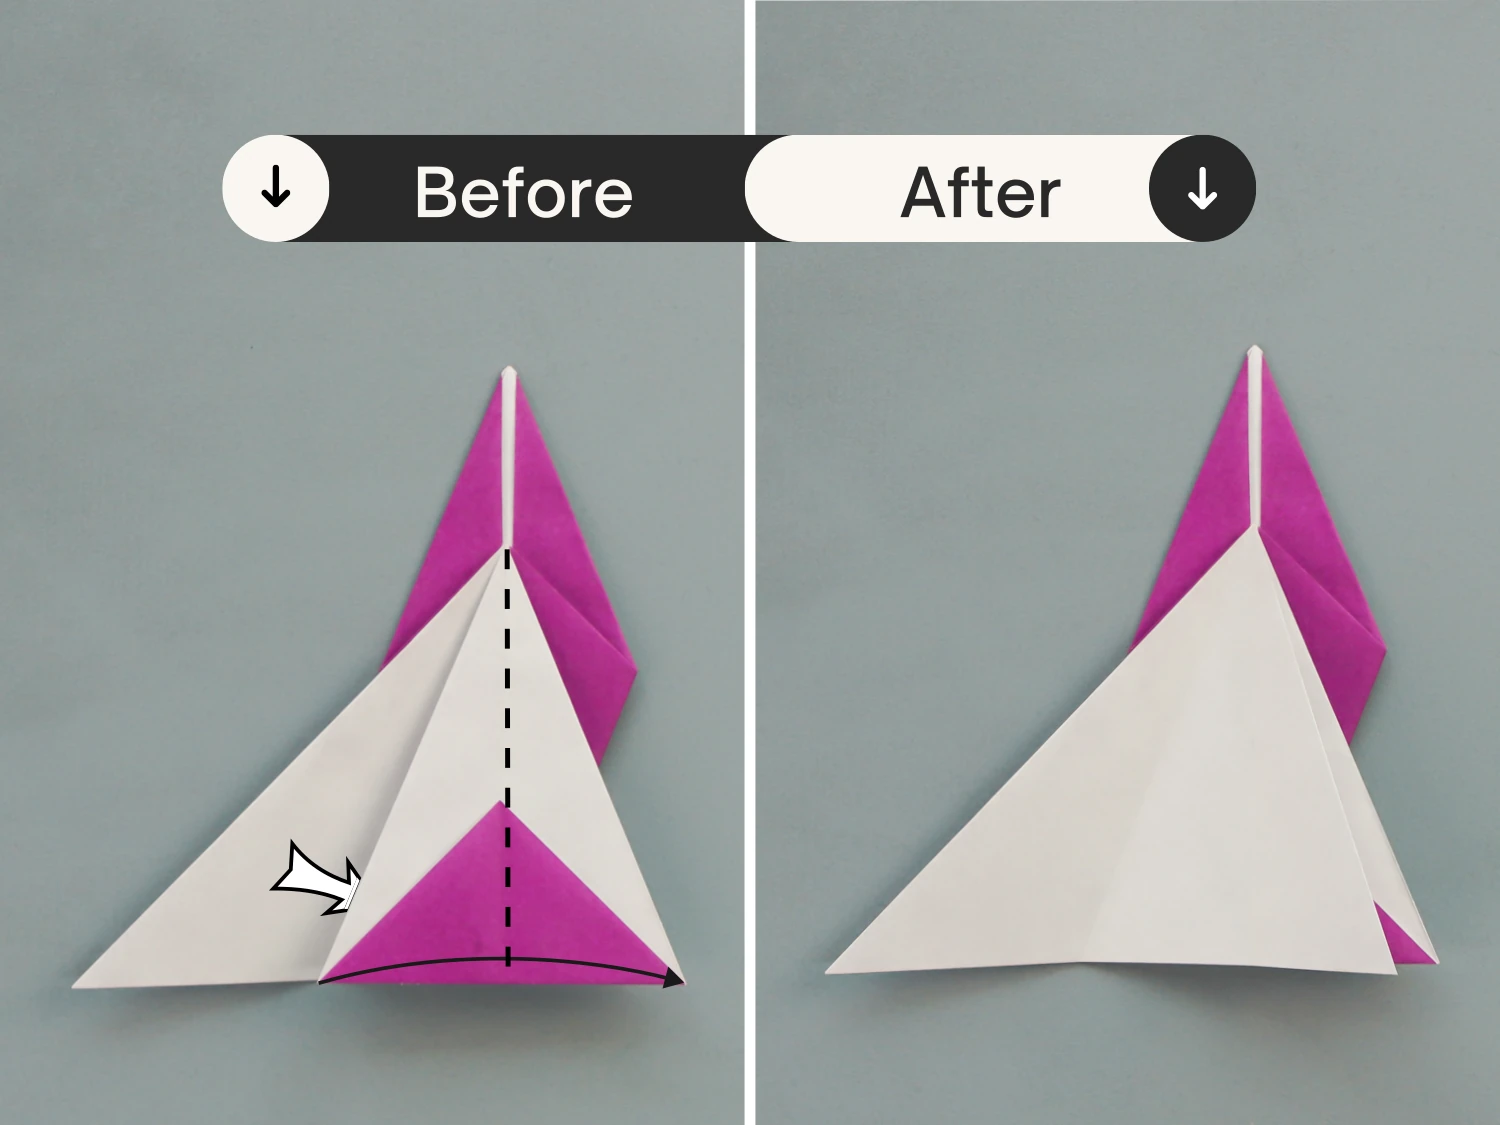
Step 16
View the paper from the bottom, we can see there are three other flaps, now you should repeat steps 14 to 15 for these three flaps, after that, you will get a shape like the third picture shows.
Then fold all the flaps you just made to the left.
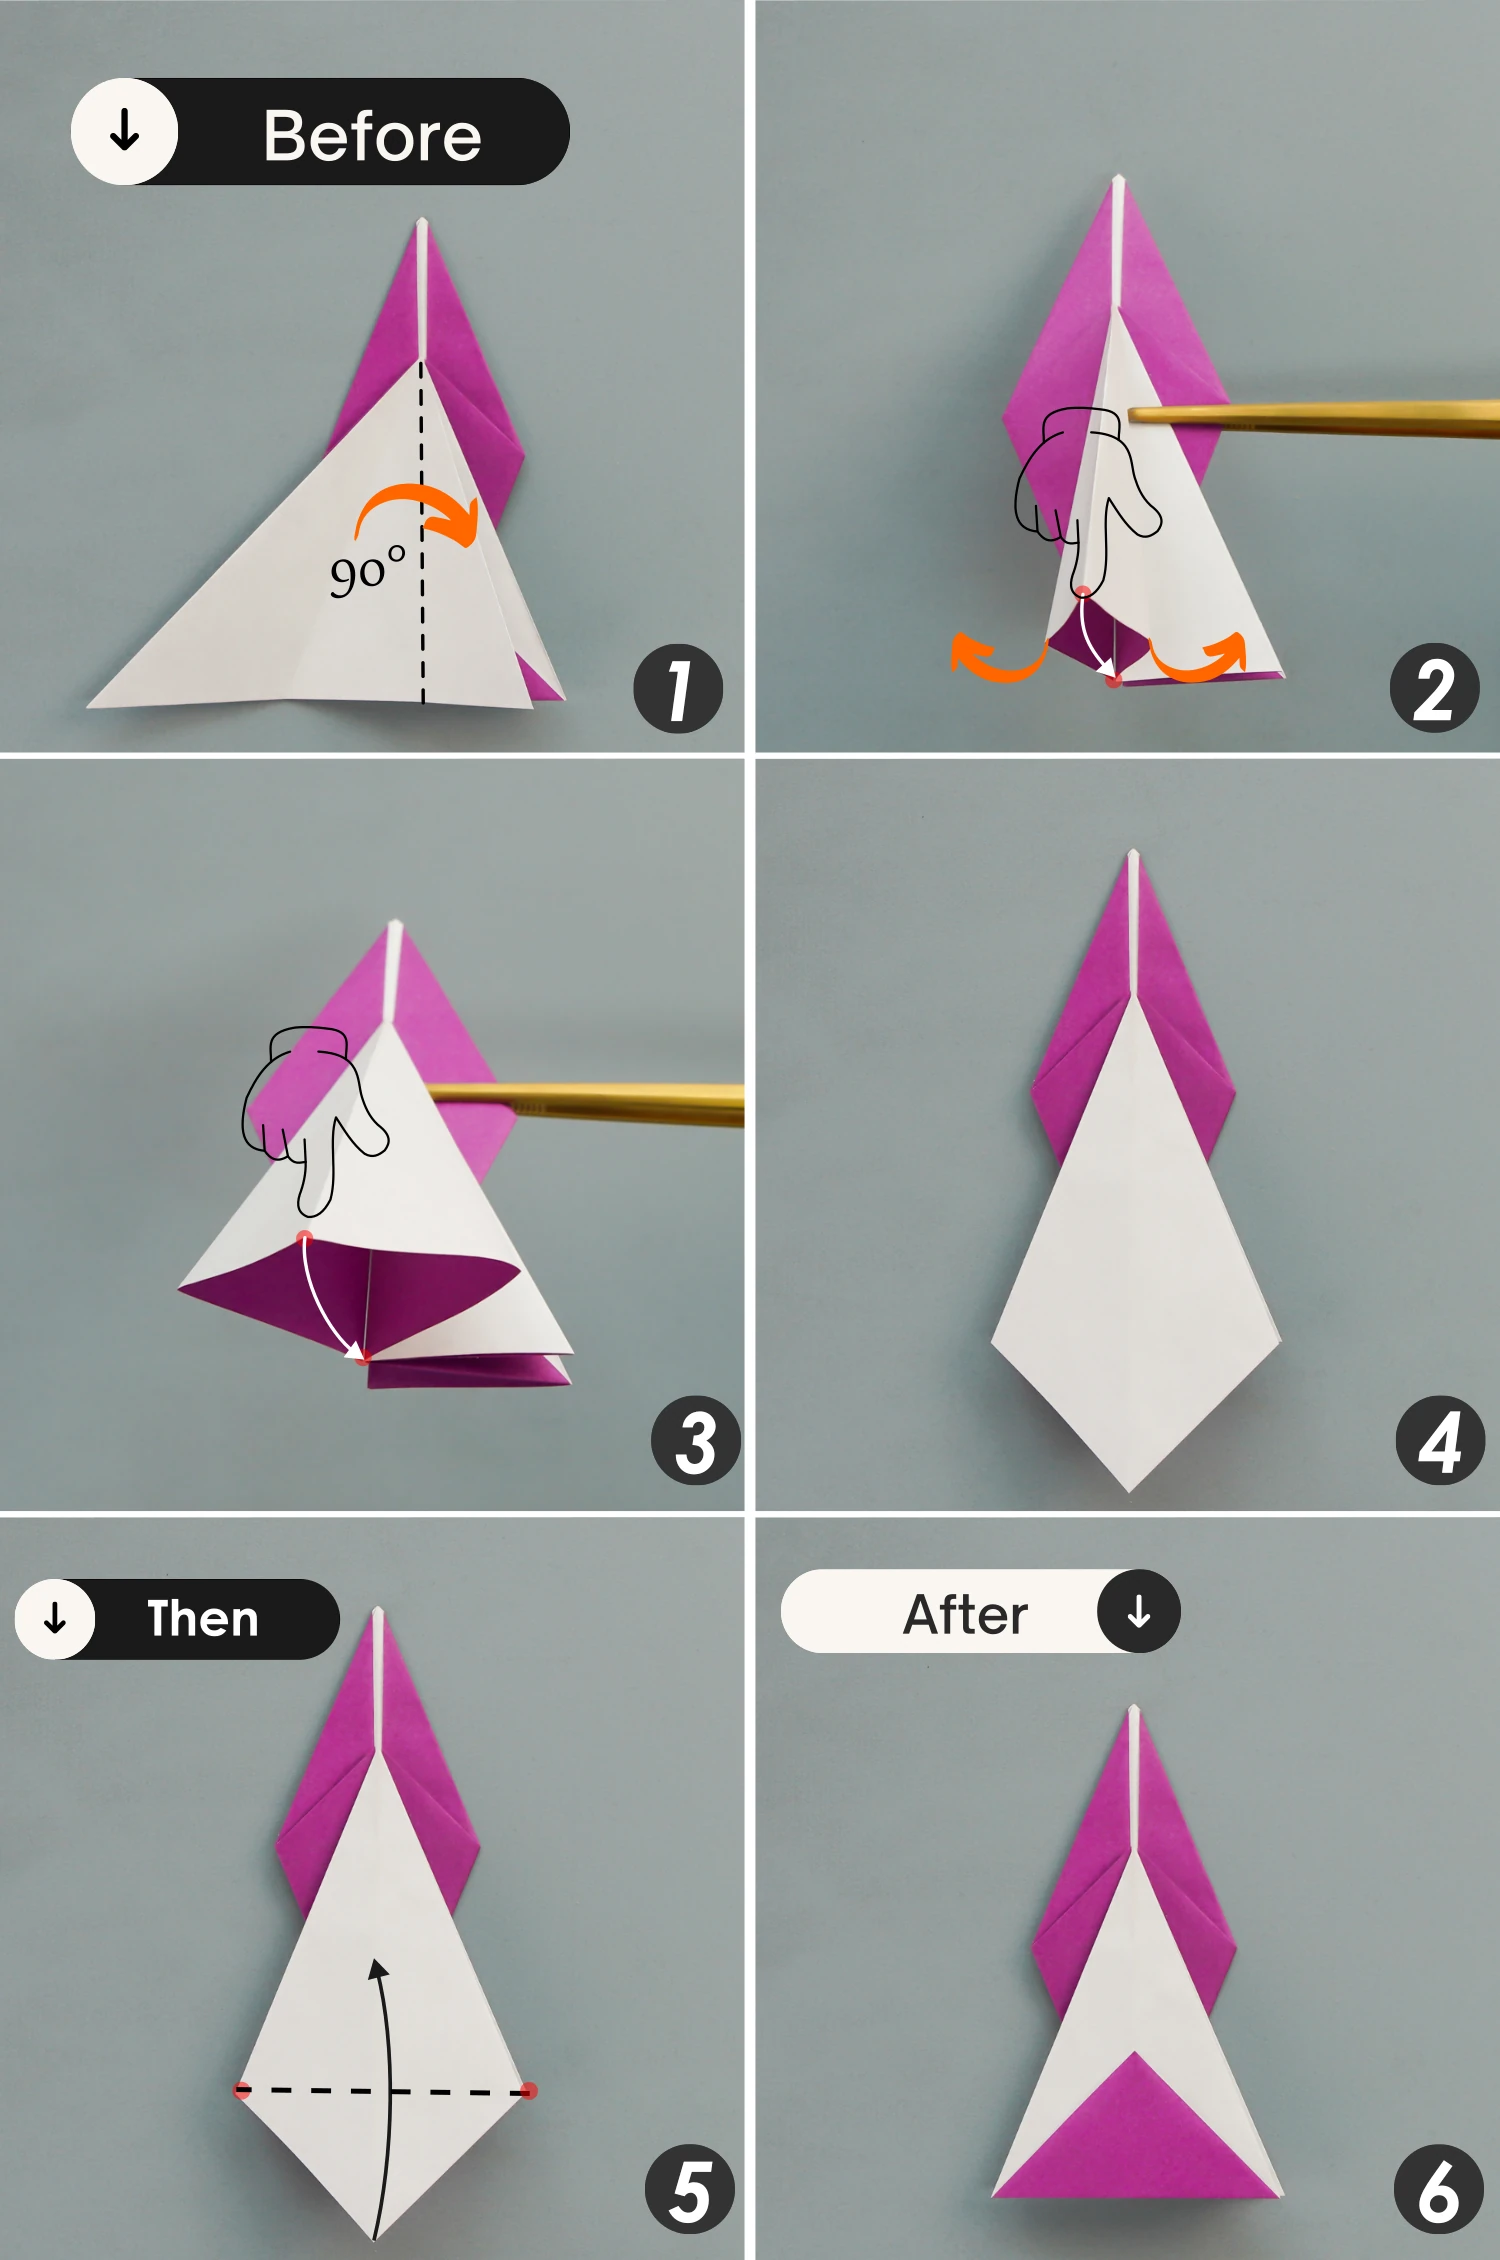
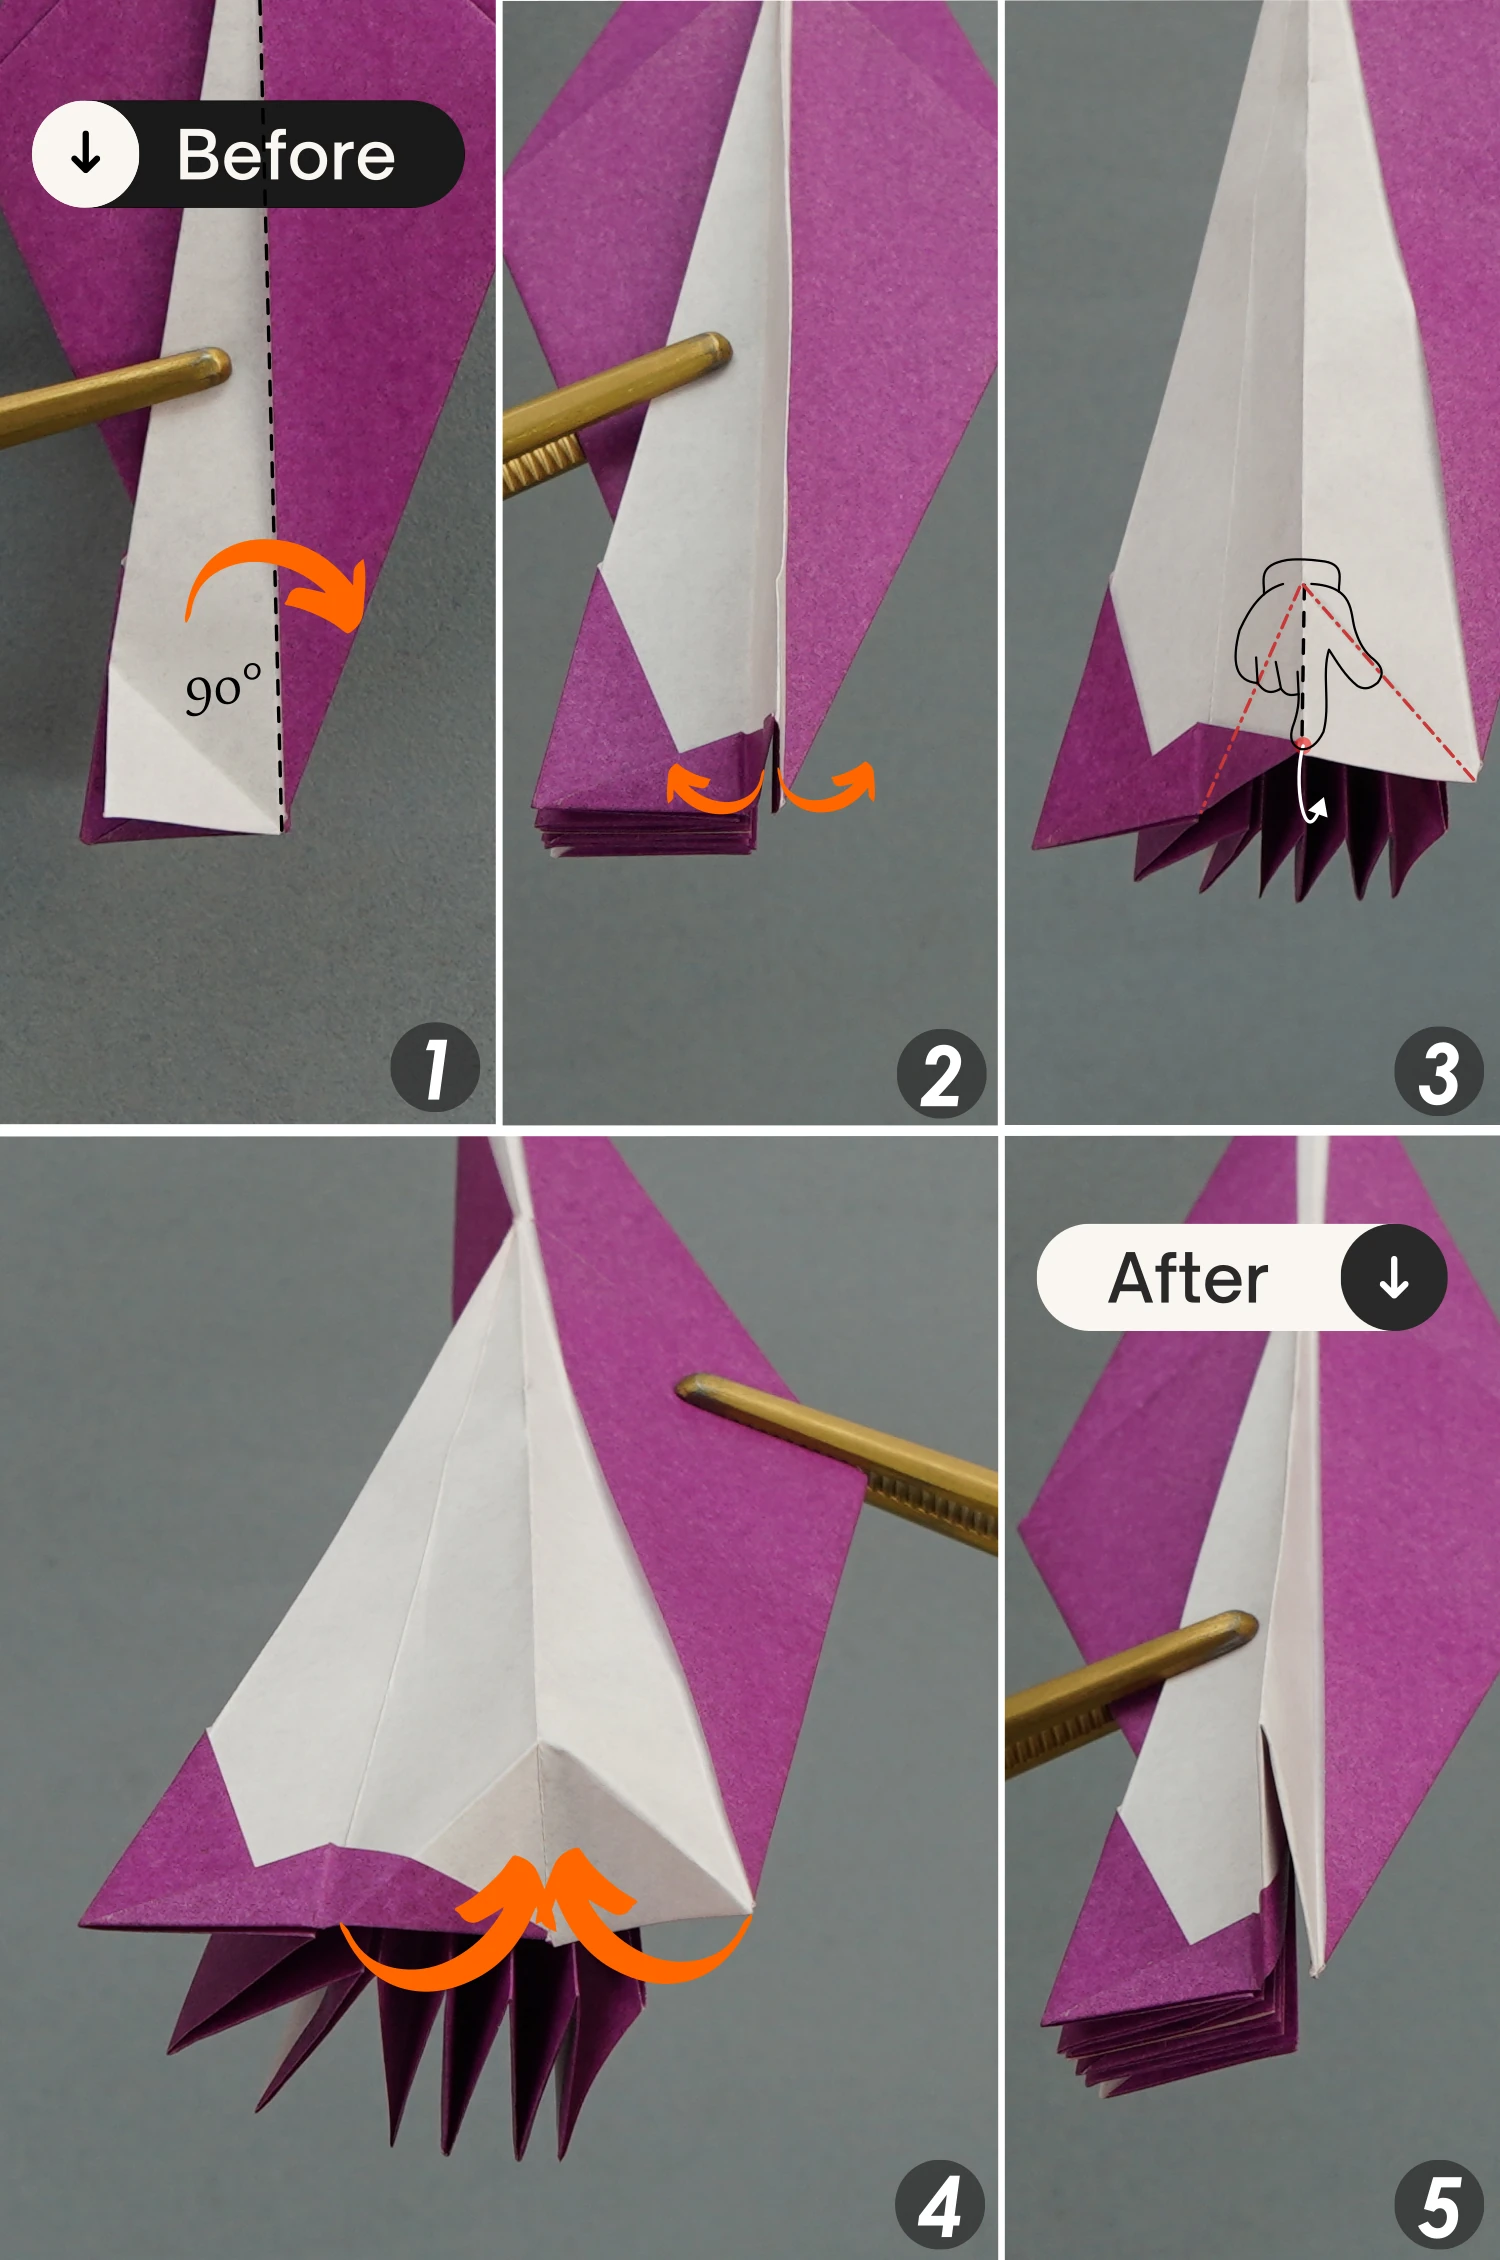
Step 17
Focus on the bottom of the paper, fold the bottom edge to align with the right edge of the white part, then unfold it.

Step 18
Lift the top layer along its right edge, open it from the bottom, and push the middle point down, then close this pocket along the creases you just made.
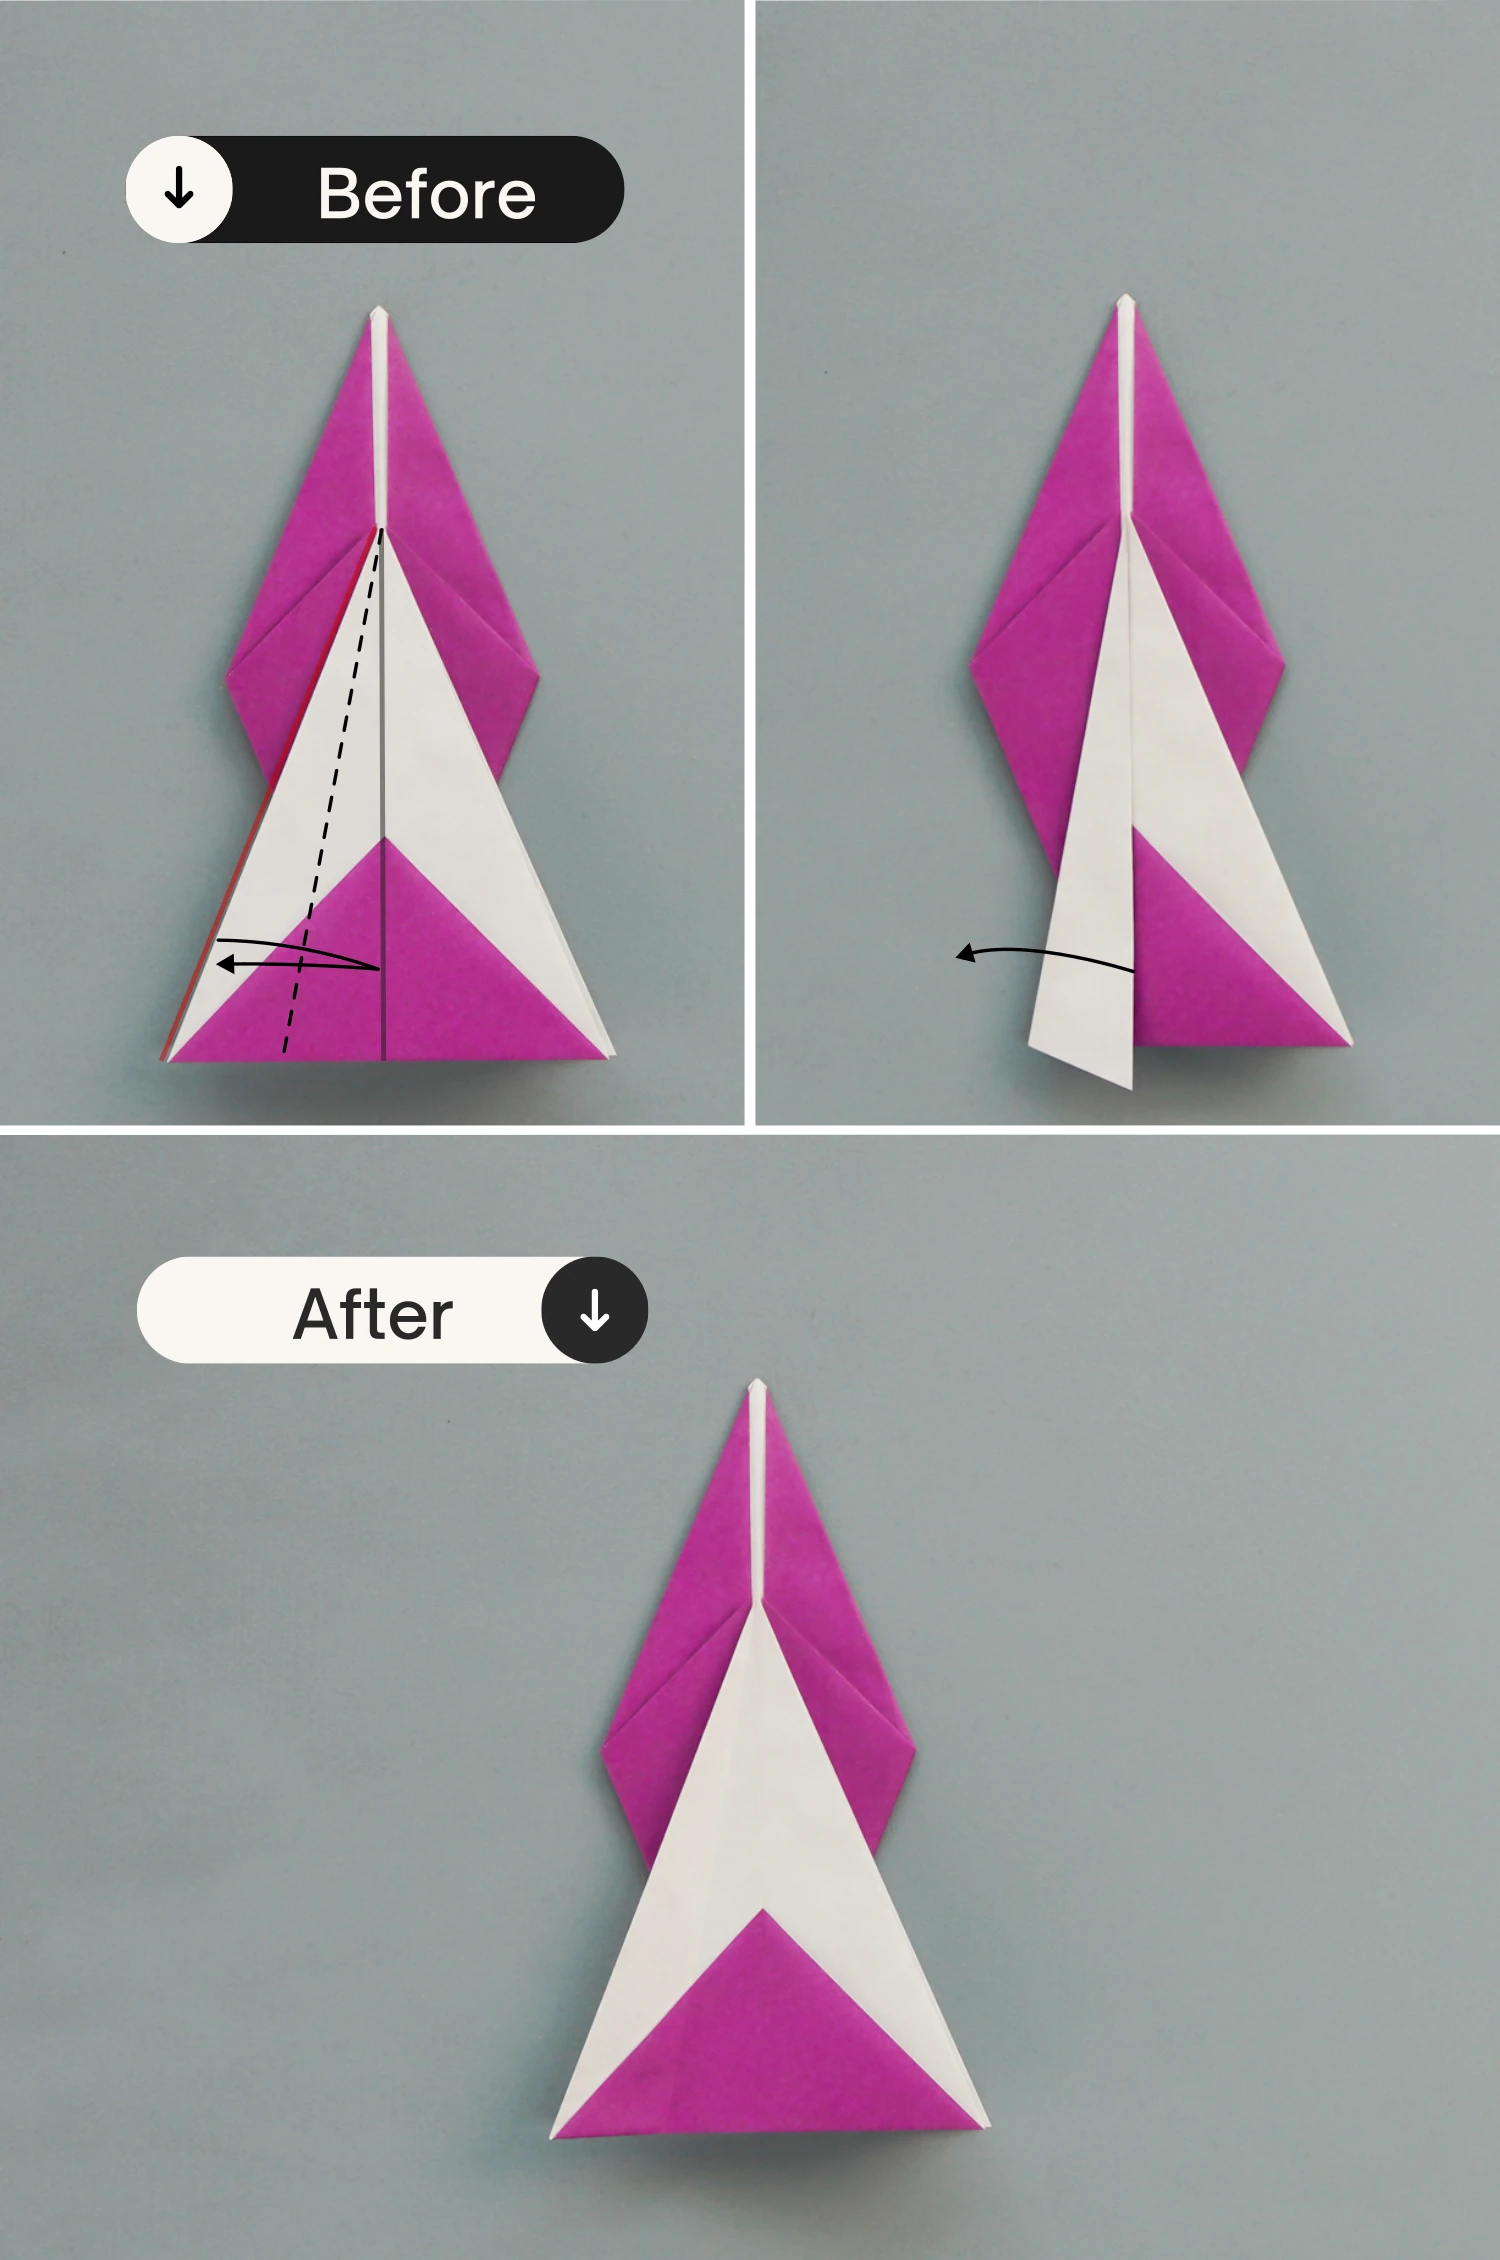
Step 19
Repeat steps 17 to 18 for the remaining seven flaps to create a shape like the one depicted in the third picture. Then, observe it from the top and flip it over vertically.
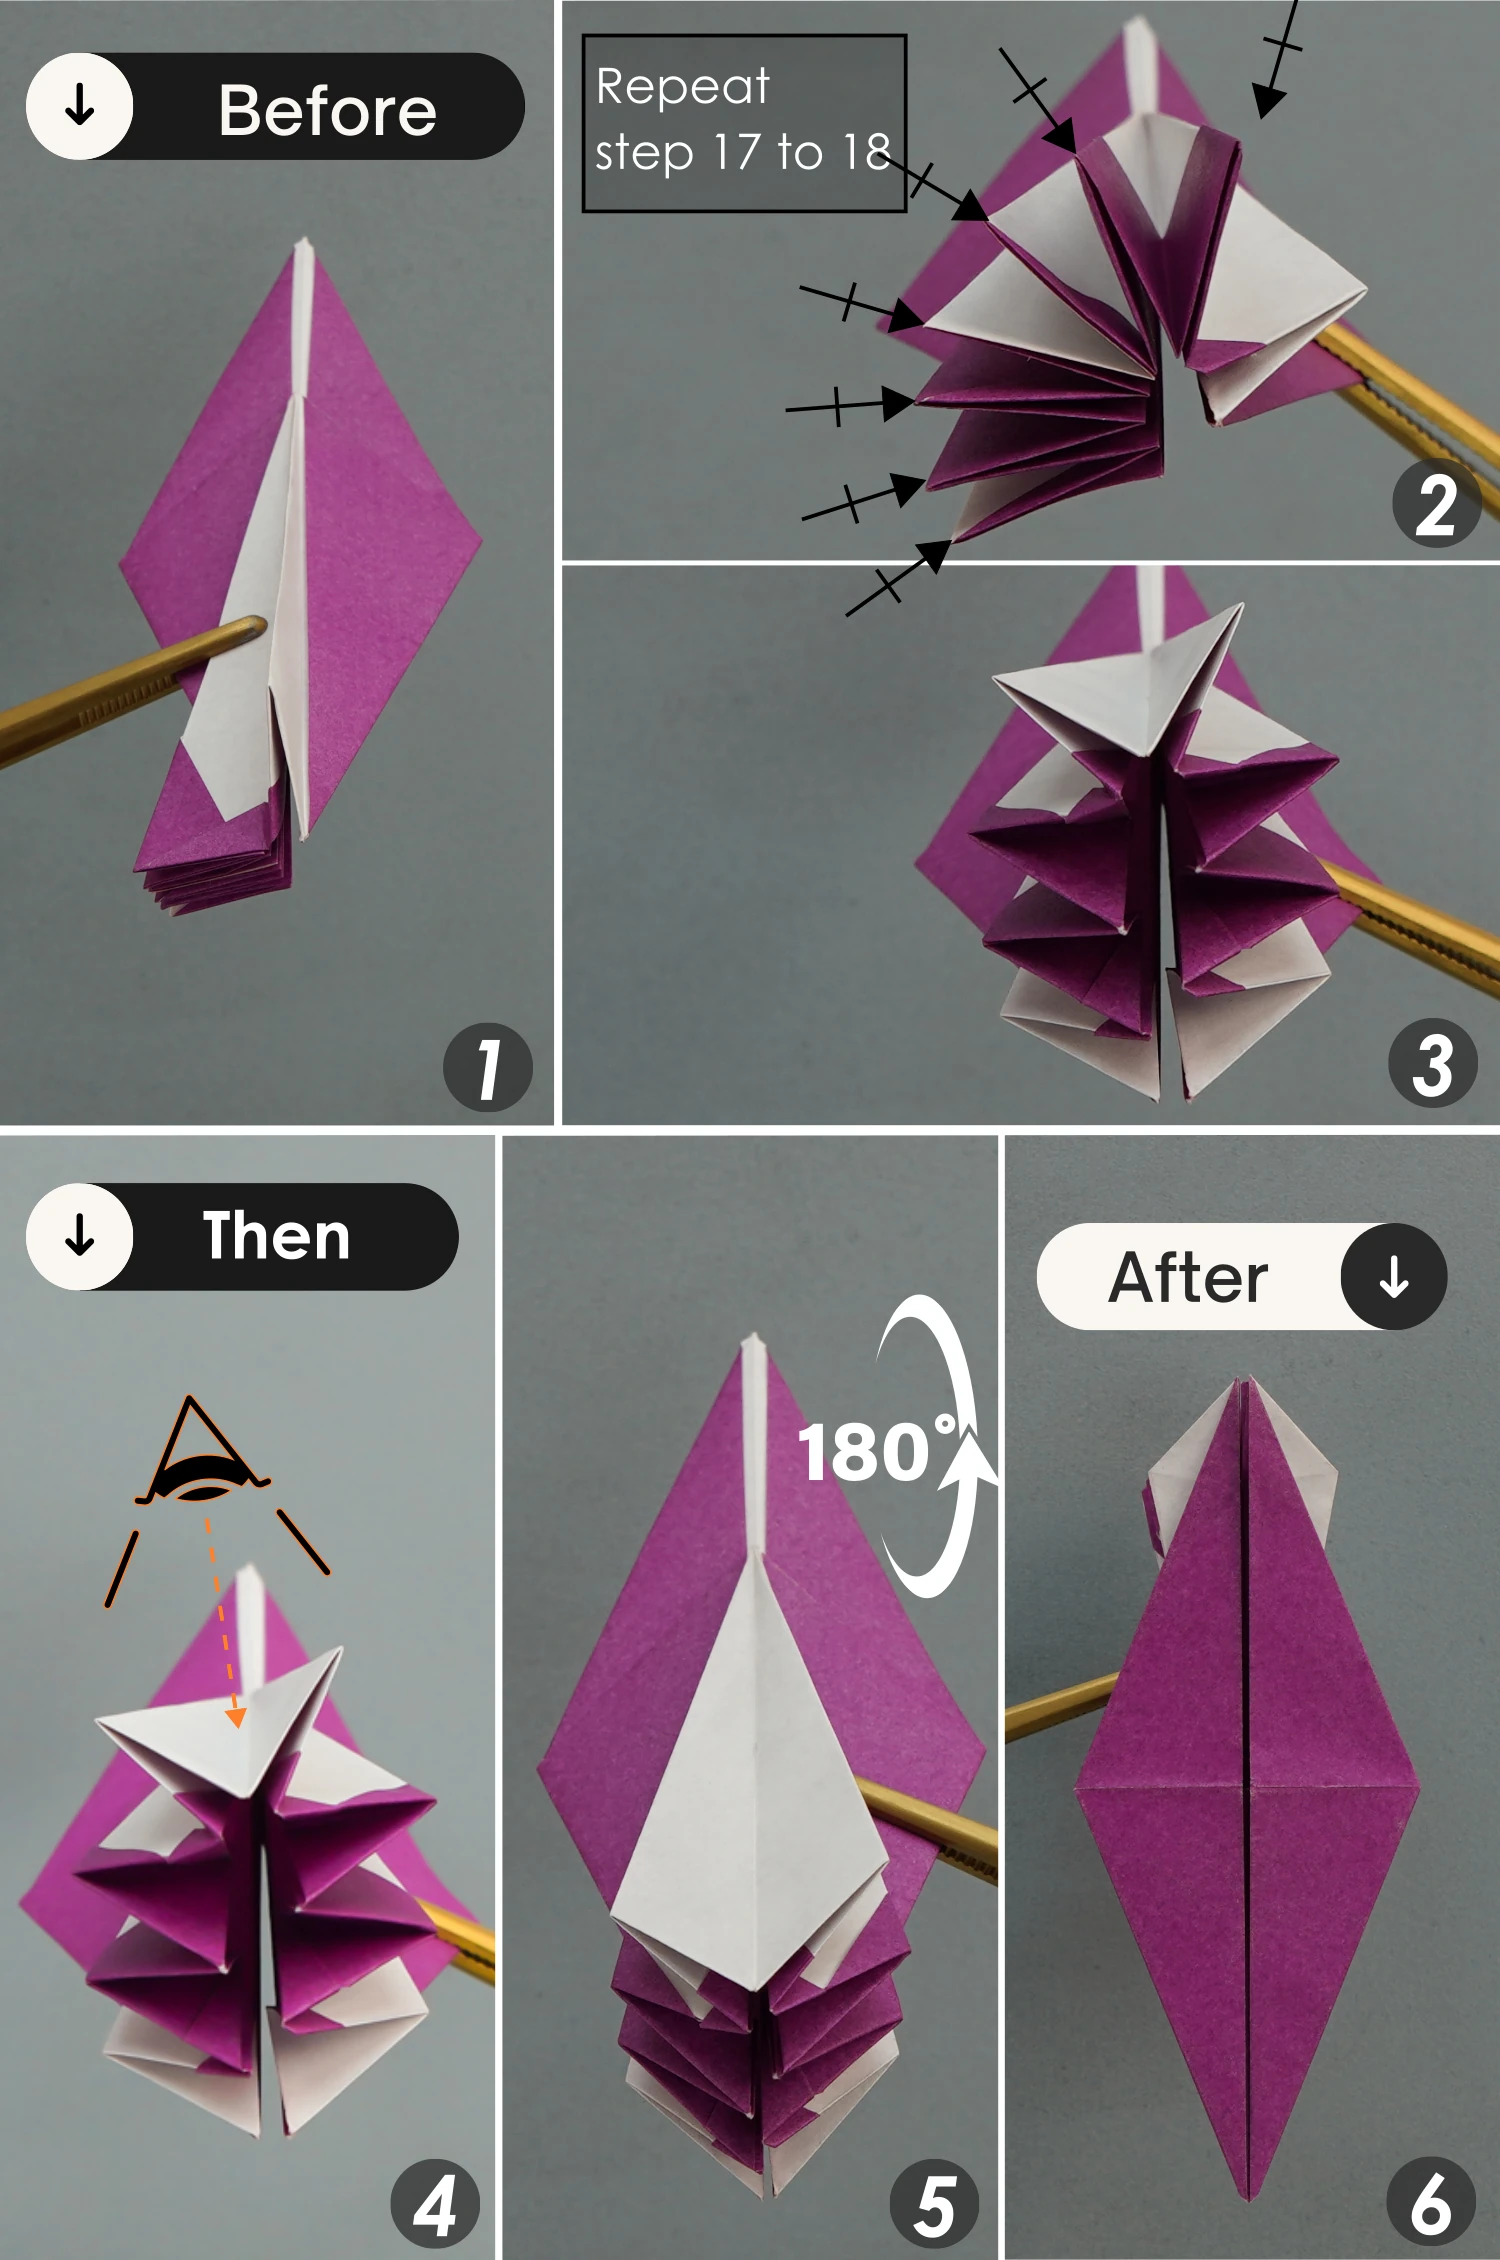
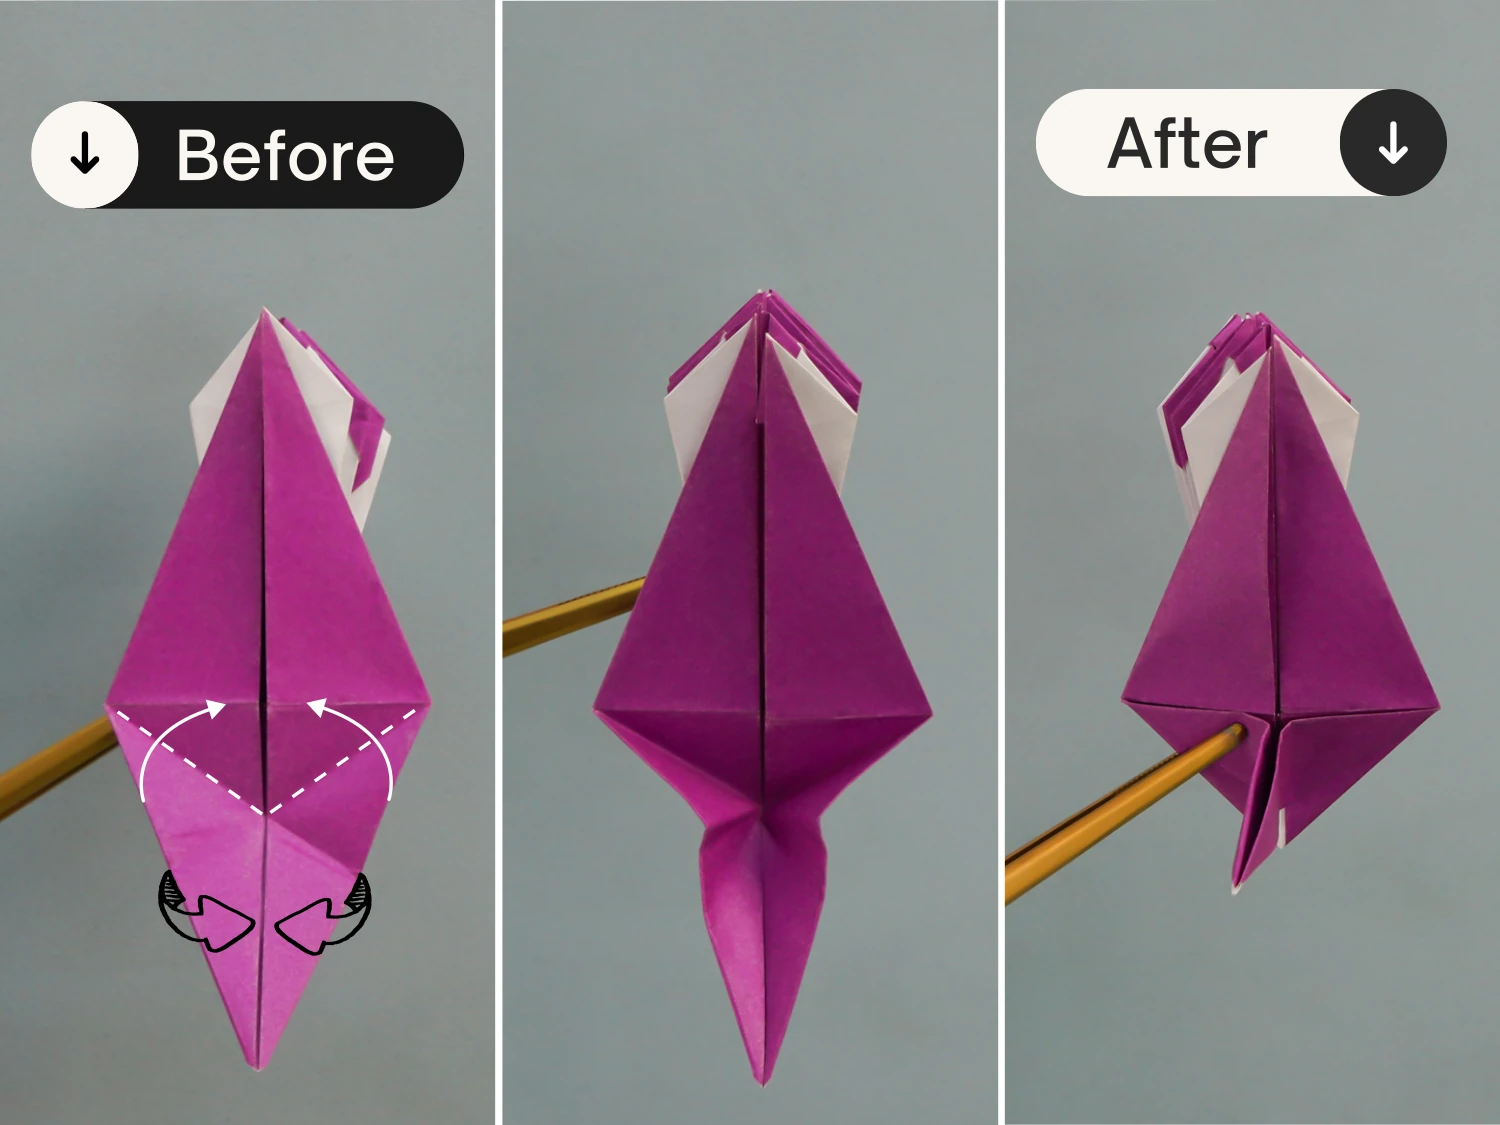
Step 20
Fold the bottom left edge to align with the middle horizontal crease, crease it well then unfold. Then fold the bottom right edge to align with the middle horizontal crease, and unfold it as well.
Step 21
Lift the bottom left and right edges along the upper creases you just made shown by the dotted line, then pinch the bottom point to create a corner.
Step 22
Open this corner and squash it.
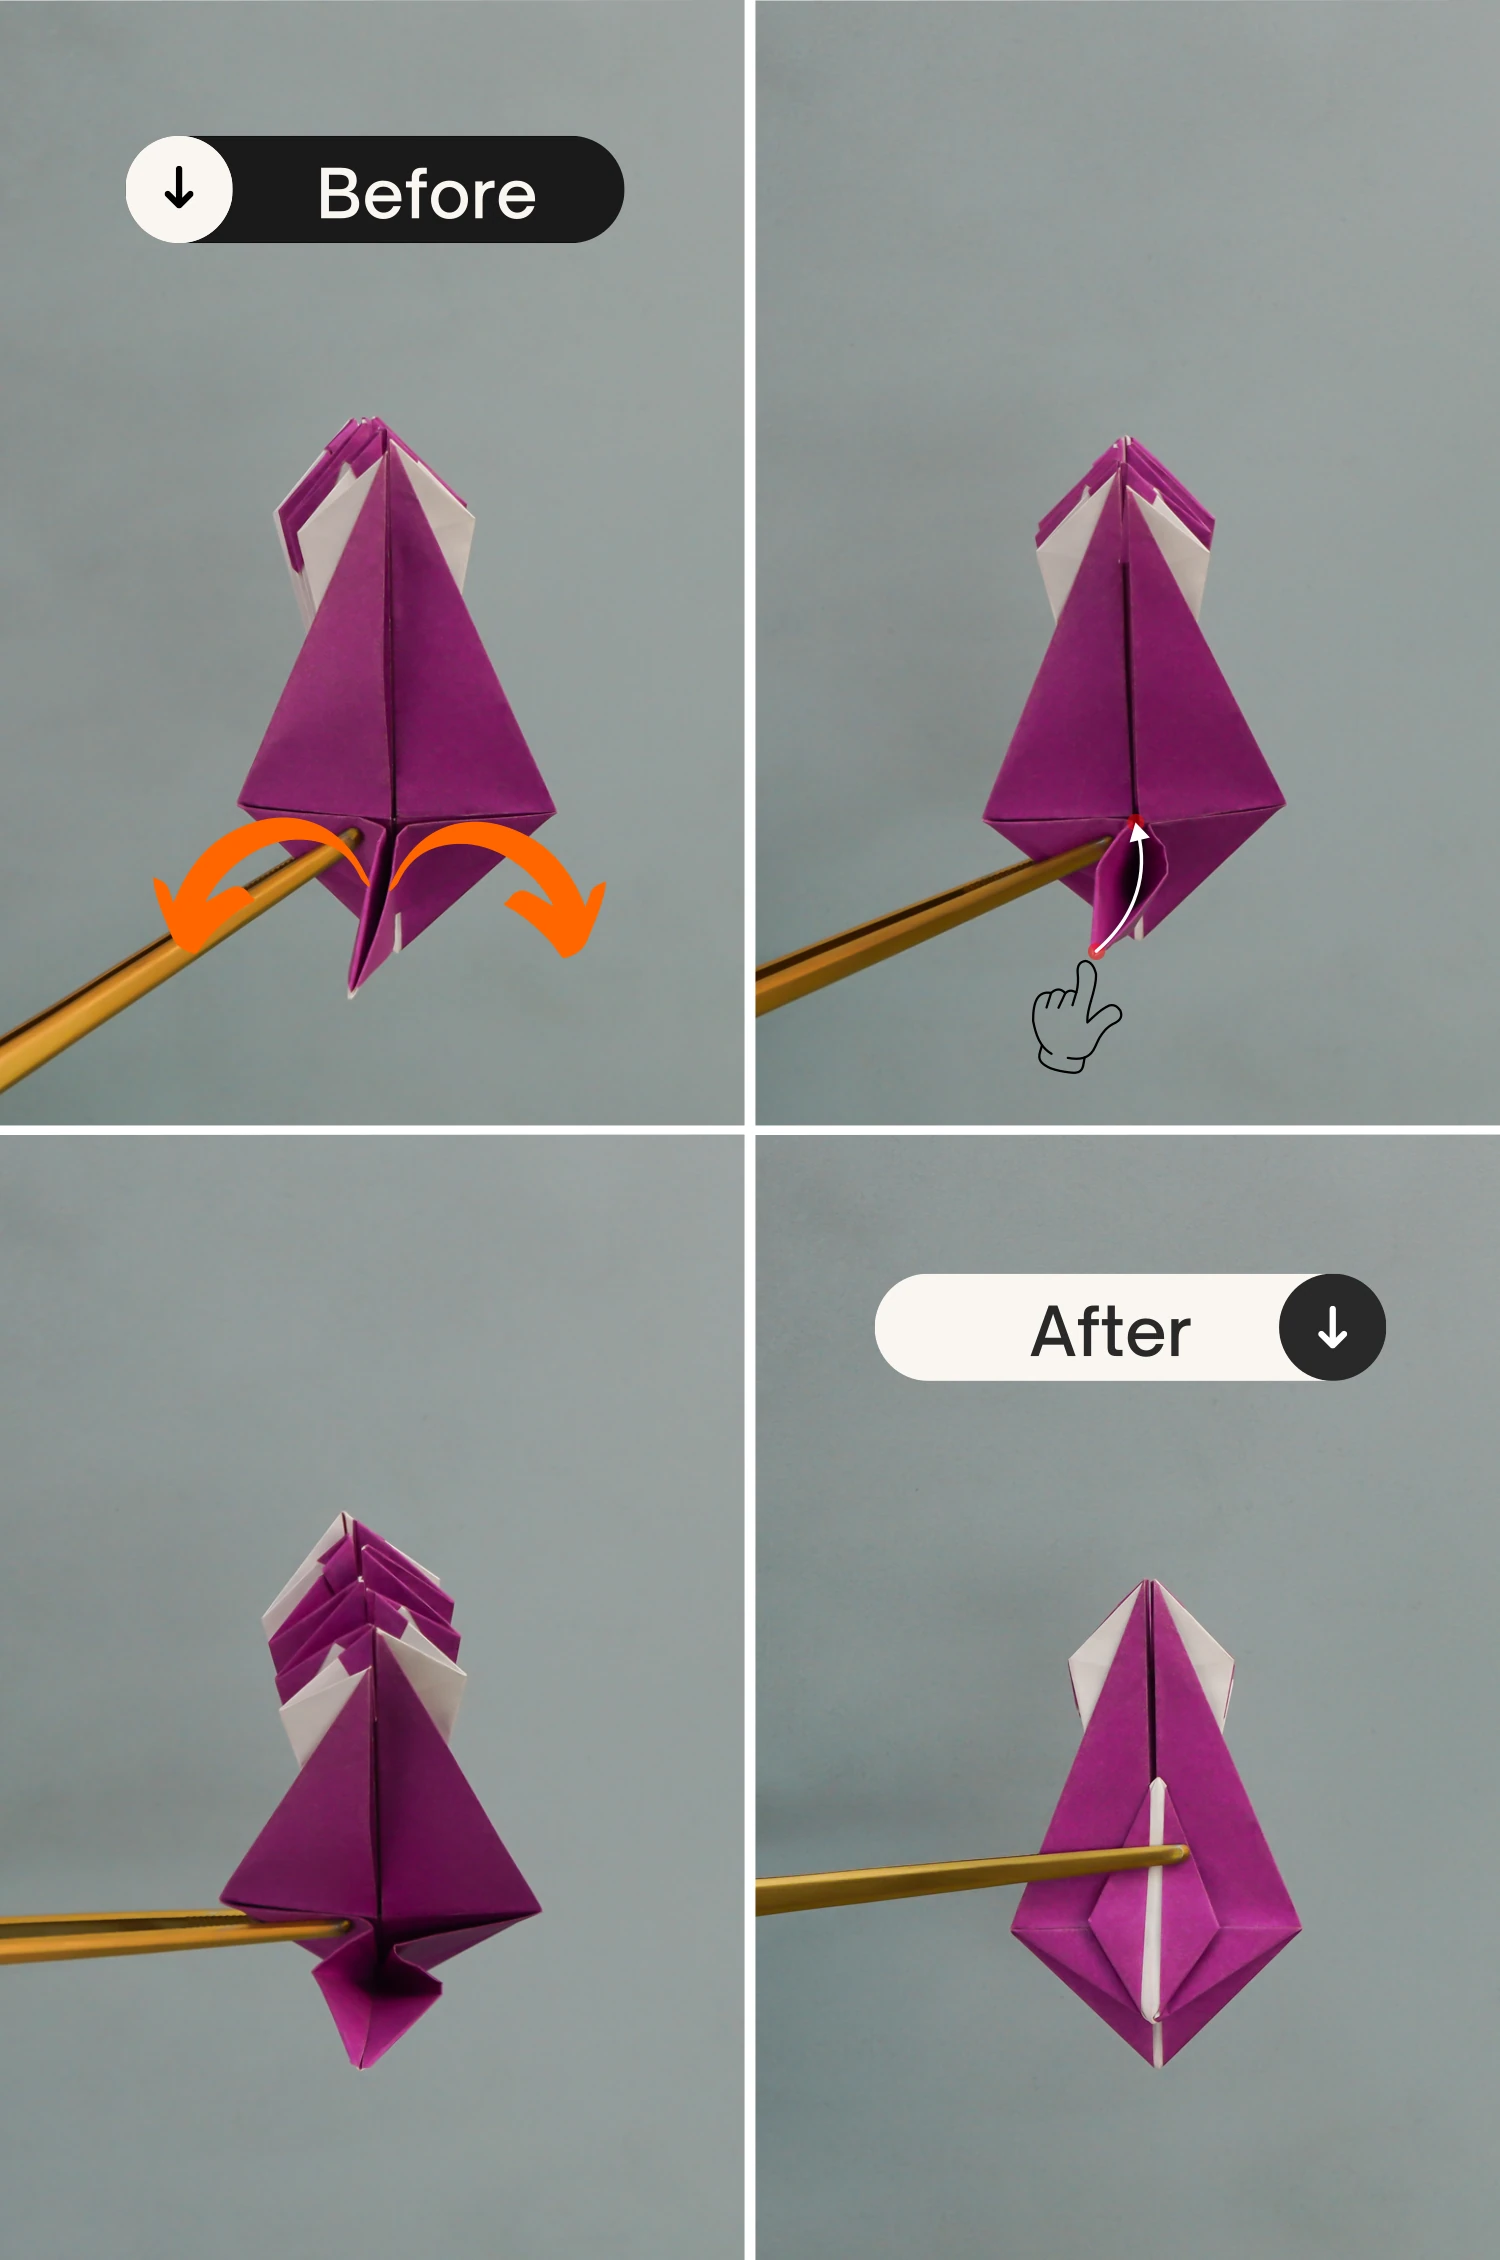
Step 23
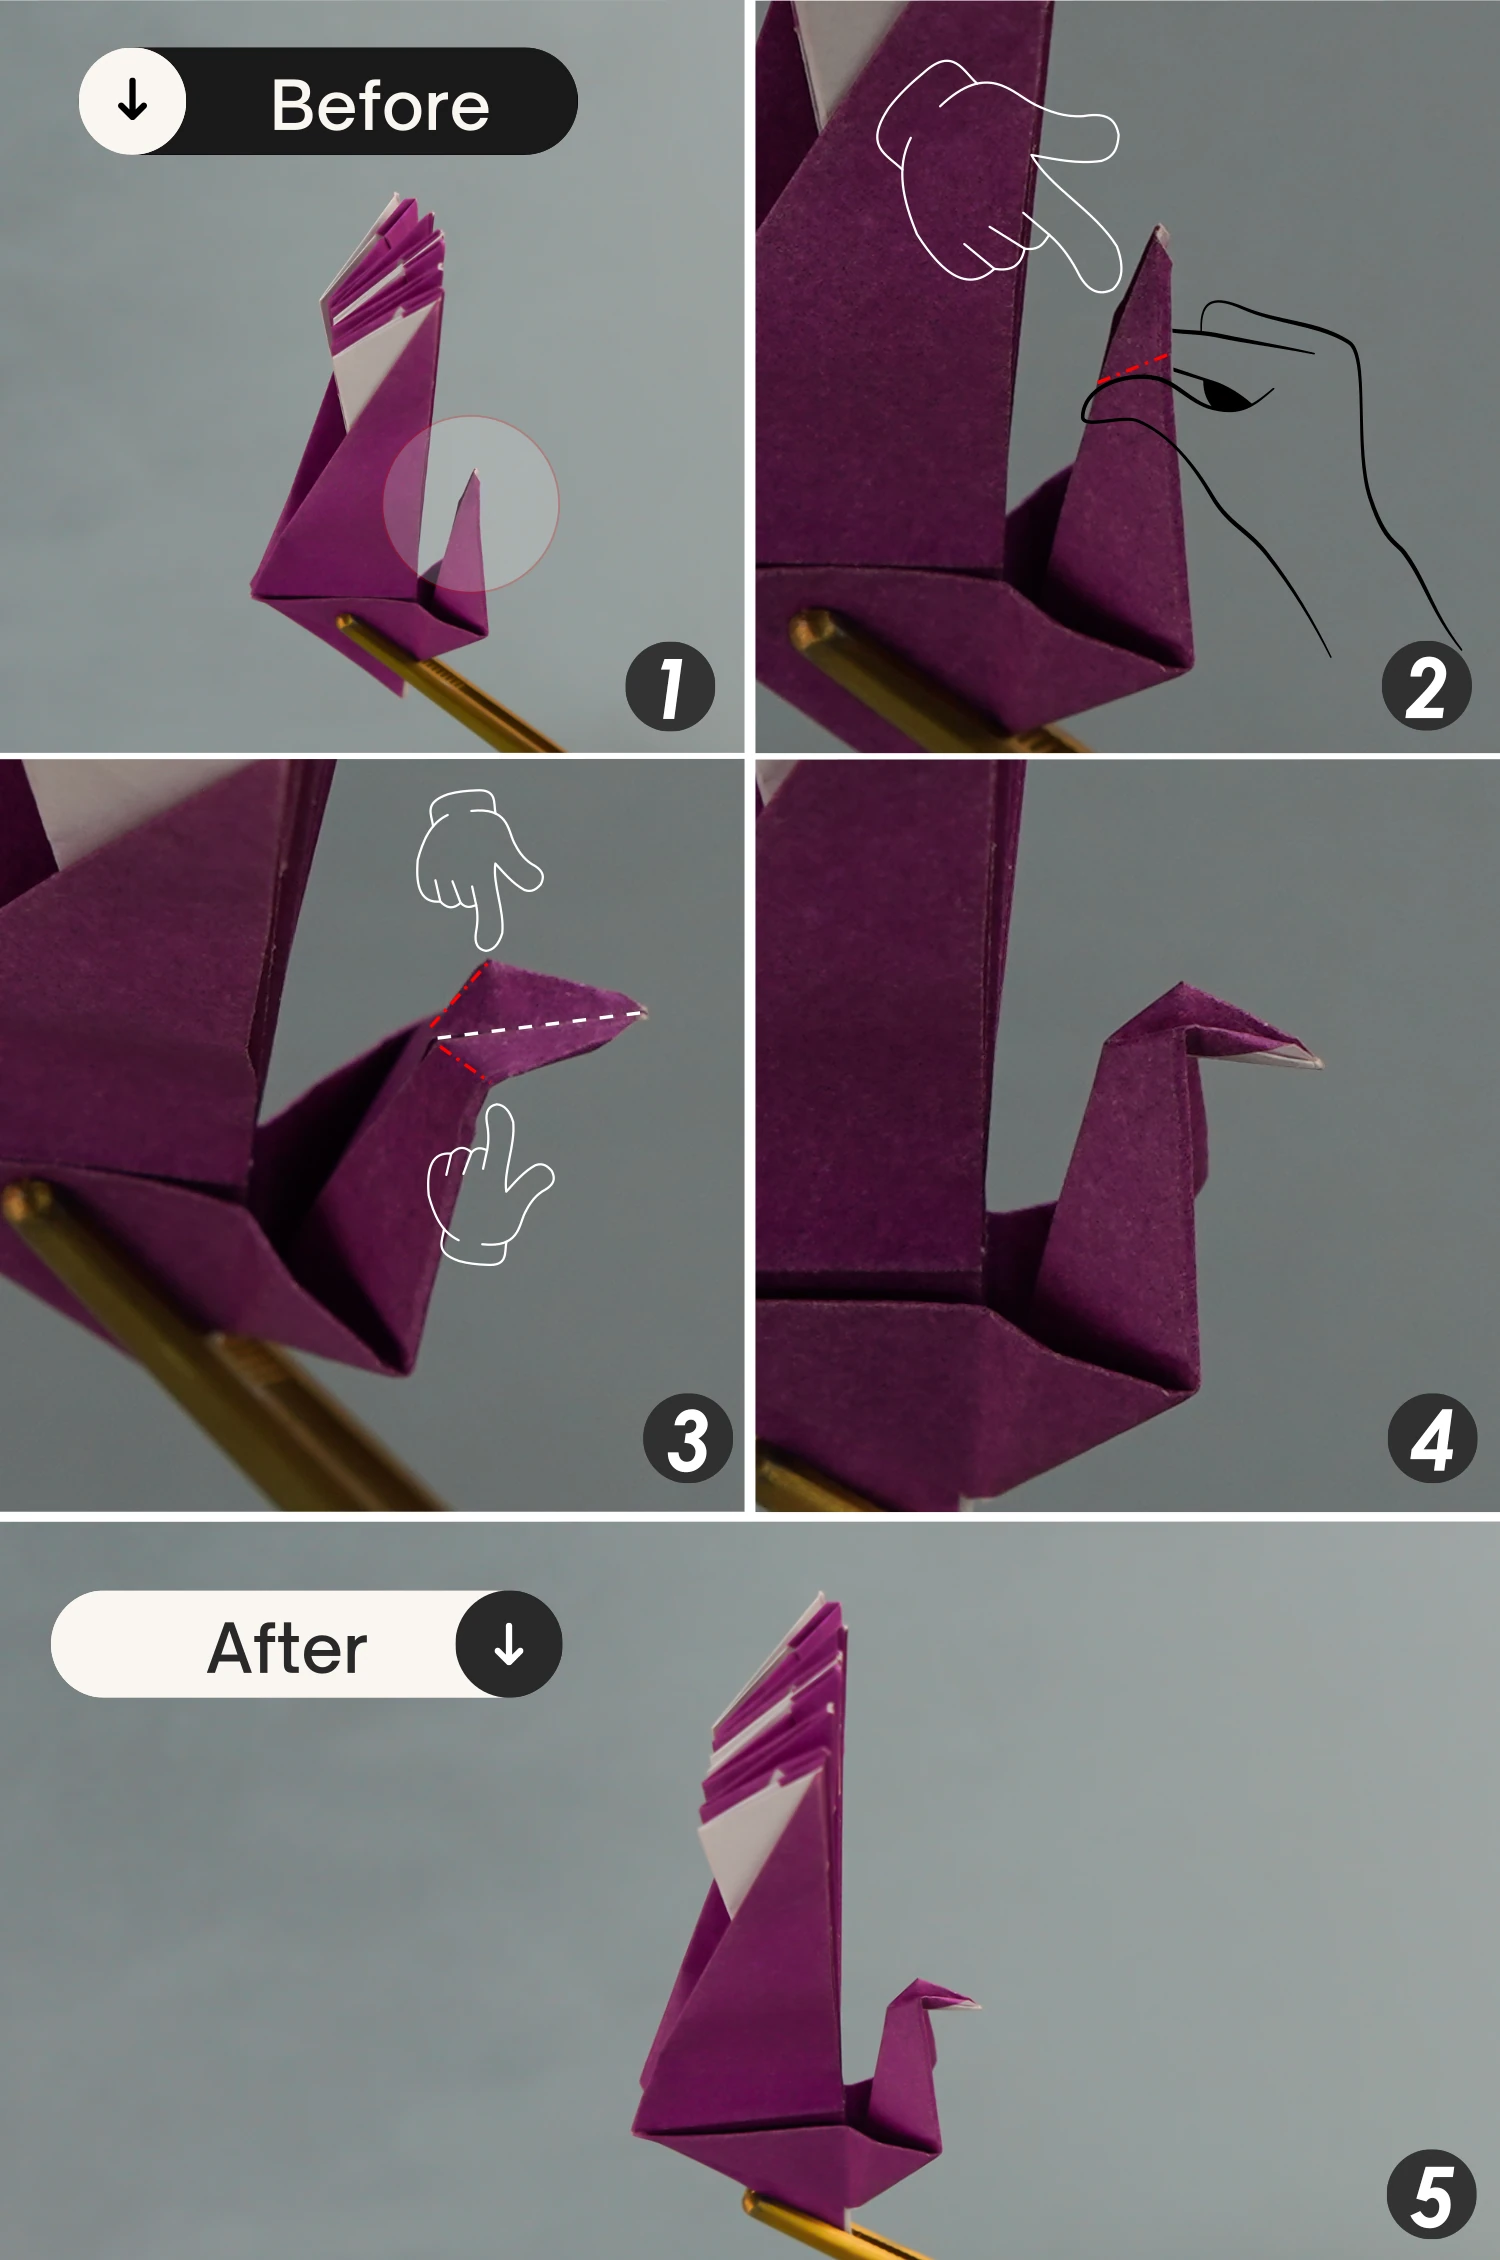
Fold the upper layer in half vertically forward, and fold the underlying part in half backward, then view the model from the left.
Step 24
Focus on the small flap on the right, fold it down a little, crease it well then unfold it. Next, open this corner and press the tip down to tuck it between the layers of this flap, and finally flatten it along the creases you made in the previous step, now you create a complete peacock’s head.
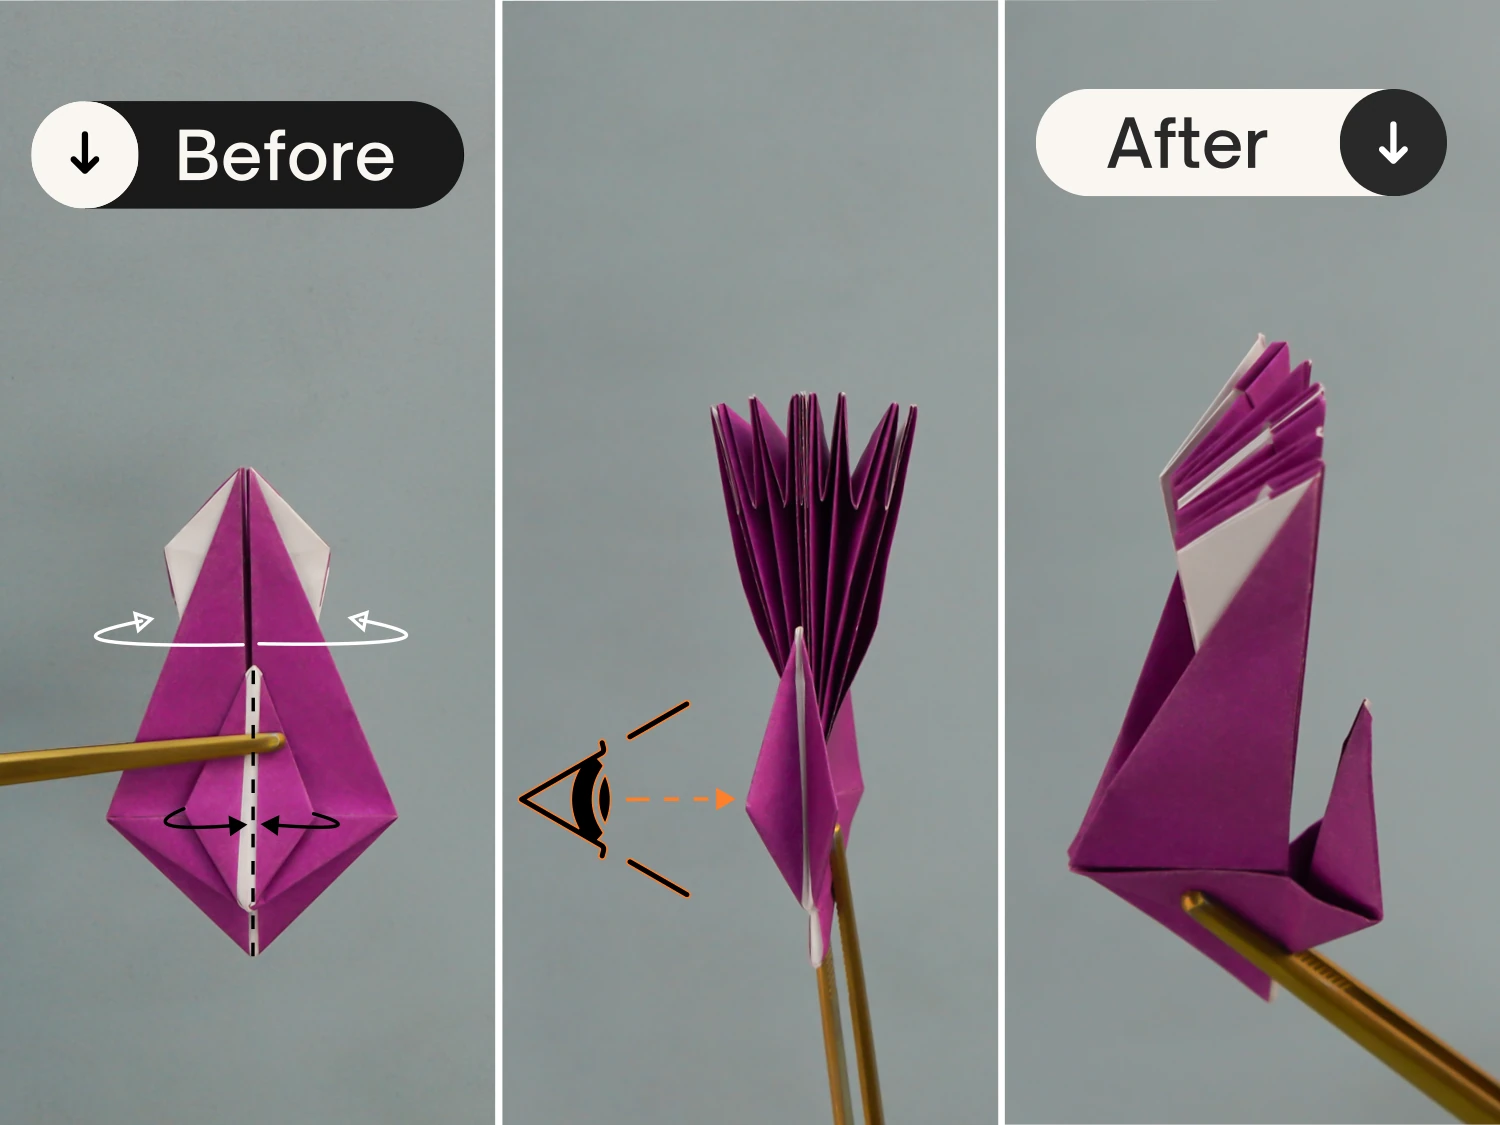
Step 25
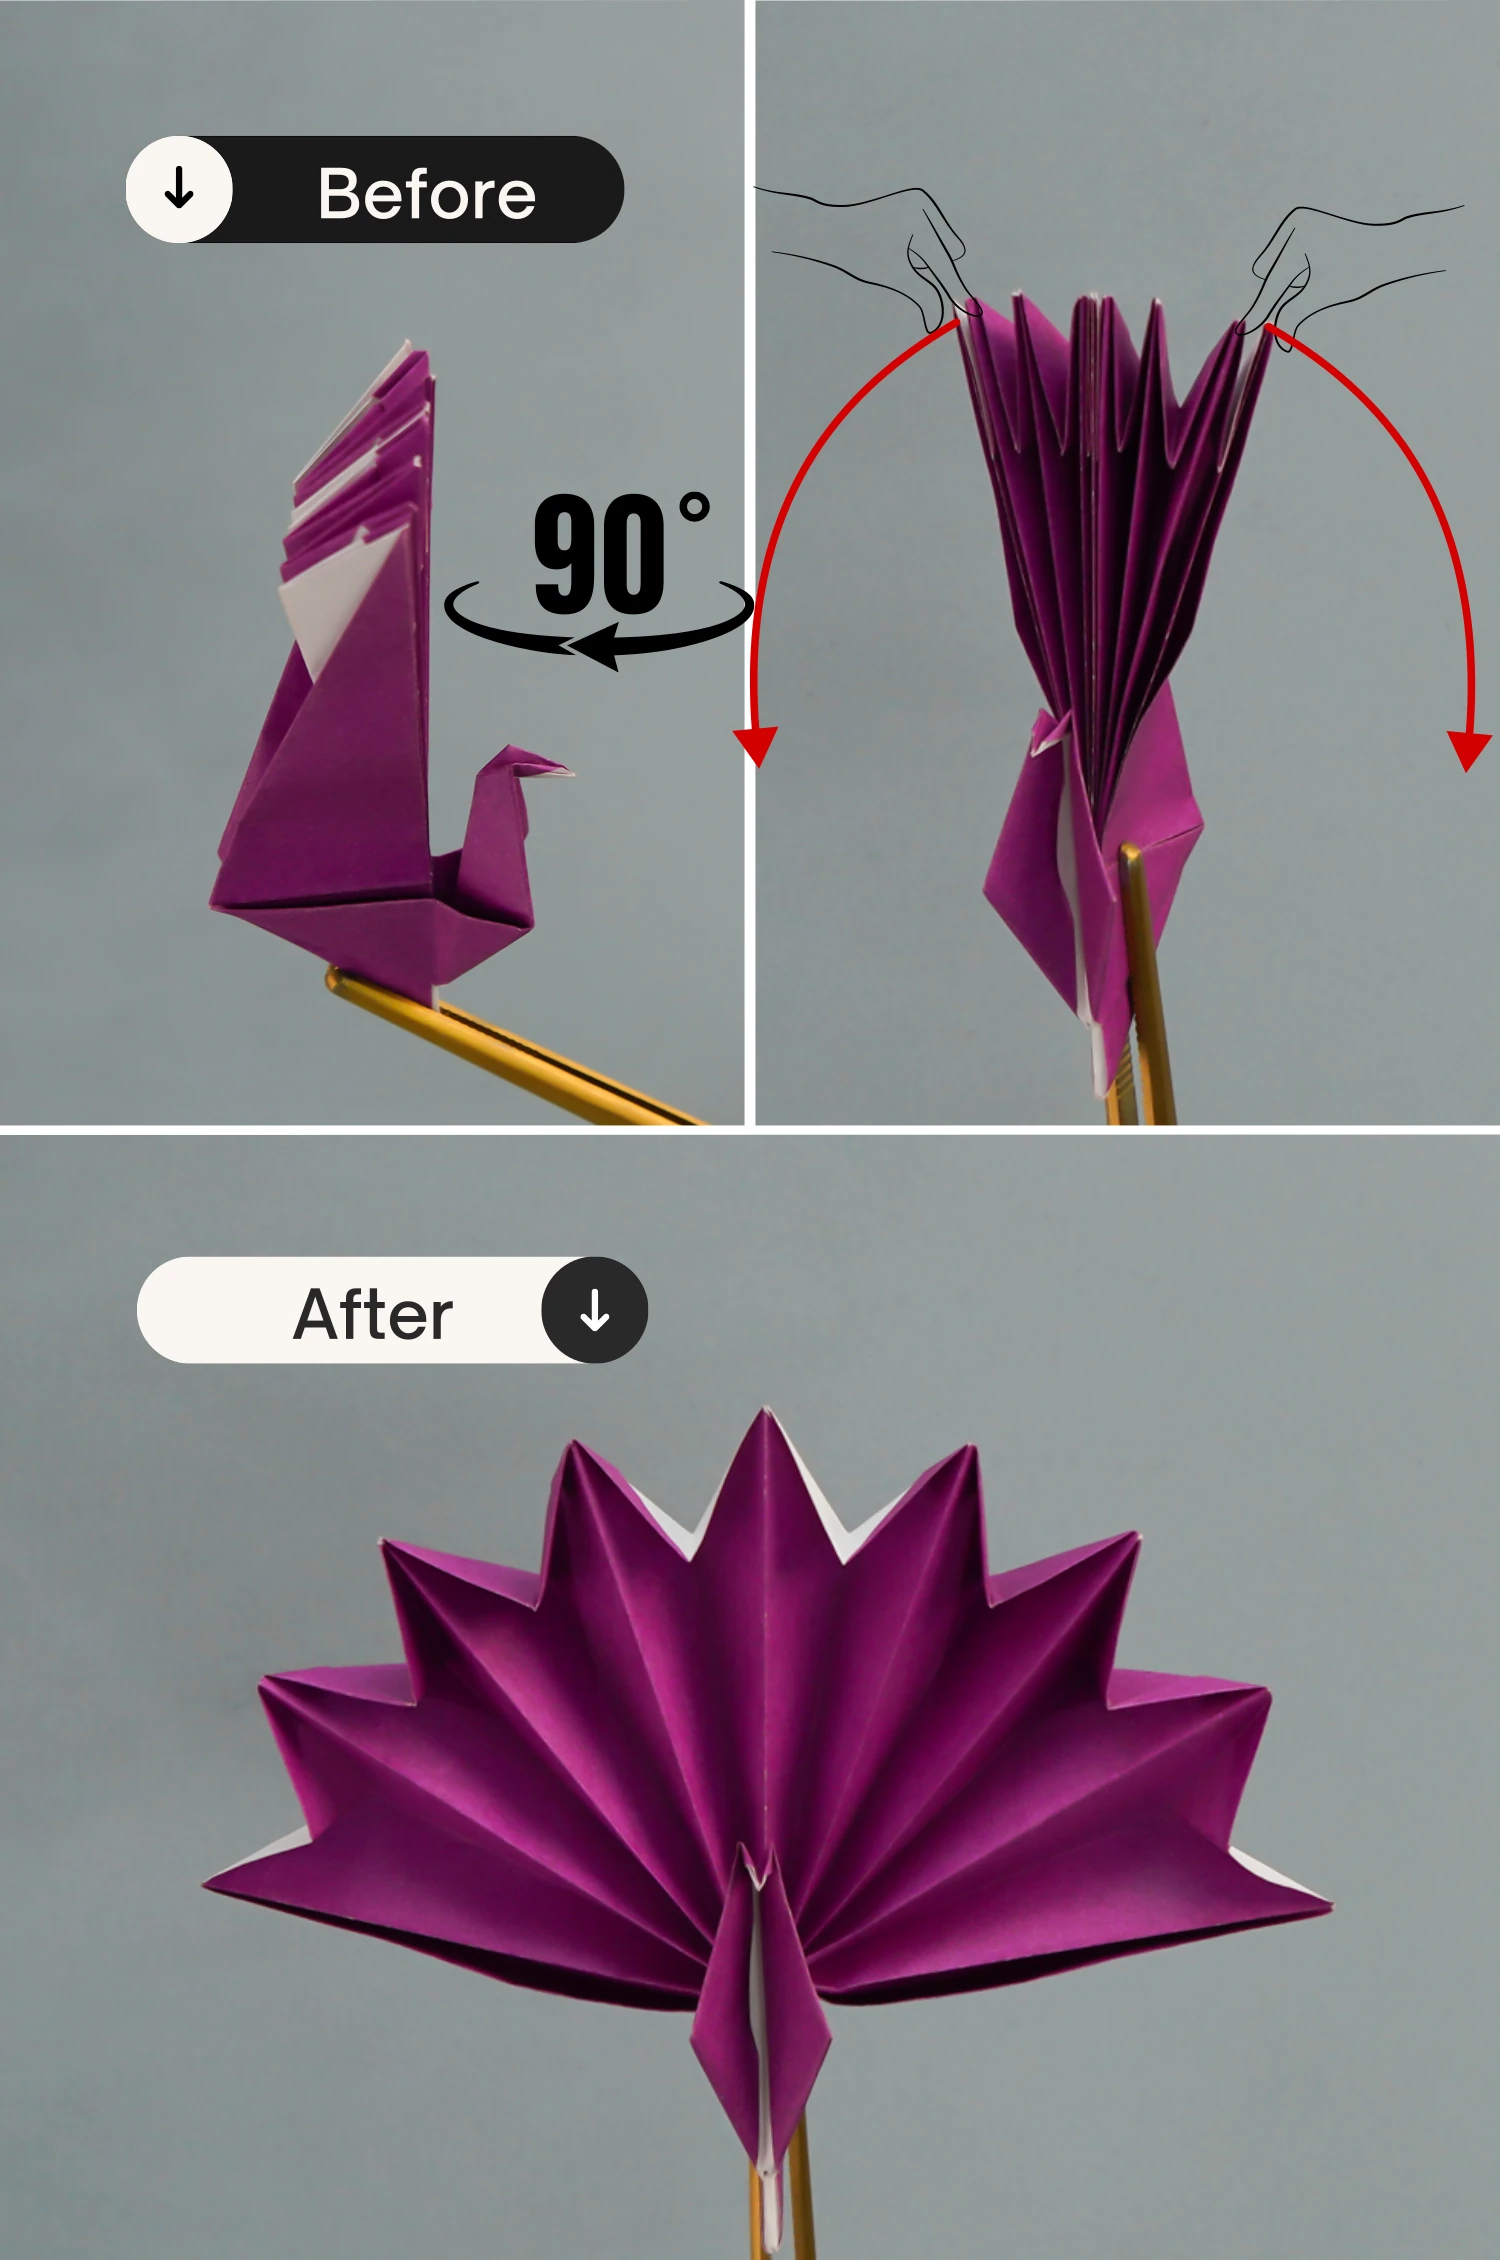
Rotate the paper 90 degrees to the left horizontally, and fold the left and right flaps of its Fan of feathers down to spread its tail feathers.
What’s Next
This is the final shape of the origami peacock, next, you can explore our other origami bird instructions, and enrich your world of origami birds. Enjoy folding!
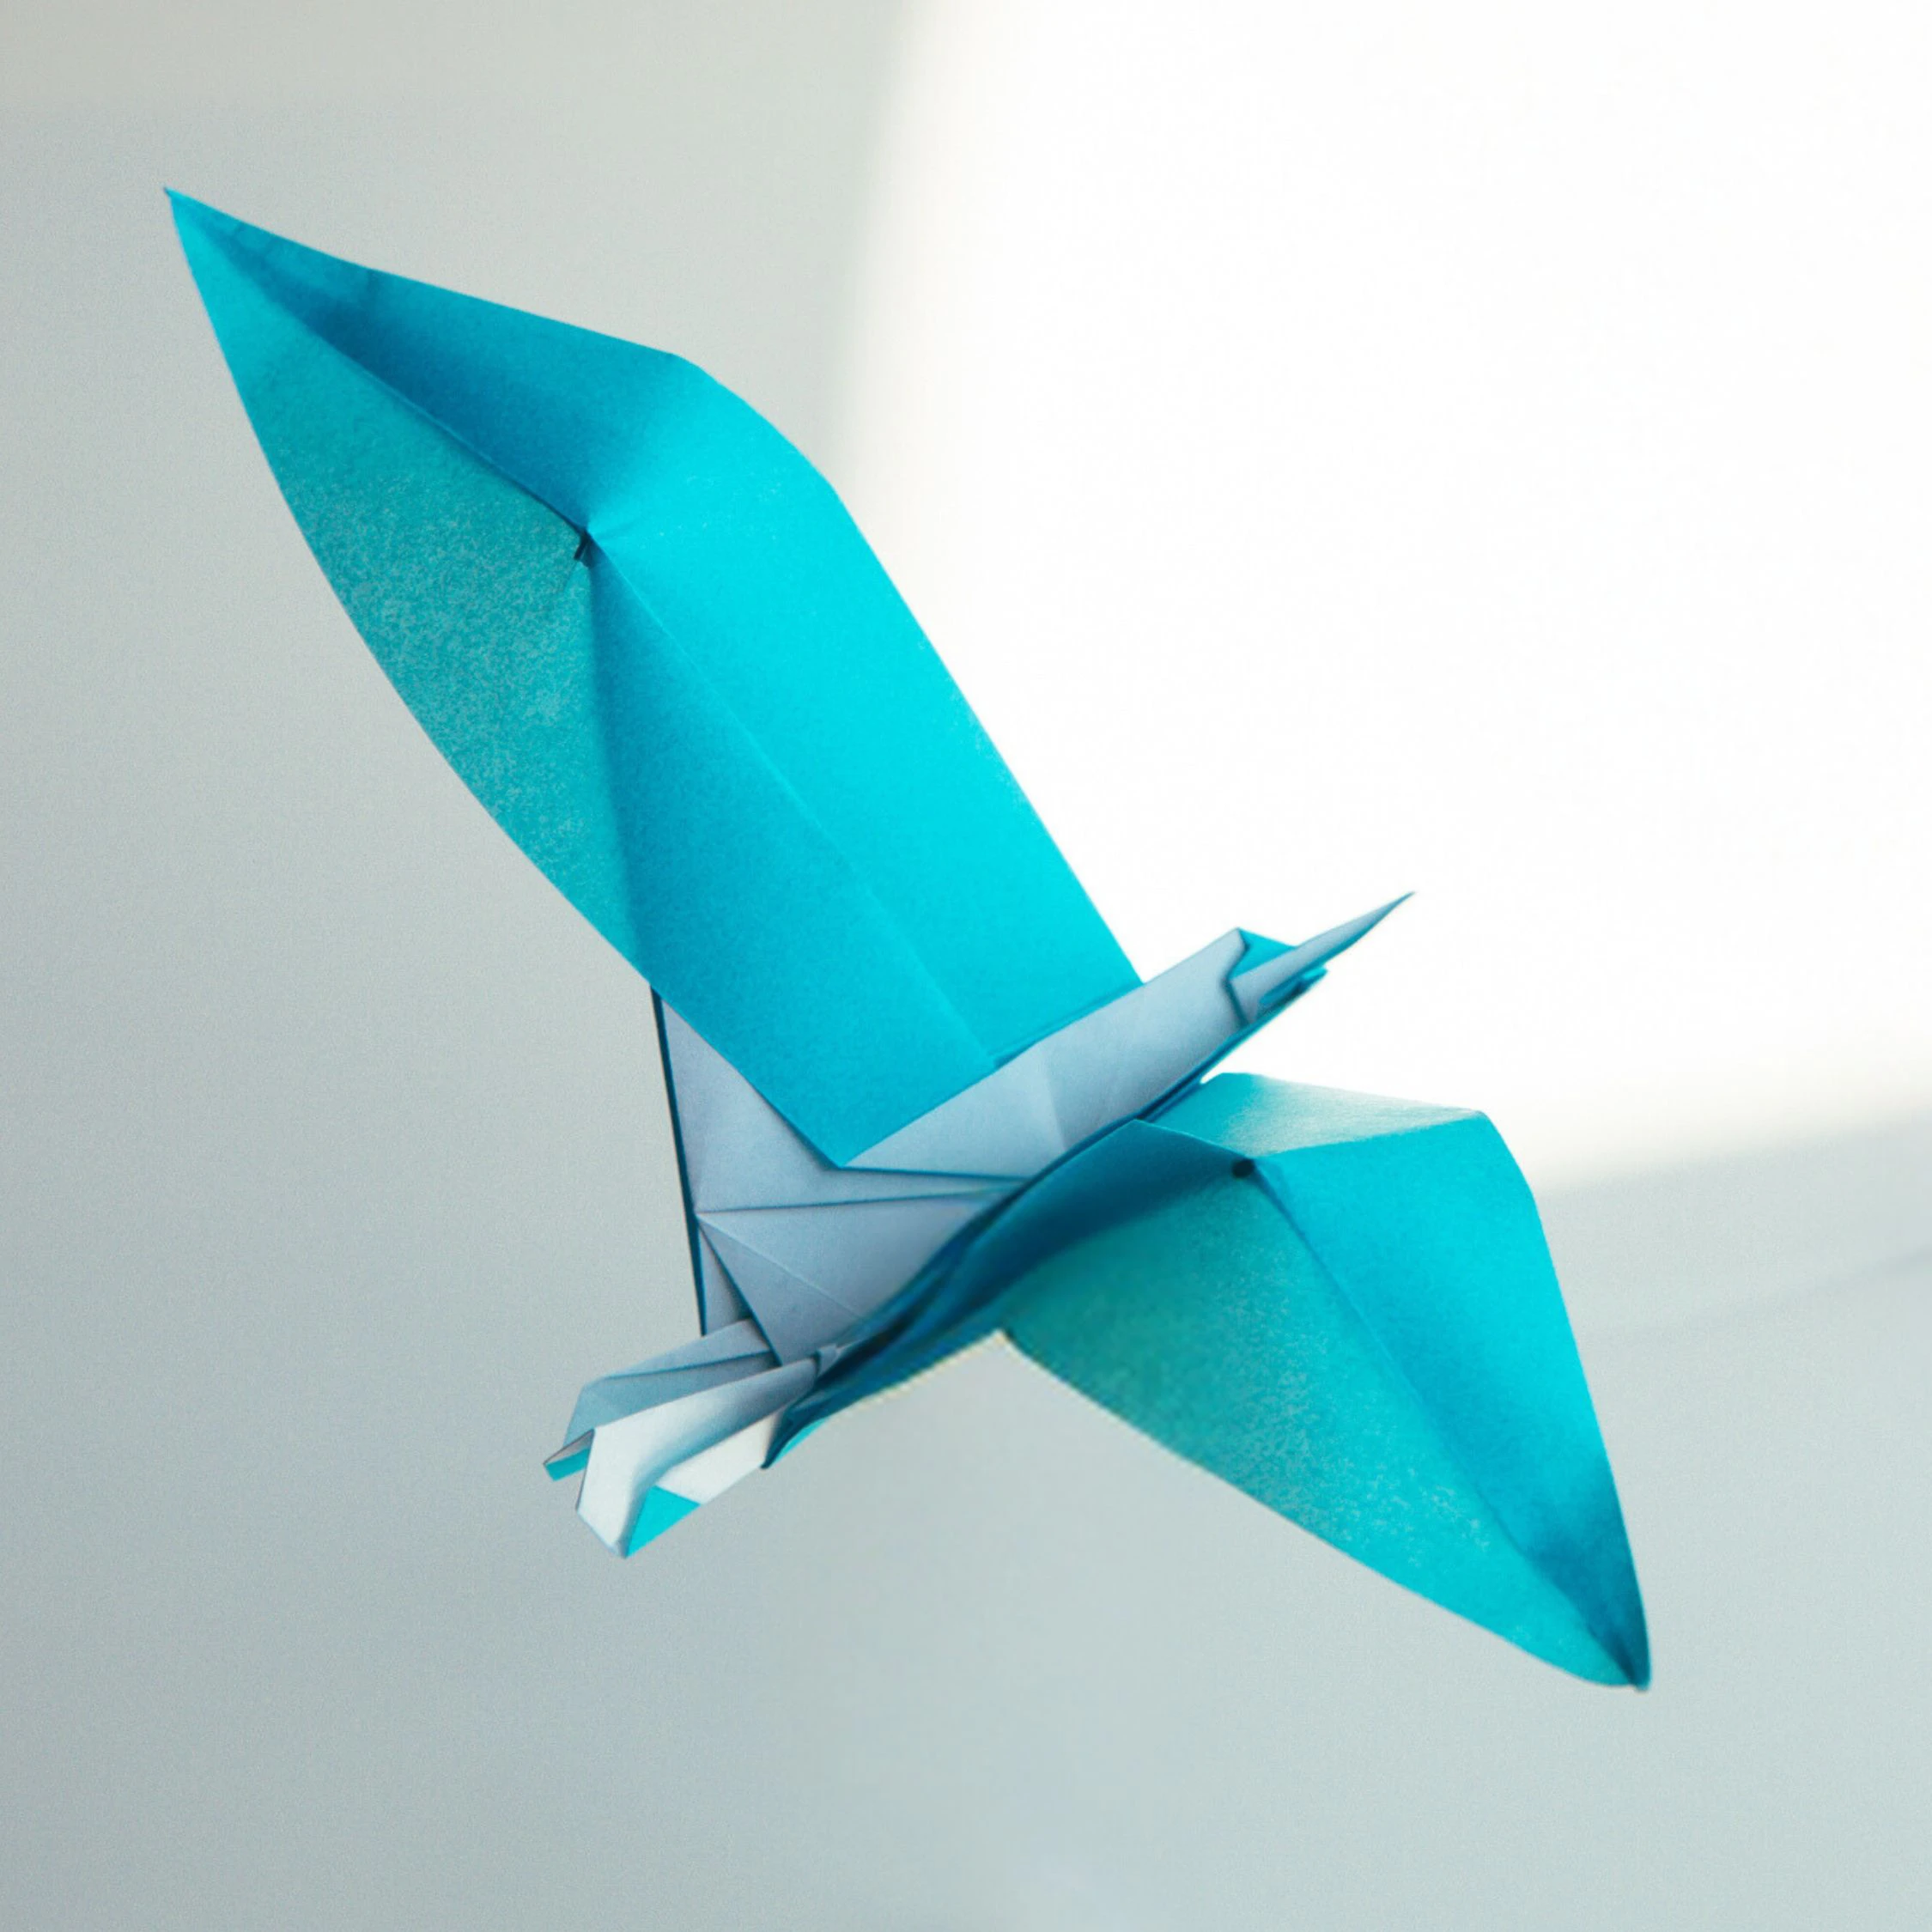
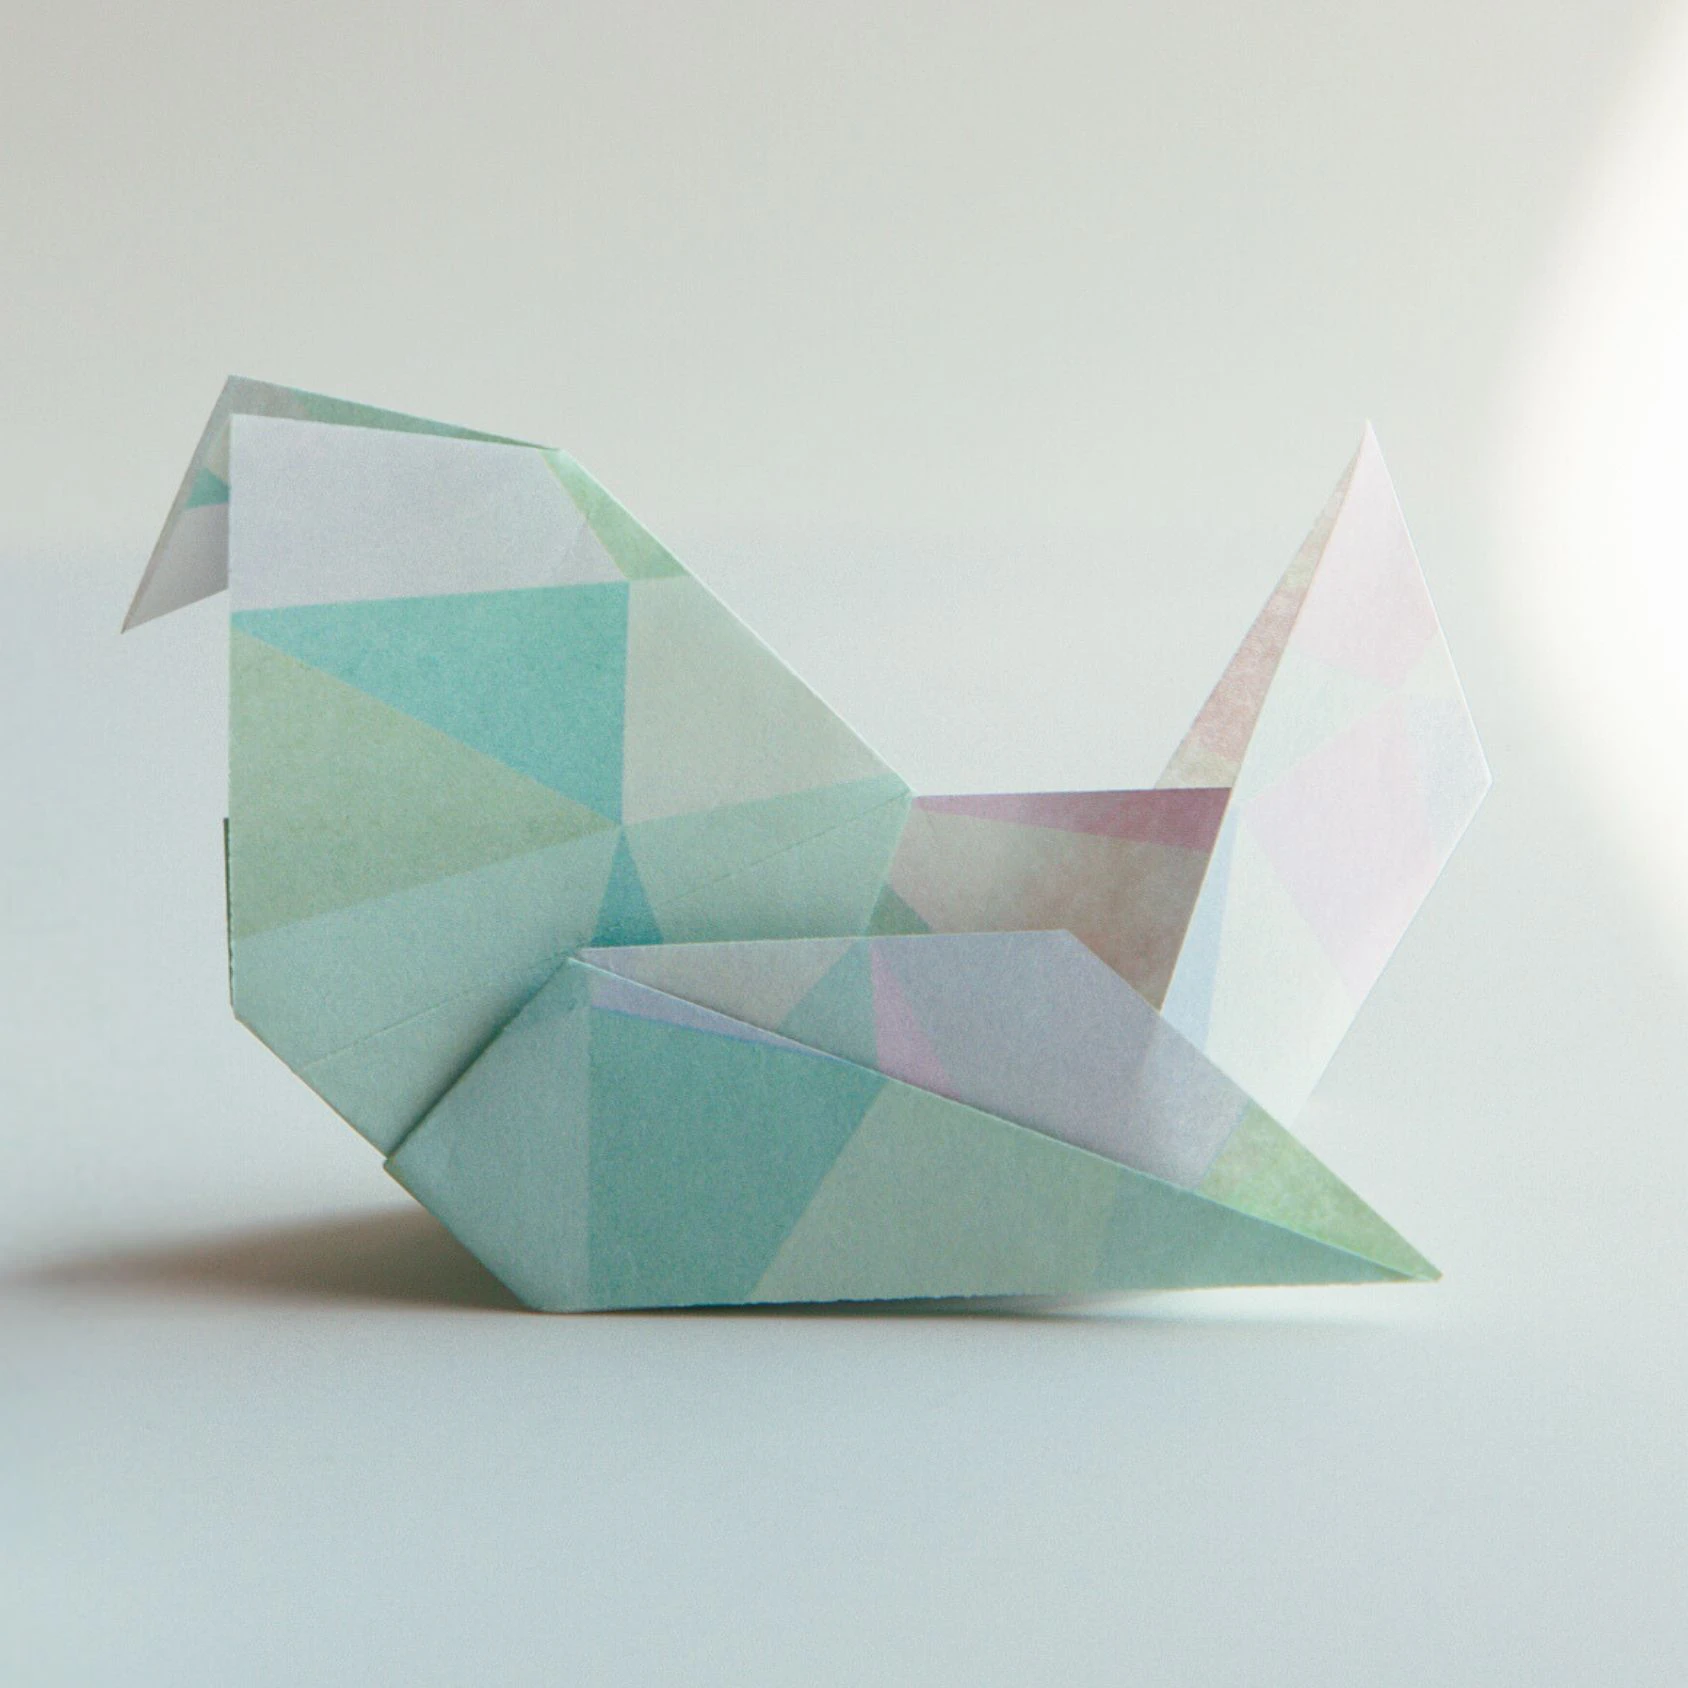
Other Origami Bird Ideas