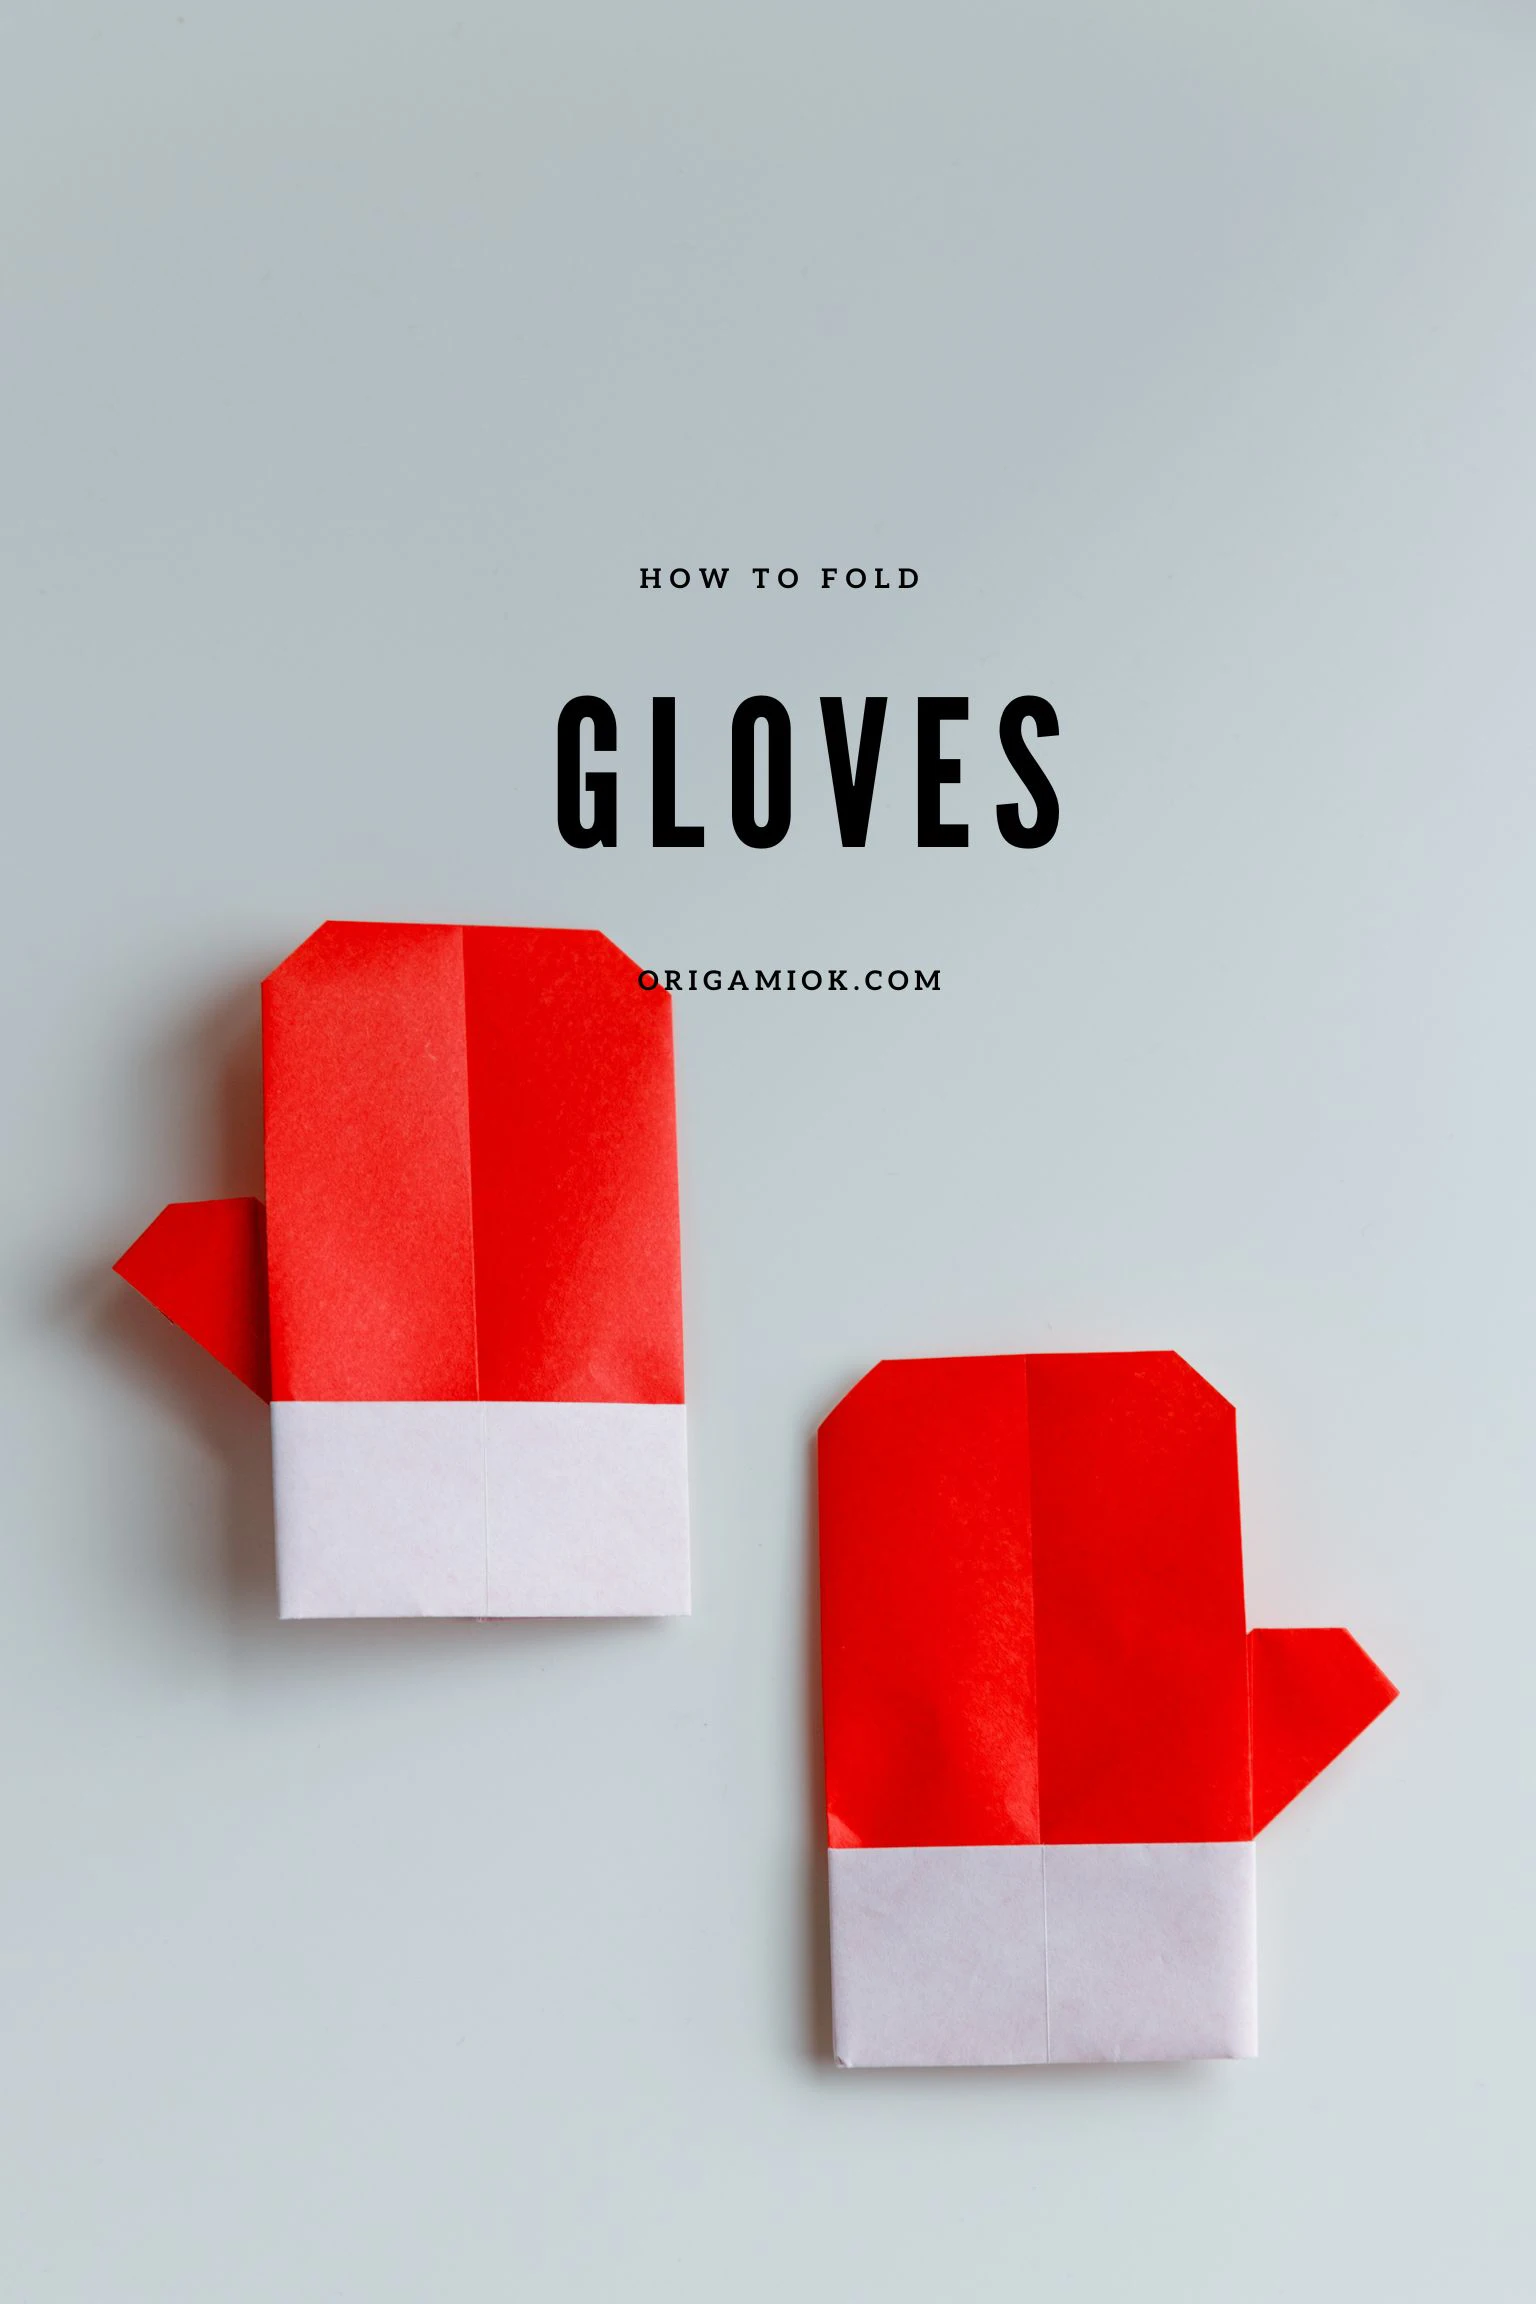
Learn how to make a lovely origami glove. This is very easy to make with one sheet of square paper, with one red side and one white, to create a classic Christmas glove.

We provide step-by-step diagram instructions and beginner-friendly videos. Check both for quicker learning.
If you are new to origami, start here from our beginner guide to know the basics and how to read the step-by-step instructions.
- Folding time: 5 minutes
- Paper: 15×15 cm
- Difficulty: Easy, Beginner friendly
Material
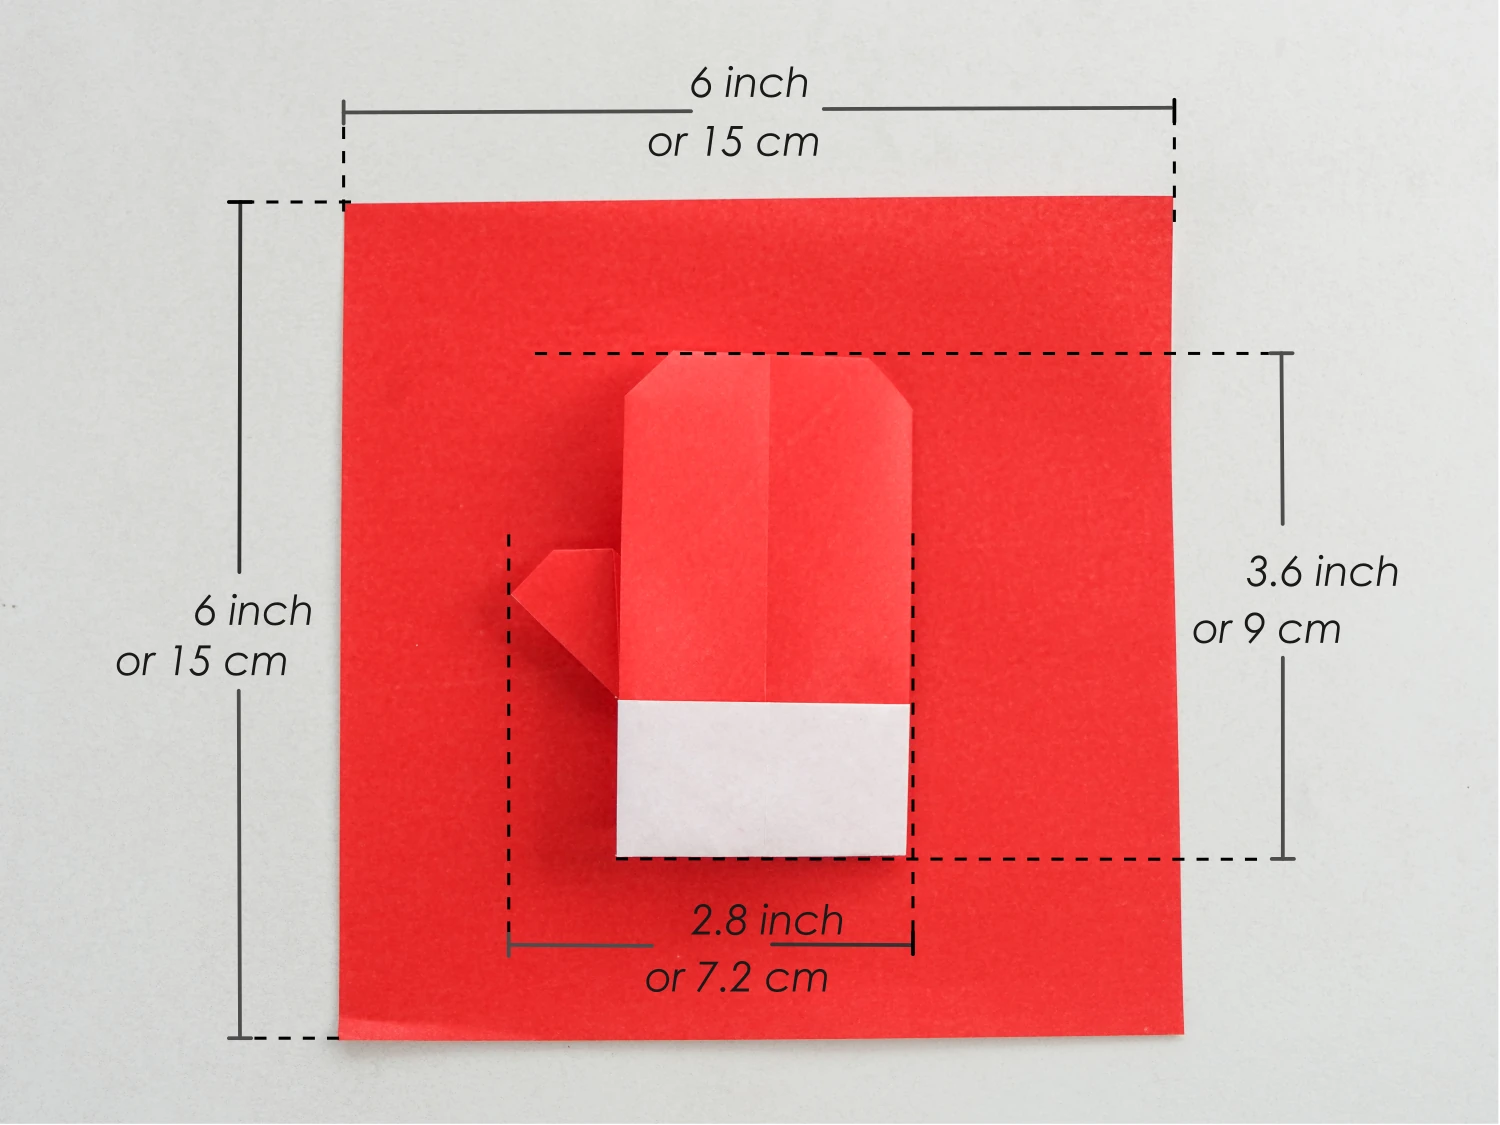
Get a 15*15 cm origami paper, with different colors on each side, and you will get a 9*7.2 cm glove. You can use other sizes of square paper to make a bigger or smaller glove.
Easy Origami Gloves Video
Step by Step Instructions
Step 1
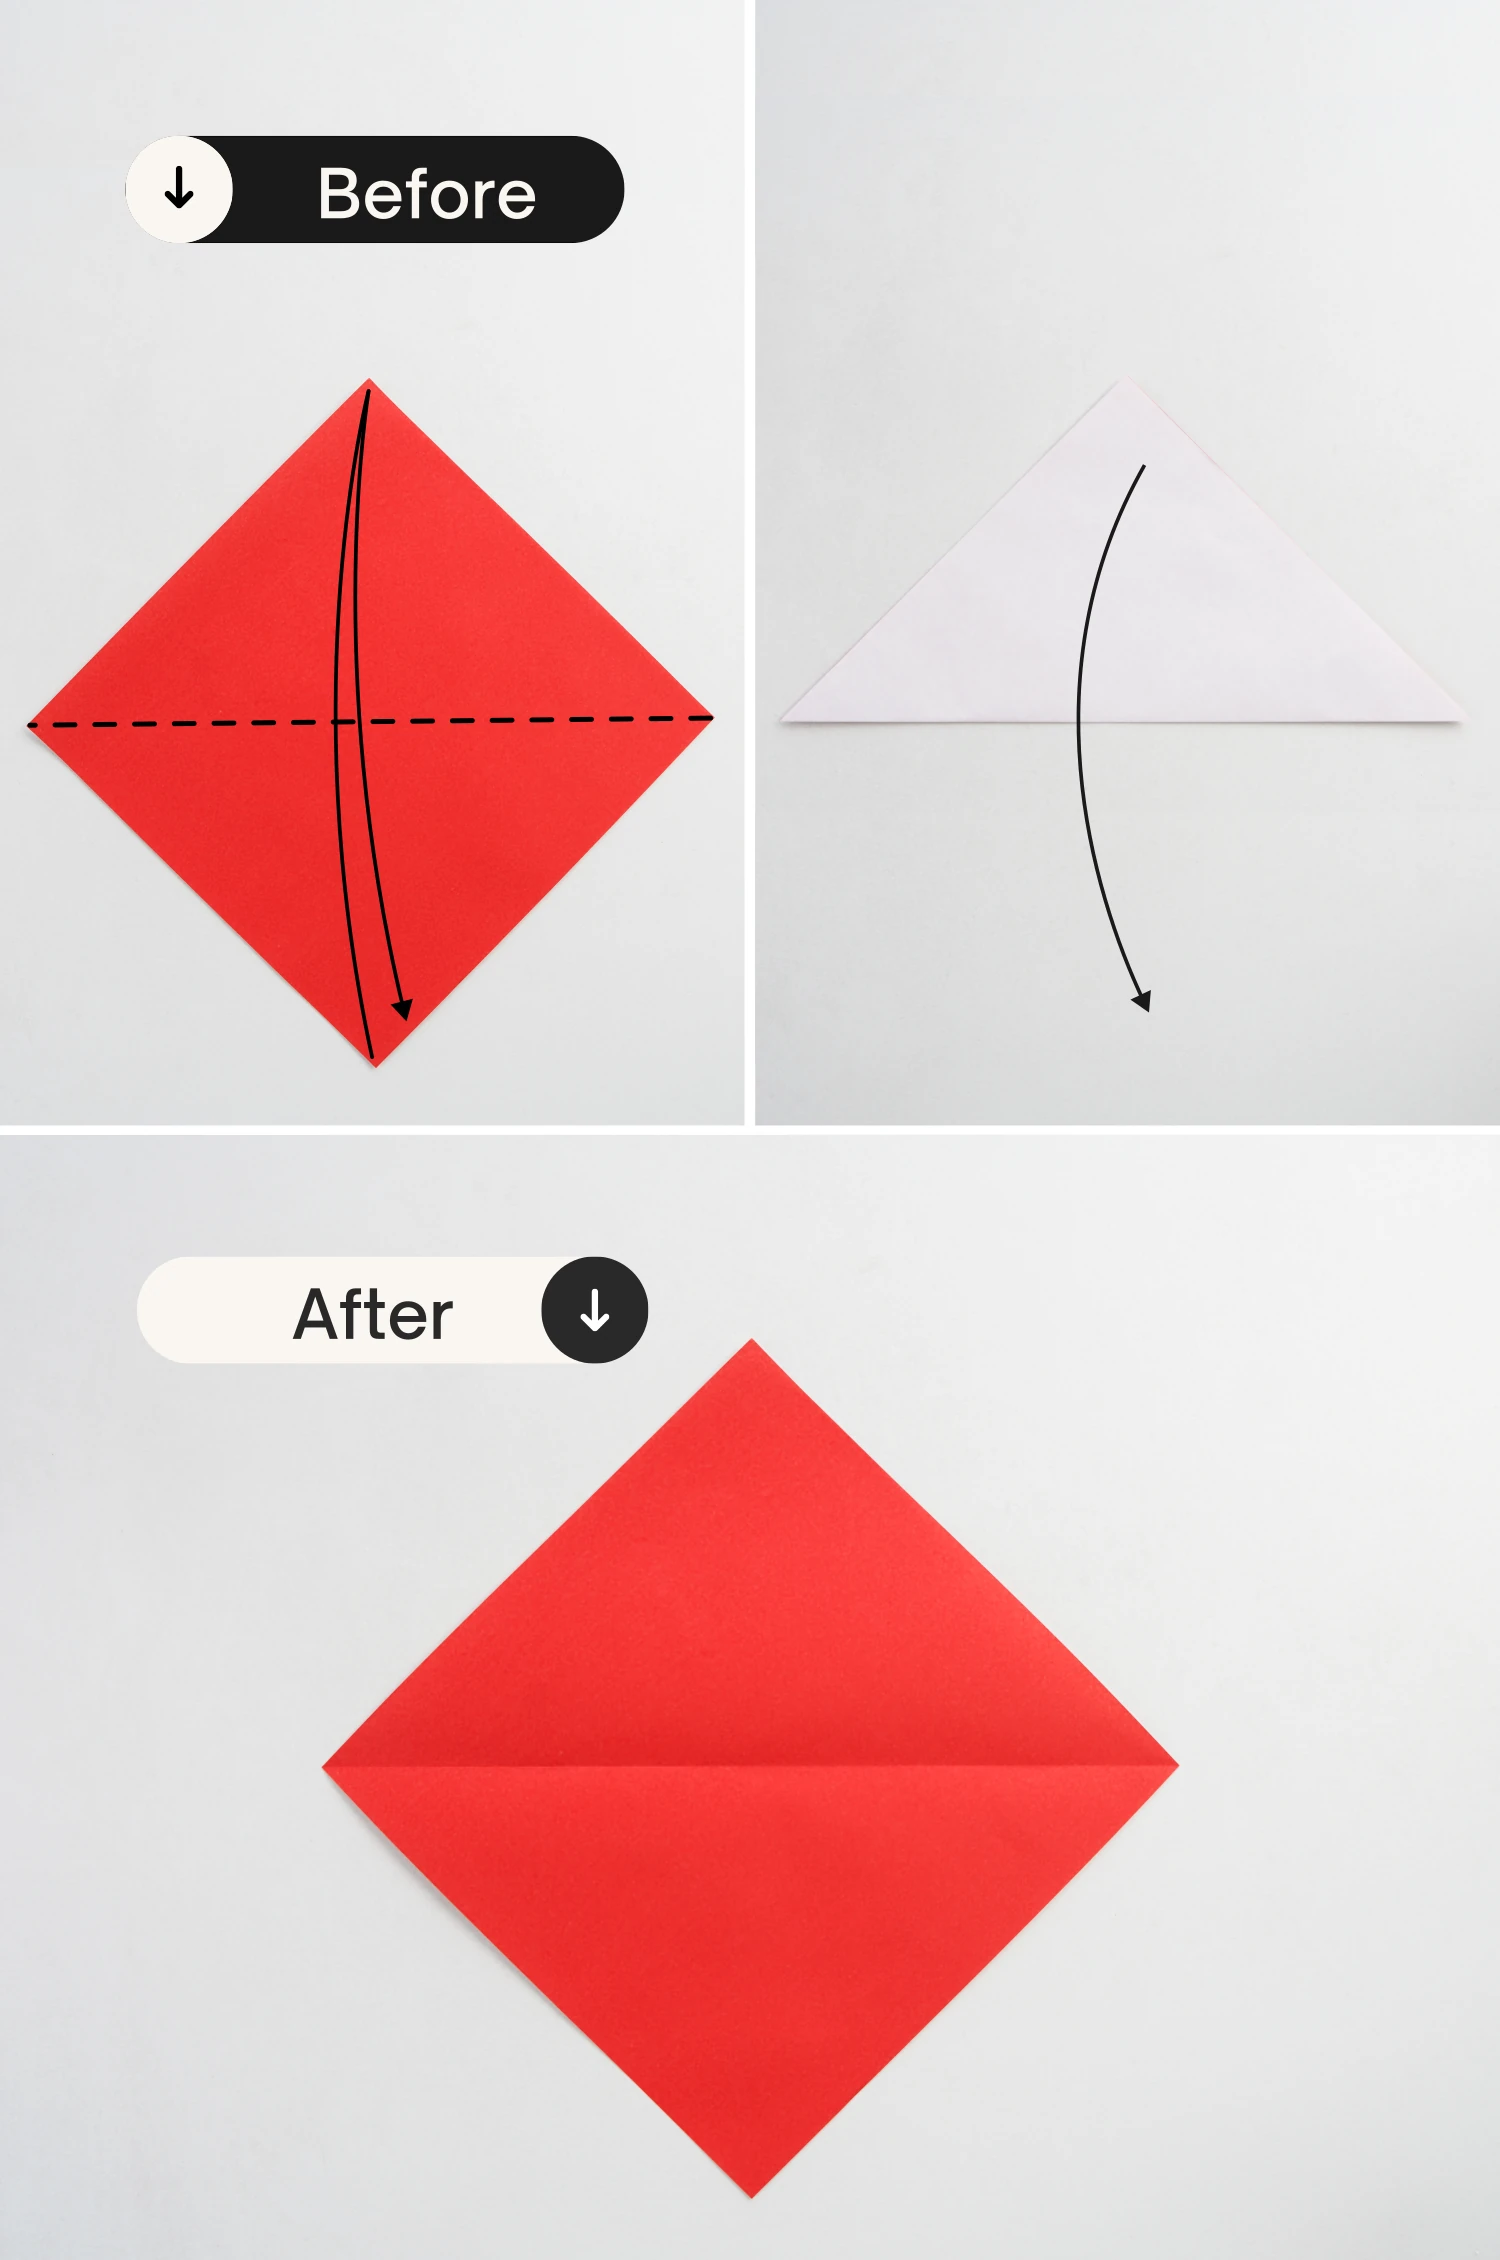
Start with the red side of the paper facing up, fold it in half horizontally, crease it well then unfold.
Step 2
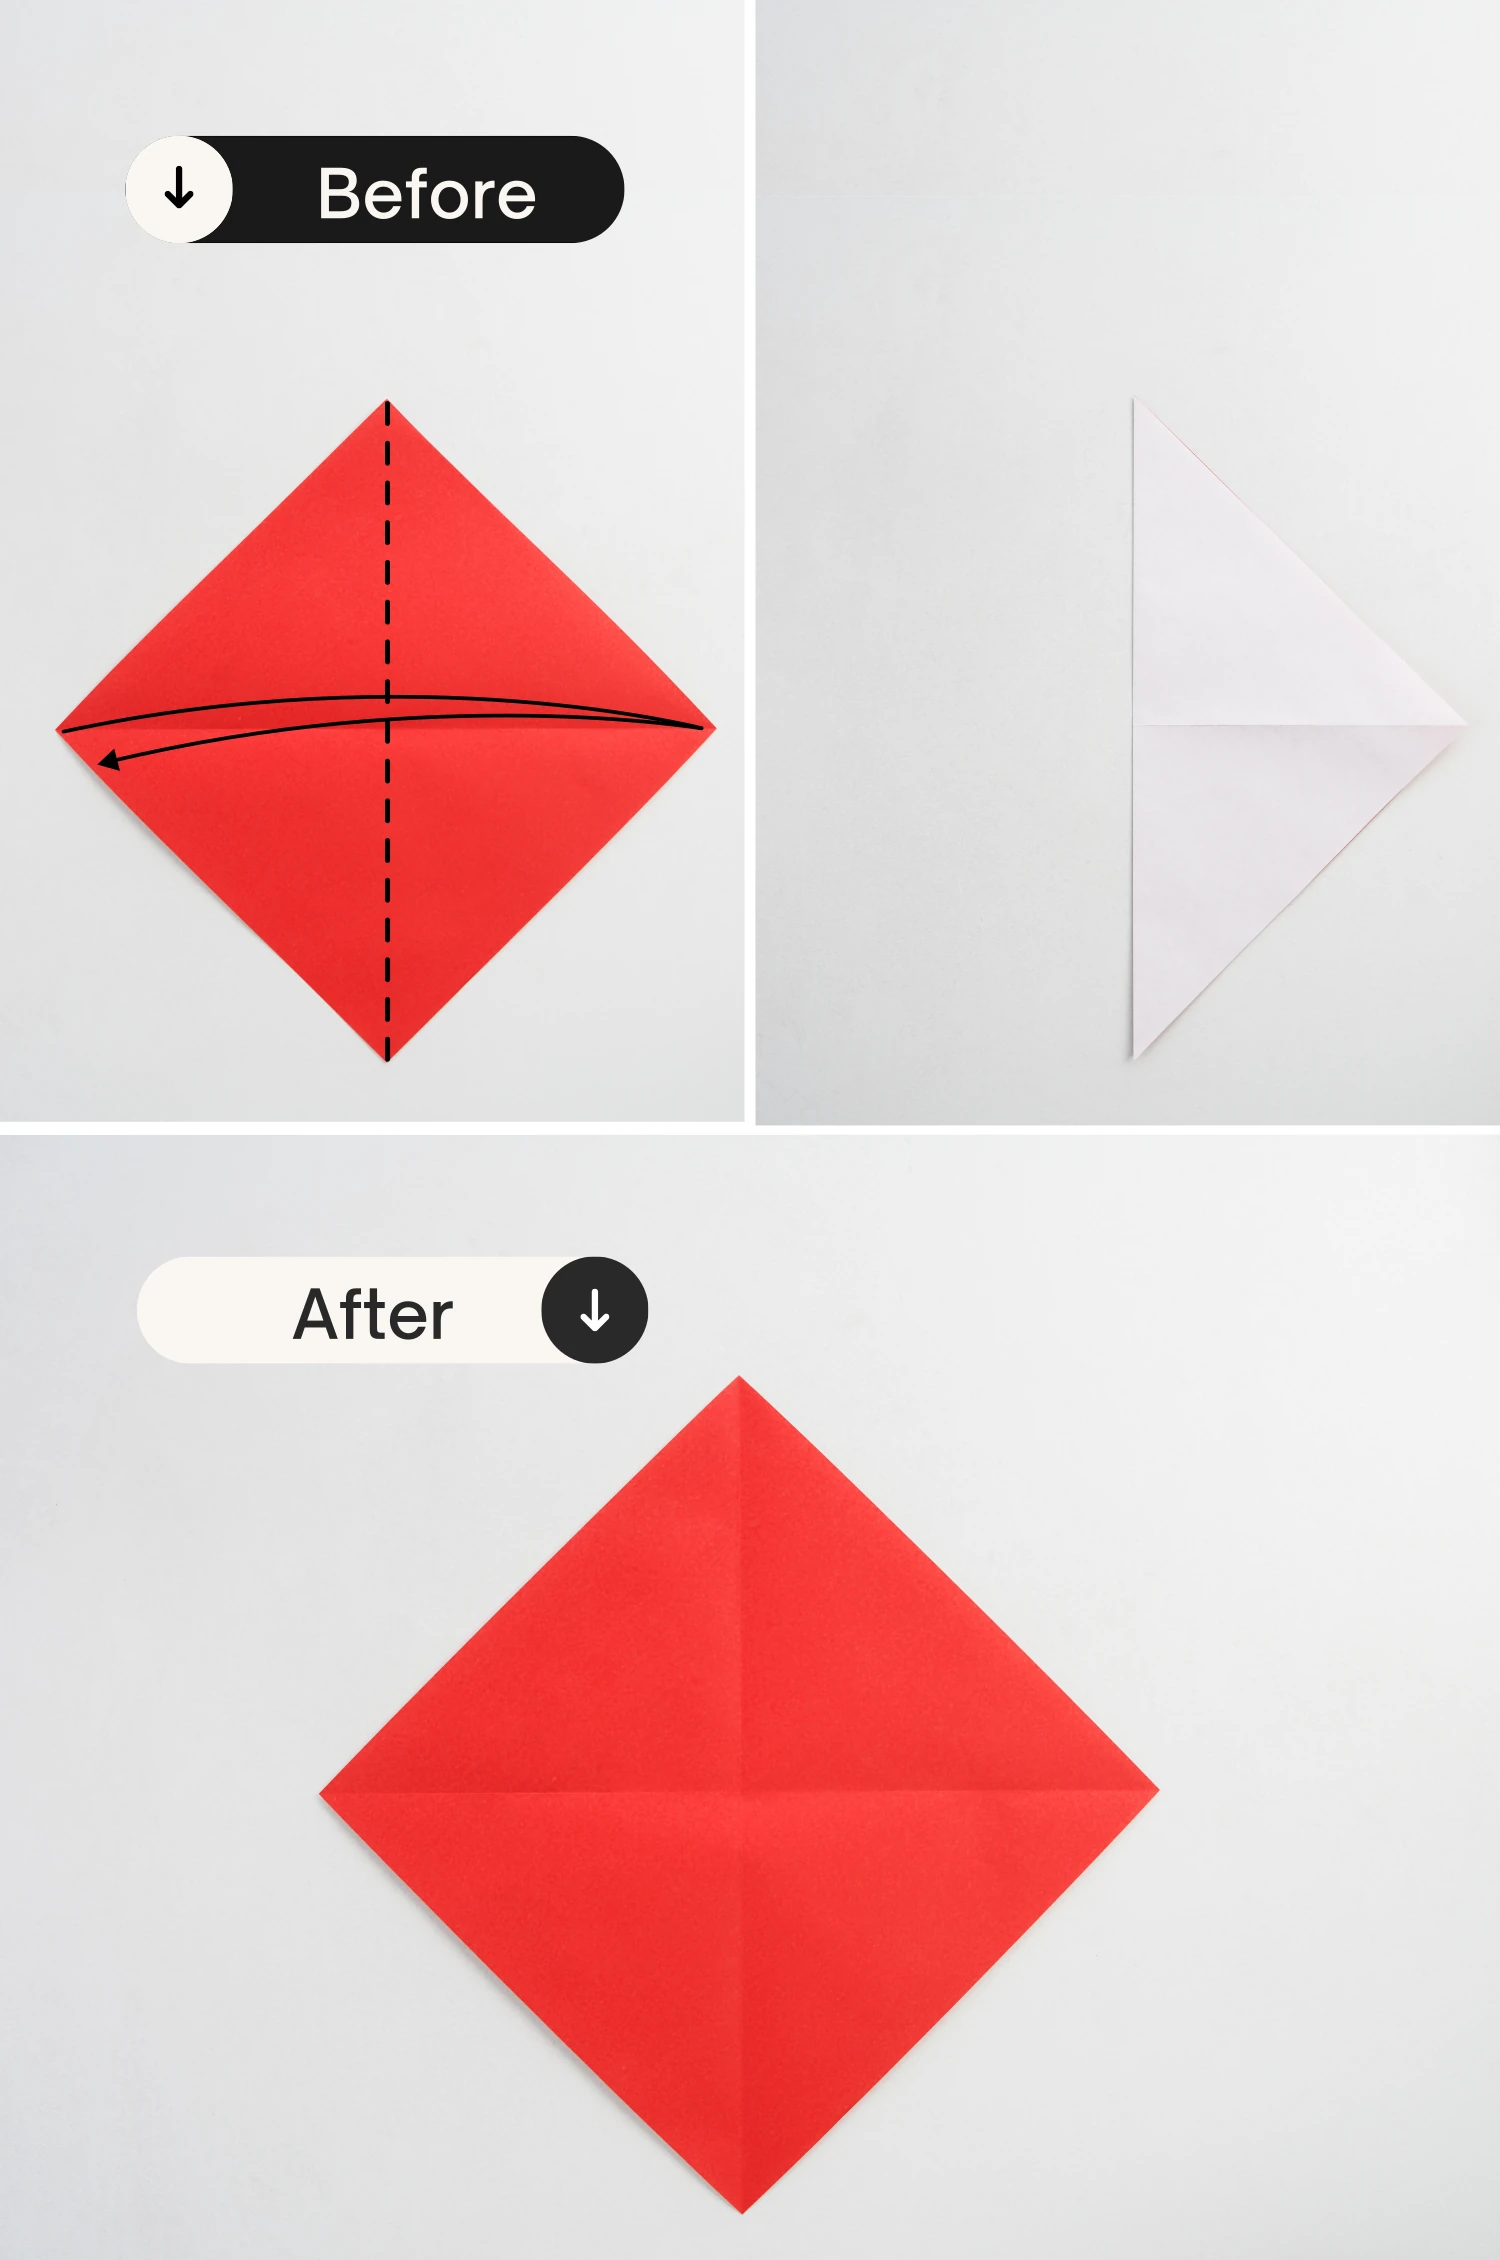
Then fold it in half vertically, crease it well then unfold.
Step 3
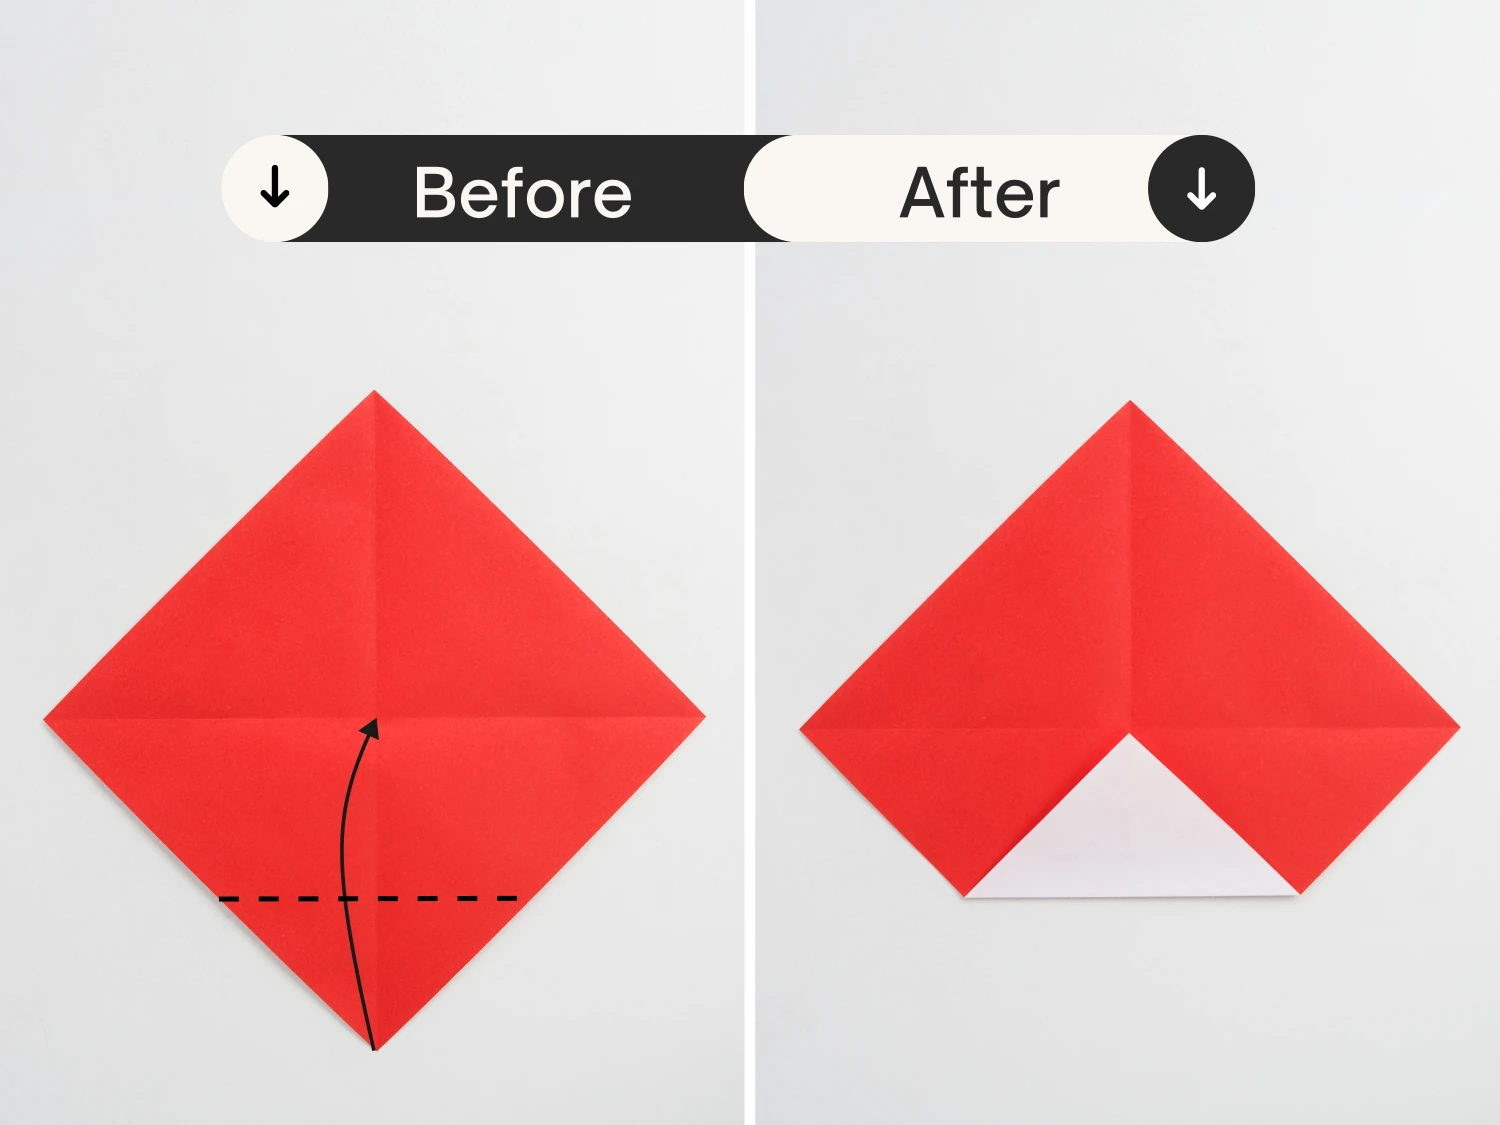
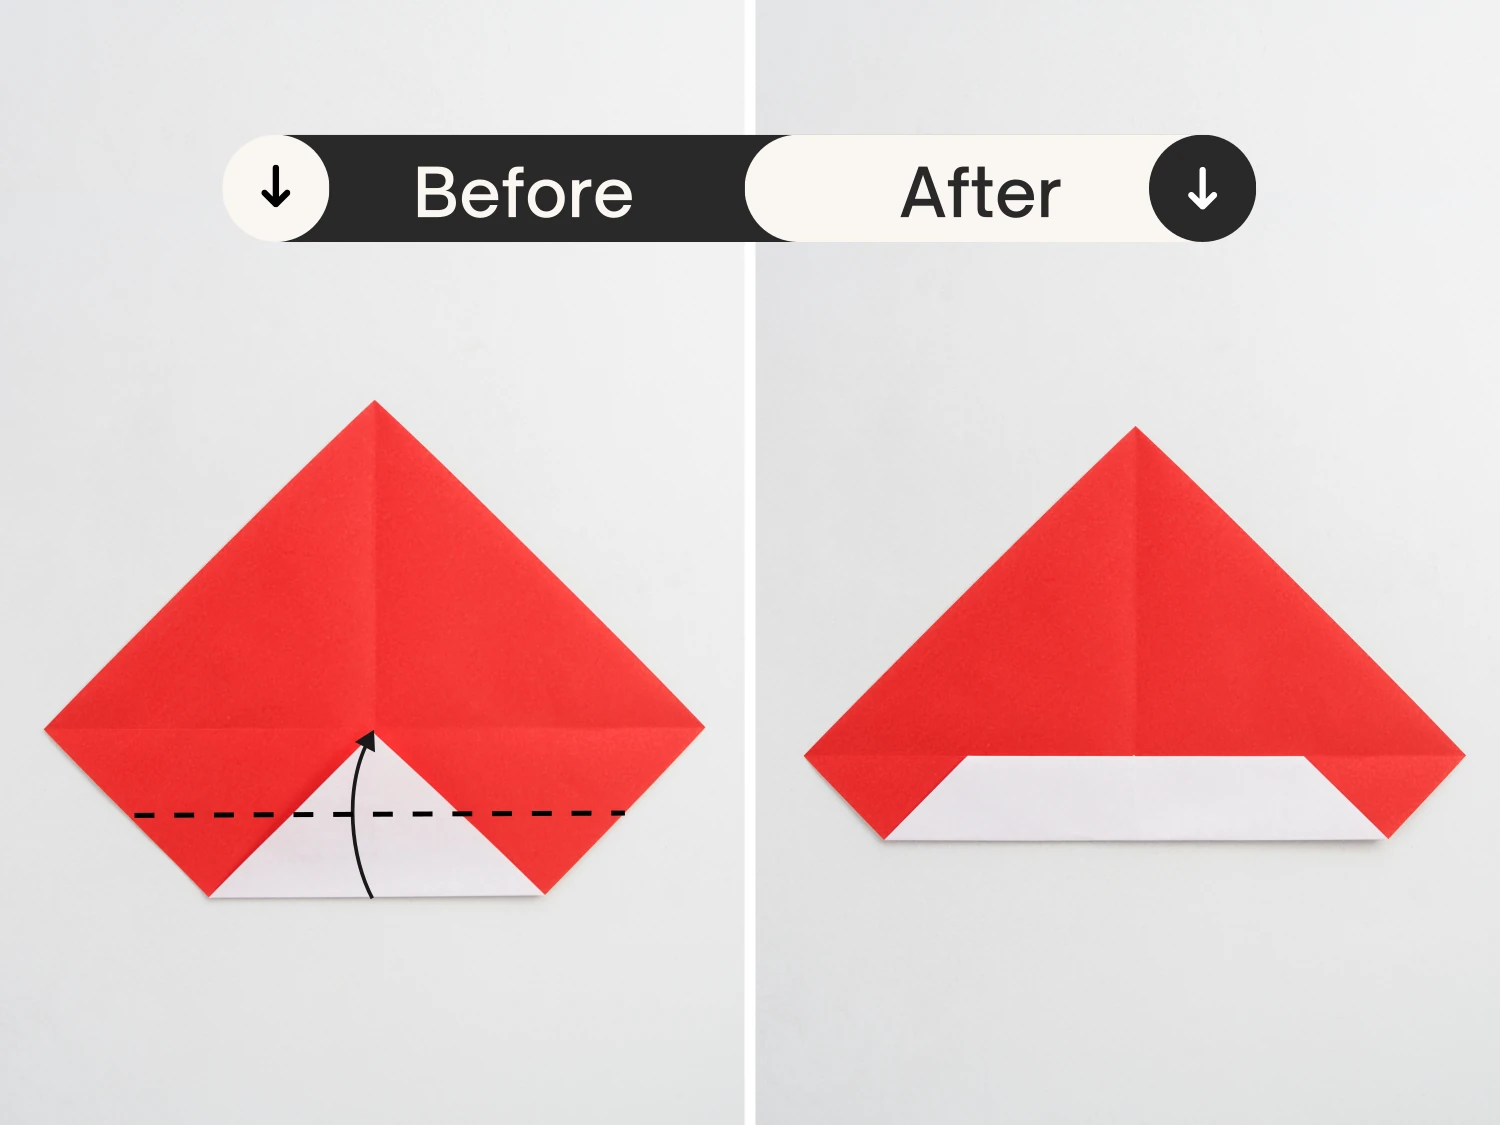
Fold the bottom point up to meet the center intersection point.
Step 4
Fold the bottom edge up to meet the horizontal center crease.
Step 5
Fold it up again along the center horizontal crease.
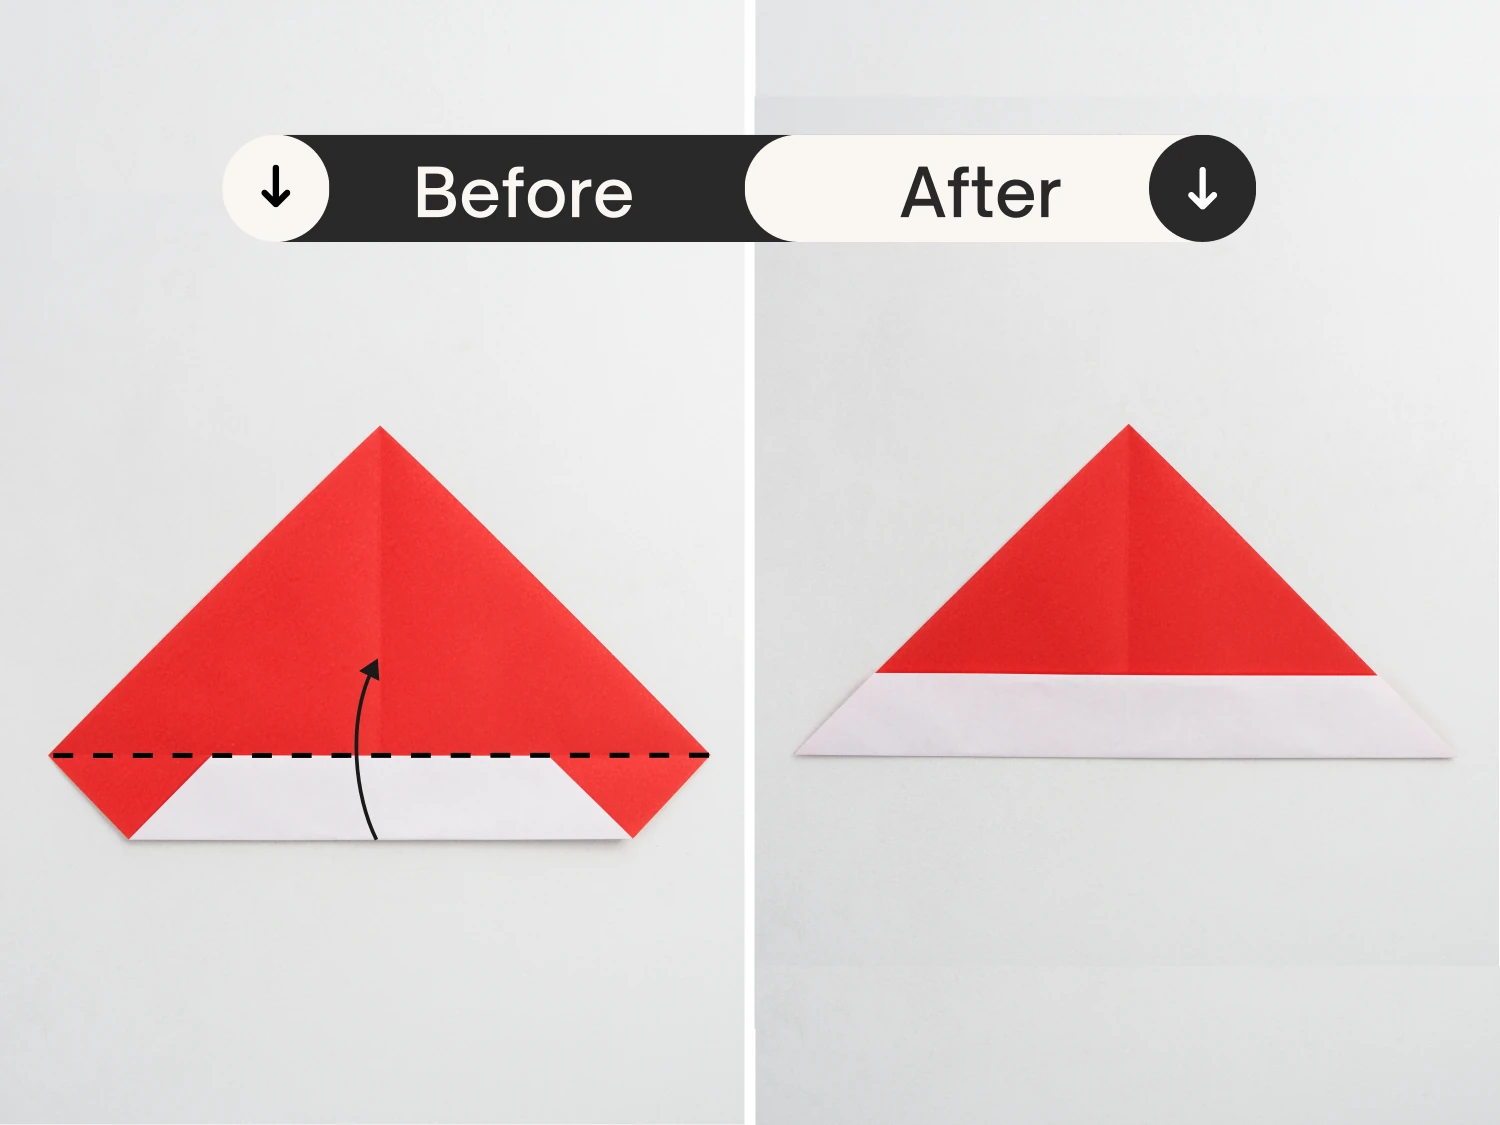
Step 6
Flip it over.
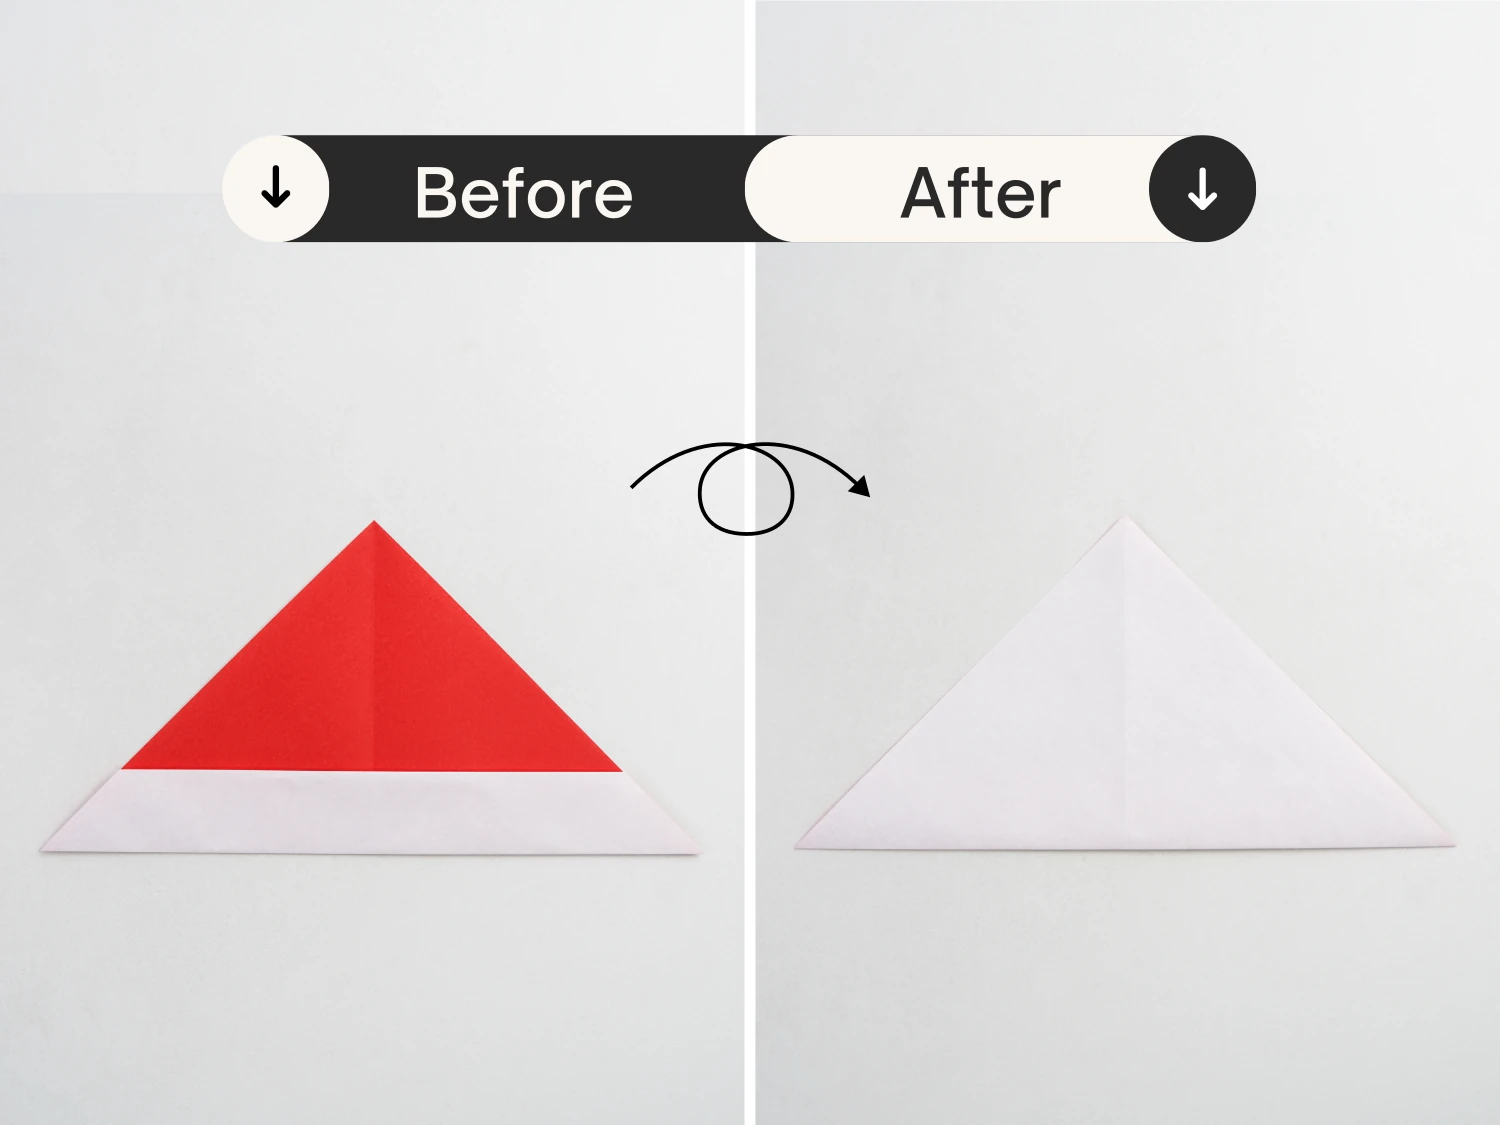
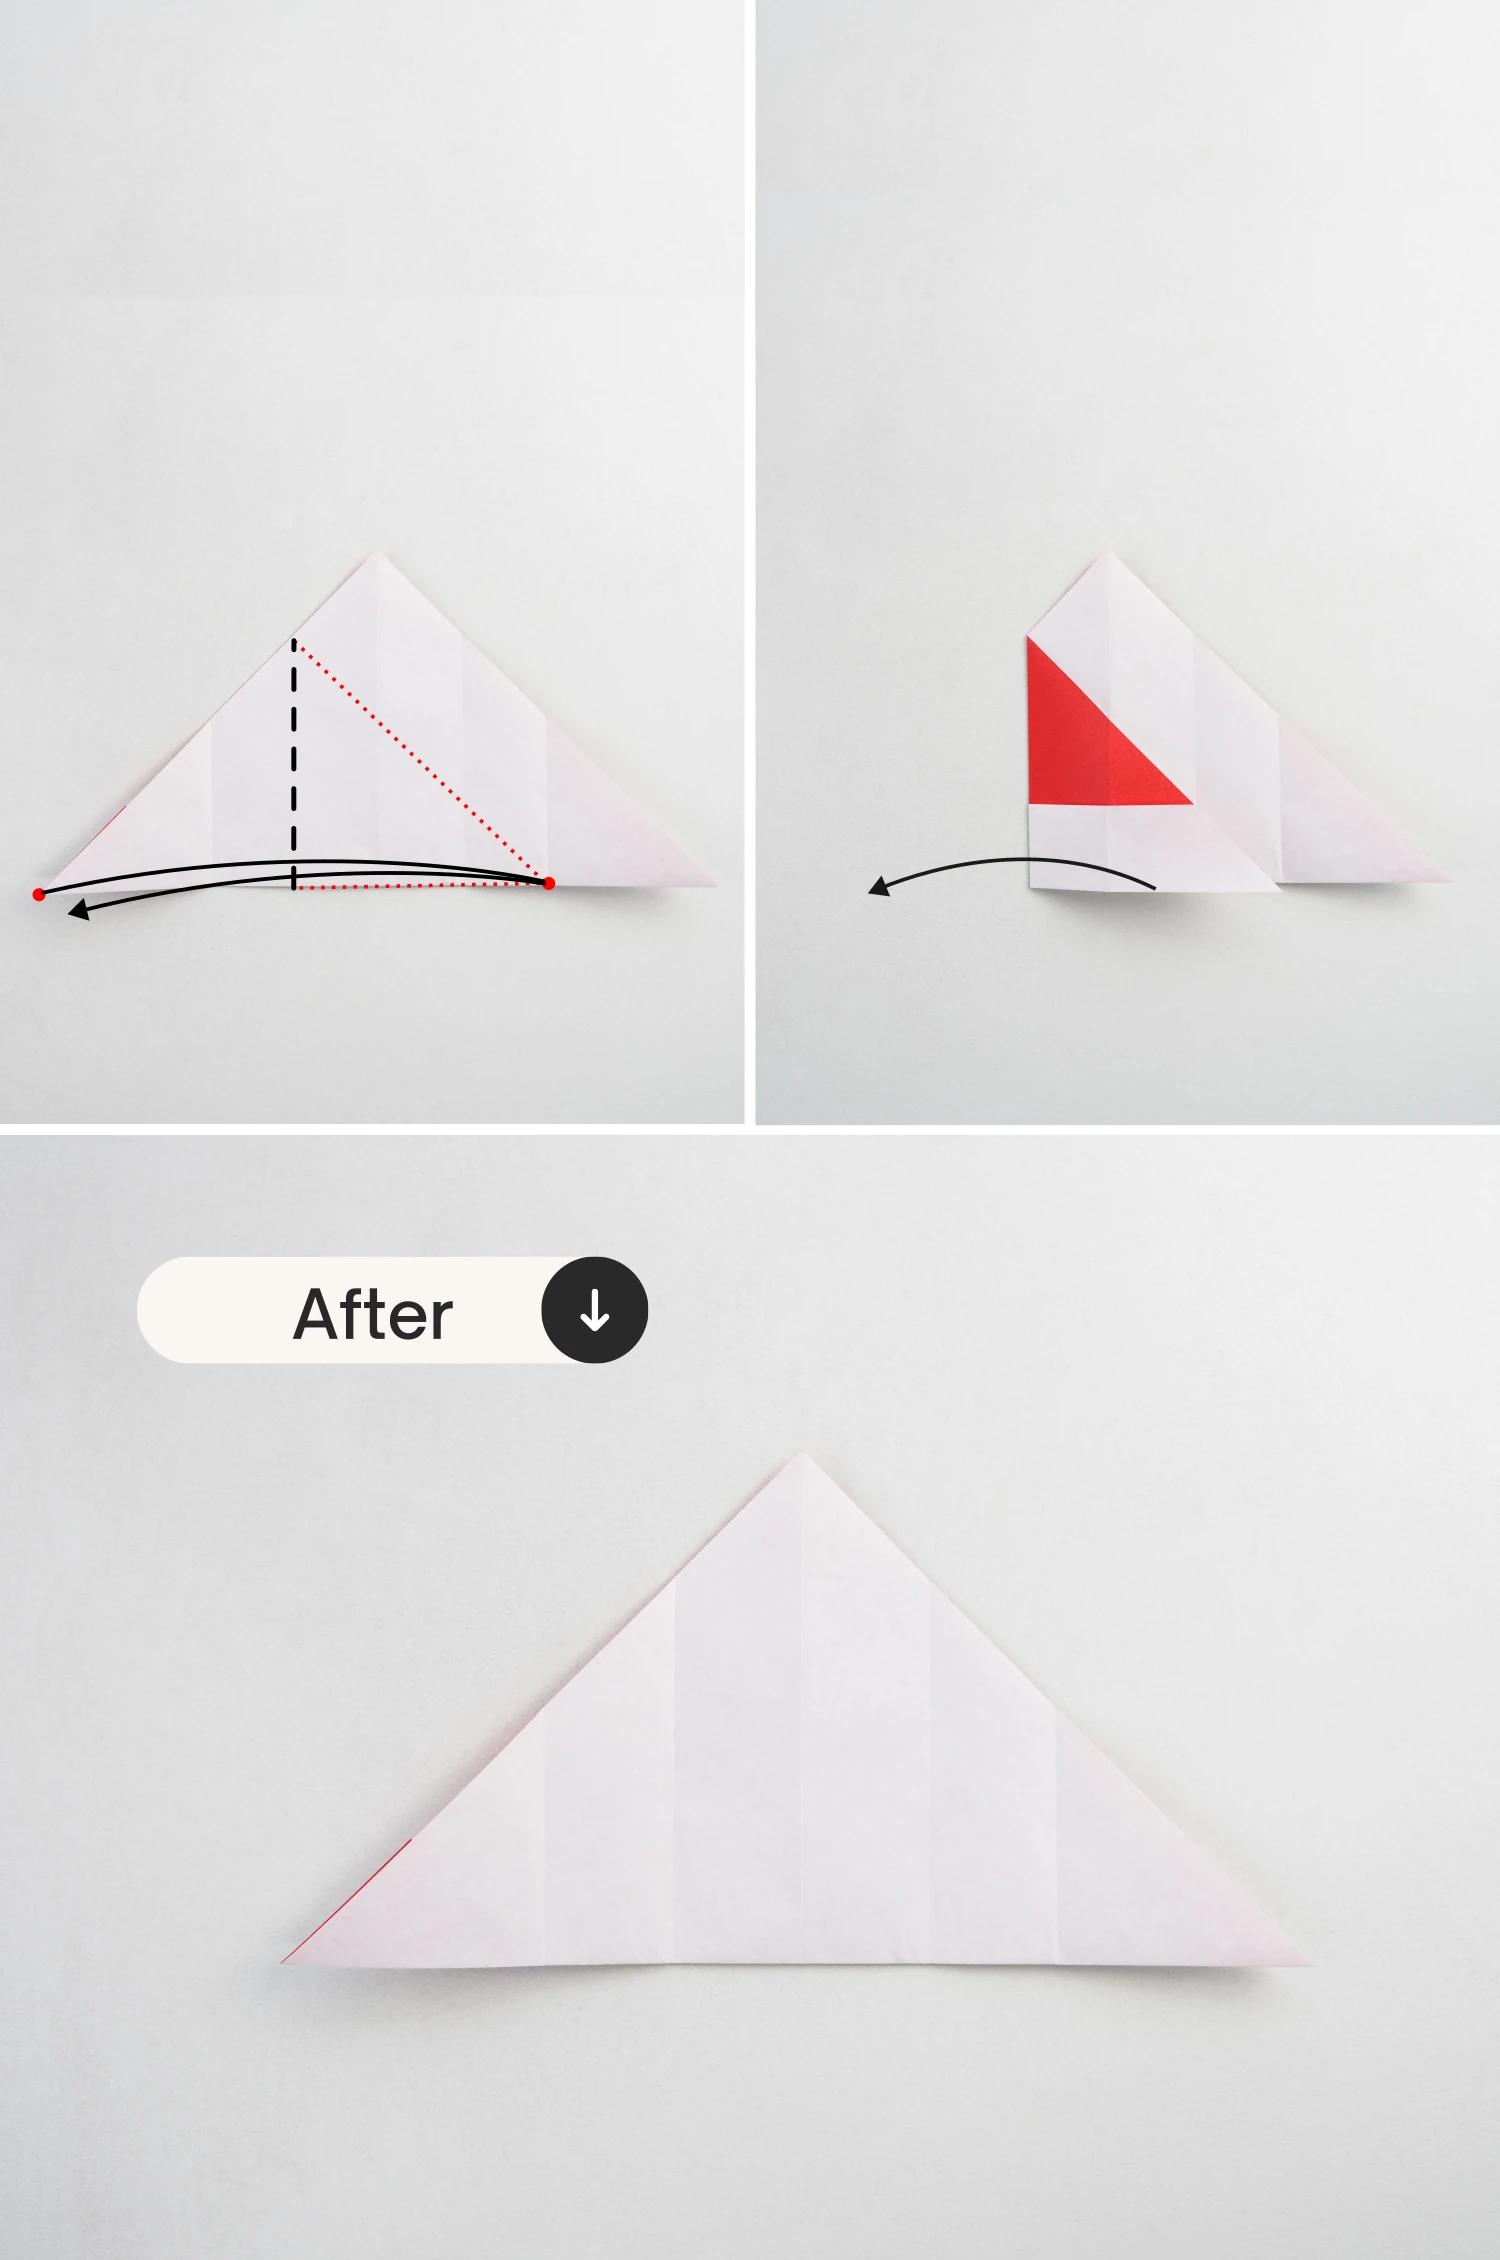
Step 7
Fold the left and right corners toward the center to meet the middle point of the bottom edge, crease it well then unfold.
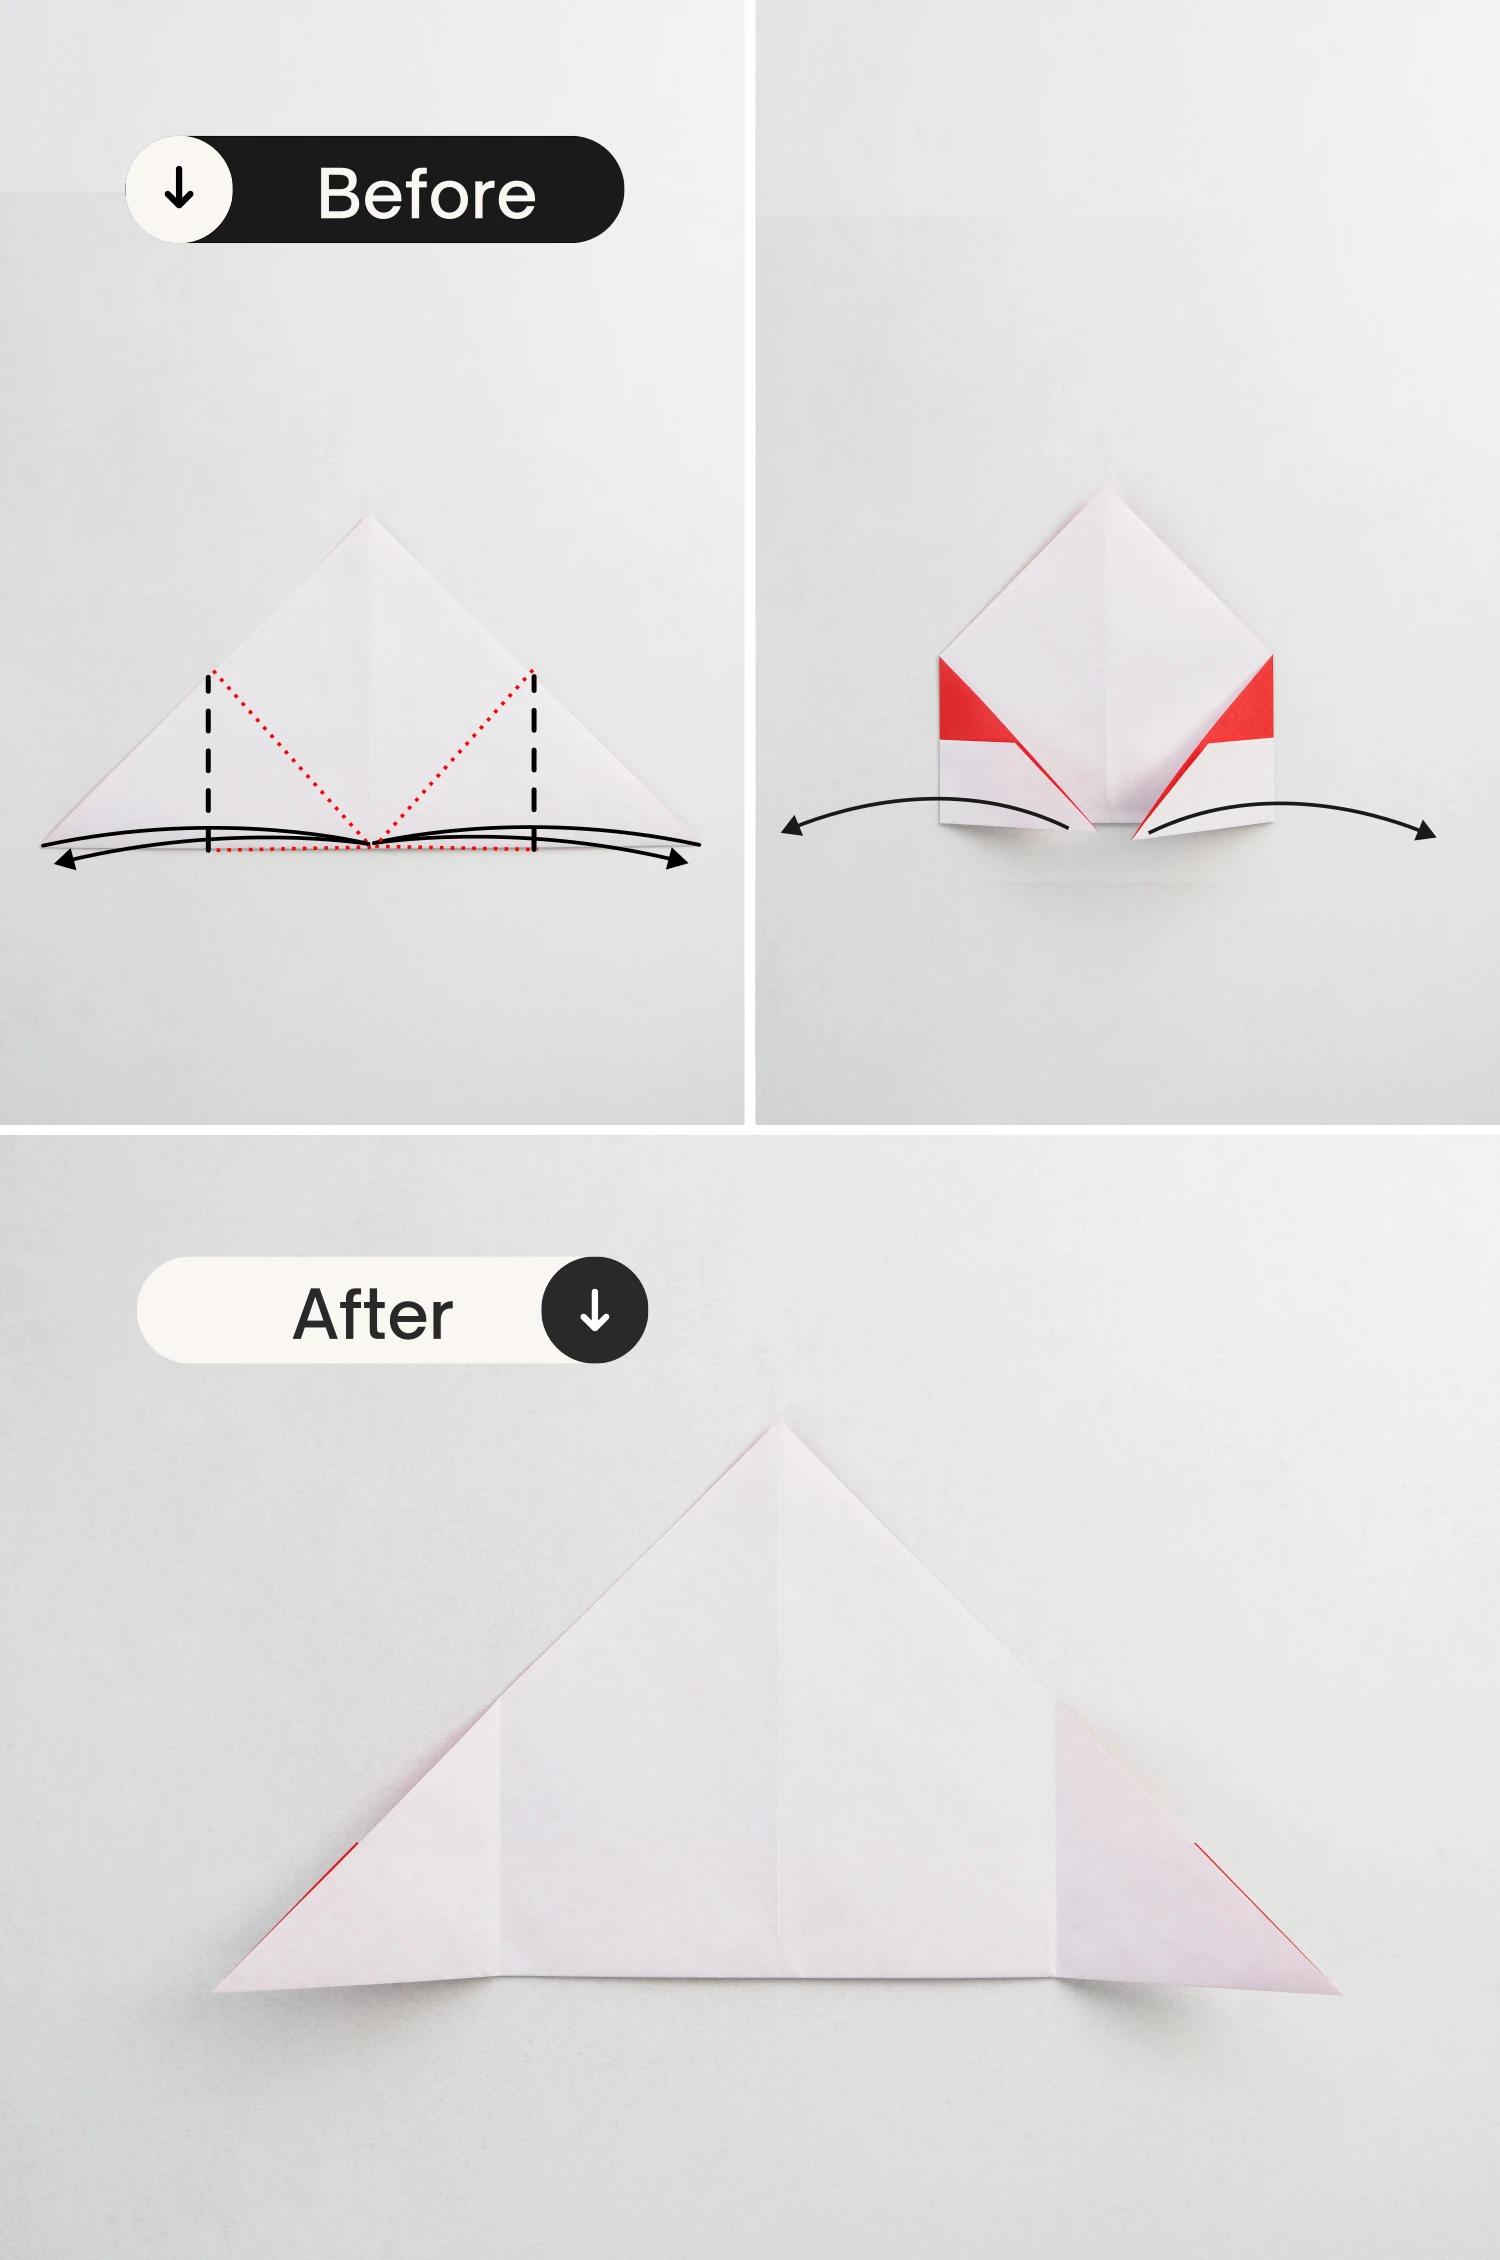
Step 8
Take the right corner, fold it to the left diagonally along the black dotted line, to meet the crease you just made, crease it well then unfold.

Step 9
Repeat this for the left side.
Step 10
Fold the left and right bottom edges up to meet the creases you just made, crease it well then unfold.
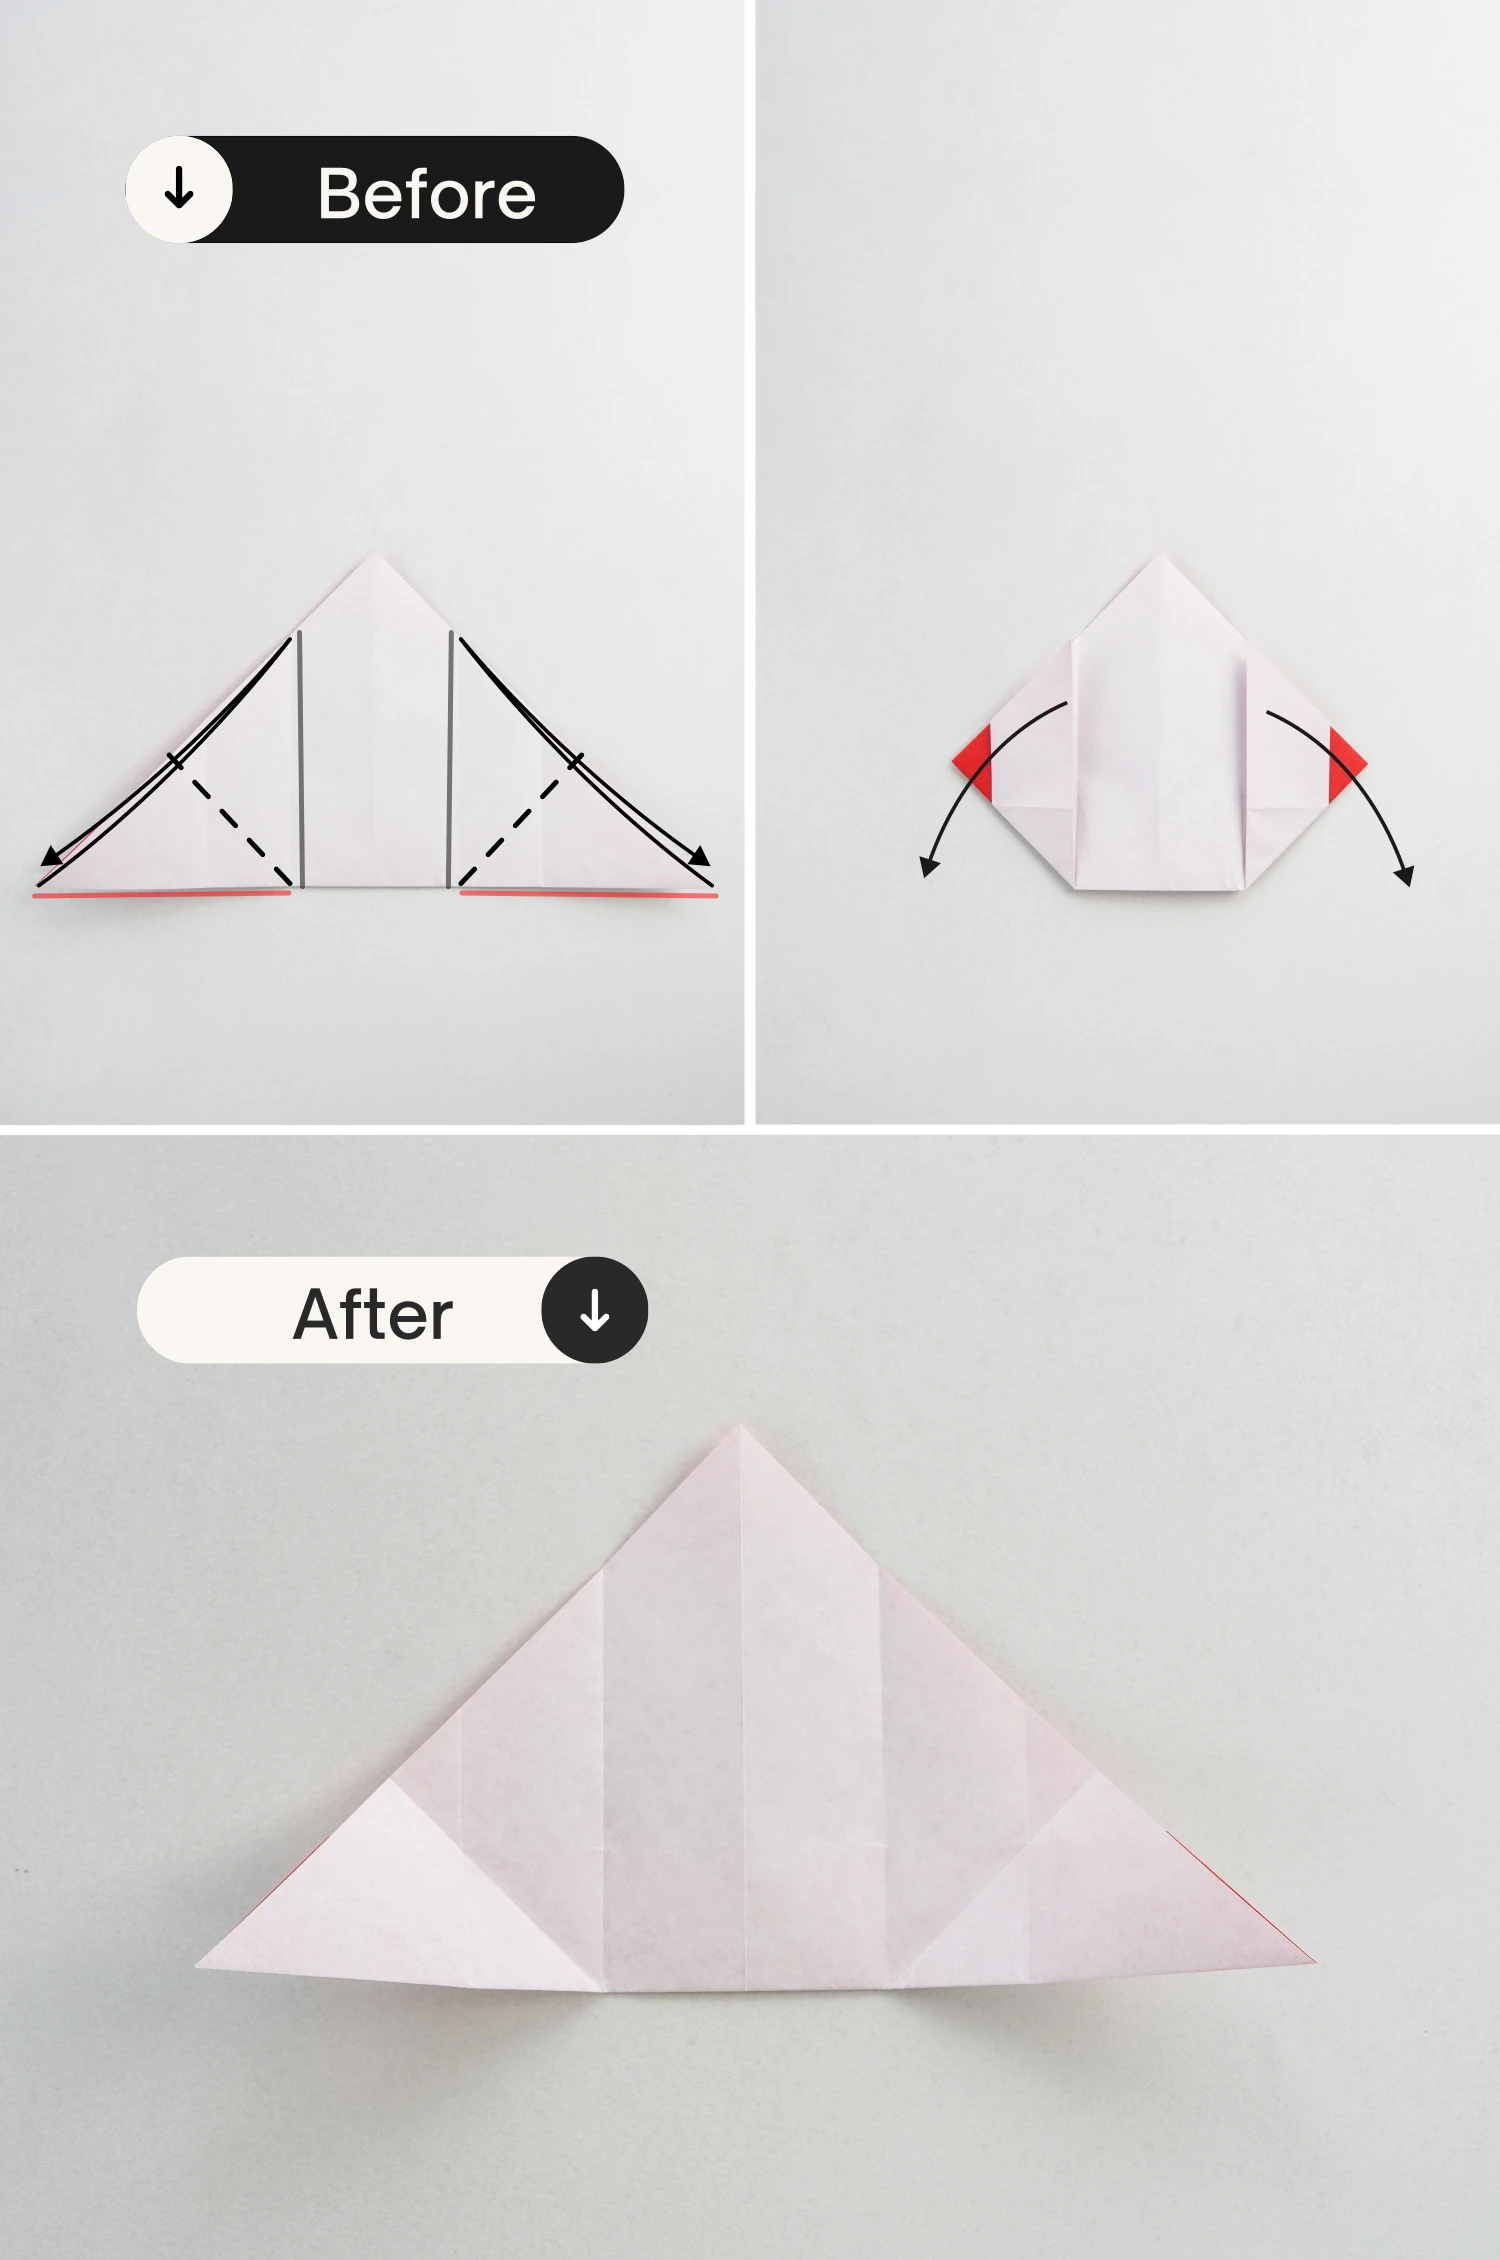
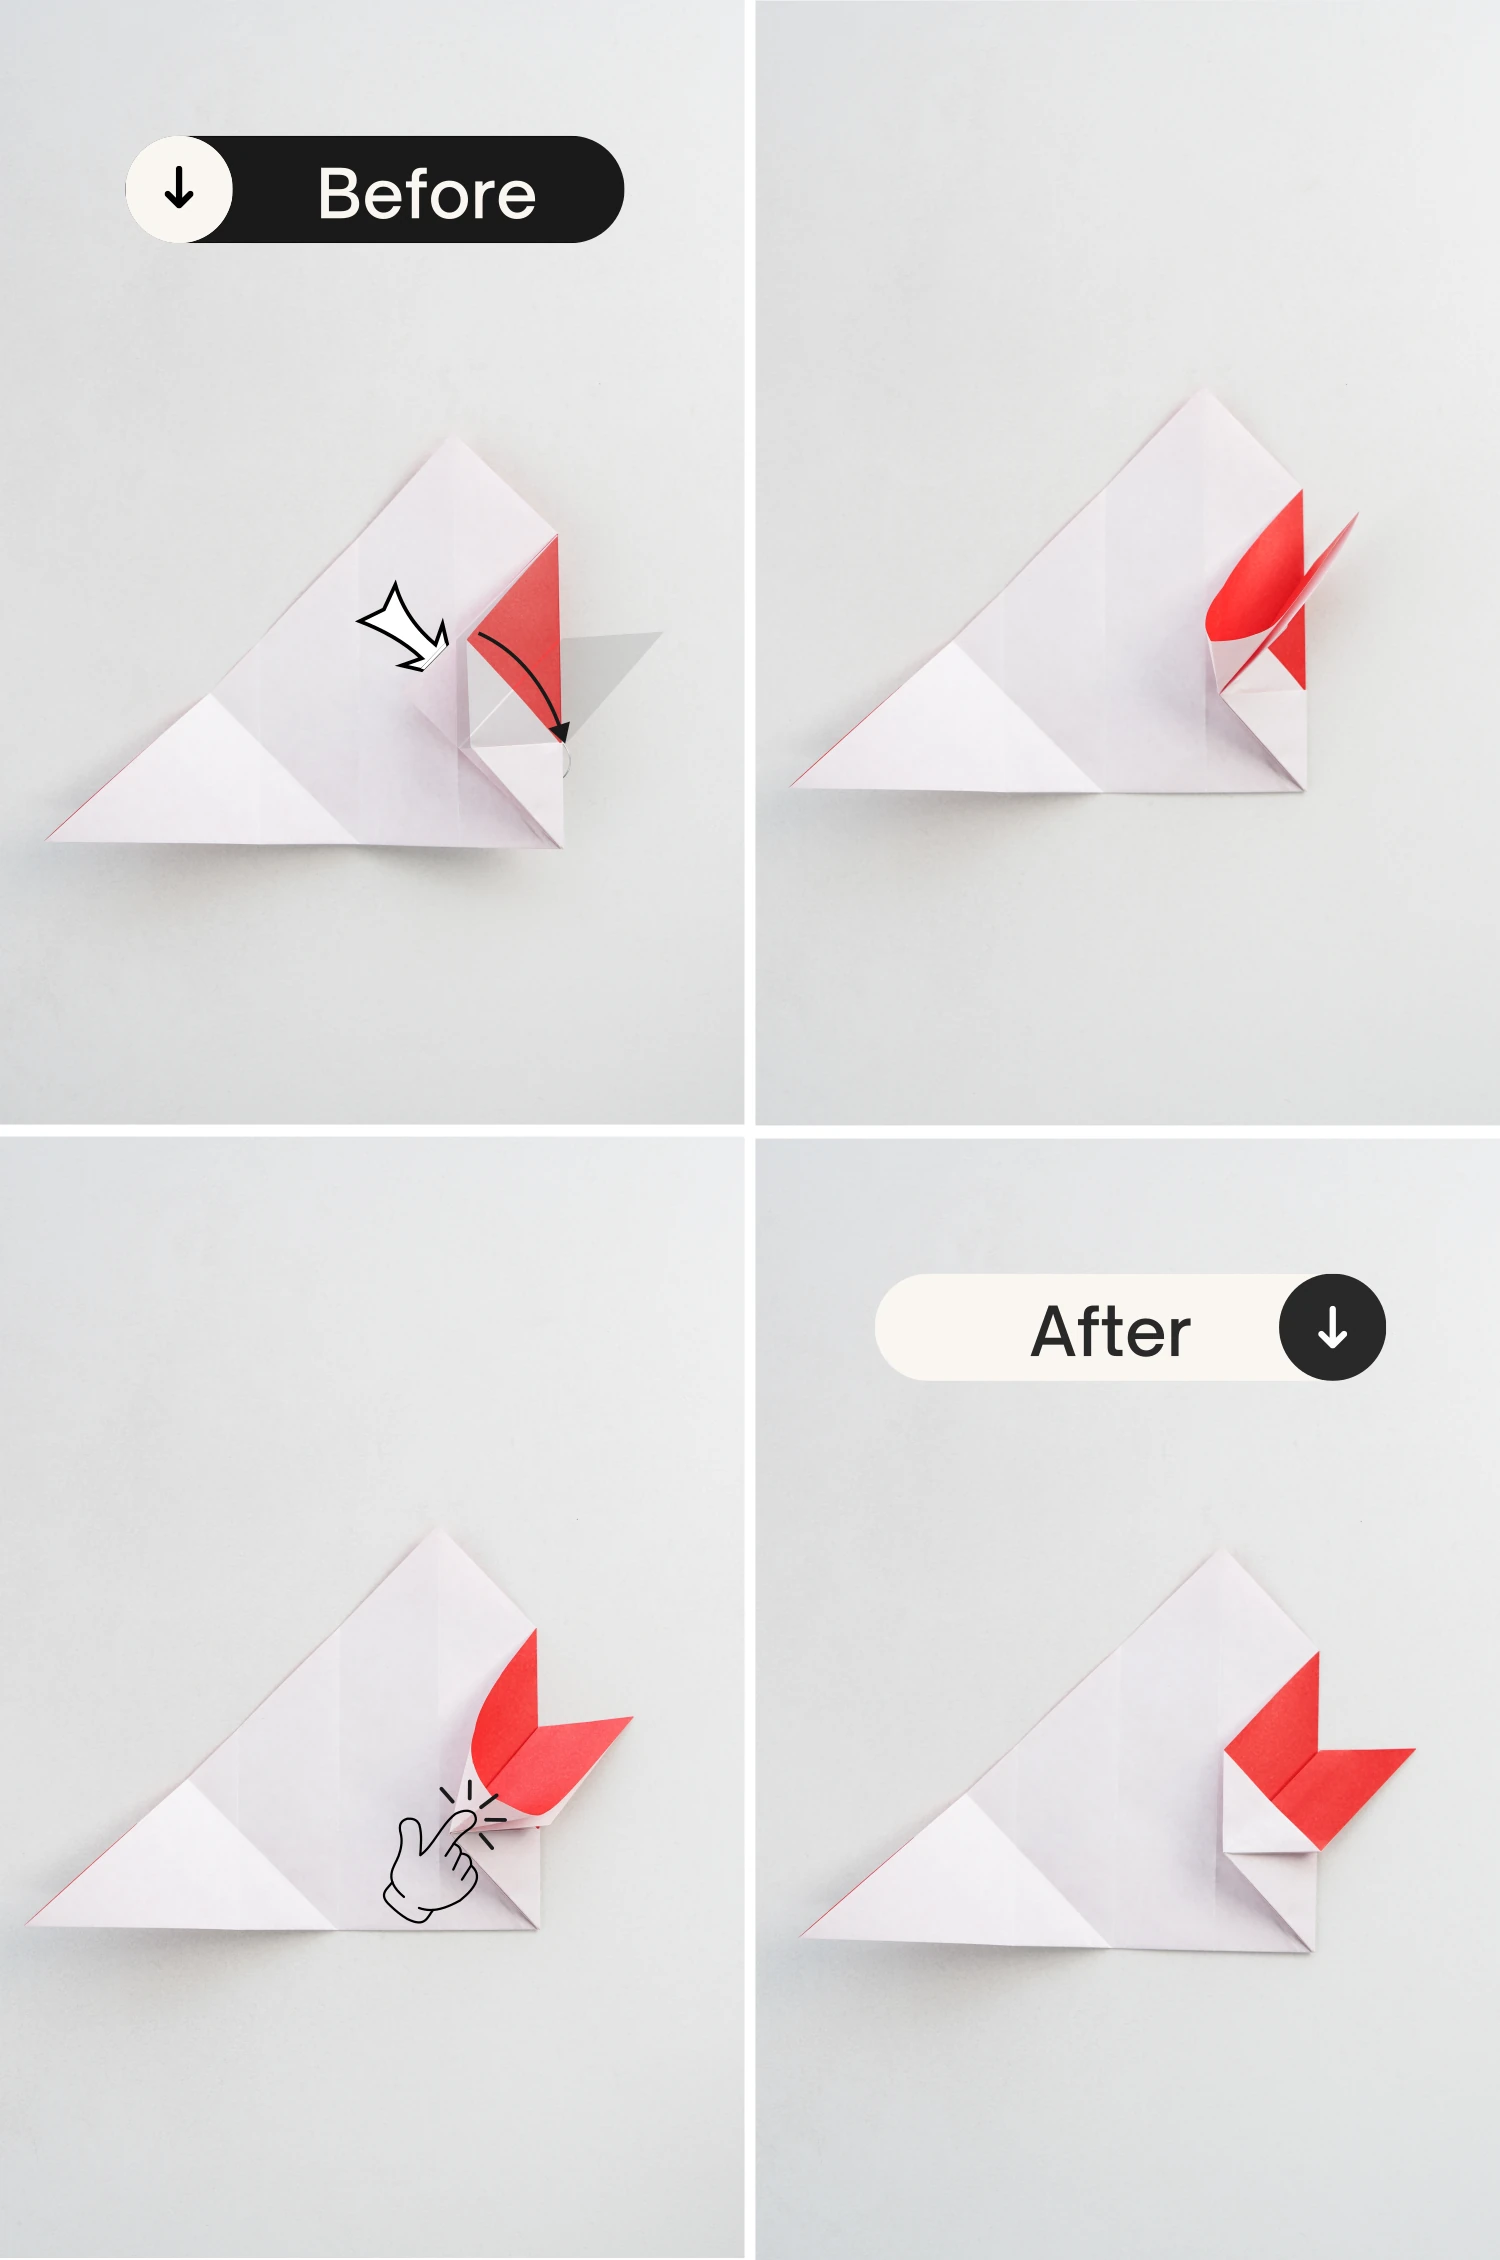
Step 11
Lift the right corner along the crease shown by the dotted line to make it stand, open it, and flatten it along the middle crease of the corner.
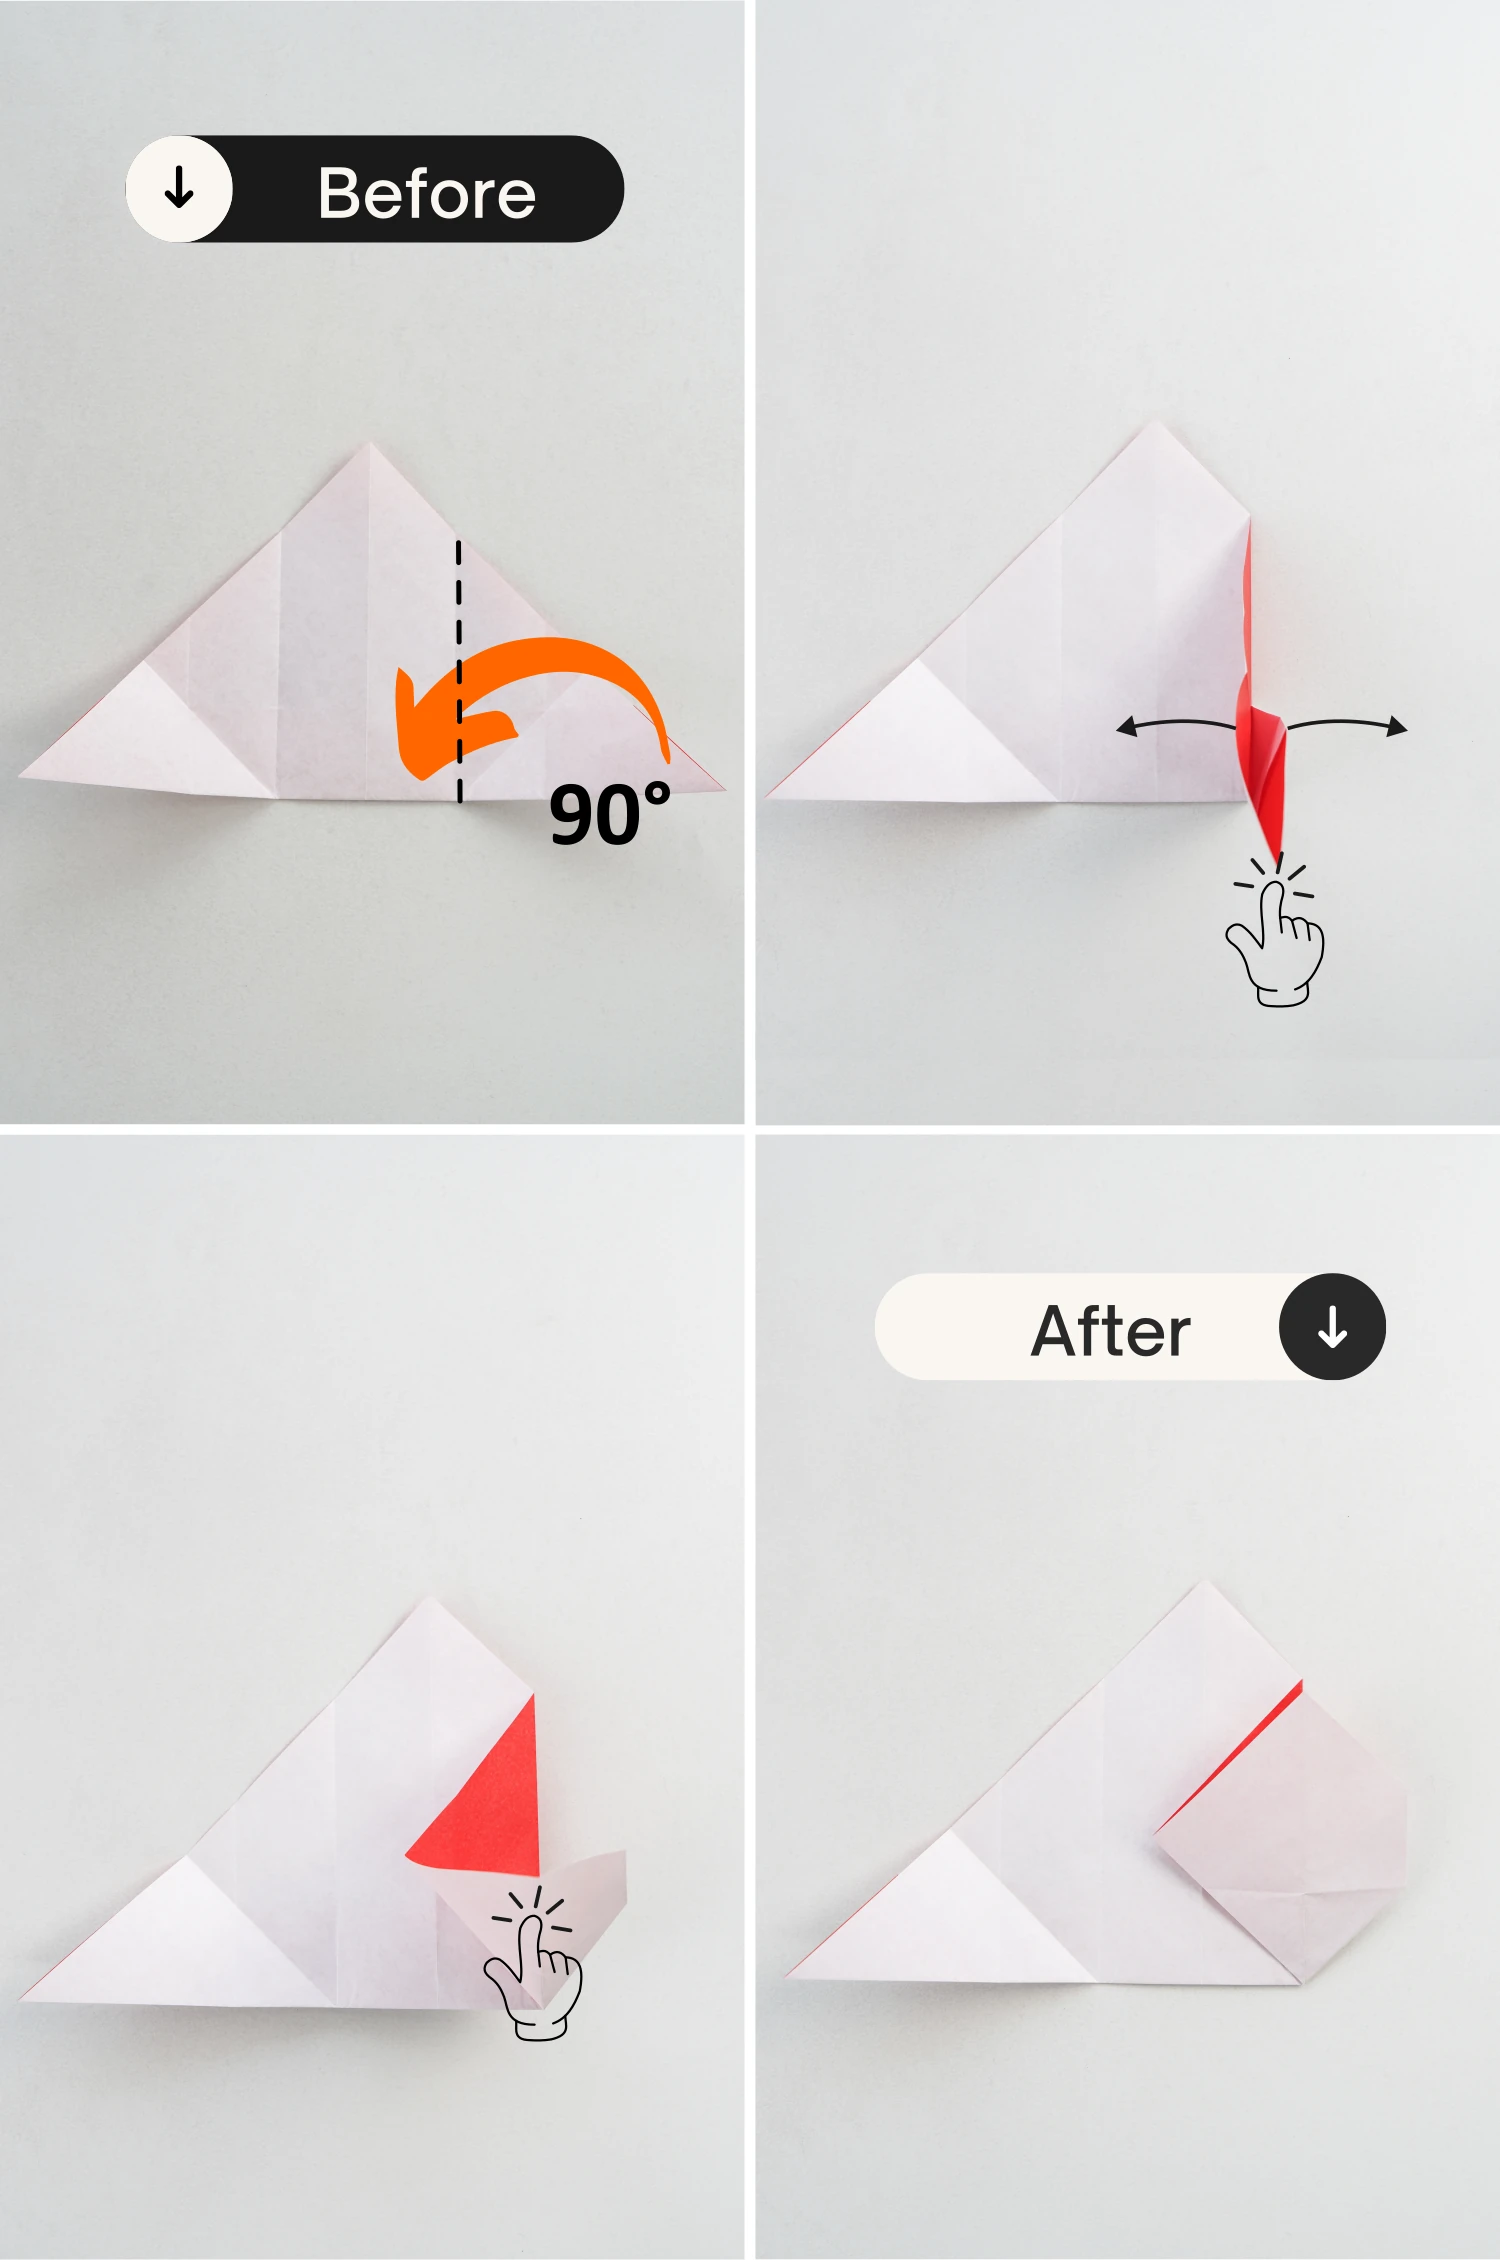
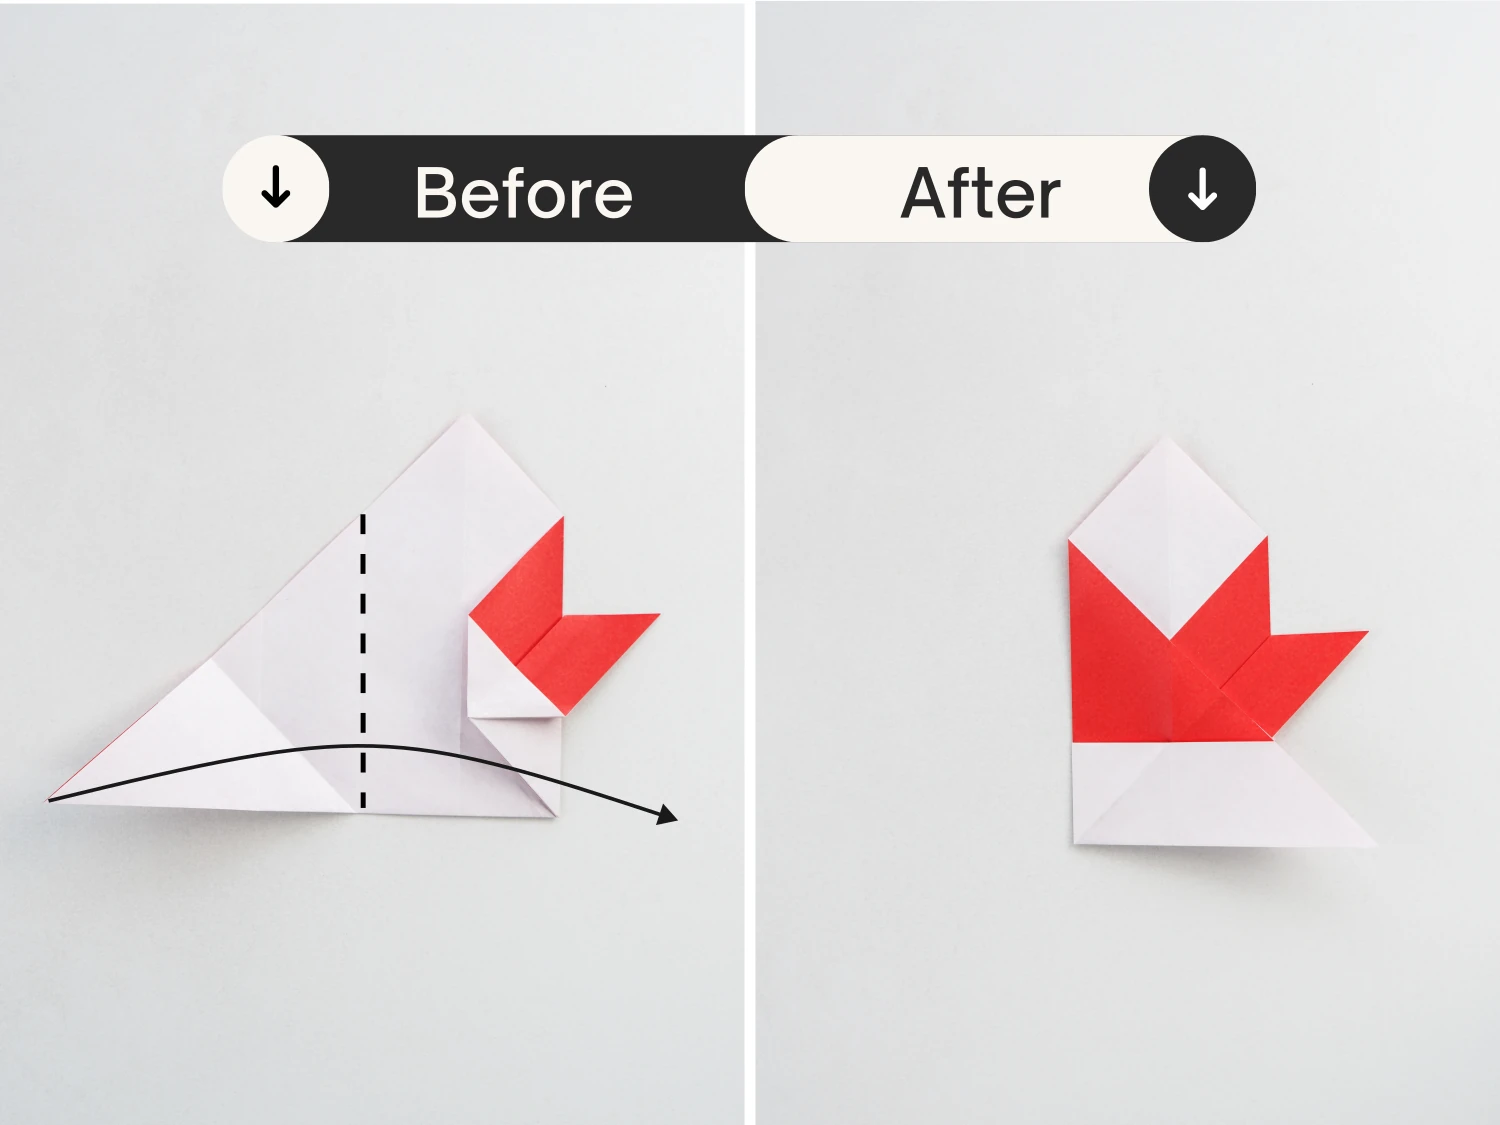
Step 12
Fold the right edge to the left along the vertical crease.
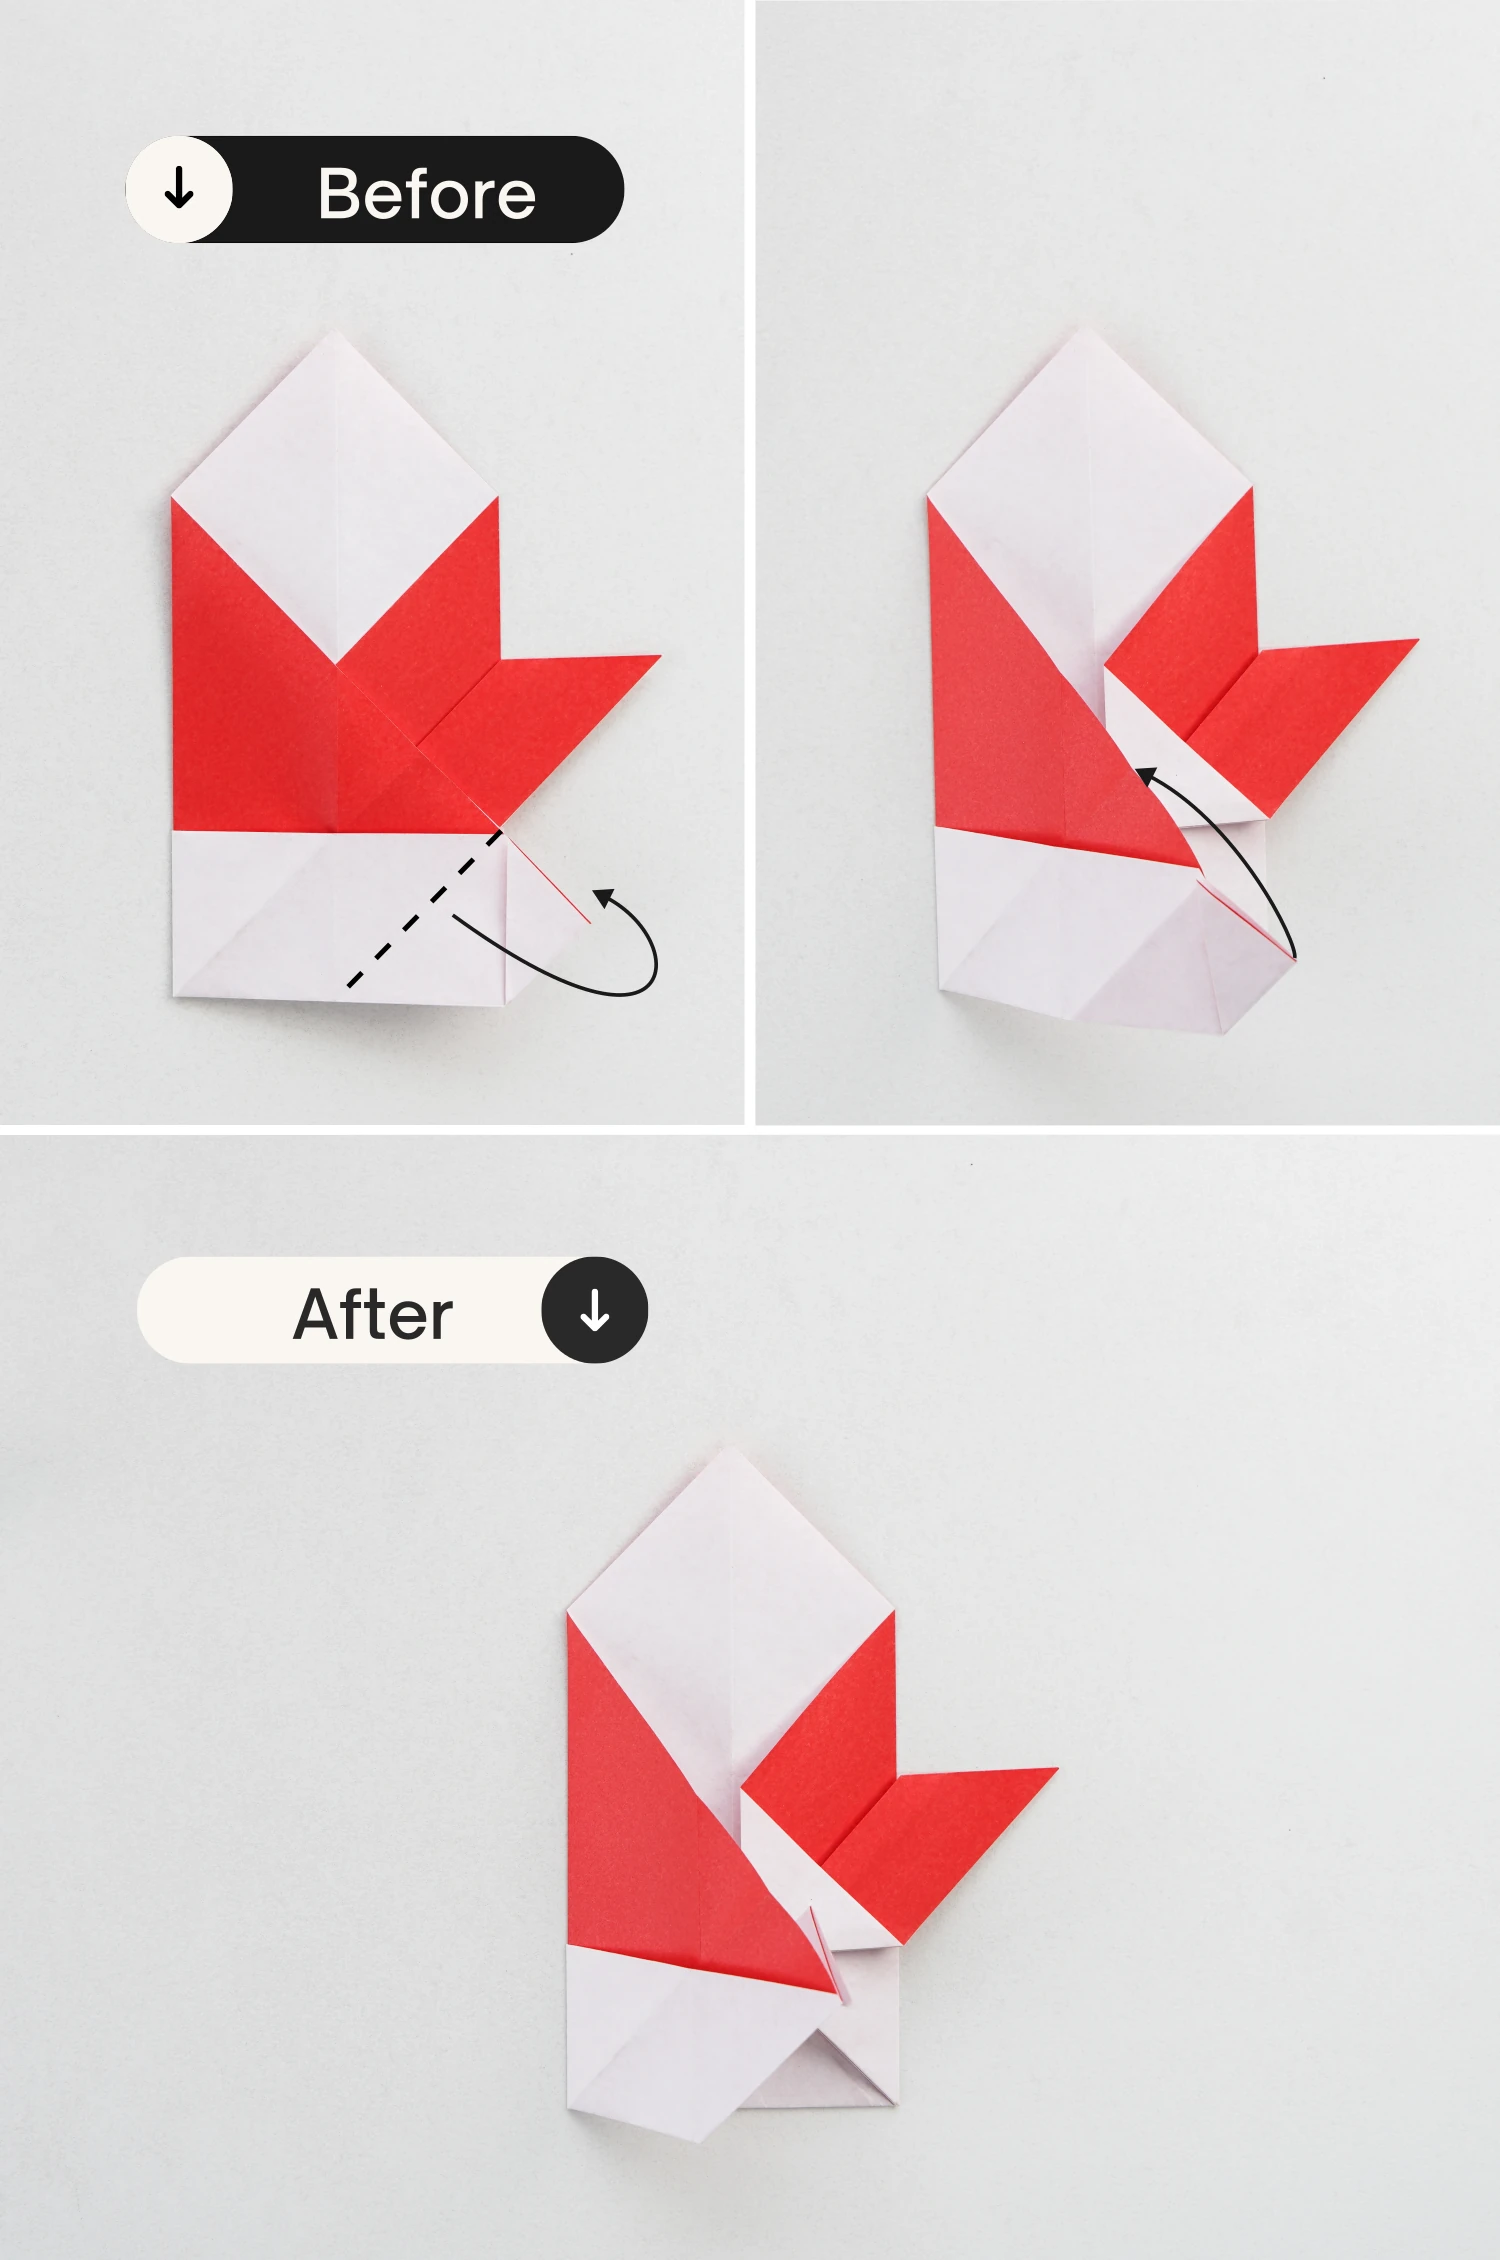
Step 13
Open the bottom corner on the right, and flatten it.
Step 14
Fold the left corner to the right along the crease sown by the dotted line.
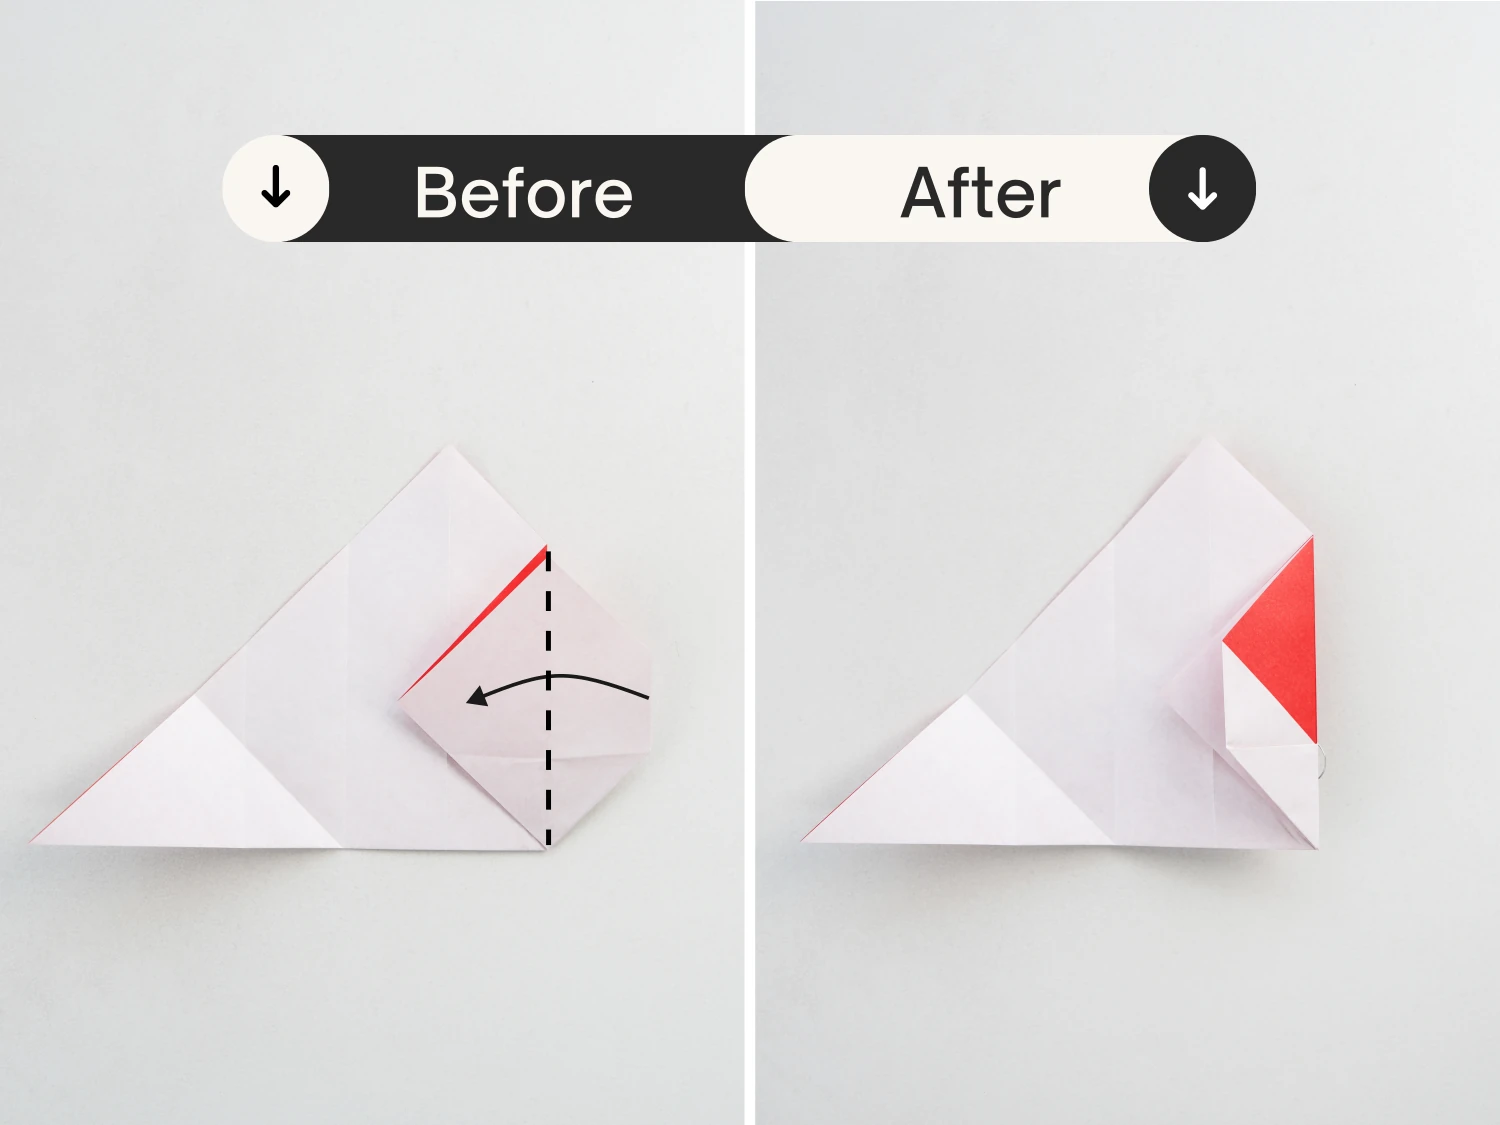
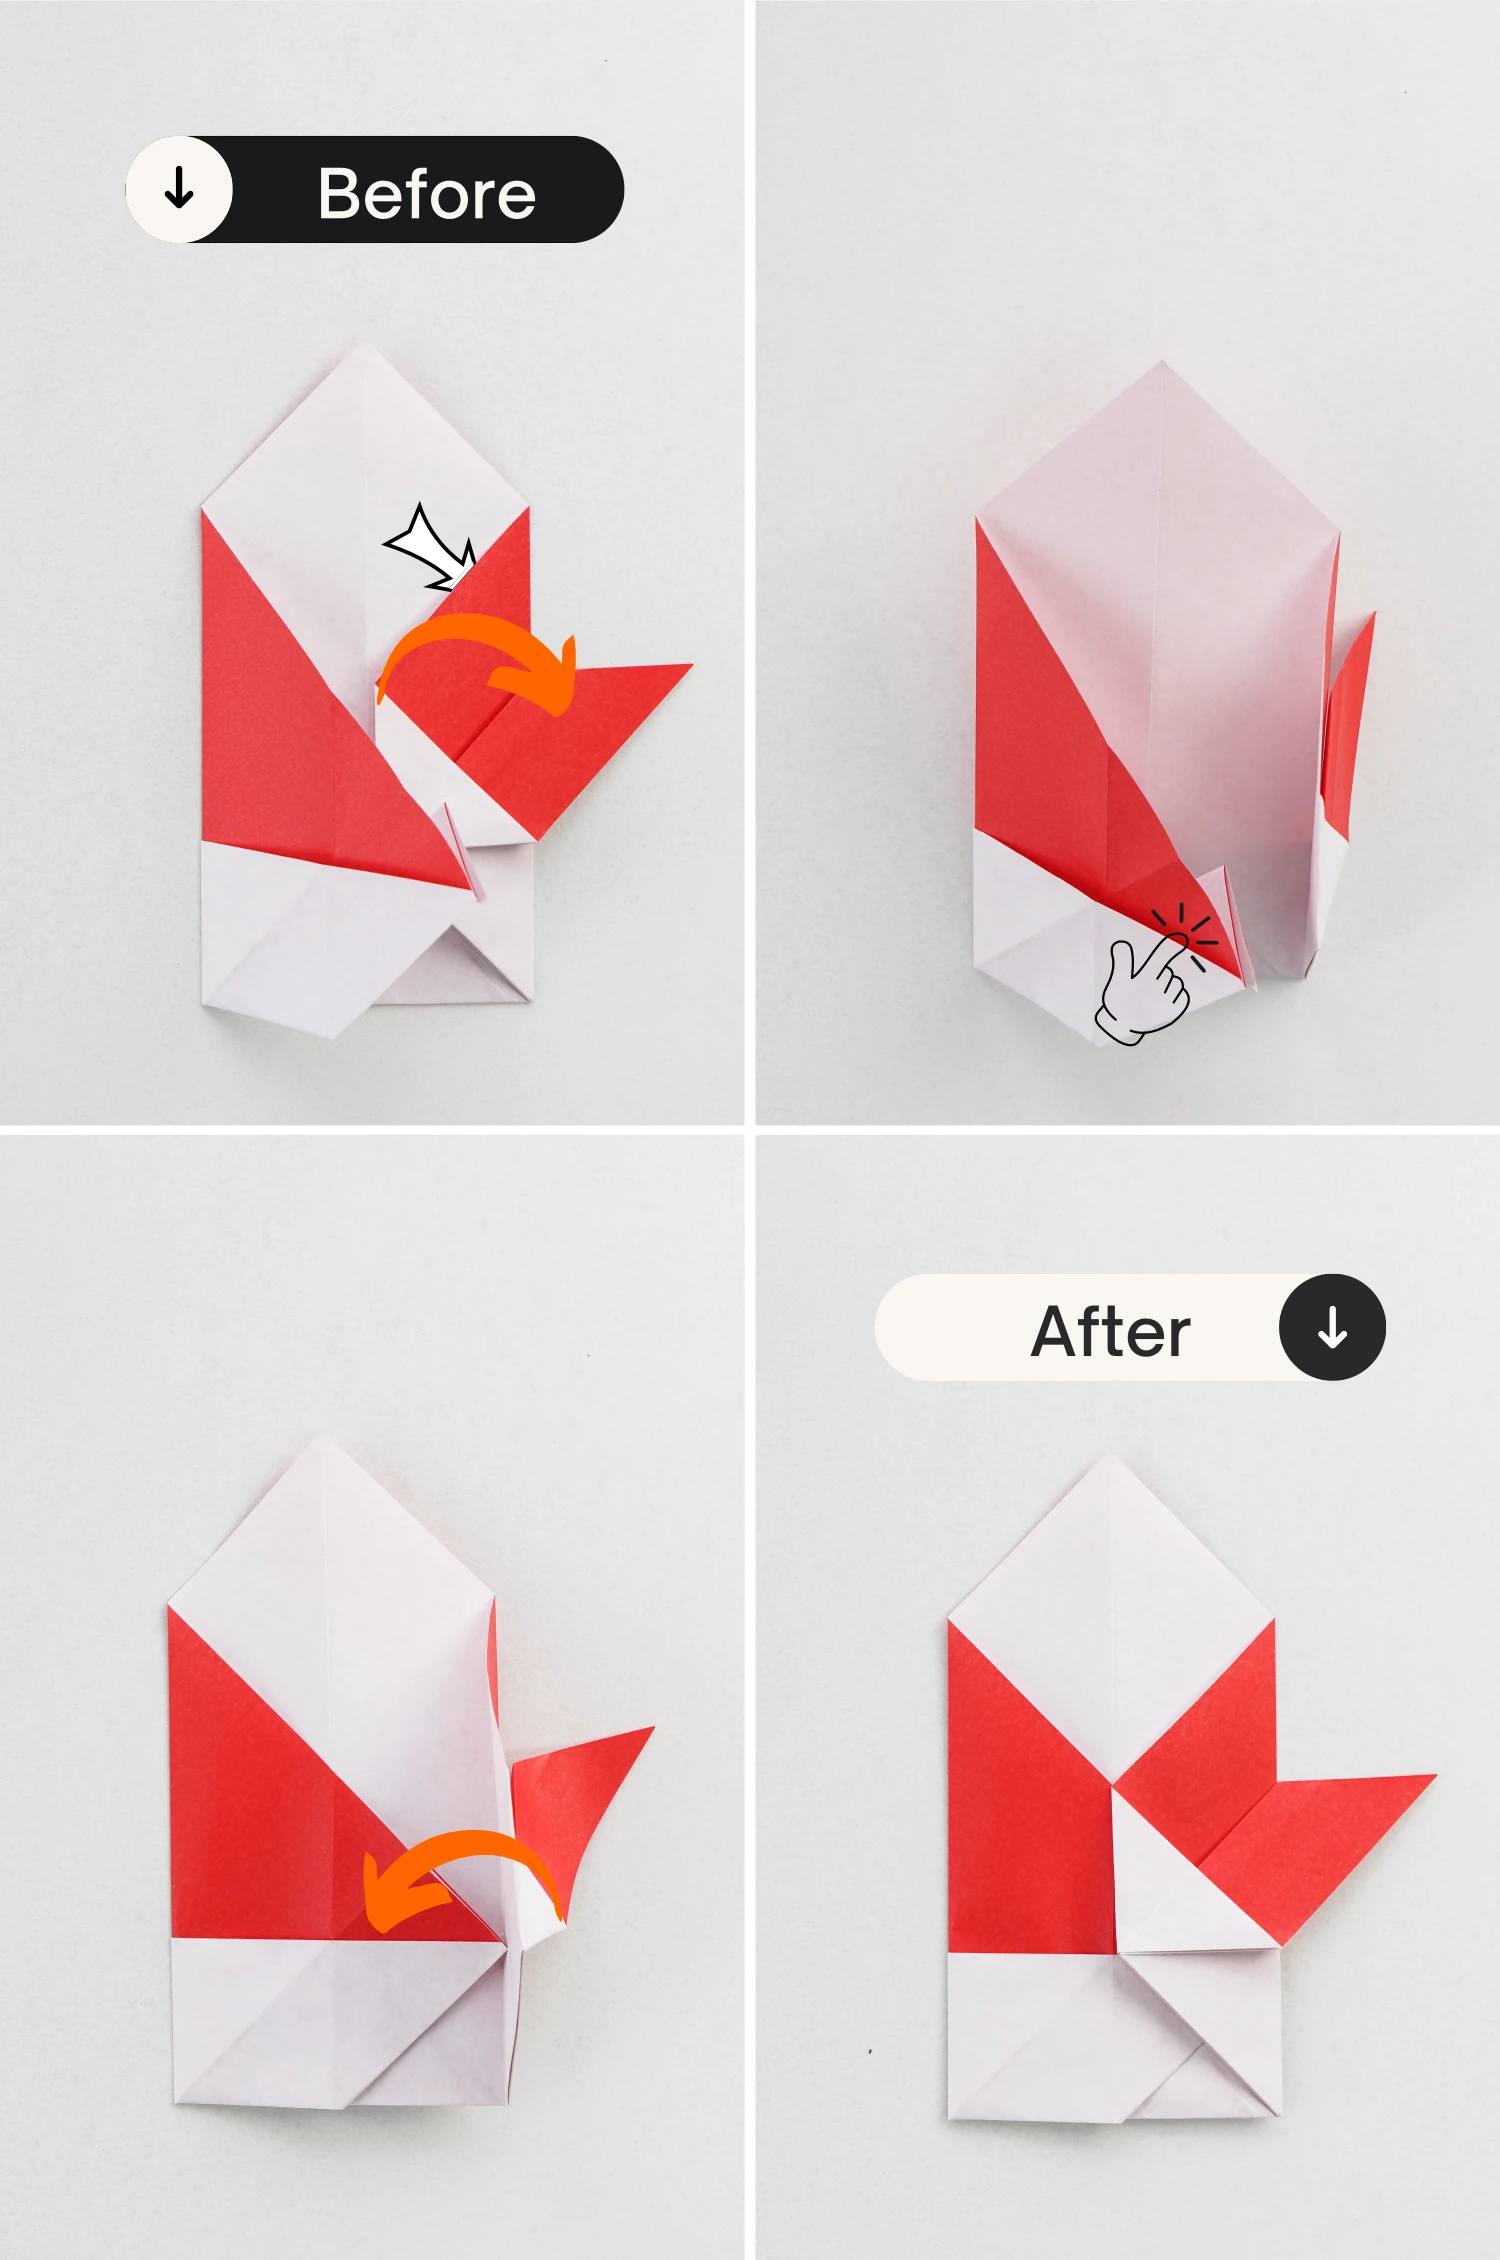
Step 15
Fold the right corner up diagonally along the dotted line.

Step 16
Fold the bottom right part backward along the dotted line.
Step 17
Lift the right flap, and press the left flap under it.
Step 18
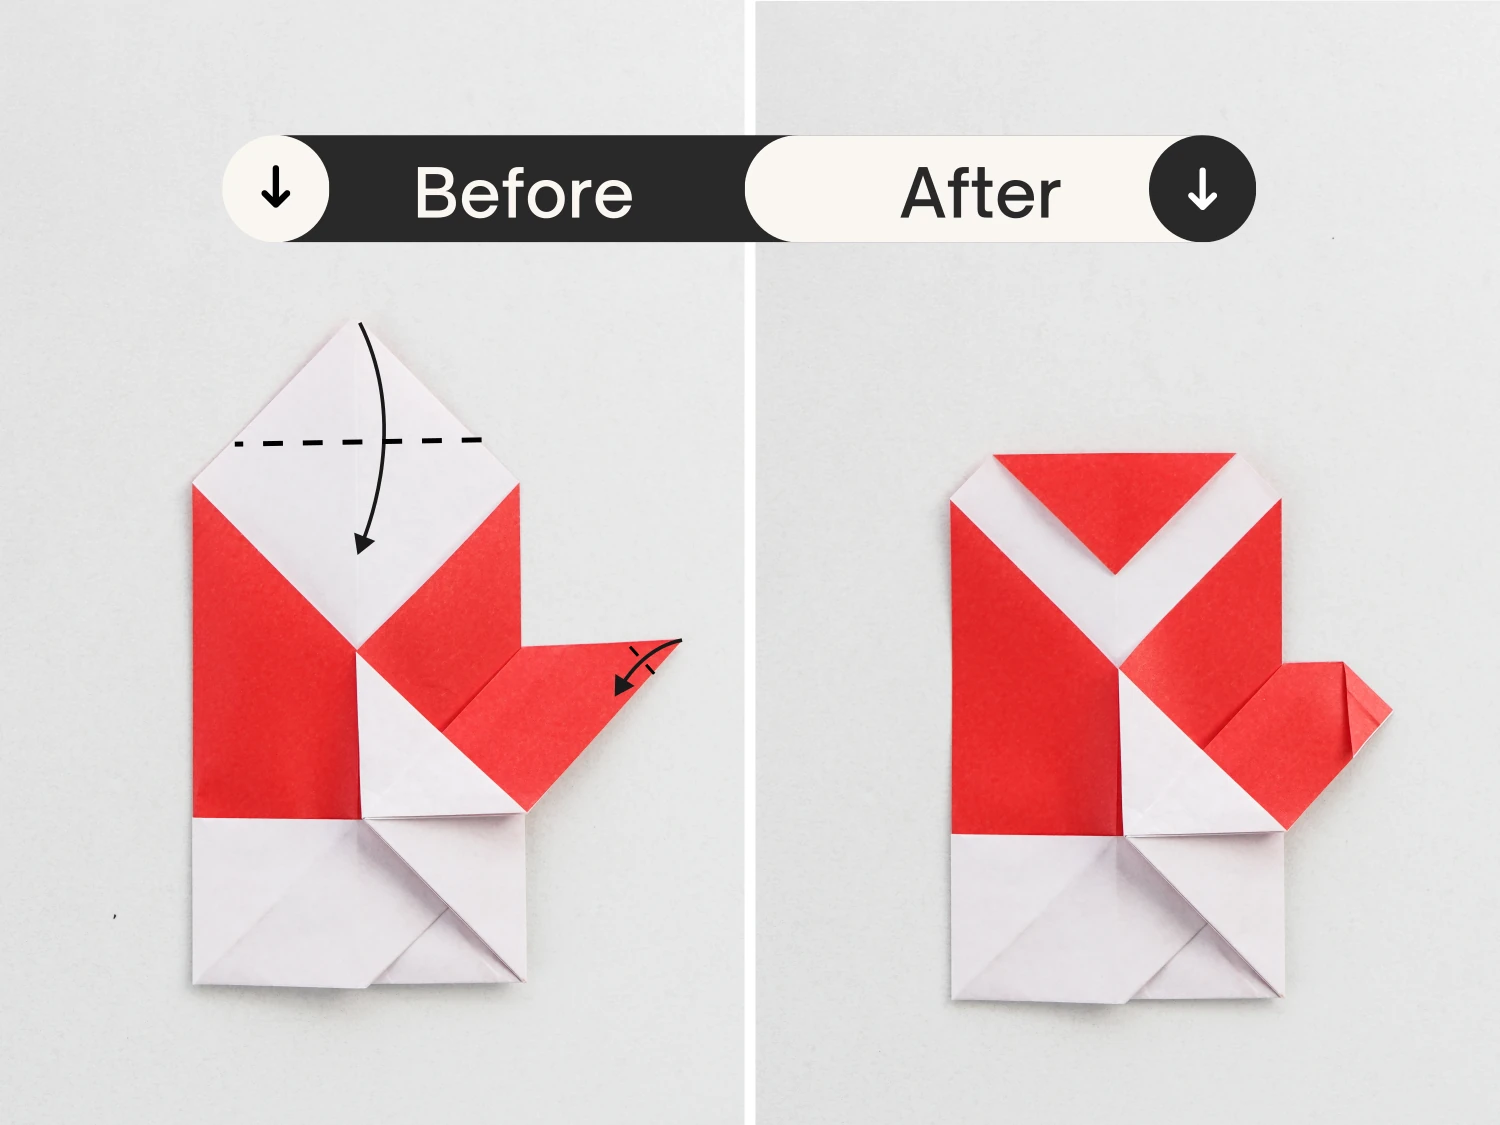
Fold the top point down along the dotted line.
Fold the right corner down a little to form the thumbs.
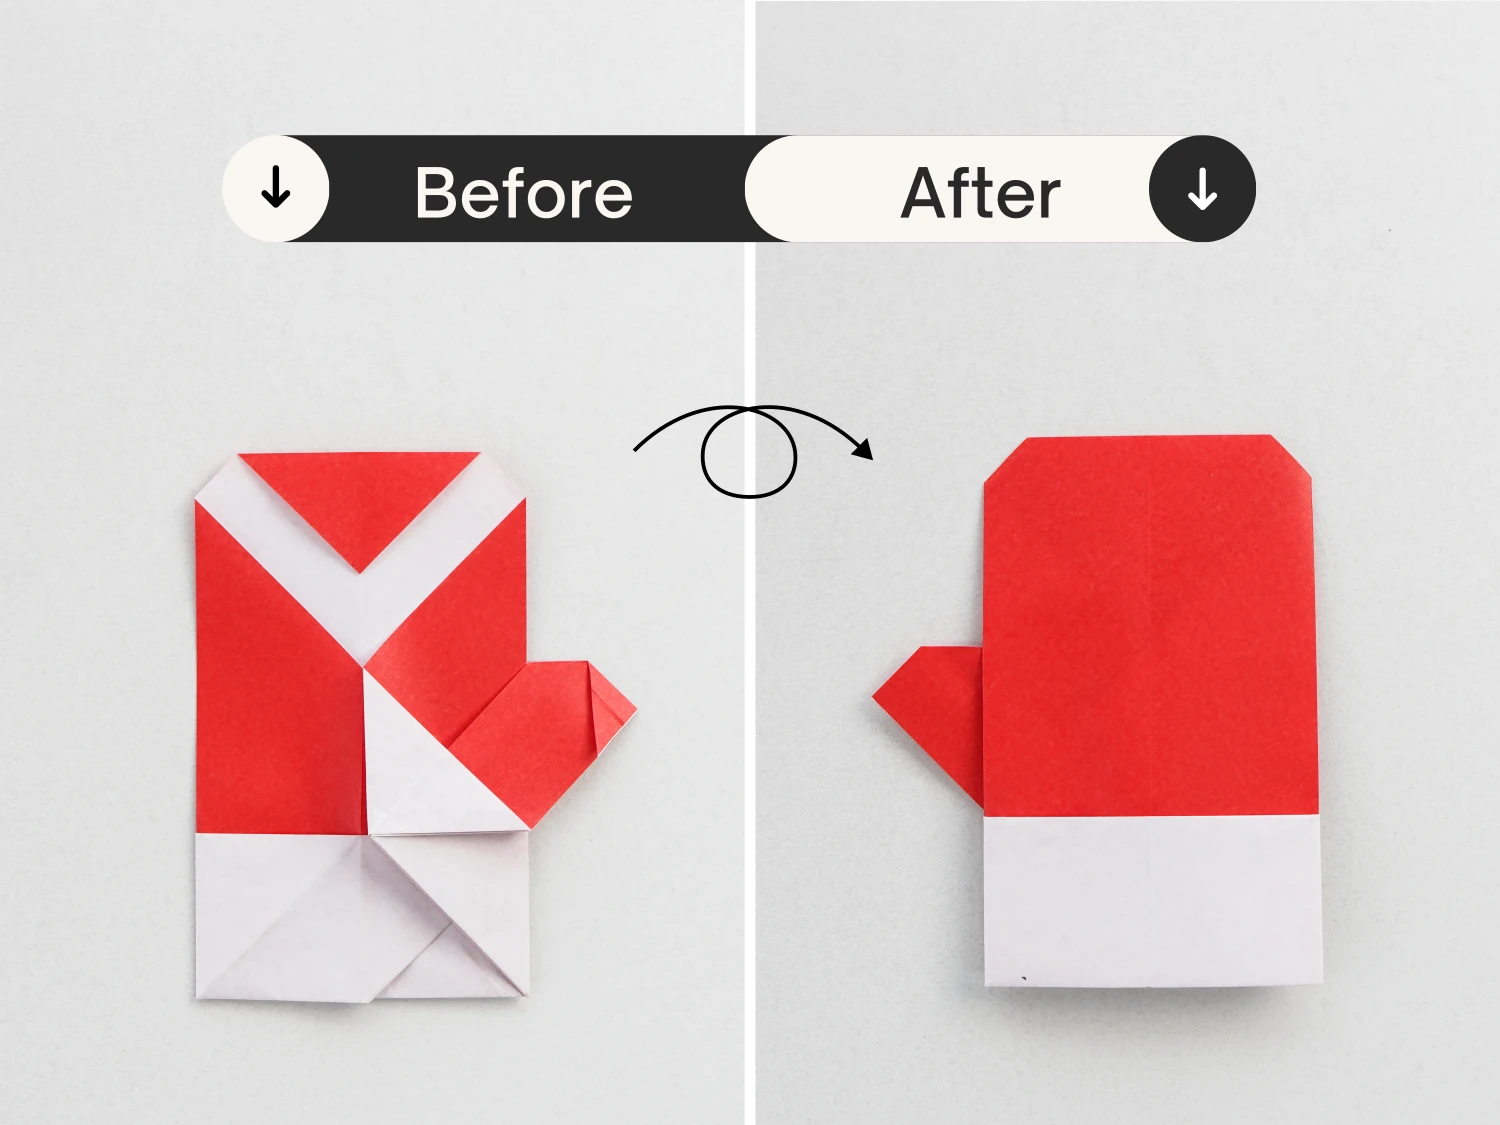
Step 19
Flip it over, this is the final shape of a Christmas gloves.
What’s Next
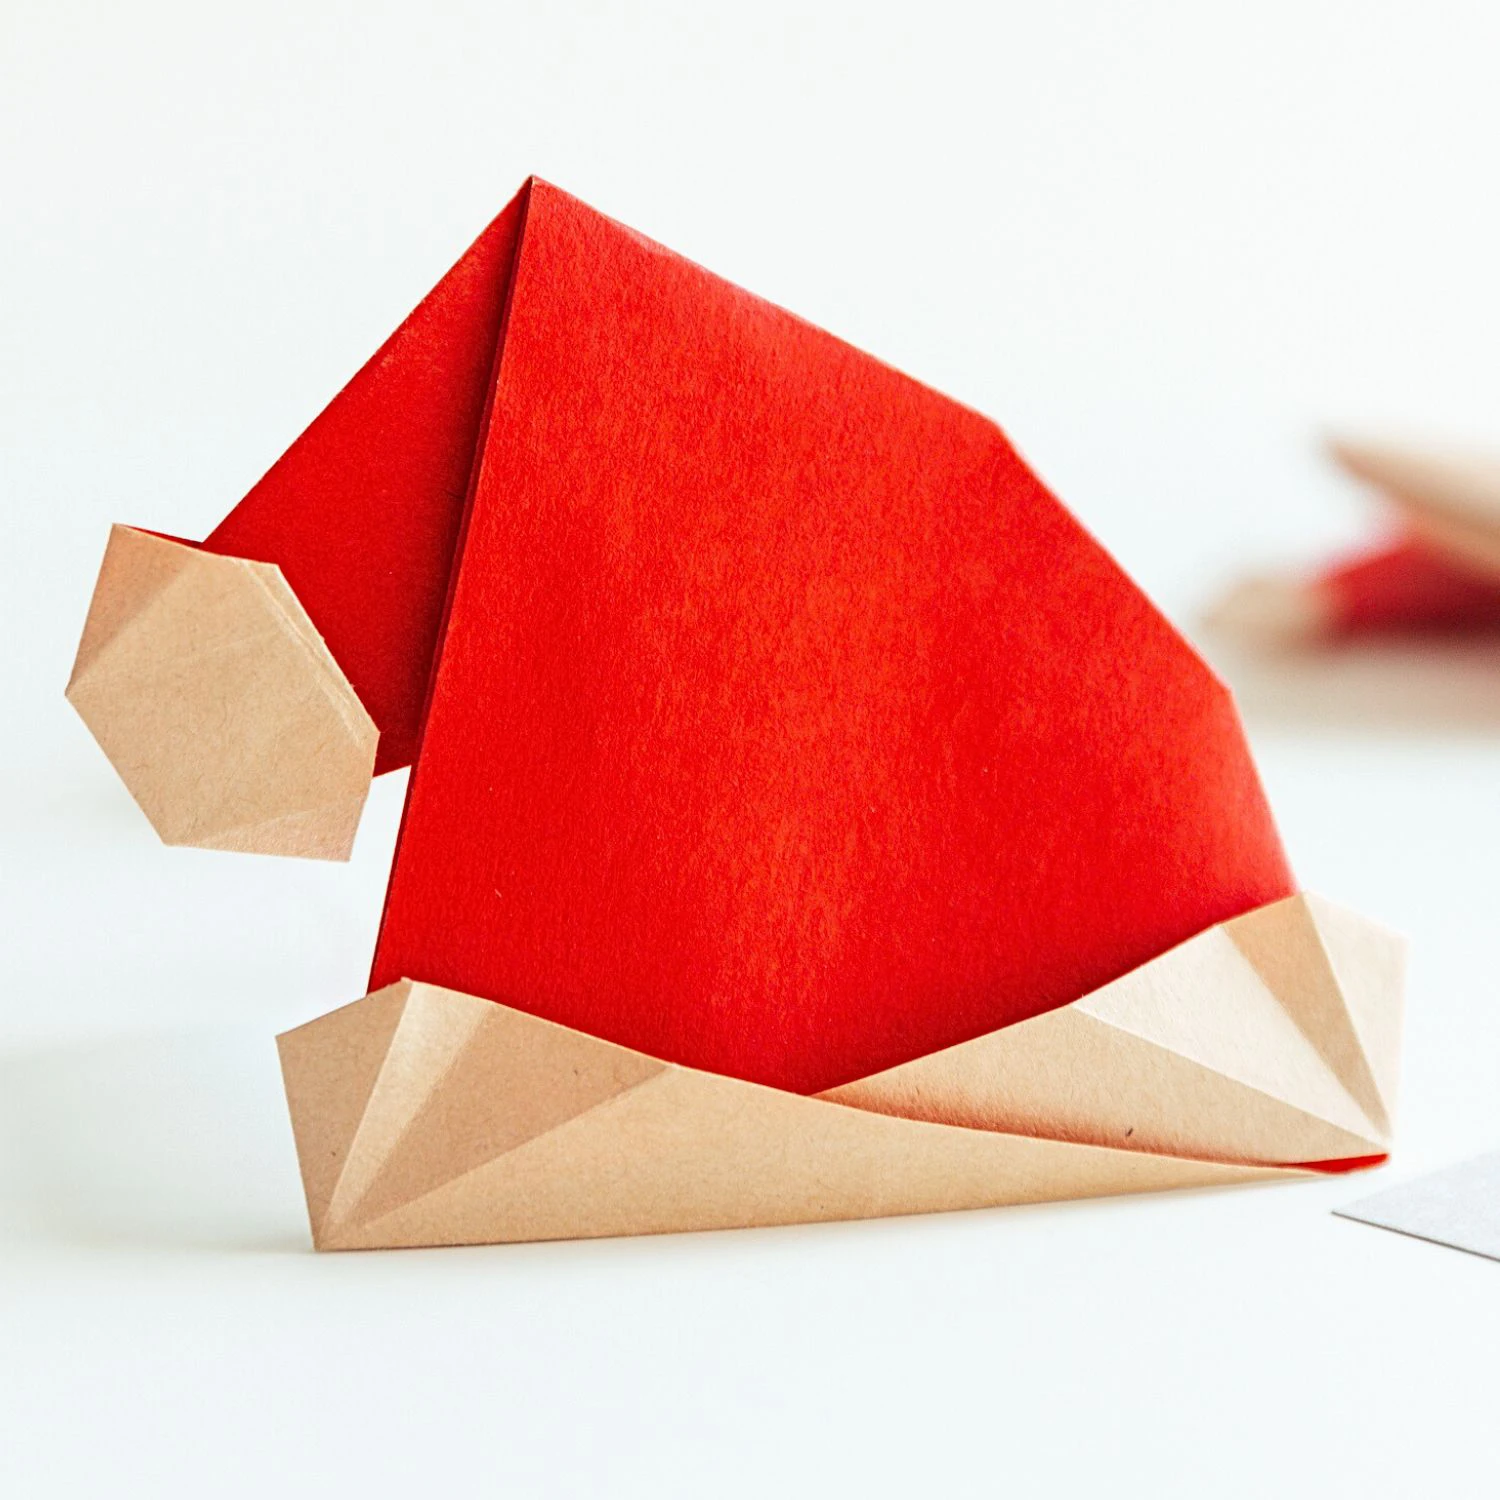
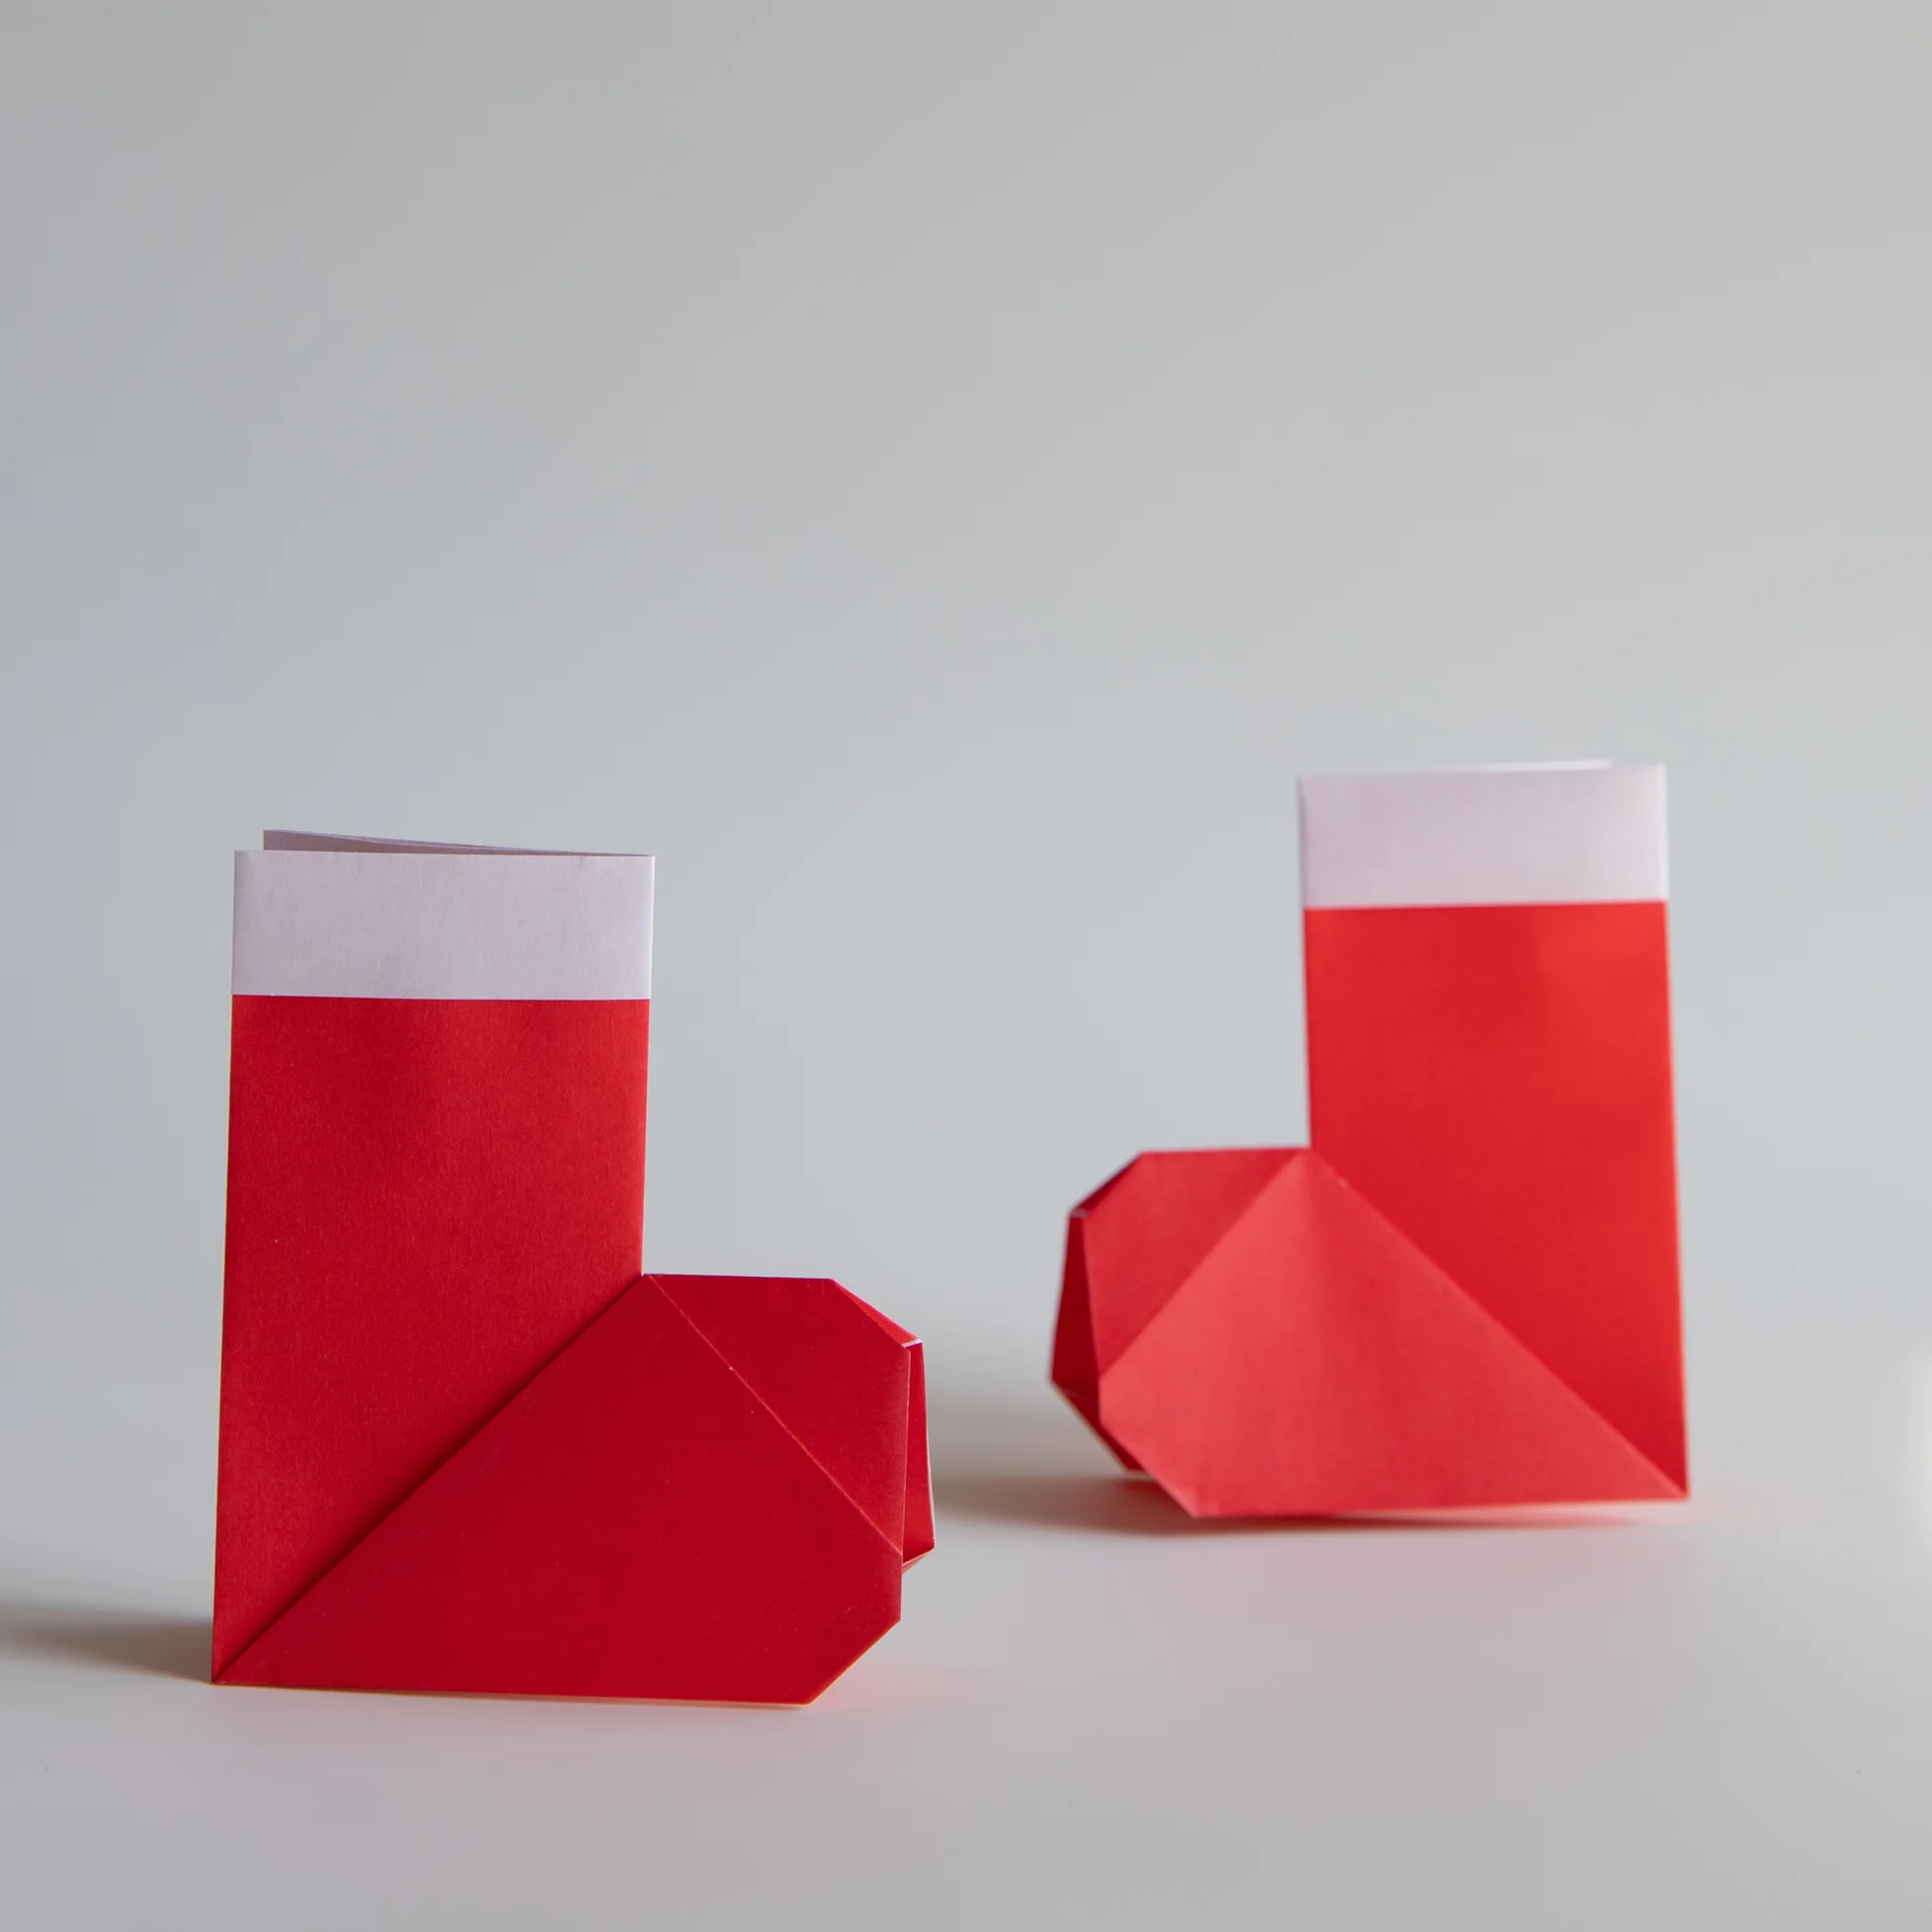
Now you have finished this lovely glove, I would recommend the origami Christmas Santa. Next, you can explore other interesting and easy origami instructions for the Christmas festival.
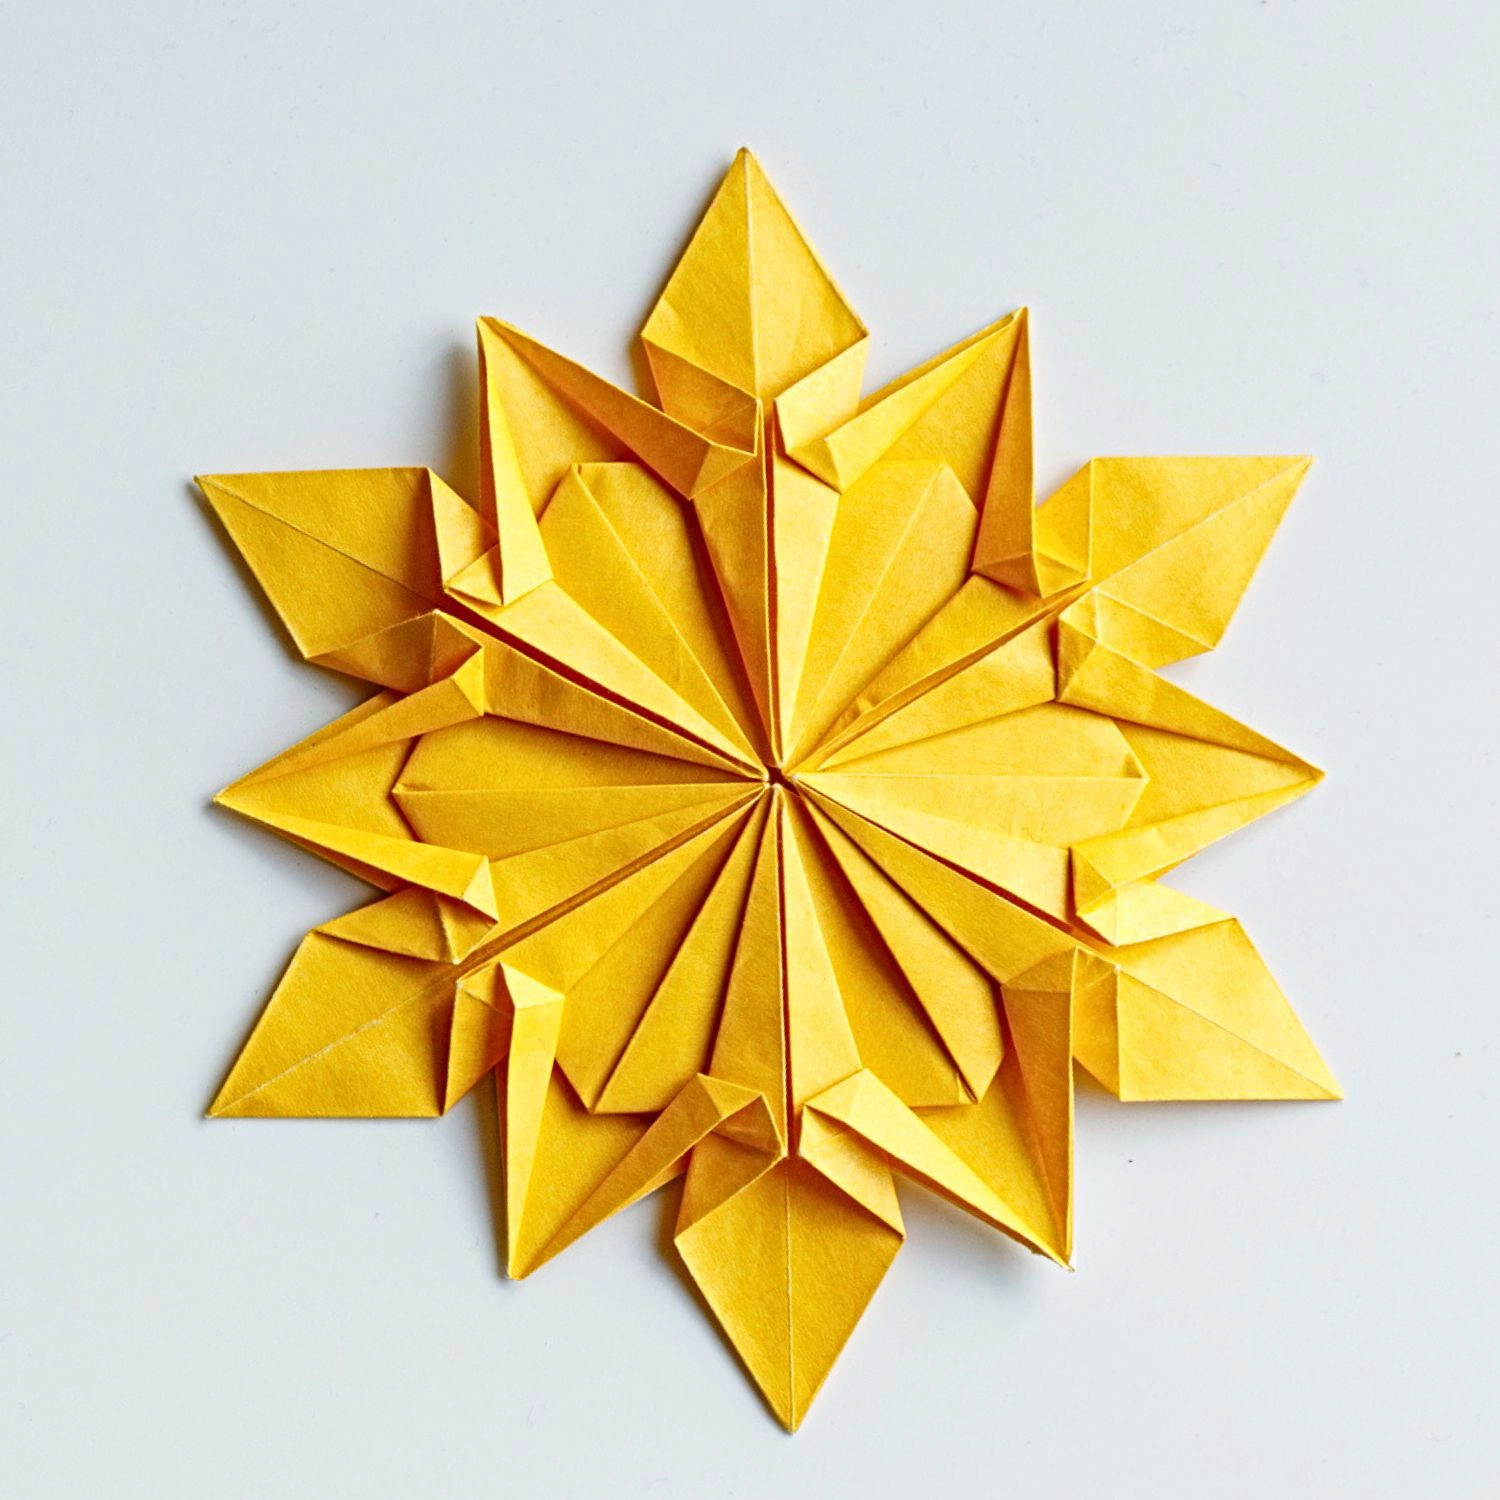
Other Easy Origami Christmas Ideas