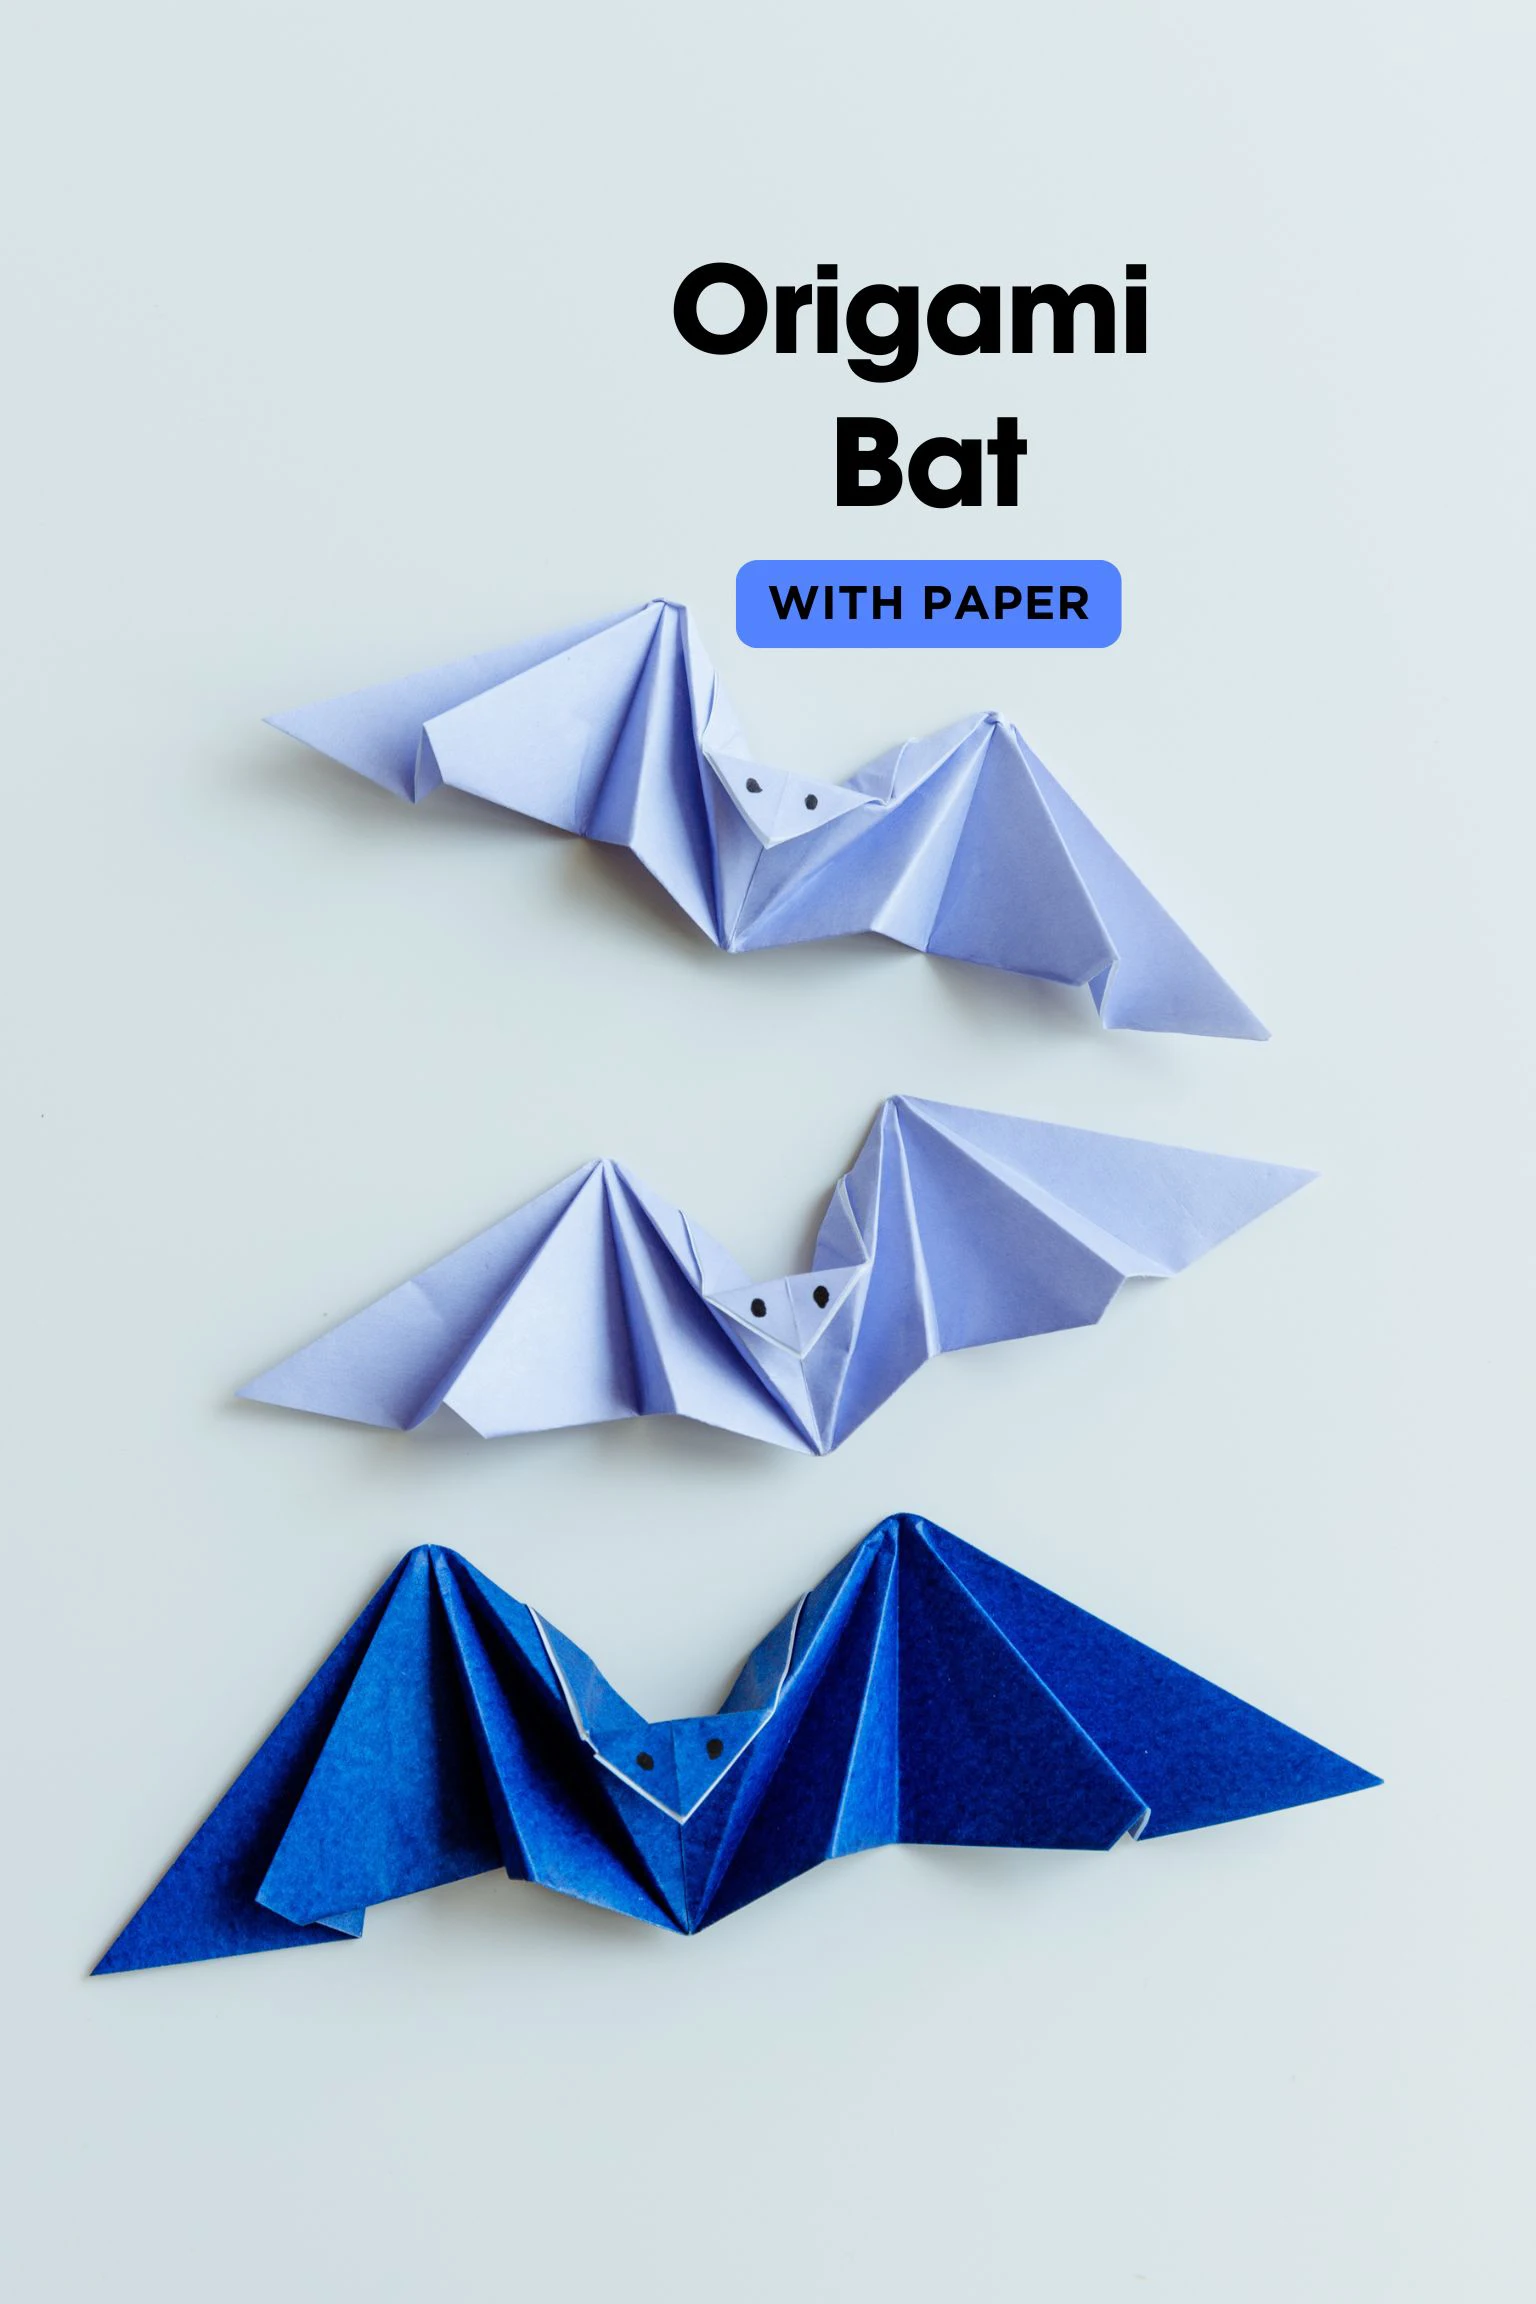
This super cool origami bat has a unique design that features two spread-out wings, that not only look impressive but can also swing.
The wings of this paper origami bat can flap up and down when you finish creating it and press it correctly. This interactive feature adds much extra fun, and brings your bat to life, making it a perfect choice for both origami enthusiasts and beginners.

If you are new to origami, start here from our beginner guide to know the basics and how to read the step-by-step instructions.
- Folding time: 15 minutes
- Paper: 15×15 cm
- Difficulty: Easy
Material
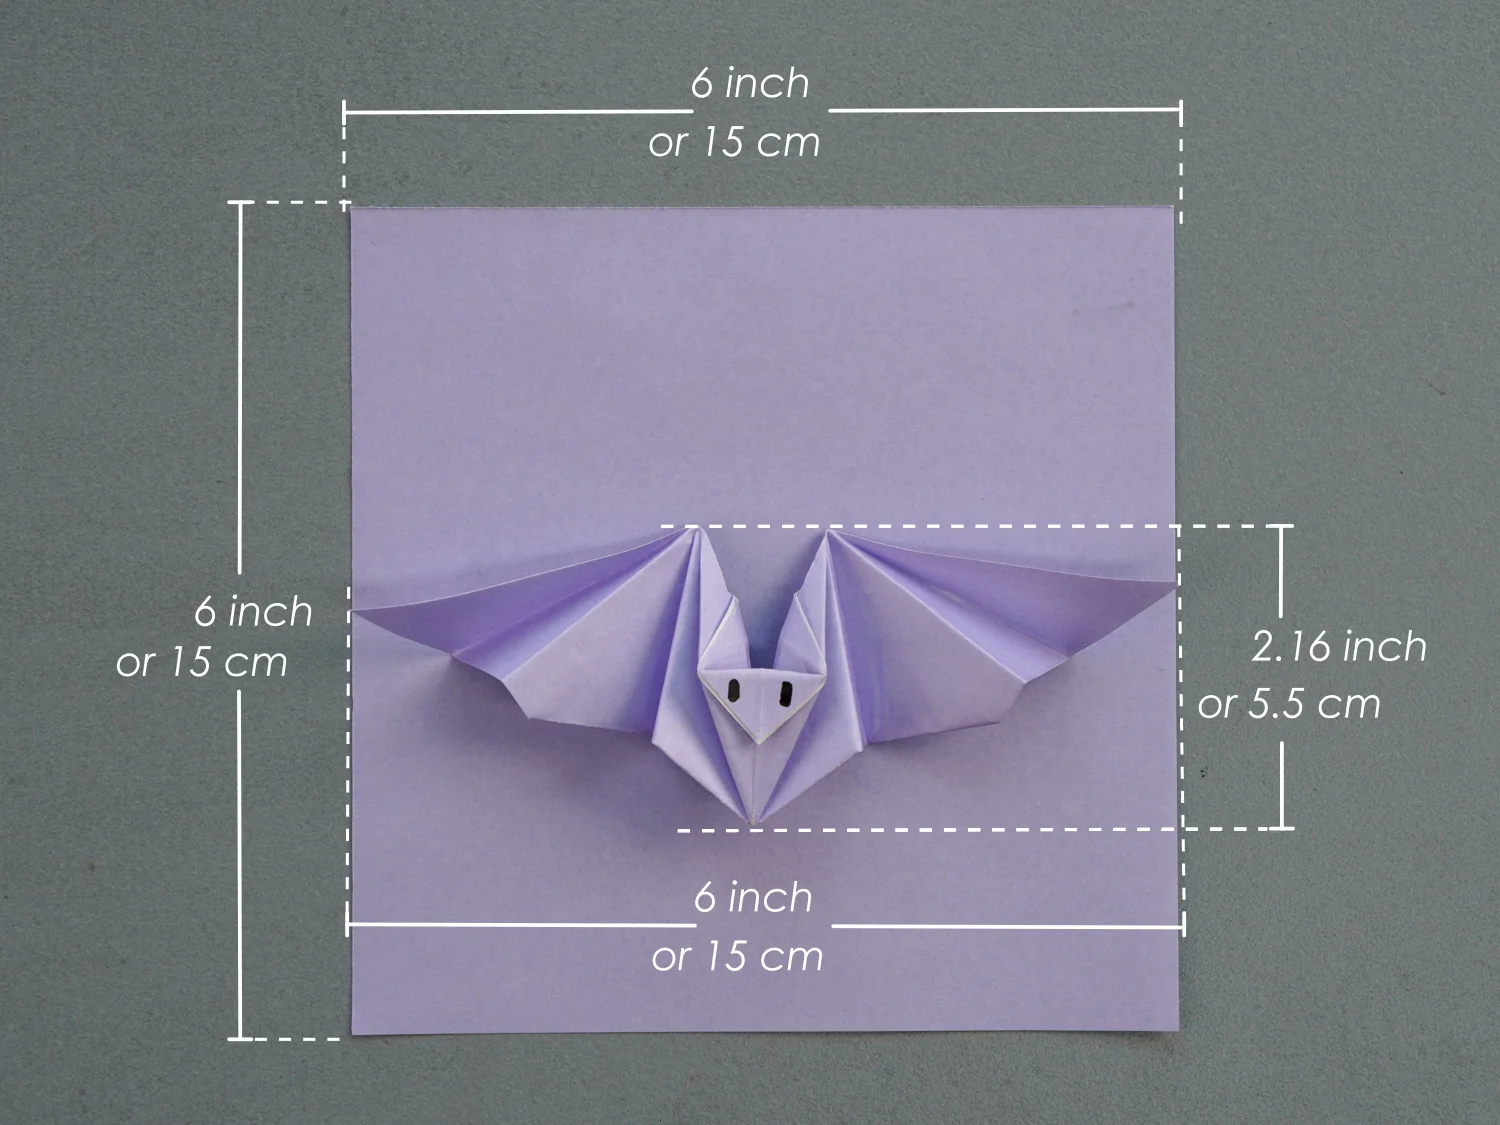
Get a piece of 15×15 cm origami square paper, with different colors on each side, to create a 5.5×15 cm origami bat.
Only the color of one side shows up in the final paper bat. If you pursue a realistic look, you can use a dark-colored paper like black or dark gray to mimic the bat’s natural appearance.
Origami Bat Video
Step by Step Instructions
Step 1
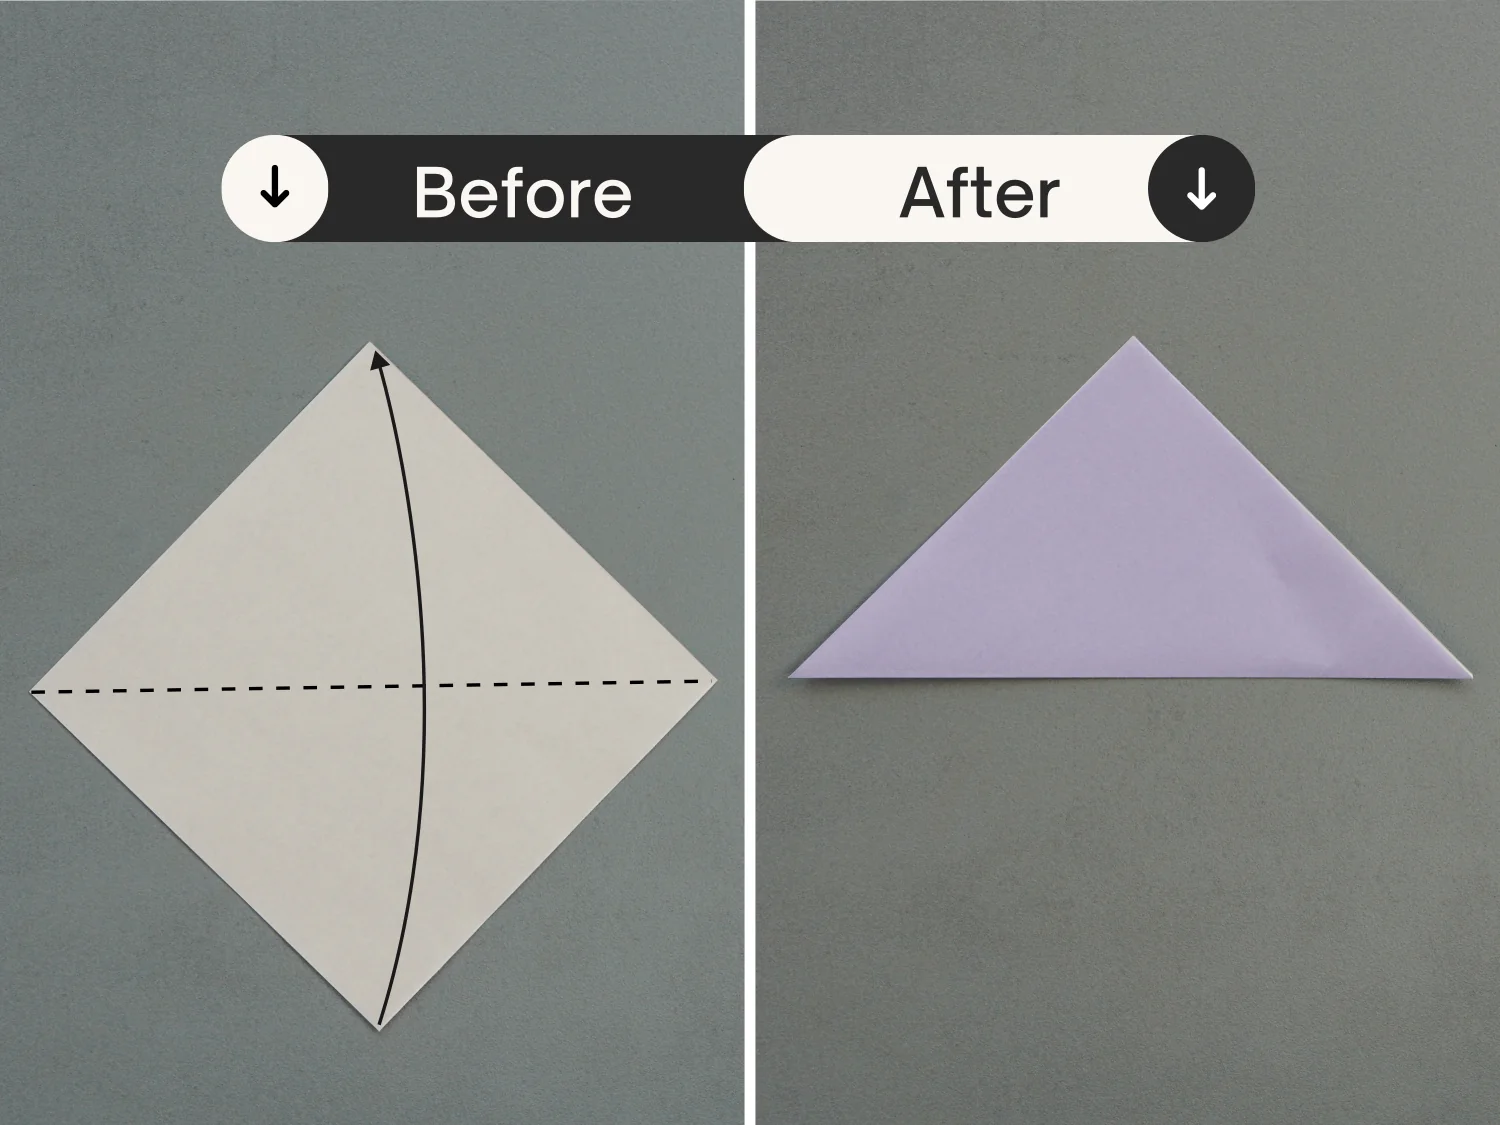
Start with the white side of the paper facing up, and fold it in half horizontally from the bottom to the top.
Step 2
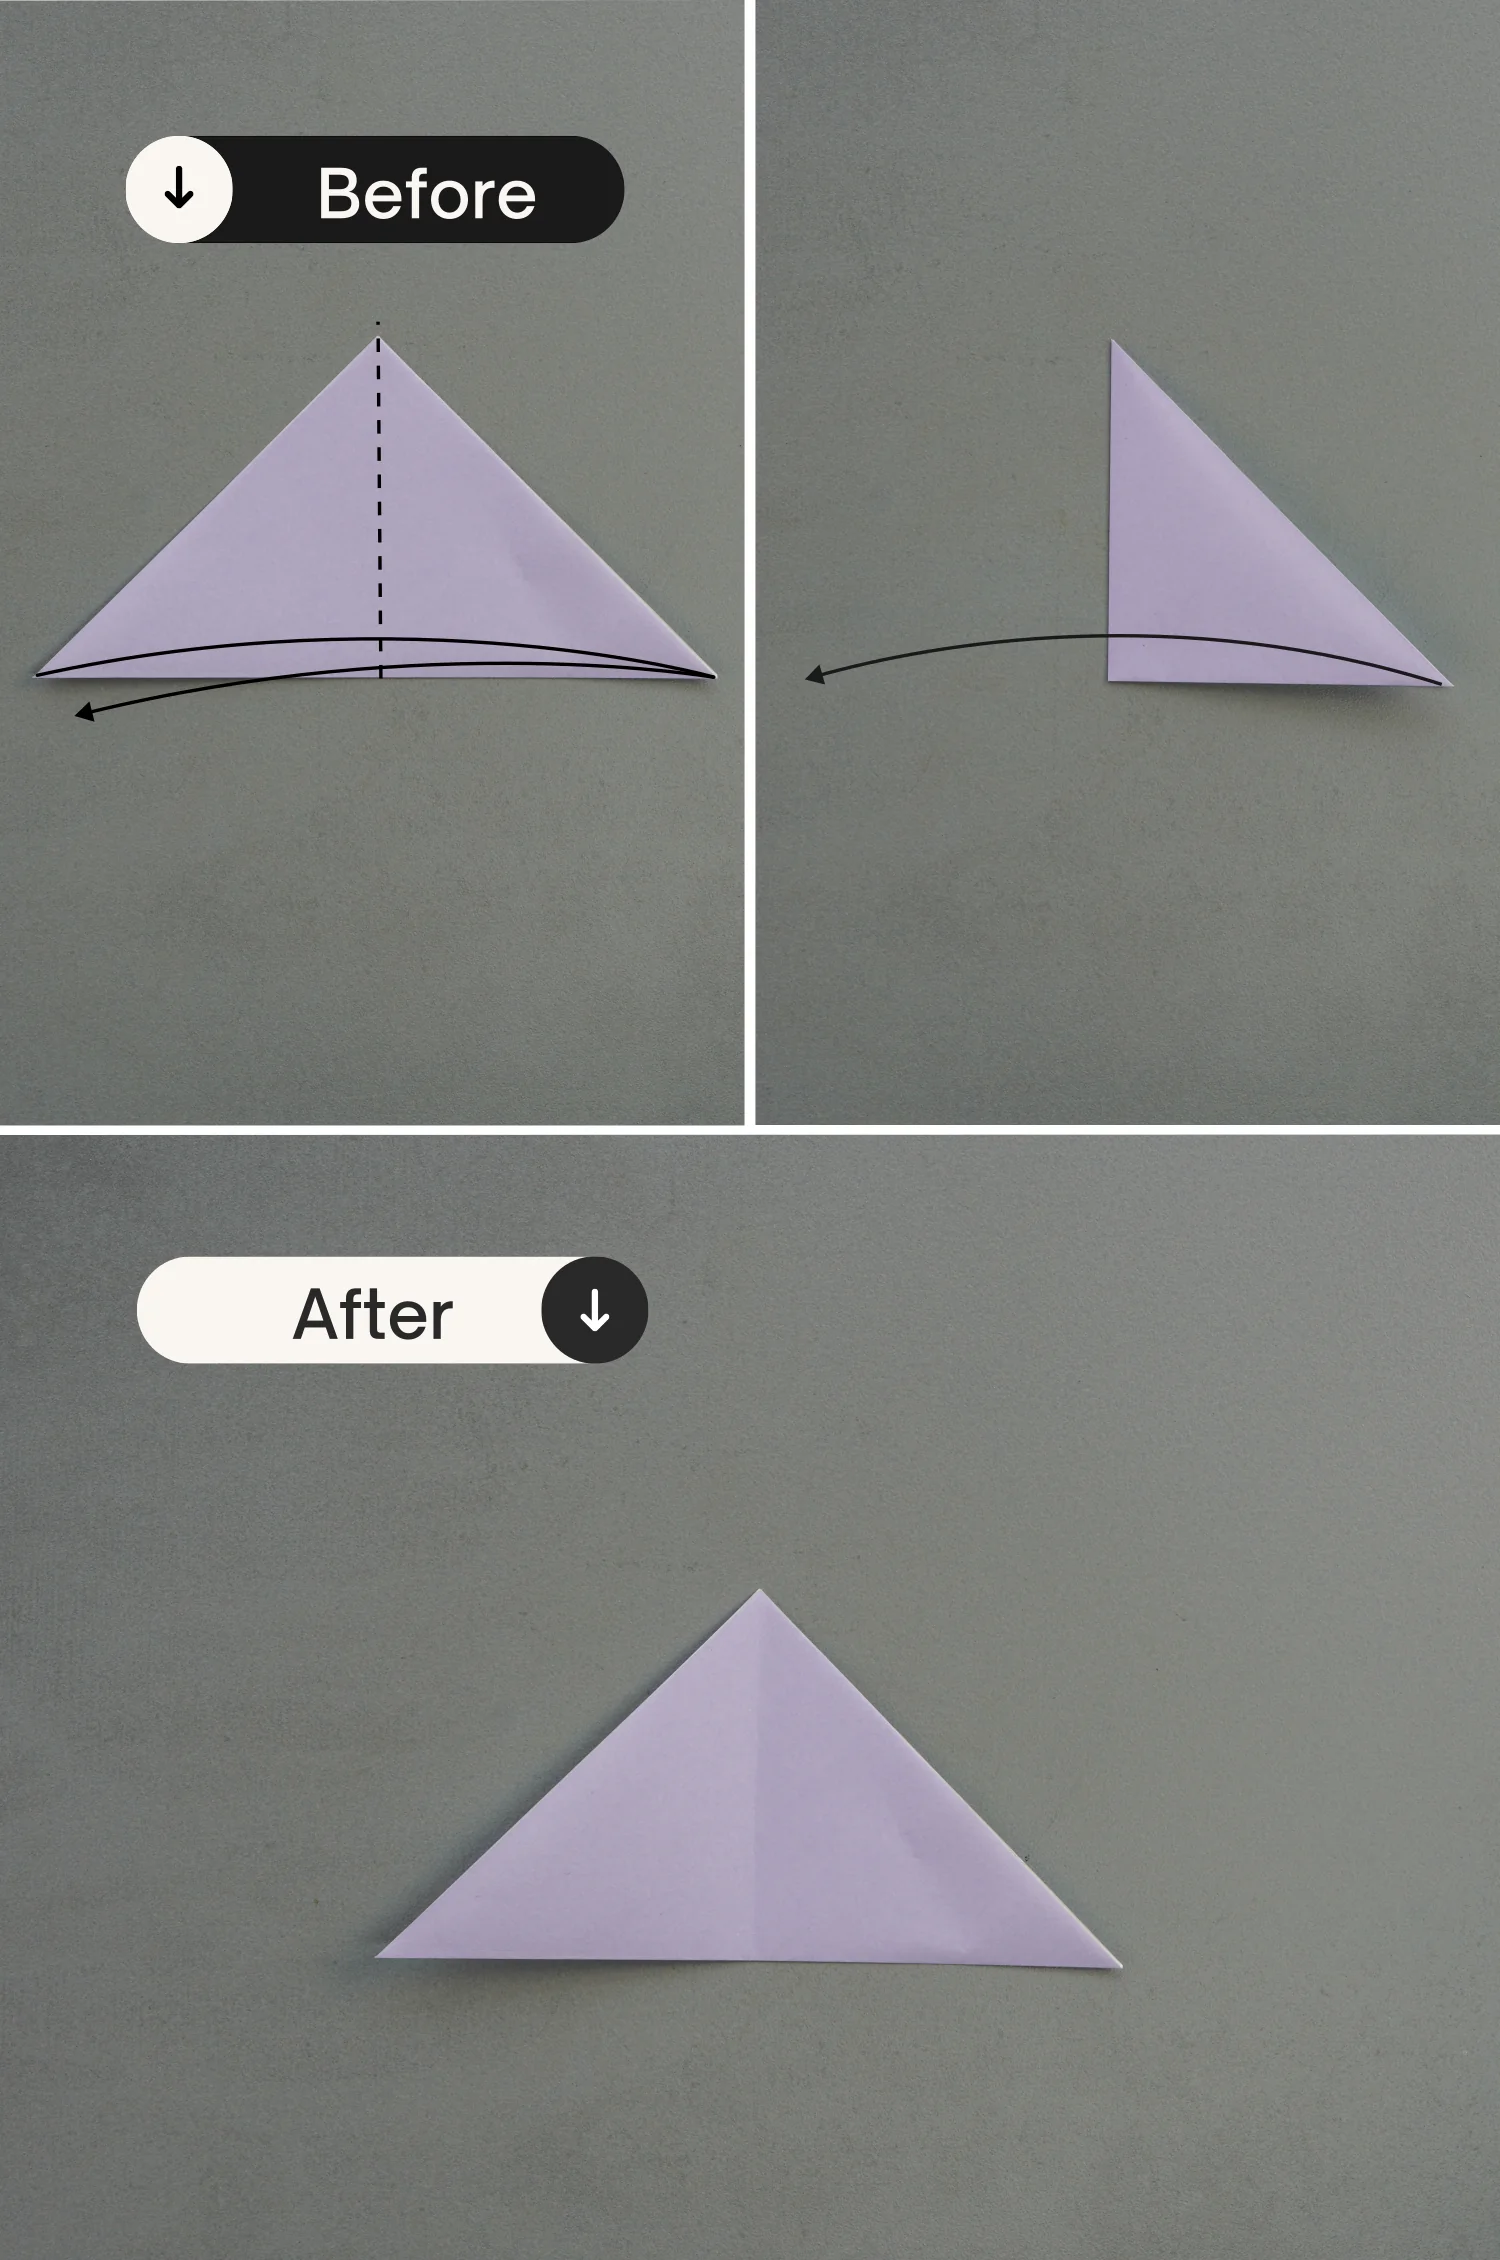
Fold the paper in half vertically, leaving a crease then unfold.
Step 3
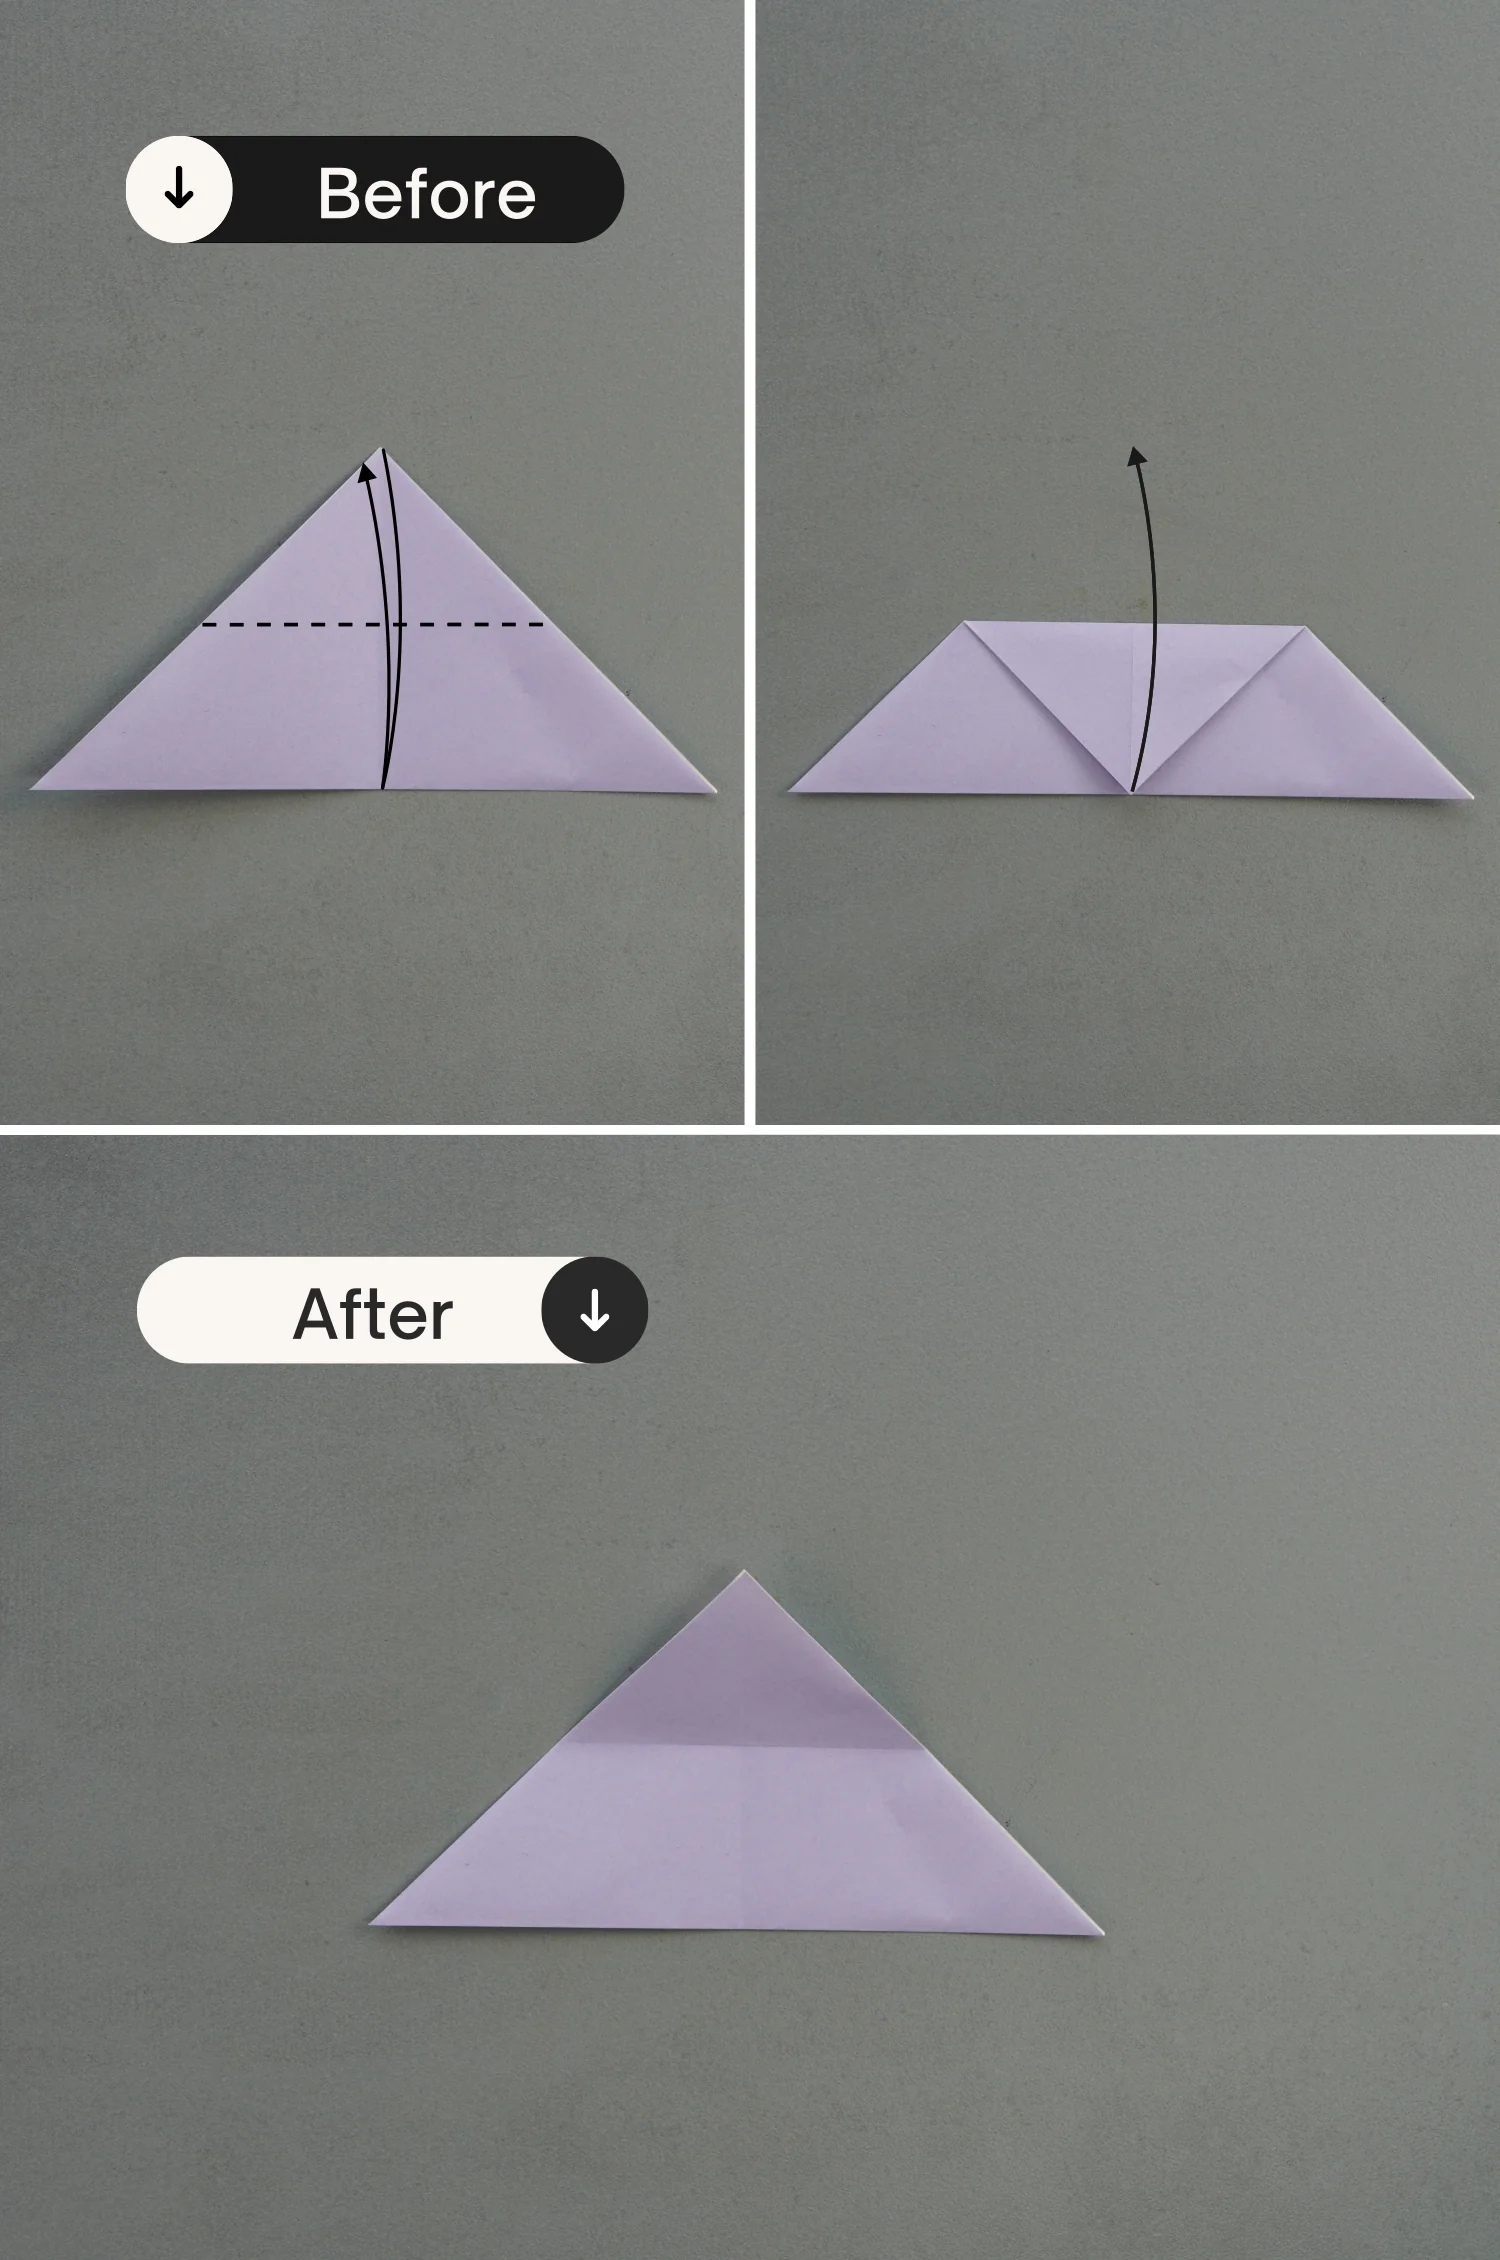
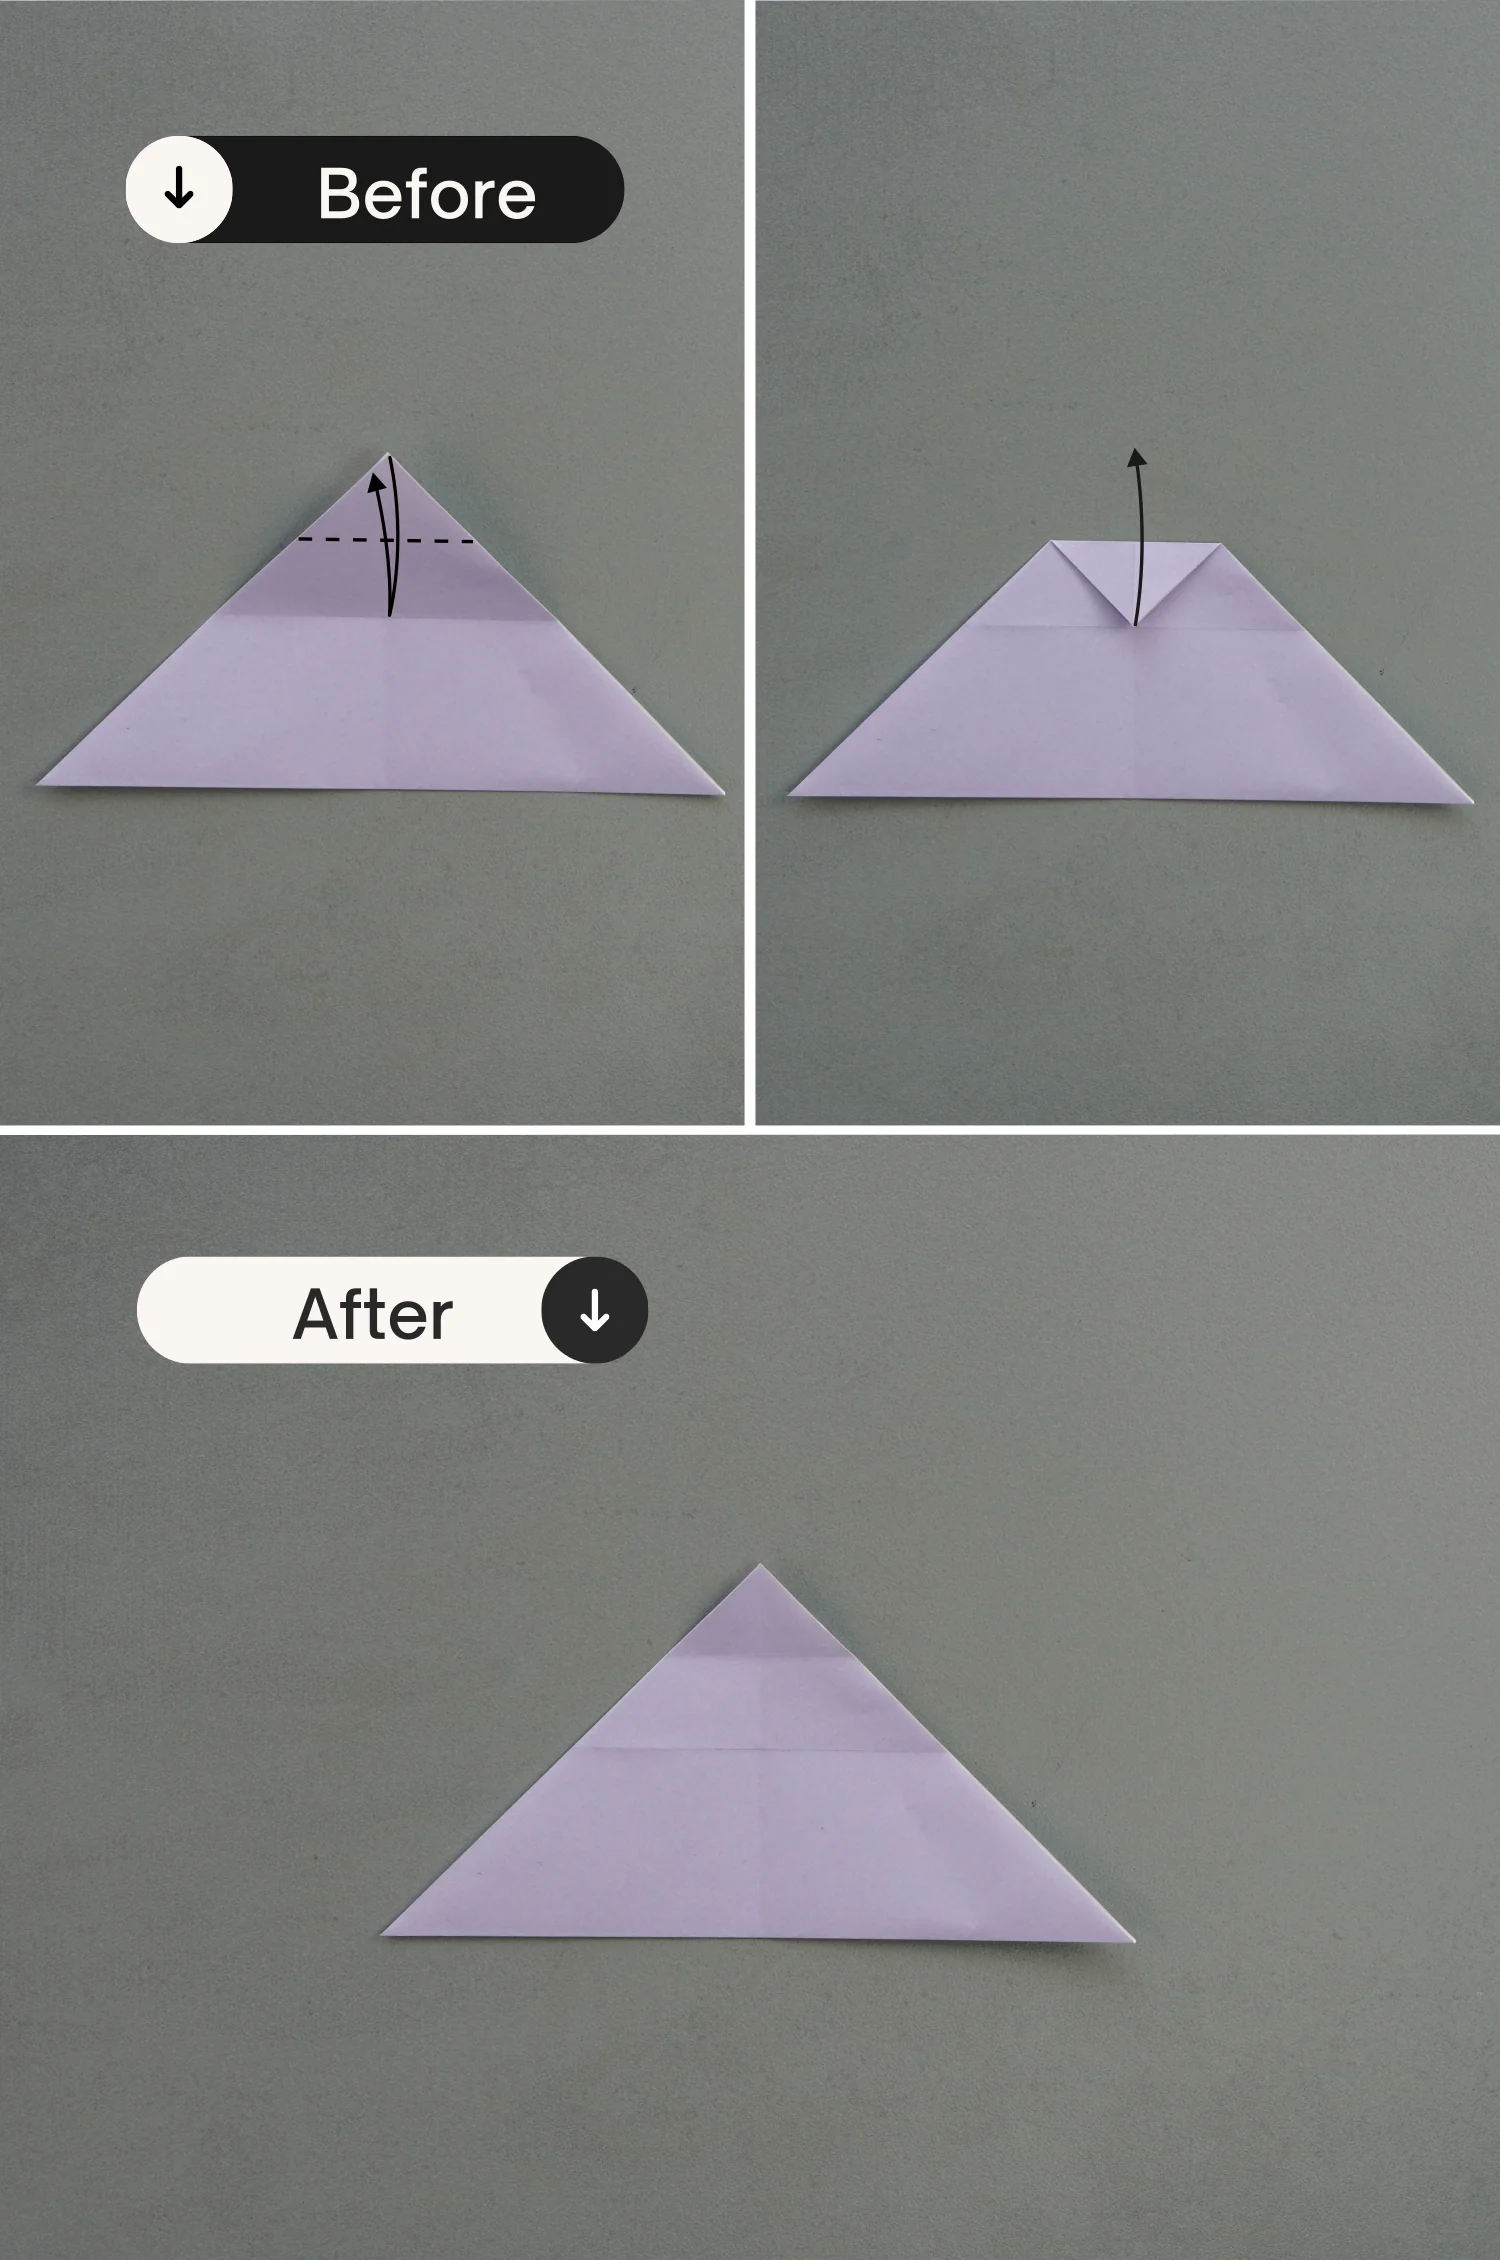
Fold the top point down diagonally, and unfold it.
Step 4
Fold the top point down diagonally to meet the crease you just made, and unfold it.
Step 5
Fold the bottom edge up to align with the crease you made in the previous step, then fold the top triangle down.
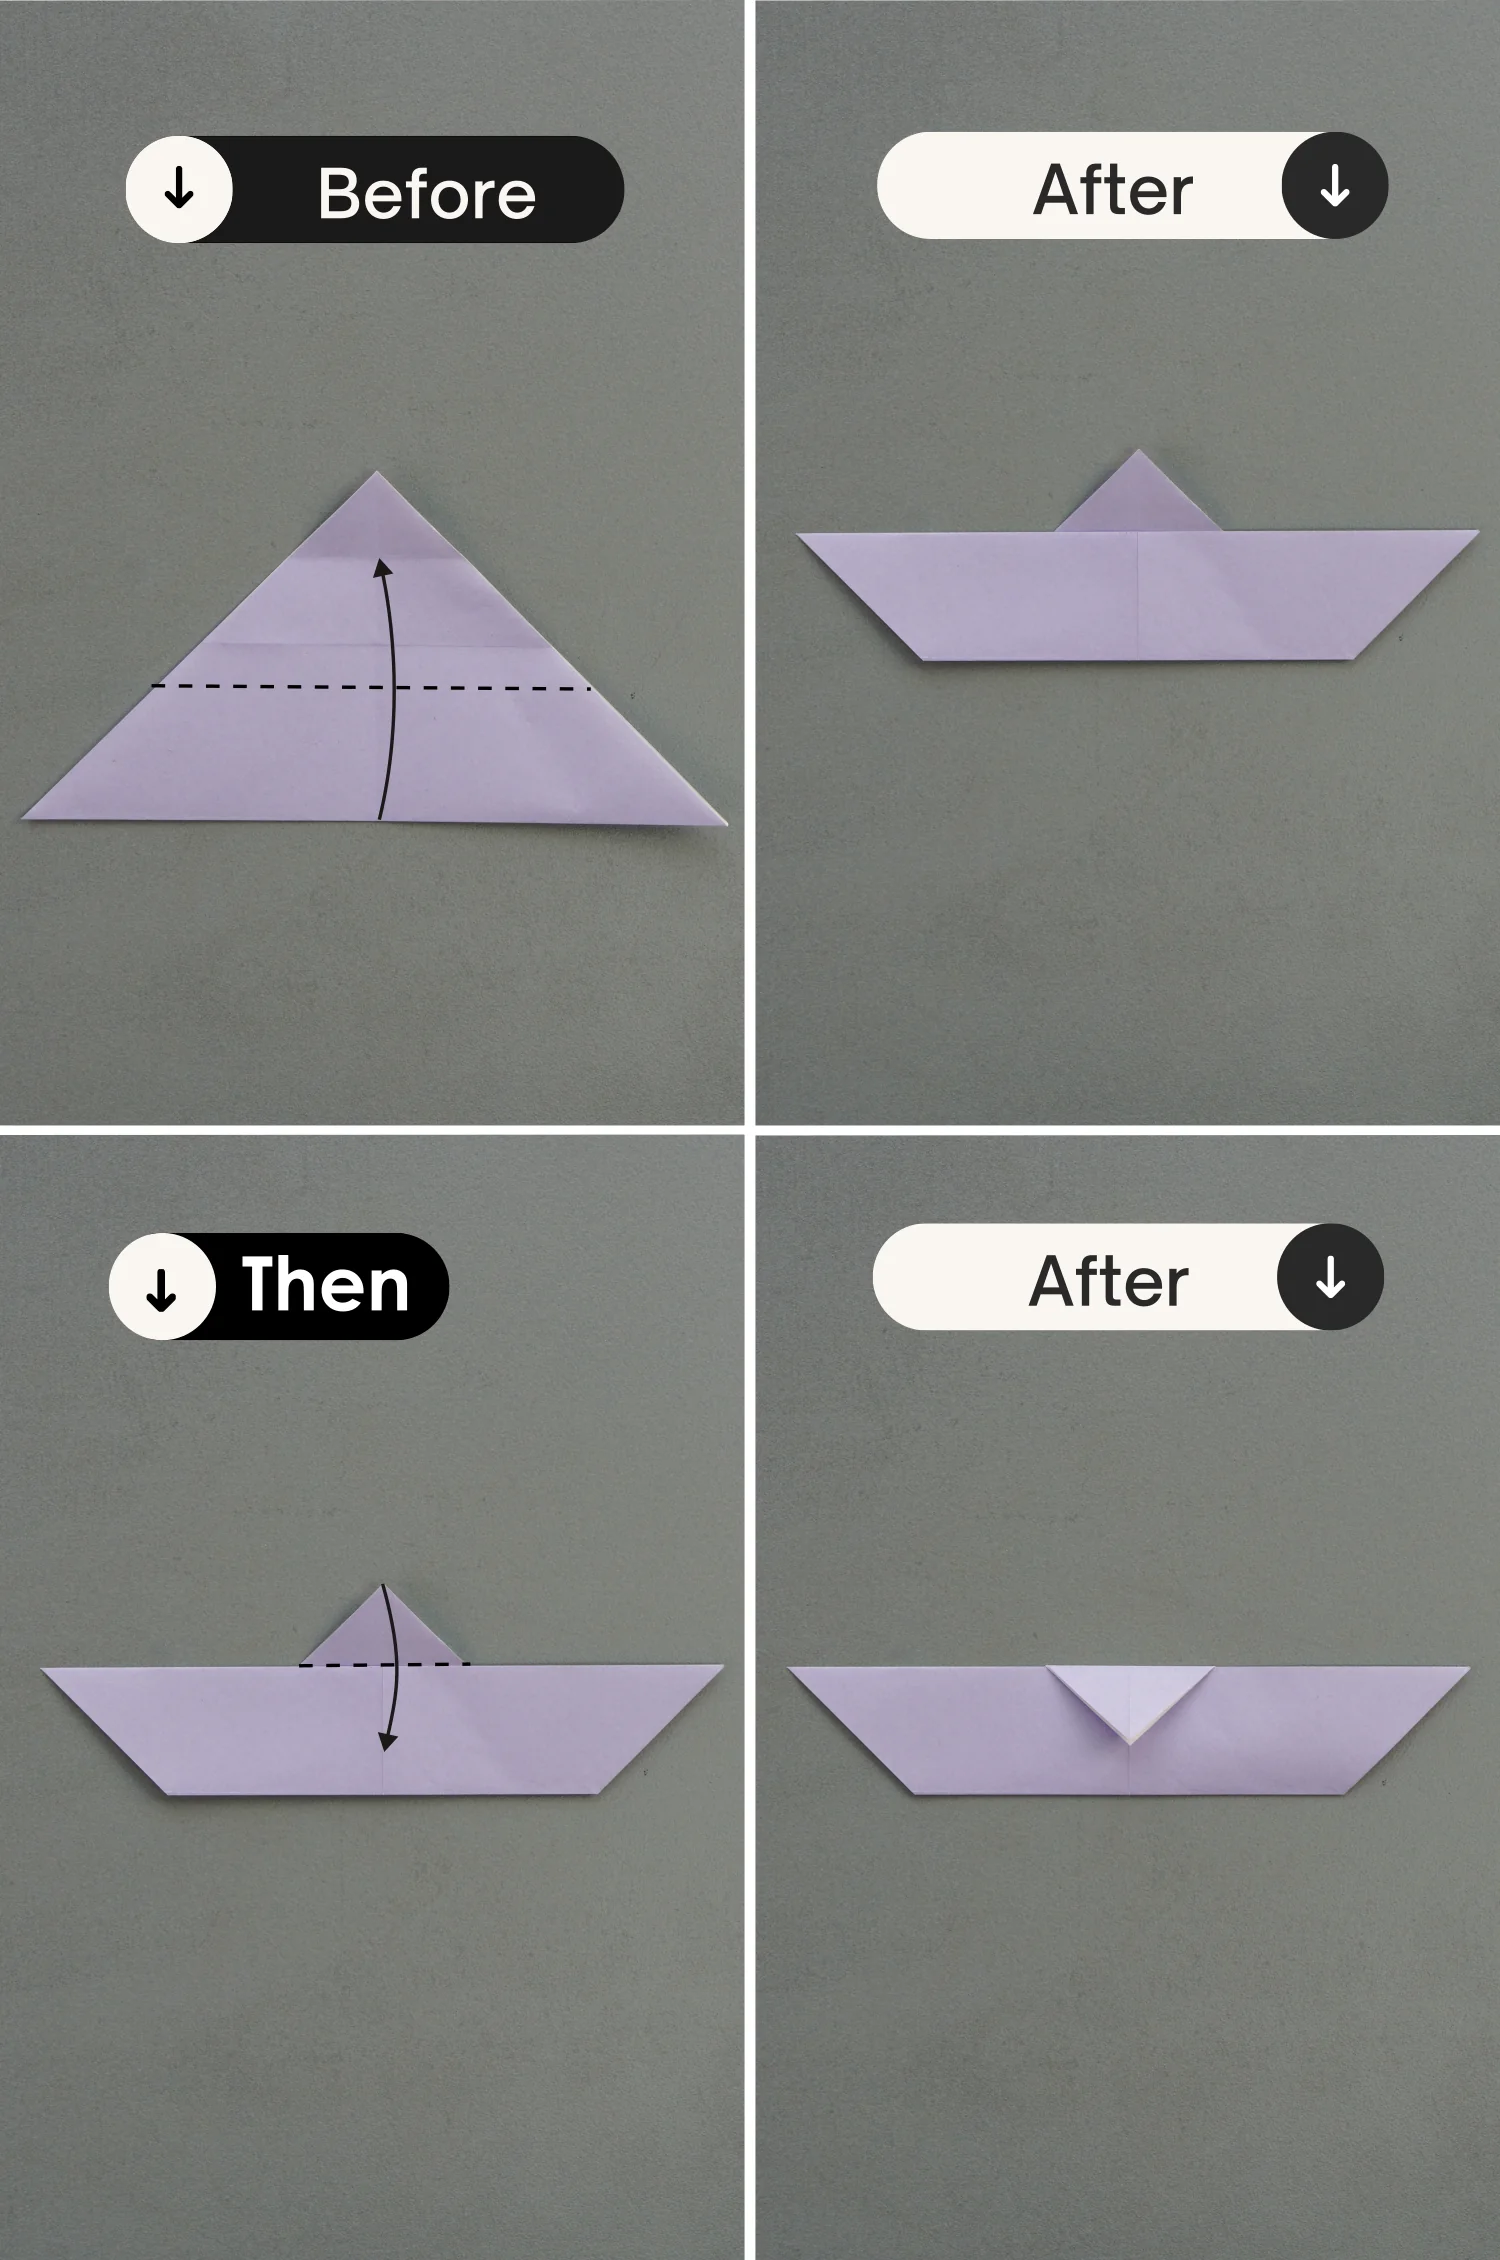
Step 6
Flip the paper over.

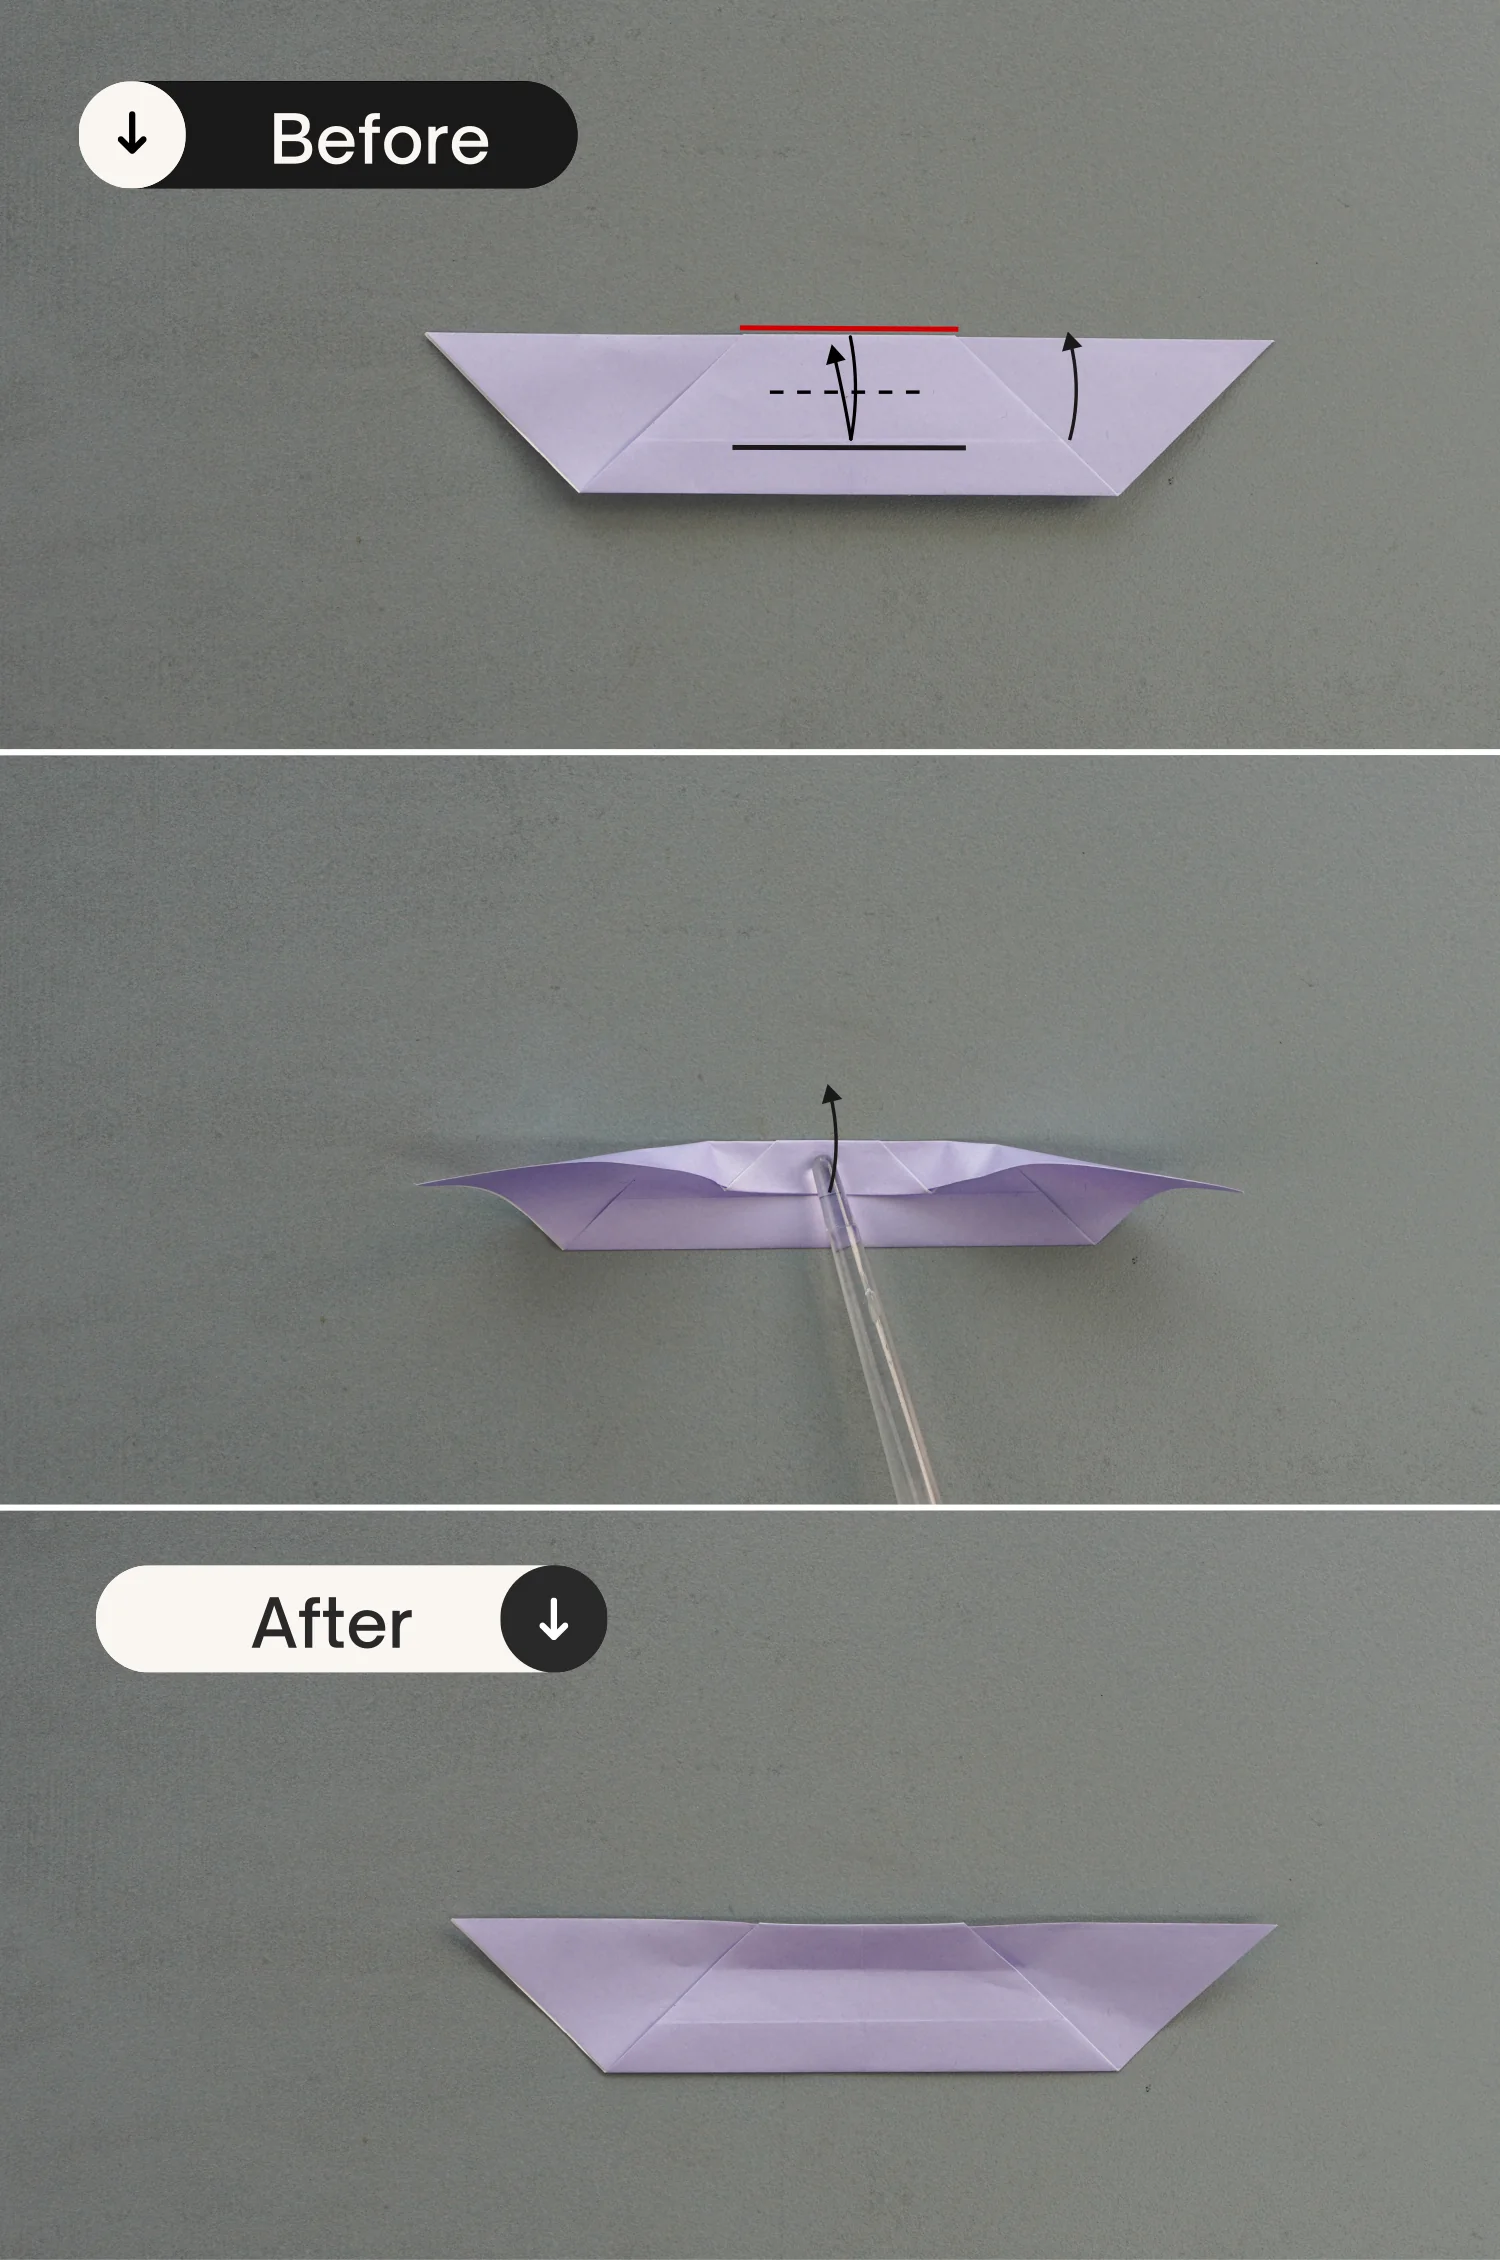
Step 7
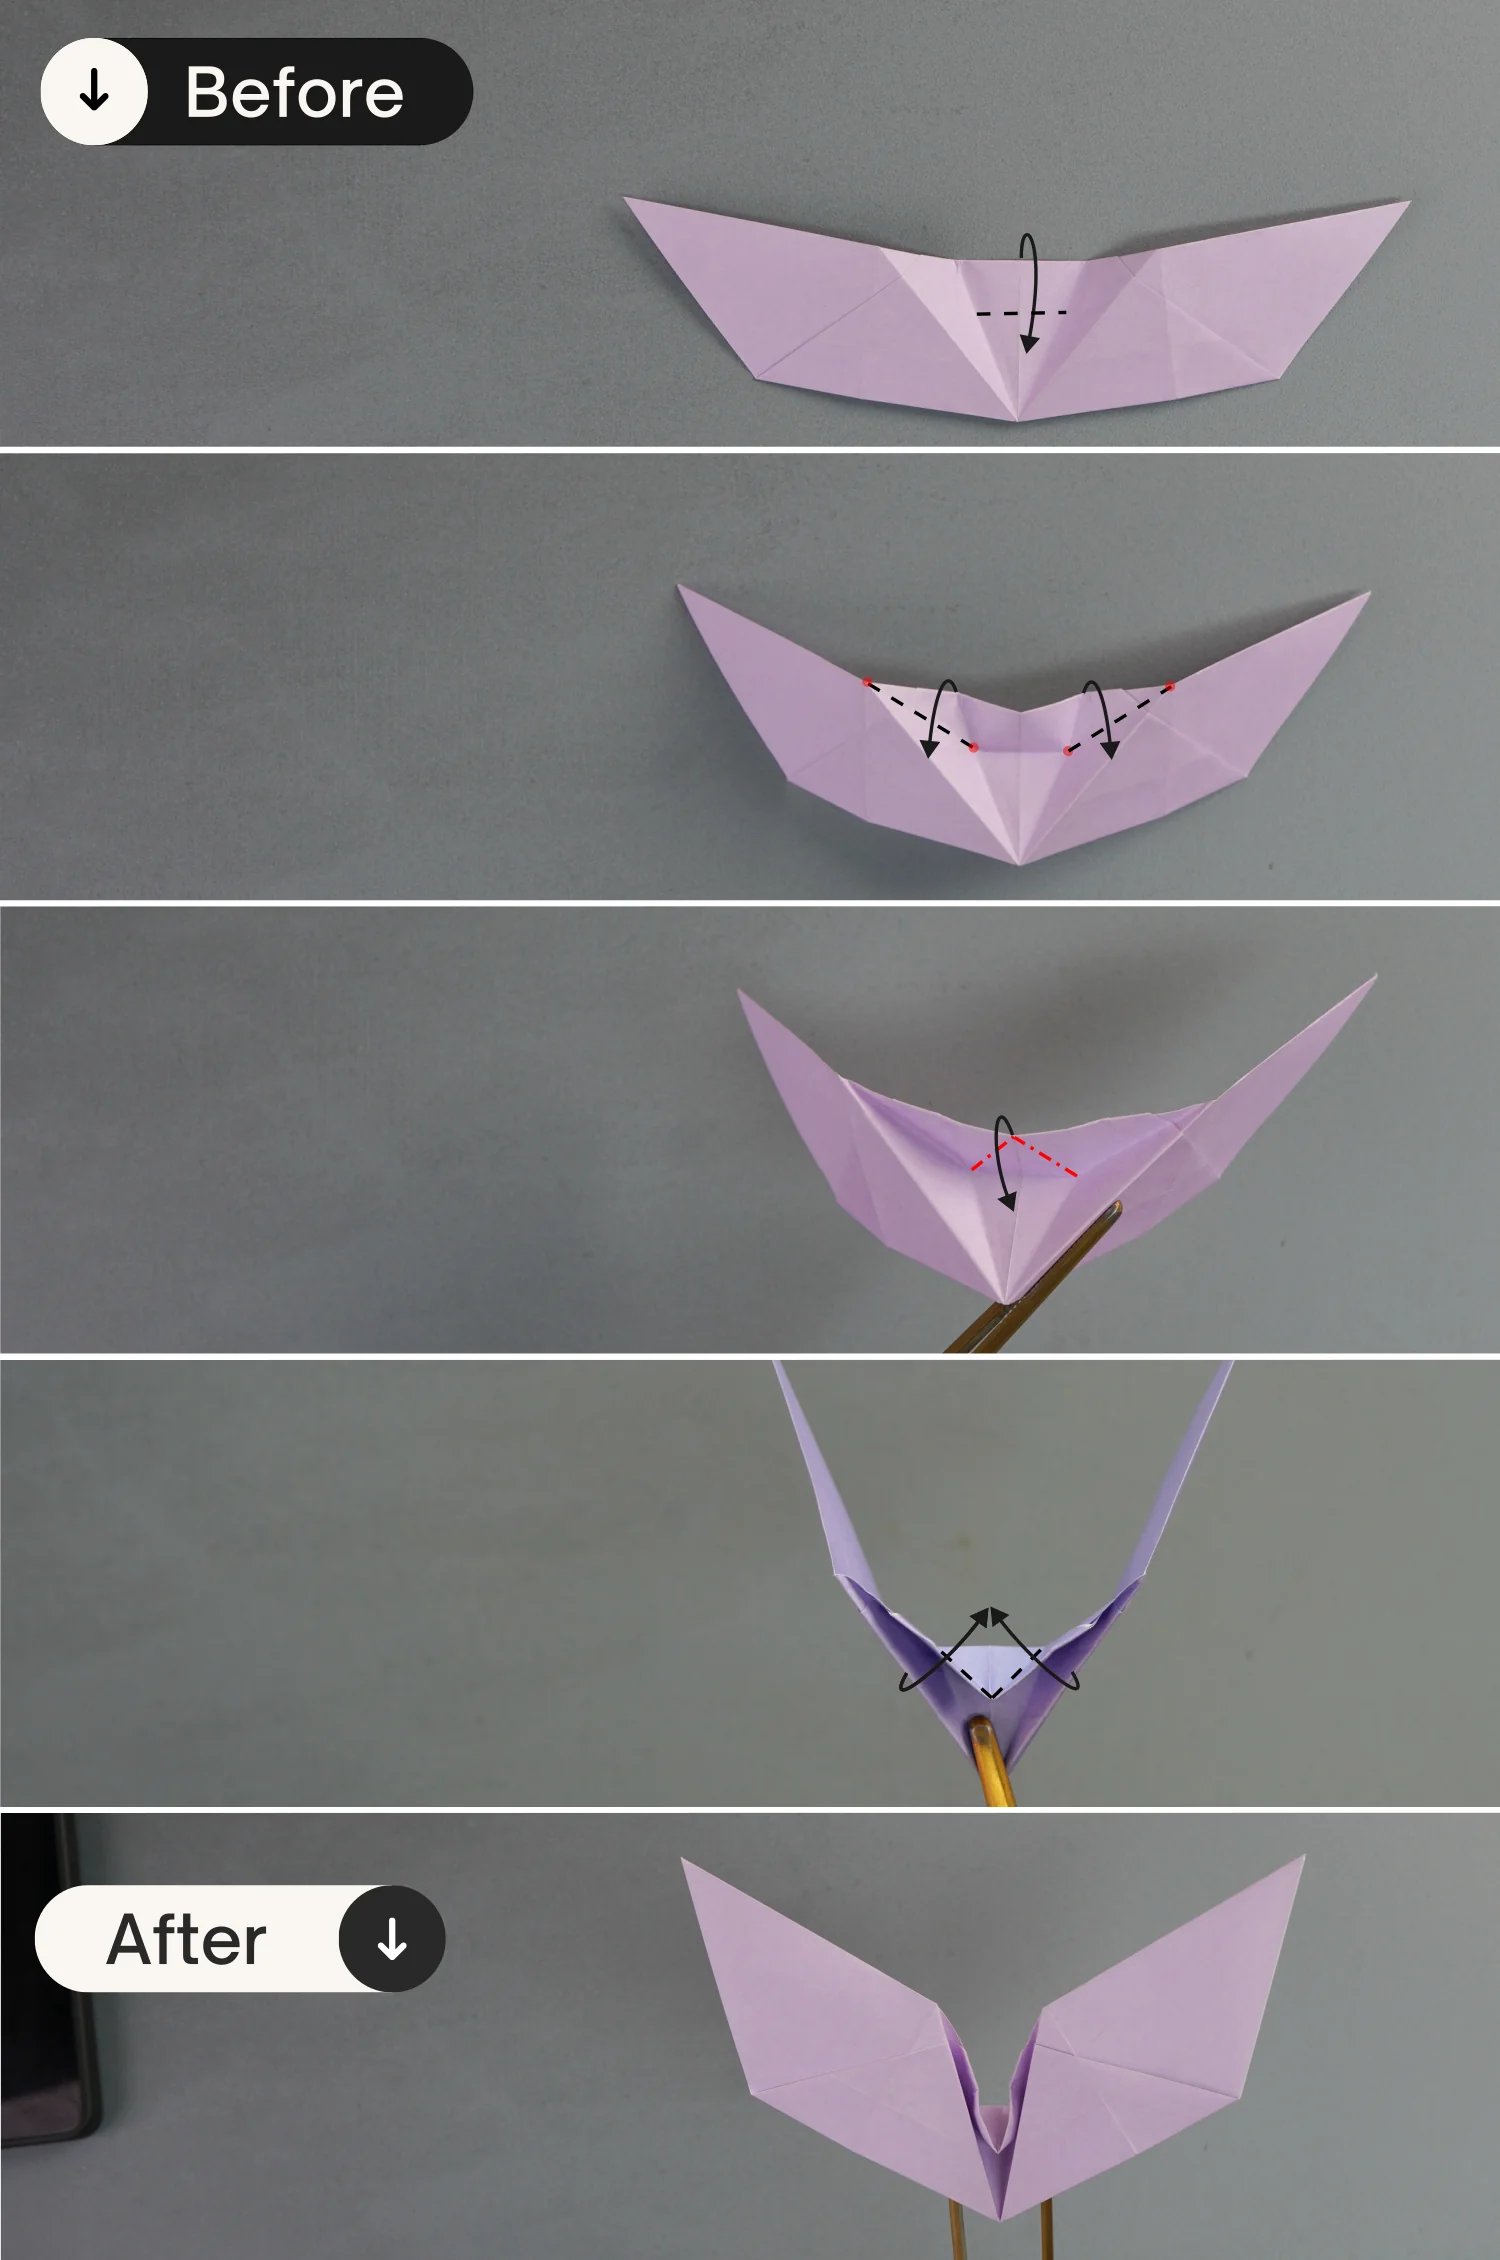
Fold the top edge down to align with the crease indicated by the black line, crease out the middle part, and unfold it.
Step 8
Flip the paper over.
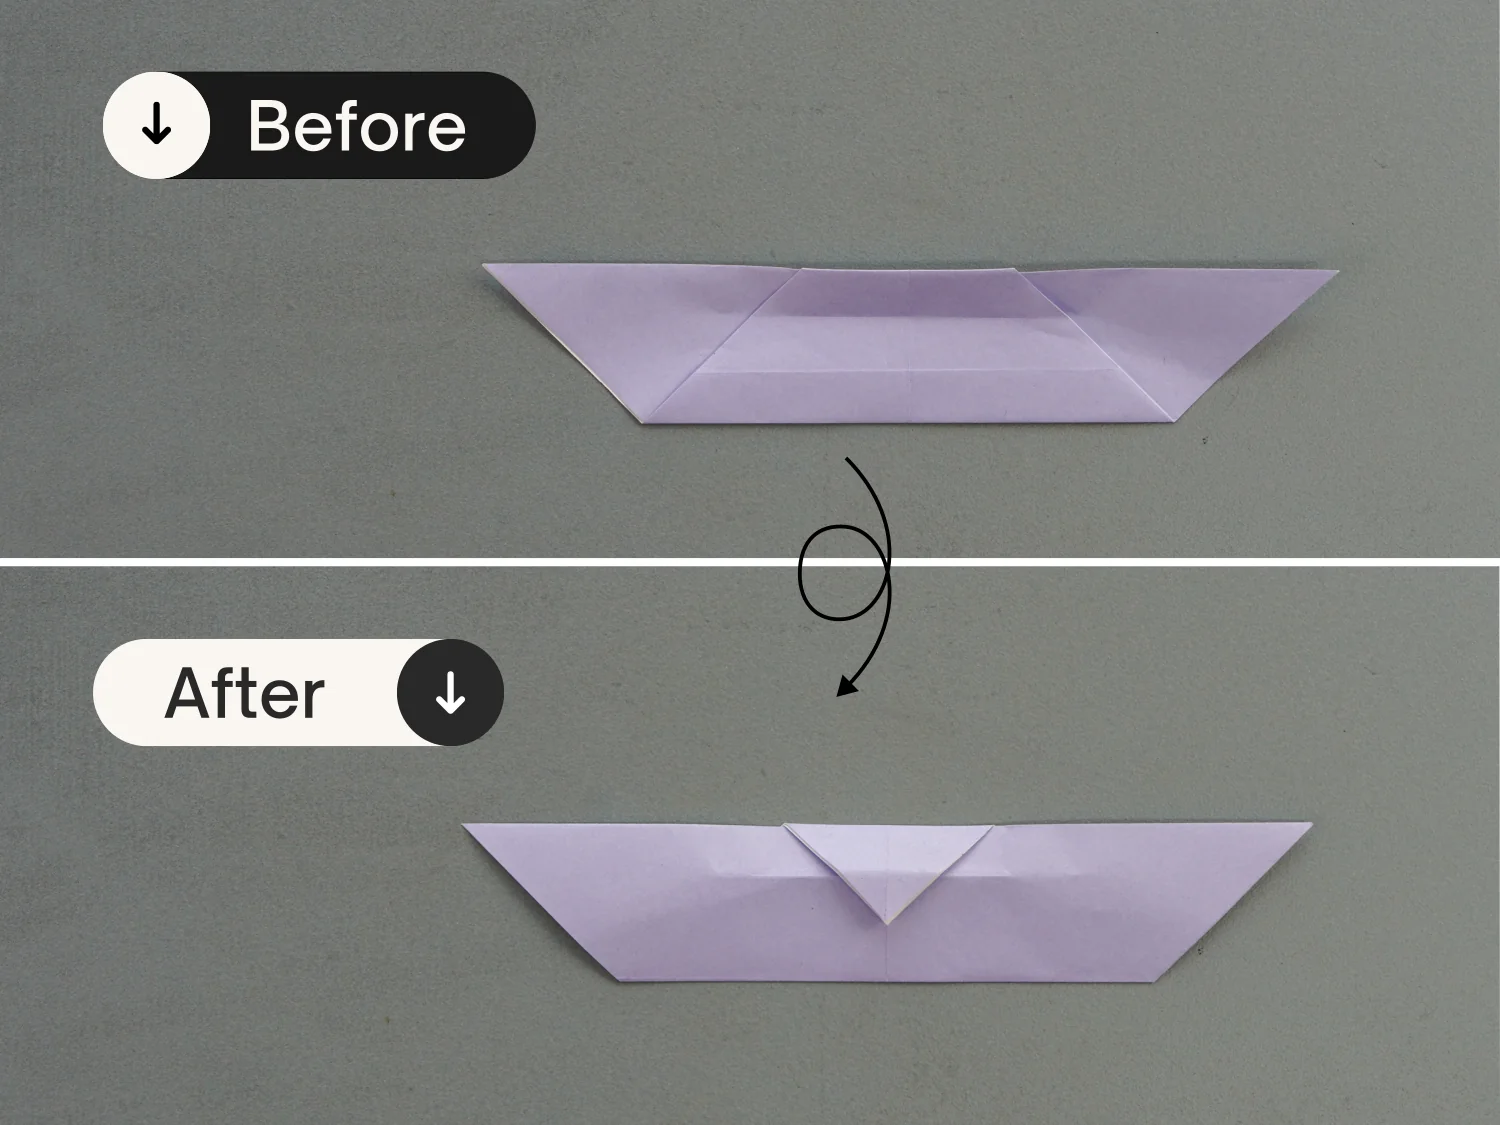
Step 9
Fold the top right point to meet the left point of the middle triangle, crease it well then unfold.
Repeat this for the left side, fold the left point to meet the right point of the triangle, and unfold it.
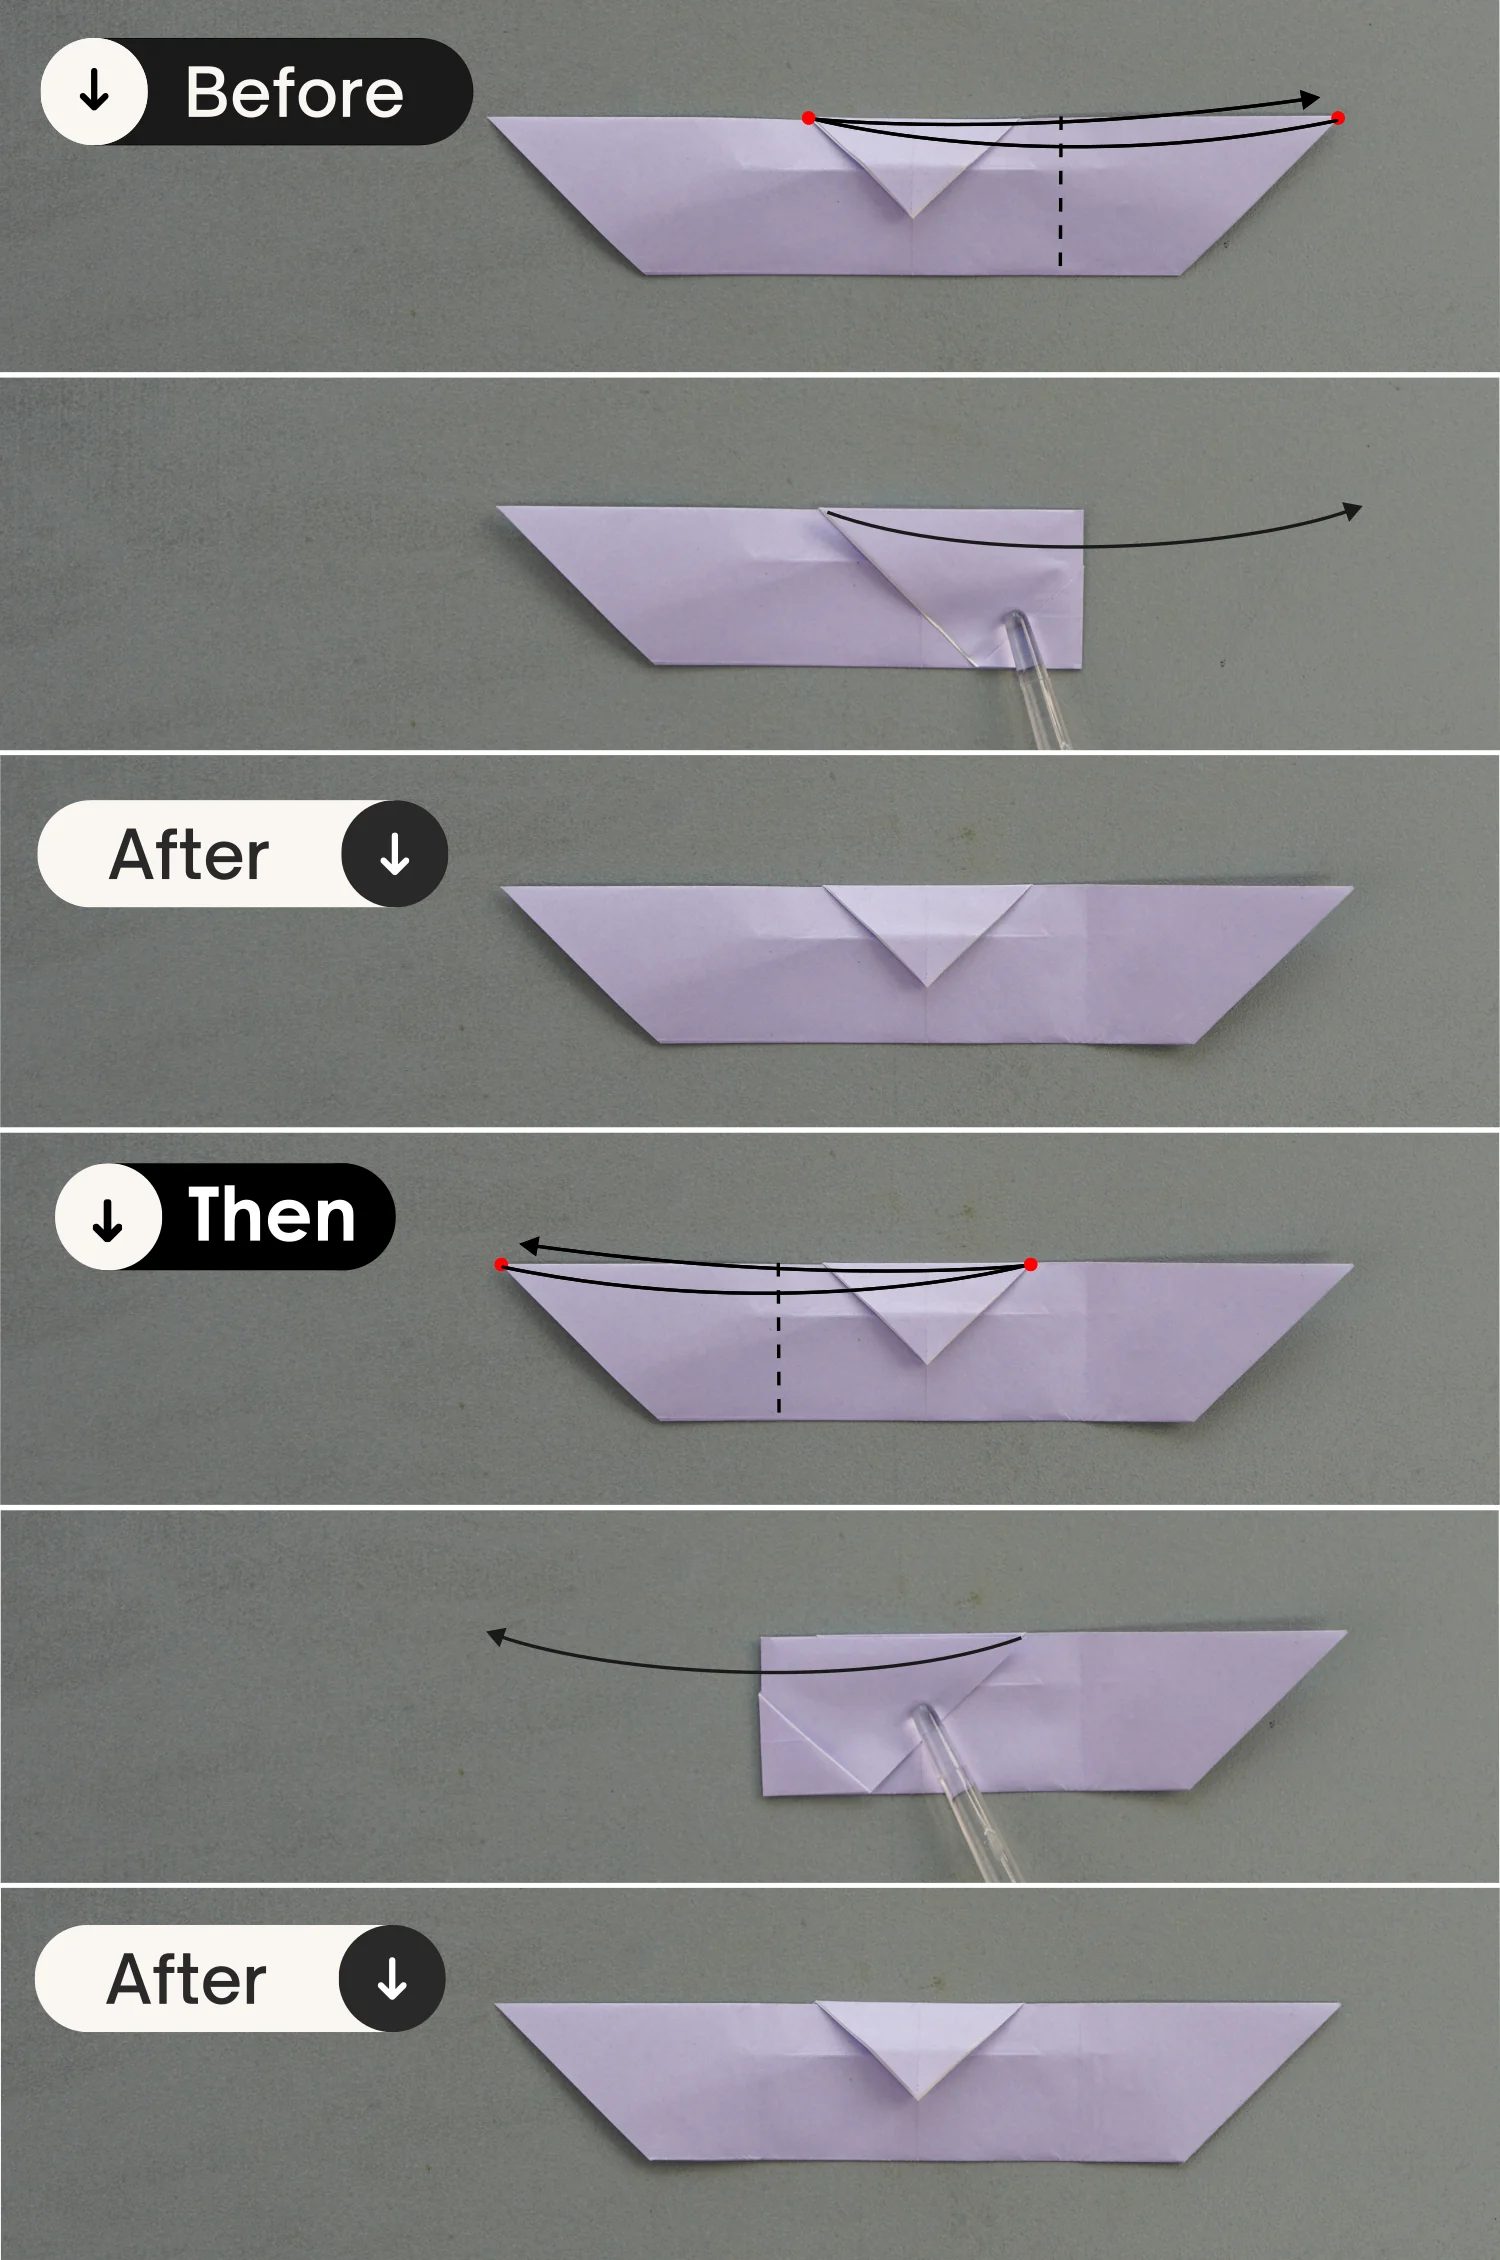
Step 10
Fold the left and right sections of the bottom edge to align with the middle vertical crease, and unfold them.
Step 11
Flip the paper over.
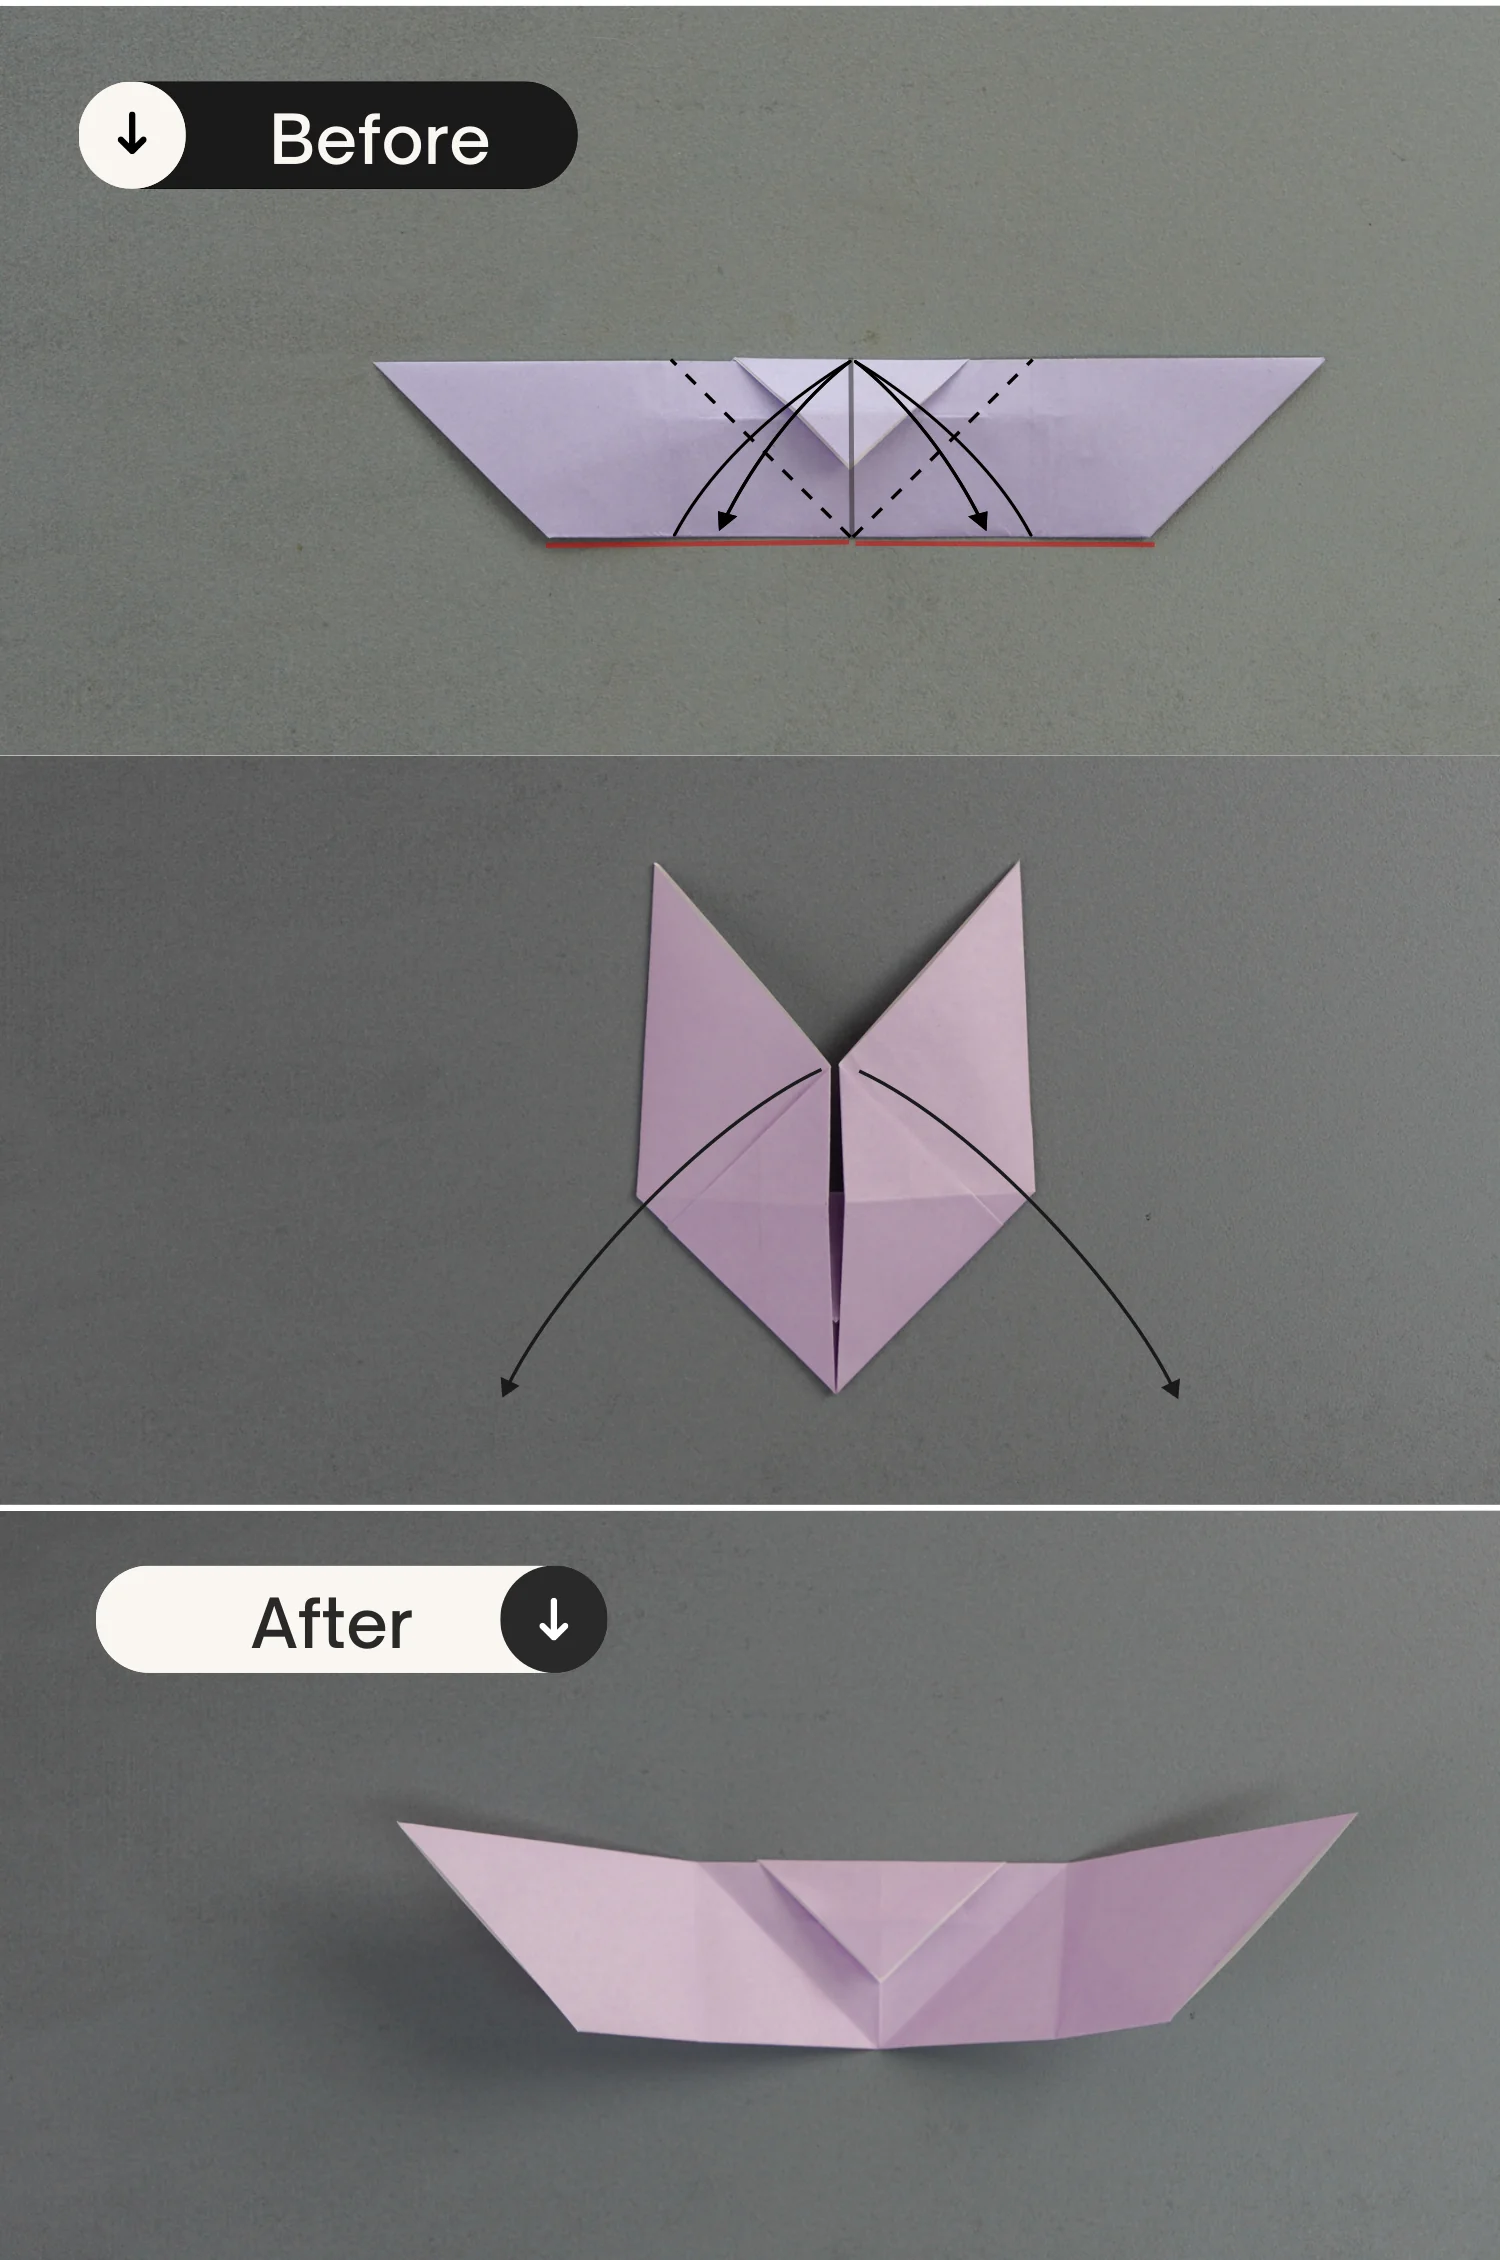
Step 12
Fold the two creases you made in the previous step to align with the middle vertical crease, leaving two creases then unfold them.
Step 13
Press down the middle part of the top edge along the crease shown by the dotted line, and shape the corners on the left and right.
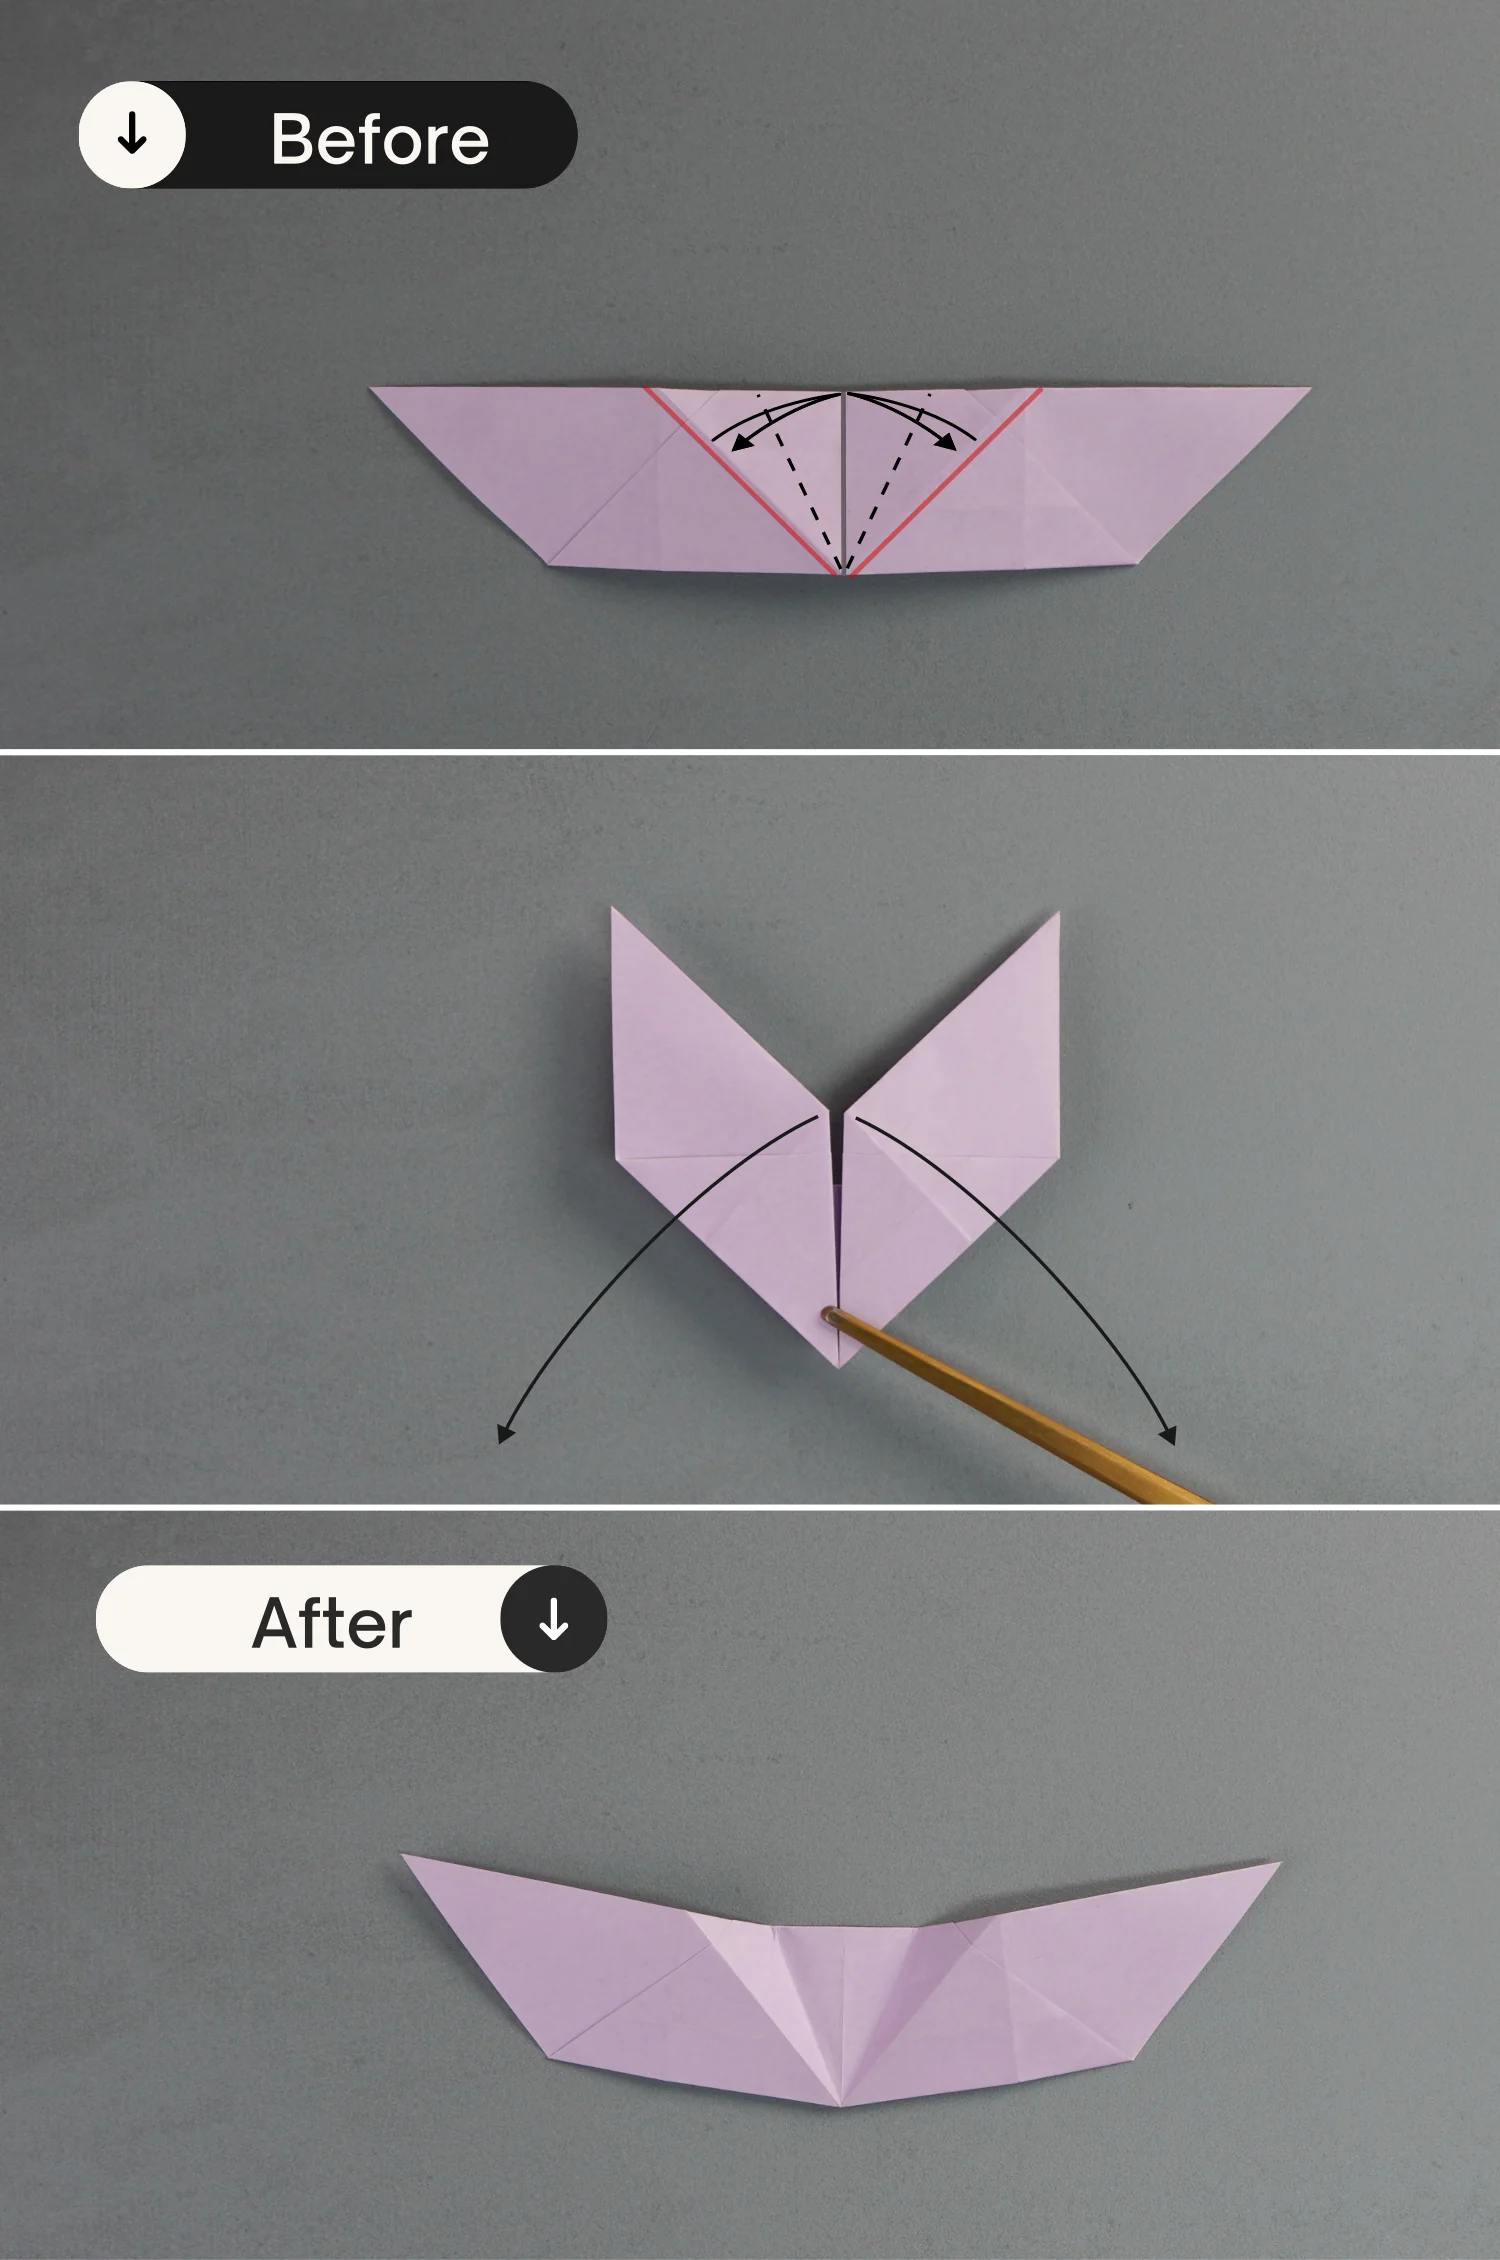
Step 14
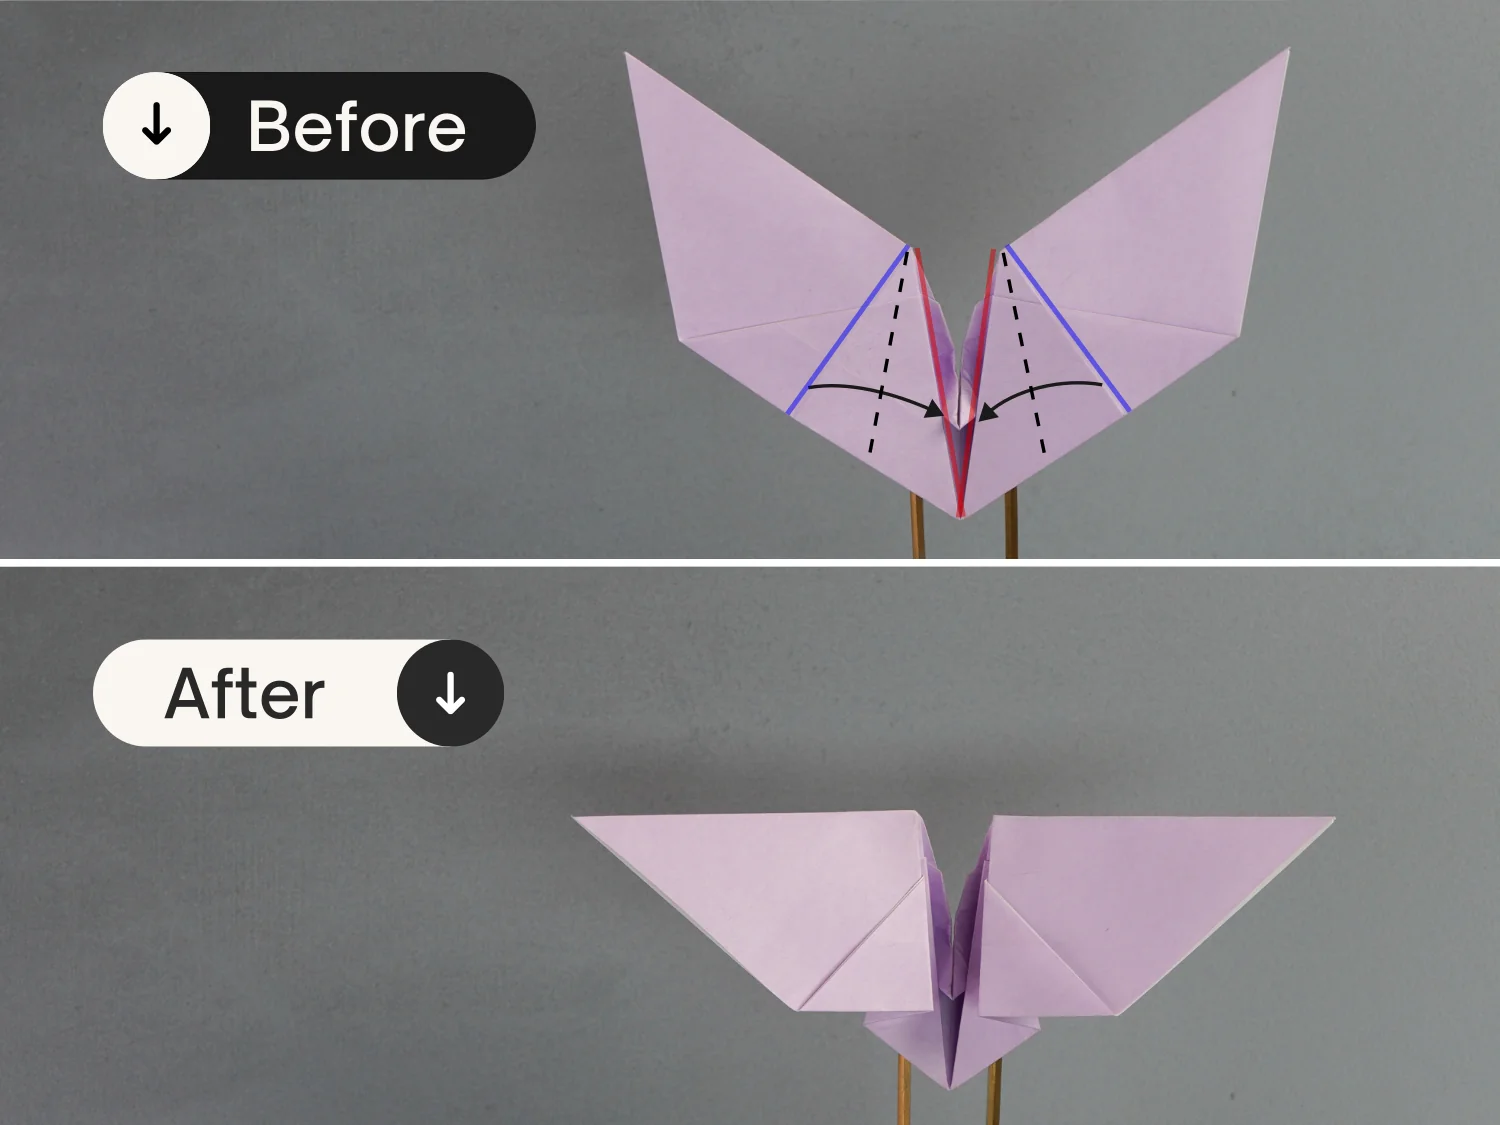
Fold the creases shown by the blue lines on the left and right to align with the edge indicated by the red lines.
Step 15
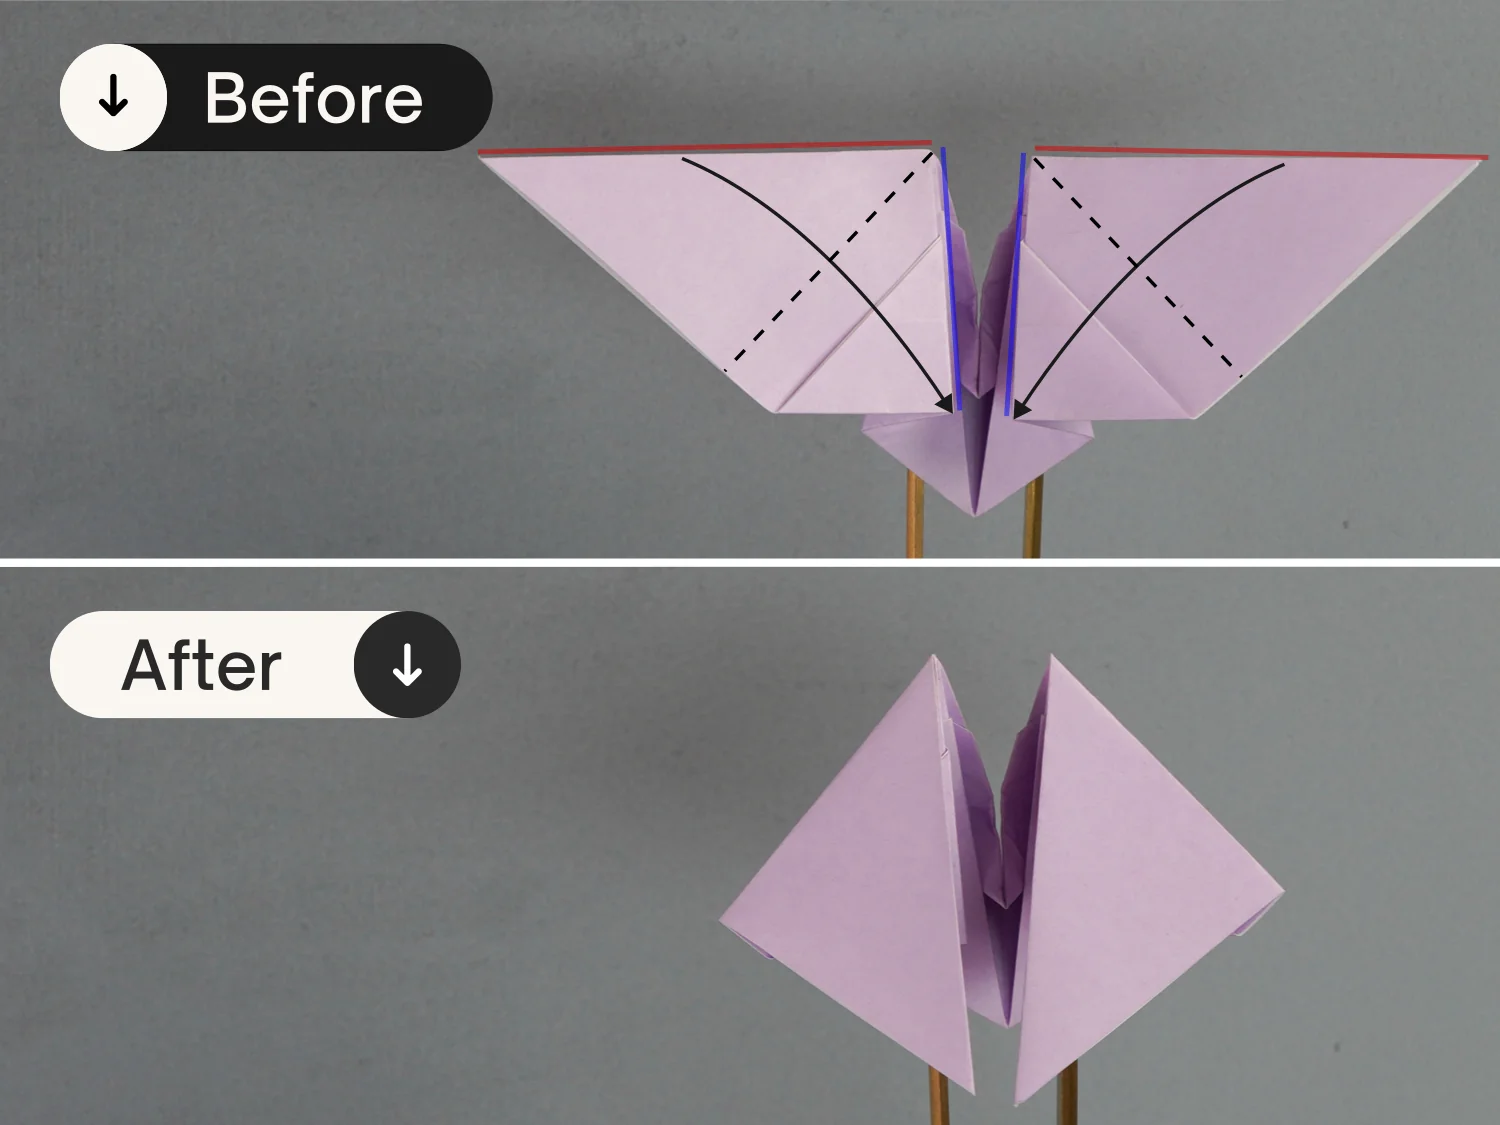
Fold the top edge of the left layer to align with its left edge.
Repeat this for the right layer, fold its top edge to align with its left edge.
Step 16
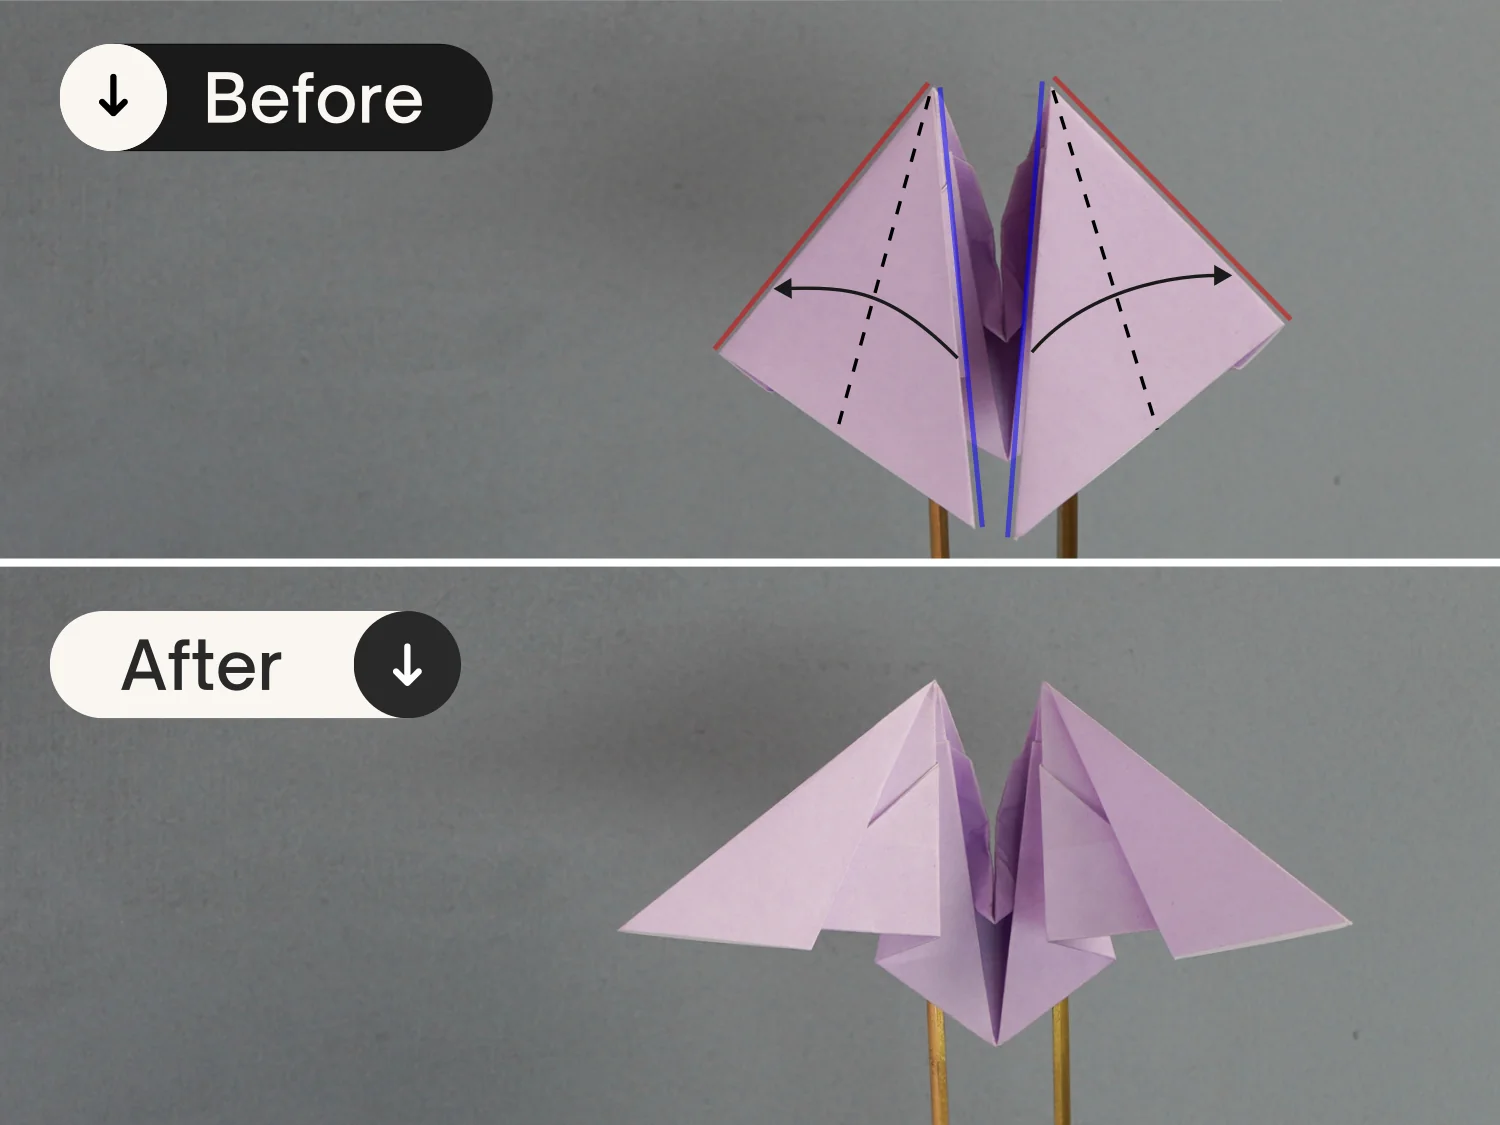
Fold the right edge of the left layer to align with its left edge.
Repeat this process for the right wing by folding its left edge to align with its right edge.
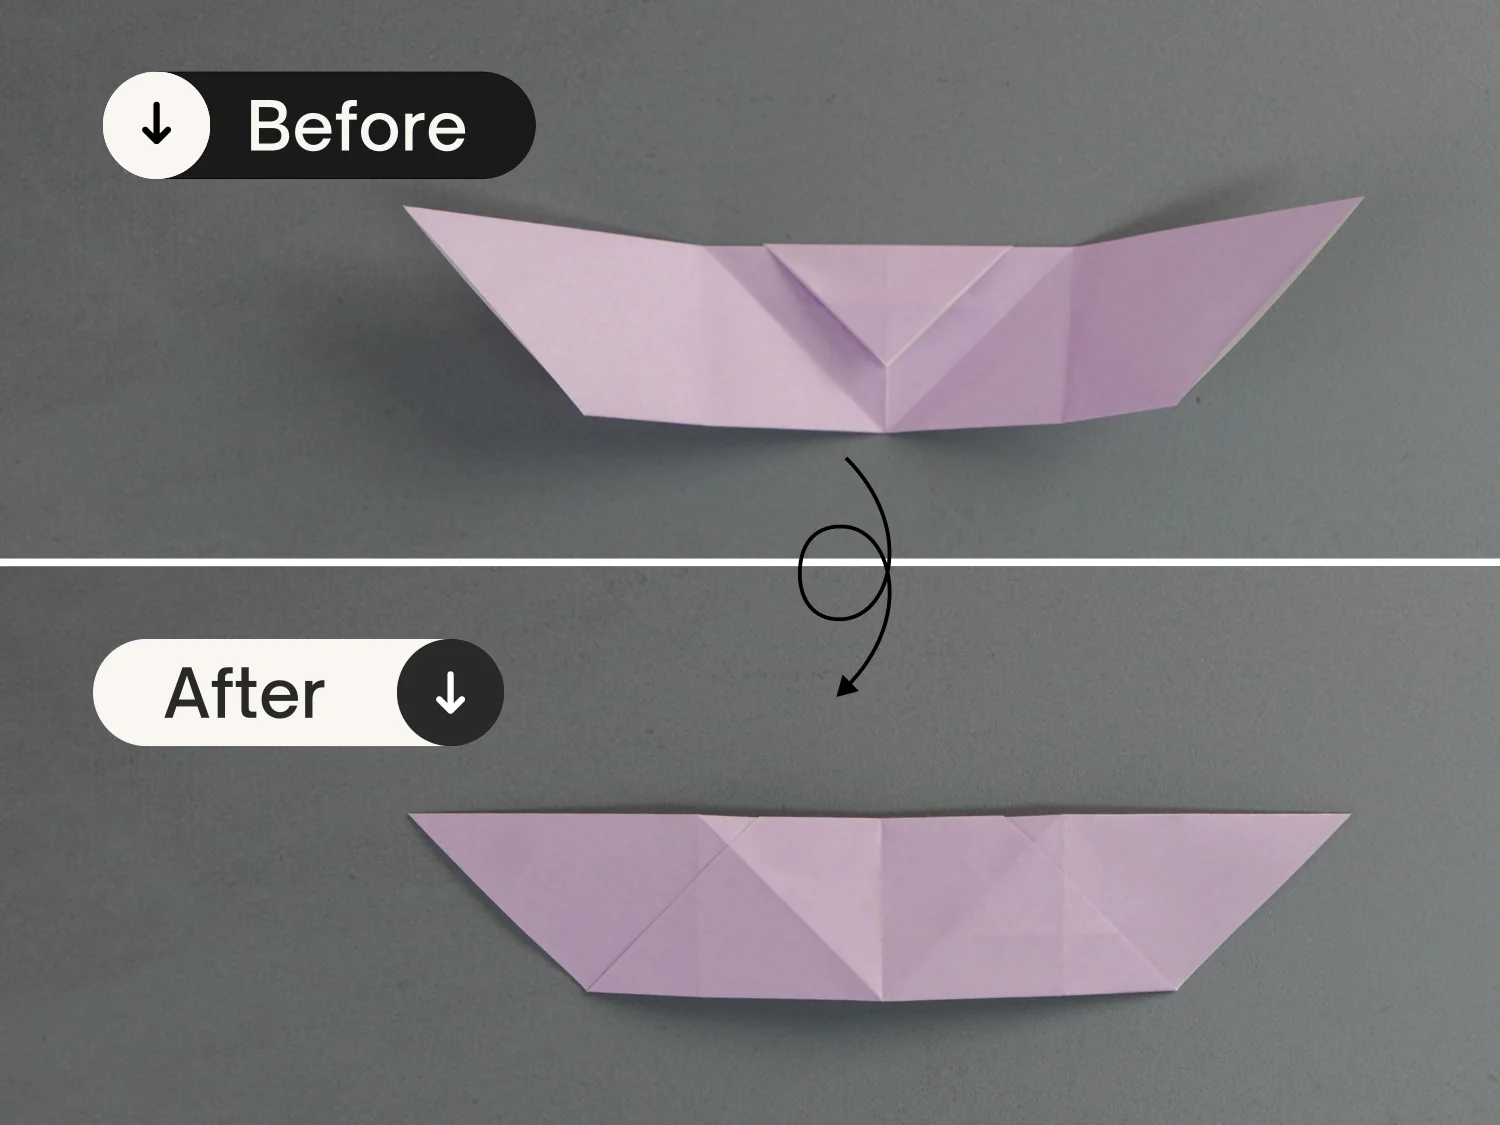
Step 17
Flip the paper over.
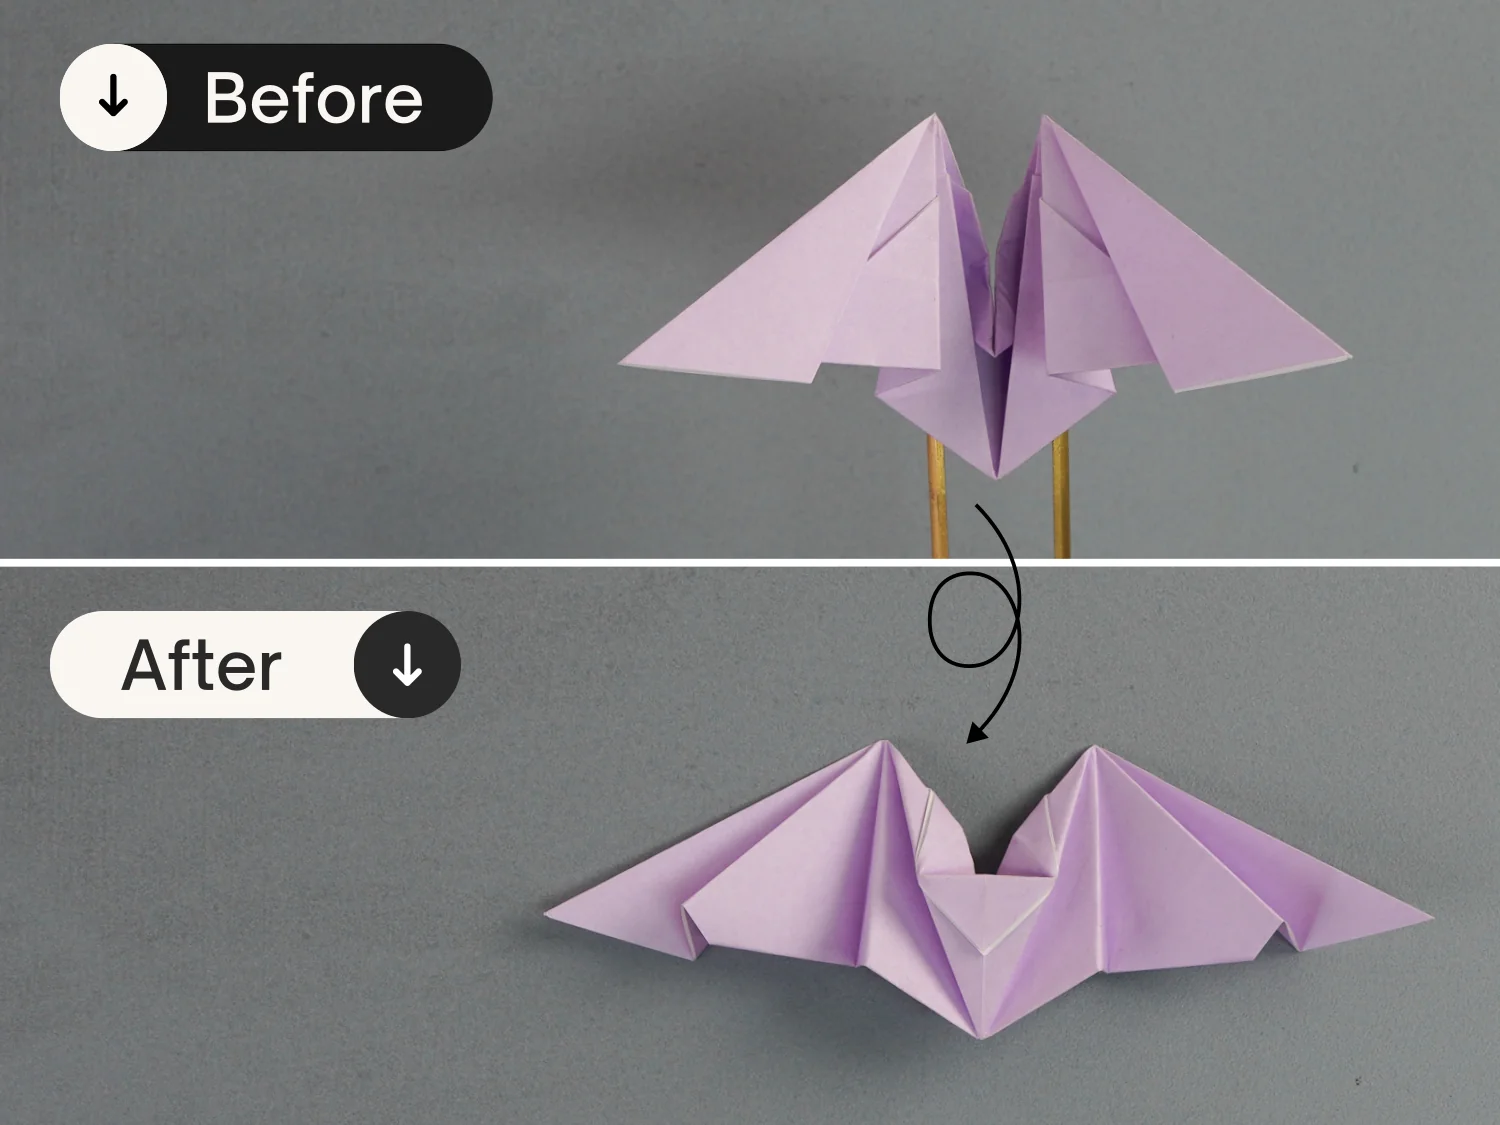
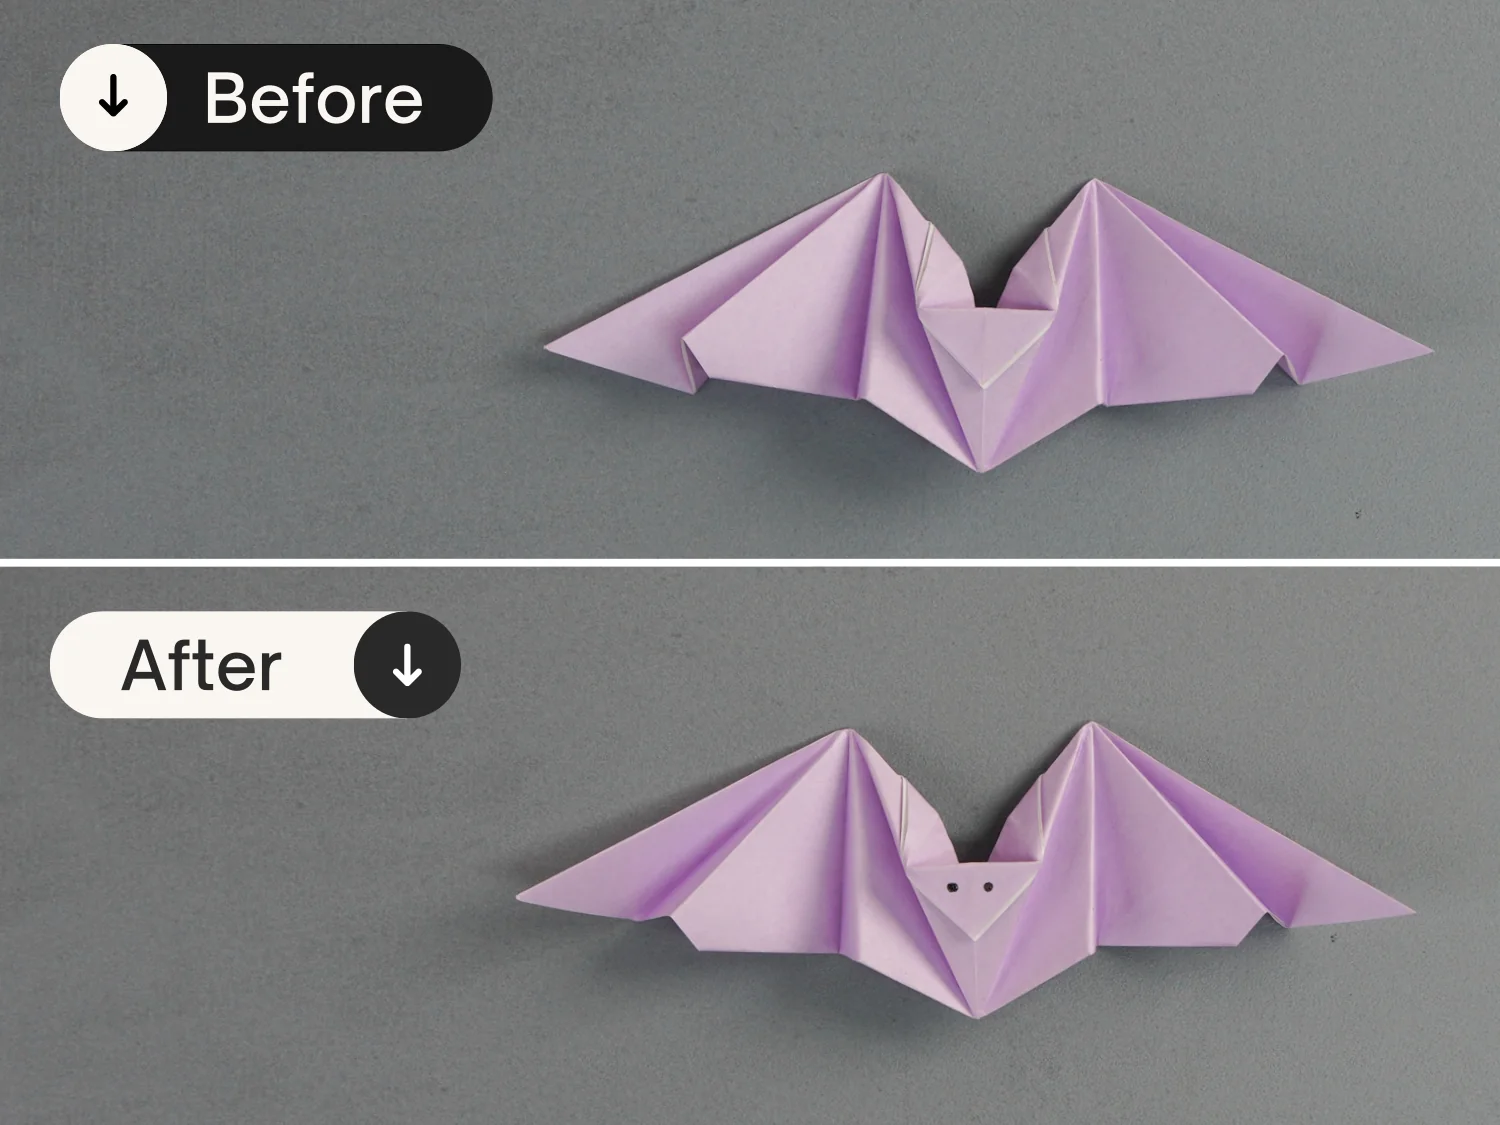
Step 18
Draw eyes on the middle small triangle.
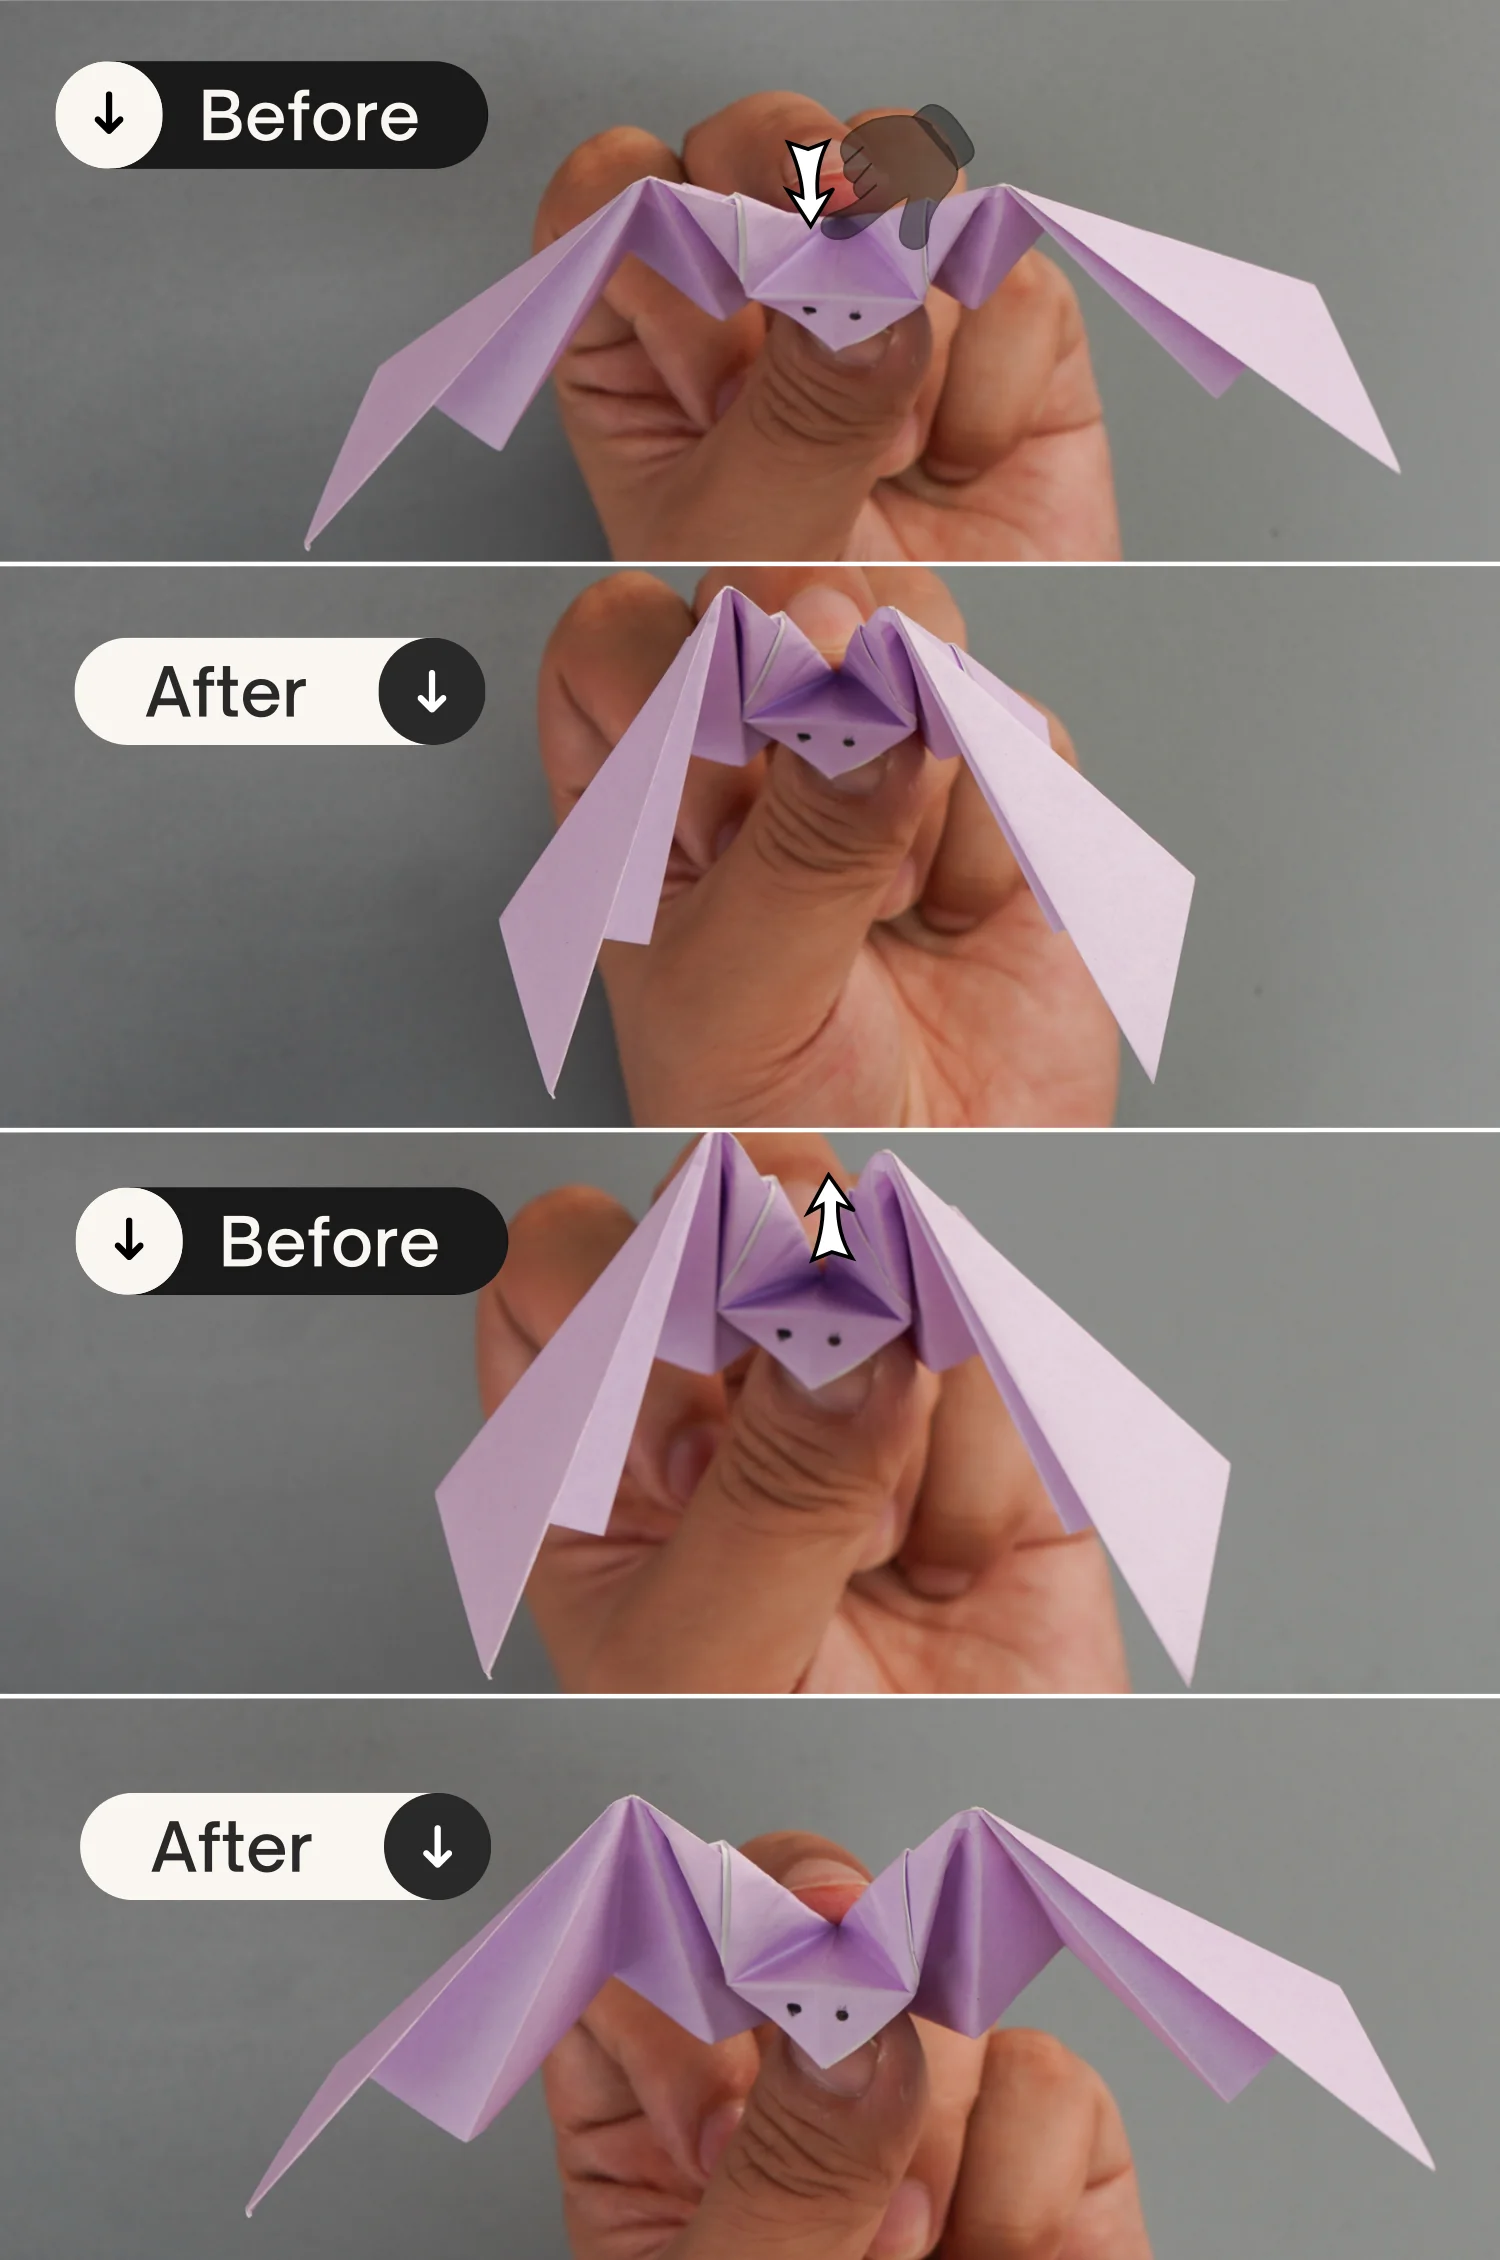
Step 19
Press down the the corner behind the face and release, repeat this action, and you’ll notice the wings will flap up and down.
What’s Next
That’s your cool origami bat, it would be a great gift for your children. Now you can explore our other origami animal instructions. Happy folding!
Other Origami Animal Ideas