How to Make an Origami Dinosaur
This post will teach you how to create an advanced version of an origami dinosaur. Although it’s a bit challenging, we provide detailed step-by-step instructions and video tutorials. Just follow along, and you’ll end up with a super cool origami dinosaur with lots of details.

If you are new to origami, start here from our beginner guide to know the basics and how to read the step-by-step instructions.
- Folding time: 15 minutes
- Paper: 15×15 cm
- Difficulty: Middle
Material
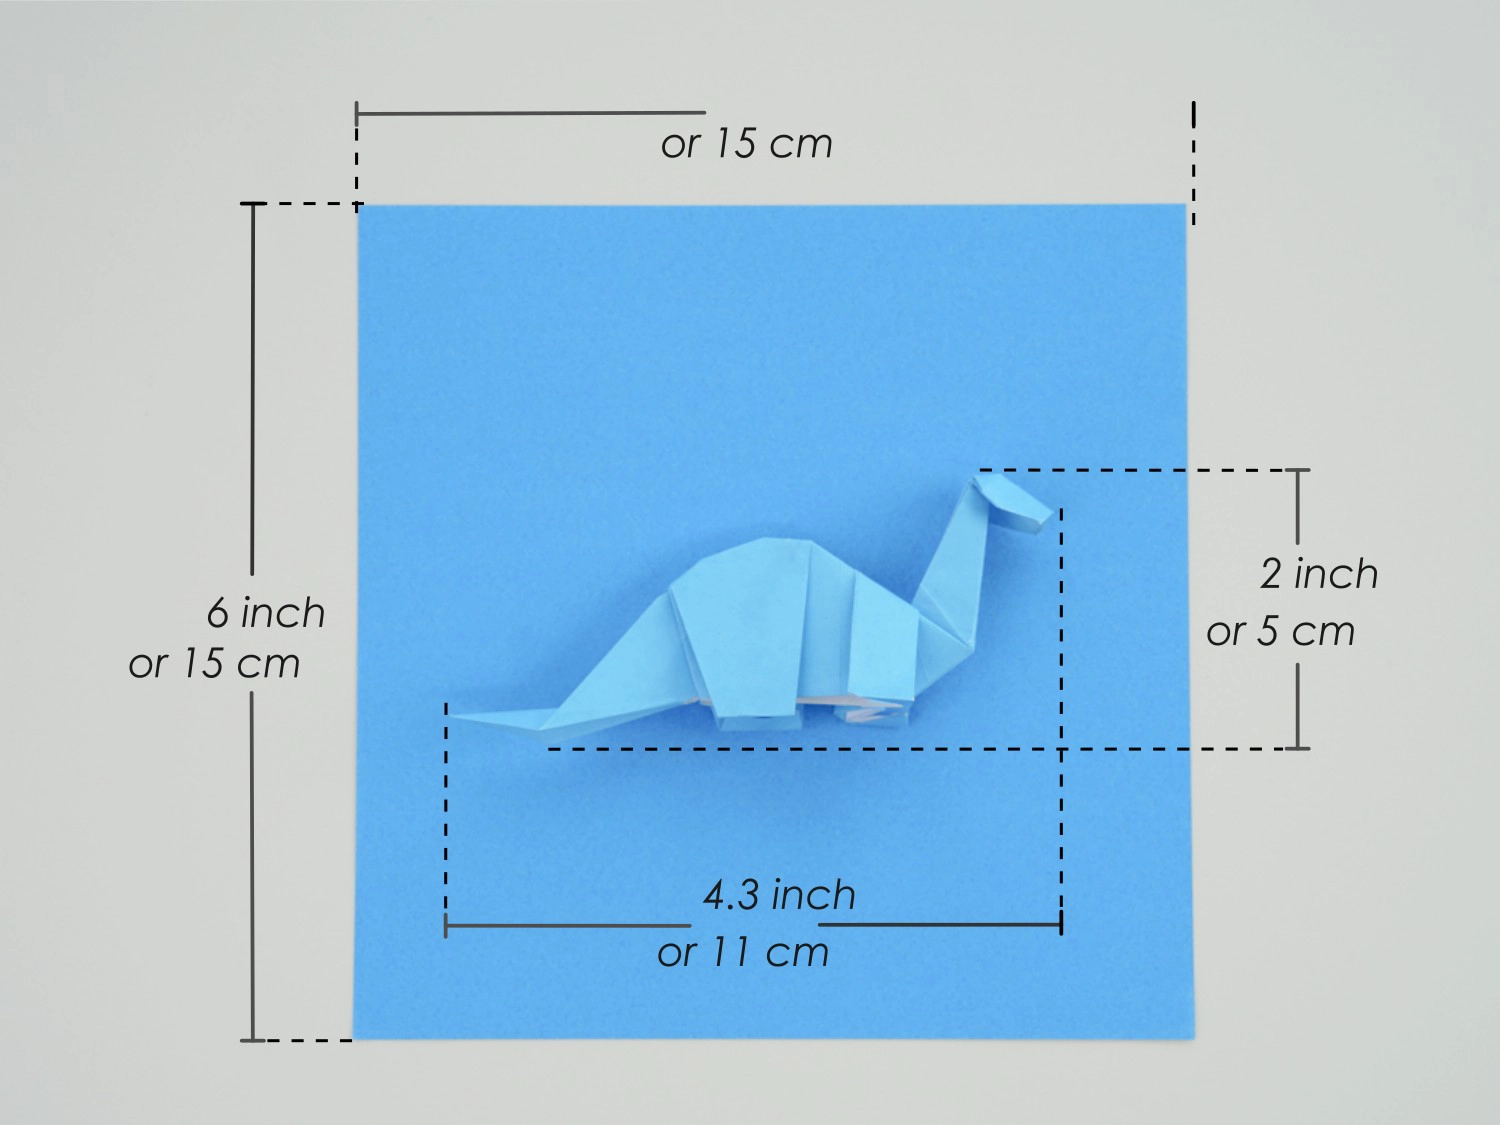
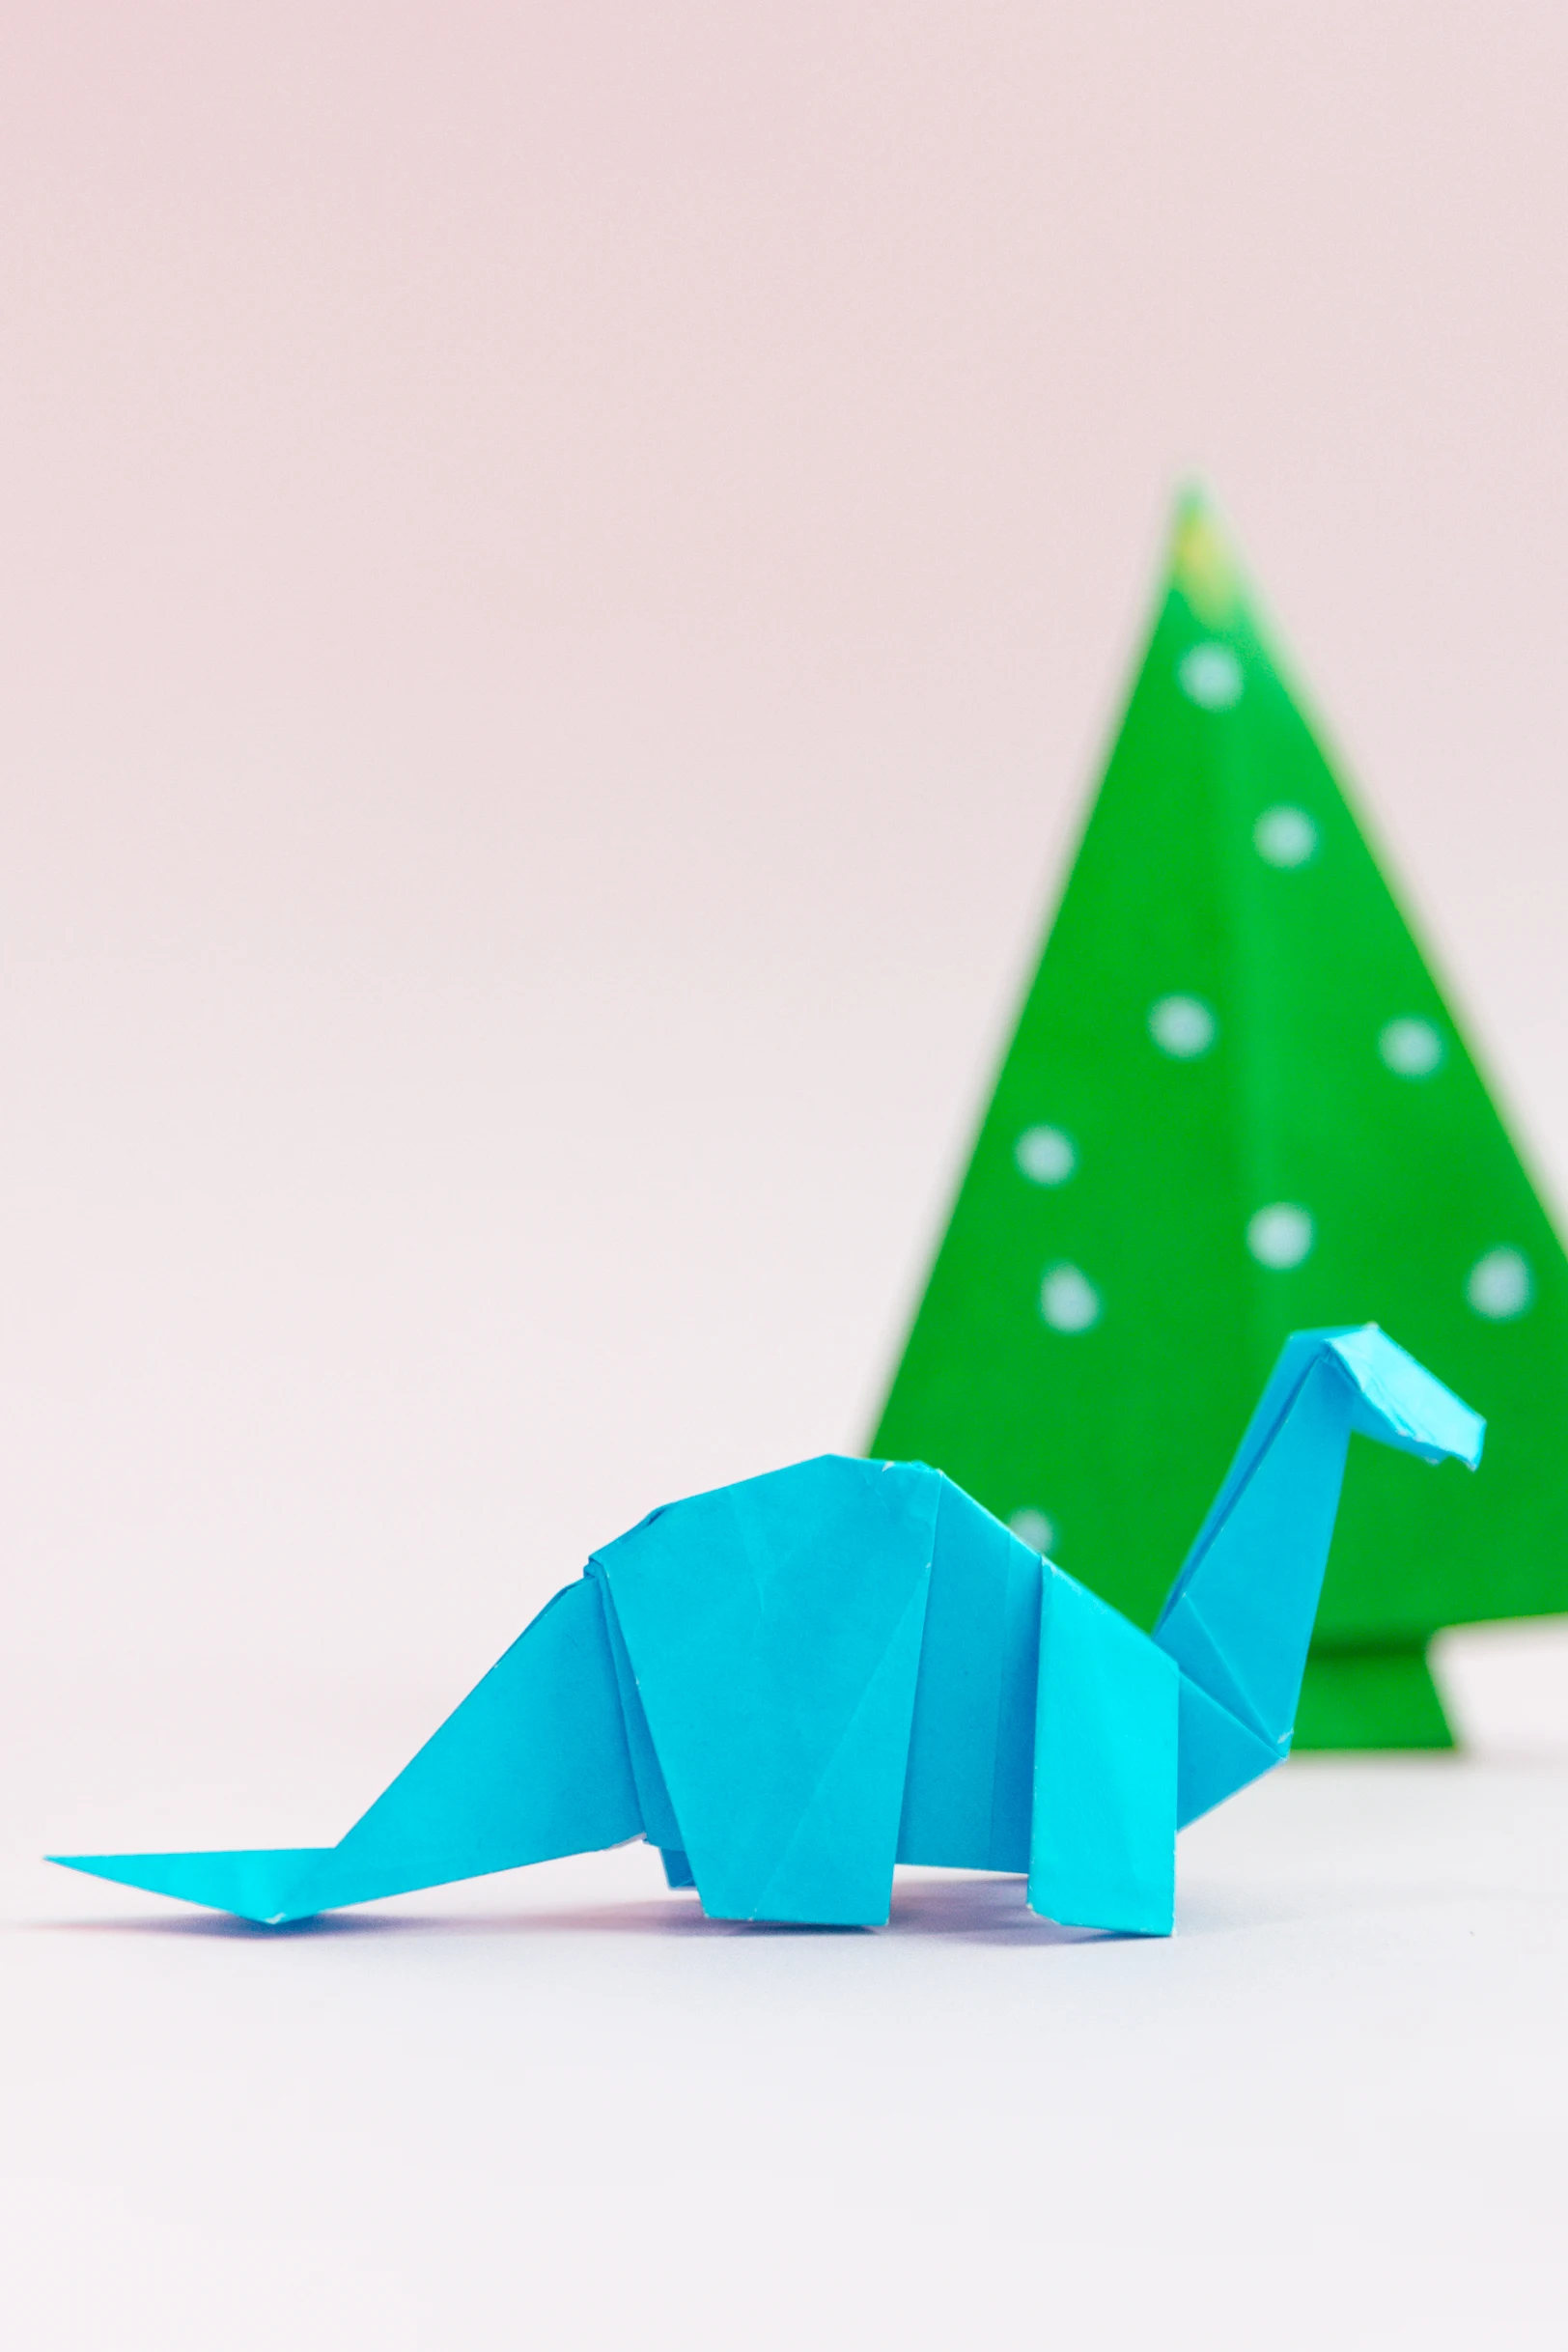
Prepare a 15×15 cm origami square paper, with one blue and one white side, to create a 5×11 cm dinosaur. Different dinosaurs can be made using various colors and sizes of square paper.
Origami Dinosaur Video
Step by Step Instructions of Origami Dinosaur
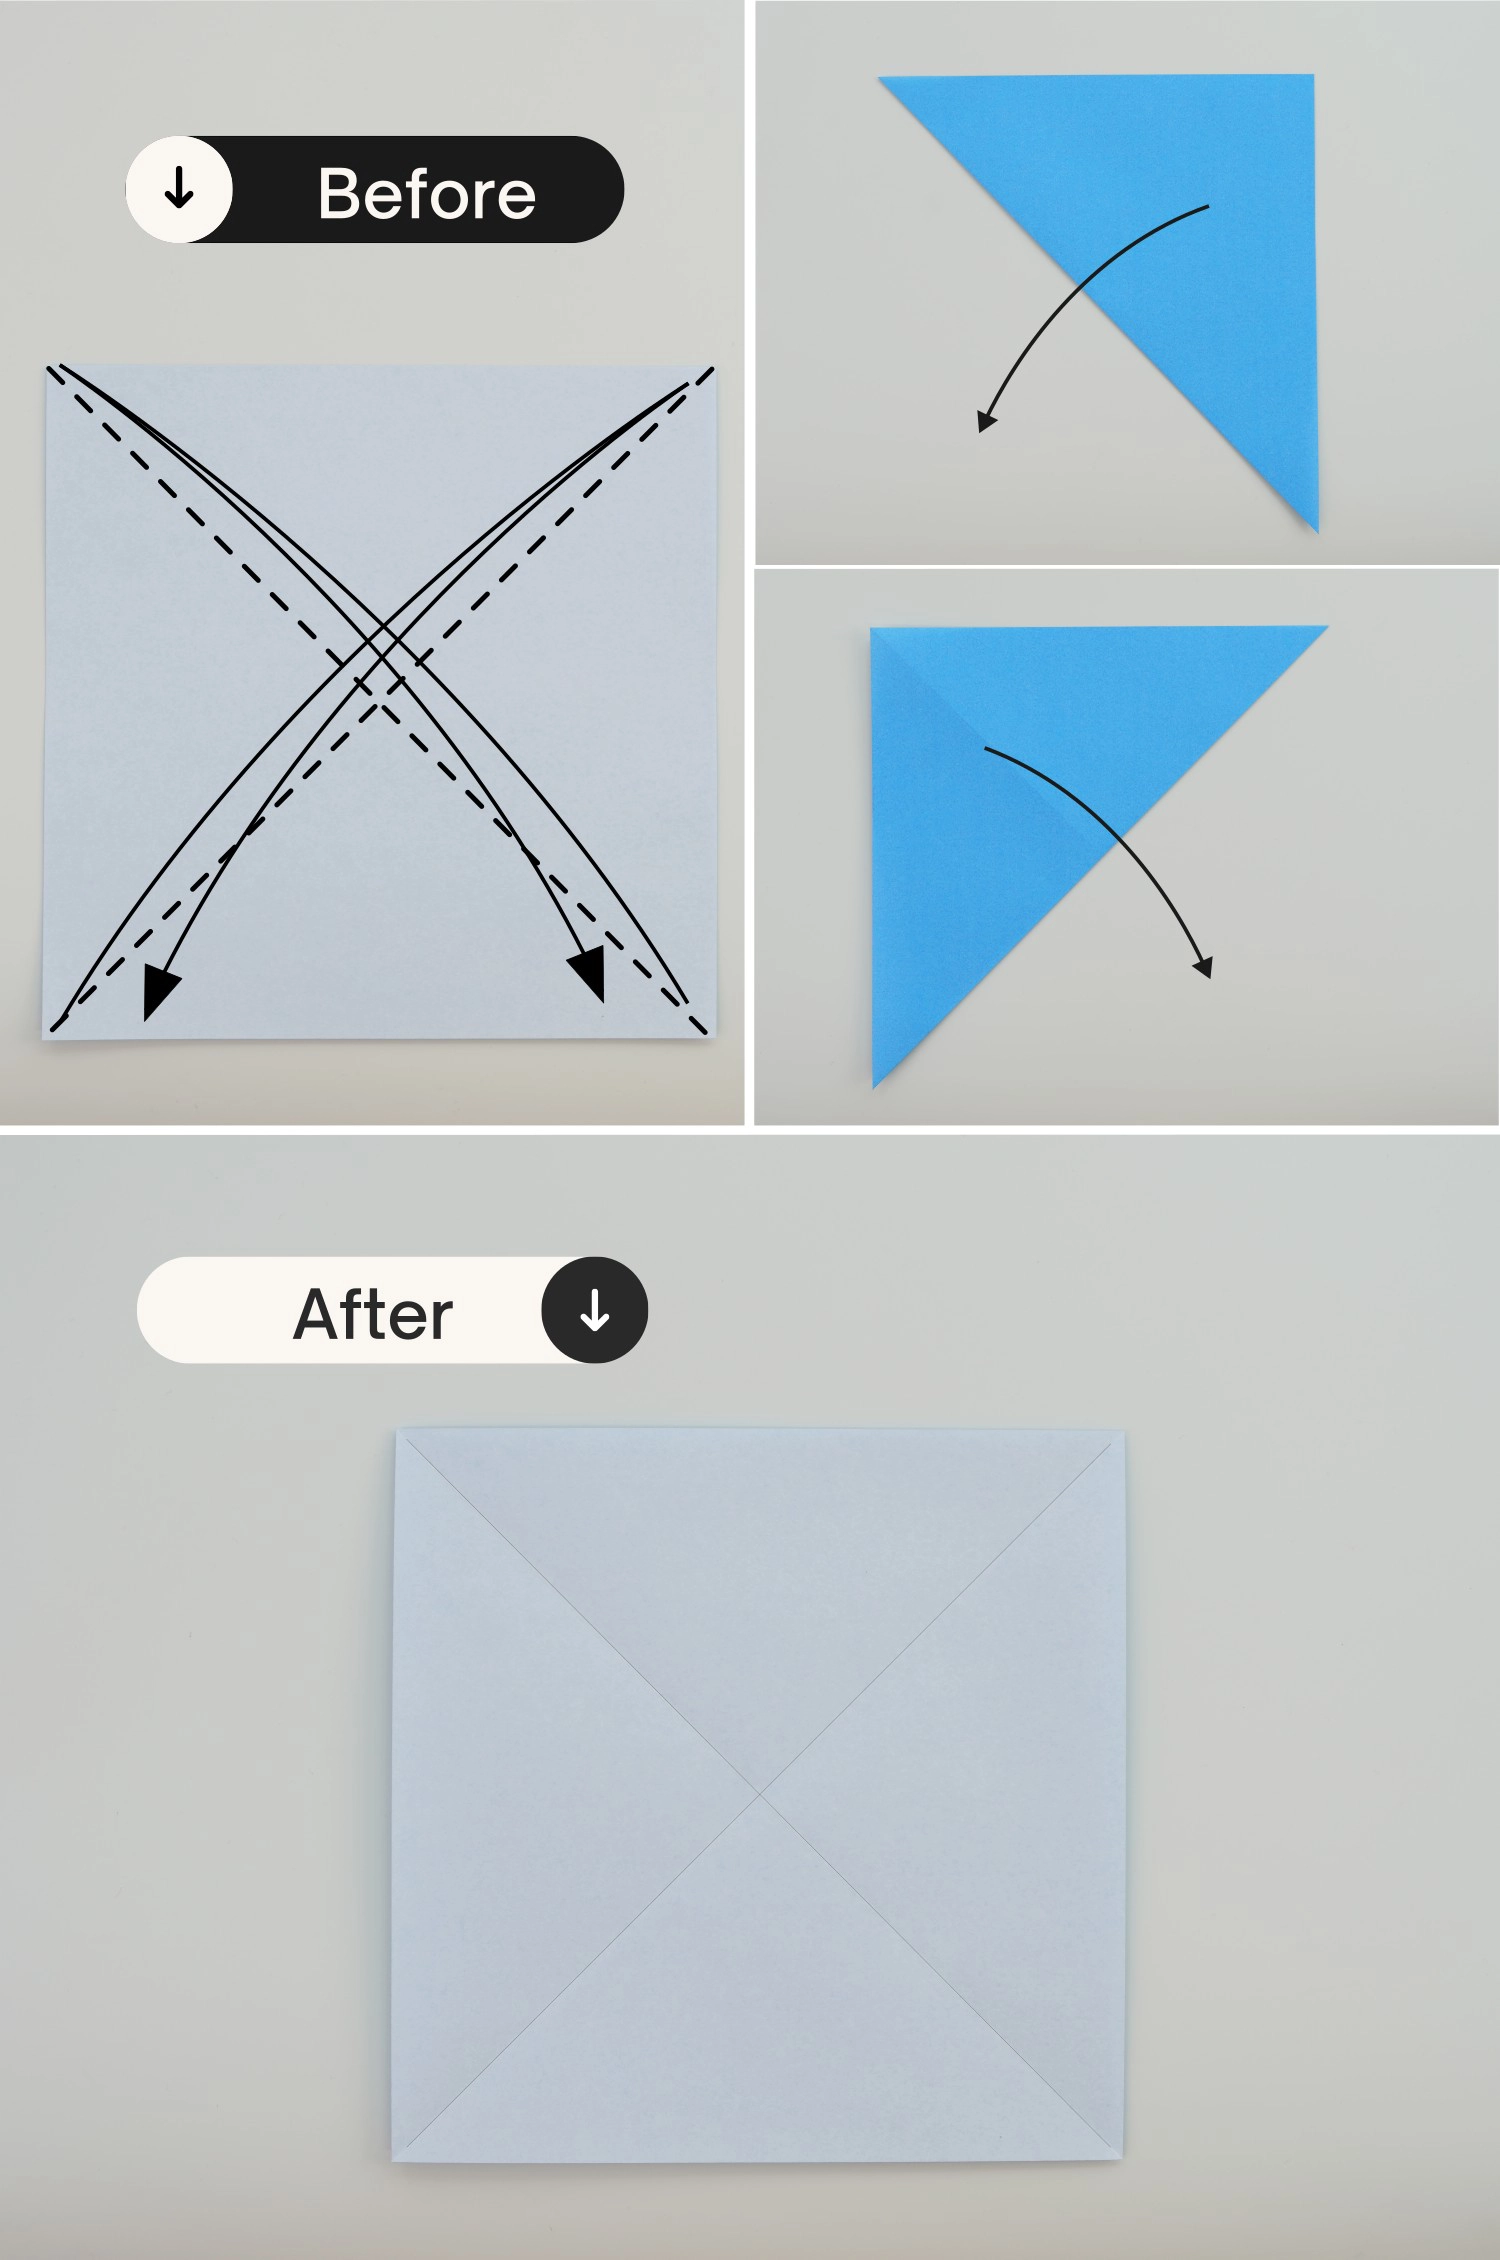
Step 1
Start with the white side of the paper facing up. Fold in half diagonally and unfold, then
fold diagonally in the opposite direction and unfold.
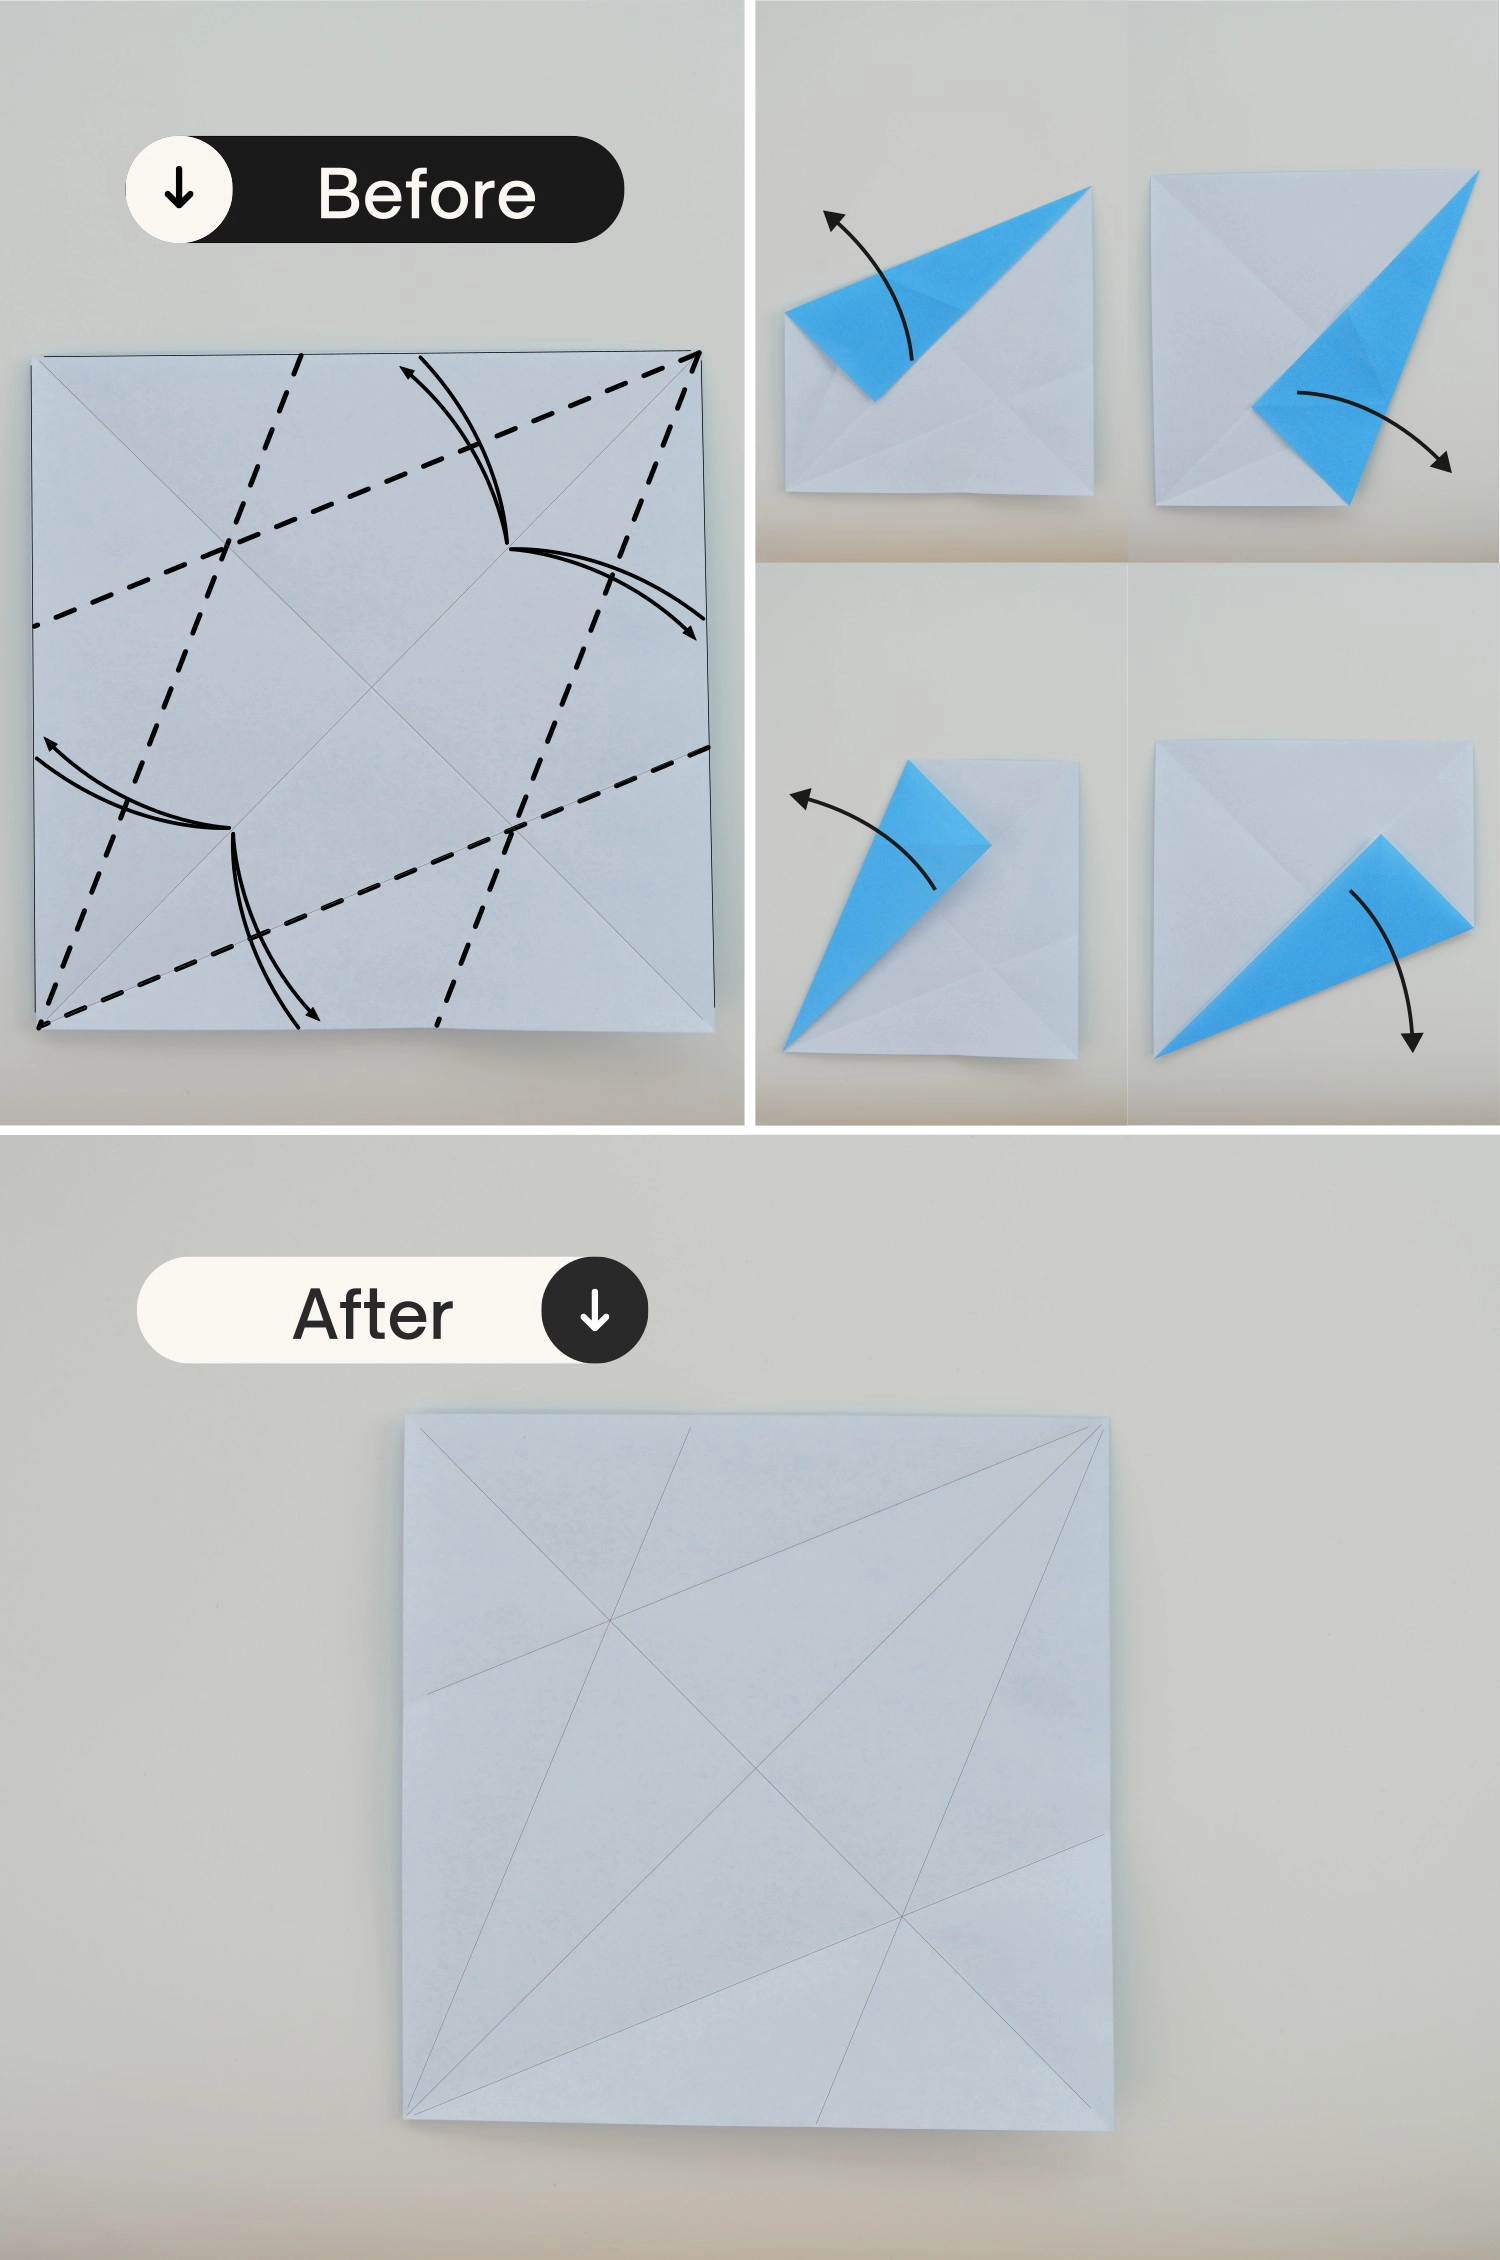
Step 2
Fold the top edge of the paper to align with the diagonal crease, then unfold.
Repeat this process with the left, right, and bottom edges to create four new creases.
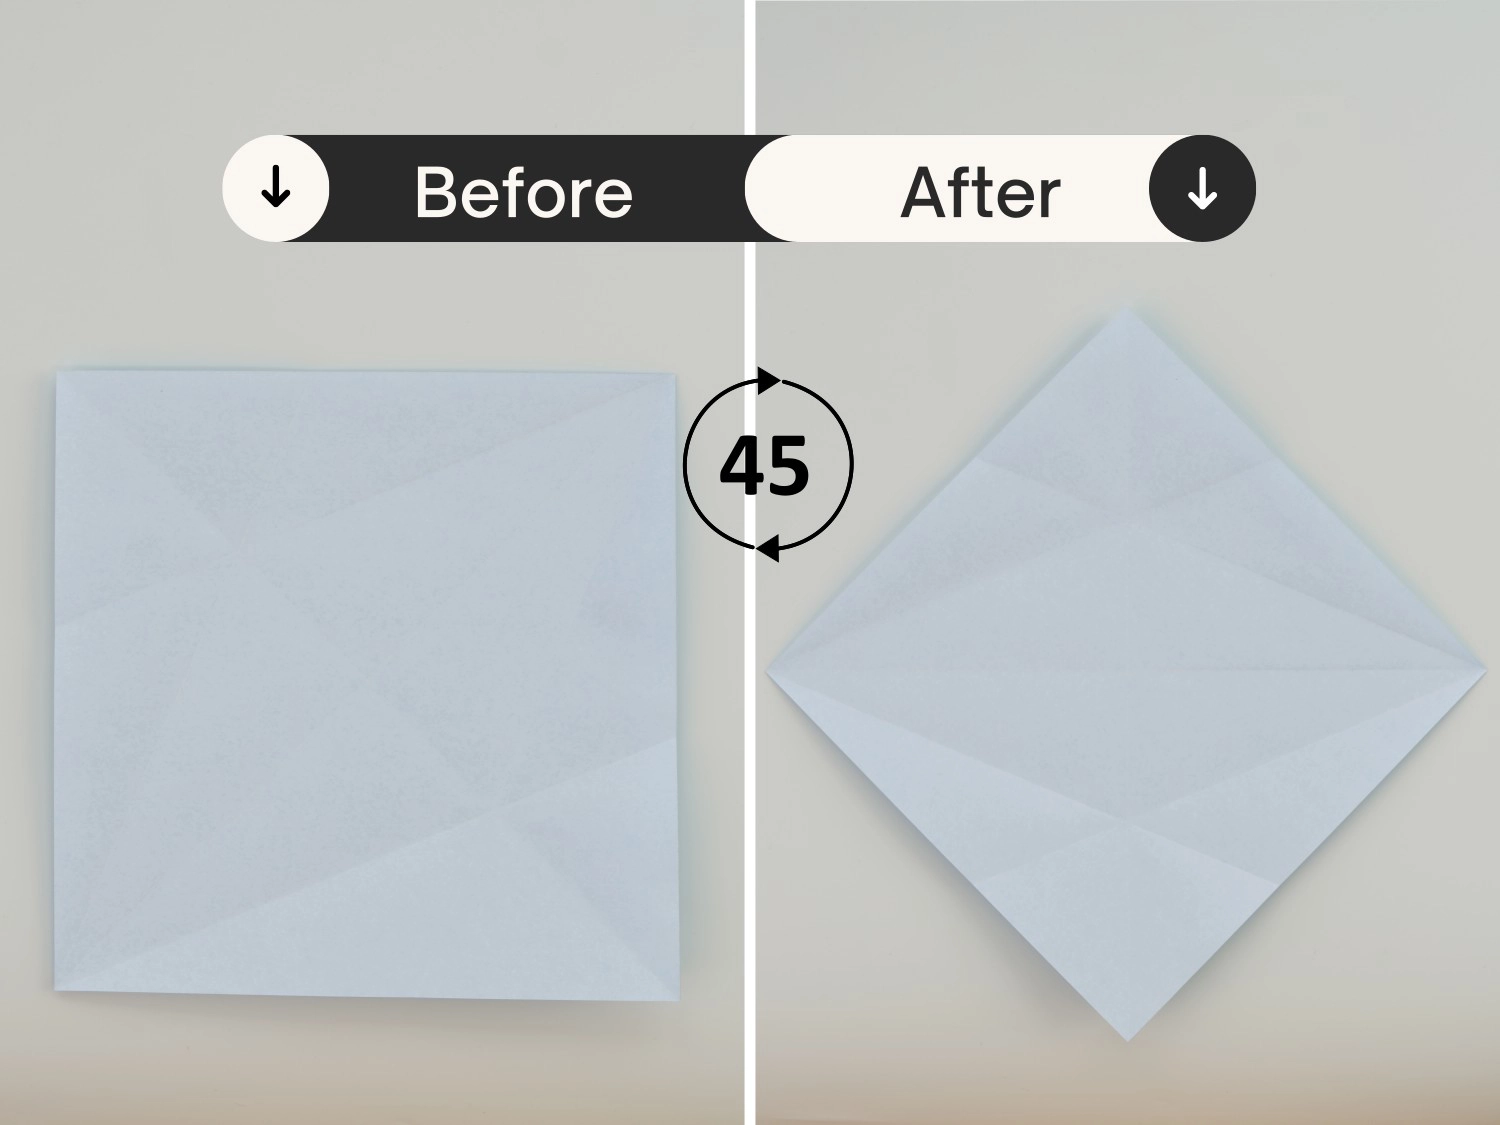
Step 3
Rotate the paper 45 degrees to the right.
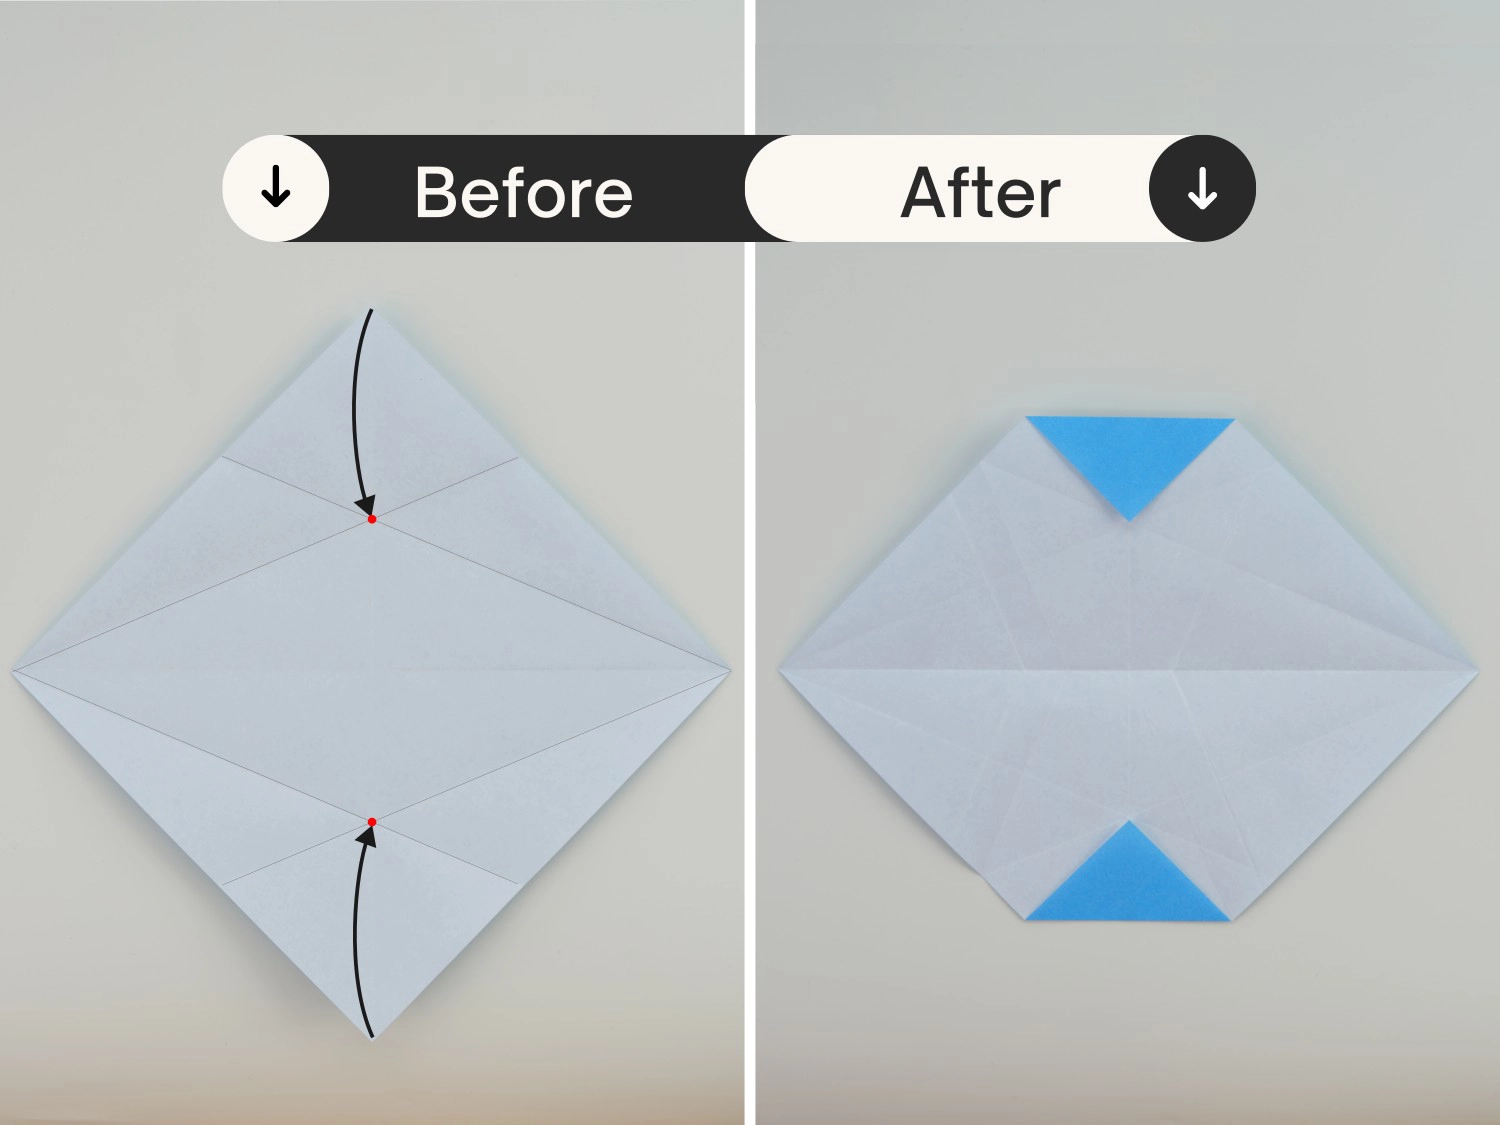
Step 4
Fold the top corner to the intersection point created by the two creases from step 2.
Repeat with the bottom corner.
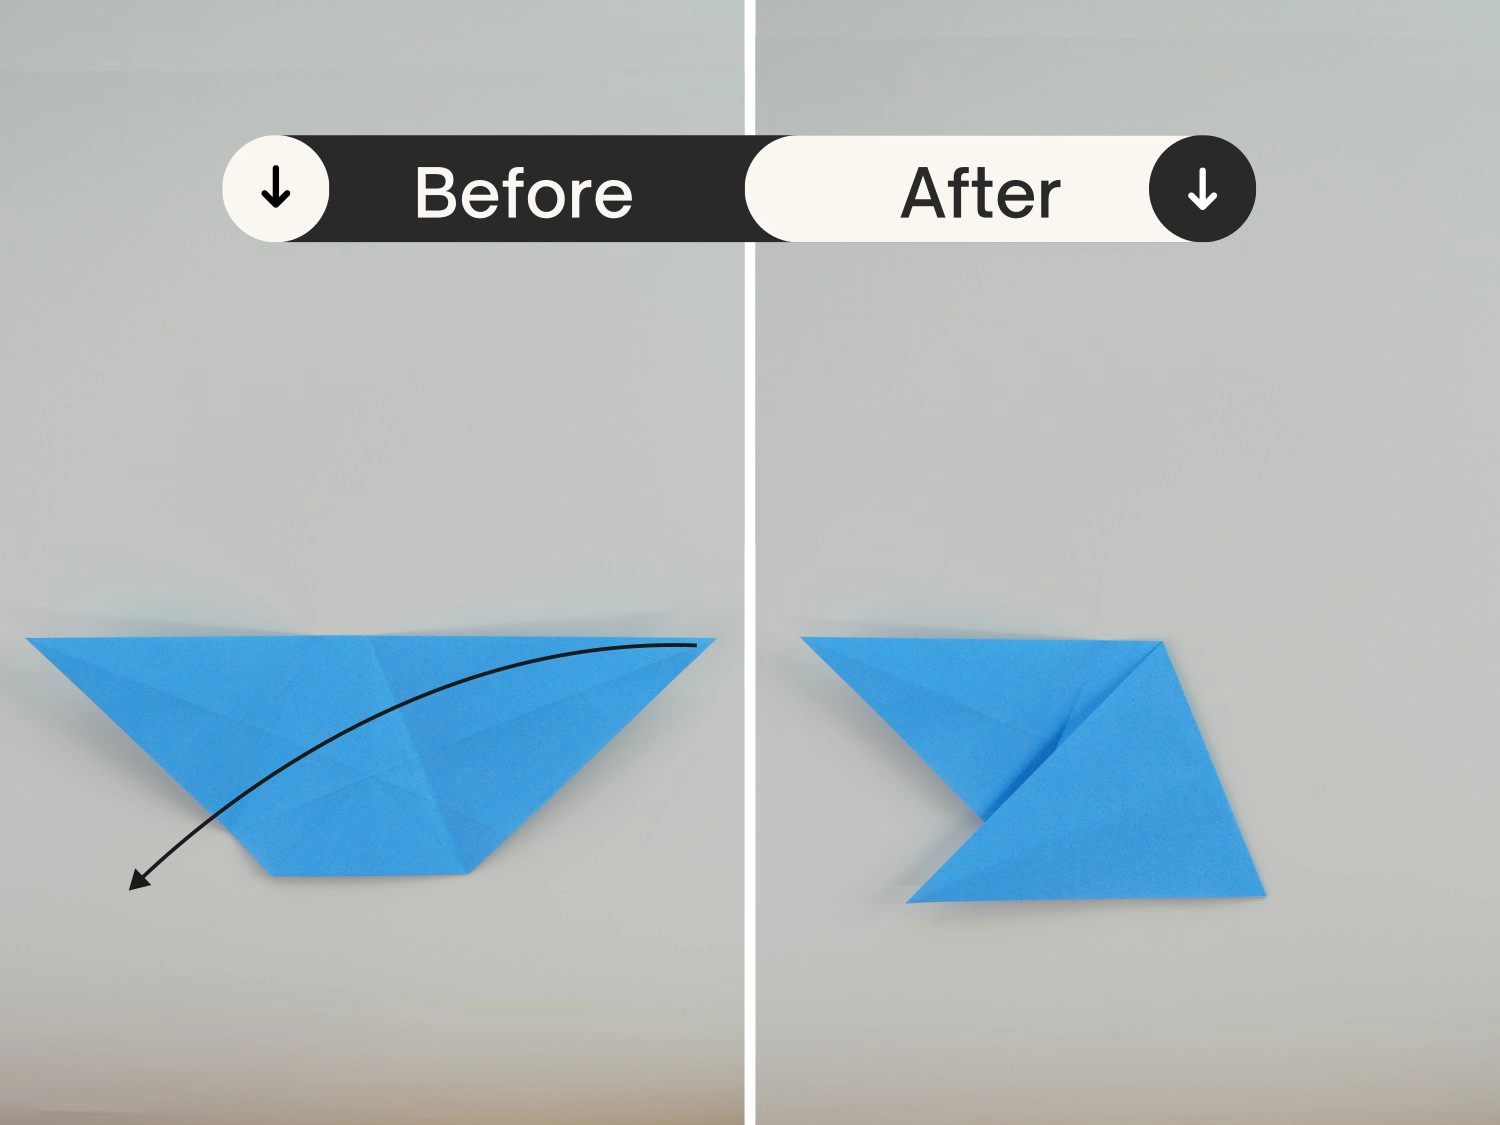
Step 5
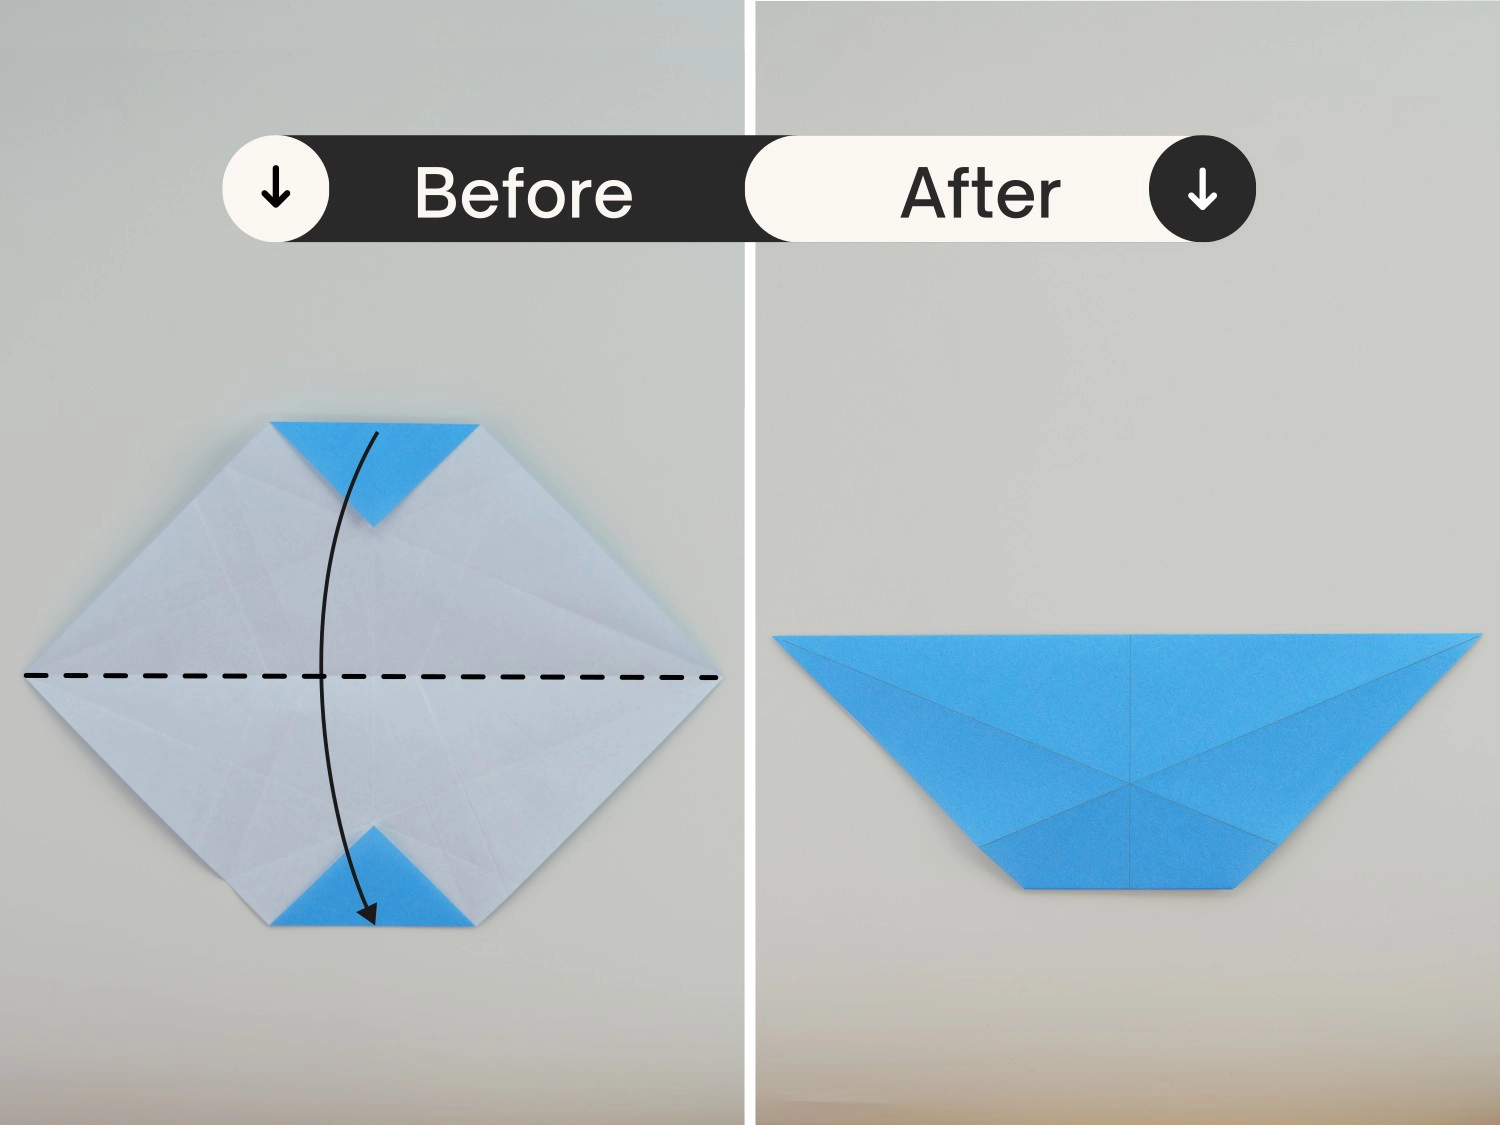
Fold the model in half downward along the existing horizontal crease.
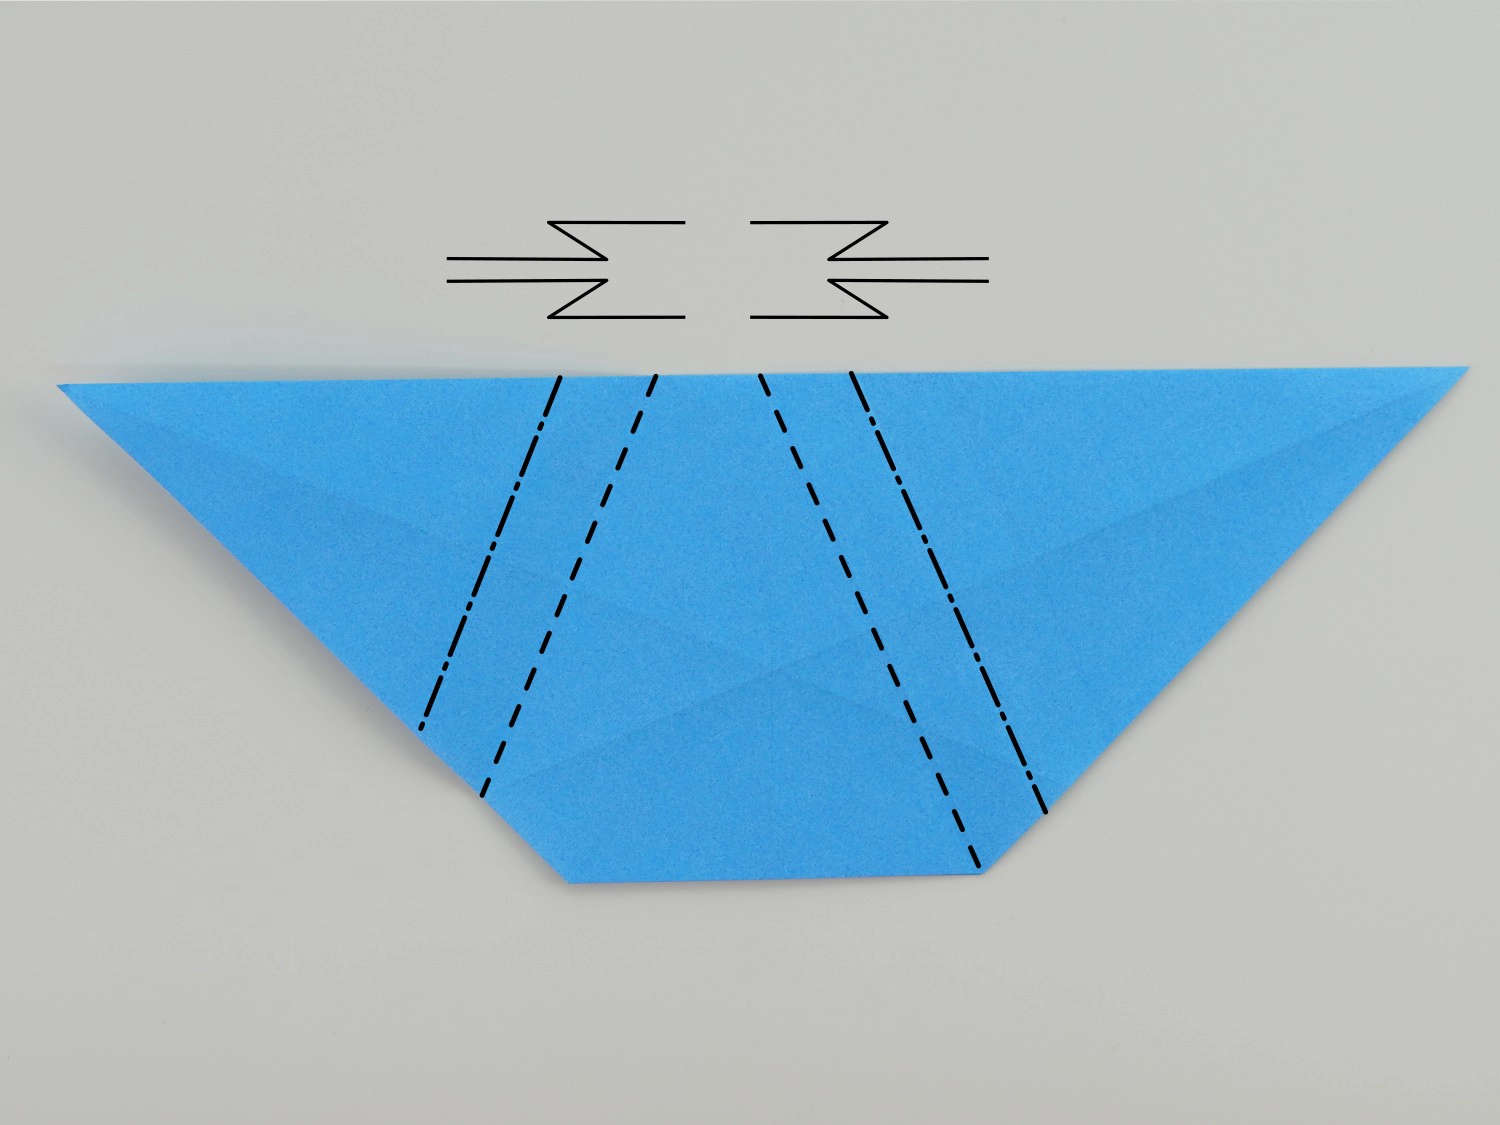
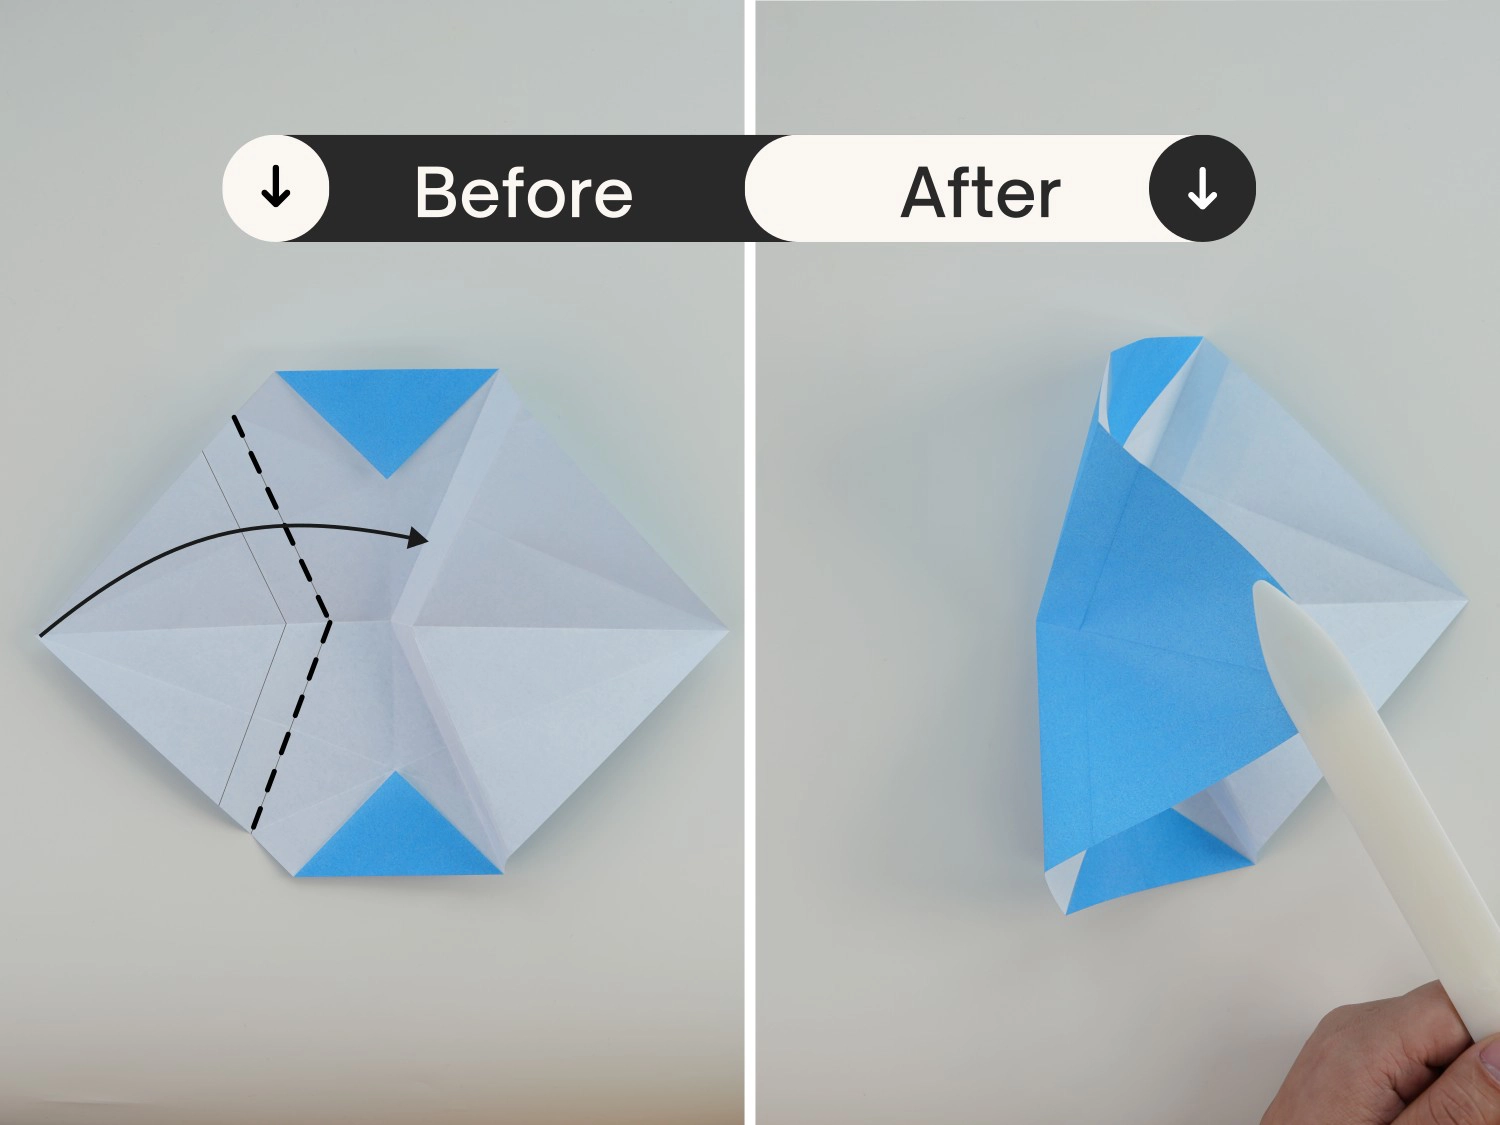
Step 6
Fold the top right corner towards the left side. The ends of the crease will intersect the
bottom right corner and the top tip of the center vertical line. Unfold the crease.
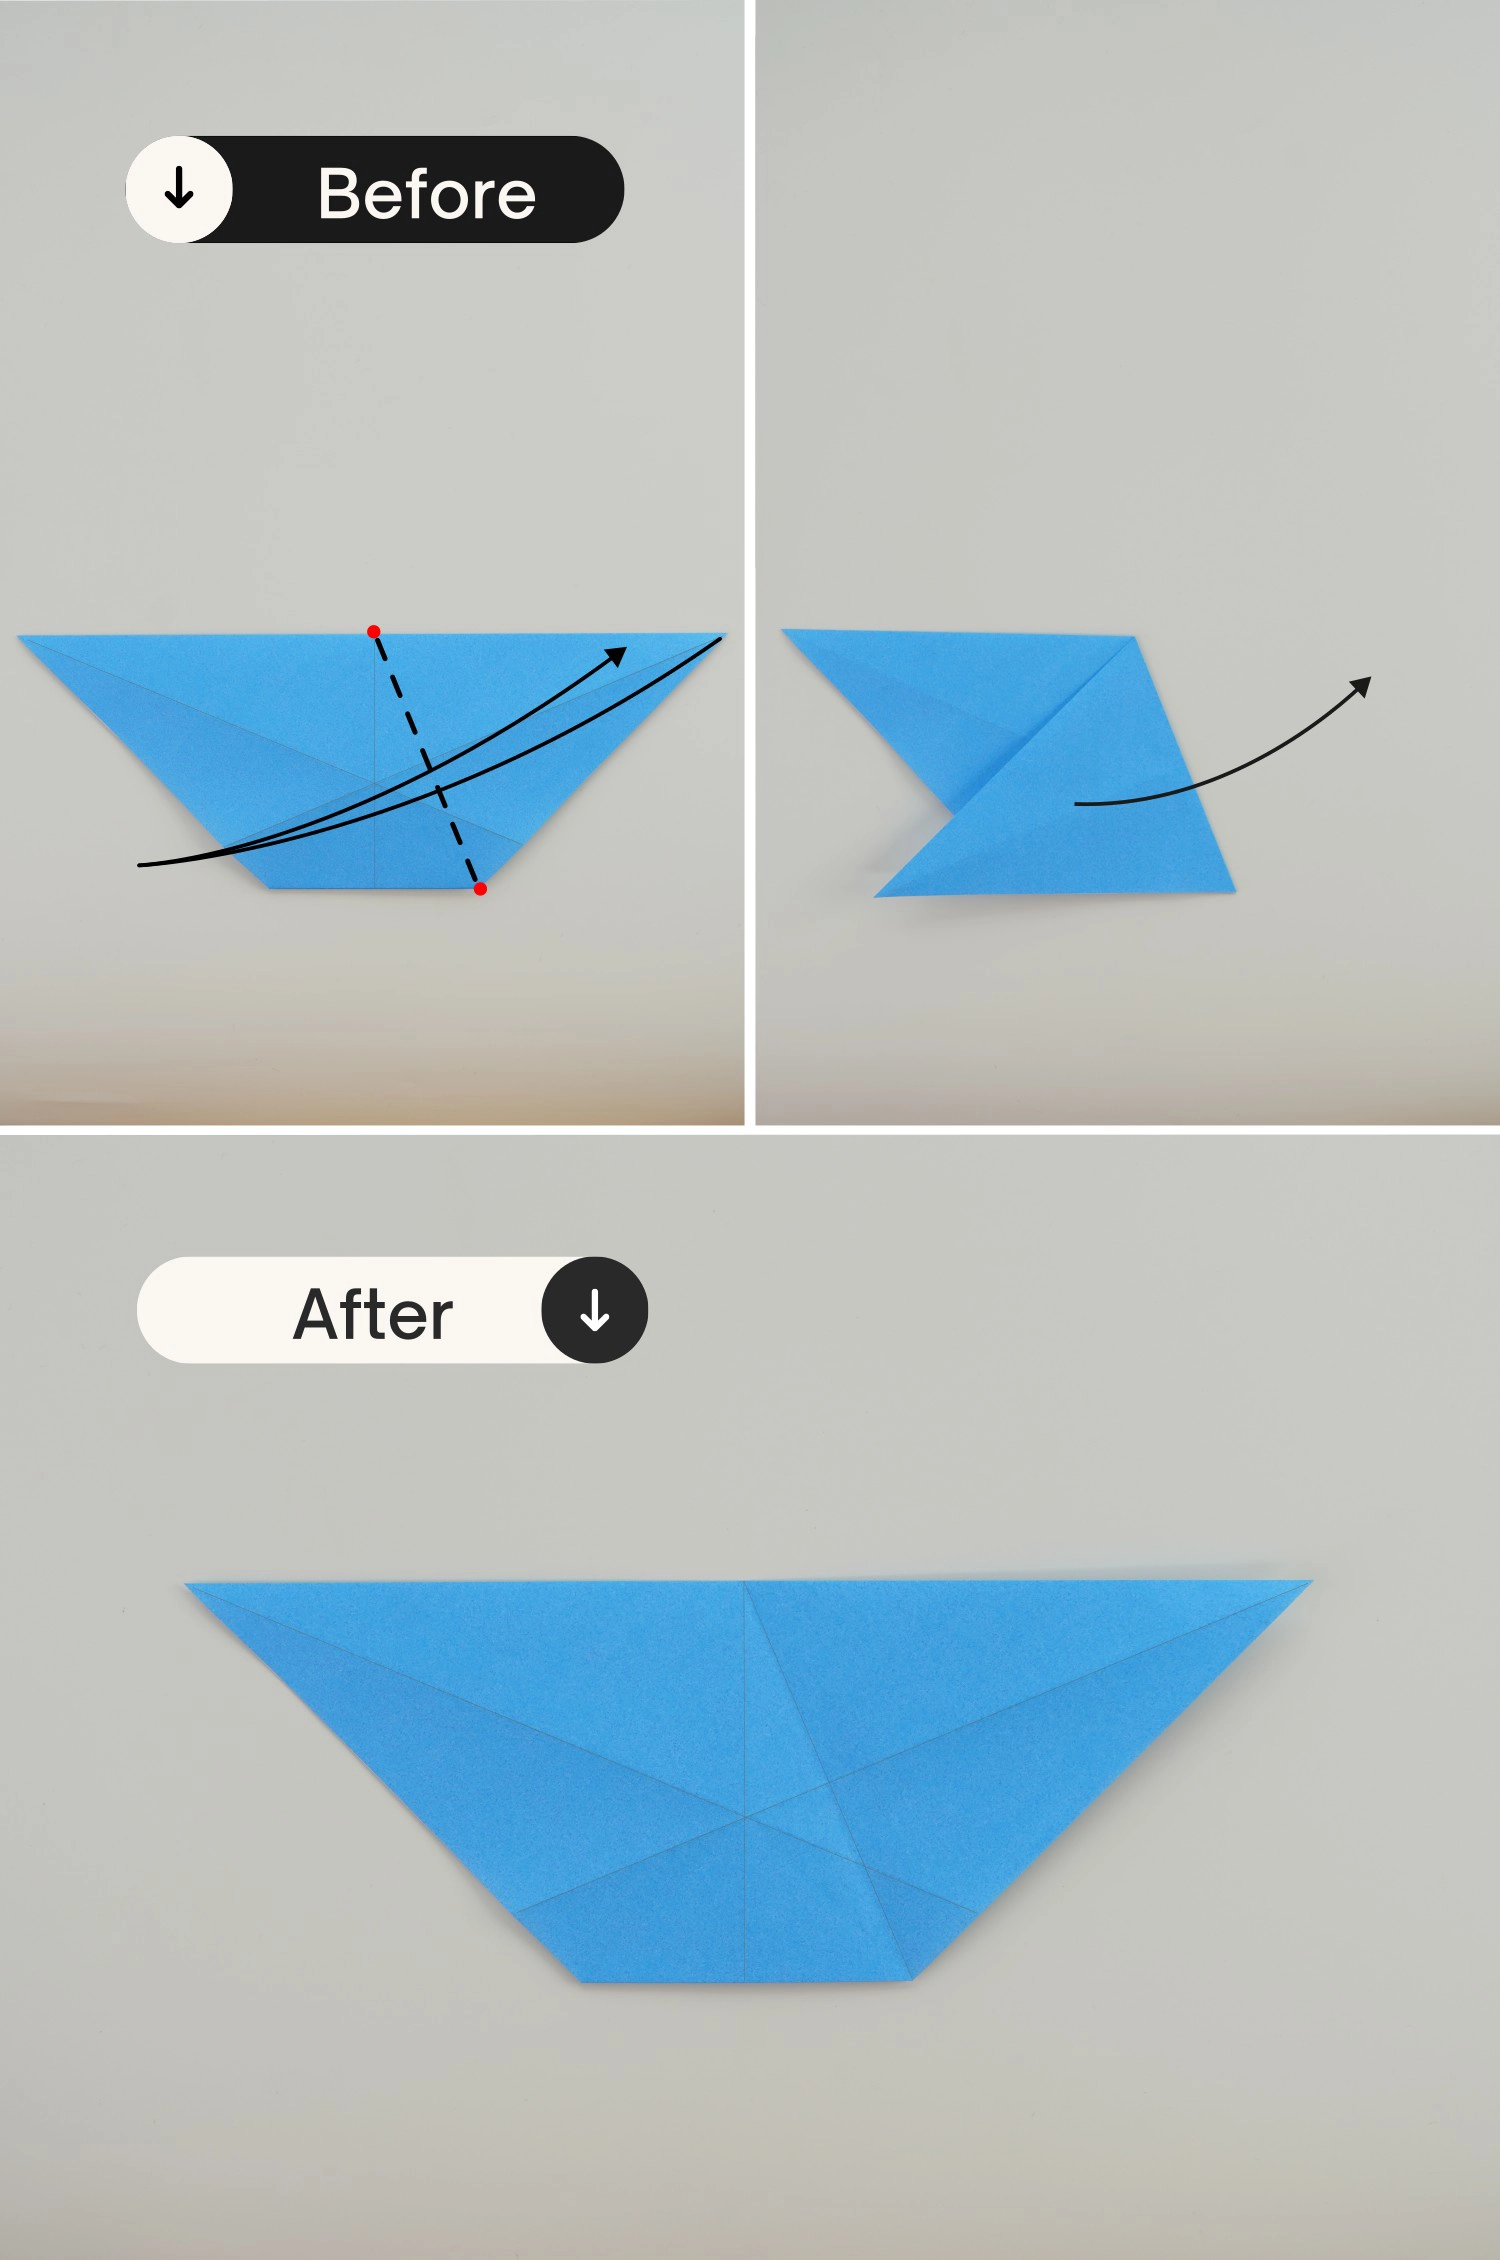
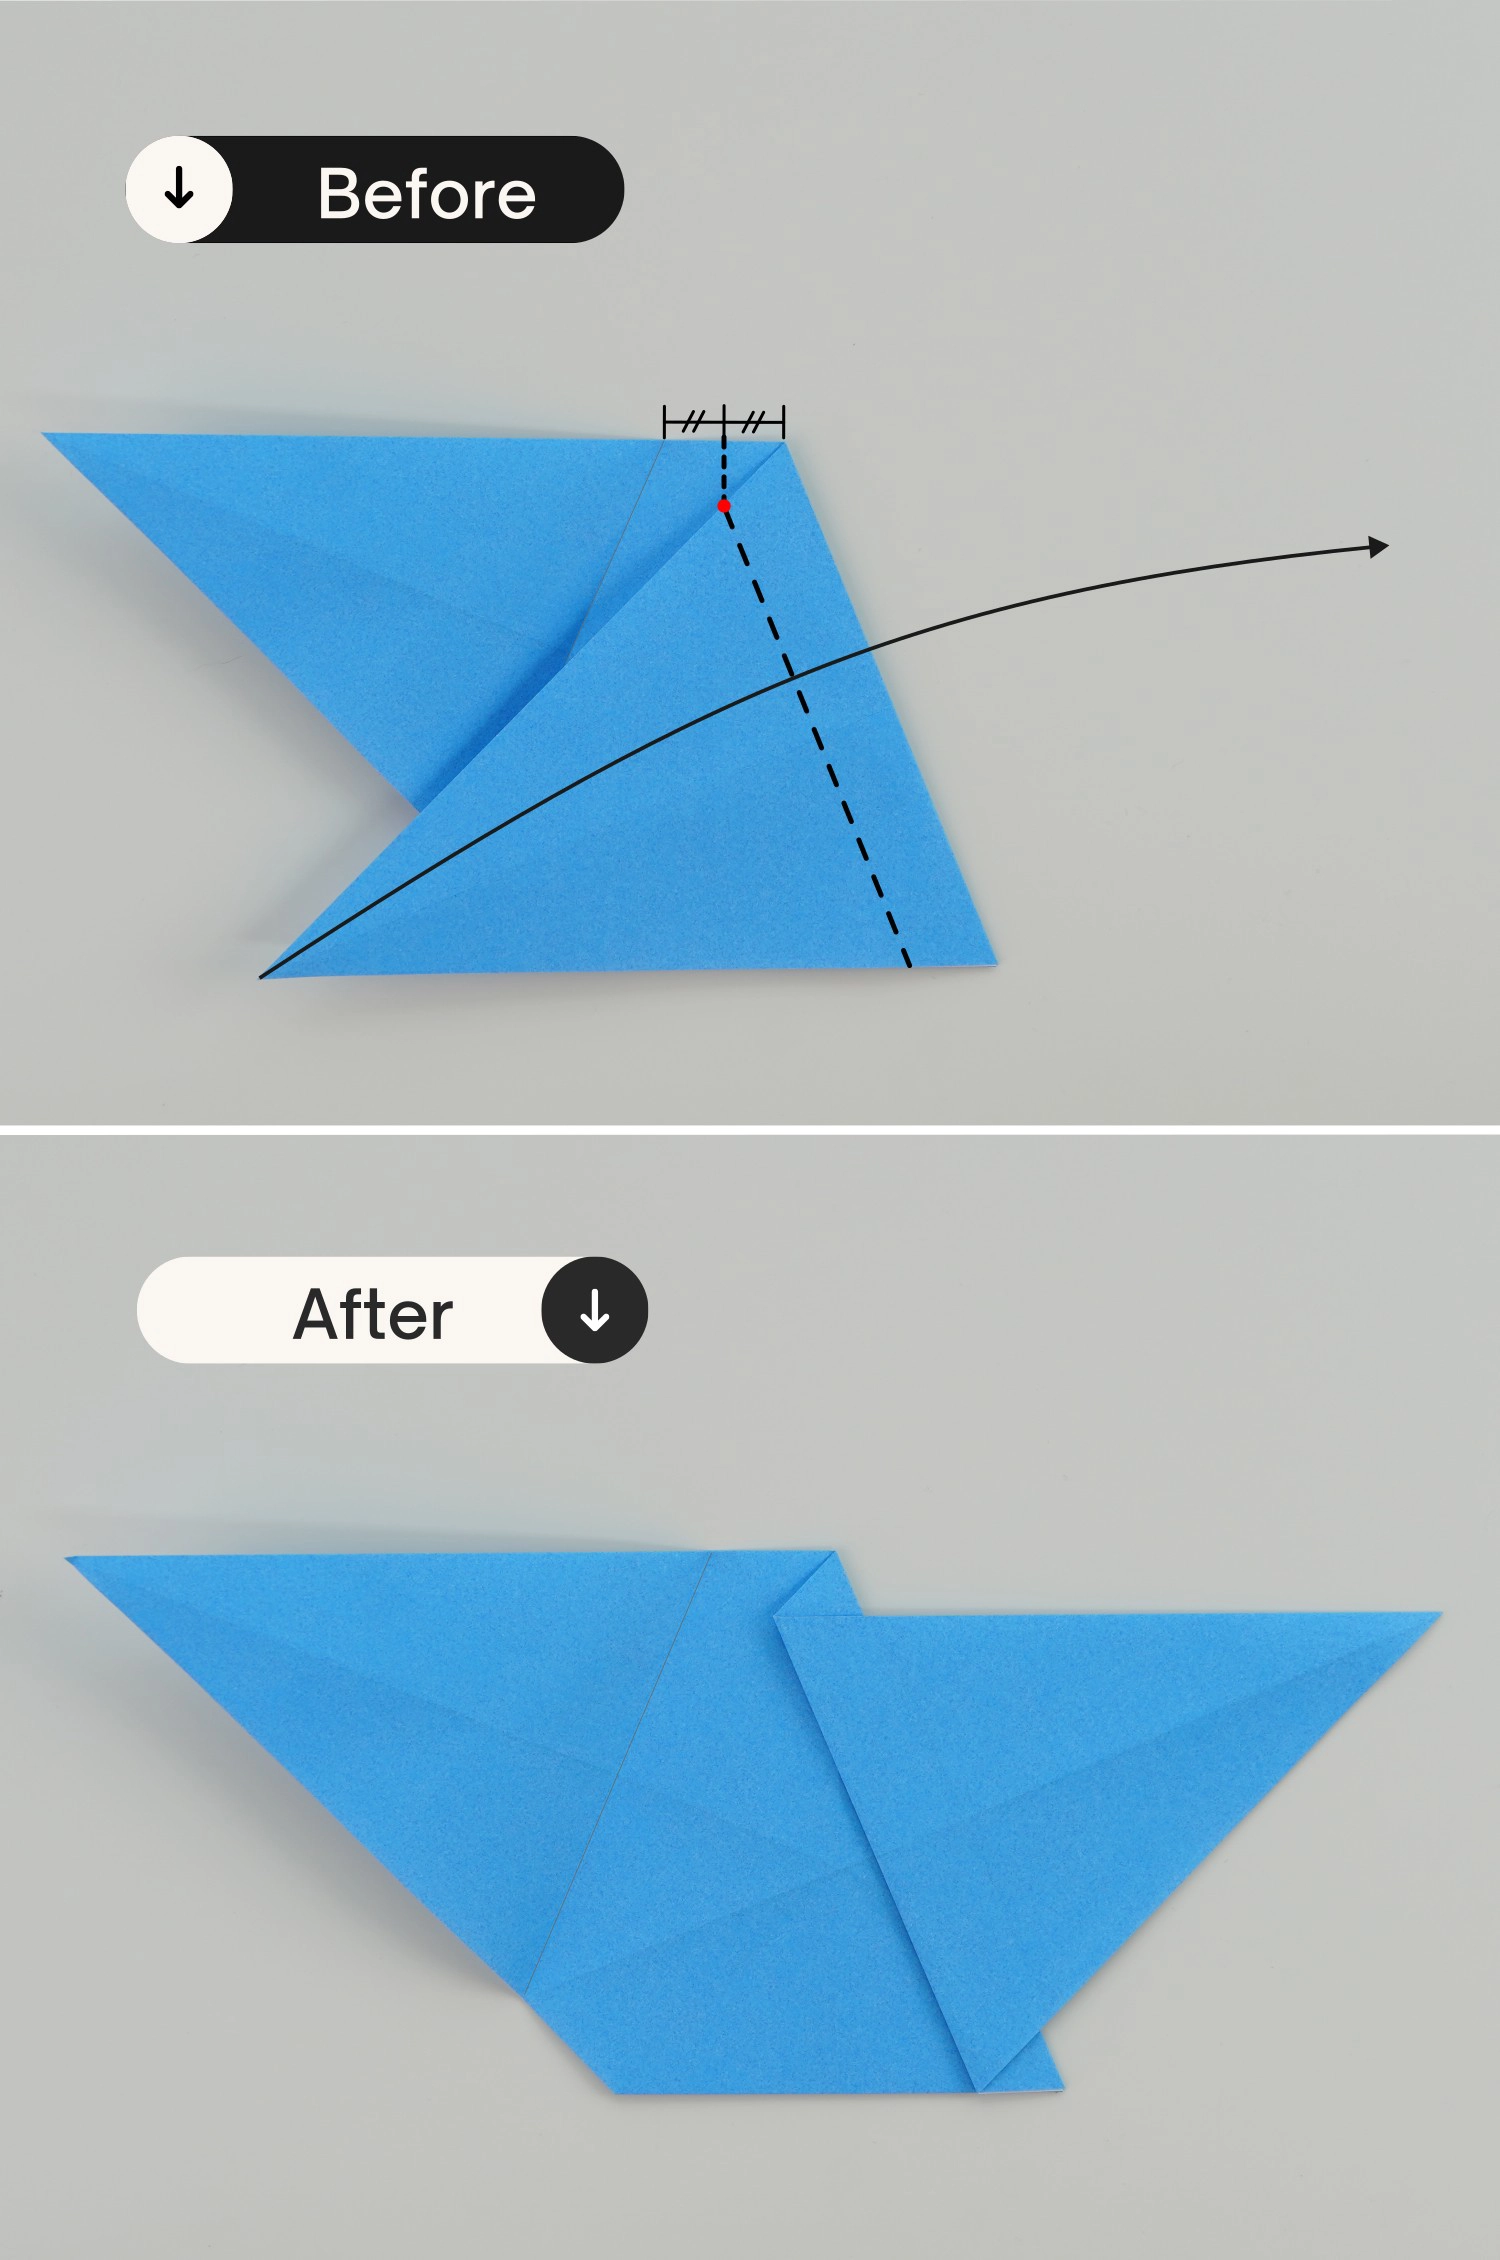
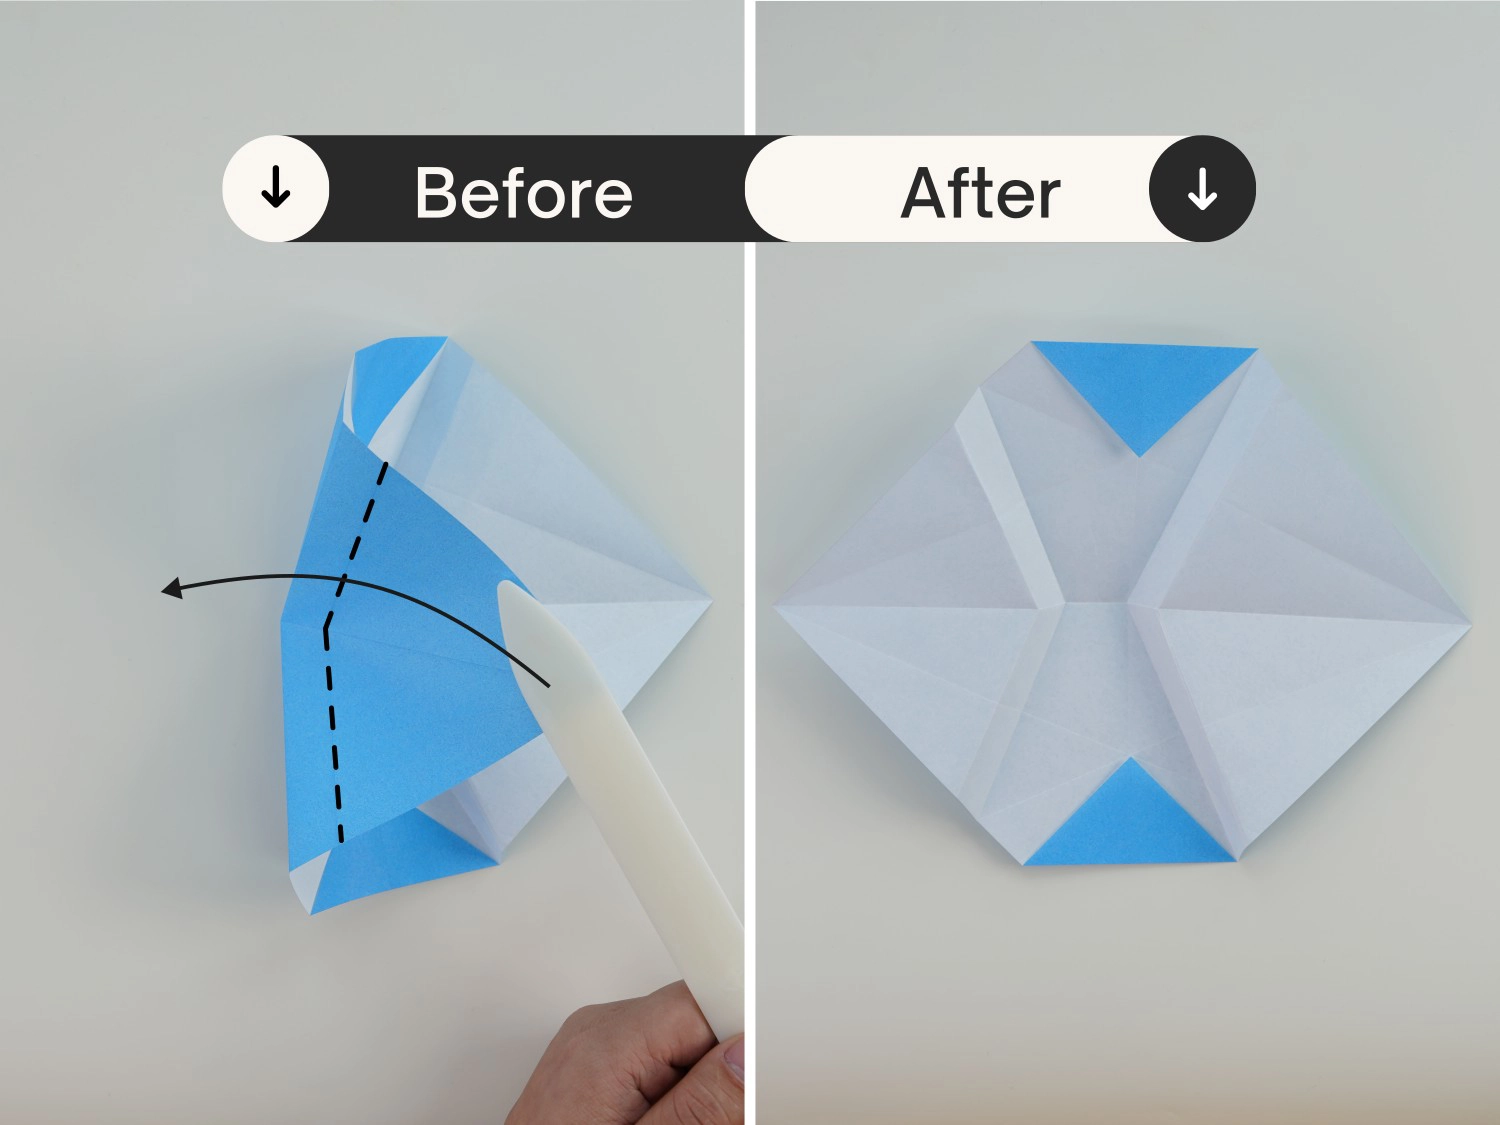
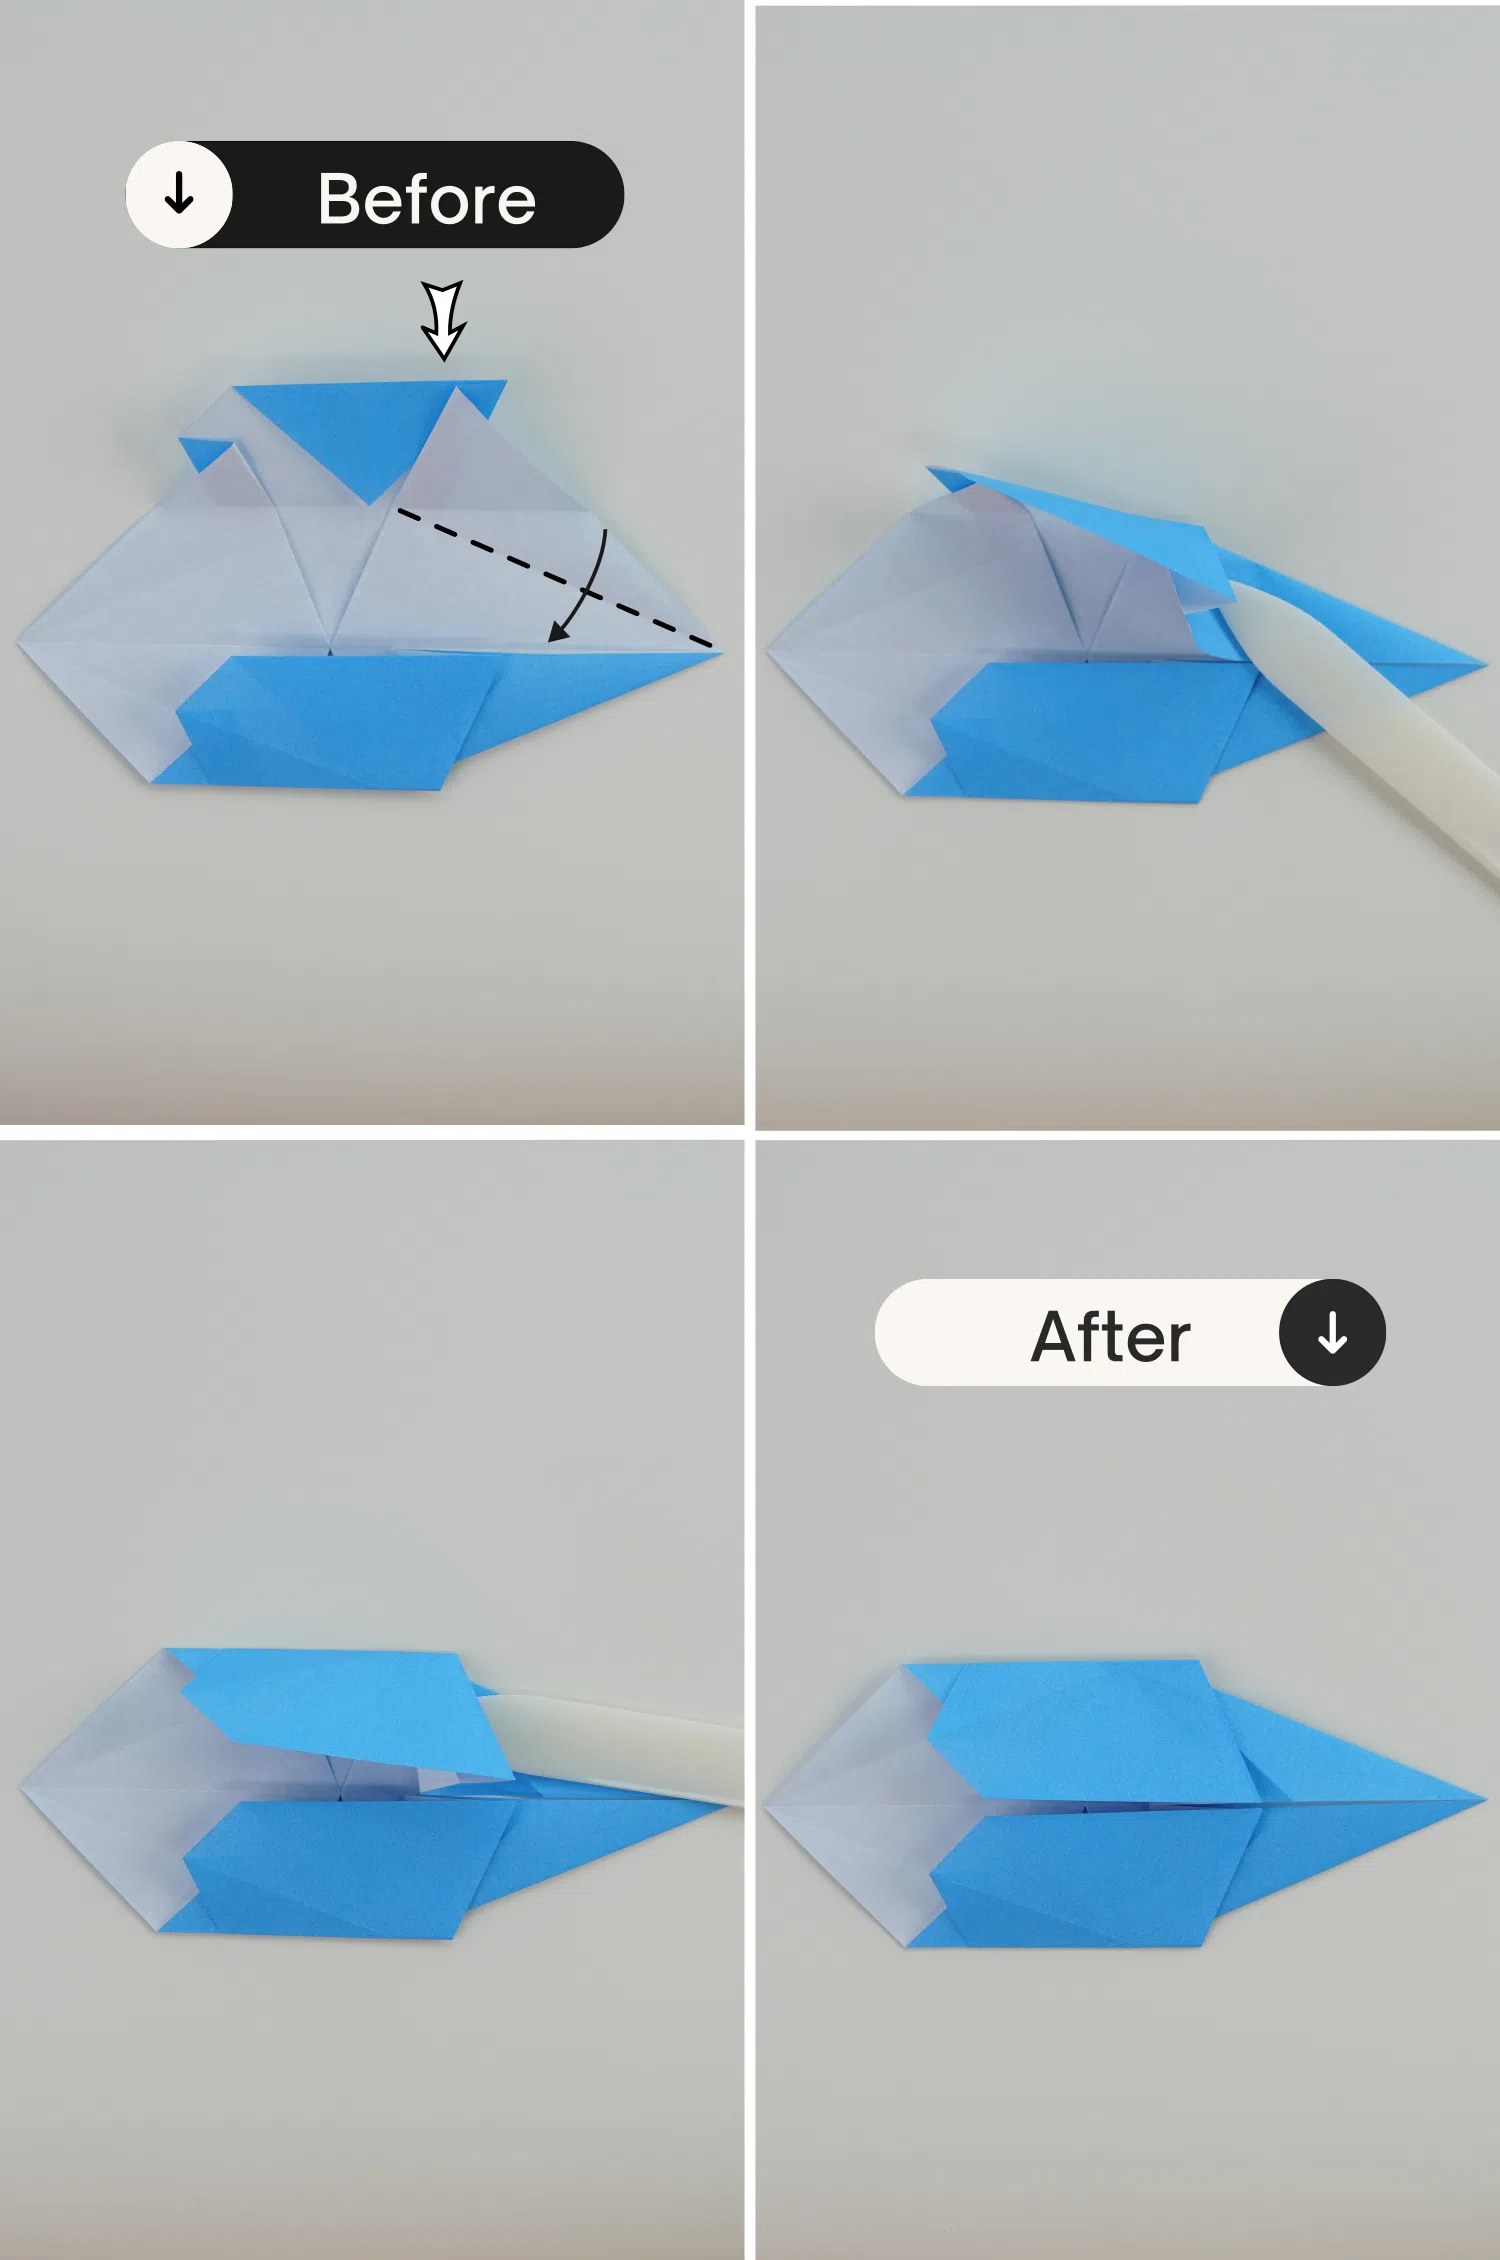
Step 7
Fold the top left corner towards the right side. The corner should touch the bottom right
intersection of the fold created in step 2.
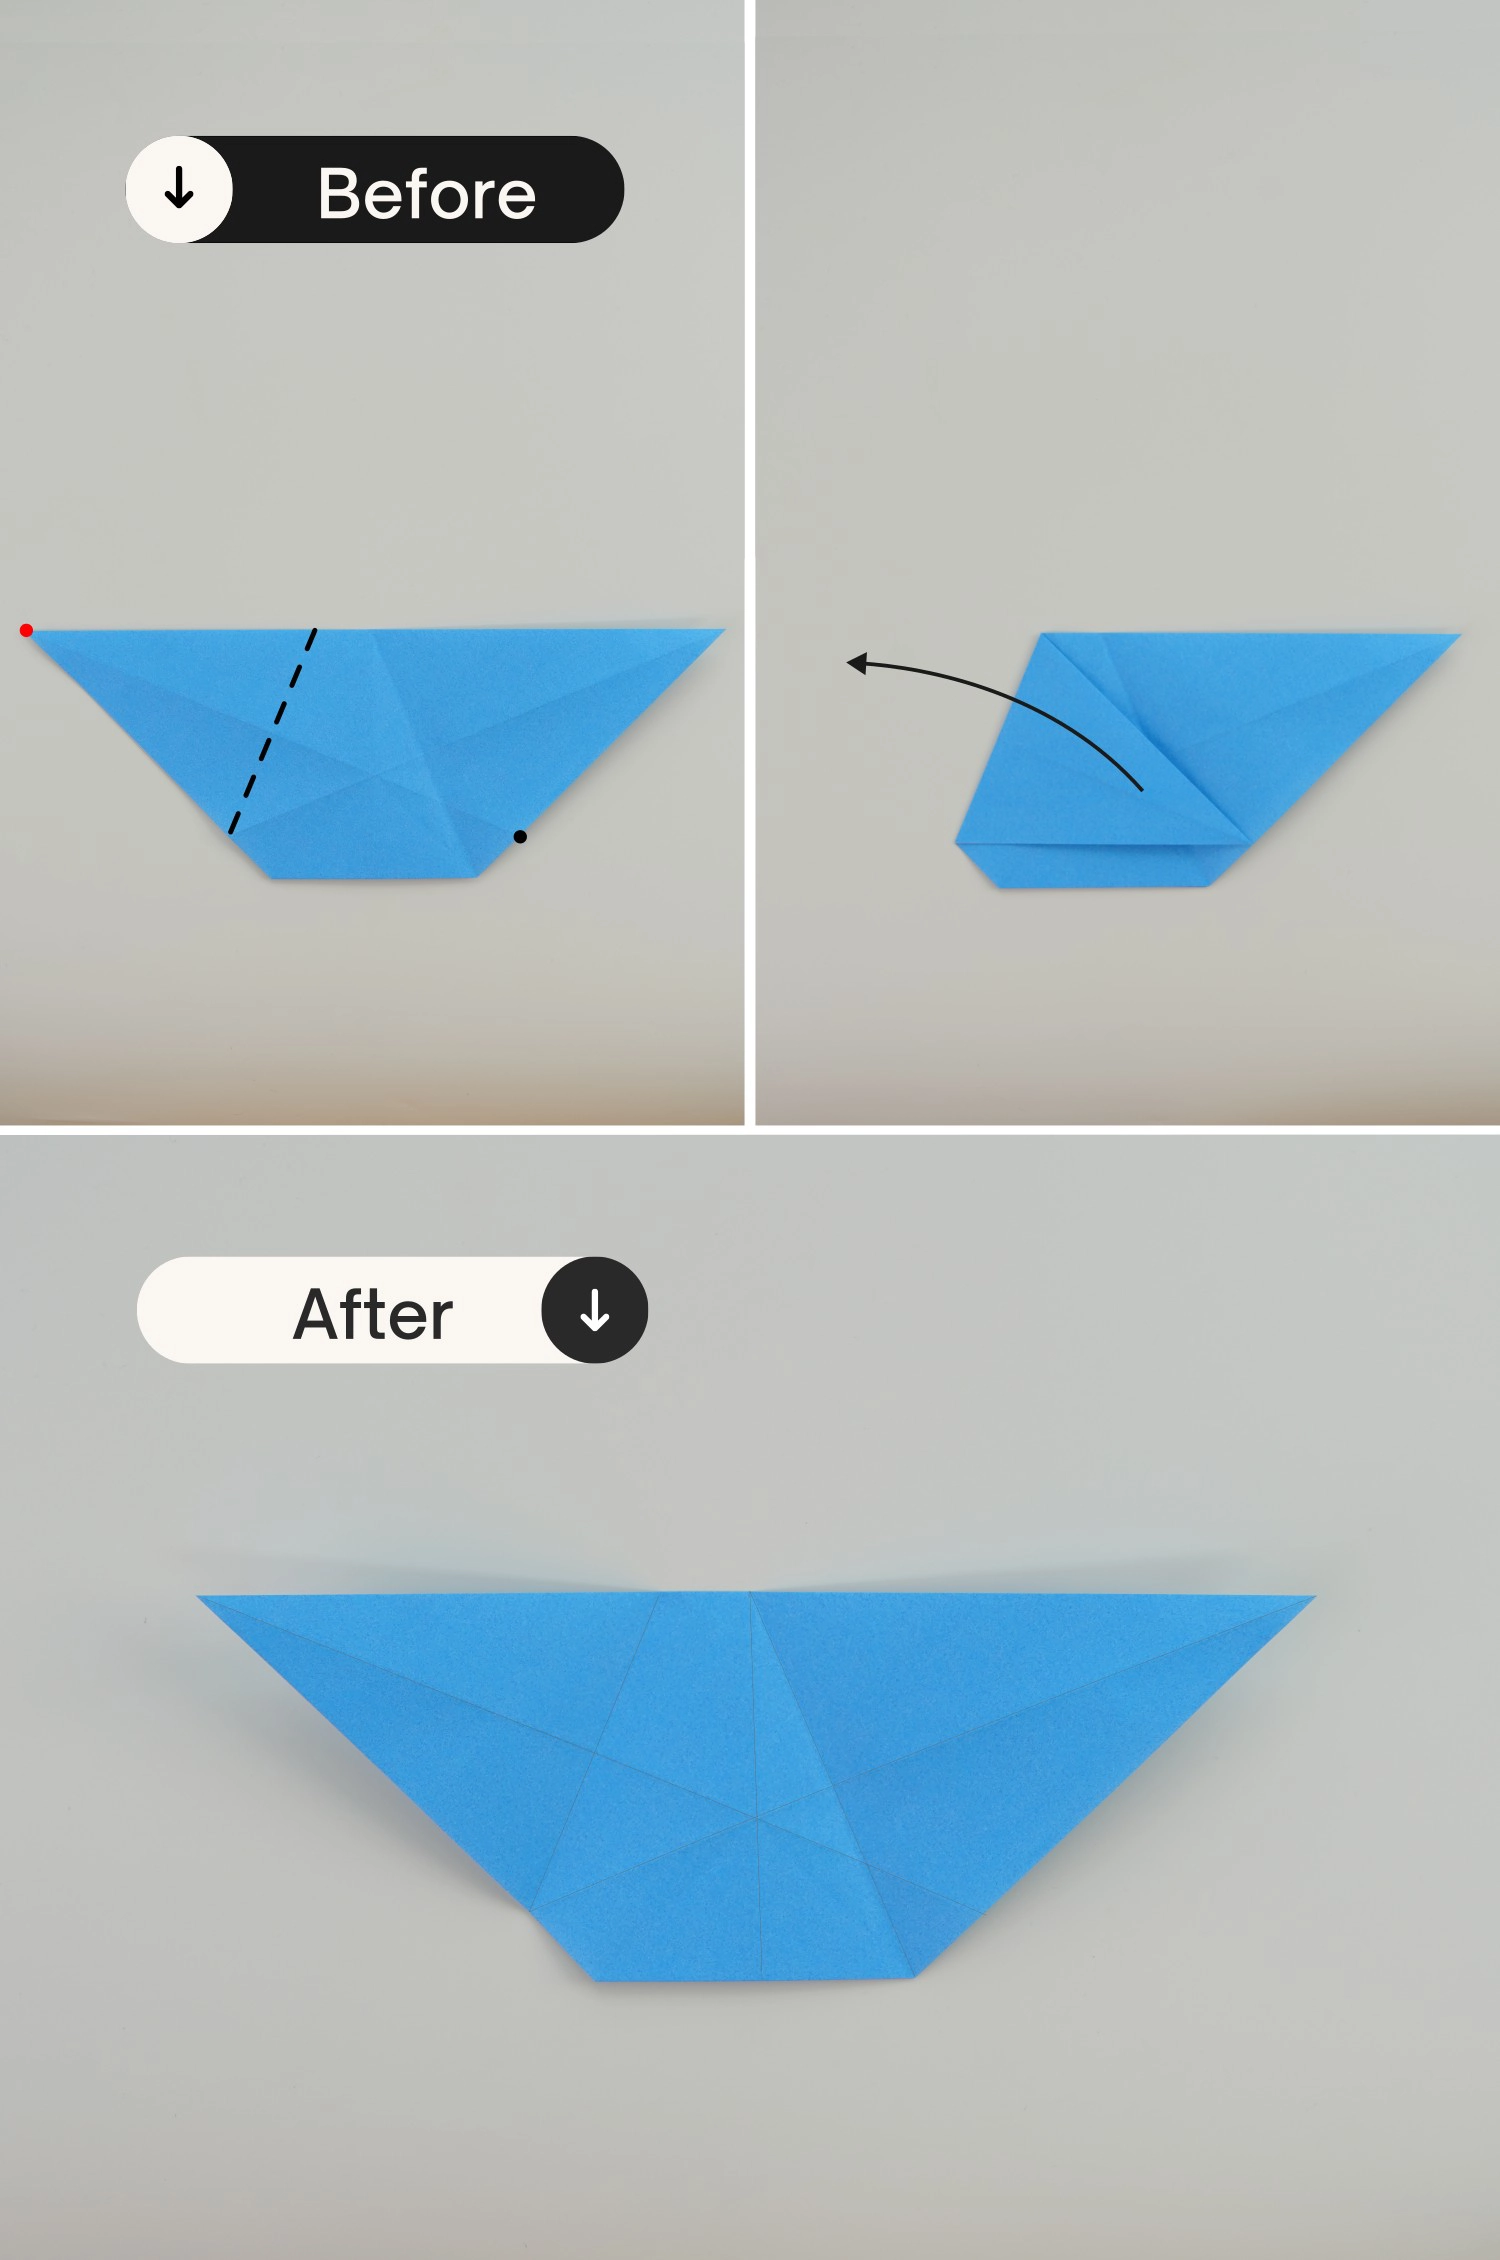
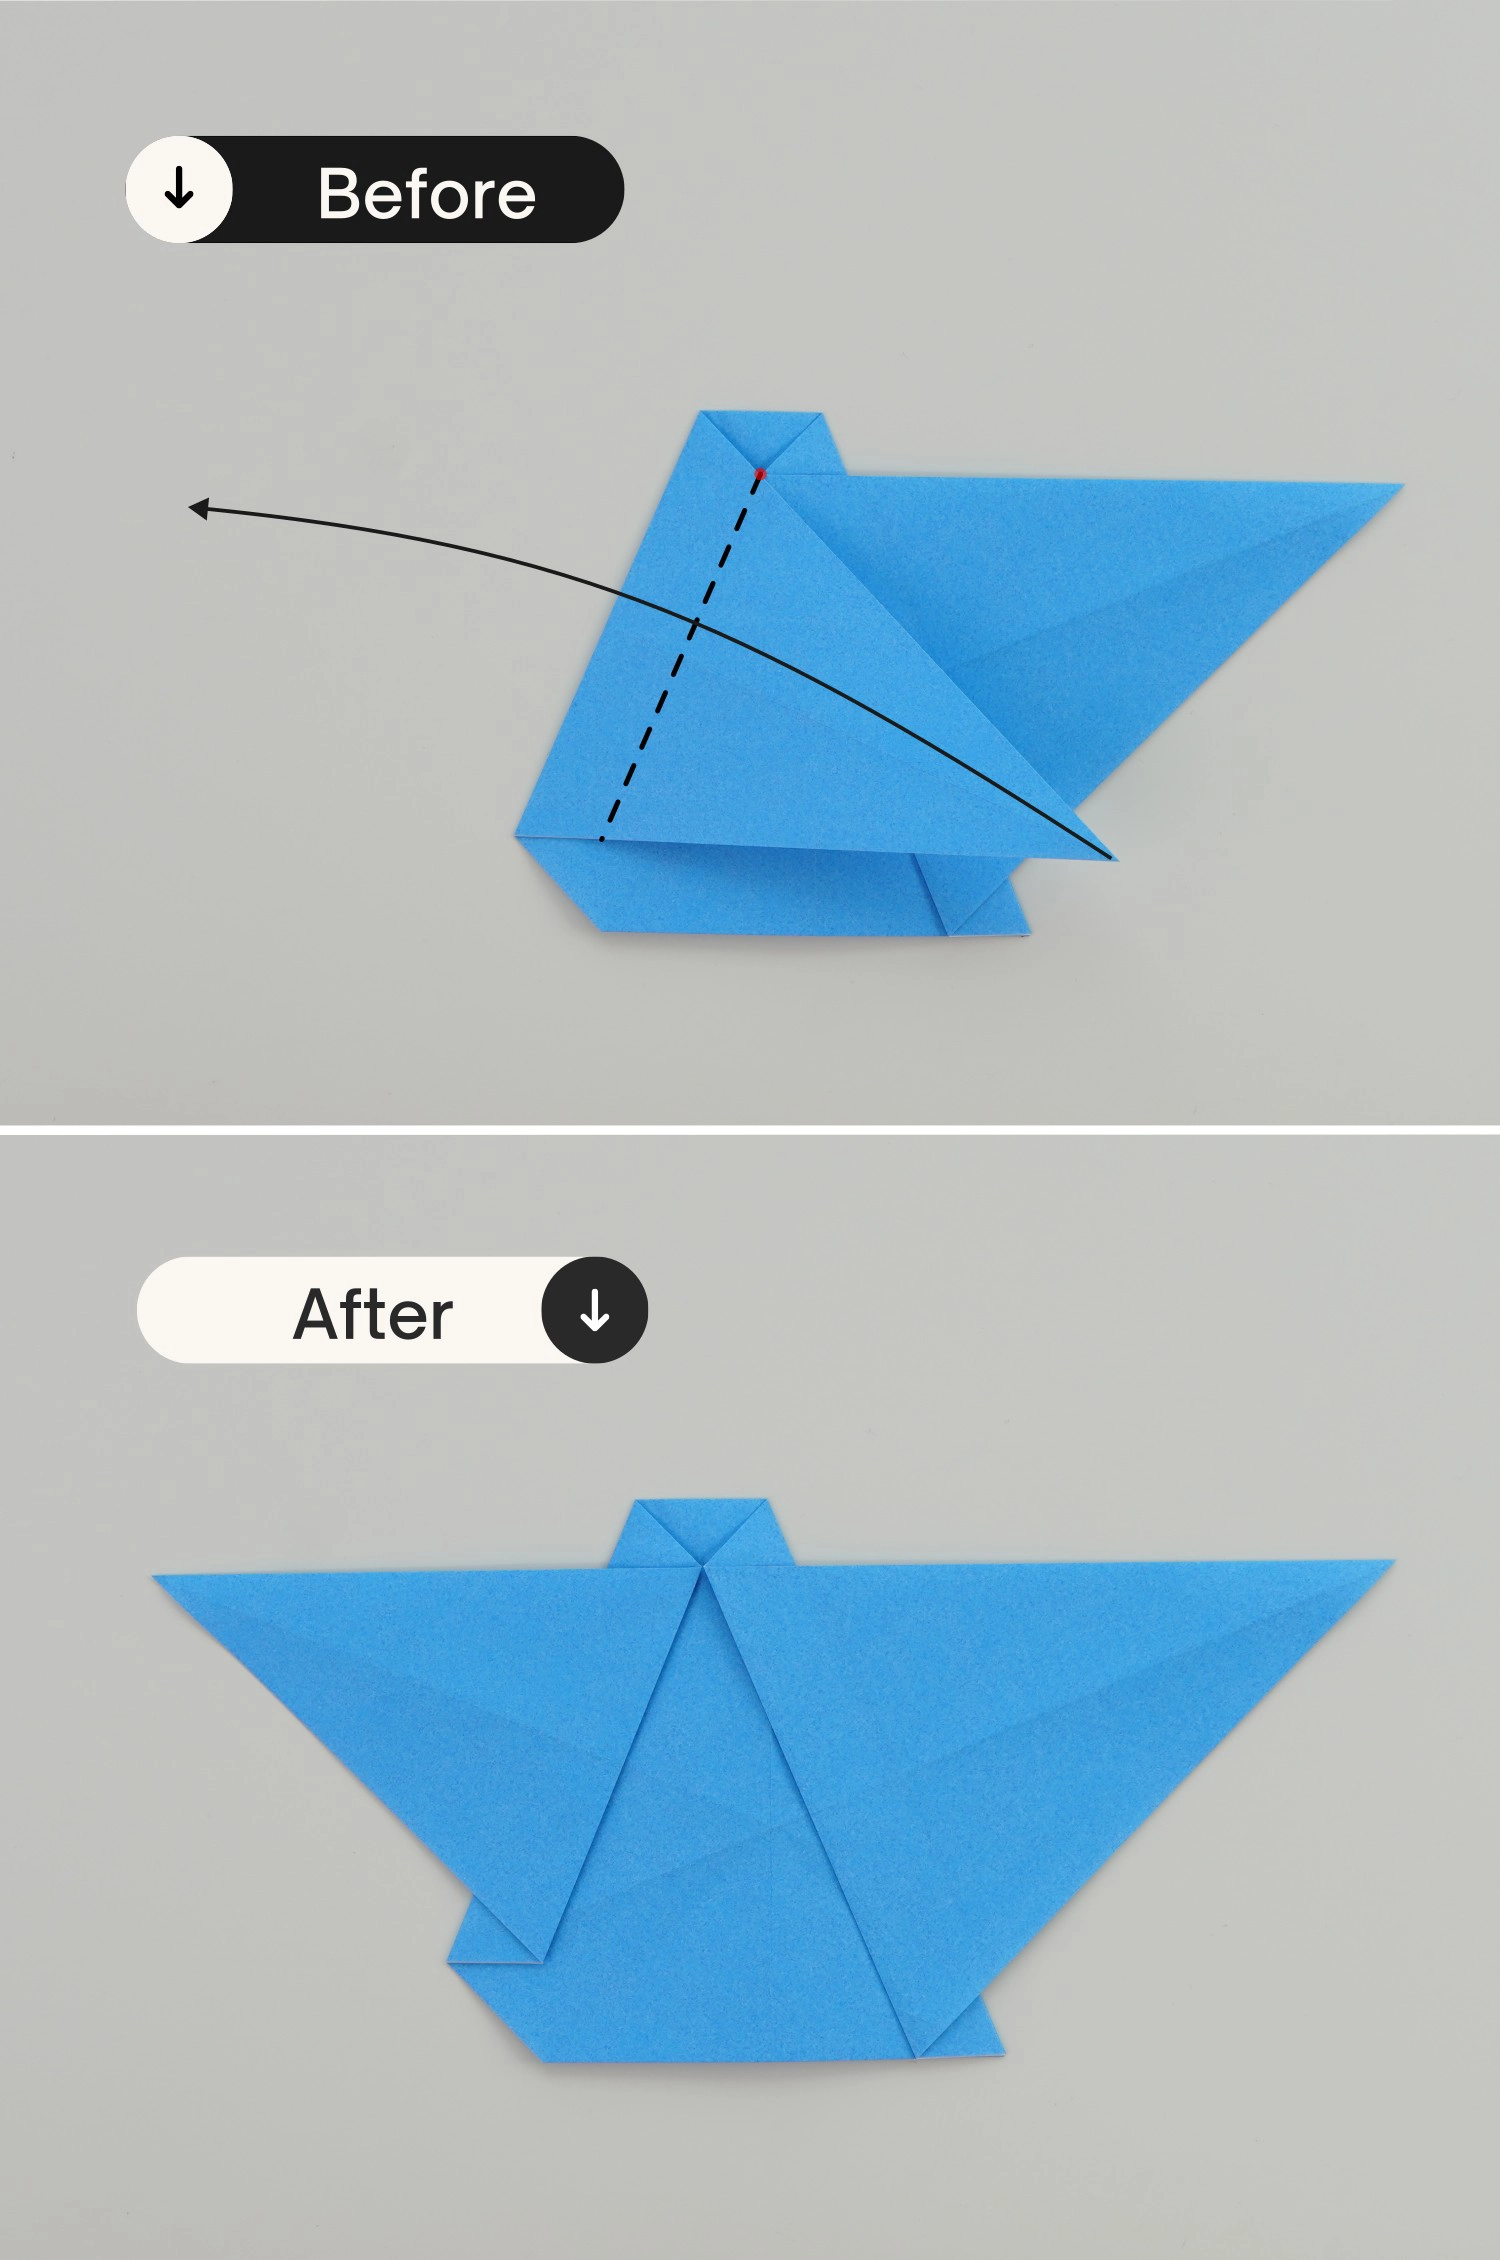
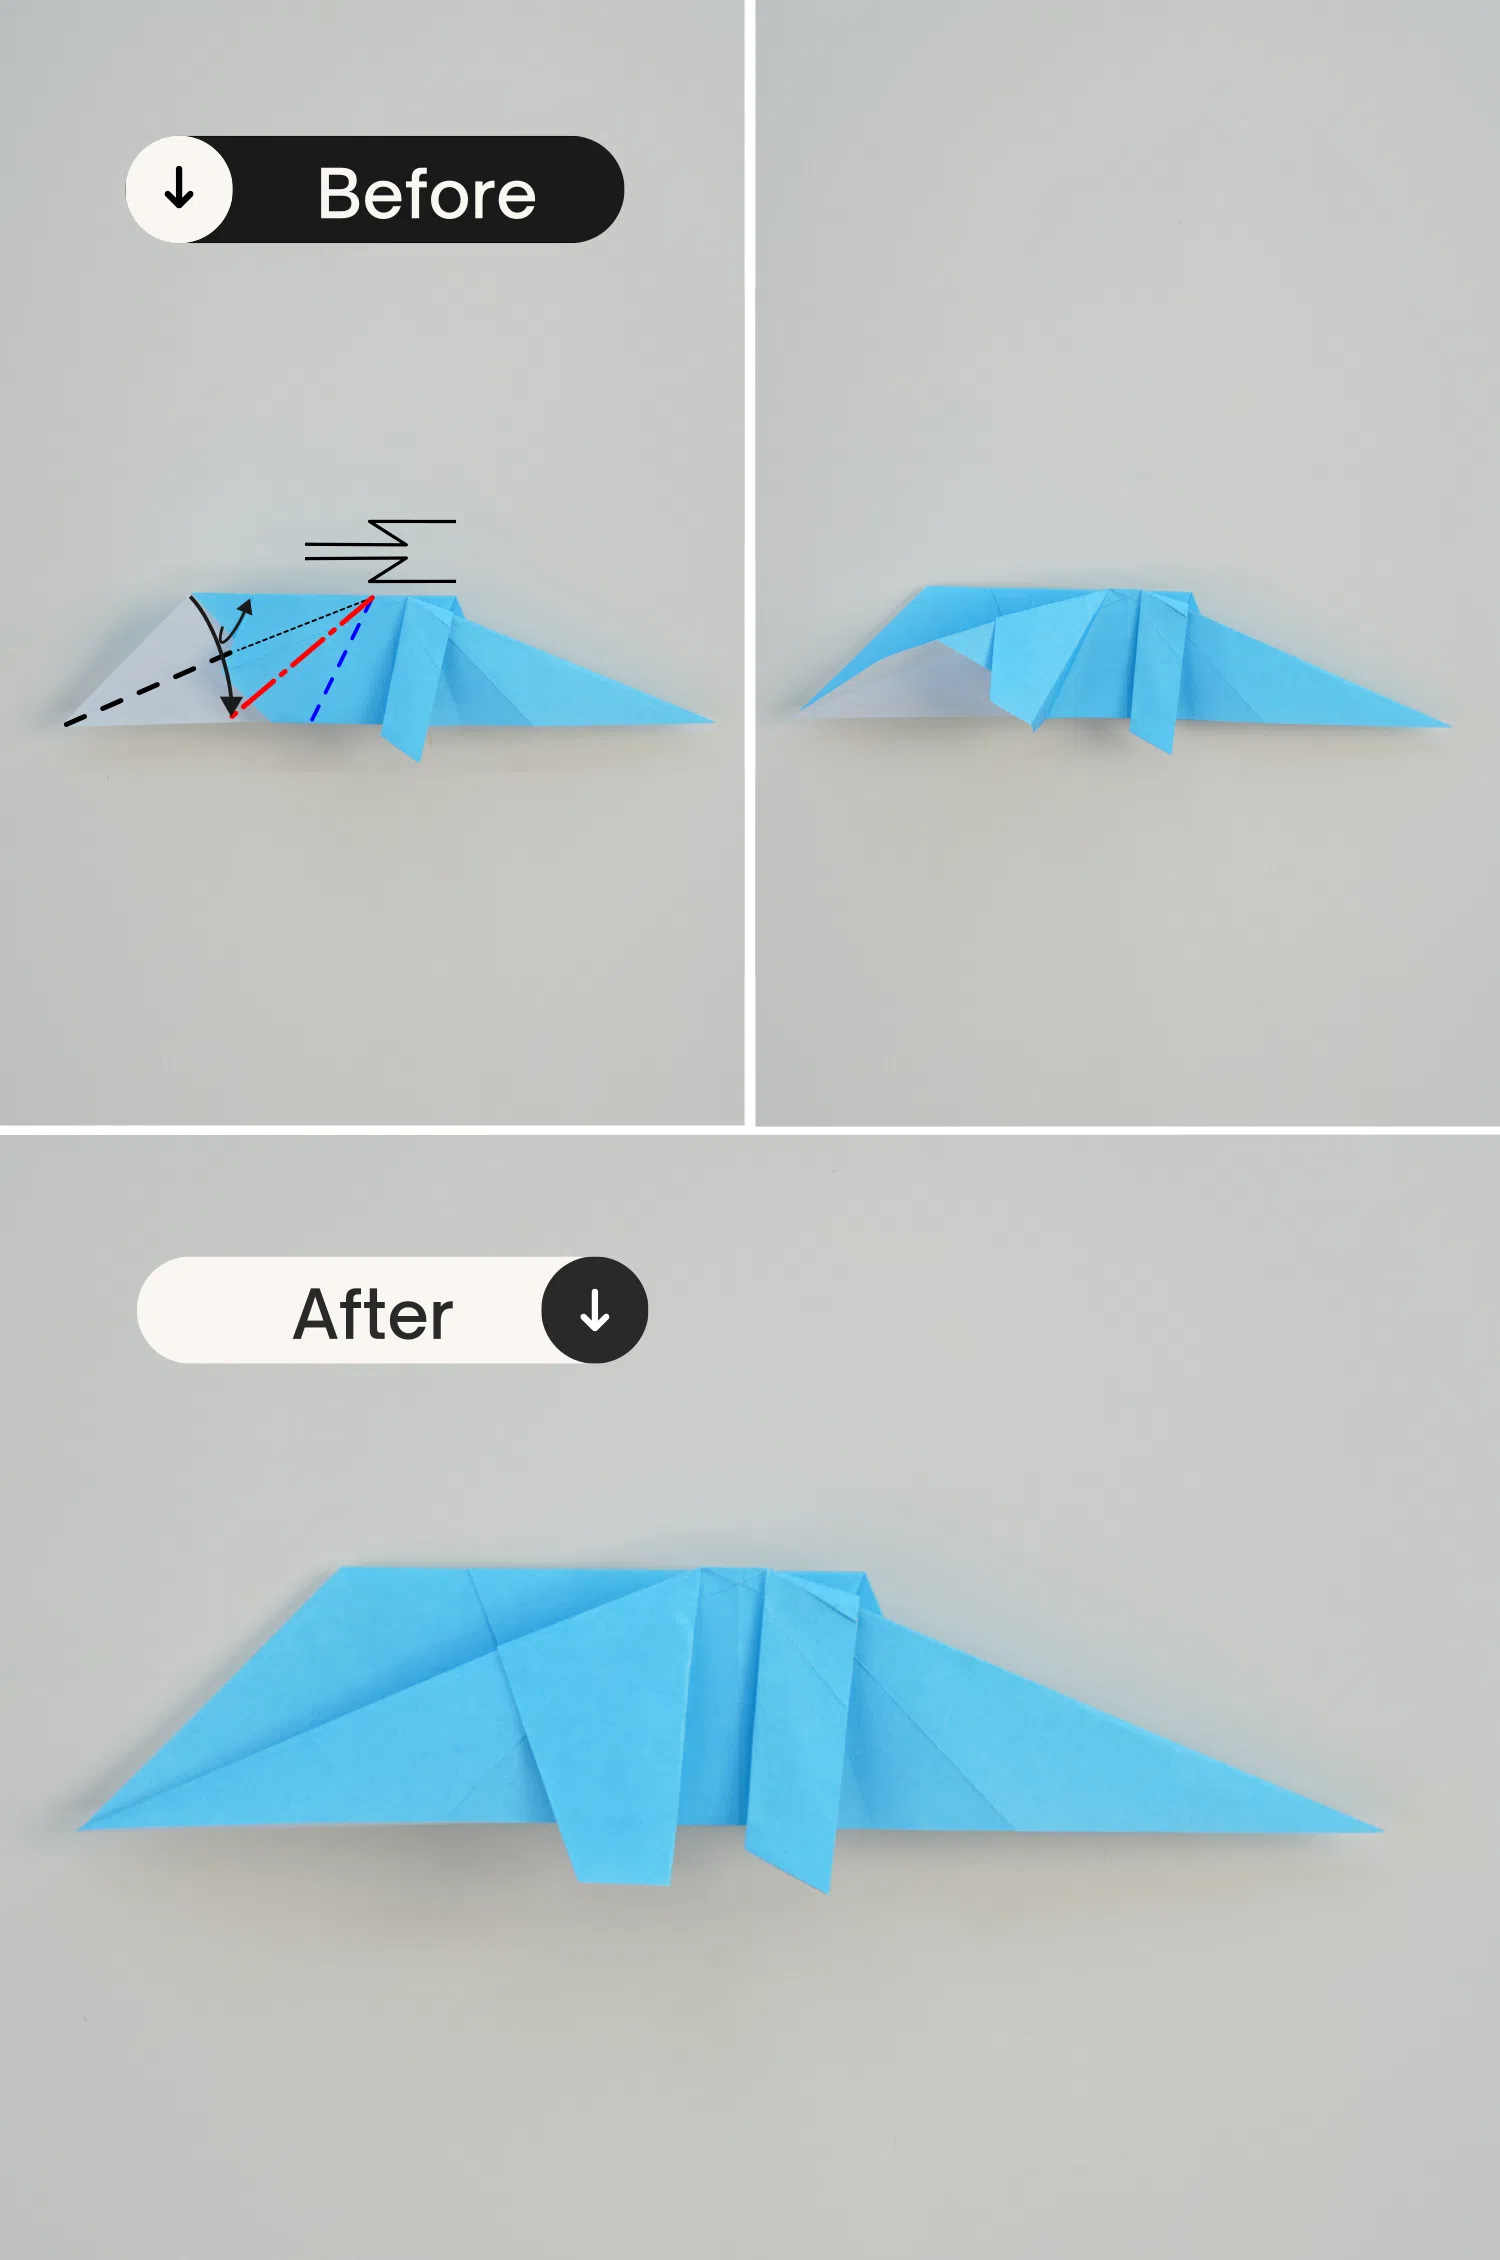
Step 8
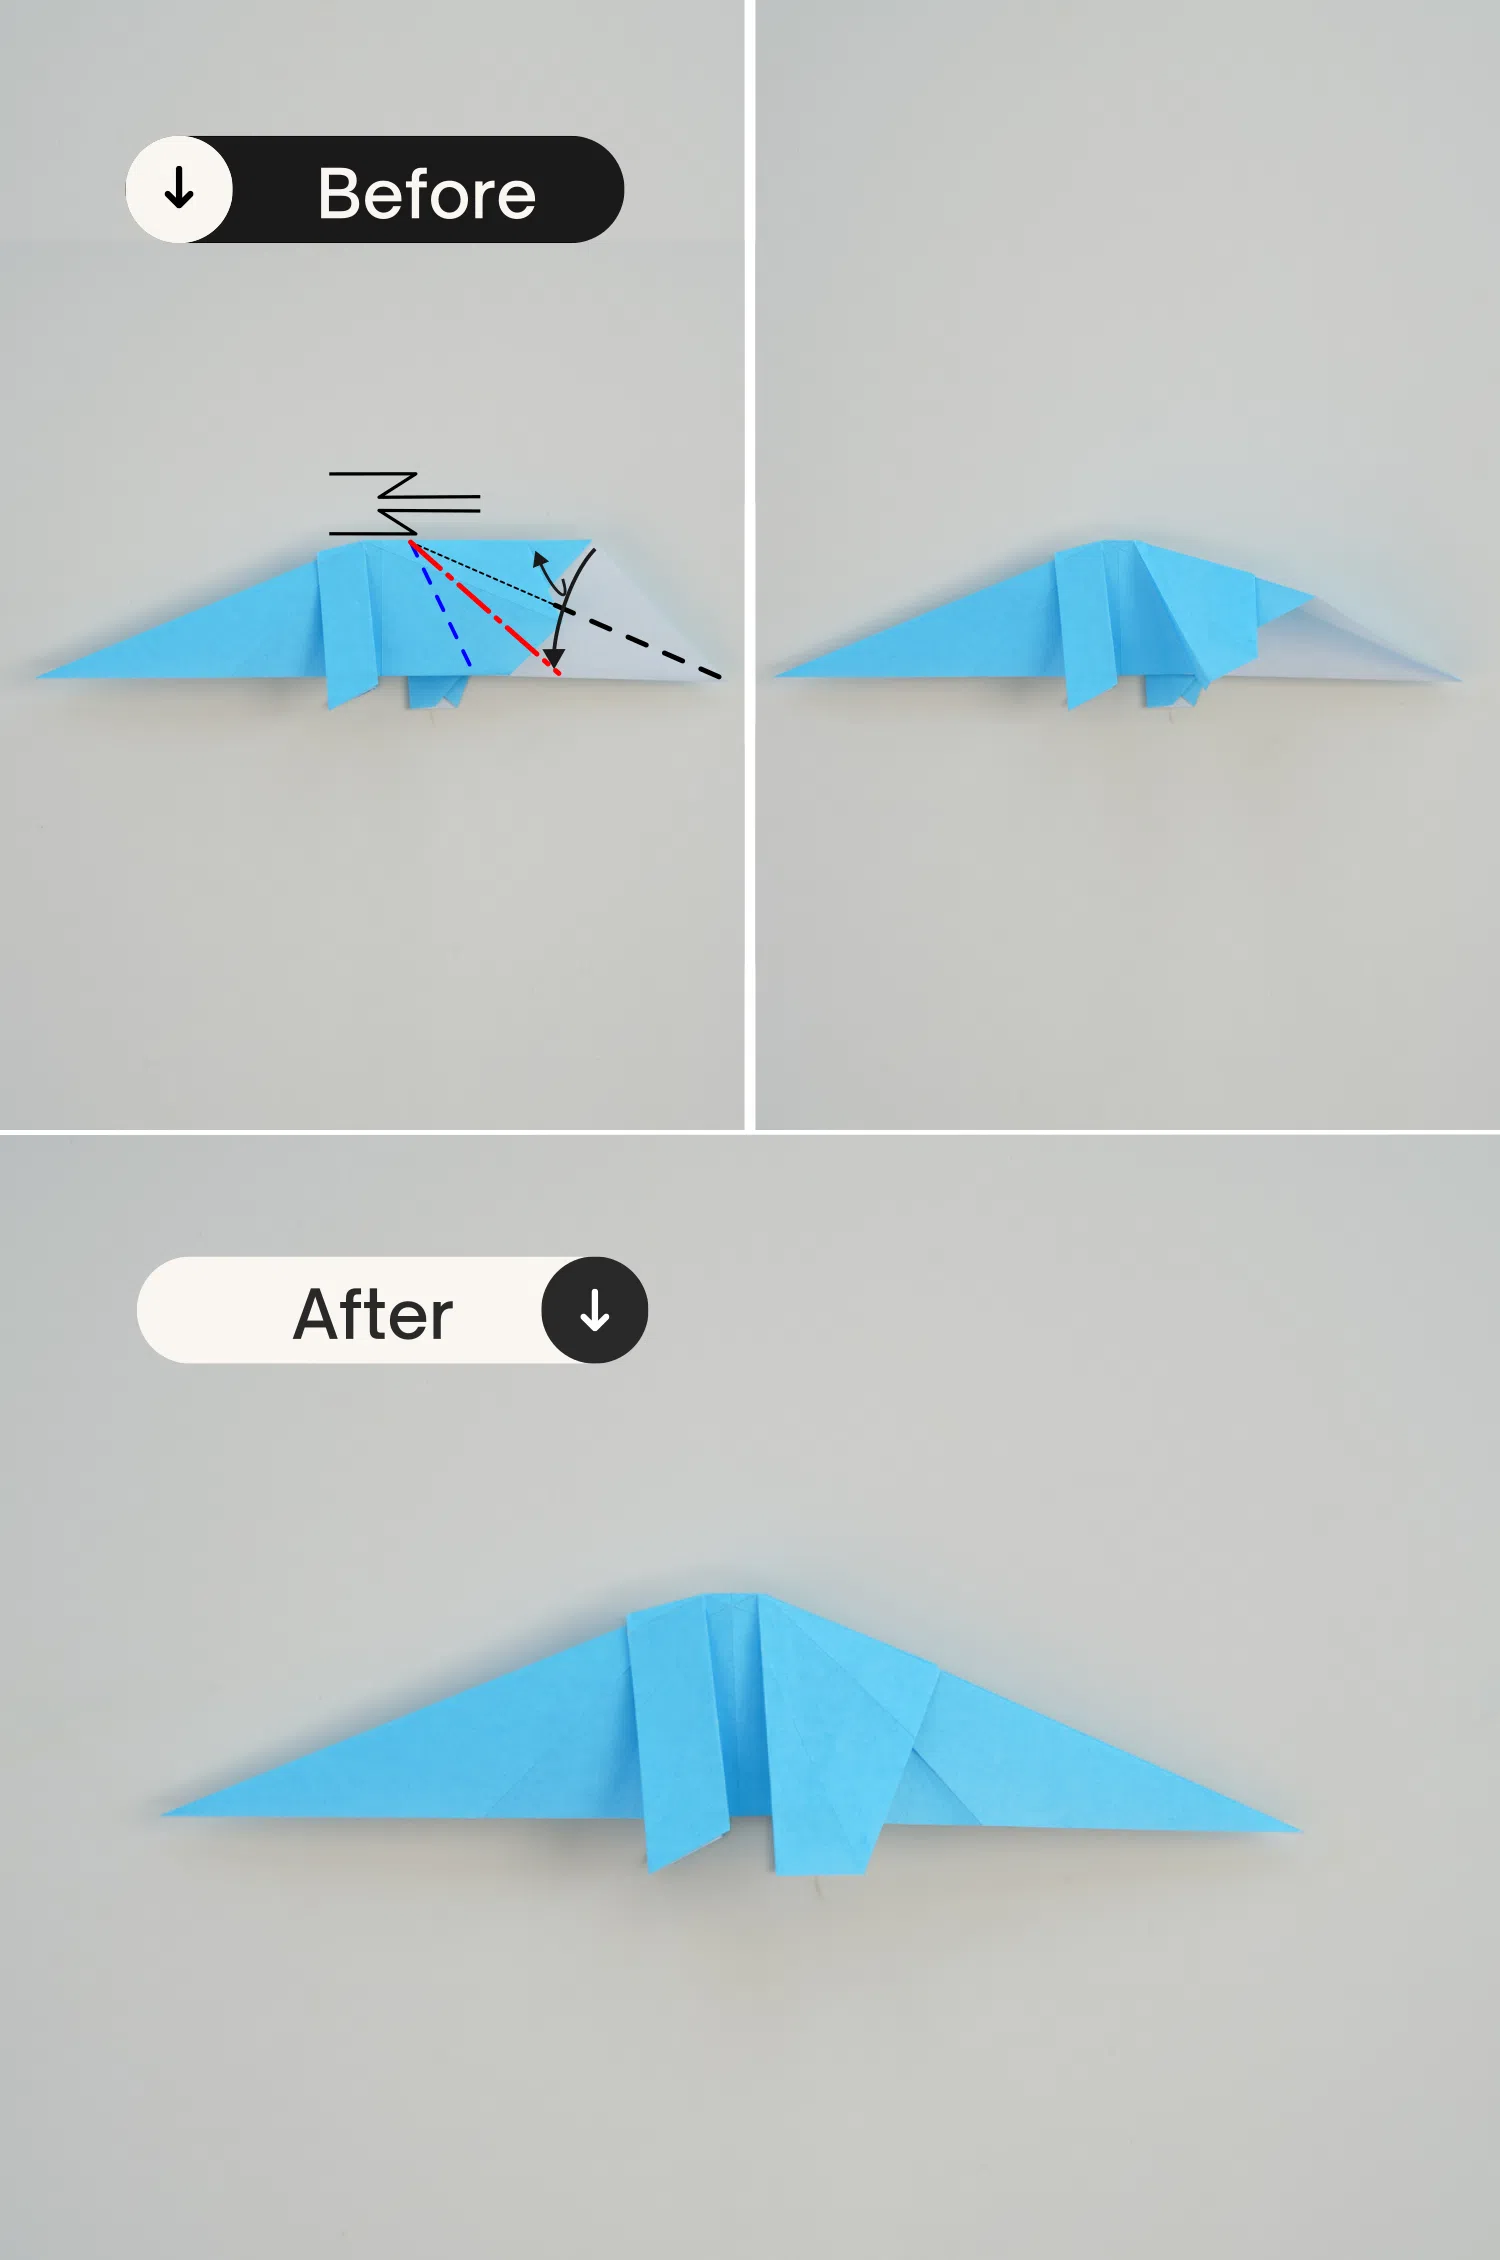
Refold the fold from step 6 down.
Step 9
Pleat the corner back to the top right. The top of the pleat should intersect the center
(vertical) line.
Step 10
Refold the fold from step 7 down.

Step 11
Pleat the corner back to the top left. The top of the pleat should intersect the center
(vertical) line.
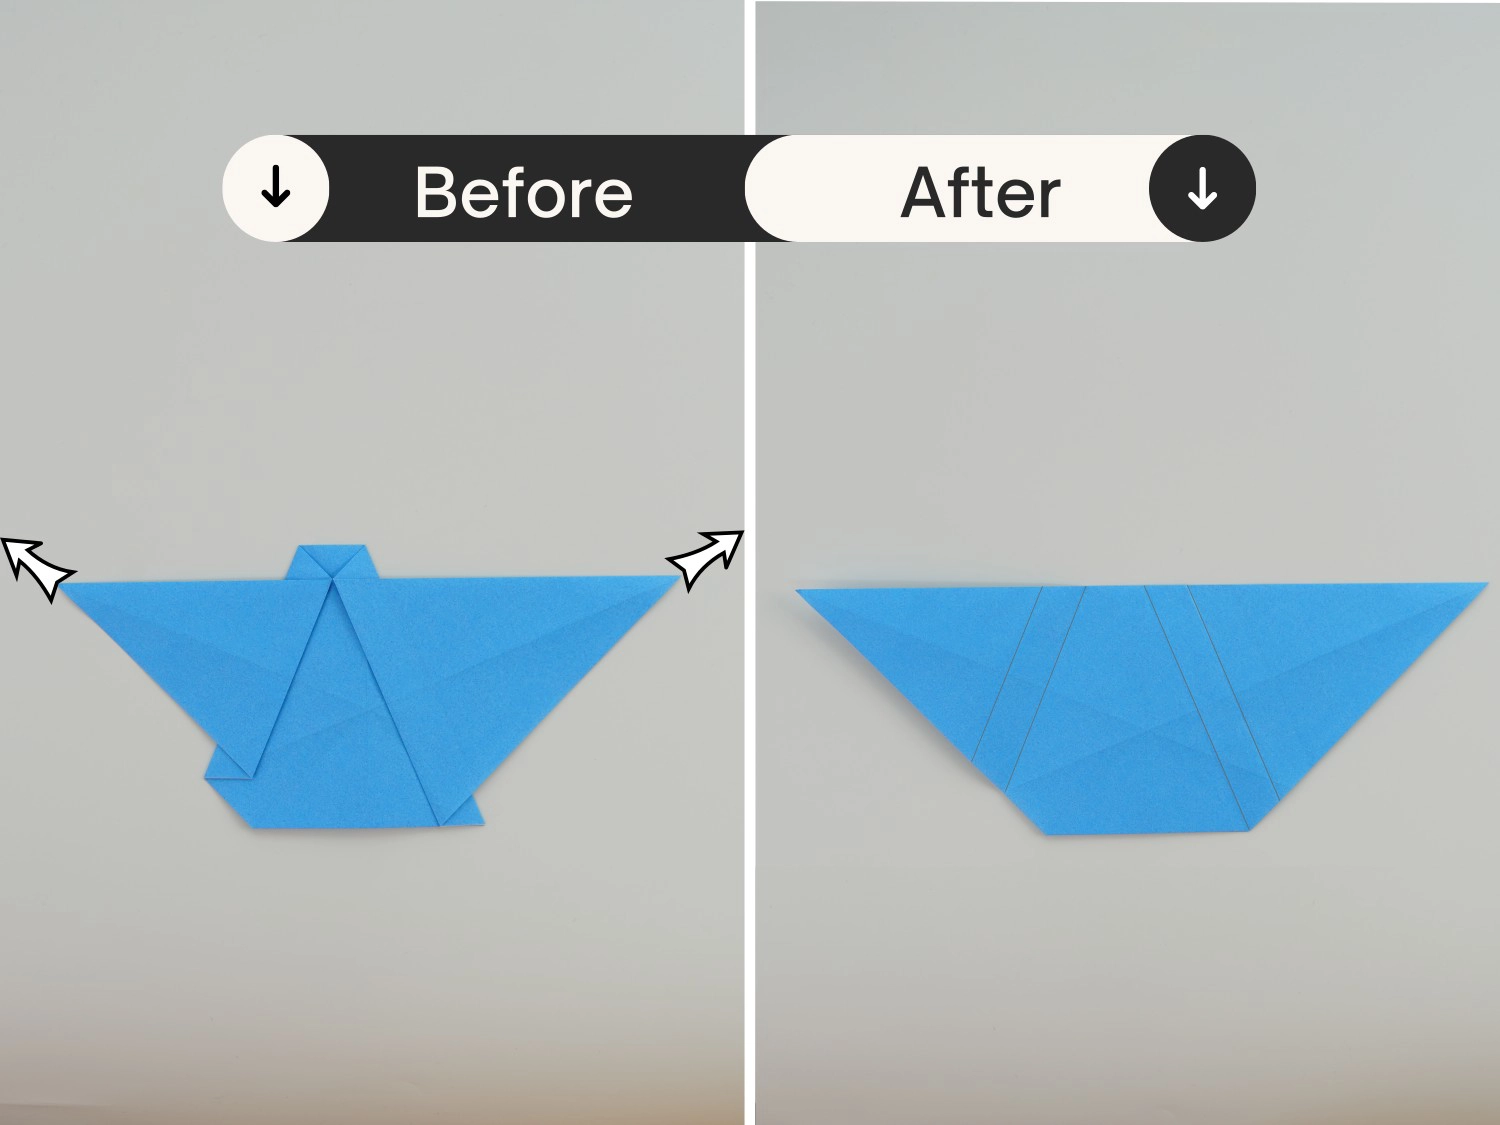
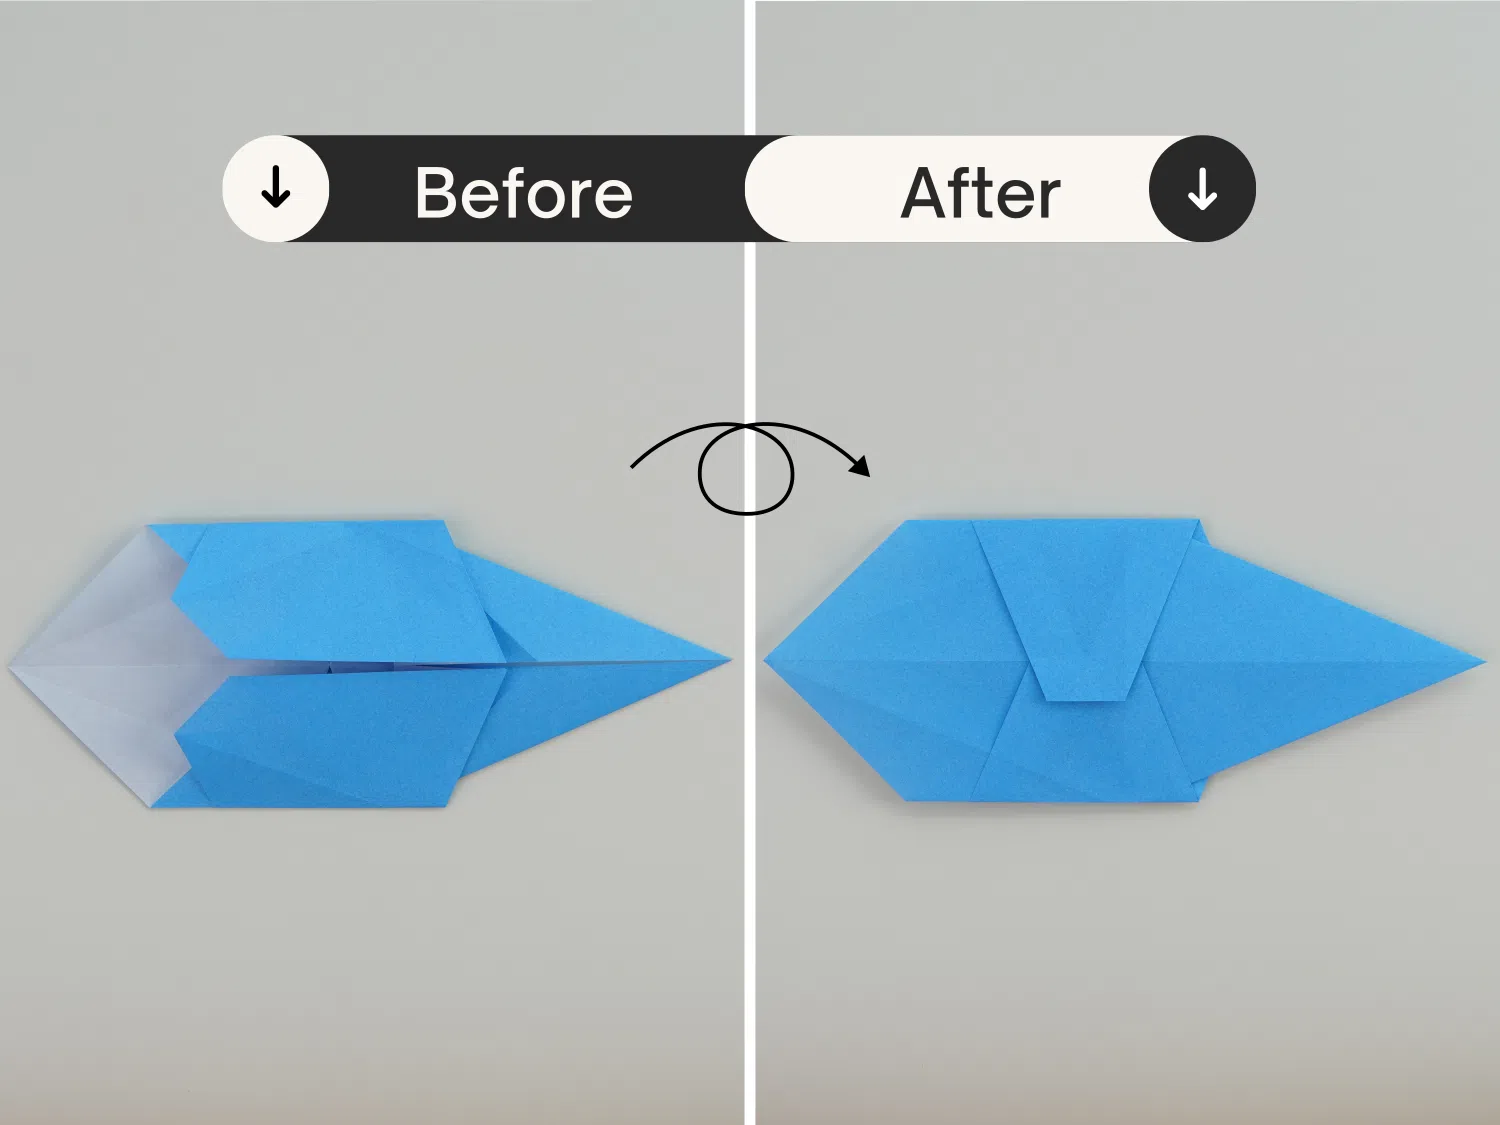
Step 12
Unfold both pleats by pulling on the left and right corners.
Step 13
Crimp both sides along the existing creases.
Step 13-a
To do this, unfold the paper horizontally upward.
Step 13-b
Valley fold the inner right creases. The paper should not lie flat.
Step 13-c
Fold the paper back to the right along the outer creases. This creates the first crimp.
Step 13-d
Repeating step 13-b on the left side, valley fold the inner left creases.
Step 13-e
Repeating step 13-c, fold the paper back to the left along the outer creases. This creates the second crimp.
Step 13-f
Refold the paper in half downward. Gently push the left and right sides towards the center to keep the crimps folded.
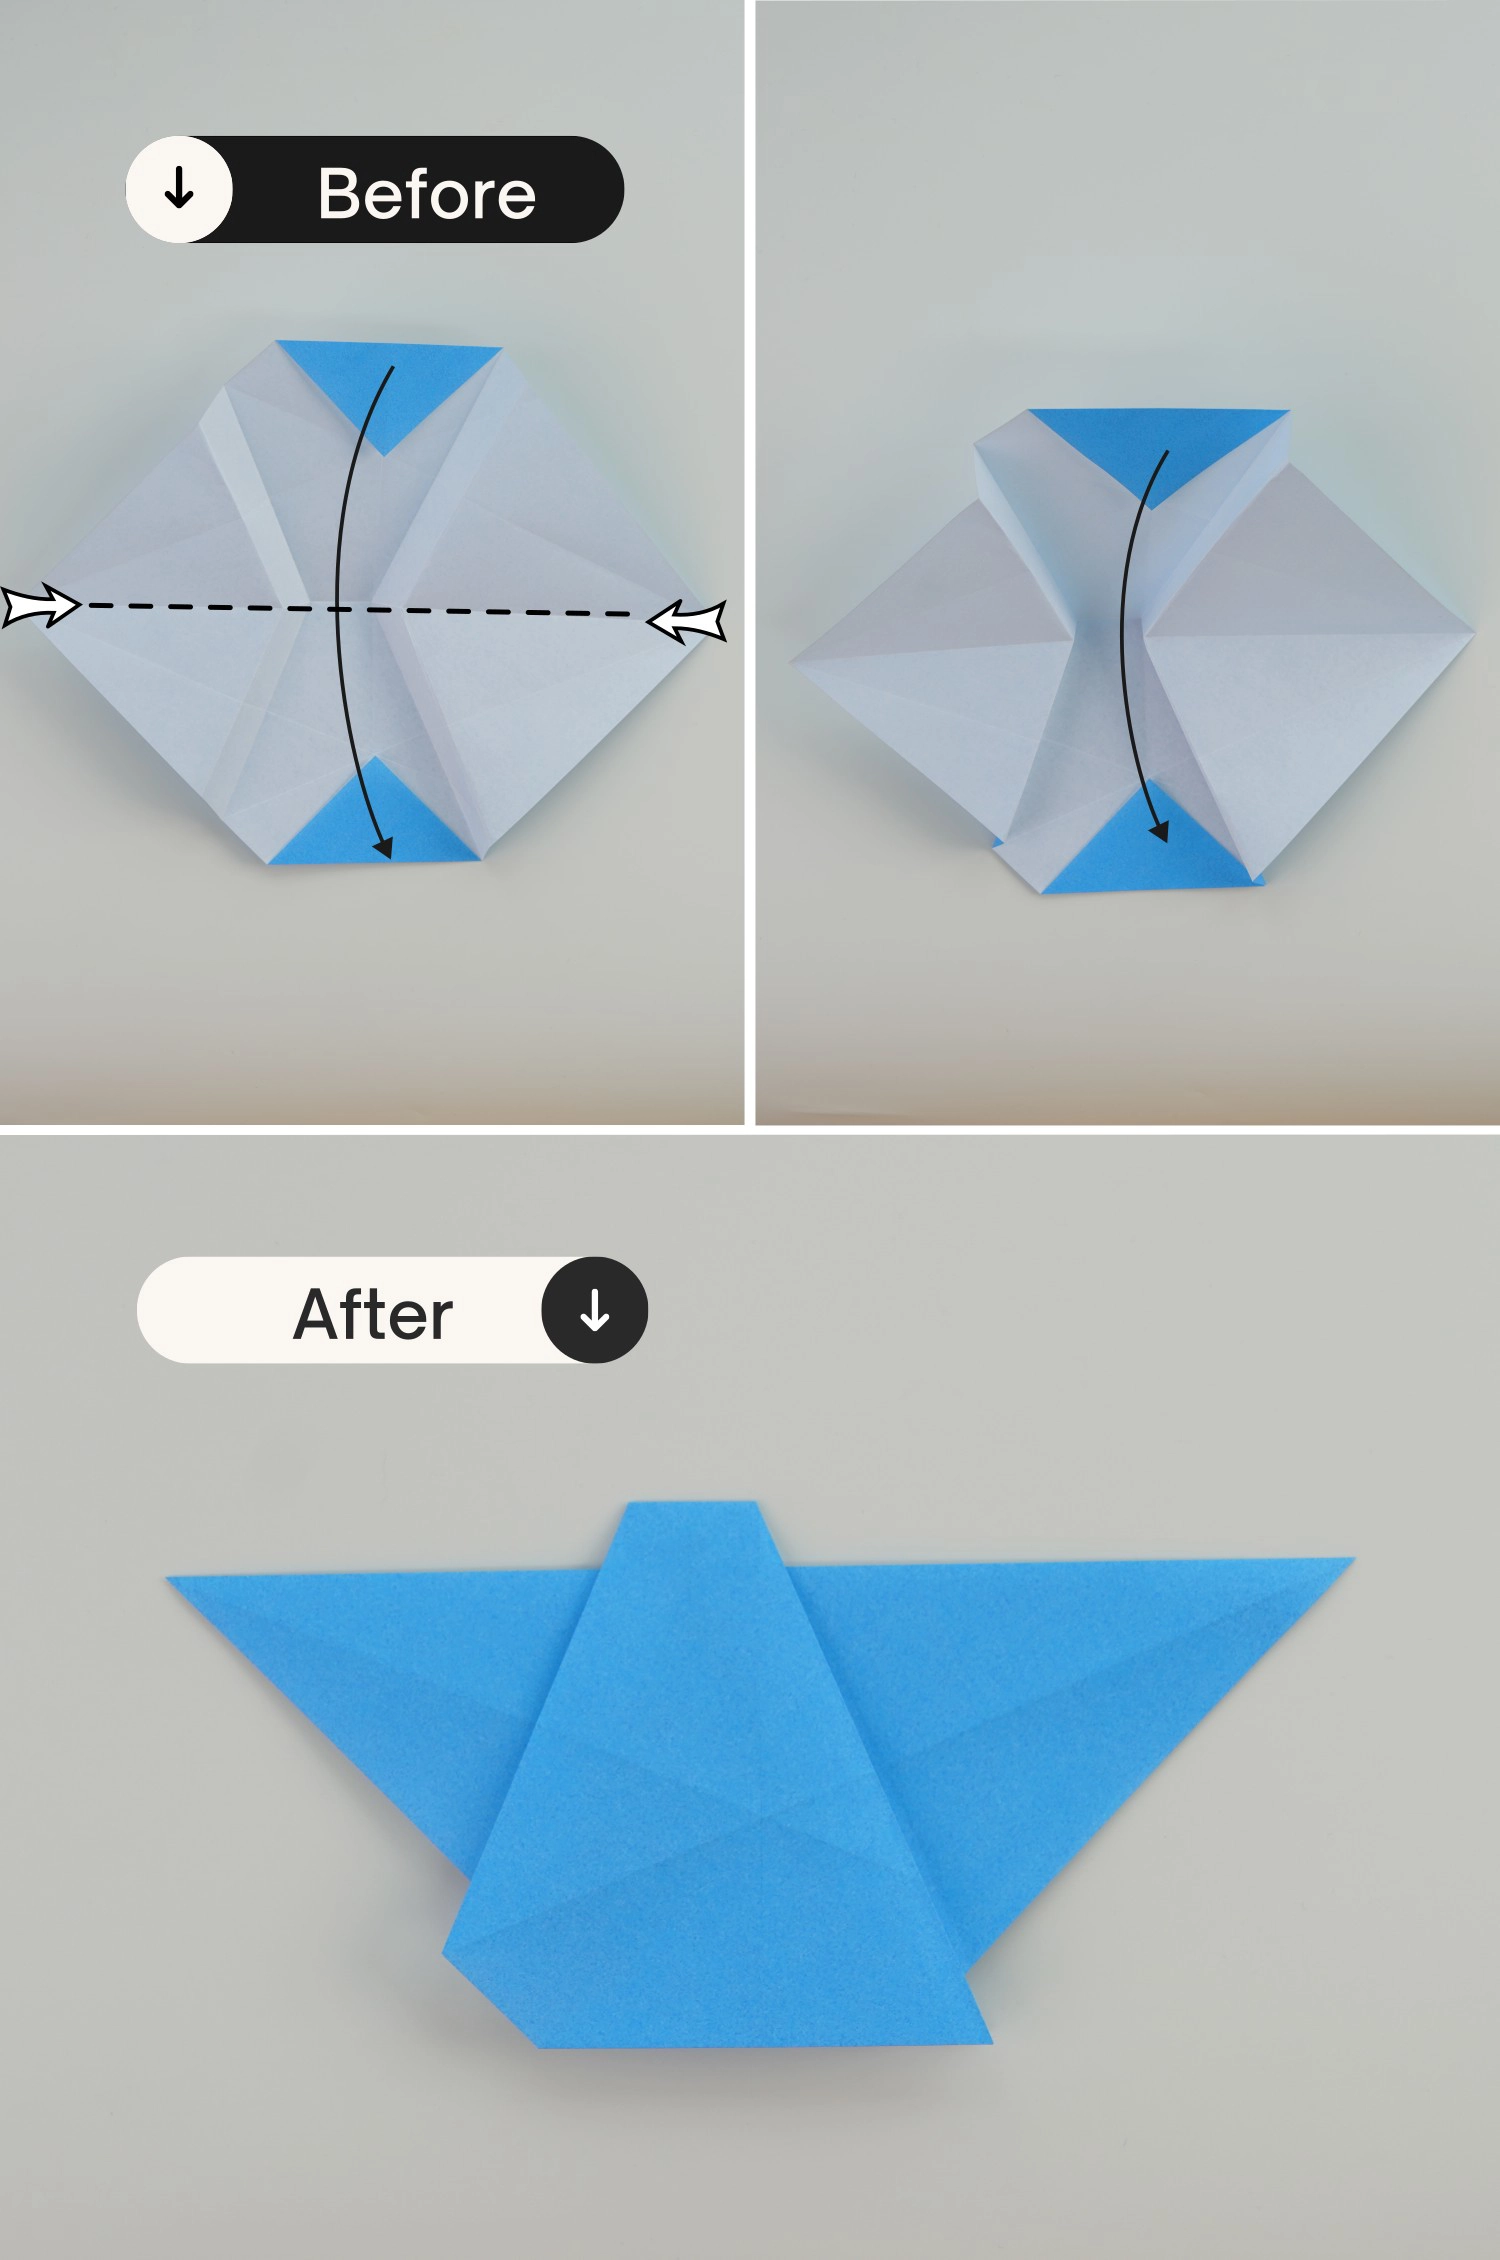
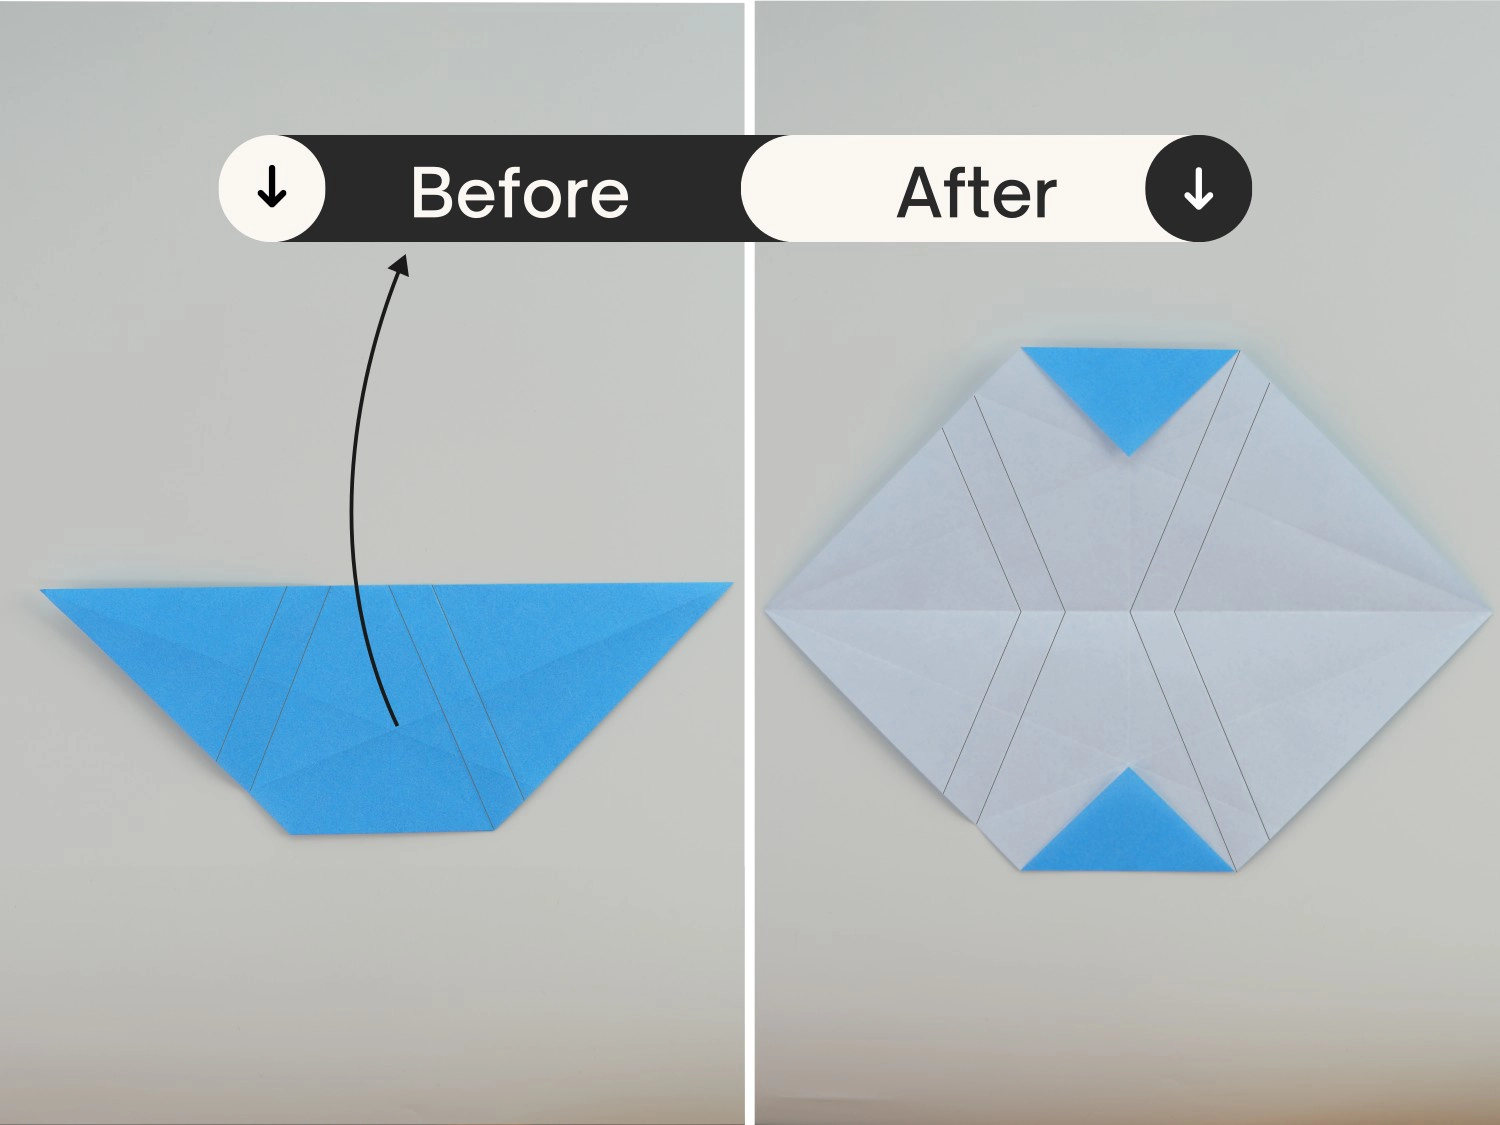
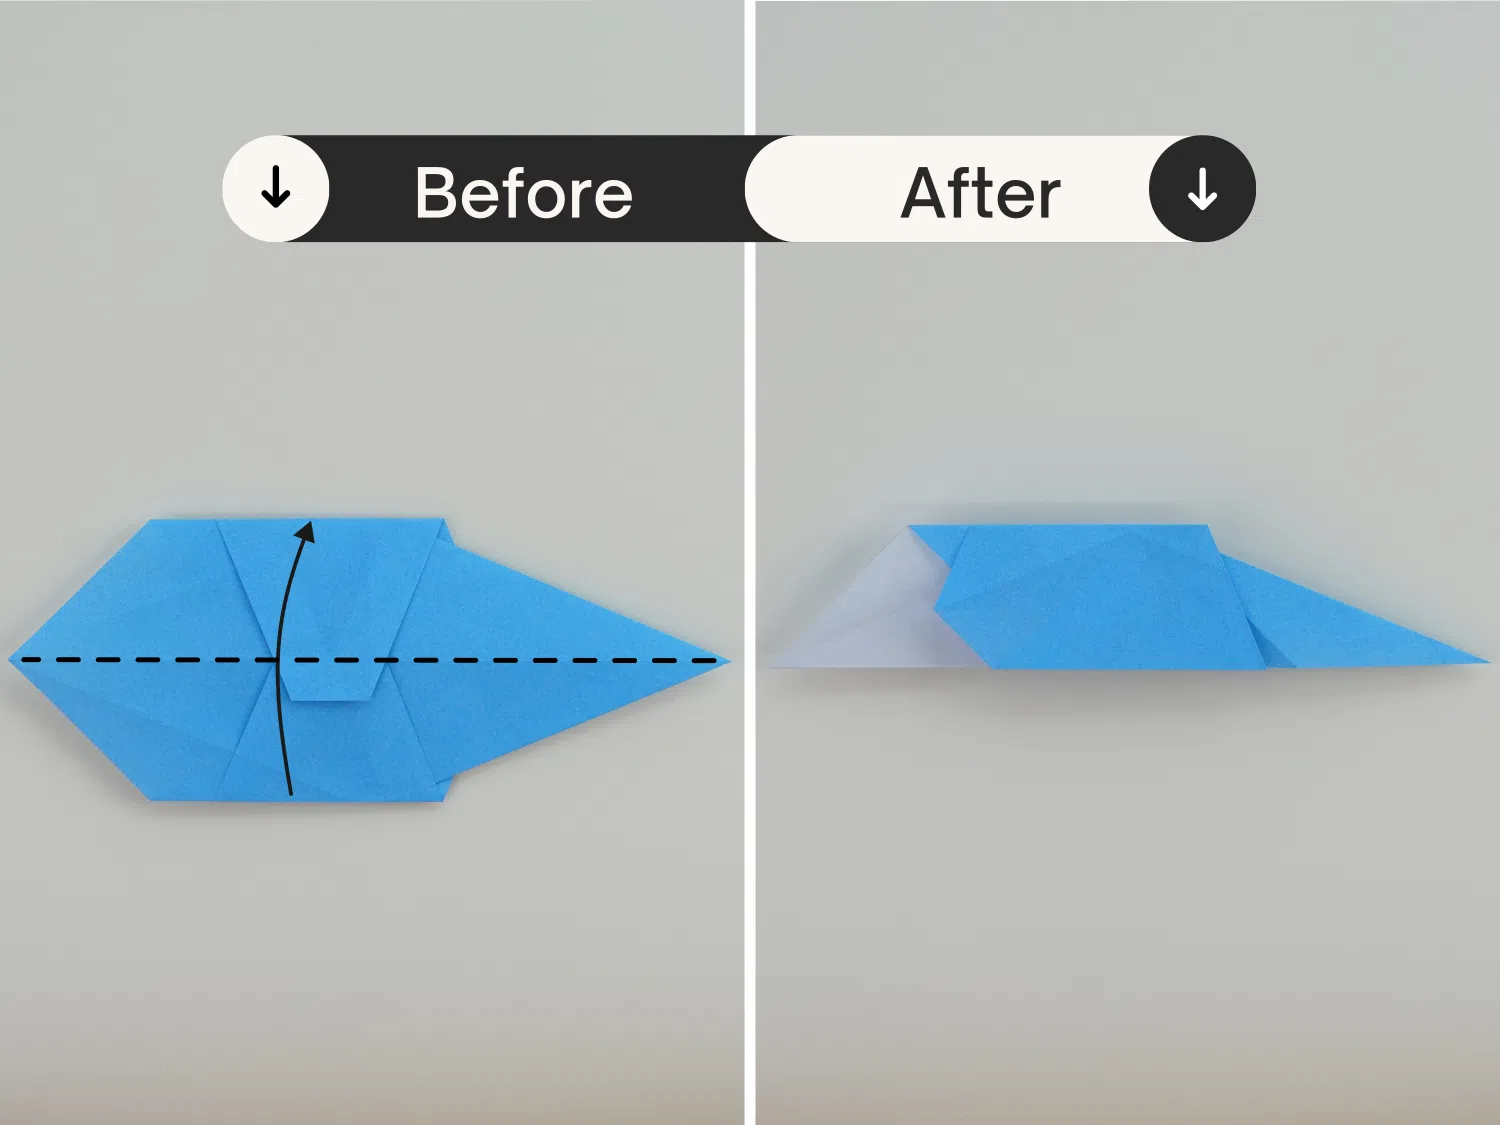
Step 14
Fold the paper in half upward, along the horizontal edge spanning both corners.
[Note that this is not the same as unfolding the entire paper in half!]
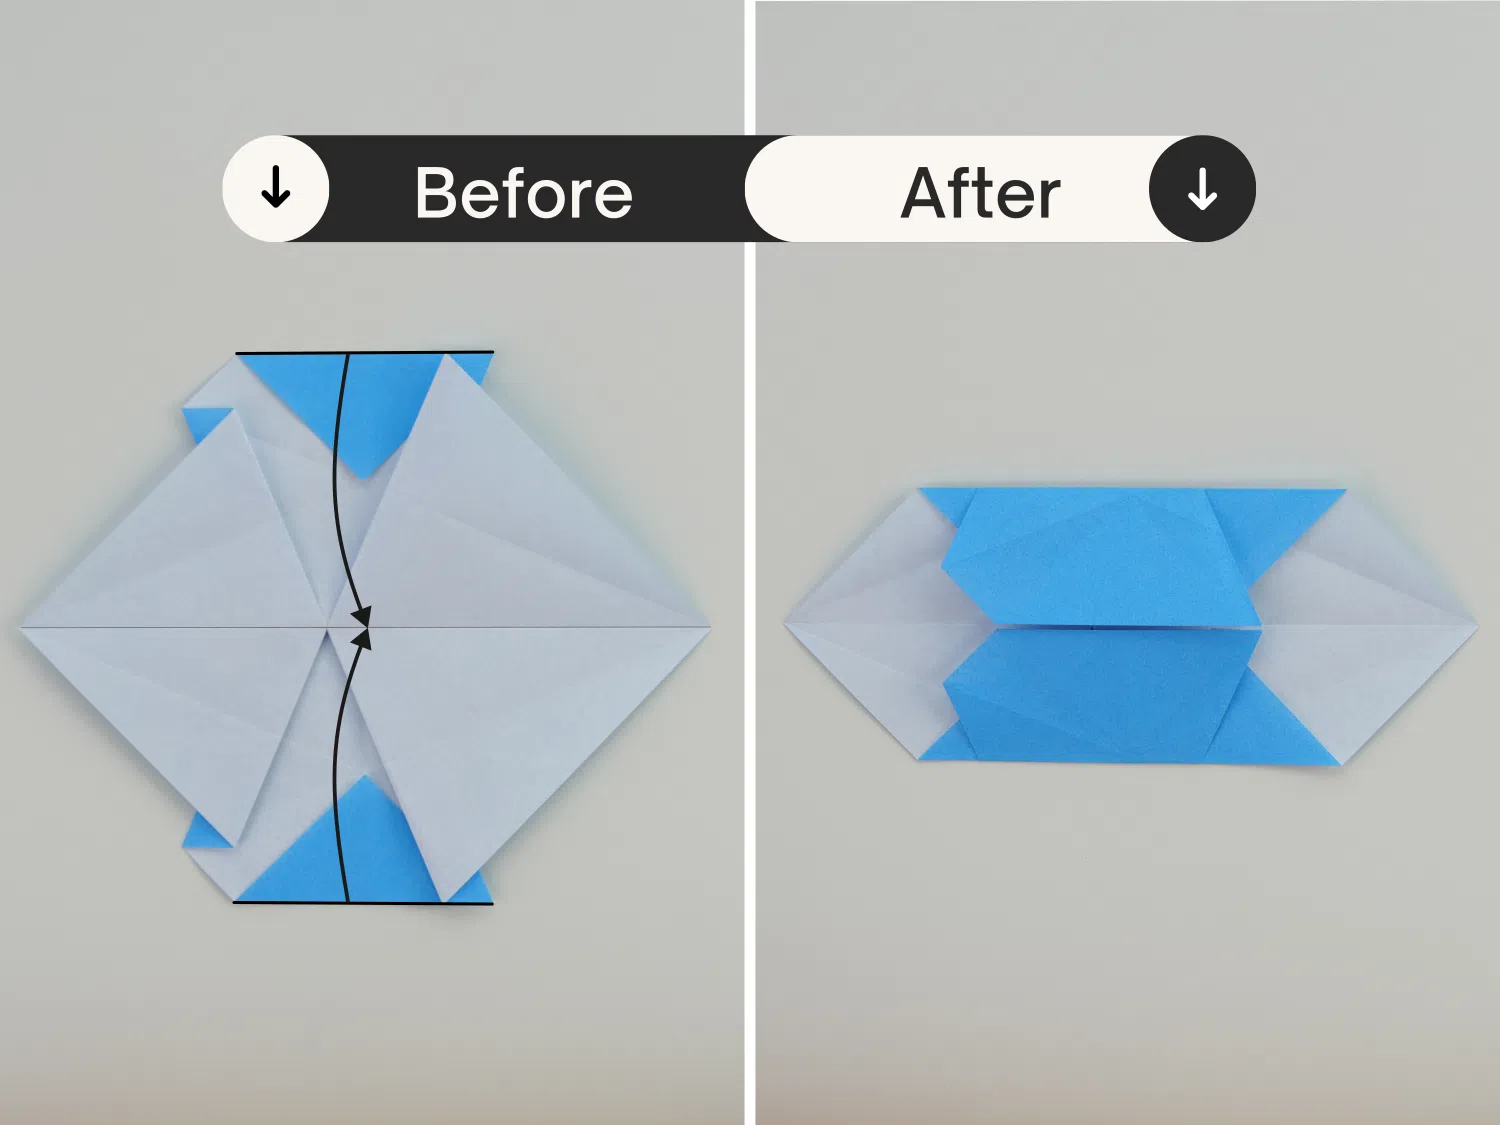
Step 15
Fold the top and bottom edges to the center (horizontal) line.
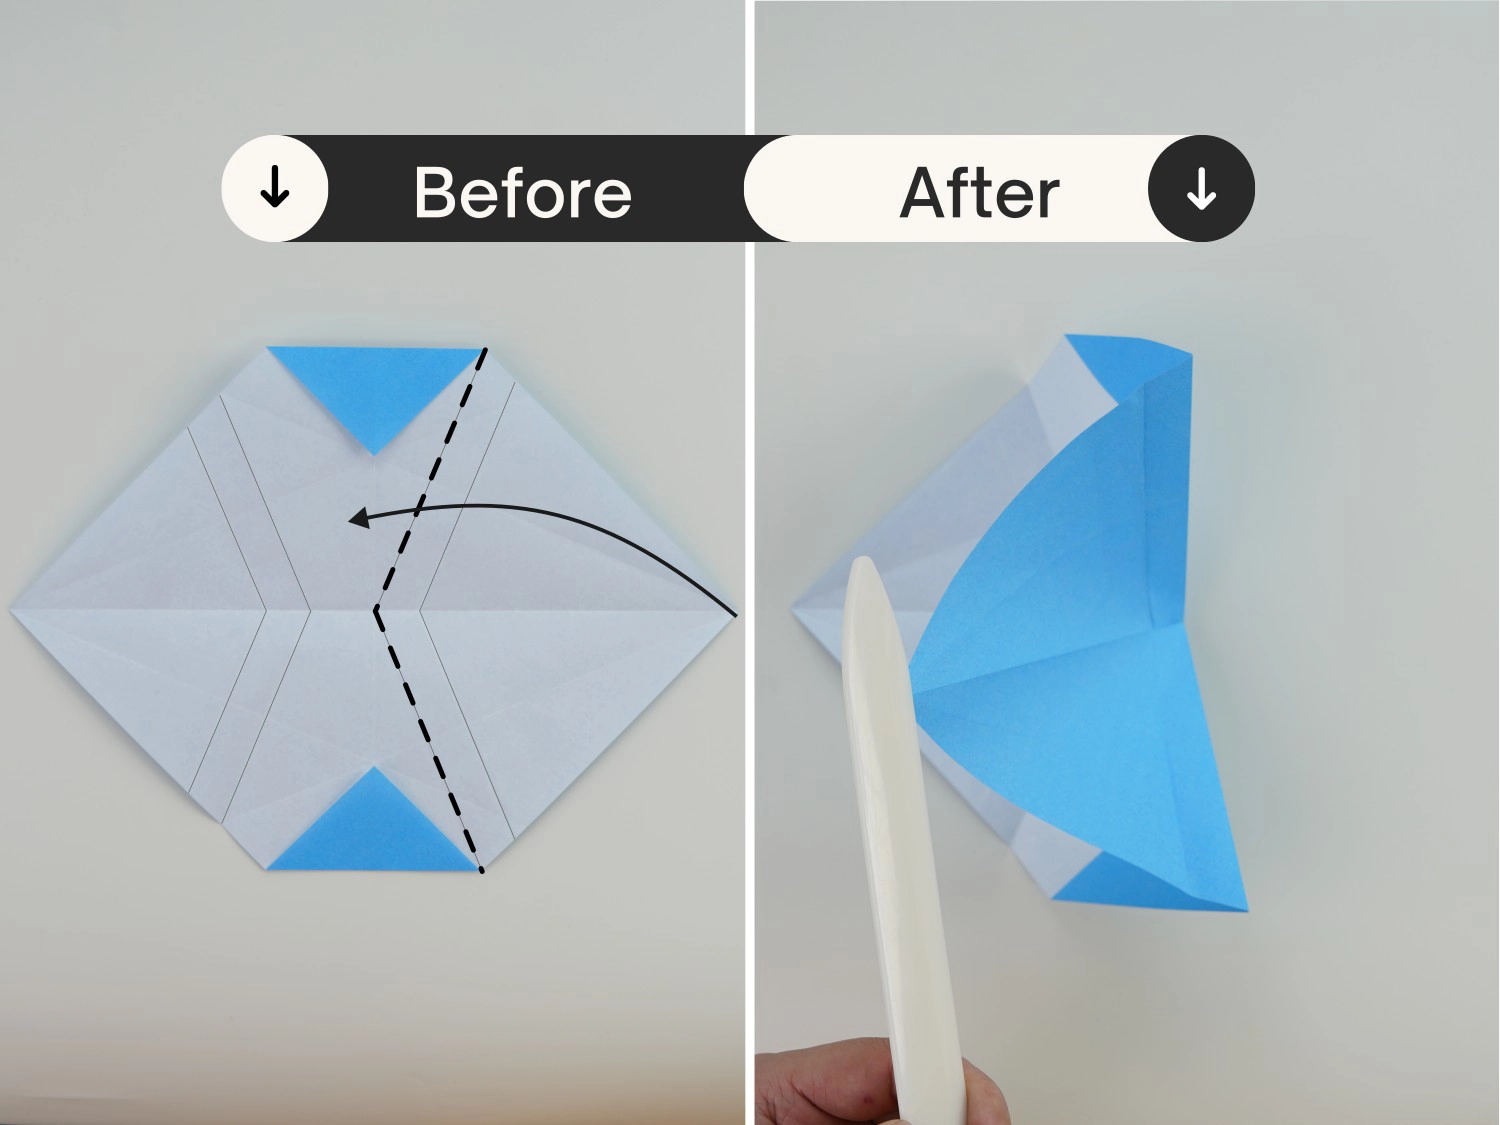
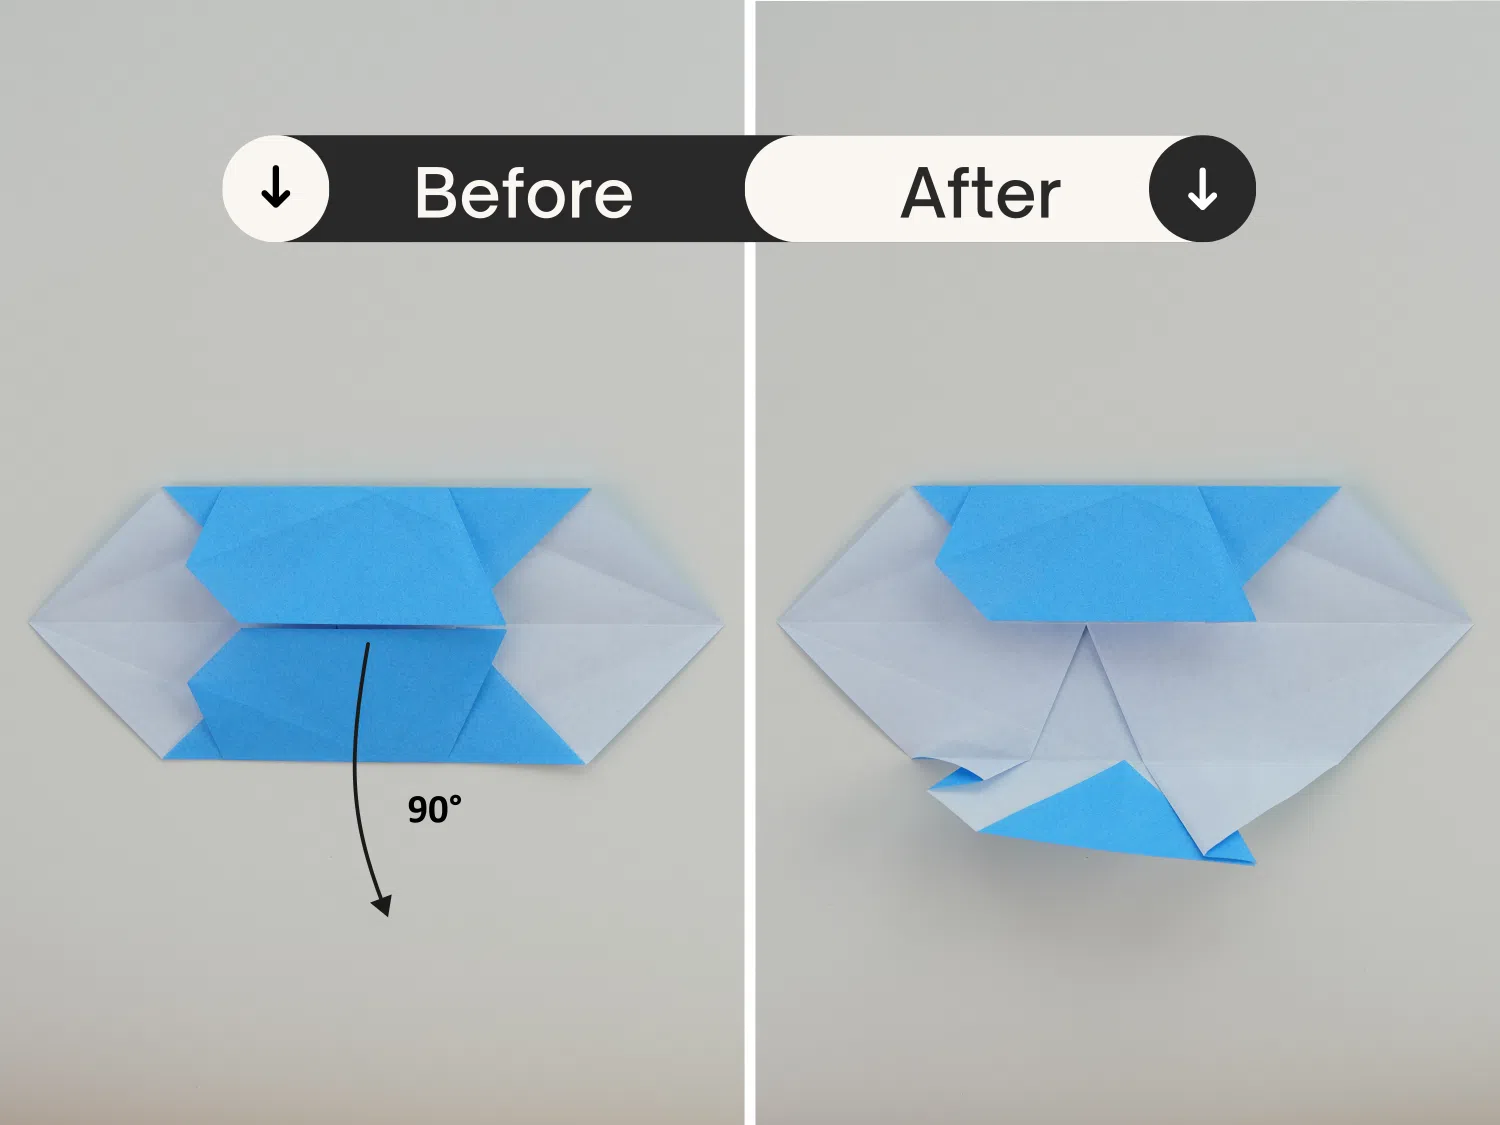
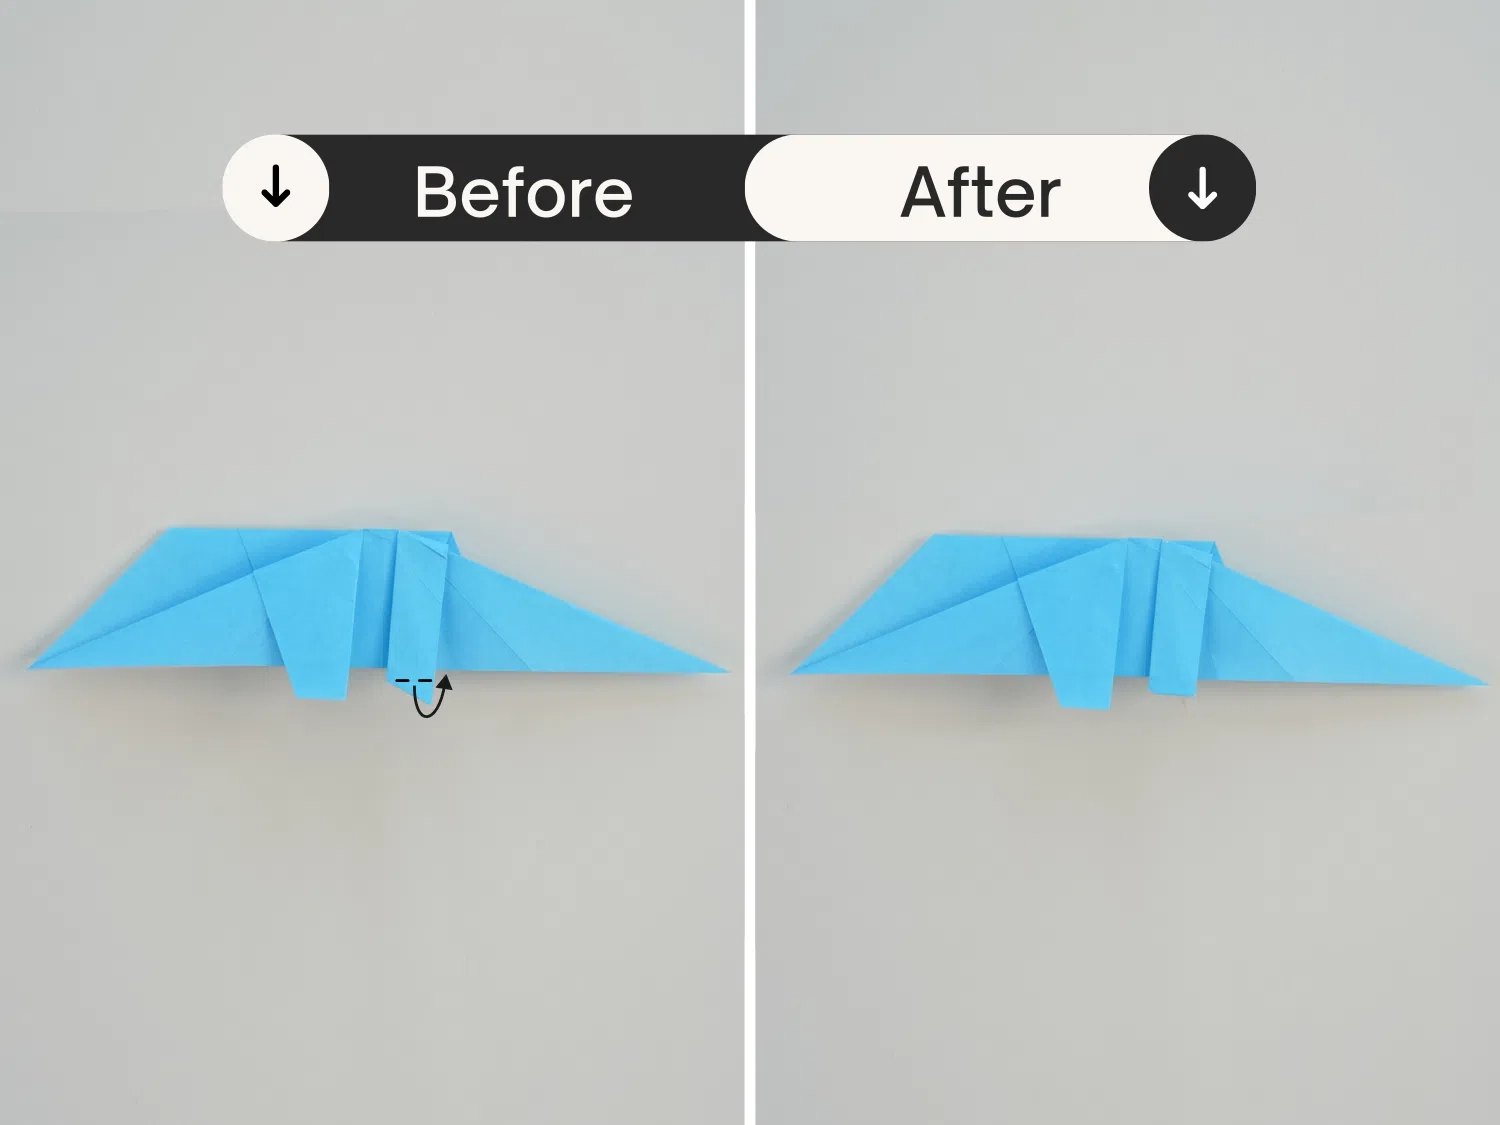
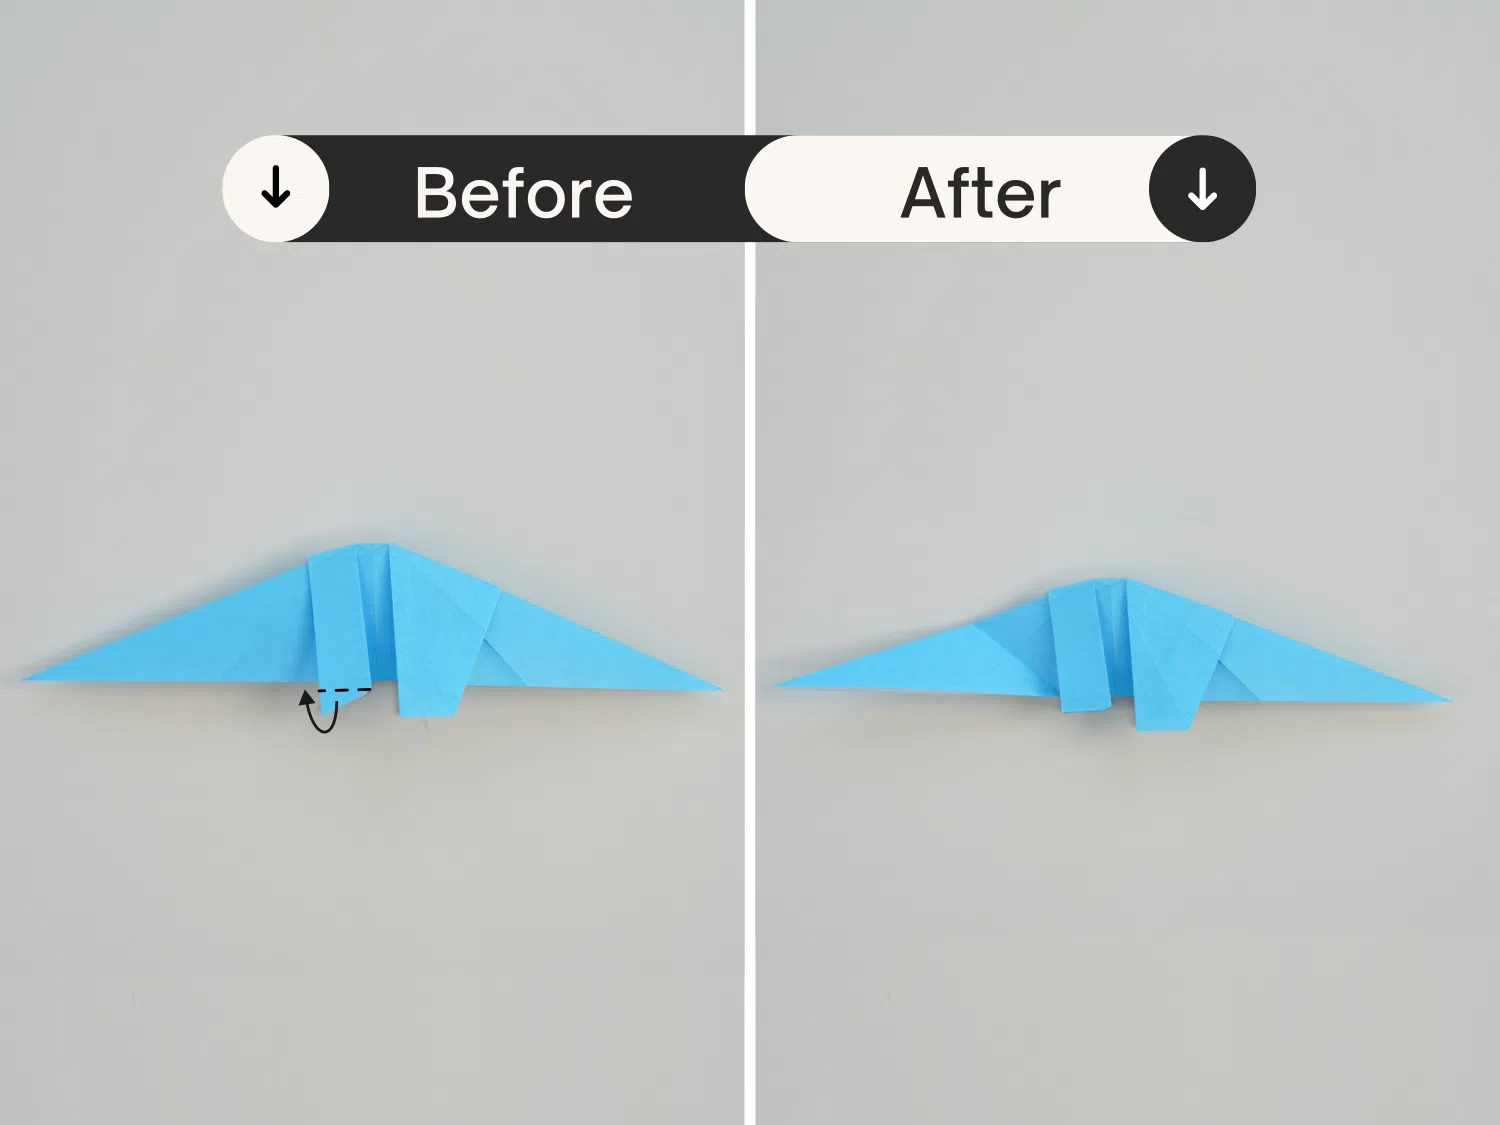
Step 16
Unfold the bottom flap at a 90-degree angle, so the paper points directly upward.
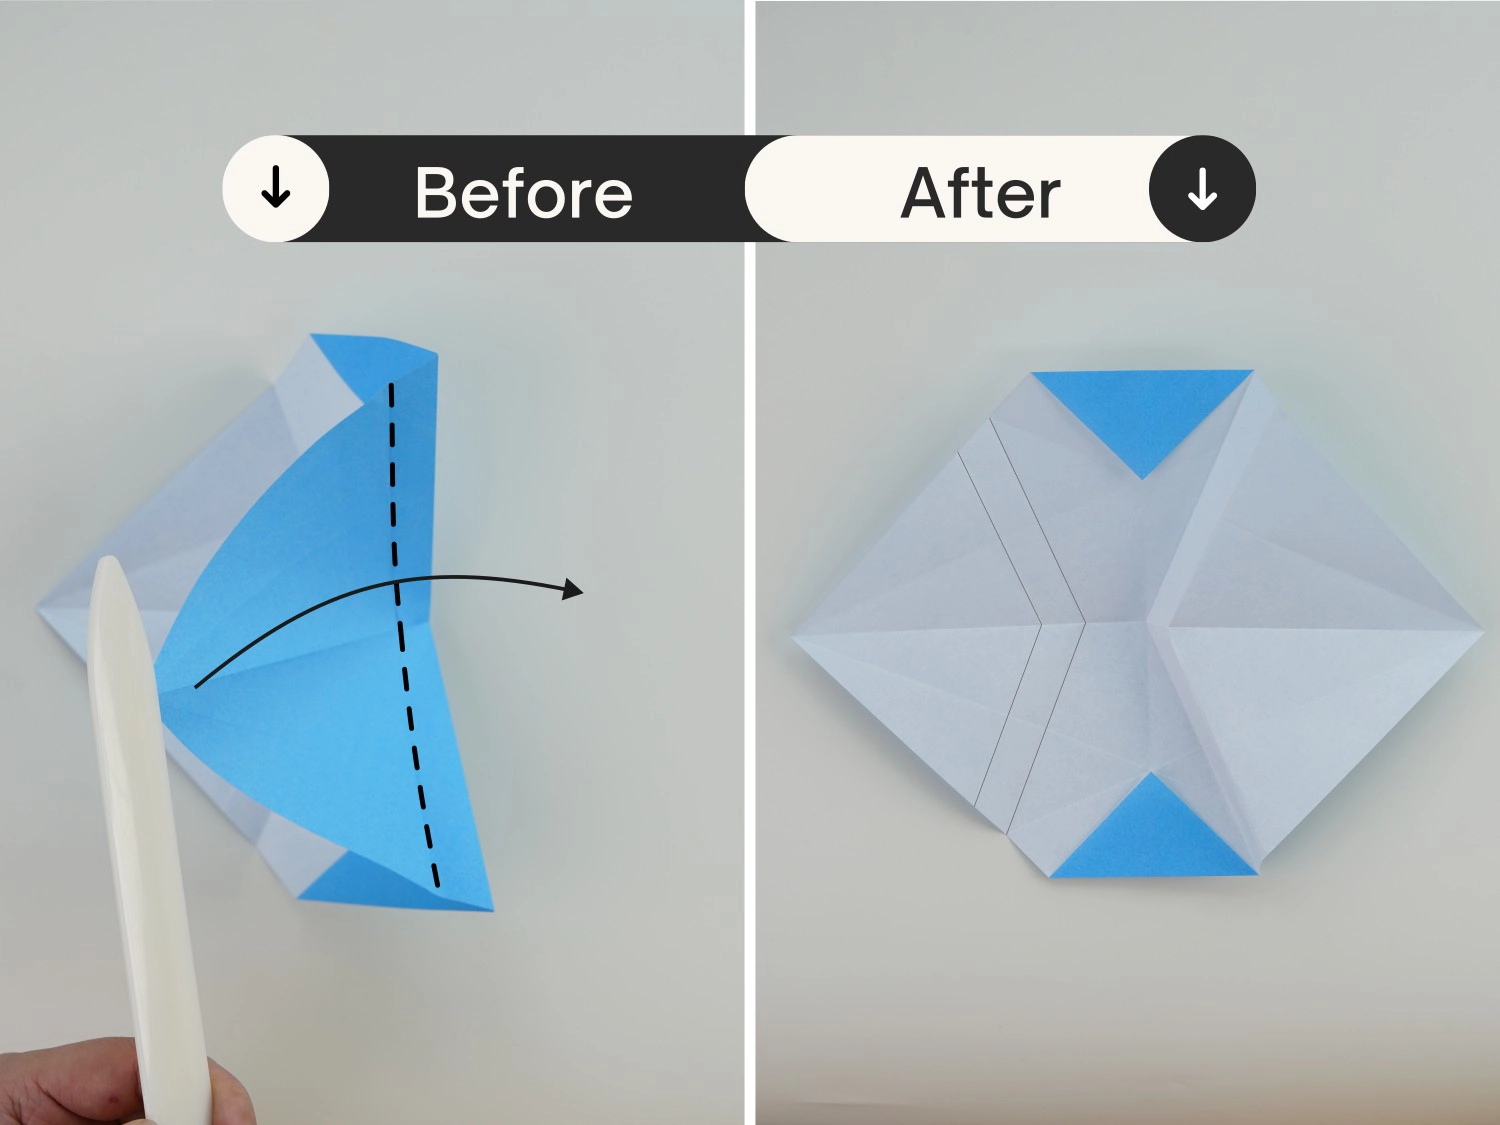
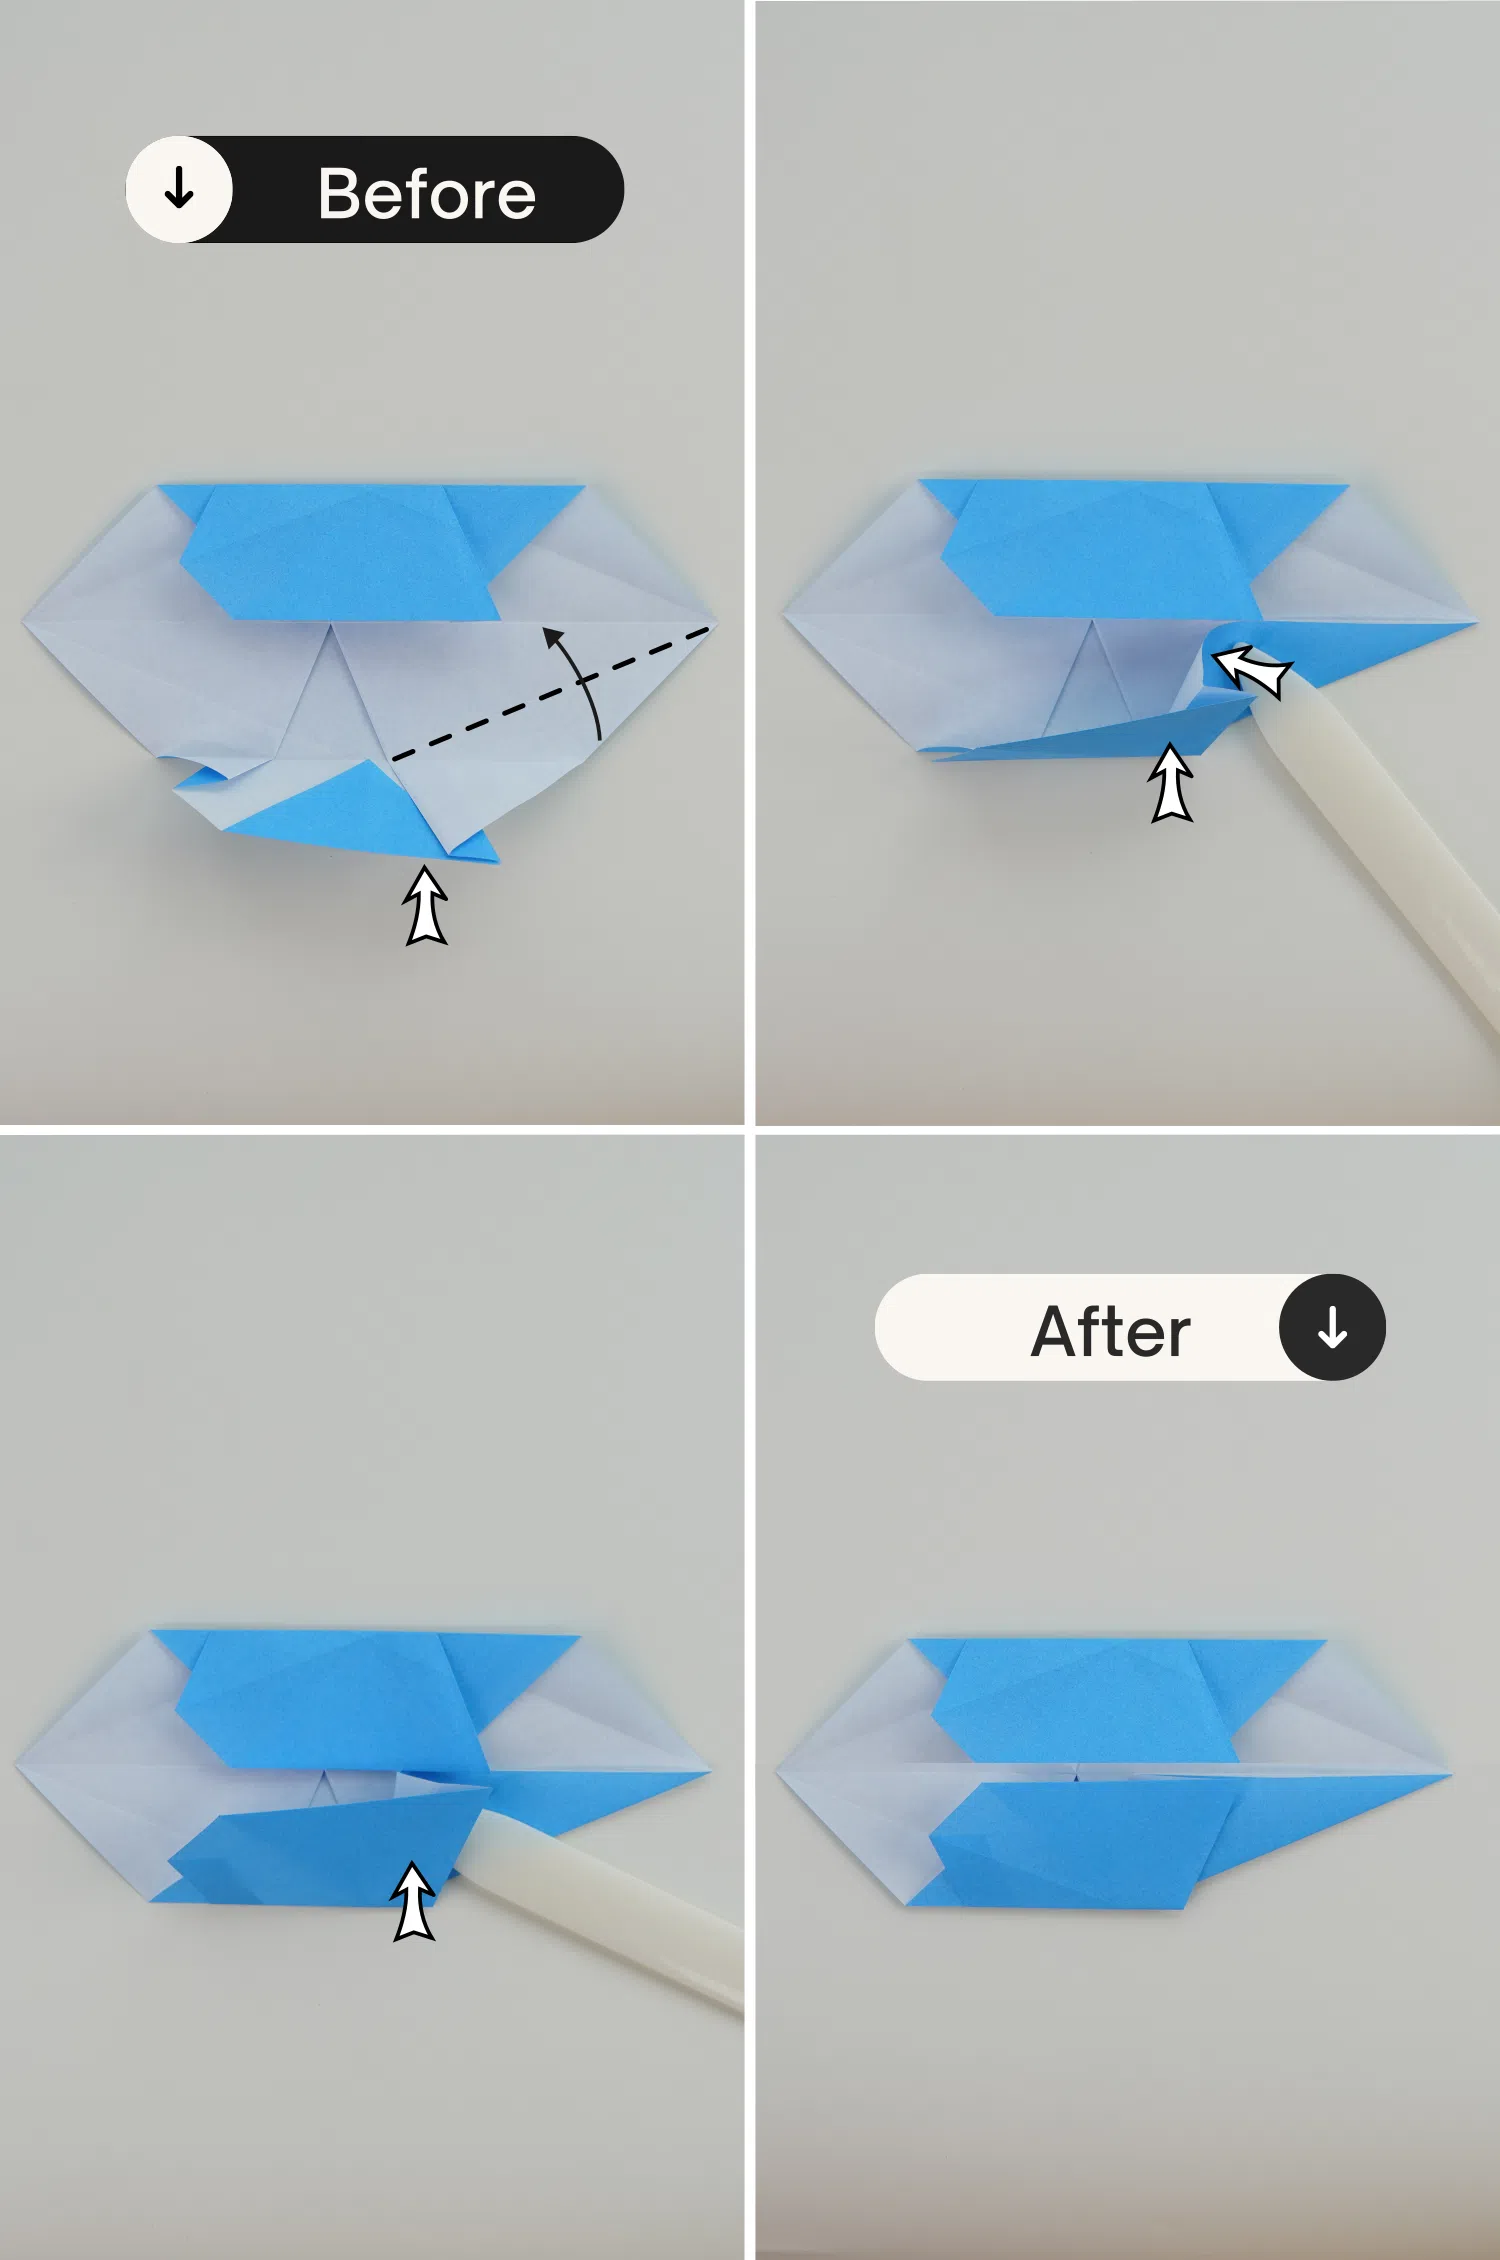
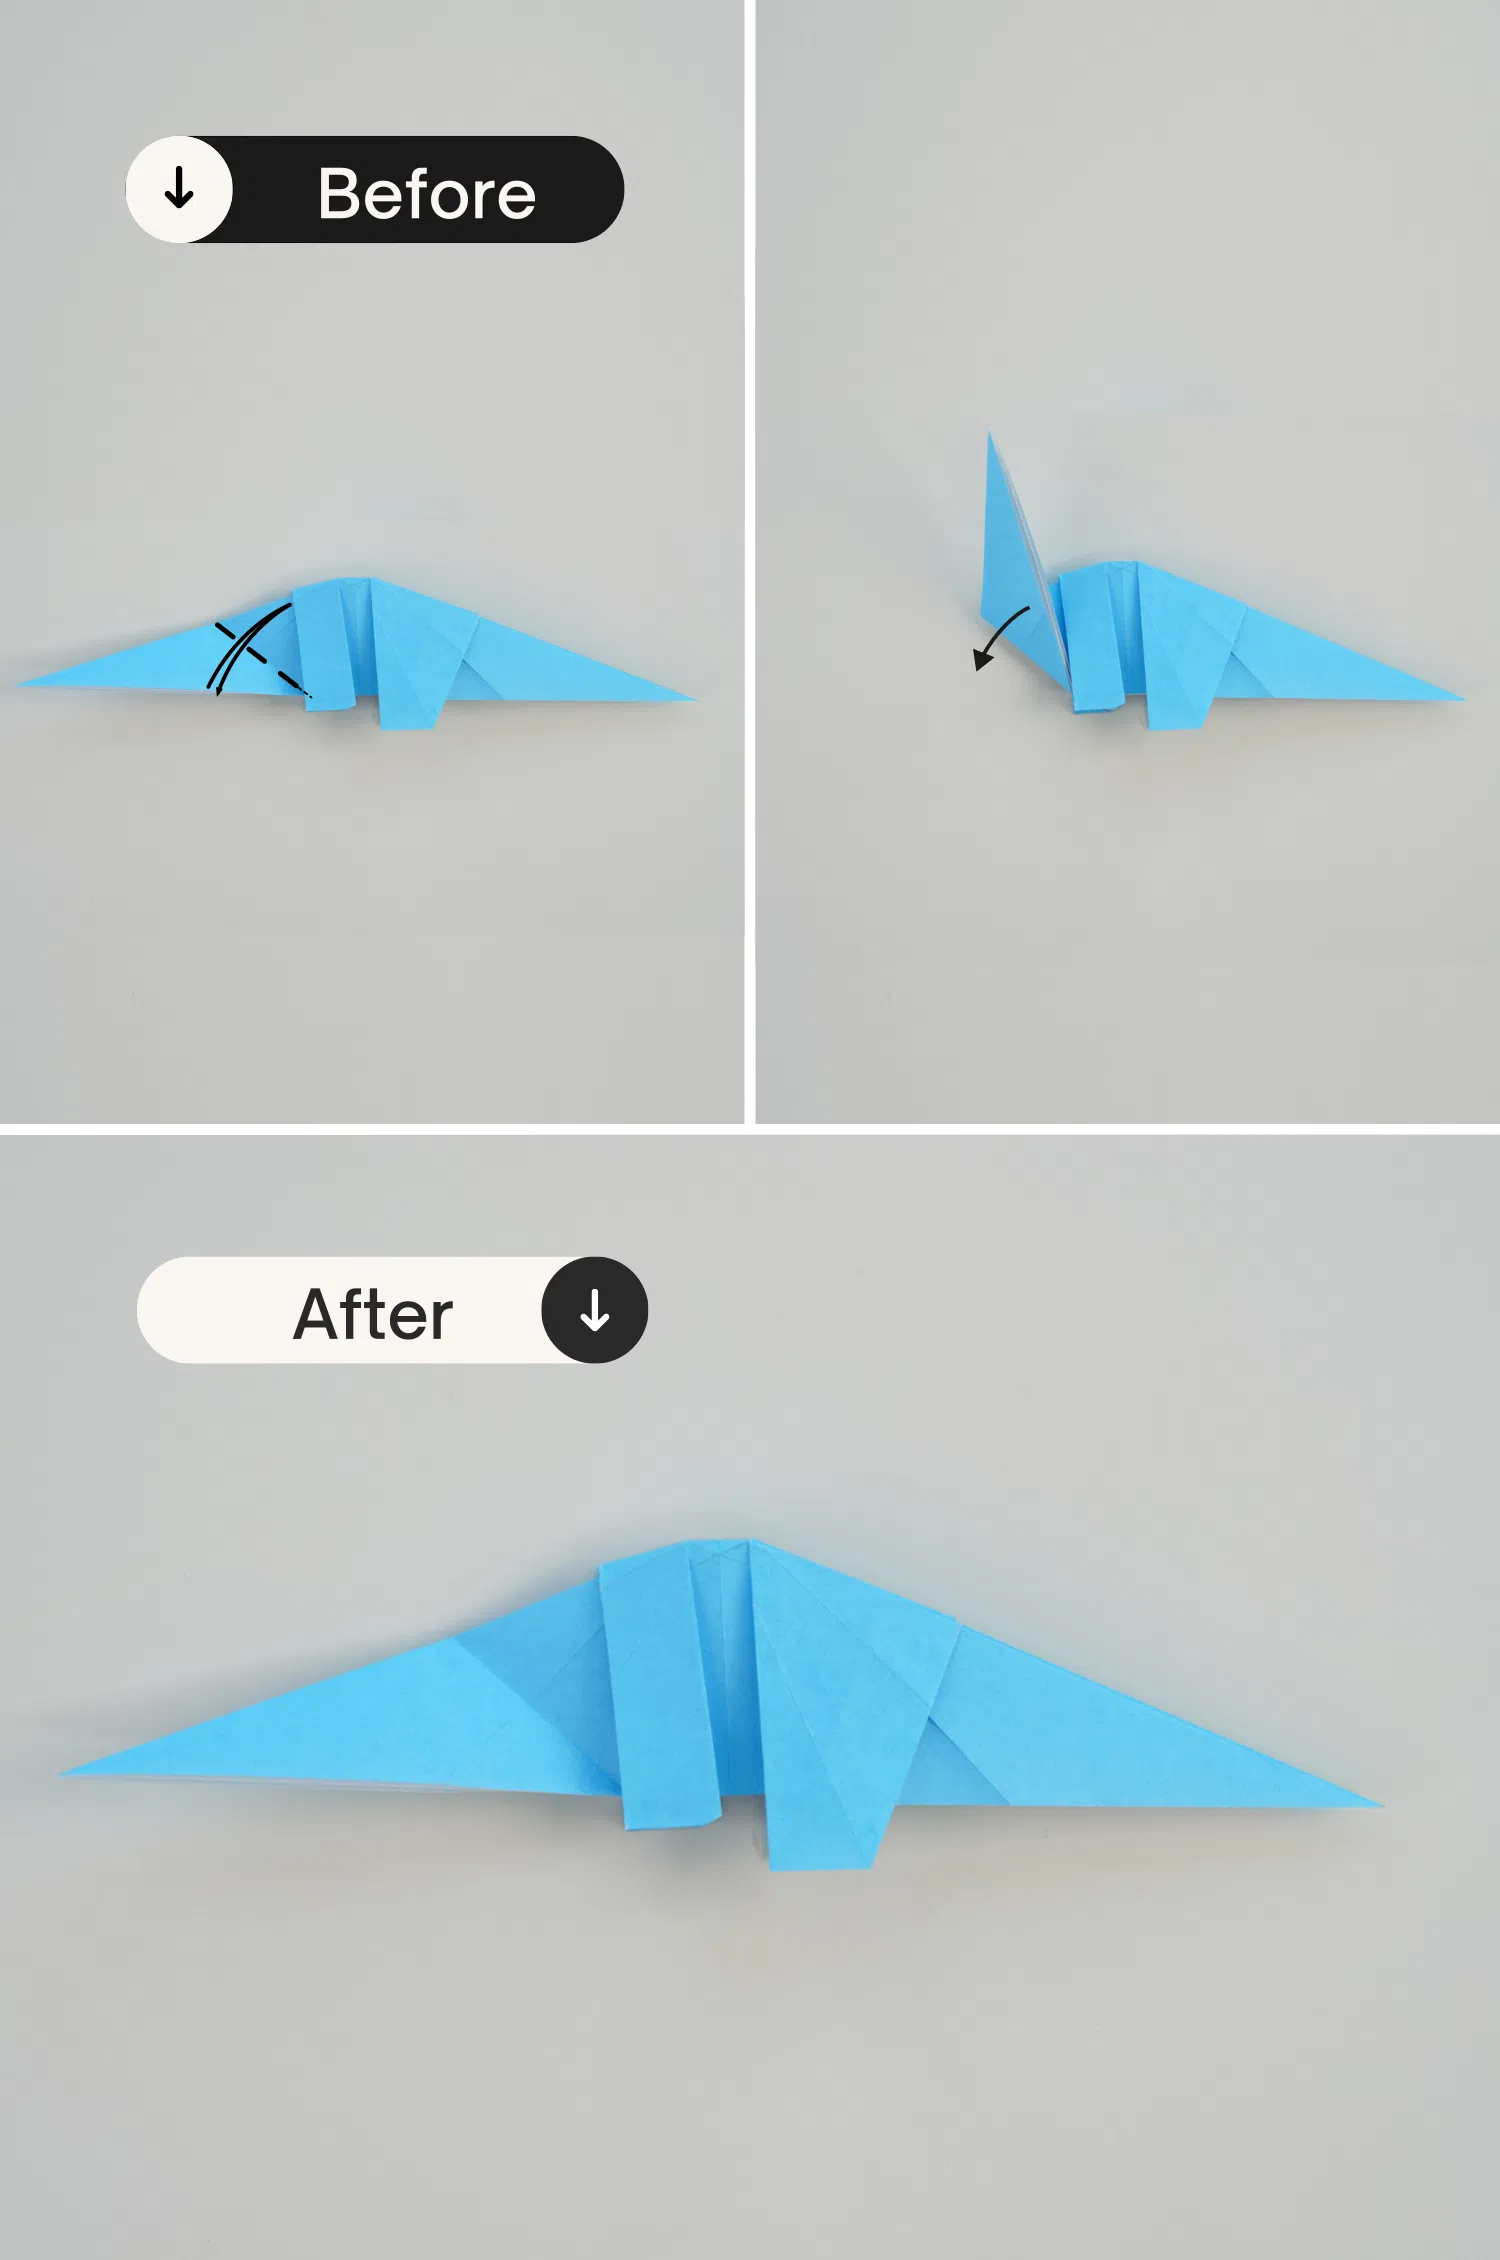
Step 17
Create an inside reverse fold by simultaneously folding the bottom flap and the crease
made in step 2 to the center line.
- To do this, start by folding the crease from step 2 up.
- Holding this crease, begin folding the bottom flap back up, ensuring that the bottom right corner remains above both folds.
- Continue pressing both folds down until the paper flattens. The corner should point right.
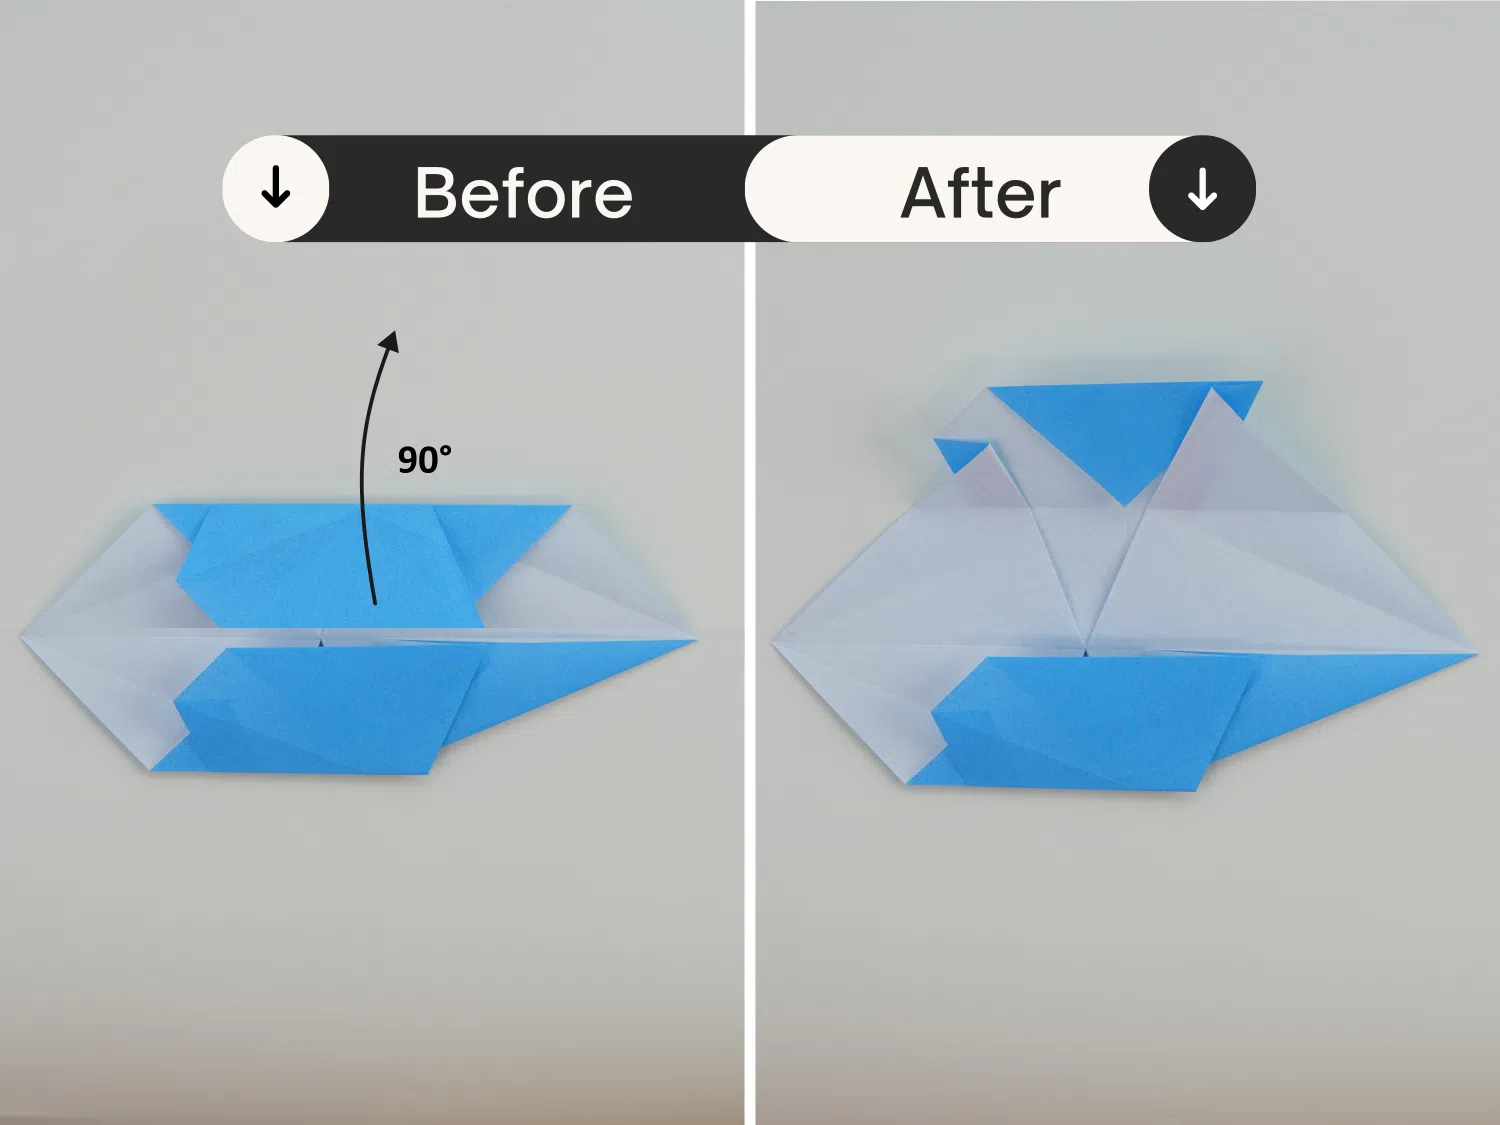
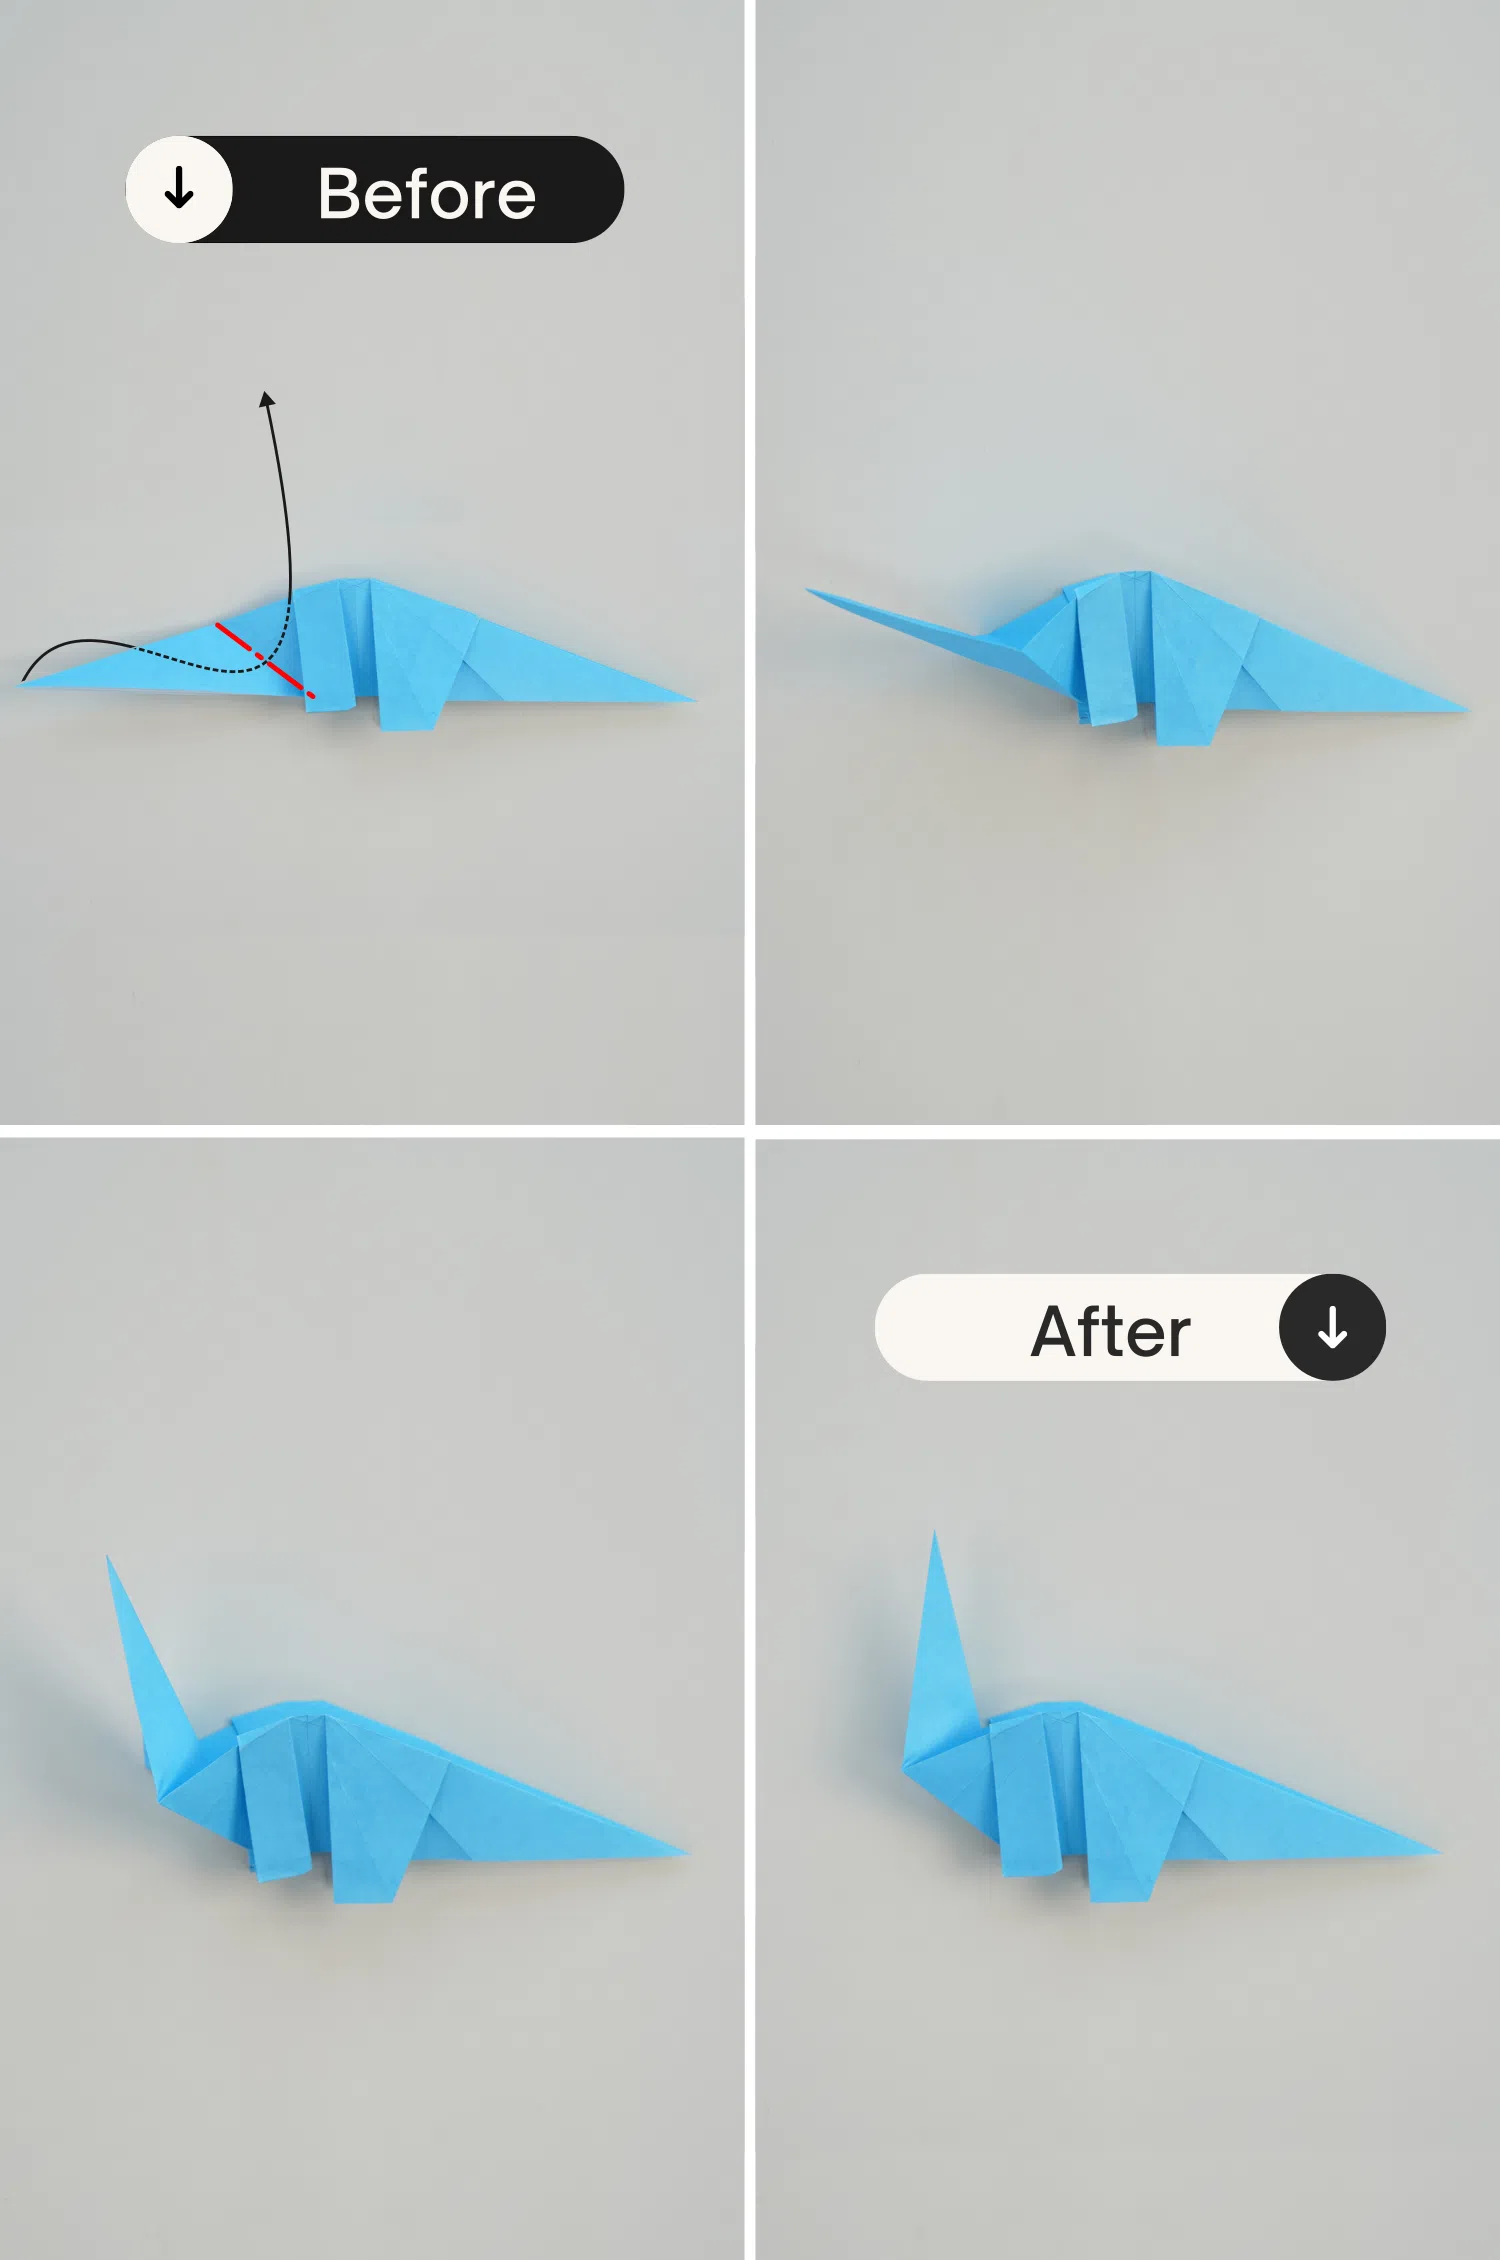
Step 18
Repeat step 16 on the top, unfolding it at a 90-degree angle.
Step 19
Repeat step 17 on the top flap by creating an inside reverse fold with the top flap and
the crease made in step 2.
- Start by folding the crease from step 2 down.
- Holding this crease, begin folding the top flap down, ensuring that the top right corner remains above both folds.
- Continue pressing both folds down until the paper flattens. The corner should point to the right.
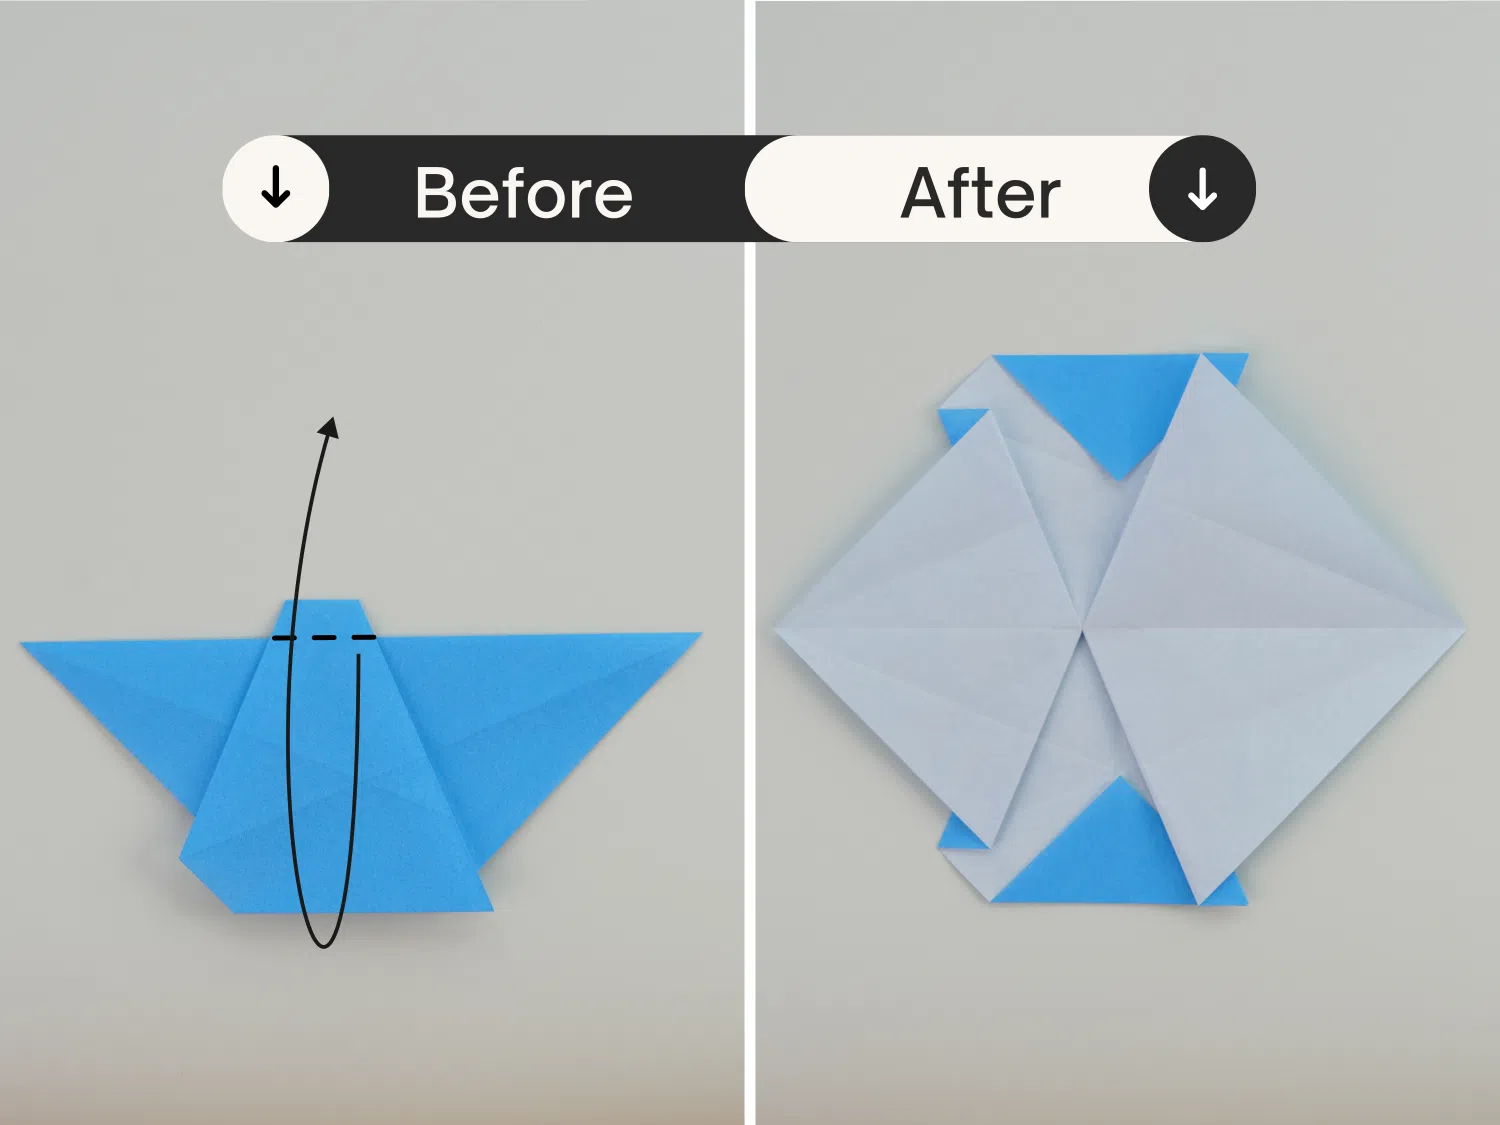
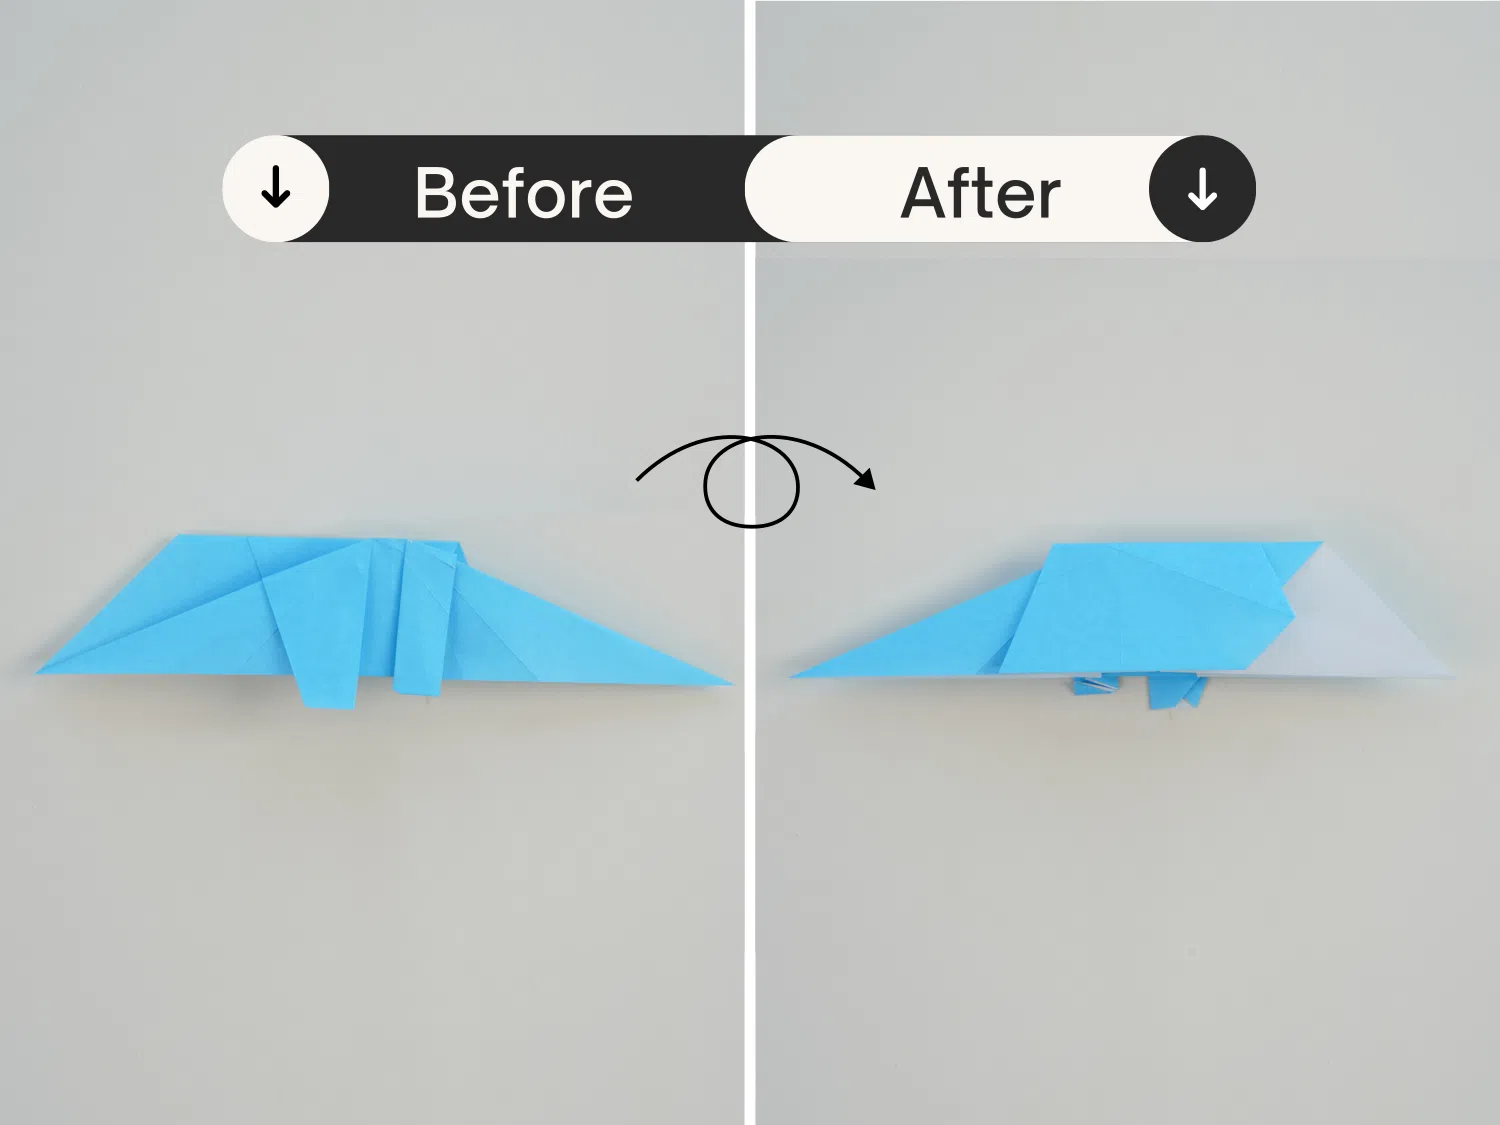
Step 20
Turn over the paper.
Step 21
Fold the model in half upward along the existing horizontal crease.
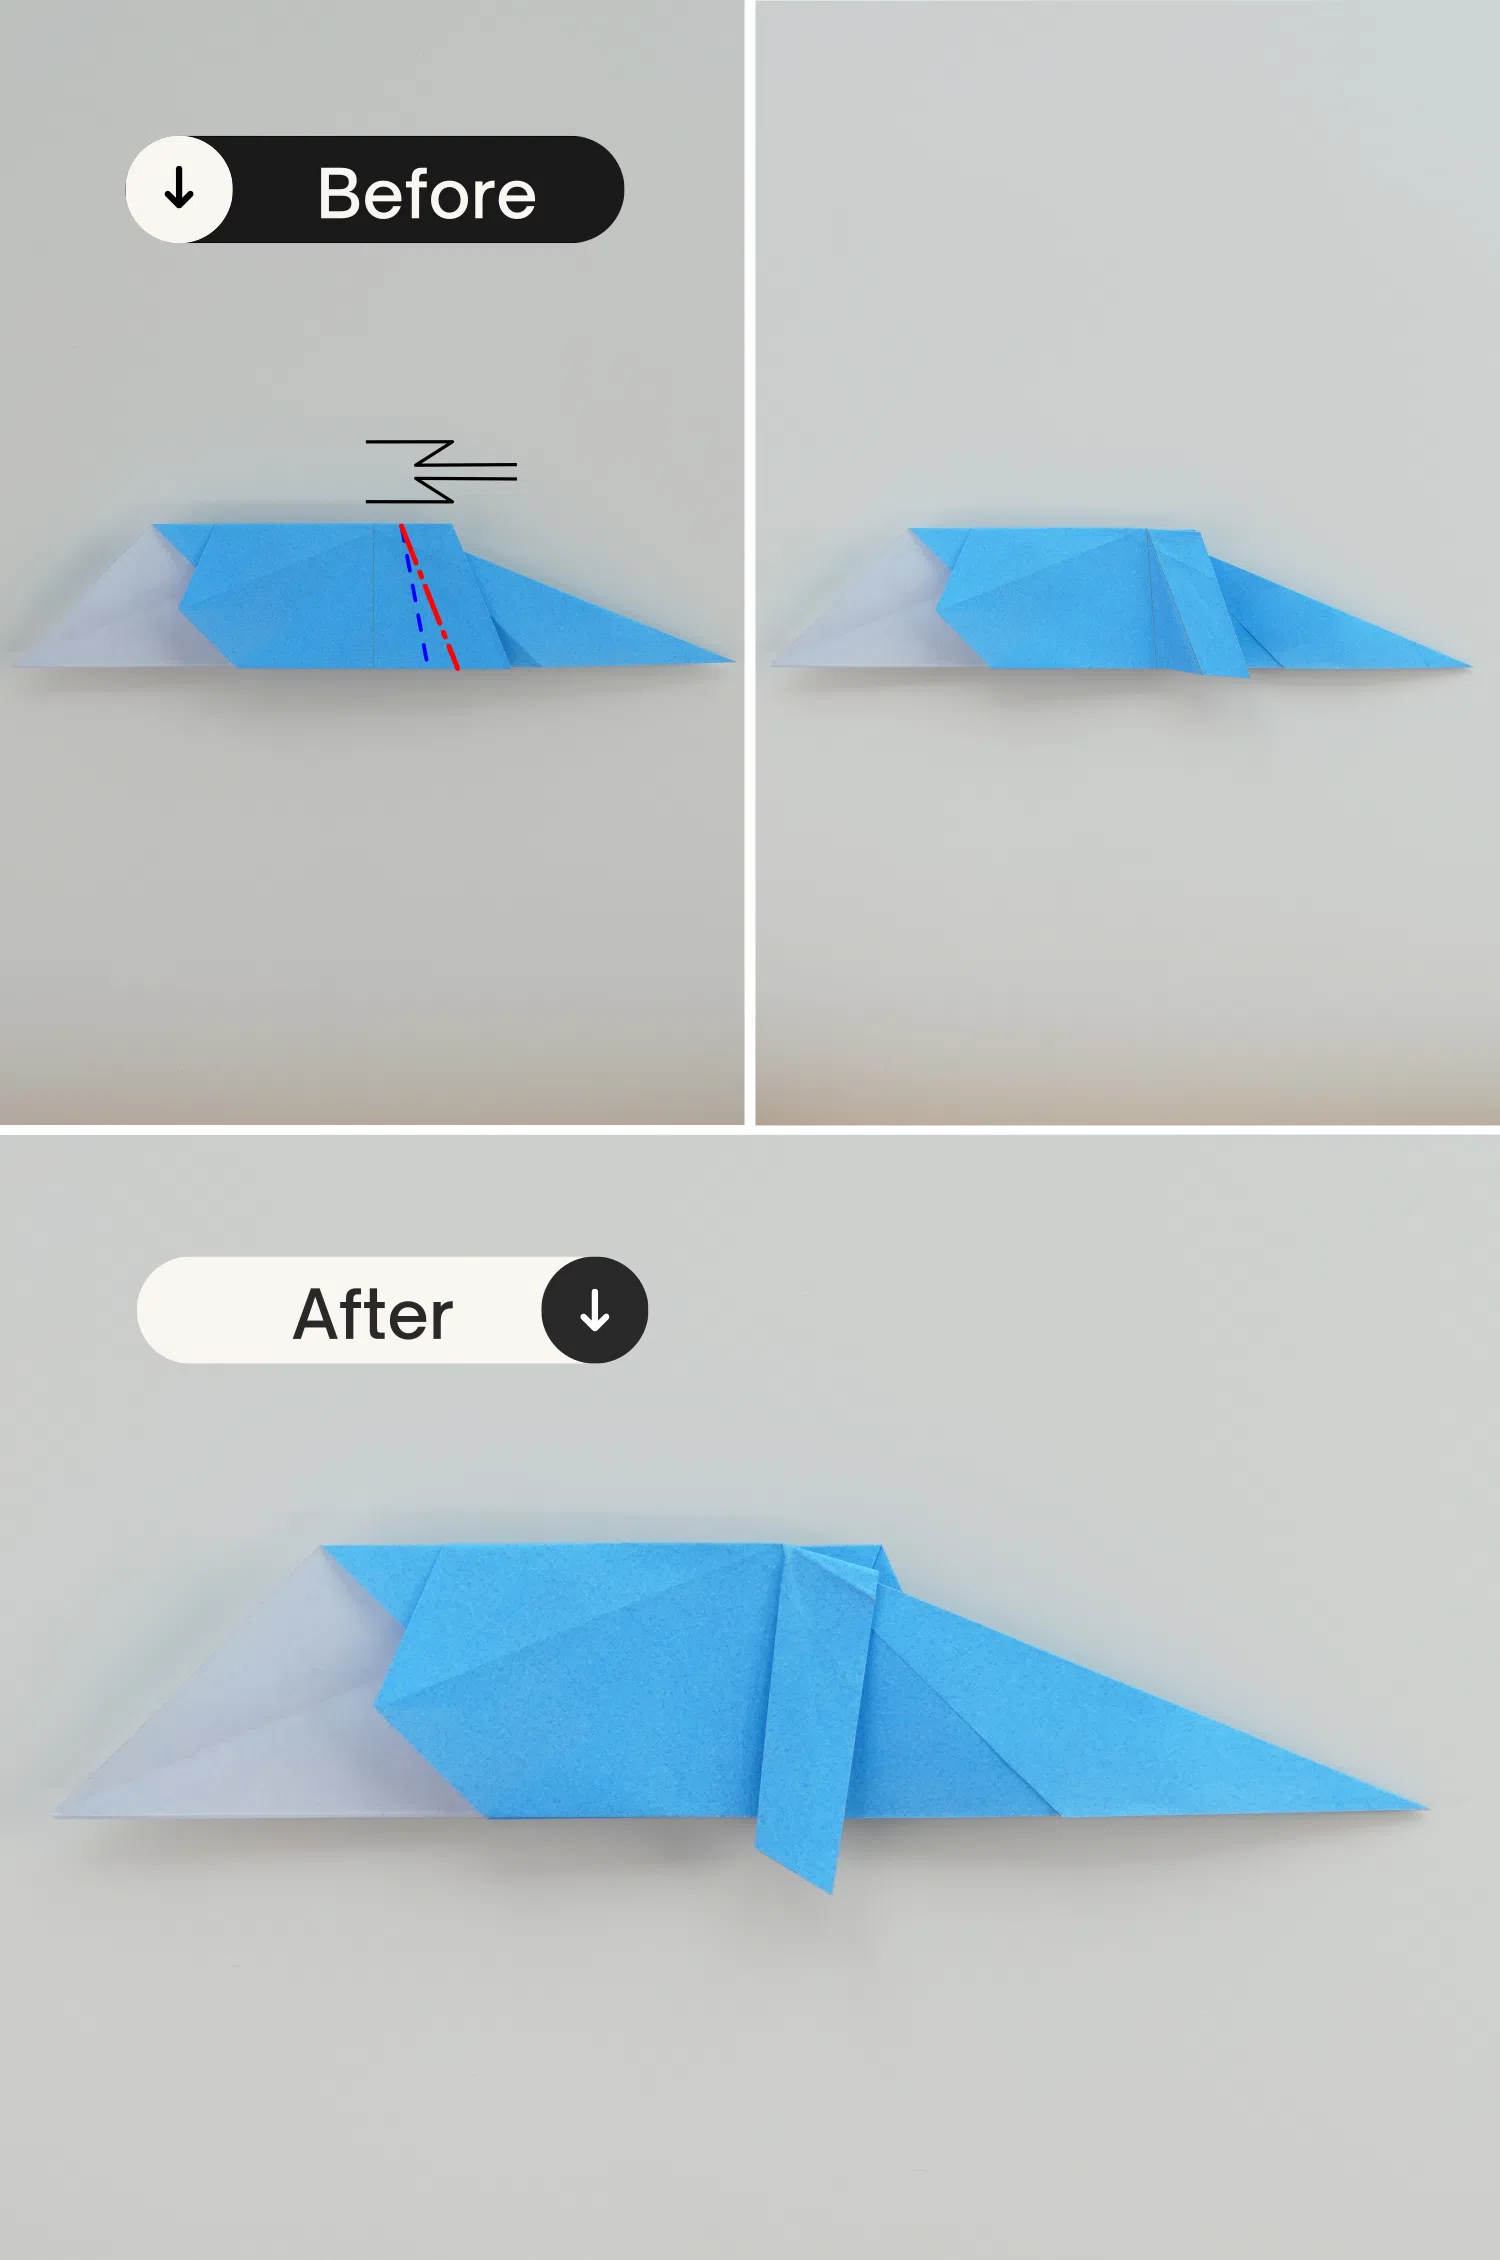
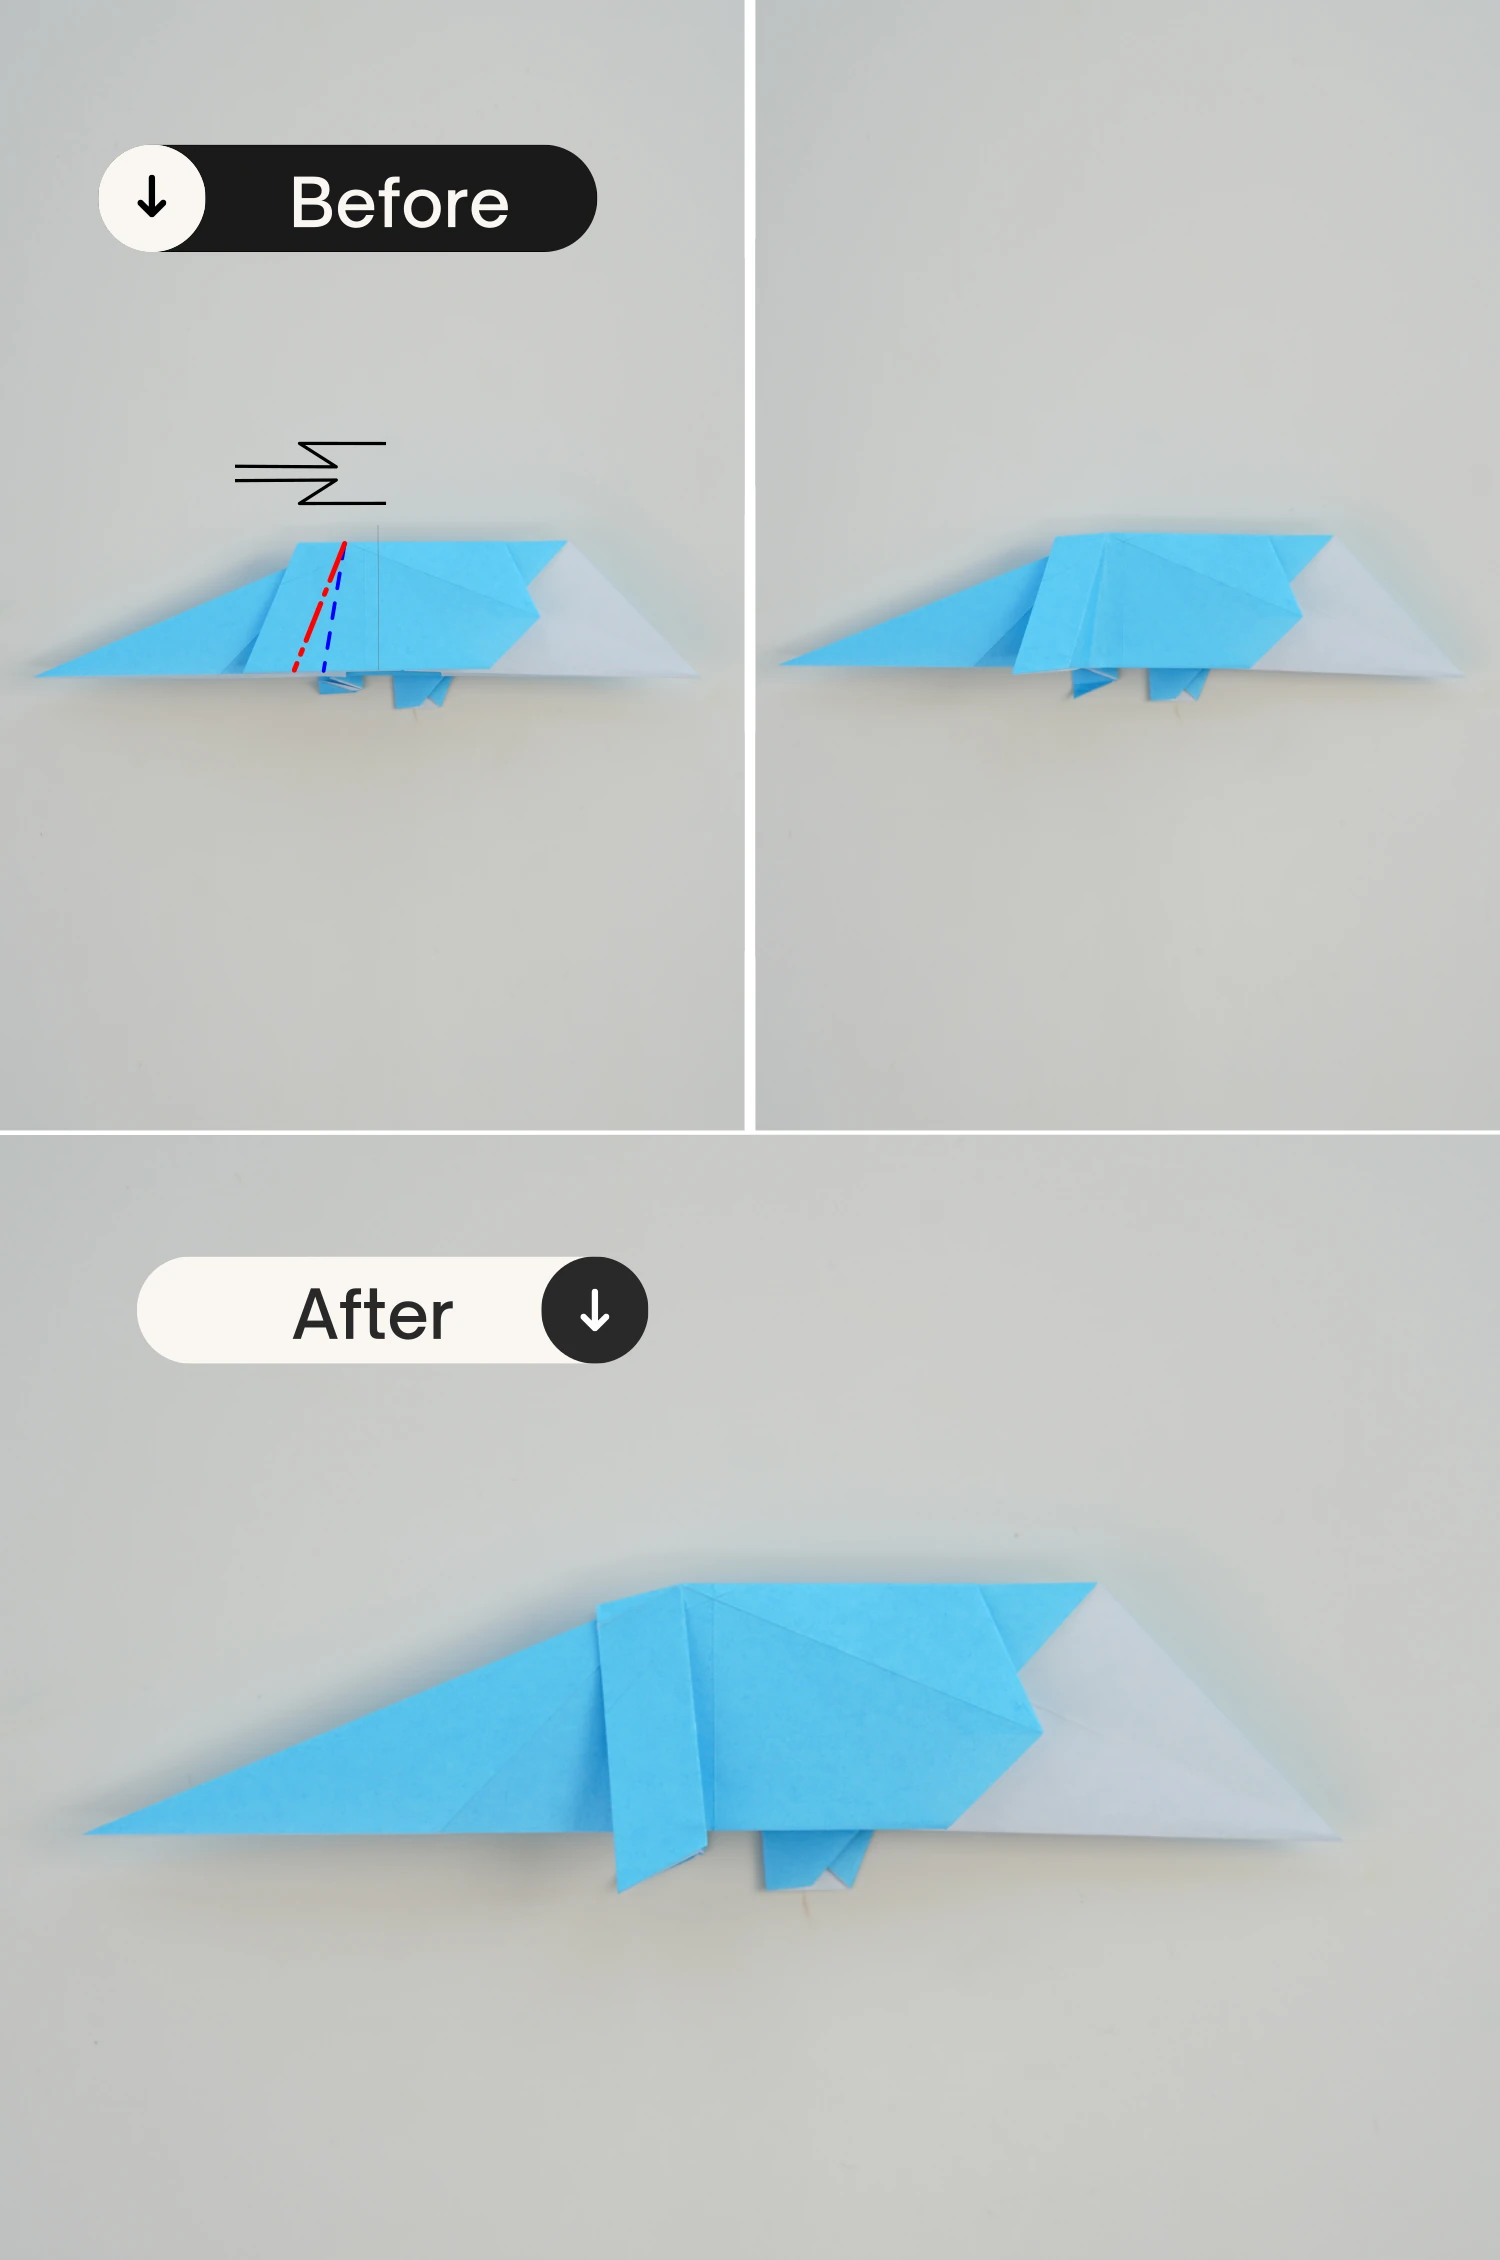
Step 22
Create a pleat fold on the right part of the body. The valley fold should be a vertical line,
while the mountain fold is angled.
[Note that the paper will not lie flat.]
Step 23
On the left side, create another pleat on the very top layer of the paper, while also
folding the left edge to the bottom edge.
- To do this, slightly lift the top flap to create the pleat folds. As the paper folds to the right, begin folding down the left edge to the bottom edge. Flatten the folds.
Step 24
Mountain fold the tip of the paper to hide the corner.
Step 25
Turn over the paper.
Step 26
Repeat step 22 to create a pleat fold on the left part of the body. The mountain and
valley folds should directly line up with the pleat created in step 22. The paper should
now lie flat.
Step 27
Repeat step 23 to create another pleat on the right side while folding down the right
edge to the bottom edge.
- Slightly lift the top flap to create the pleat folds. As the paper folds to the left, begin folding down the right edge. Flatten the folds.
Step 28
Repeat step 24 to mountain fold the tip to hide the corner.
Step 29
Fold the left corner directly up, and unfold.
Step 30
Make an inside reverse fold. To do this, slightly open up the paper from the top, and
push the corner up. Fold along the creases made in step 29 and flatten the paper.
Step 31
Fold the top layer such that the corner touches the edge of the crimp and unfold.

Step 32
Create a swivel fold using the creases made in step 2 and step 31. To do this, mountain
fold the crease from step 2 inwards, while folding the crease from step 31 to the right.
Push the extra paper between the creases downward.
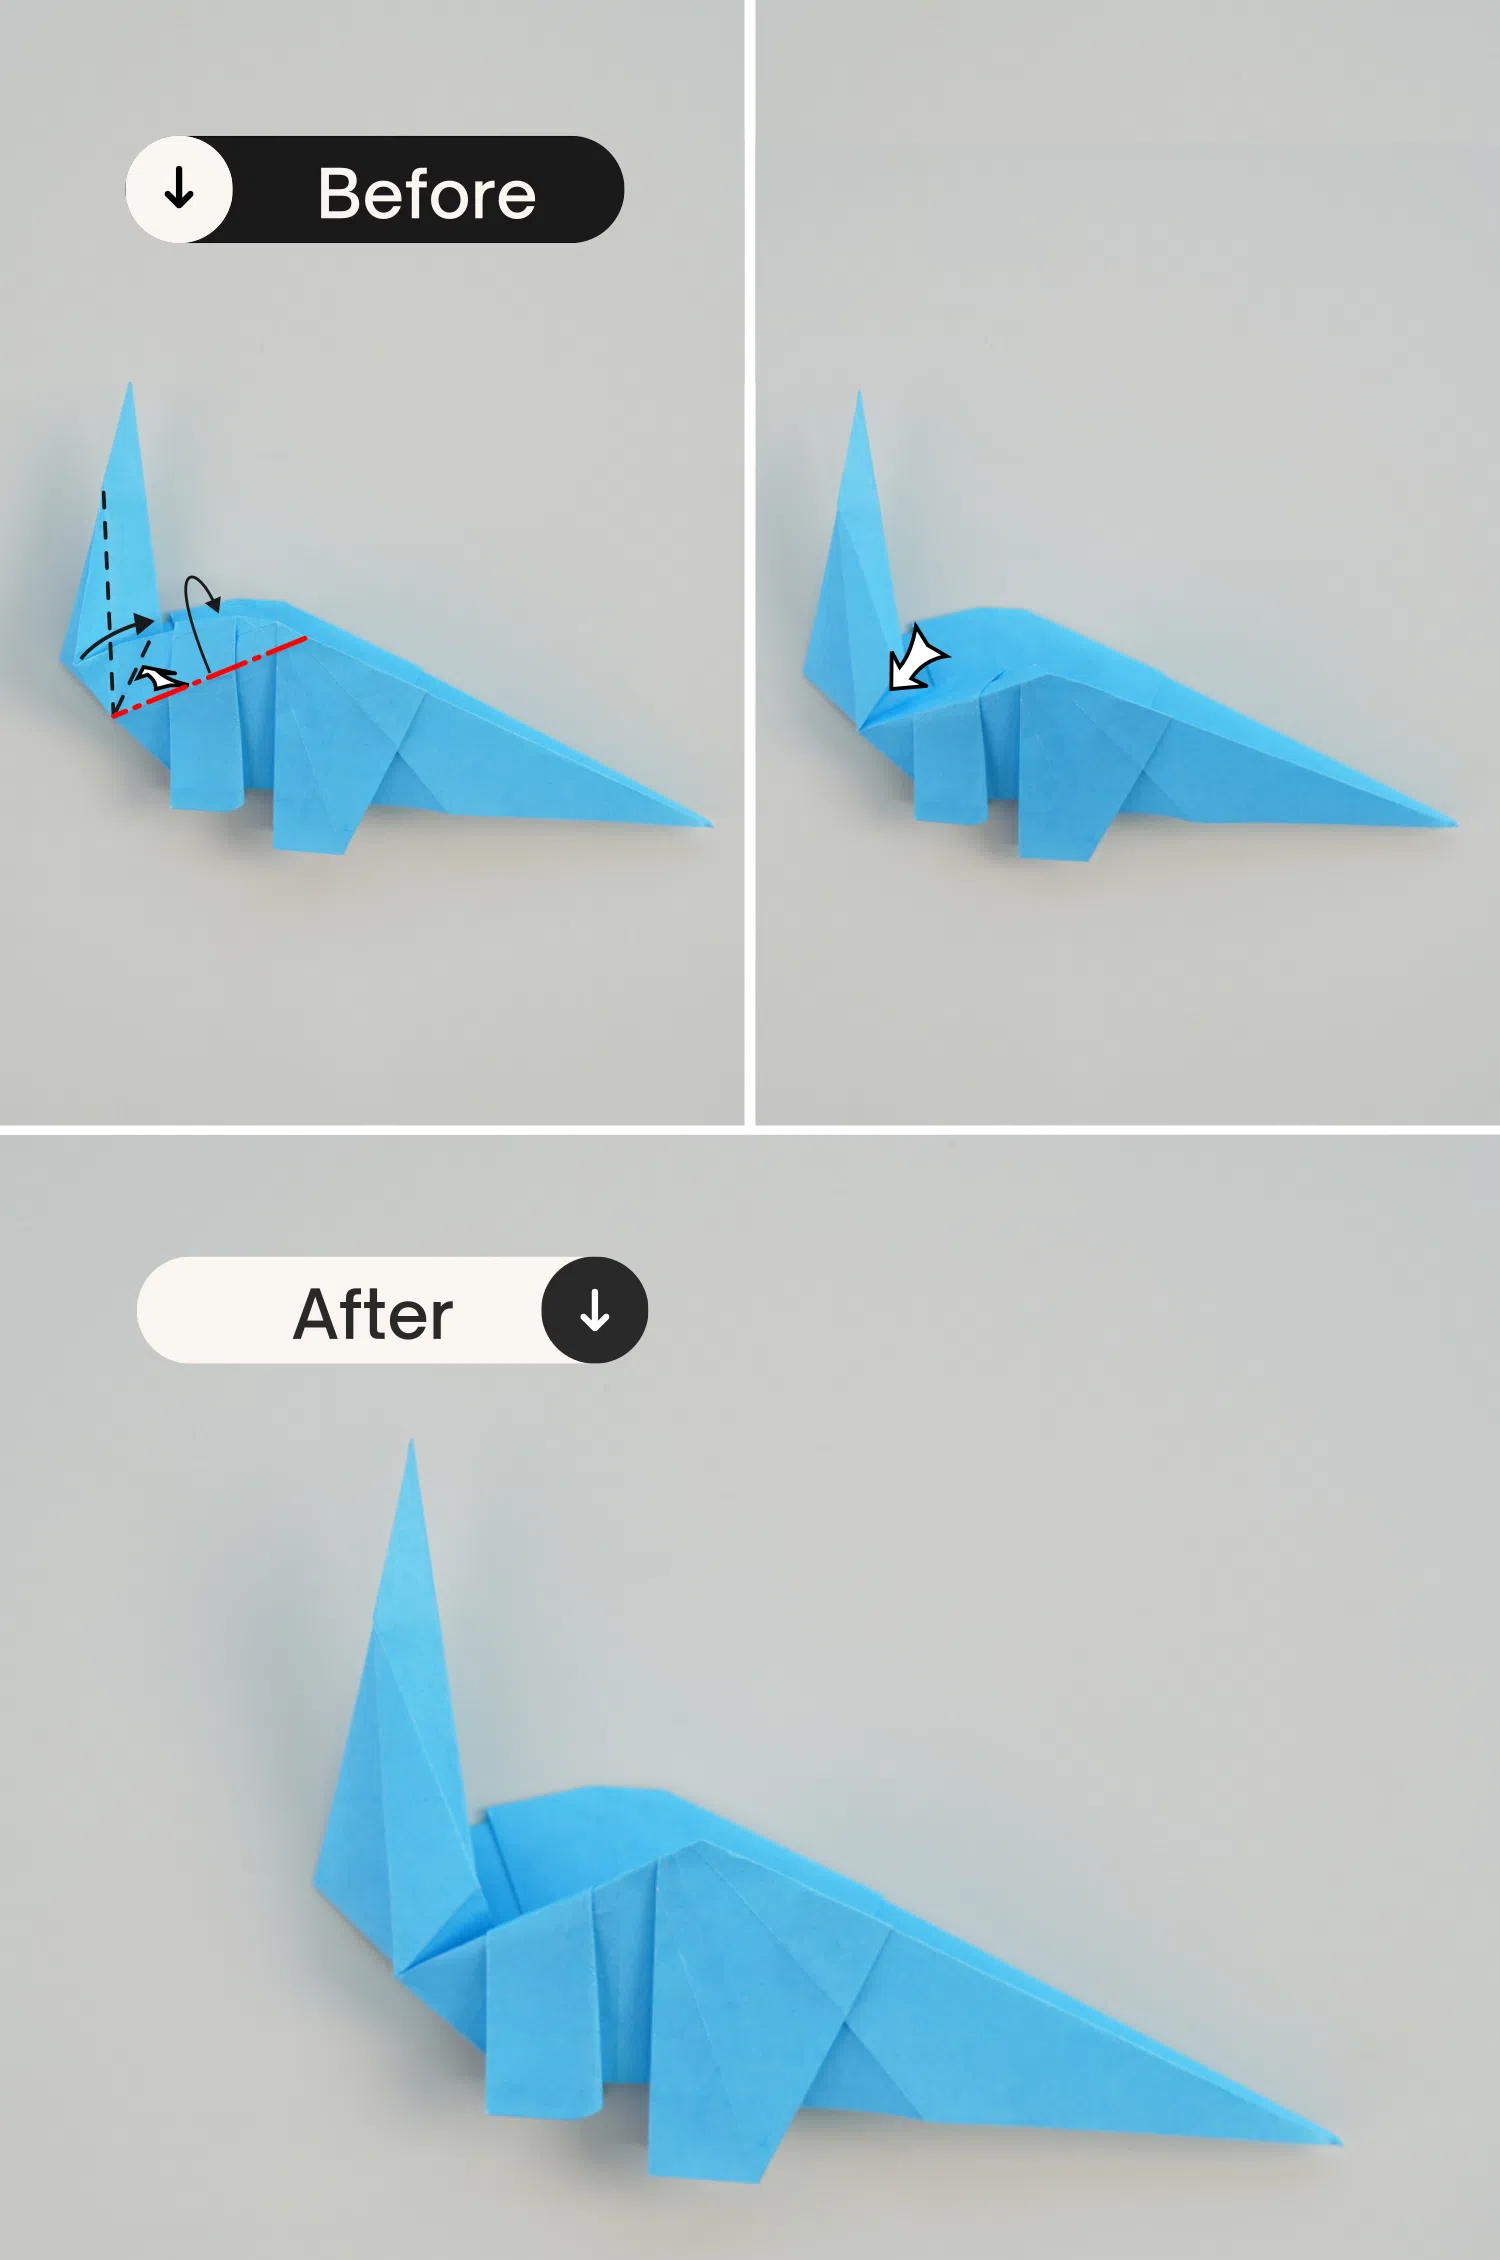
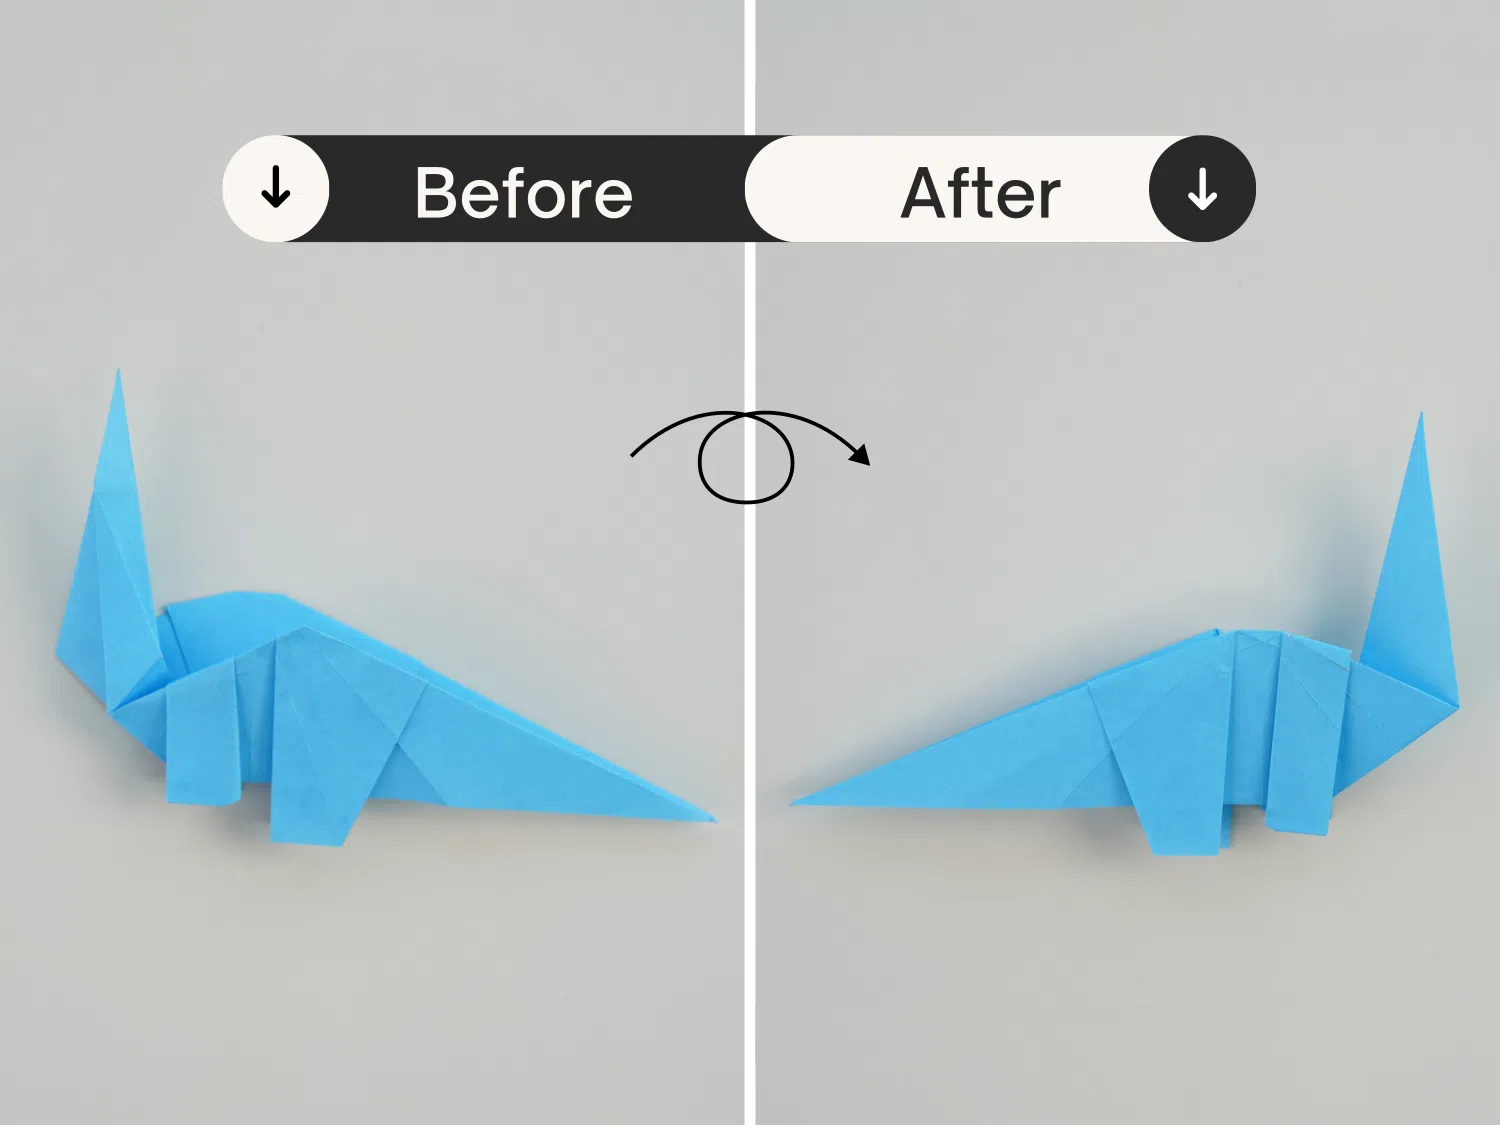
Step 33
Turn over the paper.
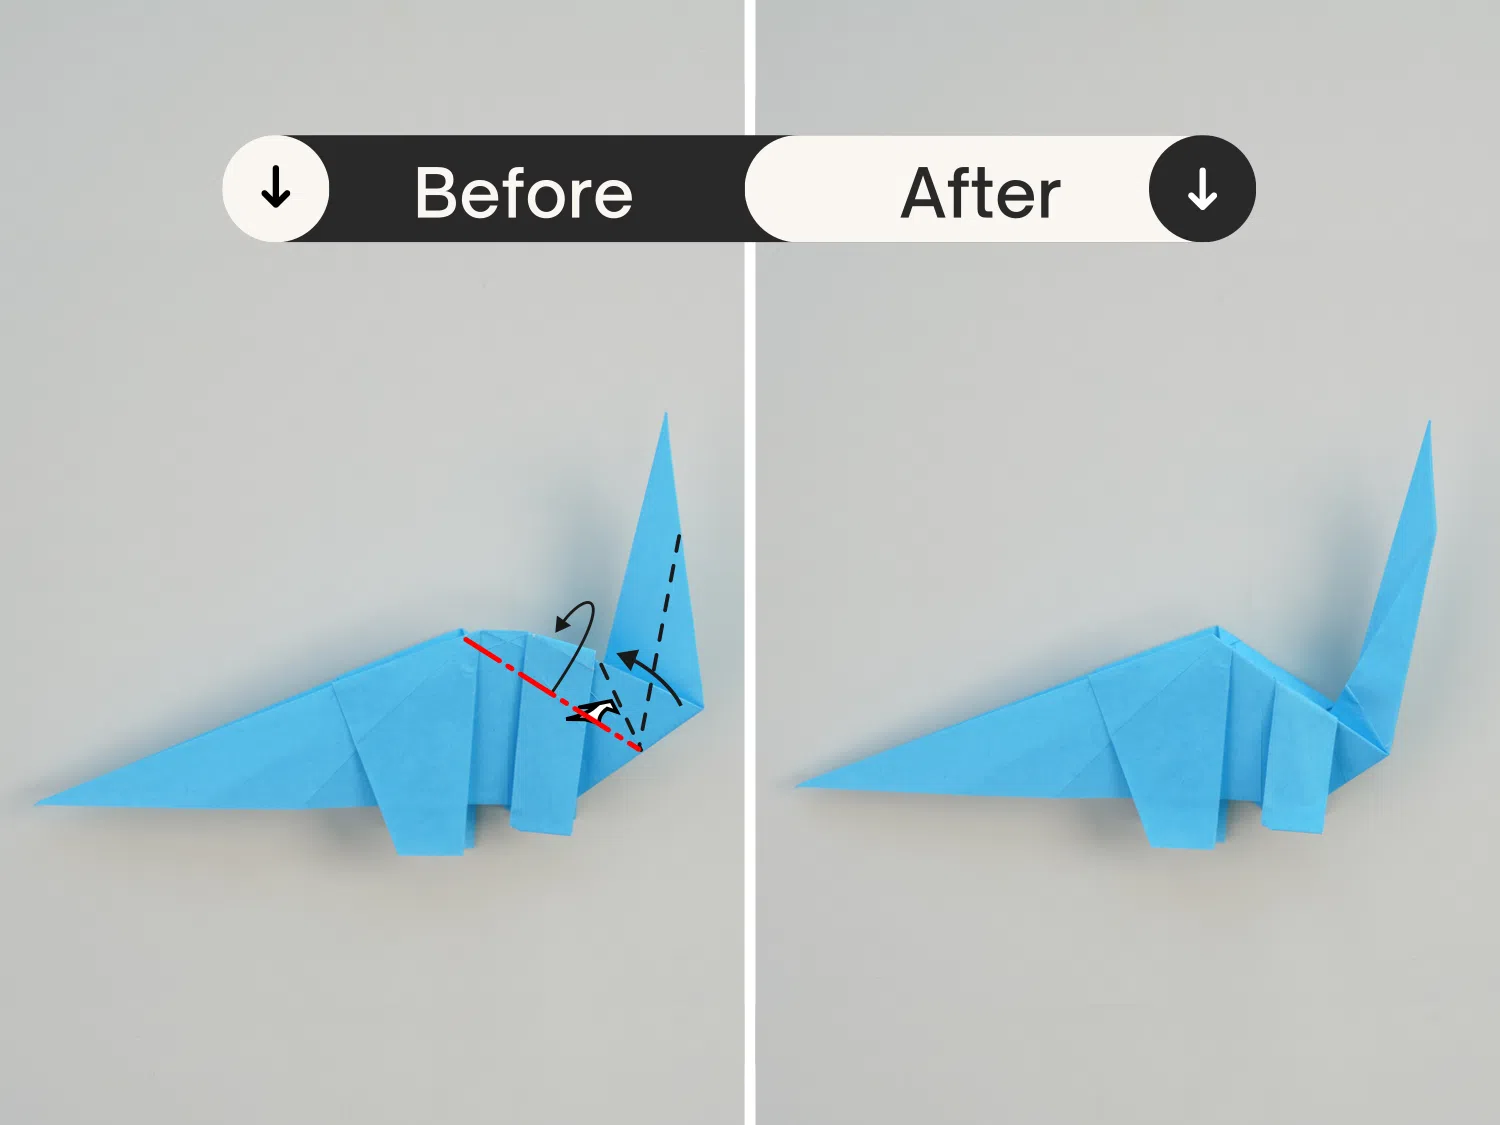
Step 34
Repeat steps 31 and 32. Fold the top layer to the crimp and unfold. Swivel fold by
mountain folding the crease from step 2 and the crease you just made. Push the extra
paper between the creases downward.
Step 35
Fold a diagonal crease along the thin strip of paper, starting at the top right corner at
the bottom left.
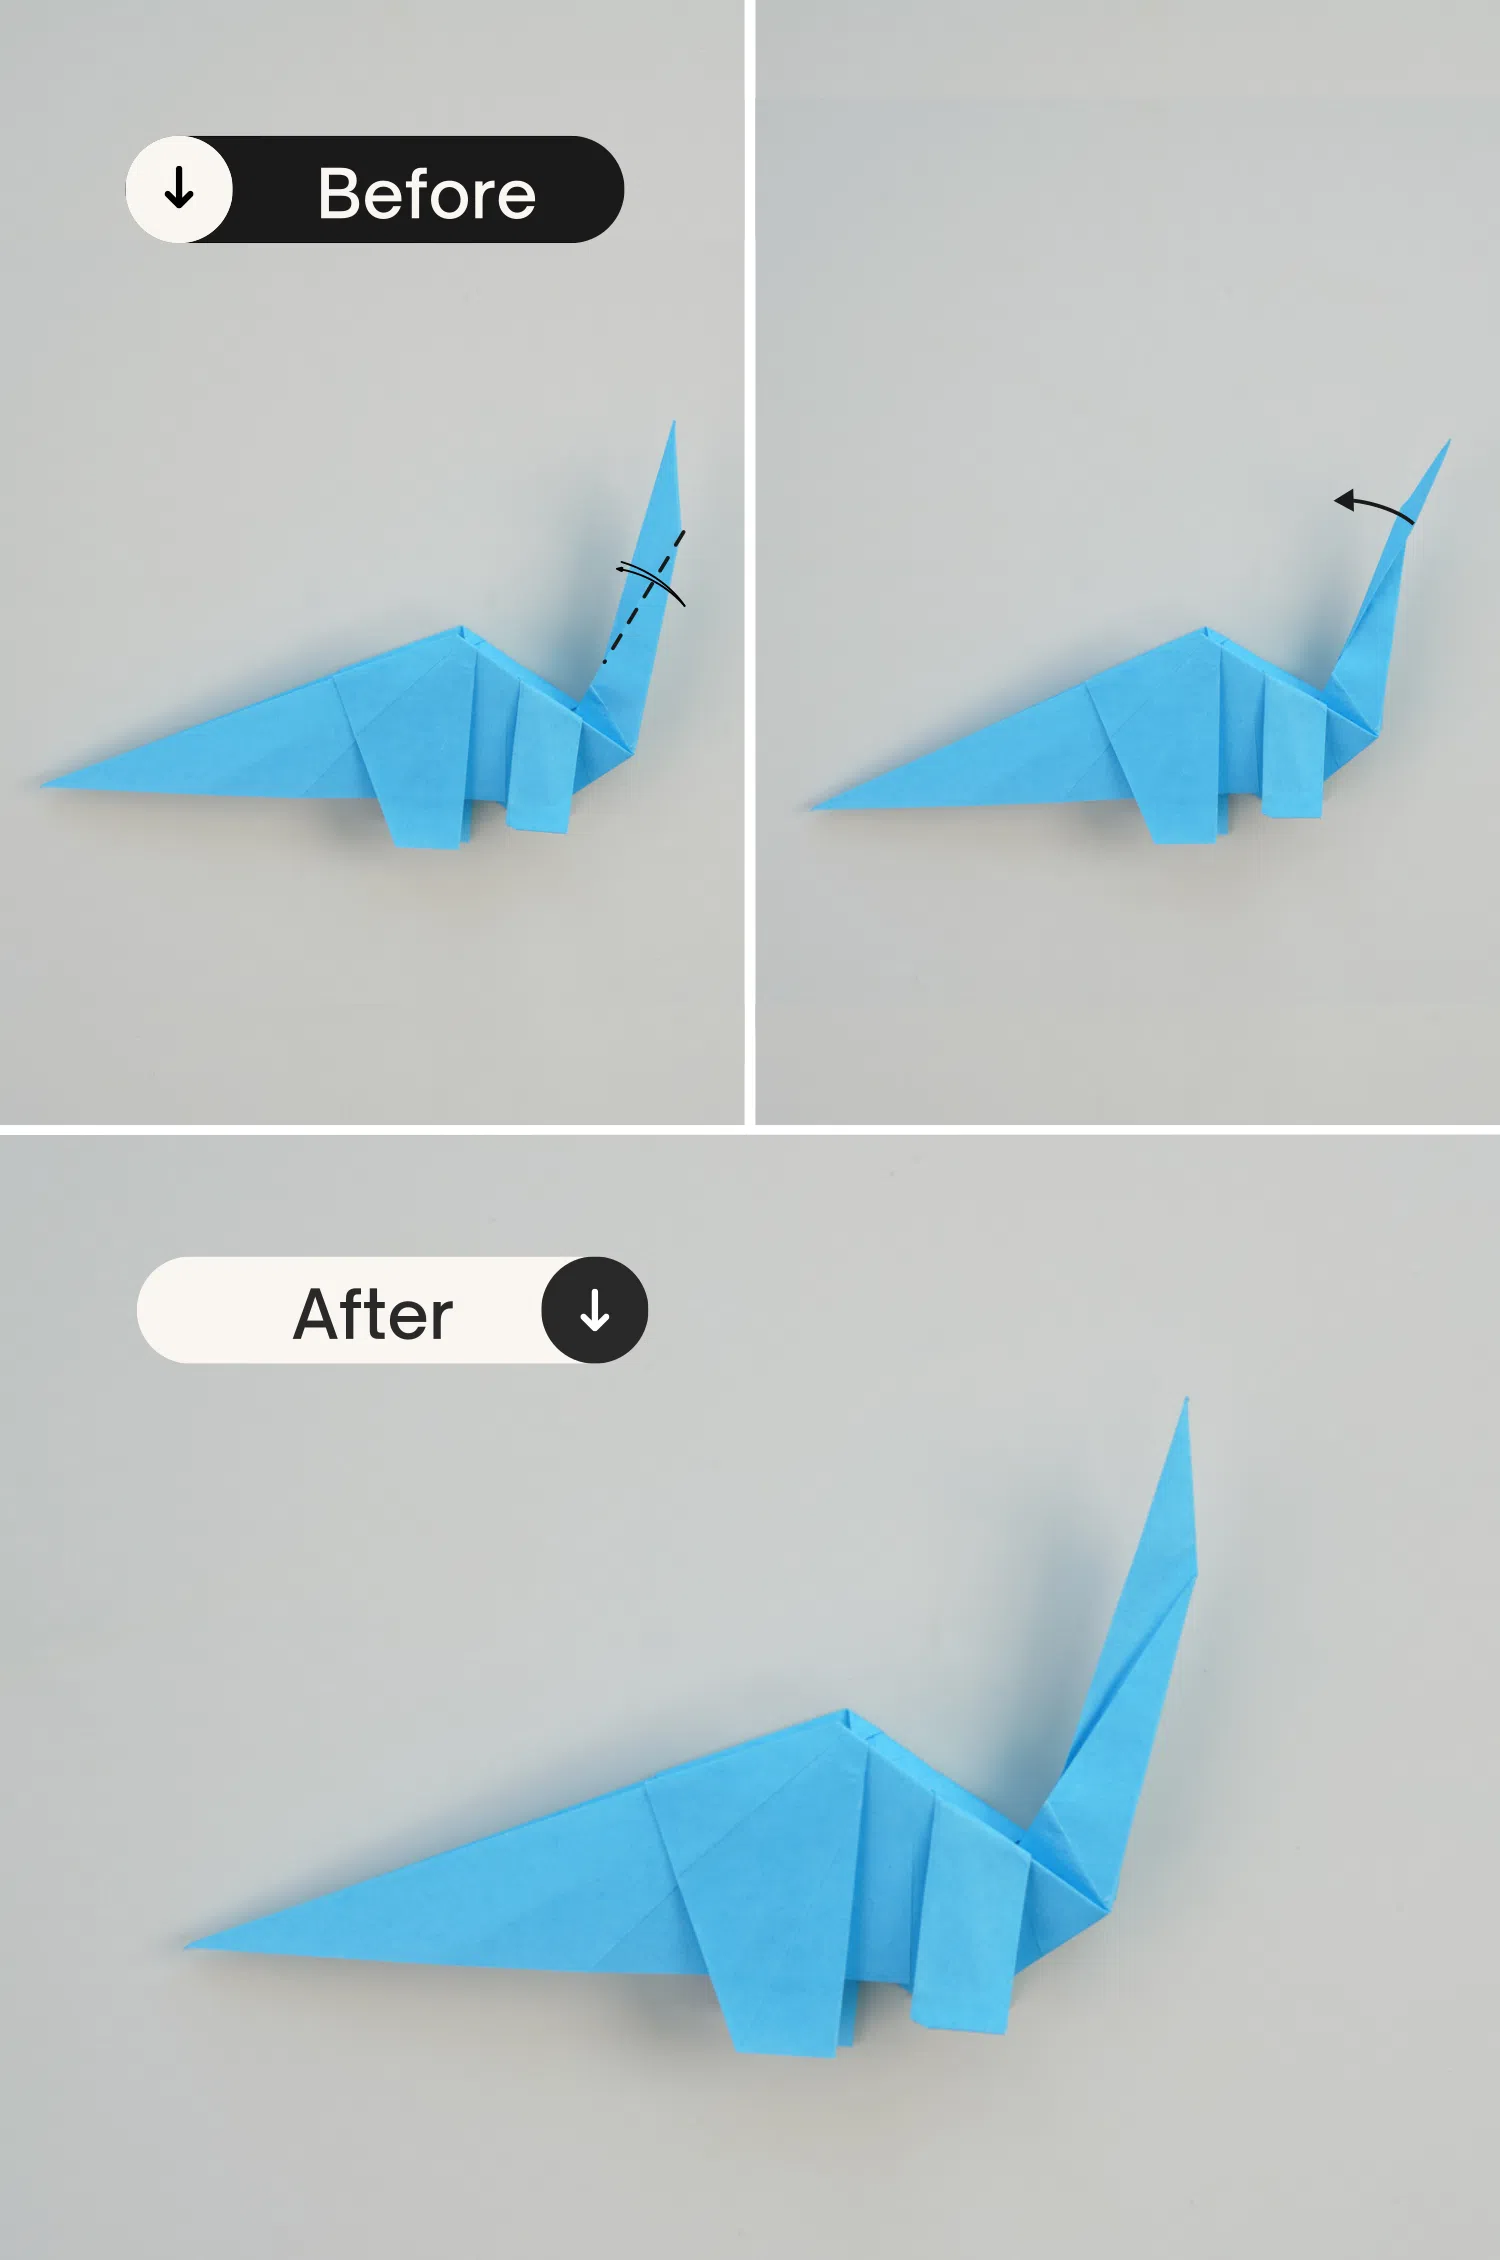
Step 36
Make an inside reverse fold. Slightly open the paper and push the top left corner to the
right, folding along the creases made in step 25.
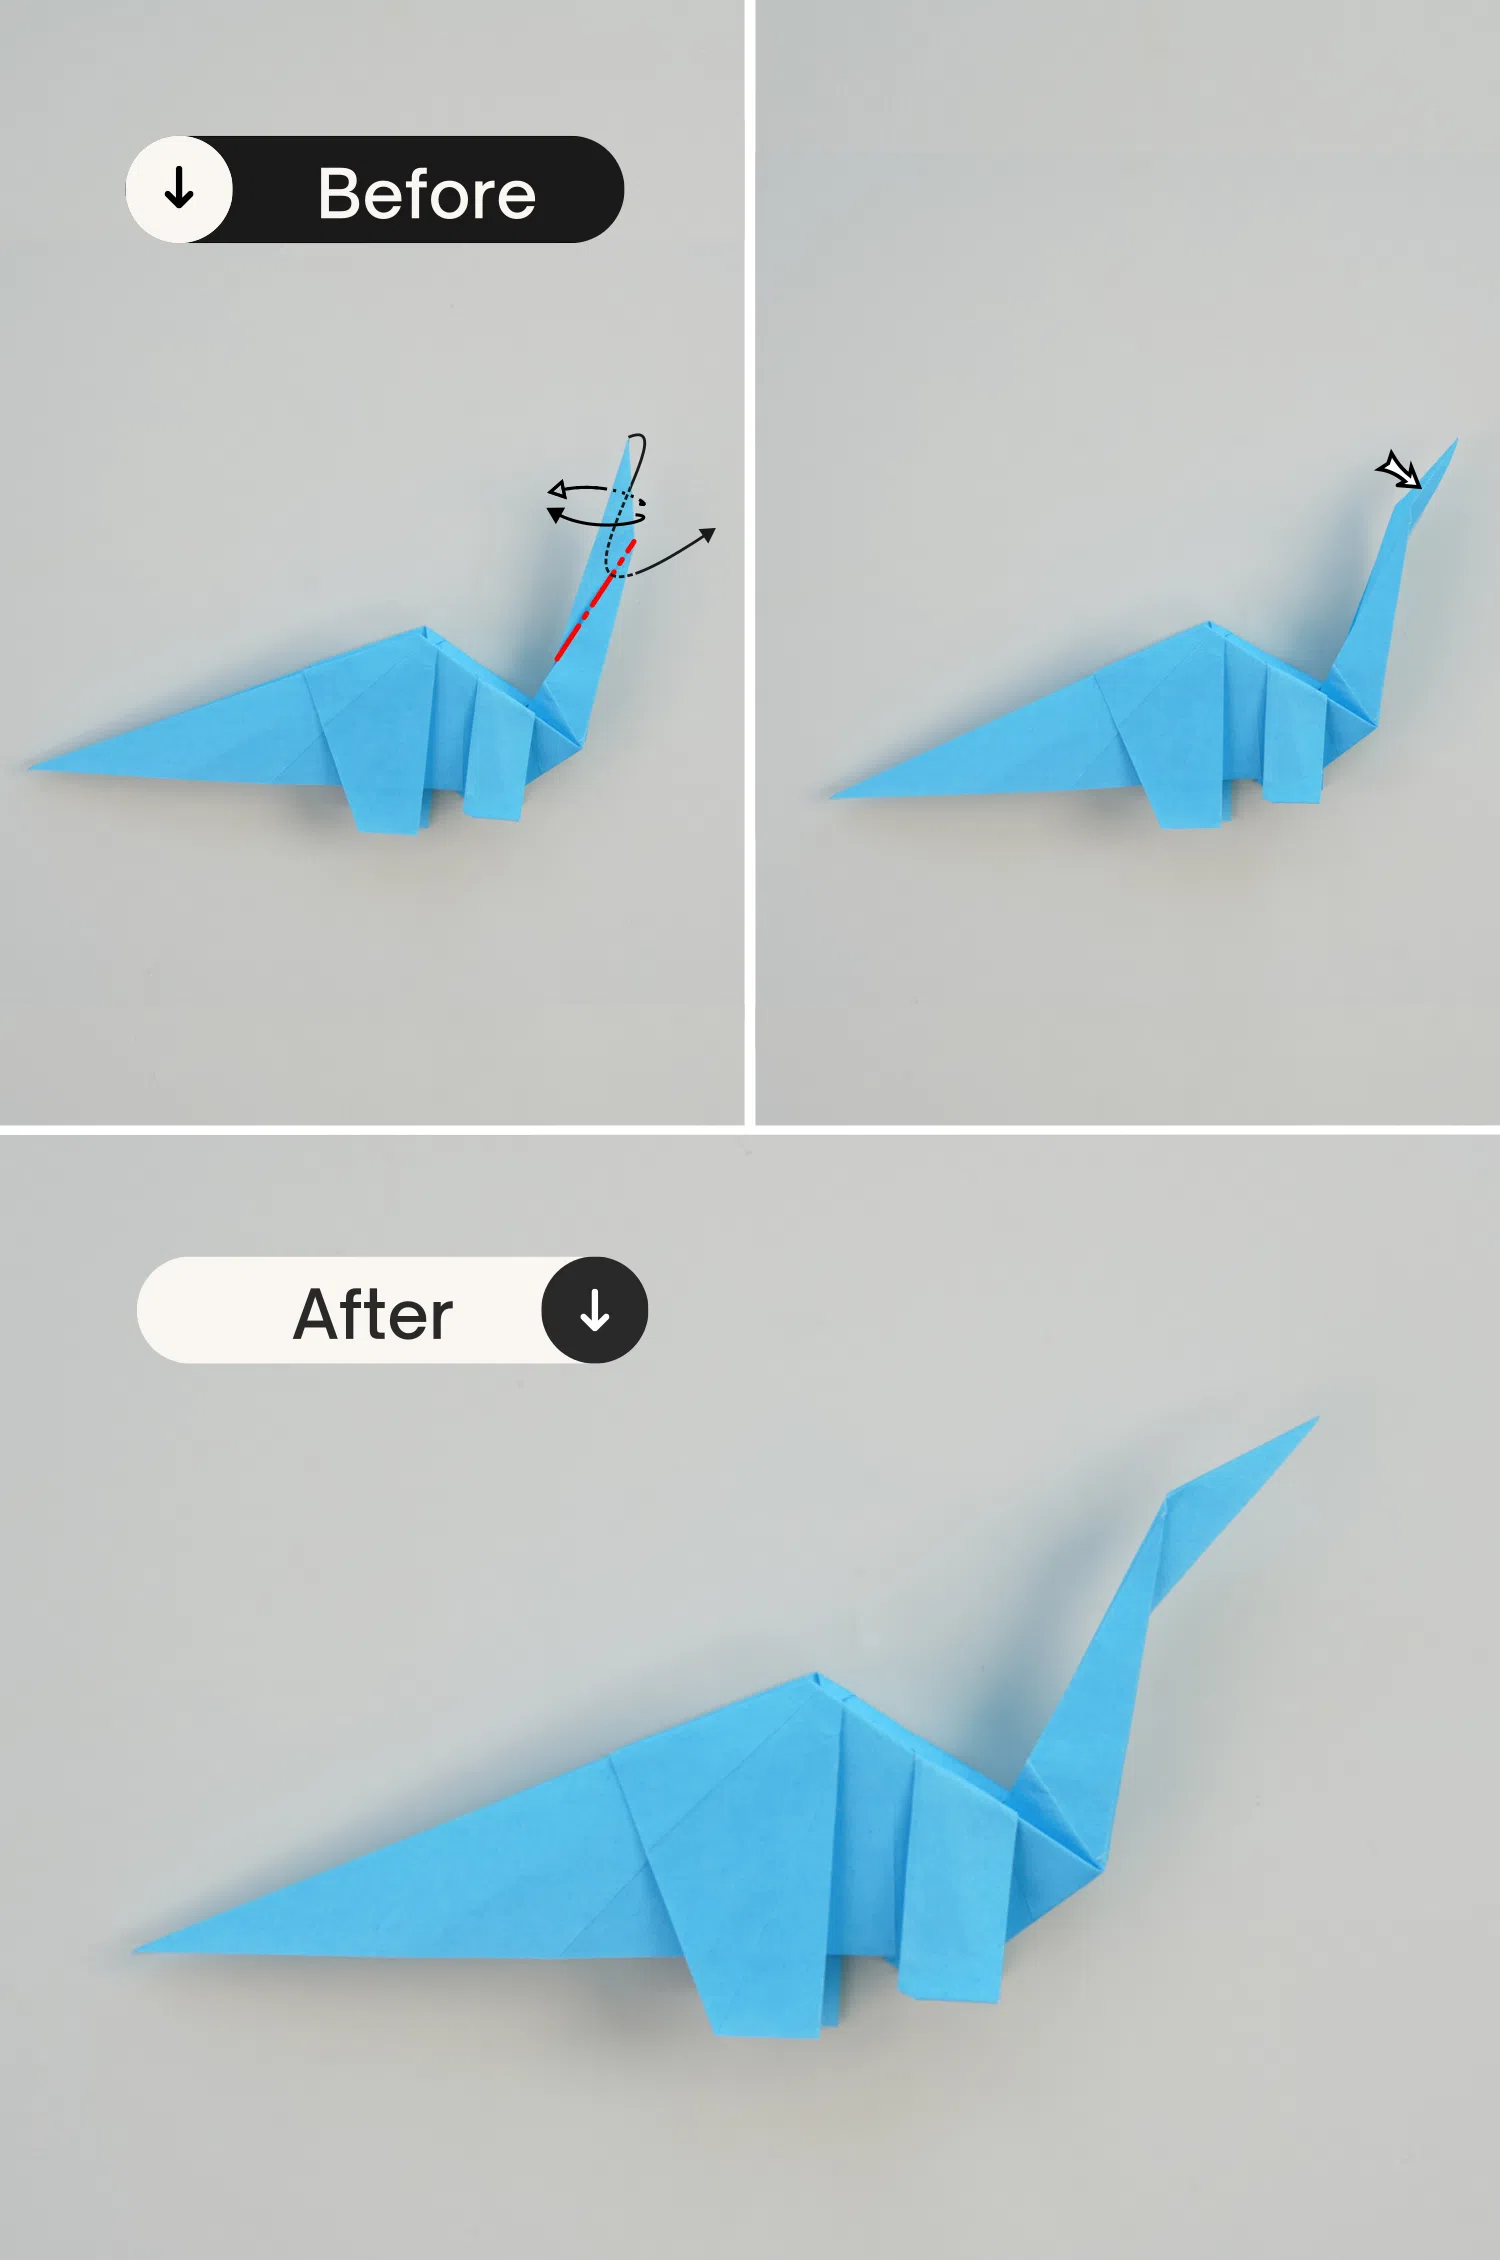
Step 37
Make an outside reverse fold by pulling apart the two layers from the top, and folding
them downward.
Step 38
Make an inside reverse fold along the tip by pushing the corner underneath the layers.
This completes the head of the dinosaur.
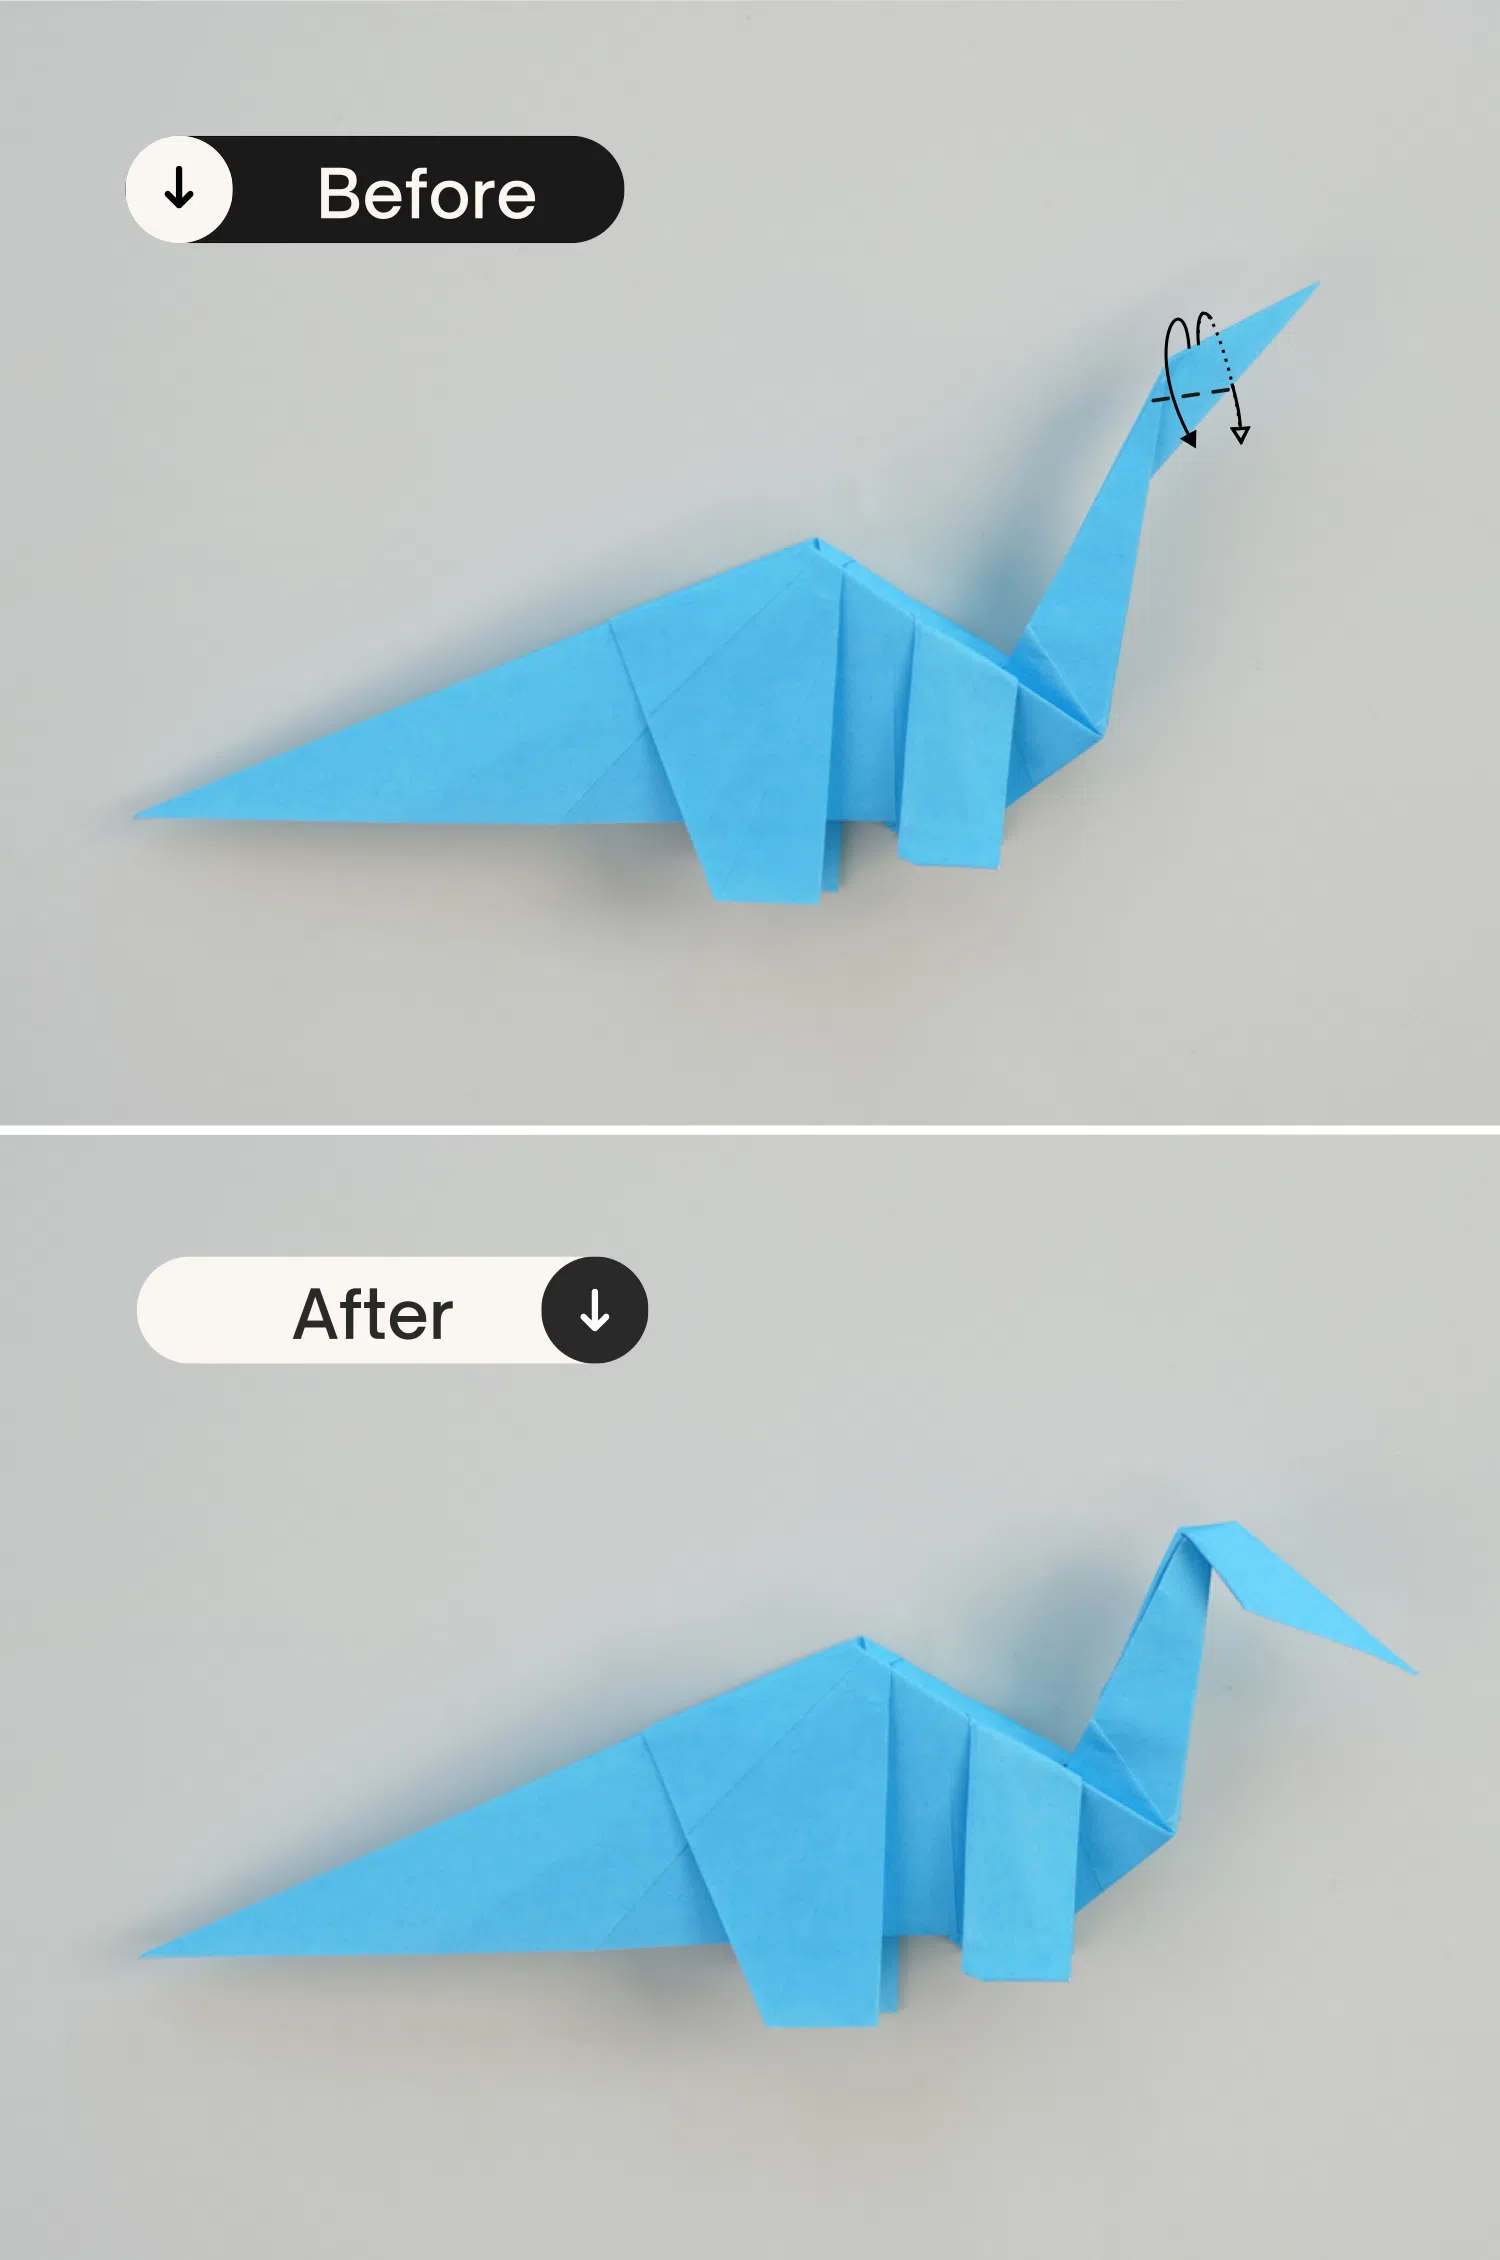
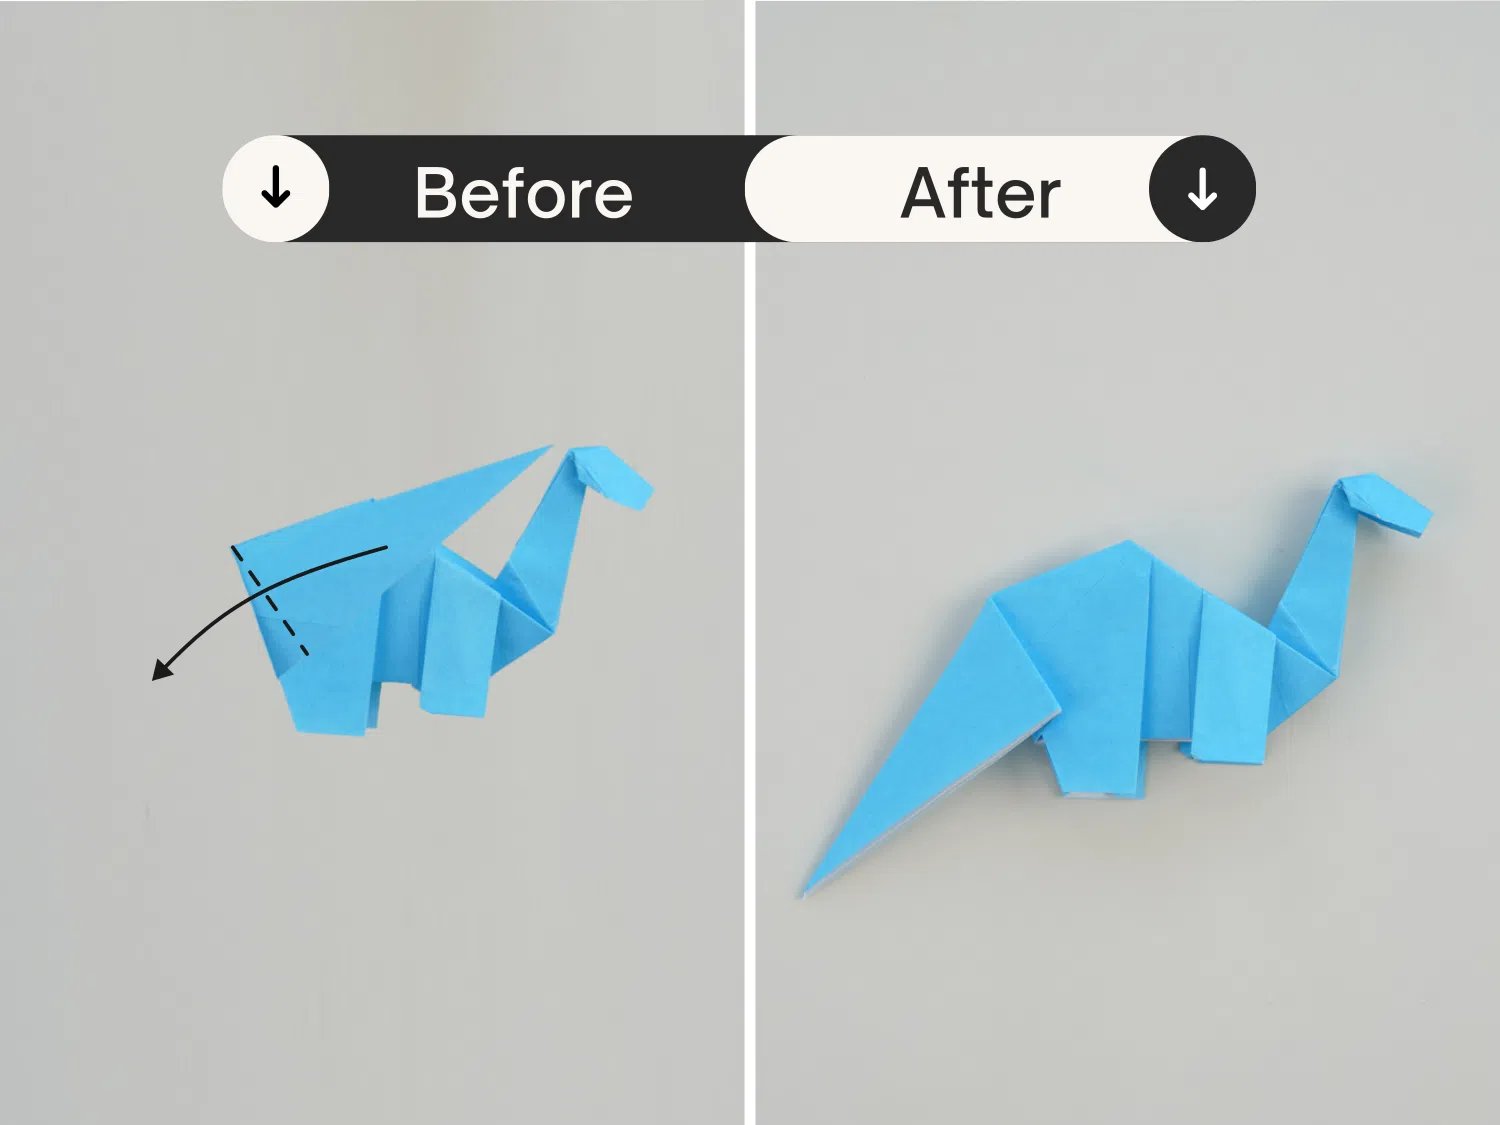
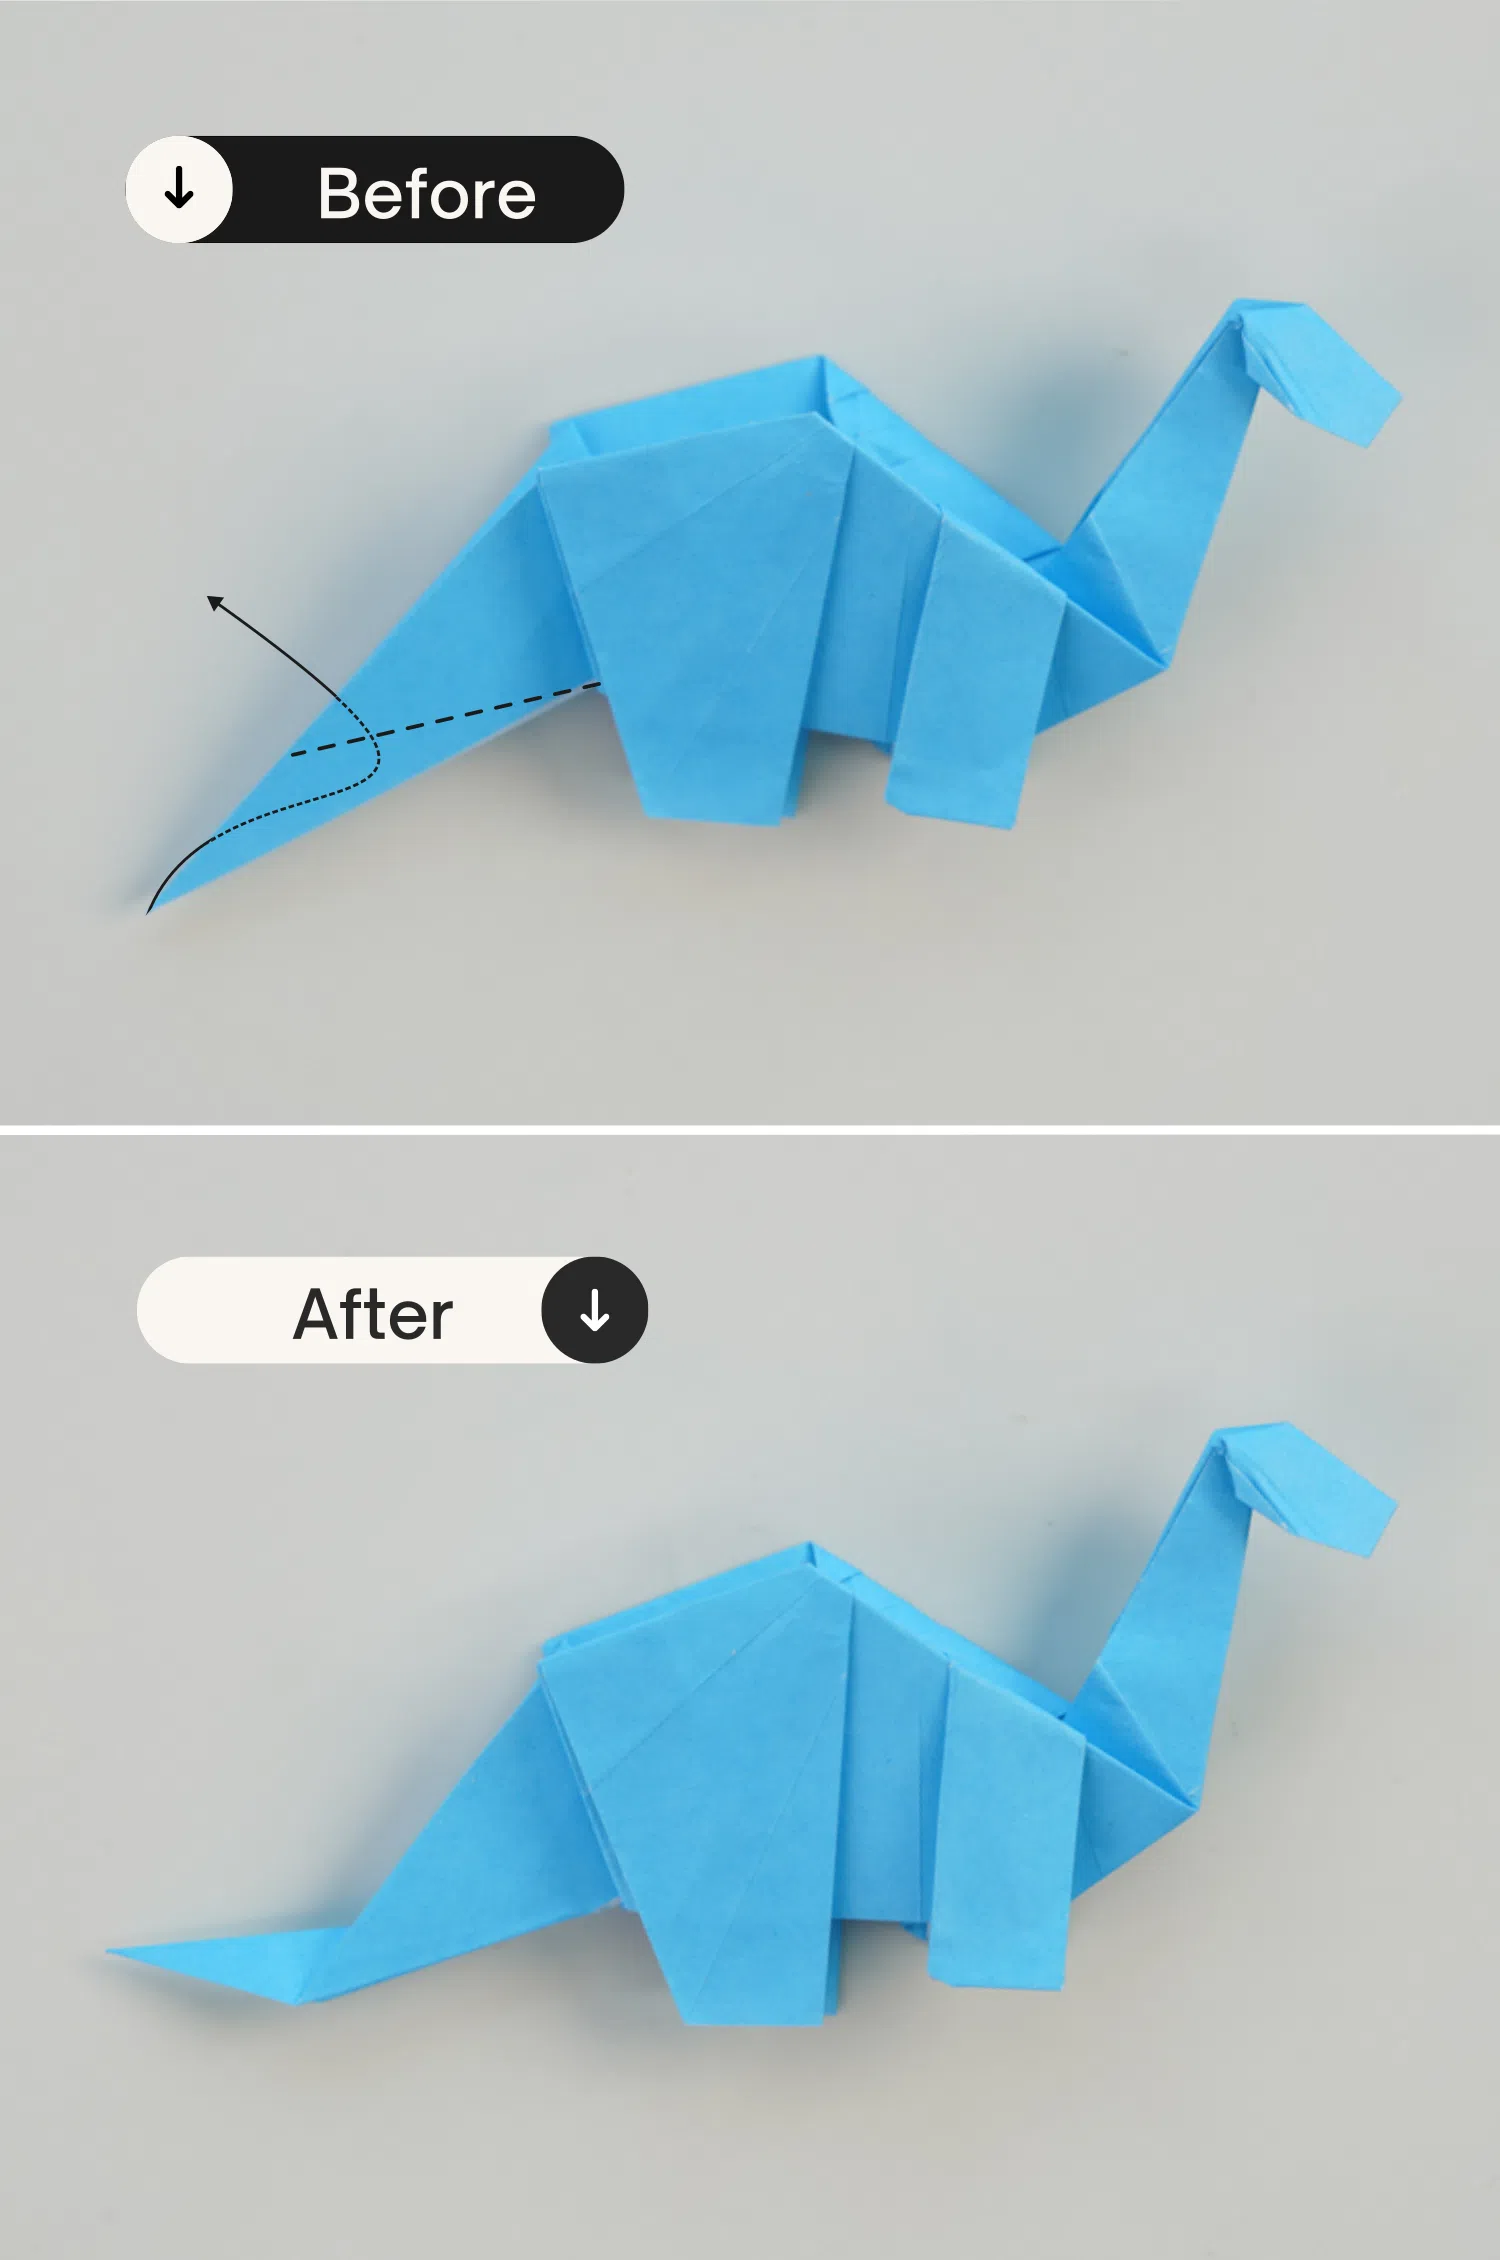
Step 39
Fold the left corner (the tail) to the right, folding along the line of the crimp.
Step 40
Fold the corner back to the left, creating a 90-degree angle with the base of the paper.
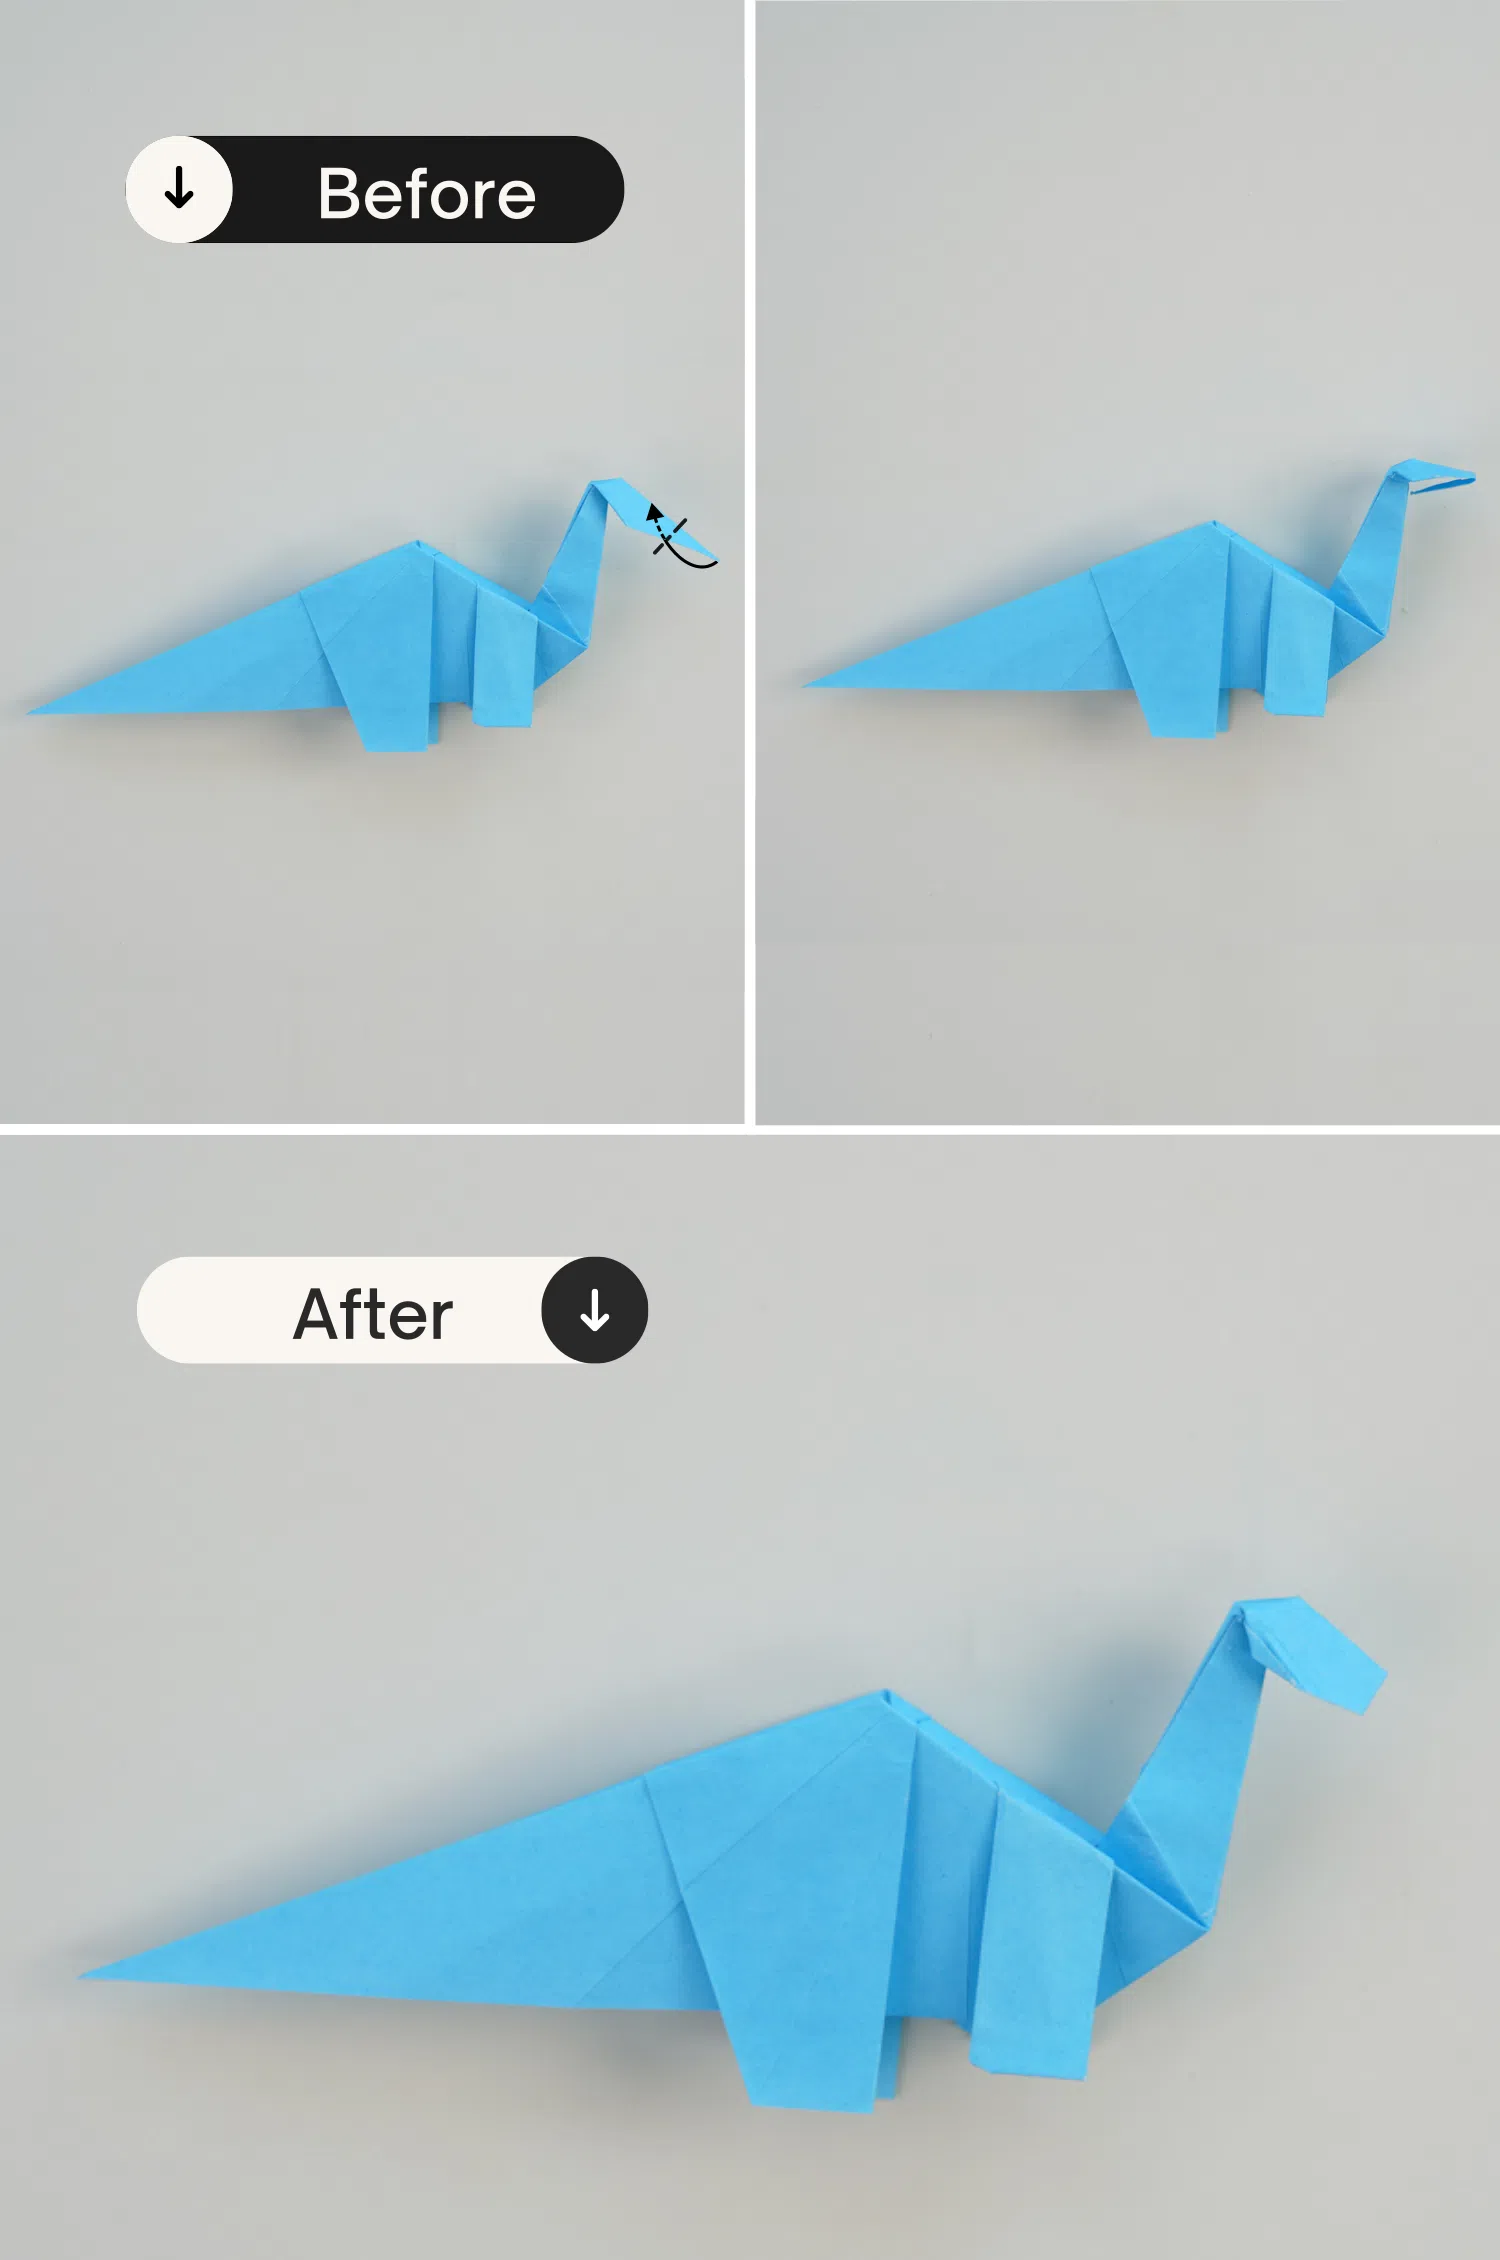
Step 41
Unfold the folds from the previous two steps.
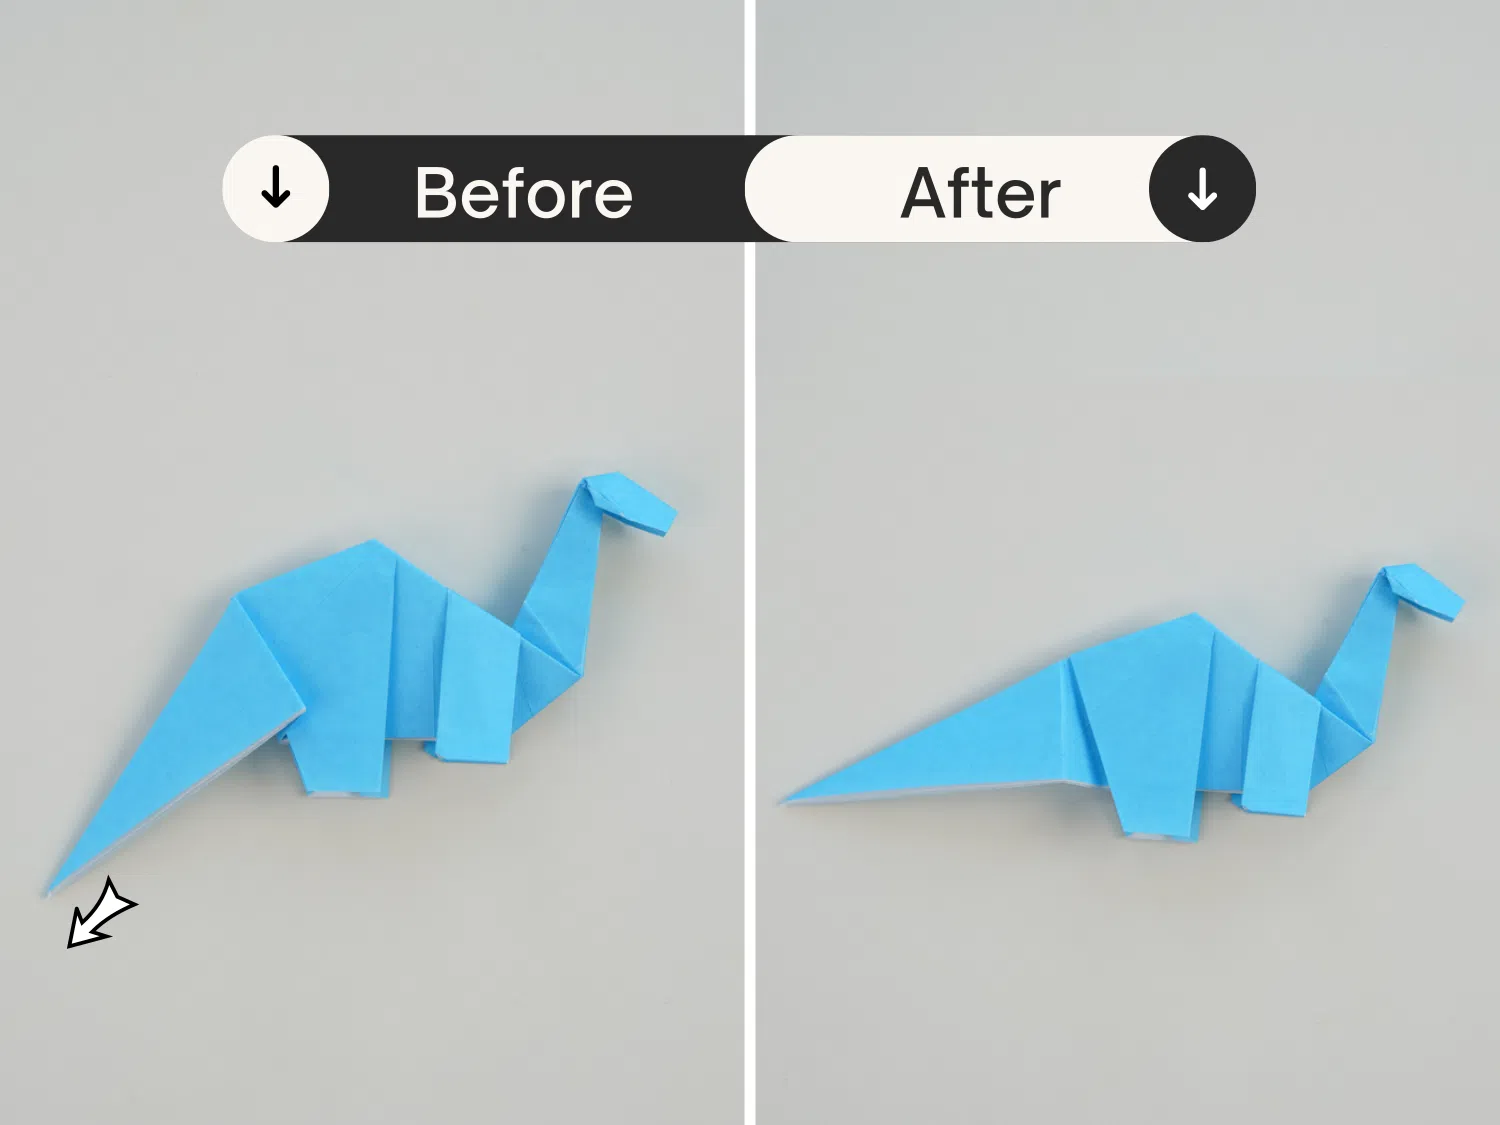
Step 42
Create a crimp with the creases made in steps 39 and 40.
- To do this, slightly open up the layers.
- Start by mountain folding on the front and back using the crease made in step 39, bringing the corner up and to the right.
- Then, valley fold the tail back down using the creases from step 40.
- Close the model back in half.
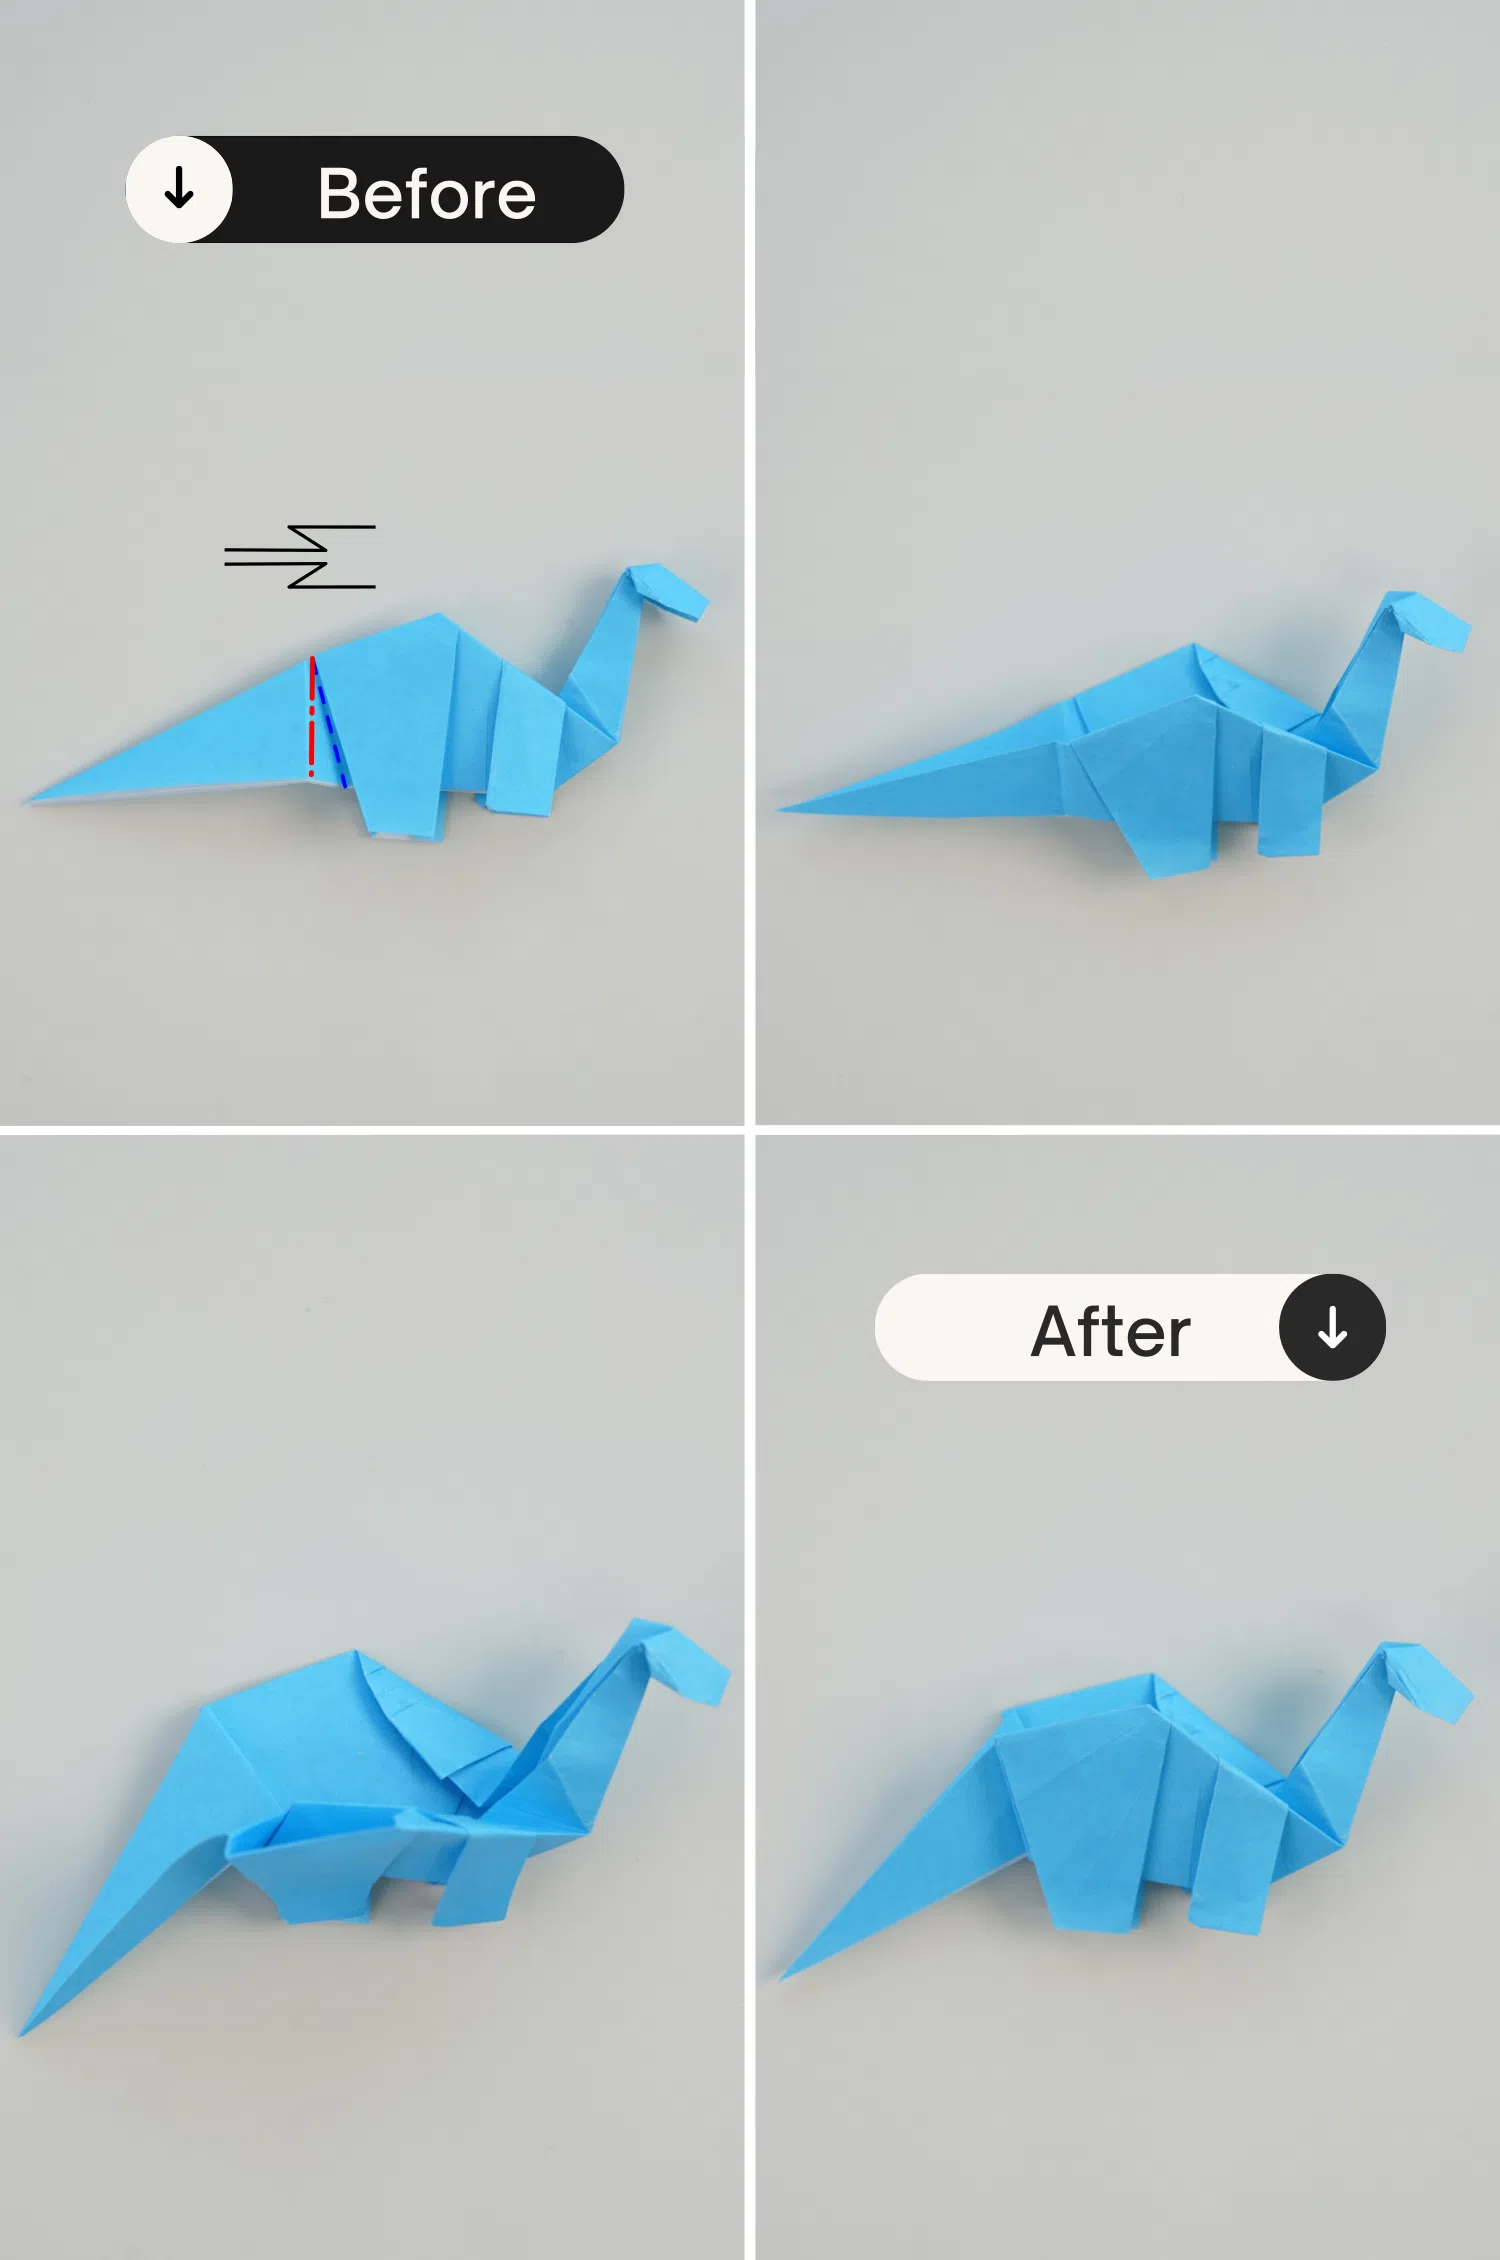
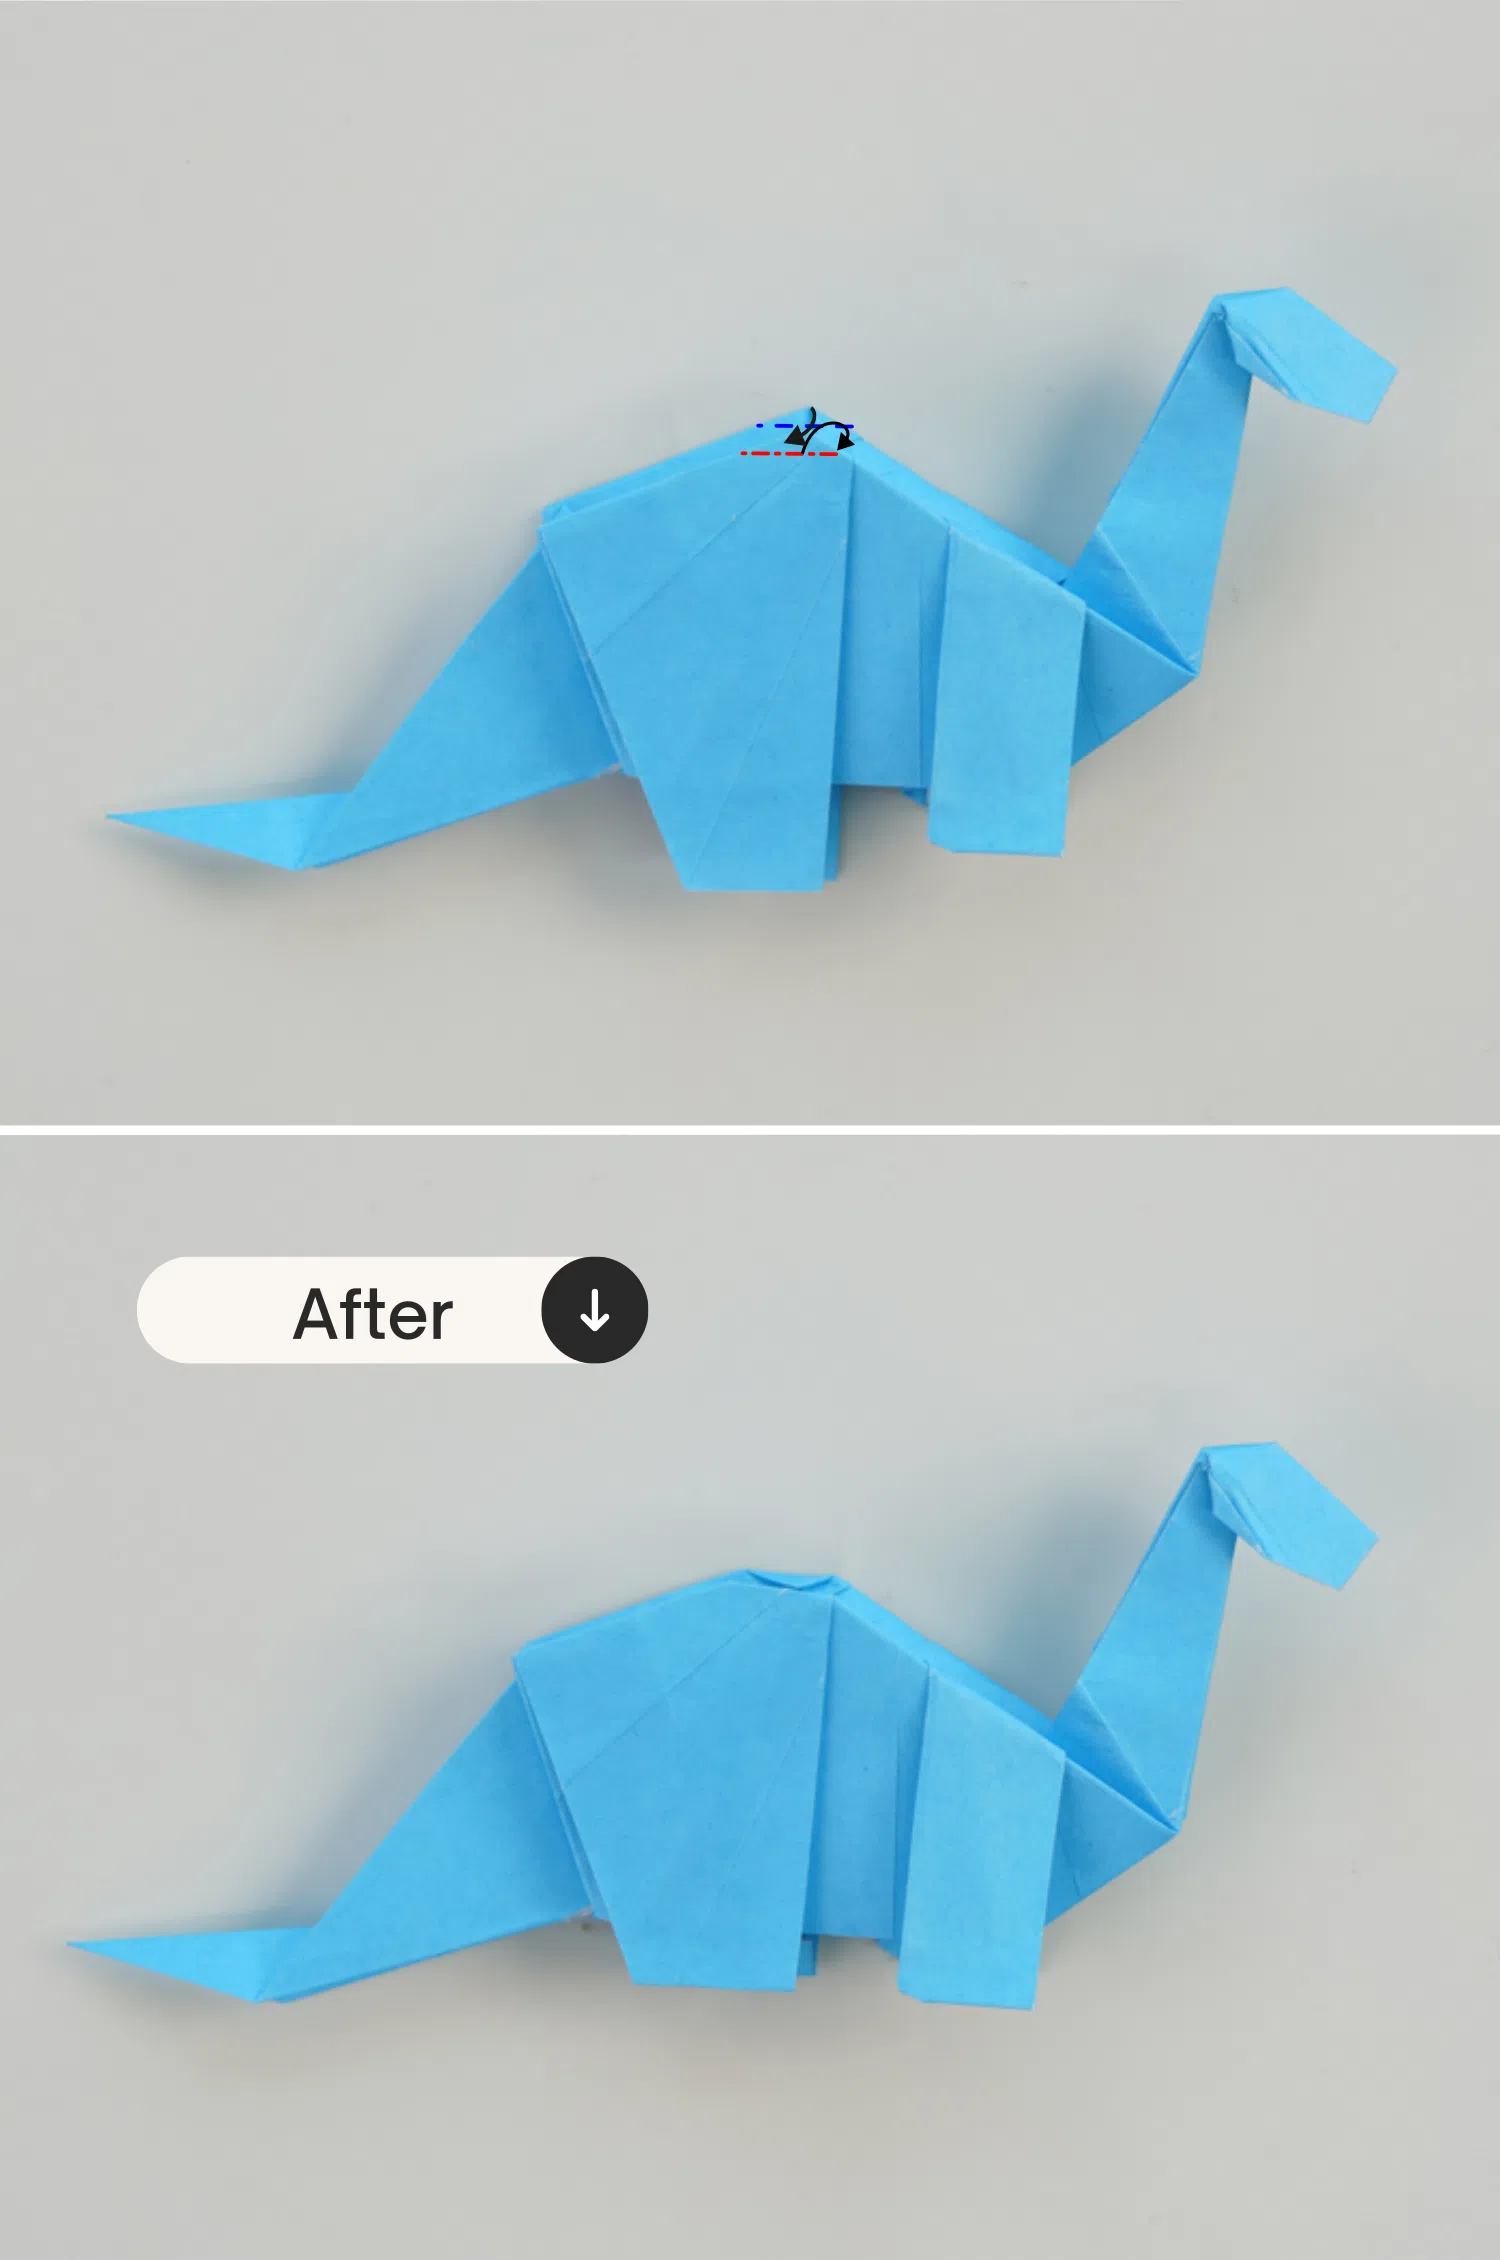
Step 43
Fold the bottom corner of the tail up and unfold. The crease should intersect the crimp
made in the previous step.
Step 44
Make an inside reverse fold from the crease. Open up the paper slightly and push the
corner upward.
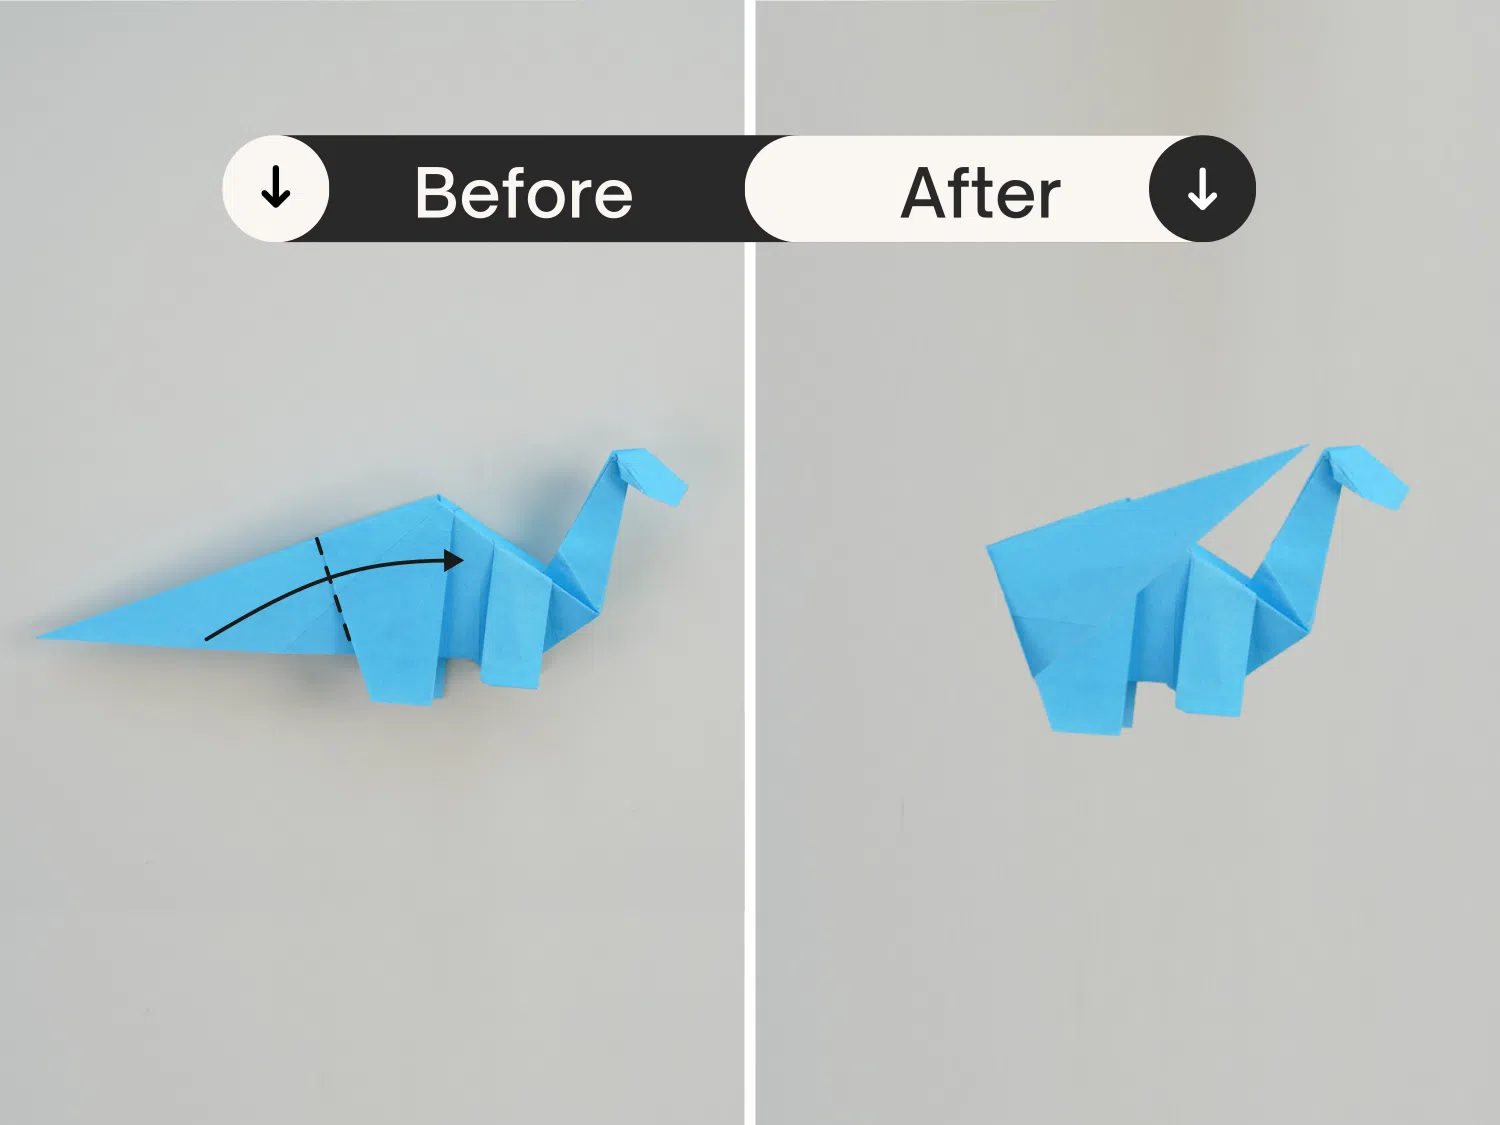
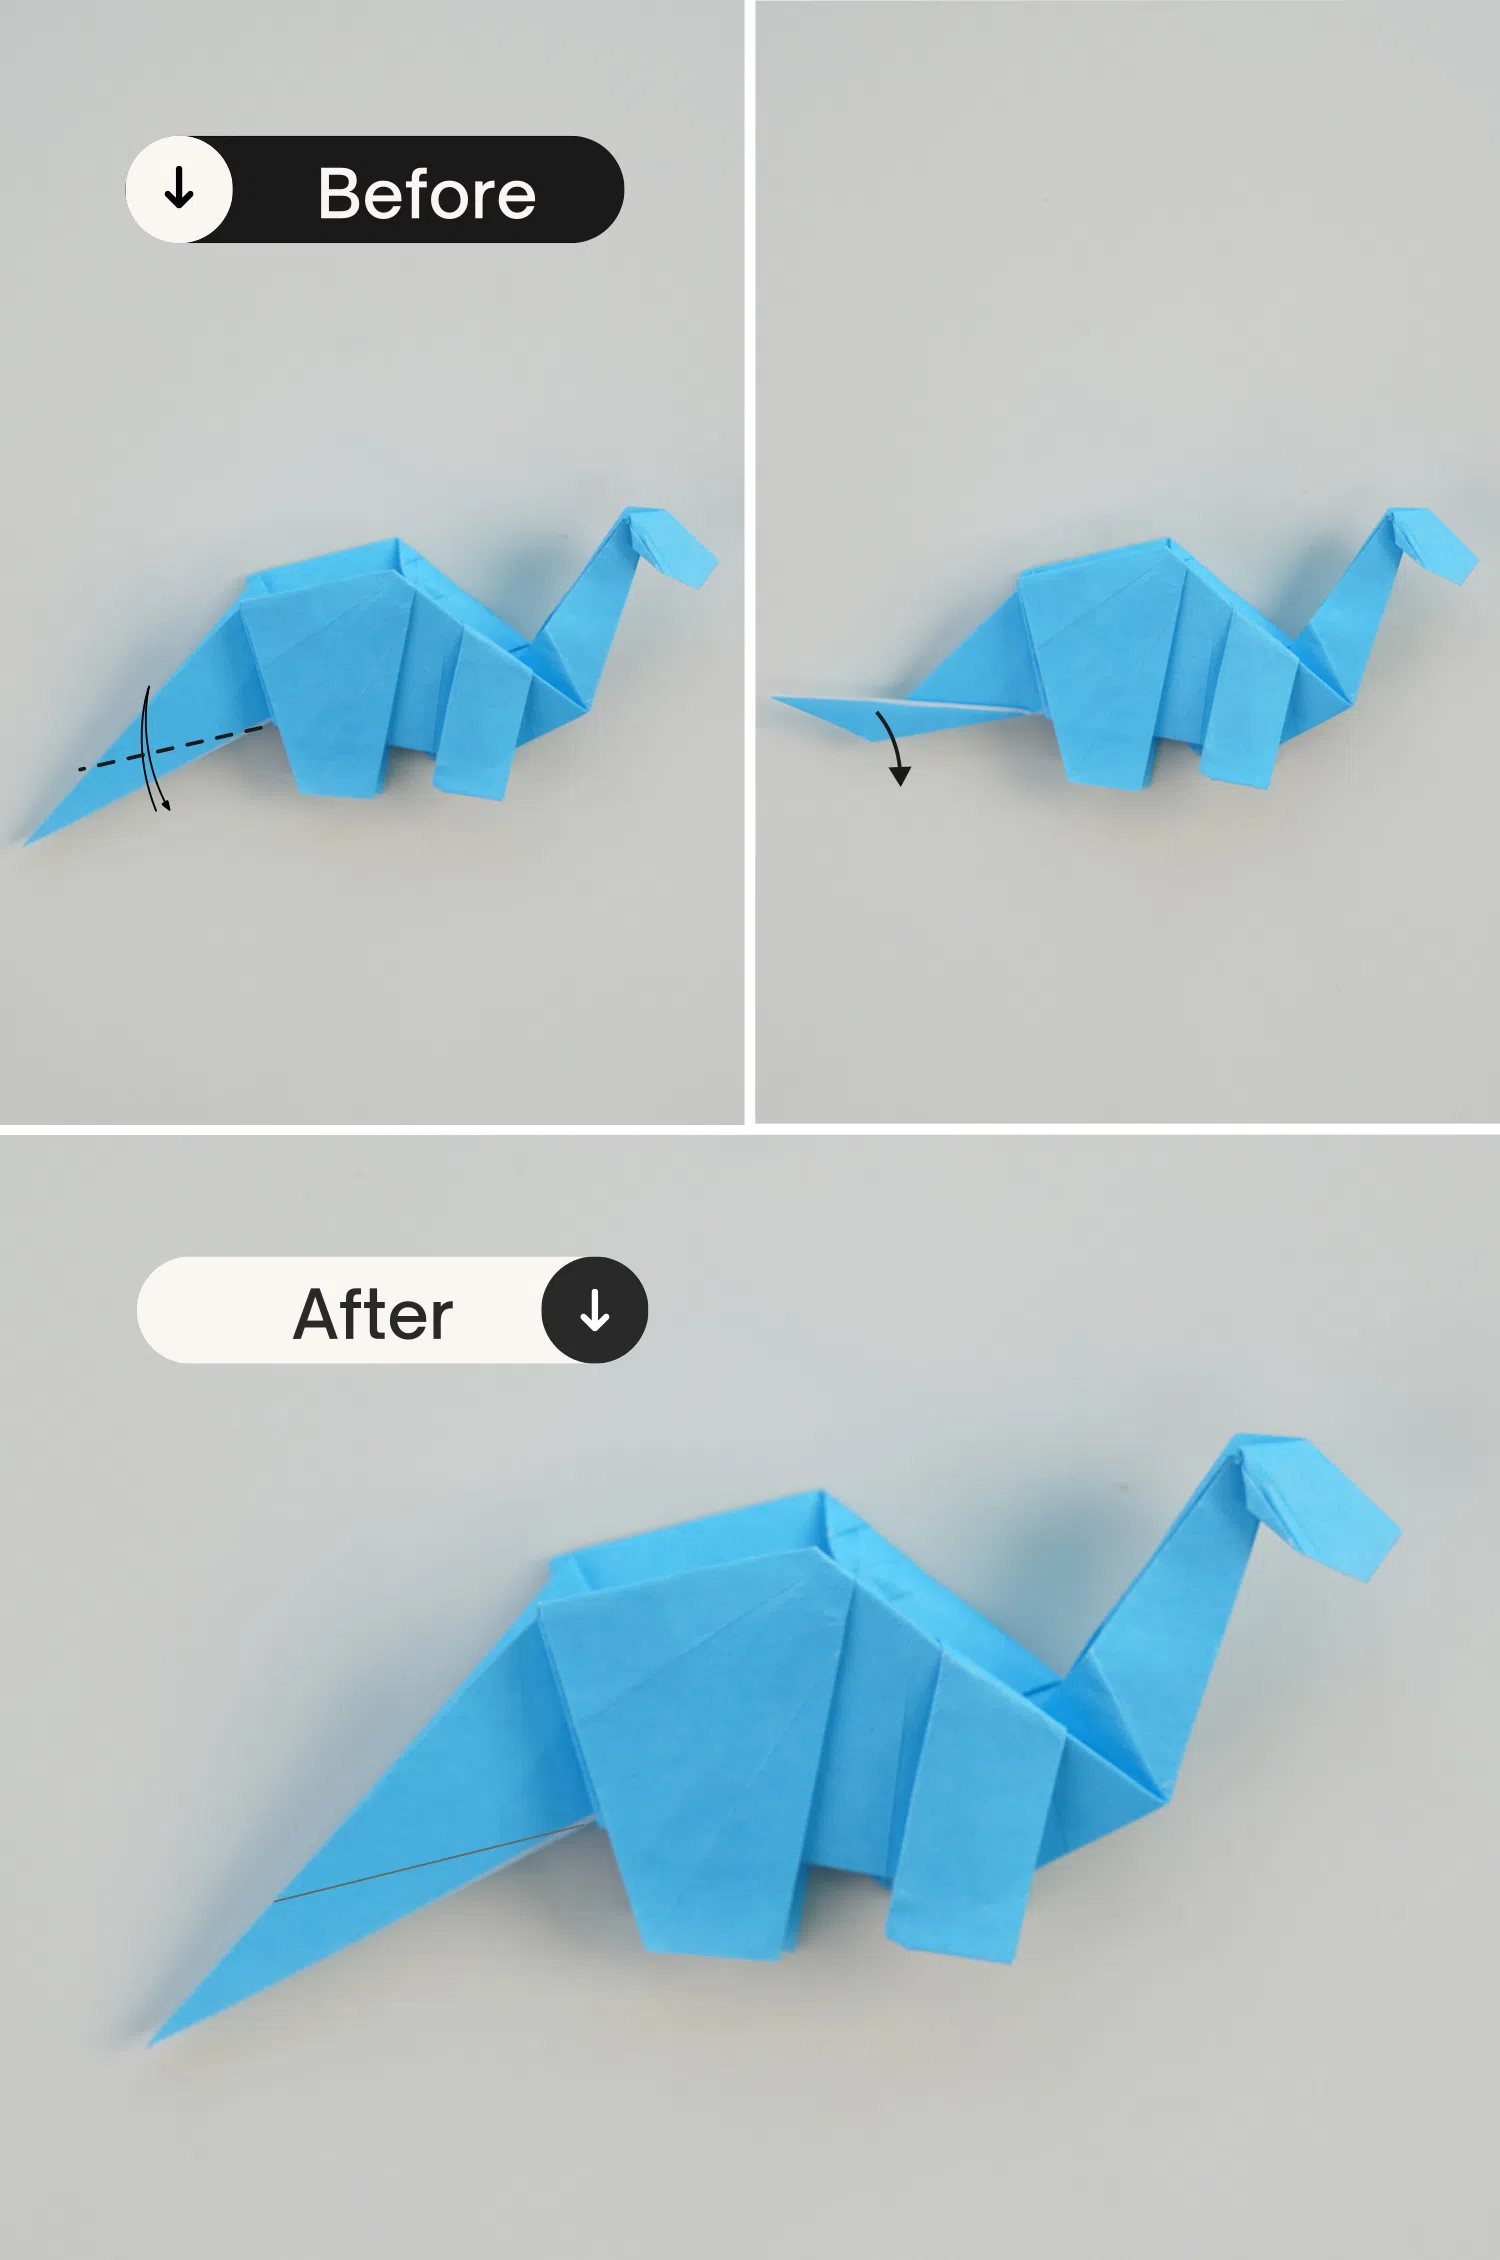
Step 45
Round the body by folding the top corners inward. Flatten the legs by folding them
inward as well.
What’s Next
That’s your super cool dinosaur, now please check our other easy origami animals, happy folding!
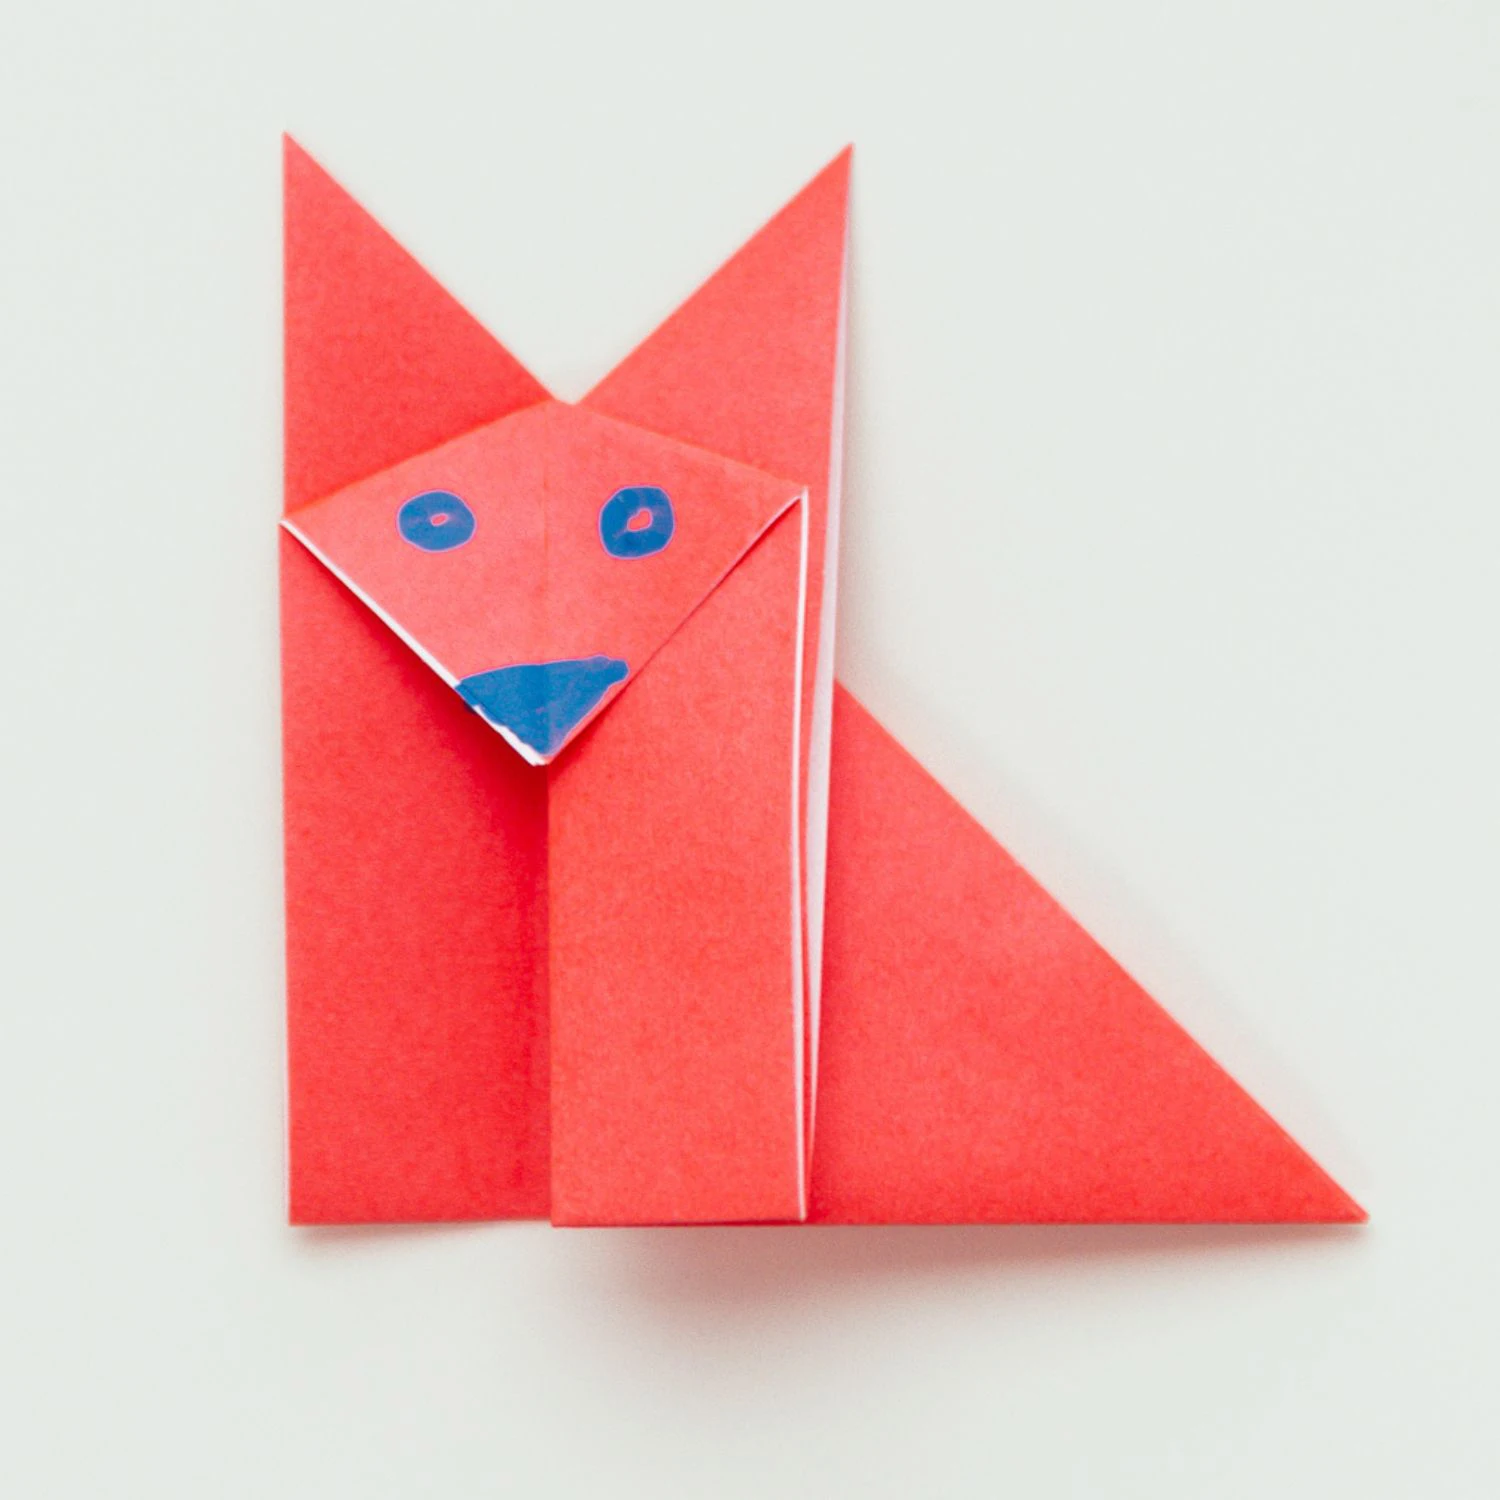
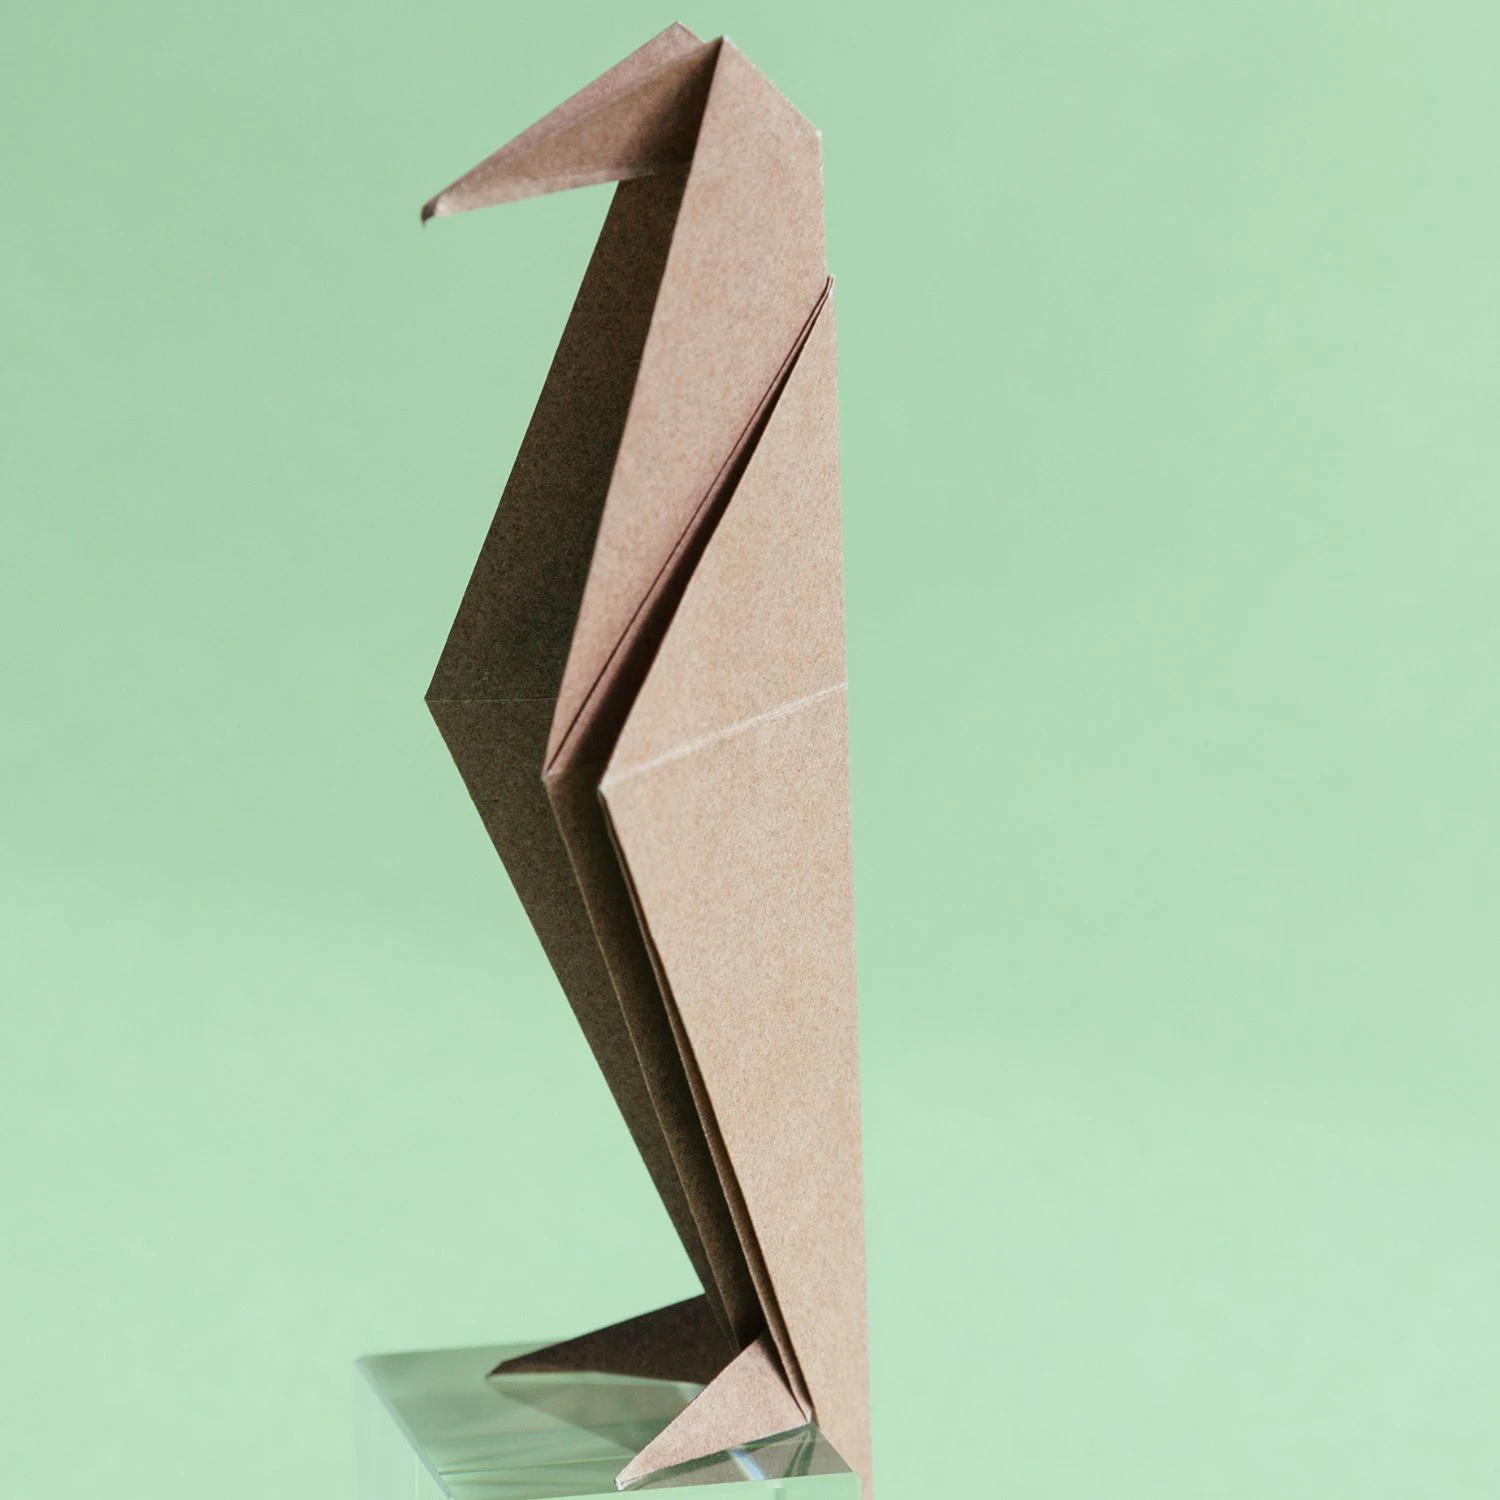
Other Origami Animal Ideas
What’s Next
Now you finished this advanced origami dinosaur. It has so much many details and I bet you loved the process. You can move on for more interesting origami animals. Don’t forgot to keep in touch on pinterest and youtube.