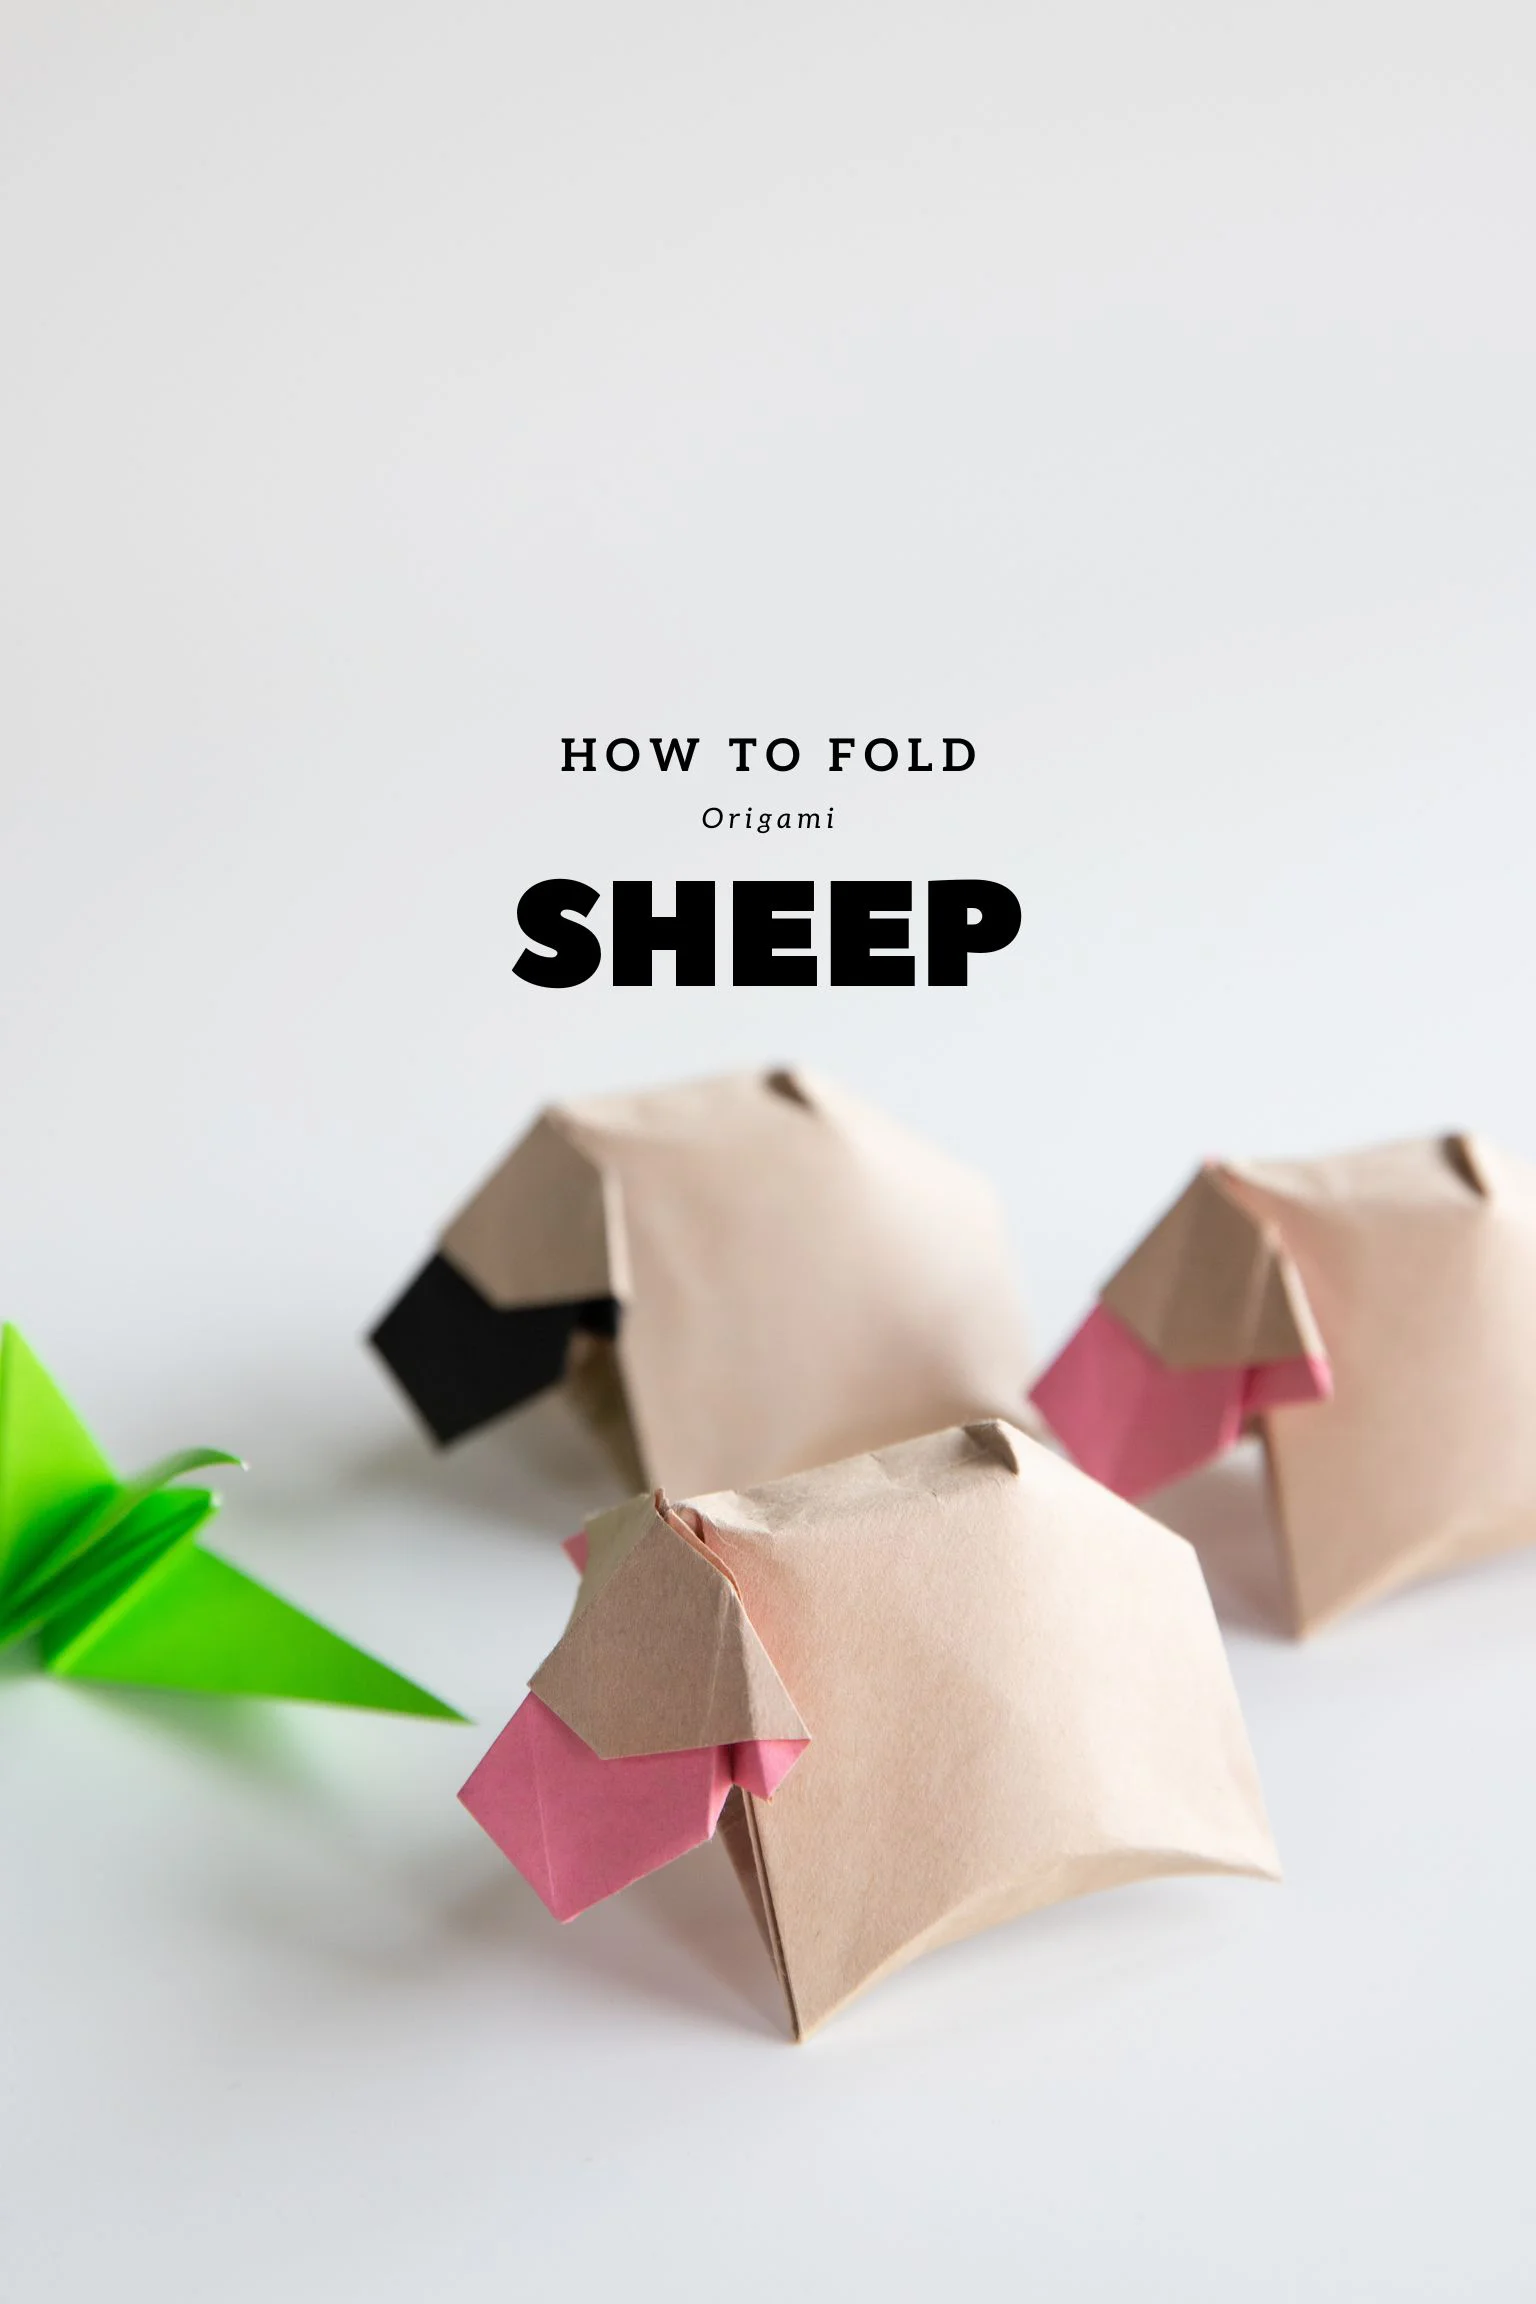
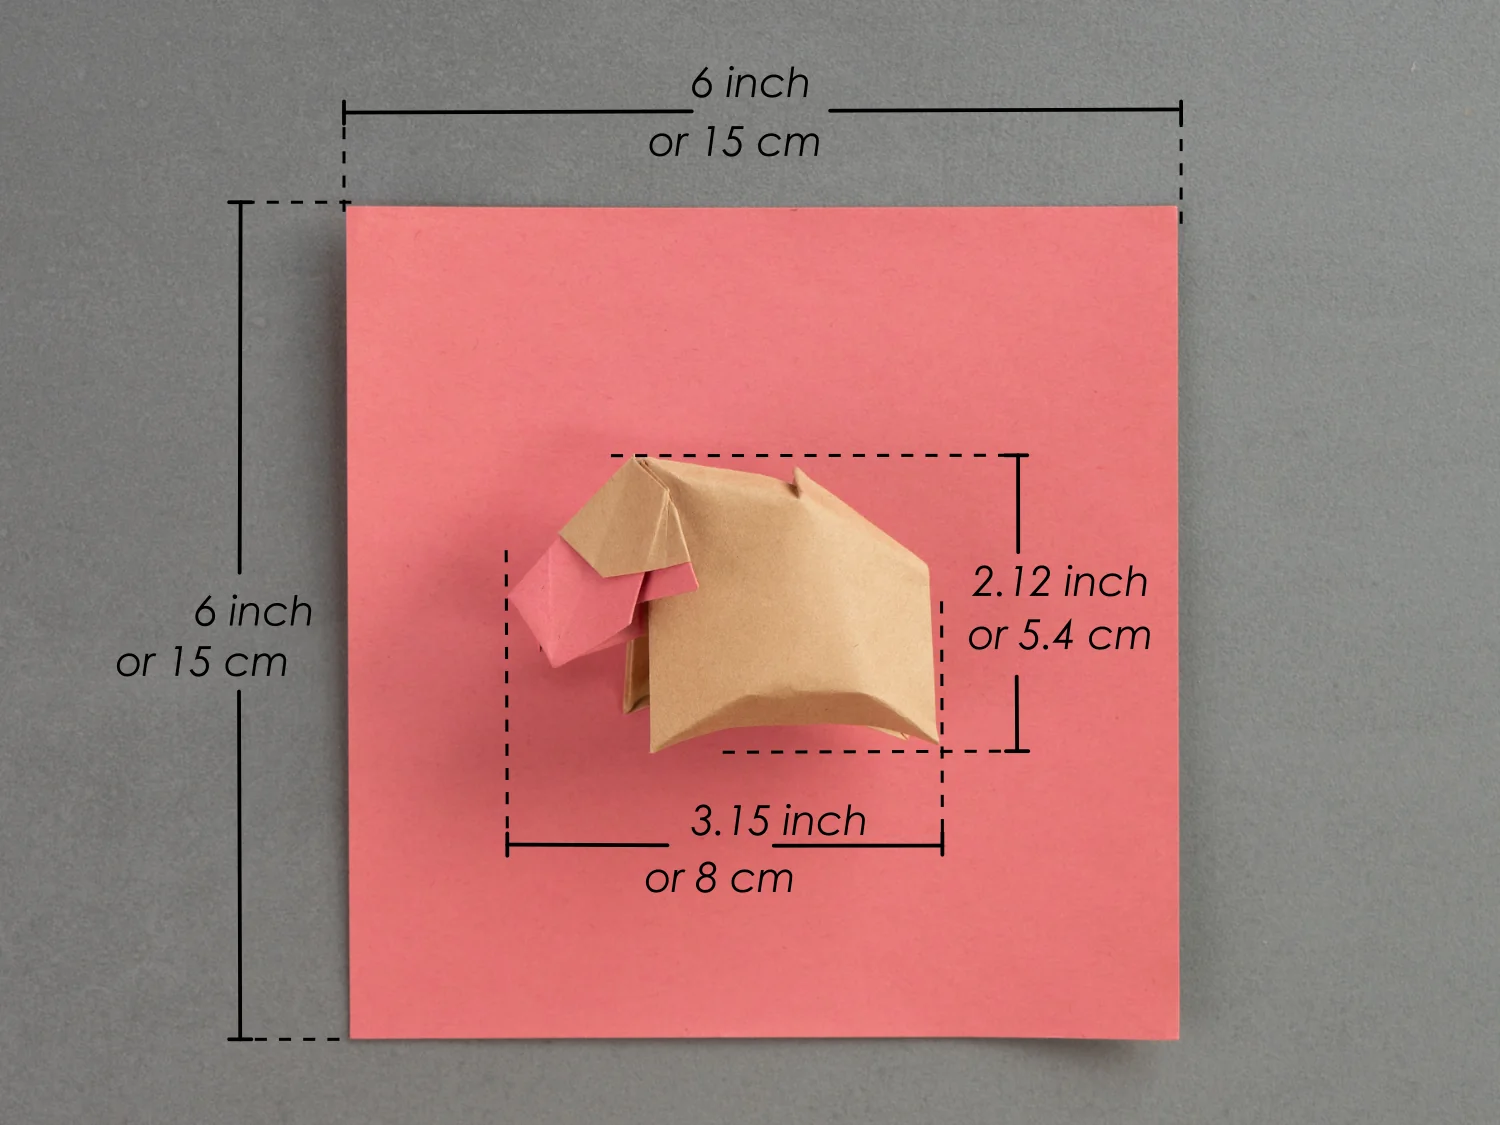
Once you try making this origami sheep, I’m sure you’ll fall in love with it and you may make a flock of sheep. It looks round and chubby as if it’s inflated, which is really cute. Plus, it’s effortless to make, even a beginner won’t find it difficult.

If you are new to origami, start here from our beginner guide to know the basics and how to read the step-by-step instructions.
- Folding time: 15 minutes
- Paper: 15×15 cm
- Difficulty: Middle
- Designer: Yoo Tae Yong
Material
Prepare a piece of 15×15 cm origami square paper, with different colors on each side to create a 5.4×8 cm origami sheep. Other papers with different sizes and colors are also practicable.
Step by Step Instructions
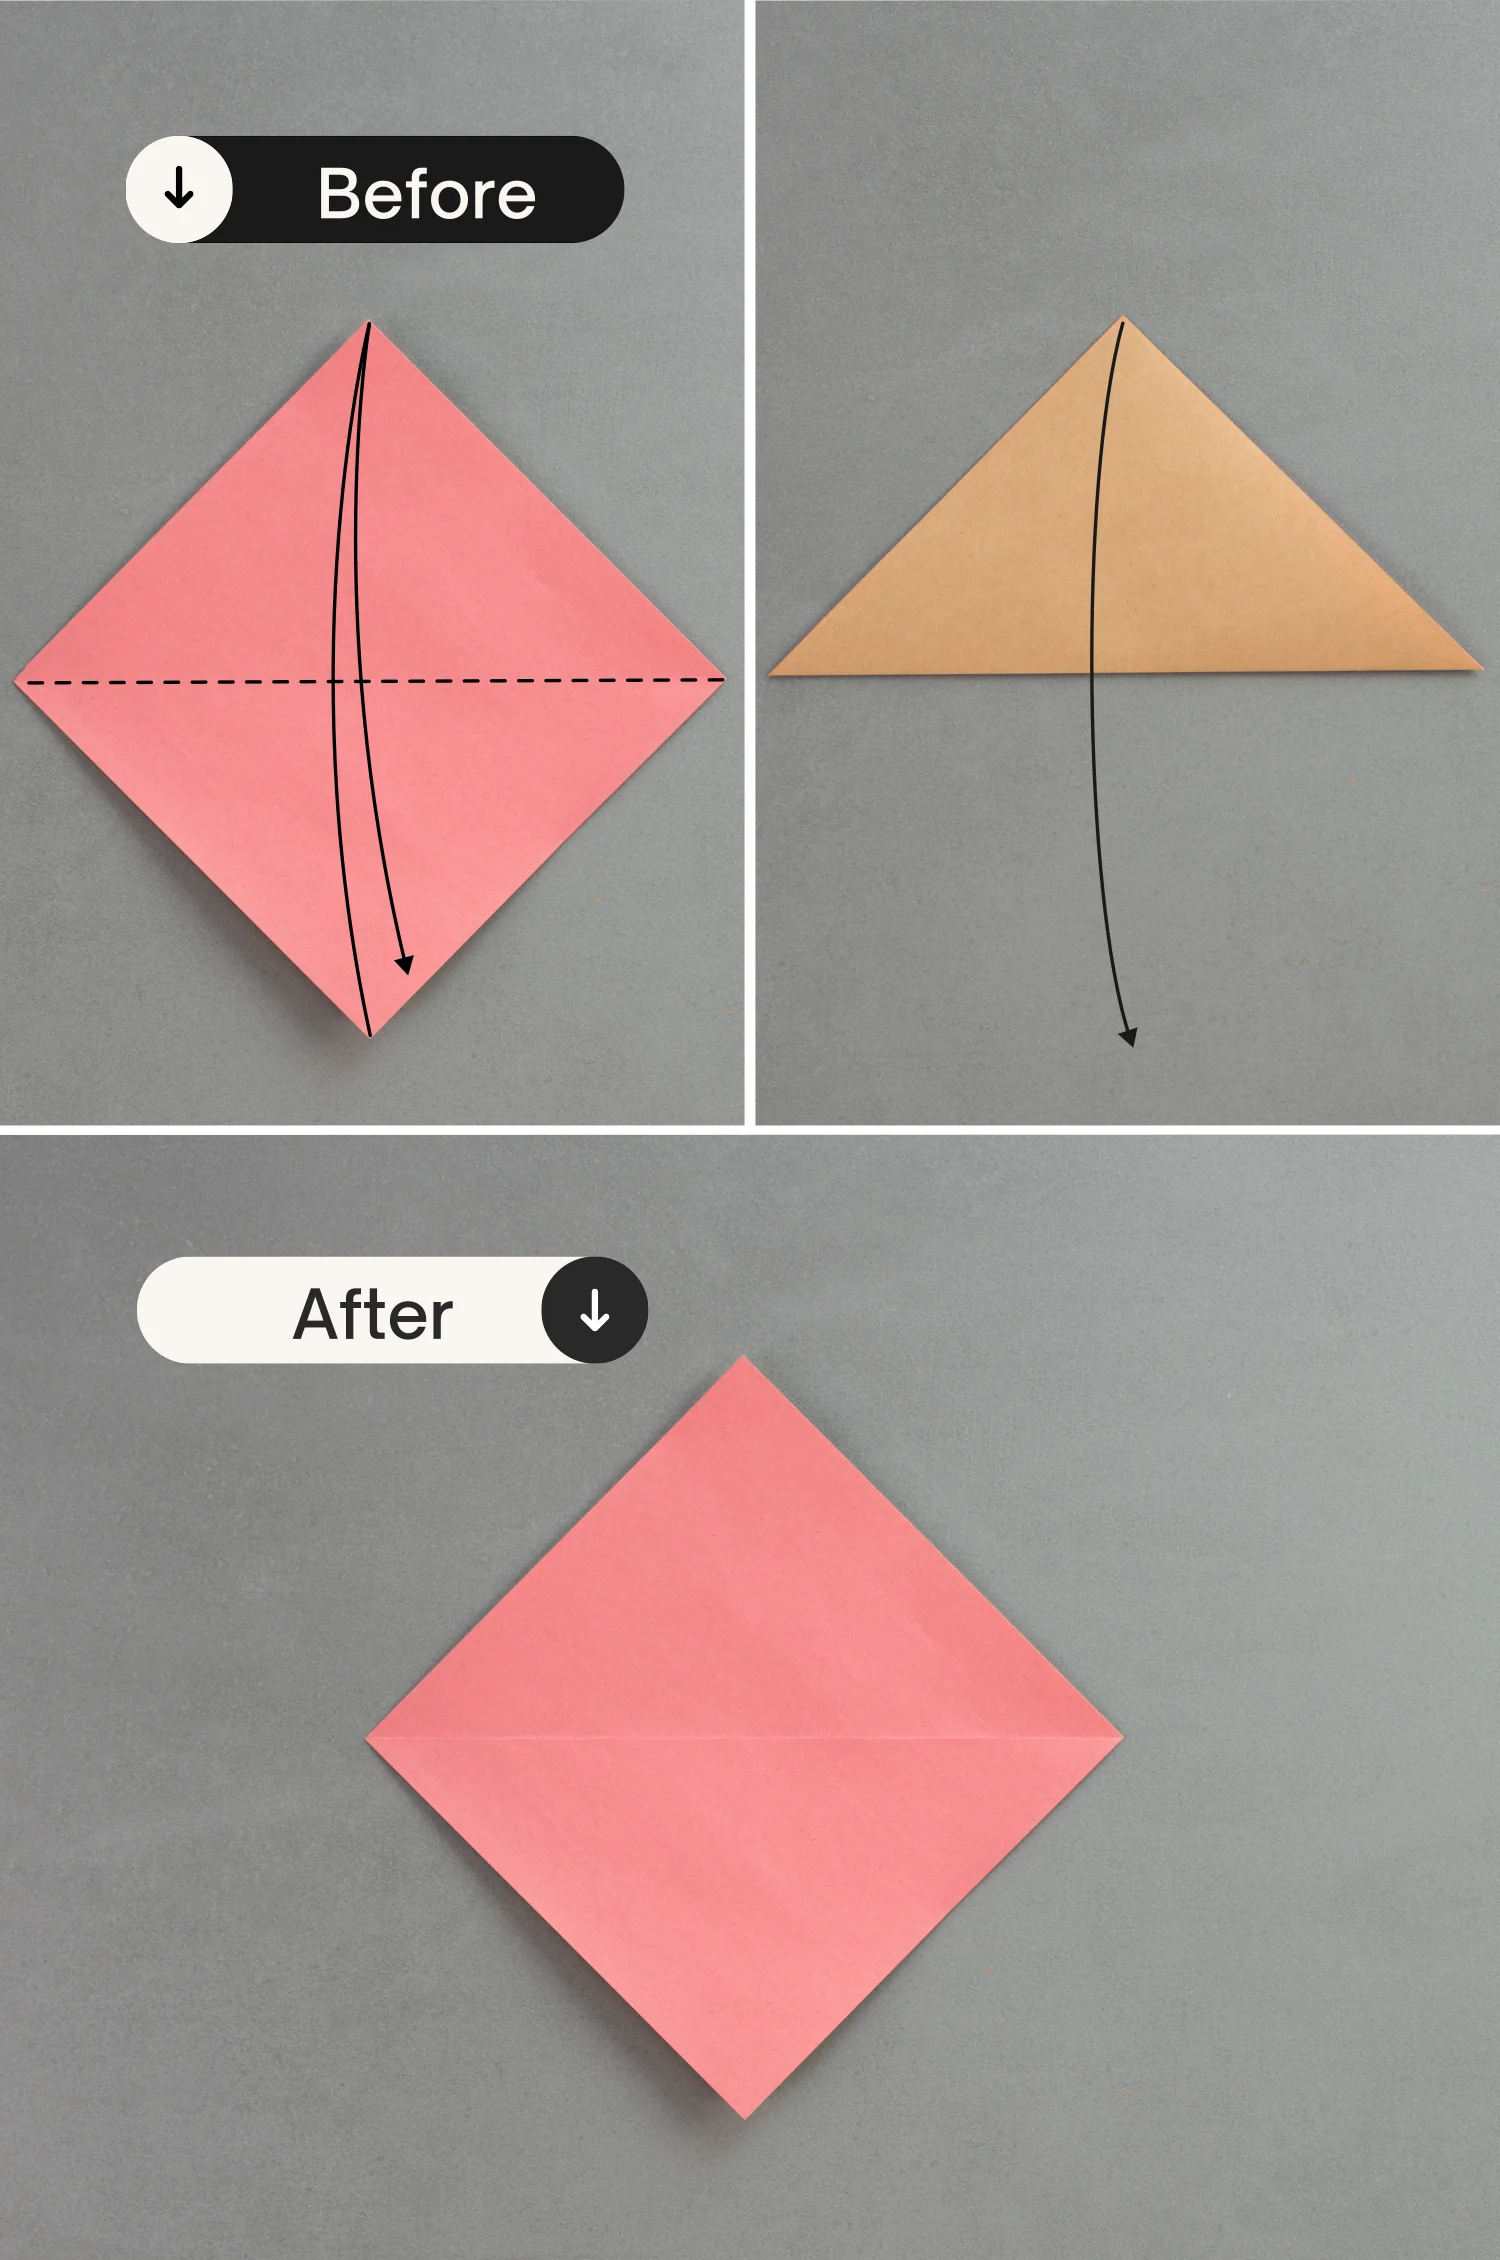
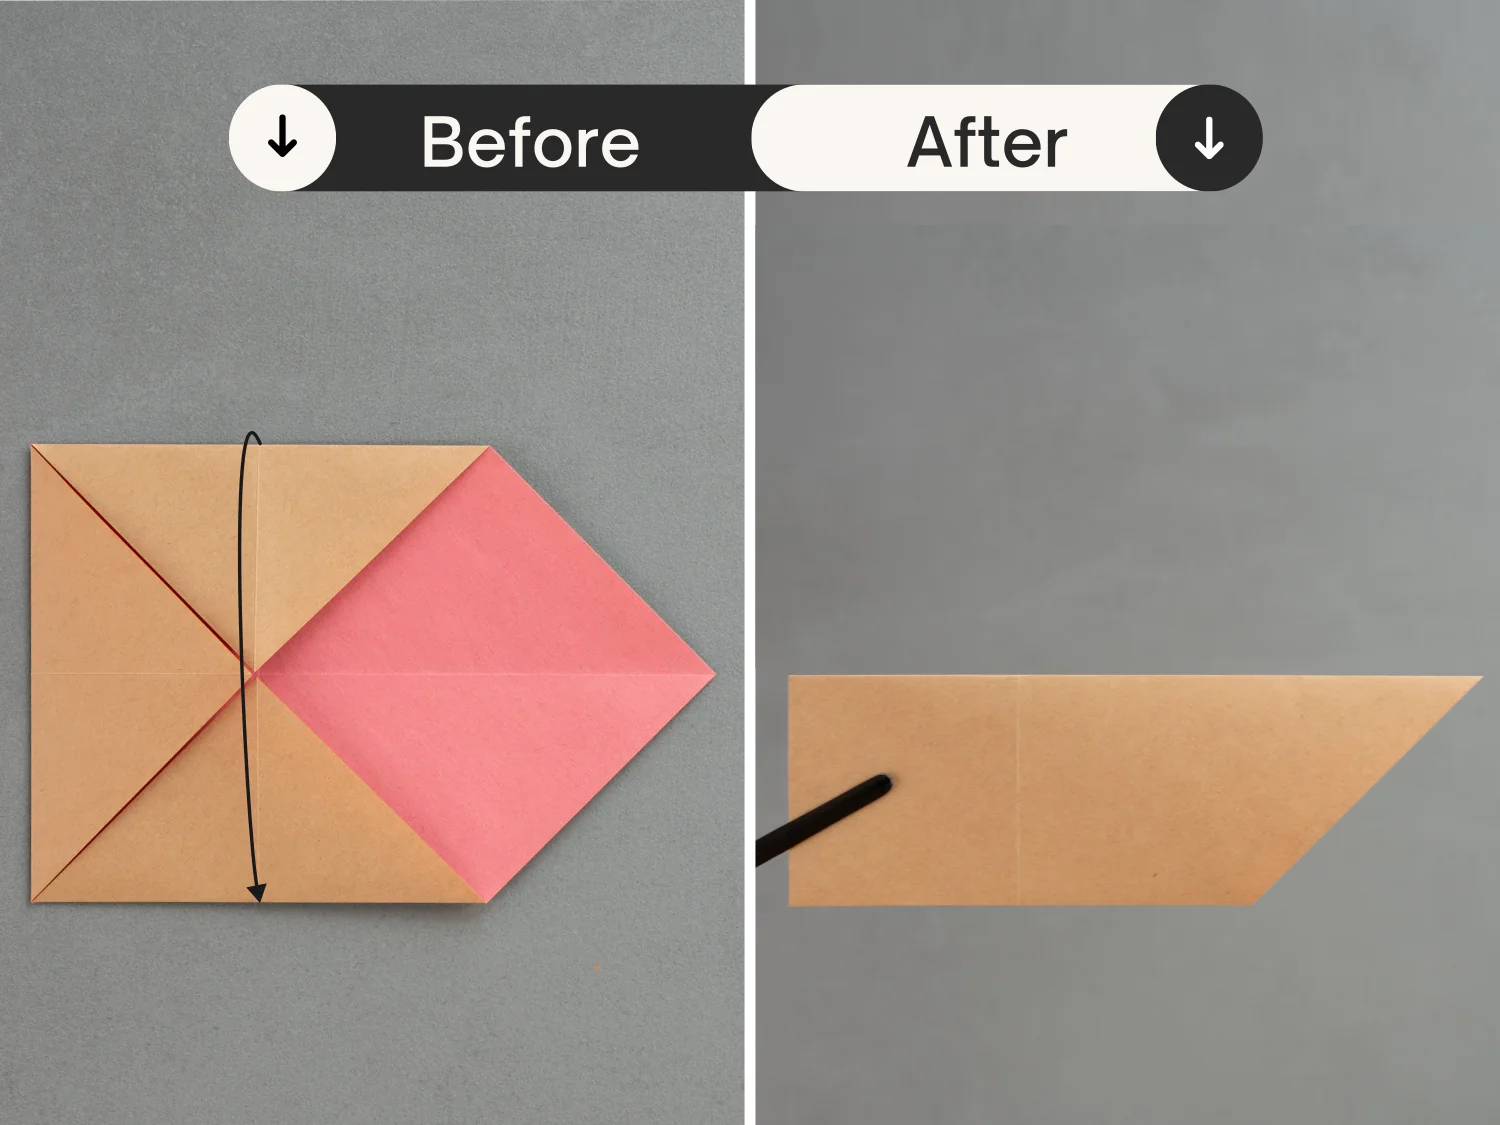
Step 1
Place the paper with the desired display color side down to begin folding, fold it in half horizontally, leaving a crease then unfold it.
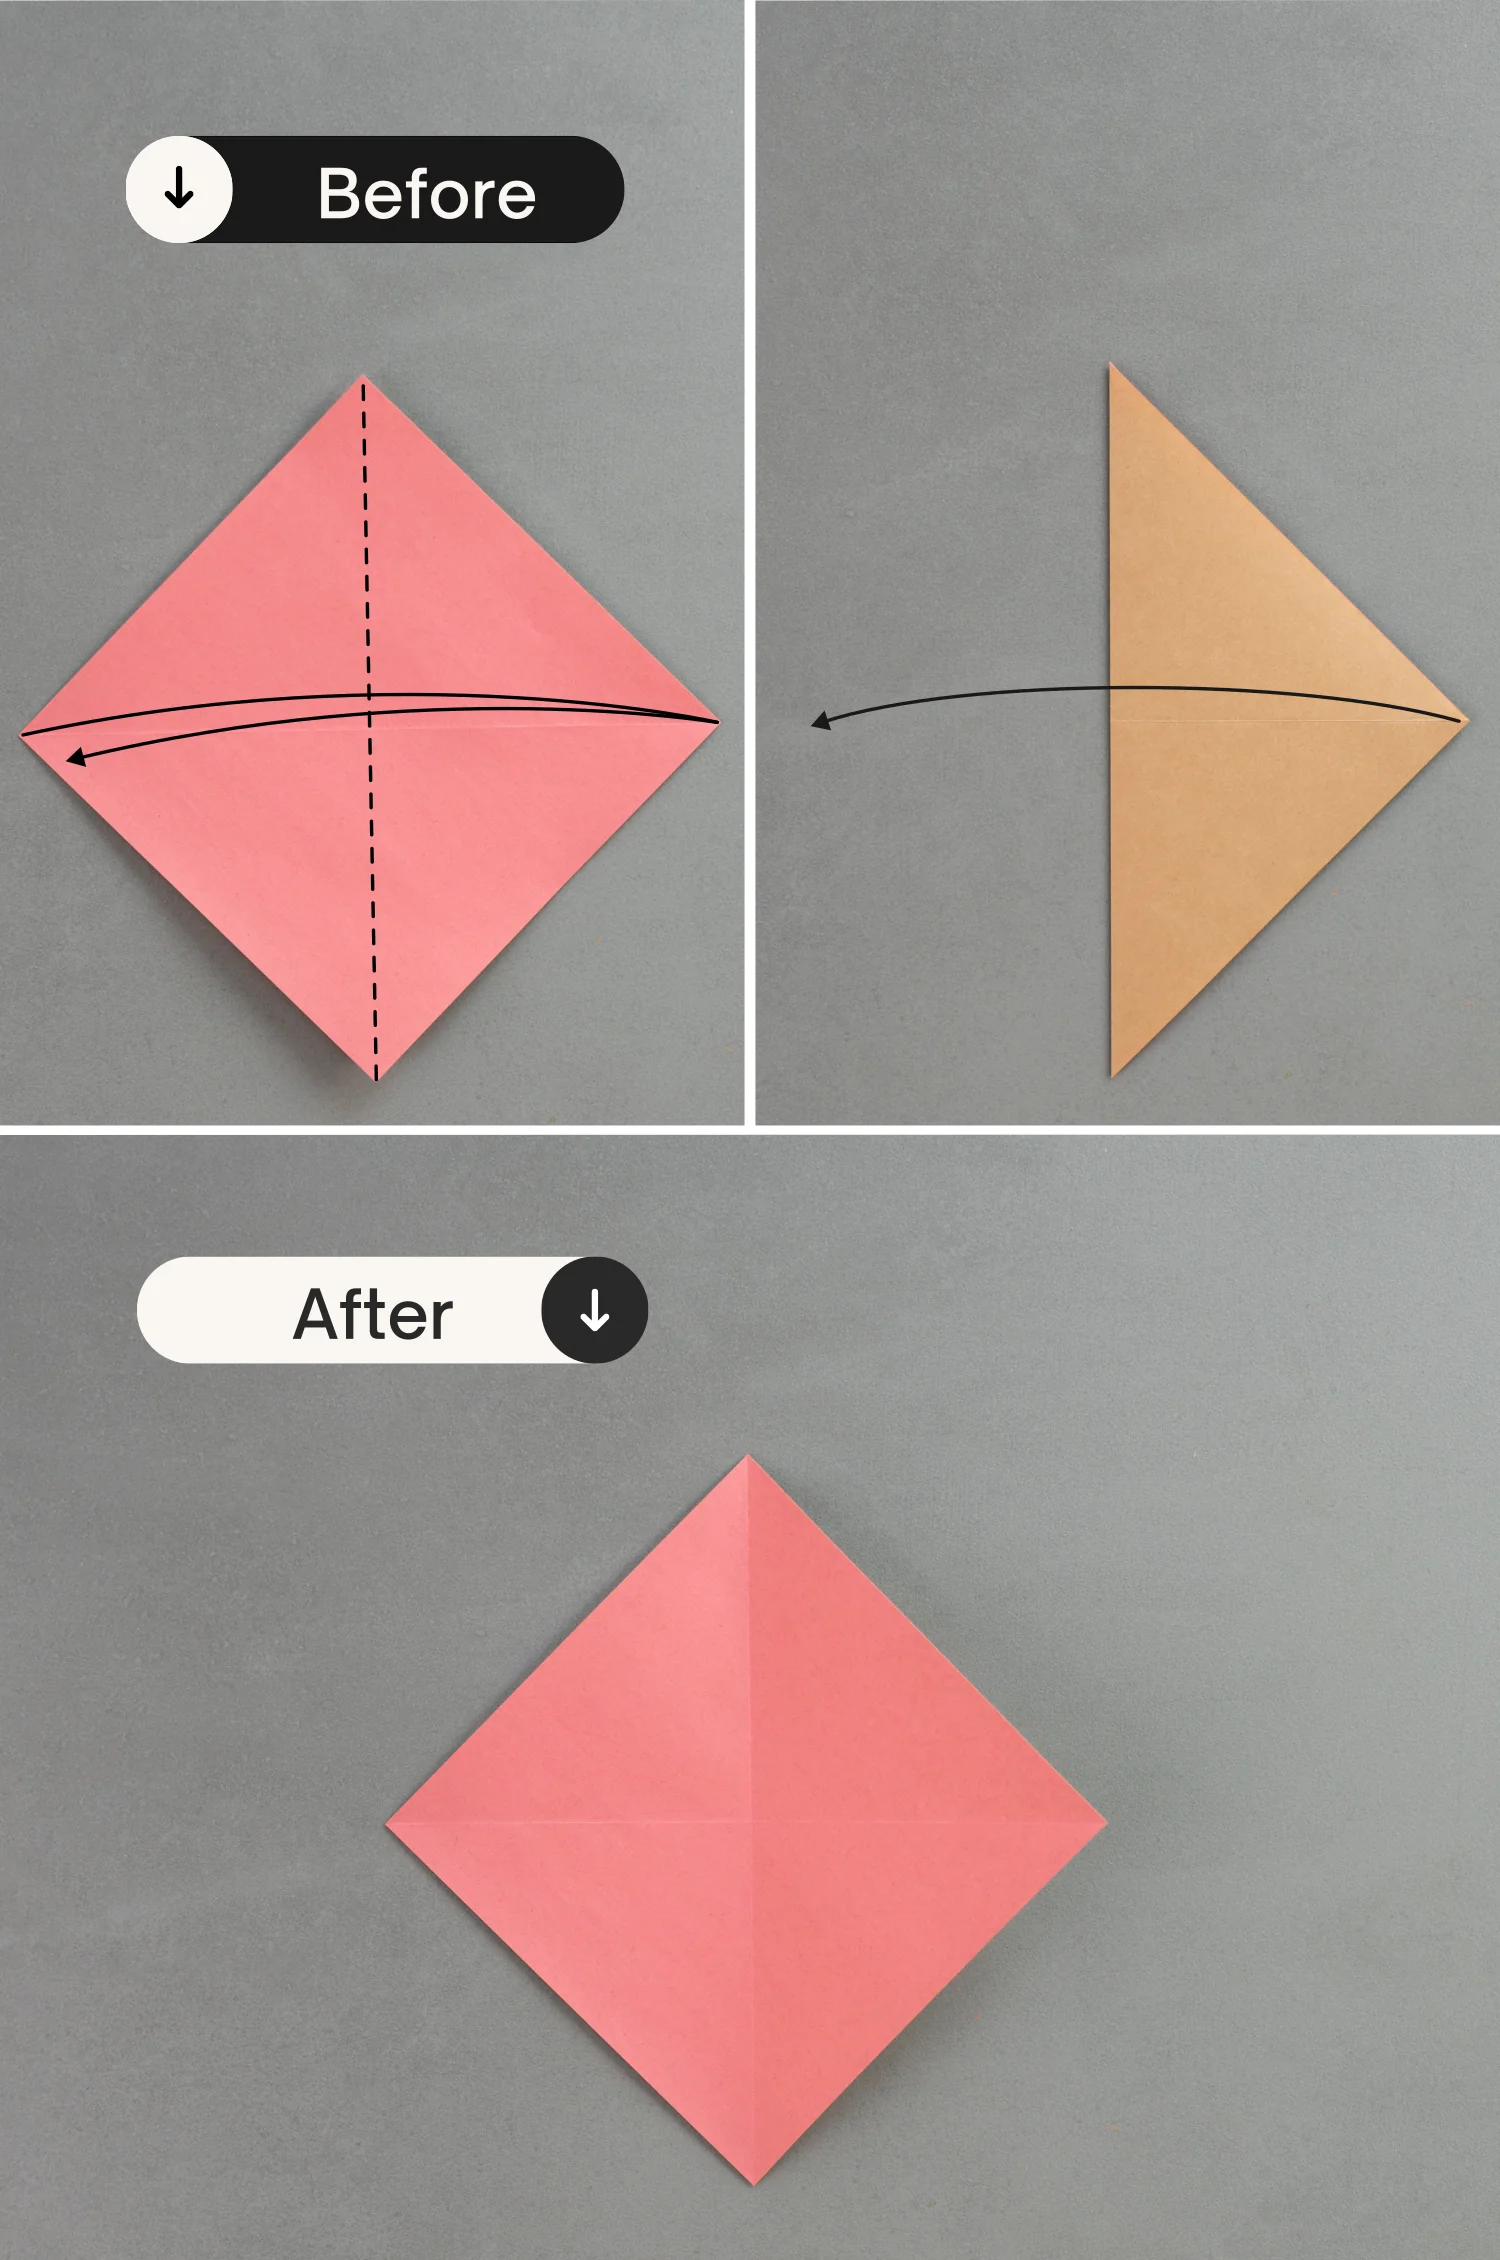
Step 2
Fold the paper in half vertically, leaving a crease, and unfold it.
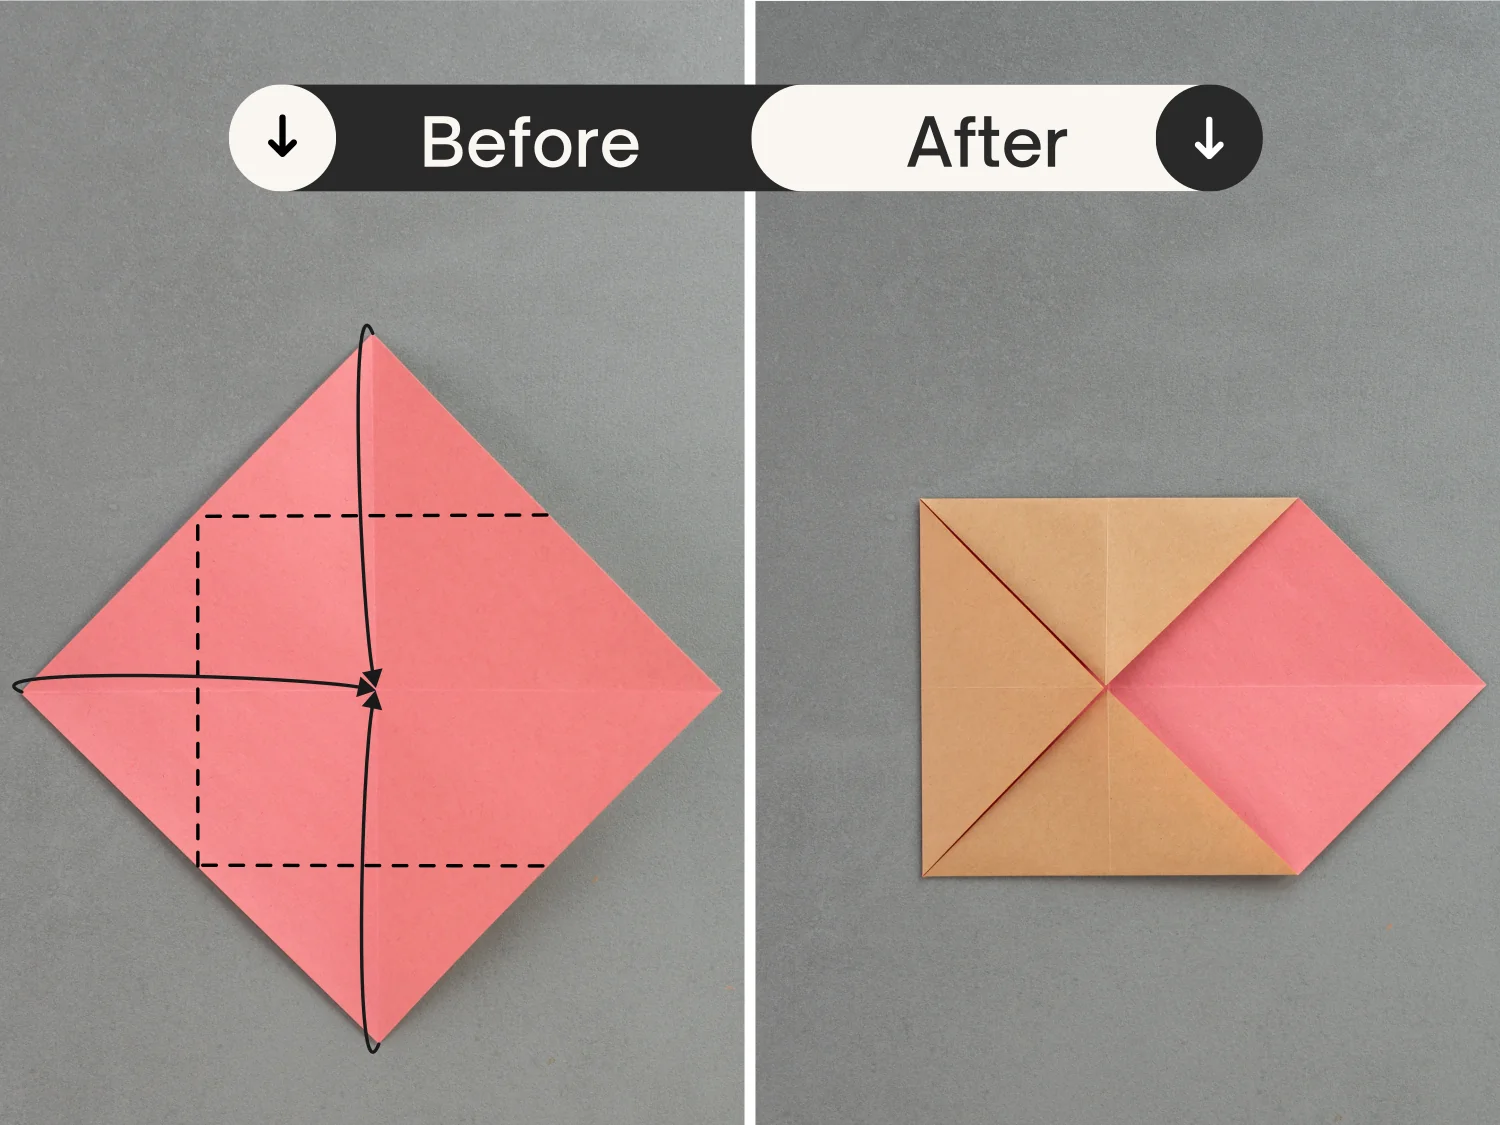
Step 3
Fold the top, left, and bottom points to meet the center intersection point formed by the two creases you made.
Step 4
Fold the paper in half horizontally from top to bottom.
Step 5
Fold up the edge indicated by the black line to align with the crease indicated by the red line, then fold down the top point, making the left edge of the folded part and the vertical crease align. Finally, unfold the paper to the original shape, as the last picture shows.
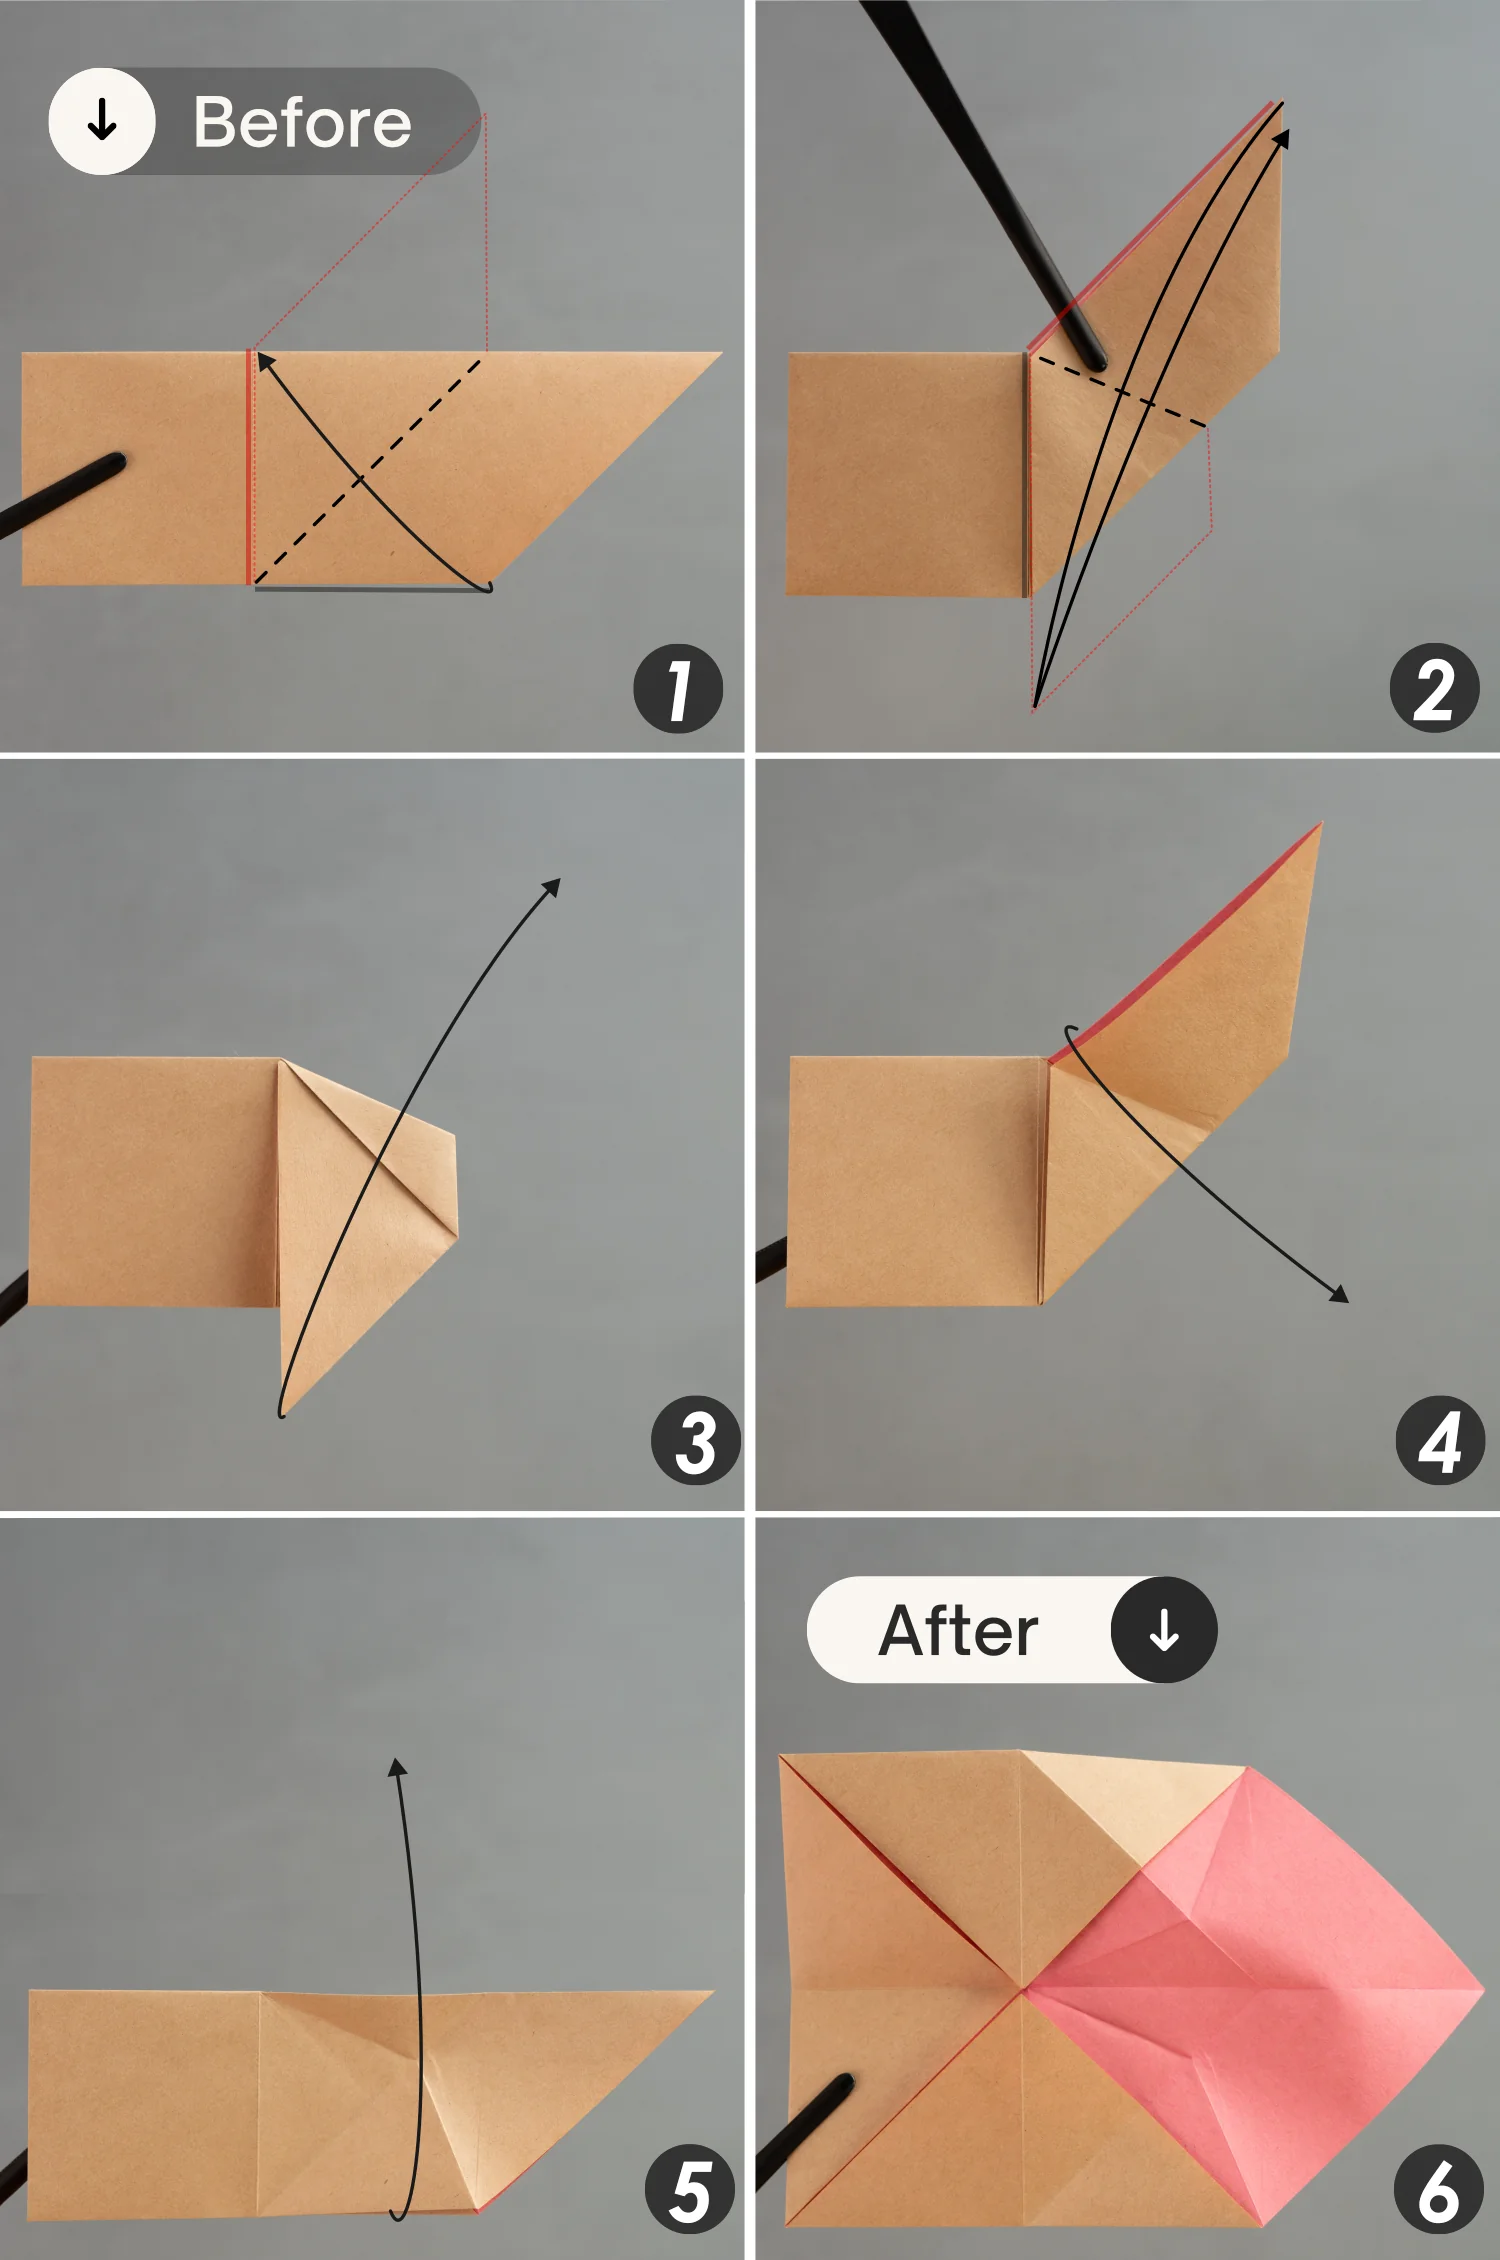
Step 6
Flip the paper over from front to back, then fold the two creases indicated by the red dotted lines toward the center along the creases indicated by the black dotted lines, creating a pocket on the right side. Finally, squash and flatten this pocket.
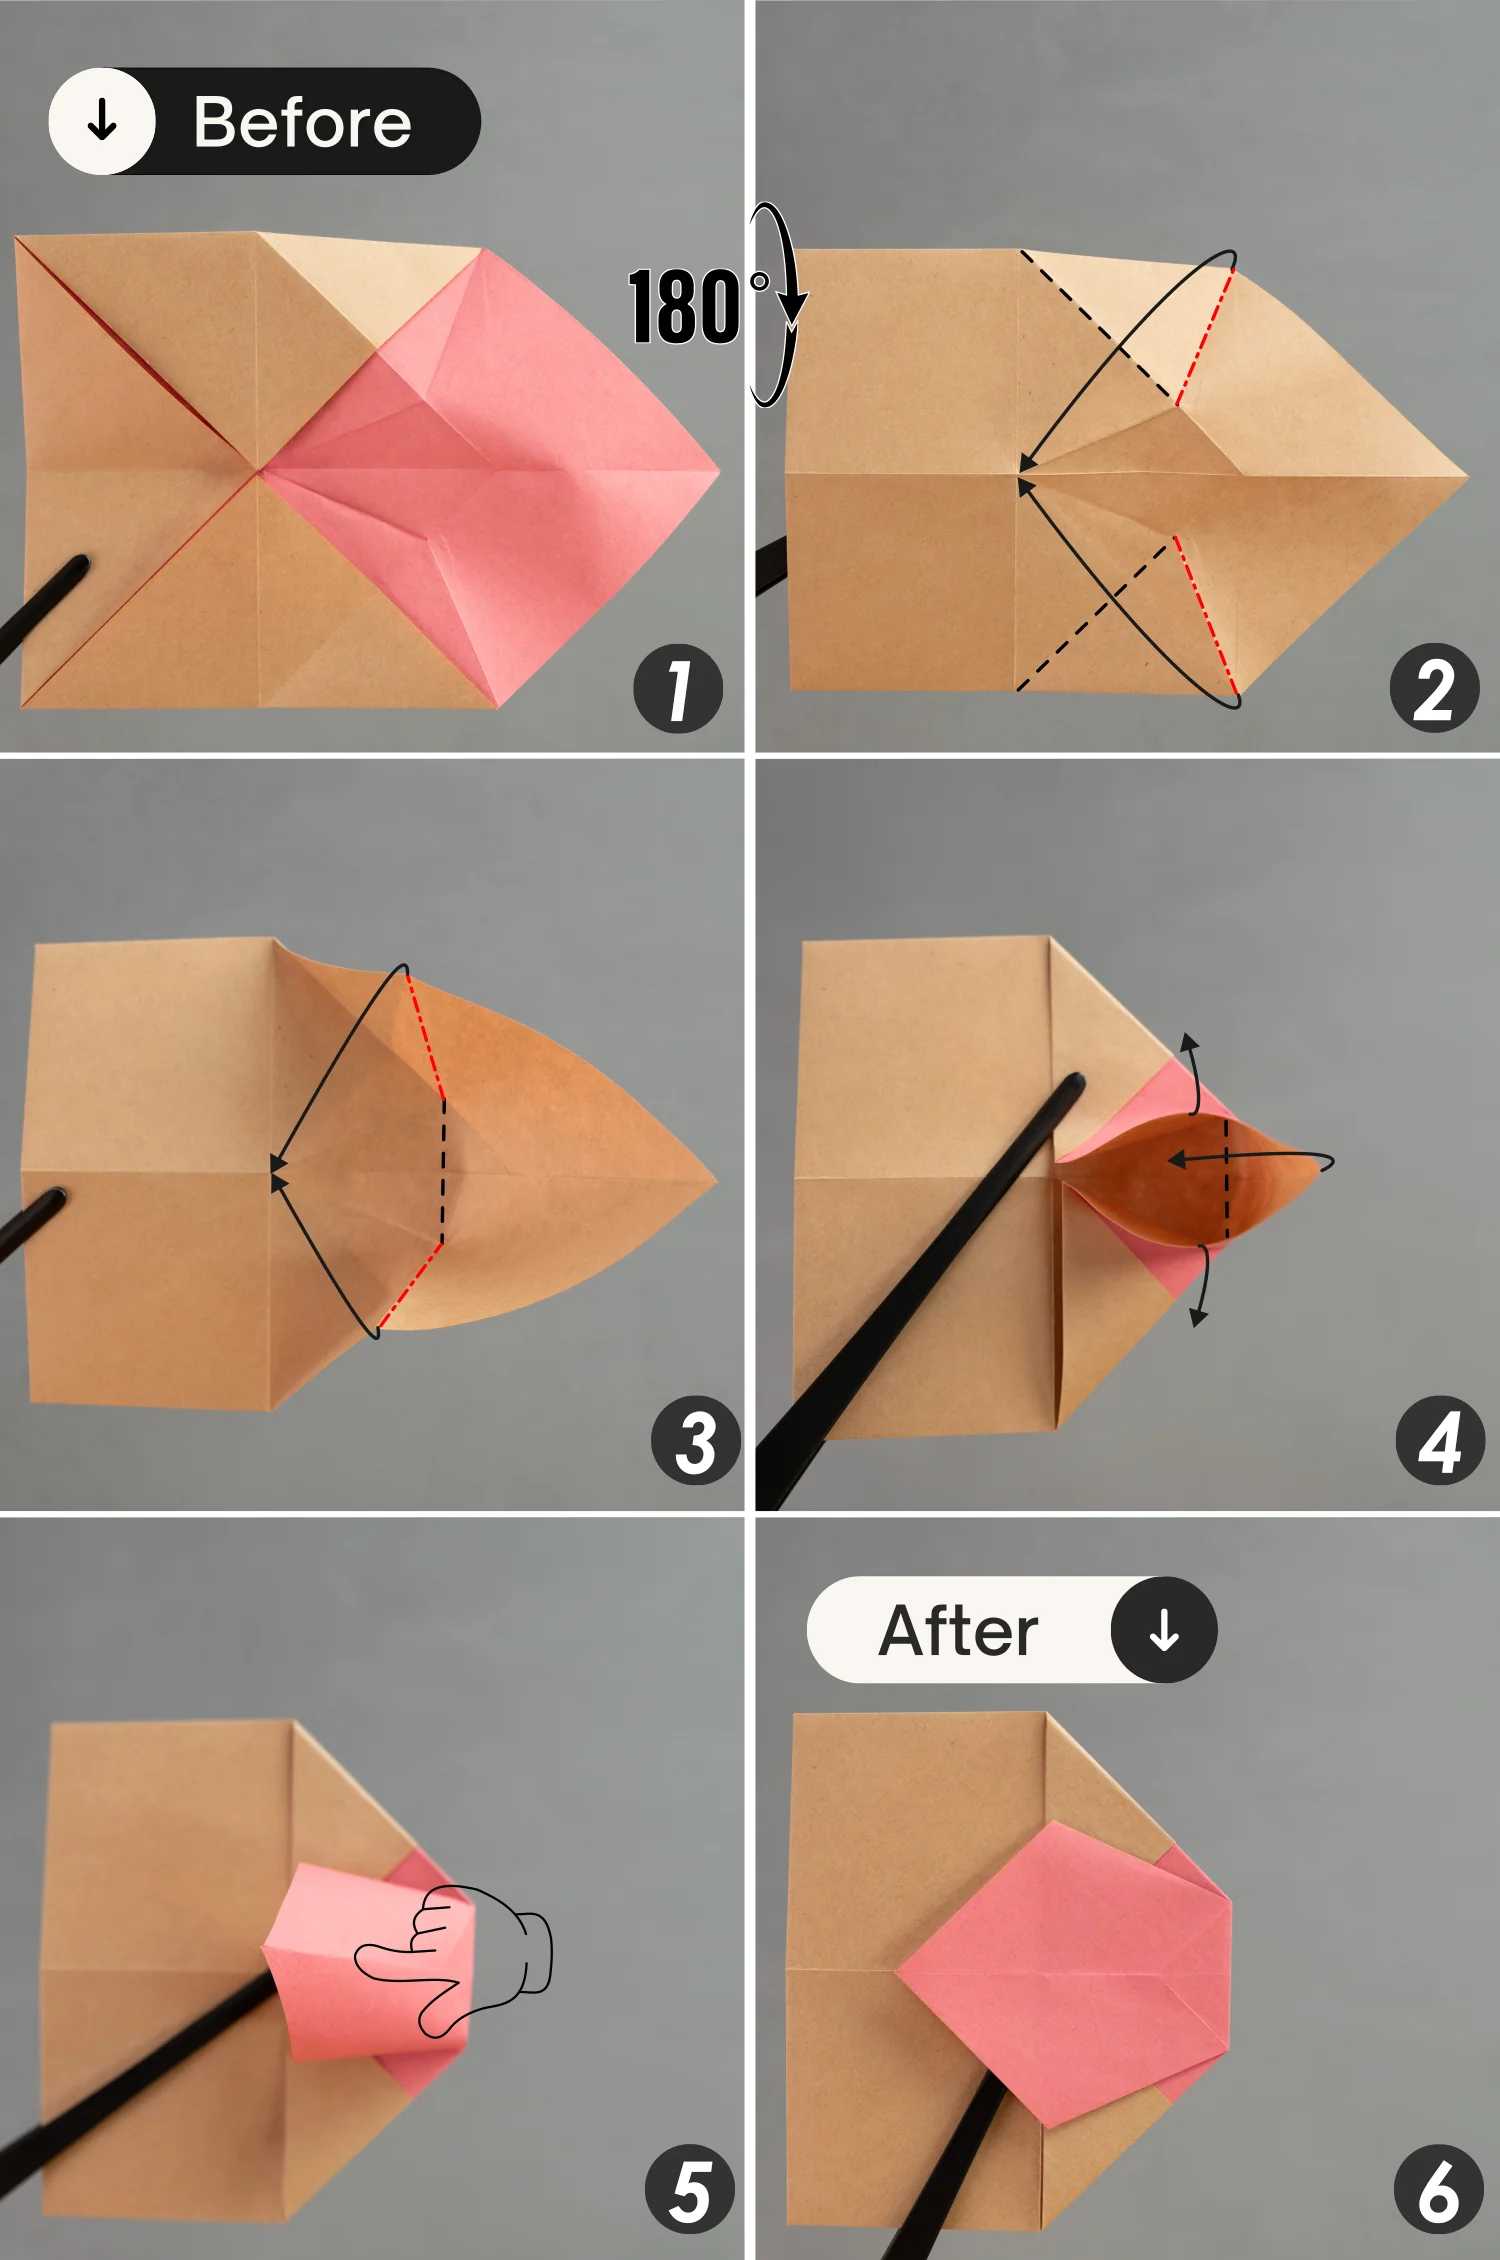
Step 7
Fold the left point of the top layer a little to the right, then fold again toward the right side.
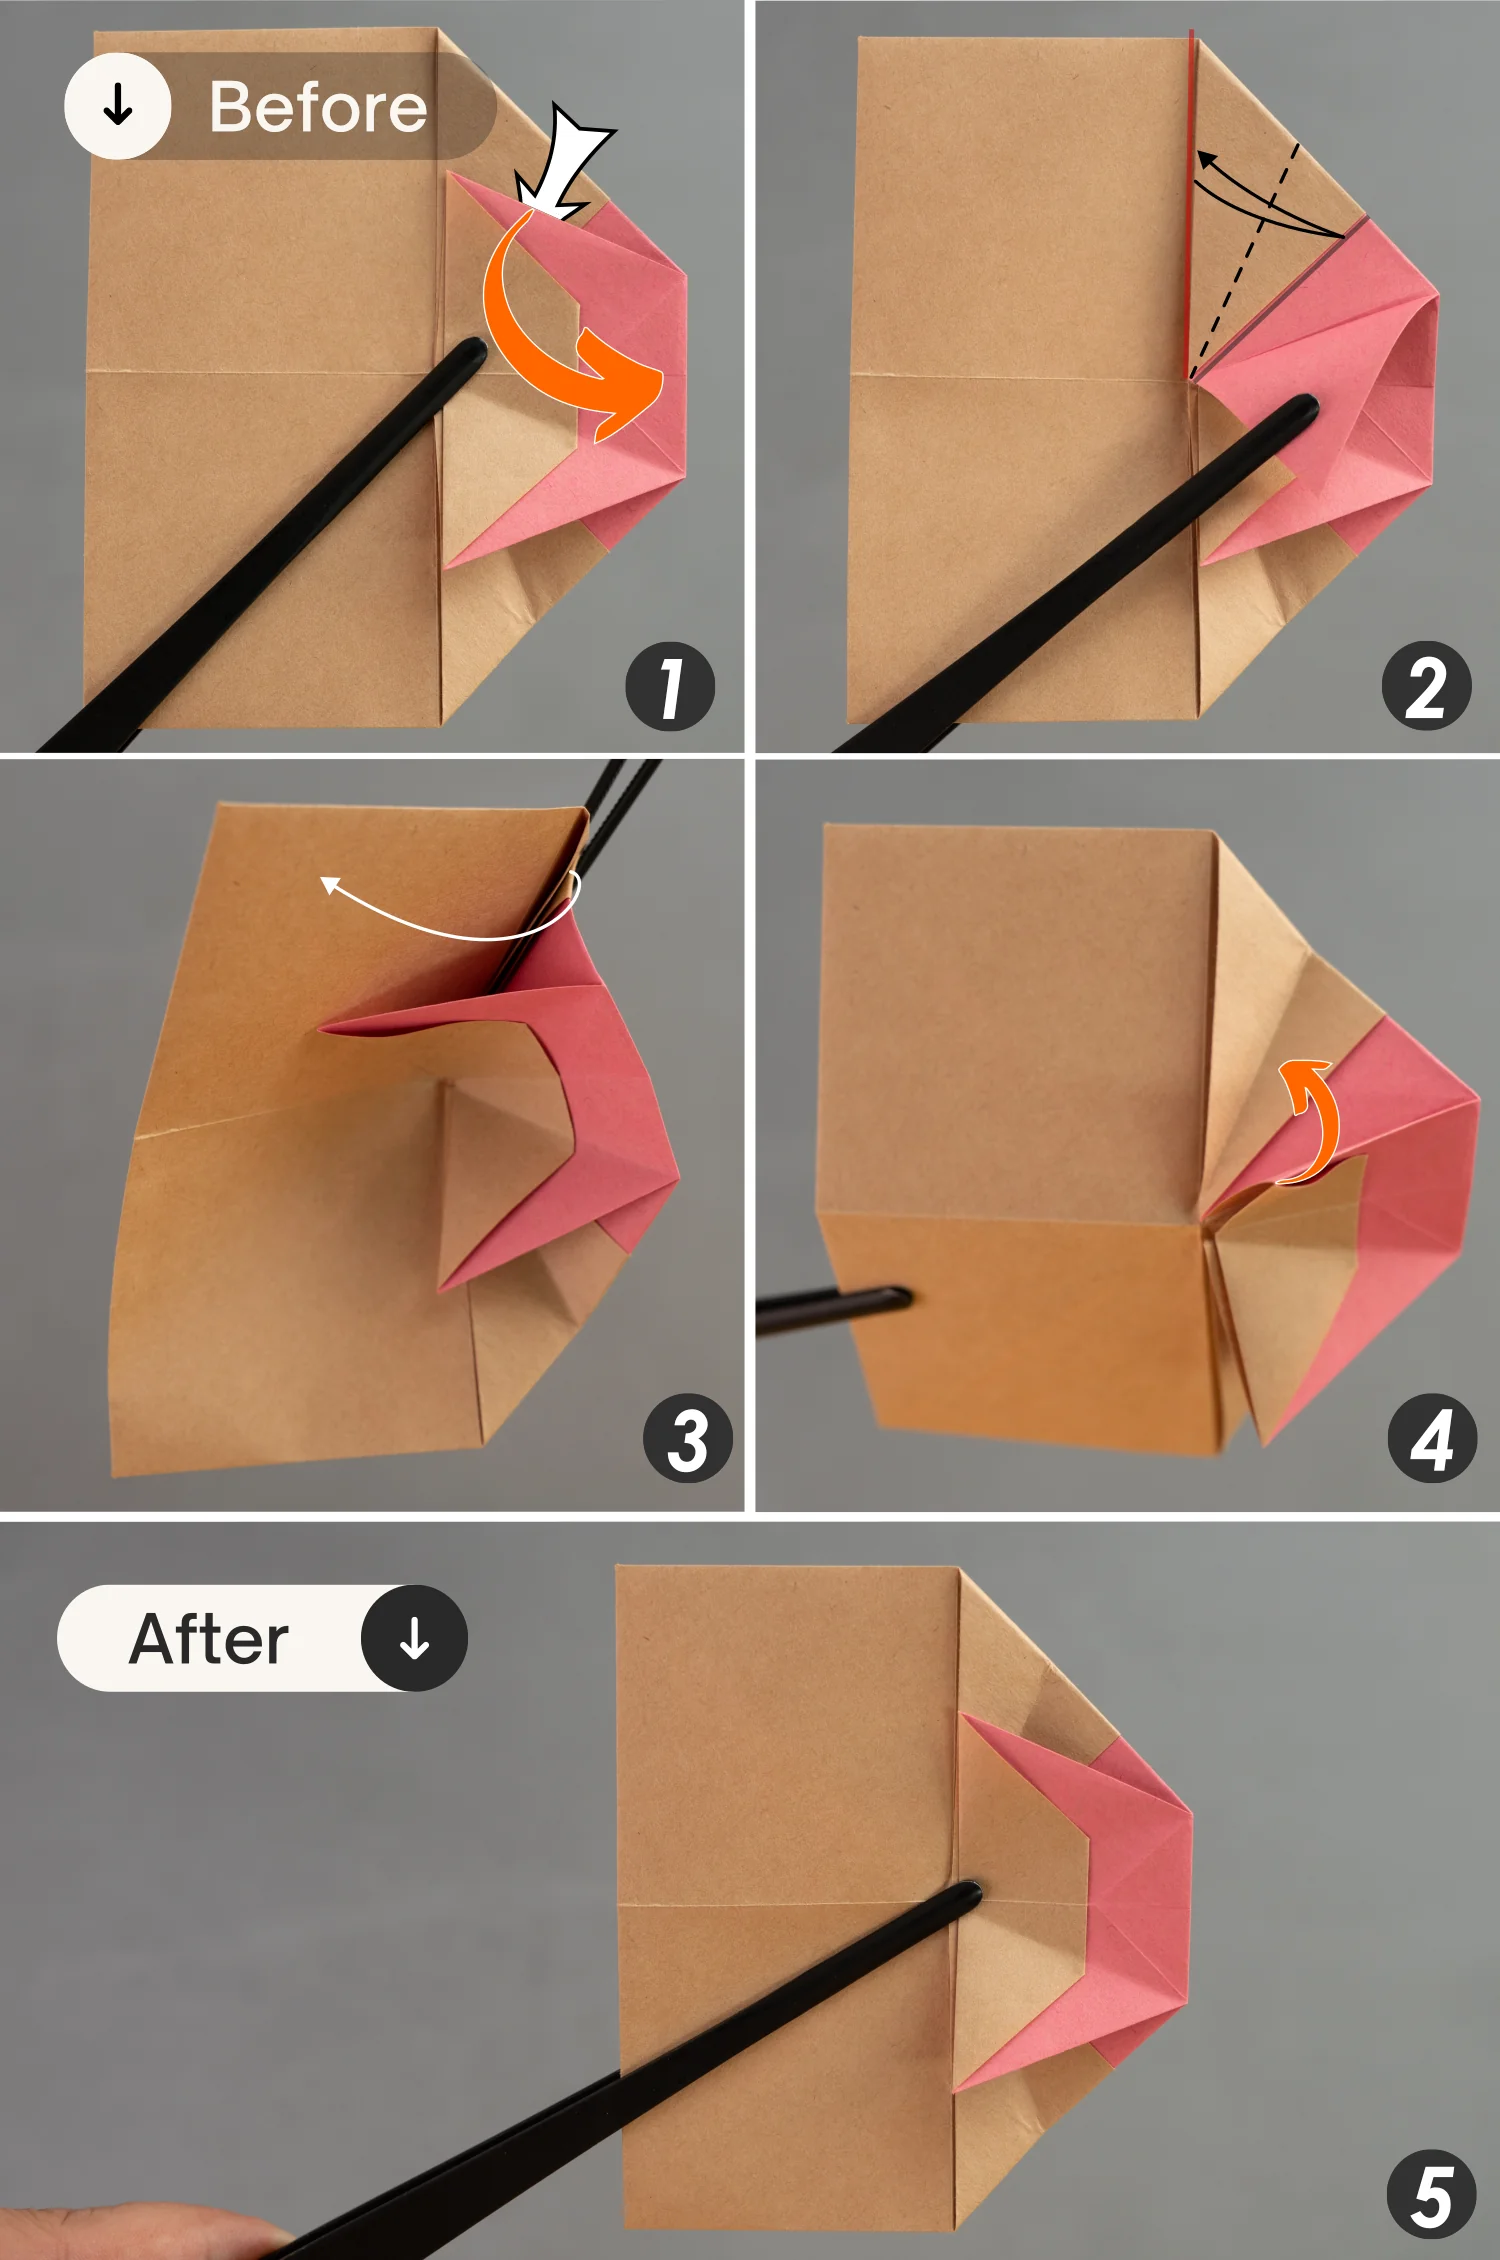
Step 8
Lift the bottom part of the top layer on the right side [picture 1].
Then, fold the edge indicated by the red line to align with the edge indicated by the black line, creating a crease, and unfold it [pictures 1 to 3].
Finally, put down the layer you lifted up.
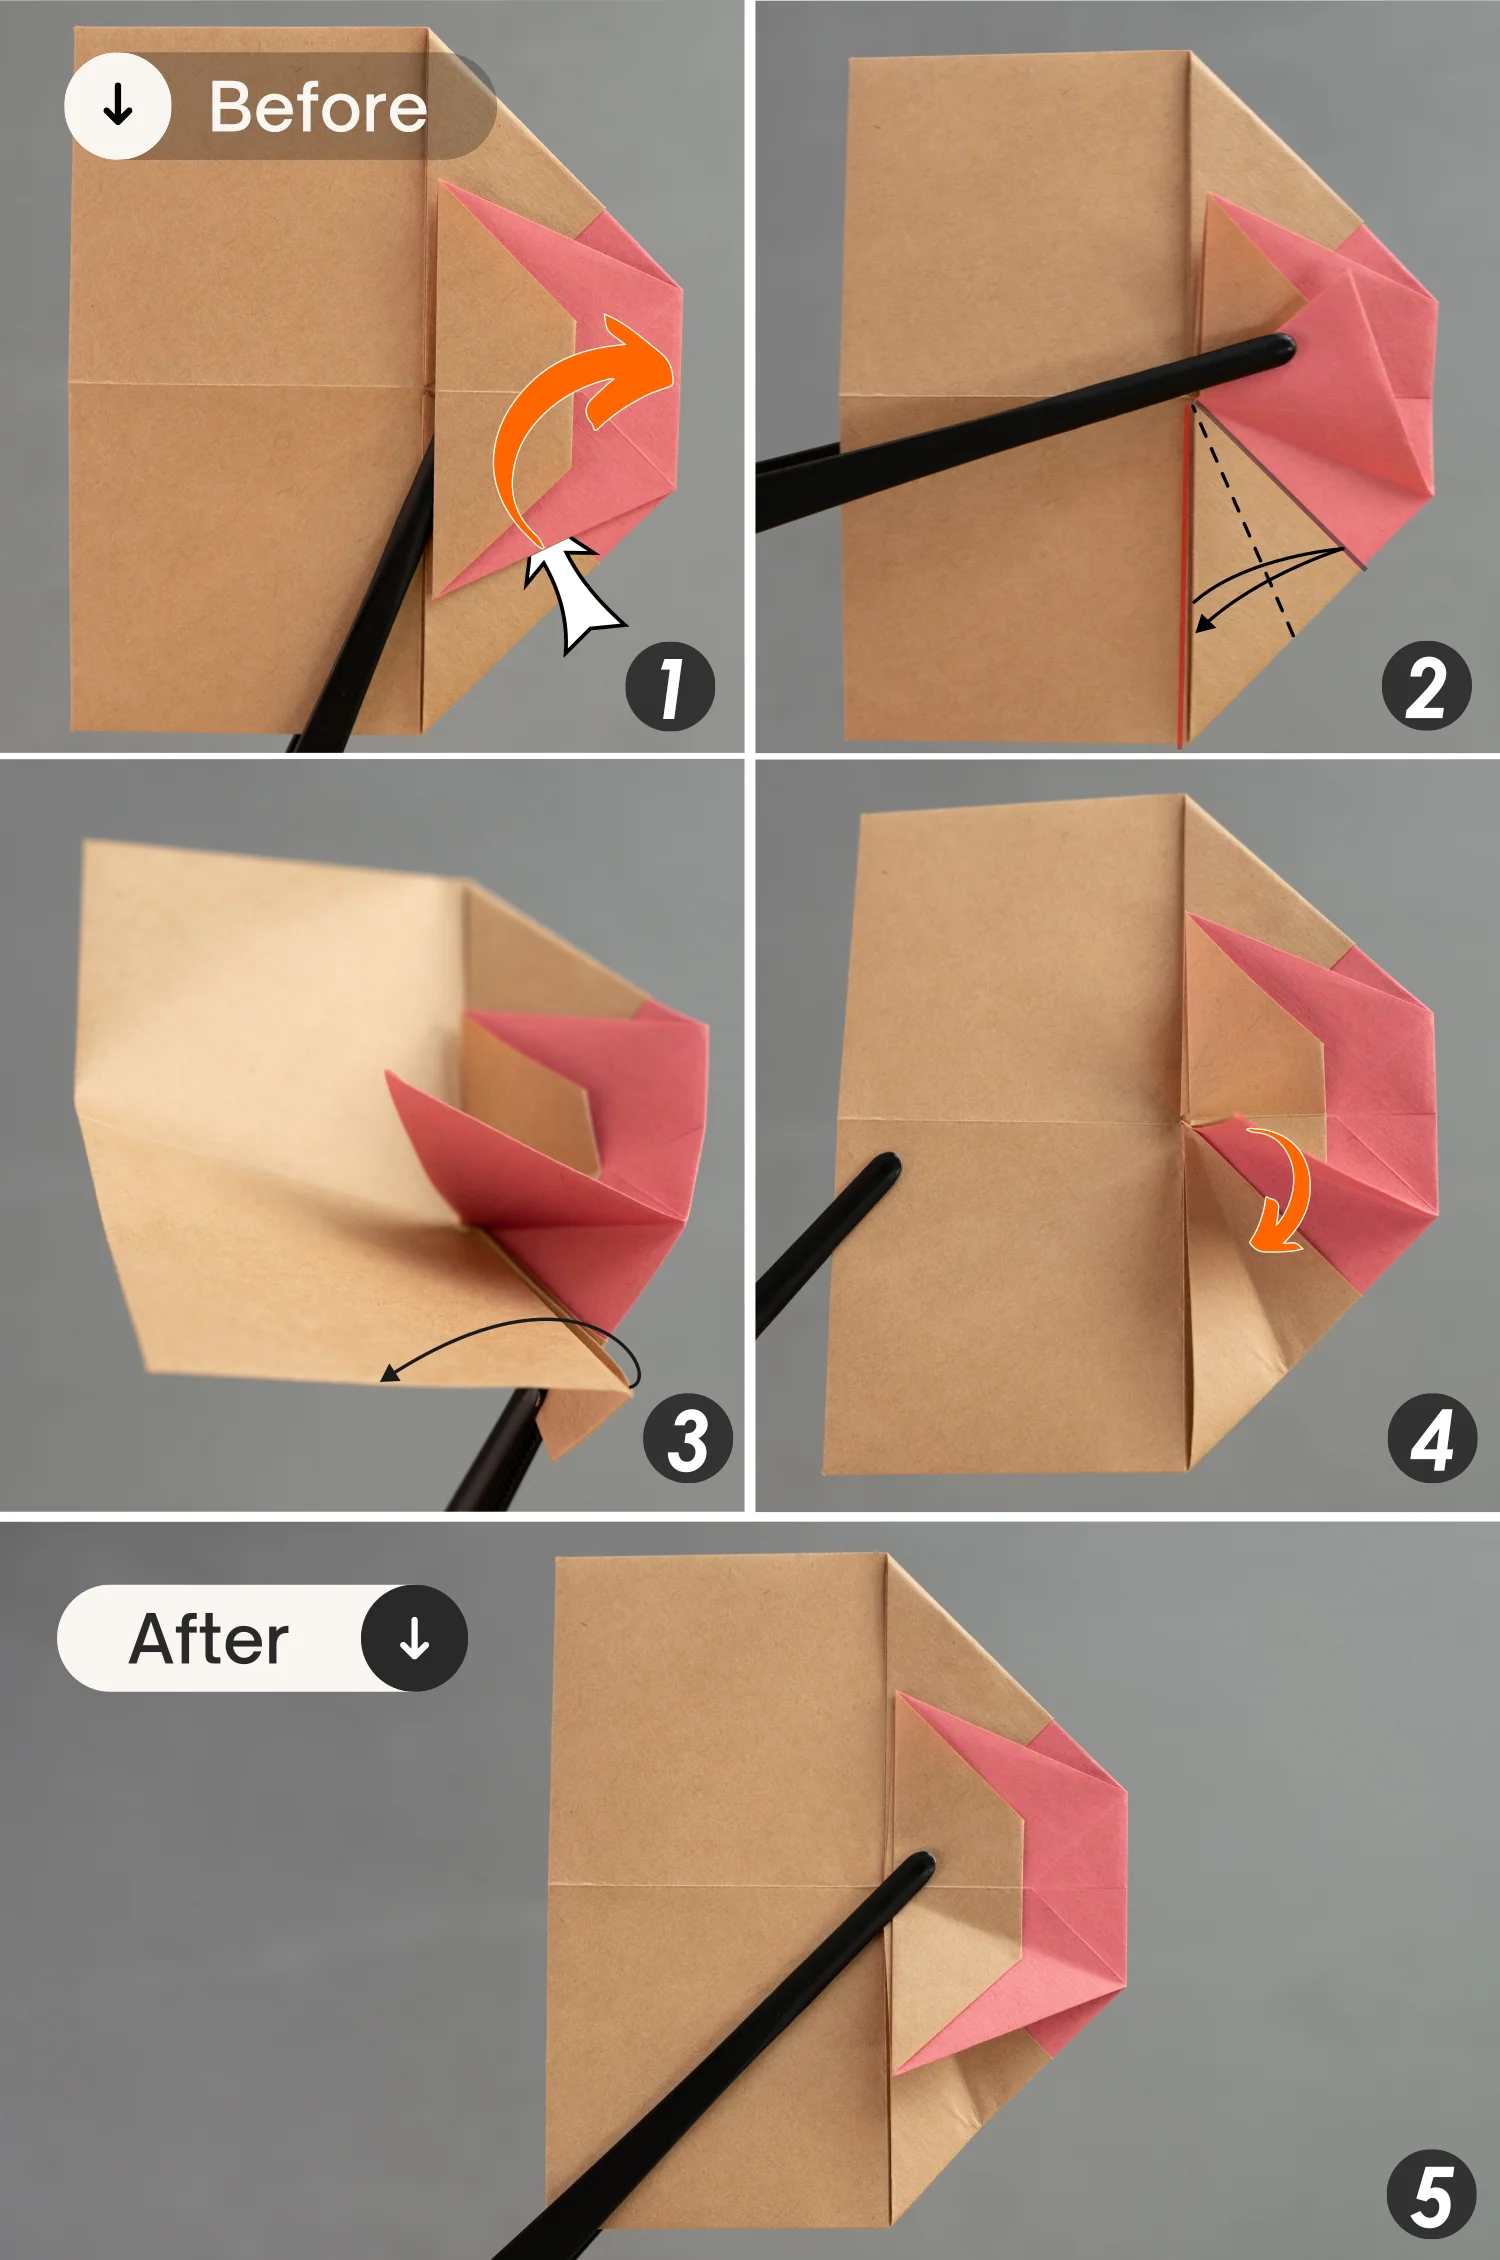
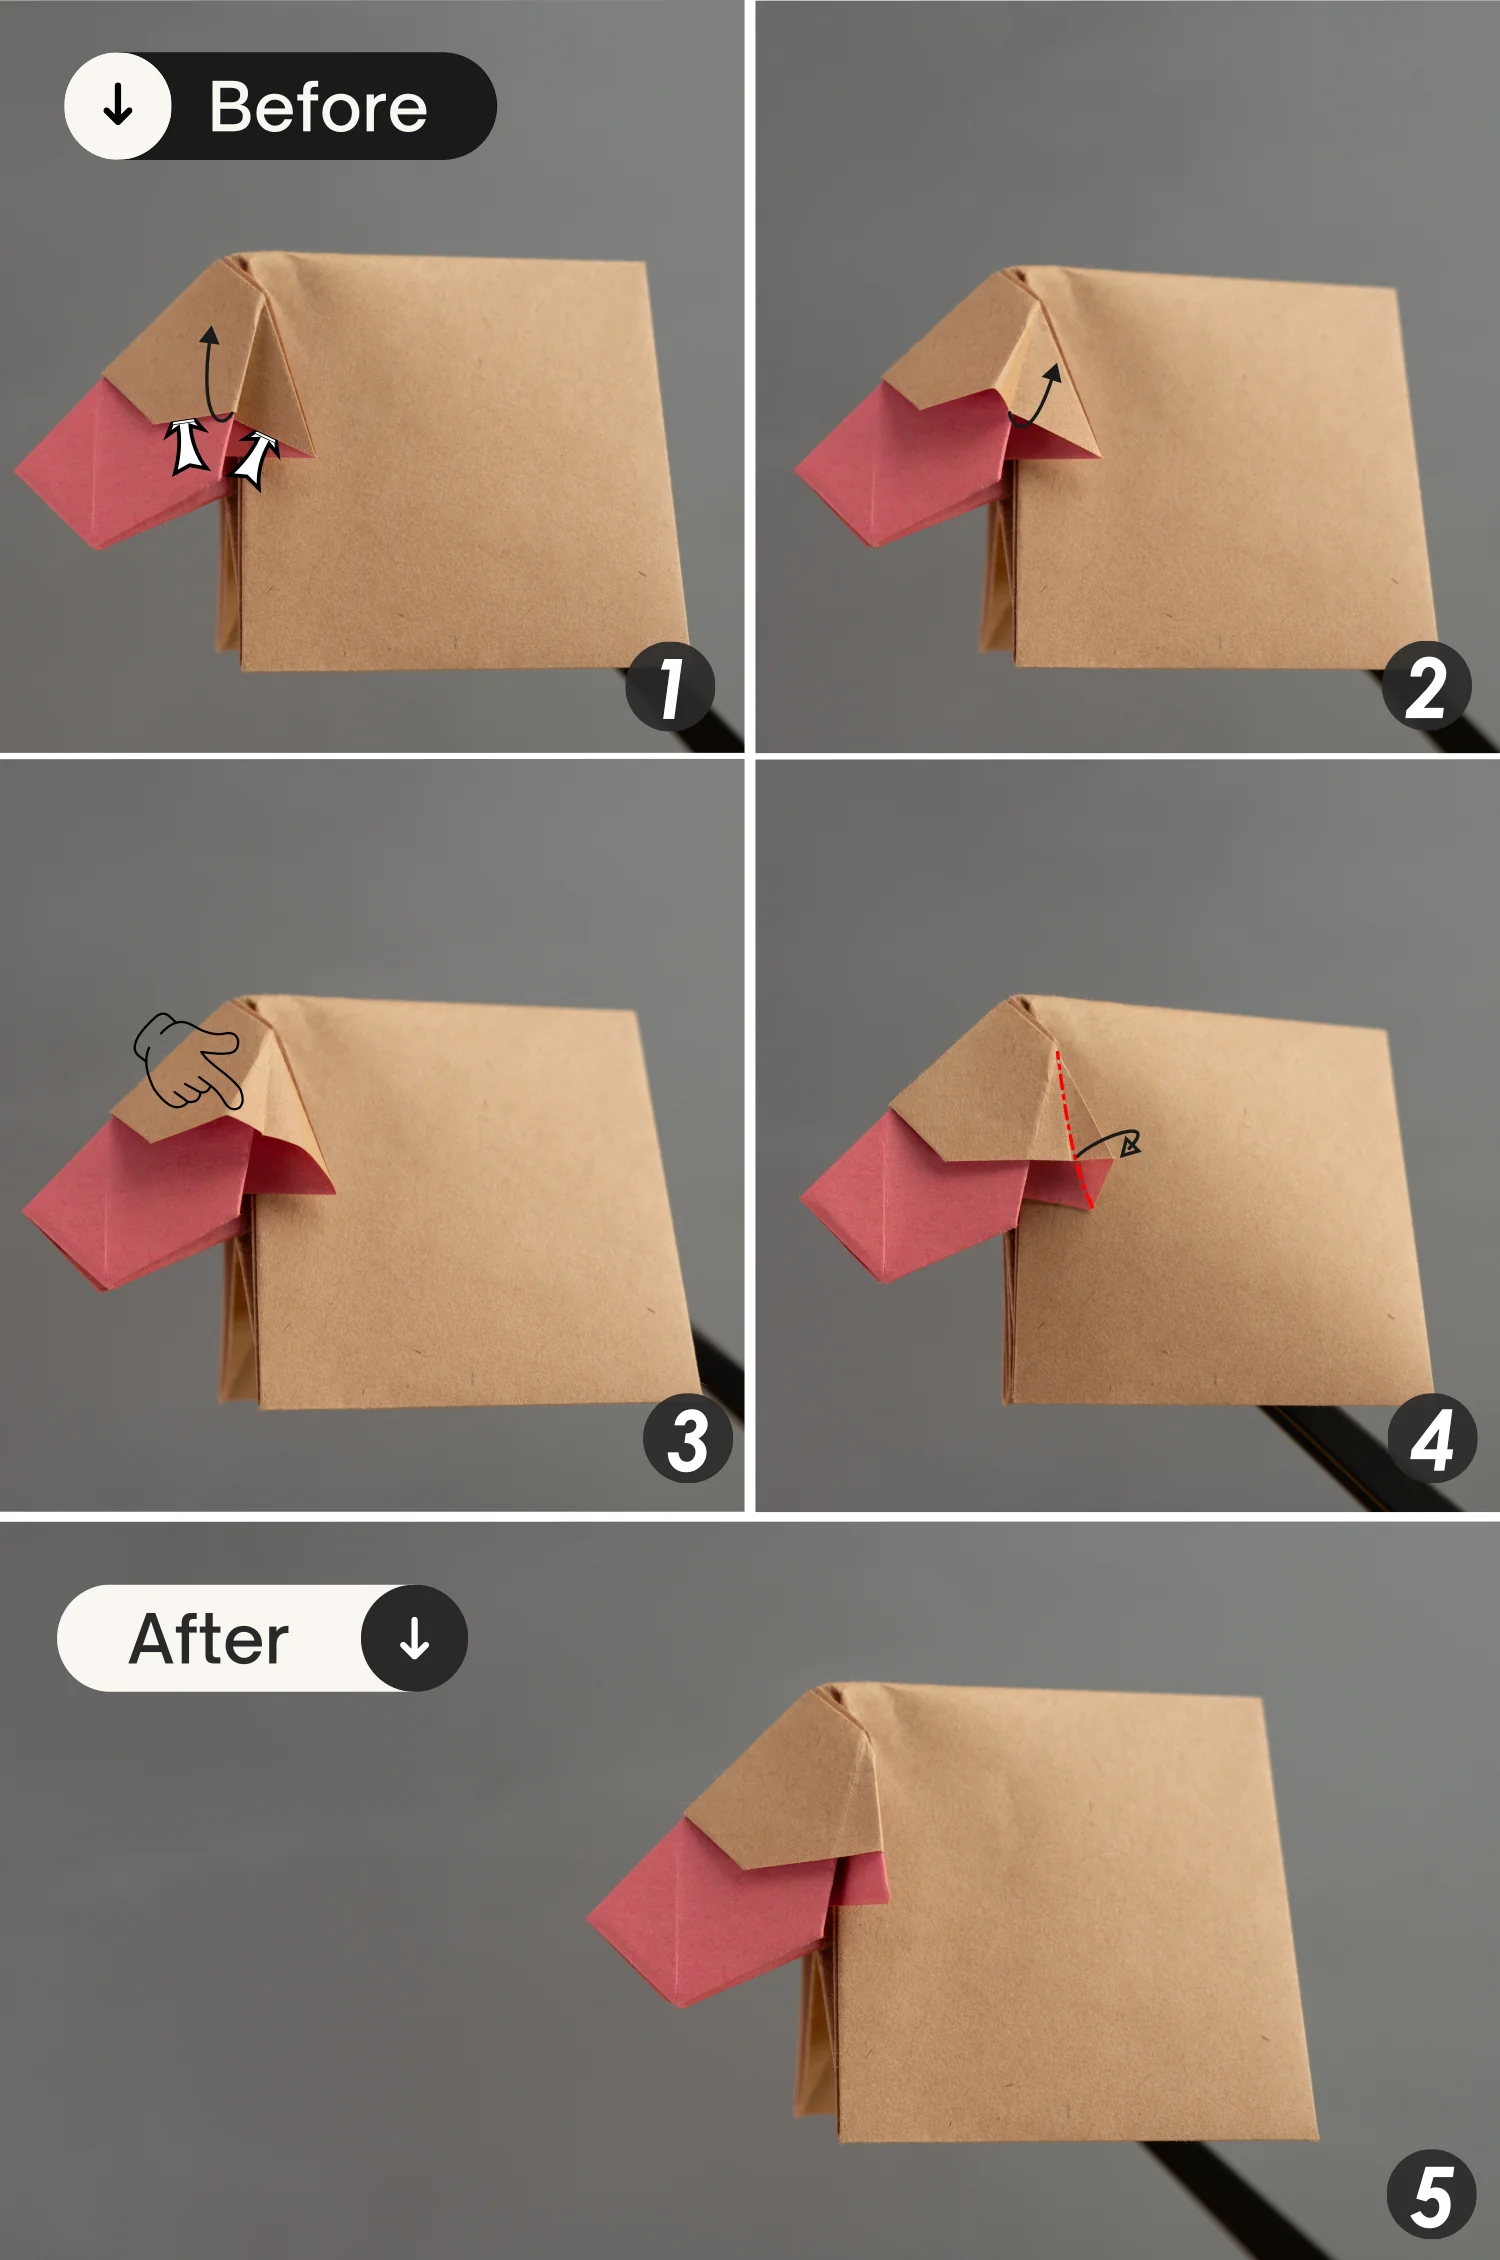
Step 9
Similarly, lift the top part of the top layer on the right side [picture 1].
Then, fold the edge indicated by the red line to align with the edge indicated by the black line, crease it well, and unfold it [pictures 2 to 3].
Finally, put down the layer you lifted up.
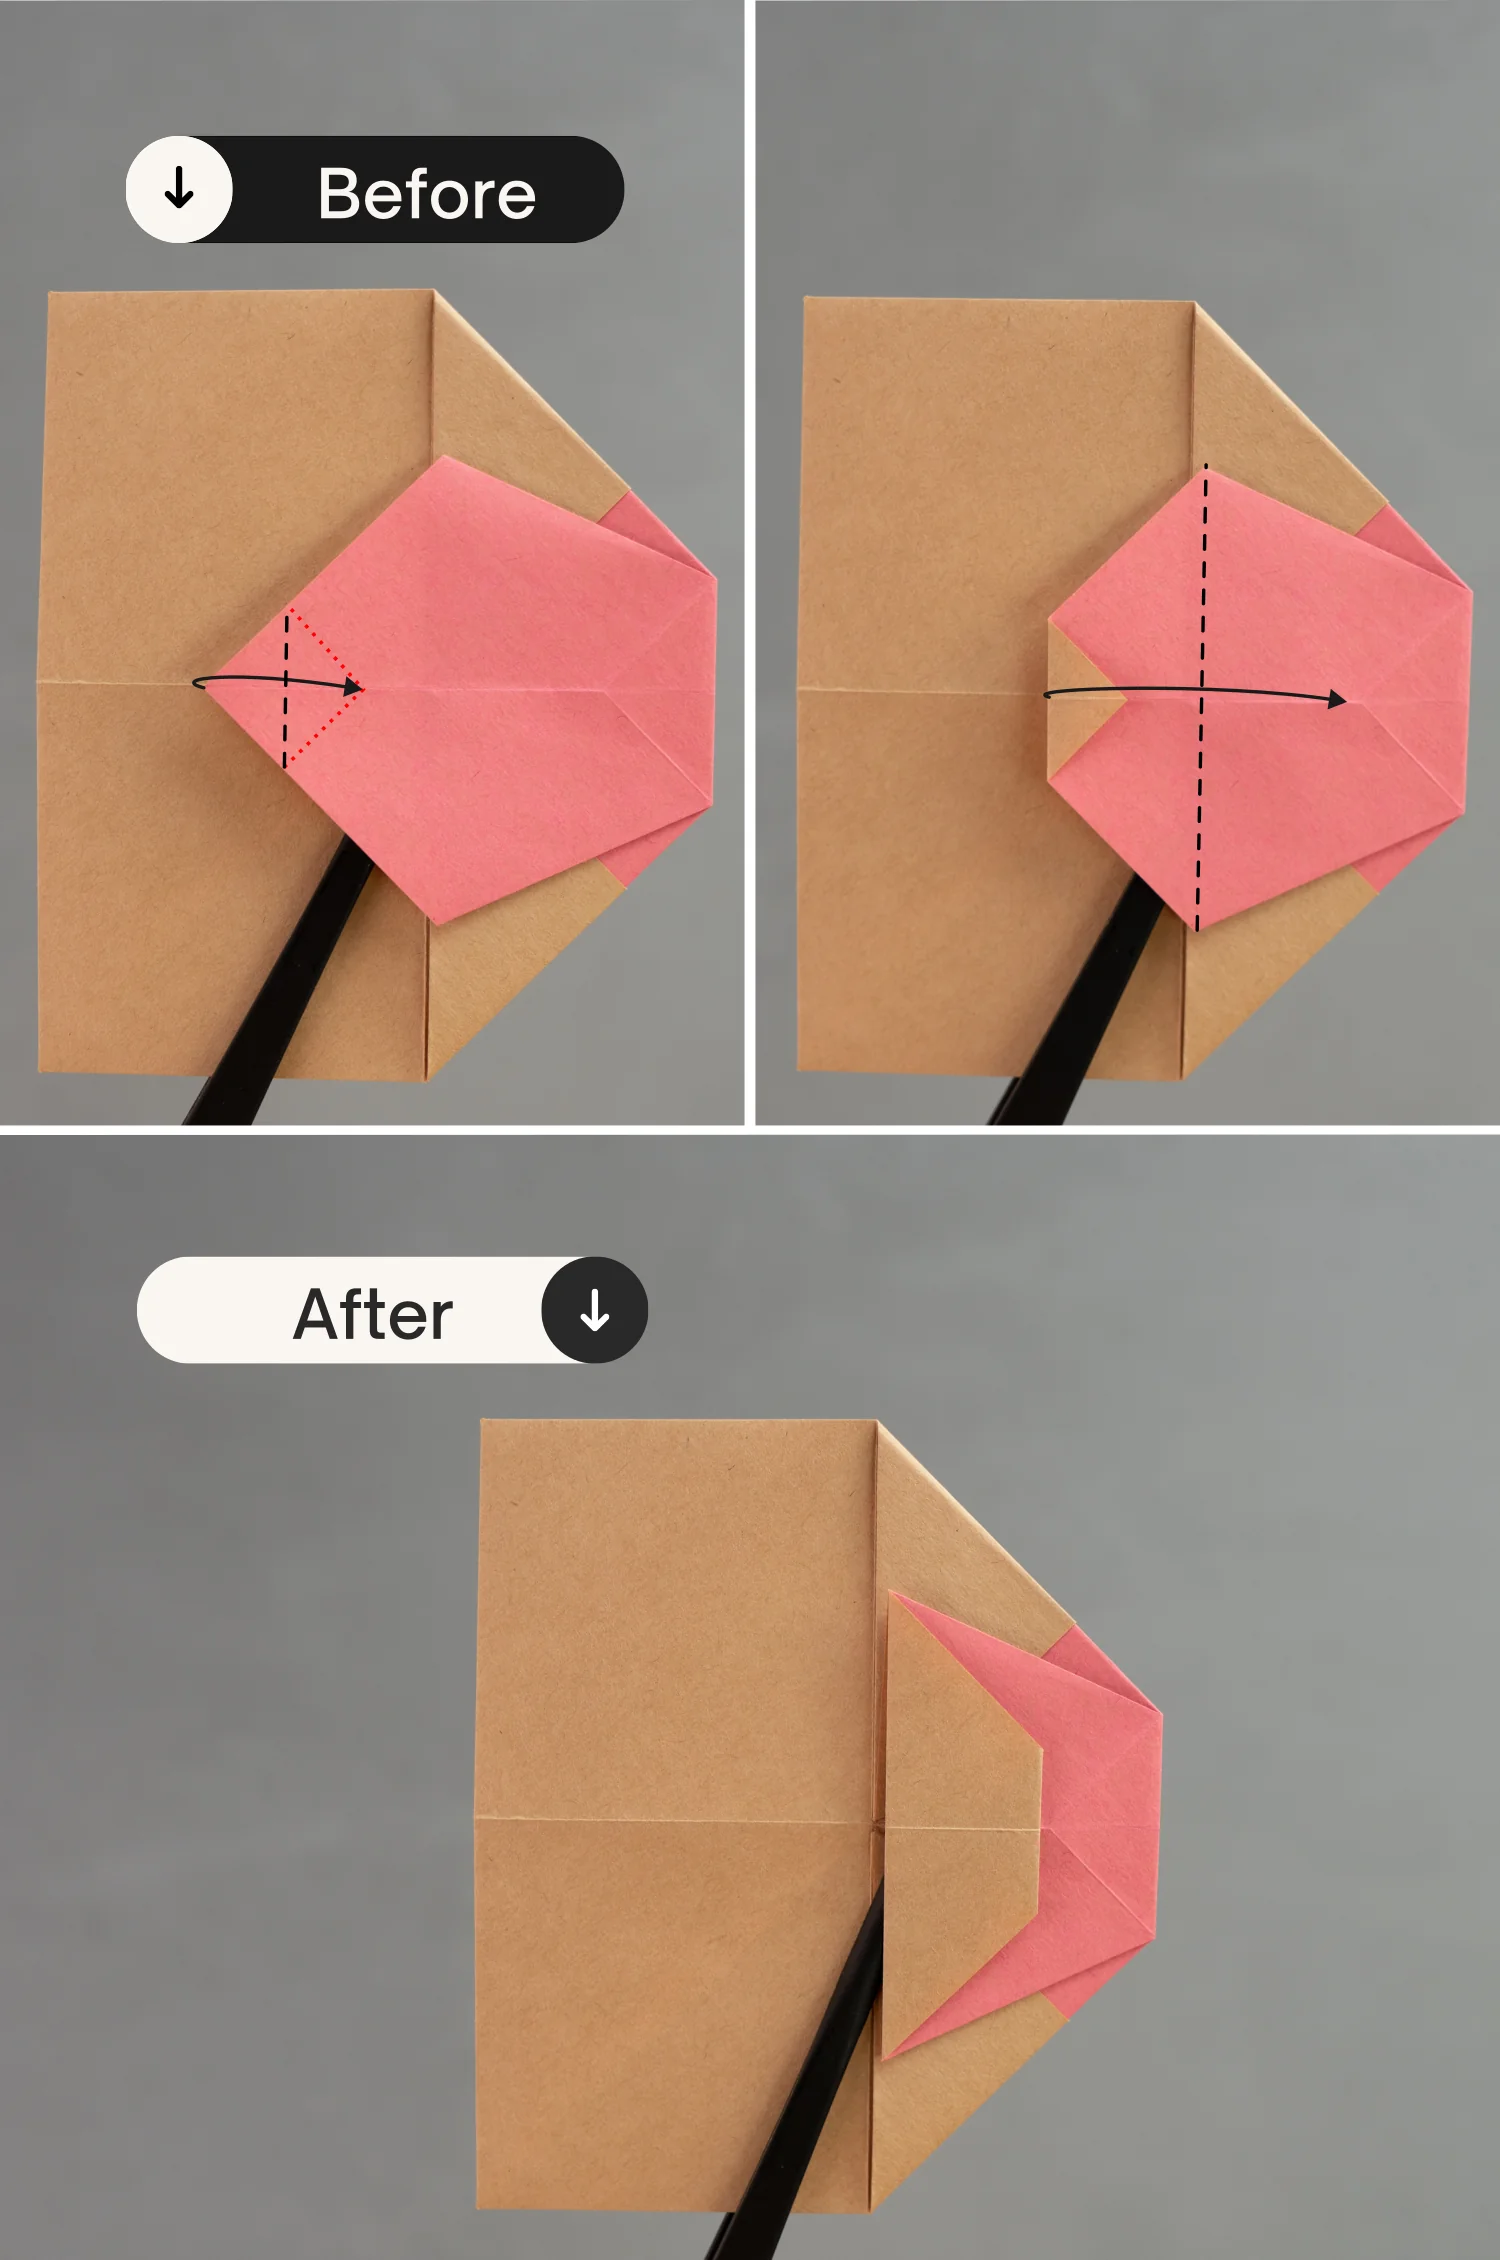
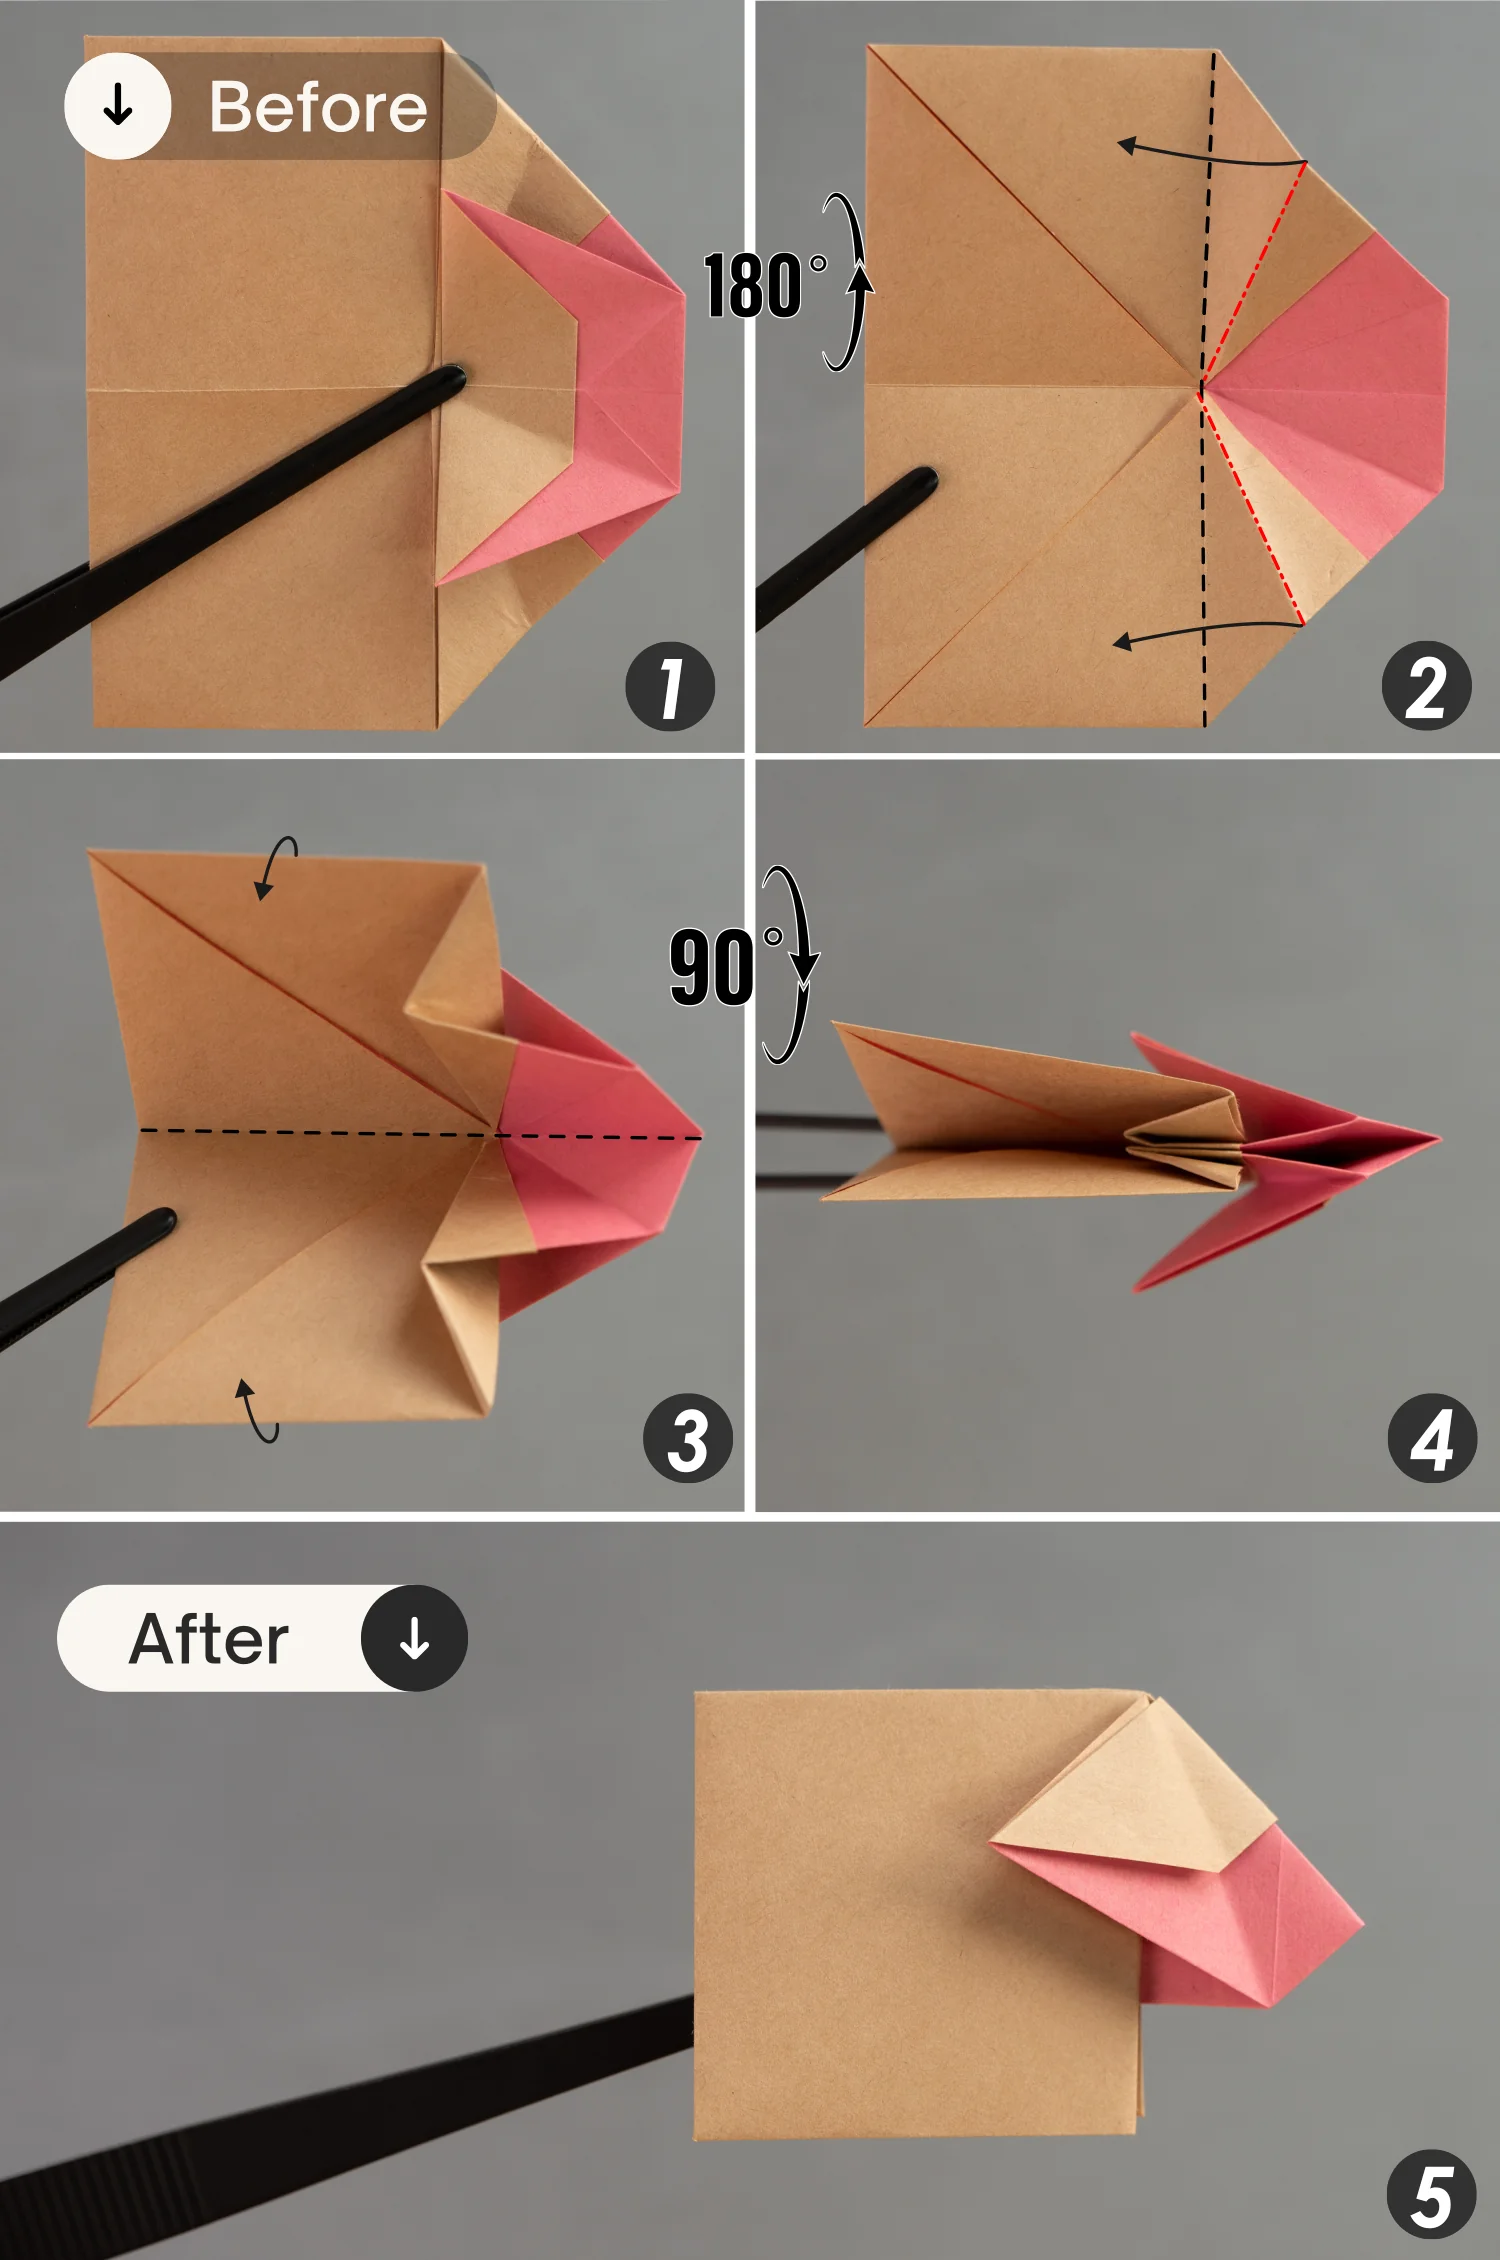
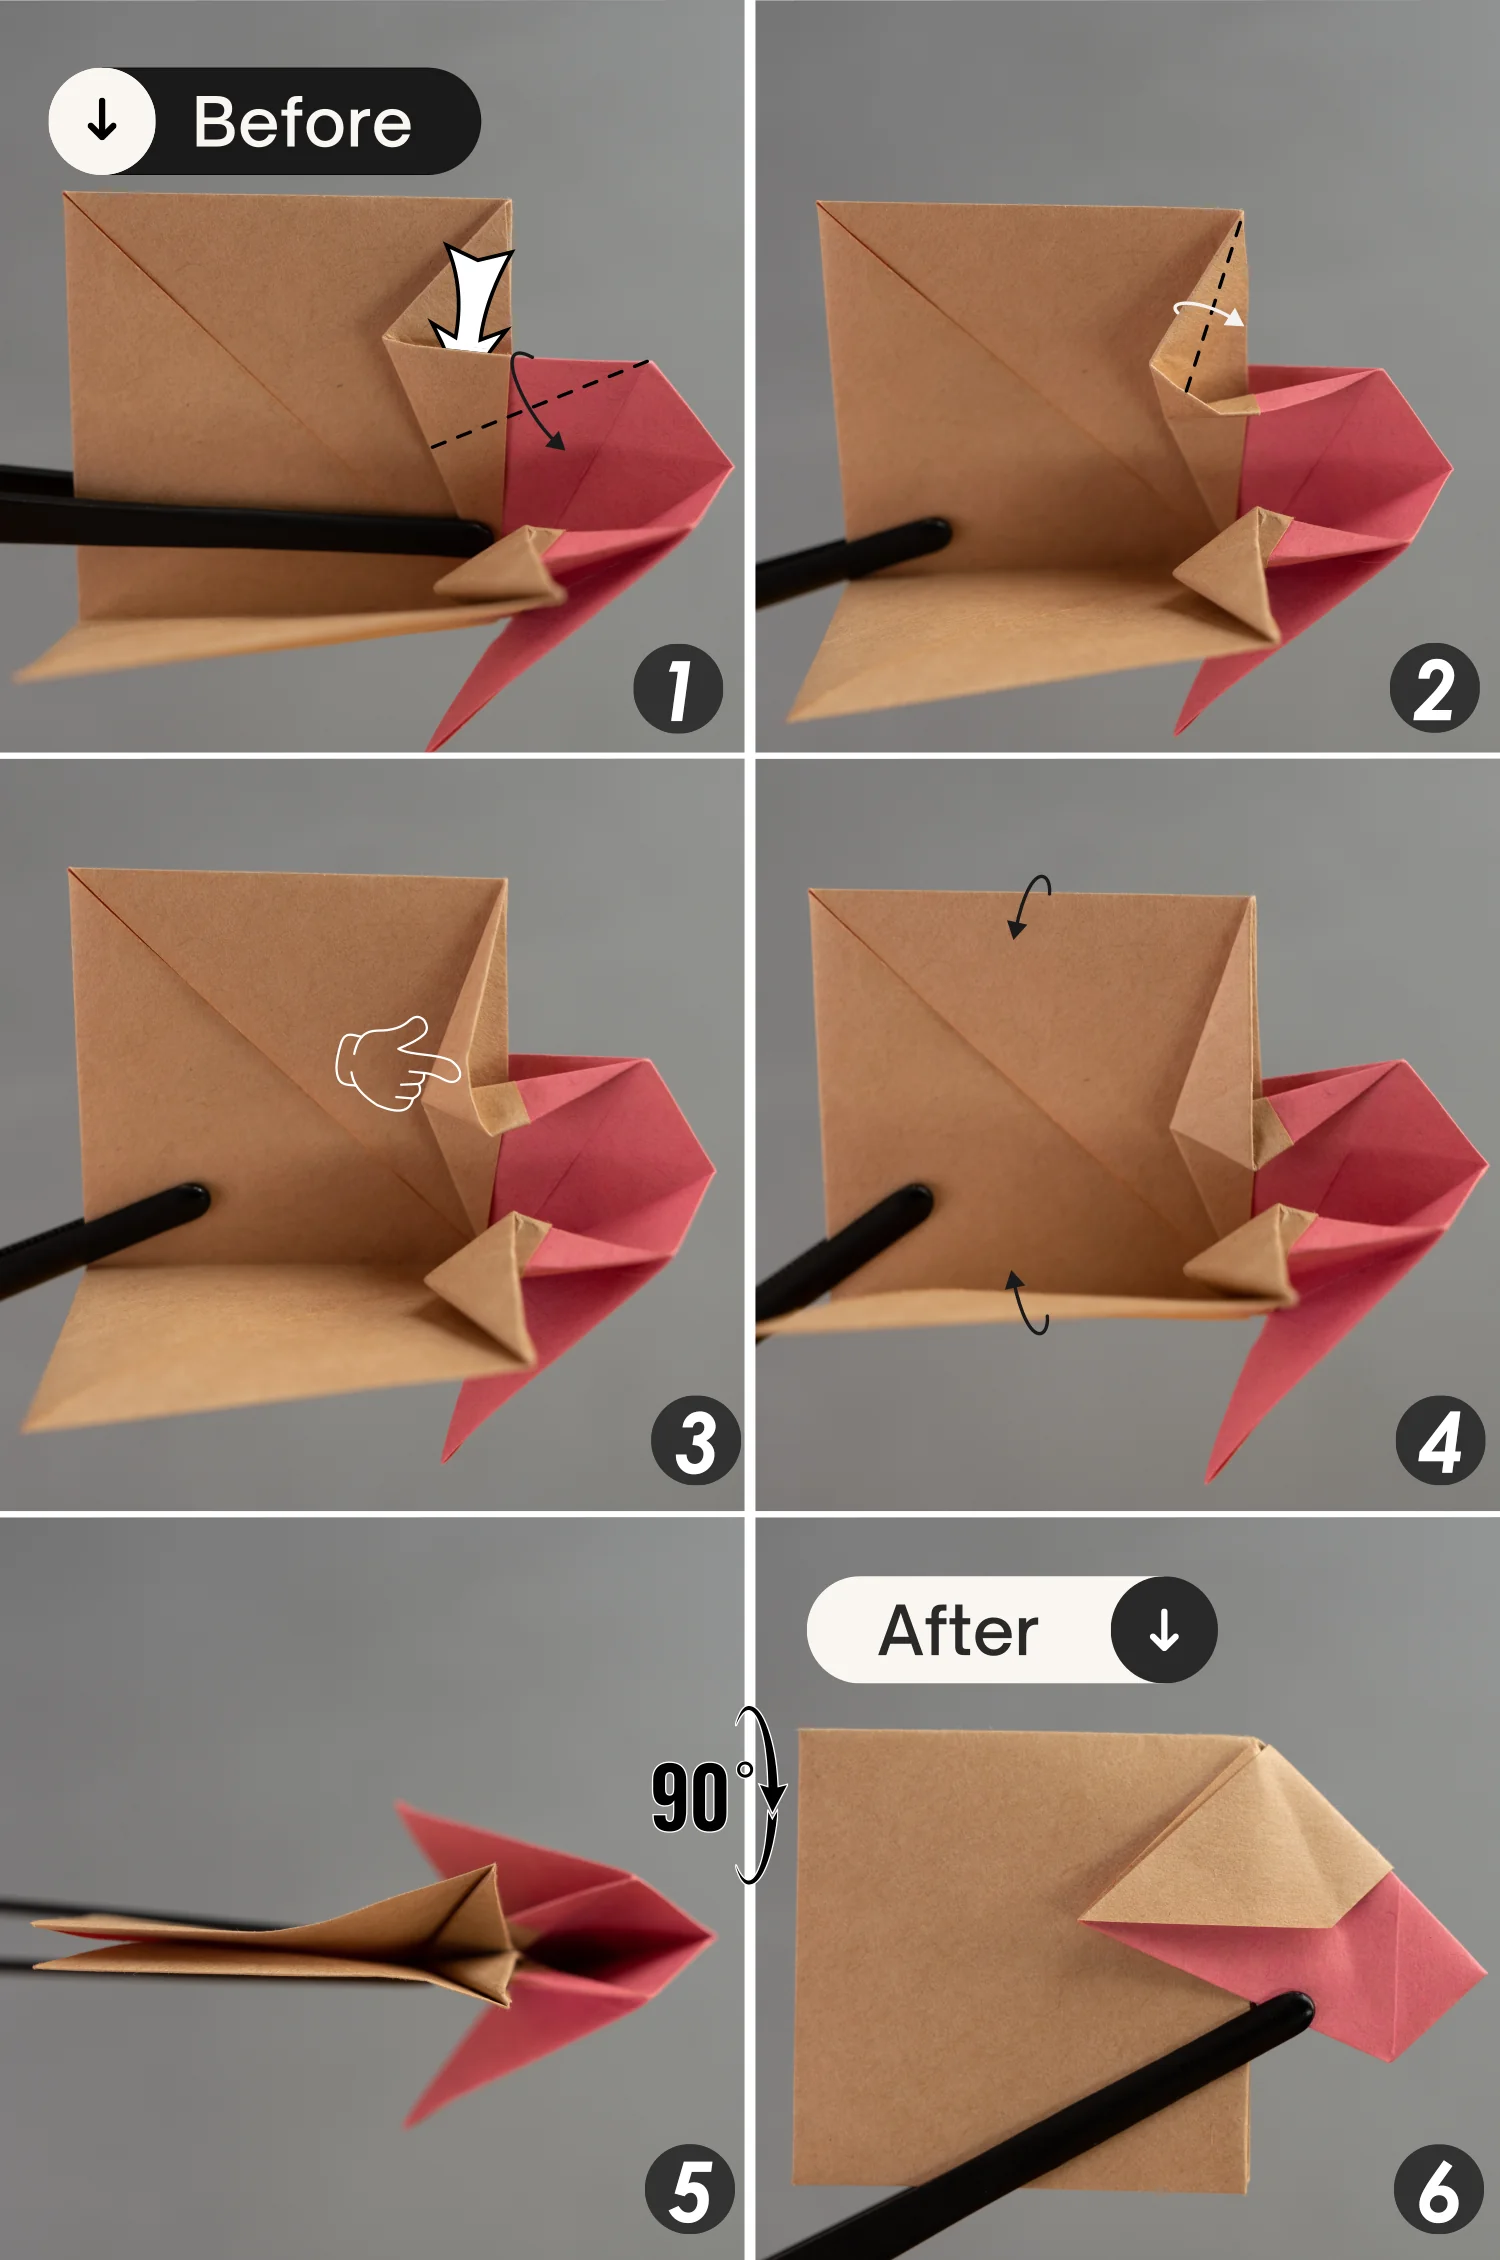
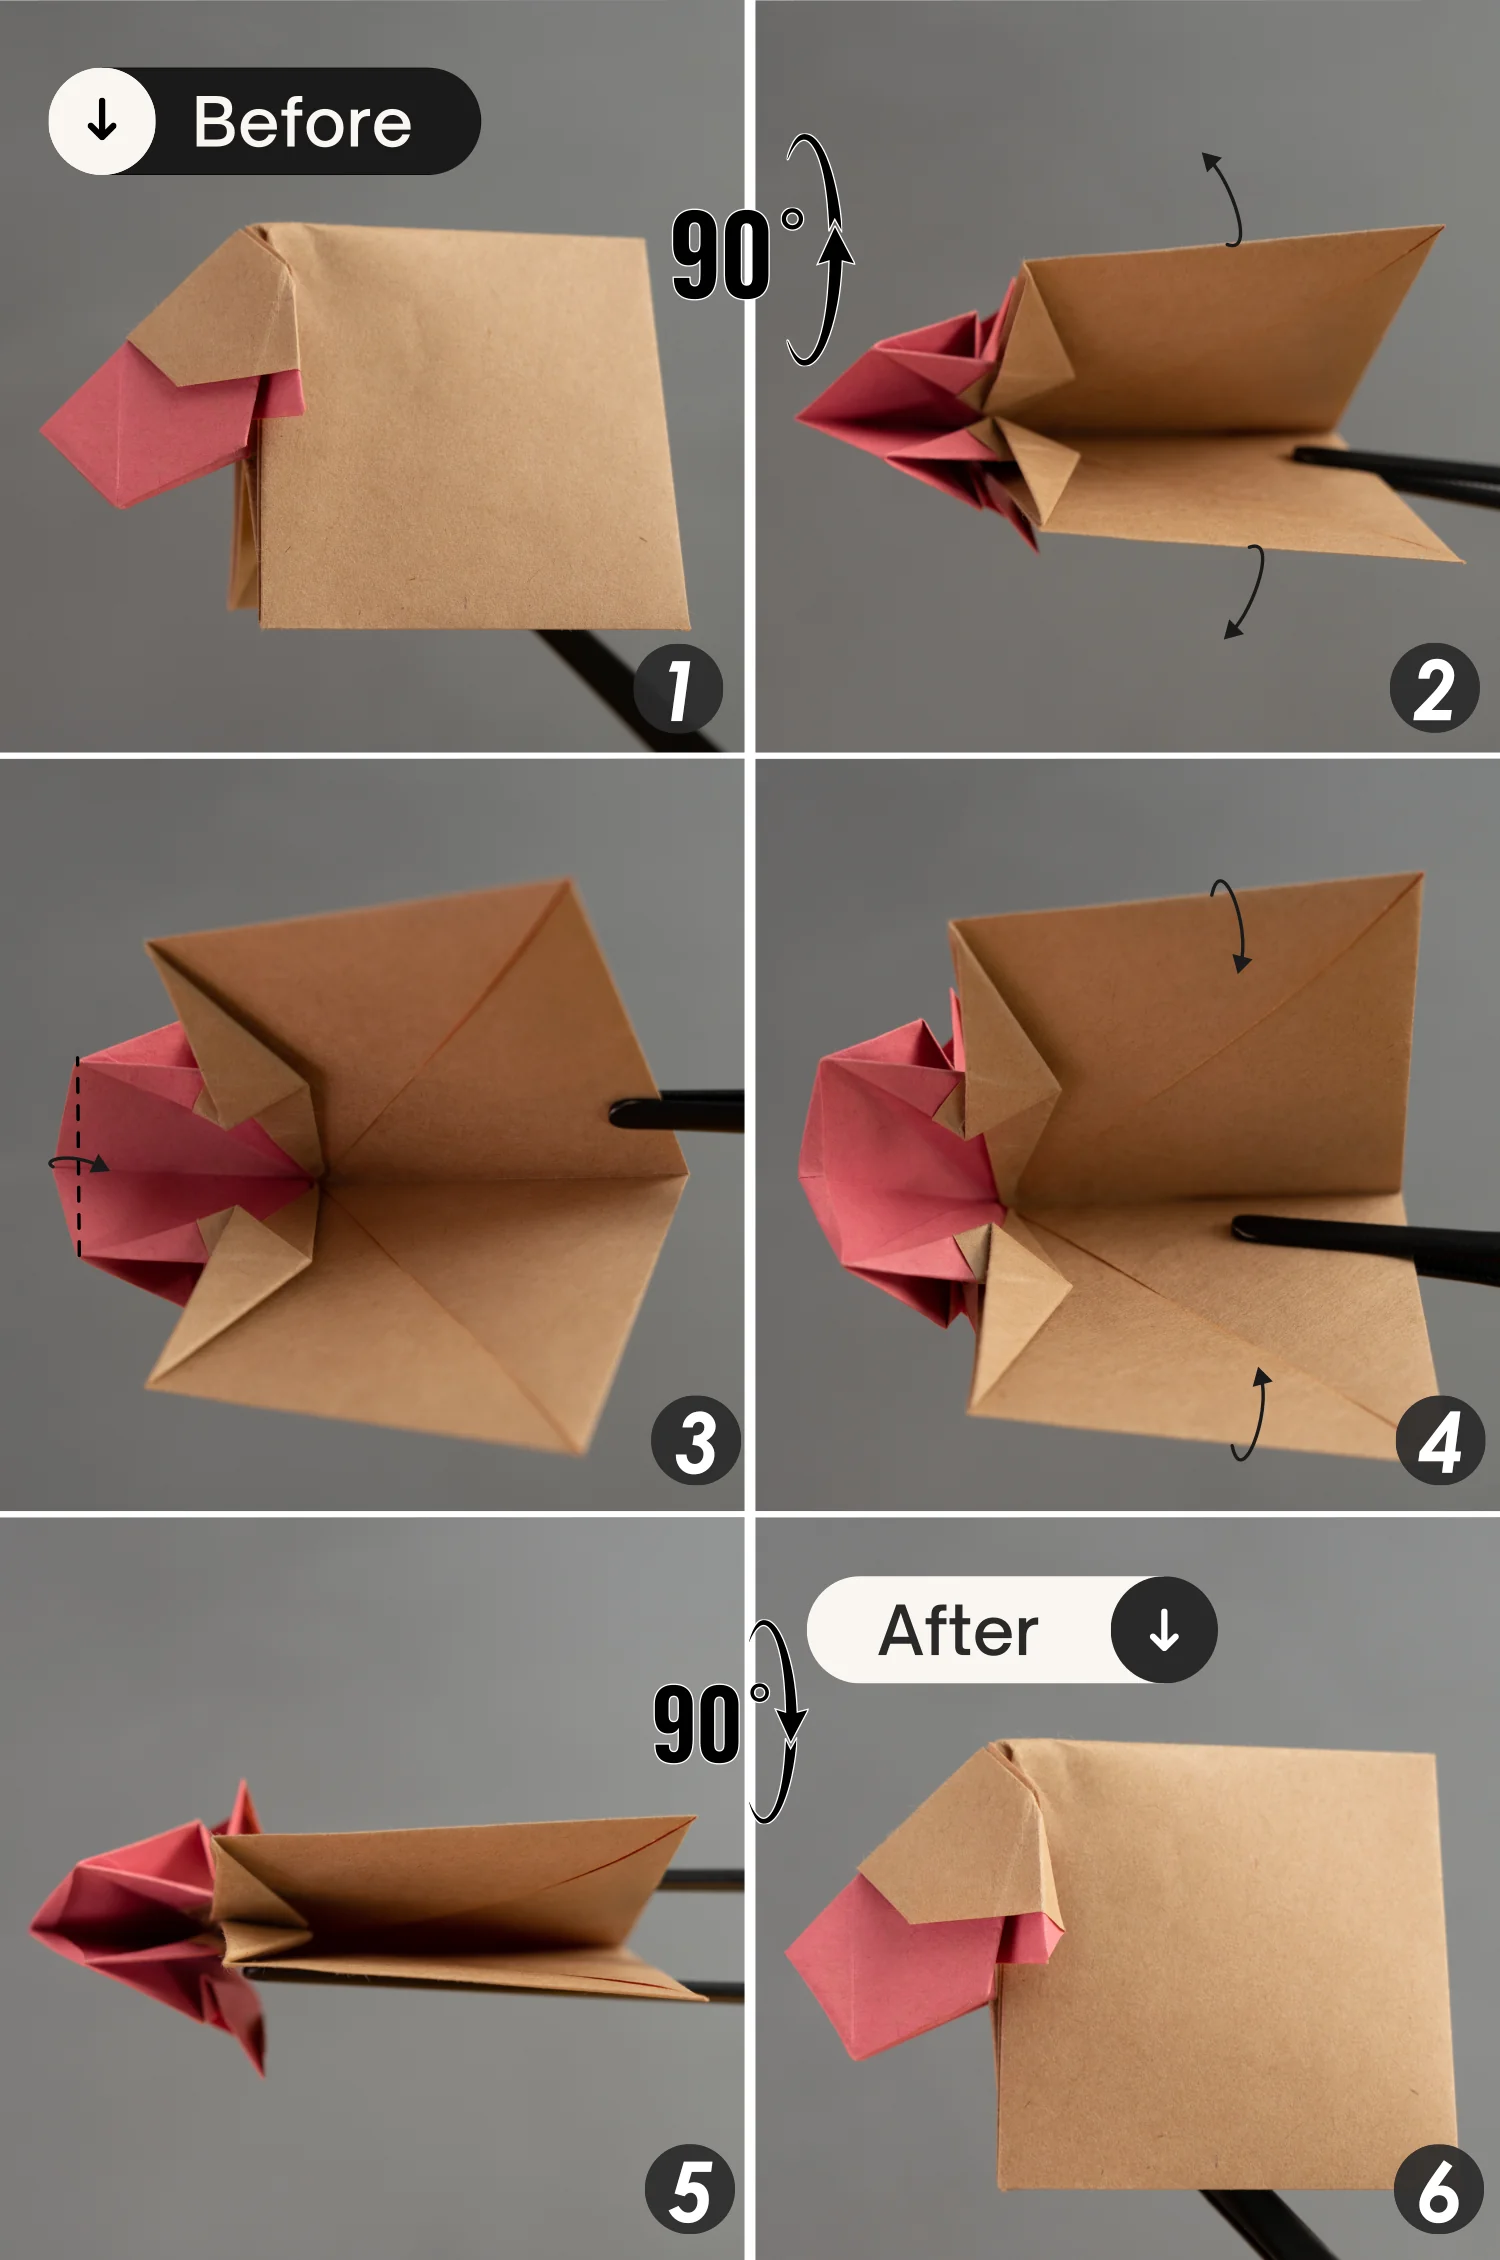
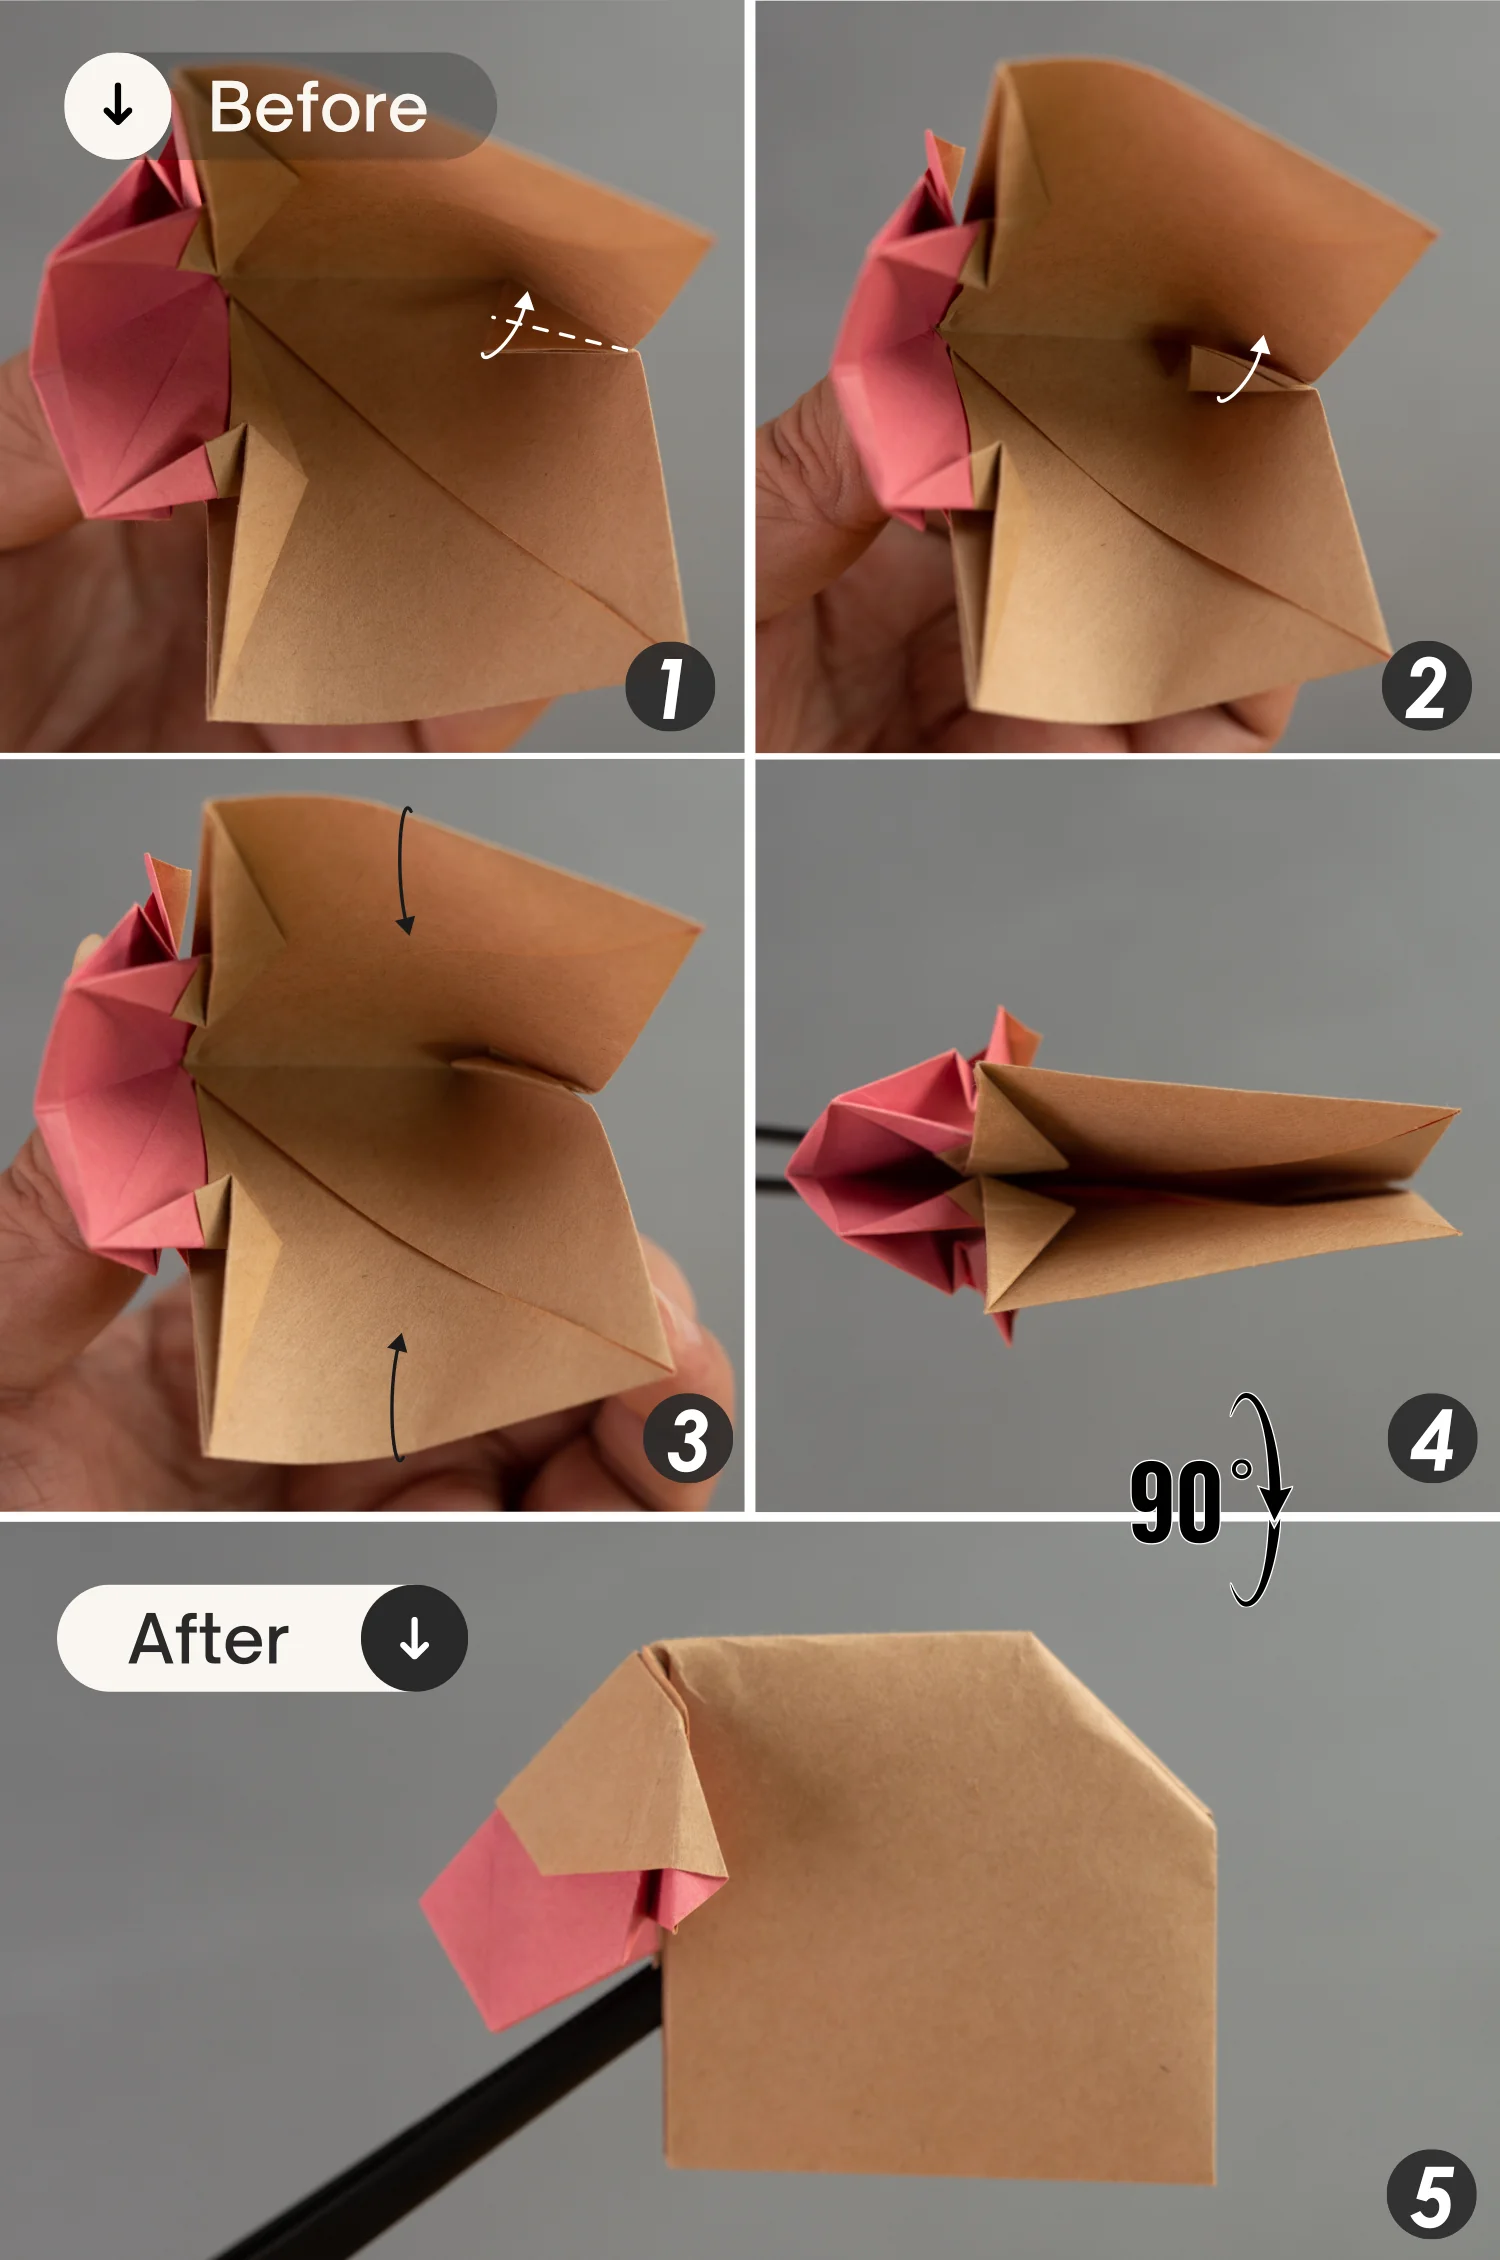
Step 10
Turn over the paper from back to front, then fold the creases indicated by the red dotted lines toward the left side along the black dotted line [pictures 1 and 2].
Next, bring the top and bottom edges together to close this opening, and finally, rotate the paper 90 degrees from front to back [pictures 3 to 5].
At this point, we can see the prototype of the origami sheep.
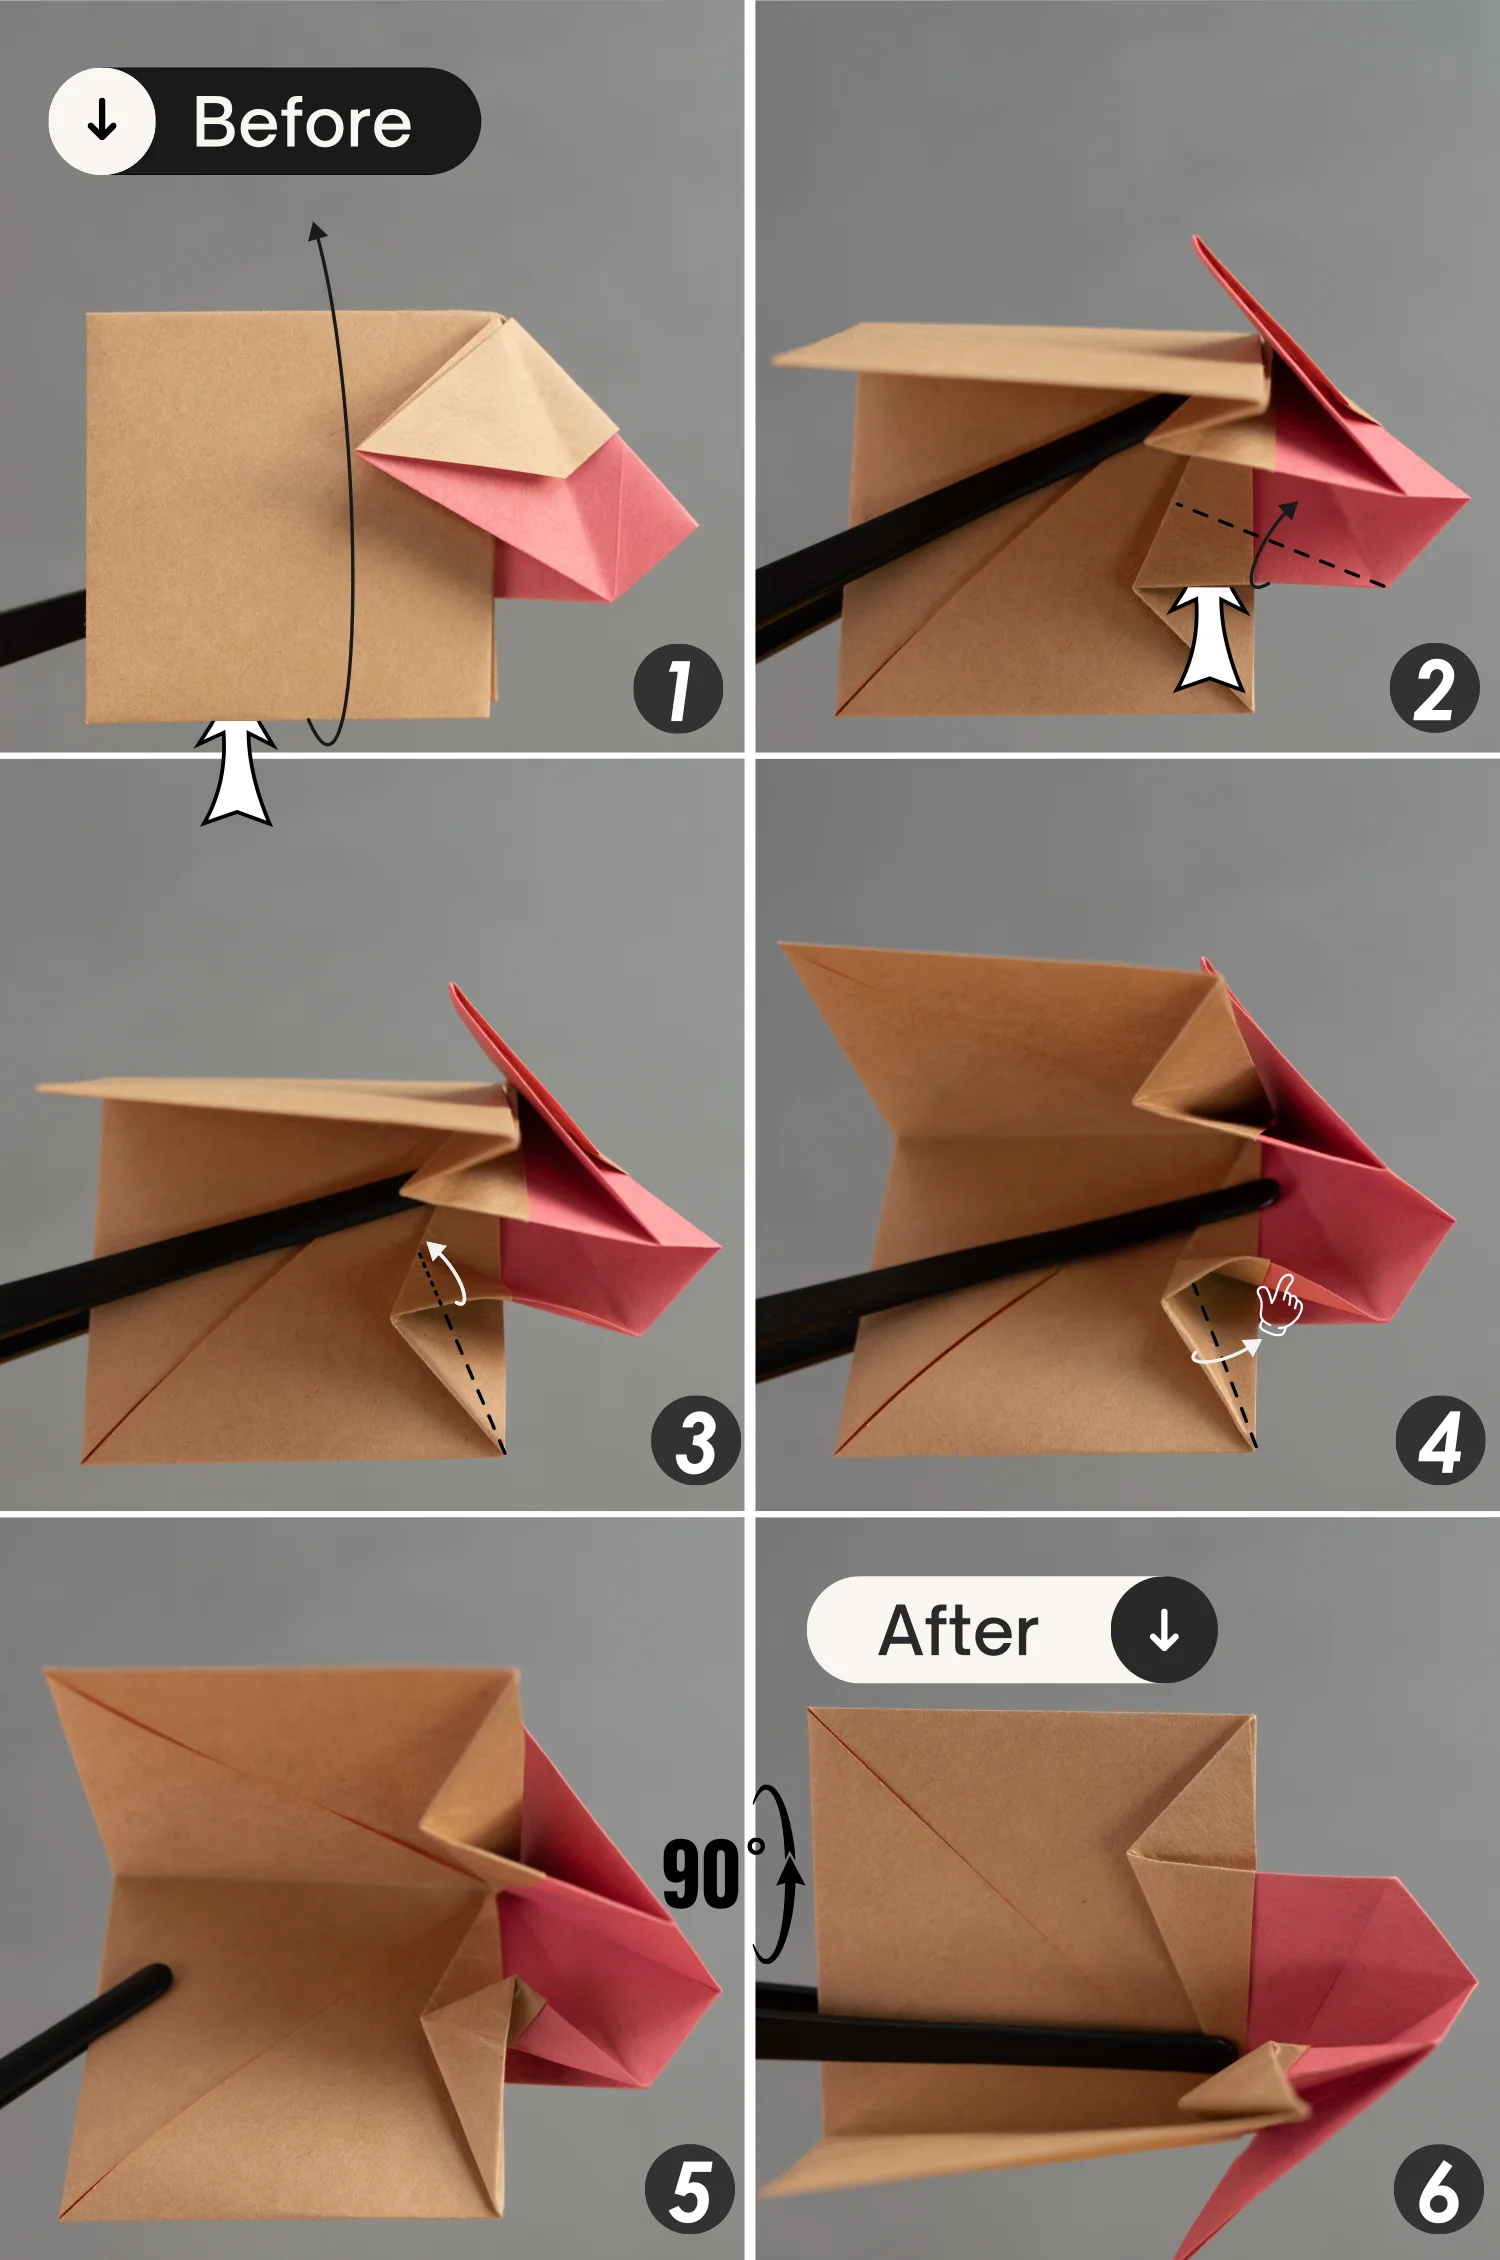
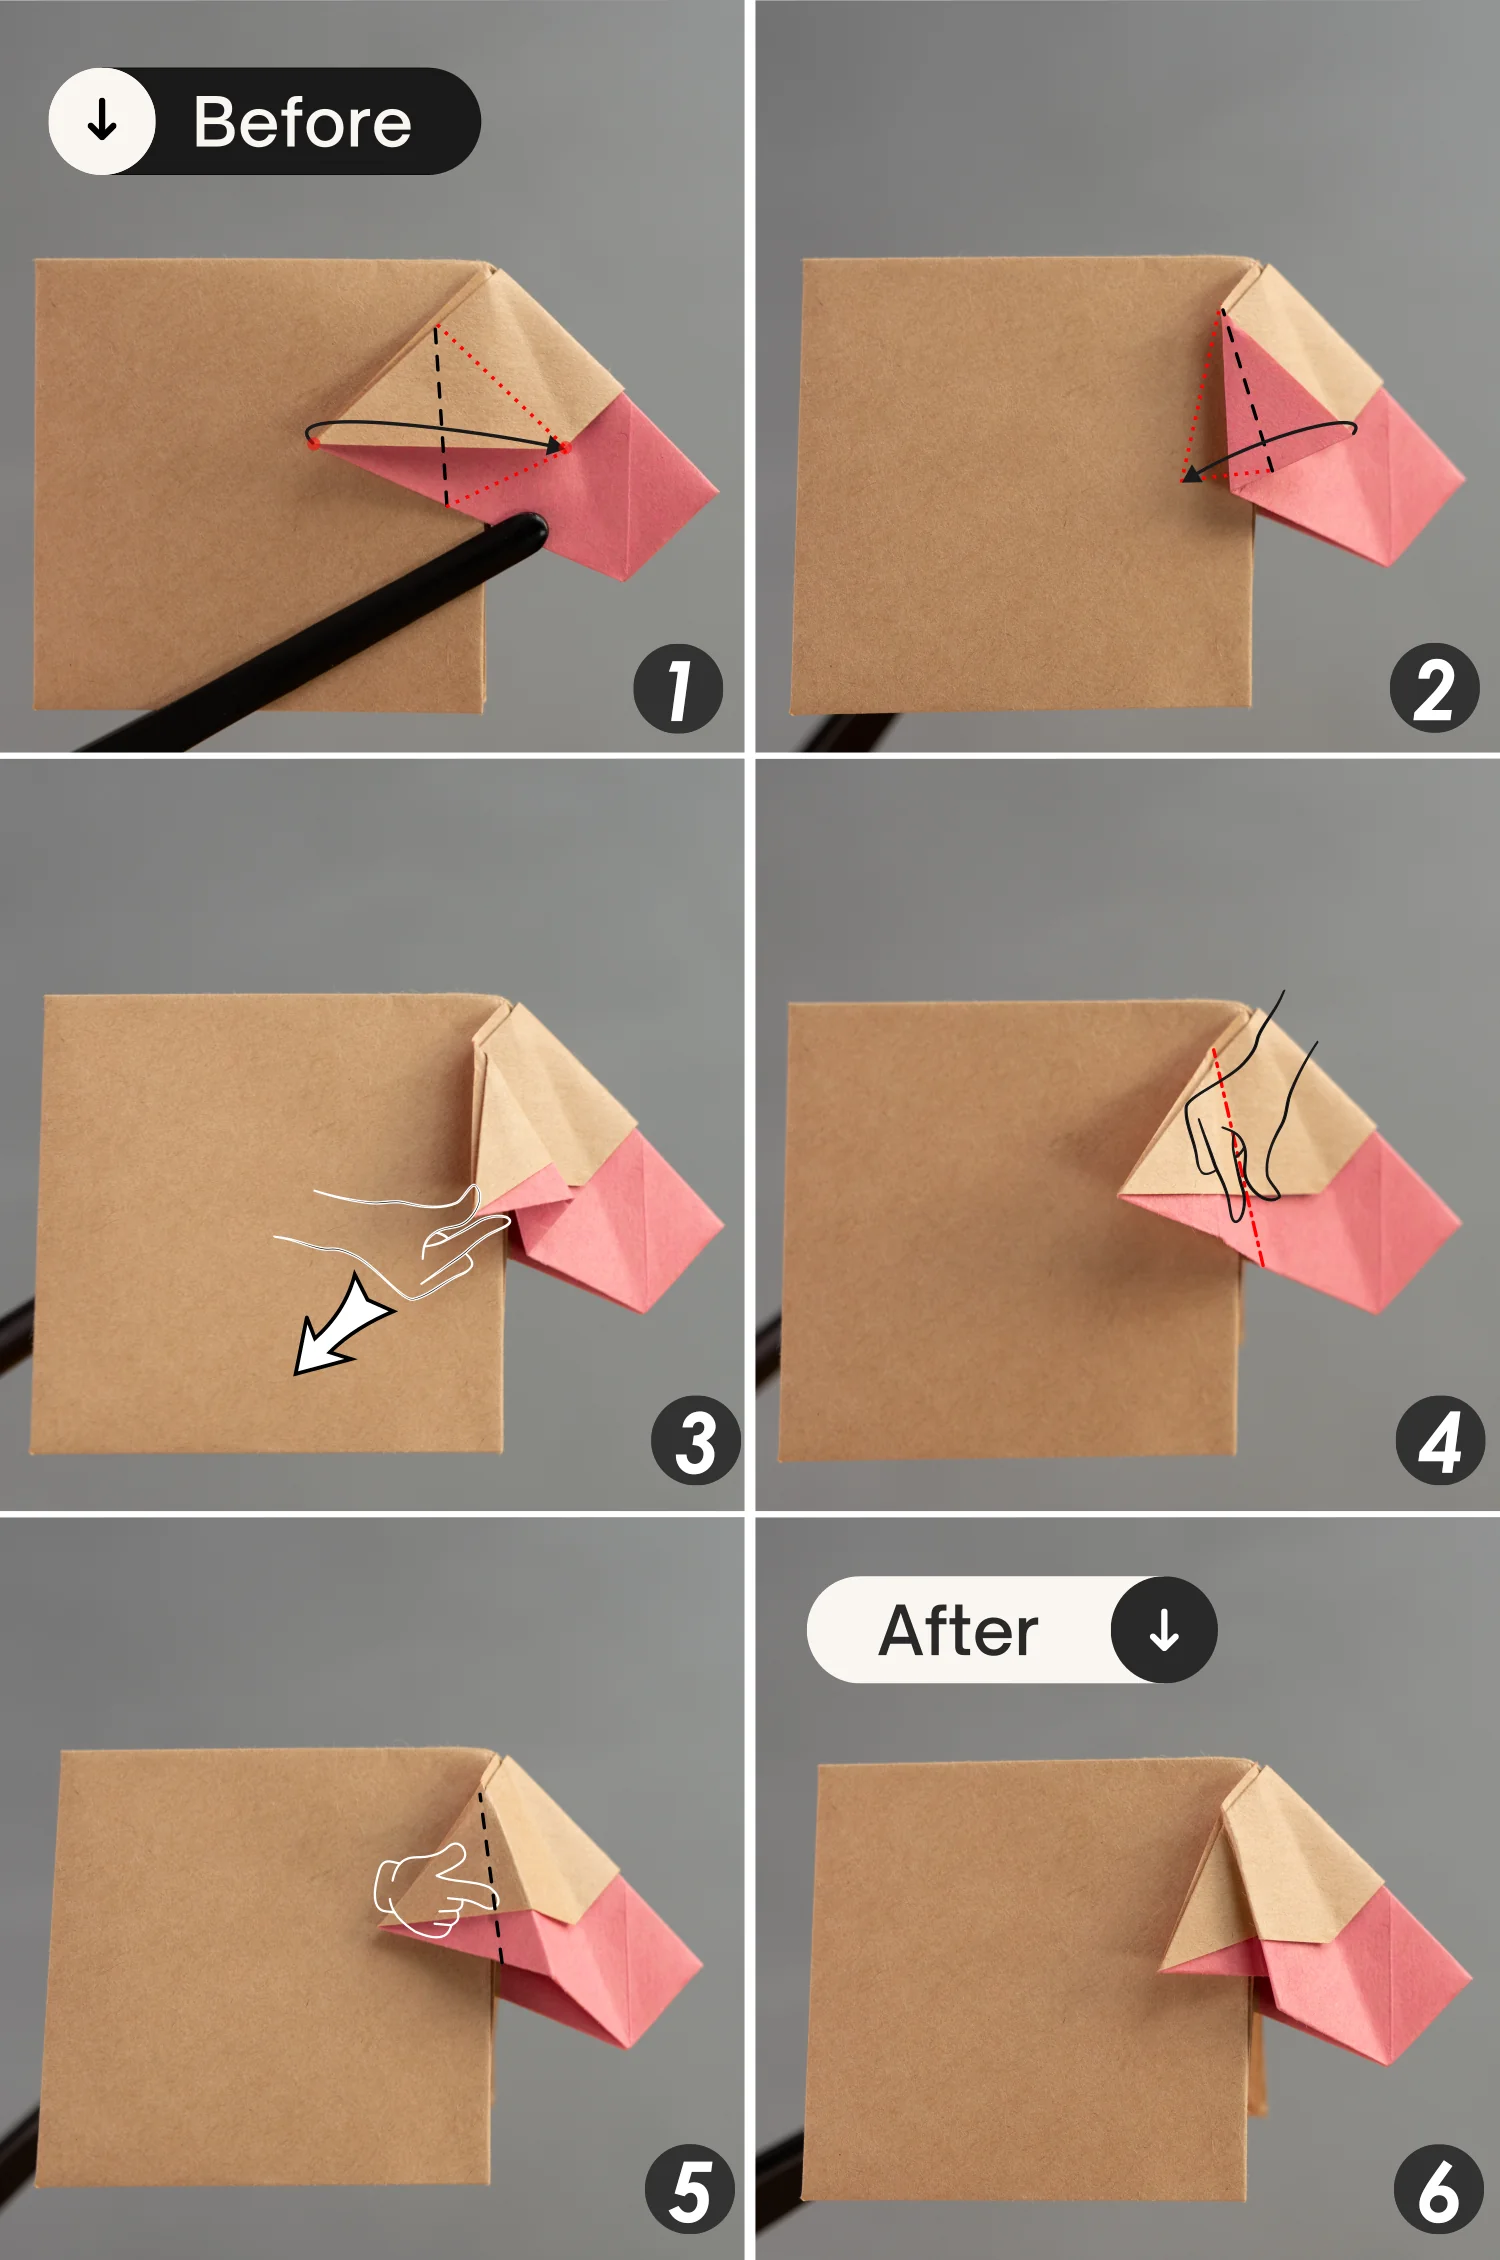
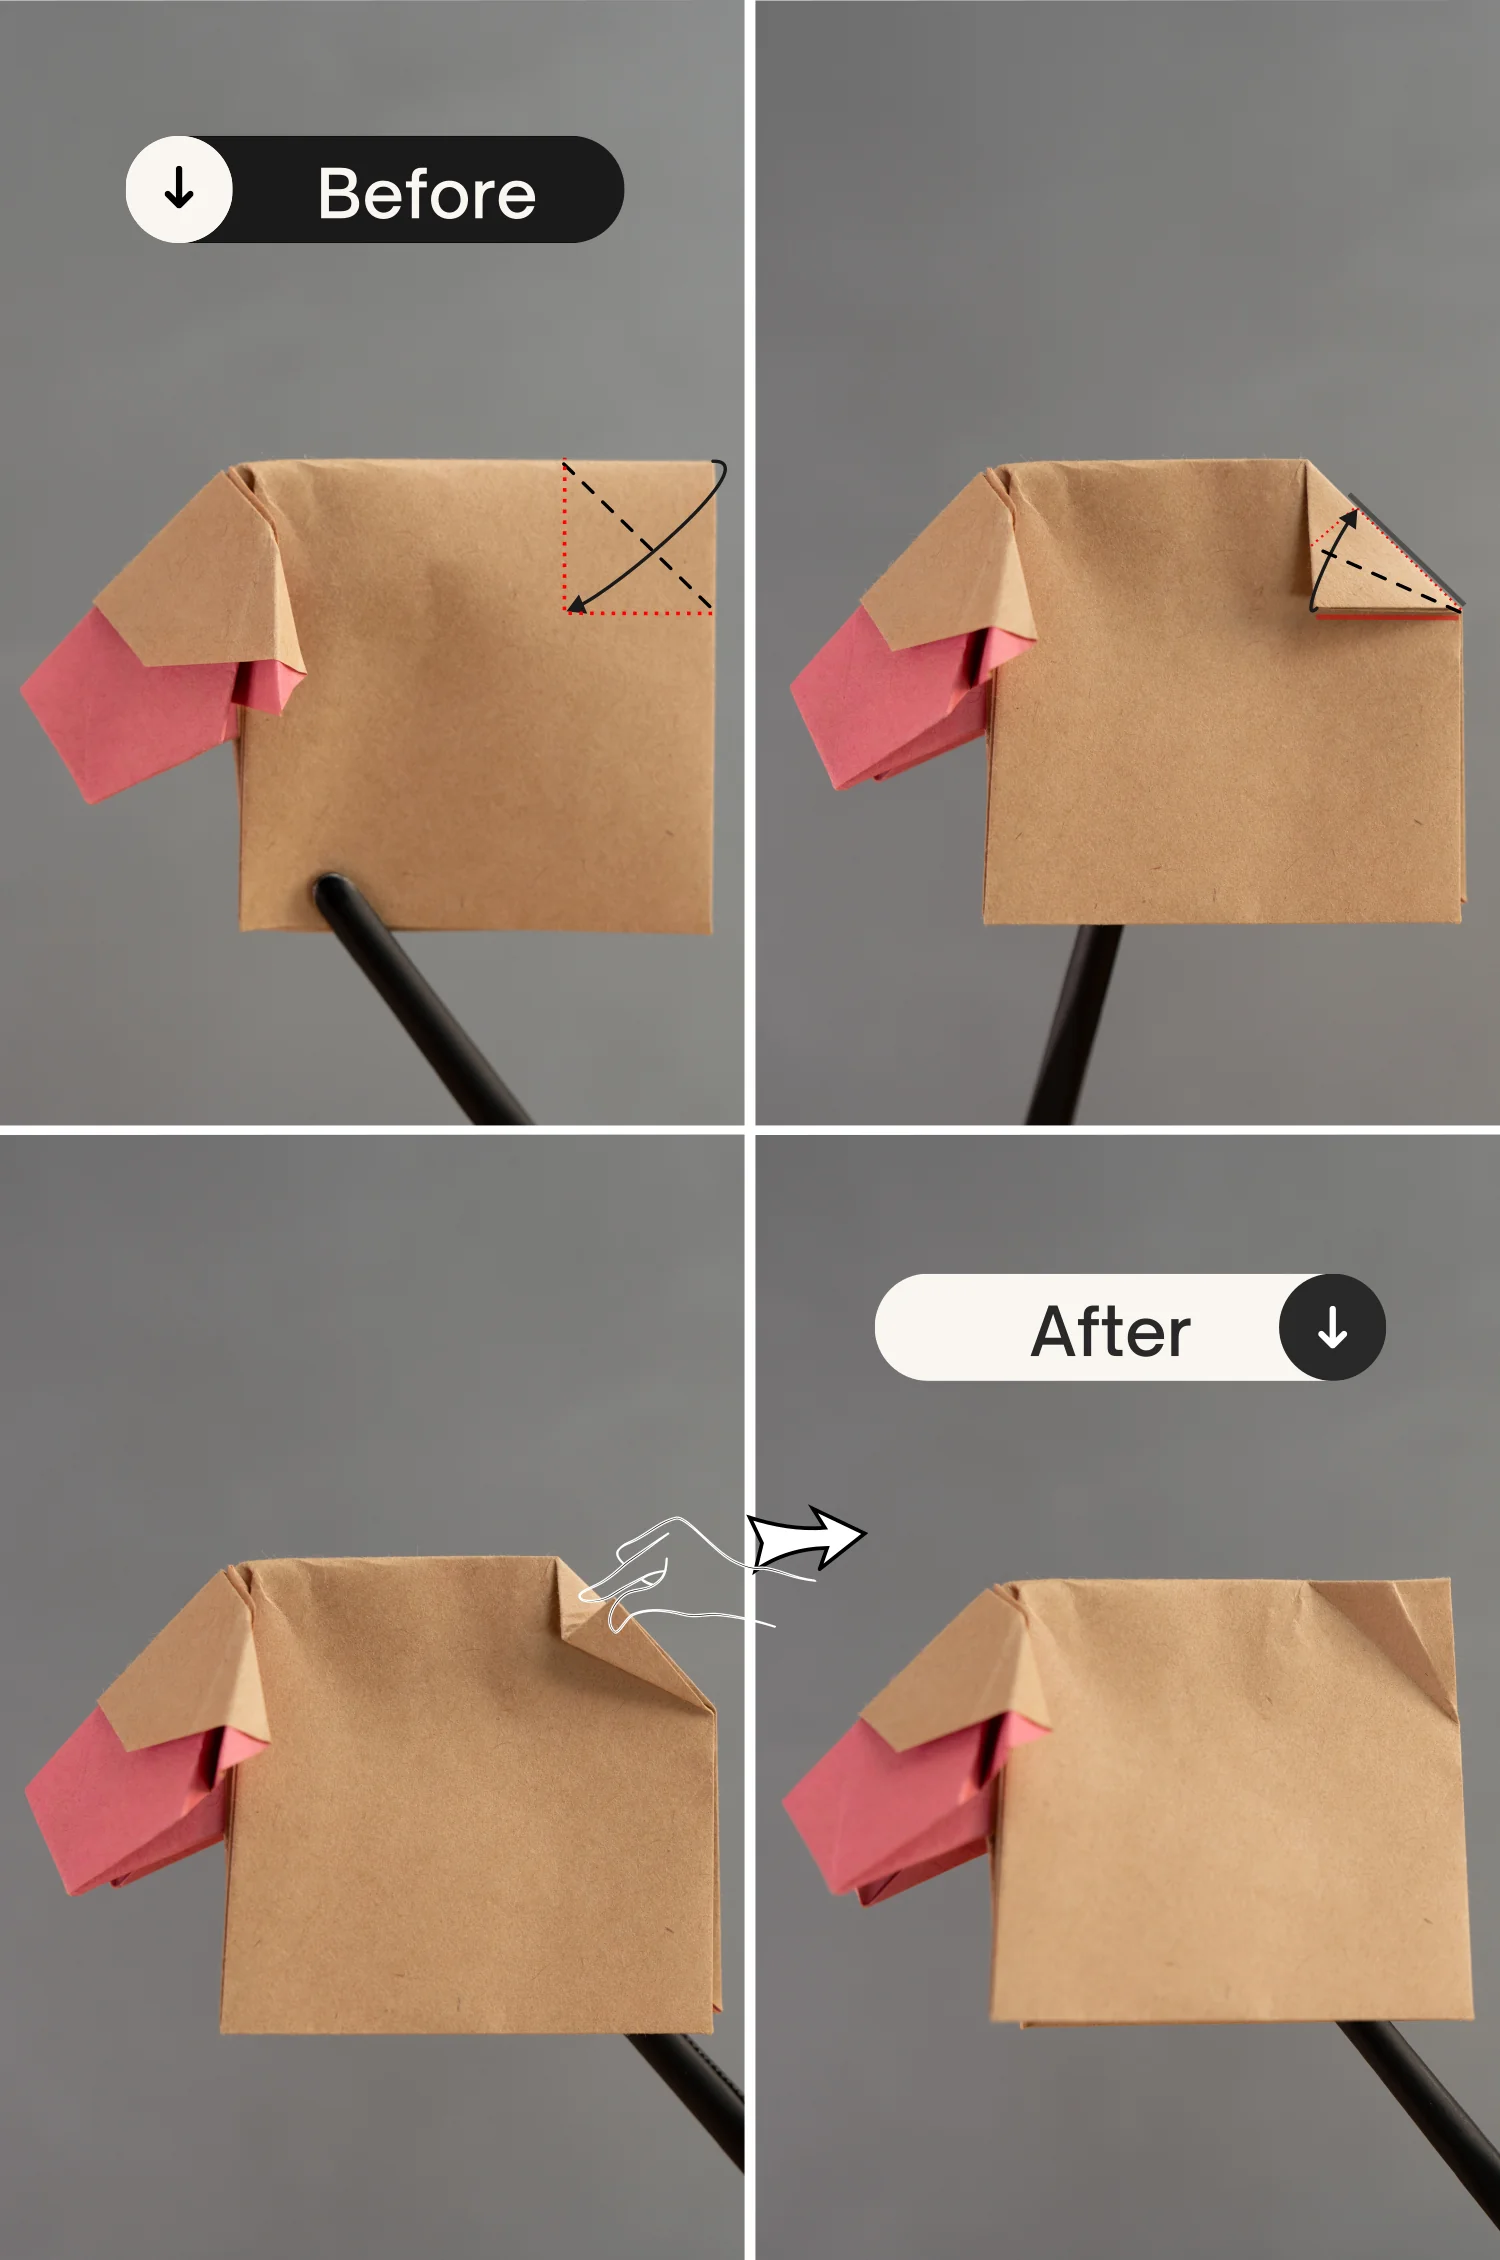
Step 11
Bring up the top layer of the square on the left, then lift the layer above the arrow in picture 2 and fold it up along the dotted line.
As the third and fourth pictures show, the corner will also be lifted when you lift that layer, and then just squash this corner along the dotted line.
Finally, rotate the paper 90 degrees from back to front.
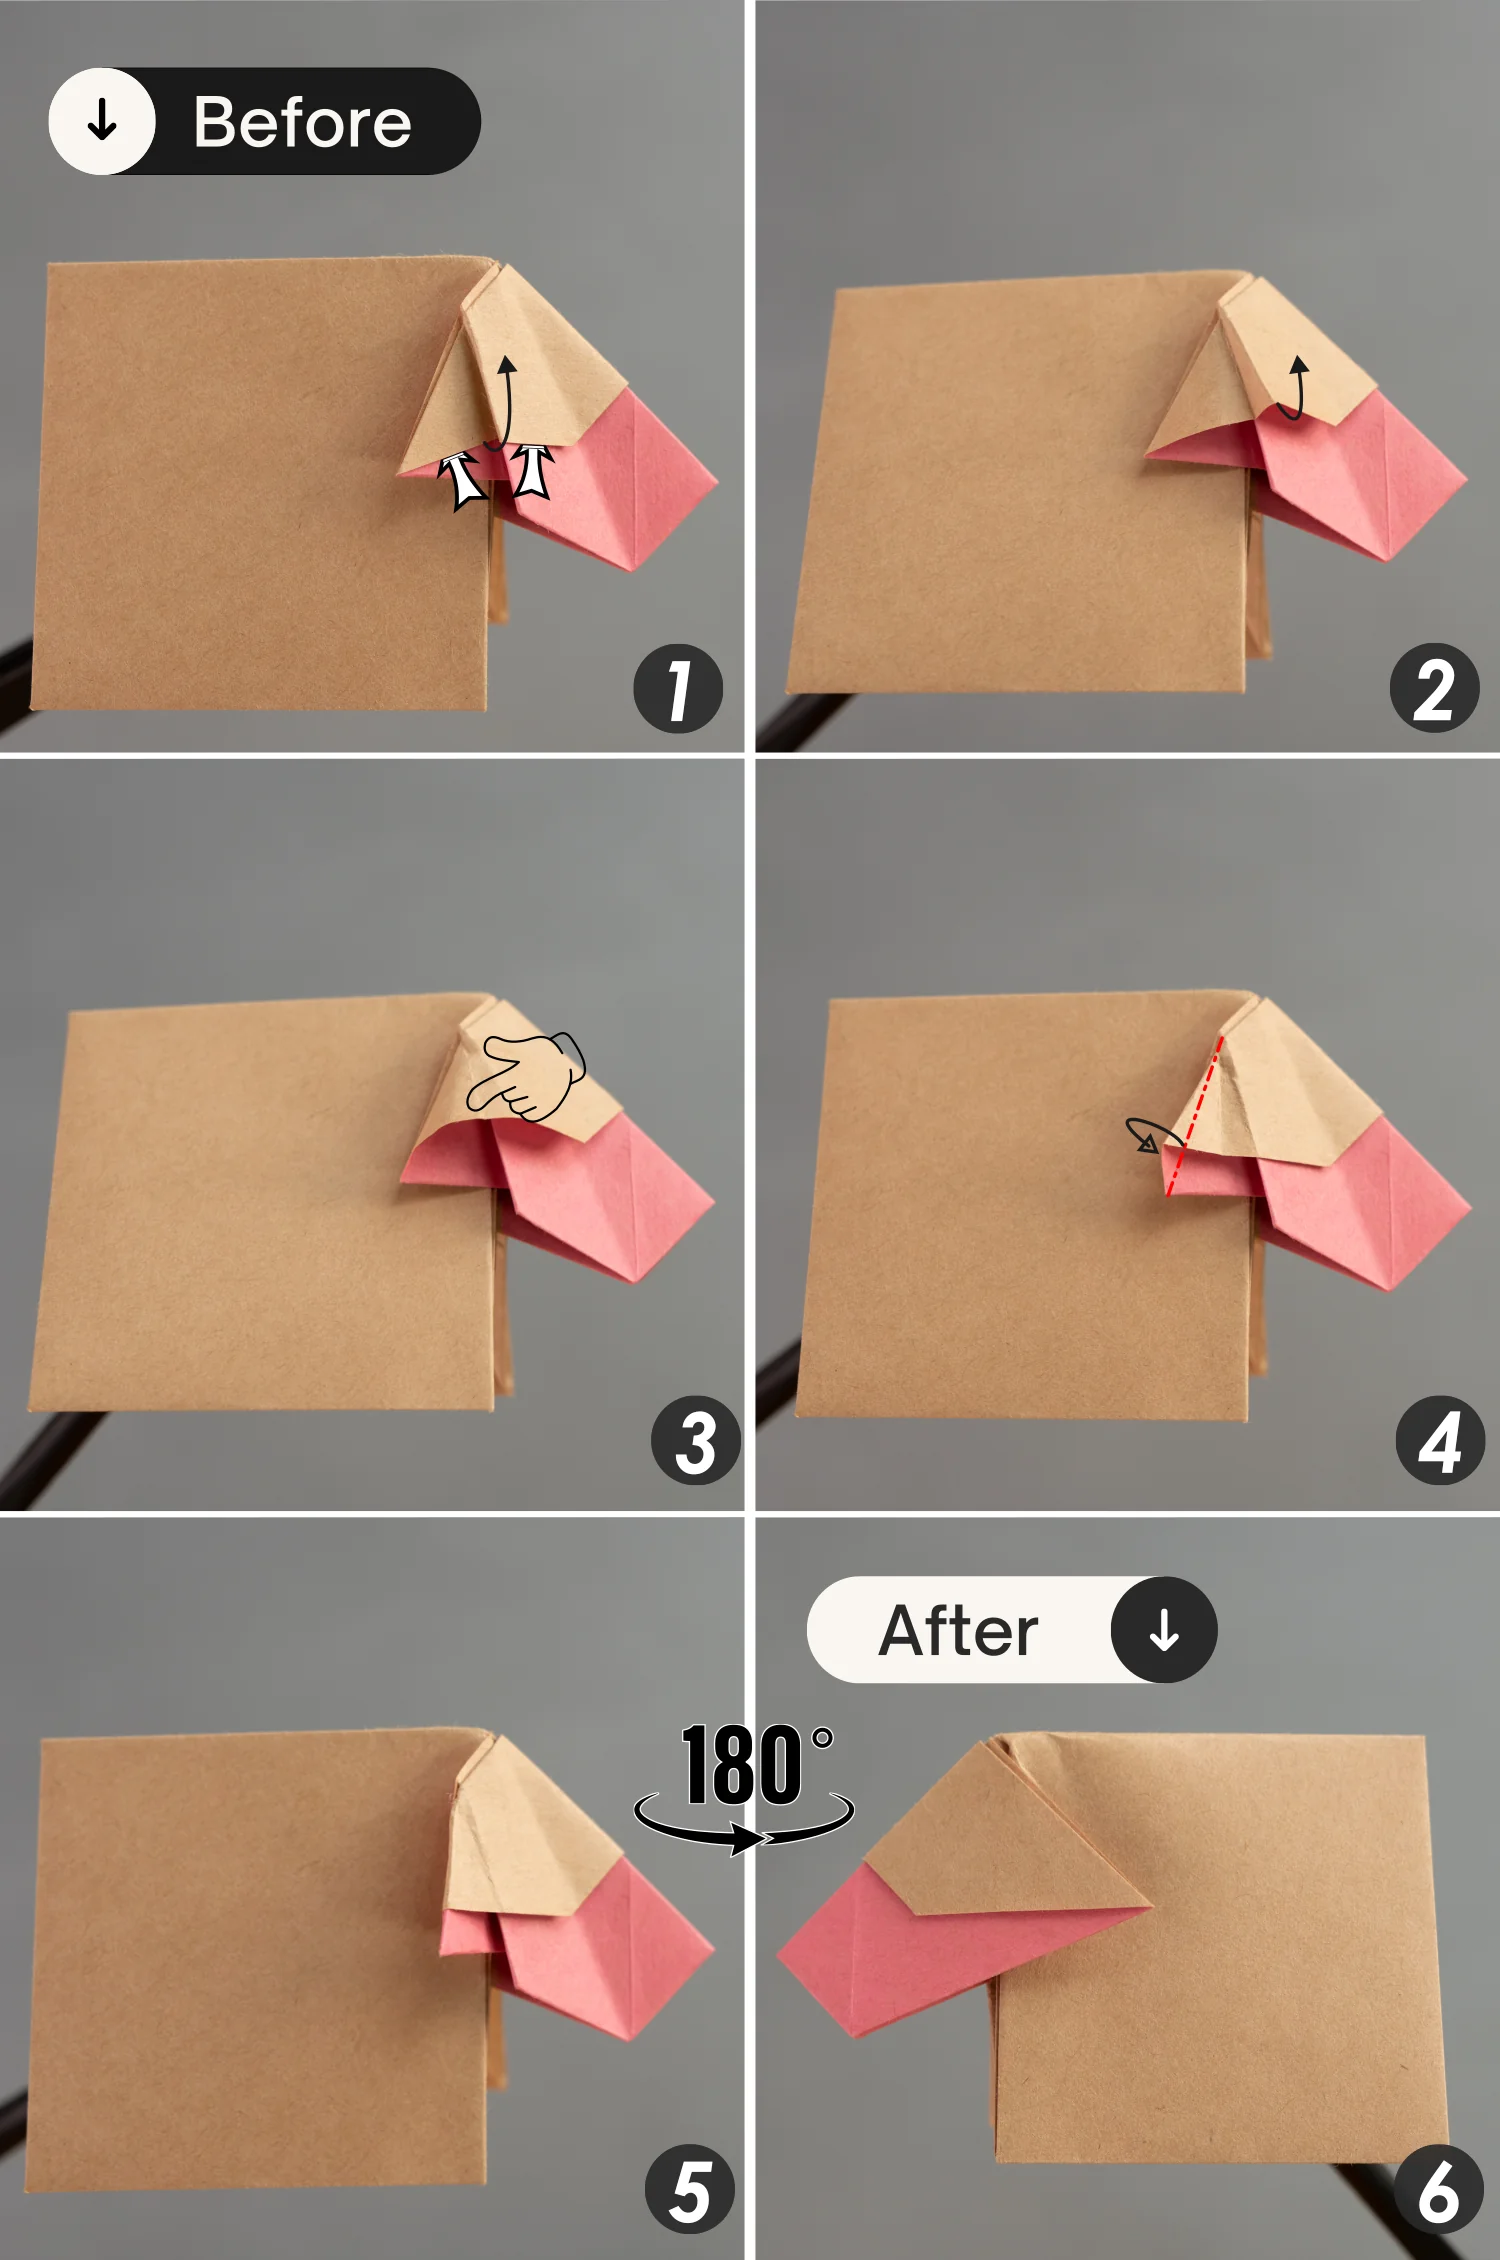
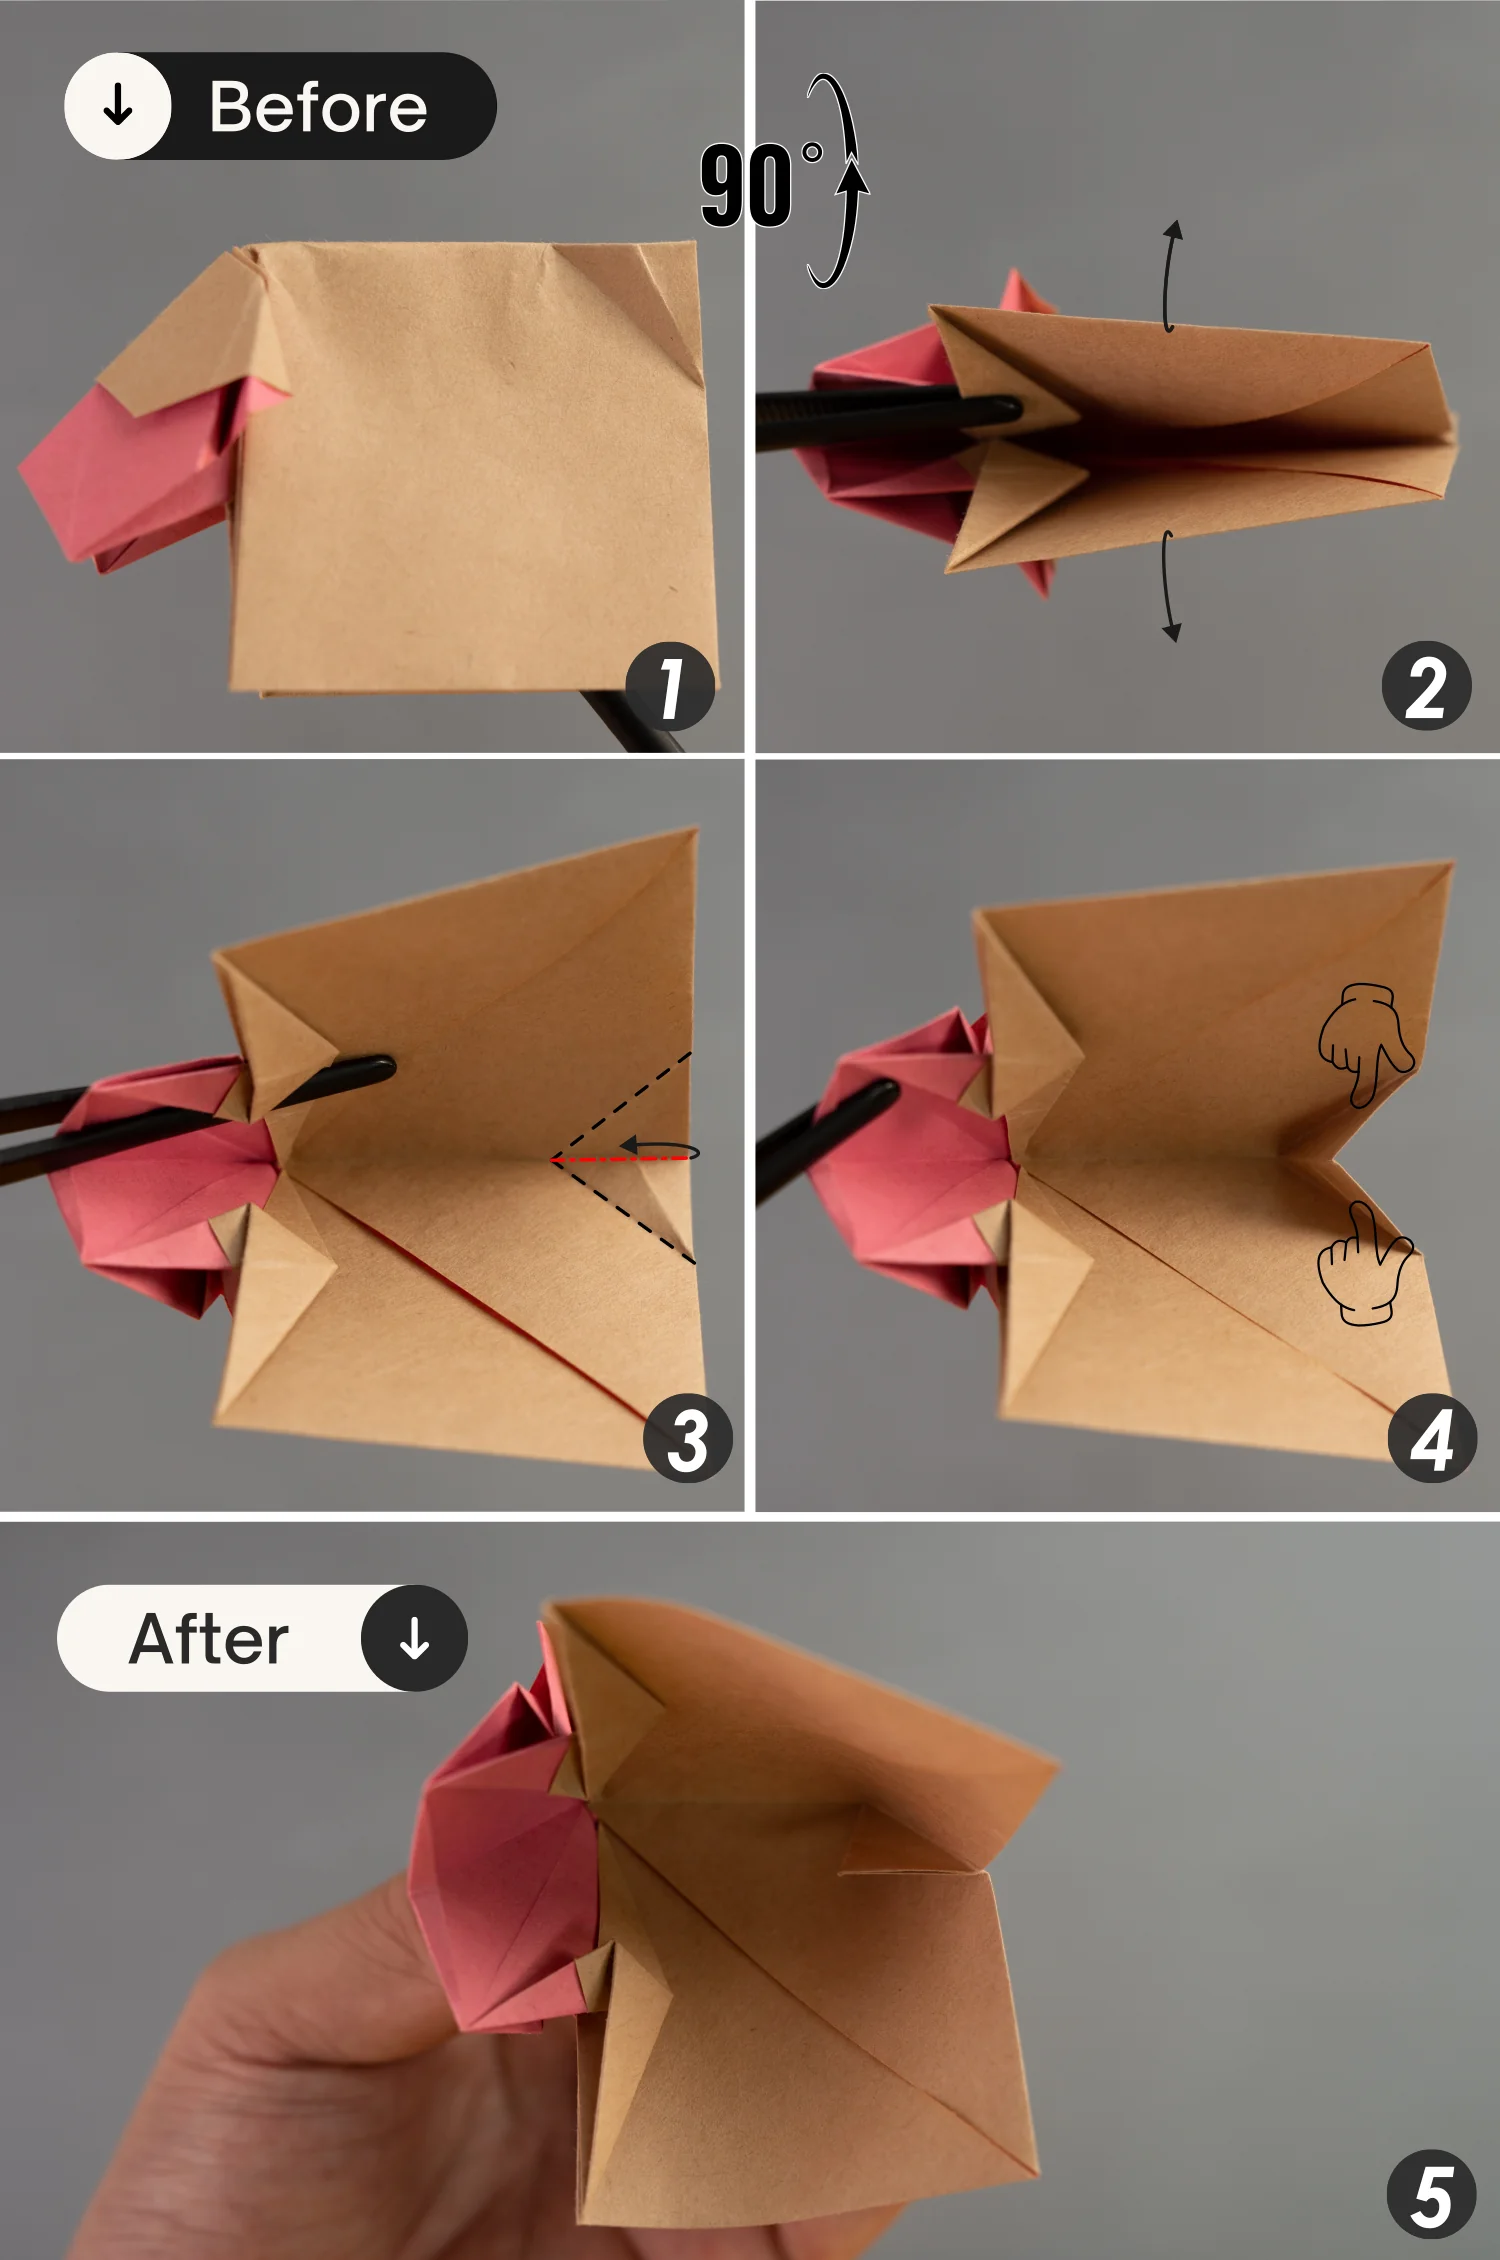
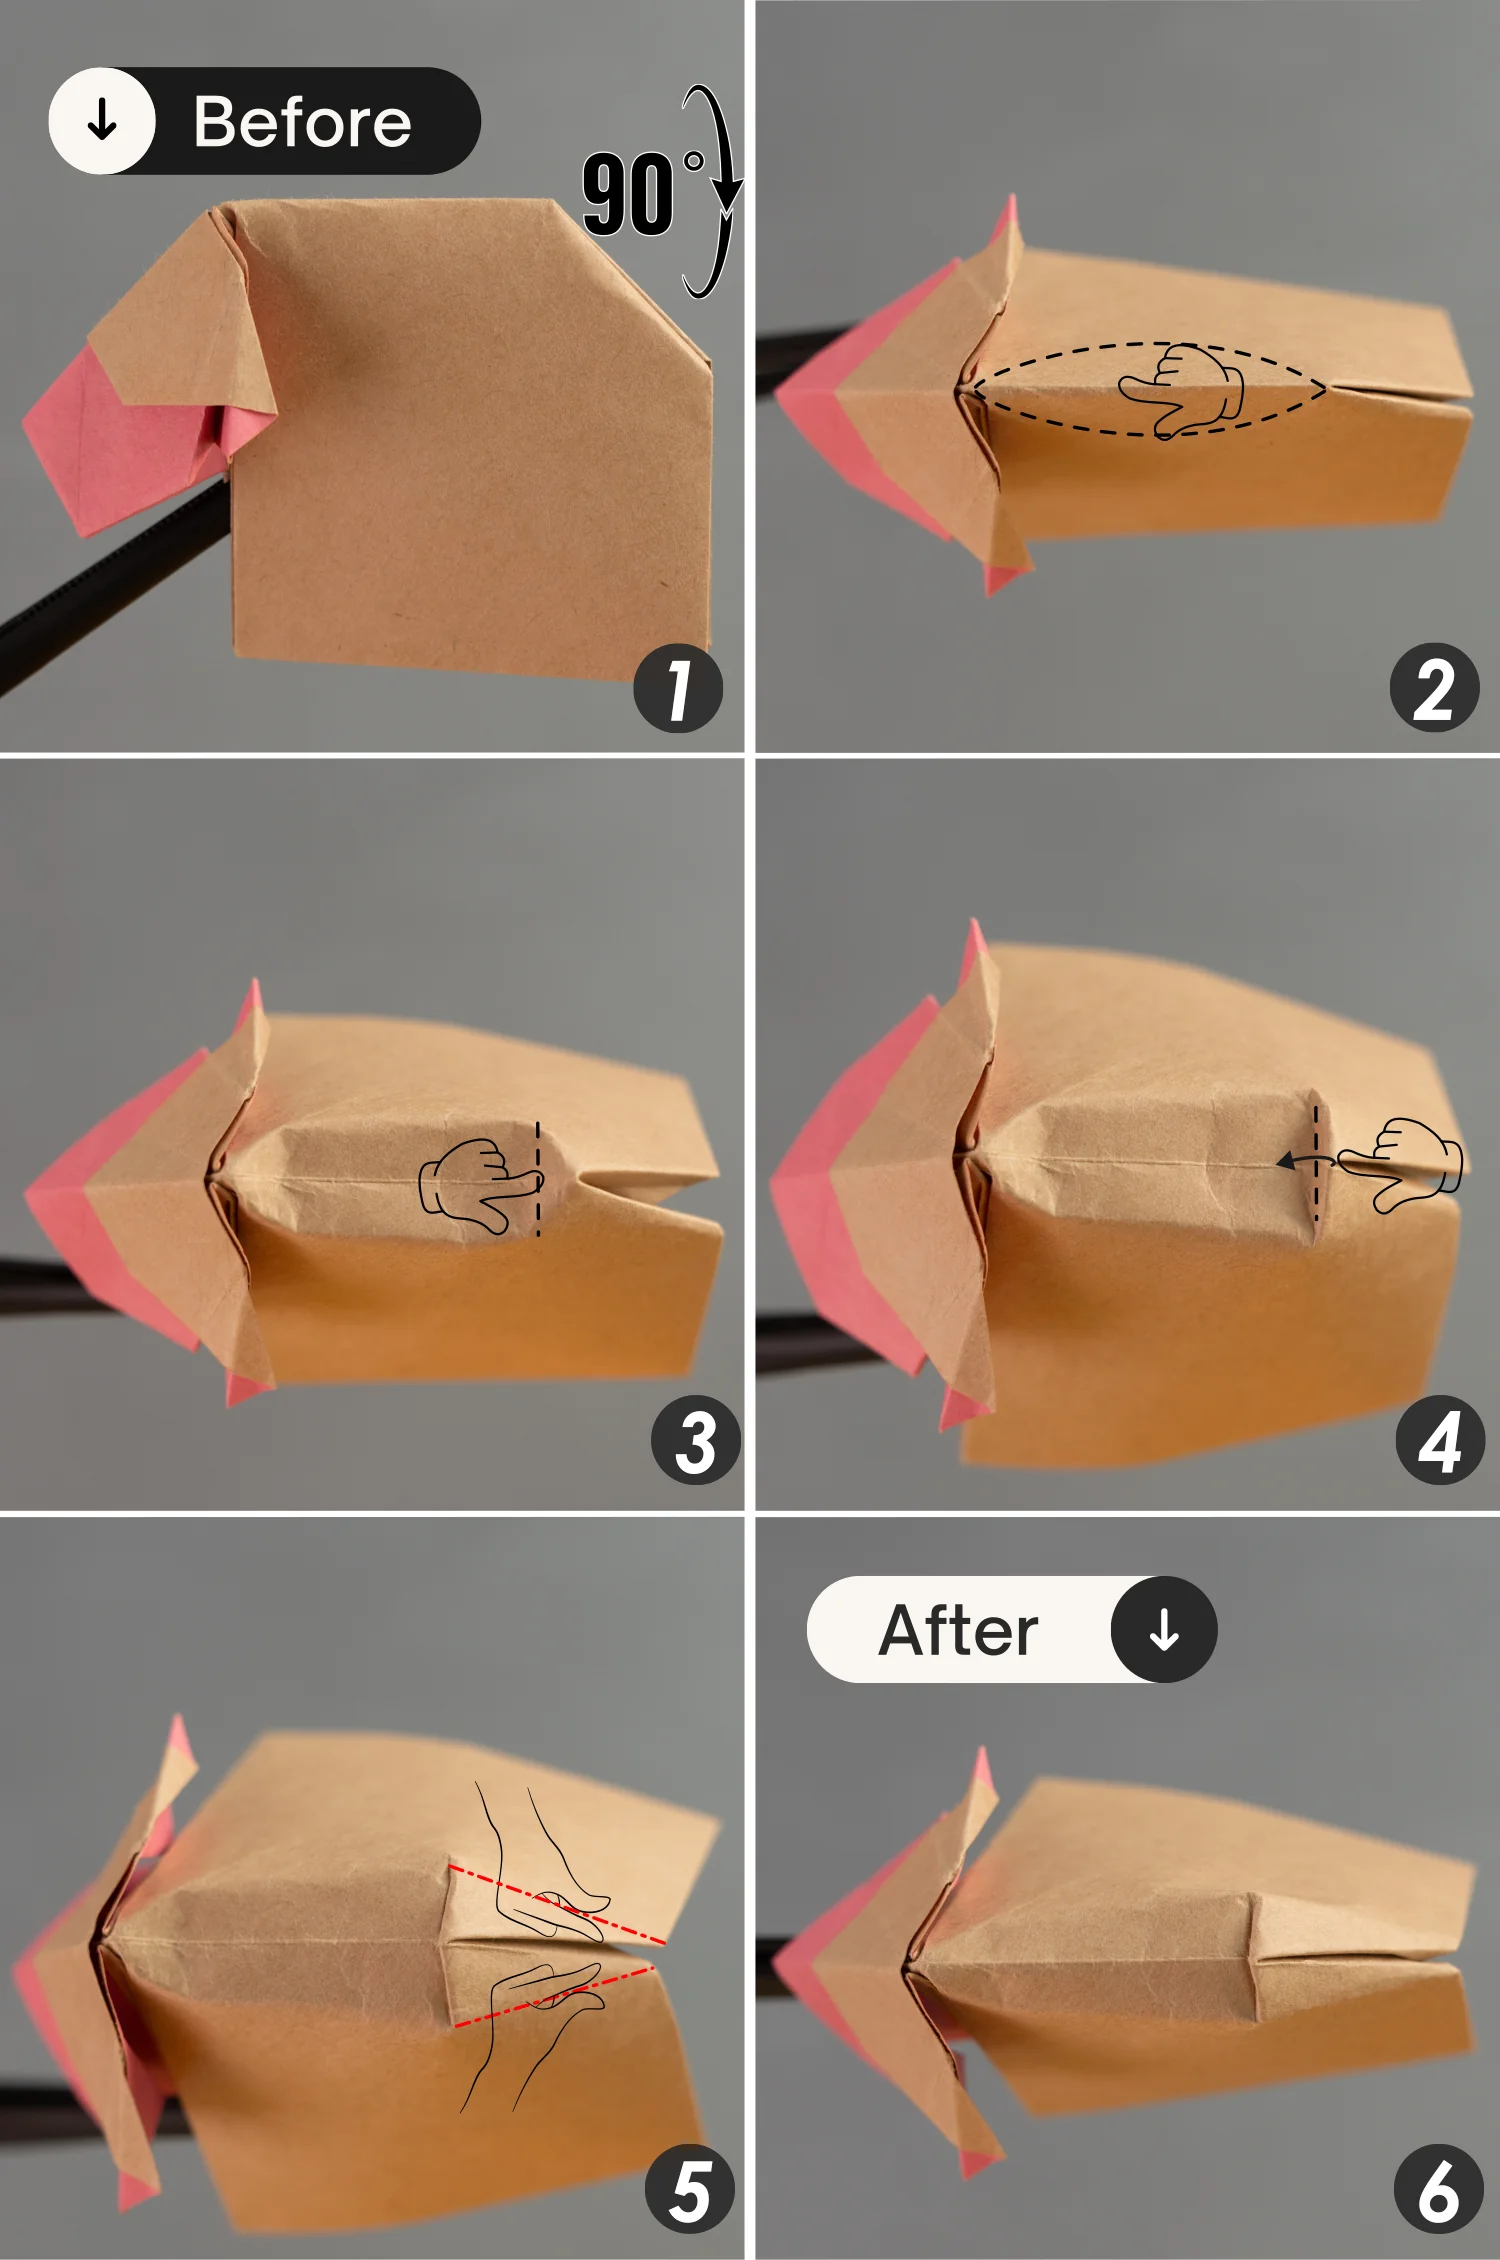
Step 12
Similarly, lift the layer above the arrow in picture 1 and fold it down along the dotted line.
Then, squash the corner along the dotted line as shown in the pictures 2 and 3.
Finally, close this opening and rotate the paper 90 degrees from front to back.
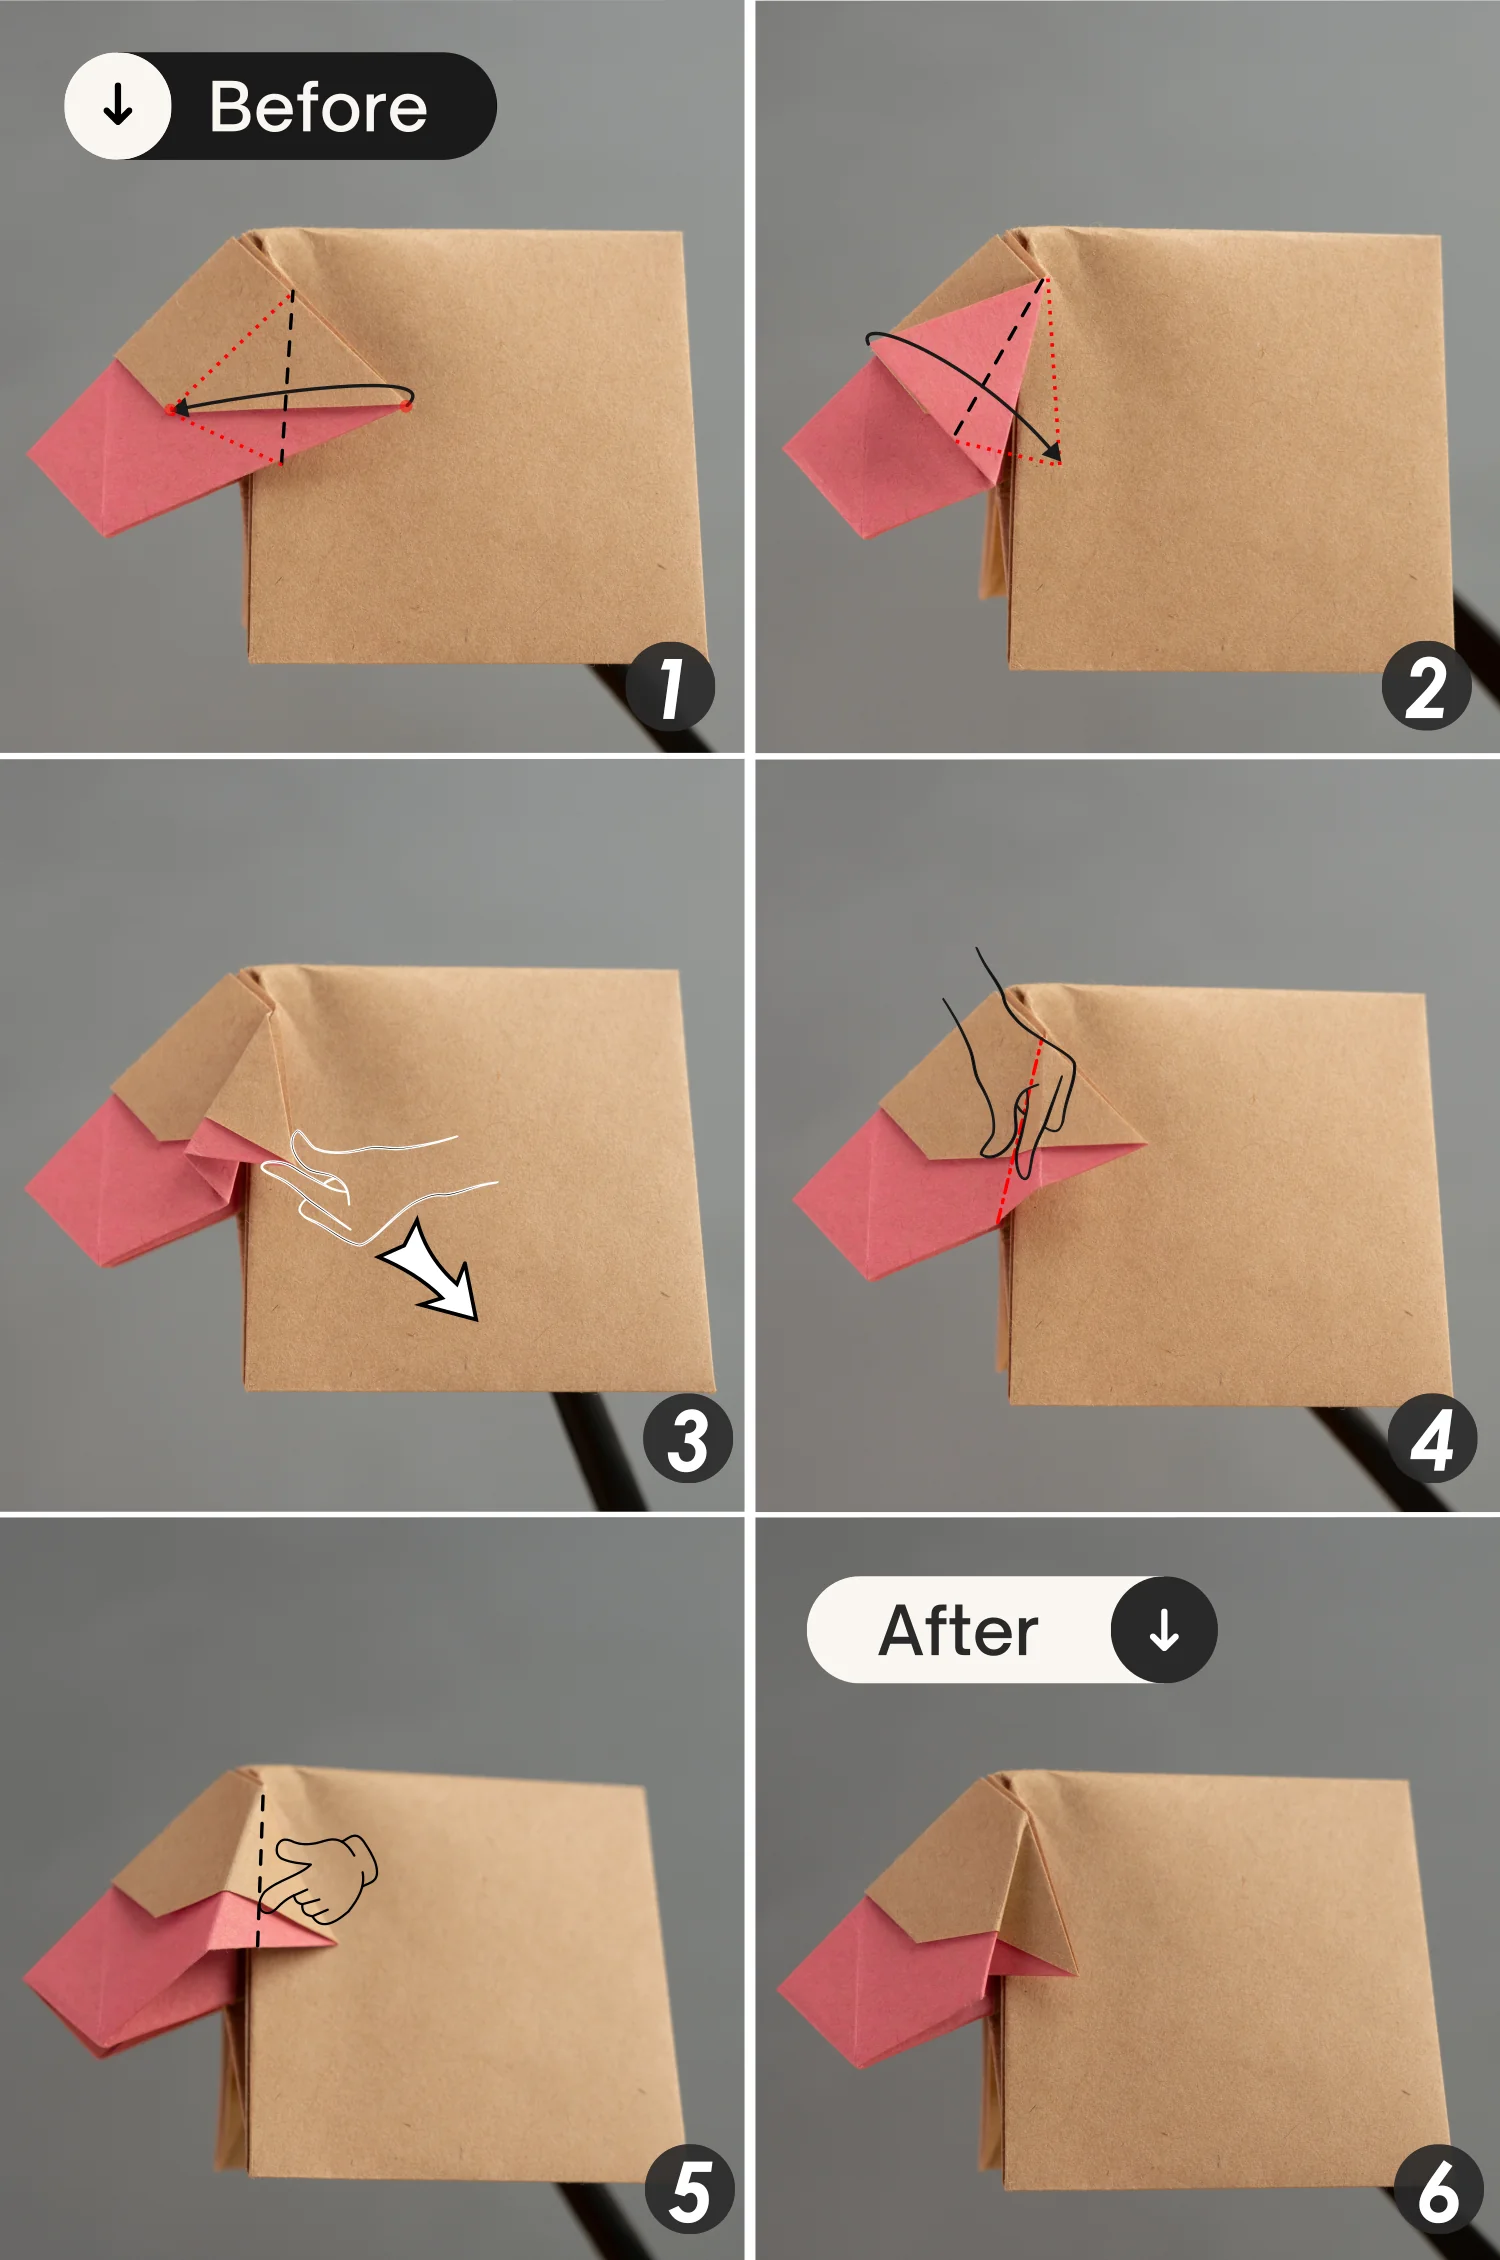
Step 13
Fold the left point of the right part to the right side along the black dotted line to meet the red spot, then fold it back to the left side for a short section, crease them well, and unfold them [pictures 1 to 3].
Next, Mountain fold the first crease you just made, indicated by the red dotted line, and valley fold the second crease, indicated by the black dotted line [pictures 4 to 6].
Step 14
Lift the top layer only of the right part and expand it, then flatten it and fold its left point backward along the crease indicated by the red dotted line, now you are done with one of its ears.
Finally, rotate the paper 180 degrees from left to right to flip it over and create another ear.
Step 15
As you did in step 13, fold the right point of the left part to the left side along the black dotted line to meet the red spot, then fold it back to the right side for a short section, crease them well, and unfold them [pictures 1 to 3].
Next, Mountain fold the first crease you just made, indicated by the red dotted line, and valley fold the second crease, indicated by the black dotted line [pictures 4 to 6].
Step 16
As you did in step 14, lift the top layer only of the left part and expand it, then flatten it and fold its right point backward along the crease indicated by the red dotted line. Now you’ve finished making another ear.
Step 17
Rotate the paper 90 degrees from back to front, then expand it and fold the left point a little toward the right side along the black dotted line.
Finally, close the opening and rotate the paper 90 degrees from front to back.
Step 18
Fold the top right point of the paper diagonally along the black dotted line, then fold the bottom edge of this small triangle to align with its hypotenuse. Crease them well and unfold them.
Step 19
Rotate the paper 90 degrees from back to front, and expand the opening.
Next, take the midpoint of the right edge and fold it toward the left side along the crease indicated by the black dotted line, and valley fold the crease indicated by the red dotted line.
Step 20
Fold the top point of the small flap along the white dotted line, then close the opening, and rotate the paper 90 degrees from front to back.
Step 21
Rotate the paper 90 degrees from front to back, then press down the top of the paper as the second and third pictures show.
Next, press down the top point toward the left side along the black dotted line, then create two mountain folds indicated by the red dotted lines [pictures 4 and 5].
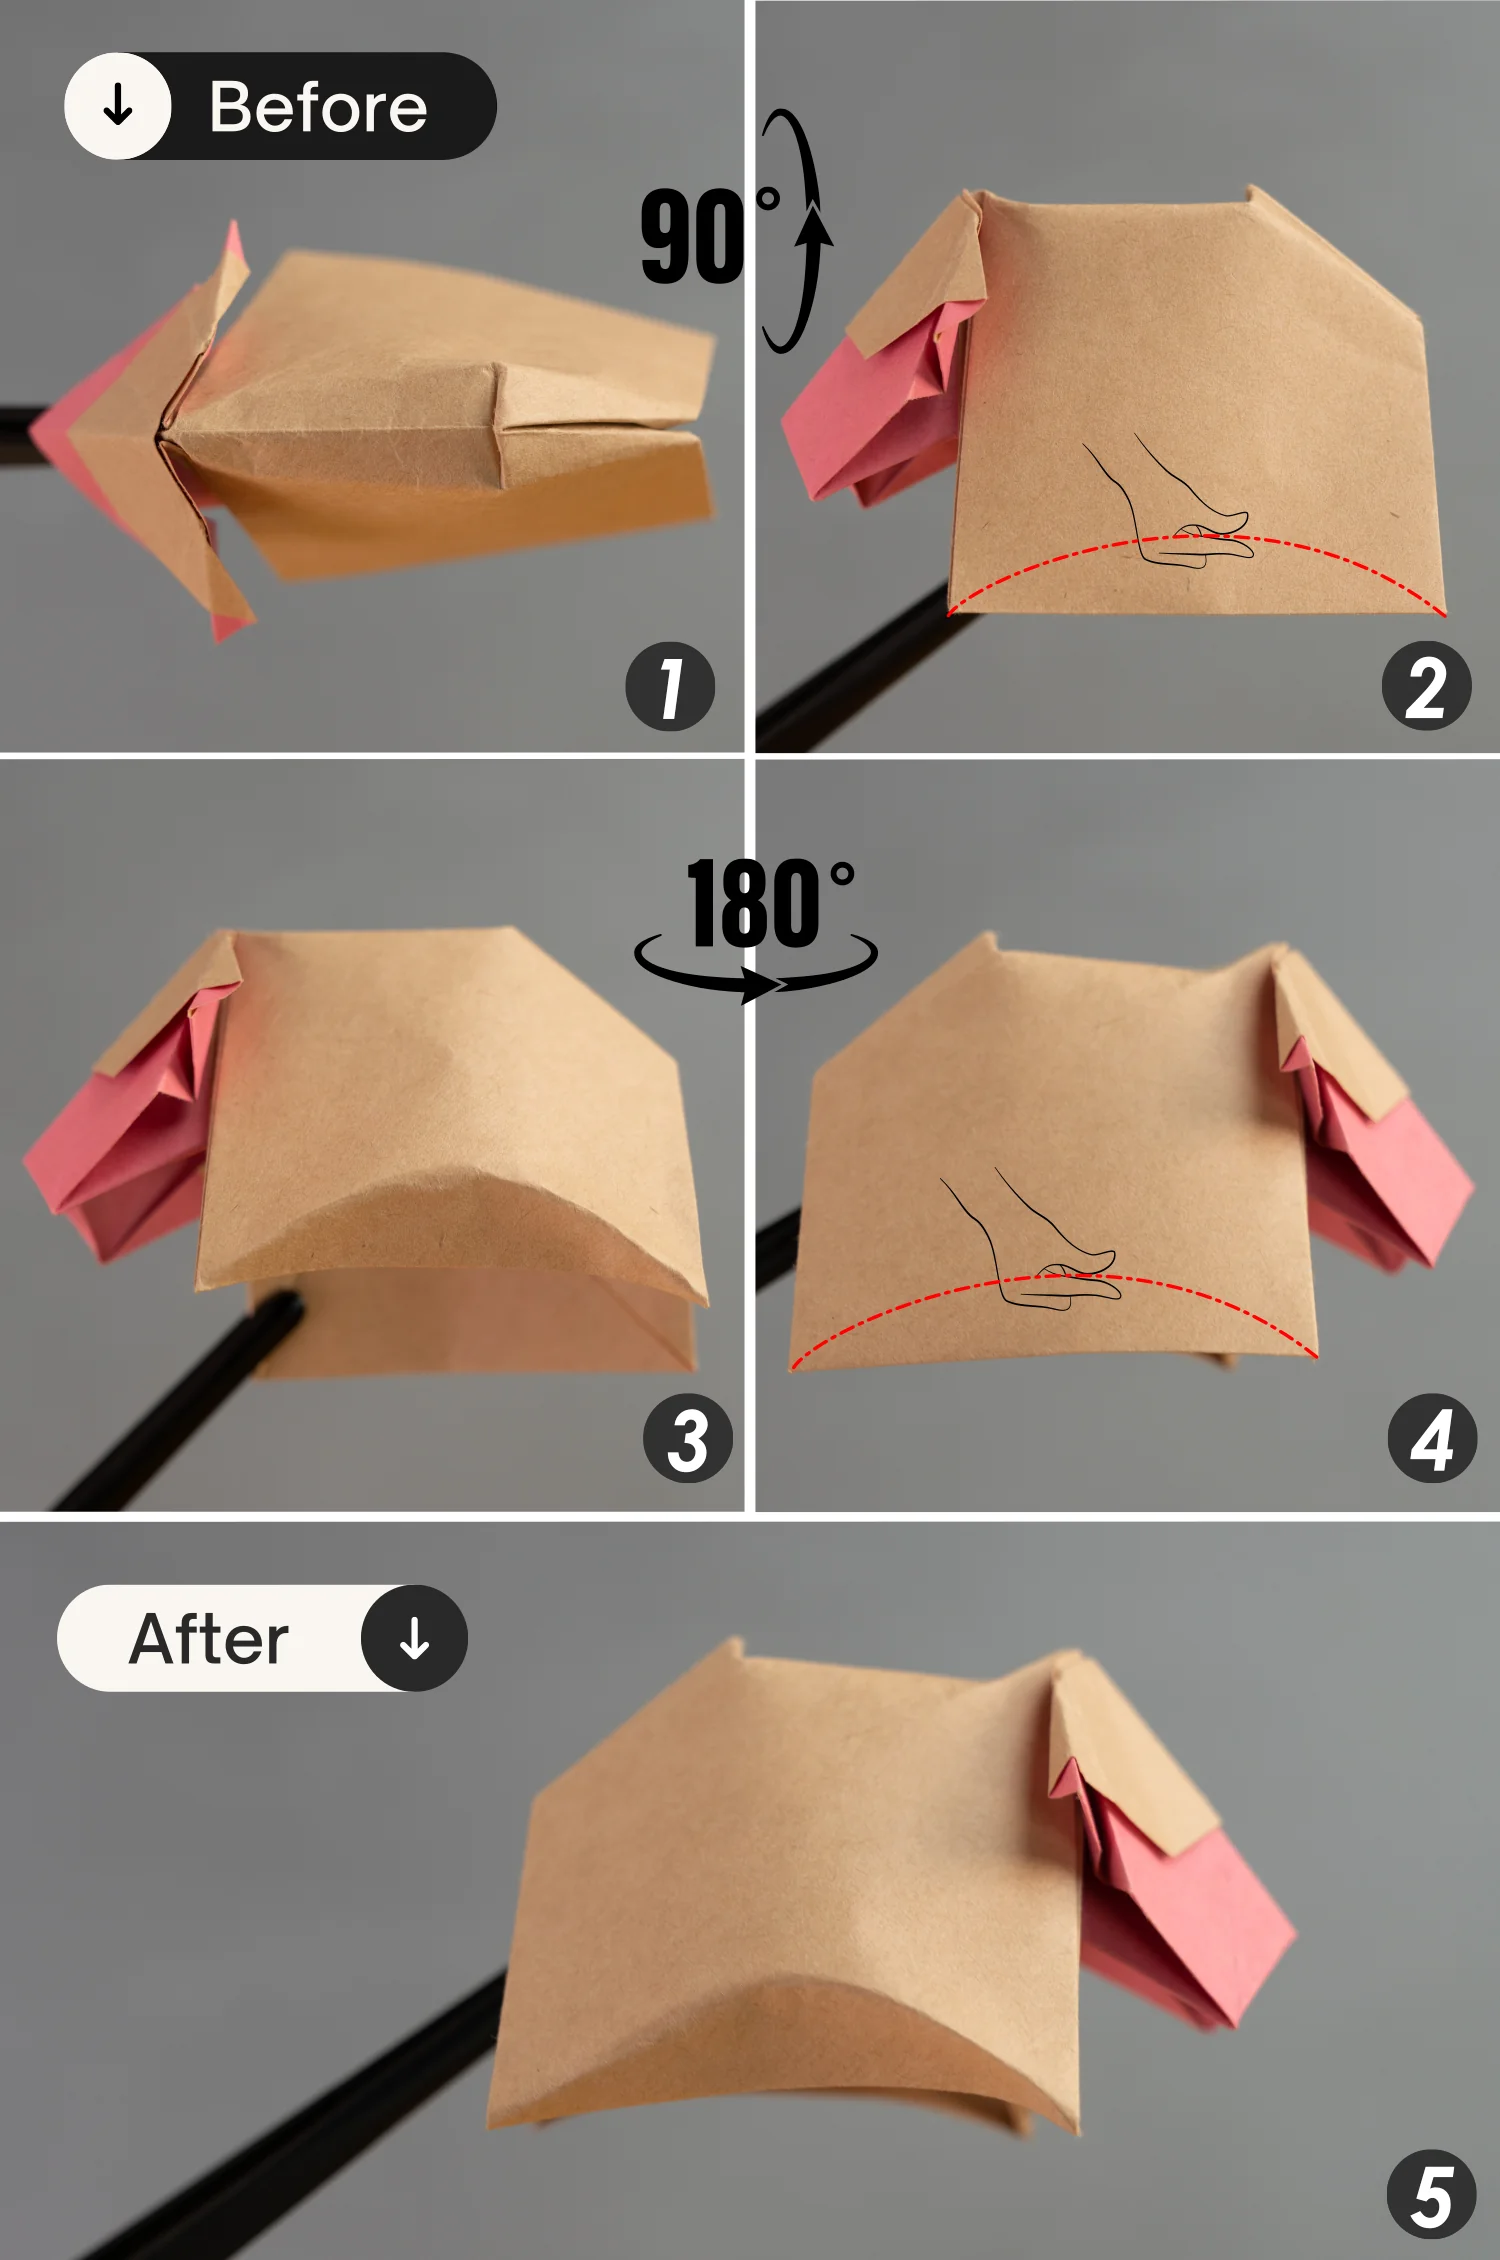
Step 22
Rotate the paper 90 degrees from back to front, then fold the bottom edge backward along the red dotted line, to create an arch.
Flip the paper over from left to right, and fold the bottom edge along the red dotted line as well.
What’s Next
This is the final shape of an origami sheep, next, you can explore our other origami animal instructions. Happy folding!
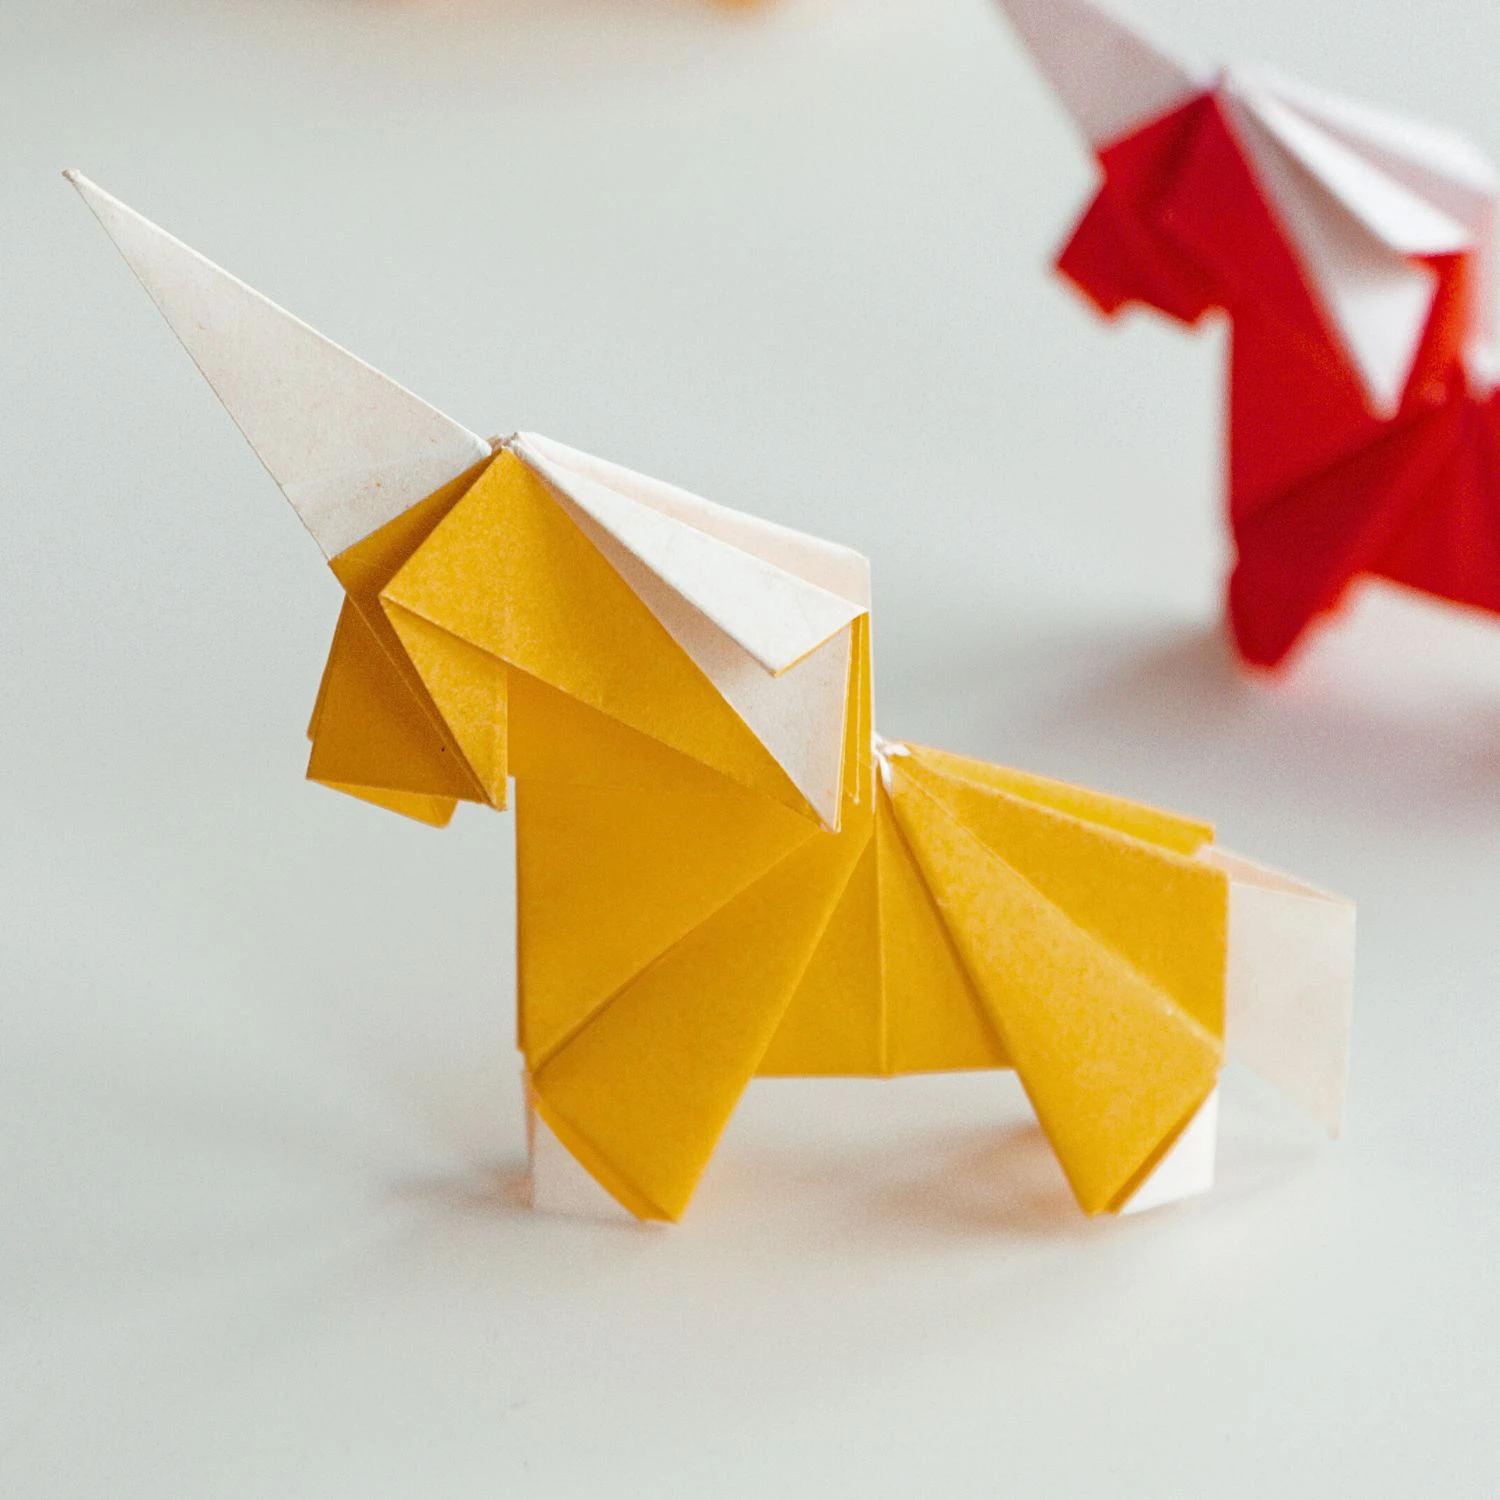
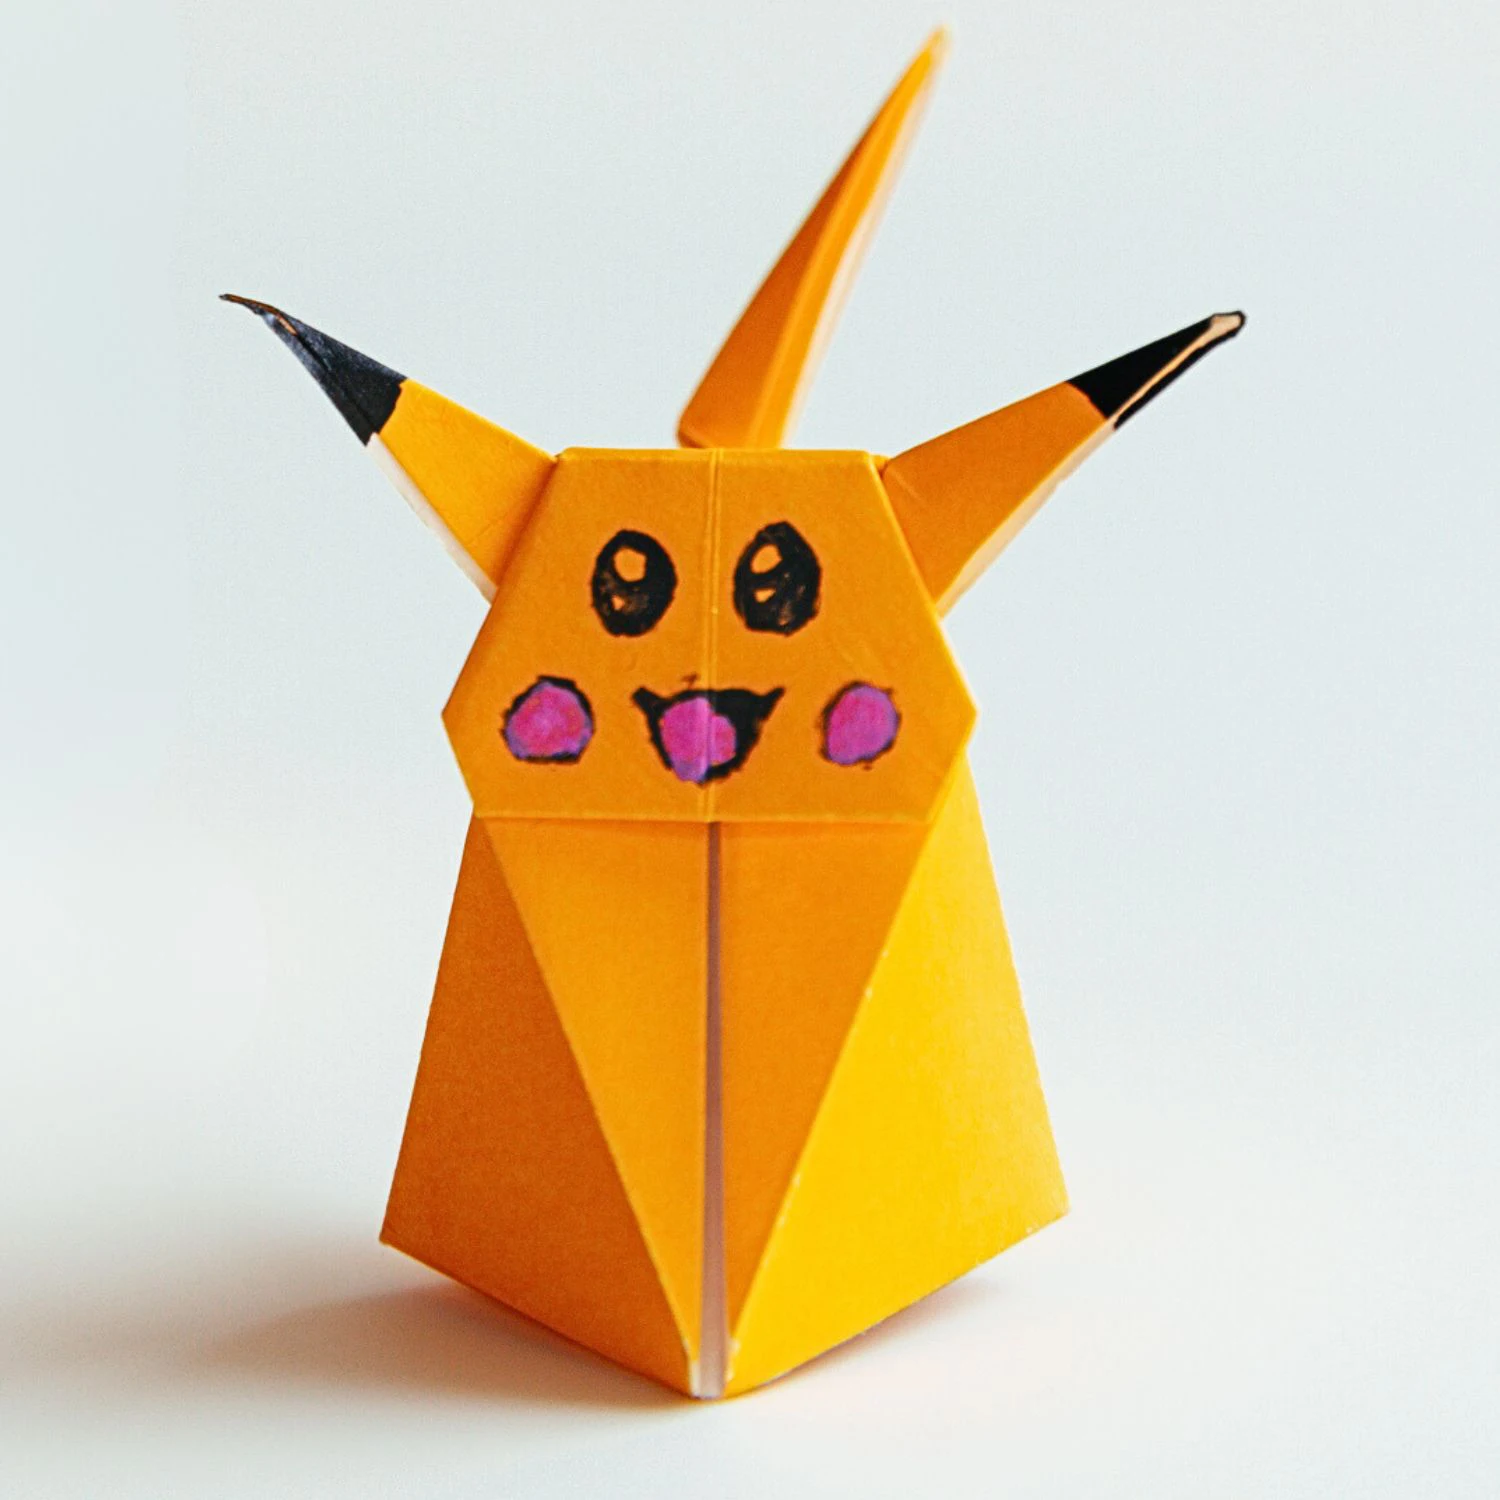
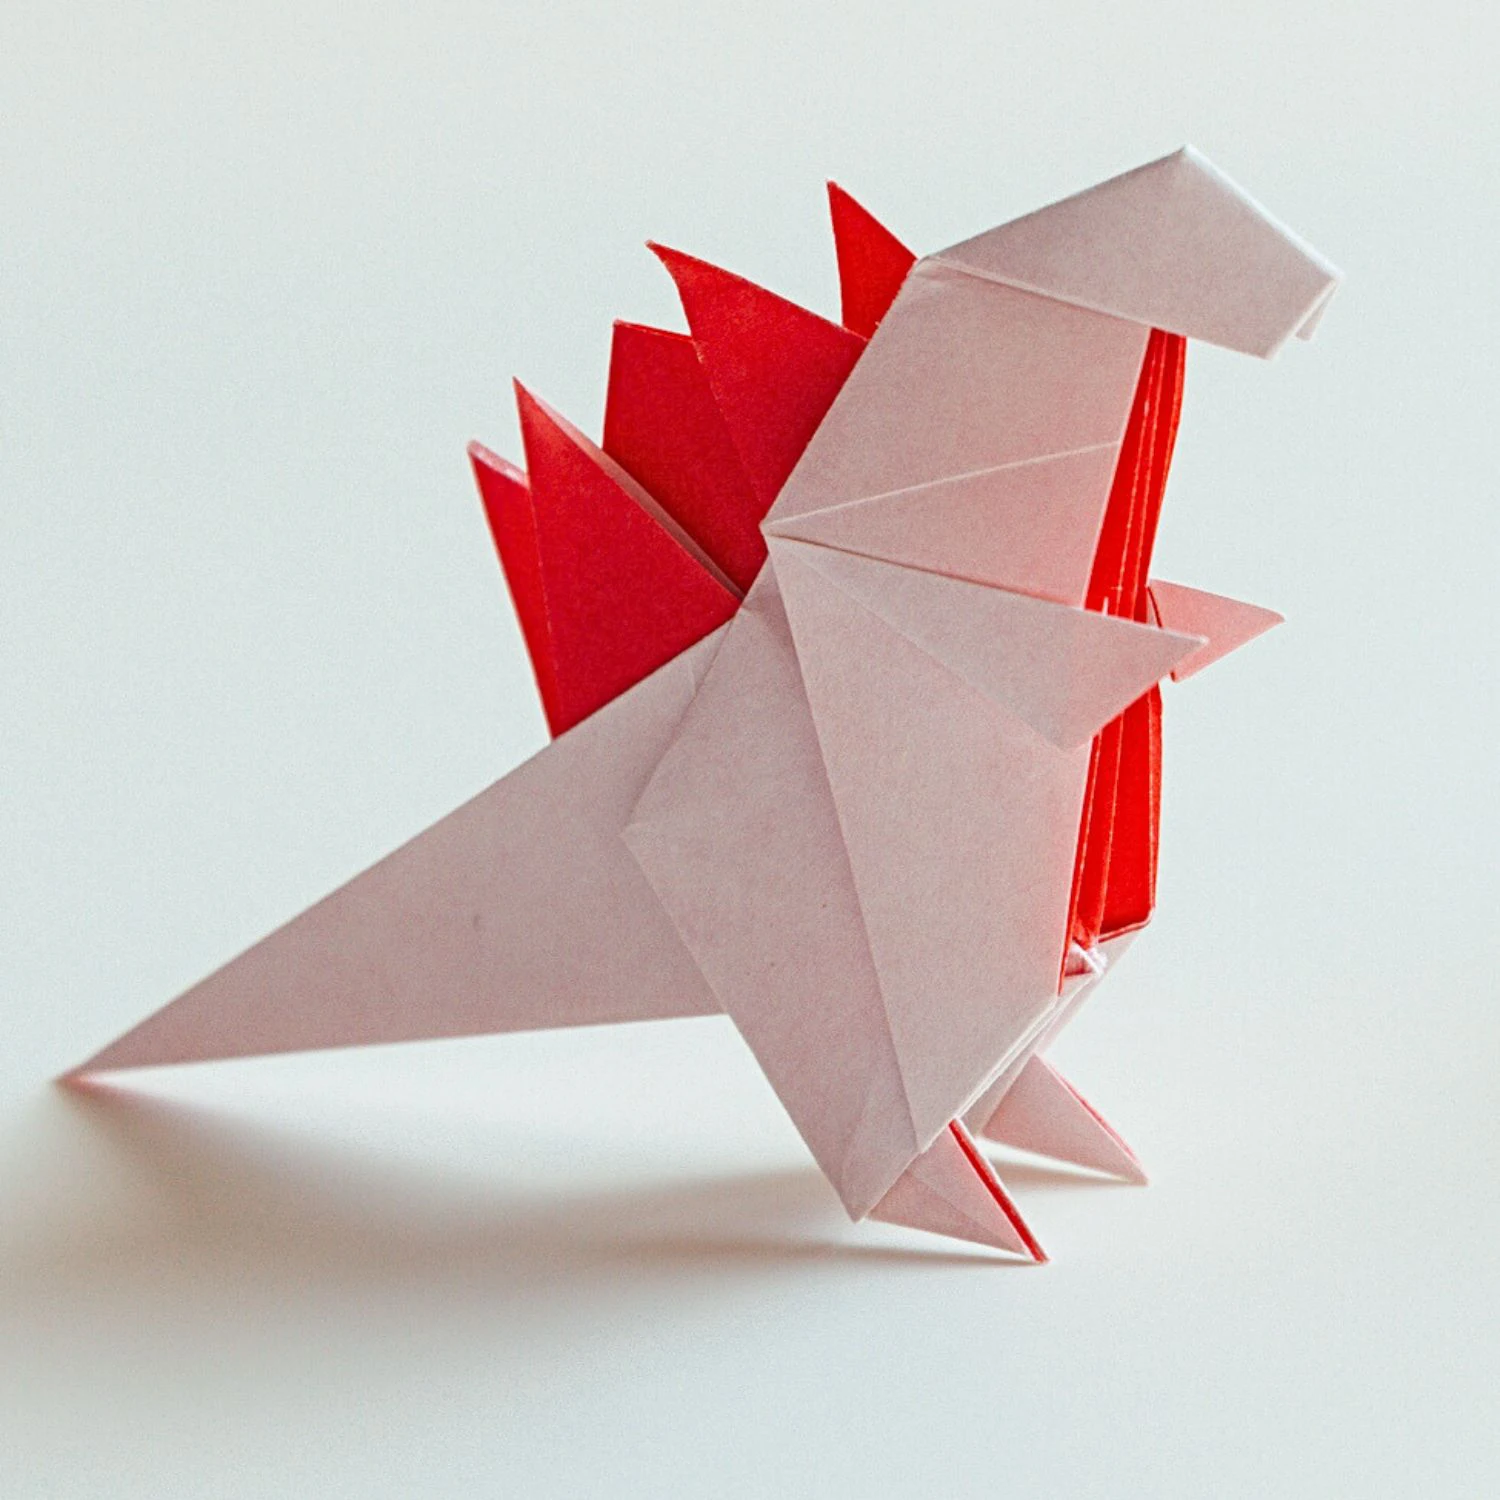
Other Origami Animal Ideas