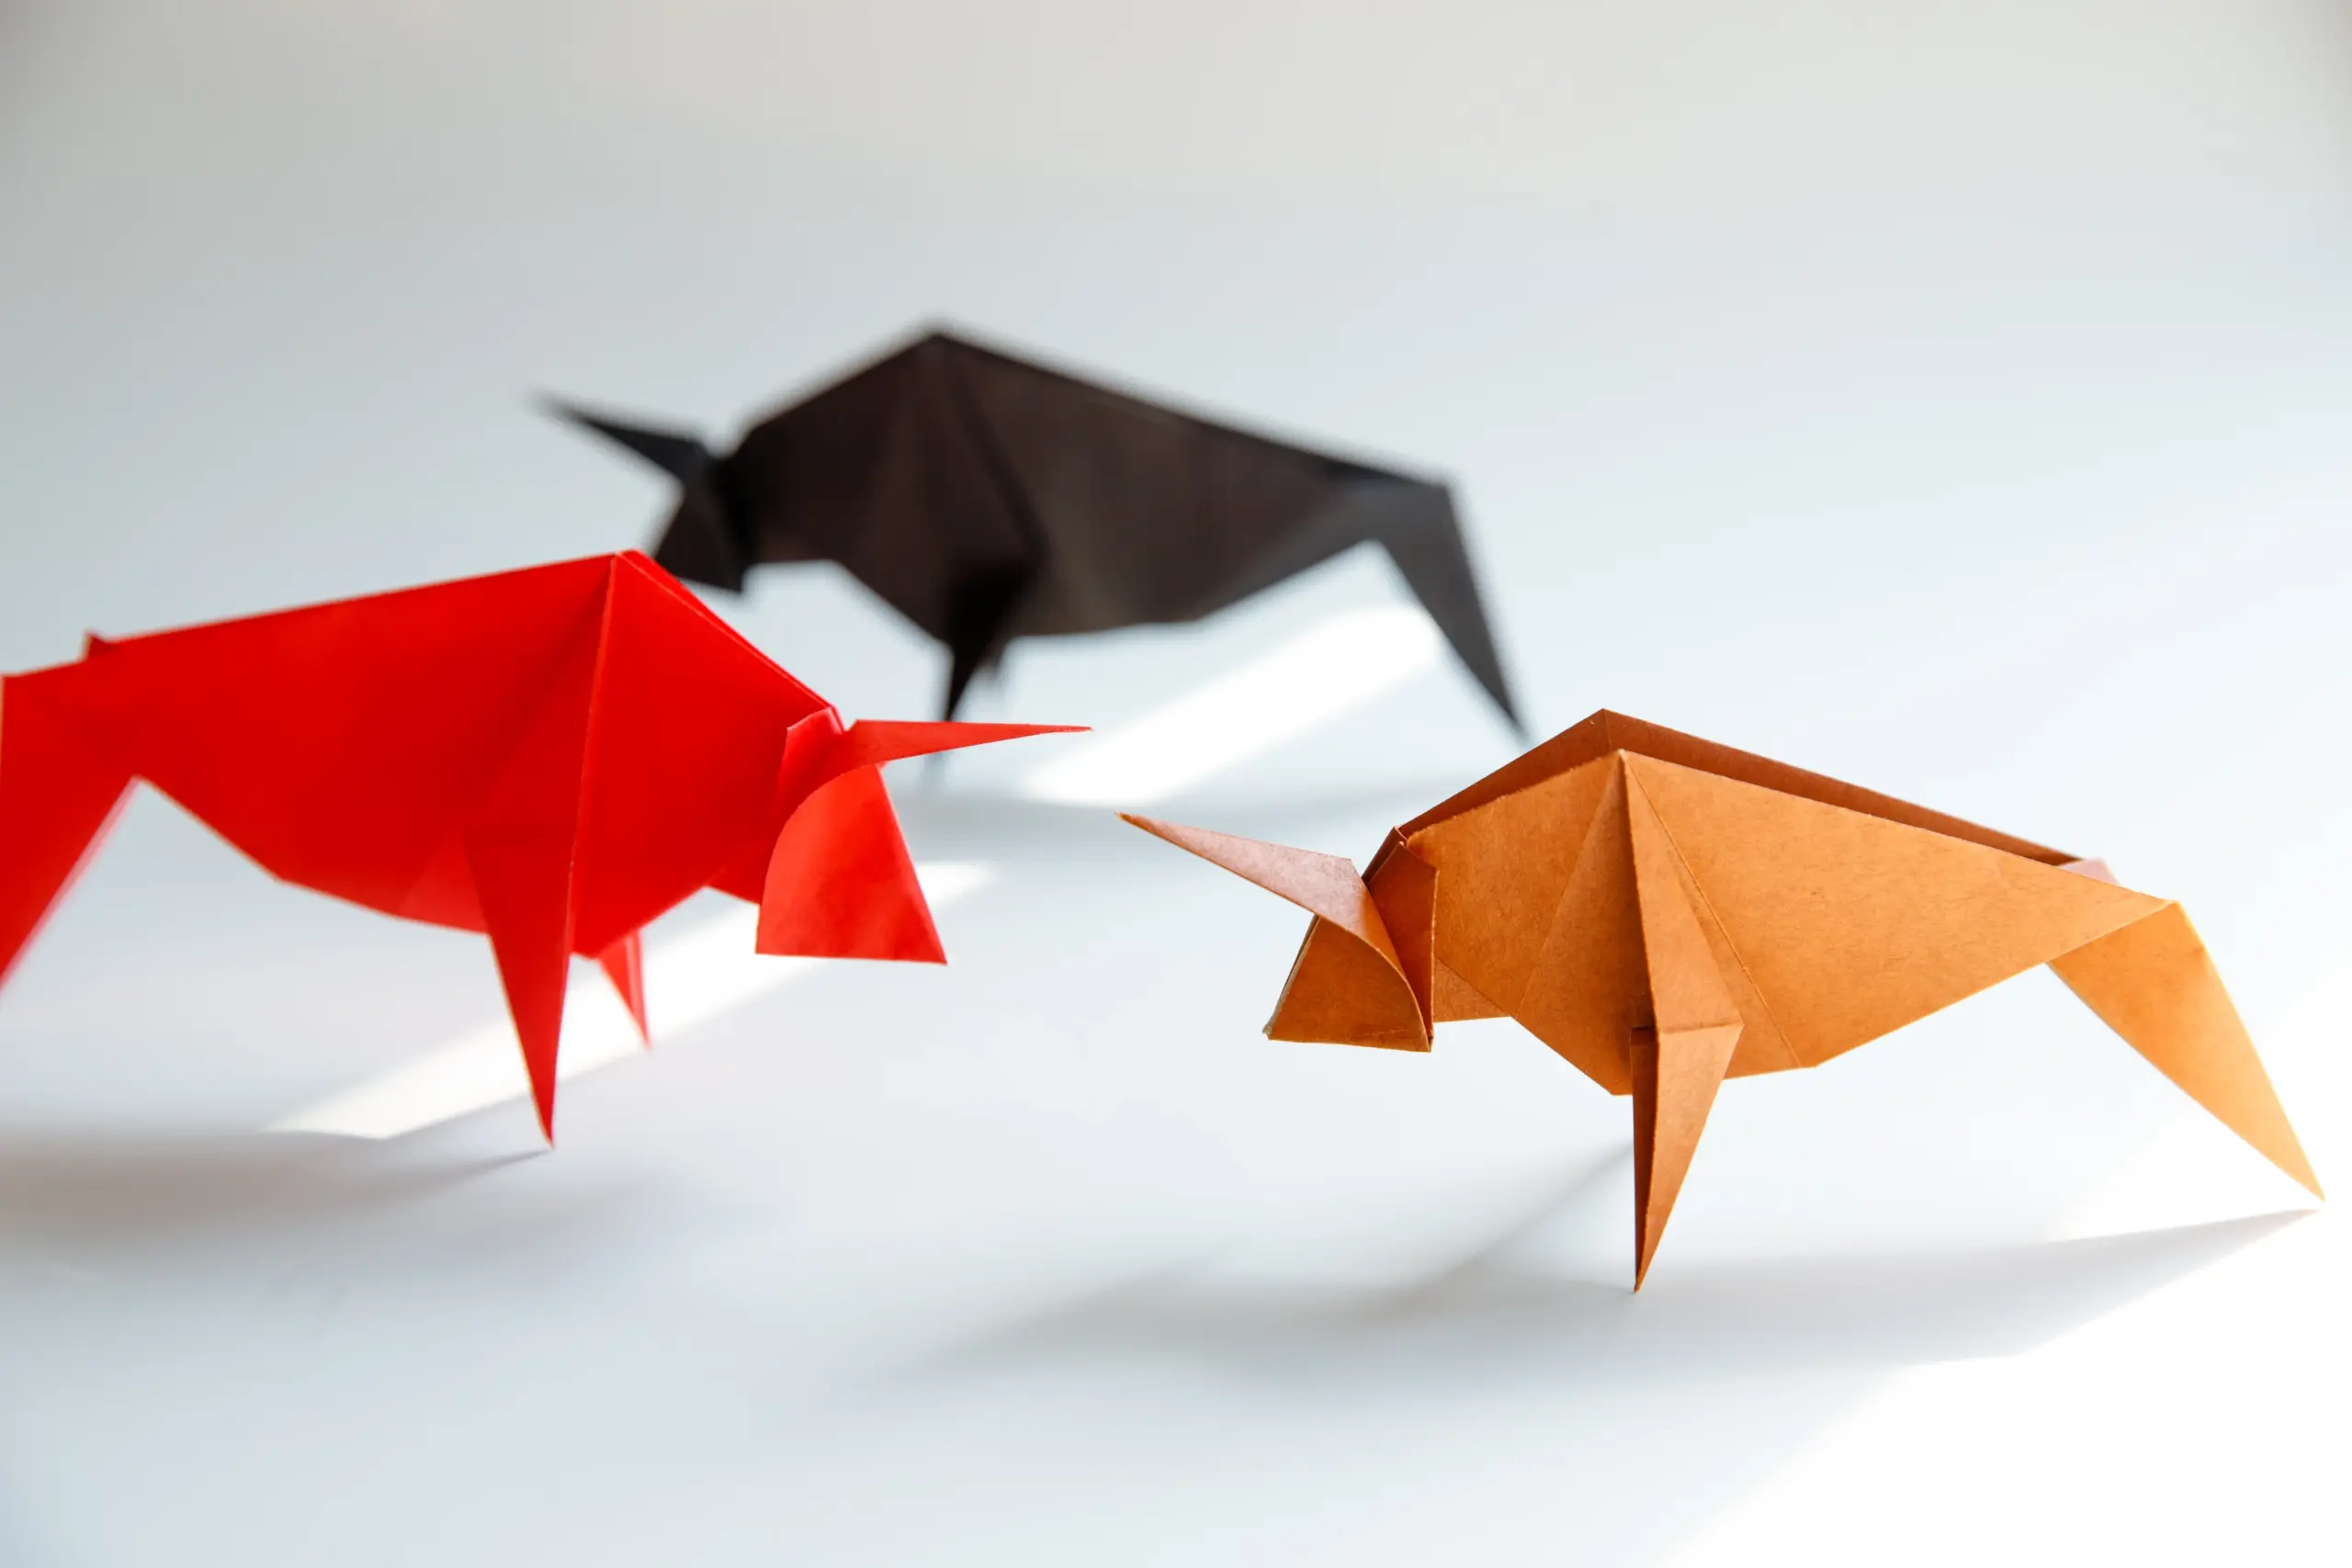
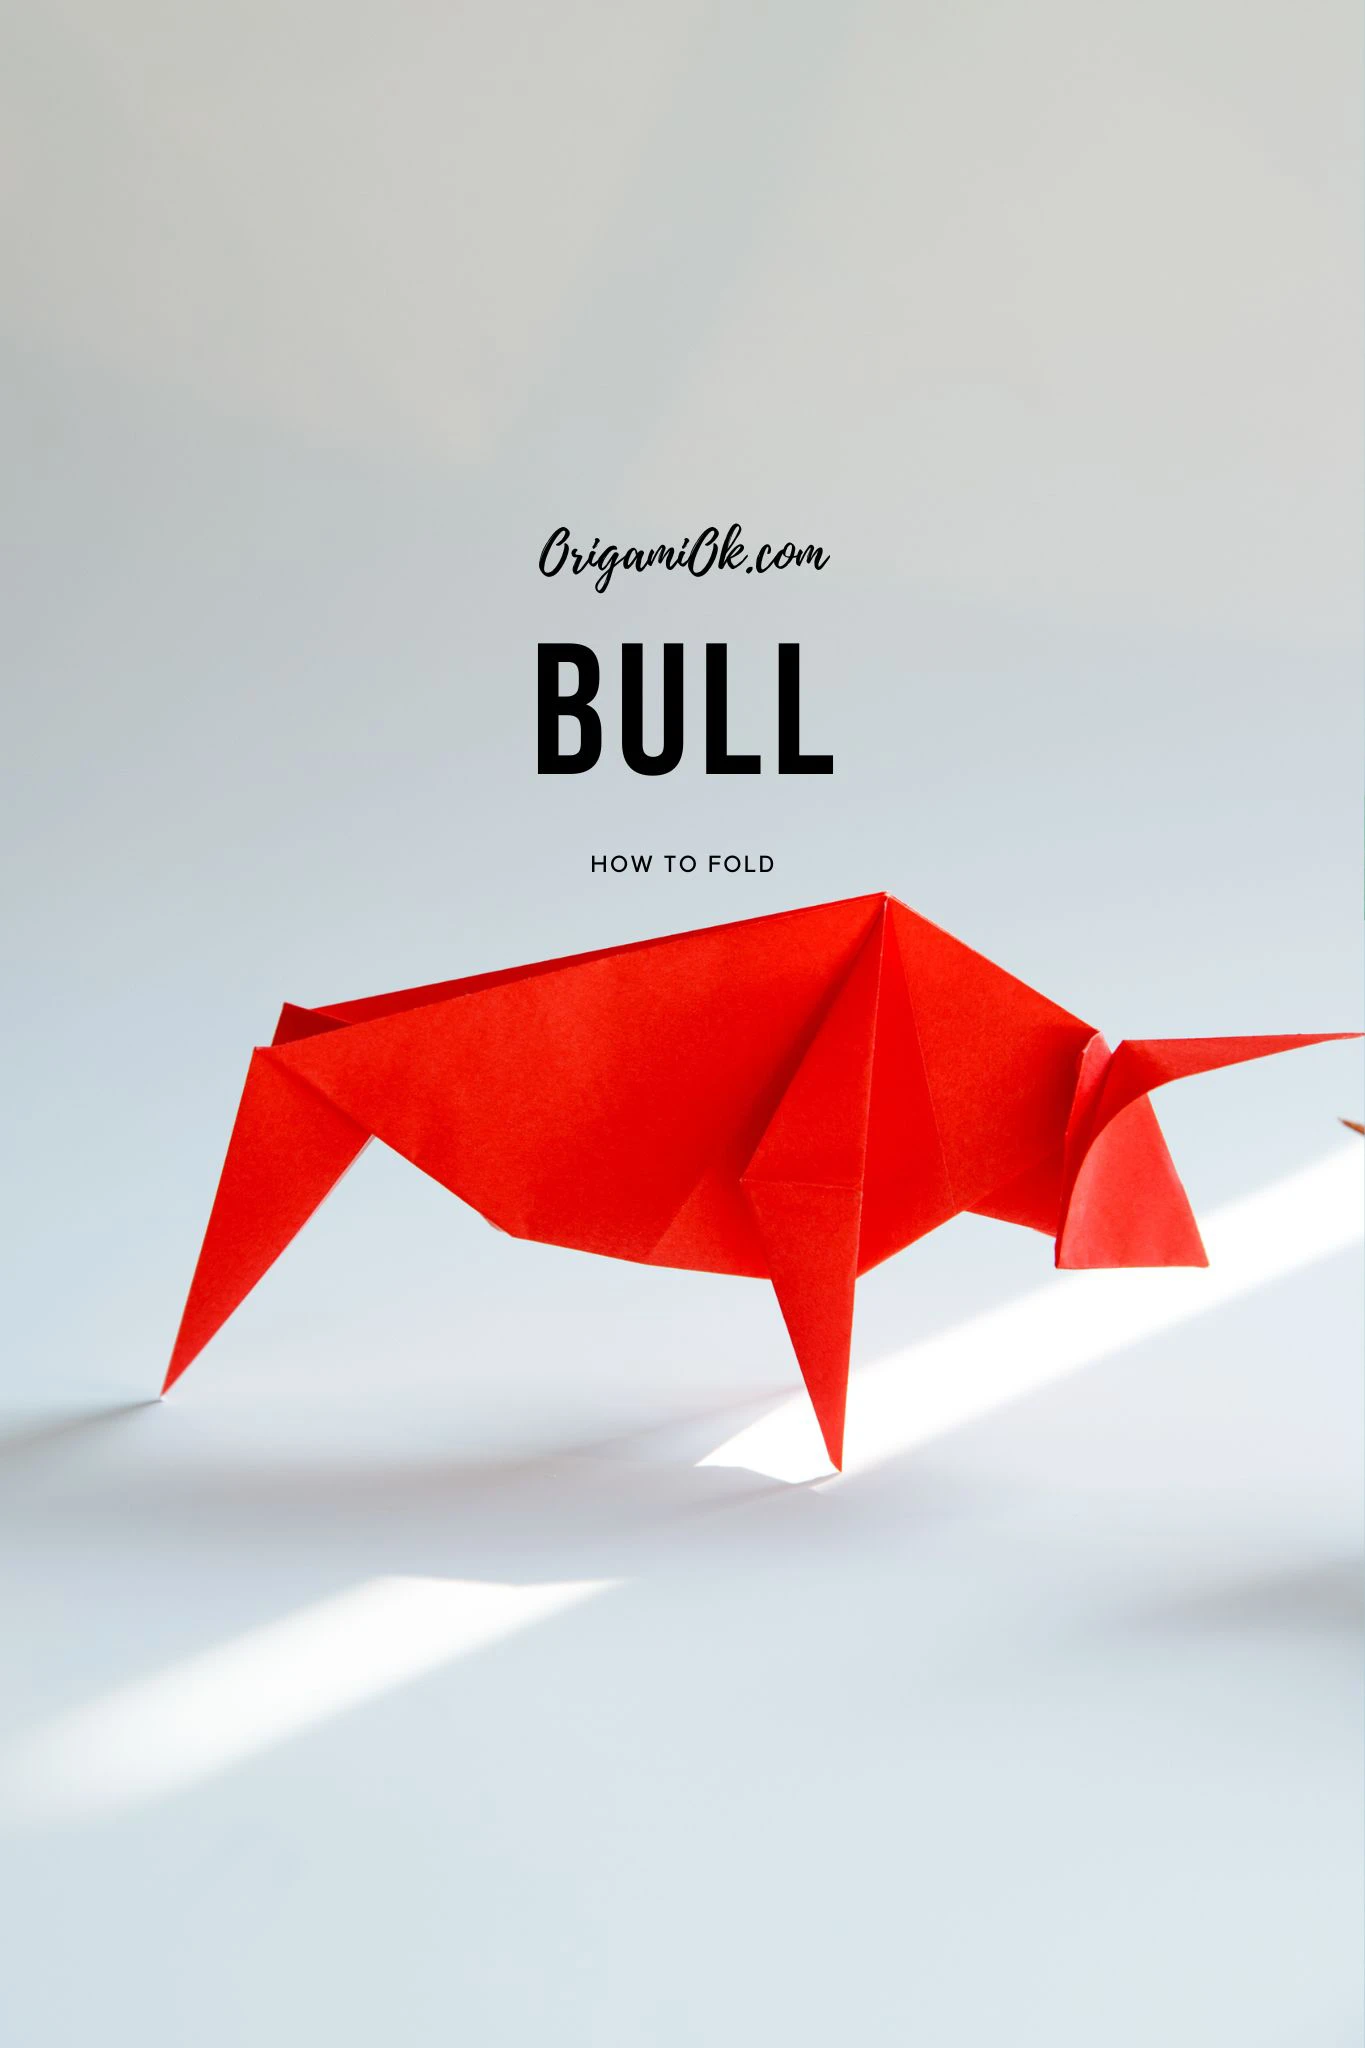
This origami bull looks pretty cool, with its head slightly lowered, muscular stance, and its body bent, looking like it’s ready to attack. Its horns and body show the power of a real bull, making it a great and unique gift for friends and family, especially those who appreciate wildlife.
If you are new to origami, start here from our beginner guide to know the basics and how to read the step-by-step instructions.
- Folding time: 10 minutes
- Paper: 15×15 cm
- Difficulty: Easy
Material
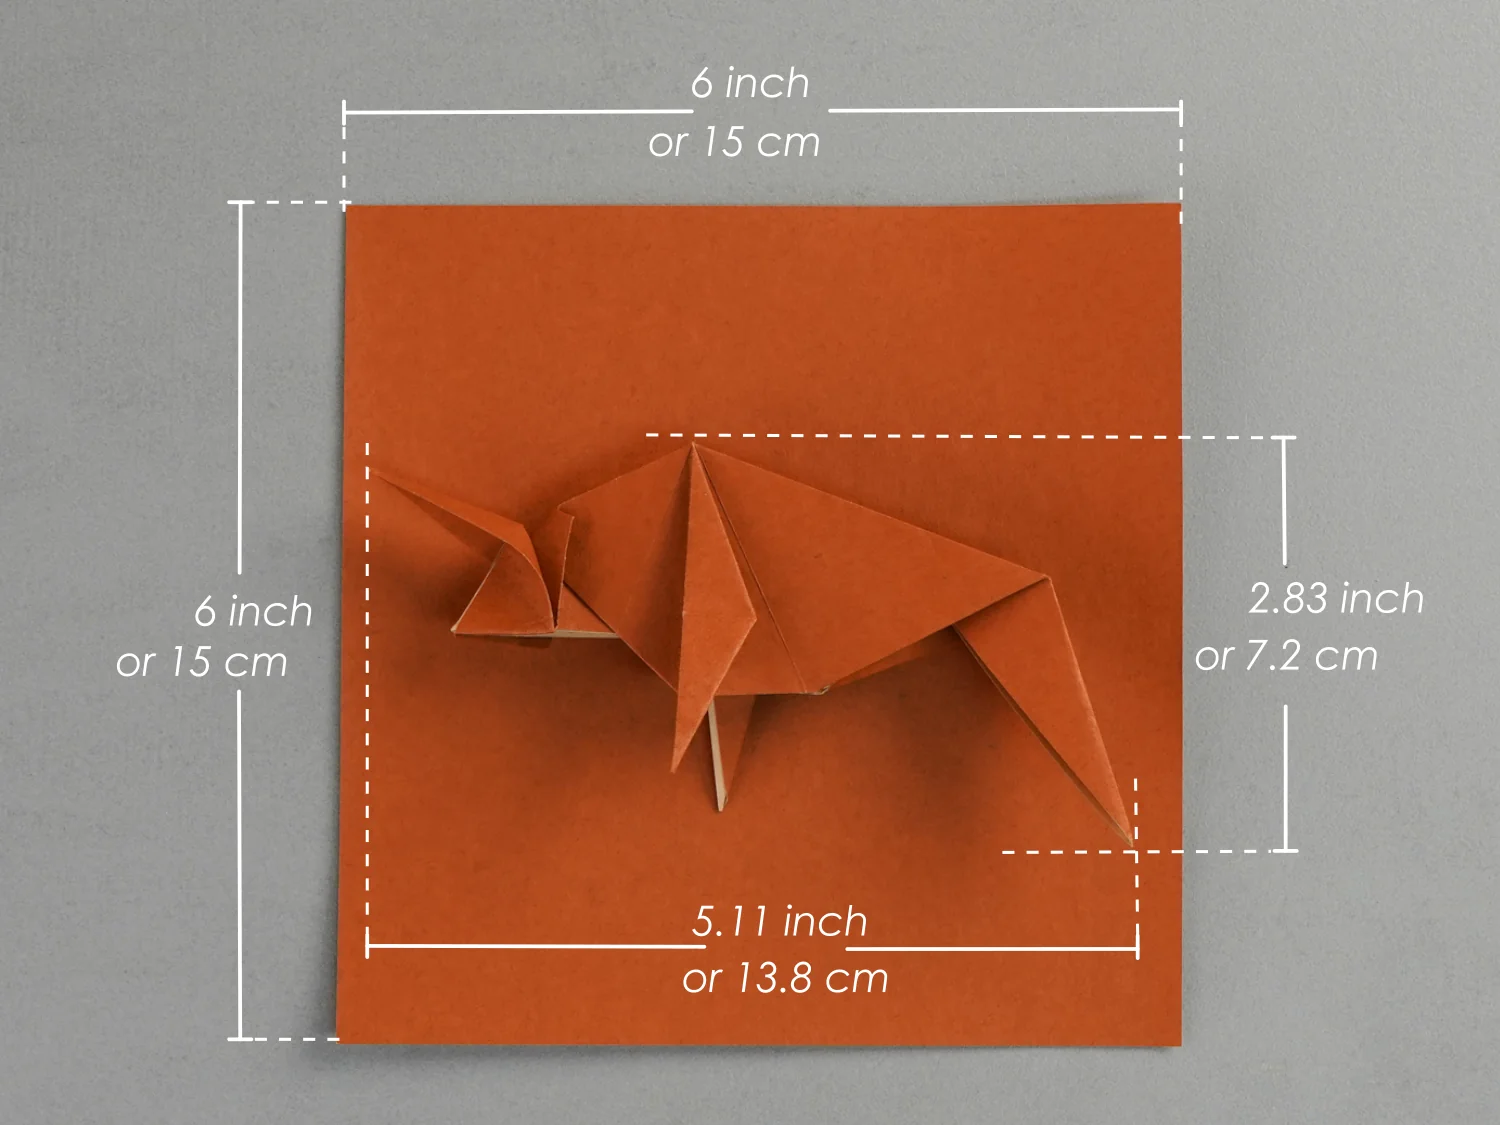
Get a piece of 15×15 cm origami square paper, with different colors on each side, to create a 7.2×13.8 cm origami bull. Choose any other square paper in your preferred color to better match your style.
Step by Step Instructions
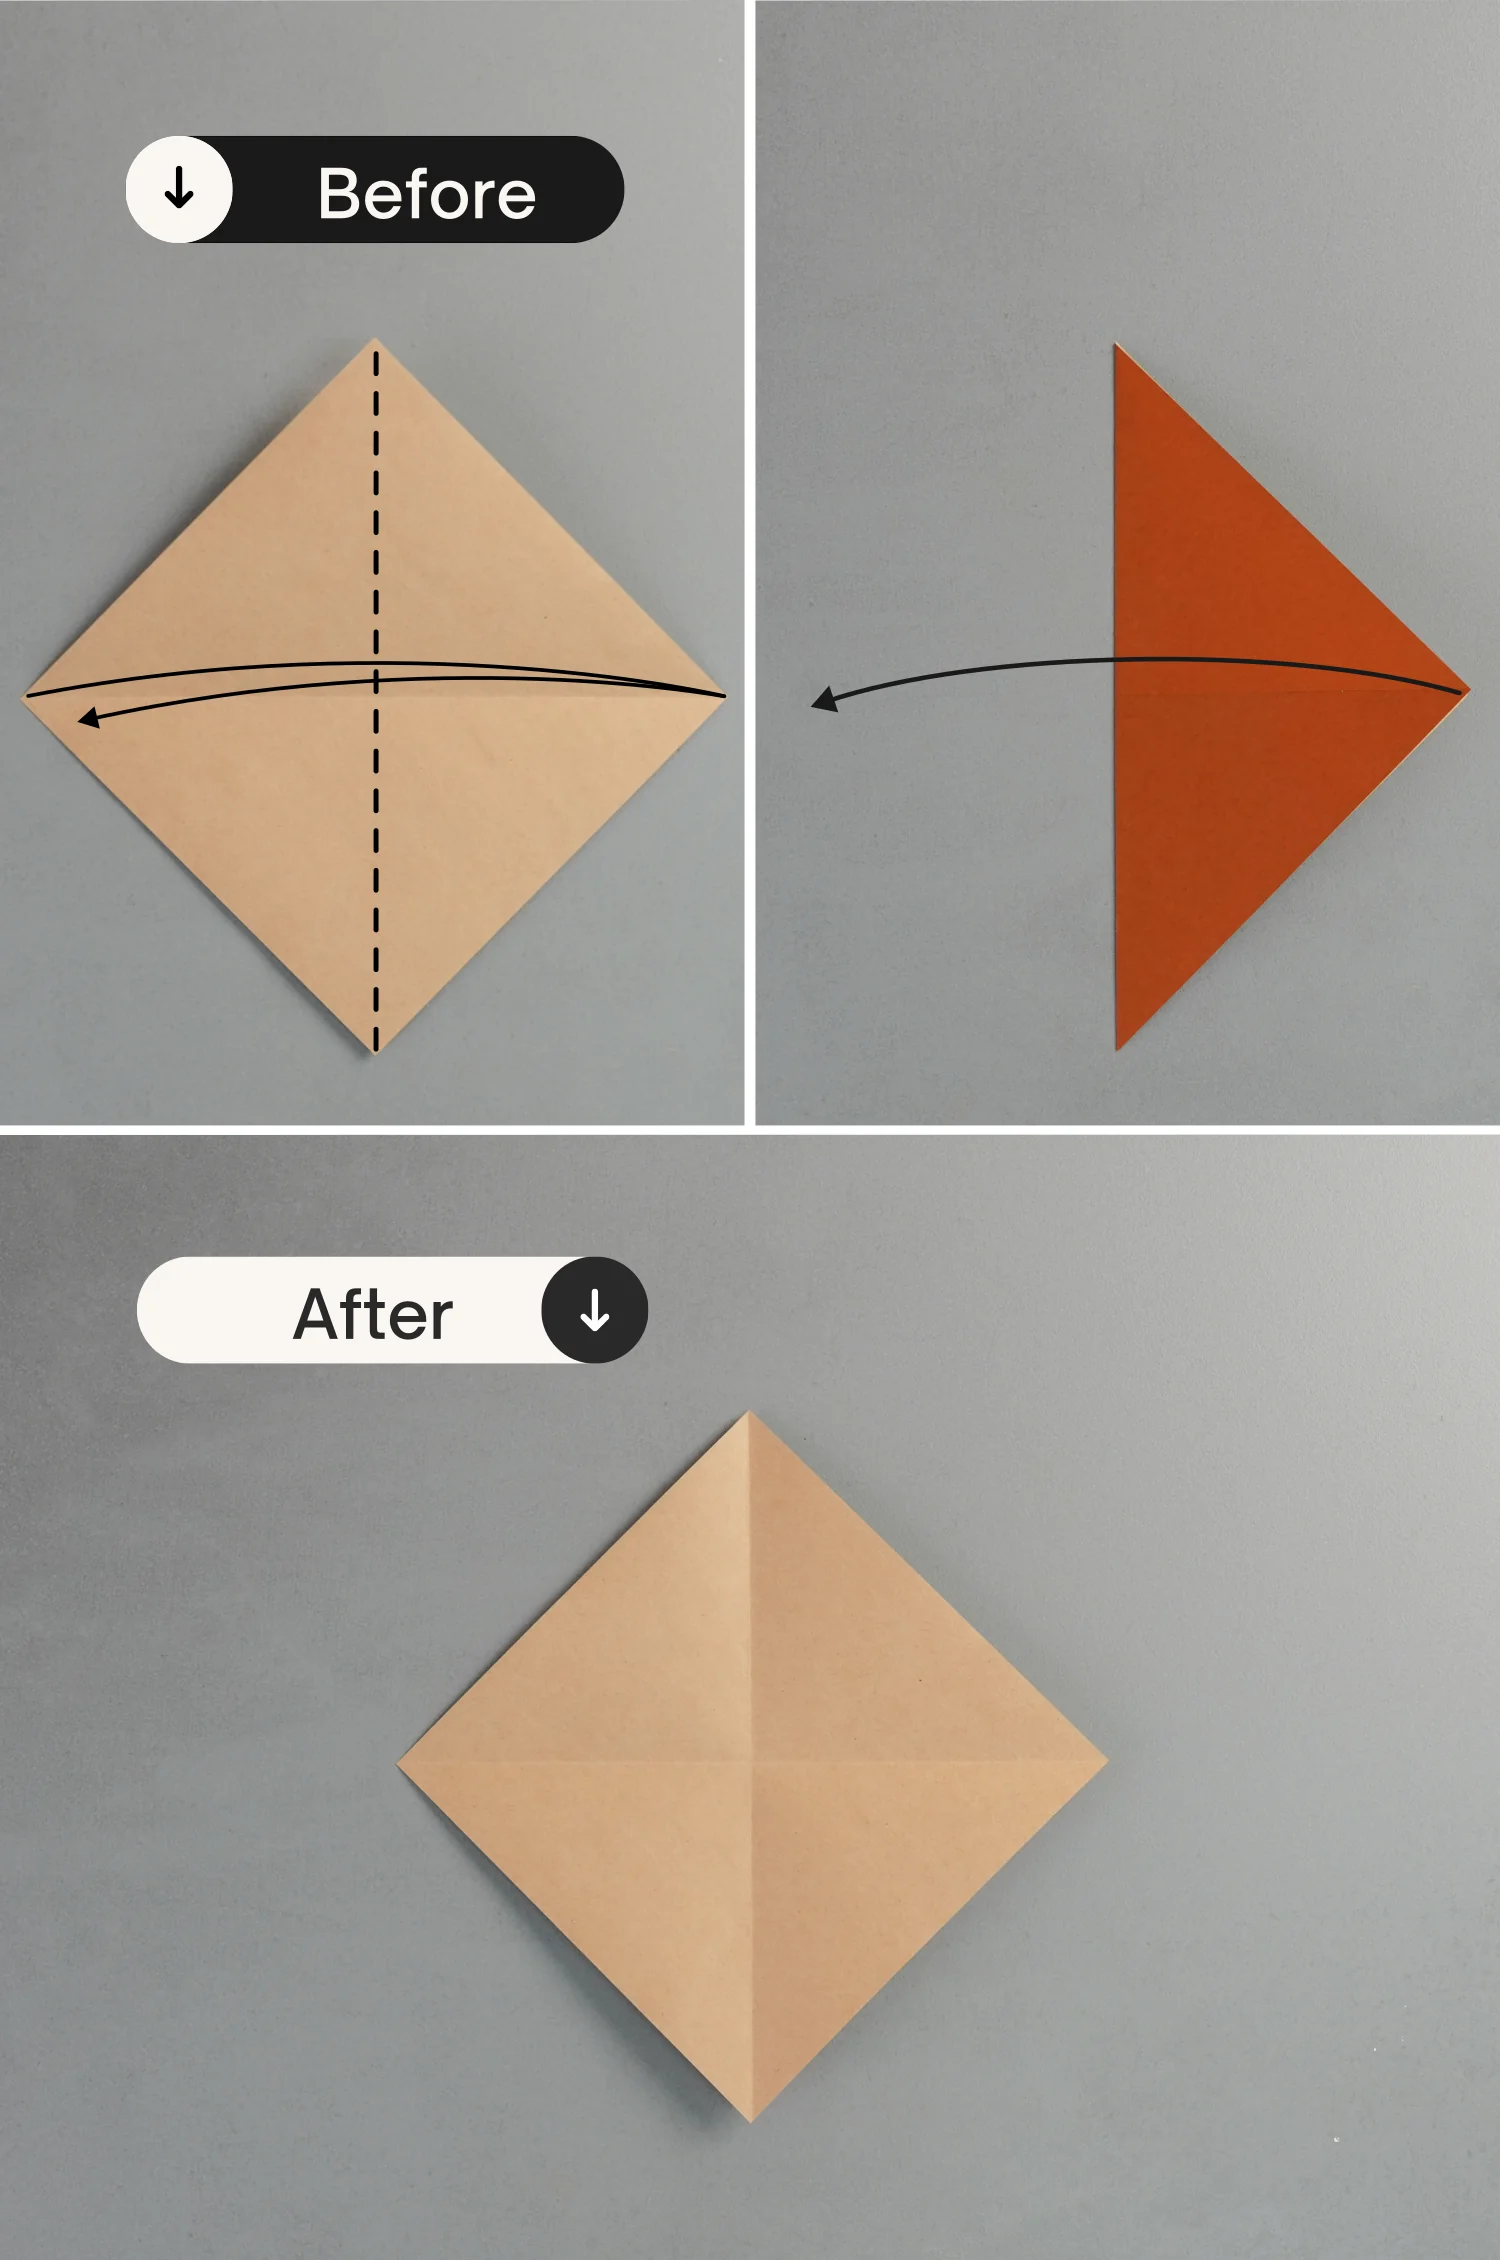
Step 1
Place the paper with the desired display color side down to begin folding, fold it in half horizontally, and unfold it.

Step 2
Fold the paper in half vertically, and unfold it.
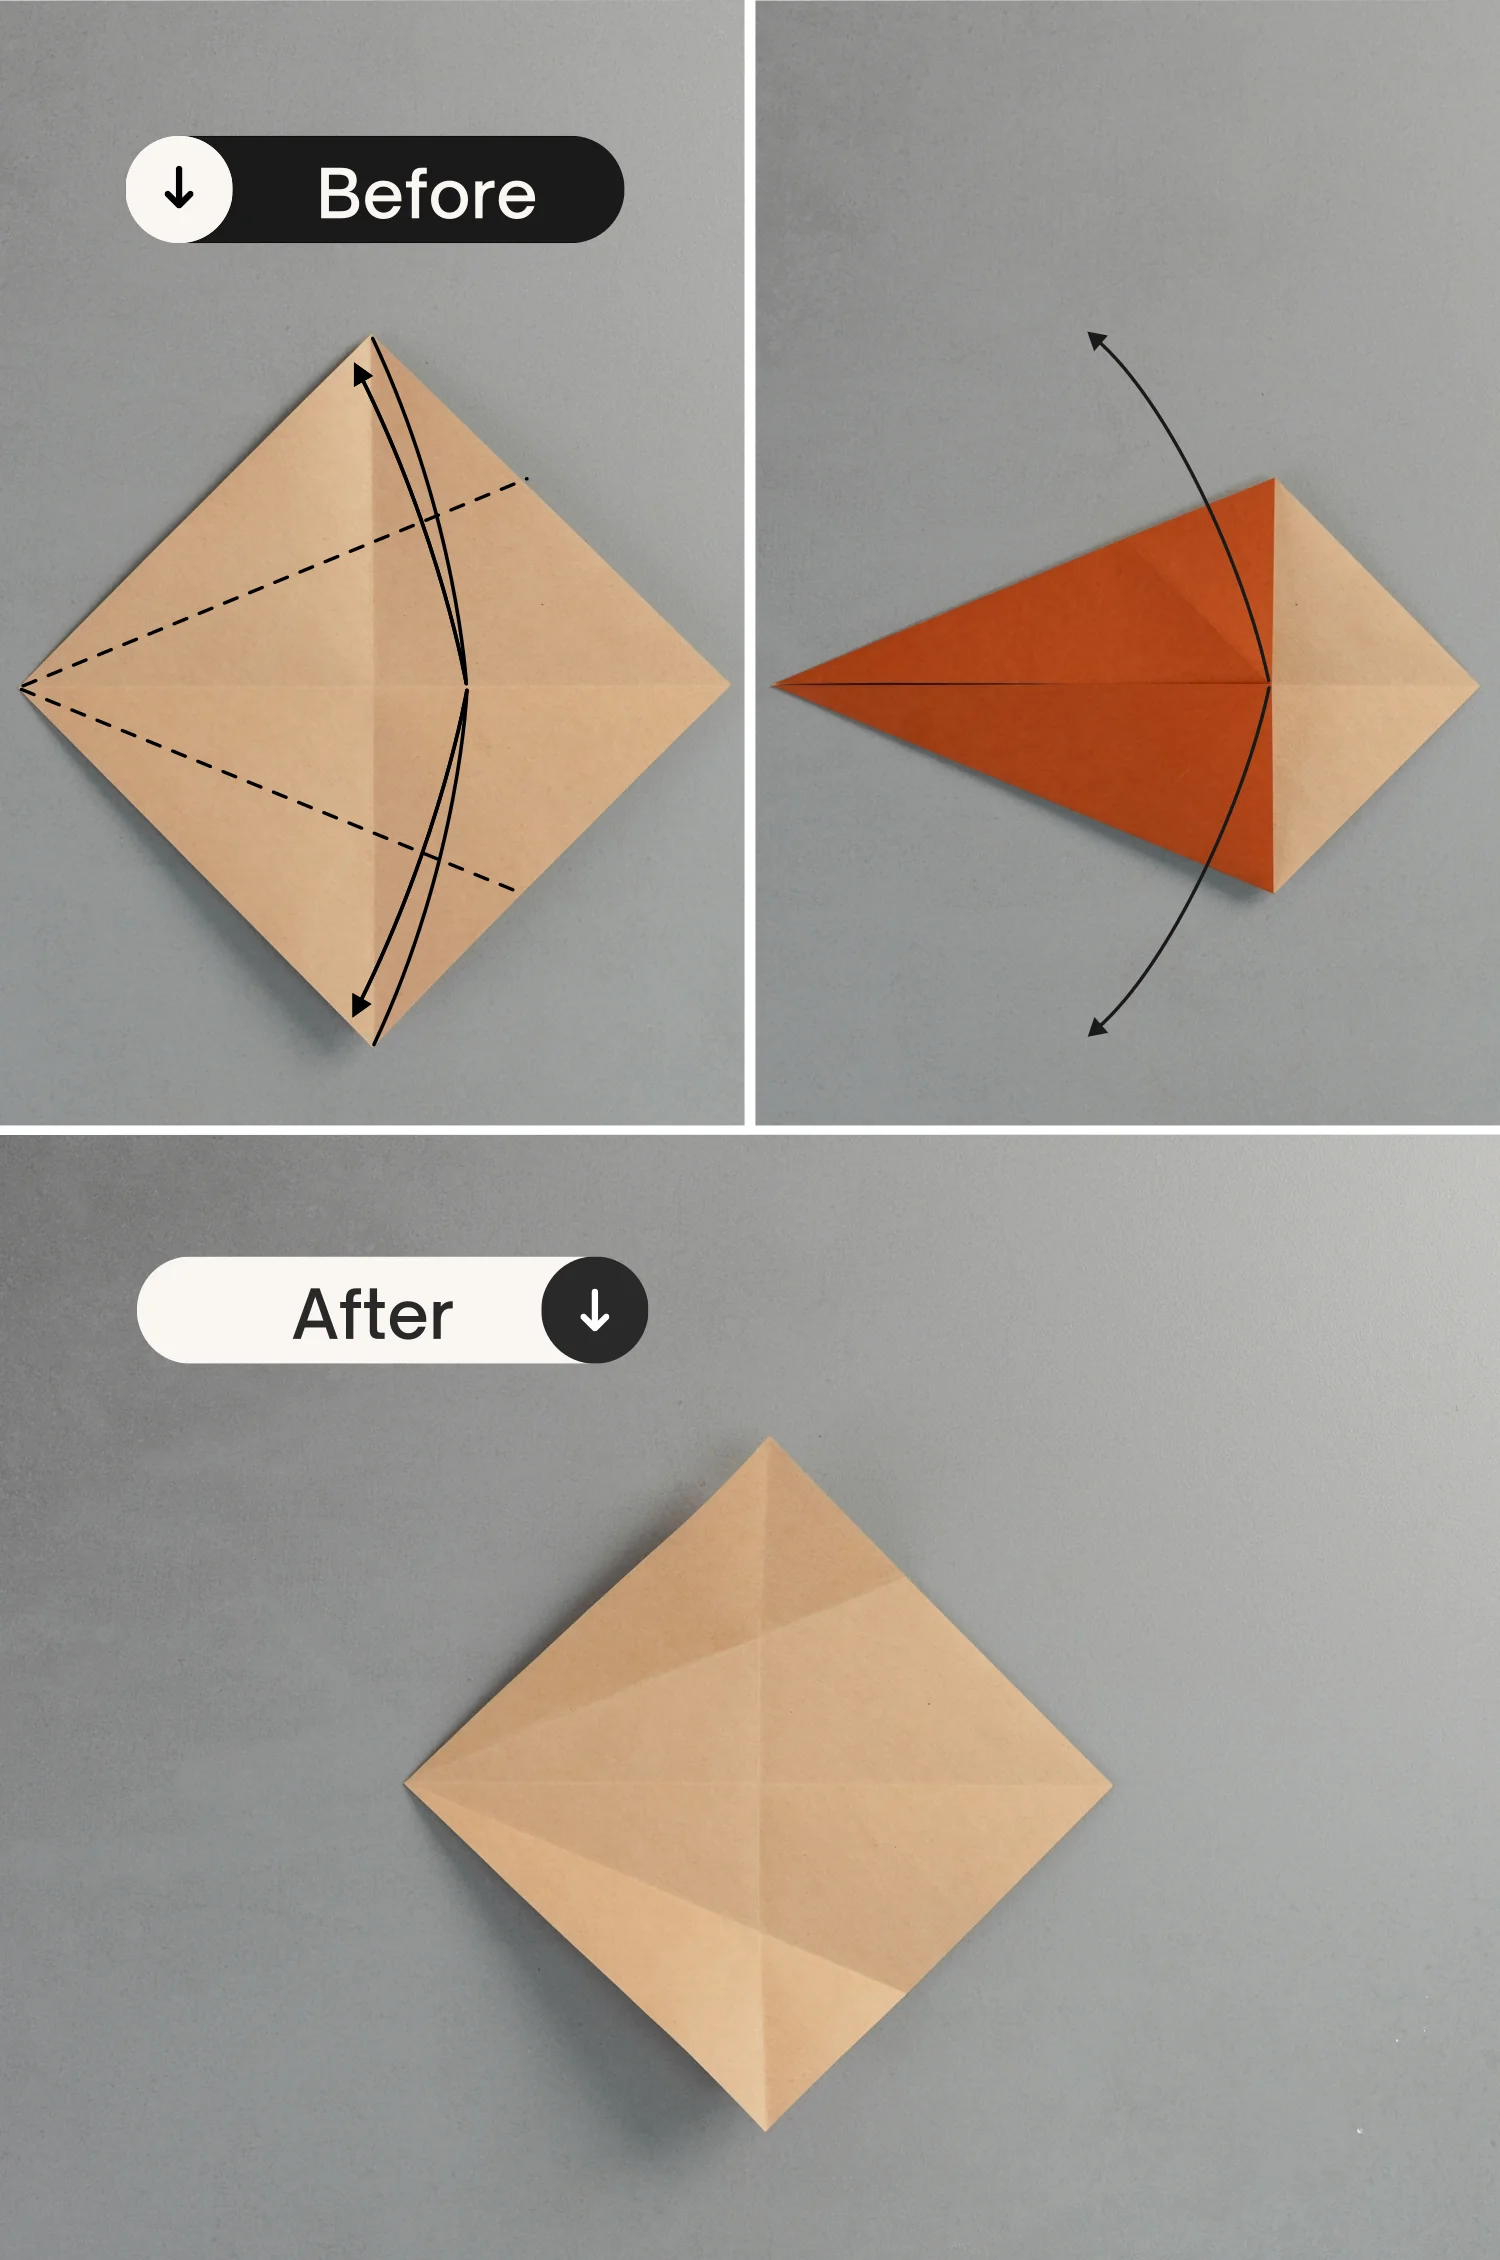
Step 3
Fold the top and bottom left edges to align with the middle horizontal crease, crease them well then unfold them.
Step 4
Fold the top and bottom right edges to align with the middle horizontal crease, and unfold them.
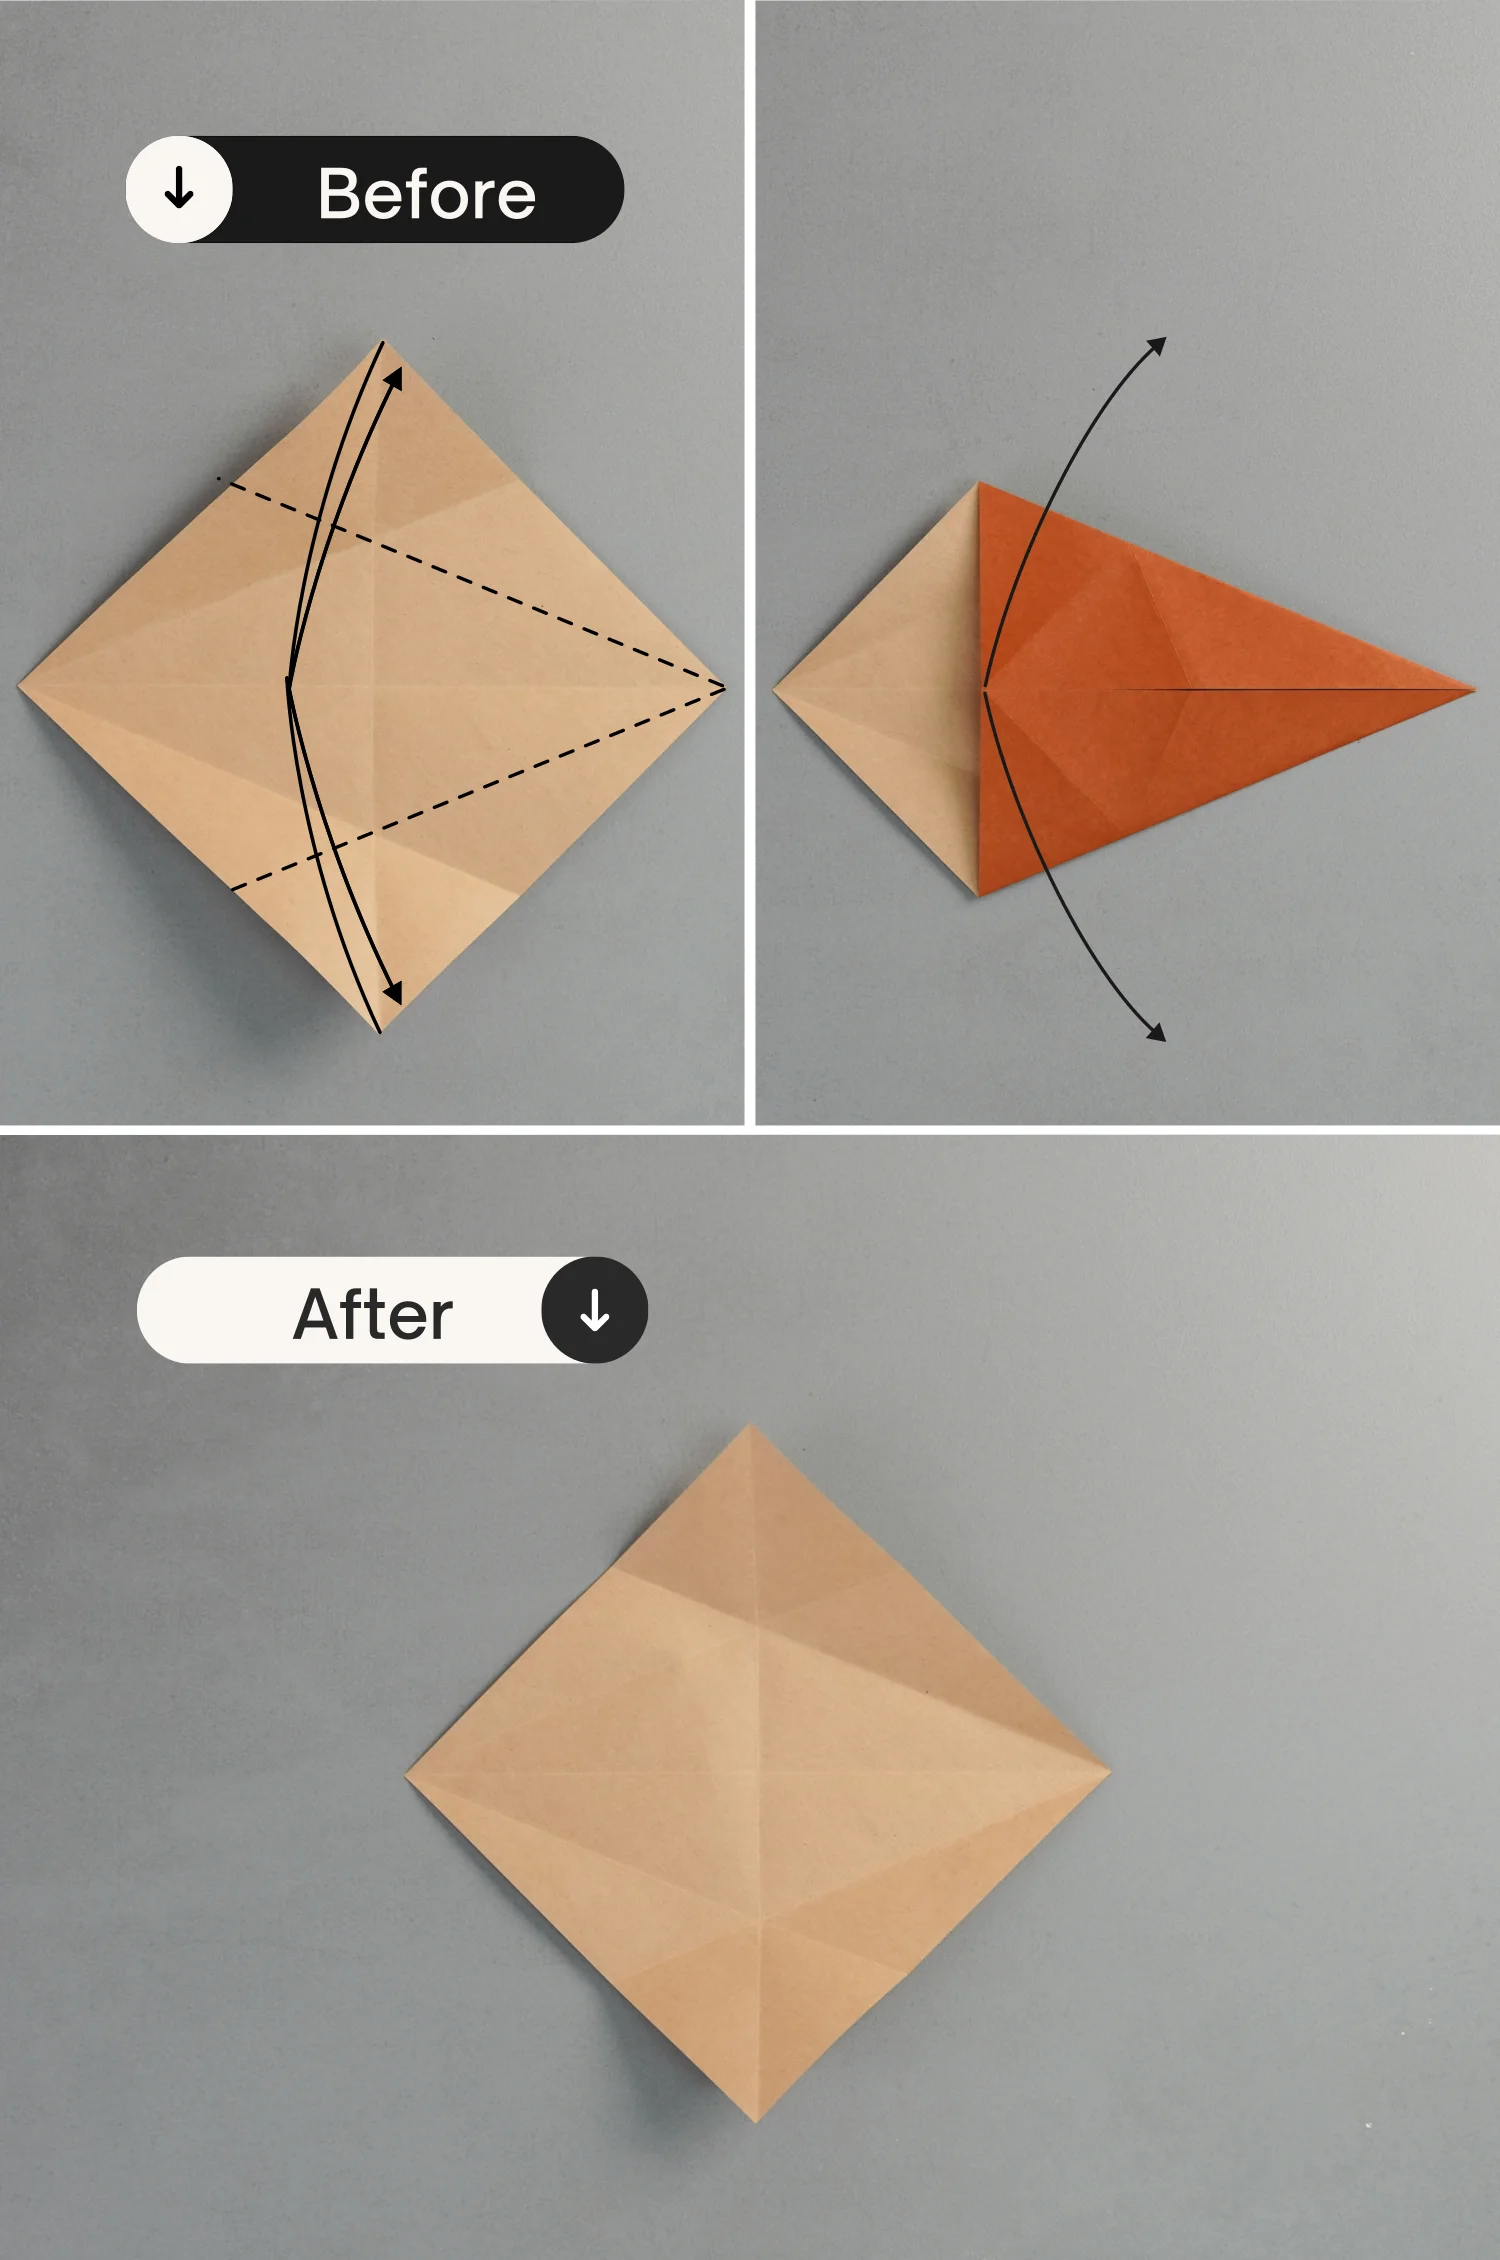
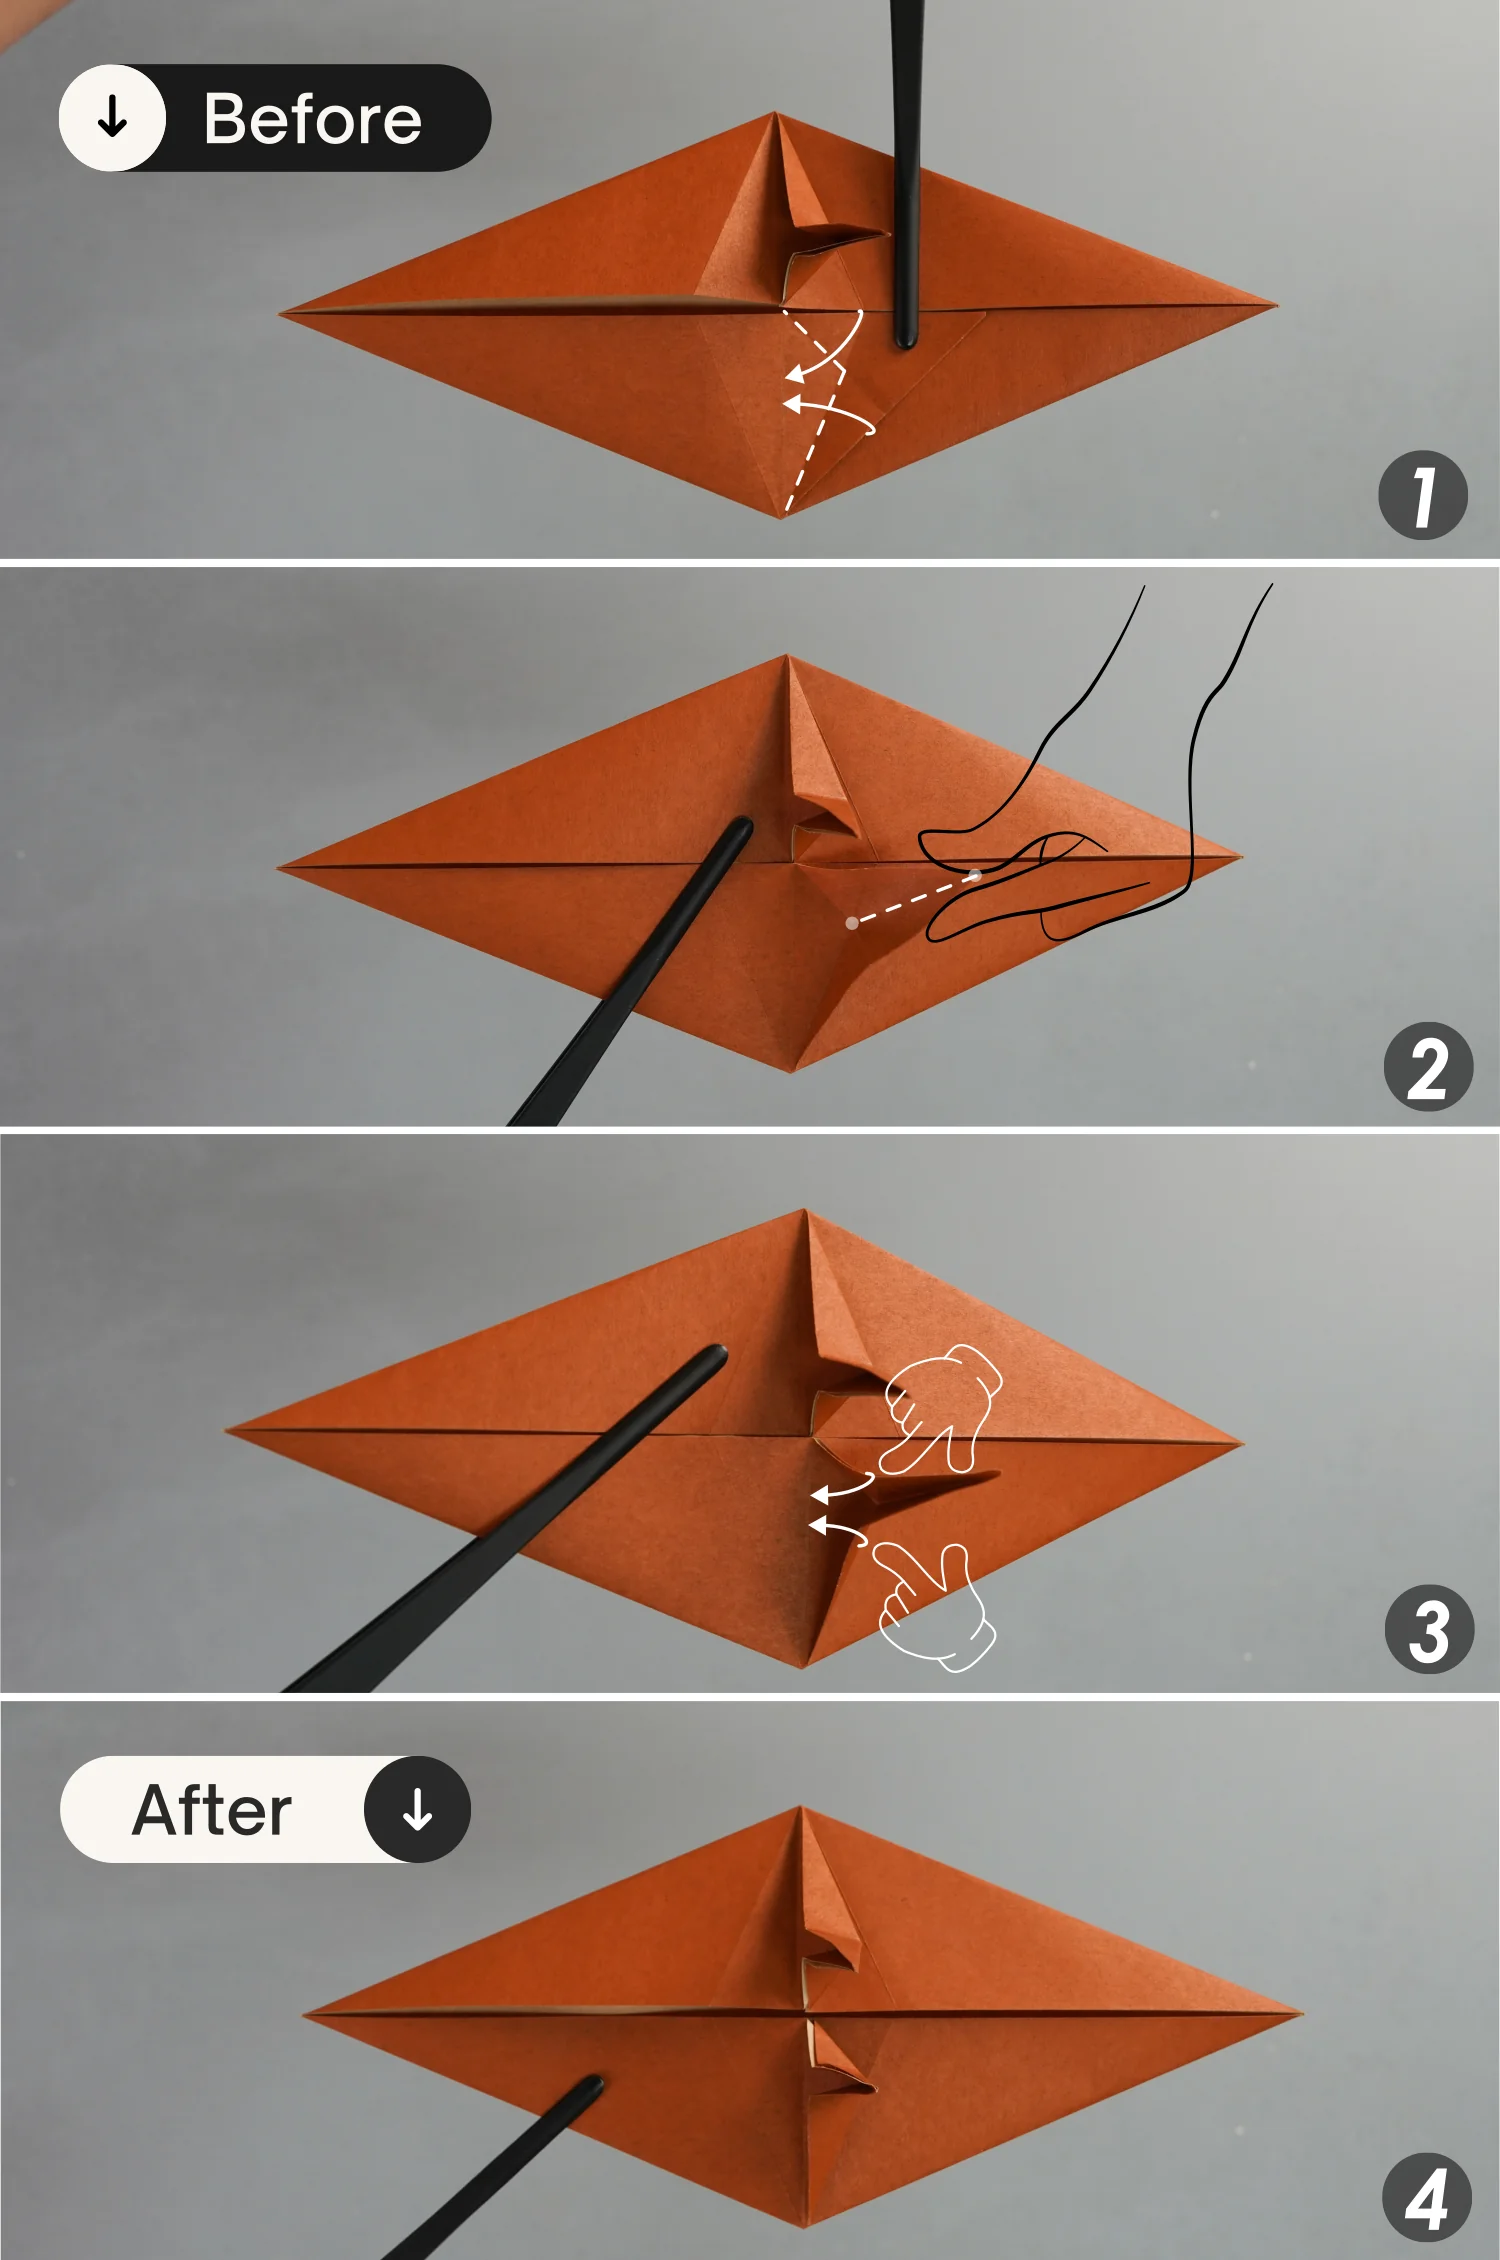
Step 5
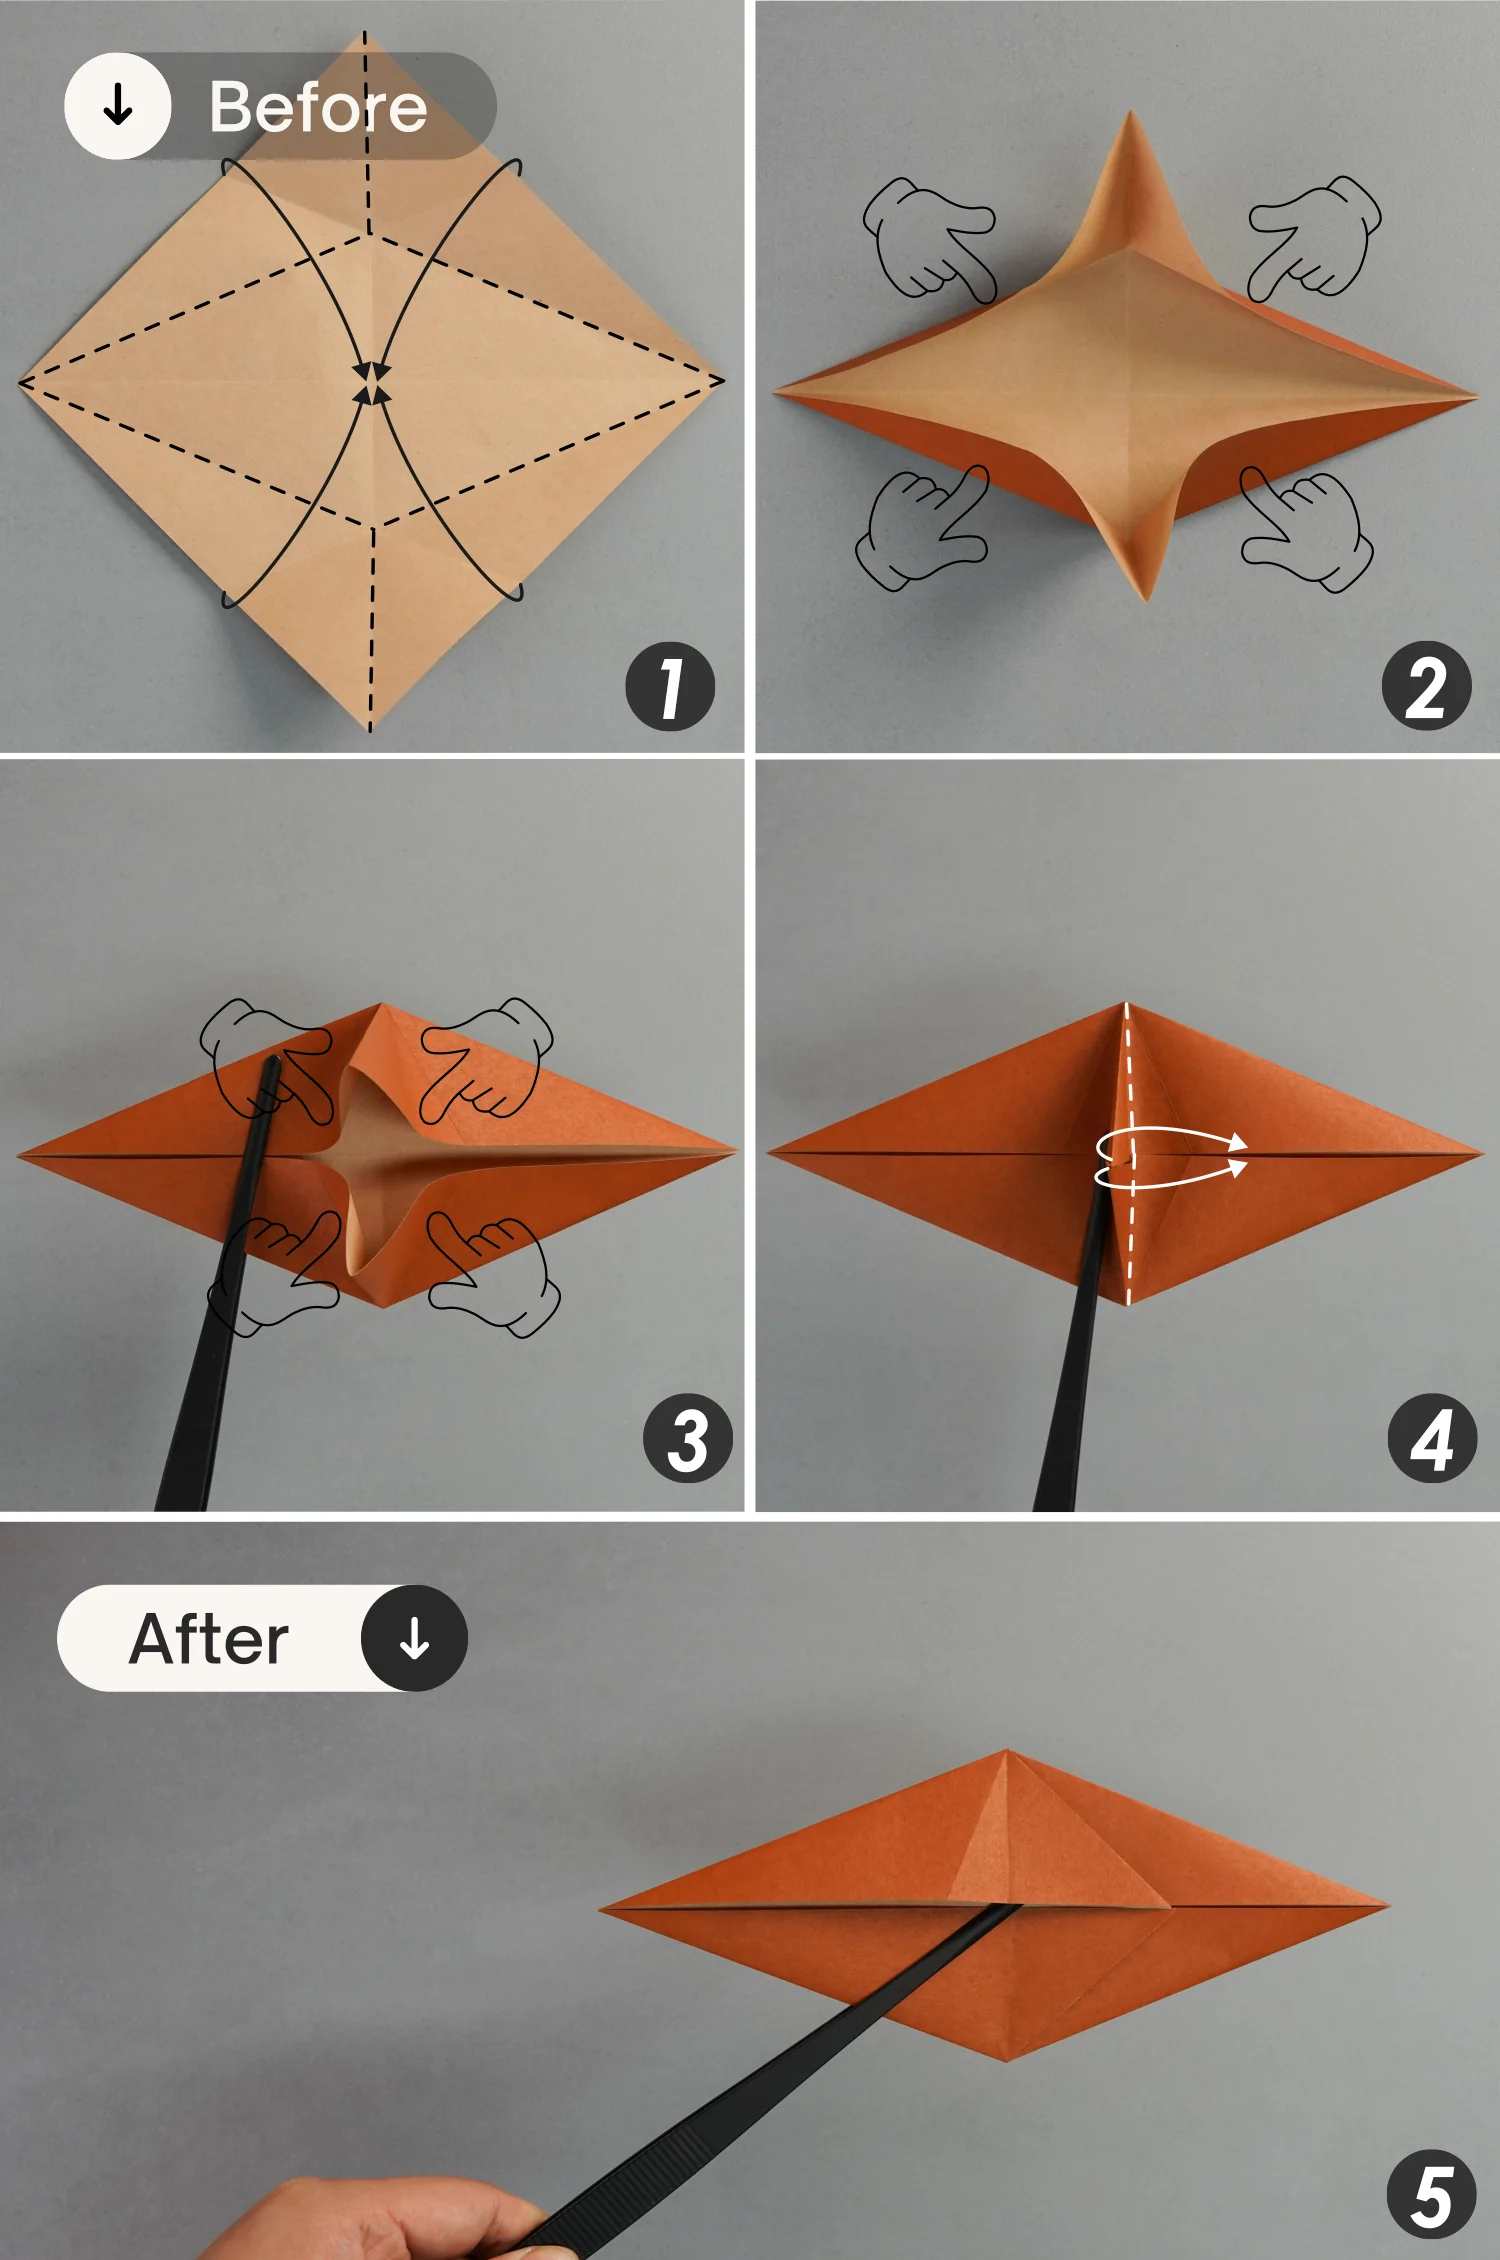
Bring up the four edges toward the center along the creases you just made, flatten the fold, getting two flaps on the center, and then press down the flaps to the right side.
Step 6
Fold the right edges of both the two flaps to align with the middle vertical line of the paper, and unfold them.
Step 7
Fold up the bottom right point of the top flap to meet the top point of the paper, crease it well, and unfold it.
Fold the top right point of the bottom flap to meet the bottom point of the paper, crease it well, and unfold it.

Step 8
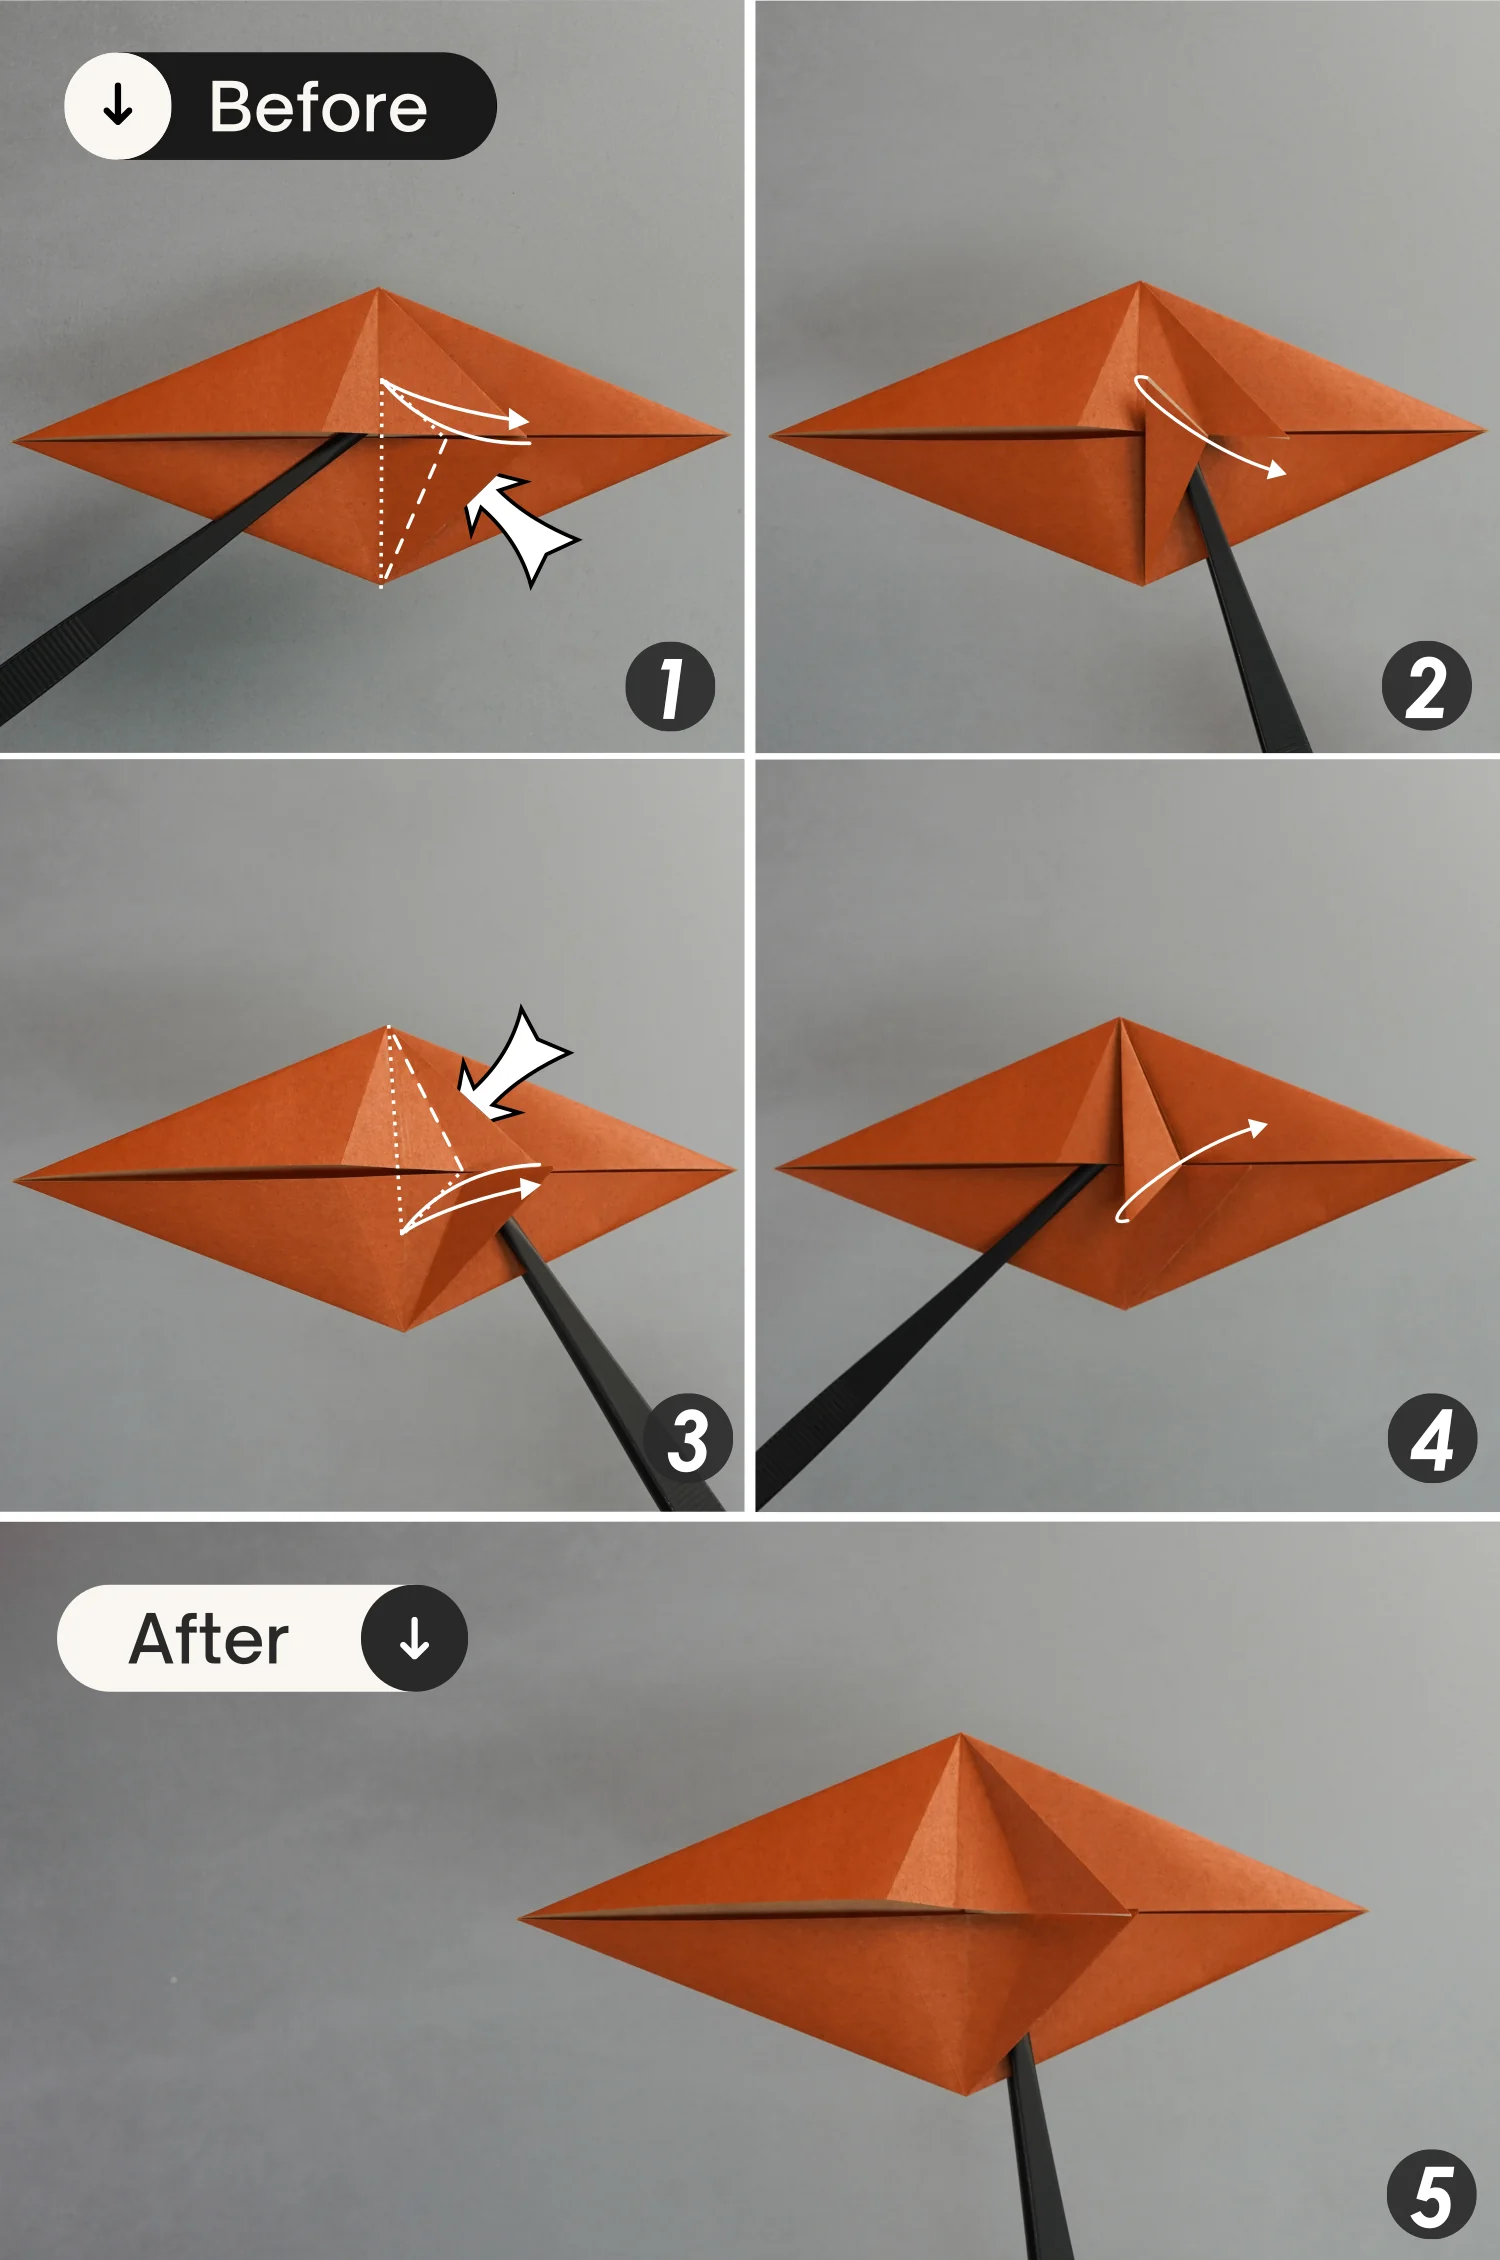
Bring up the right and bottom edges of the top flap along the existing creases you made in the previous step, to sharpen its right corner.
Step 9
Similarly, bring up the right and top edges of the bottom flap along the existing creases you made in the previous step, to sharpen its right corner.
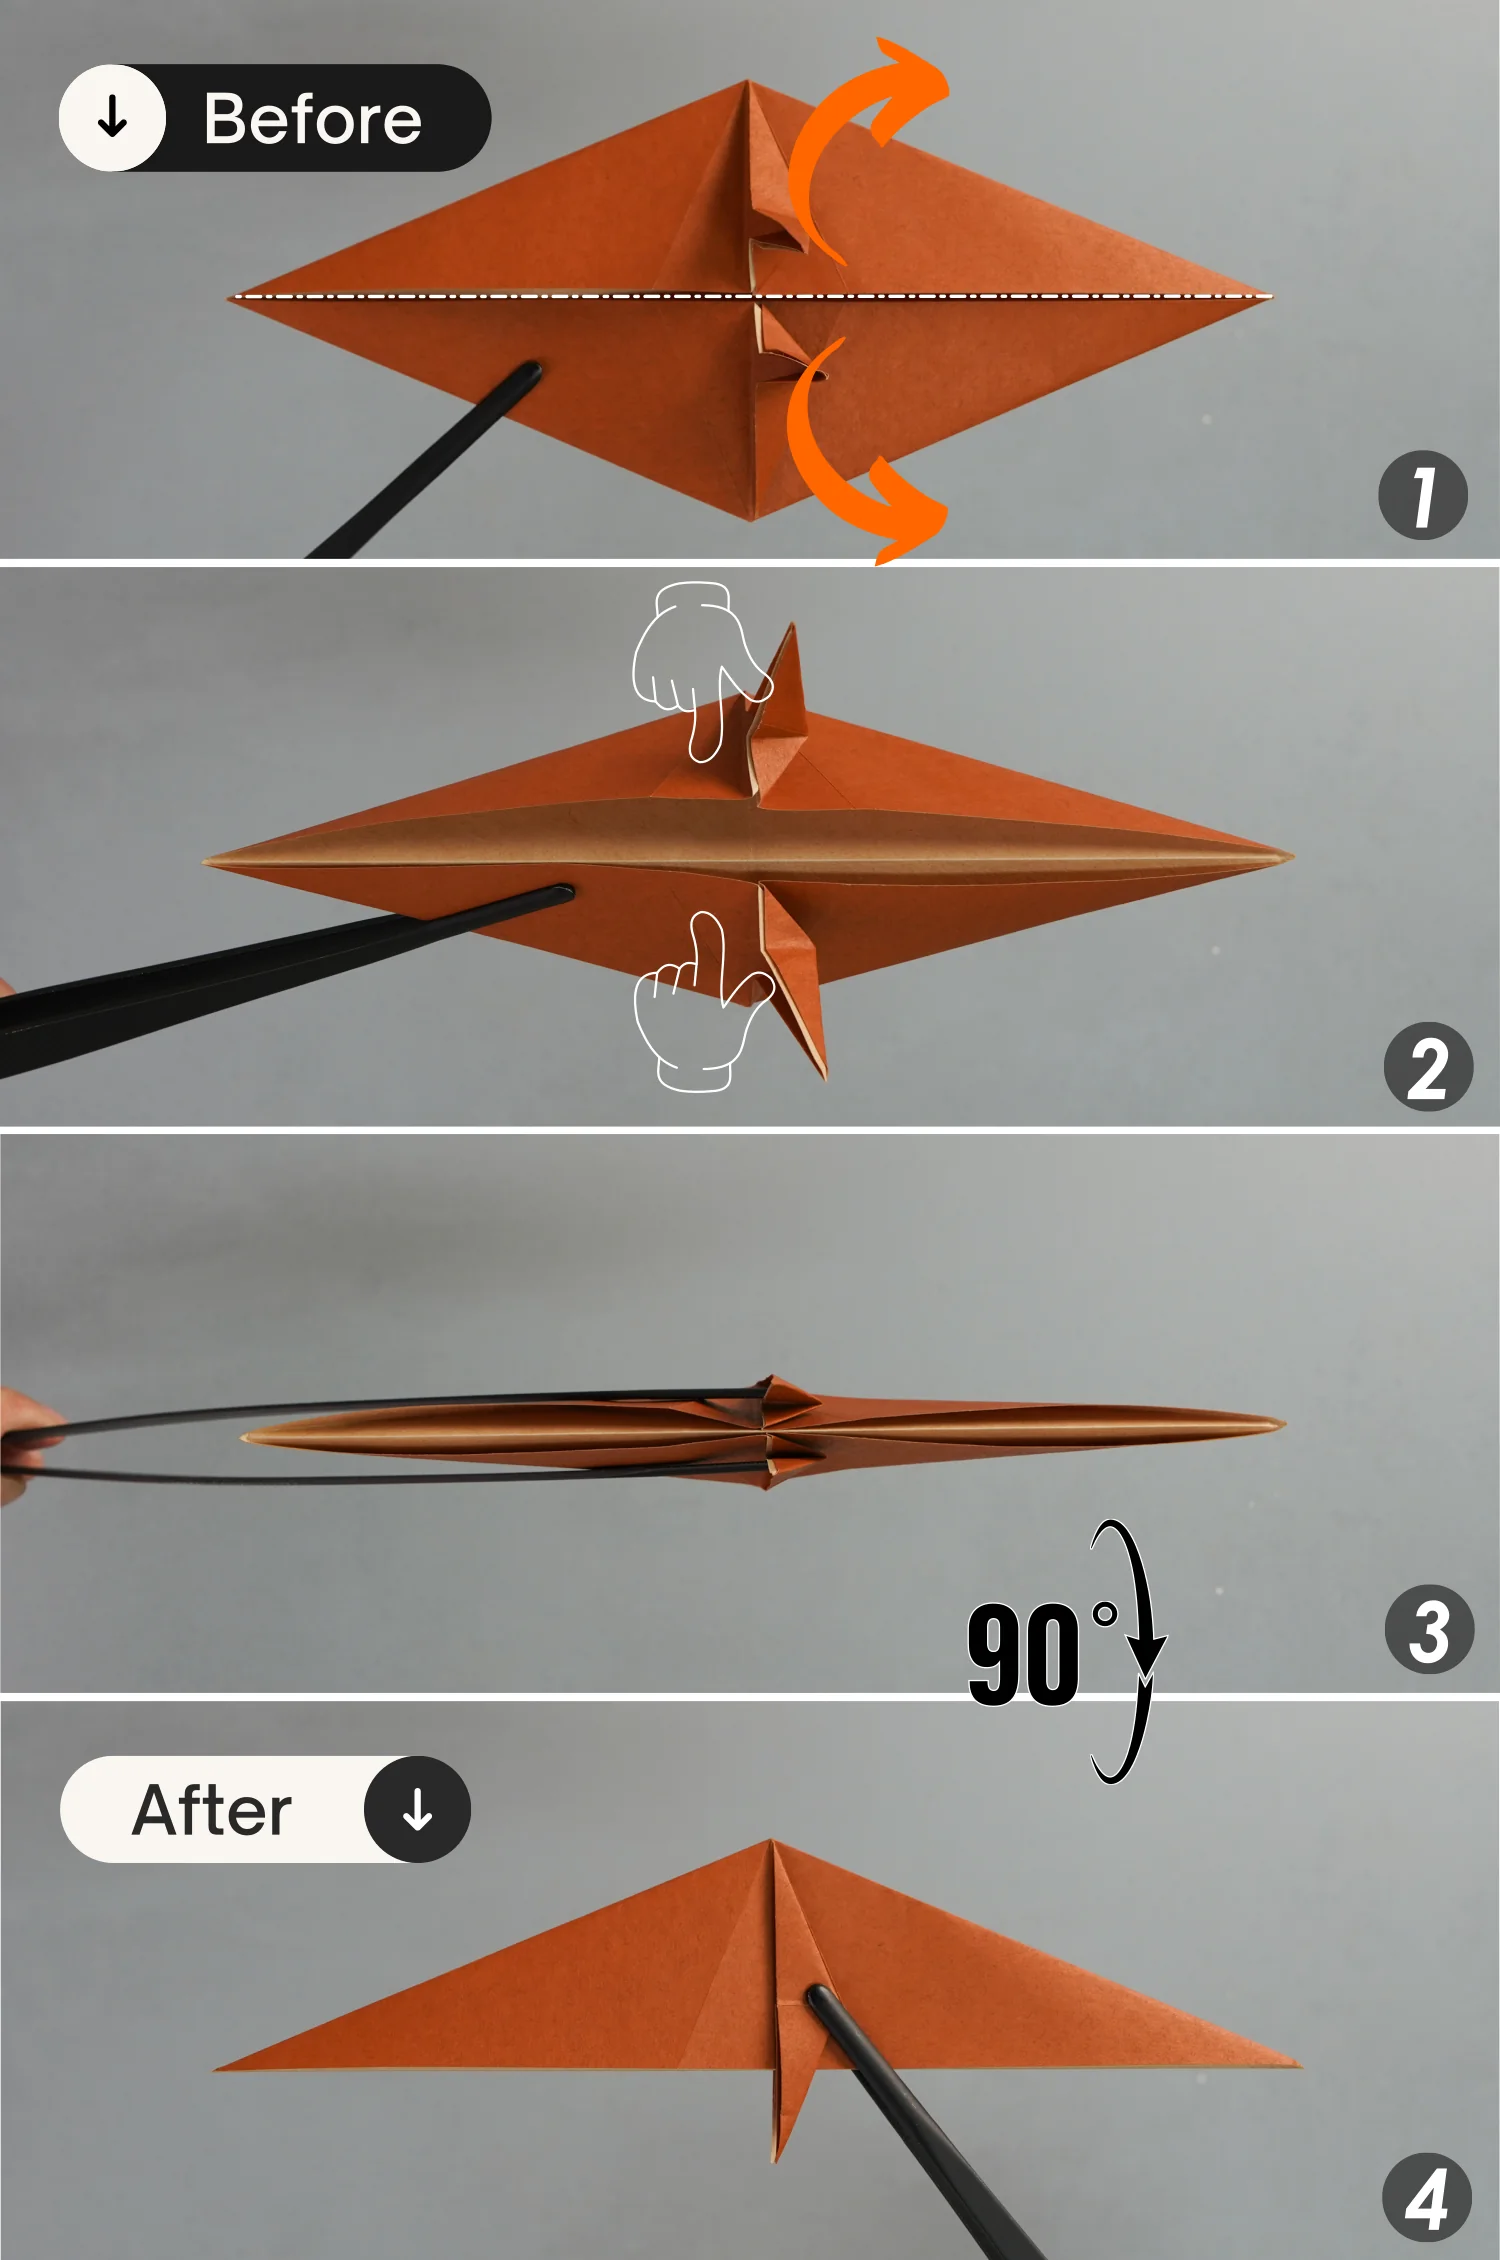
Step 10
Fold the paper in half horizontally backward, then rotate it 90 degrees from front to back.
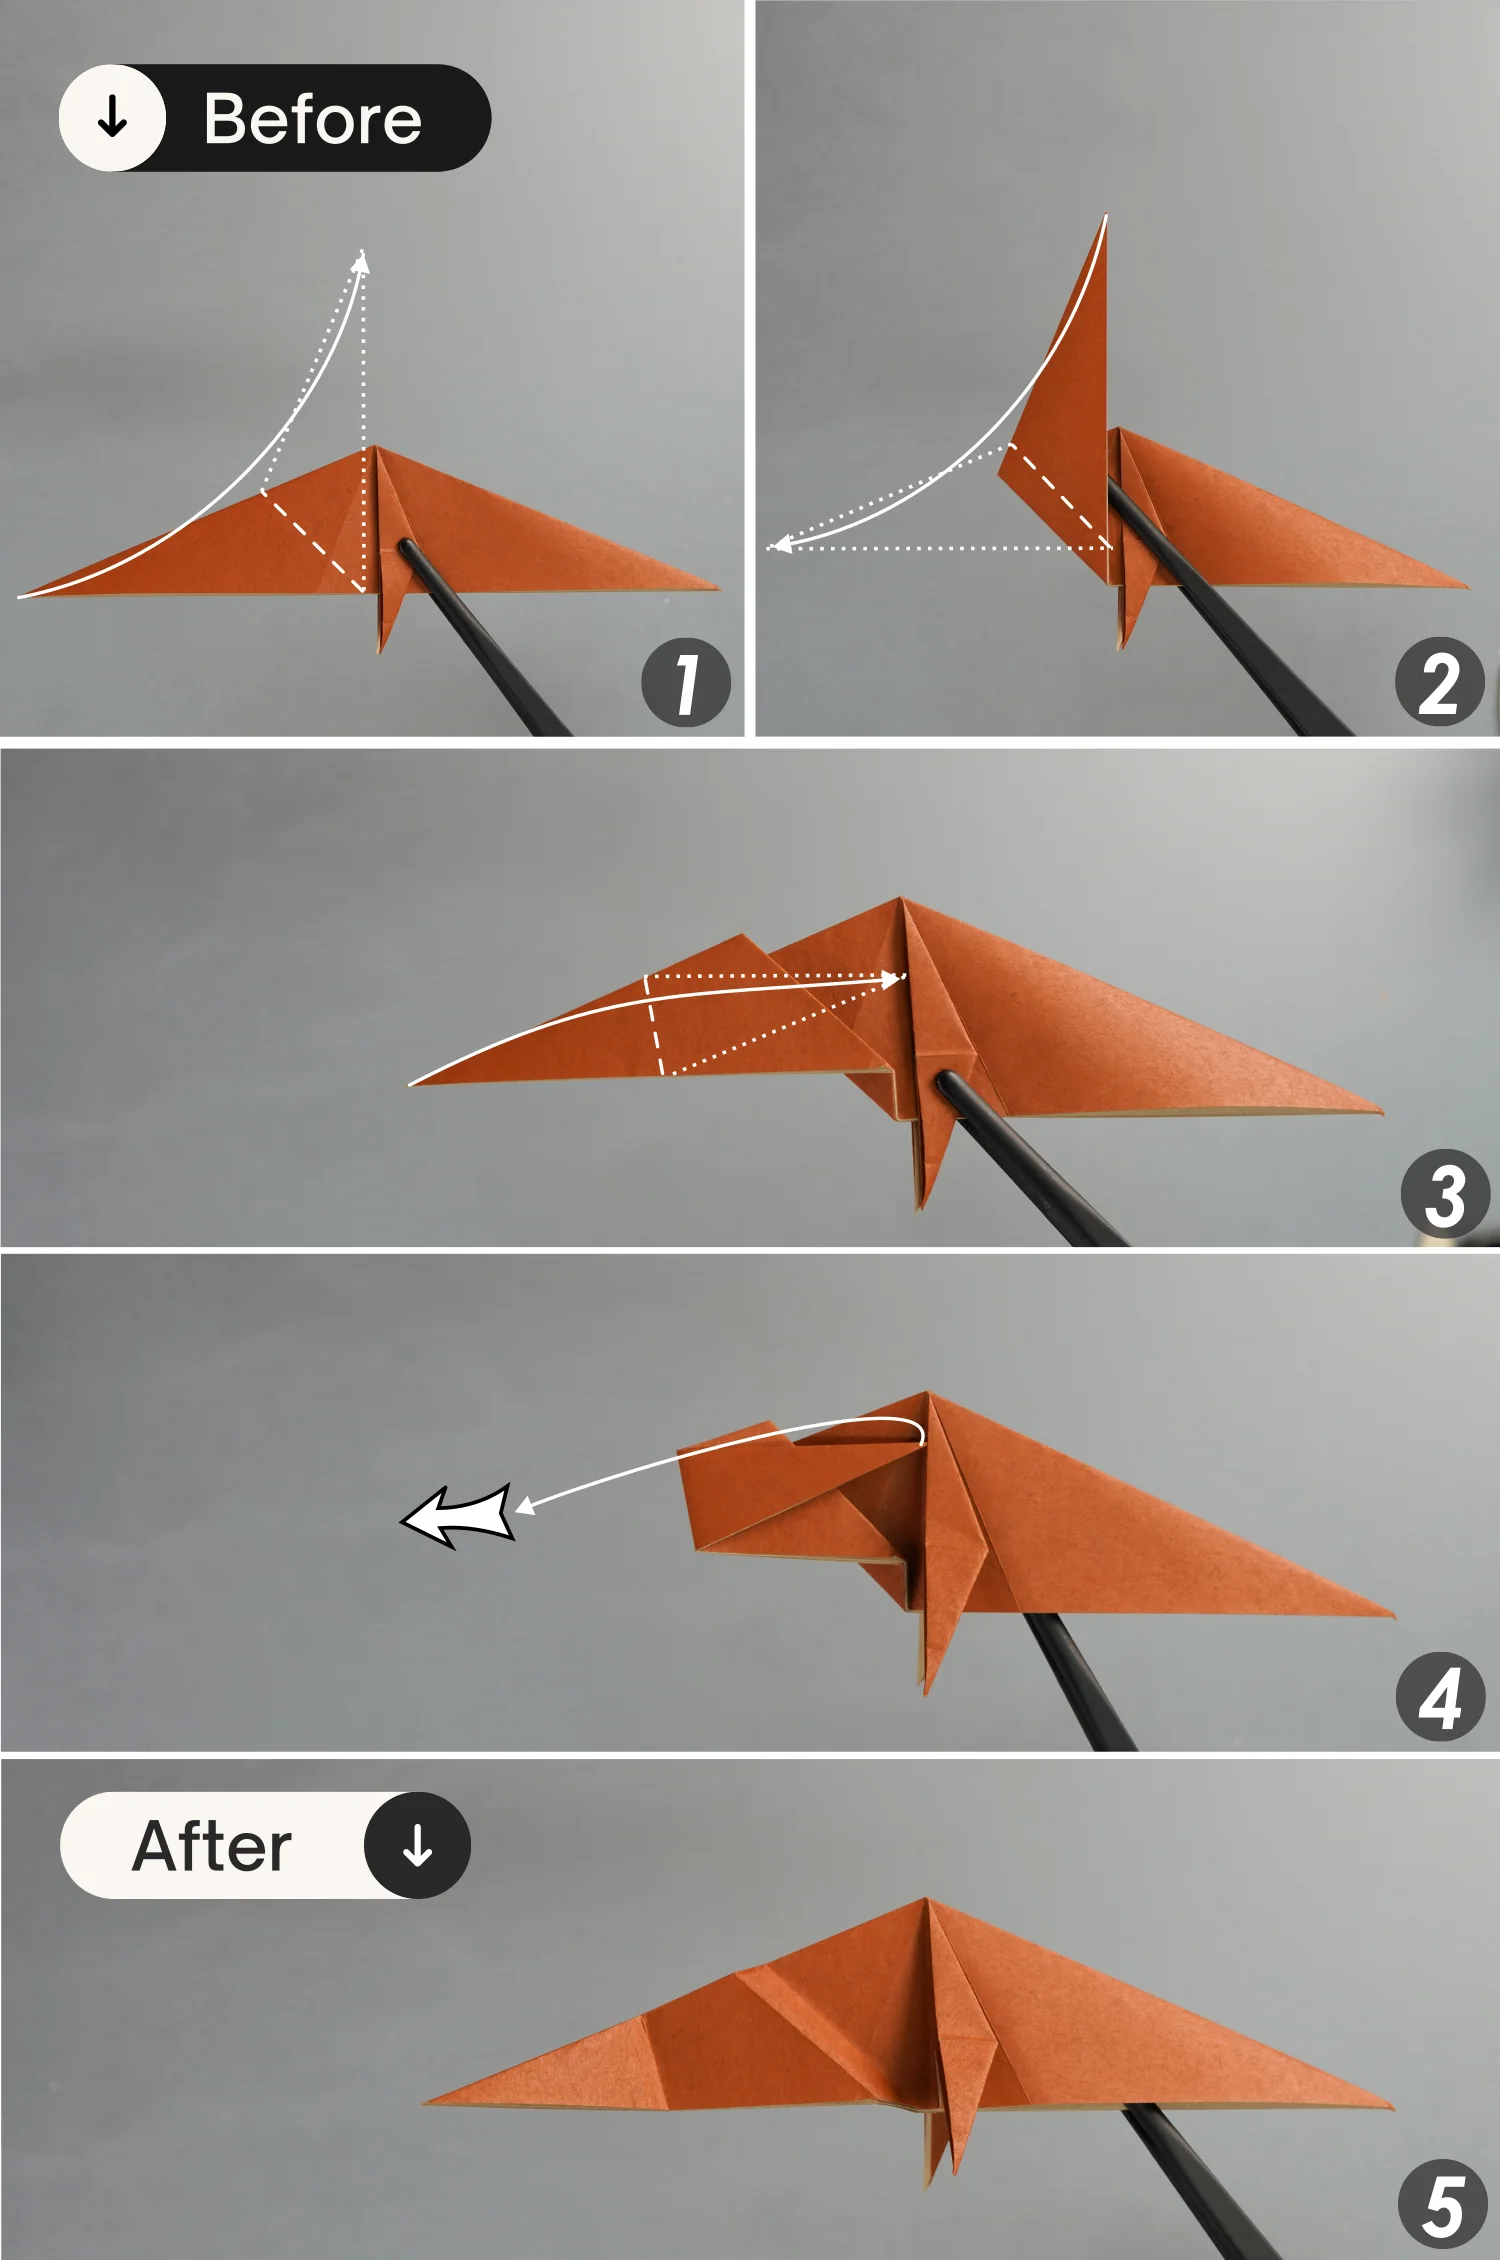
Step 11
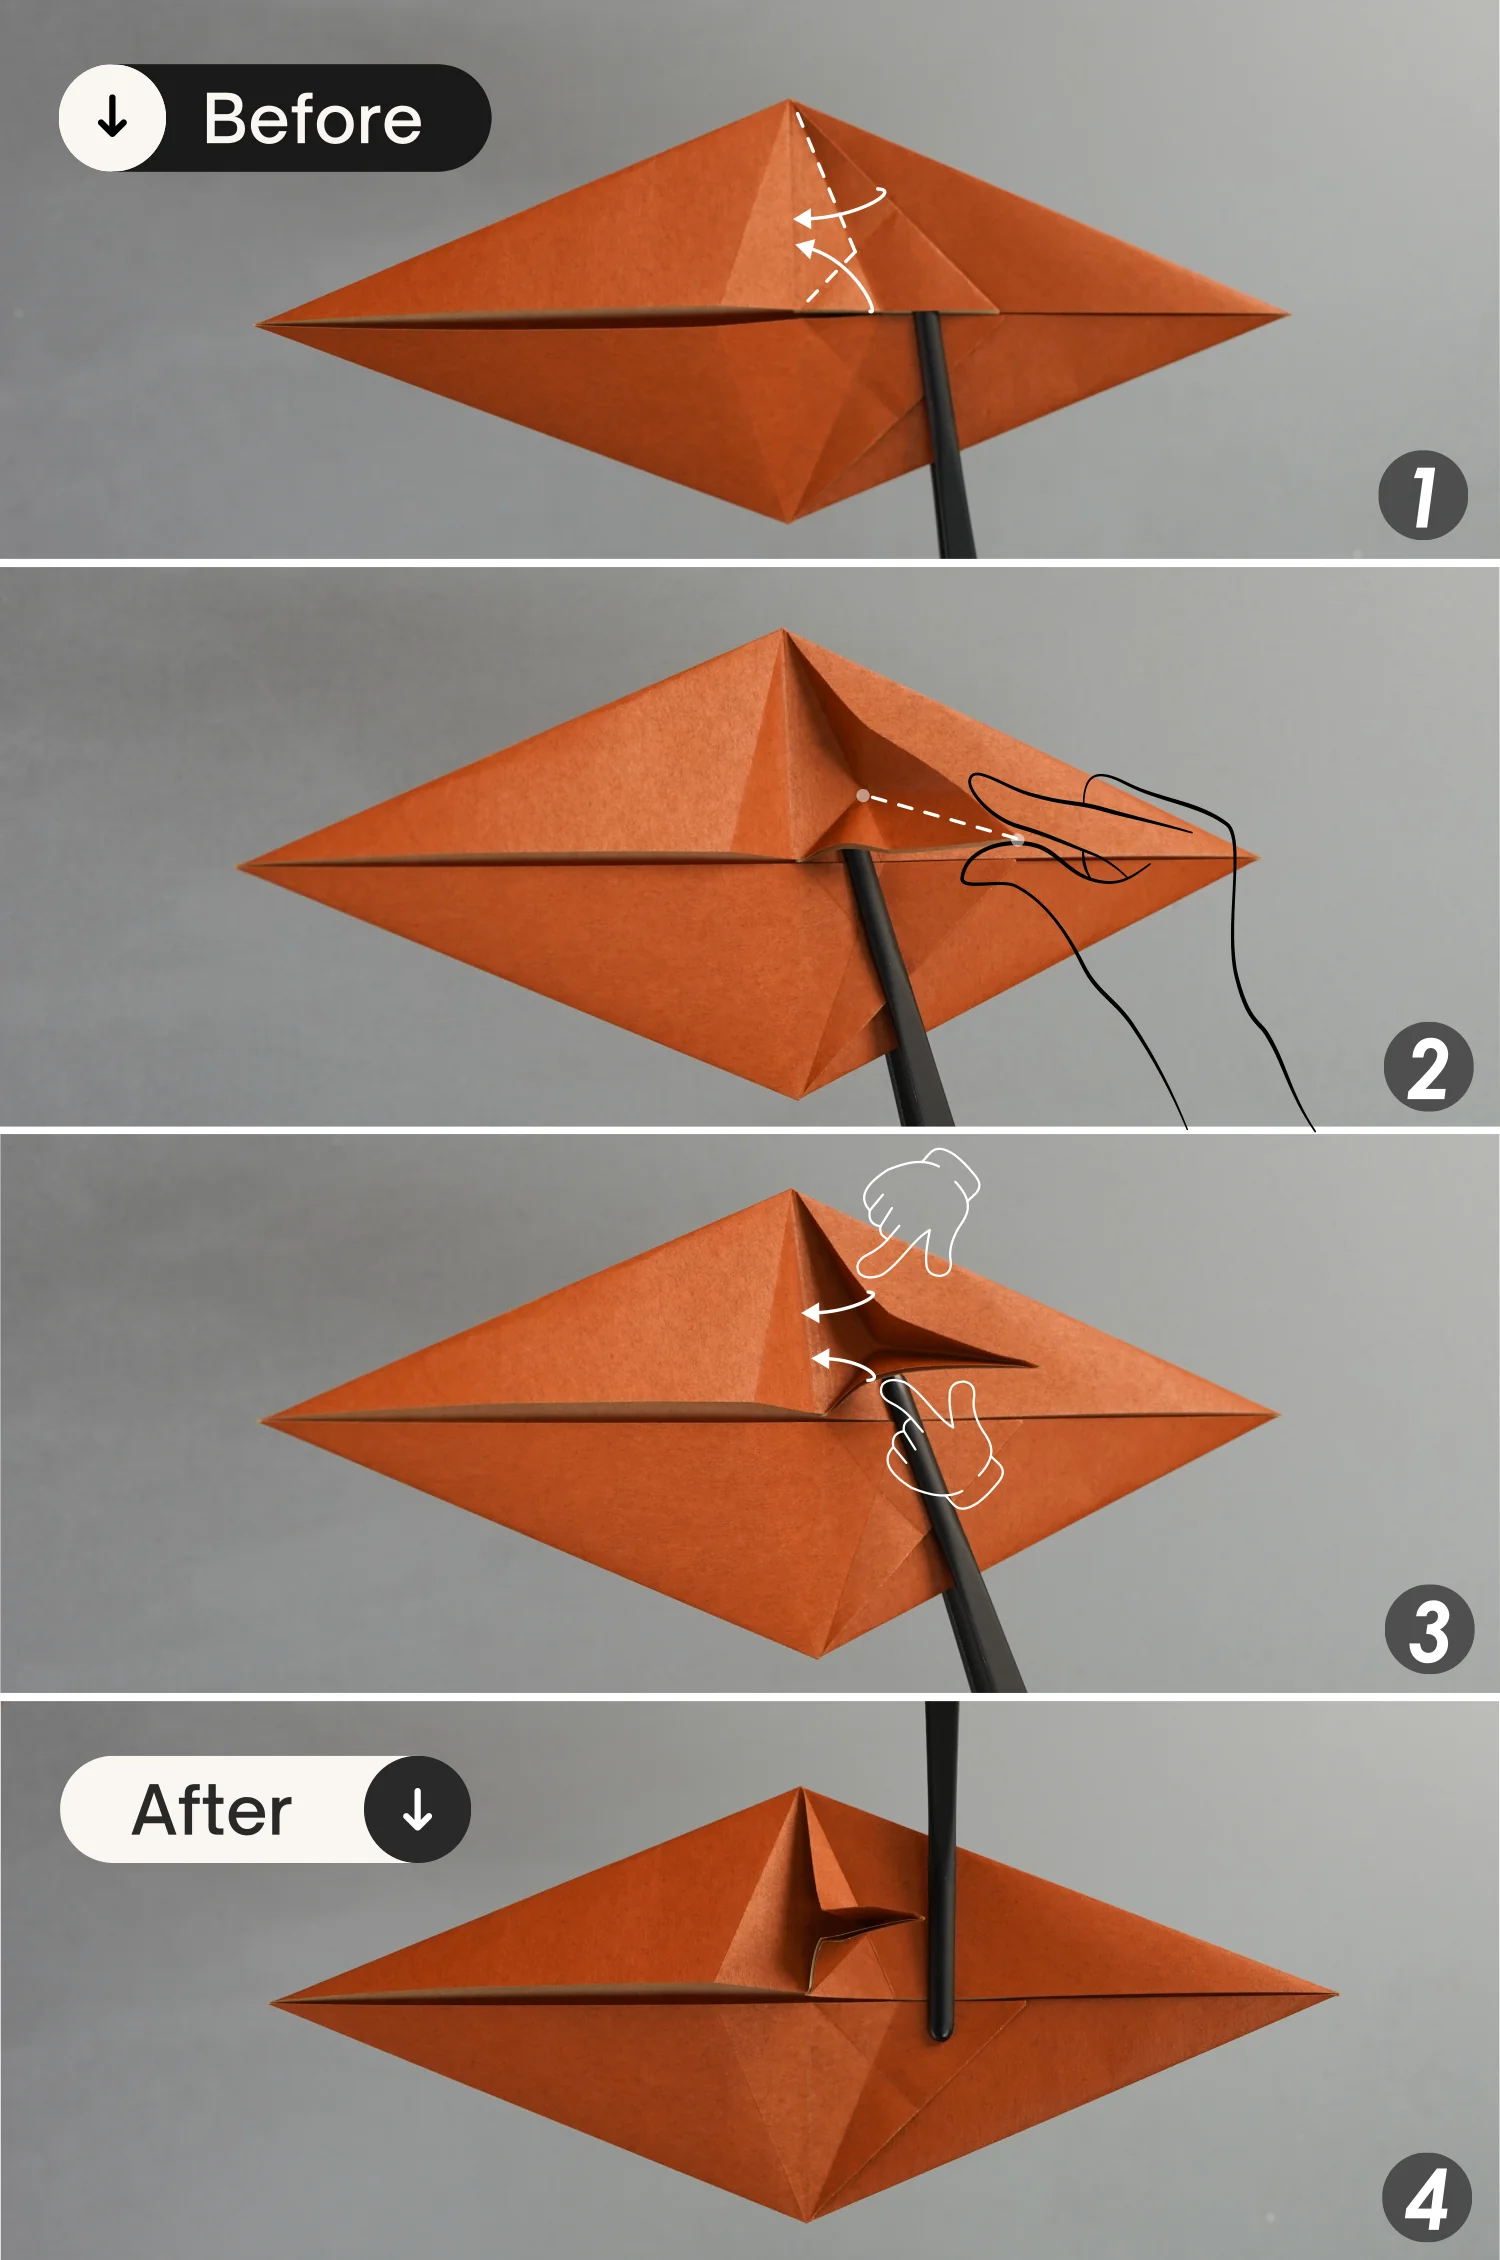
Fold up the left part to make the right edge of the folded part perpendicular to the bottom edge [picture 1], then fold down this part to its original side [picture 2], and next fold the left point toward the right side [picture 3]. Finally, unfold them.
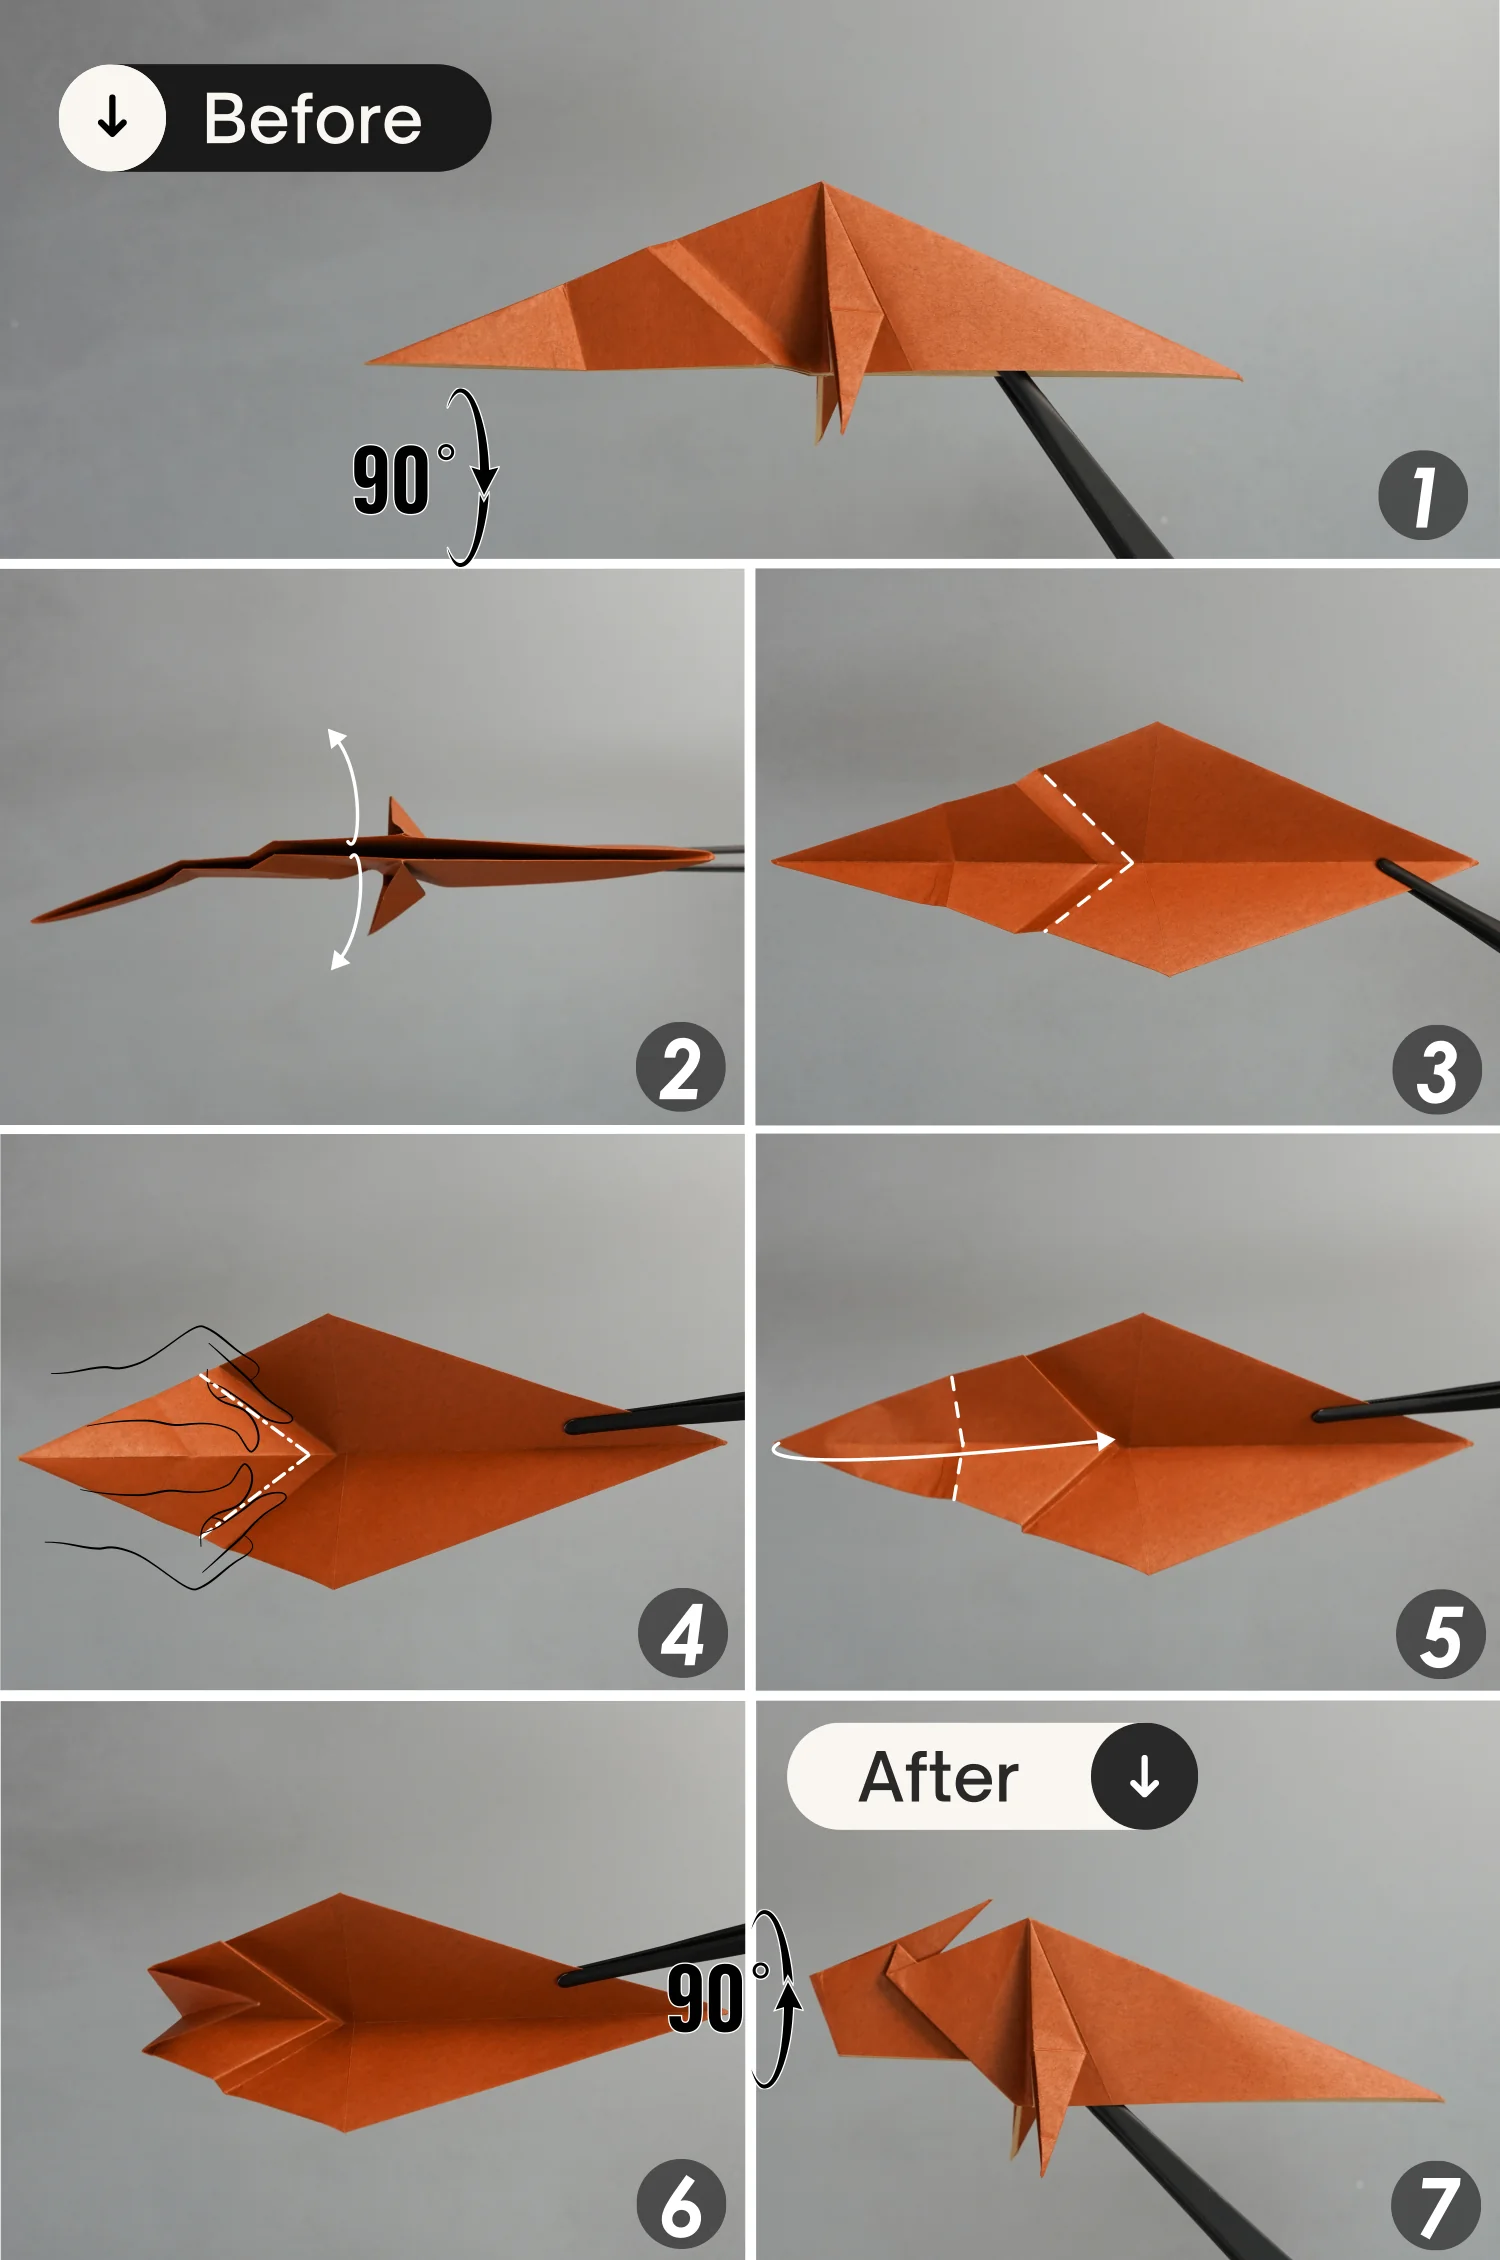
Step 12
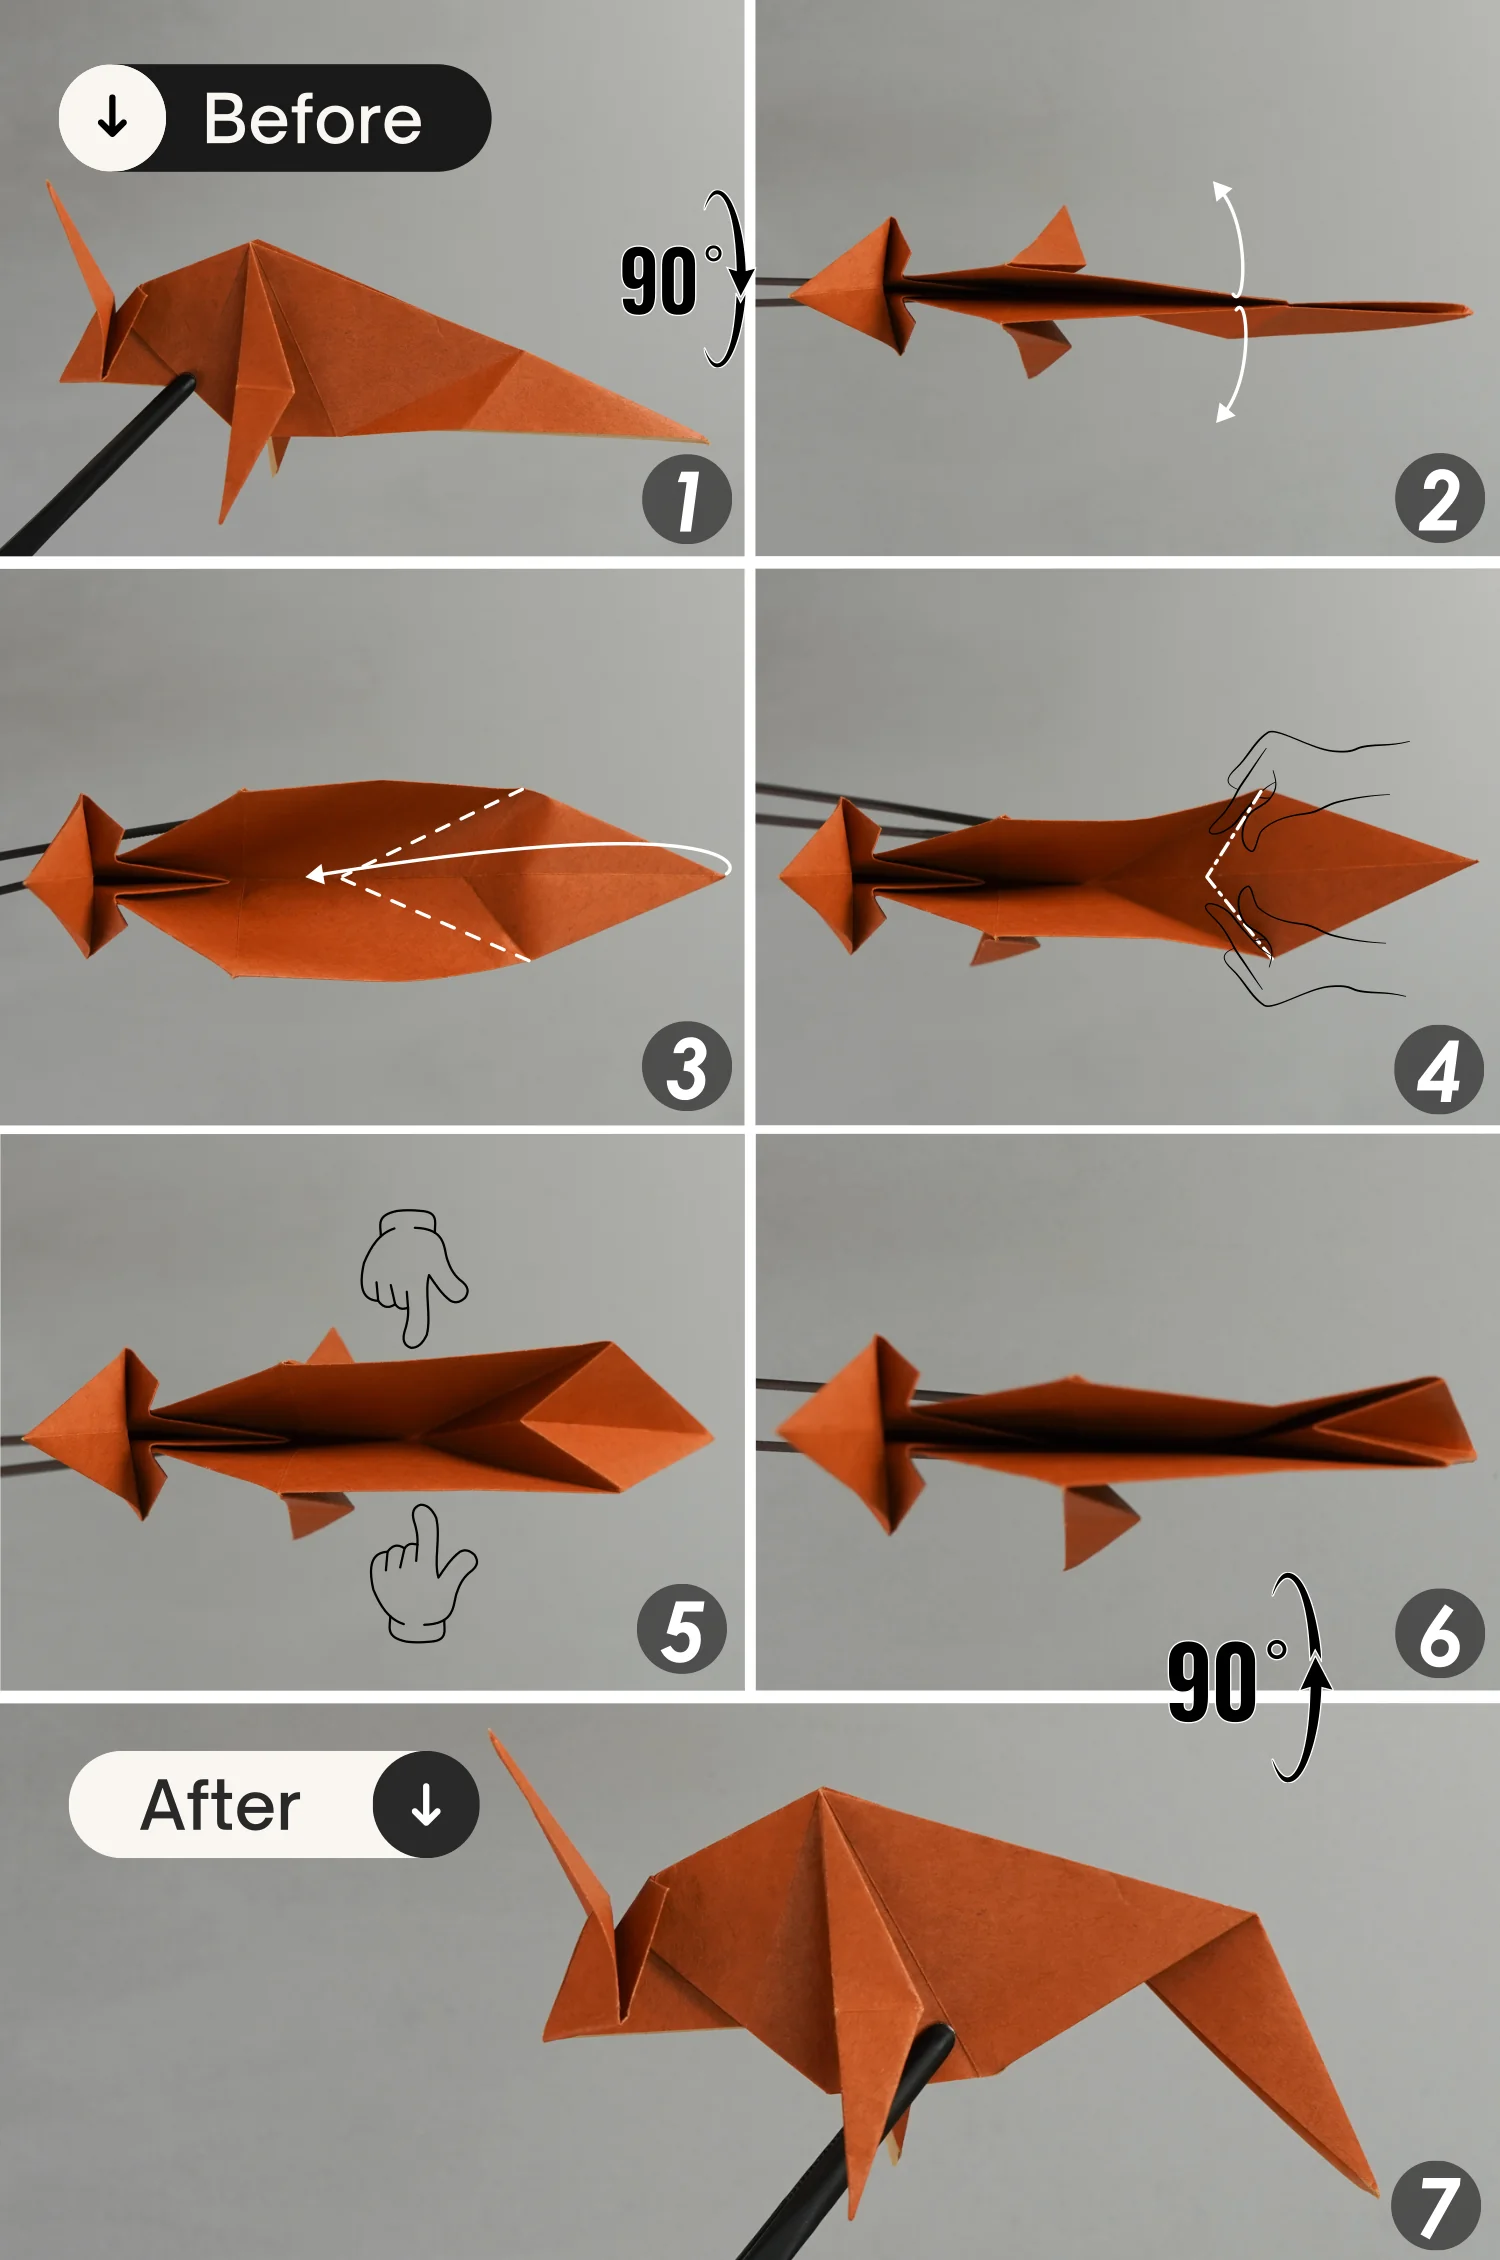
Rotate it 90 degrees from front to back, to make the opening face up, then open it, and valley fold the crease you made from the first fold in the previous step [pictures 1 to 3].
Next, shape the two creases you made from the second fold in the previous step [picture 4].
Finally, fold the left point toward the right side along the crease you made from the third fold in the previous step, then close this opening, and rotate it 90 degrees from back to front [pictures 5 to 7].
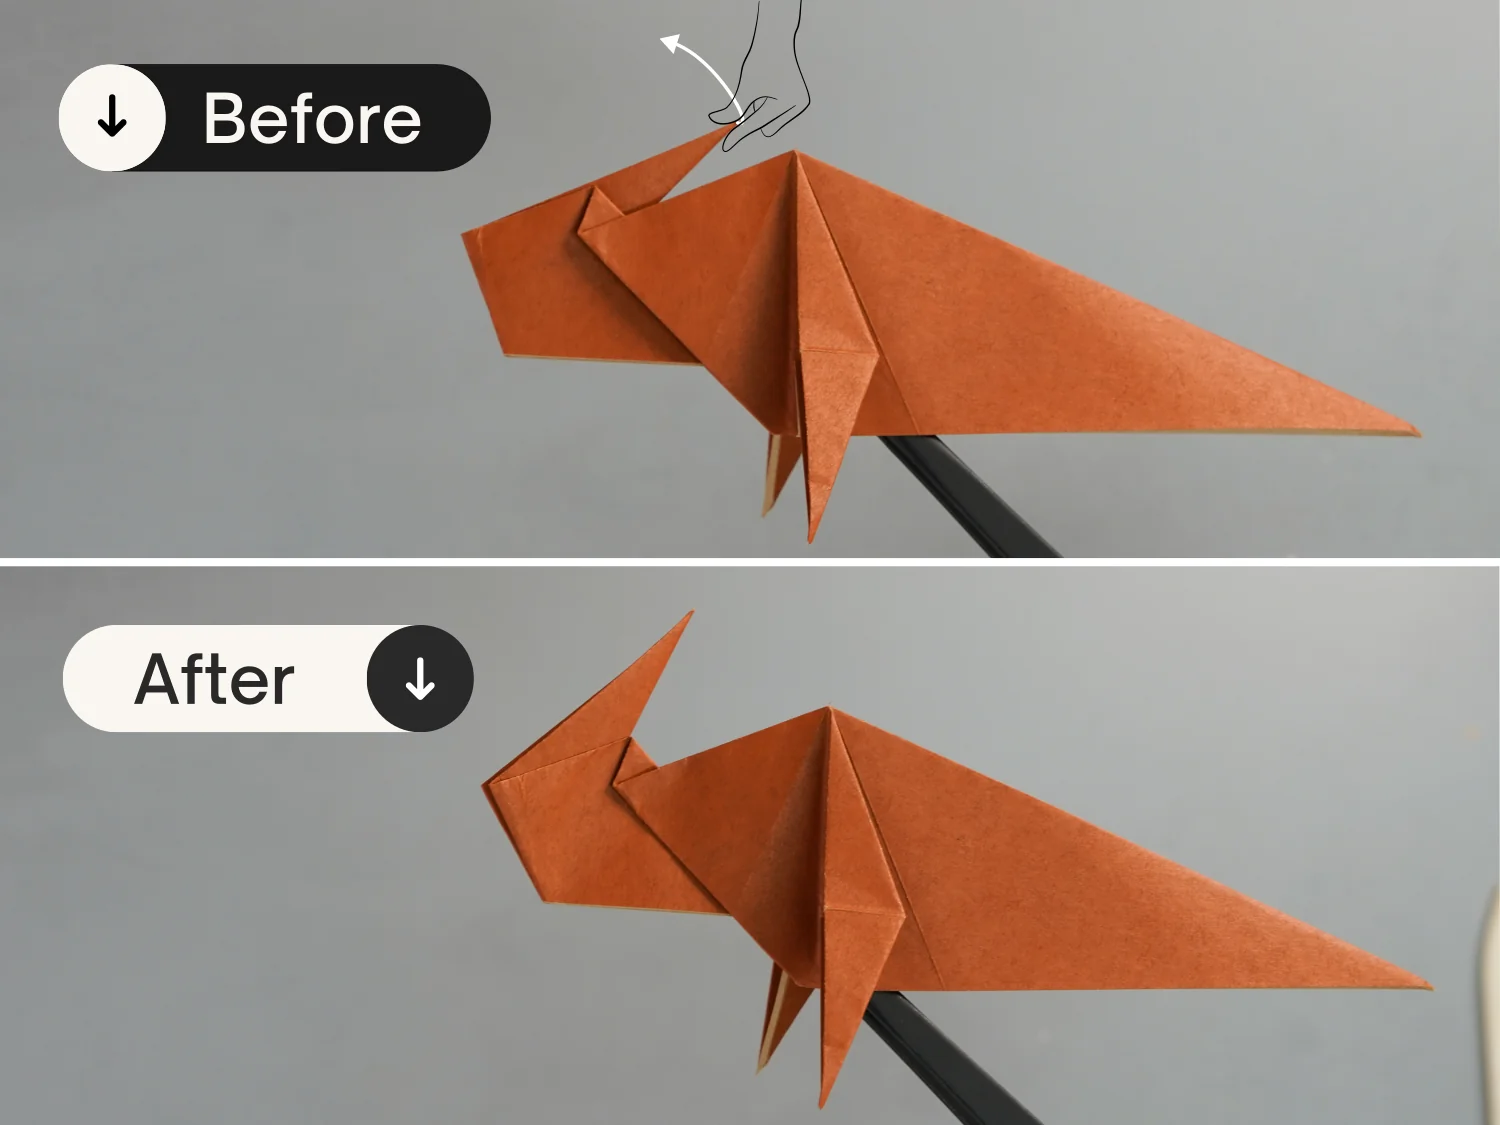
Step 13
Lift this little corner up a little.
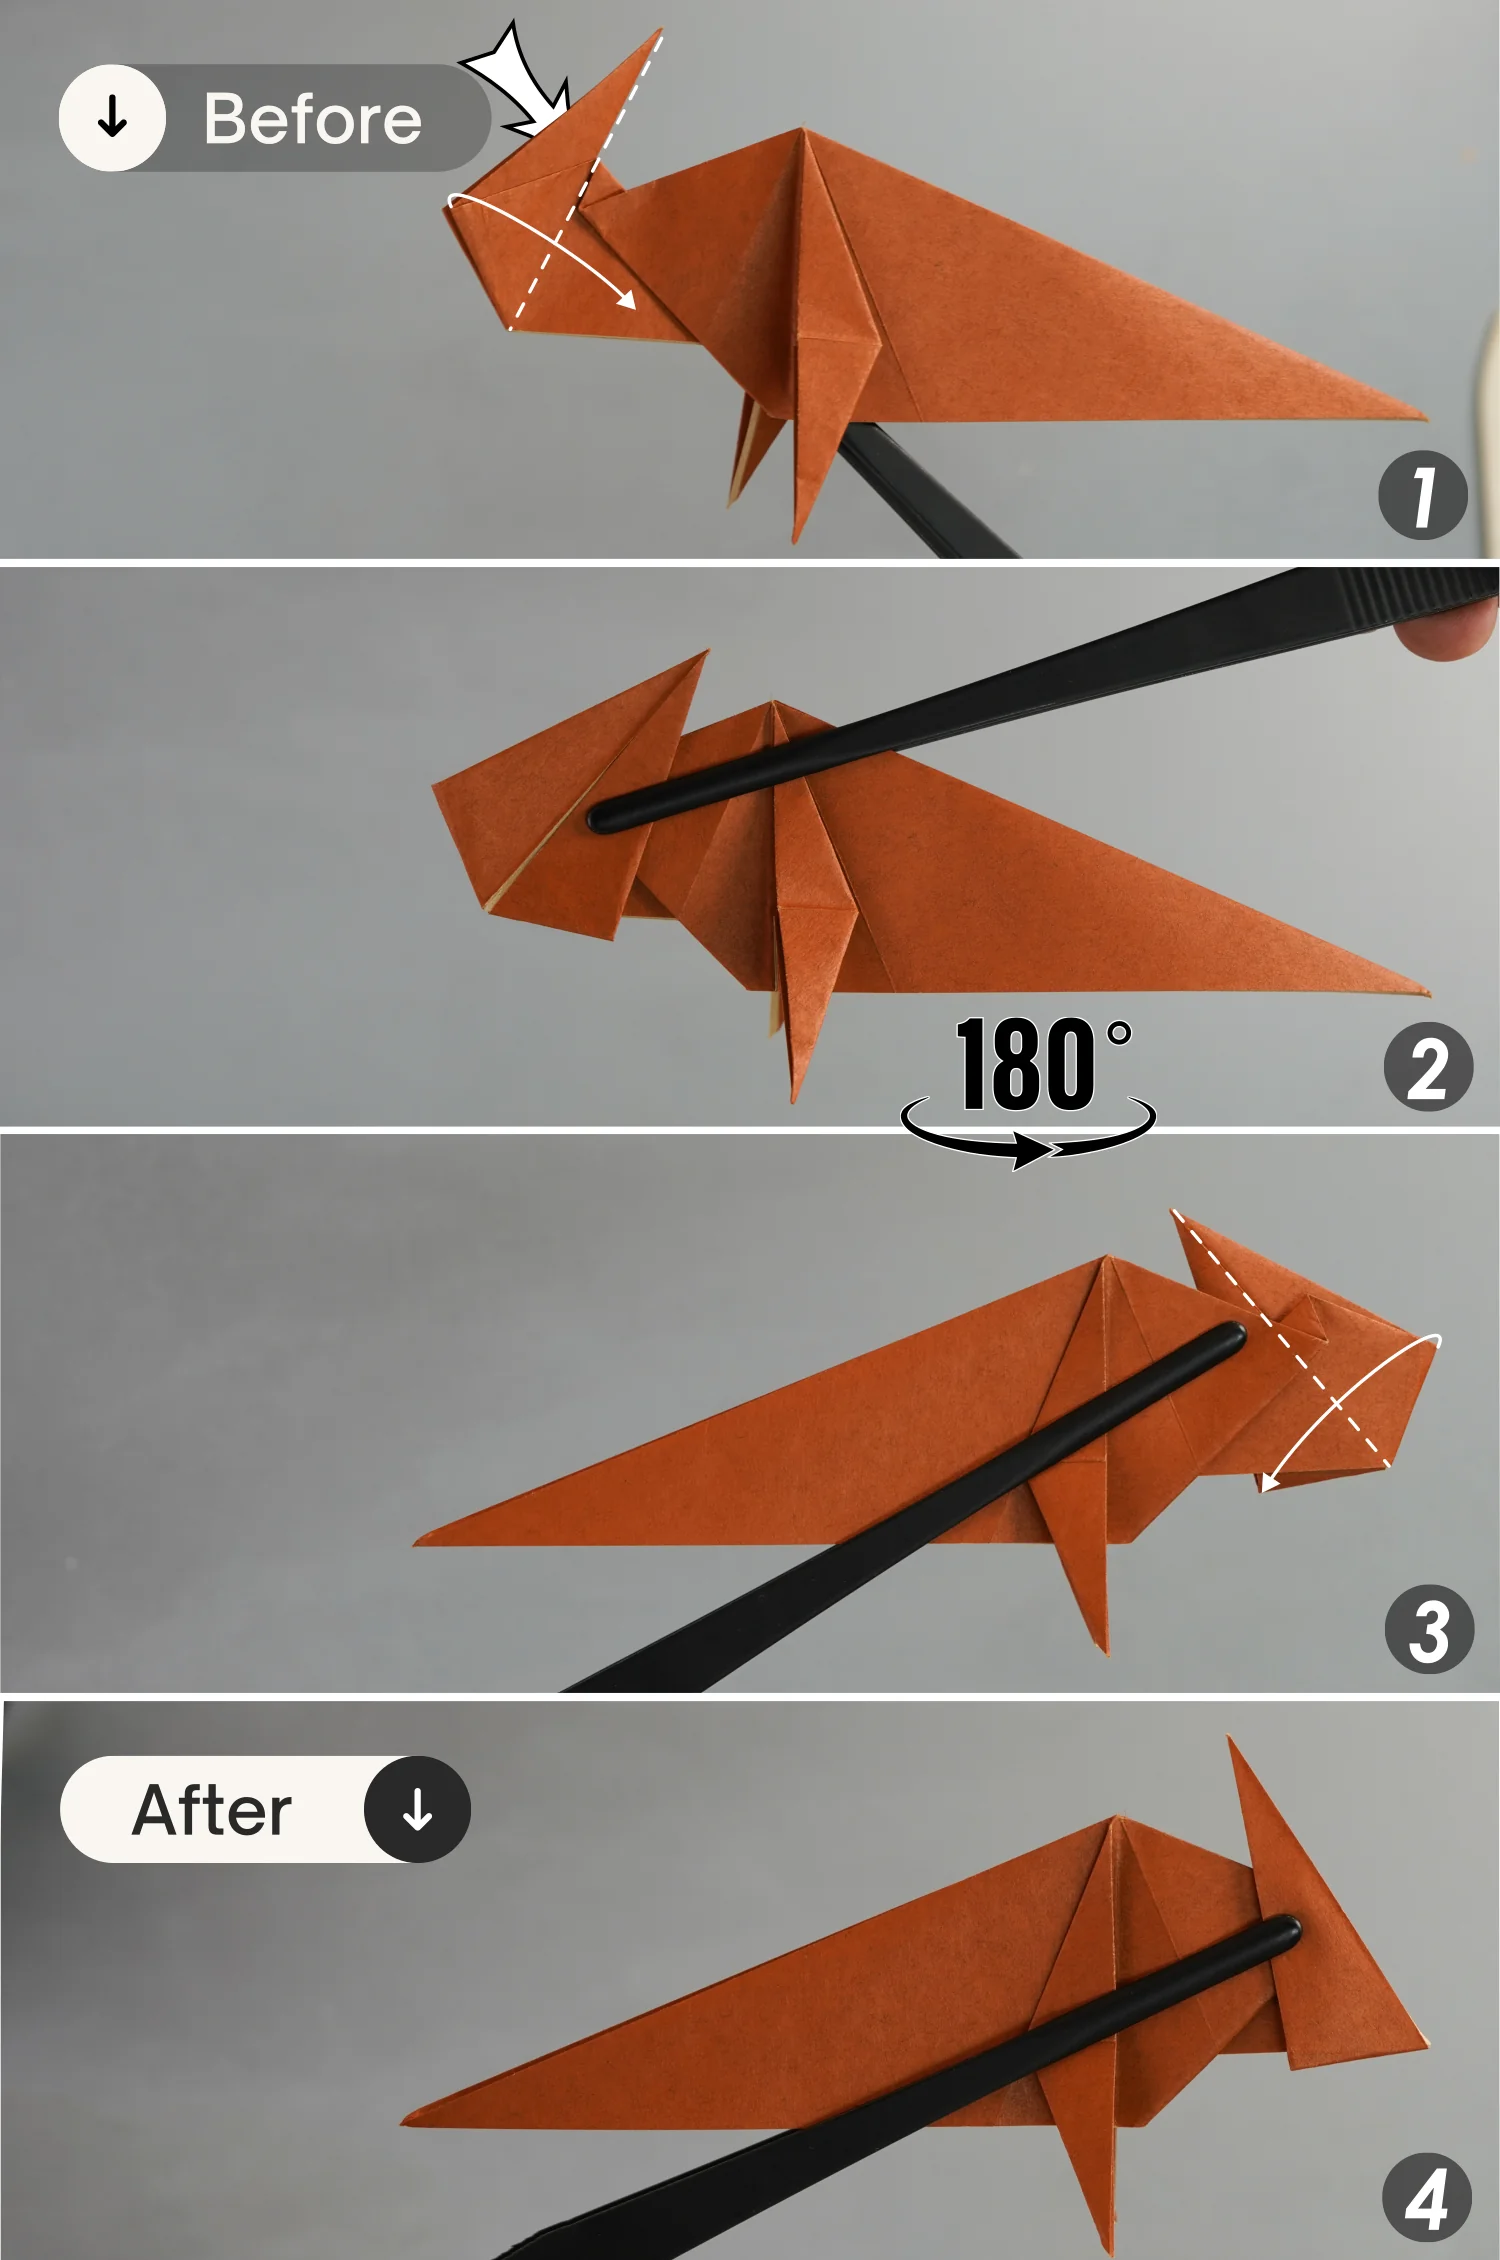
Step 14
Fold this top left edge of the upper layer to the right side along the dotted line, then rotate it 180 degrees from left to right, and similarly, fold the top right edge to the left side.
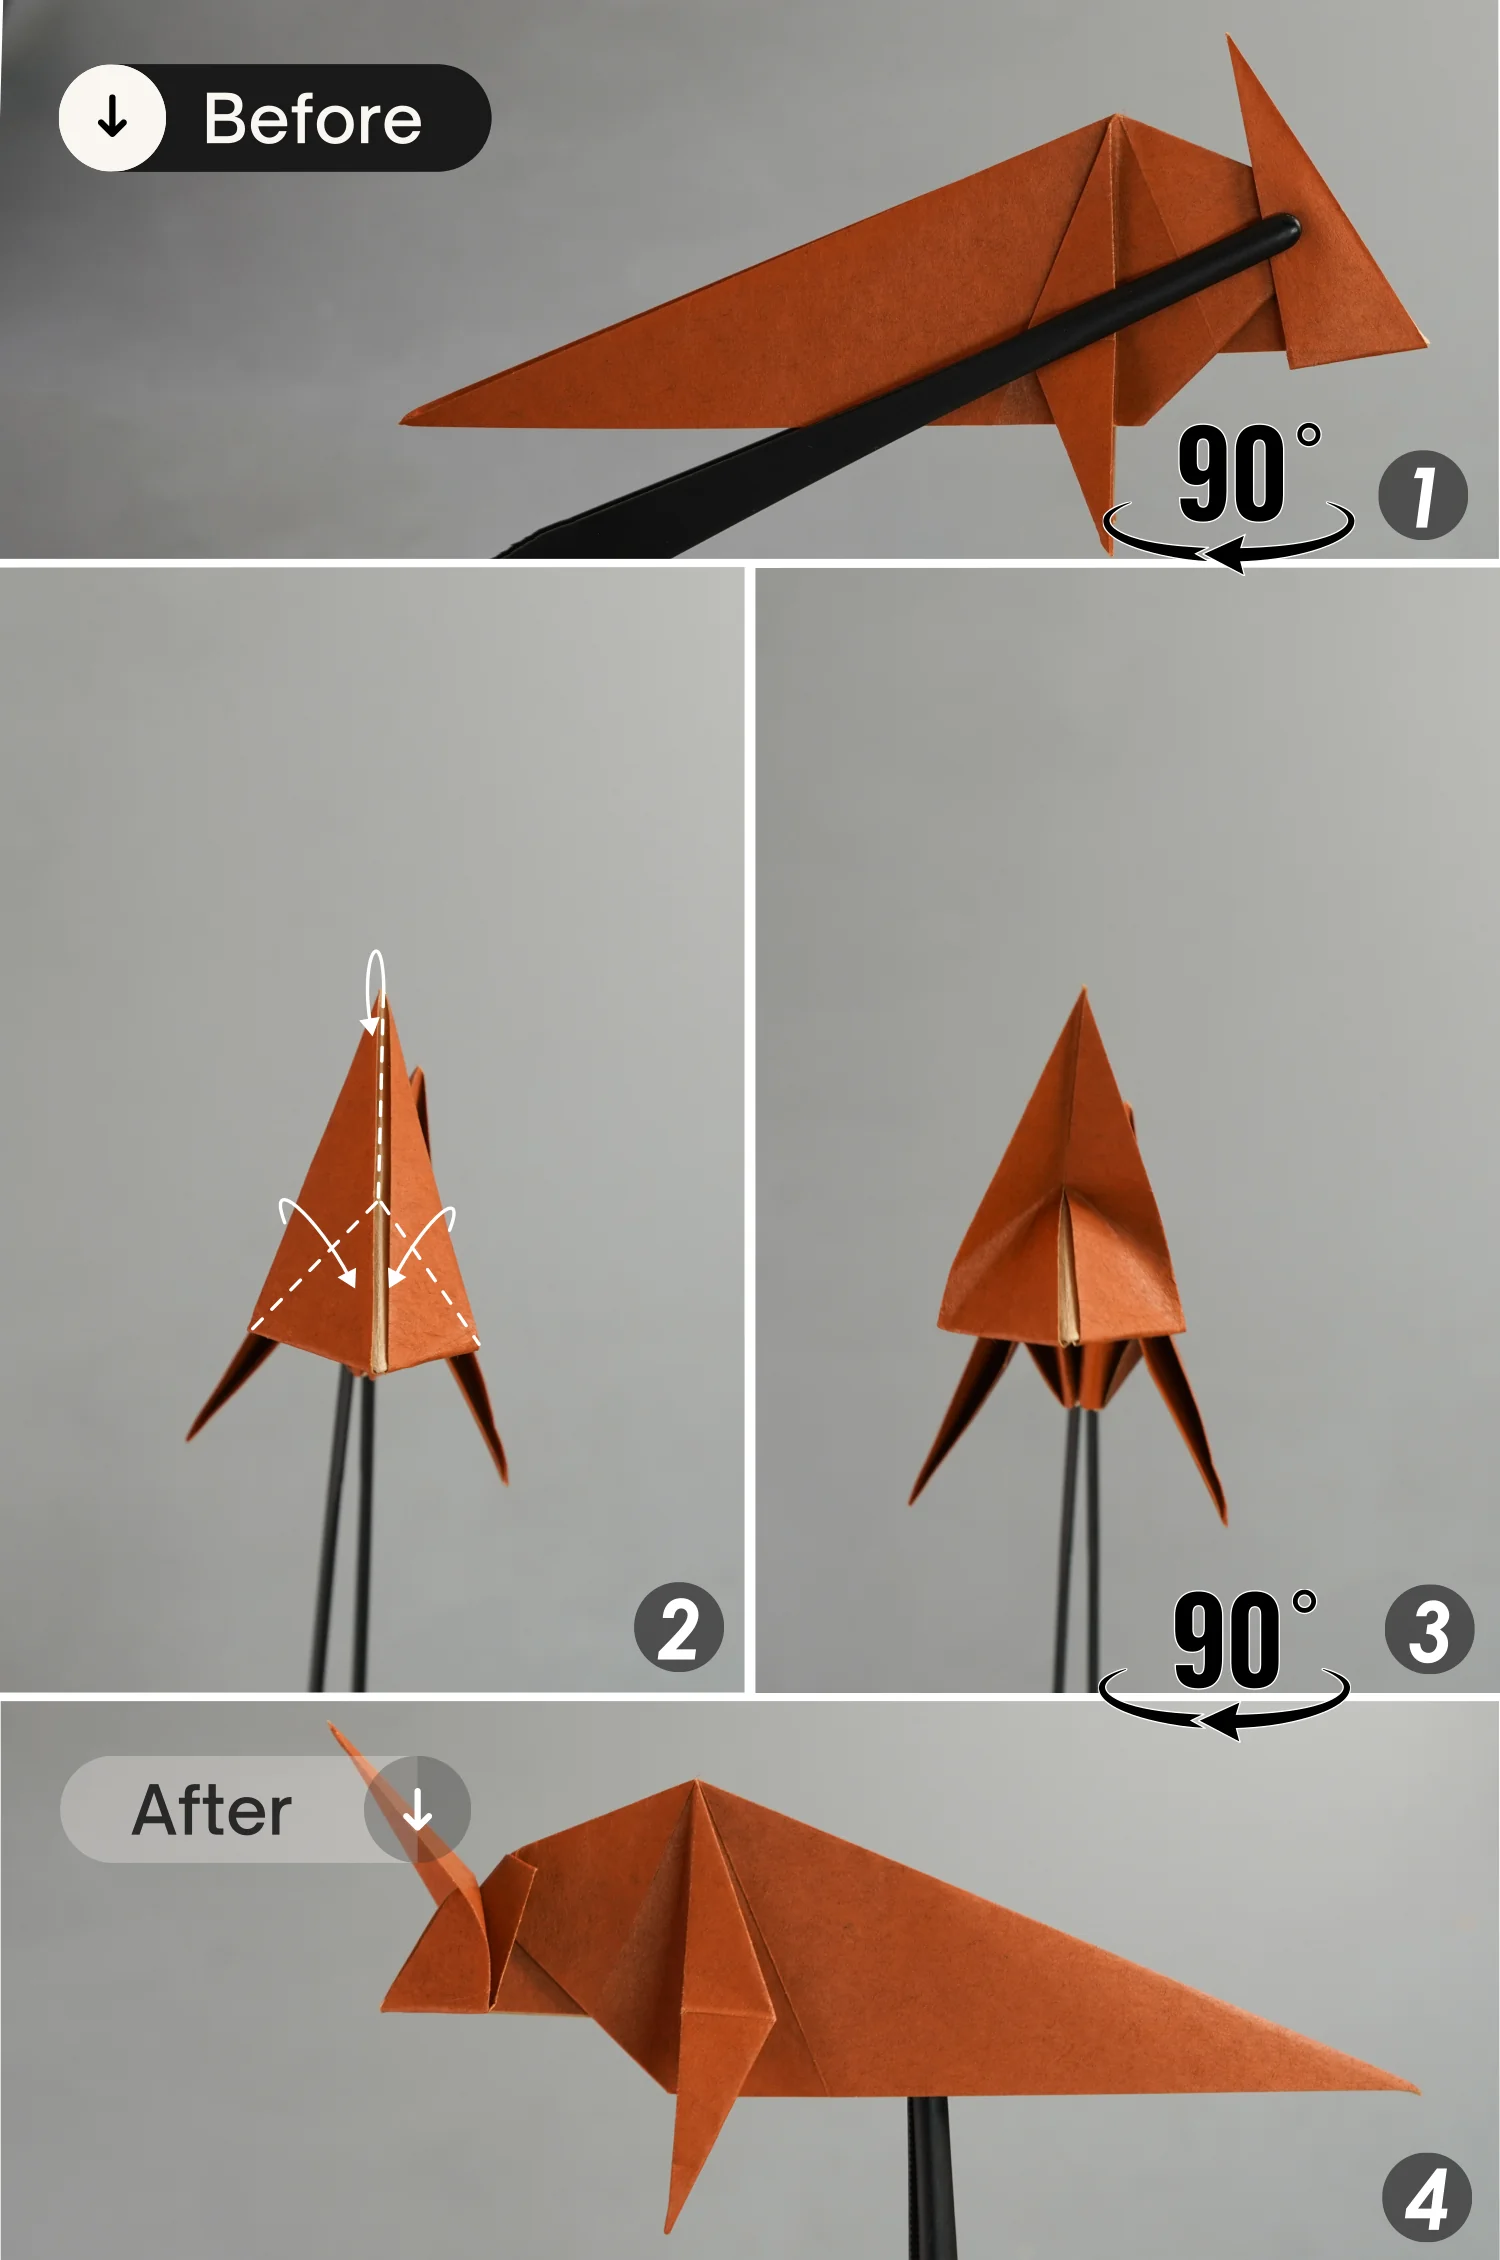
Step 15
Rotate the paper 90 degrees from right to left, then along these dotted lines, press down the top point of this quadrilateral and push its left and right edges a little towards the center. Finally, rotate it 90 degrees from right to left.
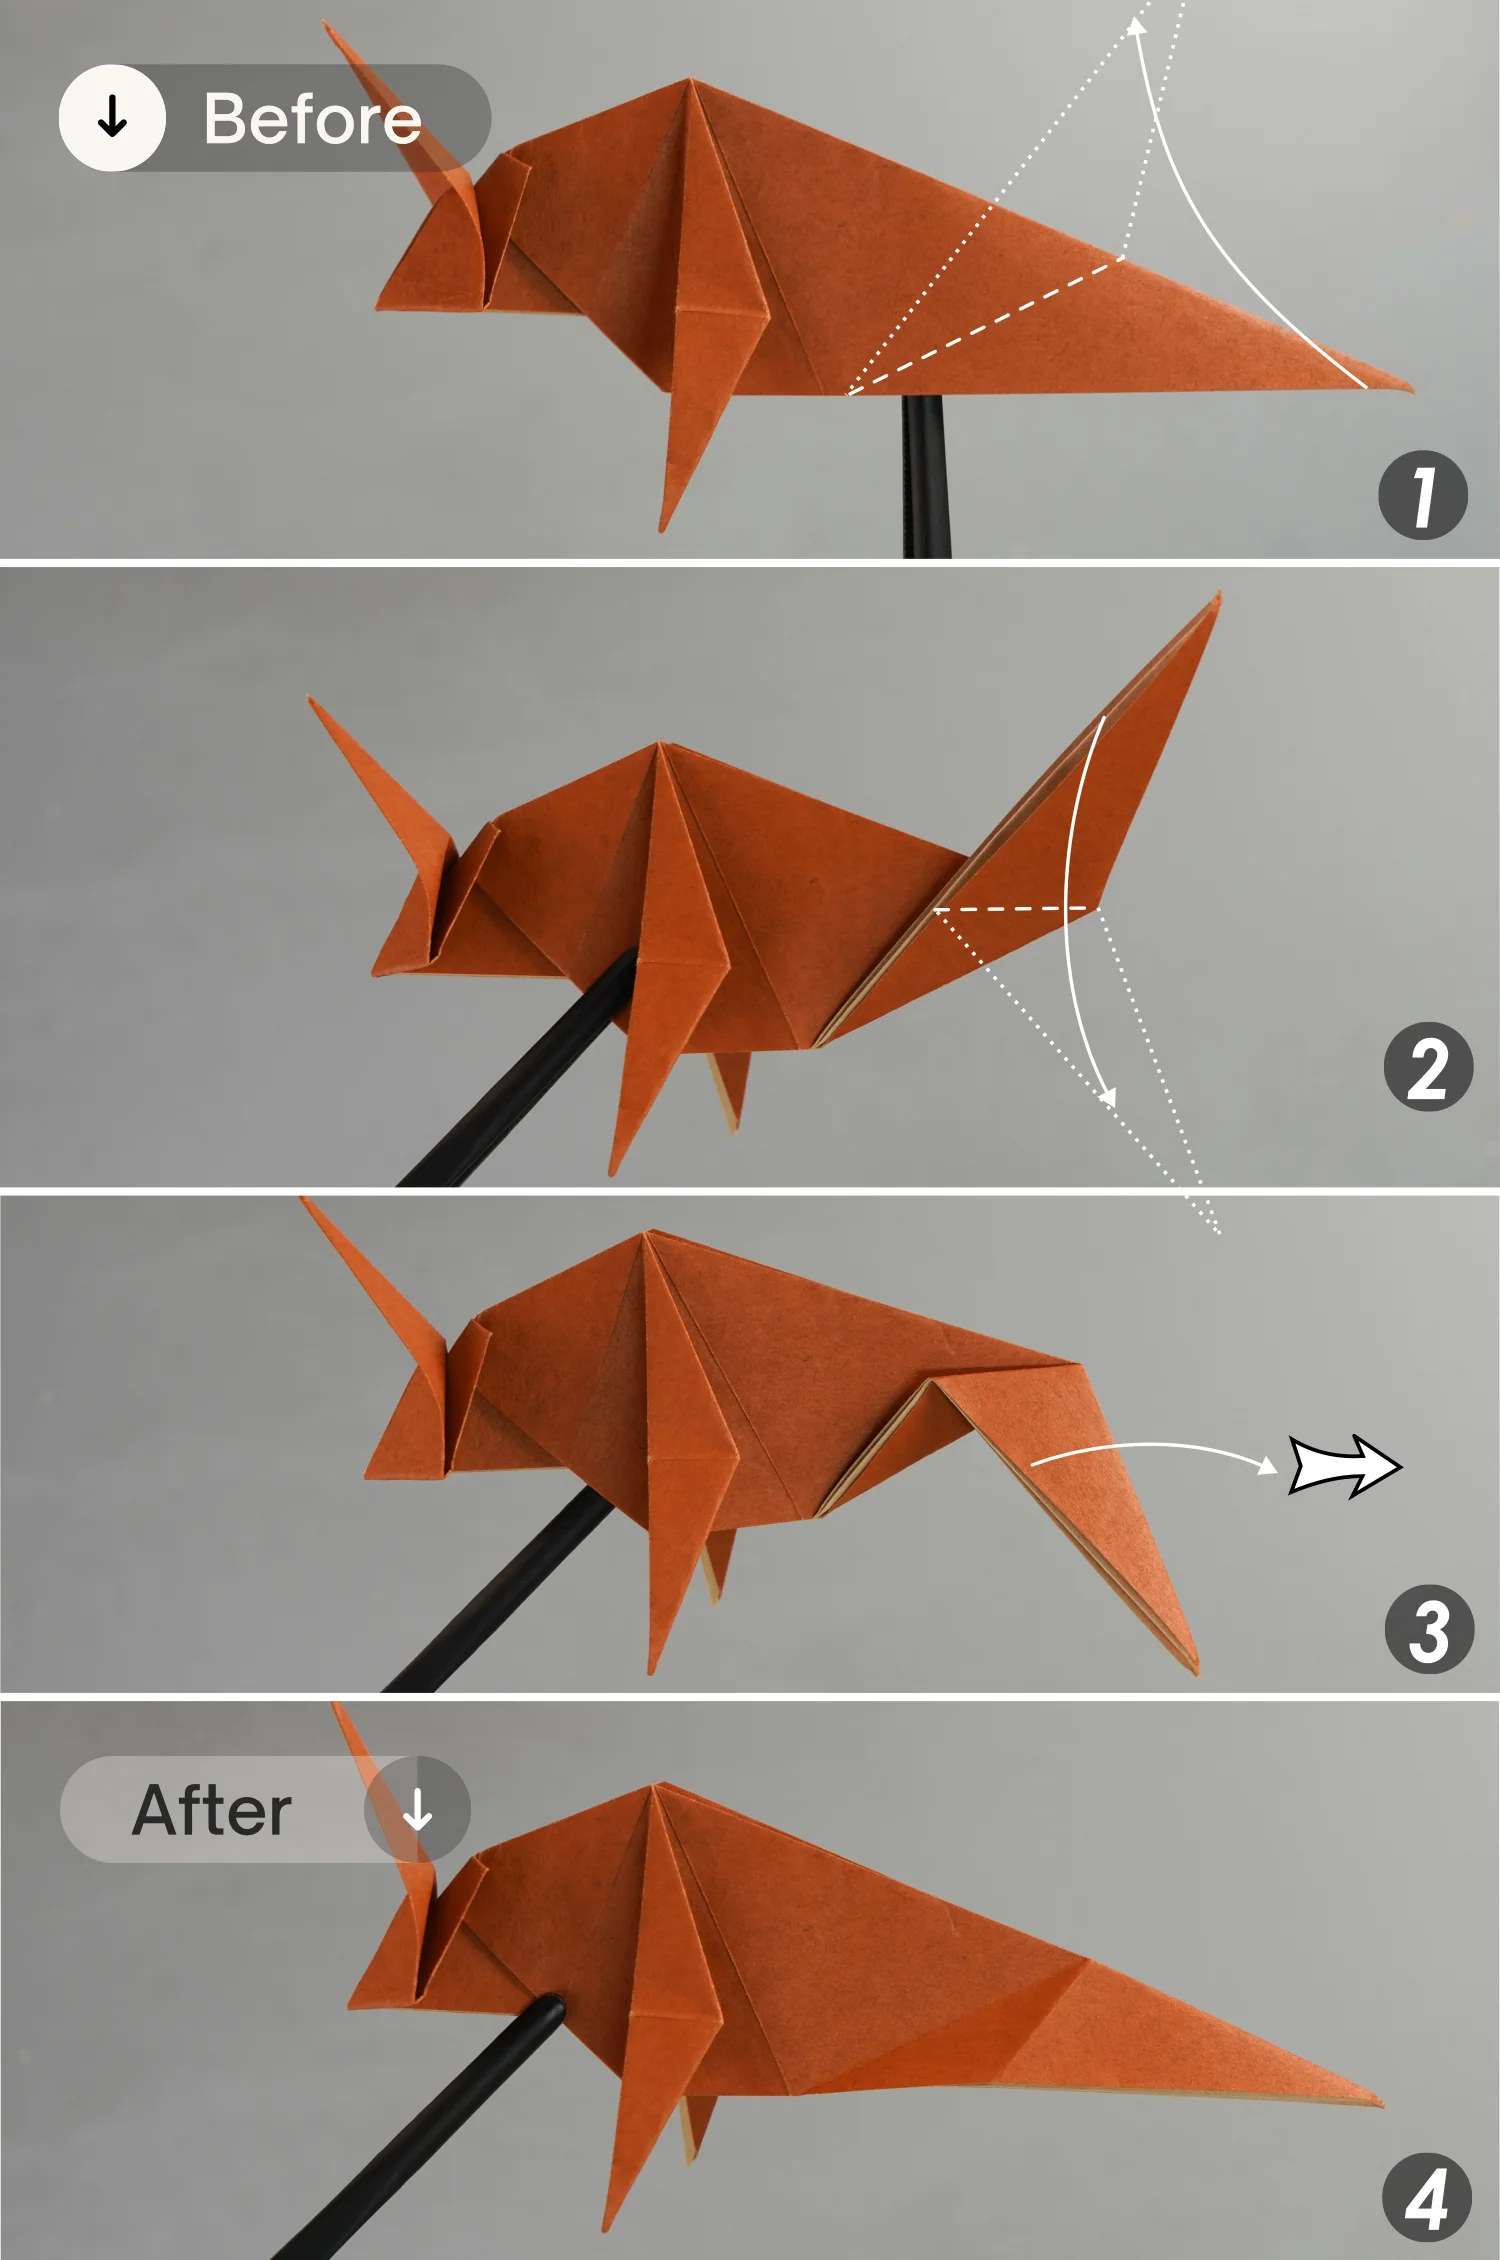
Step 16
Fold up the tail part, then fold it down to leave a horizontal crease, and finally, unfold the tail part.
Step 17
Rotate the paper 90 degrees from front to back, to make the opening face up, then open it, and valley fold the creases you made from the first fold in the previous step, and mountain fold the creases you made from the second fold in the previous step.
Finally, close this opening and rotate the paper 90 degrees from back to front.
What’s Next
This is the final shape of your origami bull. Now you can explore our other interesting origami animal instructions. Happy folding!
Other Origami Animal Ideas