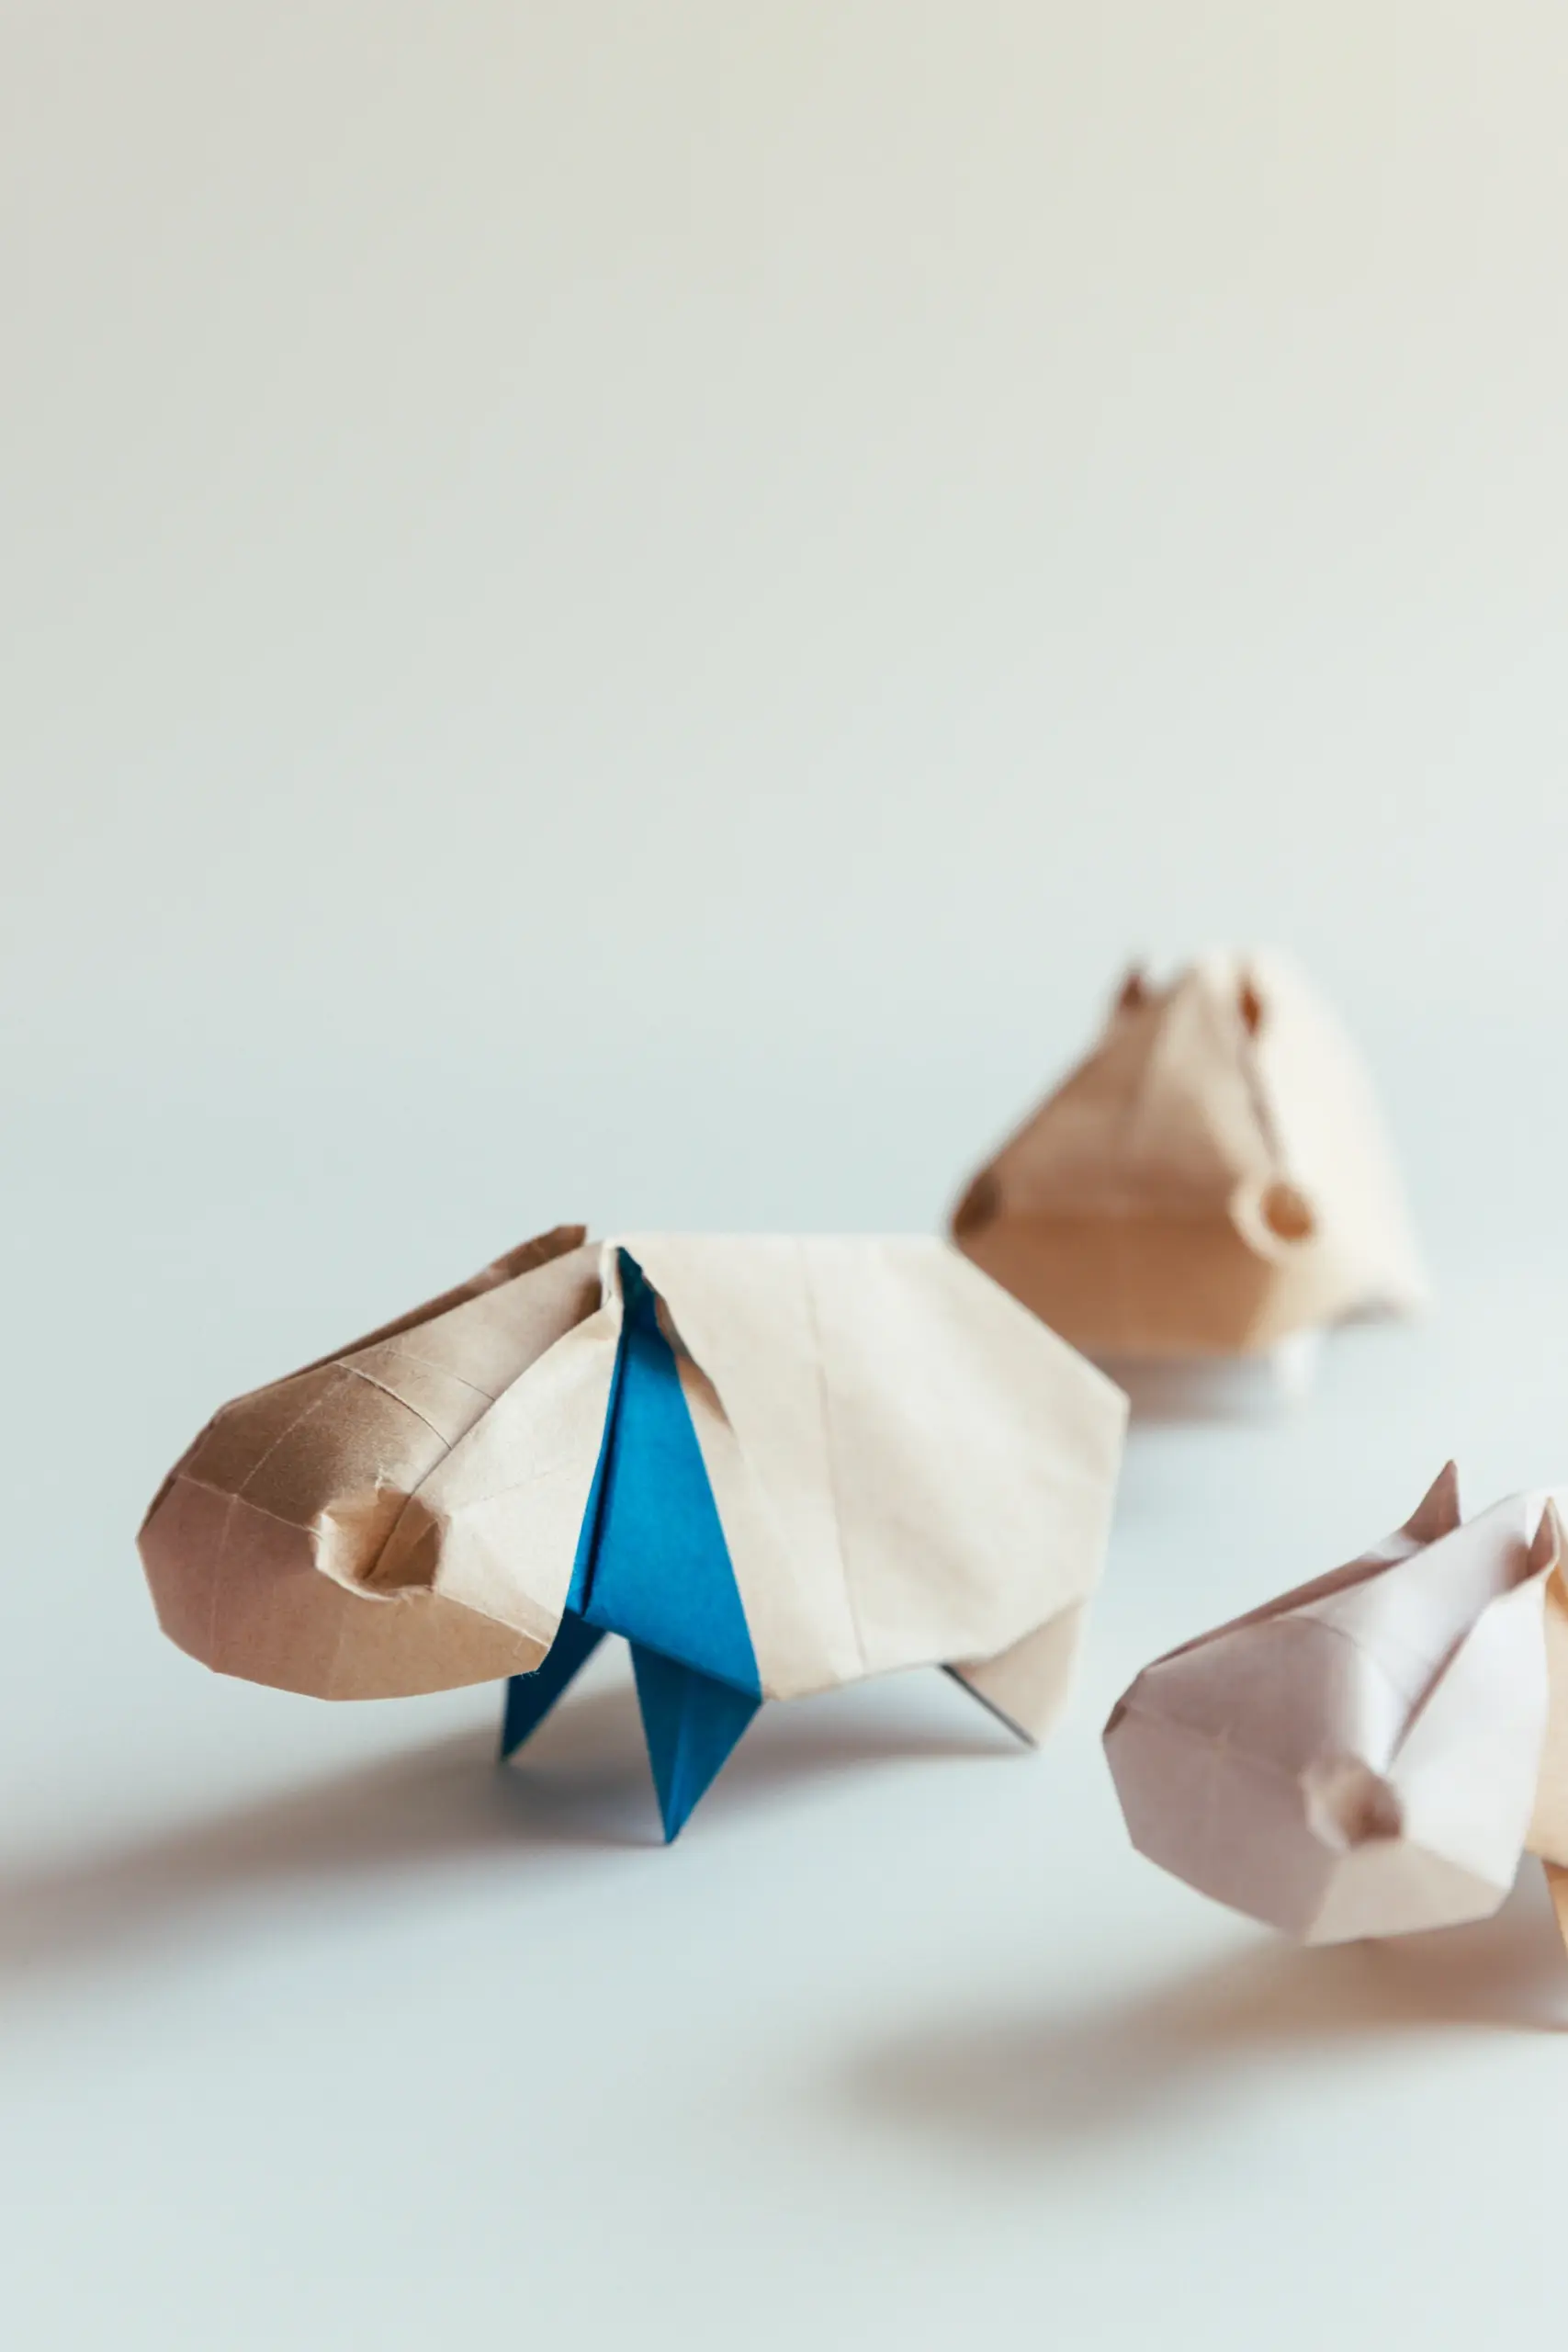
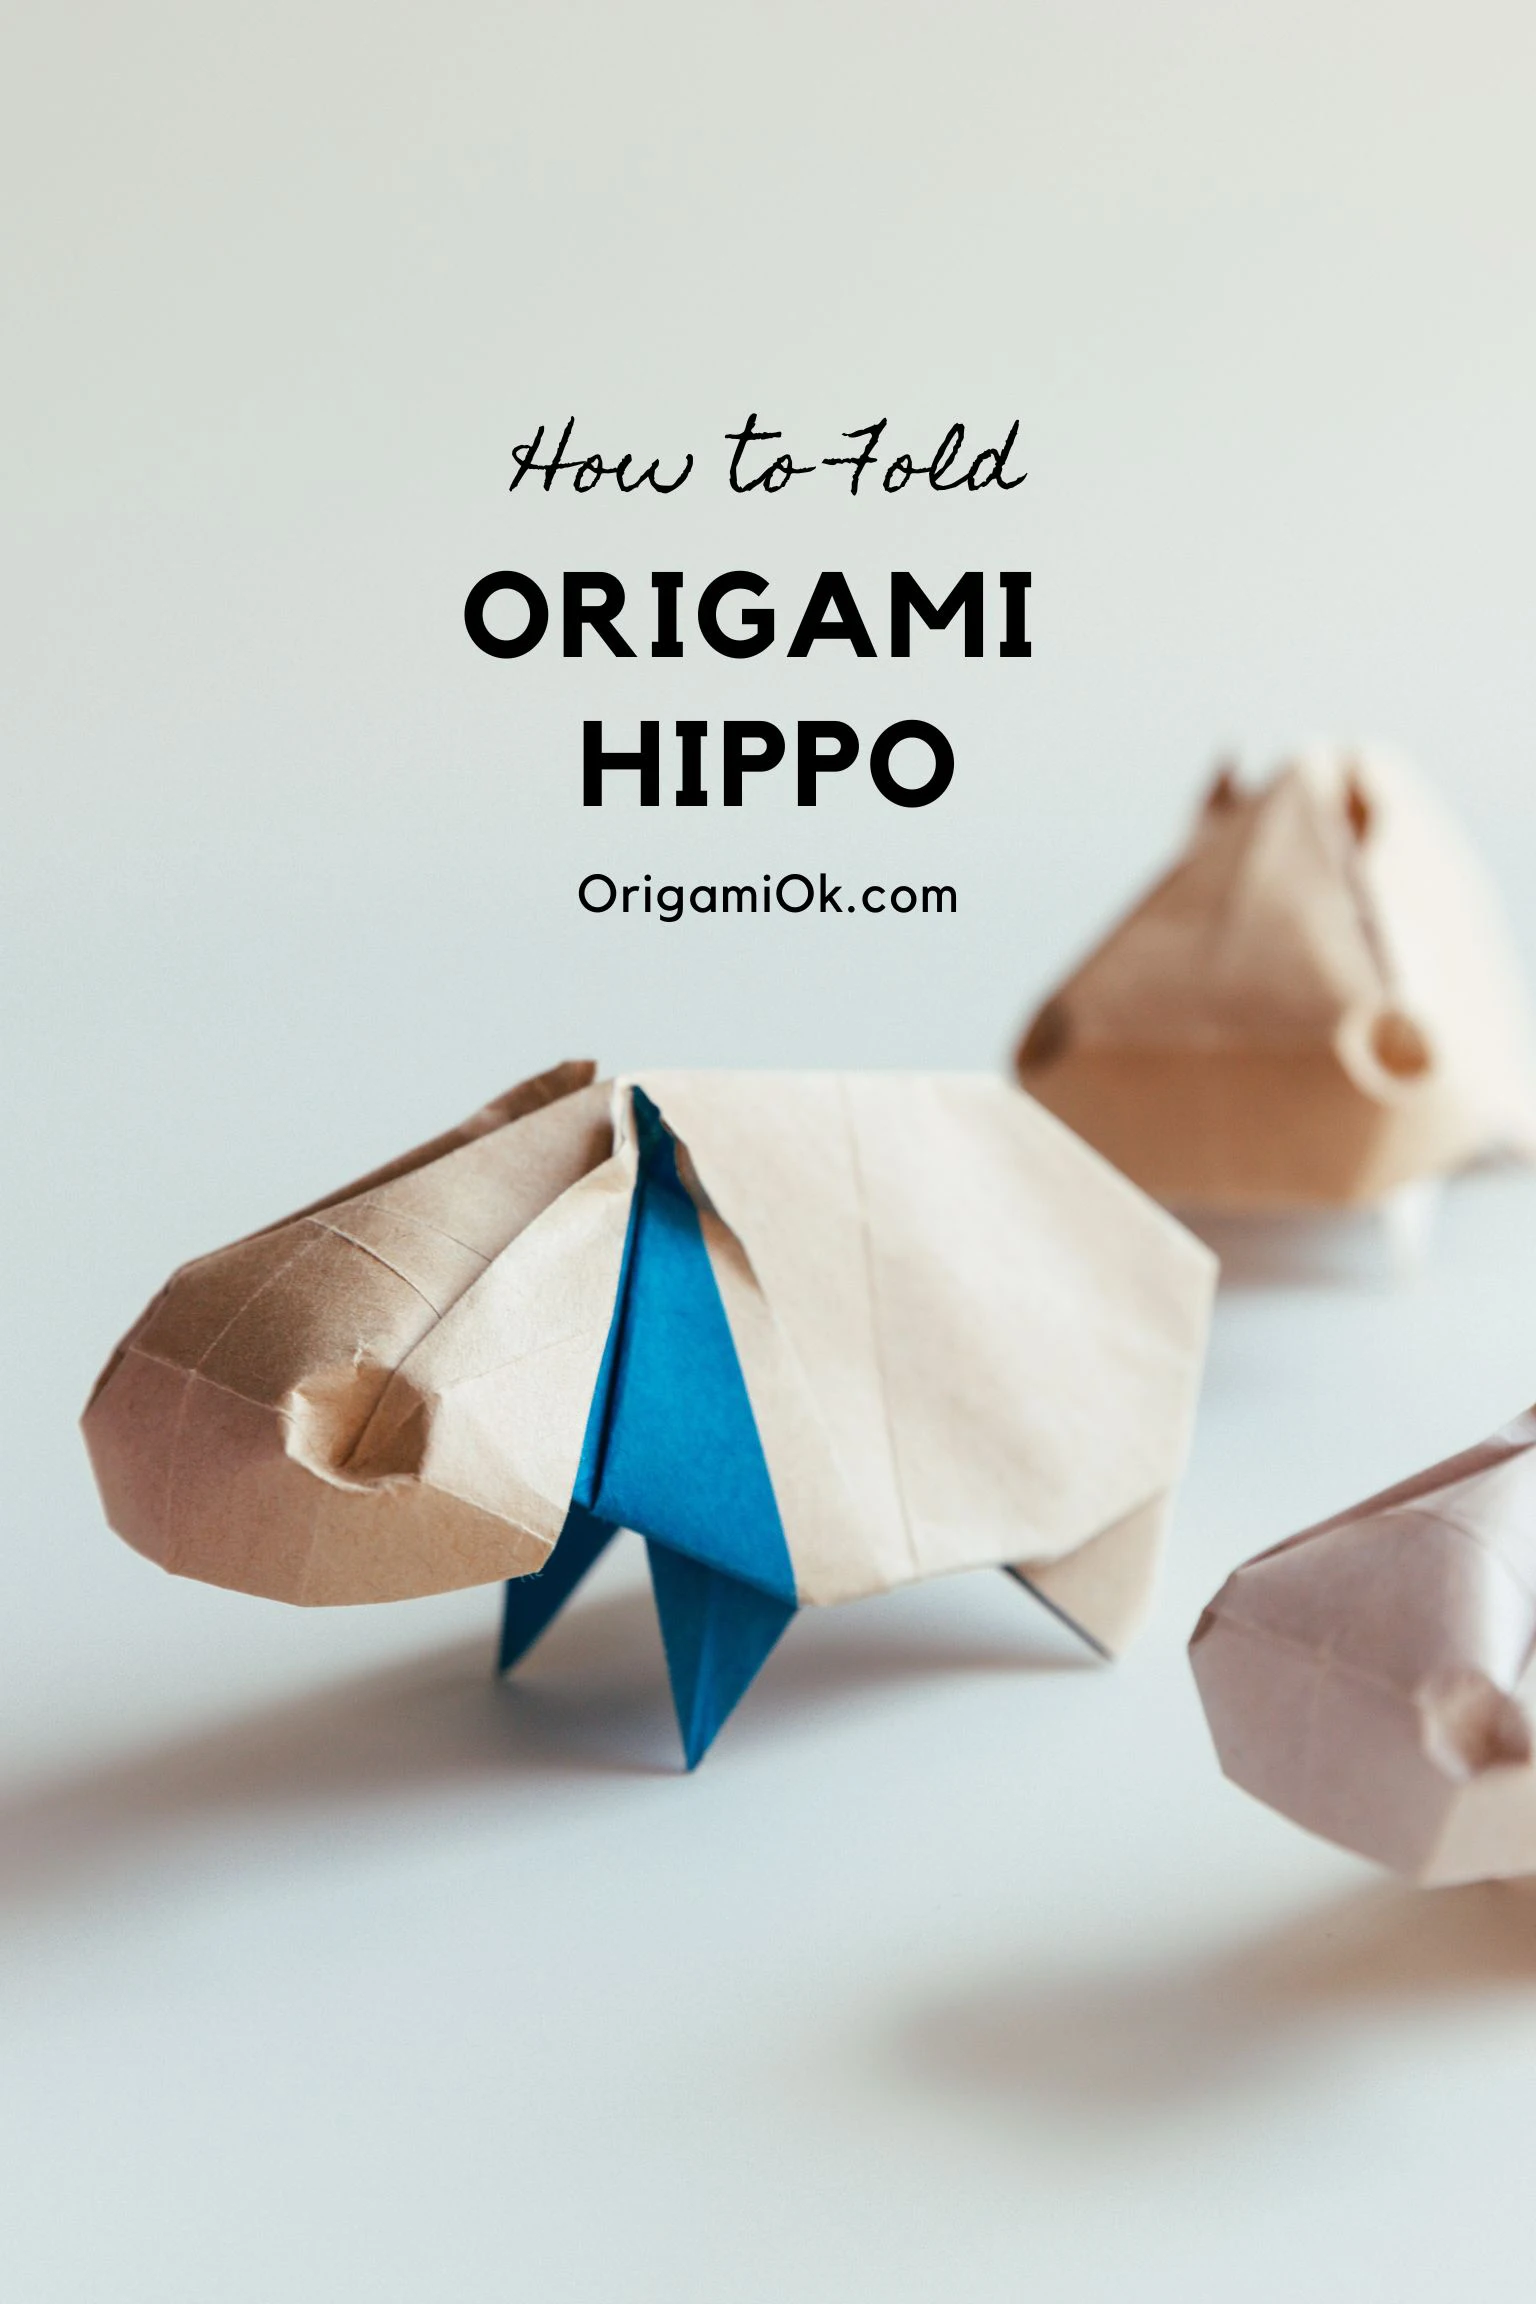
Create a lifelike, and lovely origami hippo with a piece of paper. It featured a big mouth, a chubby body, and two funny nostrils, perfectly capturing the essence of a hippo. Whether you use it for education purposes, to teach your children about hippos through origami, or use it for decoration, to make your room and desk more interesting, it will be a great choice.

If you are new to origami, start here from our beginner guide to know the basics and how to read the step-by-step instructions.
- Folding time: 20 minutes
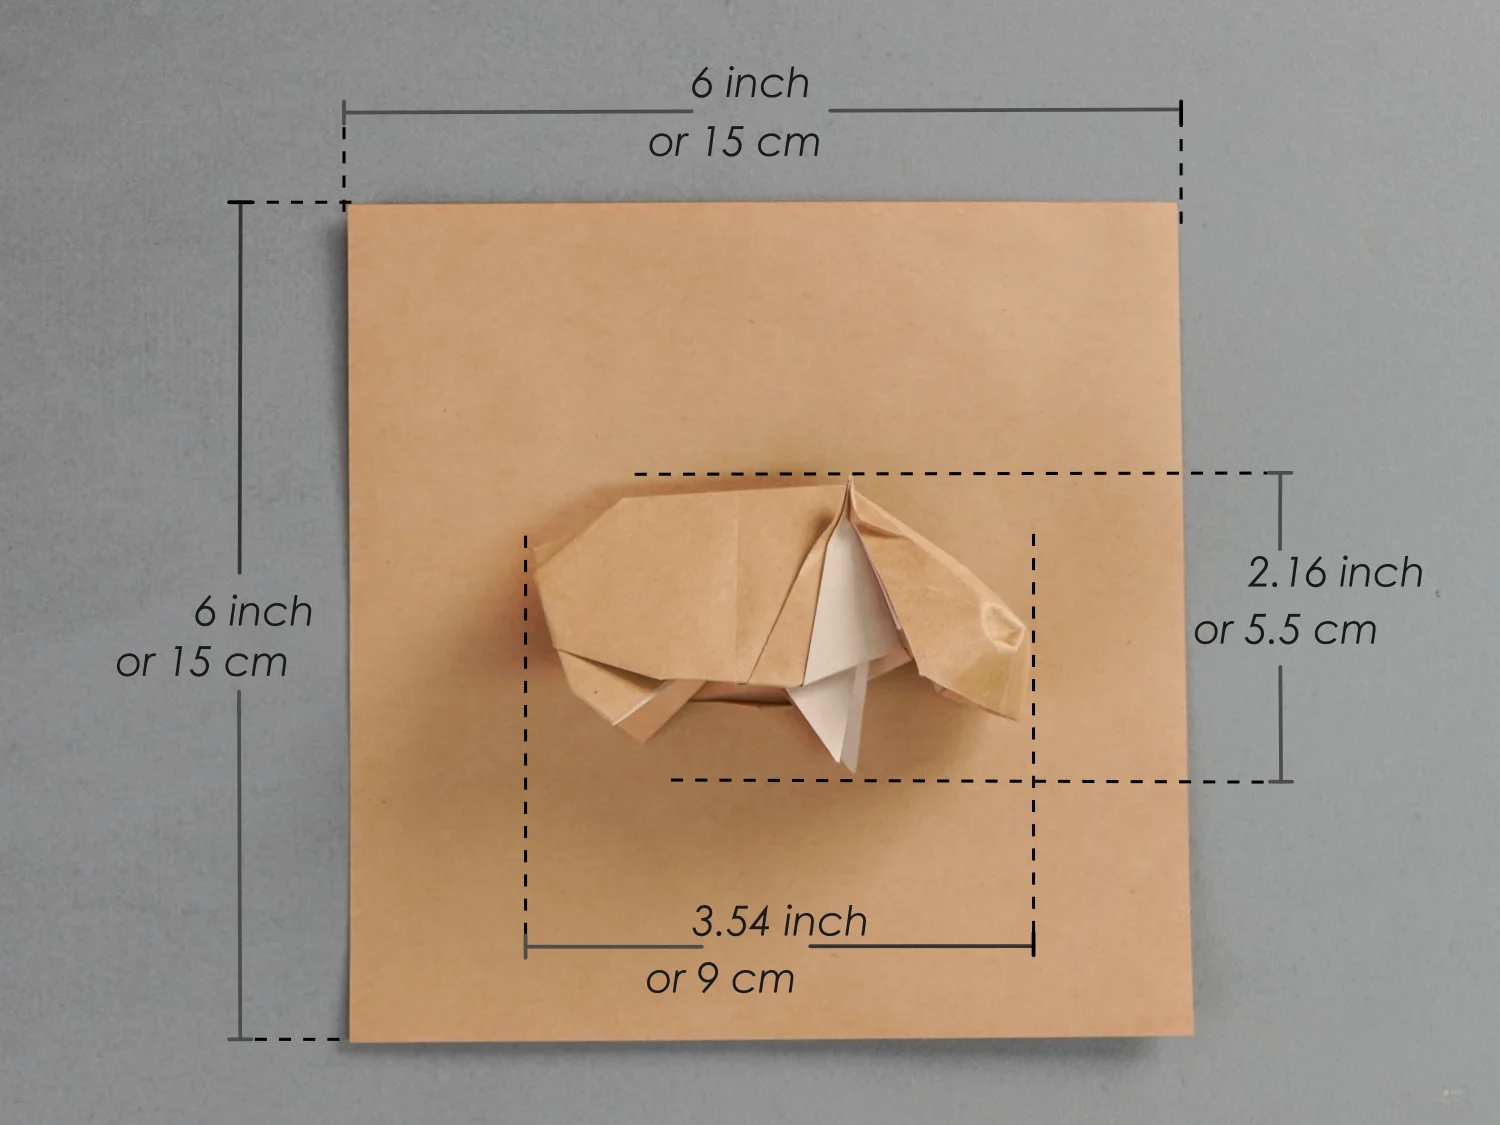
- Paper: 15×15 cm
- Difficulty: Middle
Material
Prepare a piece of 15×15 cm origami square paper, with different colors on each side, to create a 5.5×9 cm origami hippo. Experiment with different colors and patterns, making your product more unique.
Step by Step Instructions
Step 1
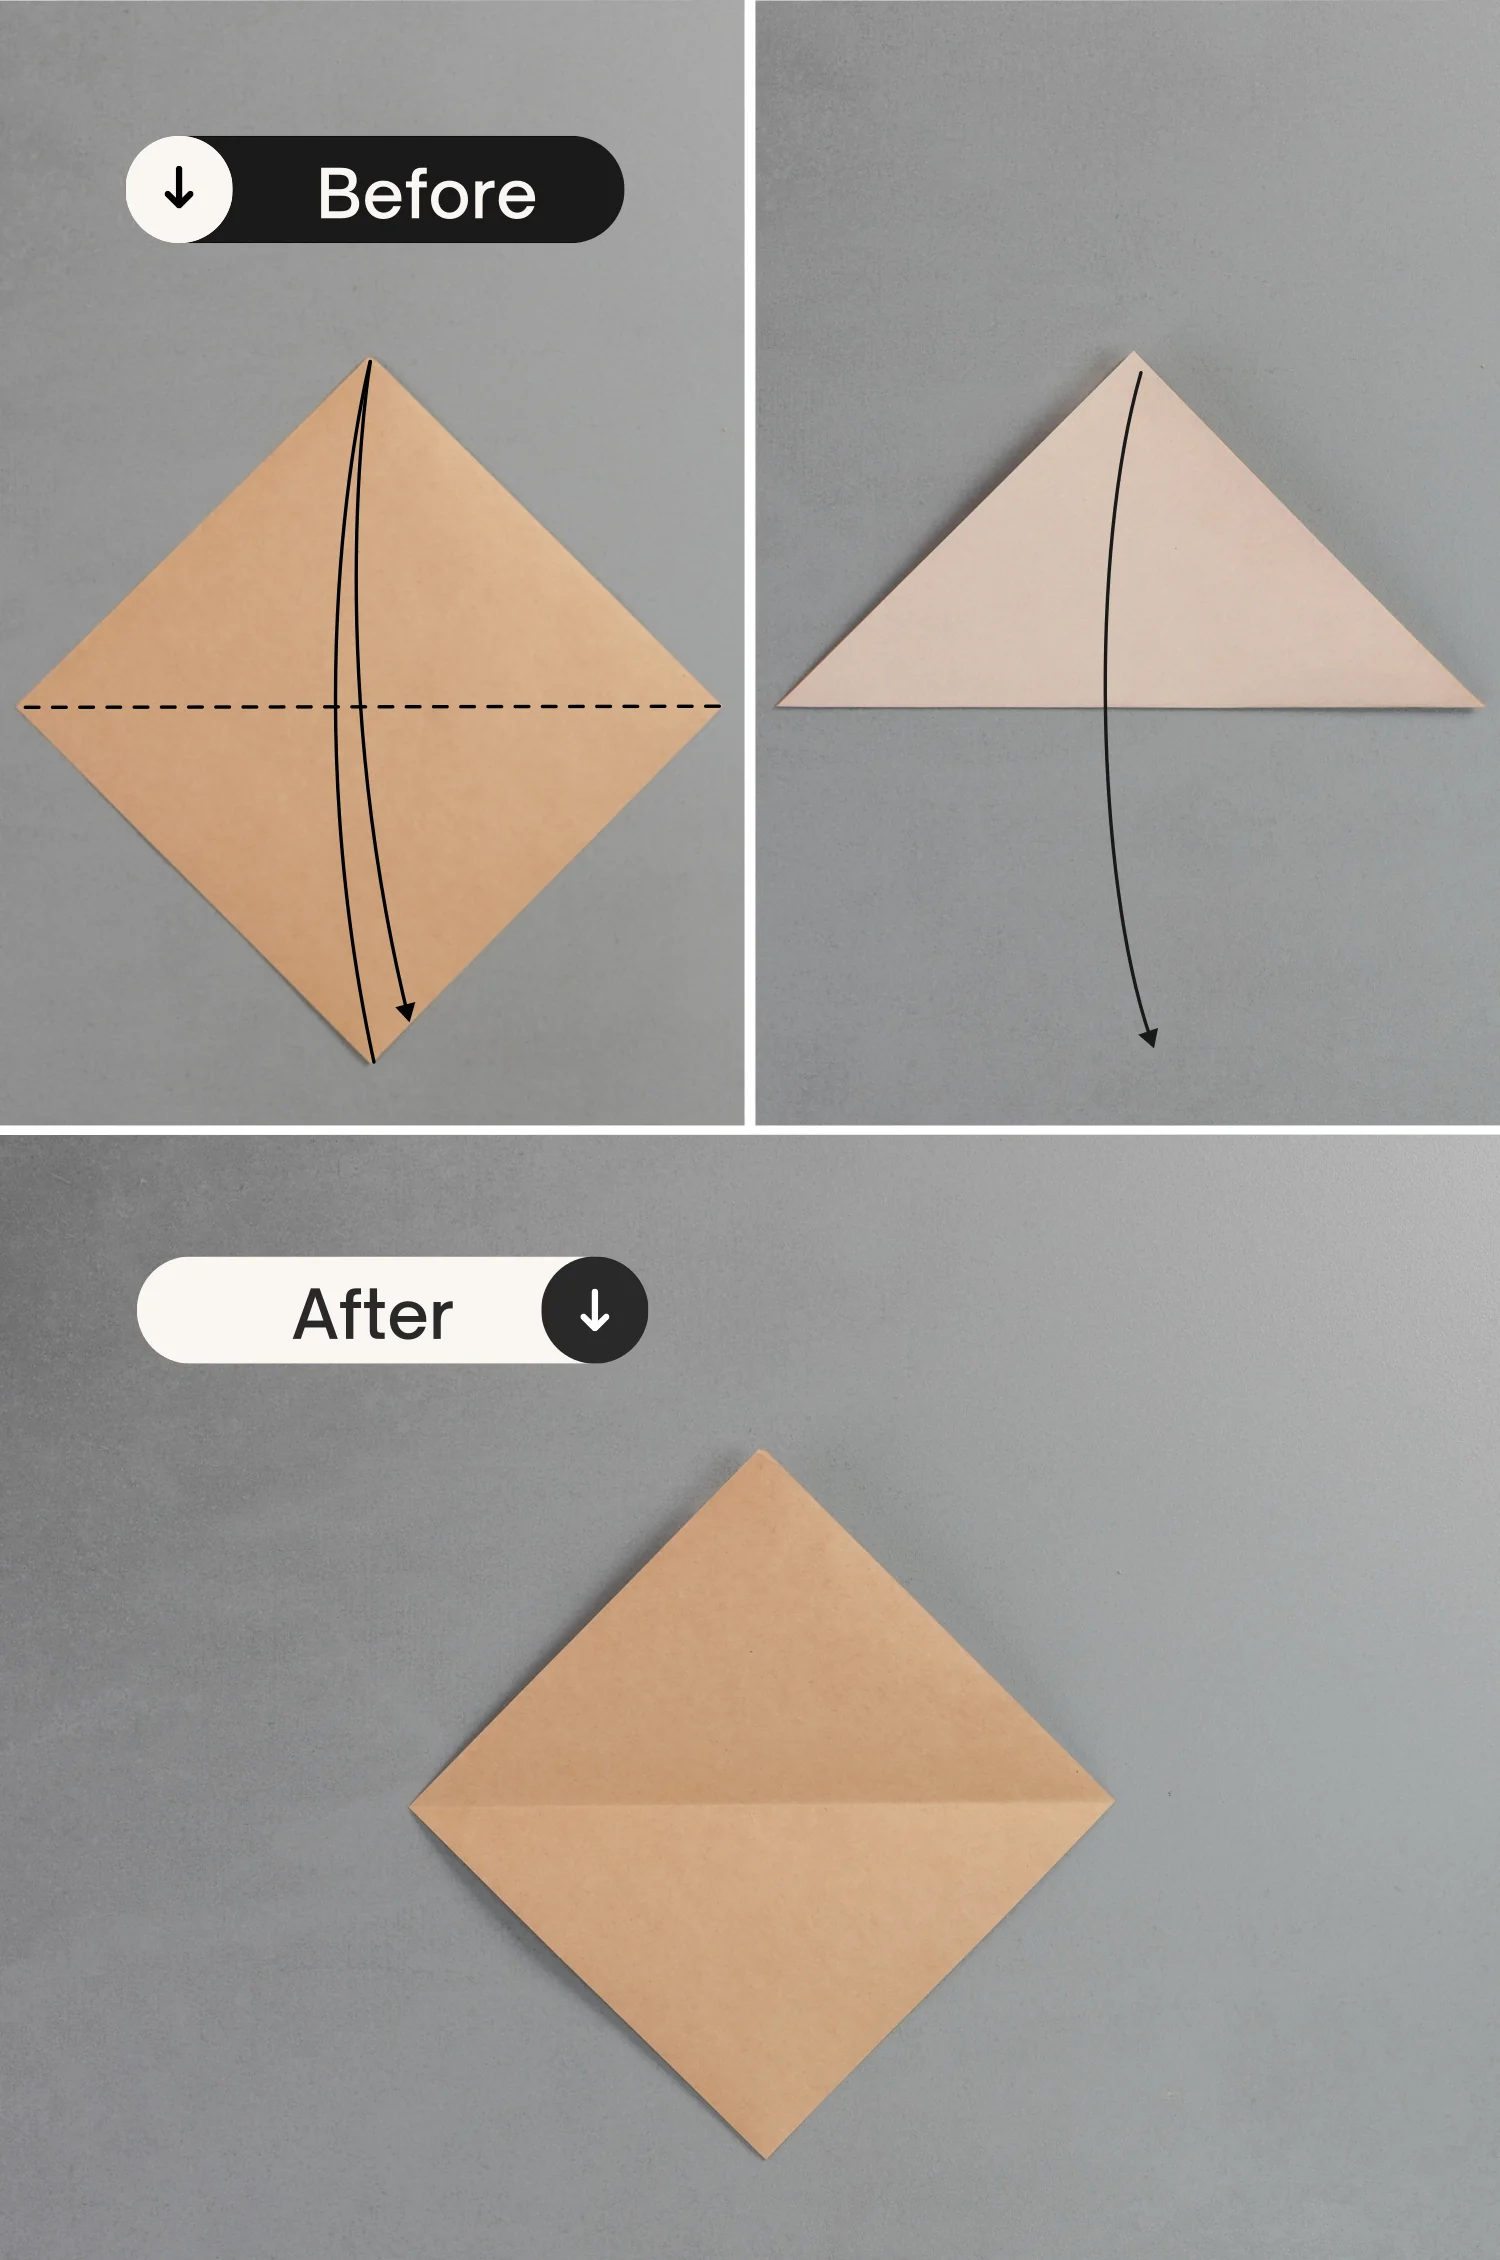
Place the paper with the desired display color side up to begin folding, fold it in half horizontally, and unfold it.
Step 2
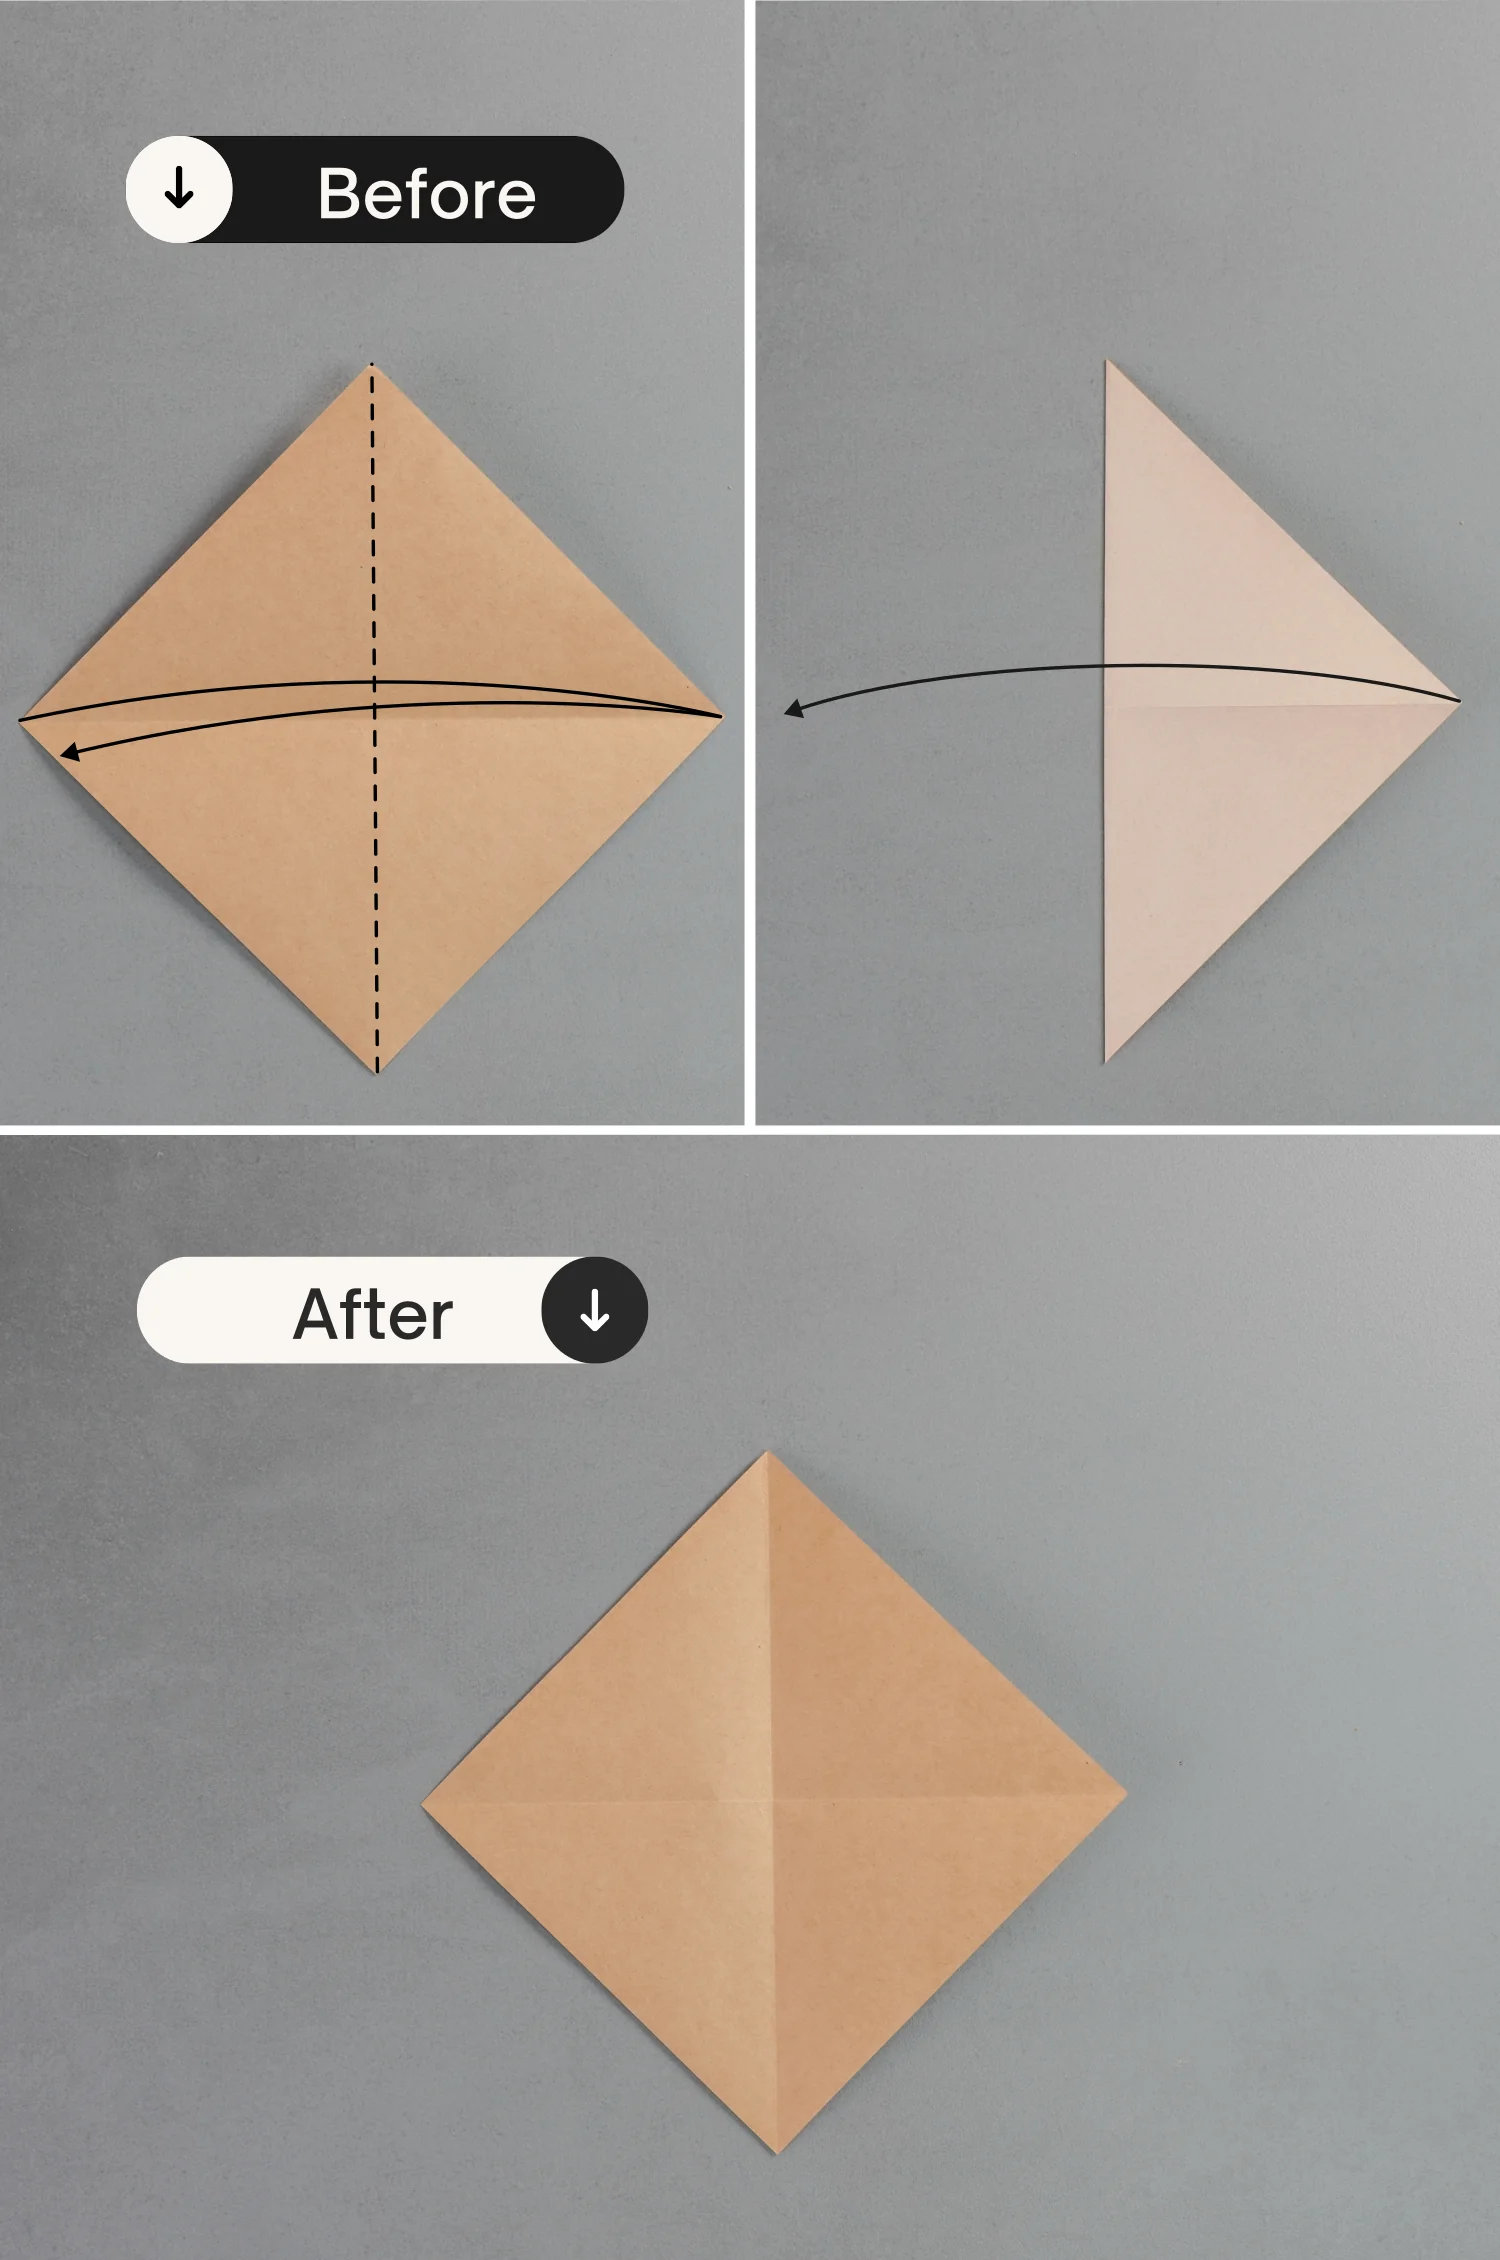
Fold it in half vertically, and unfold it.
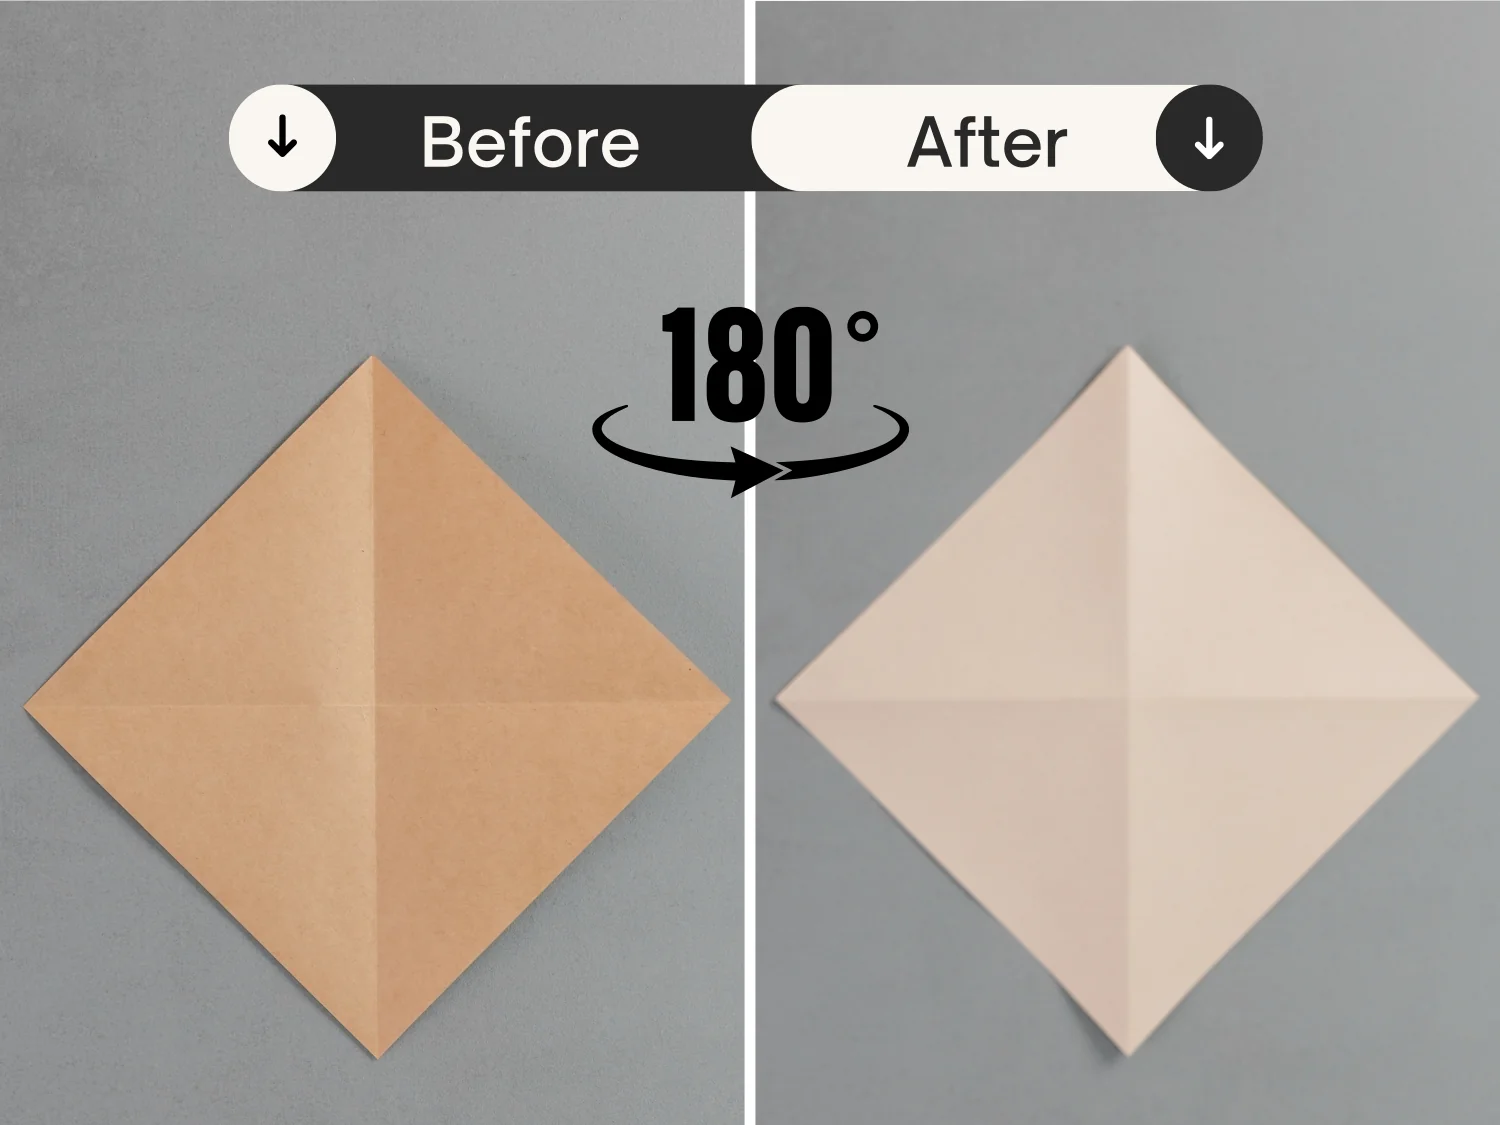
Step 3
Rotate it 180 degrees from the left to the right, to flip the paper over.
Step 4
Fold the bottom left and right edges to align with the middle vertical crease, and unfold them.
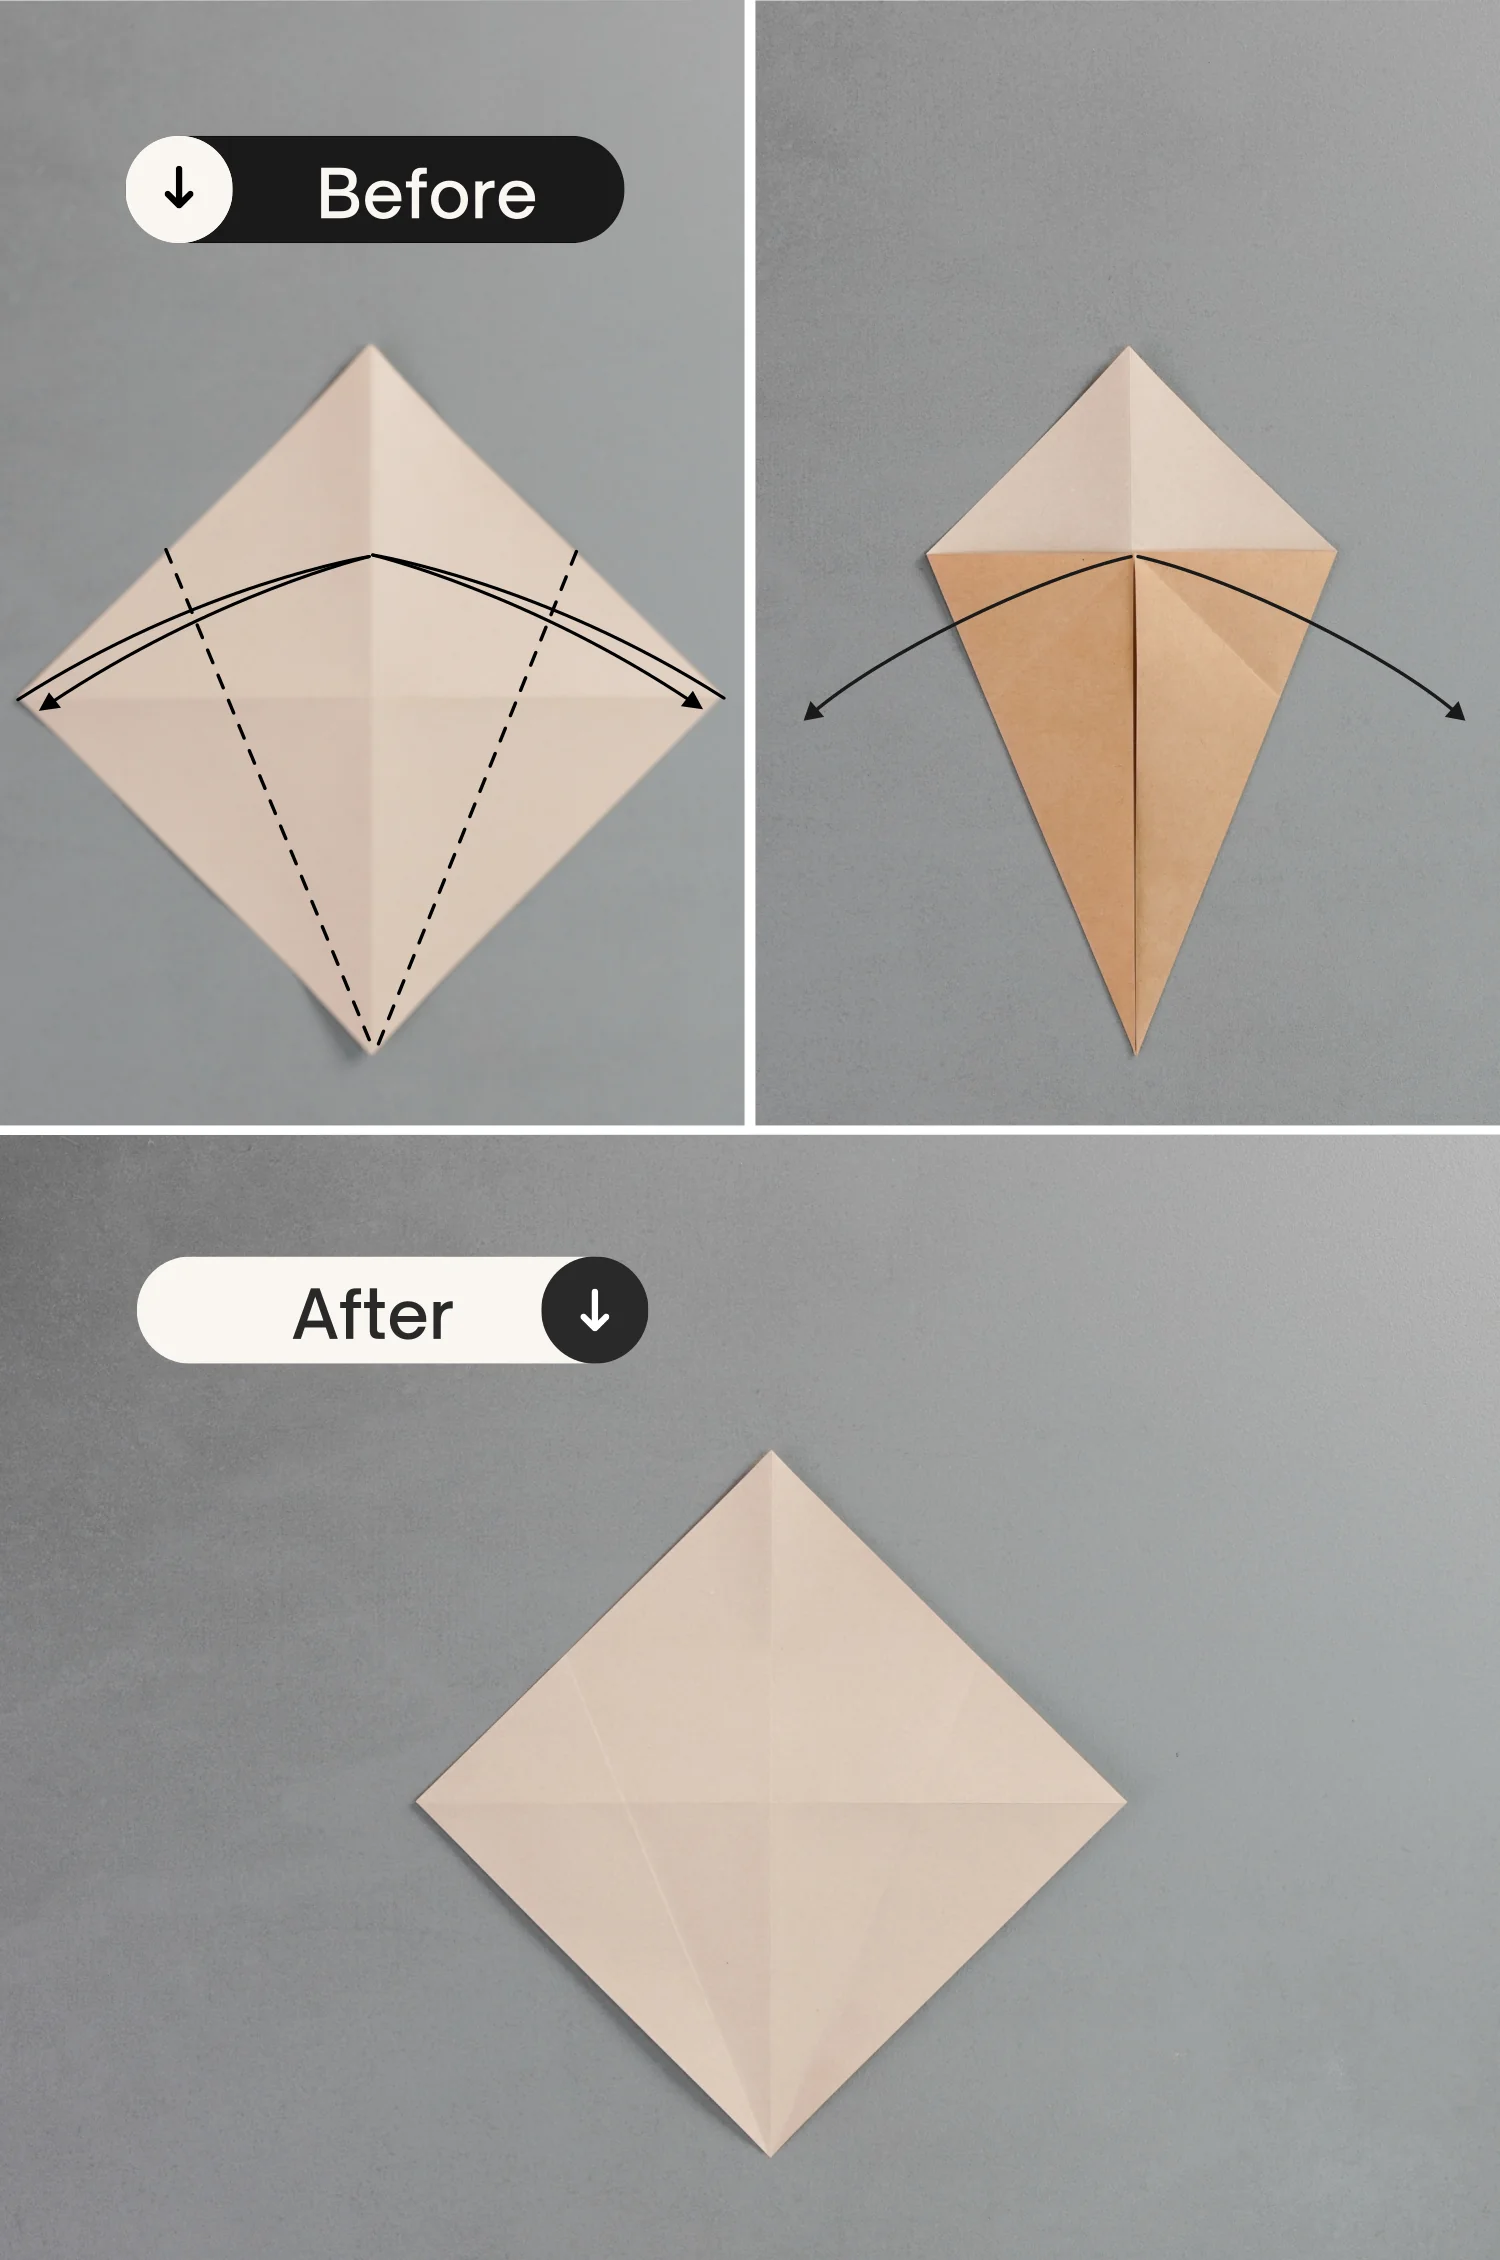
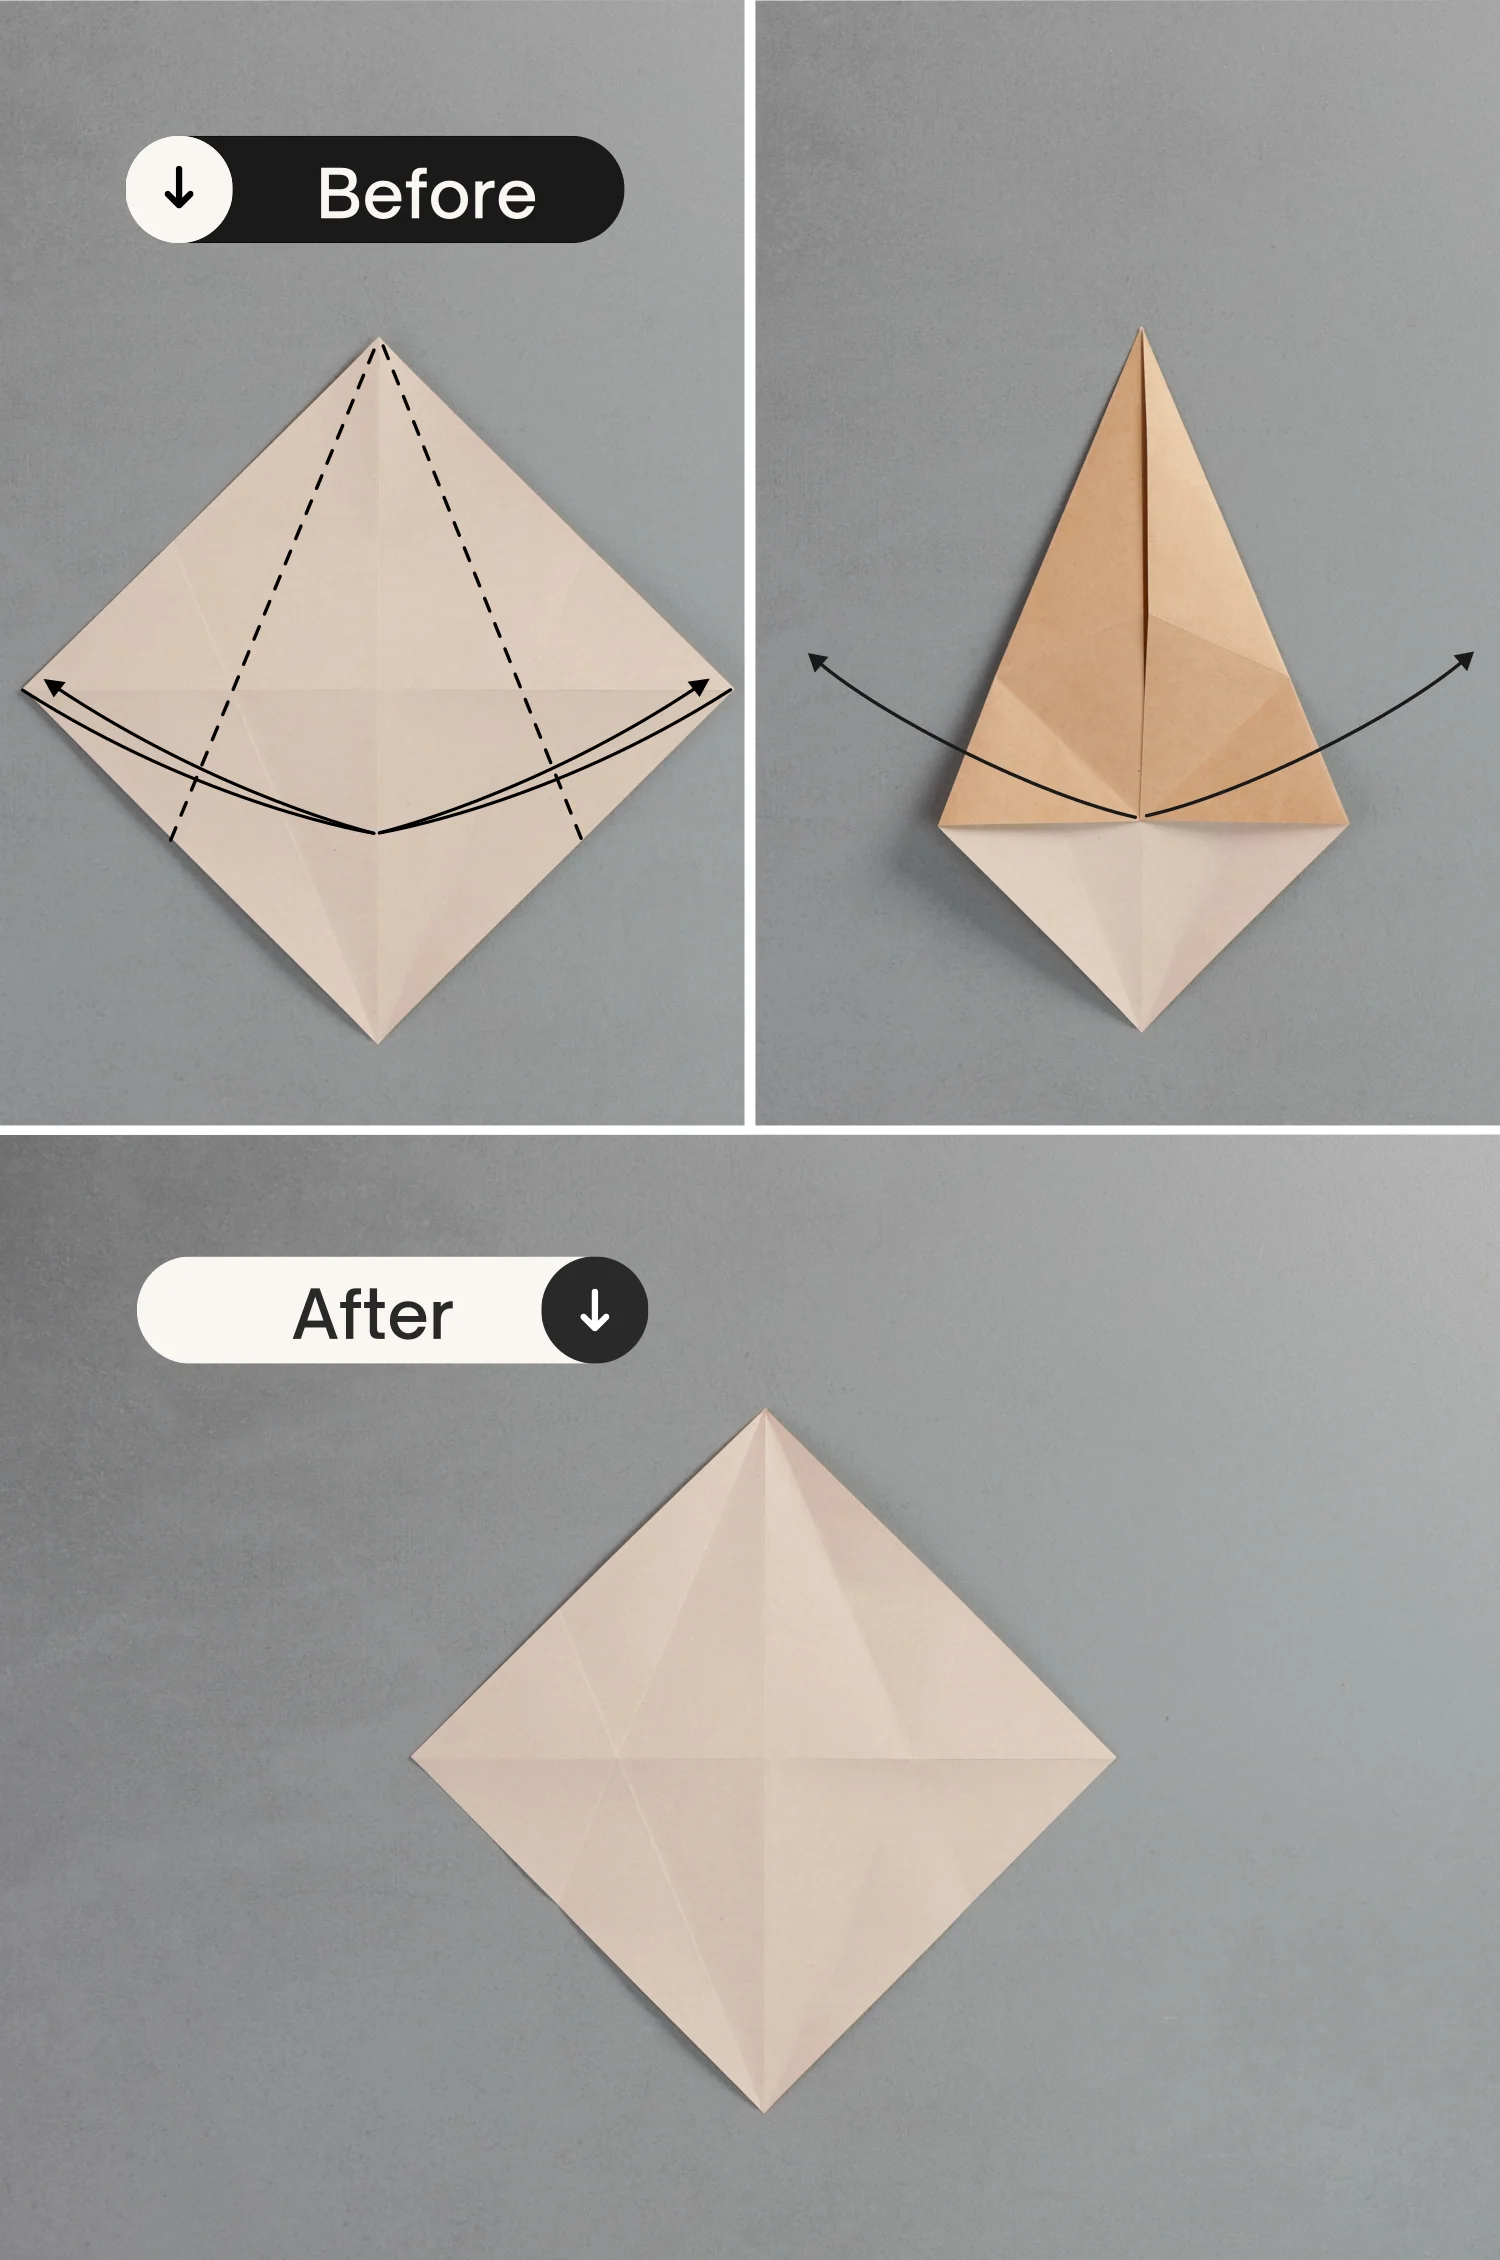
Step 5
Fold the top left and right edges to align with the middle vertical crease, and unfold them.
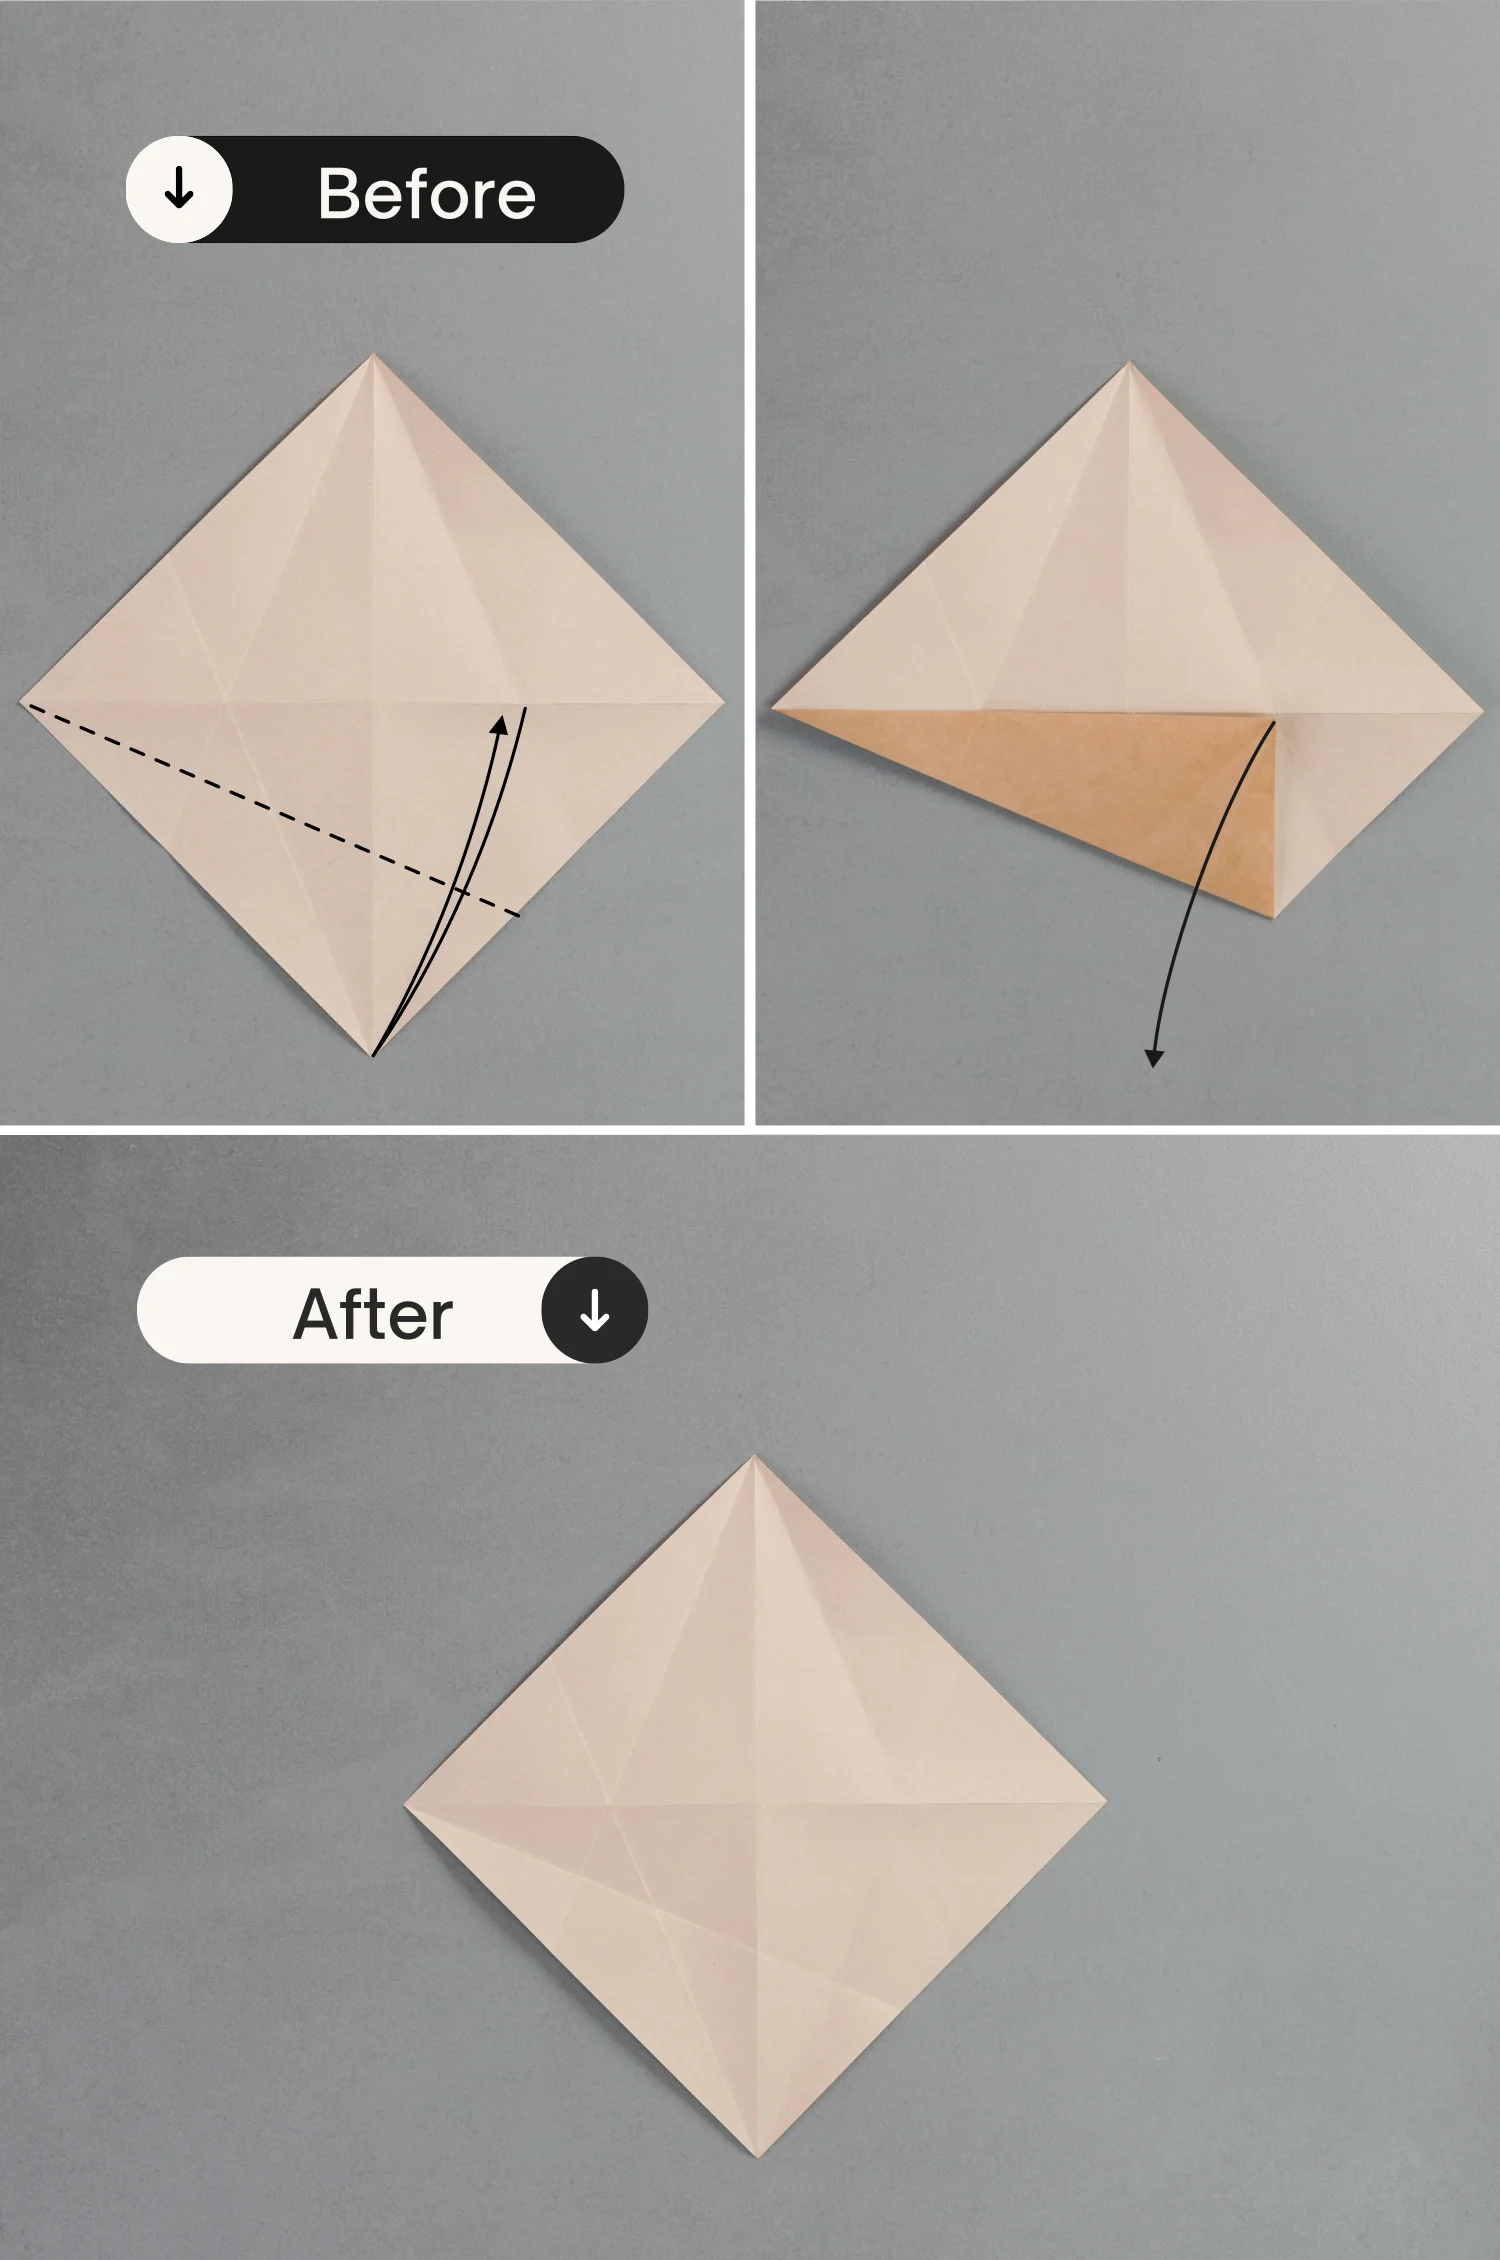
Step 6
Fold up the bottom left edge to align with the horizontal crease, and unfold it.
Step 7
Fold up the bottom point along the dotted line that connects the two red spots.[these two red spots are the intersection points of the edges and creases]
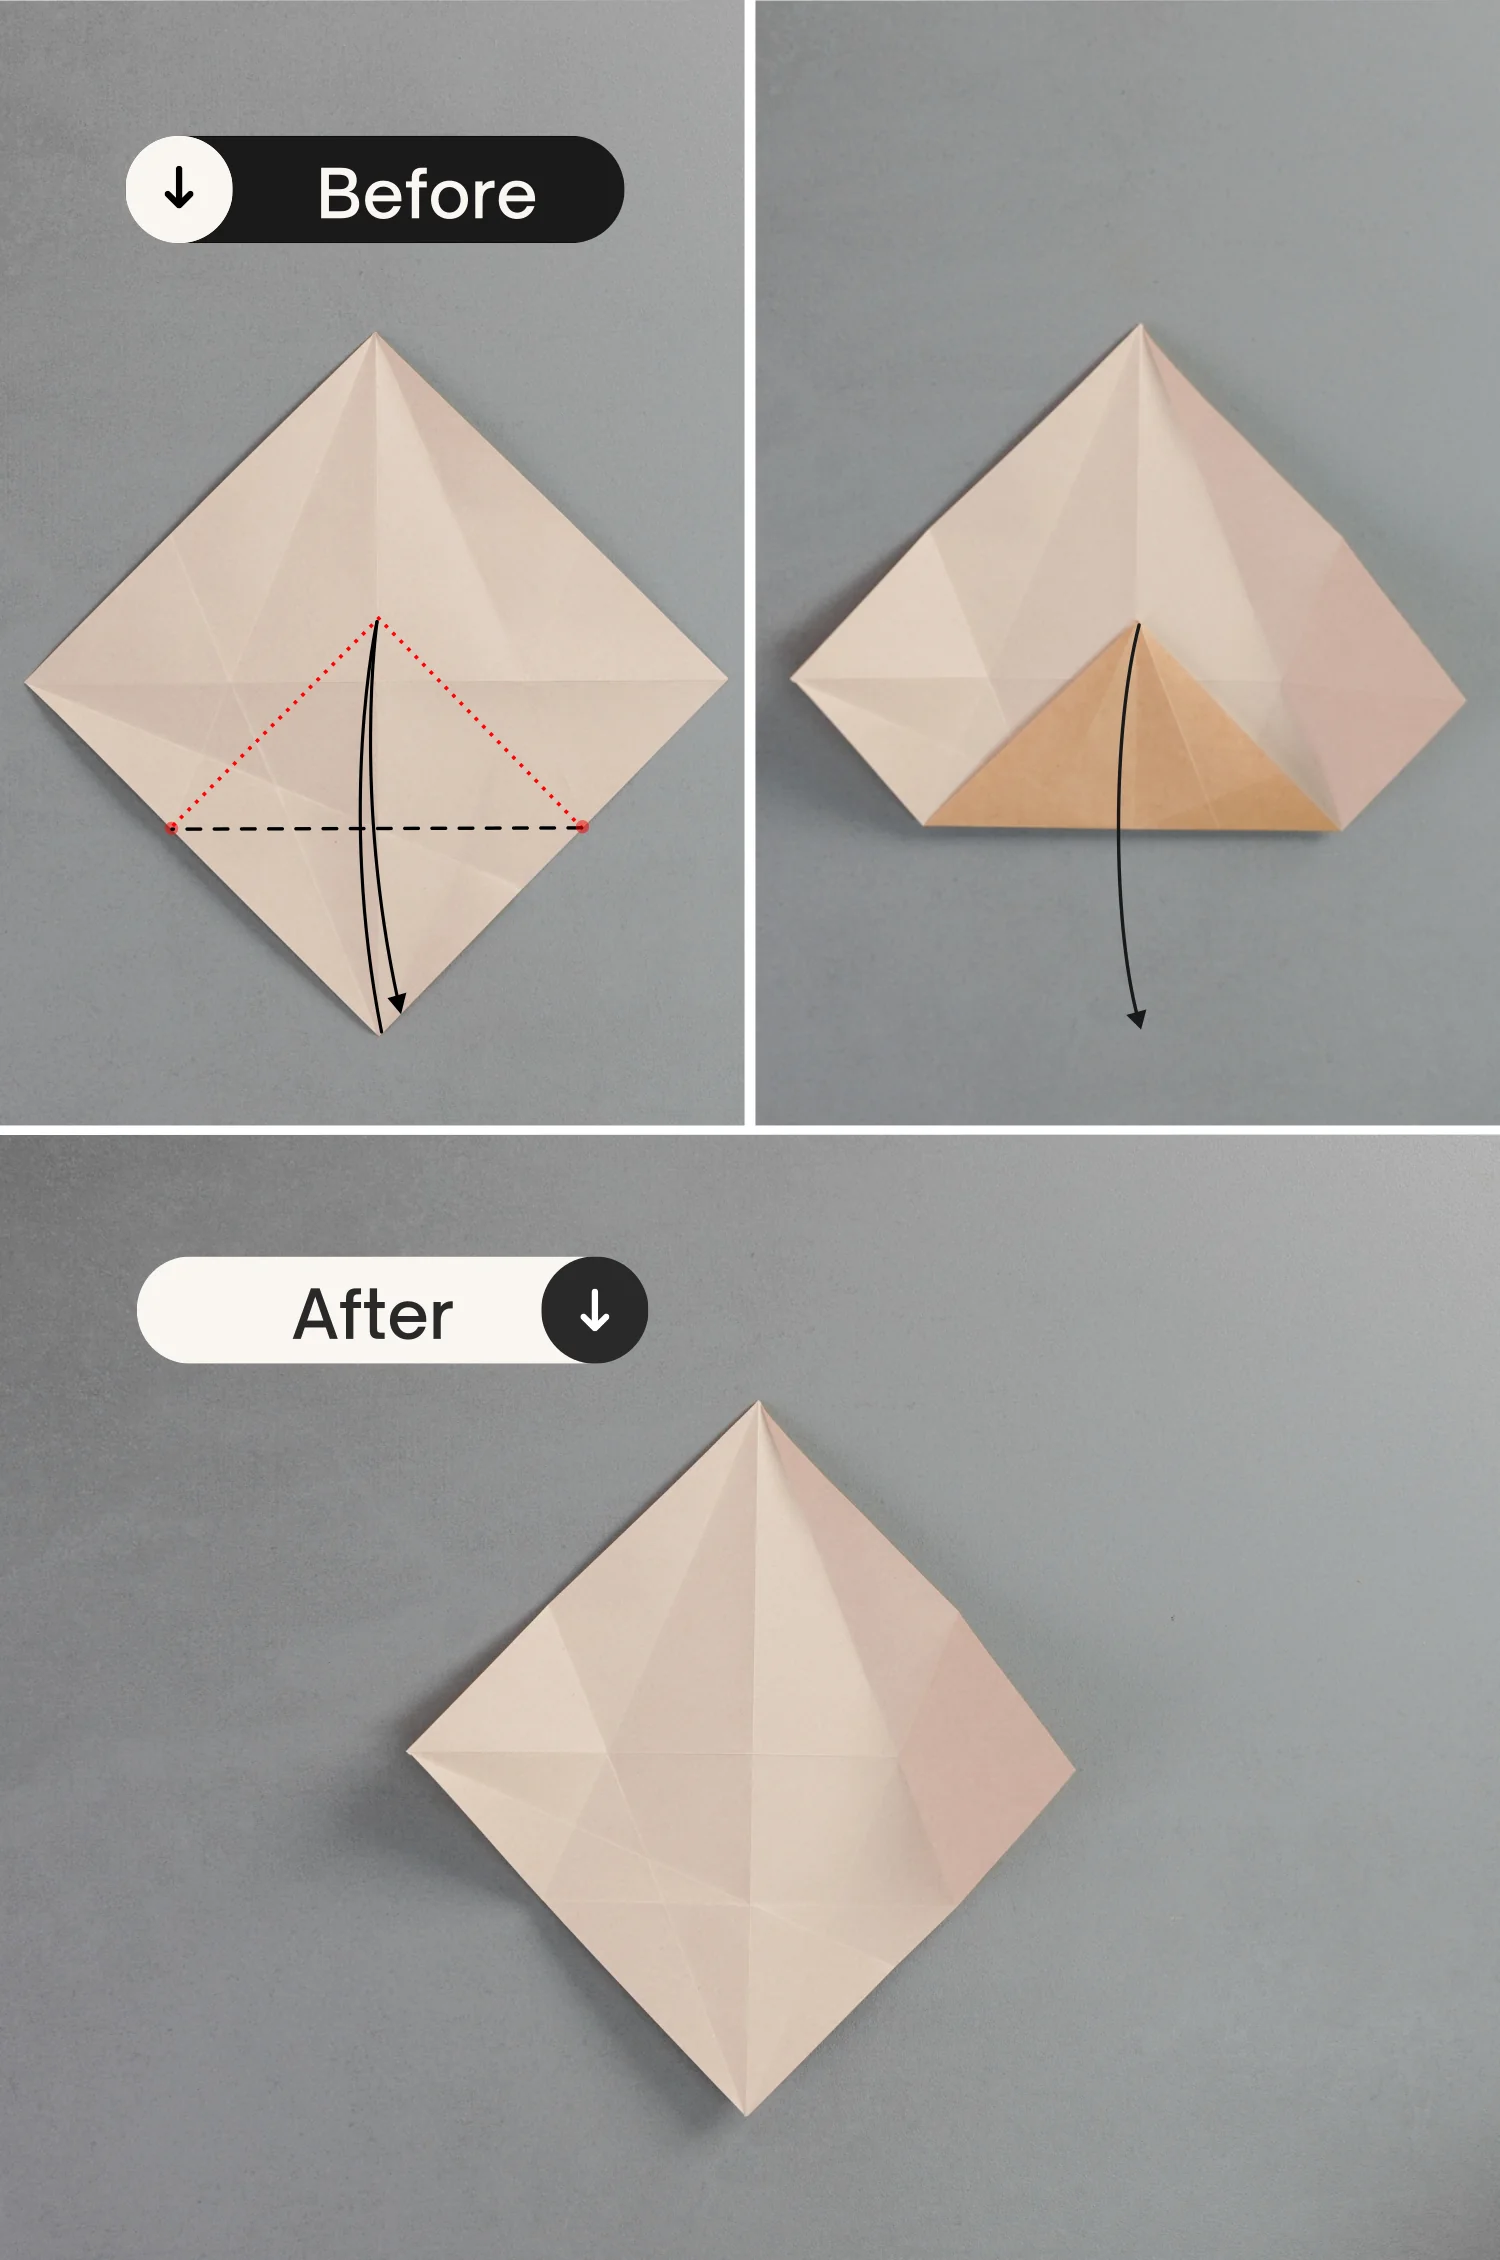
Step 8
Fold up the bottom point to meet the intersection point formed by creases, as you can see in the following pictures. Crease it well, and unfold it.
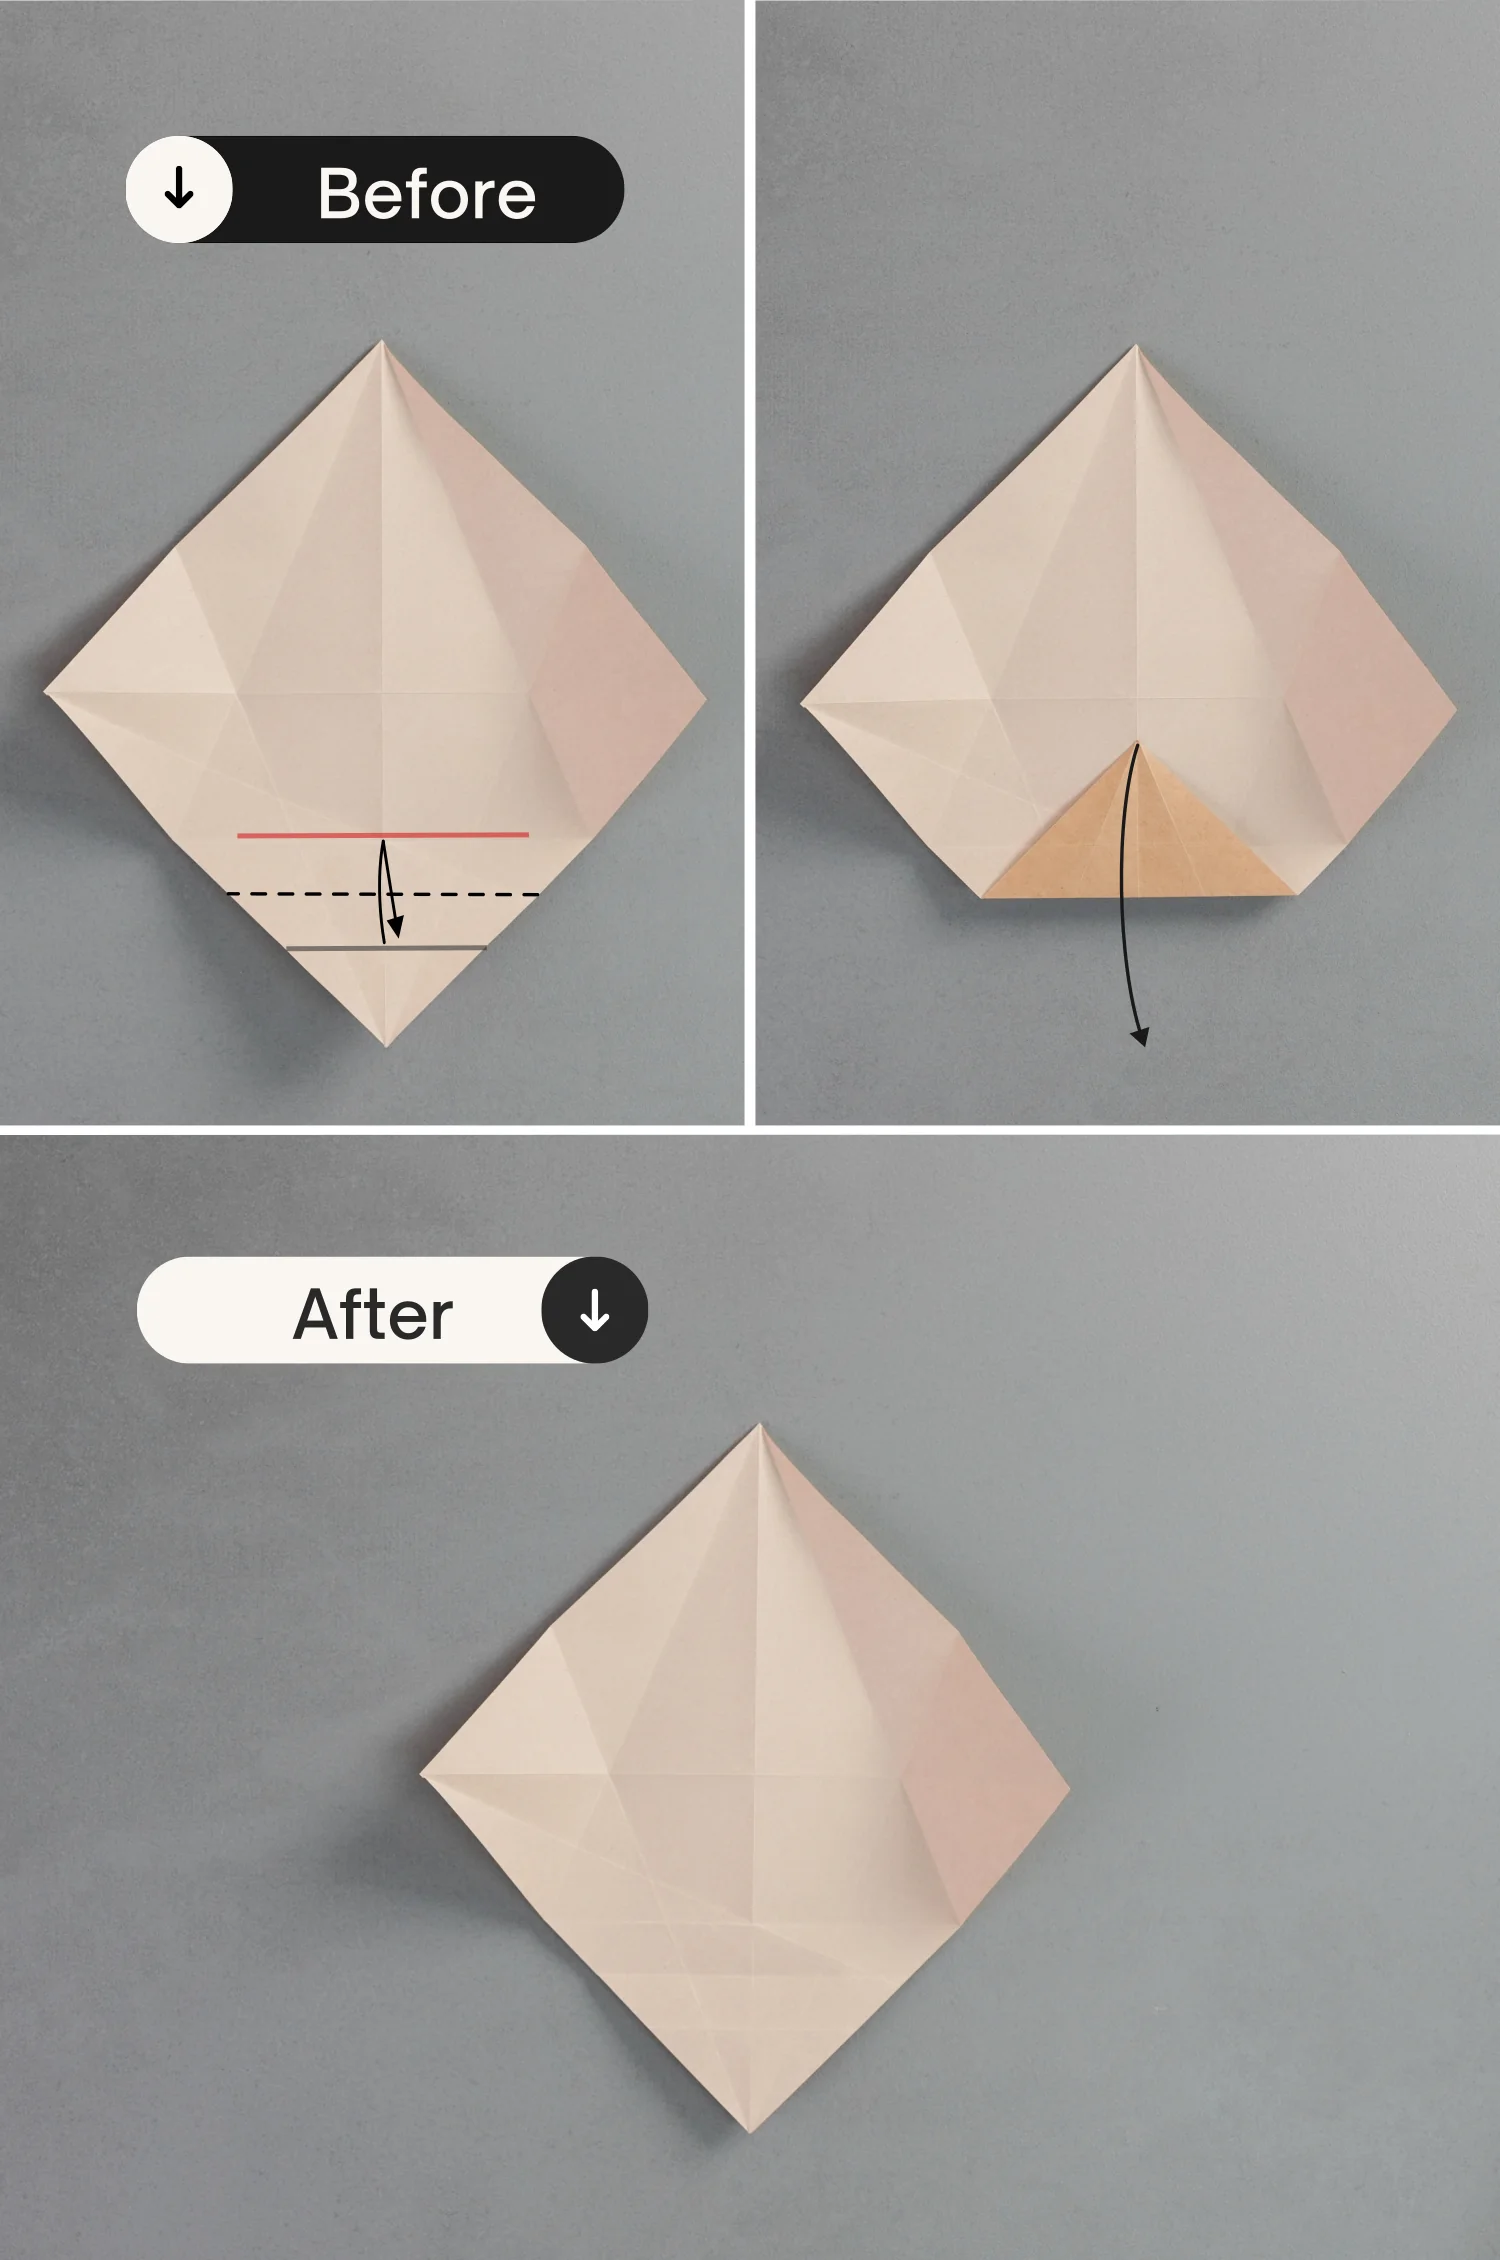
Step 9
Fold up the crease indicated by the black line to align with the crease indicated by the red line, leaving a crease then unfold it.
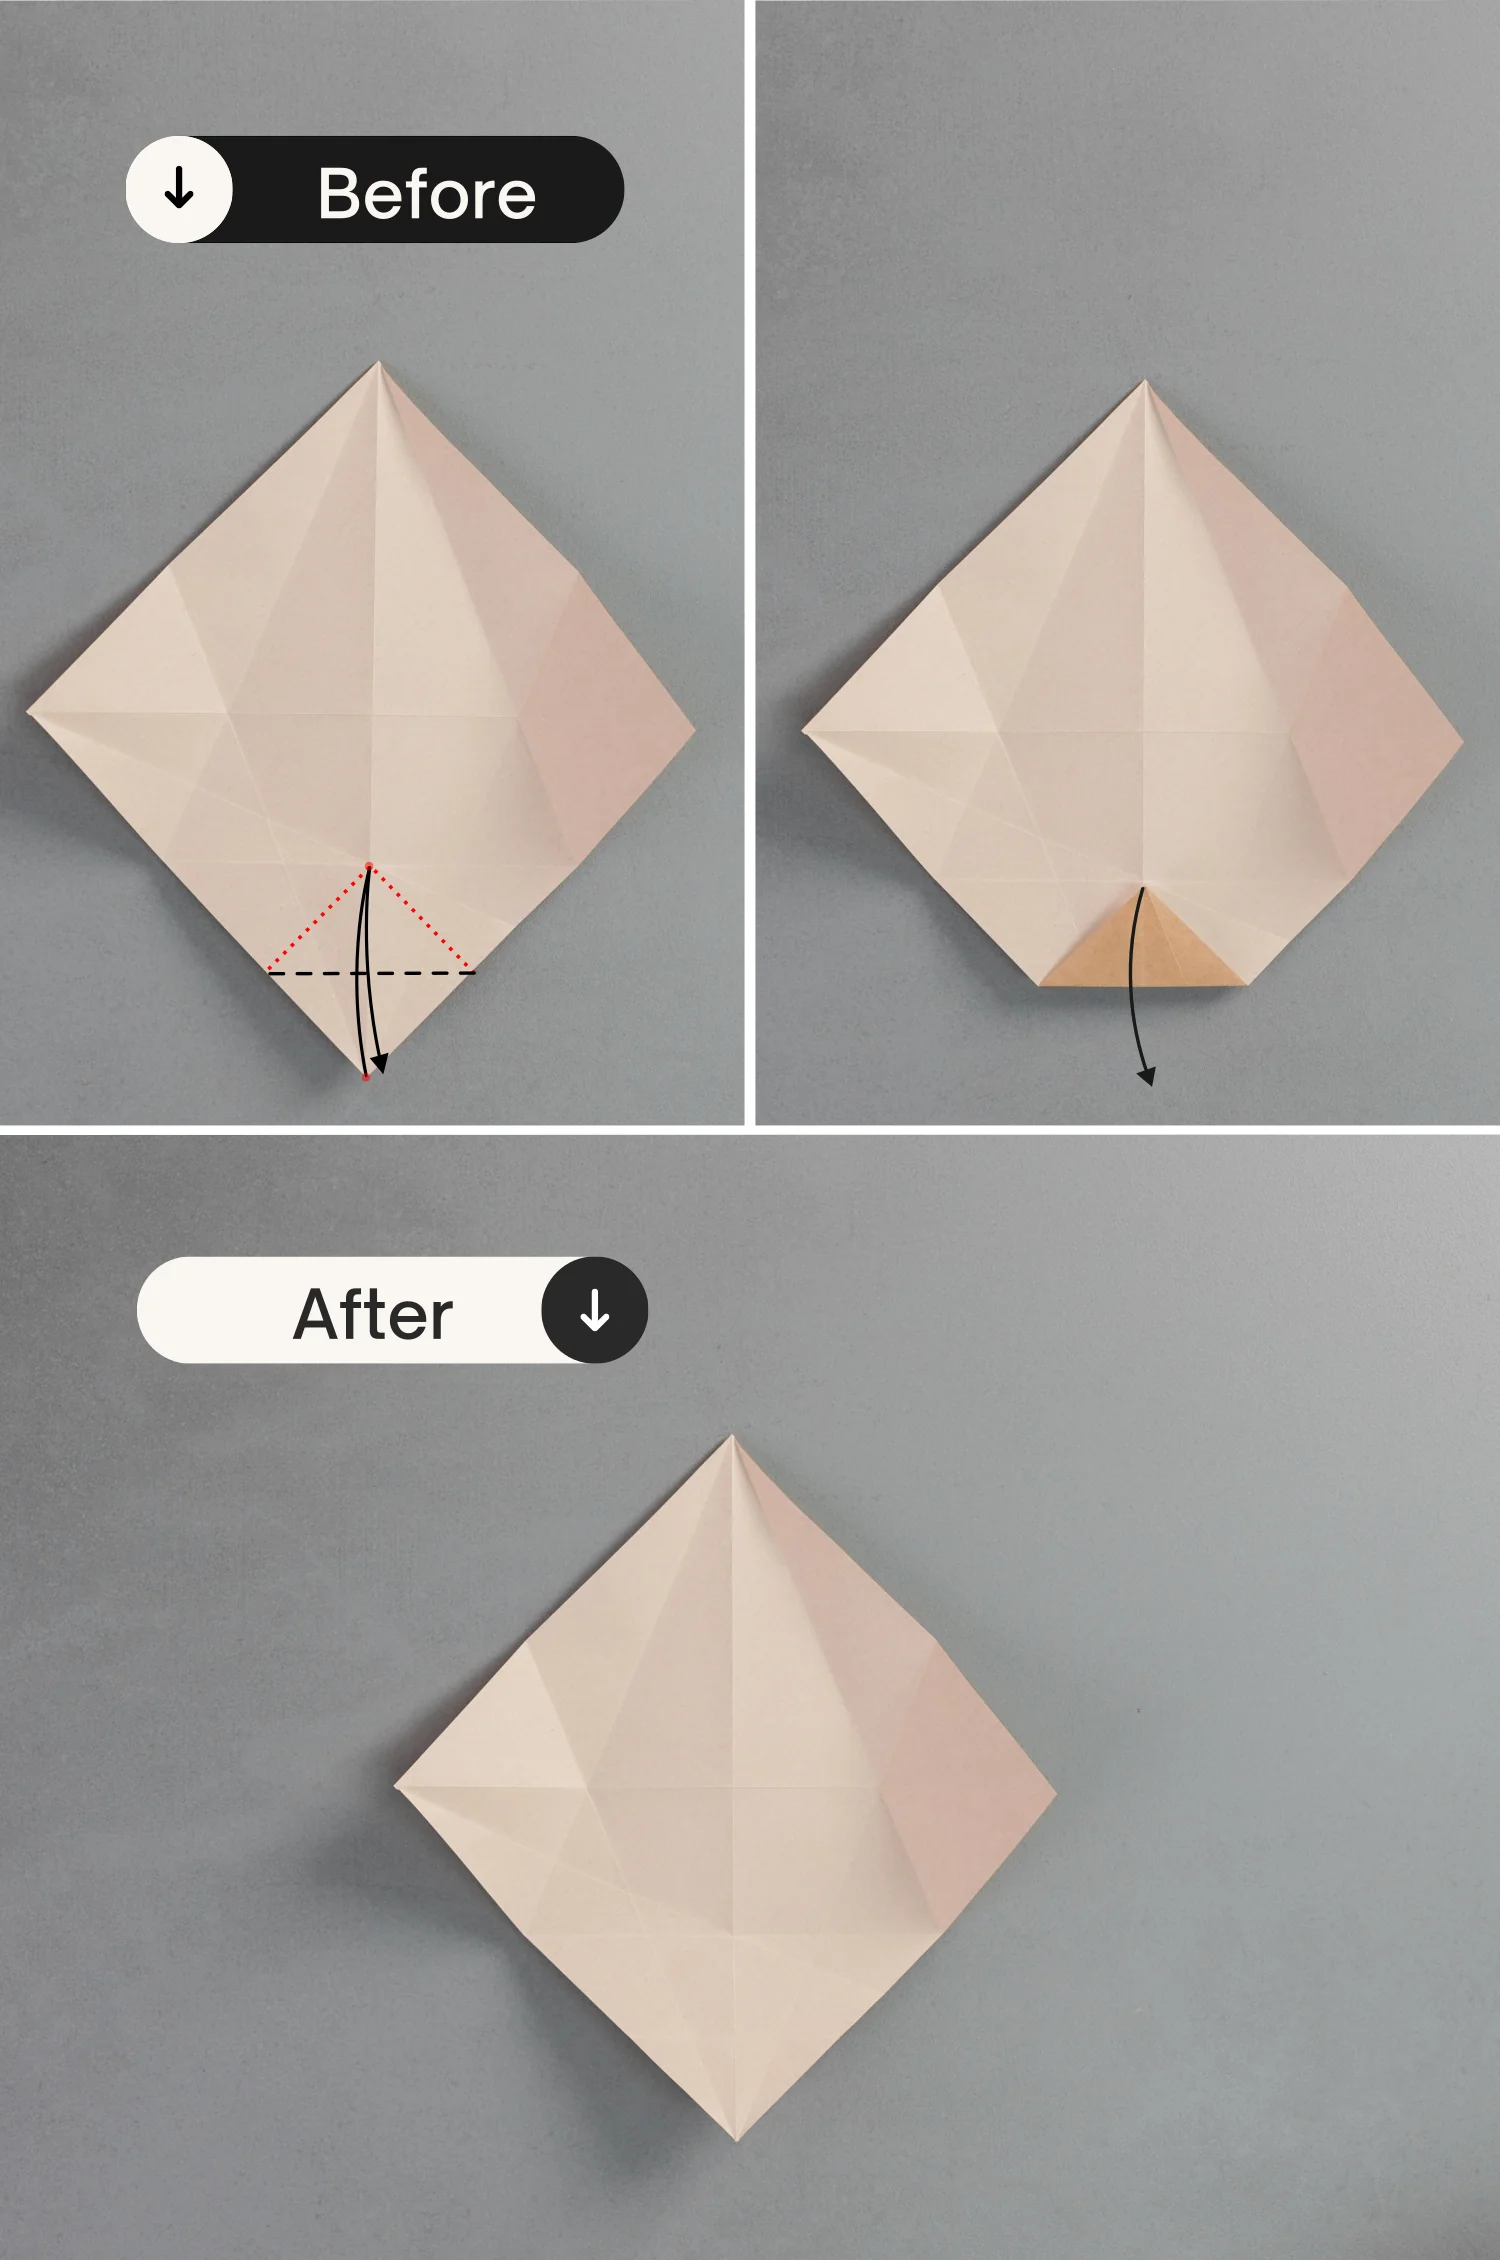
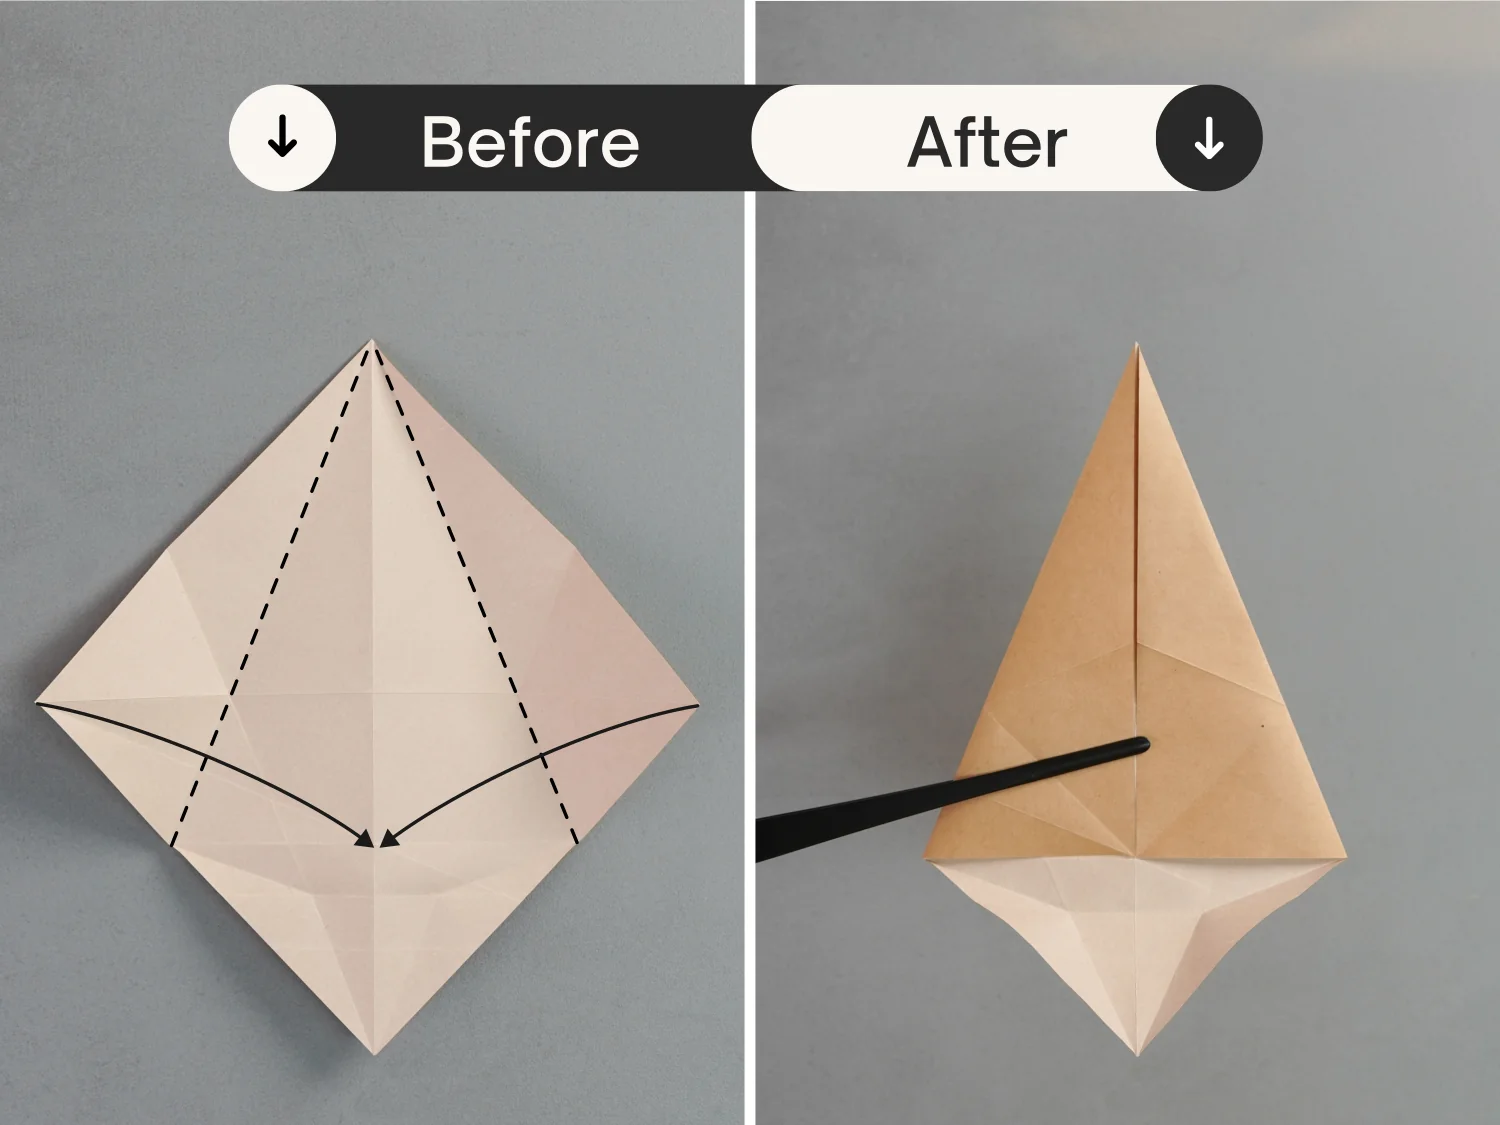
Step 10
Fold up both the bottom left and bottom right edges along the dotted lines that connect the red spots, leaving two creases, and unfold them.
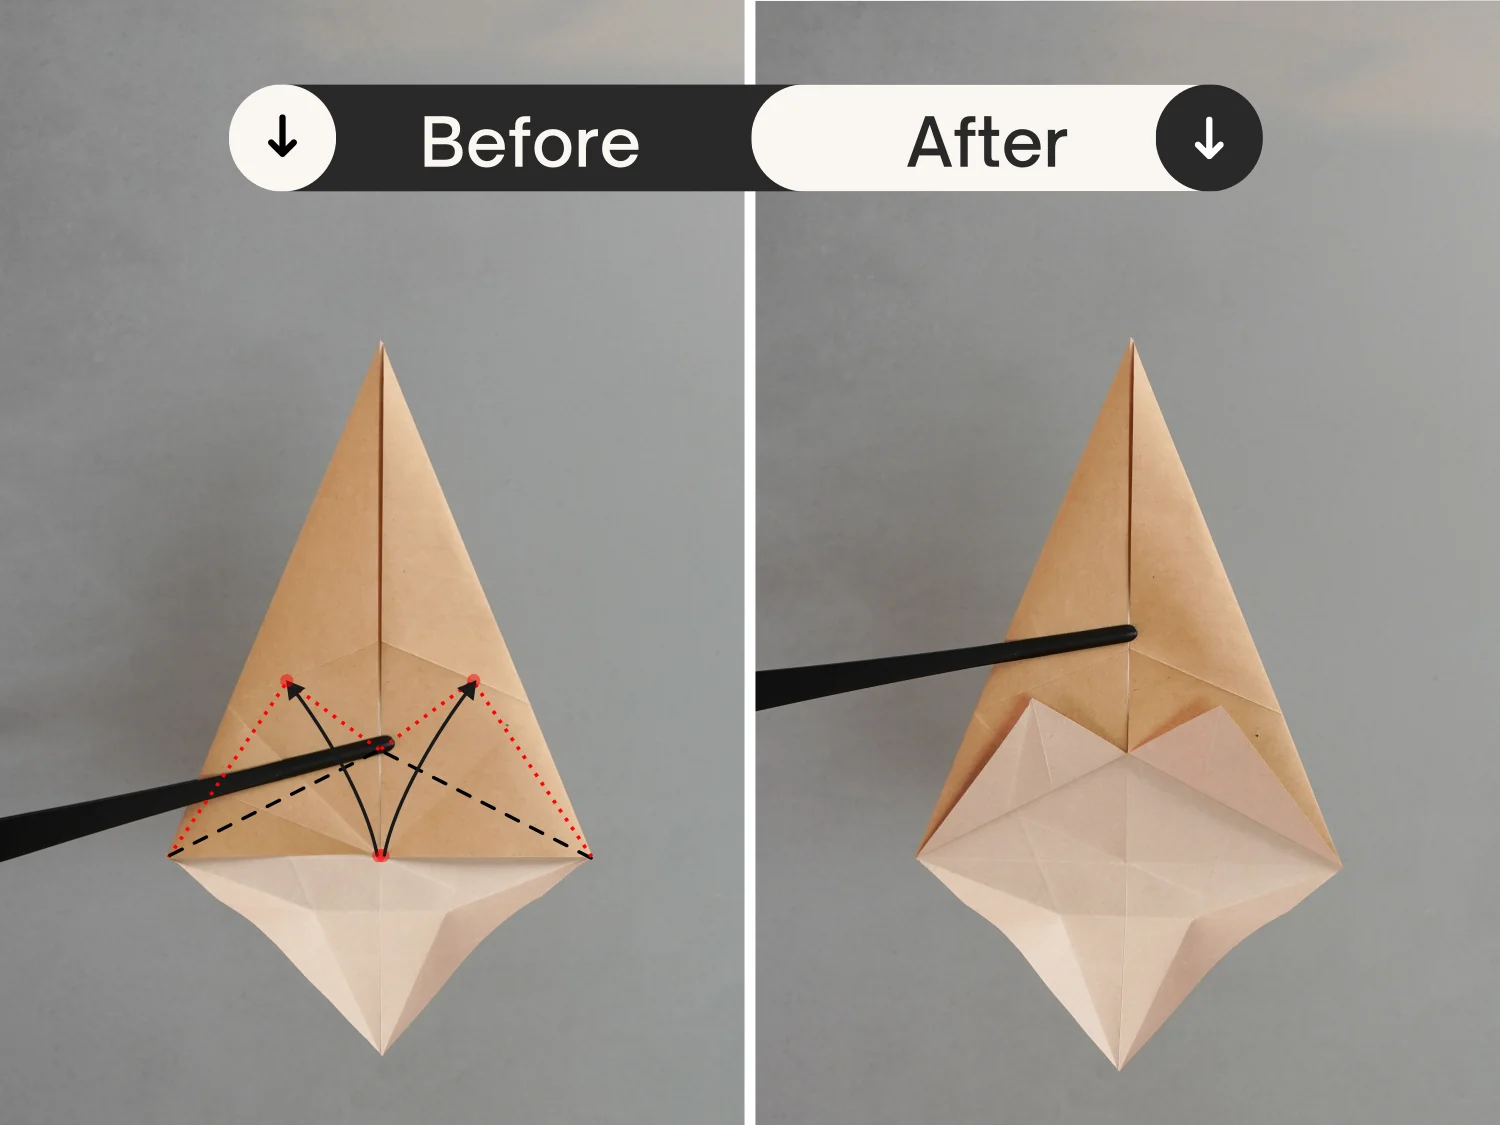
Step 11
Fold the top left and right edges to align with the vertical crease.
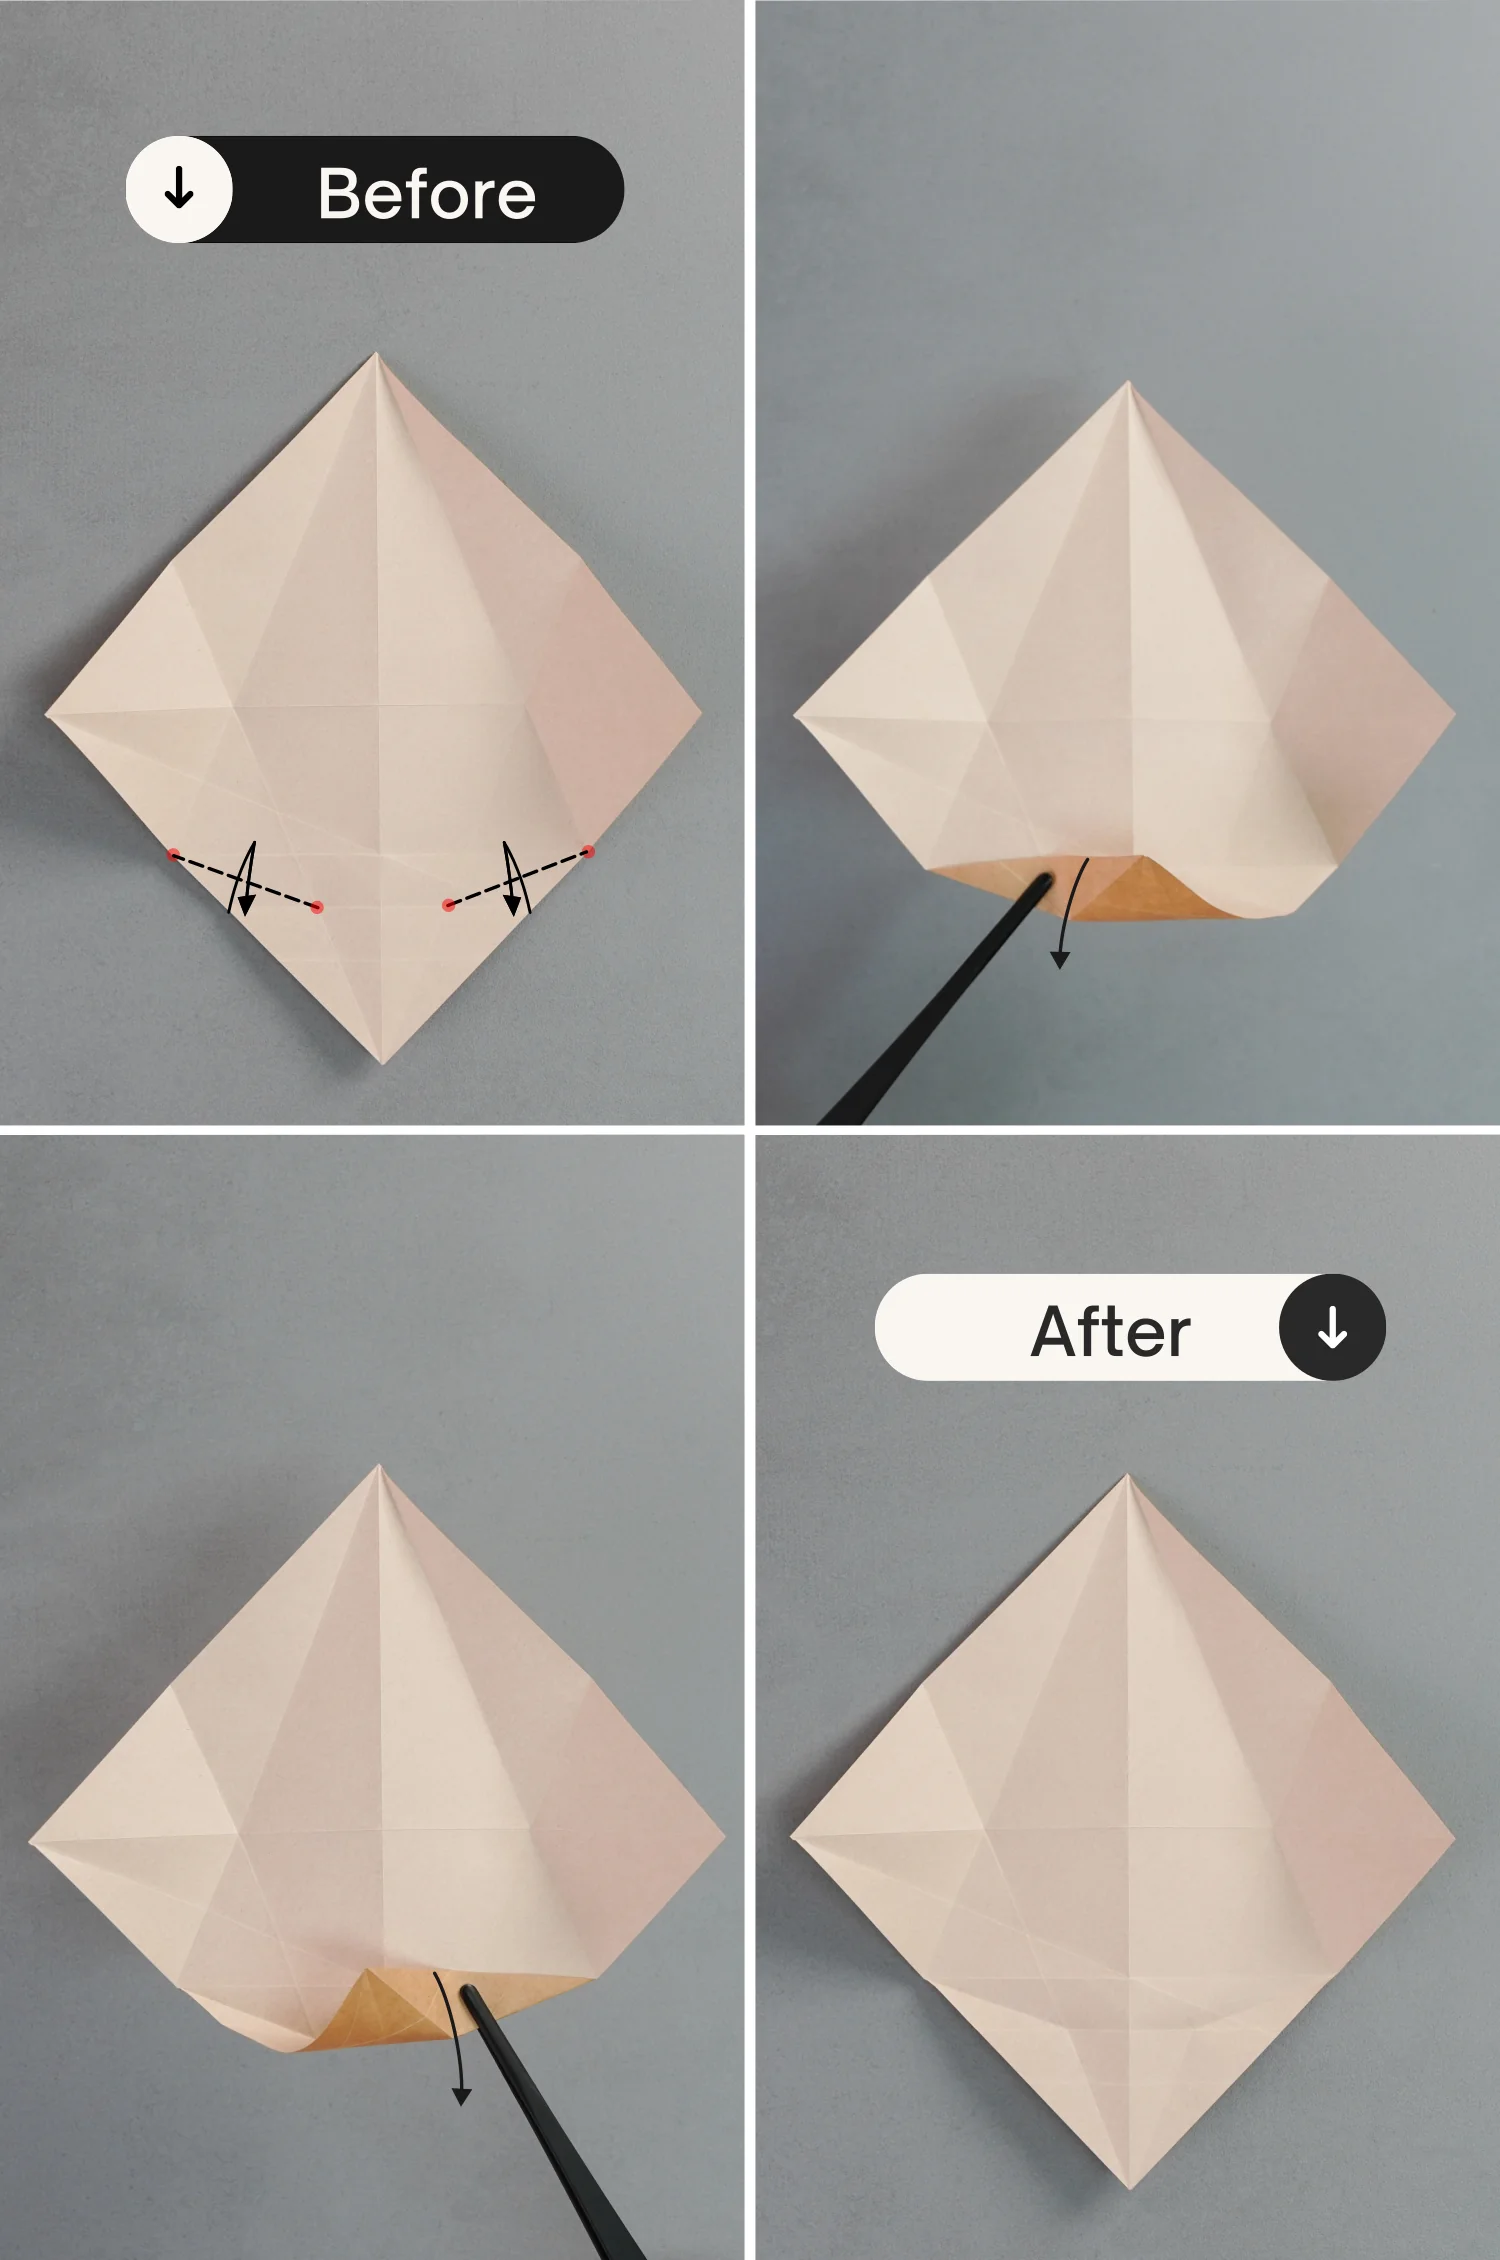
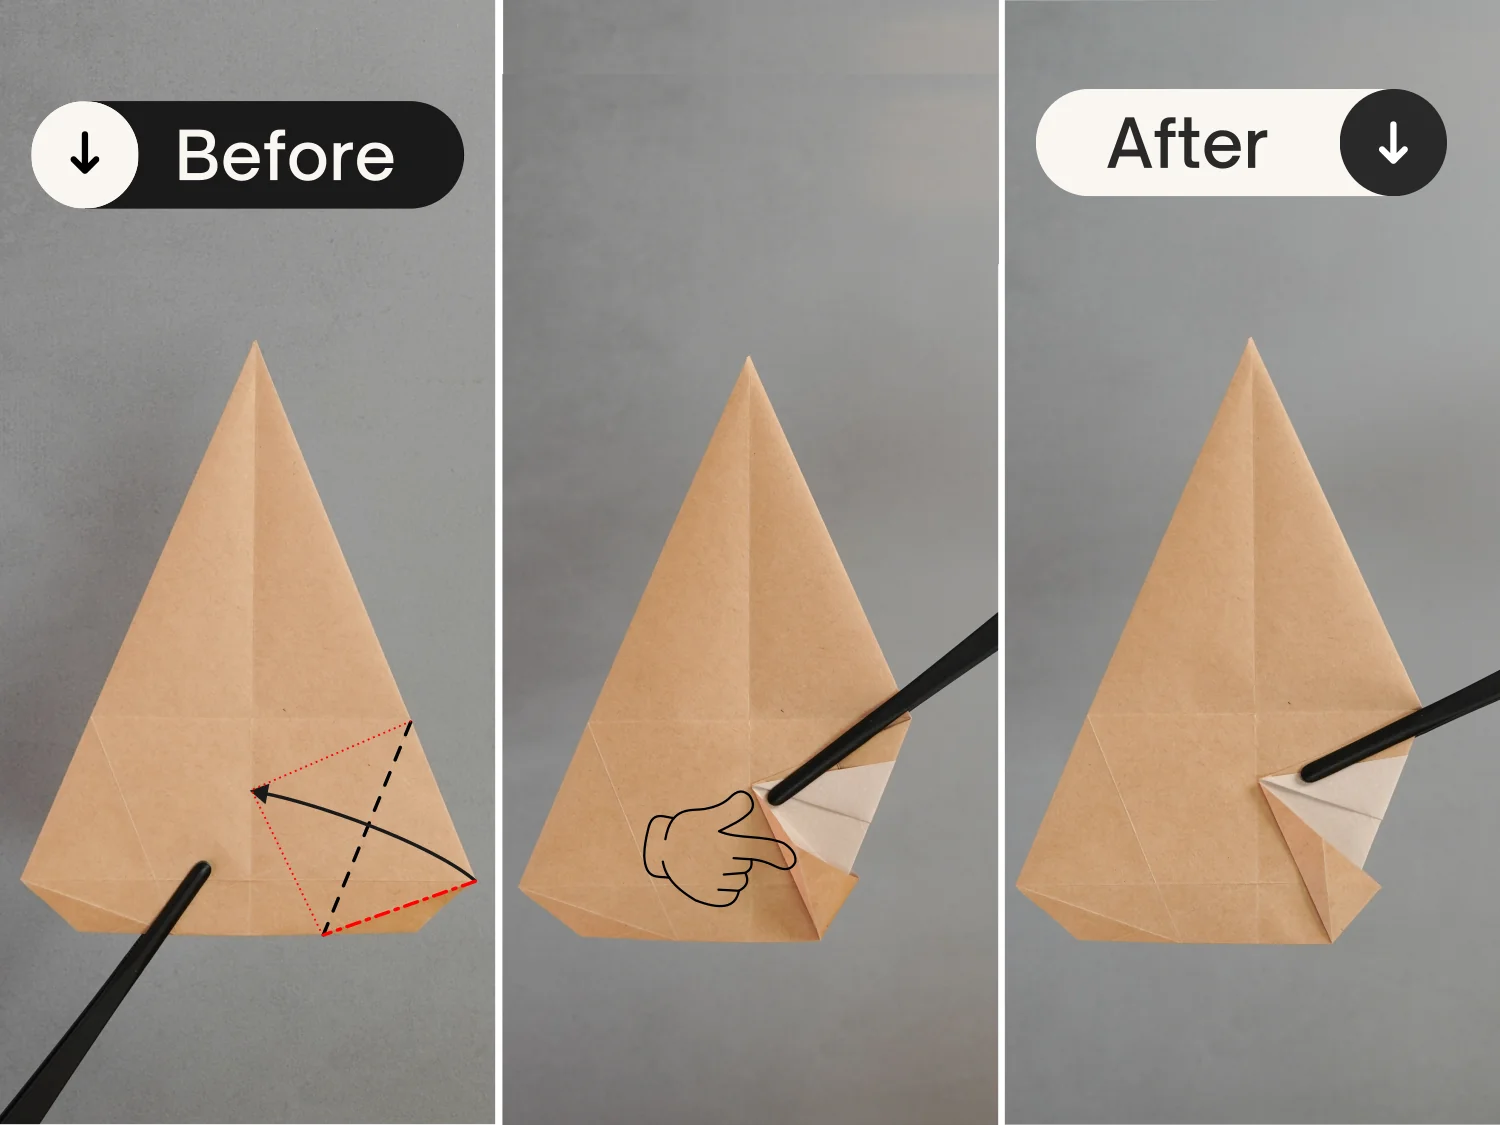
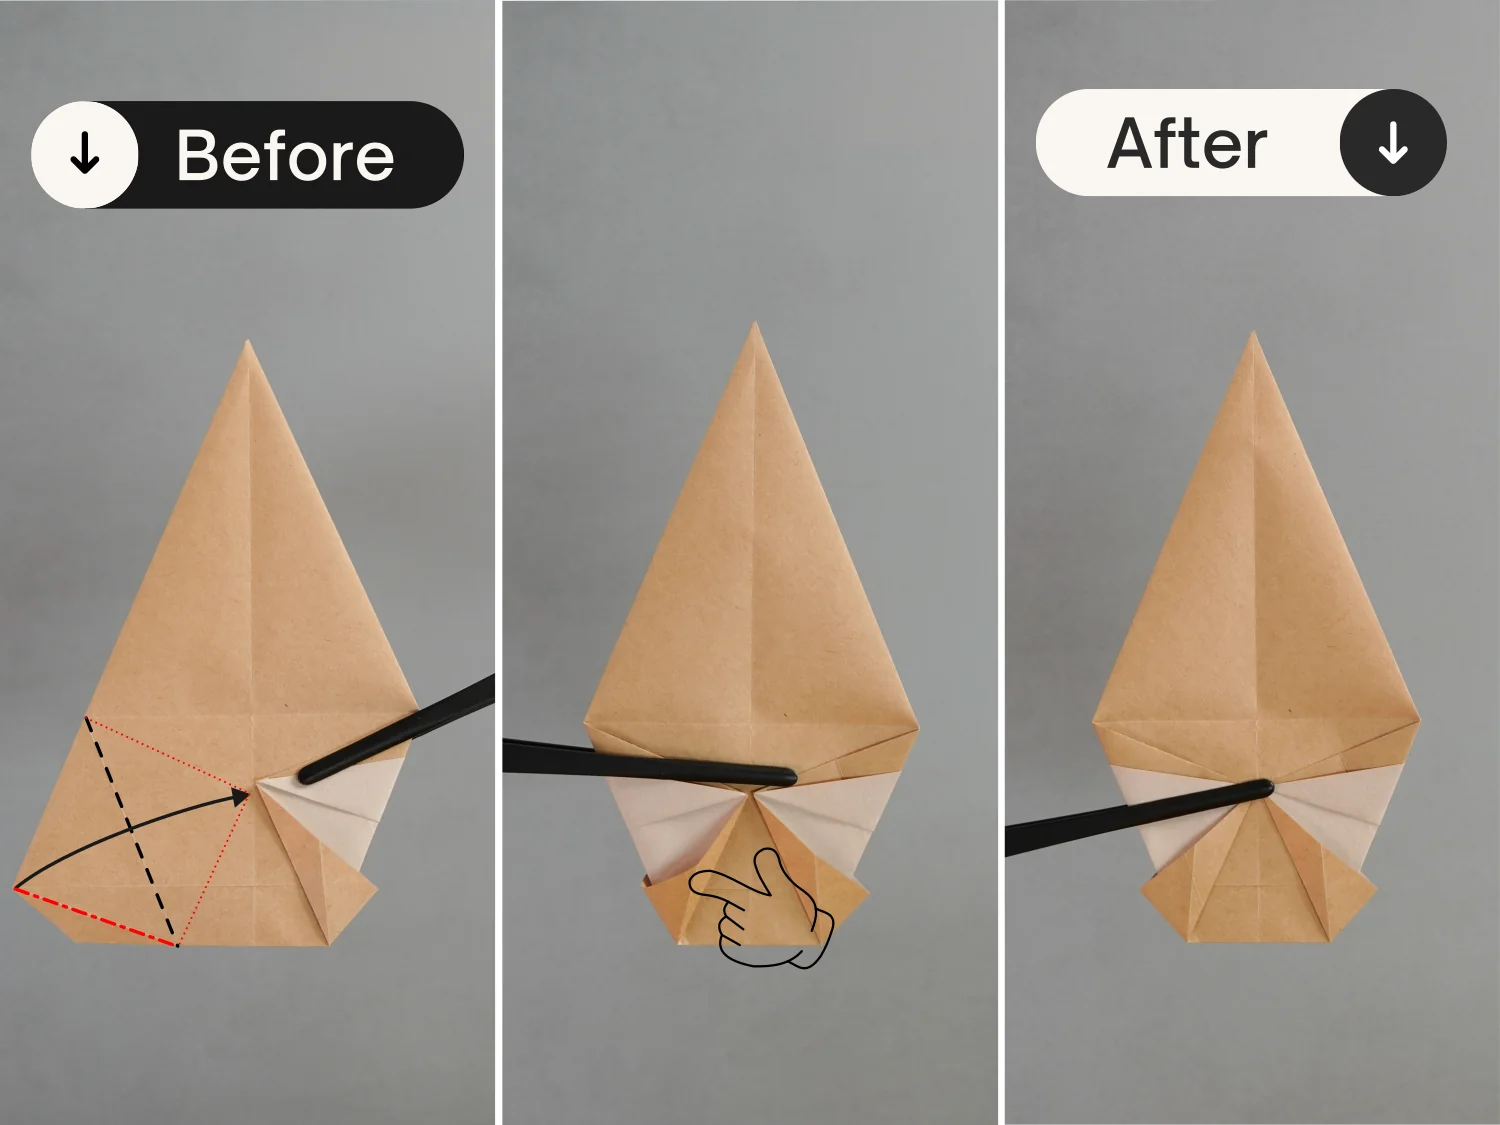
Step 12
Fold up the bottom right point of the left layer along the dotted line, to meet the red spot located on the crease.
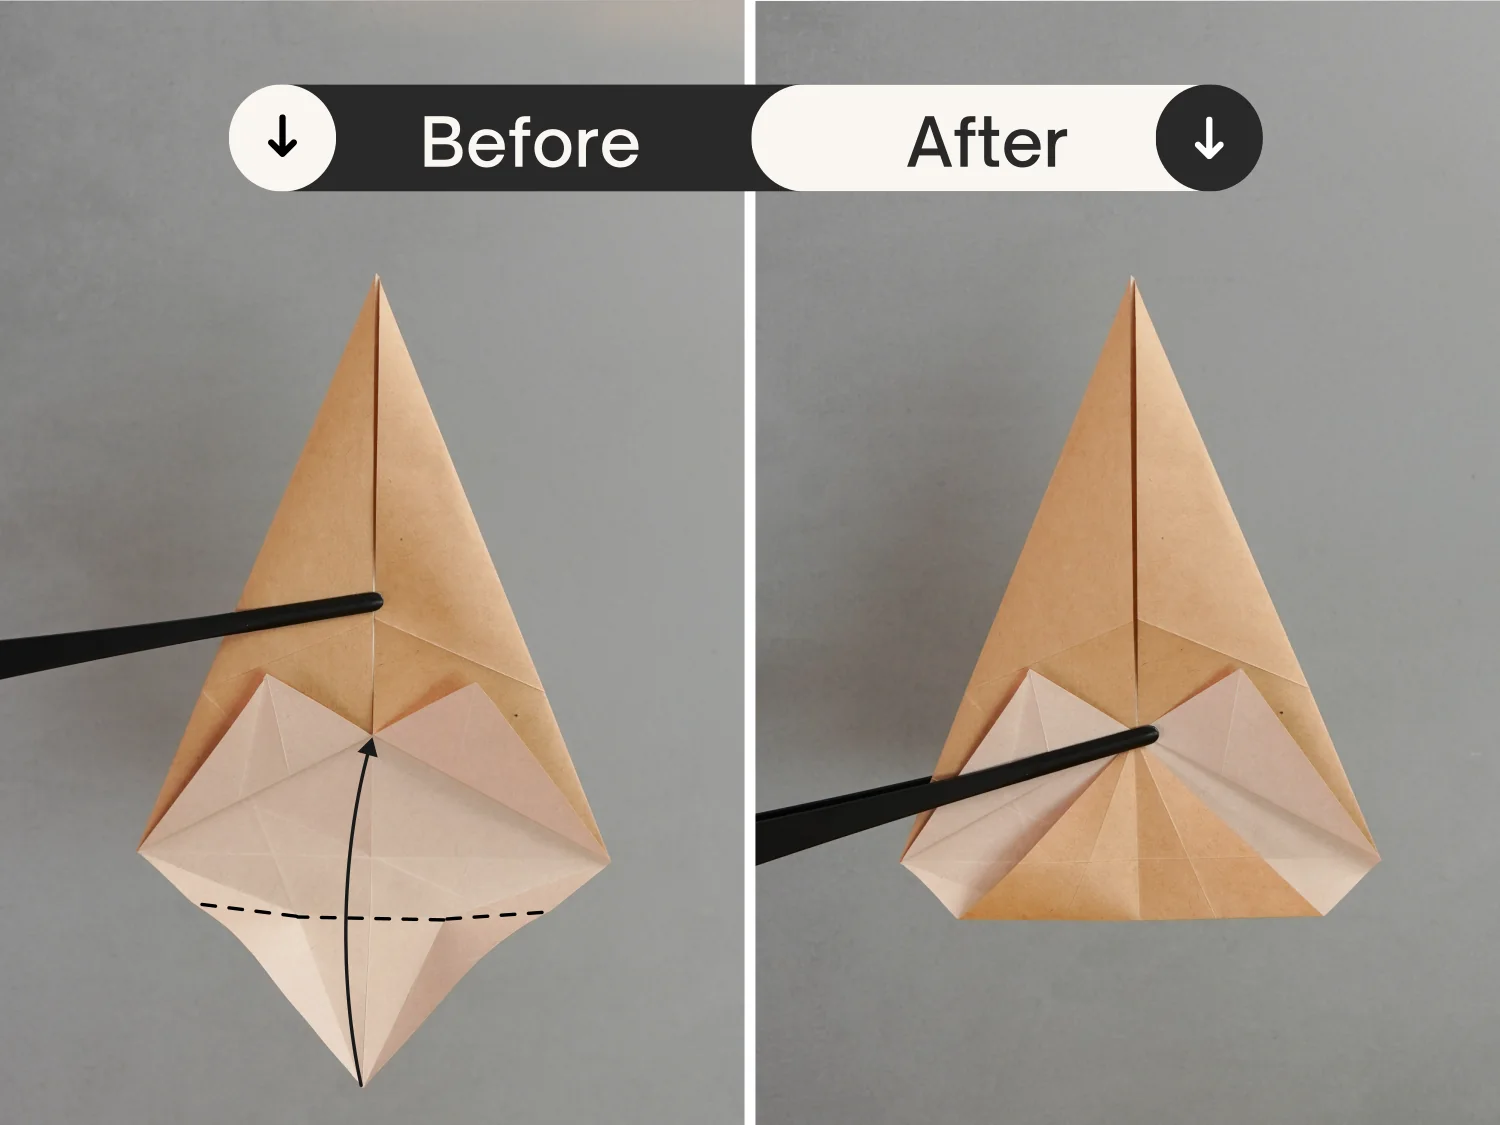
Repeat this for the bottom left point of the right layer.
Step 13
Fold up the bottom point along the dotted line.
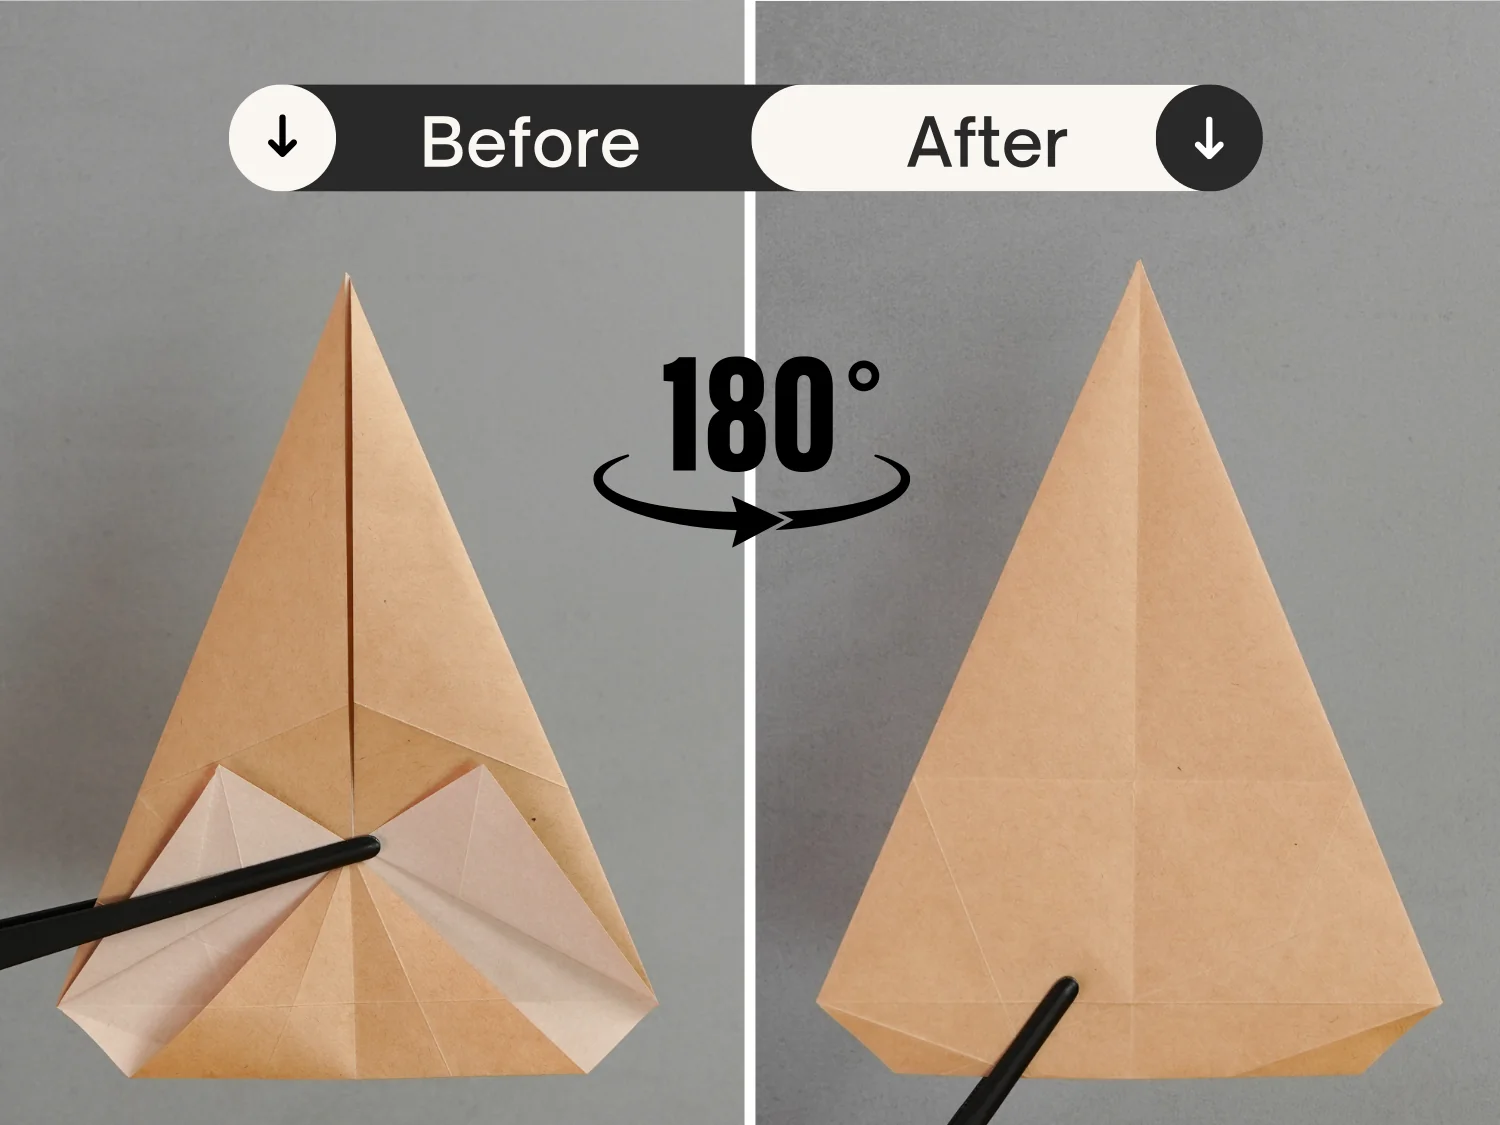
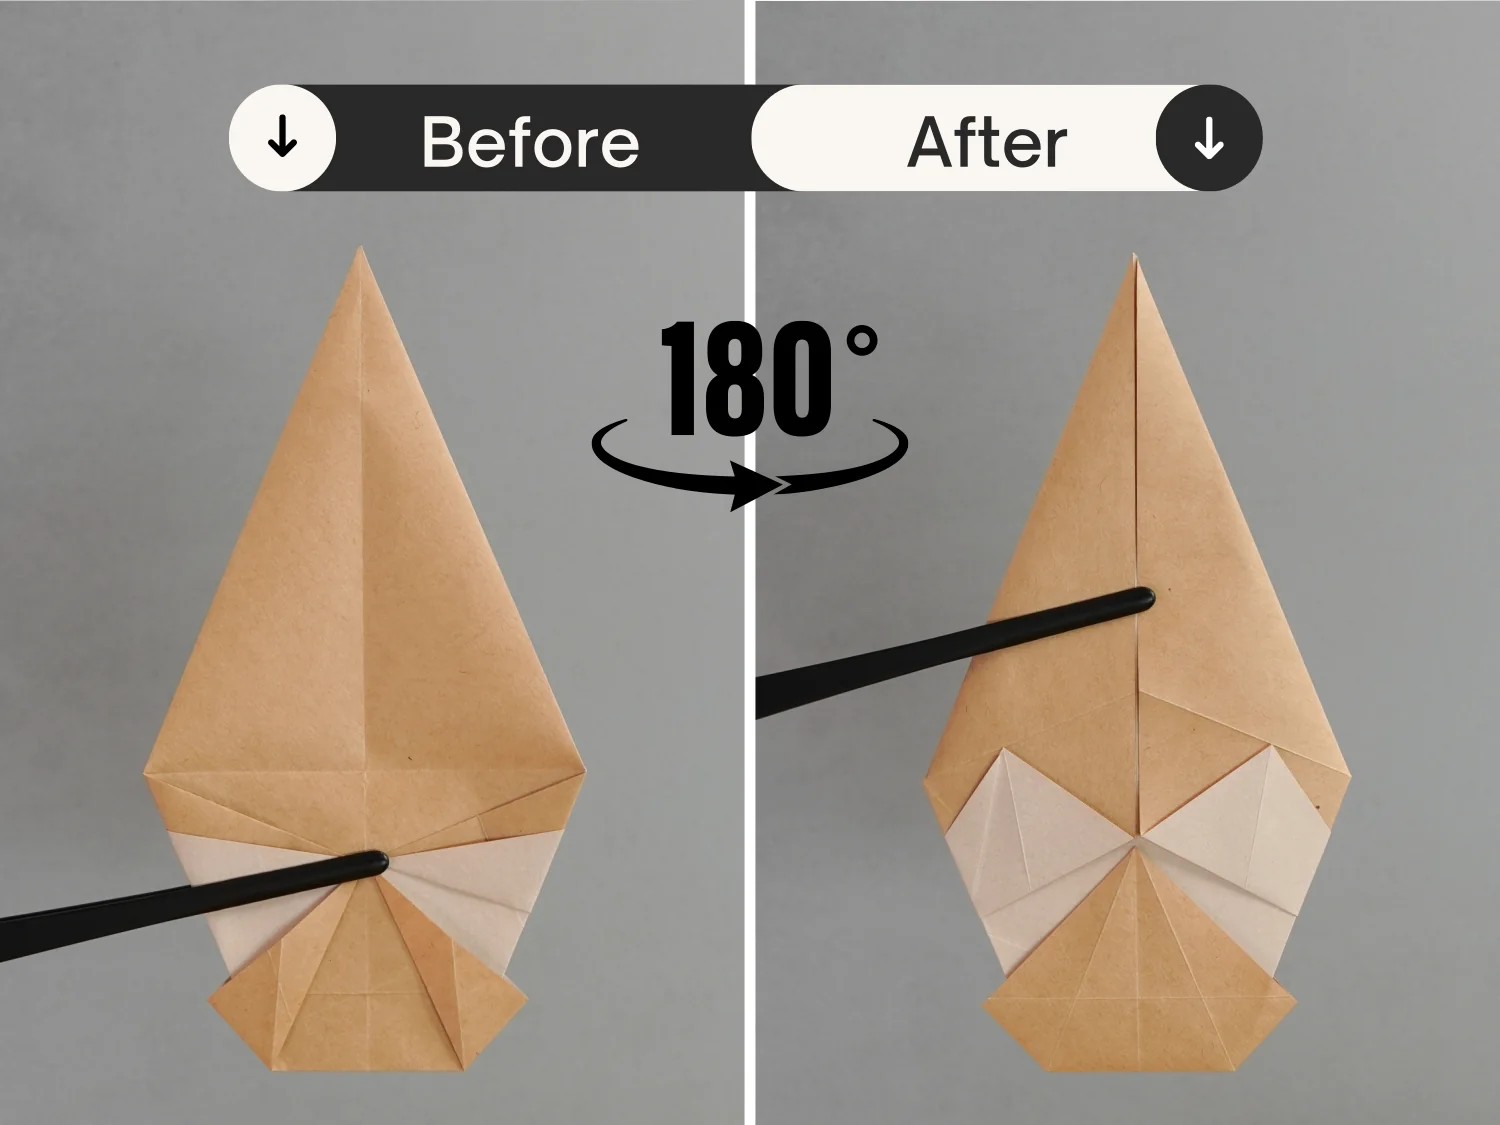
Step 14
Rotate the paper 180 degrees from the left to the right, to flip the paper over.
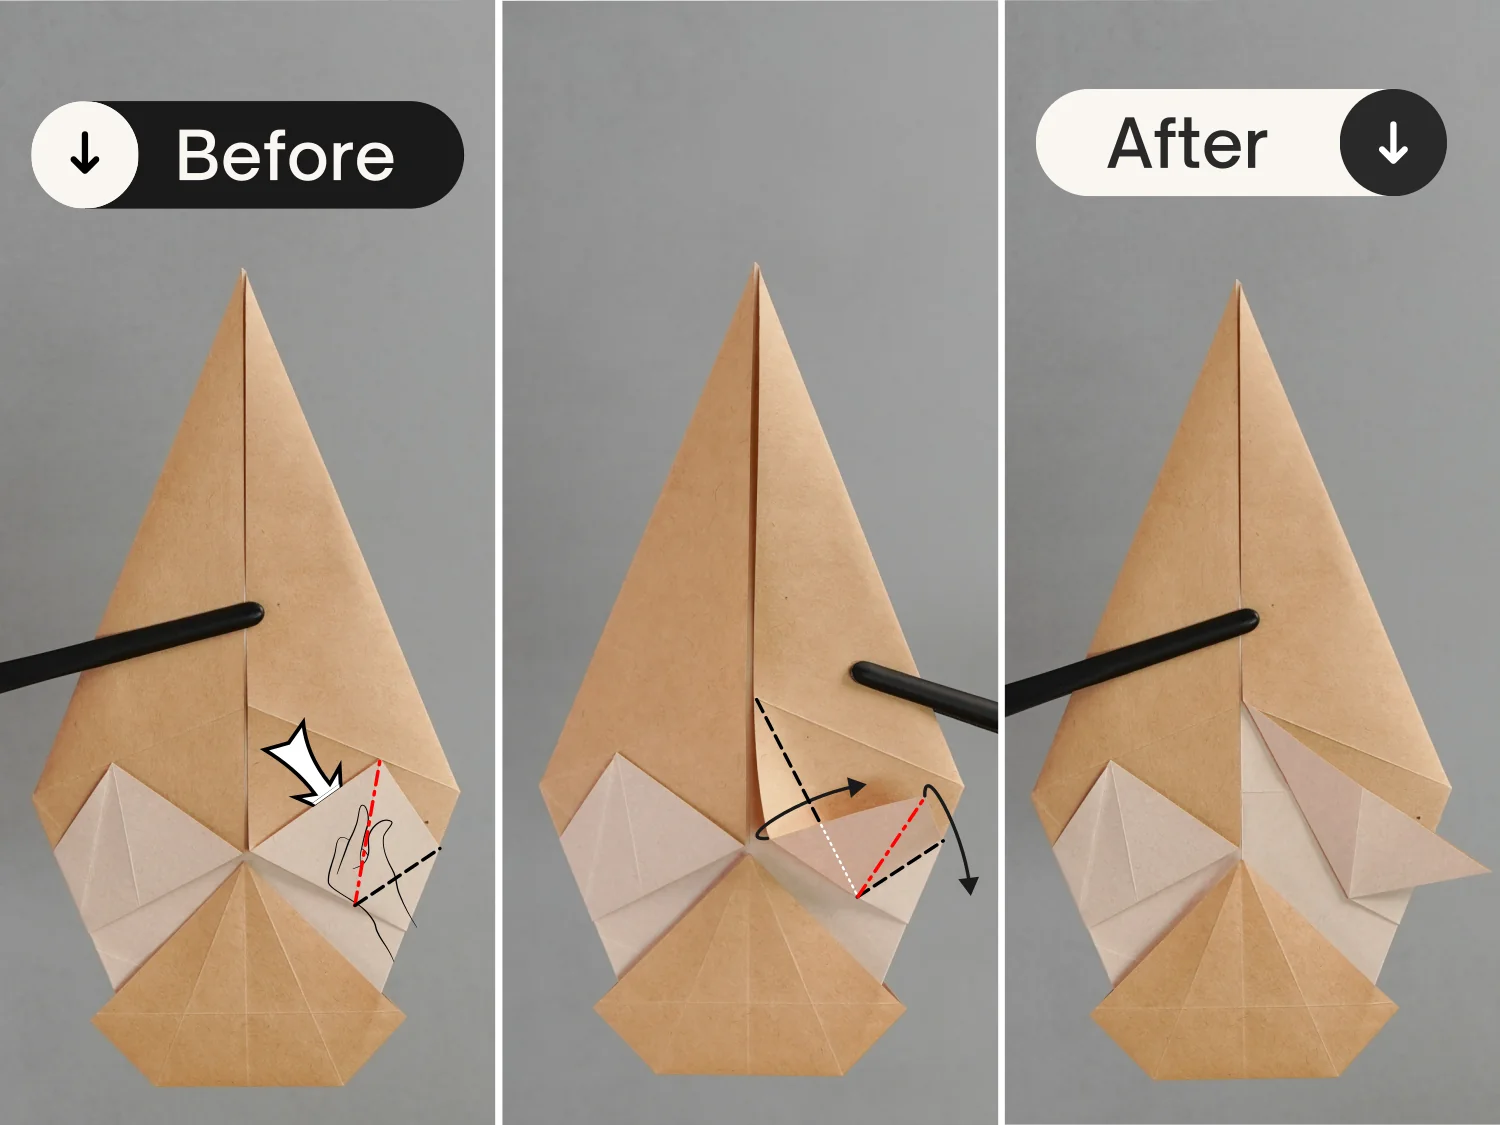
Step 15
Fold the right corner of the paper to the left along the crease indicated by the black dotted line, then push the bottom left edge of the folded part to the right along the crease shown by the red dotted line, and finally flatten it.
Step 16
Repeat this for the left side, fold the left corner to the right along the black dotted line, then push the bottom right point of the folded layer to the left side along the red dotted line, and finally flatten the fold.
Step 17
Rotate it 180 degrees from the left to the right, to turn over the paper.
Step 18
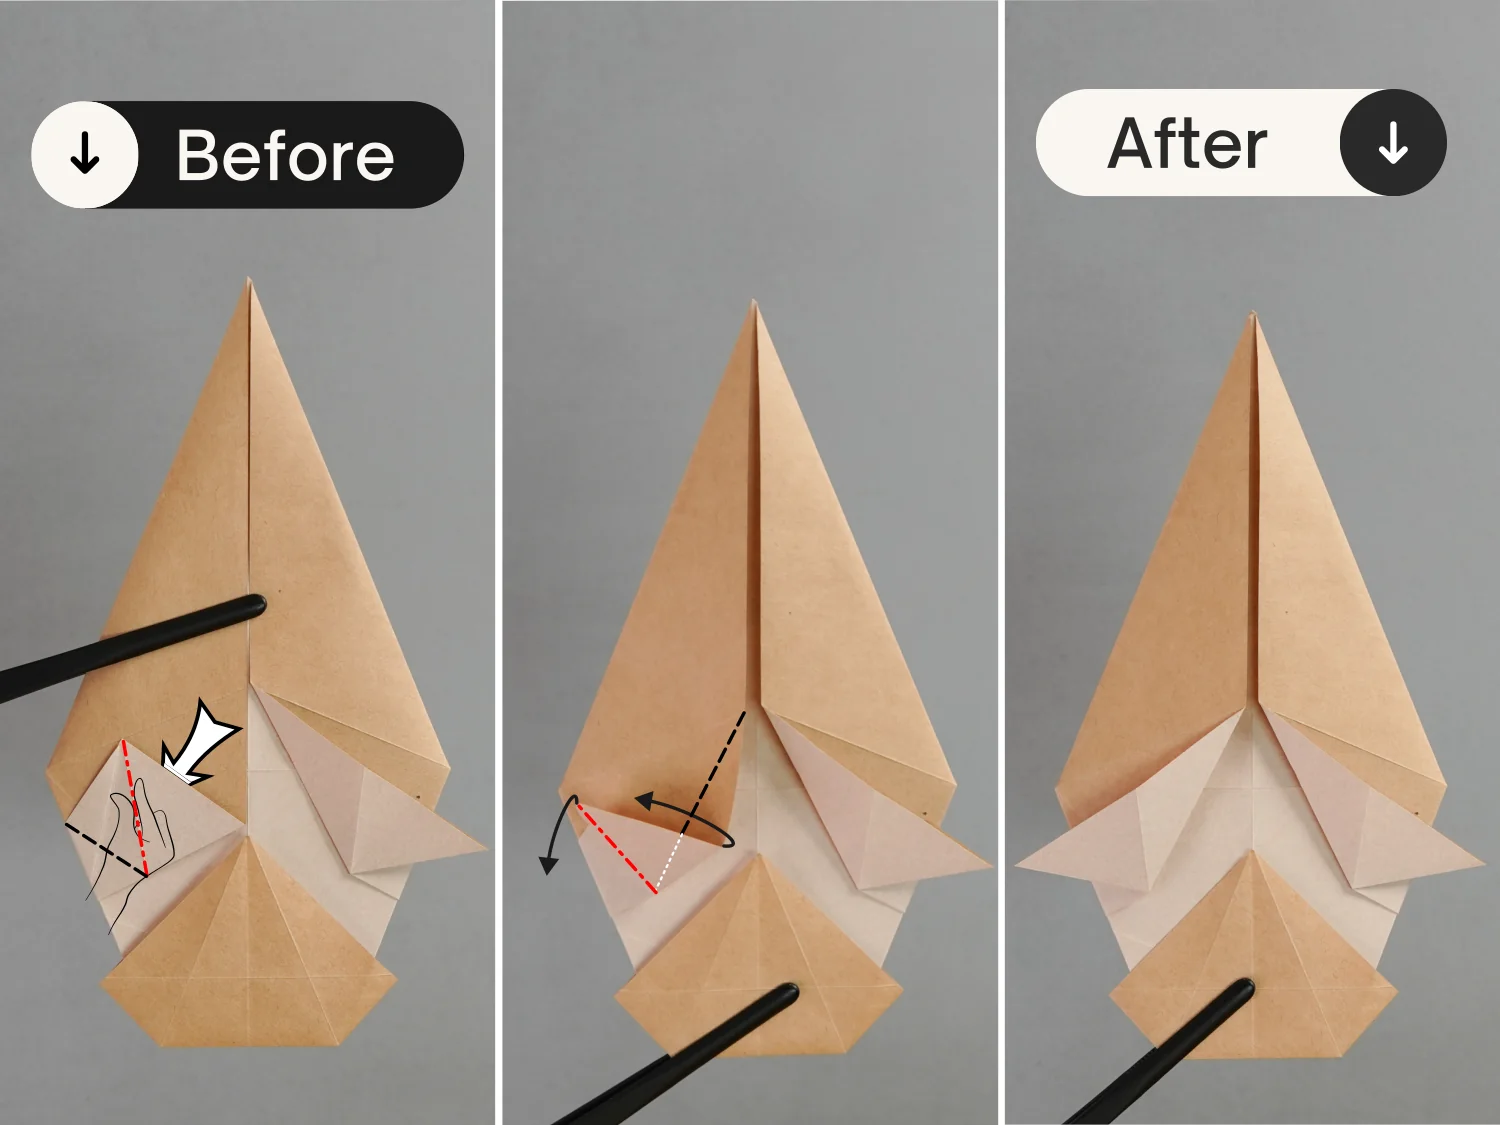
Shape the crease indicated by the red dotted line, then lift this layer. Next, fold down this crease to the right side along the black dotted lines, and finally flatten the fold.
Step 19
Like before, shape the crease shown by the red dotted line, then lift this left layer. Next, fold down this crease to the left side along the black dotted lines, and finally flatten the fold.
Step 20
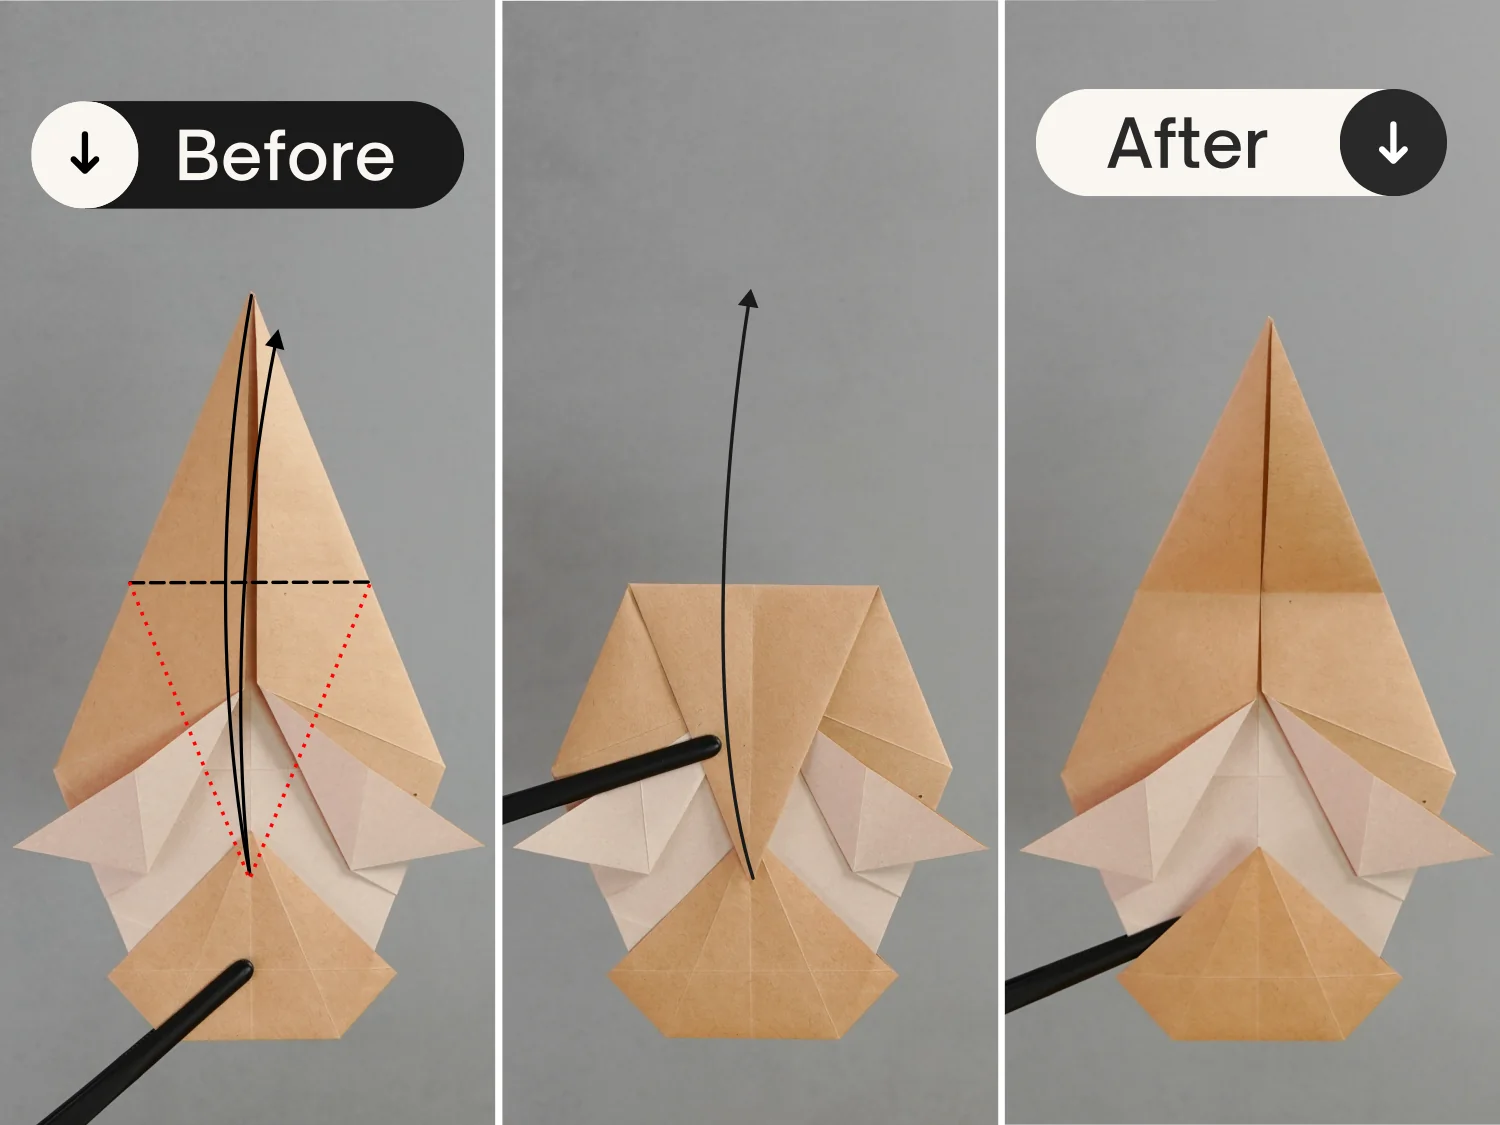
Fold down the top point along the black dotted line, and unfold it.
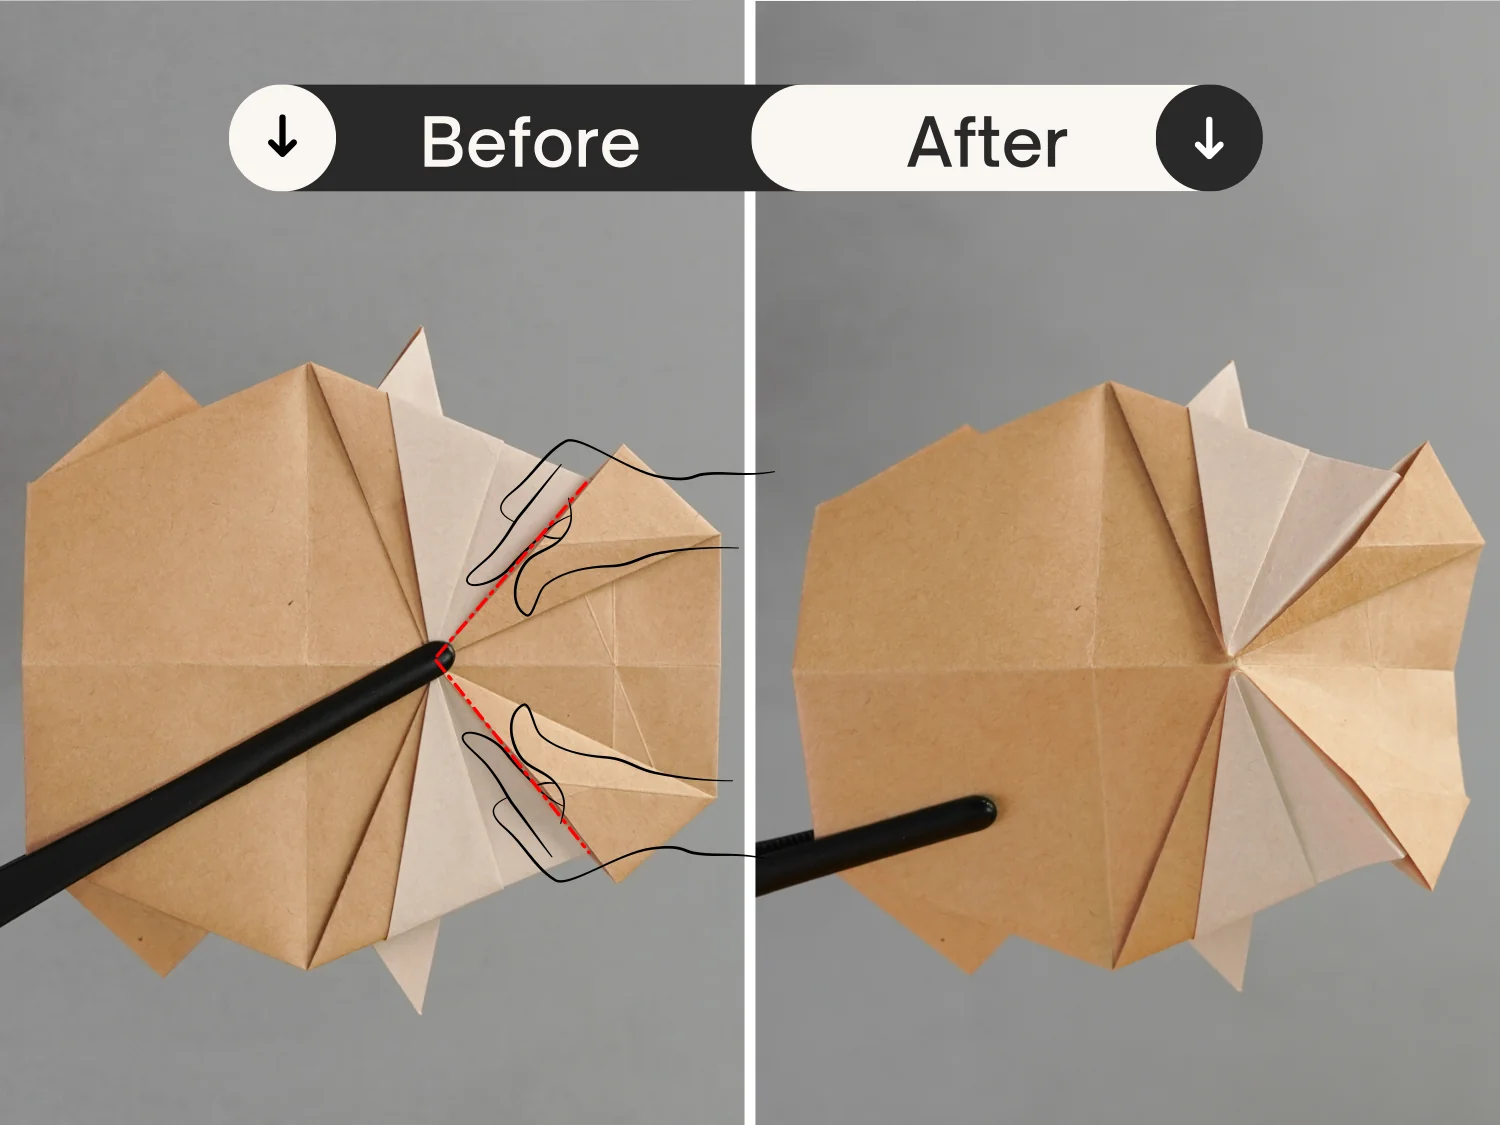
Step 21
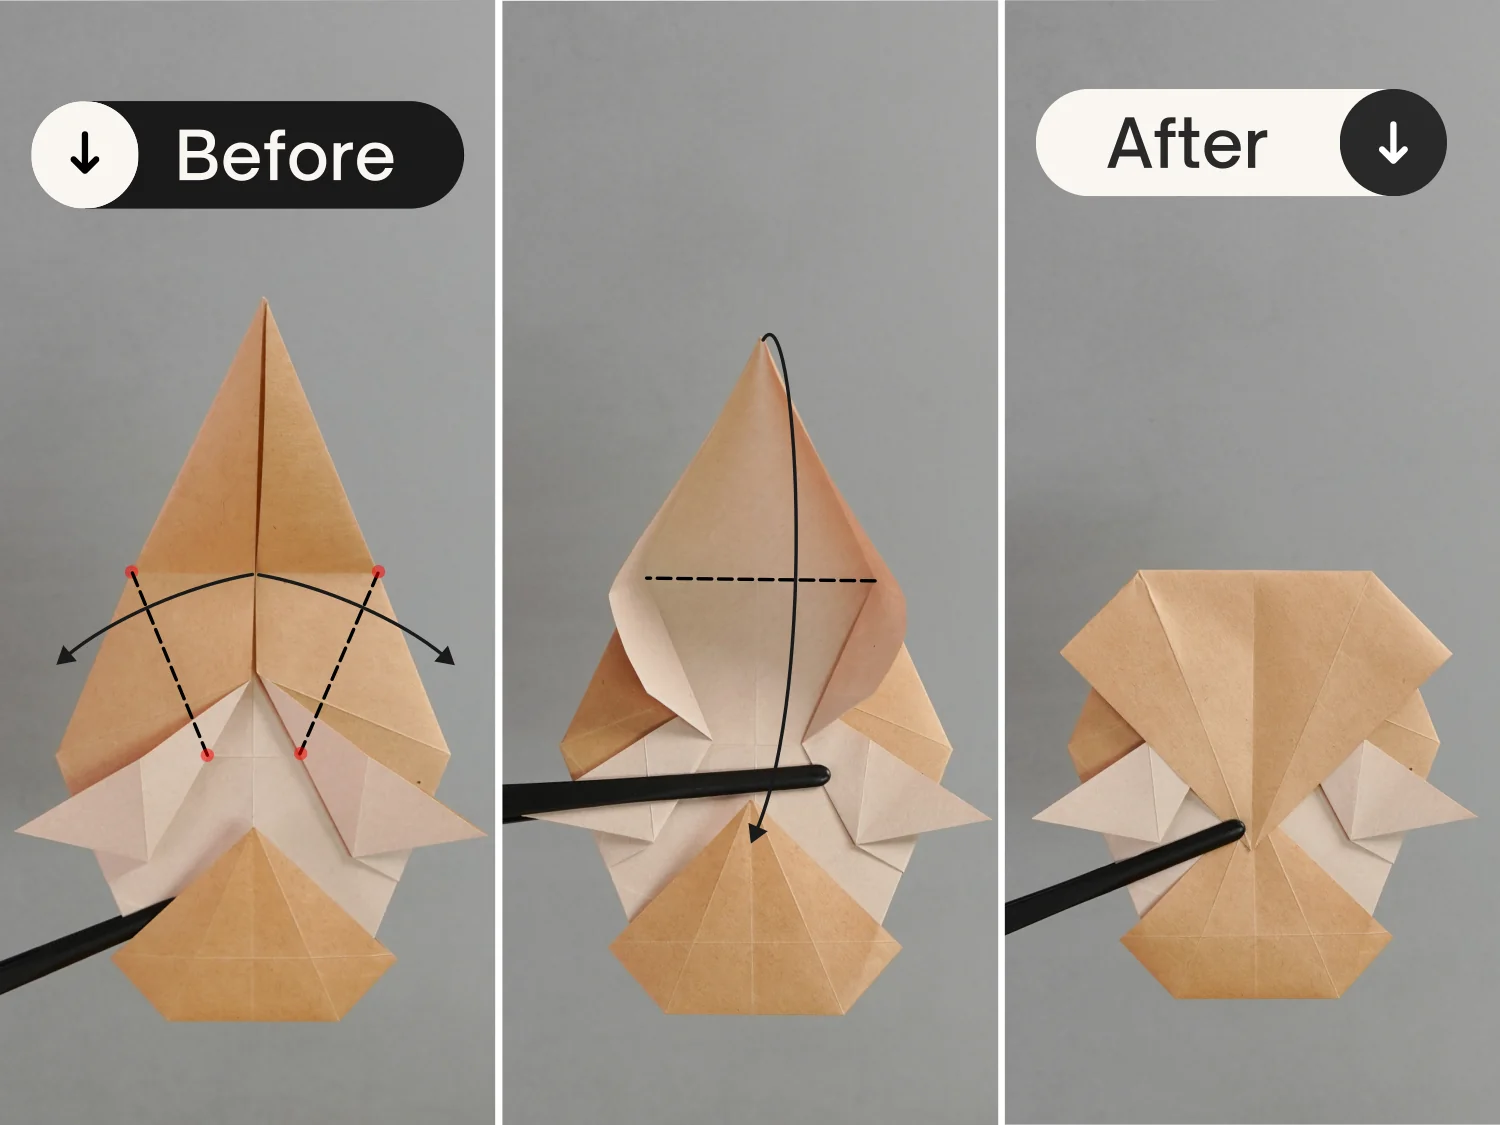
Open the top corner and lift the top point along the crease you just made, then press it down and flatten it along the two dotted lines that connect the red spots.
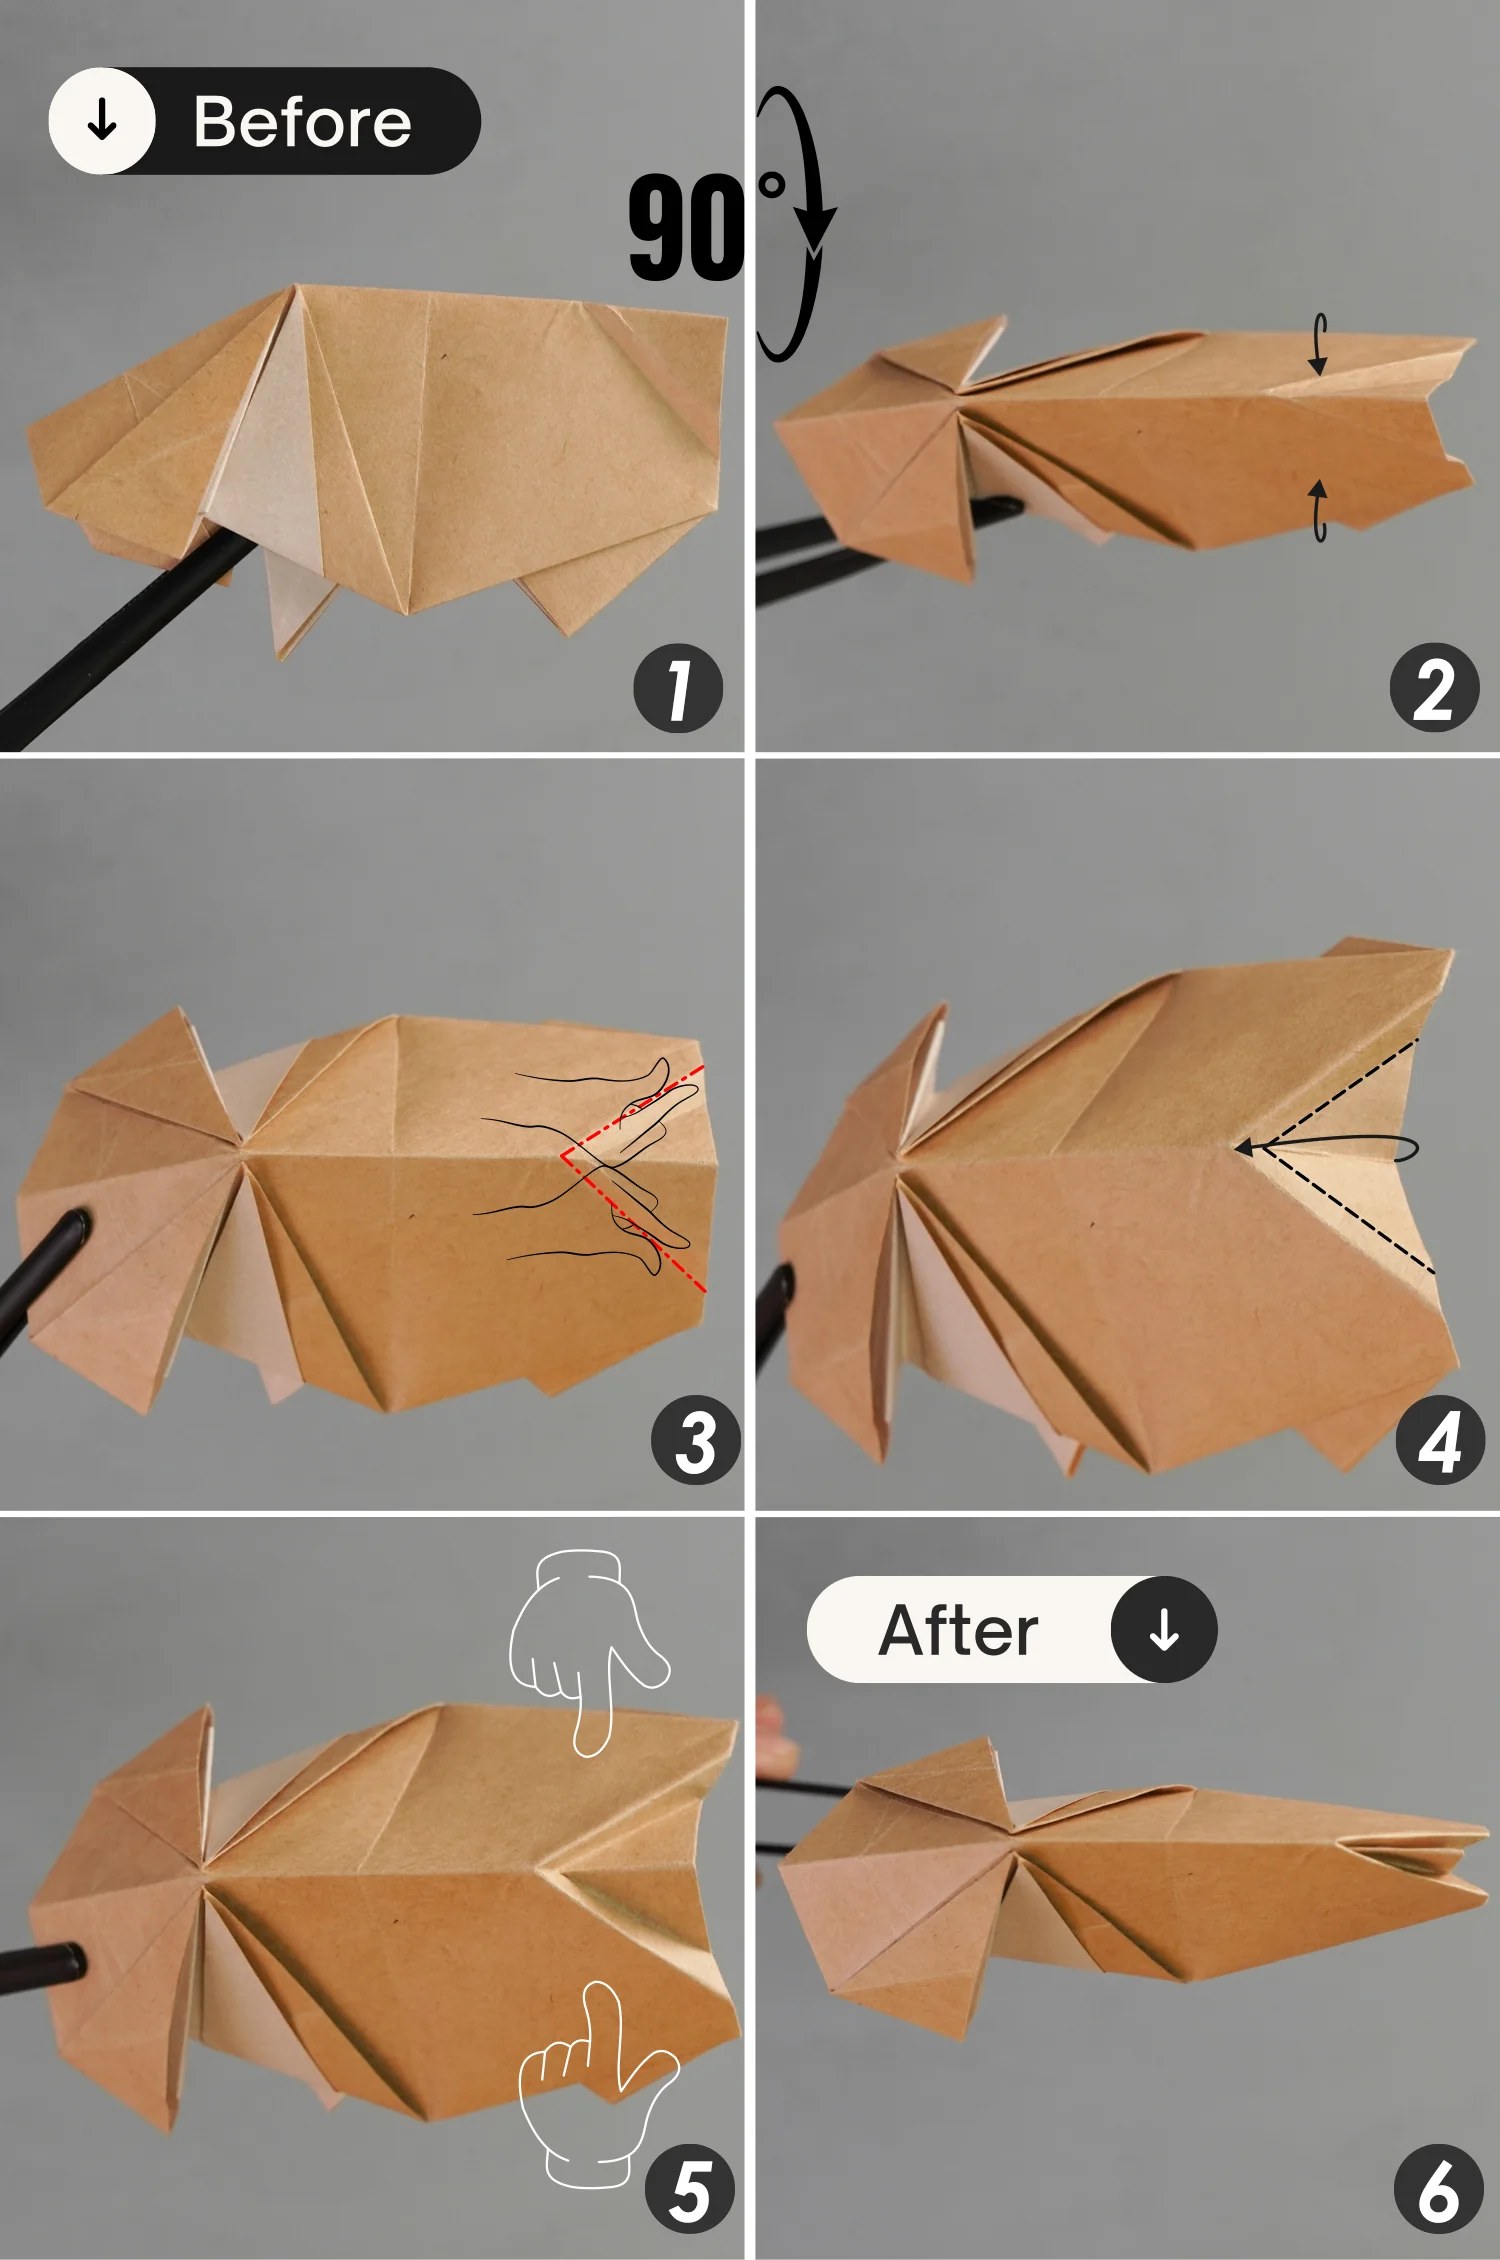
Step 22
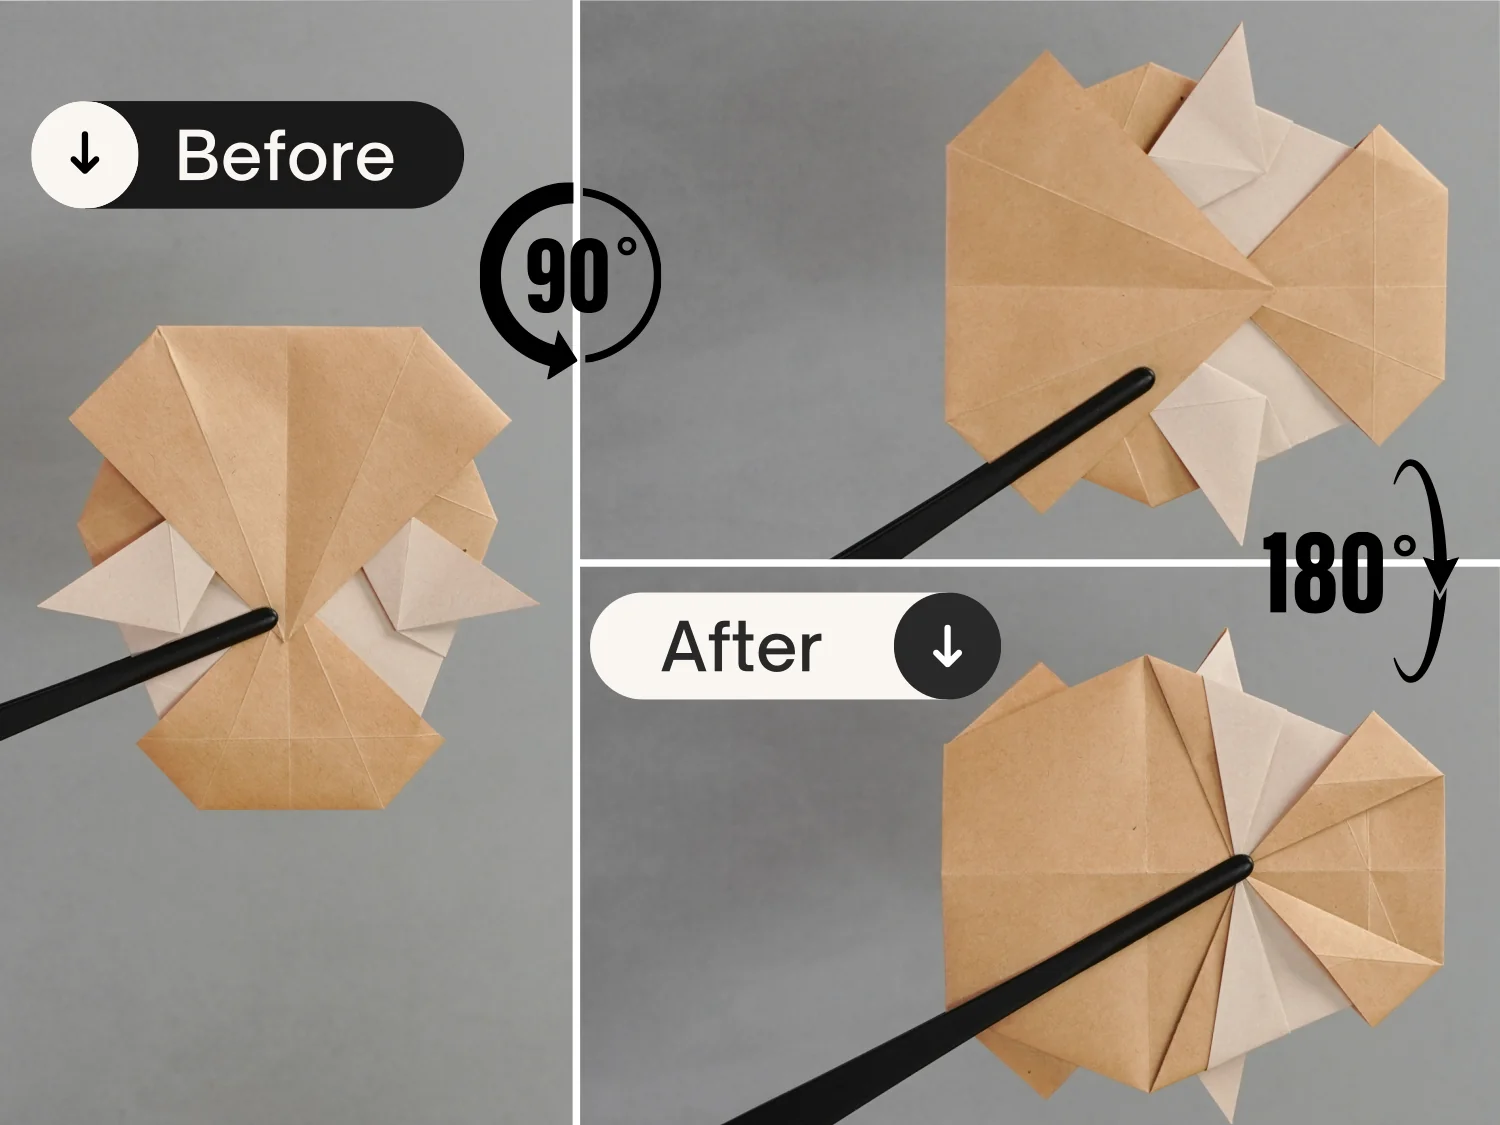
Rotate it 90 degrees from the right to the left, then rotate it again from the back to the front to flip the paper over.
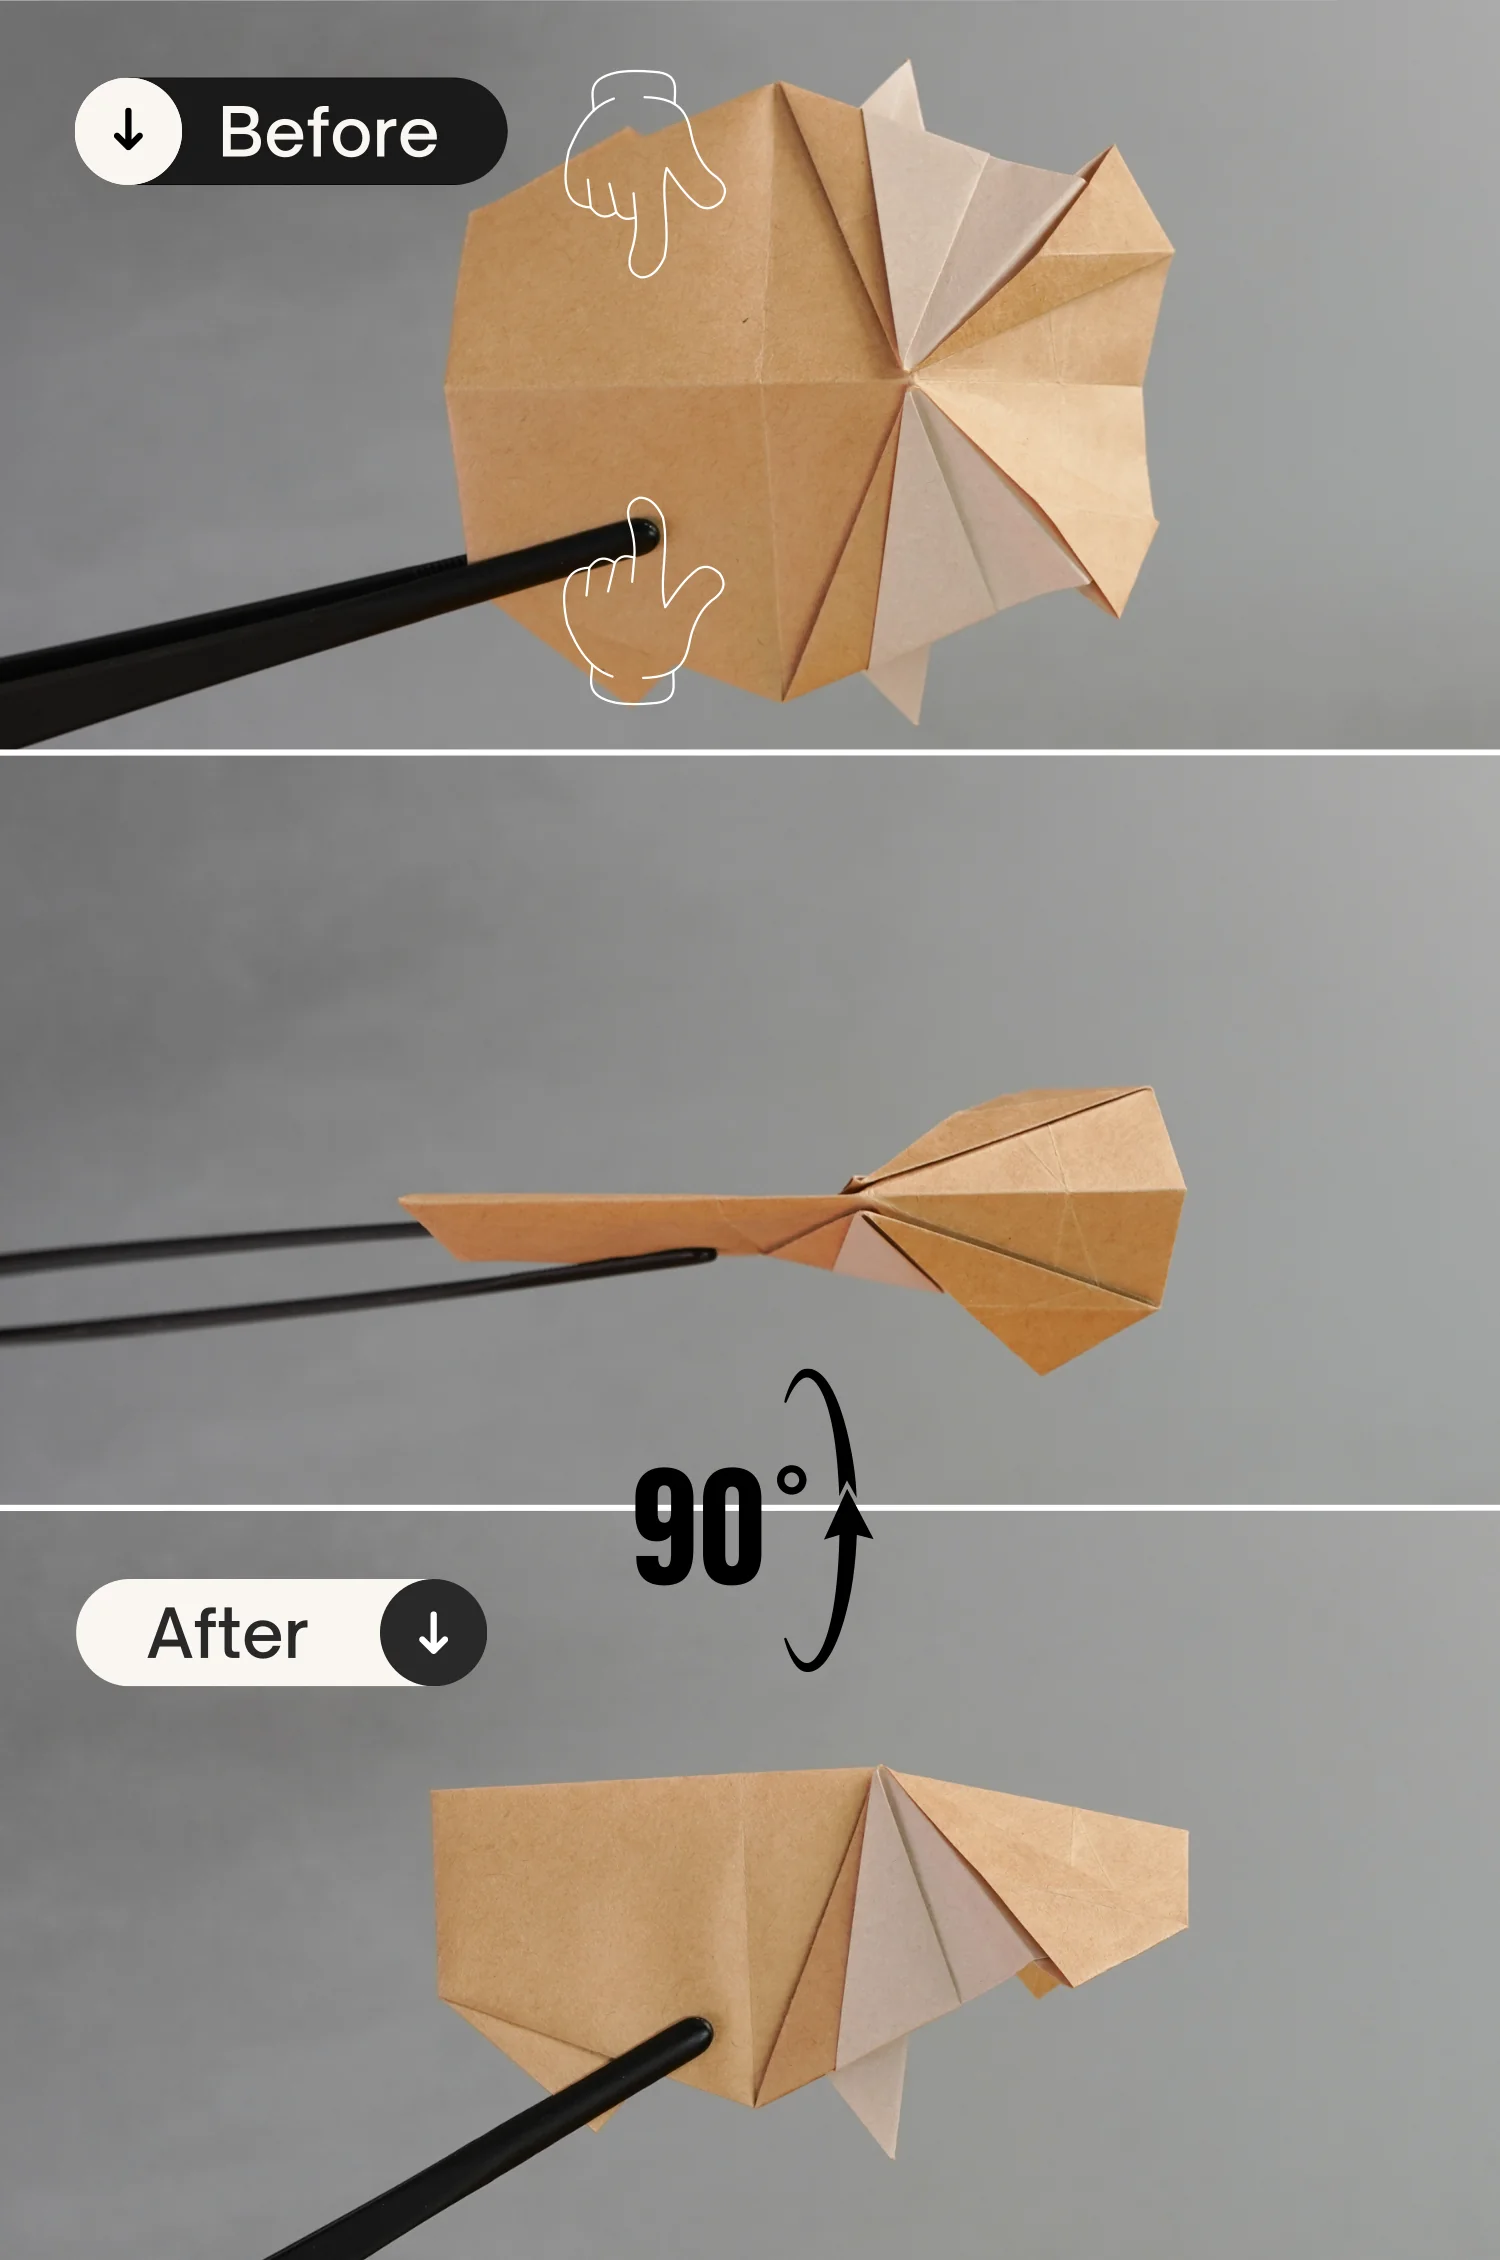
Step 23
Shape the paper along the two red dotted lines.
Step 24
Pinch the left part of the paper downward, and rotate it 90 degrees from the back to the front.
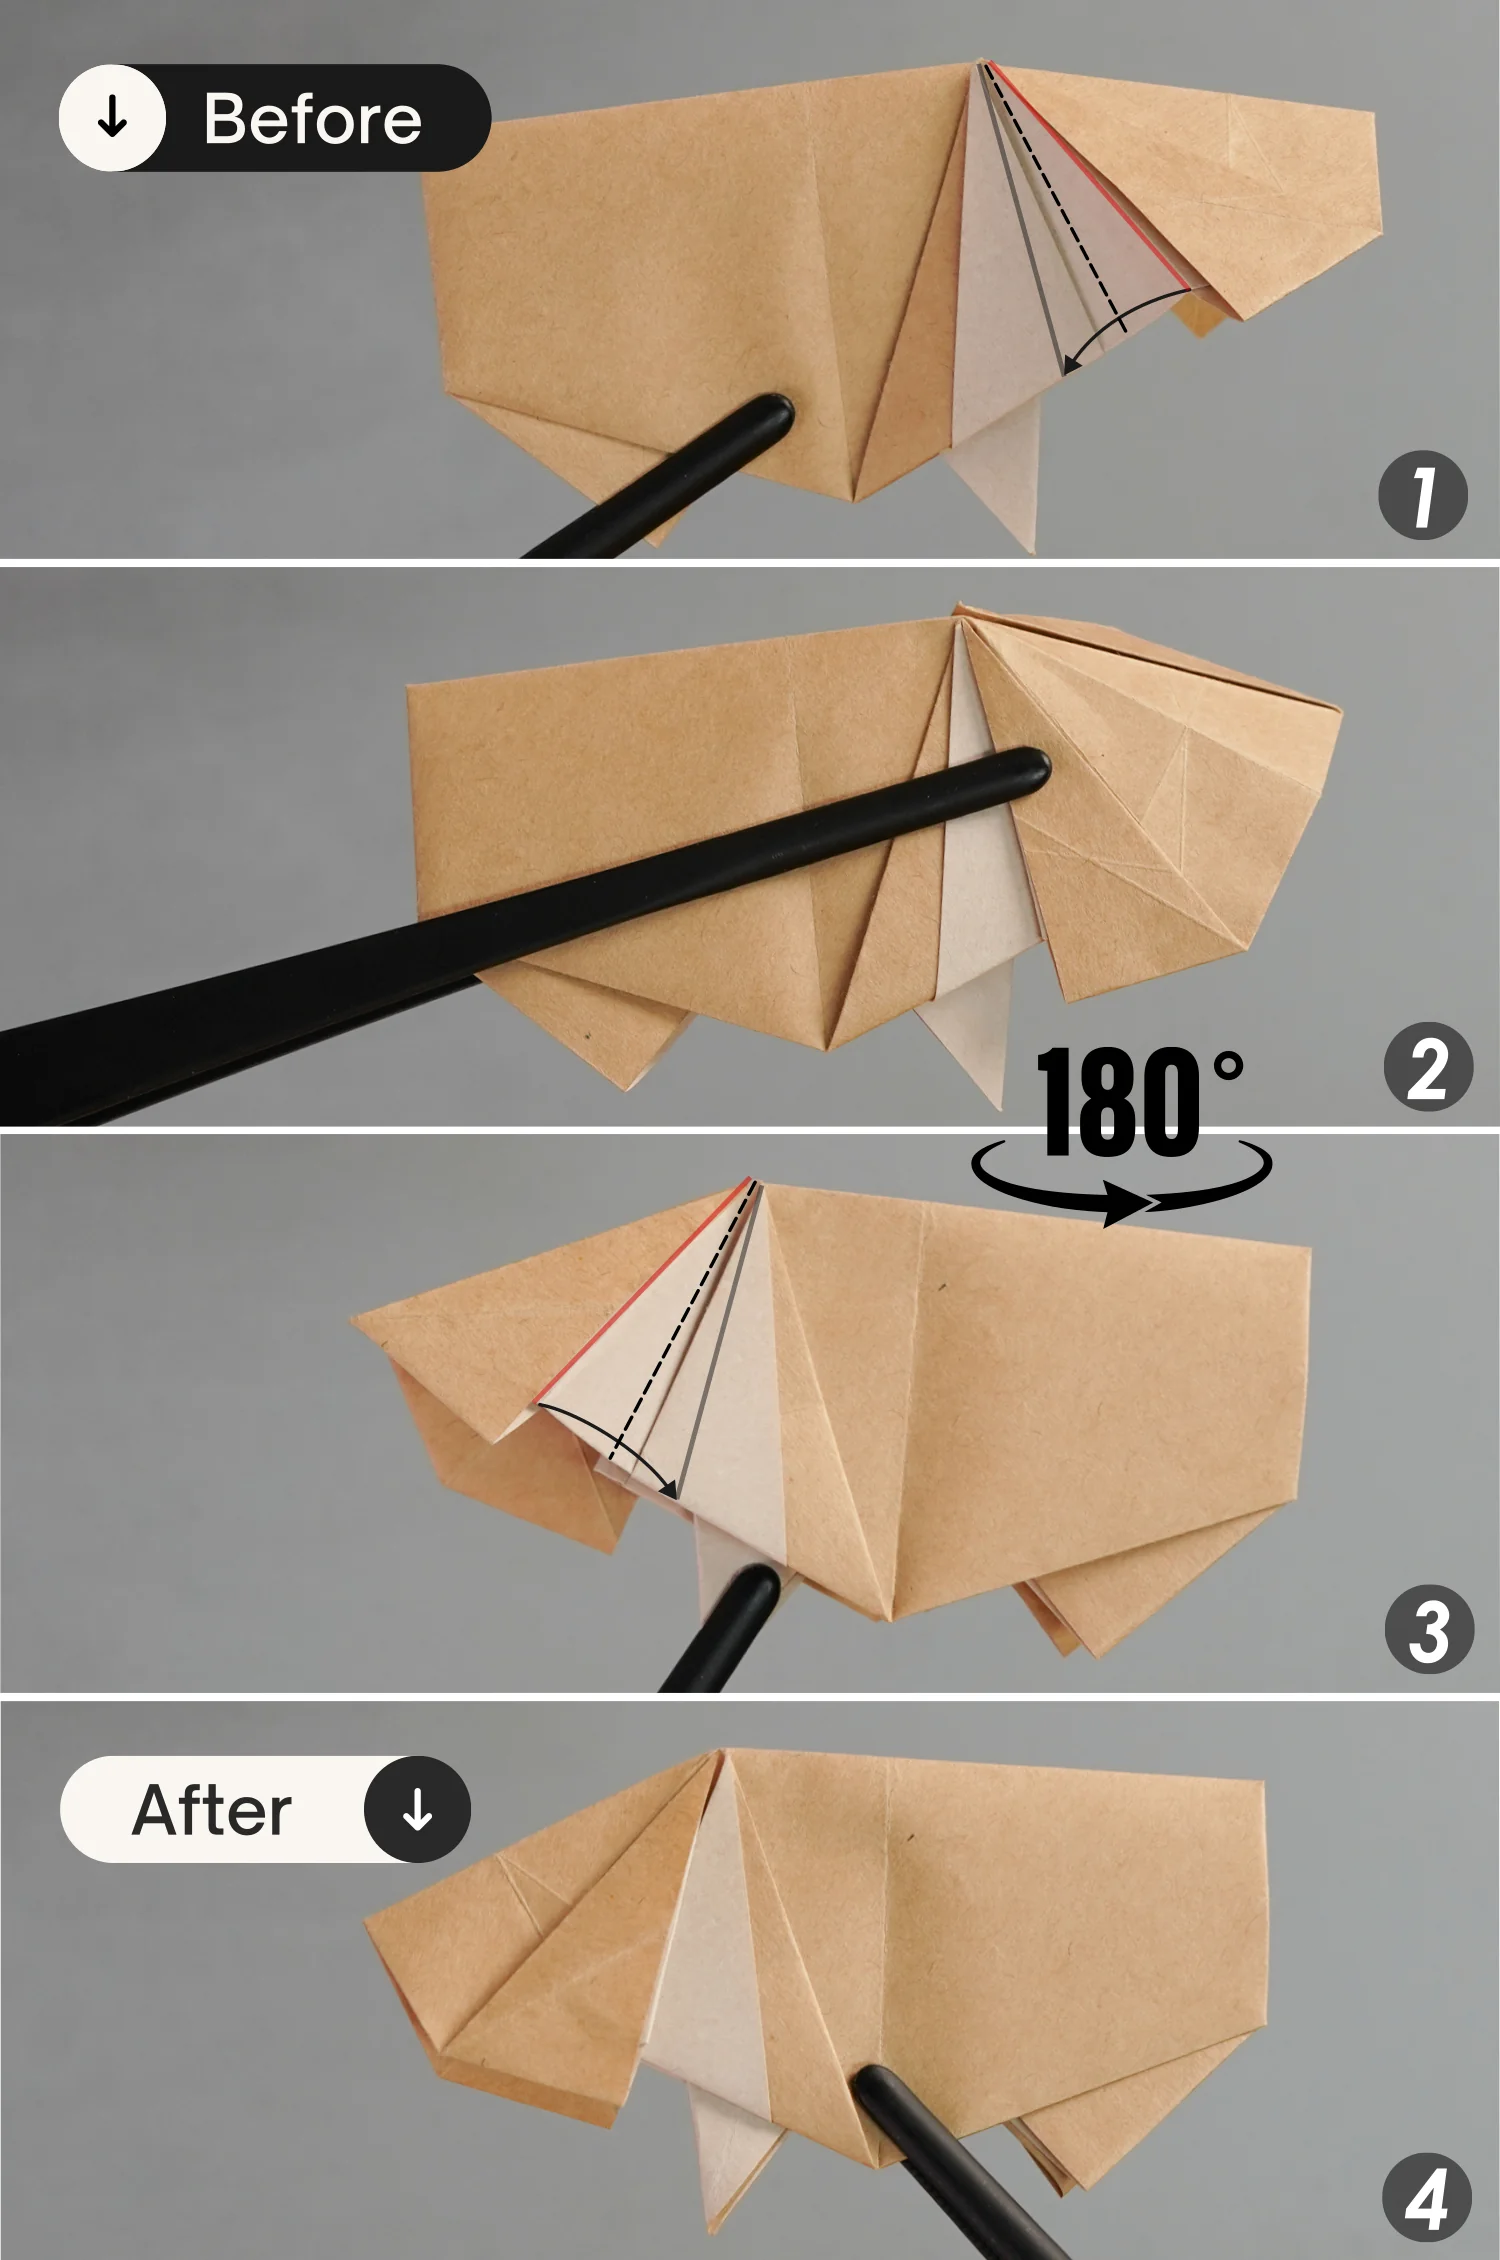
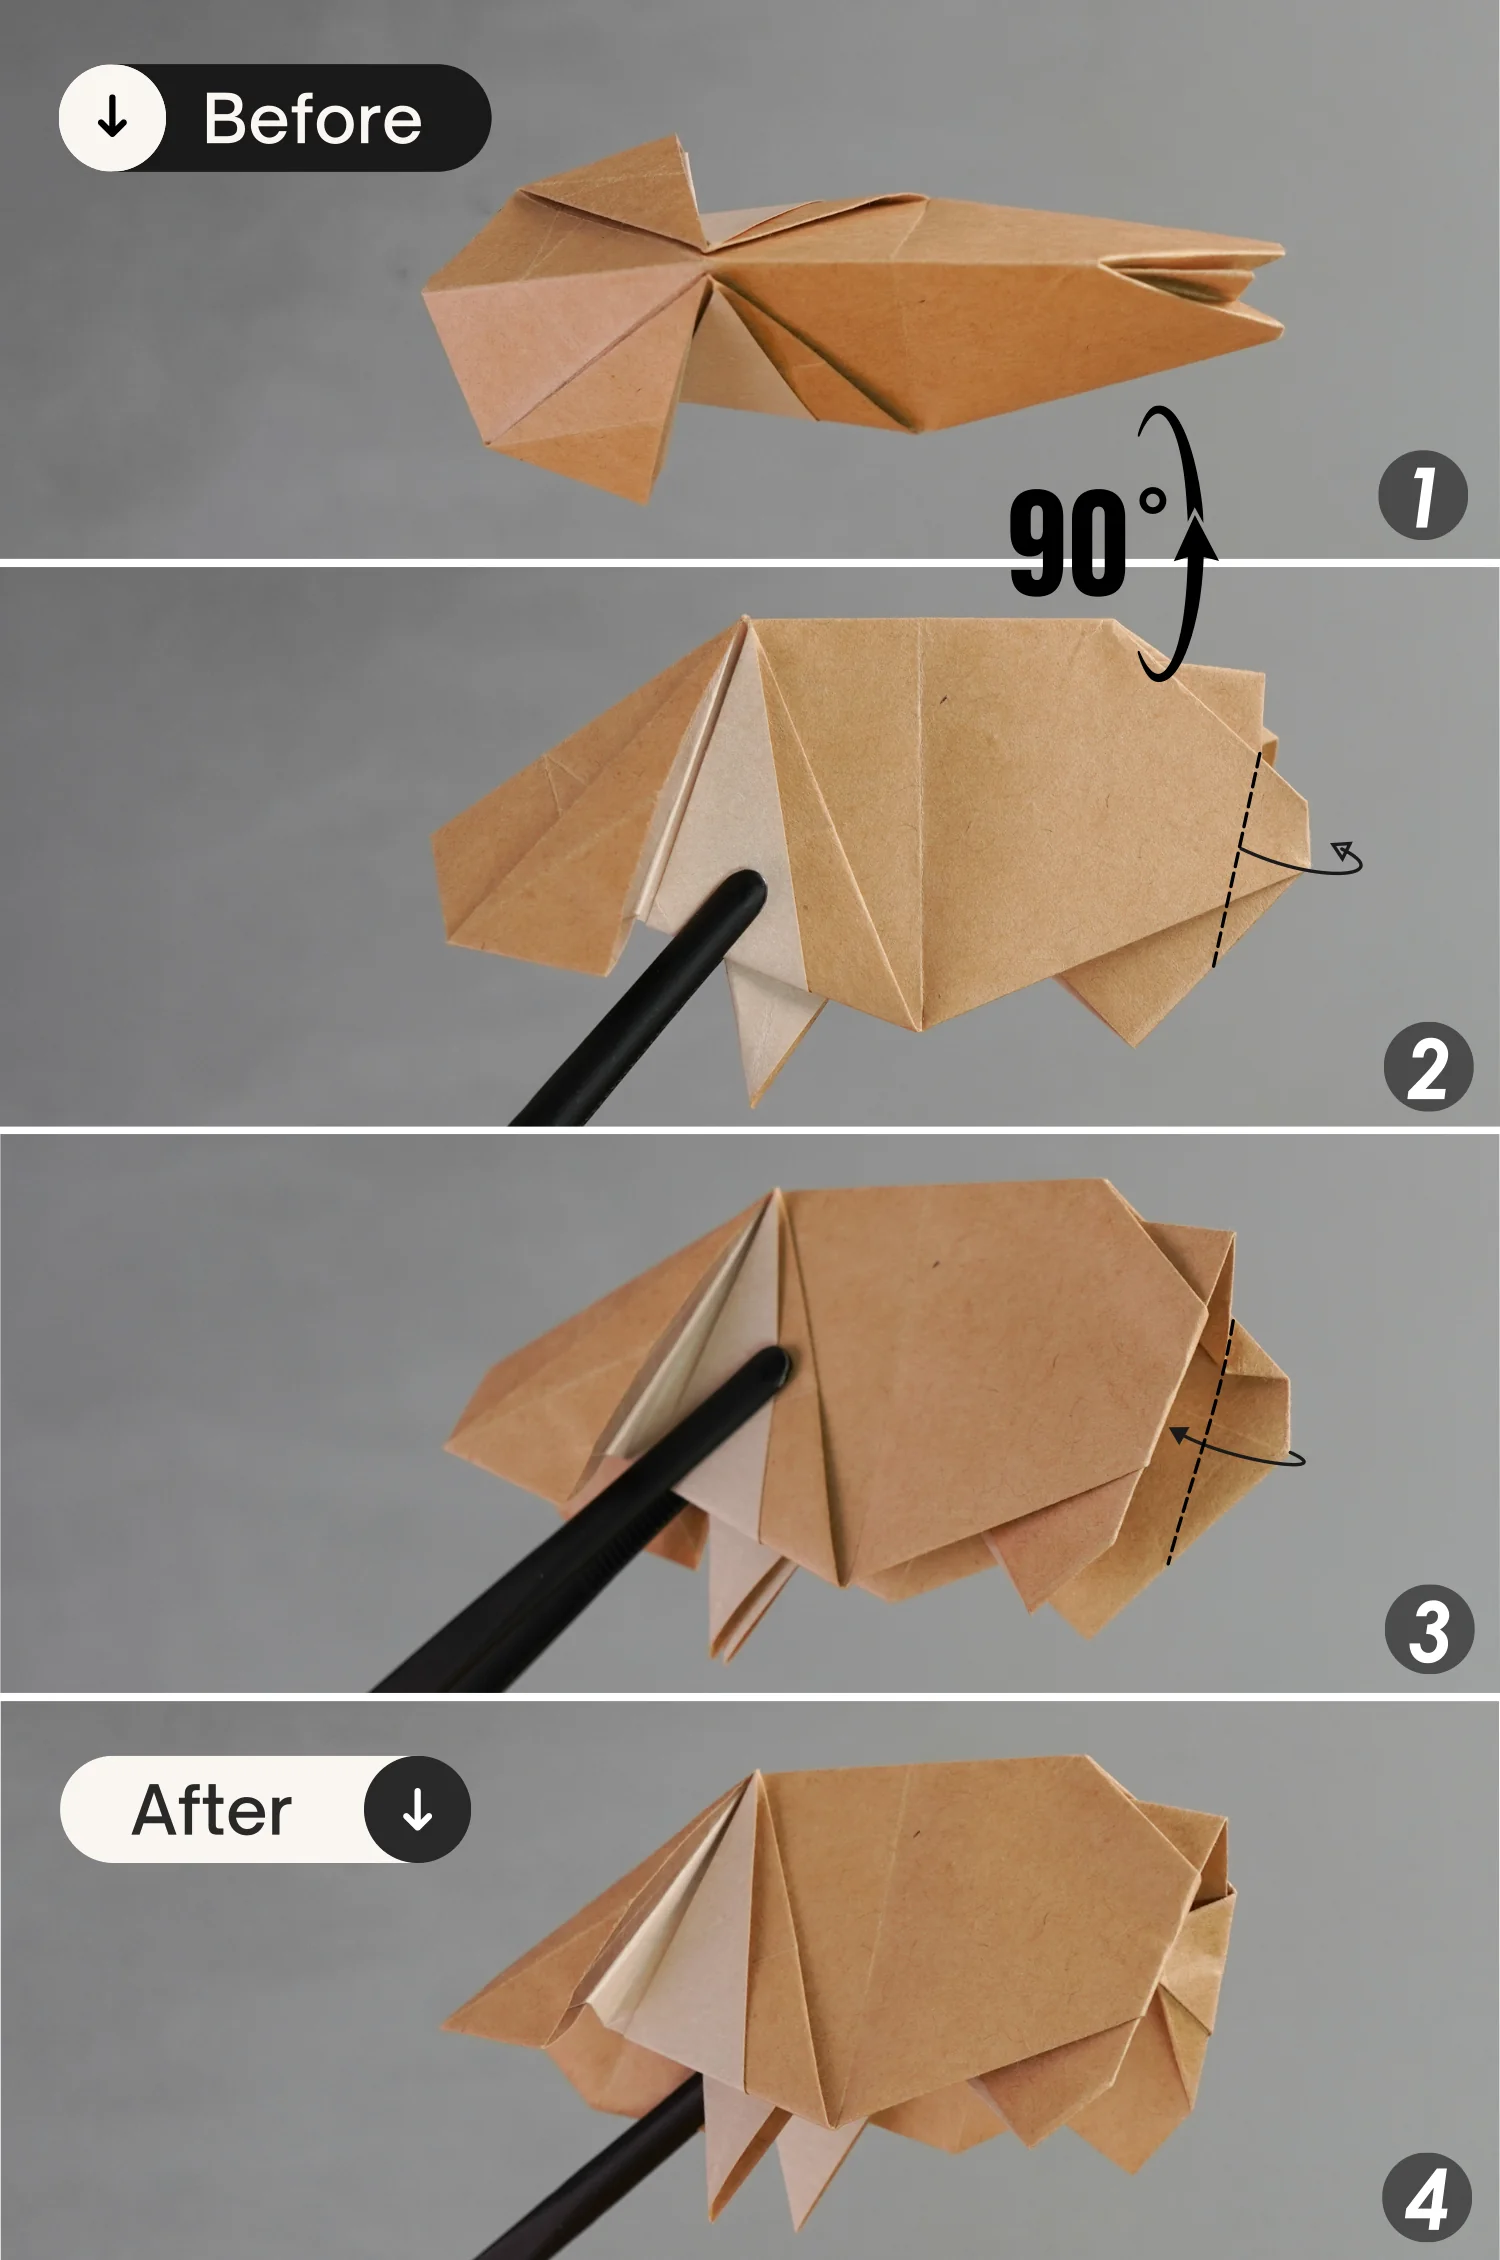
Step 25
Fold the edge indicated by the red line along the dotted line to align with the black line, then rotate it 180 degrees from left to right, and repeat what you just did.
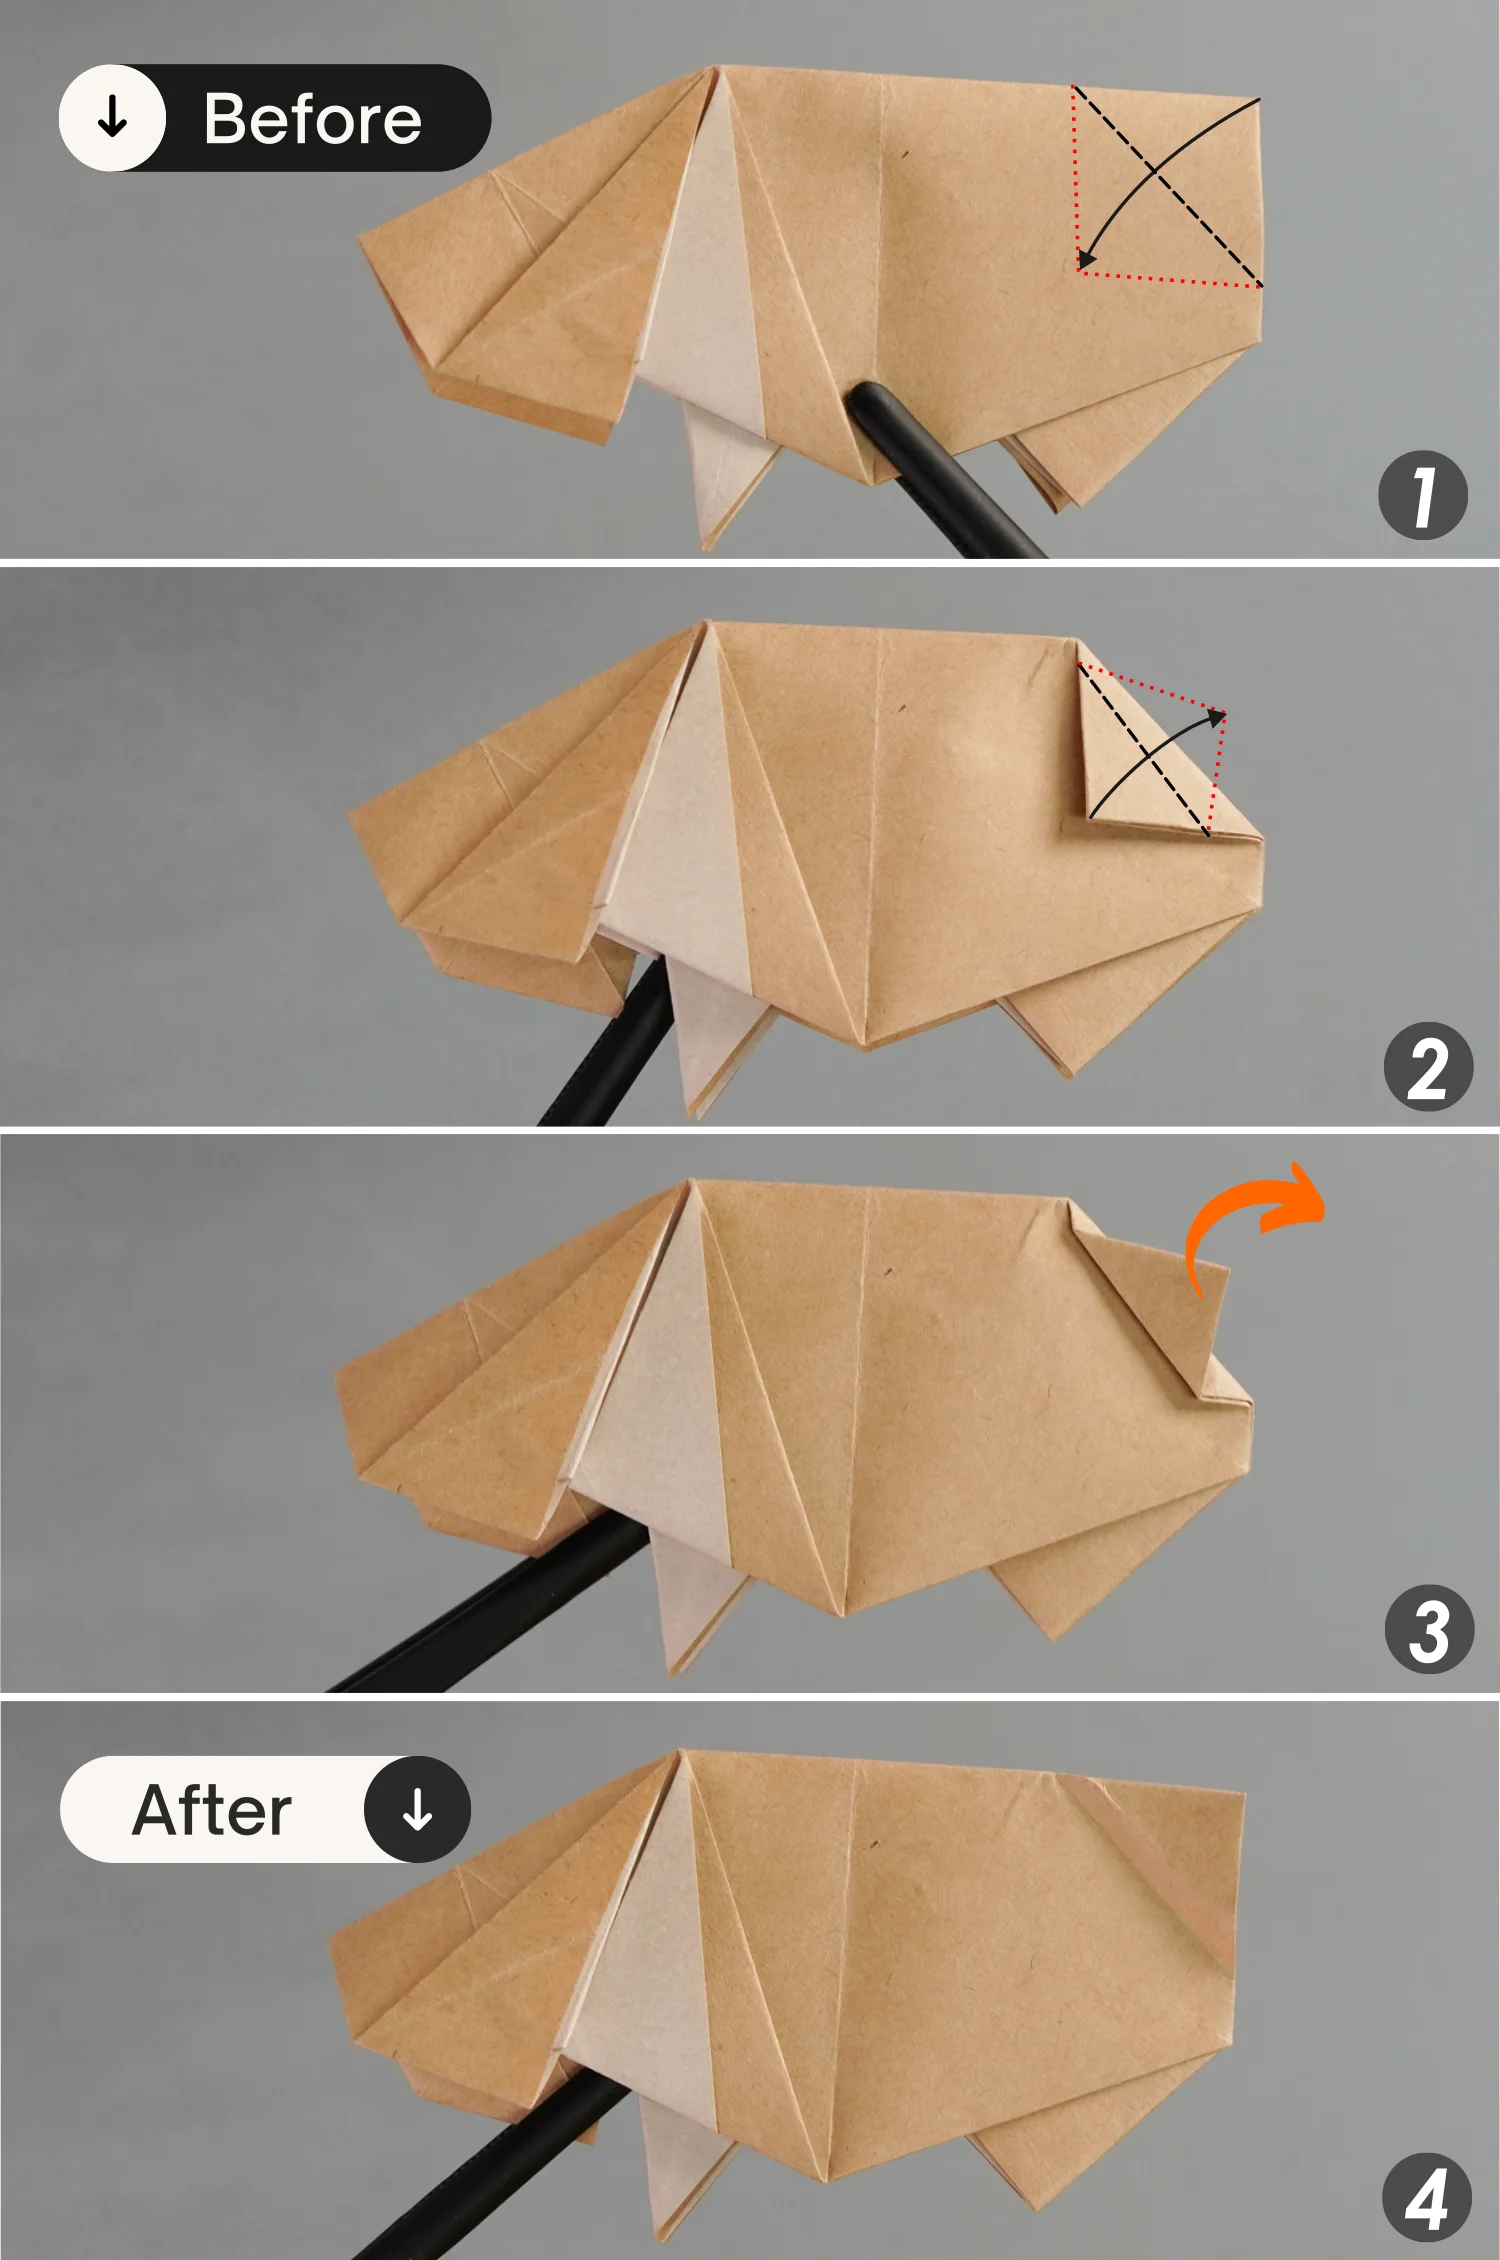
Step 26
Fold the top left corner along the black dotted line, then fold it back for a short section, leaving two creases, and unfold it.
Step 27
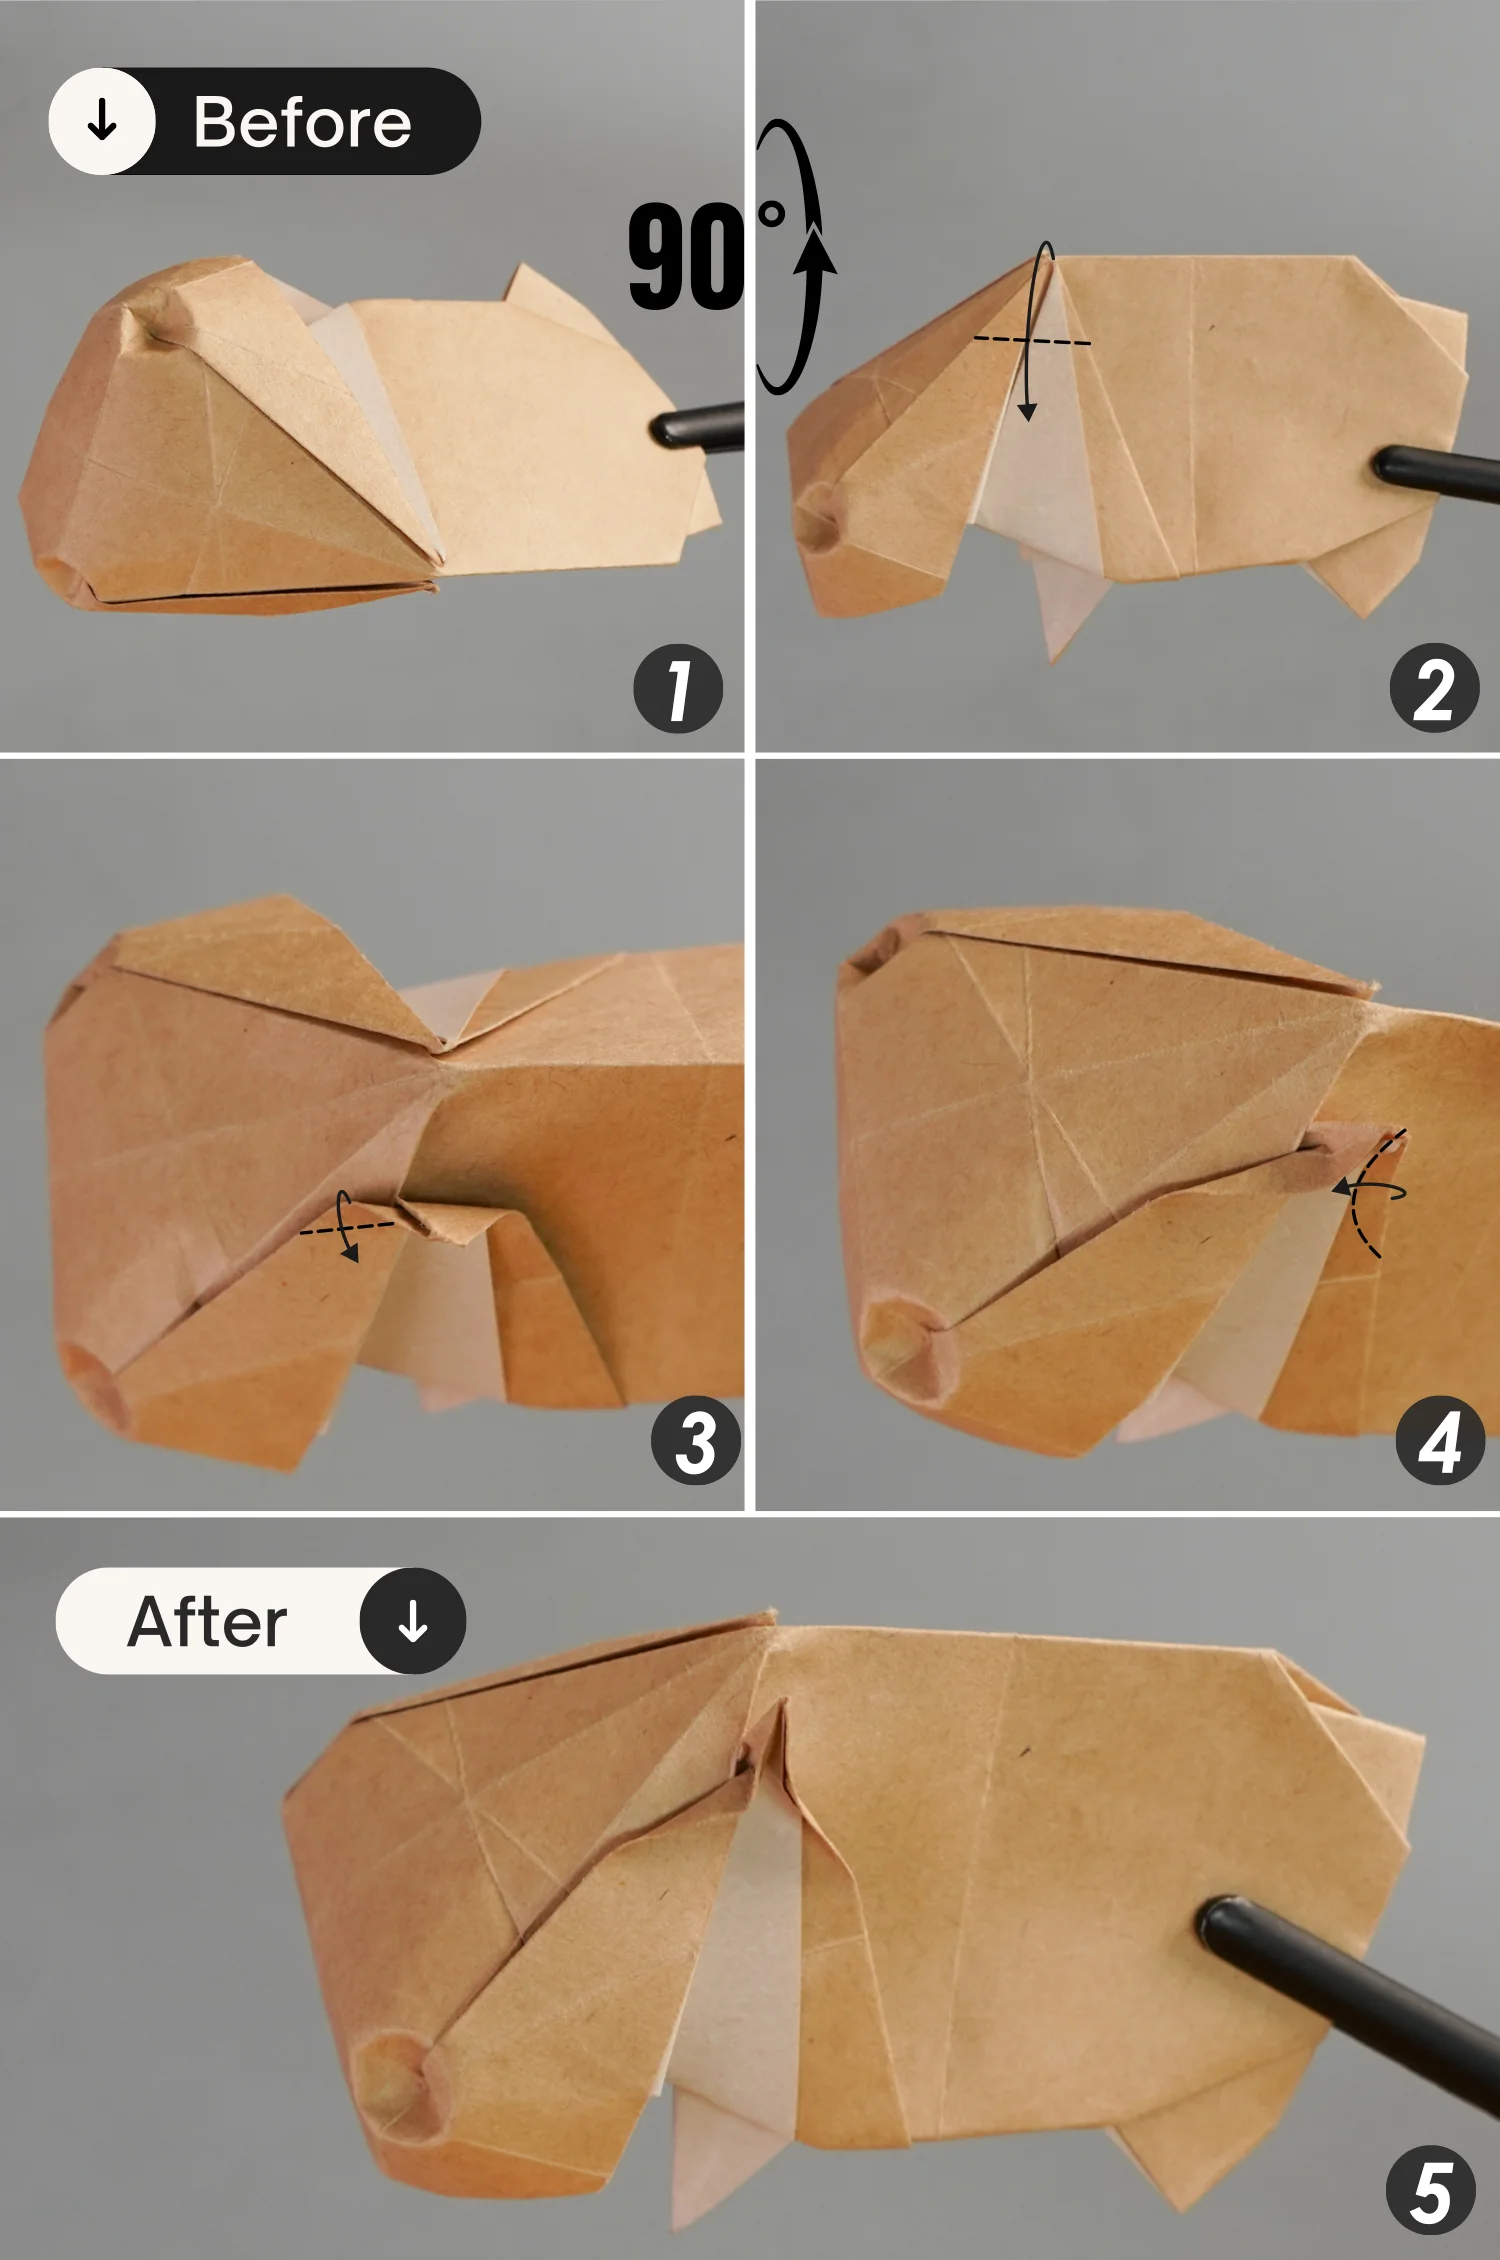
Rotate it 90 degrees from the back to the front, open the paper from the bottom, and shape the creases indicated by the red dotted lines [picture 3], then bring up the right along the creases indicated by the black dotted lines [picture 4]. Finally, flatten the fold.
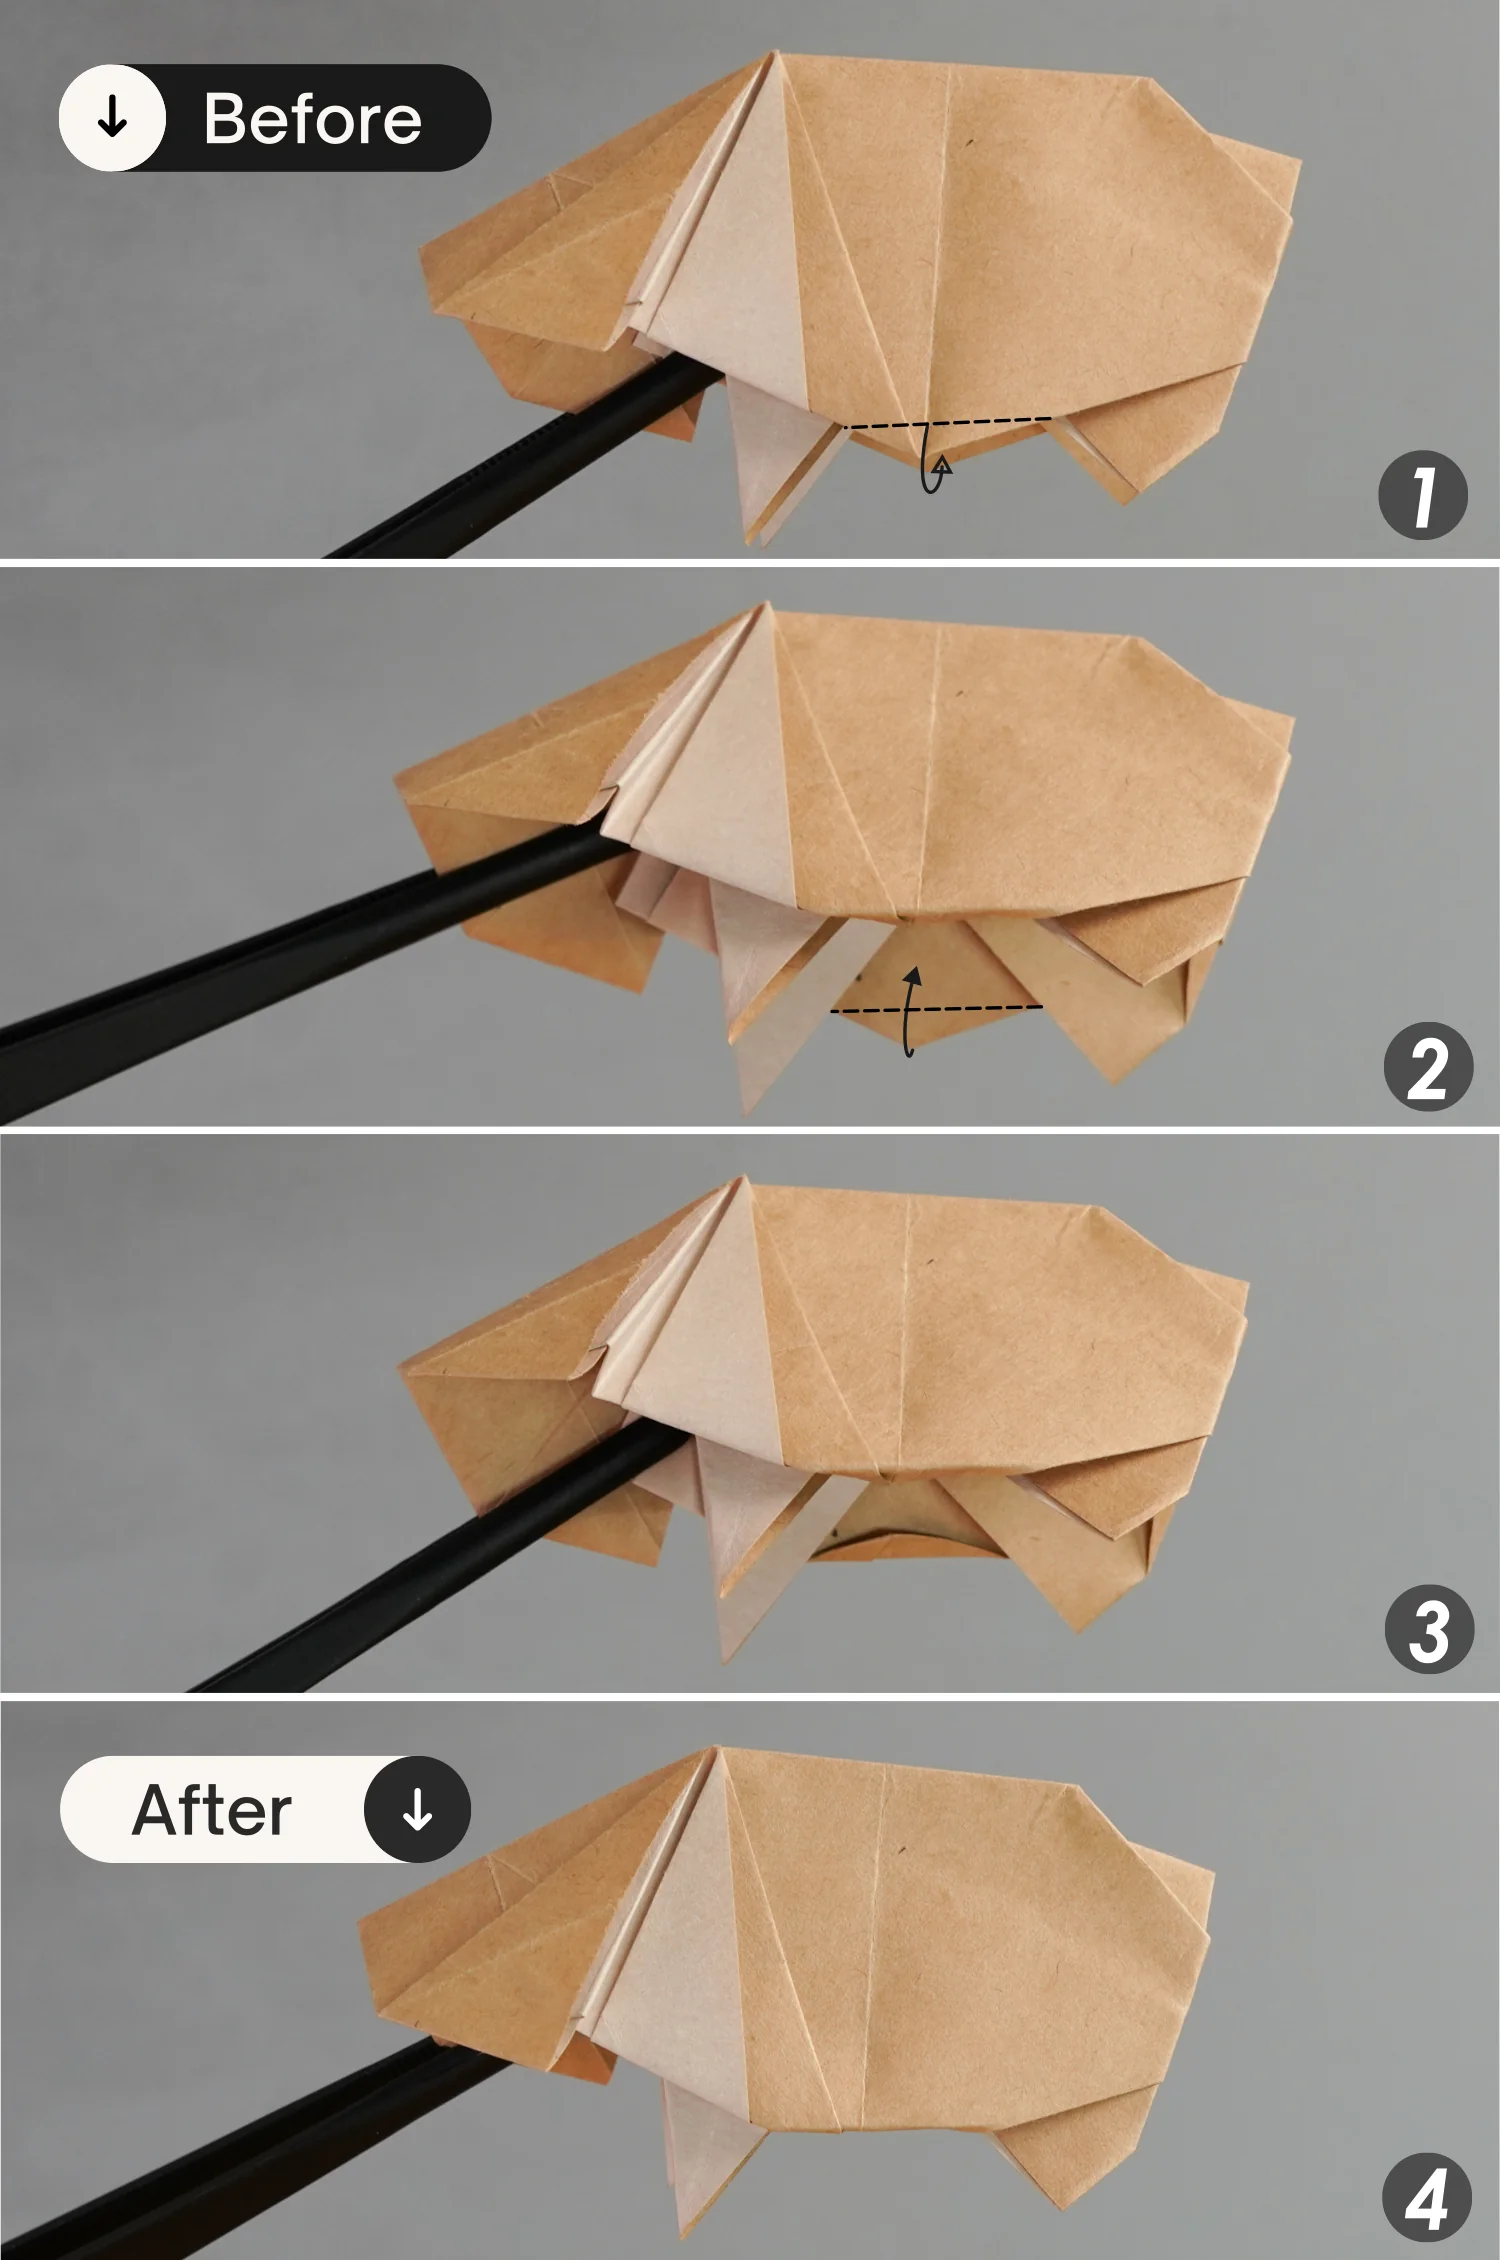
Step 28
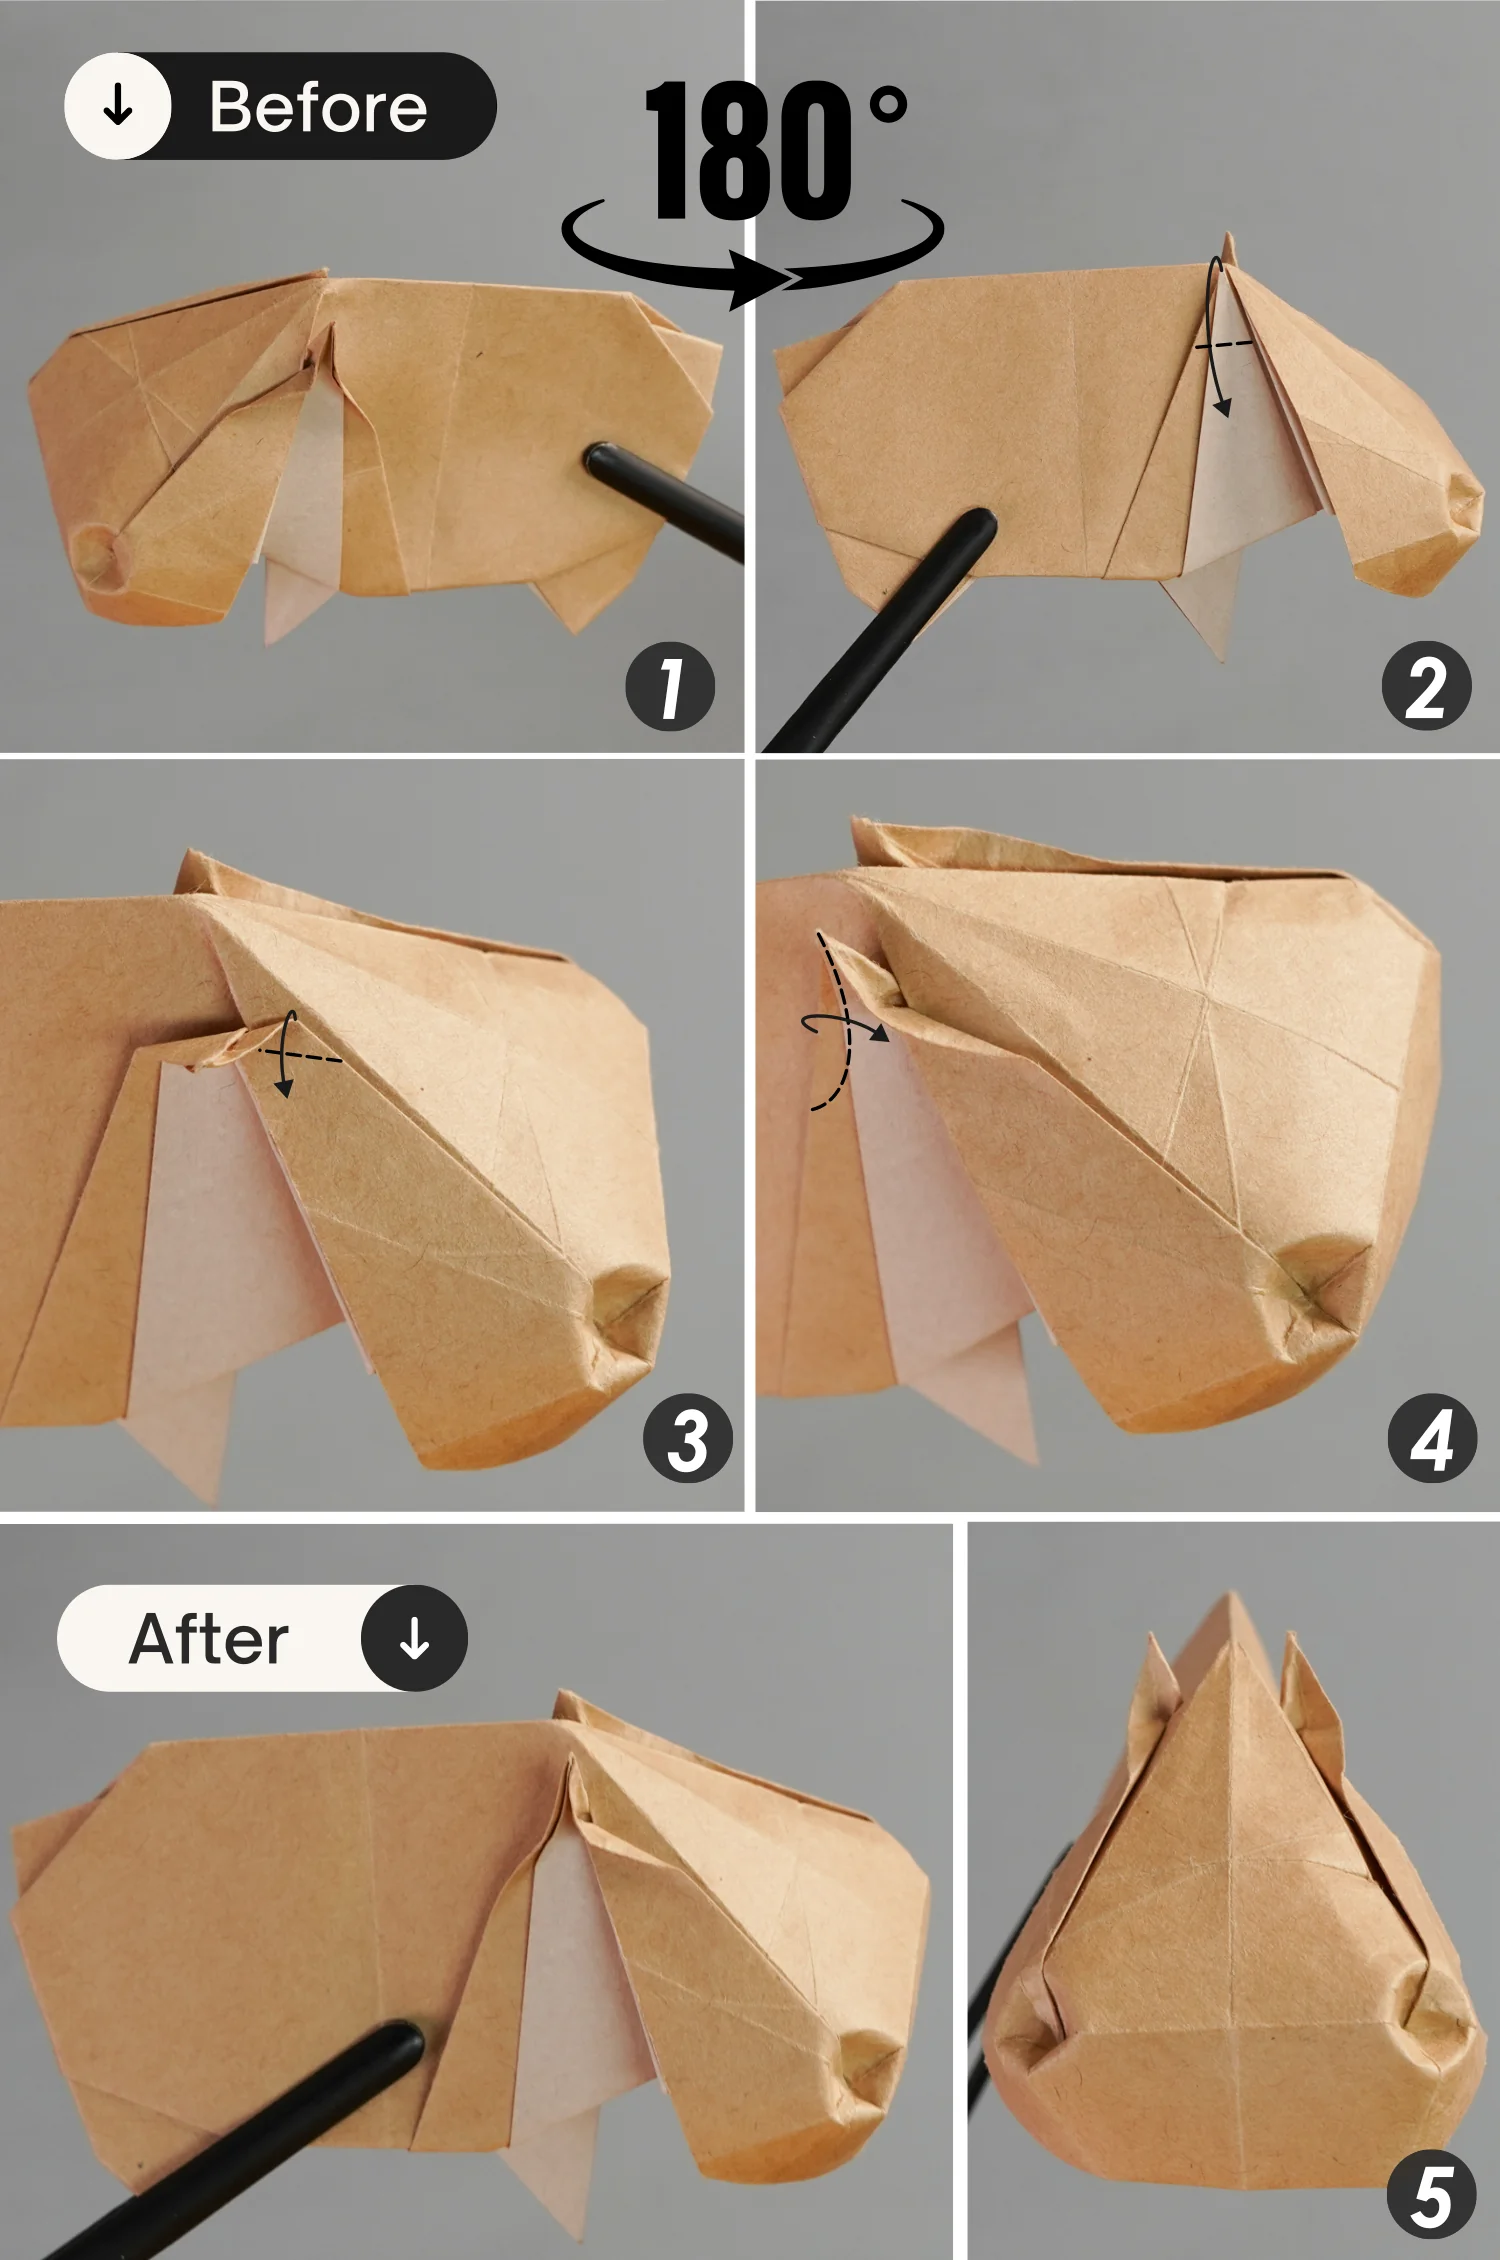
Rotate the paper 90 degrees from the back to the front to lay the paper flat, then focus on the right part, fold the top layer along the dotted line backward, and fold the under layer along the dotted line forward, ensuring they are flush.
Step 29
Fold the bottom point of the belly backward along the dotted line, repeat this for the point of the bottom layer of the belly.
Step 30
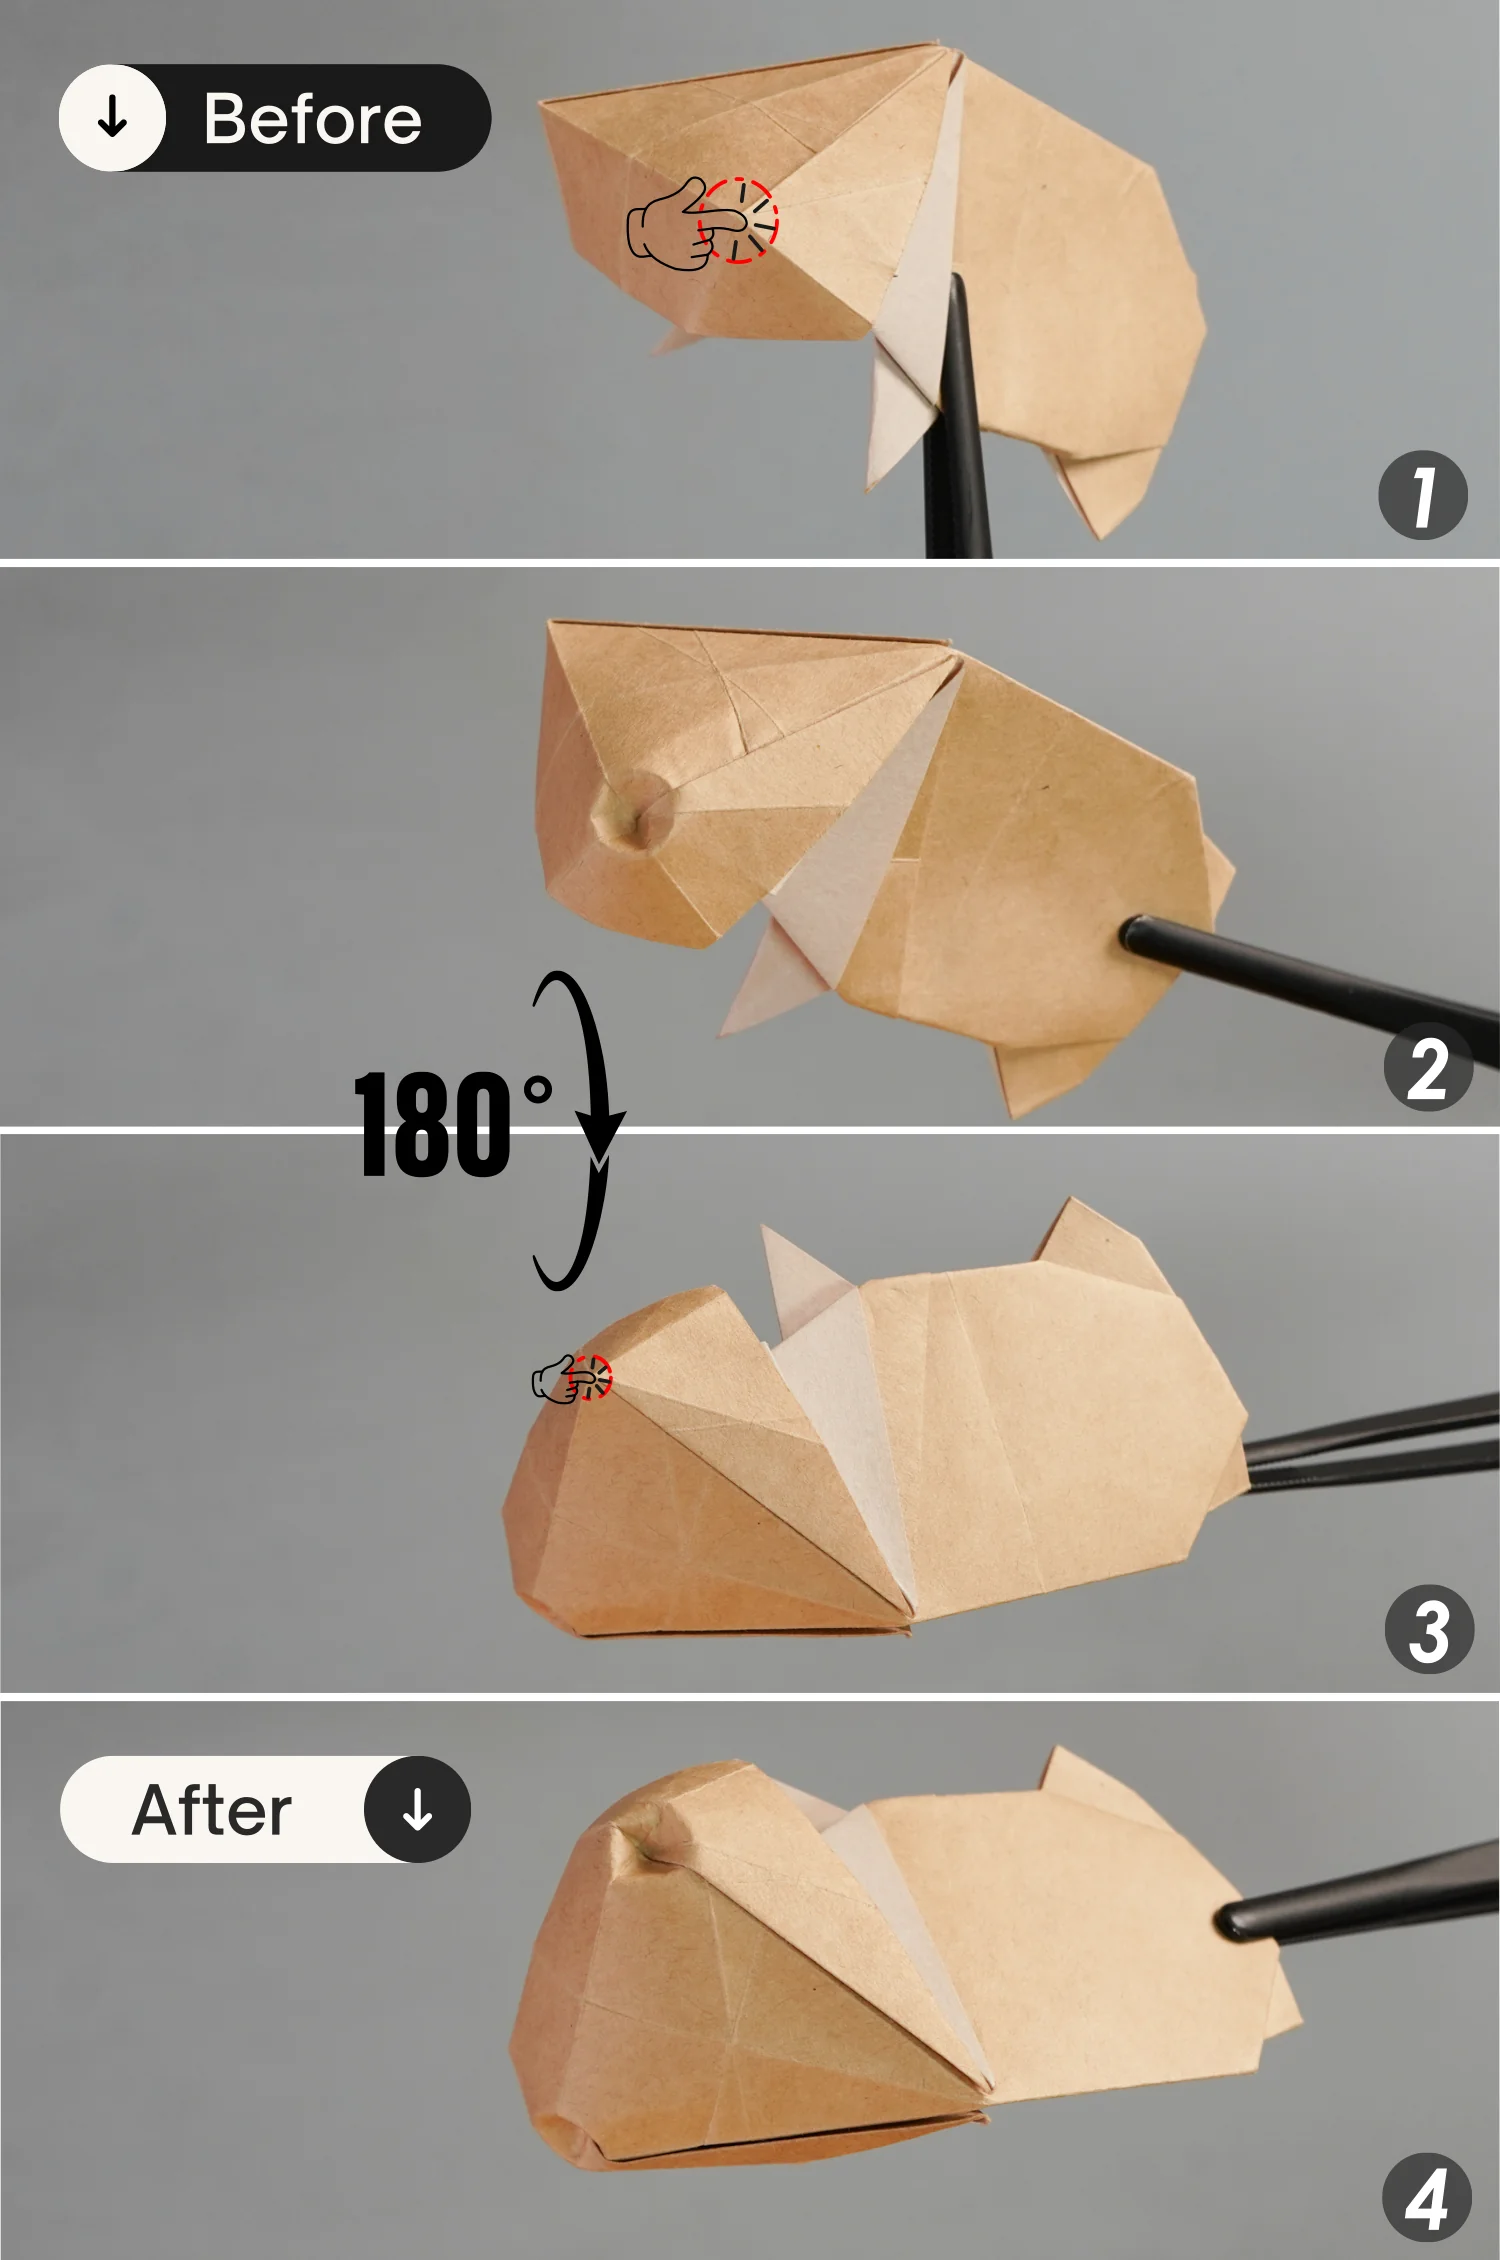
Rotate it 90 degrees from the back to the front, making the bottom face up, then take the left tip of the right layer, and slightly pull it to the right. Next, remove the layer beneath it so that it becomes the top layer.

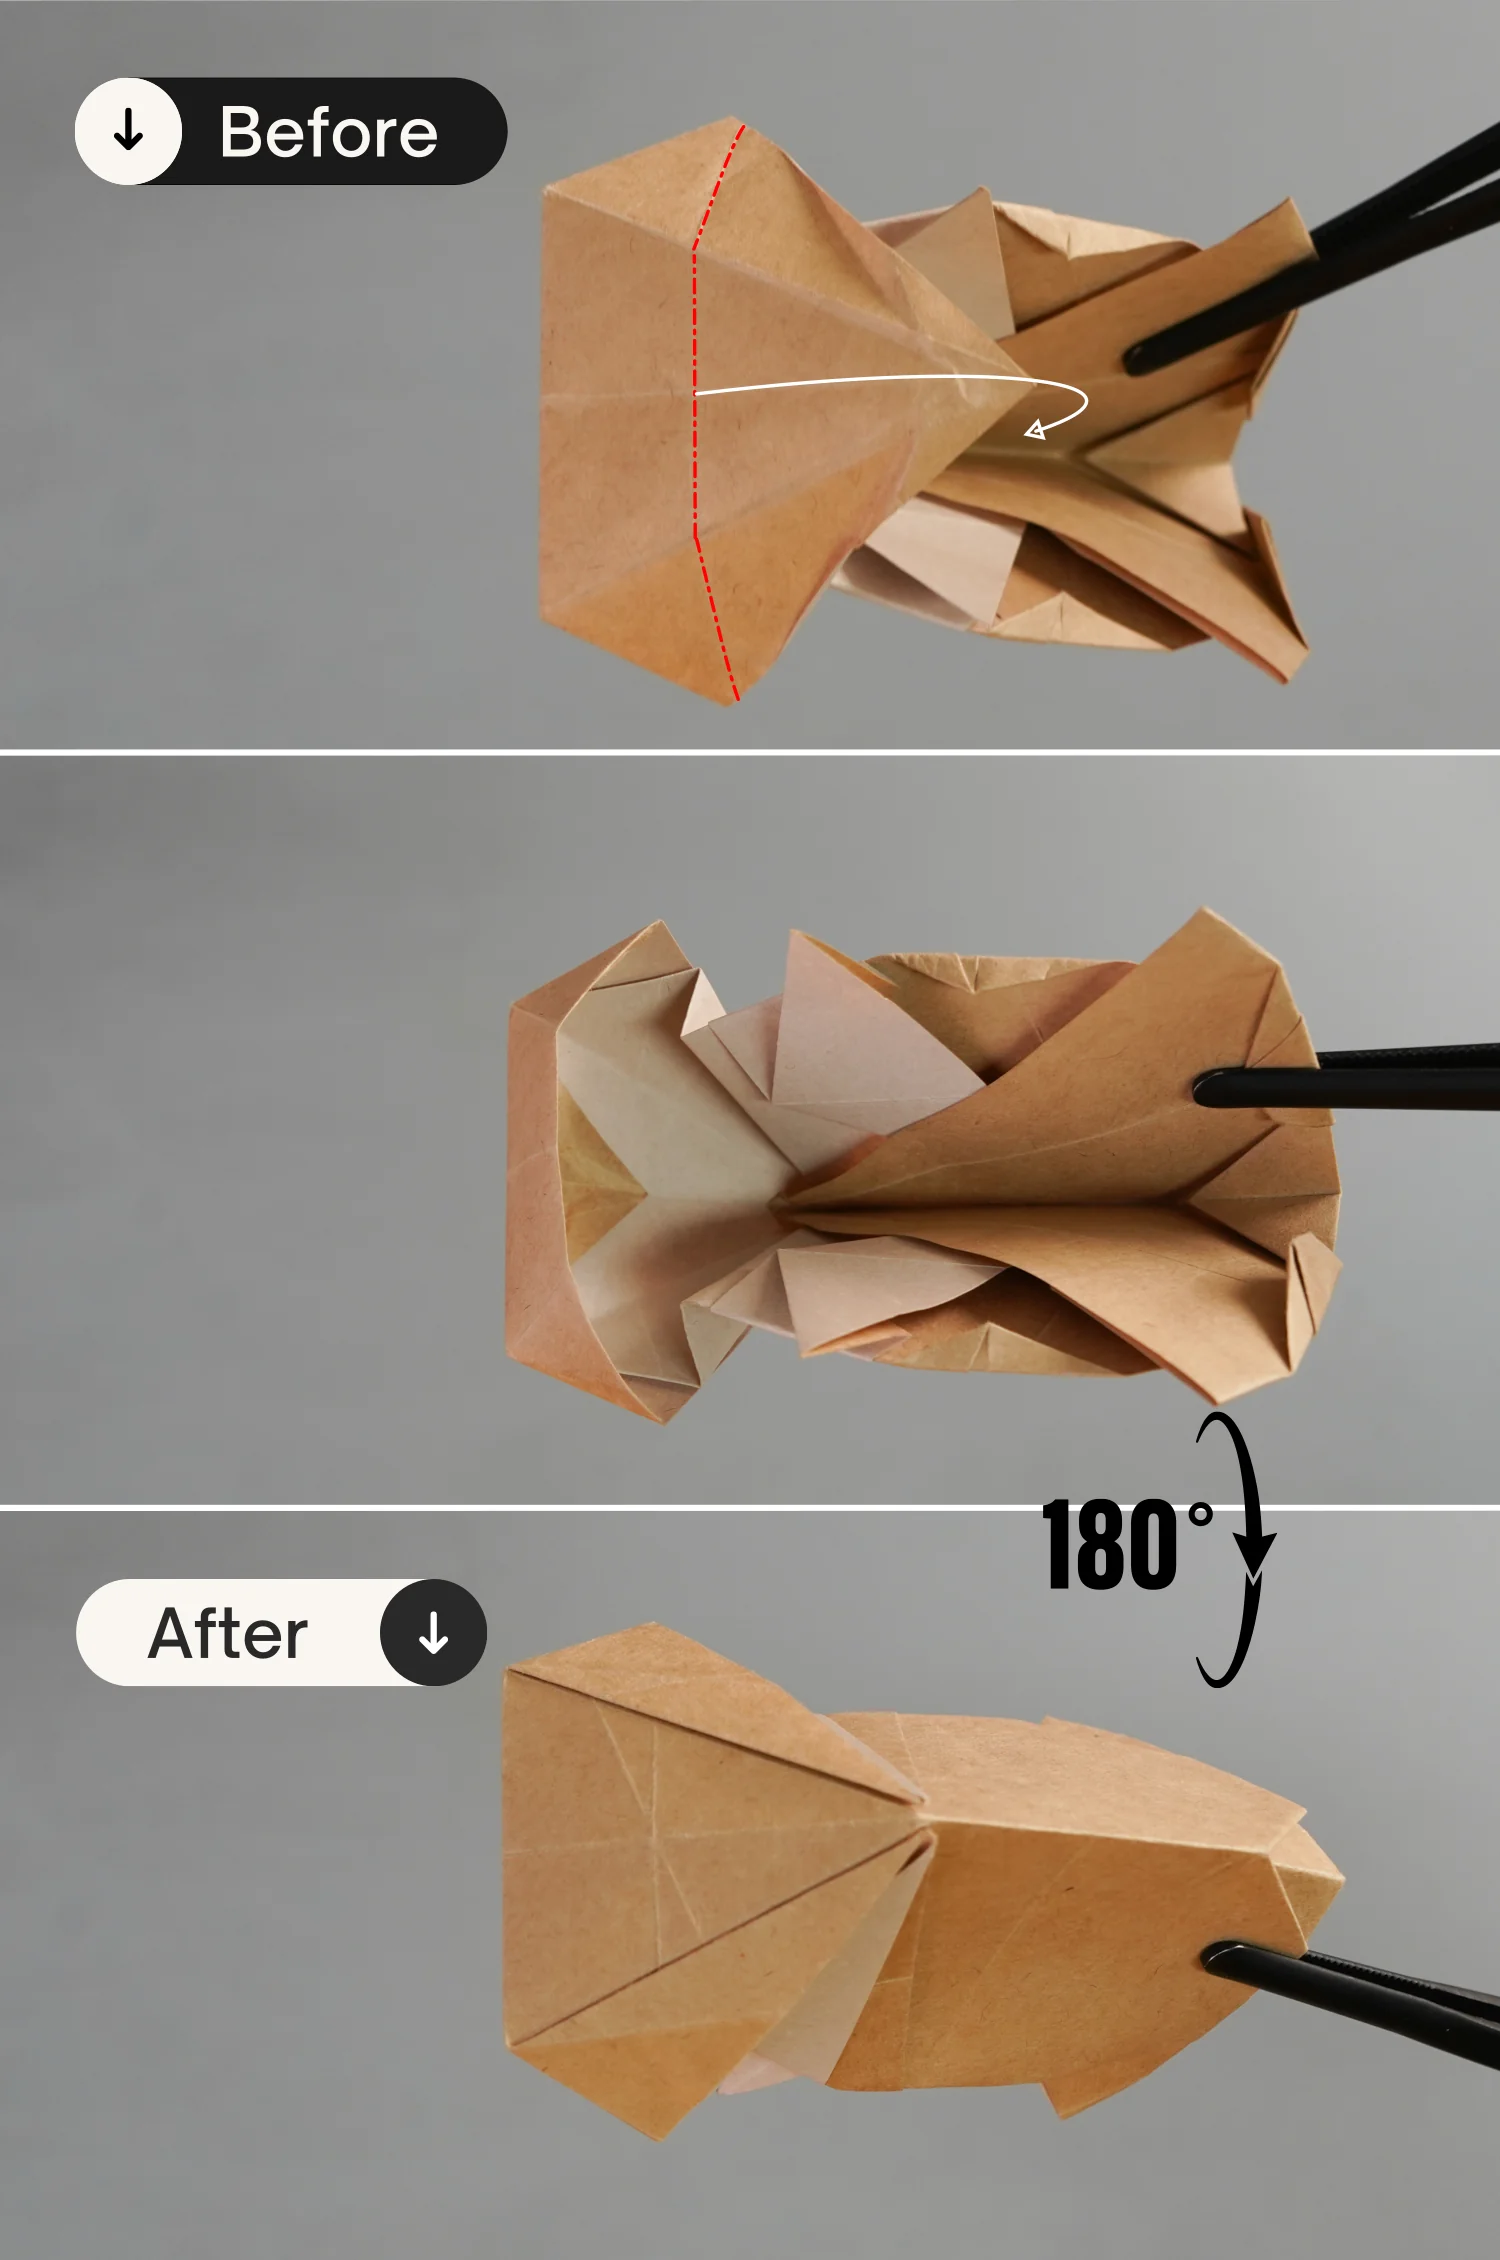
Step 31
Fold the right point of this left layer backward along the crease shown by the red dotted line, and rotate it 180 degrees from the back to the front. You will see that the head part is inflated naturally.
Step 32
Press down the two arched points on the head, and make them concave to get two nostrils.
Step 33
Lay it flat, and fold down the top point as the second picture shows, then sharpen this tip, getting an ear.
Step 34
Rotate it 180 degrees from the left to the right, creating another ear like you did in the previous step.
What’s Next
This is the final shape of an origami hippo, it is really adorable. Now you can explore our other origami animal instructions. Happy folding!
Other Origami Animal Ideas