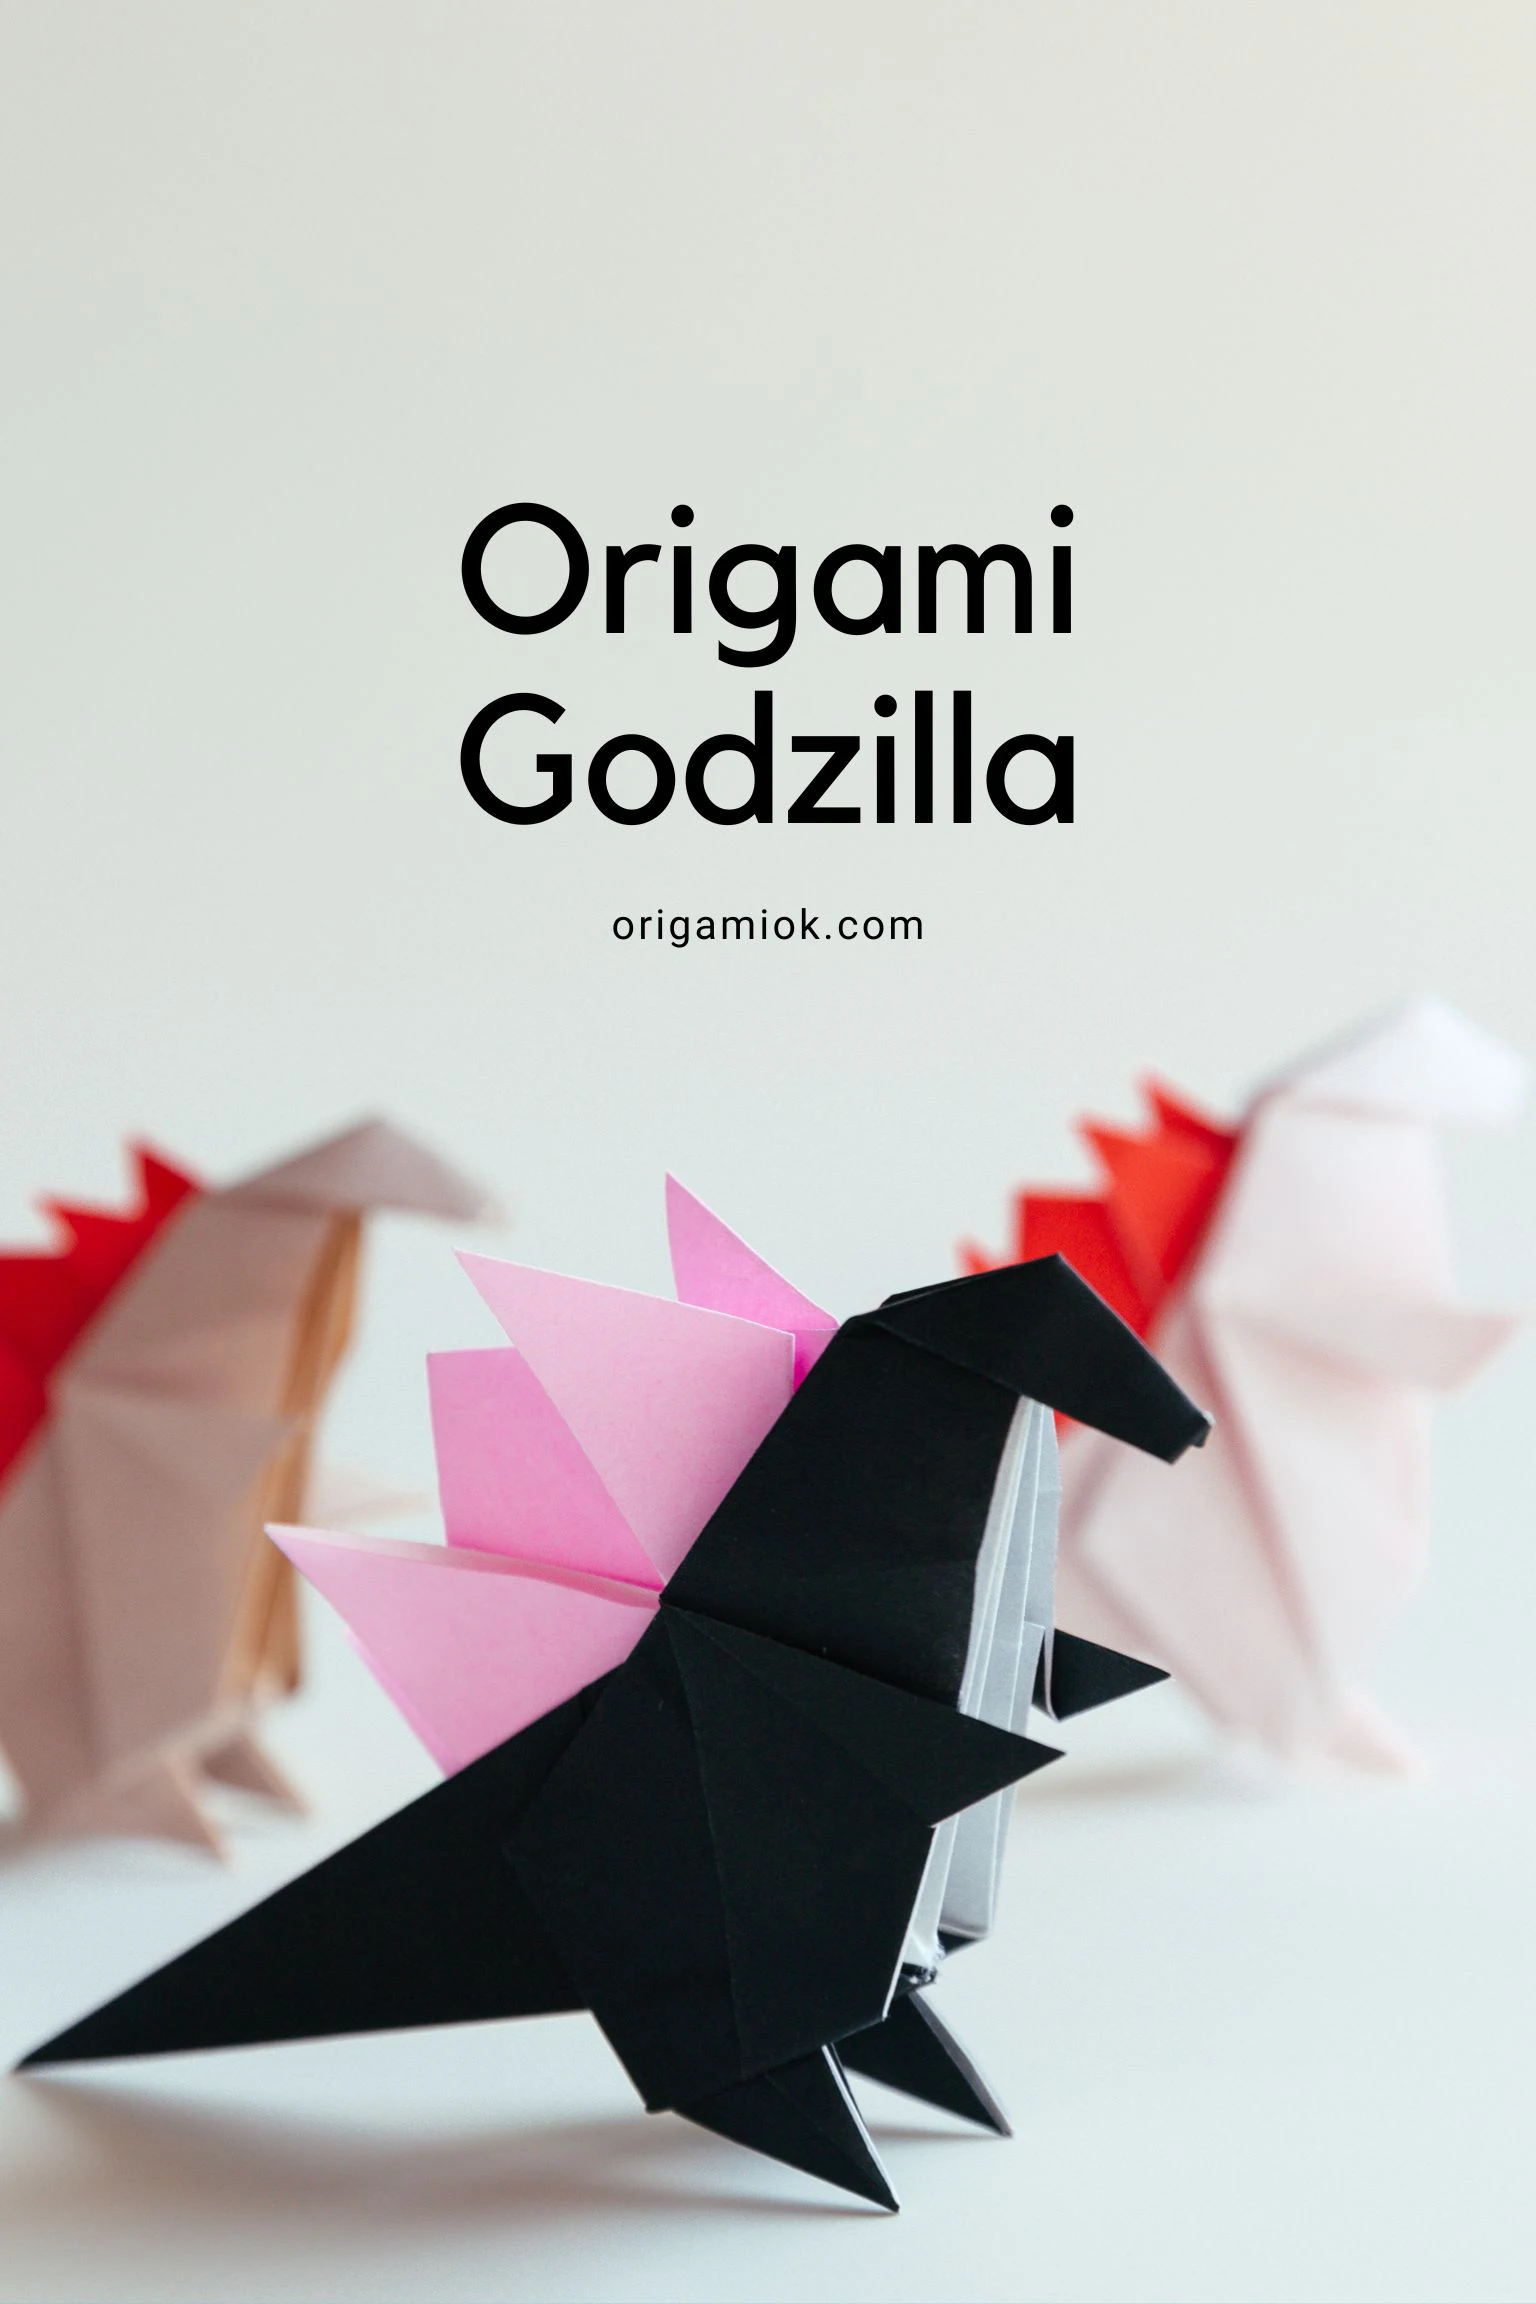
Godzilla is a giant monster from a Japanese film of the same name. He is both a destroyer and a protector, protecting humans from other monstrous threats, and it has always been very popular with fans worldwide.
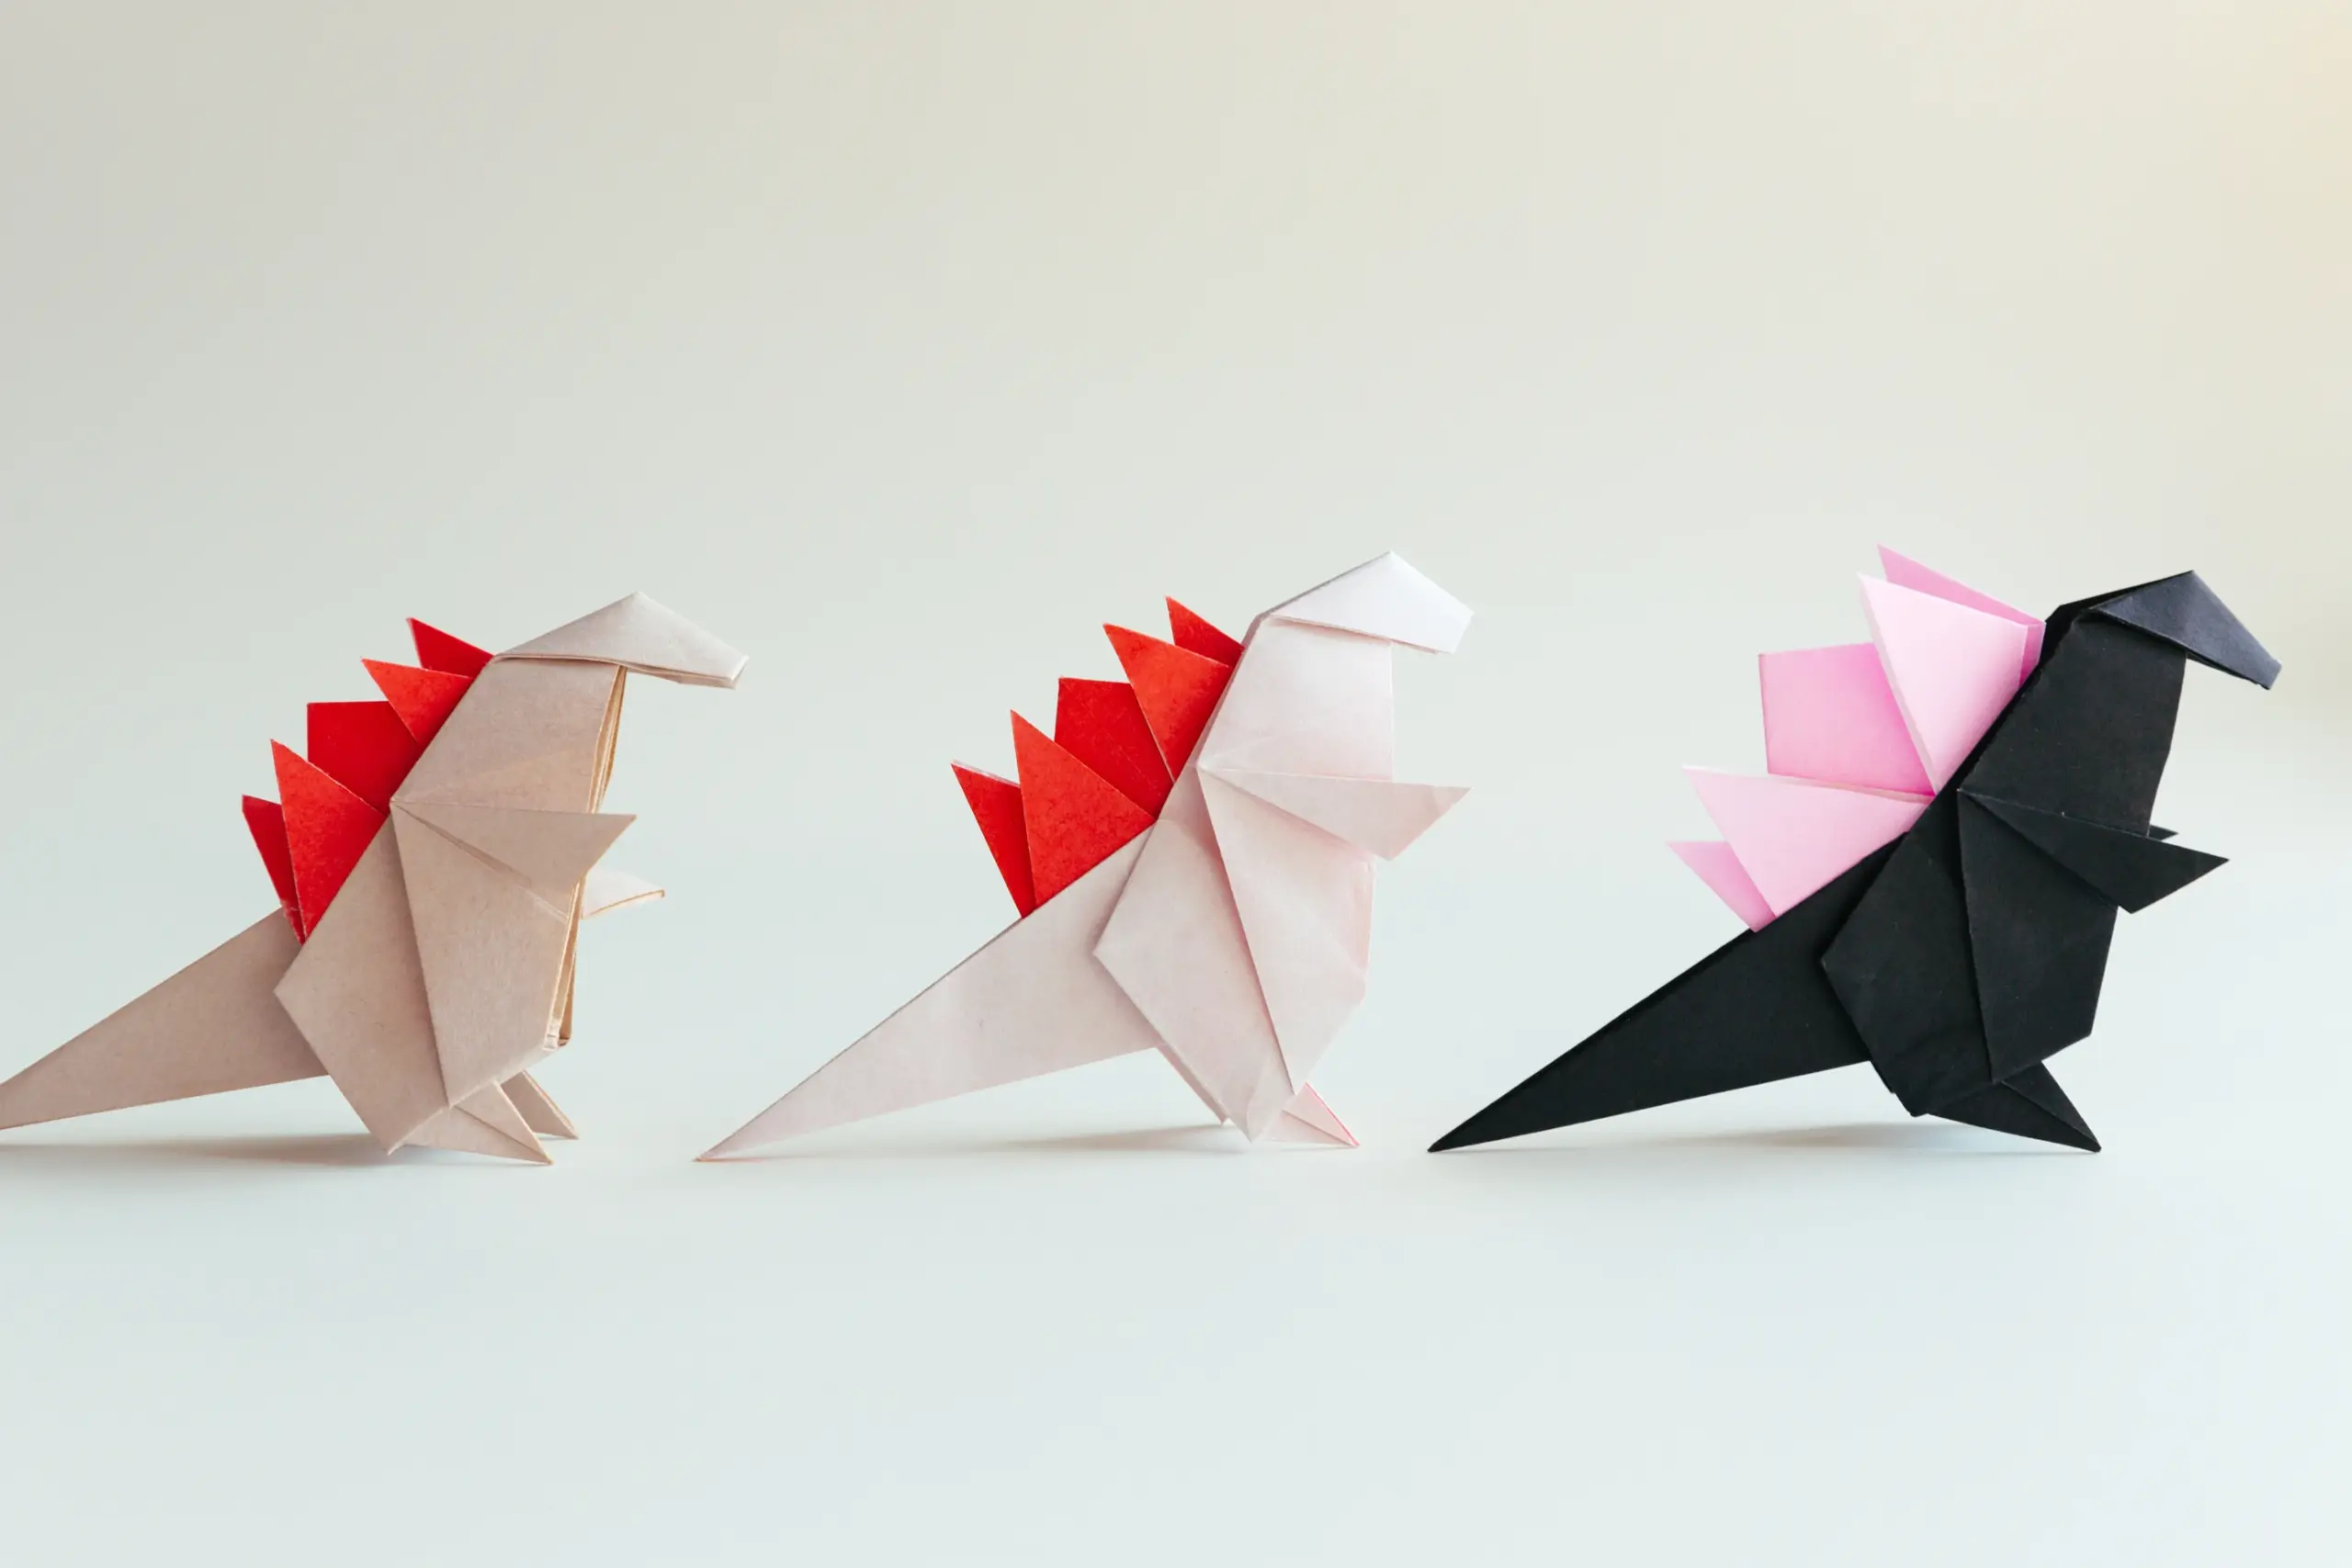
This time, we will create a cool Godzilla together with two pieces of paper, one for its body part, and another for its dorsal fins part. This means you can freely match its colors, to get a more unique Godzilla that is more in your style. When you finish, whether the intricate details of the dorsal fins, or the powerful and cool stance of the body, you will be impressed and deeply feel the spirit of Godzilla.
If you like this cool, large creature, don’t miss our origami dinosaurs!
If you are new to origami, start here from our beginner guide to know the basics and how to read the step-by-step instructions.
- Folding time: 25 minutes
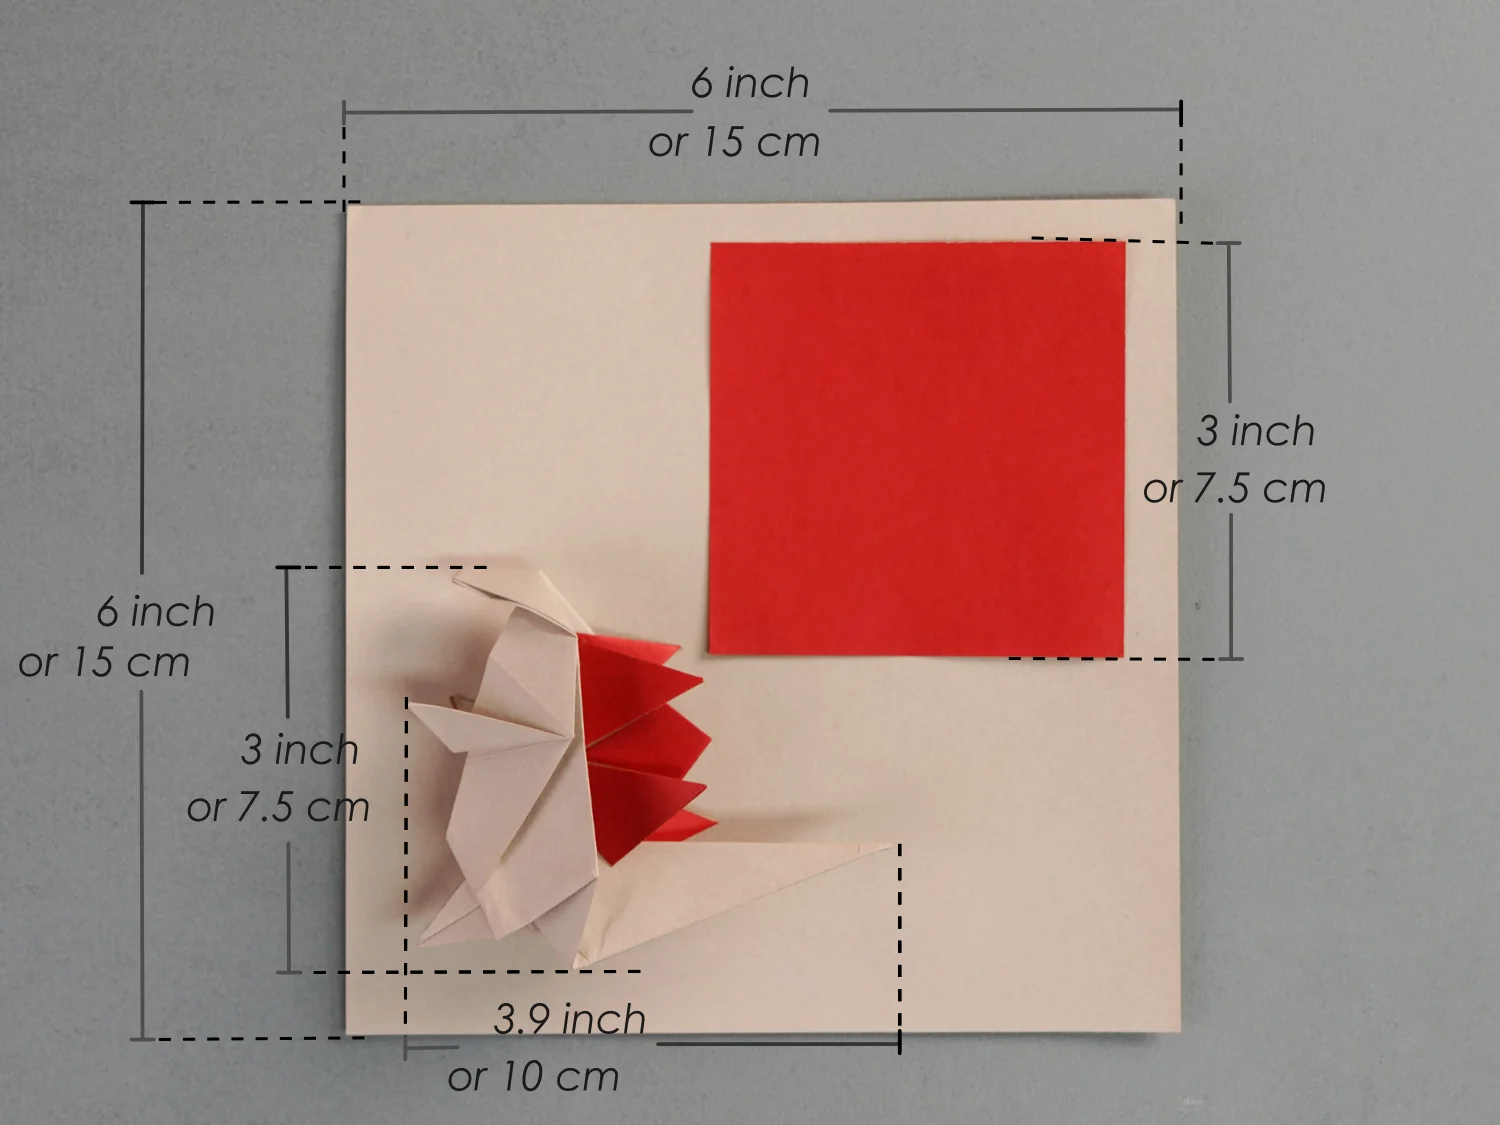
- Paper: 15×15 cm , 7.5×7.5 cm
- Difficulty: Advanced
Material
Prepare a piece of 15×15 cm and 7.5×7.5 cm origami square paper, with different colors on each side, to create a 10×7.5 cm origami Godzilla. Experiment with different colors and patterns, making your product more unique.
Step by Step Instructions
Step 1
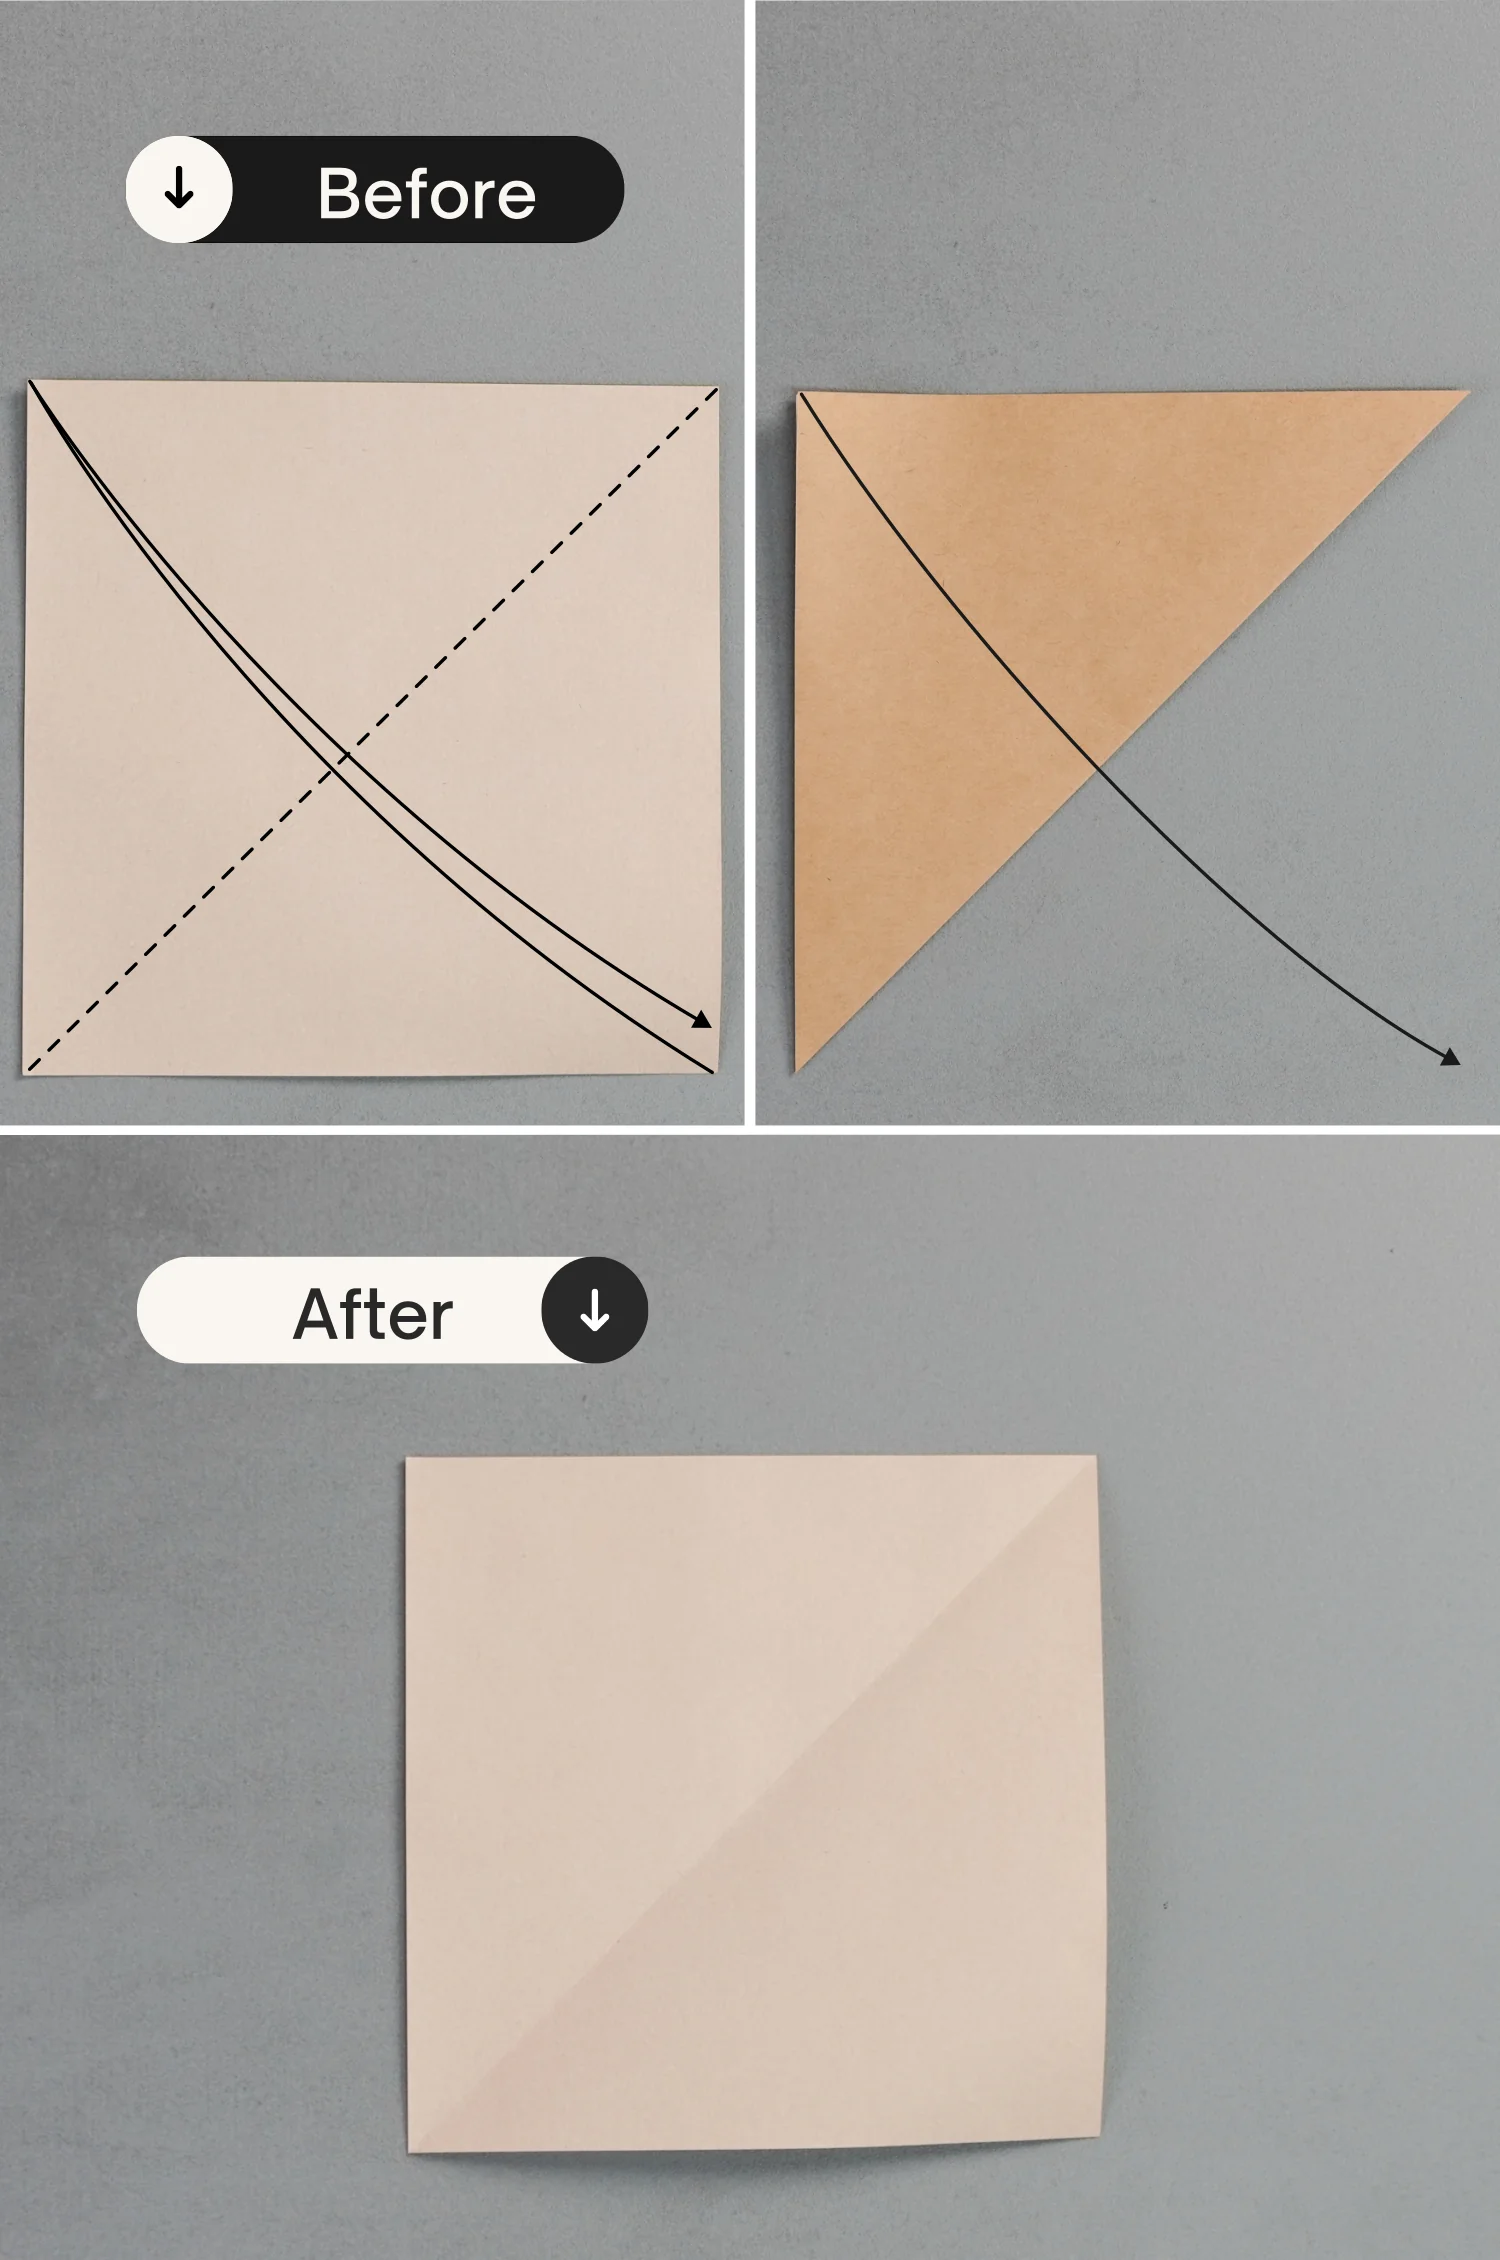
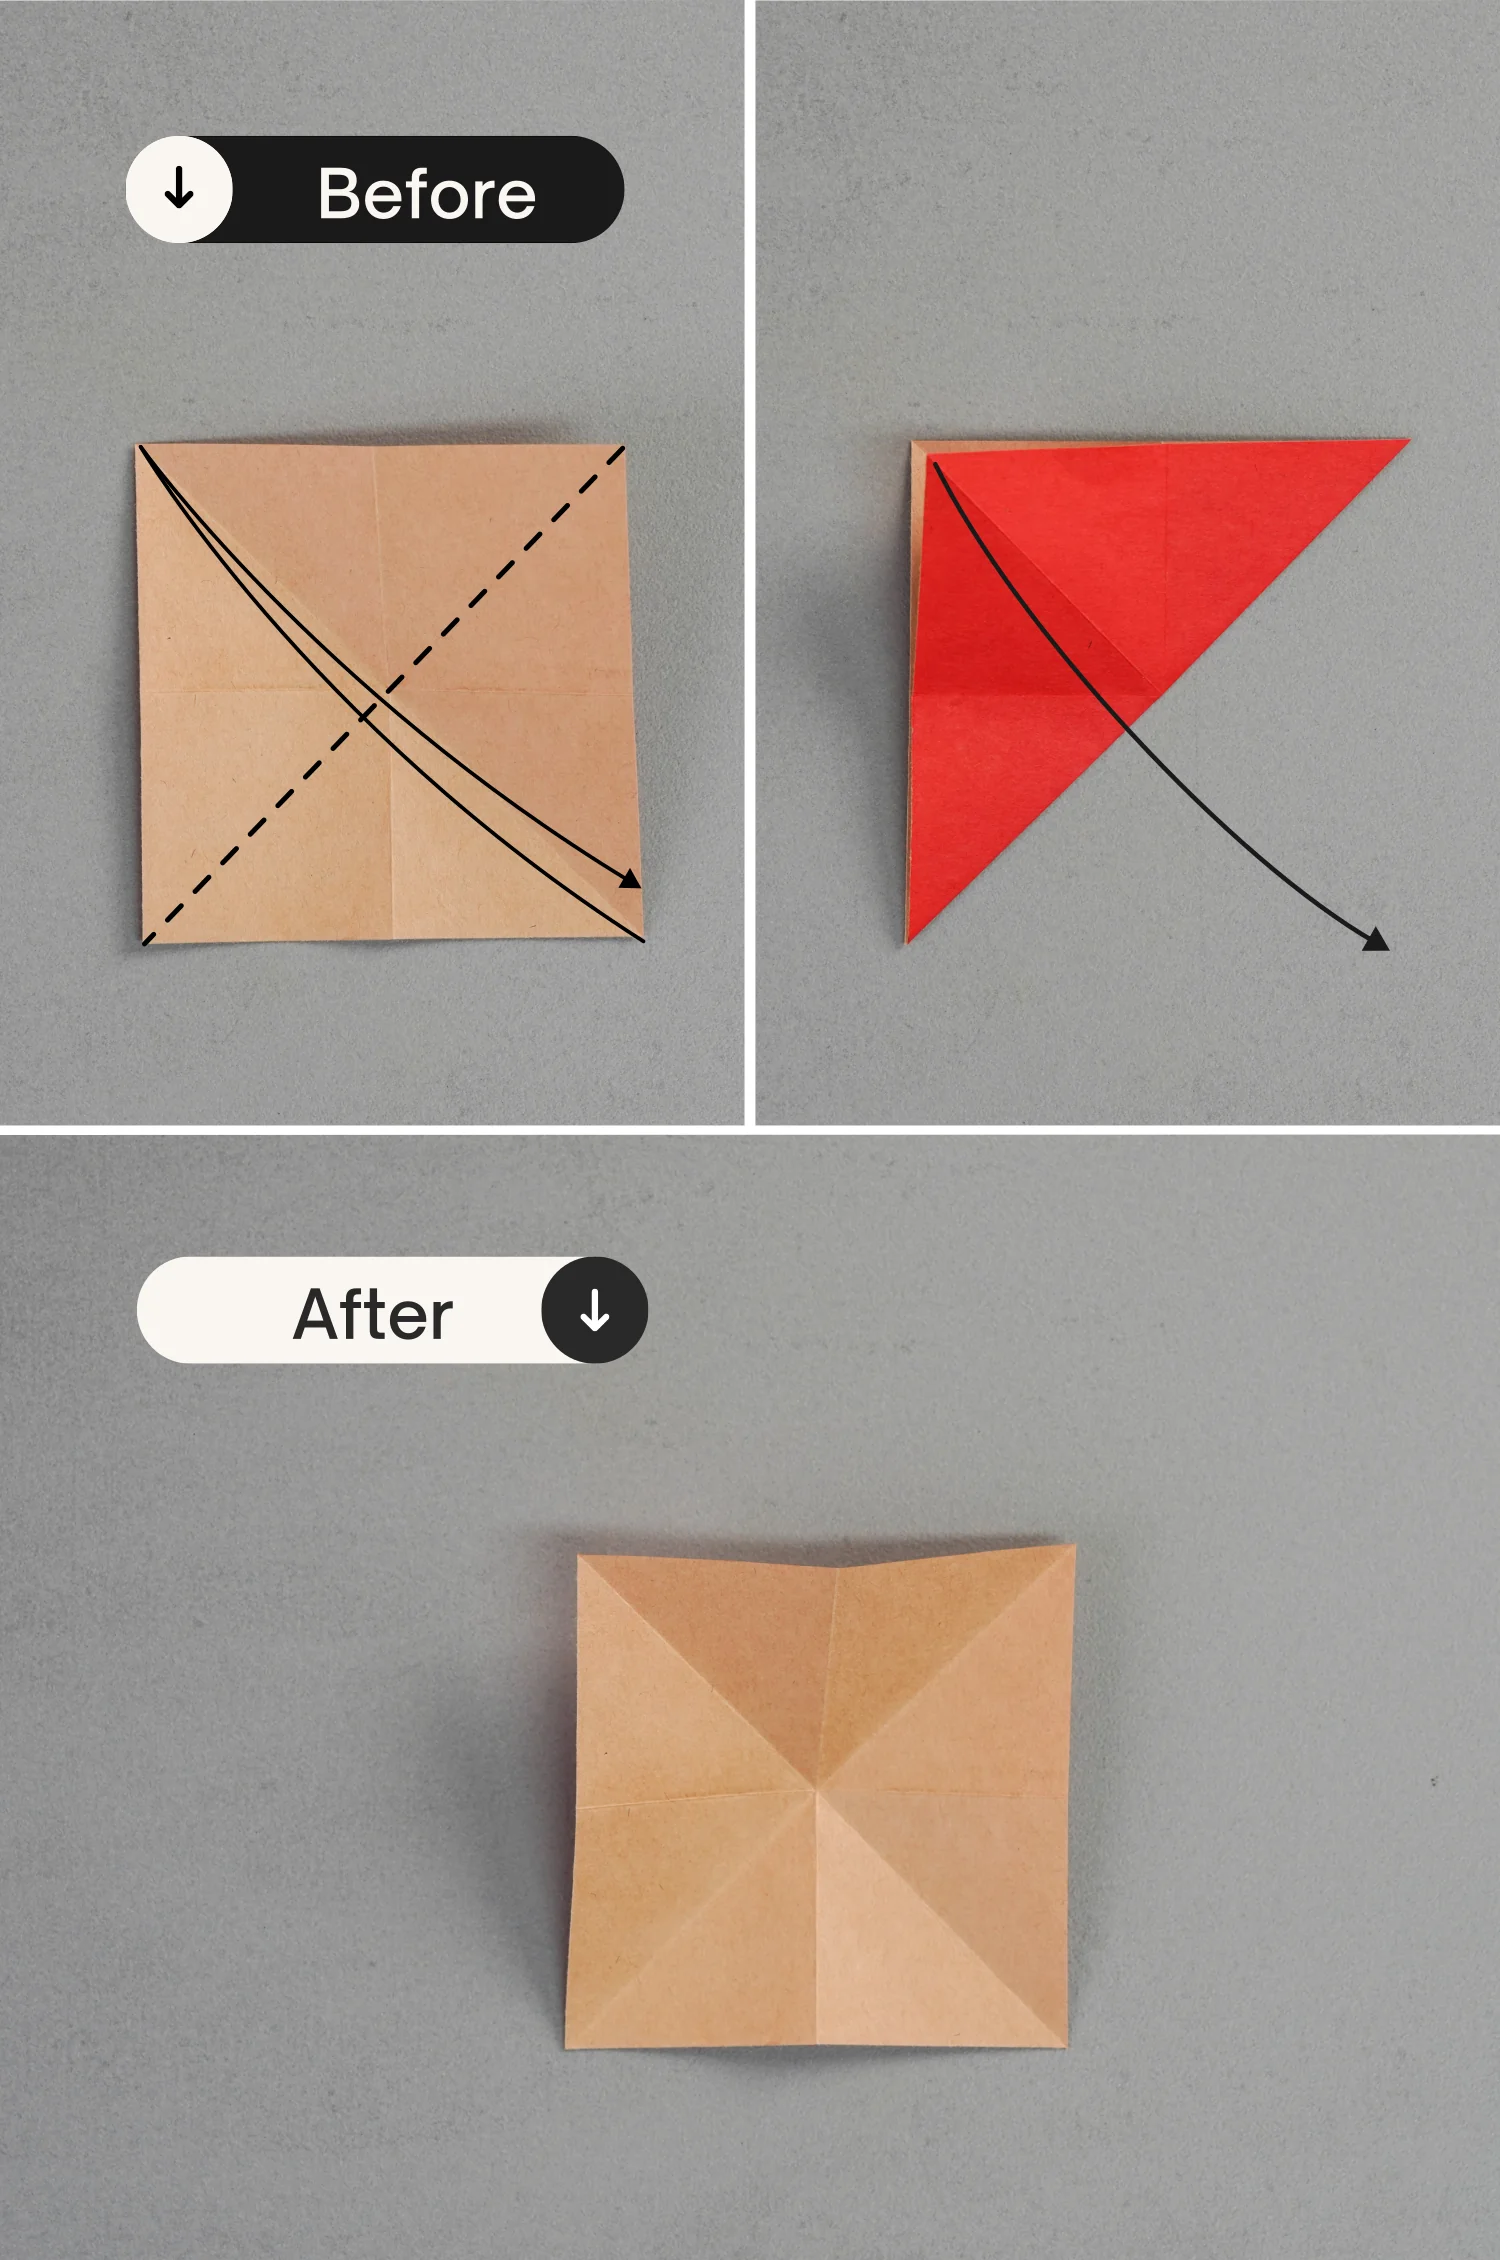
Take out the 20×20 cm paper, we are going to make the body part of this Godzilla. Place the paper with the desired display color side up to begin folding, fold it in half diagonally, and unfold it.
Step 2
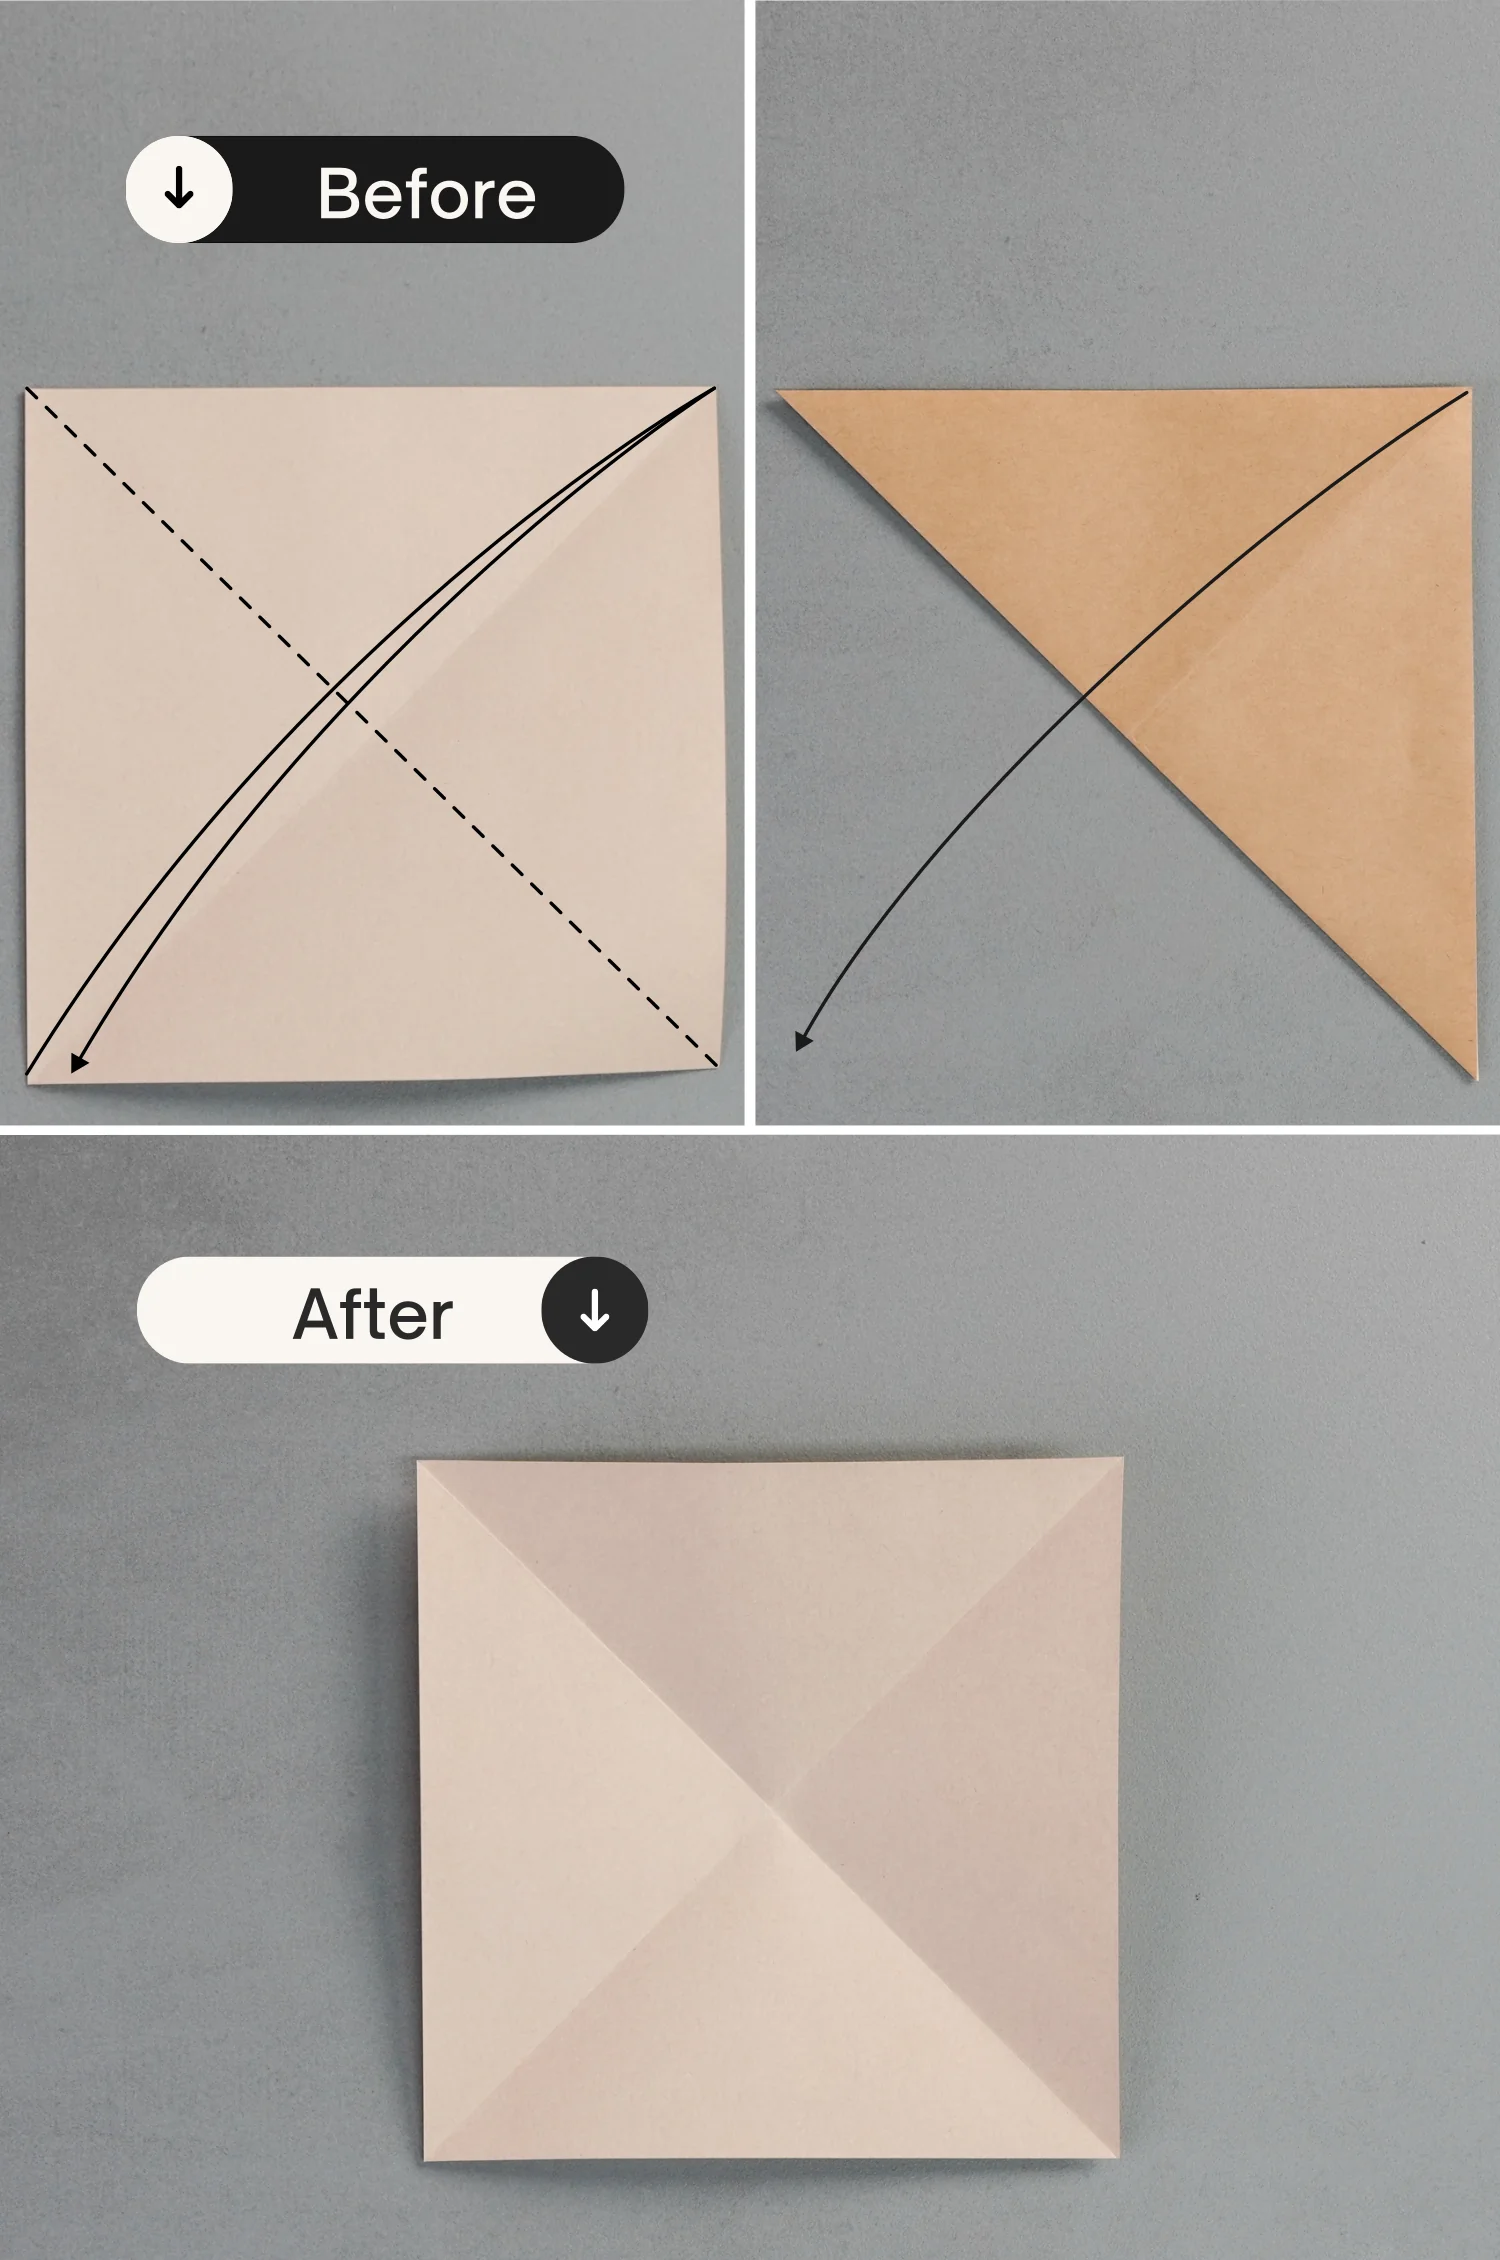
Fold it in half diagonally from the opposite side, leaving a crease then unfold it.
Step 3
Fold it in half horizontally, crease it well then unfold it.
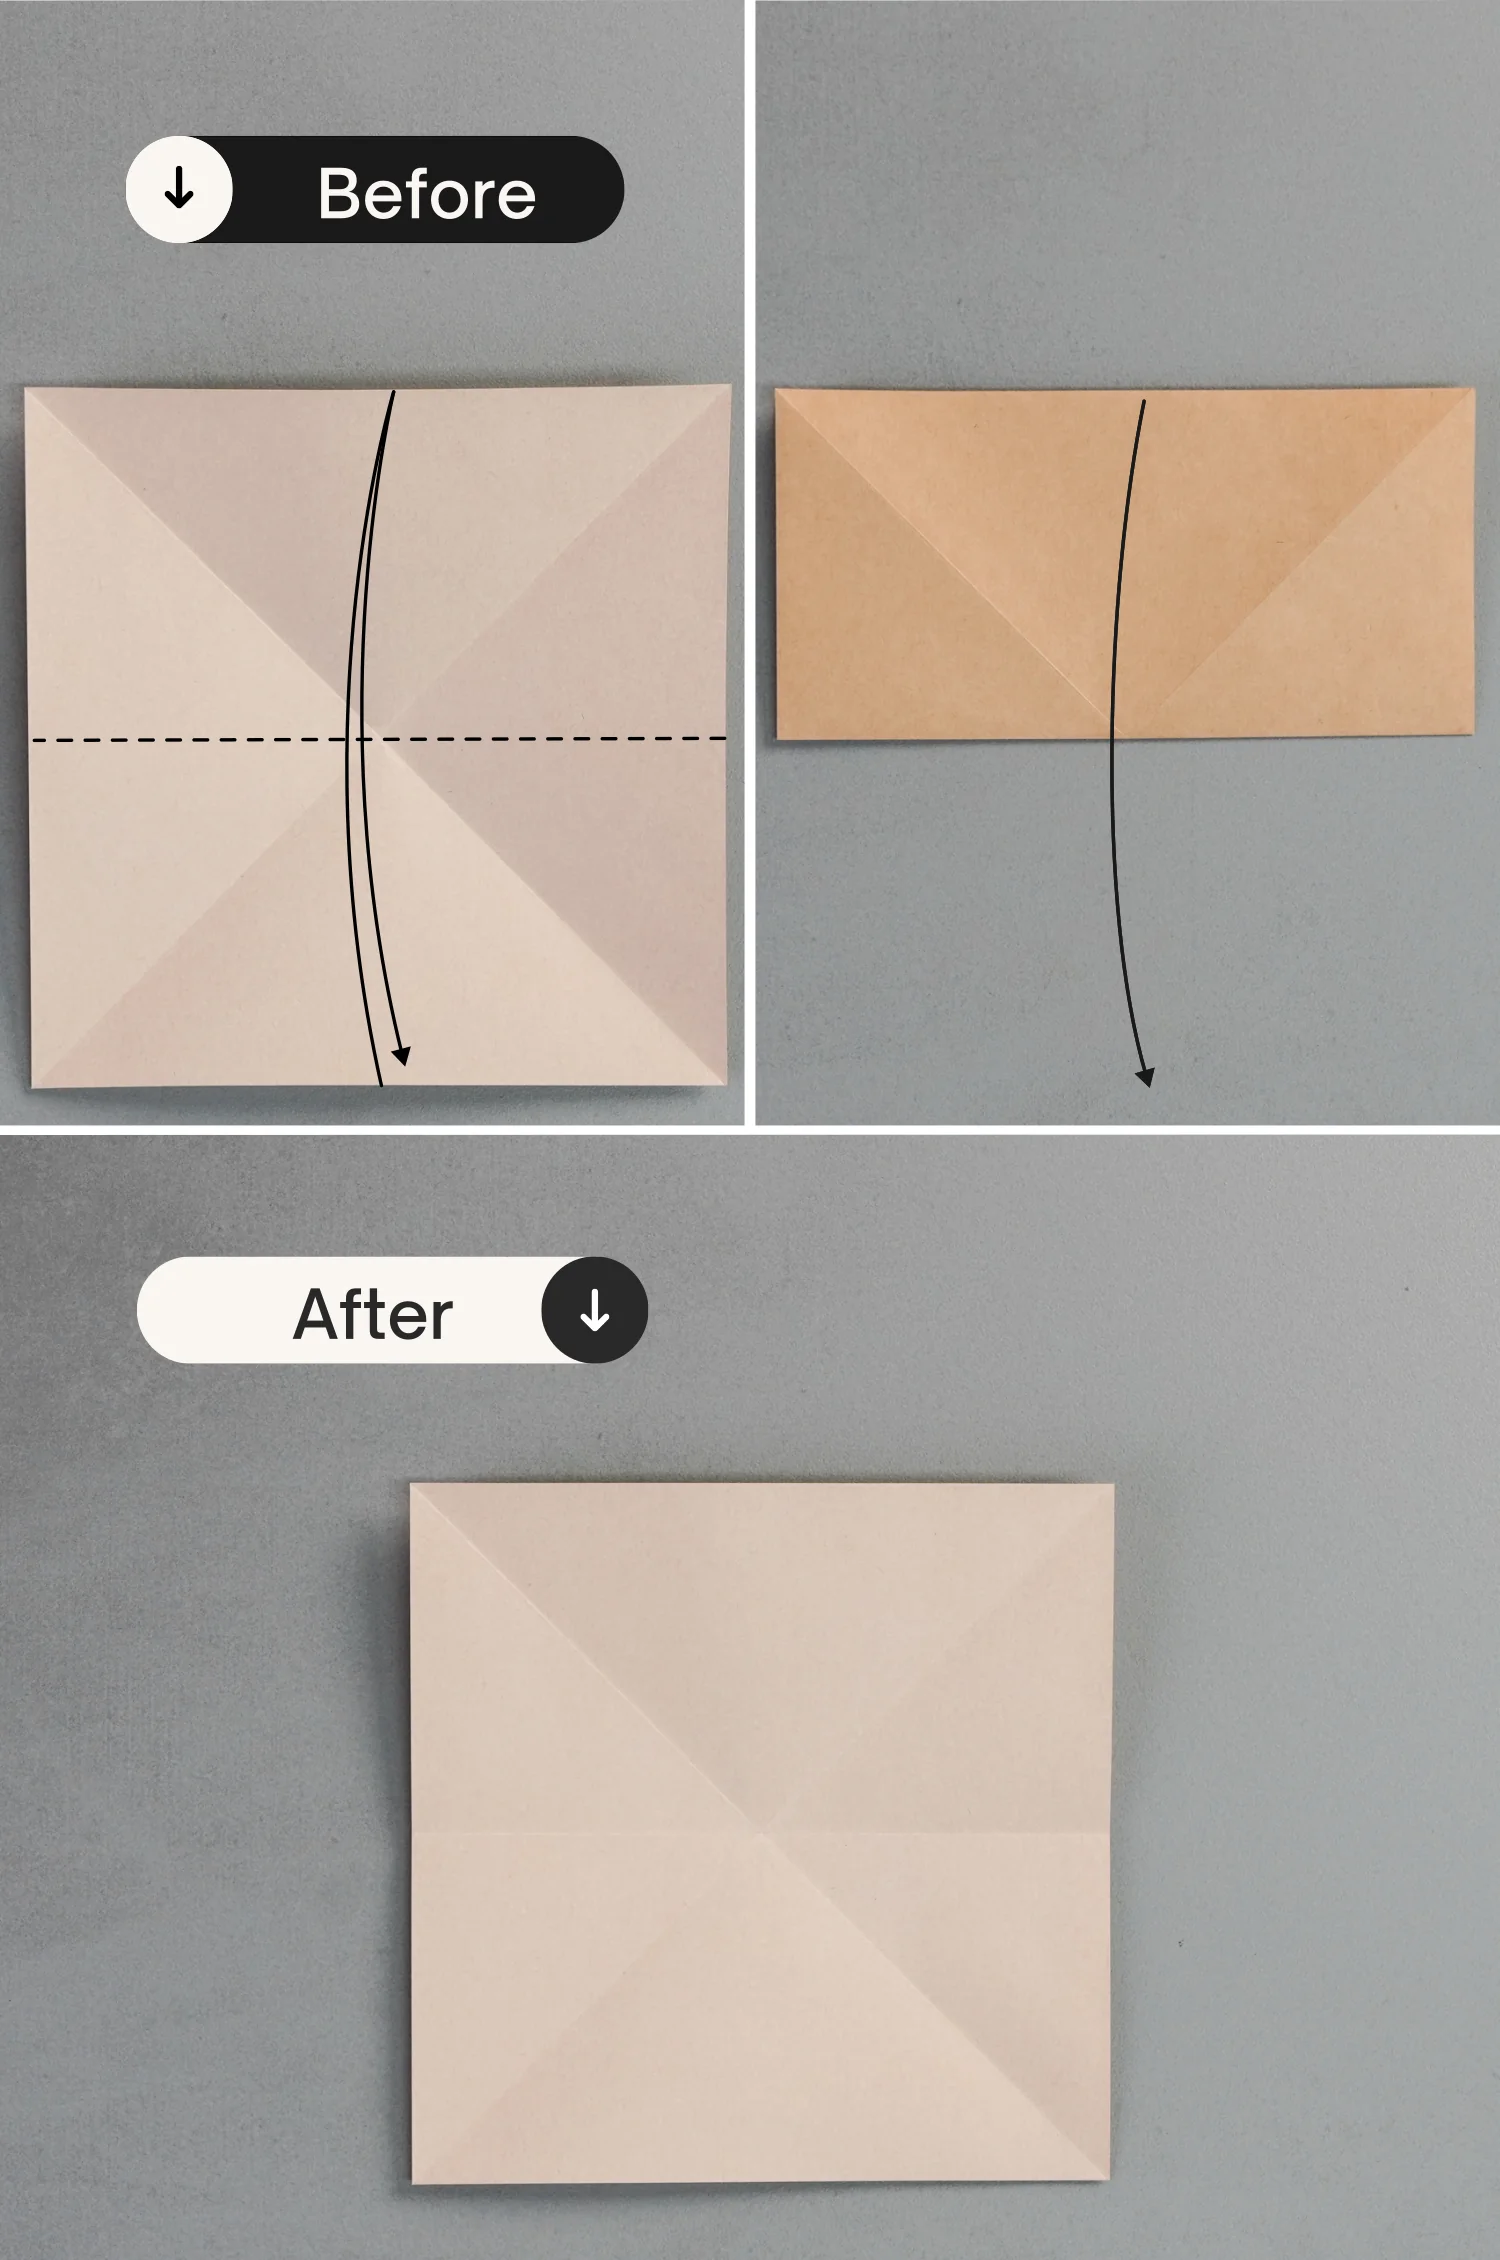
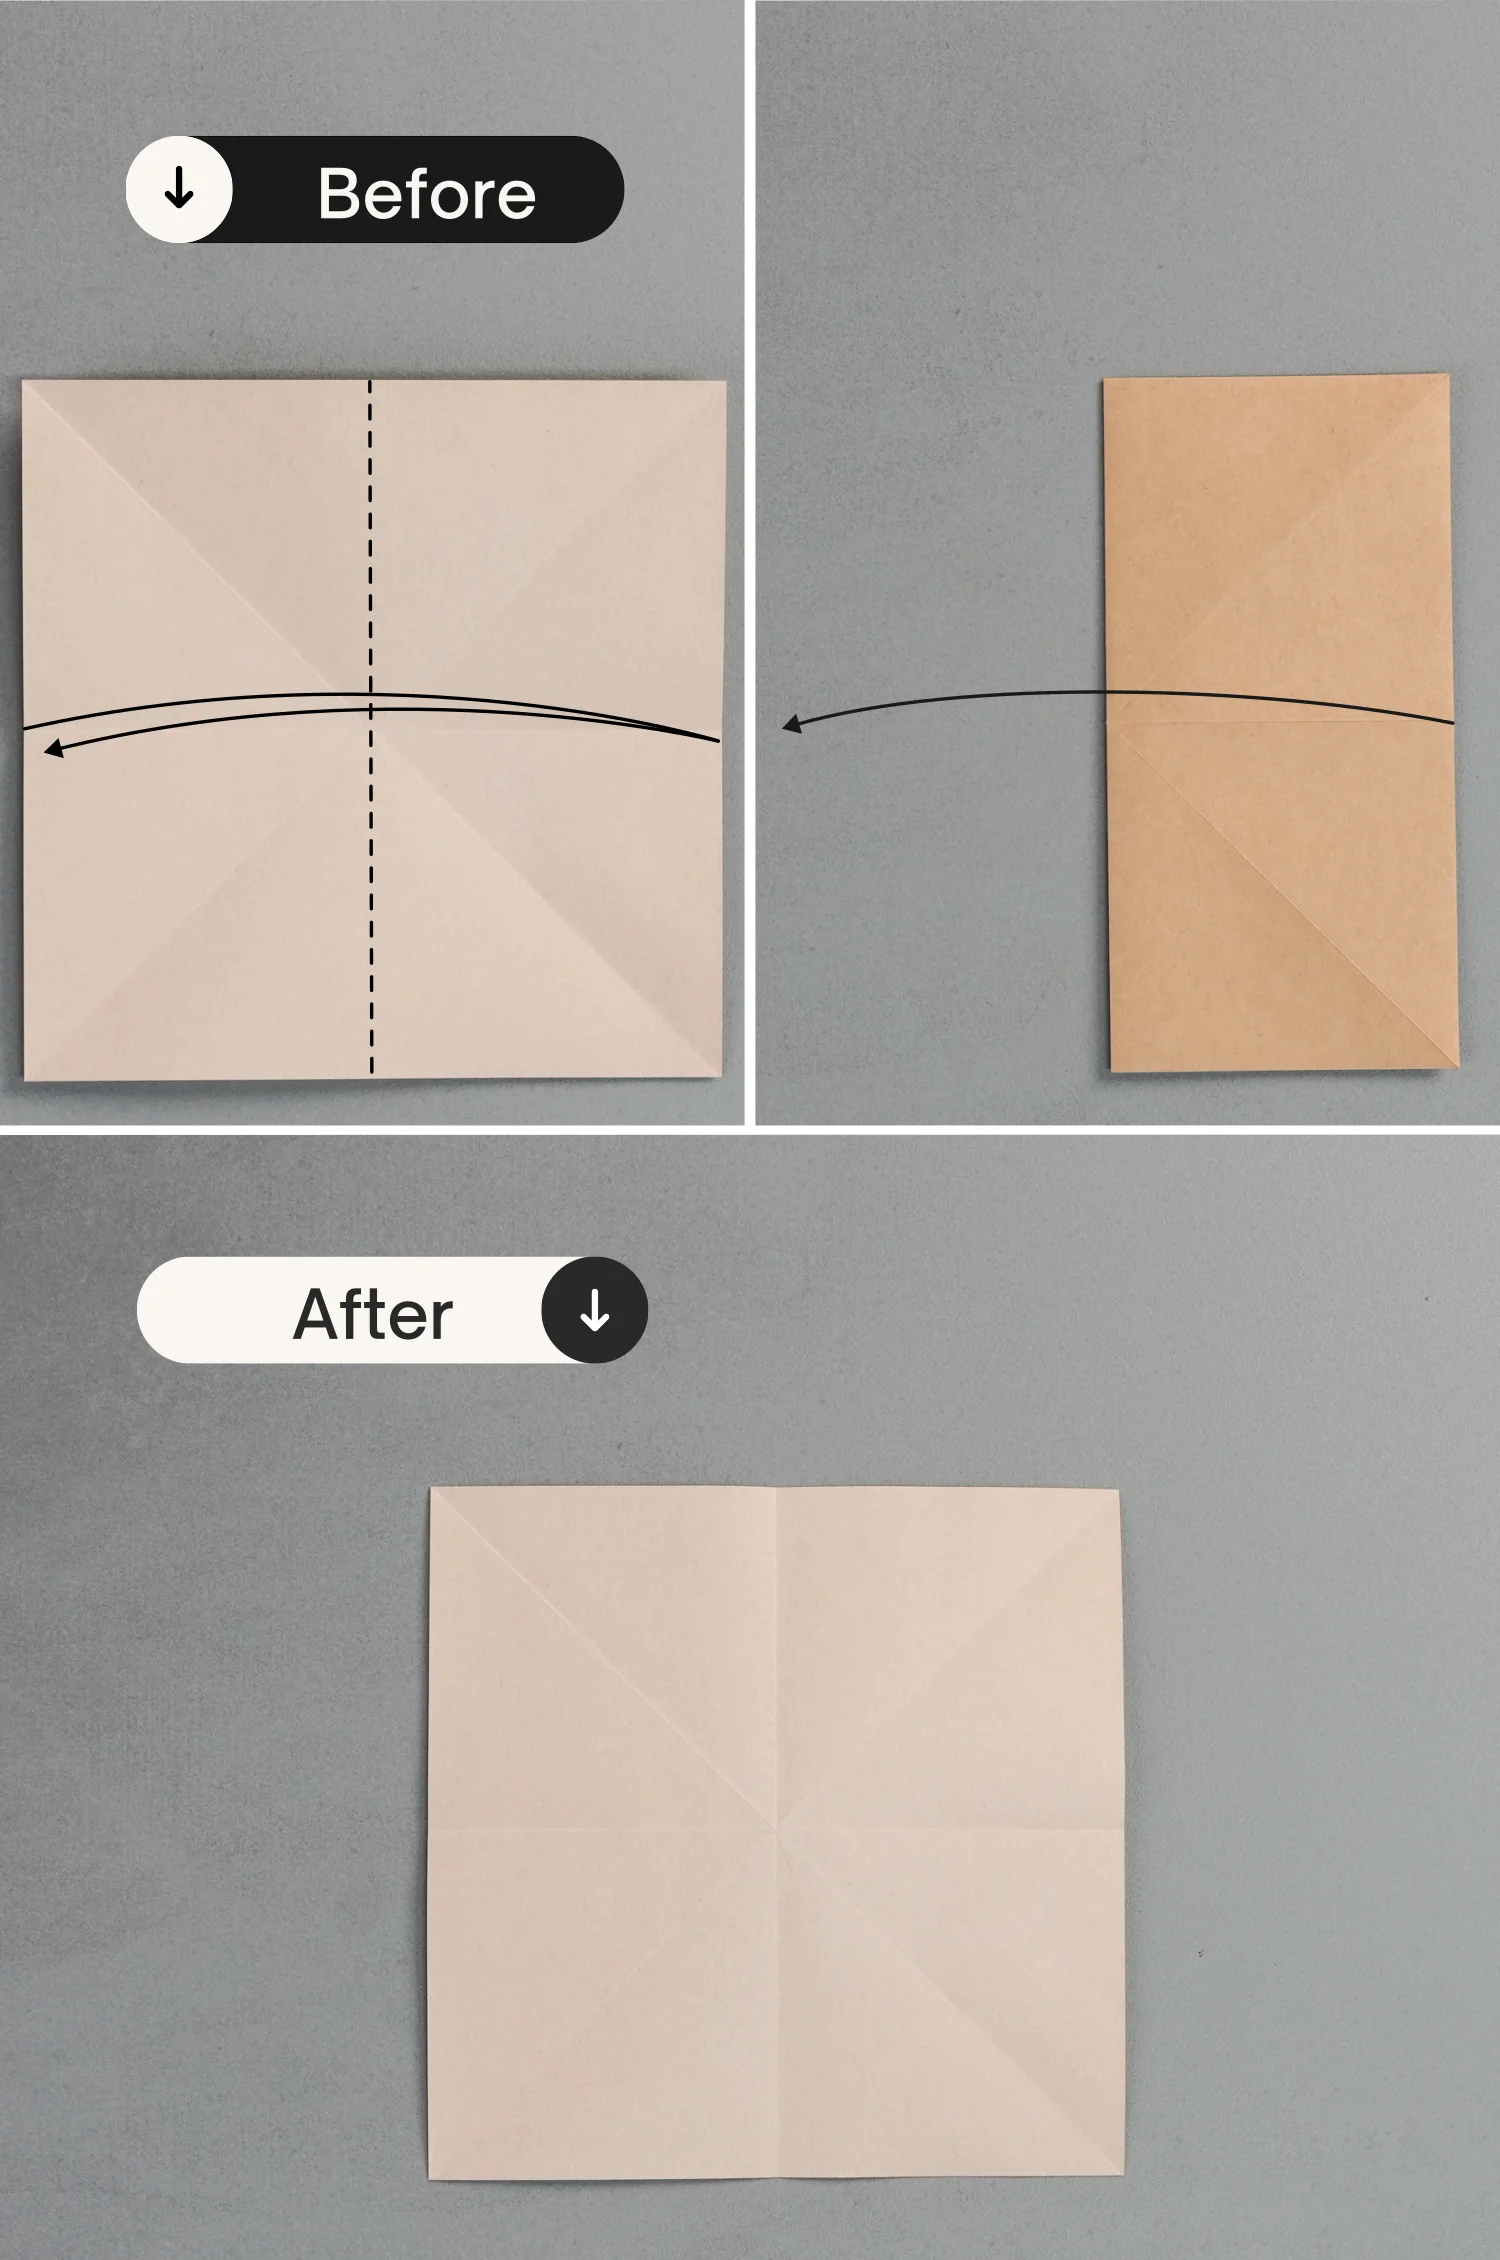
Step 4
Fold it in half vertically, and unfold it.
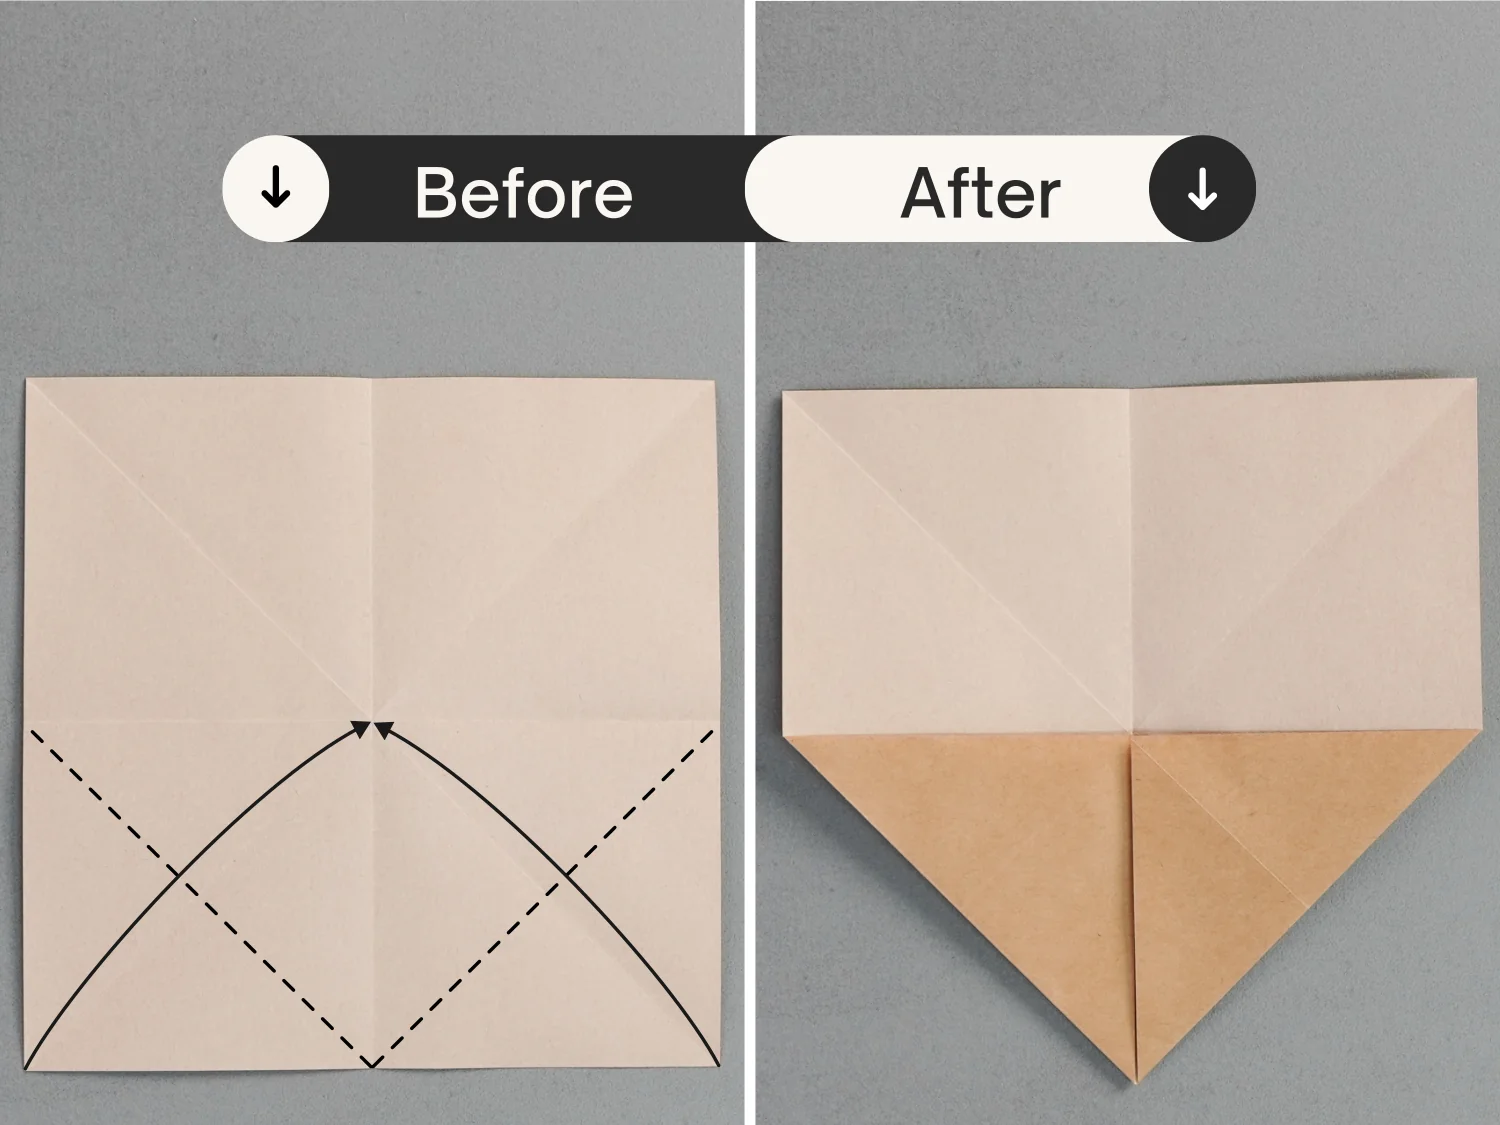
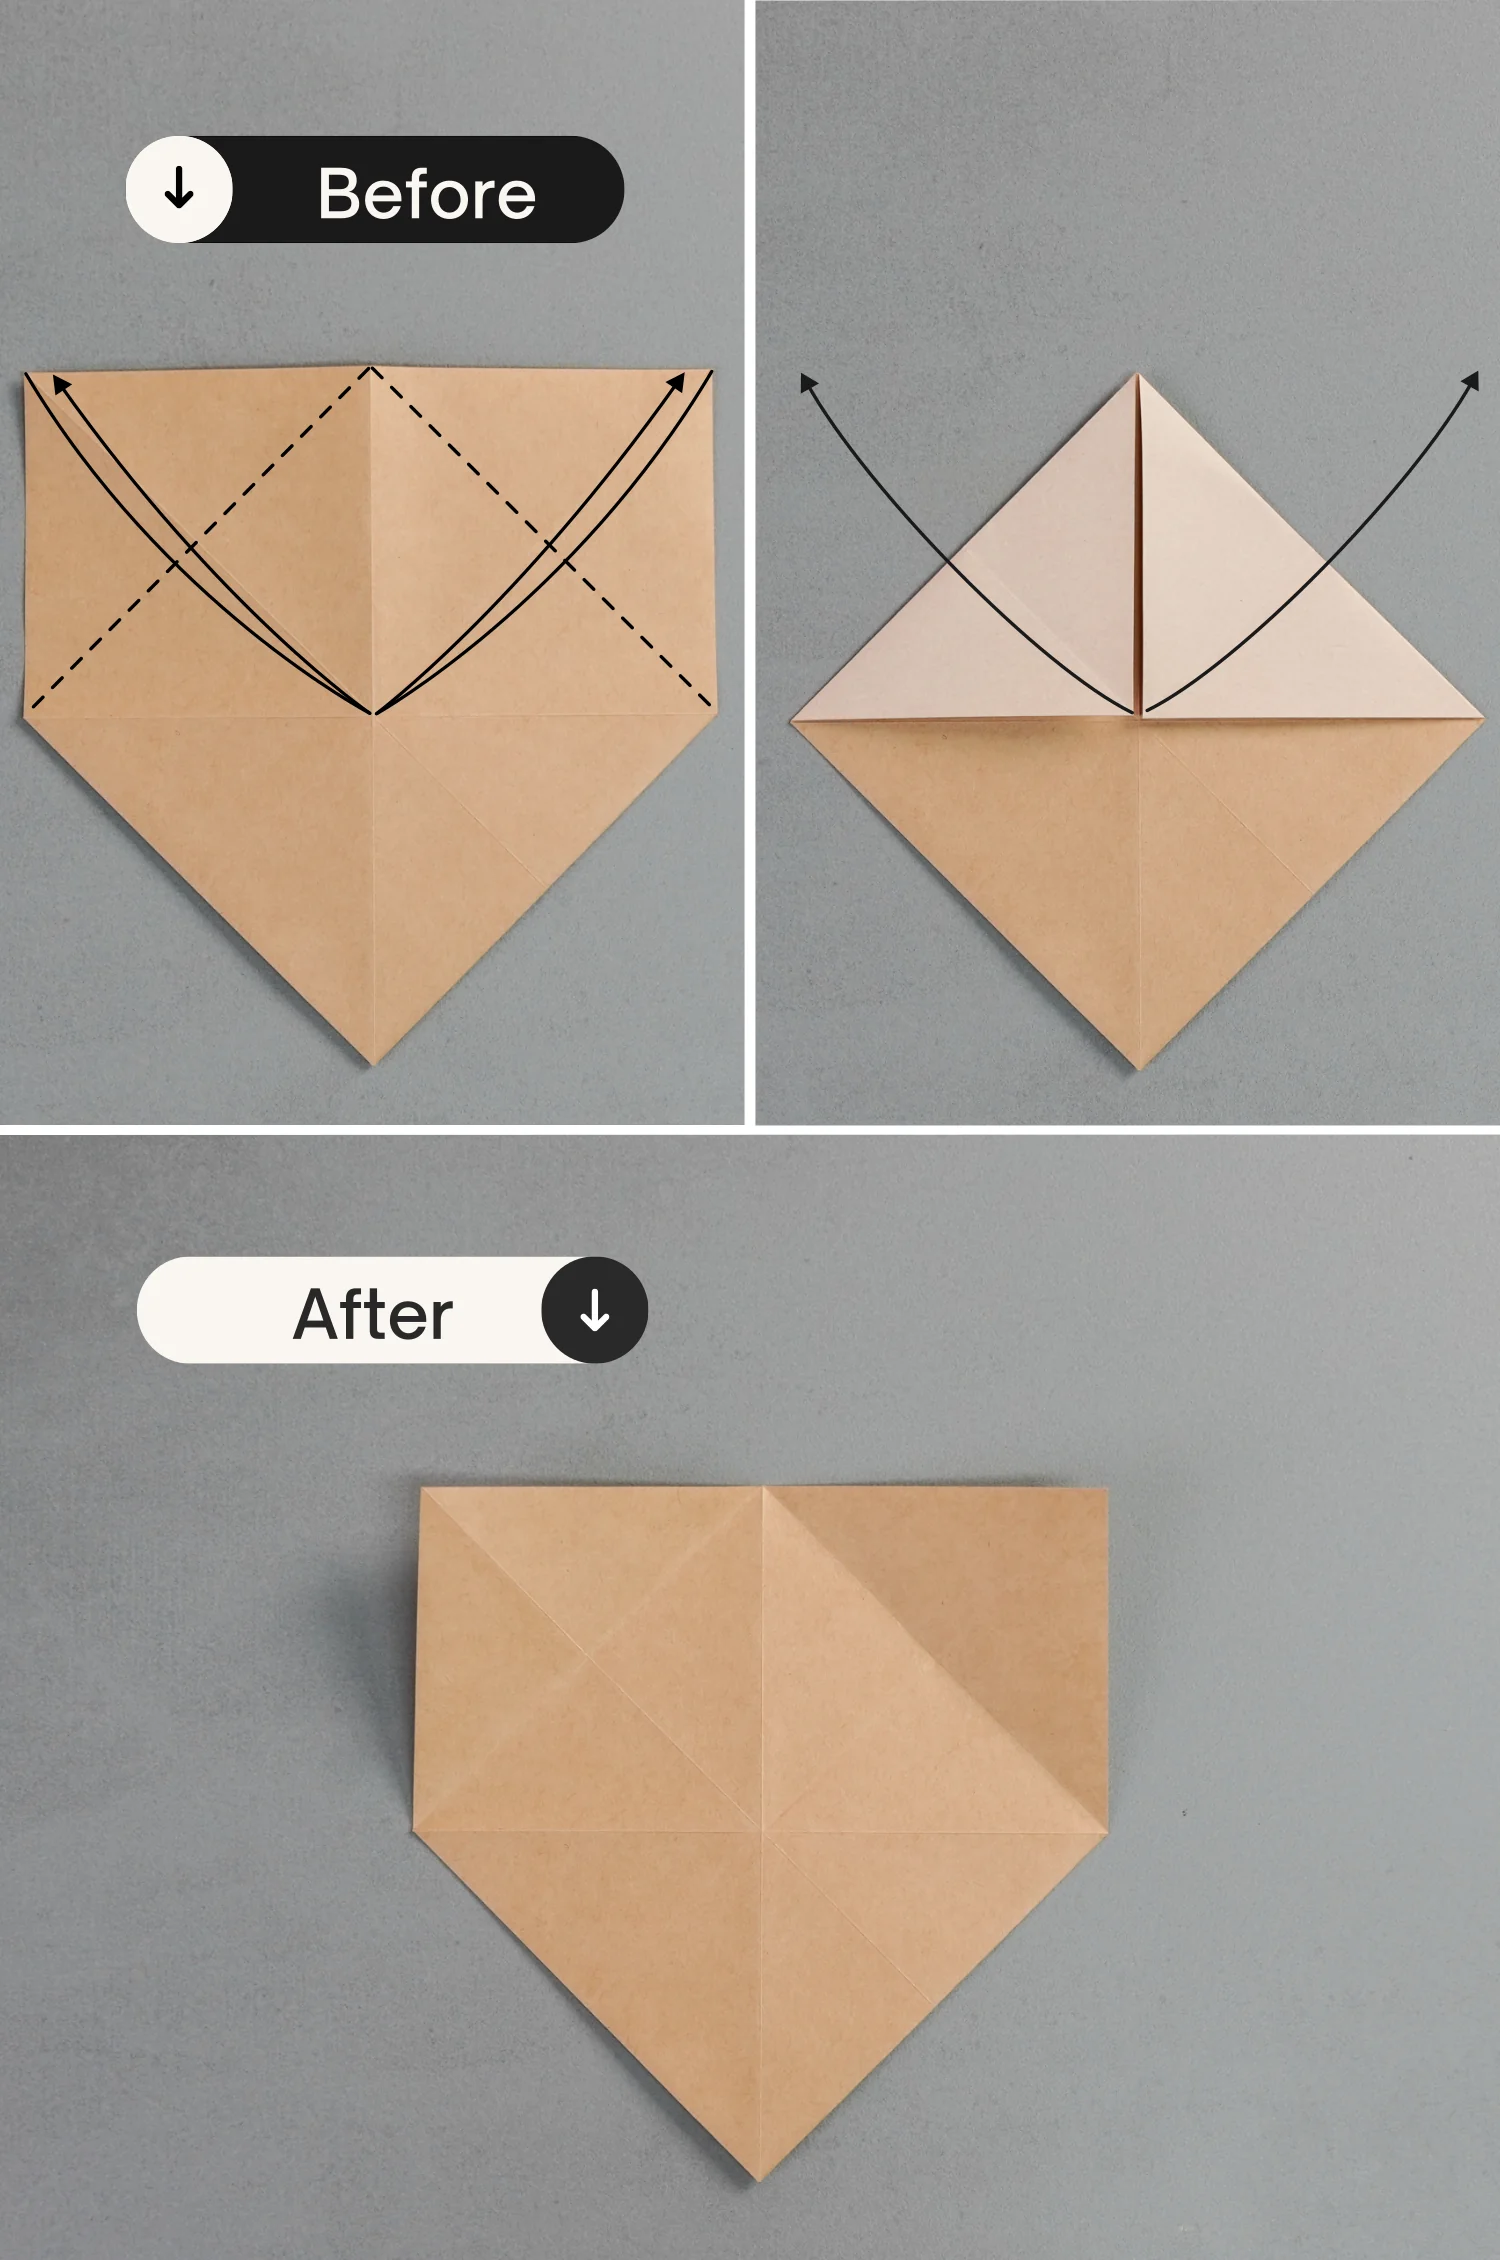
Step 5
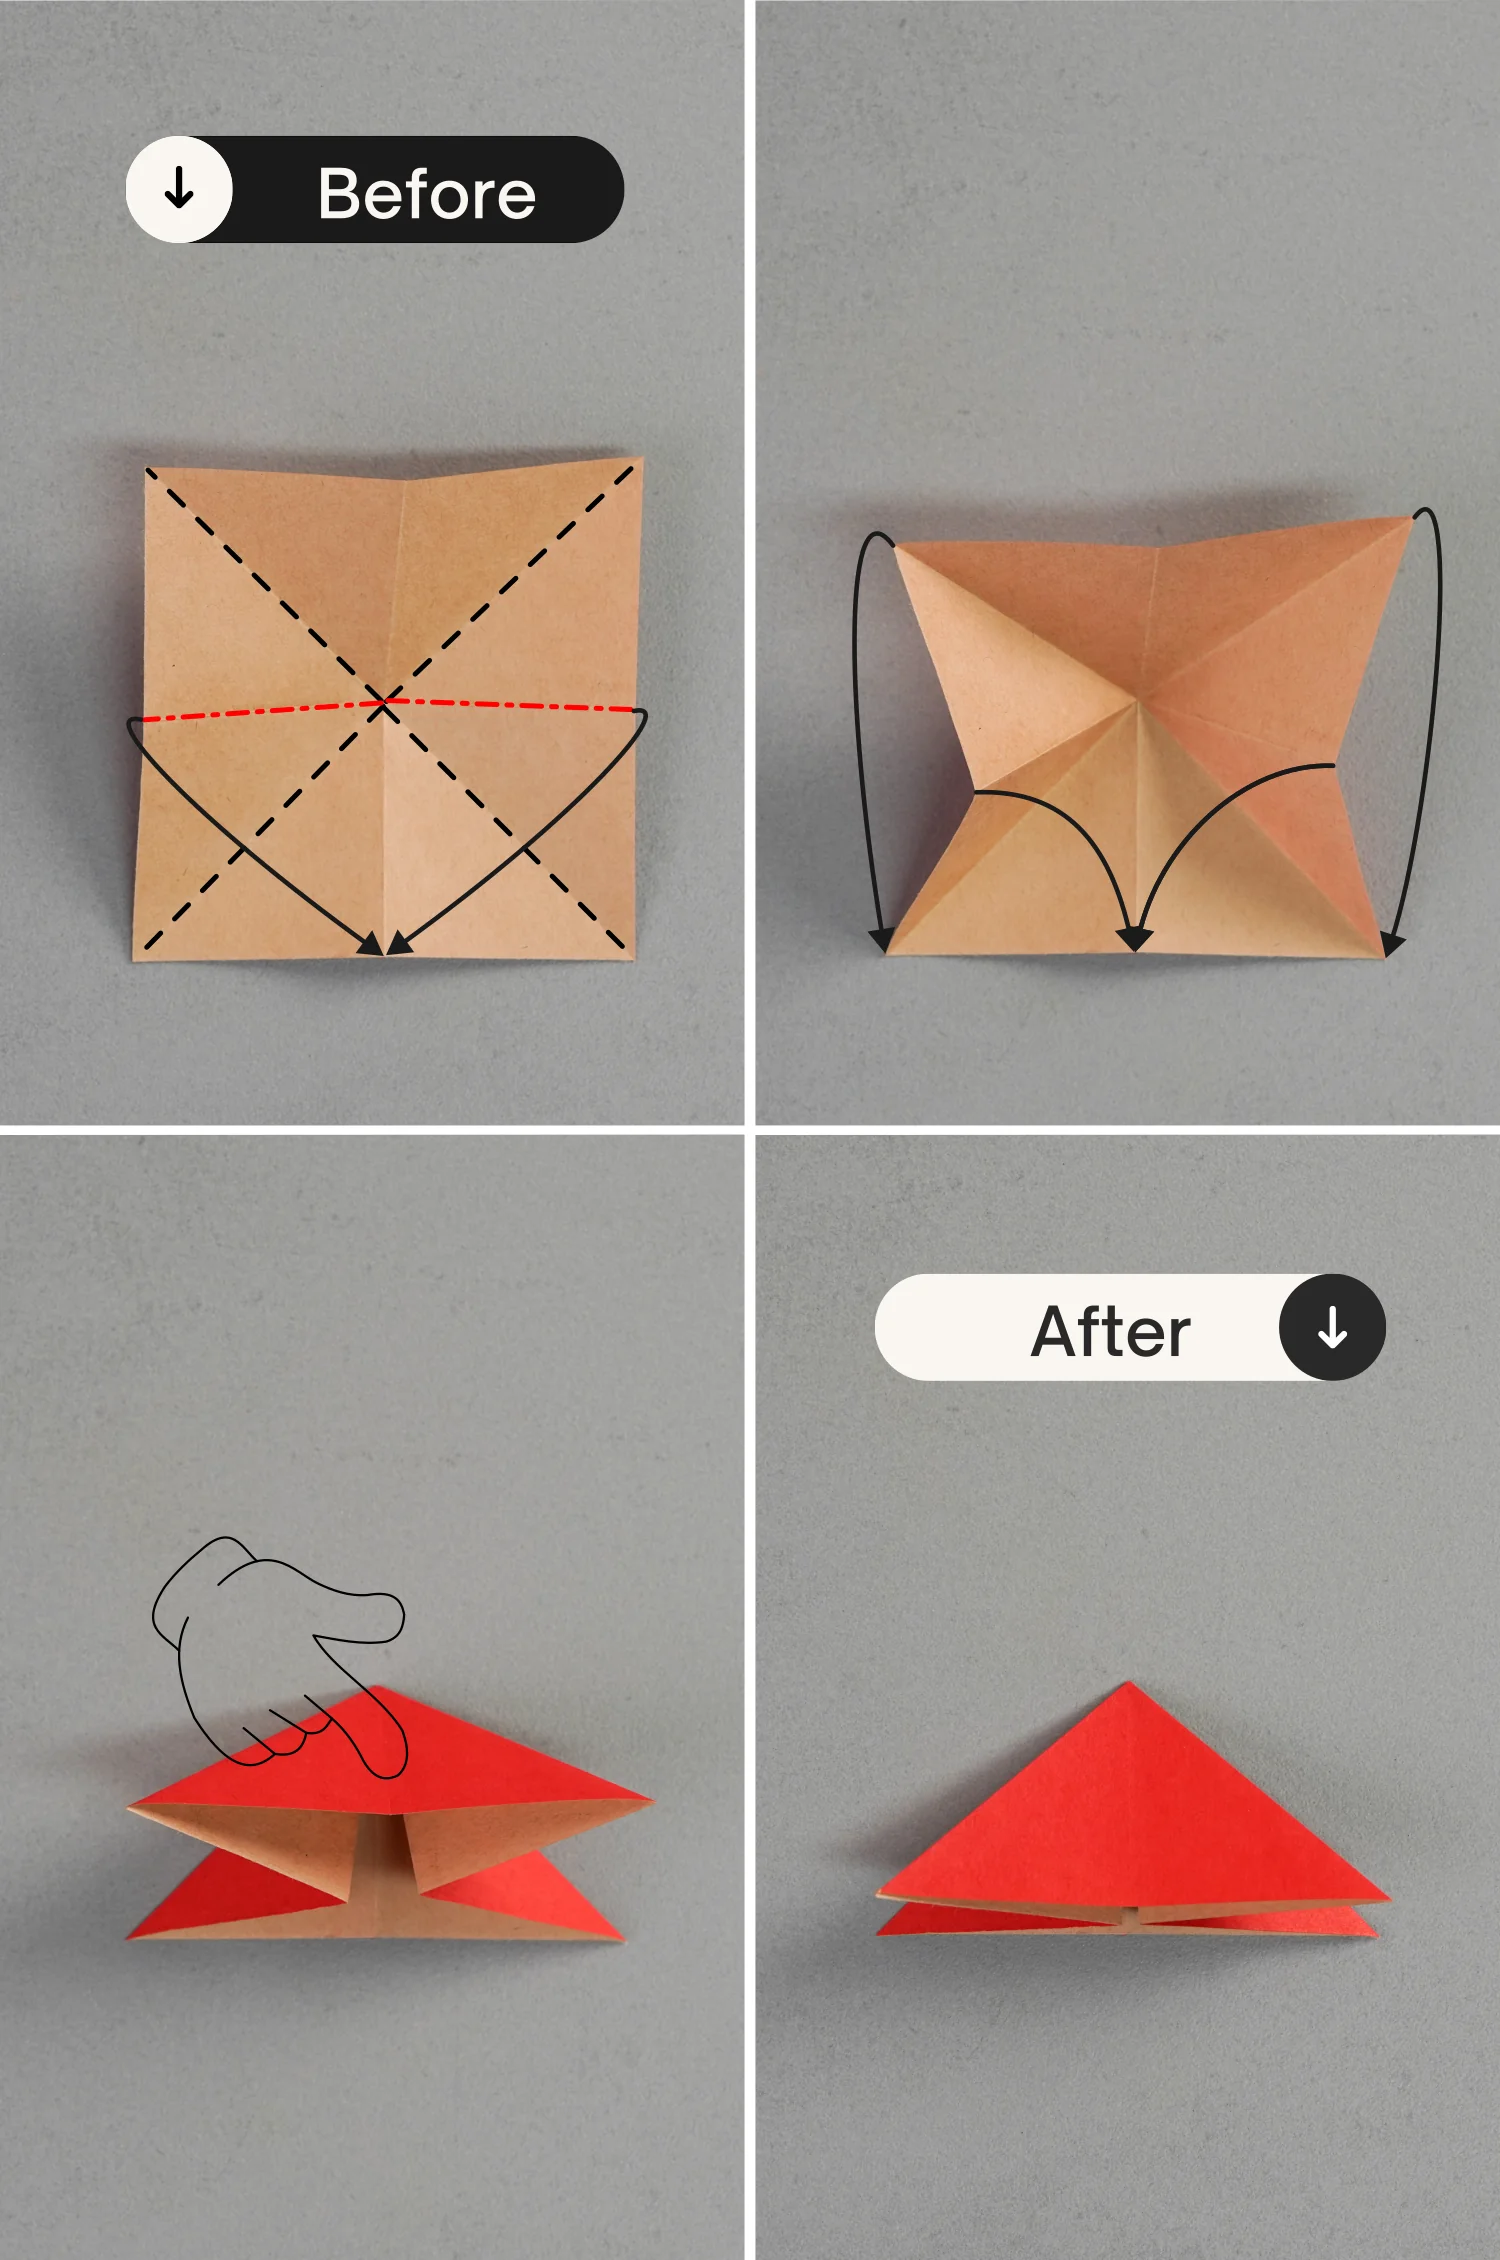
Fold the bottom left and right points to meet the center intersection point.
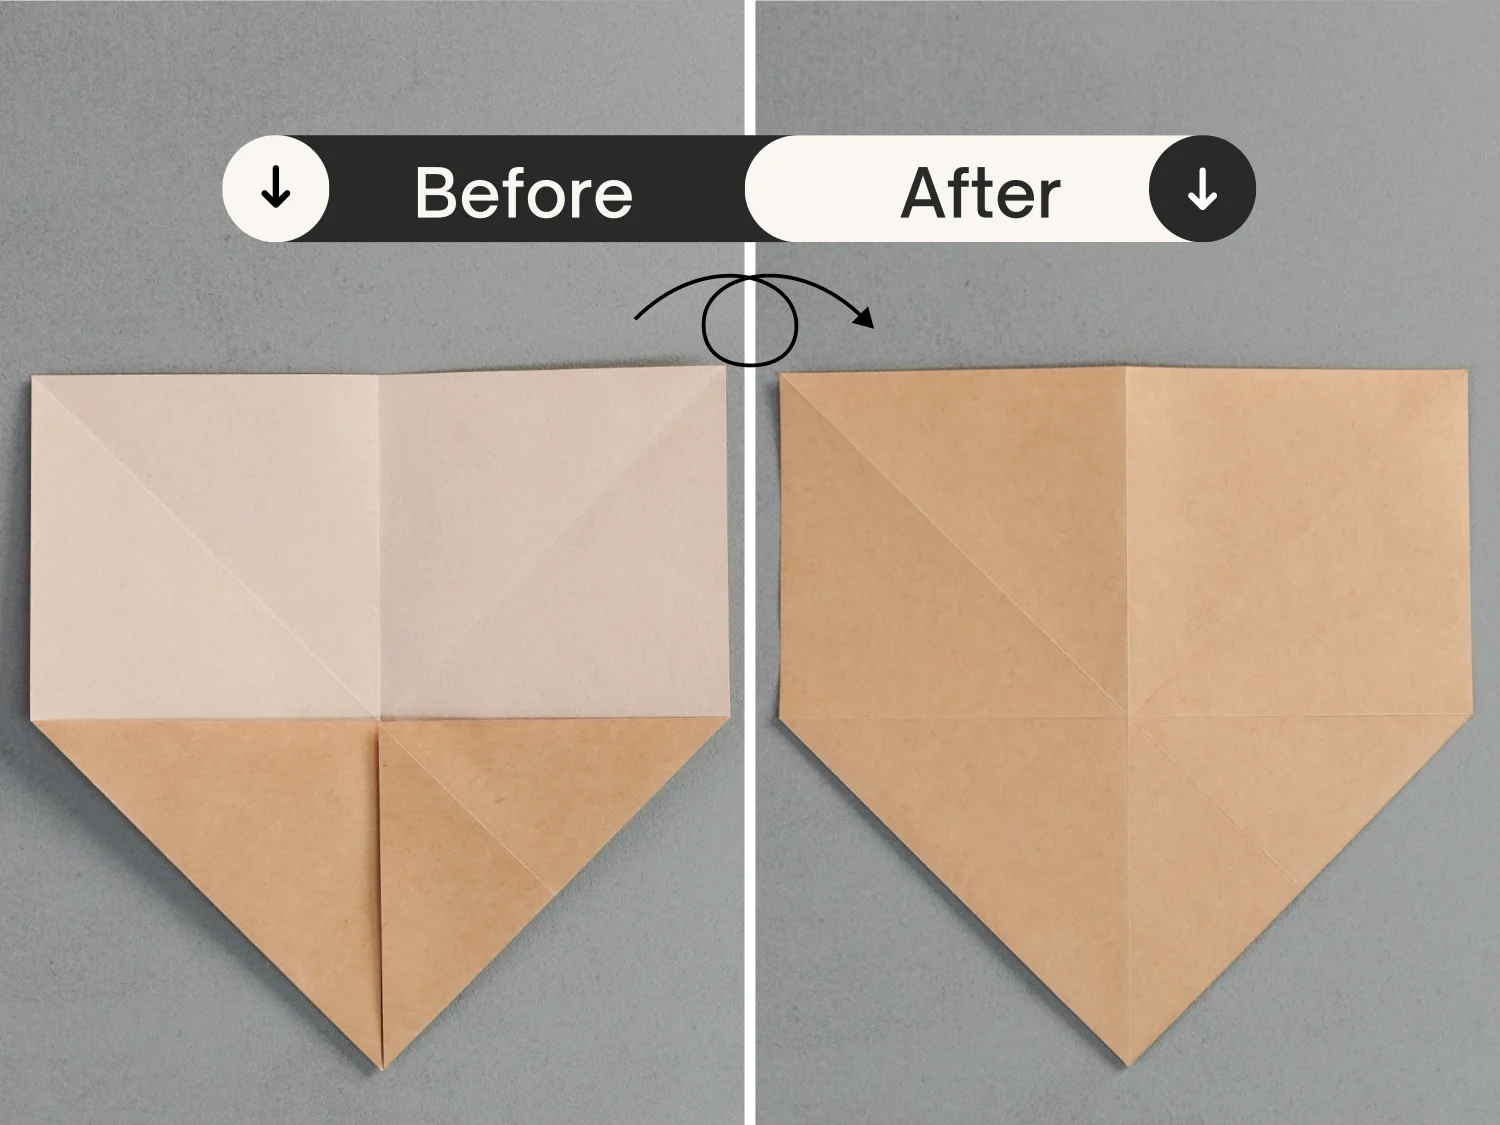
Step 6
Flip the paper over.
Step 7
Fold the top left and right points to meet the intersection point, and unfold them.
Step 8
Fold the left and right sections of the top edge to align with the creases you just made. Then fold the top left and right edges down along the two creases.

Step 9
Turn over the paper.
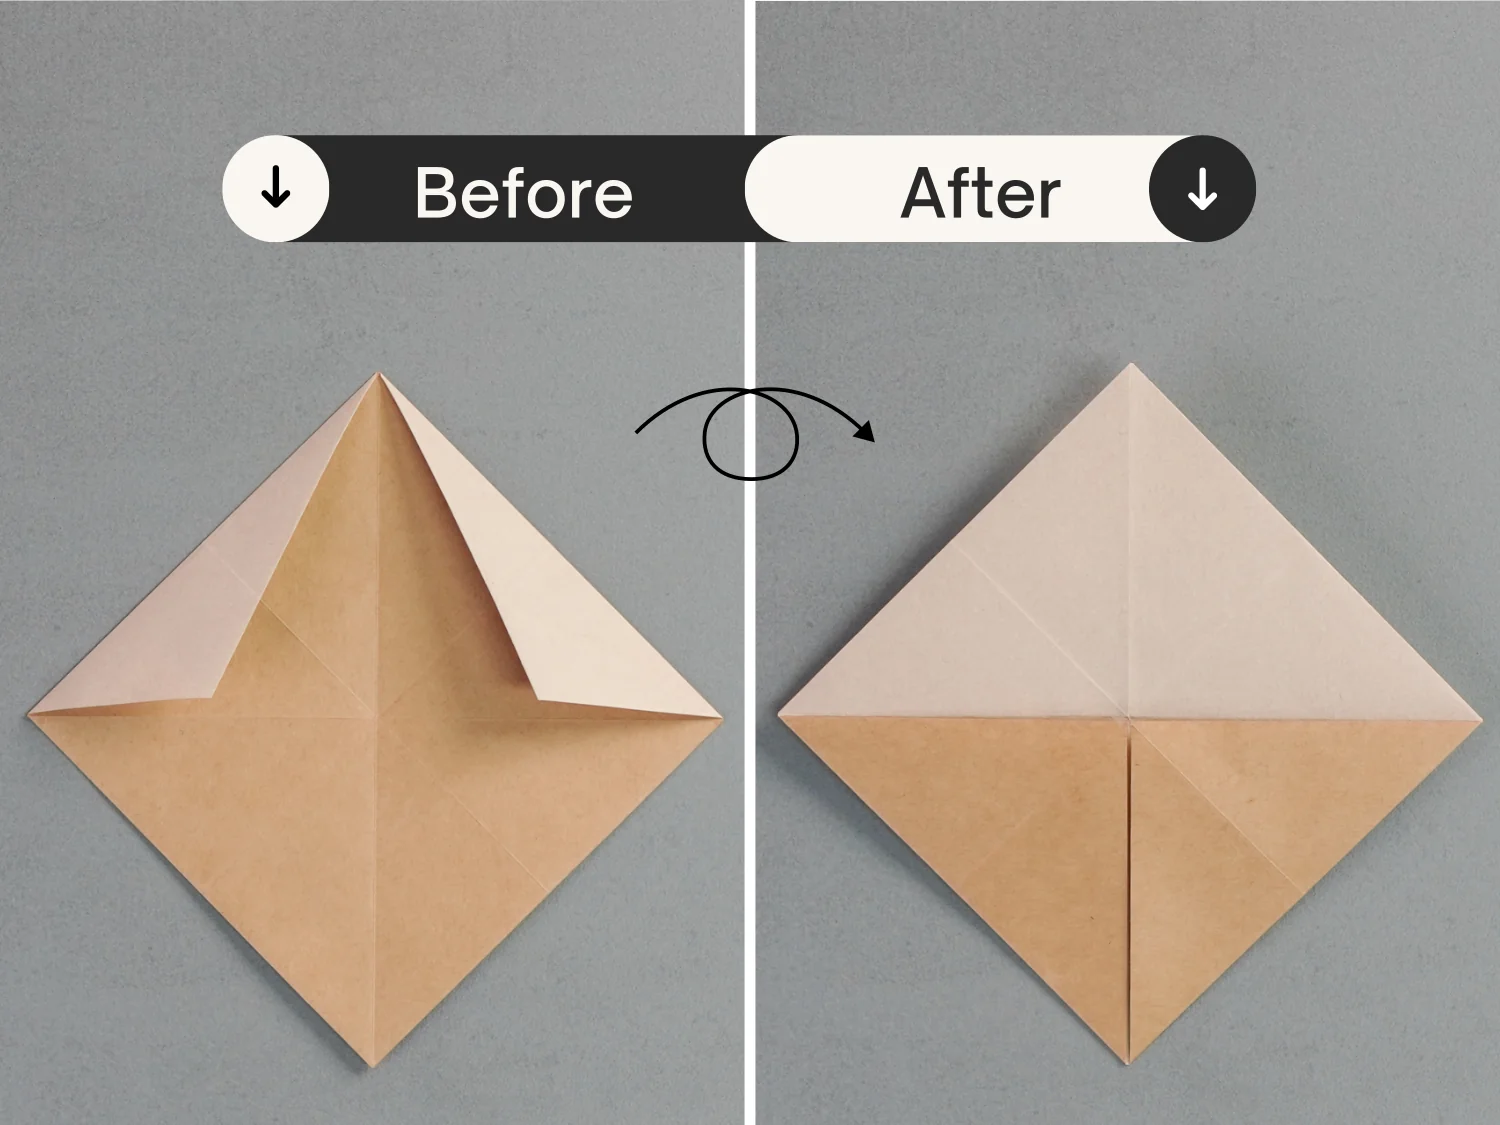
Step 10
Unfold the bottom left and right layers.
Step 11
Flip the paper over.
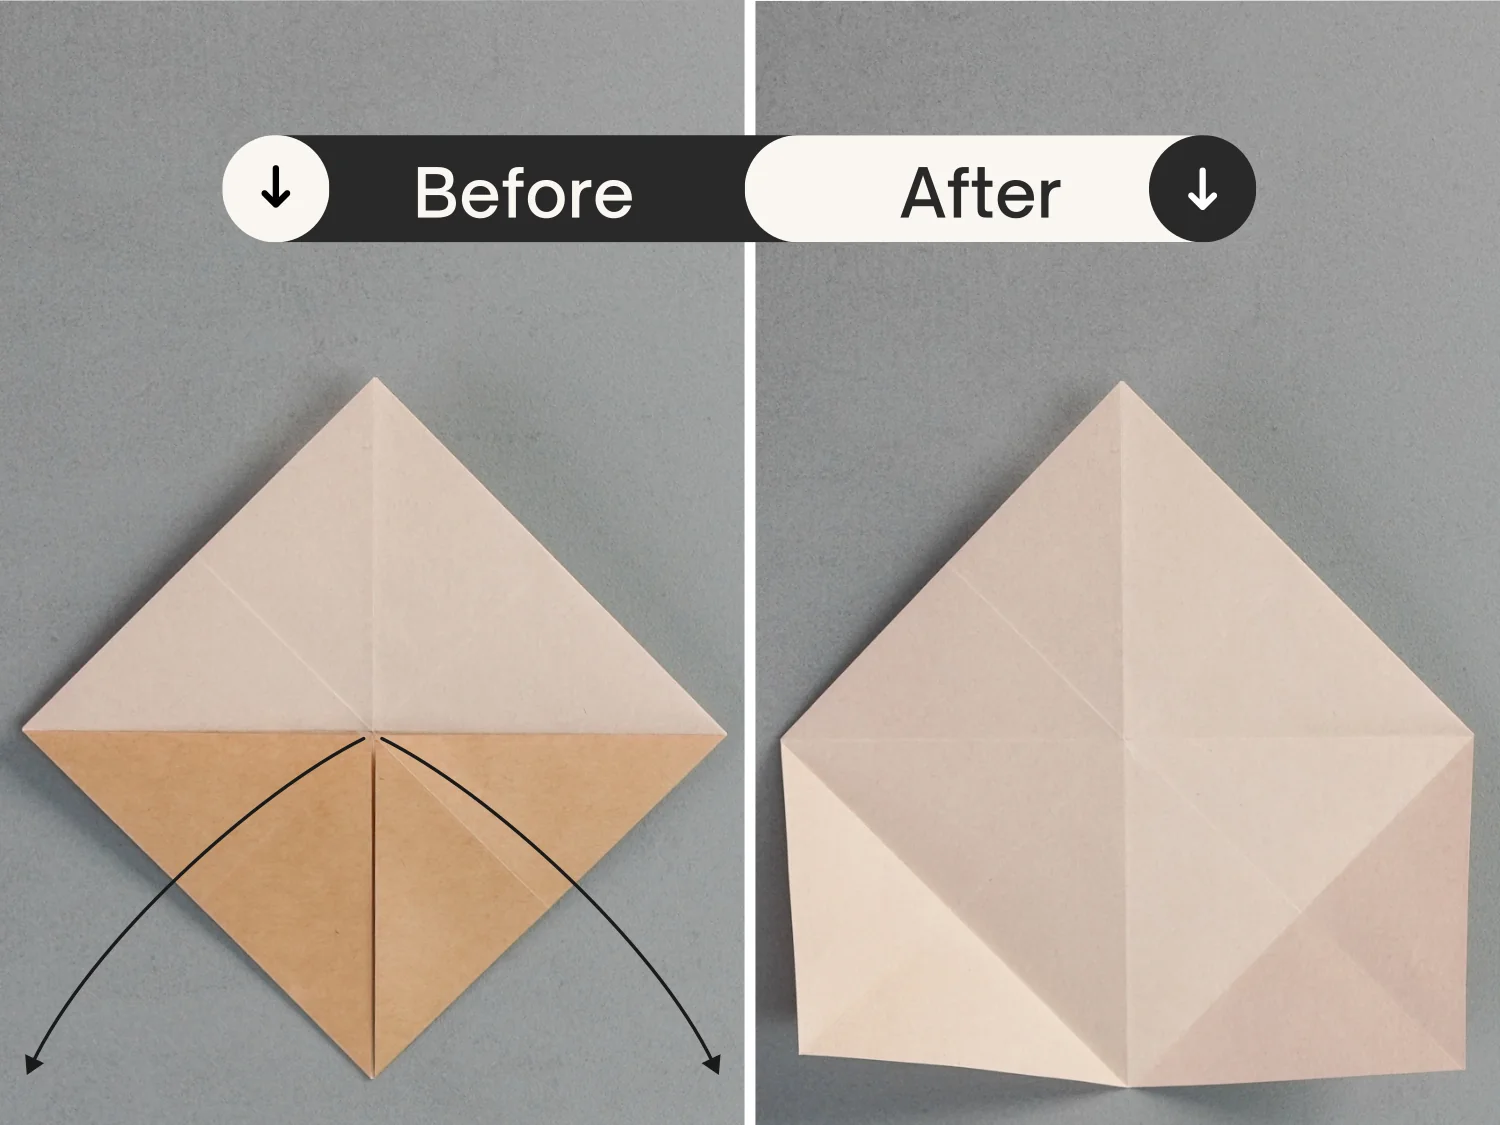
Step 12
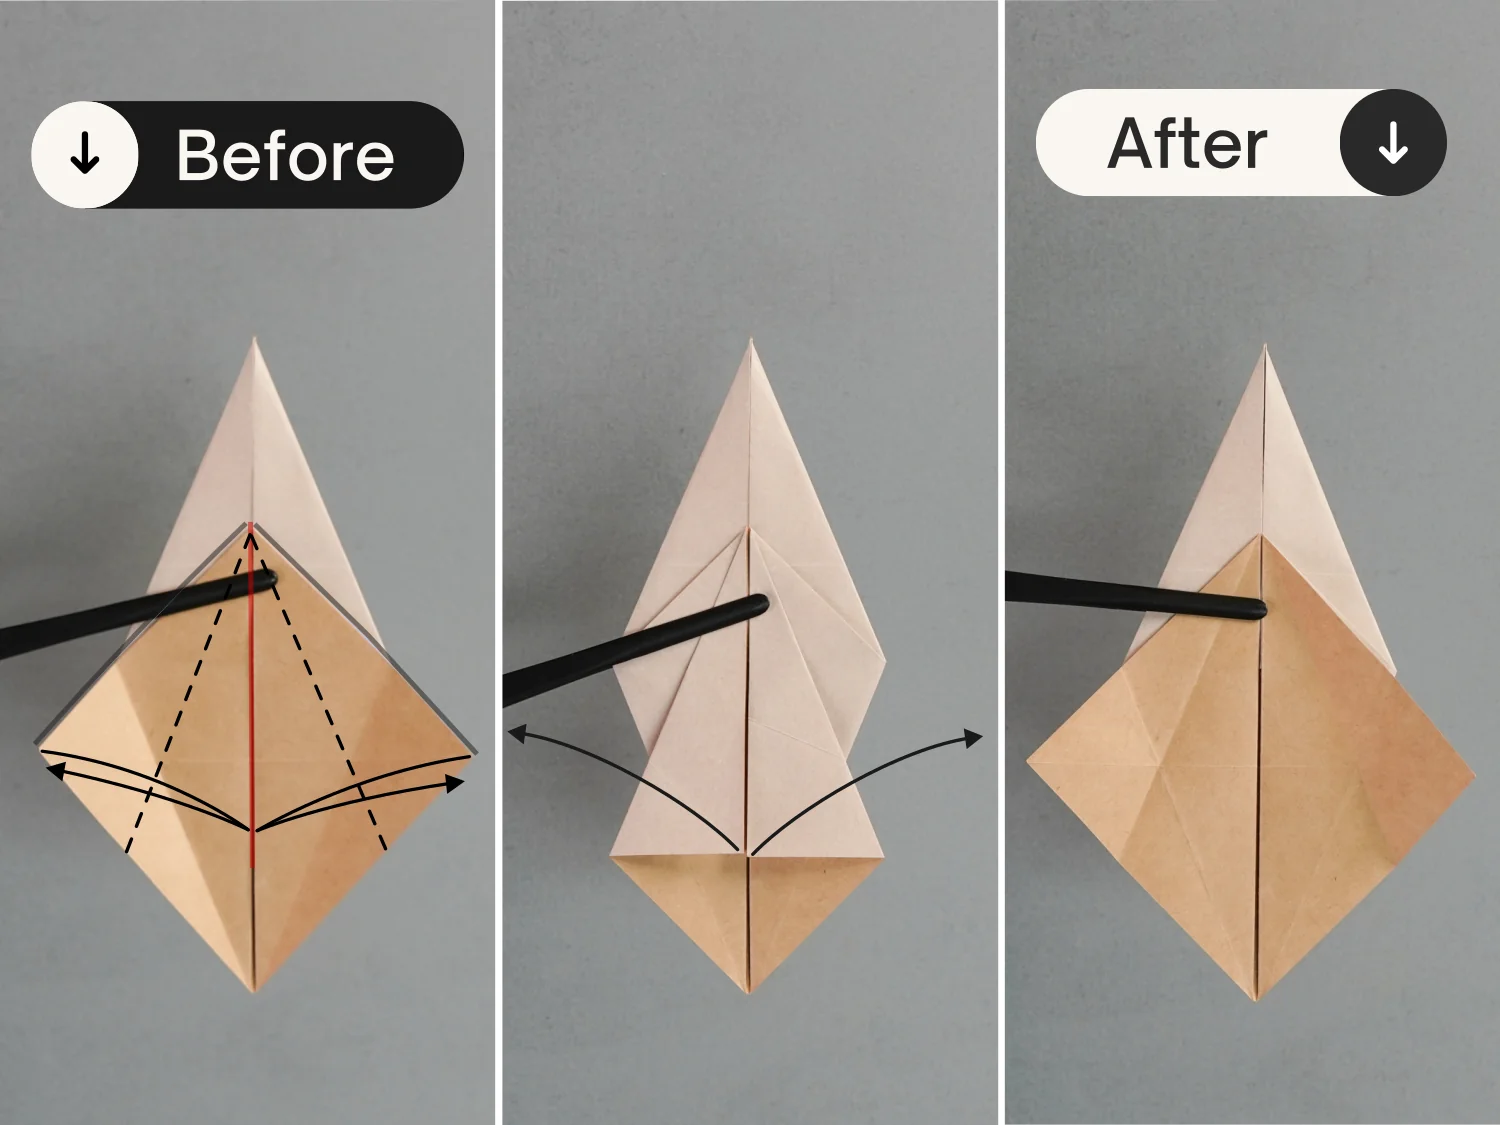
Take the creases indicated by the black lines, and fold them to align with the middle vertical crease, crease them well, and unfold them.
Step 13
Similarly, fold the top left and right edges to align with the middle vertical crease, and unfold them.
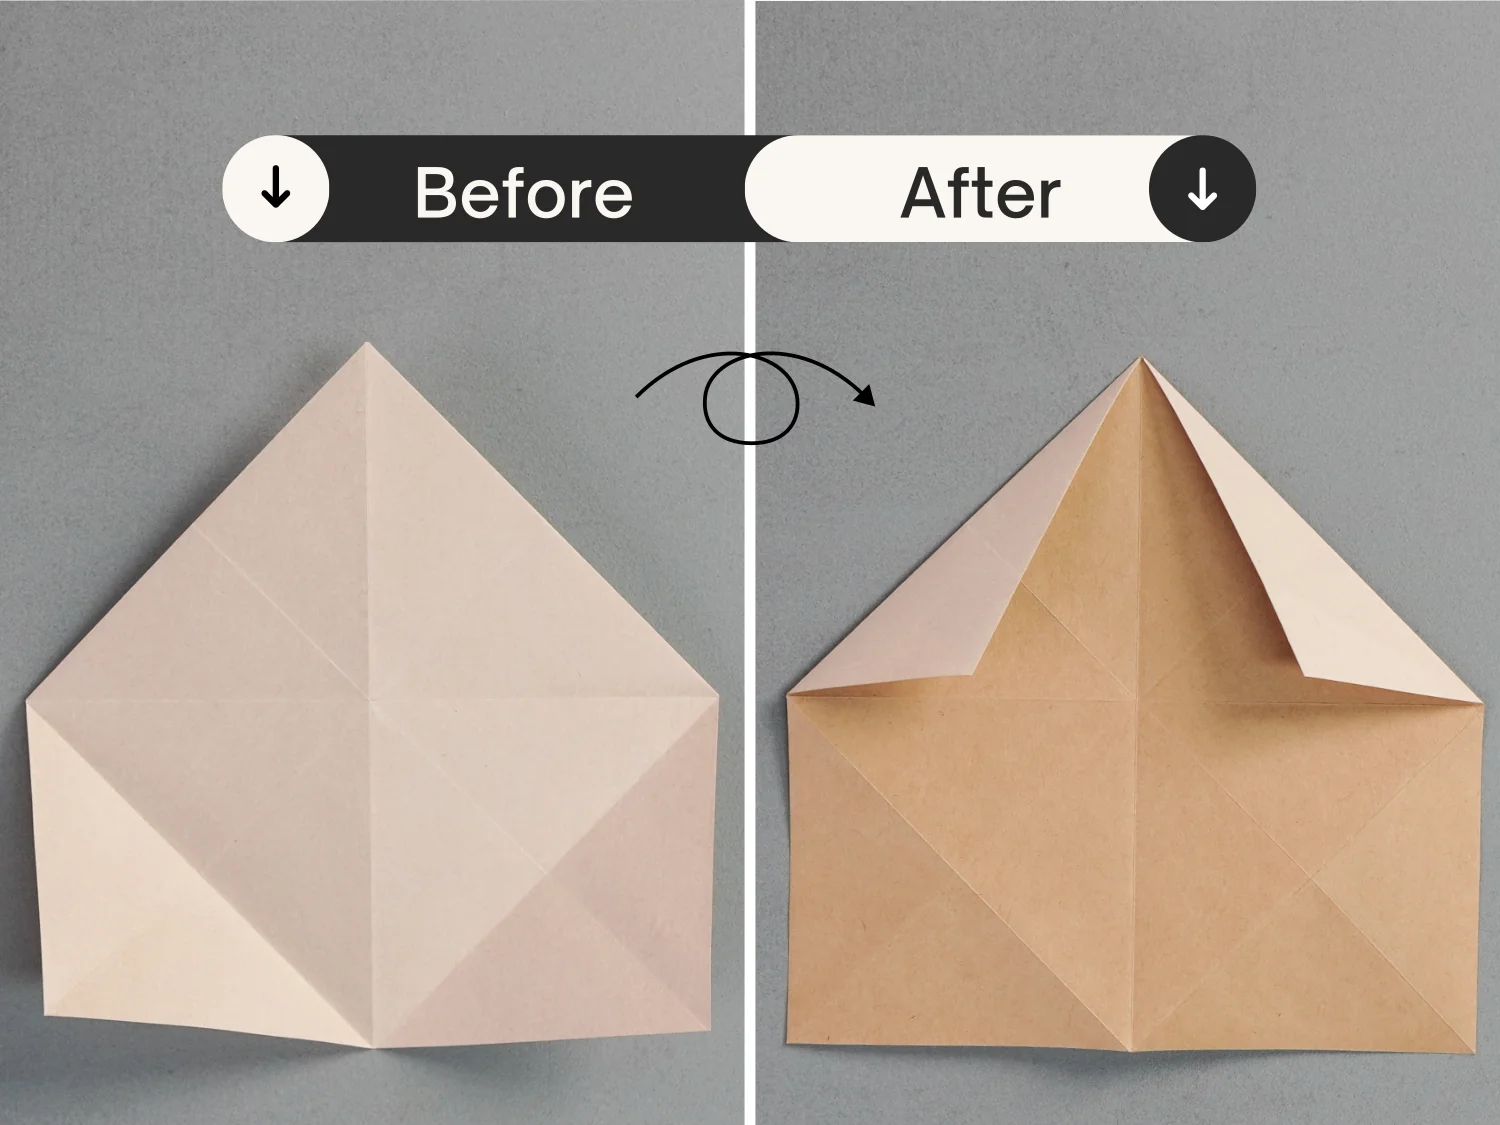
Step 14
As shown in the picture, bring up the four edges, to shape the left and right corners along the existing creases, then press them down upward.
Step 15
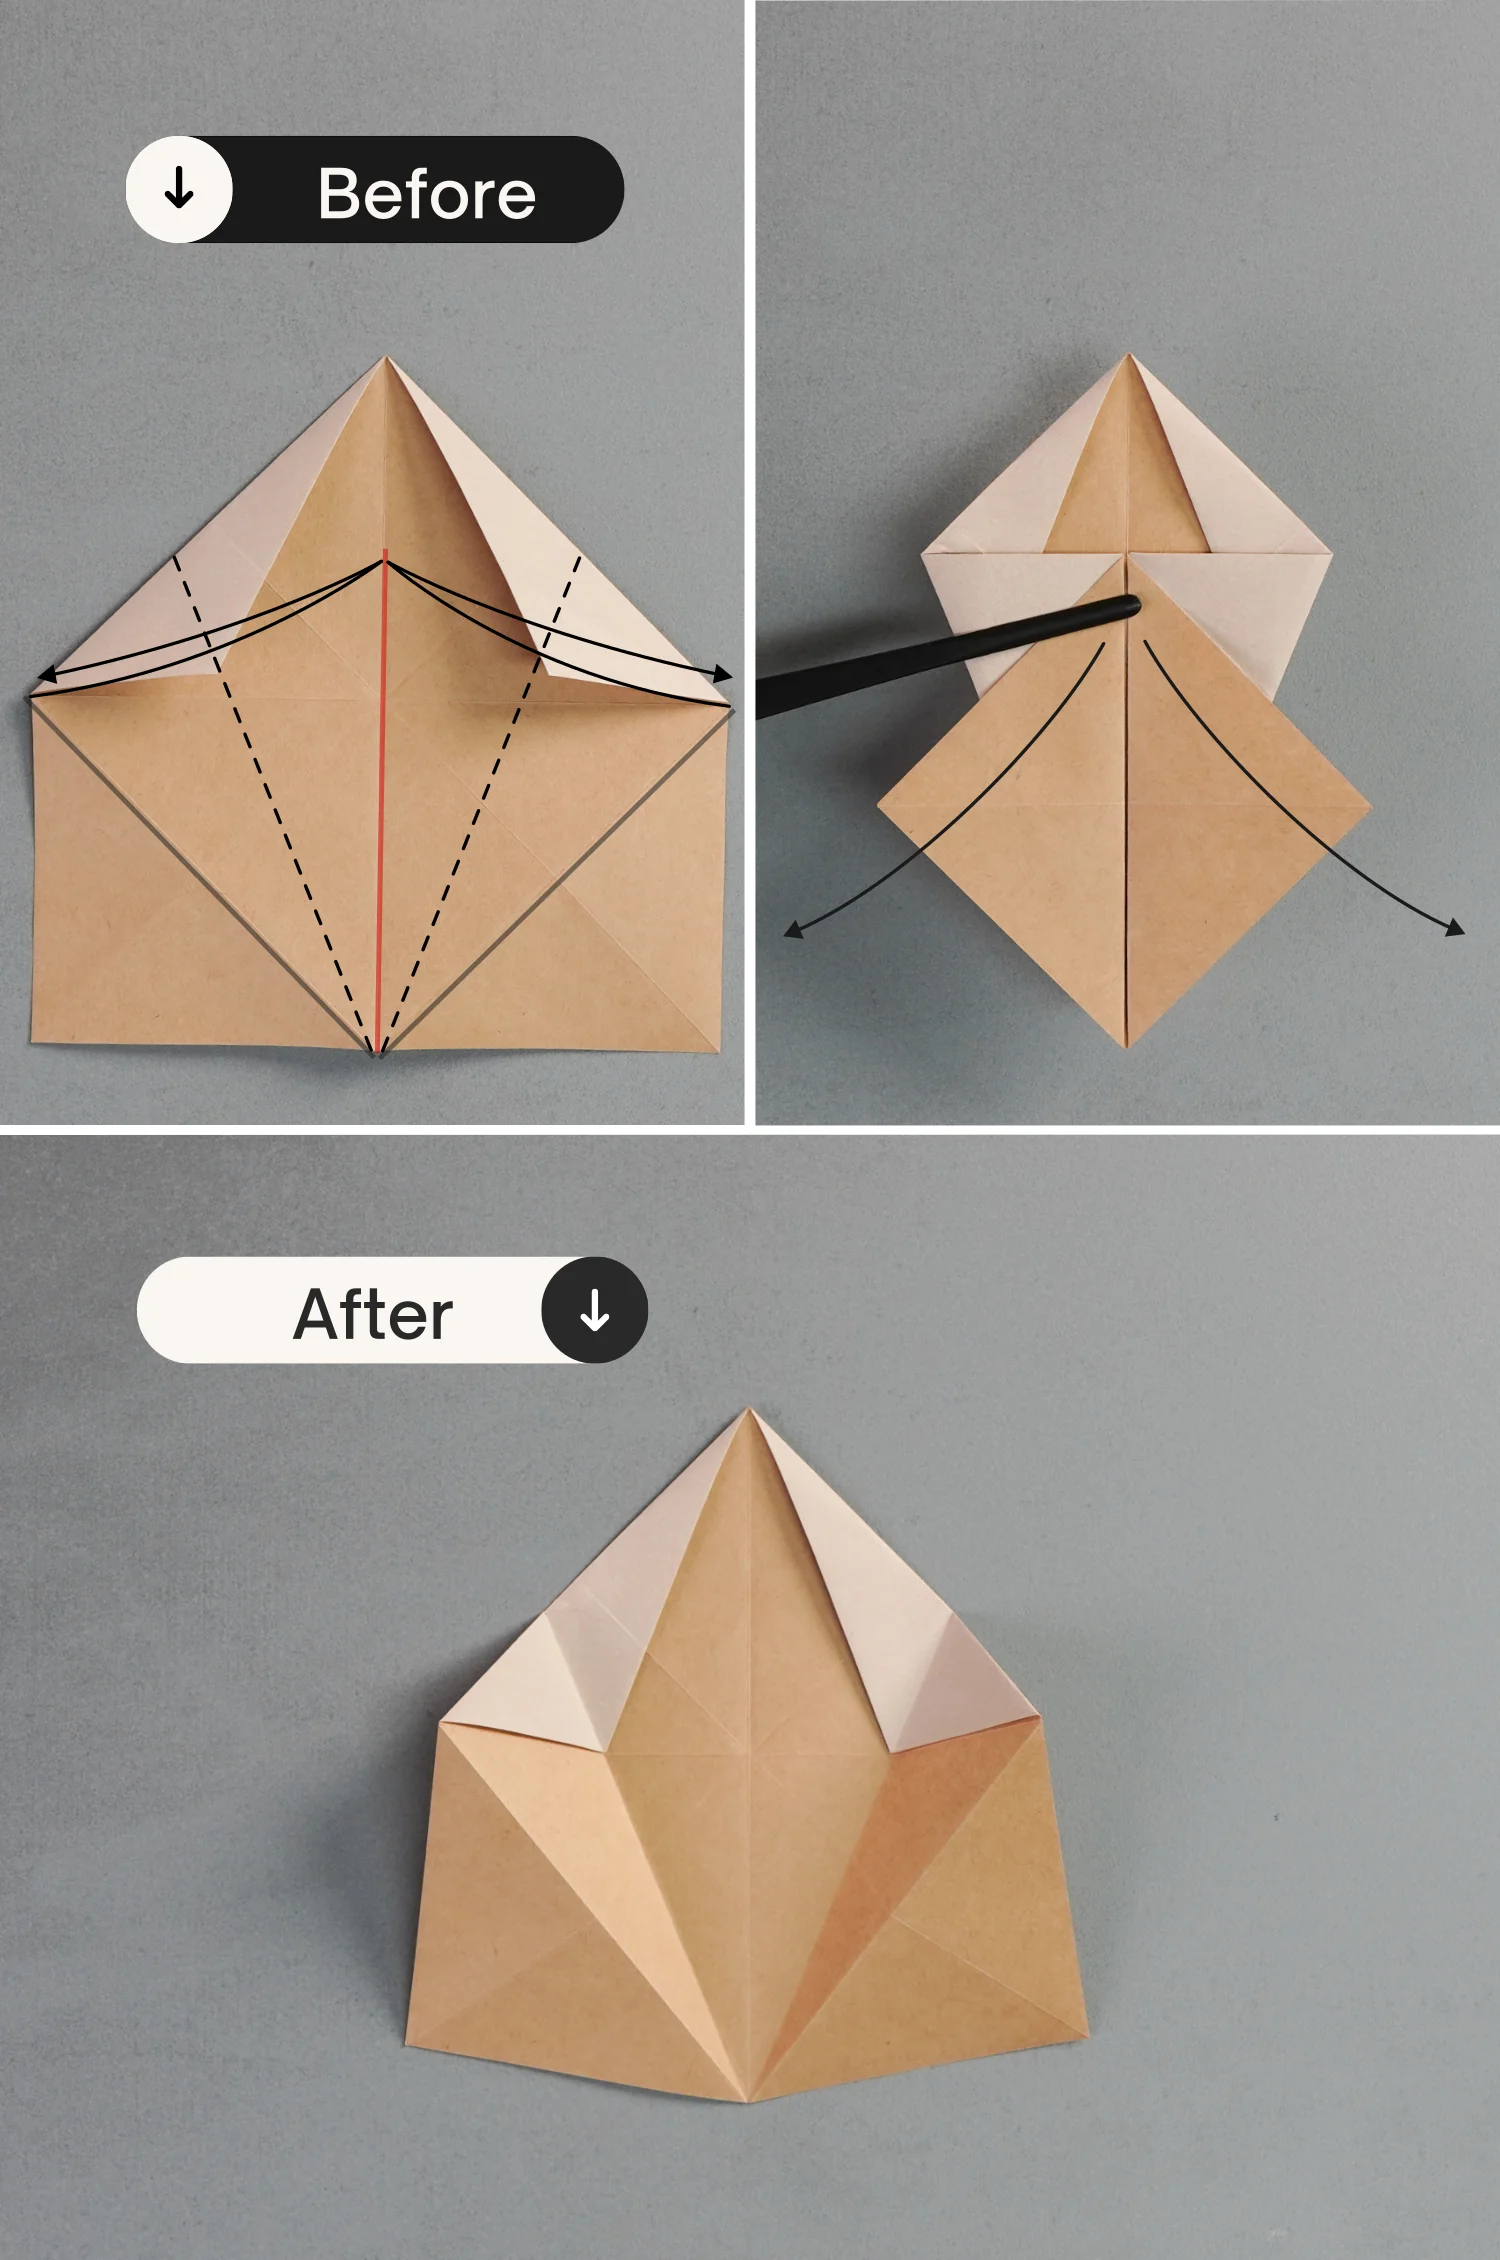
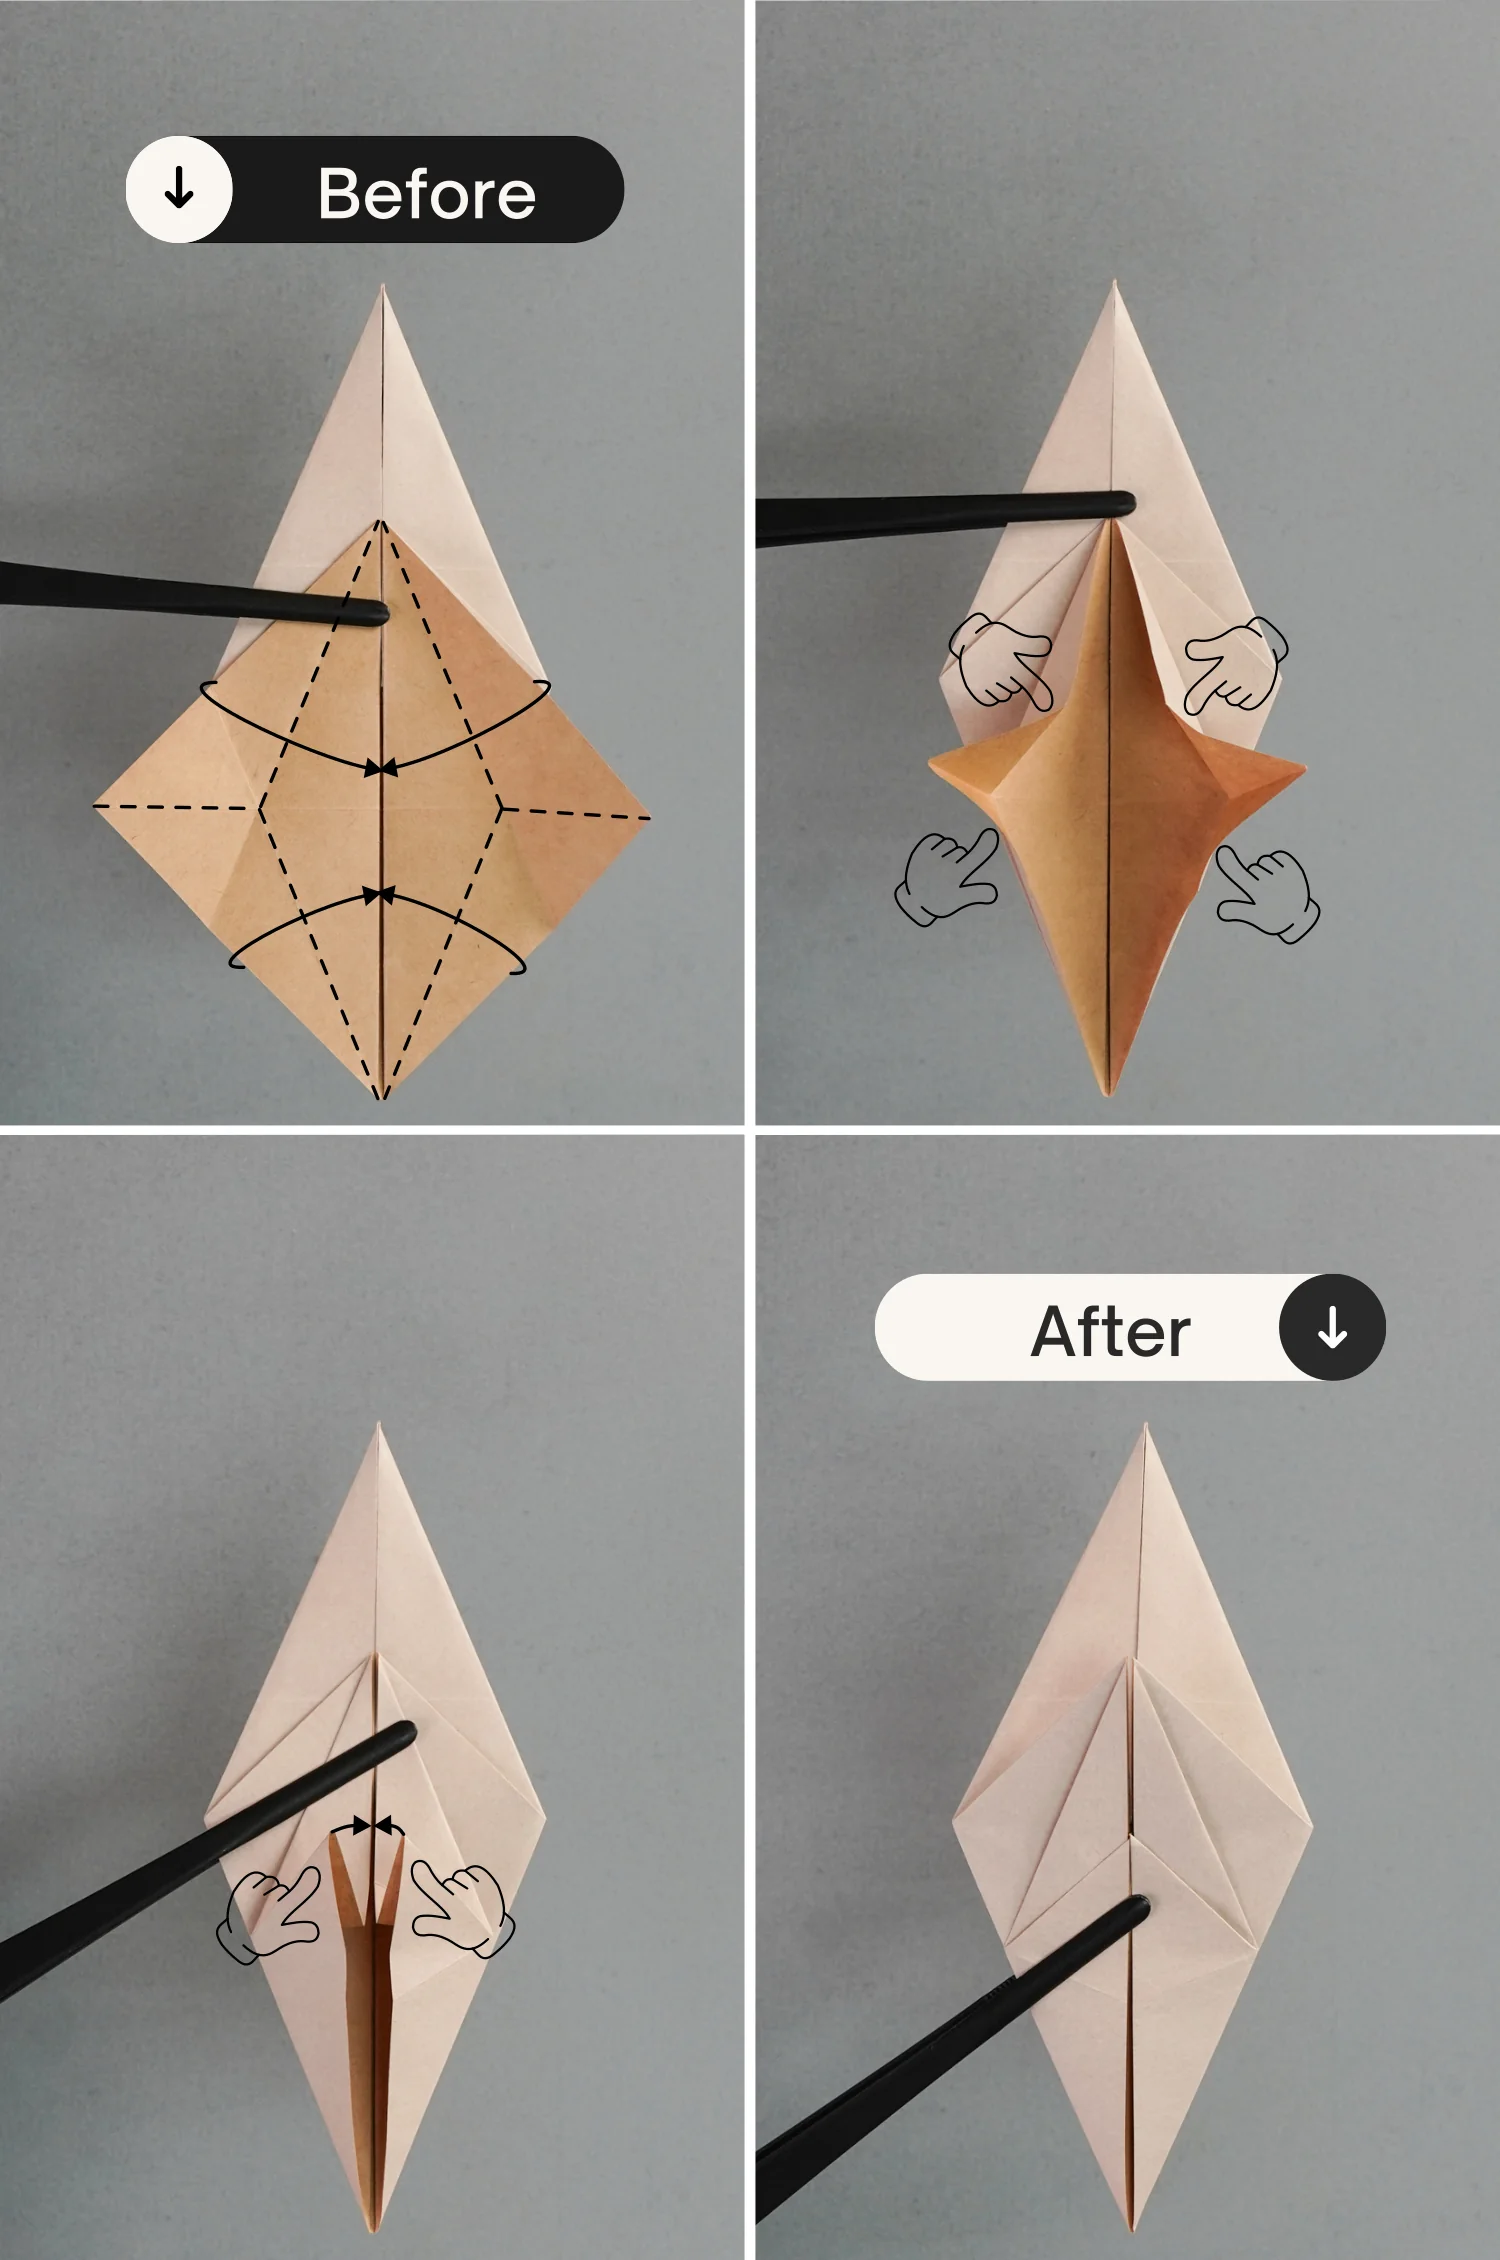
Fold the bottom left and right edges to align with the middle vertical crease, and unfold them.
Step 16
Fold the top left and right edges of the bottom square to align with the middle vertical crease, and unfold them.
Step 17
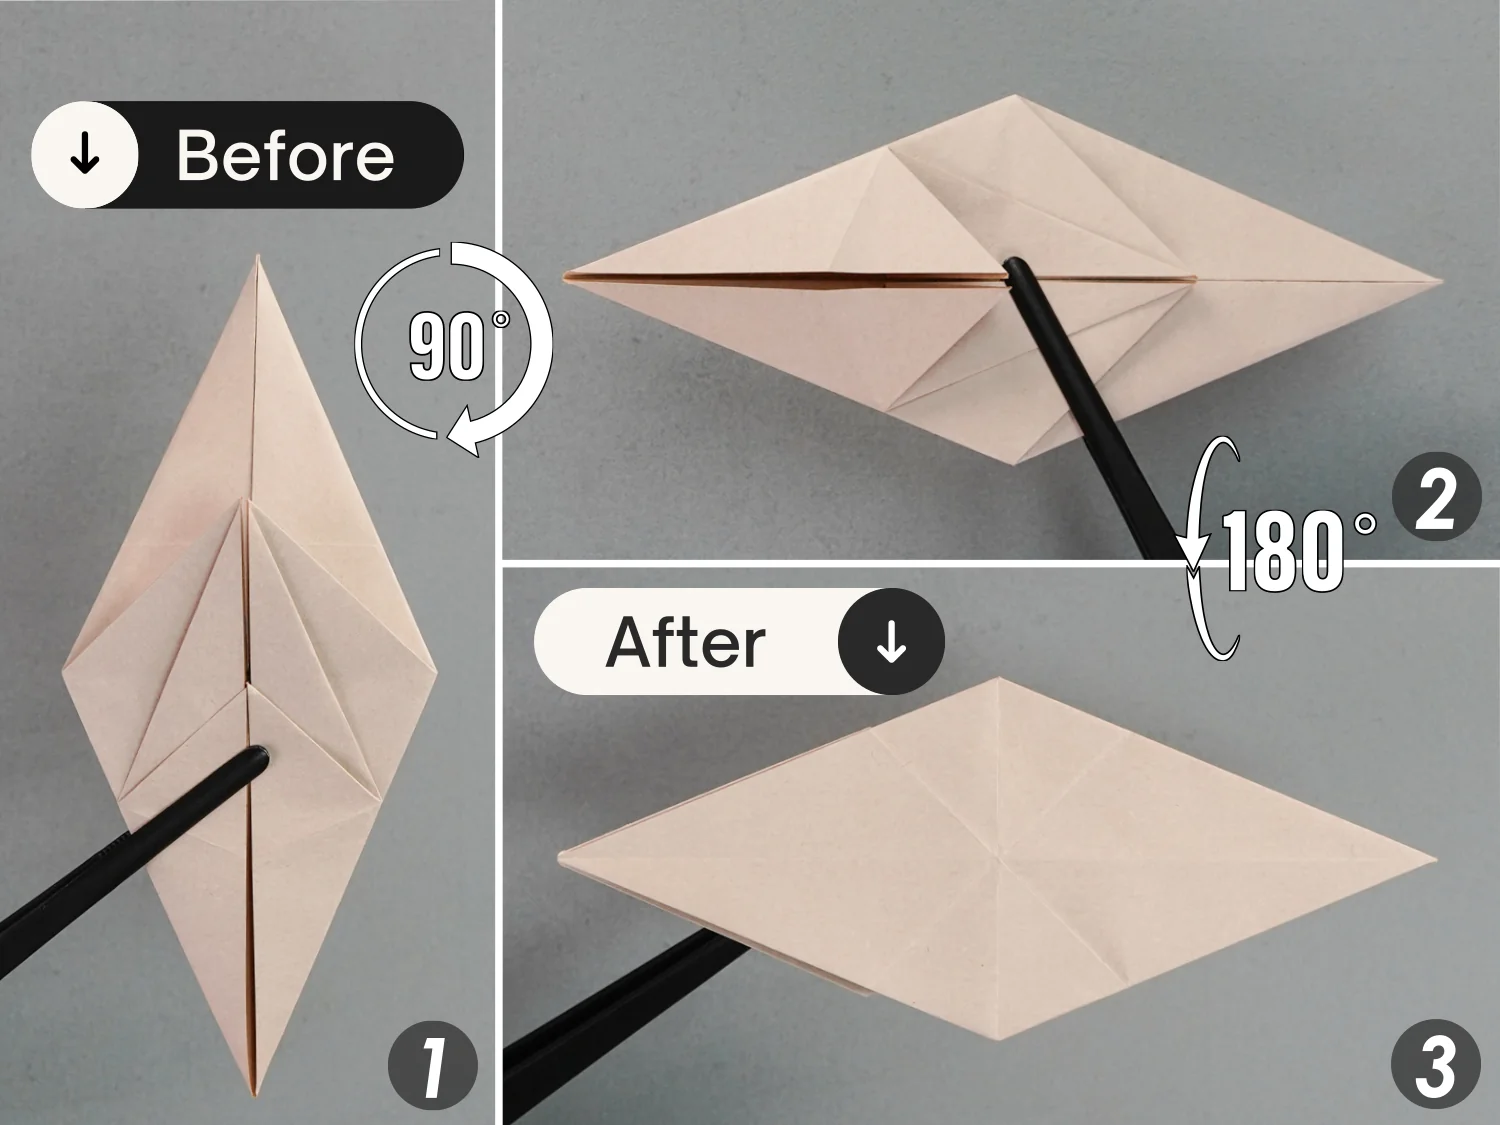
Bring up the four edges of the bottom square along the existing creases, to sharpen the left and right corners, then press the two flaps down upward.
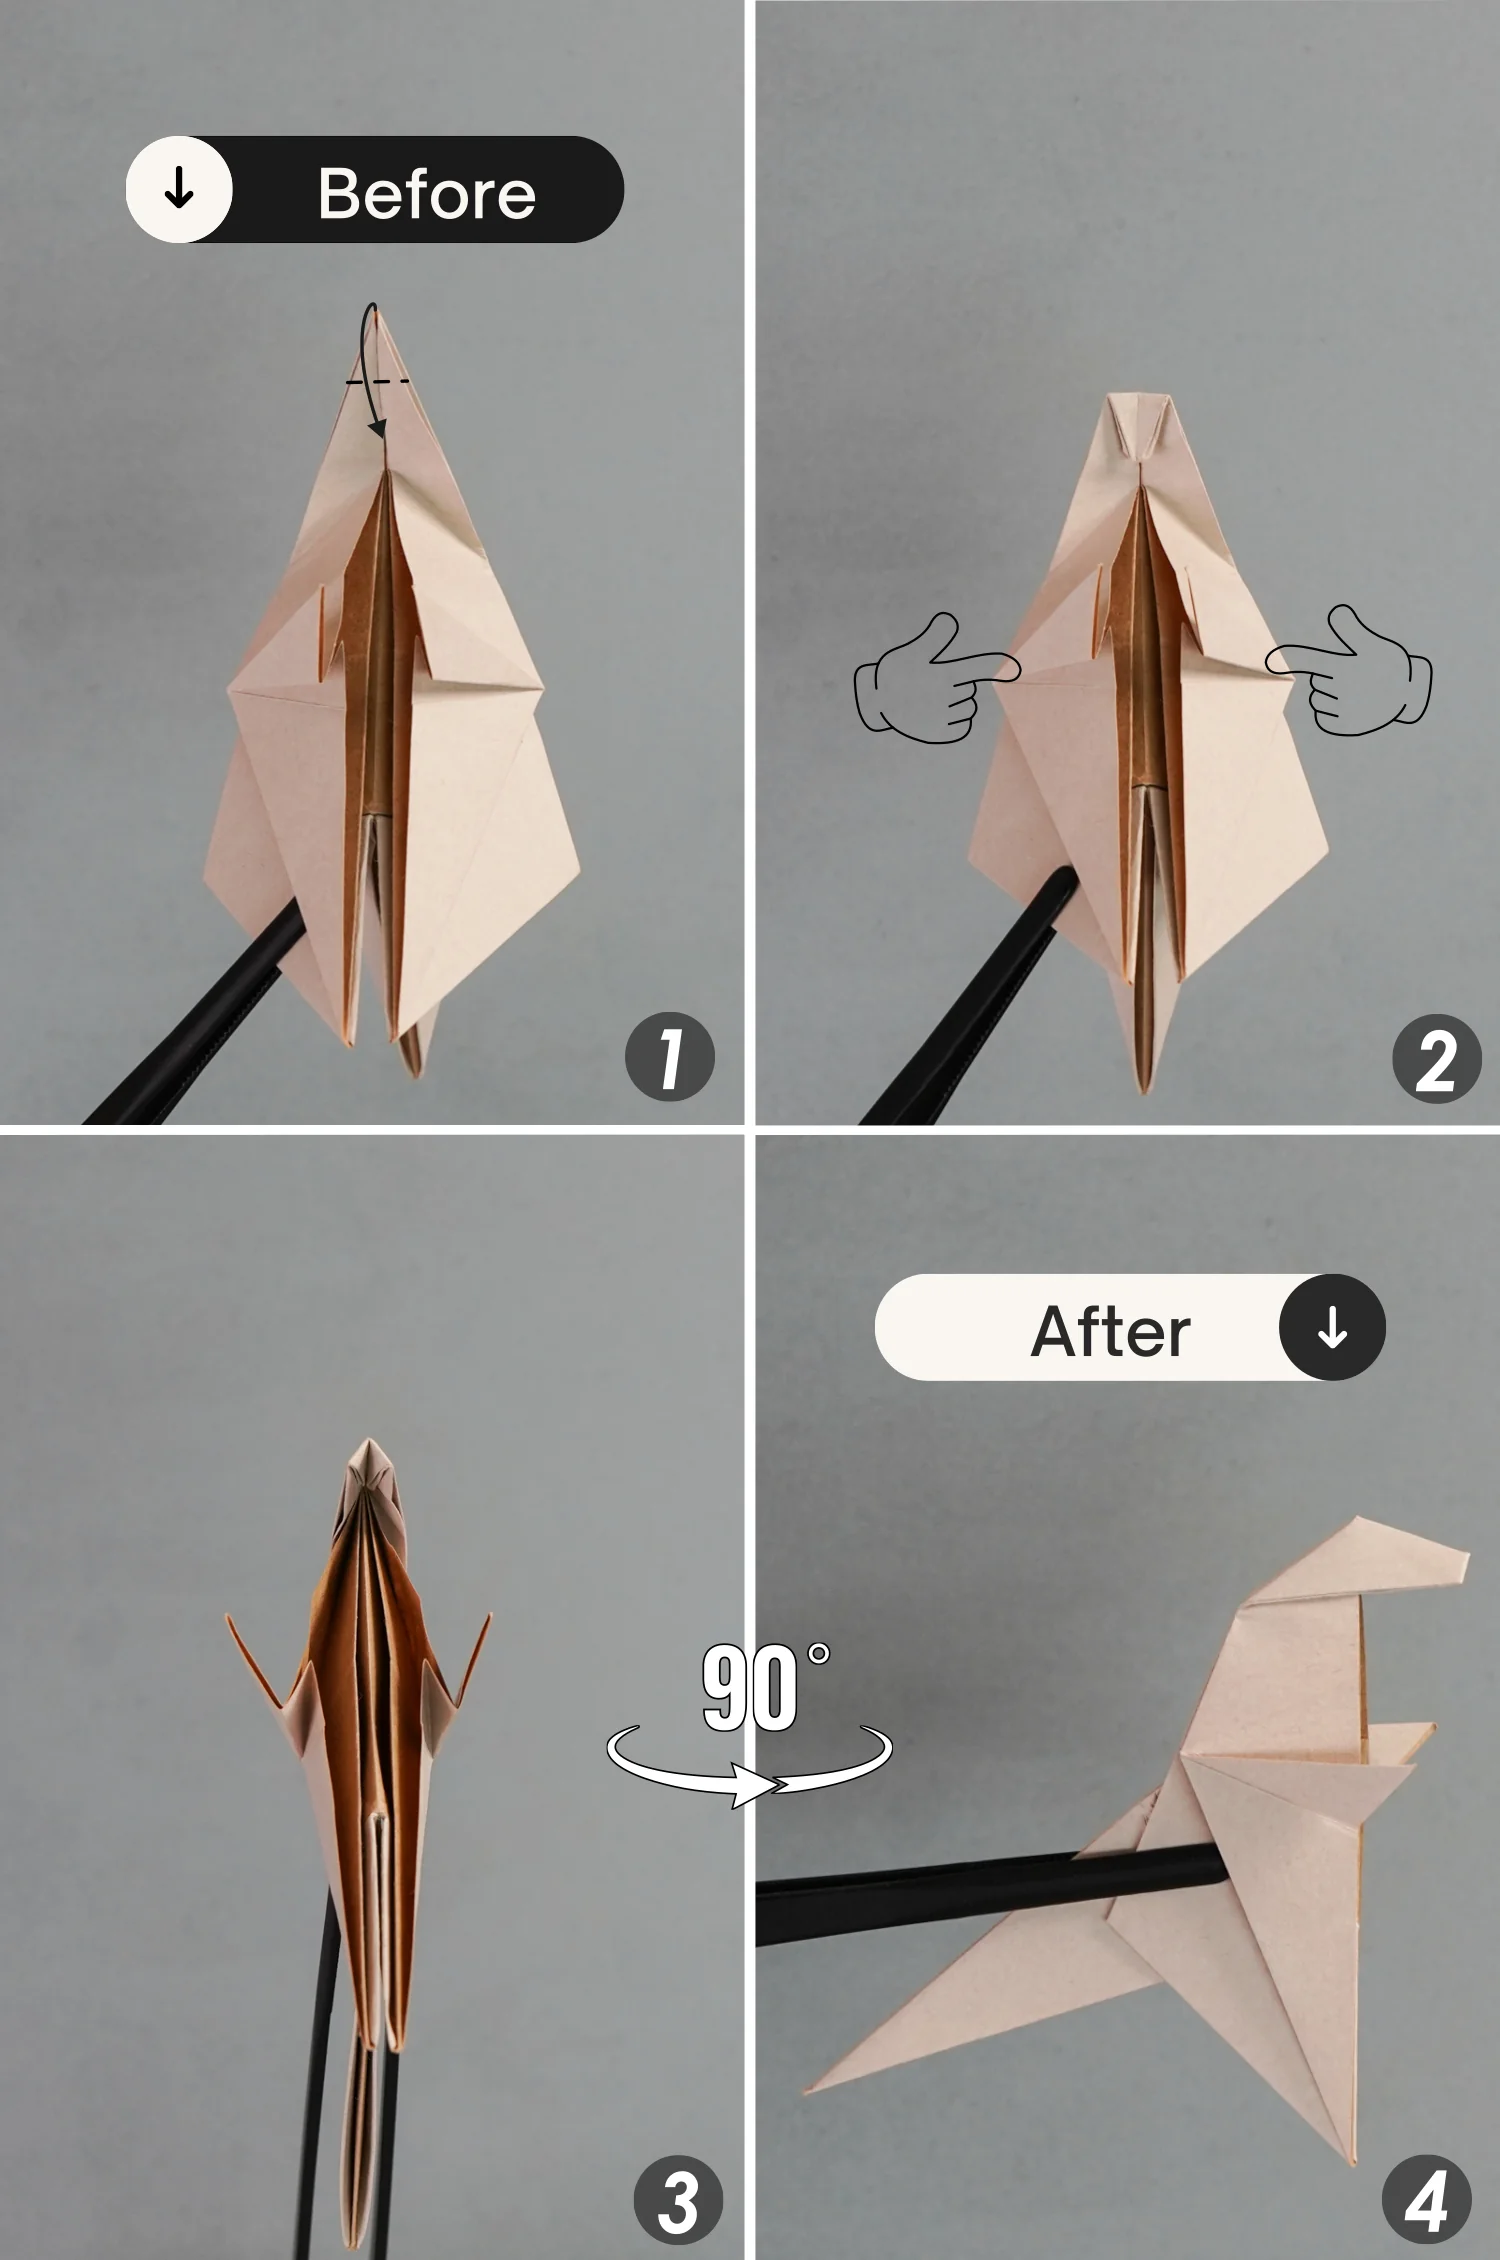
Step 18
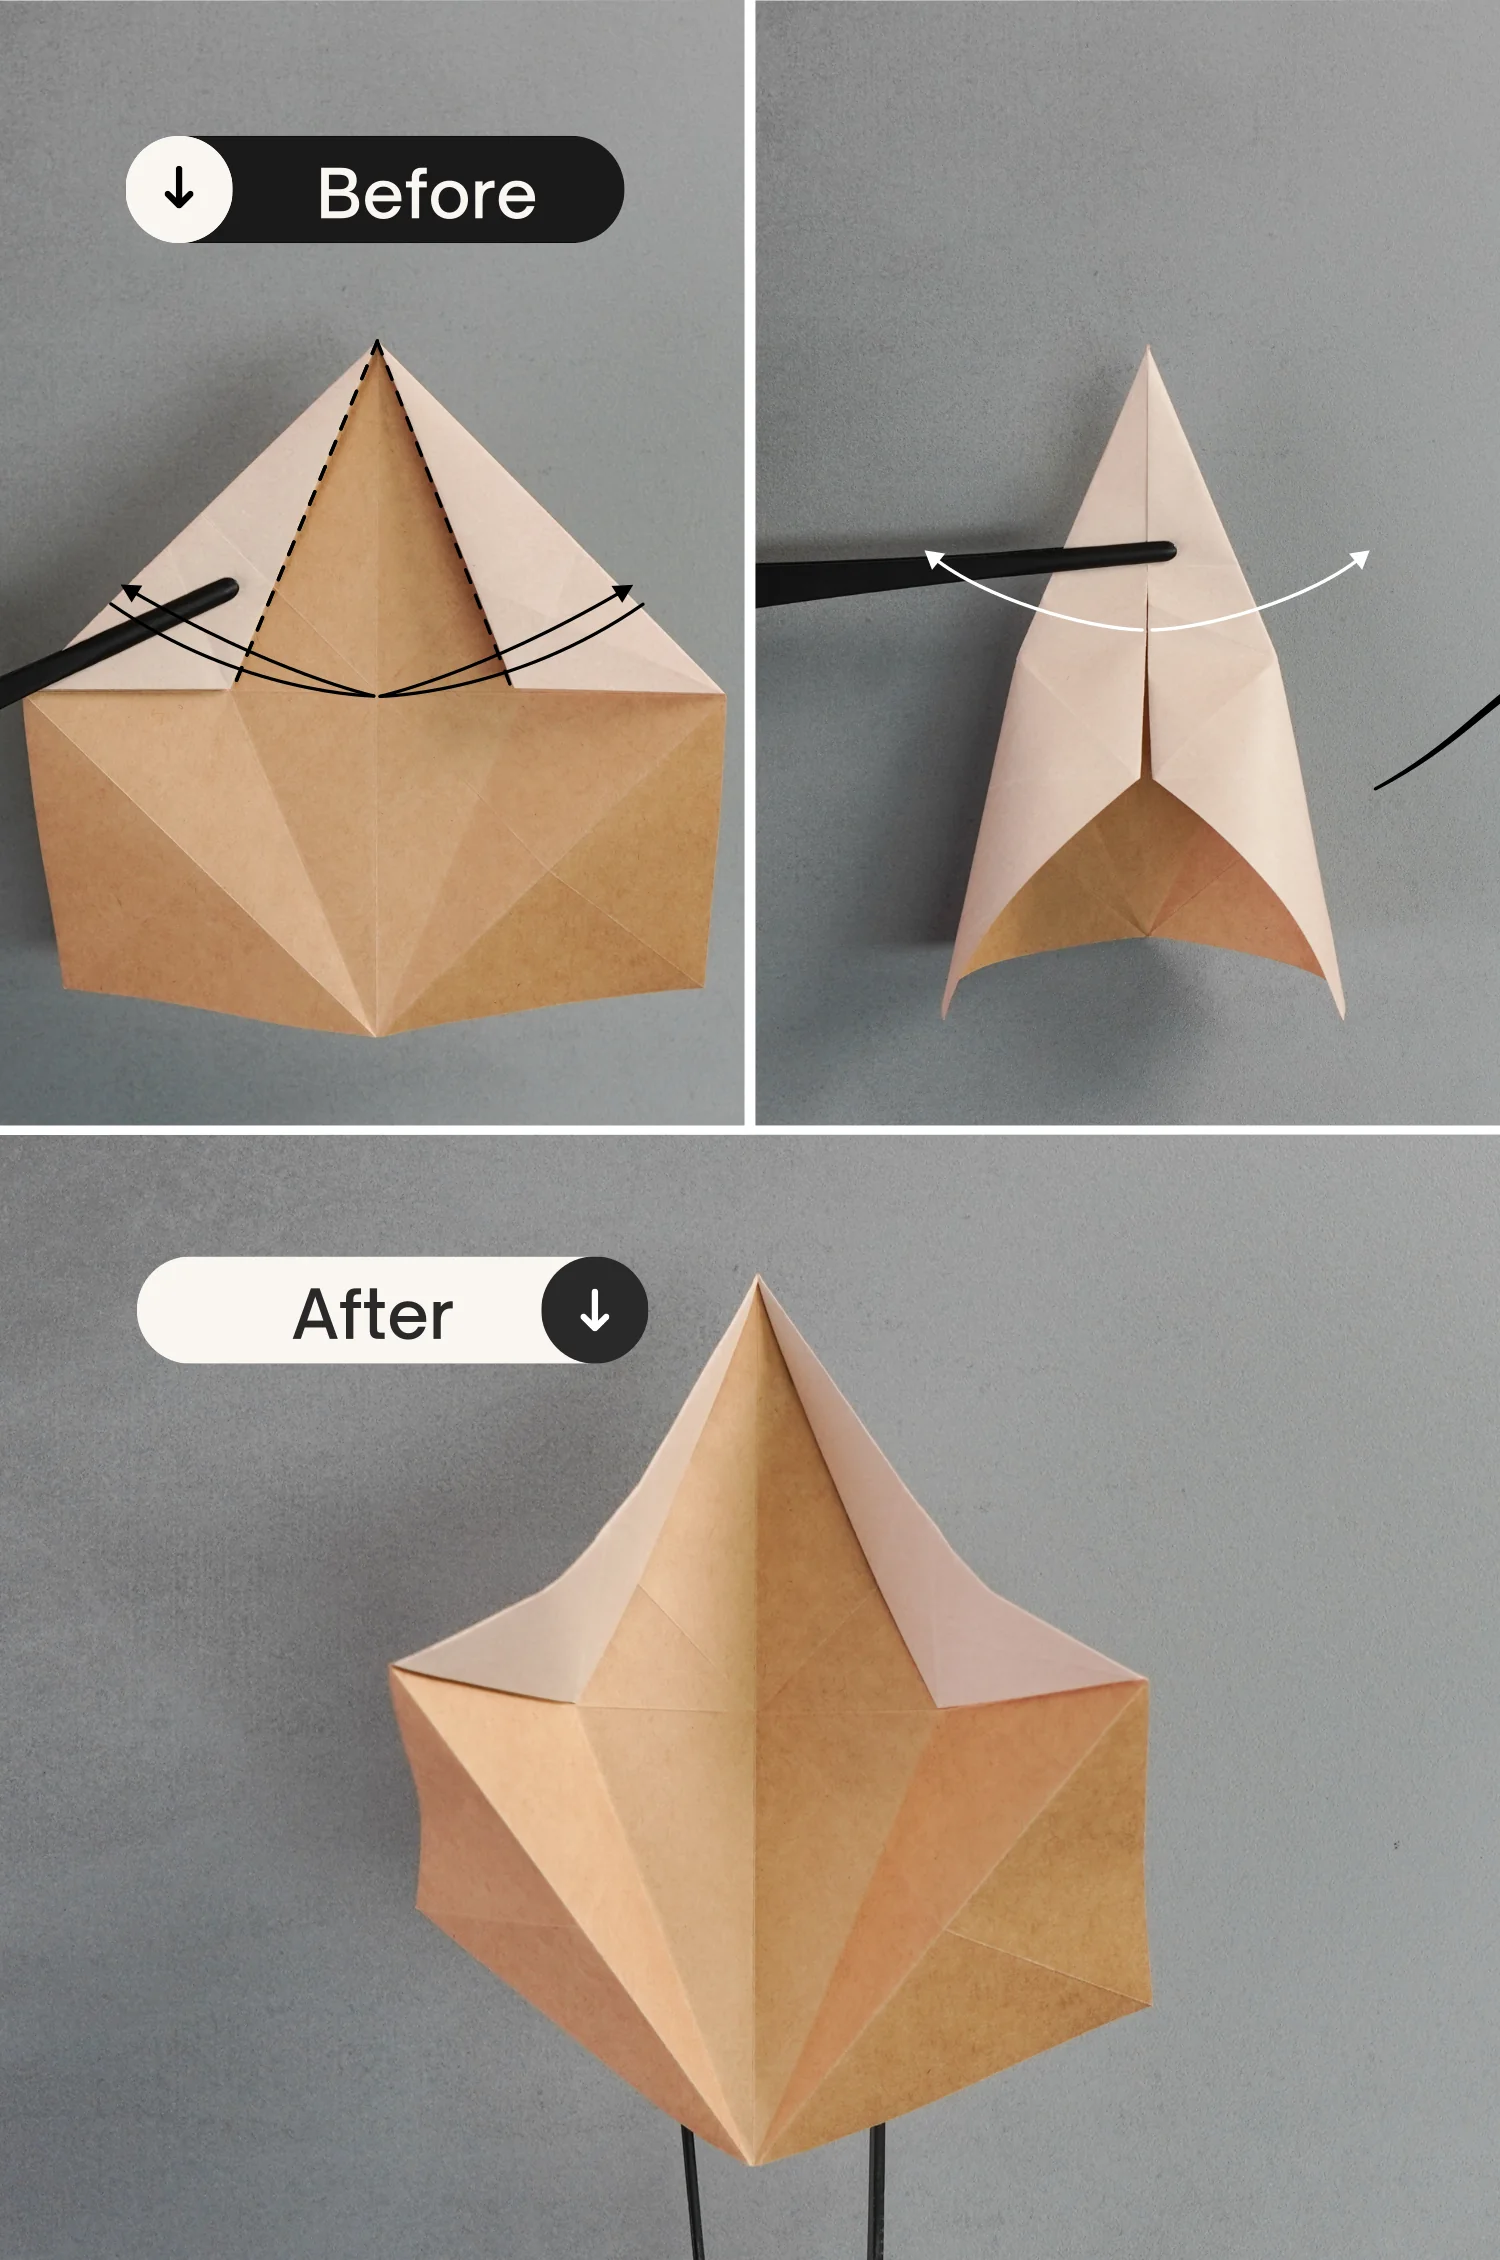
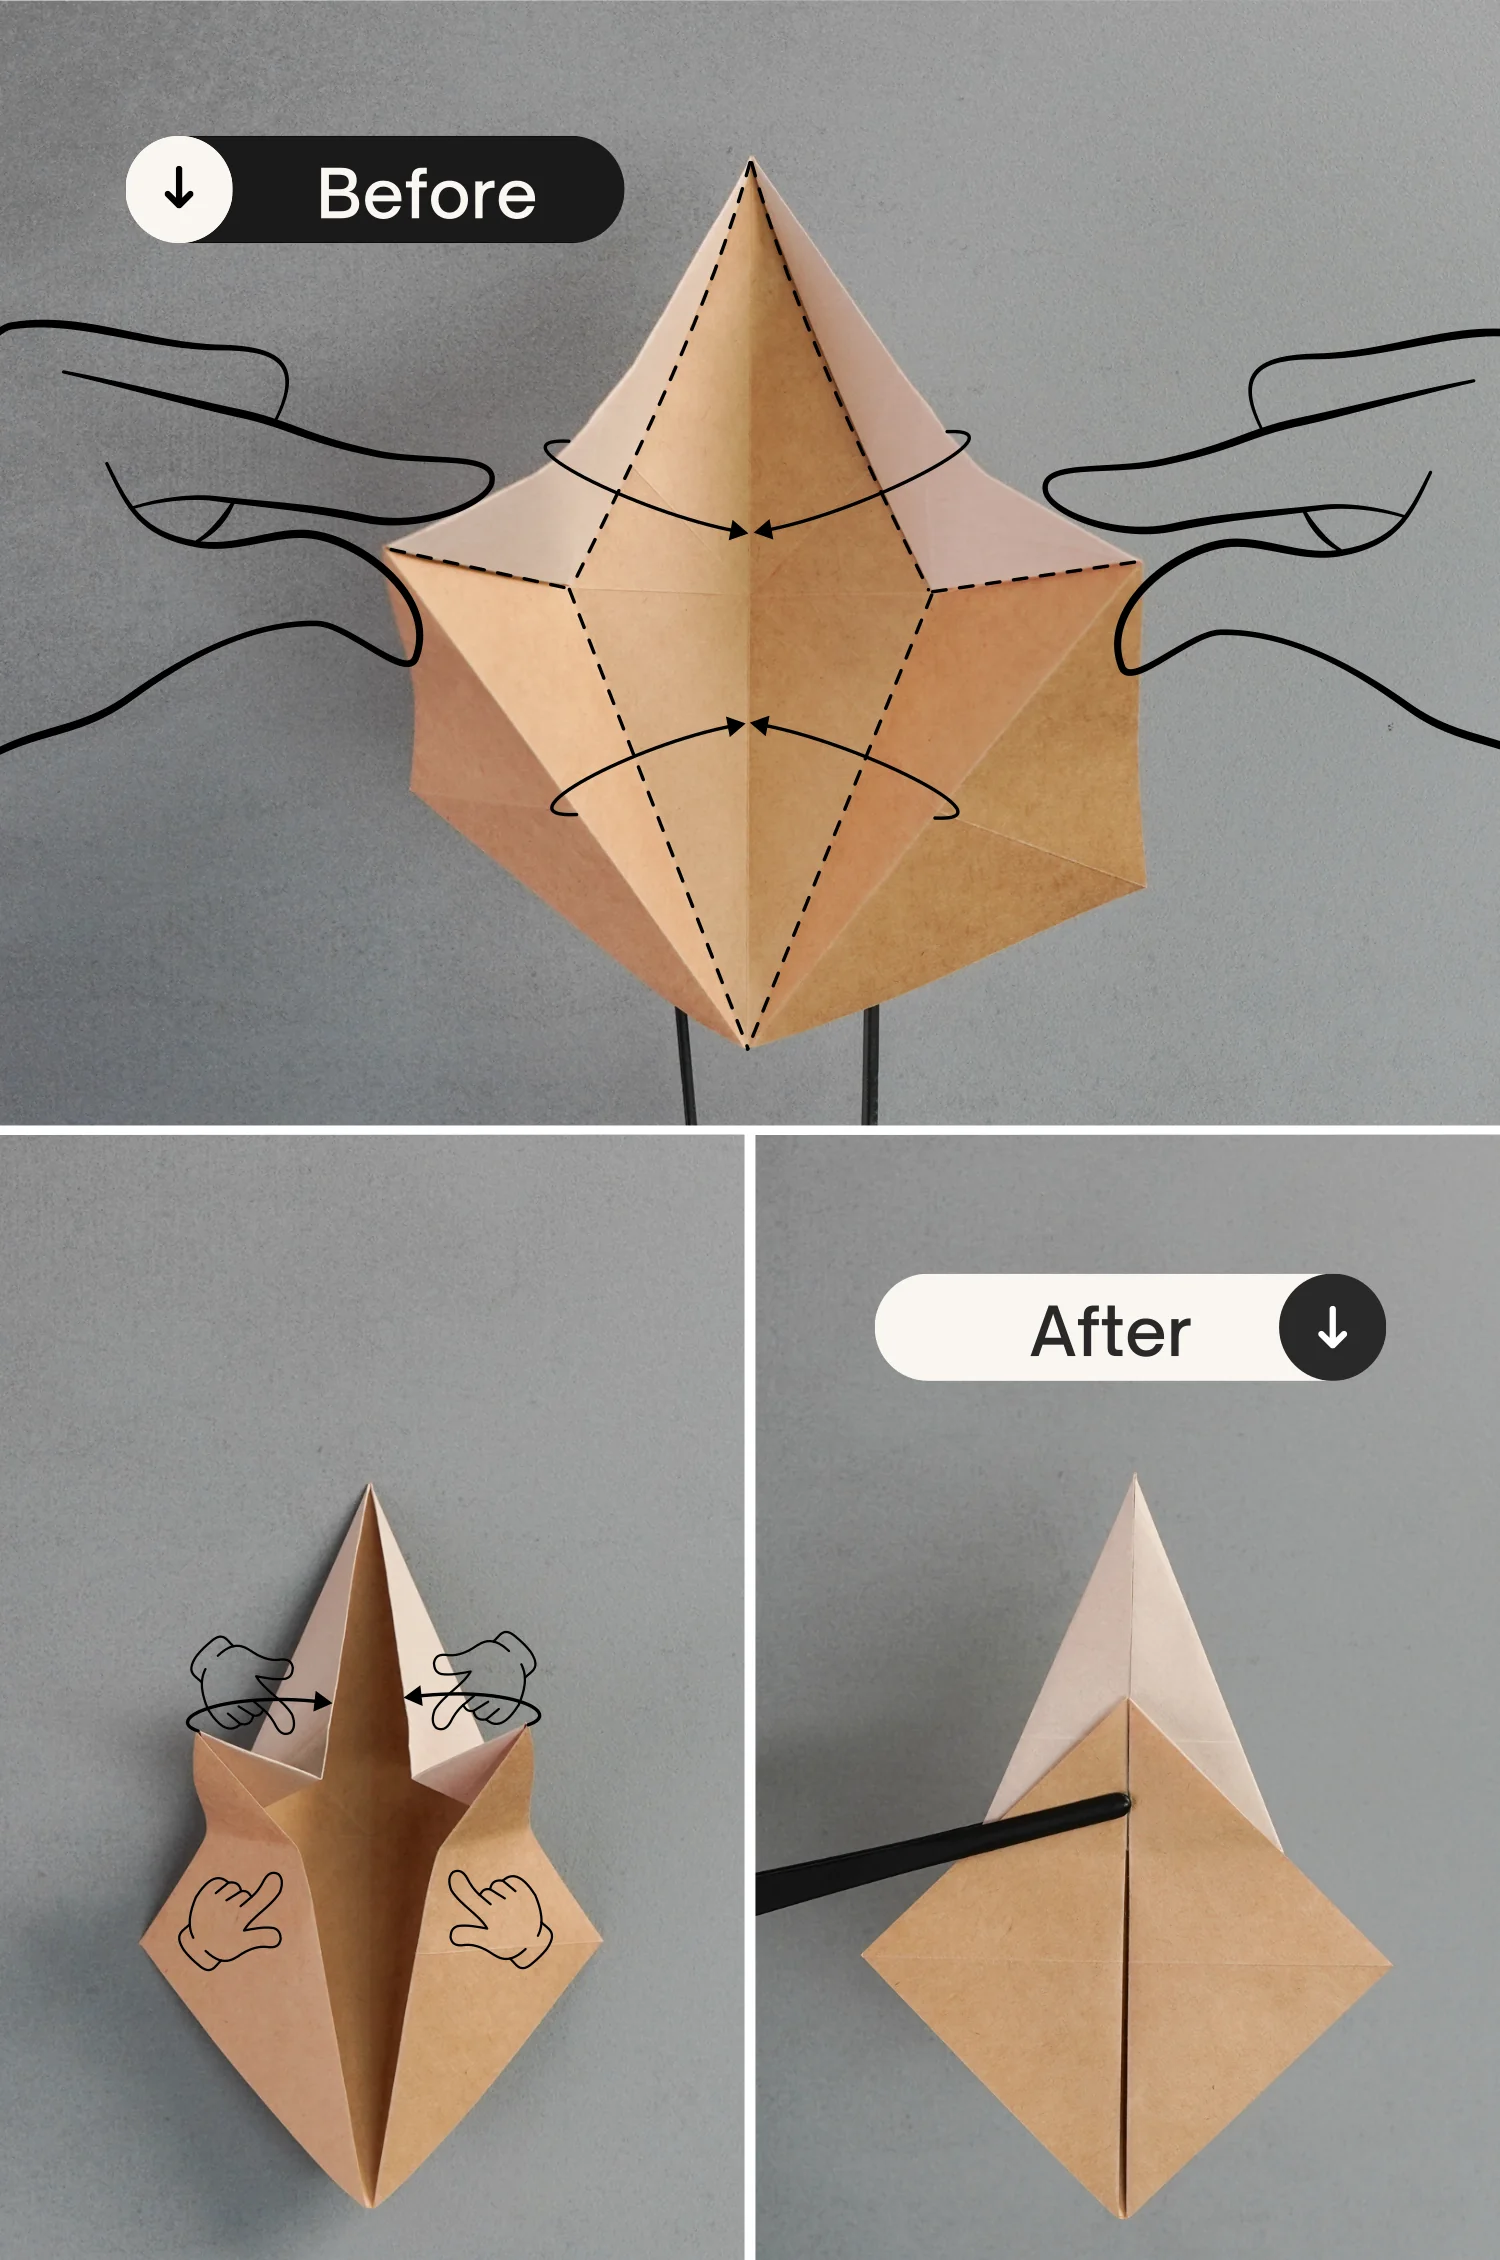
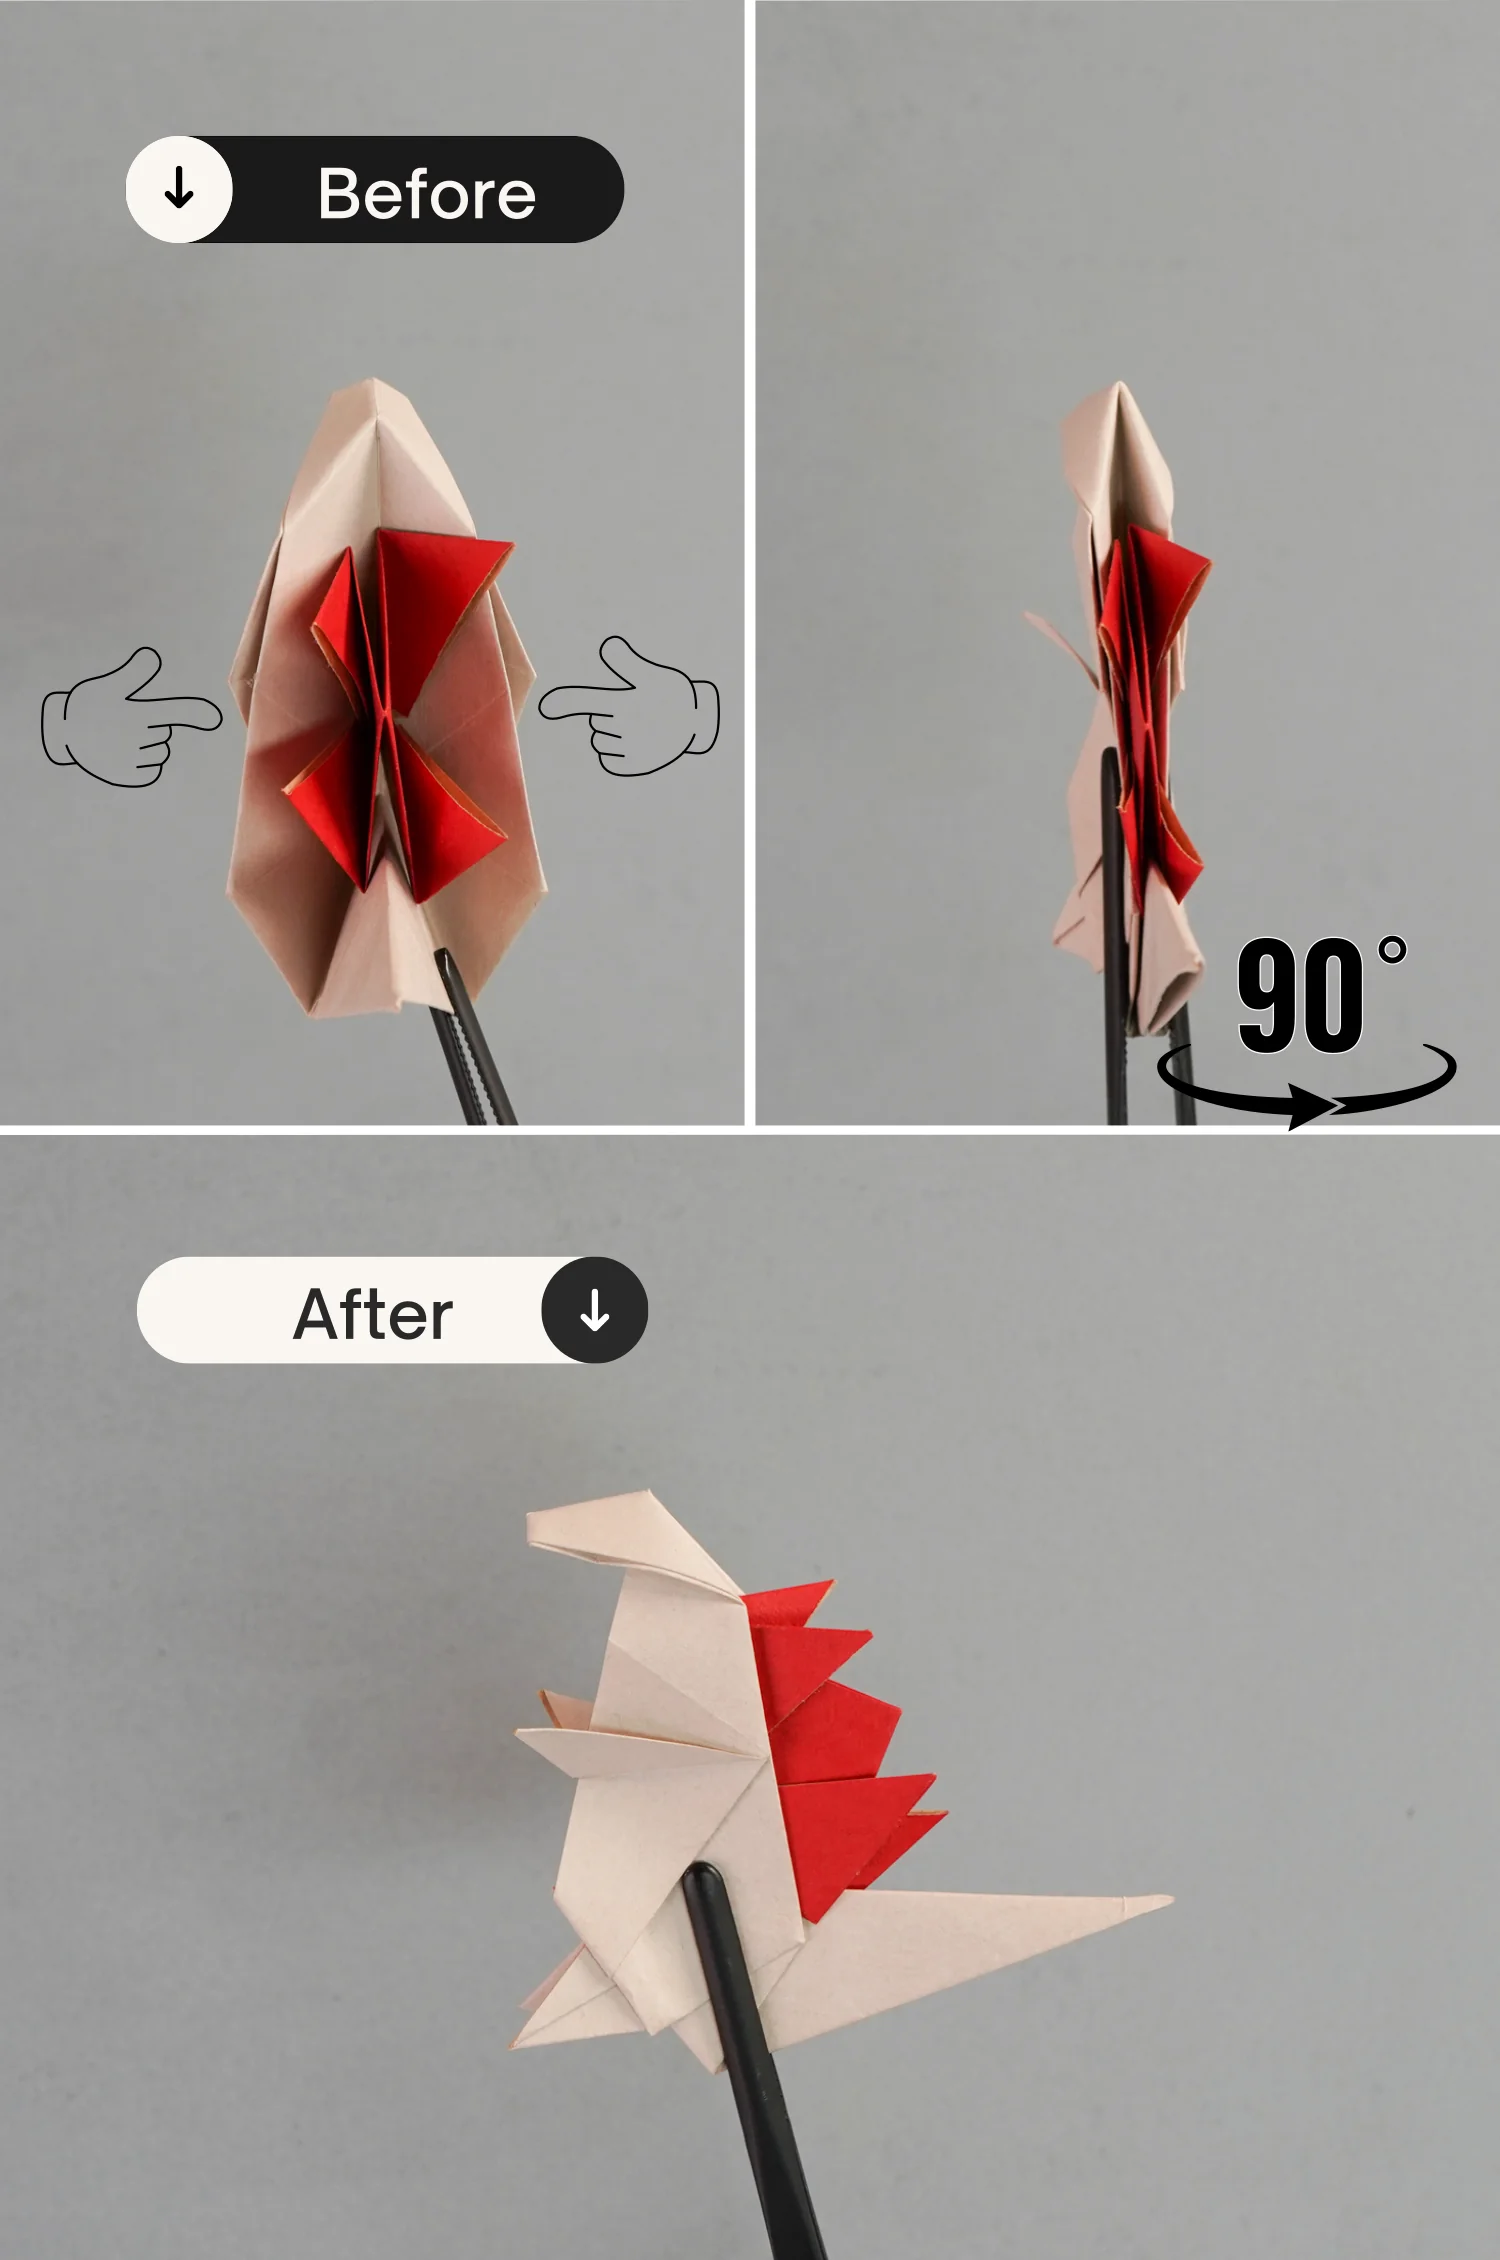
Rotate it 90 degrees clockwise first, then rotate again from the back to the front to make the back side face up.
Step 19
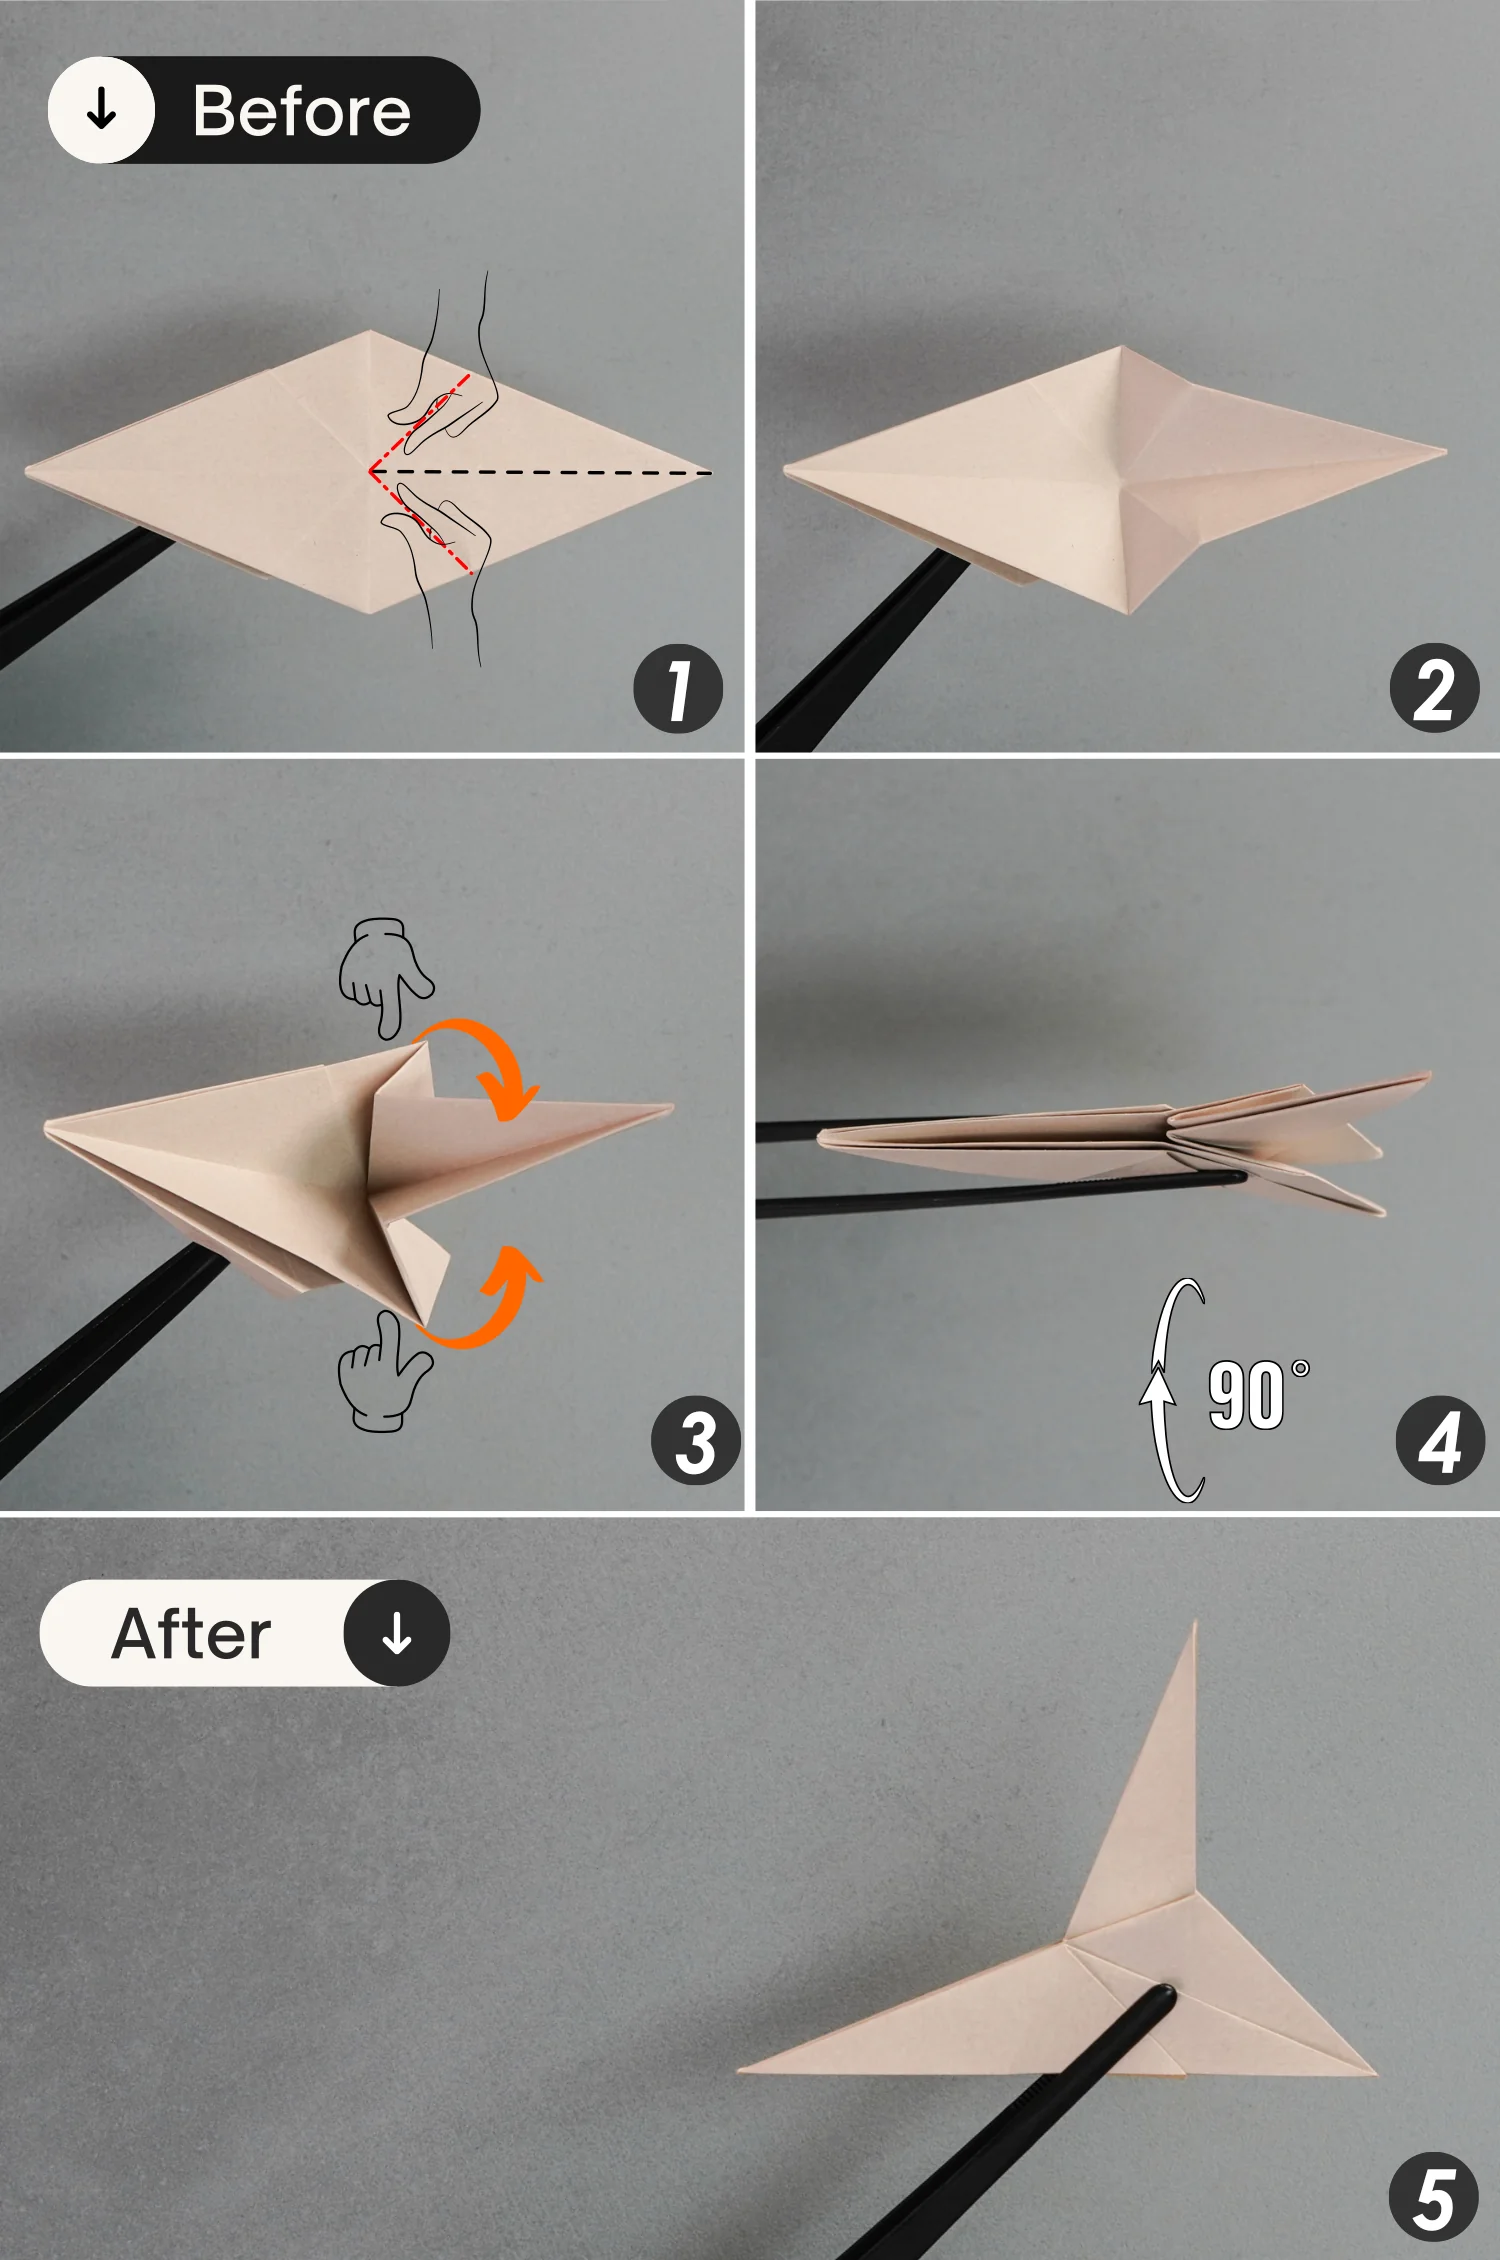
Shape the two creases indicated by the red dotted lines, then bring up the right part. Then pinch the paper together upward with your fingers, as the 3, and 4 pictures show, and finally rotate it 90 degrees from the front to the back, to lay it flat.
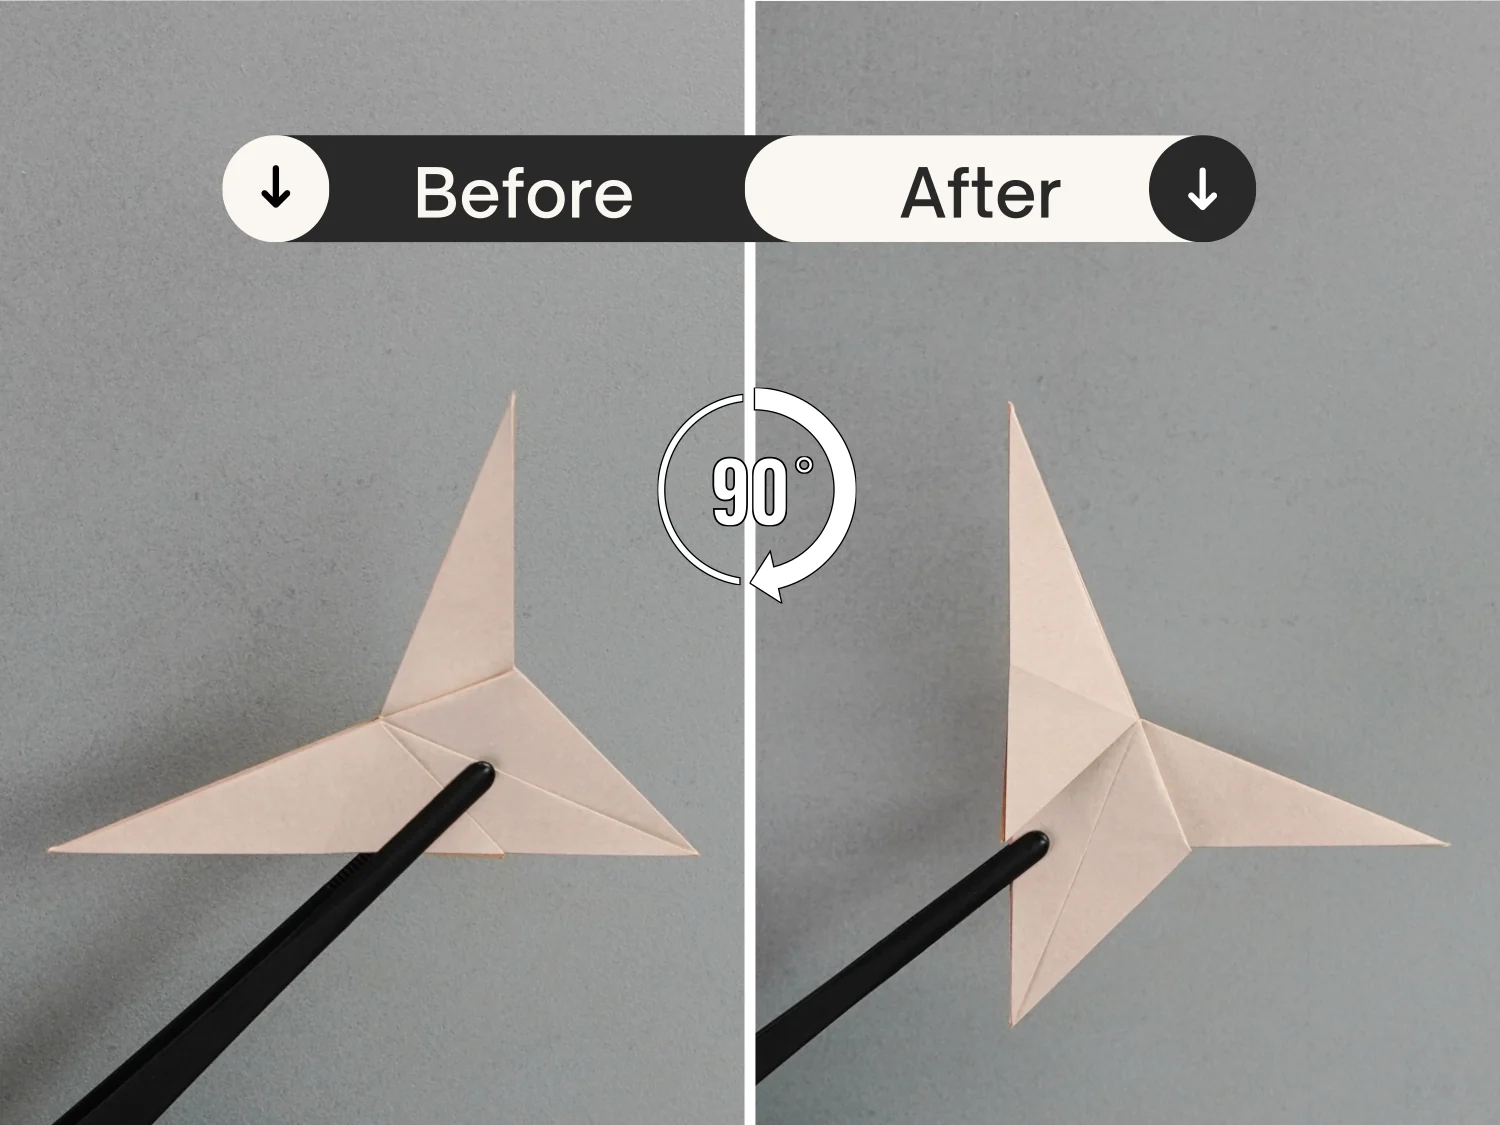
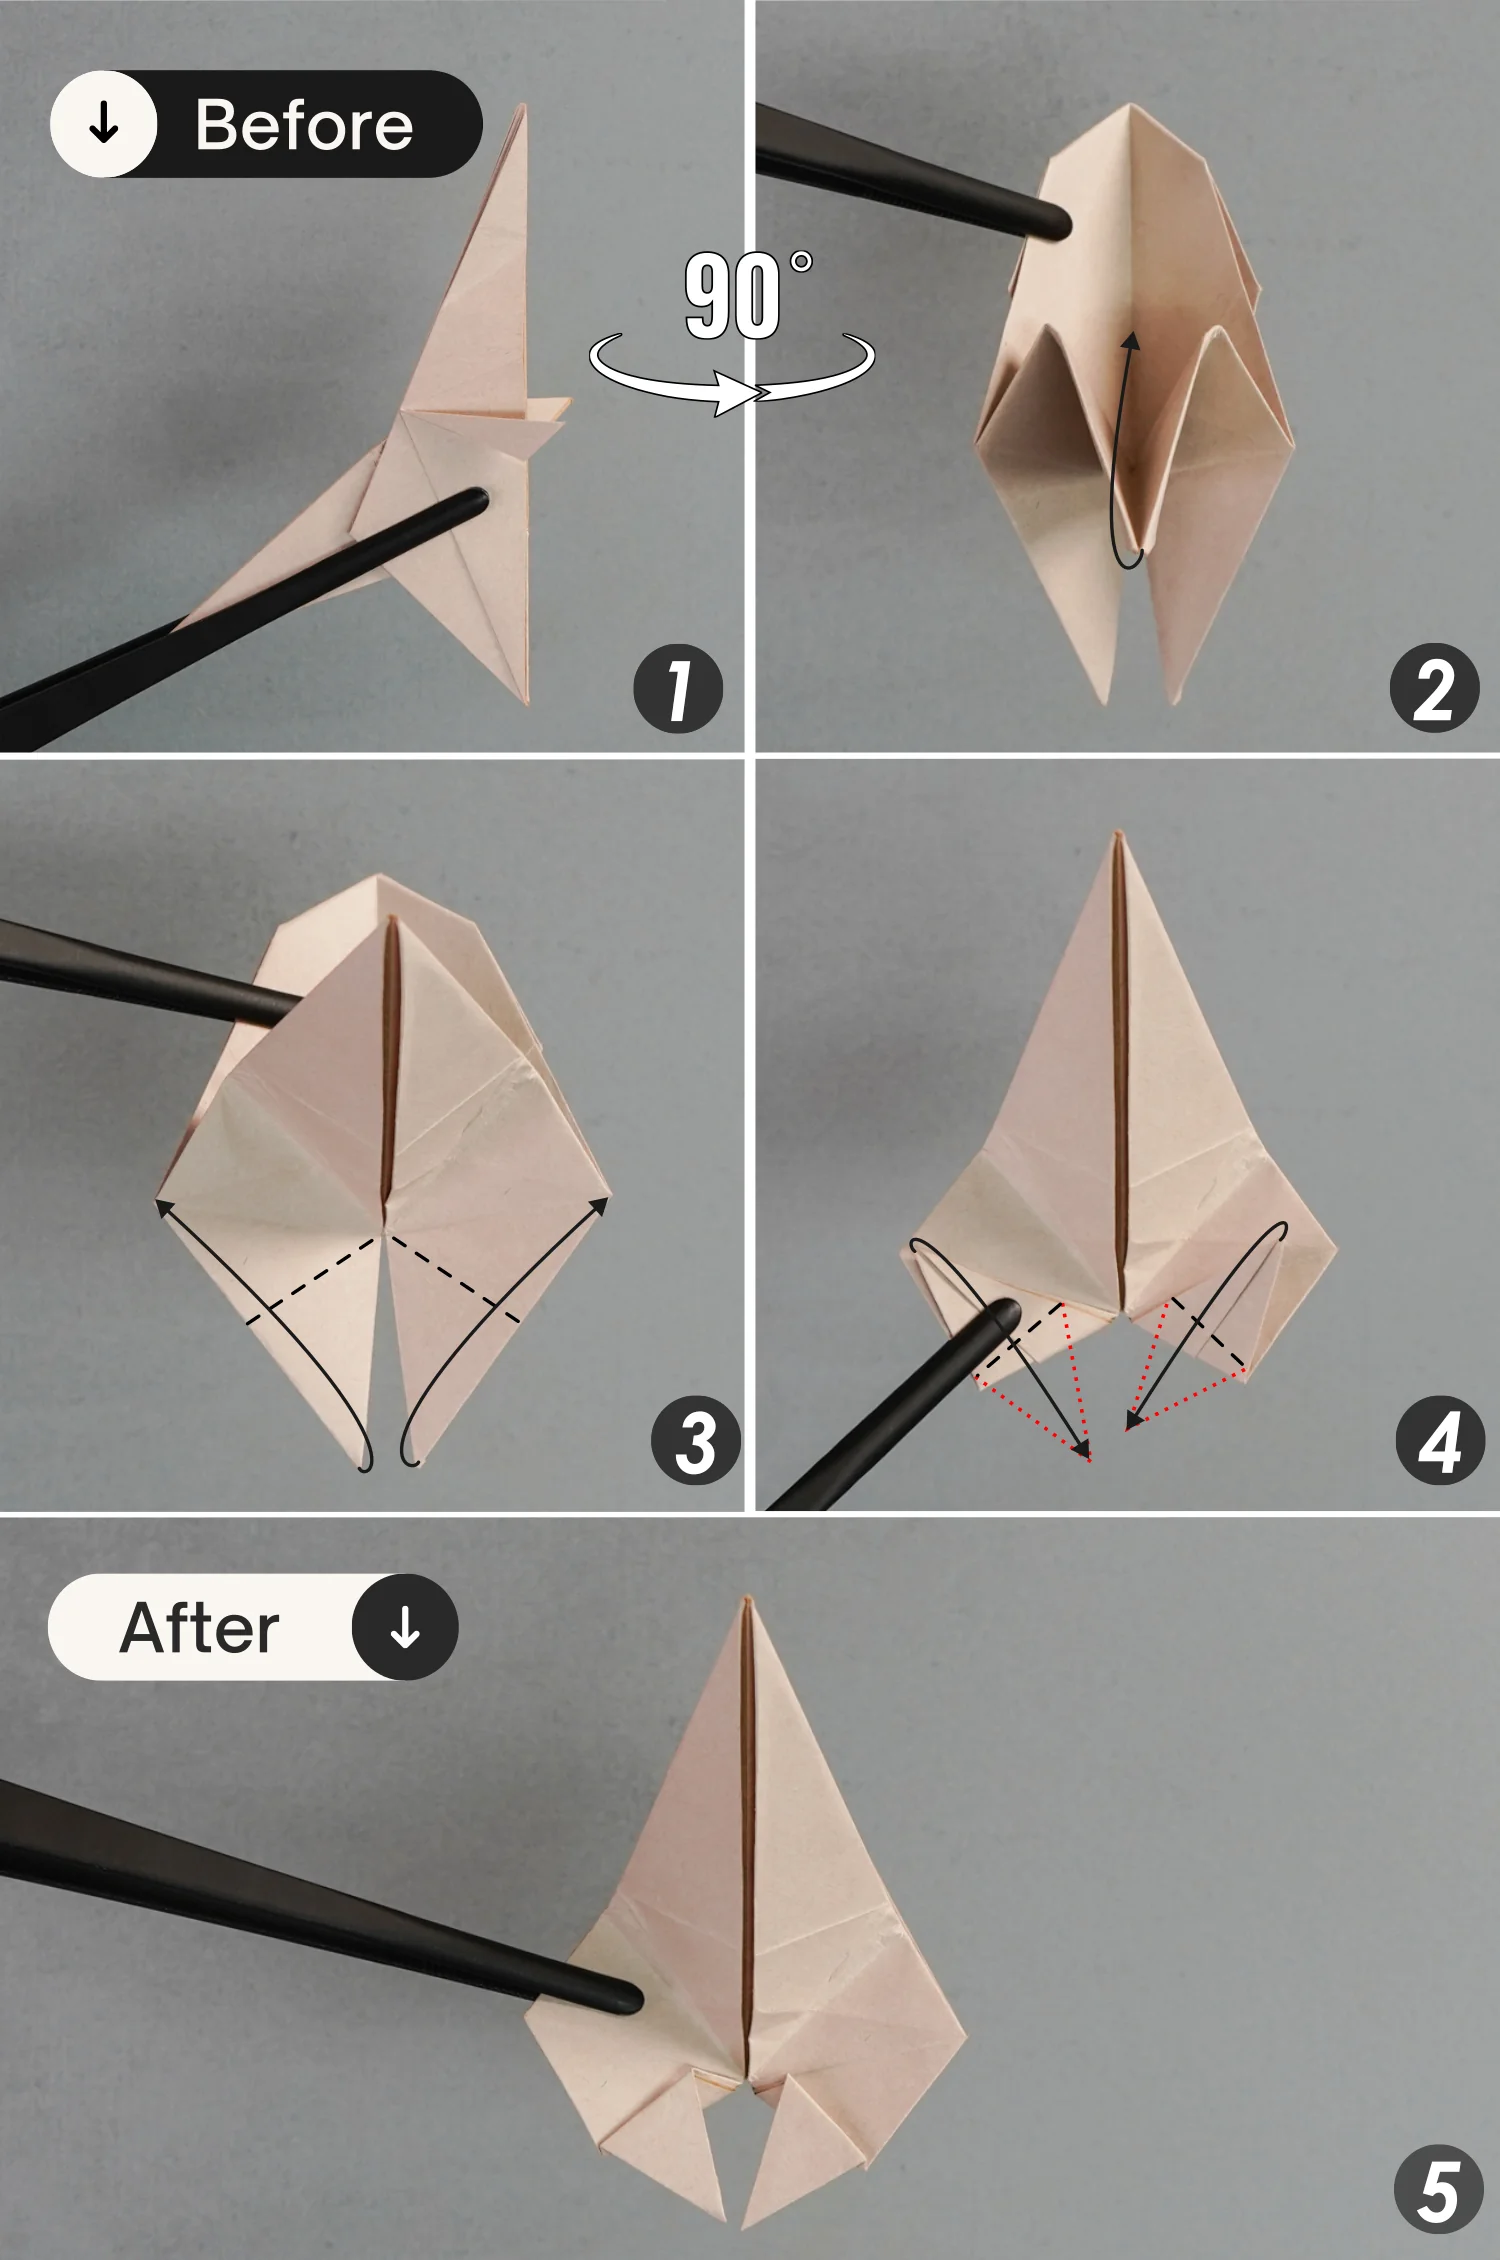
Step 20
Rotate it 90 degrees clockwise.
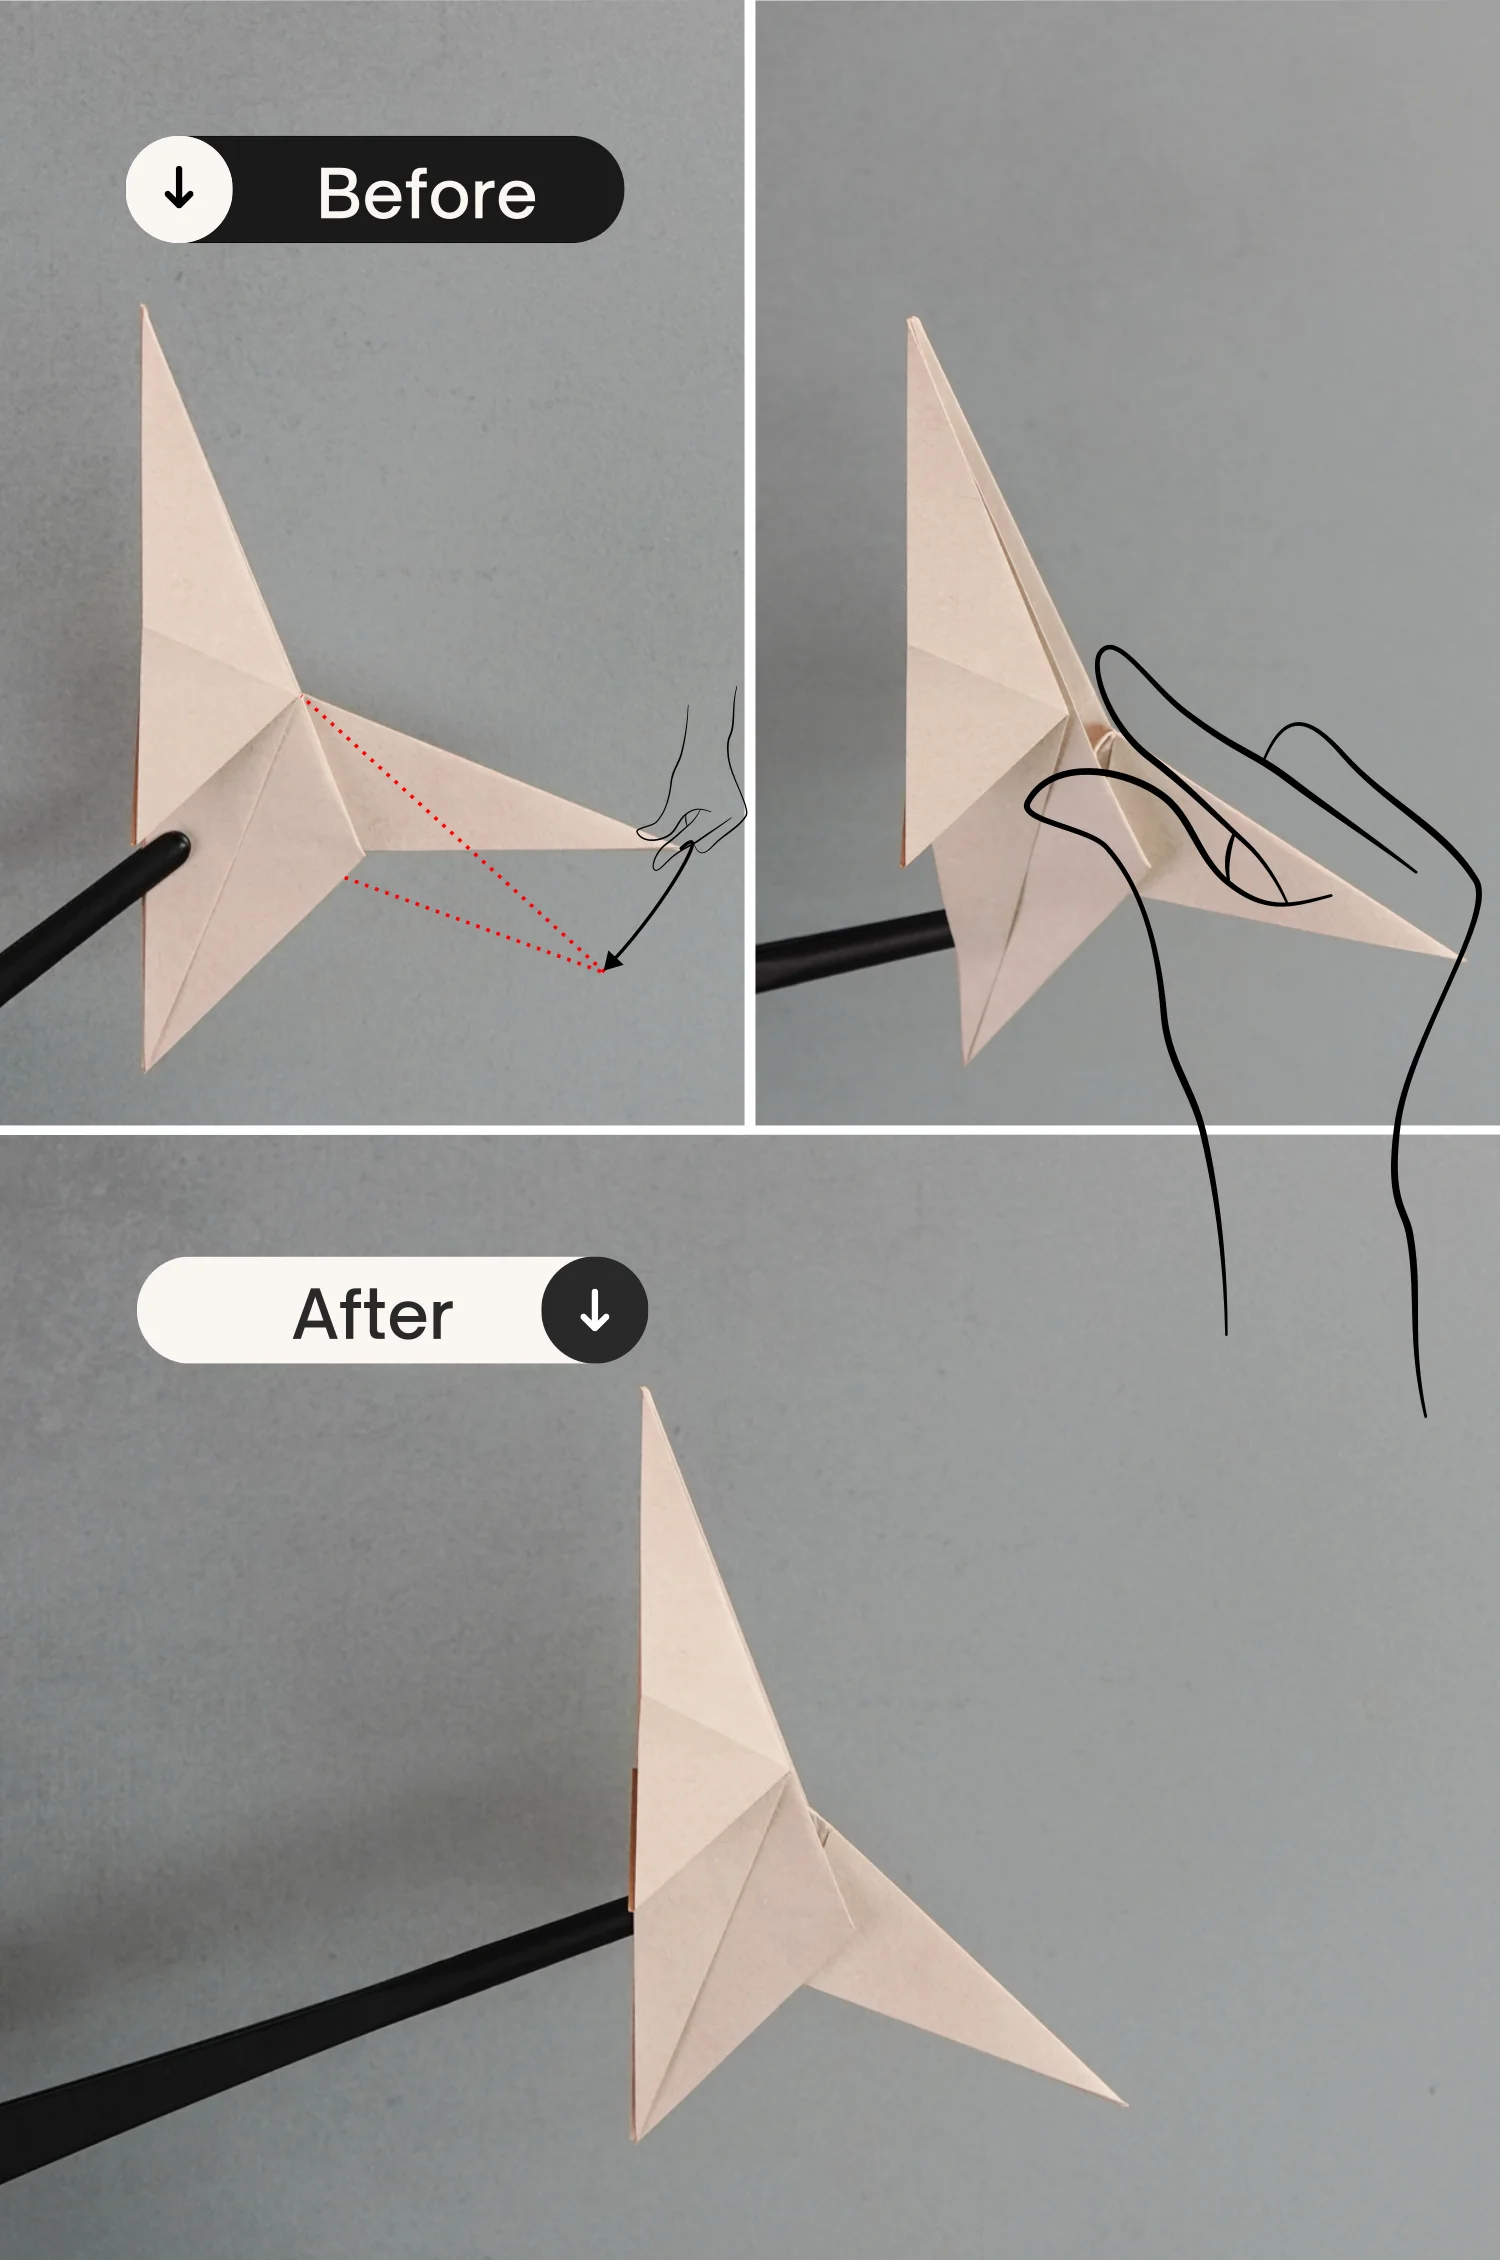
Step 21
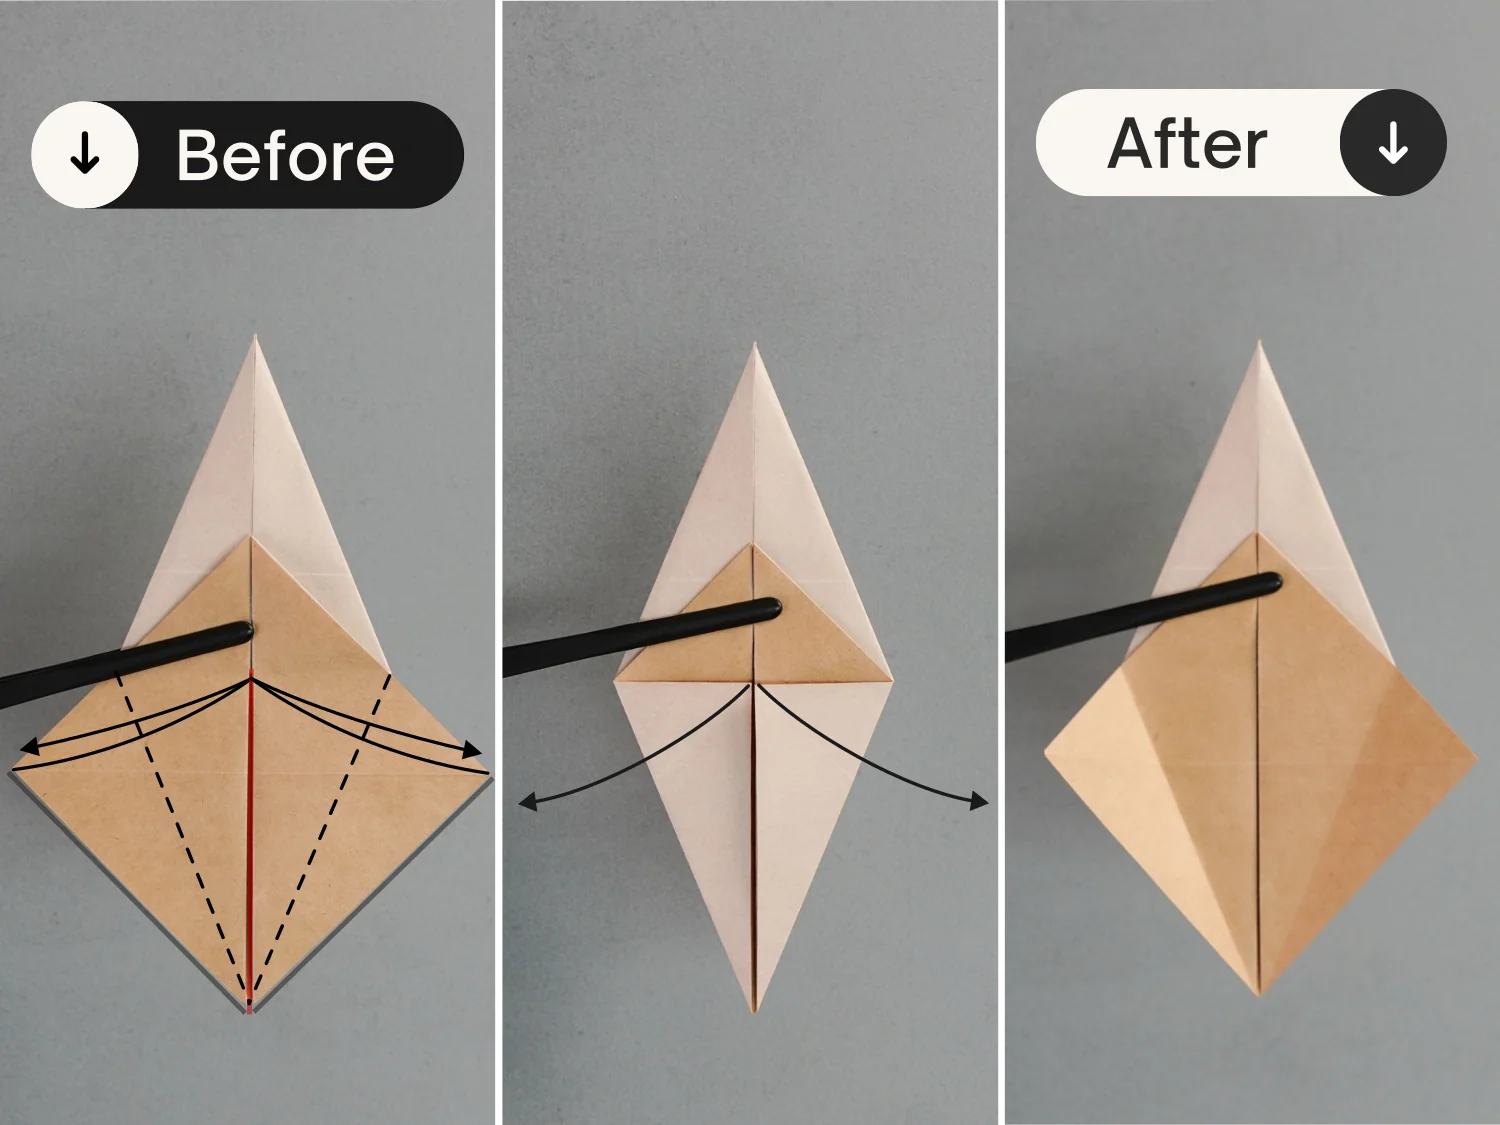
Take the right flap, and gently pull it down a little, then flatten it.
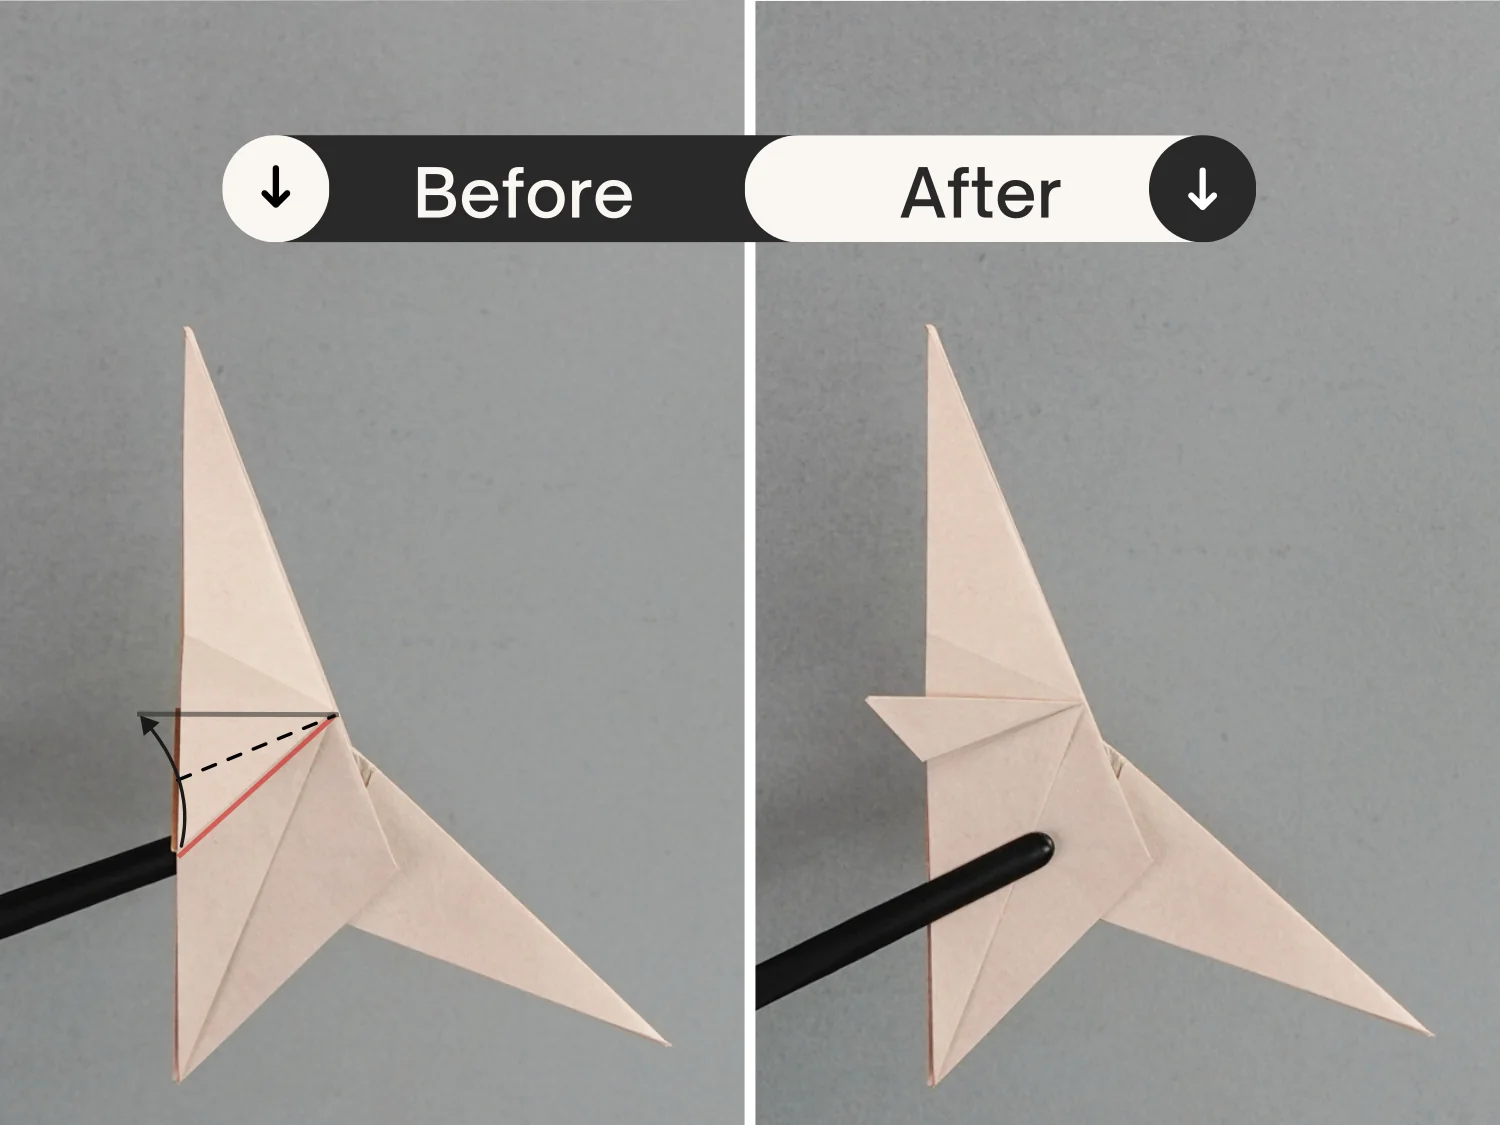
Step 22
Fold up the edge shown by the red line along the dotted line, making it horizontal.
Step 23
Flip the paper over, then like before, fold up the edge shown by the dotted line to make it horizontal.

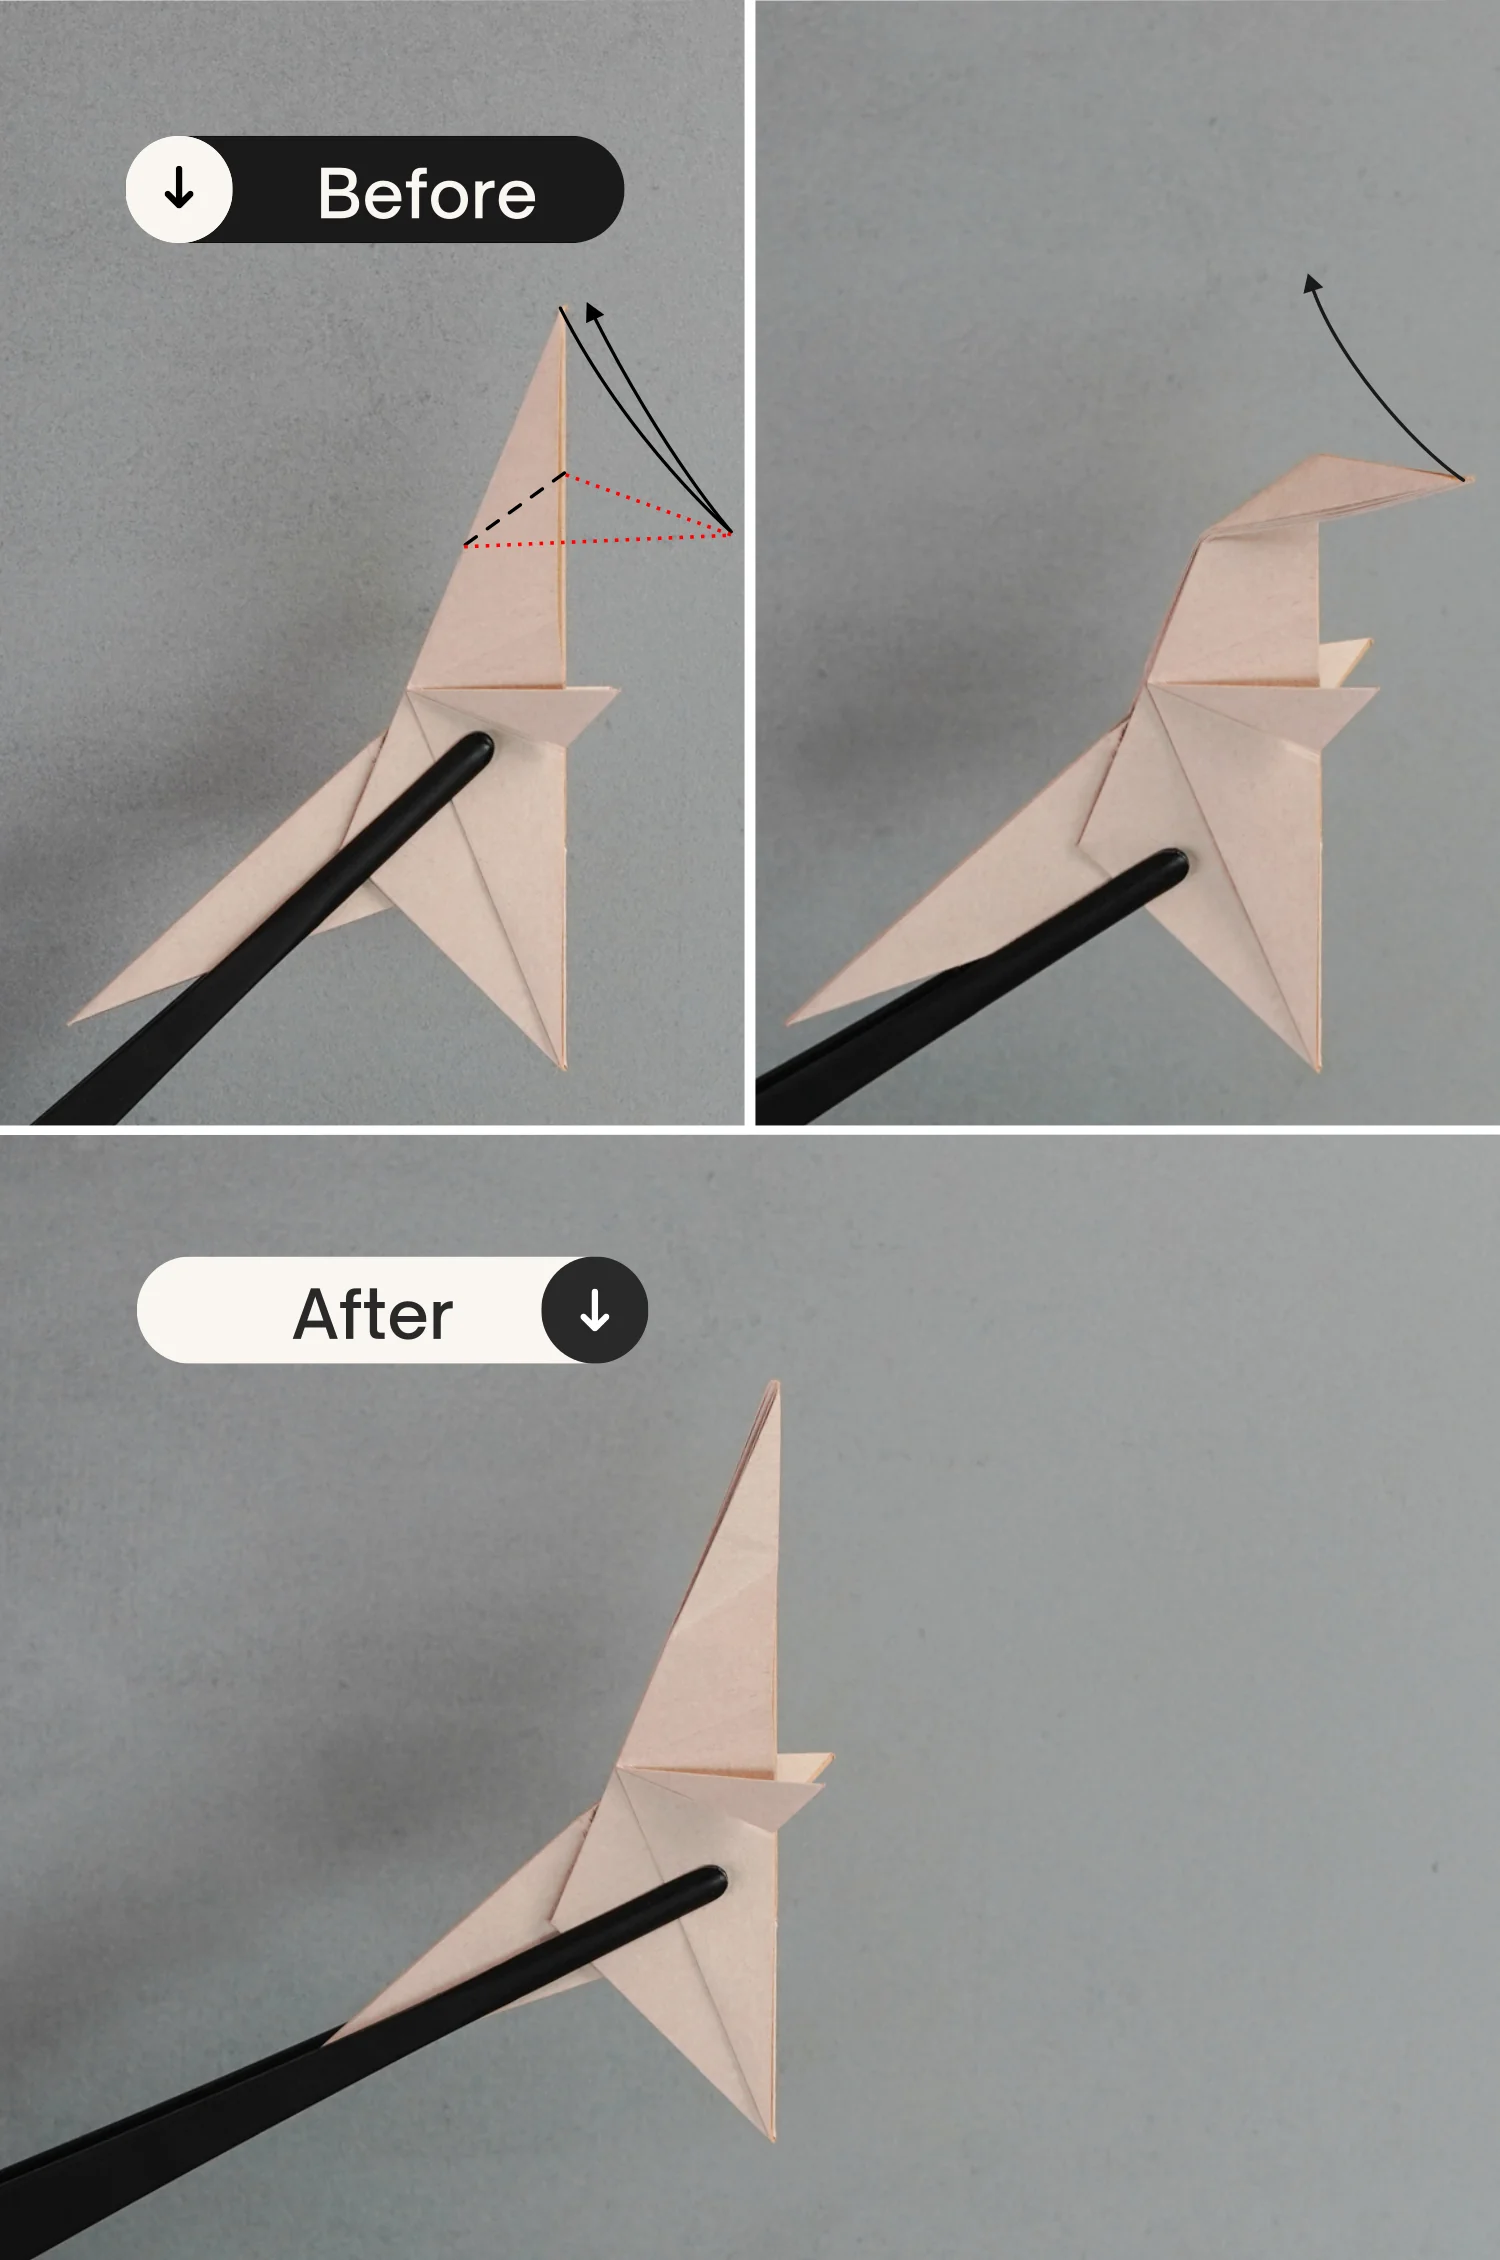
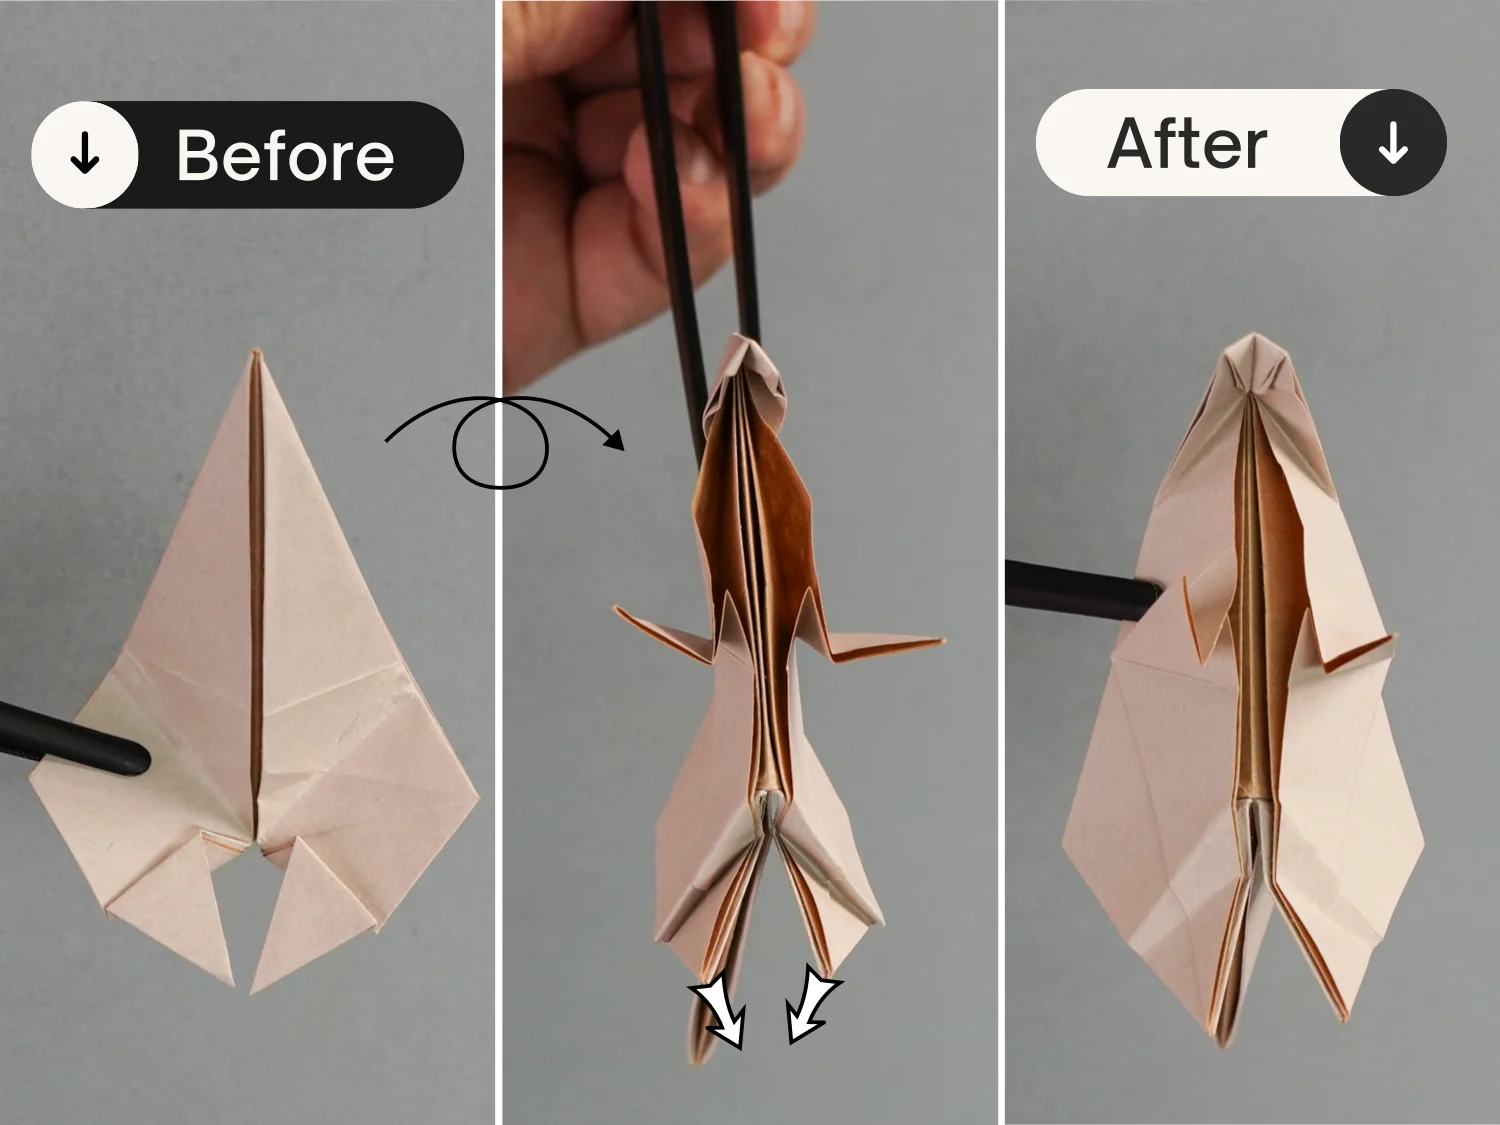
Step 24
Fold down the top point to the right side, and unfold it.
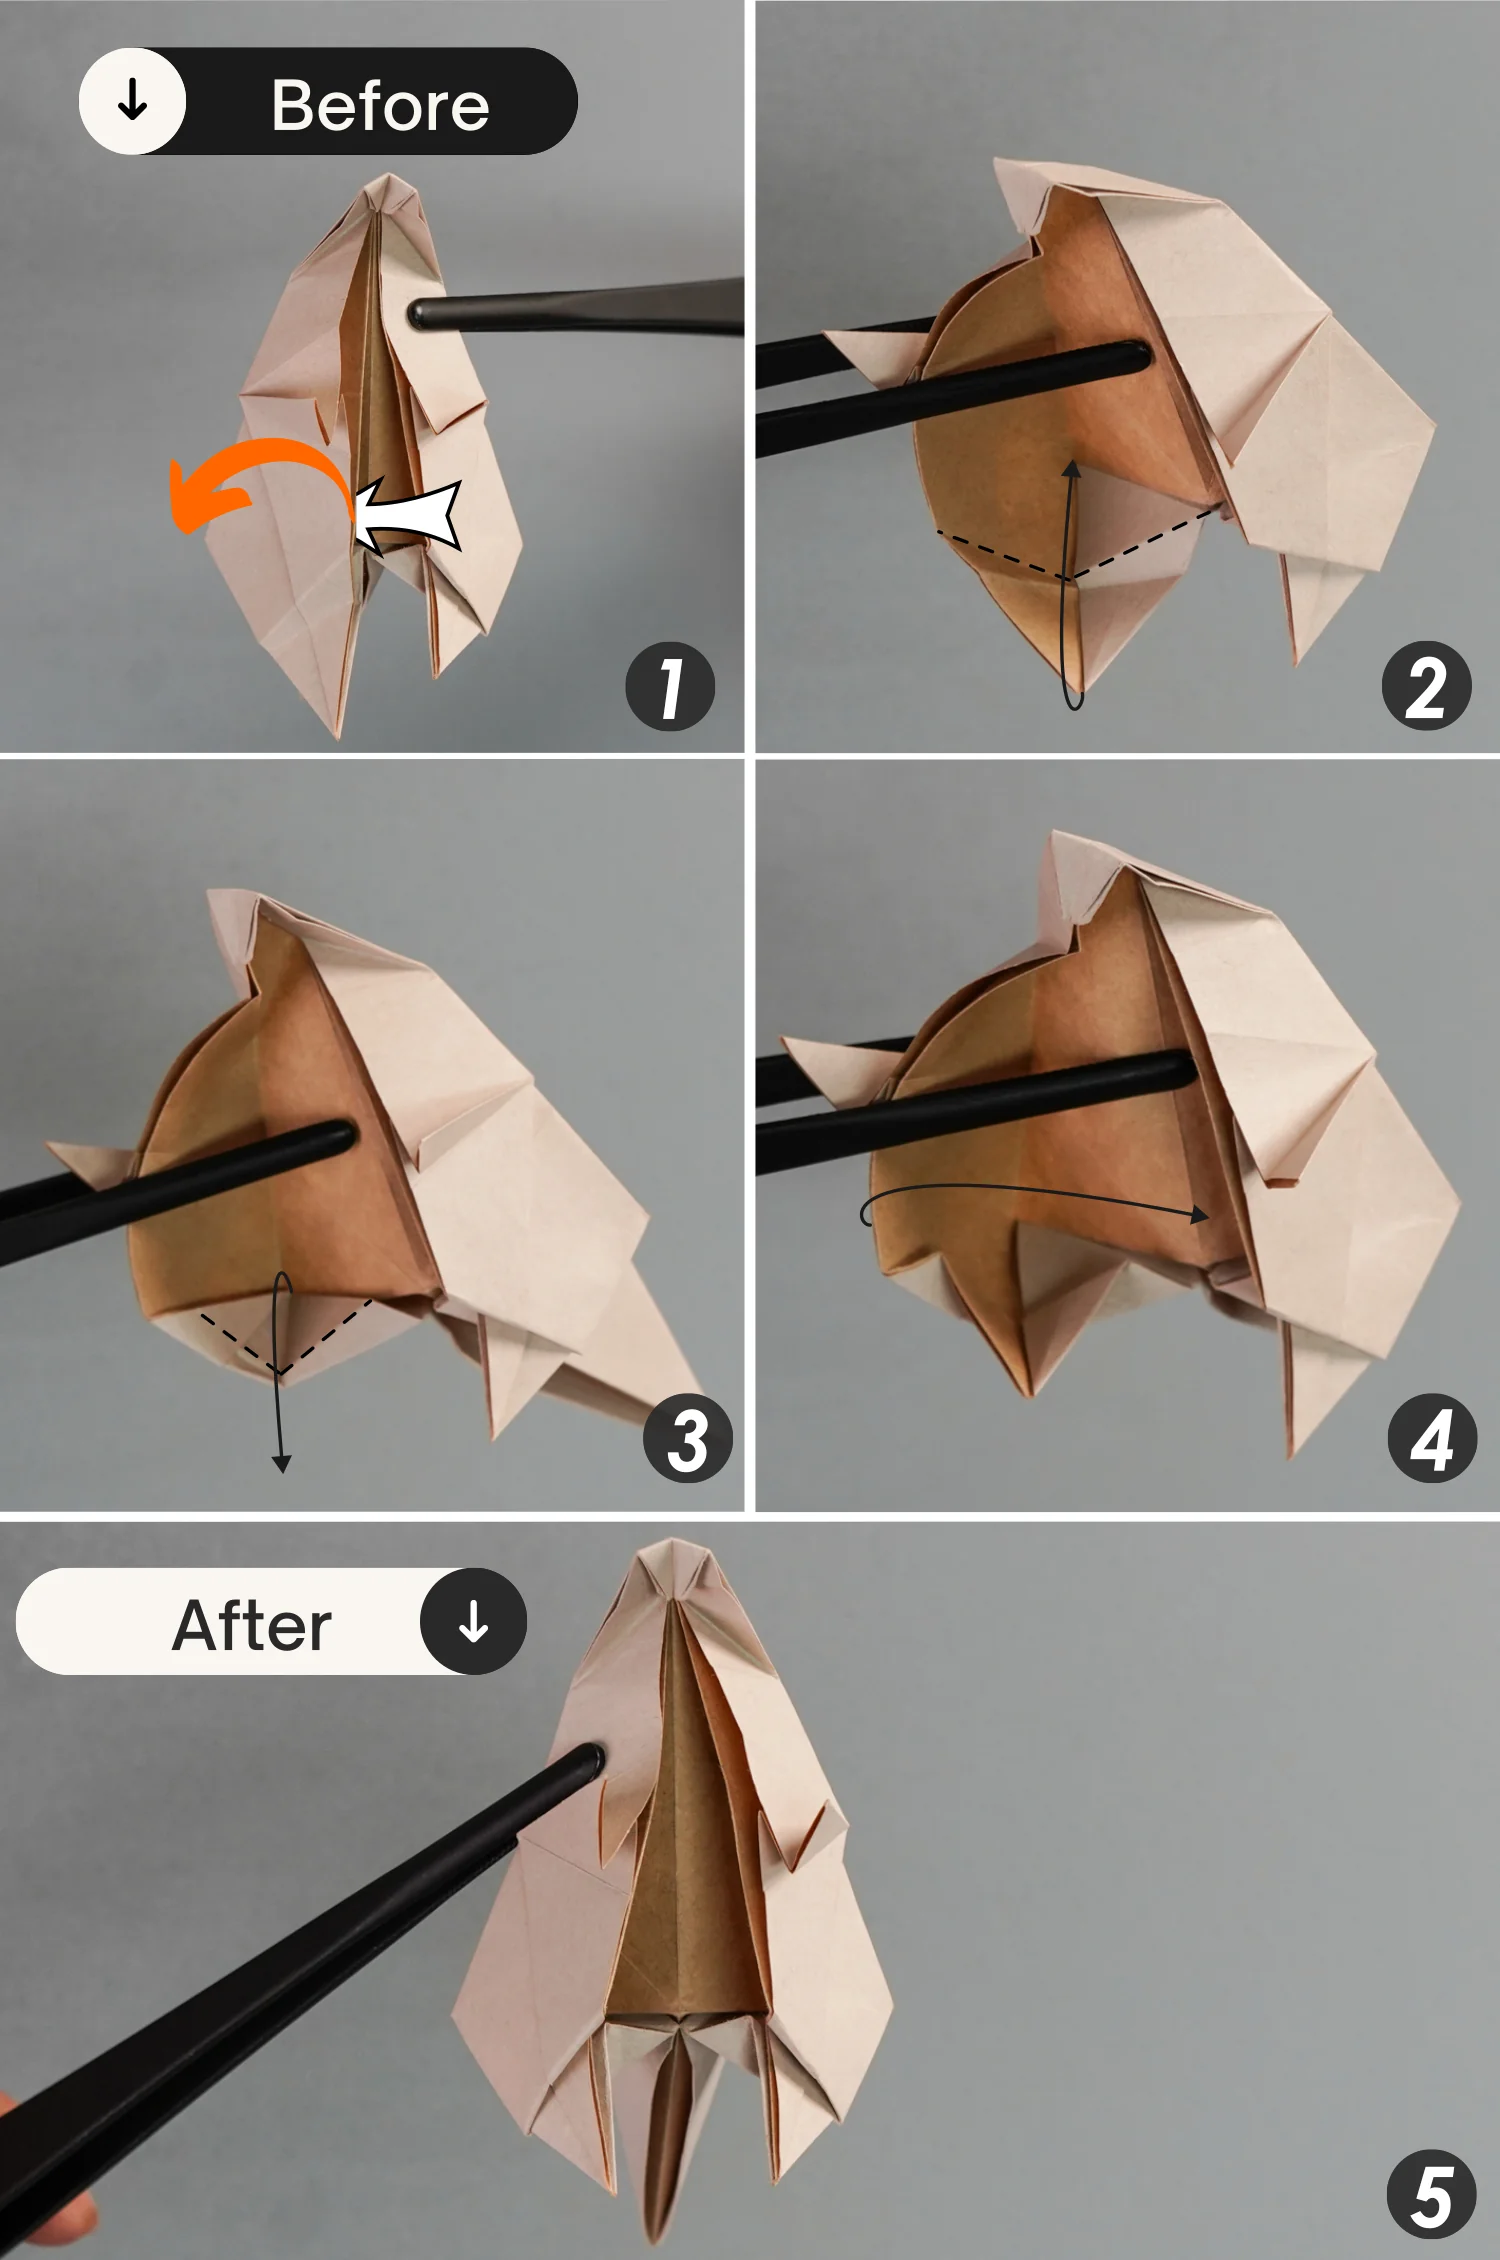
Step 25
Rotate it 90 degrees from the right side to the left side, and expand the top part from the back, then press down the top point along the creases you made in the previous step.

Step 26
Fold the top corner down a little along the dotted line, then pinch the left and right sides together, and flatten the fold. Finally, rotate the paper 90 degrees from the left to the right.
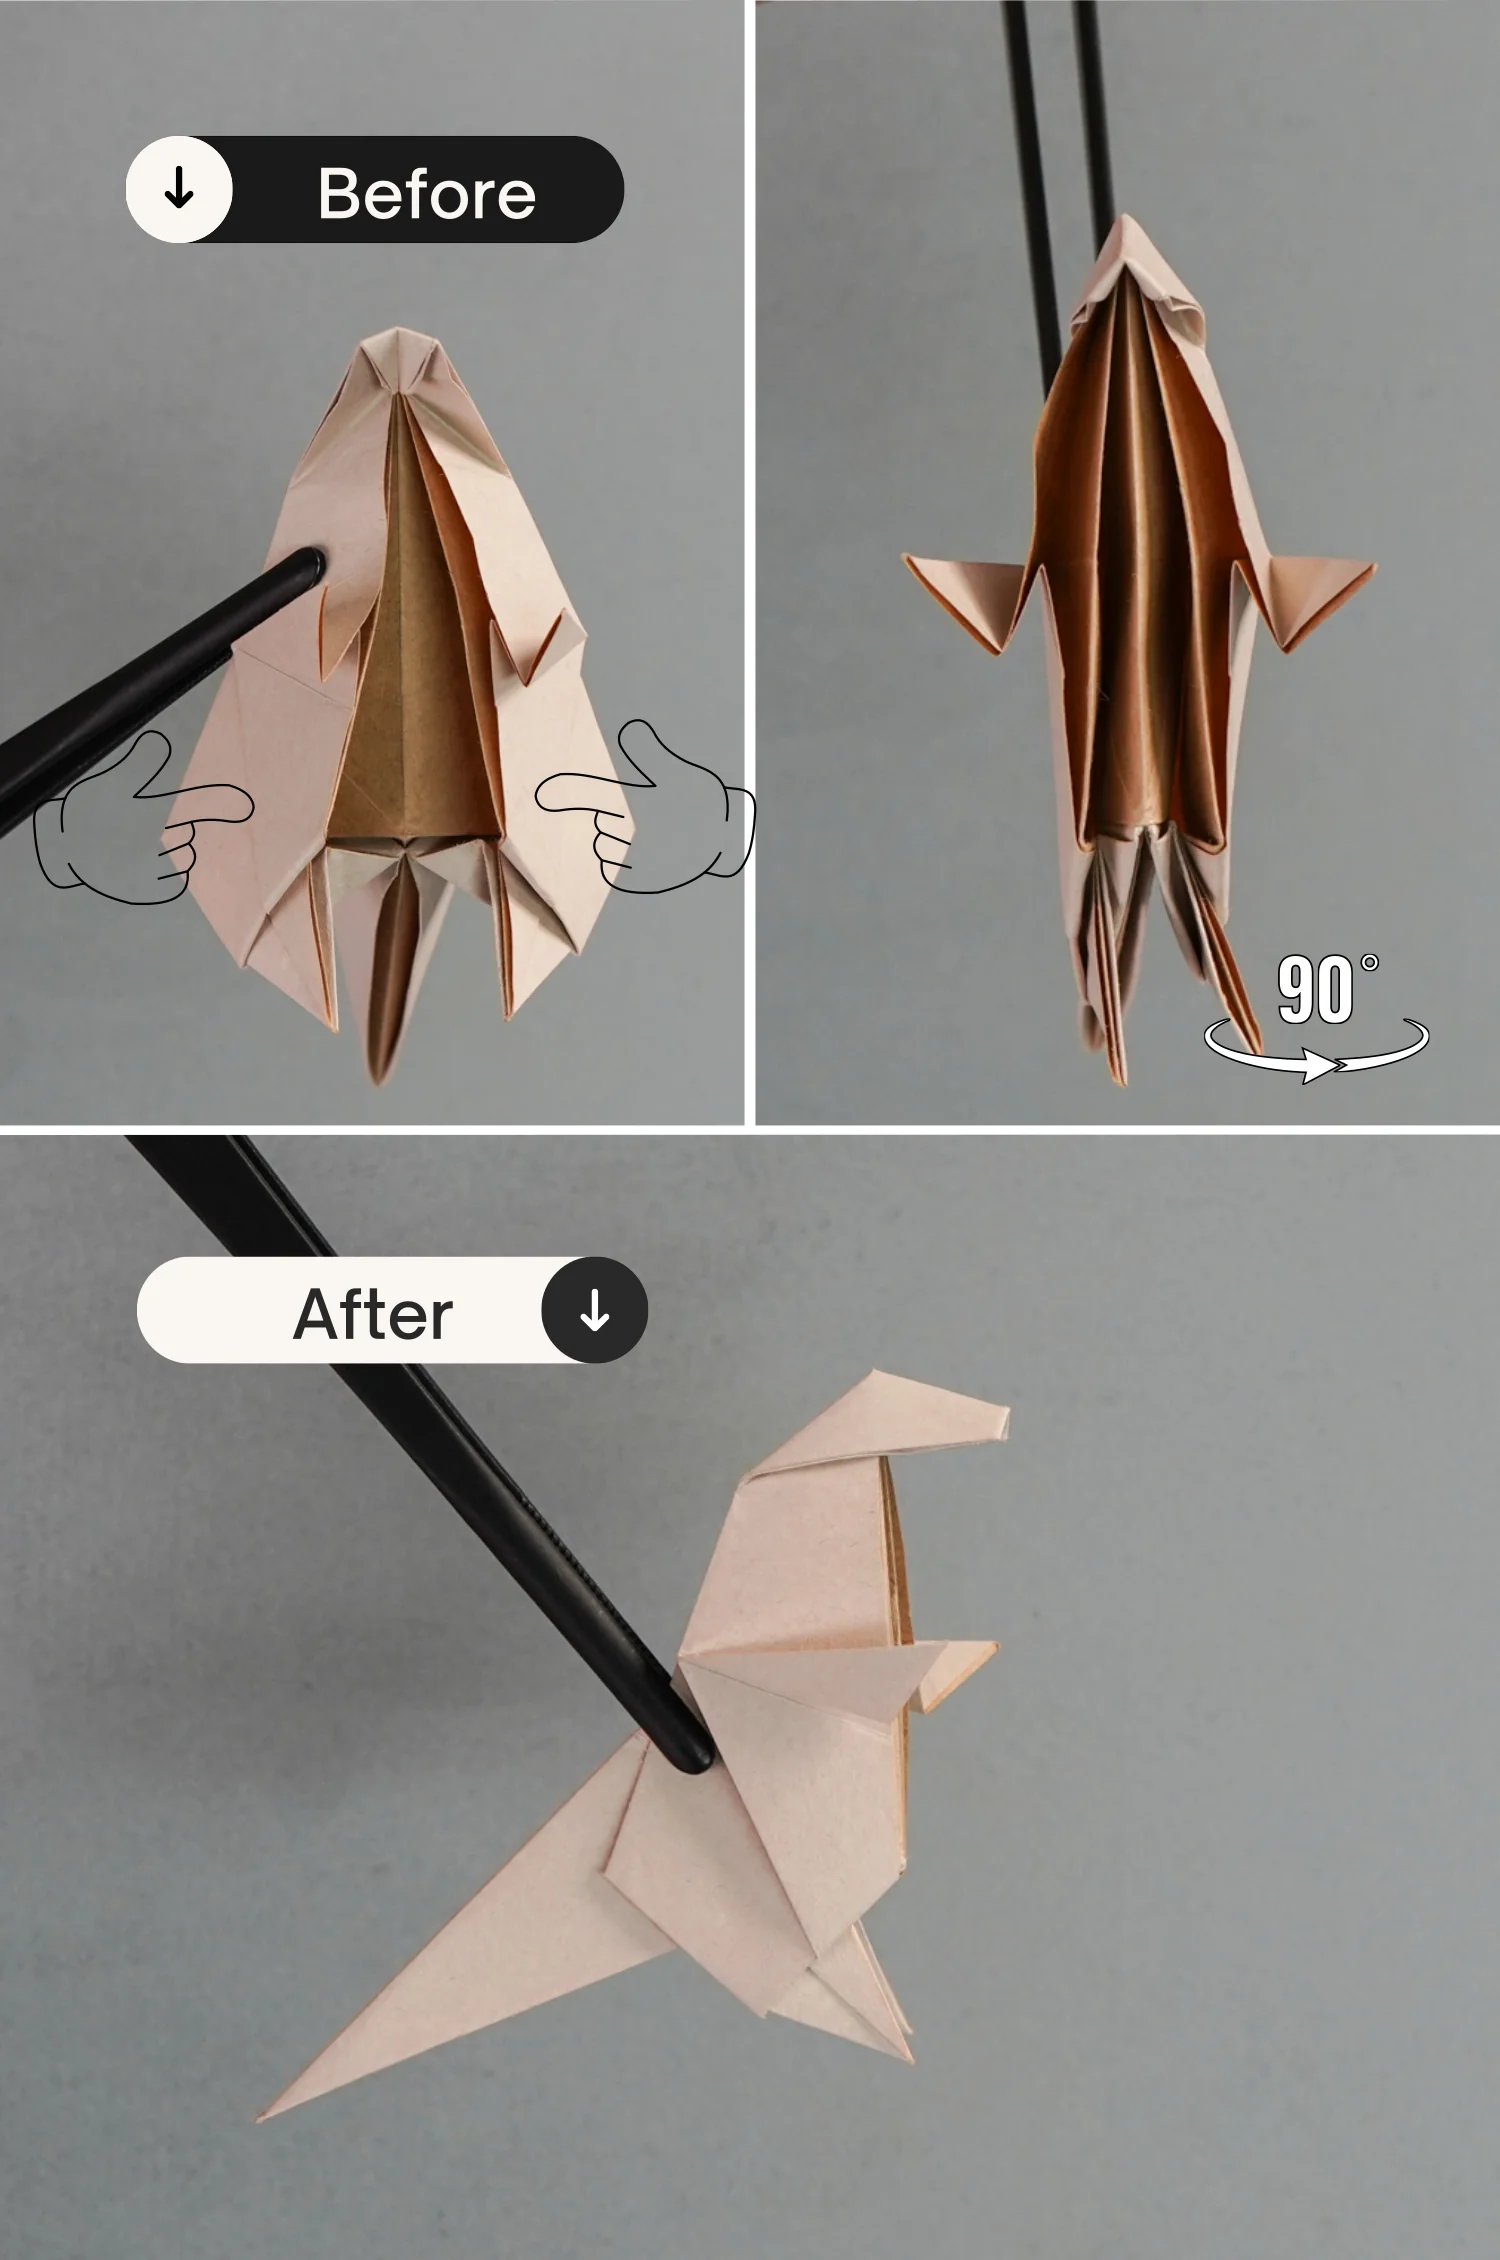
Step 27
Rotate the model 90 degrees from the left to the right, and fold up the flap. Then fold the bottom left and right points to meet the left and right corners of the paper, and finally fold them back toward their original direction for a short section.
Step 28
Flip the model over, then unfold the two layers you folded in the previous step.
Step 29
Focus on the right part, take the top two layers, and fold them to the right side to open this part. Next, fold up the bottom point of the right part, then fold it down for a short section, as the second and third pictures show. All the required creases are already exist, indicated by the dotted lines. Finally, close and flatten this right part.
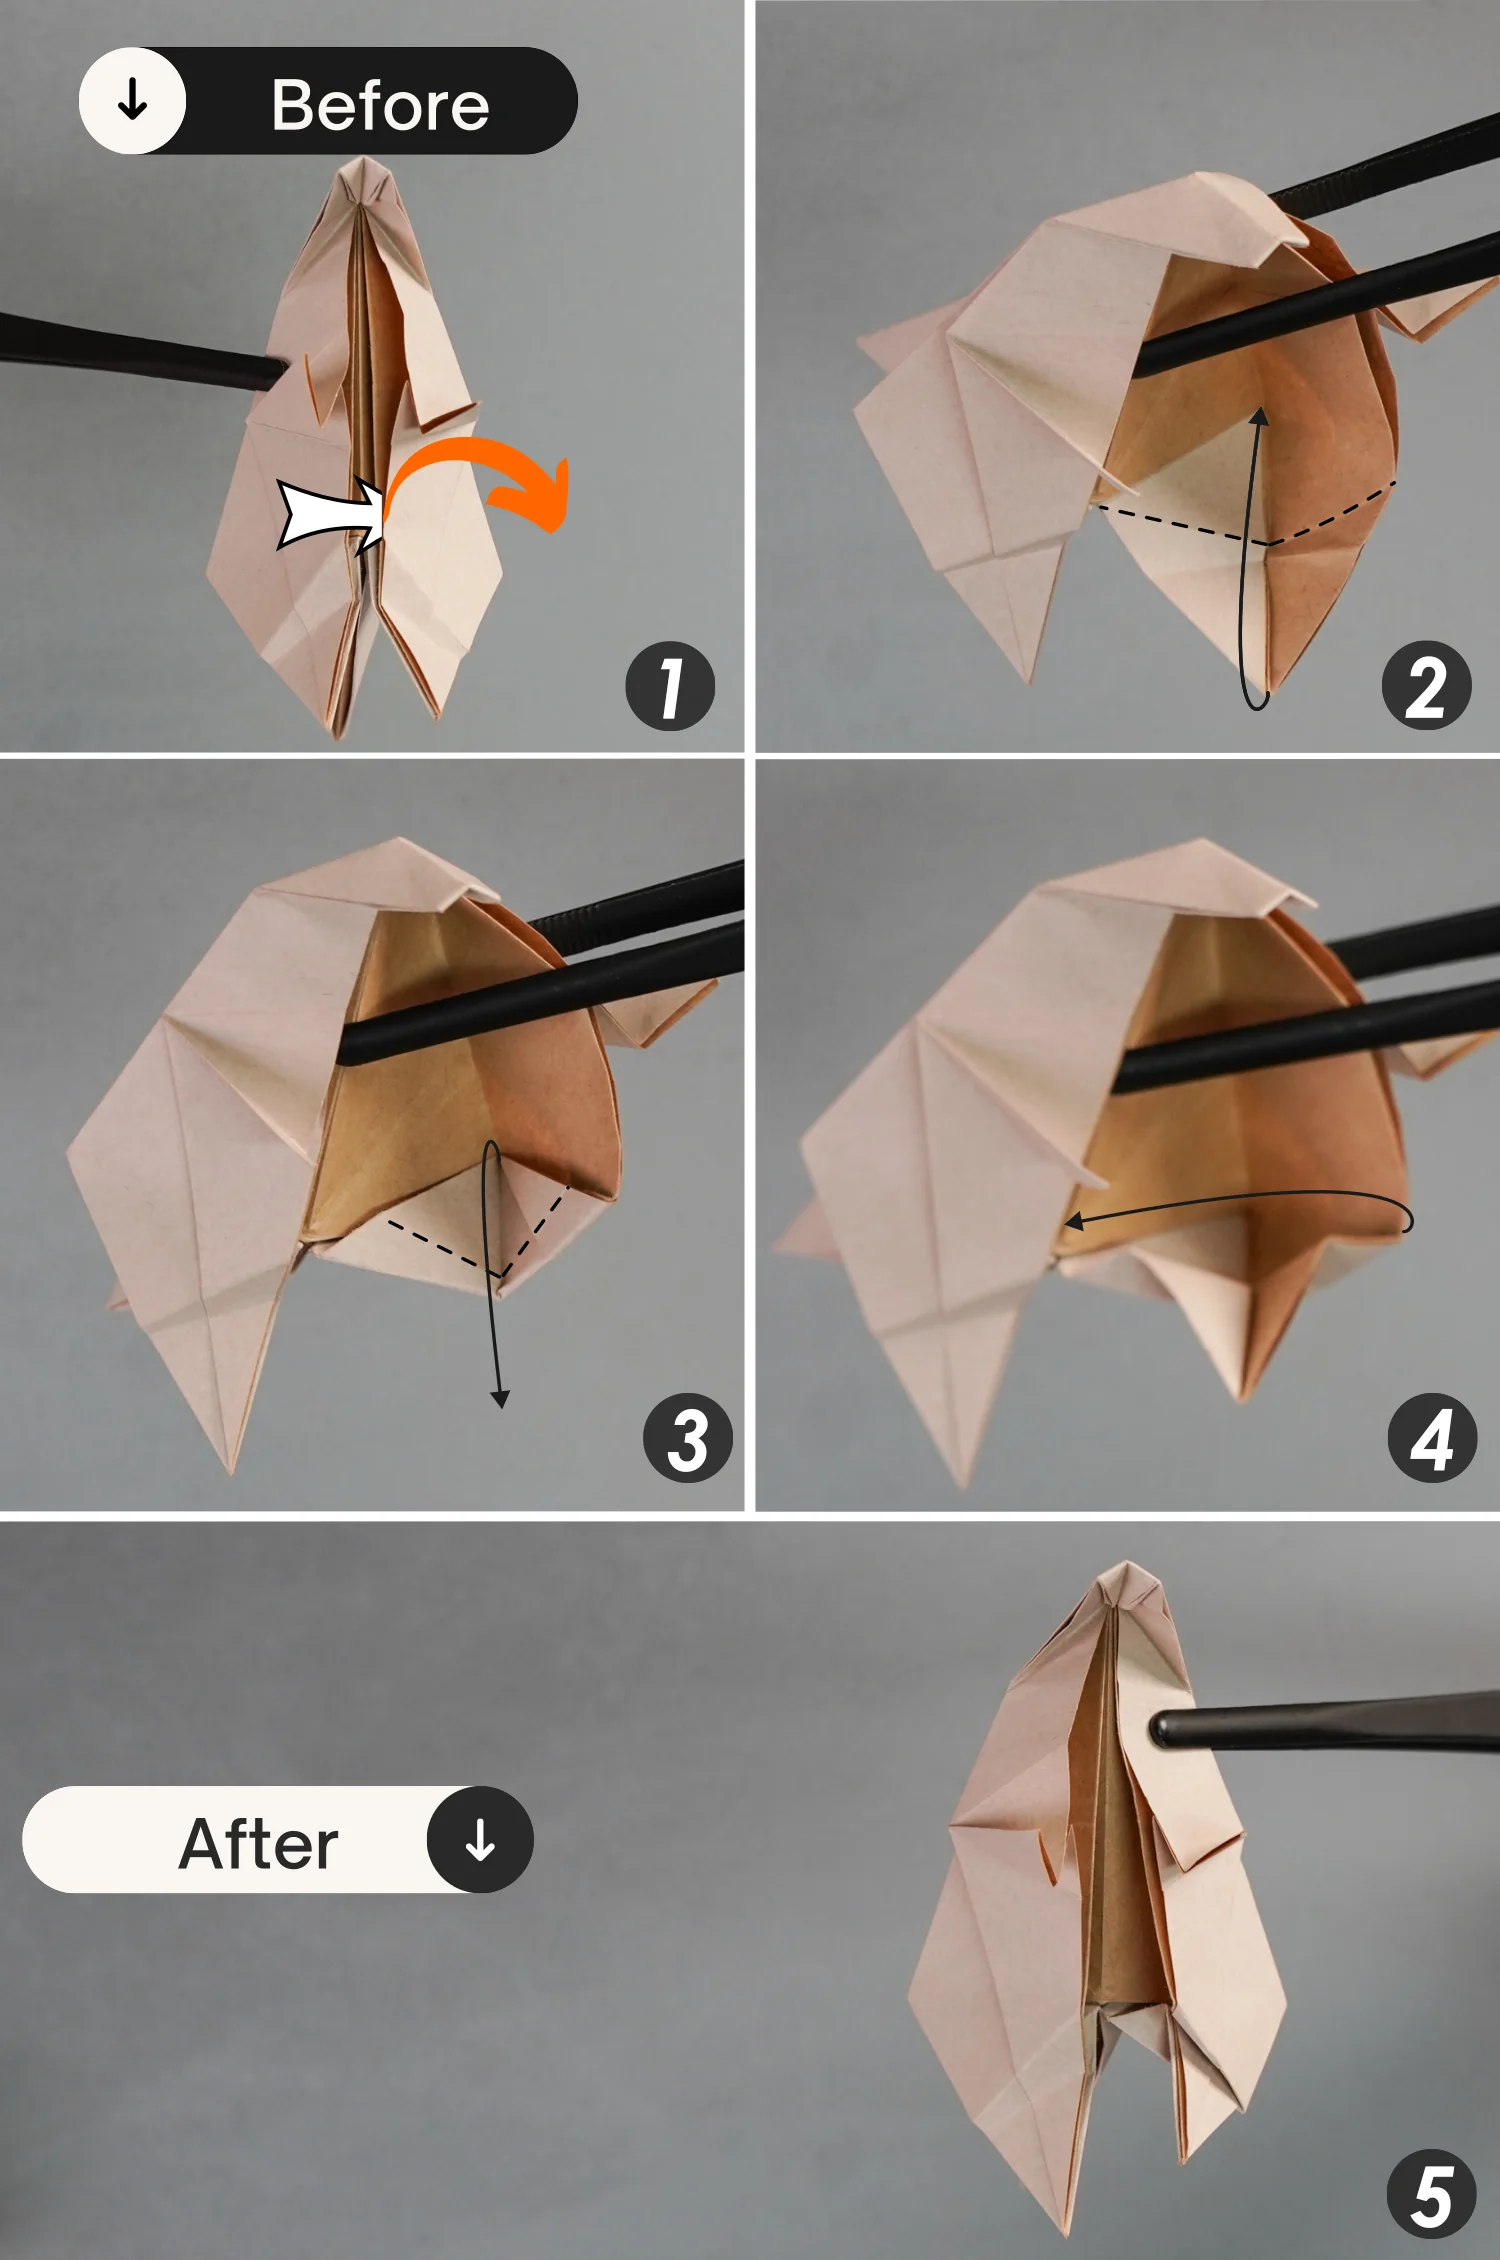
Step 30
Similarly, lift the top two layers of the left part to open this part, then fold up its bottom point, and fold it down for a short section, all the required creases are already here. Finally, close and flatten the left part.
Step 31
Flatten the paper, then rotate it 90 degrees from the left to the right. This is the final shape of the body part.
Step 32
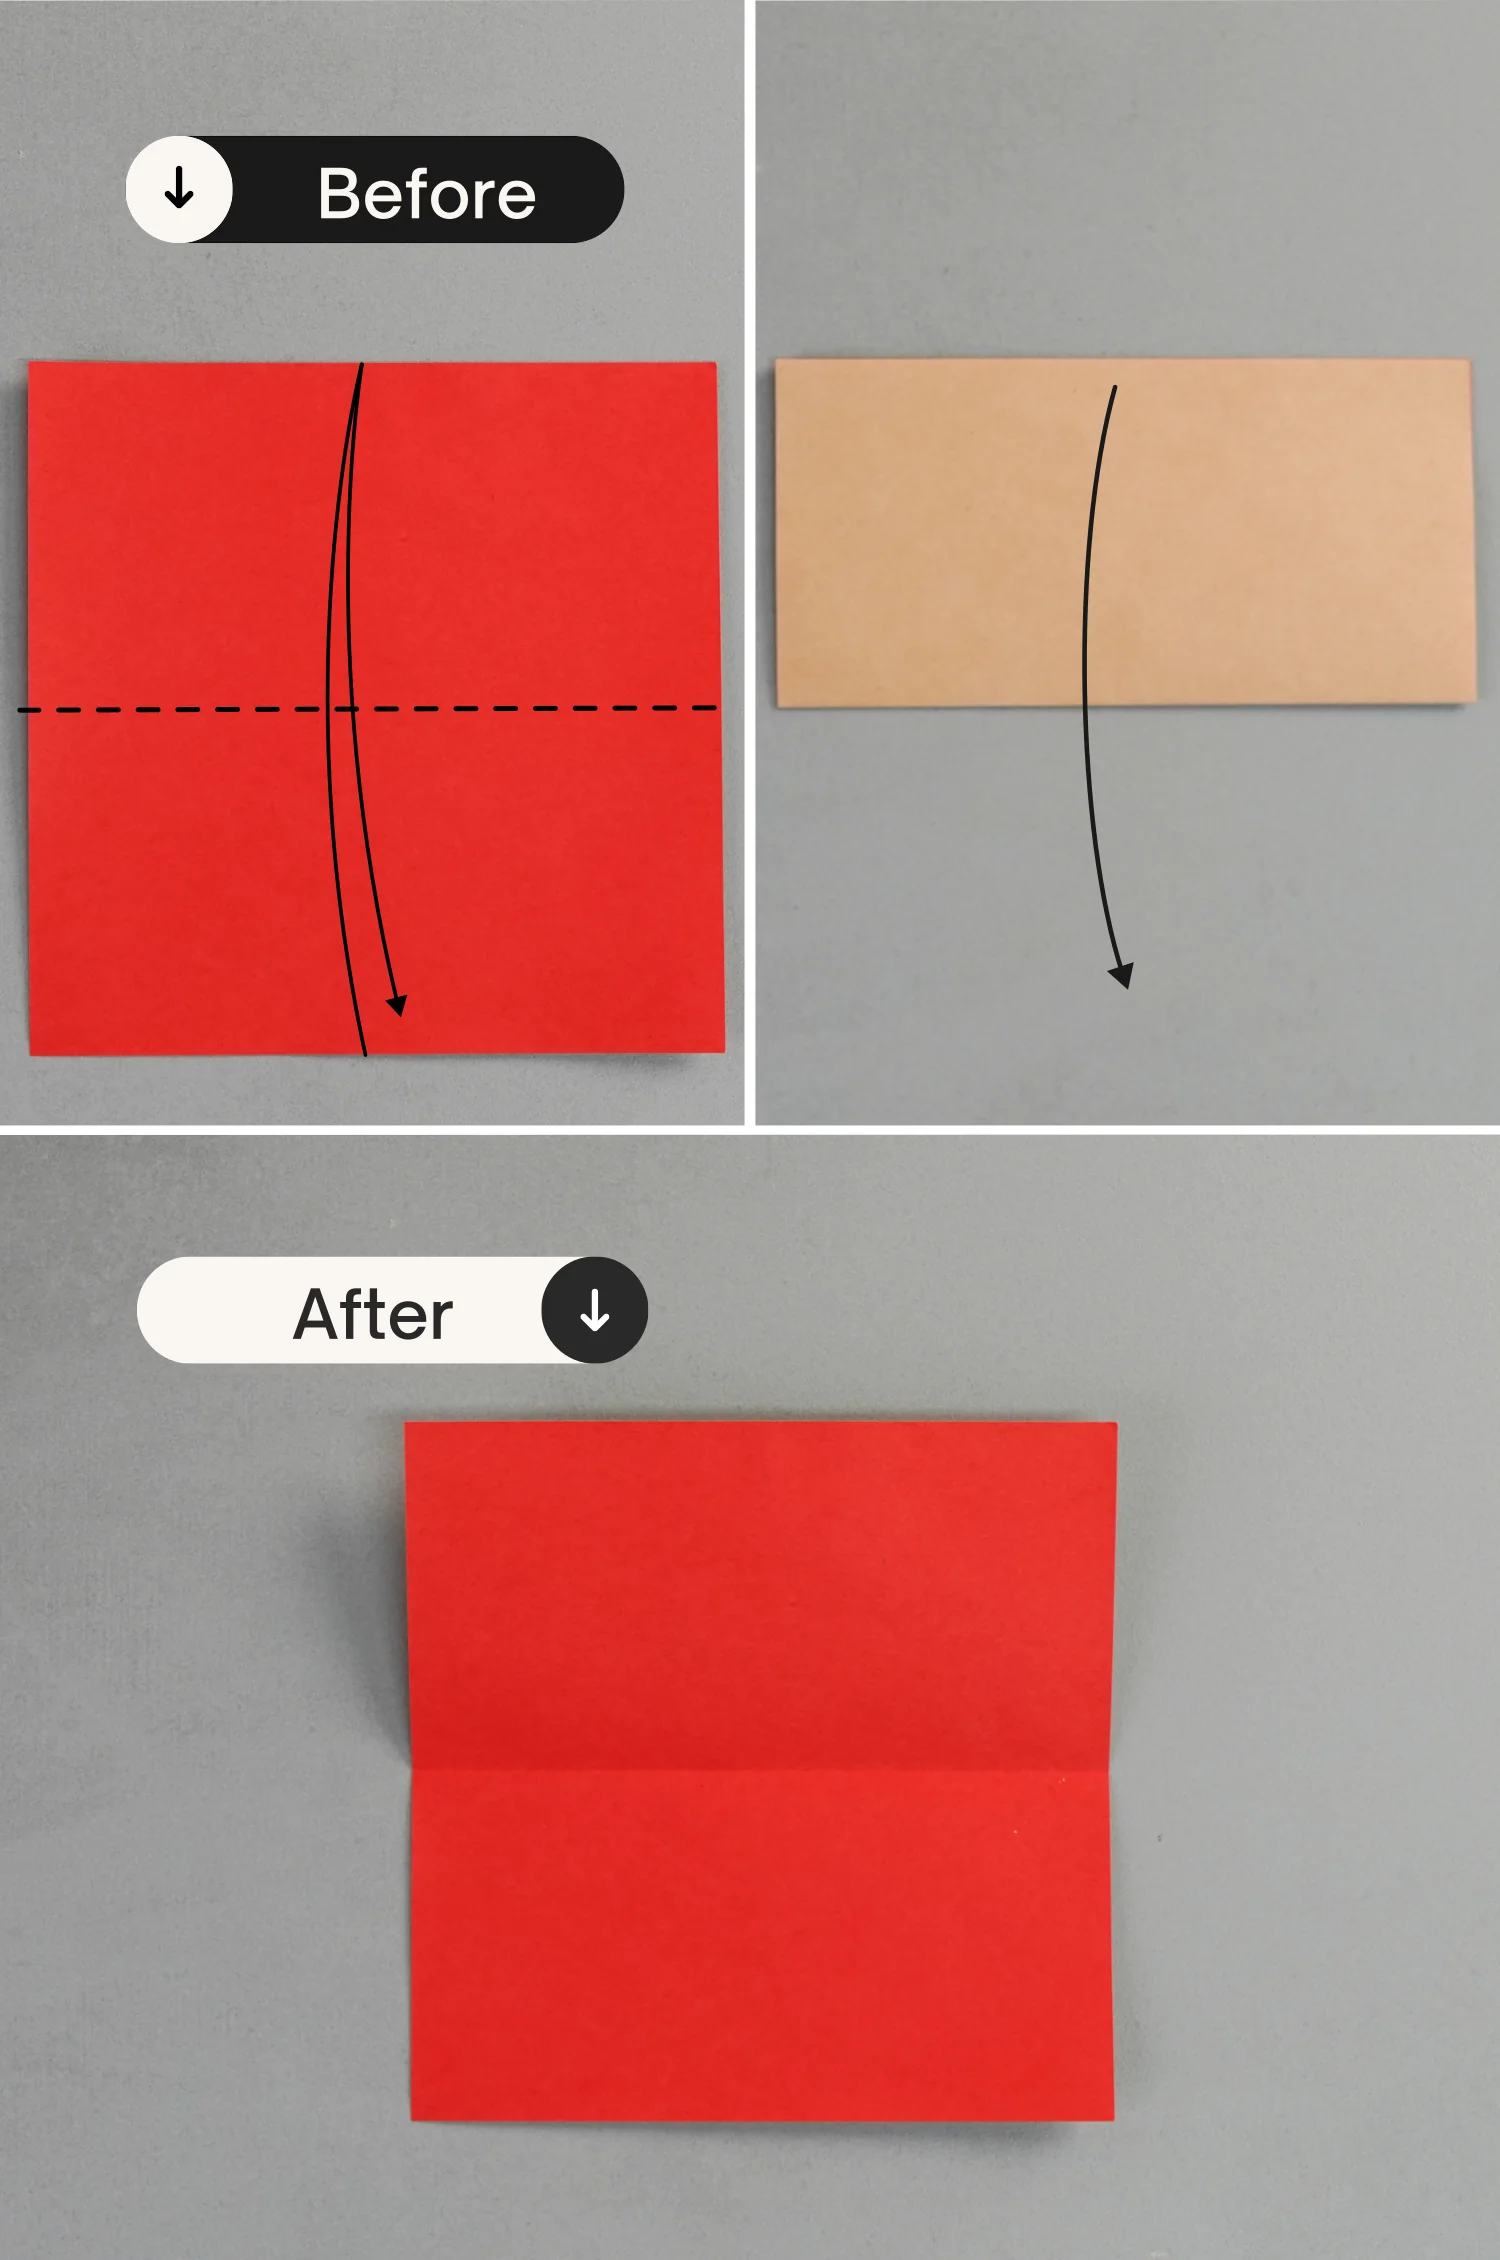
Take out another 15×15 cm piece of paper, we’re going to start by cutting out a 7.5 x 7.5 cm piece of paper from this sheet, you can skip this step if you already have it and start from step 35.
start with the red side of the paper face up, fold it in half horizontally, crease it well then unfold it.
Step 33
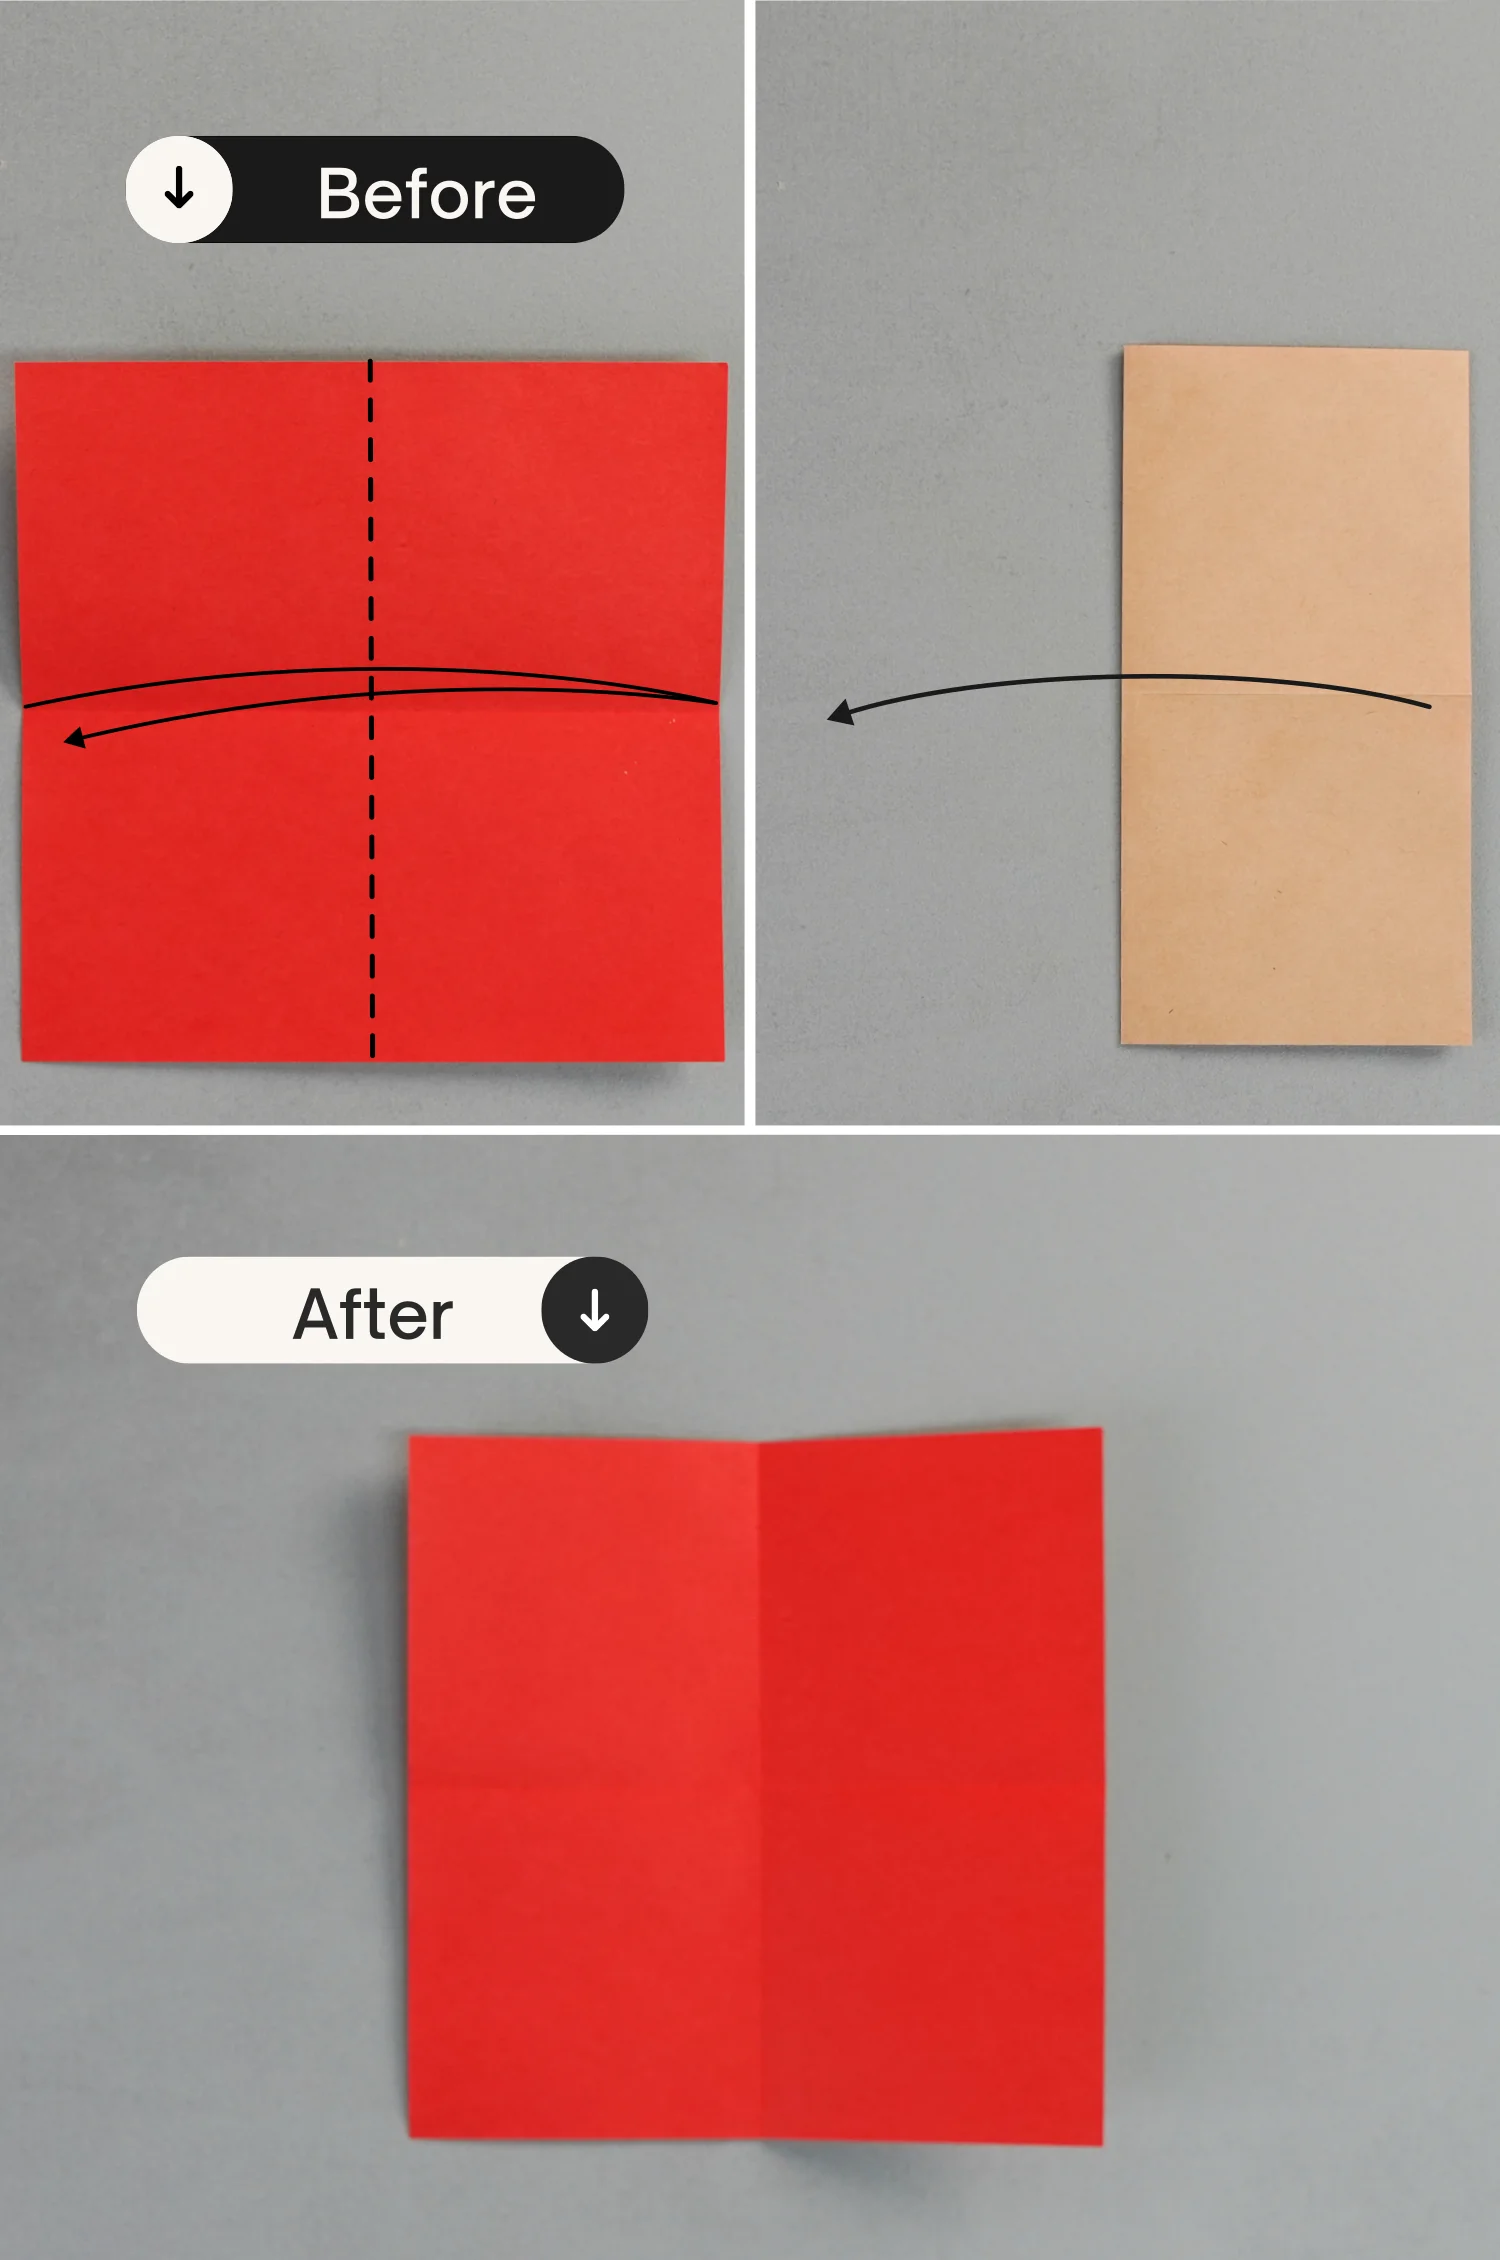
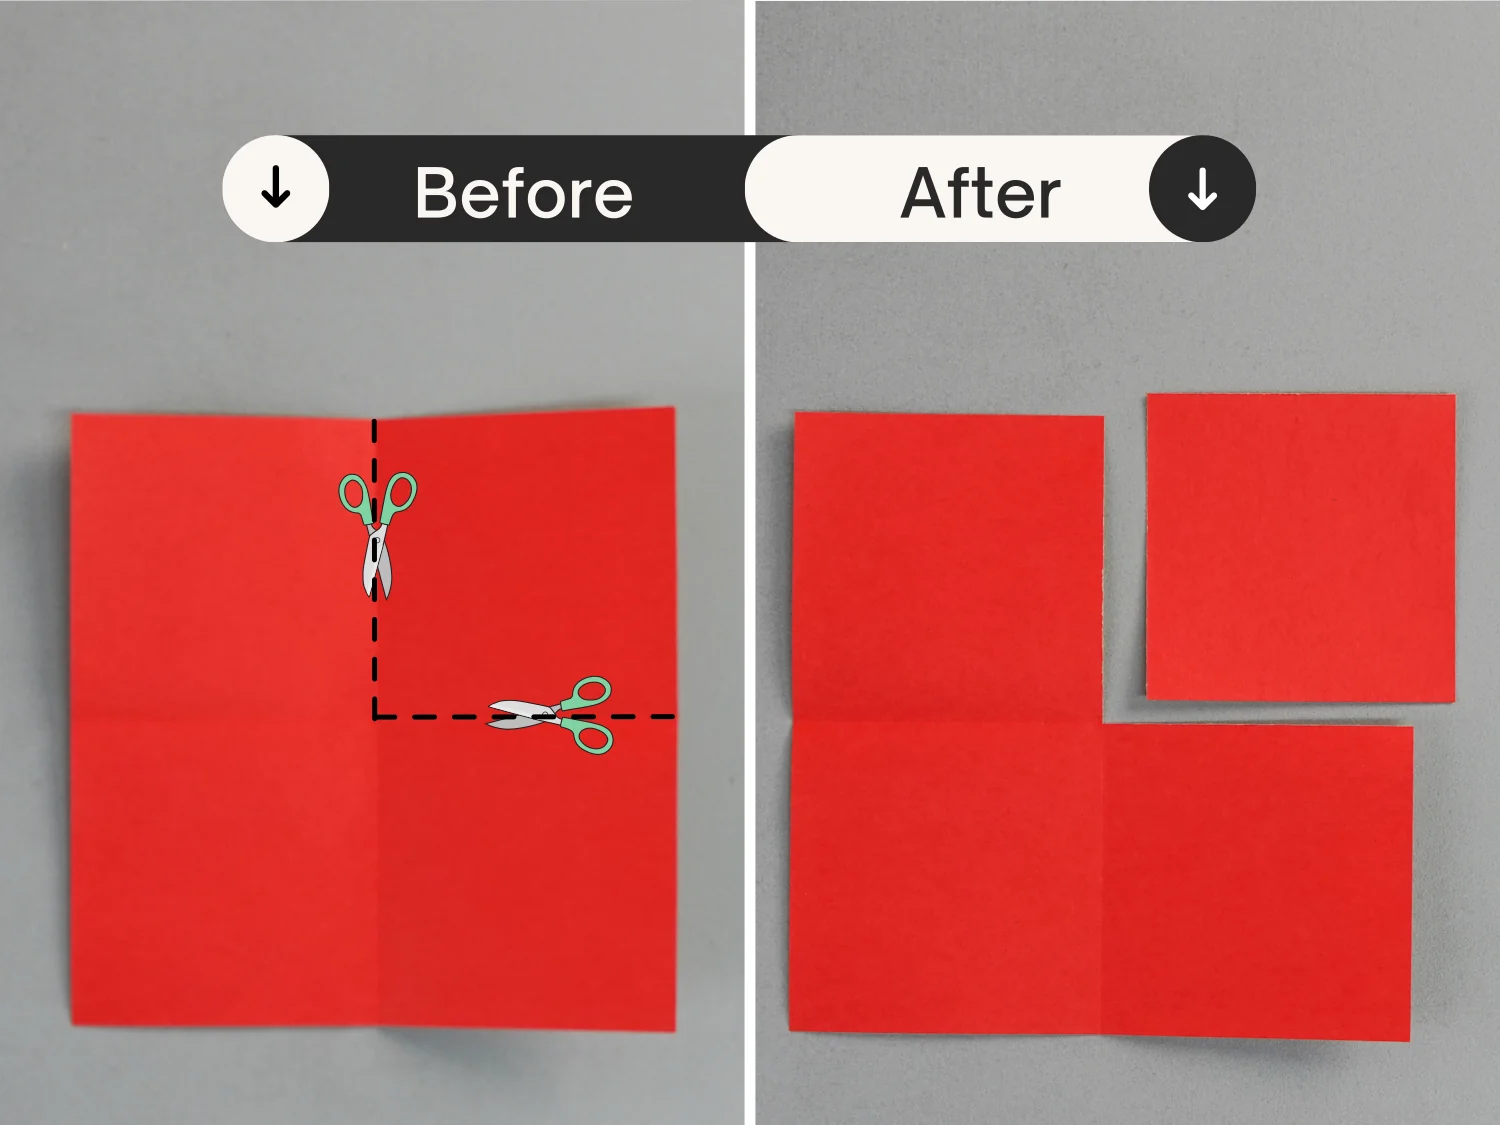
Fold it in half vertically, and unfold it.
Step 34
Cut it along the crease you just made, then you will get a 7.5×7.5 cm paper.
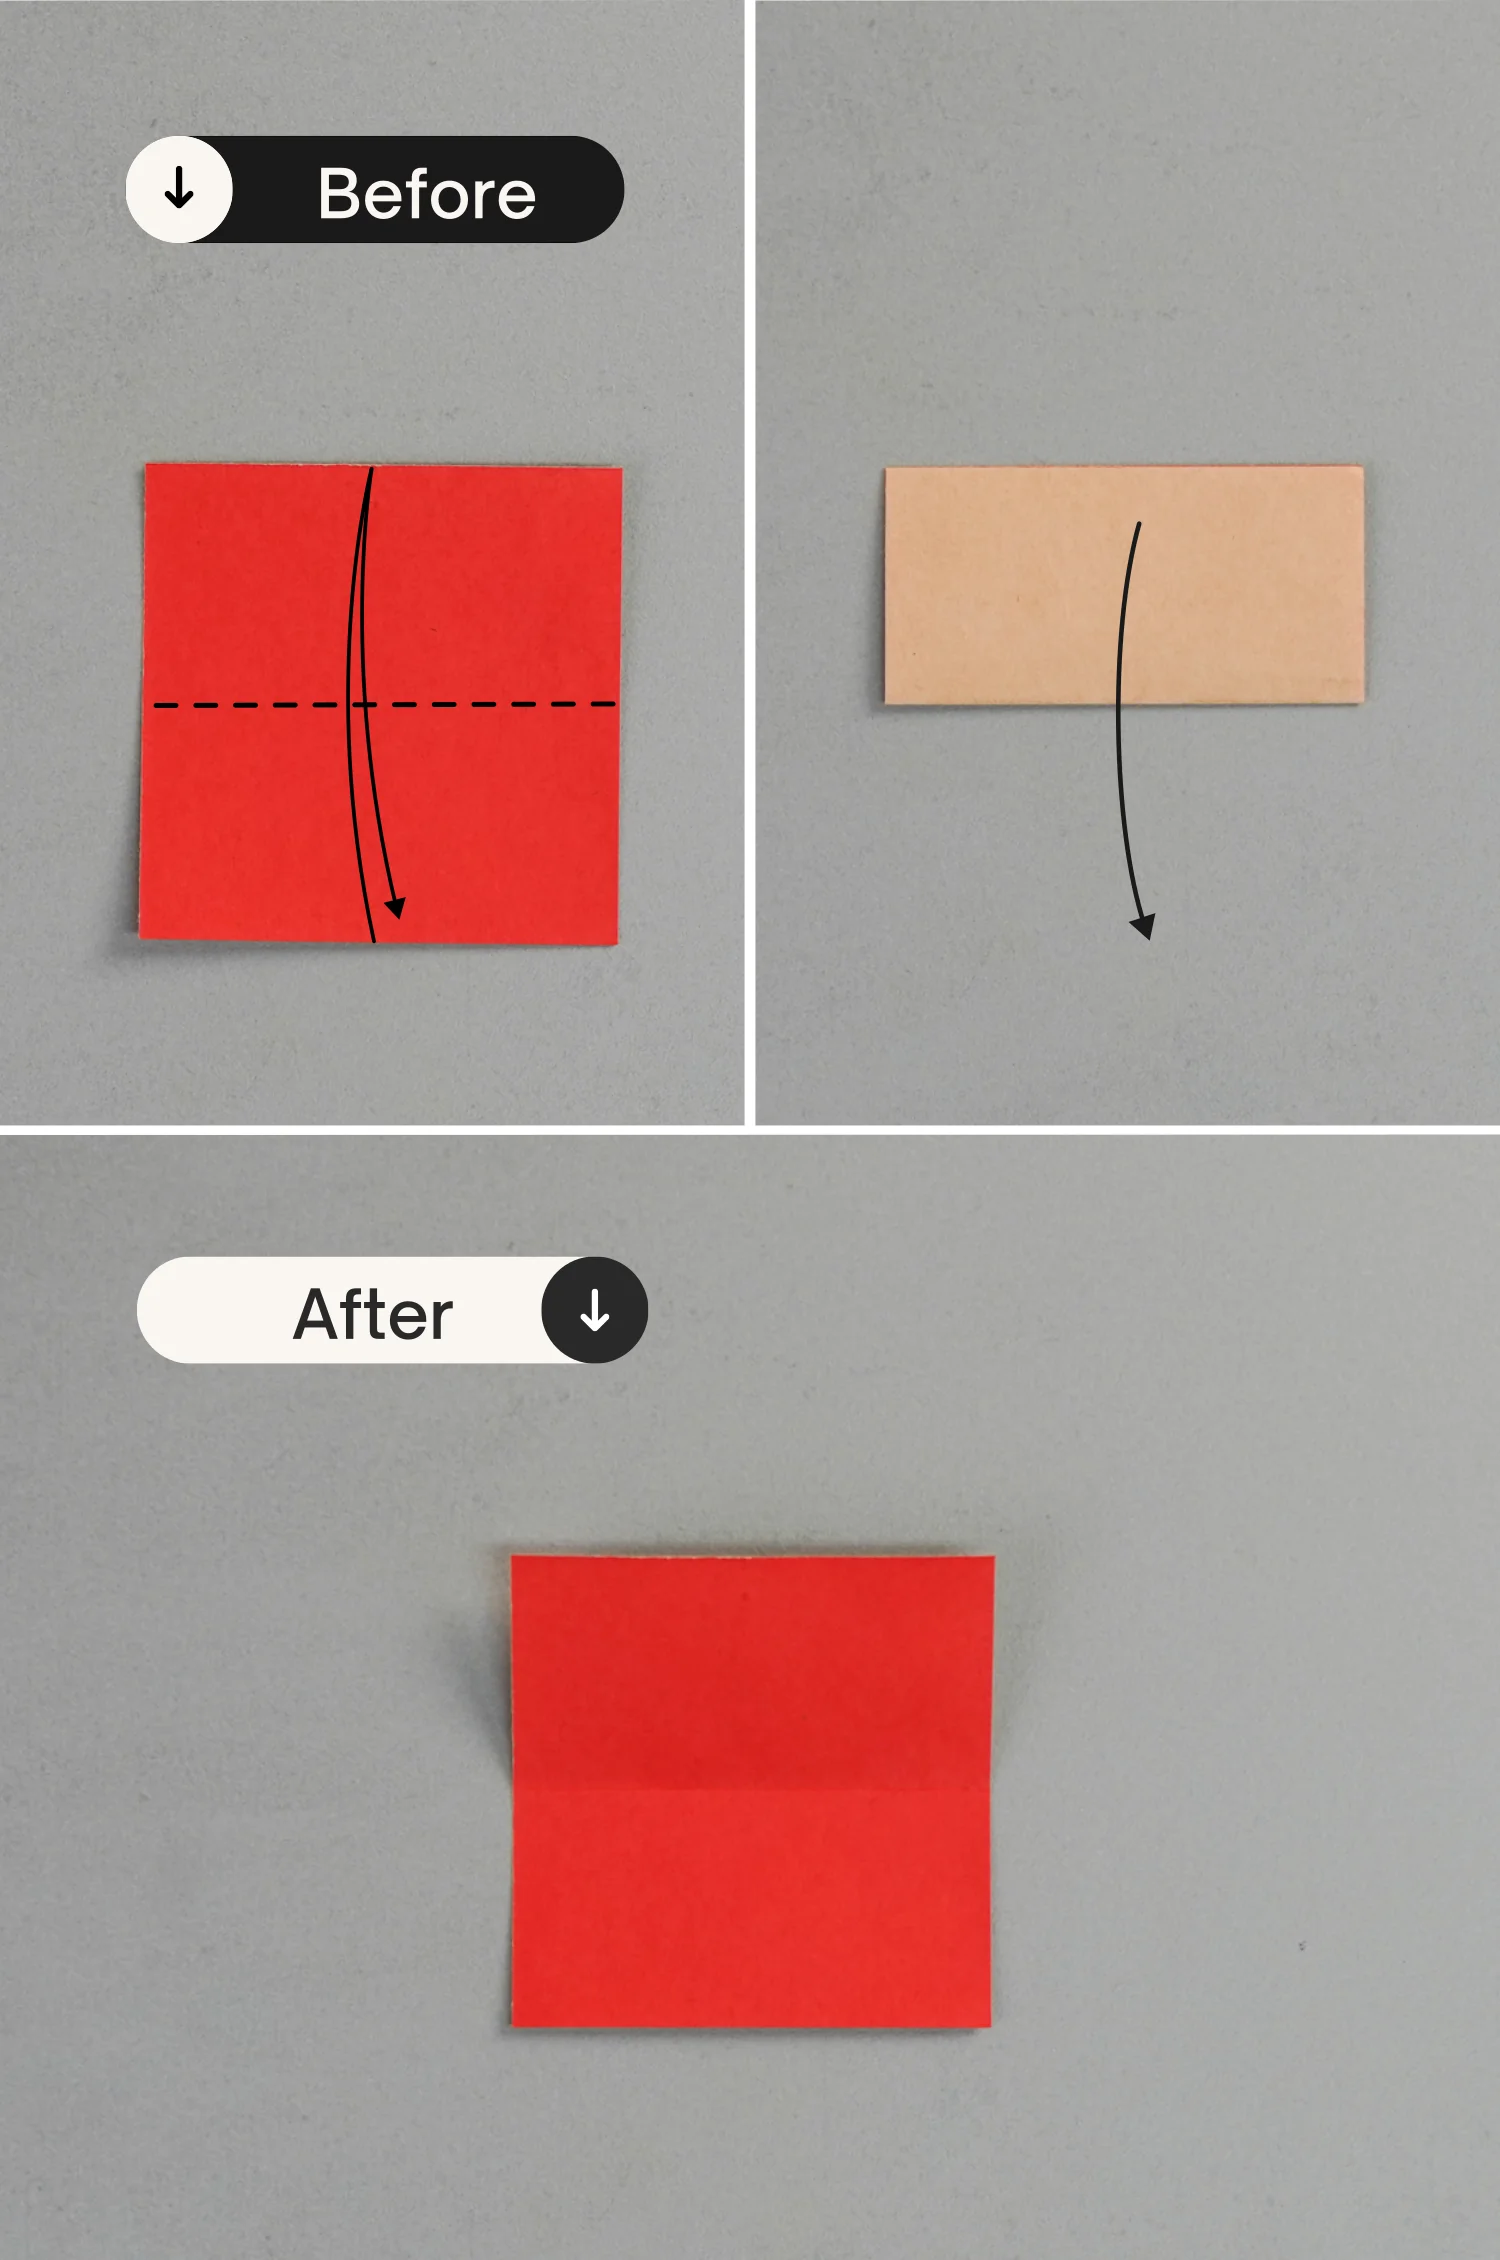
Step 35
Fold this piece of 7.5×7.5 cm paper in half horizontally, and unfold it.
Step 36
Fold it in half vertically, and unfold it.

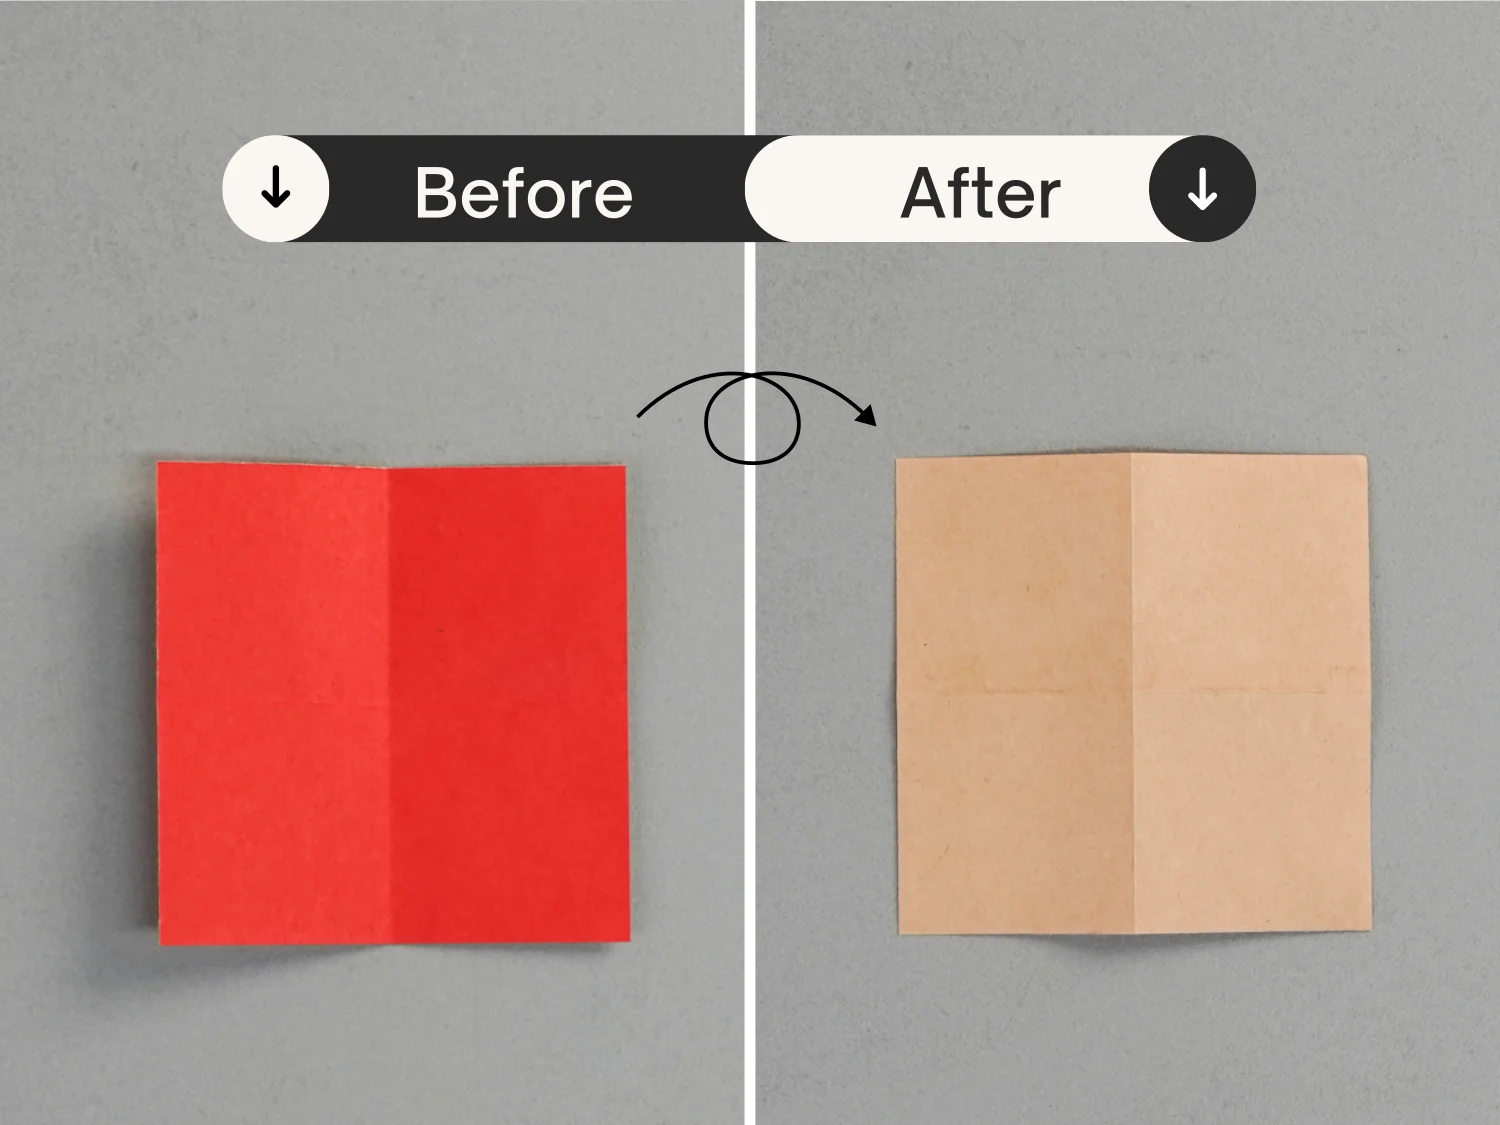
Step 37
Flip the paper over.
Step 38
Fold it in half diagonally, crease it well then unfold it.
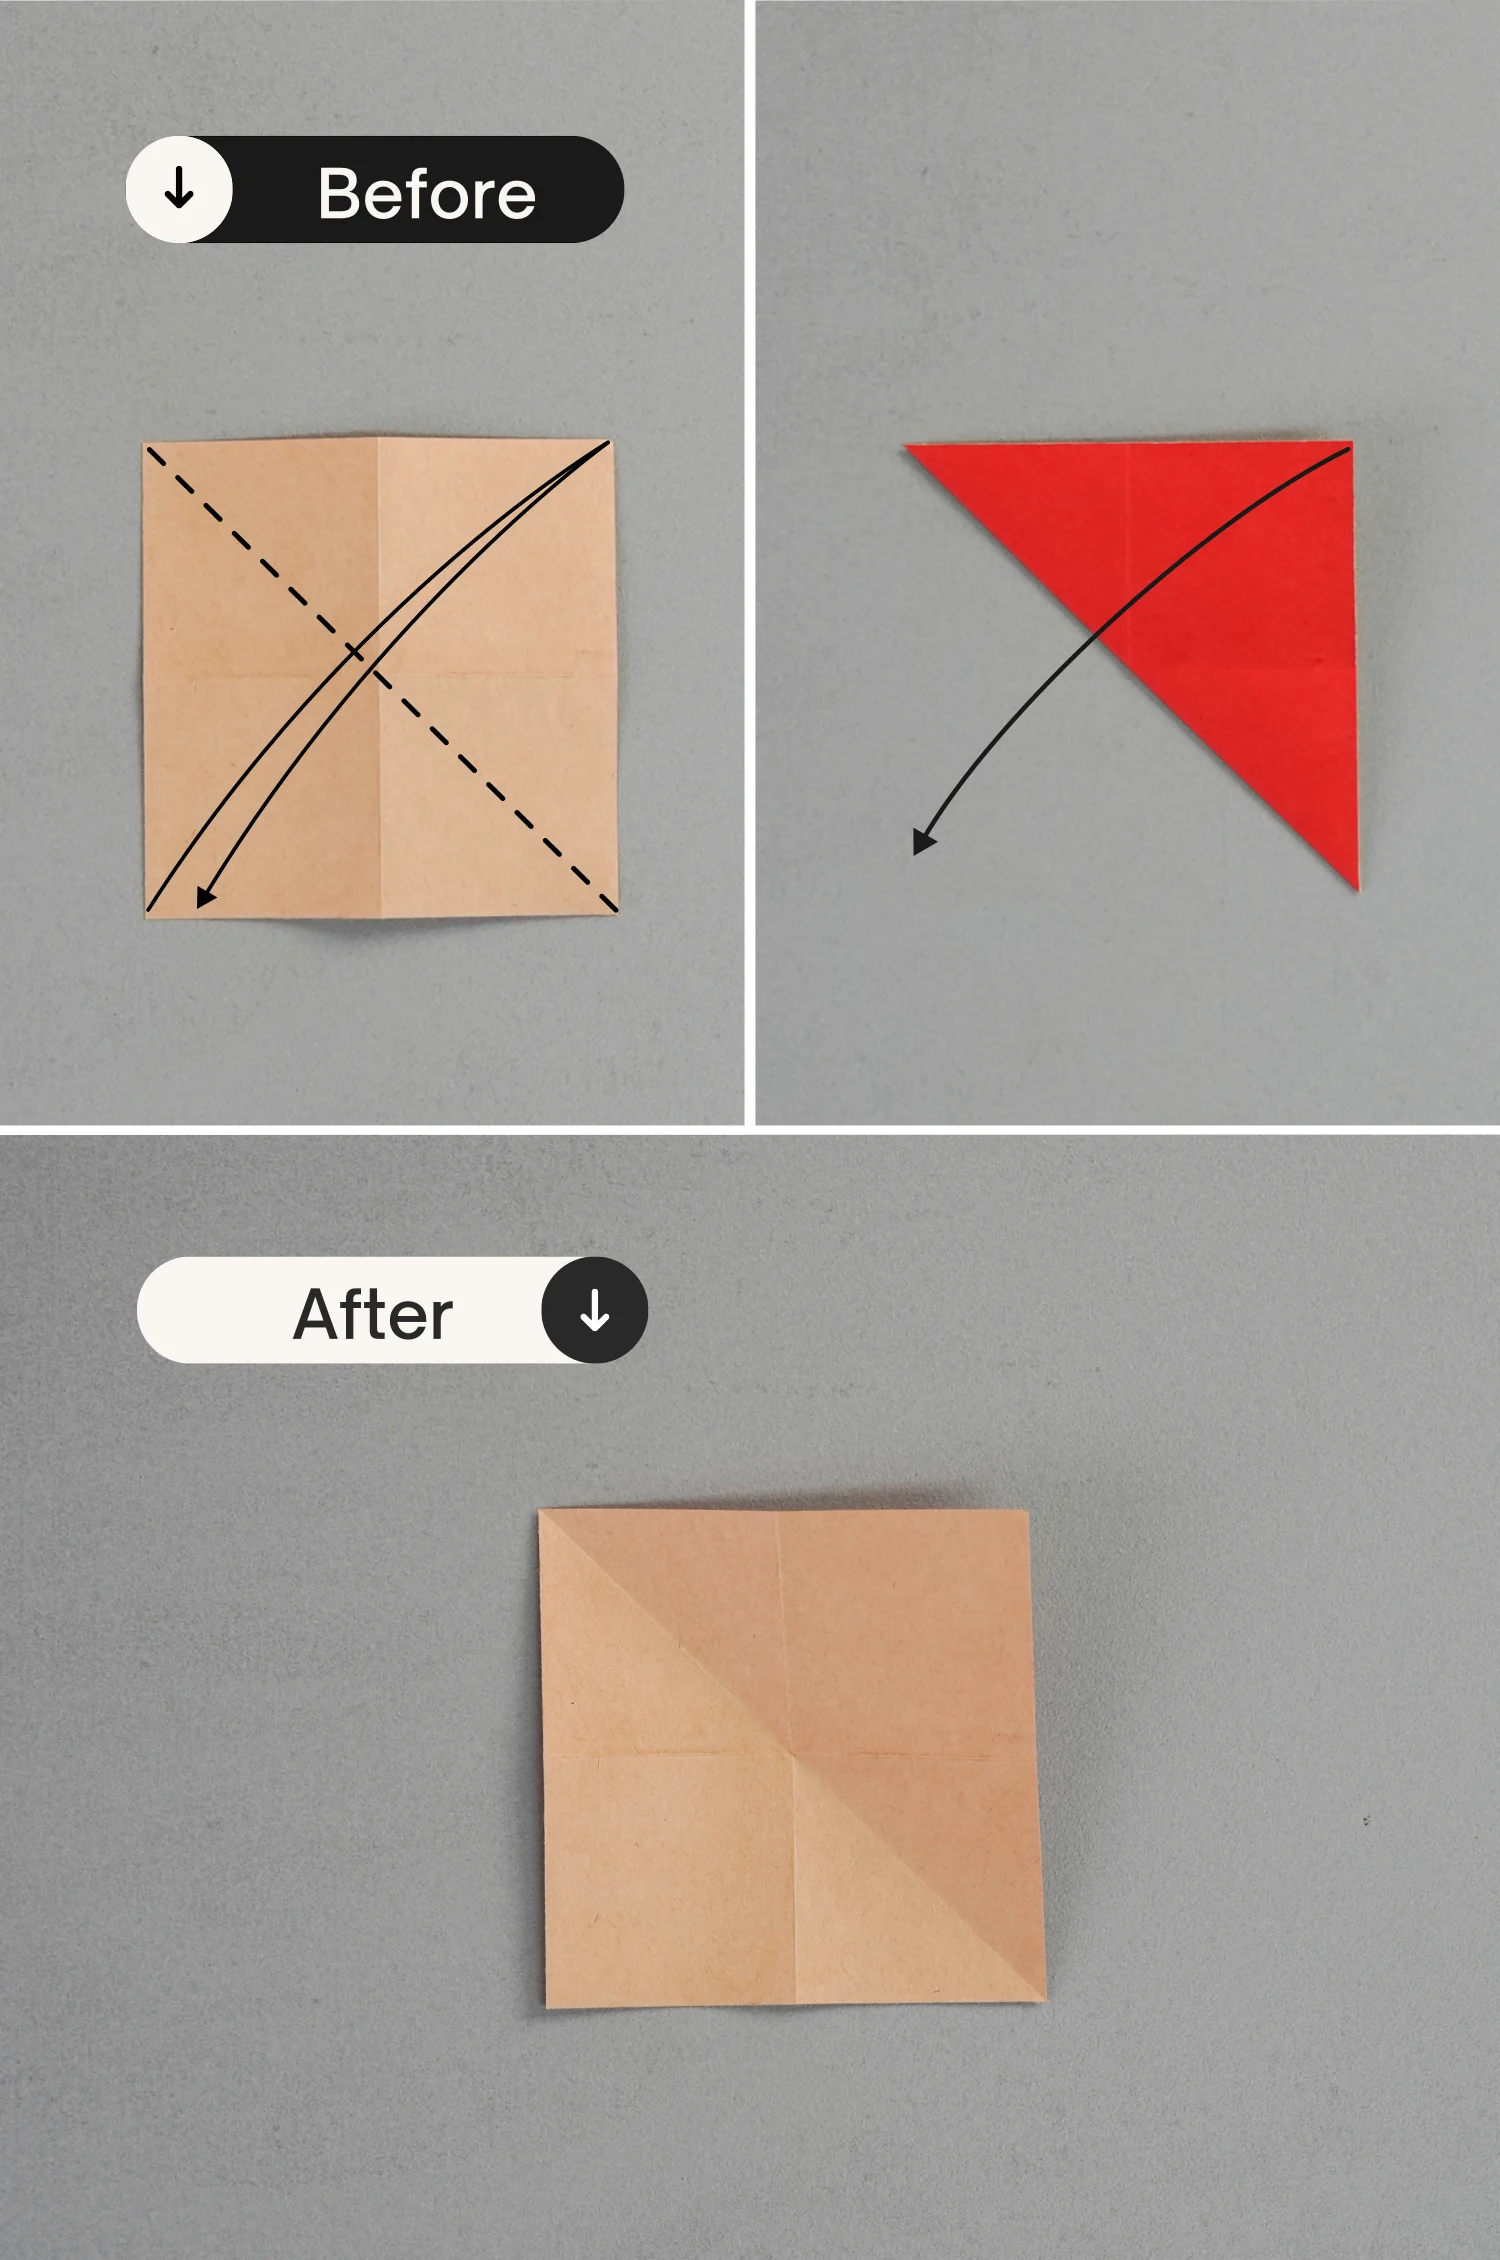
Step 39
Fold it in half diagonally from another side, and unfold it.
Step 40
Now, press the two middle points on the right and left edges. Then push it down to make the center points of the three edges meet the middle point of the bottom edge.
Flatten the fold to create a triangle.
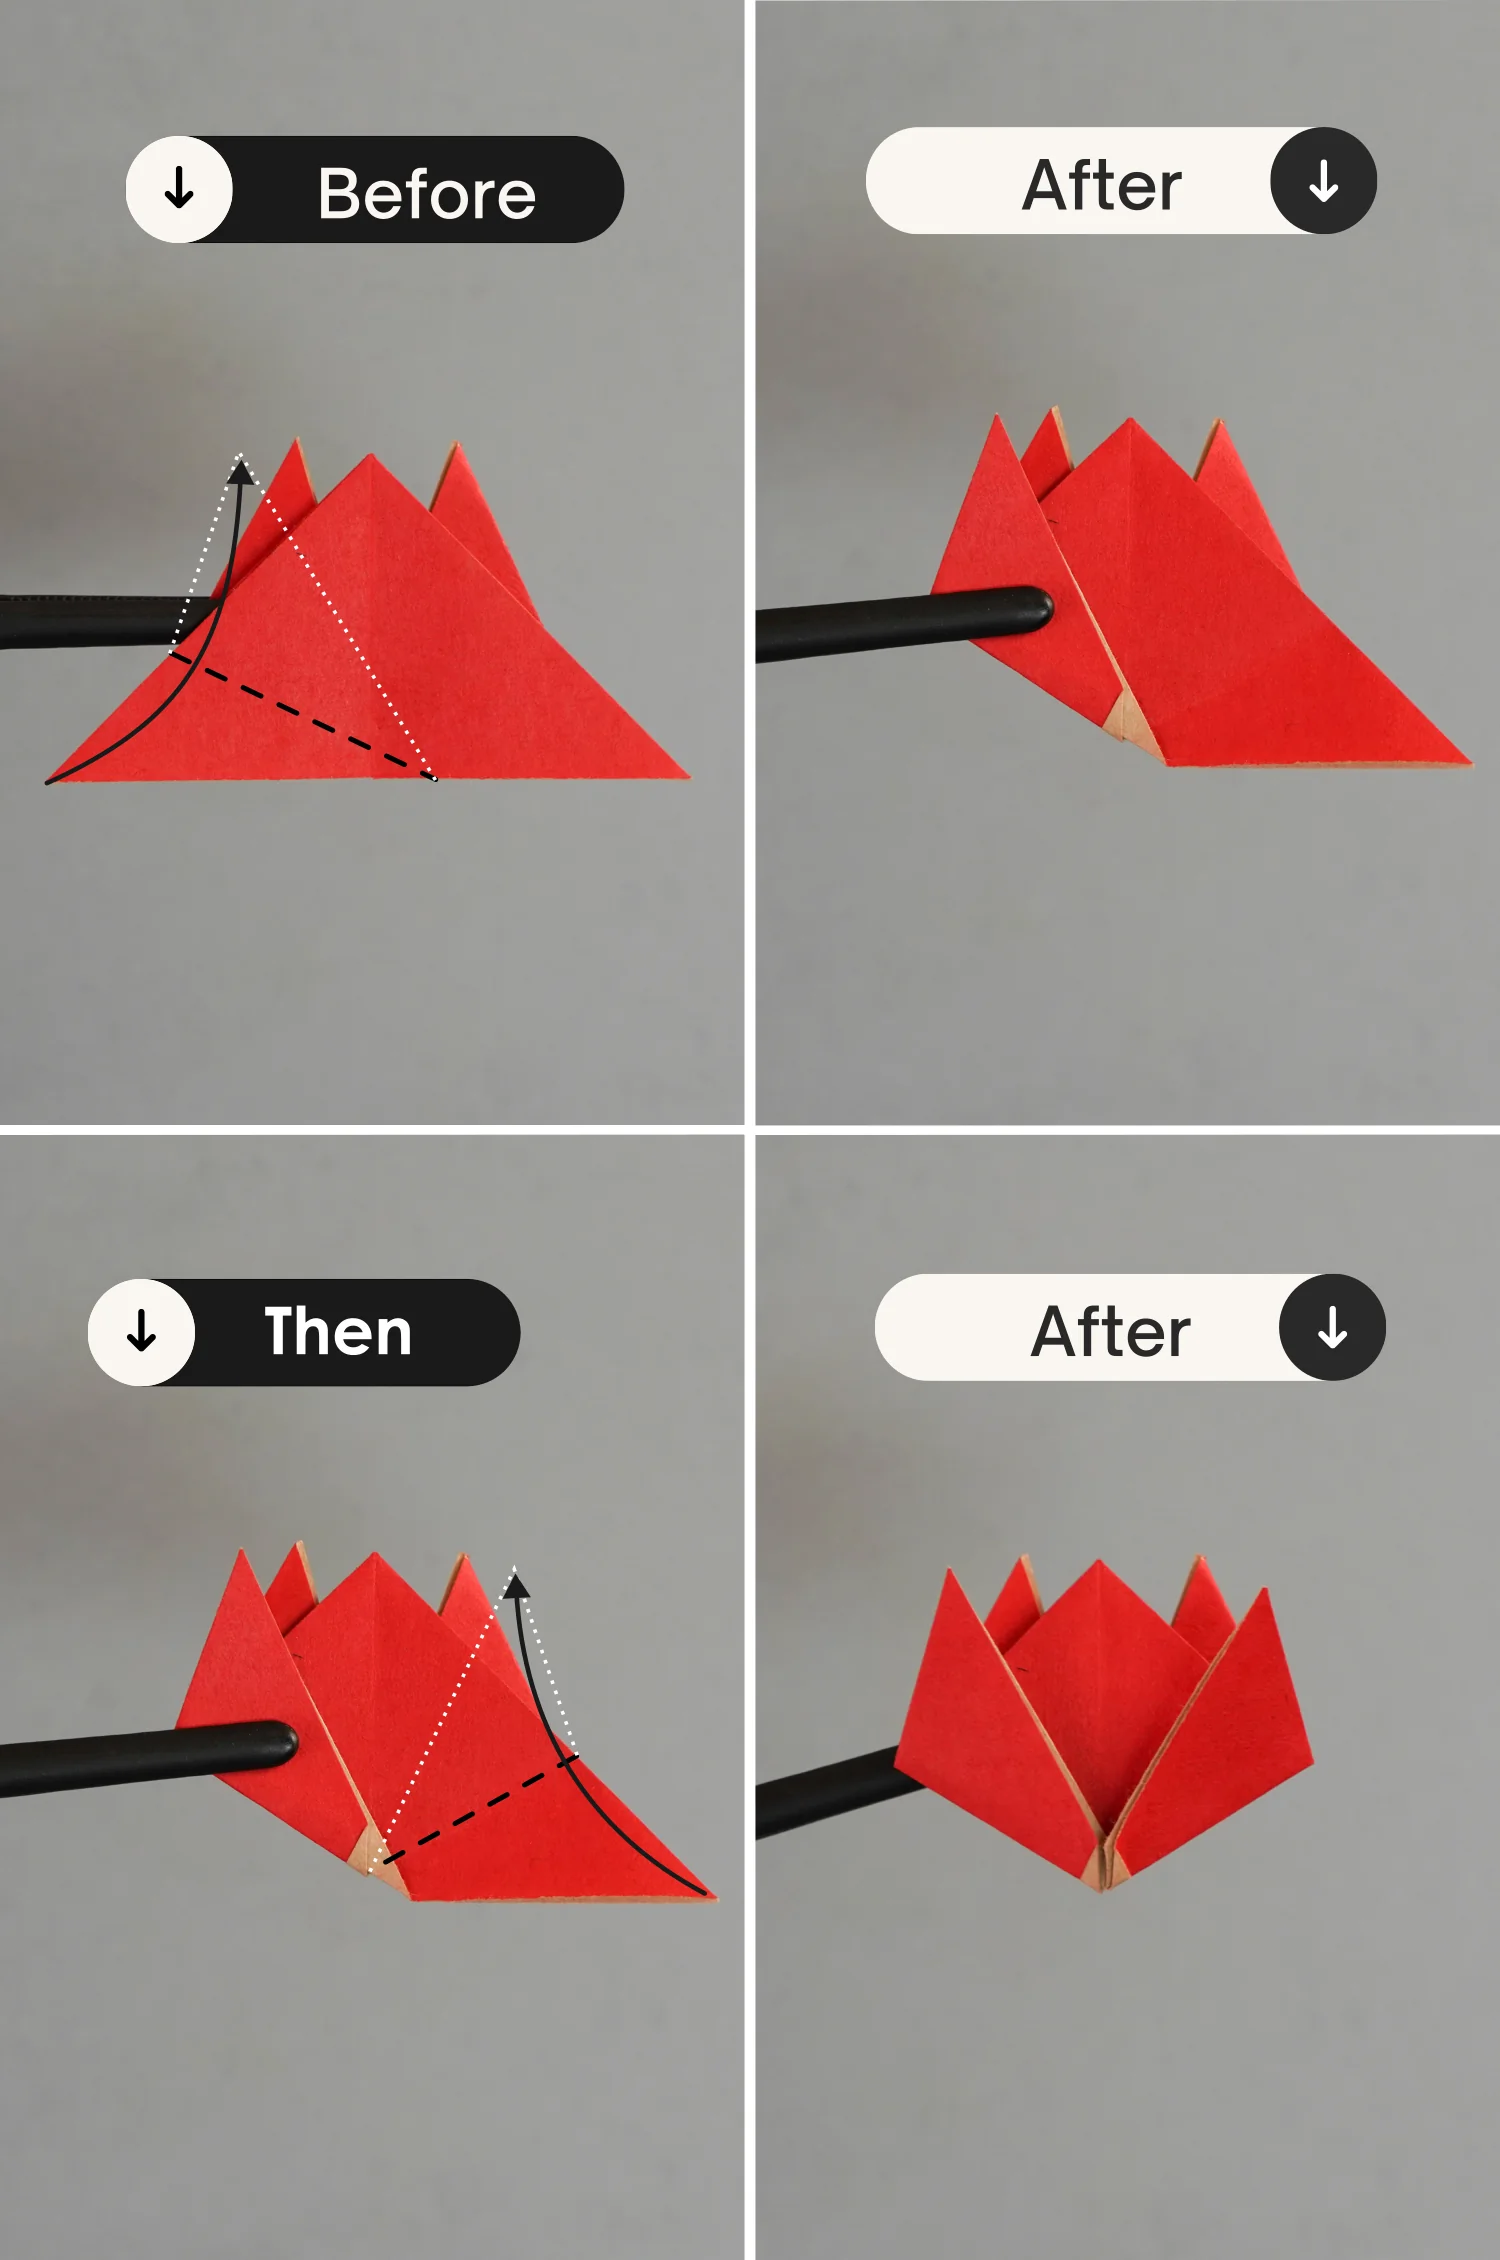
Step 41
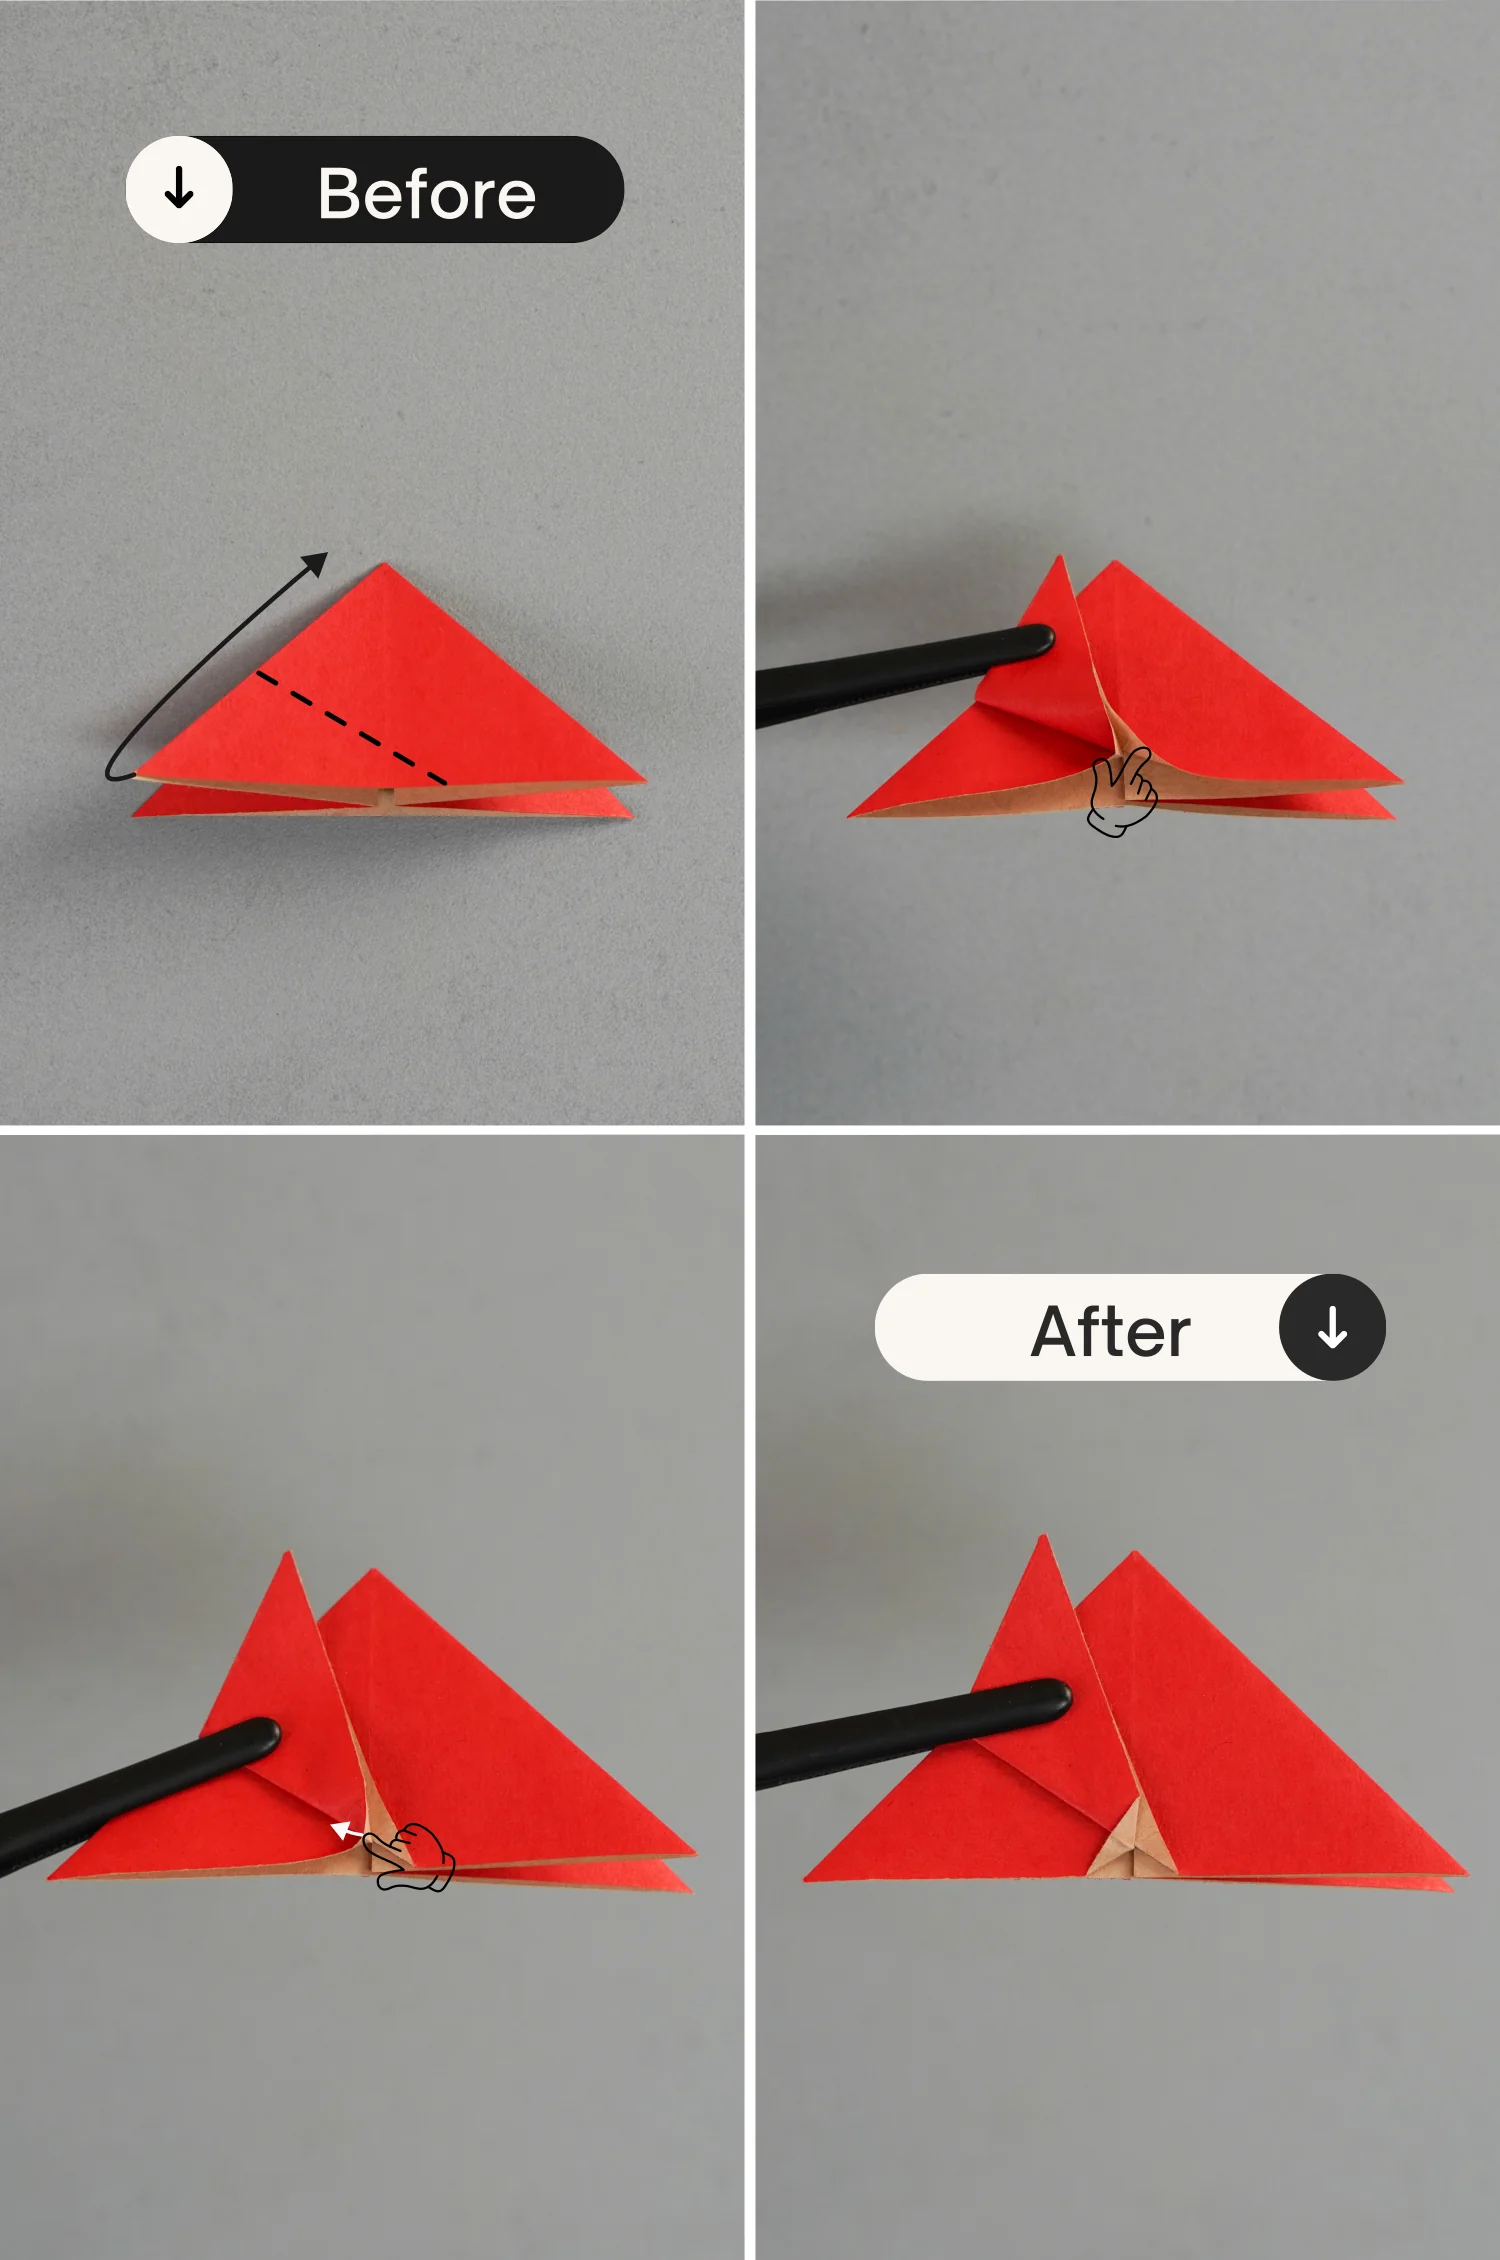
Take the bottom left point of the top layer, fold it up along the dotted line, and then flatten the small raised corner towards the top left.
Step 42
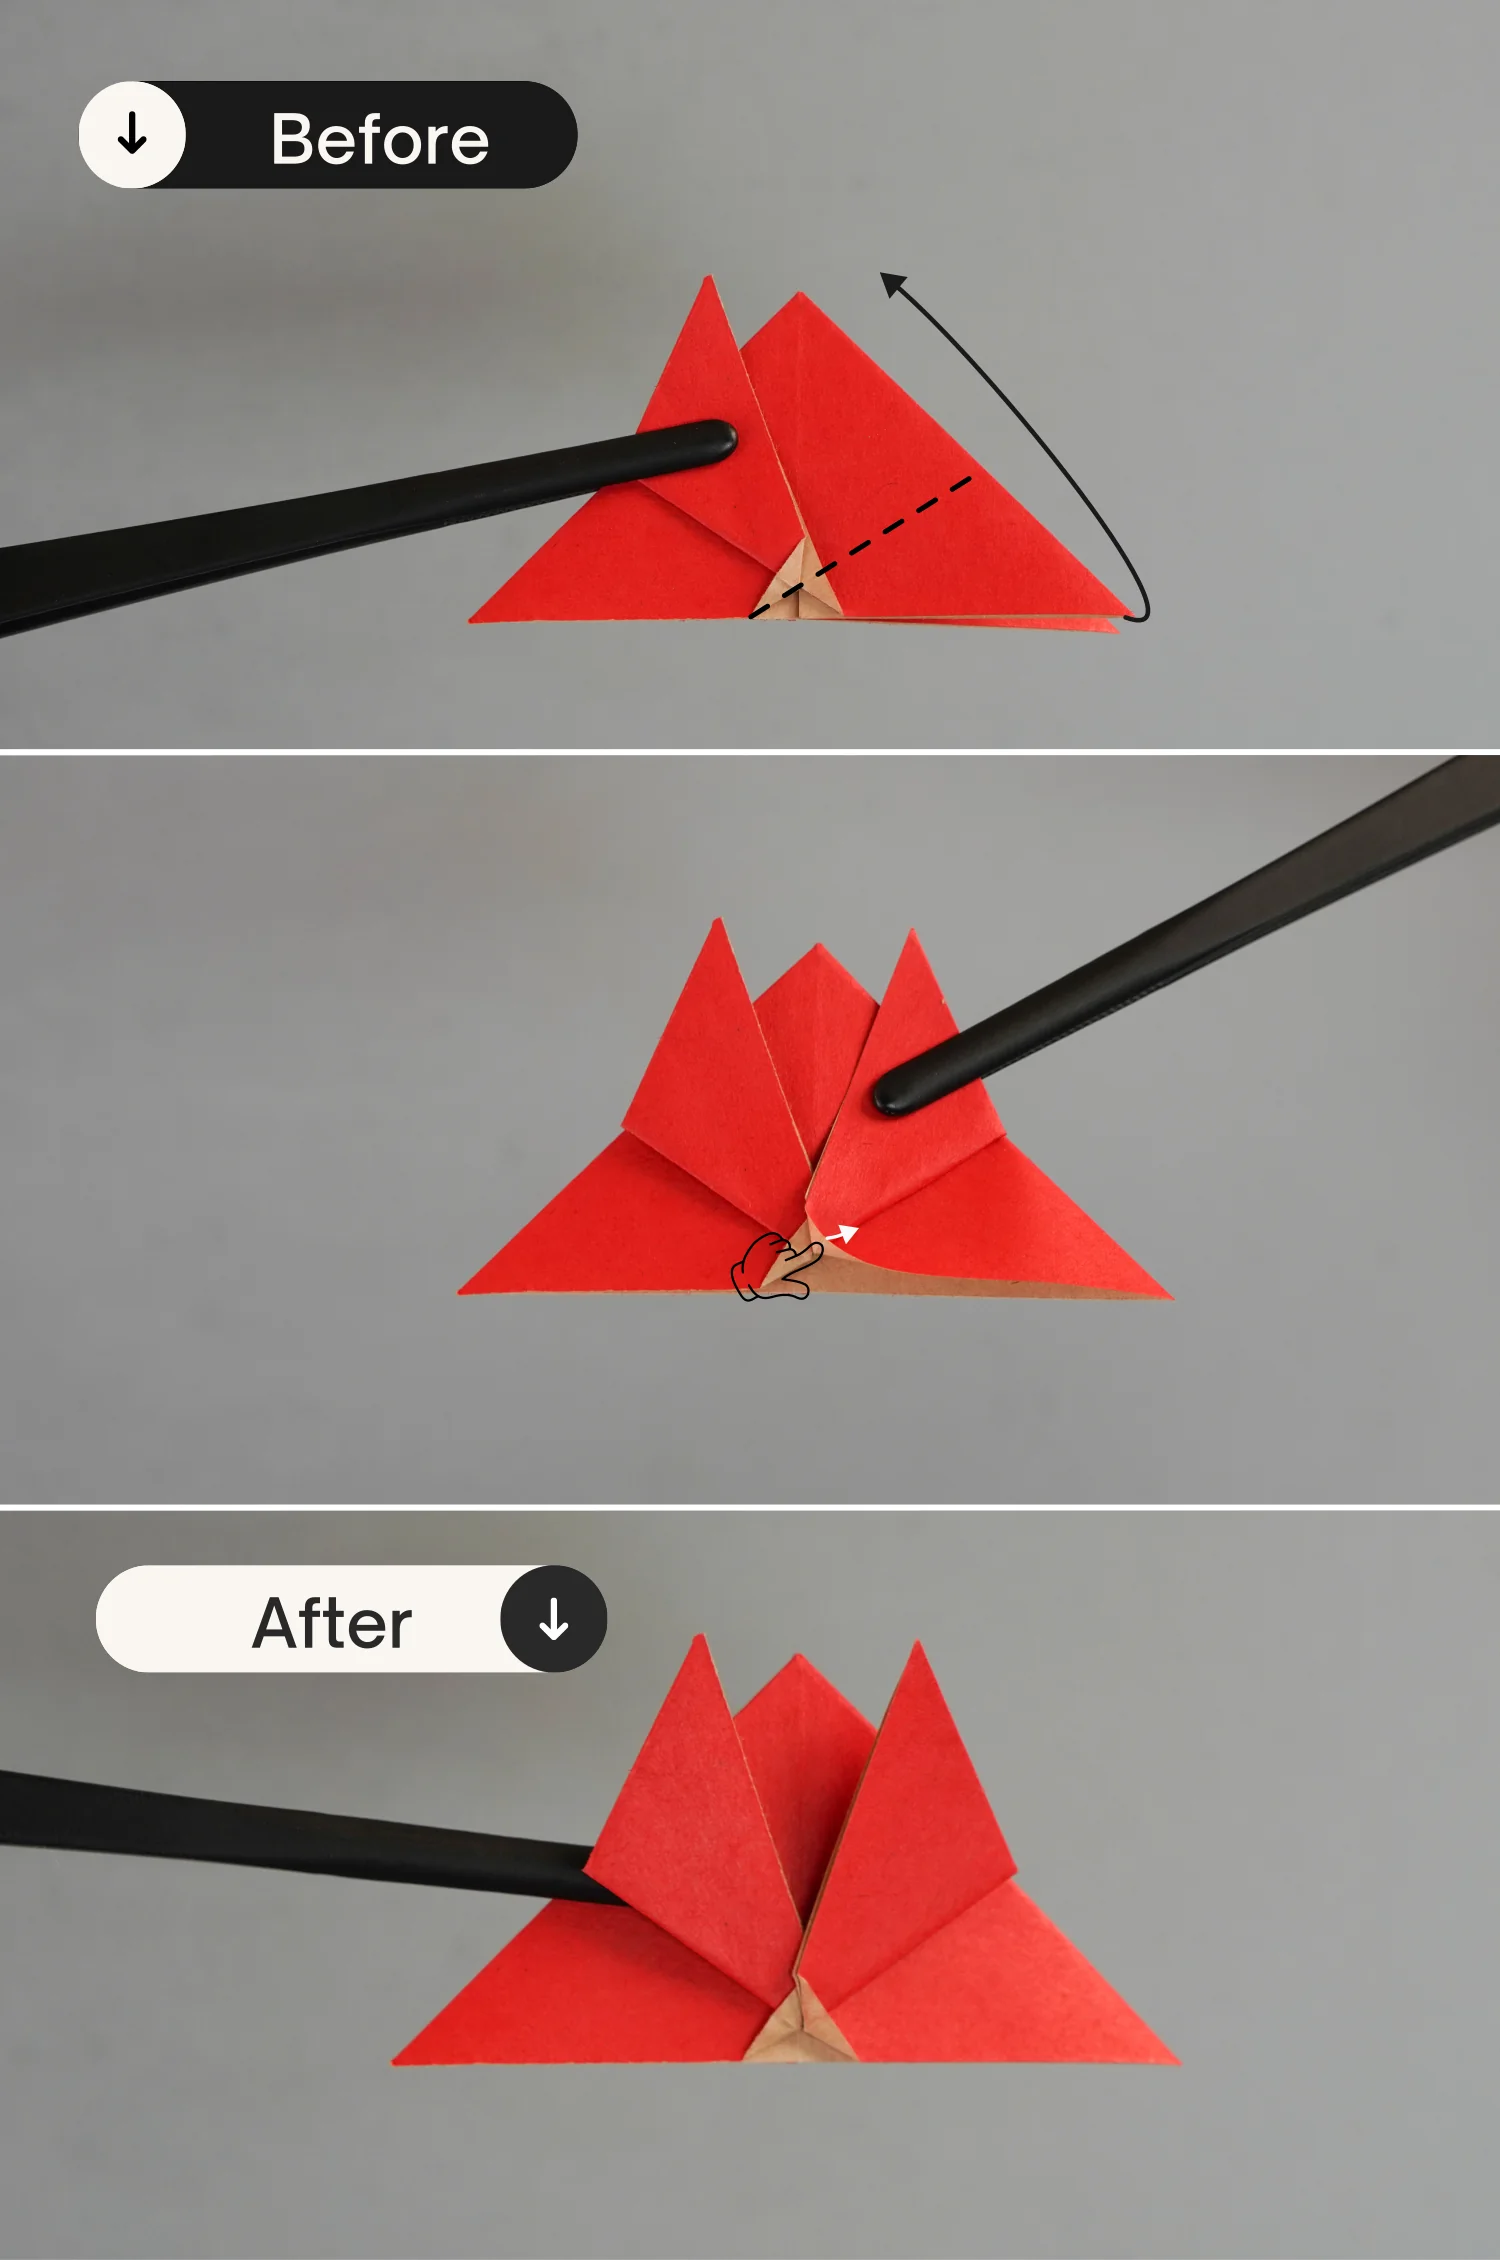
Similarly, fold up the bottom right point of the top layer along the dotted line, and then flatten the raised corner on the middle of the bottom toward the top right.
Step 43
Turn over the paper.
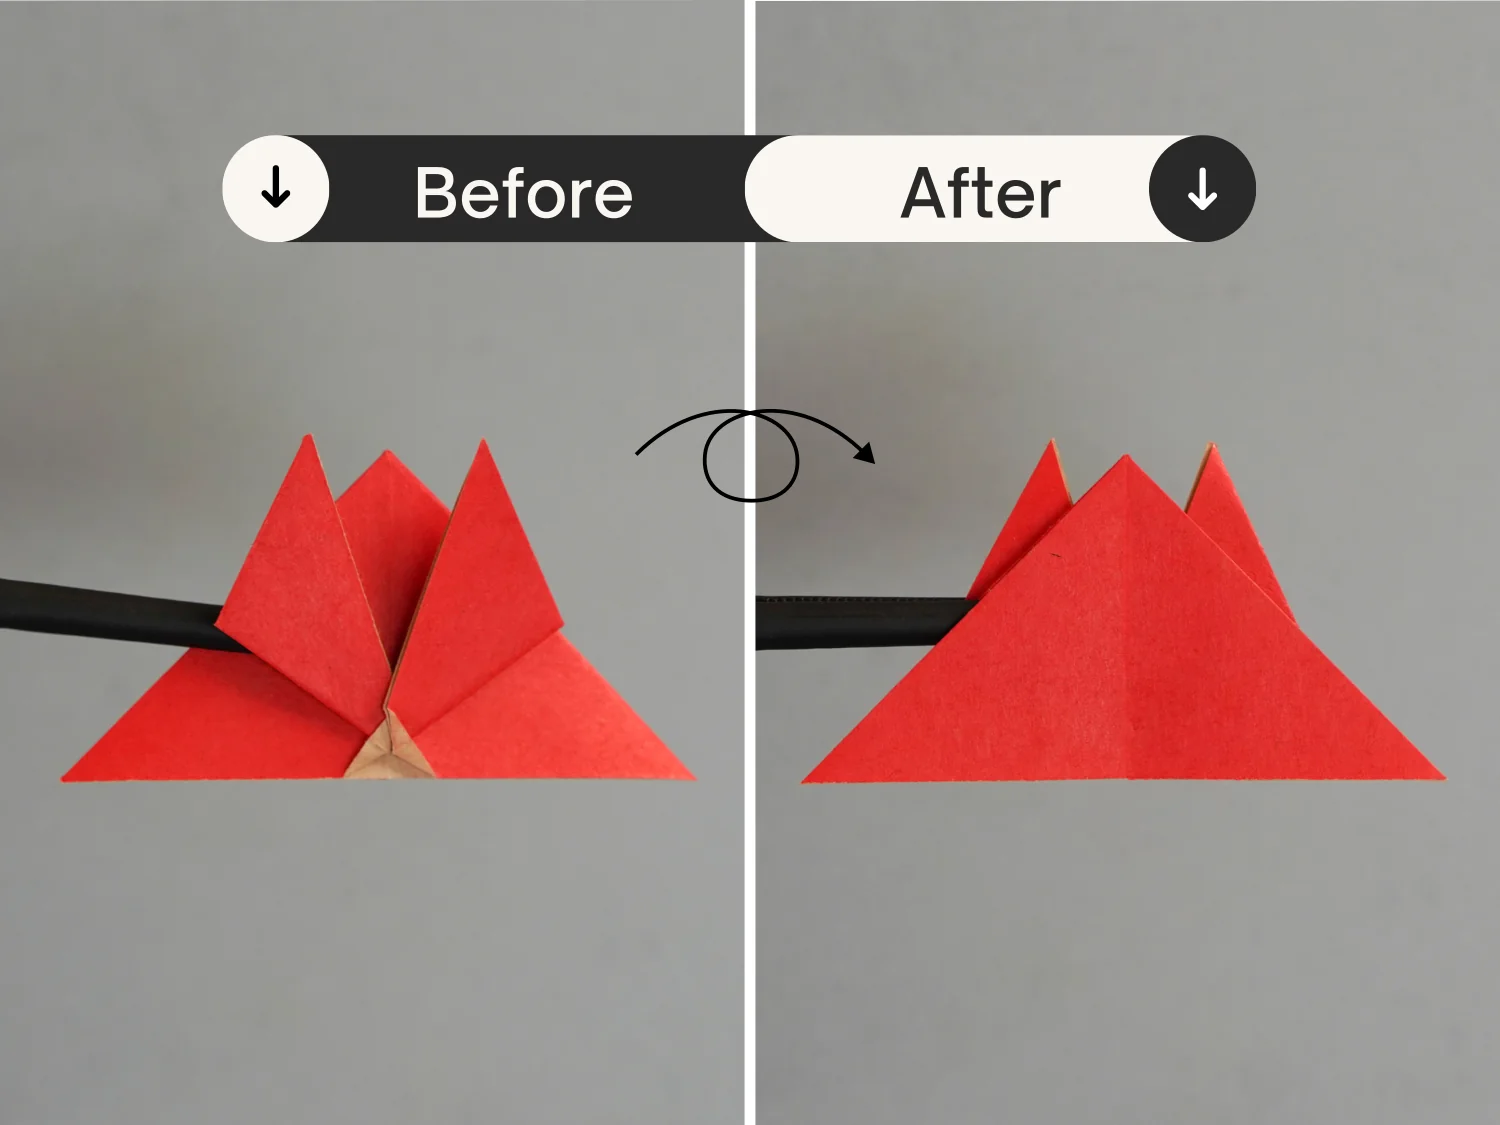
Step 44
Like before, fold up the bottom left point along the dotted line. Then fold up the bottom right point.
Step 45
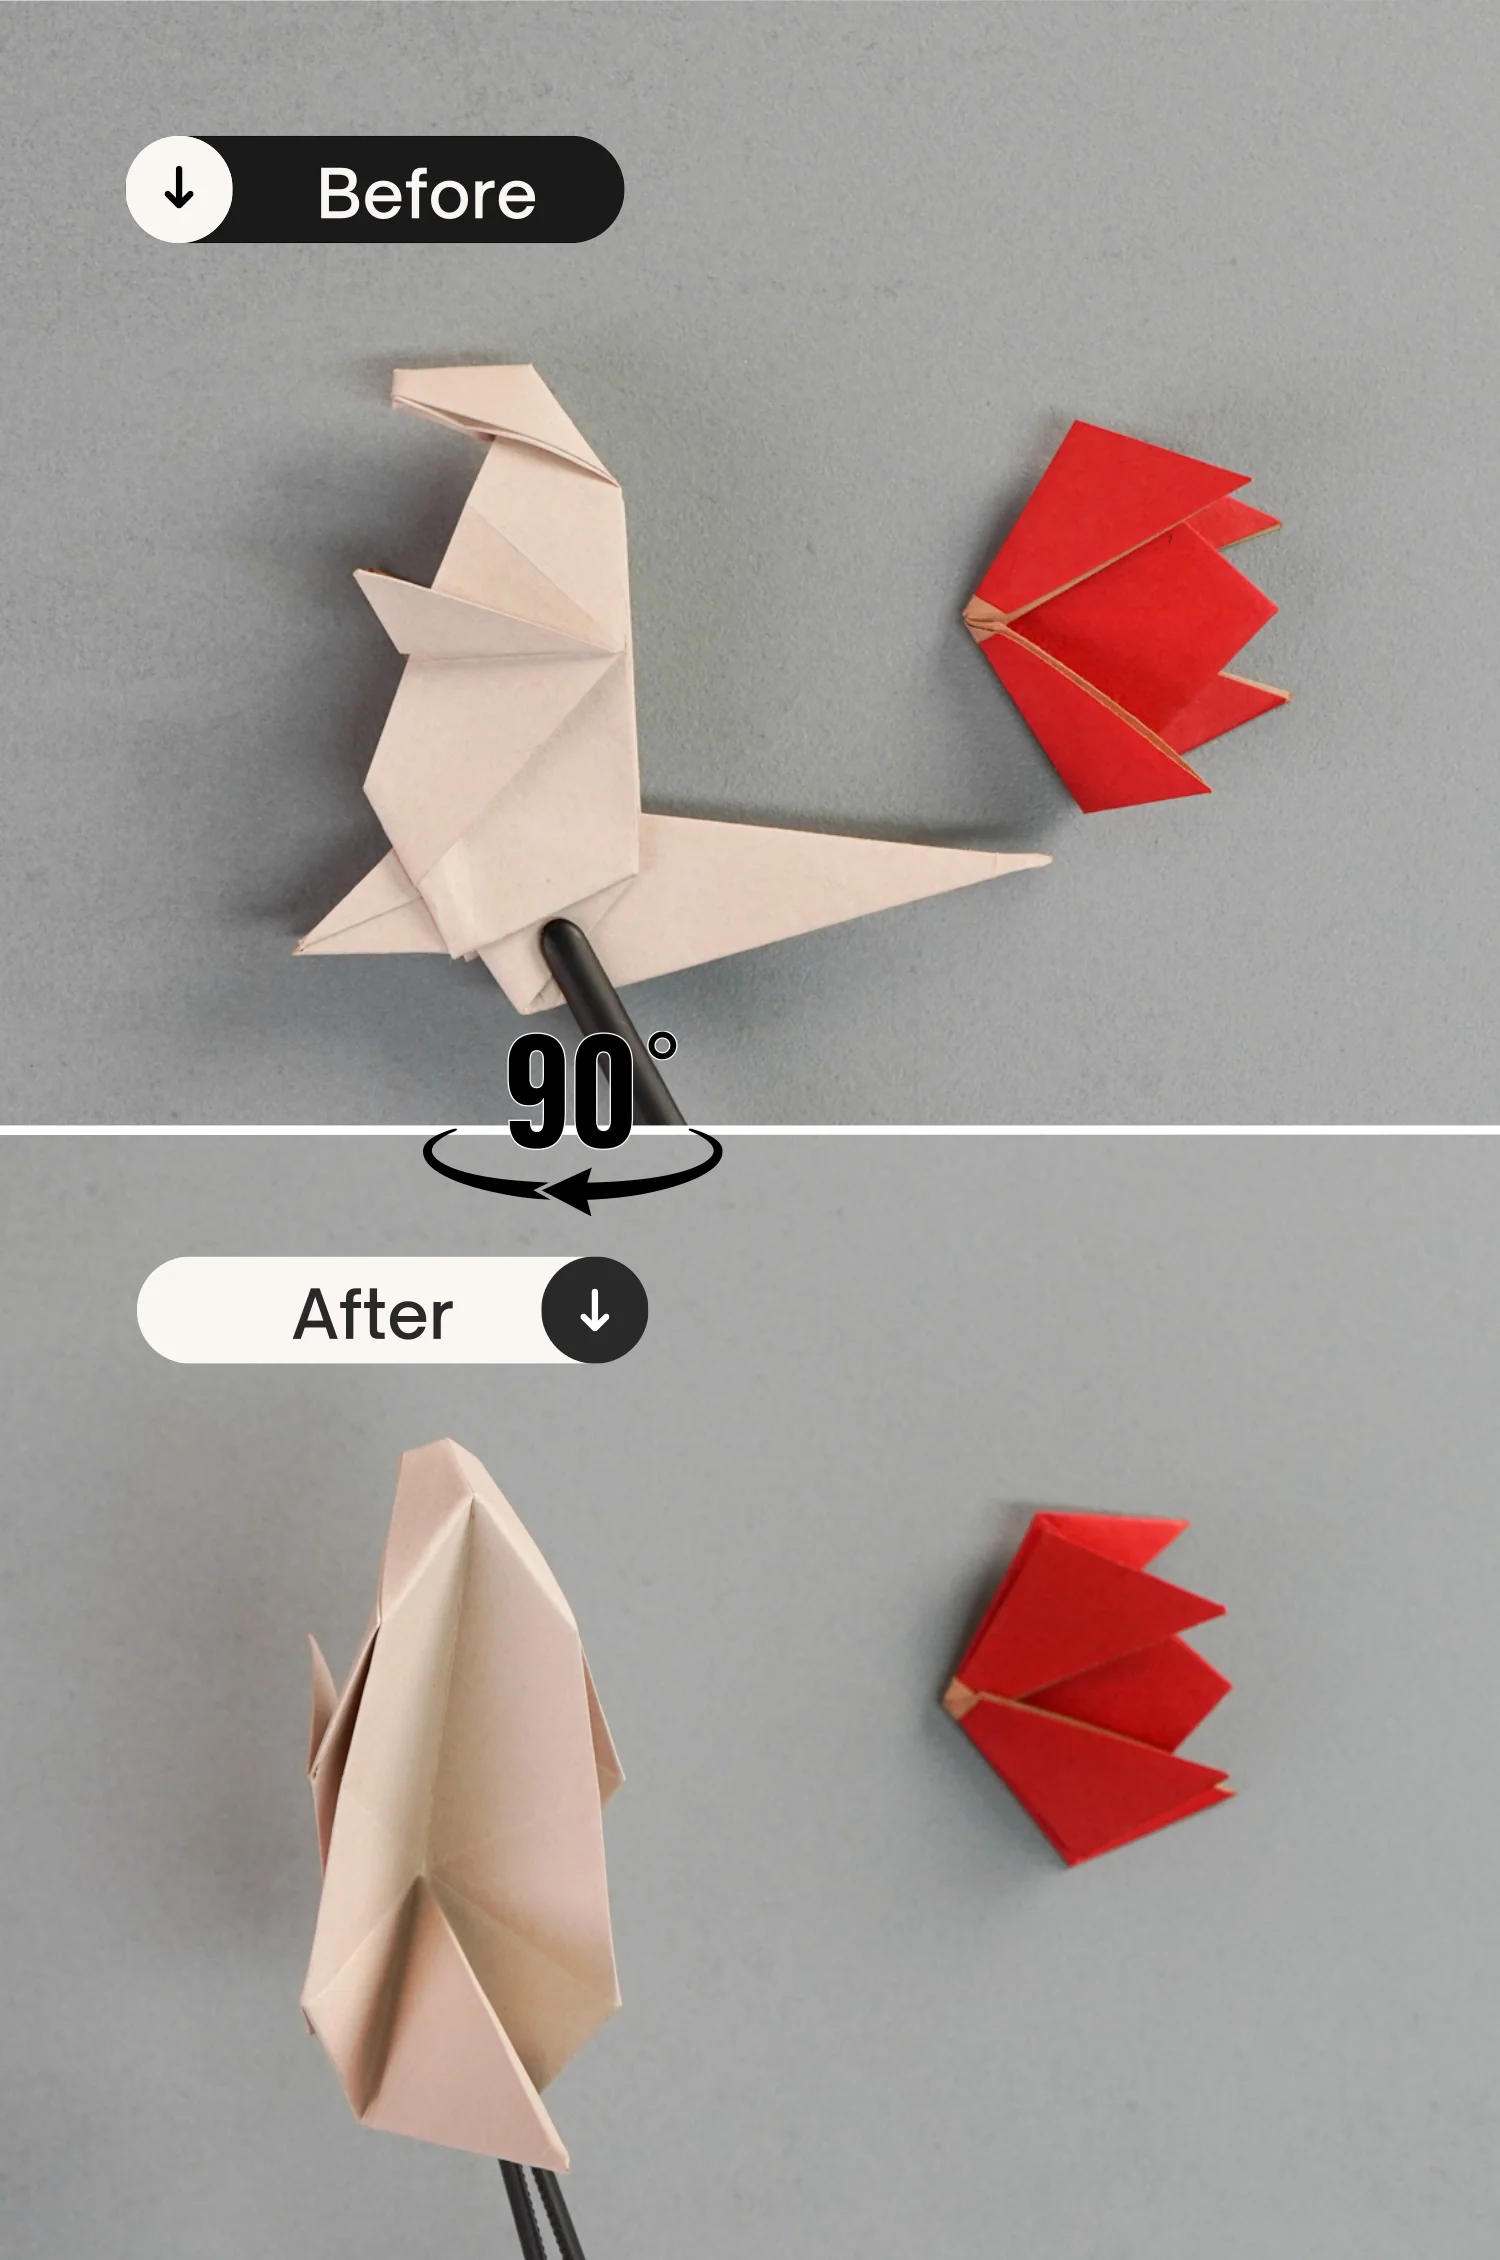
Place the body part and dorsal fins part as shown.
Rotate the body part 90 degrees from the right to the left, making the back face up.
Step 46
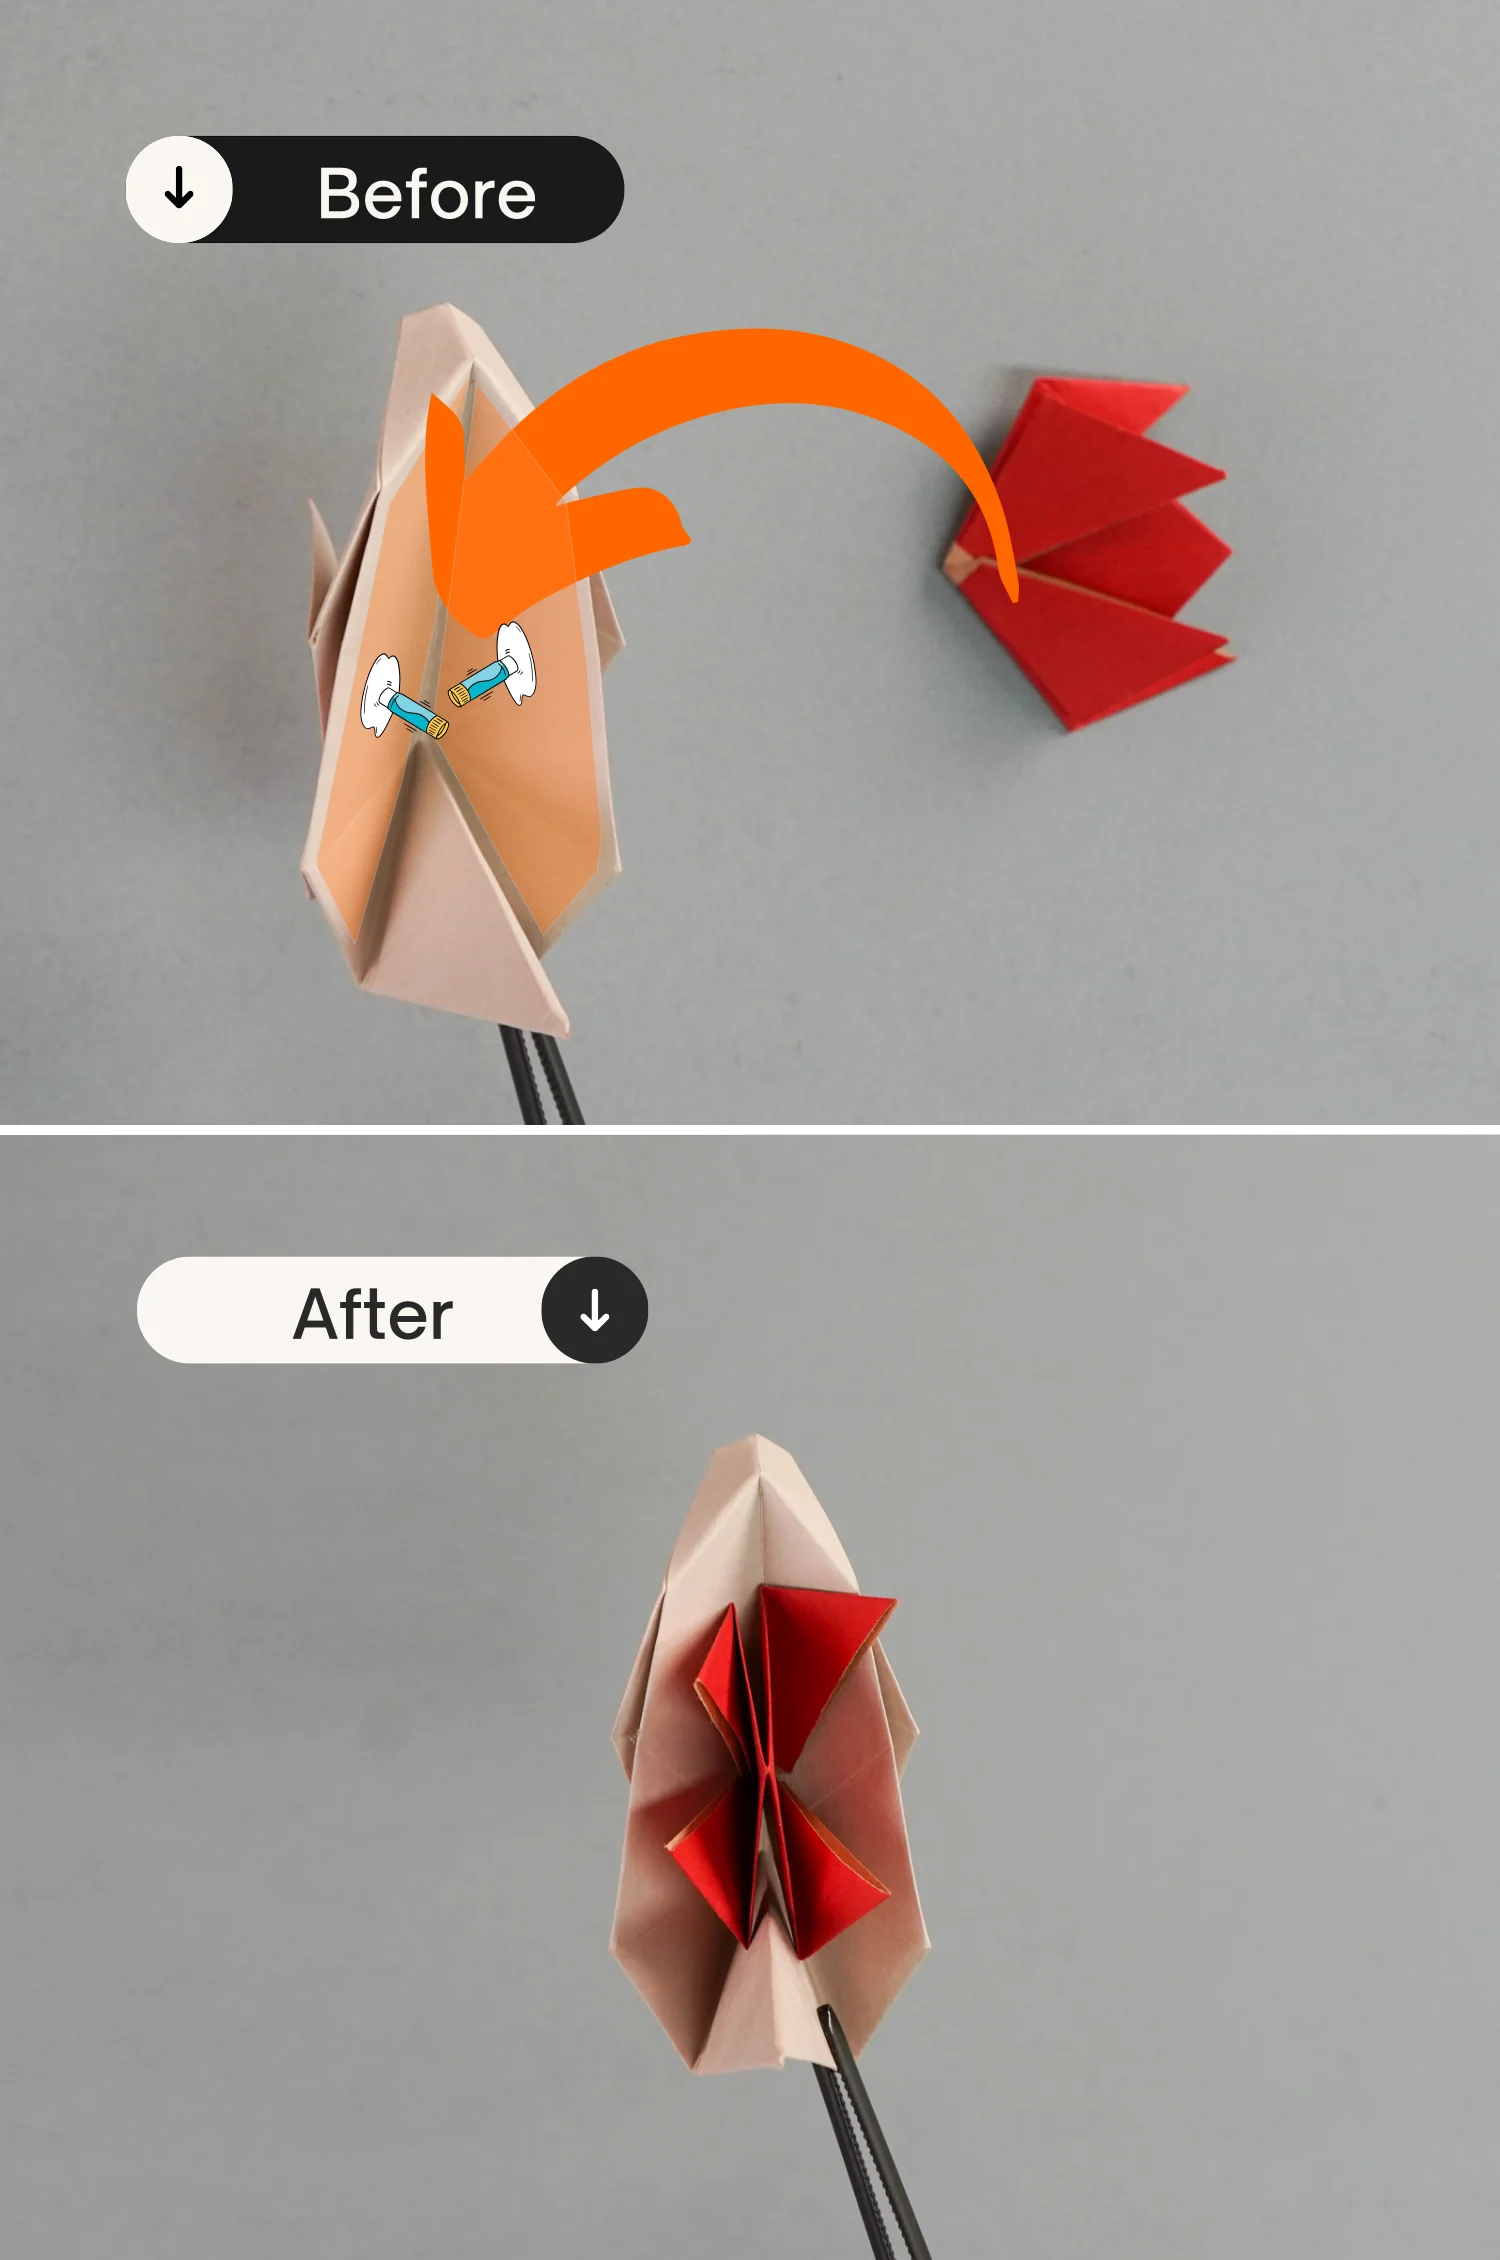
Apply glue to the left and right sides of the inside of the back and tuck the dorsal fins part between it.
Step 47
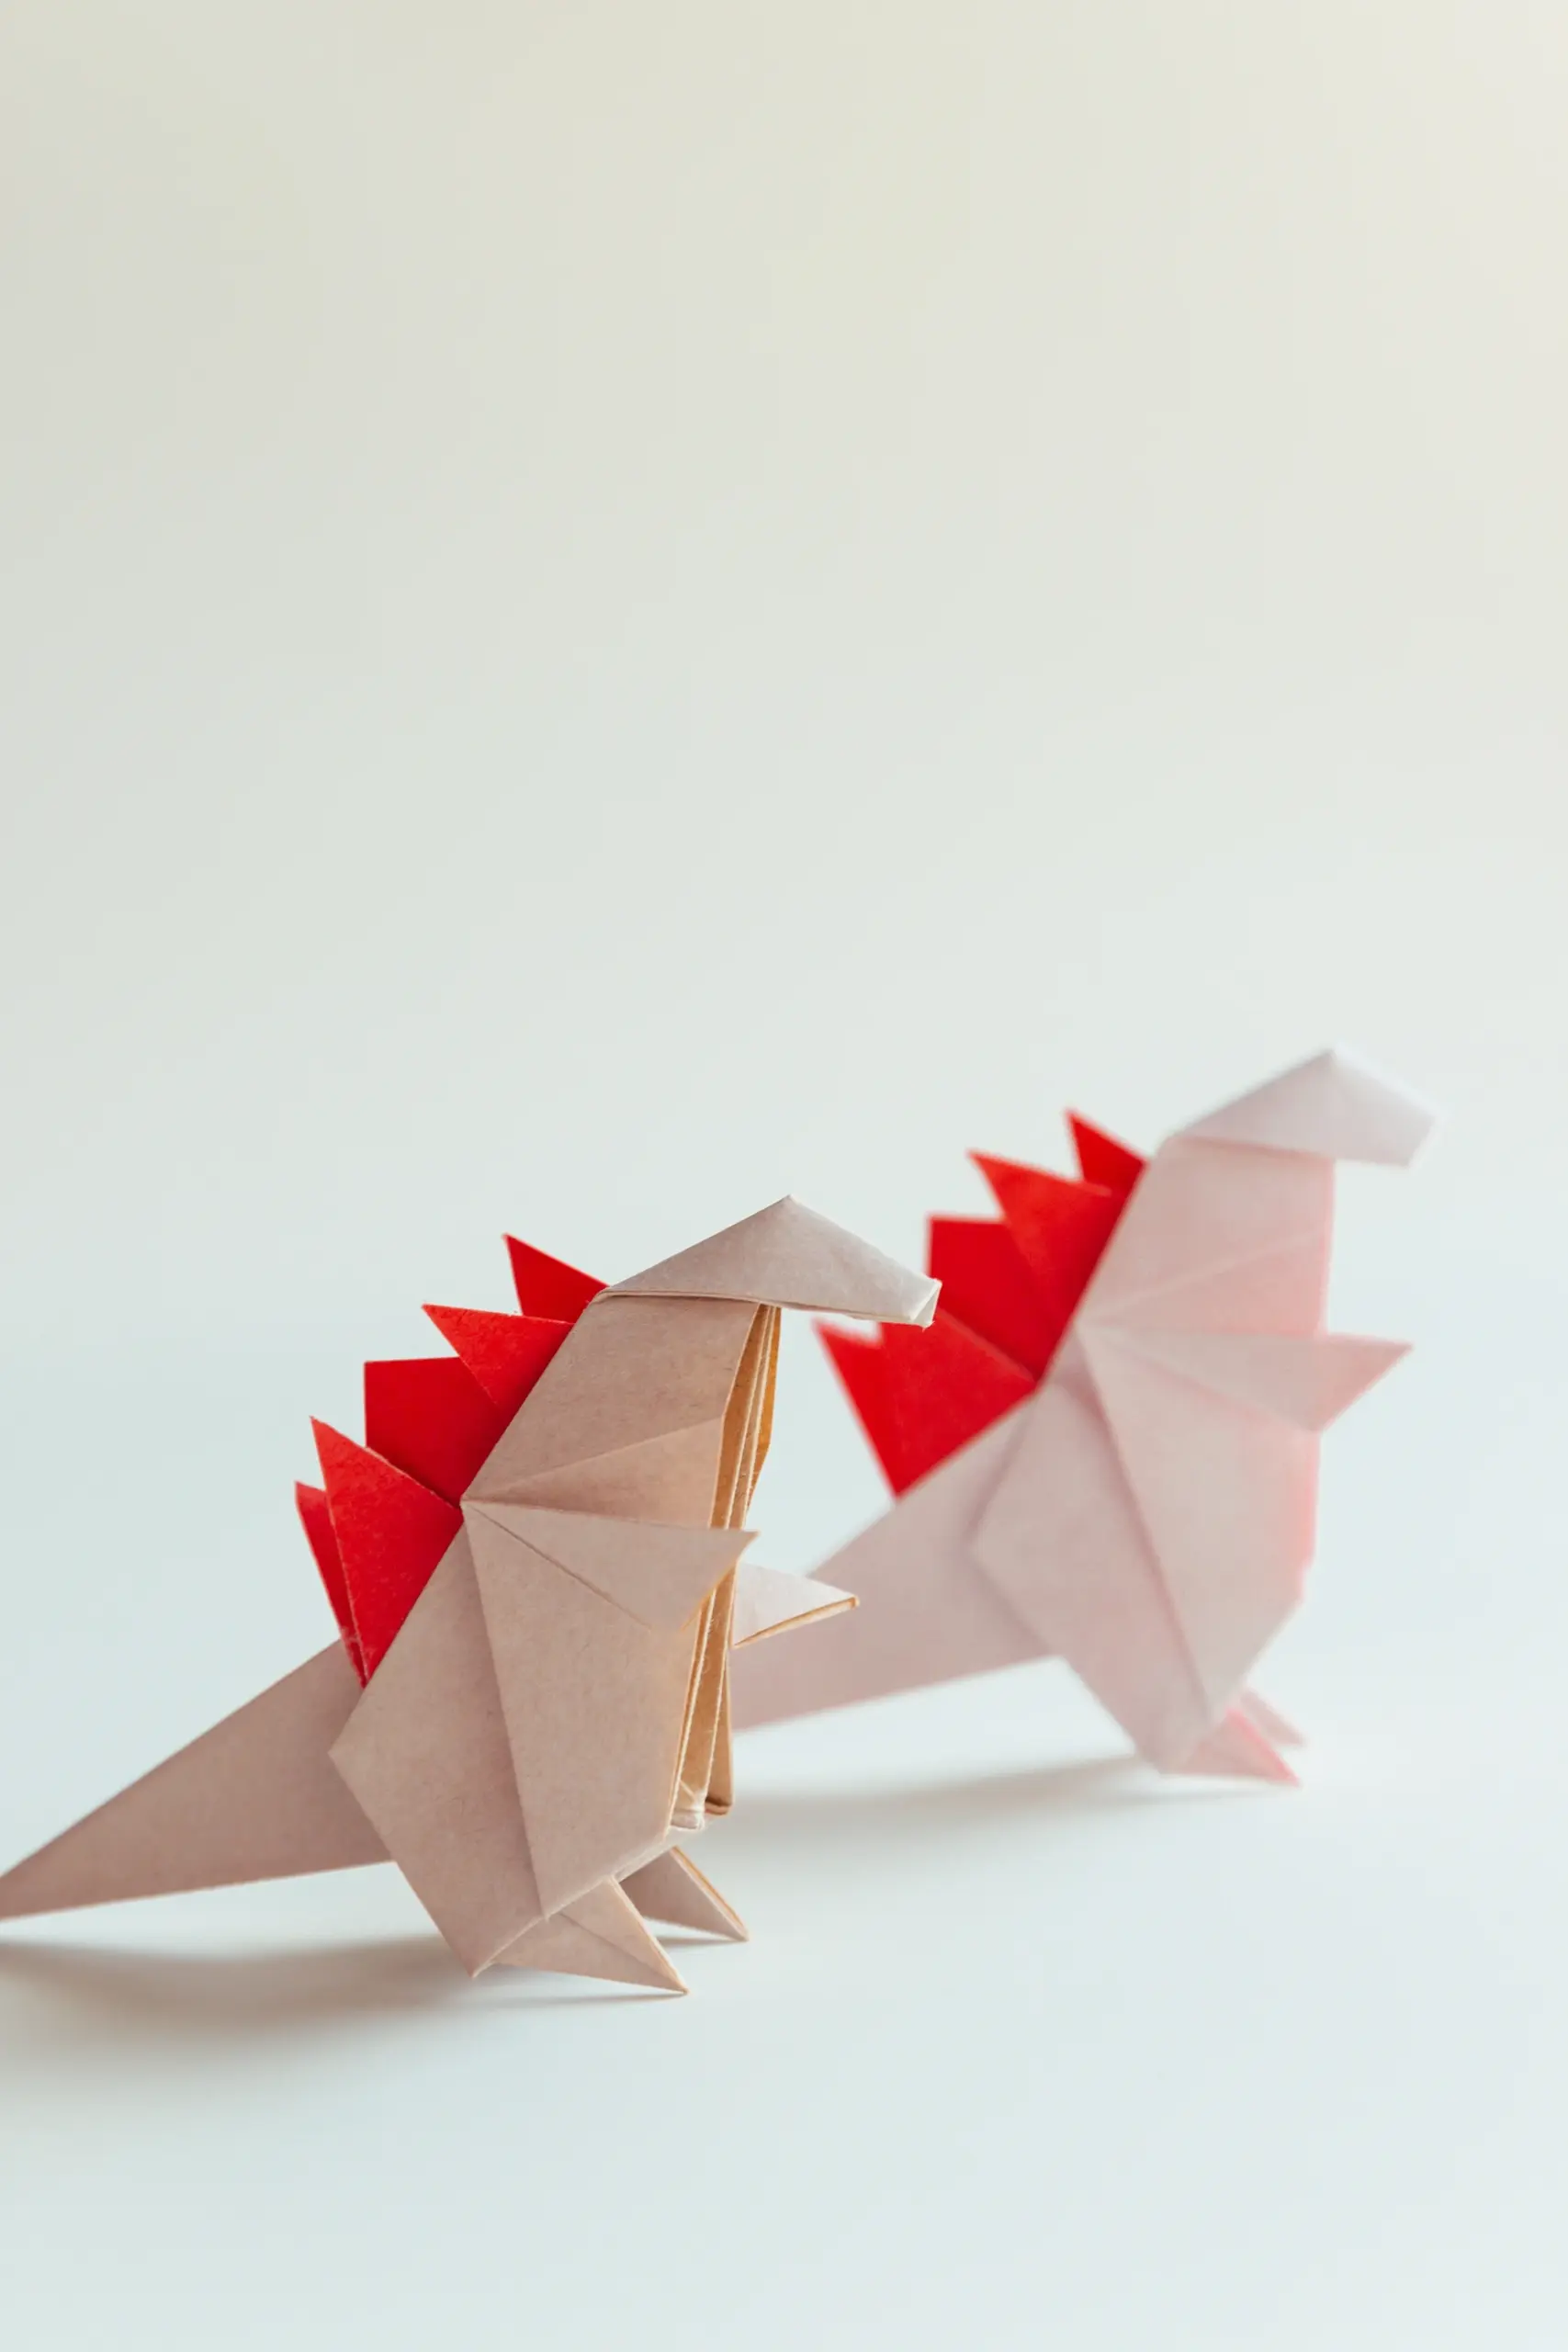
Stick them well, then rotate it 90 degrees from left to right, this is a complete origami Godzilla.
What’s Next
That’s your cool and lovely origami Godzilla. Now you can explore our other origami animal instructions. Happy folding!
Other Origami Animal Ideas