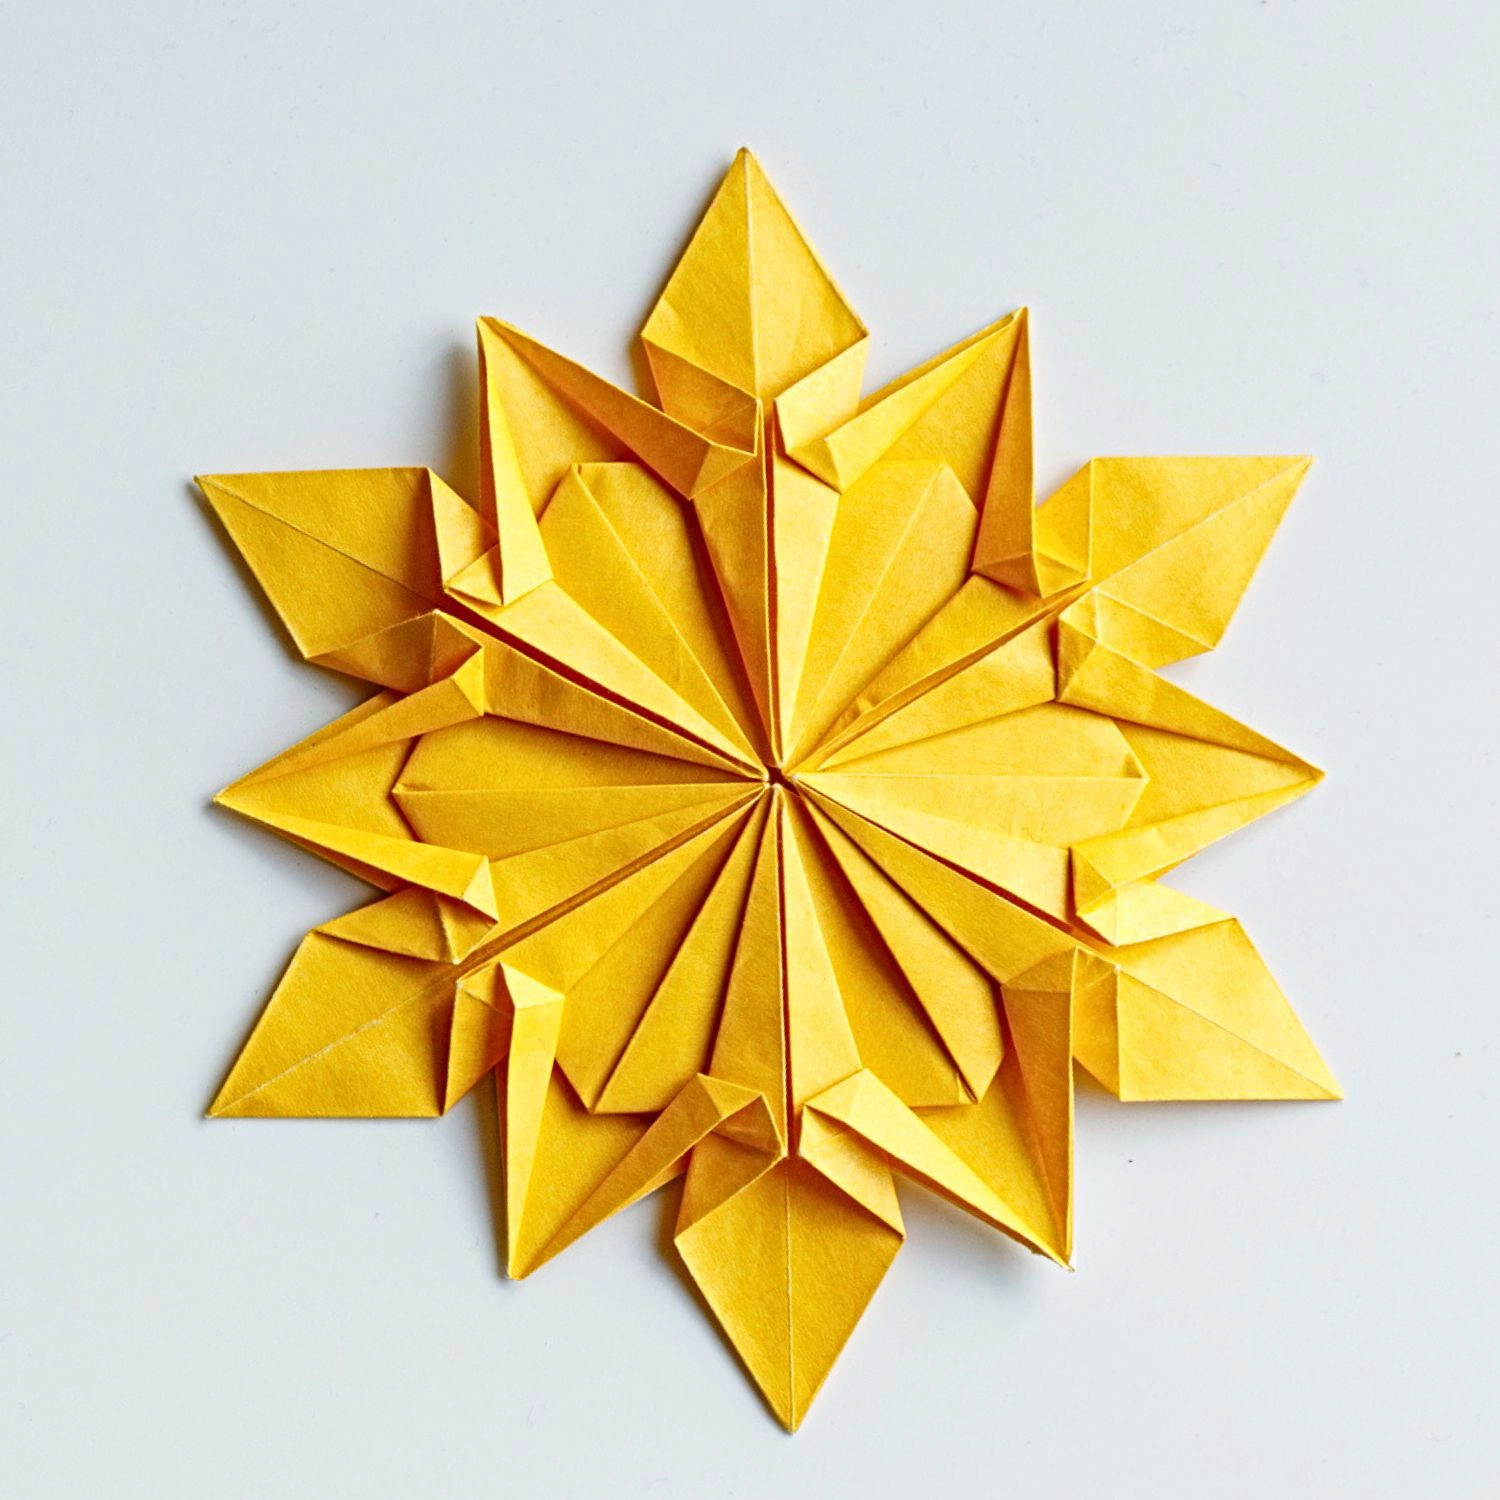
Christmas is just around the corner, and today I’d like to recommend an activity that your whole family can take part in – making this origami Christmas star! This origami Christmas also called 5-pointed star, creates some of these stars to make your home super sparkle at Christmas! Whether you use discarded gift wrapping paper or the paper you handpicked you can create lovely stars, but the glitter paper is highly recommended.
Make plenty and hang them on your Christmas trees, windows, and colorful lights to fill every corner of your home with a festive atmosphere.

If you are new to origami, start here from our beginner guide to know the basics and how to read the step-by-step instructions.

- Folding time: 20 minutes
- Paper: 15×15 cm
- Difficulty: Middle
Material
Get a piece of 15×15 cm origami square paper, with different colors on each side, to create a 8.5cm (3.5inch) origami Christmas Star.
About the paper
Patterened origami paper, including Japanese washi paper, usually creates more decorative Christmas stars.

Step by Step Instructions
Step 1
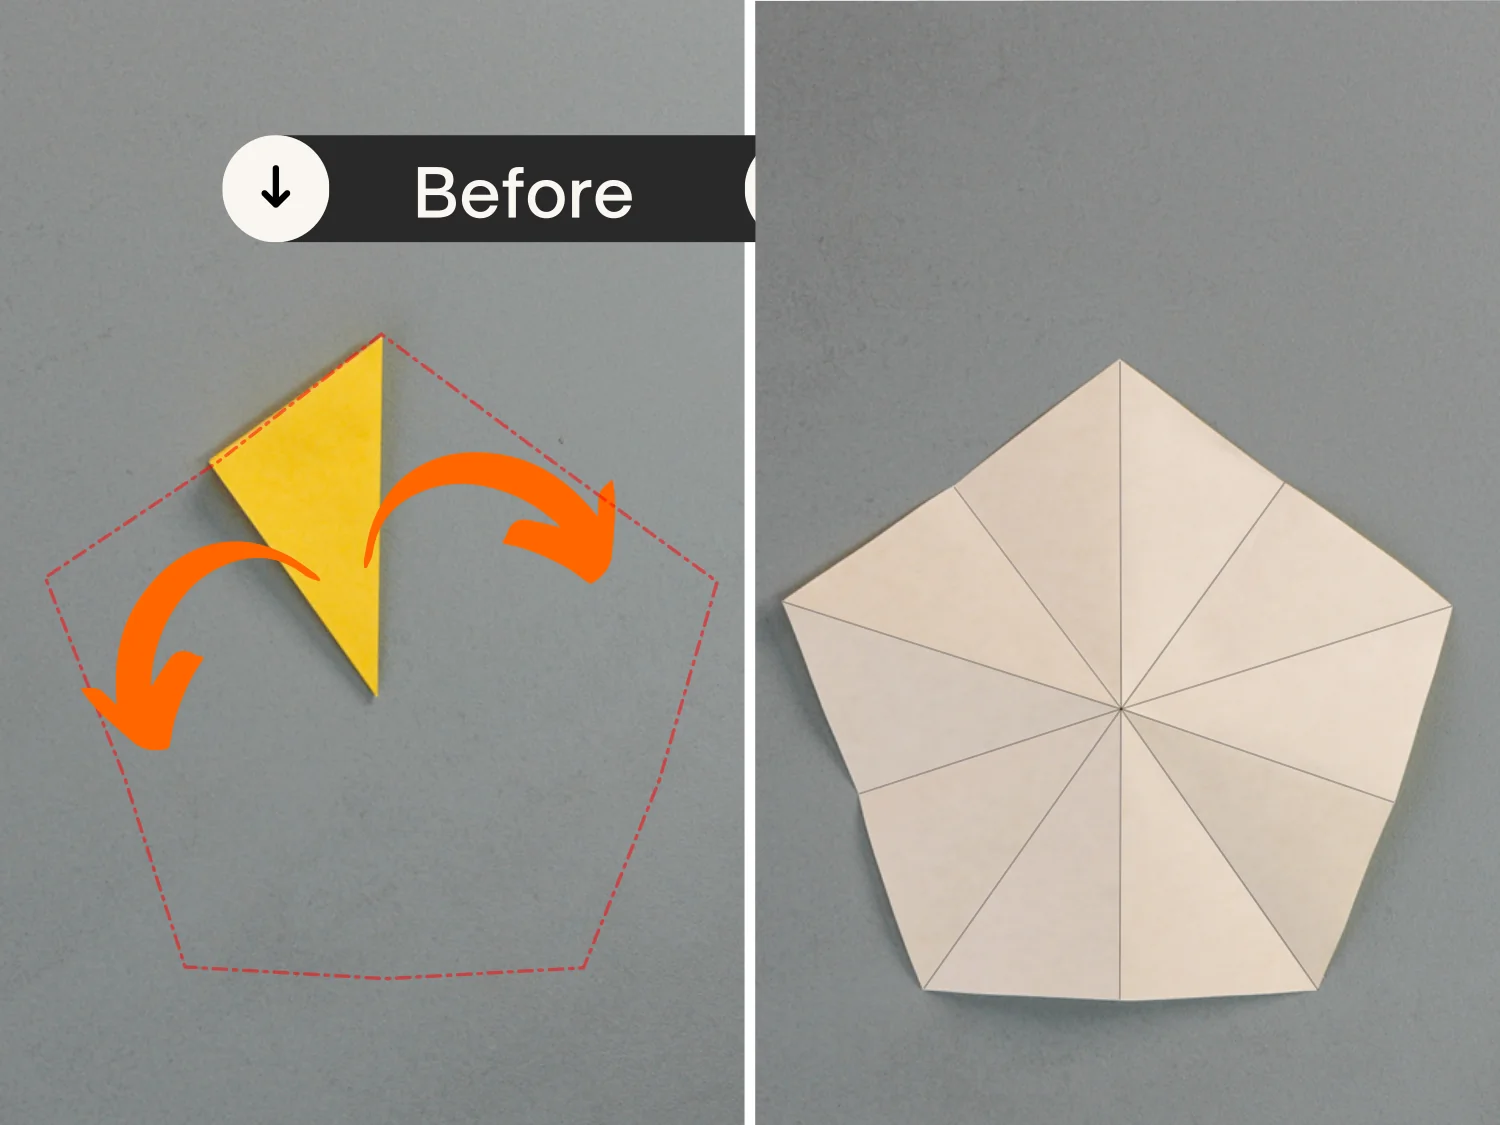
Start with the white side of the paper facing up, and fold it in half horizontally from the bottom to the top.
Step 2
Fold the right edge to align with the top edge, create a crease in the middle, and unfold it.
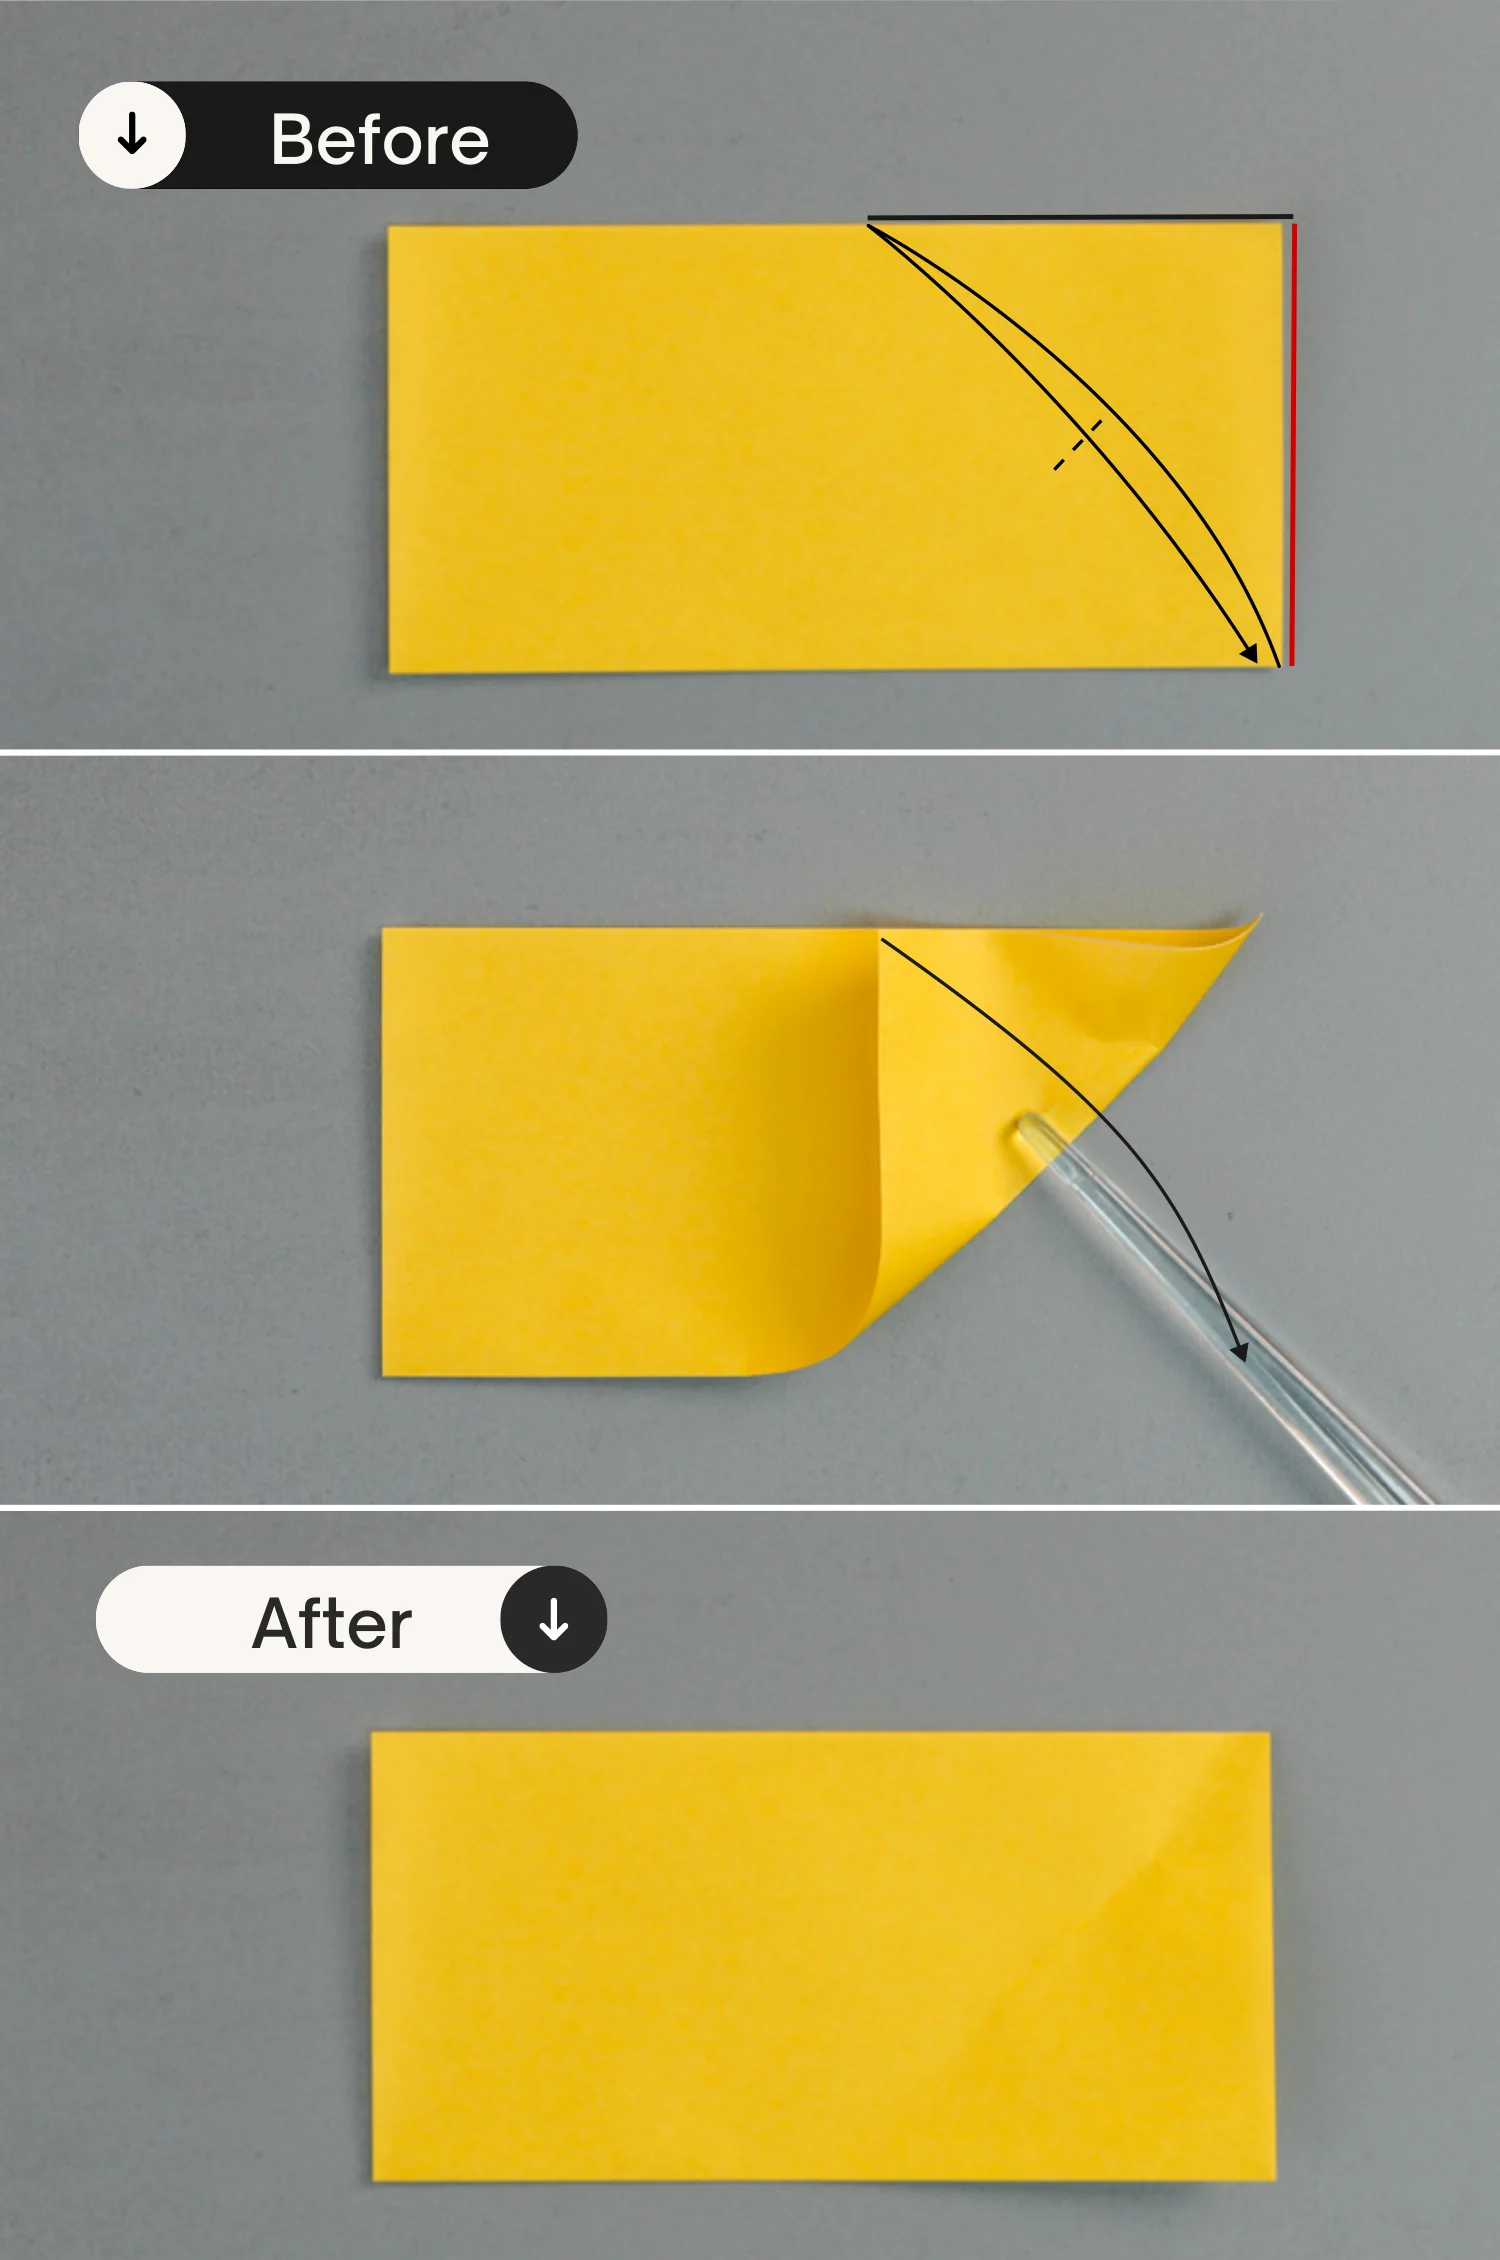
Step 3
Similarly, fold the right edge to align with the bottom edge, create a crease in the middle, and unfold it.

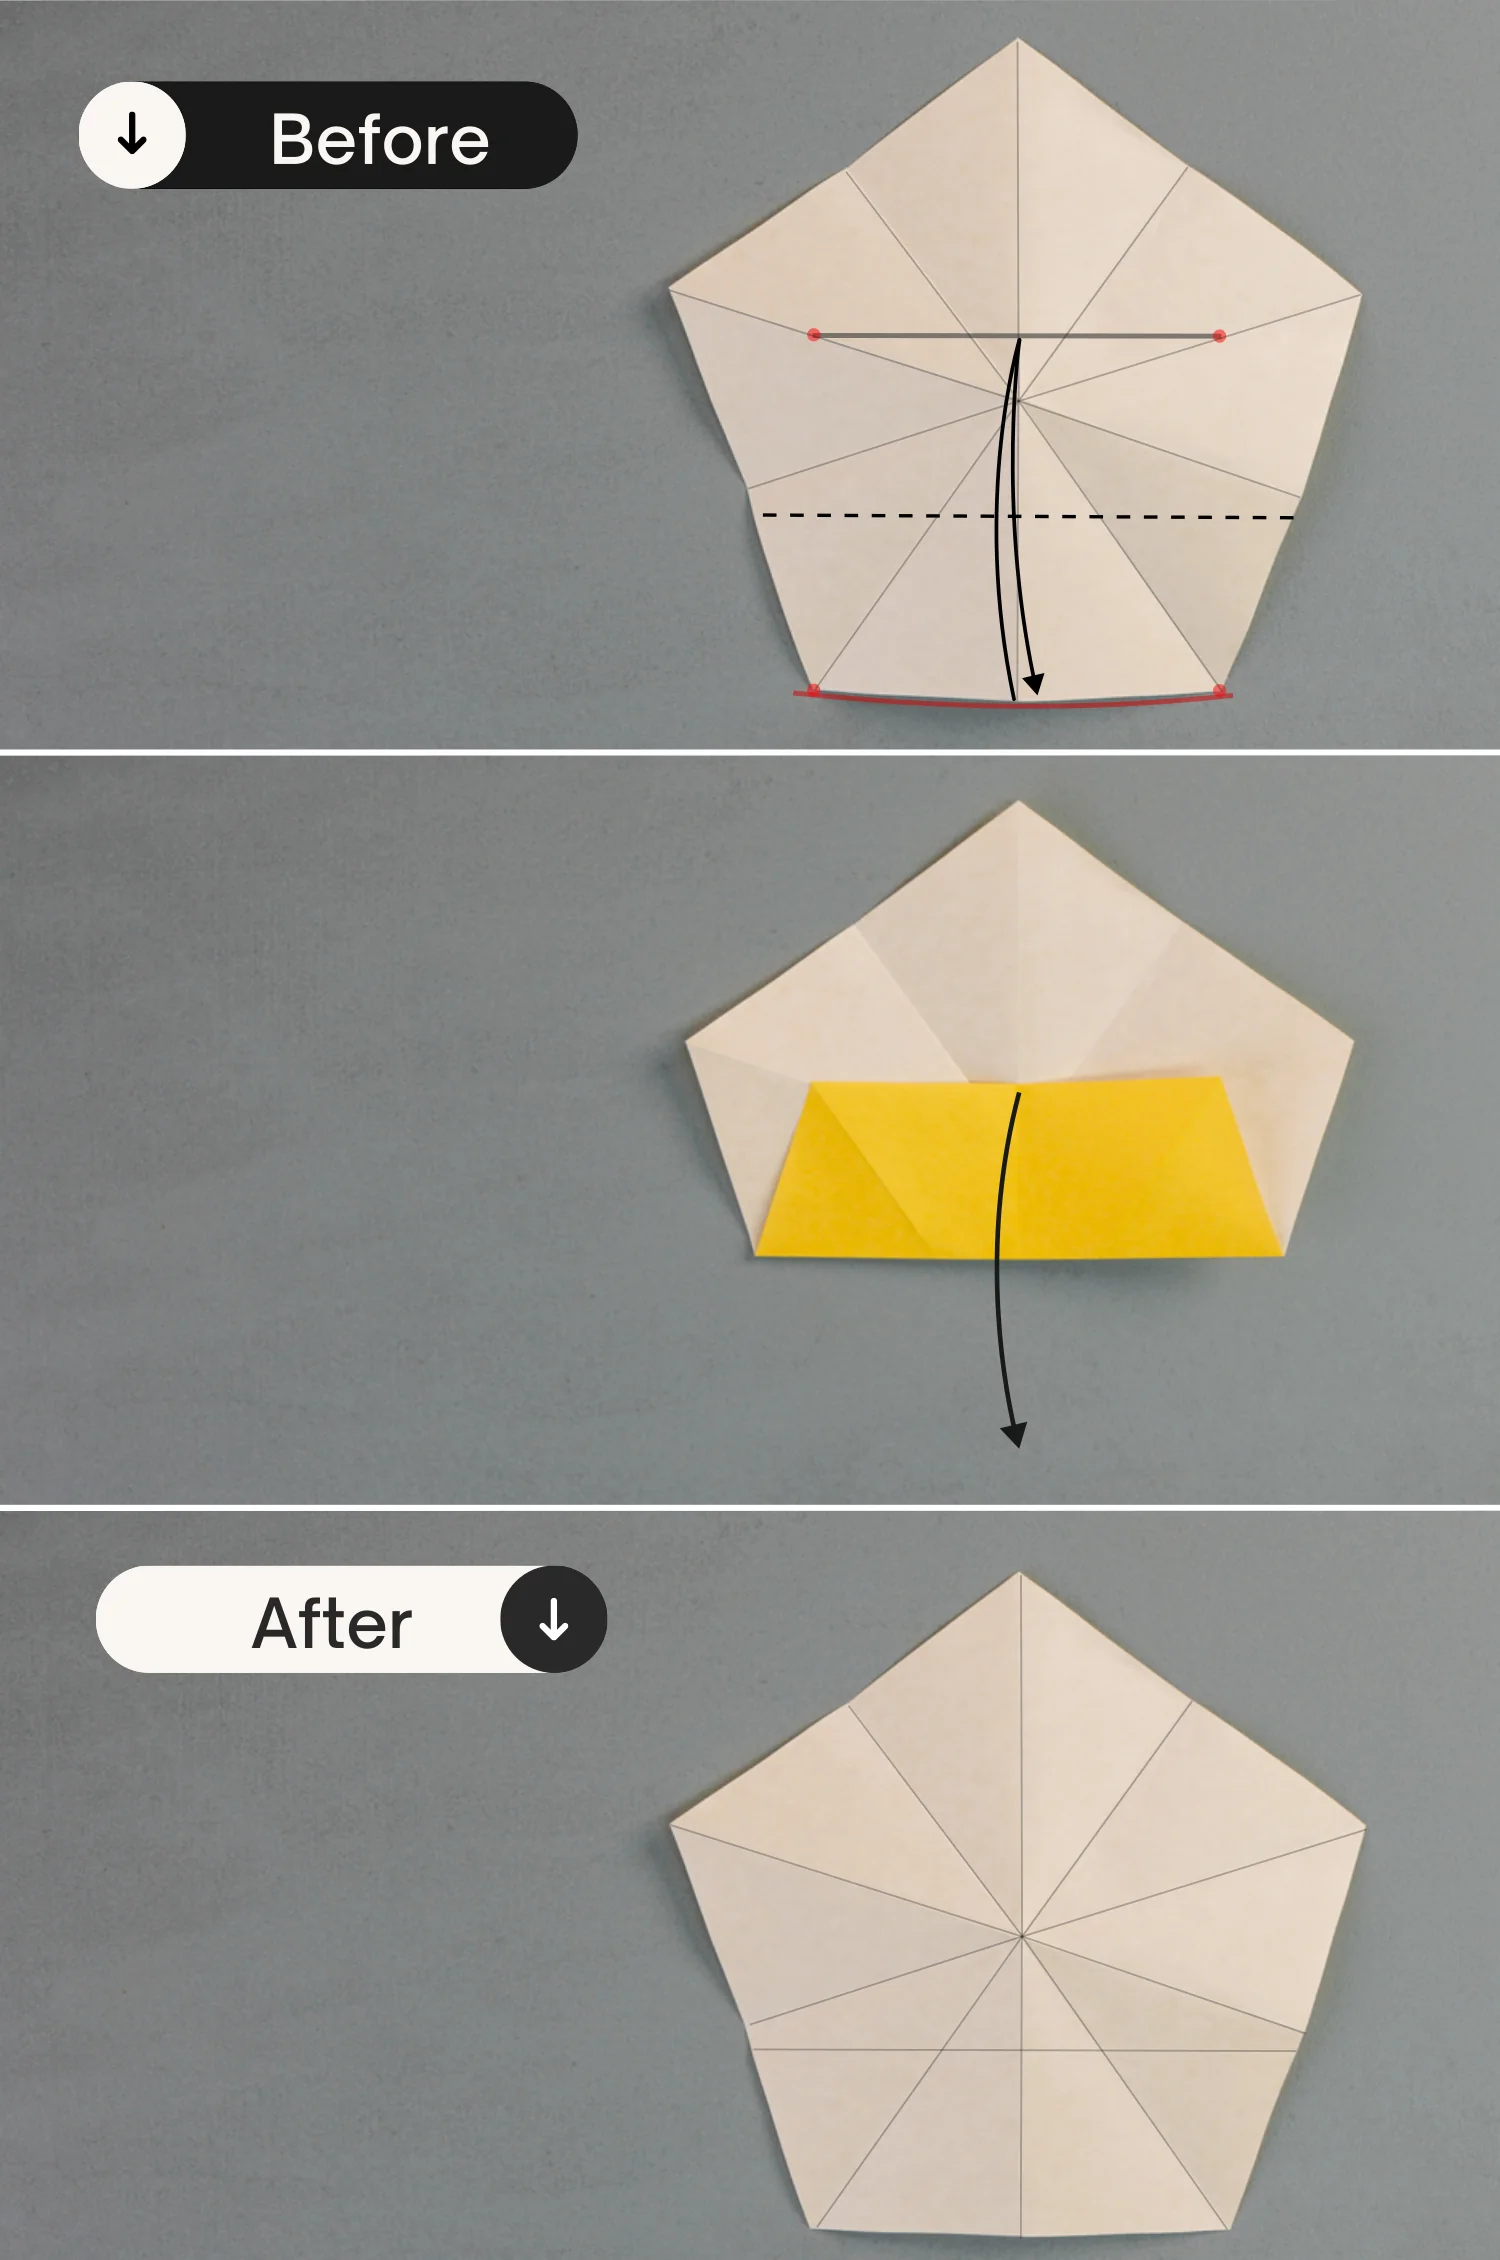
Step 4
Fold the bottom left point to meet the intersection point formed by the two creases you made in the previous step.
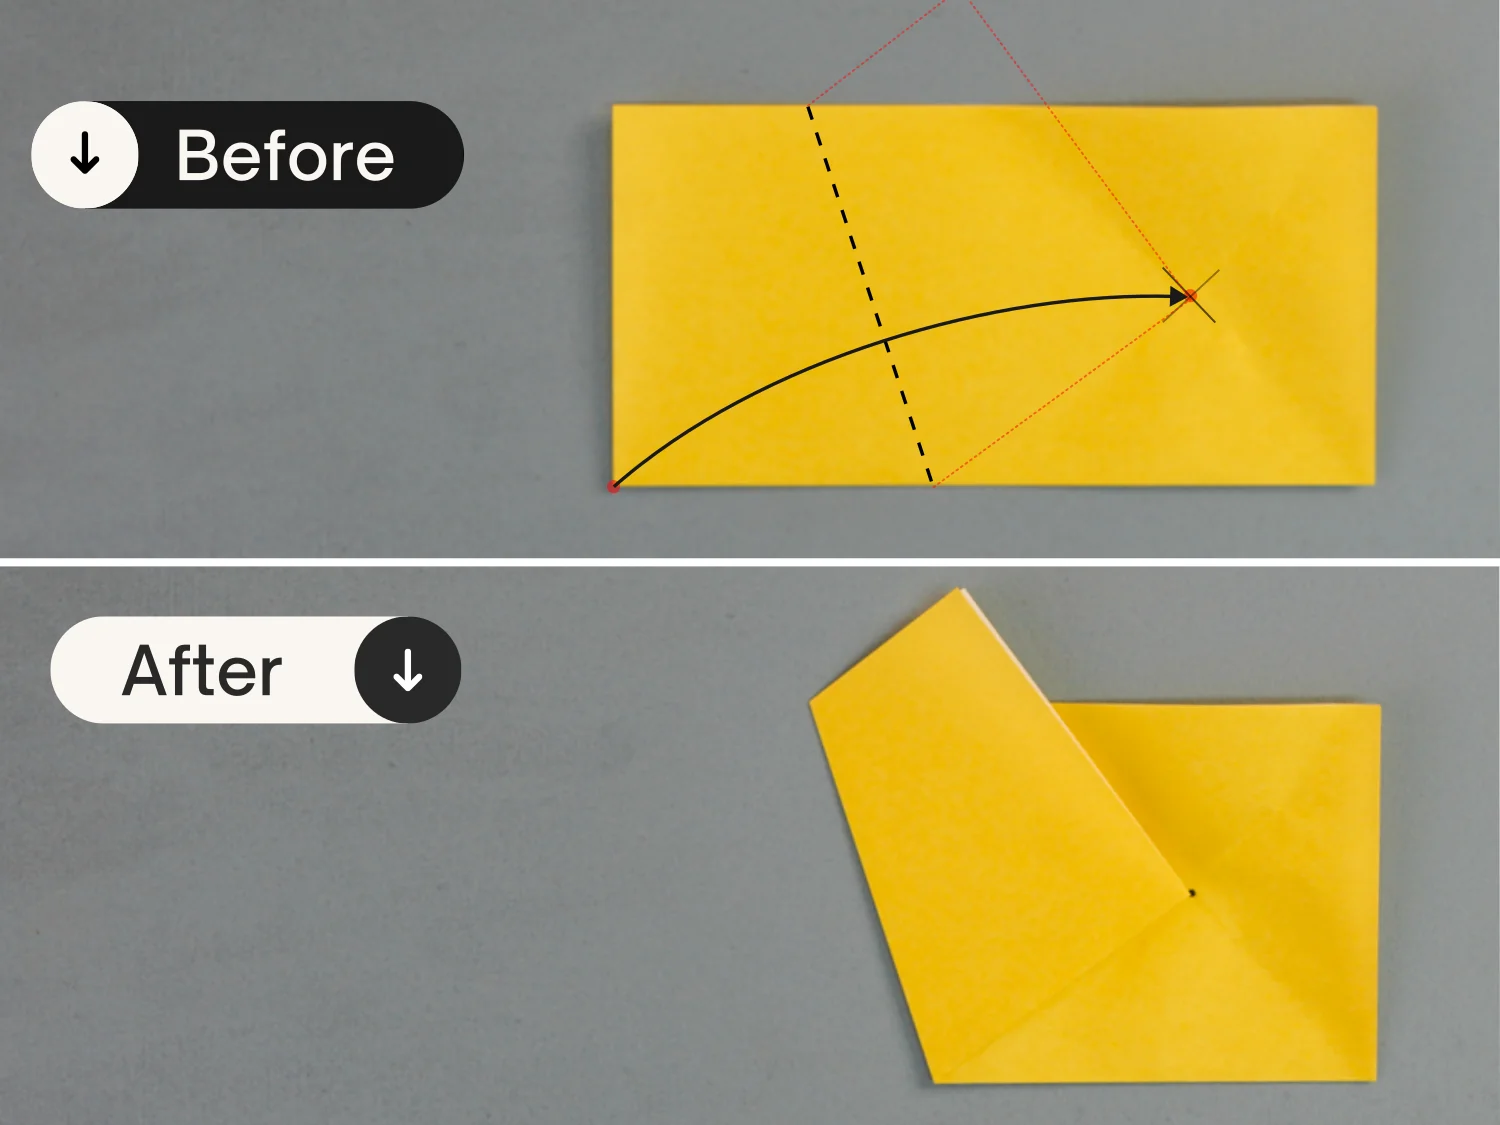
Step 5
Fold the bottom right edge of the left layer to align with its bottom left edge.
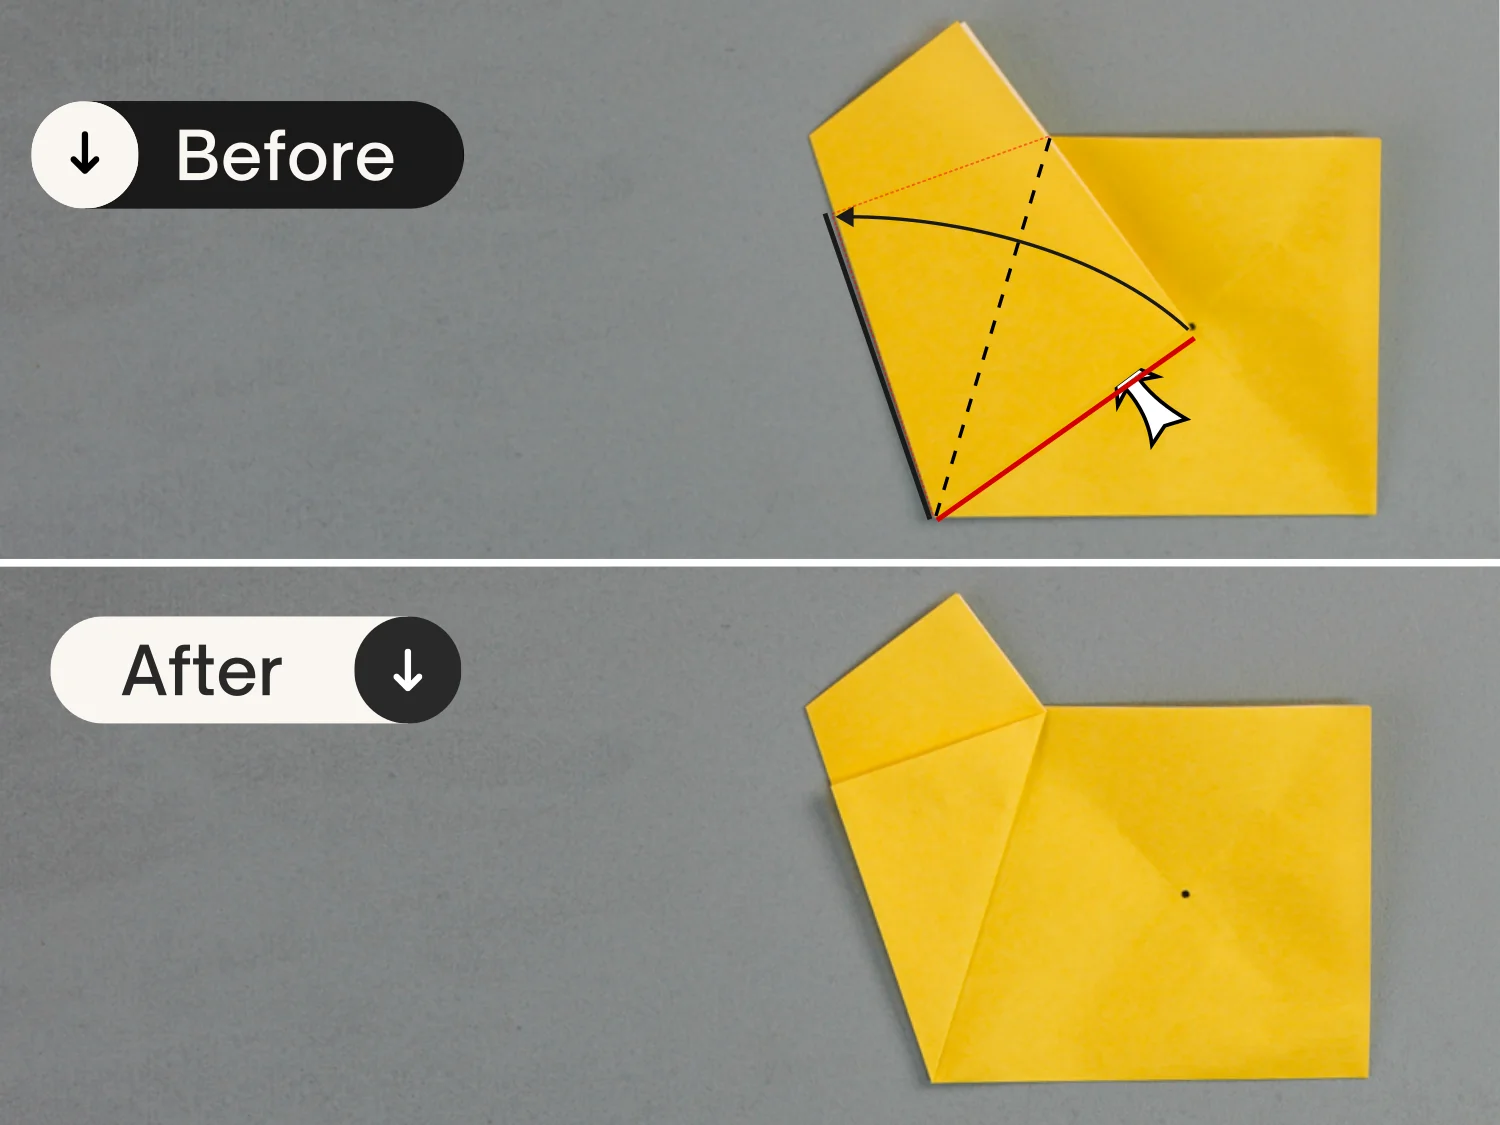
Step 6
Flip the paper over.
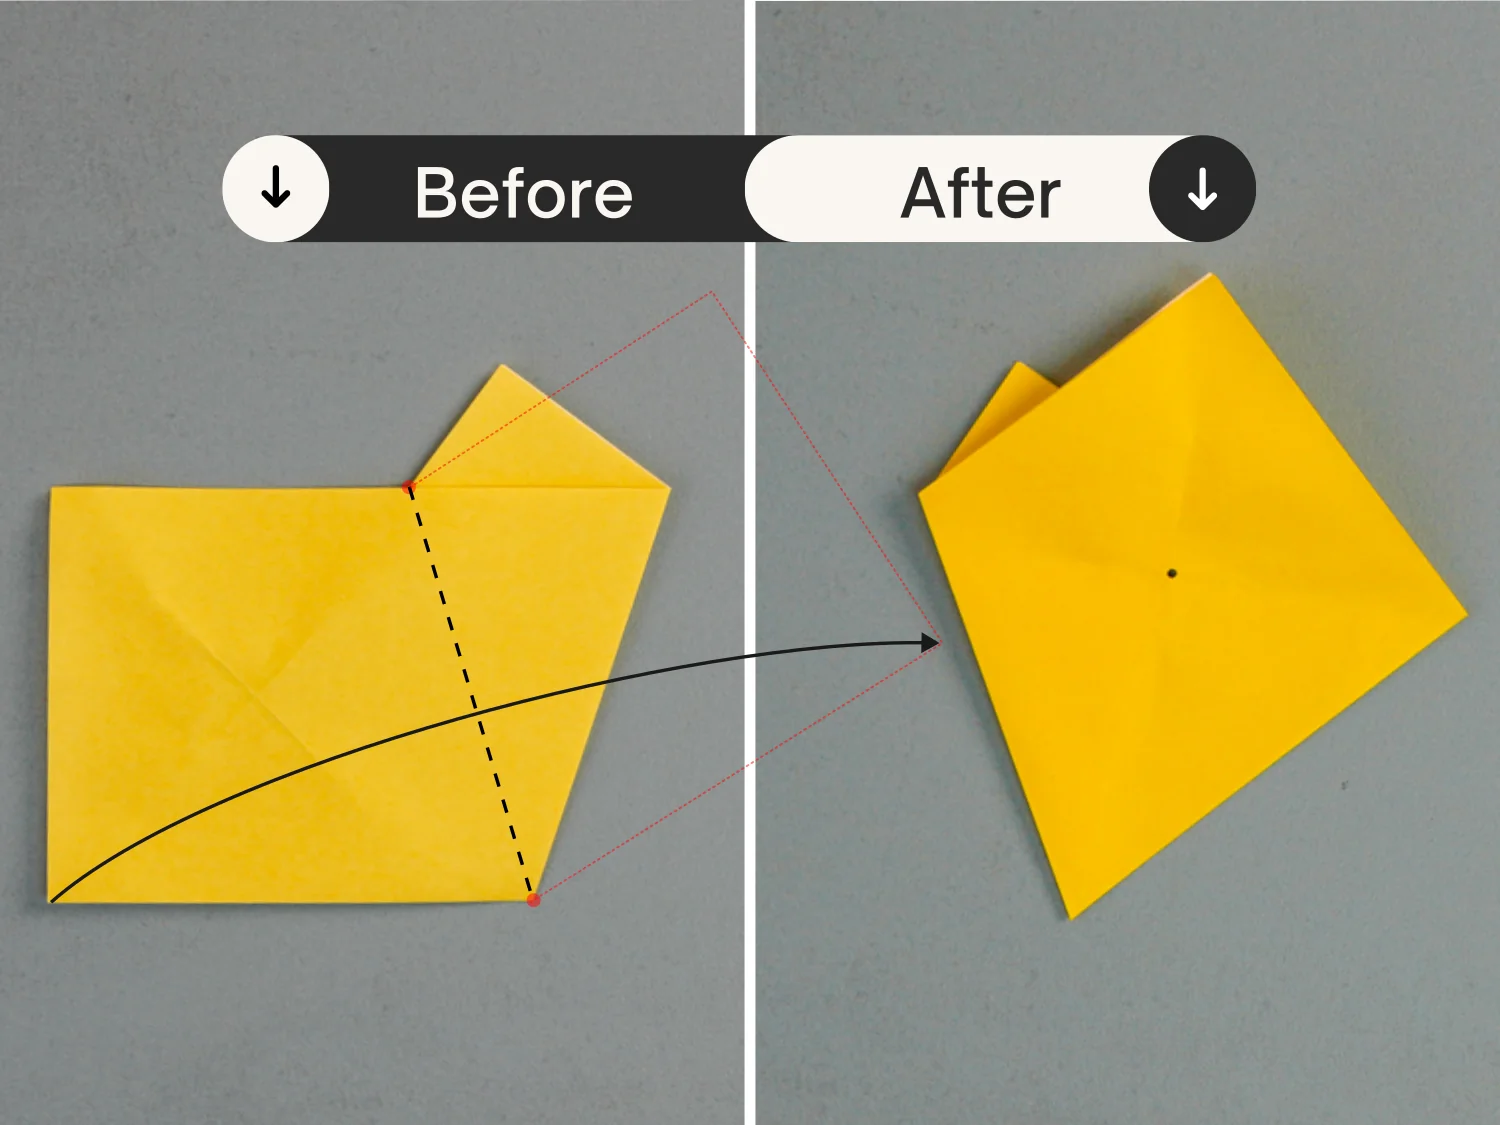
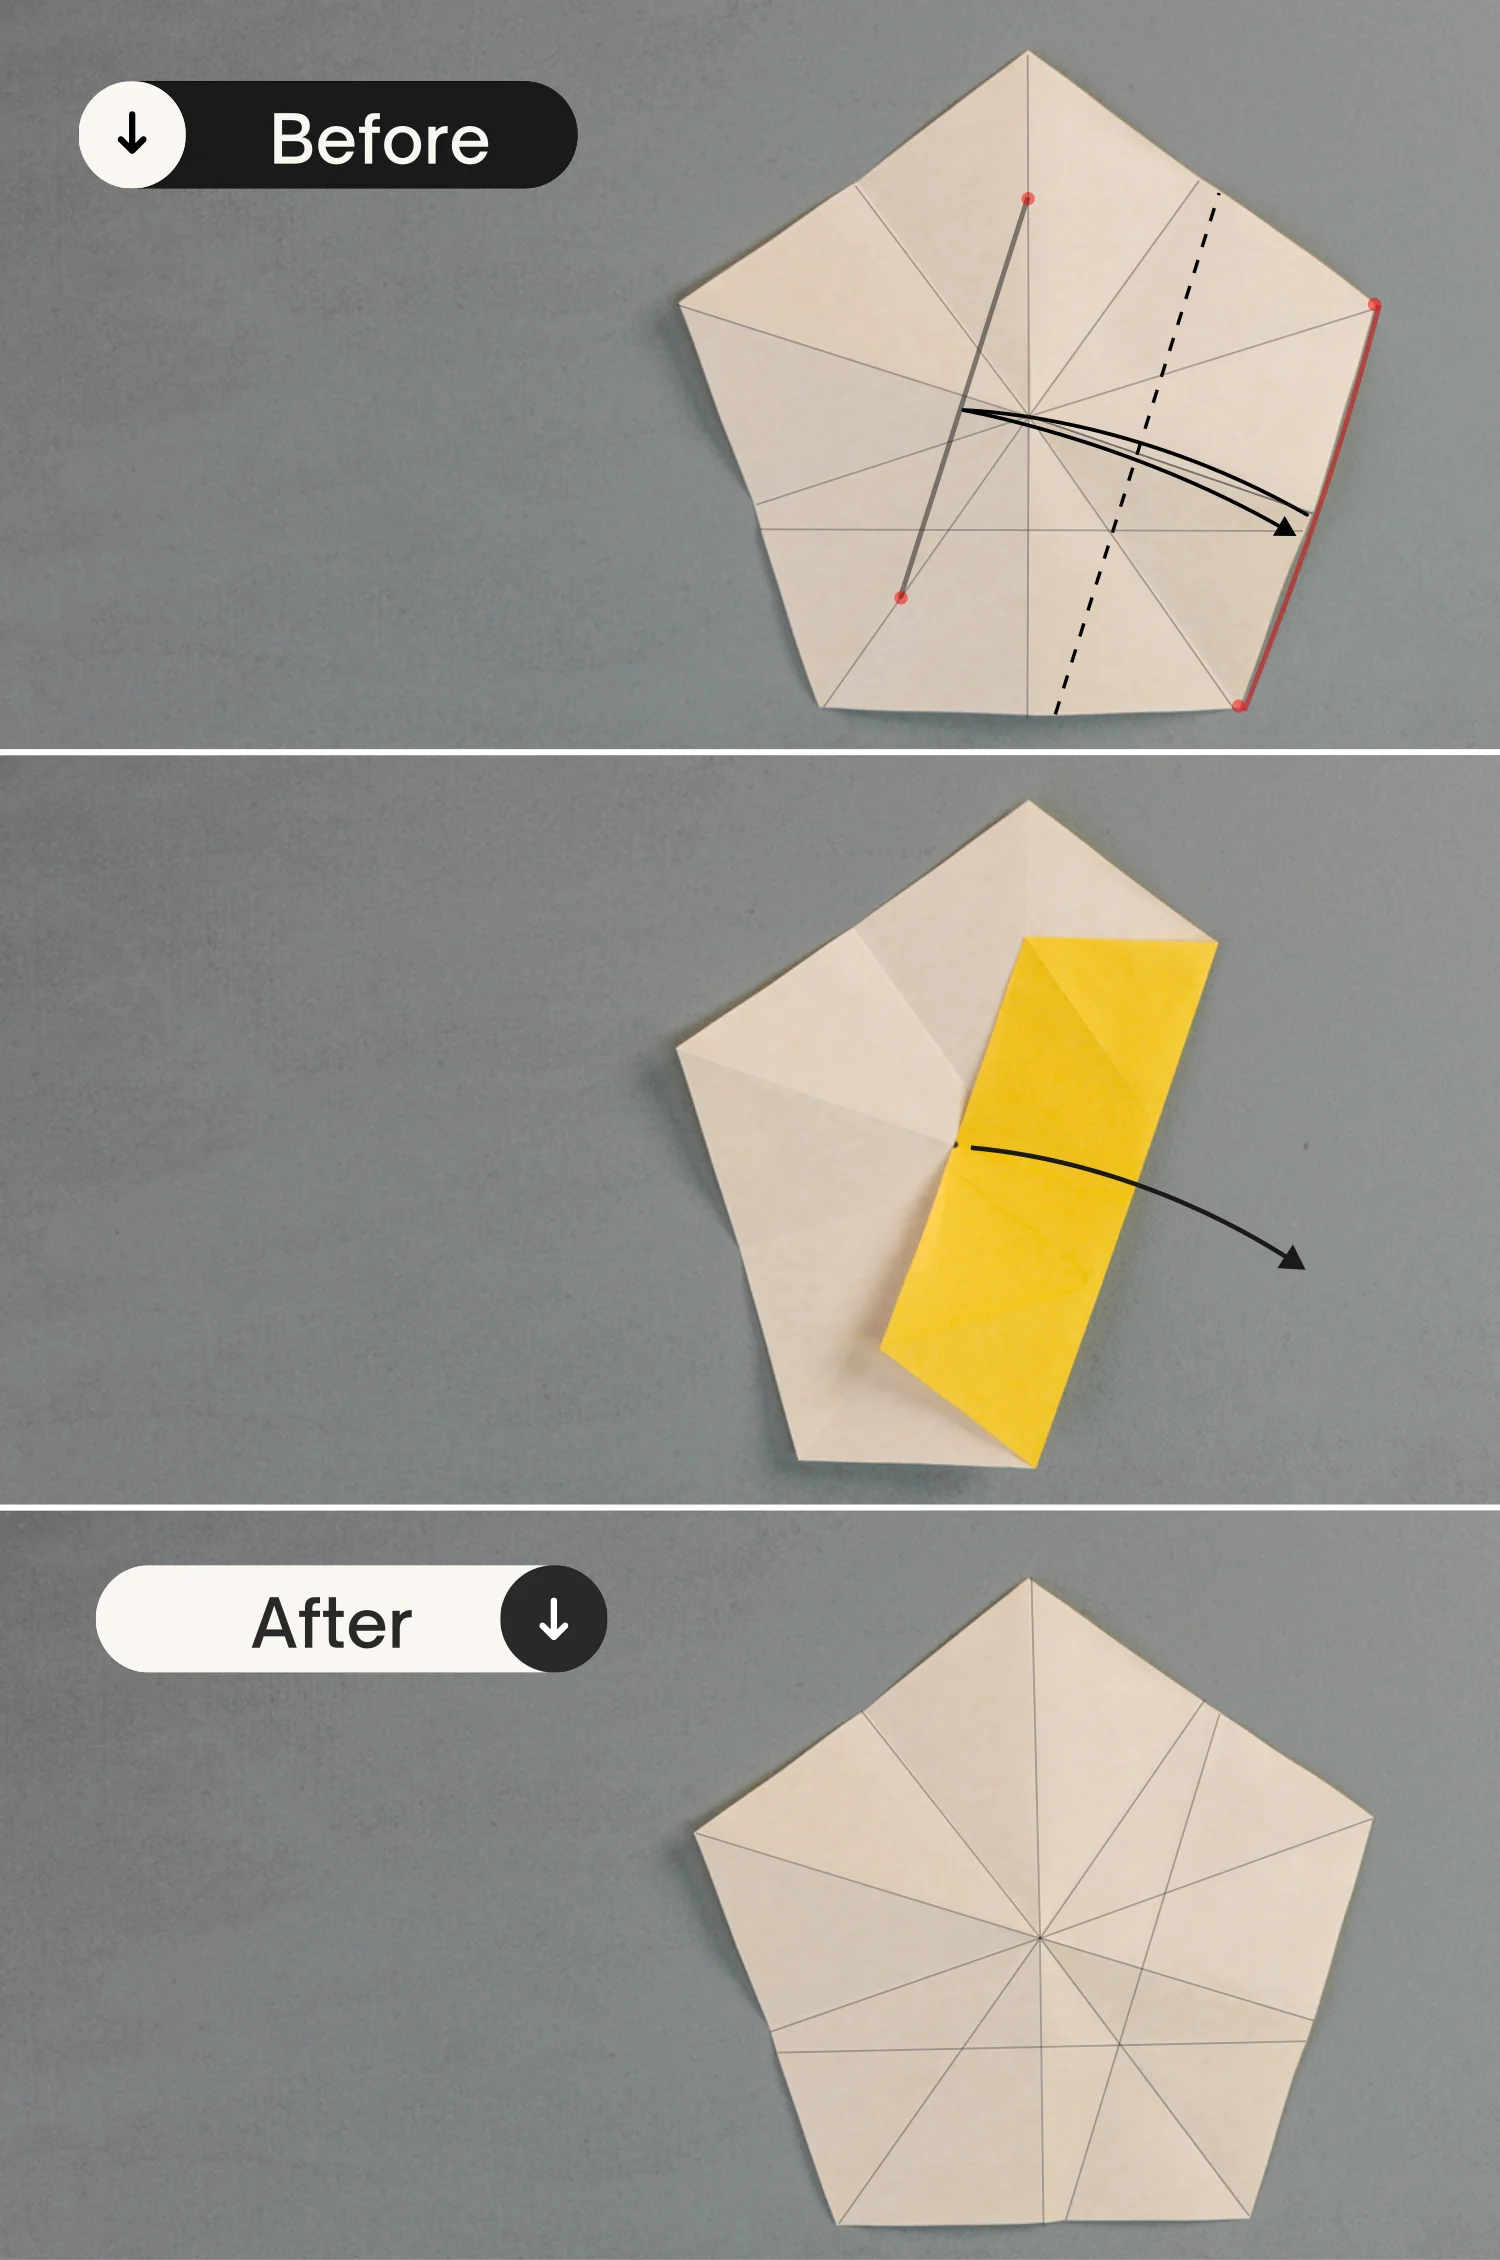
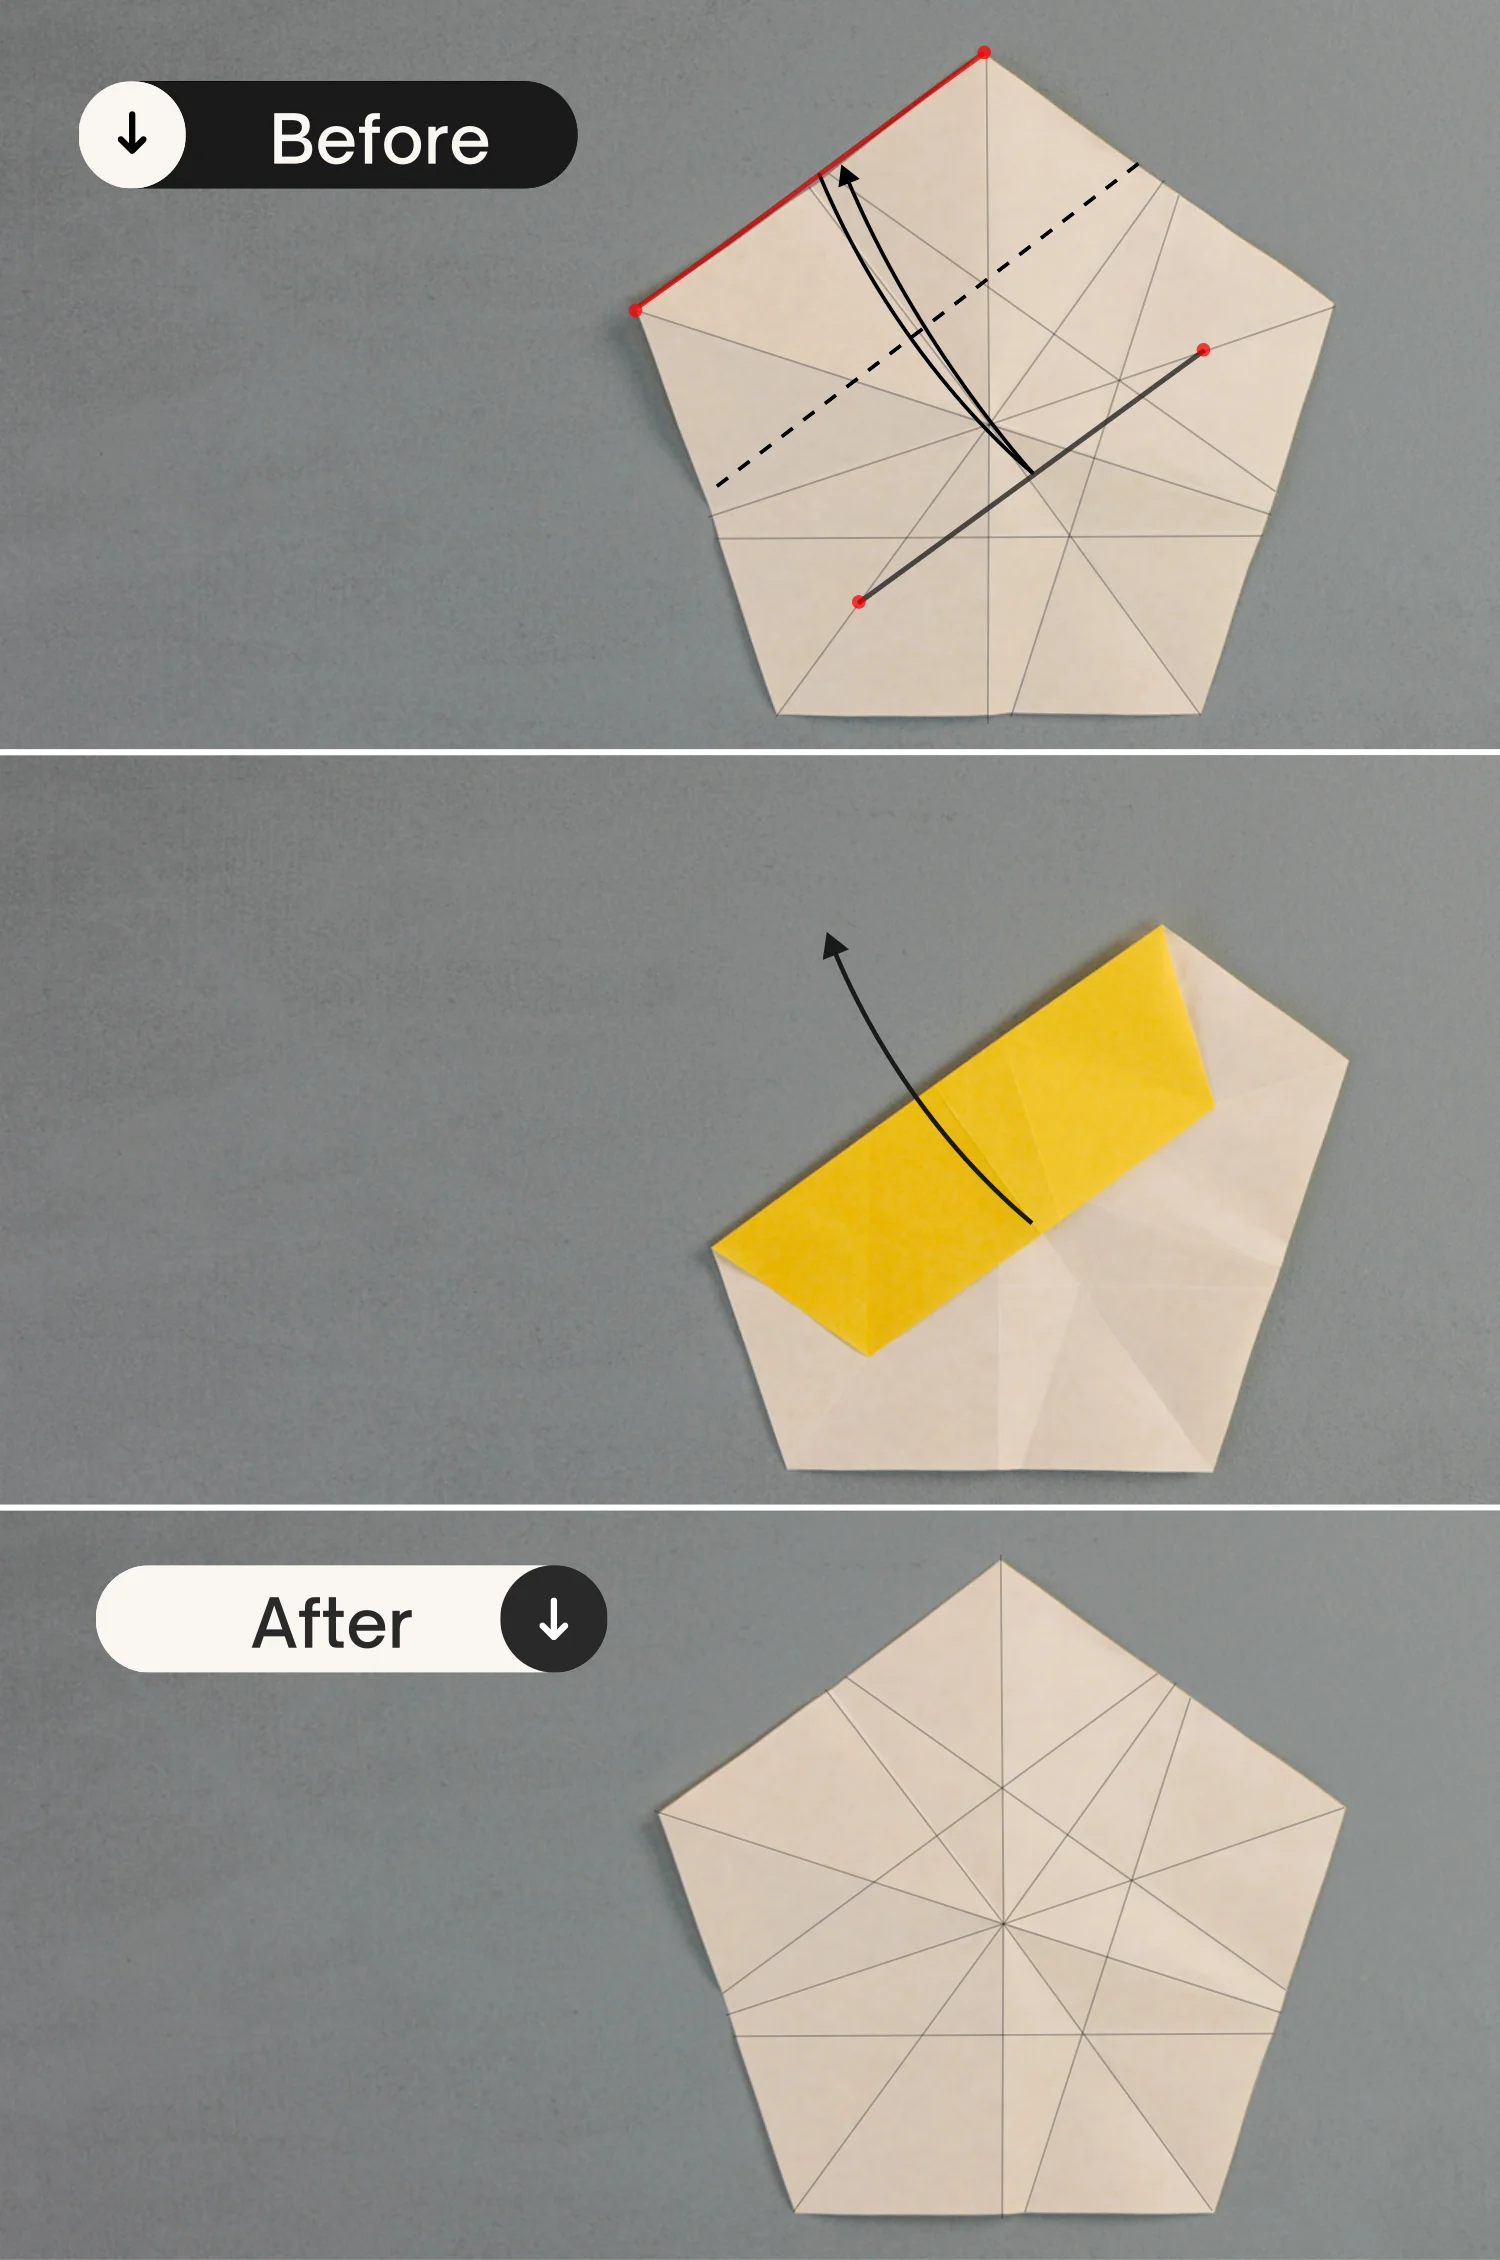
Step 7
Fold the left part to the right side along the dotted line connecting the two red spots.
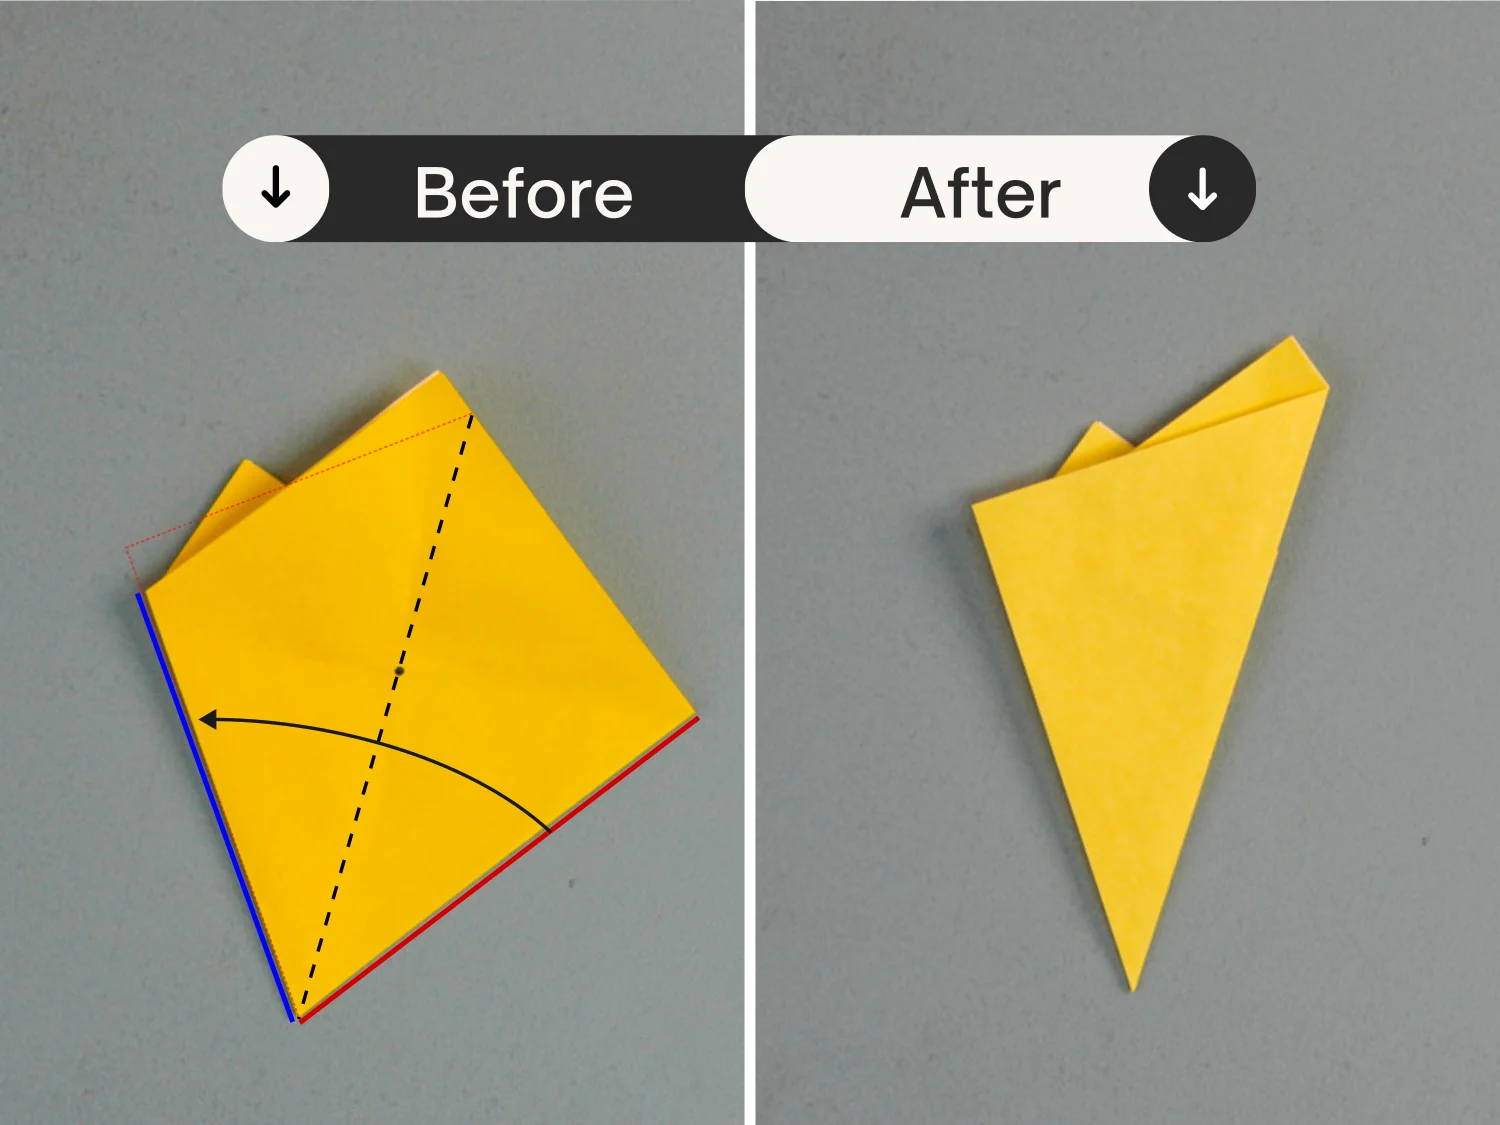
Step 8
Fold the bottom right edge to align with the bottom left edge.
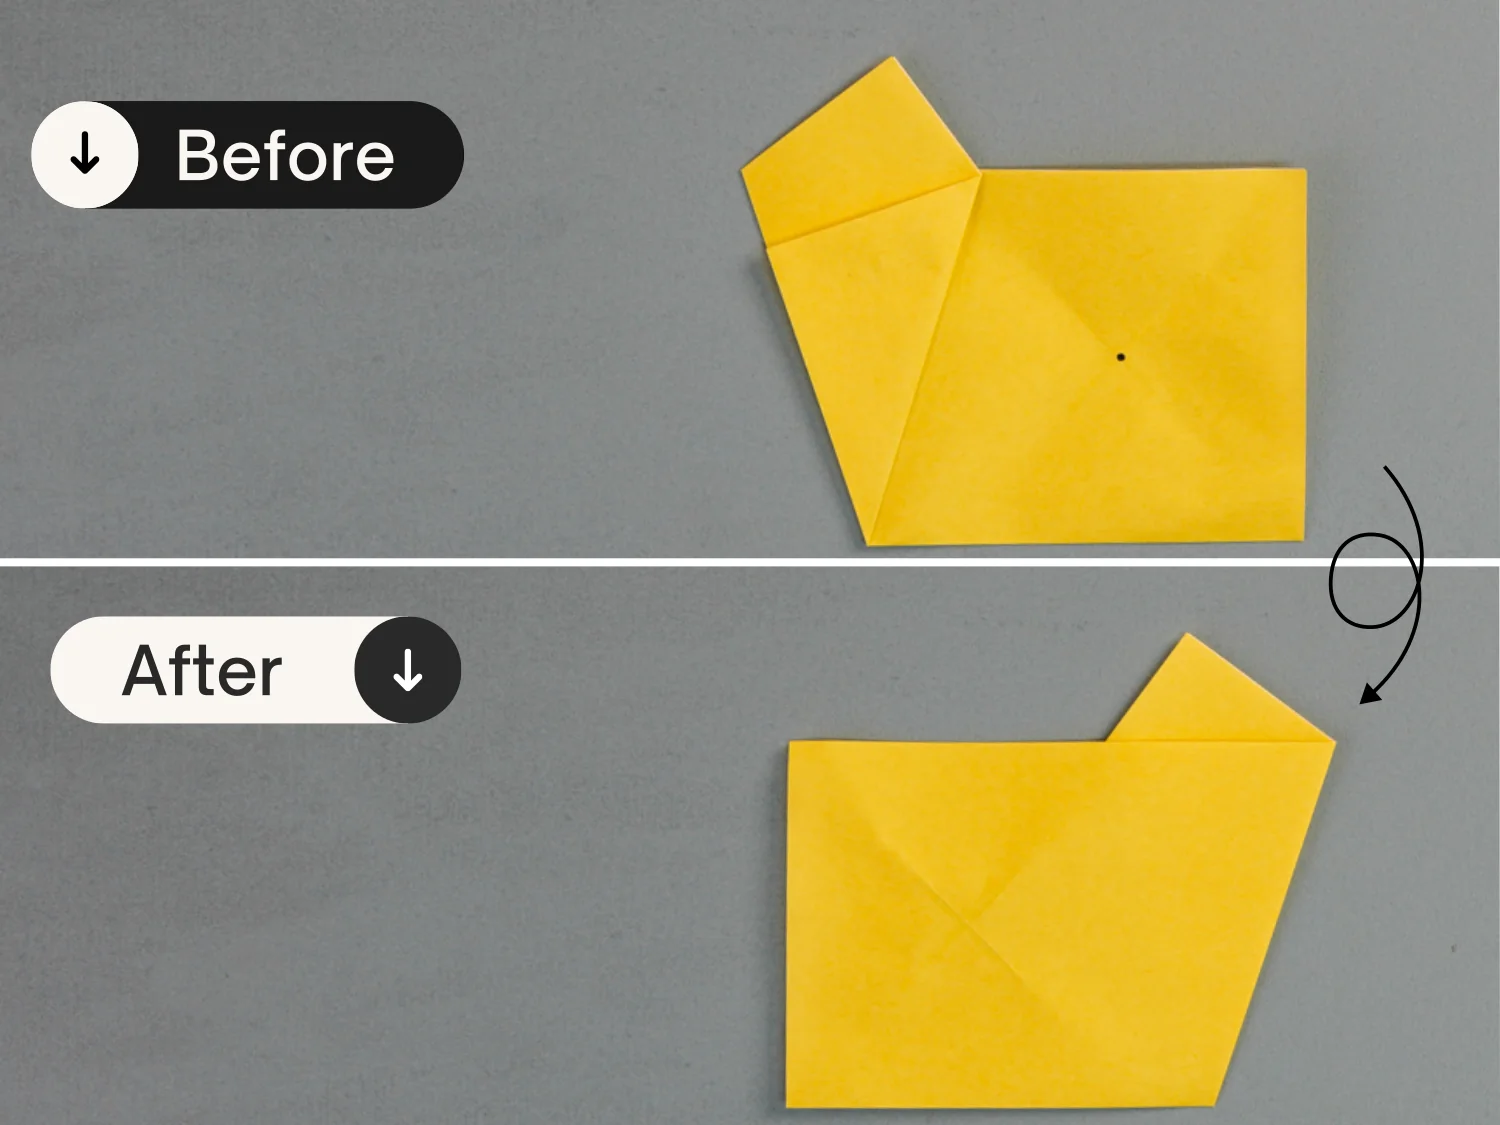
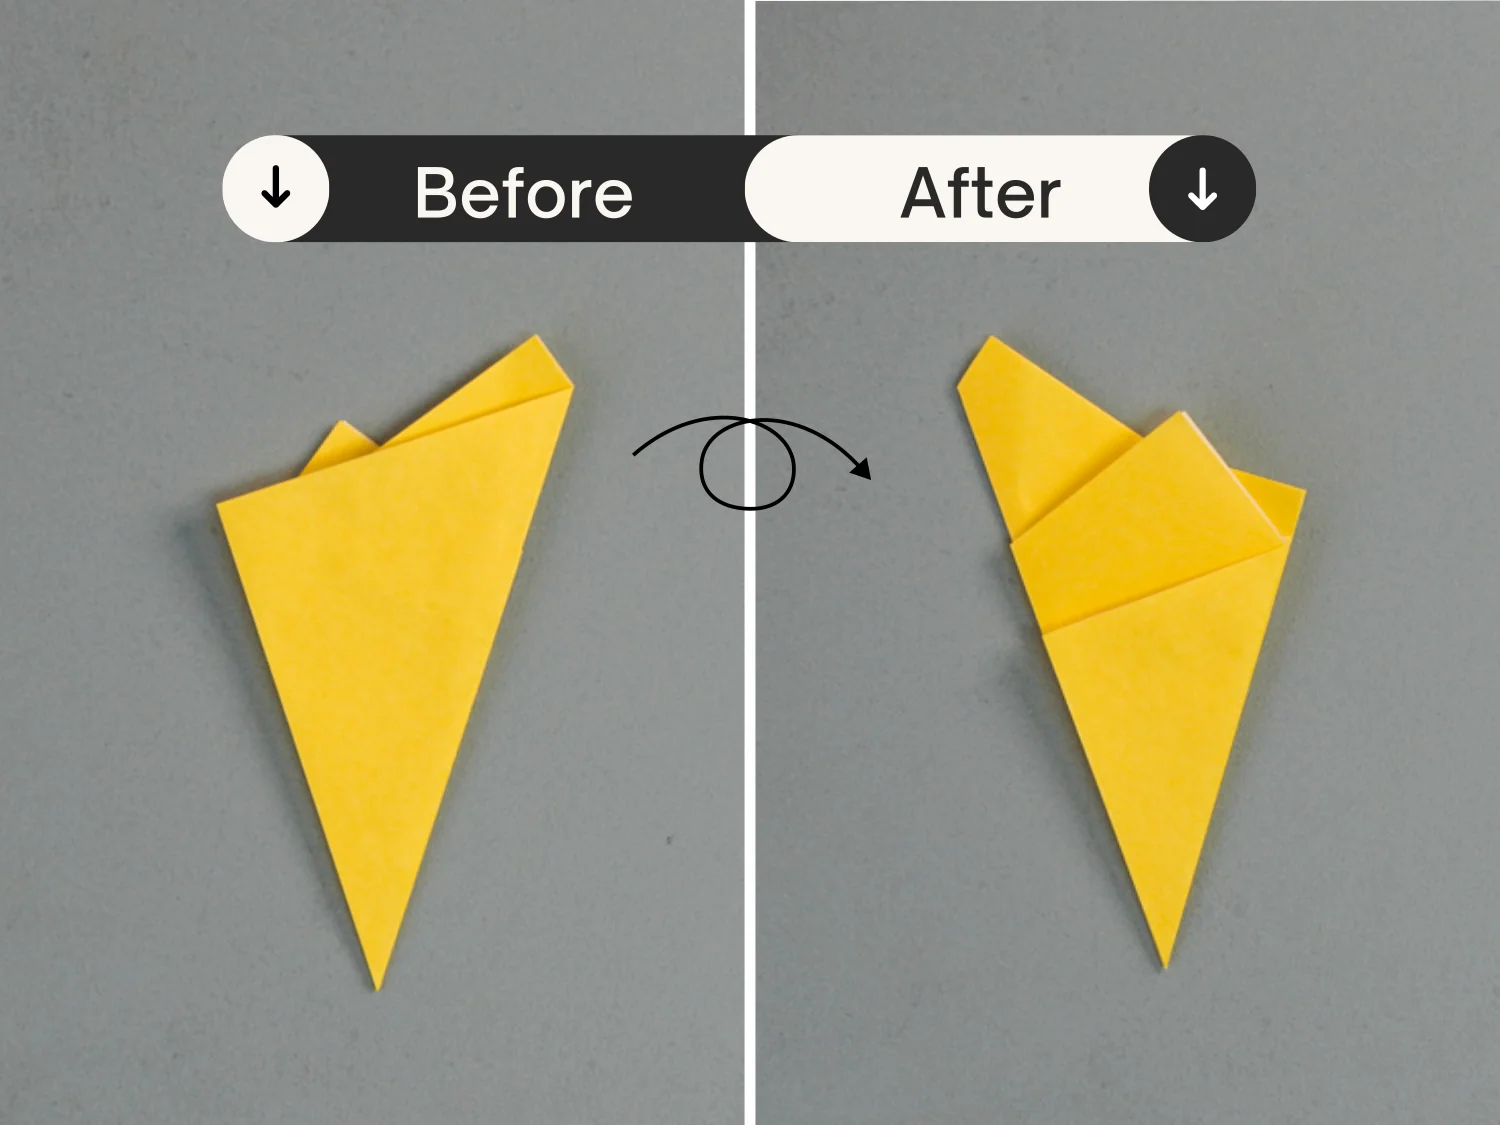
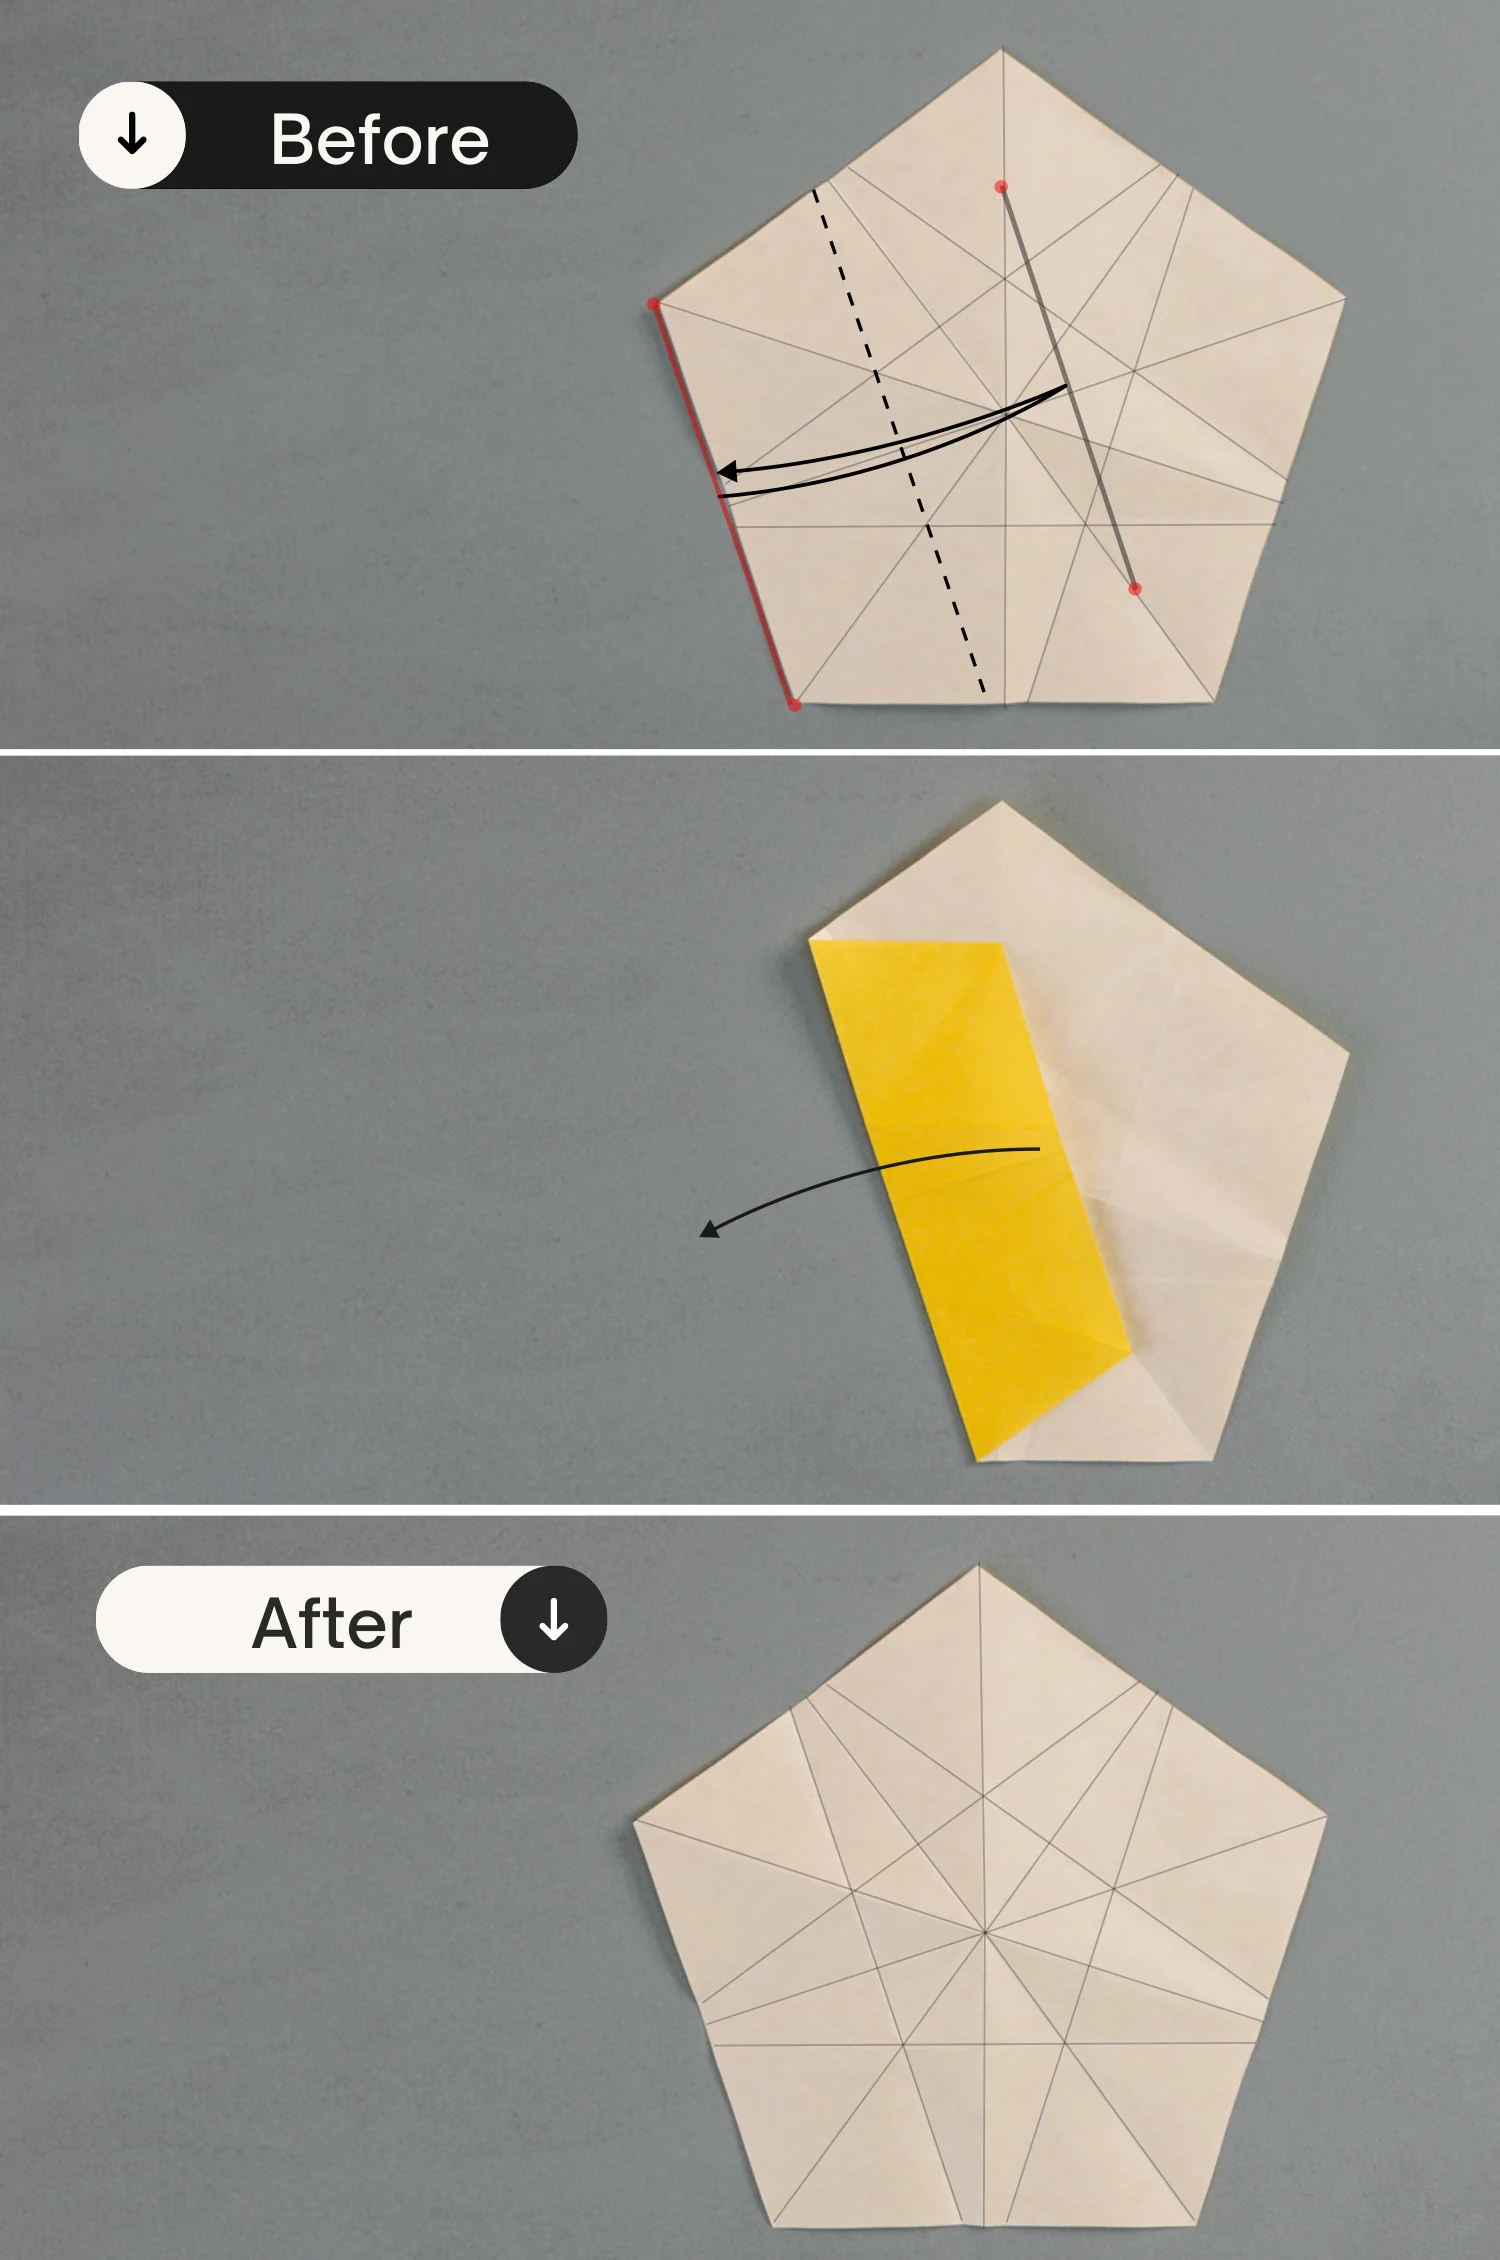
Step 9
Flip the paper over.
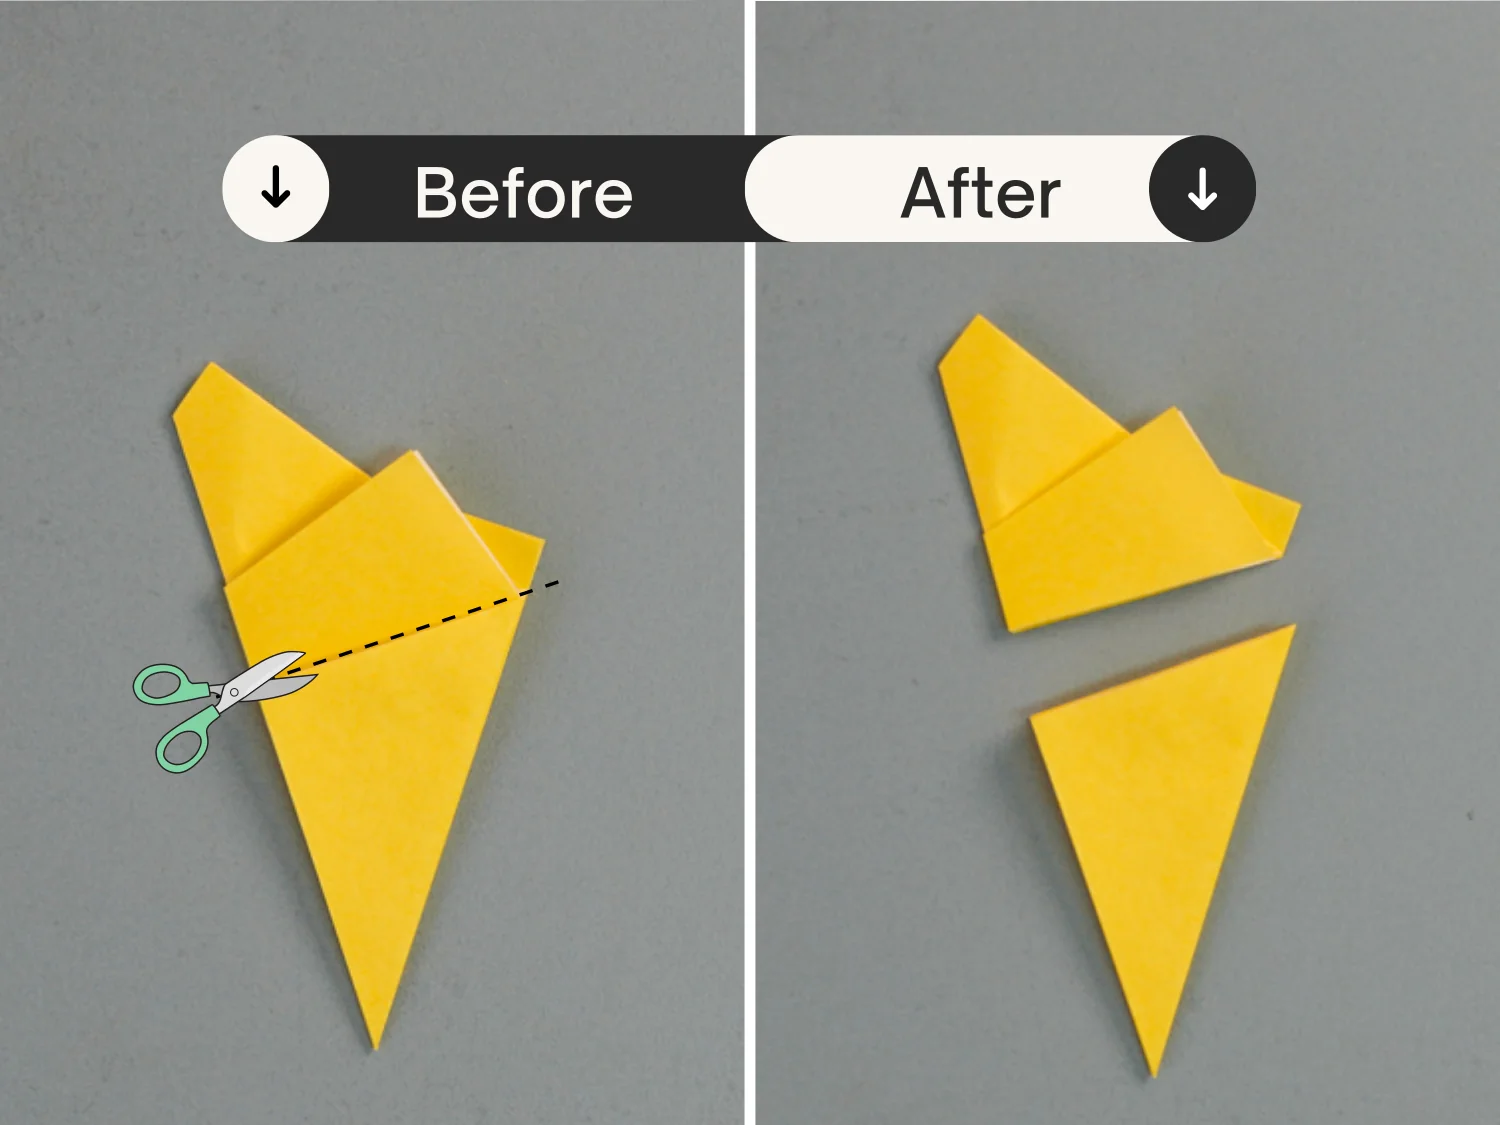
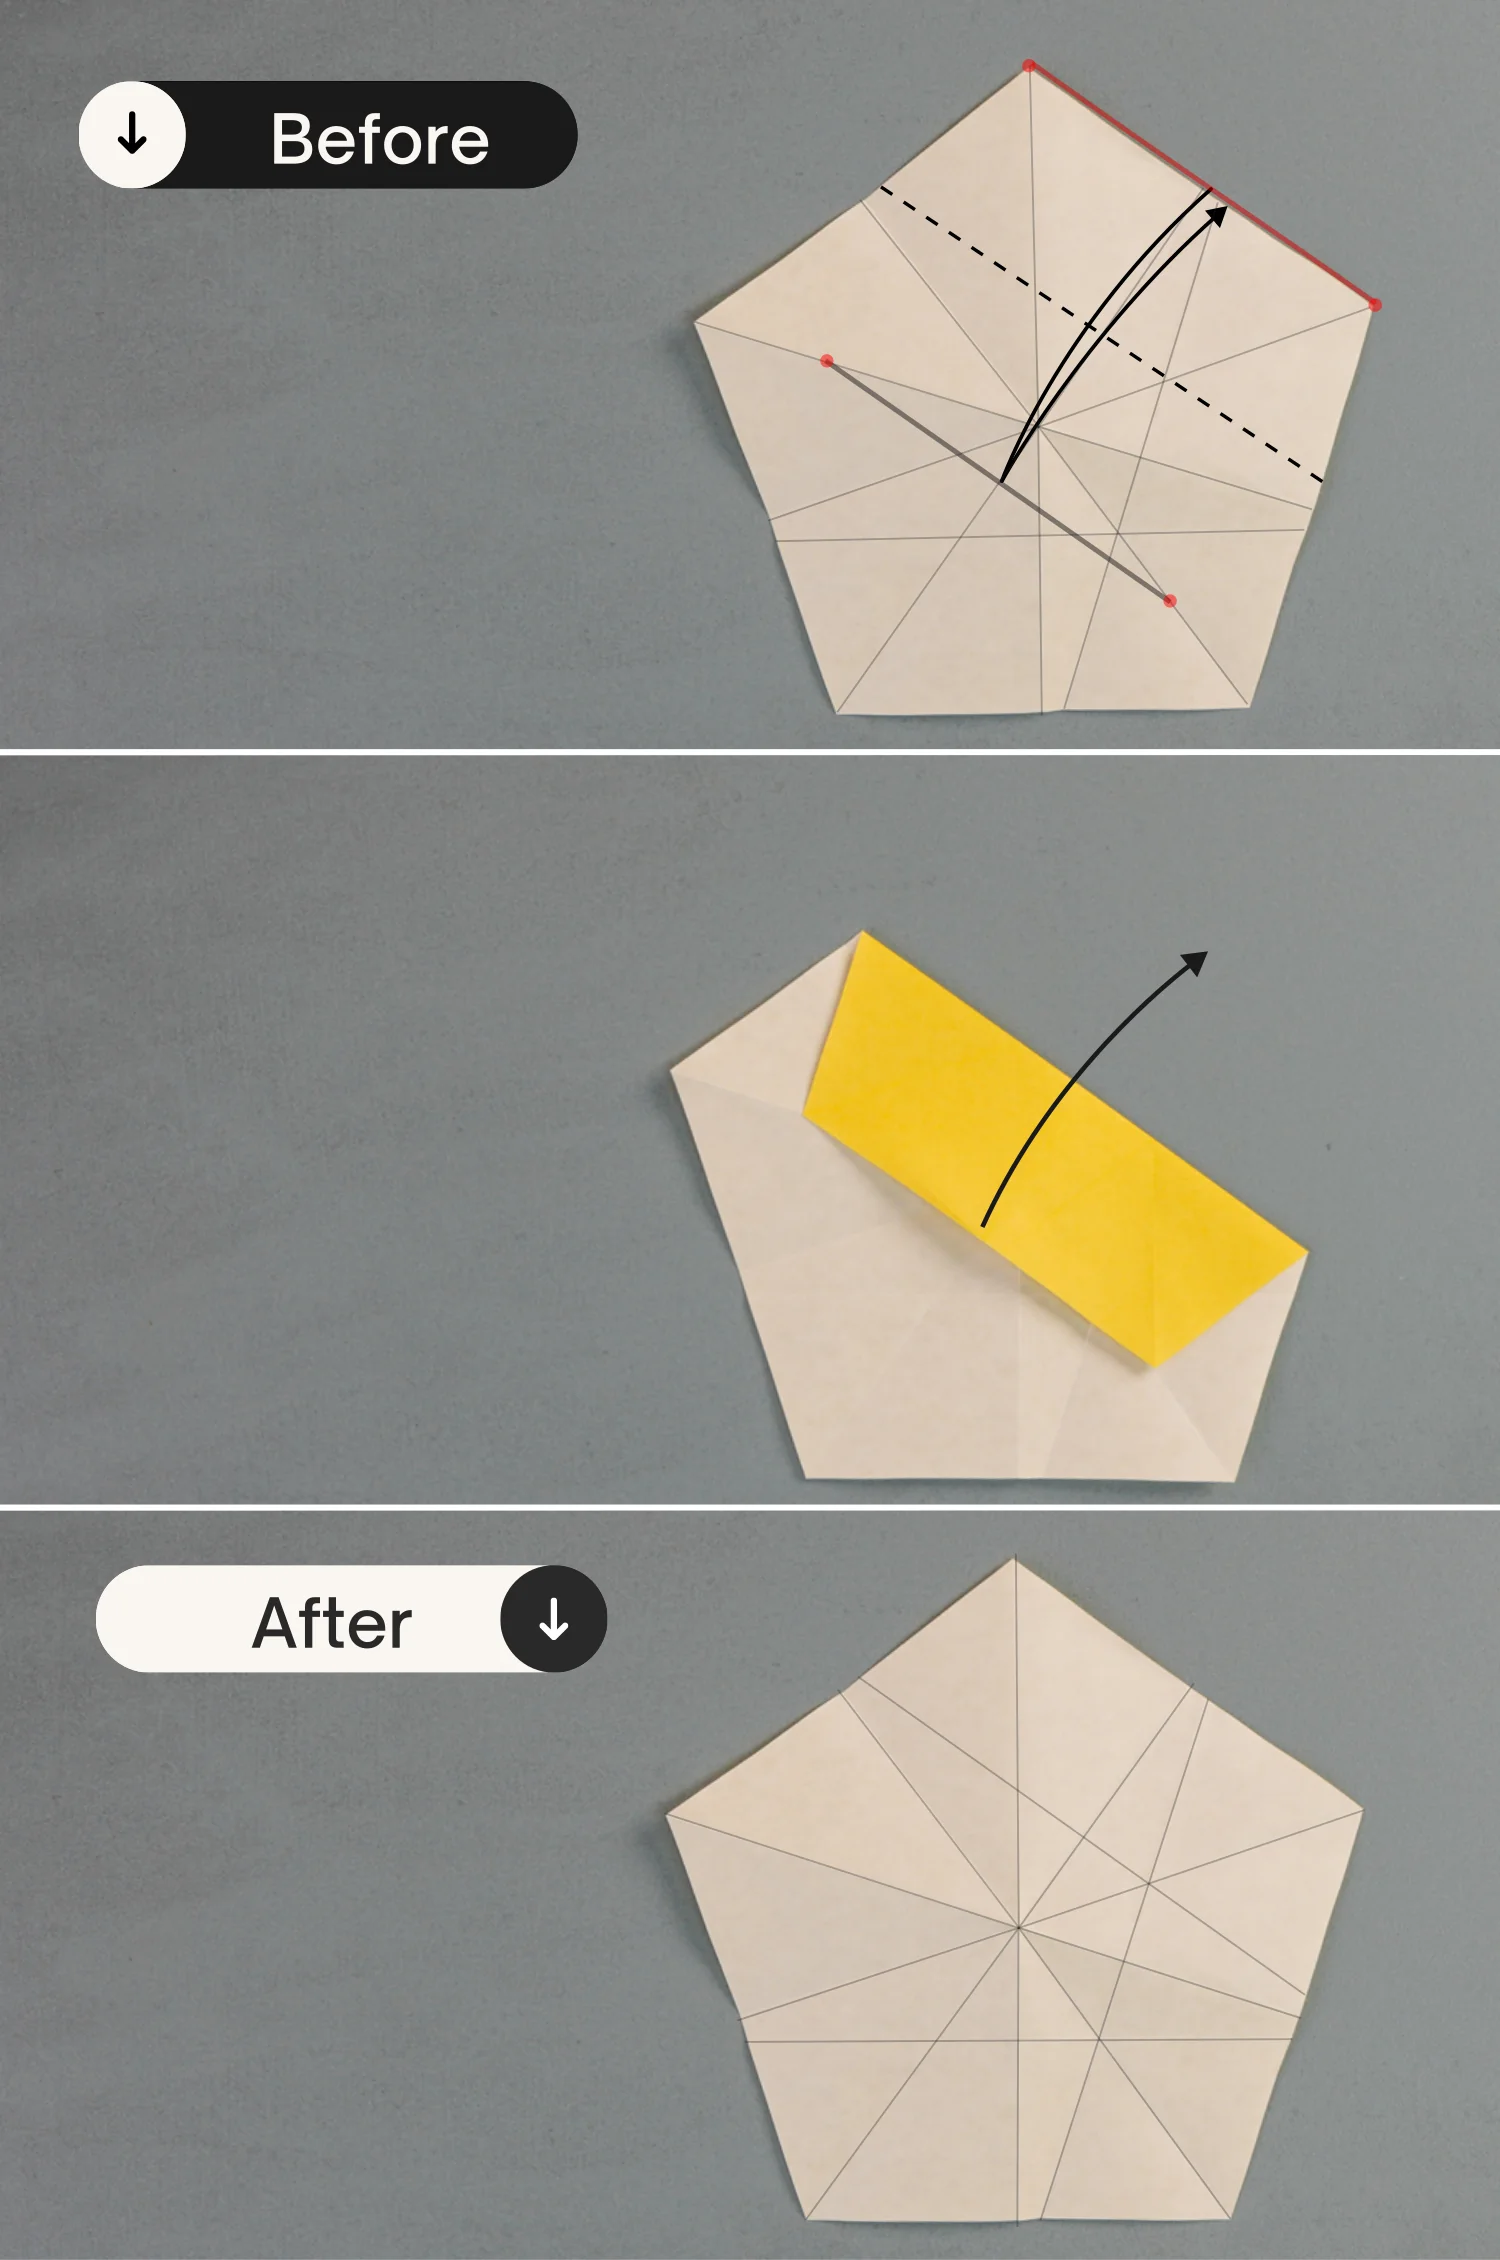
Step 10
Cut the paper along the edge shown by the dotted line as the picture shows.
Step 11
Expand the bottom one.
Step 12
Fold up the bottom edge along the dotted line, making the bottom left and right points meet the existing creases as the pictures show, crease it well then unfold it.
Step 13
In the same manner, fold the bottom right edge along the dotted lines, crease it well then unfold it.
Step 14
Fold the top right edge along the dotted line, leaving a crease then unfold it.
Step 15
As well as the top left edge, fold it along the dotted line, making the two points of the top left edge meet the existing crease, crease it well then unfold it.
Step 16
Fold the last edge, the bottom left edge, along the dotted line, leaving a crease then unfold.
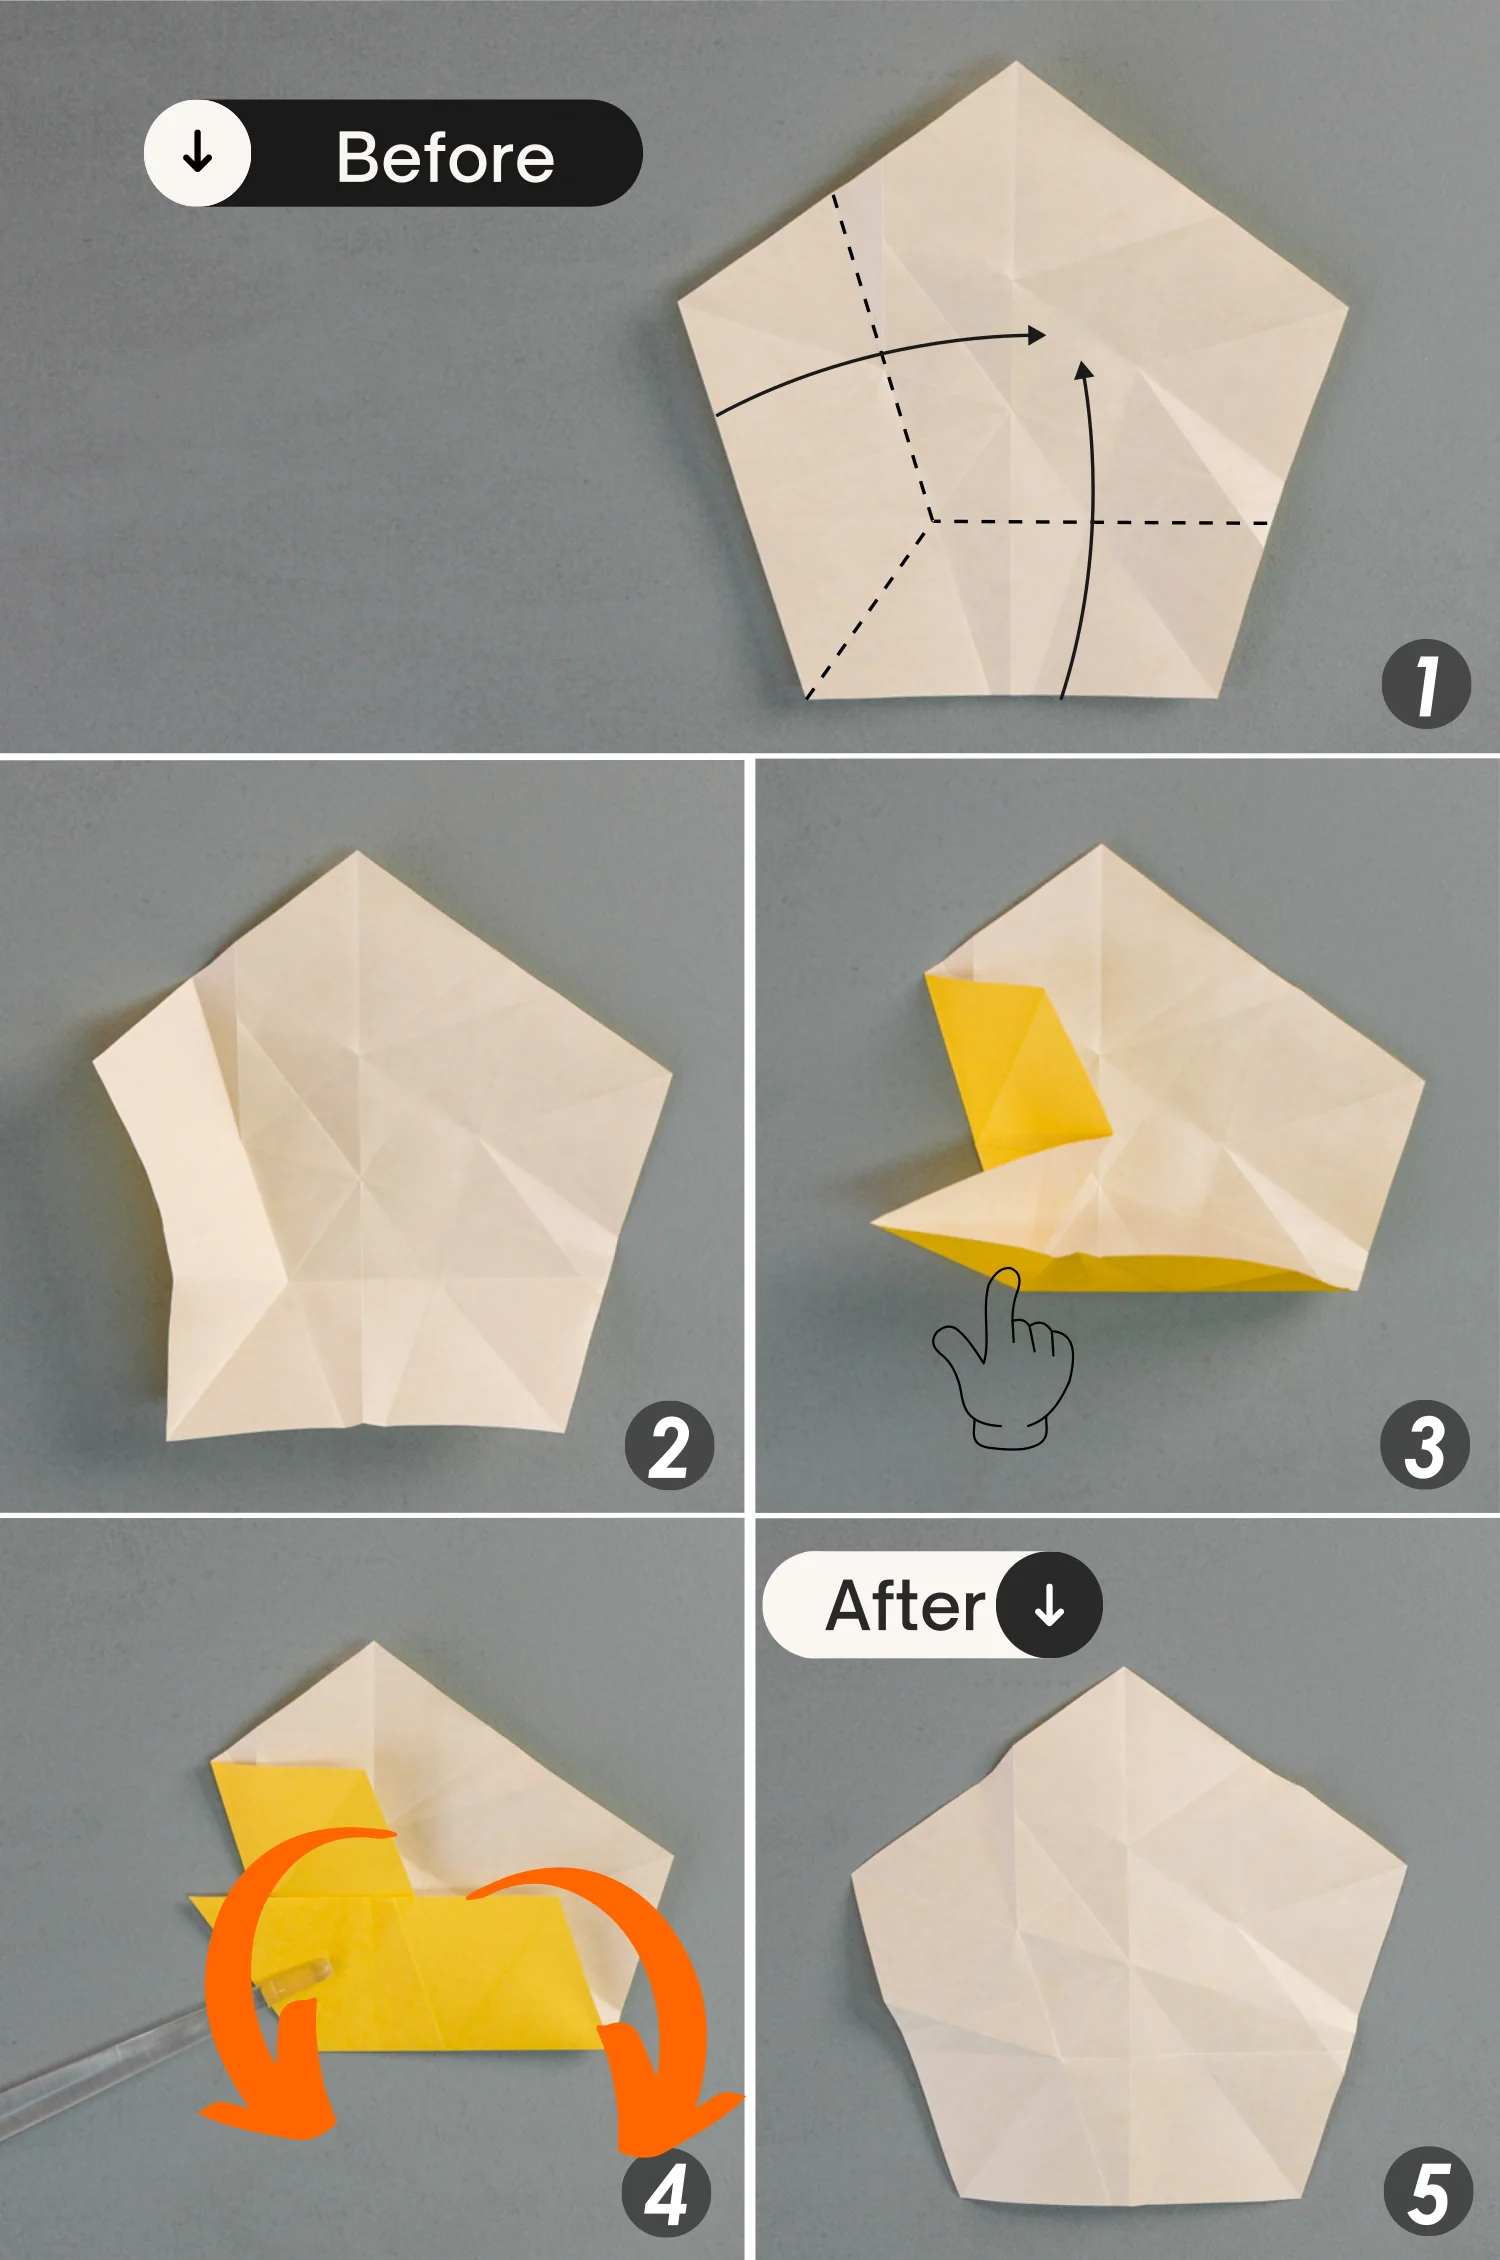
Step 17
Bring up the top and bottom right edges, creating a standing corner based on the creases indicated by the three dotted lines, then press this corner down, and unfold the paper.

Step 18
Like before, bring up the top left and right edges, creating a standing corner based on the three creases indicated by the dotted lines, then press down this corner to the right, and finally unfold the paper.
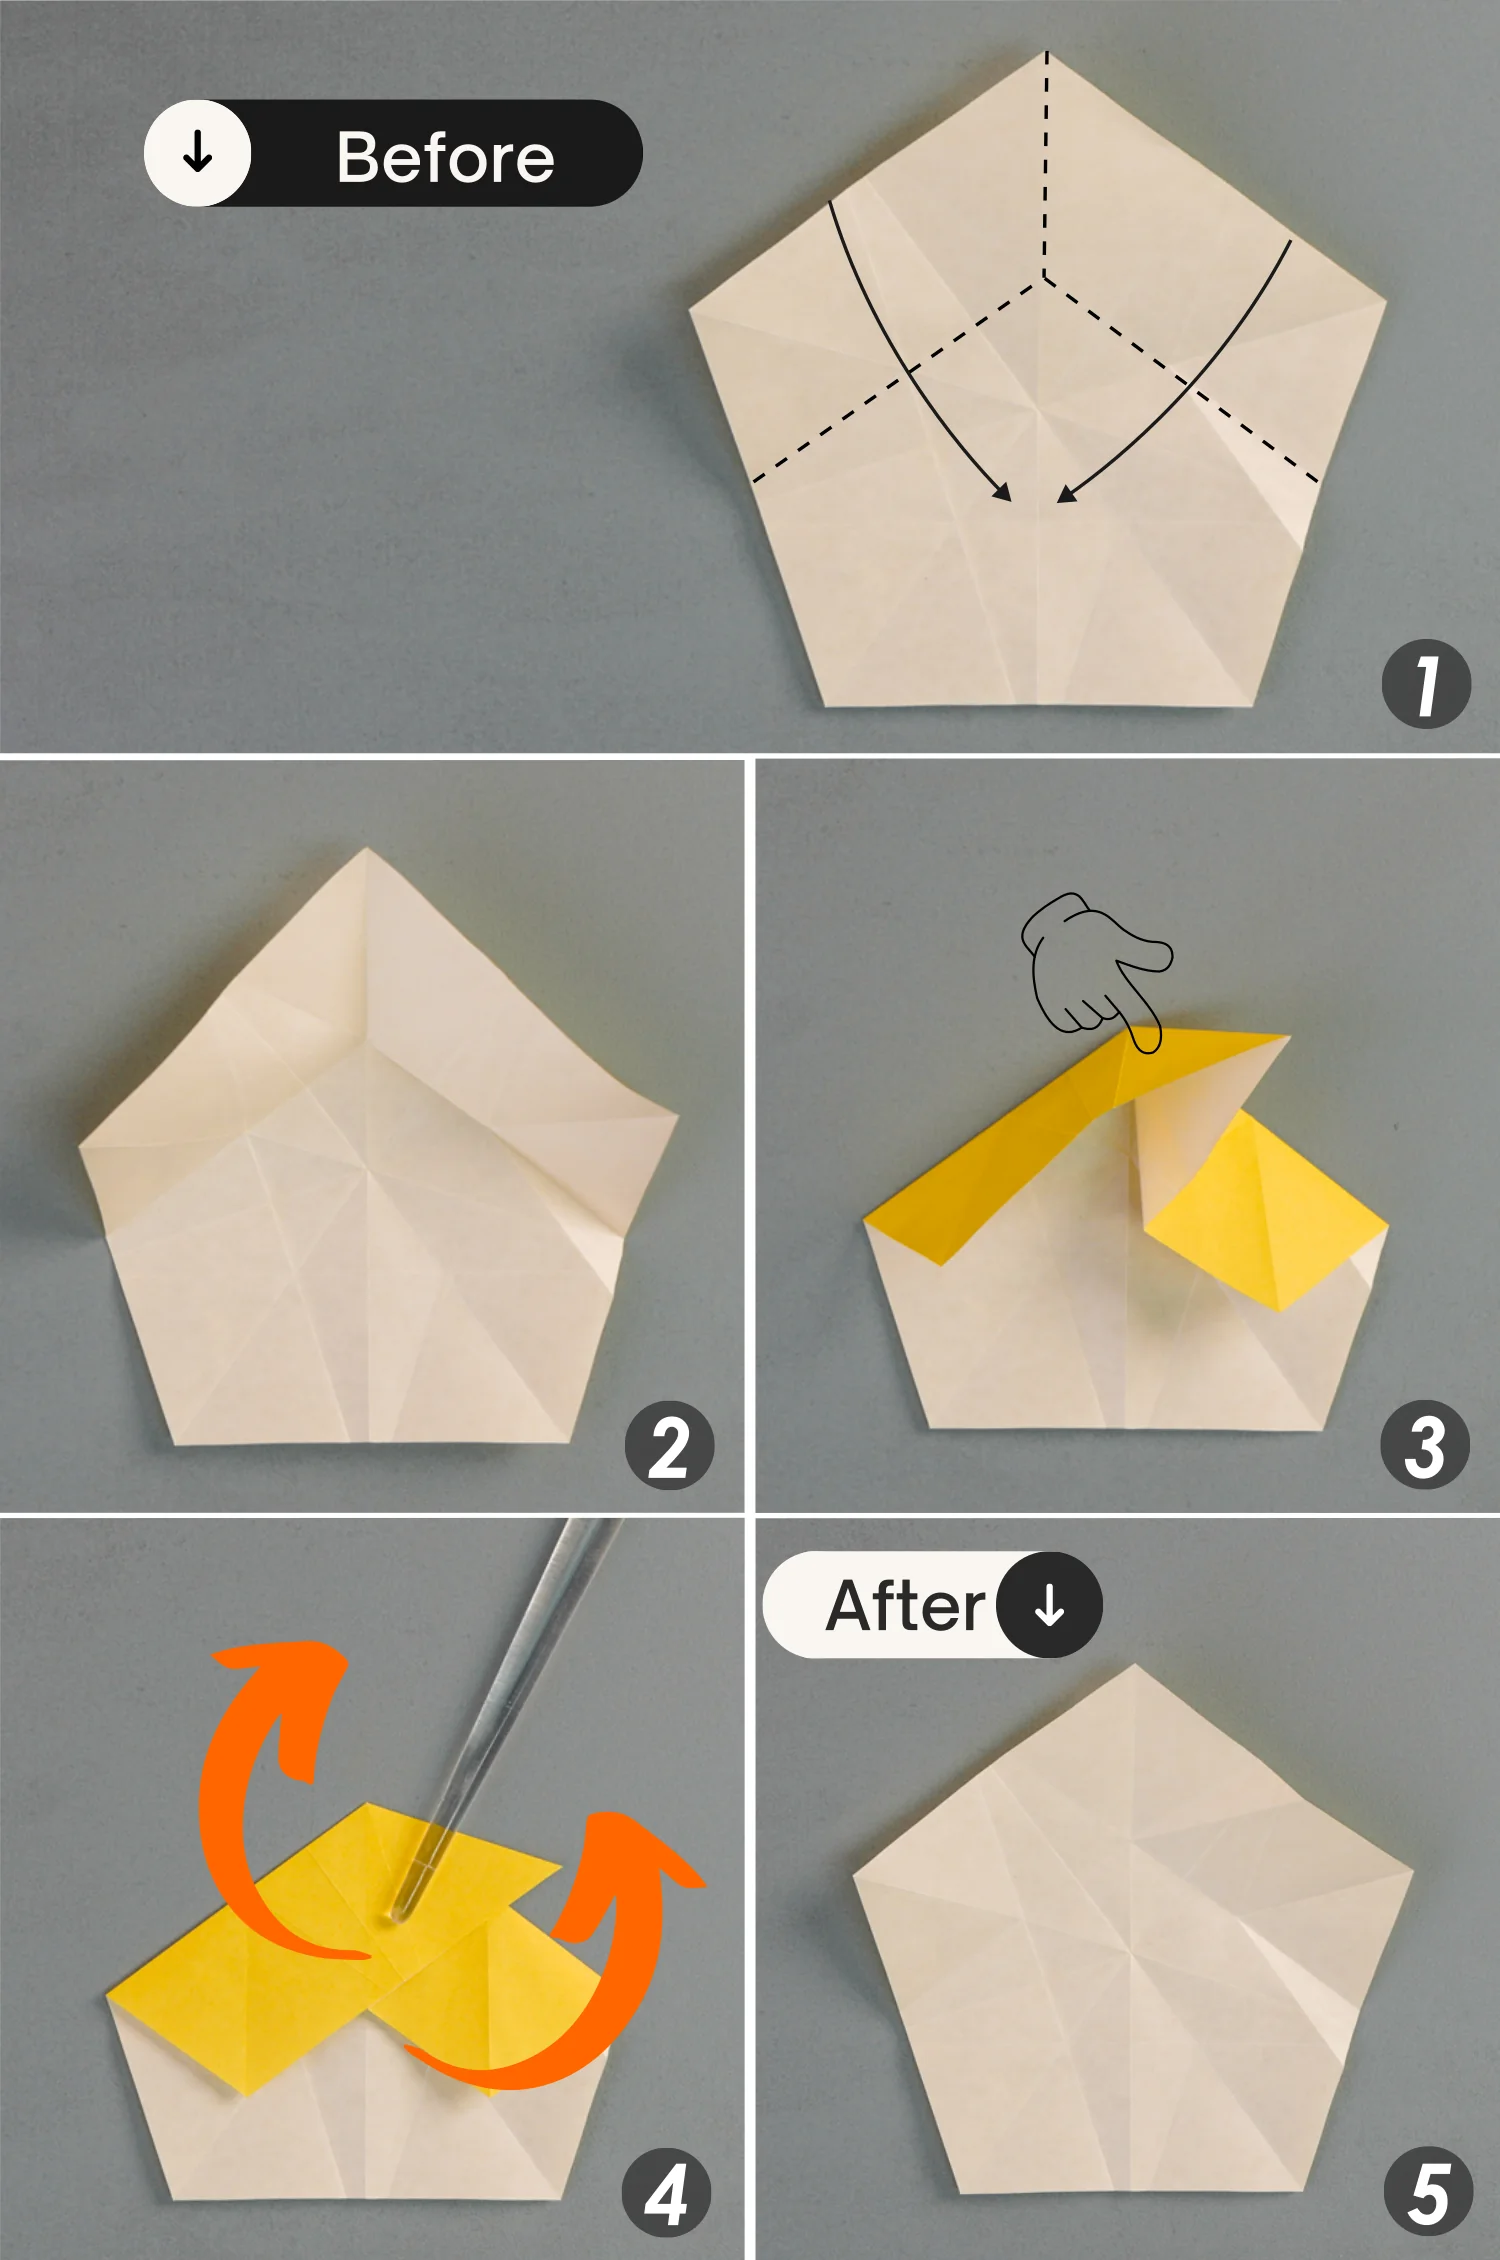
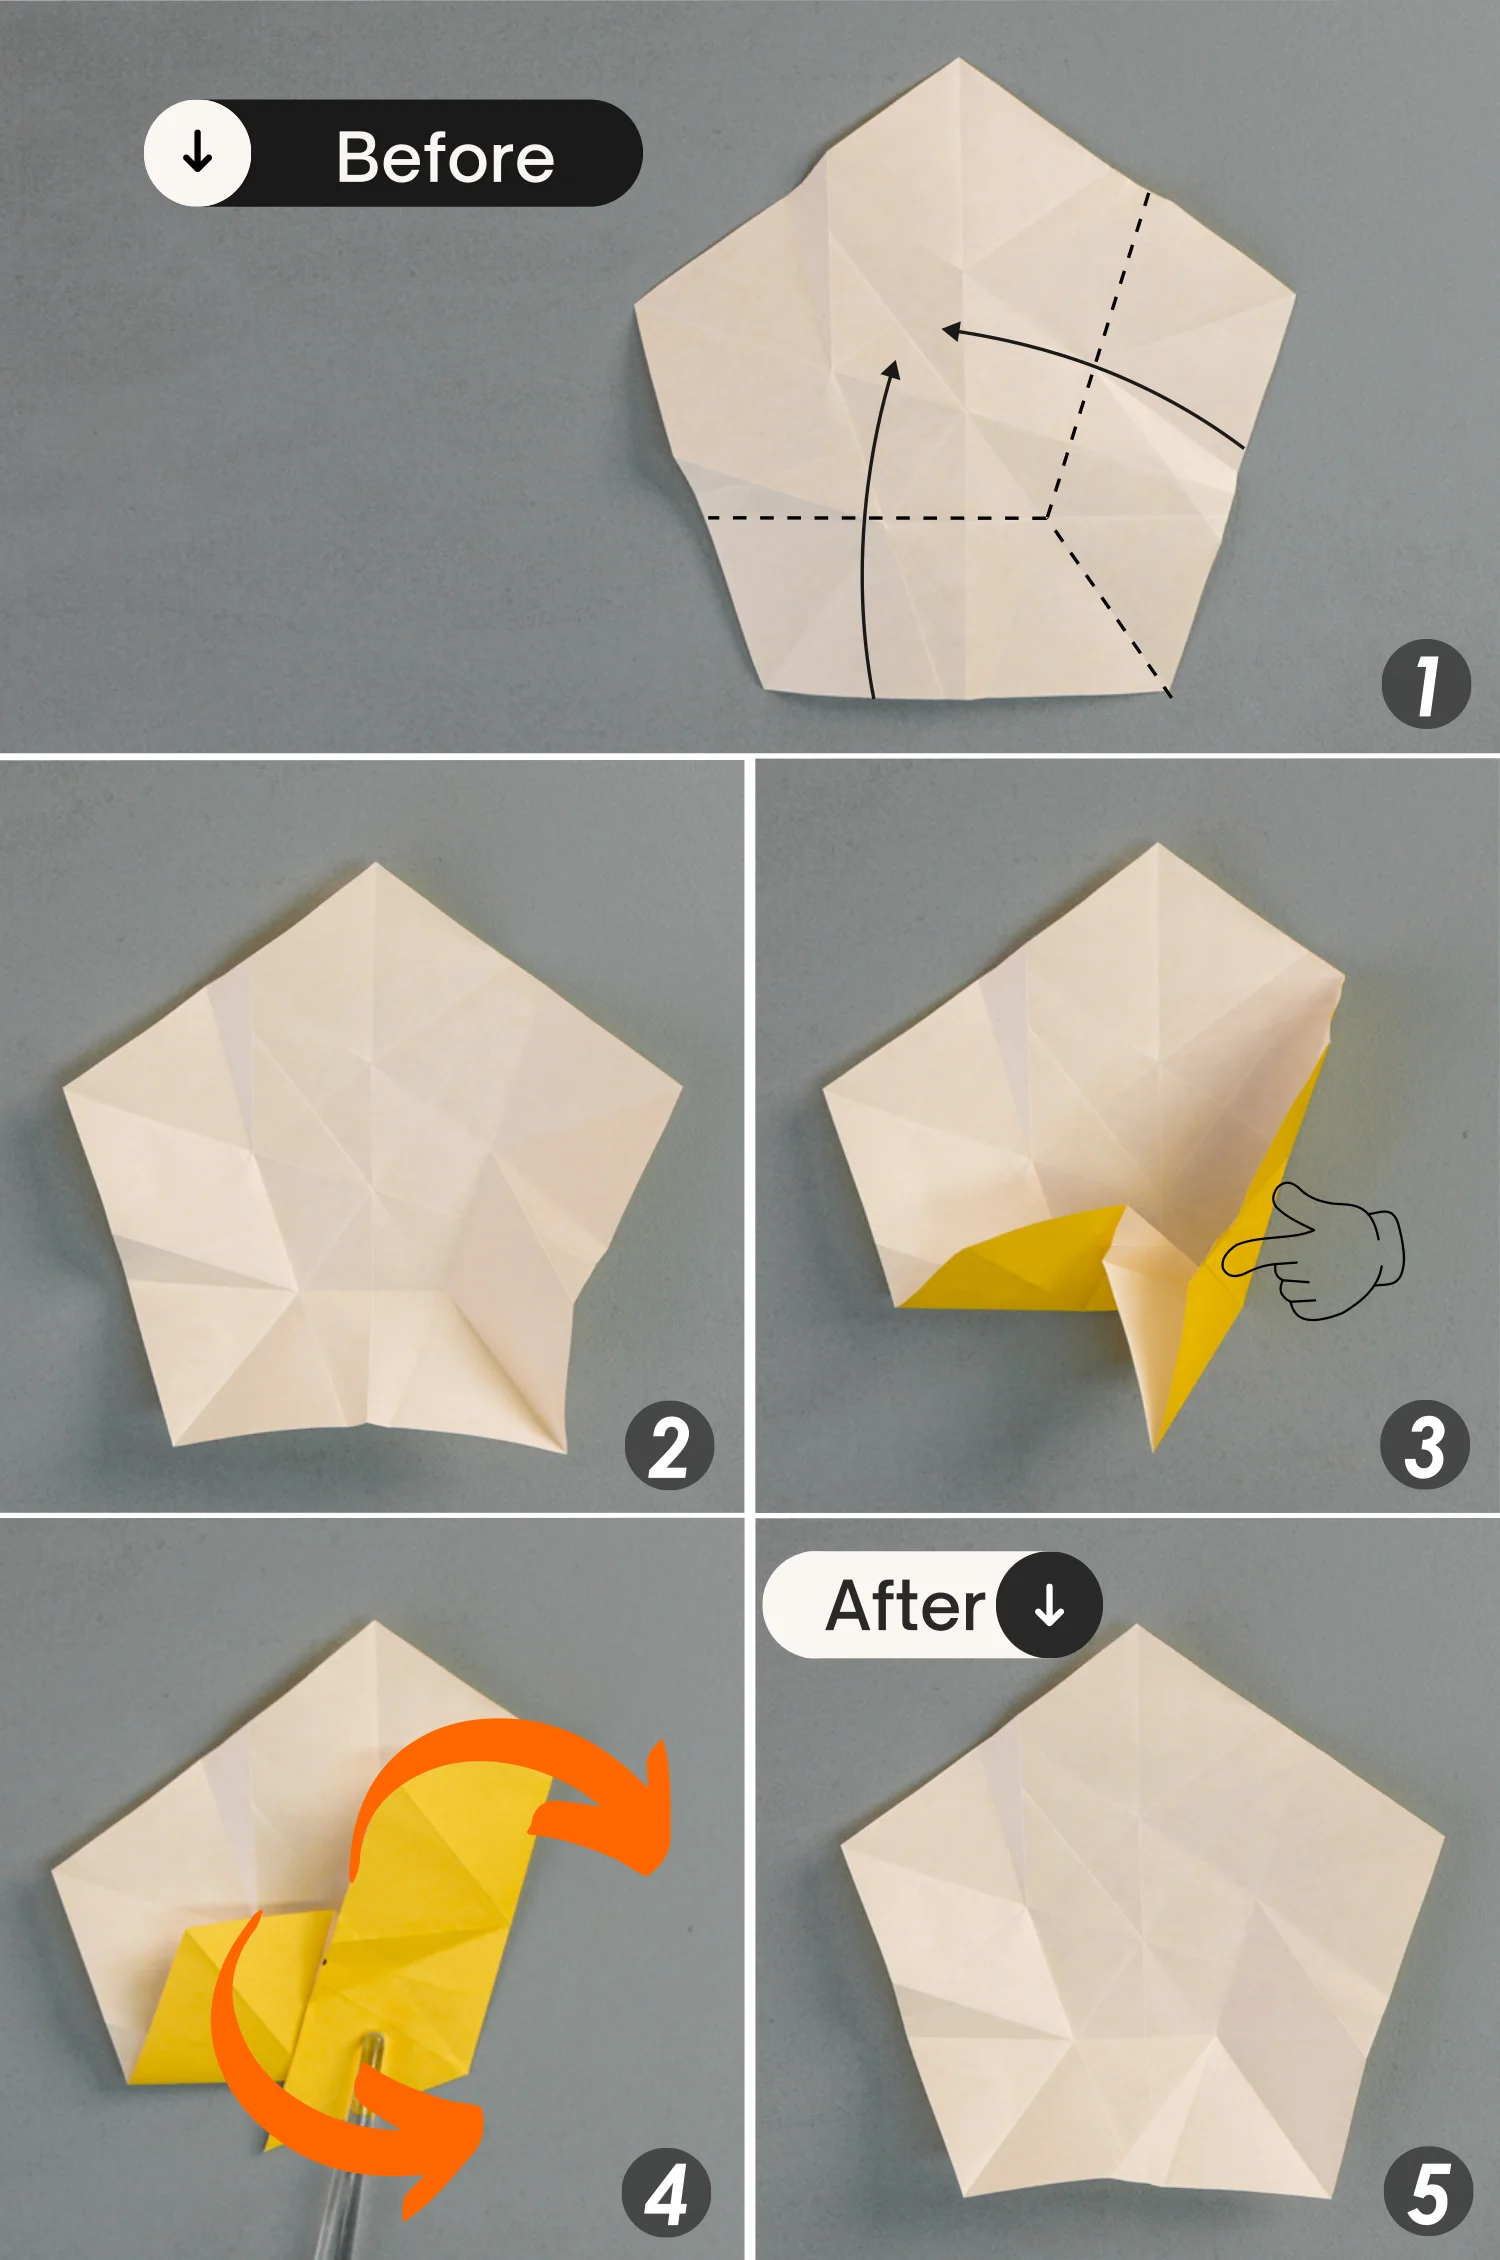
Step 19
Bring up the bottom and top left edges, creating a standing corner based on these three dotted lines, then press down this corner upward, and unfold the paper.
Step 20
Similarly, bring up the bottom left and the bottom edges, creating a standing corner based on these three dotted lines, then press down this corner to the left, and finally unfold it
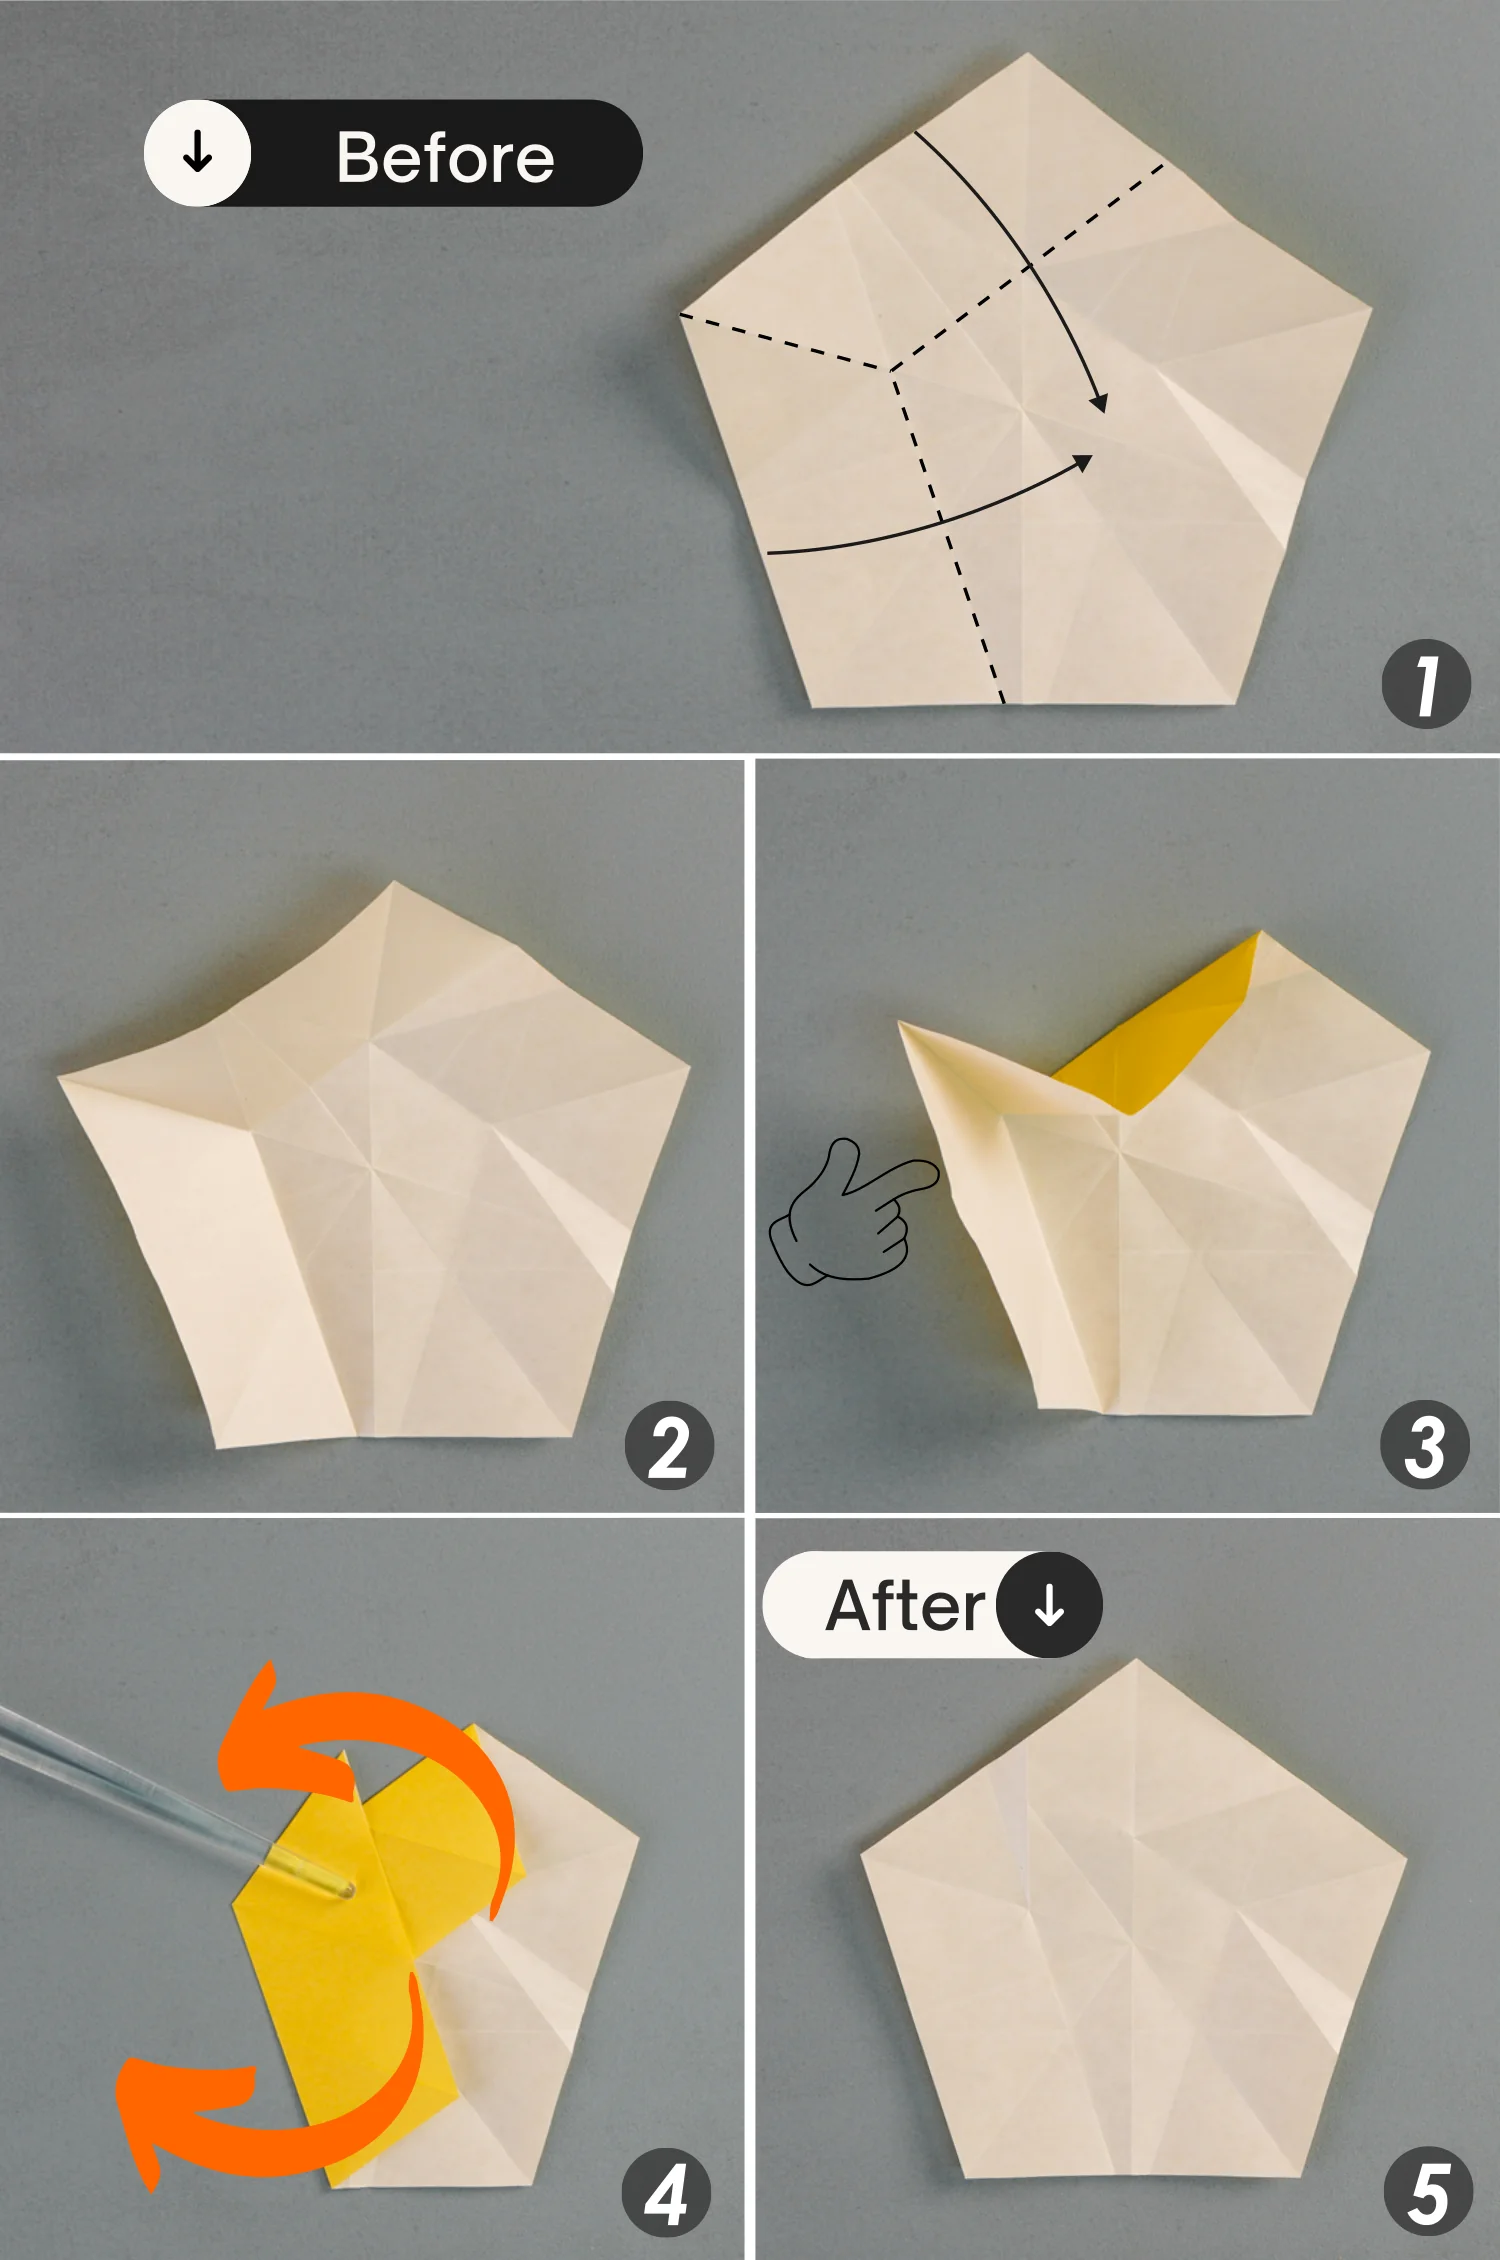
Step 21
The last time, bring up the bottom right and the bottom edges, creating a standing corner, then press it down, and finally unfold it.
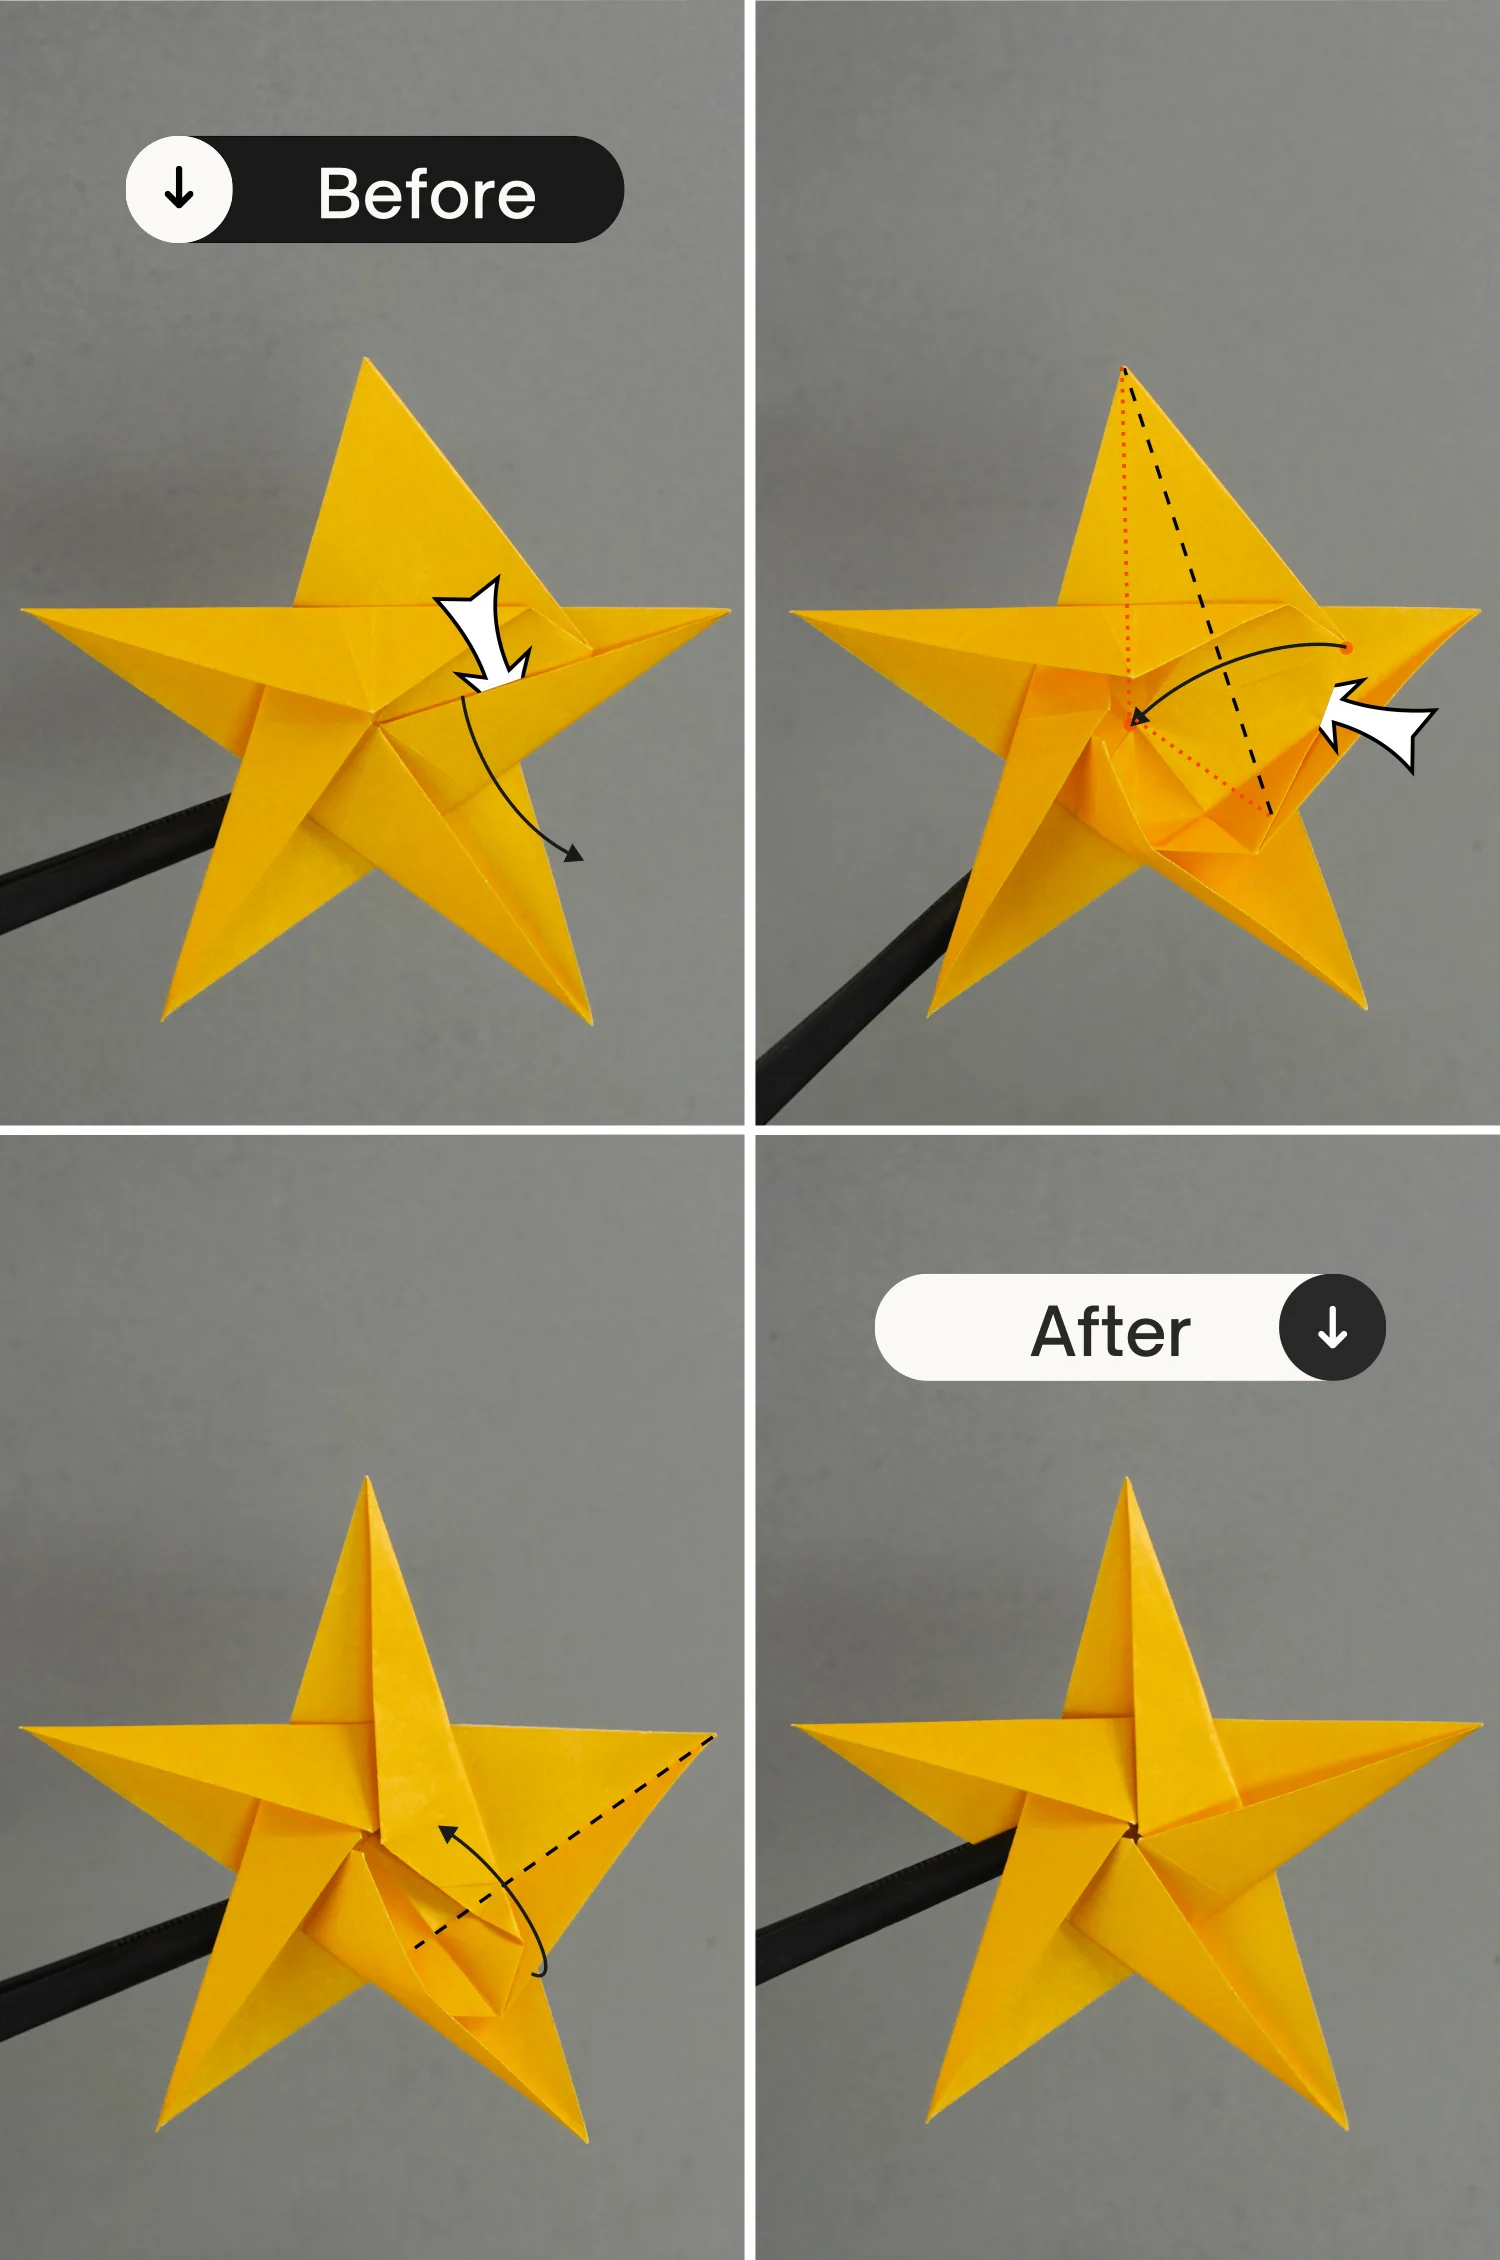
Step 22
Gather up the paper as the picture shows along the creases indicated by these dotted lines, these red lines should be pinch up and shape well.
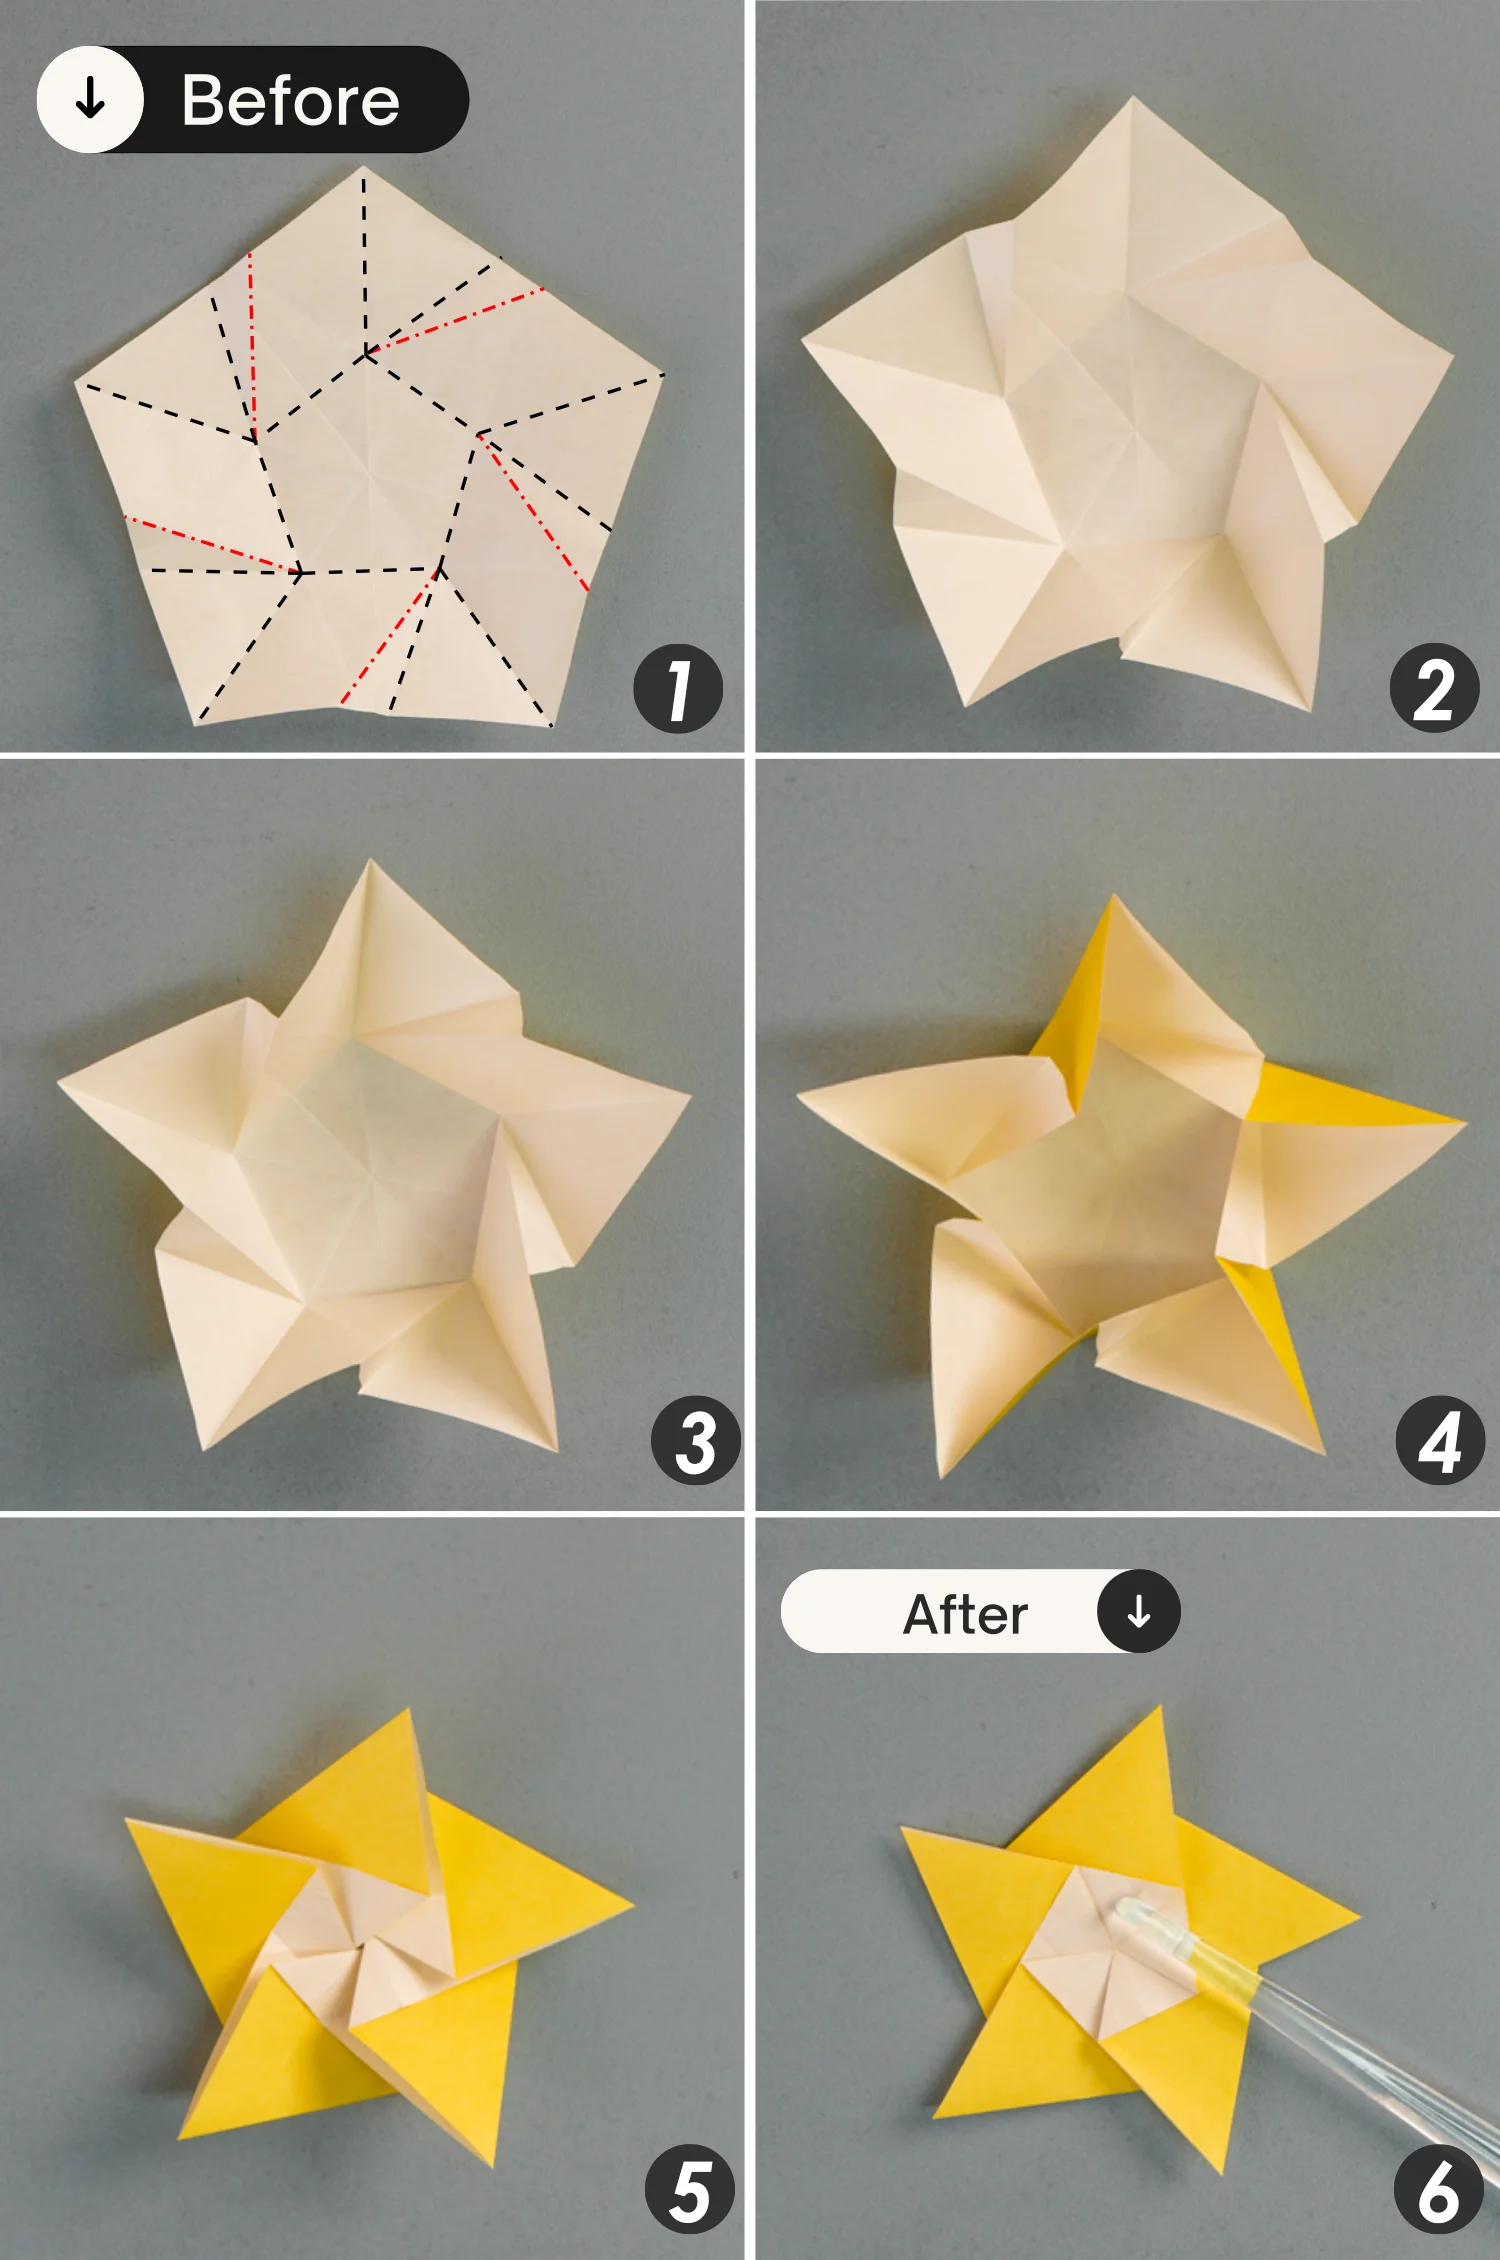
Step 23
Turn over the paper.
Step 24
Fold the bottom two points, the top left point, and the top point of the top pentagon to the center point along the dotted lines.
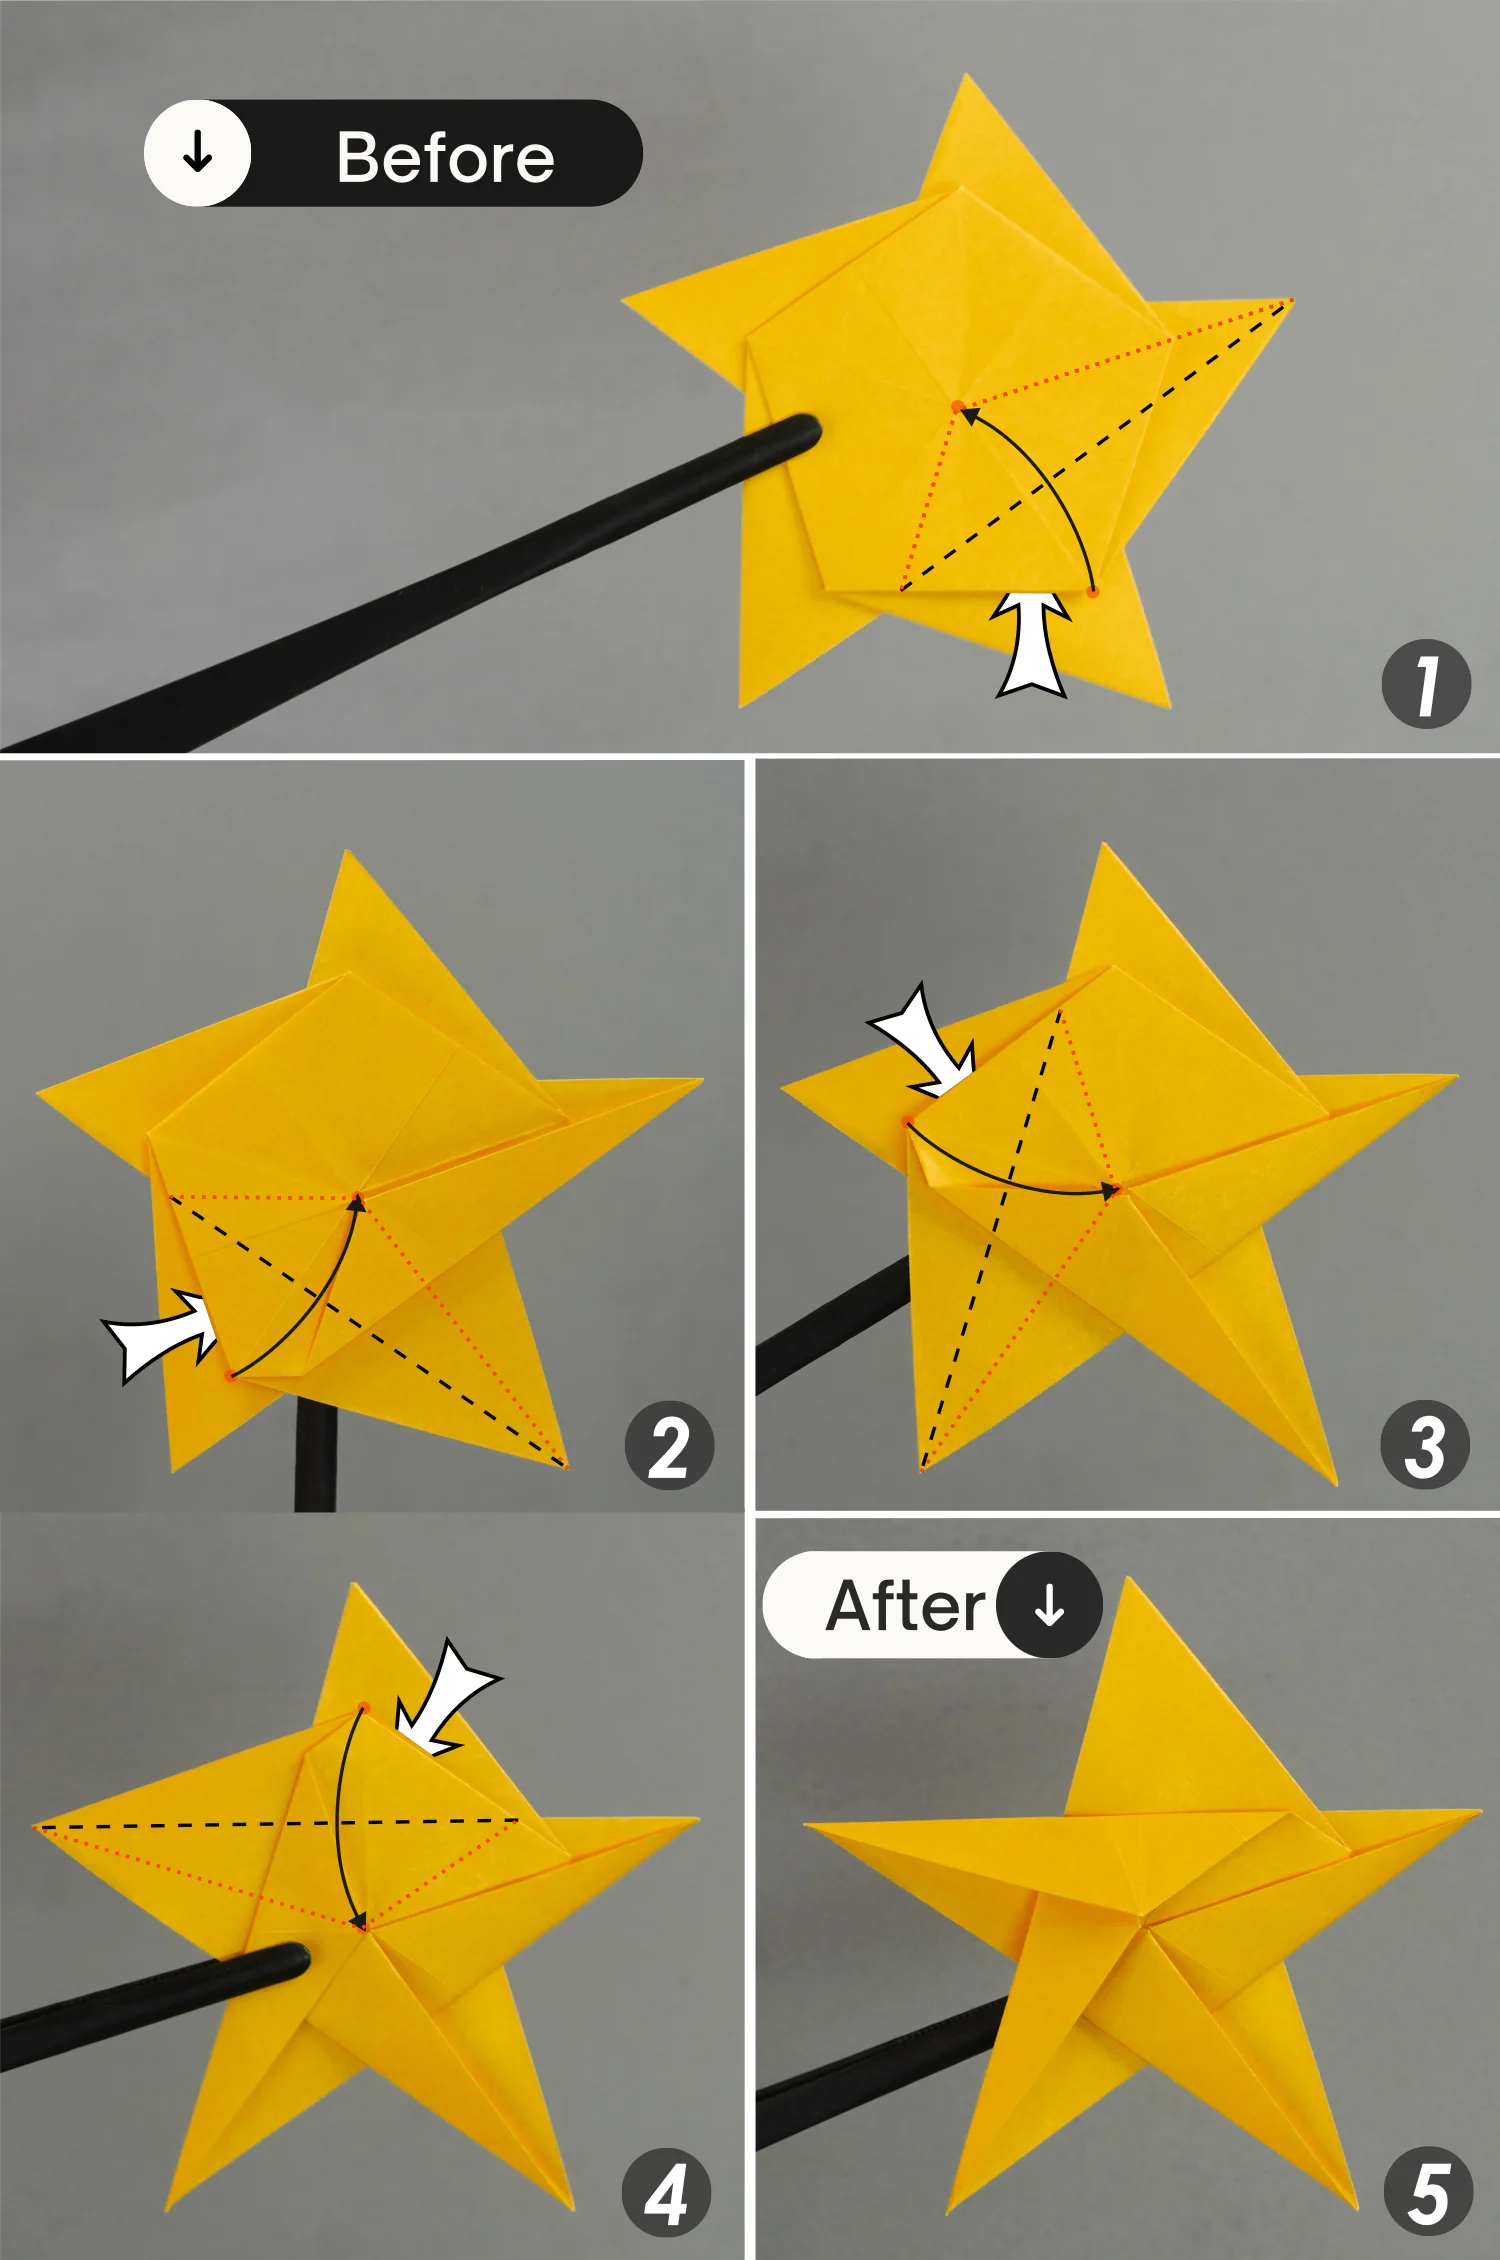
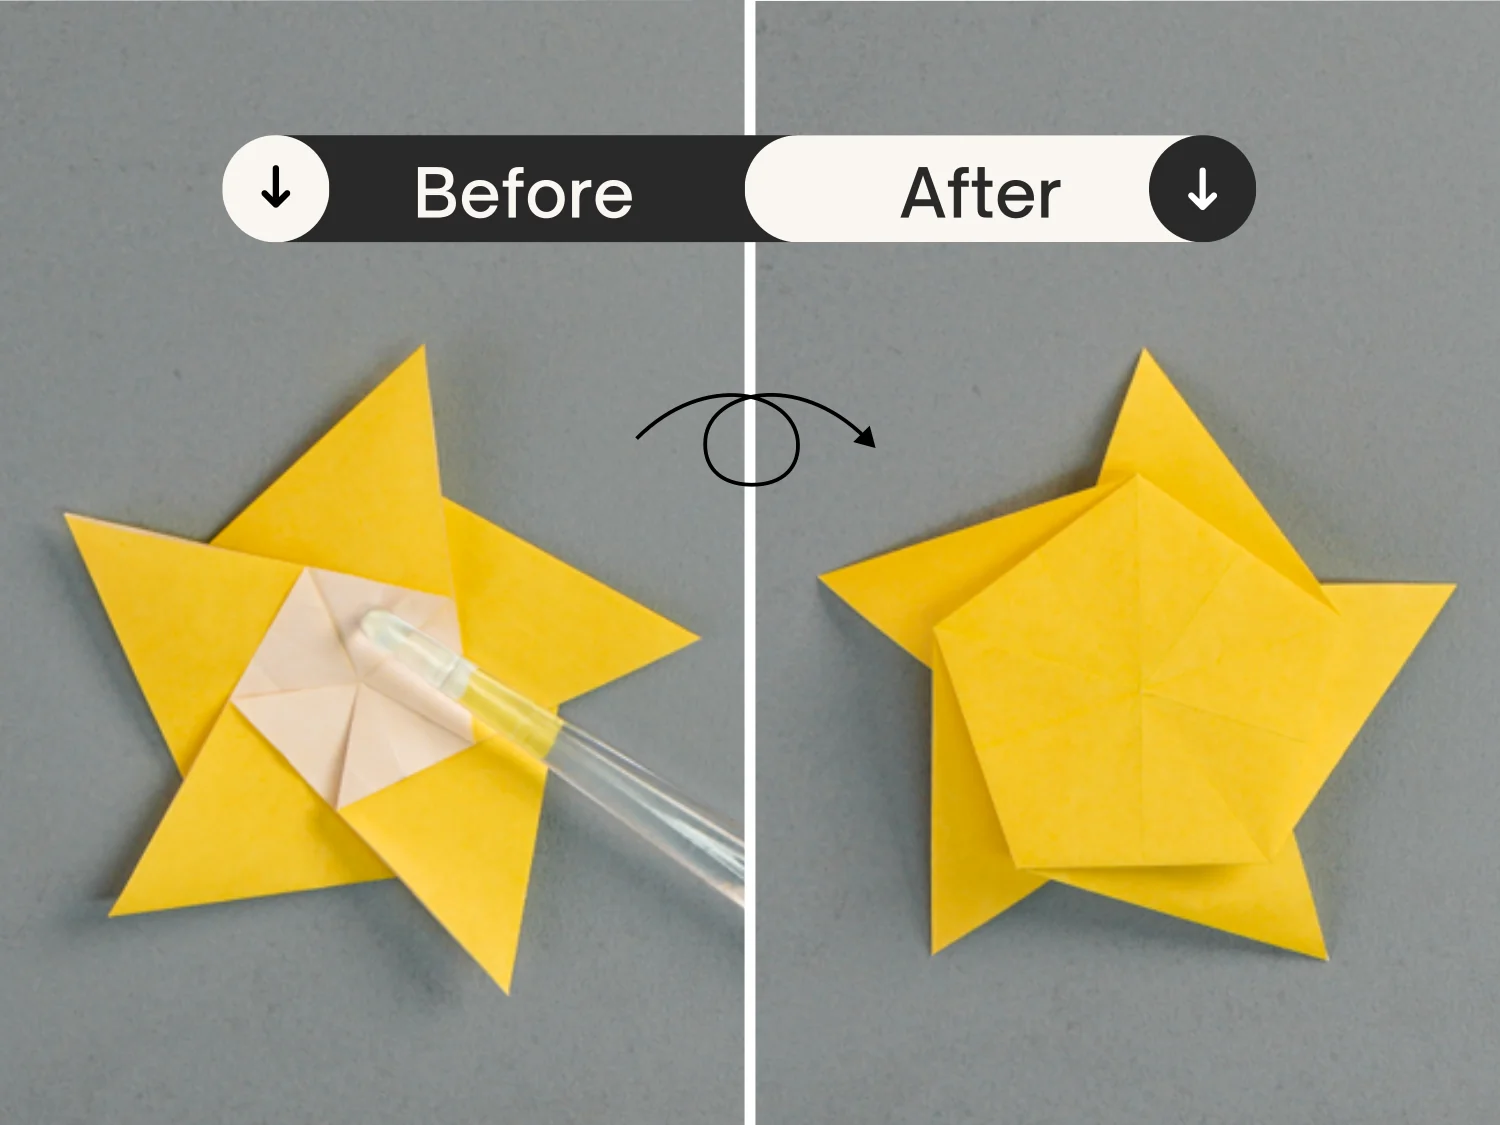
Step 25
Unfold the right layer you made in the previous step, and fold the top right point of the pentagon to the center point as you just did. Then fold the layer you just unfolded back to its original shape.
What’s Next
This is the final shape of a super cute origami star, now you can explore our other origami instructions with Christmas elements. Happy folding!
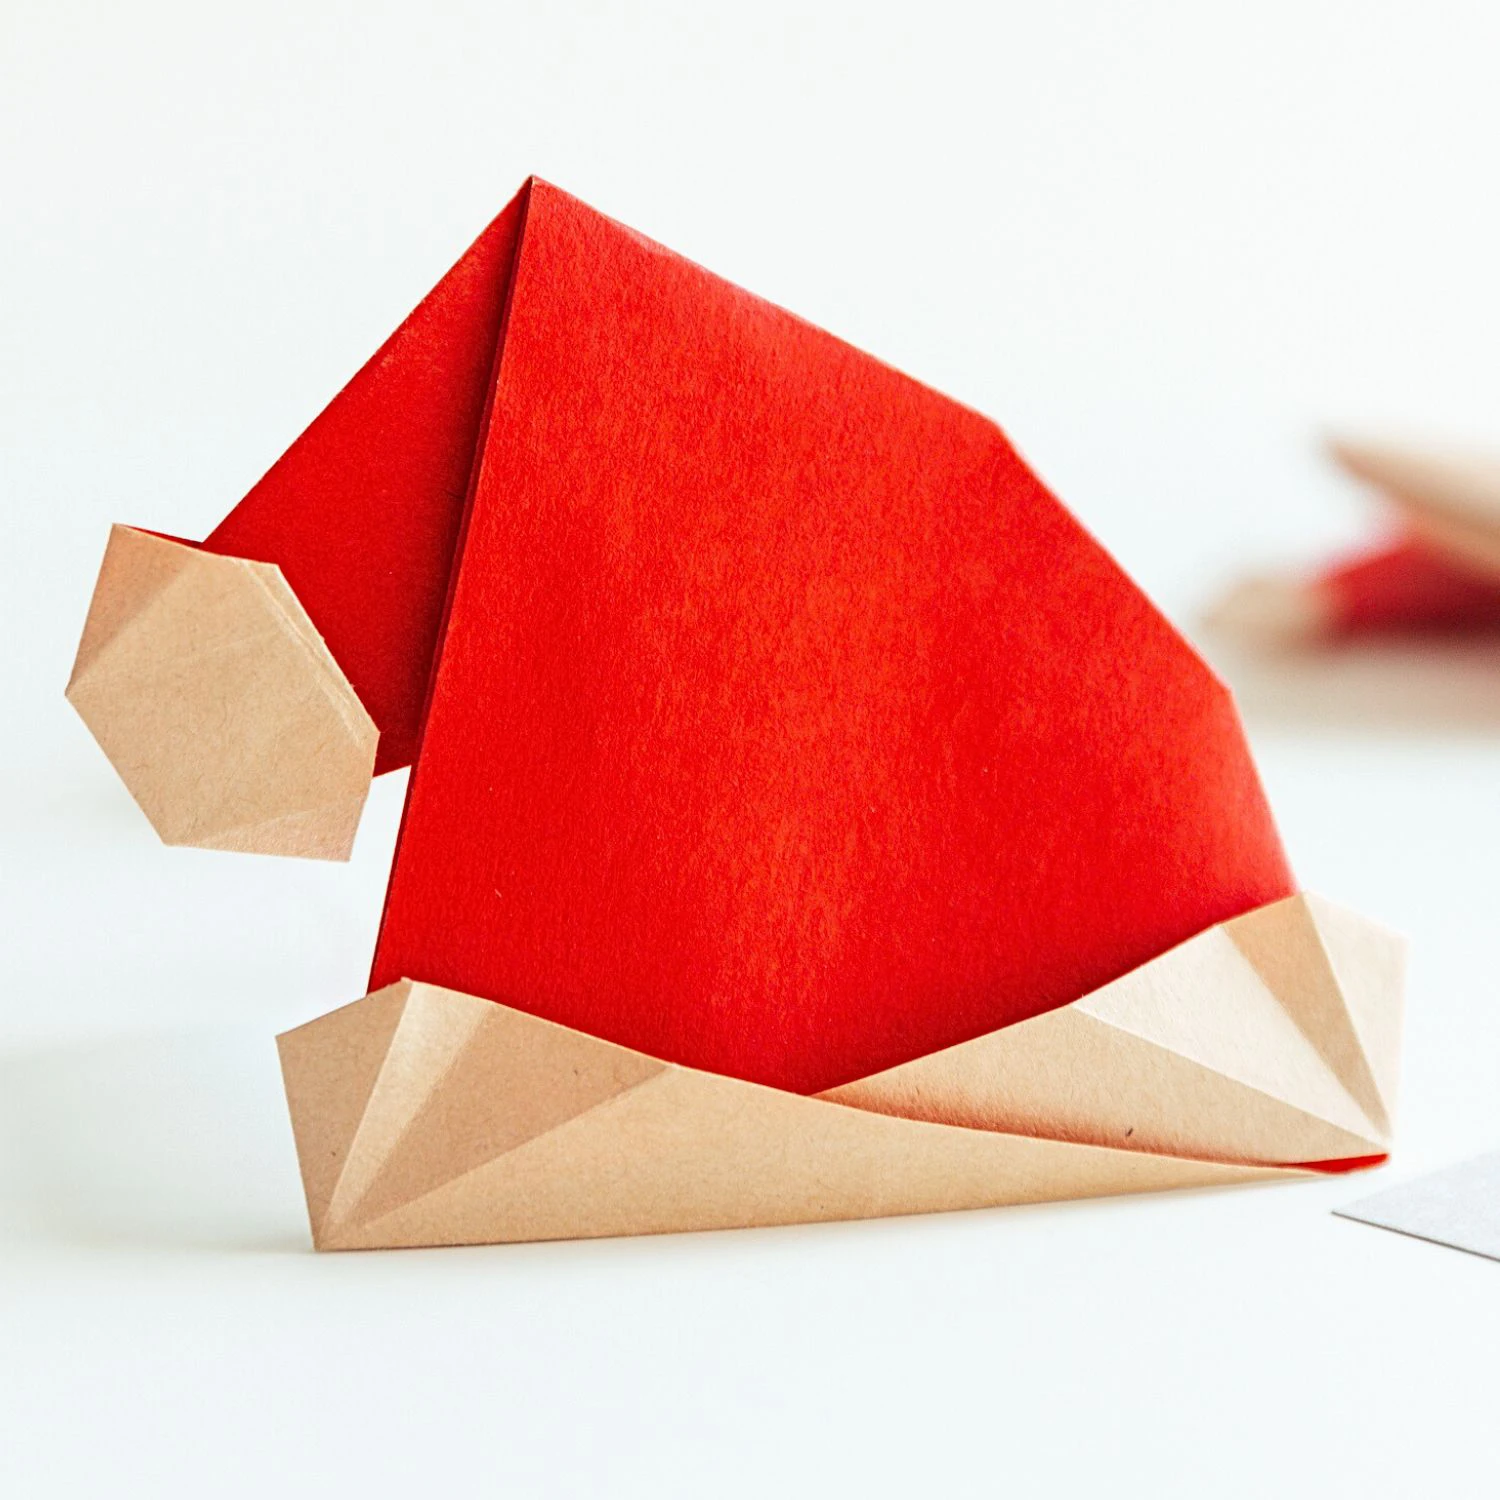
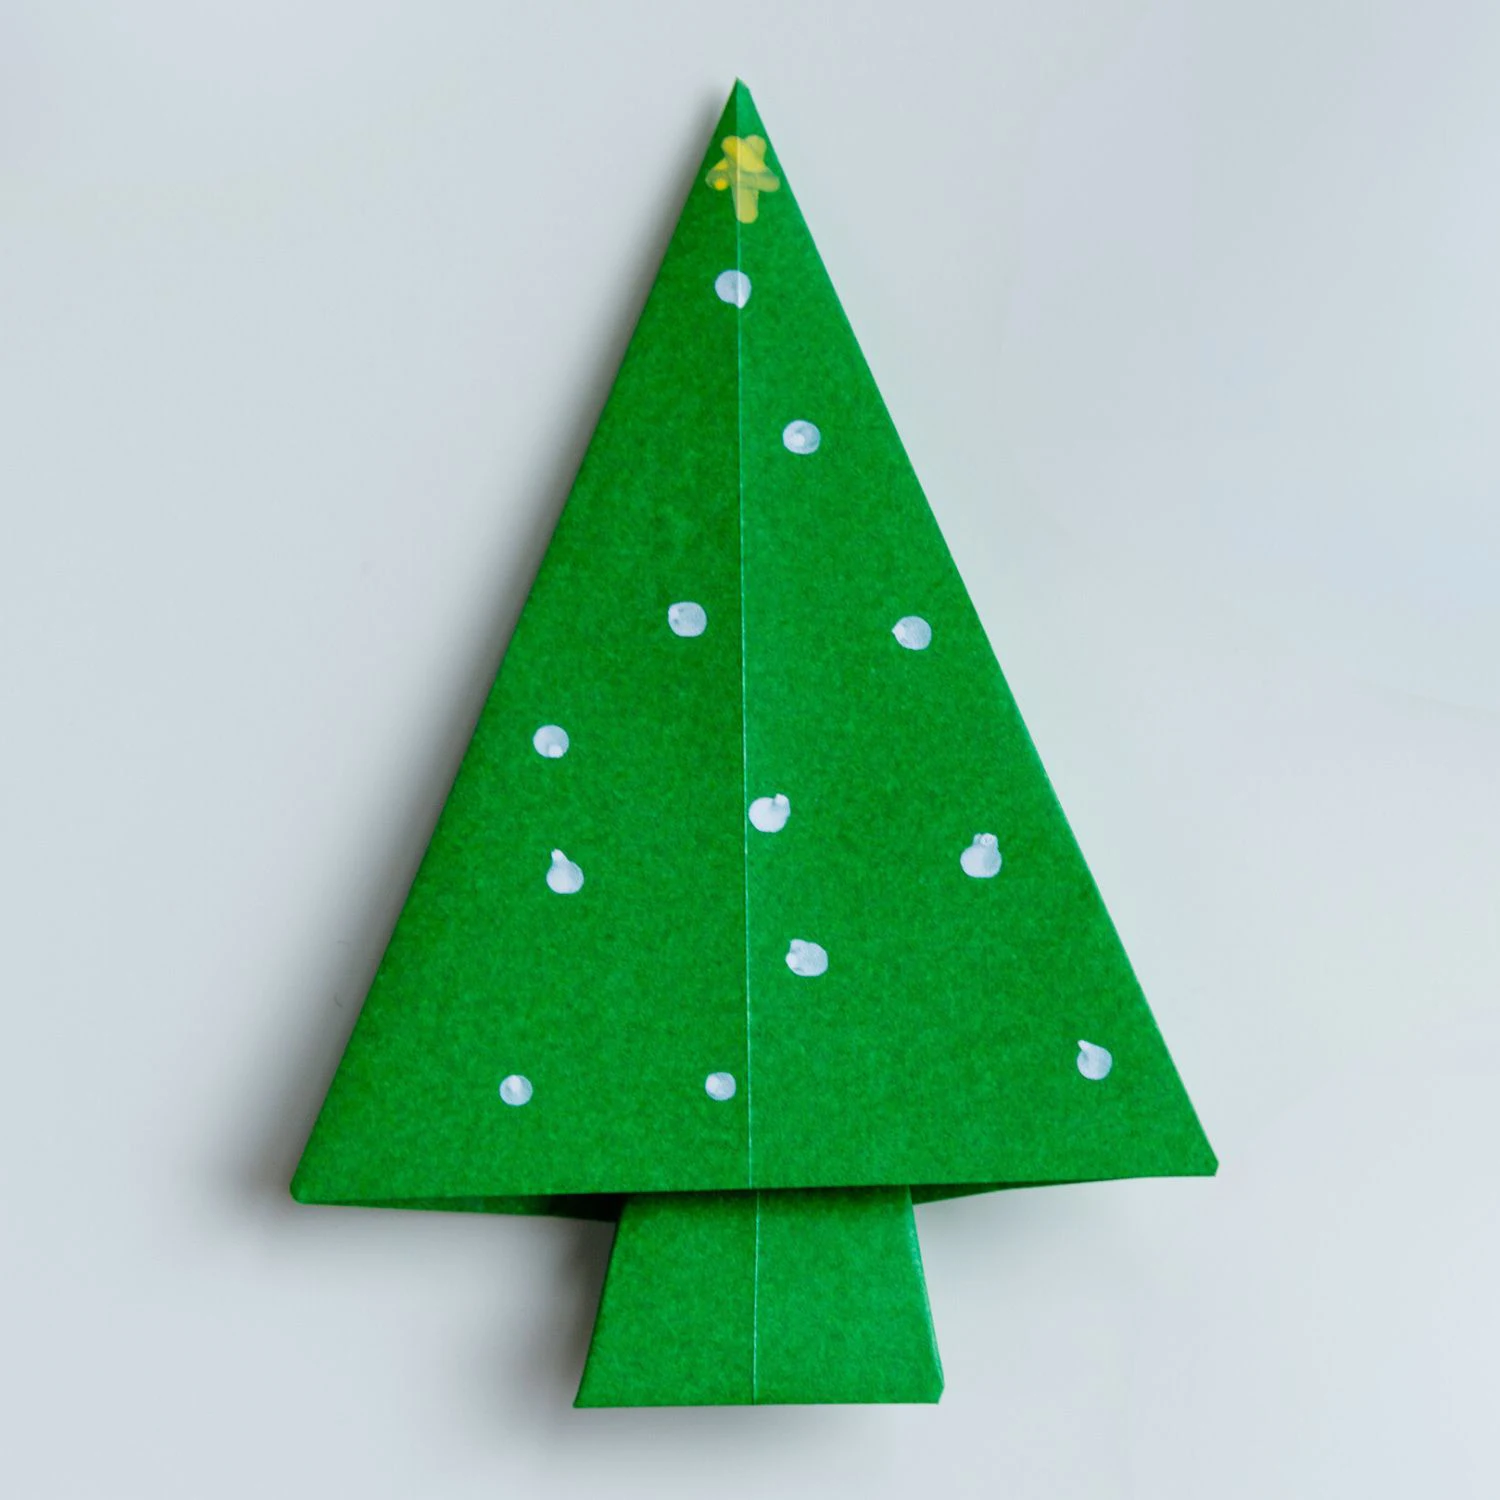
Other Origami Christmas Ideas