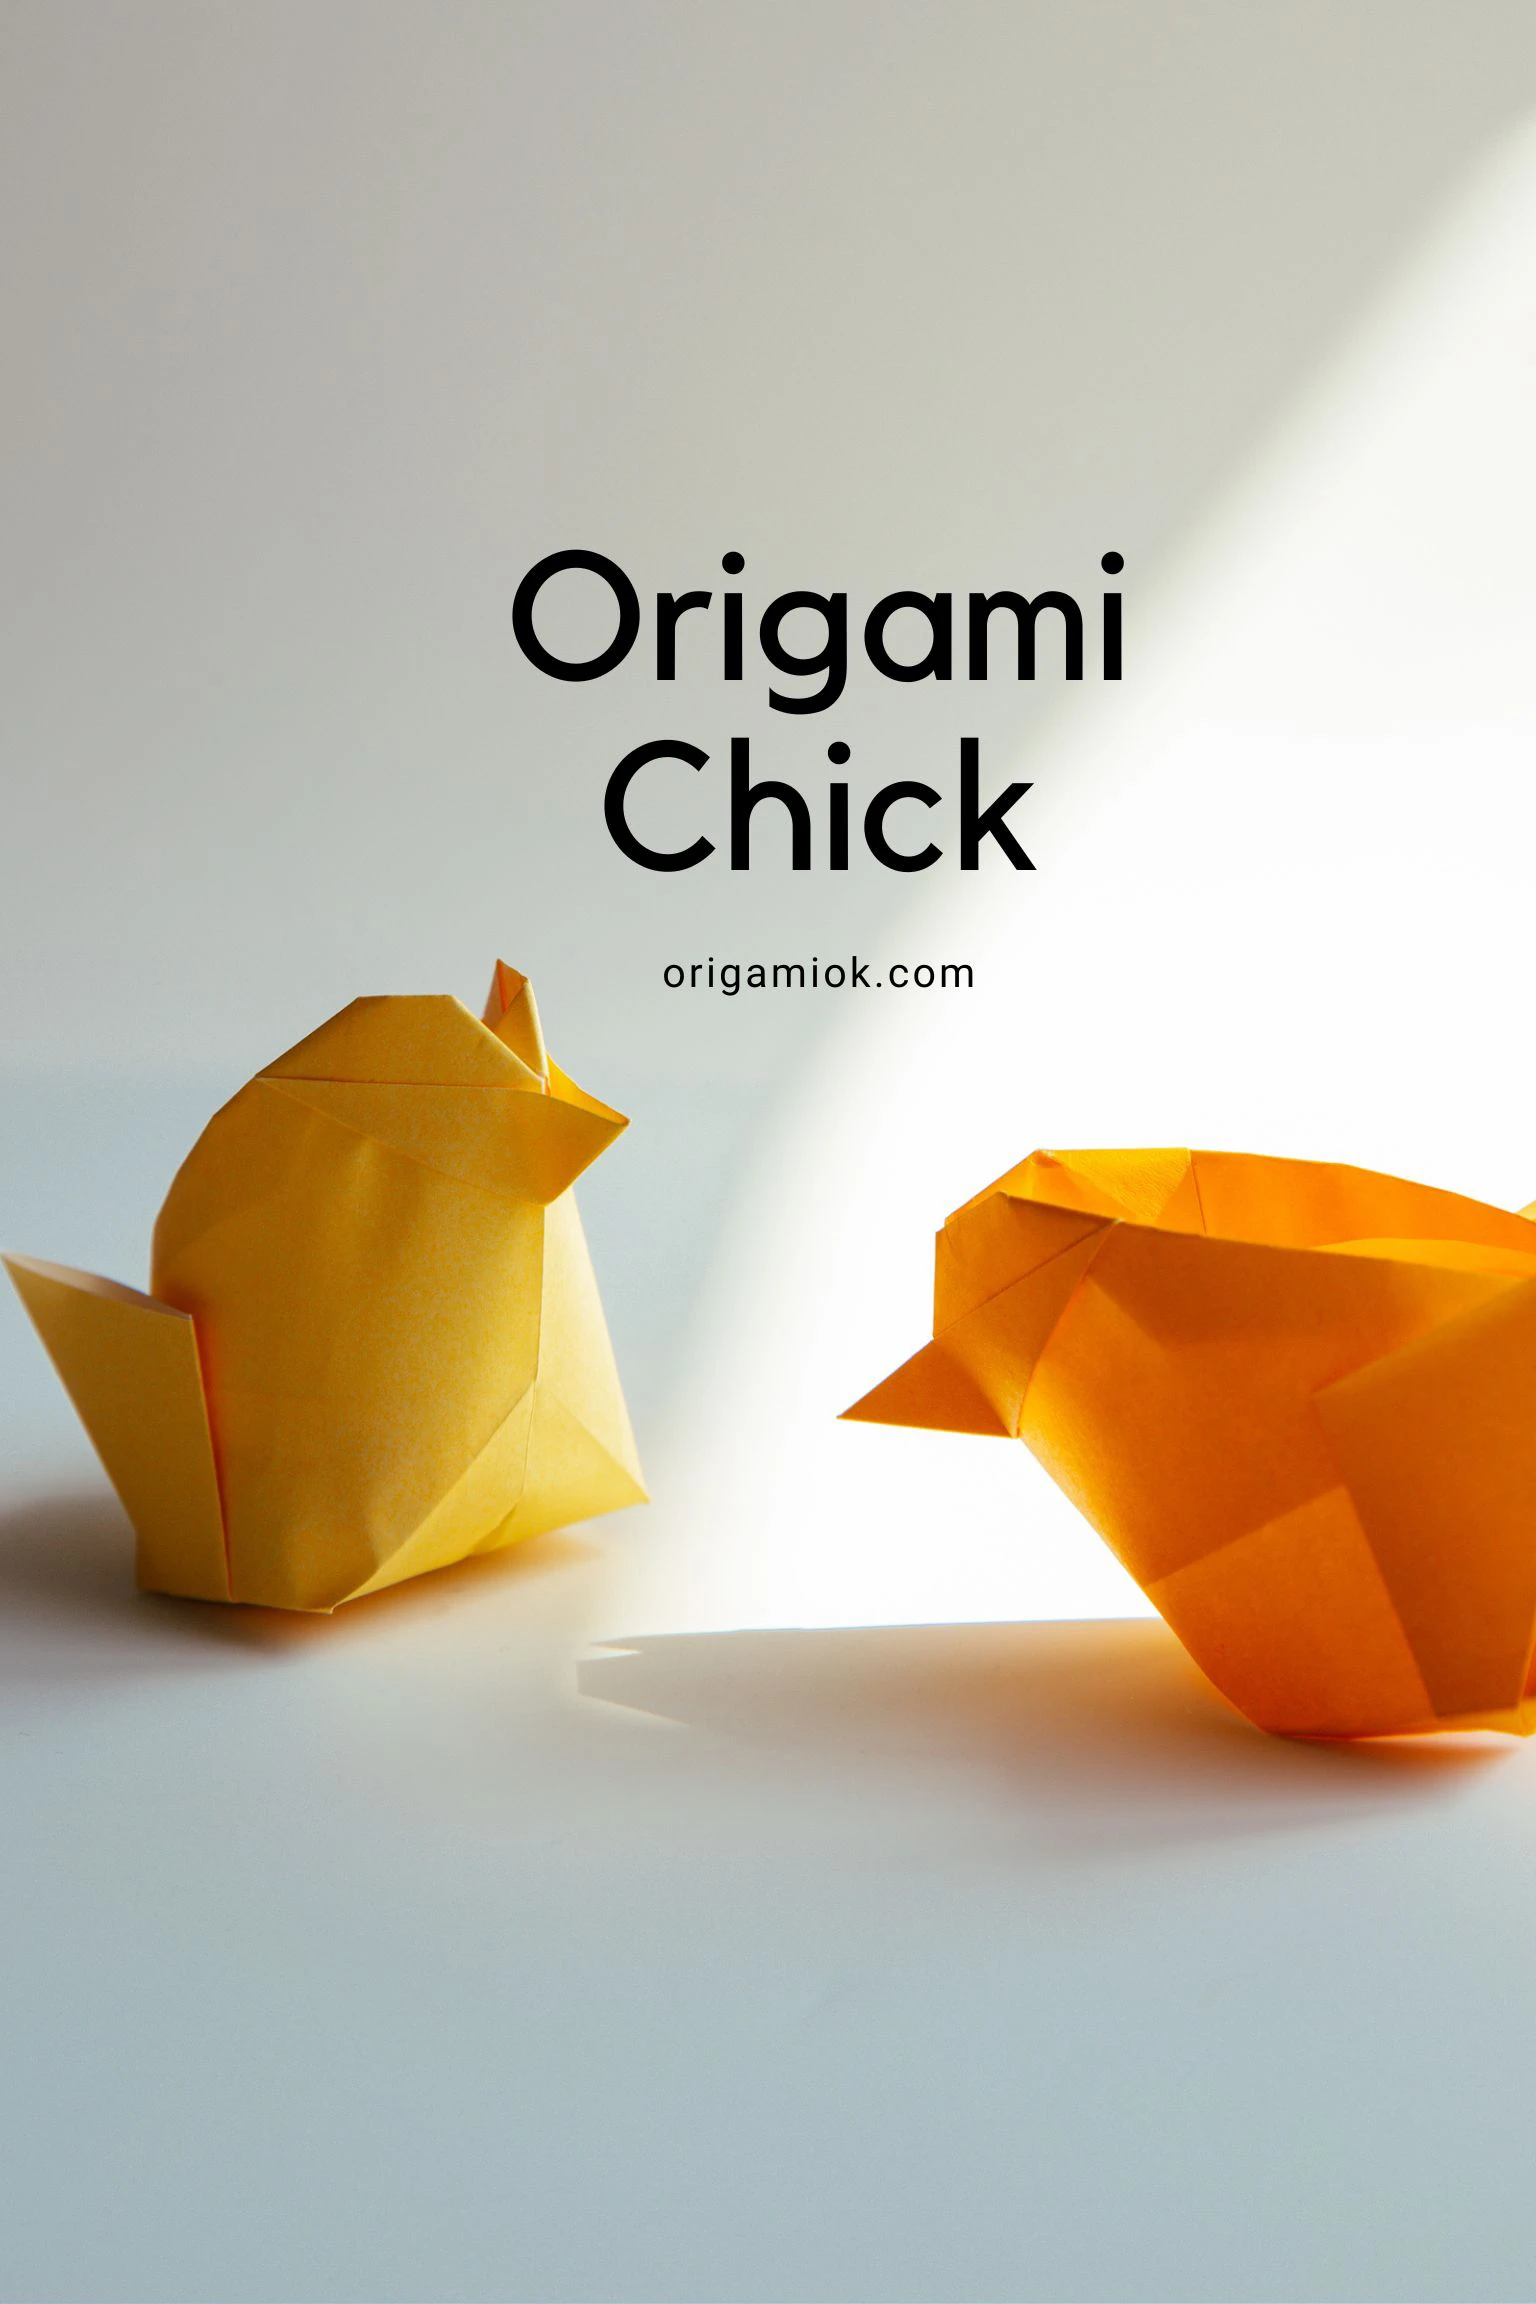
This instruction will guide you through the creation of a simple, adorable, and three-dimensional origami chick. This little chick is easy to make, and only takes you a few minutes, with a chubby body, and charming wings and beak, it will definitely capture your interest.
Check our another version of origami chicken, it is two-dimensional, but also very cute.

If you are new to origami, start here from our beginner guide to know the basics and how to read the step-by-step instructions.
- Folding time: 15 minutes
- Paper: 15×15 cm
- Difficulty: Easy
- Designer: Simon Andersen
Material
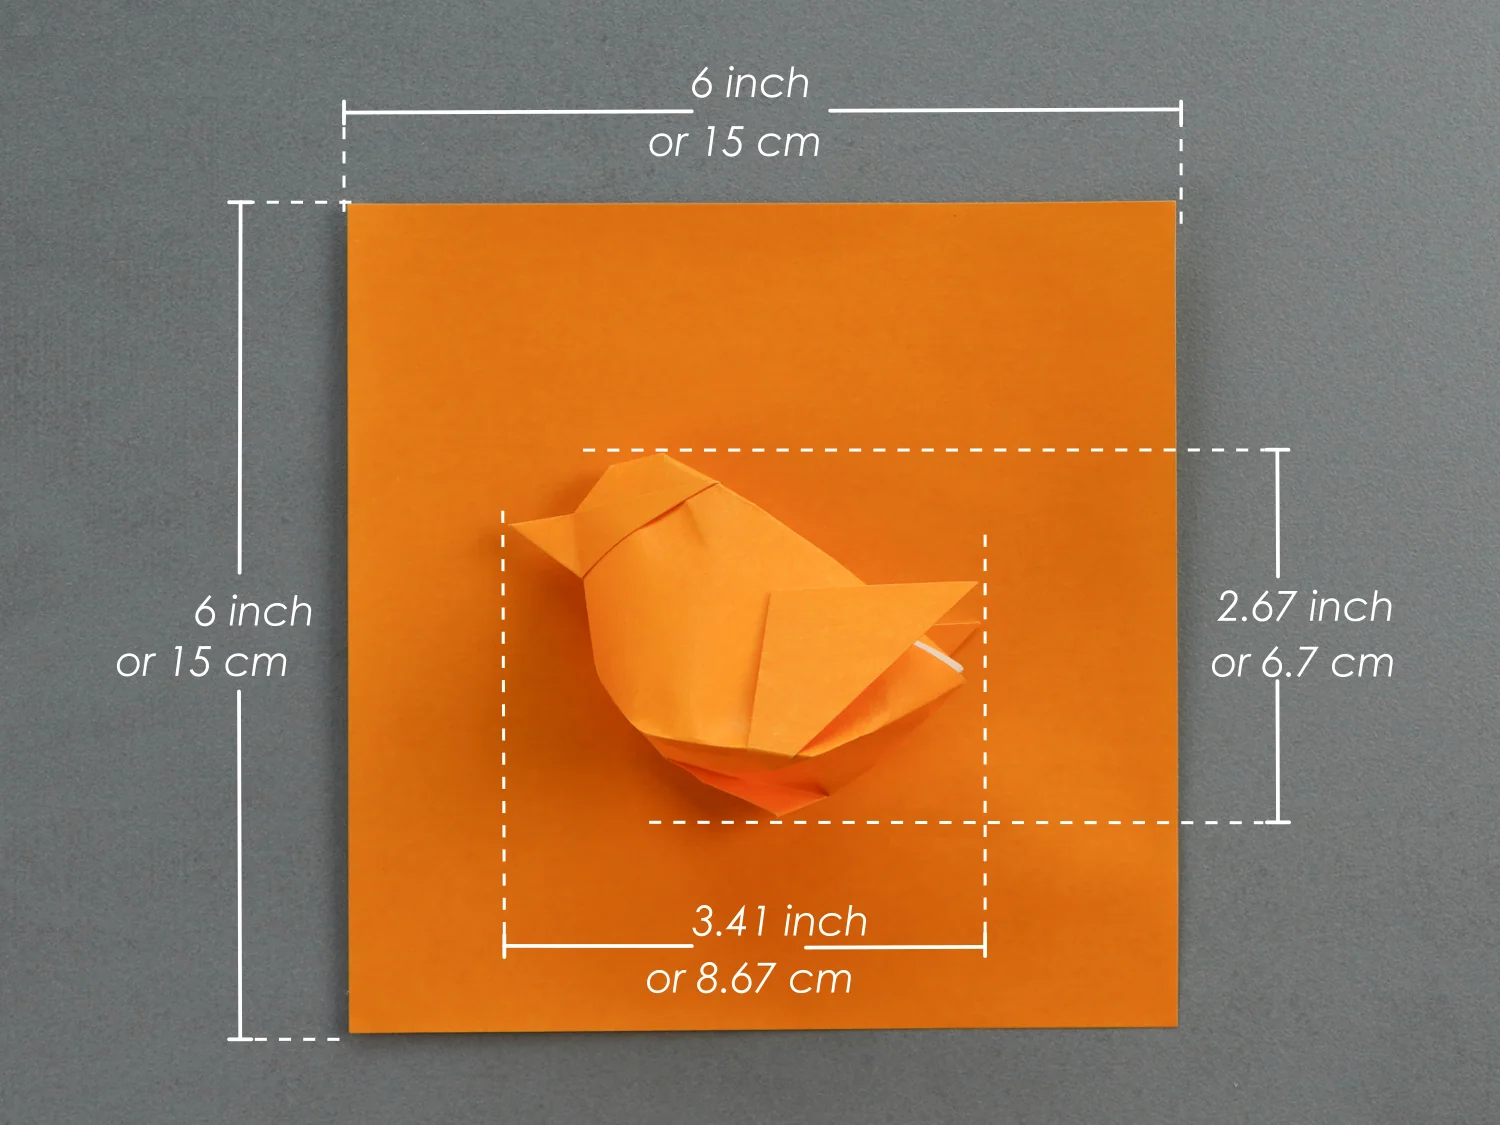
Prepare pieces of 15×15 cm origami square paper, with different colors on each side, and you will get a 6.7×8.67 cm chick.
Origami Chick Video
Step by Step Instructions
Step 1
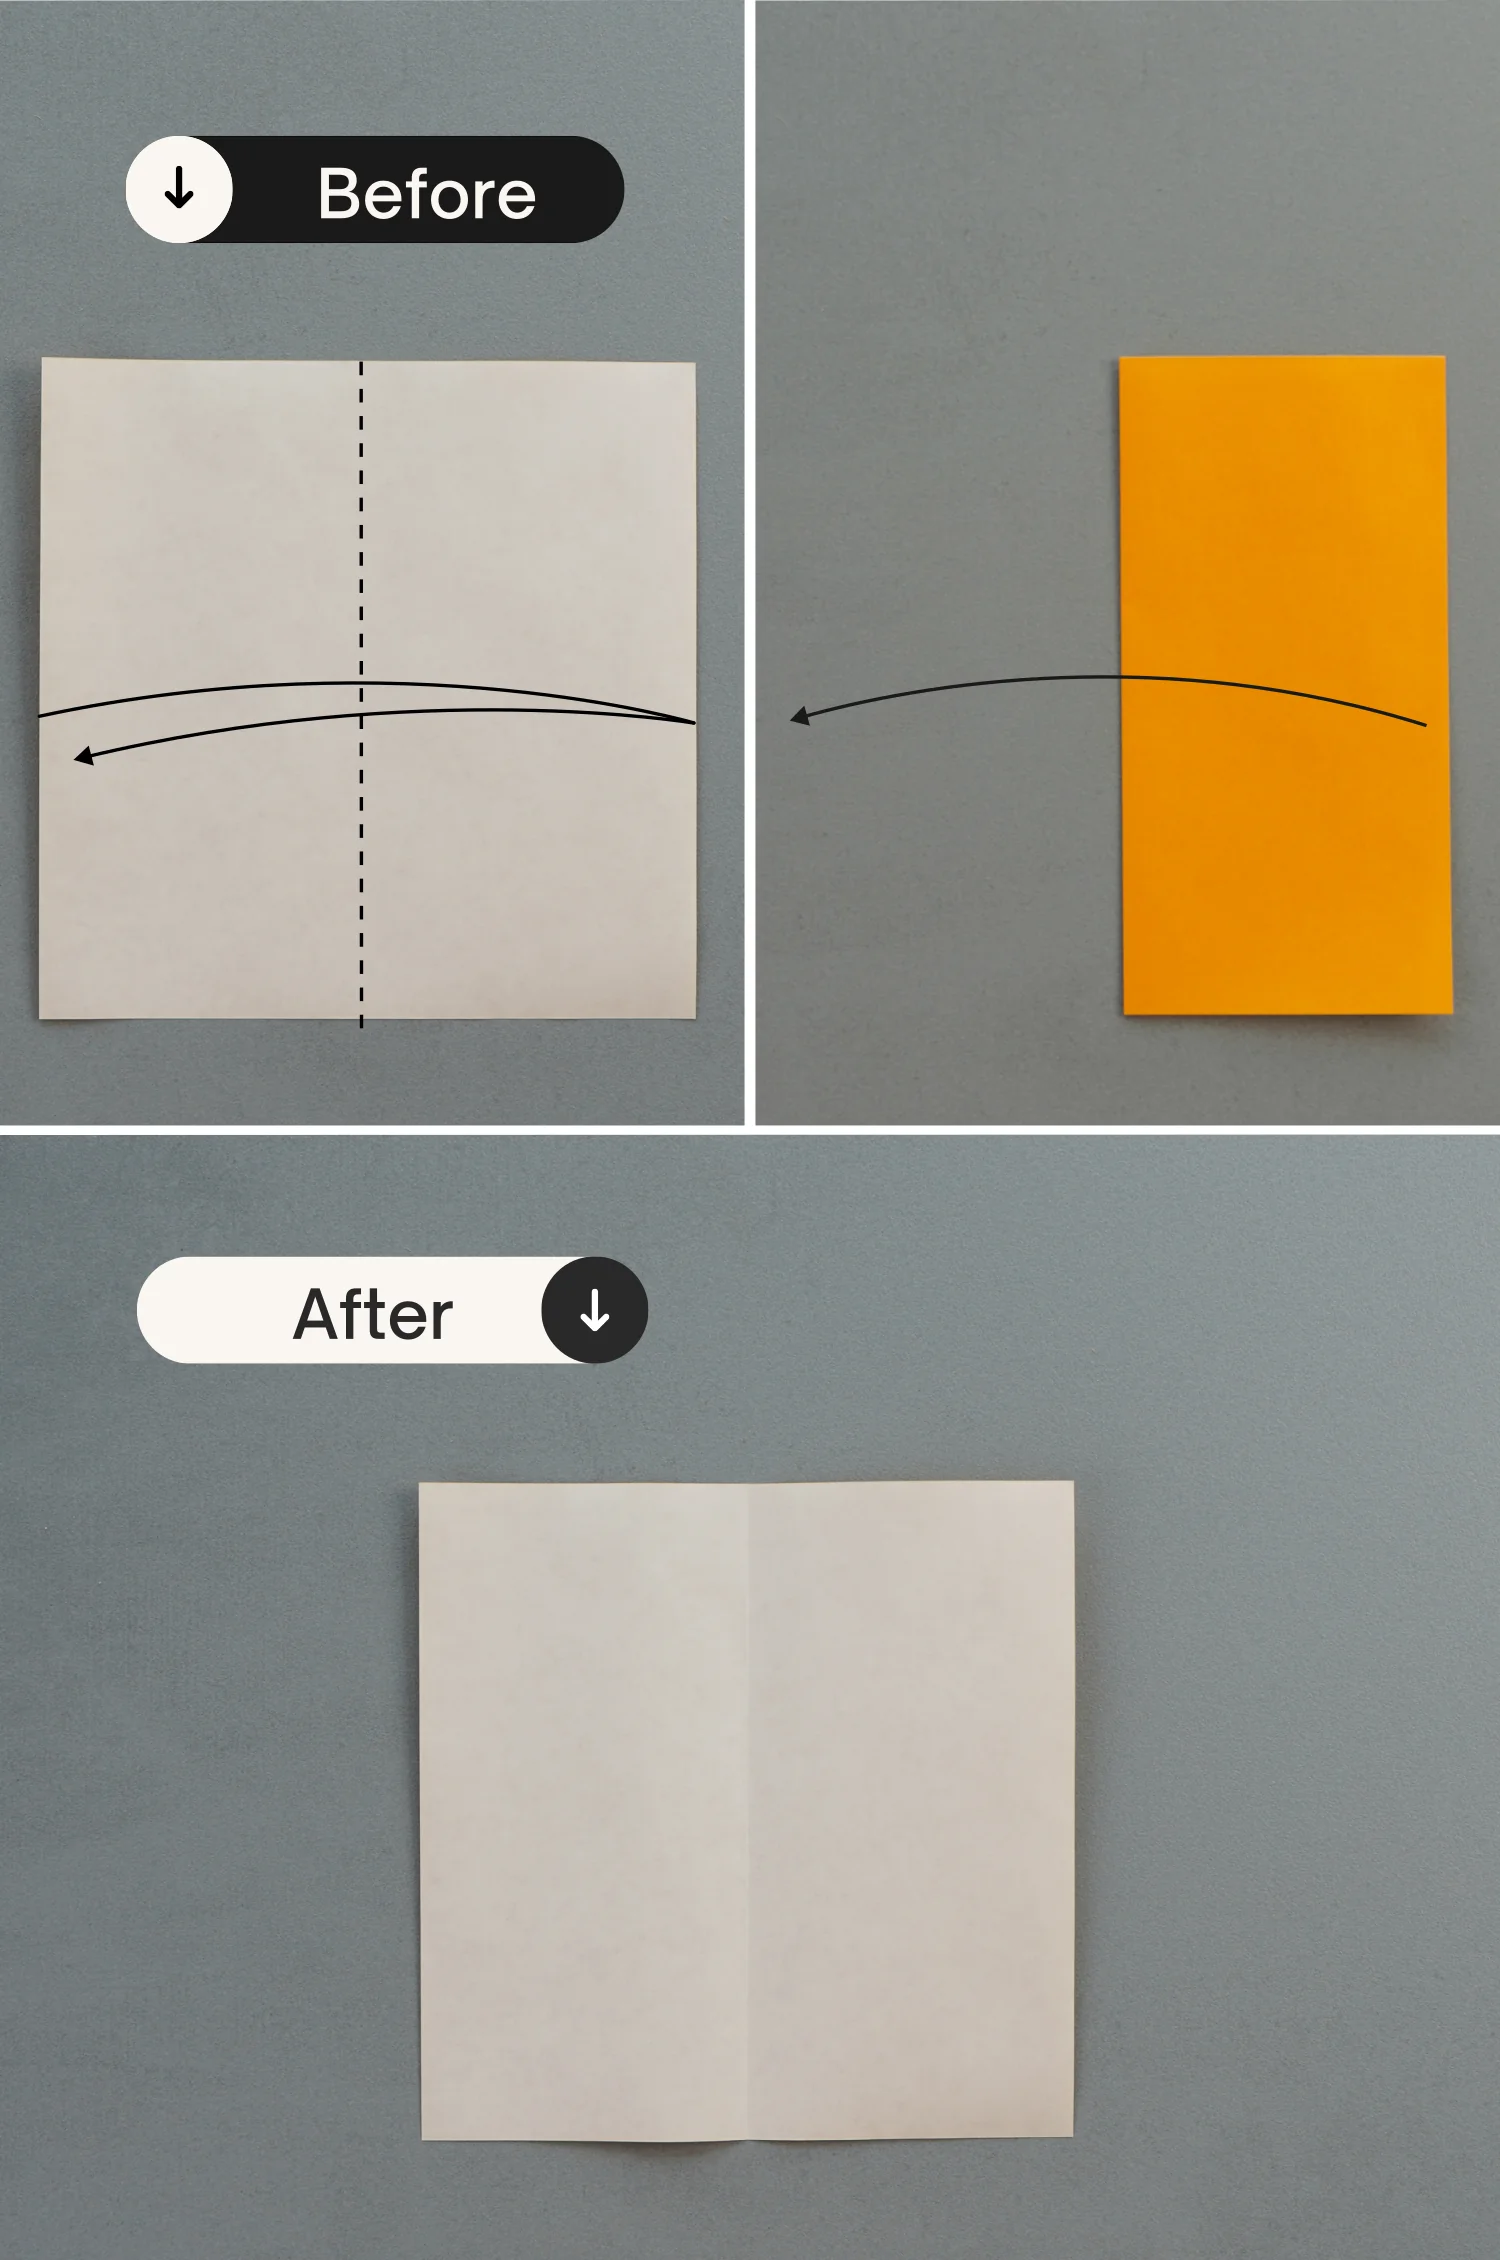
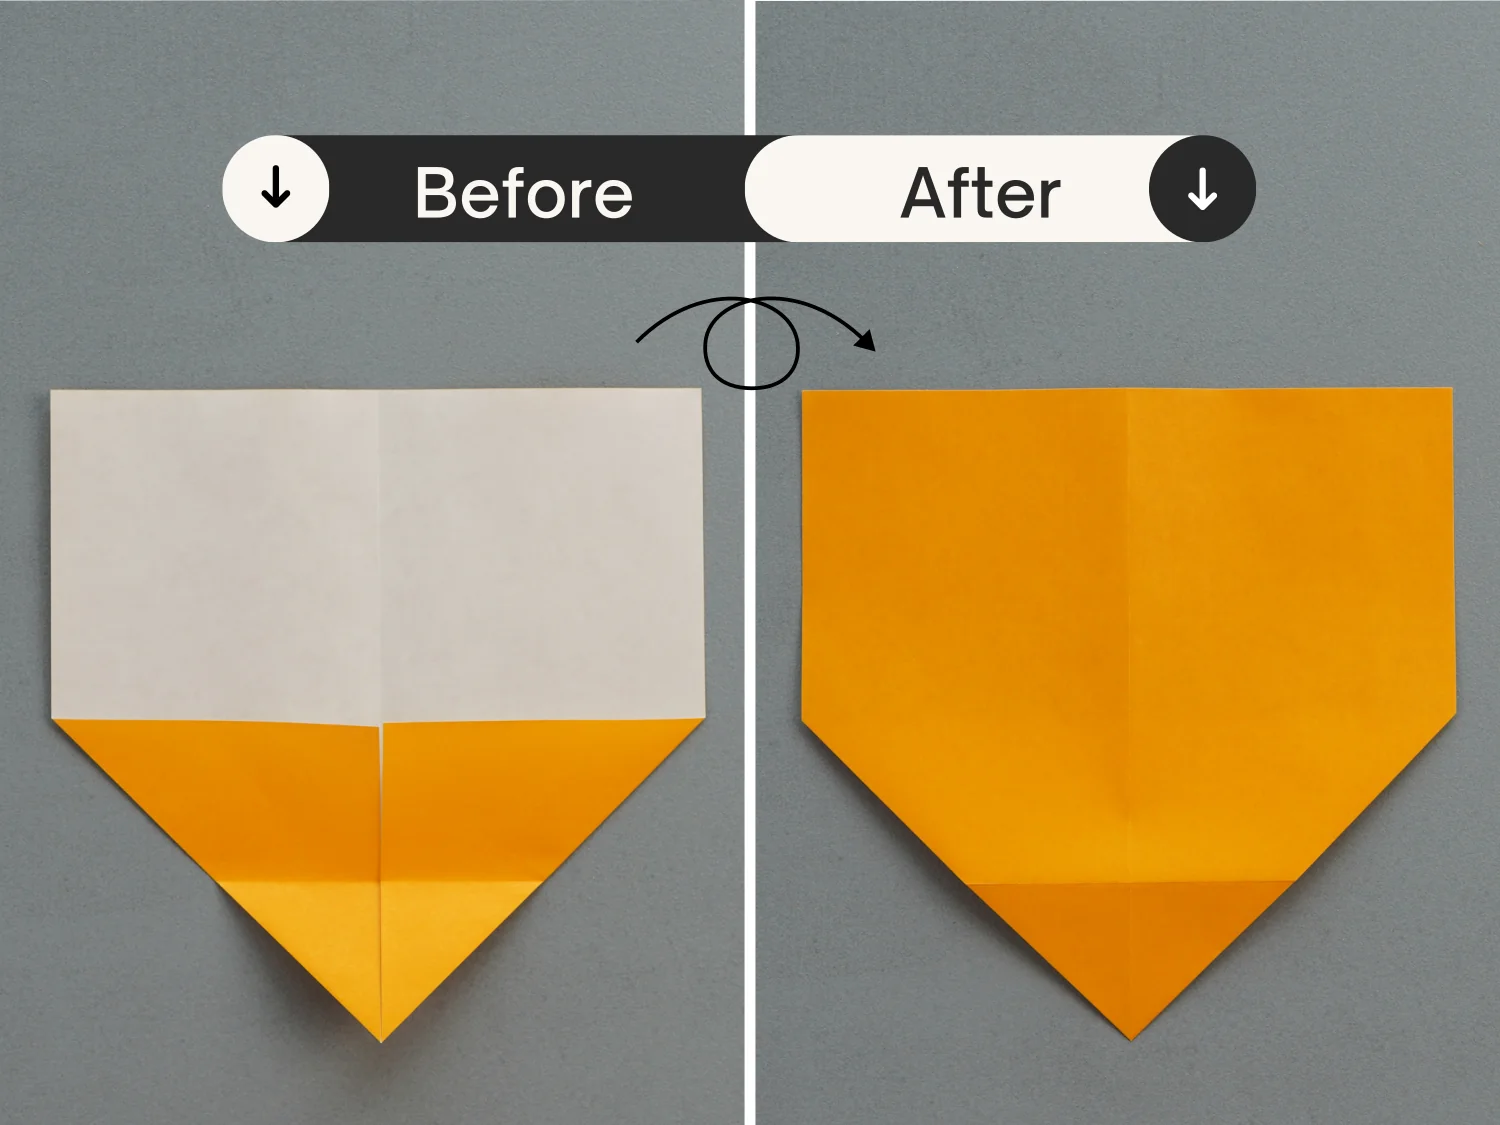
Start with the white side of the paper facing up. Fold it in half vertically, crease it well then unfold.
Step 2
Fold the bottom left and right edges to align with the middle vertical crease.
Step 3
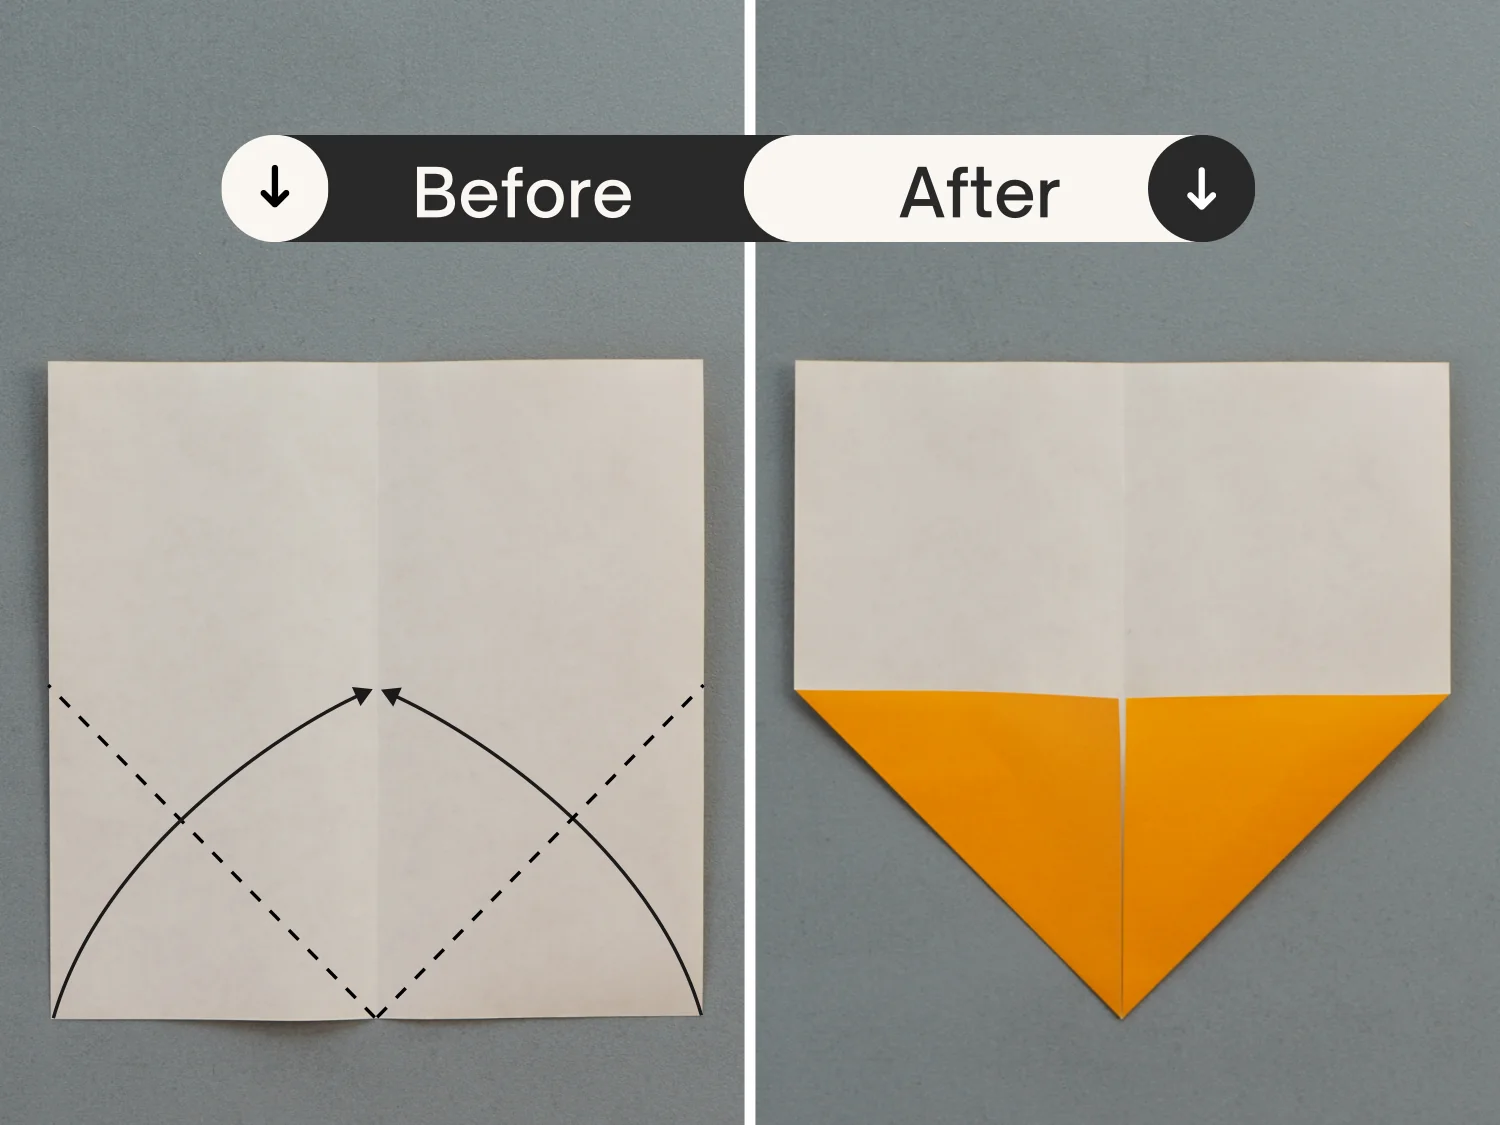
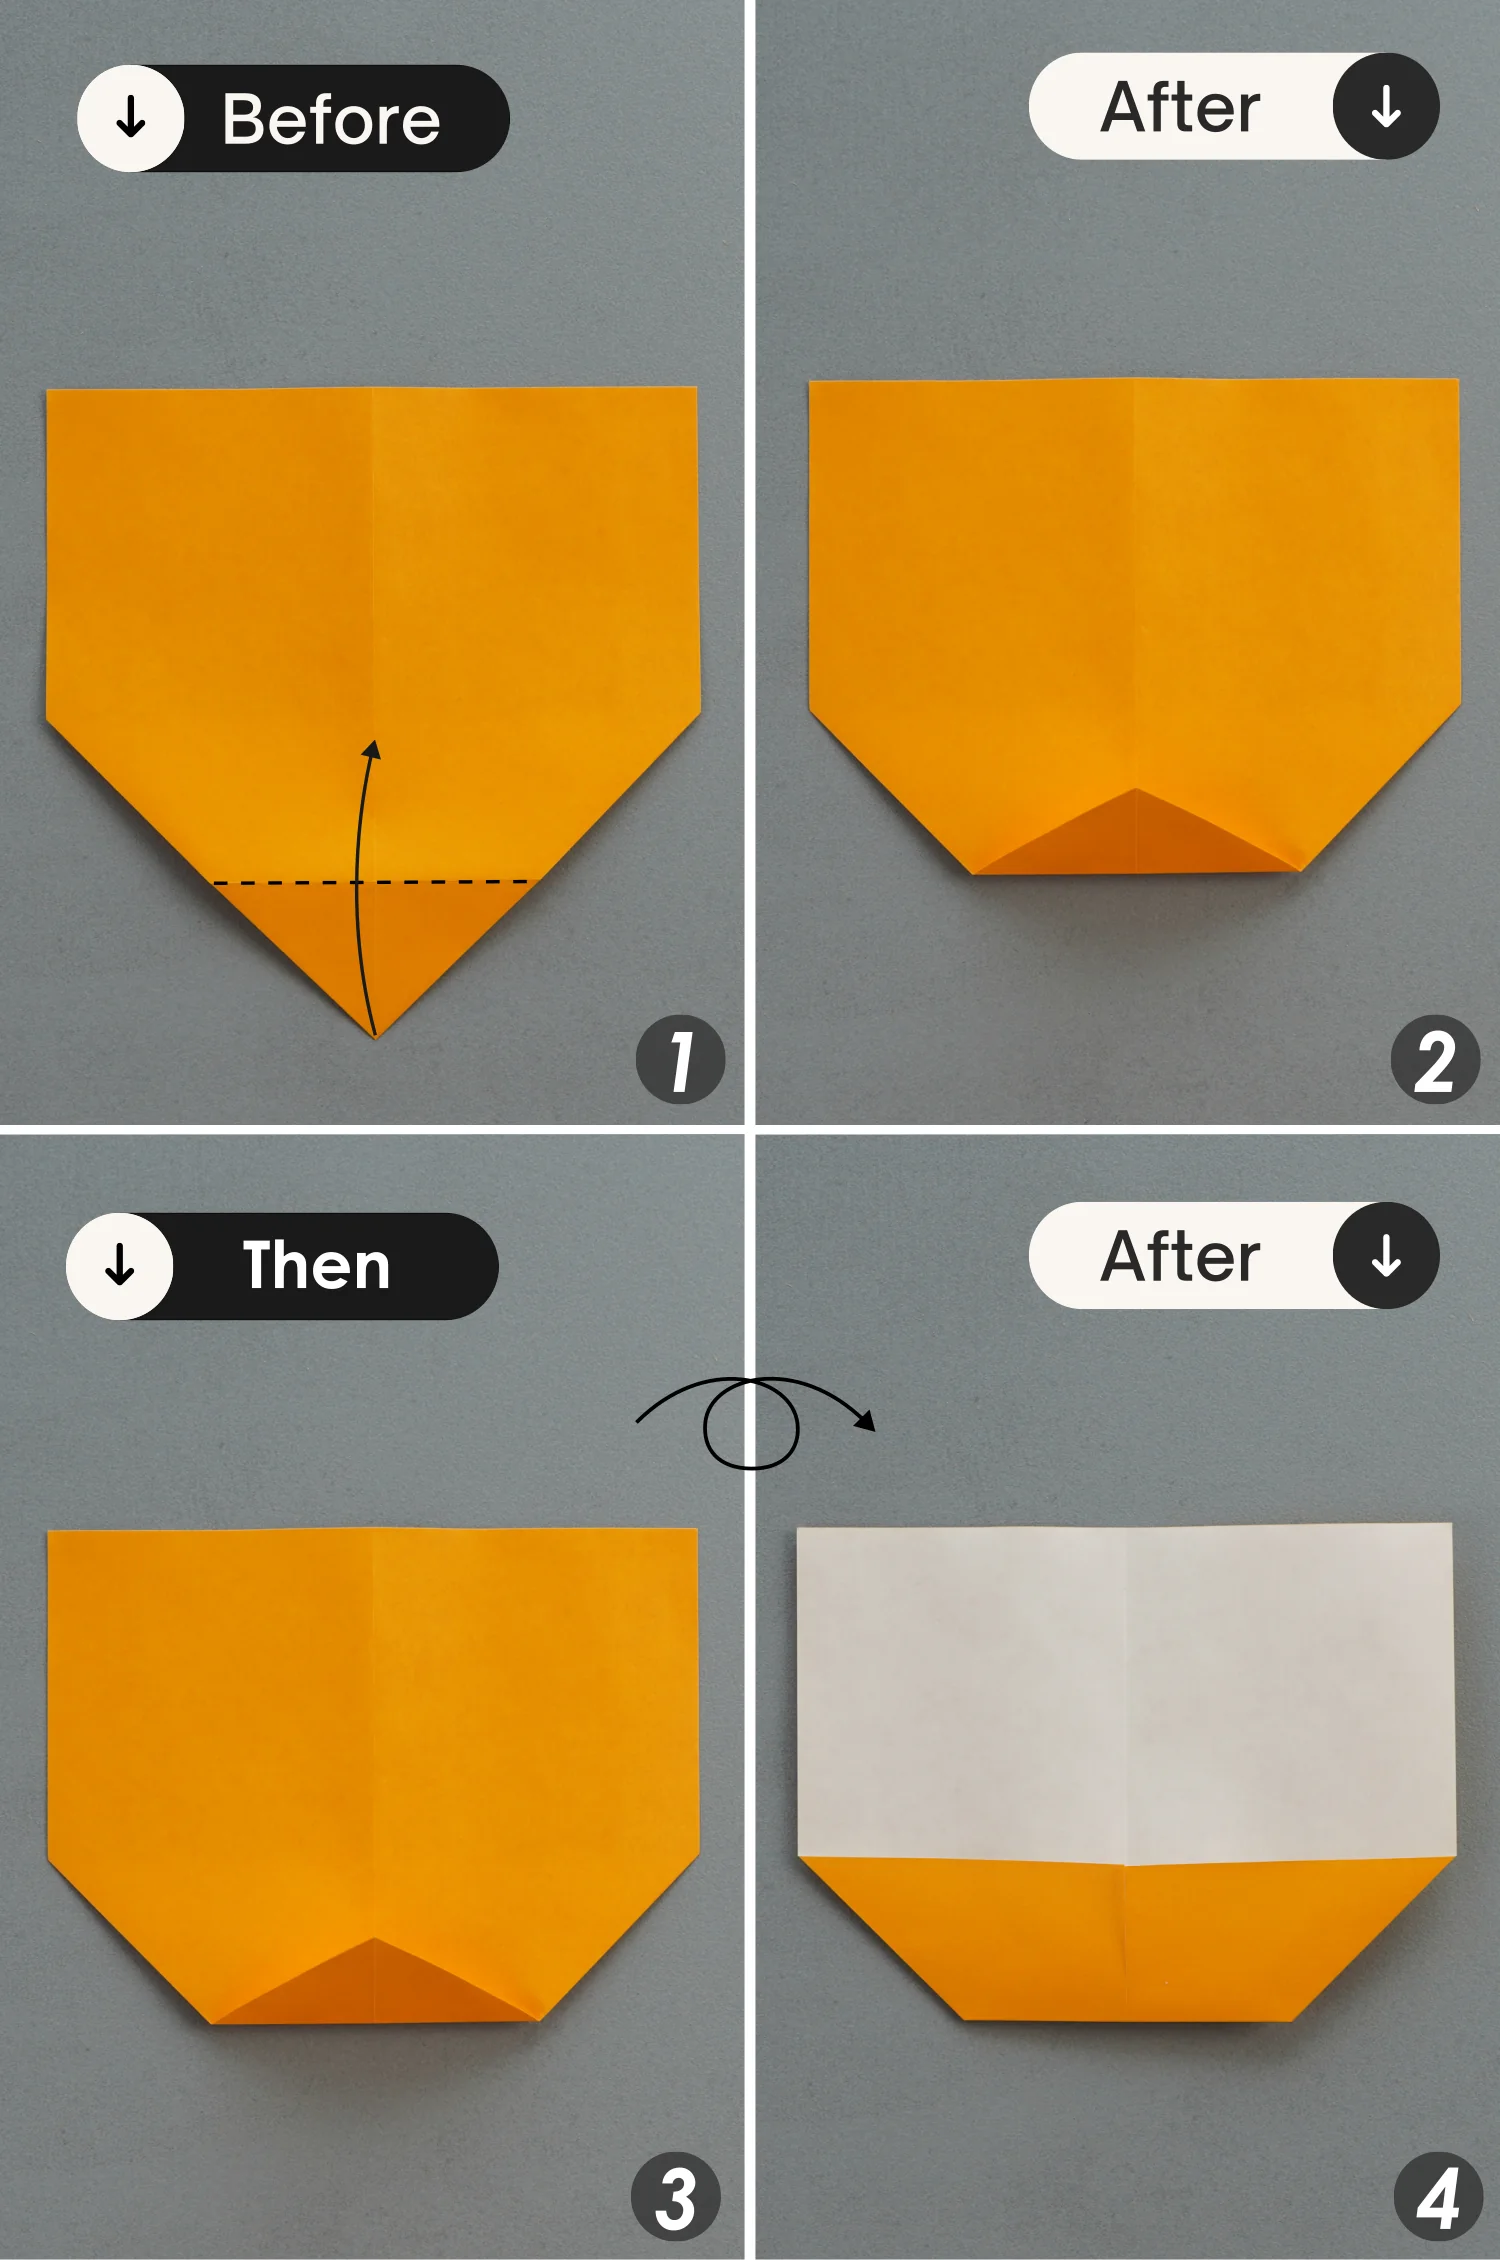
Fold the bottom point up to meet the top edge of the colored part, crease it well then unfold it.
Step 4
Flip the paper over.
Step 5
Fold the bottom point up along the crease you made in the previous step, and flip it over.
Step 6
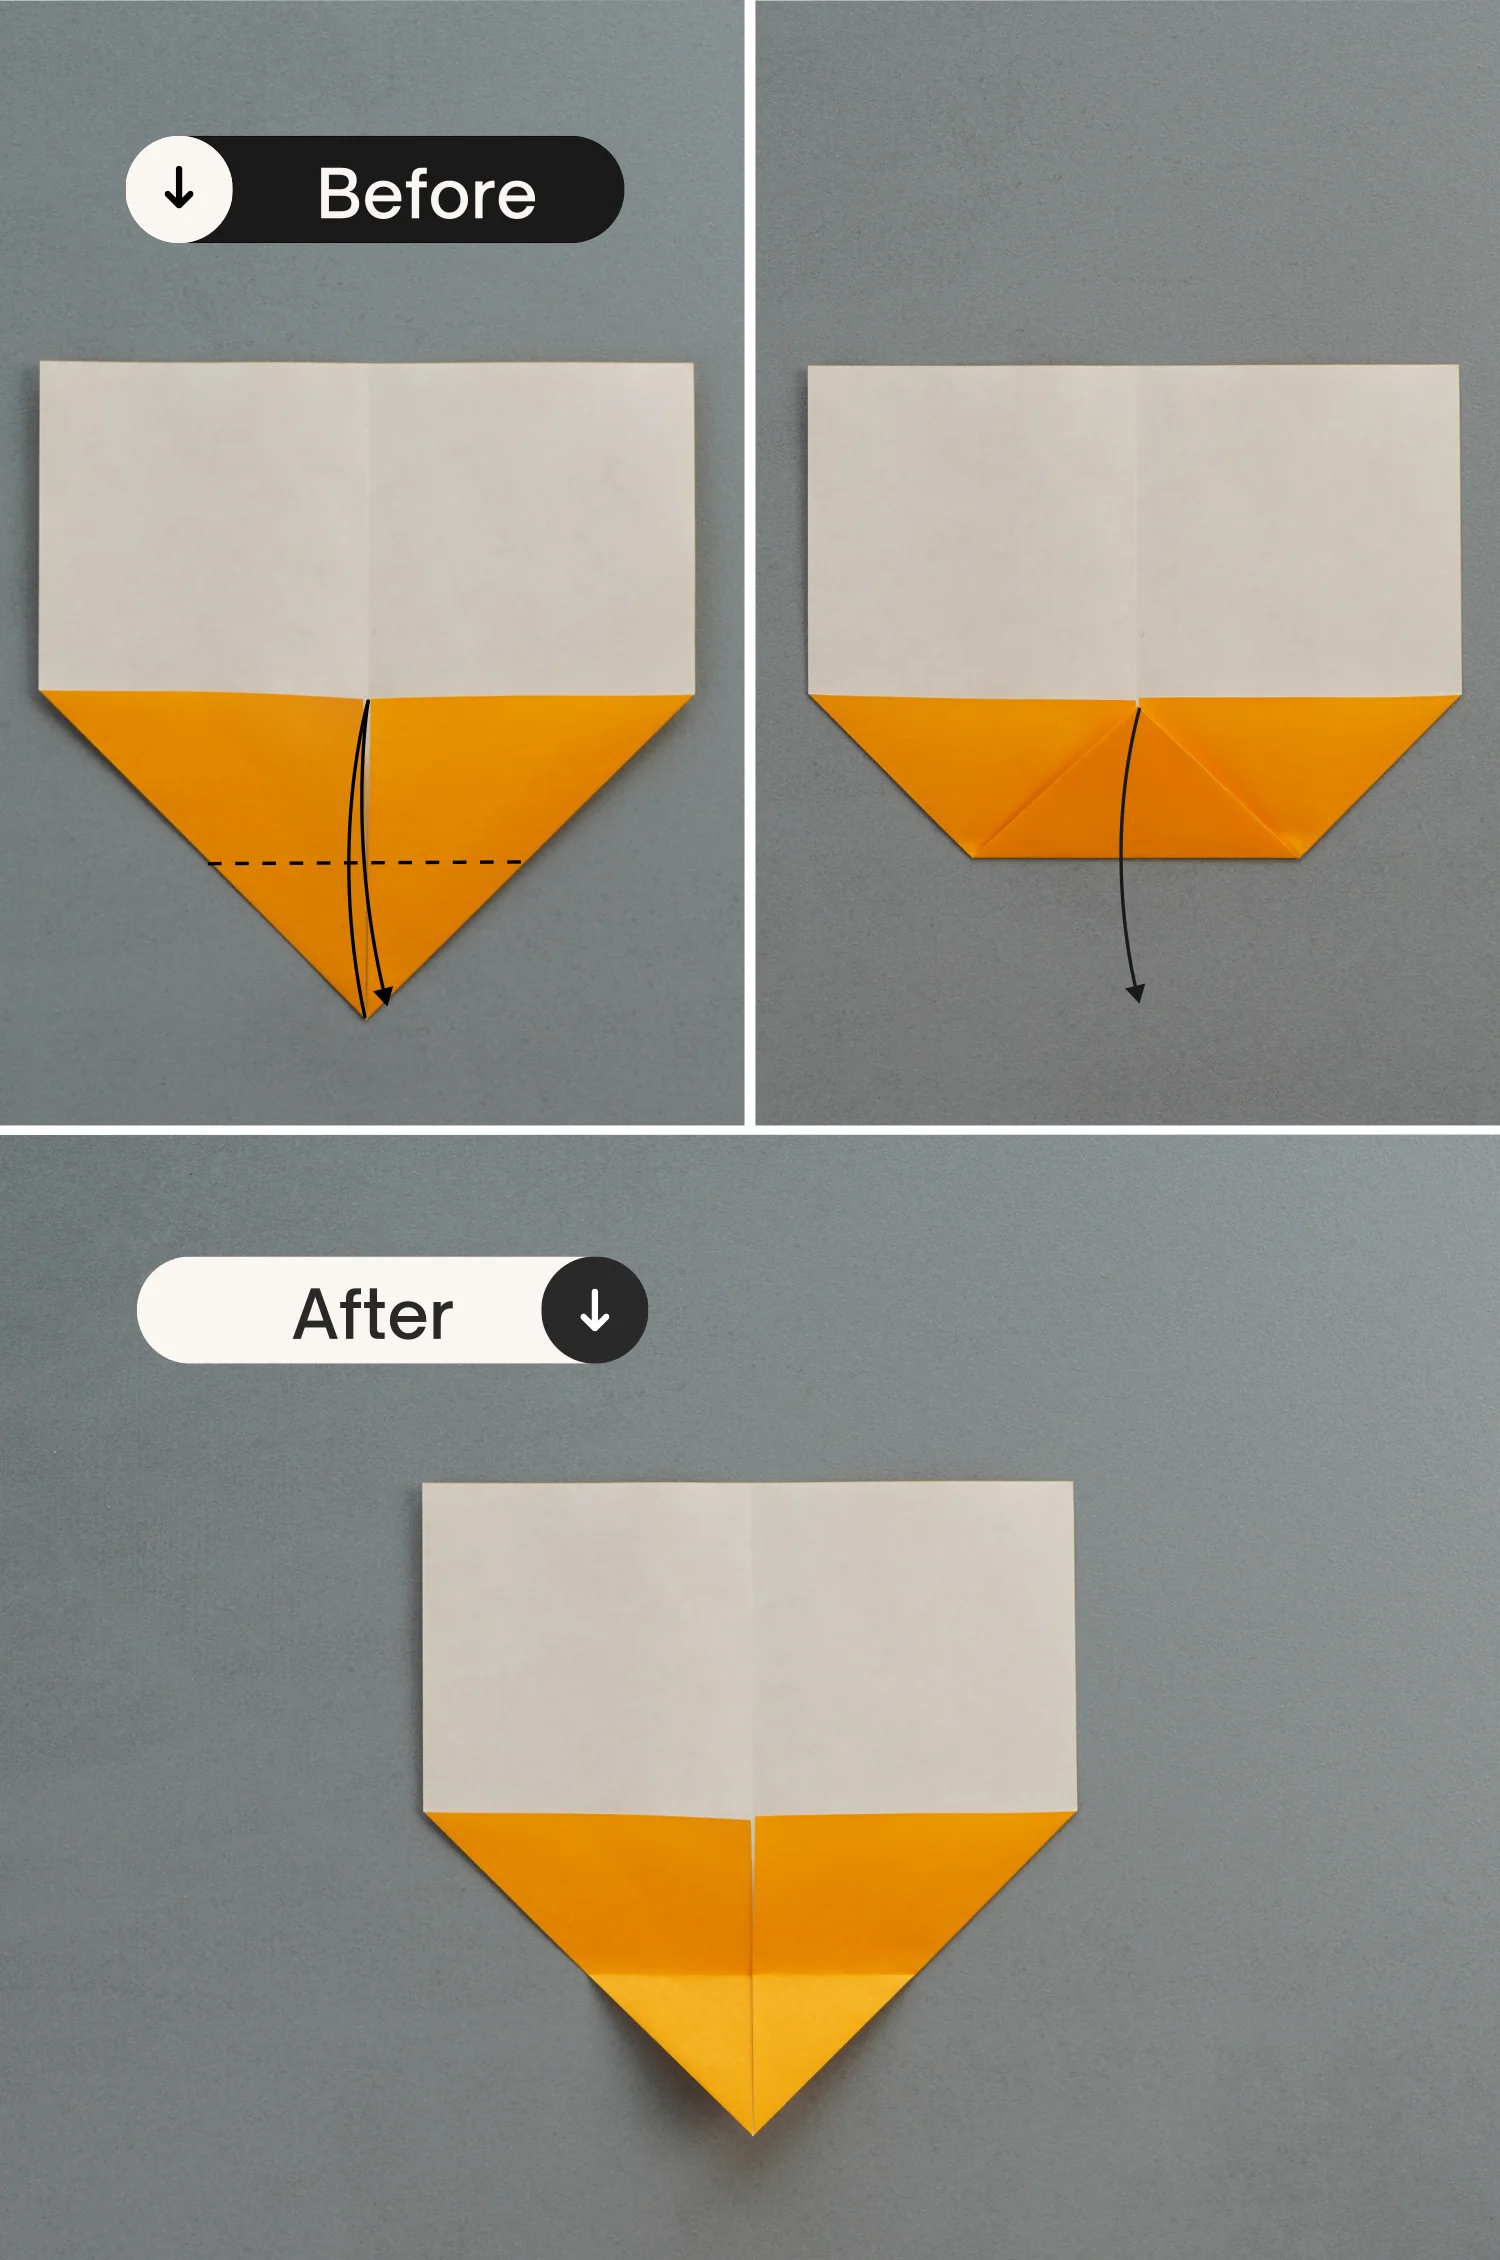
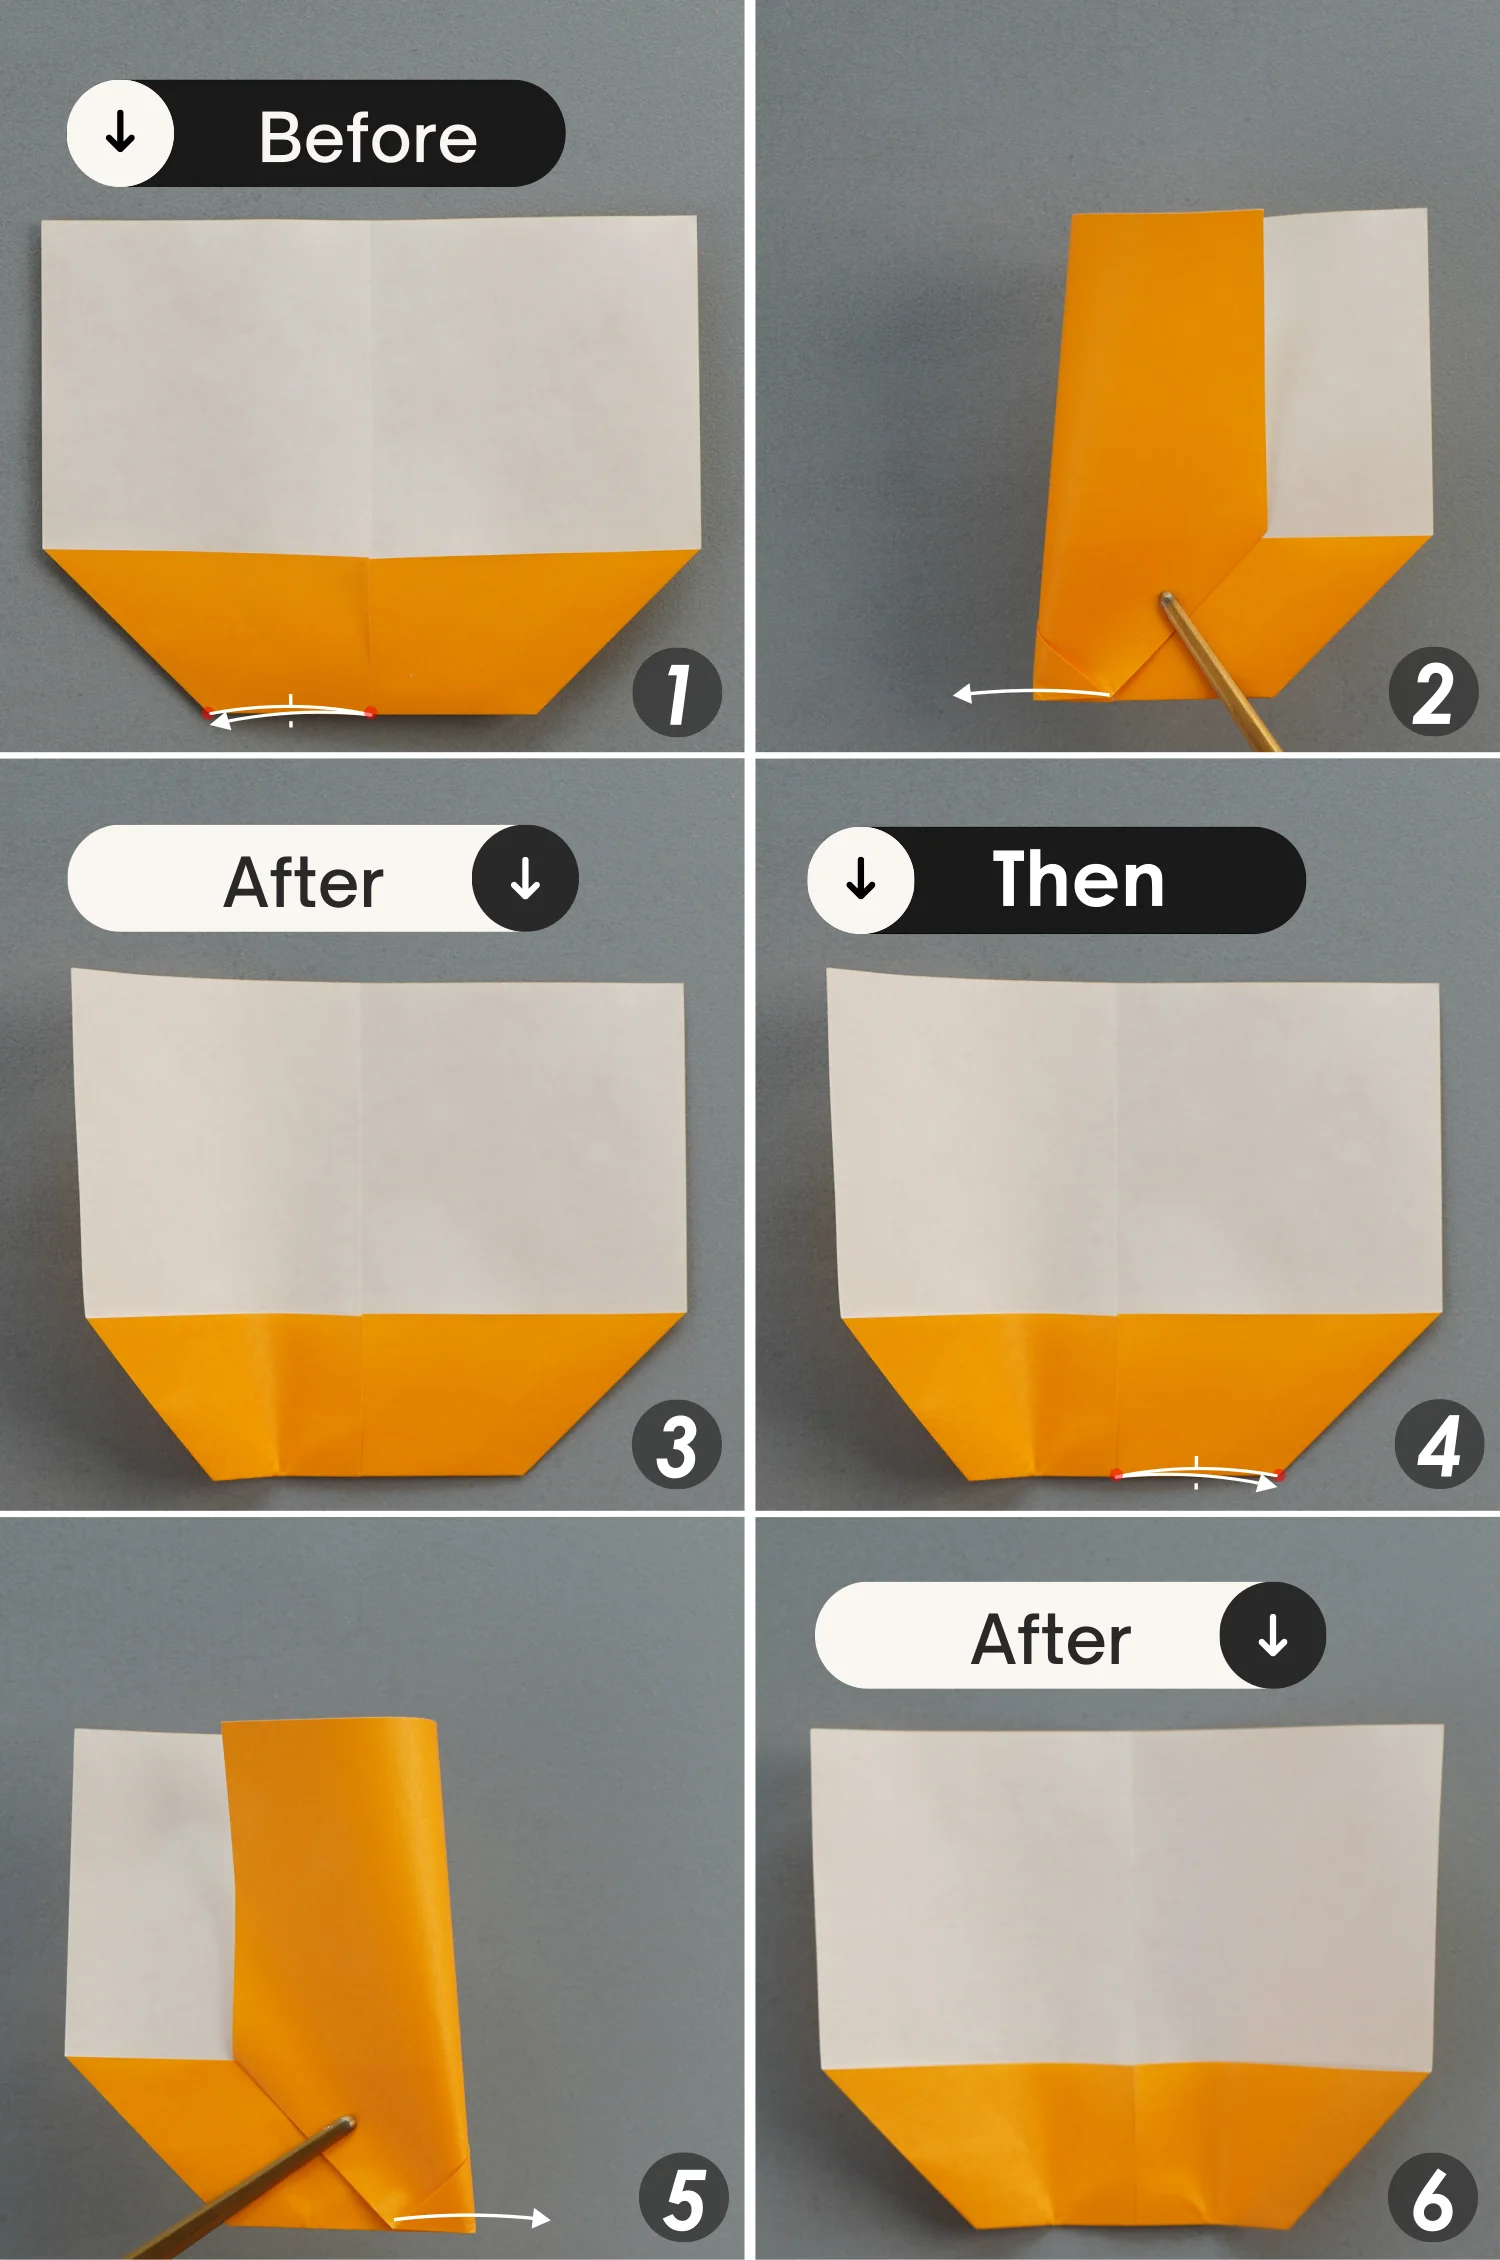
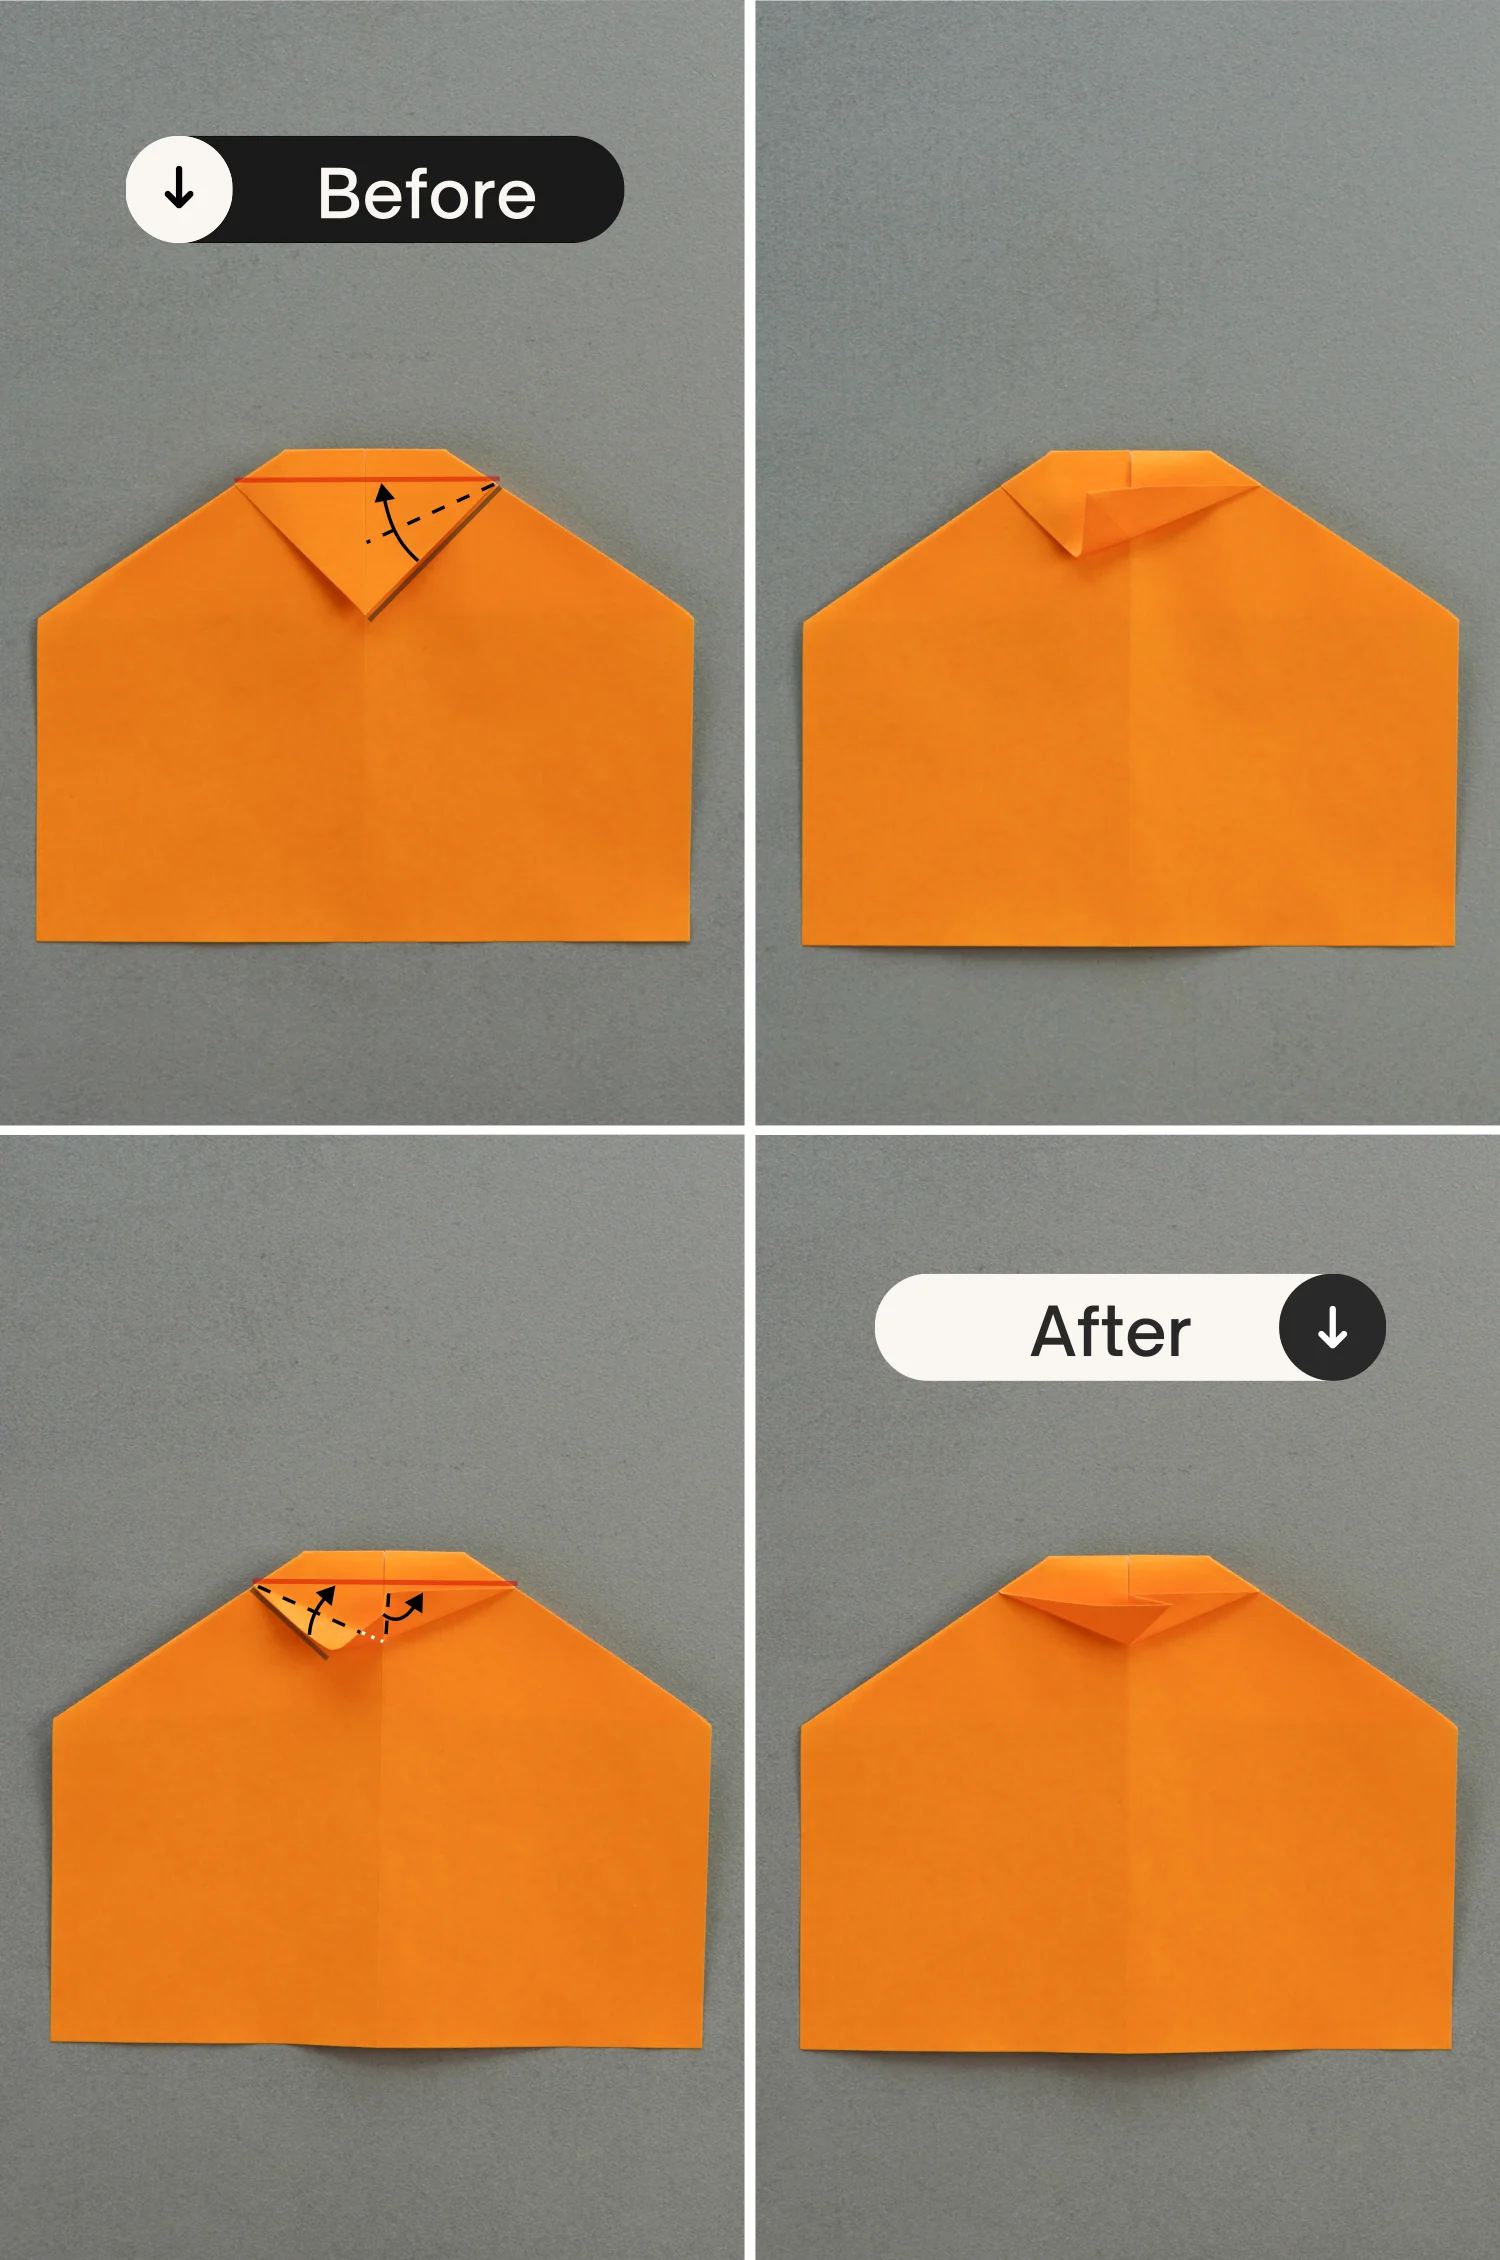
Fold the bottom left point to meet the midpoint of the bottom edge, mark the crease then unfold it.
Repeat this for the bottom right point, mark the crease then unfold as well.
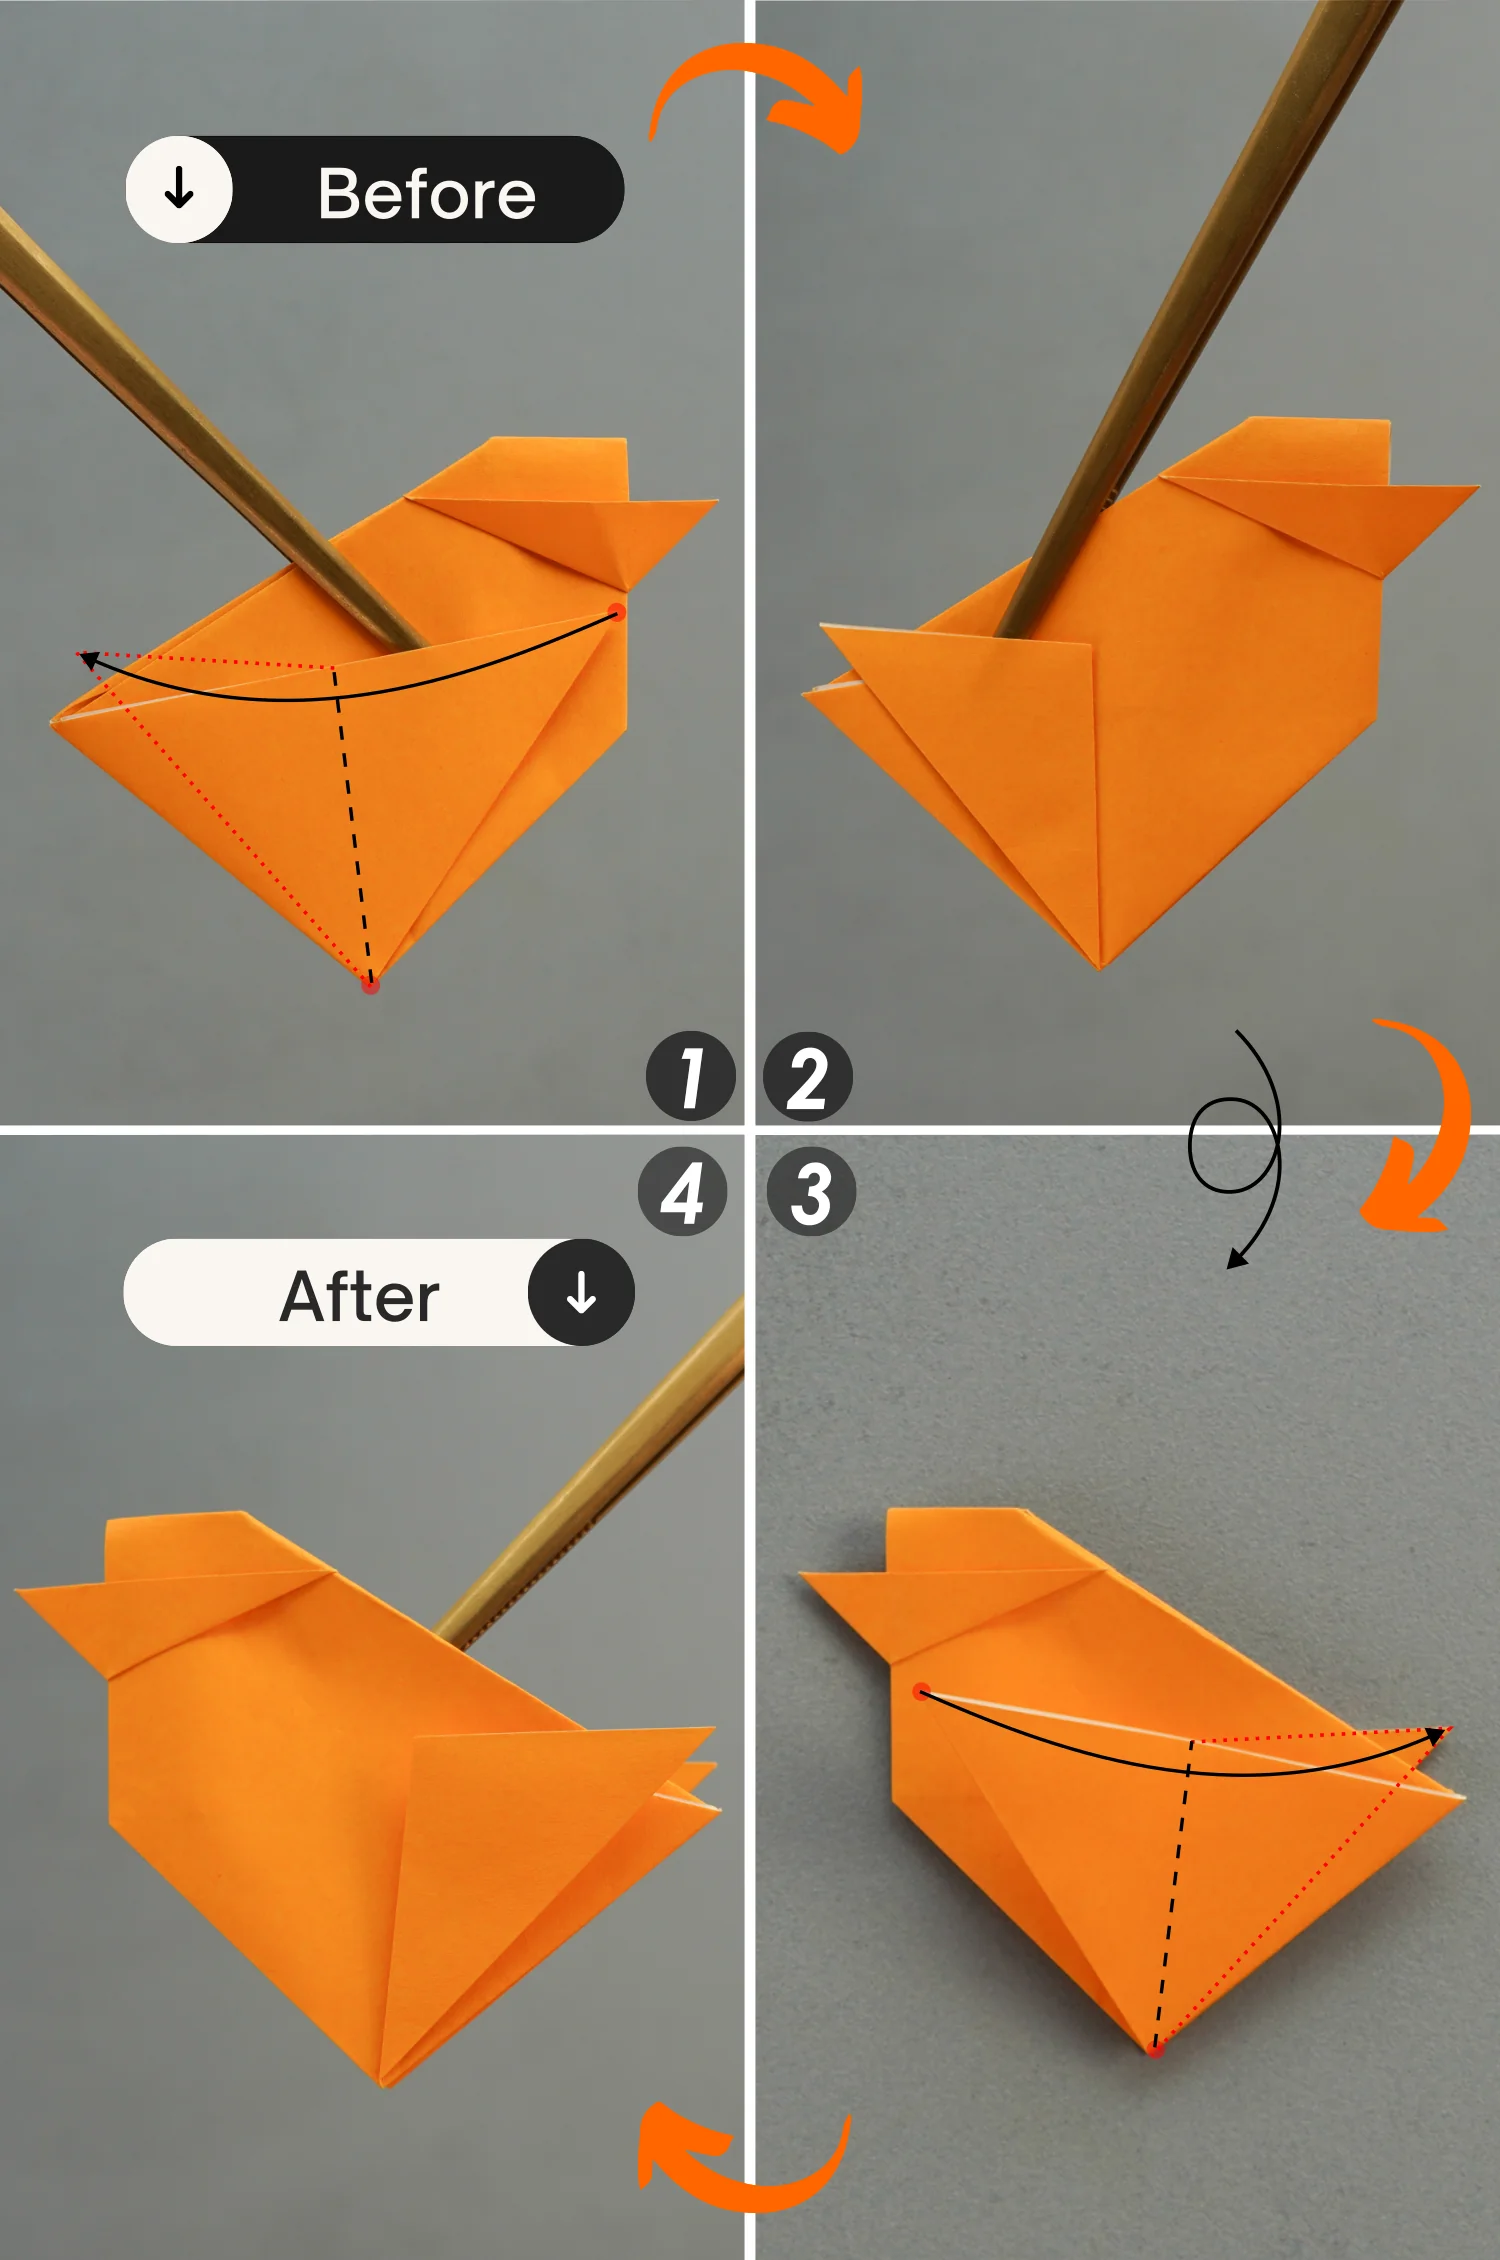
Step 7
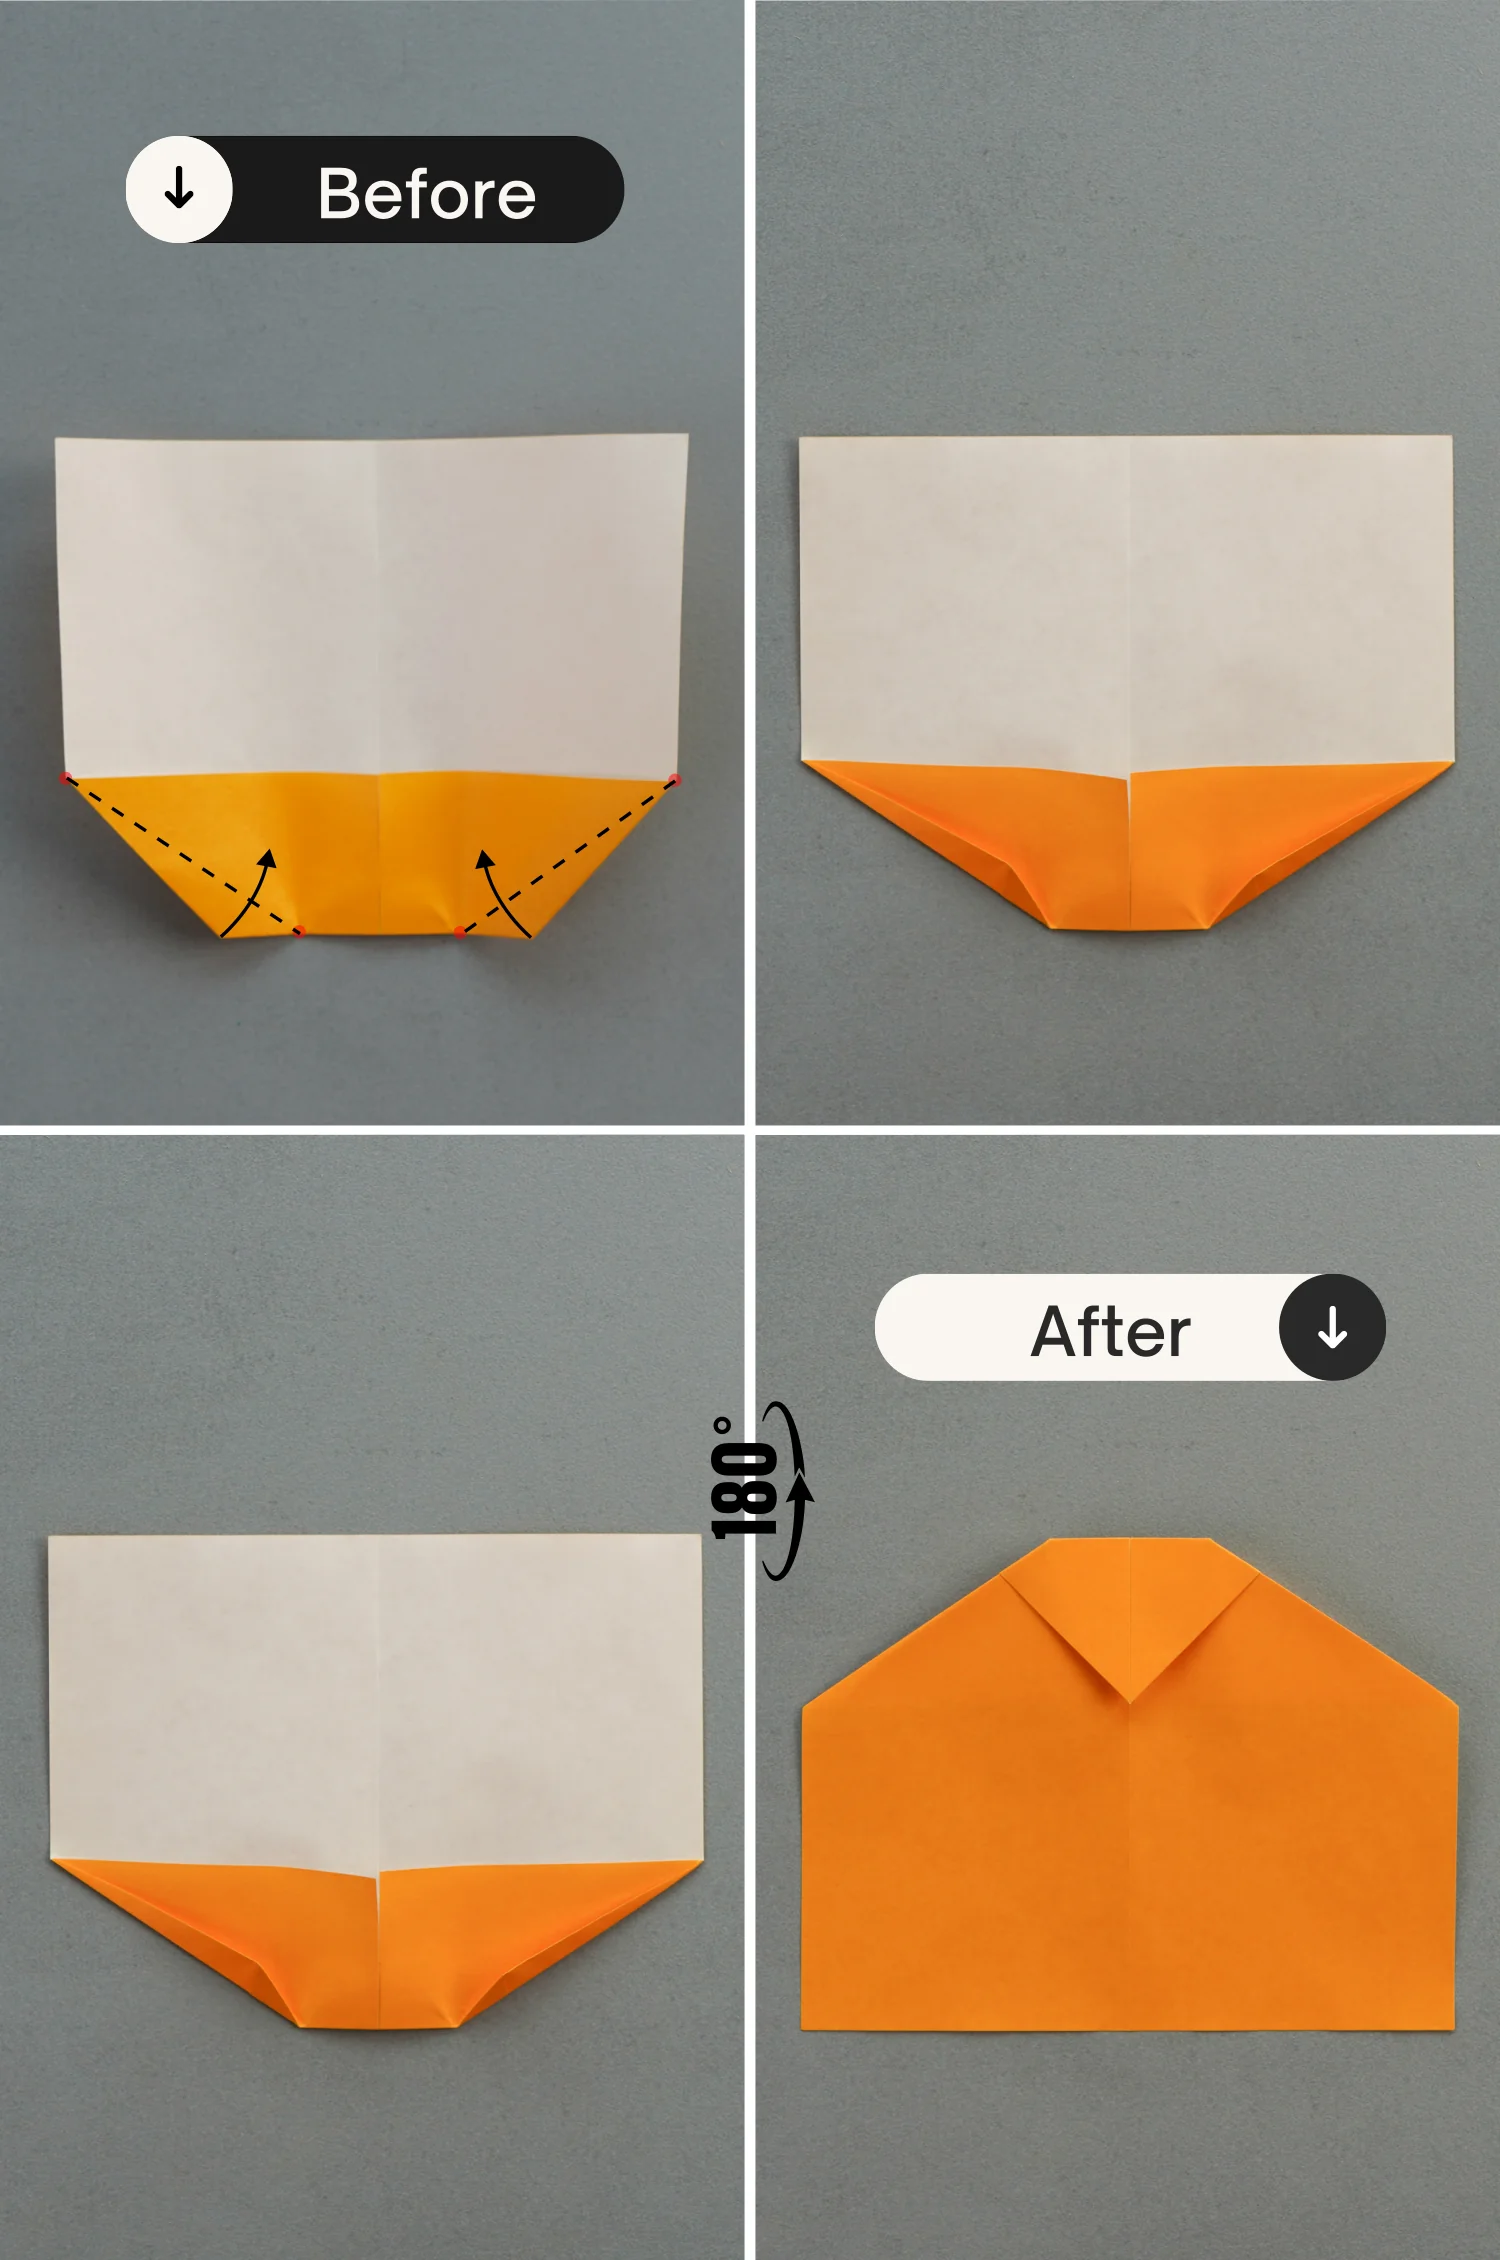
Fold the bottom left and right corners along the dotted lines, that connect the bottom left and right points of the top rectangle and the two points you marked in the previous step. Next, rotate the paper 180 degrees vertically.
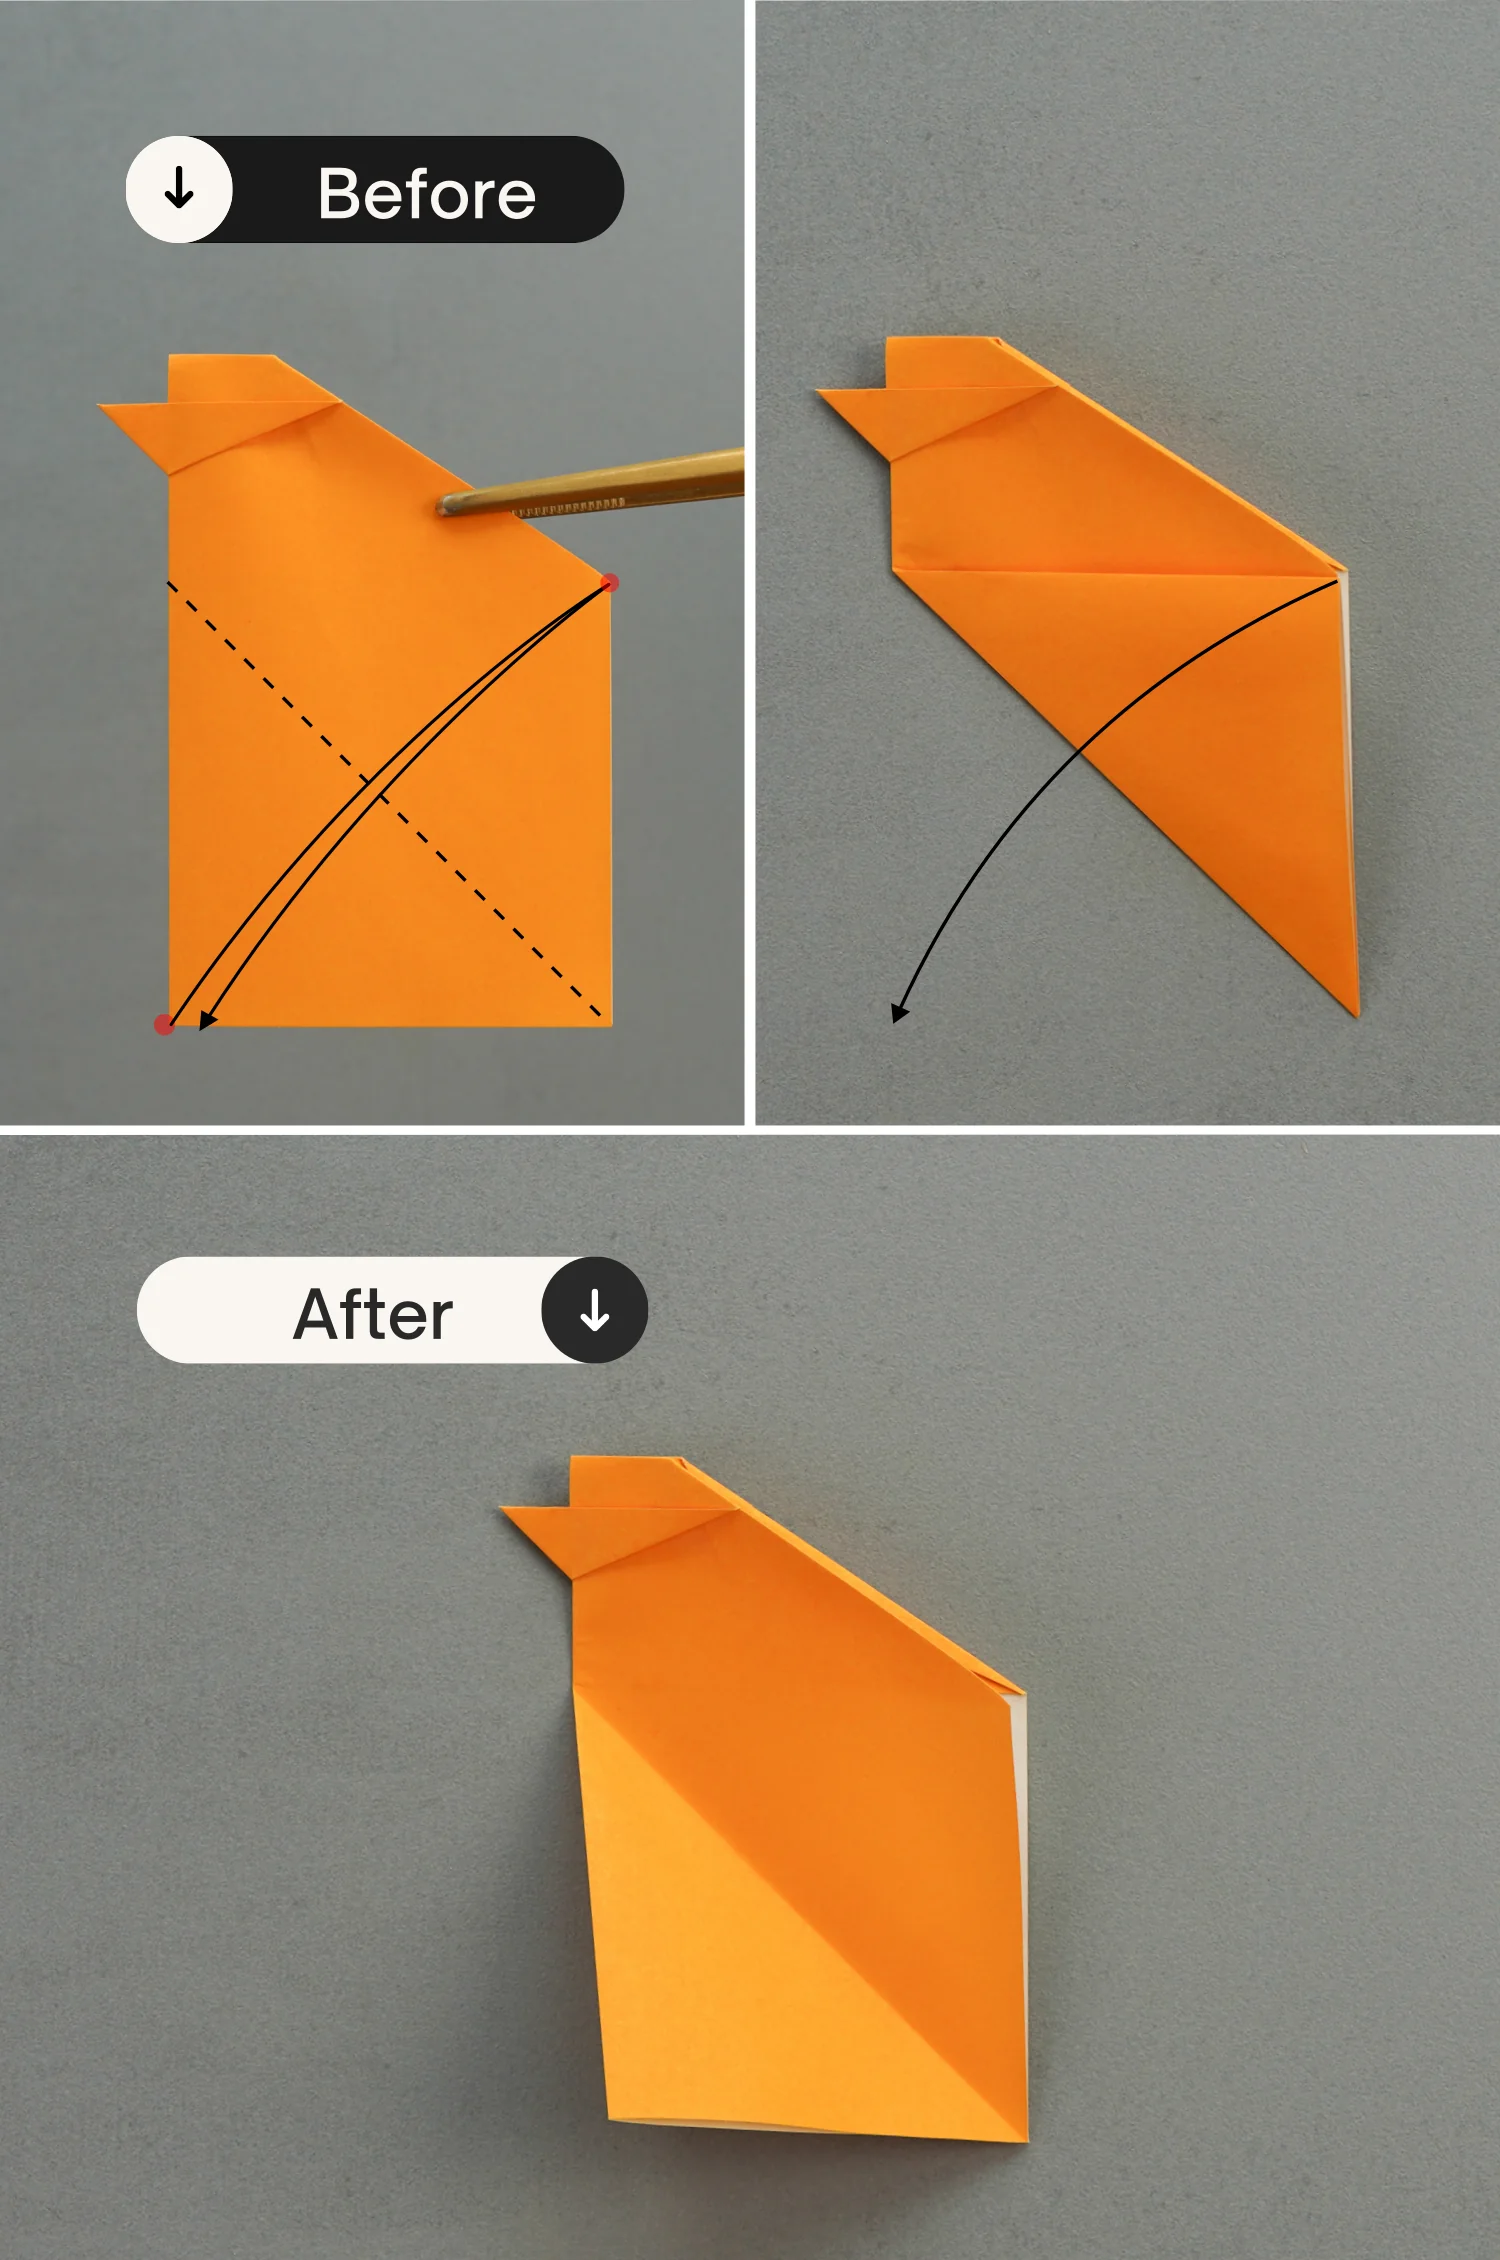
Step 8
Focus on the top diamond shape, and fold its bottom right edge up along the dotted to the horizontal red line, you don’t have to crease it very well, let it curl naturally.
Next, fold its bottom left edge in the same manner, a small corner will be formed as you do this, and push this corner down to the right.
Step 9
Fold the paper in half vertically backward, and view it from the right sight.

Step 10
Fold the bottom edge to align with the right edge, and unfold it.
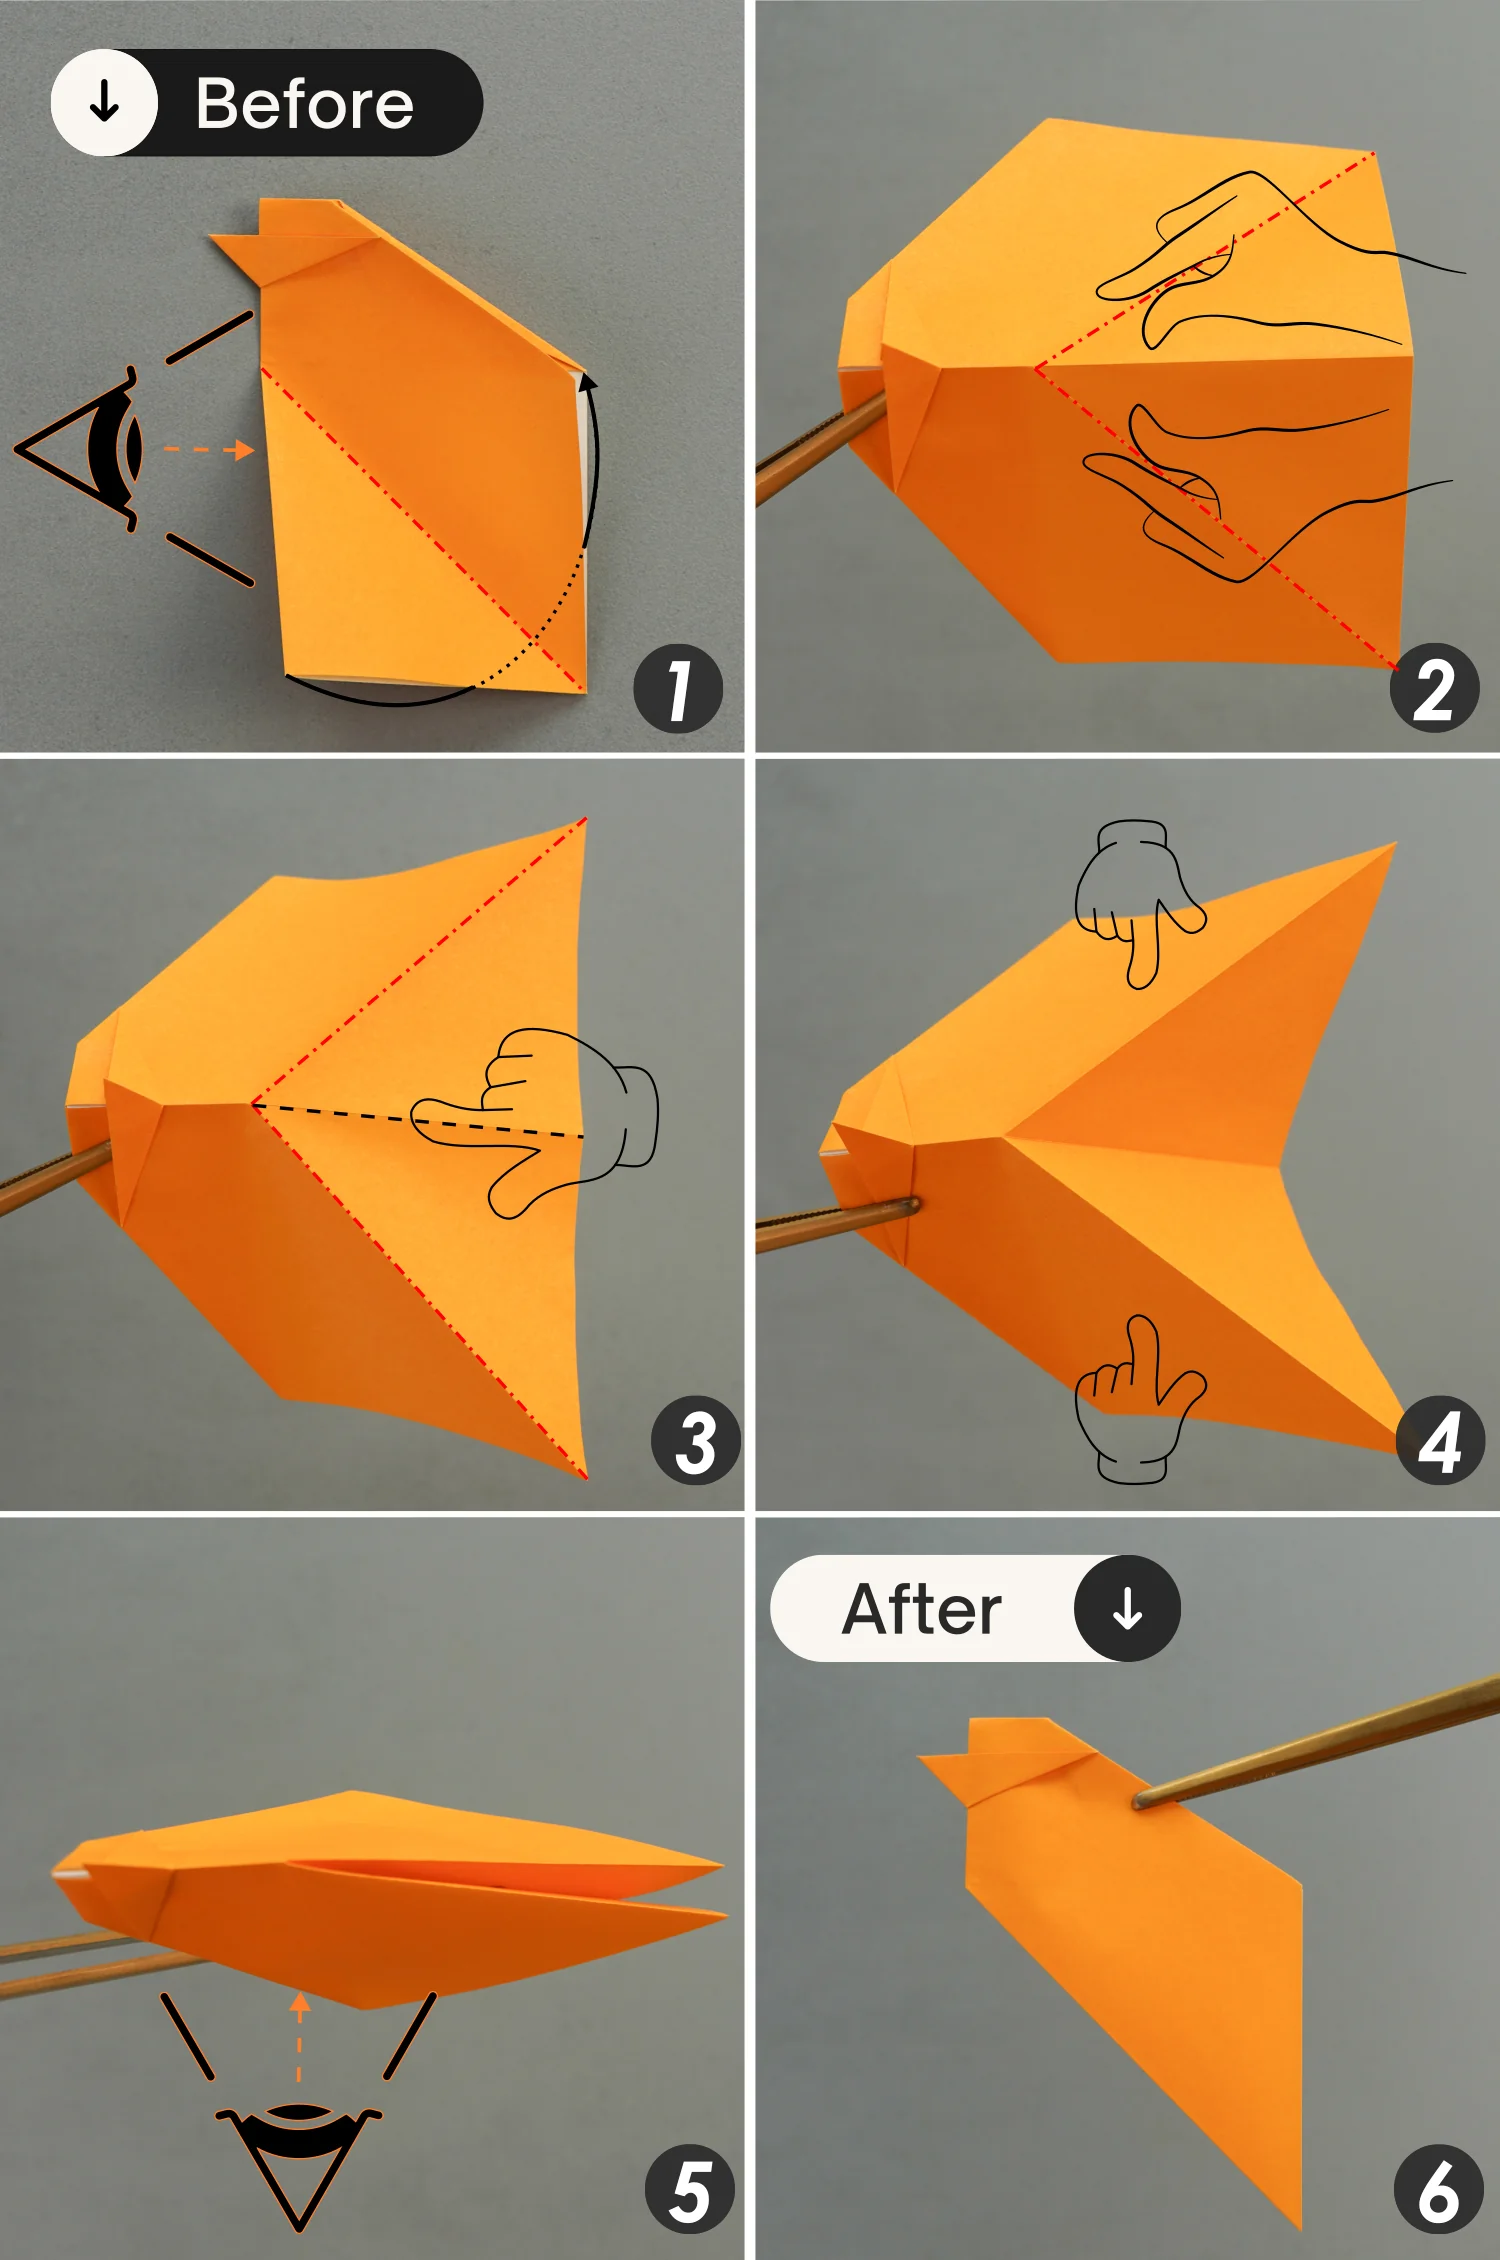
Step 11
View the paper from the left side, open it, and shape the creases you made in the previous step, then press down the middle creases, and finally flatten the fold, and view it from the original side.
Step 12
Fold the bottom point of the top layer up along the dotted line, then flip the paper over, and fold the bottom point on this side up along the dotted line as well.
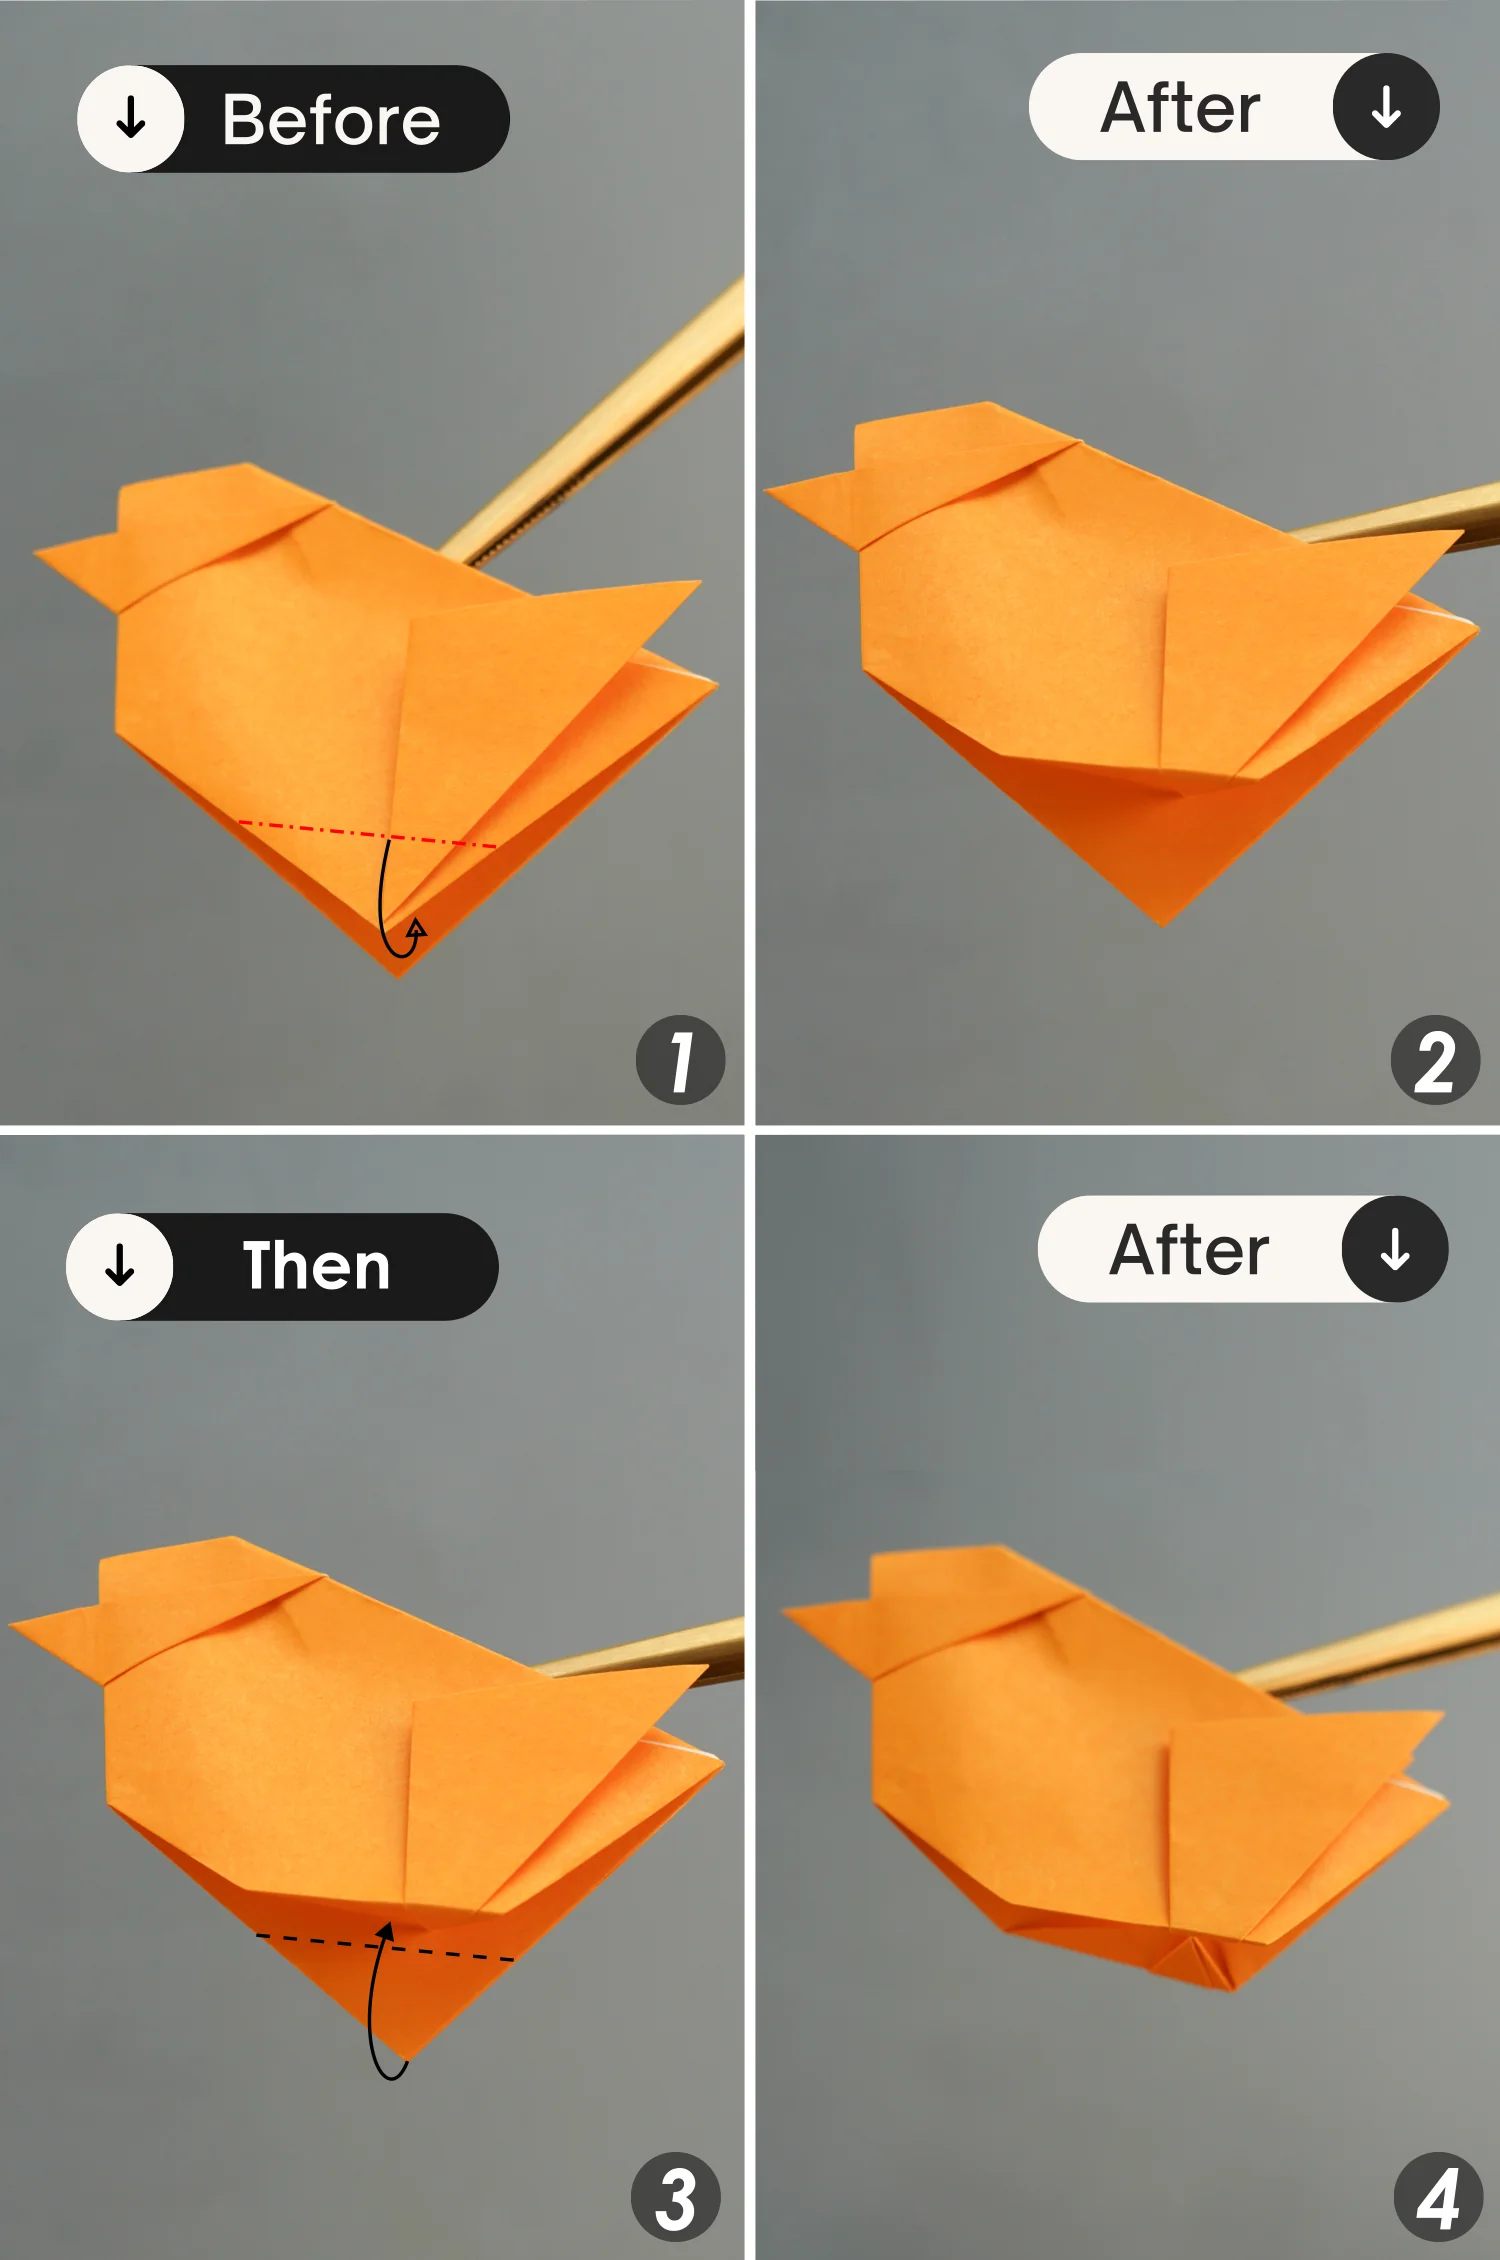
Step 13
Fold the right point of the top layer to the left along the dotted line, and flip the paper over, repeat this for the layer on this side, fold its left point to the right.
Step 14
Fold the bottom corner along the dotted line backward, then fold the bottom corner of the bottom layer up along the dotted line, making these two edges flush.
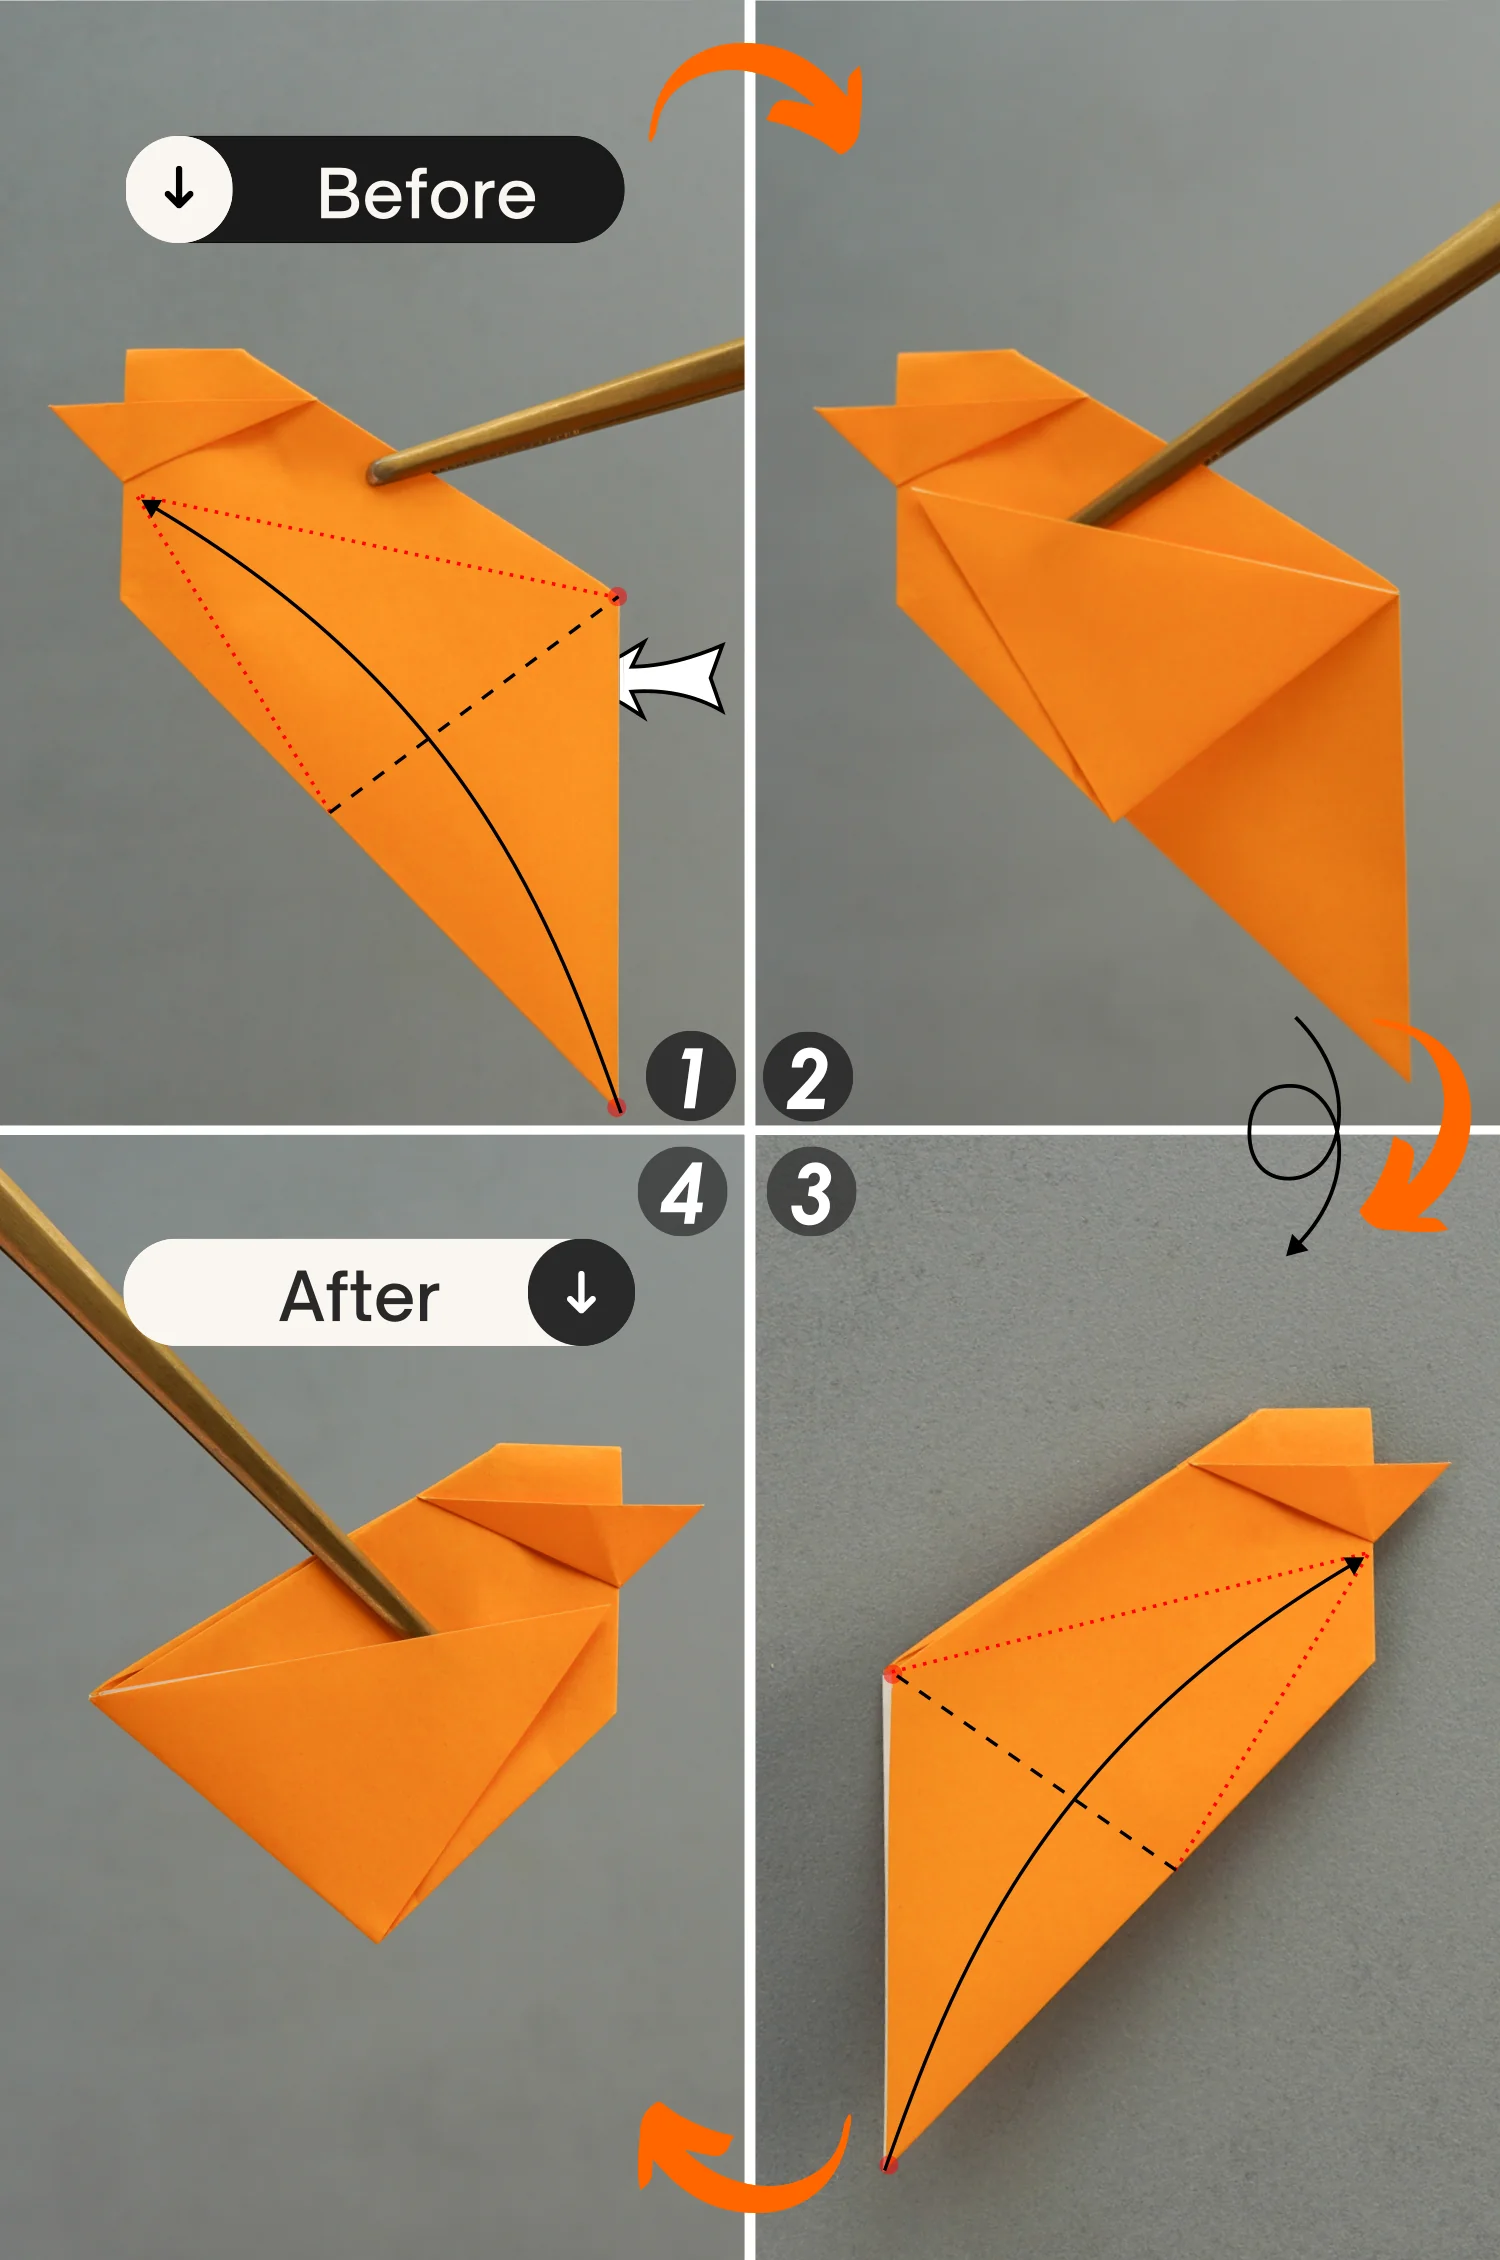
Step 15
Fold the top left corner down a little, and unfold it.
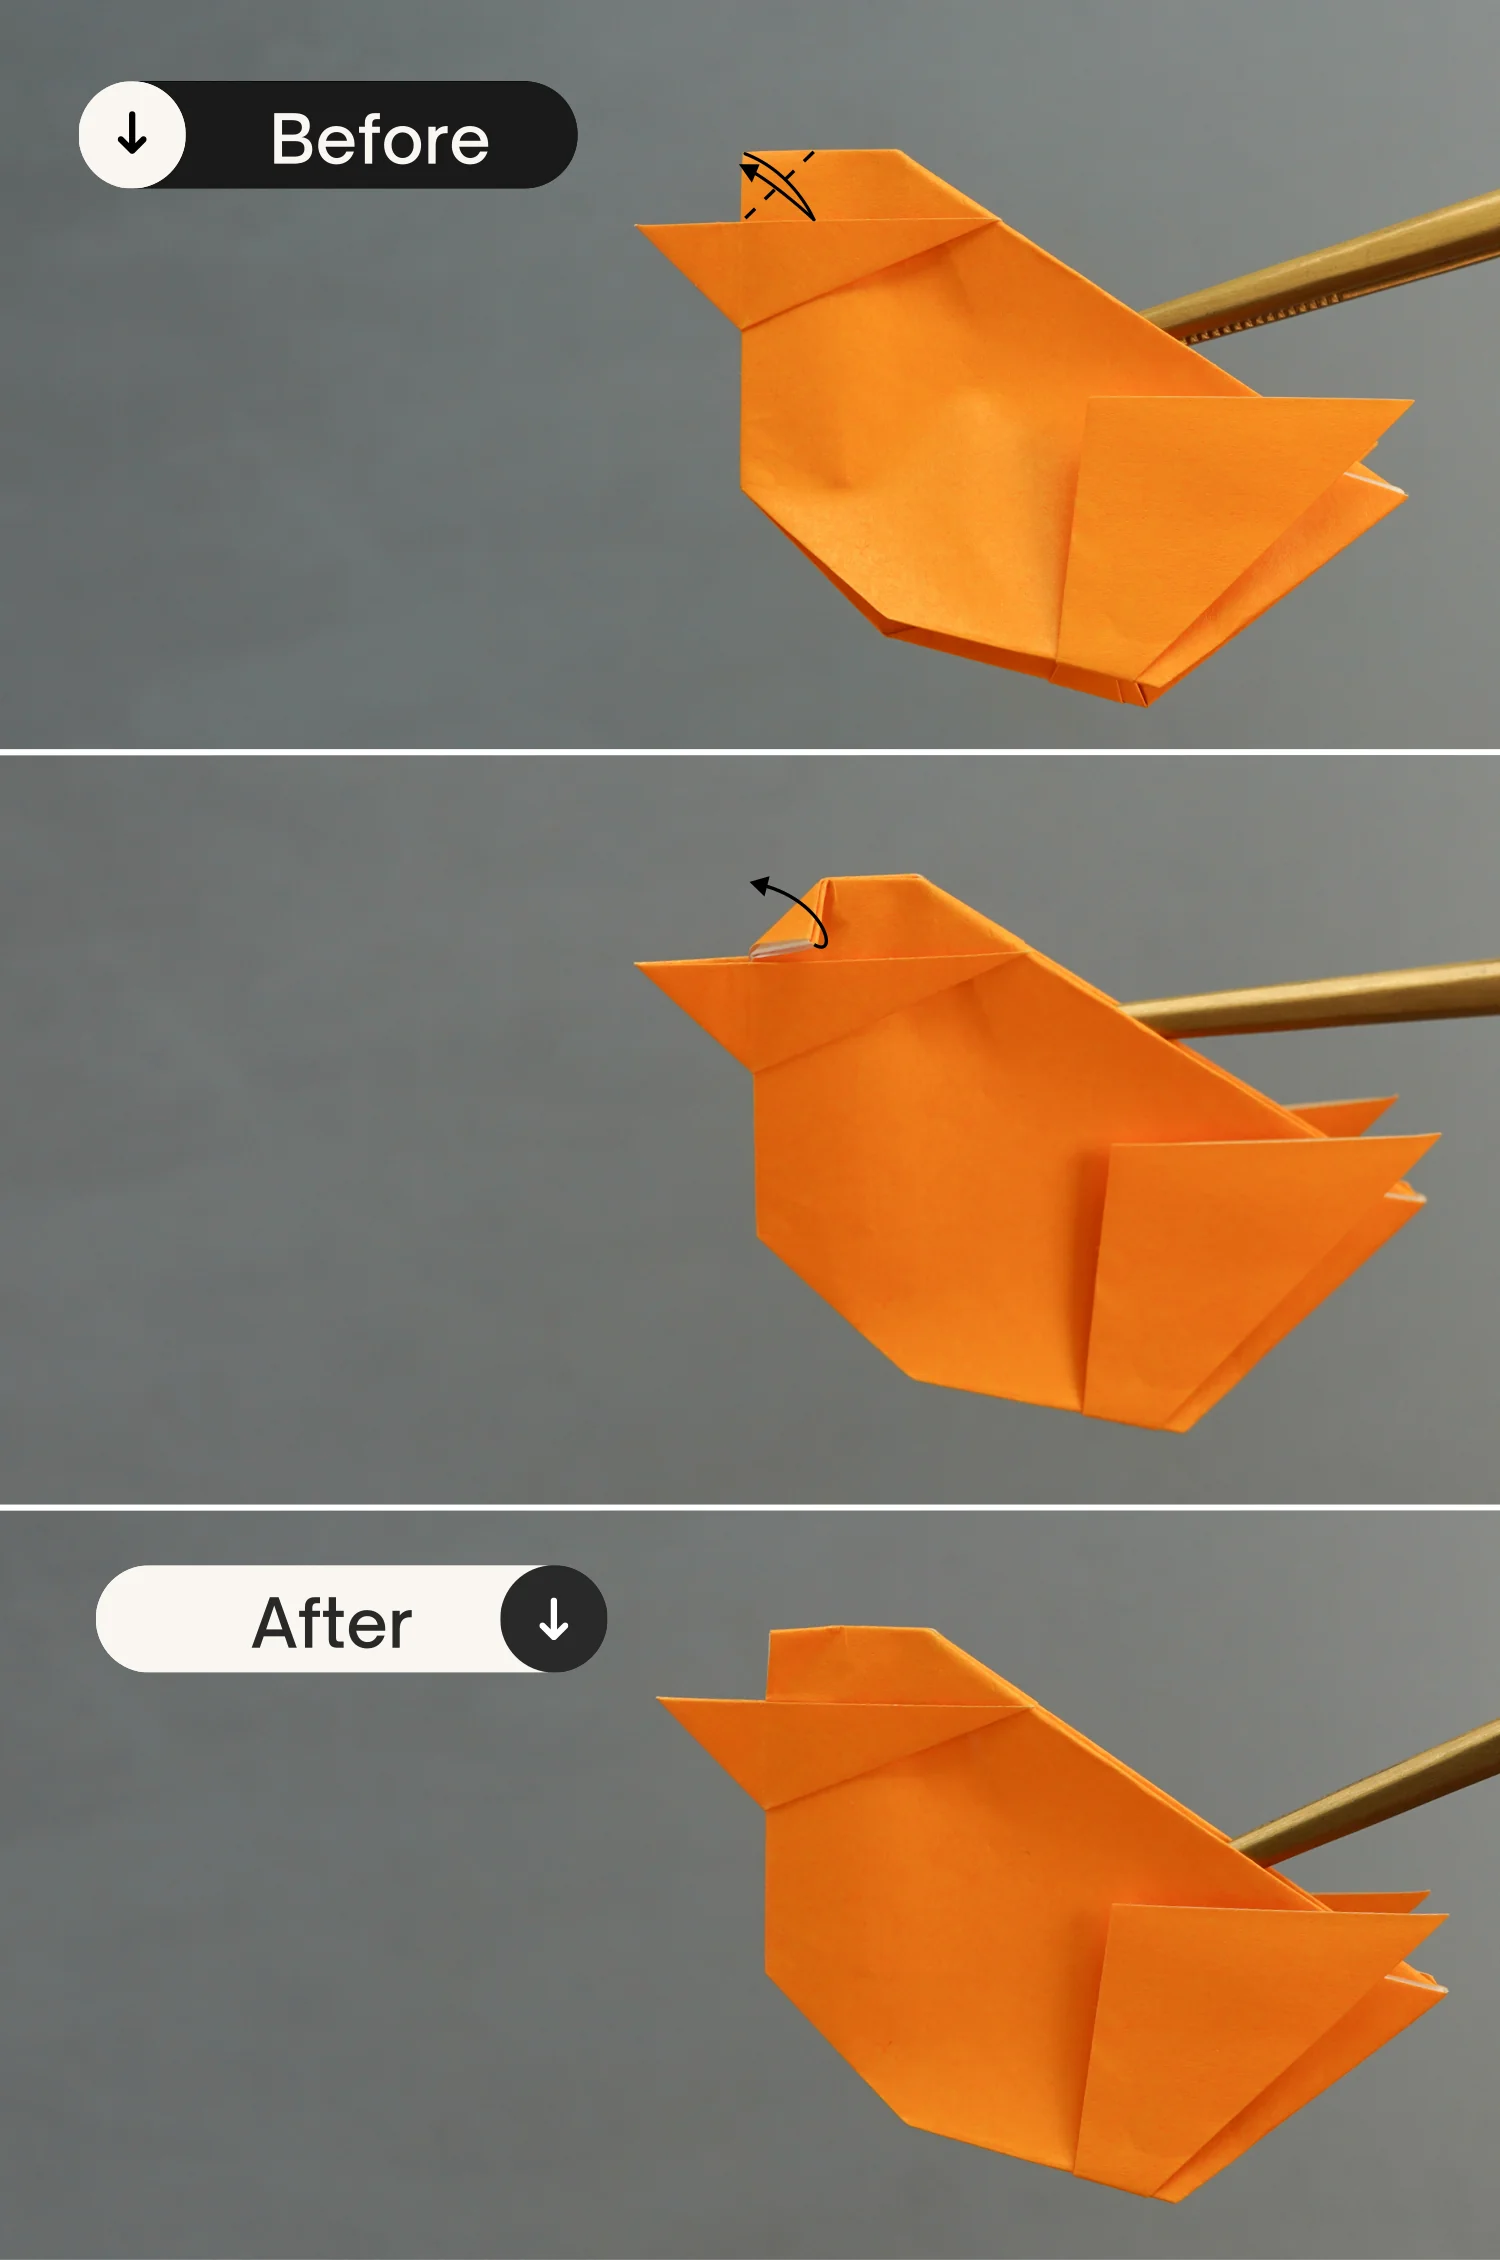
Step 16
View the paper from the top side, slightly open the paper from the right, and push down the corner you folded in the previous step toward the opening, making it tuck between the layers, and finally flatten the fold. Next, view it from the original side.
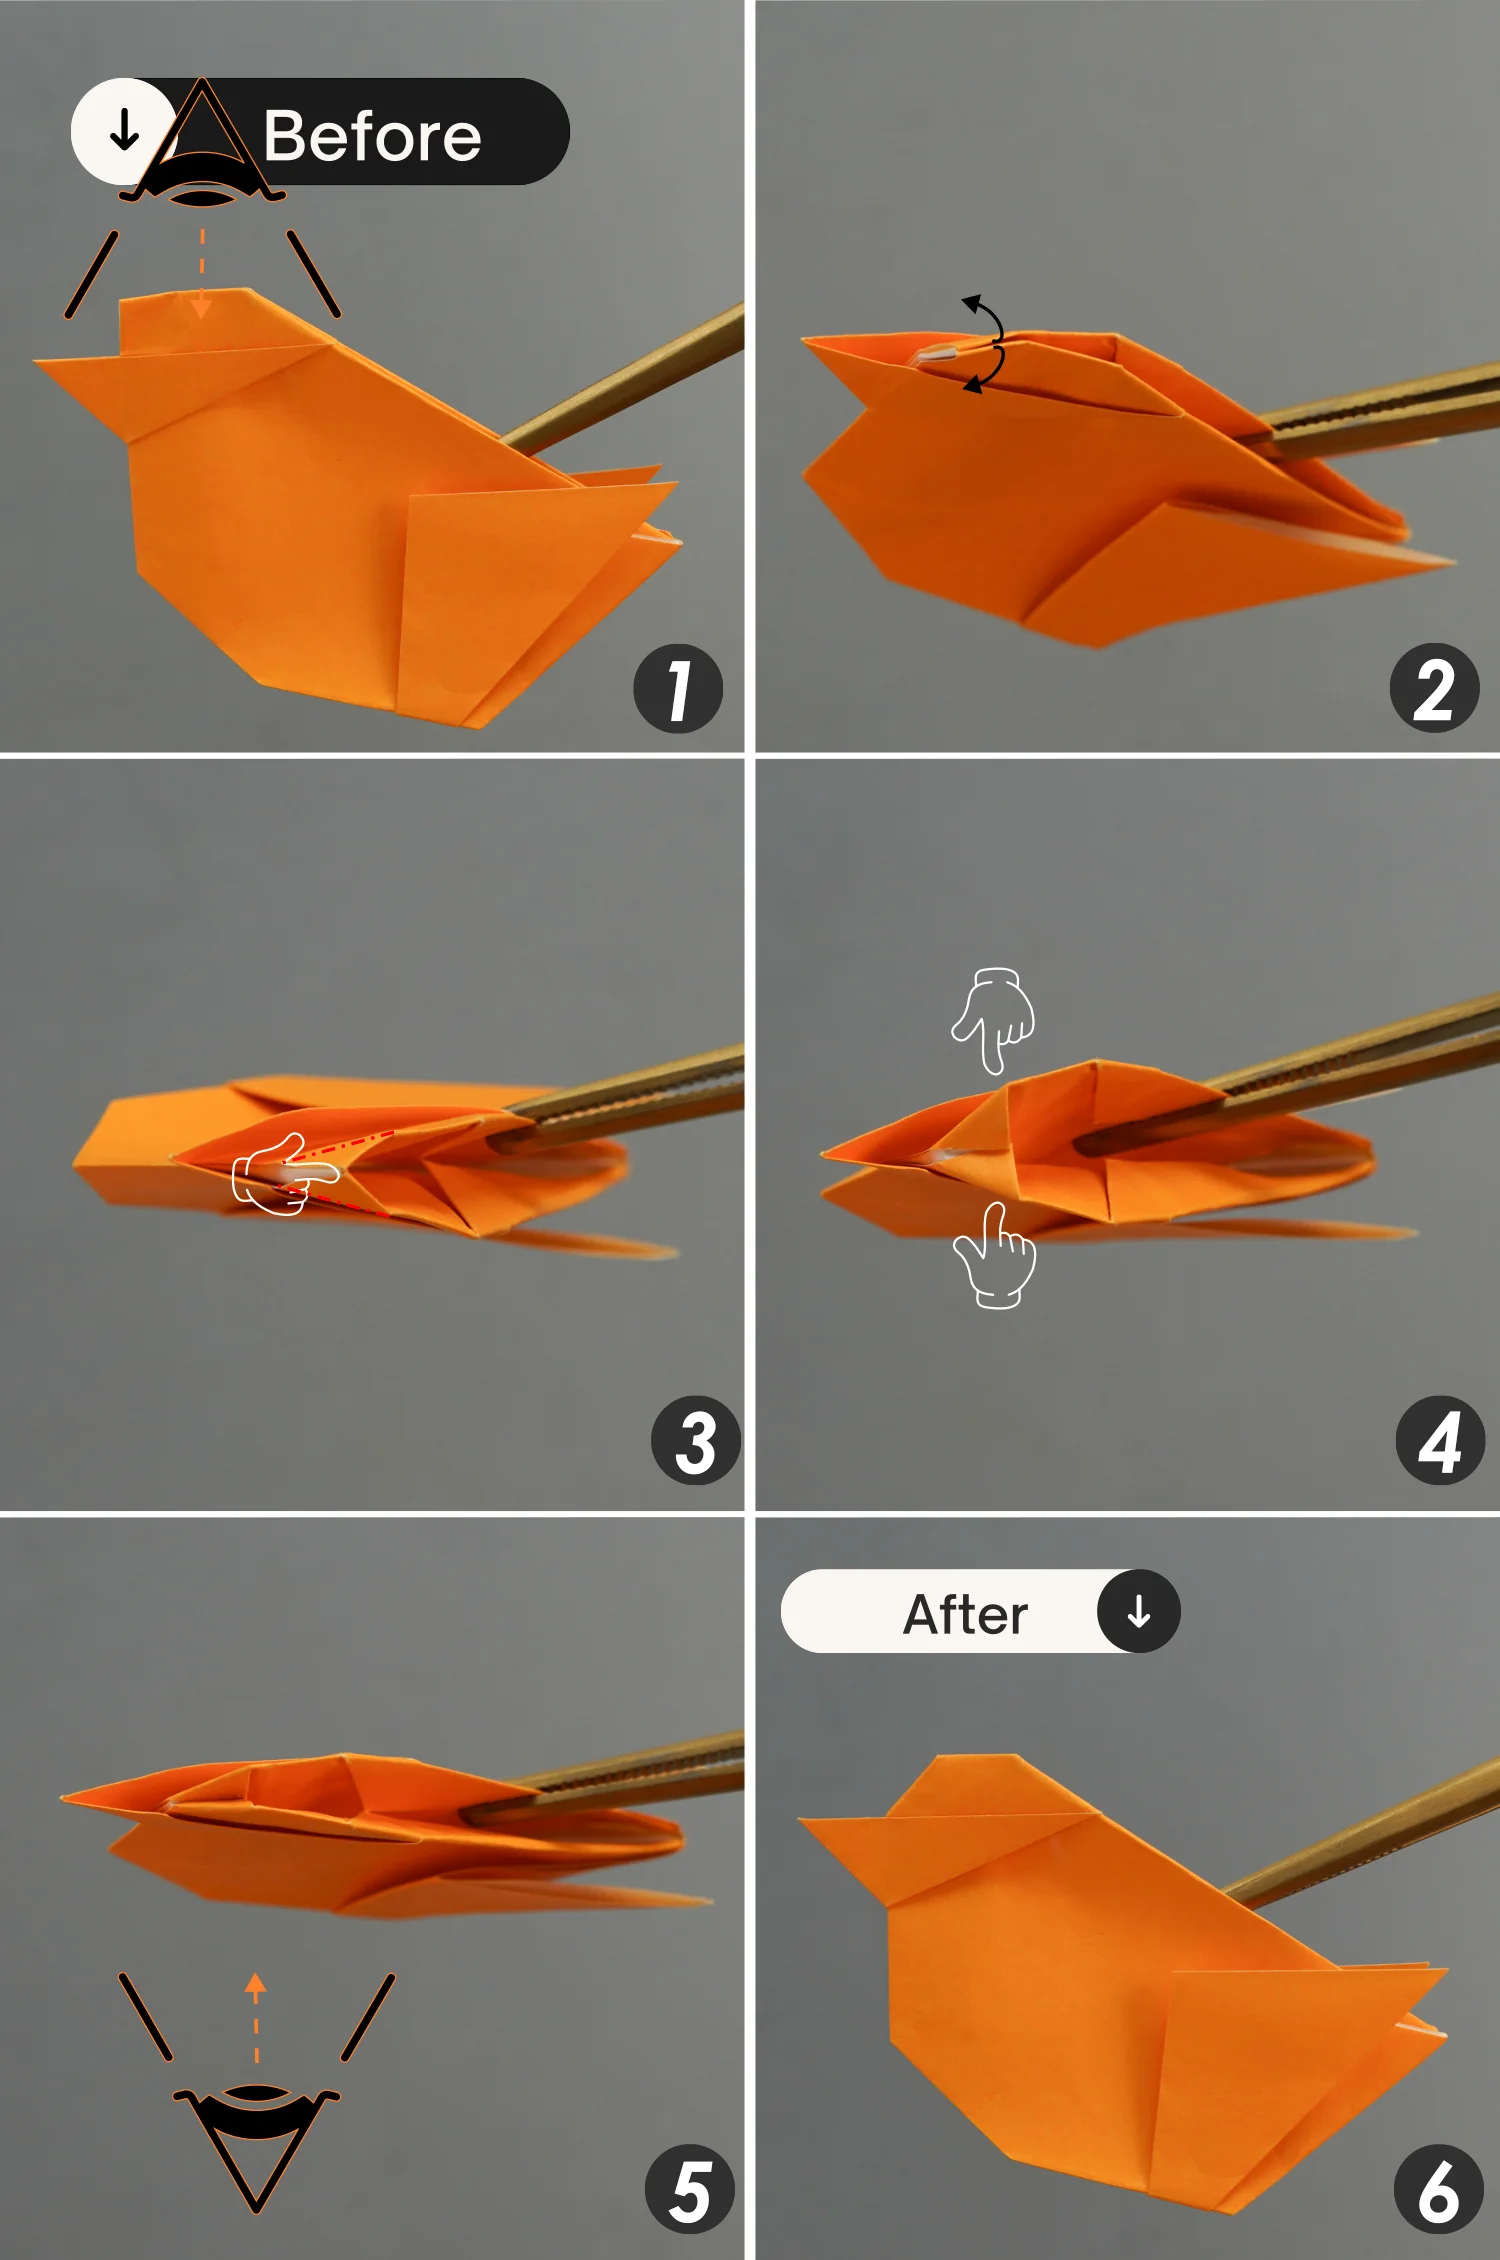
Step 17
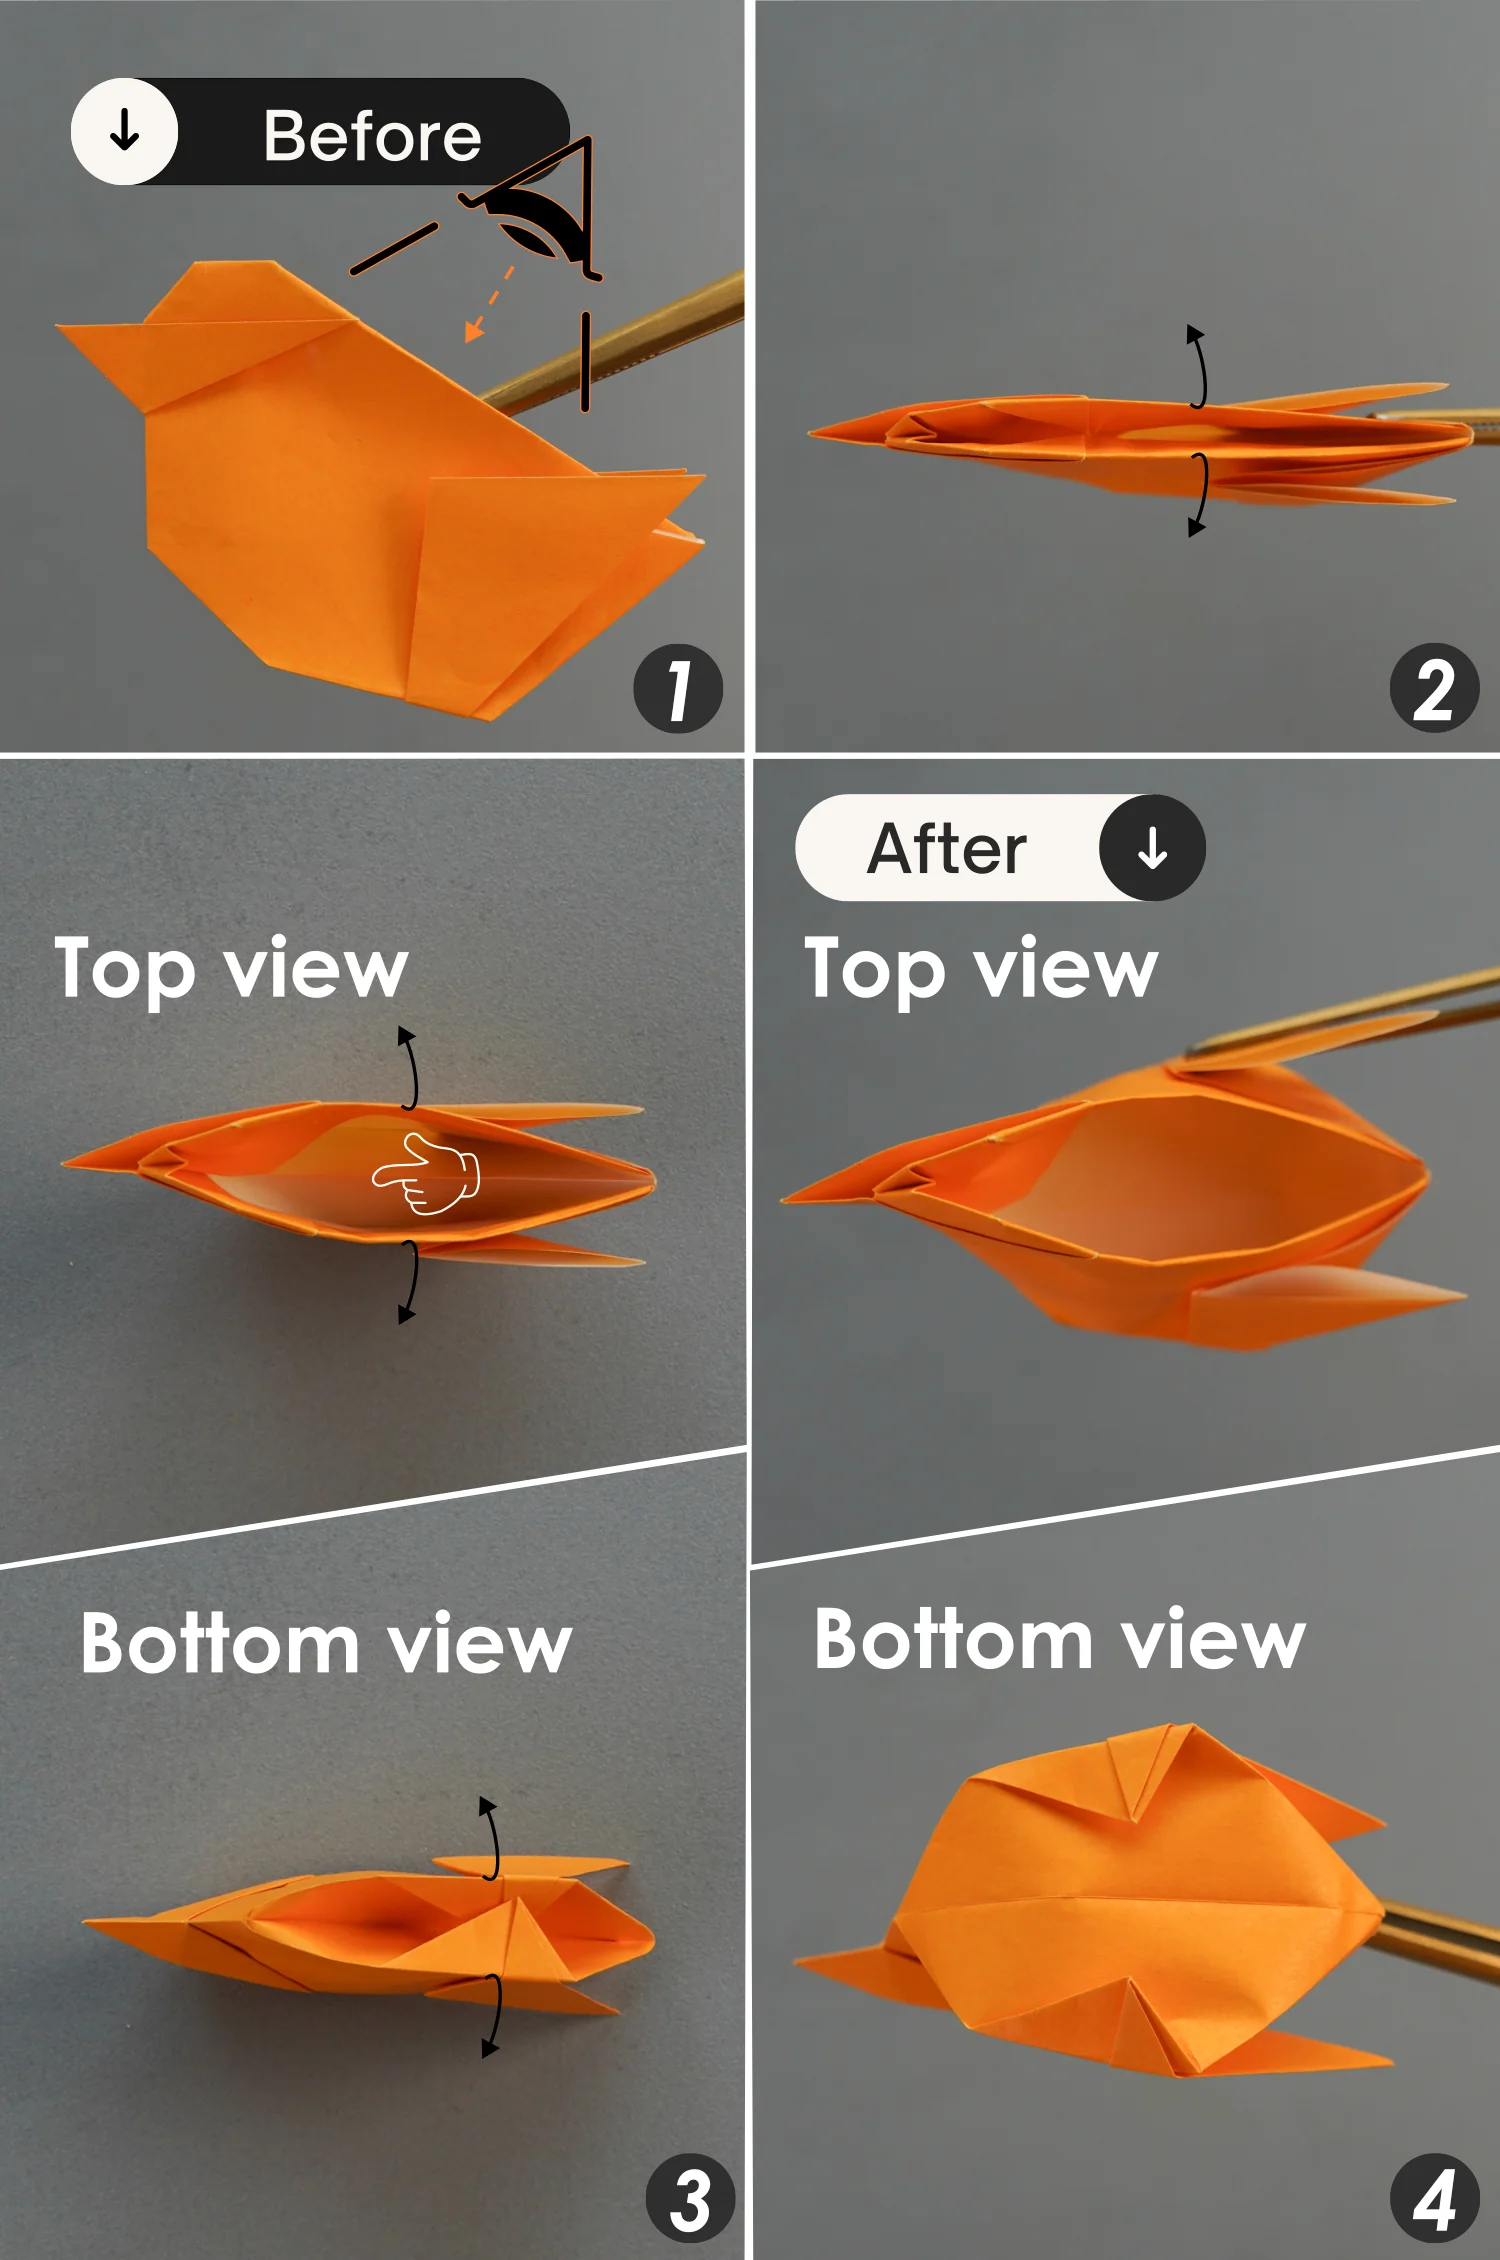
View the paper from the top right side, open the top pocket by pulling the edges to both sides, then press down the edge in the pocket, at the same time, pull the two edges to both sides at the bottom to open the bottom pocket.[picture 3]
Next, flatten the edge in the top pocket and expand the bottom side.[picture 4]
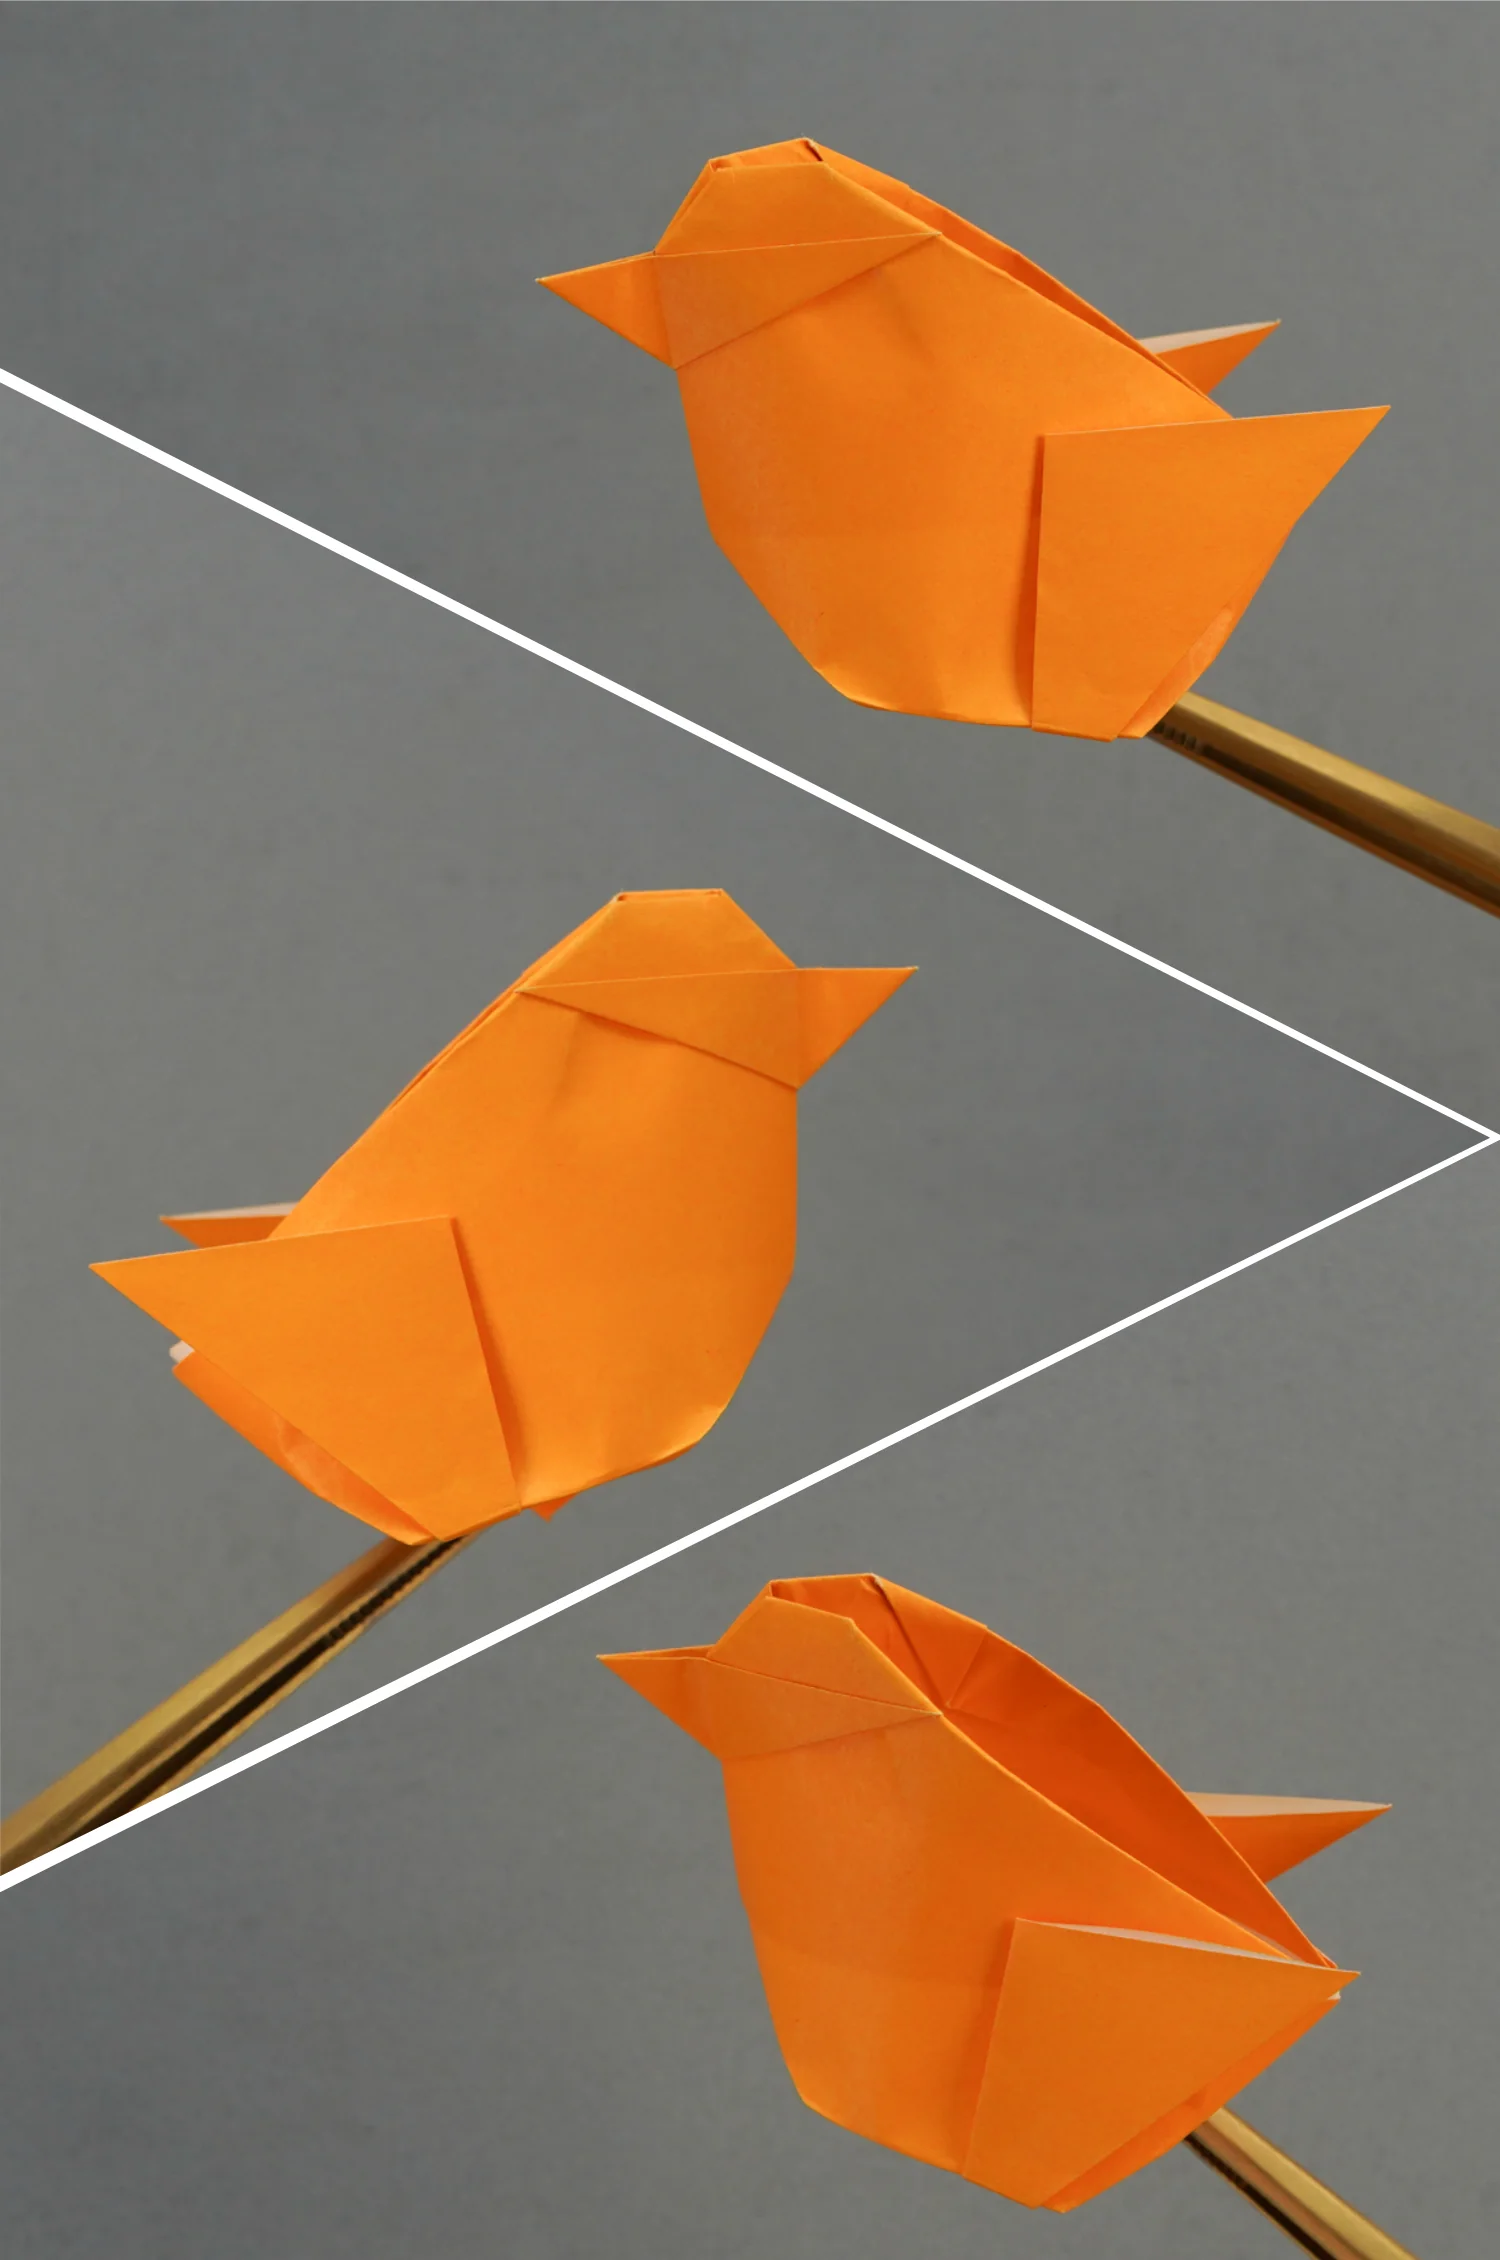
Step 18
Here’s this chick’s display from three directions.
What’s Next
This is the final shape of your super lovely origami chick, hope you enjoy the process, next, you can explore our other origami animal instructions and discover the charm of origami art.
Other Easy Origami Animal Ideas