How to Make an Origami Santa
A simple origami Santa with a lovely hat. This is a brilliant idea for Christmas crafts. You can use it as an attachment to Chairmans gift box or as a decoration of a Christmas tree.
This is a model based on kite base and thus can be a good idea if you are learning or teaching your child with basic folding bases.

If you are new to origami, start here from our beginner guide to know the basics and how to read the step-by-step instructions. And we also have other simple Christmas ideas like the Christmas bell and Christmas tree.
- Folding time: 8 minutes
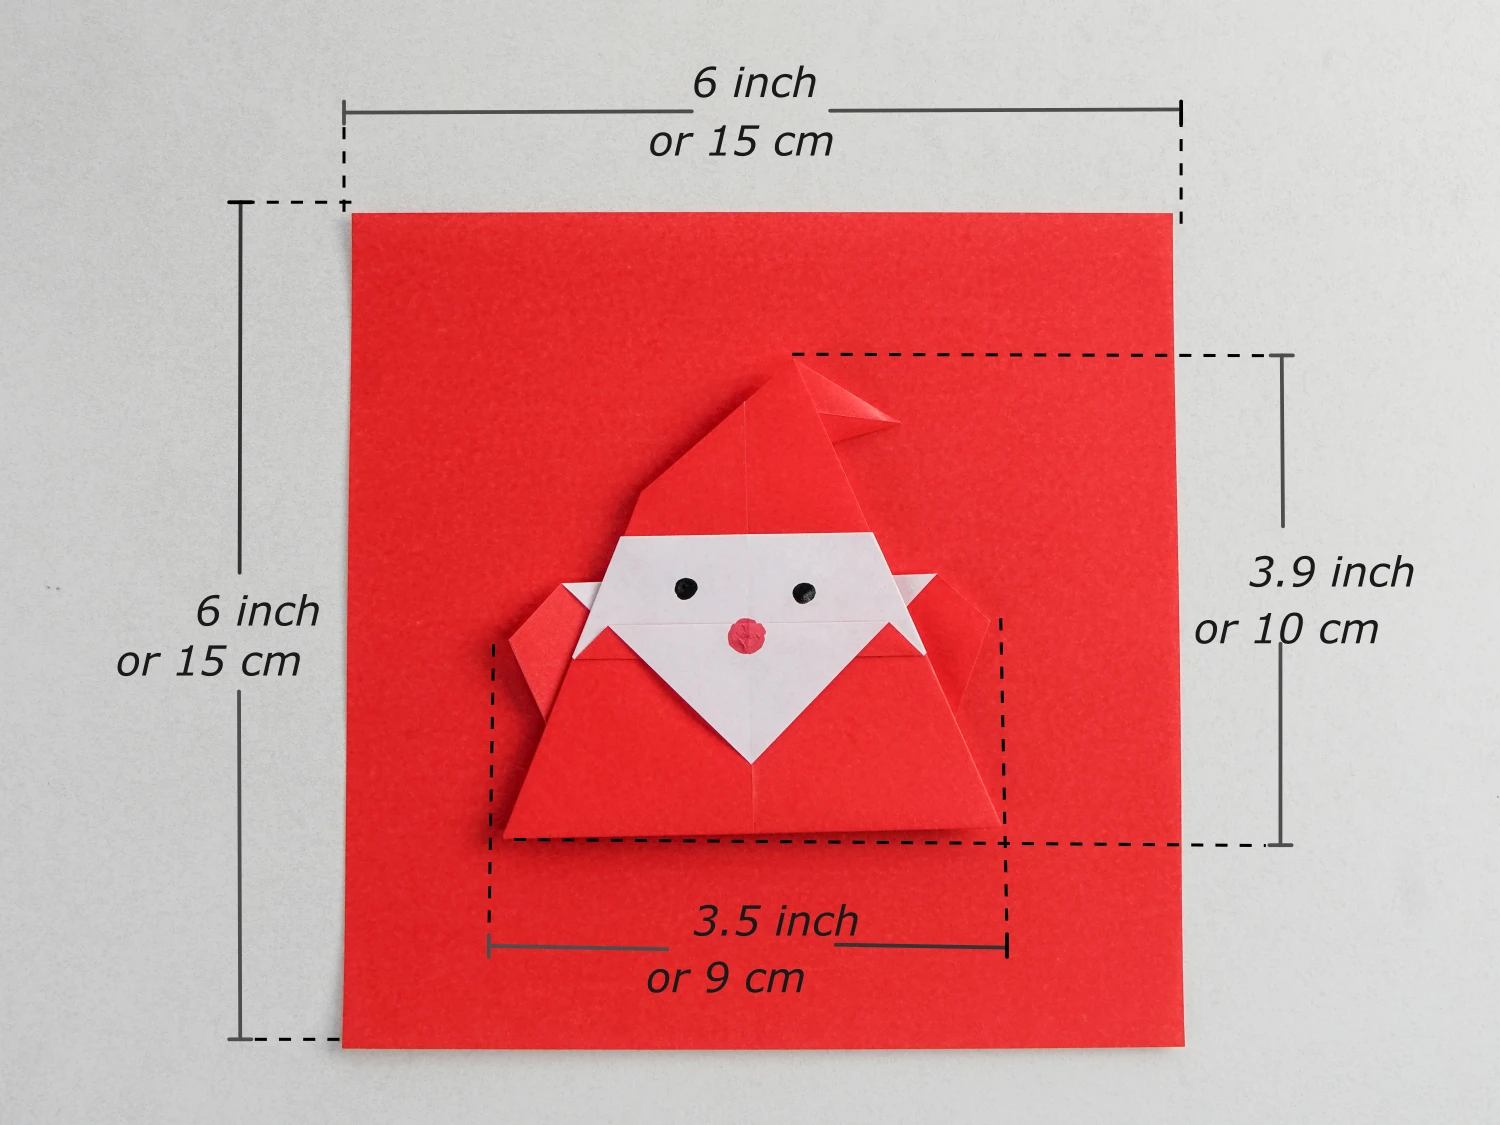
- Paper: 15×15 cm
- Difficulty: Easy, Beginner friendly
Material
Get a 15*15 cm origami paper, one yellow and one white side, and you will get a 10*9 cm Santa. Other sizes of square paper will be also available.
Easy Origami Santa Video
Step by Step Instructions
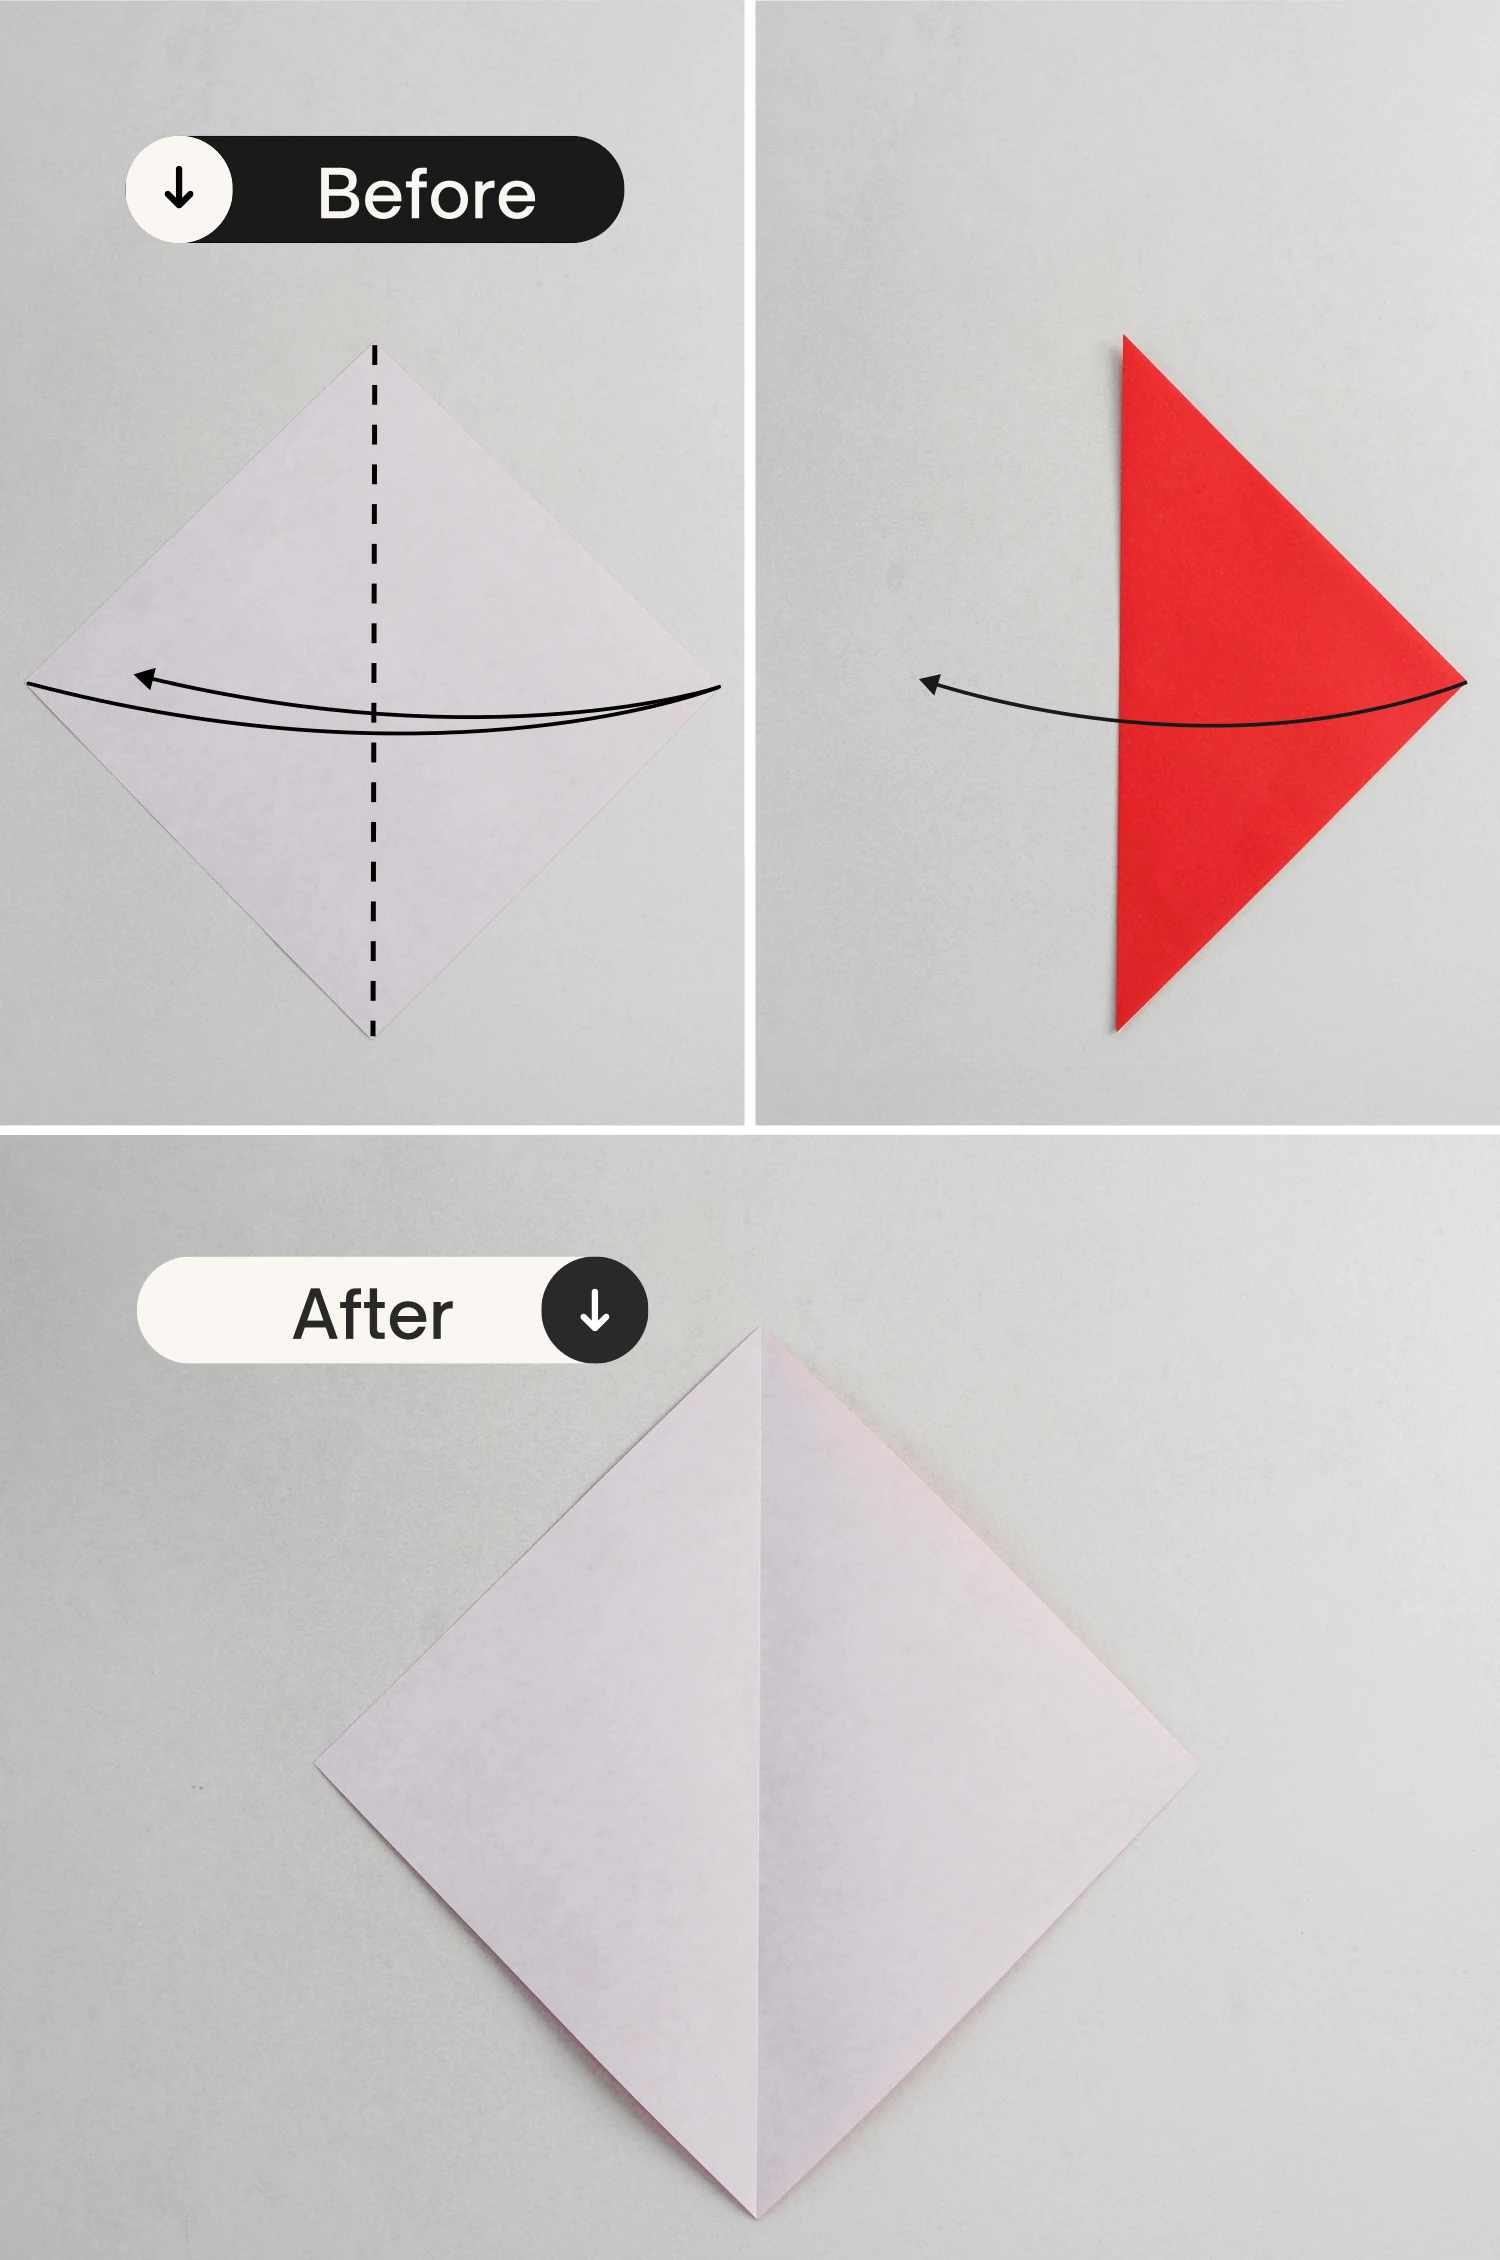
Step 1
Start with the white side of the paper facing up, fold it in half vertically, crease it well then unfold.
Step 2
Fold the bottom left and right edges to the center to meet the middle crease.

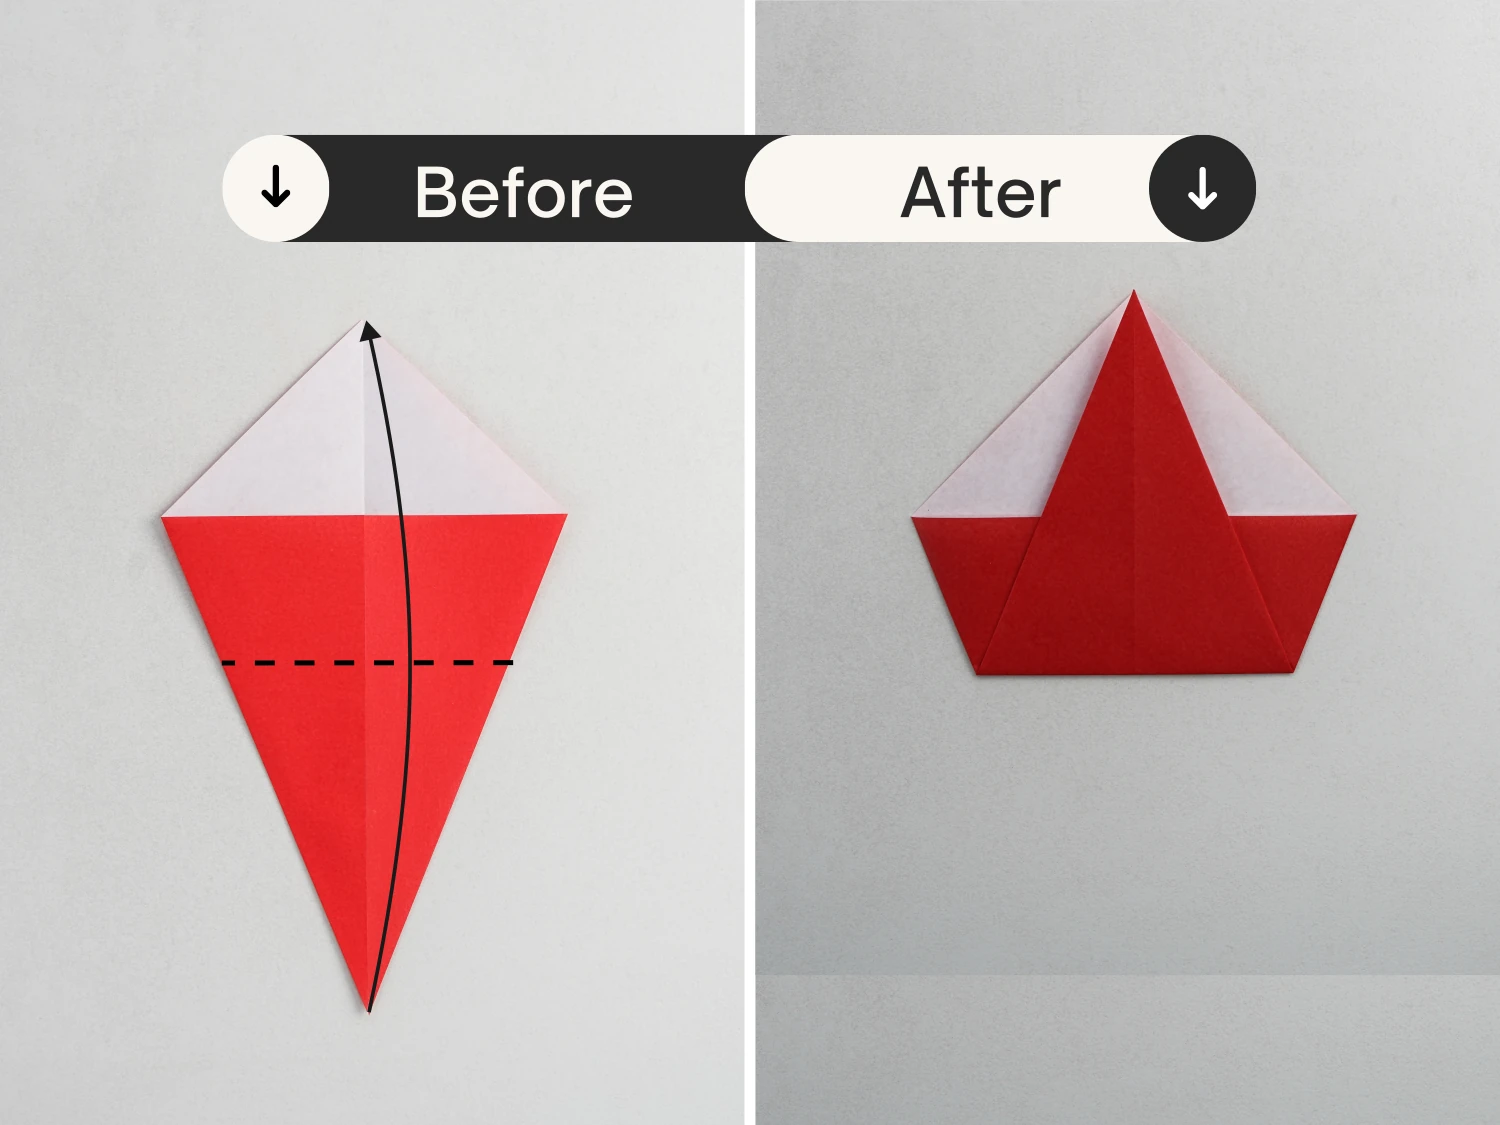
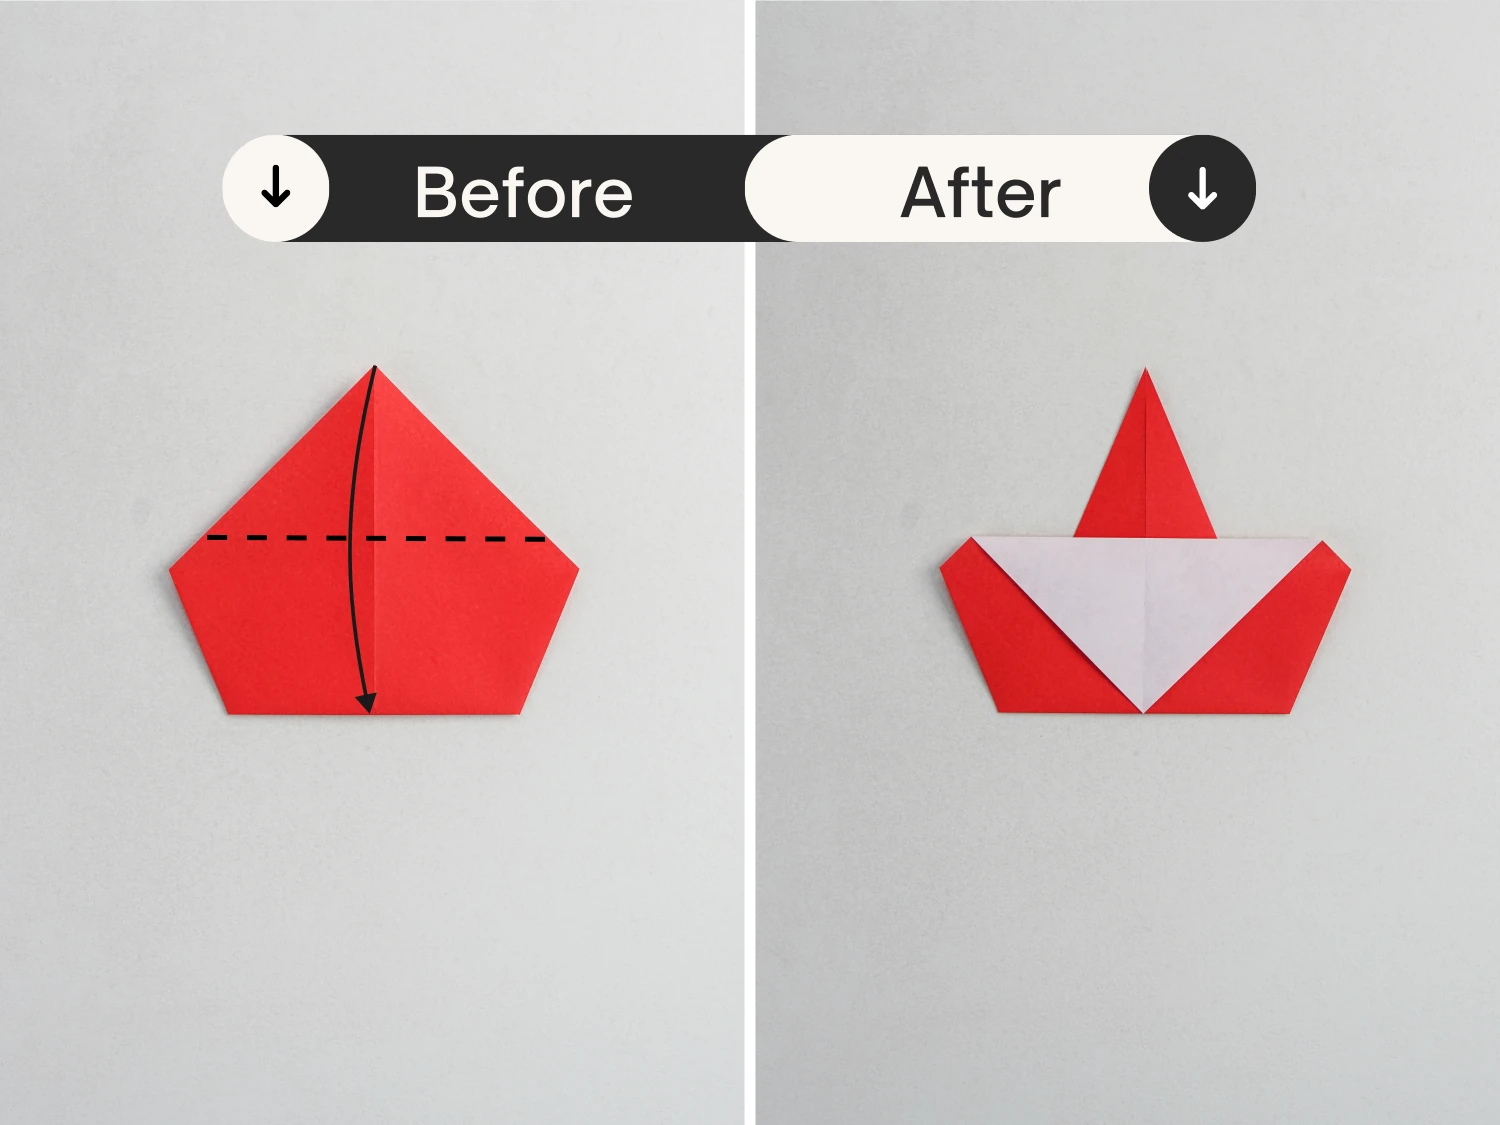
Step 3
Fold the bottom corner to the top diagonally.
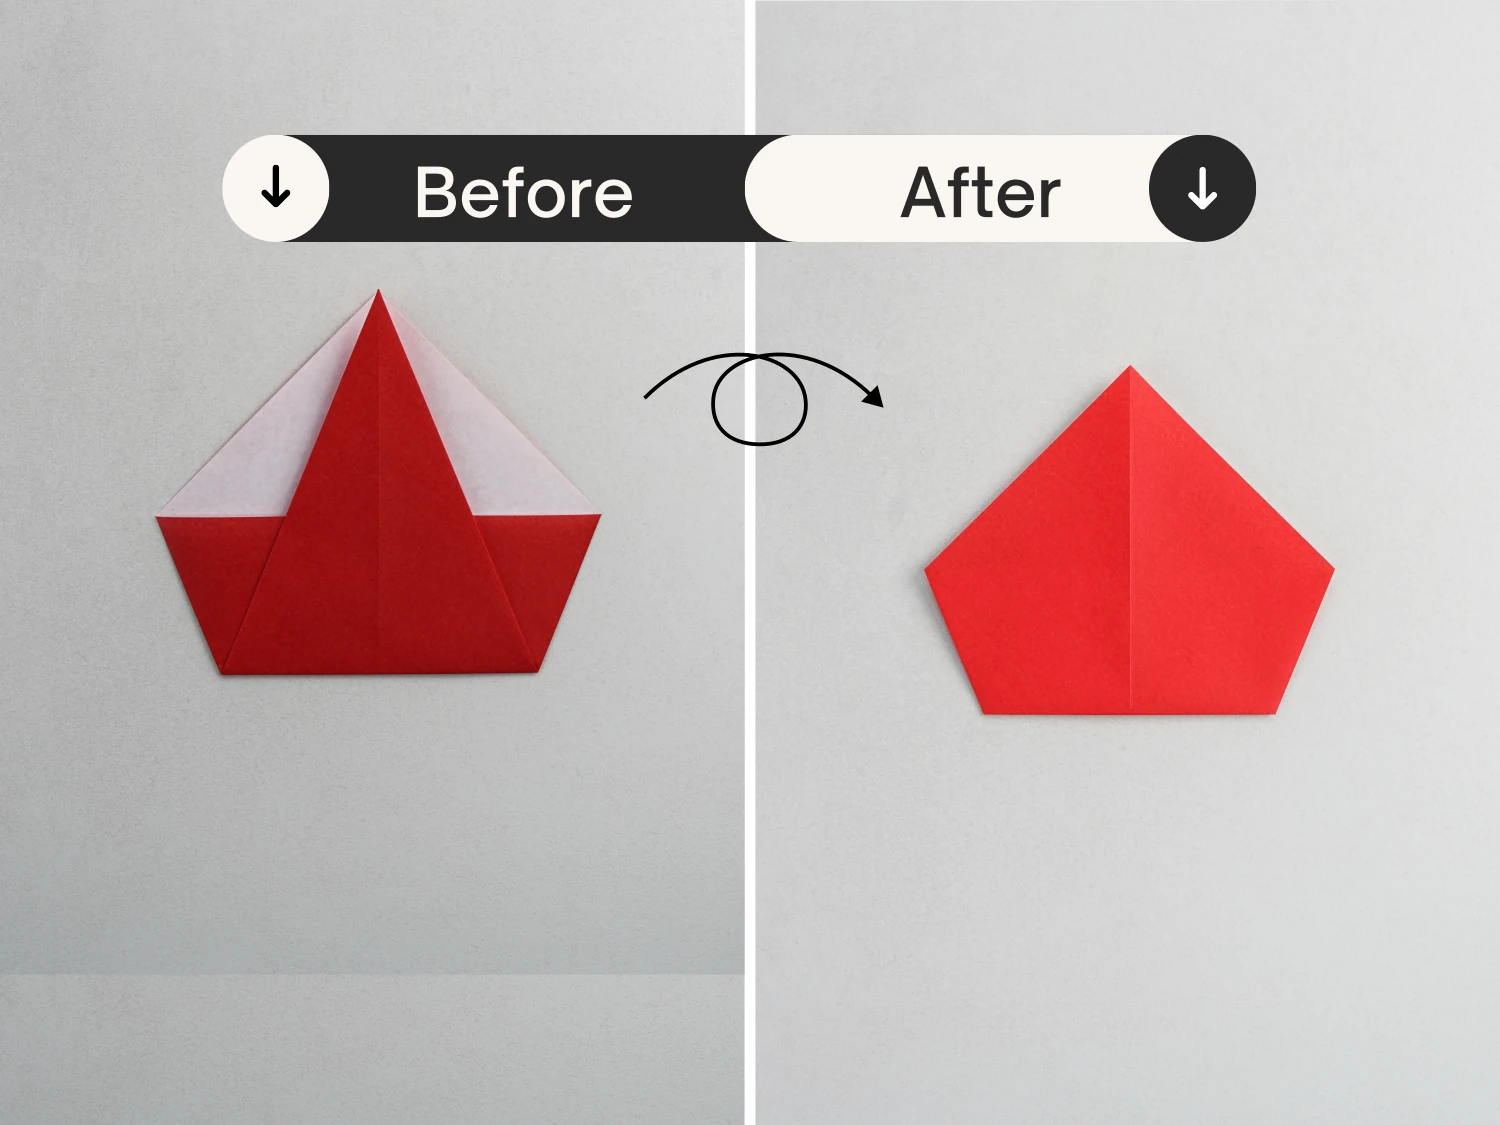
Step 4
Flip it over.
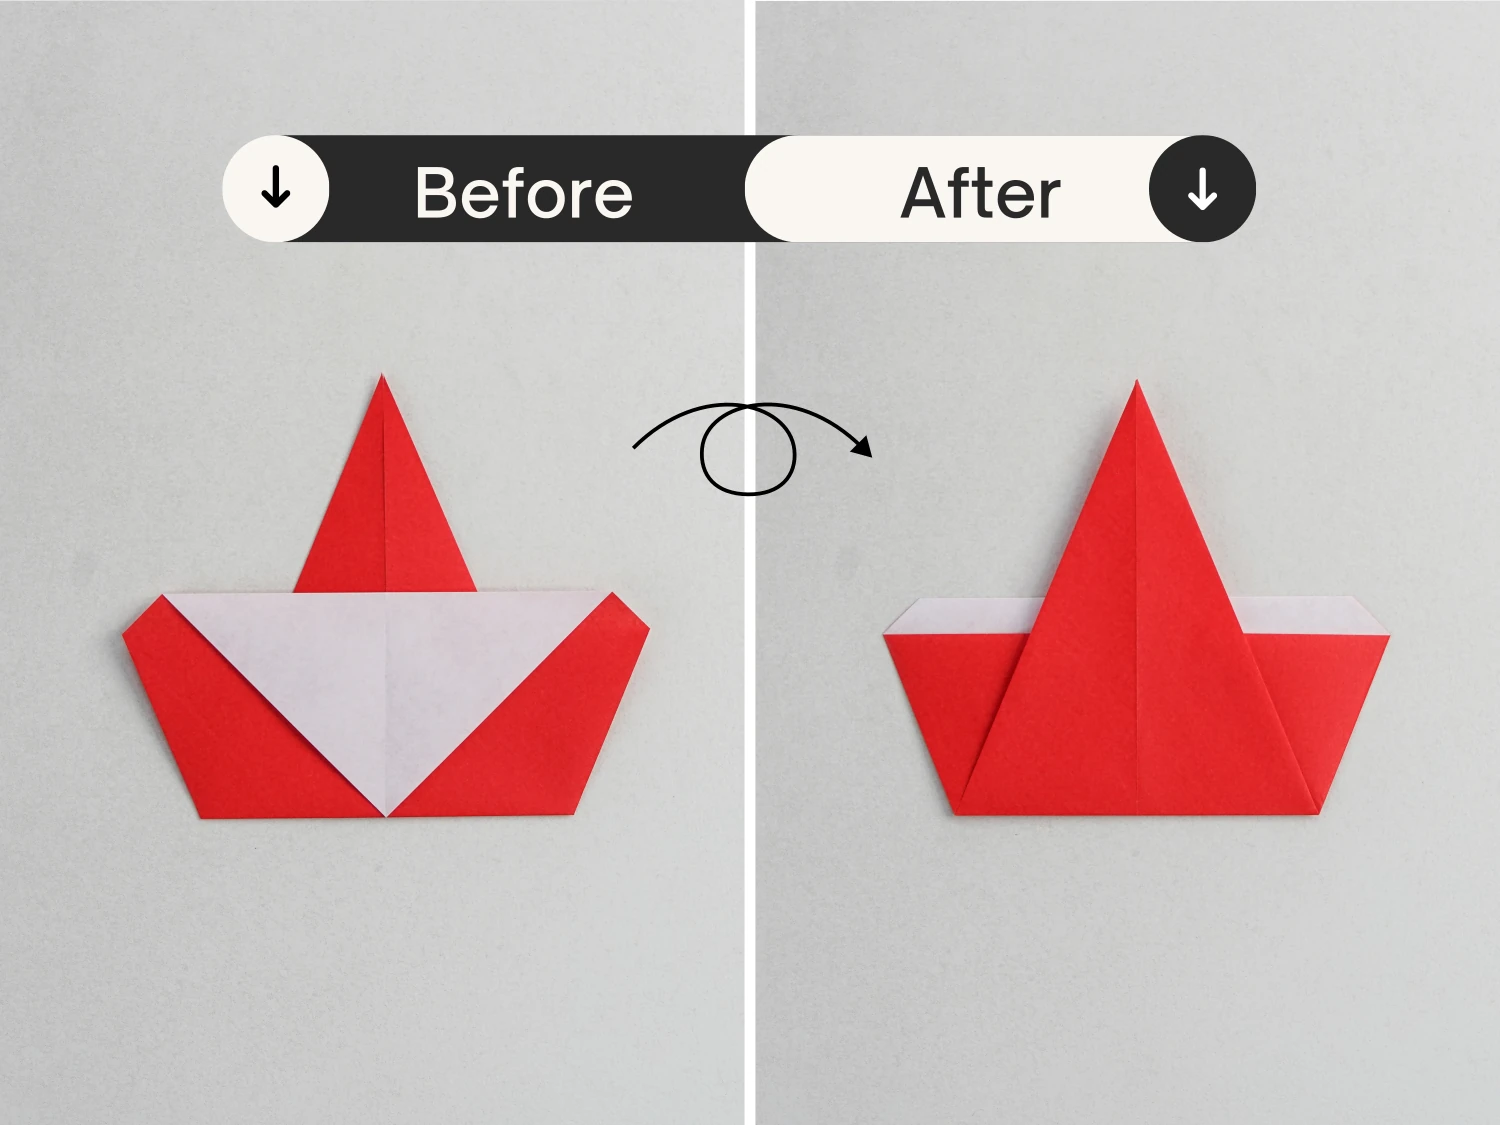
Step 5
Fold the top corner down diagonally.
Step 6
Flip it over again.
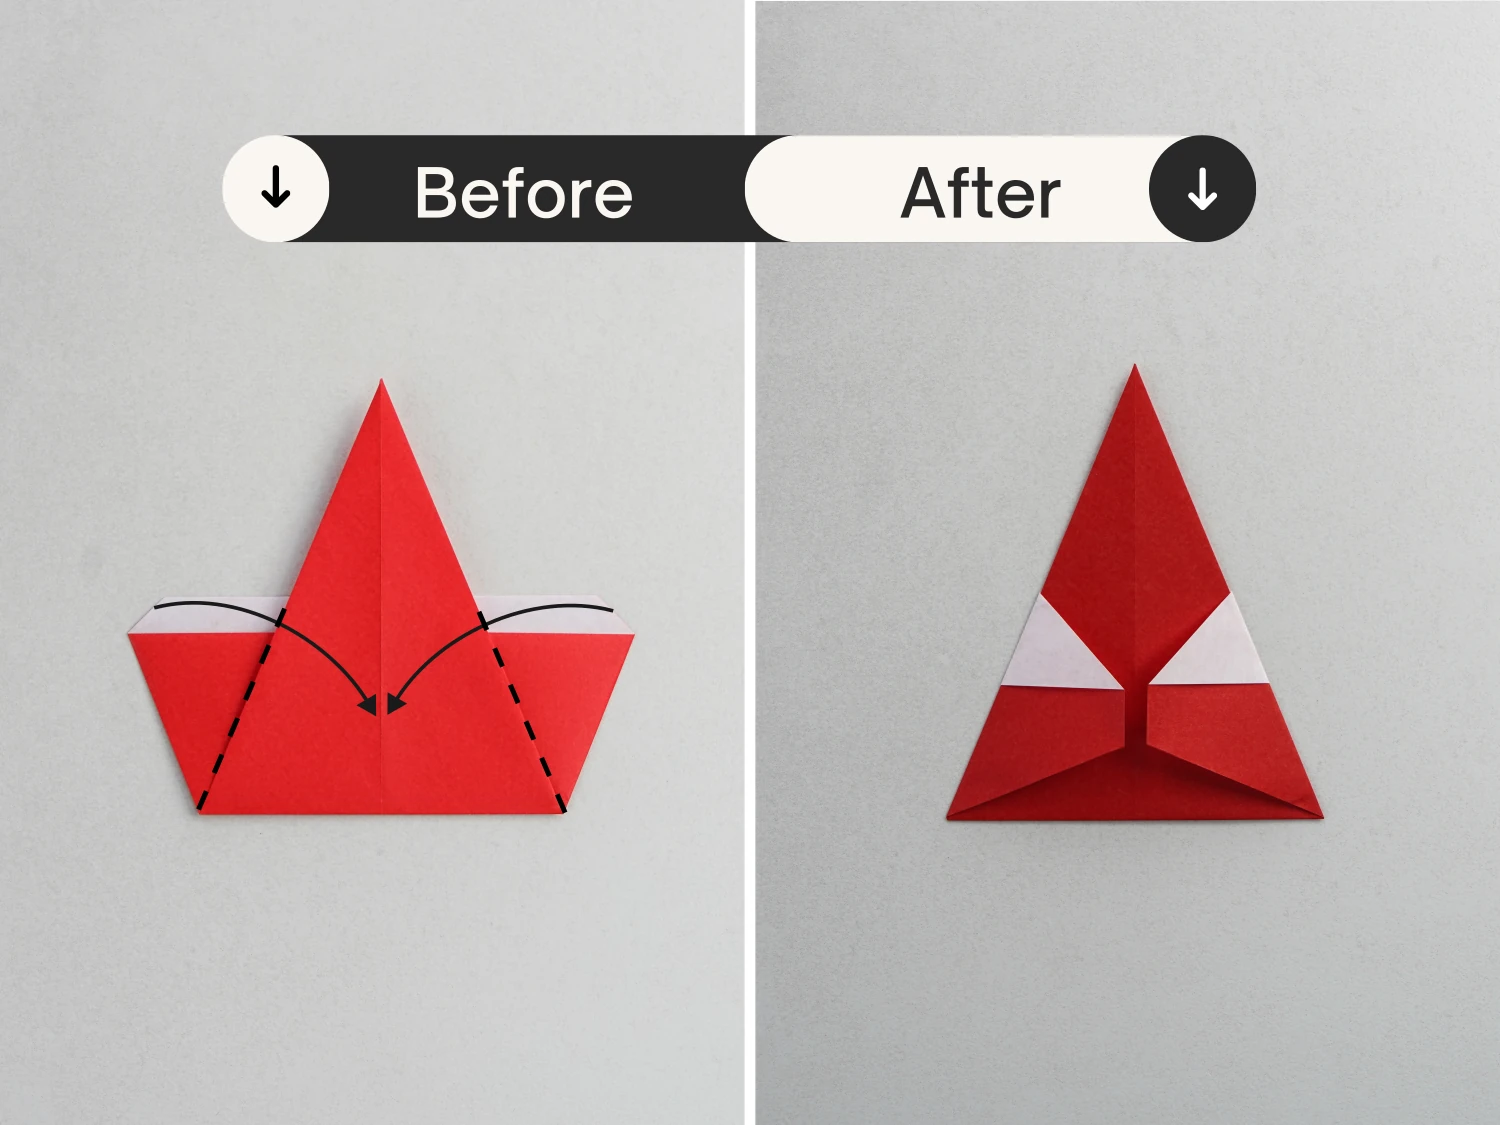
Step 7
Fold the left and right parts toward the center along the two hypotenuses of the triangle.
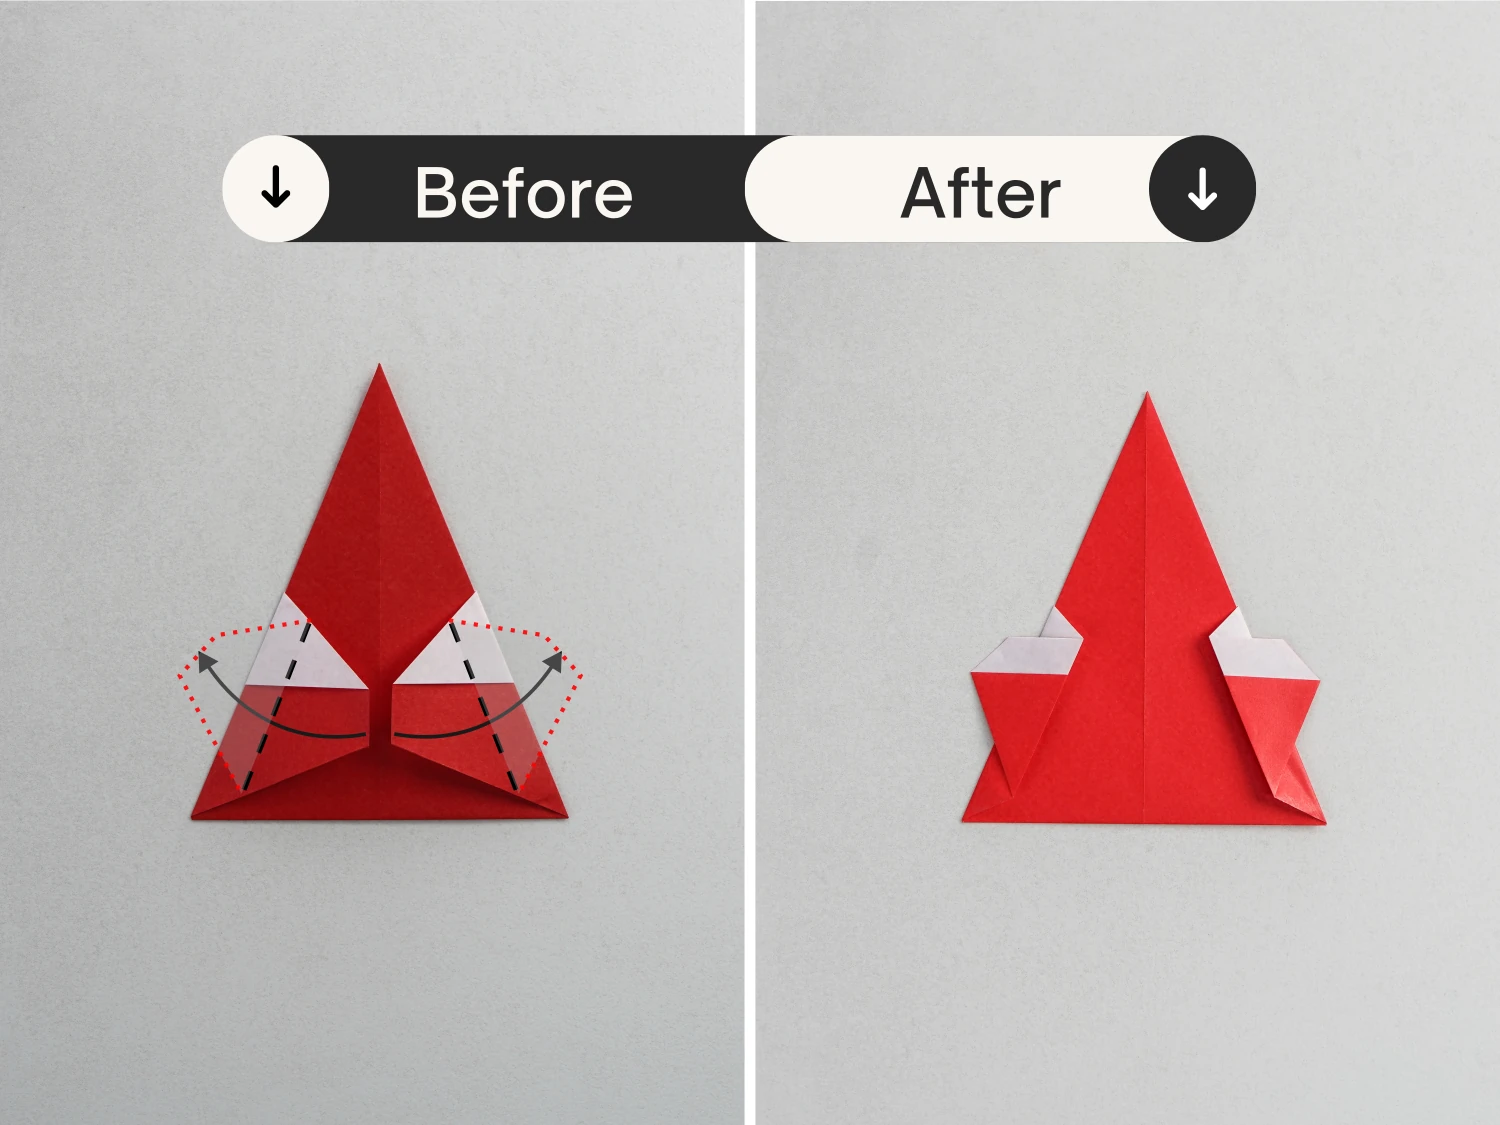
Step 8
Then fold them back along the dotted line.
Step 9
Flip it over.
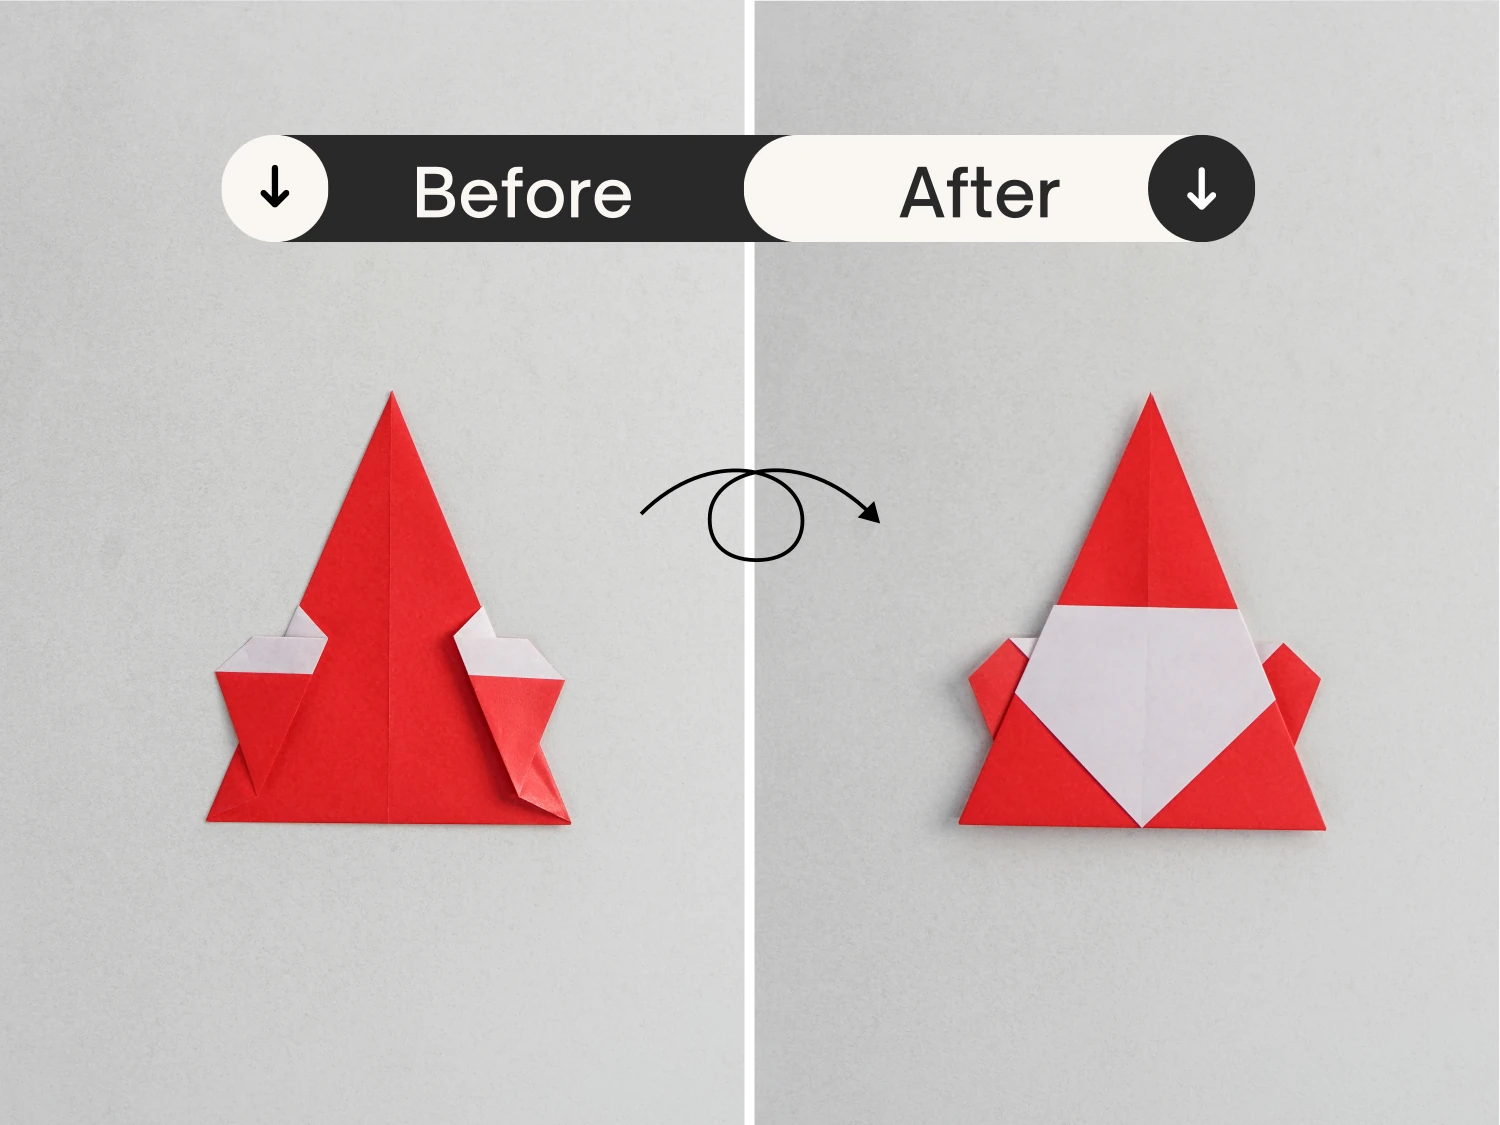
Step 10
Fold the bottom corner of the white layer up along the dotted line.
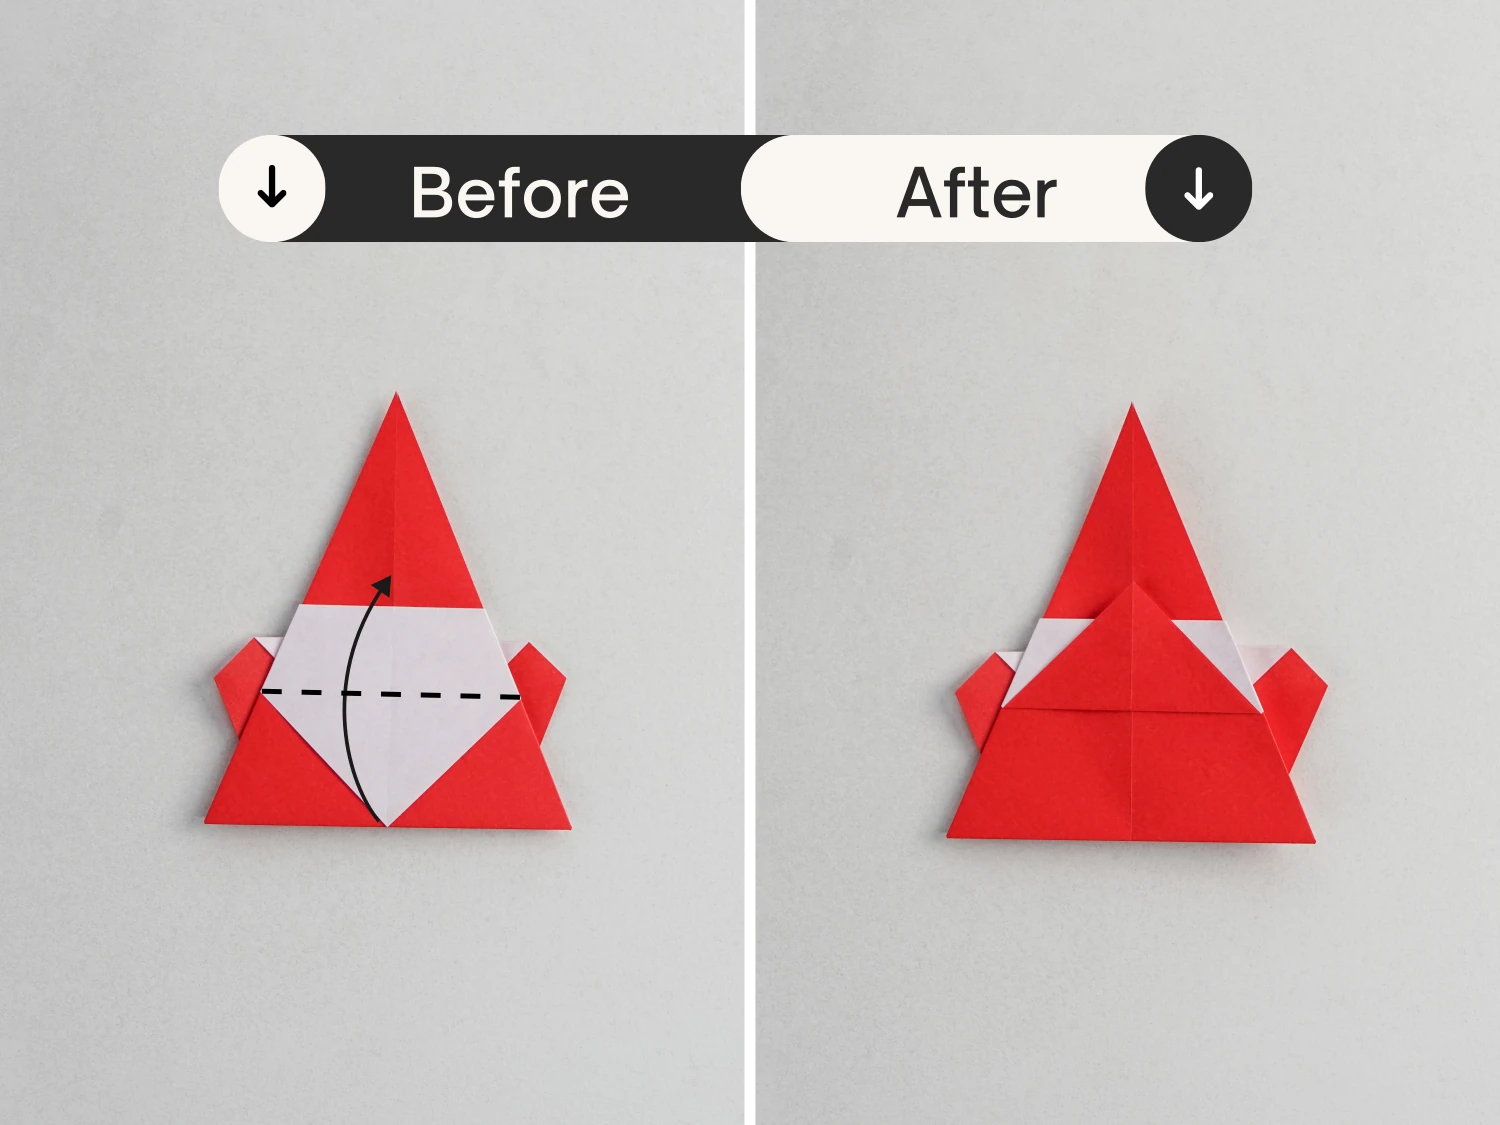
Step 11
And fold it back toward the bottom along the dotted line.
Step 12
Then flip it over again.
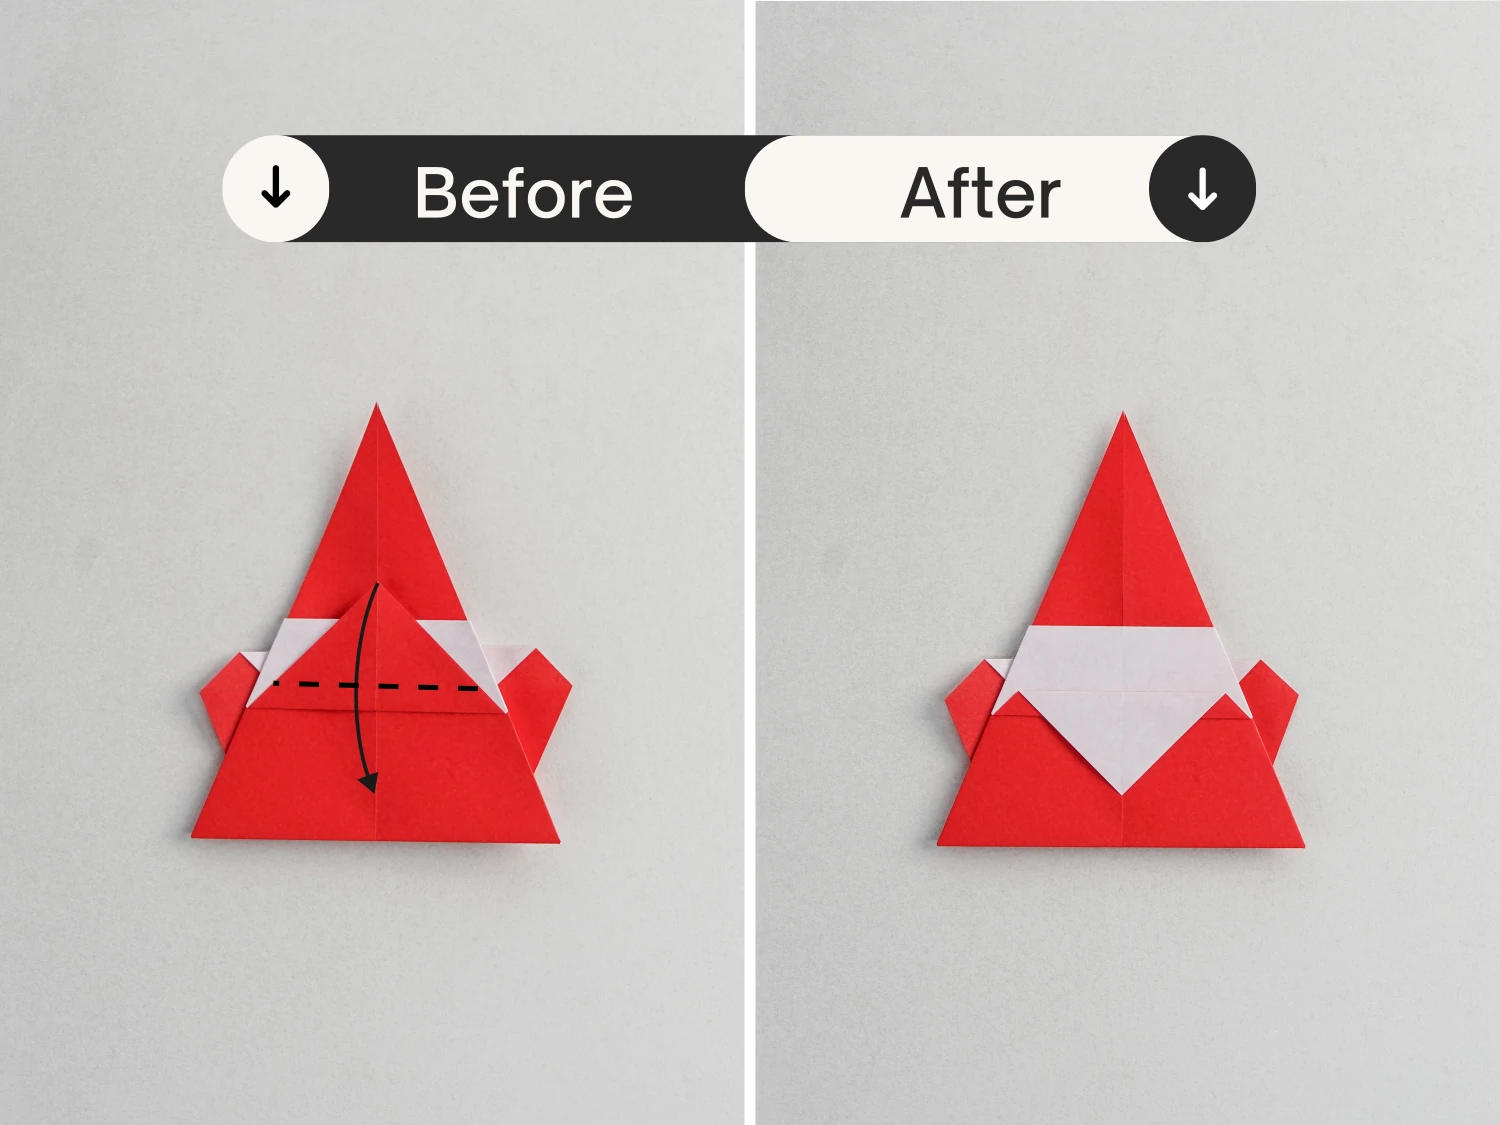
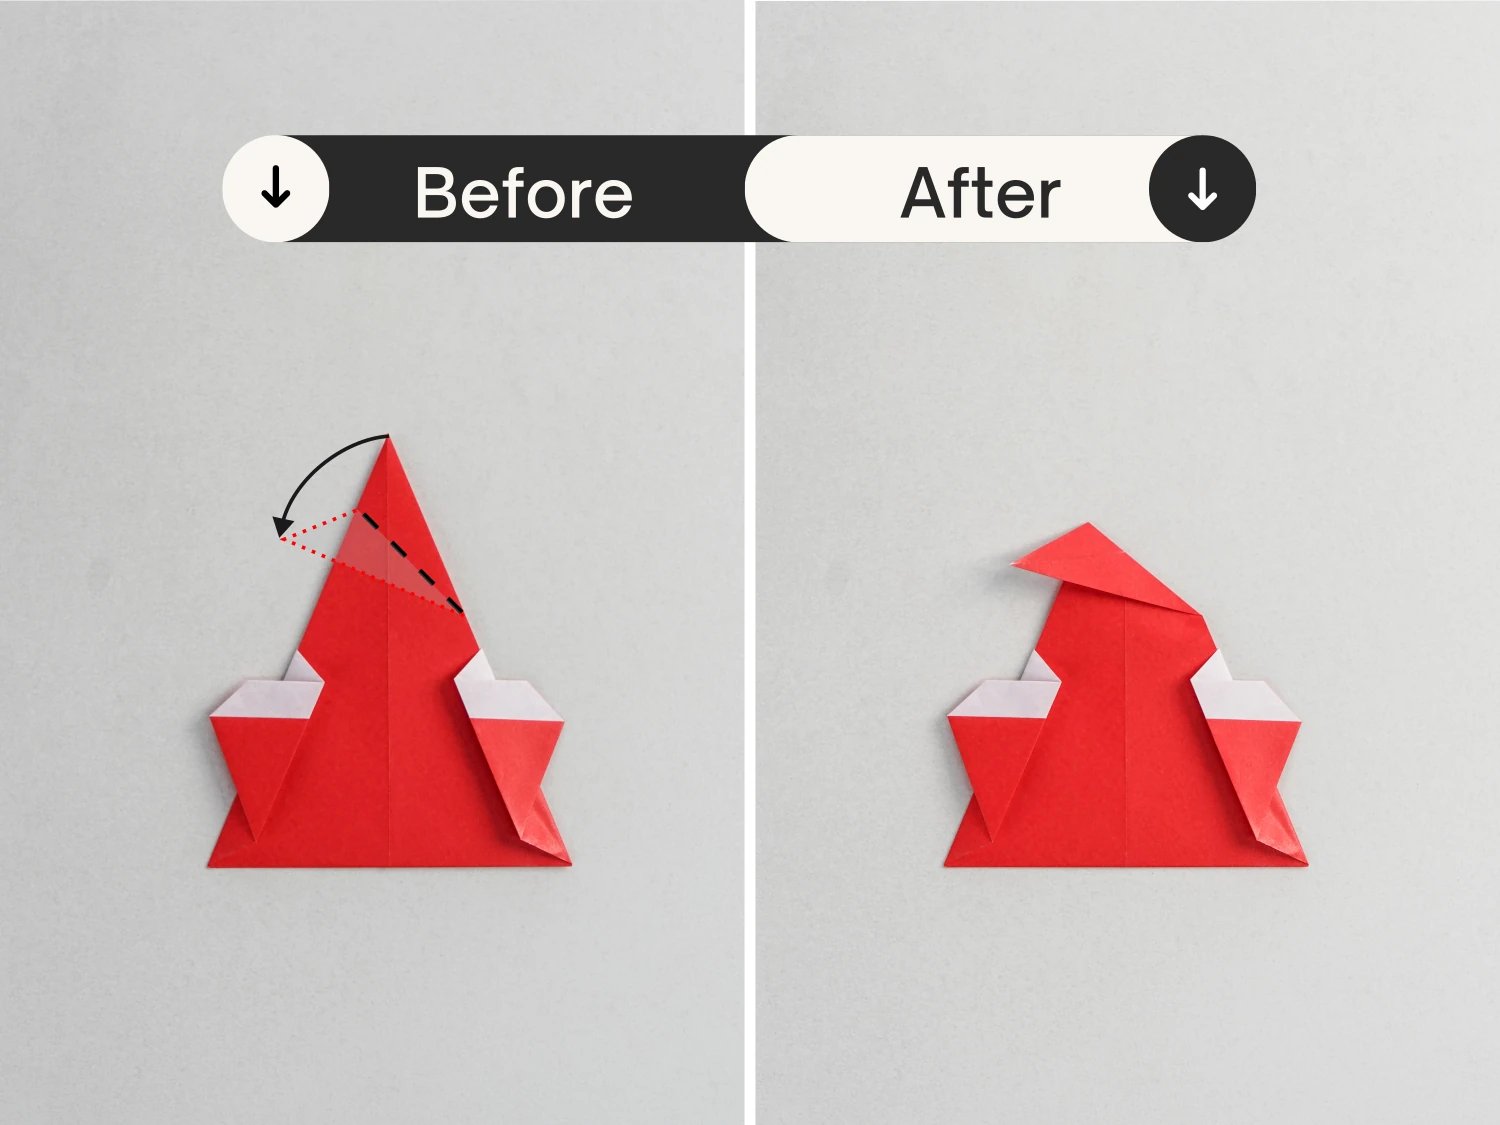
Step 13
Fold the top corner down along the dotted line as shown, to form Santa’s hat.
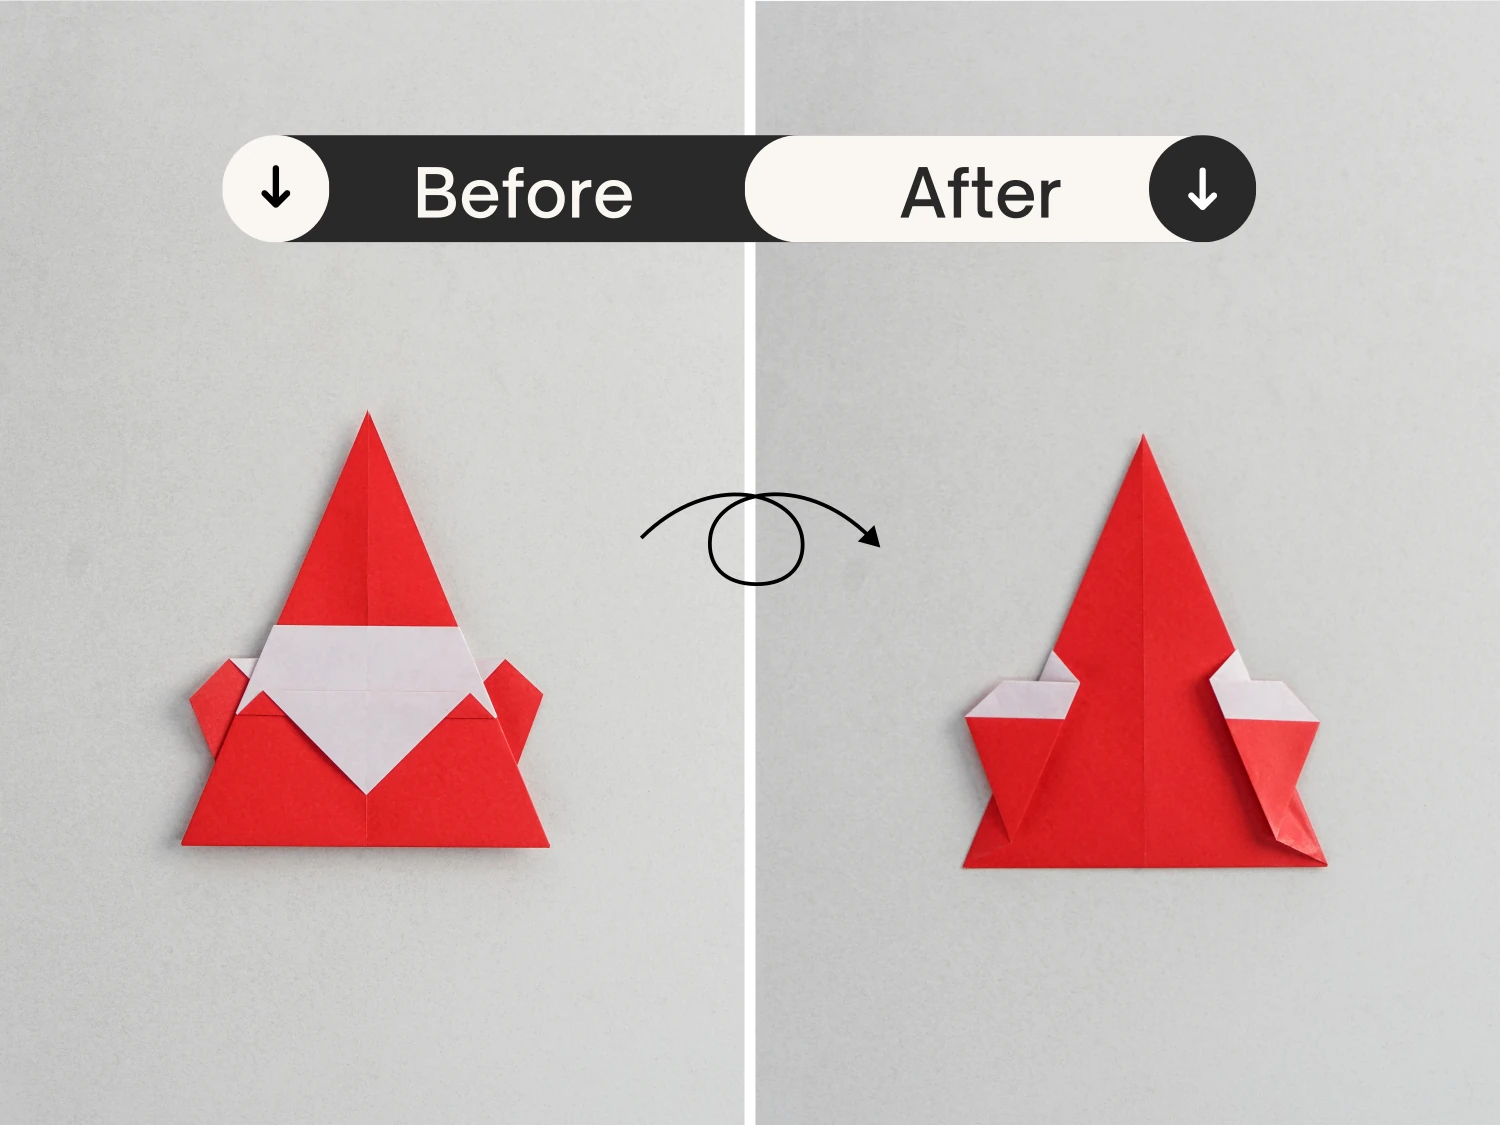
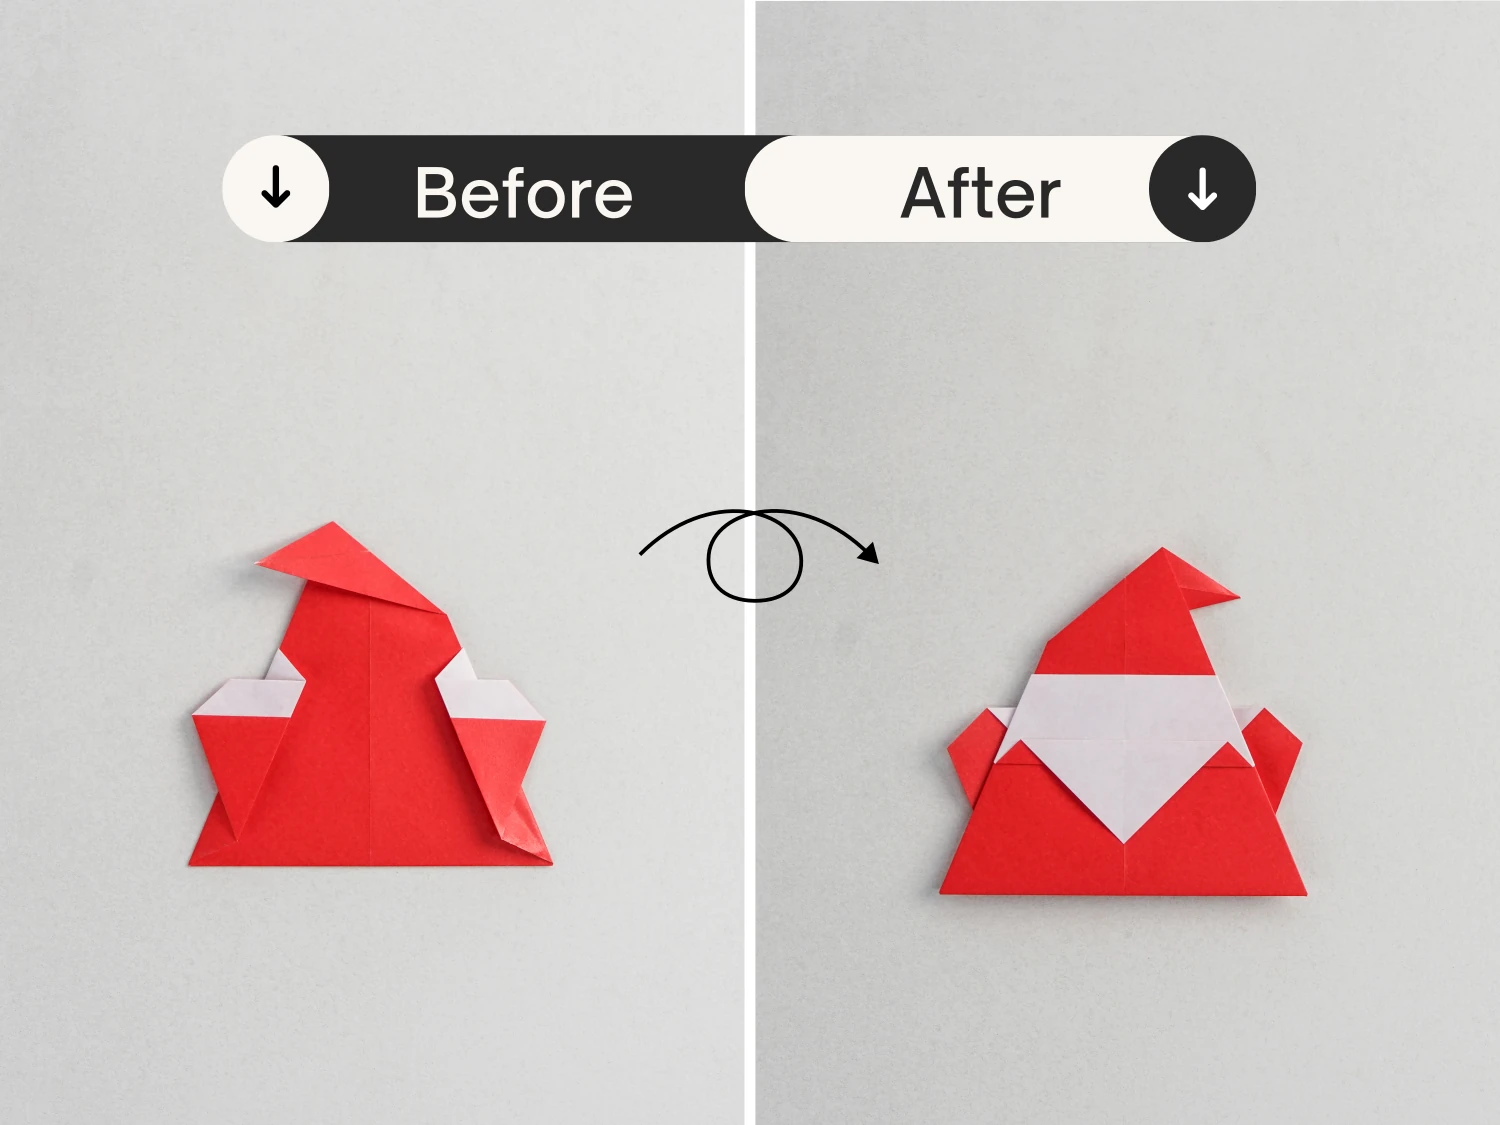
Step 14
Next, flip the paper over to get the final shape of Santa.
Step 15
Draw eyes and a nose for Santa to make him even cuter!
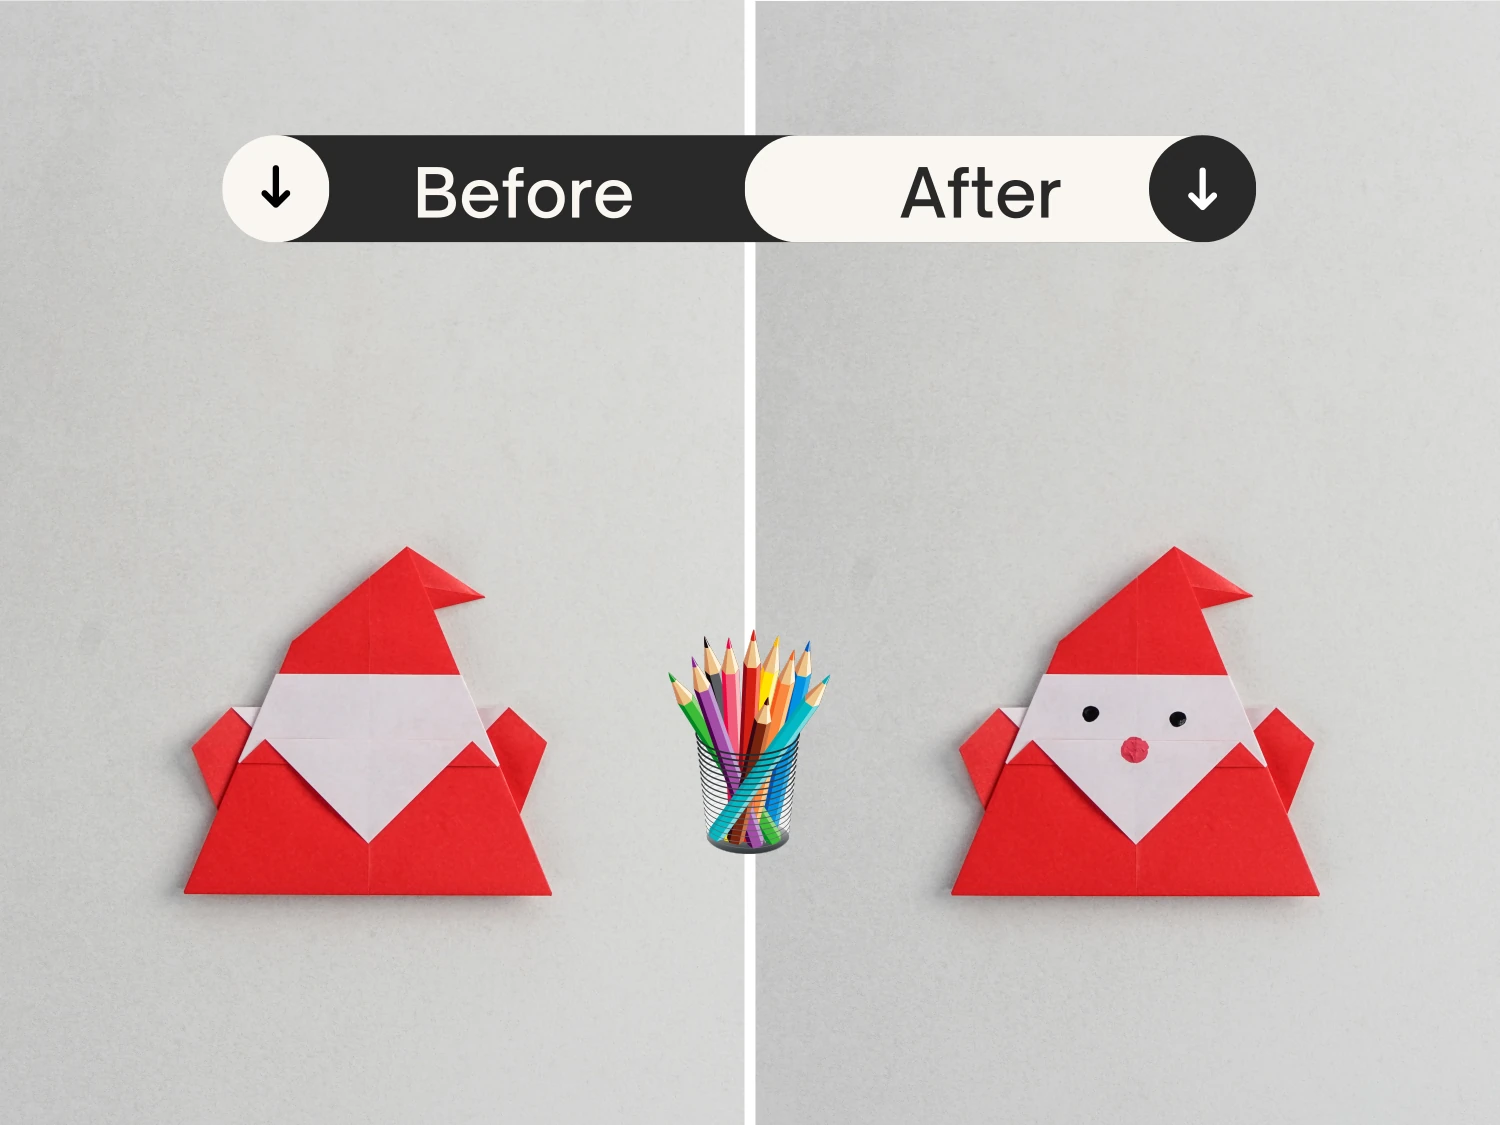
That’s you lovely origami Santa. Hope you enjoy it. Next, you can explore more interesting origami ideas.
Other easy ideas


Want more origami ideas or more instructions? Remember to subscribe our Newsletters. We will send the newest inspiration to your box.