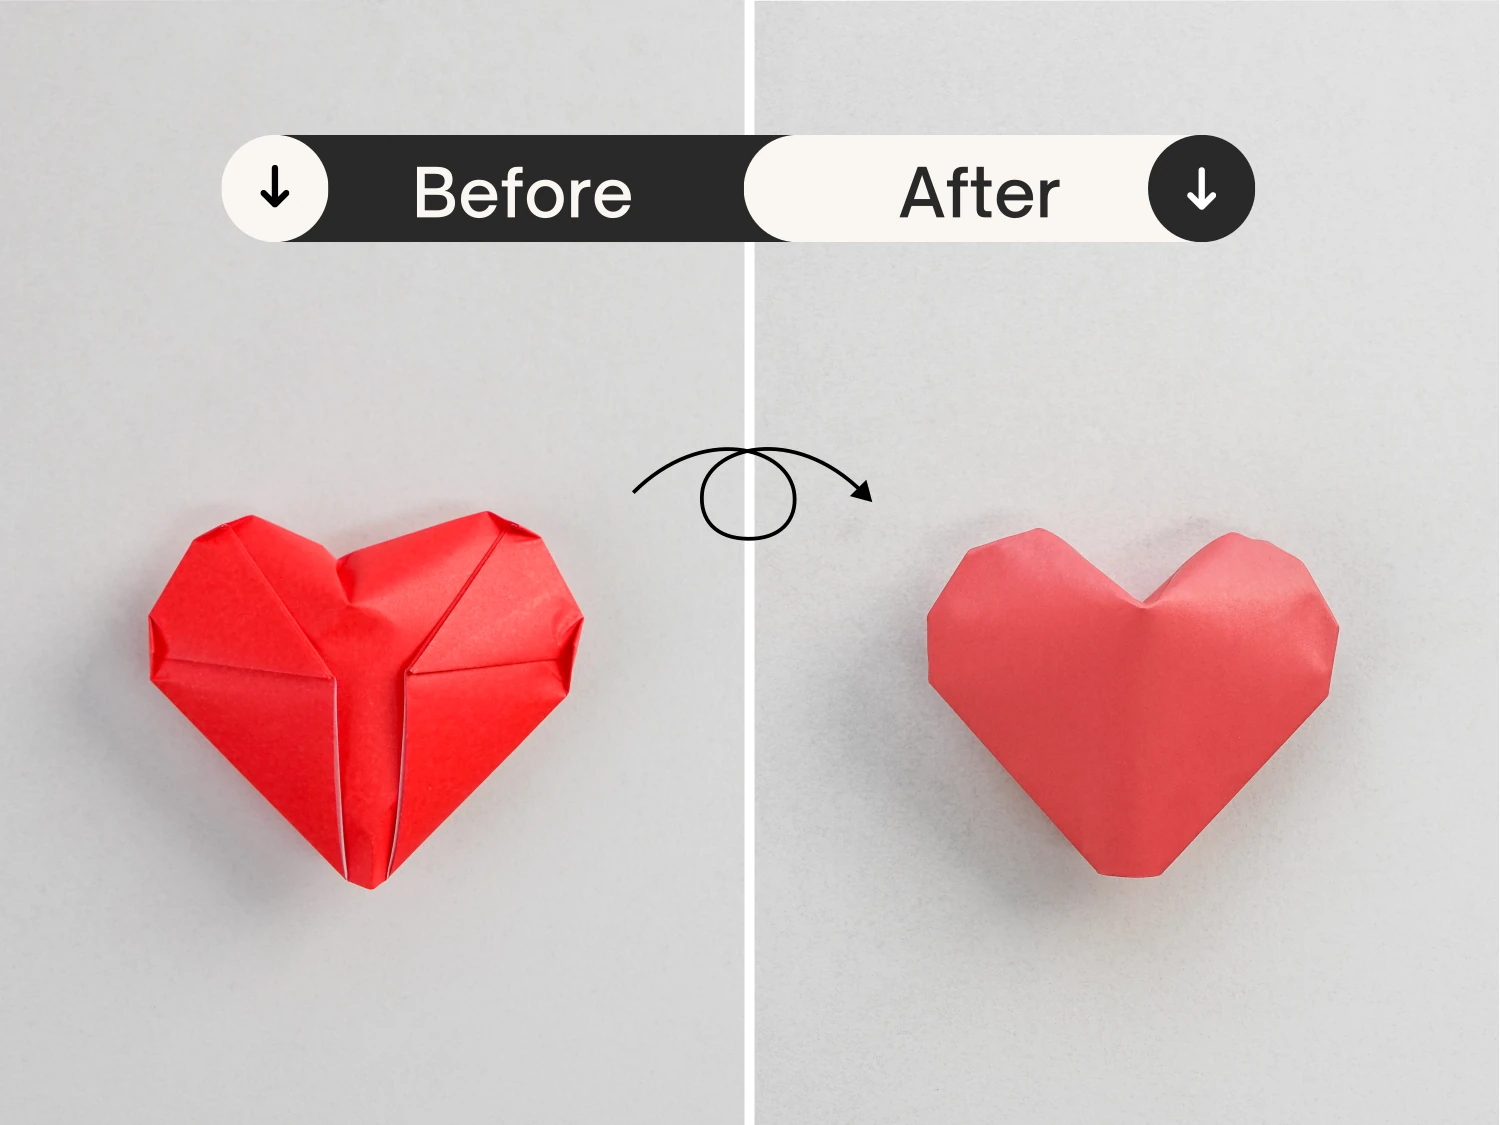
How to Make an Origami Puffy Heart
This is a puffy or 3D origami heart beyond the traditional flat origami heart. If you love to make origami heart or want to express your caring and love for loved ones, try this one.
It even requires less steps than the traditional version and the finished origami heart can puffy up. So you can use it as decoration of gift box or as the center of an origami gift.

If you are new to origami, start here from our beginner guide to know the basics and how to read the step-by-step instructions.
- Folding time: 10 minutes
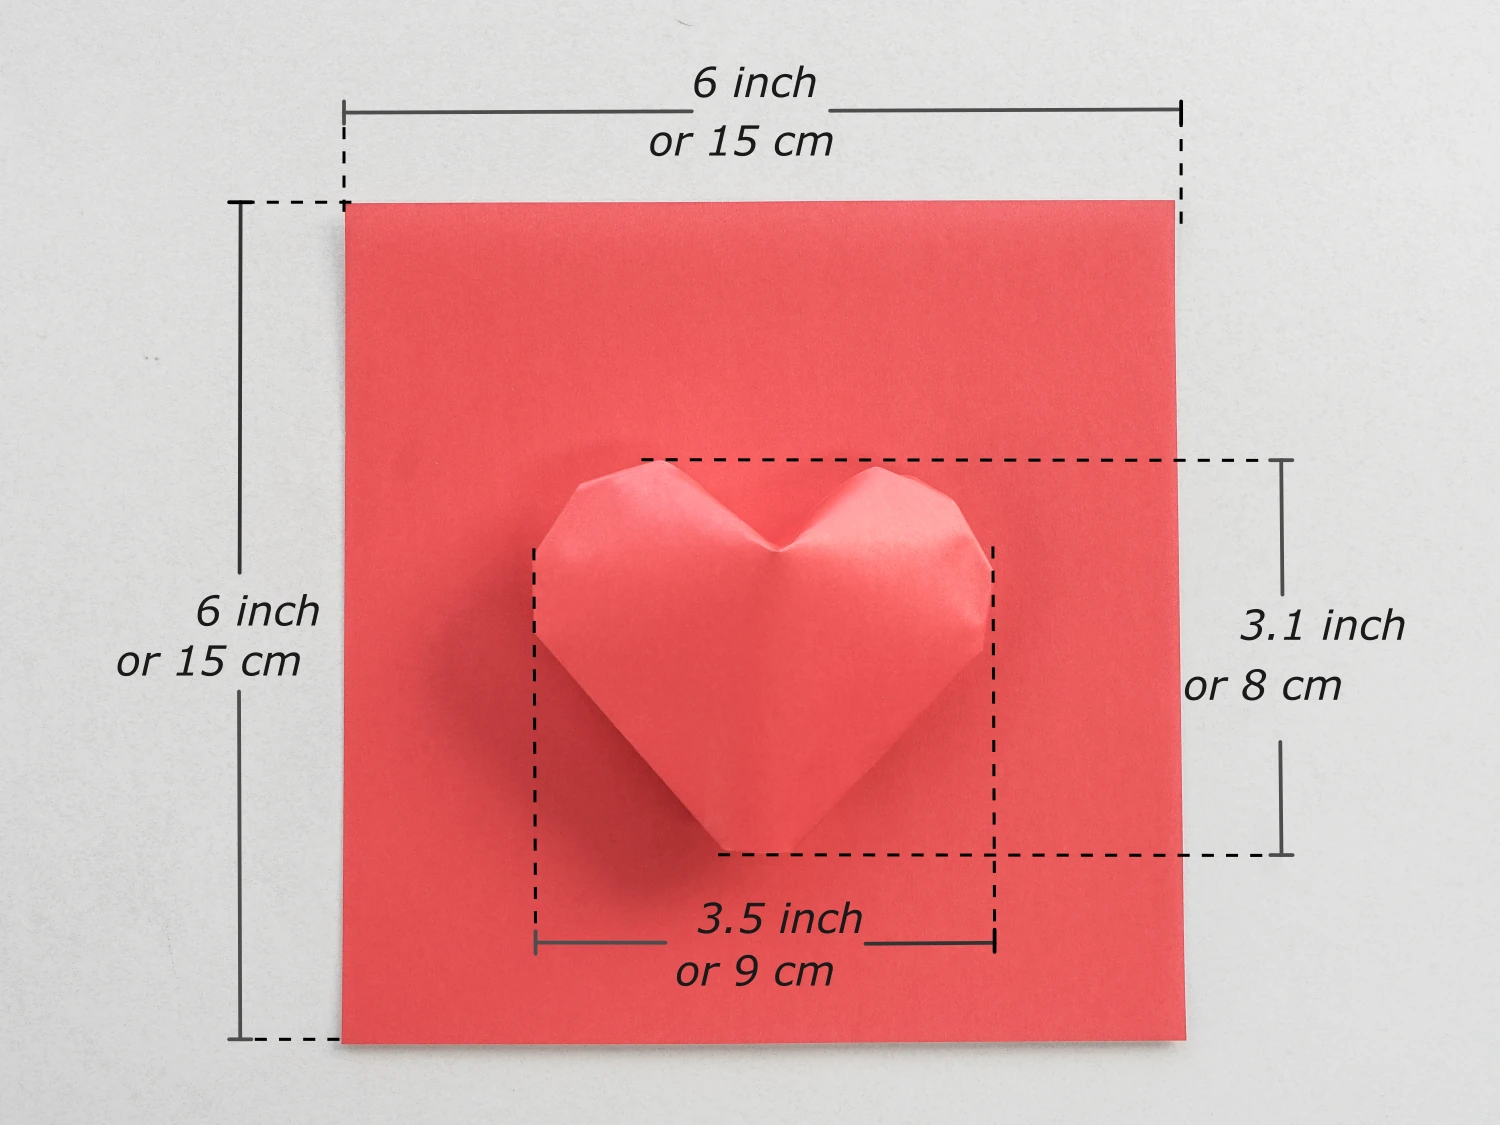
- Paper: 15×15 cm
- Difficulty: Easy, Beginner friendly
Material
Get a 15*15 cm origami paper, one red and one white side. The finished origami puffy heart will be in the color of the color side. You can also use patterned papers.
Easy Origami Puffy Heart Video
Step by Step Instructions
Step 1
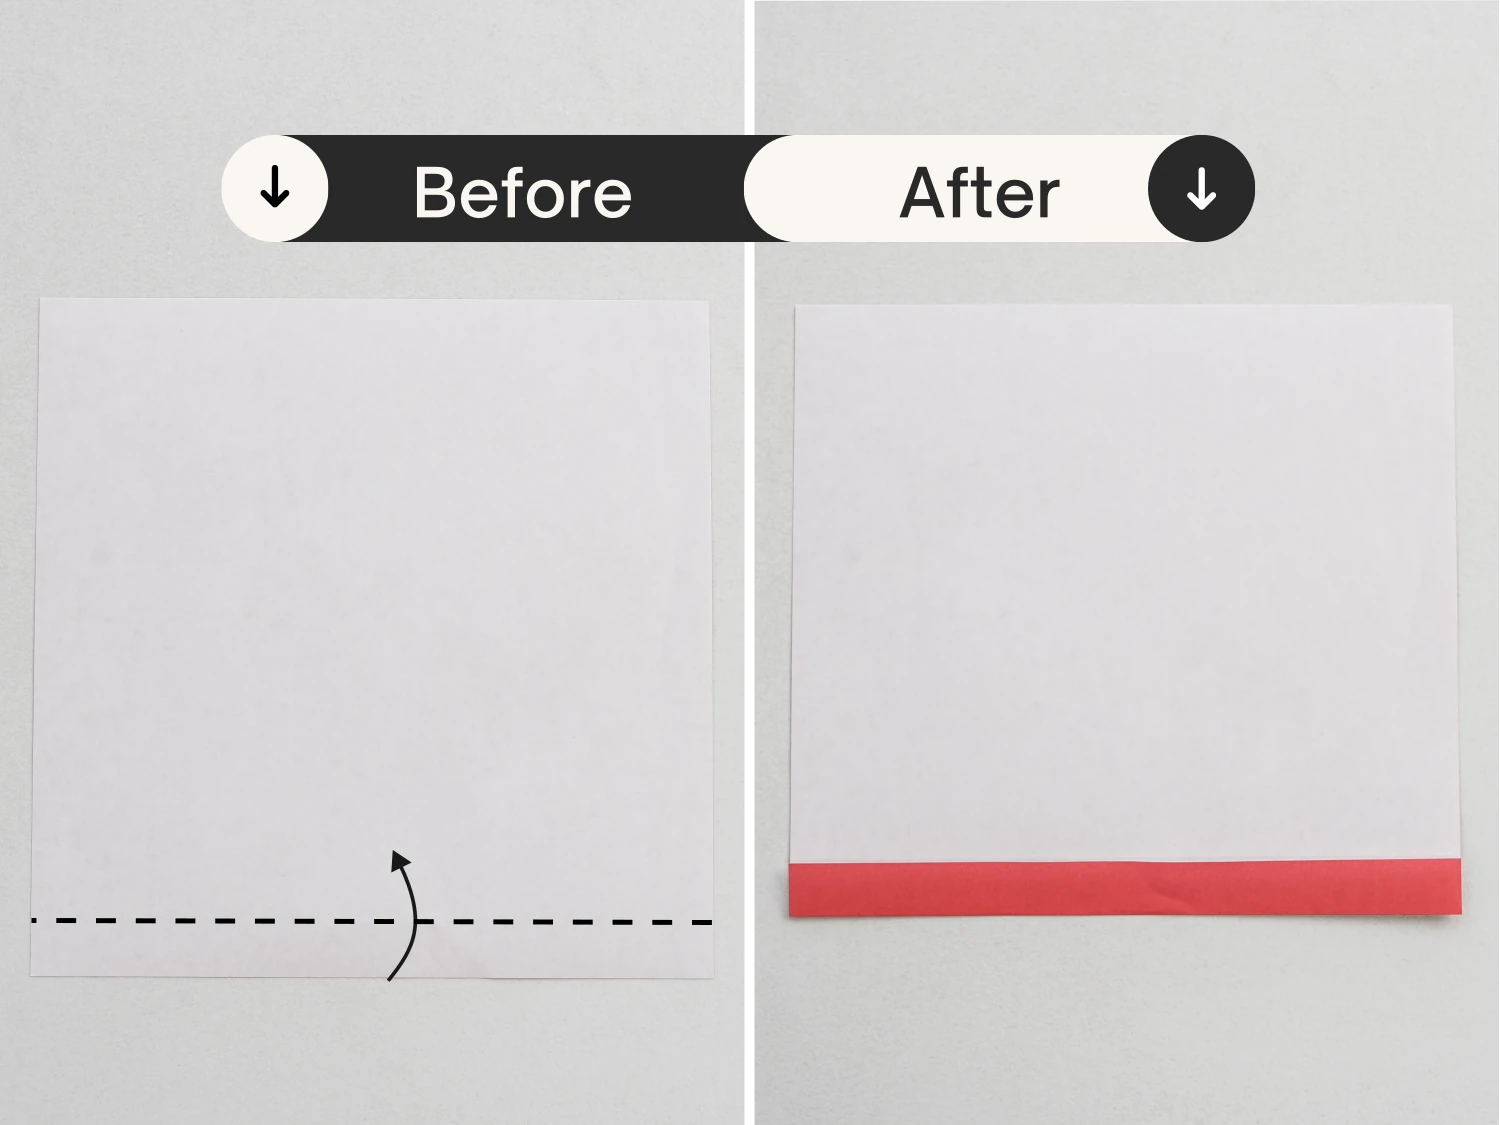
Start with the white side of the paper facing up, and fold the bottom edge up a little along the dotted line.
Step 2
Fold it in half horizontally.

Step 3
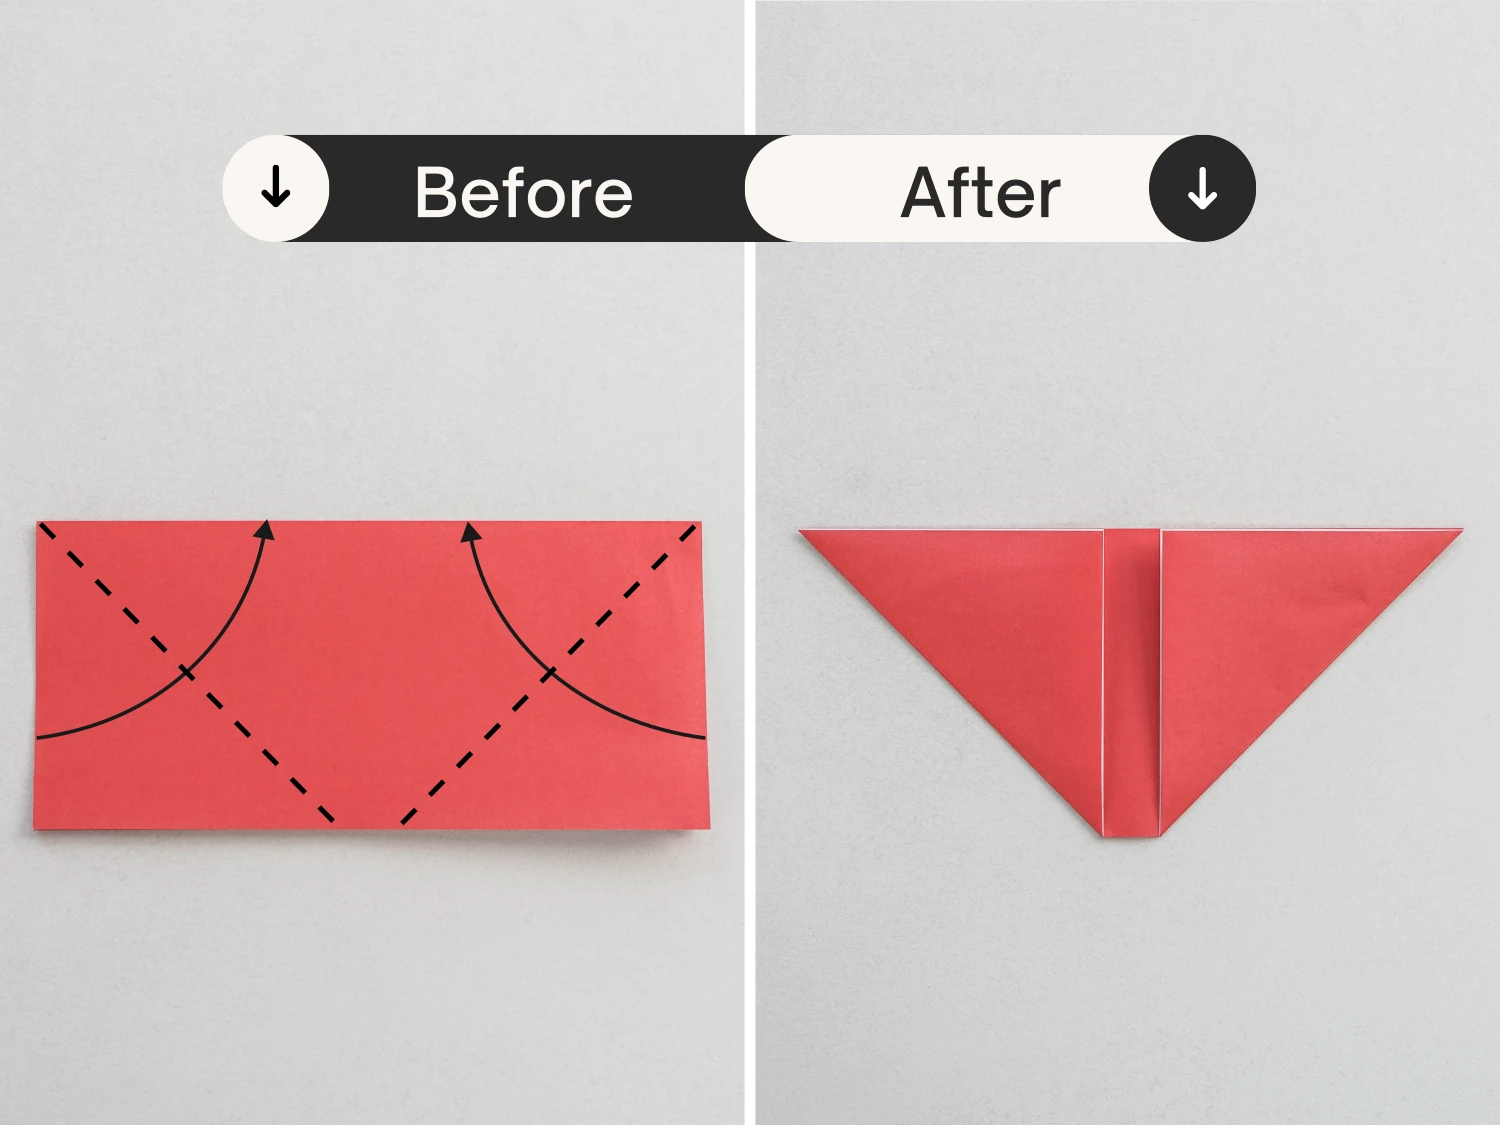
Fold the bottom left and right corners up to the top edge diagonally.
Step 4
Fold the top edges of both triangles down to the right hypotenuse.
Step 5
Crease them well, and unfold them.
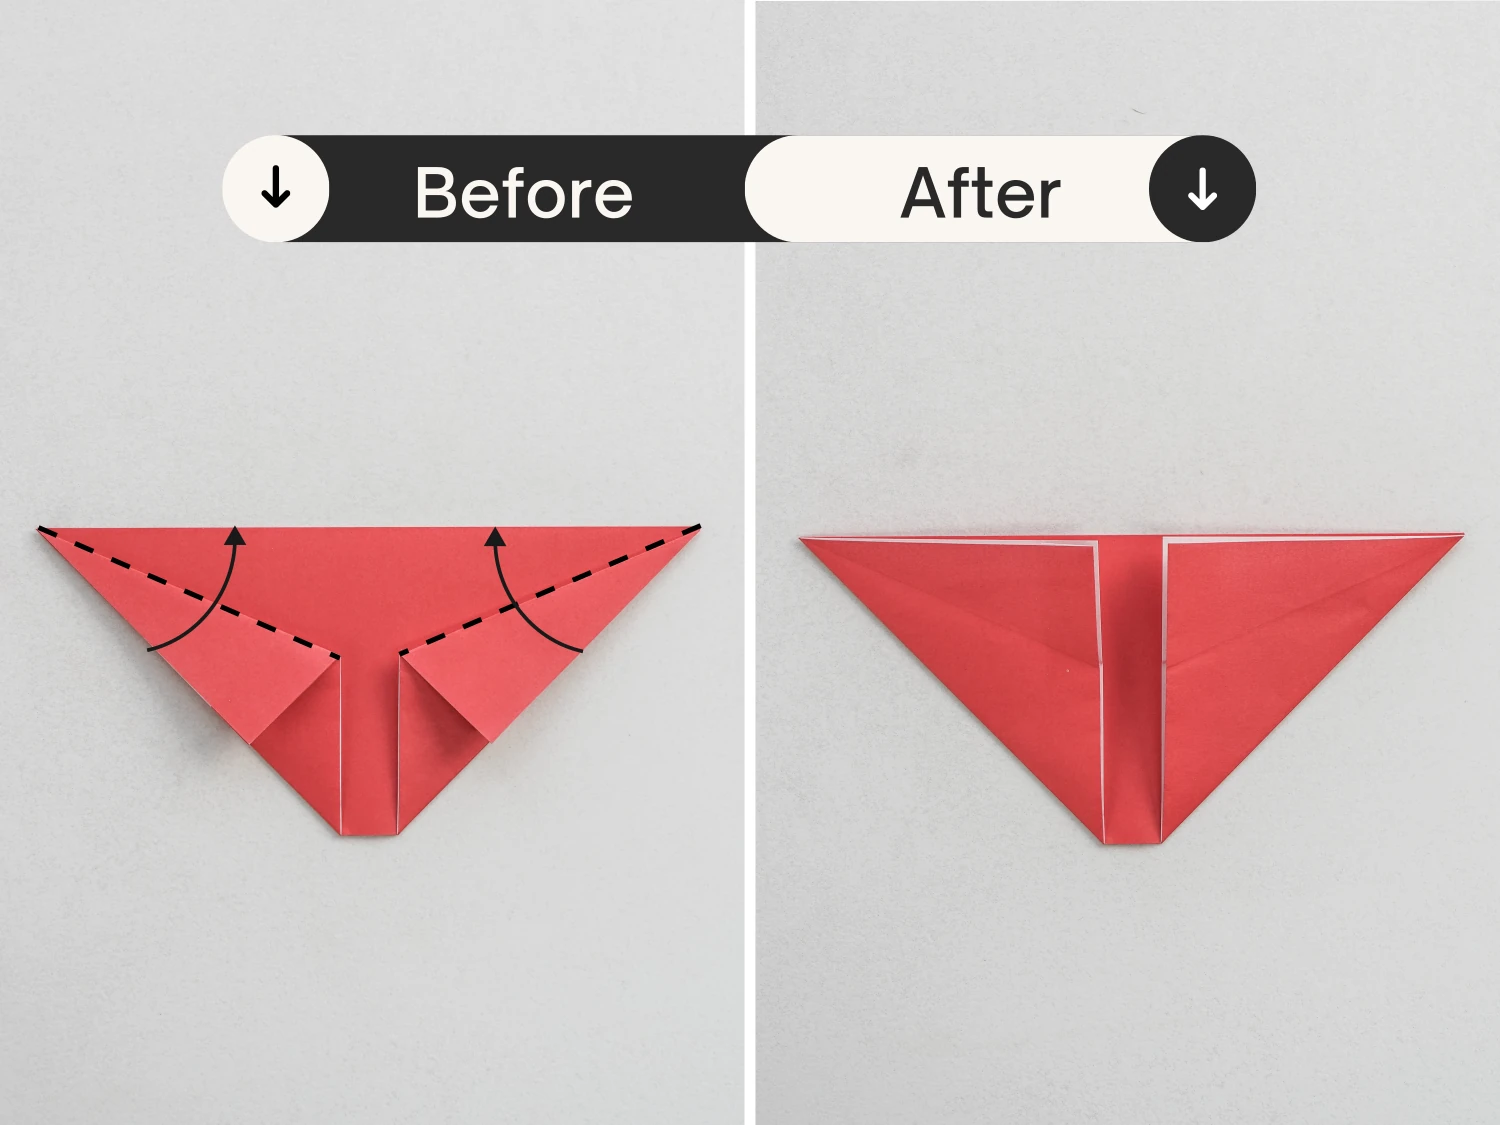
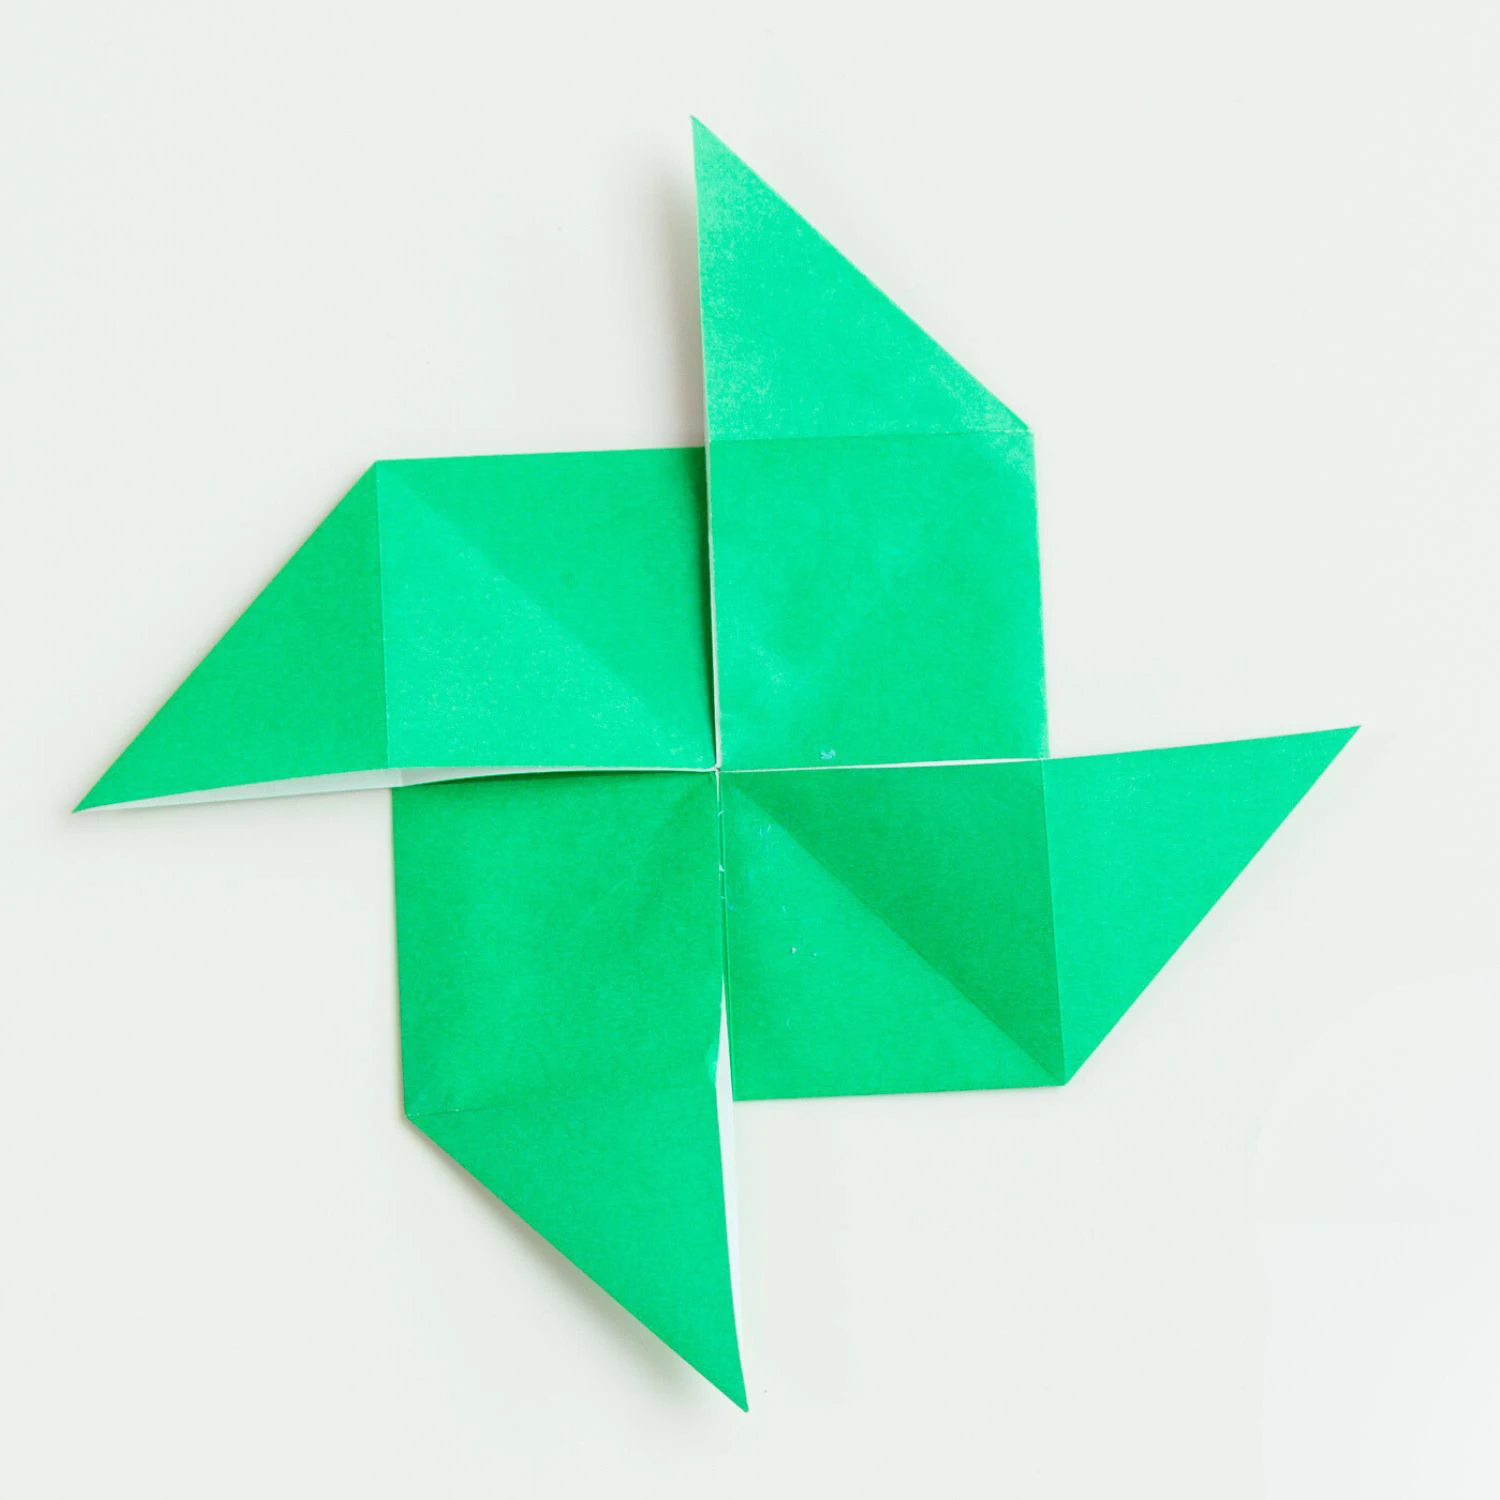
Step 6
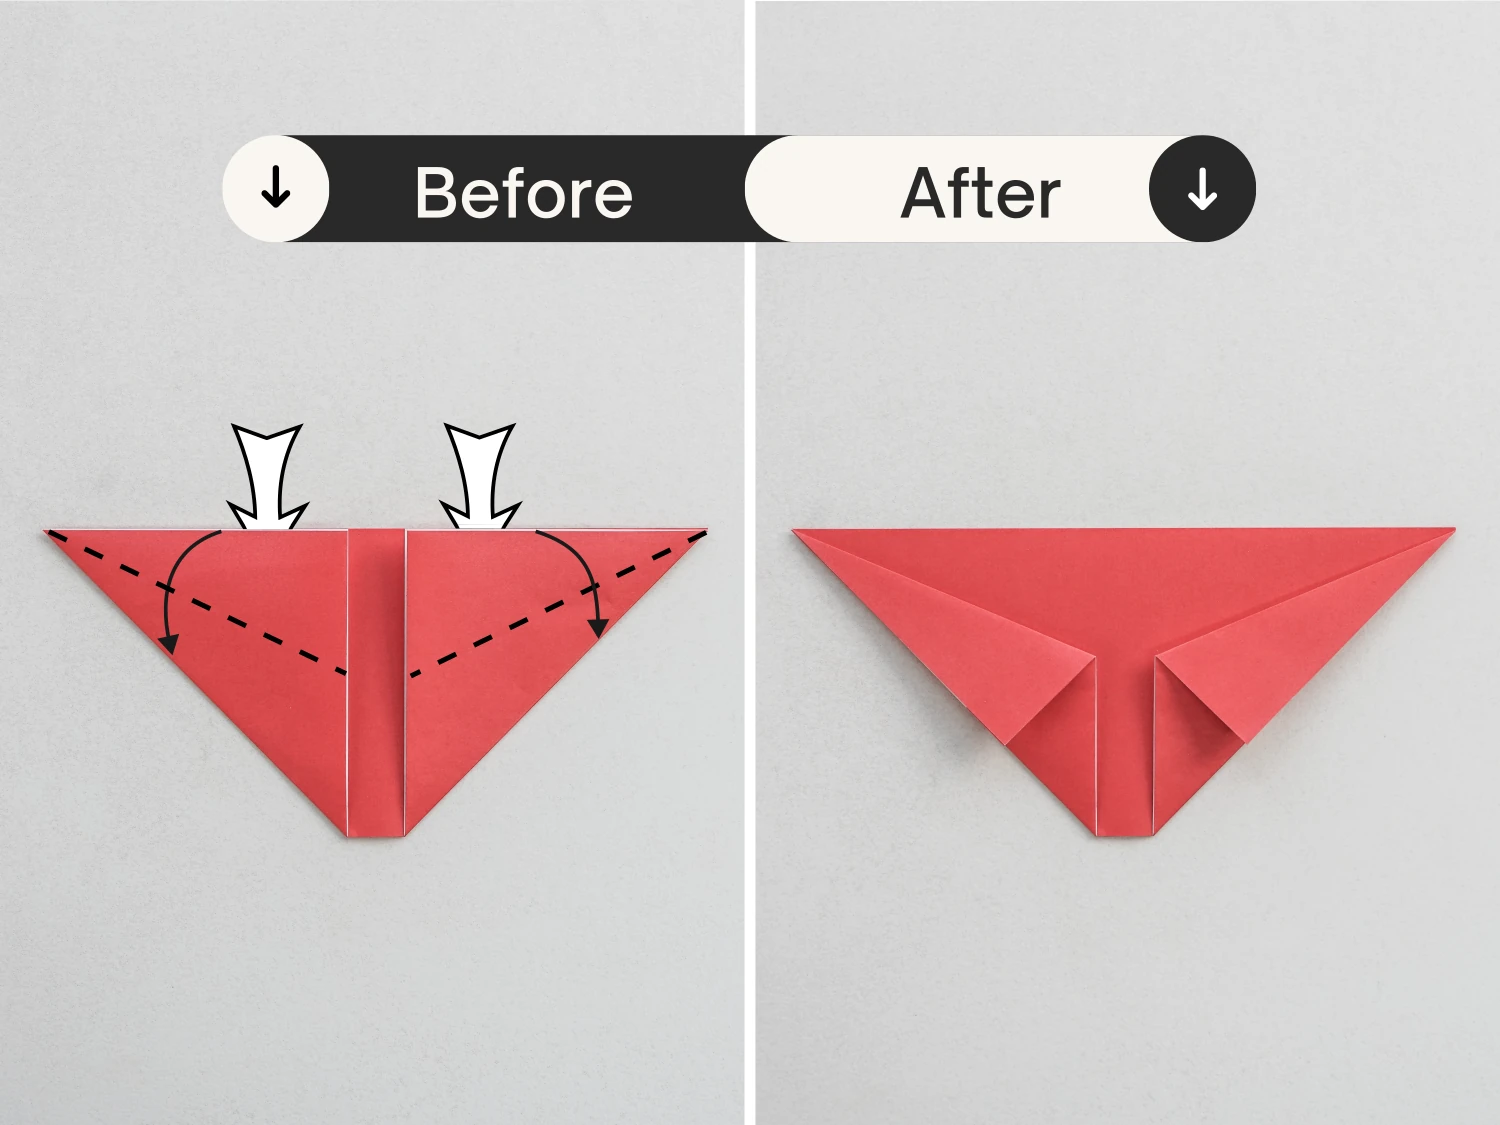
Fold the left and right corners to the left edges of the triangles, to meet the points where the creases you just made are located, creating two small triangles.
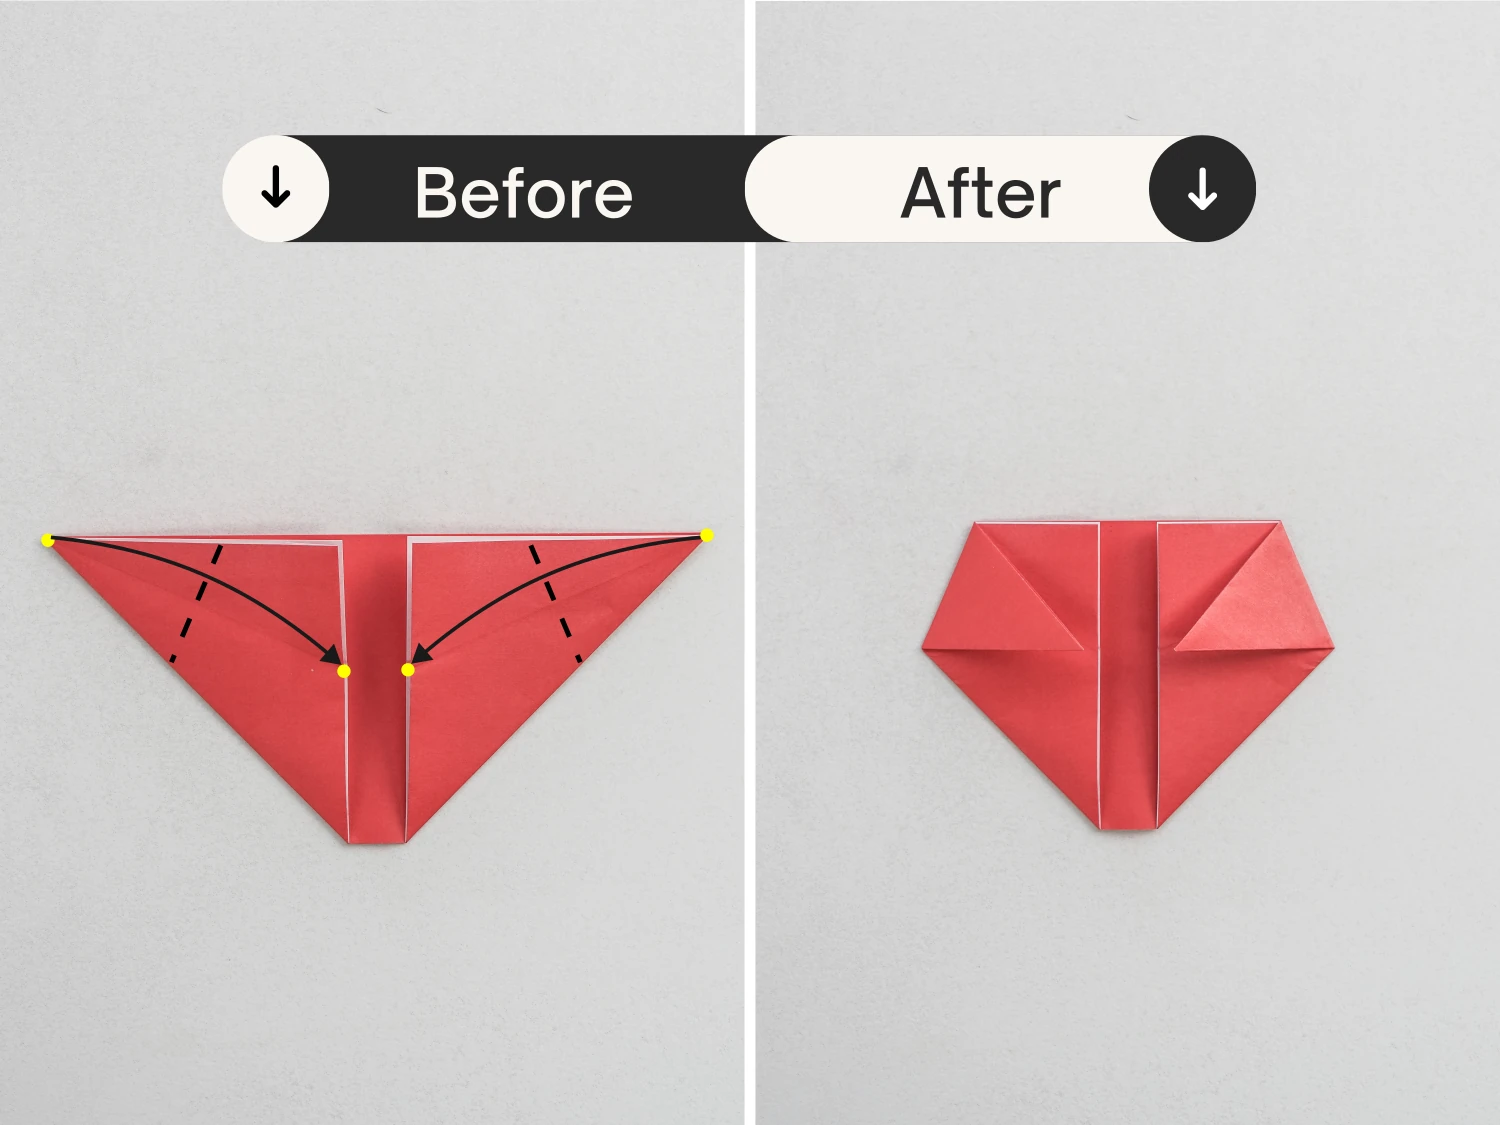
Step 7
Gently open the right small triangle, take the two layers below the triangle, and tuck them into the small triangle.
Repeat this for the left side.
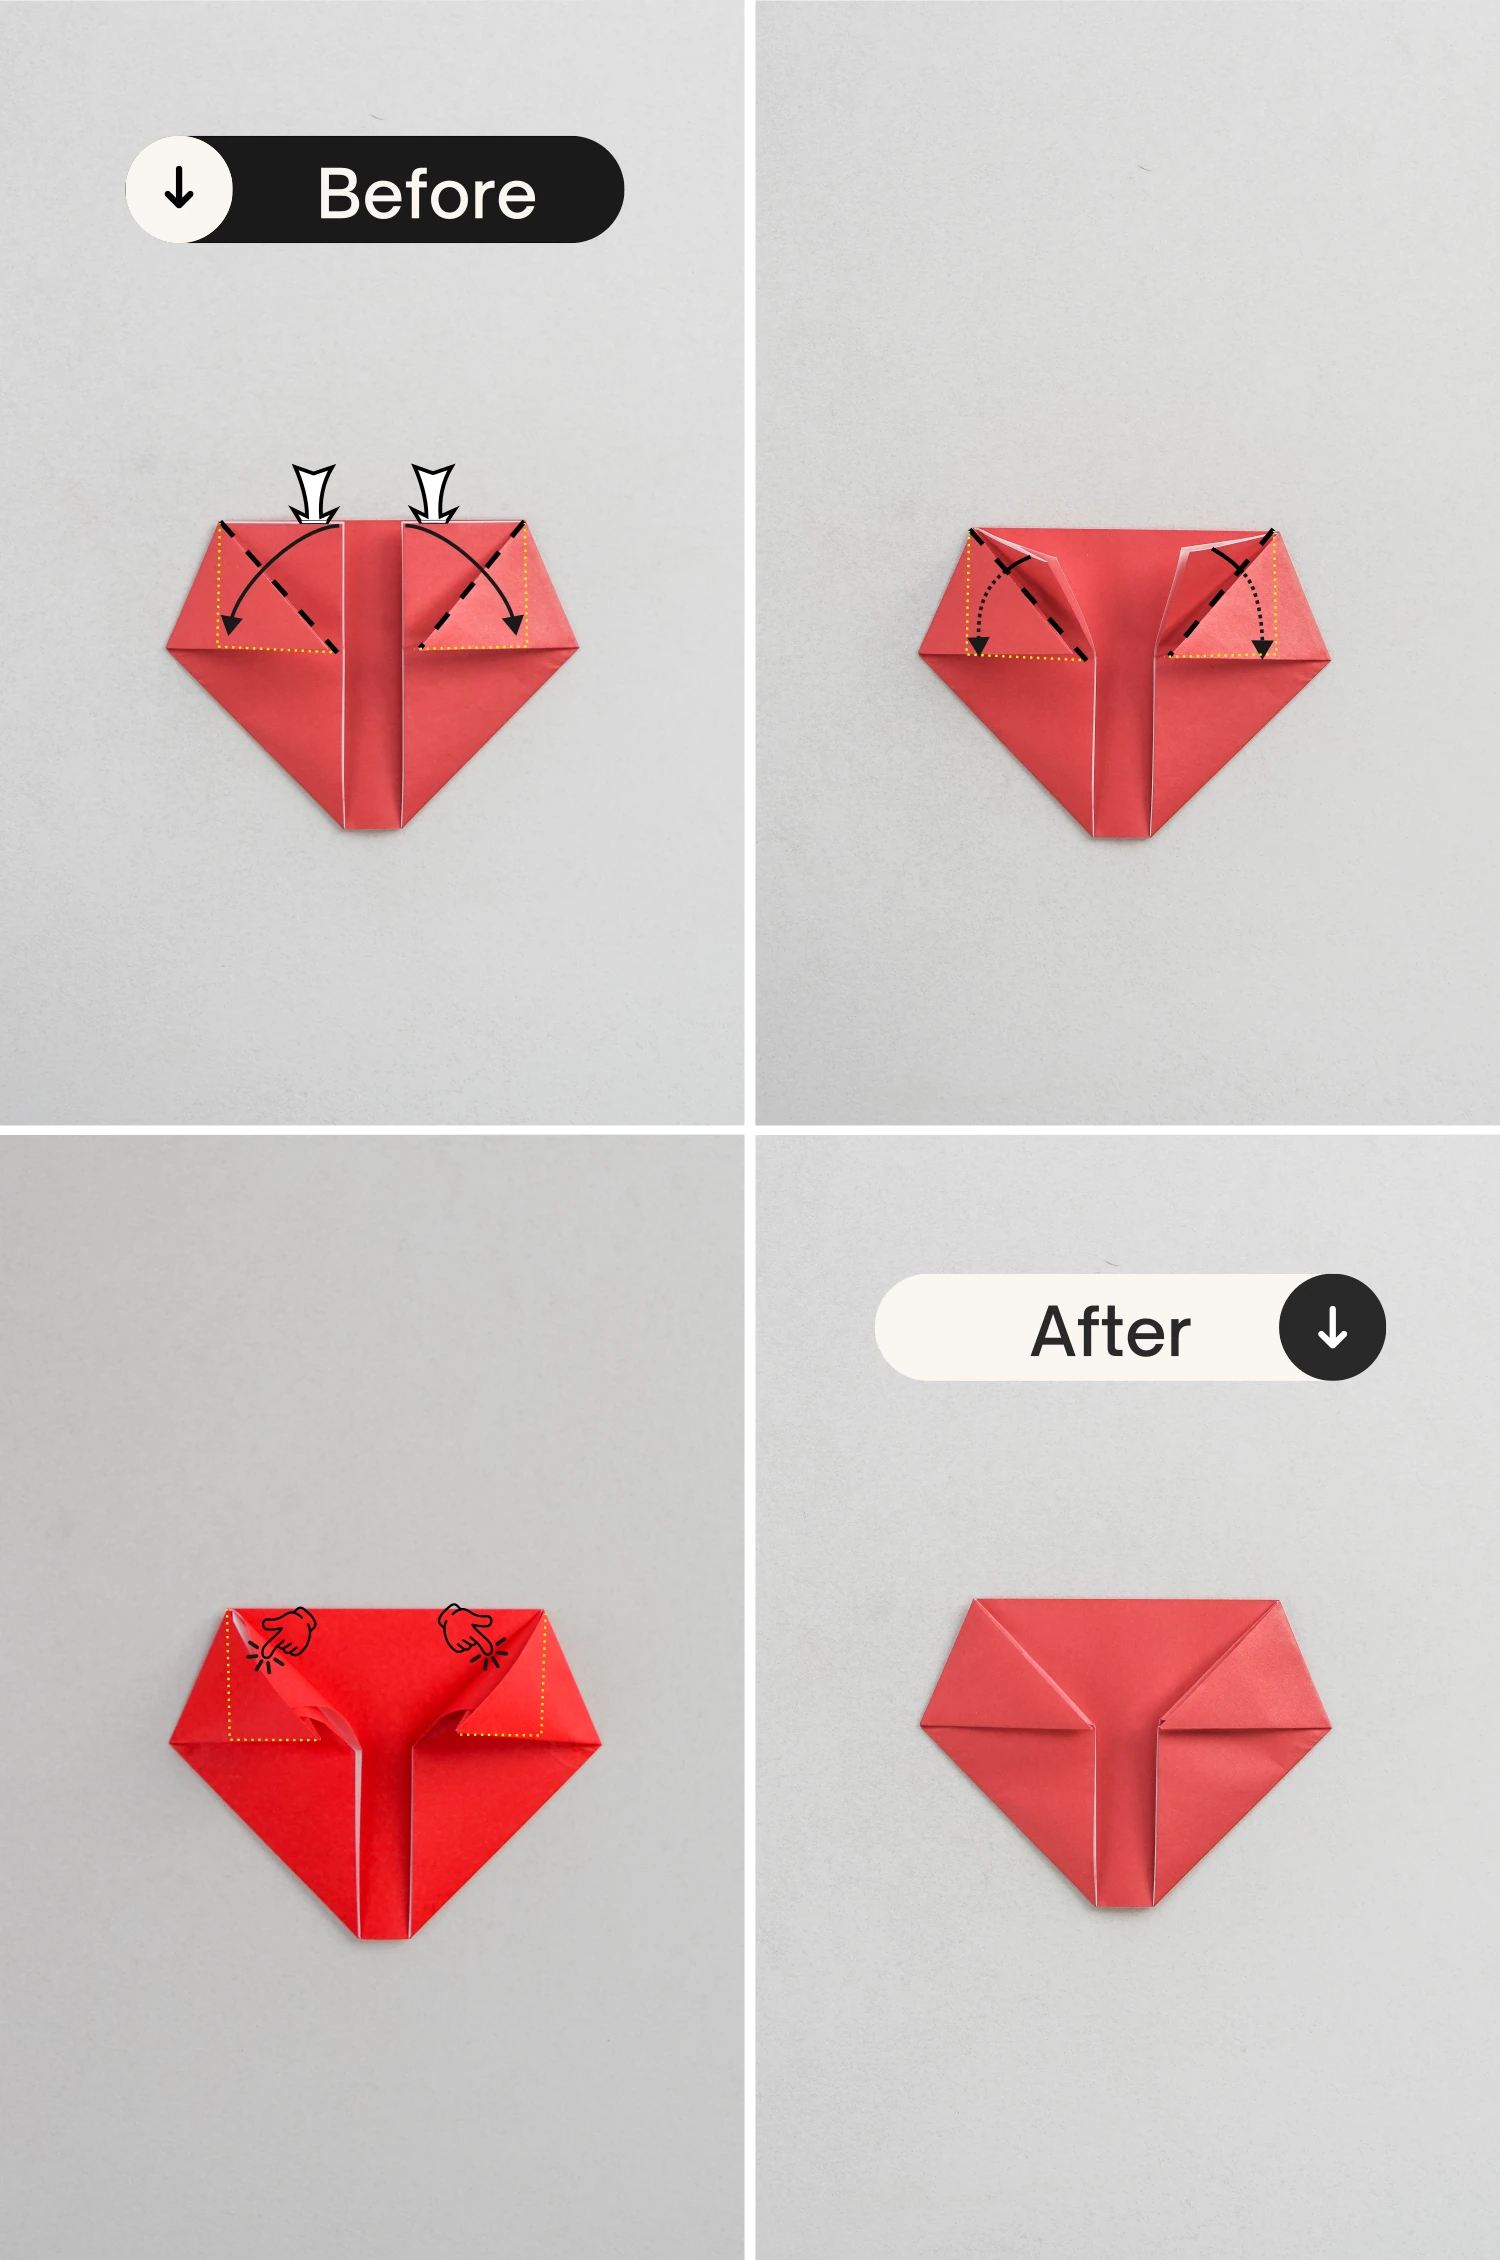
Step 8
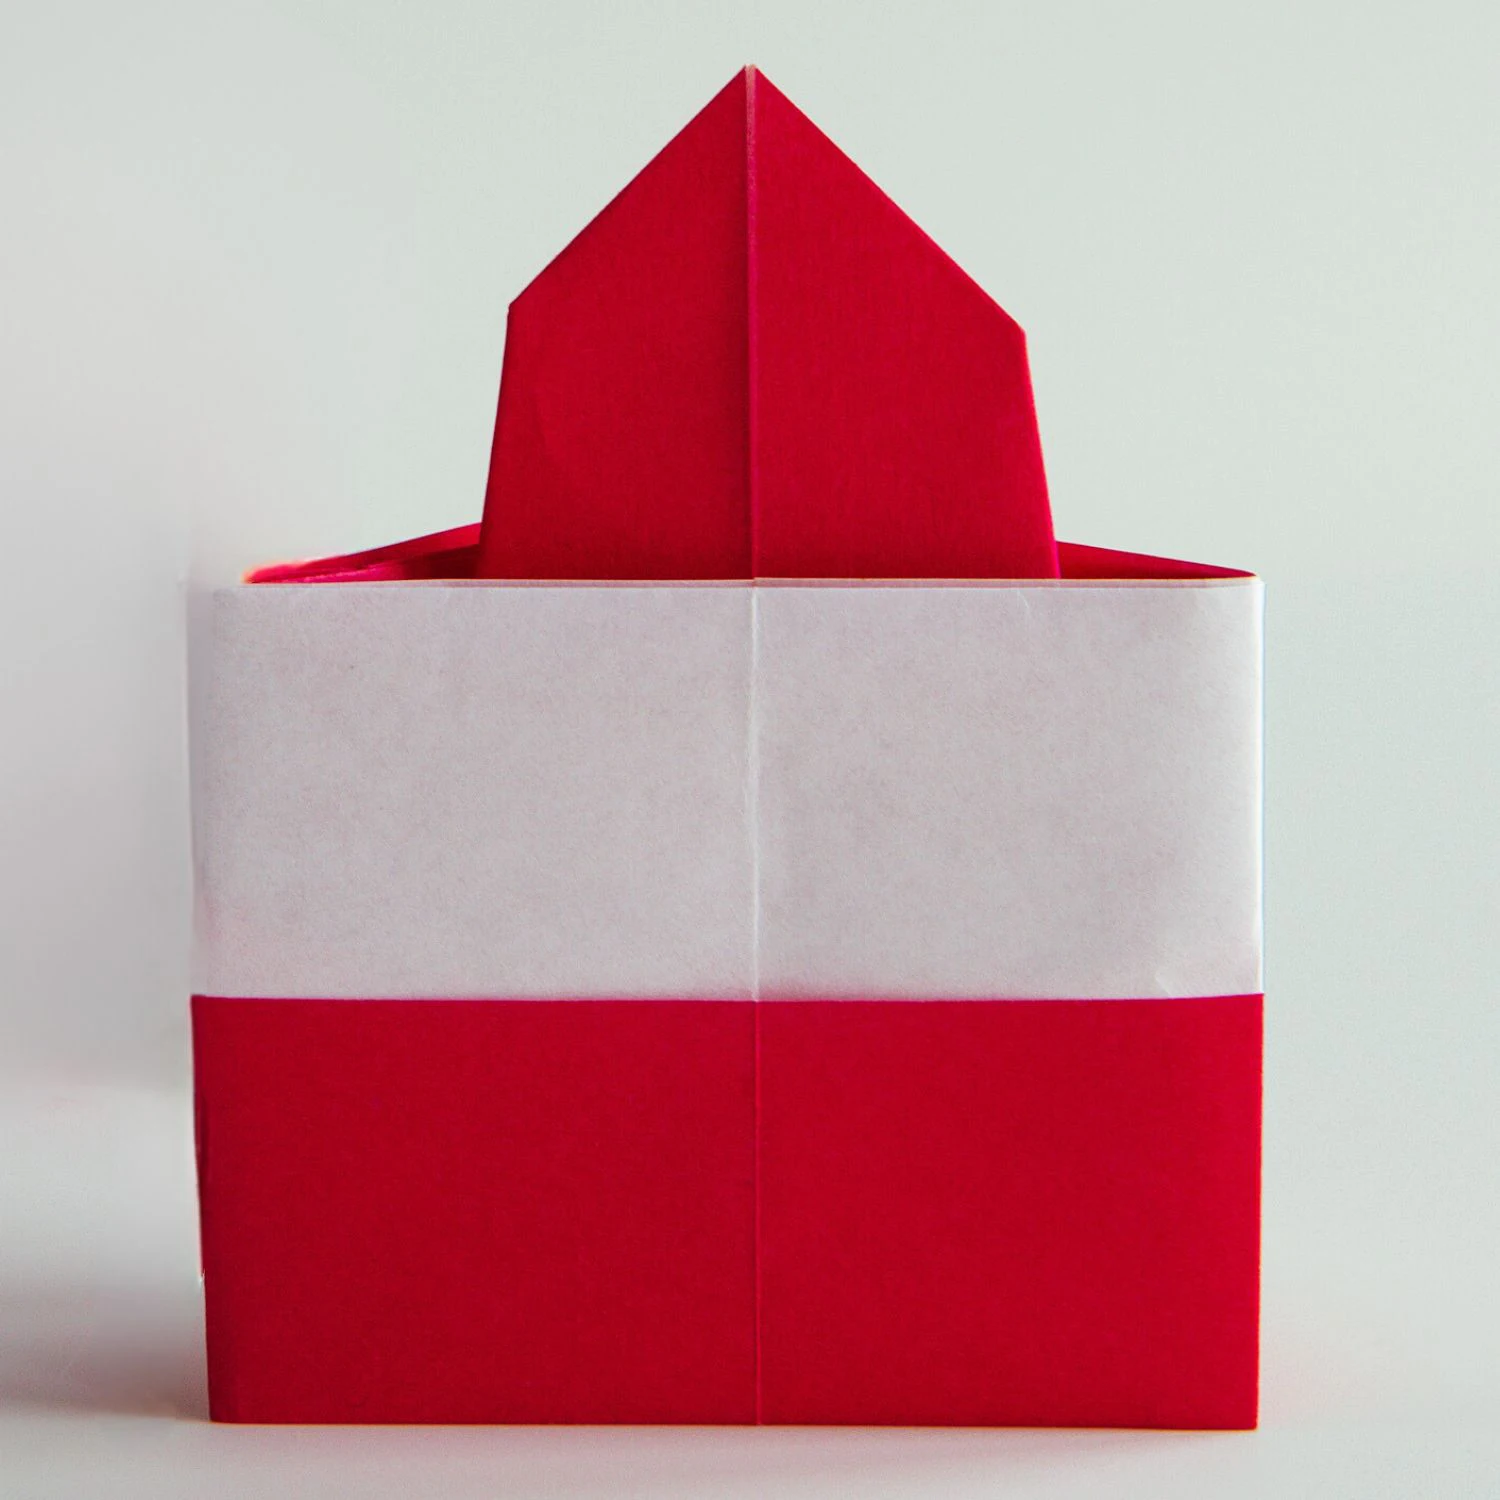
Fold the four corners of the paper’s top part to the center a little, to make the heart looks more rounder.
Blow into it from the bottom to puff it up, while pressing down the middle point of the top edge.
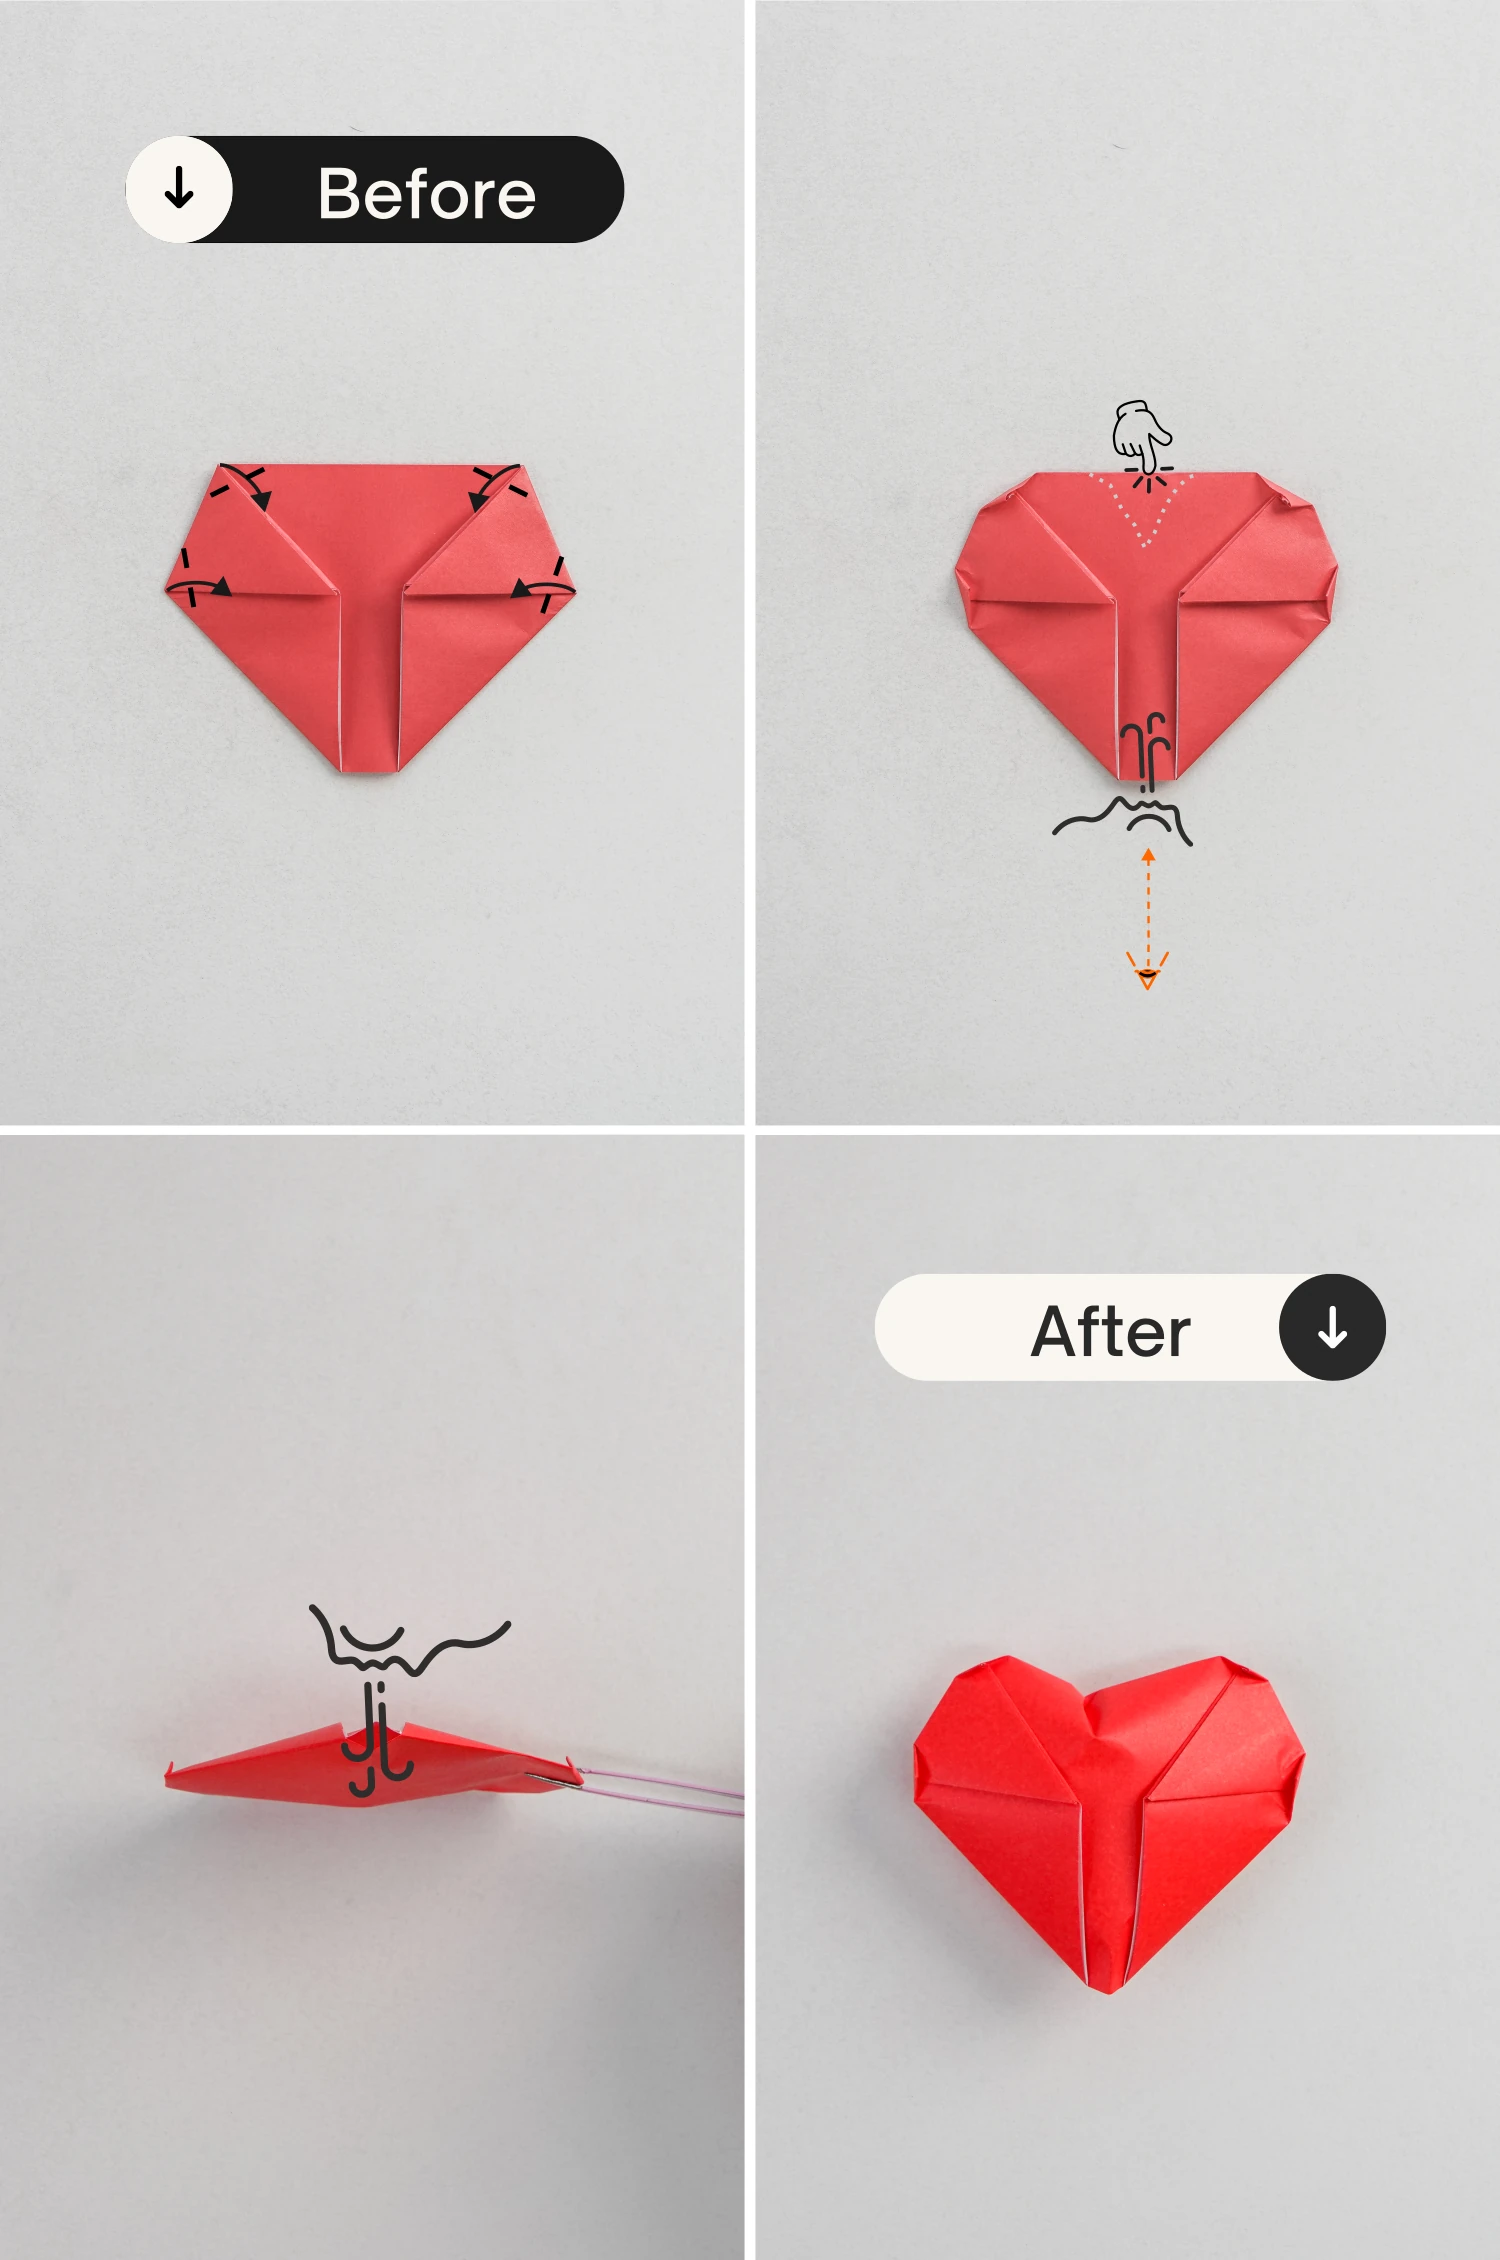
Step 9
Flip the paper over, this is the final shape of the cute puffy heart.