How to Make an Origami Inflatable Rabbit
Want to try something really cool and interesting, this origami rabbit box is quite unique because it can be inflated.
It is a cube with two lovely standing rabbit ear. Blowing the air from the hole at the bottom is the most interesting part of this origami model. Let’s start folding.

If you are new to origami, start here from our beginner guide to know the basics and how to read the step-by-step instructions.
- Folding time: 8 minutes
- Paper: 15×15 cm
- Difficulty: Easy, Beginner friendly
Material
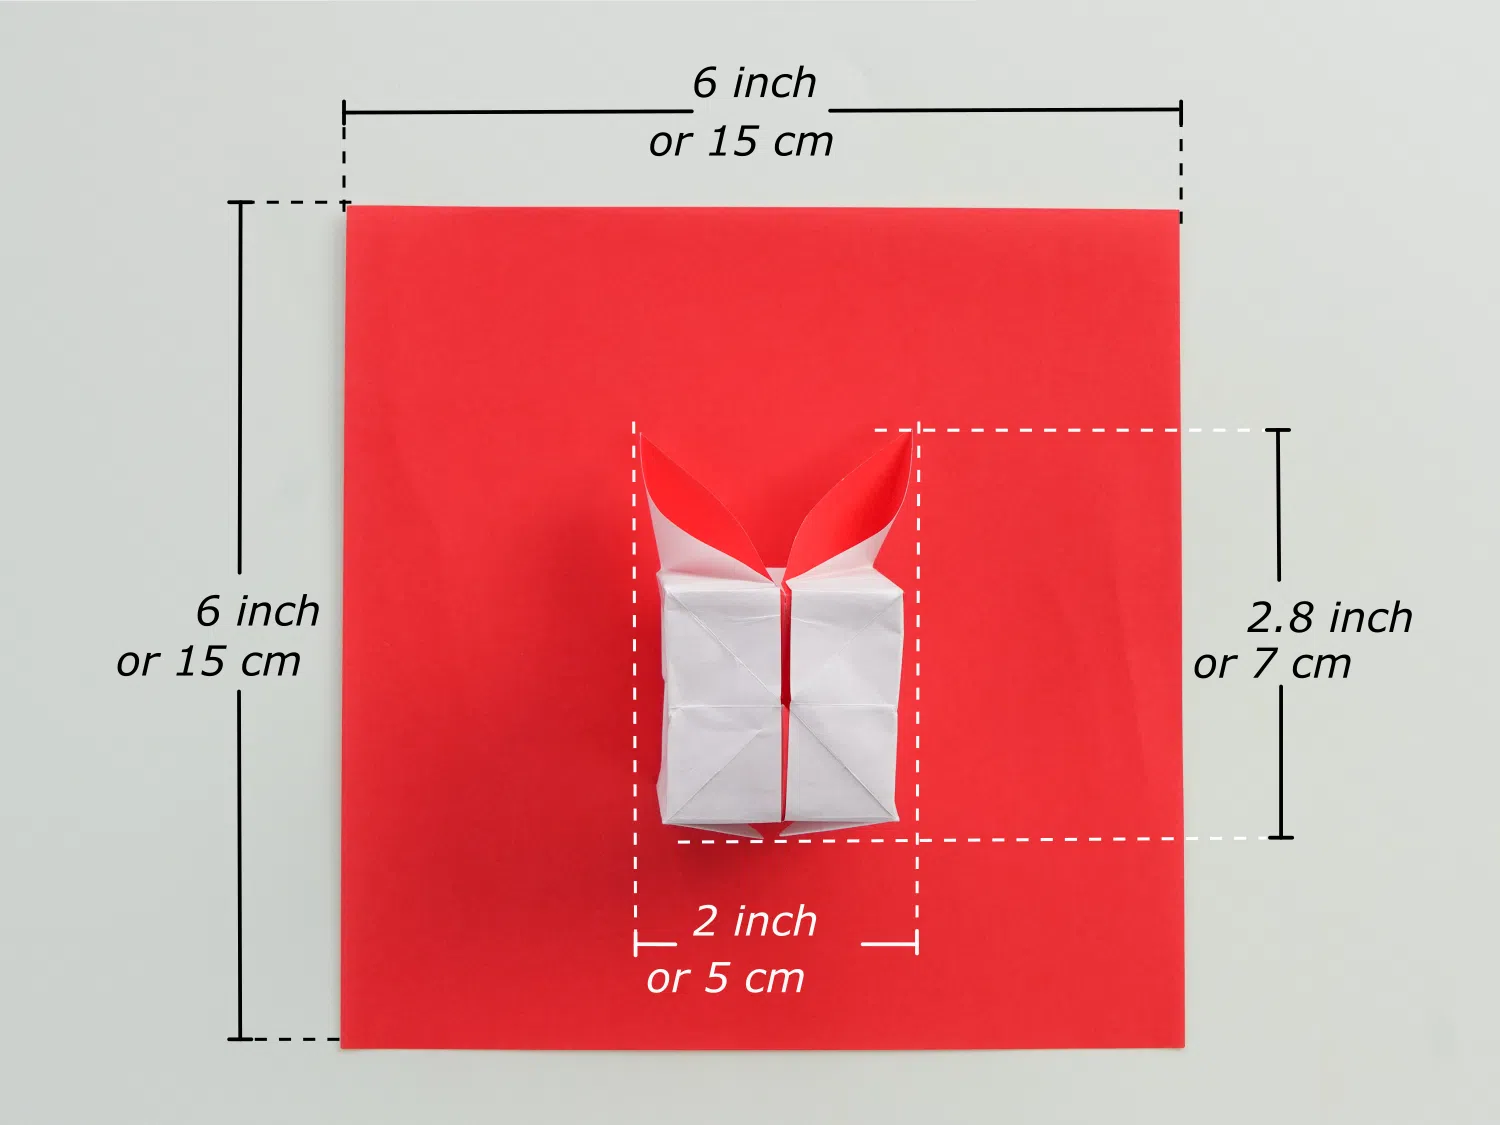
Prepare a 15*15 cm origami square paper, with one red and one white side, this will create a 7*5 cm rabbit. You can also use other colors of square origami paper to make rabbits in various colors.
Easy Origami Inflatable Rabbit Video
Step by Step Instructions
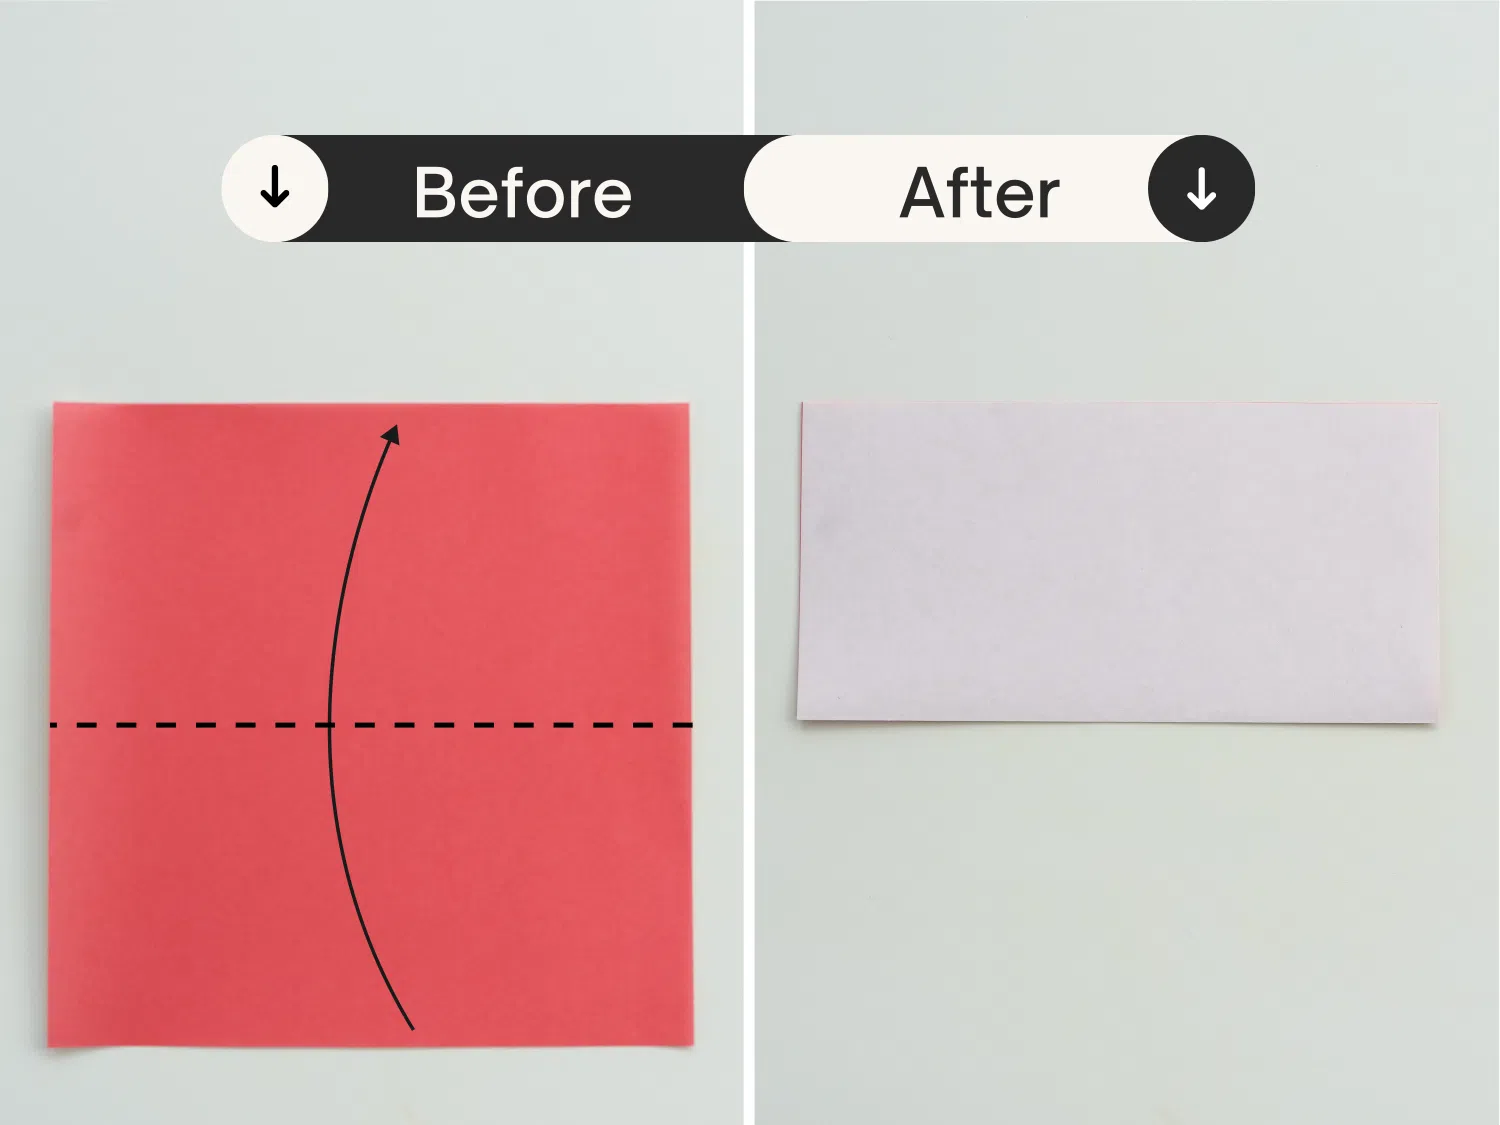
Step 1
Start with the red side of the paper facing up and fold it in half.
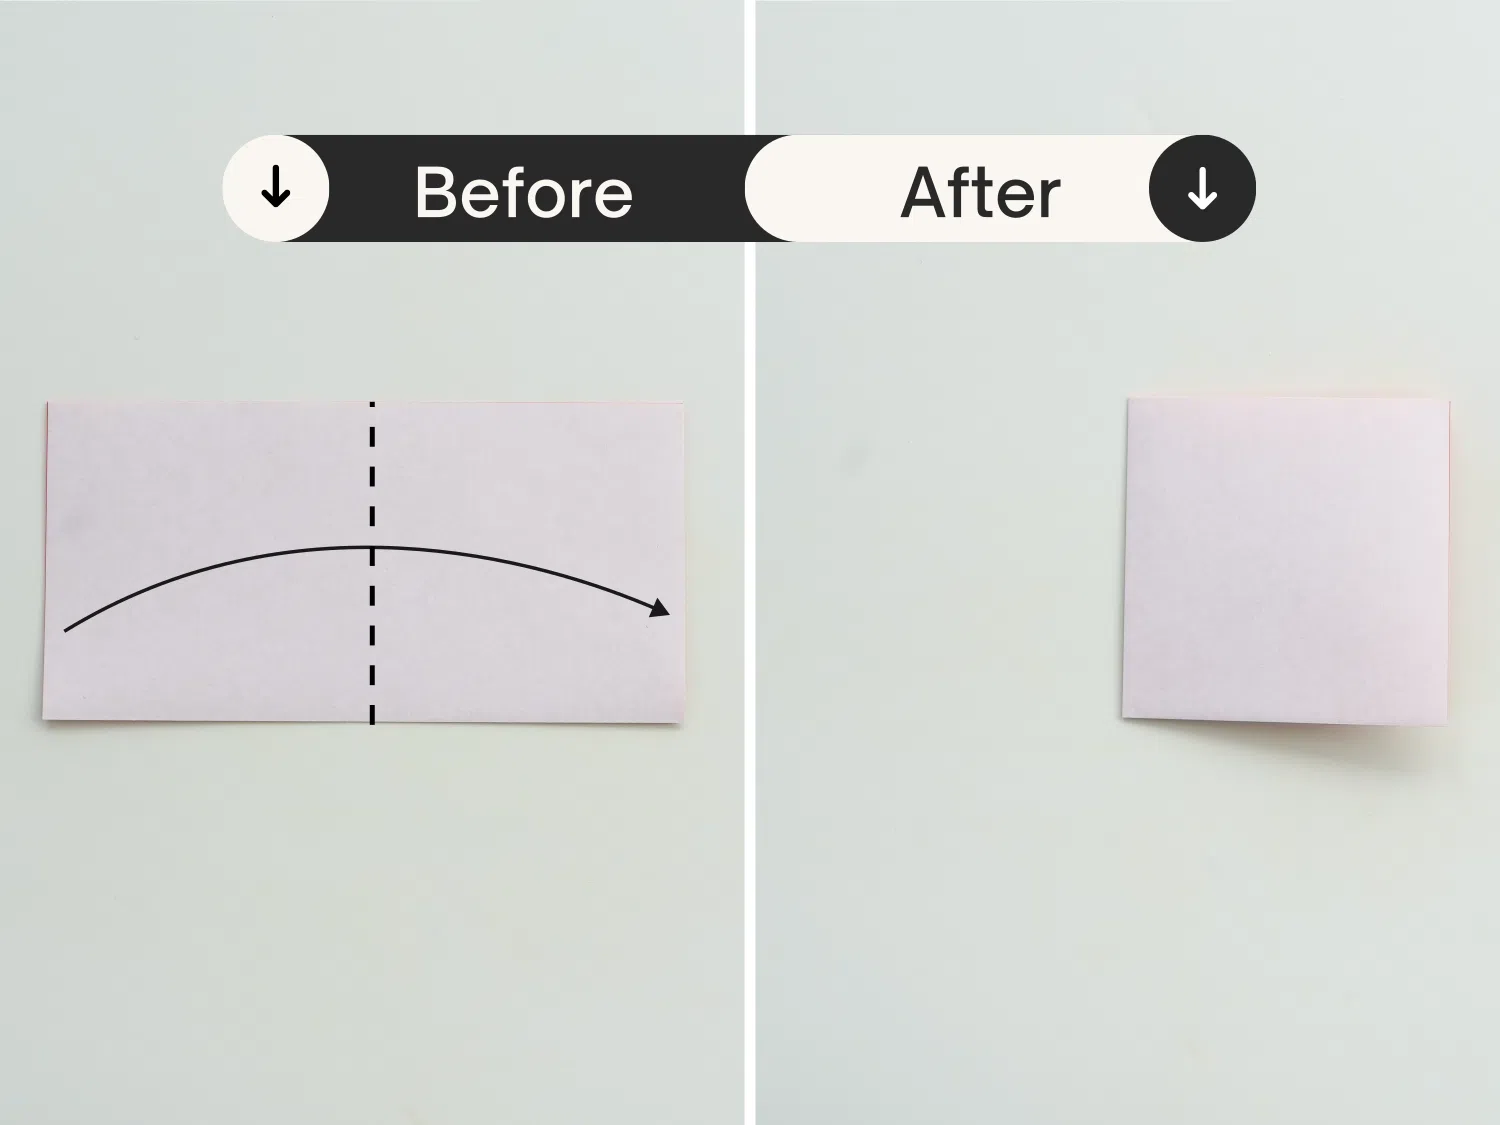
Step 2
Fold it in half again from left to right.
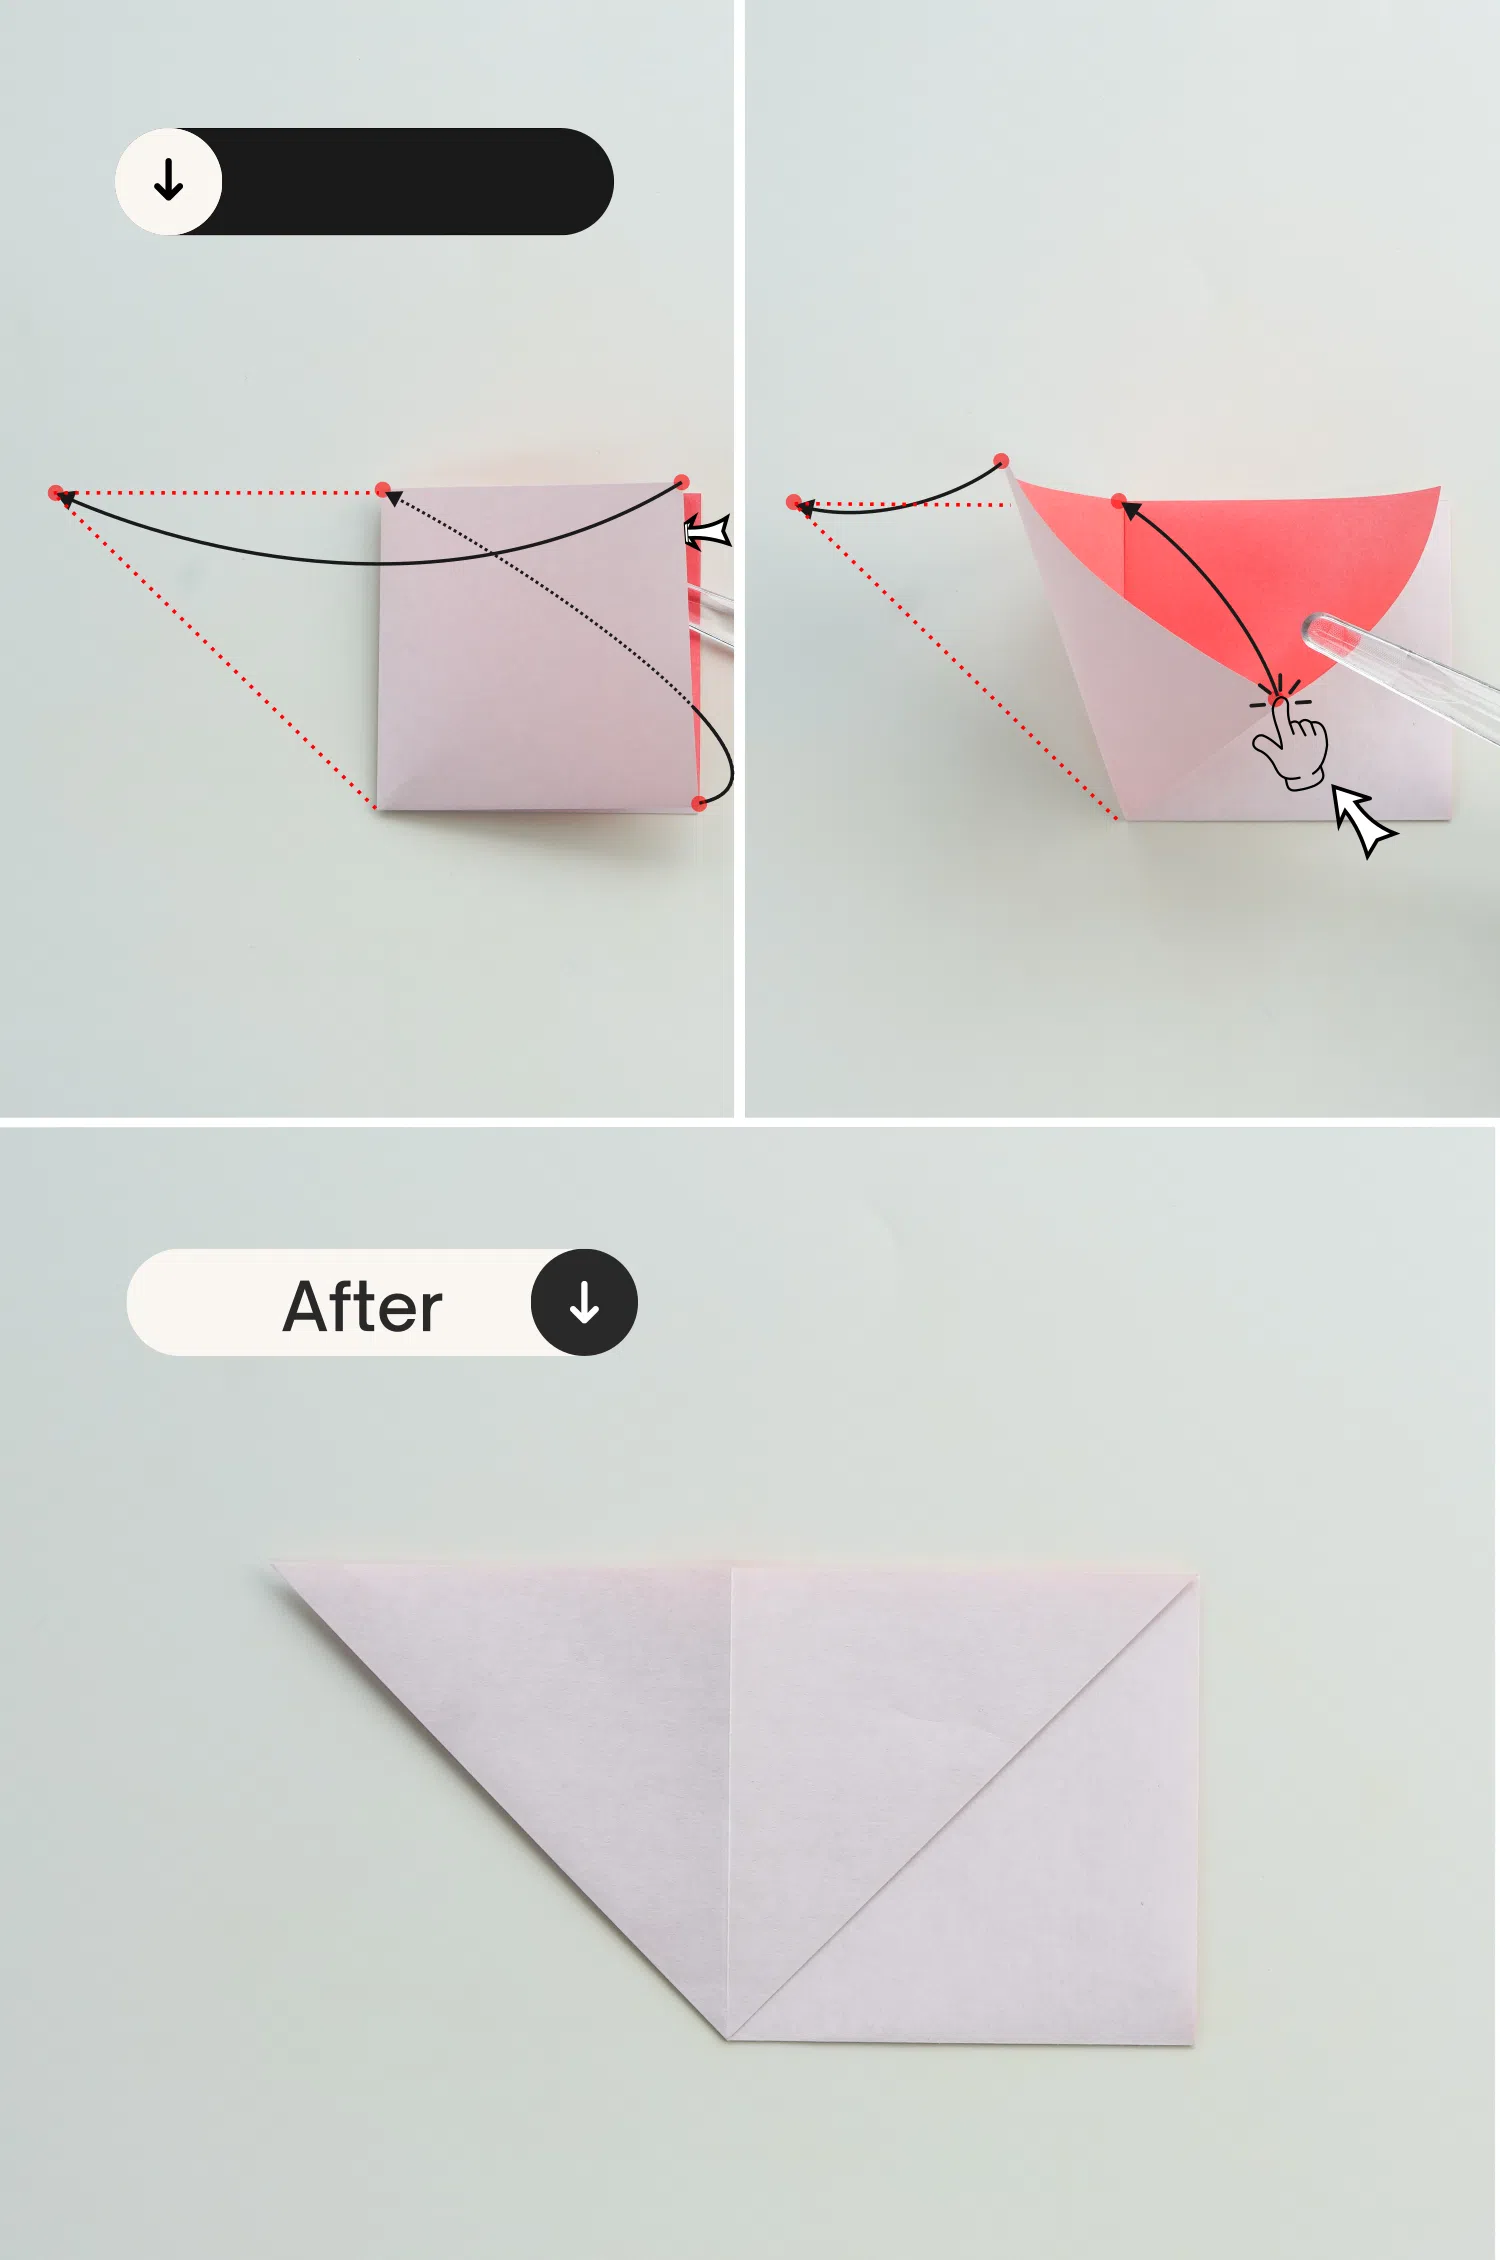
Step 3
Open the top square slightly, and push the bottom right corner to meet the top left corner, then flatten it to form a triangle.
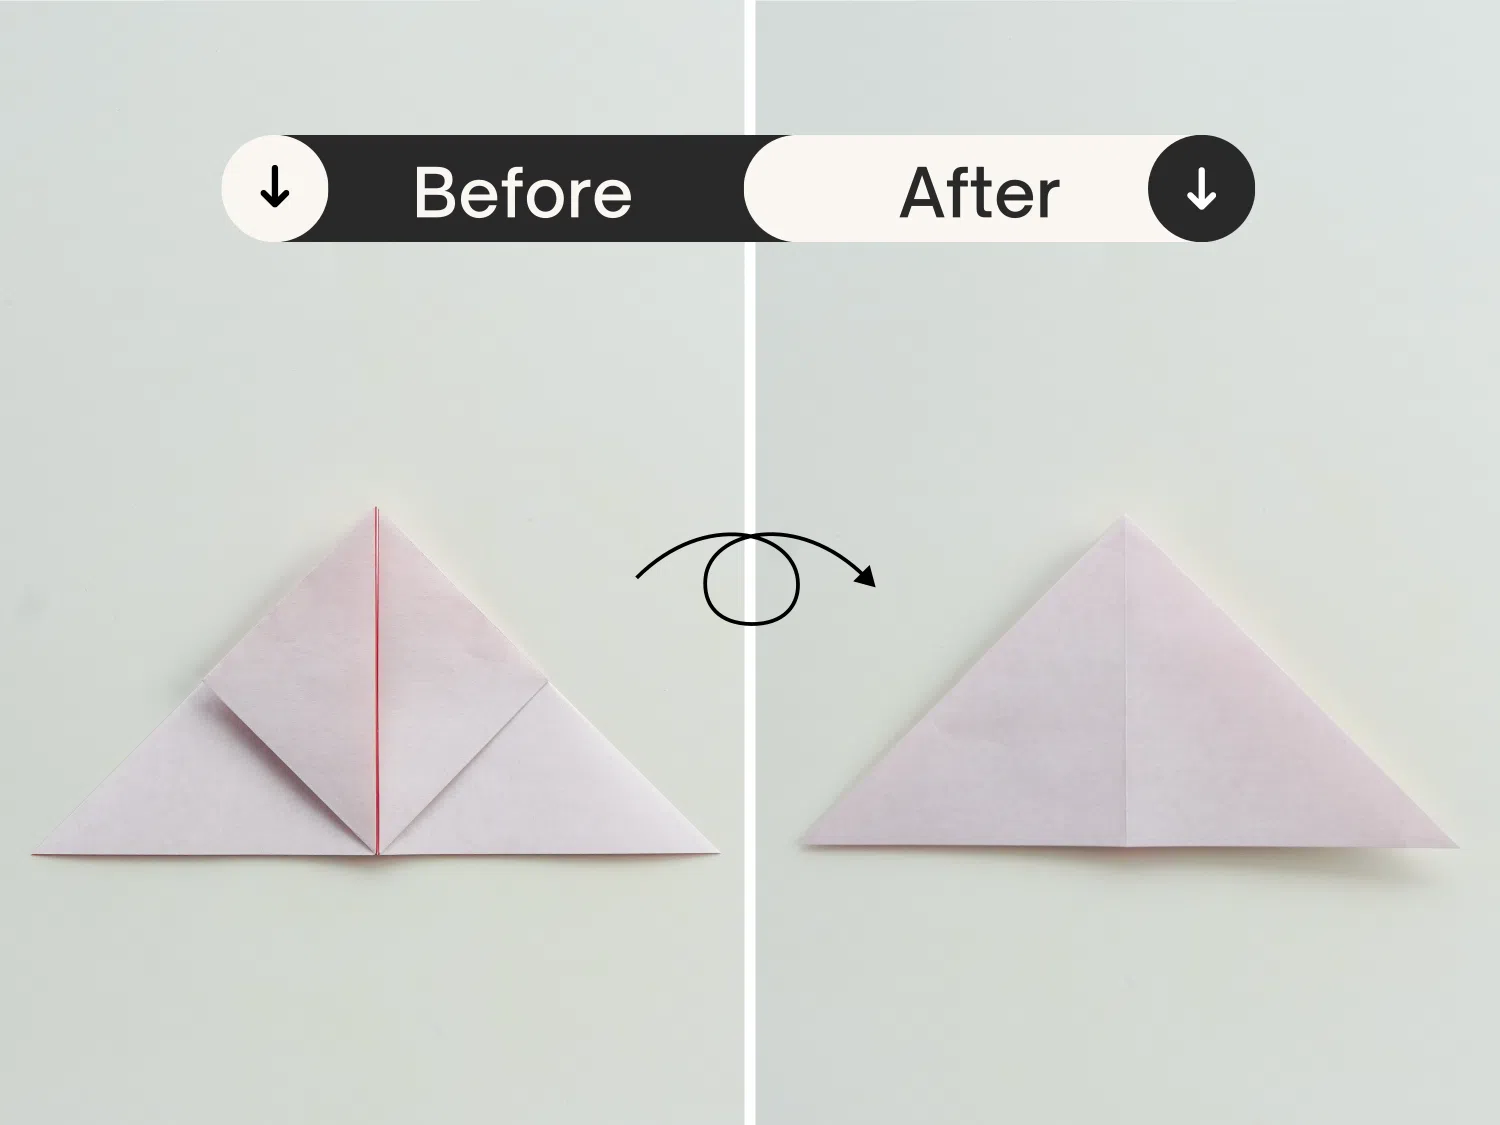
Step 4
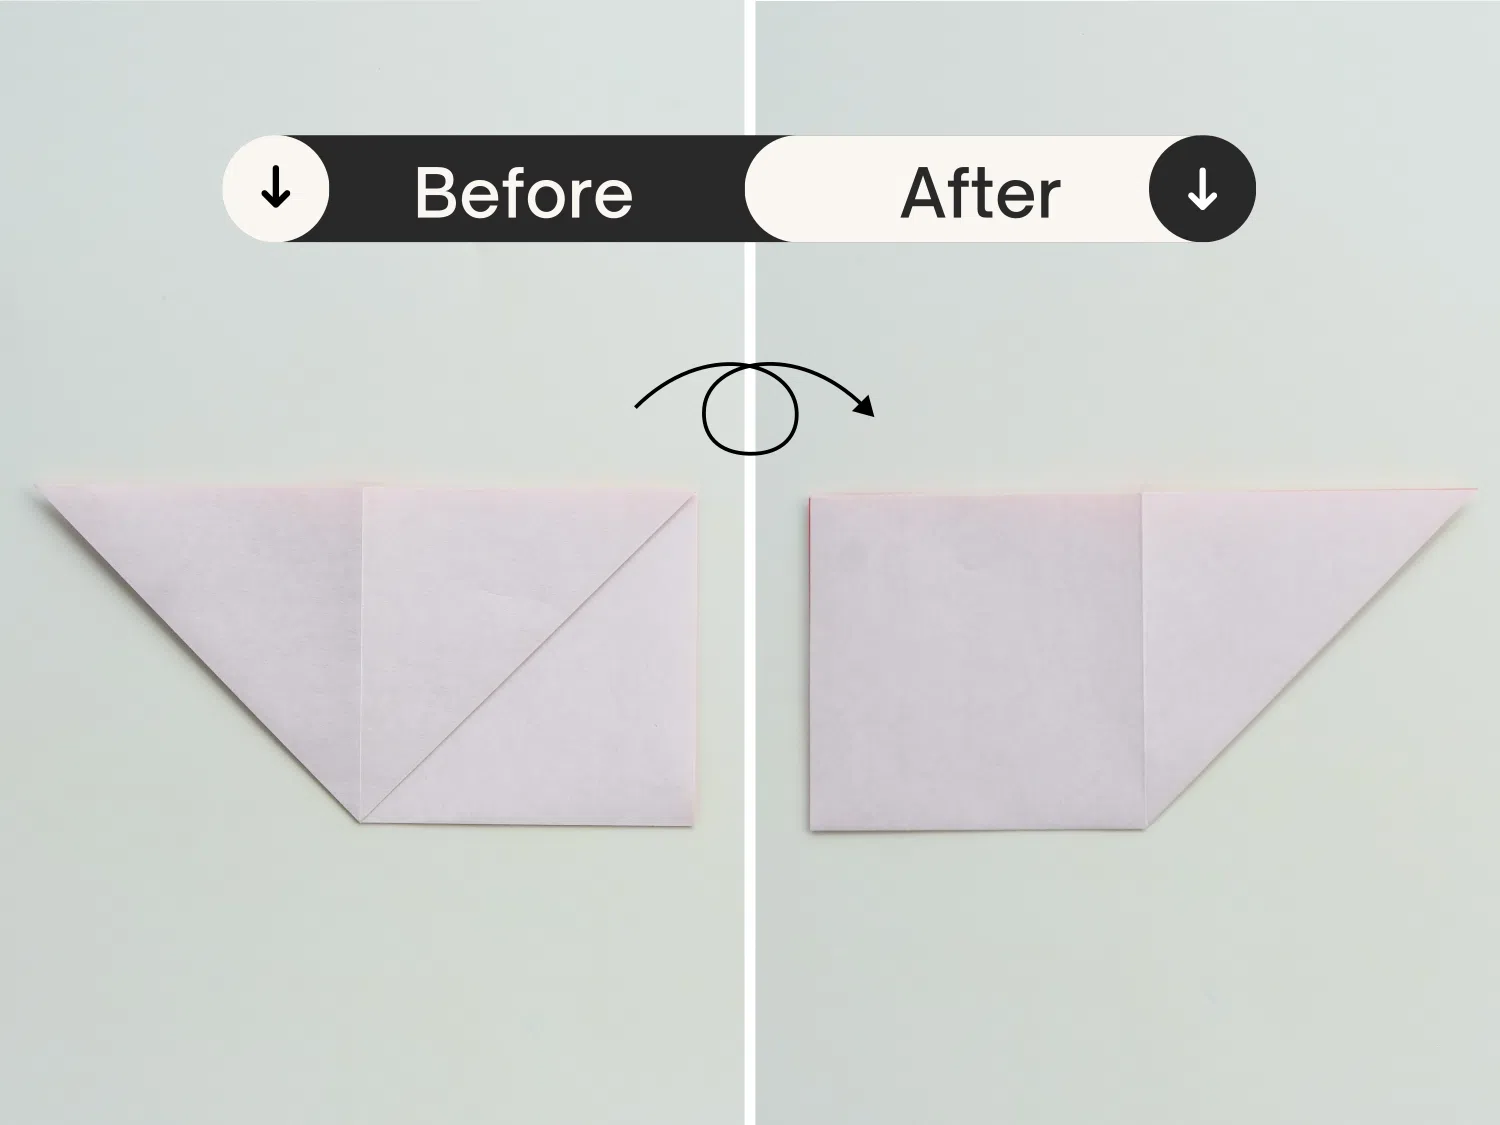
Flip it over.
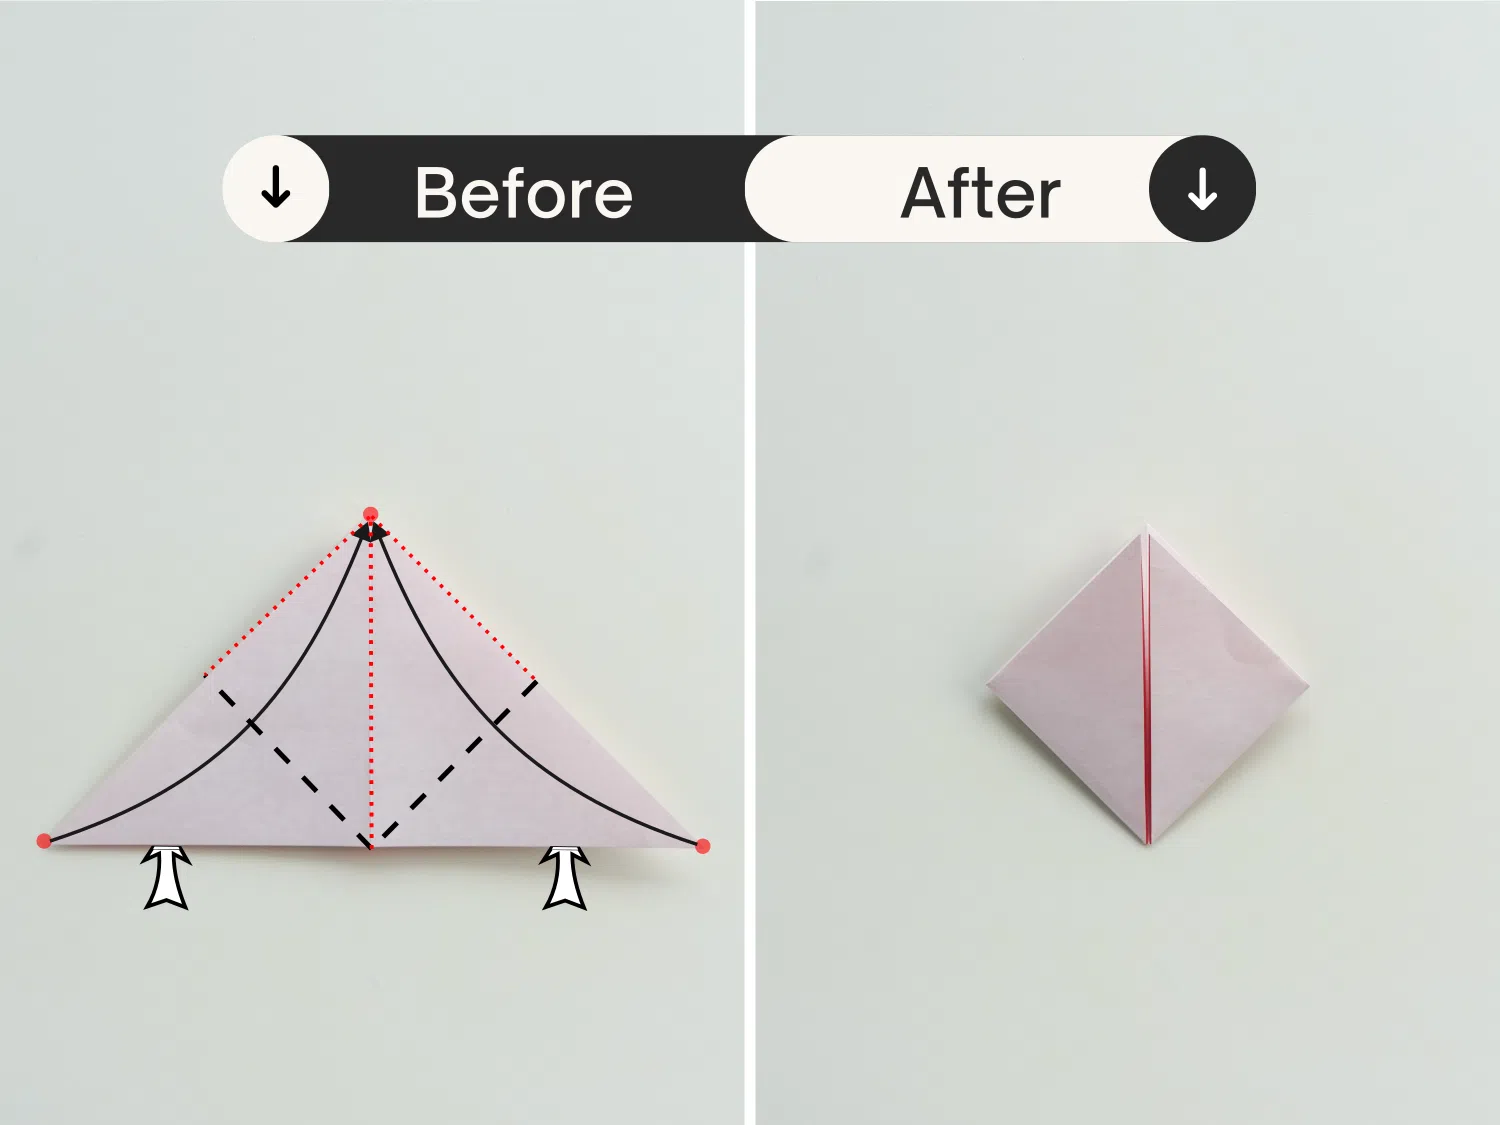
Step 5
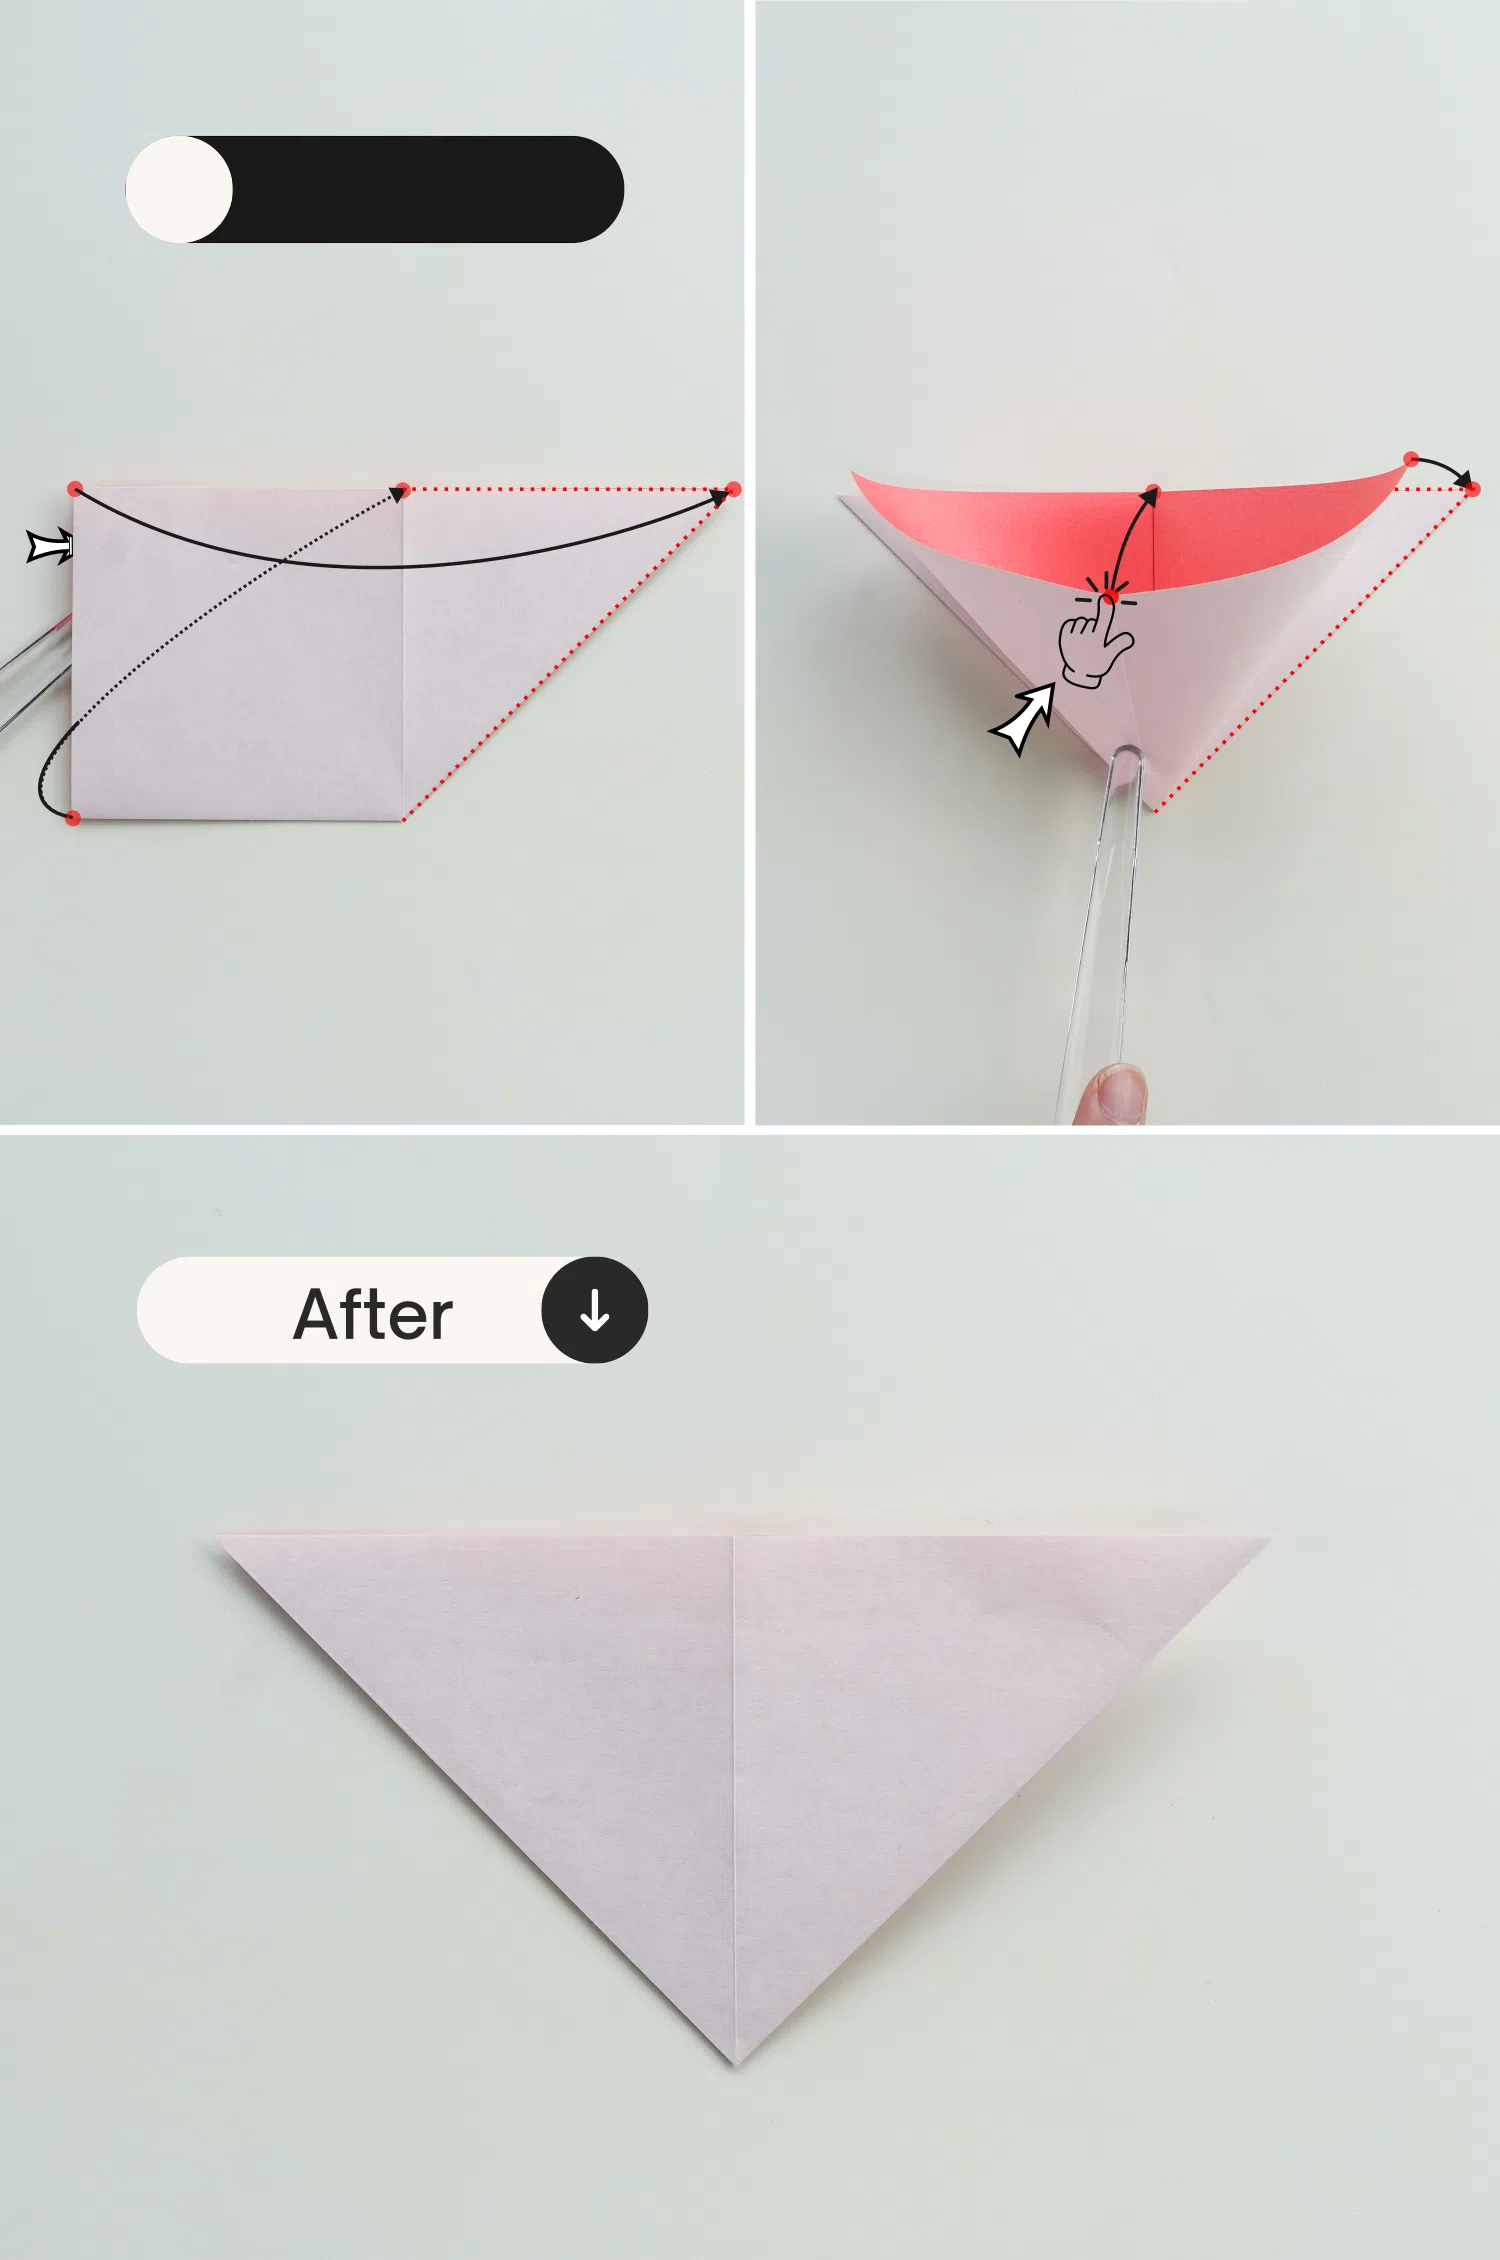
Repeat the manner as in step 3 for this side.
Slightly open this square, push the bottom left corner to meet the top right corner, then flatten it, getting two overlapping triangles.
Step 6
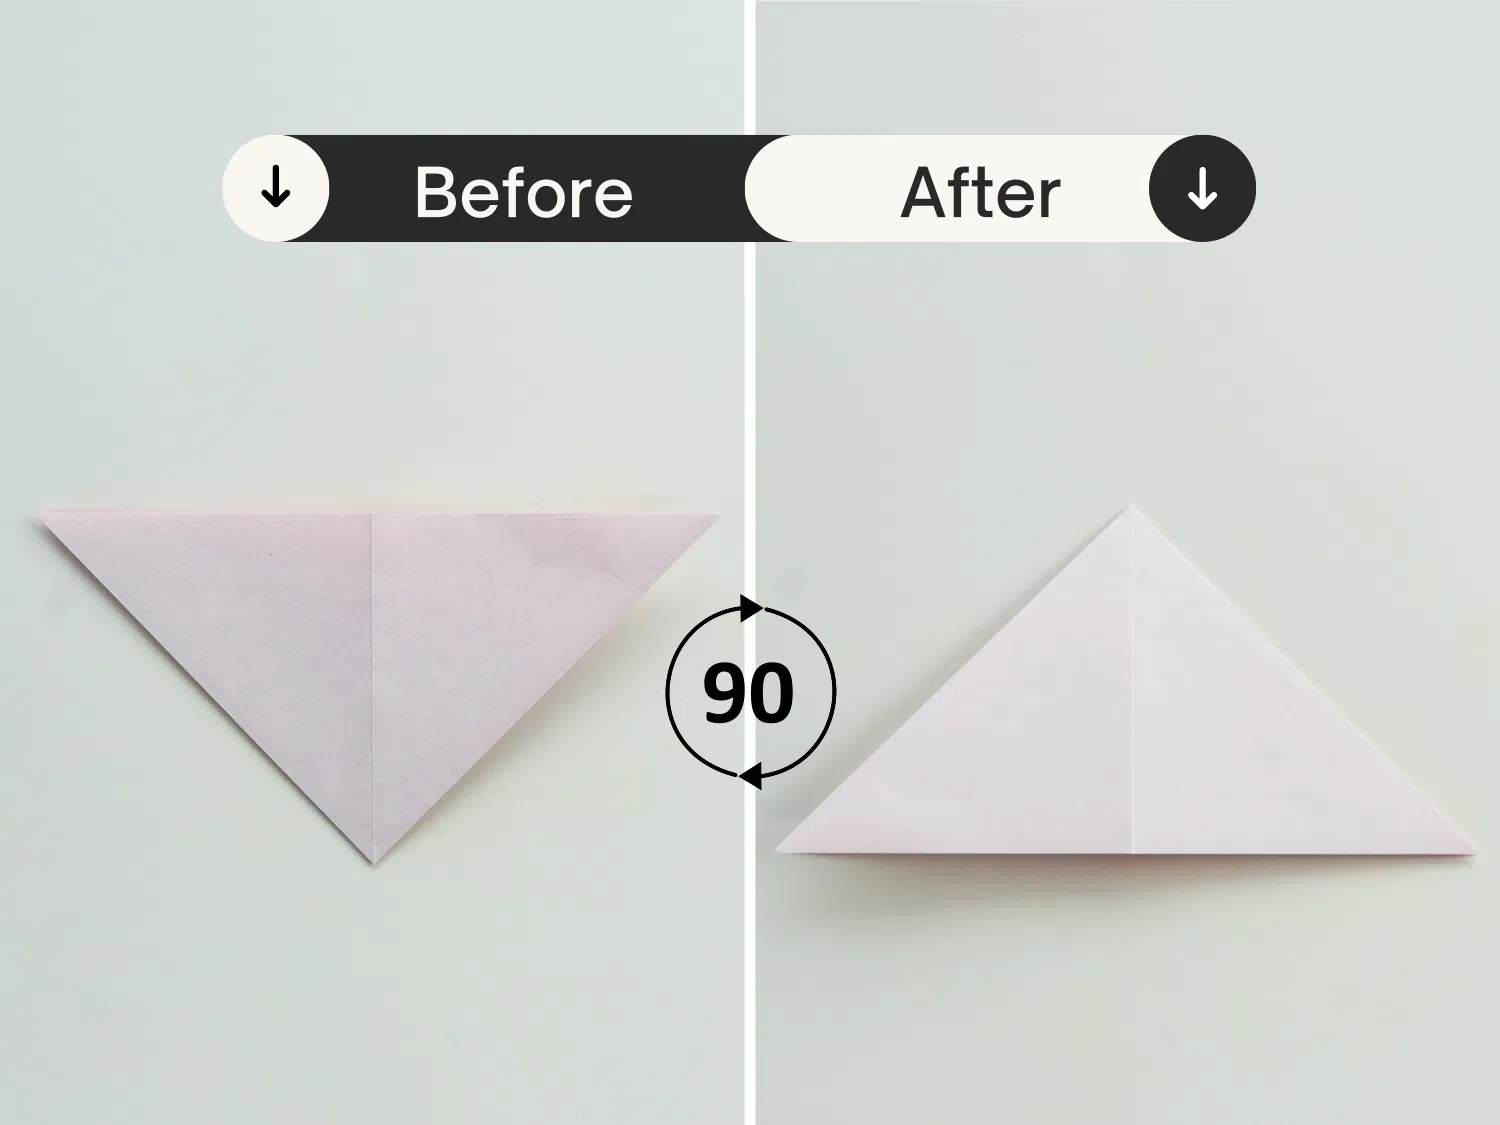
Rotate it 90 degrees clockwise.
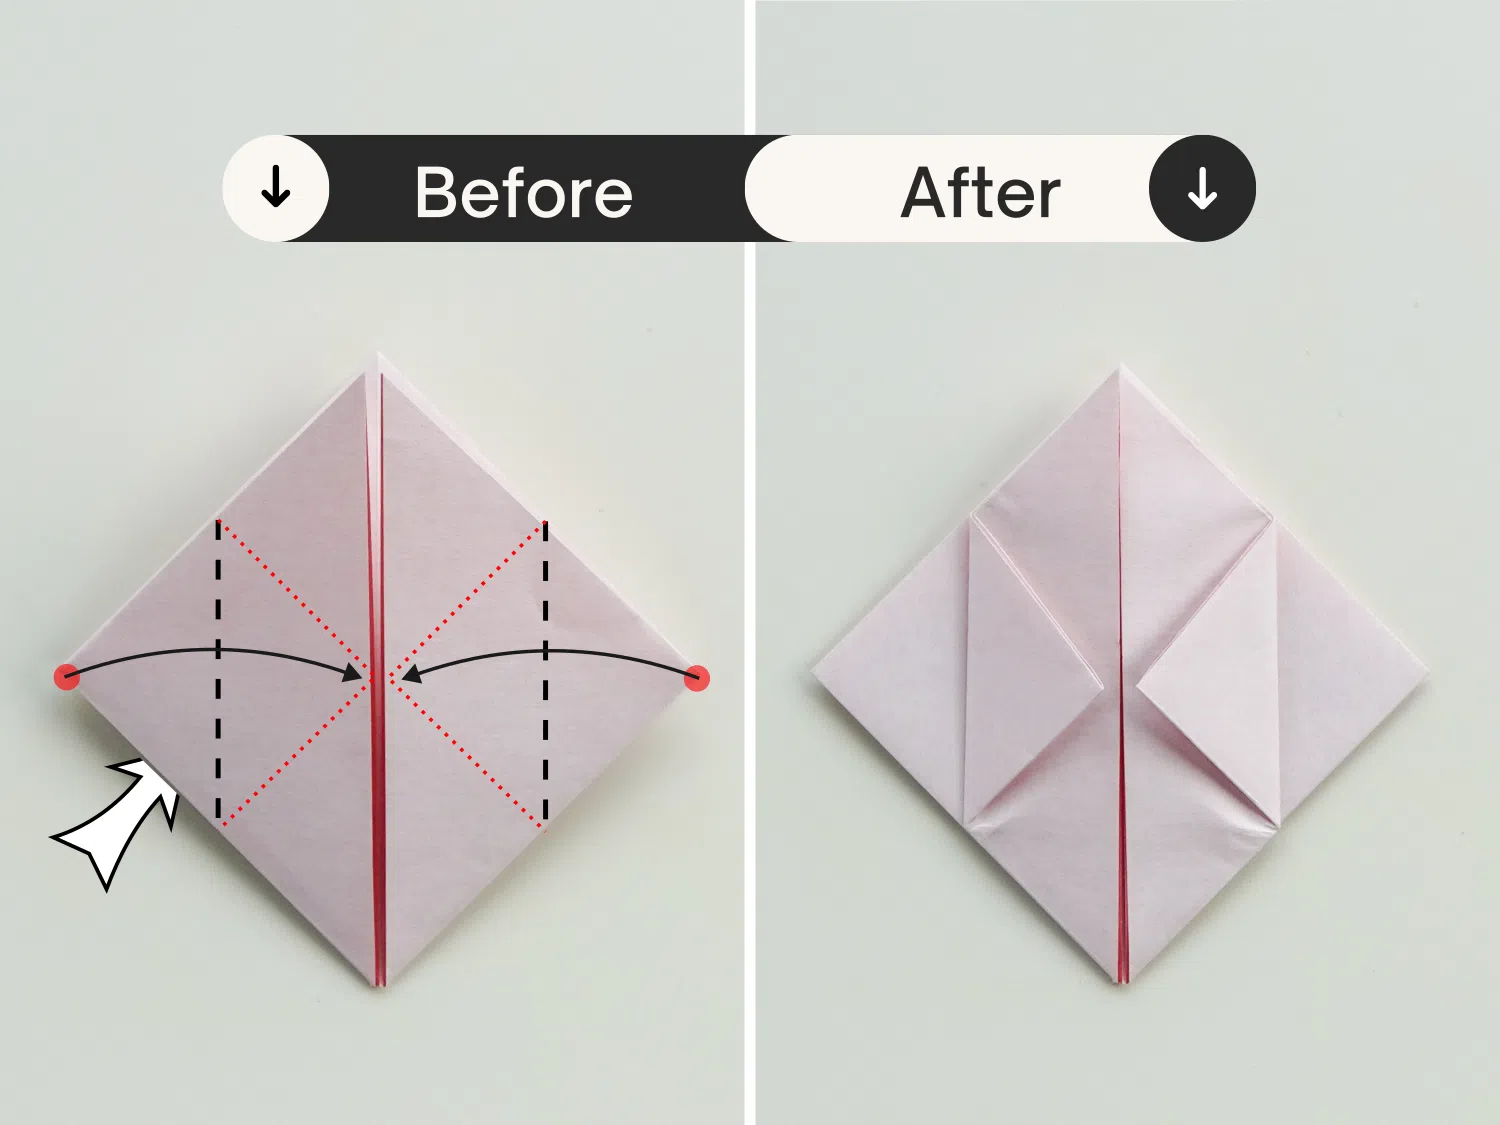
Step 7
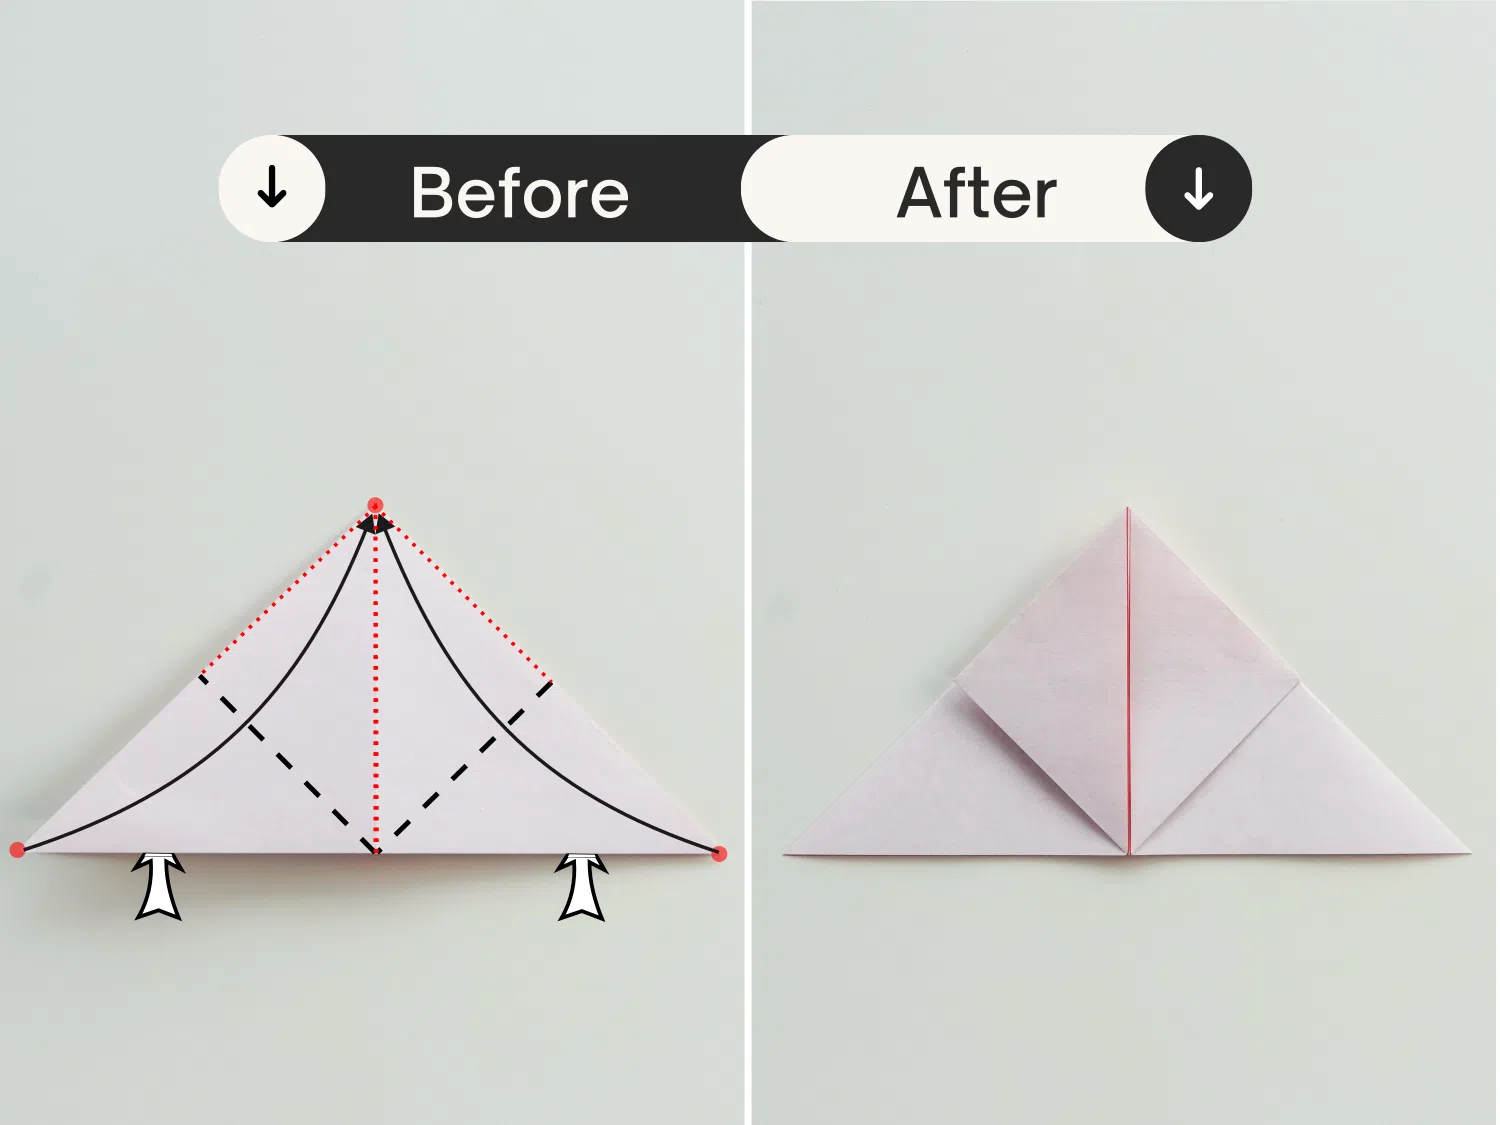
Fold the right corner of the top layer to the top corner diagonally.
Repeat this for the left side.
Step 8
Flip the paper over again.
Step 9
Similarly, fold the left and right corners to the top corner diagonally.
Step 10
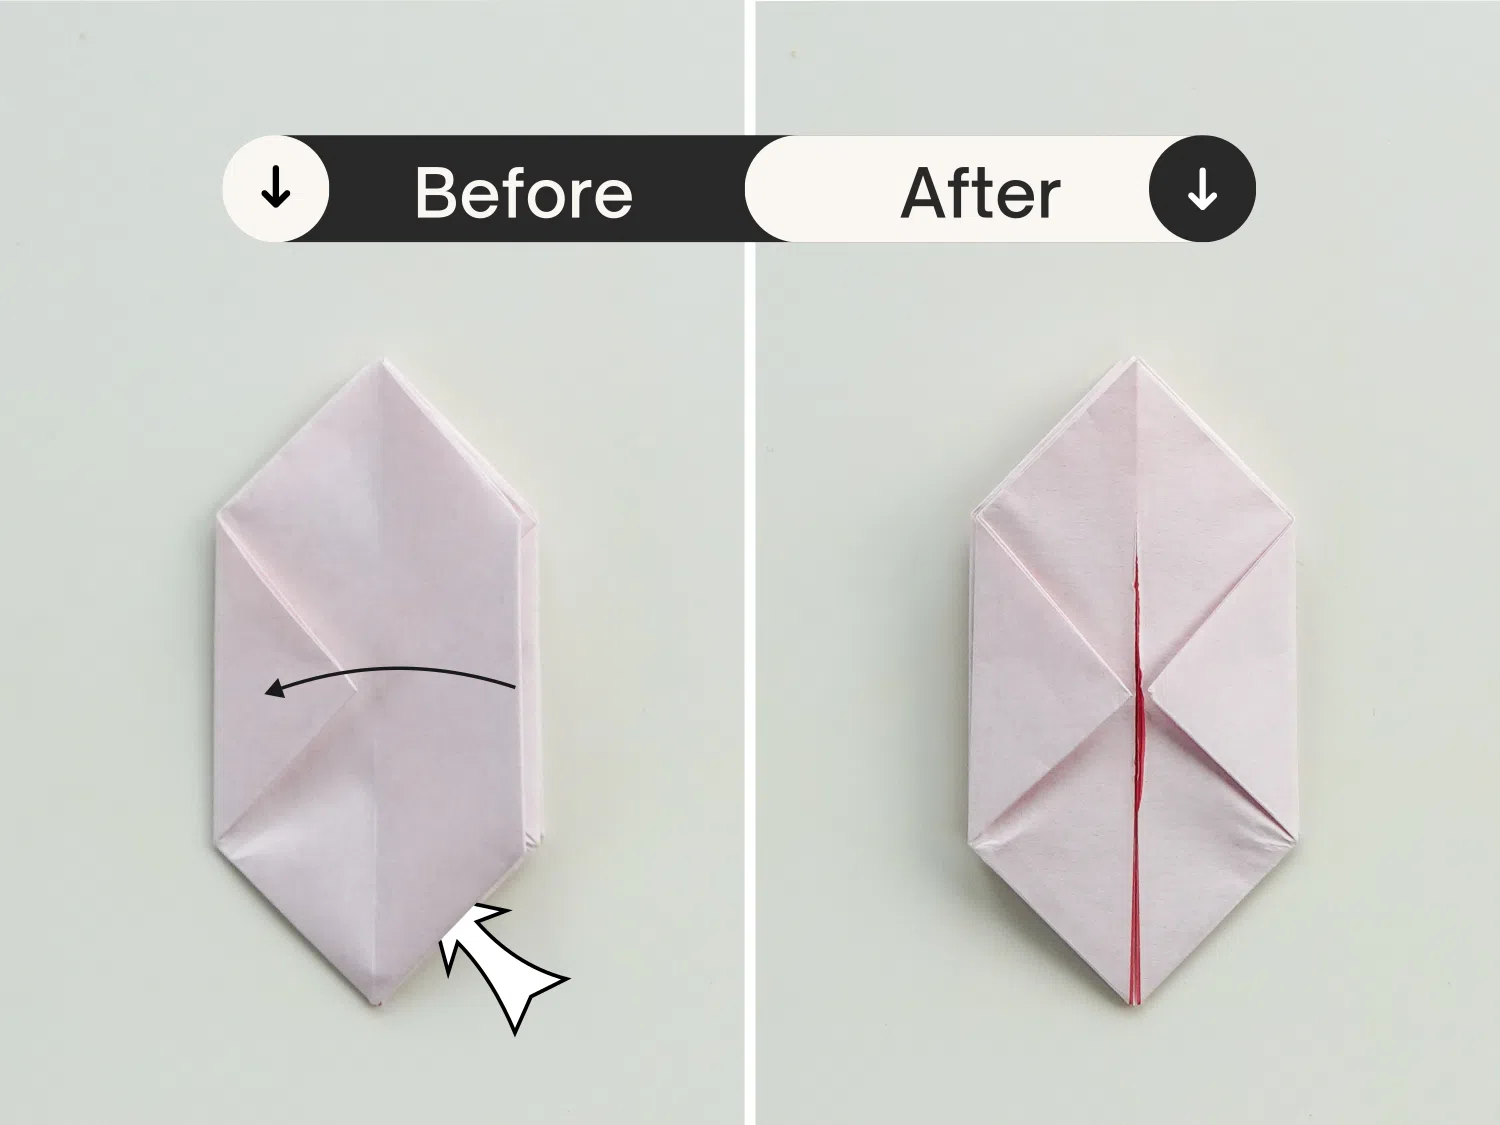
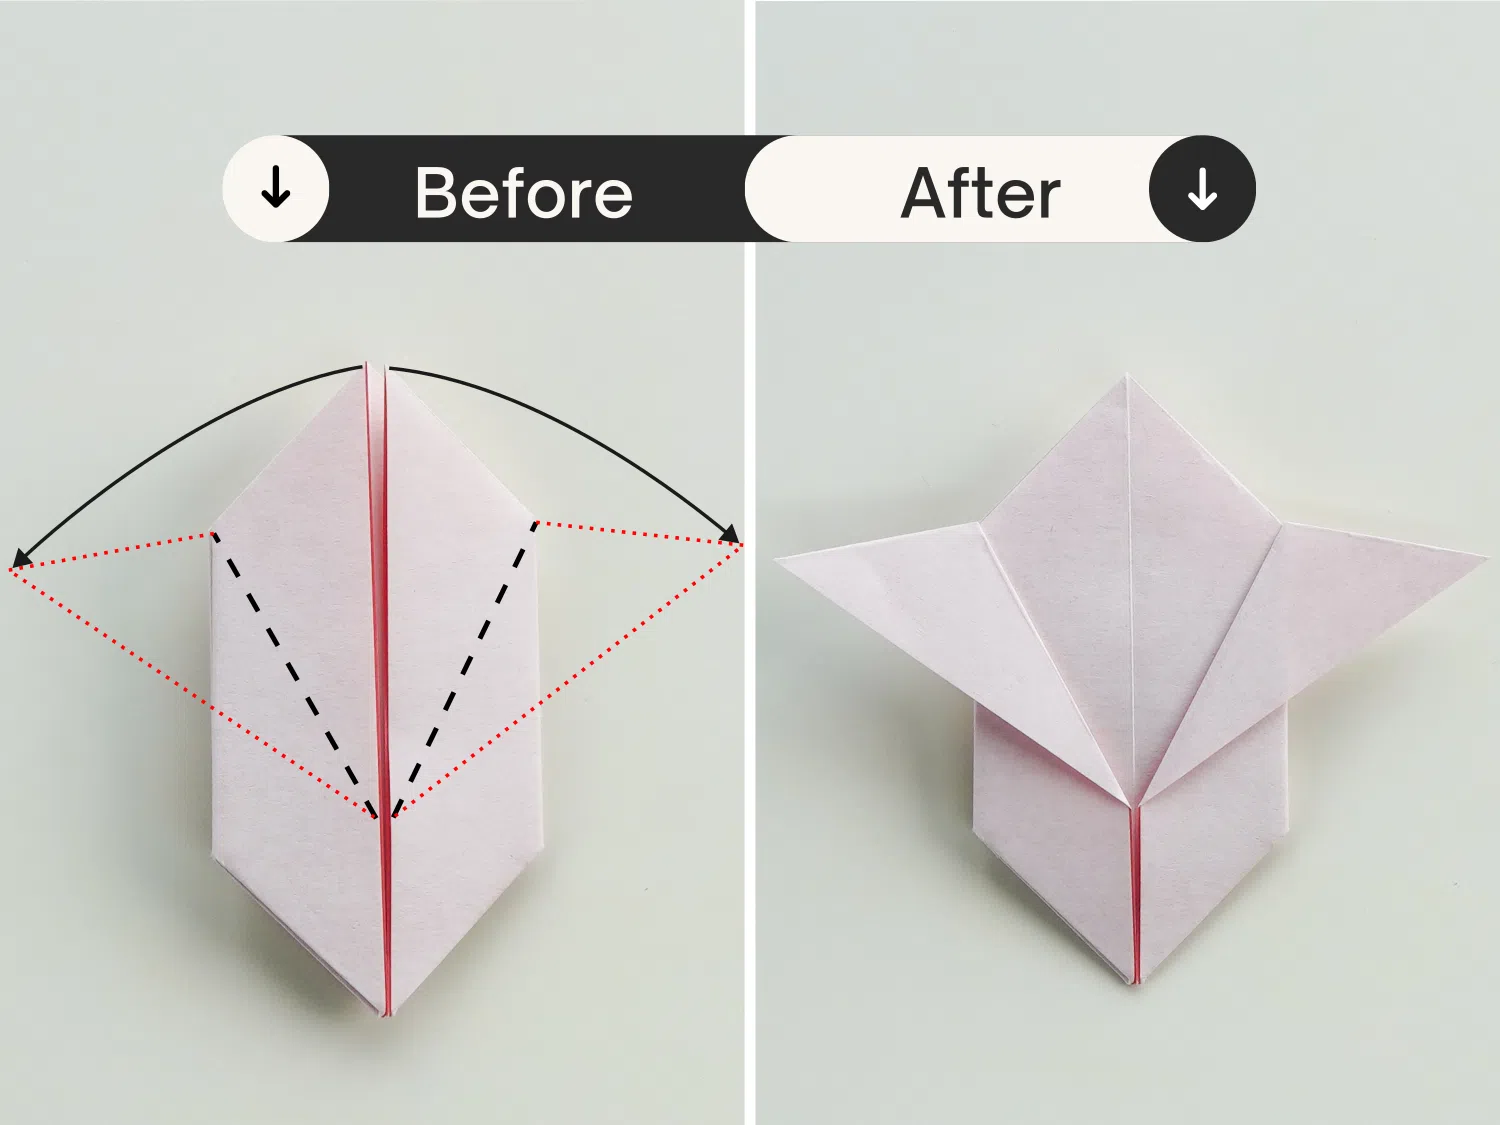
Fold both the left and right corners of the top layer to the center.
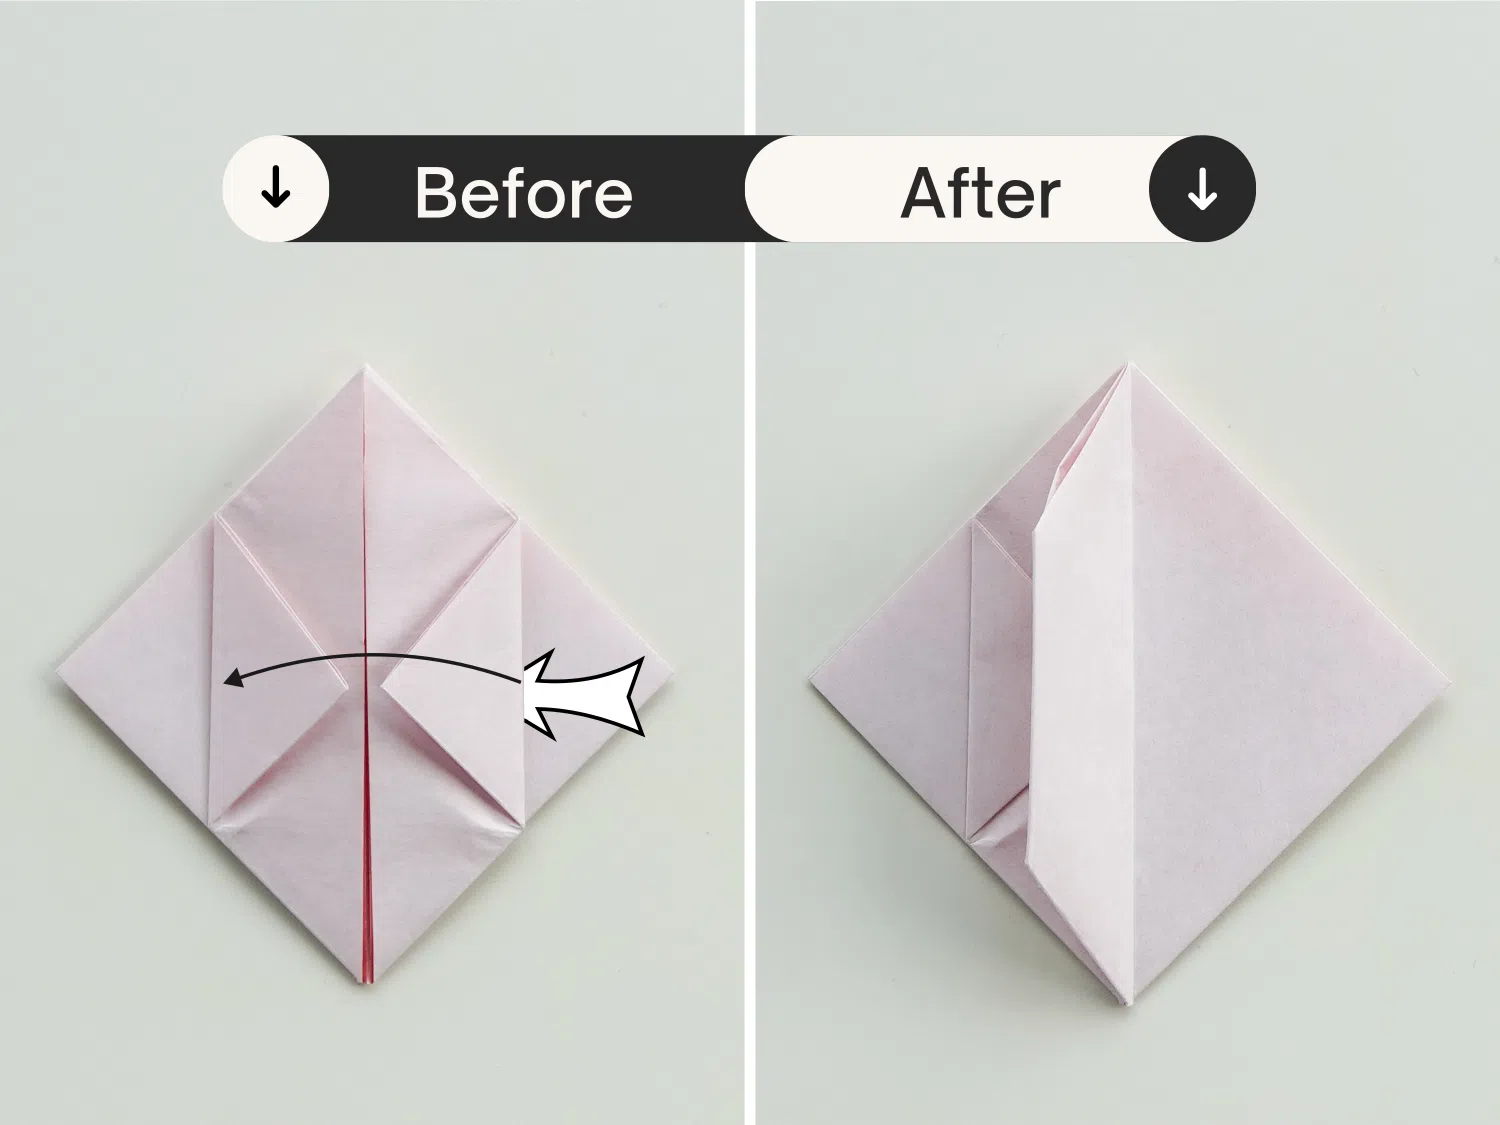
Step 11
Take the right top layer, and fold it to the left along the central line.
Step 12
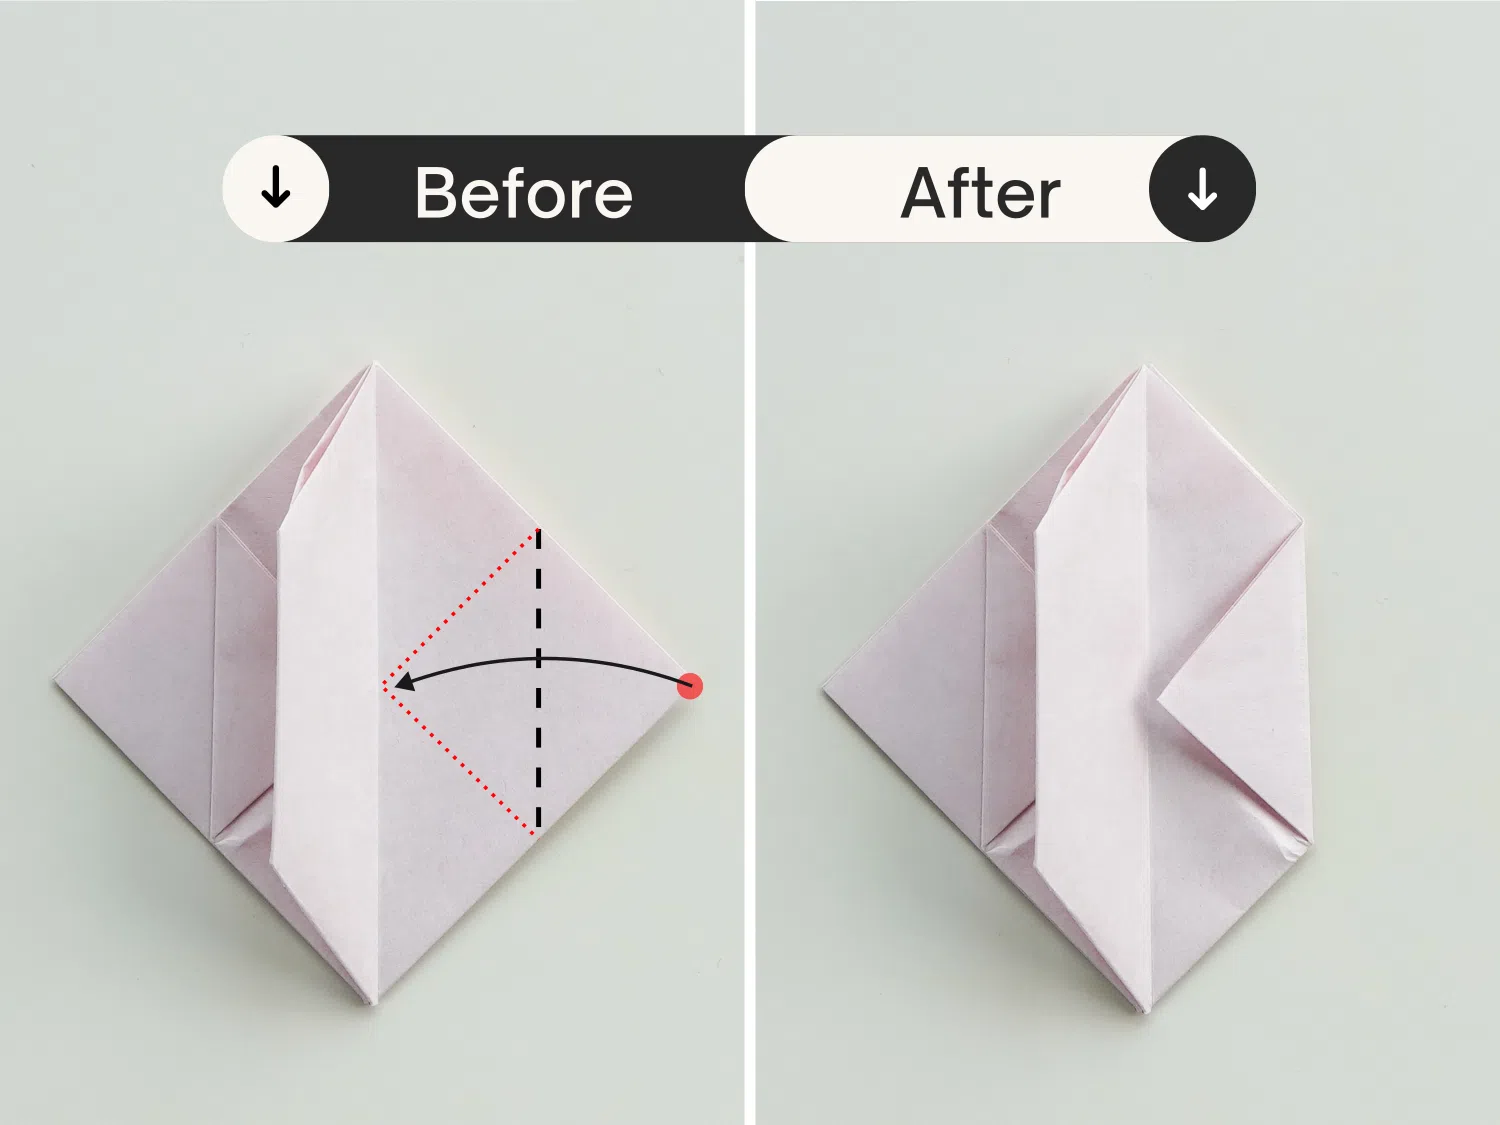
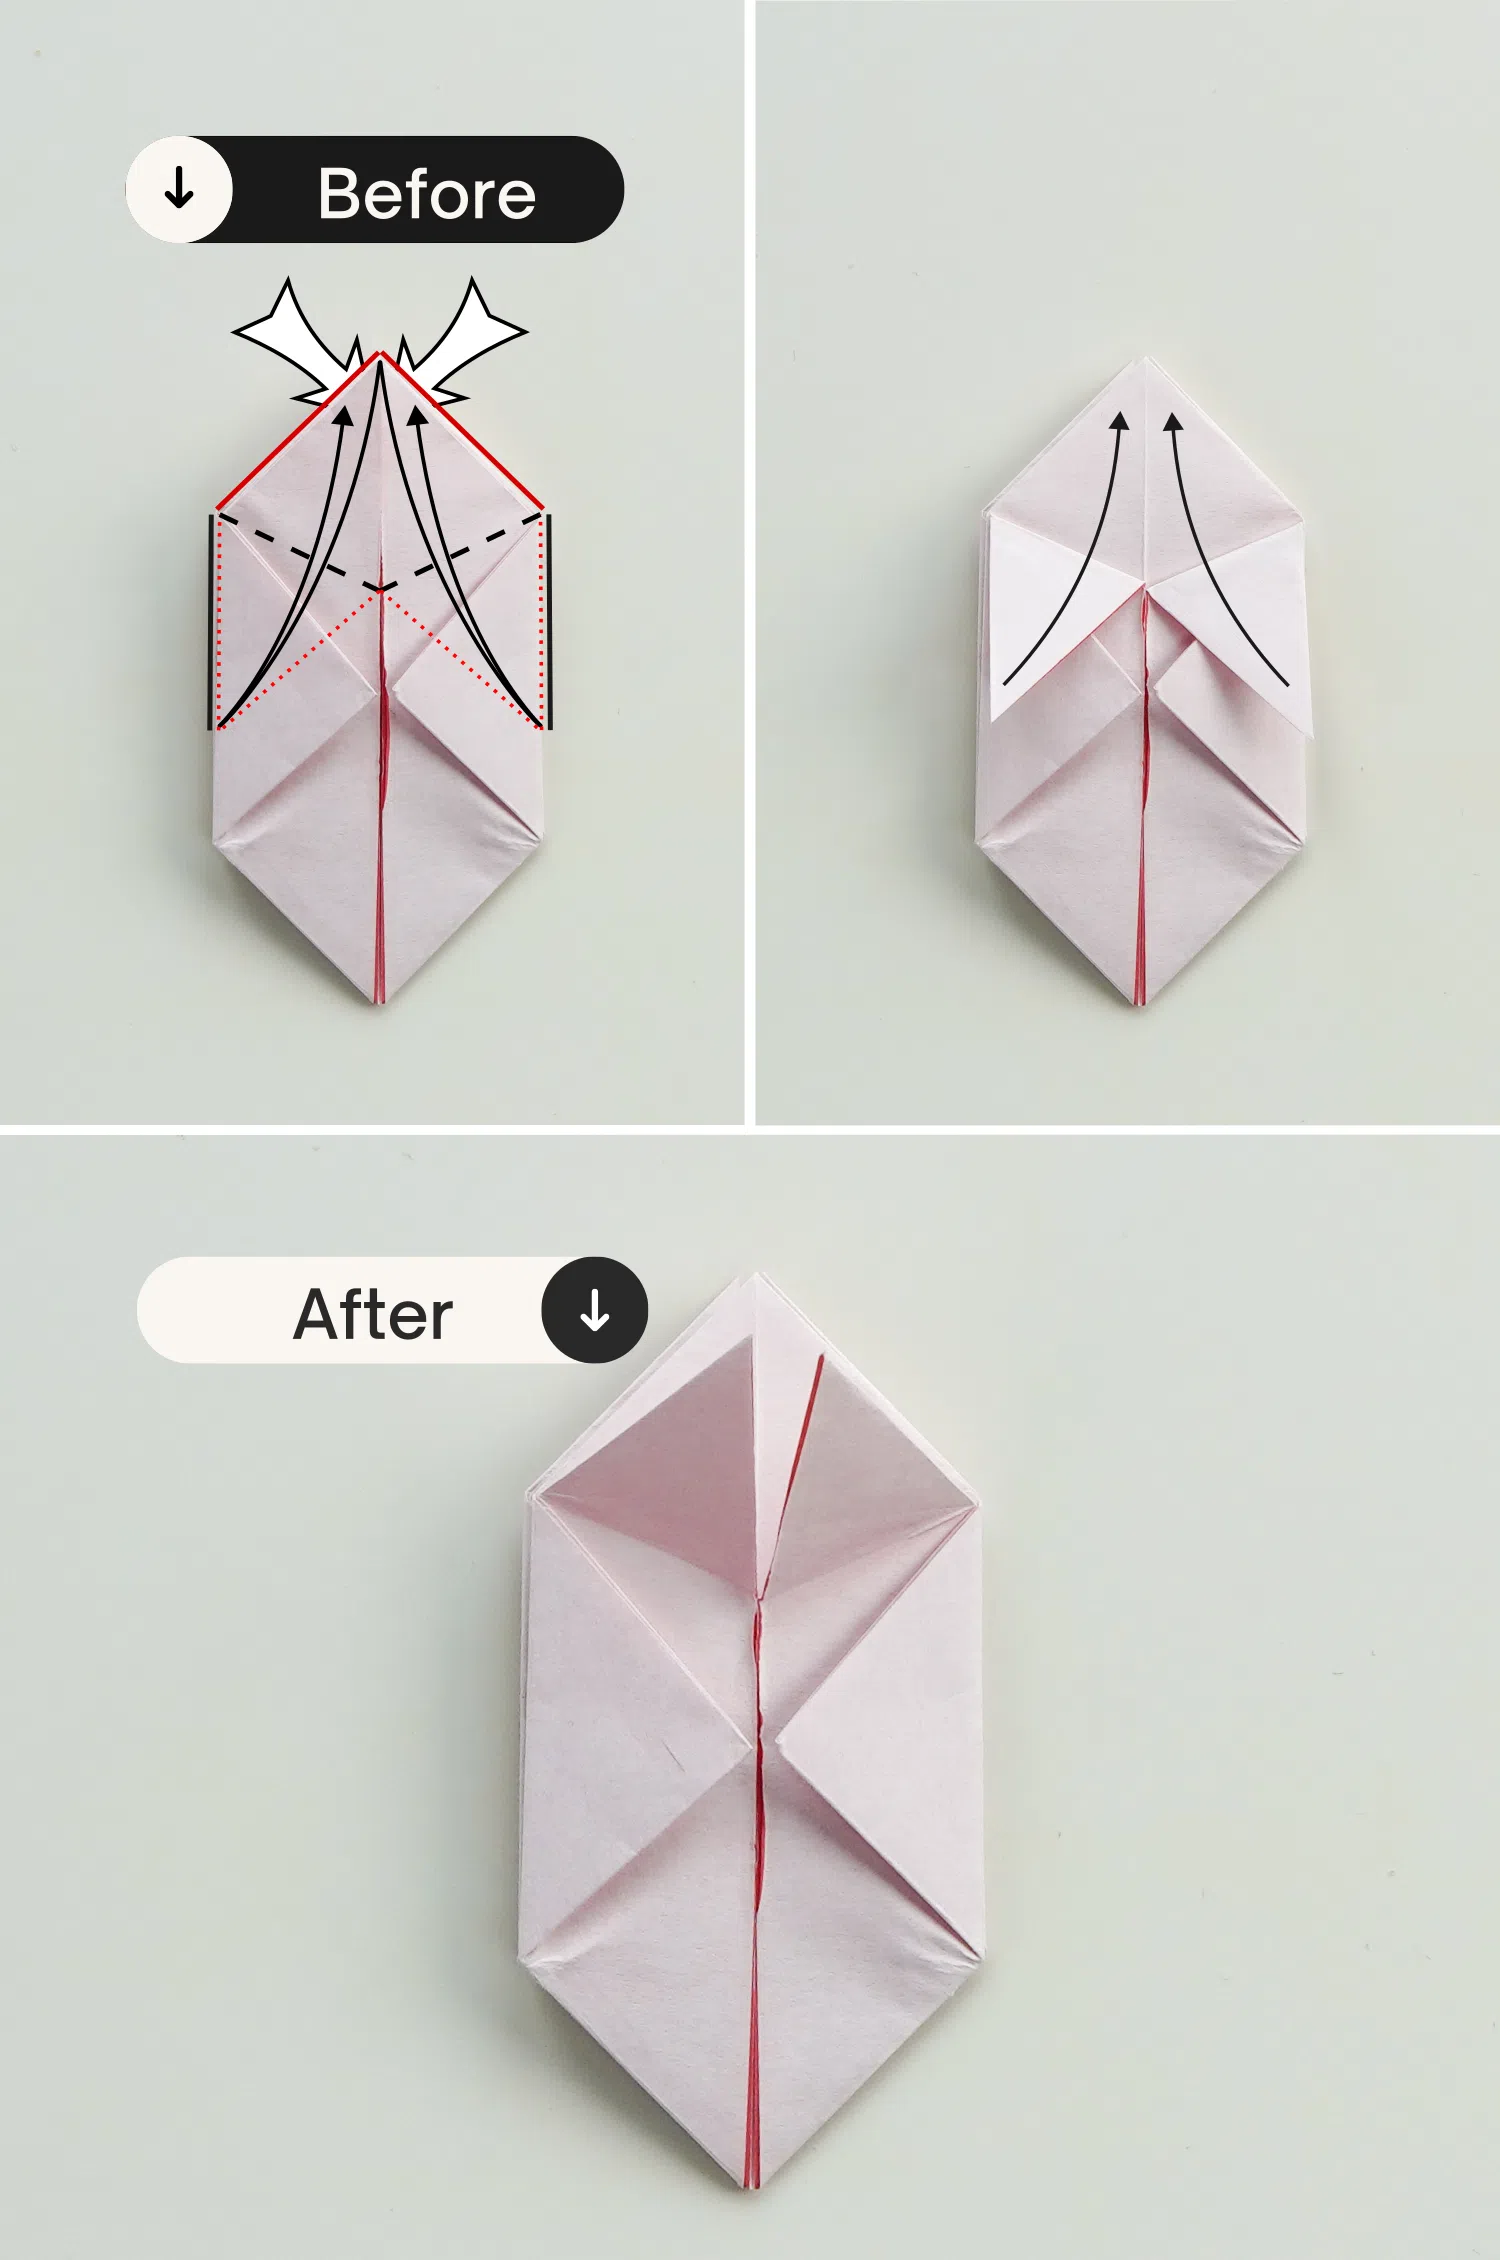
Fold the right corner to the left to meet the middle crease.
Step 13
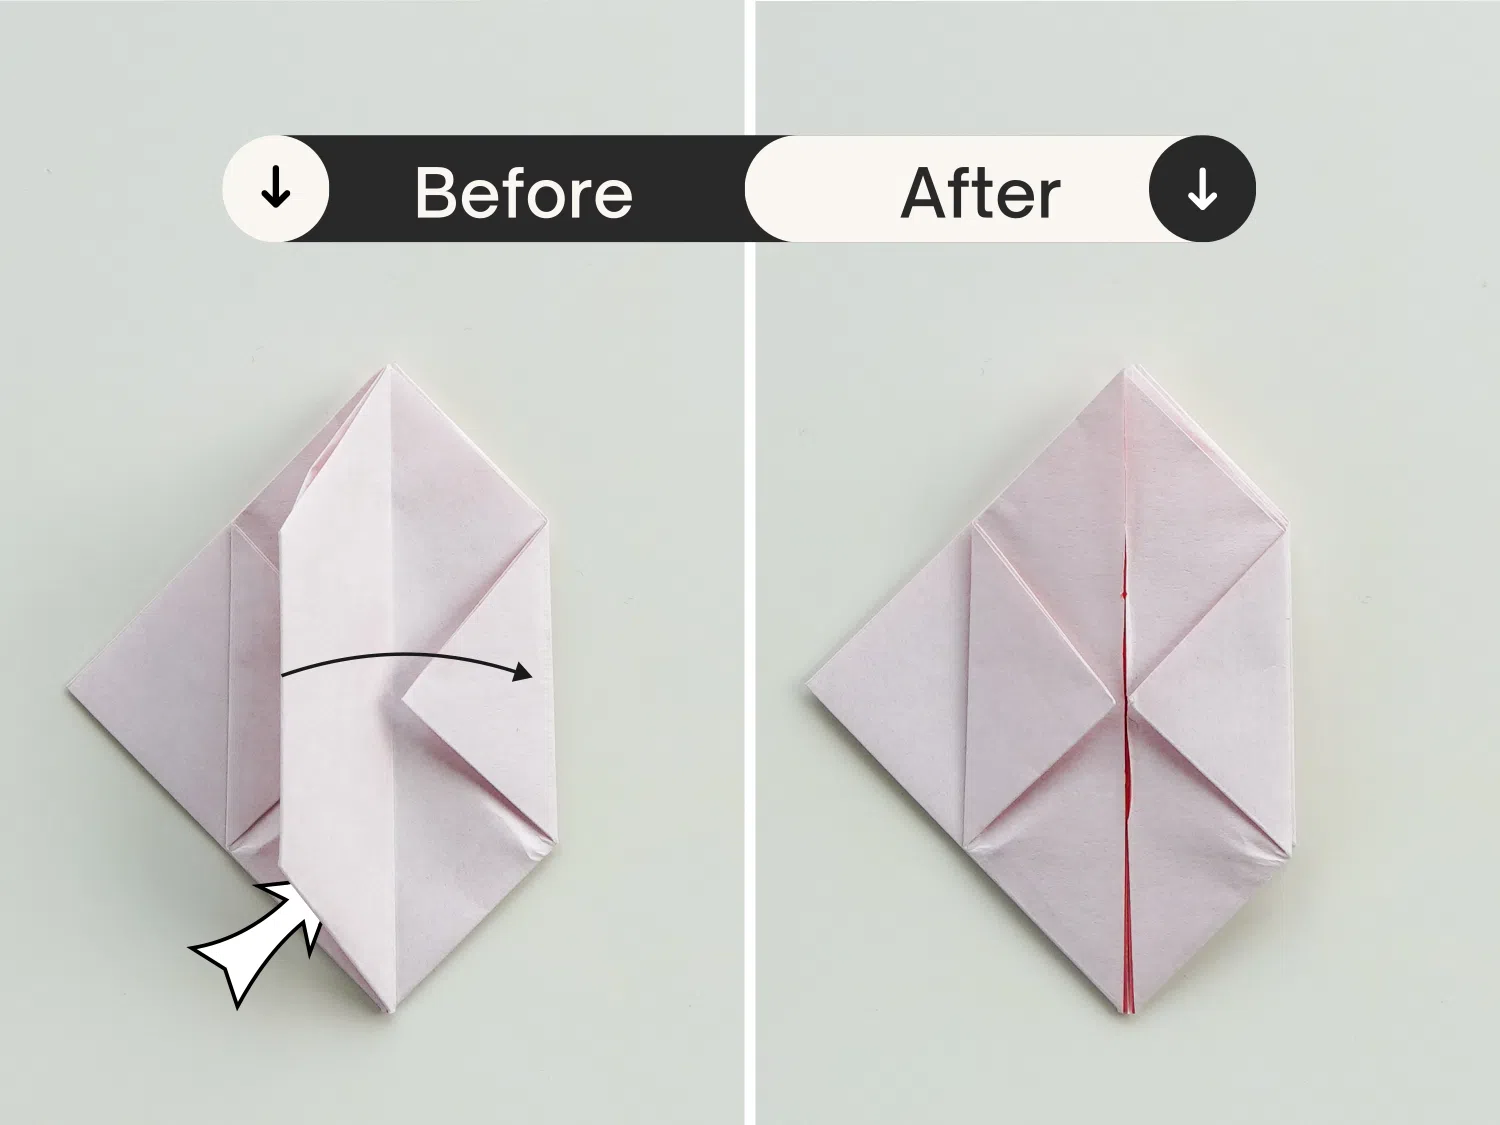
Take the folded part you made in step 11, and fold it back to the right.
Step 14
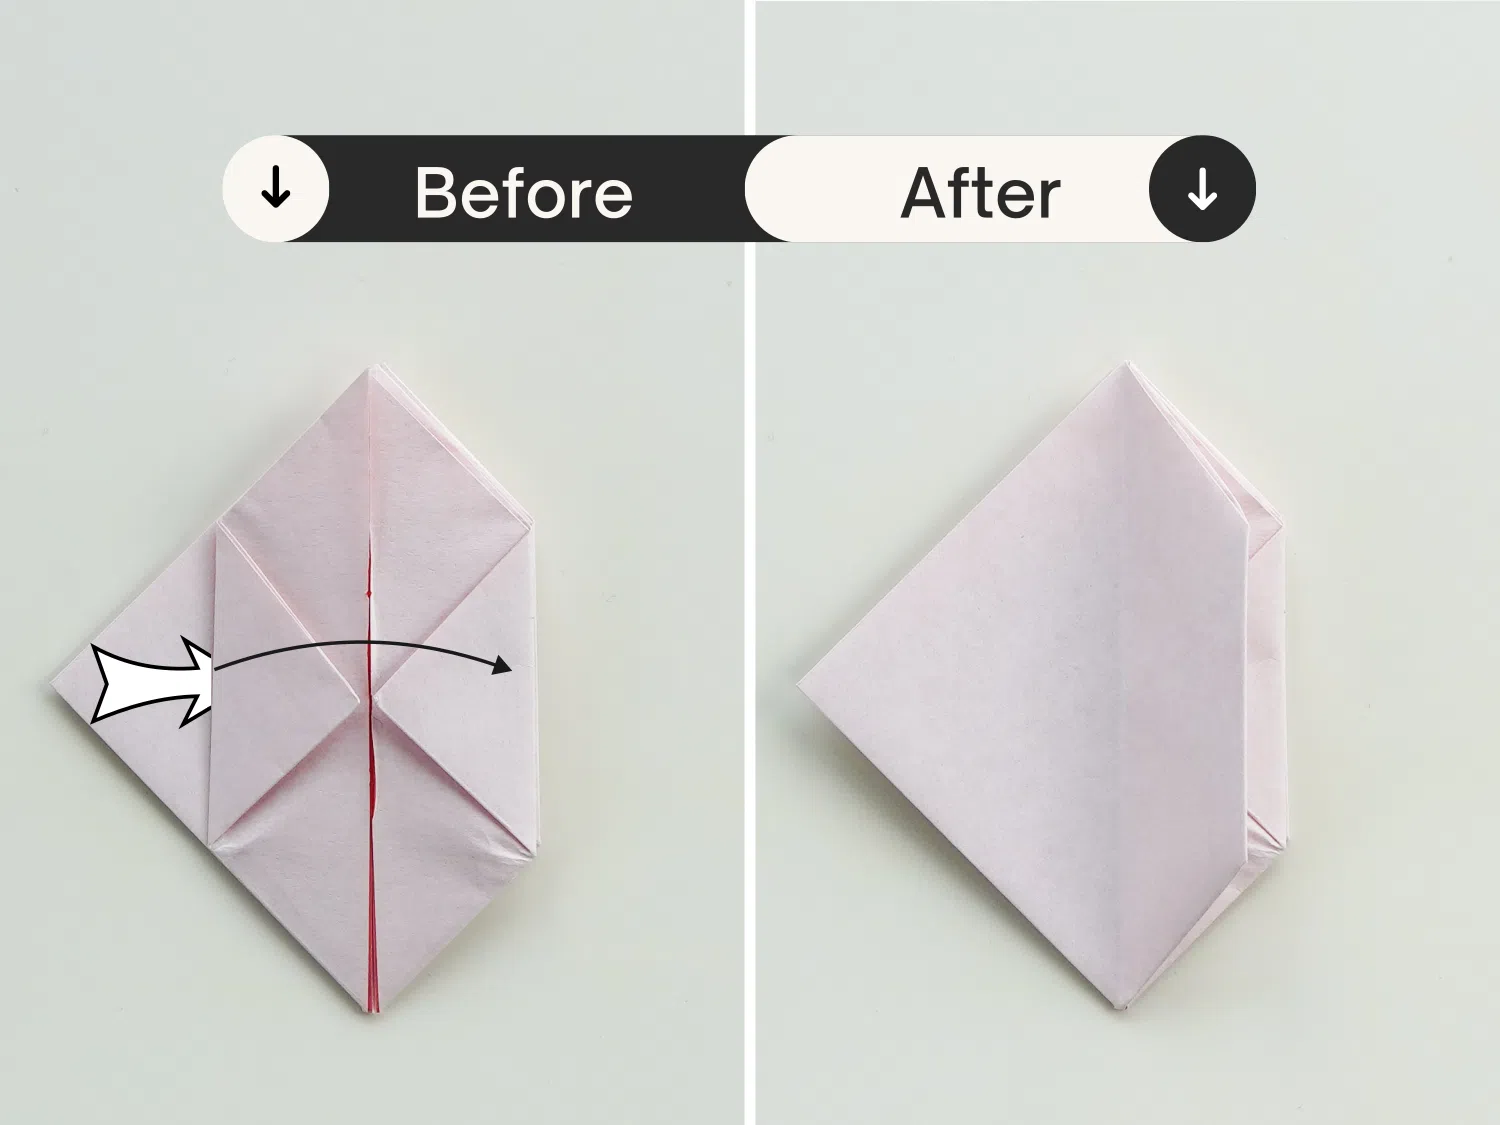
Fold the left top layer to the right along the central line.
Step 15
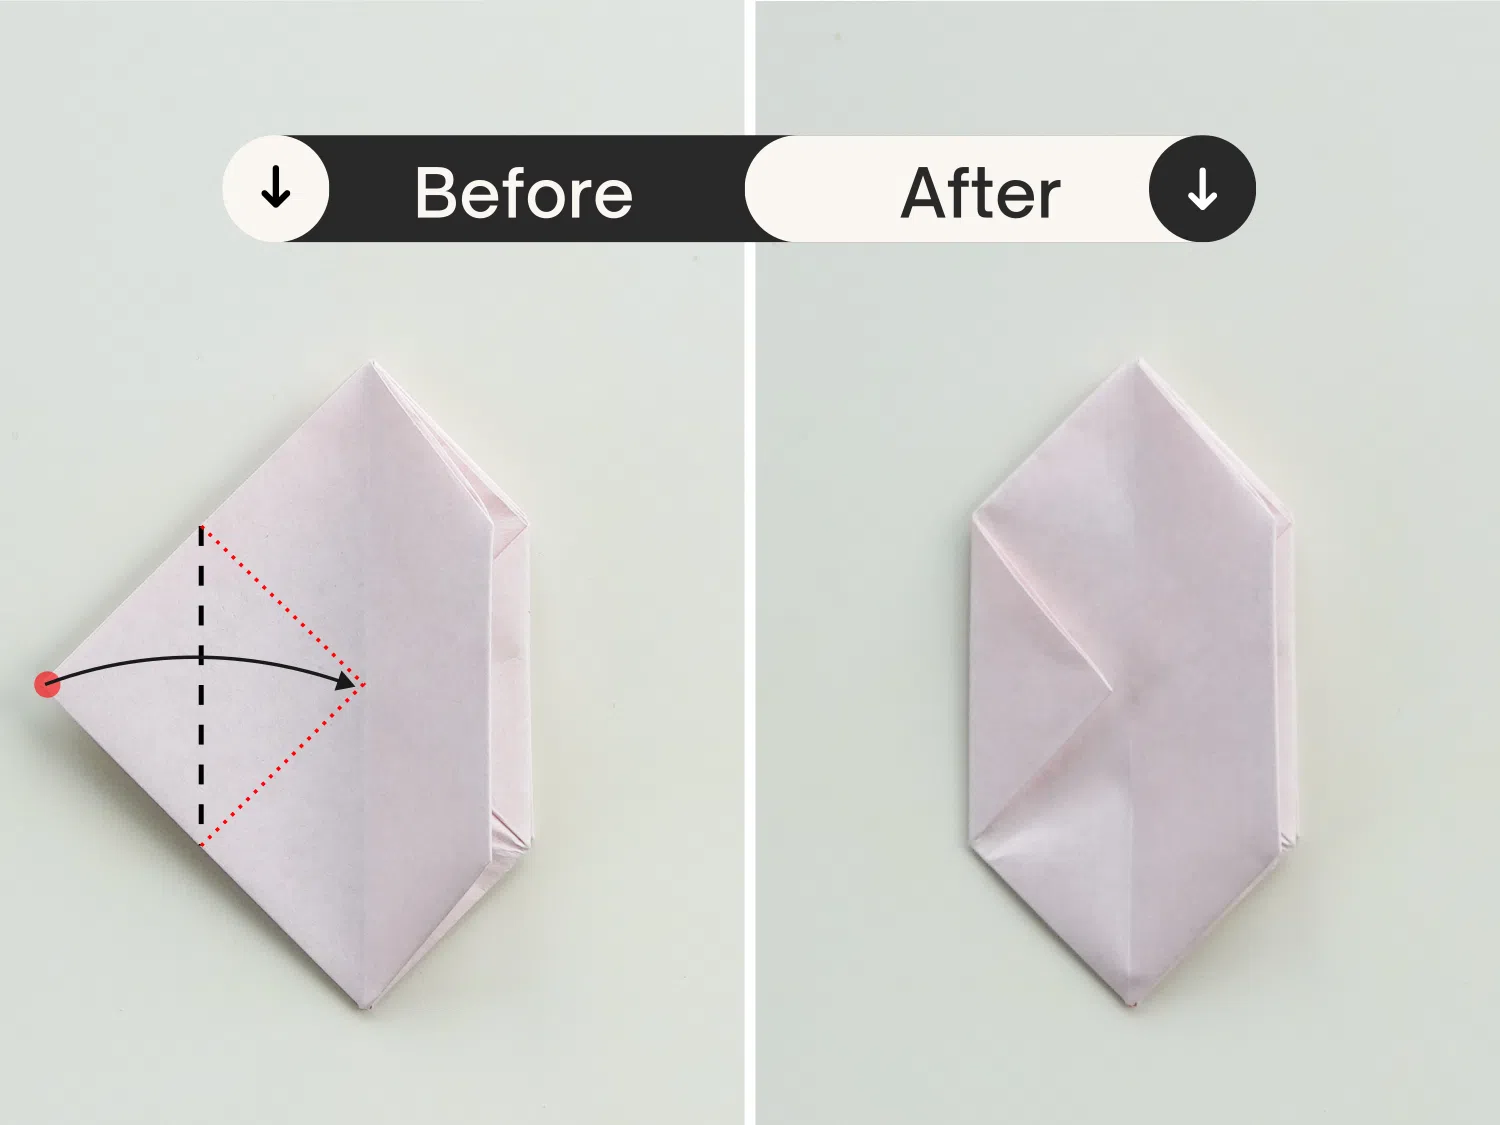
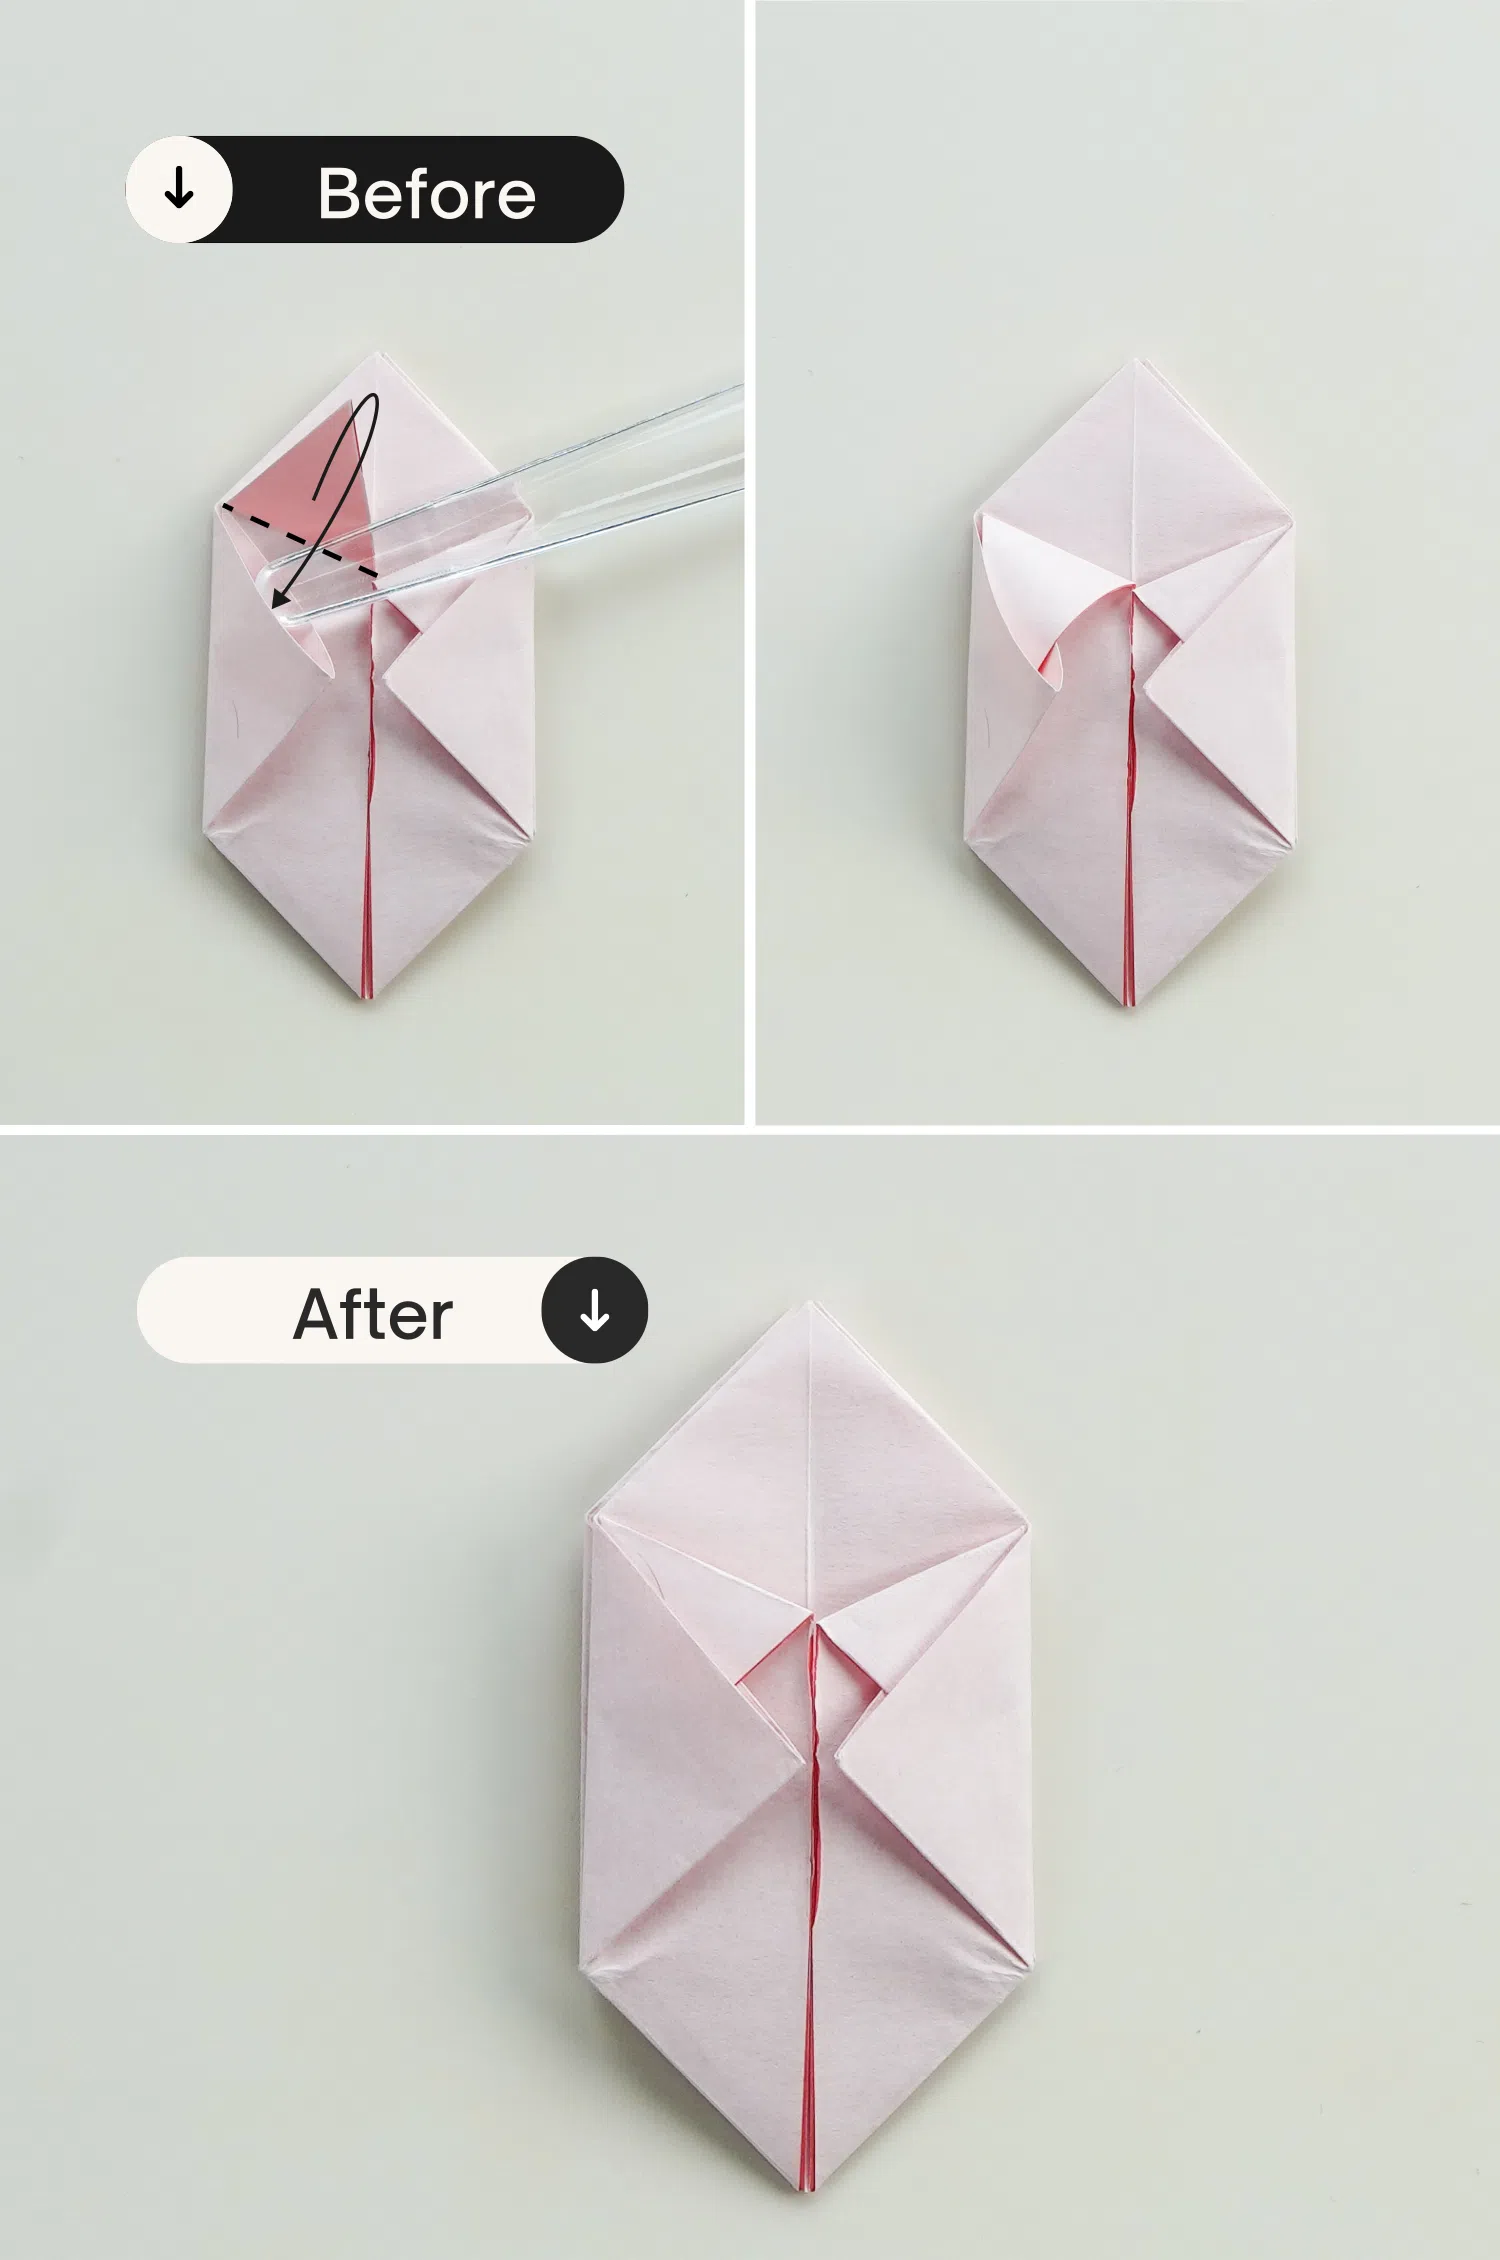
Then fold the left corner to the right to meet the central crease.
Step 16
Fold the right top layer back to the left.
Step 17
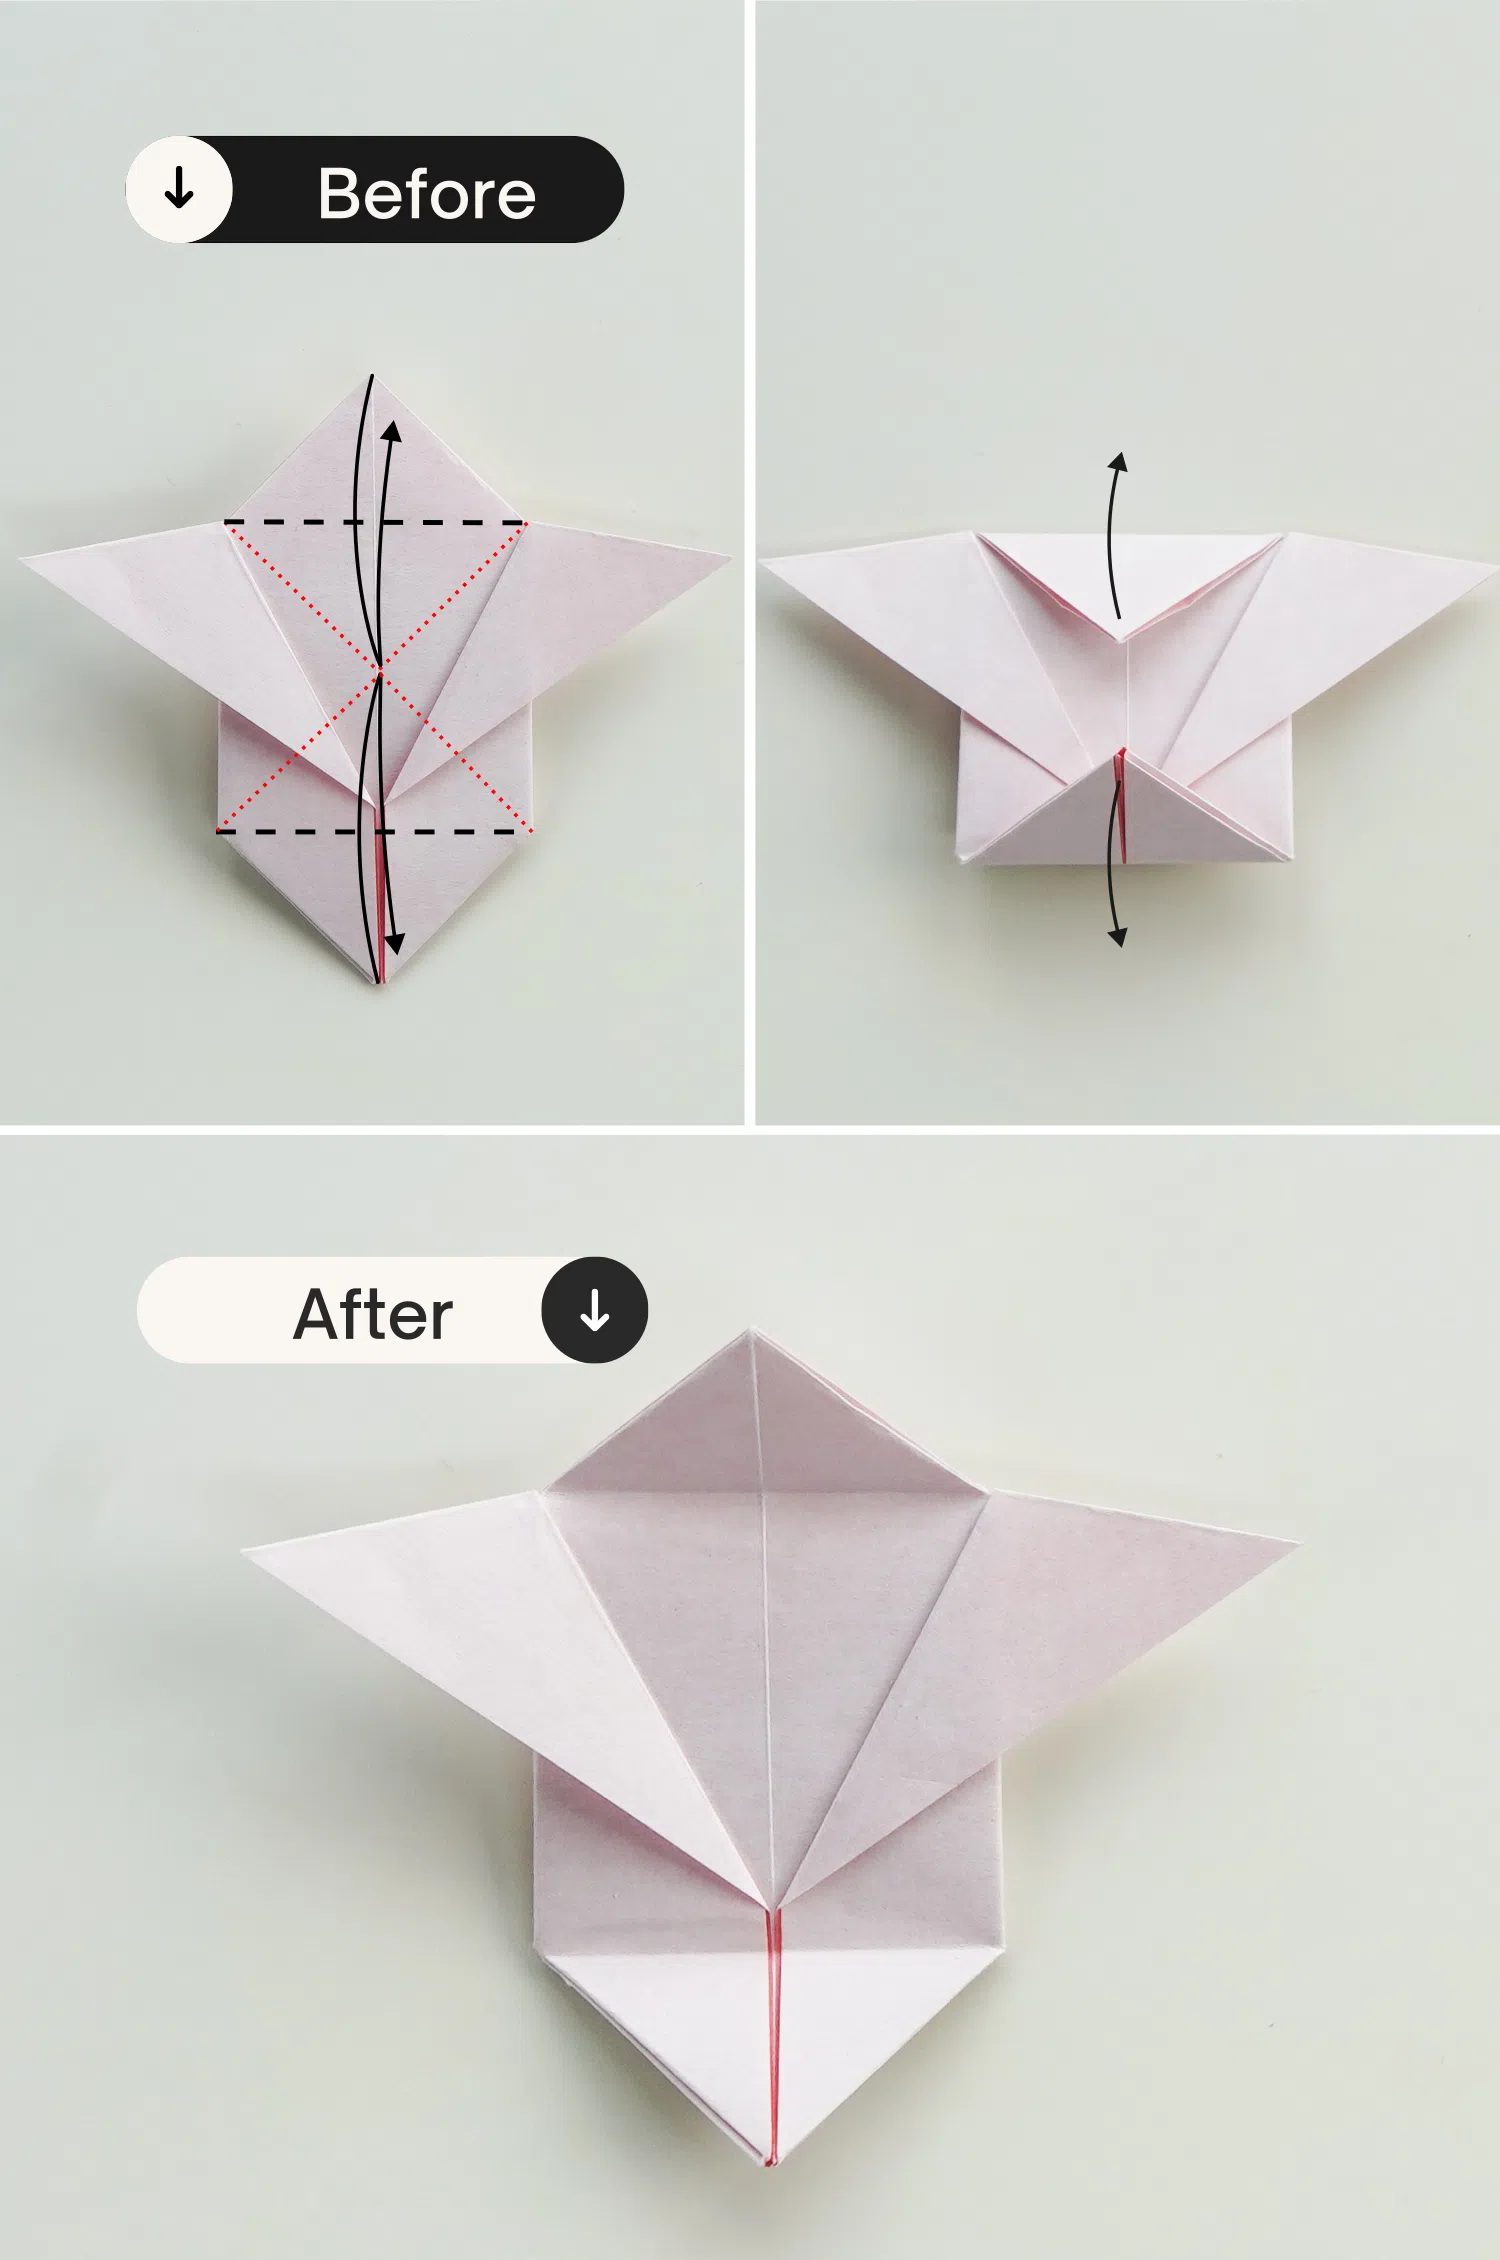
Fold both the left and right top corner of the top layer down along the black dotted line, crease it well then unfold it.
Step 18
Slightly open the right middle corner, and tuck the right top corner into it.

Step 19
Repeat this for the left side.
Step 20
Flip the paper over.
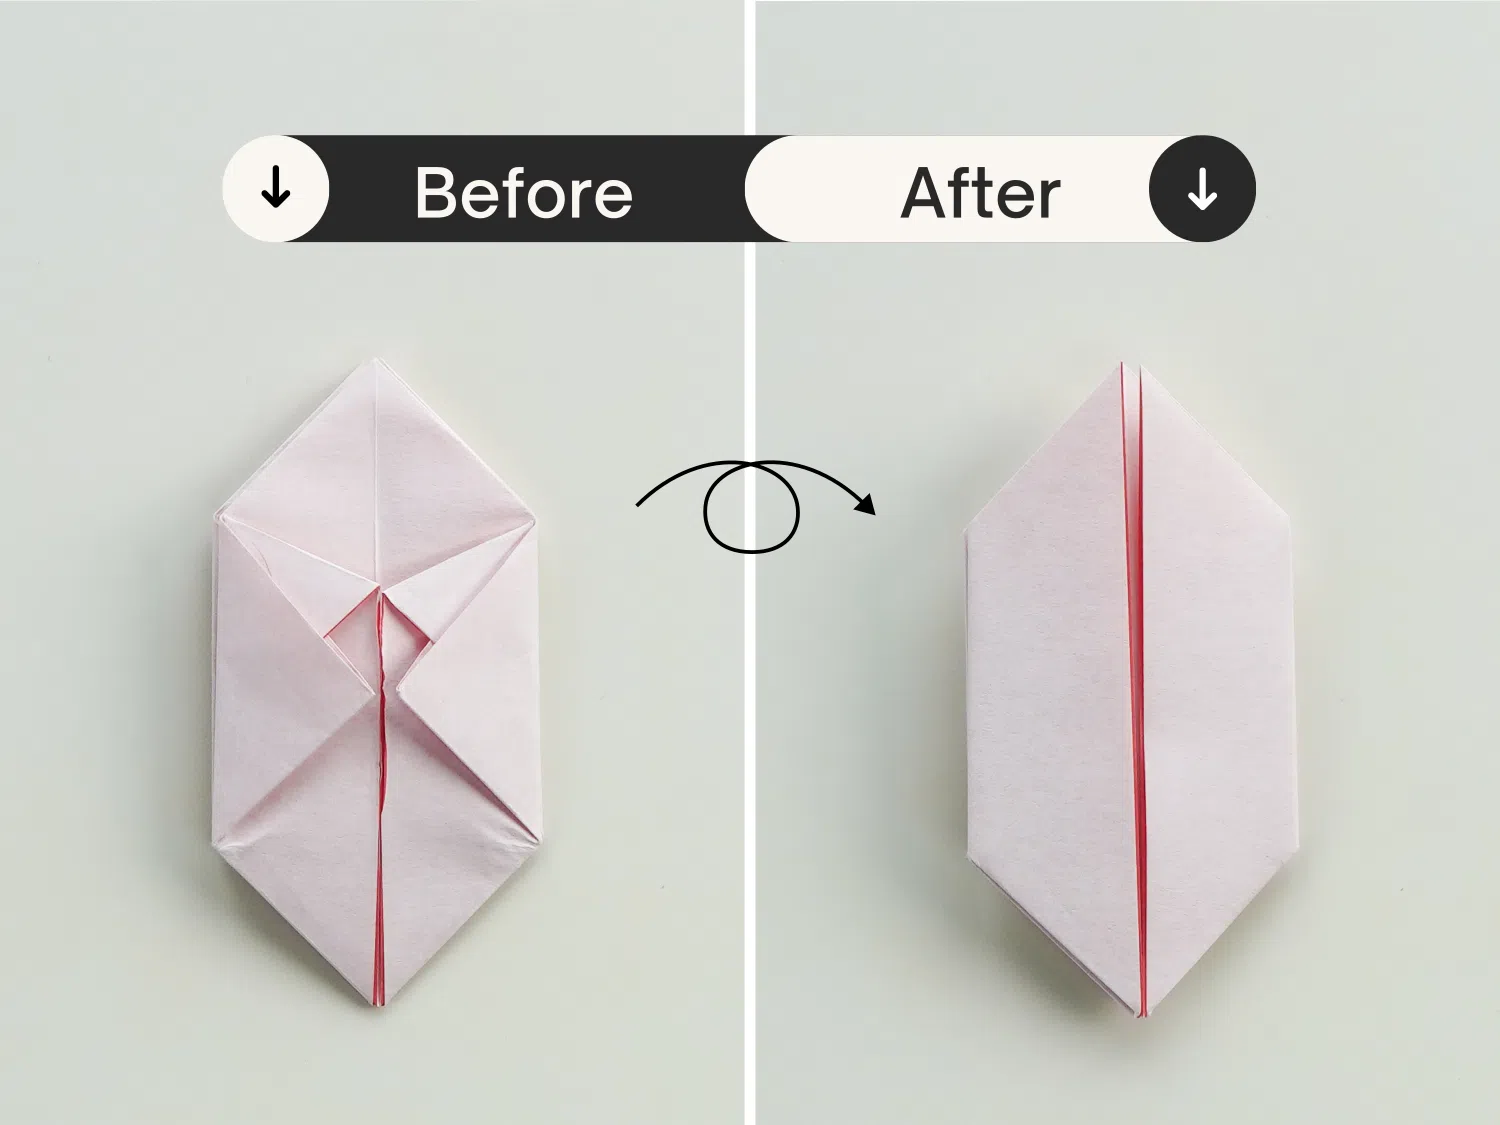
Step 21
Fold the top right corner to the right along the black dotted line.
Repeat this for the top left corner.
Step 22
Fold the top and bottom corners to the center, crease it well then unfold.
Step 23
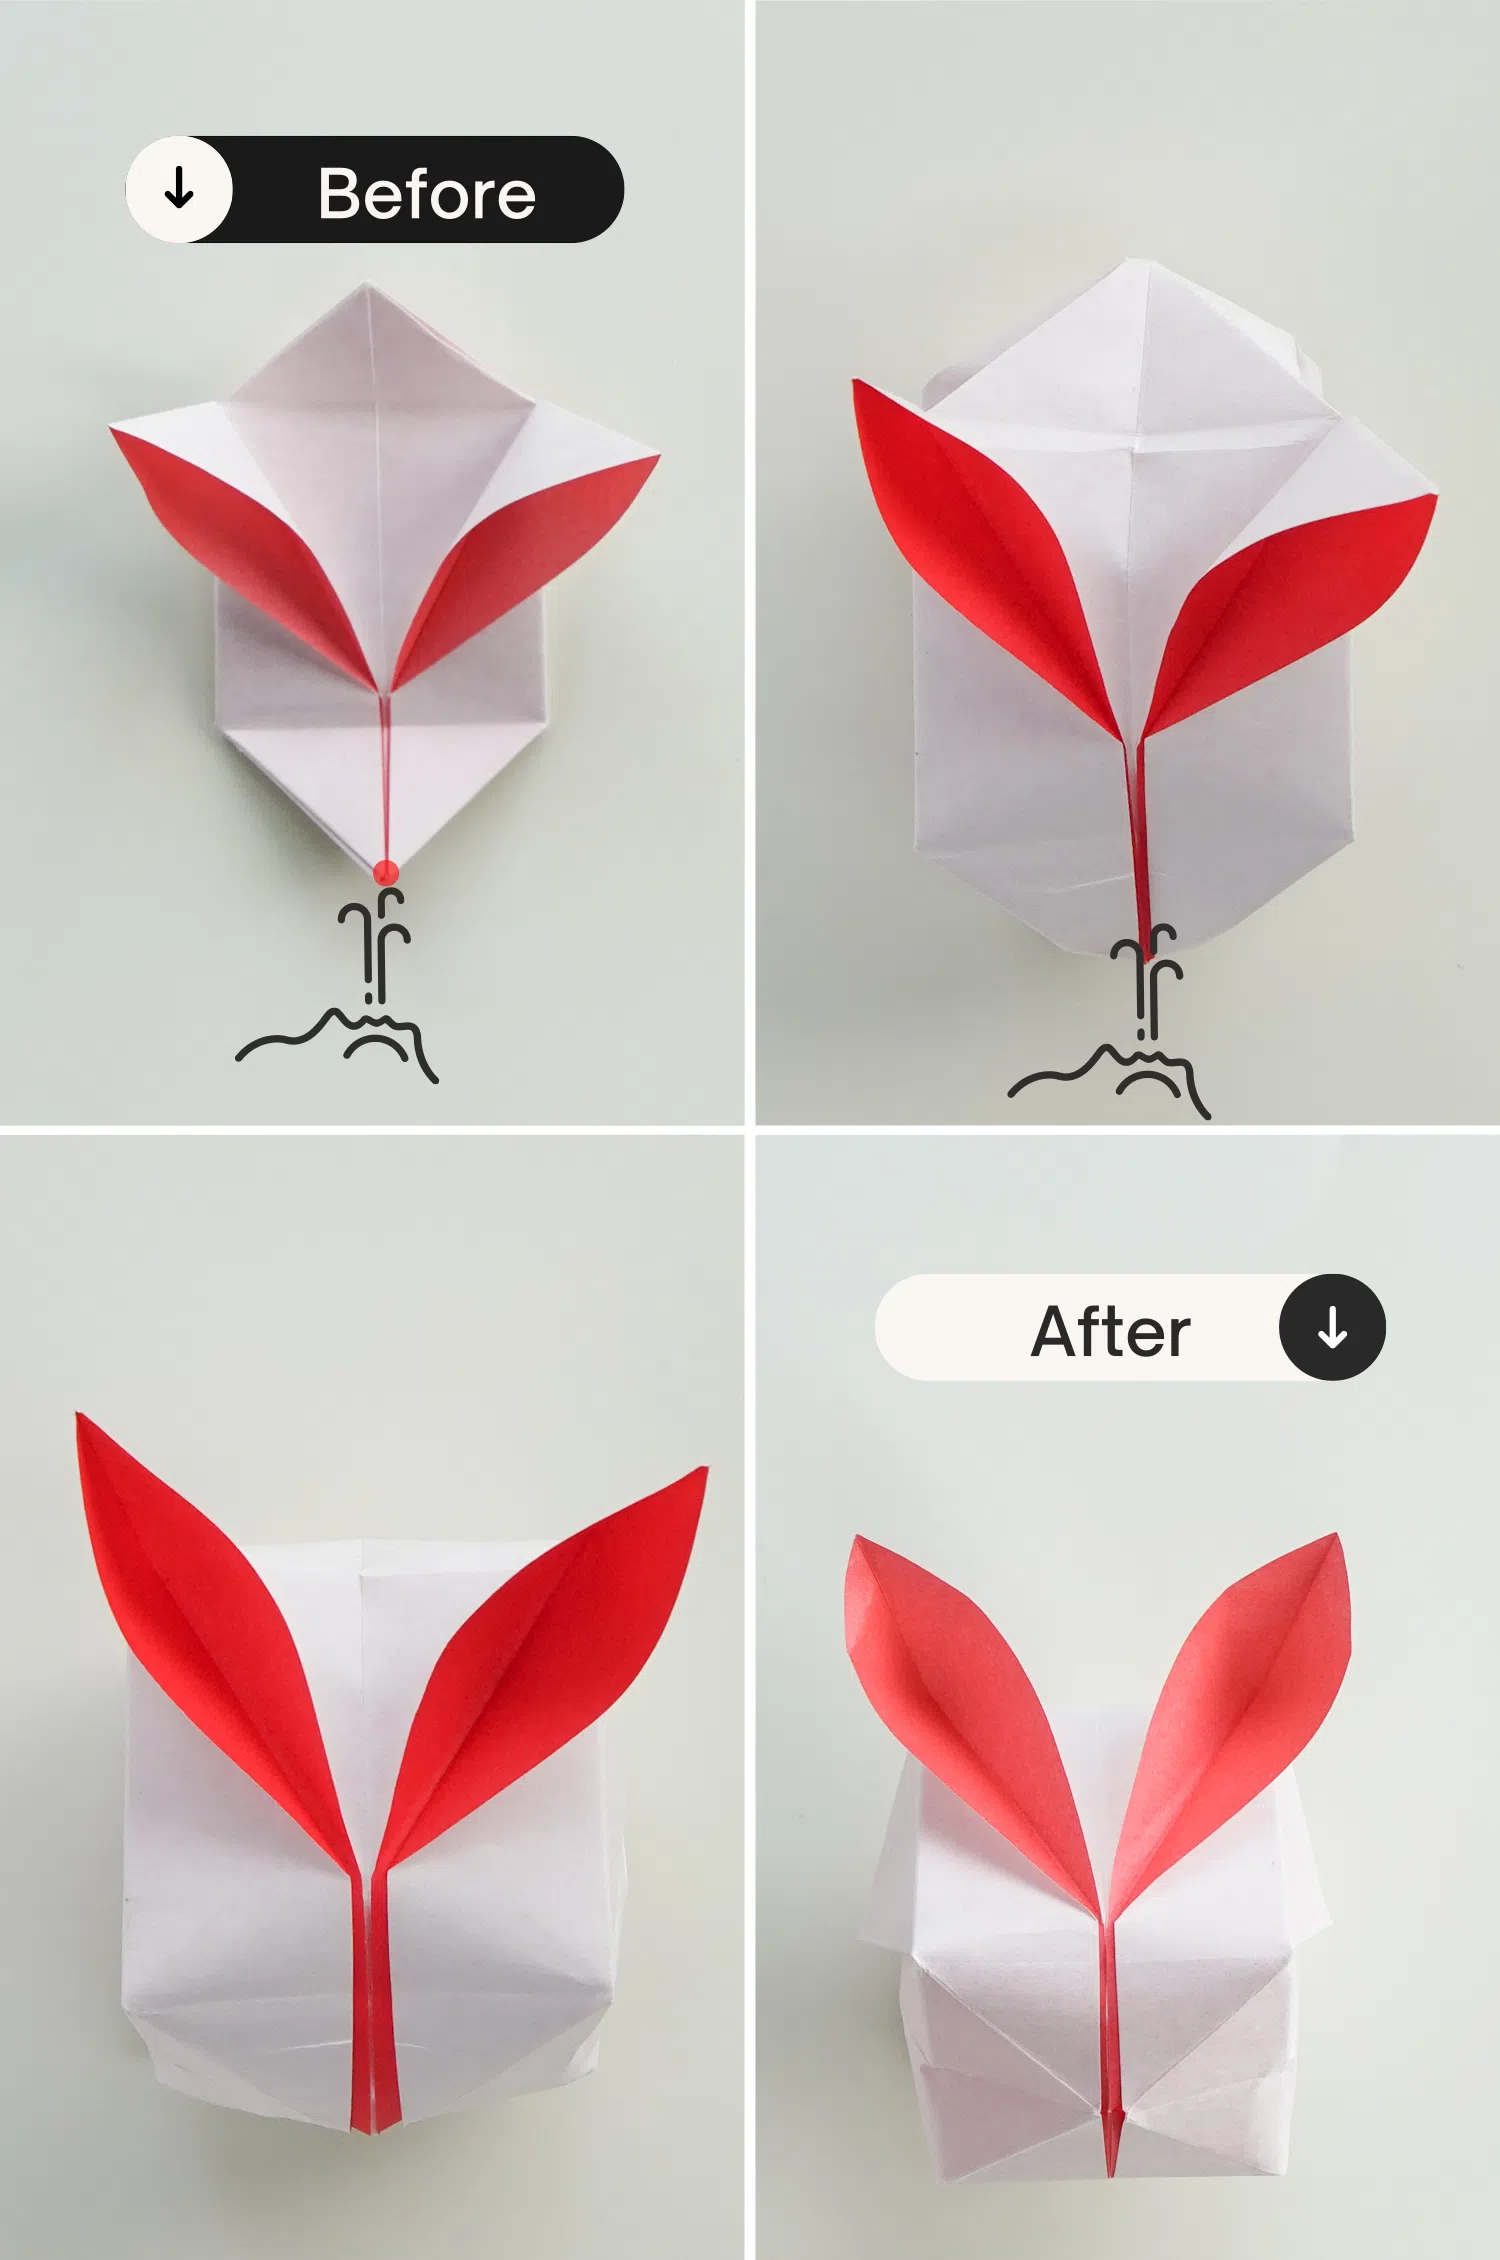
Slightly open the left and right corners

Step 24
Here comes the most interesting step, blow air into the paper from the hole at the bottom to inflate it. Please remember to adjust its shape during the process to make it more round.
Other easy ideas