How to Make an Origami Crane
Origami cranes represent good wishes and it is emotional support for people. Make an easy origami crane through simple steps, hope your wish comes true.
It is a symbol of hope and peace. Folding 1000 origami crane according to Japanese legend, can grant for a wish, such as long life, happiness or healthy.
This is the traditional Japanese crane. You can make with different papers with color or patterns, then string them together on strings or mobiles for babies.

We provide step-by-step diagram instructions and beginner-friendly videos. Check both for quicker learning.
If you are new to origami, start here from our beginner guide to know the basics and how to read the step-by-step instructions.
- Folding time: 15 minutes
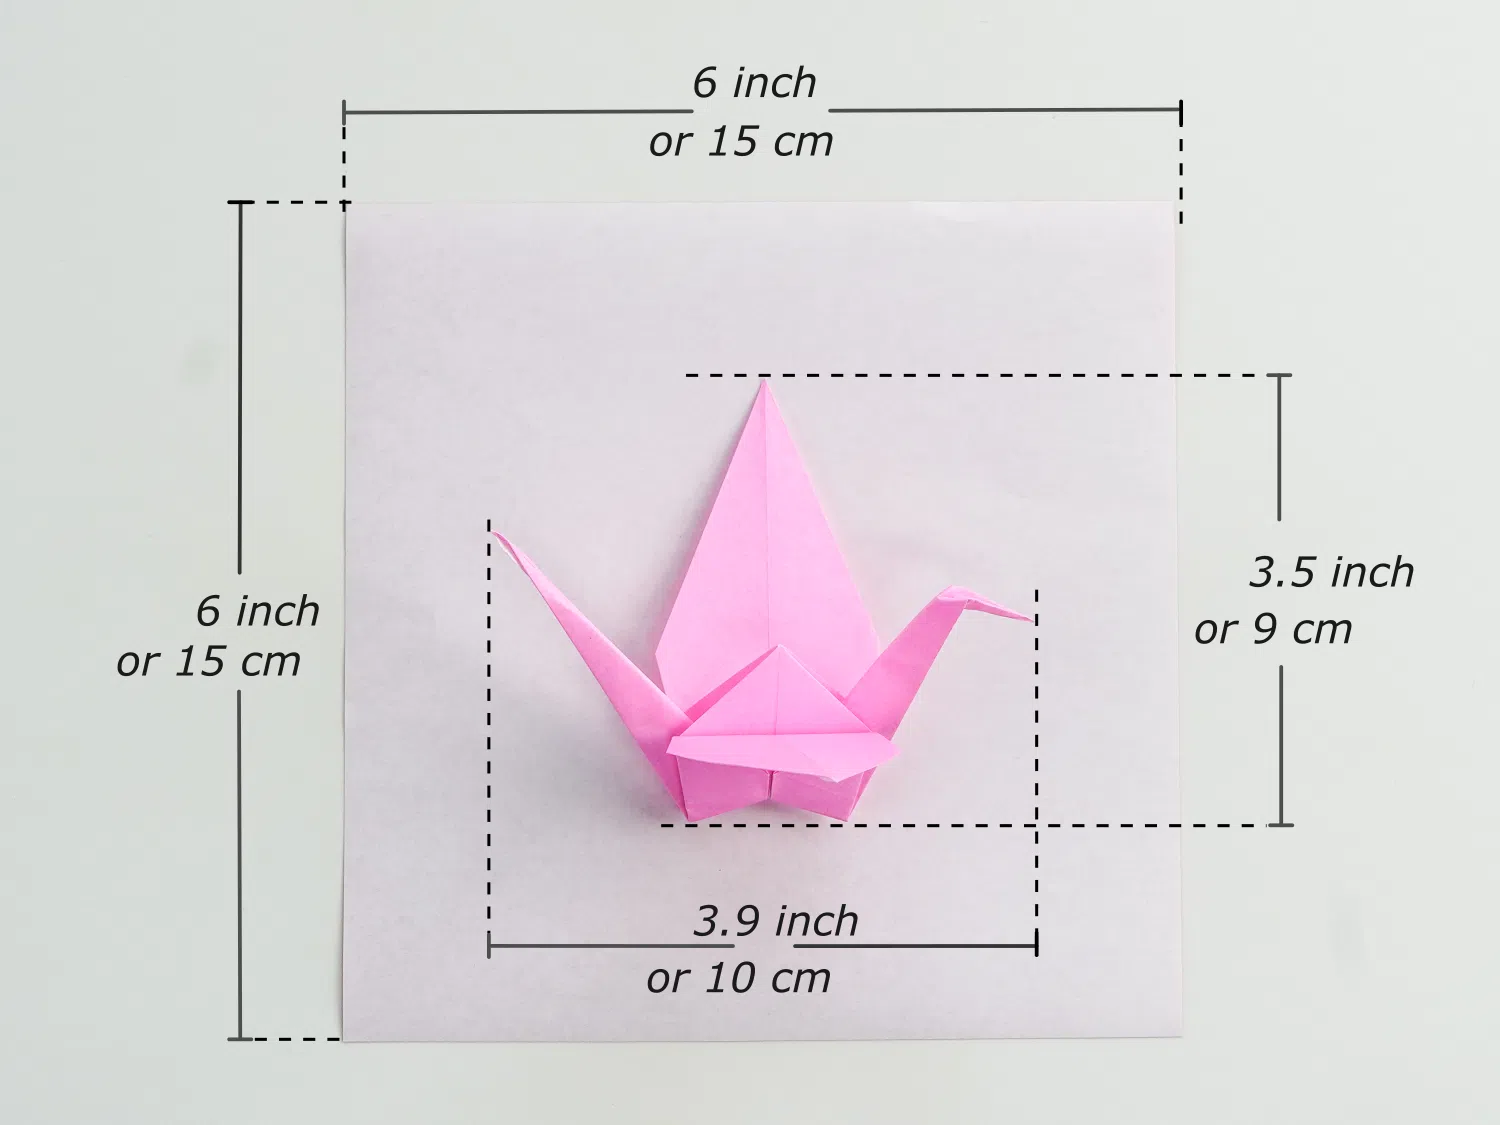
- Paper: 15×15 cm
- Difficulty: Easy, Beginner friendly
Material
Use a 15*15 cm origami square paper, with one pink and one white side, and you will get a 9*10 cm crane. Try to make many cranes with different colors of square origami paper, this would be interesting.
You can use patterned paper to make origami crane, like the Japanese origami paper.
Easy Origami Crane Video
You can refer to the video and follow along to finish or follow our step-by-step picture tutorial.
Step by Step
Step 1
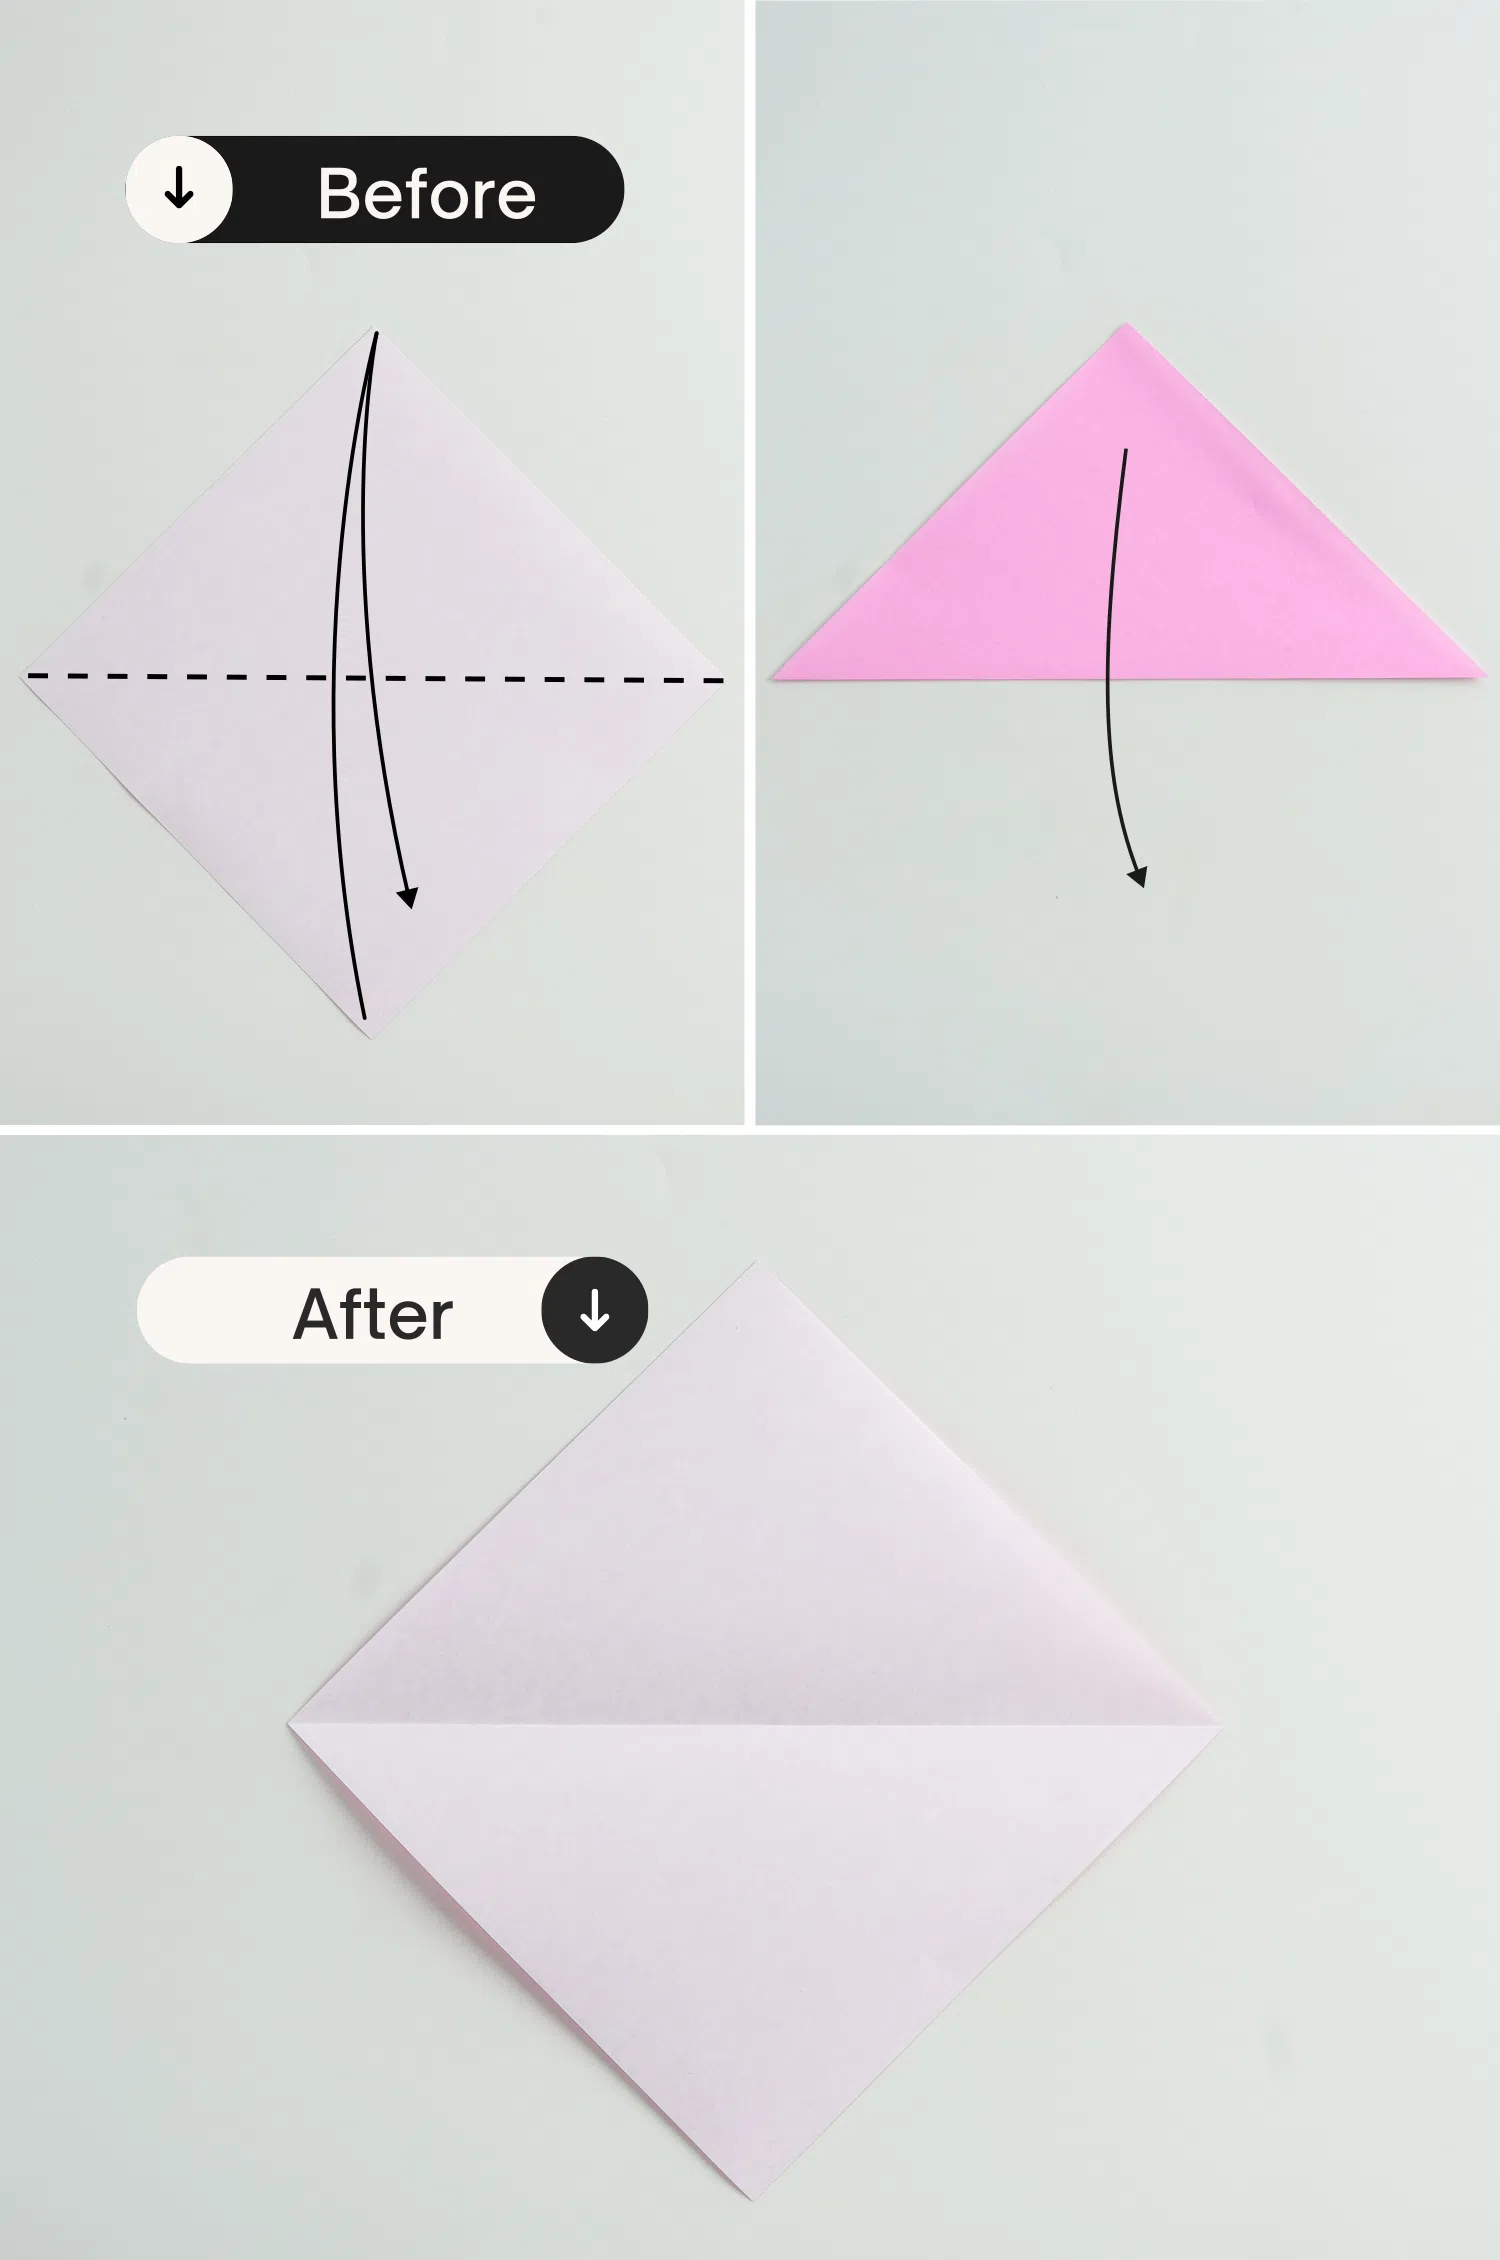
Start with the white side of the paper facing up and fold it in half diagonally, crease it well and unfold it.
Step 2
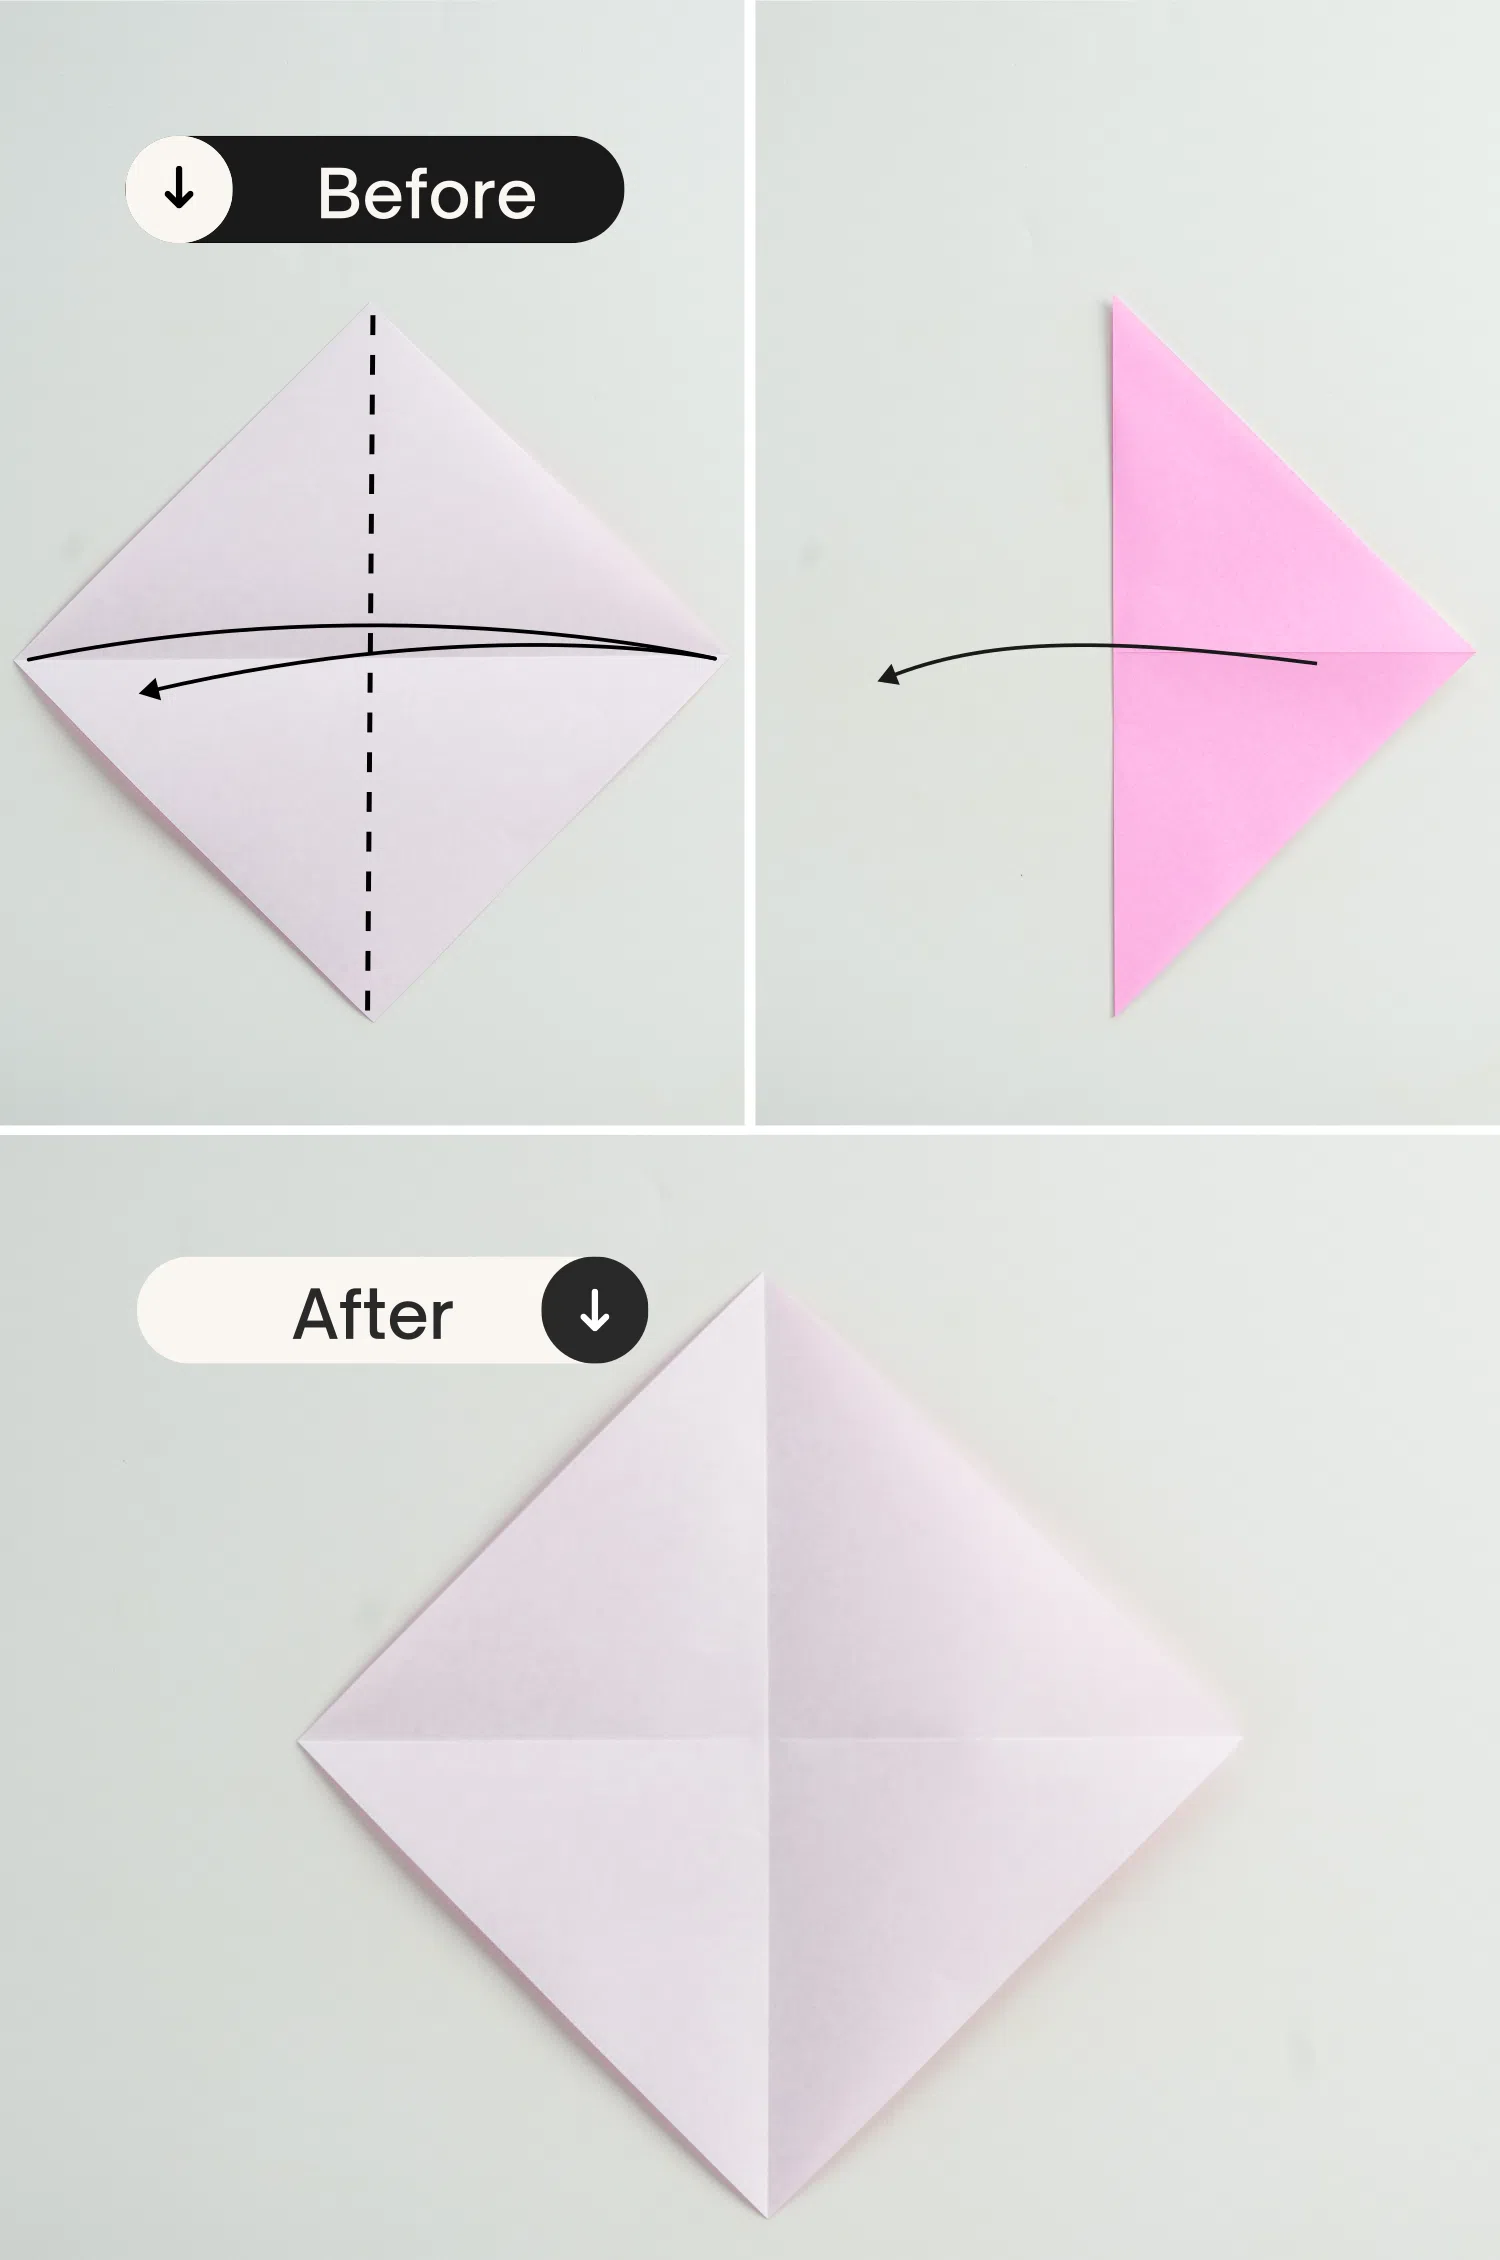
Fold it in half again from left to right, crease it well, and unfold it, getting a new crease that is perpendicular to the previous one.
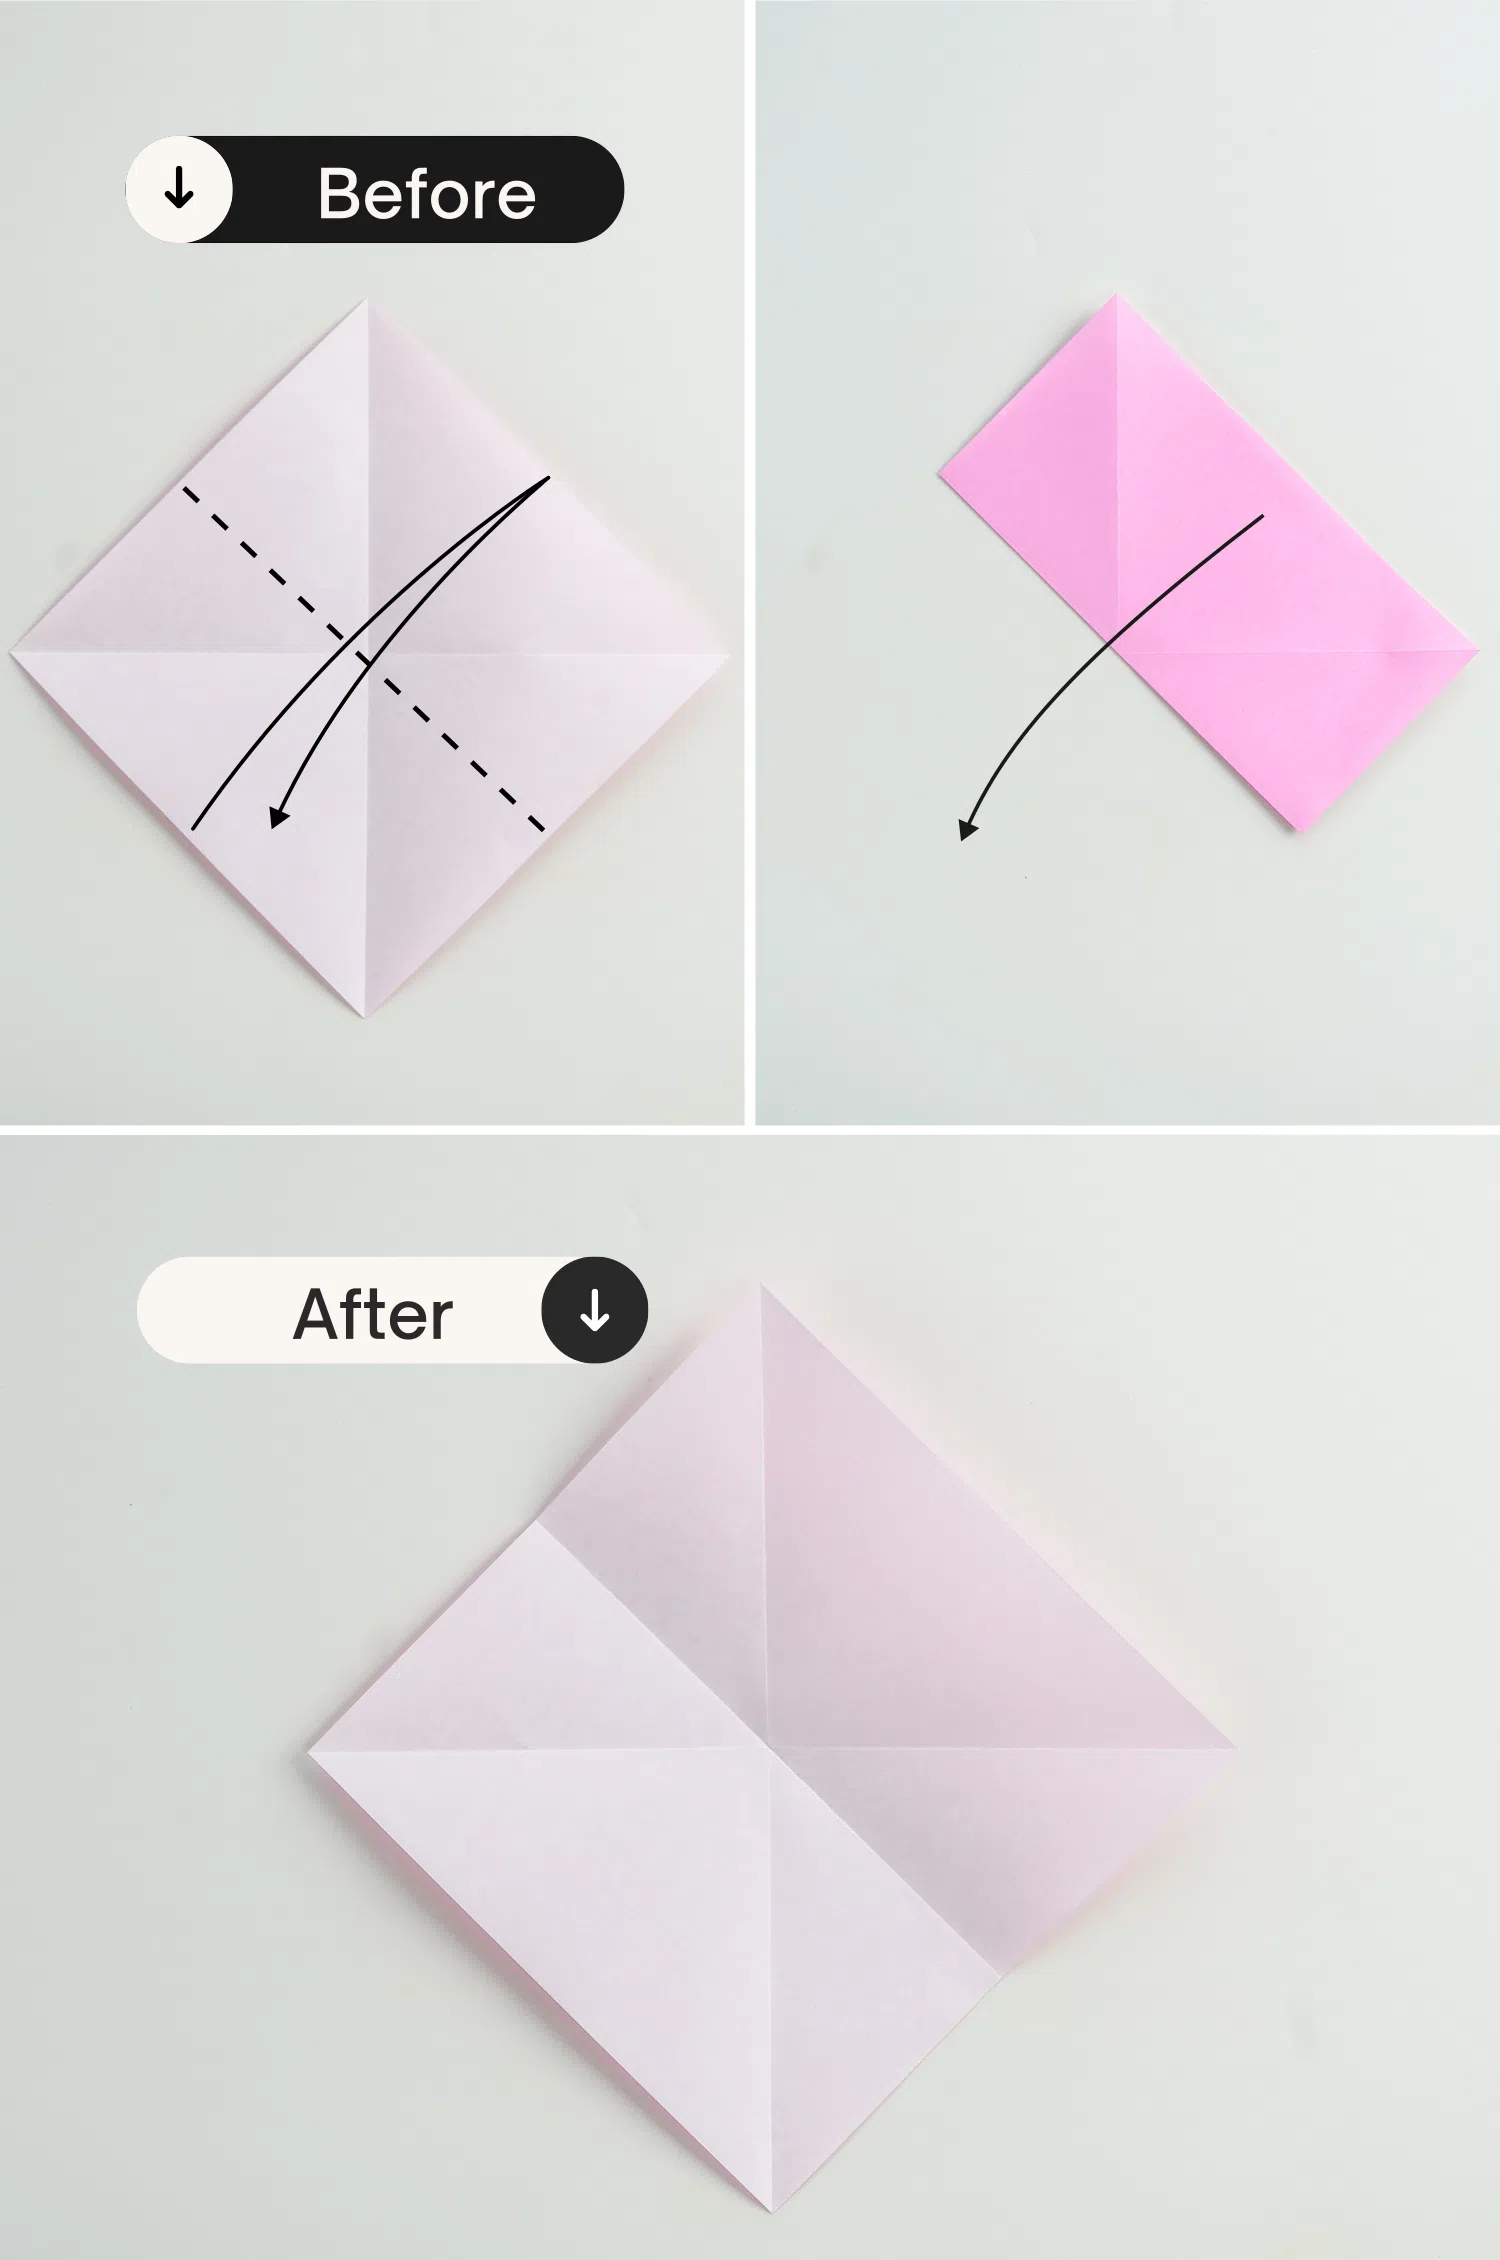
Step 3
Fold it in half from the bottom left edge to the top right edge, crease it well then unfold it.
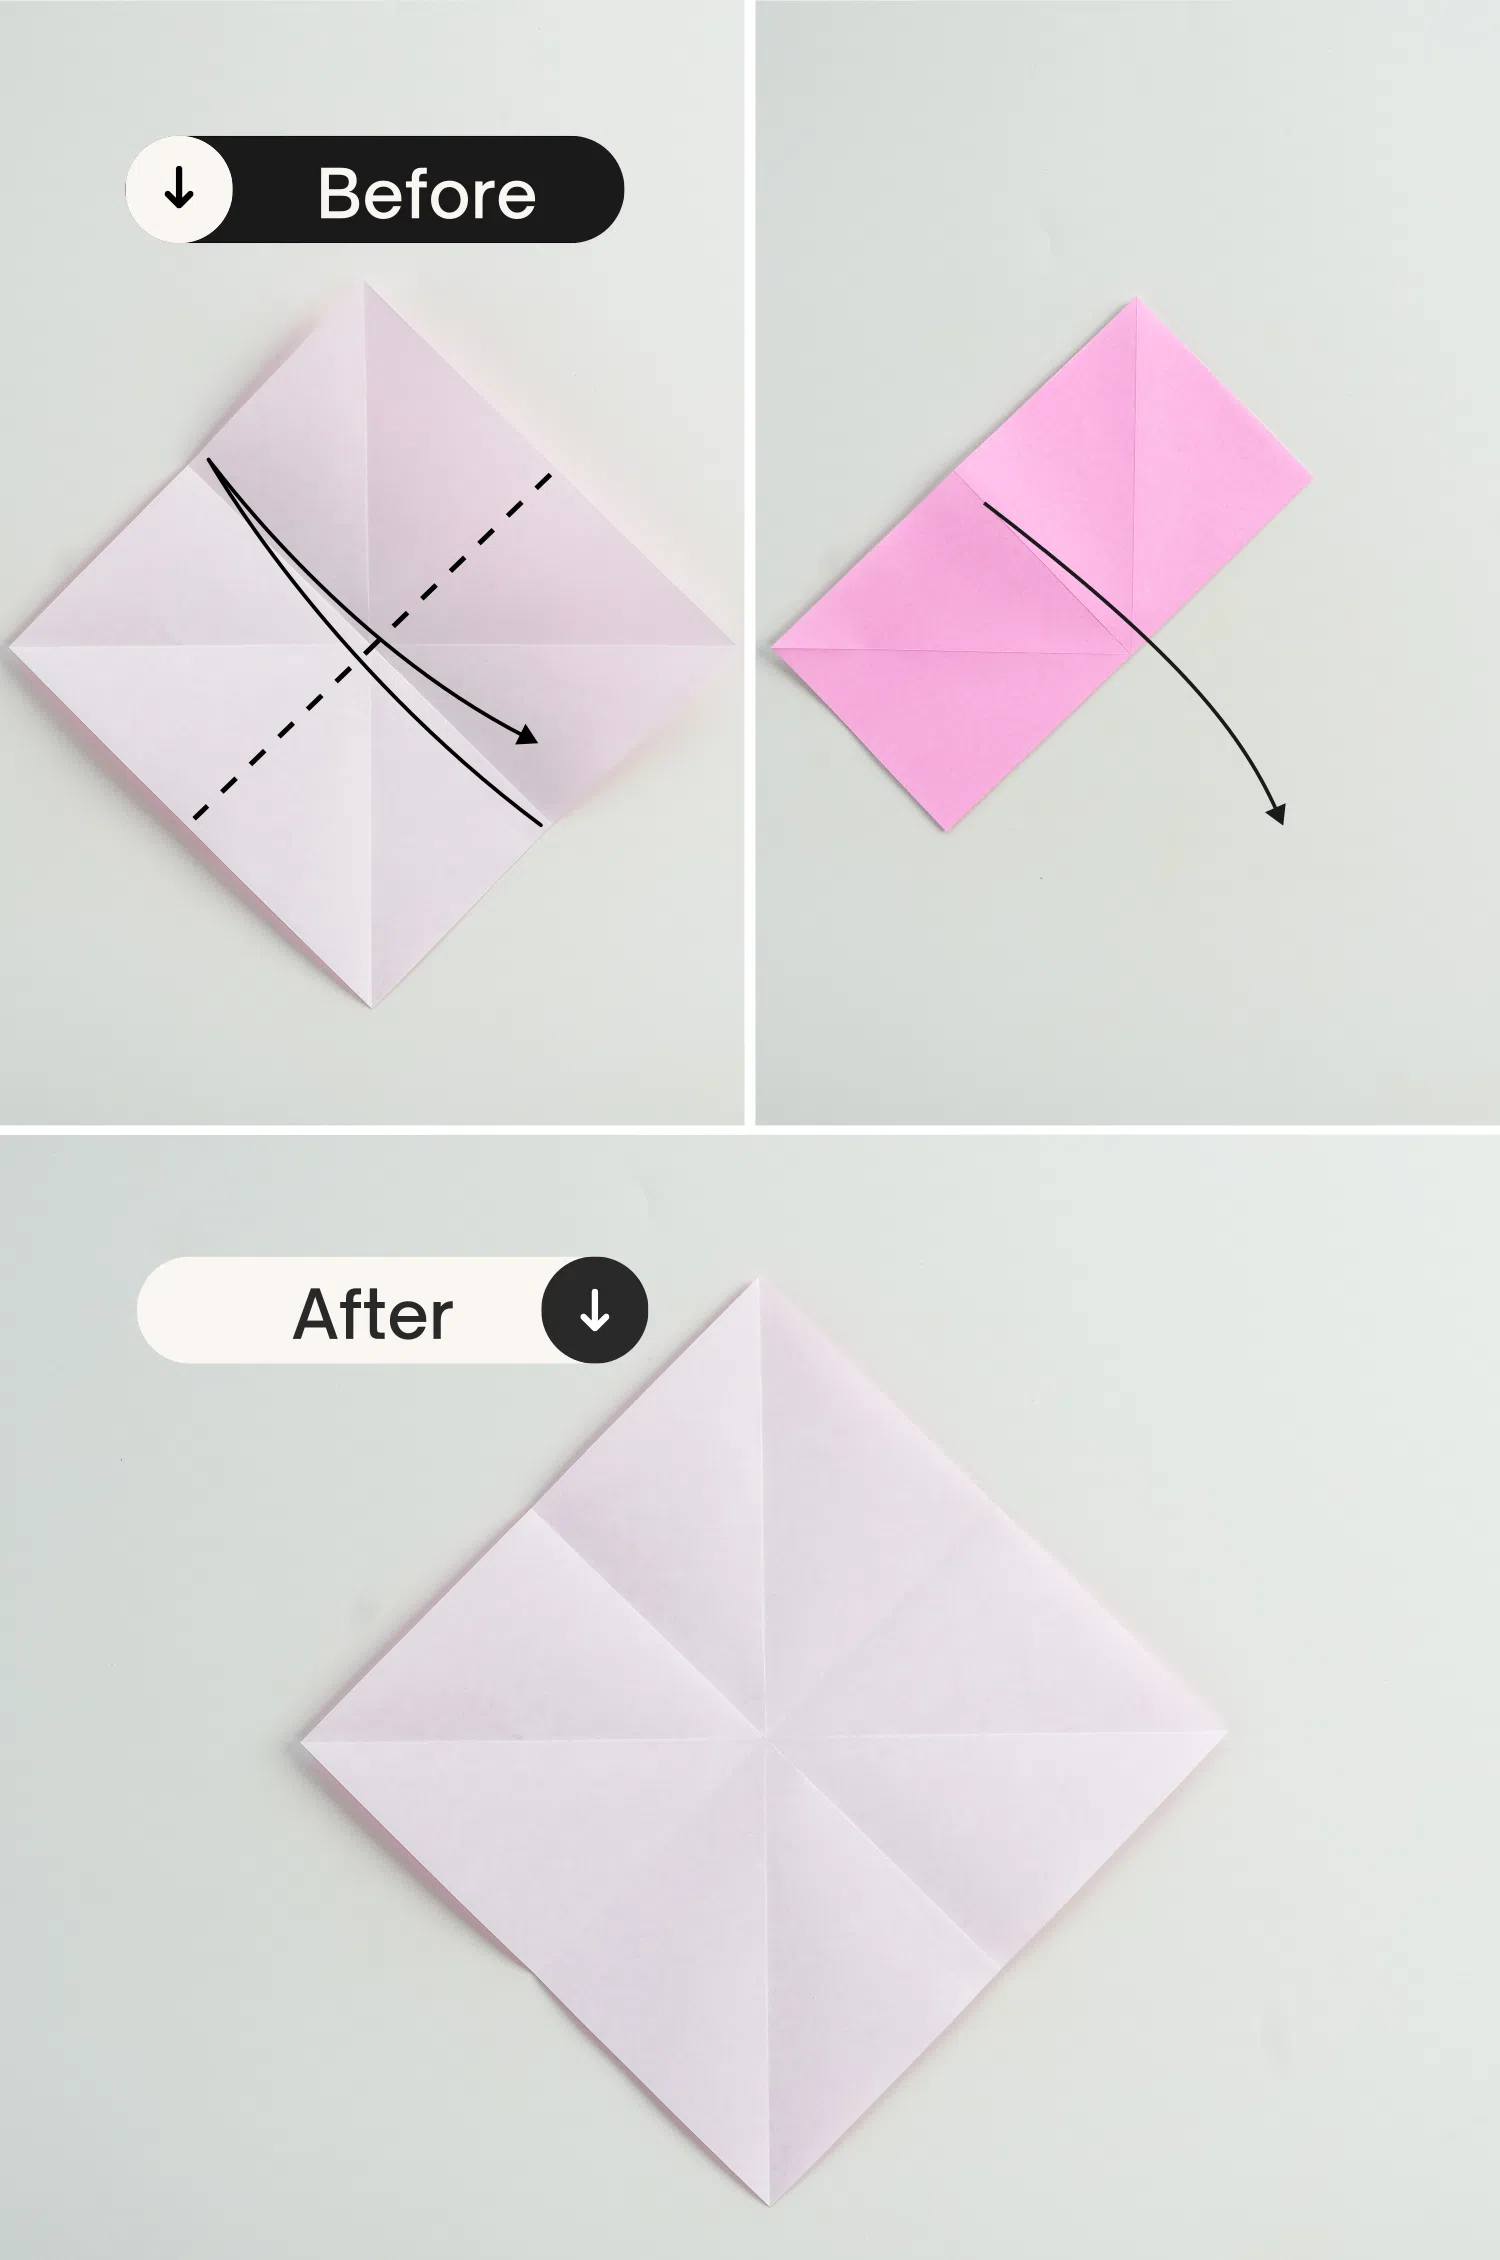
Step 4
Similarly, fold it in half from the bottom right edge to the top left edge, crease it well then unfold it.
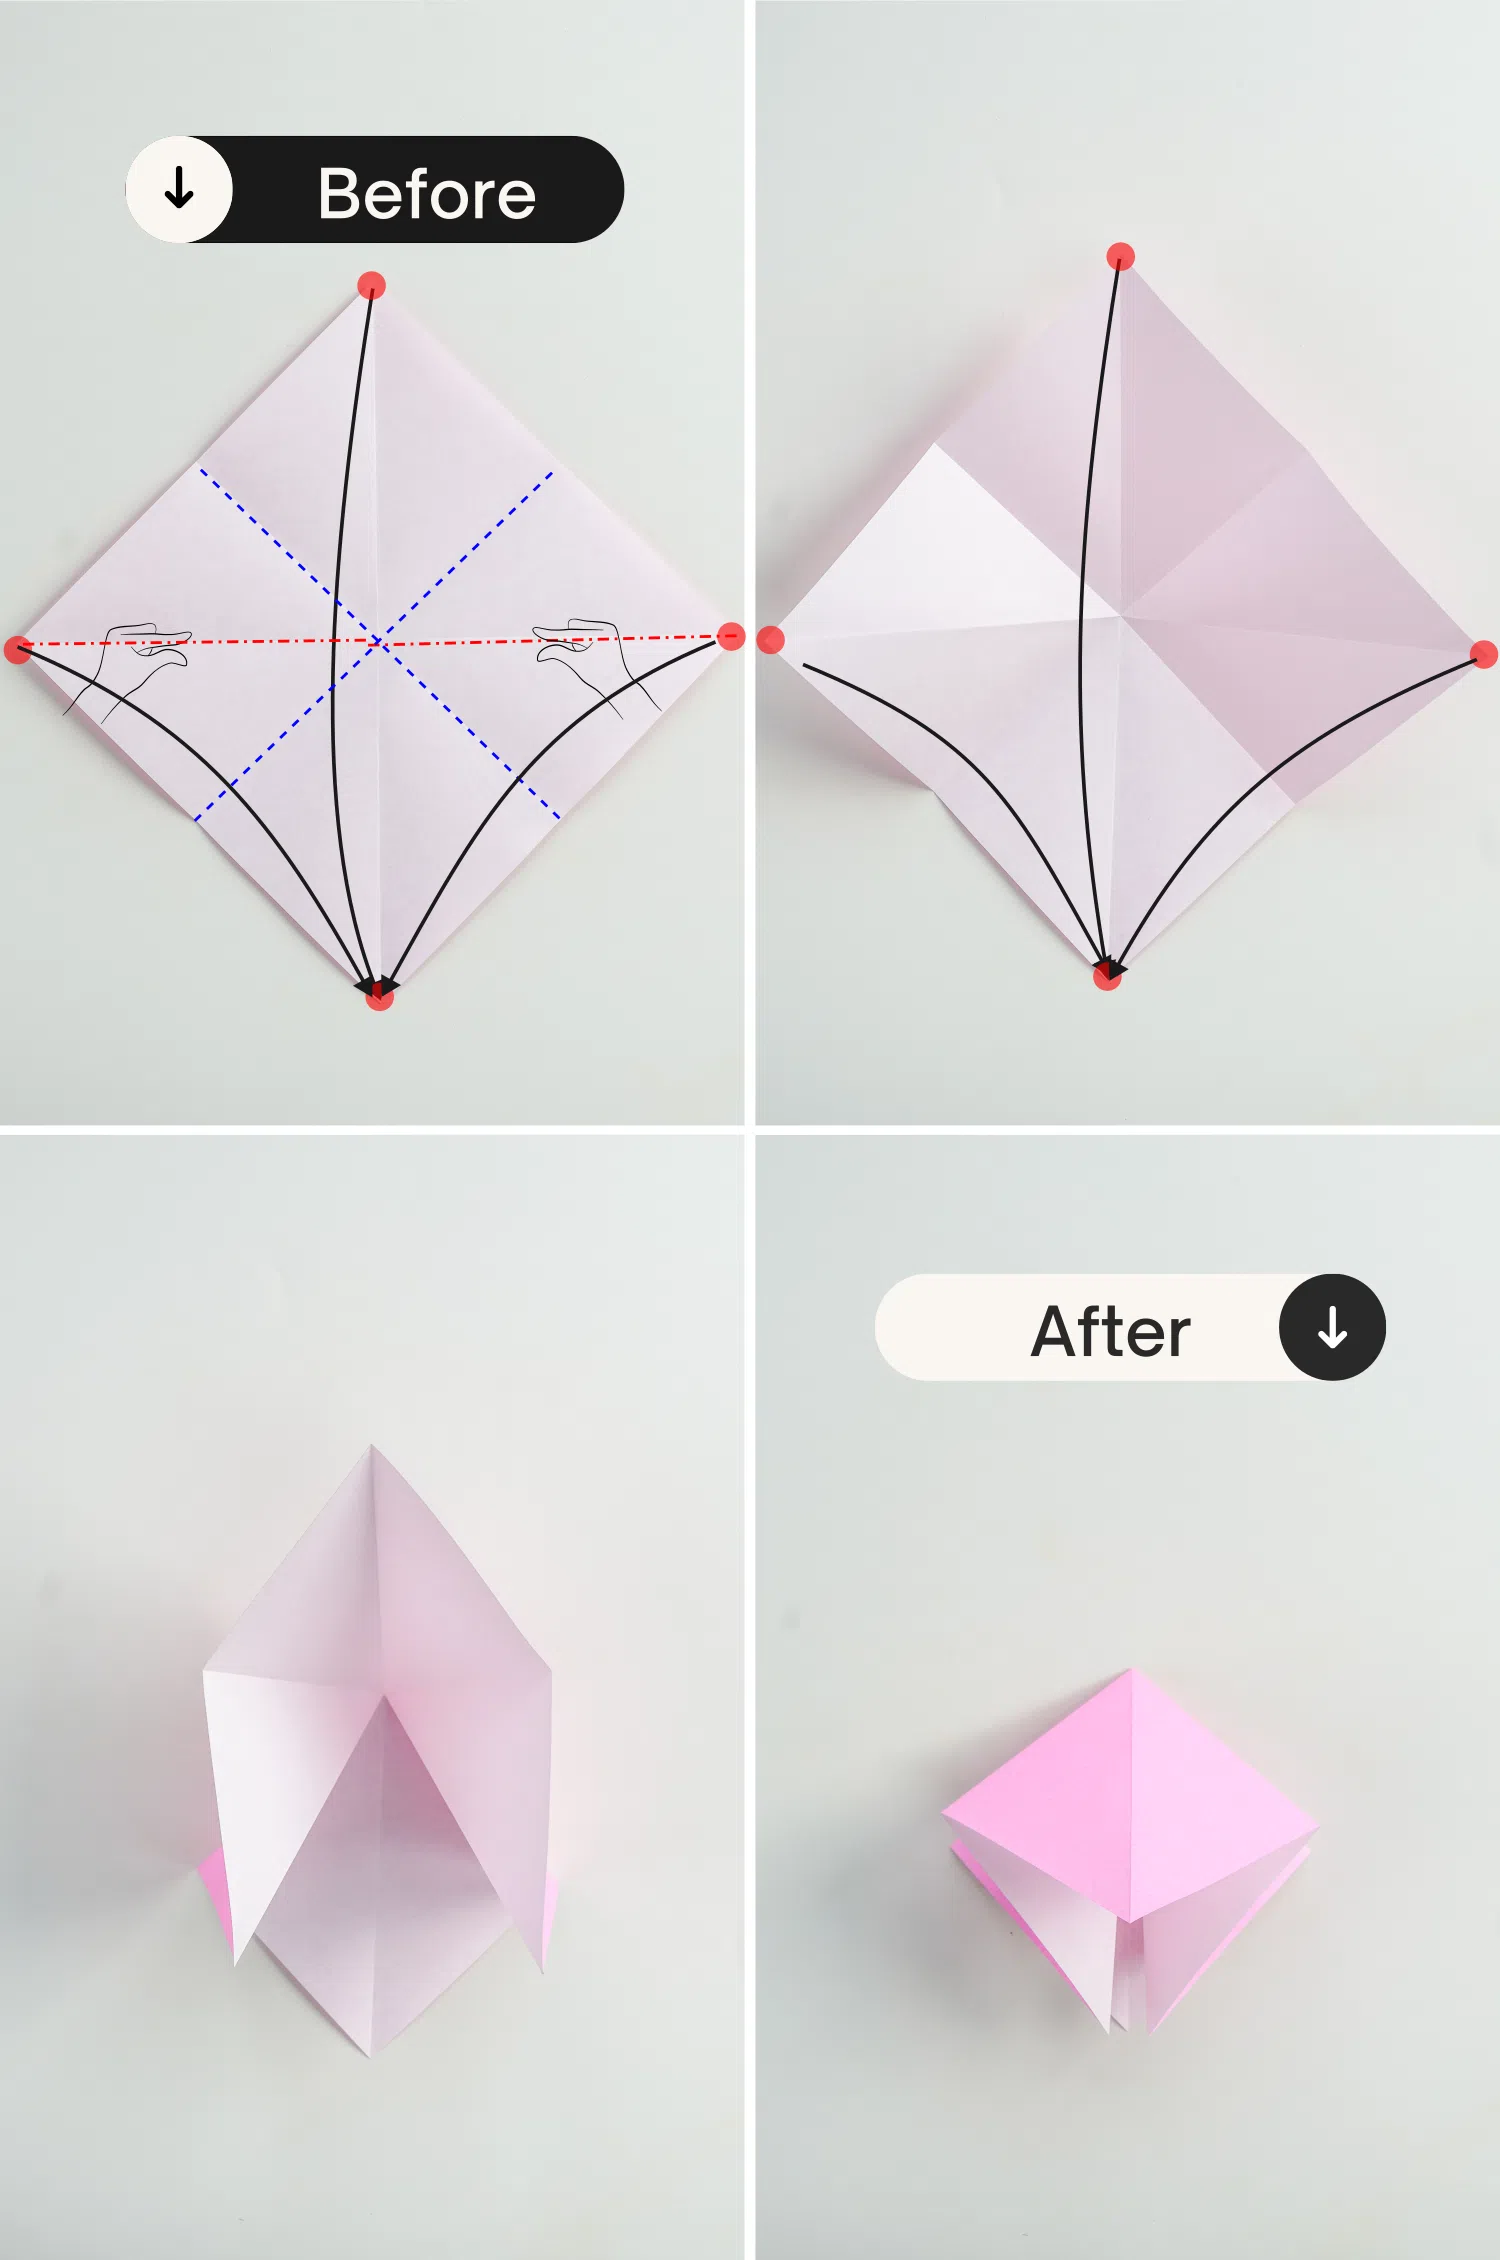
Step 5
Pinch the two creases on the left and right upwards, while fold the left, right and top point down to the bottom point along the creases you just made.
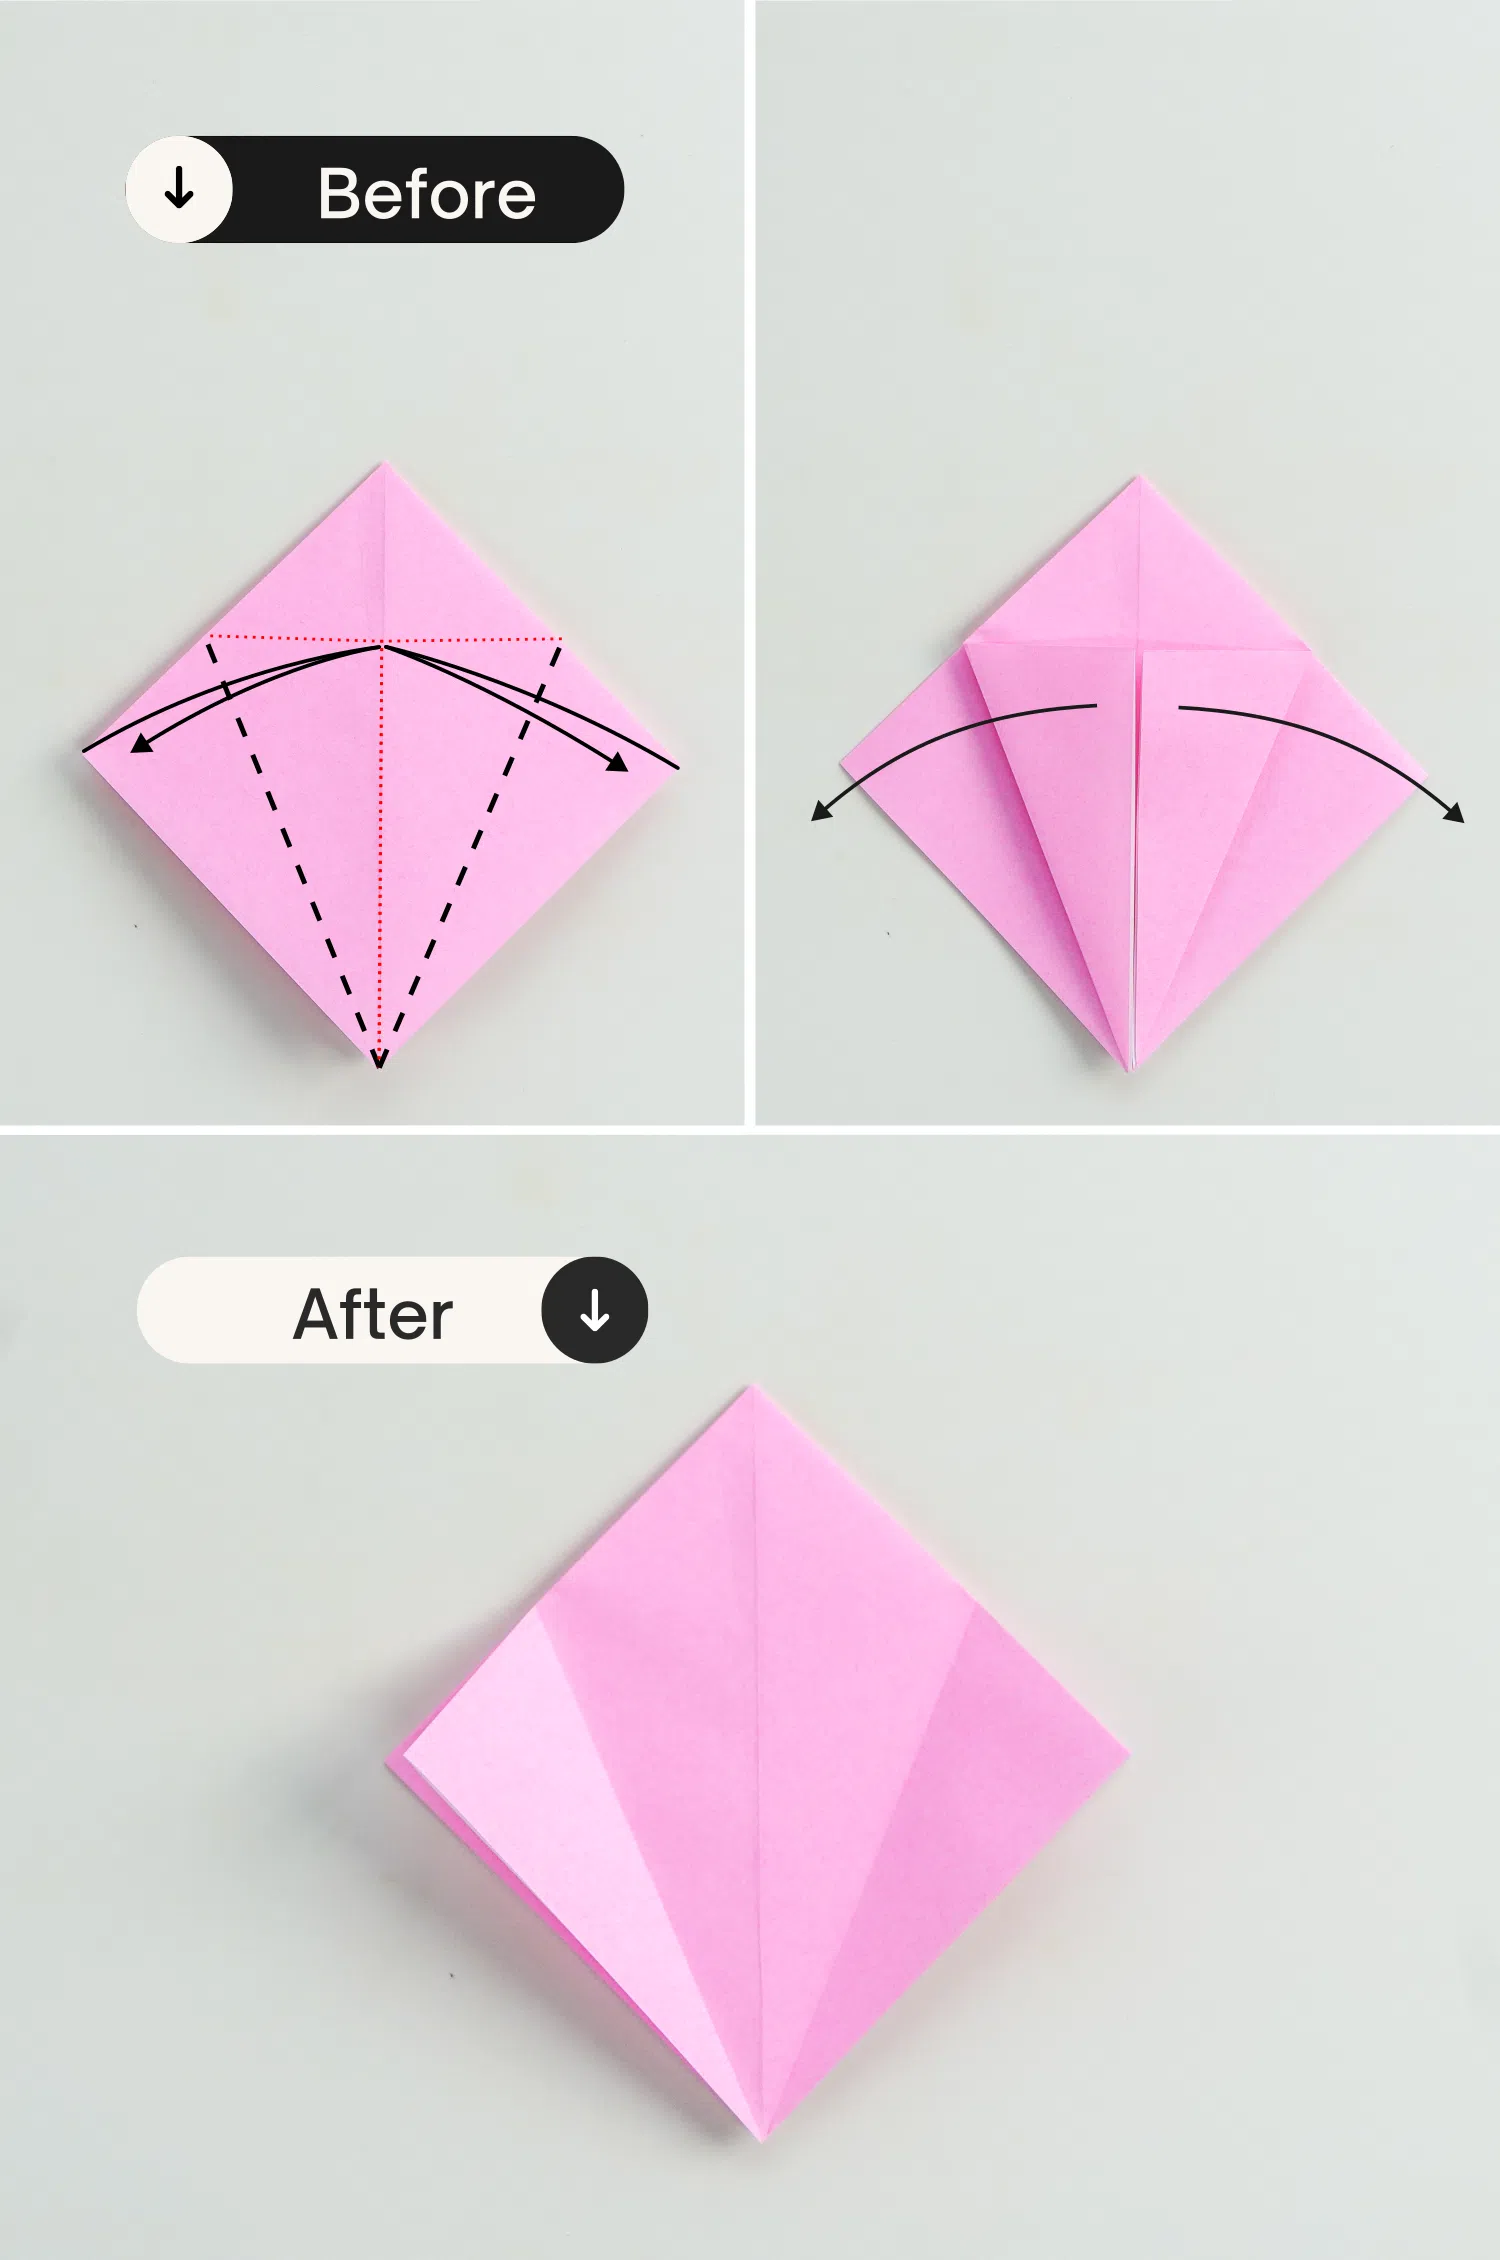
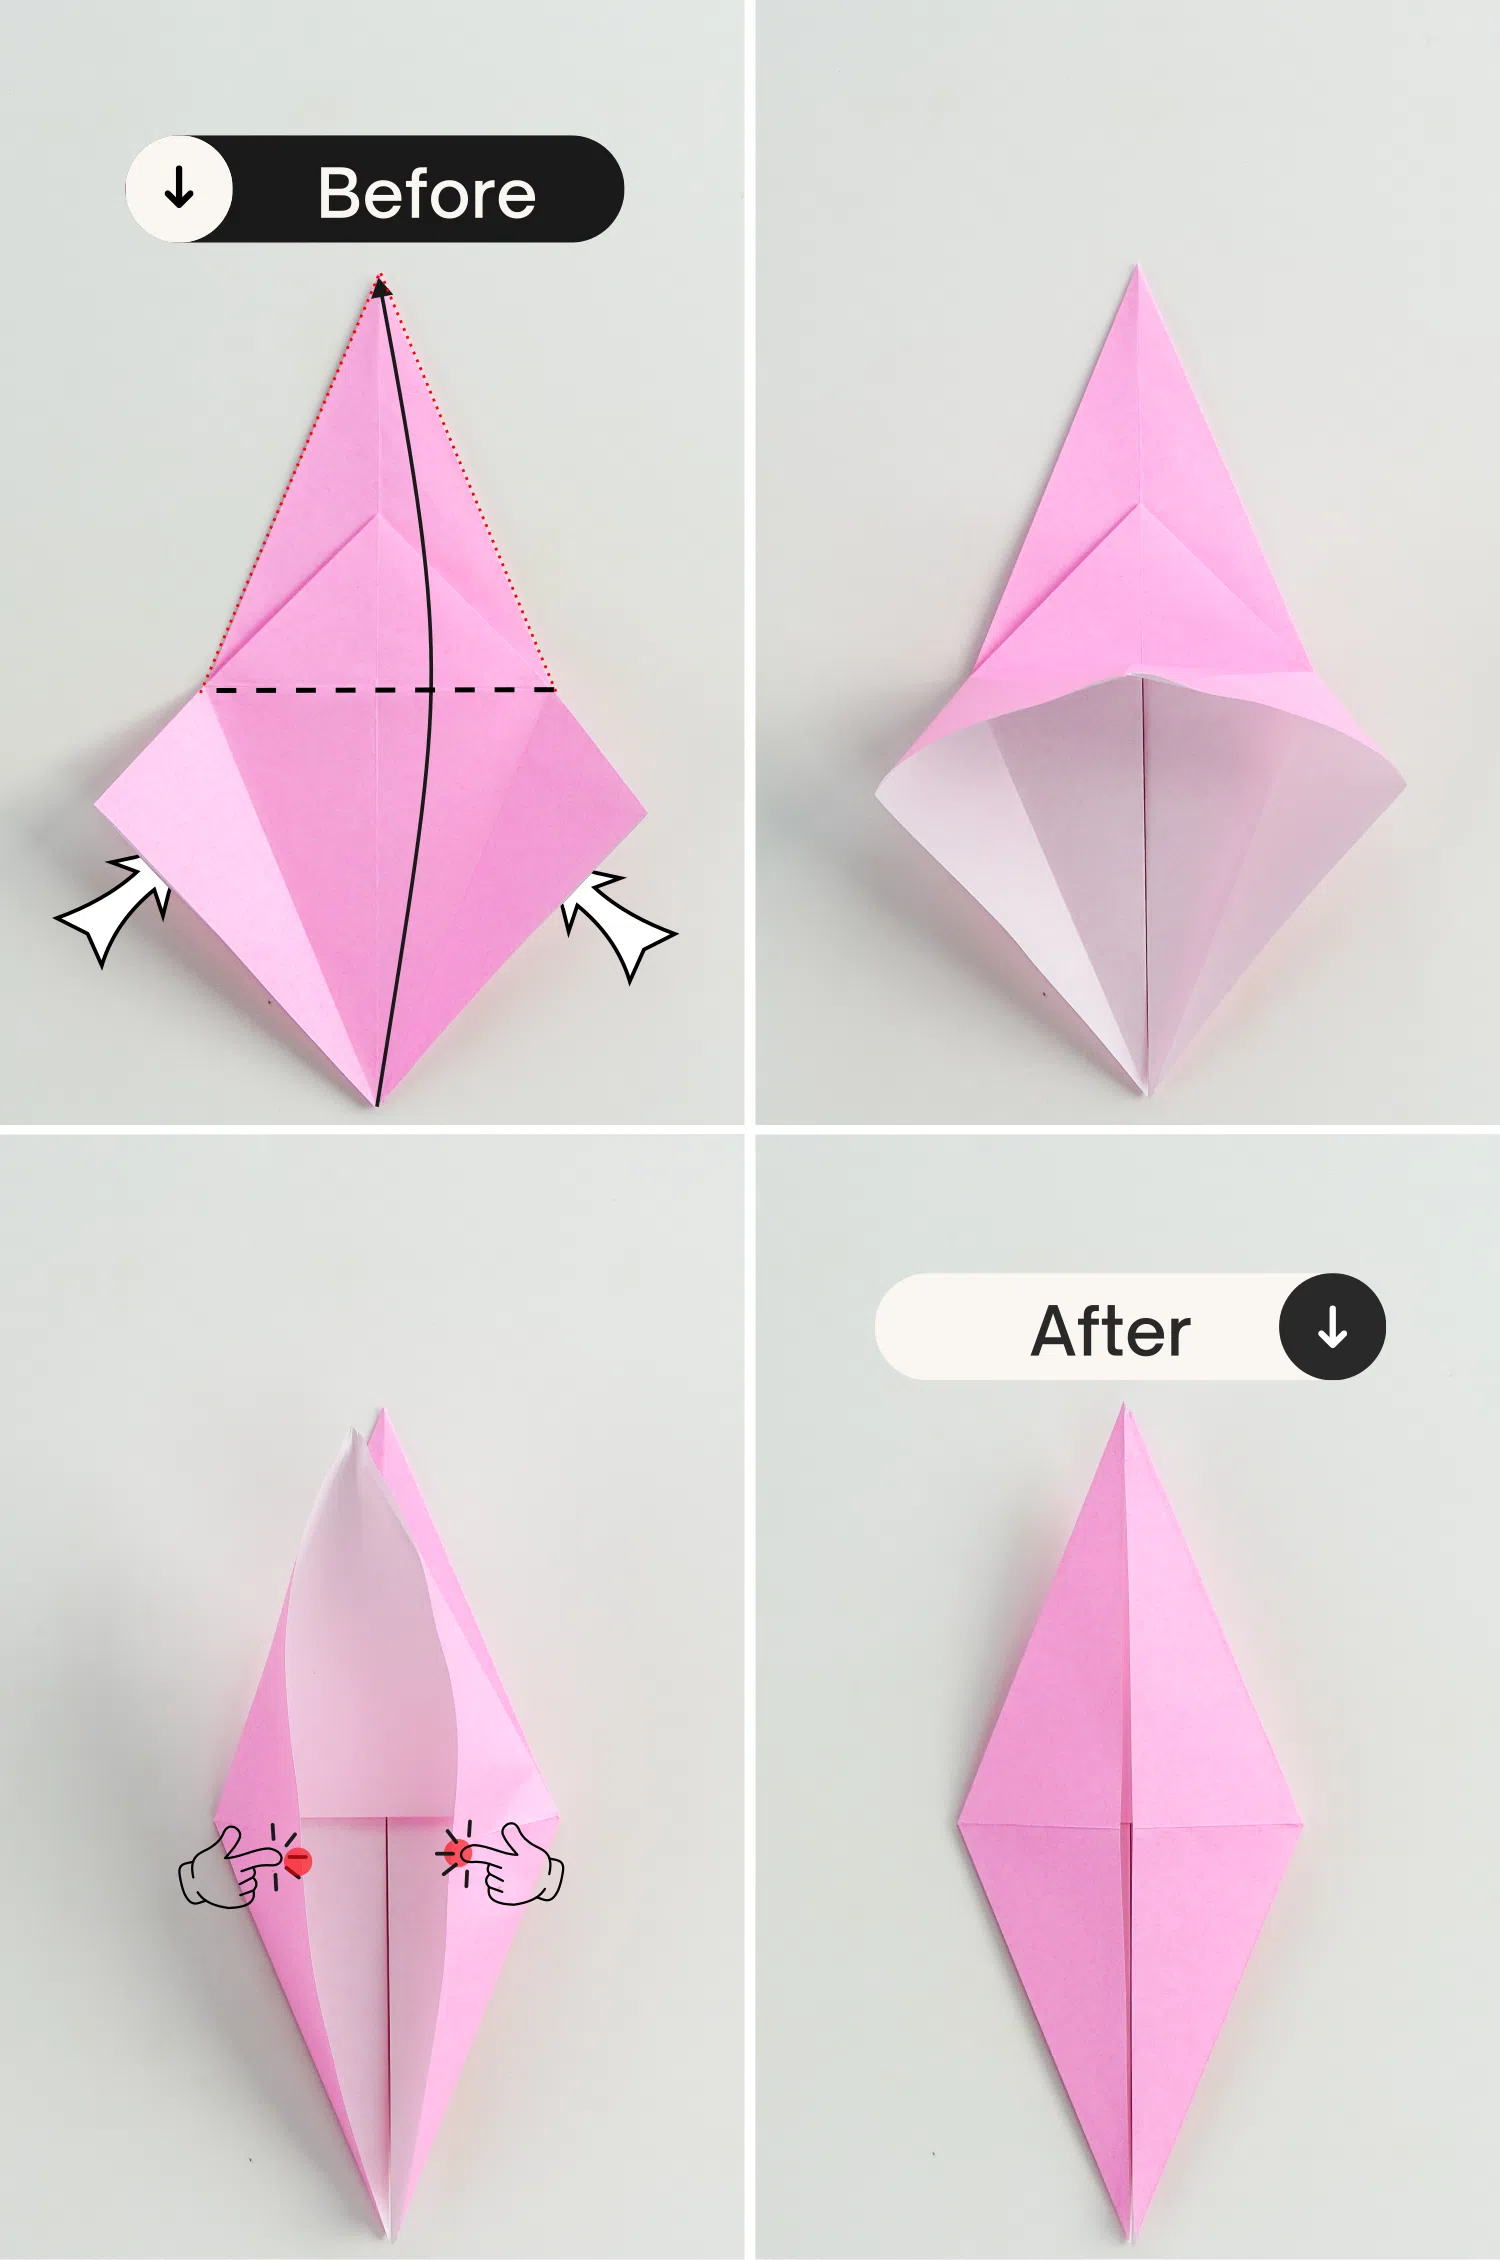
Step 6
Take the bottom right edge, fold it to the left to meet the central crease, crease it well then unfold it.
Repeat this for the left side.
Step 7
Fold the top corner down, and unfold it to make a crease.
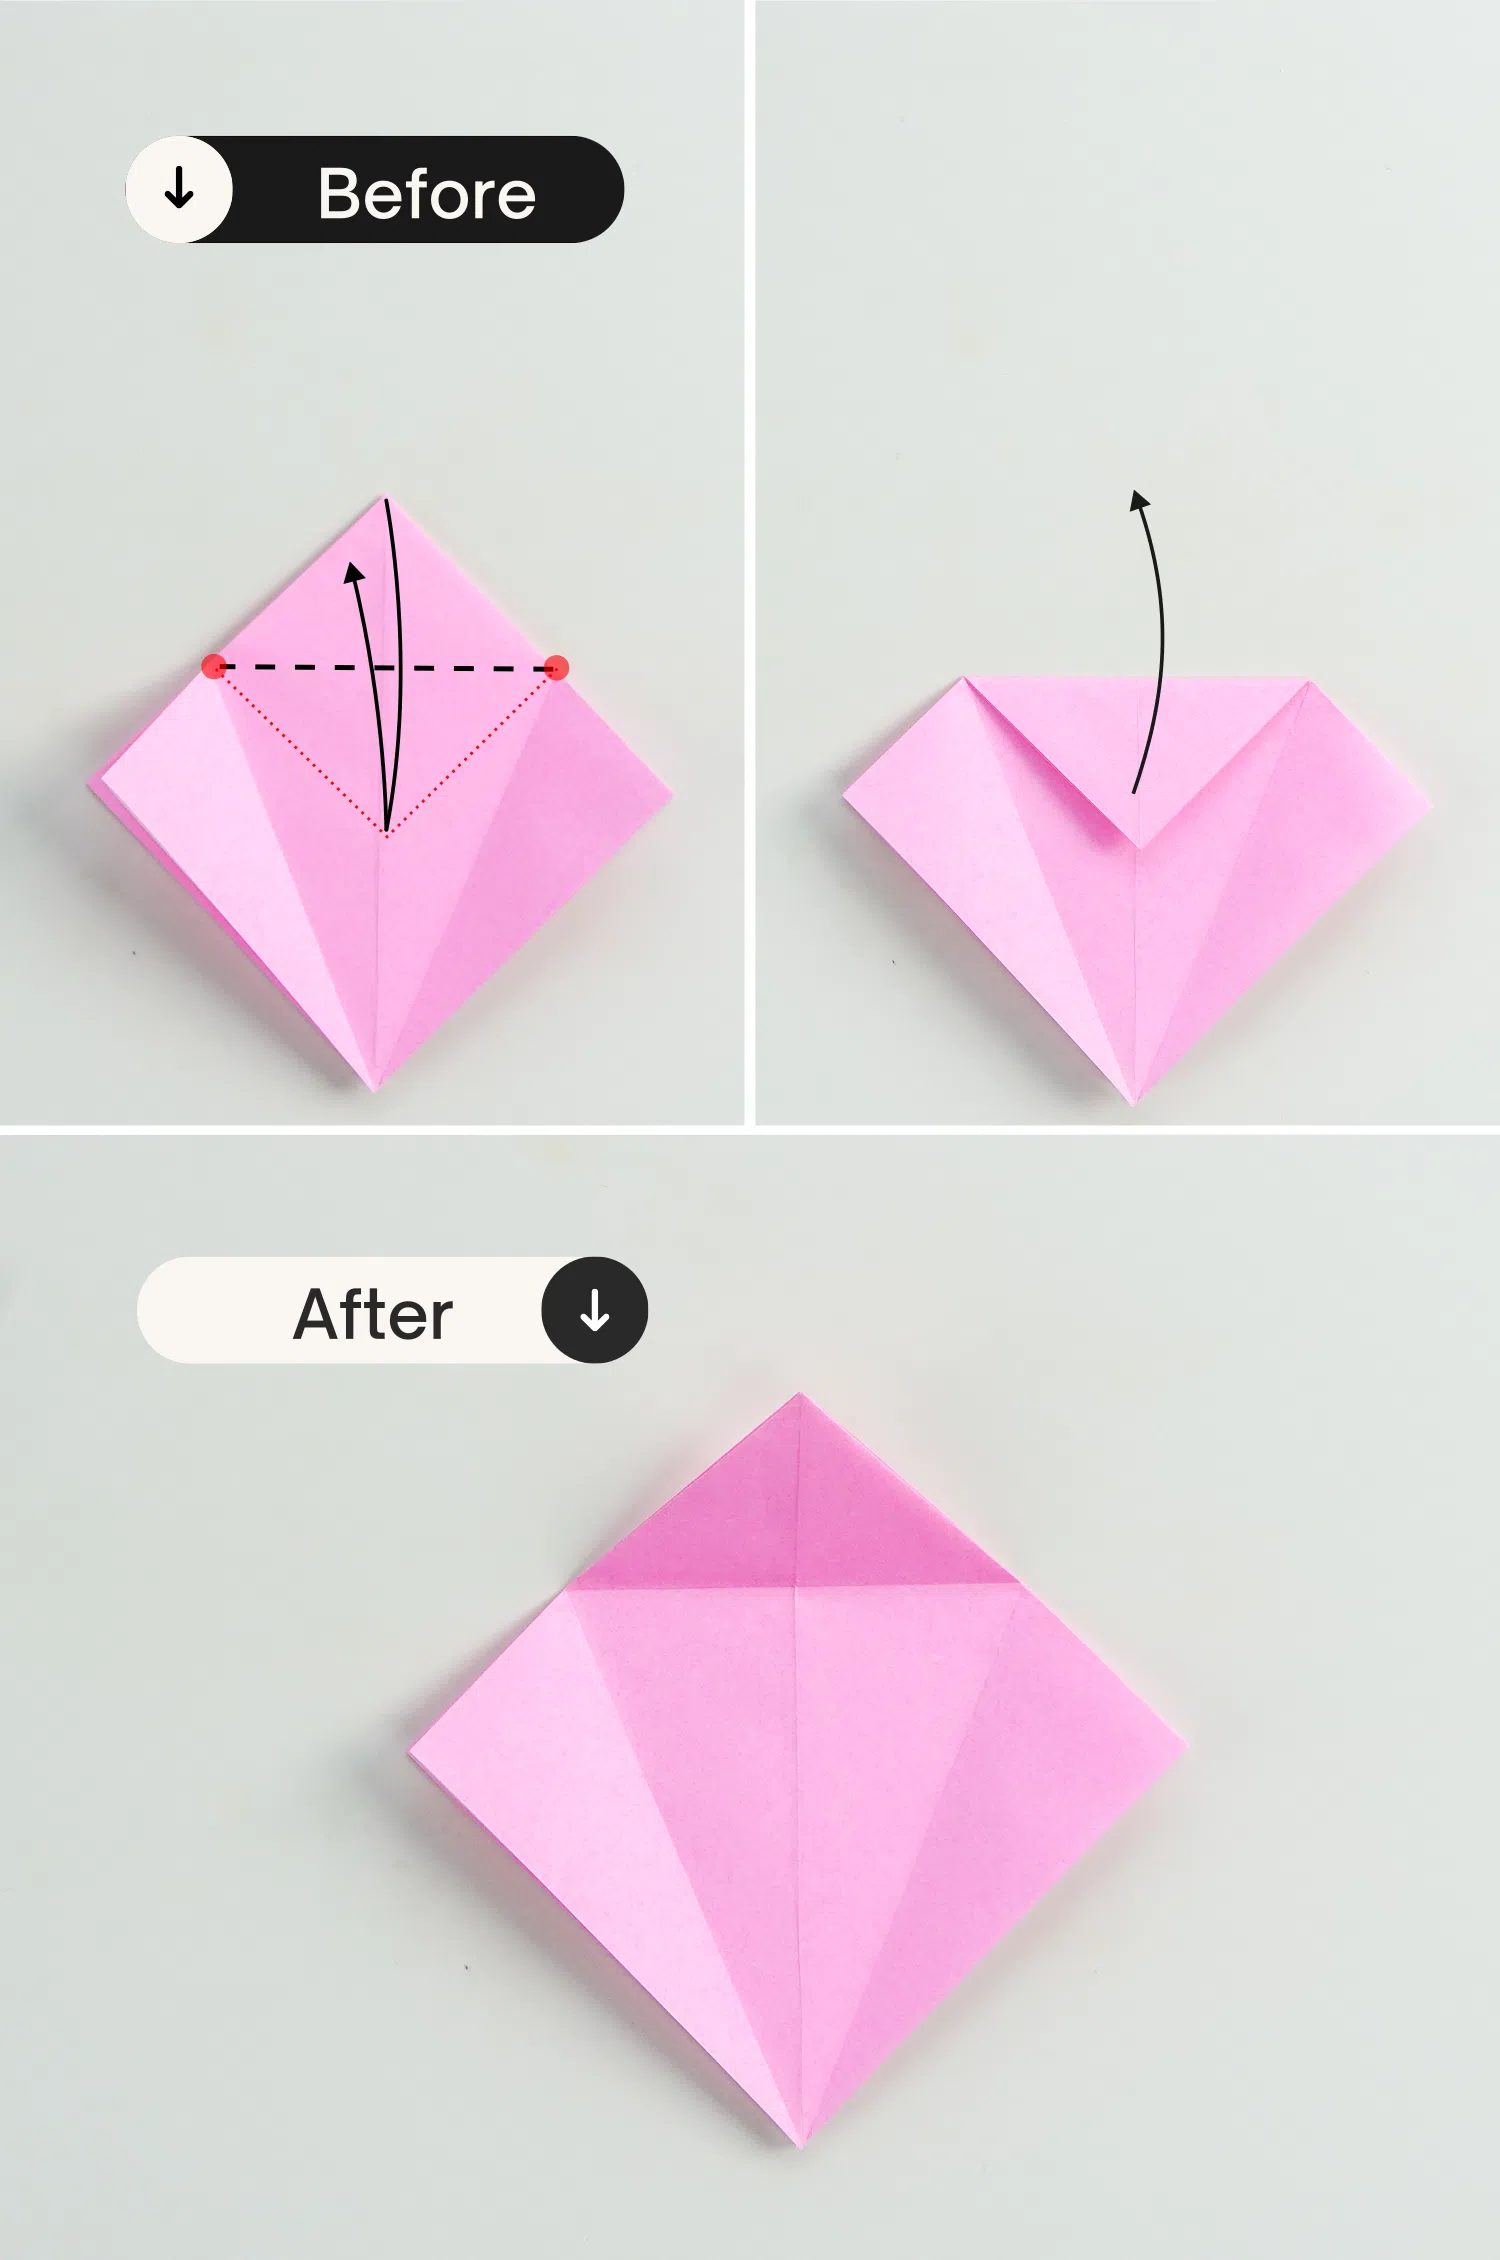
Step 8
Fold the bottom point of the above layer up along the crease you just made.
While take the left and right corners, and fold them to the center, making sure to meet the intersection point formed by the two creases. Finally, flatten it.
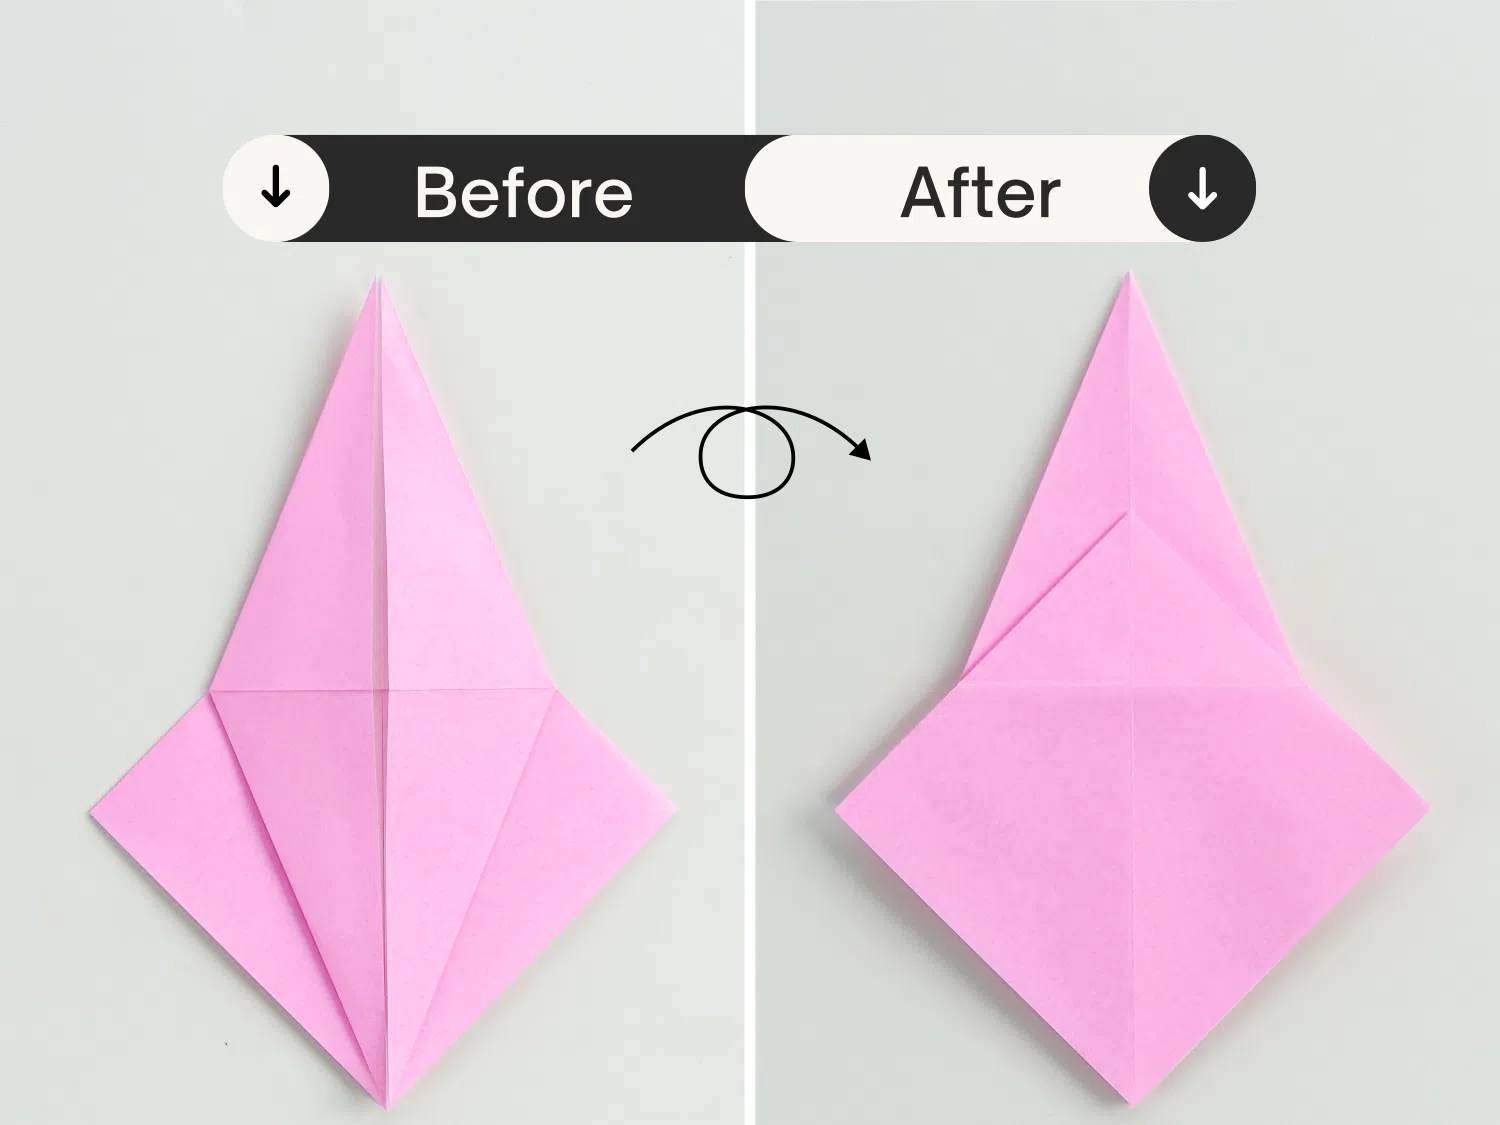
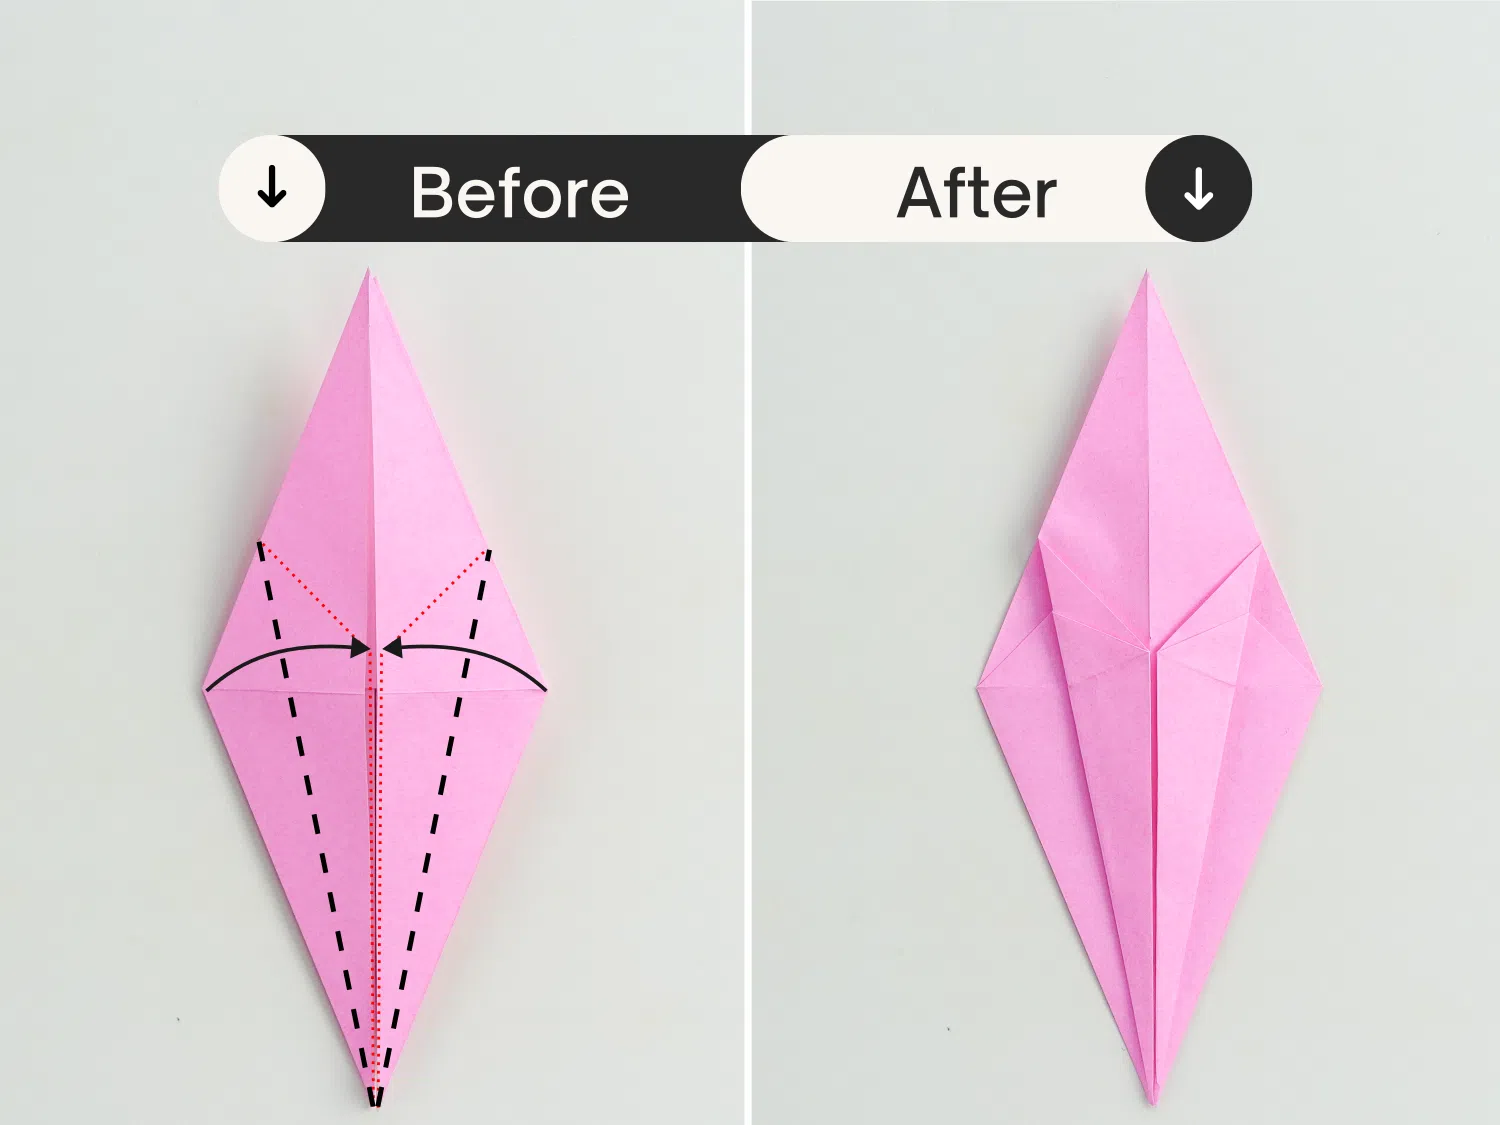
Step 9
Flip the paper over.
Step 10
Take the right corner, and fold it to the left to meet the intersection point formed by two vertical creases. Crease it well then unfold it.
Repeat this for the left corner.
Step 11
Use the same manner as in step 8, fold the bottom point up along the dotted line, while folding the left and right corners to the center, and finally flatten it.
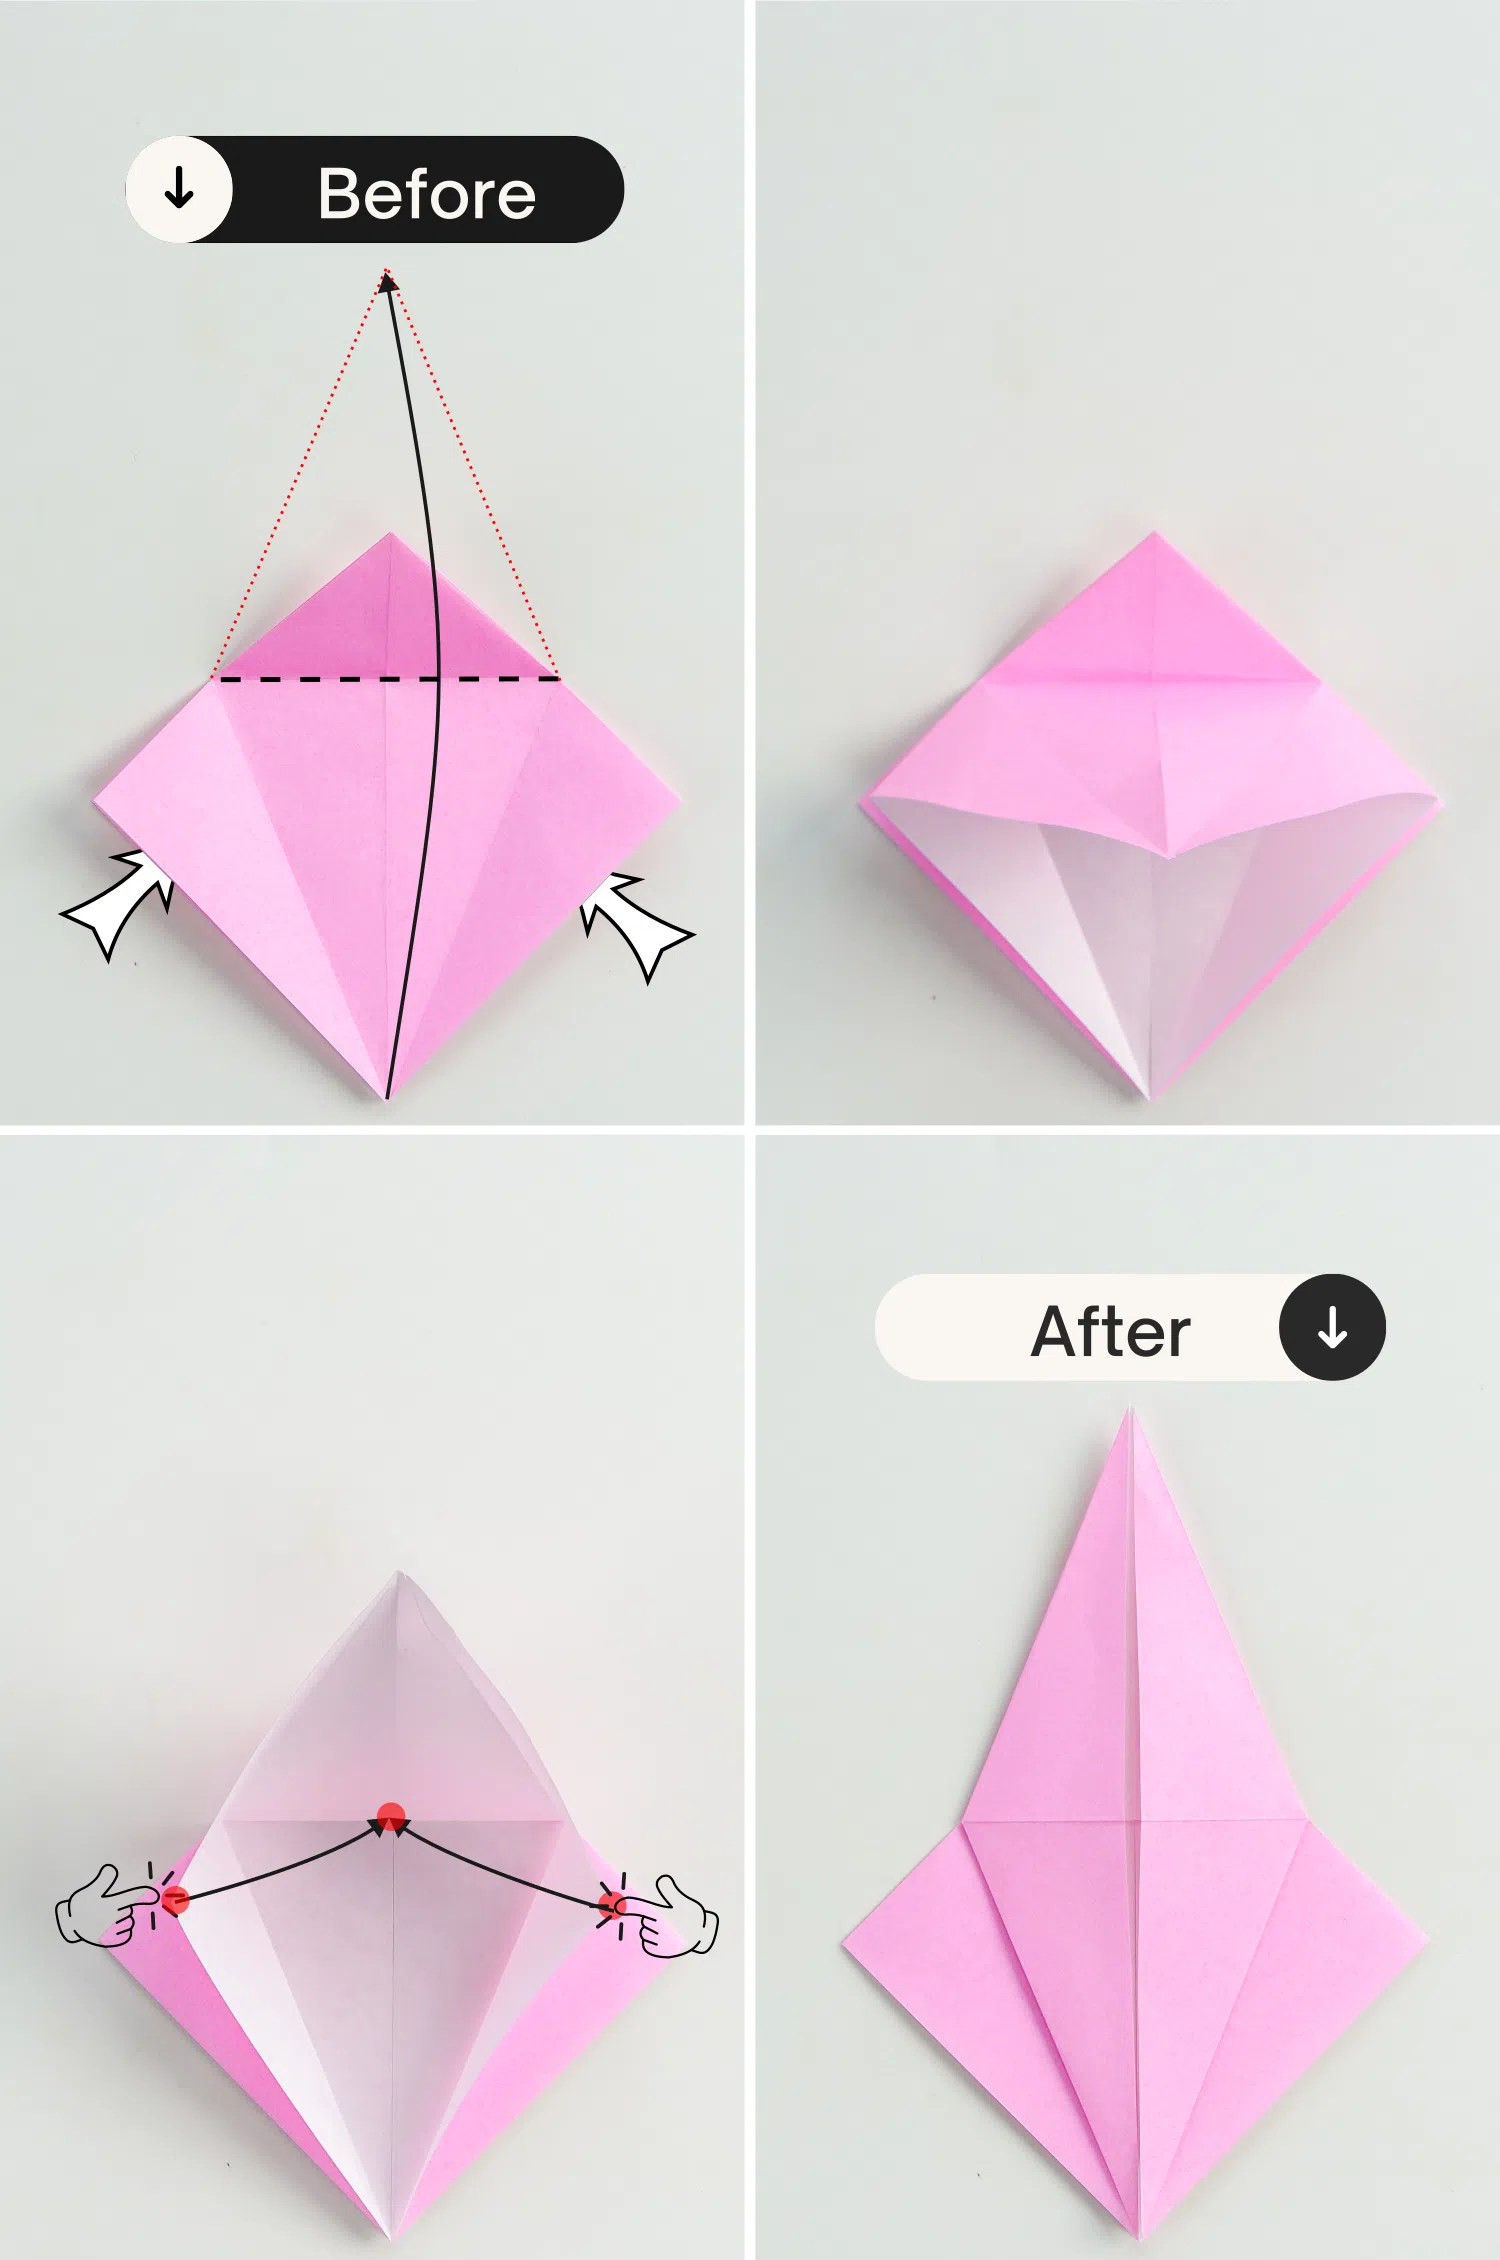
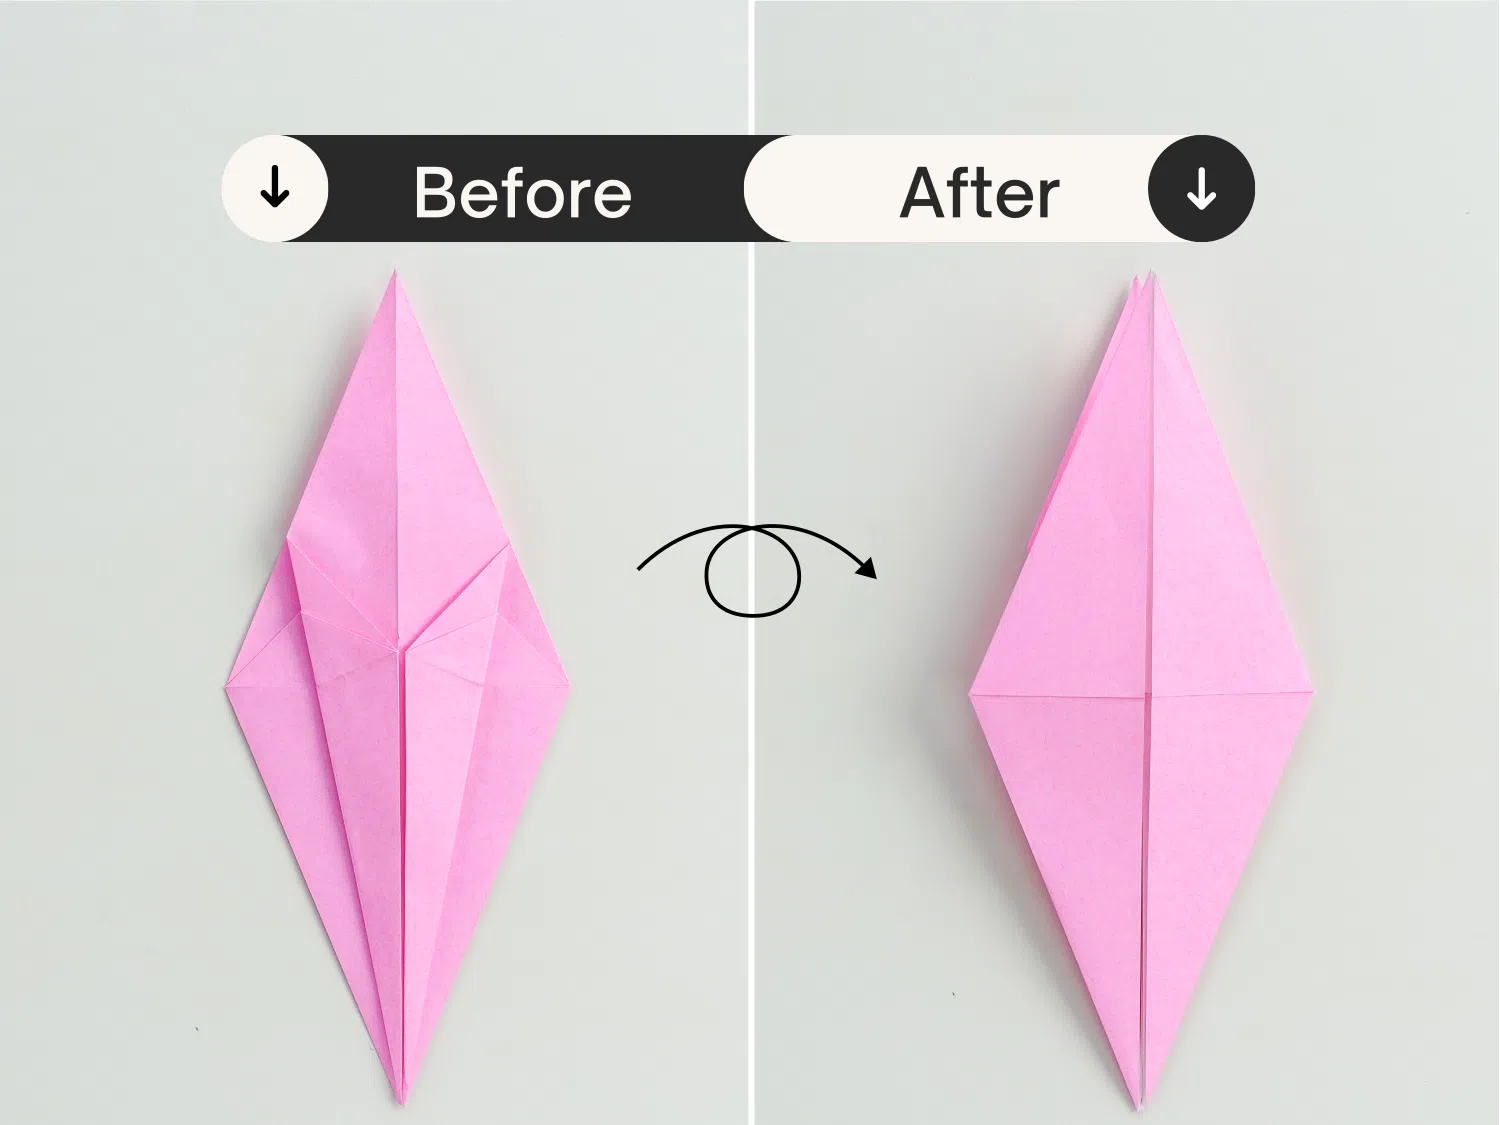
Step 12
Take the right corner of the above layer, fix the bottom point, and fold it to the left to meet the center line.
Repeat this for the left corner.
Step 13
Flip the paper over.
Step 14
Fold the left and right corners to the center in the same manner as in step 12.
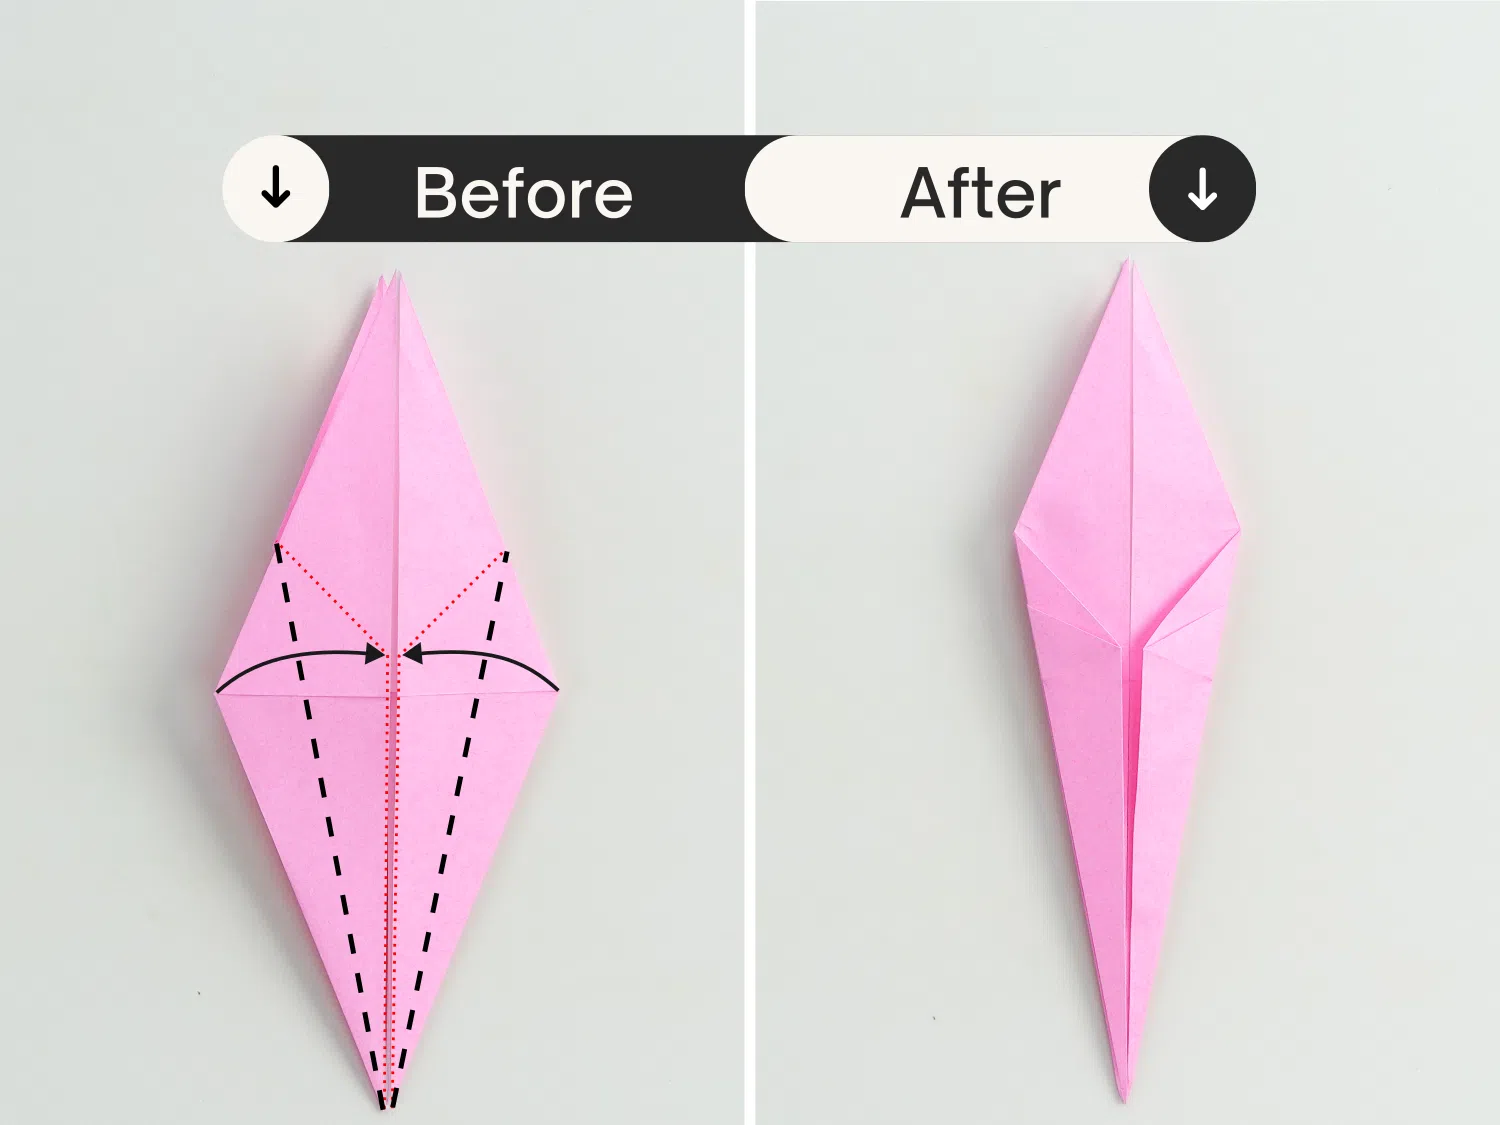
Step 15
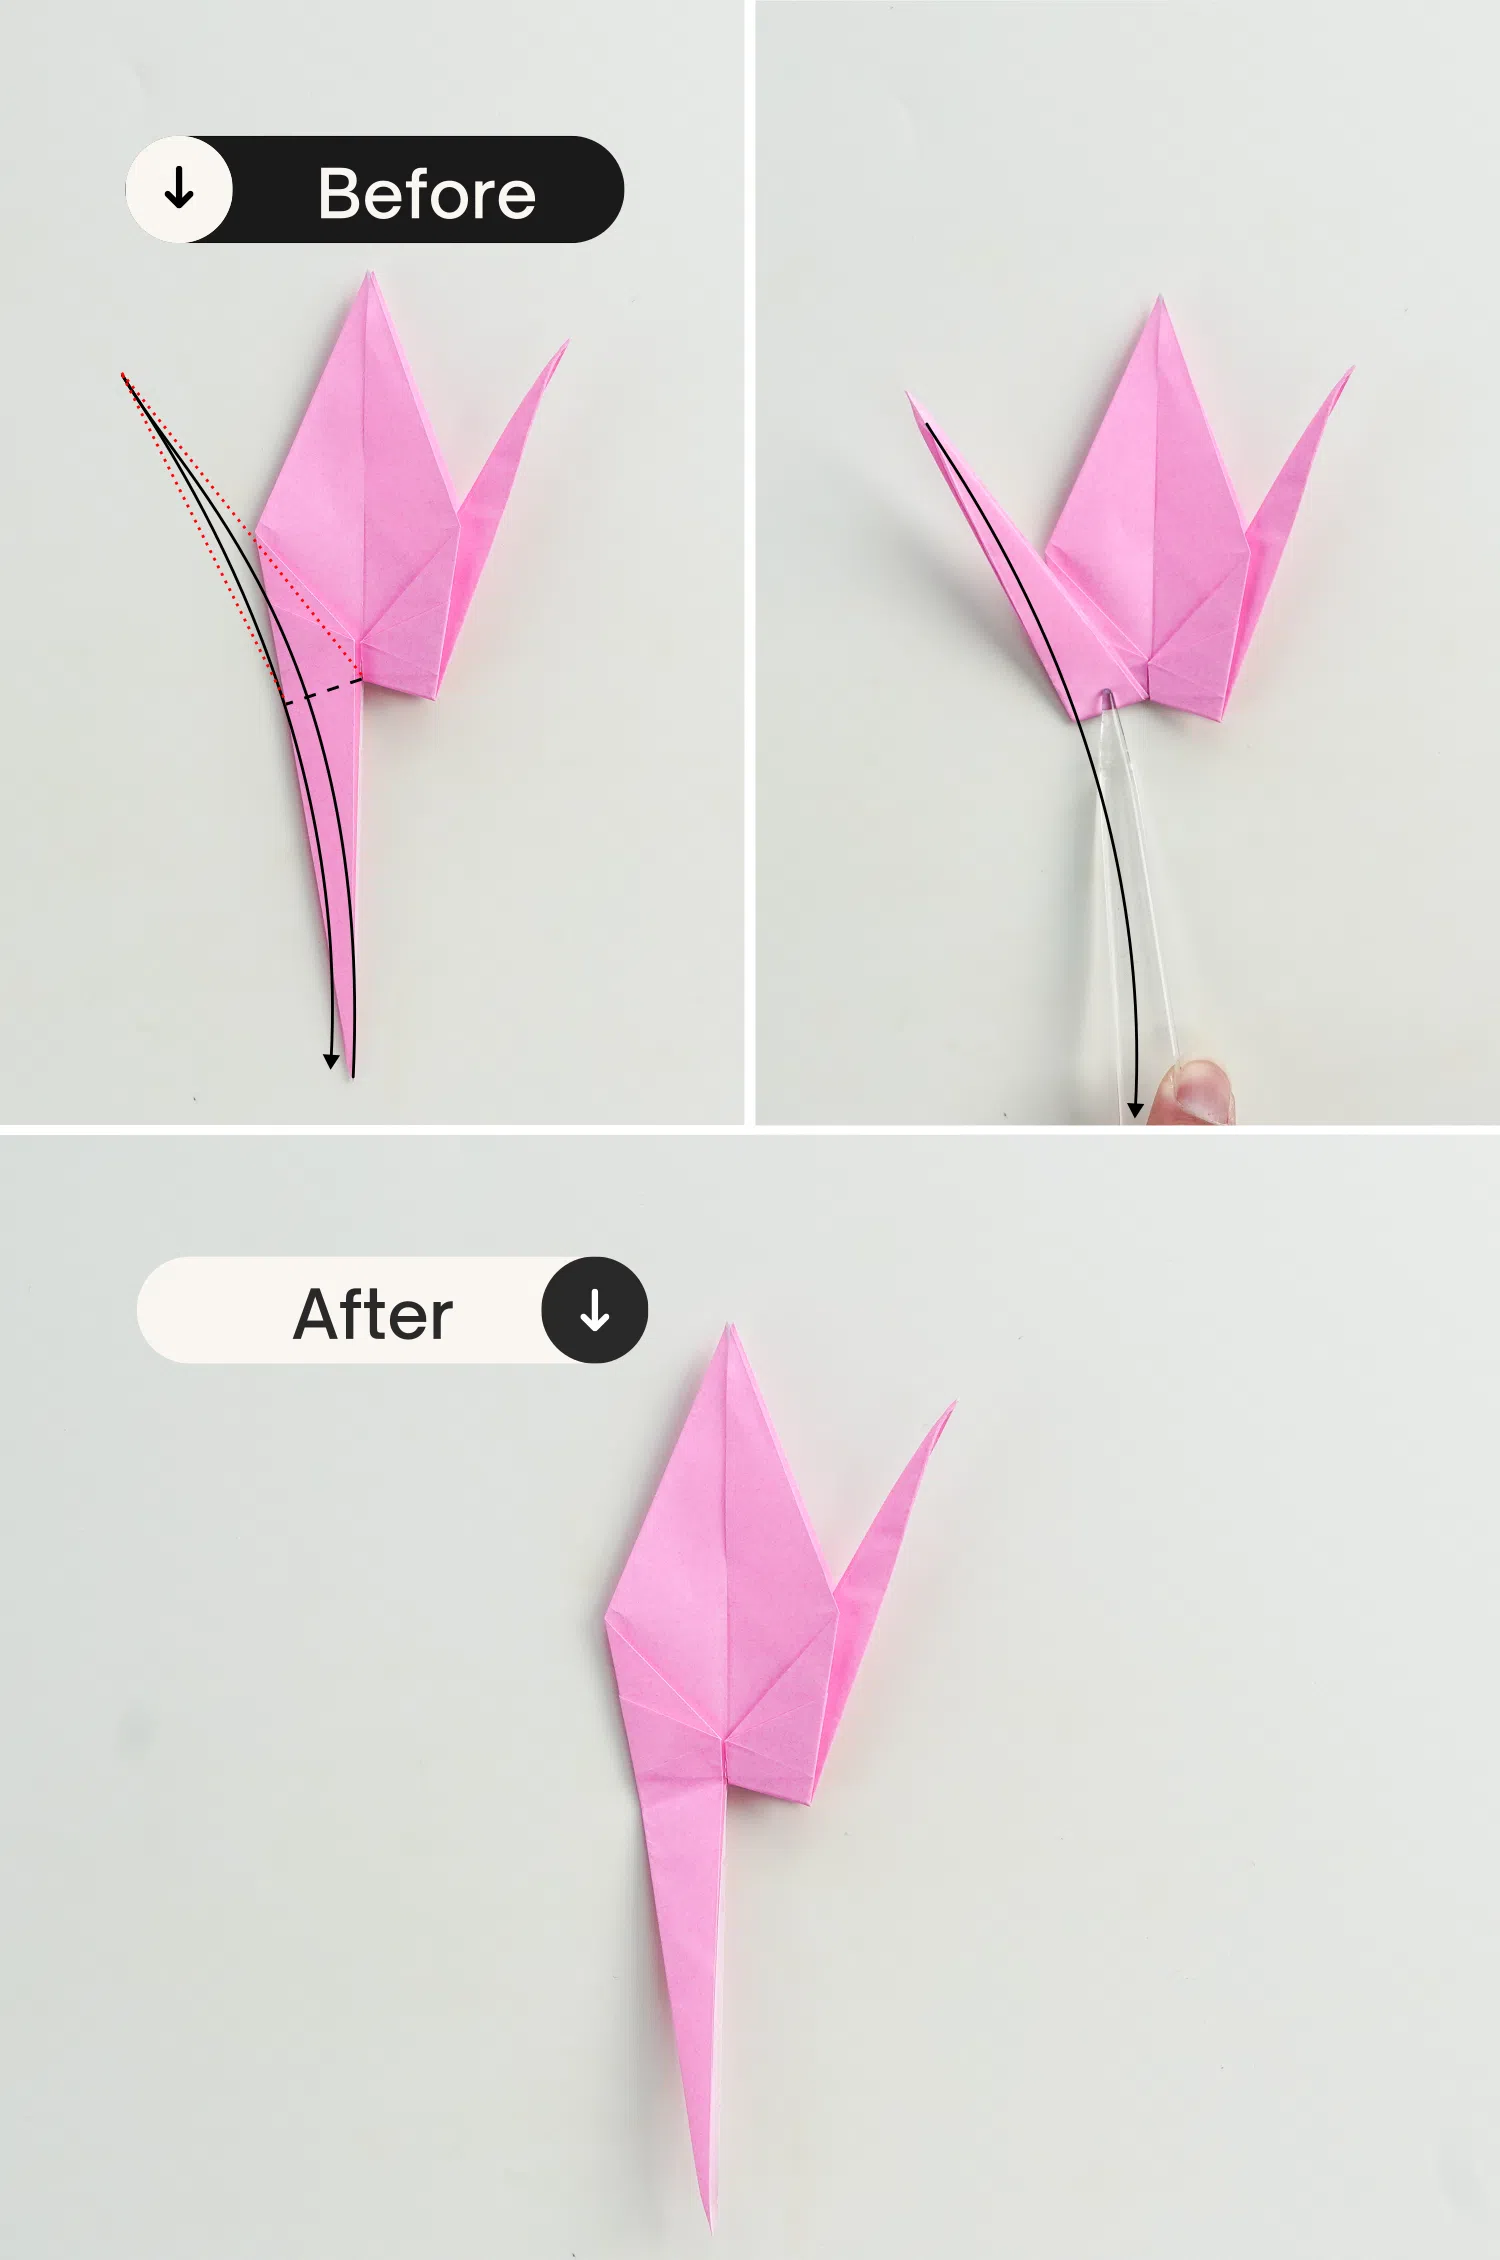
Fold the bottom right corner up along the black dotted line, crease it well then unfold it.
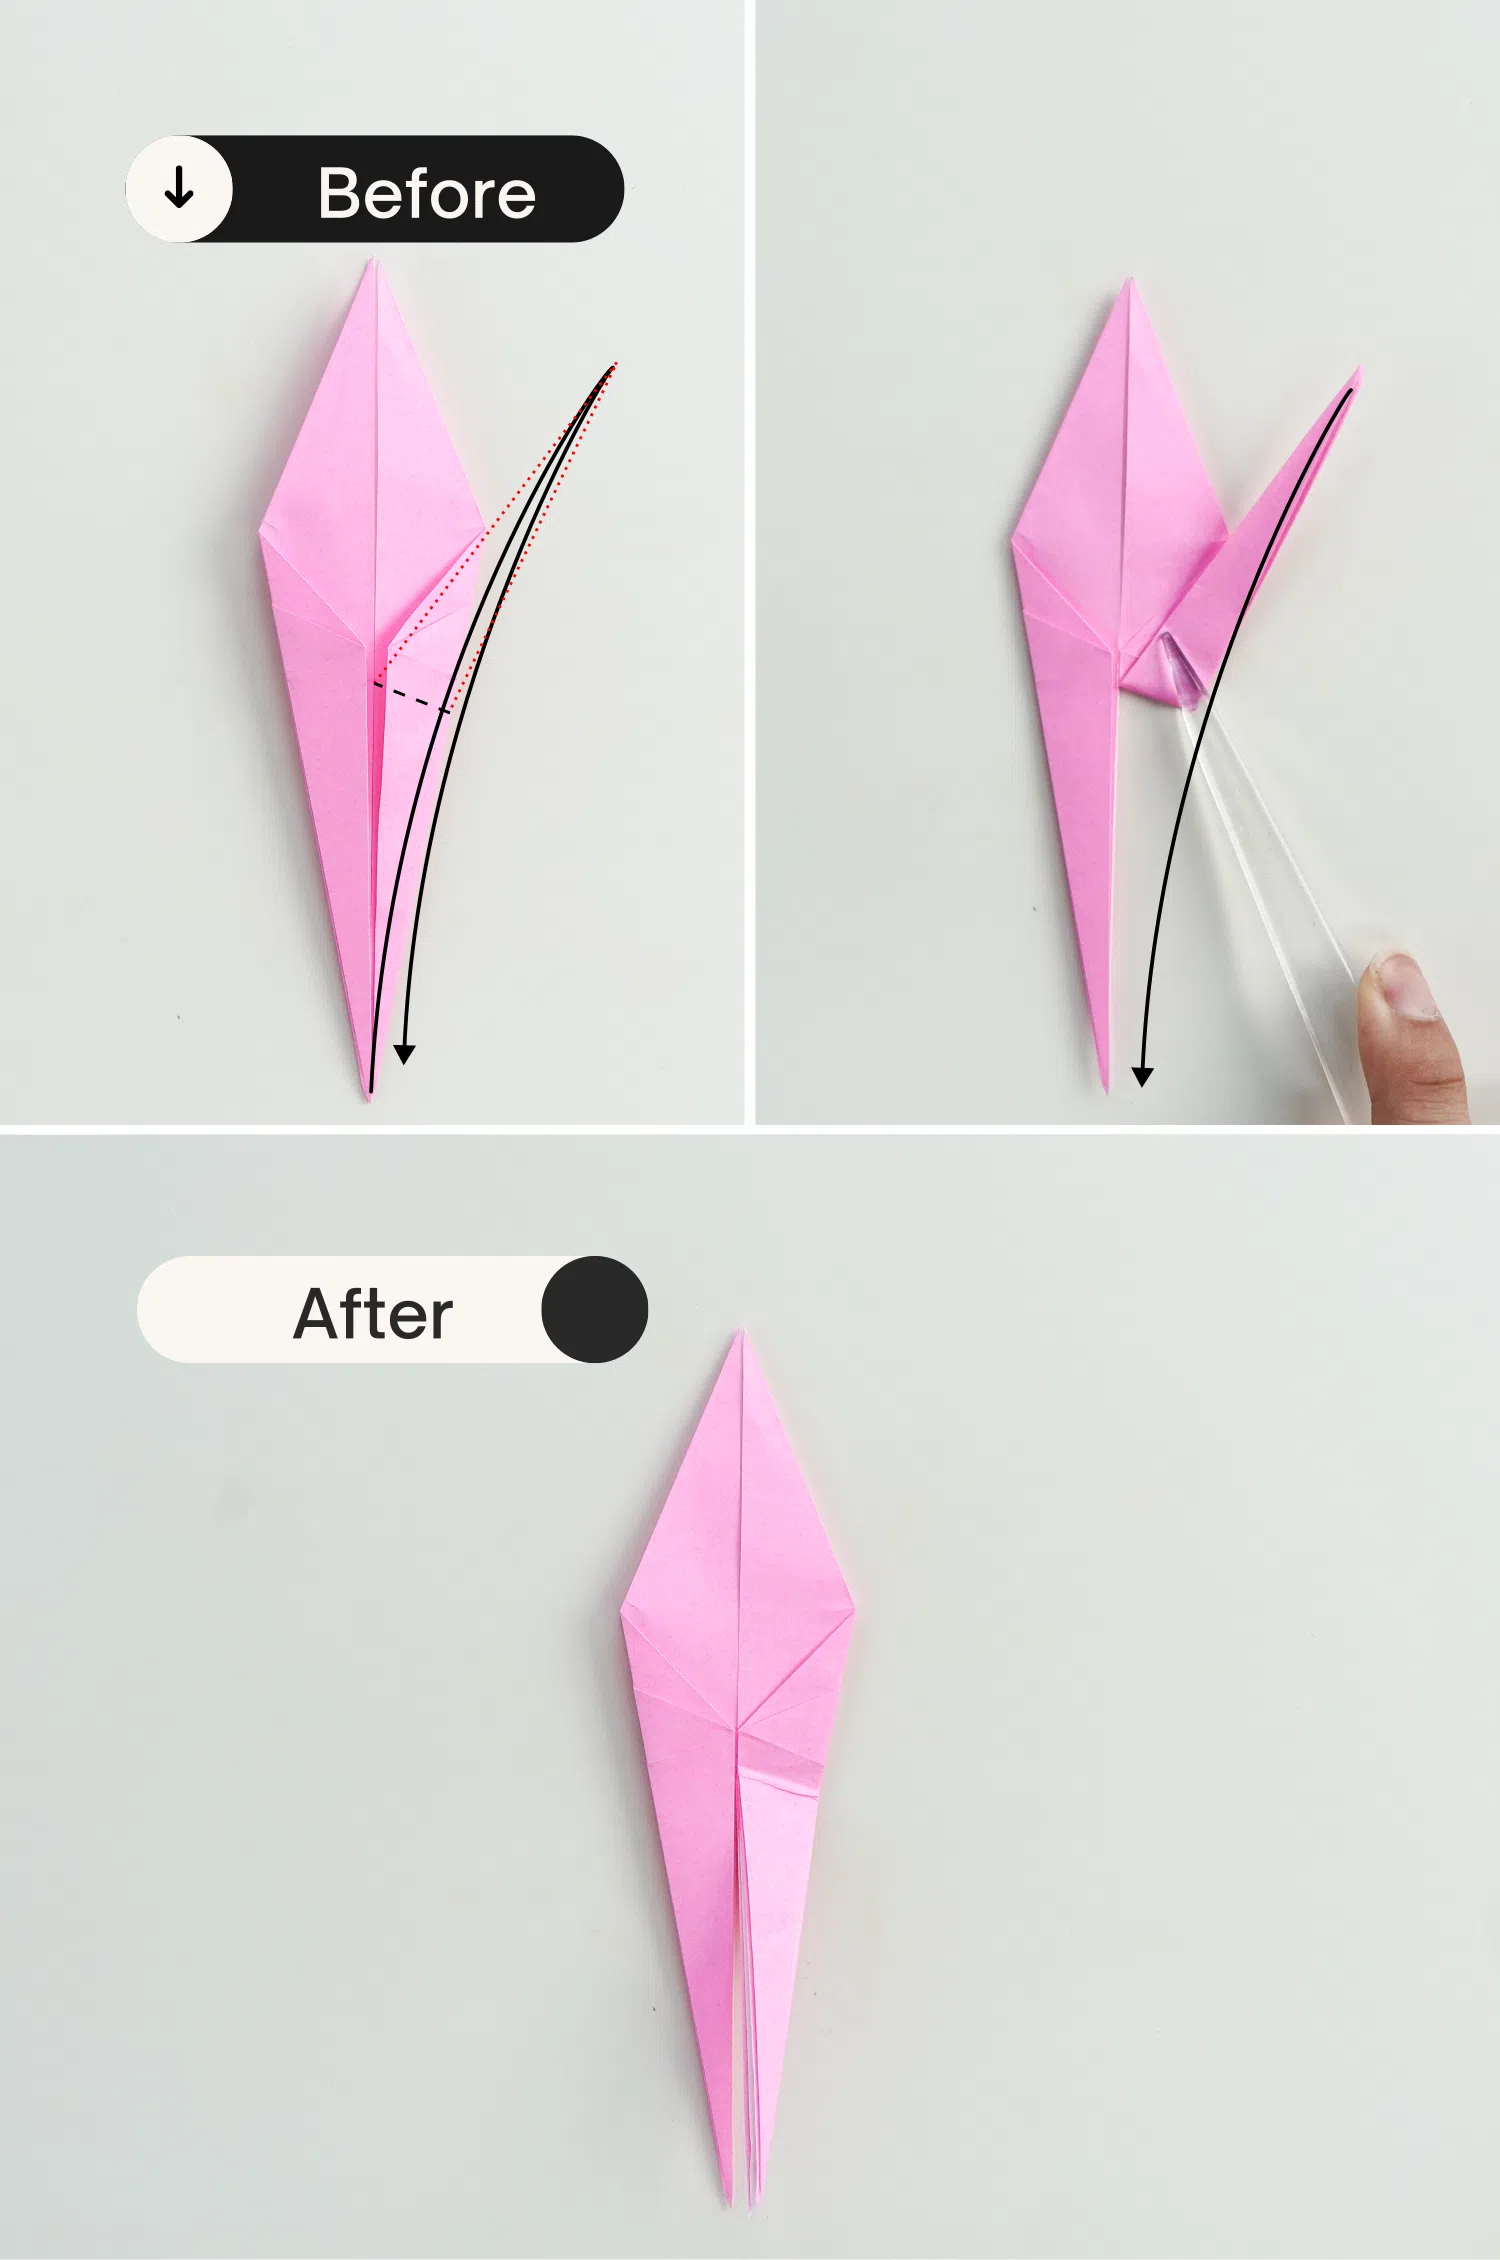
Step 16
Open the paper from the right side, rotate it 90 degrees counterclockwise, then fold the right above corner to the left along the crease you just made in the previous step.
Finally, close it and rotate it back to its original position, here we get the head and neck part of the crane.
Step 17
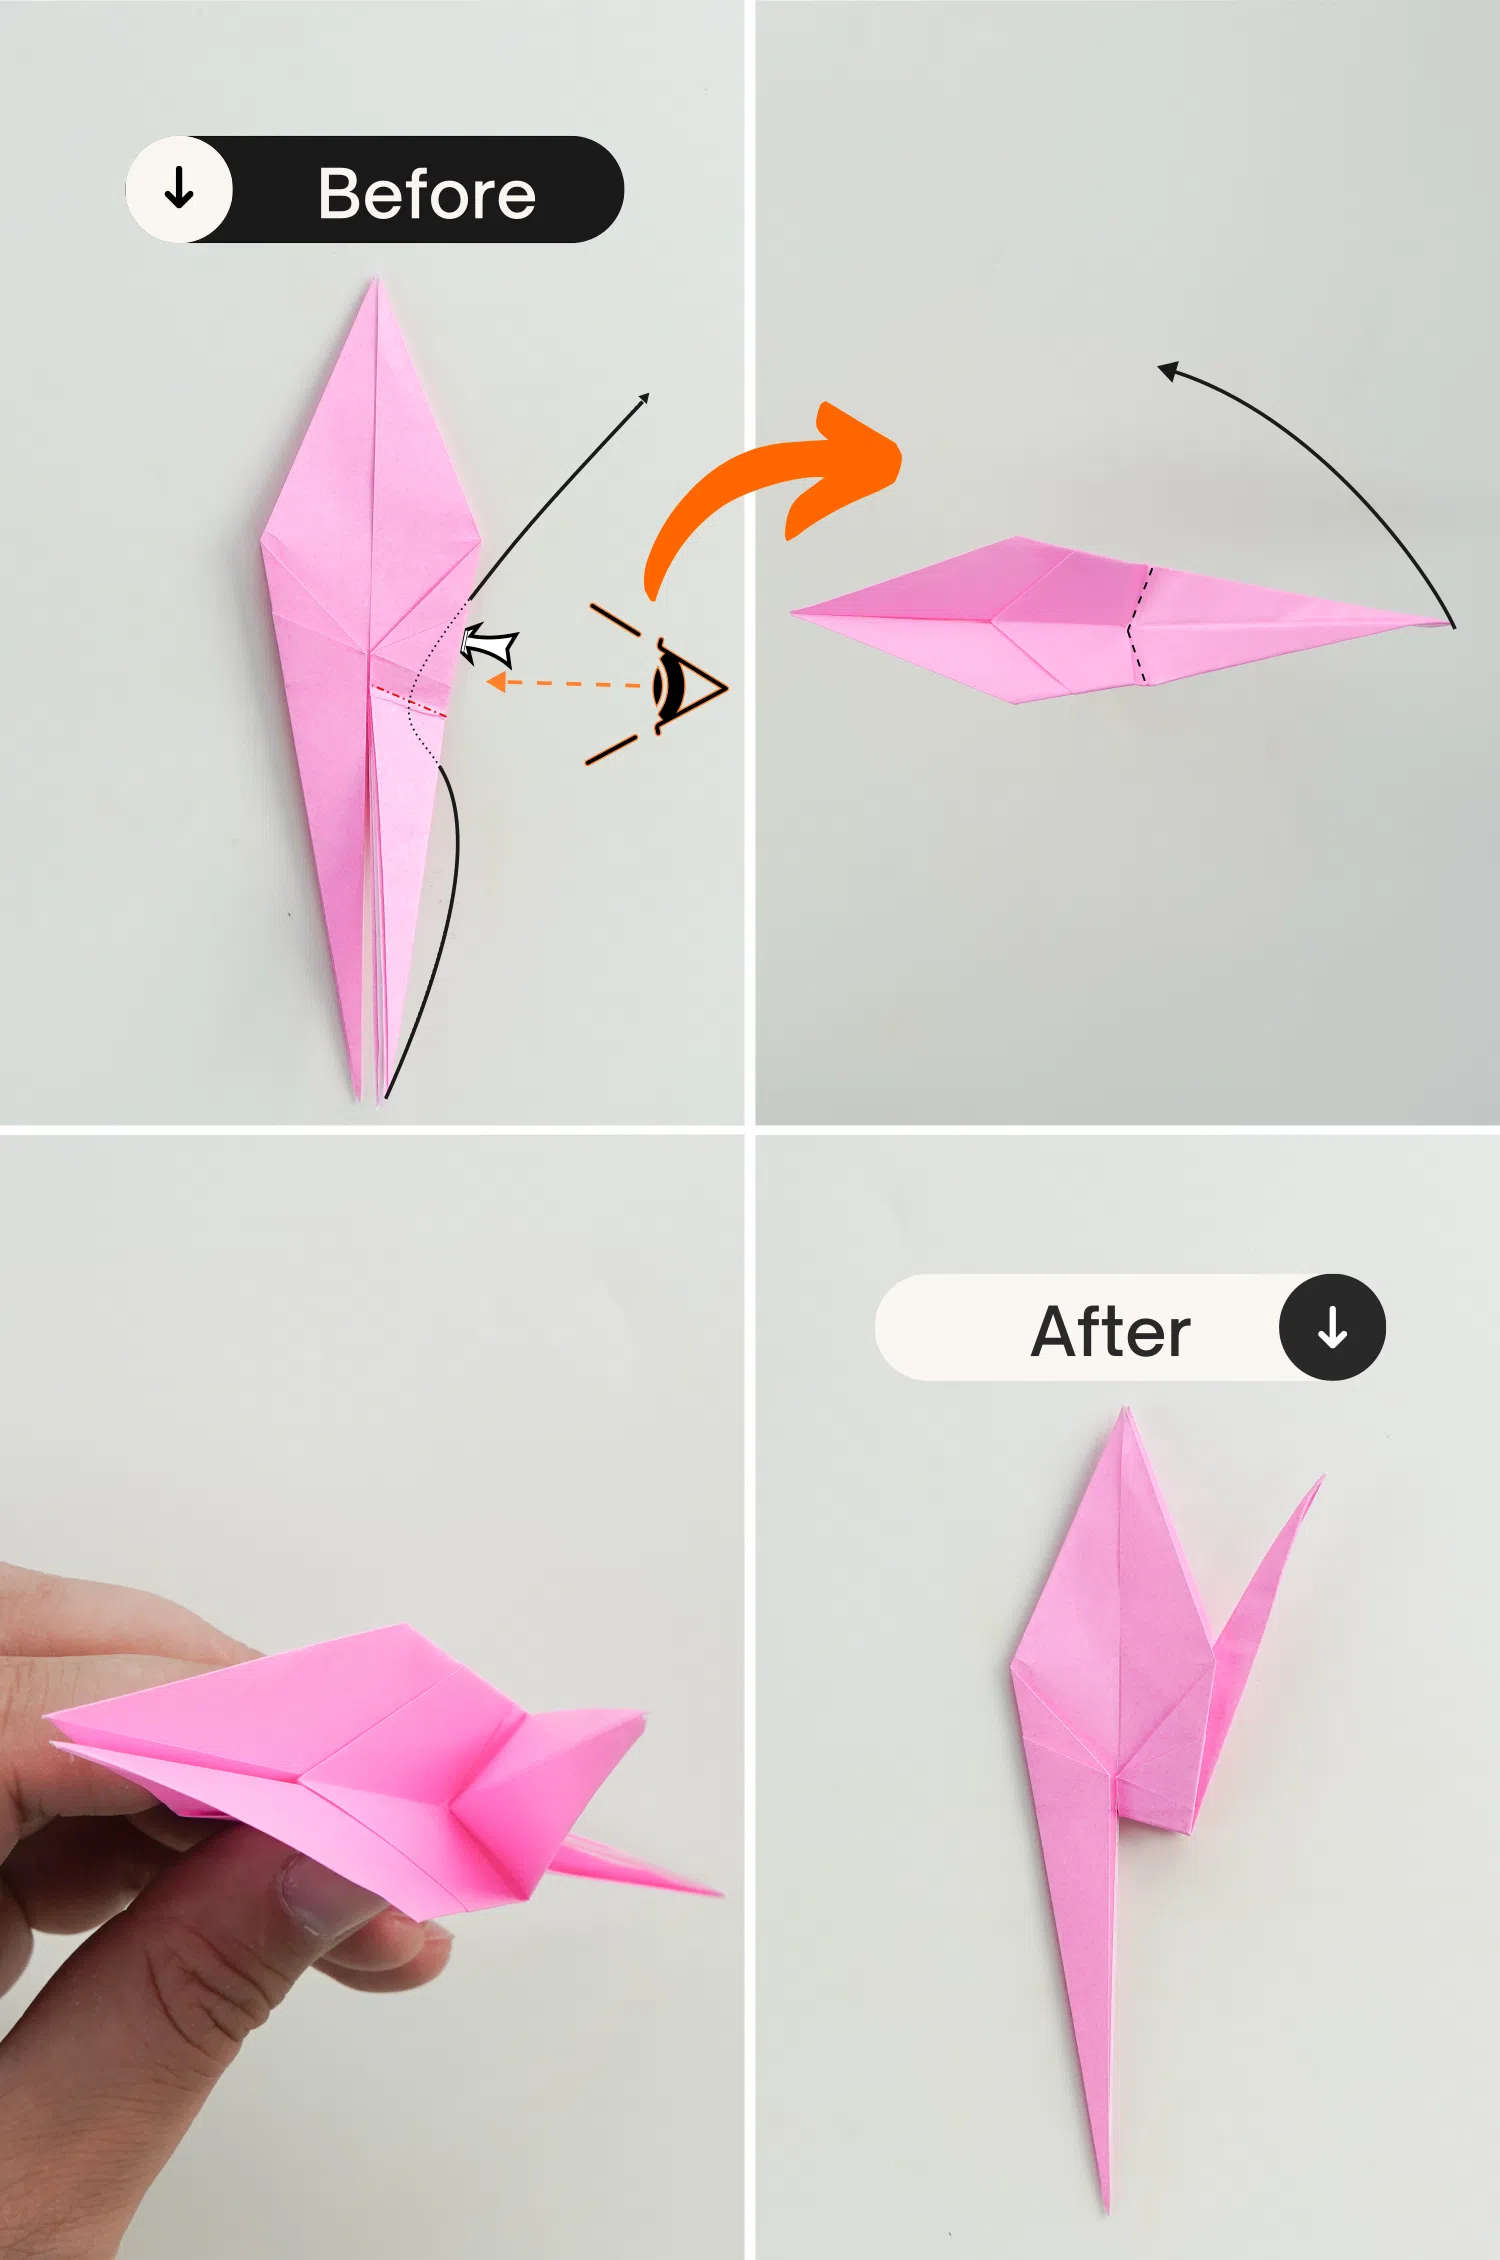
Fold the left corner up along the black dotted line, crease it well and unfold it.
Step 18
Use the same method as step 16 for this left side to form the crane’s tail.
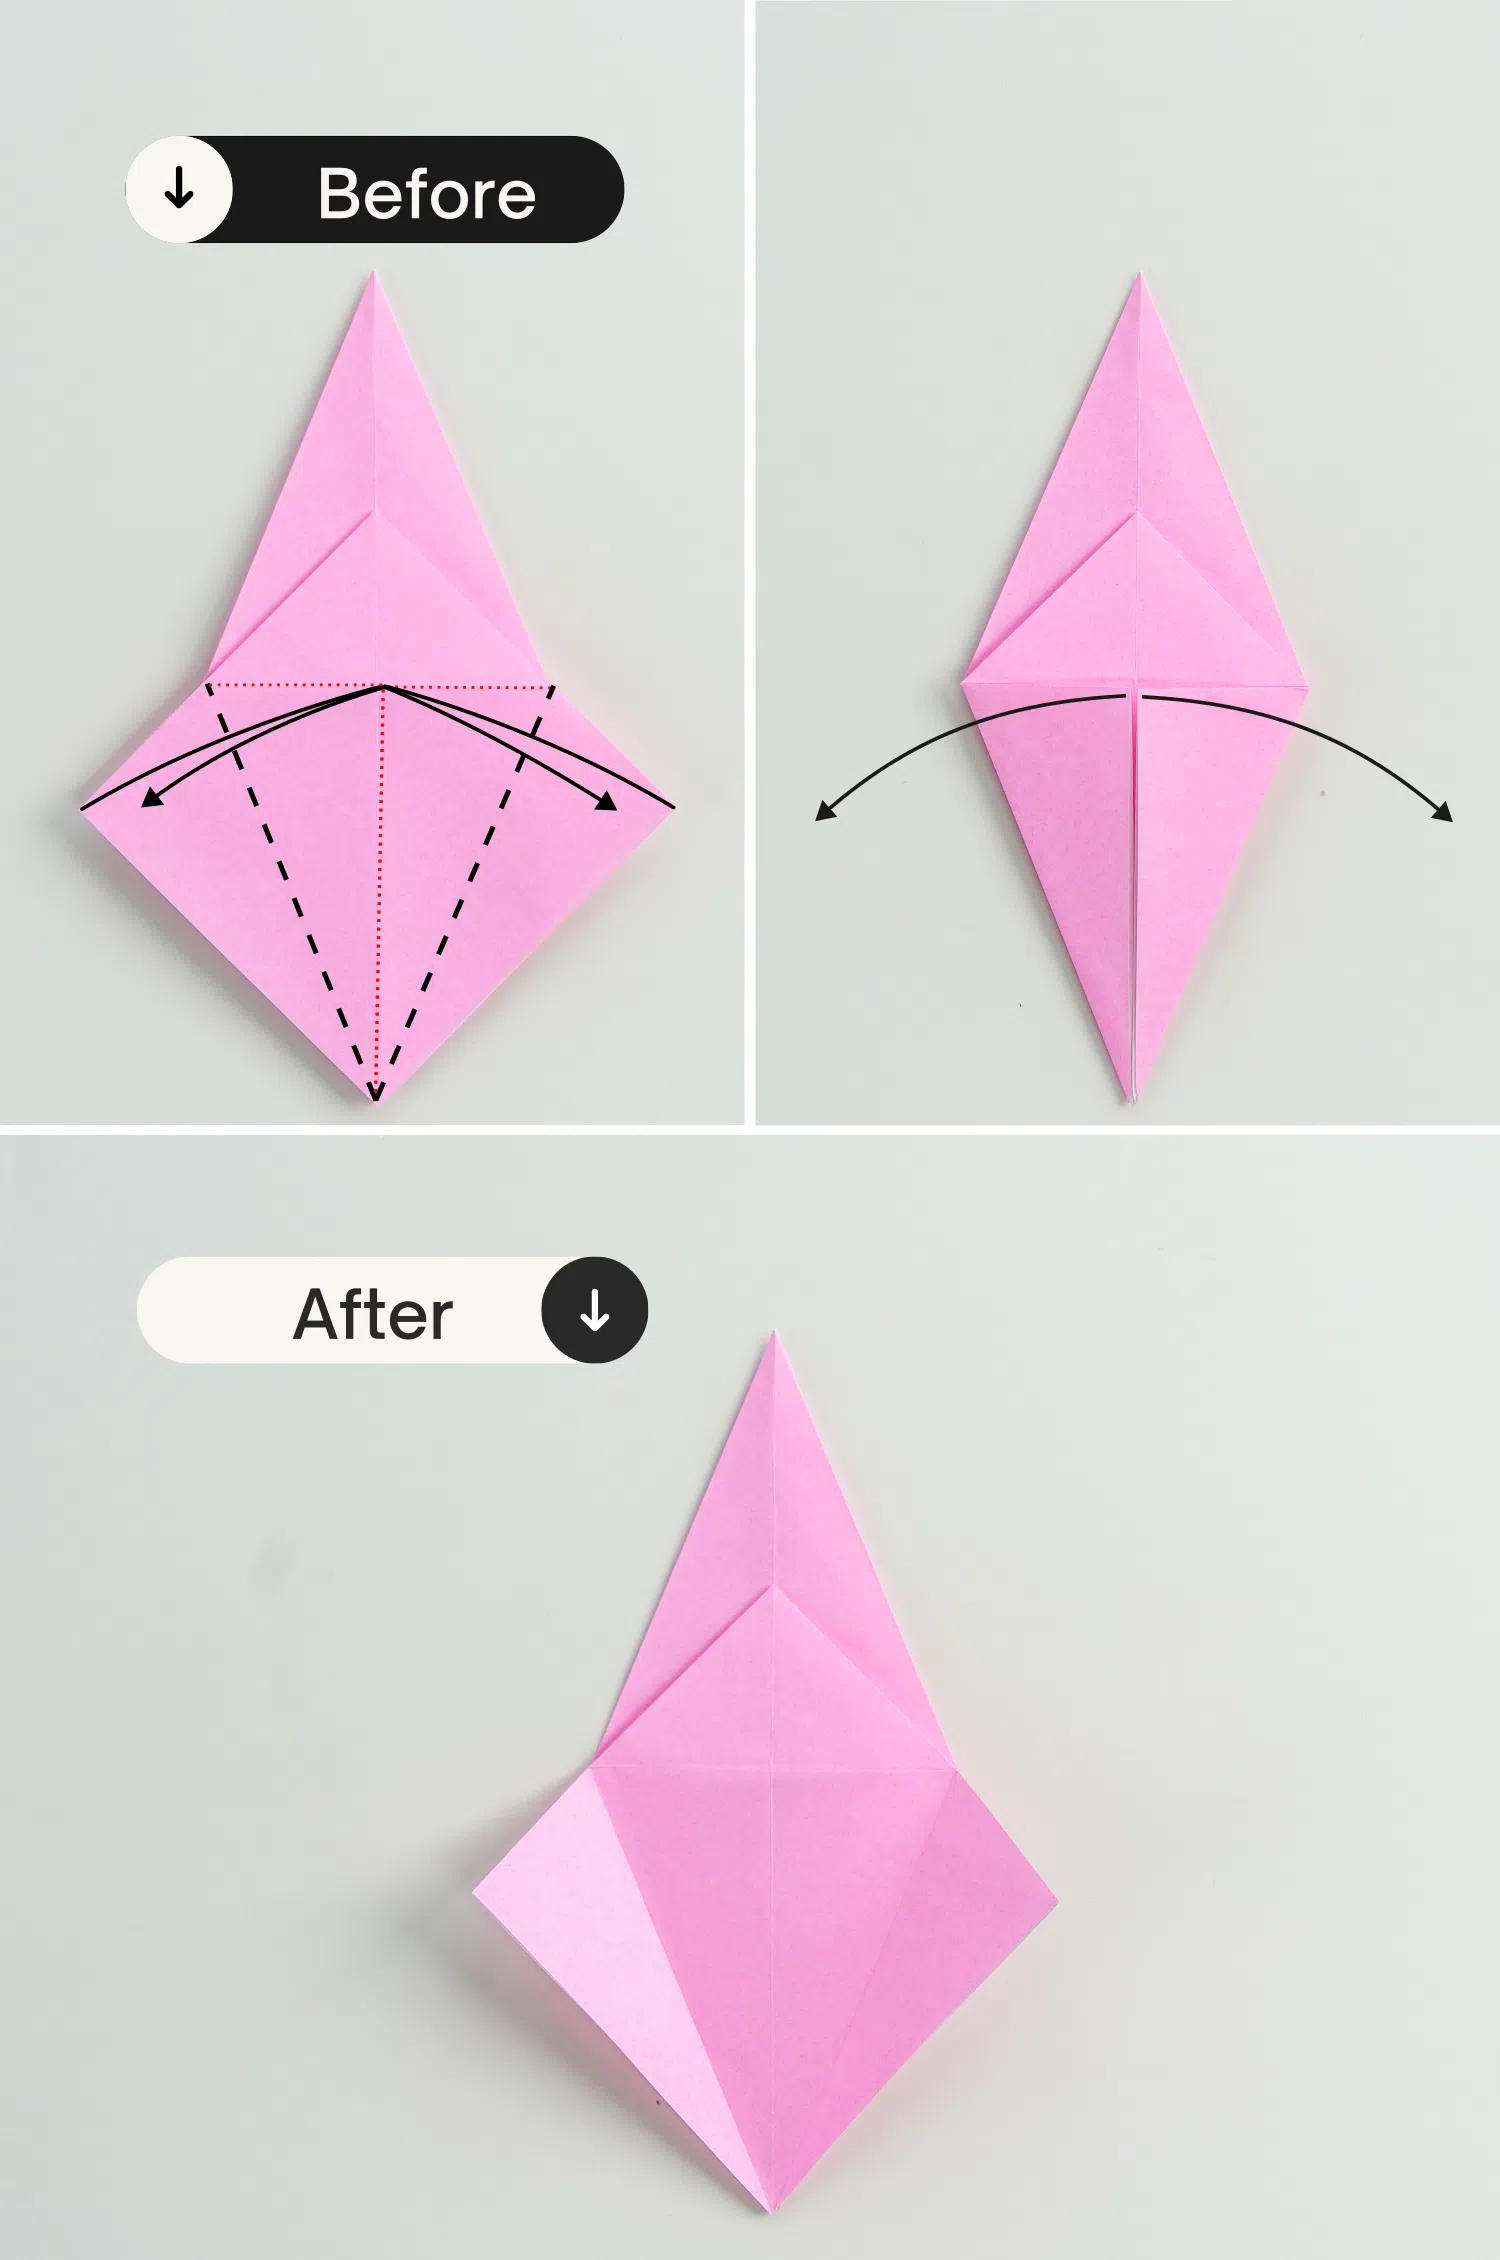
Step 19
Select a small section of the head and neck part, and open it. Press the corner inward, close and flatten it, getting the crane’s head.
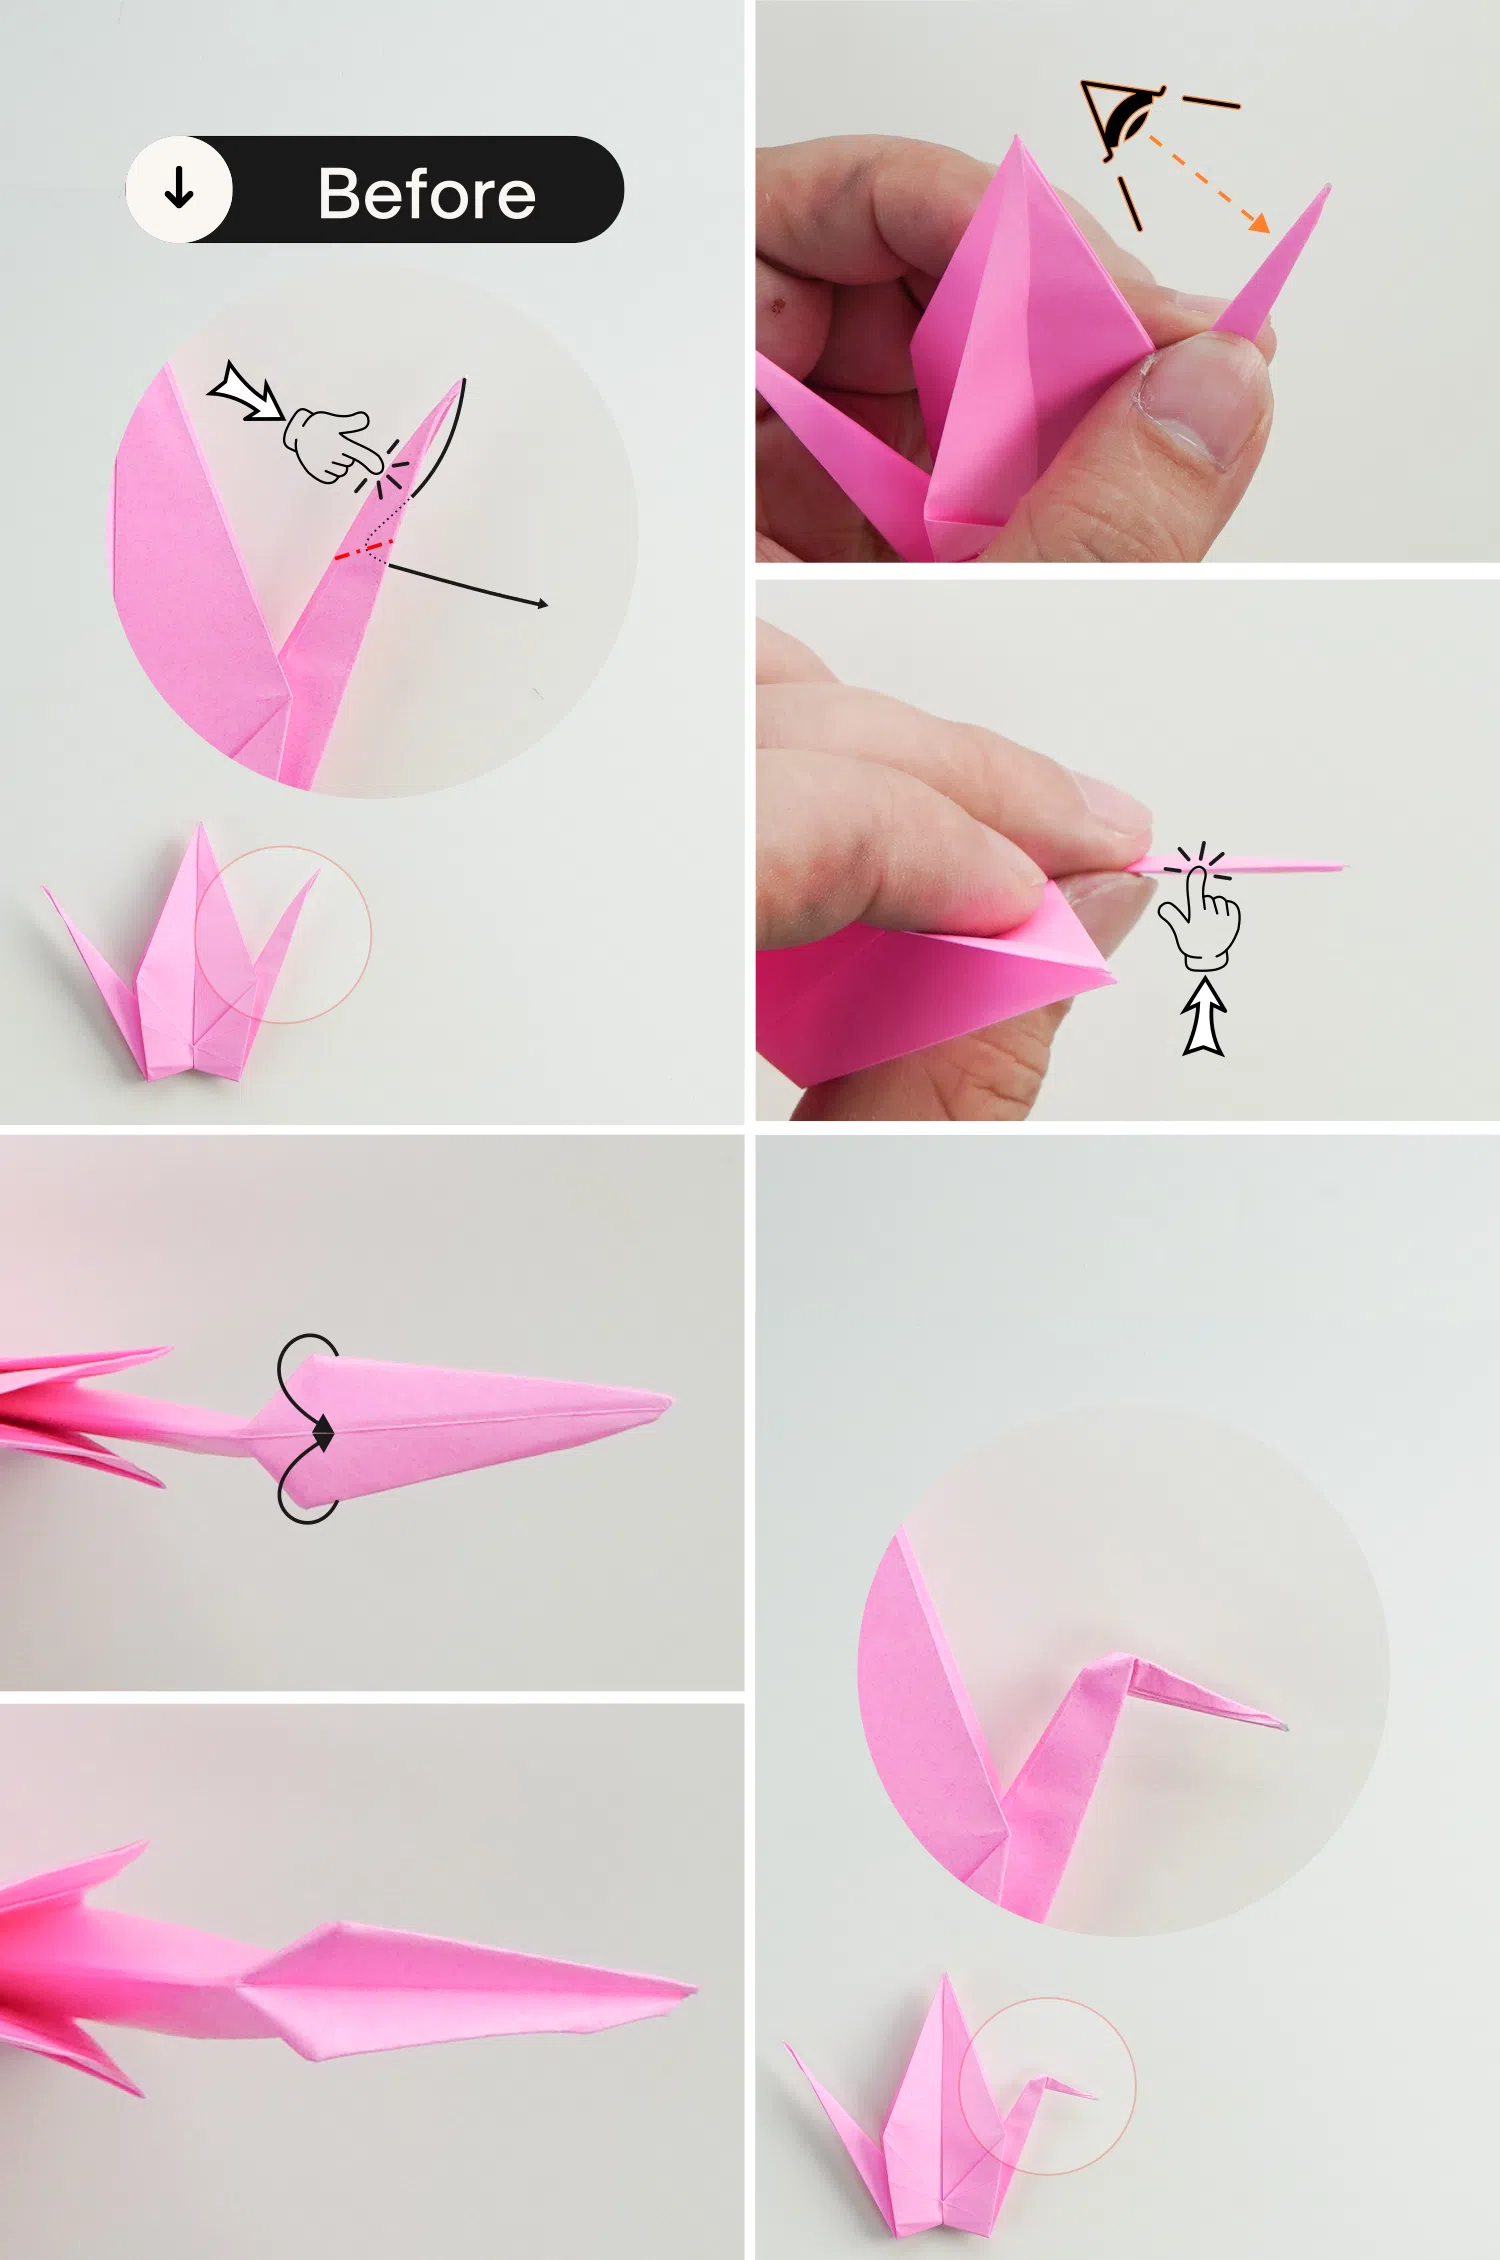
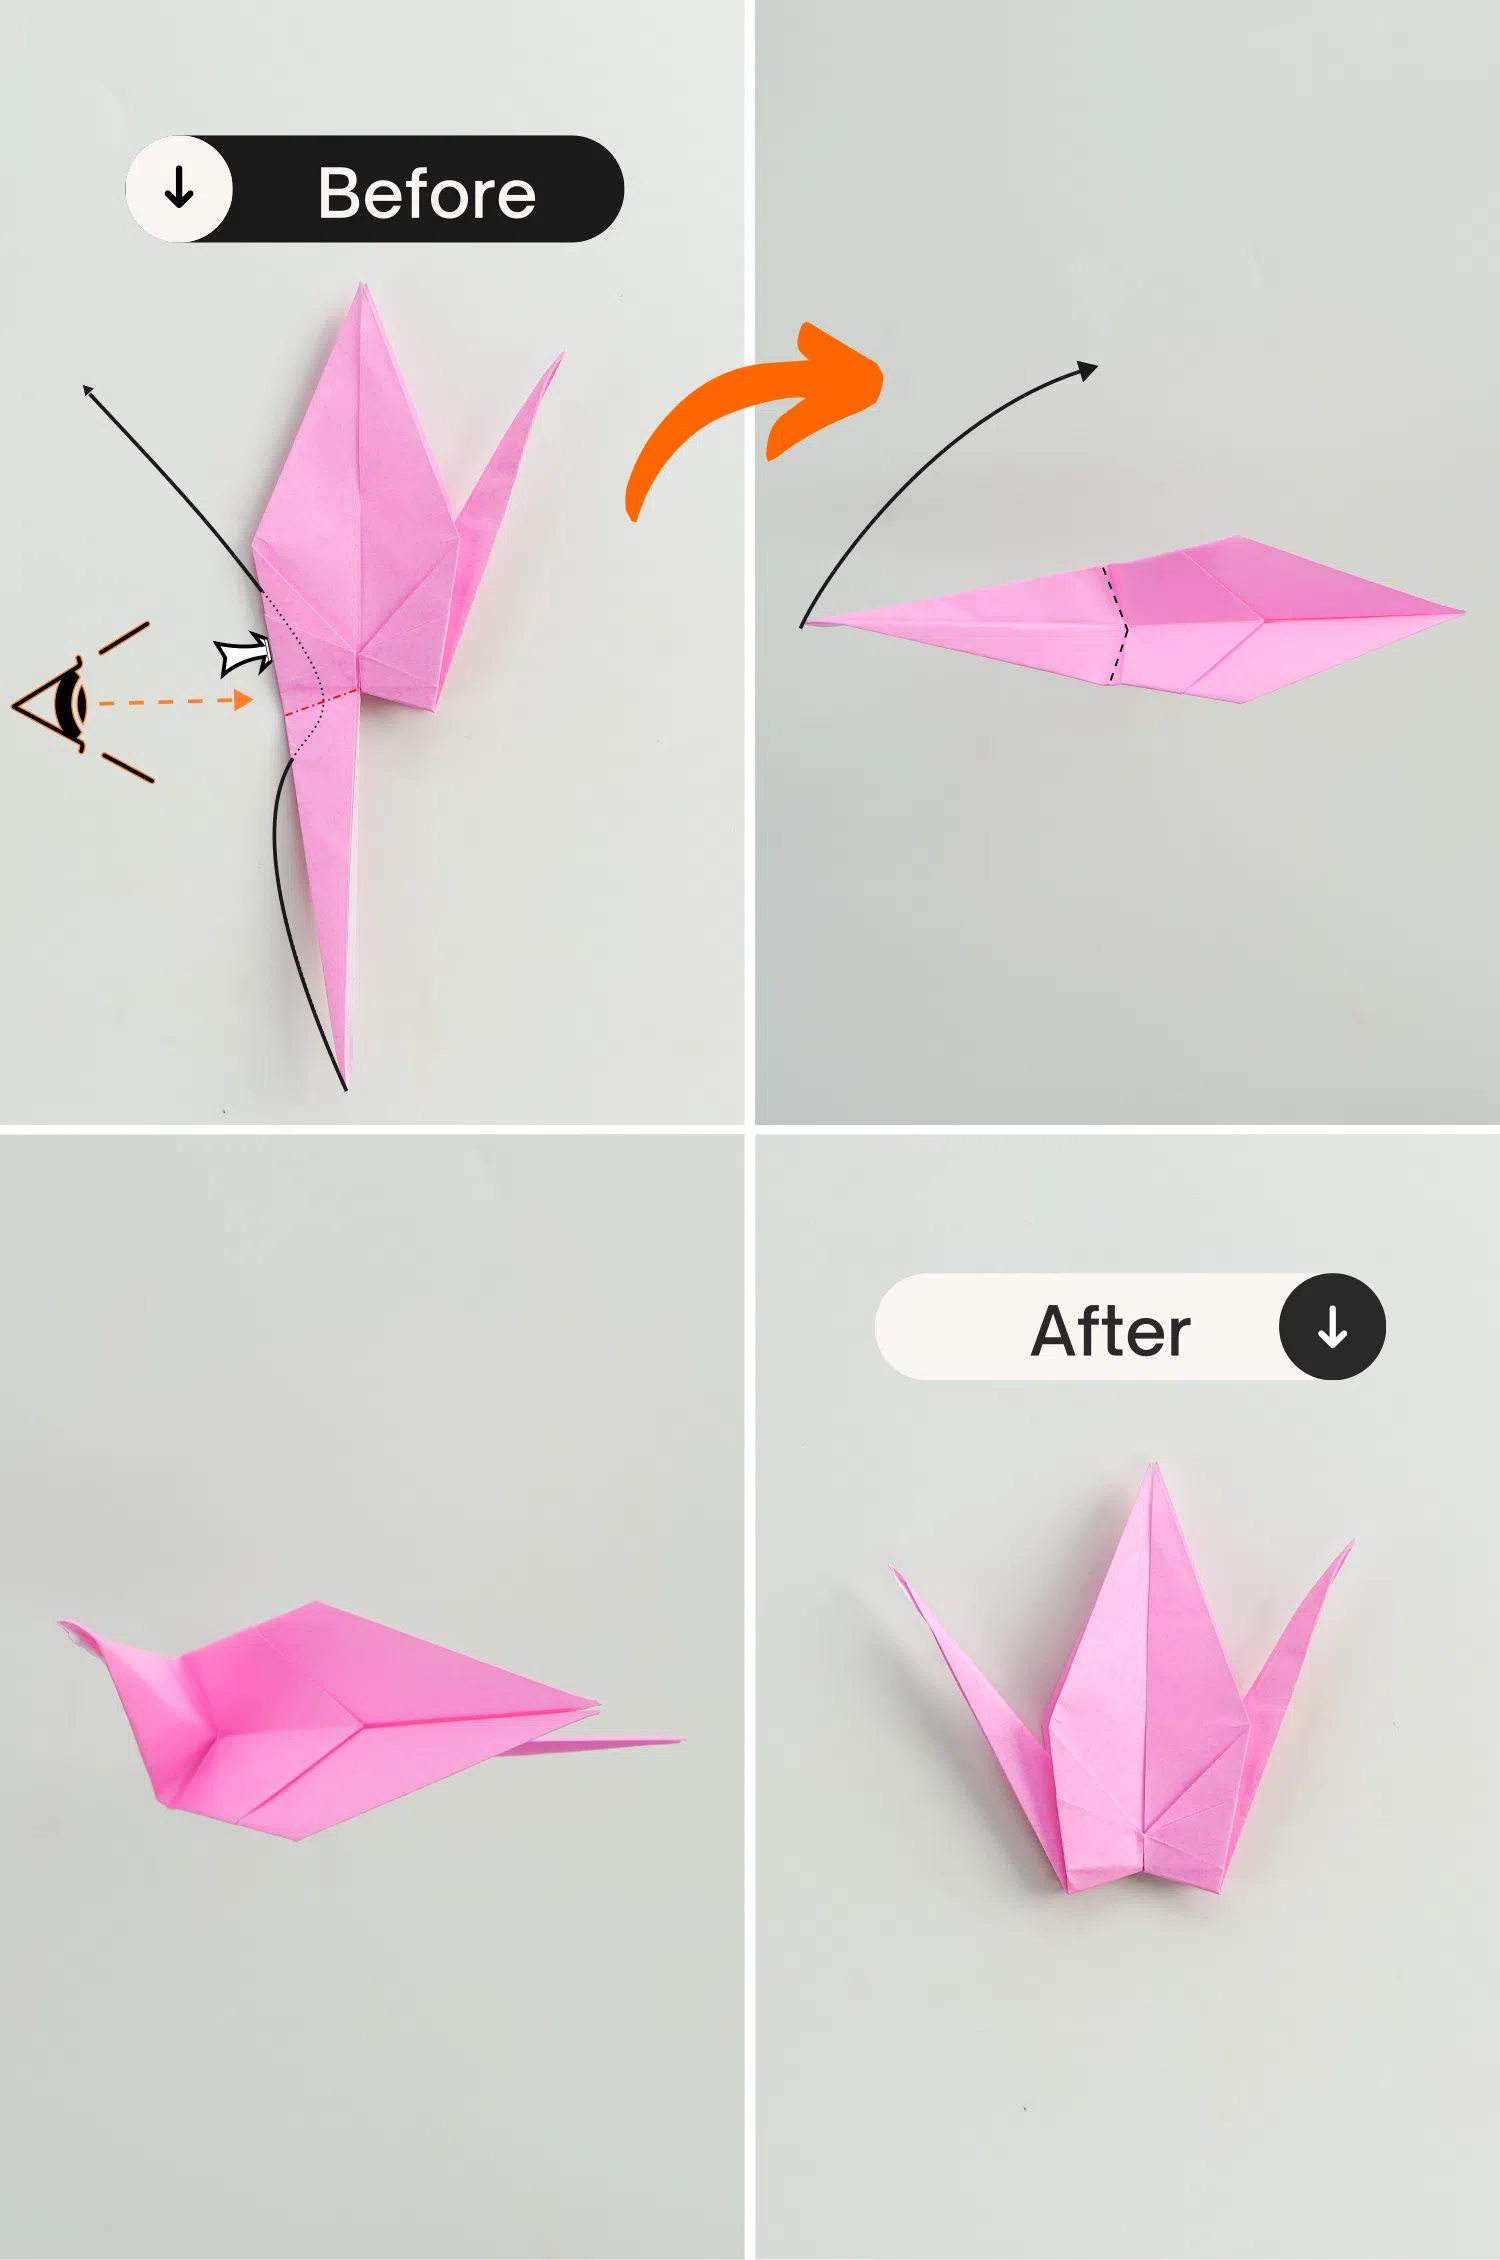
Step 20
Take two top corners, and pull them towards their respective sides to spread the wings, now you get a lovely, flying crane.
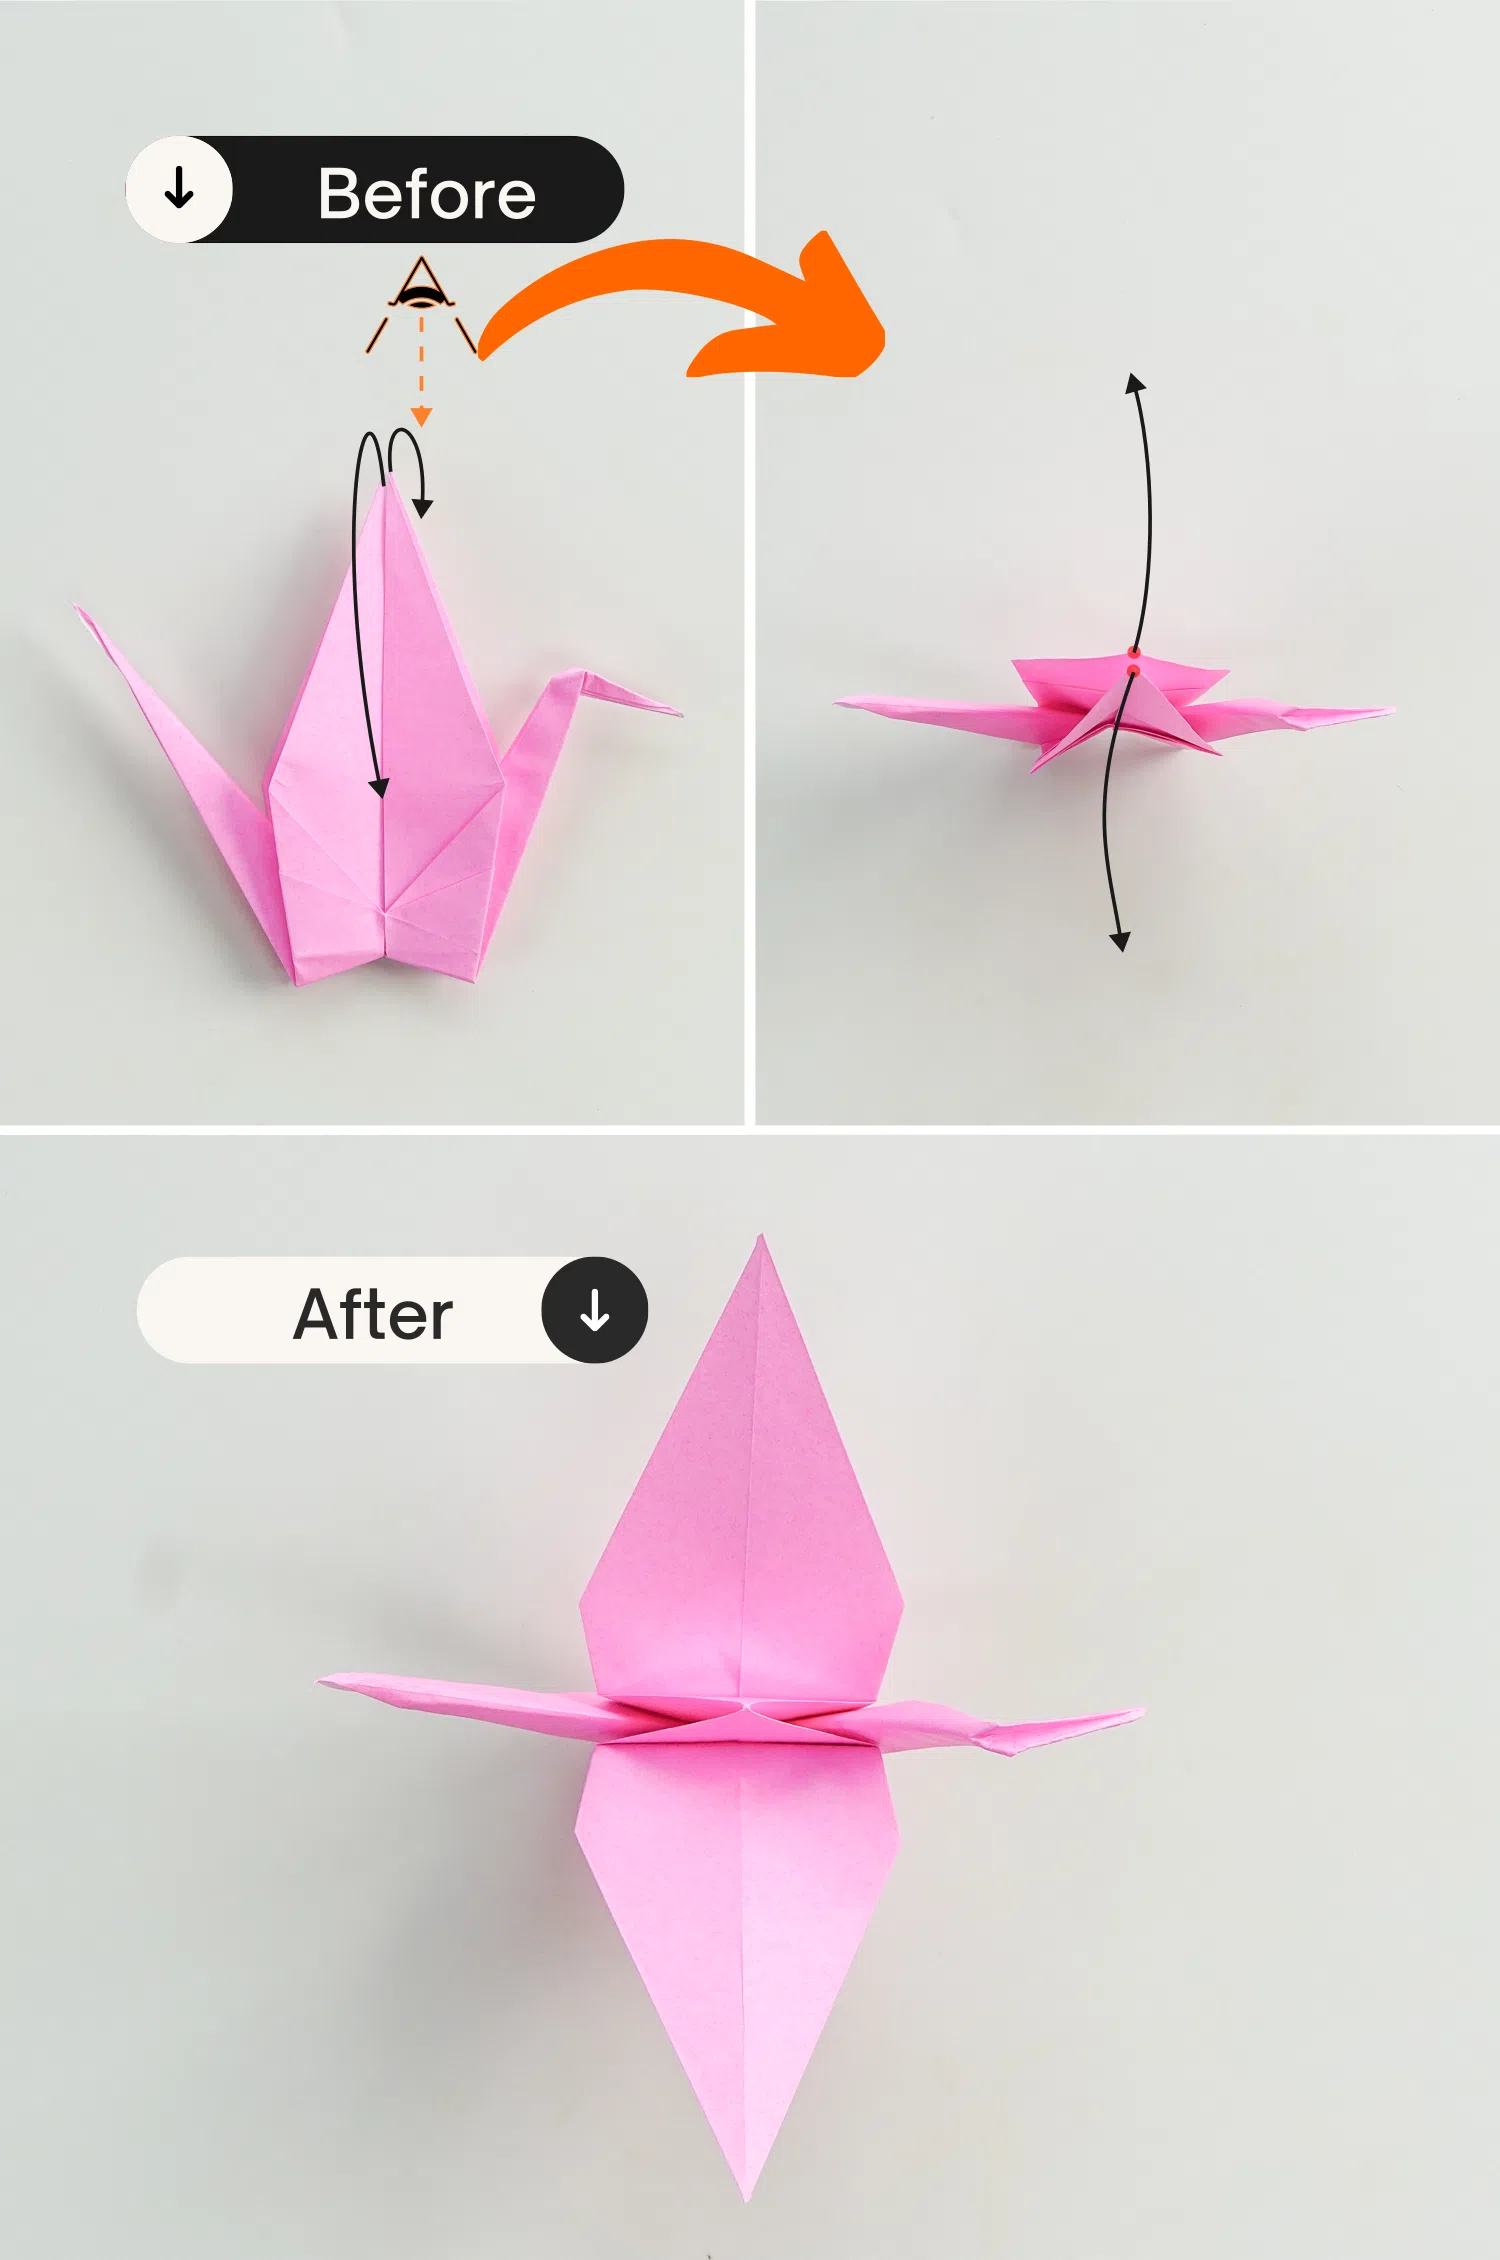
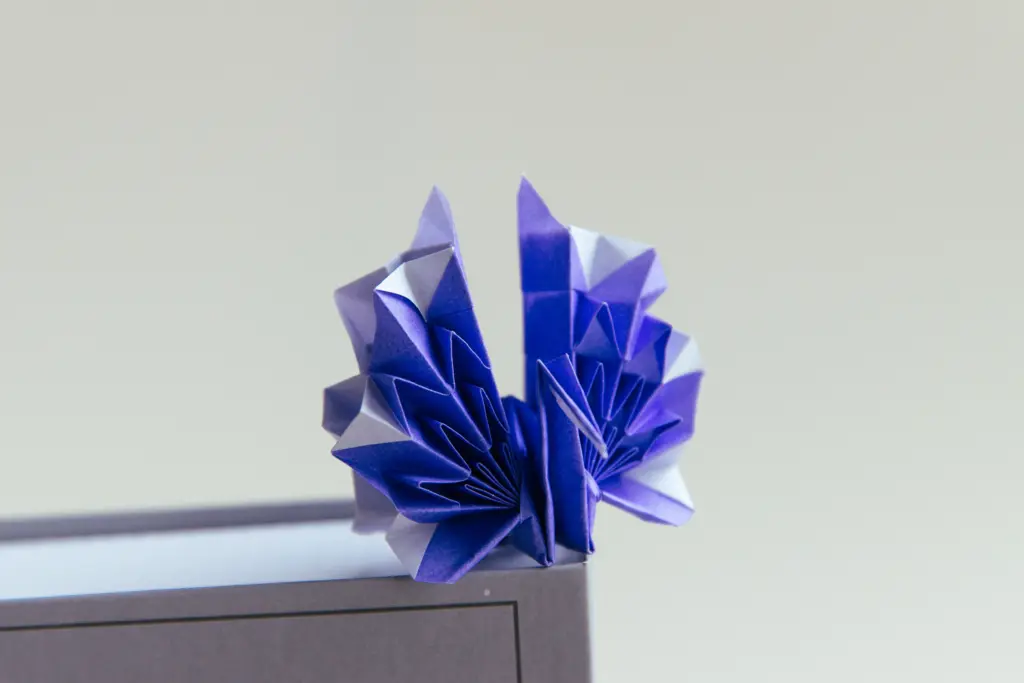
Now you have finished the classic crane. Then we have developed lots of other advanced origami crane instructions.