Origami Outside Reverse Fold
Origami Outside Reverse Fold: This fold creates a pointed flap on the outside of the model. It is similar but in different directions to the Inside Reverse Fold.
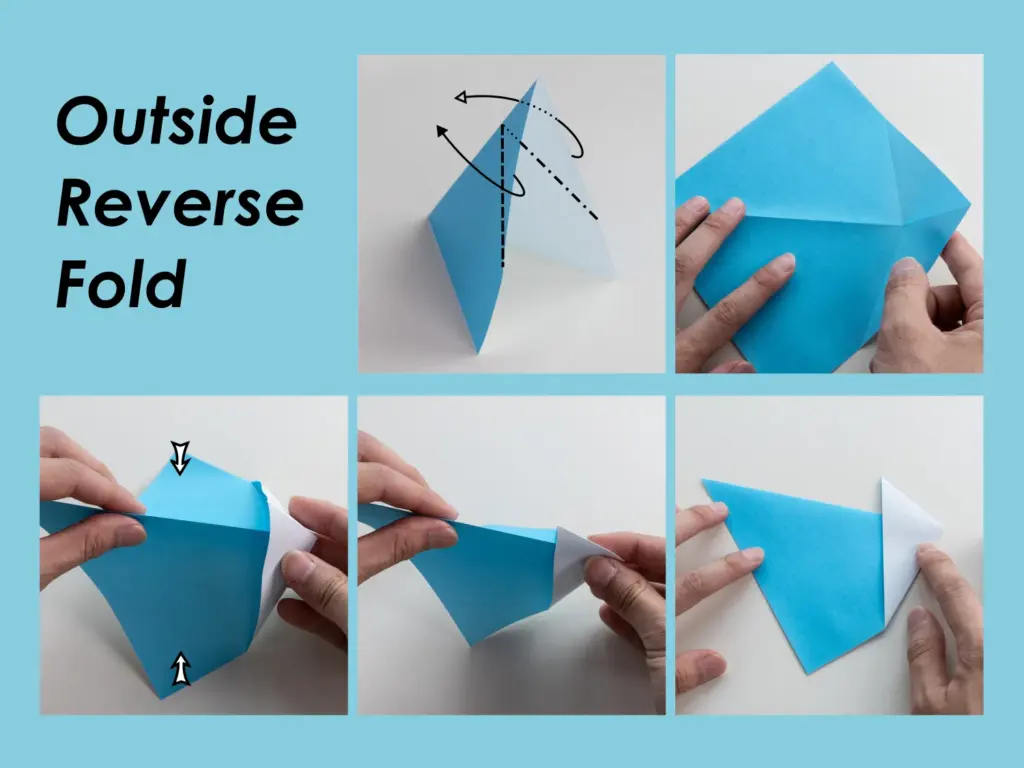
What’s outside reverse fold
If you love origami animals, you need to master the outside reverse fold. This technique is common for creating points or changing the direction of a flap or limb further to form features like tails, legs, beaks, or ears. A similar but opposite fold is inside reverse fold.
Symbol in diagrams
In origami diagrams, outside reverse fold is shown as the below.
Outside Reverse Fold: Step by Step Instruction
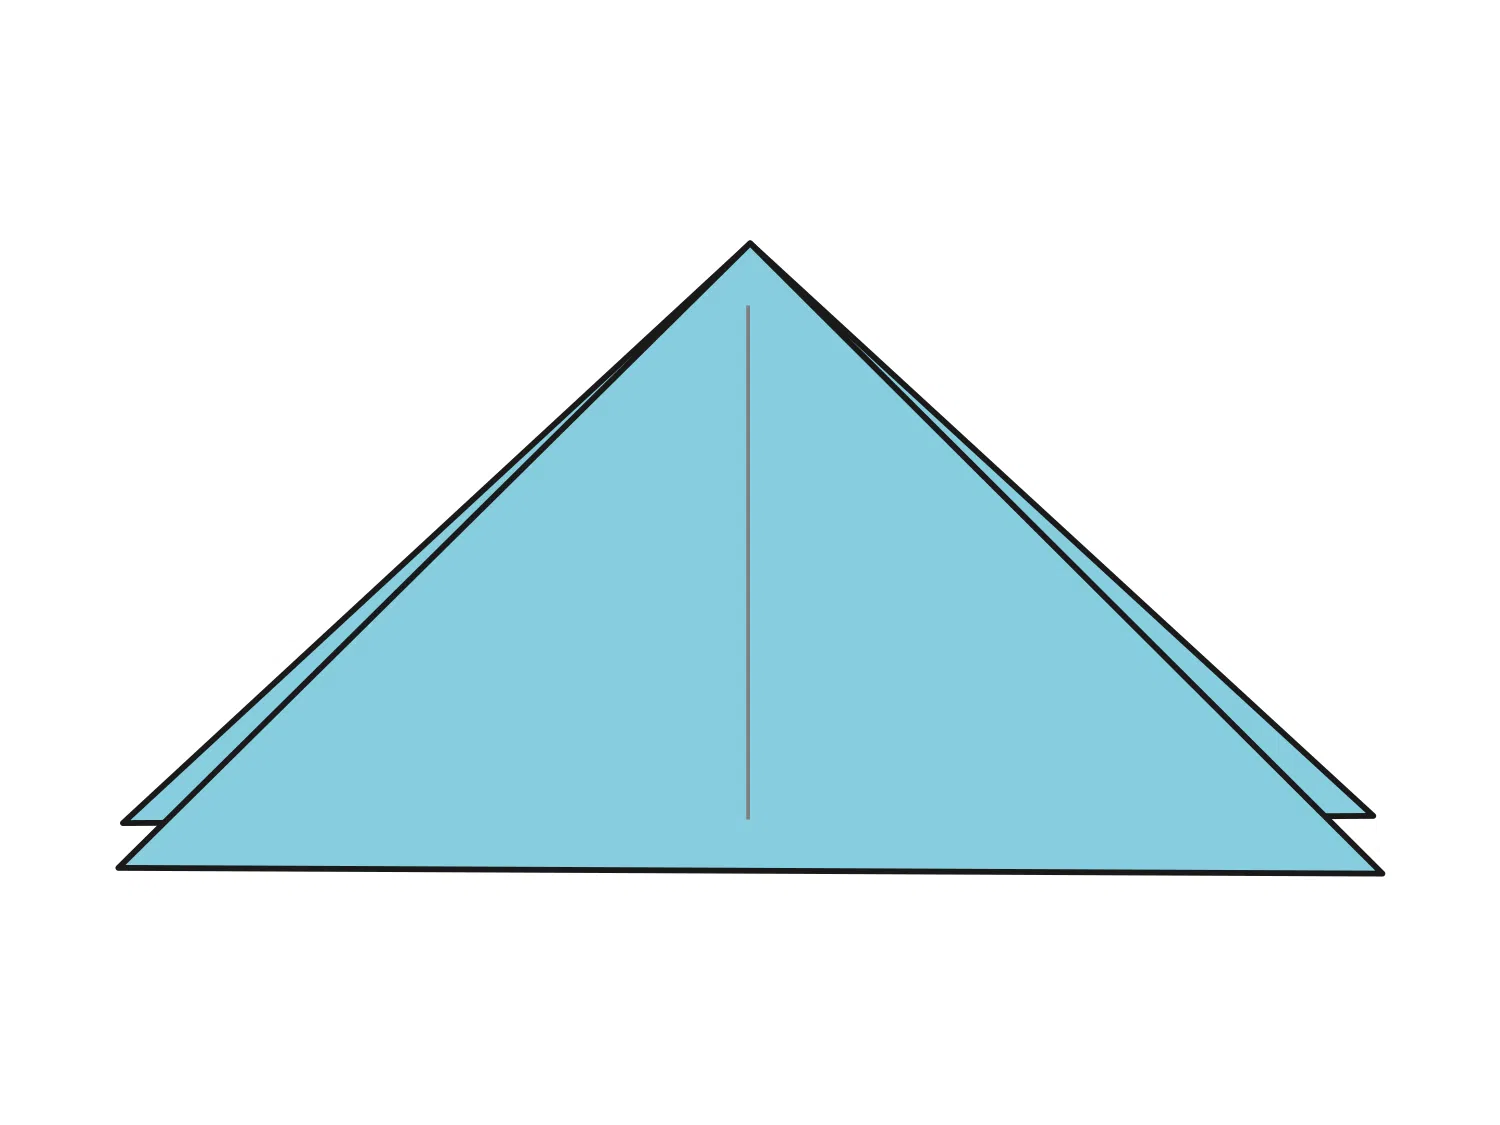
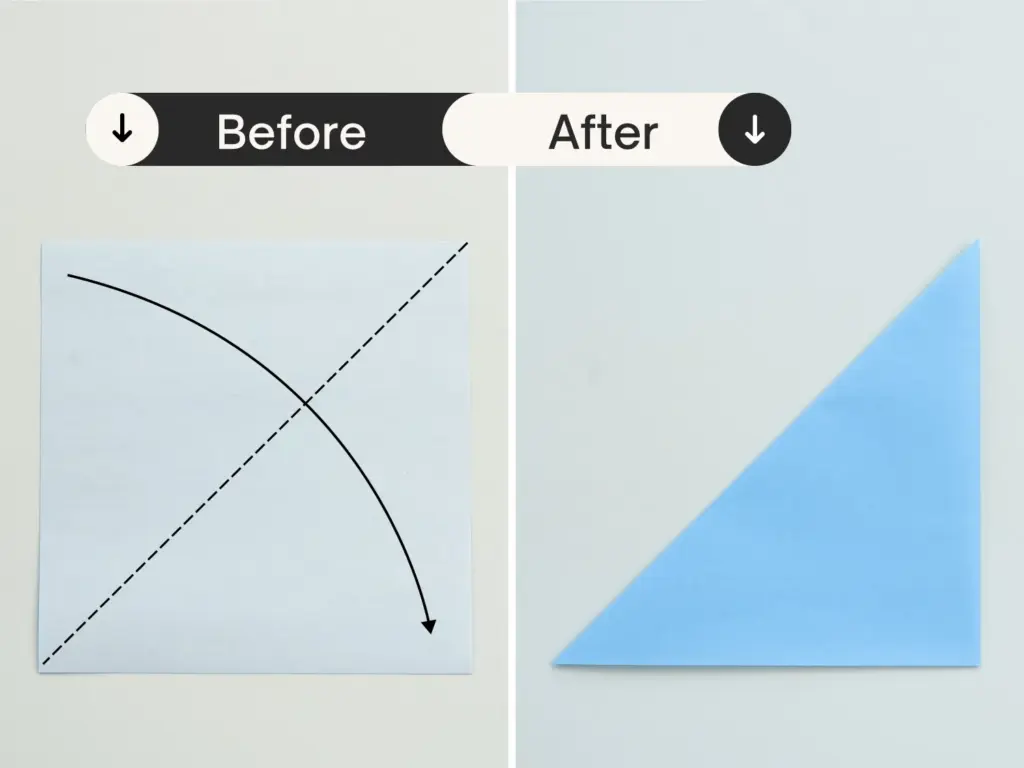
step 1
Start by placing your square paper flat on a surface. Then, fold the paper in half diagonally, creating a triangle.
Step 2
Make a diagonal crease by folding the top corner diagonally.
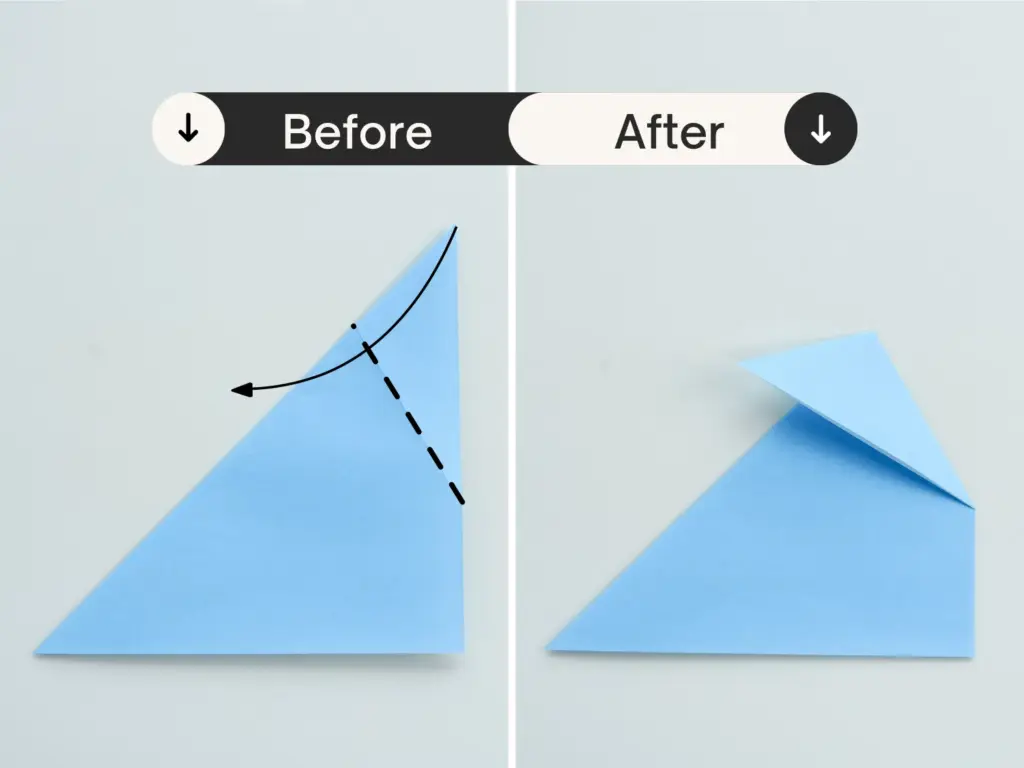
Step 3
Then unfold.
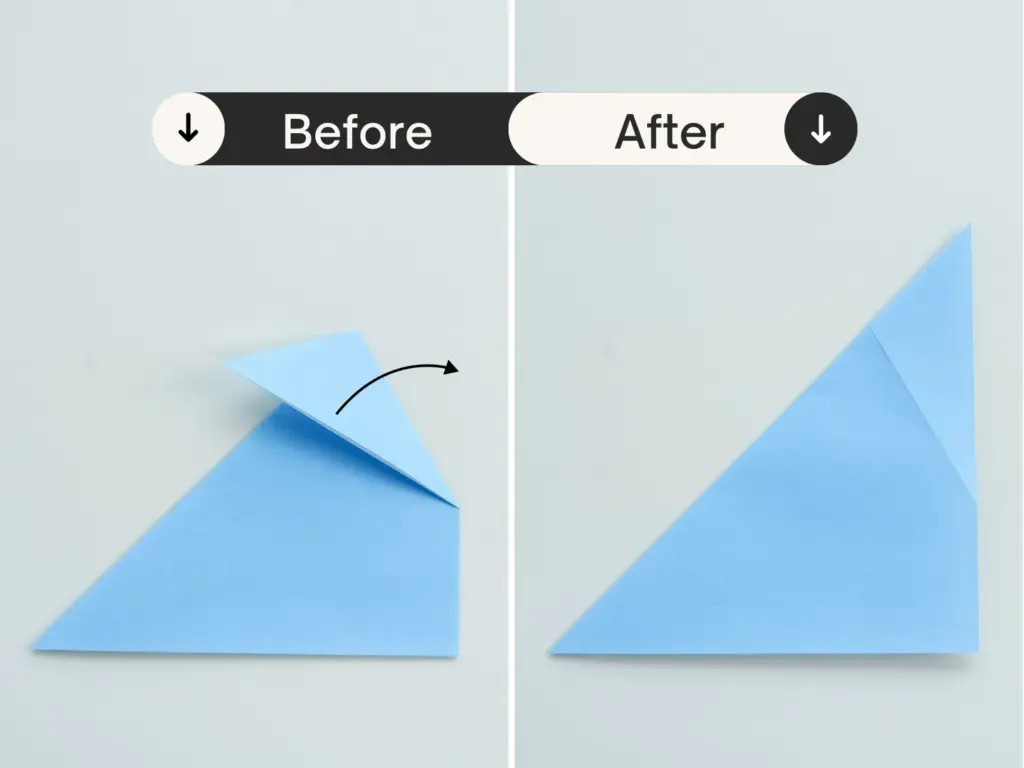
Step 4
Fold the triangle created backwards. This is optional. You can skip this once you are familiar with this fold. It can make the following step easier for beginners.

Step 5
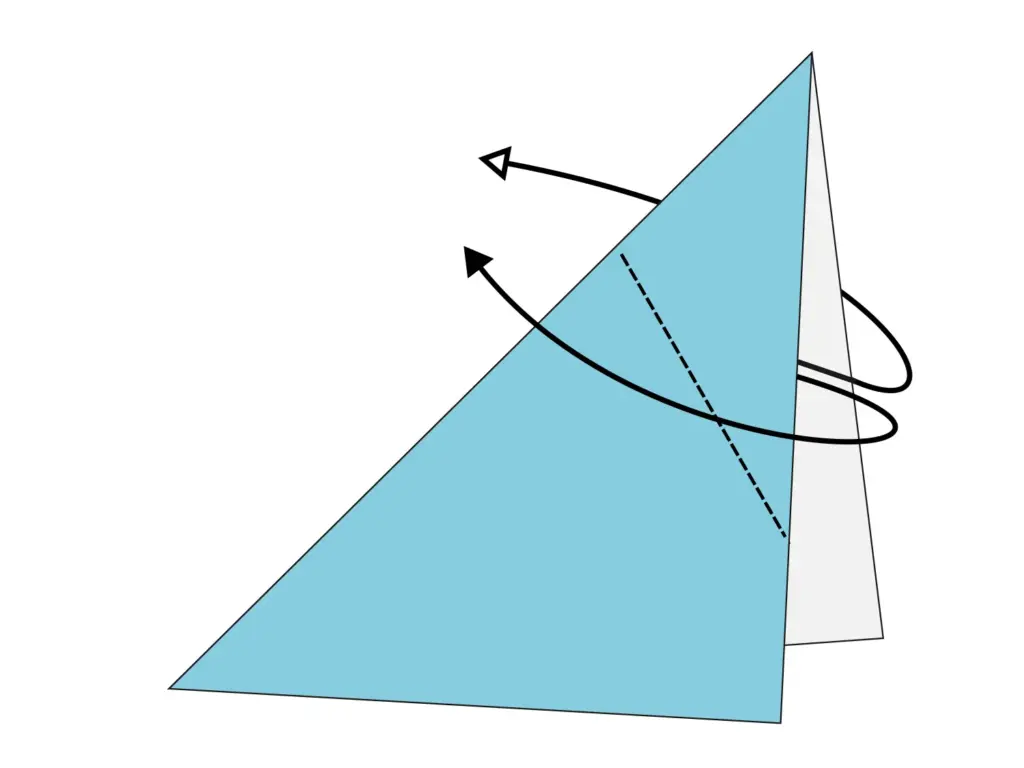
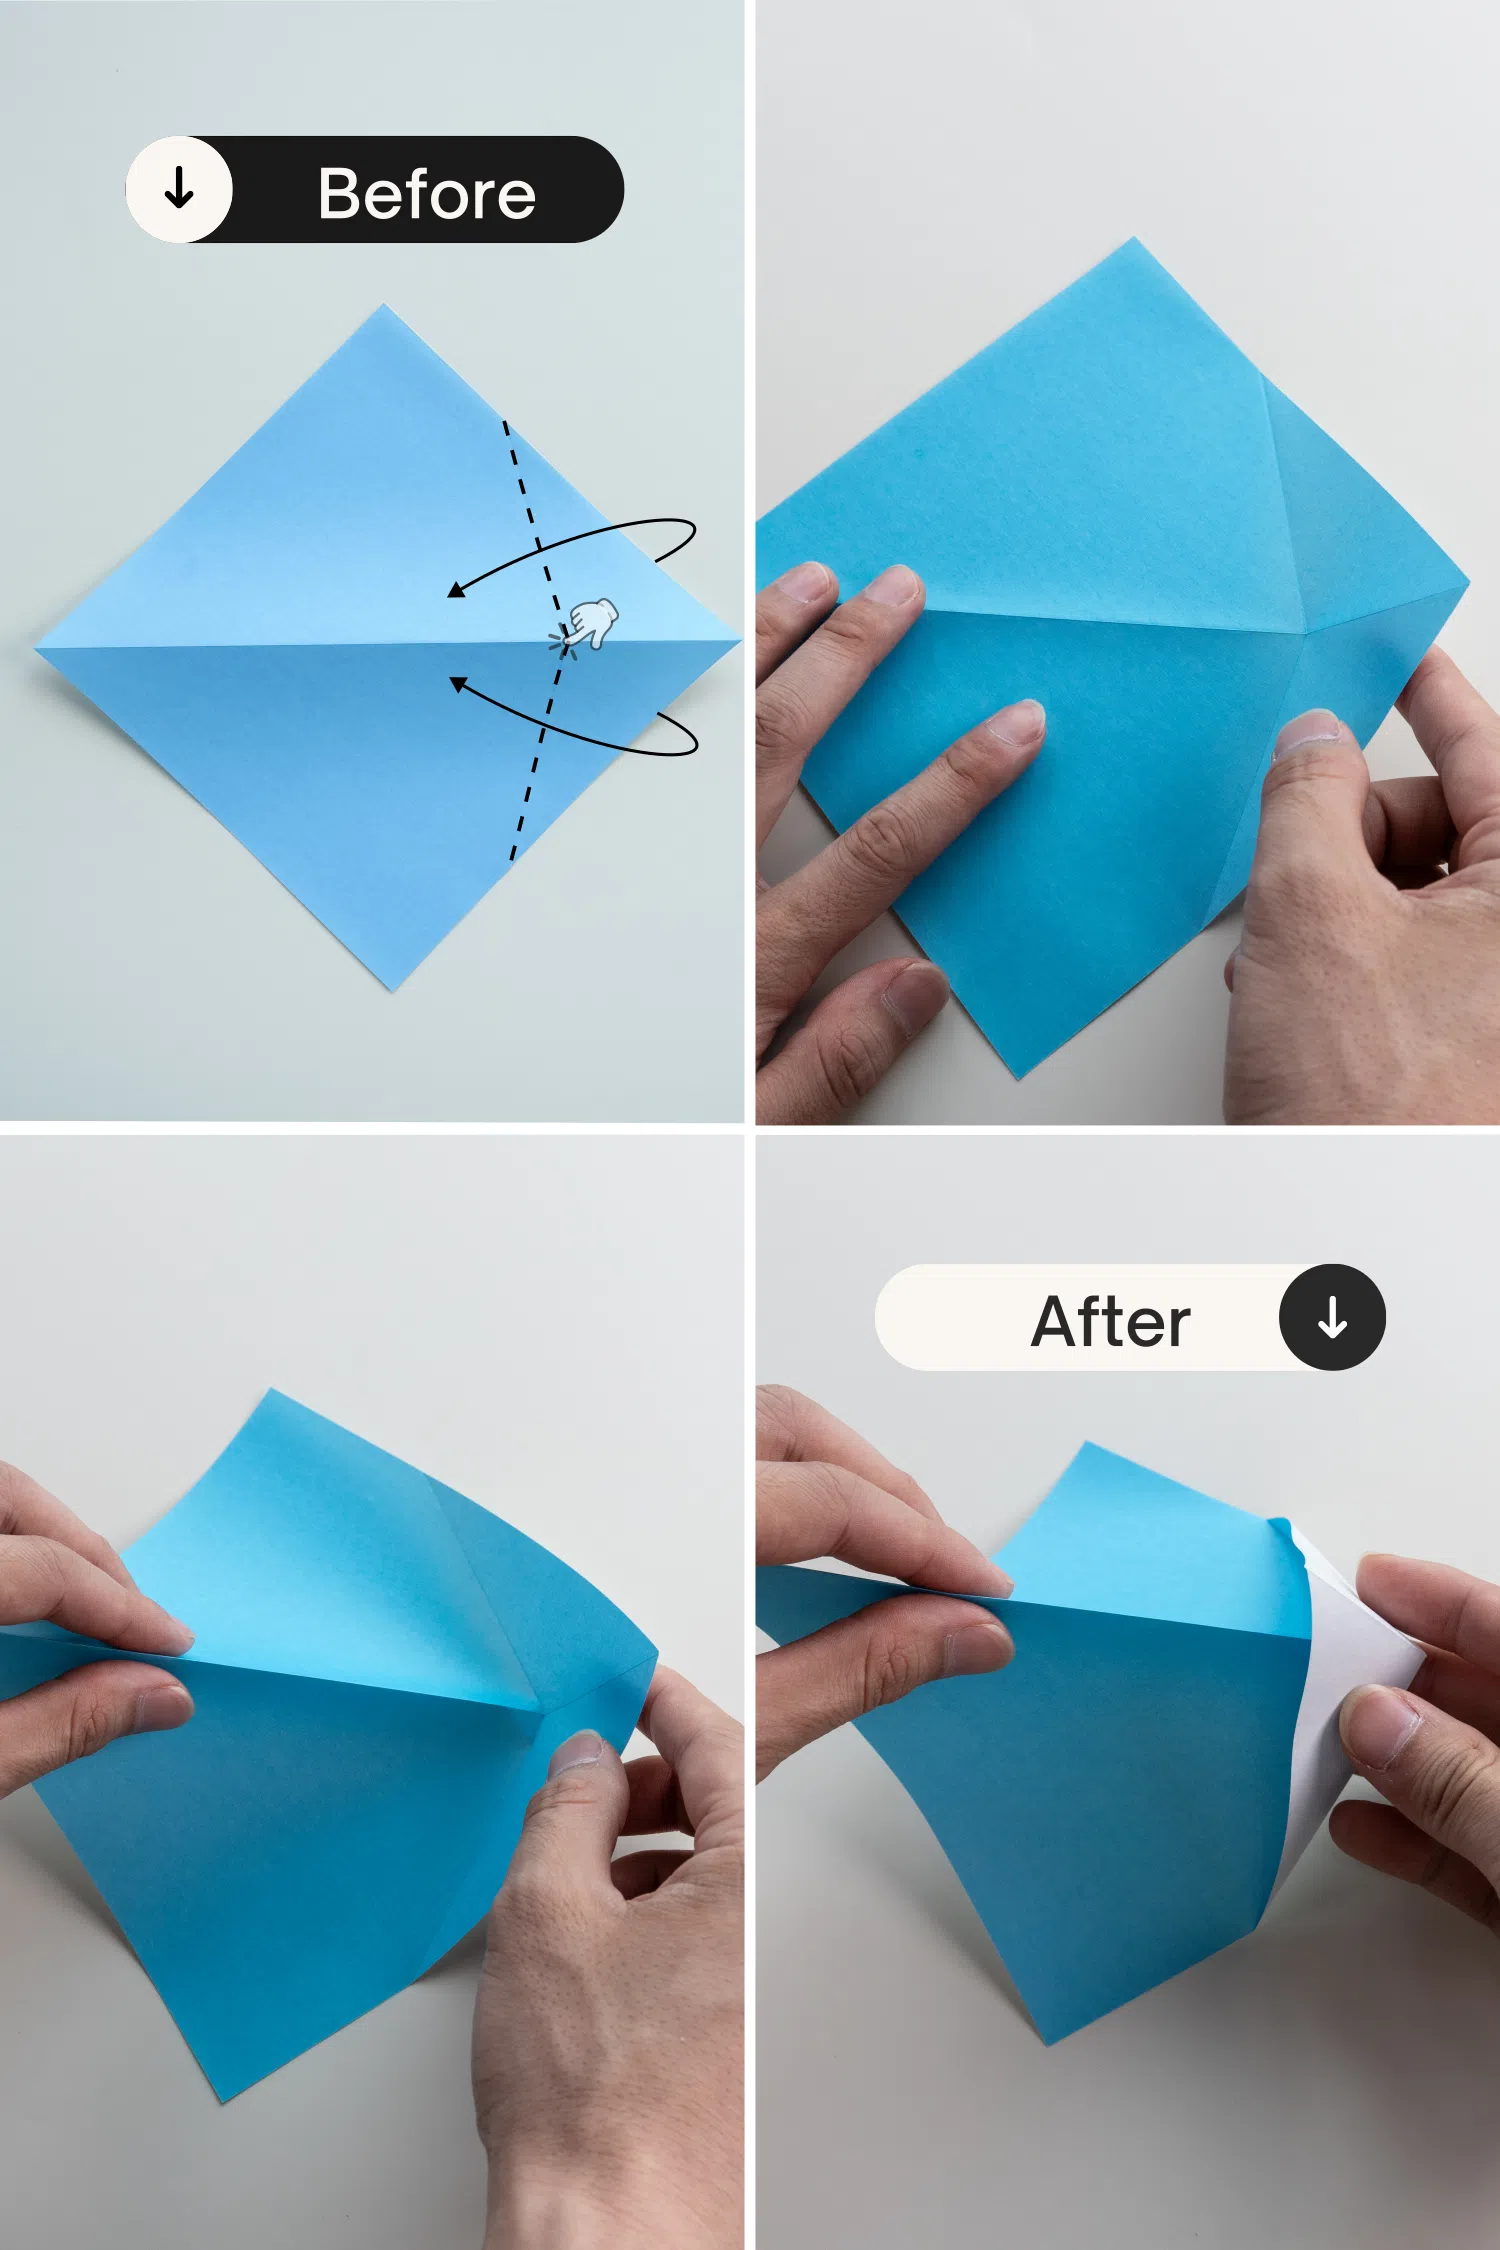
Rotate the paper
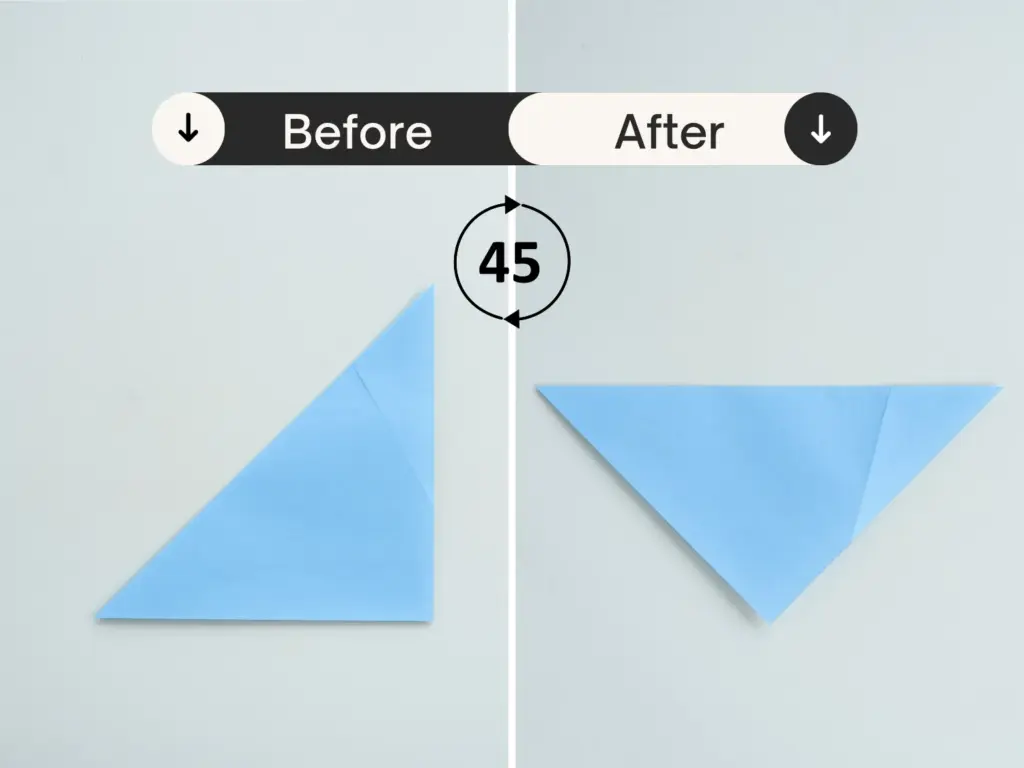
Step 6
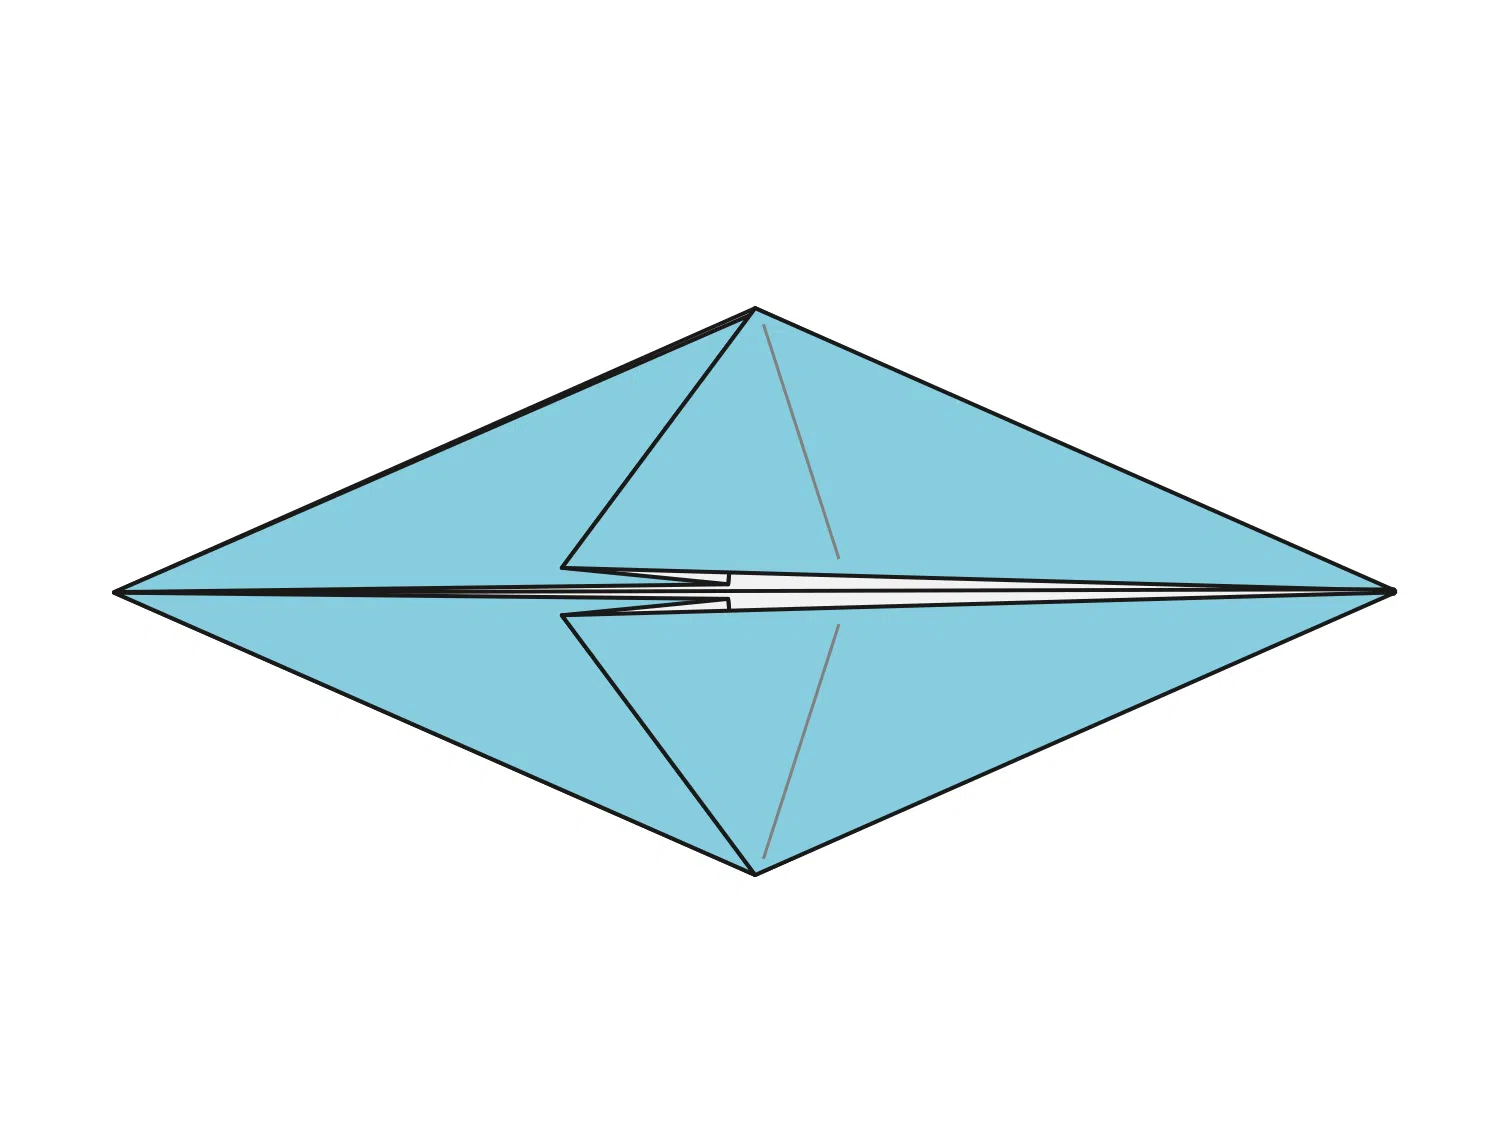
Open it with the colored page facing up.
Step 7
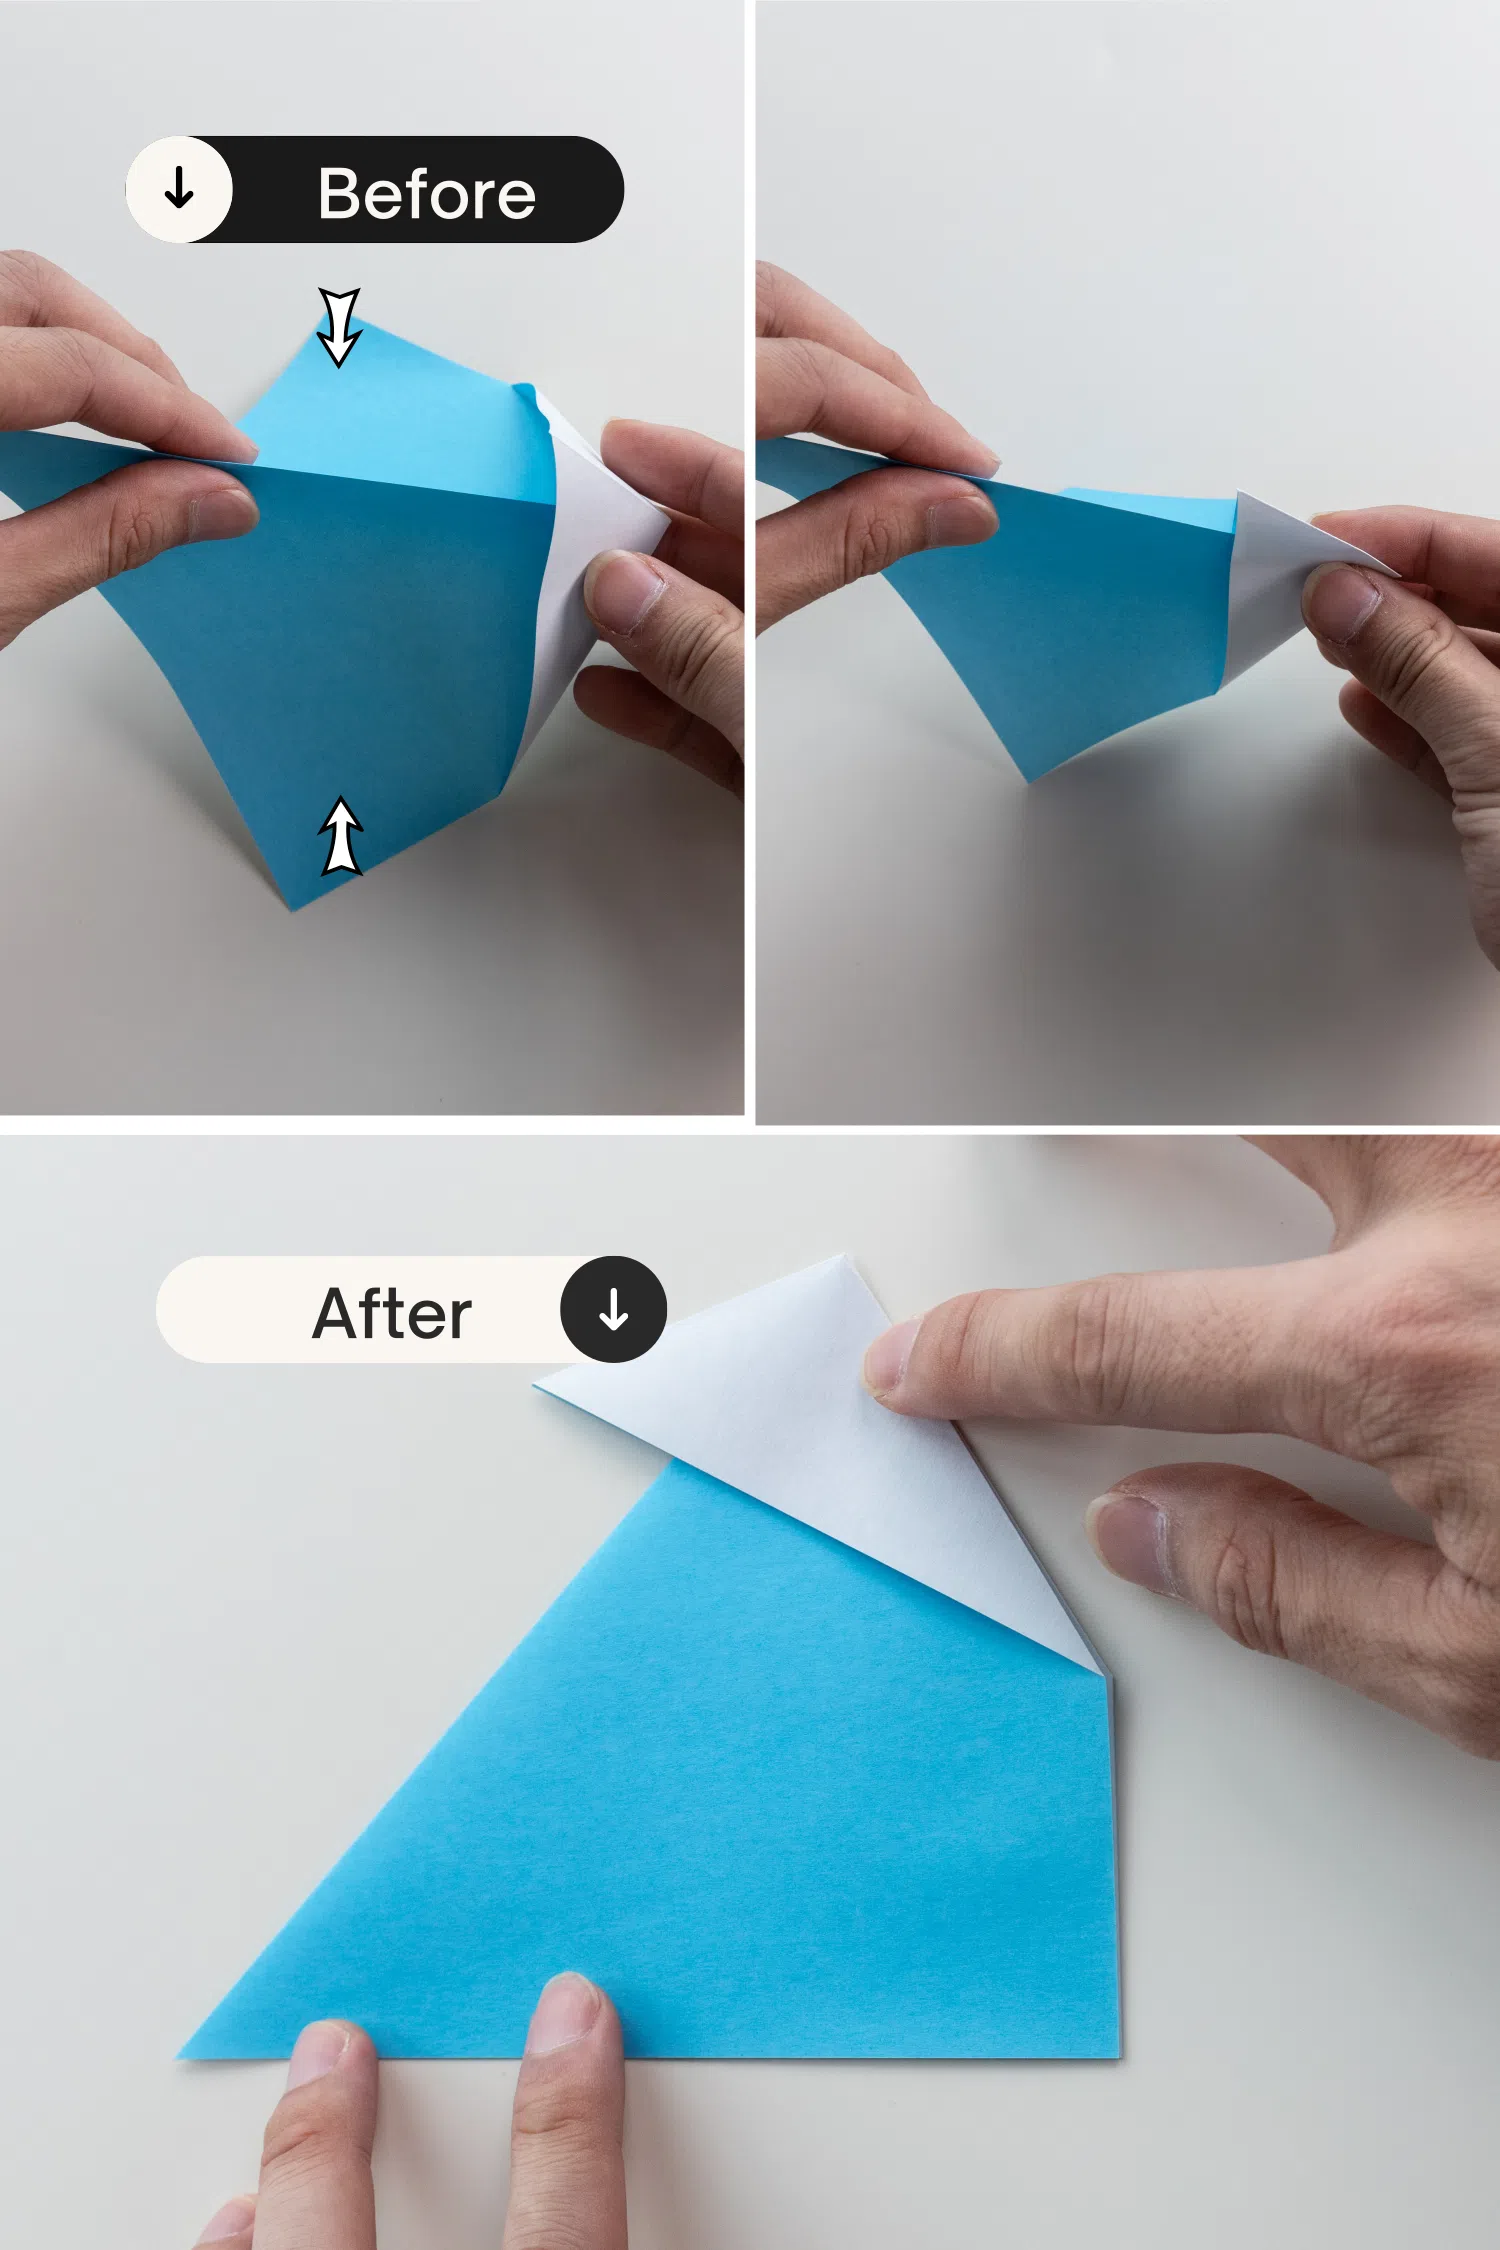
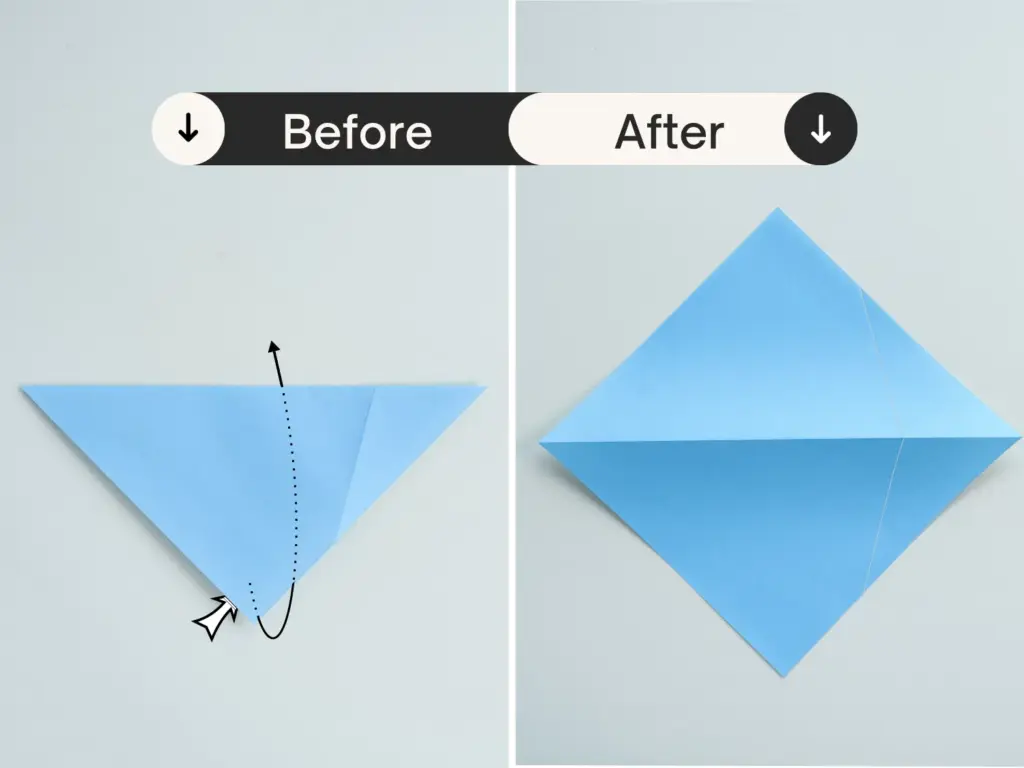
Fold the paper with one hand along with the crease in center and then starting by pushing the cross point of the two triangles, then use another hand to fold upwards.
With this tip, you can easily finish a outside reserve fold.
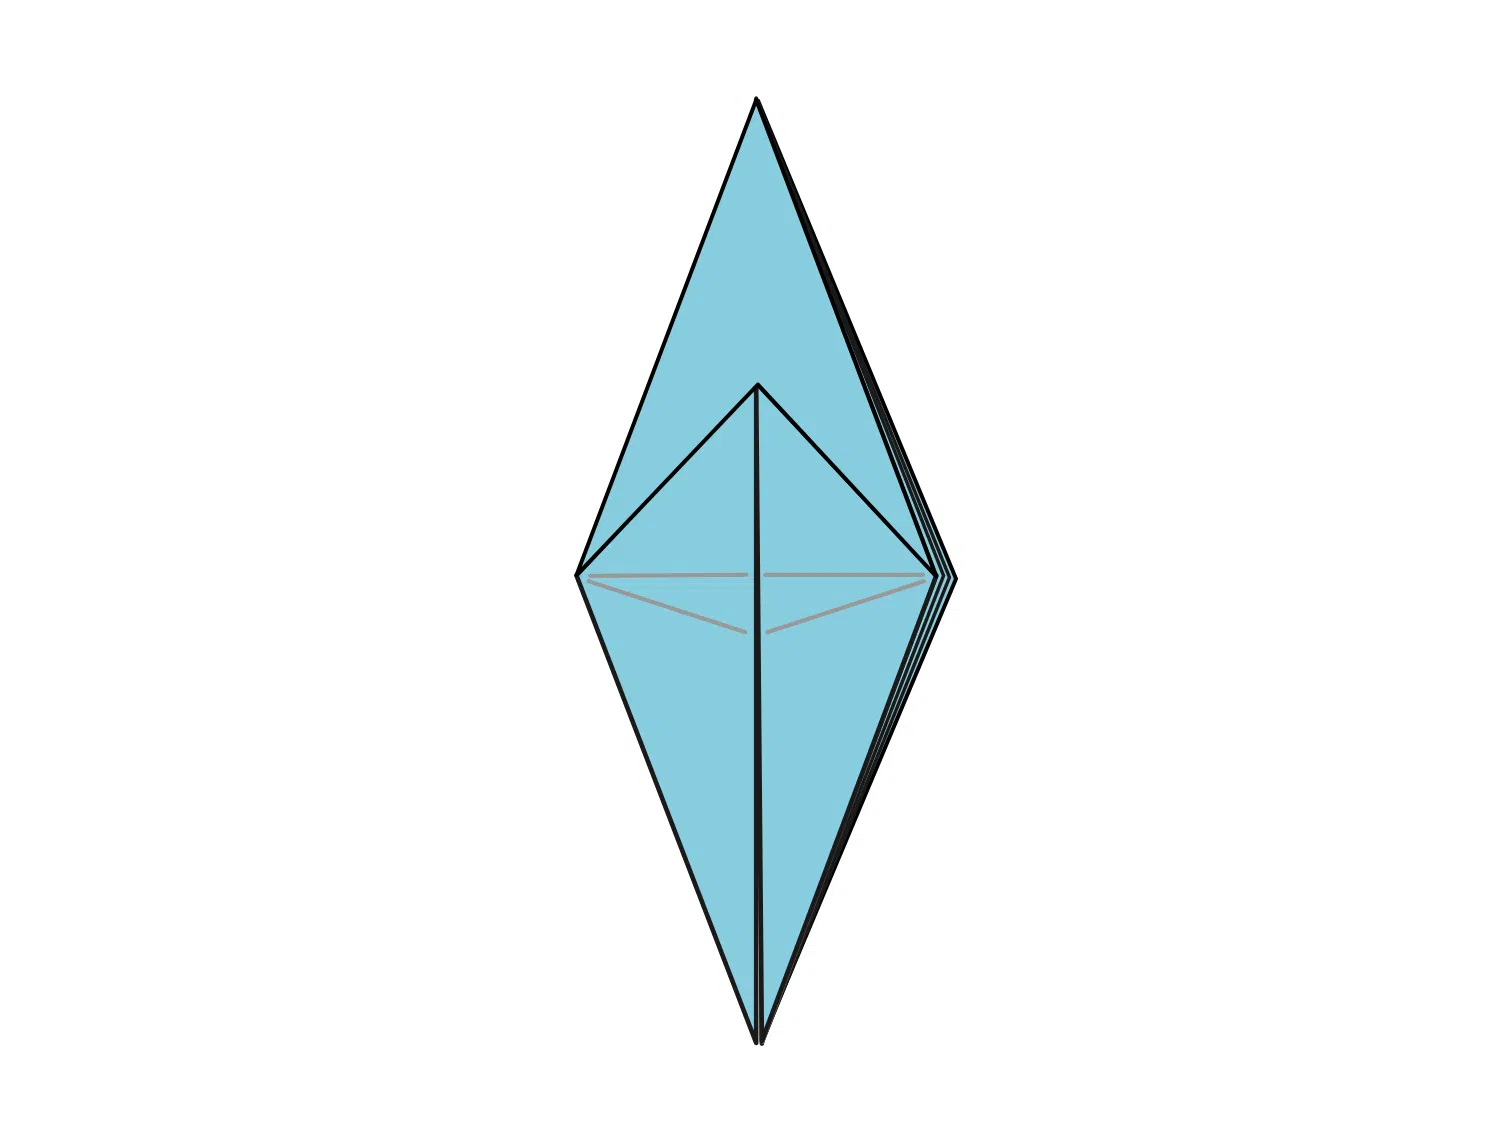
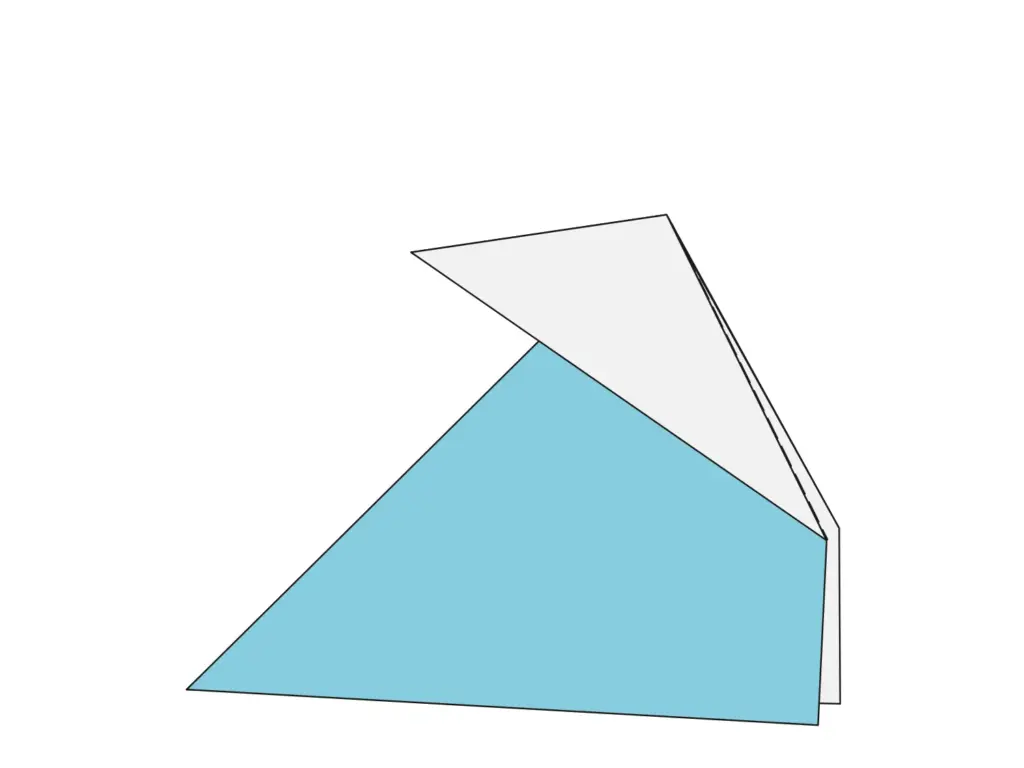
Finished outside reverse fold
Then sharp the crease and firm the fold.