How to Make an Origami Star
Star is an indispensable element of everyone’s childhood. Follow this simple instruction to fold a lovely star to make your child’s handbook, or greeting card more interesting and rich.
We provide step-by-step diagram instructions and beginner-friendly videos. Check both for quicker learning.
If you are new to origami, start here from our beginner guide to know the basics and how to read the step-by-step instructions.
- Folding time: 15 minutes
- Paper: 15×15 cm
- Difficulty:
Material
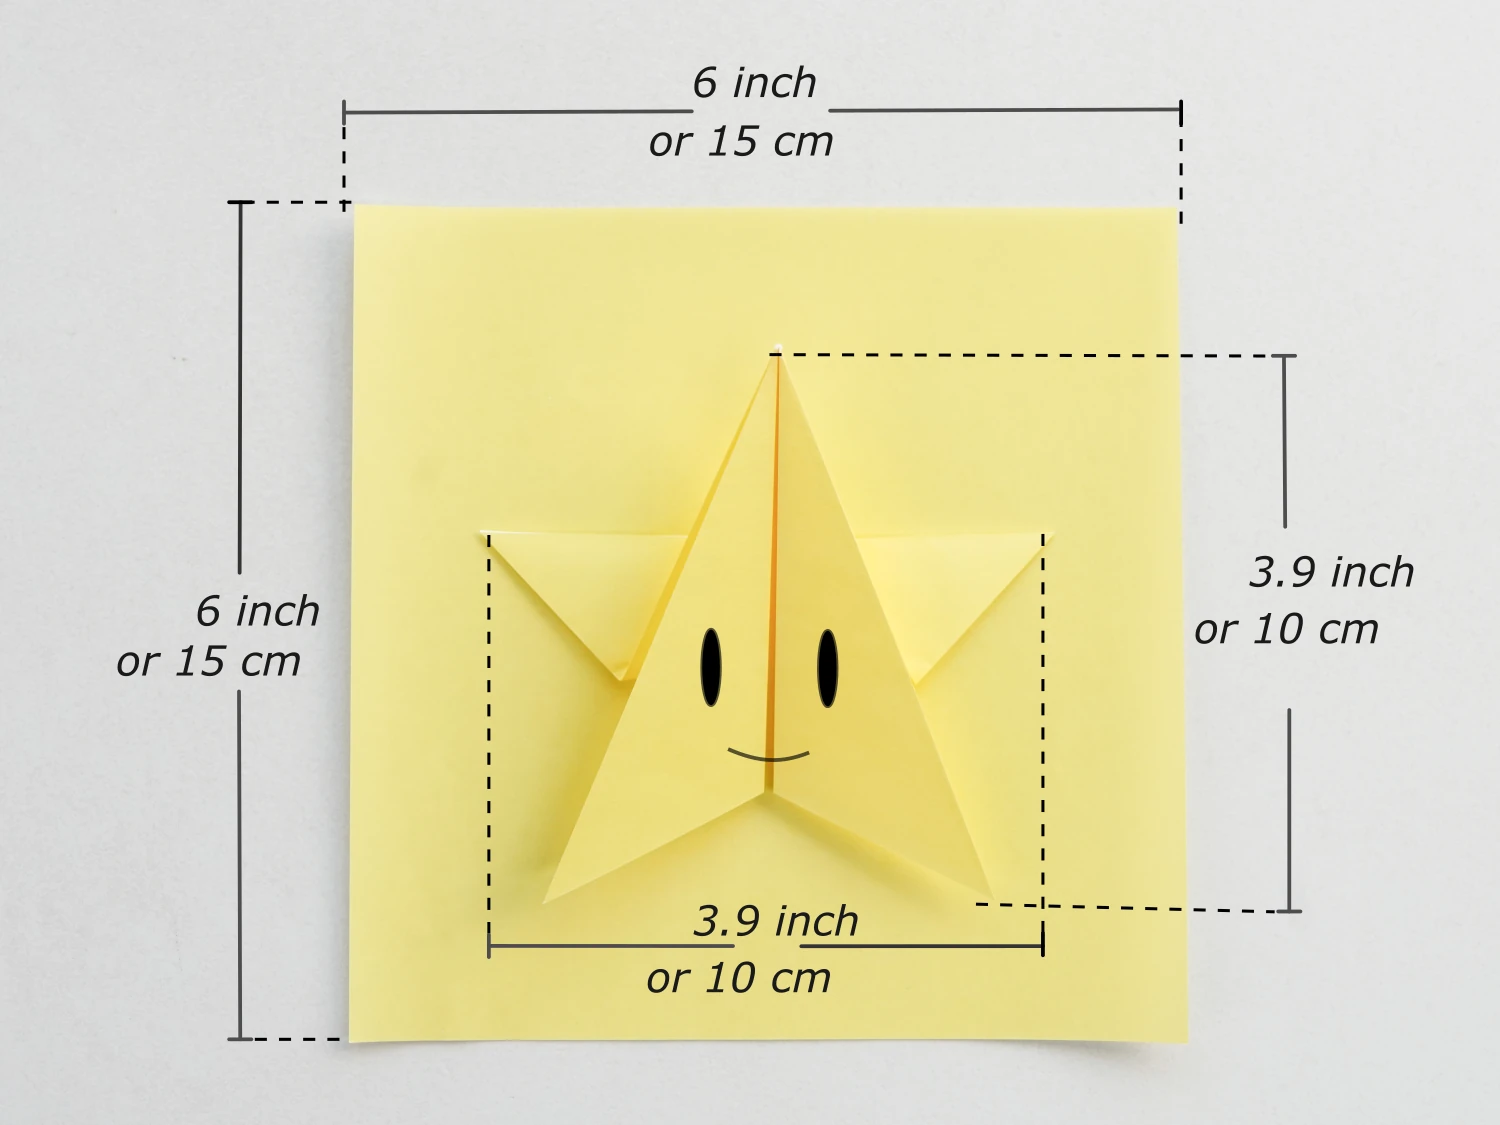
Prepare a 15×15 cm origami square paper, with one yellow and one white side, to create a 10×10 cm star. Different stars can be made using various colors and sizes of square paper.
Origami Star Video
Step by Step Instructions
Step 1
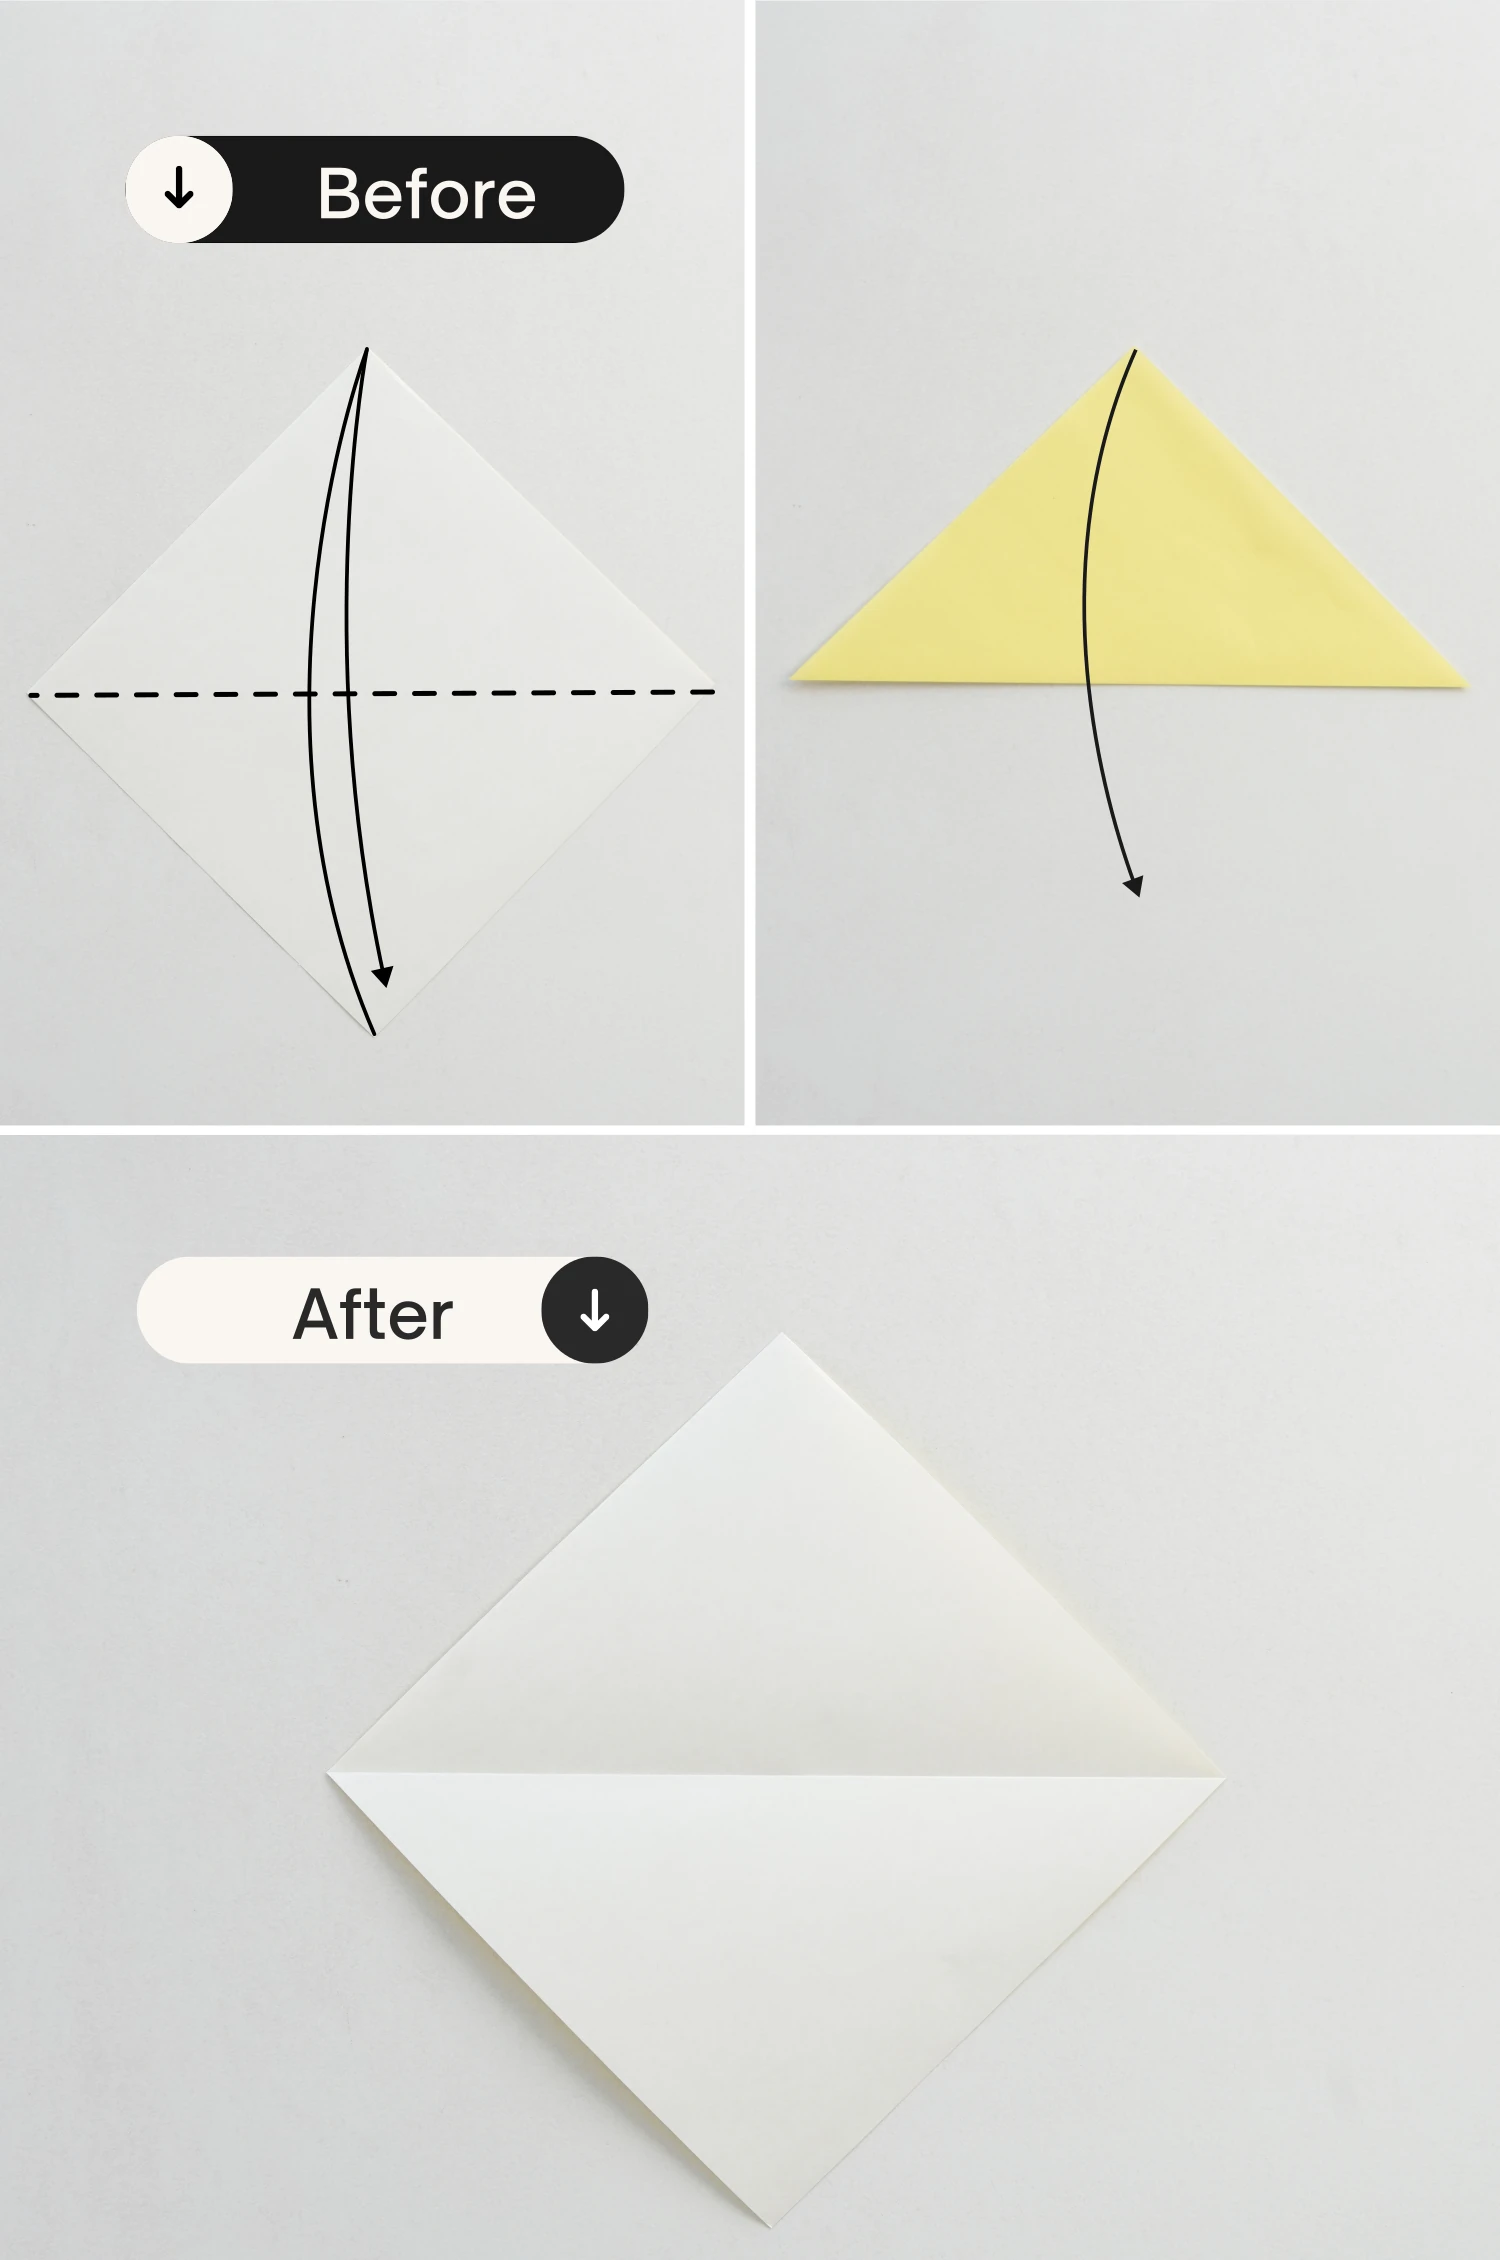
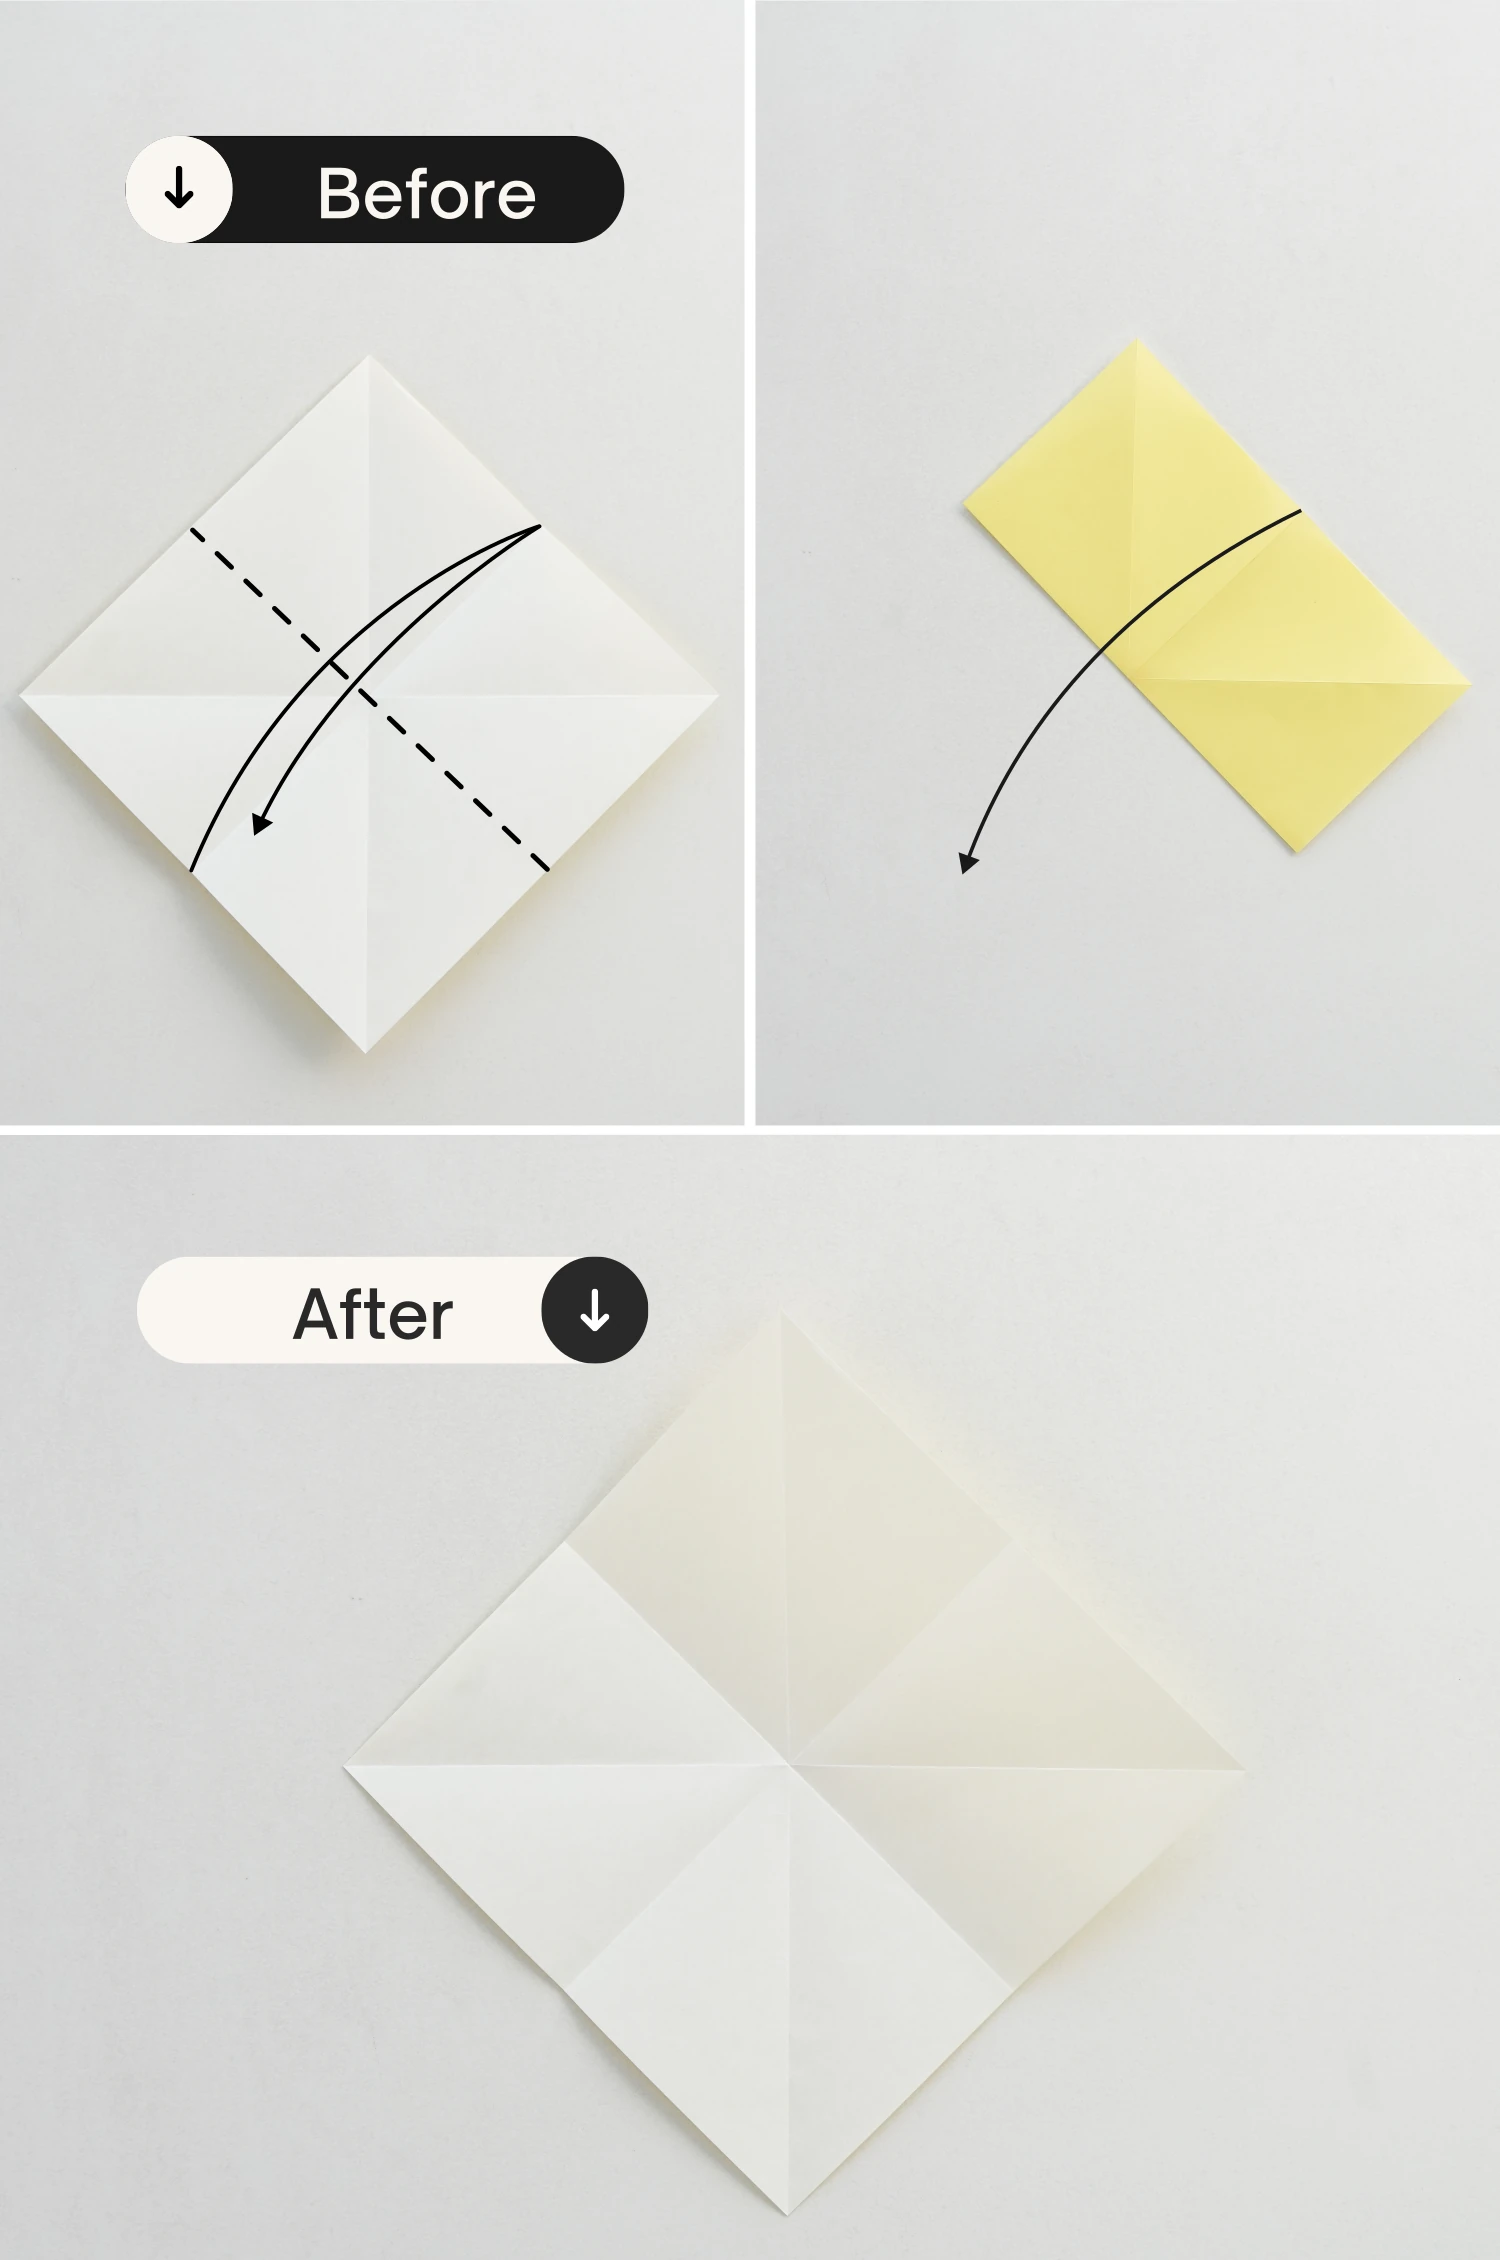
Start with the white side of the paper facing up. Fold in half diagonally crease it well then unfold.
Step 2
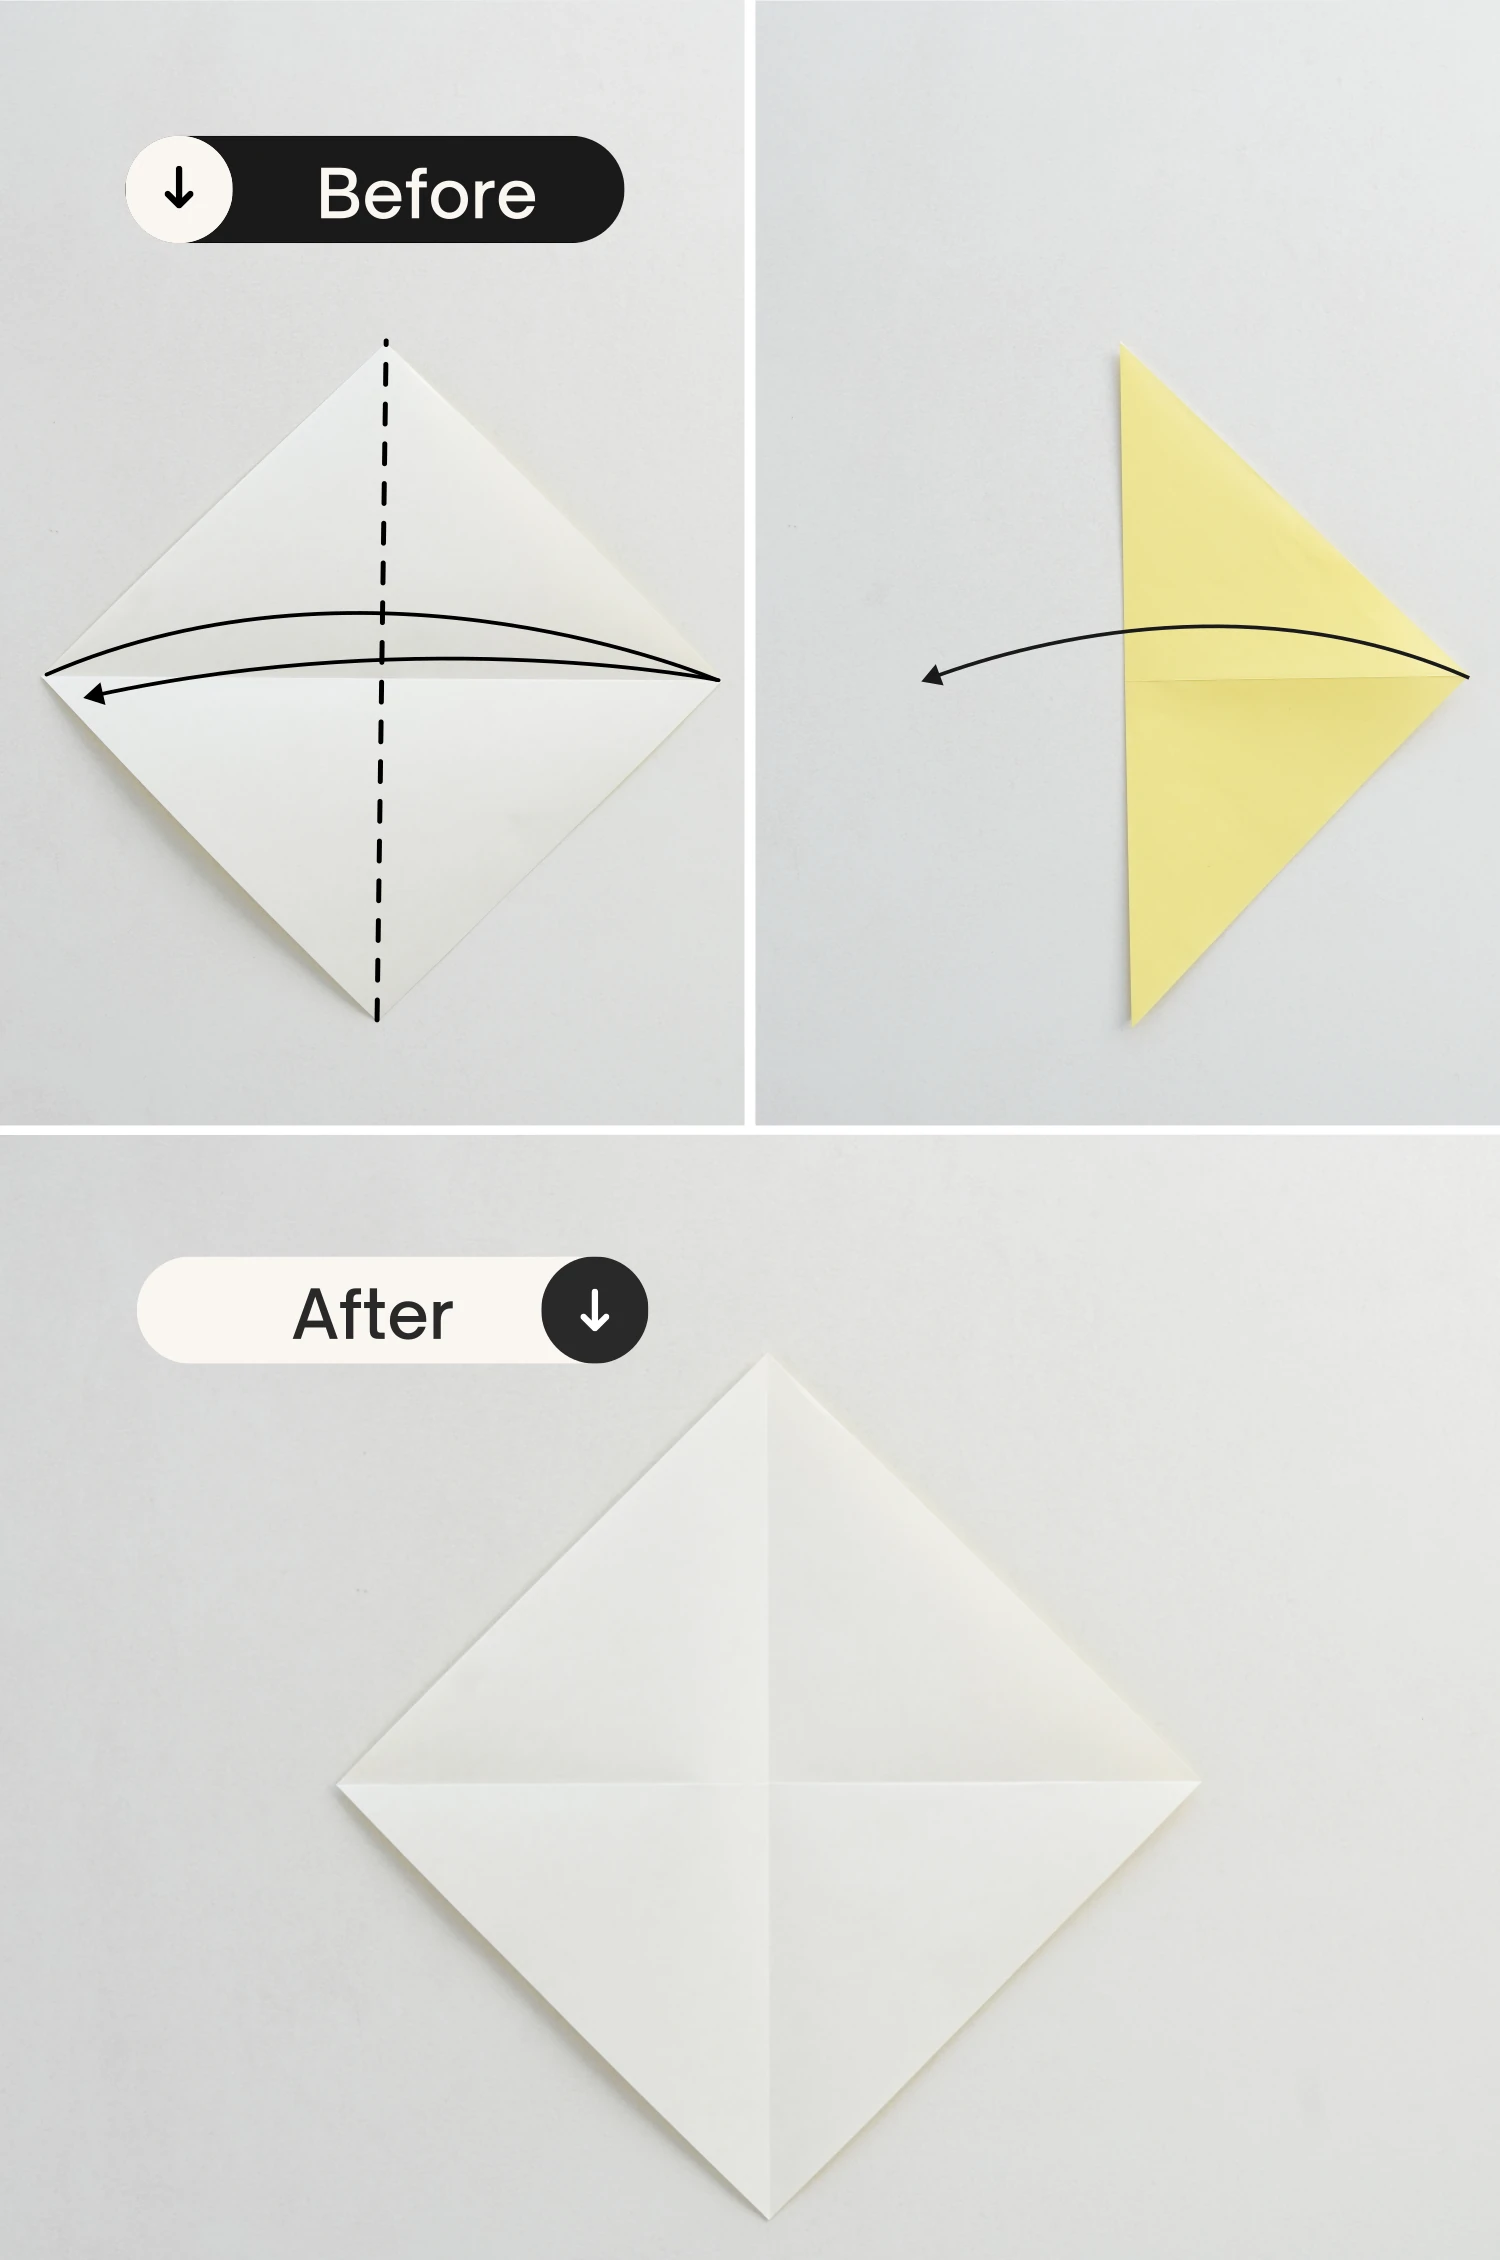
Fold it in half diagonally from the opposite direction, crease it well then unfold it.
Step 3
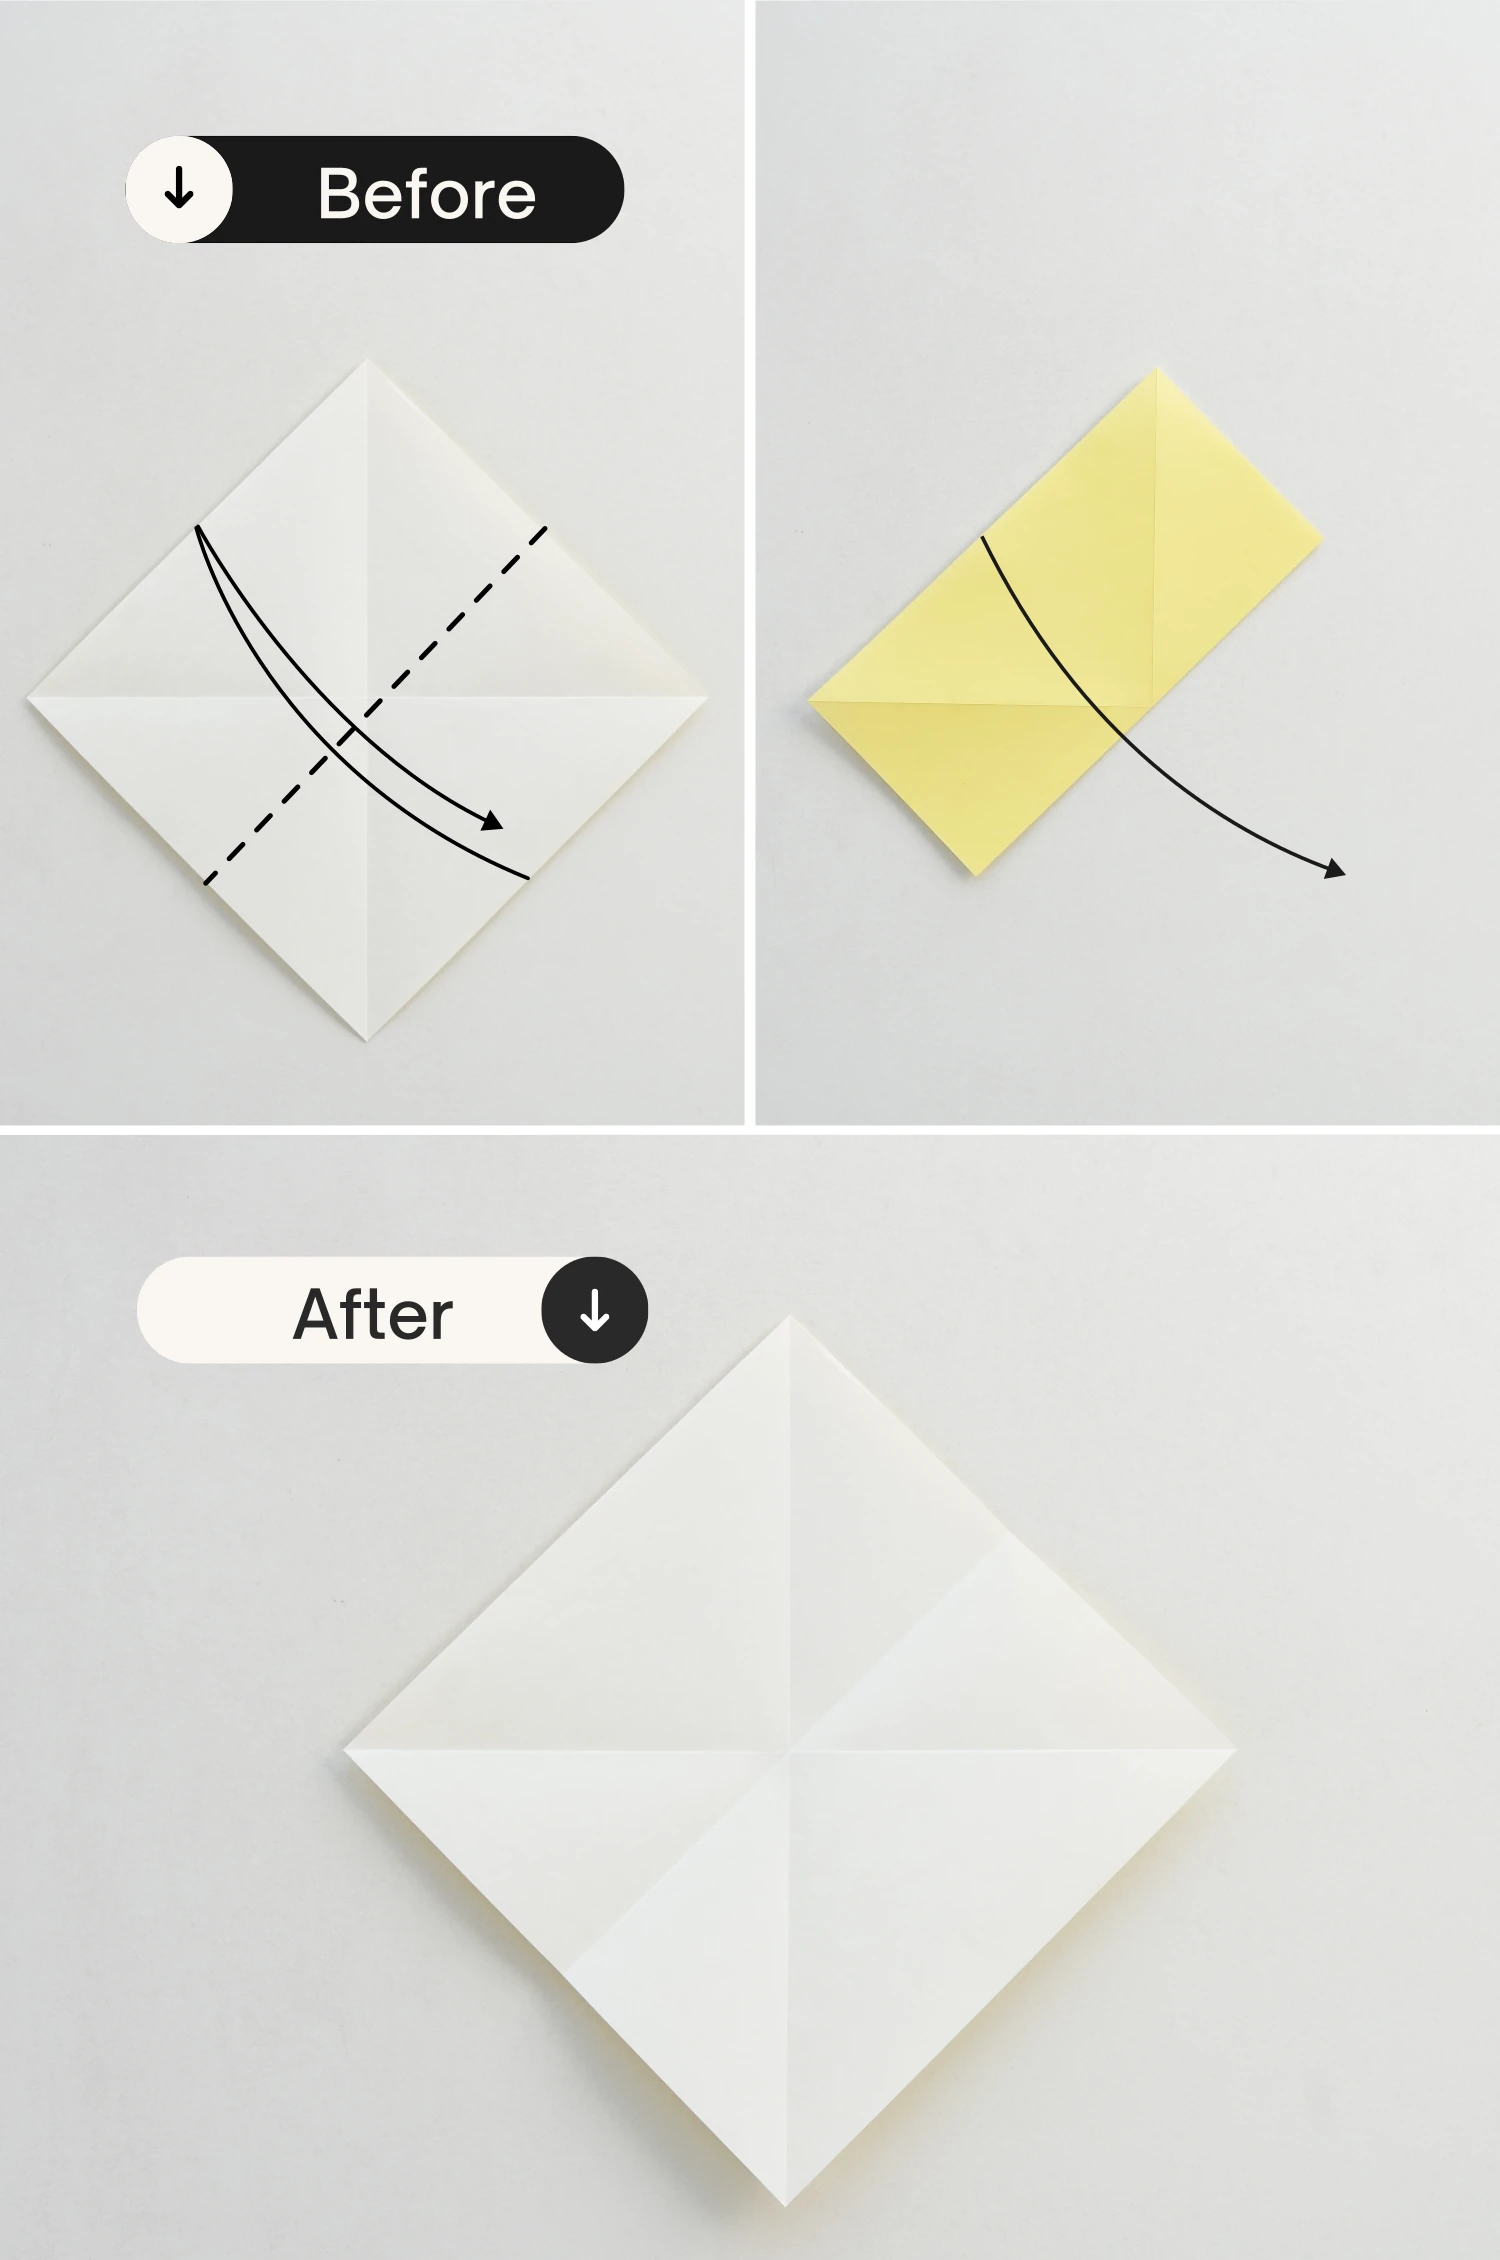
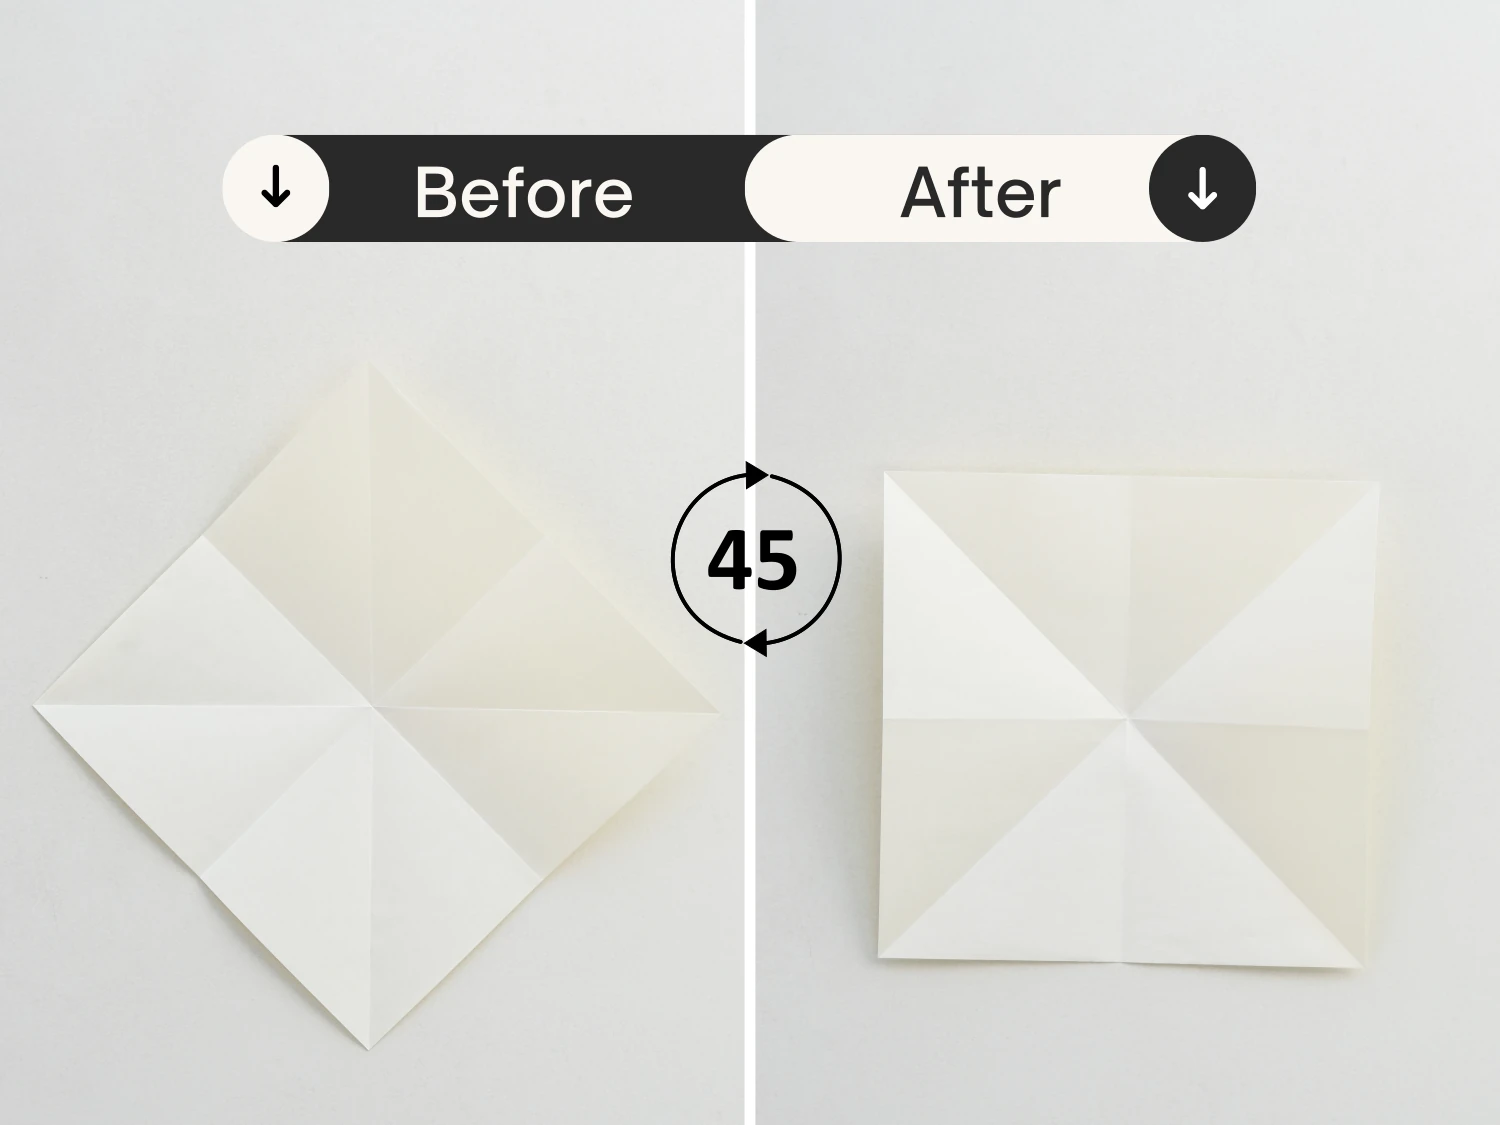
Fold the bottom right edge to the top left, then unfold.
Step 4
Fold the bottom left to the top right, crease it well then unfold.
Step 5
Rotate it 45 degrees clockwise.
Step 6
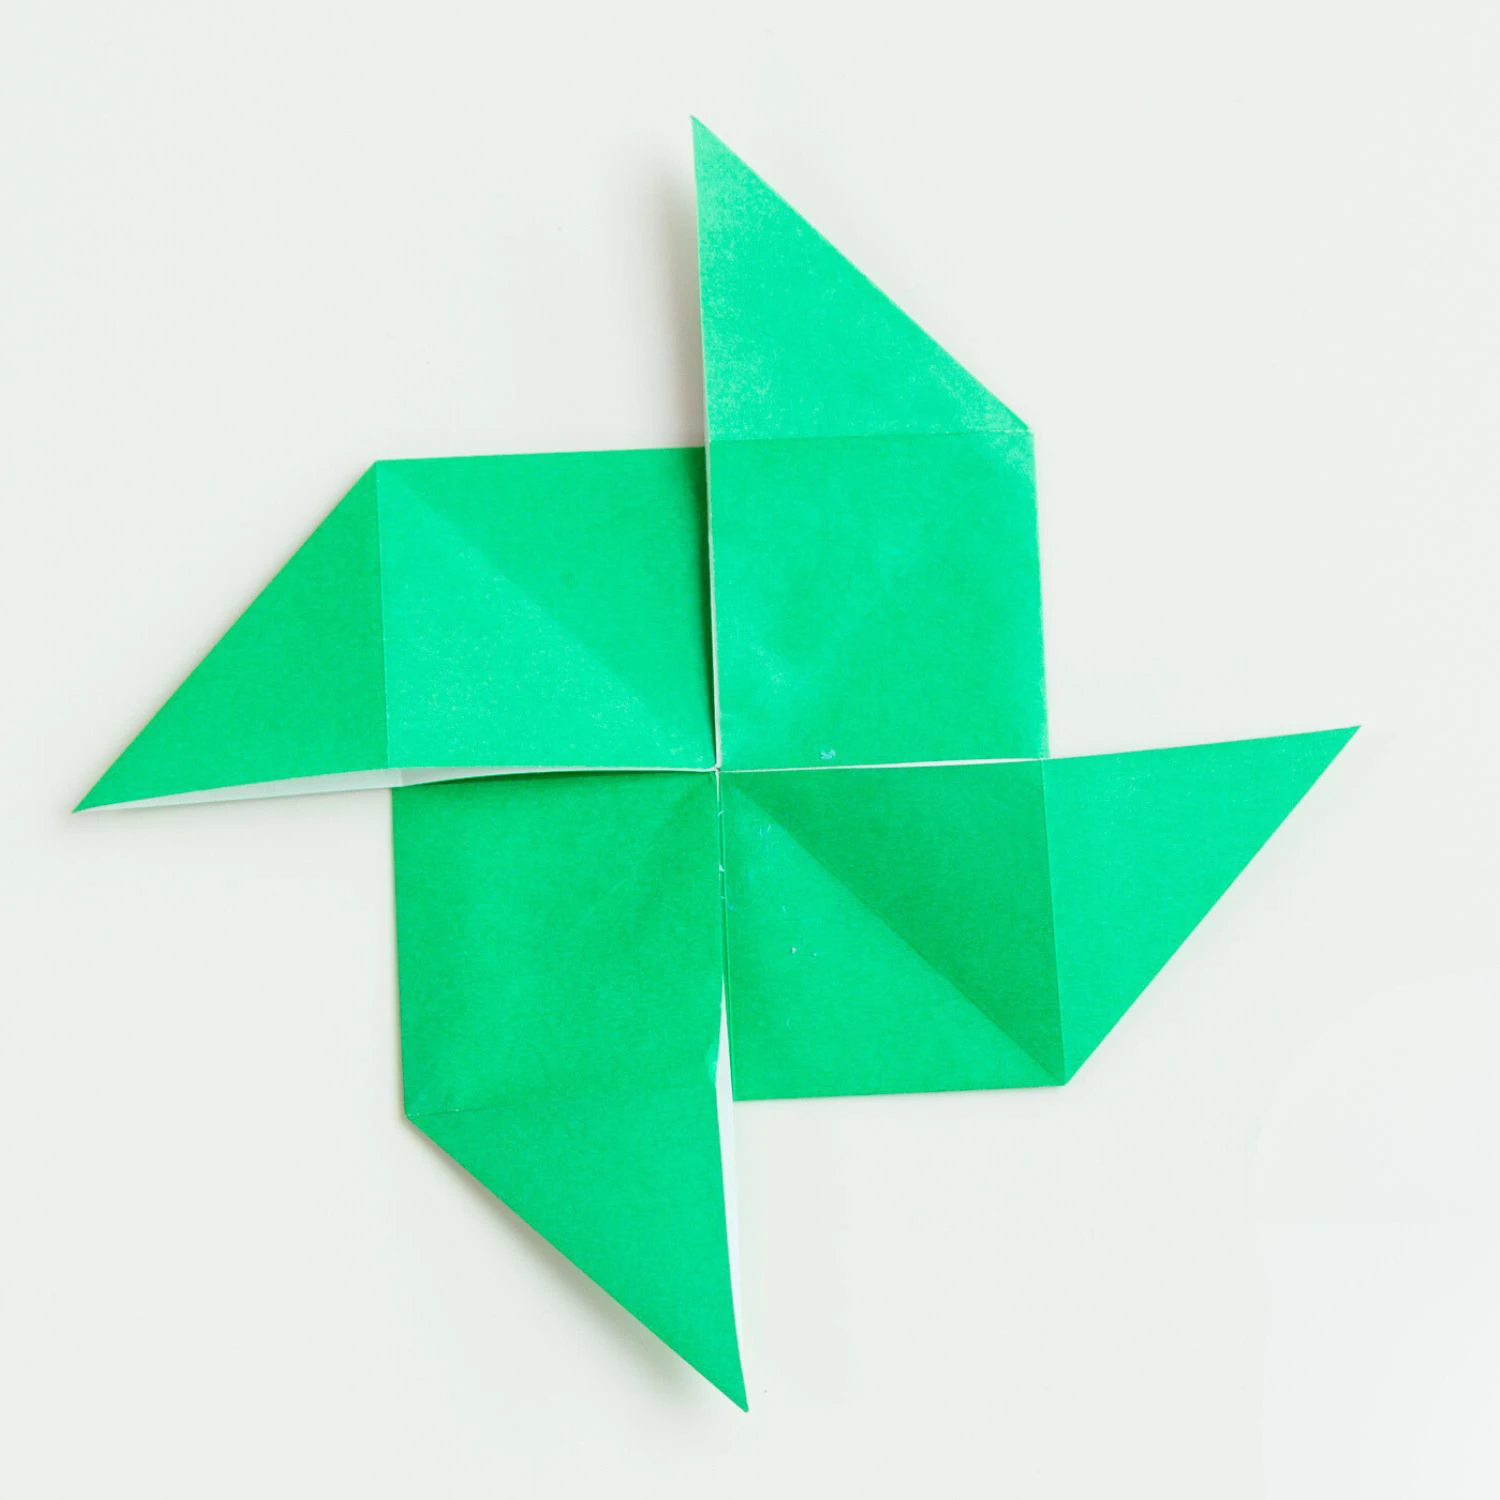
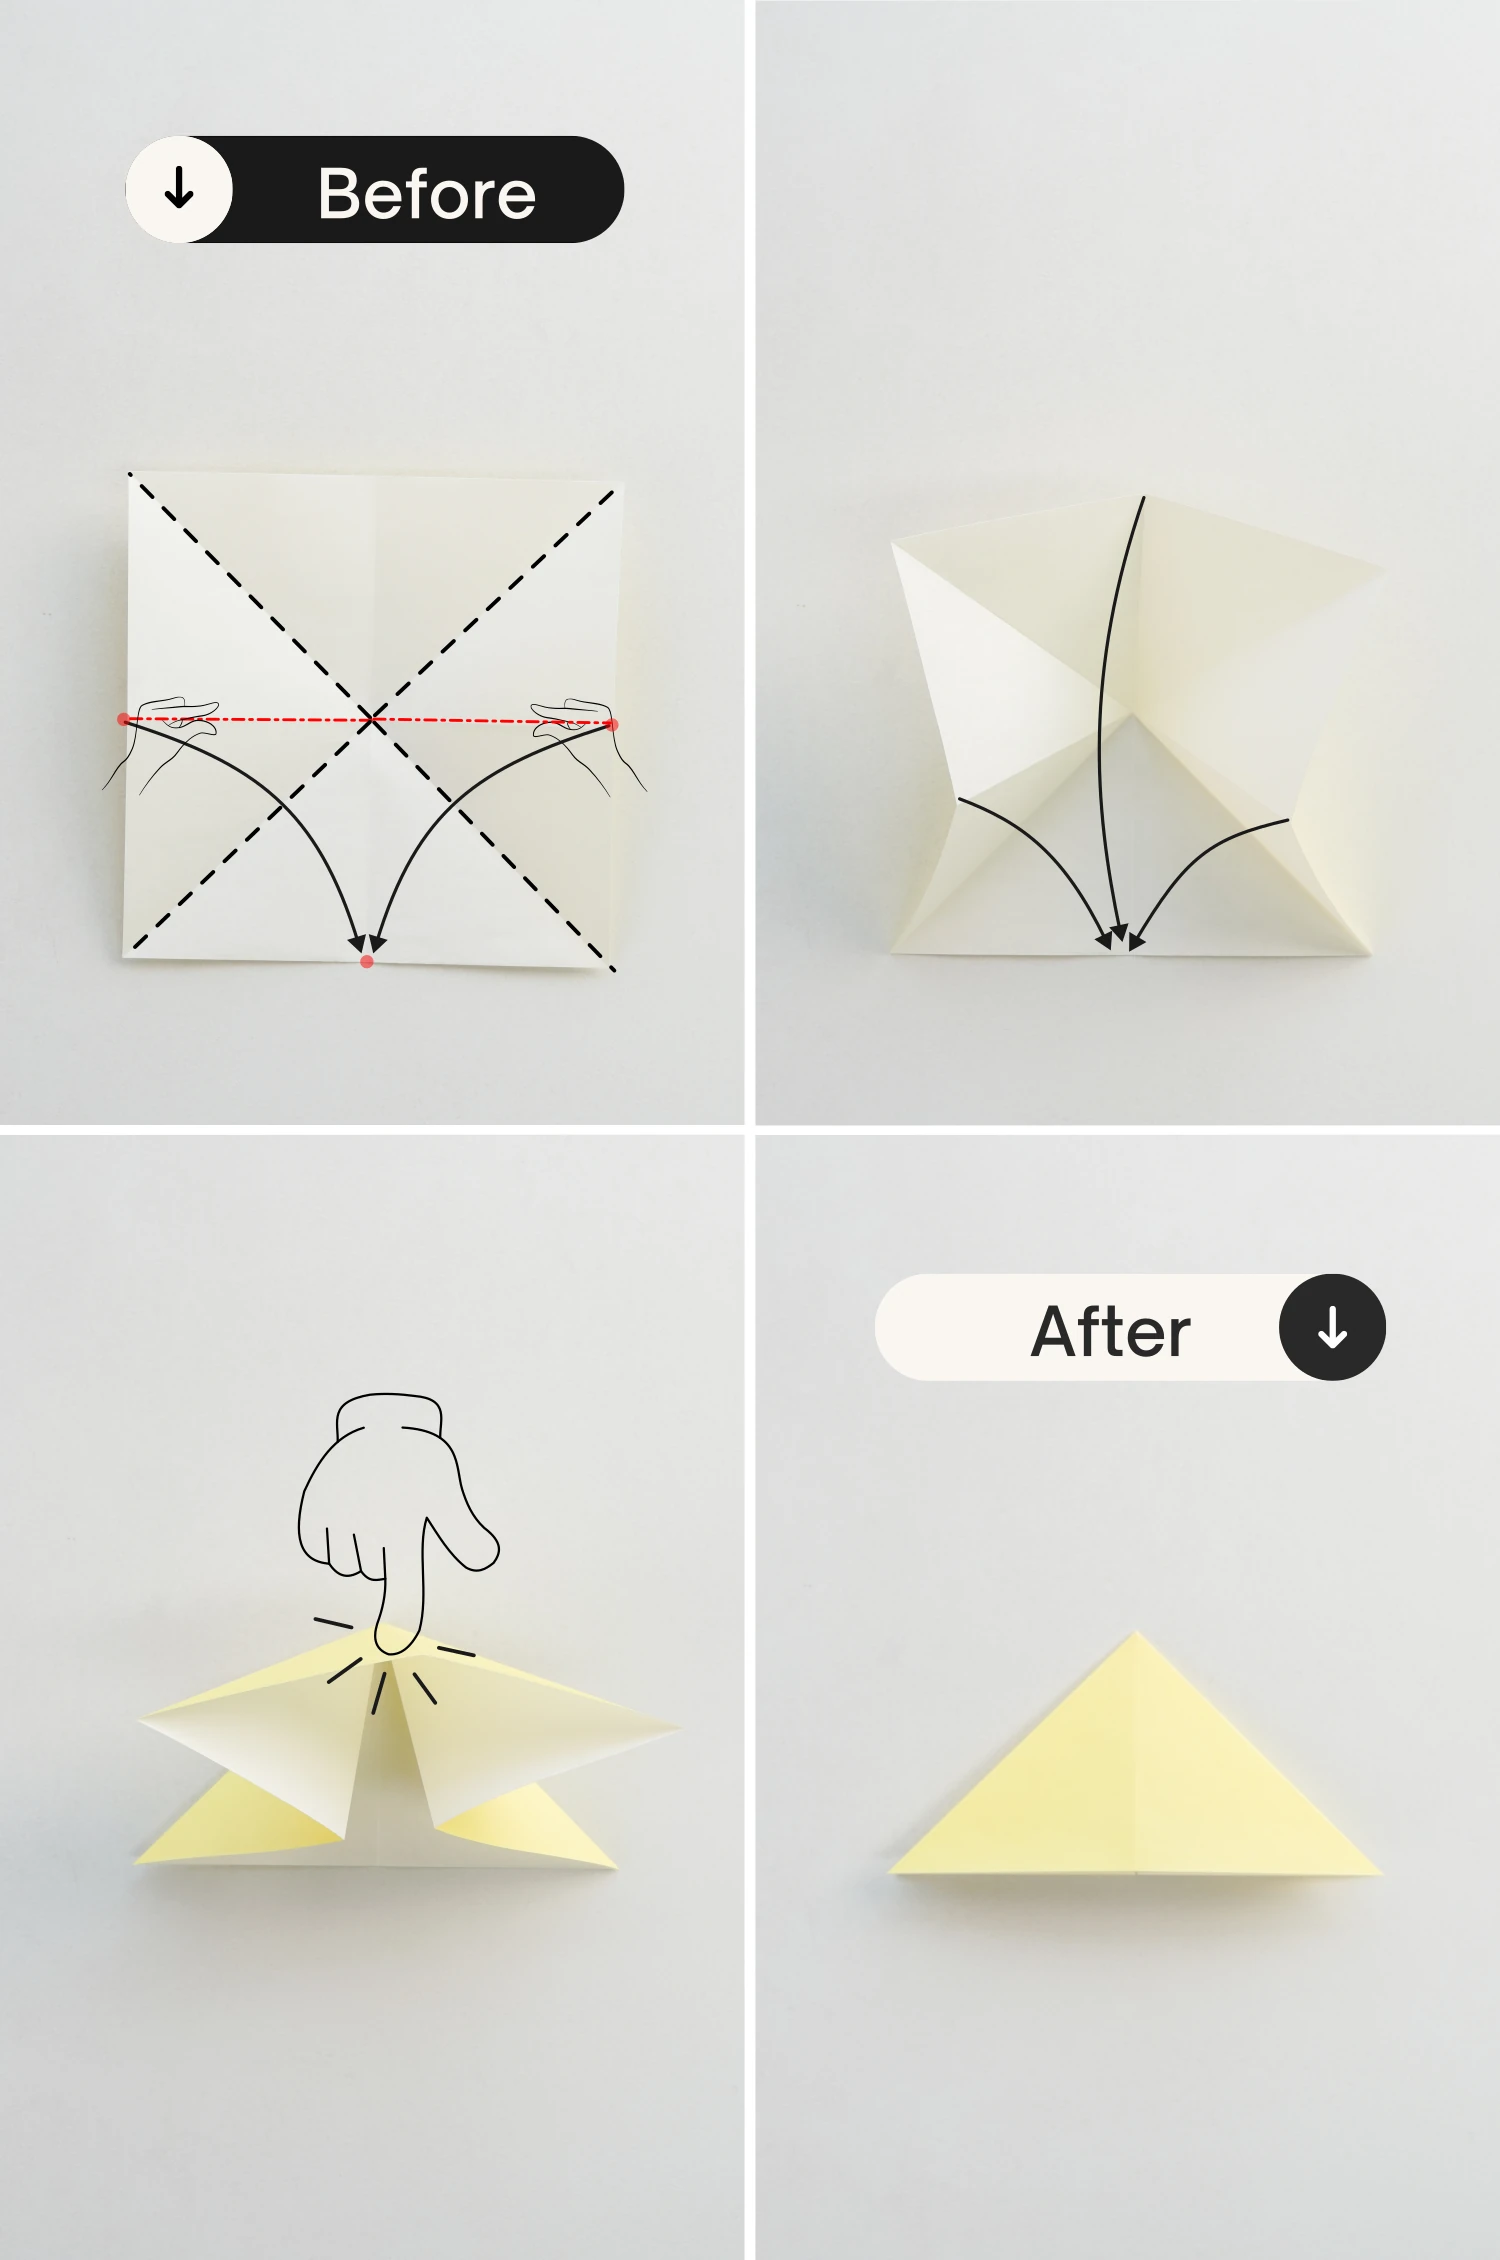
Now we are going to make a water bomb base.
Use both hands to press the two center points on the right and left edges. Then push it down to make the center points of the three edges to meet the center point of the bottom edge.
Finally, flatten it.
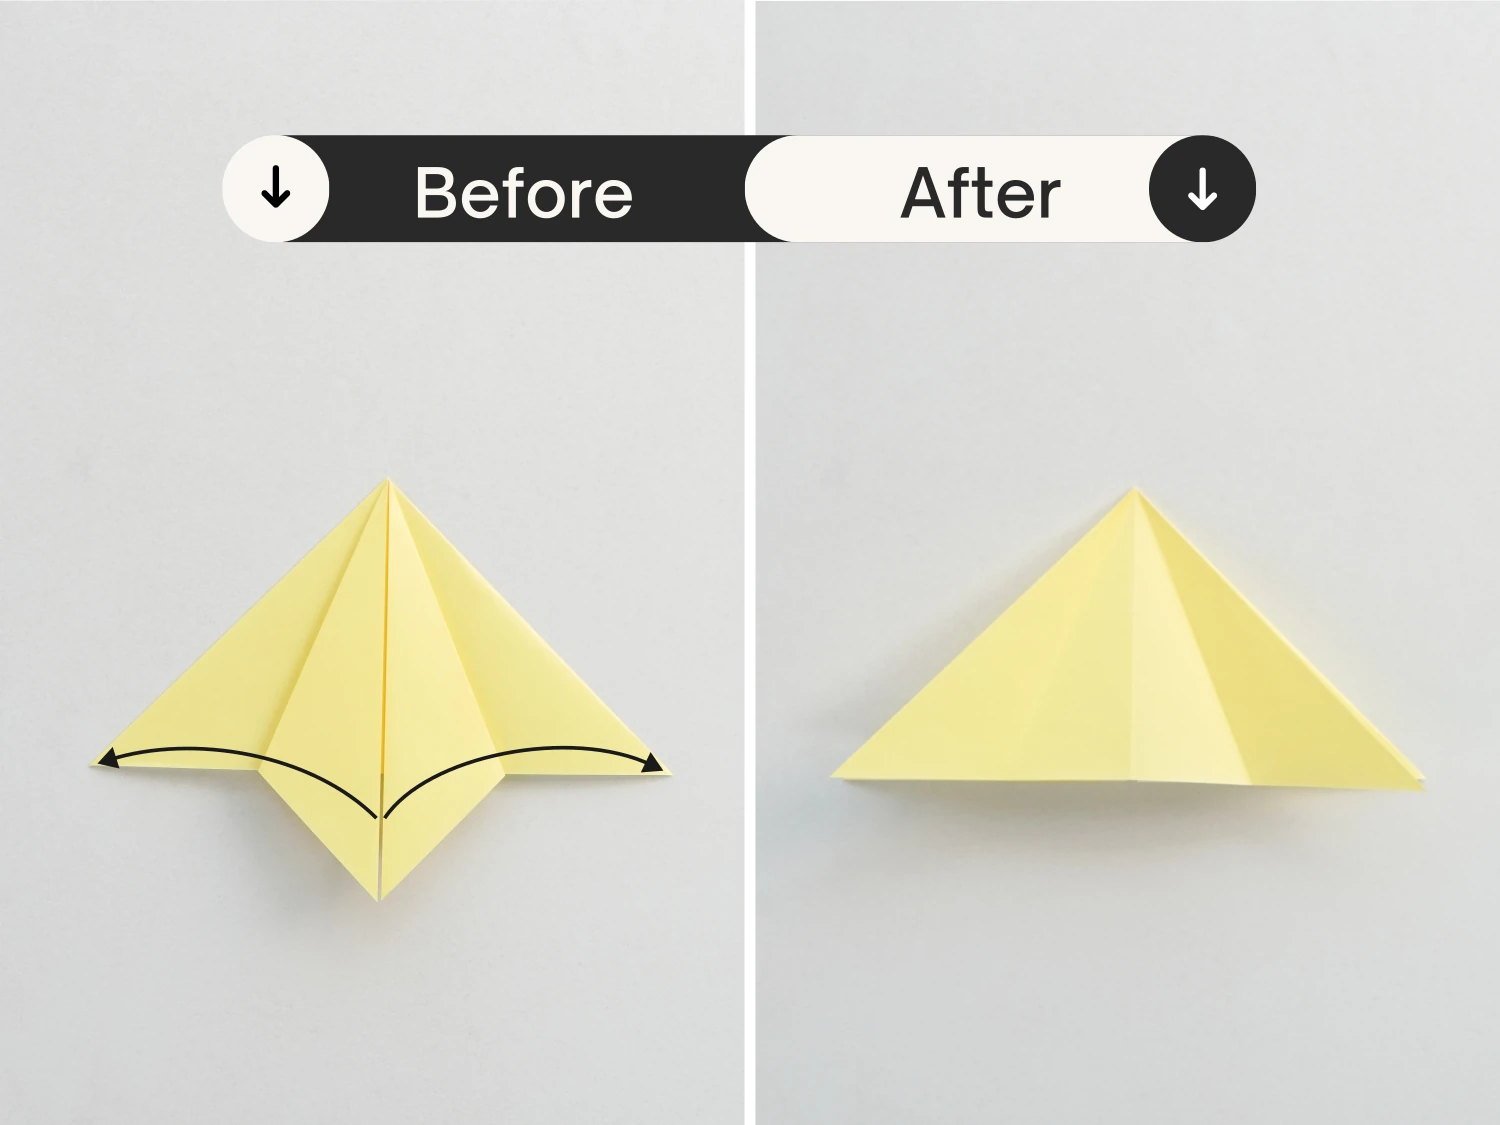
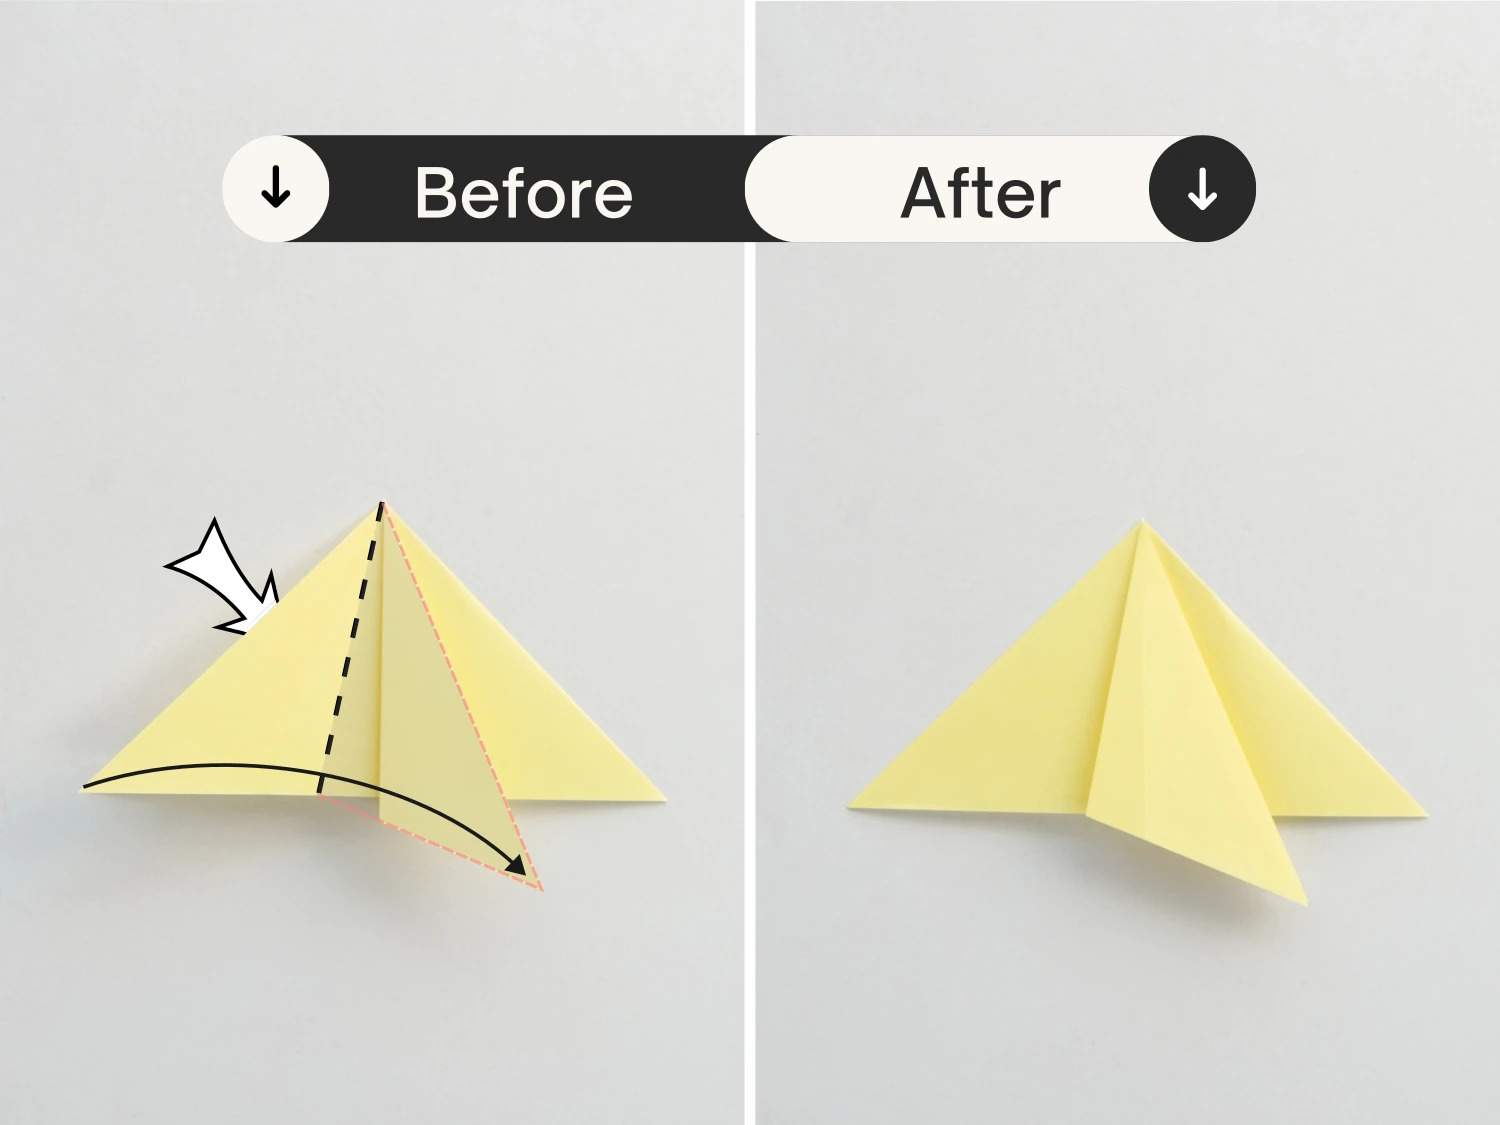
Step 7
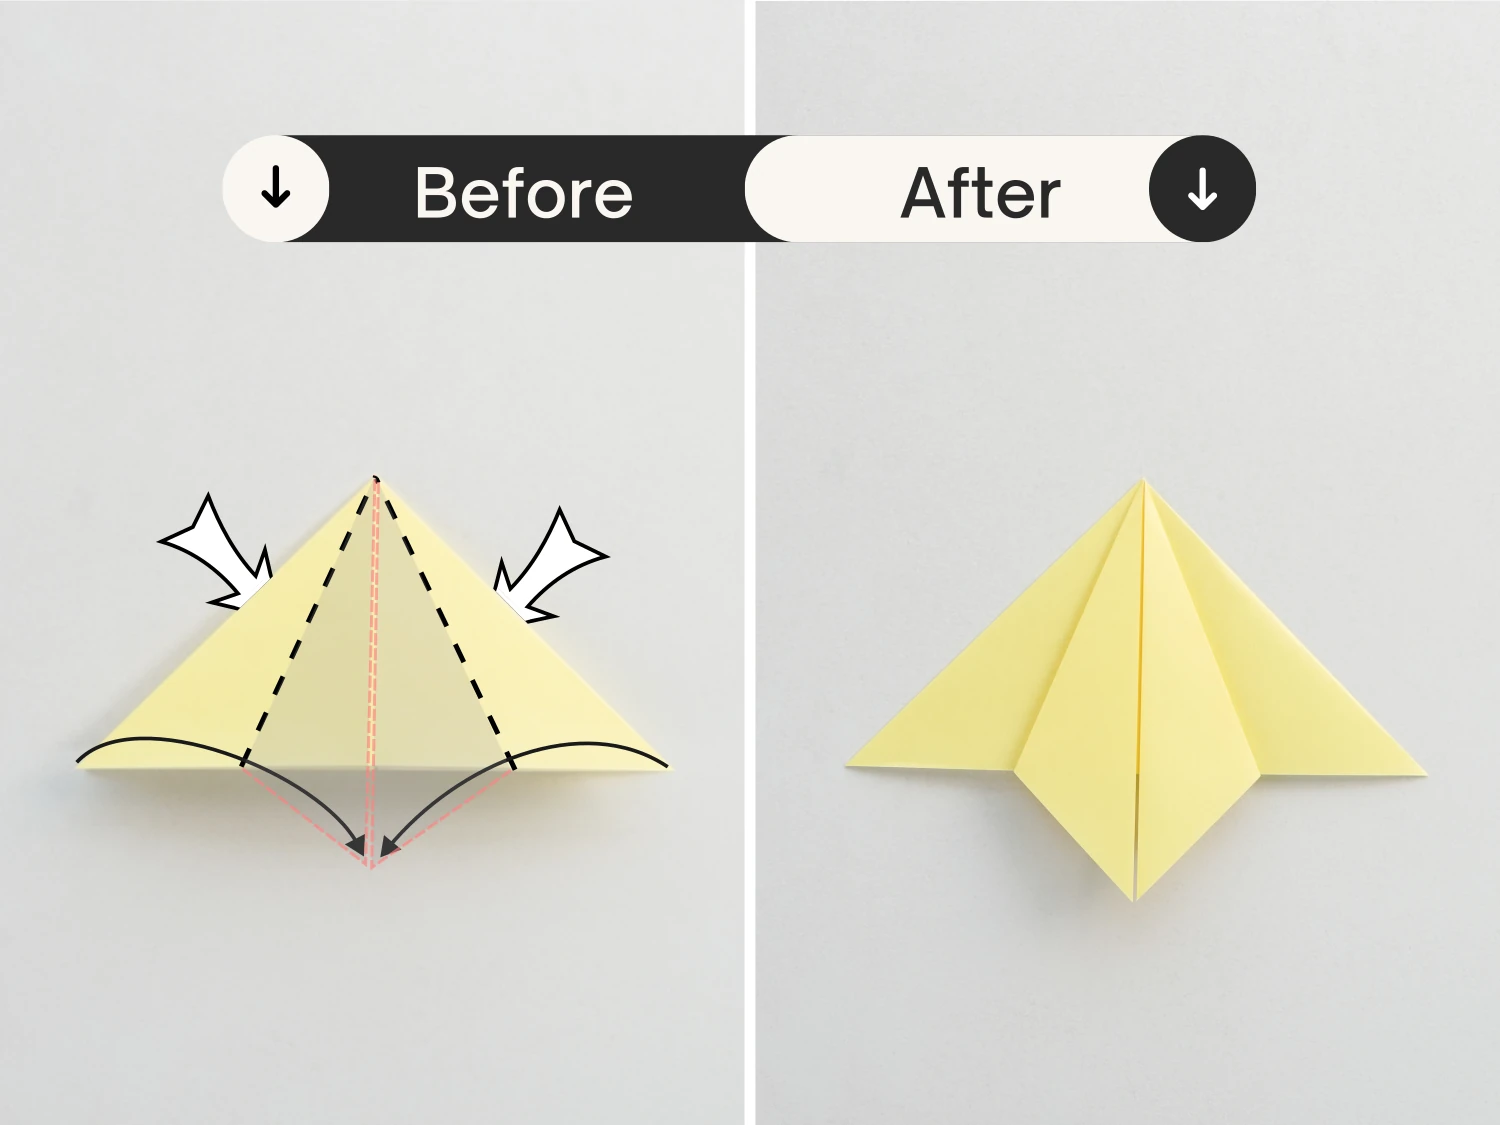
Fold the left and right edges of the top layer to the middle vertical crease.
Step 8
Then unfold them.
Step 9
Fold the left edge of the top layer to the right to meet the crease you just made, crease it well then unfold it.
Step 10
Repeat this for the right edge, and fold it to the left to meet the crease you made in step 7.
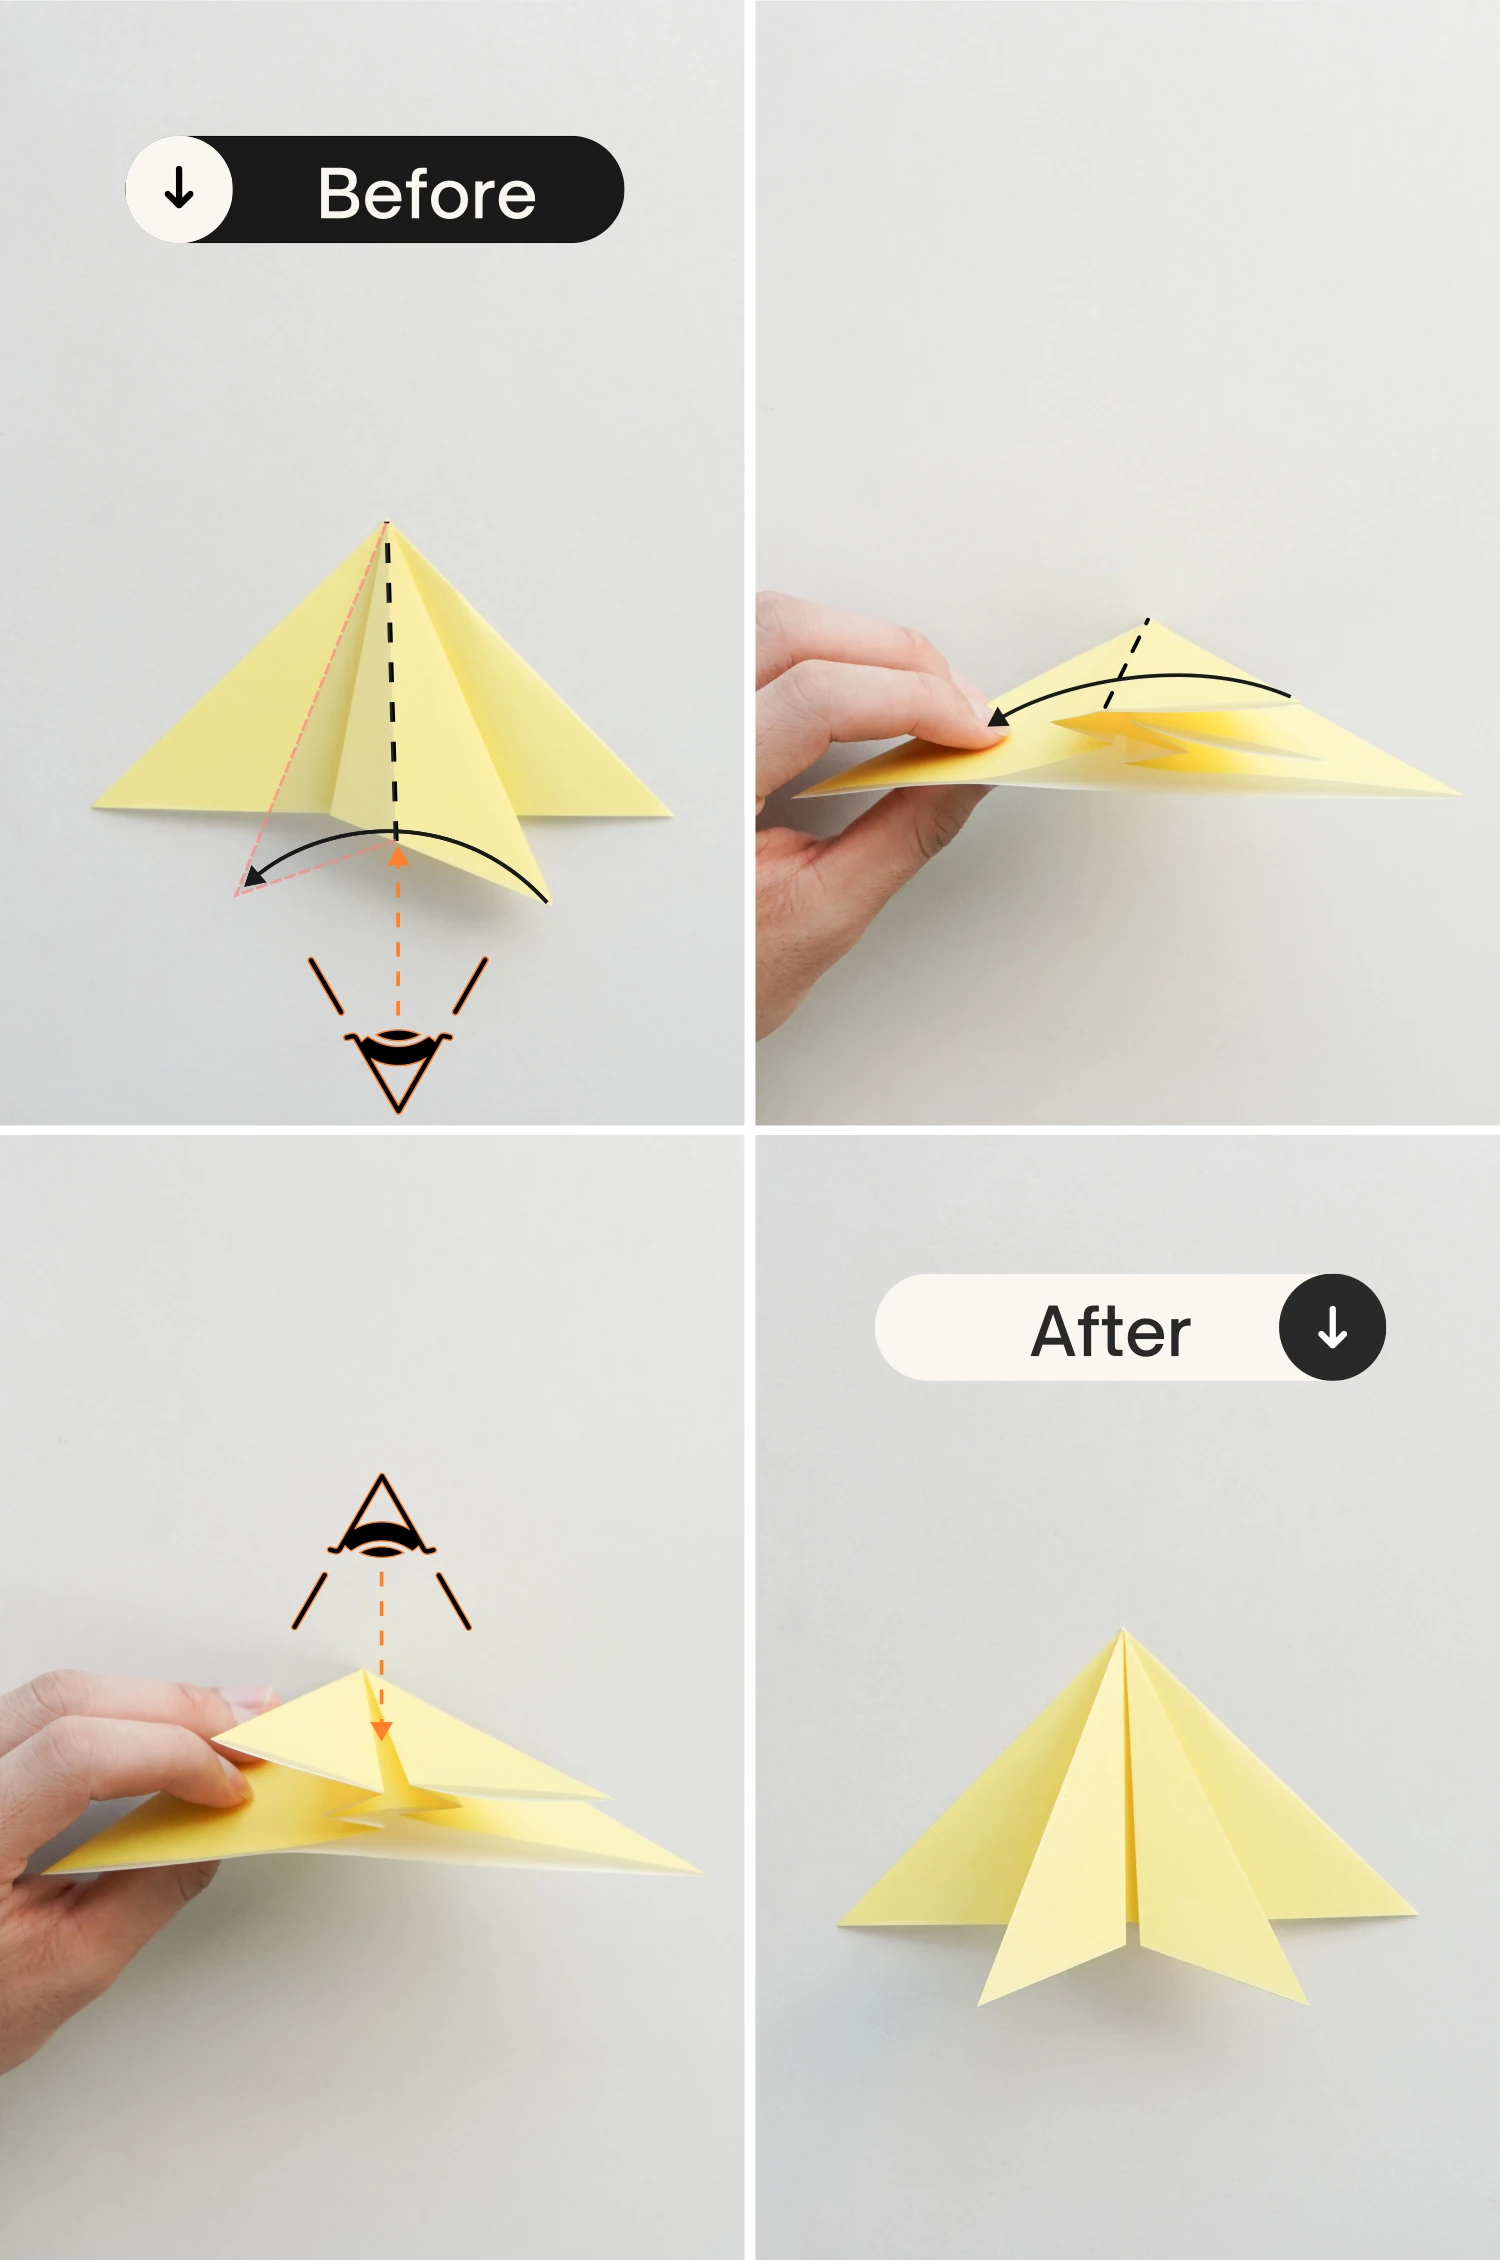
Step 11
Then fold it back to the right along the center vertical crease, which is made in step 7.
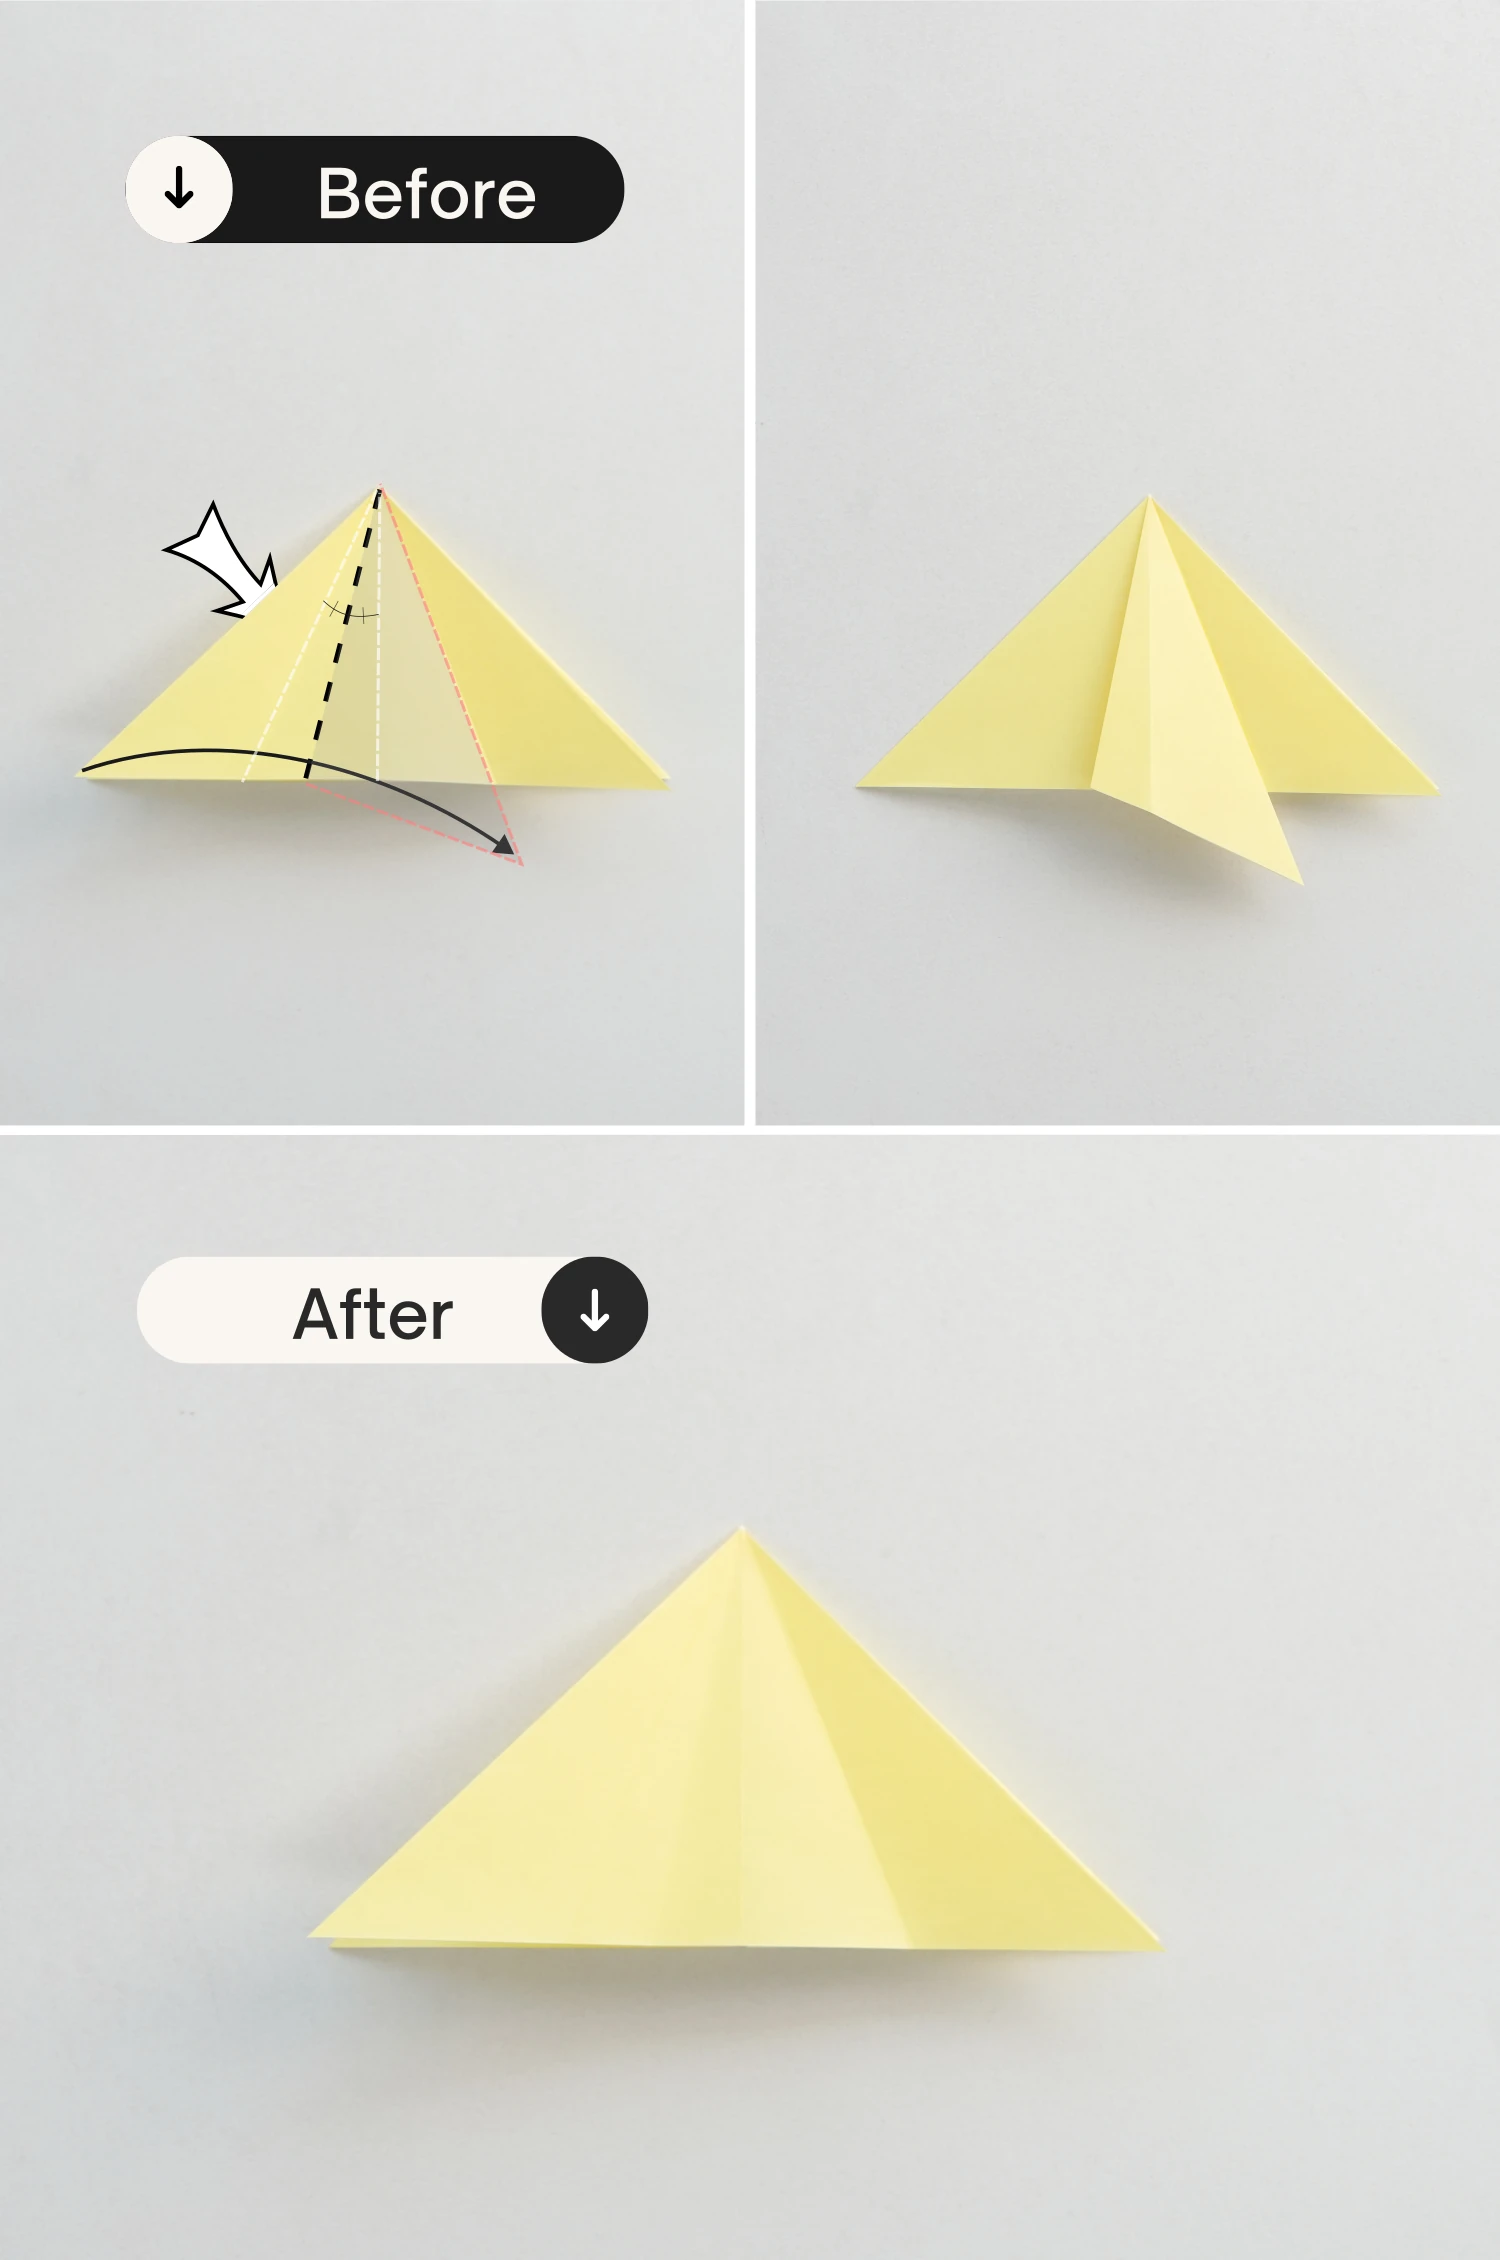
Step 12
Fold the left edge along the crease you made in step 9, and make the folded part align with the part you folded in the previous step.
Step 13
Then fold it back to the left along the crease shown by the dotted line, that is the left one you made in step 7. Now you’ve got two small symmetrical triangles.
Step 14
Flip it over.

Step 15
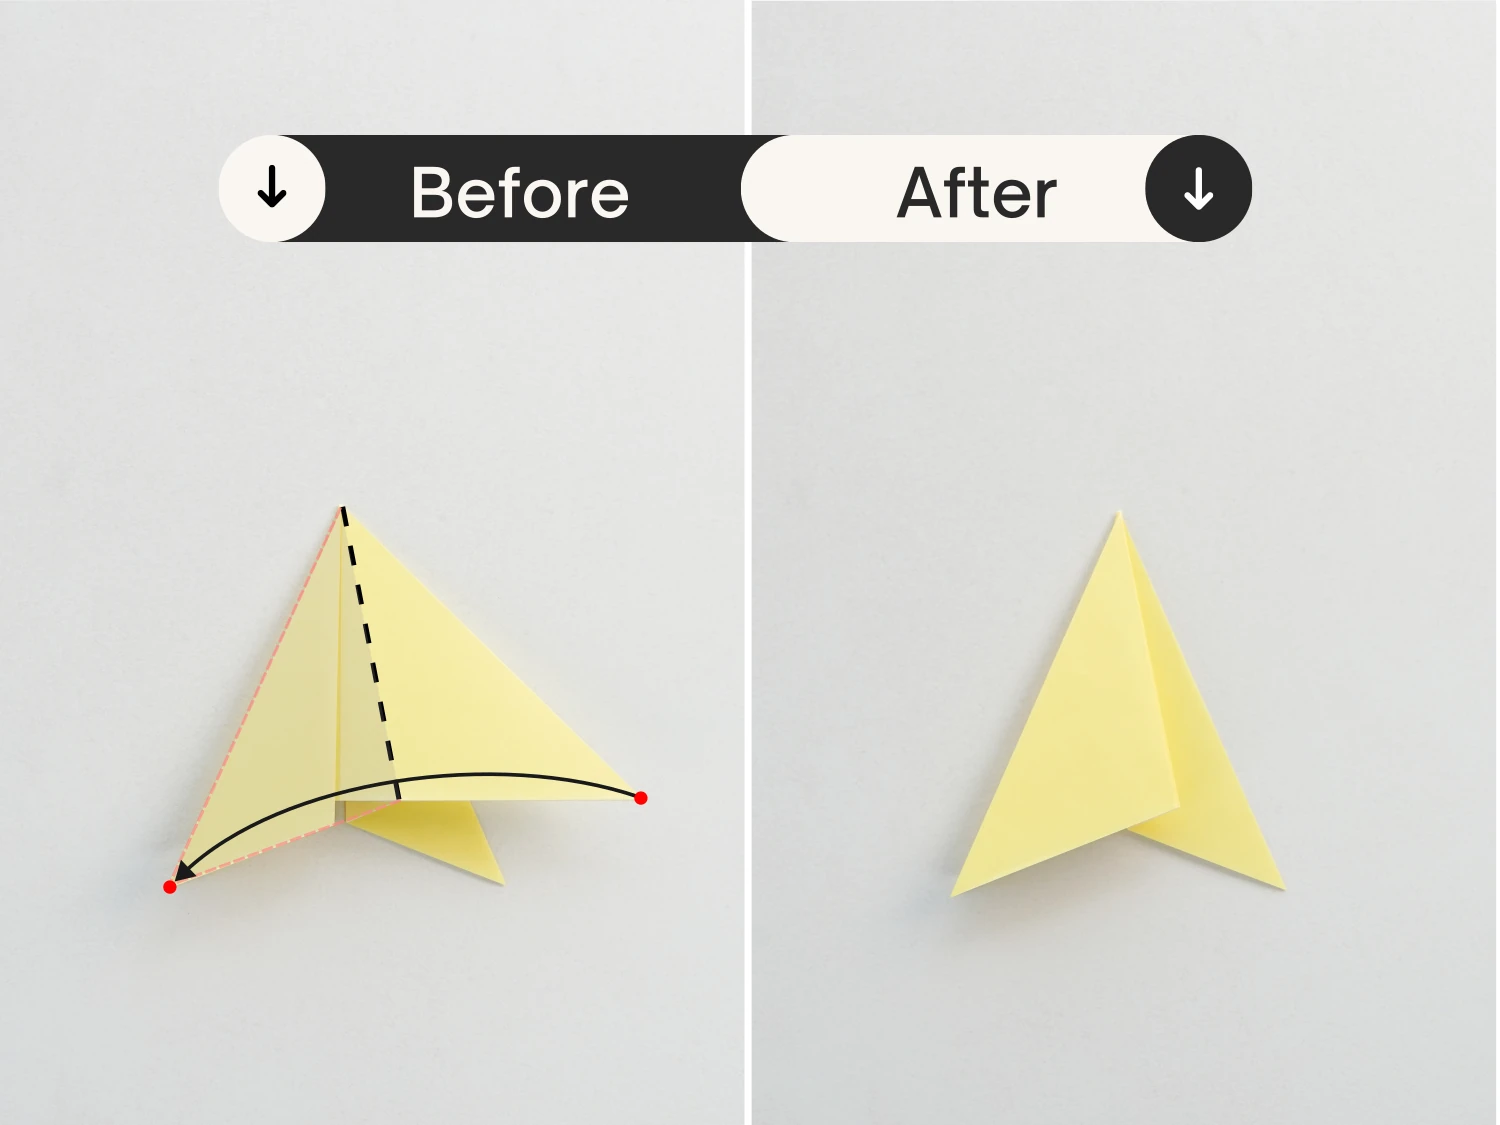
Fold the left corner of the triangle to the right to align with the right corner below.
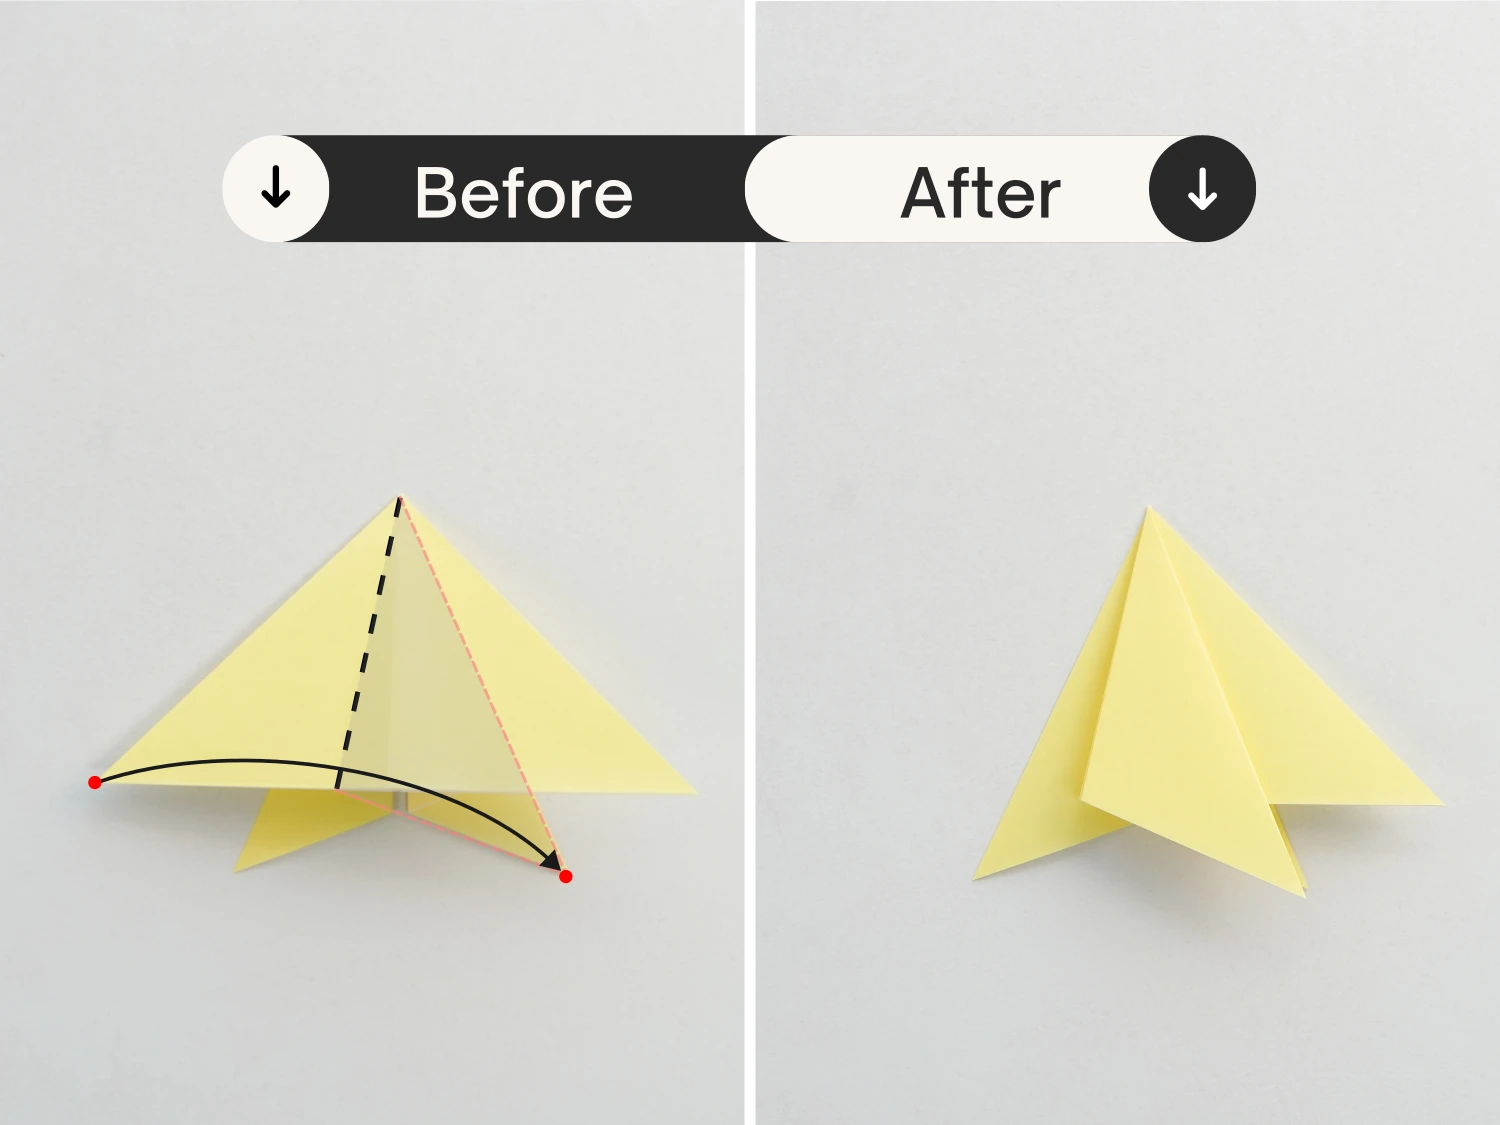
Step 16
Then fold it back to the left to align with the left corner.
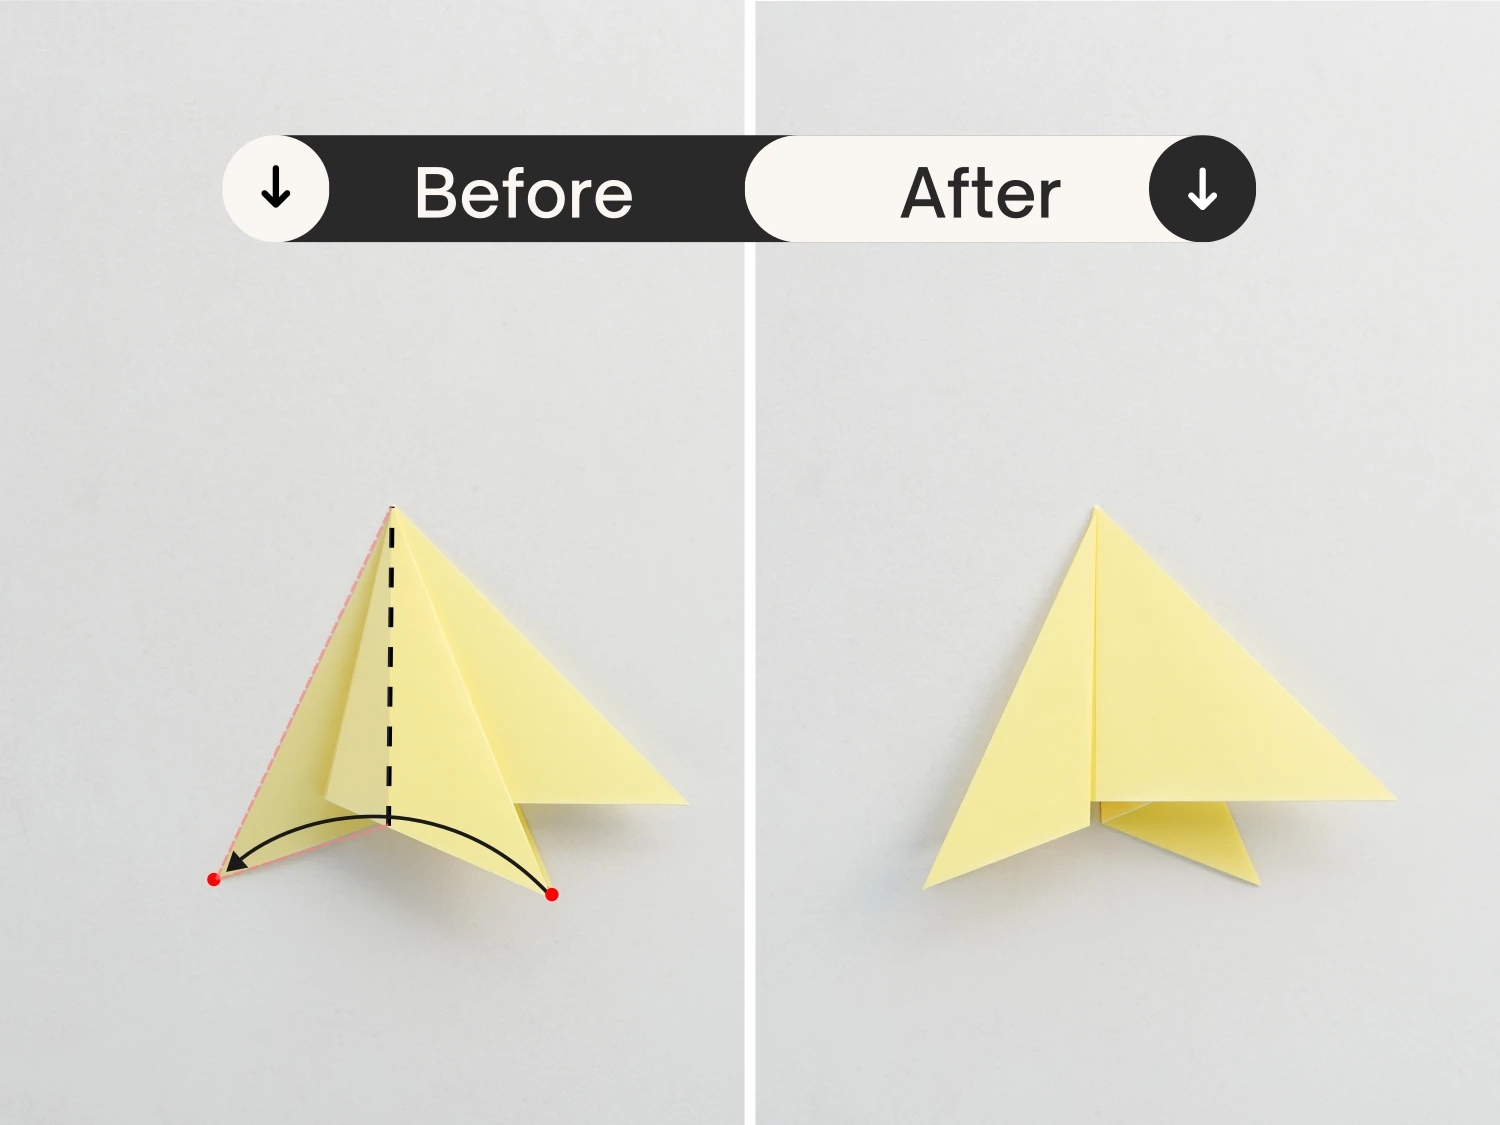
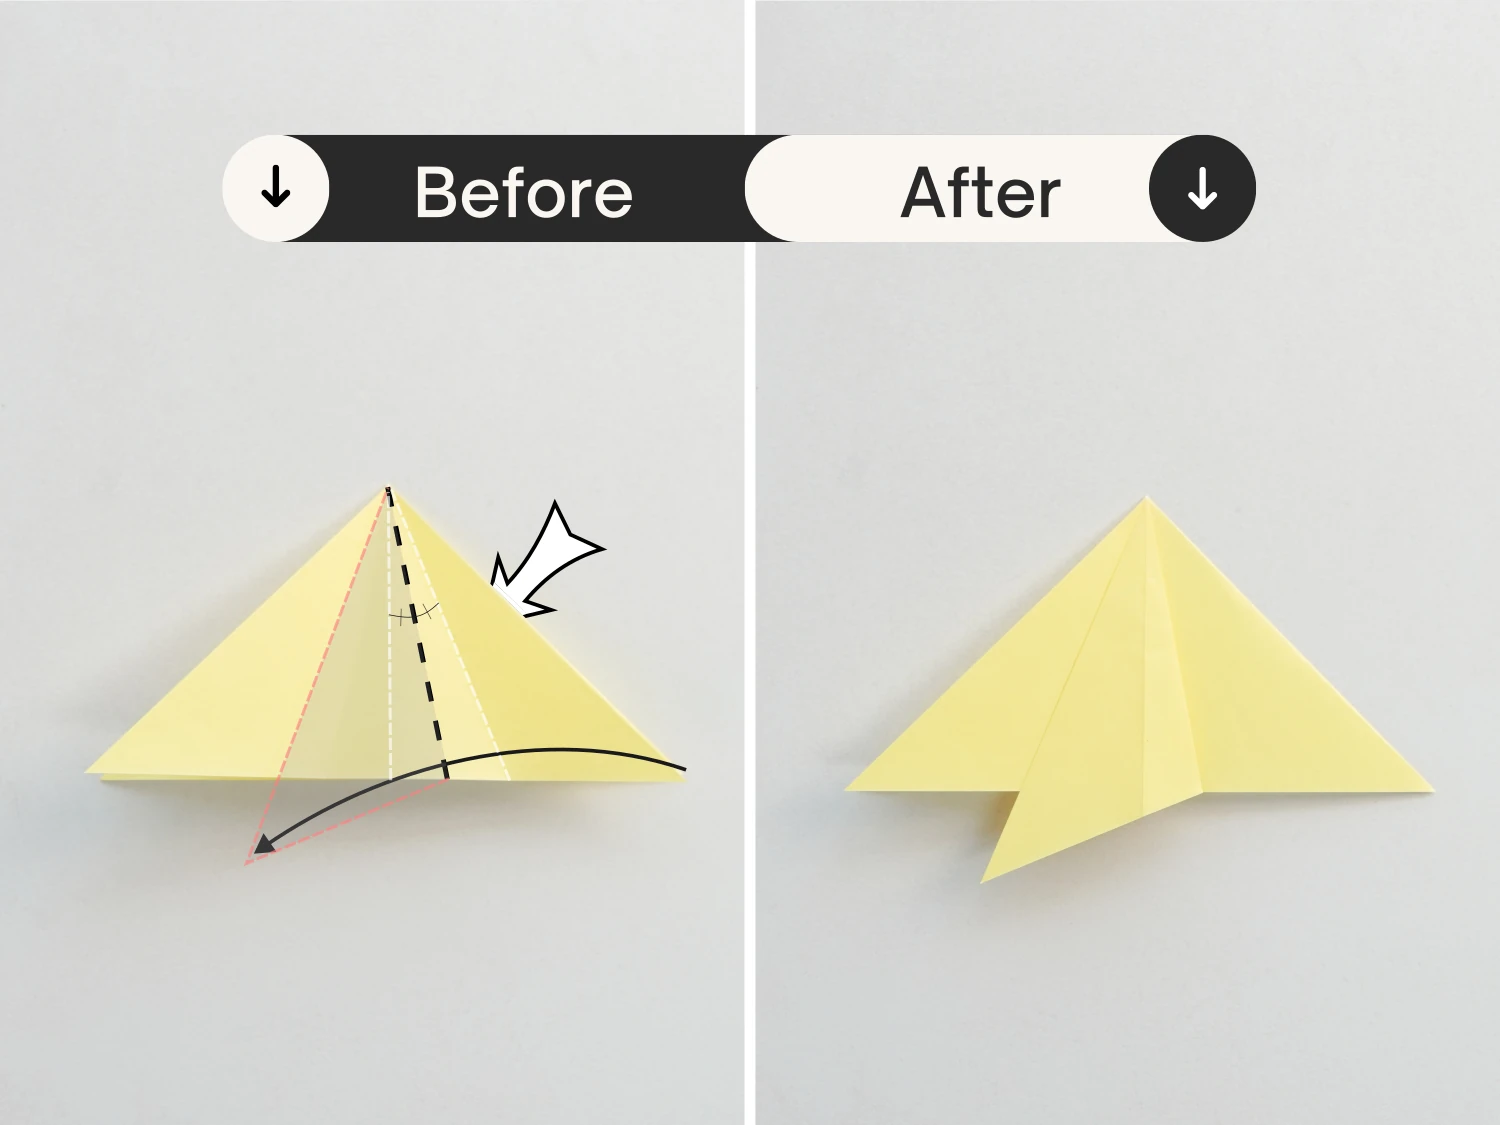
Step 17
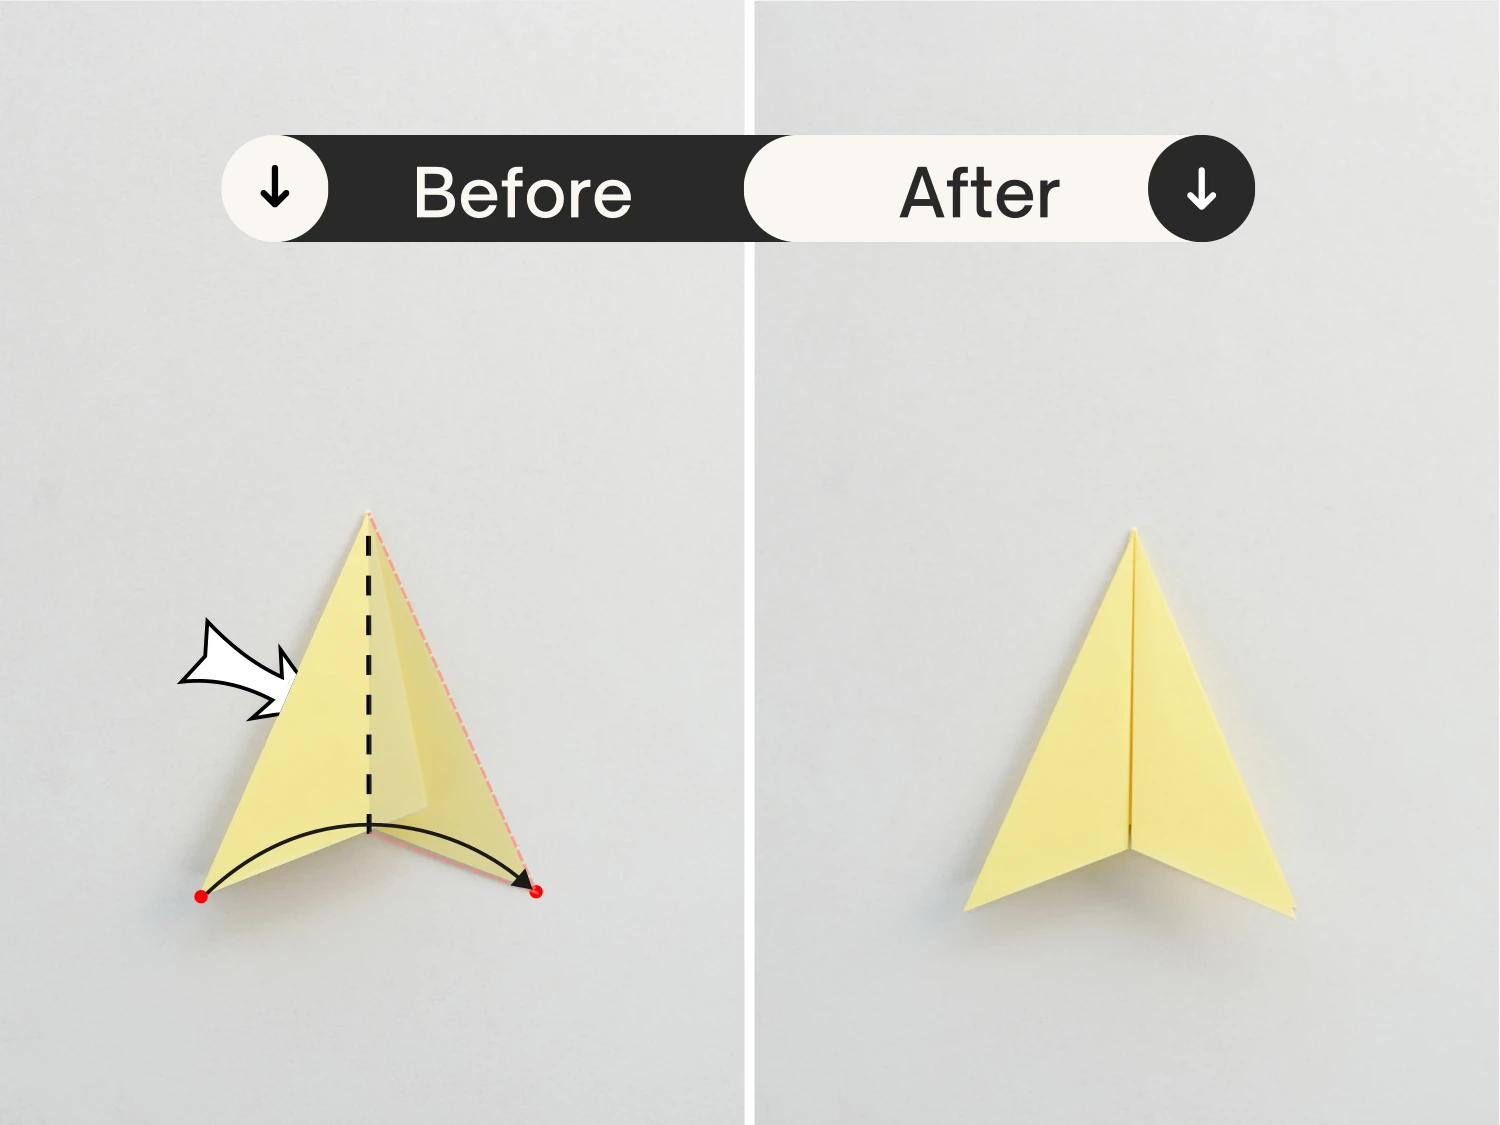
Fold the right top corner to the left to align with the left corner.
Step 18
Then fold it back to the right side to align with the right corner.
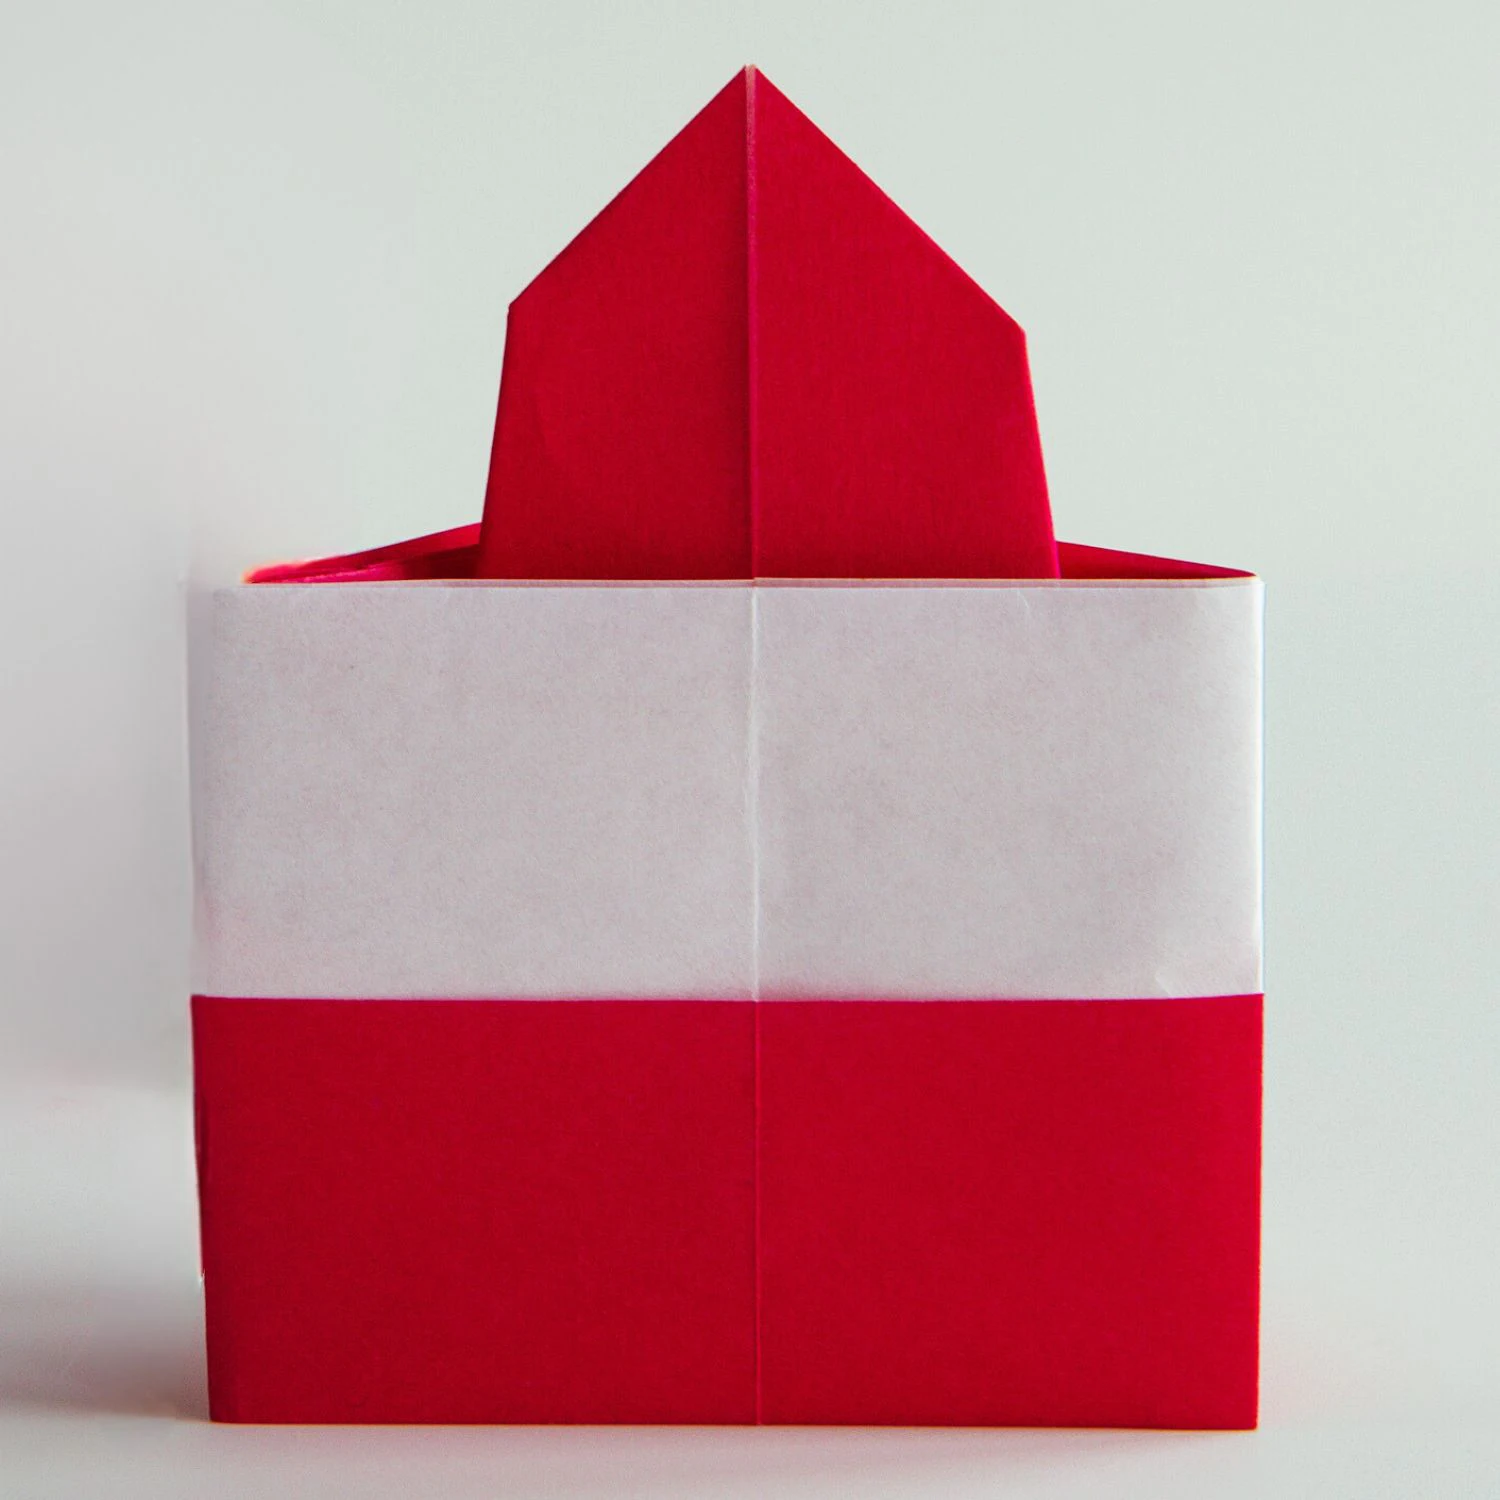
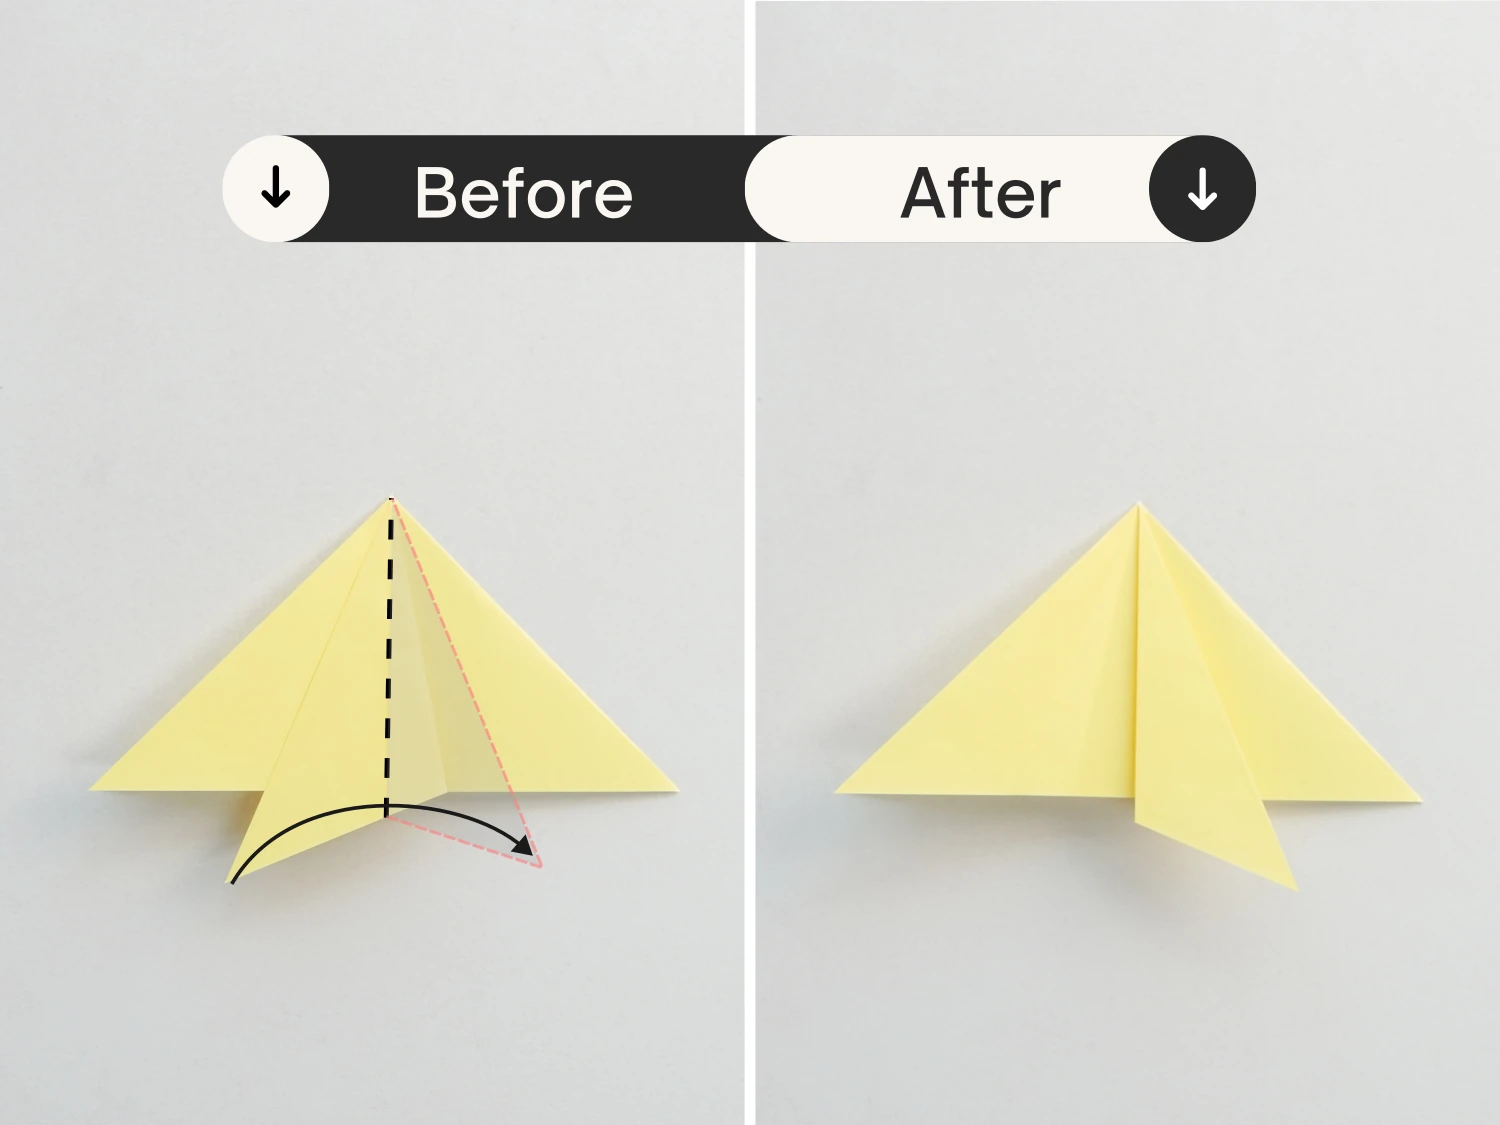
Step 19
Fold the bottom left and right corners of the top layer up along the dotted line.
As you lift them up, flatten the small left and right corners of the center to form two small triangles. Finish by flattening it.
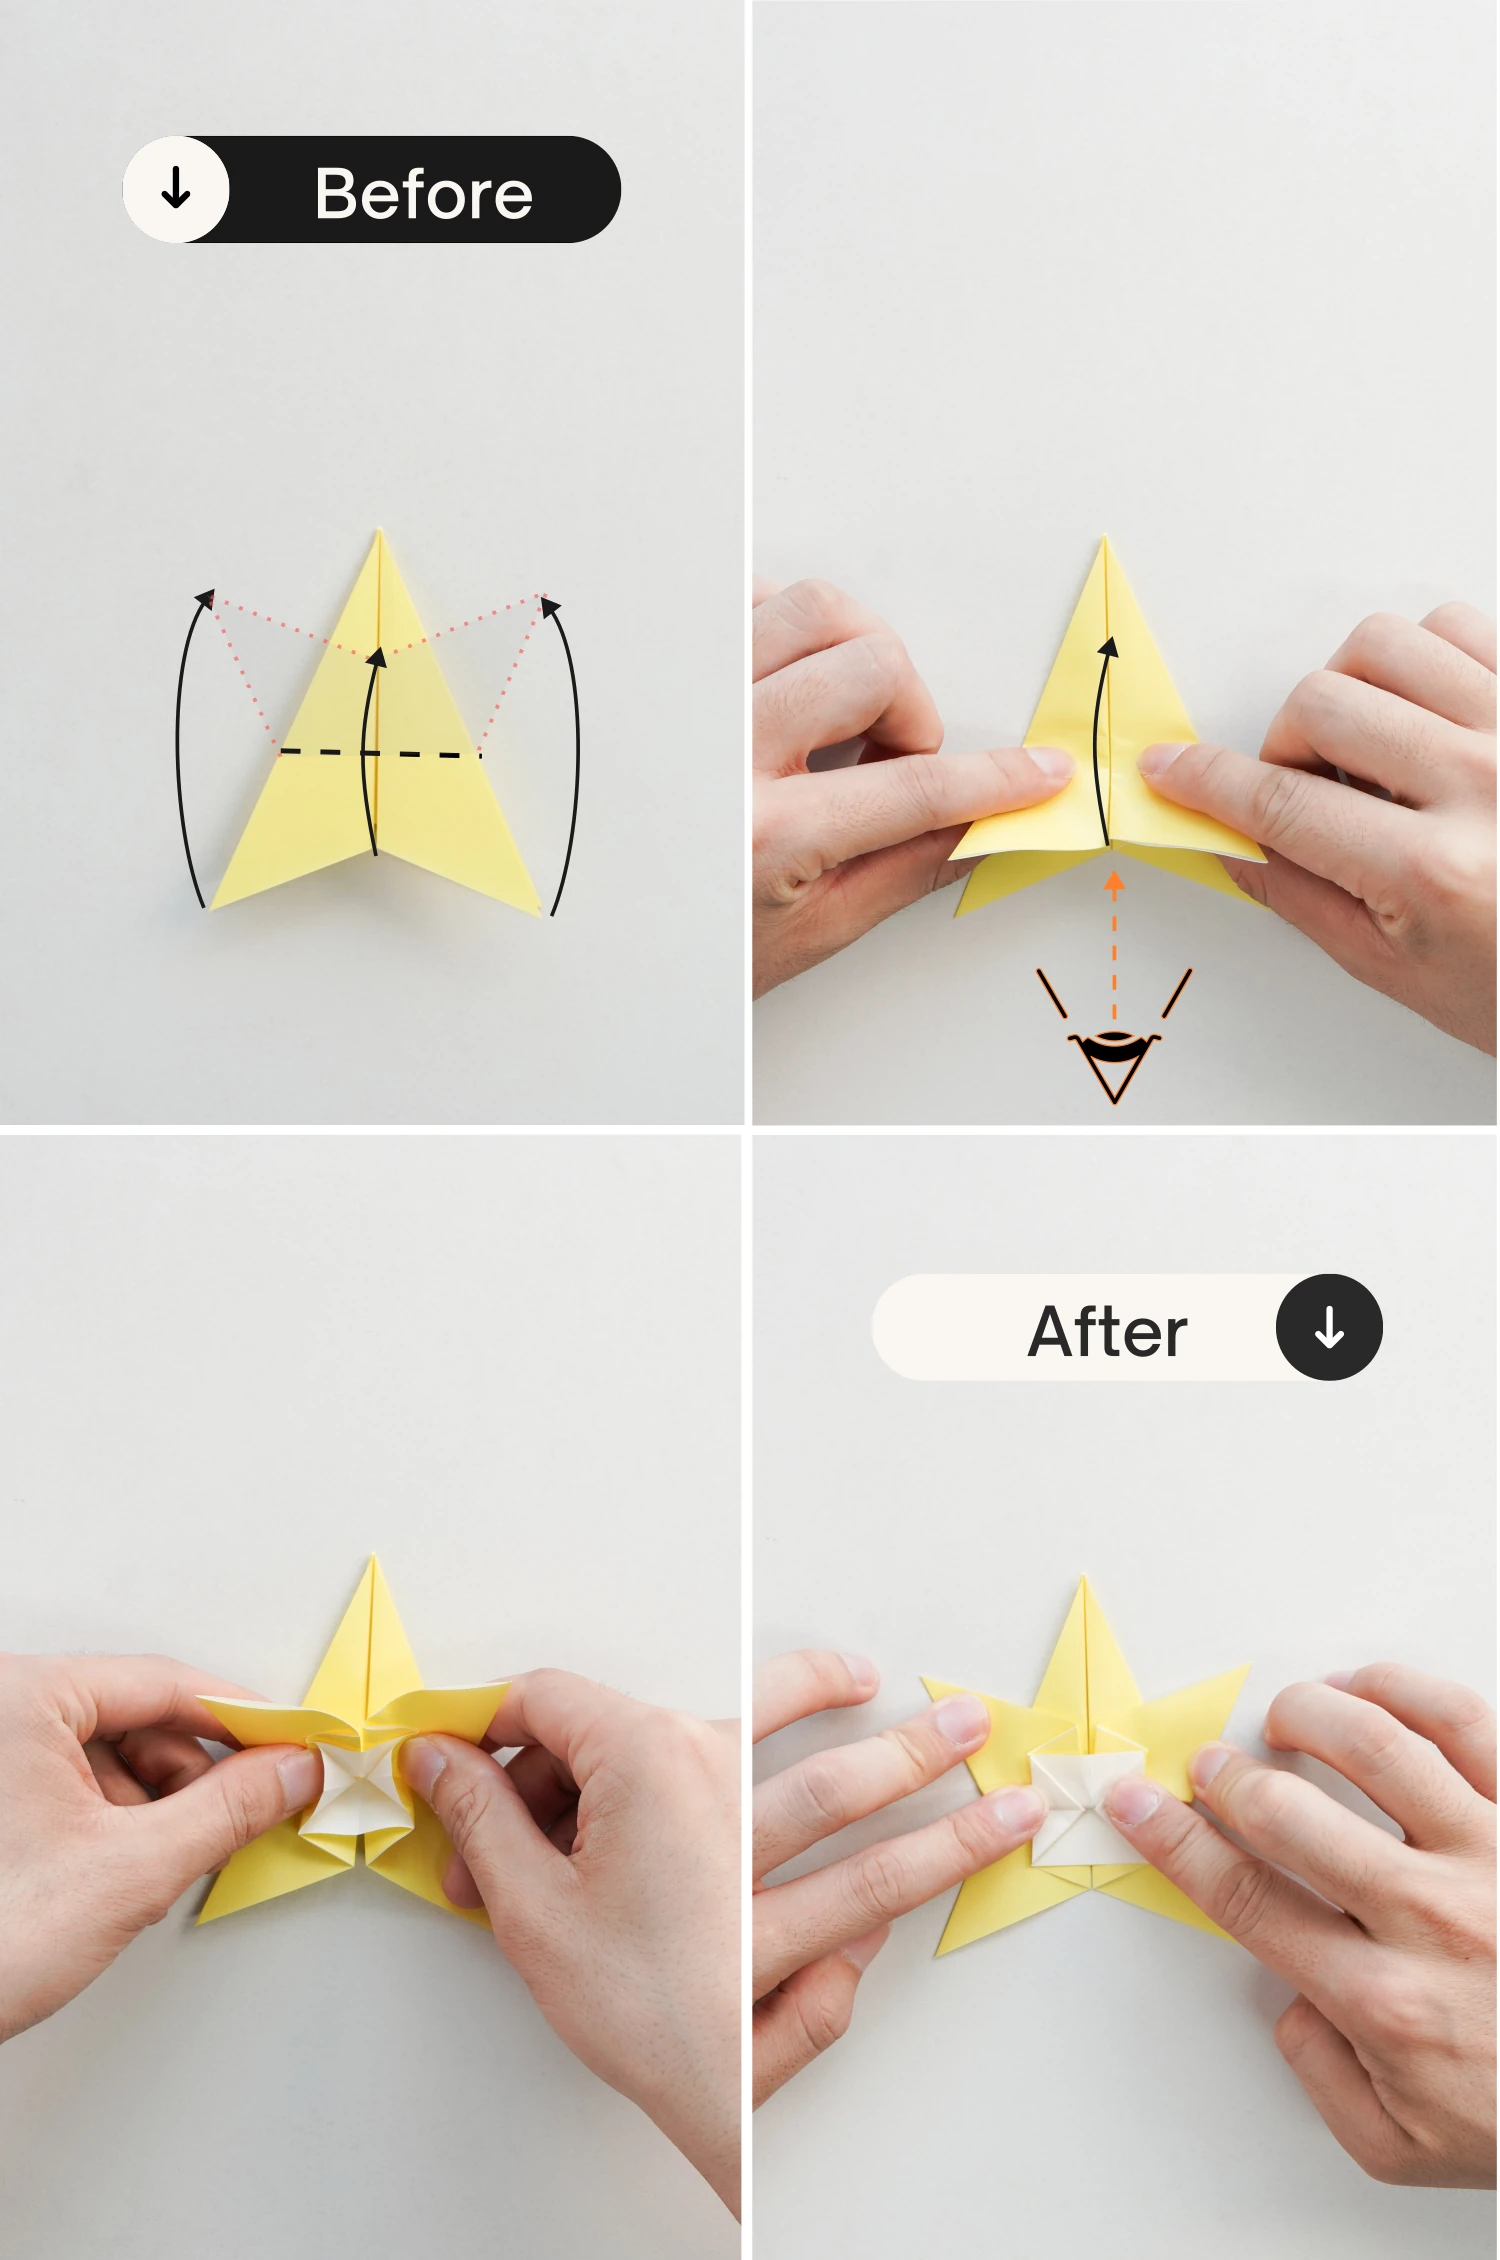
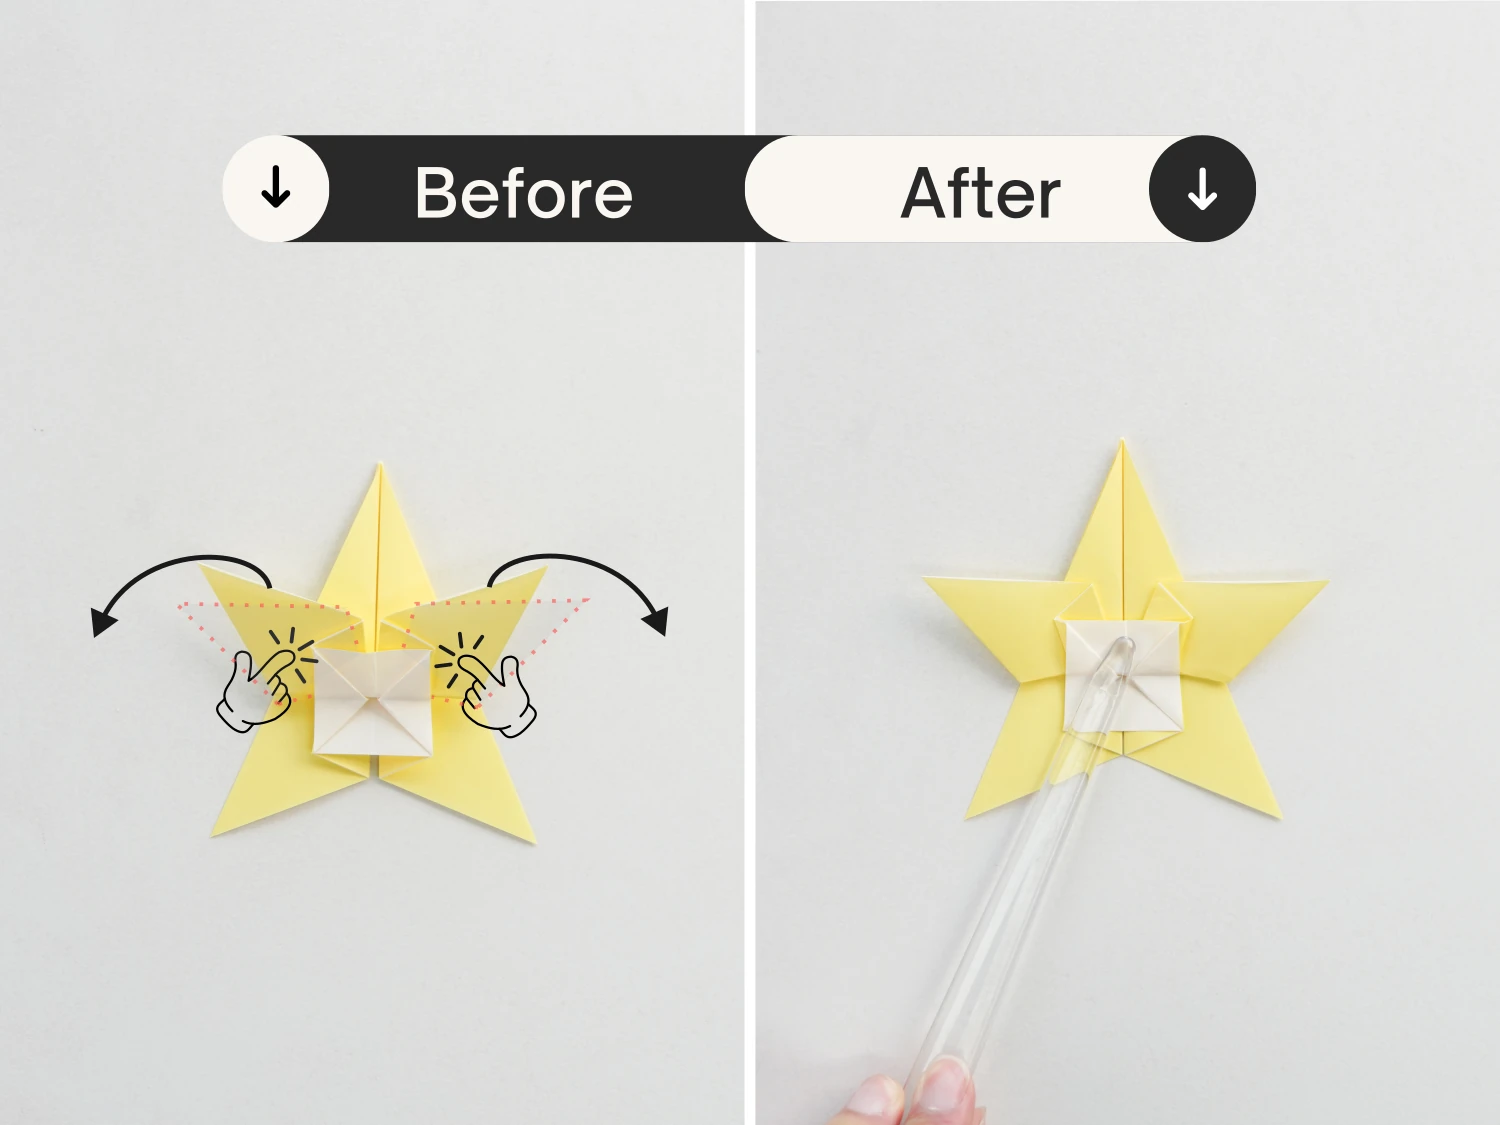
Step 20
Lift the two top flaps to make them stand.
Step 21
Press the two corners down a little bit, and then flatten it.
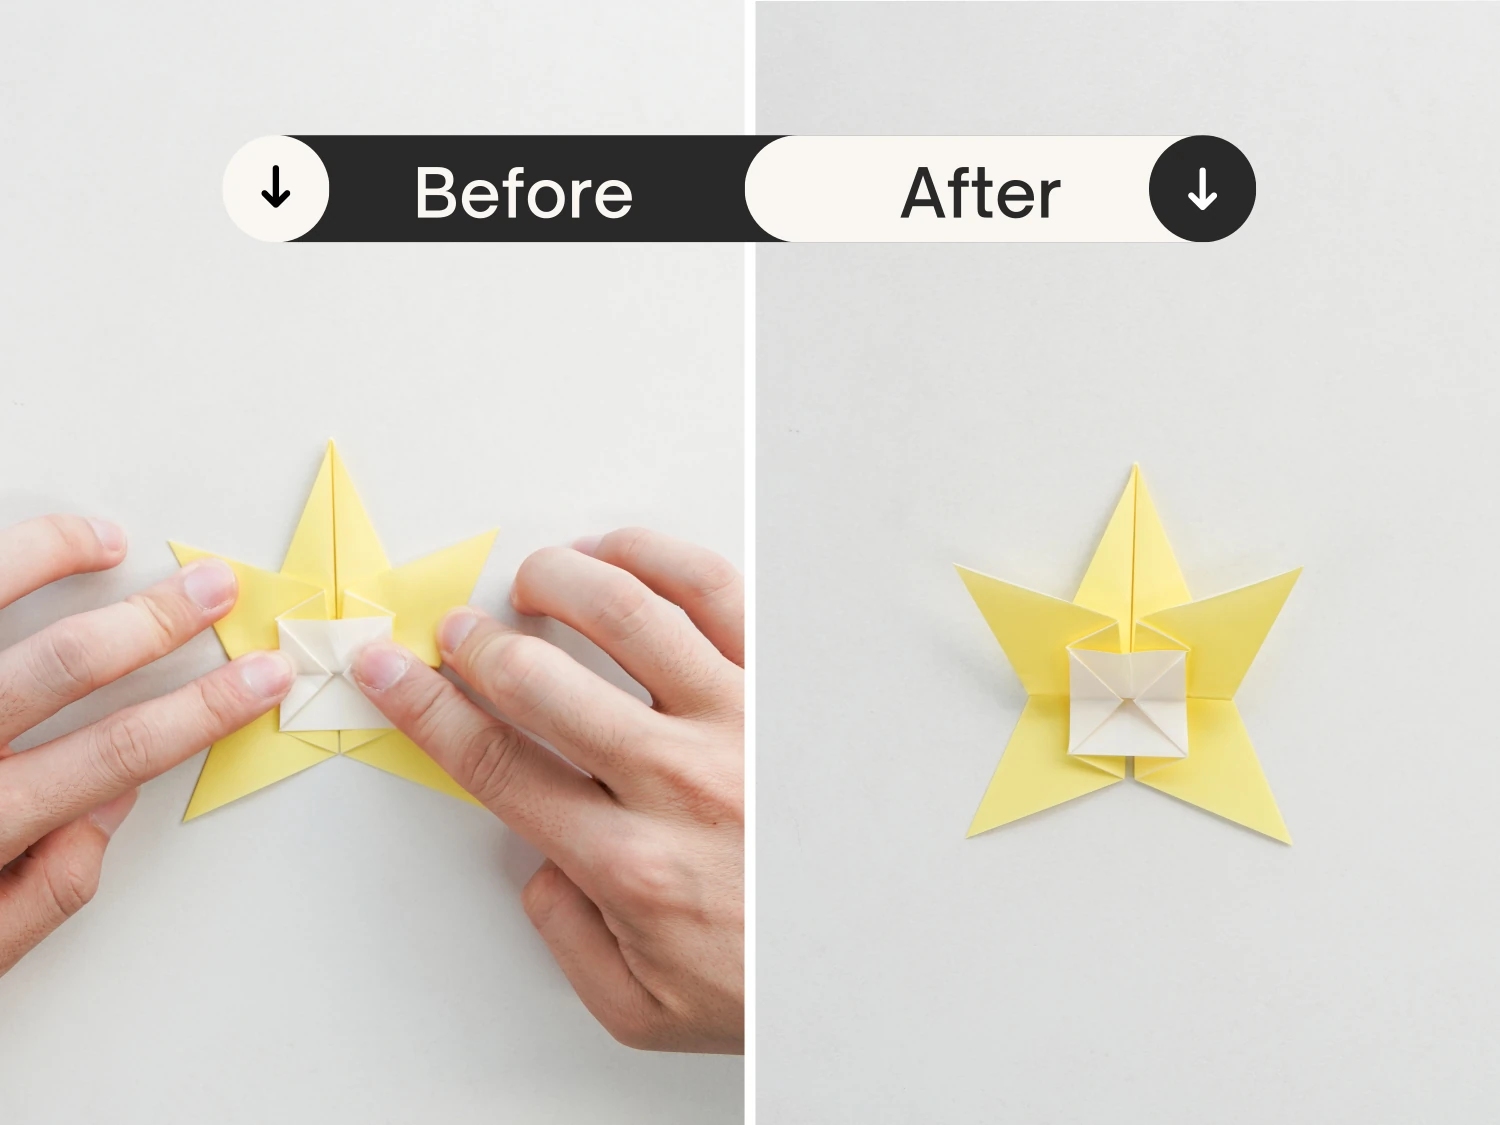
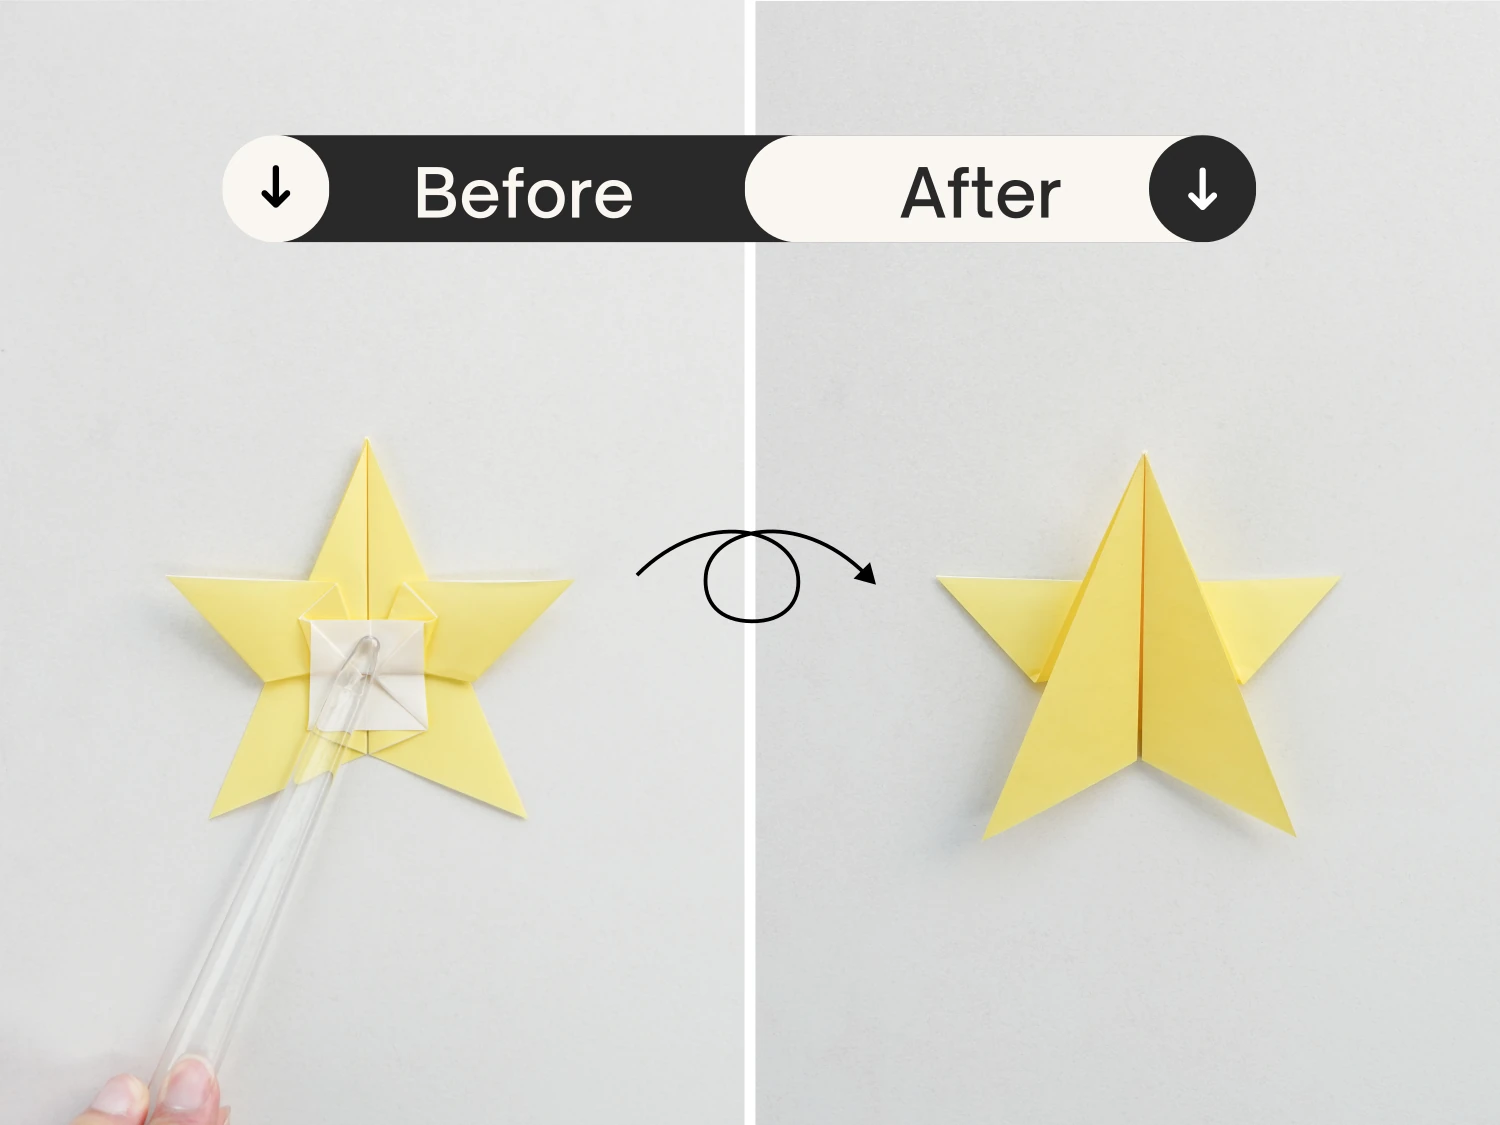
Step 22
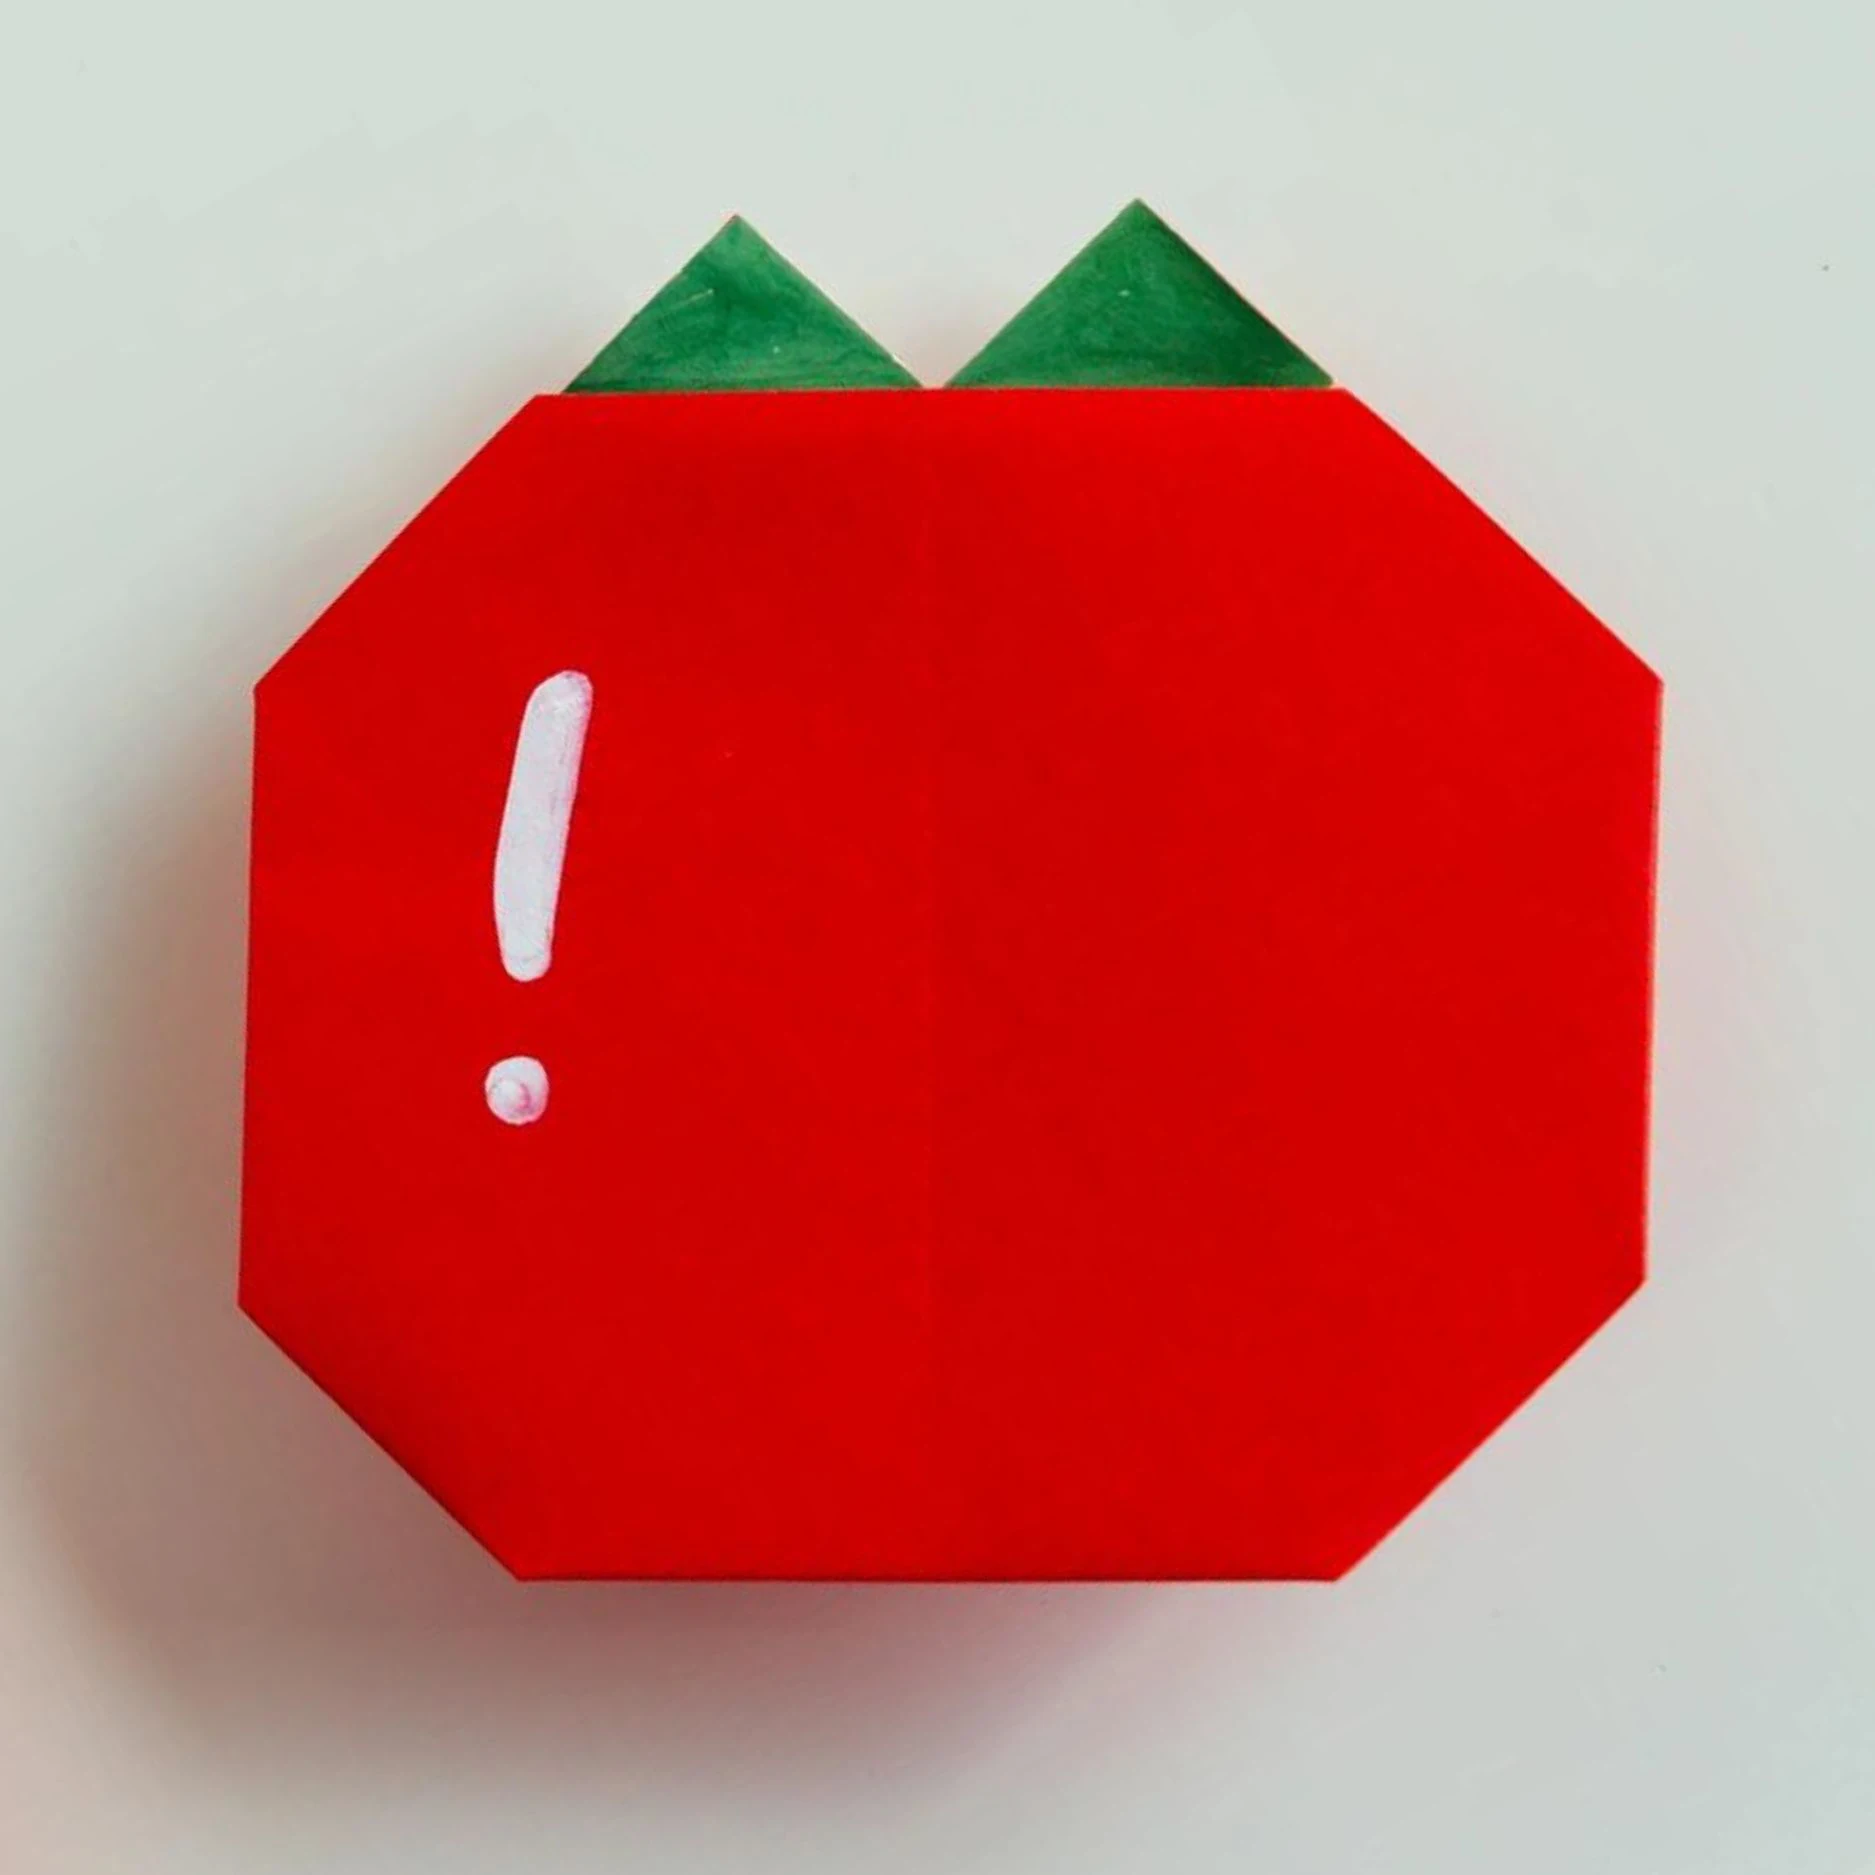
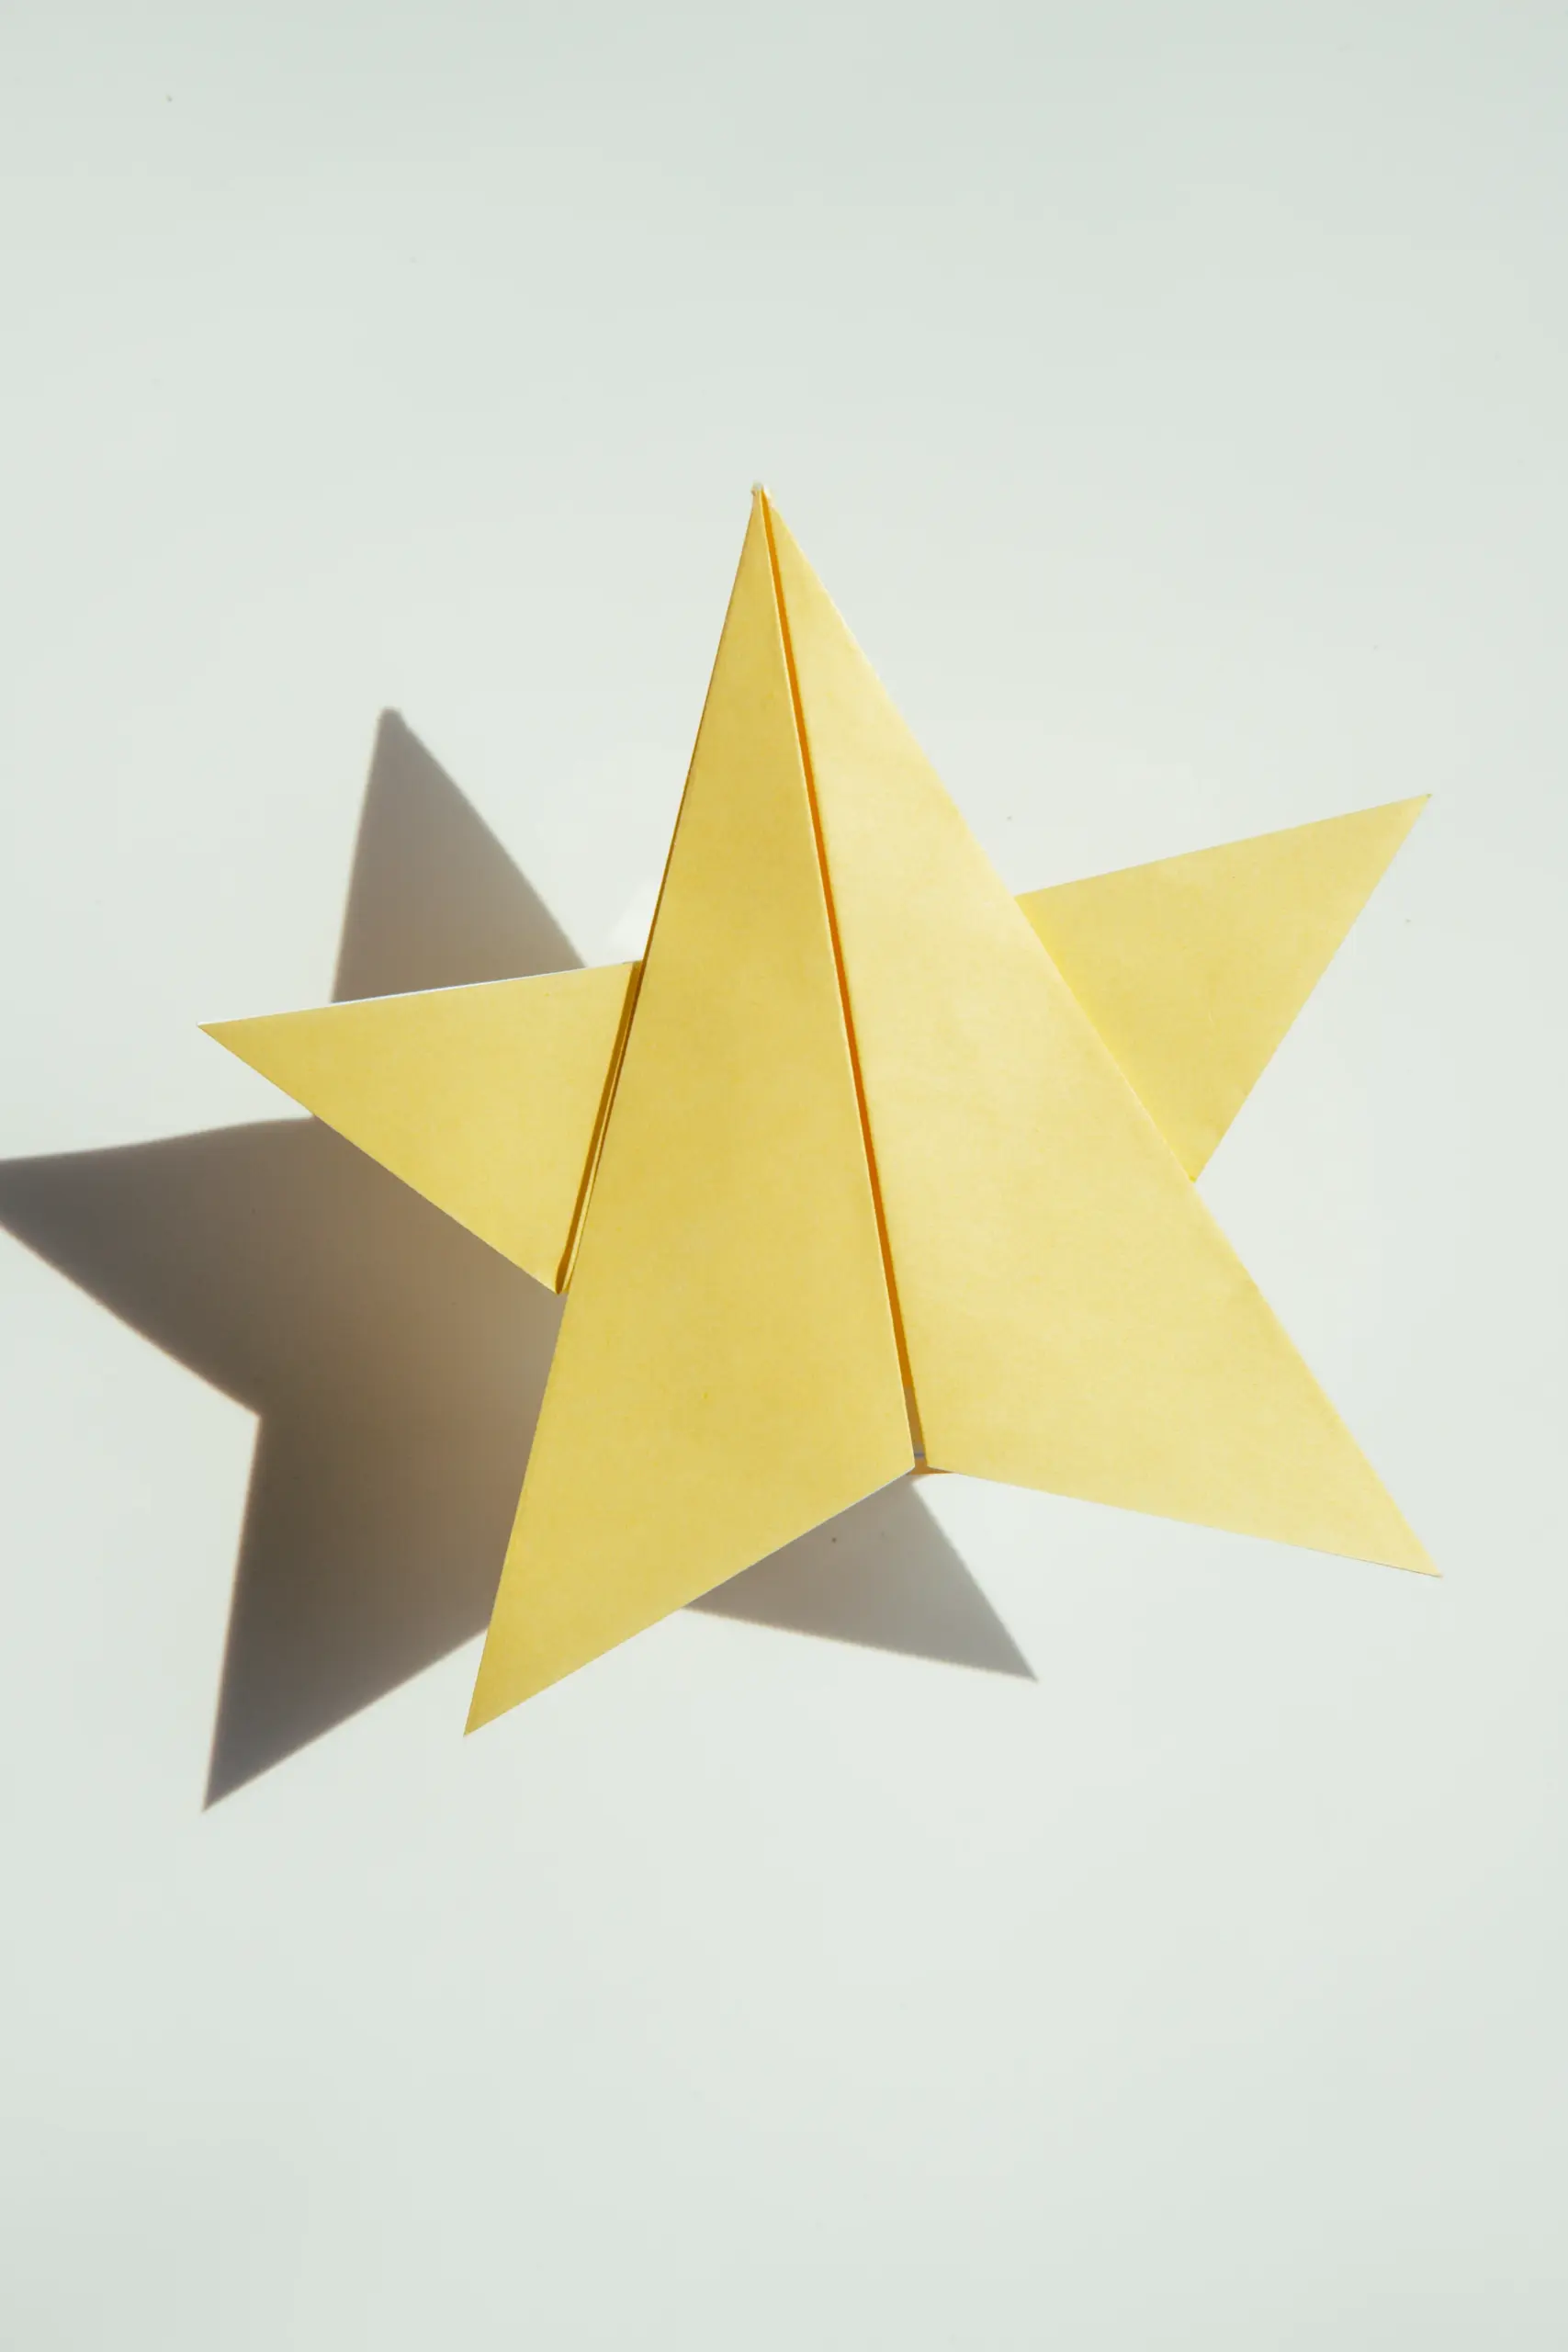
Flip the paper over to complete a perfect star.
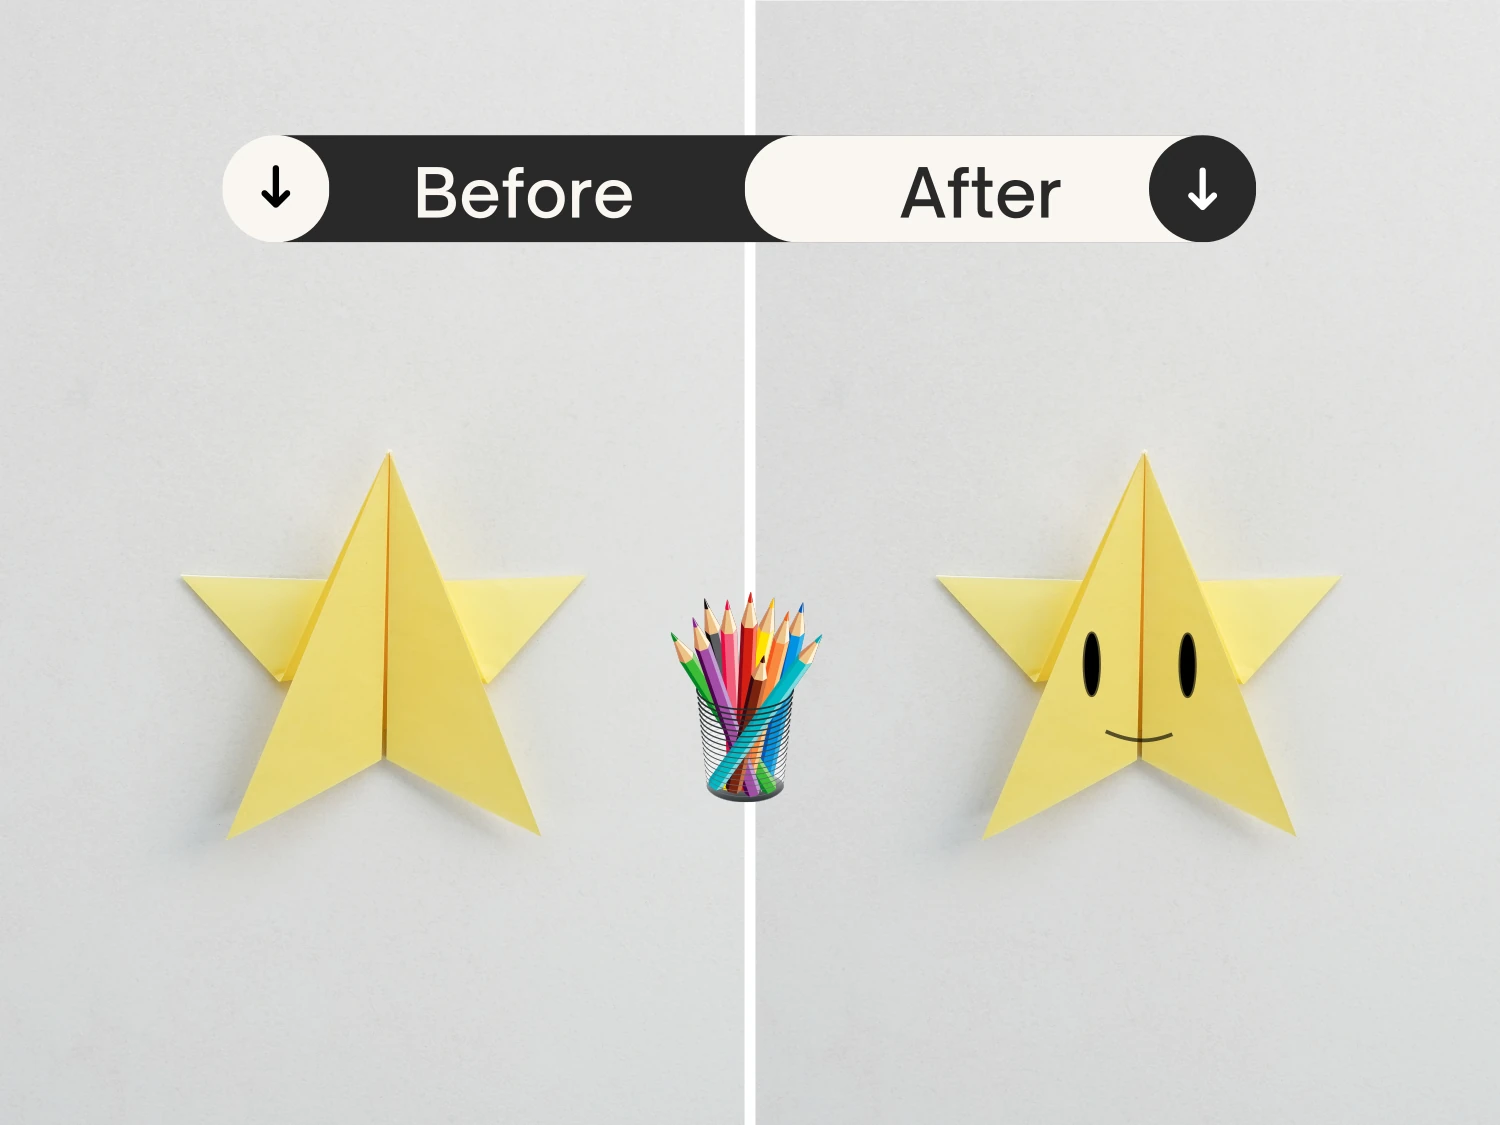
Step 23
You can draw eyes and a mouth to create a simple expression and make it look cuter.
What’s Next
This is your lovely origami star. Hope you enjoy it. Next, you can explore more interesting and easy origami ideas.
Other easy origami ideas